
Embroidery is more than a craft; it’s a quiet language spoken through thread. But sometimes, our stitches don’t say exactly what we want them to. If you’ve ever felt that your work is missing a certain polish or that your creative vision gets lost between the needle and the fabric, you are in the right place.
This is where we move beyond just following a pattern and begin to make intentional, artistic choices. We’ll explore how changing the direction of a single stitch can create lifelike texture, how choosing the right thread weight transforms an outline from simple to sophisticated, and how thoughtful composition can turn a familiar object into a deeply personal gift.
Consider this your guide to refining your technique, one thoughtful project at a time. You already have the patience and the passion; now, let’s give your hands the technical confidence to create work that feels truly, authentically yours.
1. Layered Wildflower Tote Bag
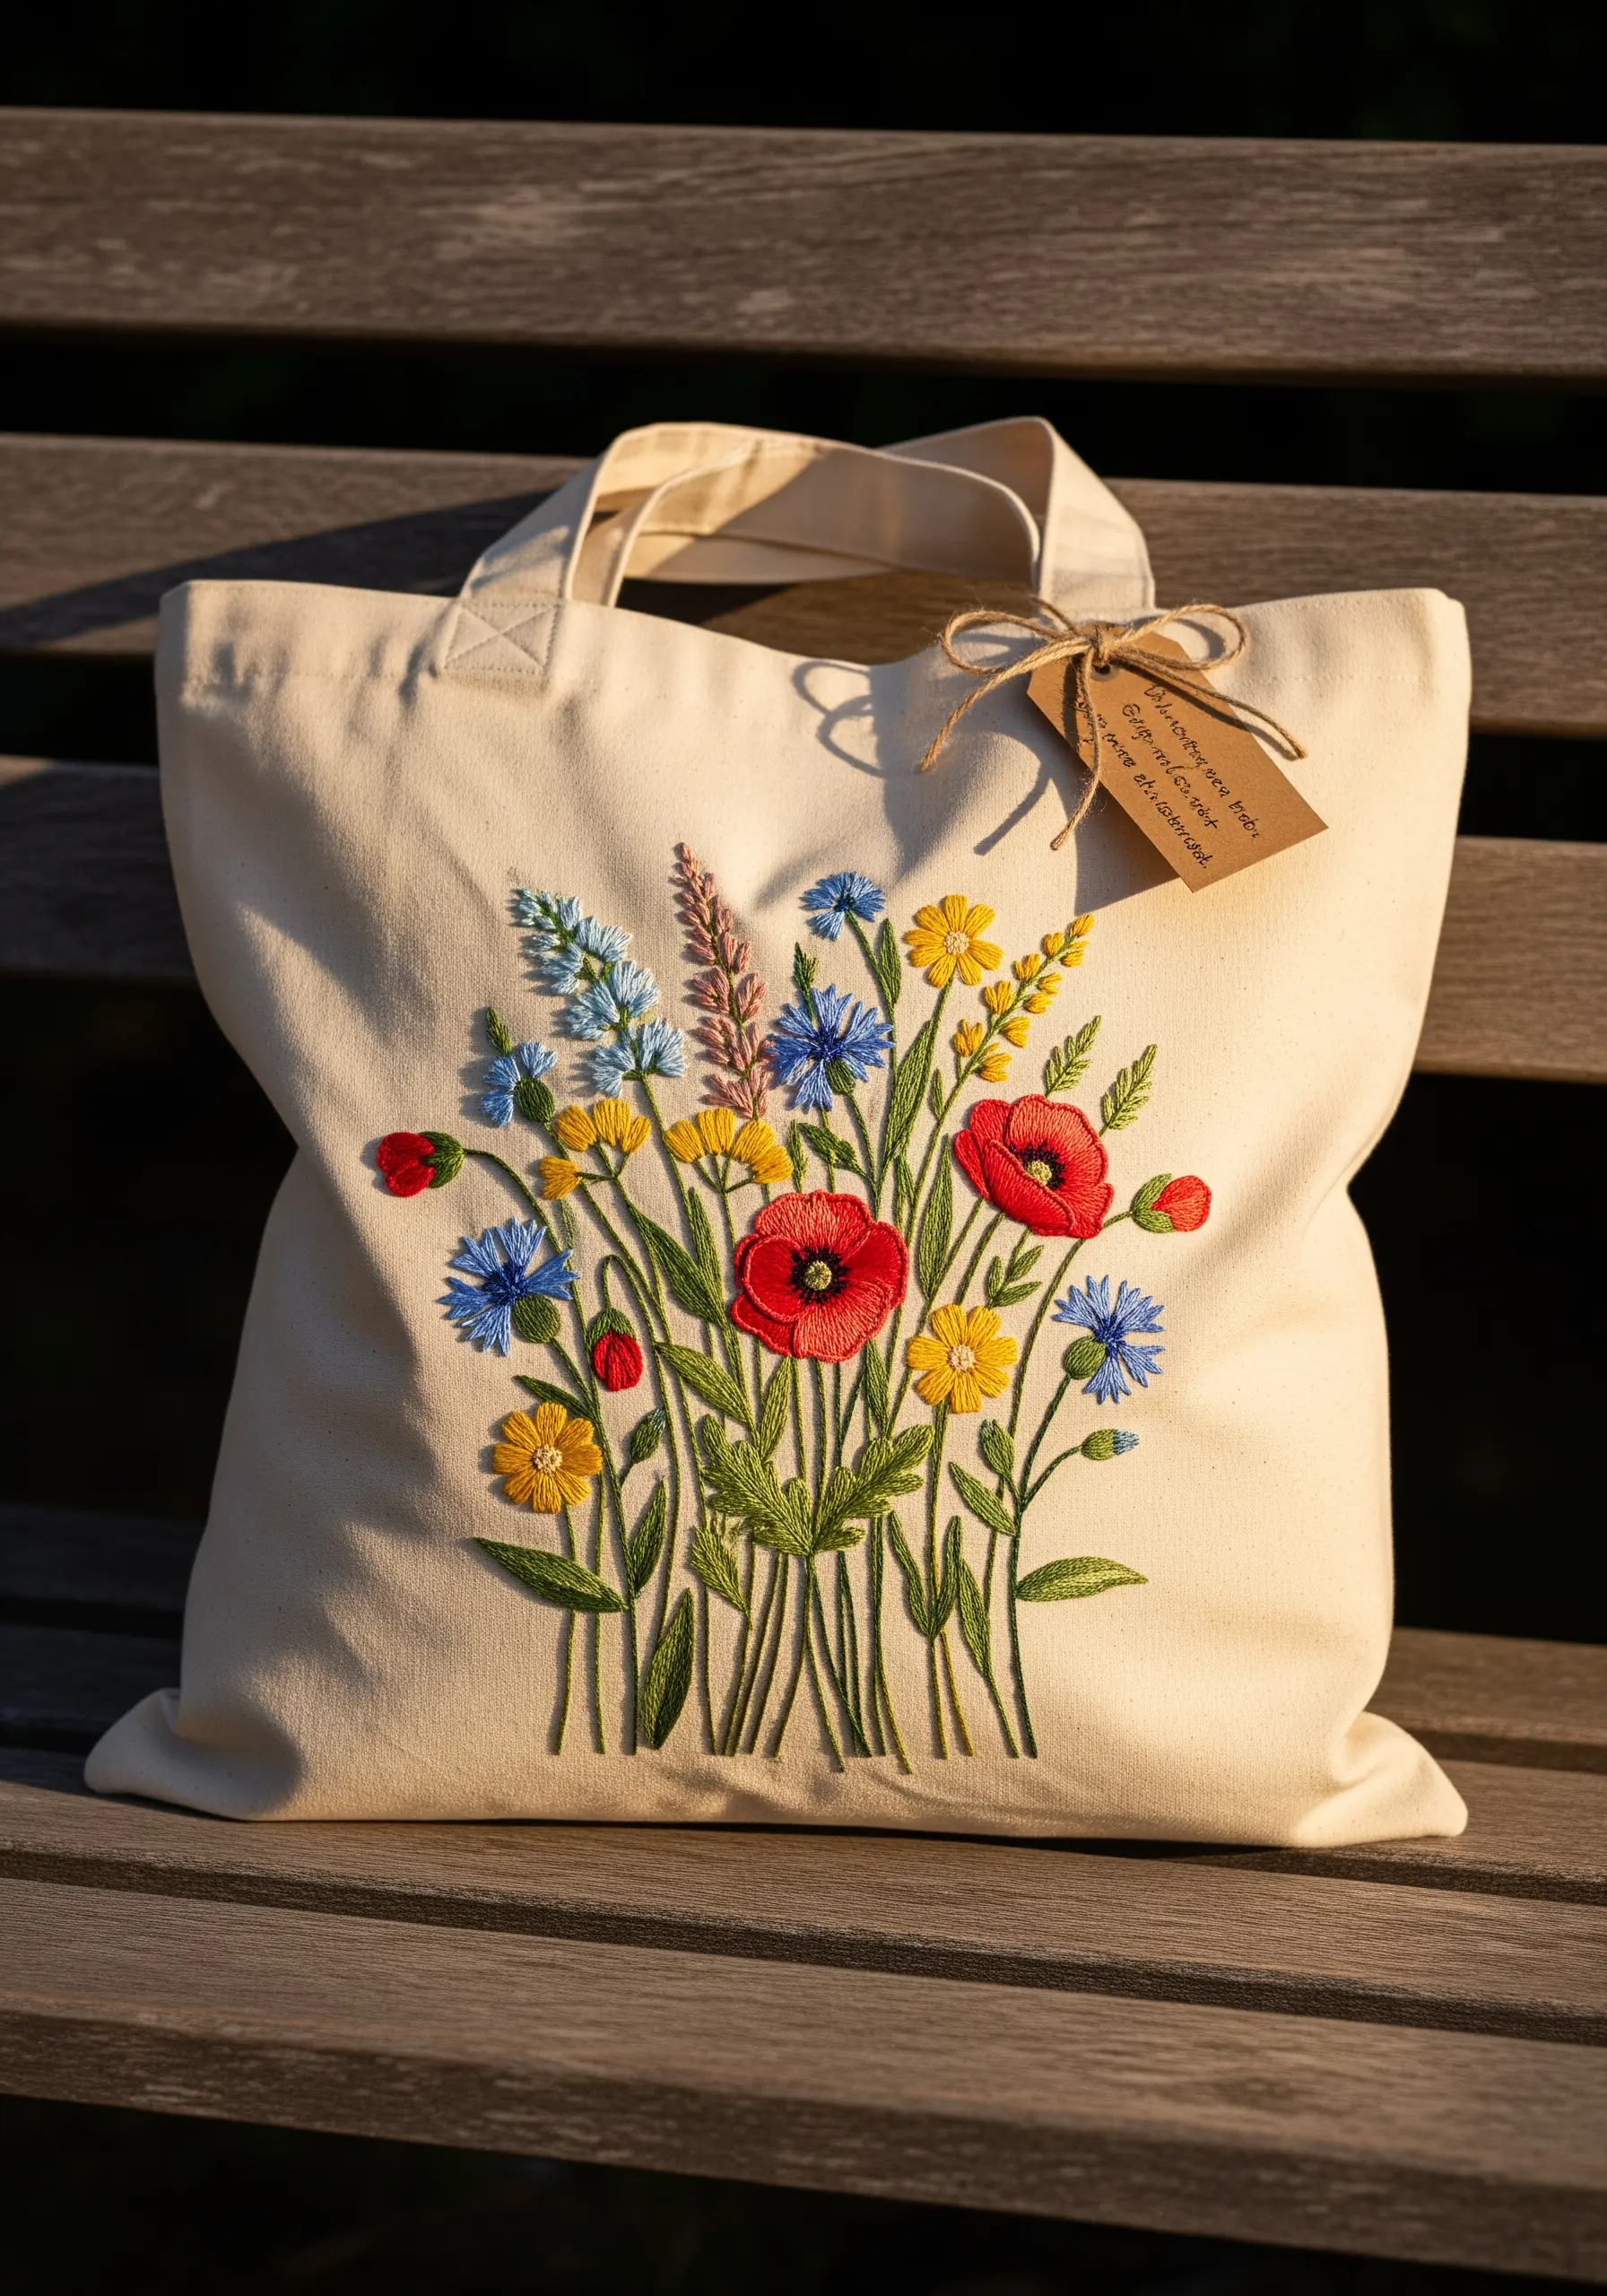
To give your floral arrangement depth, start by stitching the tallest background elements first, like the thin, wispy grasses, using a simple stem stitch.
Work forward, layering shorter flowers over the stems of the background elements to create a natural, un-staged look.
For the poppies, use a smooth satin stitch for the petals, but fill the center with a dense cluster of black French knots; this contrast in texture makes the flower pop.
Vary your stitches for each flower type: woven wheels for the yellow daisies, lazy daisy stitches for the blue cornflowers, and long-and-short stitch for the larger petals.
This variety is the key to creating a composition that feels dynamic and alive, rather than flat and uniform.
2. Minimalist Culinary Herb Napkins
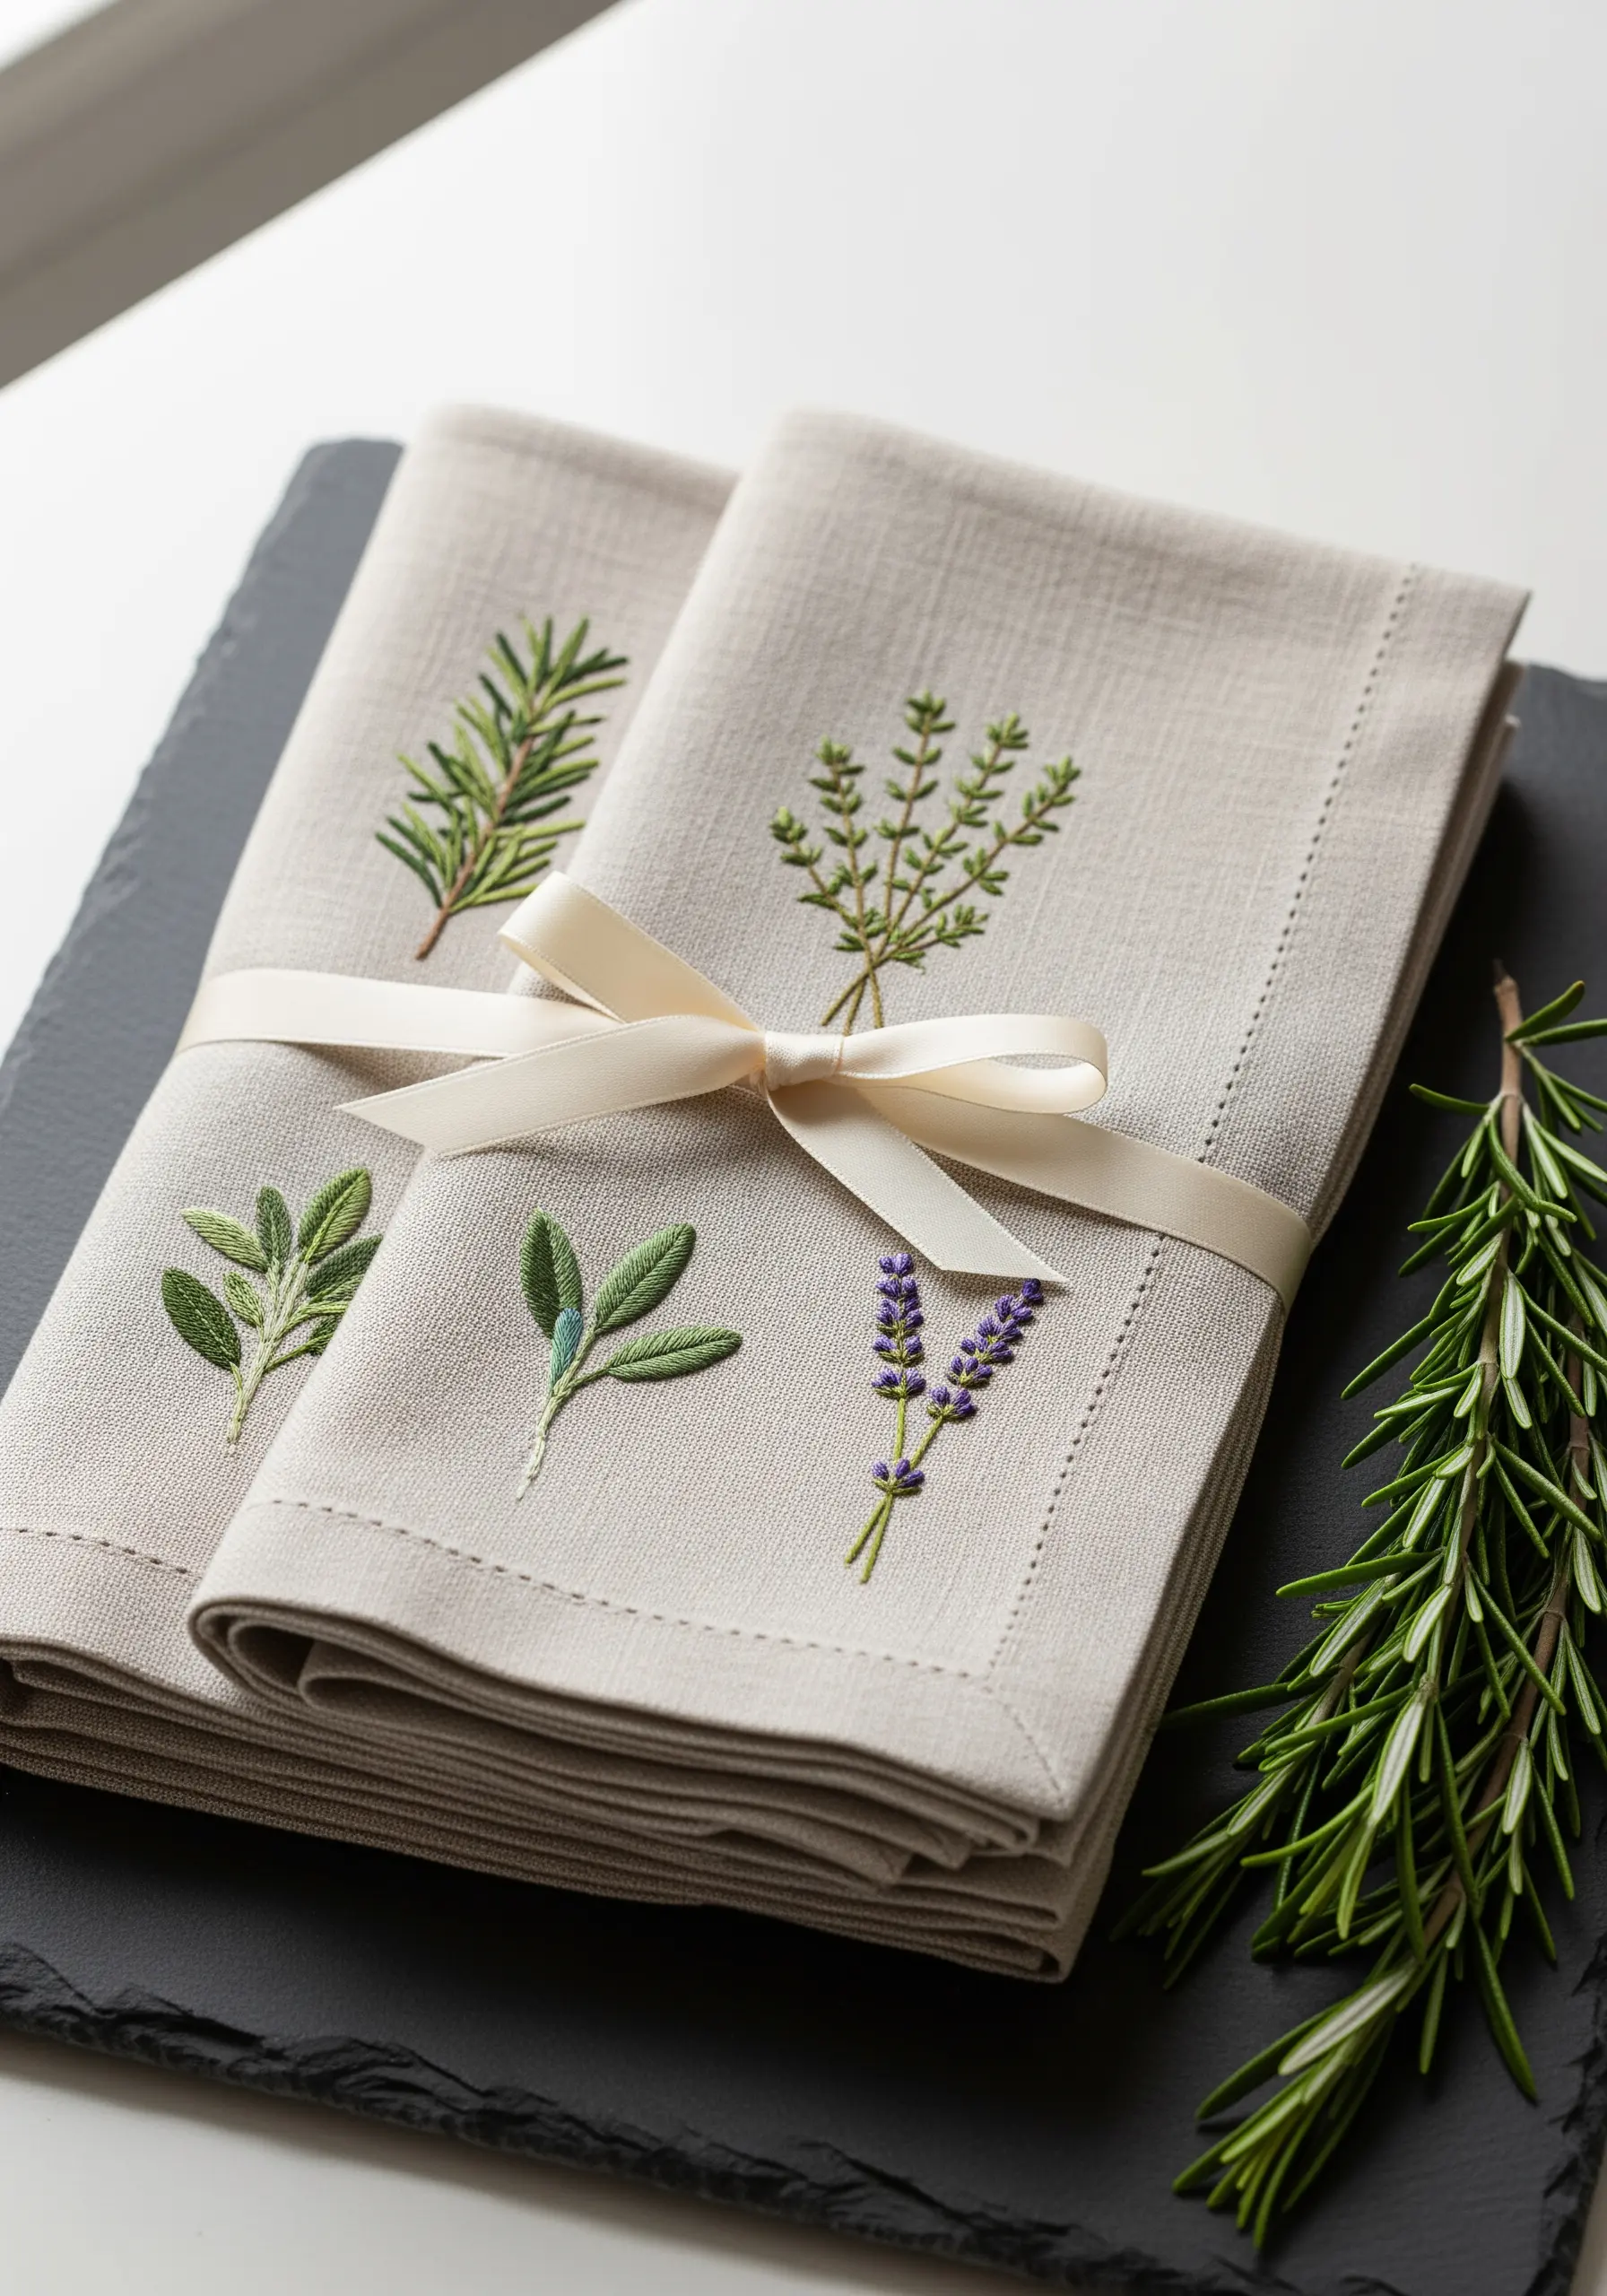
For fine-stemmed herbs like rosemary and thyme, use a single strand of floss and a whipped backstitch to create a clean, raised line without any bulk.
The lavender buds are best achieved with tiny detached chain stitches (lazy daisies) clustered tightly along the top of the stem.
To give the sage leaves their characteristic texture, use a fishbone stitch. This technique creates a central vein that adds a touch of realism to each leaf.
Choose a high-quality linen or a cotton-linen blend fabric; its natural texture provides the perfect understated background for these delicate botanical designs.
These table linen embroidery motifs feel both rustic and refined, making them a perfect housewarming gift.
3. Celestial Moon Phase Denim Jacket
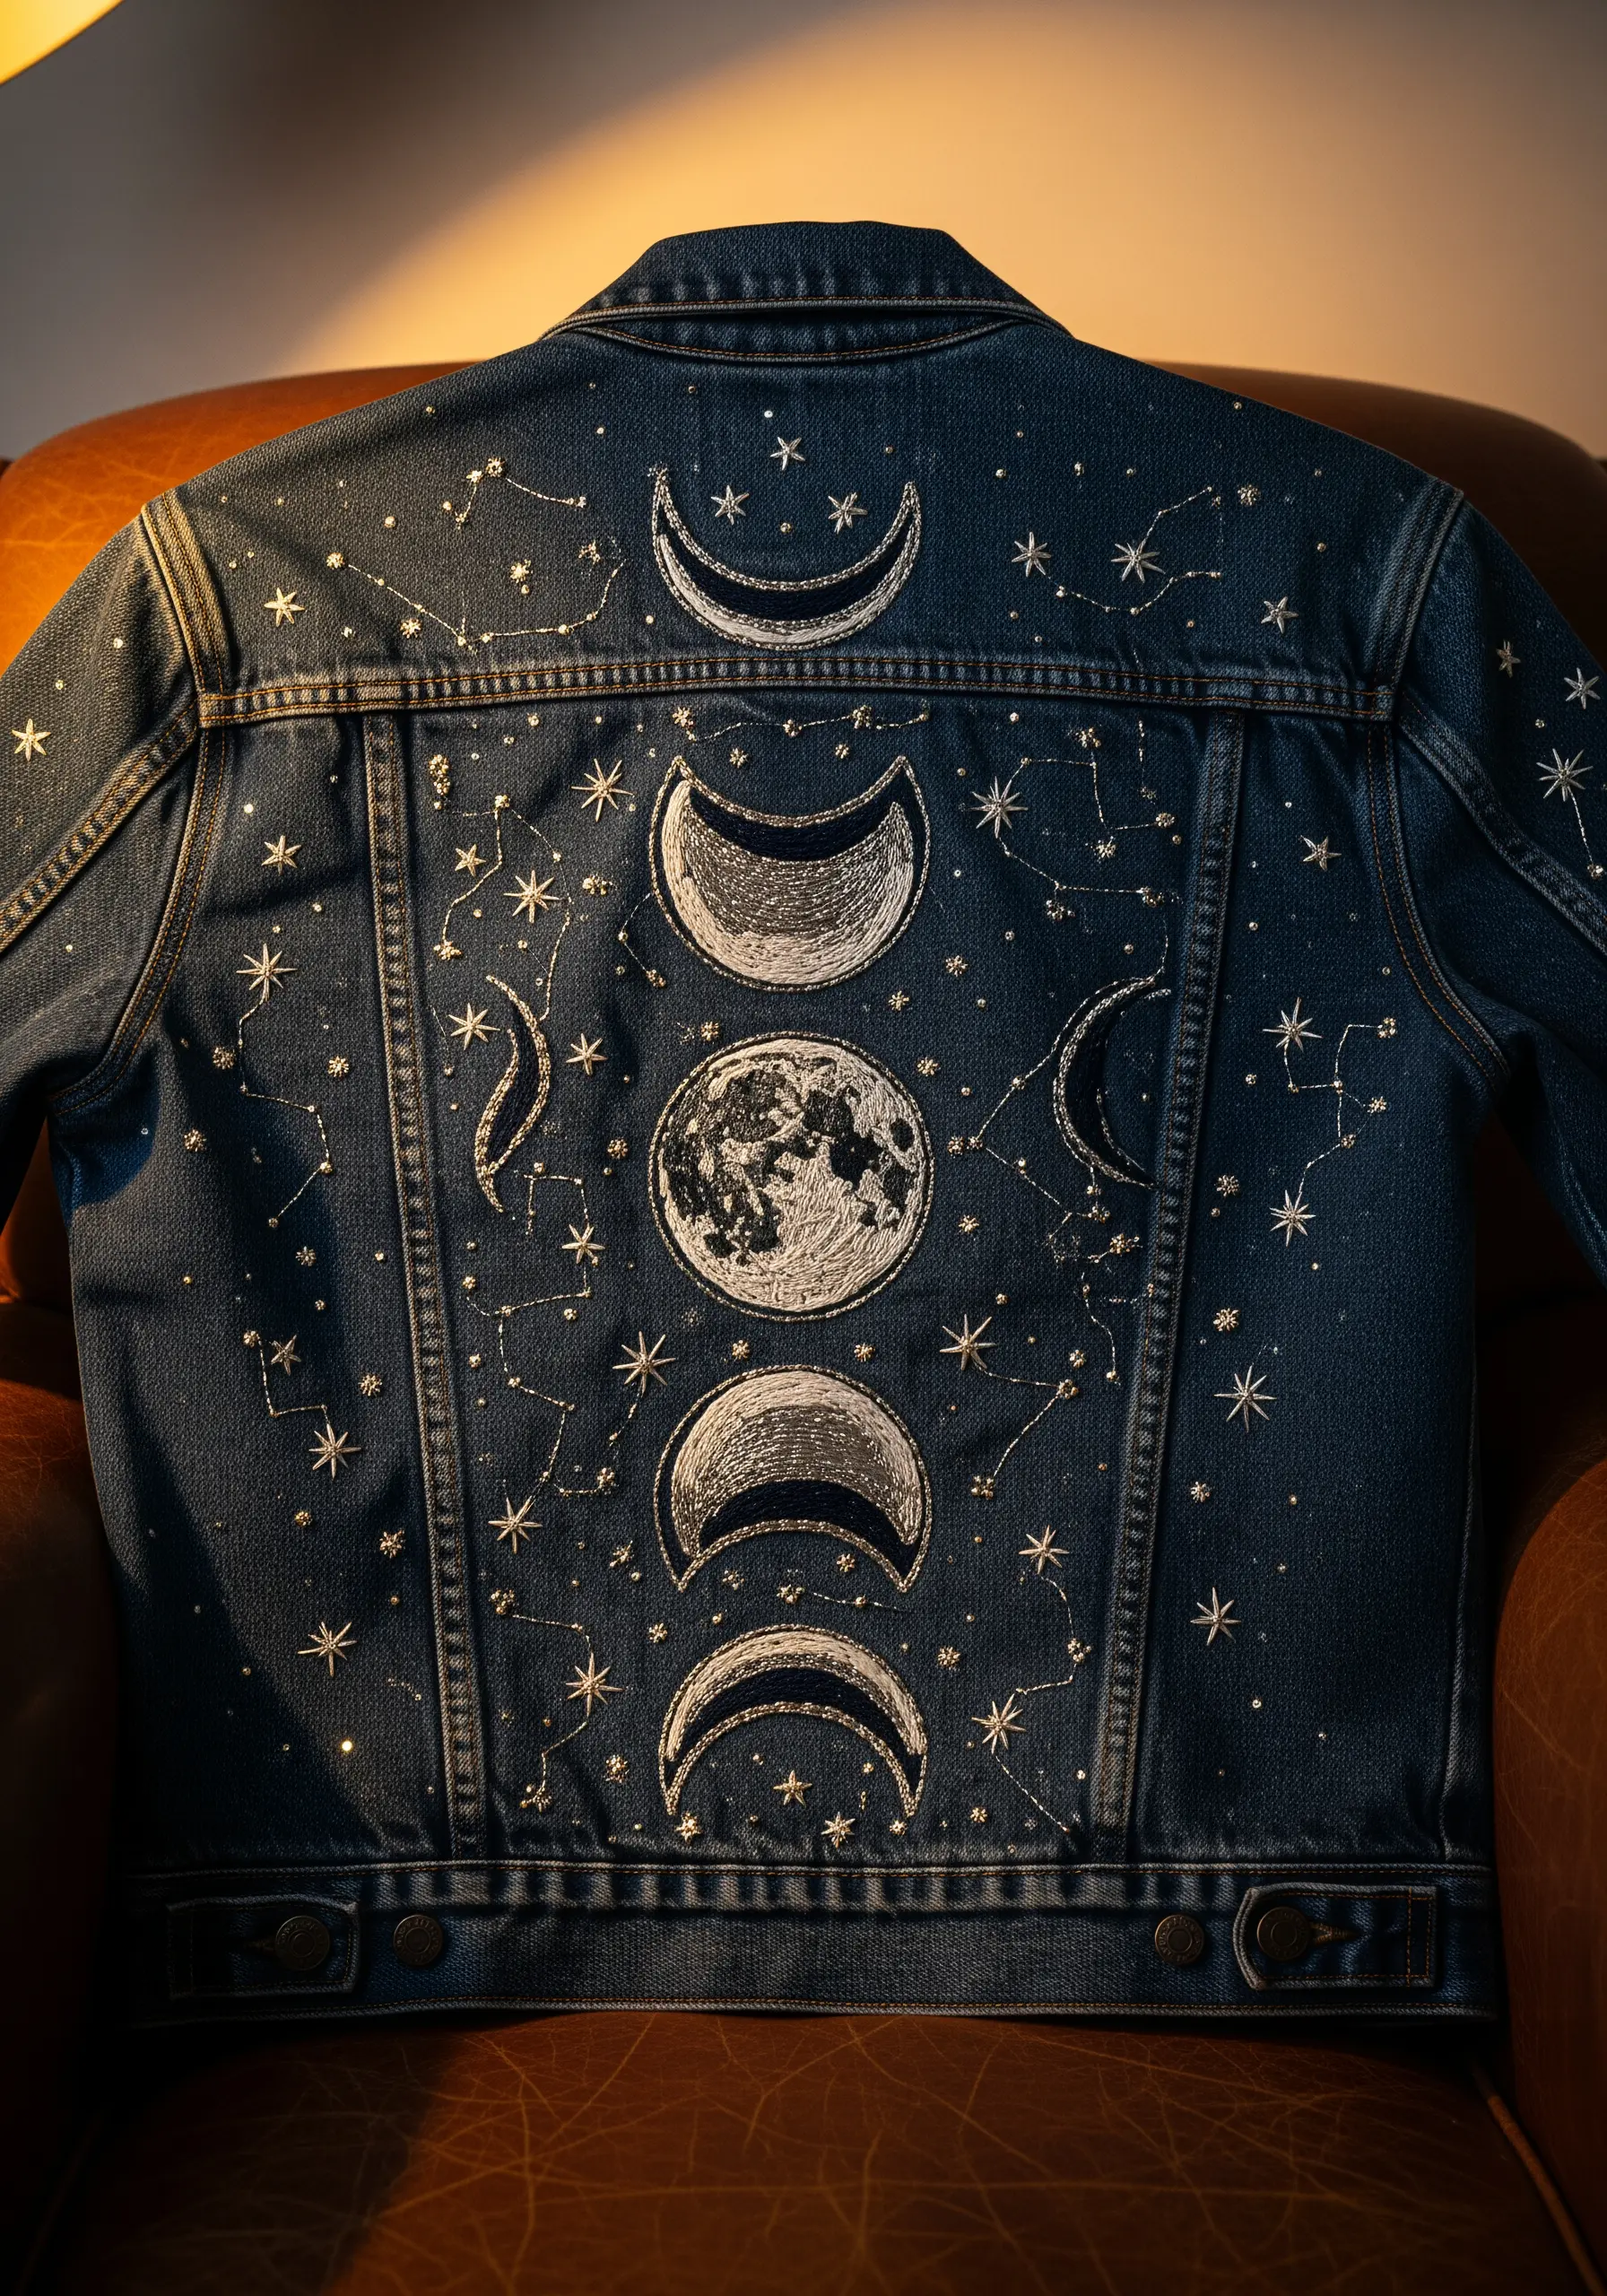
Before you begin, apply a stick-on, wash-away stabilizer to the inside of the jacket. This prevents the denim from stretching and puckering as you stitch.
To create the textured surface of the moon, use a combination of long-and-short stitch and seed stitch with light grey and white thread, then outline it with a sharp backstitch in silver metallic thread.
For the surrounding stars and constellations, use a mix of tiny star stitches and single French knots in varying sizes. This subtle variation makes the cosmic scene feel more expansive and less repetitive.
When working with metallic floss, use a needle with a larger eye and work with shorter thread lengths (about 12 inches) to minimize friction and prevent shredding.
4. Thread-Painted Fox Cushion
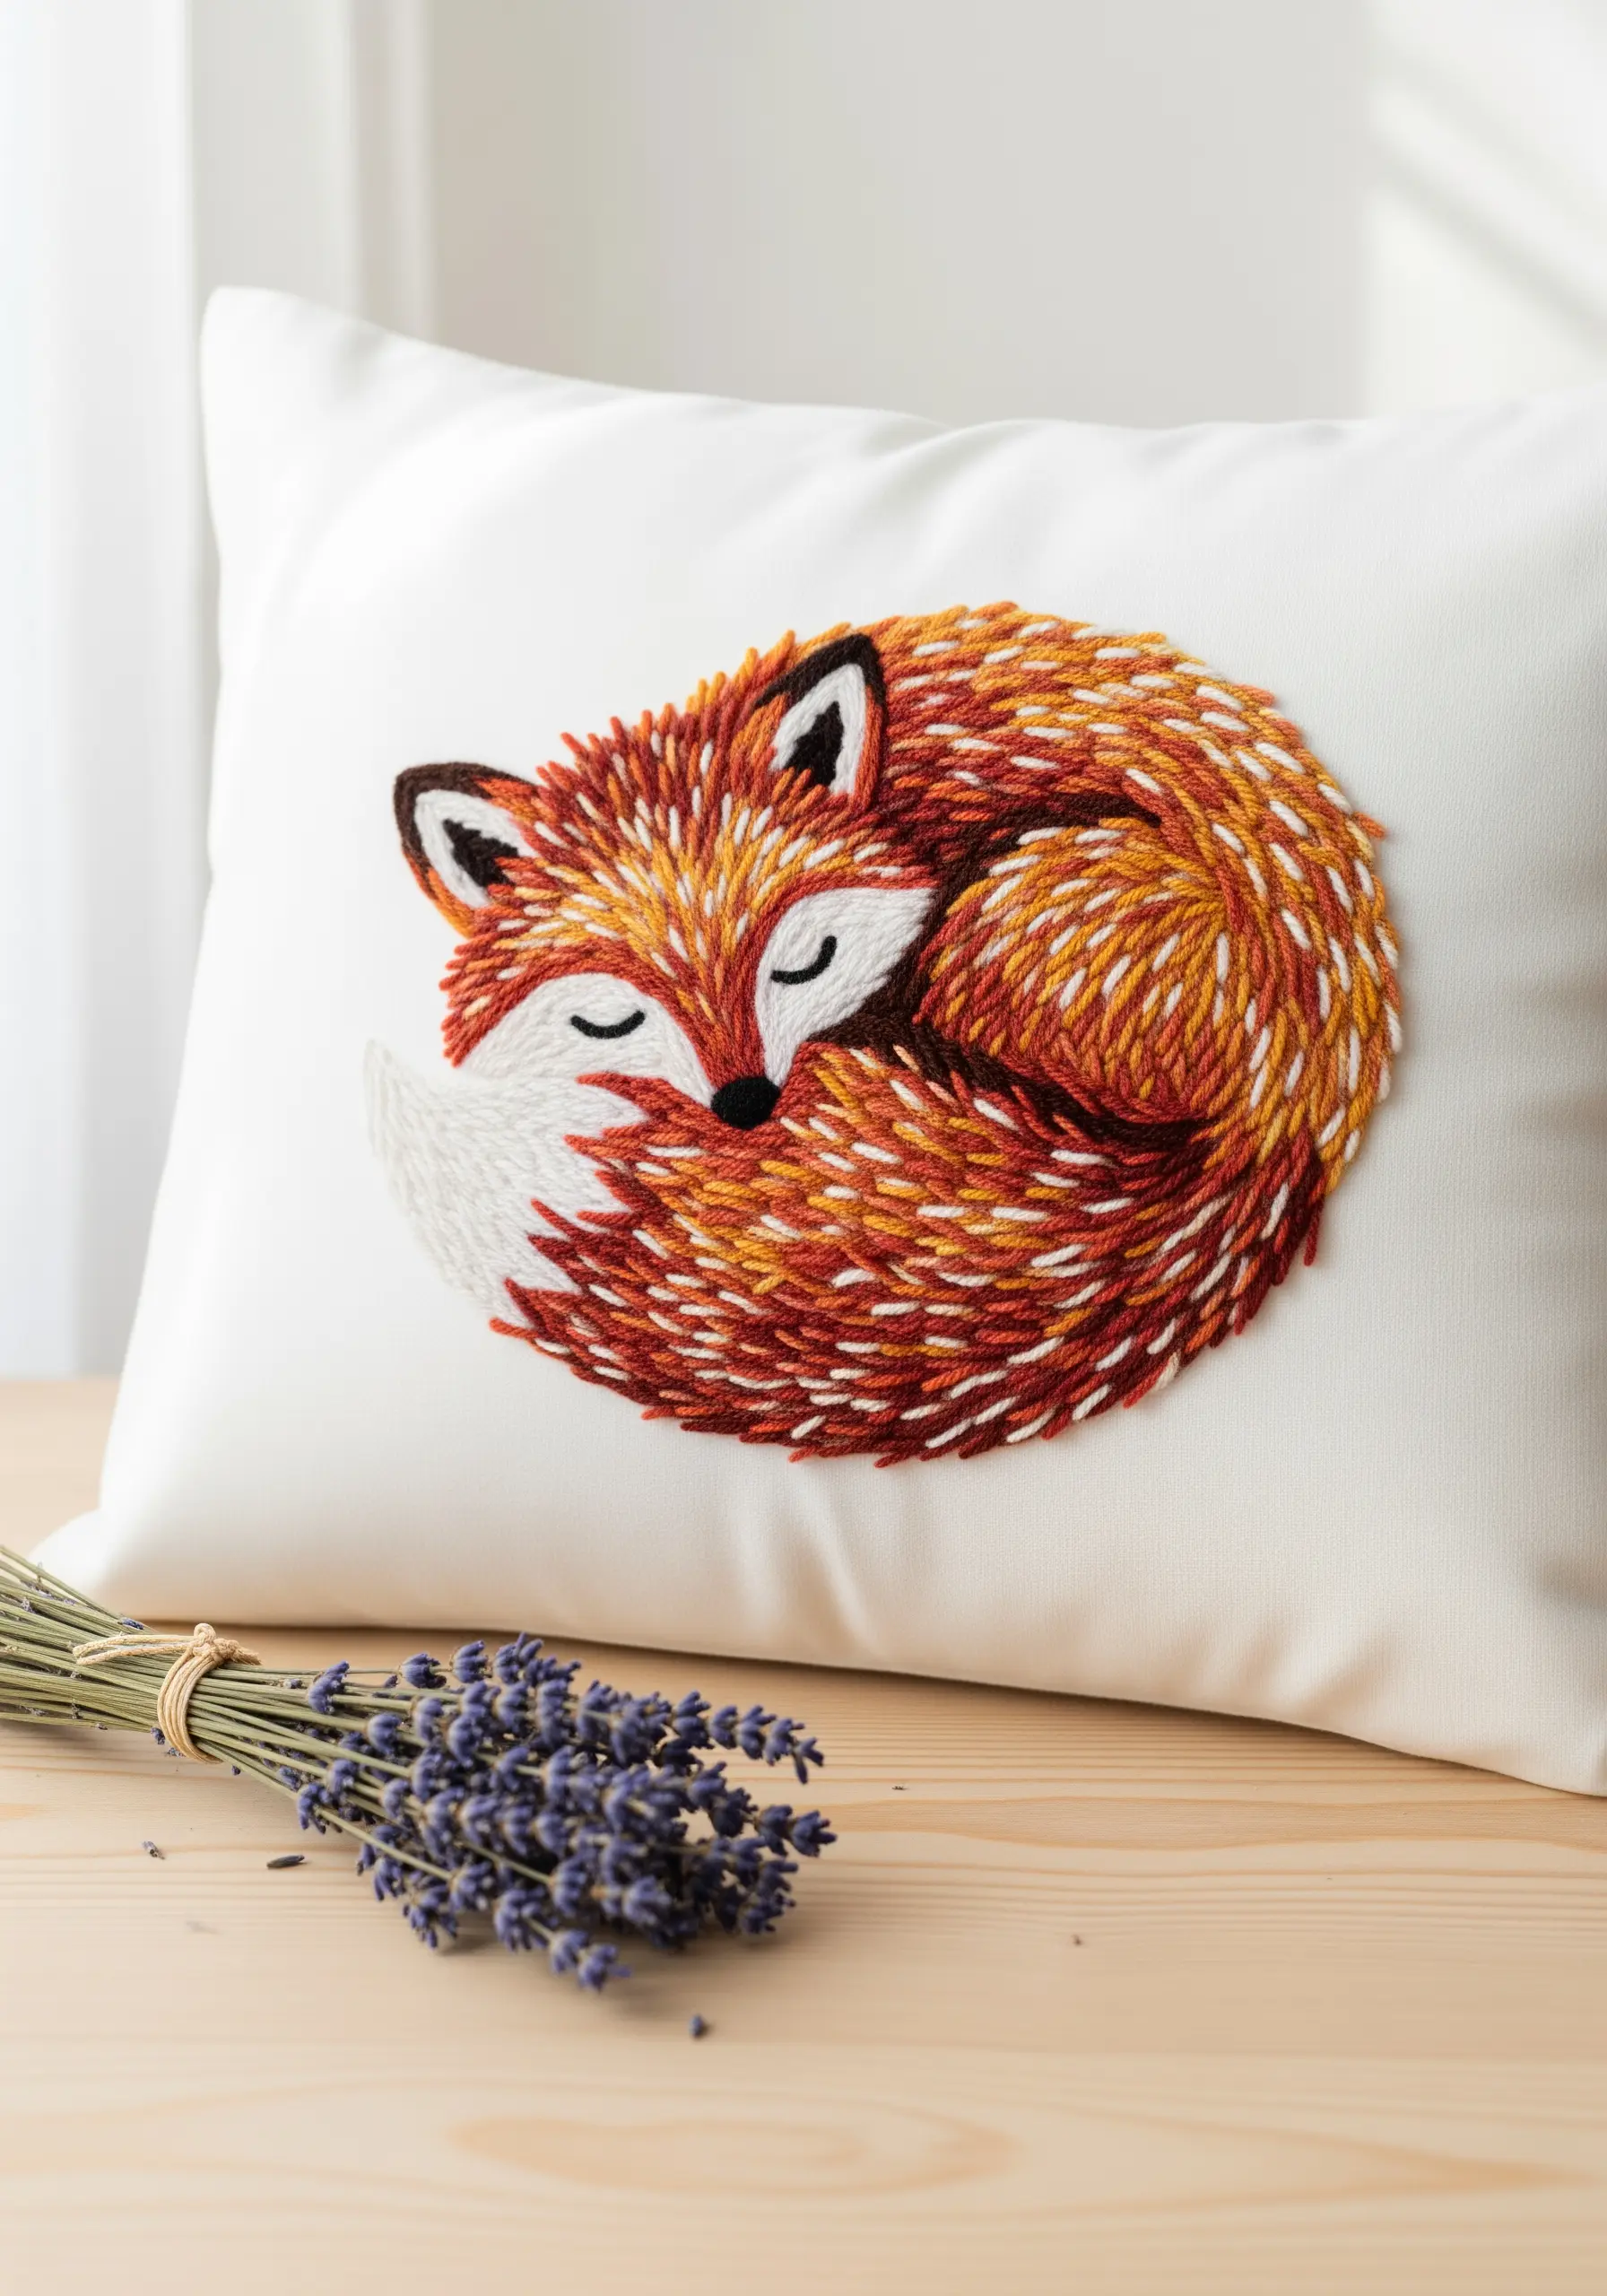
The key to realistic fur is directional stitching. Use the long-and-short stitch, ensuring your stitches follow the natural growth pattern of the fox’s fur.
Blend at least three shades of orange, rust, and brown within a single area to create depth and avoid harsh lines. This technique, known as thread painting, is what gives the fur its lifelike quality.
Keep your stitch tension slightly looser than usual. This allows the threads to fluff up slightly, enhancing the soft, touchable texture.
For the white sections, like the tip of the tail and chest, use a full six strands of floss to create a fuller, more prominent texture that contrasts with the sleeker body fur.
5. Raised Goldwork Monogram Journal
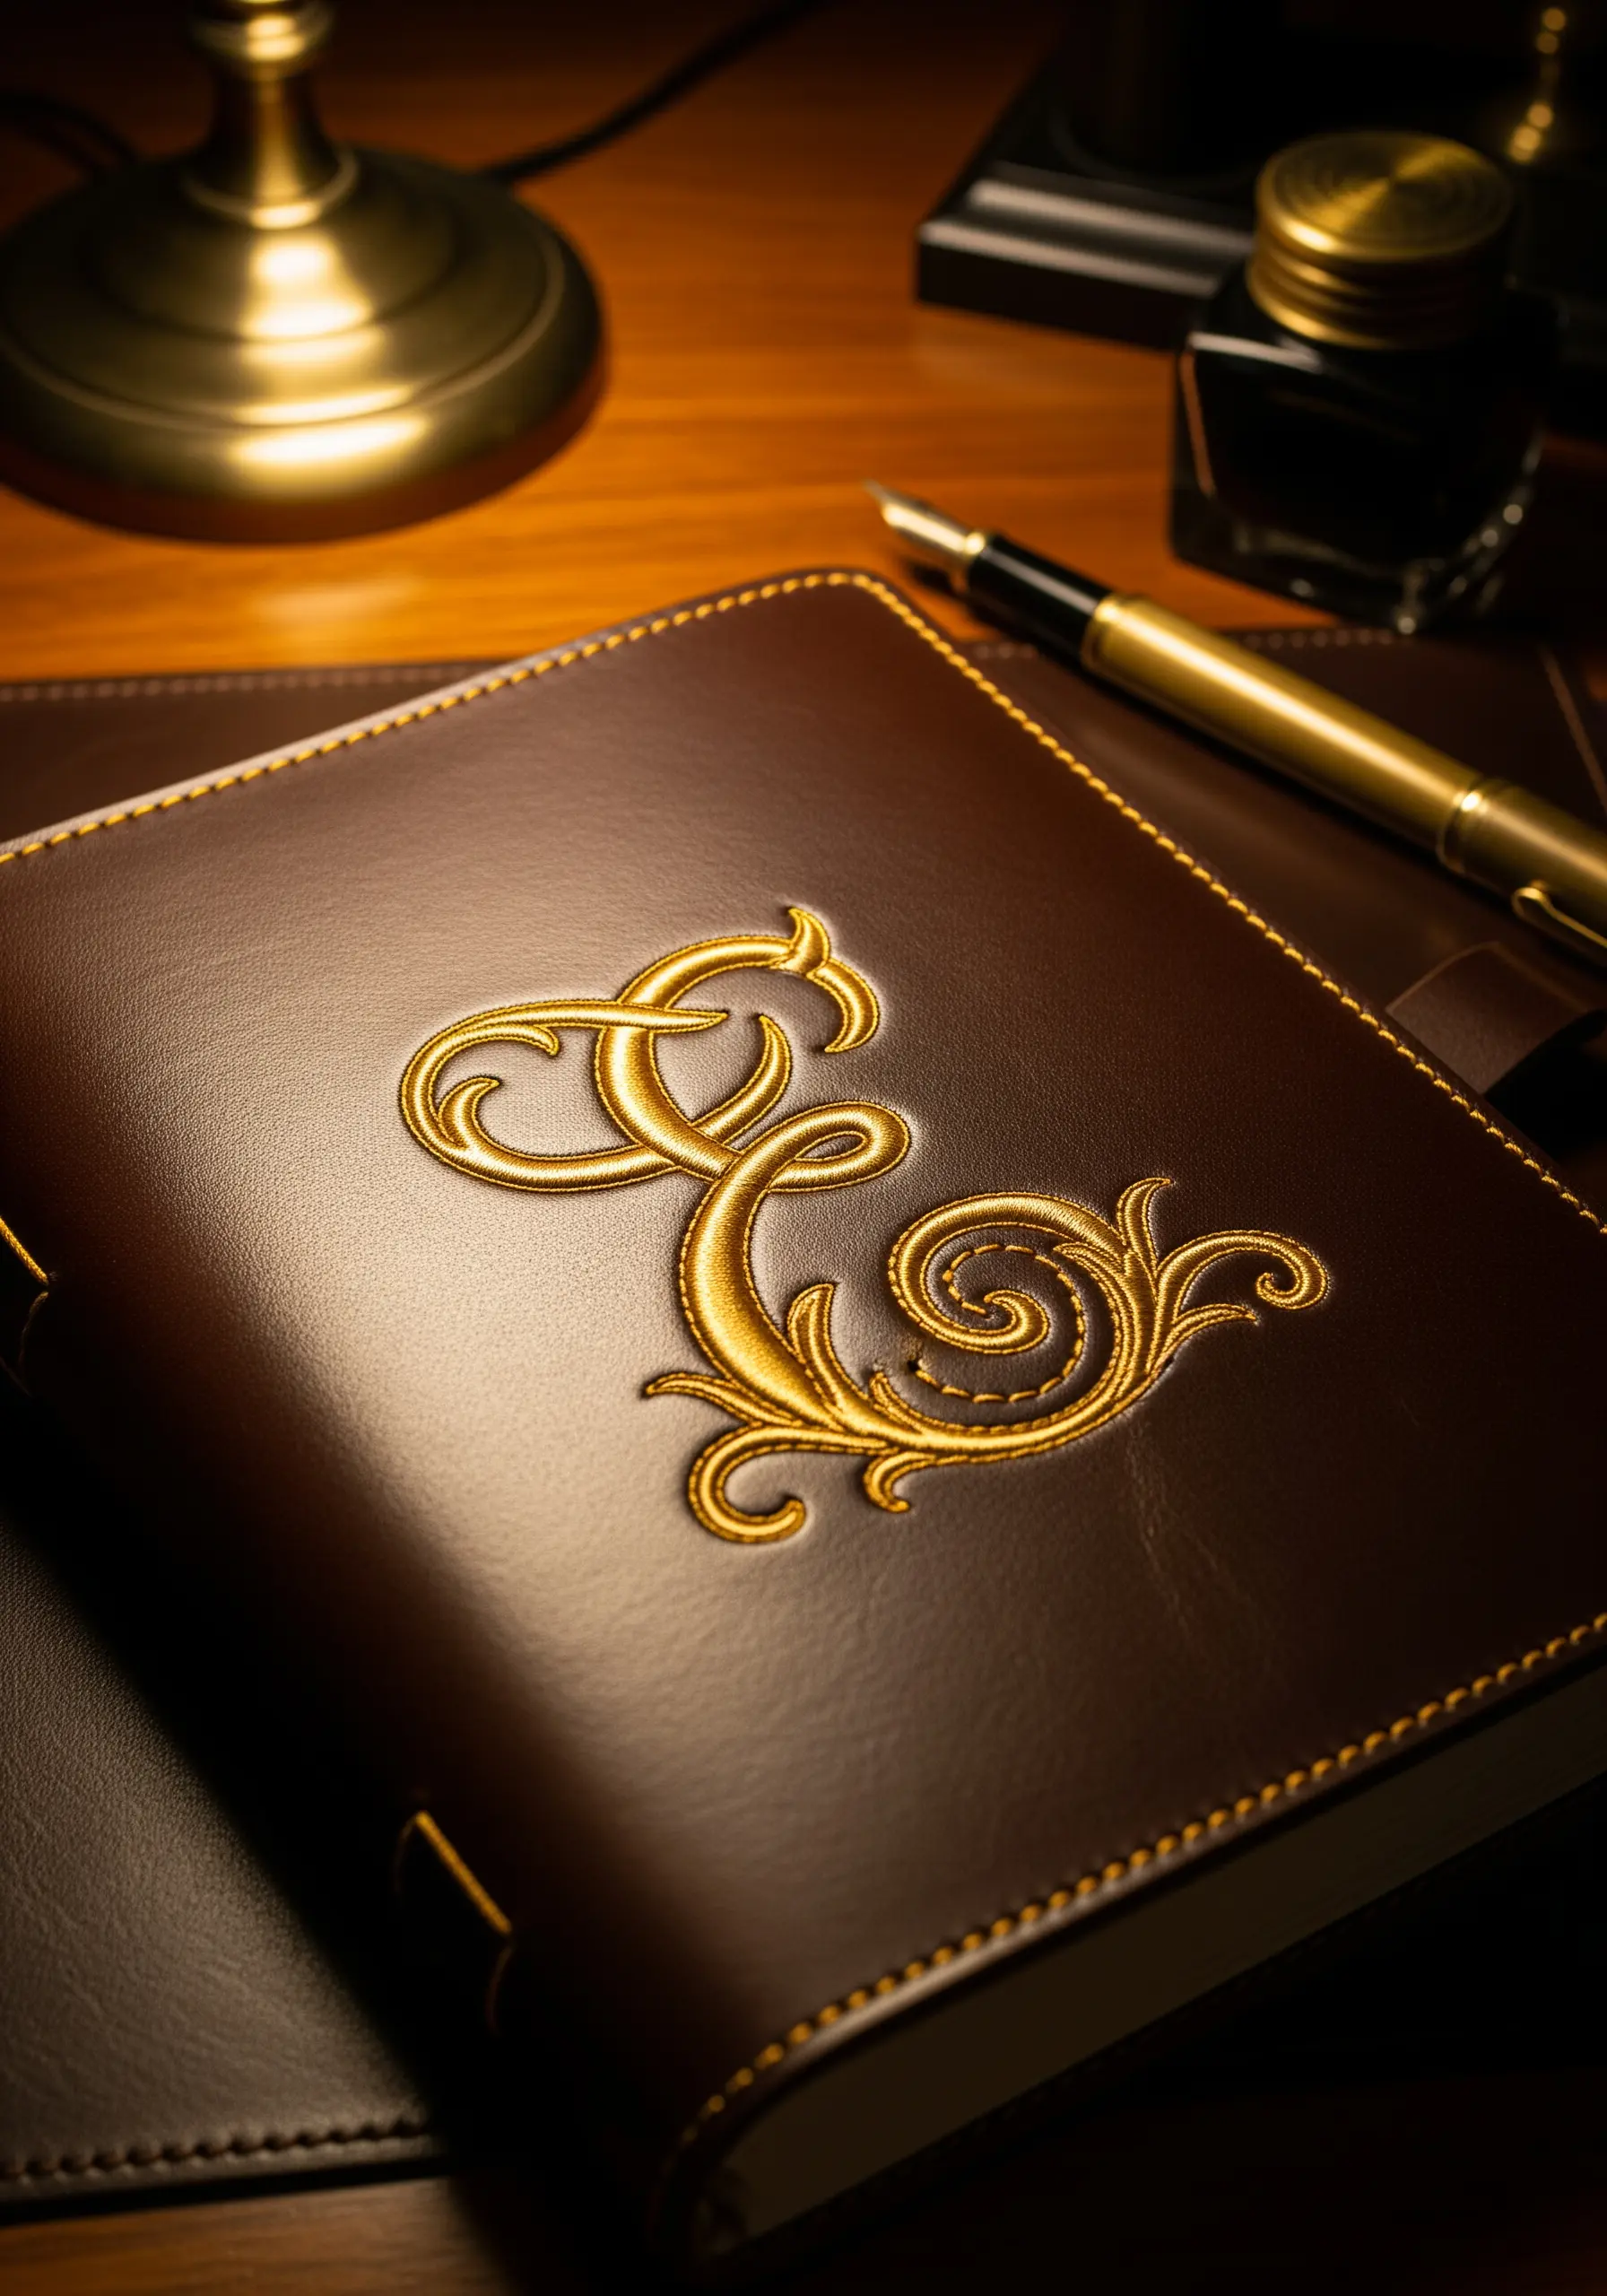
To achieve a raised, three-dimensional effect on a leather or faux-leather surface, first create a padded base using felt cut to the shape of your letter.
Stitch over the felt padding with a couch stitch, laying down a thicker metallic cord and securing it with a finer, matching thread. This creates the primary shape.
For the elegant sheen, work a tight, precise satin stitch over the couched cord using a high-quality gold metallic thread. Your stitches should lie perfectly parallel to one another for a smooth, reflective surface.
This technique elevates a simple monogram into a luxurious, tactile emblem that feels truly bespoke.
6. Personalized Felt Bookmark
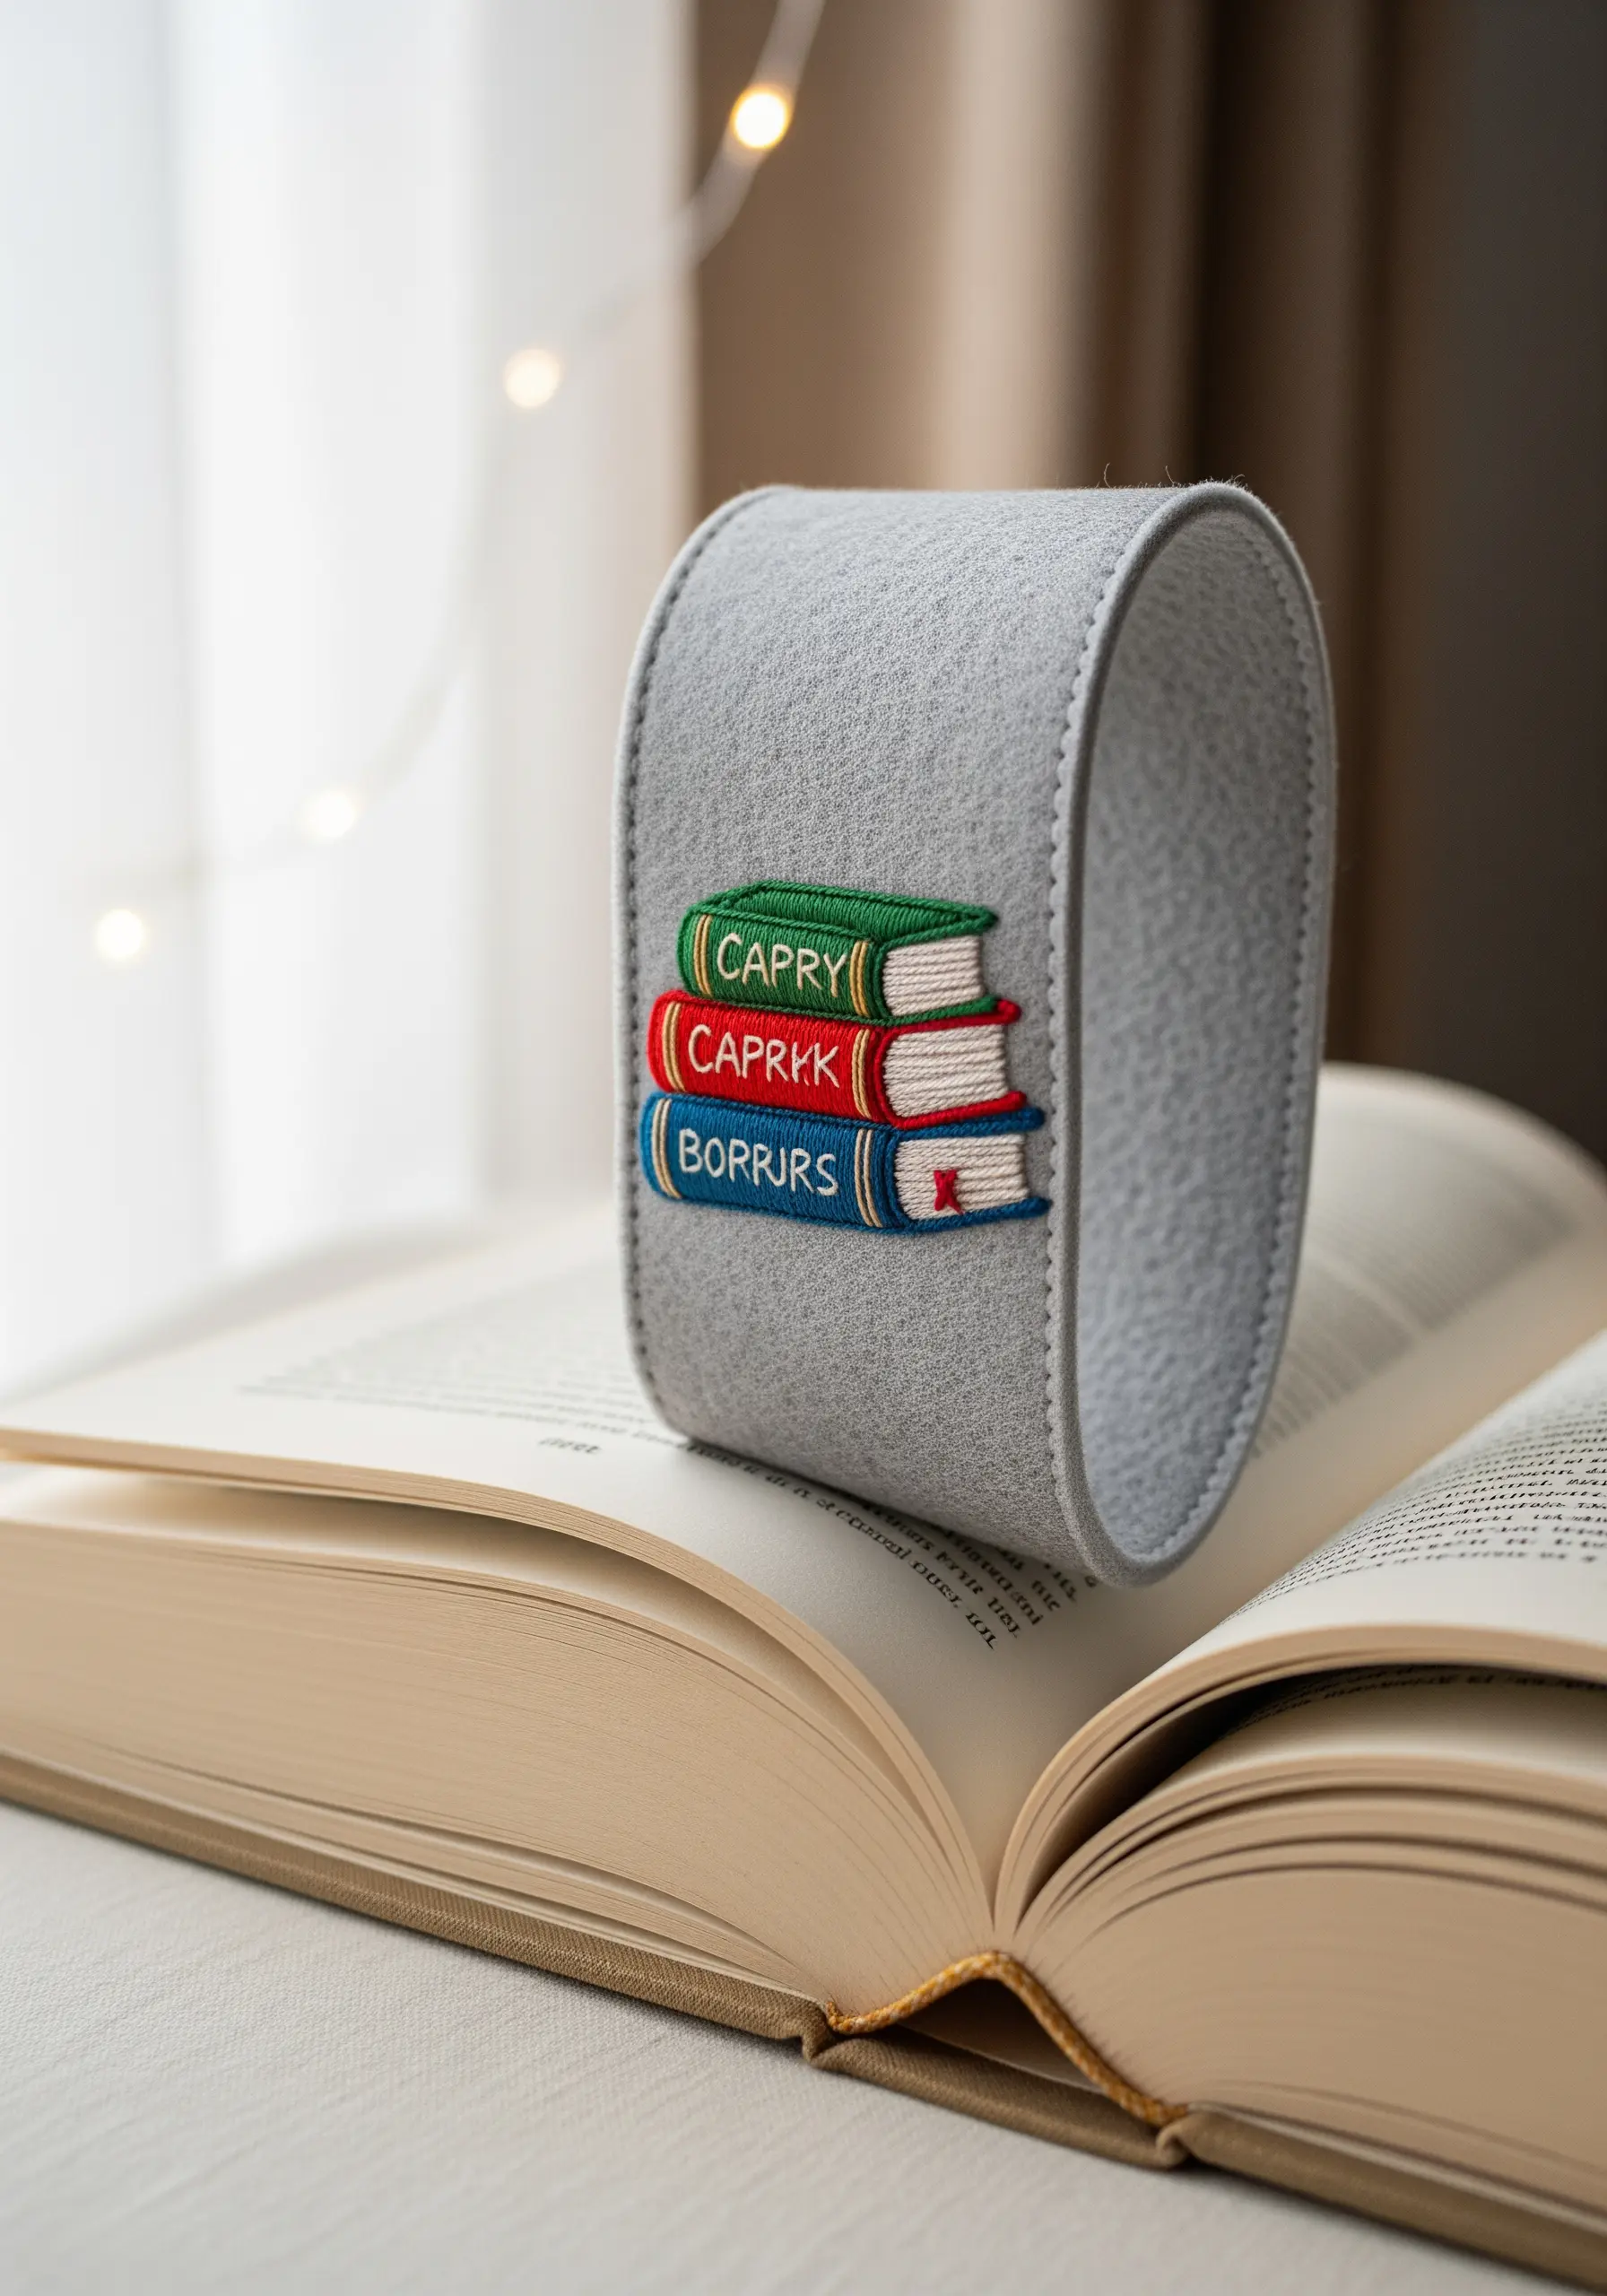
Felt is an ideal fabric for beginners because its non-fraying edges provide a clean finish without any hemming.
To make the book titles legible, even on a small scale, use a tiny backstitch with a single strand of contrasting thread.
Use a simple satin stitch to fill in the book covers. The felt’s texture will grip the thread, making it easier to achieve even coverage compared to smoother fabrics.
For a durable finish, cut two identical pieces of felt, embroider one, and then stitch them together with a neat running stitch or blanket stitch around the outer edge.
7. Garden Vegetable Kitchen Towel
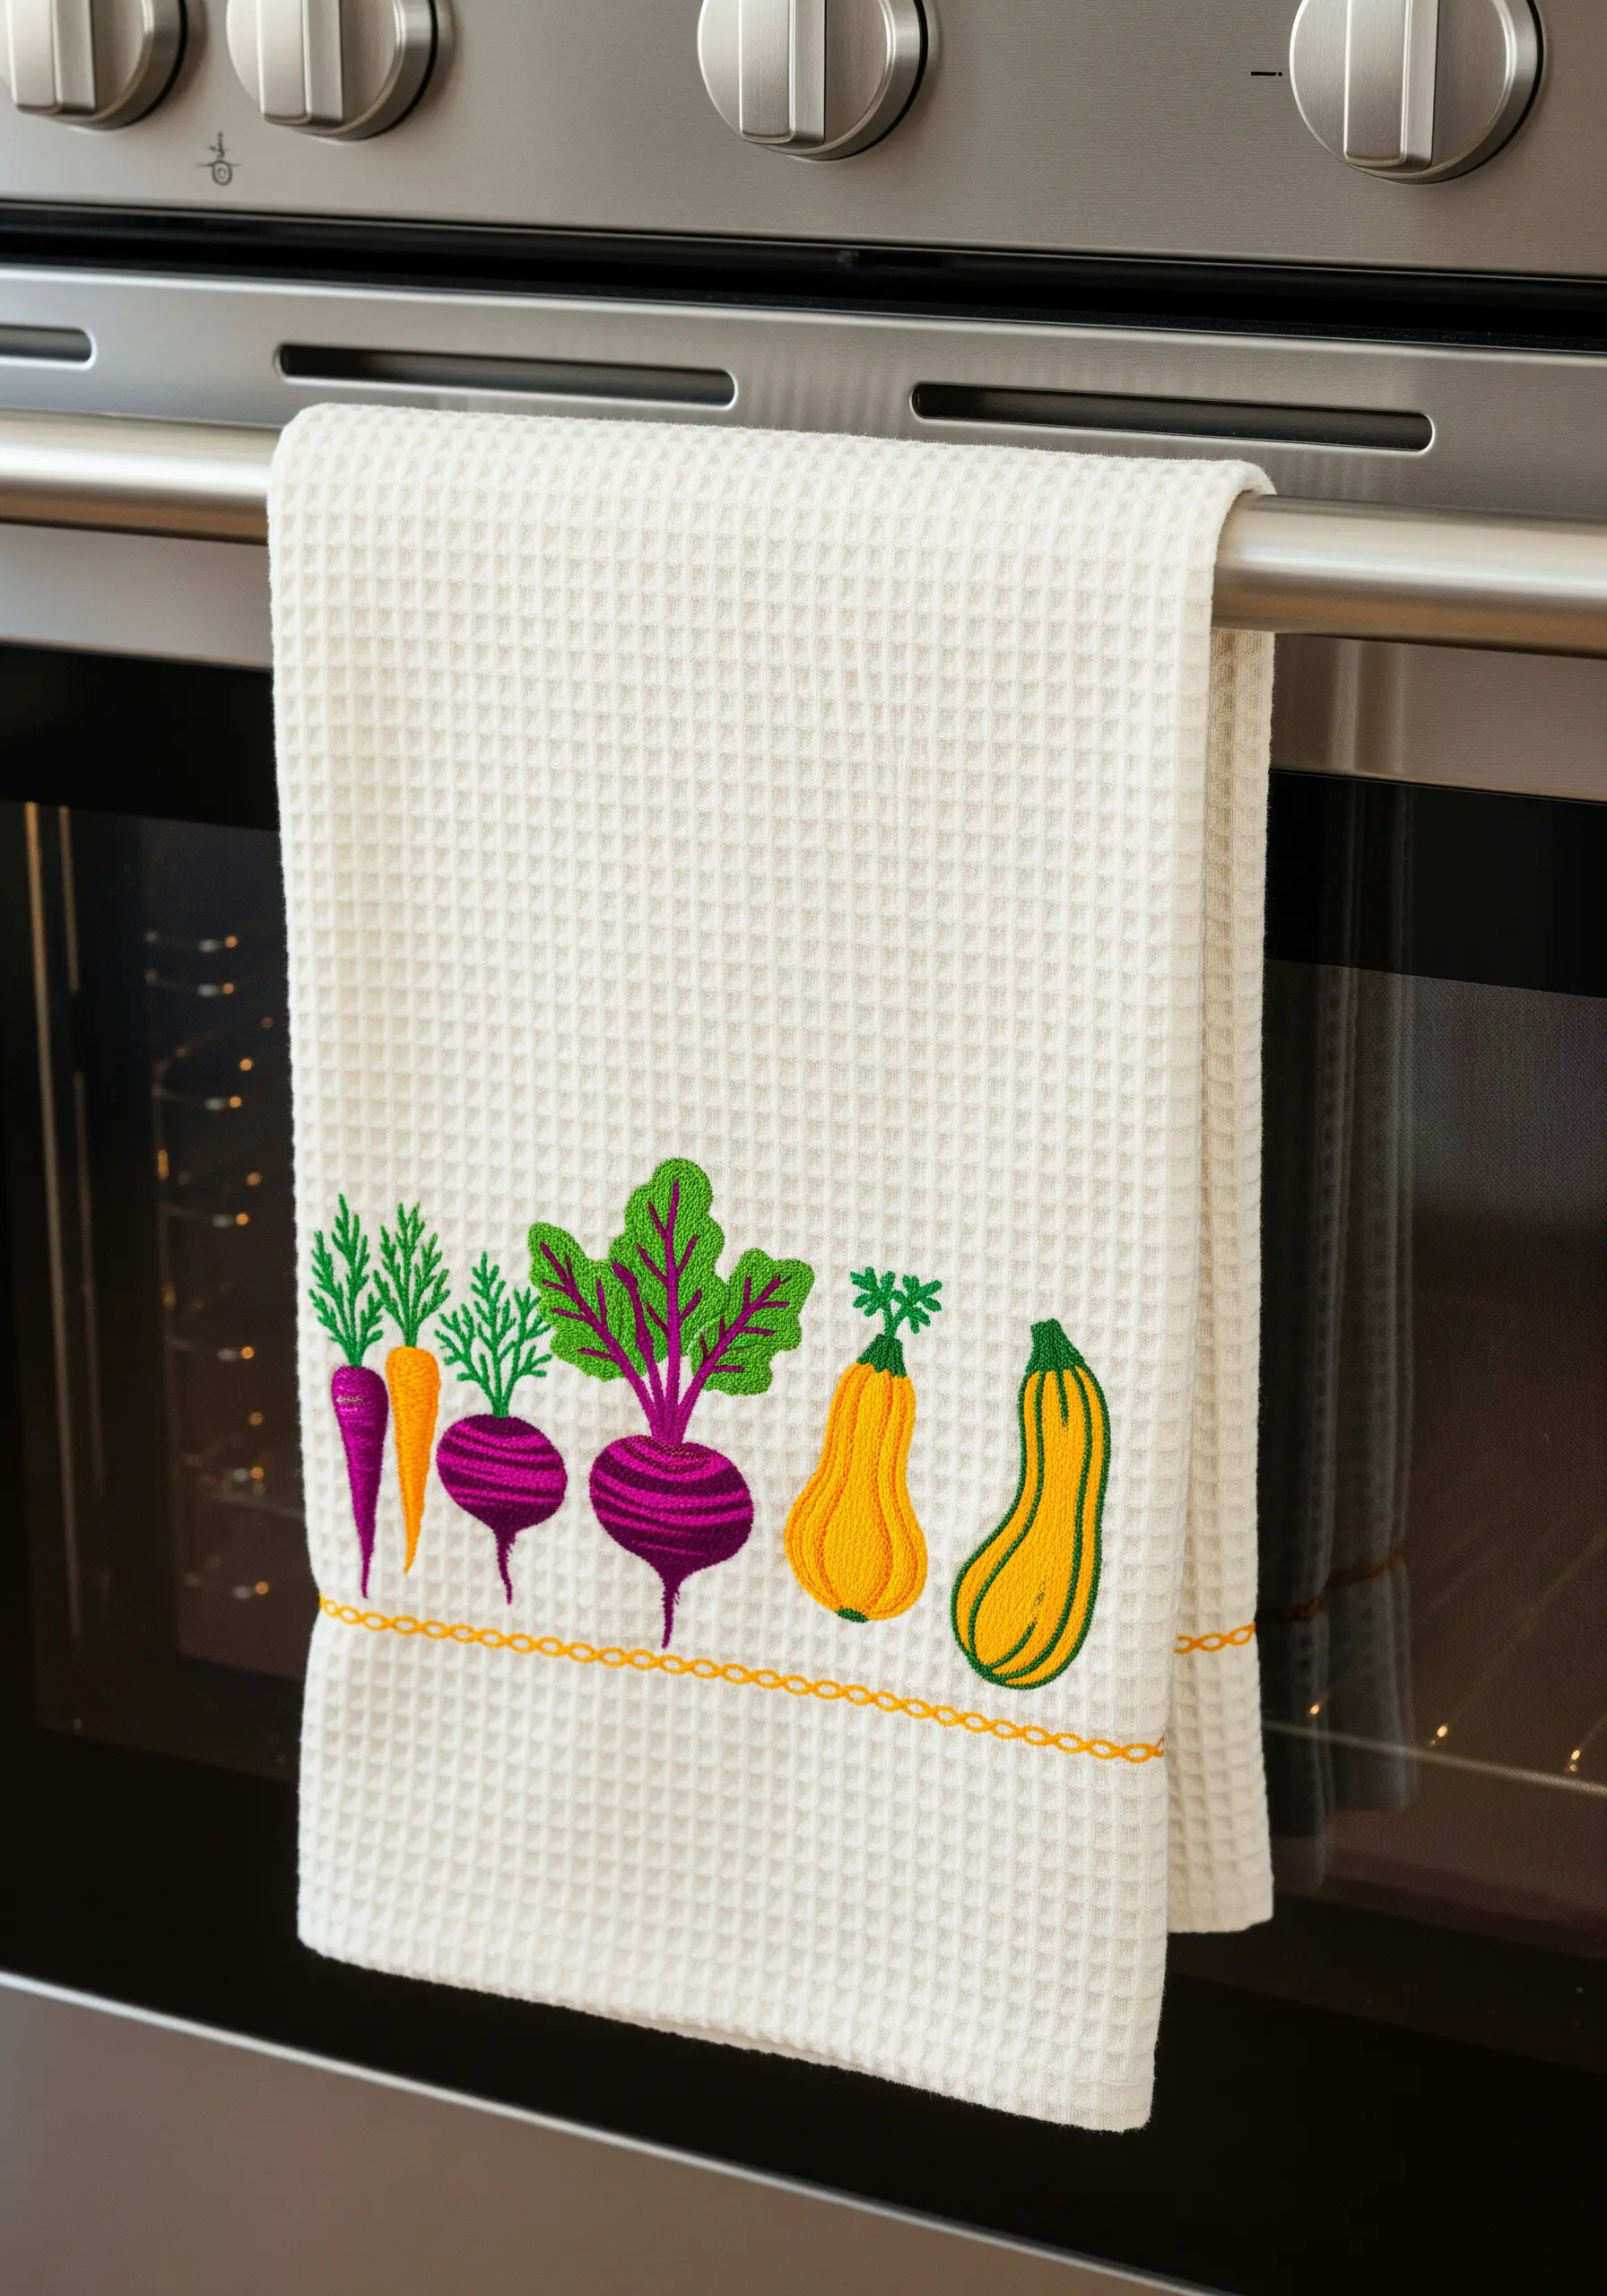
The waffle texture of this towel requires a stabilizer on the back to prevent your stitches from sinking into the fabric’s grid.
Use a bold satin stitch to fill in the vegetables. The raised texture of the stitch will stand out beautifully against the towel’s凹凸 surface.
Define each vegetable with a sharp backstitch outline in a darker shade of the main color. This simple step adds clarity and a clean, illustrative quality to the design.
Choose vibrant, slightly exaggerated colors to ensure the design remains cheerful and visible in a busy kitchen environment.
8. Thread-Painted Hummingbird T-Shirt
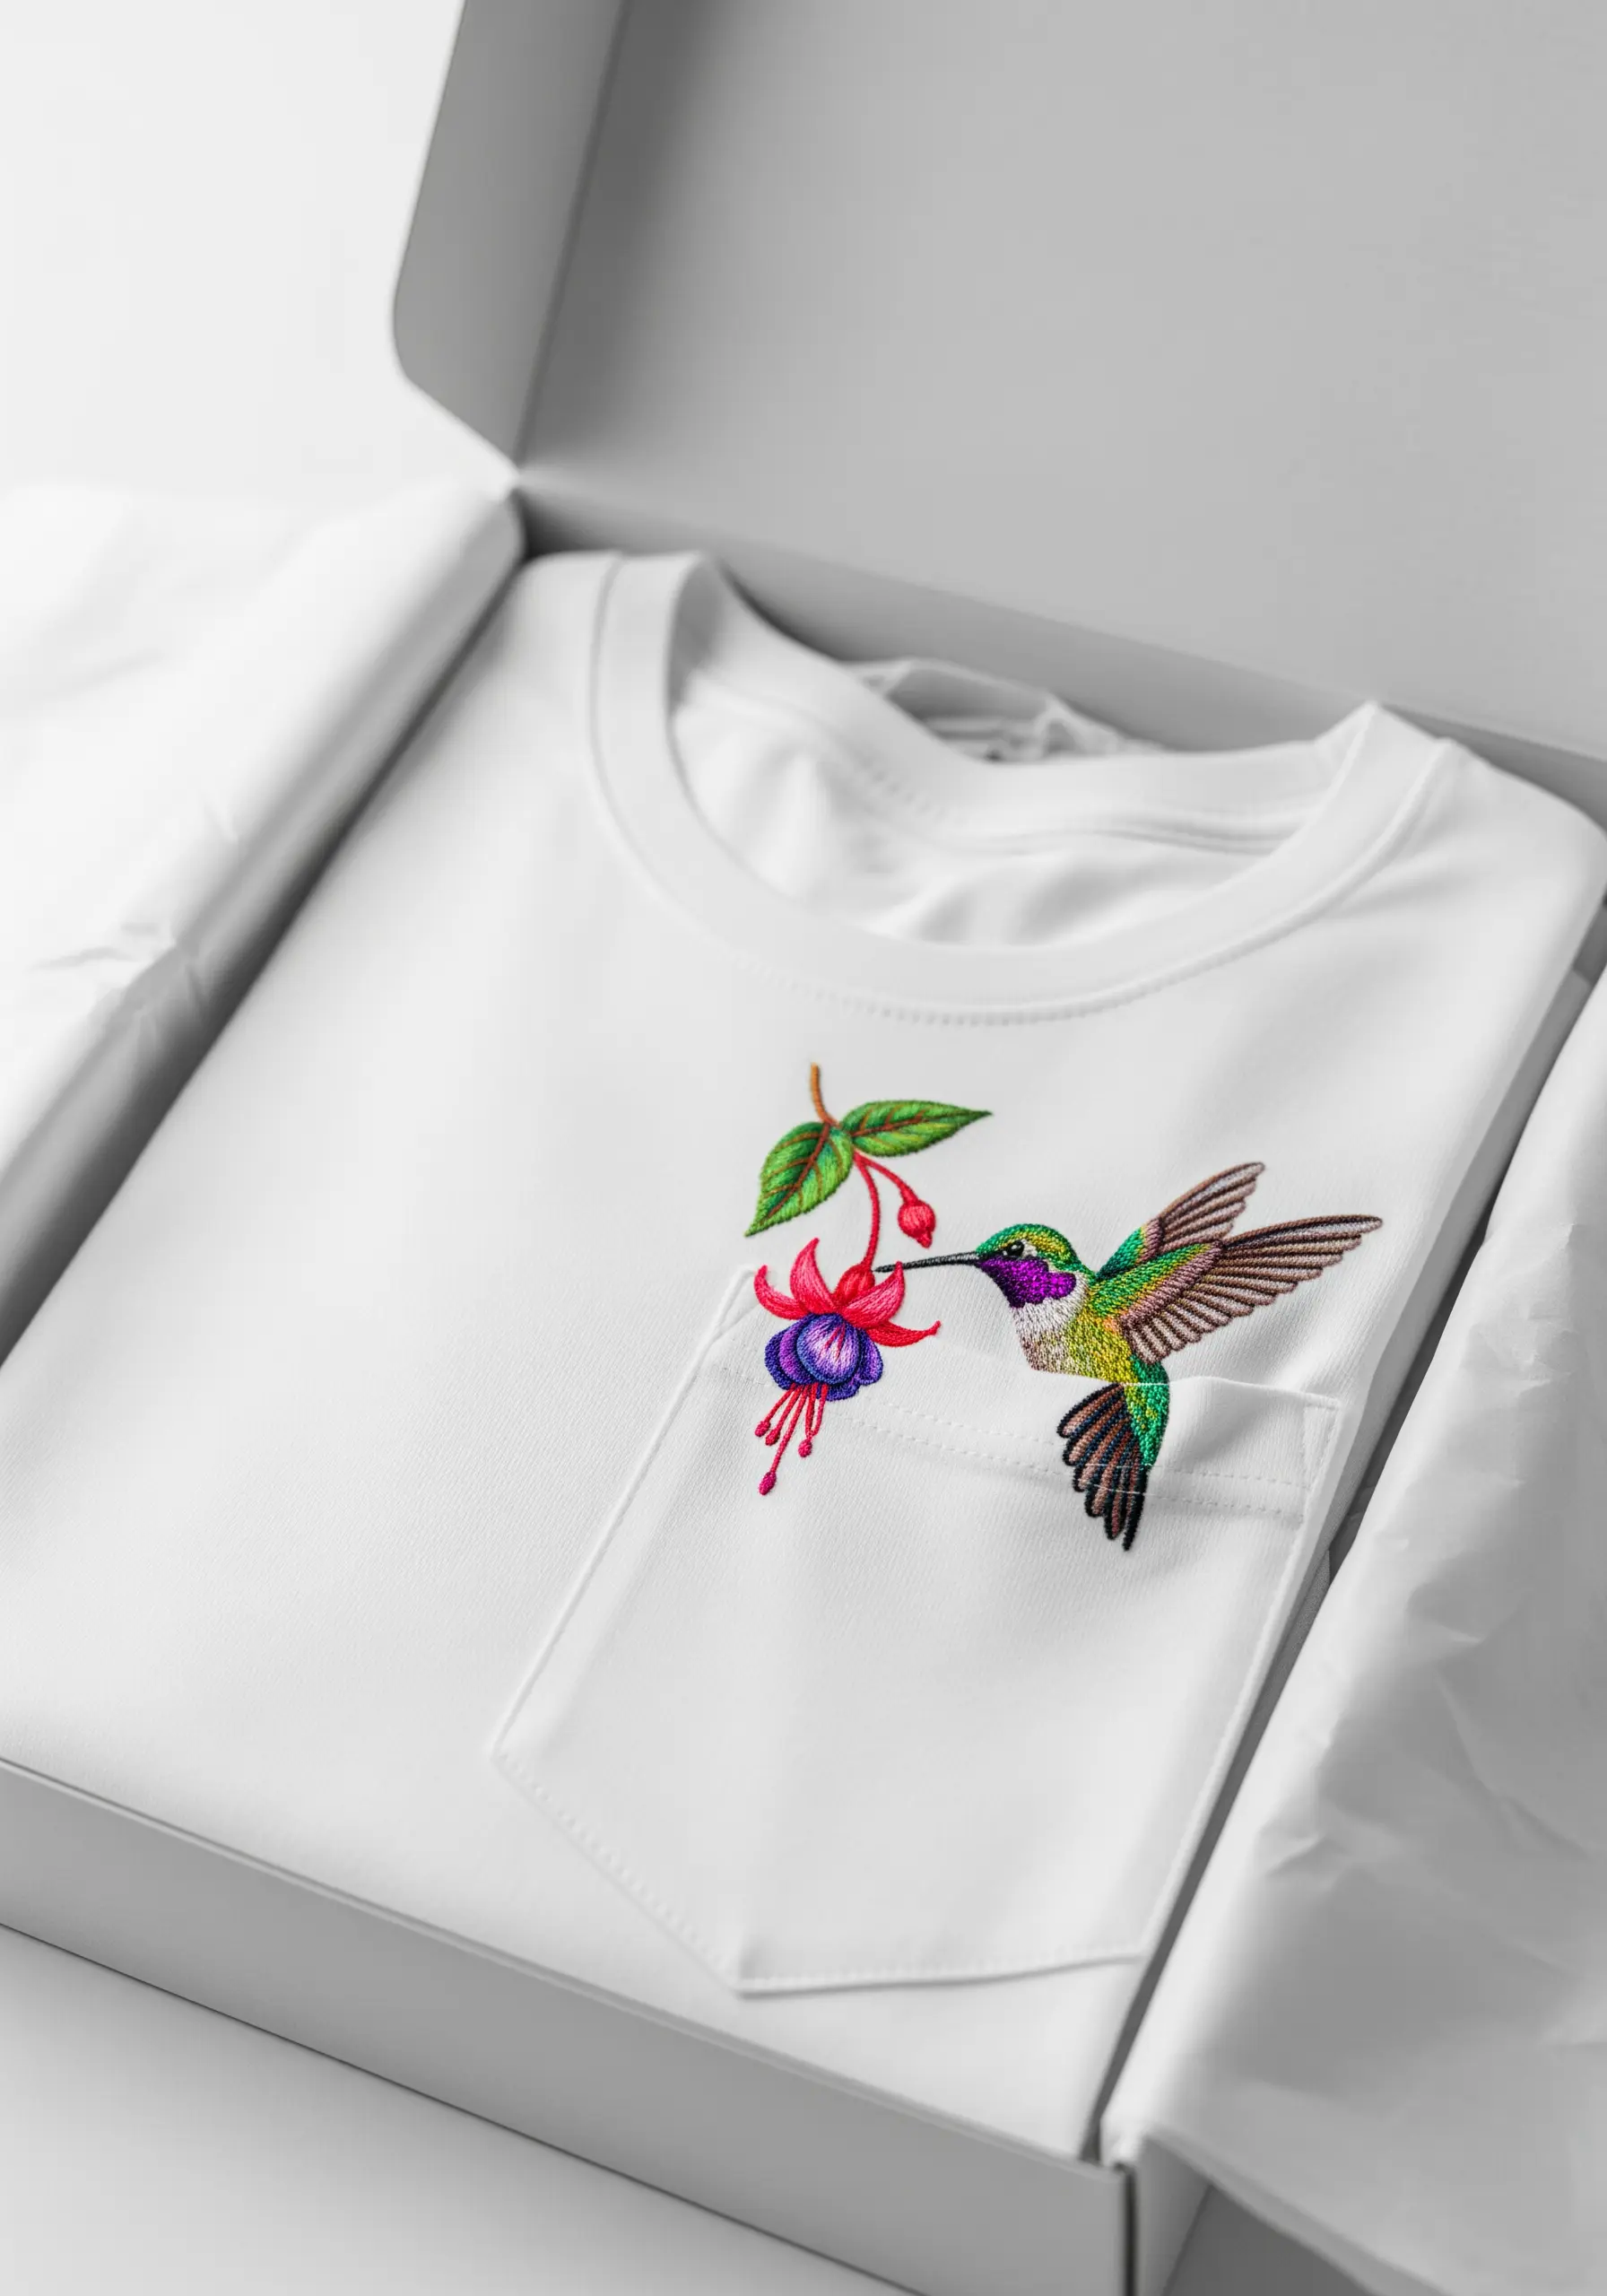
When embroidering on knit fabrics like t-shirts, always use a fusible interfacing on the inside. This prevents the fabric from stretching and distorting your design.
Capture the hummingbird’s iridescence by blending single strands of metallic and standard cotton floss within your long-and-short stitch. This creates a subtle shimmer that mimics real feathers.
For the delicate flower, use a satin stitch for the petals and long, elegant straight stitches for the stamens, topped with tiny French knots.
Positioning the design to interact with a garment’s feature, like a pocket, adds a playful and intentional element to the final piece.
9. Botanical Ivy Vine Sneakers
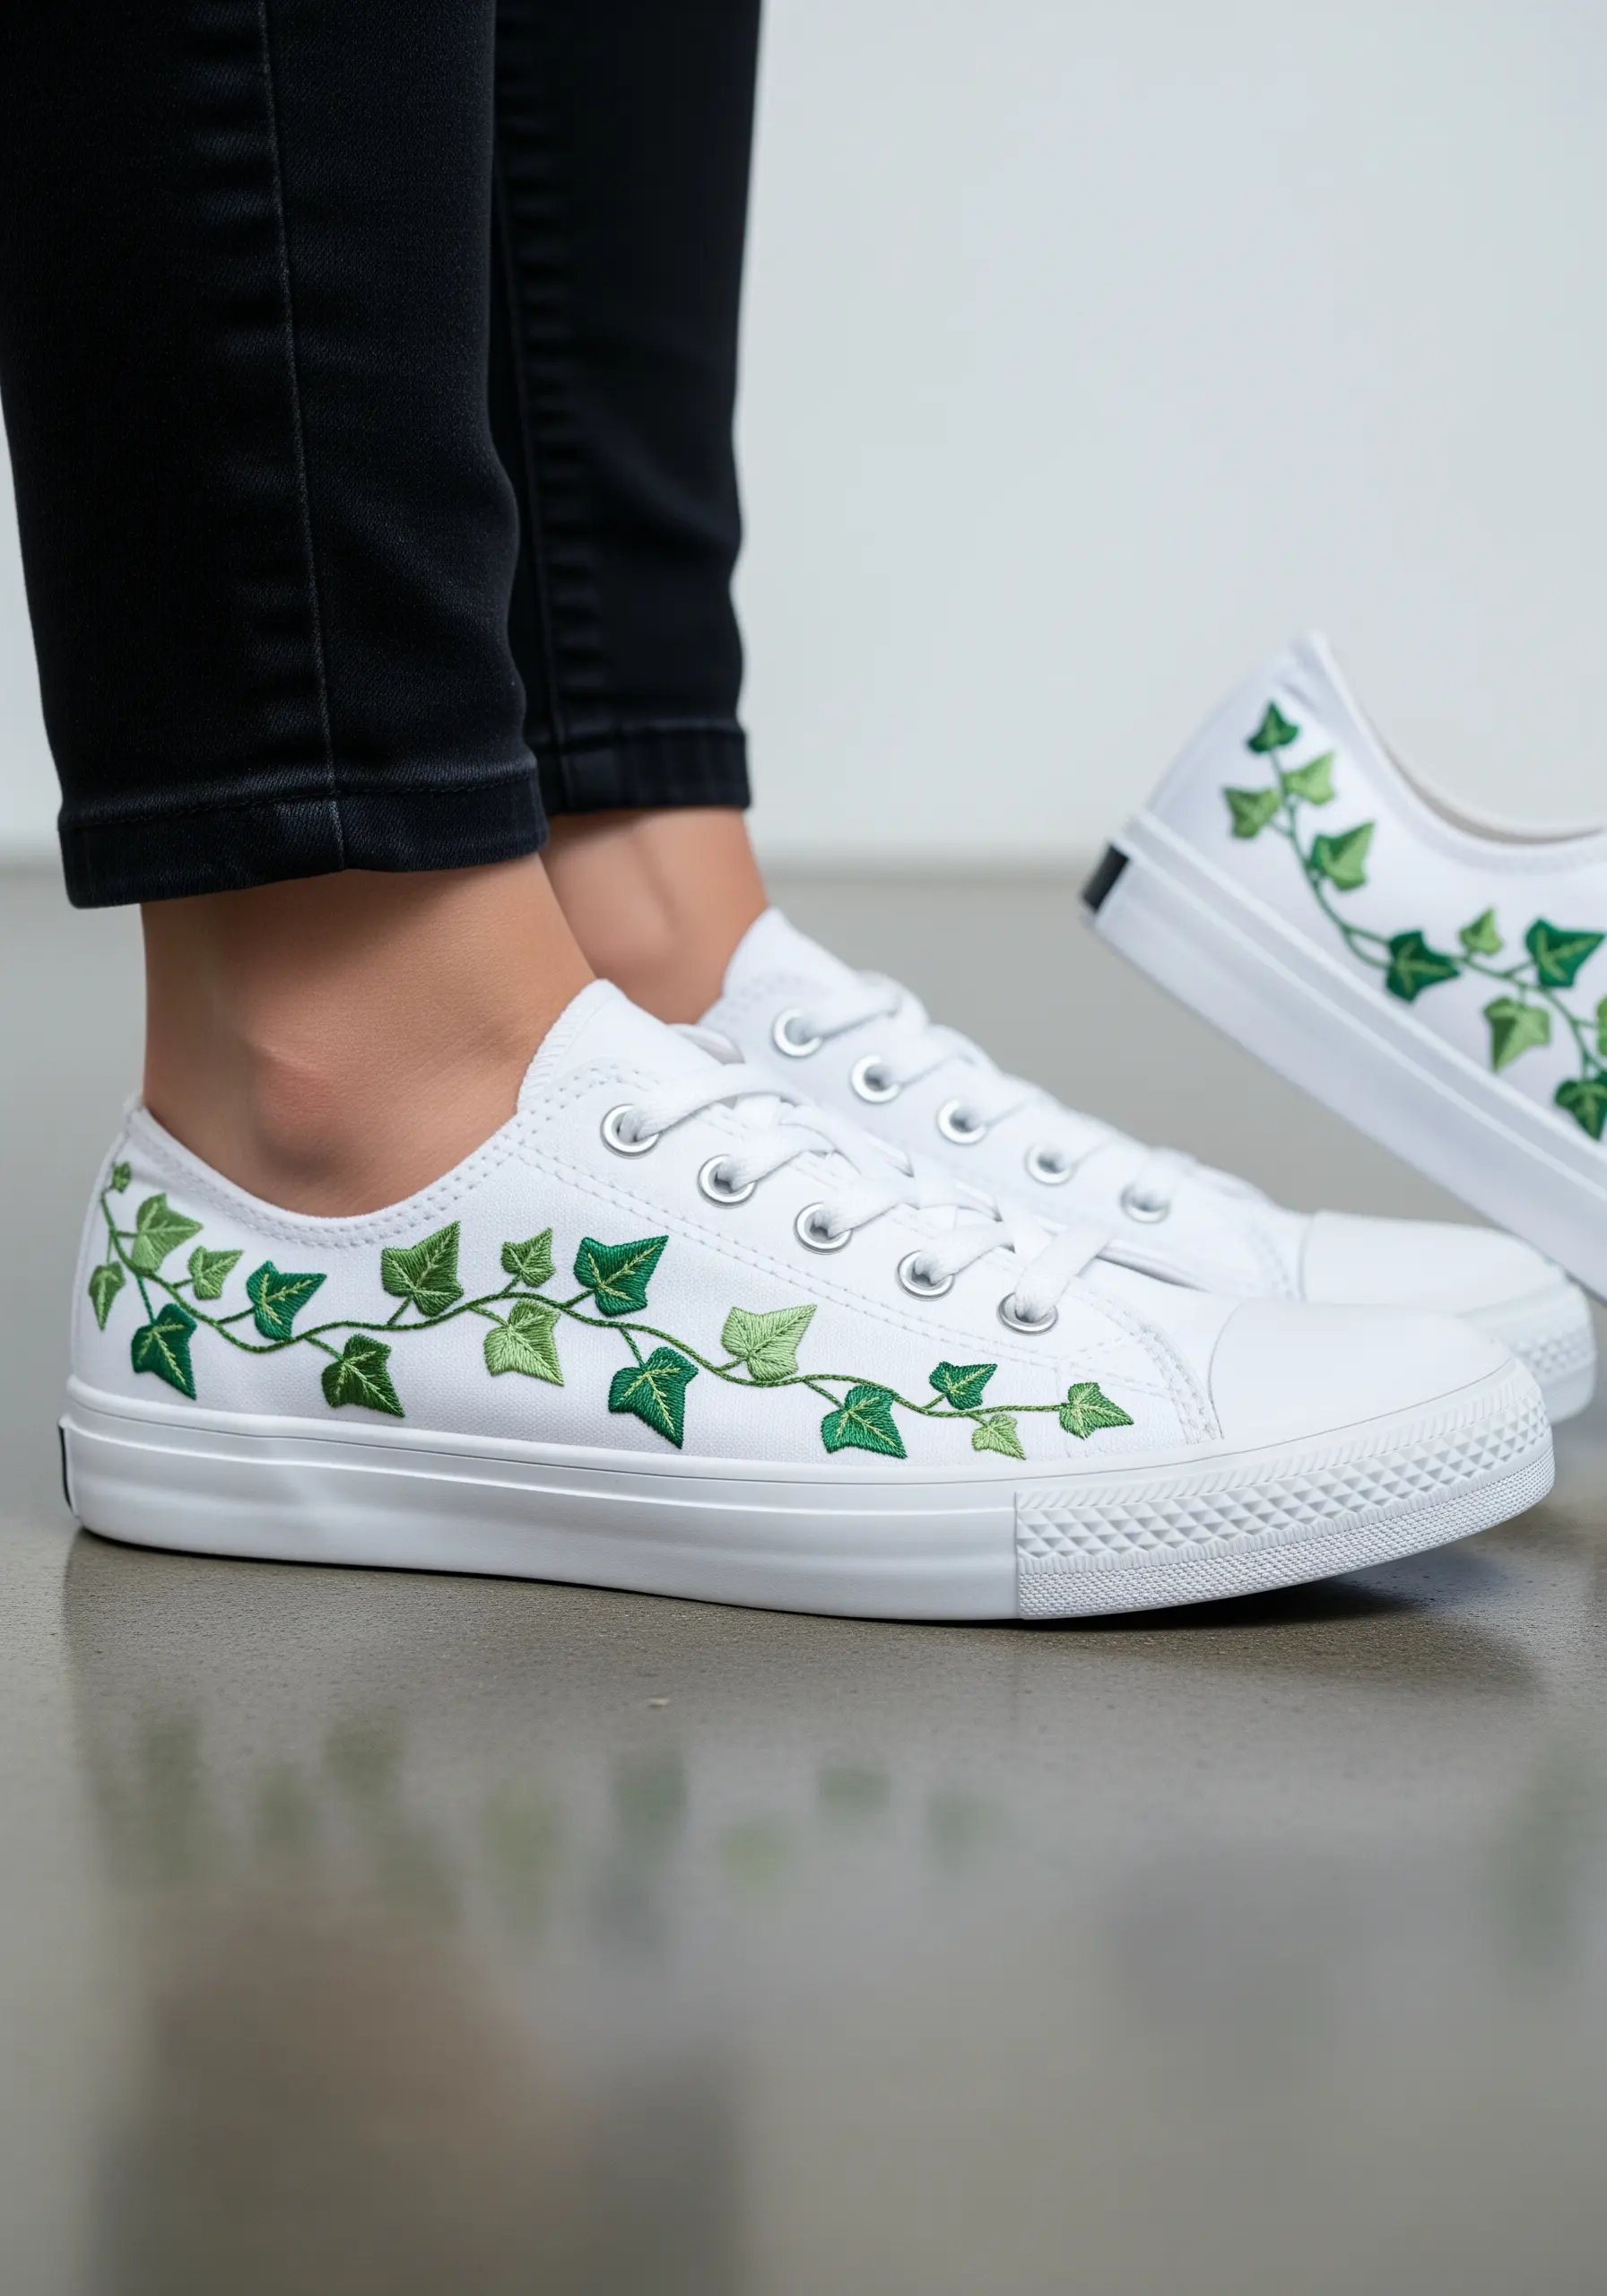
Before you begin, use a sharp, sturdy needle designed for canvas or denim. A standard embroidery needle may break.
Lightly sketch your vine design onto the shoe with a water-soluble fabric pen. This gives you a clear guide to follow.
Use a stem stitch for the twisting vines to create a rope-like texture that stands up to wear and tear better than a simple backstitch.
Fill in the leaves with a fishbone or satin stitch, varying the shades of green to give the foliage a more realistic, sun-dappled appearance. These leaf embroidery stitches transform plain shoes.
10. Minimalist Mountain Range Beanie
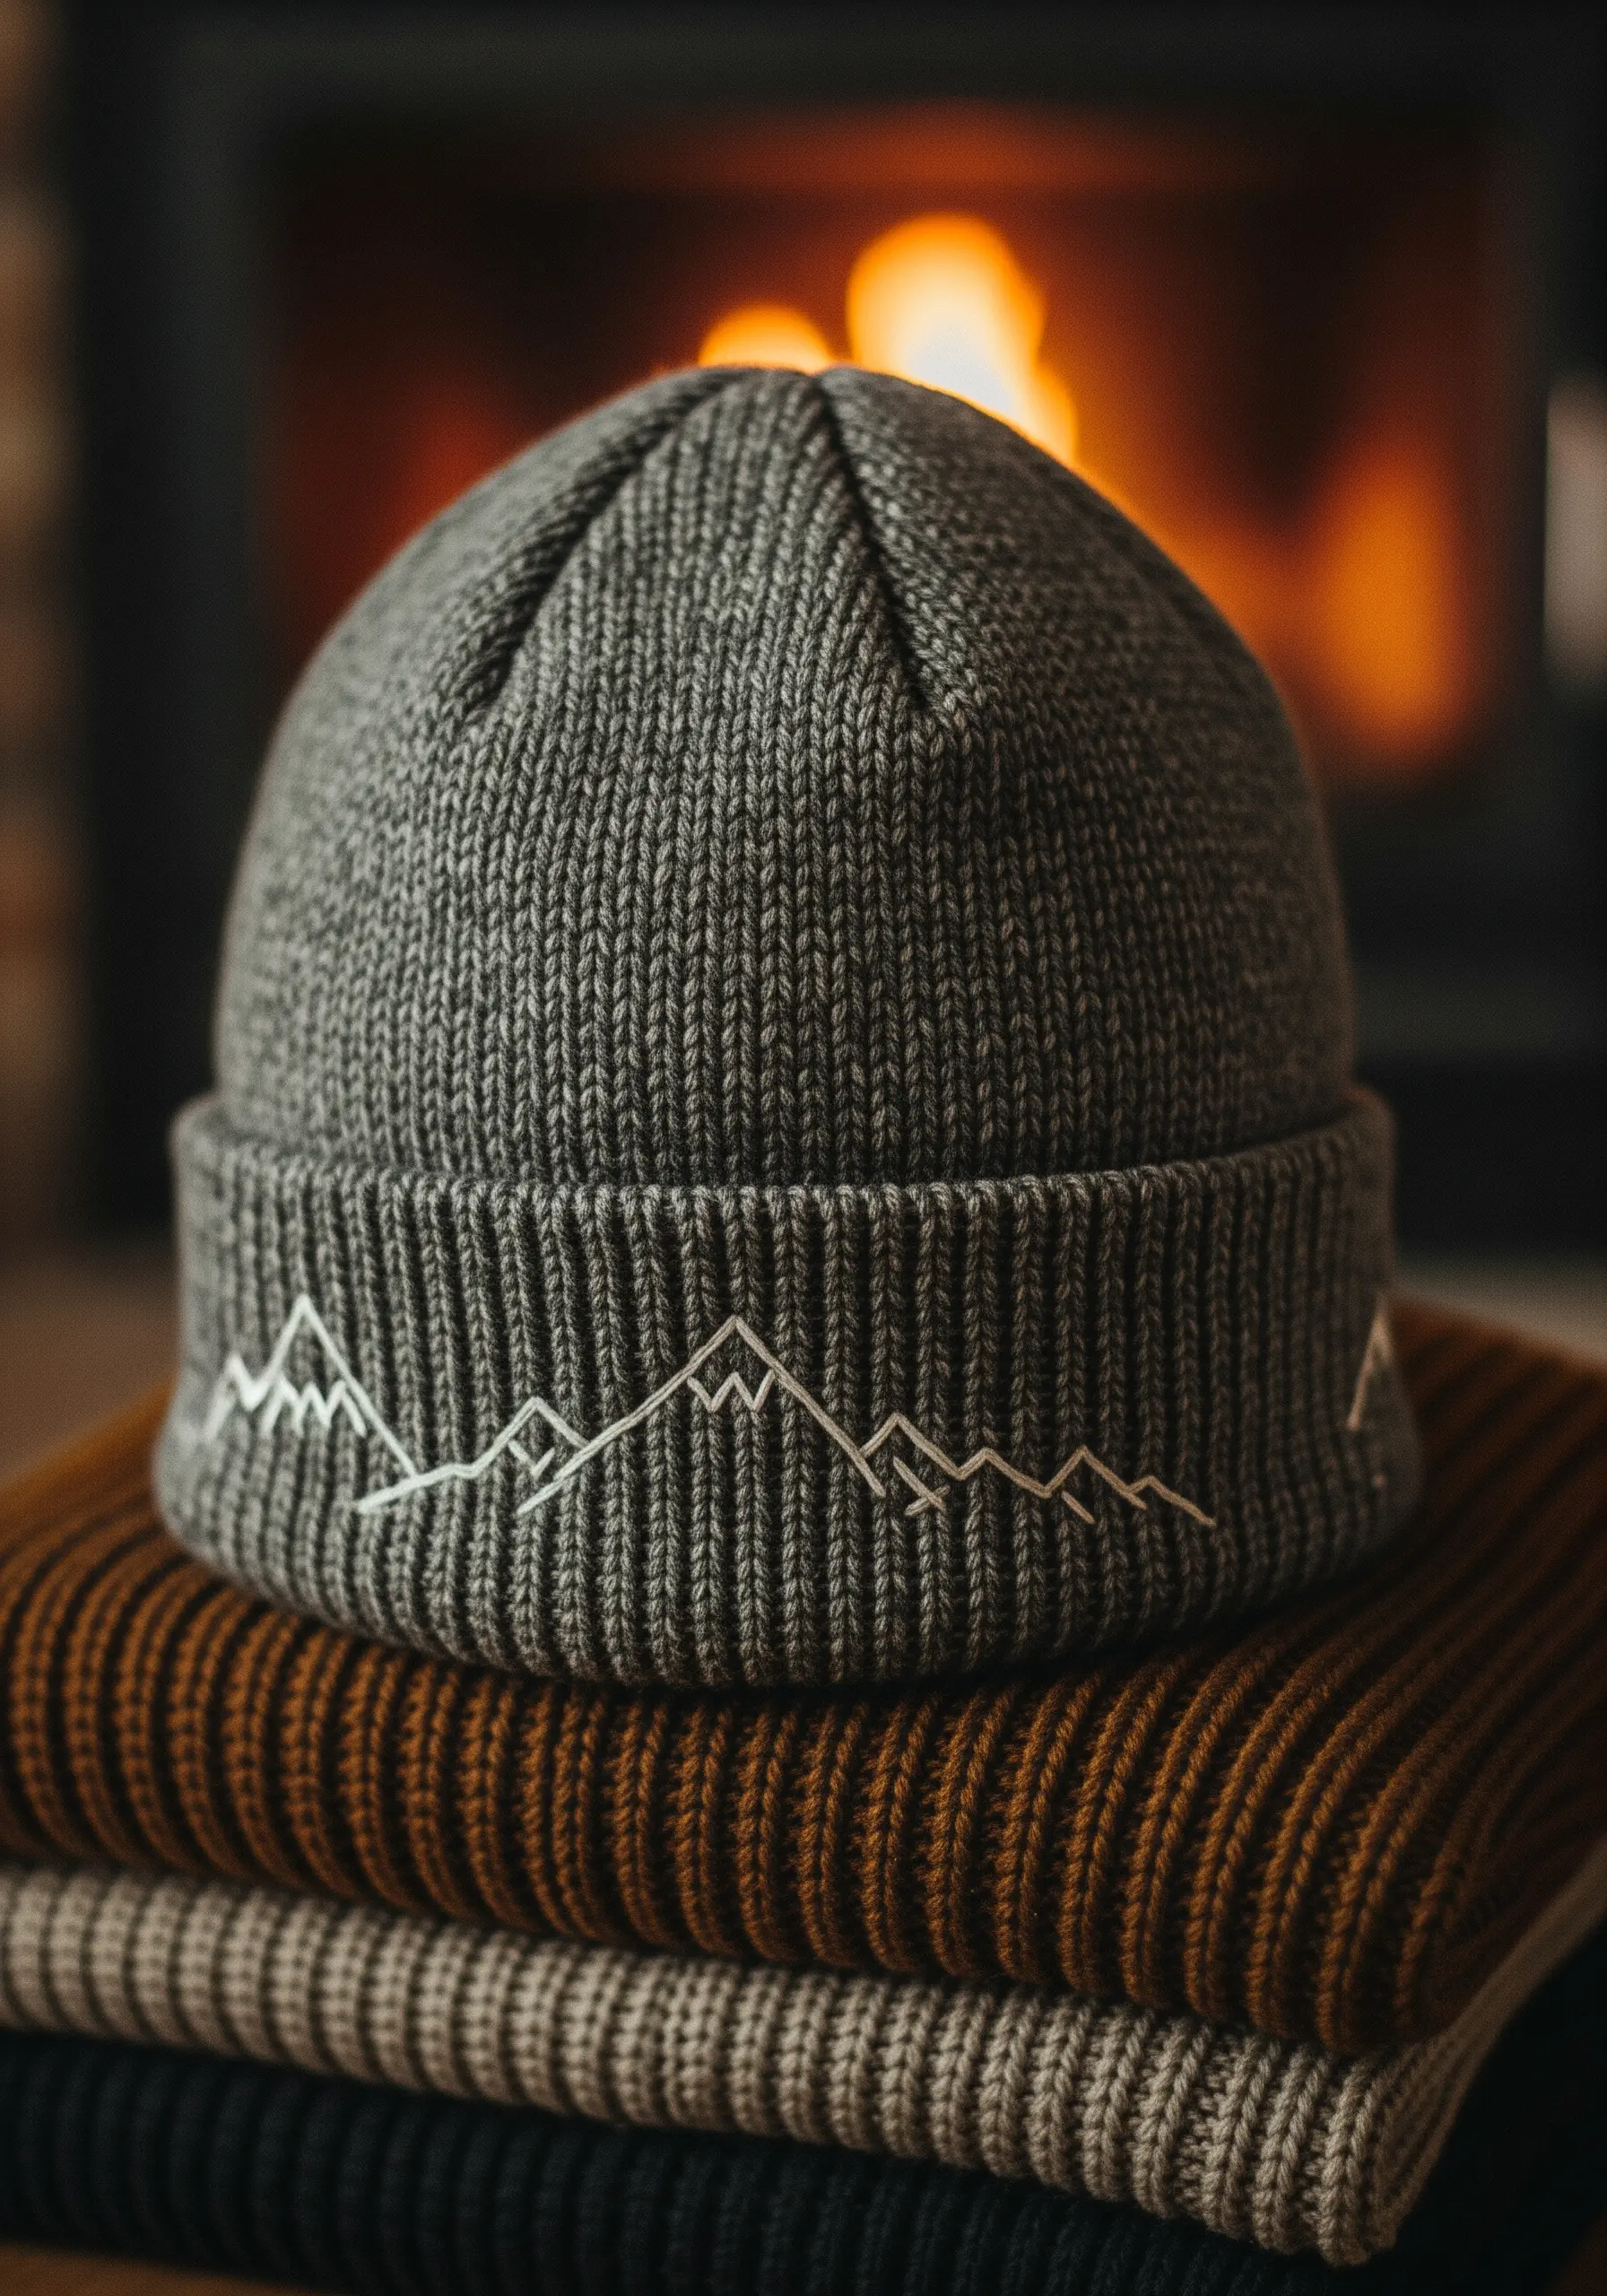
Embroidering on ribbed knits requires a gentle touch to avoid over-stretching the fabric. Use a hoop, but don’t pull the fabric drum-tight.
A simple backstitch using a thicker thread, like pearl cotton or all six strands of embroidery floss, will create a bold line that doesn’t get lost in the ribbed texture.
To create the illusion of snowy peaks, switch to a thinner thread (two or three strands) for the top sections of the mountains.
This is a perfect example of how a single, well-placed line can have more impact than a complex design, making it one of the best minimalist embroidery projects.
11. Glow-in-the-Dark Firefly Lampshade
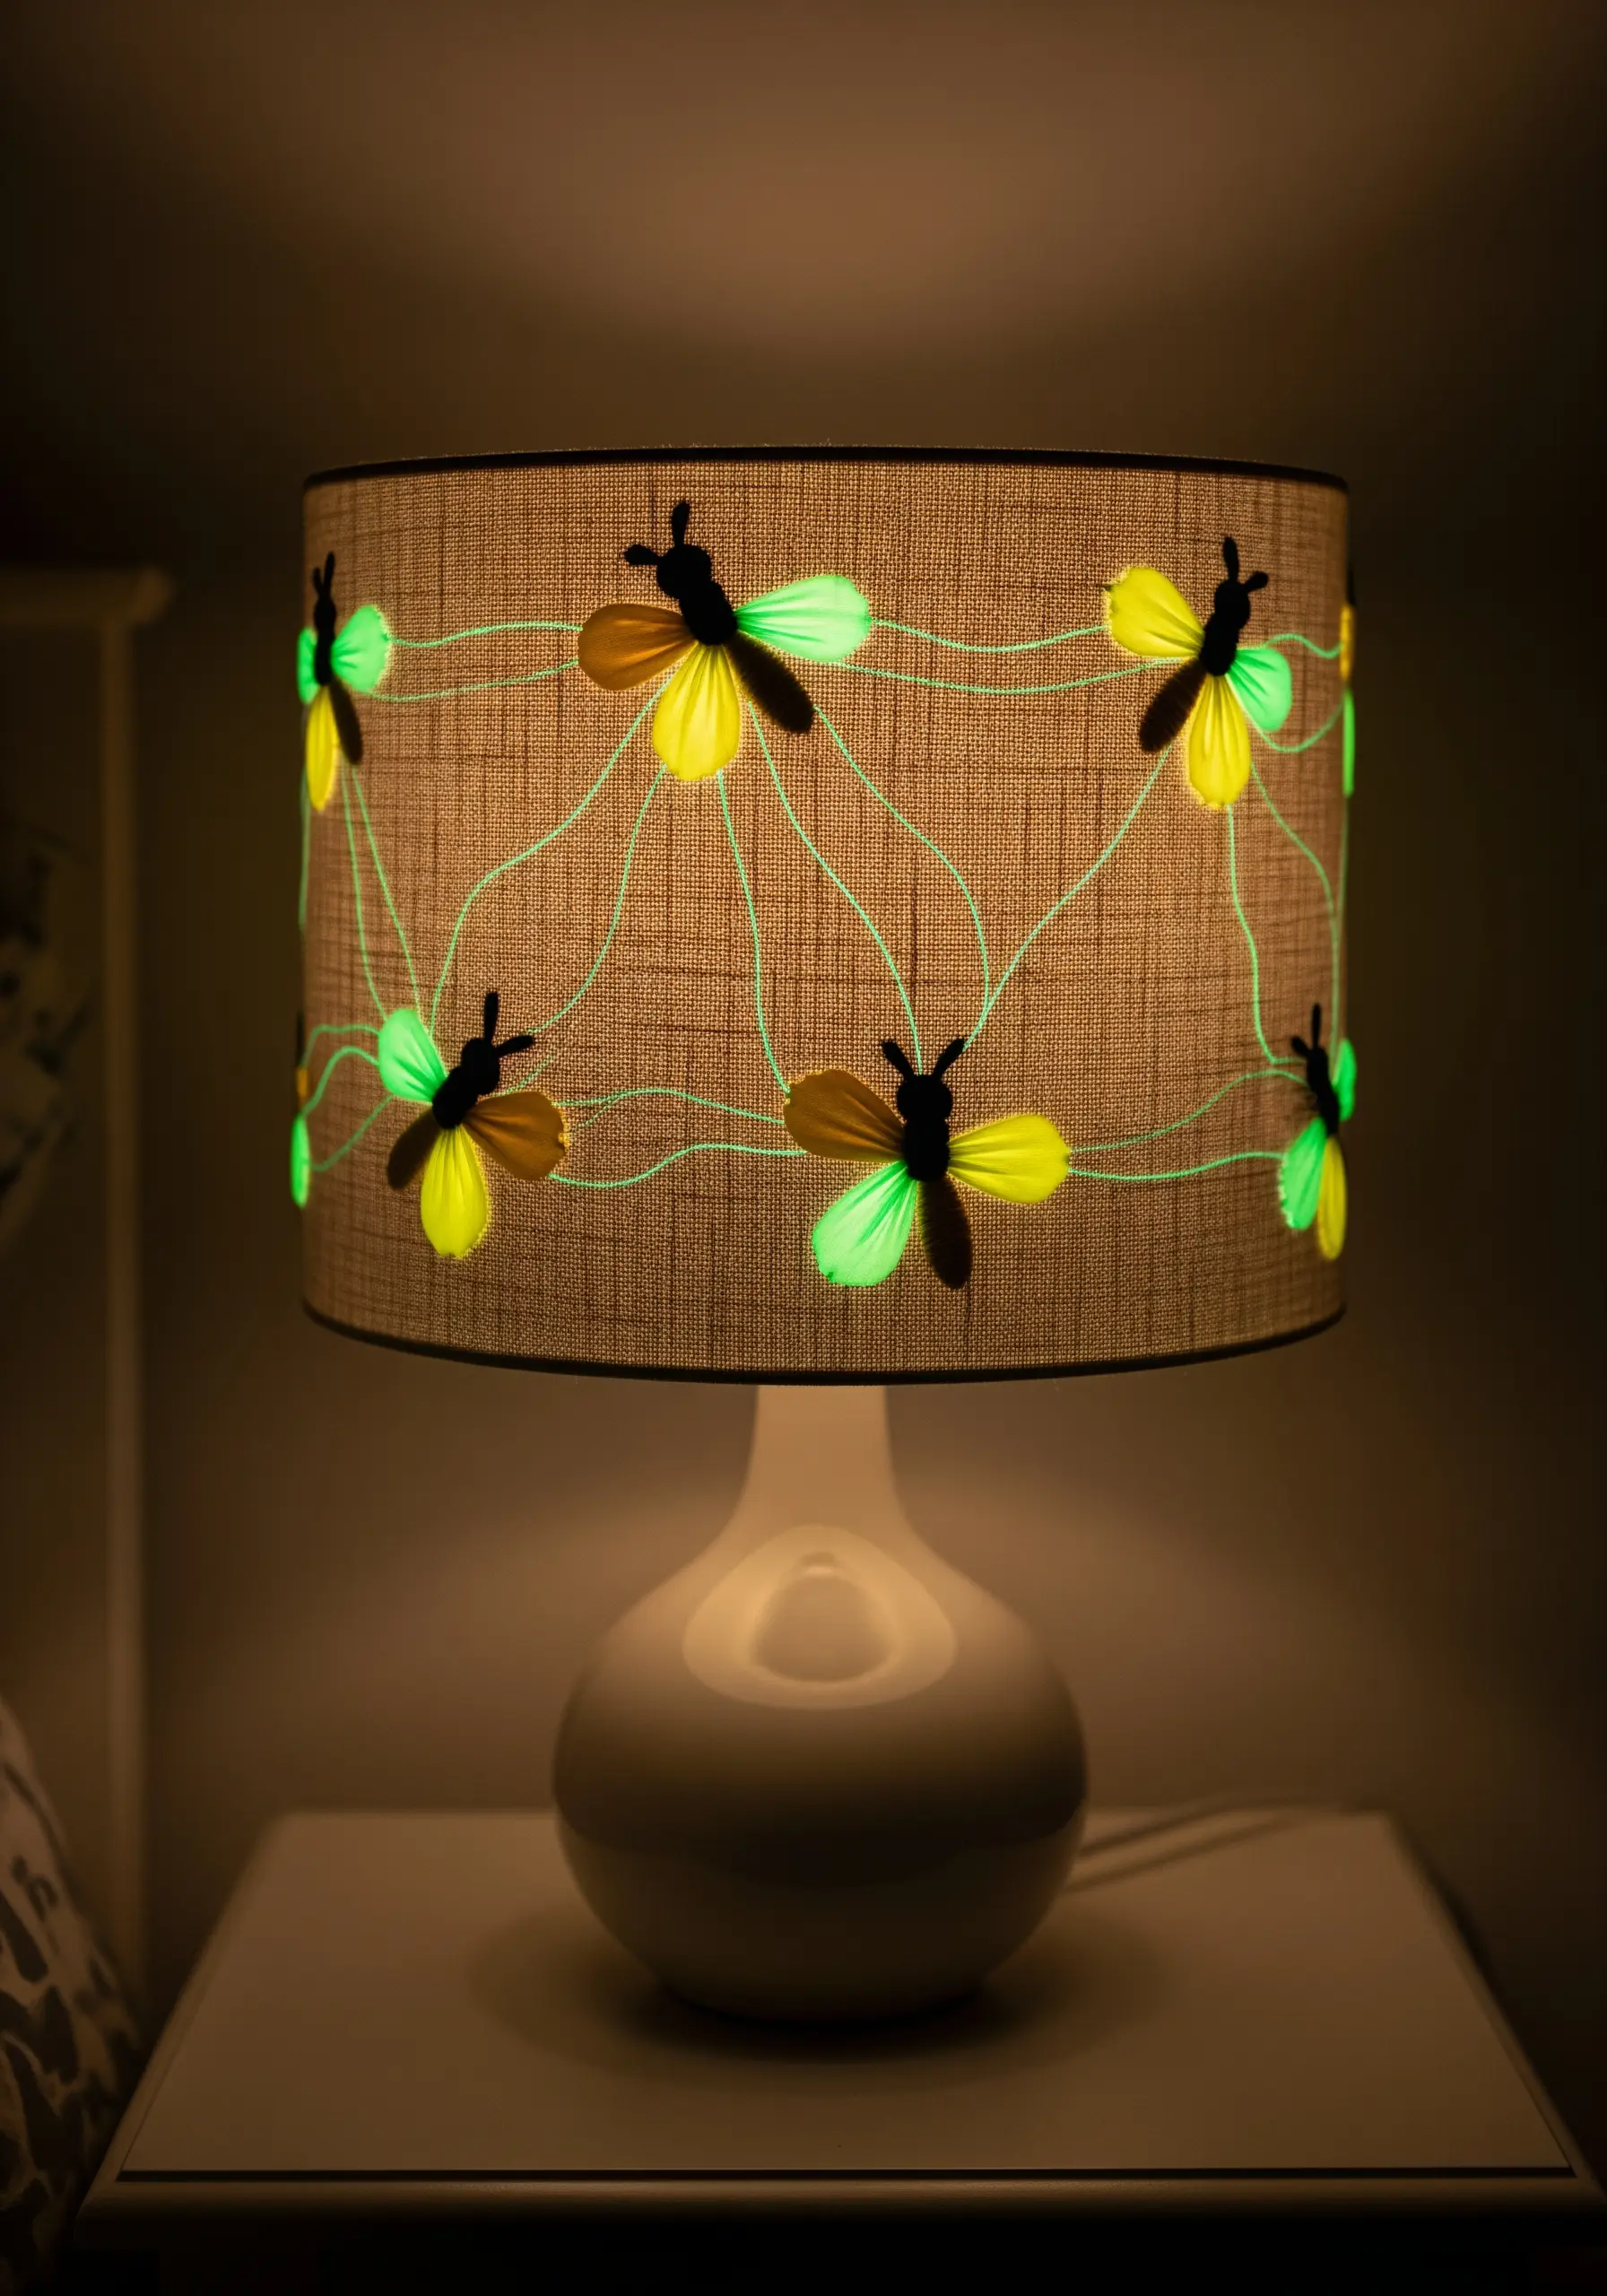
To create this magical effect, you will need specialty glow-in-the-dark embroidery floss. Use it for the fireflies’ bodies and the connecting flight paths.
Stitch the wings using a sheer organza appliqué. Lay a small piece of organza over the wing area, stitch the outline, and then carefully trim away the excess fabric.
The organza catches the light from the bulb, creating a translucent effect during the day, while the special thread makes the design come alive at night.
Work directly onto a linen or coarse-weave cotton lampshade, as the sturdy fabric can handle the stitching without needing a hoop.
12. Color-Blocked Coffee Cozy
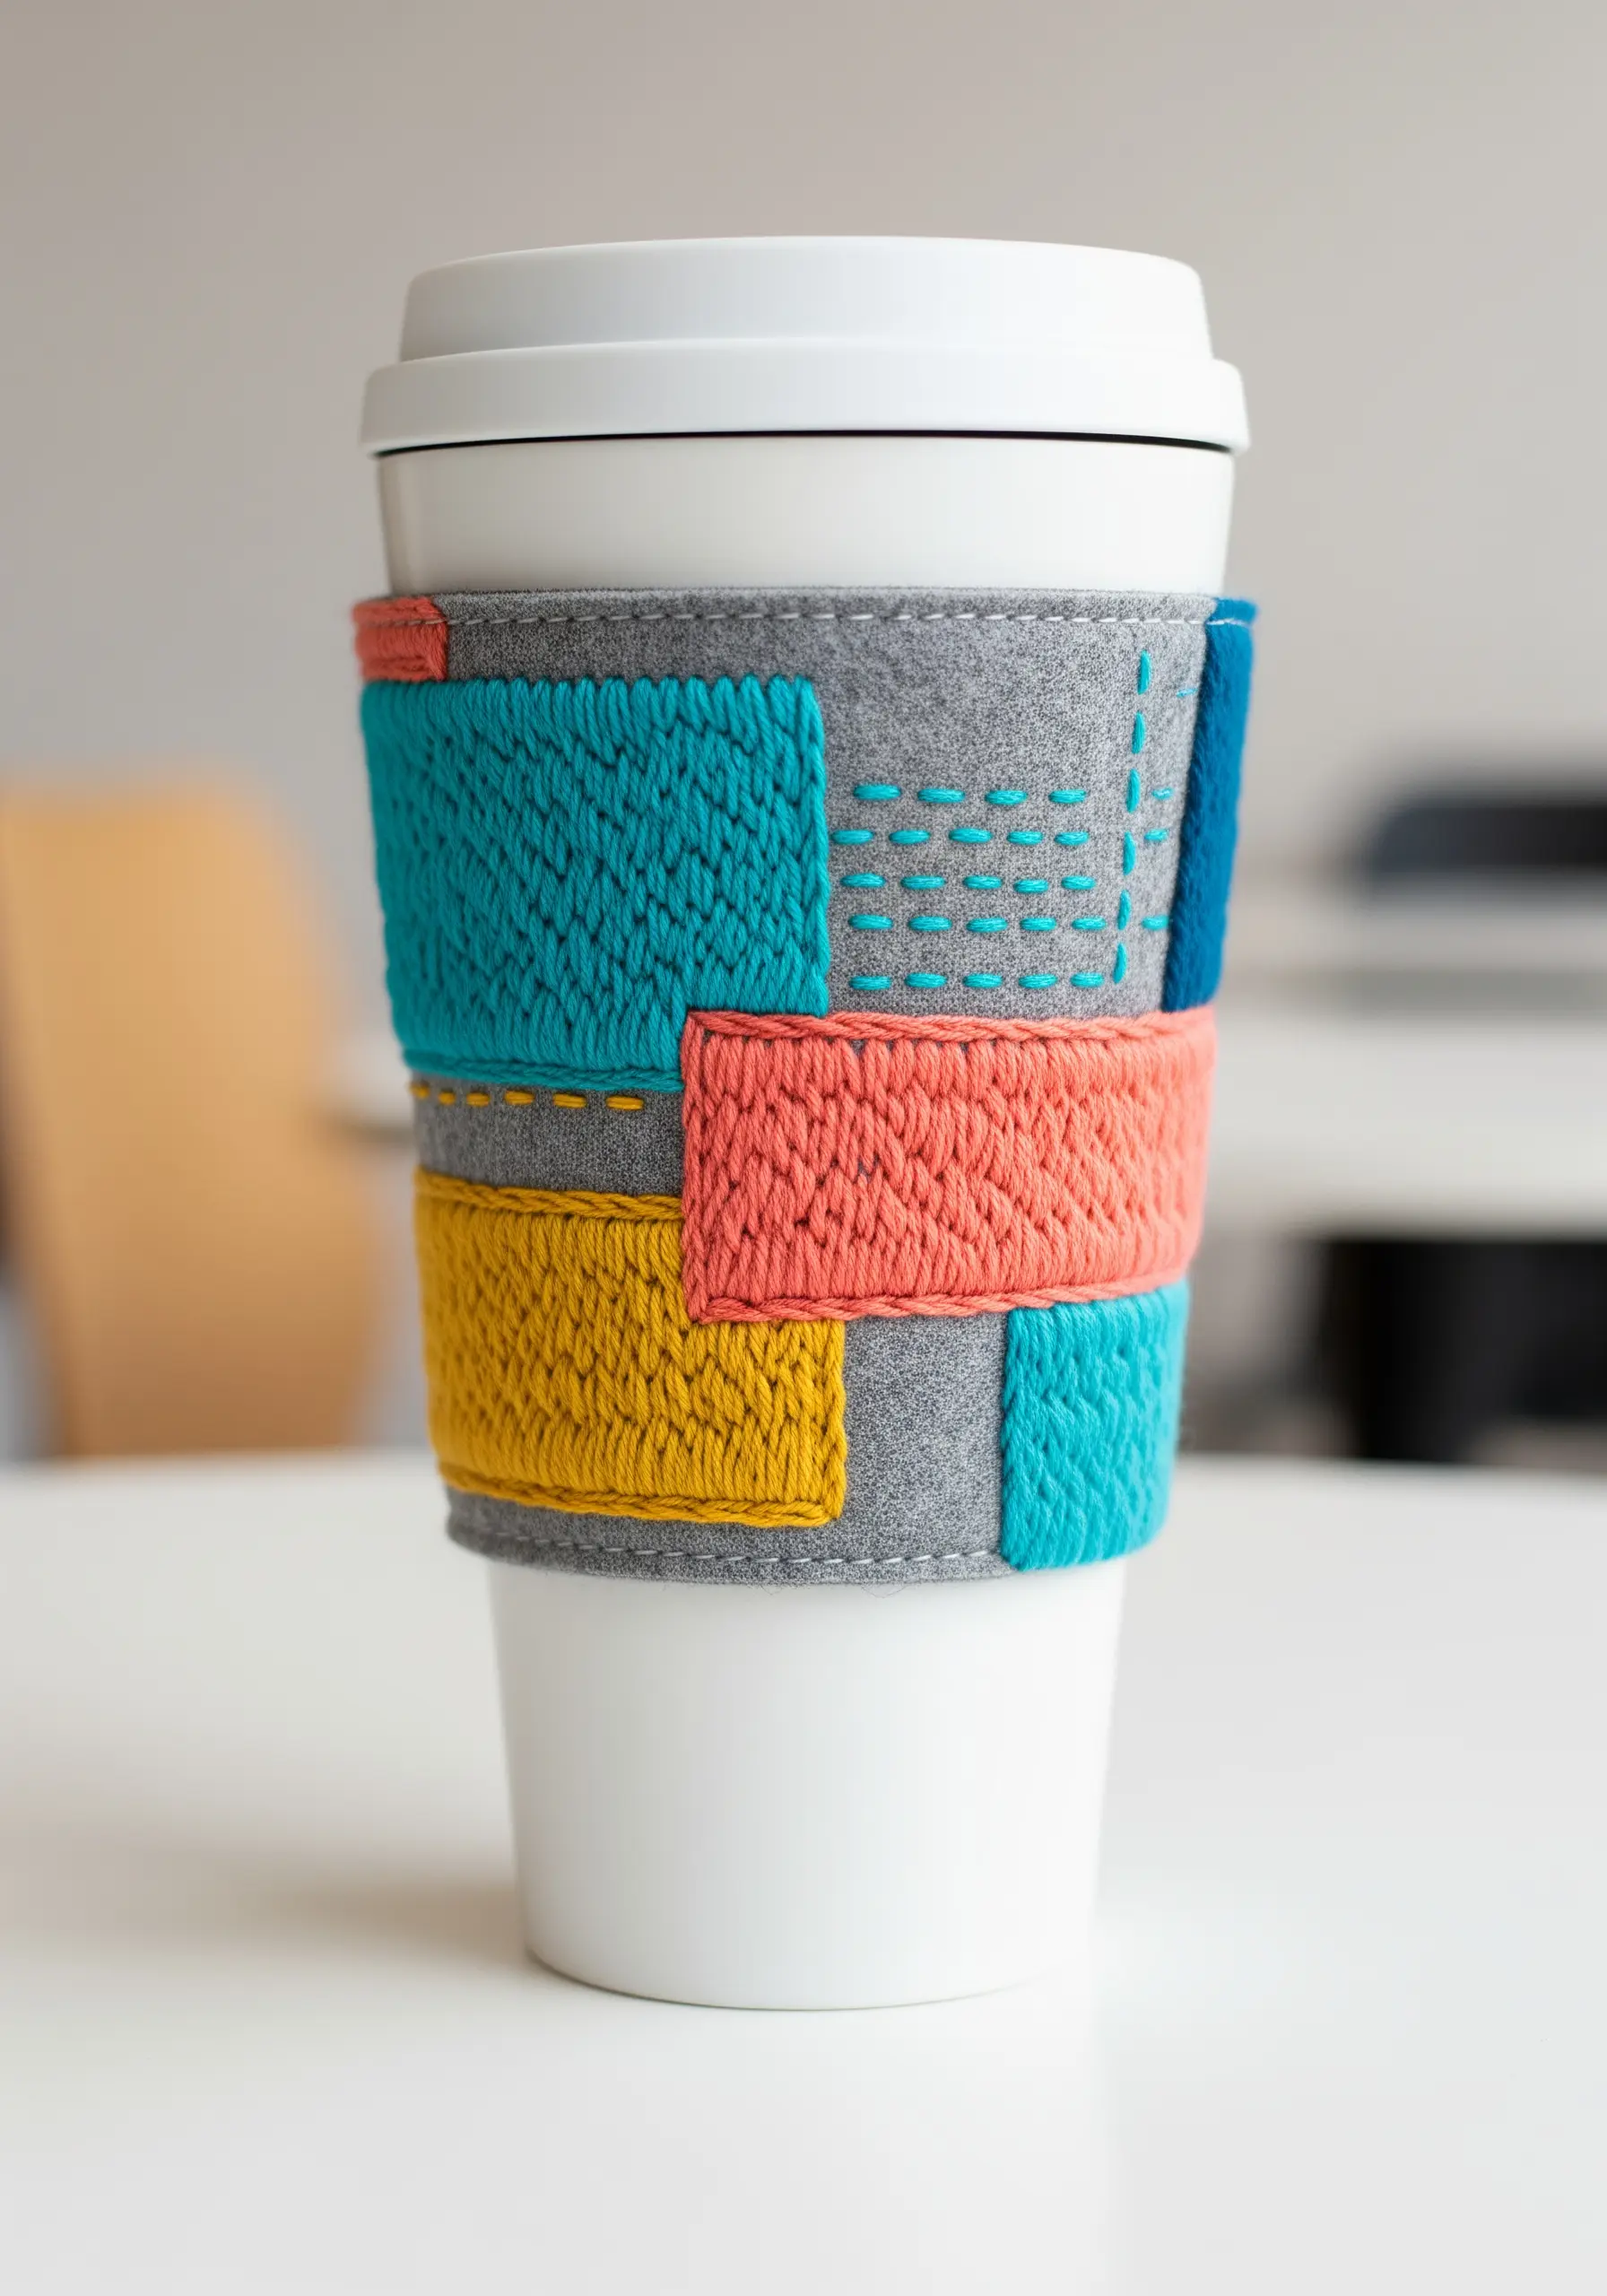
This project uses felt appliqué as a base for textural stitching. Cut out your colored felt blocks and arrange them on a larger felt piece before you begin embroidering.
Secure the color blocks with a simple running stitch around the edges, which becomes part of the design itself.
Fill each block with a different textural stitch. Try a dense satin stitch, seed stitch, or rows of backstitch to create a tactile, patchwork effect.
Using a single color of thread within each block, but changing the stitch style, creates a sophisticated visual rhythm that feels cohesive yet varied.
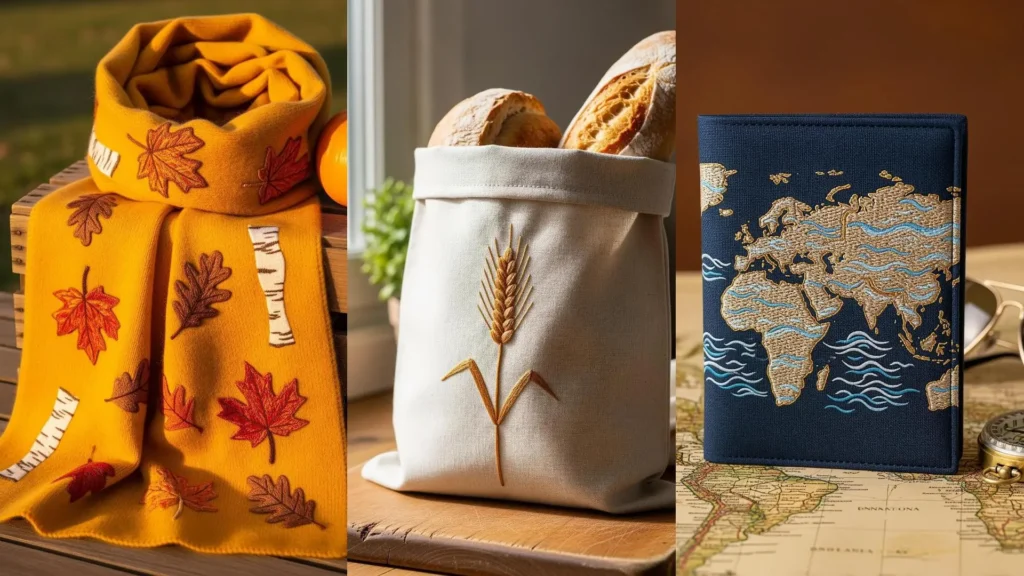
13. Golden Wheat Bread Bag
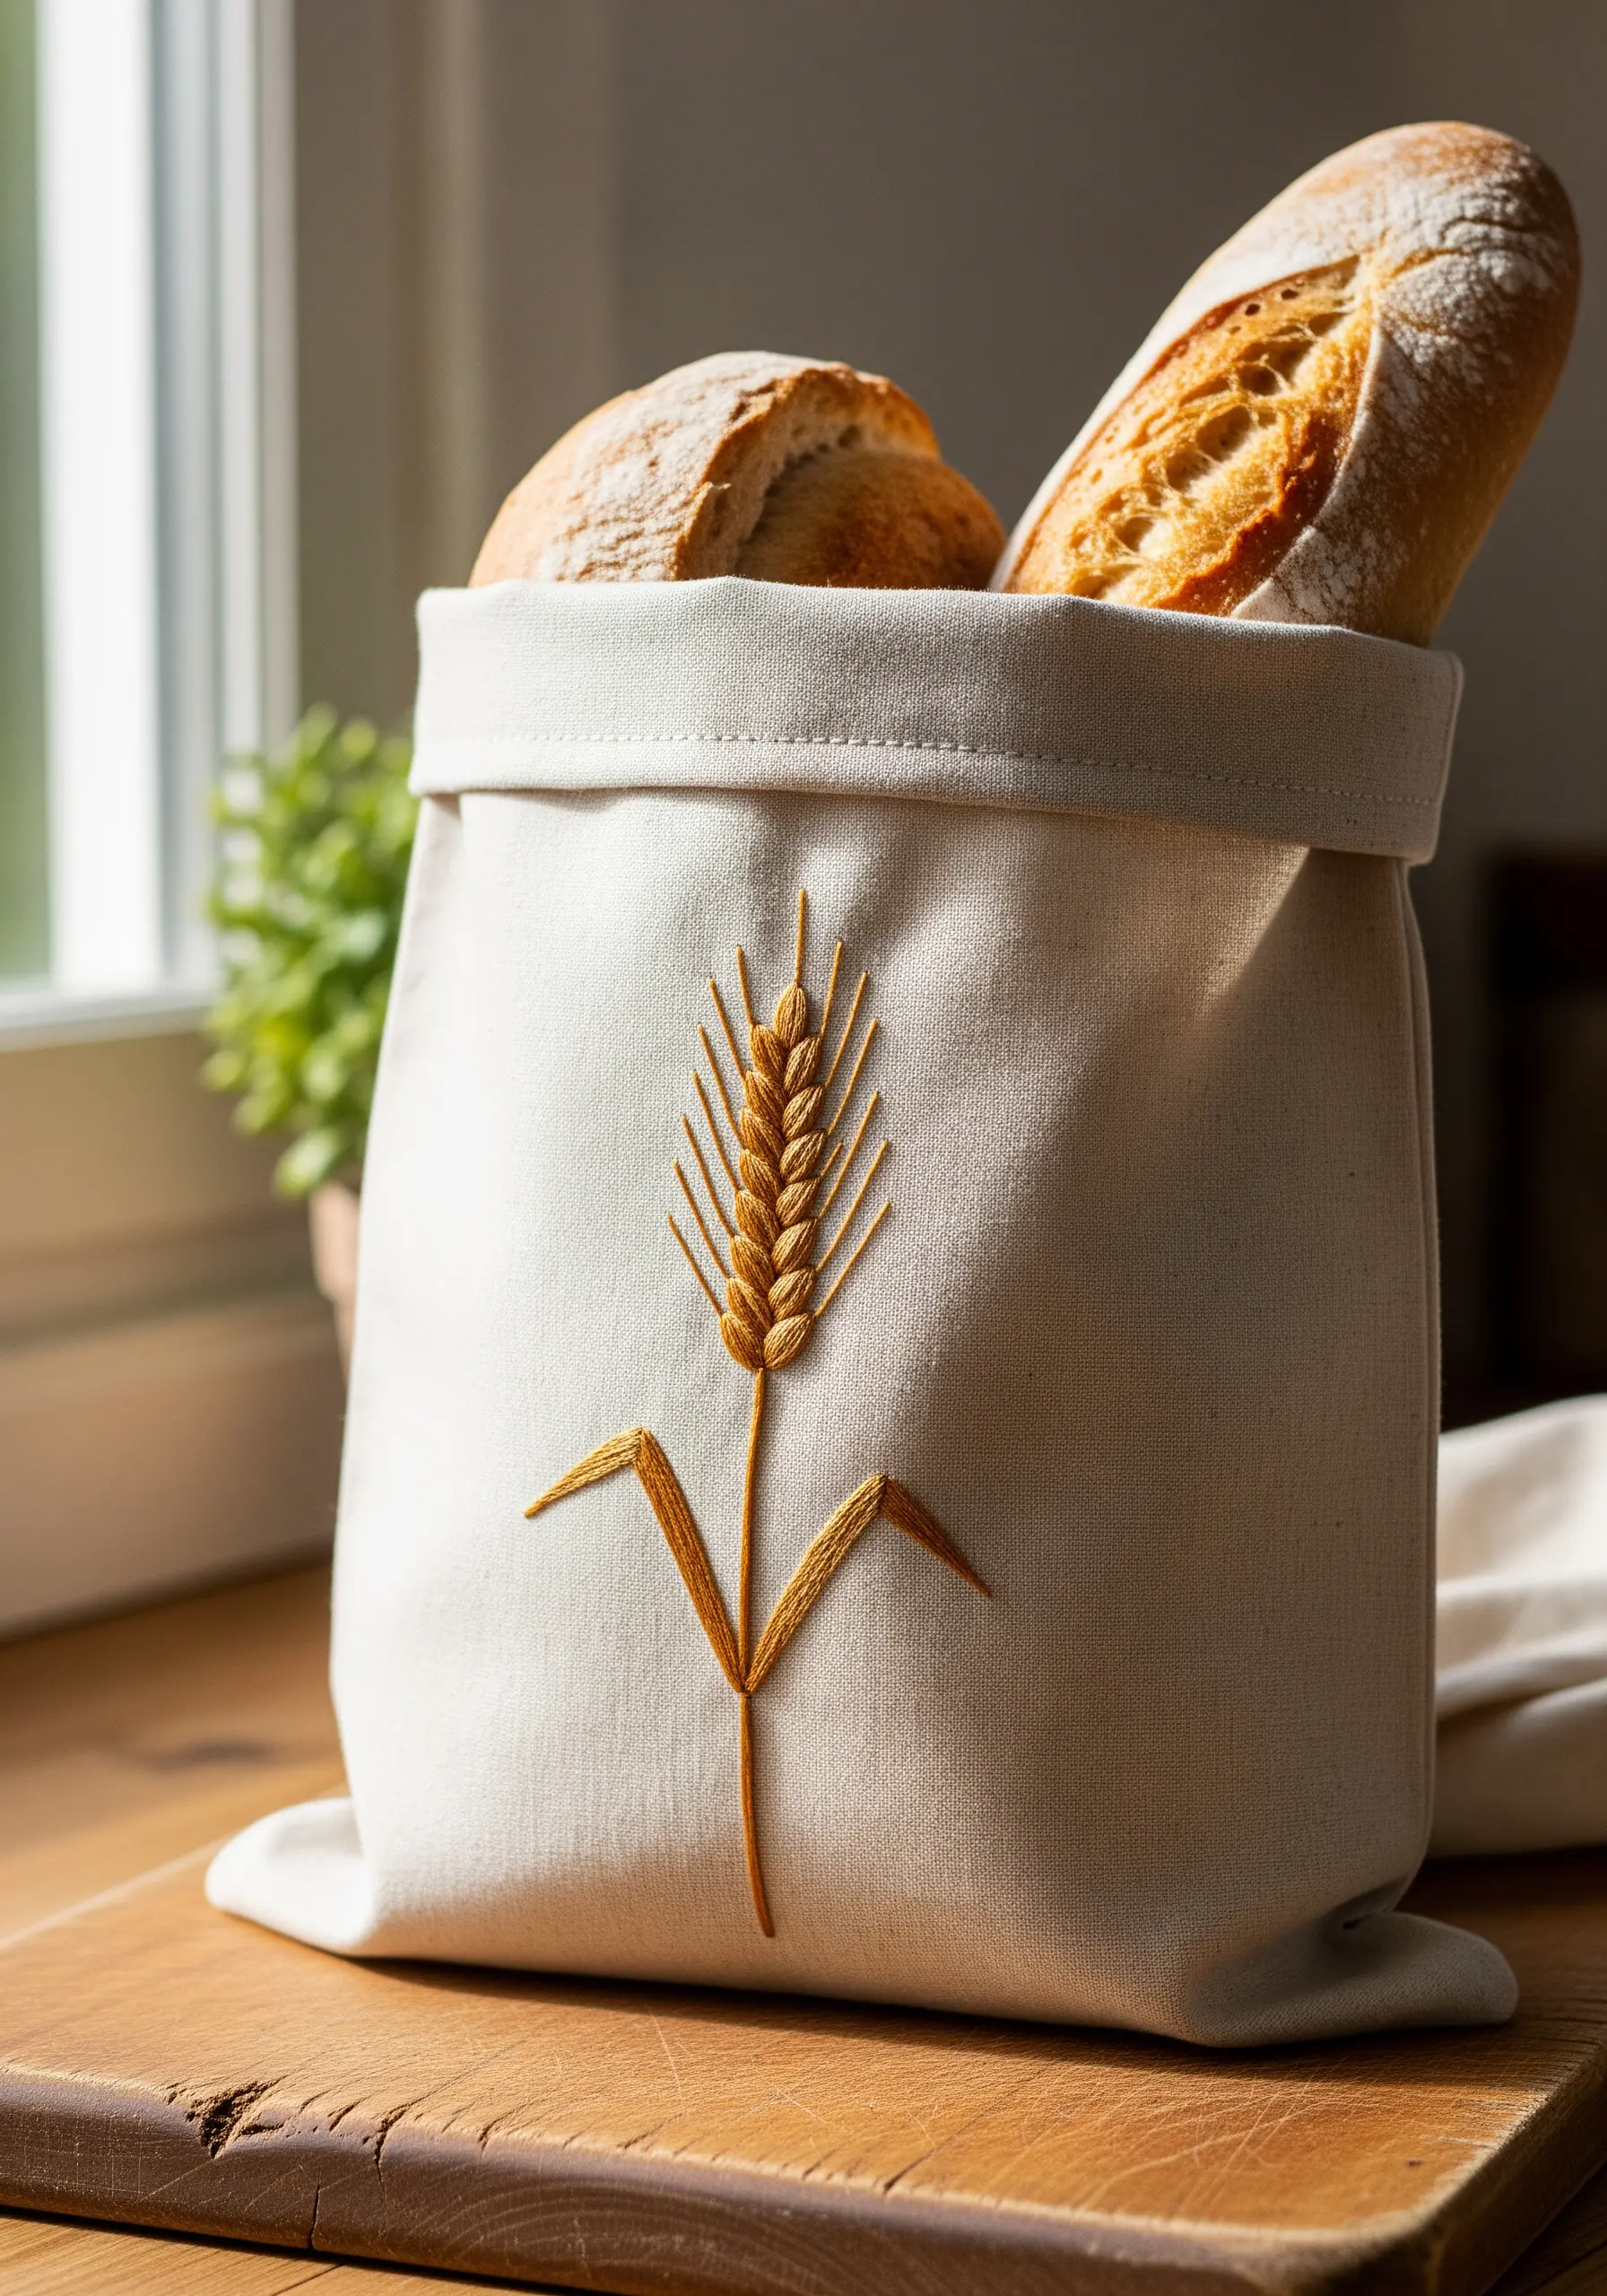
To create the plump wheat kernels, use a satin stitch, angling your stitches slightly outward from the central stem. This creates a natural, rounded shape.
For the delicate awns (the hair-like bristles), use a single, long straight stitch for each one. A single strand of floss will keep them looking fine and light.
The stem is best rendered with a stem stitch, which gives it a slightly rounded, dimensional quality that mimics a real stalk of wheat.
Using a gradient of golden yellow and light brown threads will add a sun-kissed, realistic dimension to the wheat head.
14. Textured World Map Passport Cover

Give the landmasses a solid, earthy feel by filling them with a dense seed stitch. This creates a wonderful texture that contrasts with the smooth waves.
For the oceans, use a simple backstitch in wavy lines. Alternate between two shades of blue to create the illusion of currents and depth.
Before stitching on a pre-made cover, test your needle and thread on an inconspicuous area to ensure it can handle the material without damage.
A fine-tipped, removable fabric marker is essential for accurately transferring the intricate details of a world map onto your fabric.
15. Art Deco Sunburst Glasses Case

This radiating design relies on the precision of long, straight stitches. Use a ruler and a heat-erasable pen to mark your guidelines directly onto the faux leather.
Alternate between a bright color and a metallic thread to create the signature glamour of the Art Deco style. The metallic thread catches the light, adding a touch of luxury.
To ensure your stitches lie flat and don’t pull the material, maintain an even tension and use a thimble to help push the needle through the tough fabric.
The central button acts as a perfect anchor point, allowing you to easily keep your radiating lines symmetrical and evenly spaced.
16. Soft-Edge Appliqué Dinosaur Bib
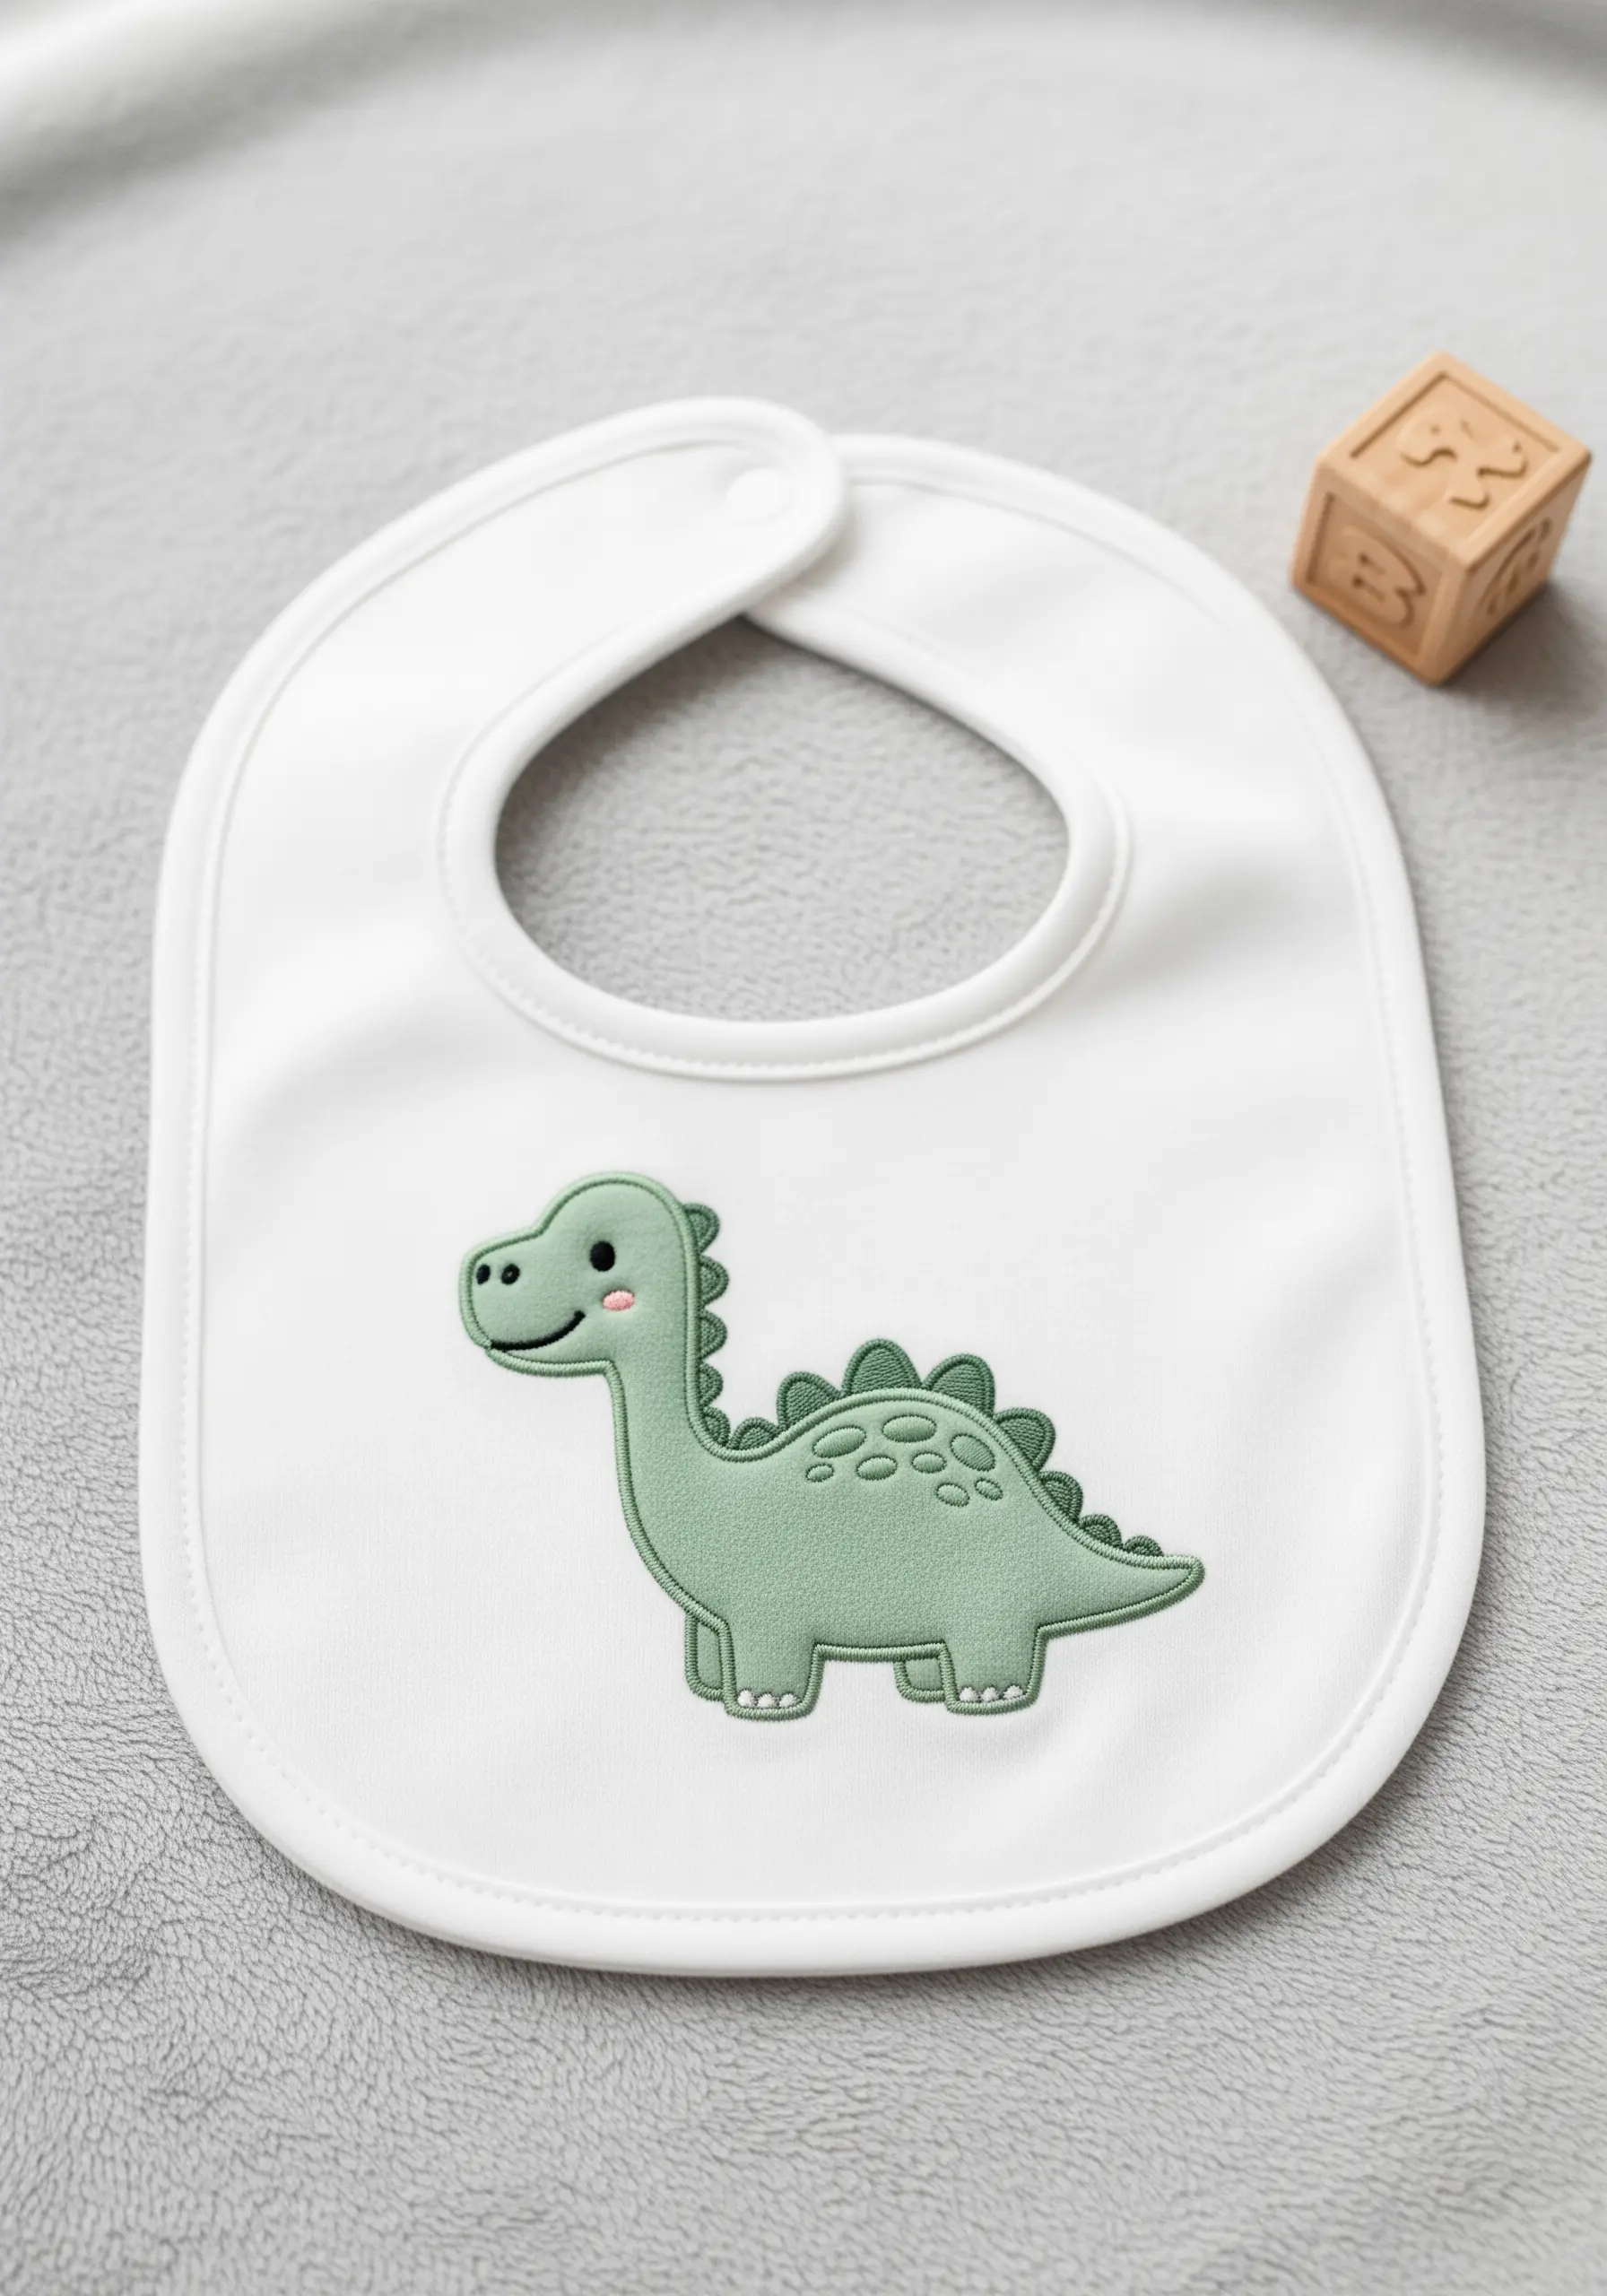
This gentle design is created using appliqué with a soft, jersey or felt fabric. First, cut out your dinosaur shape and fuse it to the bib with a lightweight fusible web.
Instead of a sharp satin stitch, secure the appliqué with a simple, clean backstitch just inside the edge of the shape. This creates a softer, more modern outline.
Add details like the spots and smile using the same backstitch technique, ensuring the gift is soft and comfortable against a baby’s skin.
Choosing a fabric for the appliqué in a slightly different texture than the bib itself adds subtle tactile interest.
17. Citrus Slice Felt Coasters
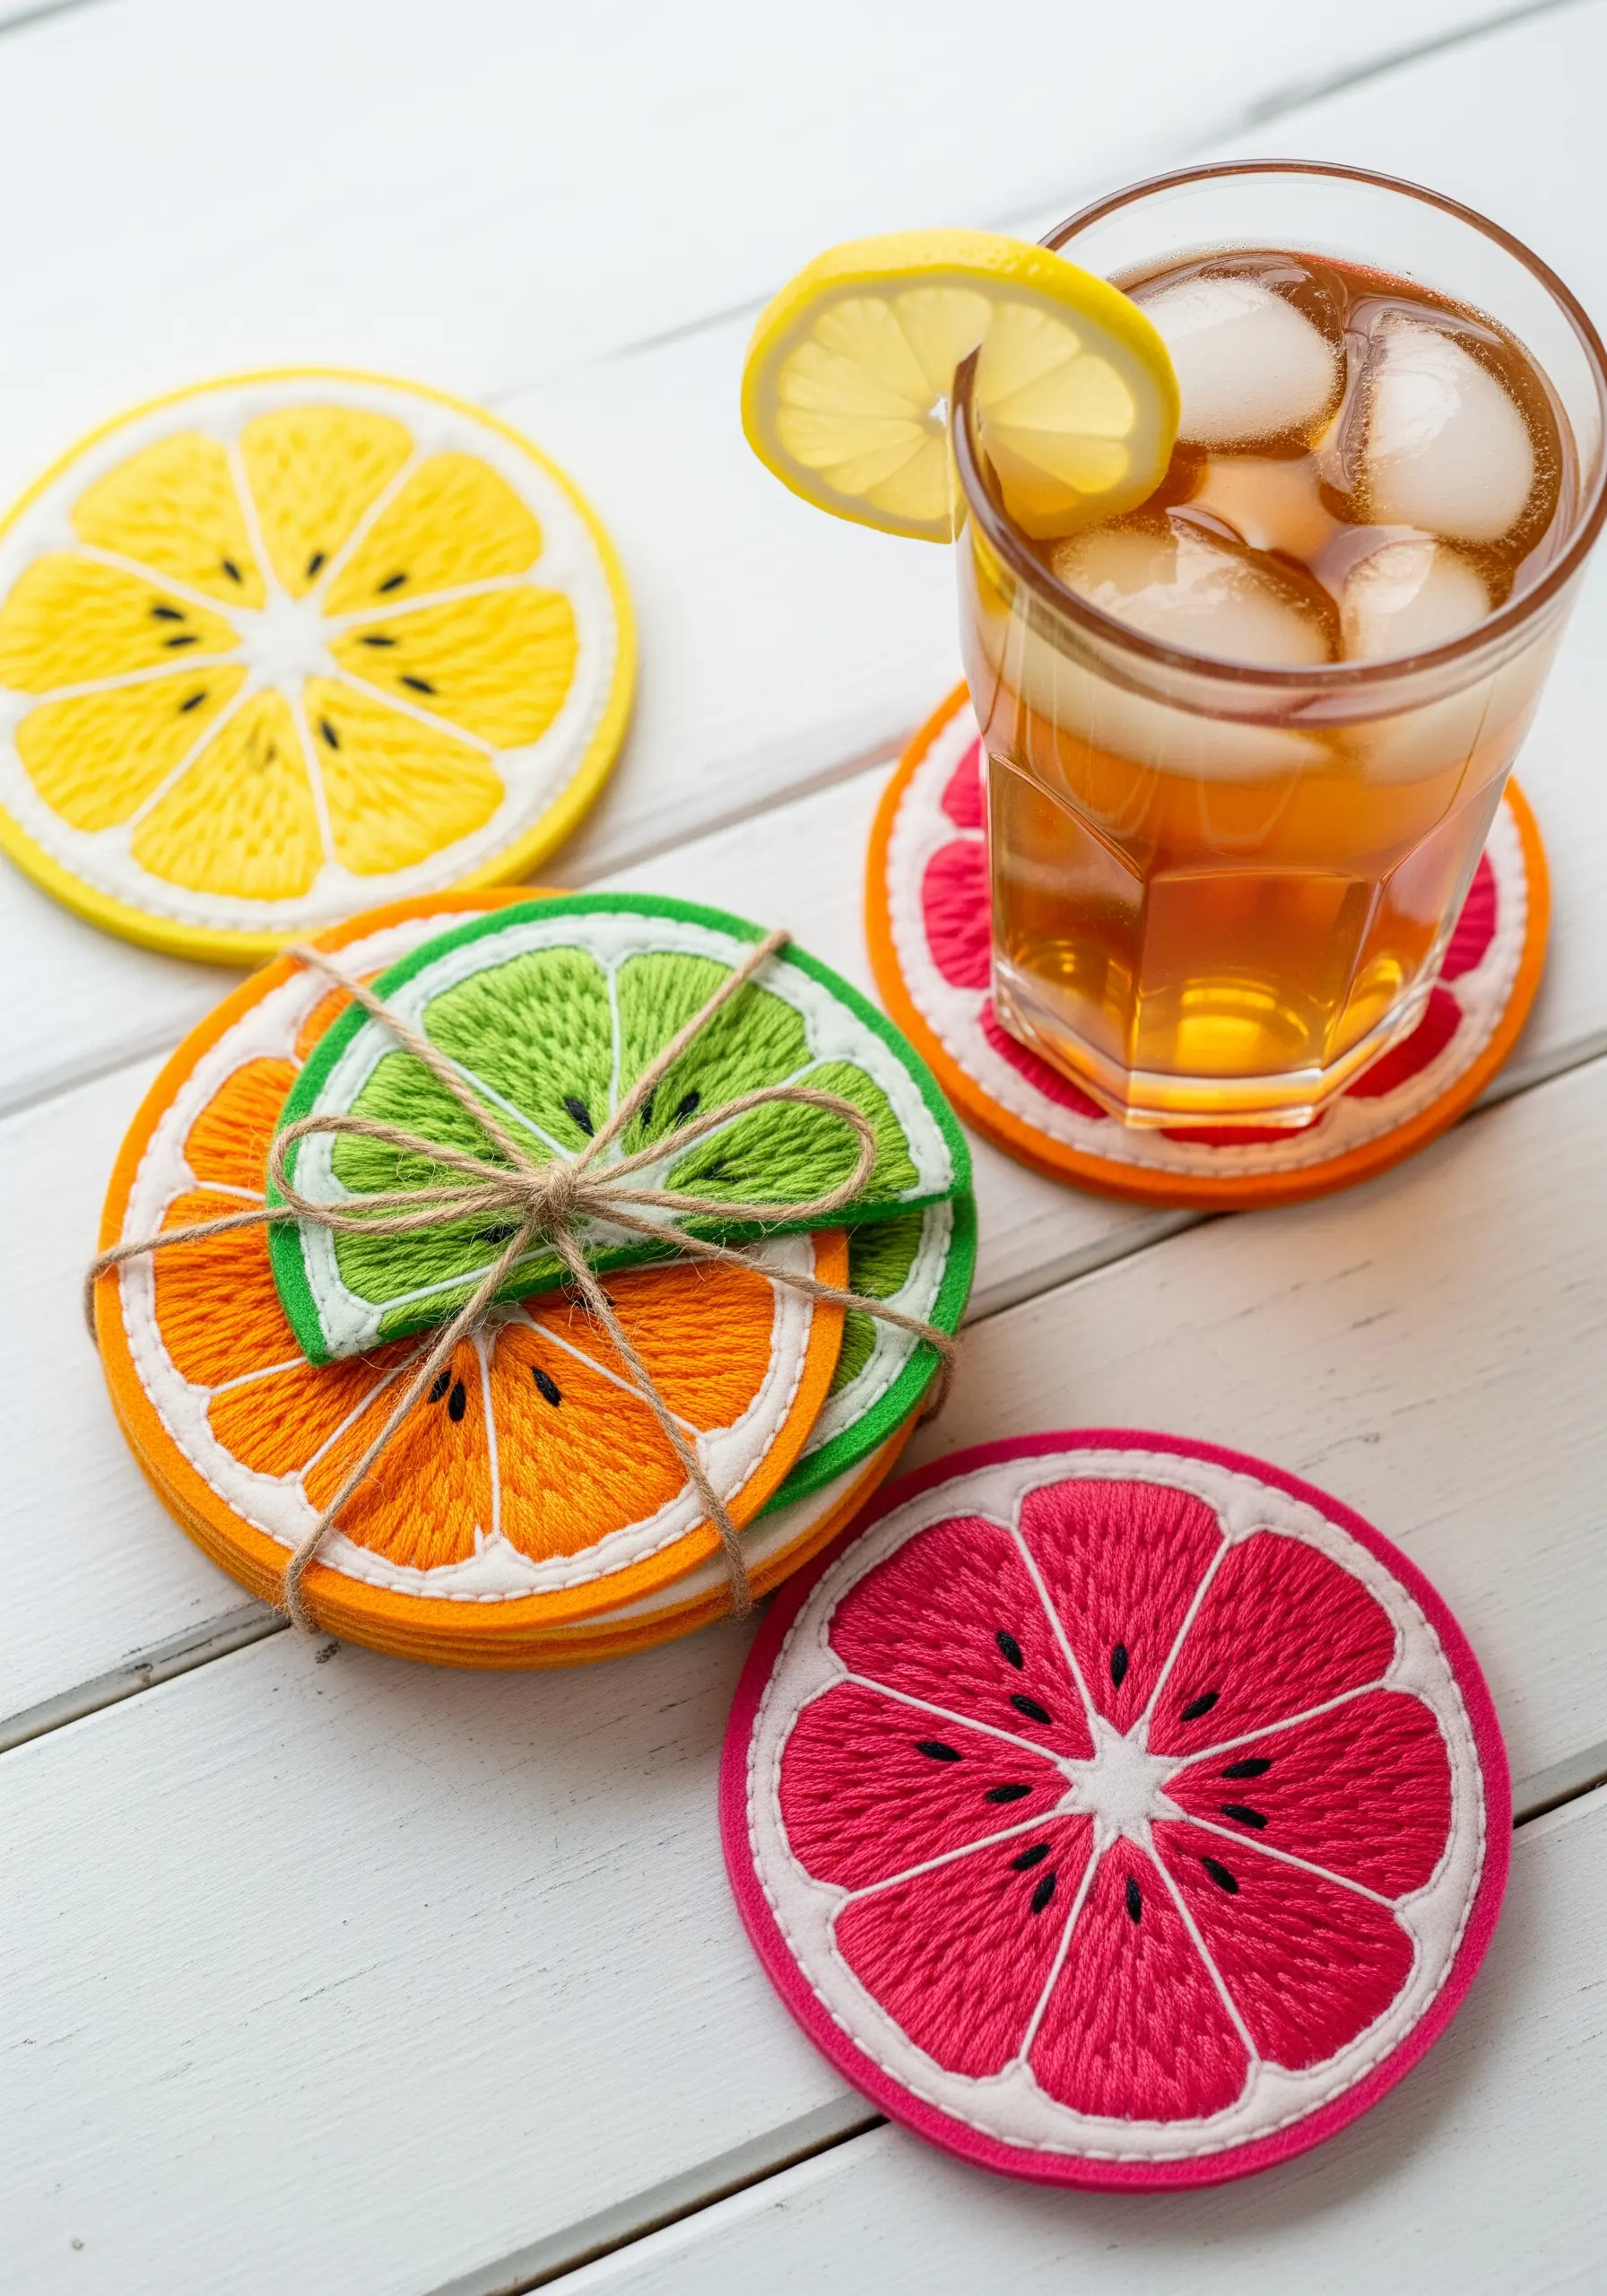
To create the juicy texture of the citrus segments, fill each section with a satin stitch, ensuring all your stitches radiate out from the center.
Define the segments and the pith with a crisp backstitch in white thread. This sharp outline is what makes the design instantly recognizable and clean.
For a professional finish, cut two identical circles of felt. Embroider the top one, then place a piece of heavyweight interfacing between the layers and stitch them together with a neat blanket stitch around the edge.
The interfacing provides rigidity, ensuring the coasters lie flat and are durable enough for daily use.
18. Circuit Board Laptop Sleeve
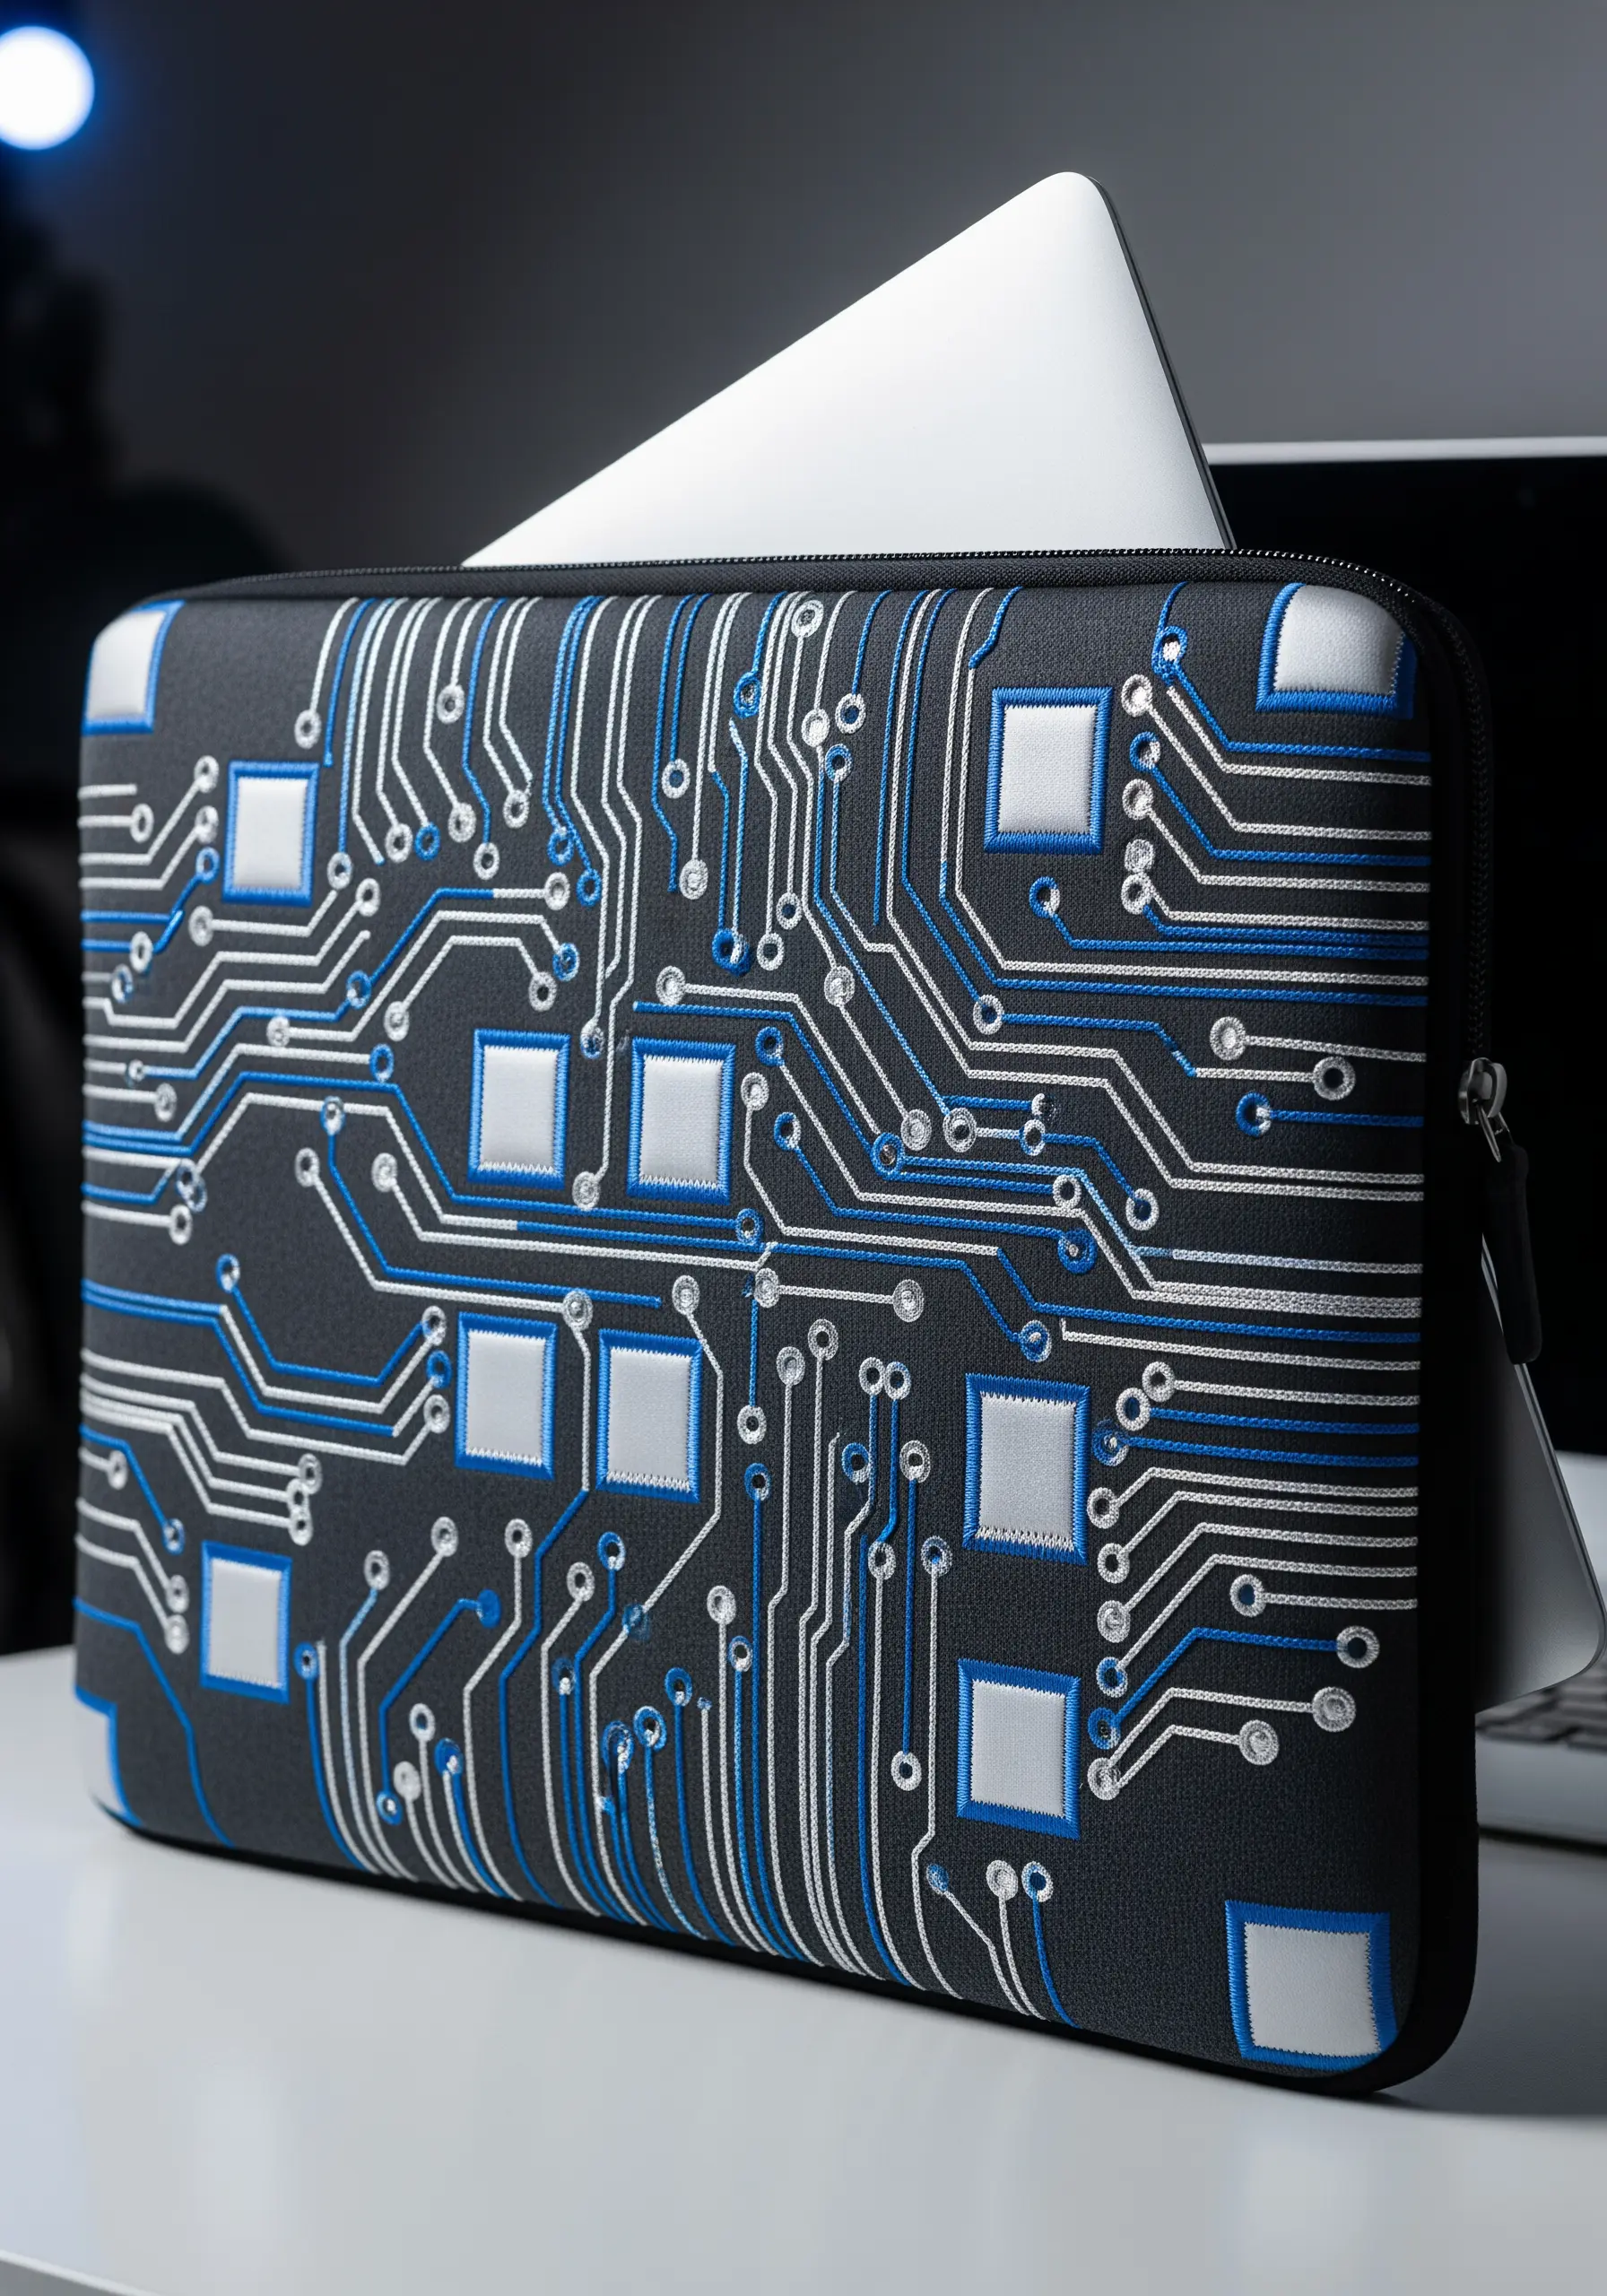
This high-tech design is built on the precision of straight lines. Use a couching stitch for the main silver pathways, laying down a thicker metallic cord and tacking it in place with a thinner thread.
The finer blue and white lines can be stitched with a simple backstitch. Using a single strand of floss will keep the lines sharp and technical.
For the square components, create a padded satin stitch by first filling the square with a layer of horizontal stitches, then covering that with a layer of vertical stitches. This gives them a raised, 3D effect.
Stitching on neoprene requires a sharp needle and patience, as the fabric is dense but forgiving.
19. Lavender and Bee Gardening Gloves
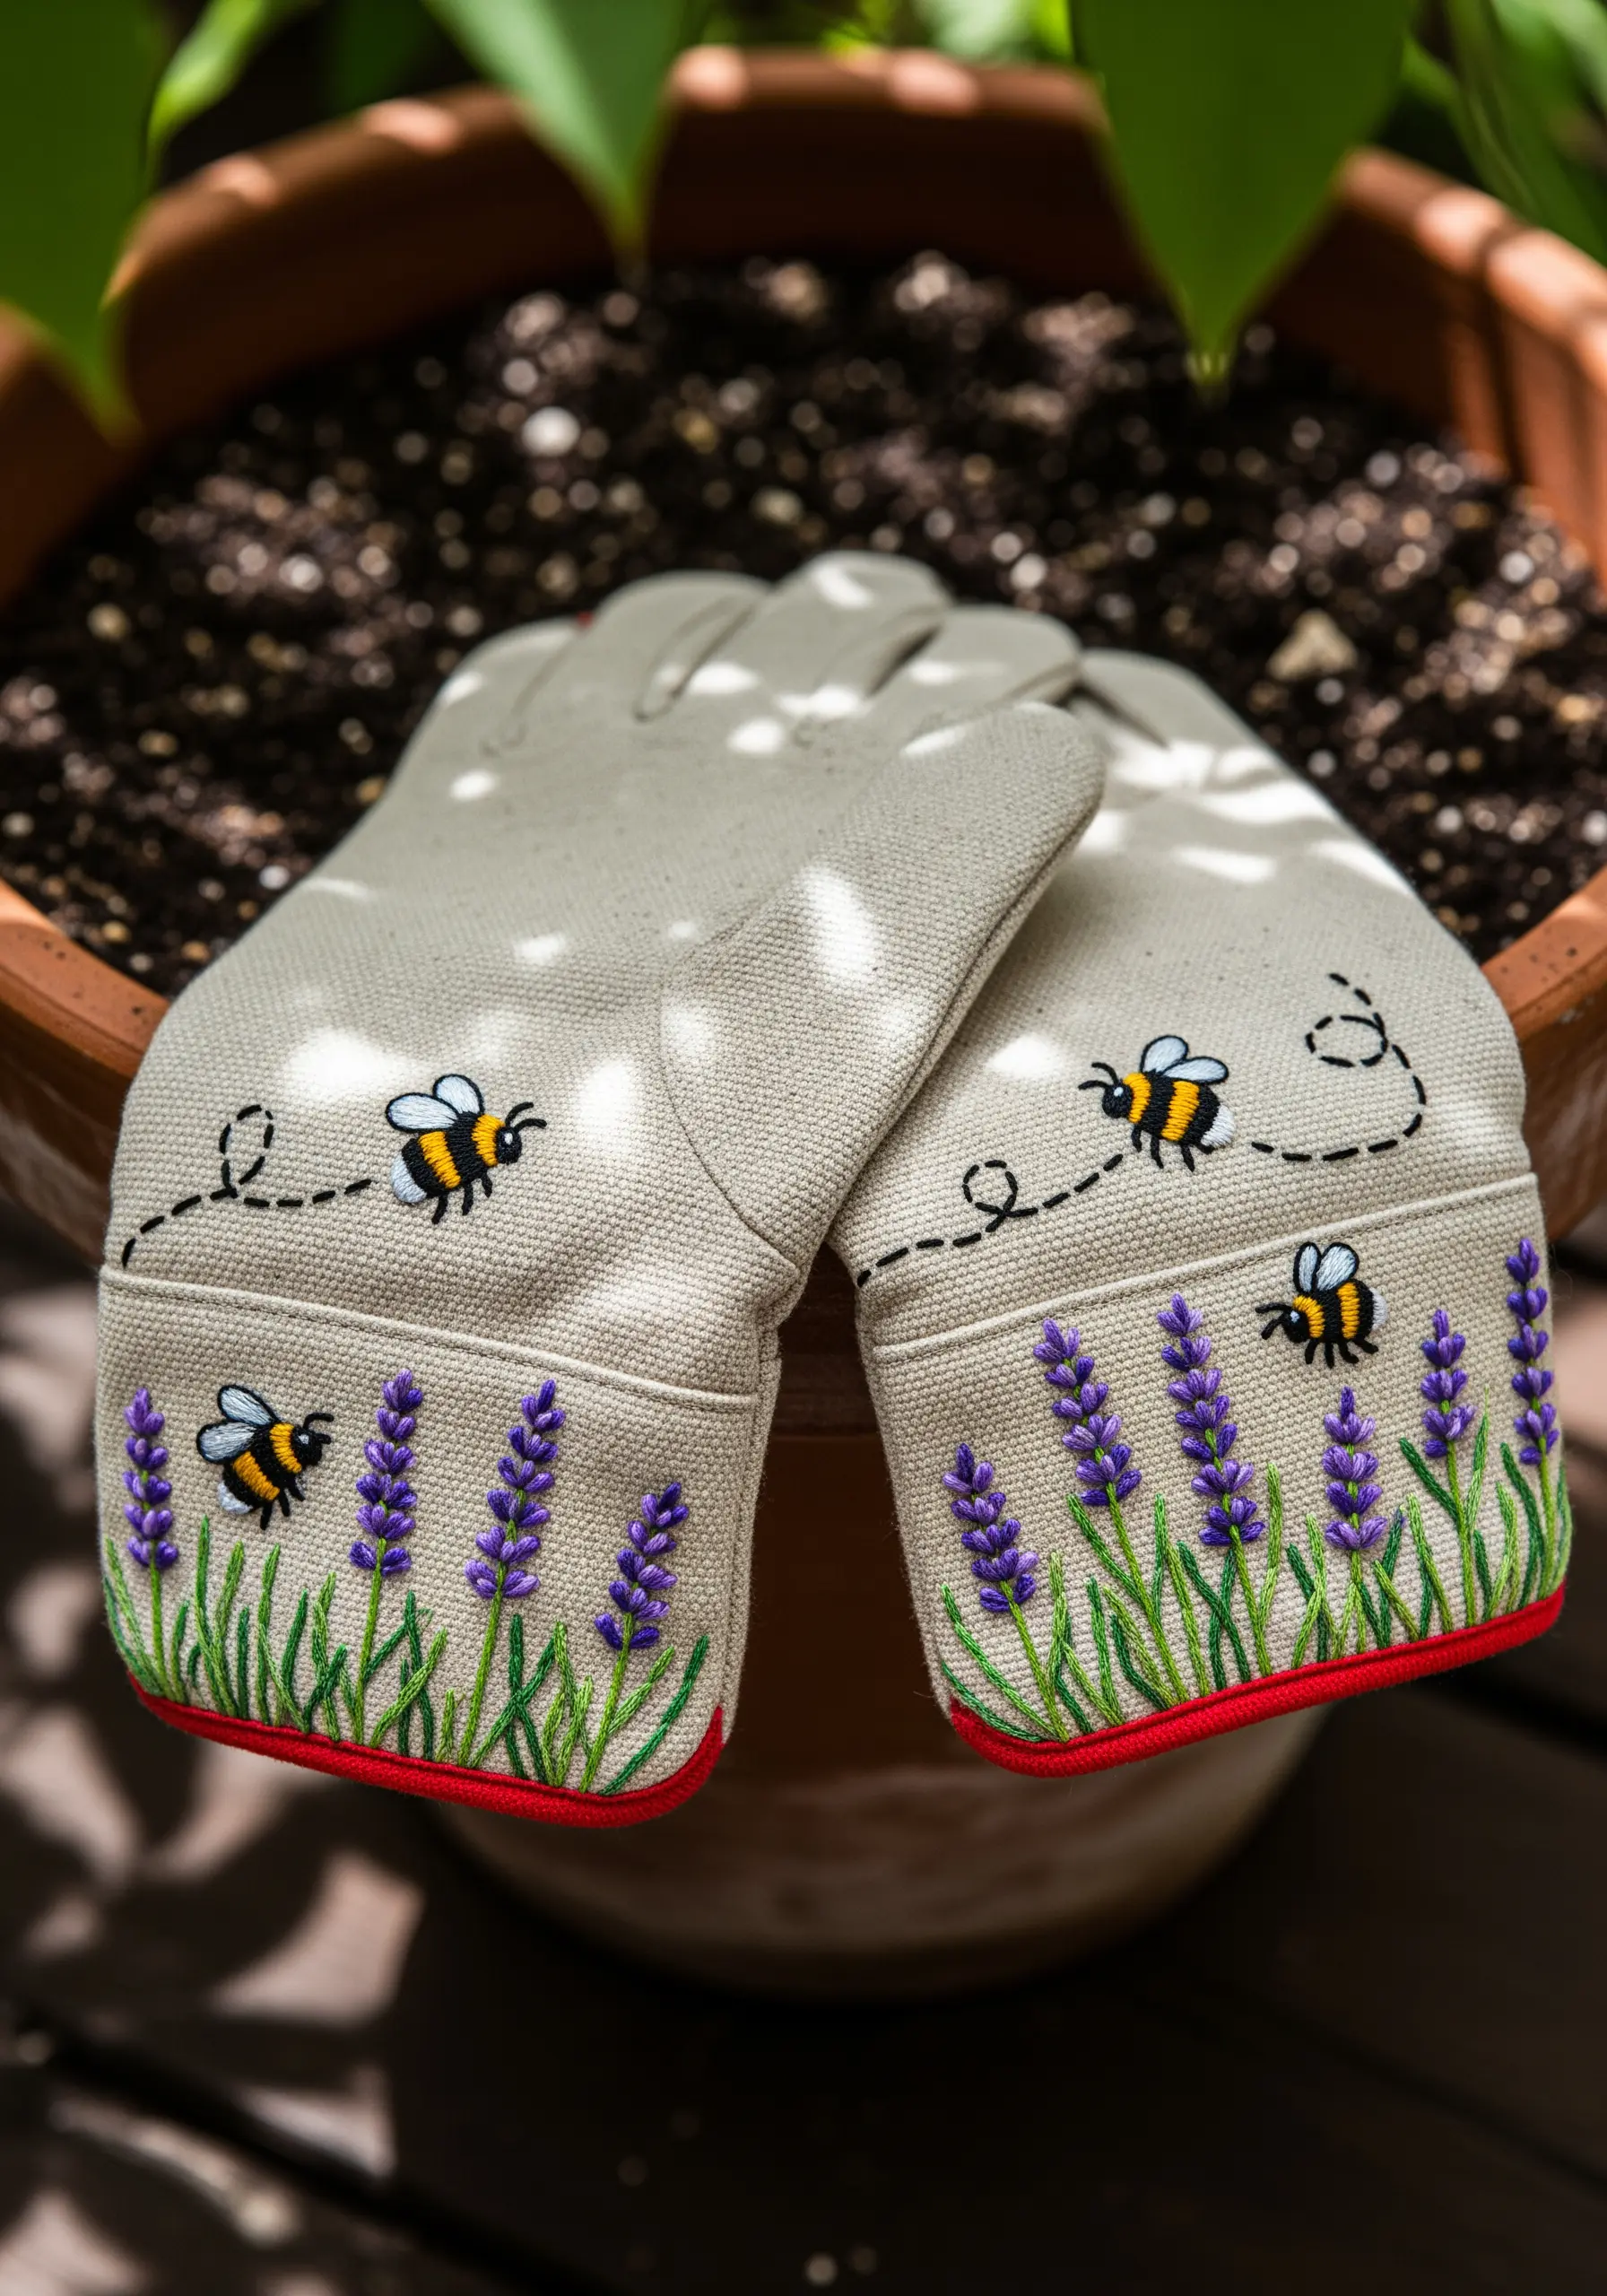
To make the bee’s body, use a padded satin stitch. Create a small oval of seed stitches first, then cover it with yellow and black satin stitches to give the body a plump, rounded look.
The wings are best made with a single detached chain stitch (lazy daisy) on each side using a light blue or off-white thread to suggest translucency.
For the lavender, use stem stitch for the stalks and clusters of French knots or short straight stitches for the blossoms.
Stitching on heavy canvas gloves is much easier if you use a curved upholstery needle, which allows you to make stitches without having to turn the glove inside out.
20. Velvet Headband with Floral Scatter

Stitching on velvet requires a light hand to avoid crushing the pile. Use a very sharp needle and try not to pull your stitches too tight.
A random scatter of tiny flowers is more effective here than a rigid pattern. Use woven wheel stitches for the larger pink flowers and French knots for the smaller white and yellow buds.
For the leaves, a simple fishbone stitch provides texture and form without being overly complicated.
The rich texture of the velvet makes the floss appear even more lustrous, creating a luxurious contrast that feels incredibly special.
21. Personalized Pet Leash
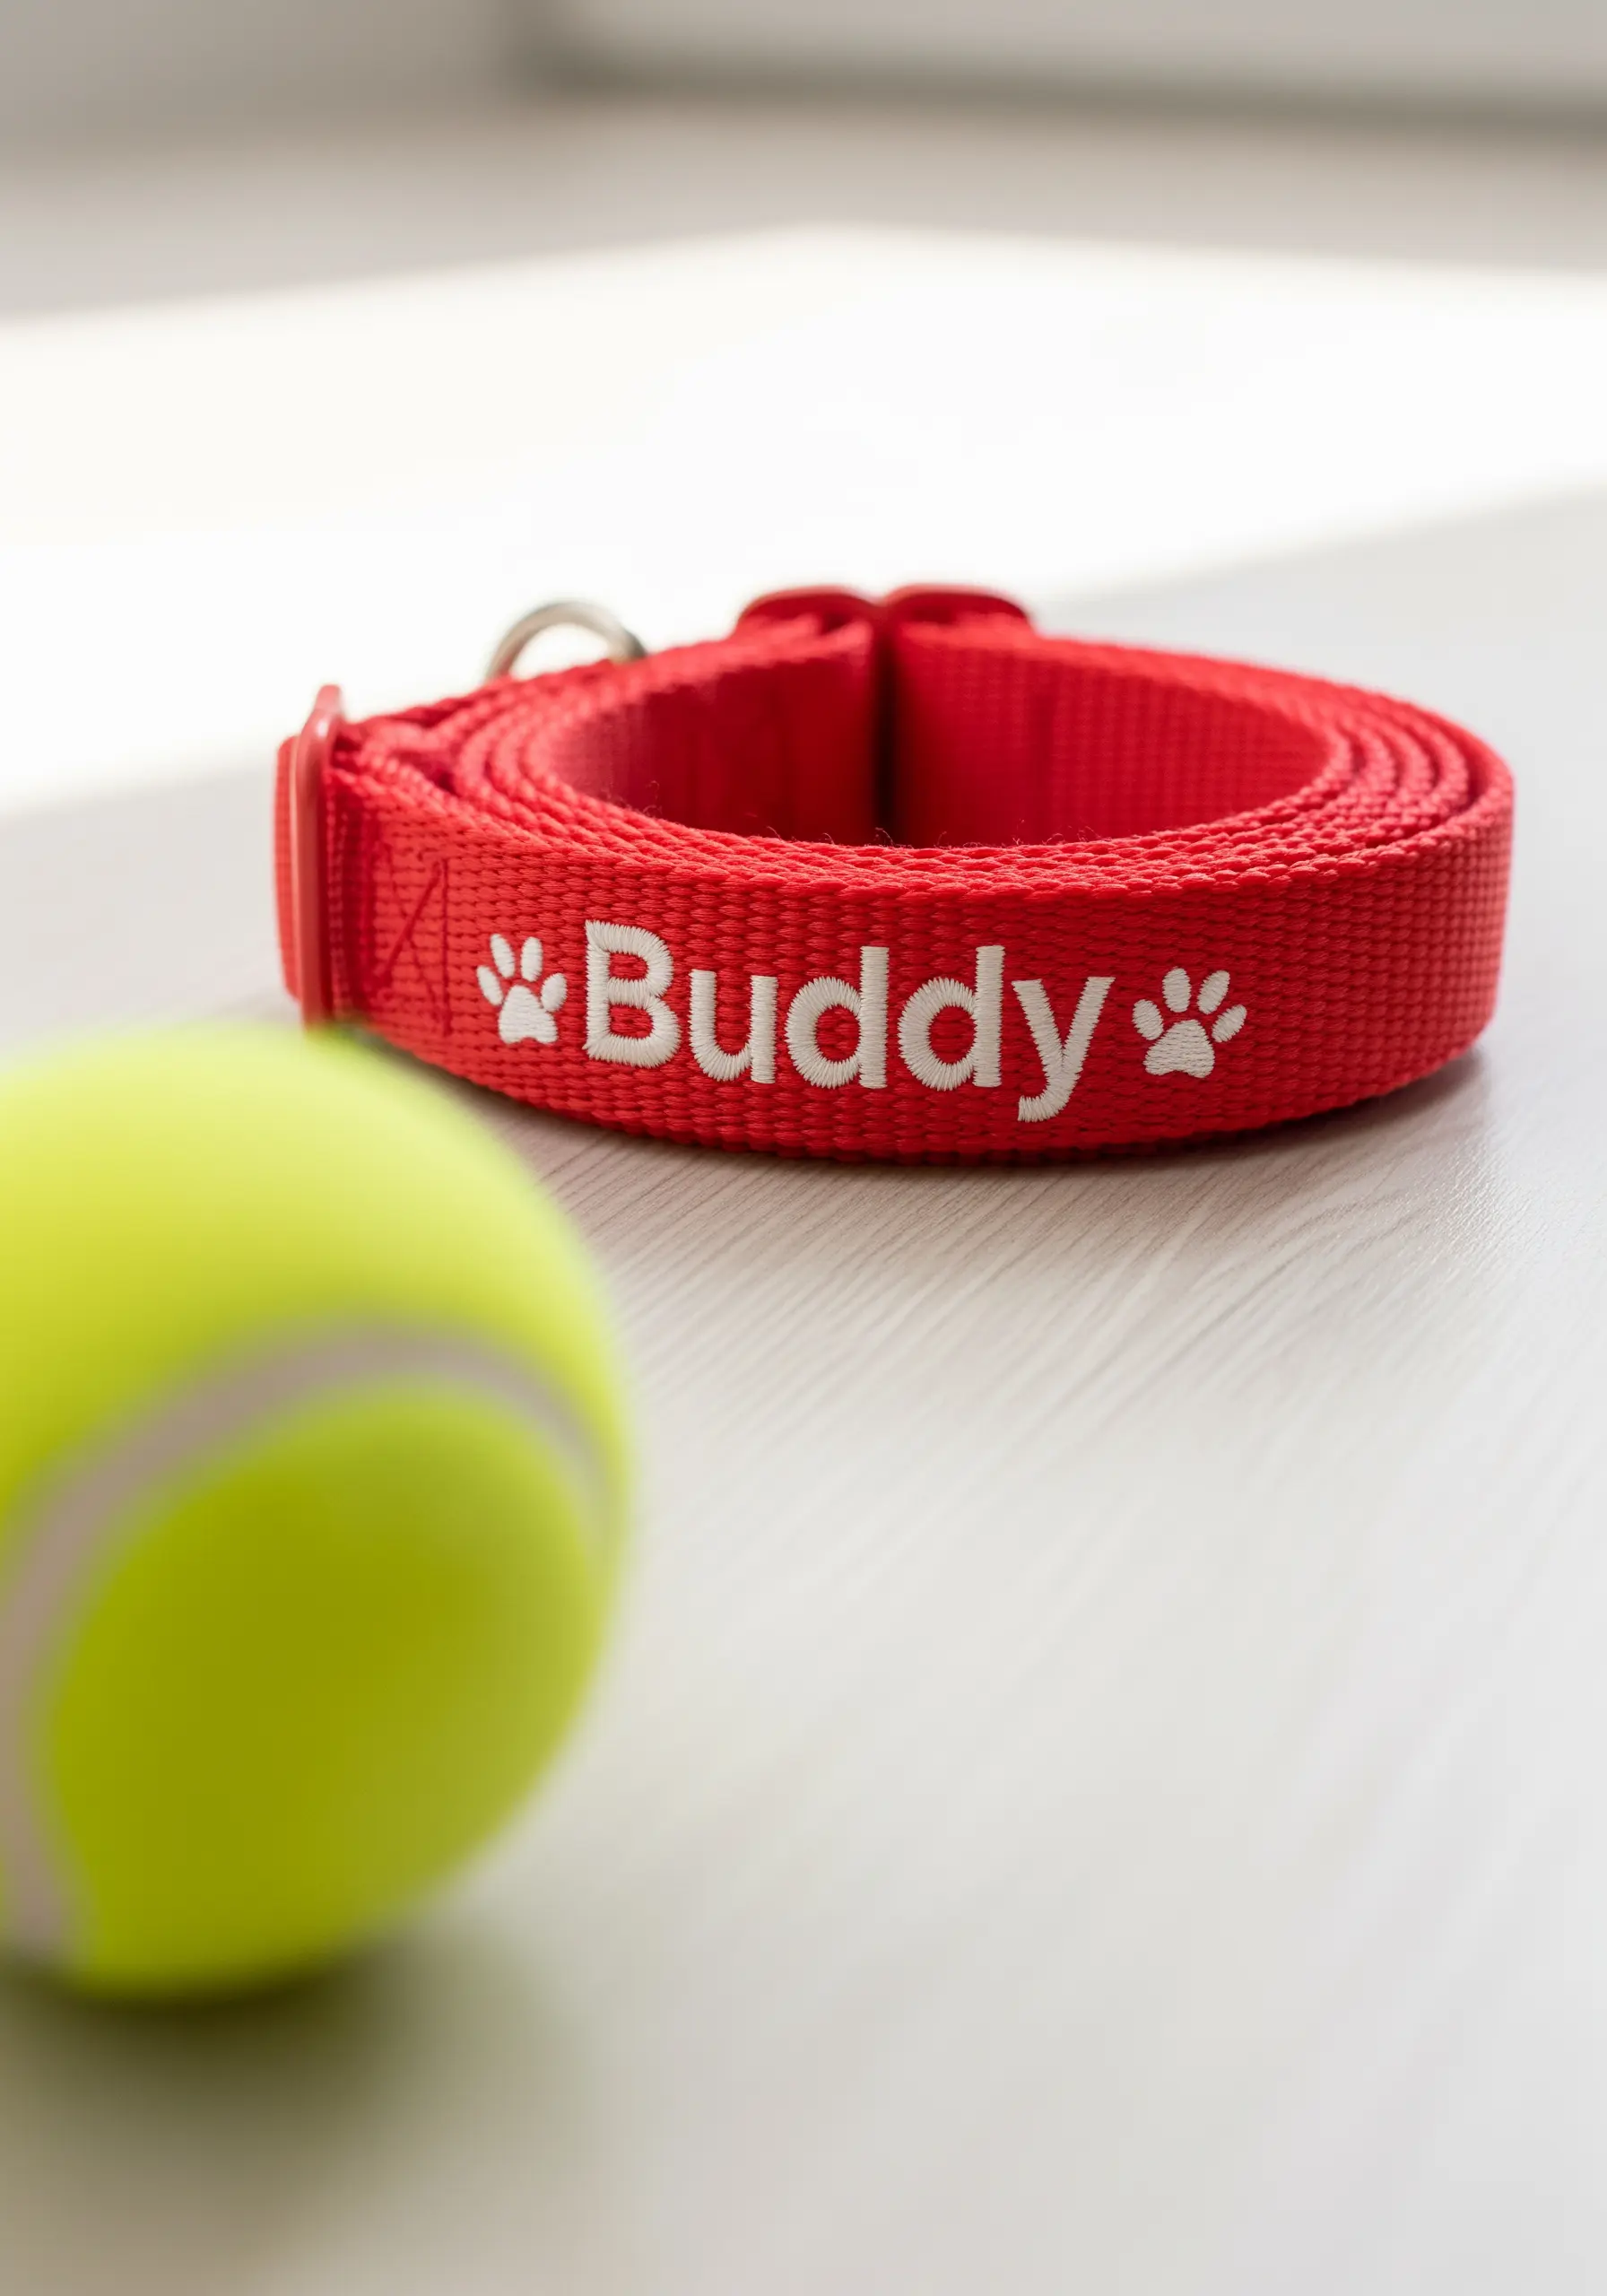
When embroidering on a thick material like nylon webbing, it’s best to use a punch needle or a very strong needle and thimble.
For crisp, easy-to-read lettering, choose a simple, bold font and use a satin stitch to fill it in. Outline the letters with a backstitch to sharpen the edges.
A water-soluble stabilizer that you can stick on top of the leash is invaluable here. It allows you to print or draw your design and provides a smoother surface for your needle.
Using a contrasting thread color, like white on red, ensures the name is highly visible and adds a classic, polished look.
22. Woven-Style Camera Strap
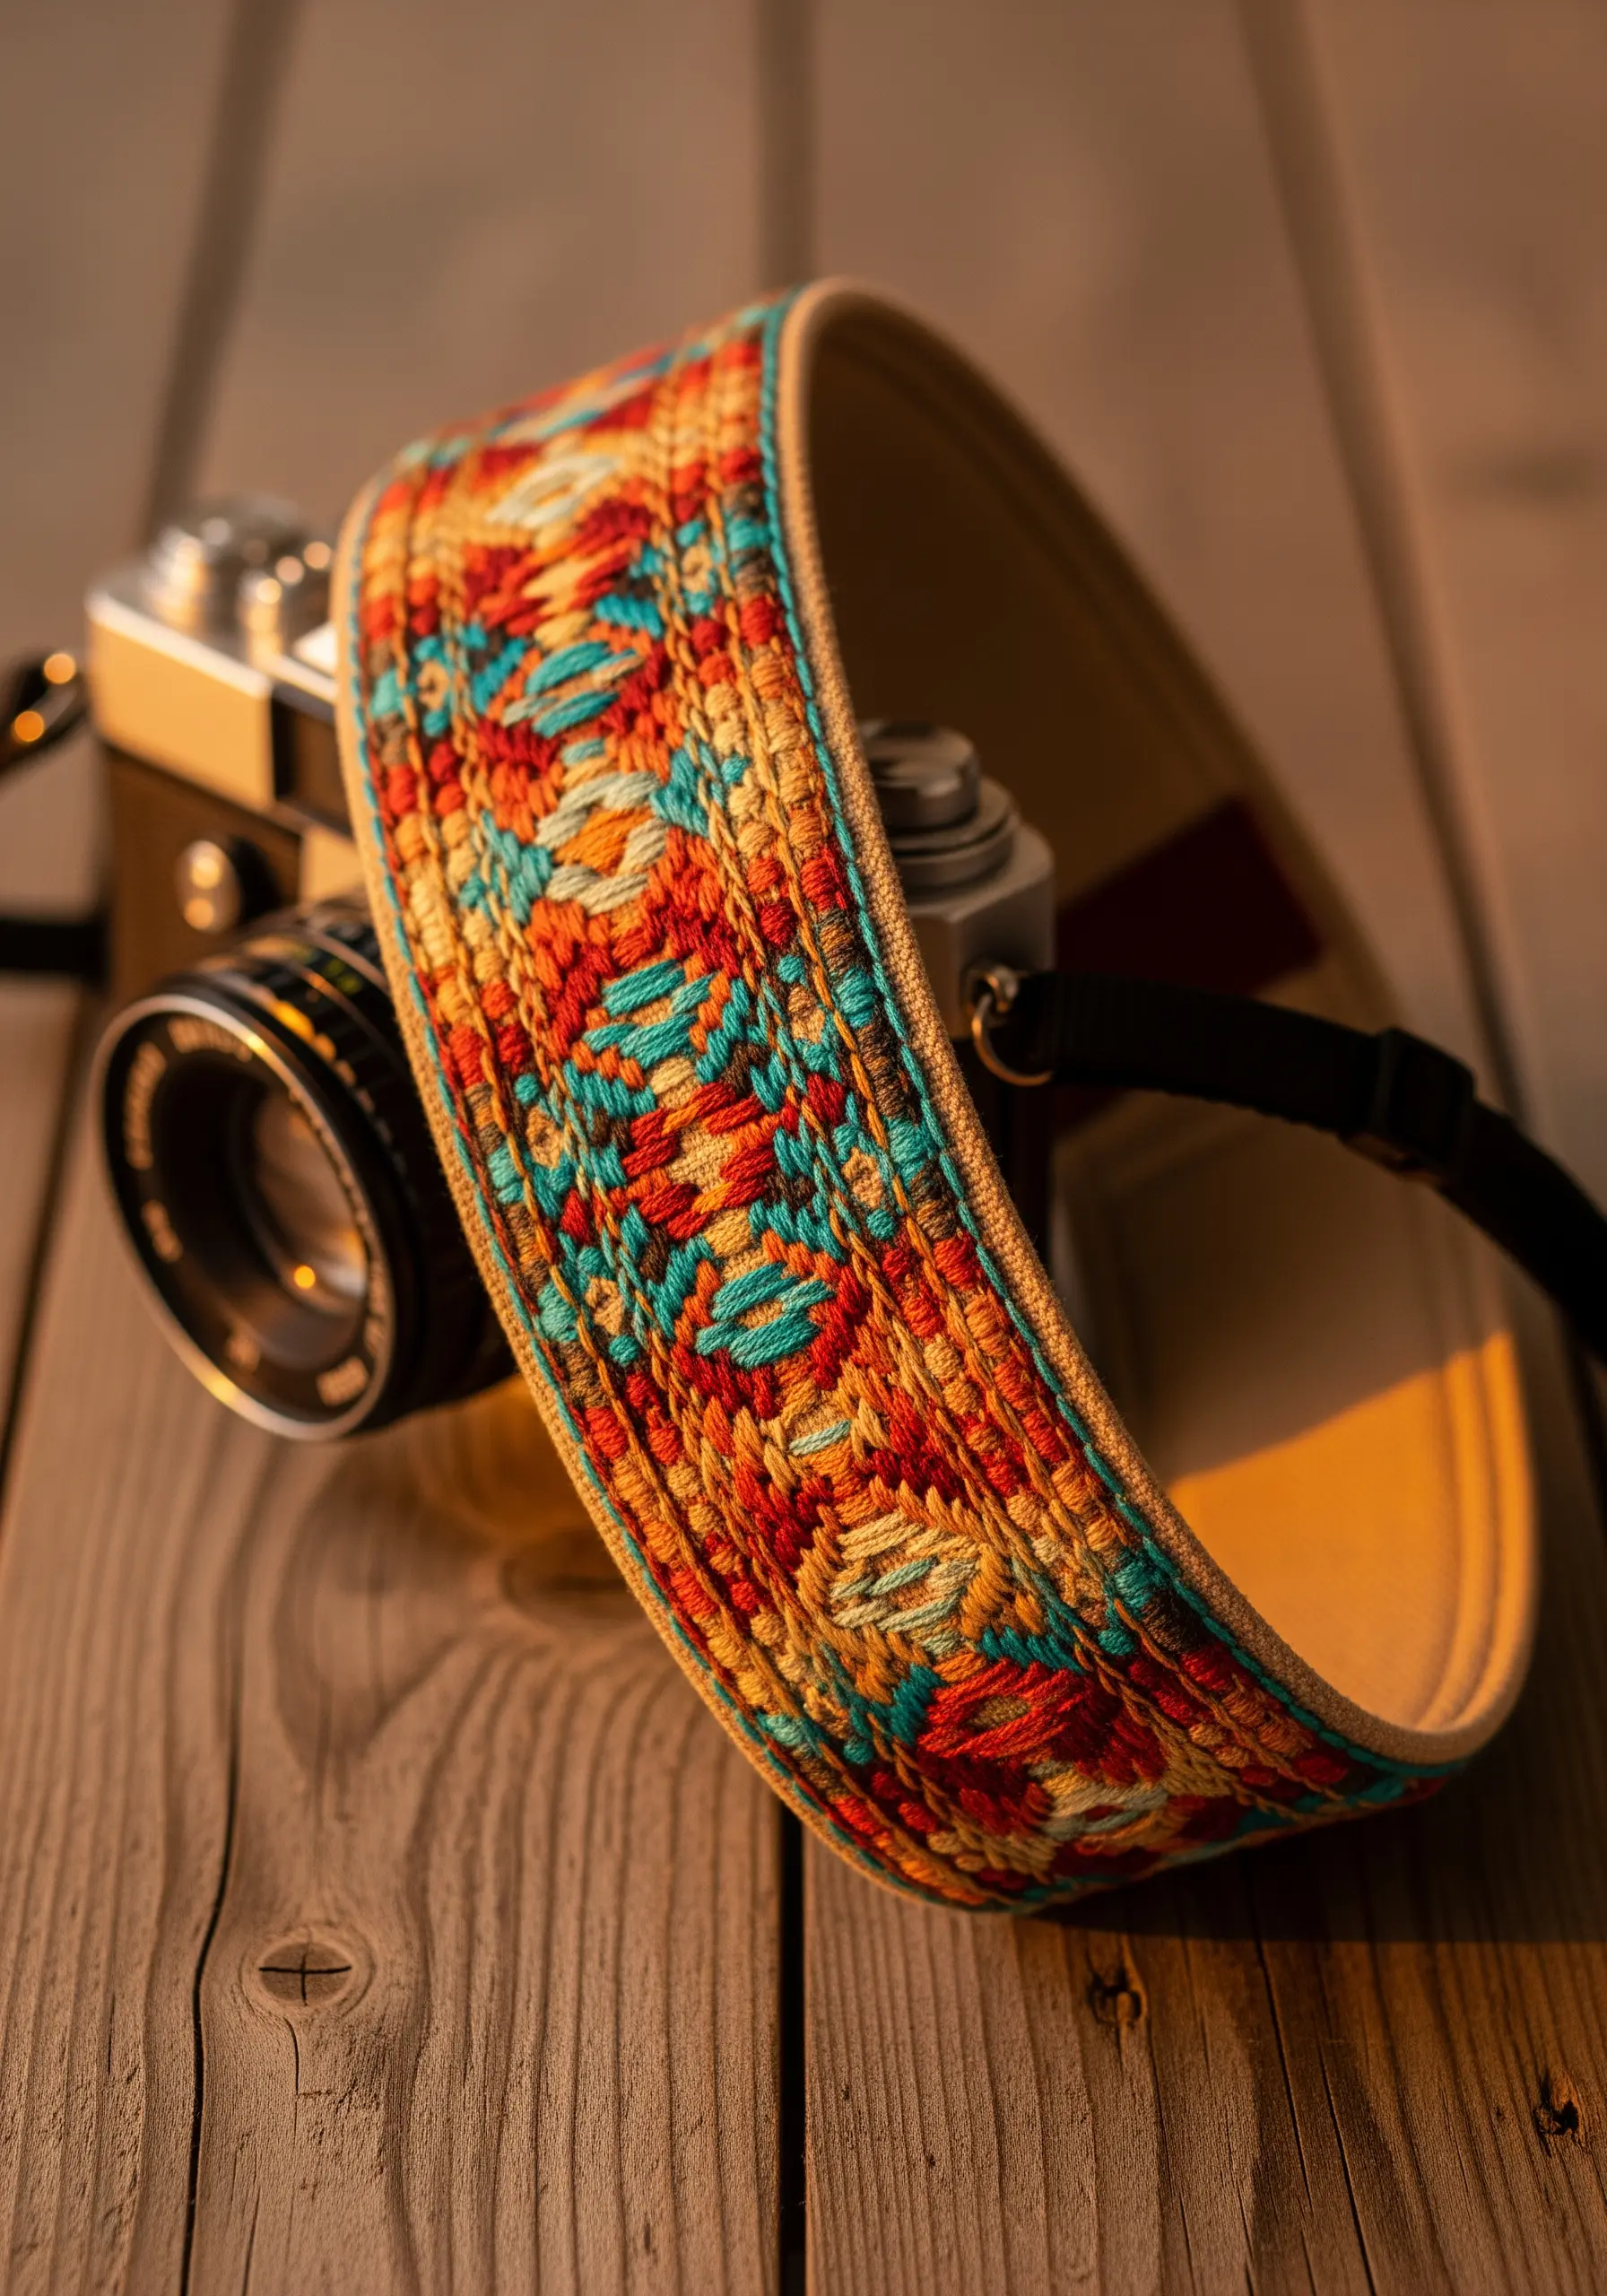
This intricate pattern is achieved using a technique called bargello, which involves upright stitches of varying lengths and colors to create geometric patterns.
Work on a strip of canvas or even-weave fabric that you can then sew onto a pre-made camera strap for durability.
The key to successful bargello is counting your threads and following a chart, but the repetitive nature of the stitches makes it a surprisingly meditative process.
Choose a vibrant, high-contrast color palette to make the geometric pattern pop. The final effect mimics the look of traditional woven textiles.
23. Seashell Border Hand Towel
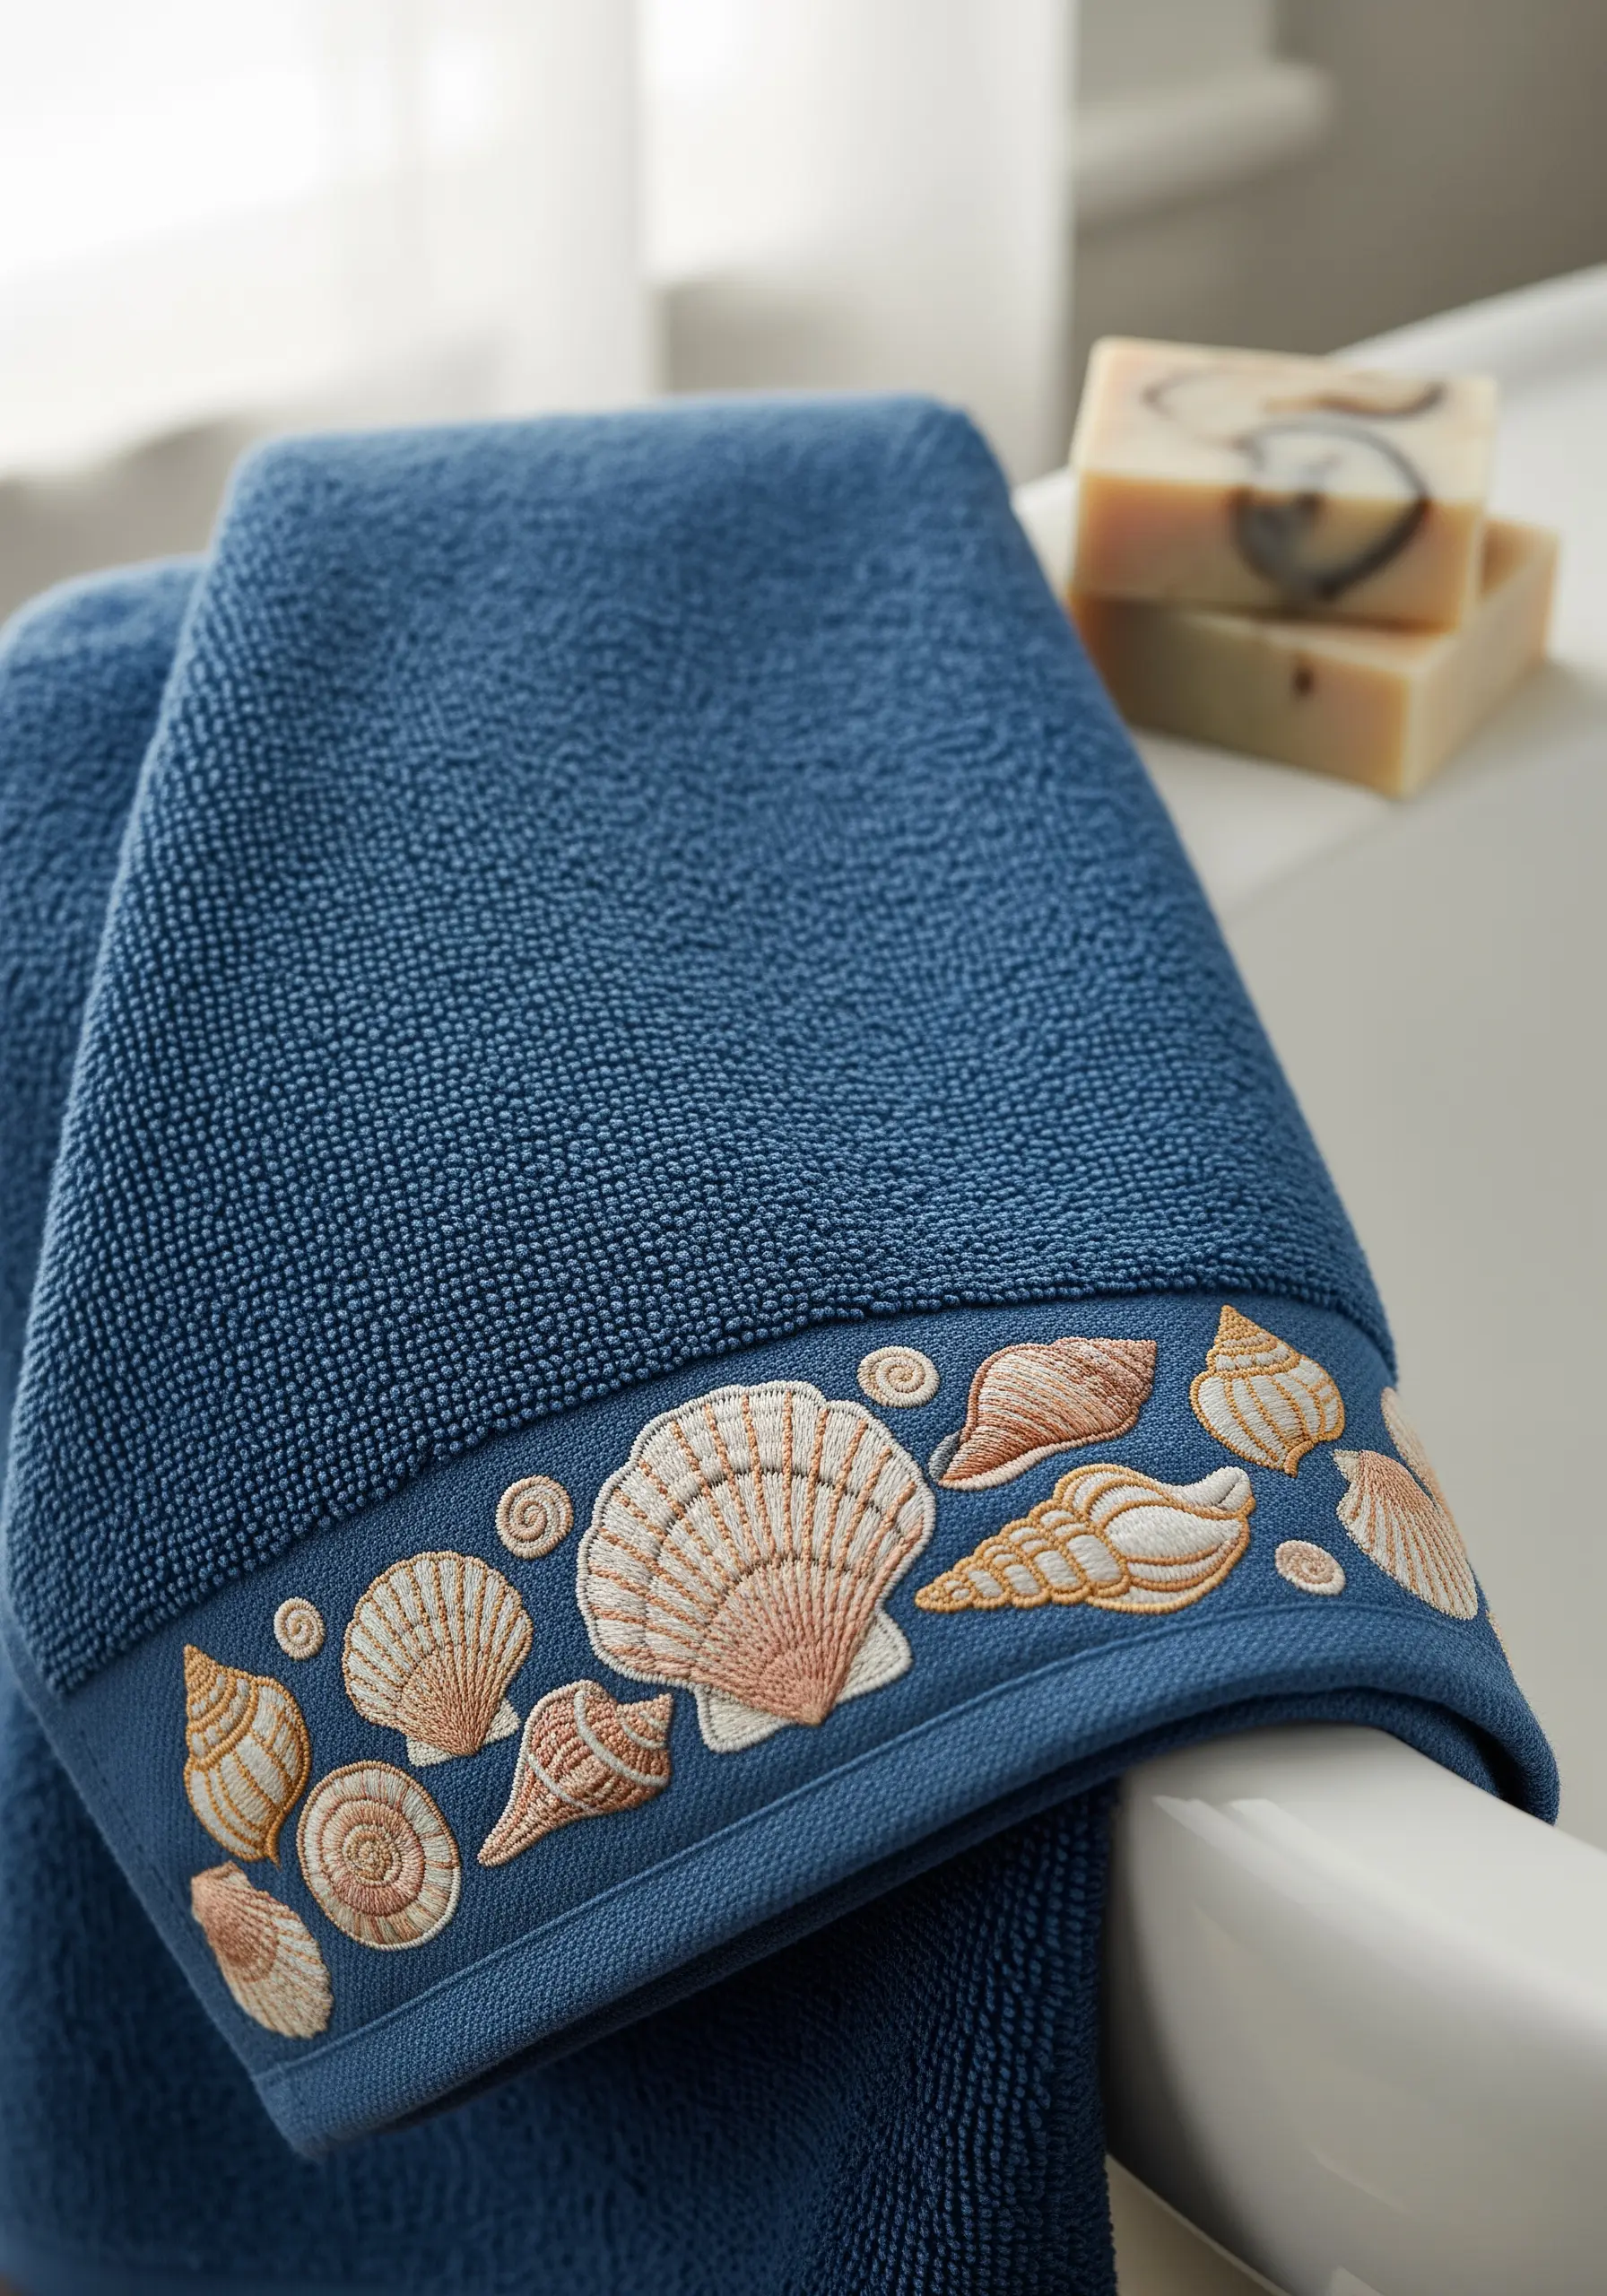
To embroider on a terrycloth towel, you must use a water-soluble topping stabilizer. This film sits on top of the fabric, preventing your stitches from getting lost in the loops.
Use a long-and-short stitch to create the subtle color gradients on the shells. Blending shades of cream, beige, and soft pink gives them a realistic, pearlescent quality.
Define the delicate ridges of each shell with a fine backstitch or stem stitch in a slightly darker neutral tone.
The dense, flat band on many towels (the dobby border) is the ideal place for embroidery, as it provides a much smoother surface than the main looped body of the towel. These coastal-inspired designs are perfect for bathrooms.
24. Expressive Eyes Makeup Pouch

For the smoothest, most dramatic eyelashes, use a whipped backstitch. This technique covers the stepped look of a regular backstitch, creating a single, fluid line.
To make the eyes sparkle, fill the iris with a circular satin stitch, leaving a small spot of the fabric bare to act as a catchlight. You can also add a single white French knot.
The sharpest, cleanest lines for the eyeliner are achieved by using only two strands of black floss and a meticulous split stitch.
This design is all about confident lines and smooth fills, so take your time to ensure your satin stitches are dense and even.
25. Heirloom Embroidered Wall Calendar
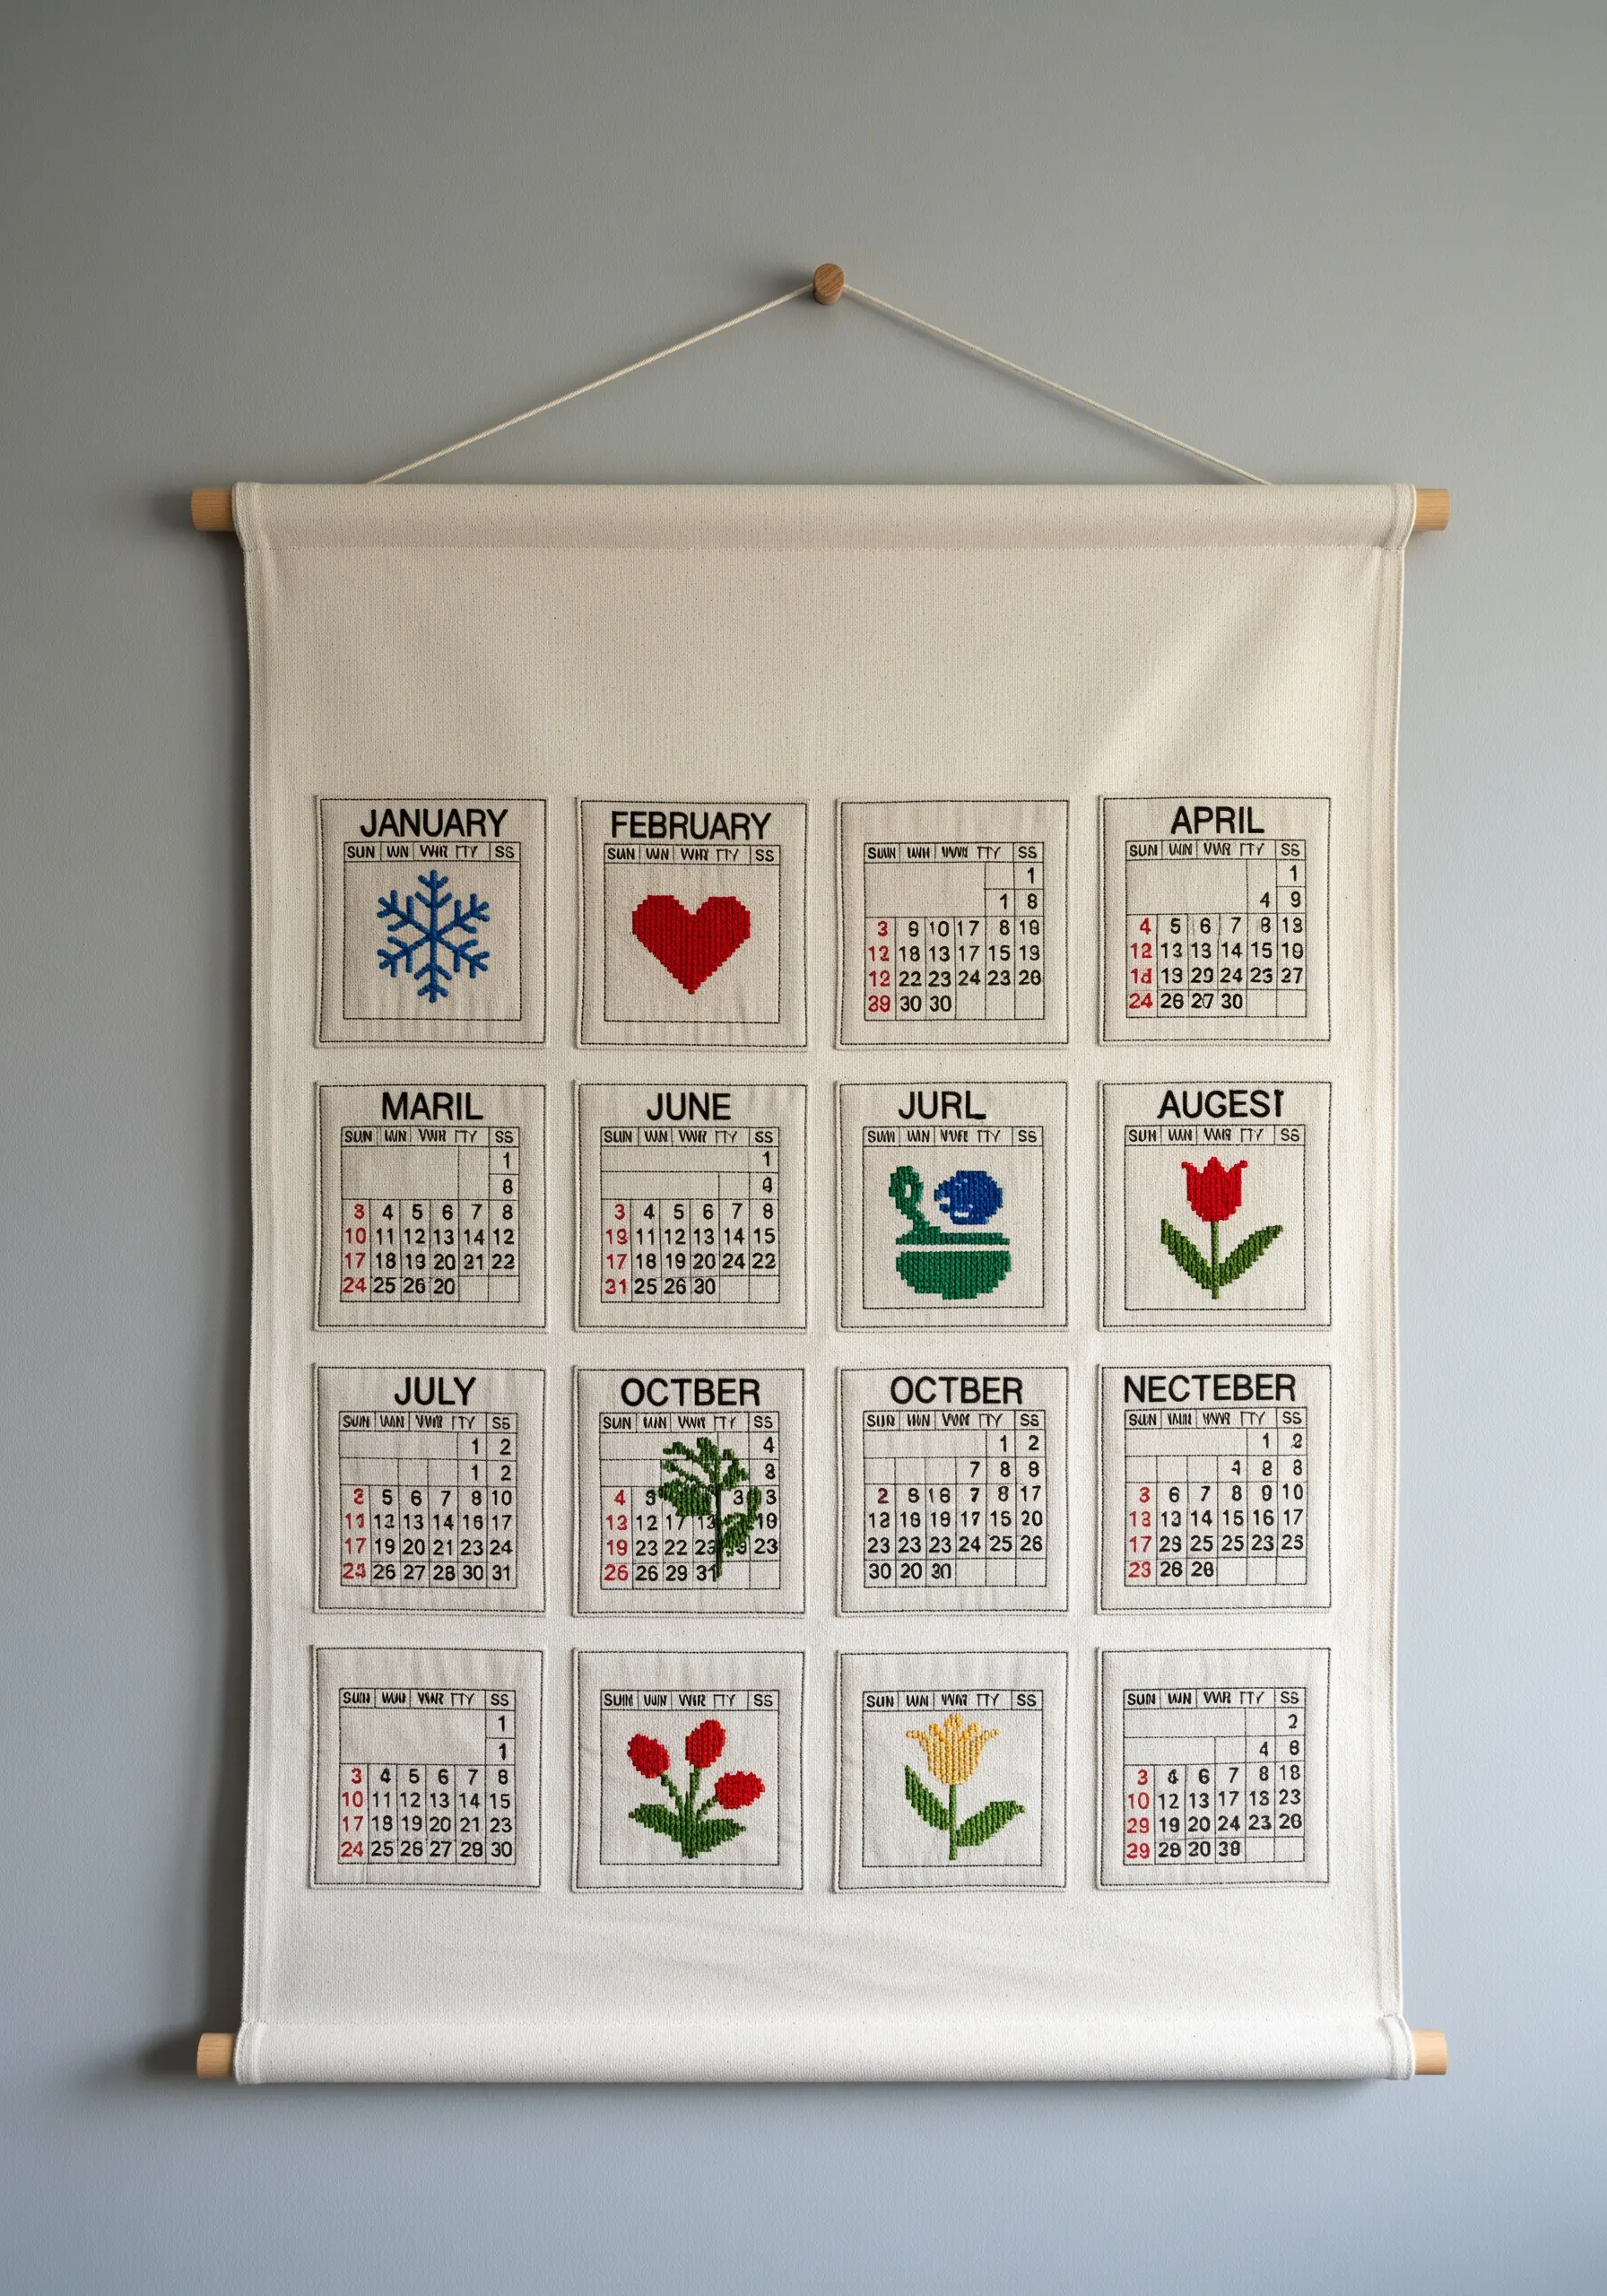
This project combines embroidery with organization, making it a thoughtful and long-lasting gift. Work each monthly panel on a separate piece of even-weave fabric.
The small icons are perfect for cross-stitch, which gives them a charming, pixelated quality that is easy to execute on a grid.
For the calendar grids and numbers, use a simple backstitch with two strands of floss for clarity and legibility.
Once all panels are complete, press them carefully and sew them onto a larger linen backing, leaving channels at the top and bottom for wooden dowels to ensure it hangs flat.
26. Personalized Knit Throw Blanket
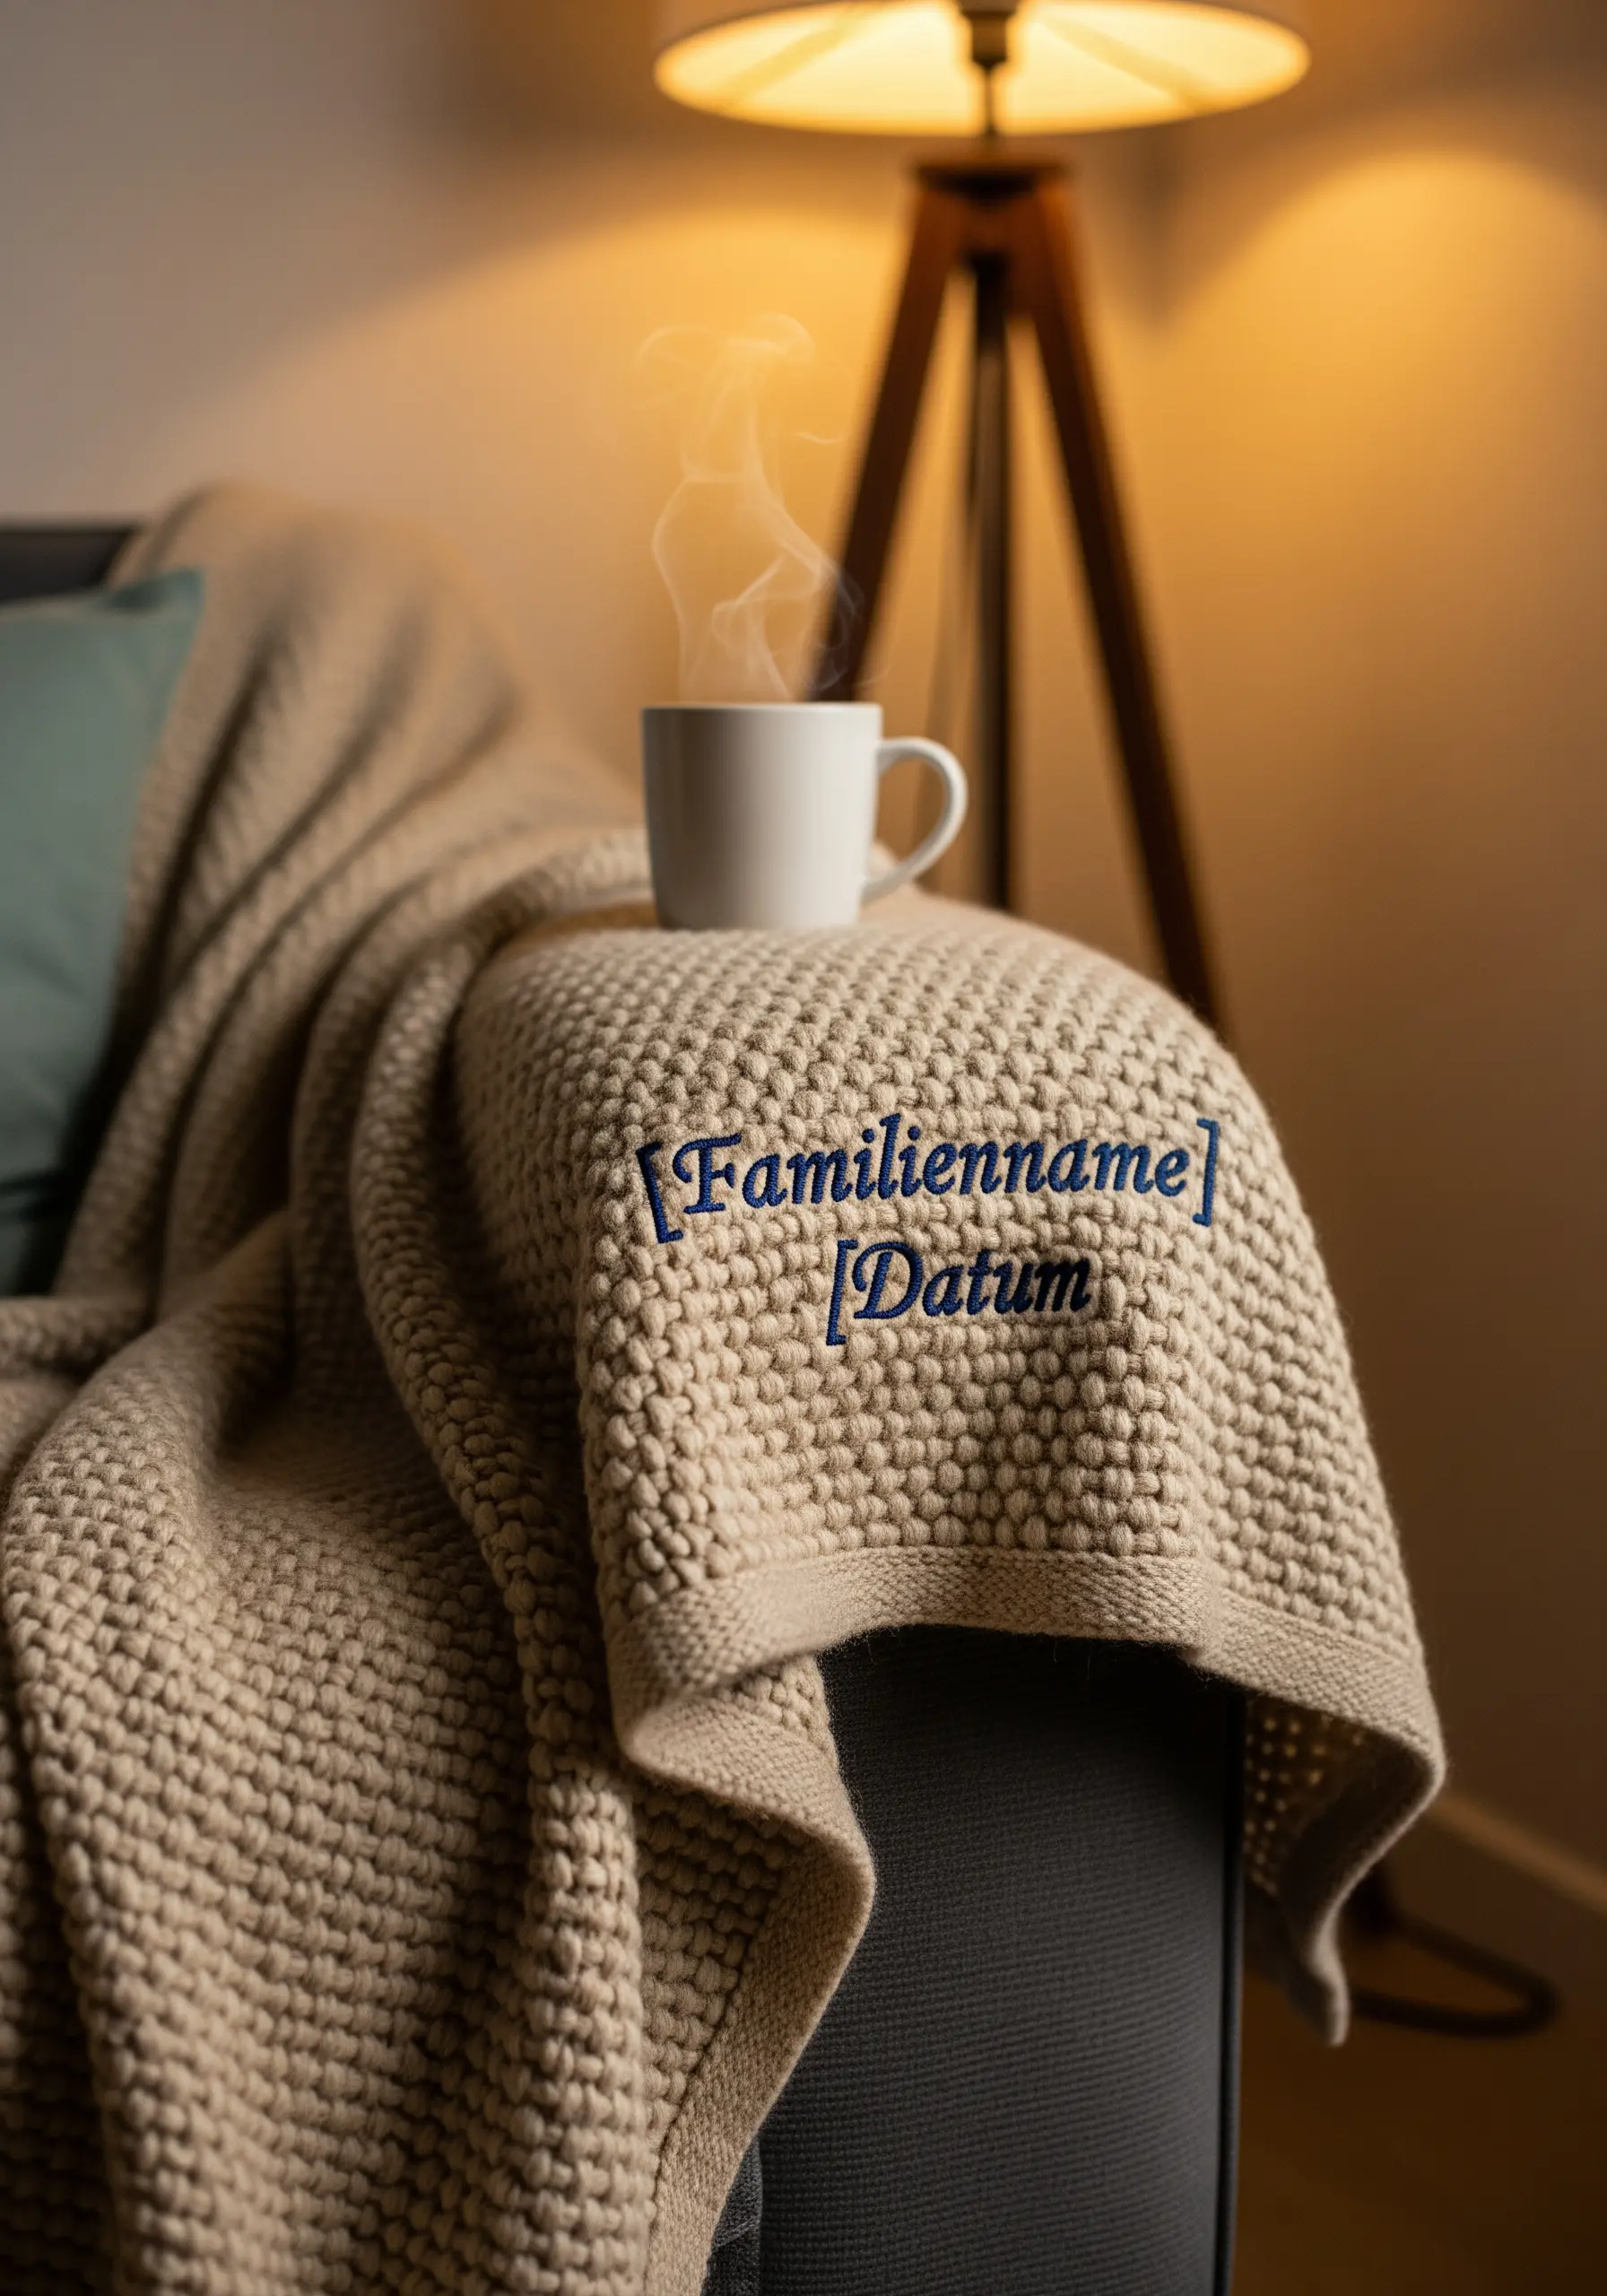
Embroidering on a chunky knit requires a different approach. Instead of piercing the yarn, weave your needle through the existing knitted loops.
Use a tapestry needle with a blunt tip to avoid splitting the yarn of the blanket. A contrasting yarn of a similar weight is the best choice for your embroidery material.
The duplicate stitch (or Swiss darning) is the perfect technique here. It allows you to create a design that looks like it was knitted right into the blanket by tracing the path of the existing knit stitches.
This method preserves the stretch and softness of the blanket, making the final result both beautiful and functional.
27. Graphic ‘King of the Grill’ Apron
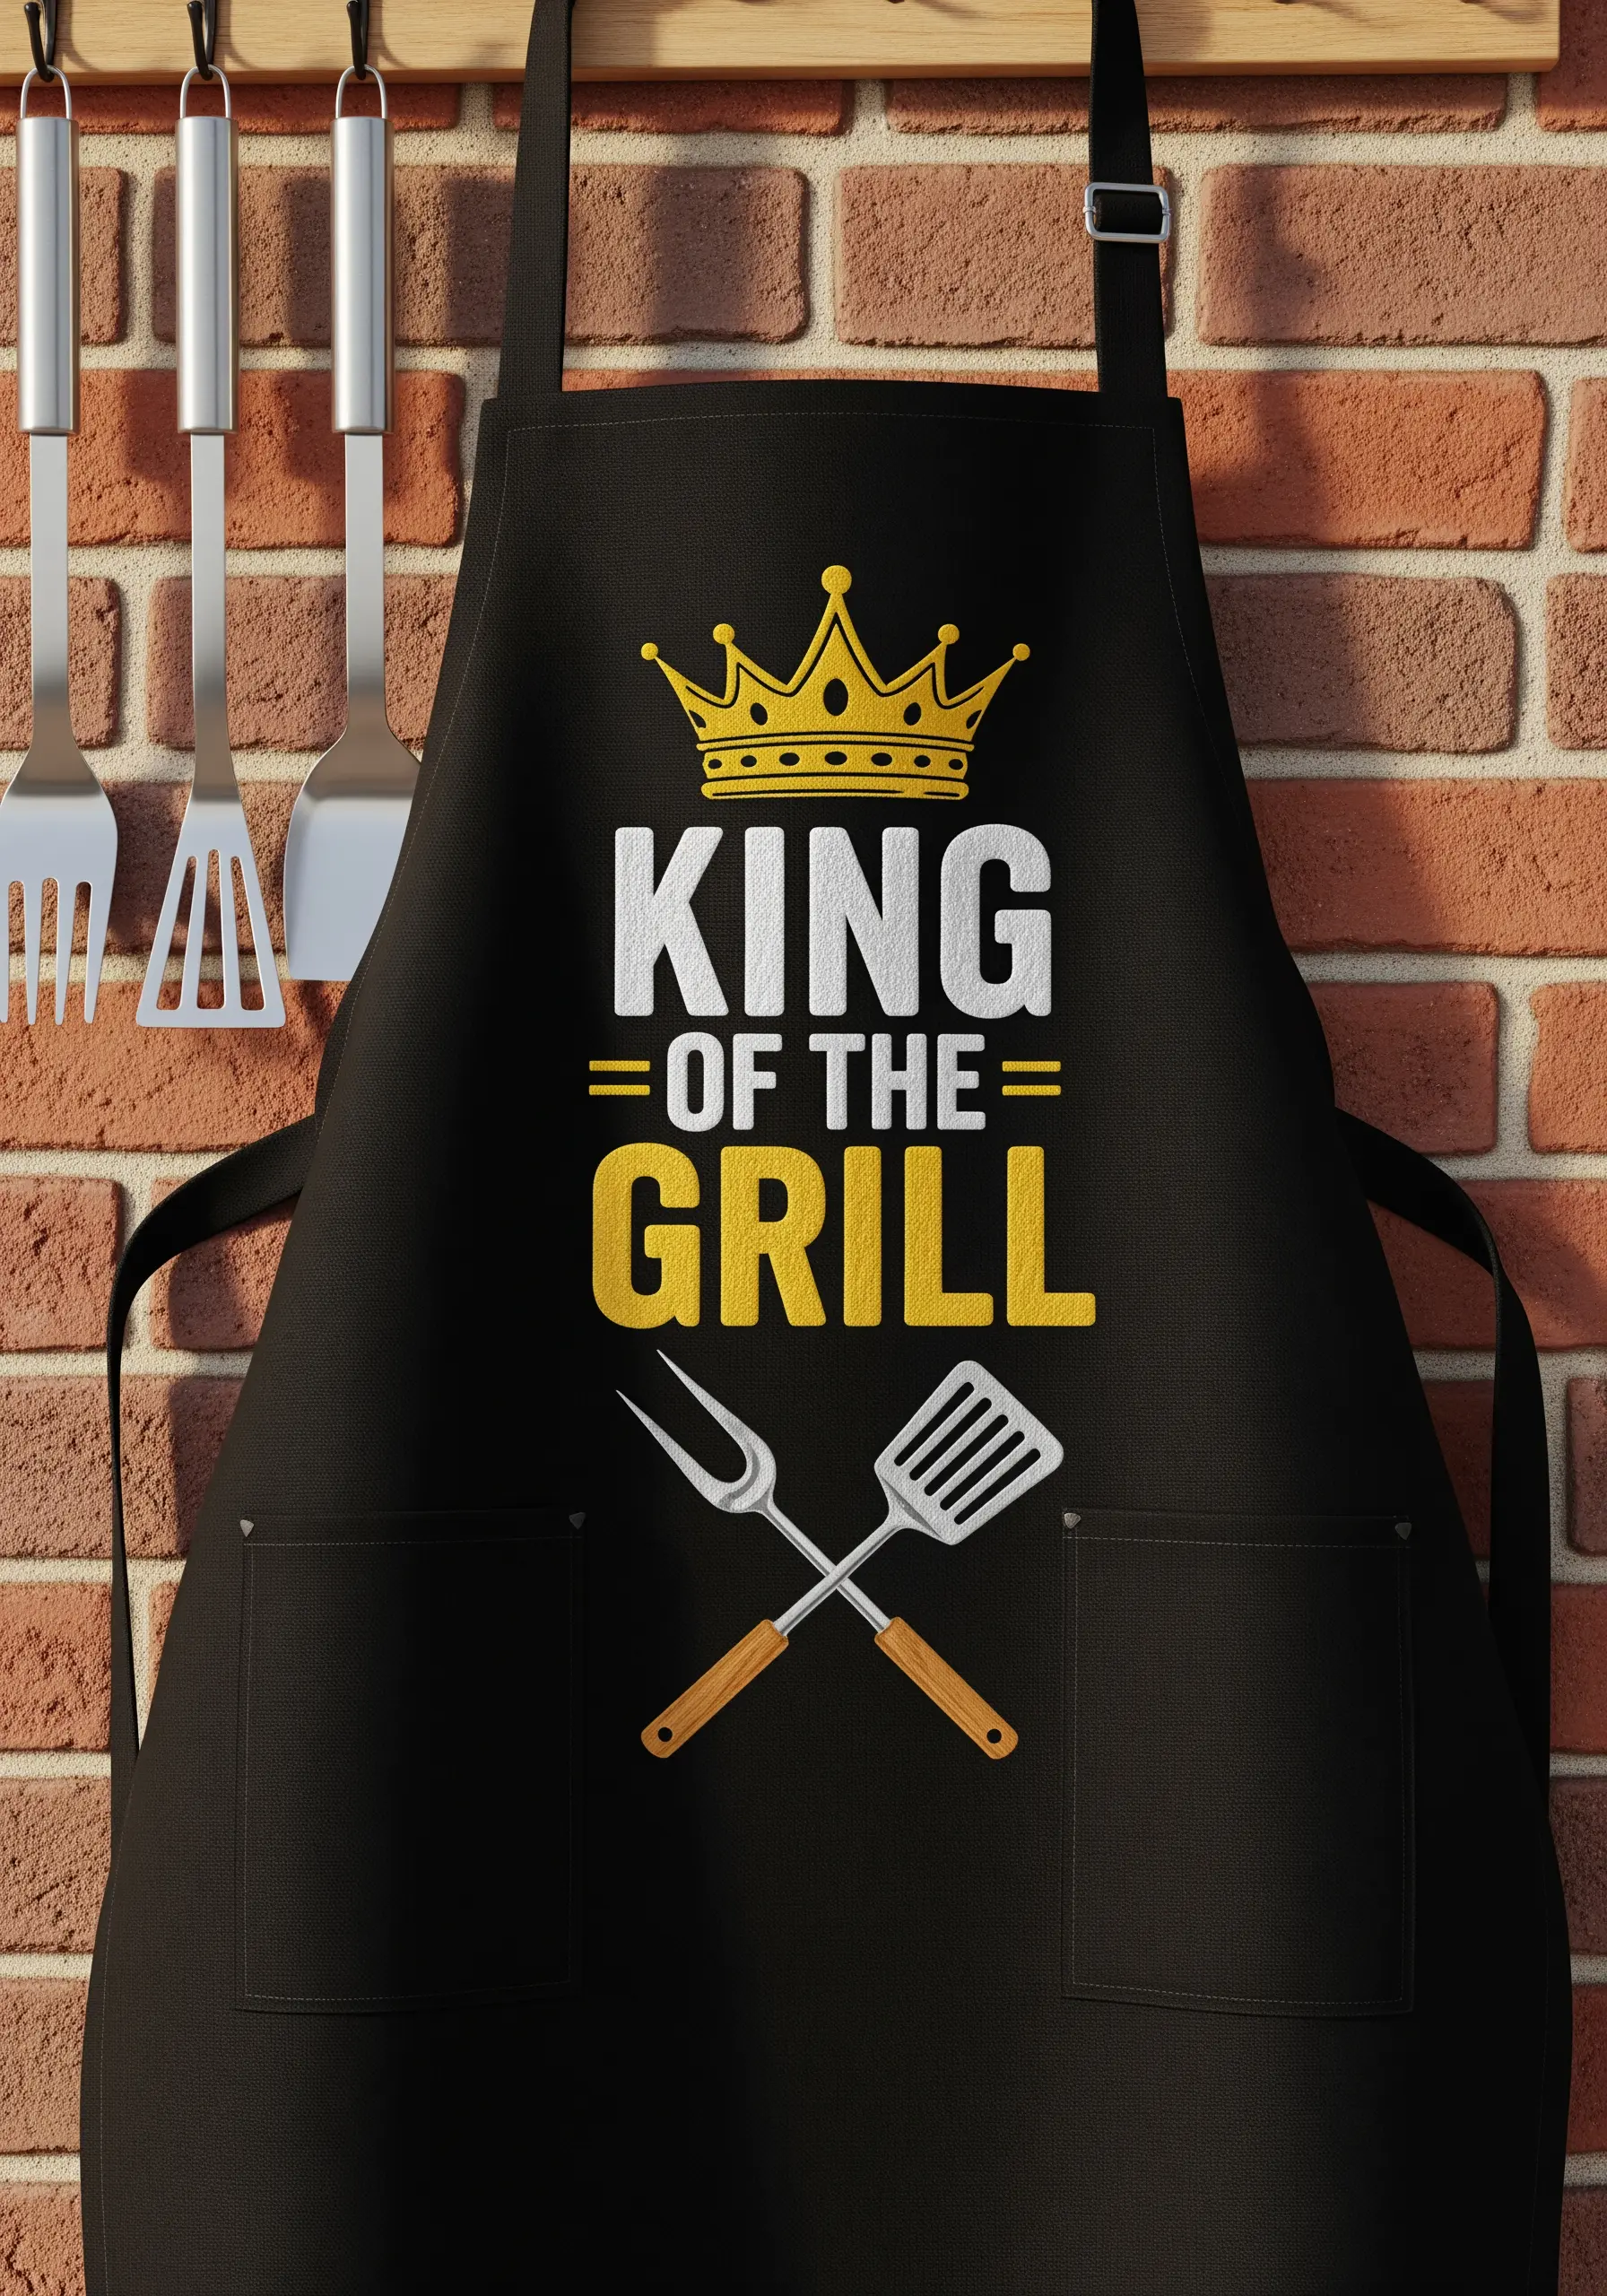
For bold, graphic lettering like this, a chain stitch outline filled with satin stitch provides a raised, professional-looking finish.
To ensure your satin stitches are perfectly smooth on a large area, you can first lay down a grid of straight stitches (a technique called underlay). This gives the top layer of satin stitch a foundation to sit on, preventing gaps.
The contrast between the white, gold, and black is key to the design’s impact. Use a high-quality, colorfast thread to prevent fading after washing.
Always pre-wash your apron before embroidering to prevent the fabric from shrinking later and causing your design to pucker.
28. Monstera Leaf Fabric Planter
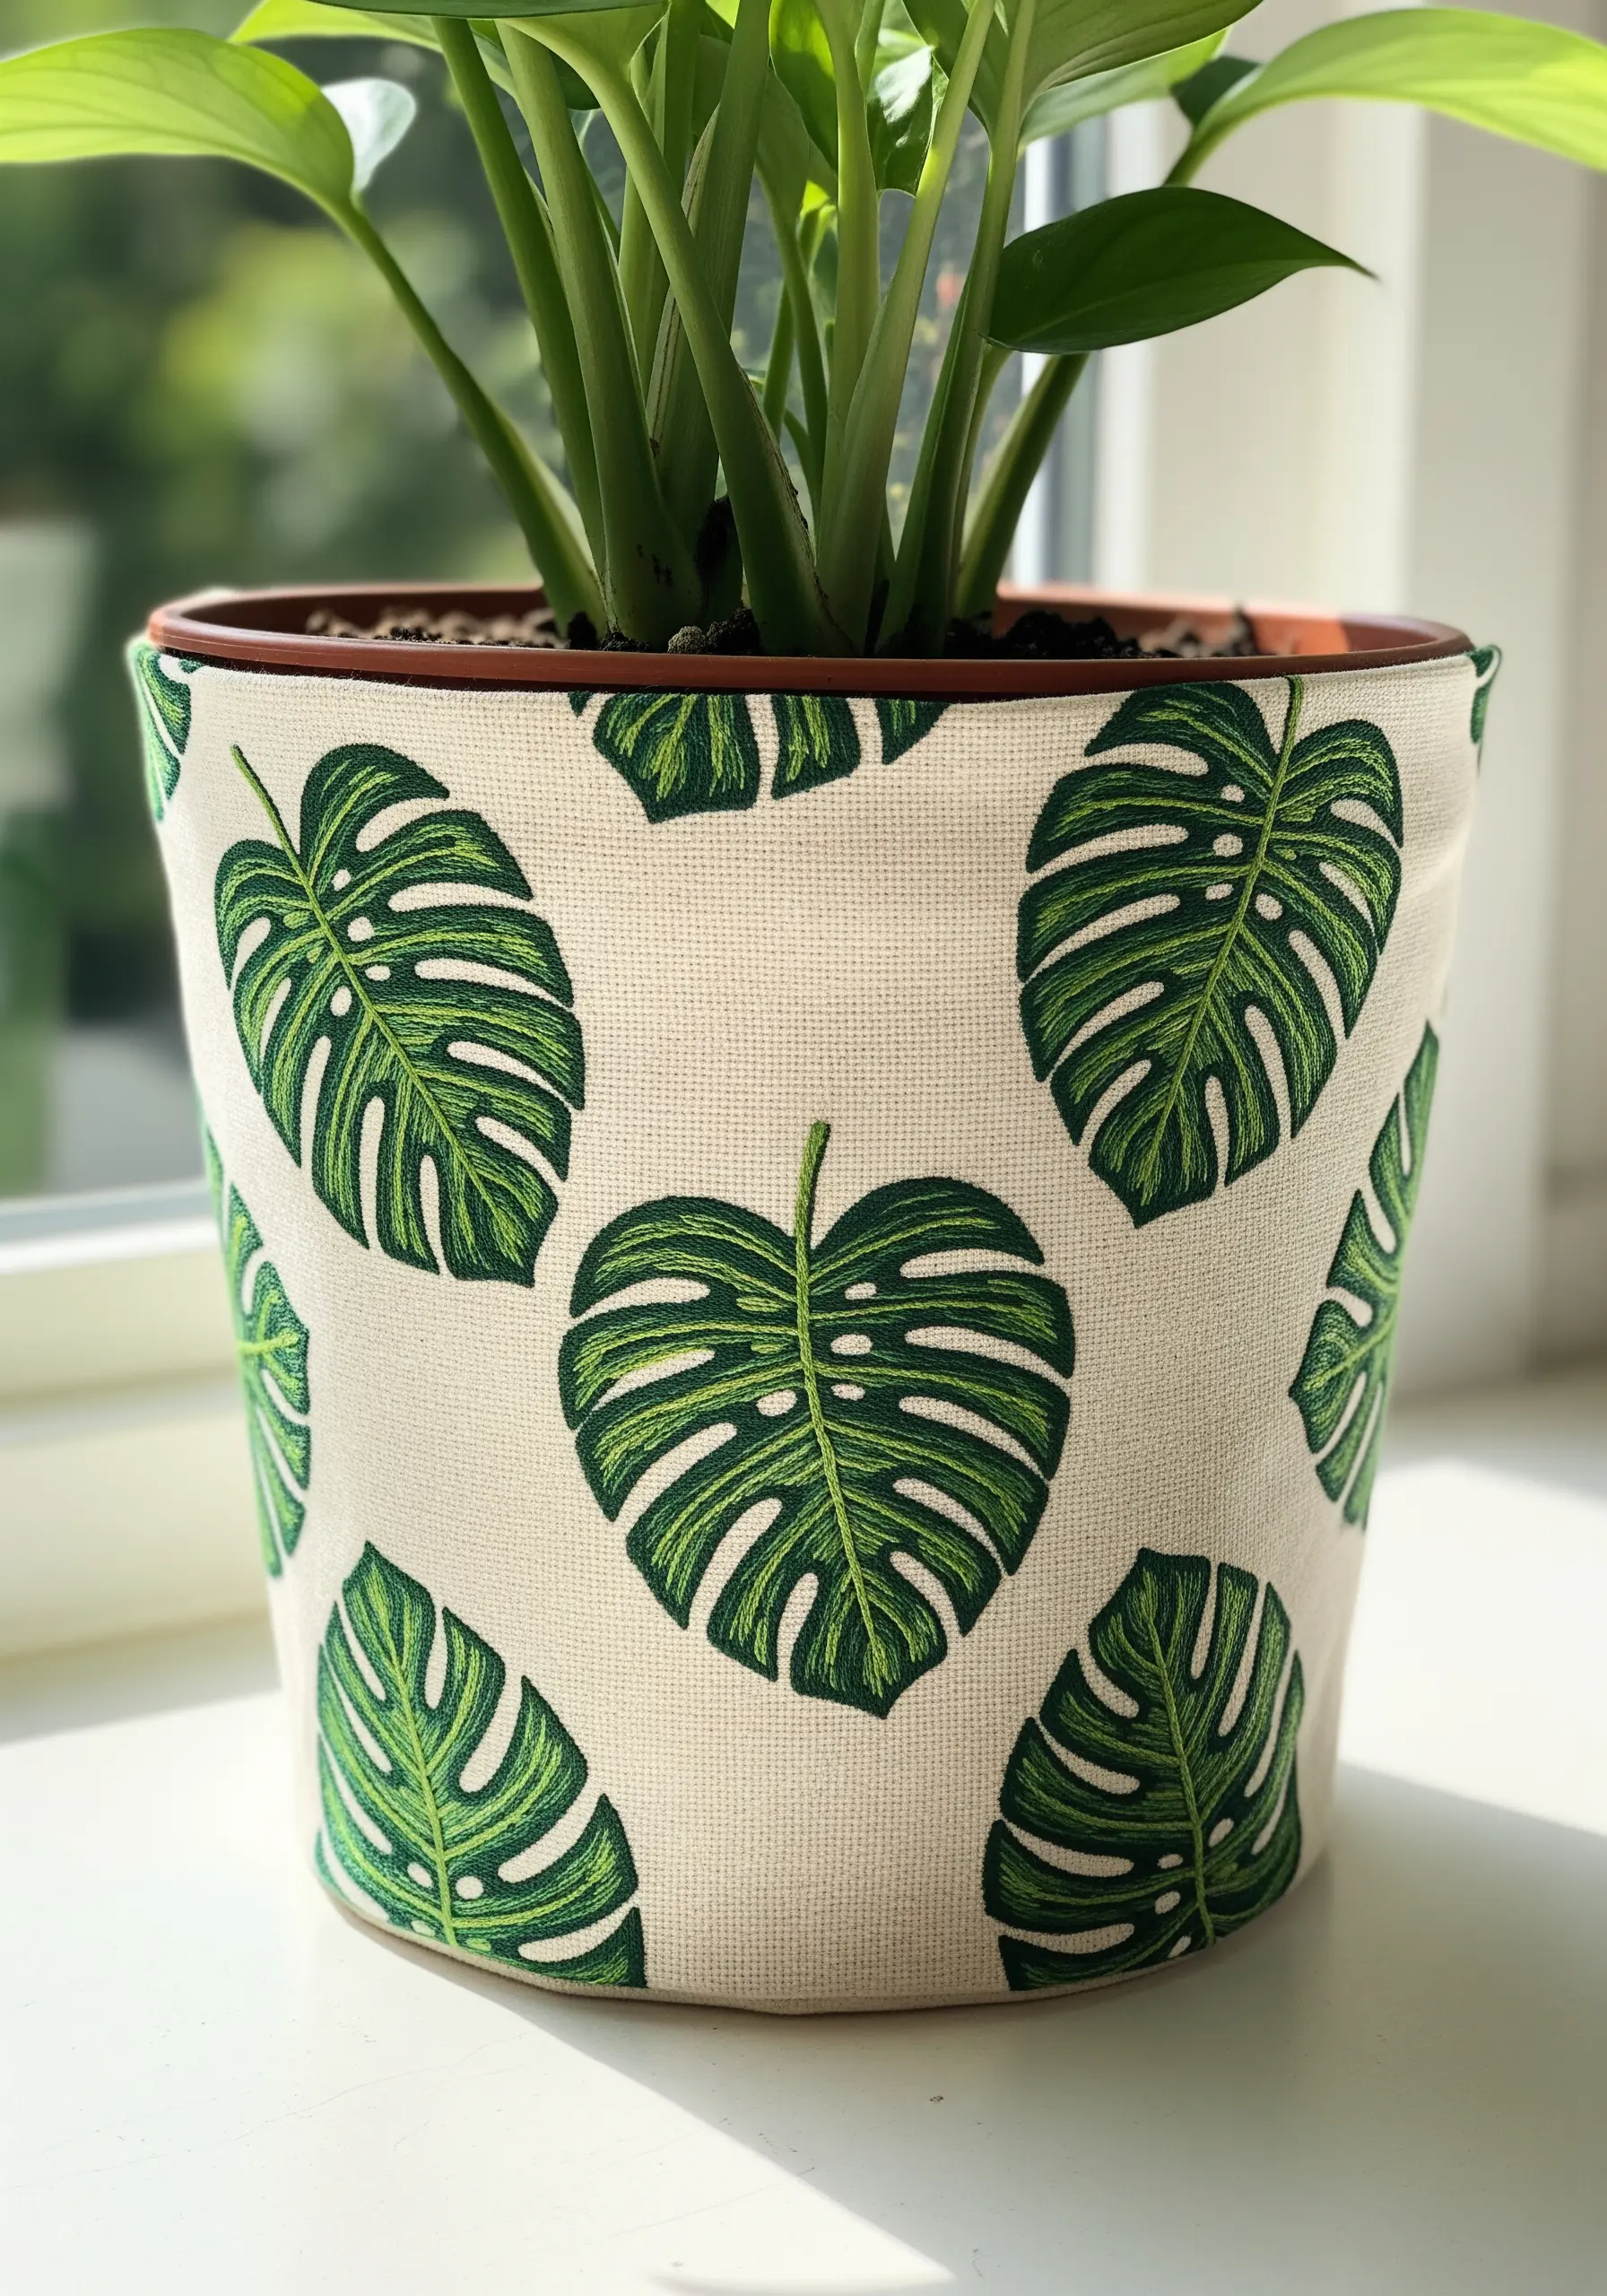
For the sharp divisions in the Monstera leaves, a split stitch is your best tool. It creates a finer, more controlled line than a backstitch, which is ideal for these intricate details.
To create the subtle texture of the leaves, fill the sections with a long-and-short stitch using two very similar shades of green. This adds dimension without being overly complicated.
This project is perfect for using up fabric scraps. Simply embroider your leaf design onto a piece of canvas, then sew it into a cylindrical shape to create a soft plant pot cover.
Ensure you use a plastic liner inside the fabric cover to protect your embroidery from water and soil.
29. Cheerful Avocado Socks
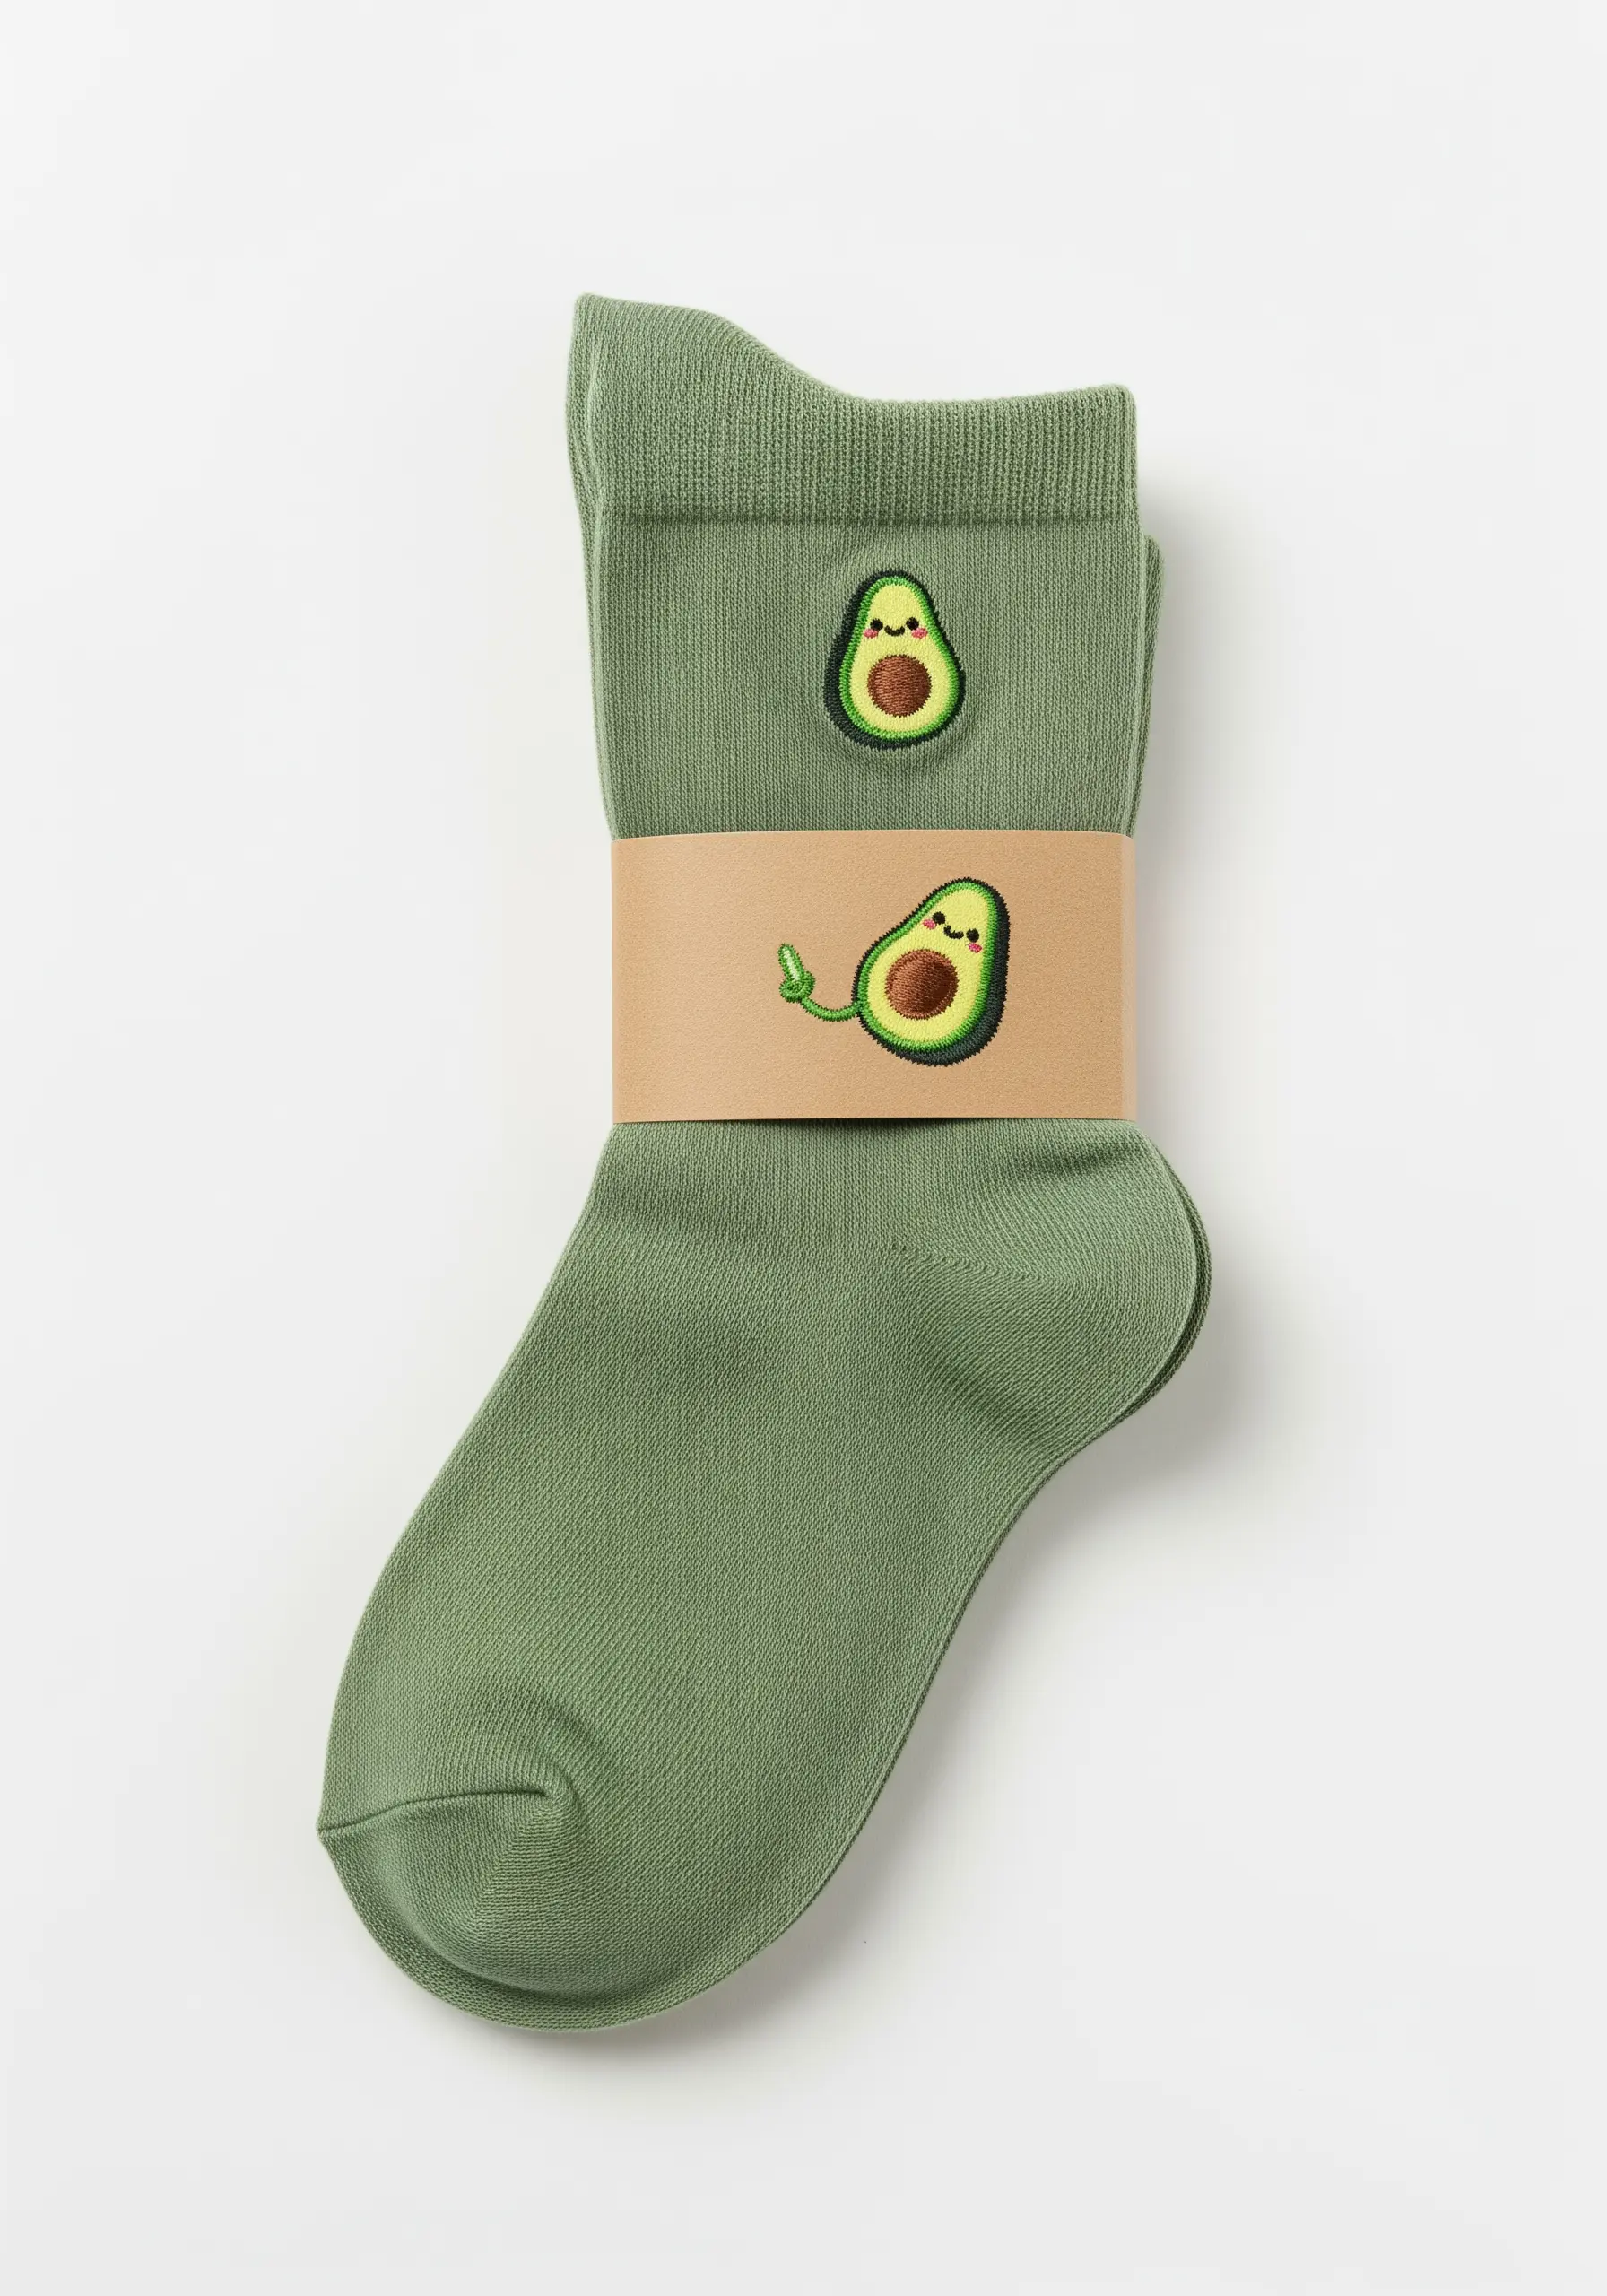
When embroidering on socks, stretch the area you’re working on slightly in a small embroidery hoop. This ensures the design won’t warp when the sock is worn.
For the smooth texture of the avocado flesh, use a satin stitch. The pit can be made with a small cluster of French knots or a padded satin stitch for a more rounded look.
A simple backstitch for the smile and eyes is all you need. Using a single strand of black floss will keep the expression delicate and sweet.
These tiny secret embroidery ideas are perfect for adding a touch of personality to an everyday item.
30. Minimalist ‘Home’ Keychain

For a clean, graphic house outline on nylon webbing, a simple backstitch is the most effective choice. Use a bright white thread for maximum contrast against a dark background.
The heart inside the house is a perfect place for a single, well-placed satin stitch or even a tiny detached chain stitch.
Use a thimble and a sharp, strong needle to easily penetrate the dense webbing without straining your fingers.
This is a wonderful project for using up leftover thread and hardware, turning small scraps into a thoughtful housewarming gift.
31. Elegant ‘Sweet Dreams’ Sleep Mask

Satin fabric is slippery, so use a stabilizer to prevent puckering. A stick-on, wash-away stabilizer on the front of the mask provides a stable surface to stitch on.
For elegant, flowing script, a whipped backstitch is ideal. It creates a smooth, unbroken line that mimics calligraphy.
Choose a thread that has a slight sheen, like a silk or rayon floss, to complement the luxuriousness of the satin.
Your stitches on the back should be neat, but they will ultimately be hidden by the mask’s lining, so focus on getting the front perfect.
32. Autumn Leaves Appliqué Scarf

This design combines appliqué with embroidery for a rich, textural effect. Cut your leaf and birch bark shapes from felt or wool fabric.
Arrange and pin your appliqué pieces onto the scarf before stitching. This allows you to perfect the composition before making any permanent stitches.
Secure the appliqué pieces with a decorative blanket stitch around the edges, which adds another layer of texture. Then, add the leaf veins using a stem stitch or backstitch directly onto the appliqué.
For the birch bark, add horizontal straight stitches in black or dark gray to complete the illusion. This mix of techniques makes the design visually compelling.
33. Dimensional Grape Wine Bag
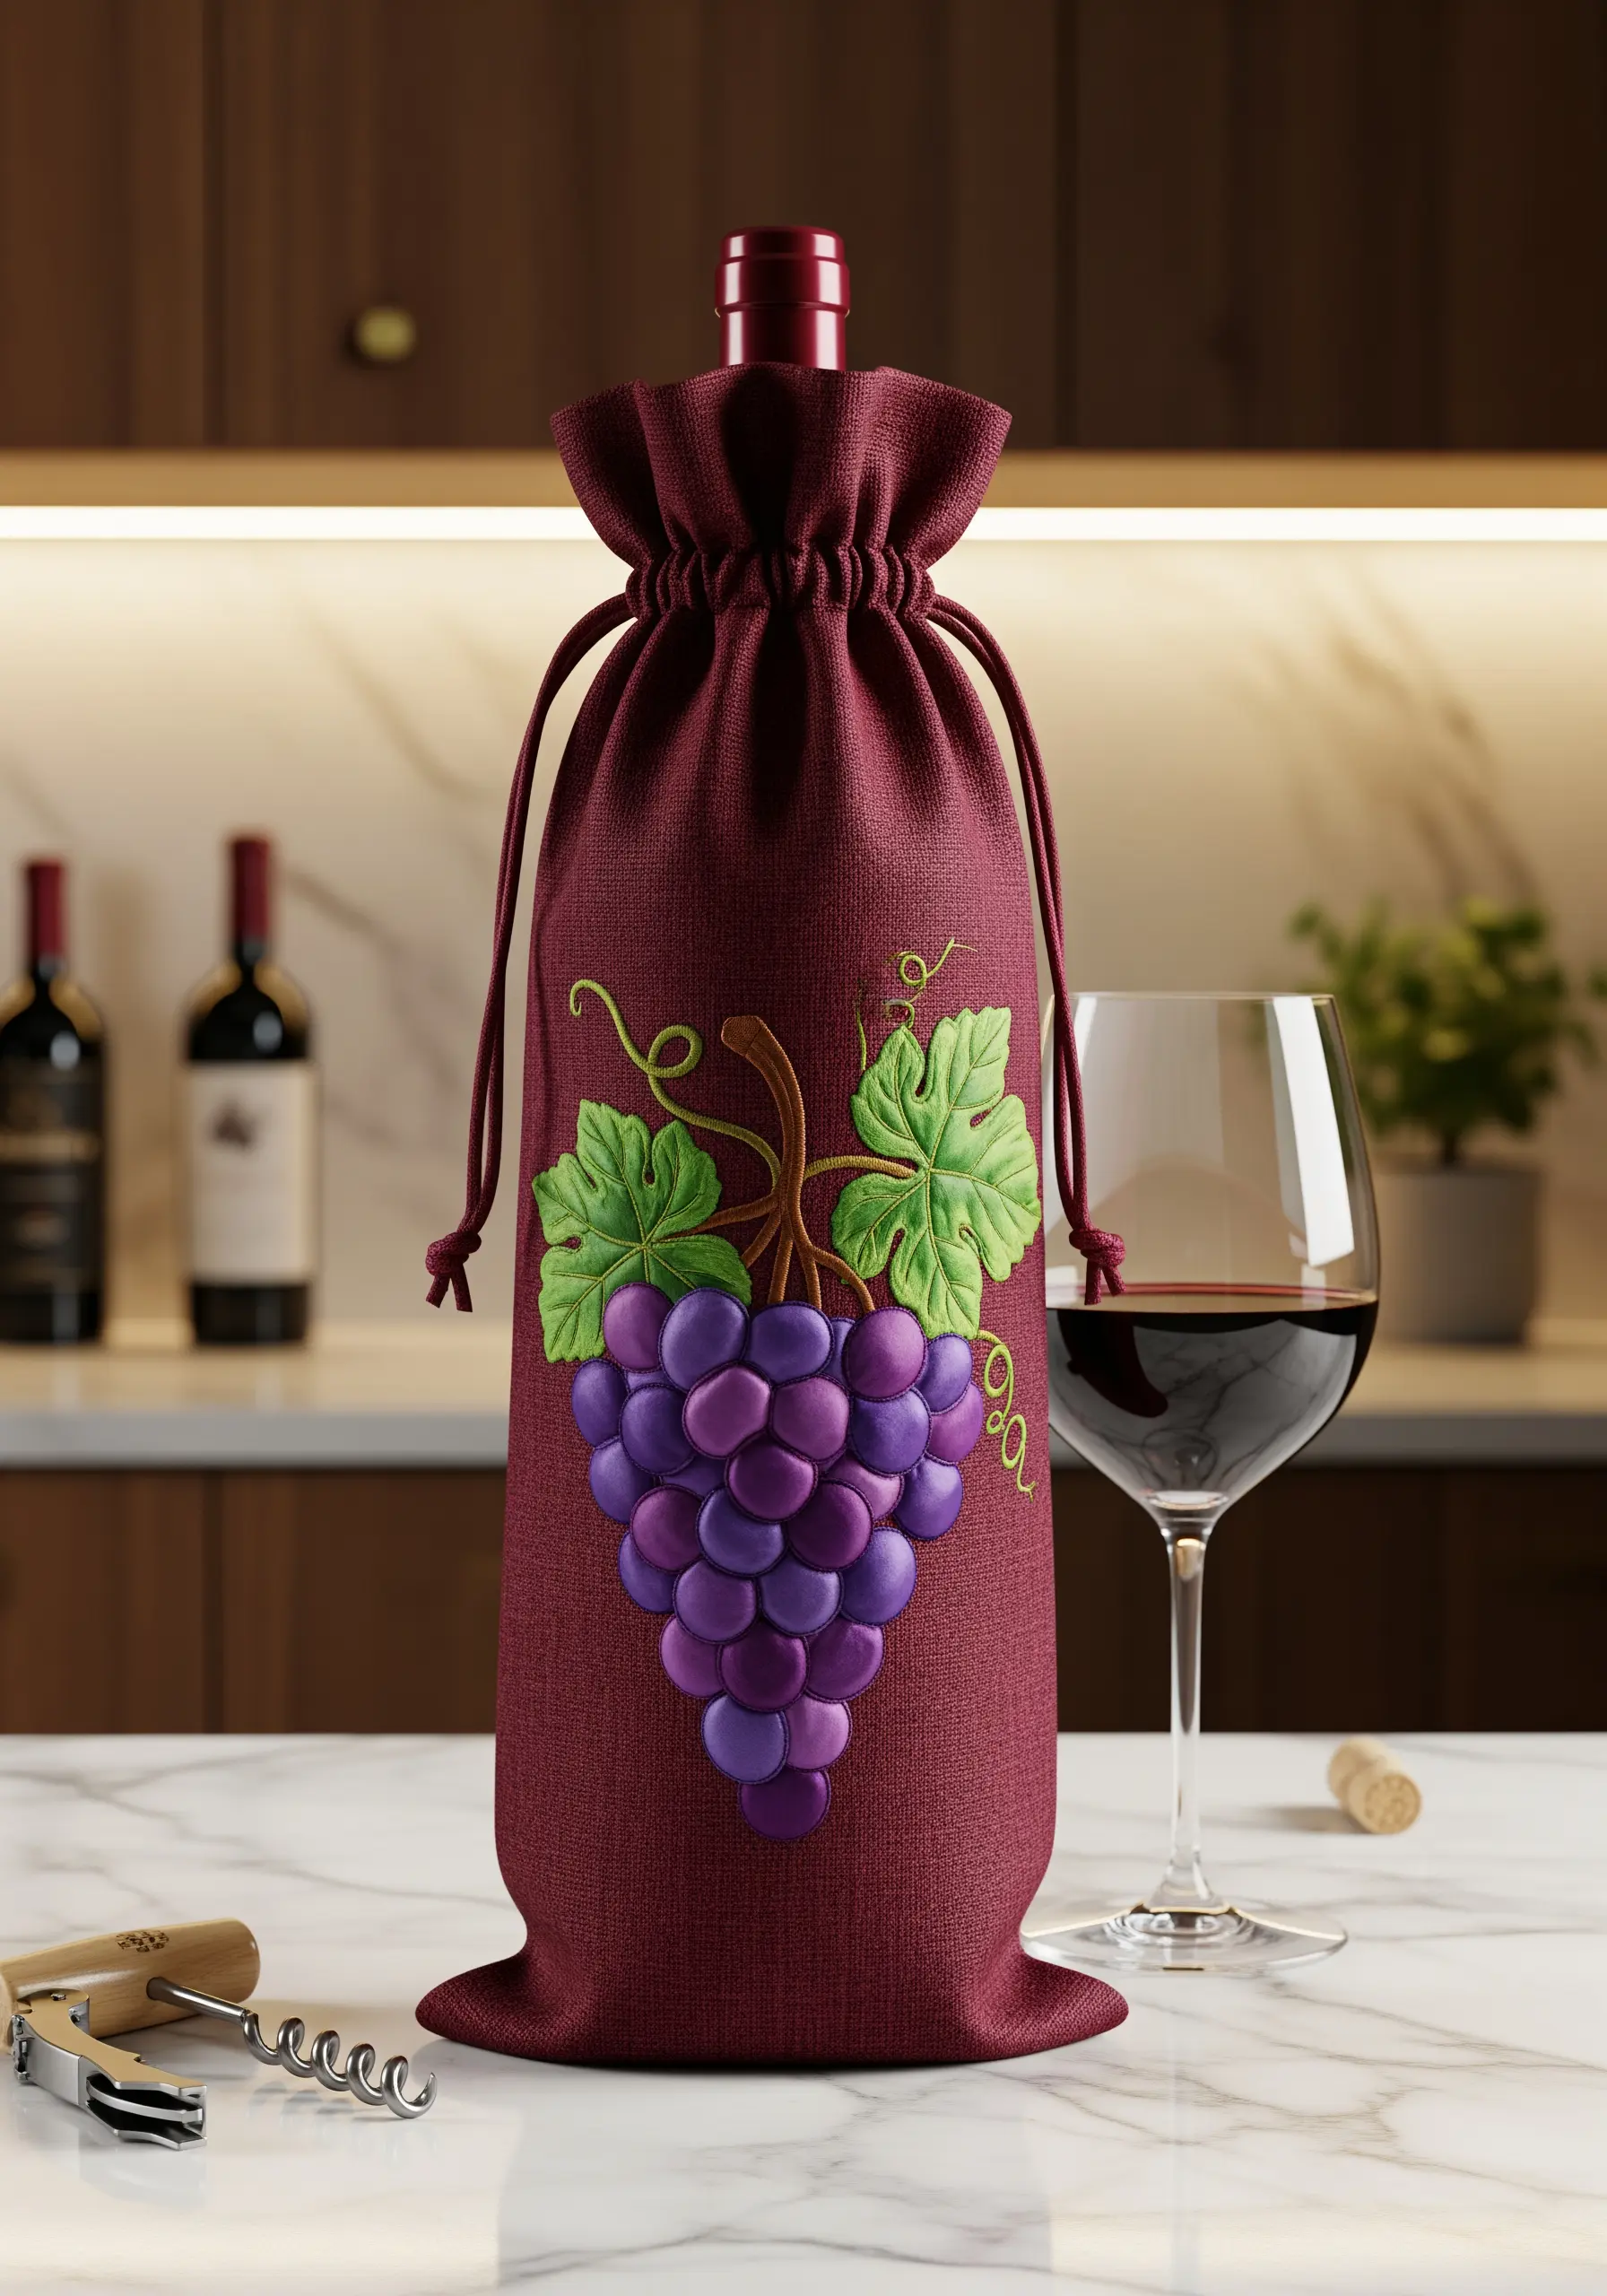
To give the grapes a plump, 3D appearance, use a padded satin stitch. First, create a small circle of seed stitches or a spiral of backstitches, then cover it with satin stitch.
Vary the shades of purple and add a small white straight stitch to each grape as a highlight. This simple touch dramatically increases the realism.
For the twisting vines, couch a piece of thicker green yarn or pearl cotton onto the bag, tacking it down with a finer, matching thread for a truly dimensional effect.
The leaves will look most realistic if you use a fishbone stitch, which creates a natural central vein.
34. Strawberry Pincushion with Seed Details

To create the iconic strawberry shape, you’ll sew two pieces of red fabric together and stuff them firmly with fiberfill or emery sand, which helps keep pins sharp.
The tiny black ‘seeds’ are simply French knots scattered across the surface. Varying their placement and tightness will give the strawberry a more organic look.
The green leafy top is cut from felt and attached with a few simple stitches at the crown.
Use a strong thread to stitch the vertical indentations, pulling tightly to create the subtle segments of the berry’s form. This small detail adds a lot of character.
35. Sweet Pastry Oven Mitts
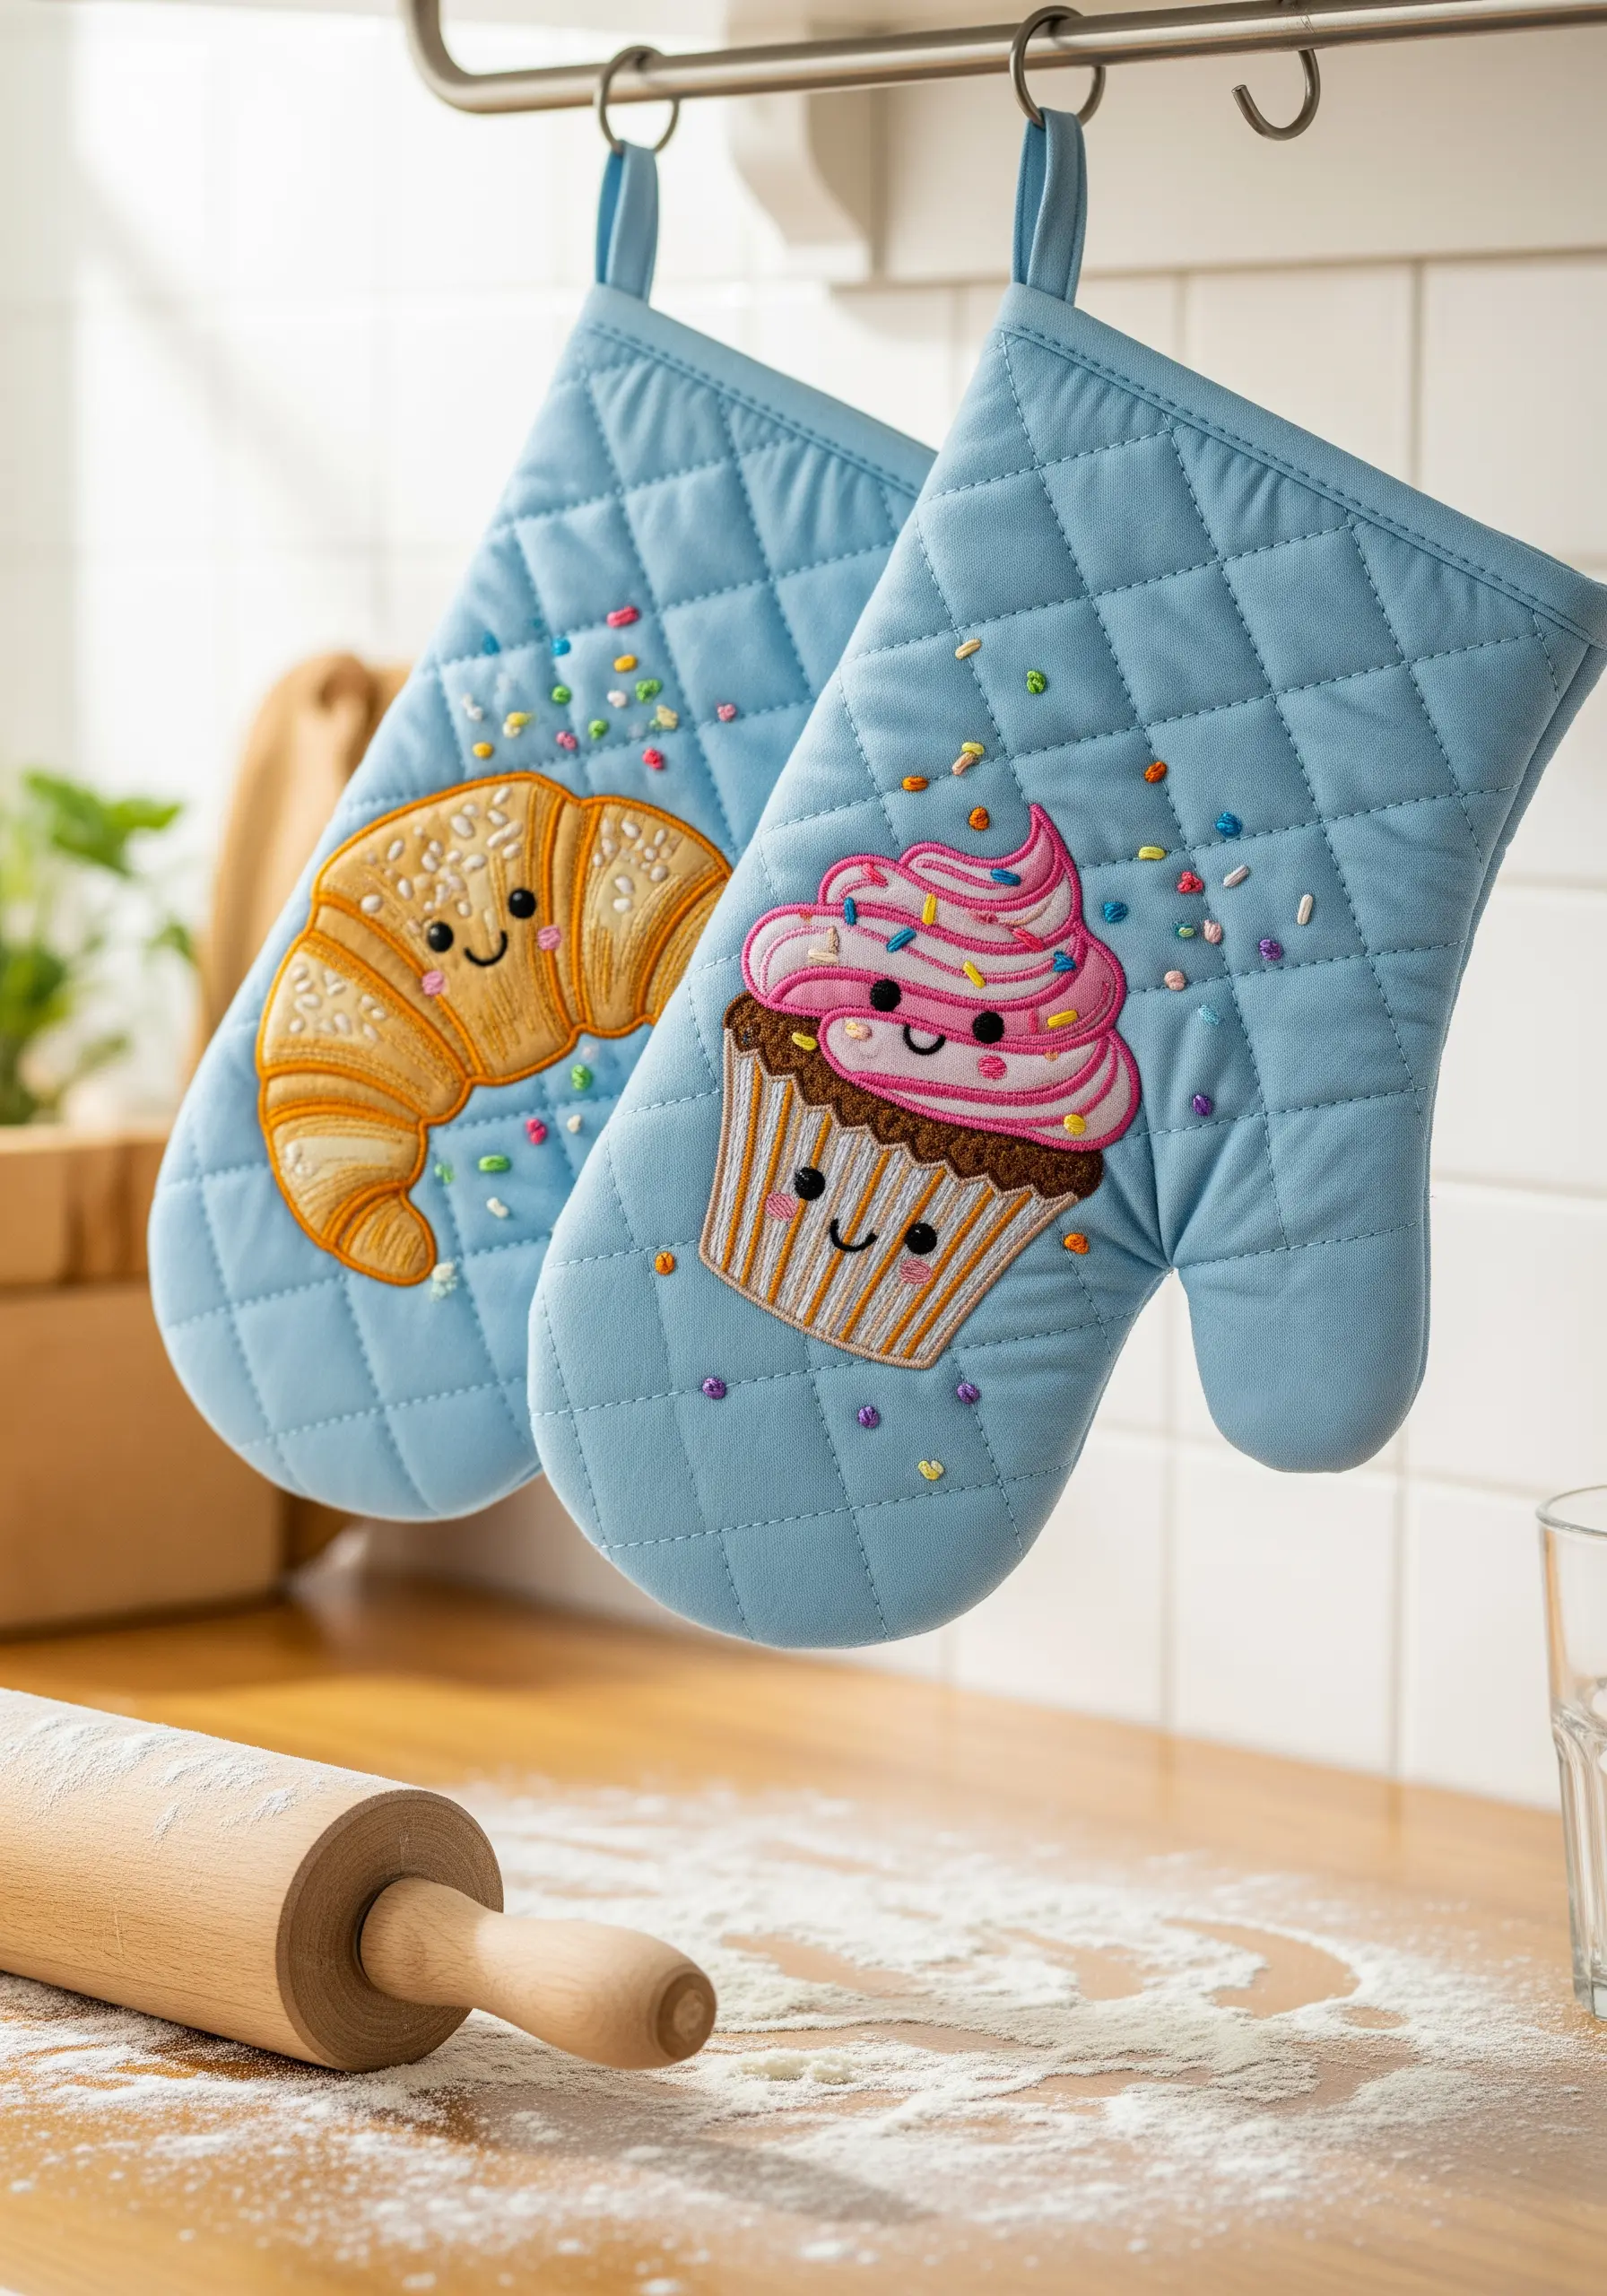
When embroidering on a quilted surface, use a stabilizer on the back to prevent the batting from shifting and to ensure your stitches are even.
The flaky layers of the croissant can be suggested by using a long-and-short stitch with three shades of golden brown, following the curved shape of the pastry.
For the cupcake, use a vertical satin stitch for the liner and a swirling satin stitch for the frosting to mimic its texture.
The colorful sprinkles are tiny, single straight stitches in bright colors, scattered randomly over the frosting for a fun, playful effect.
36. Farmer’s Market Appliqué Tote

This bold, graphic style is perfect for felt appliqué. Cut your vegetable and letter shapes from different colors of felt for a vibrant, color-blocked effect.
Secure each appliqué piece with a neat blanket stitch around the edge using a contrasting thread. This not only holds the felt in place but also adds a charming, handcrafted border.
Add interior details, like the cabbage veins or carrot texture, with a simple backstitch directly onto the felt before you attach it to the bag.
This technique is forgiving for beginners and creates a durable design that can withstand the wear and tear of trips to the market.


