
Have you ever finished an embroidery piece and felt that something was missing? That spark of artistry that separates a pleasant craft from a piece of decor you truly love? The answer isn’t in more complex patterns or a thousand shades of floss. It’s in the intention behind each stitch.
True artistry in embroidery comes from understanding how a simple change—like switching from a satin stitch to a long-and-short stitch, or choosing a metallic thread for just one element—can transform the entire mood of your work. It’s about learning to see your needle and thread as tools for creating texture, depth, and light, not just color.
These ideas are designed to be your guide. They are not just patterns to copy, but invitations to explore technique. Here, you’ll discover how to make your florals feel softer, your landscapes more dynamic, and your abstract pieces more profound. It’s time to stitch with confidence and turn every hoop into a small, personal escape.
1. Create a Luminous Sunset Reflection
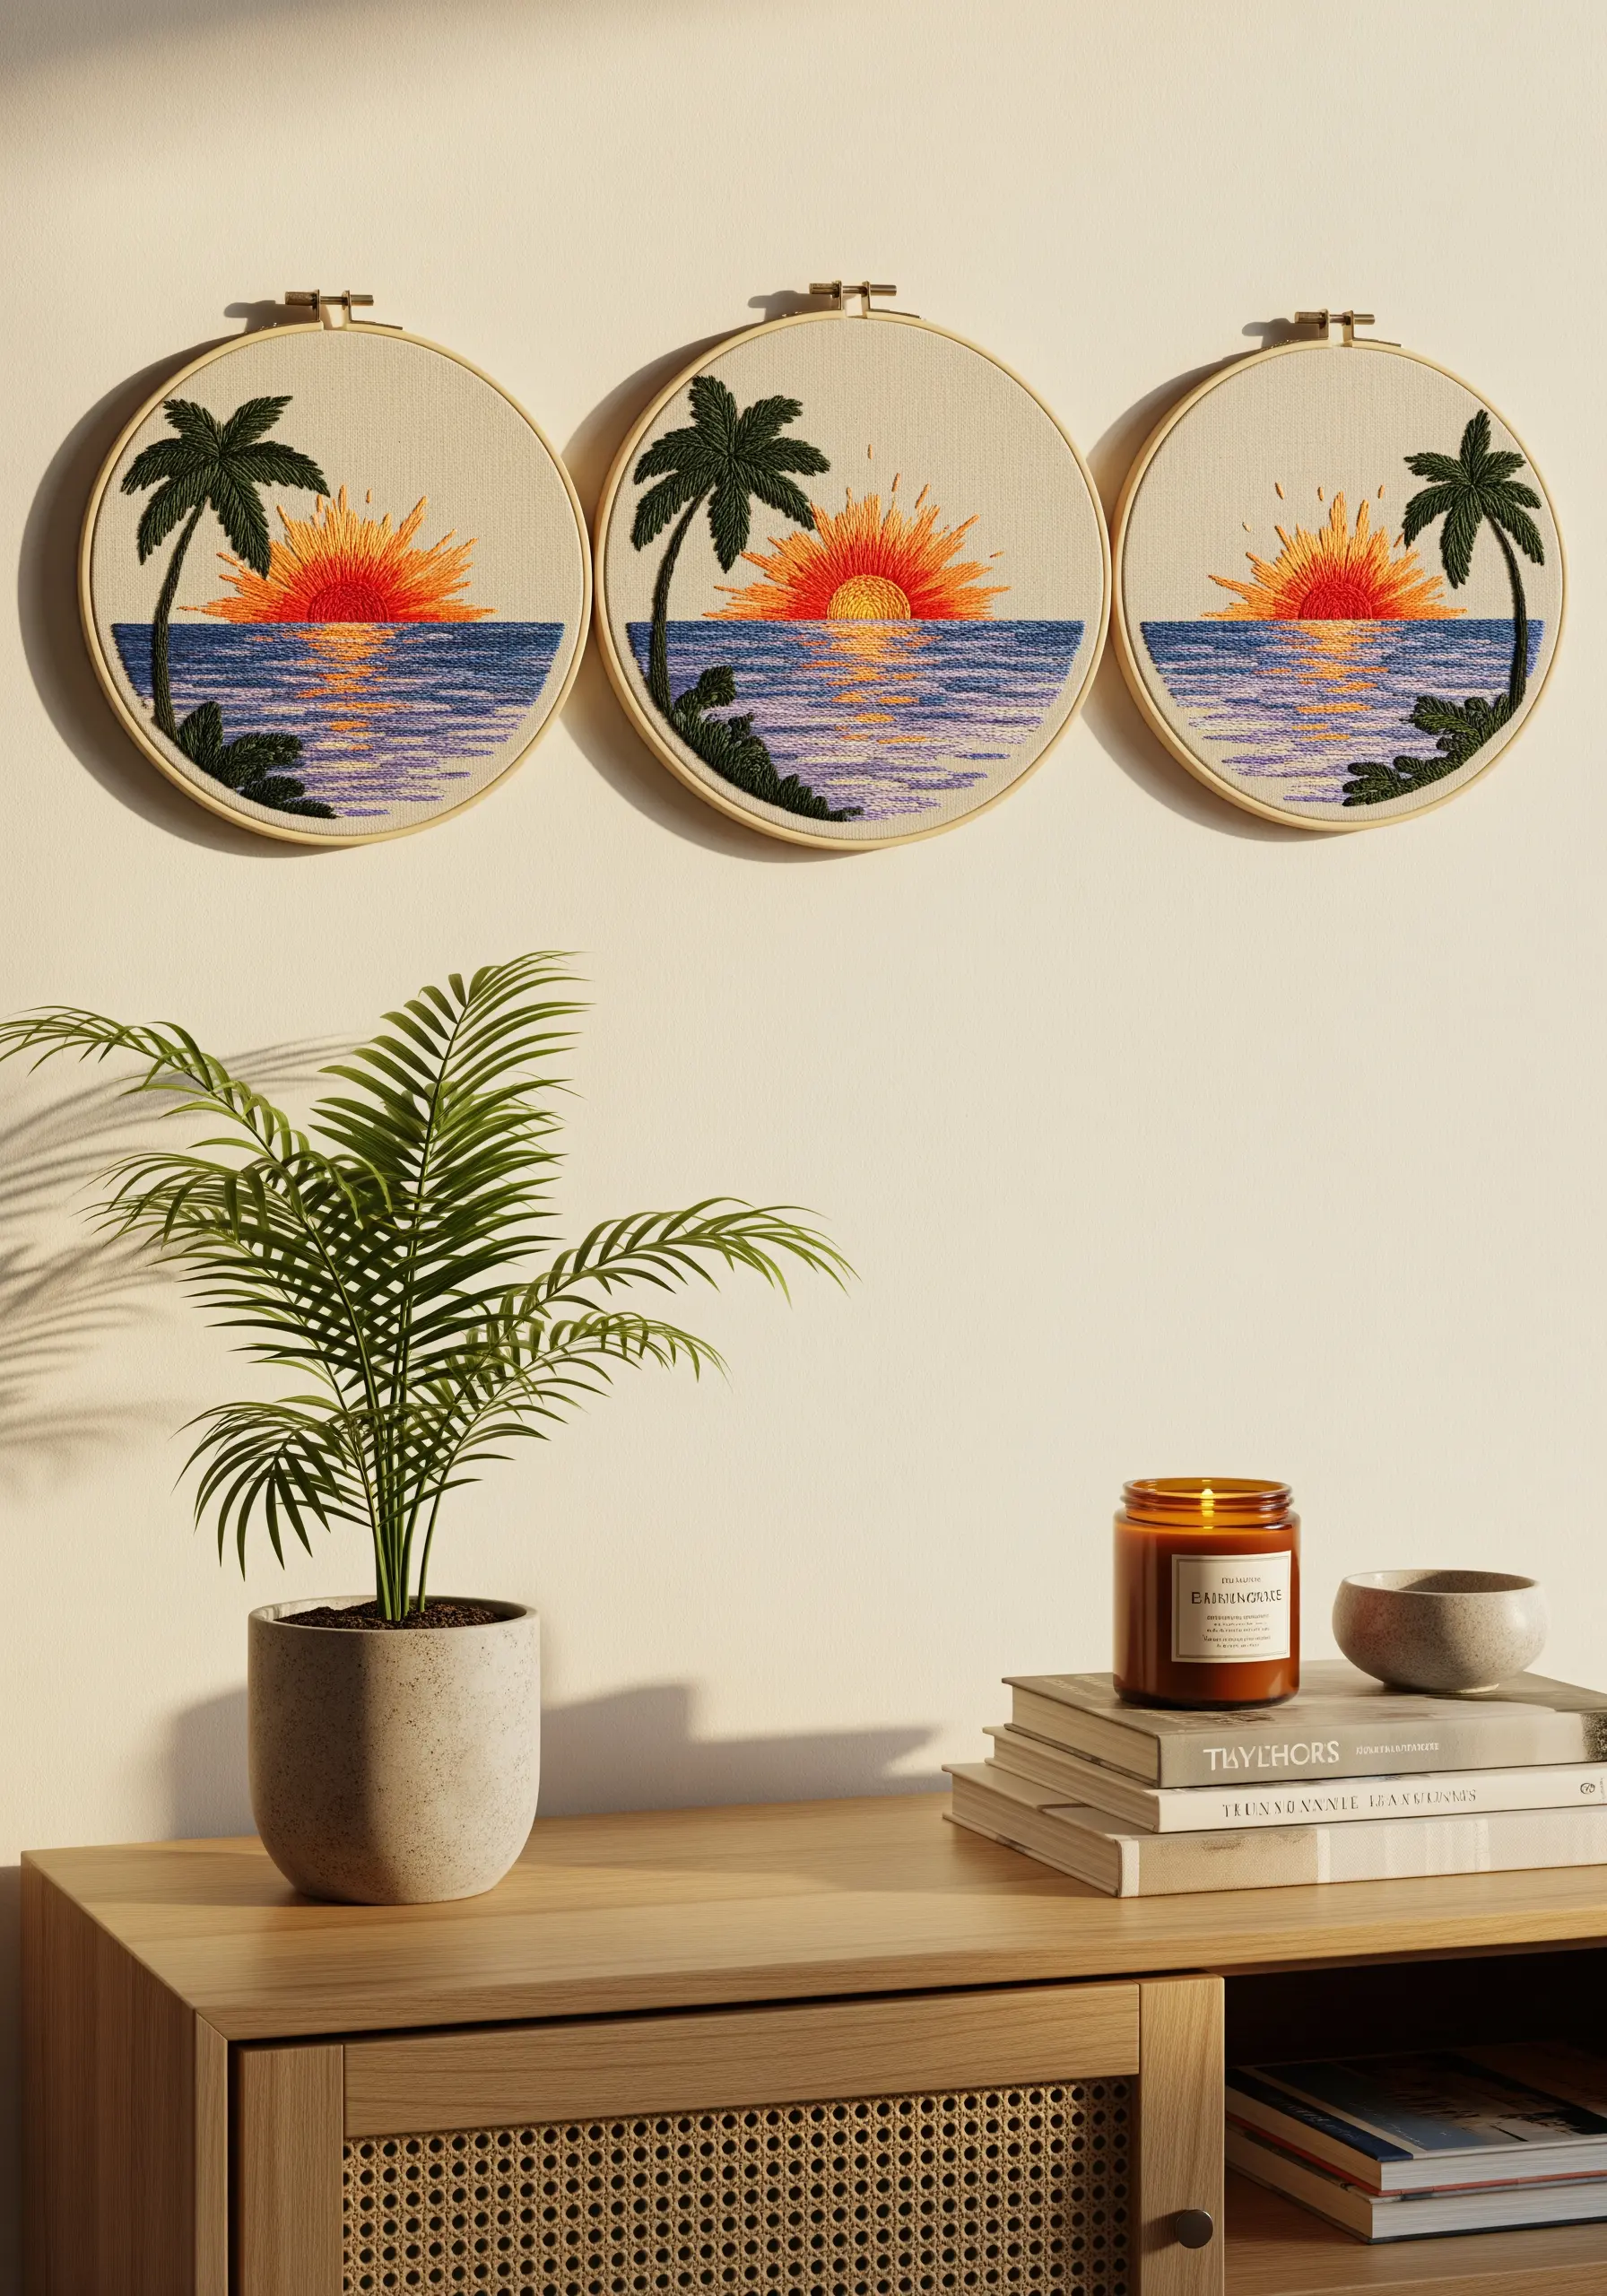
To capture the shimmering reflection of a sunset on water, alternate single strands of different blue tones using a simple backstitch for the waves.
For the sun’s reflection, use a vertical satin stitch with a single strand of metallic gold or shiny rayon thread.
Make these vertical stitches progressively shorter as they move away from the sun, mimicking how light dissipates on water.
This contrast between the matte cotton of the sea and the lustrous reflection creates a dynamic, realistic effect that draws the eye.
2. Define Landscapes with Bold Line Art
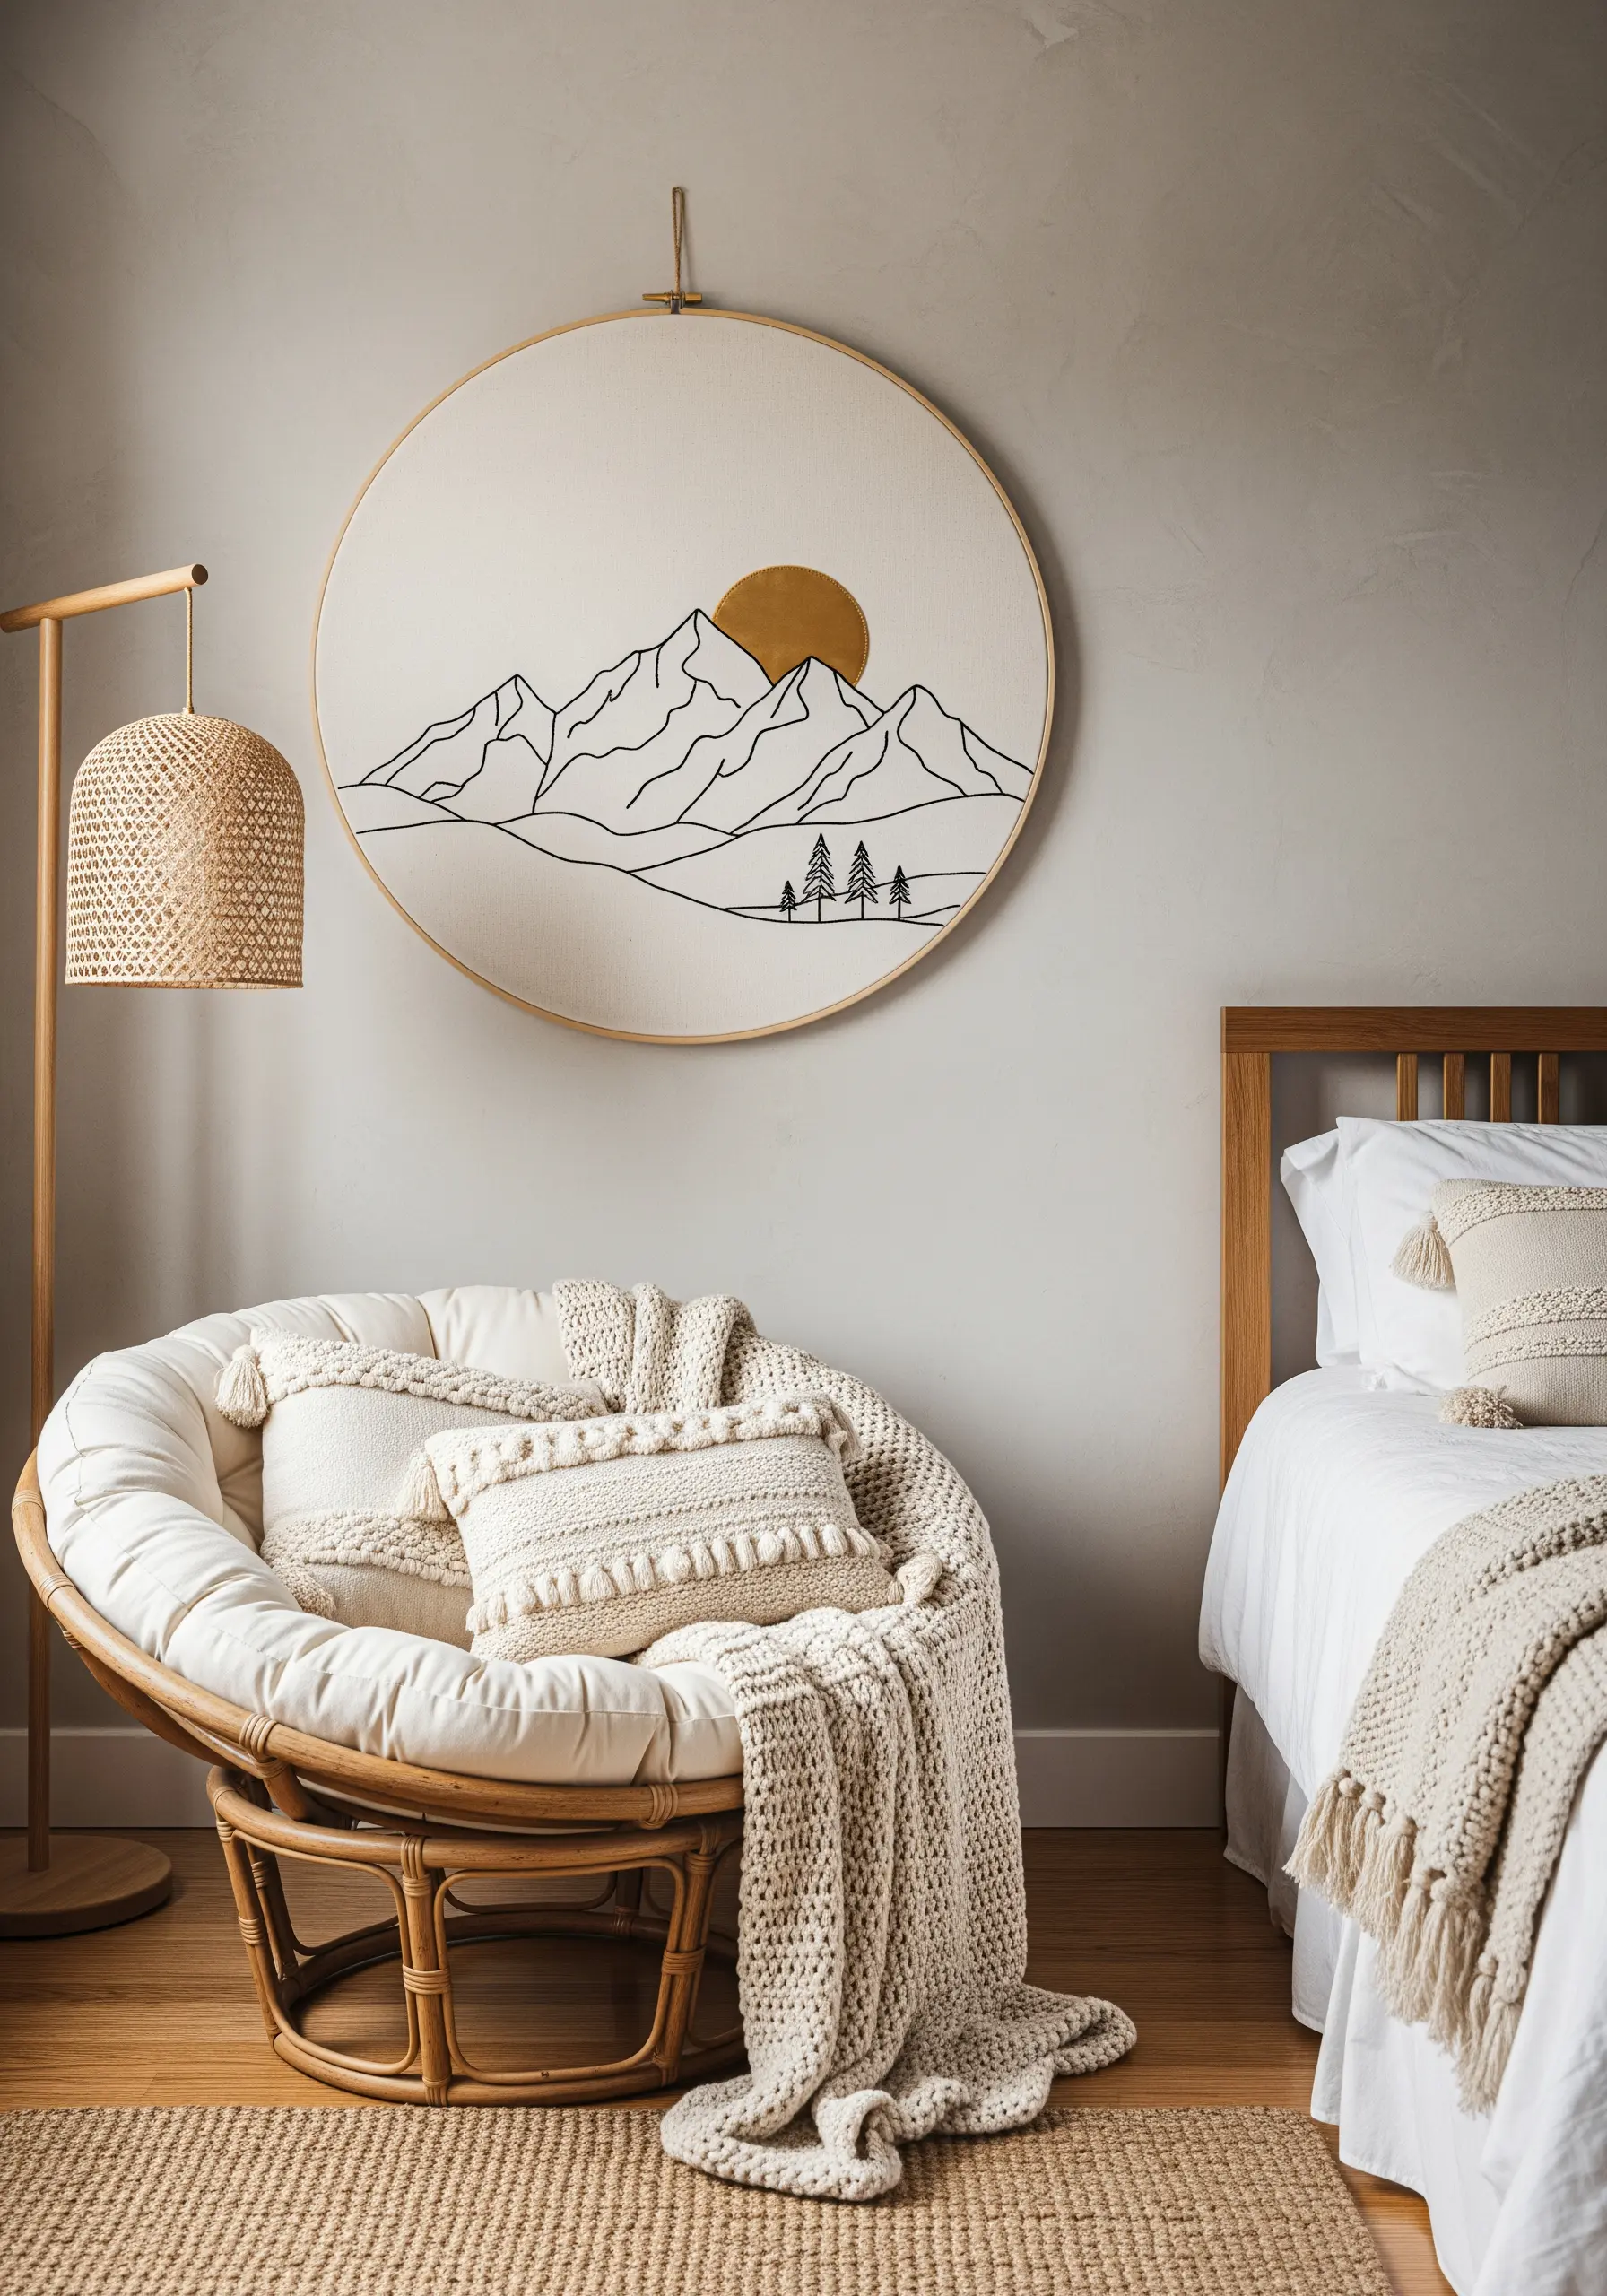
For crisp, clean mountain outlines, use a whipped backstitch with three strands of black floss.
This technique wraps the initial backstitch, creating a smooth, uninterrupted line that gives your work a polished, graphic quality.
Contrast this delicate linework with a solid, filled shape for the sun, using a dense satin stitch.
Choosing a metallic gold thread for the sun adds a focal point of warmth and texture, turning simple minimalist line art into a statement piece.
3. Build a Gallery of Sculptural Cacti
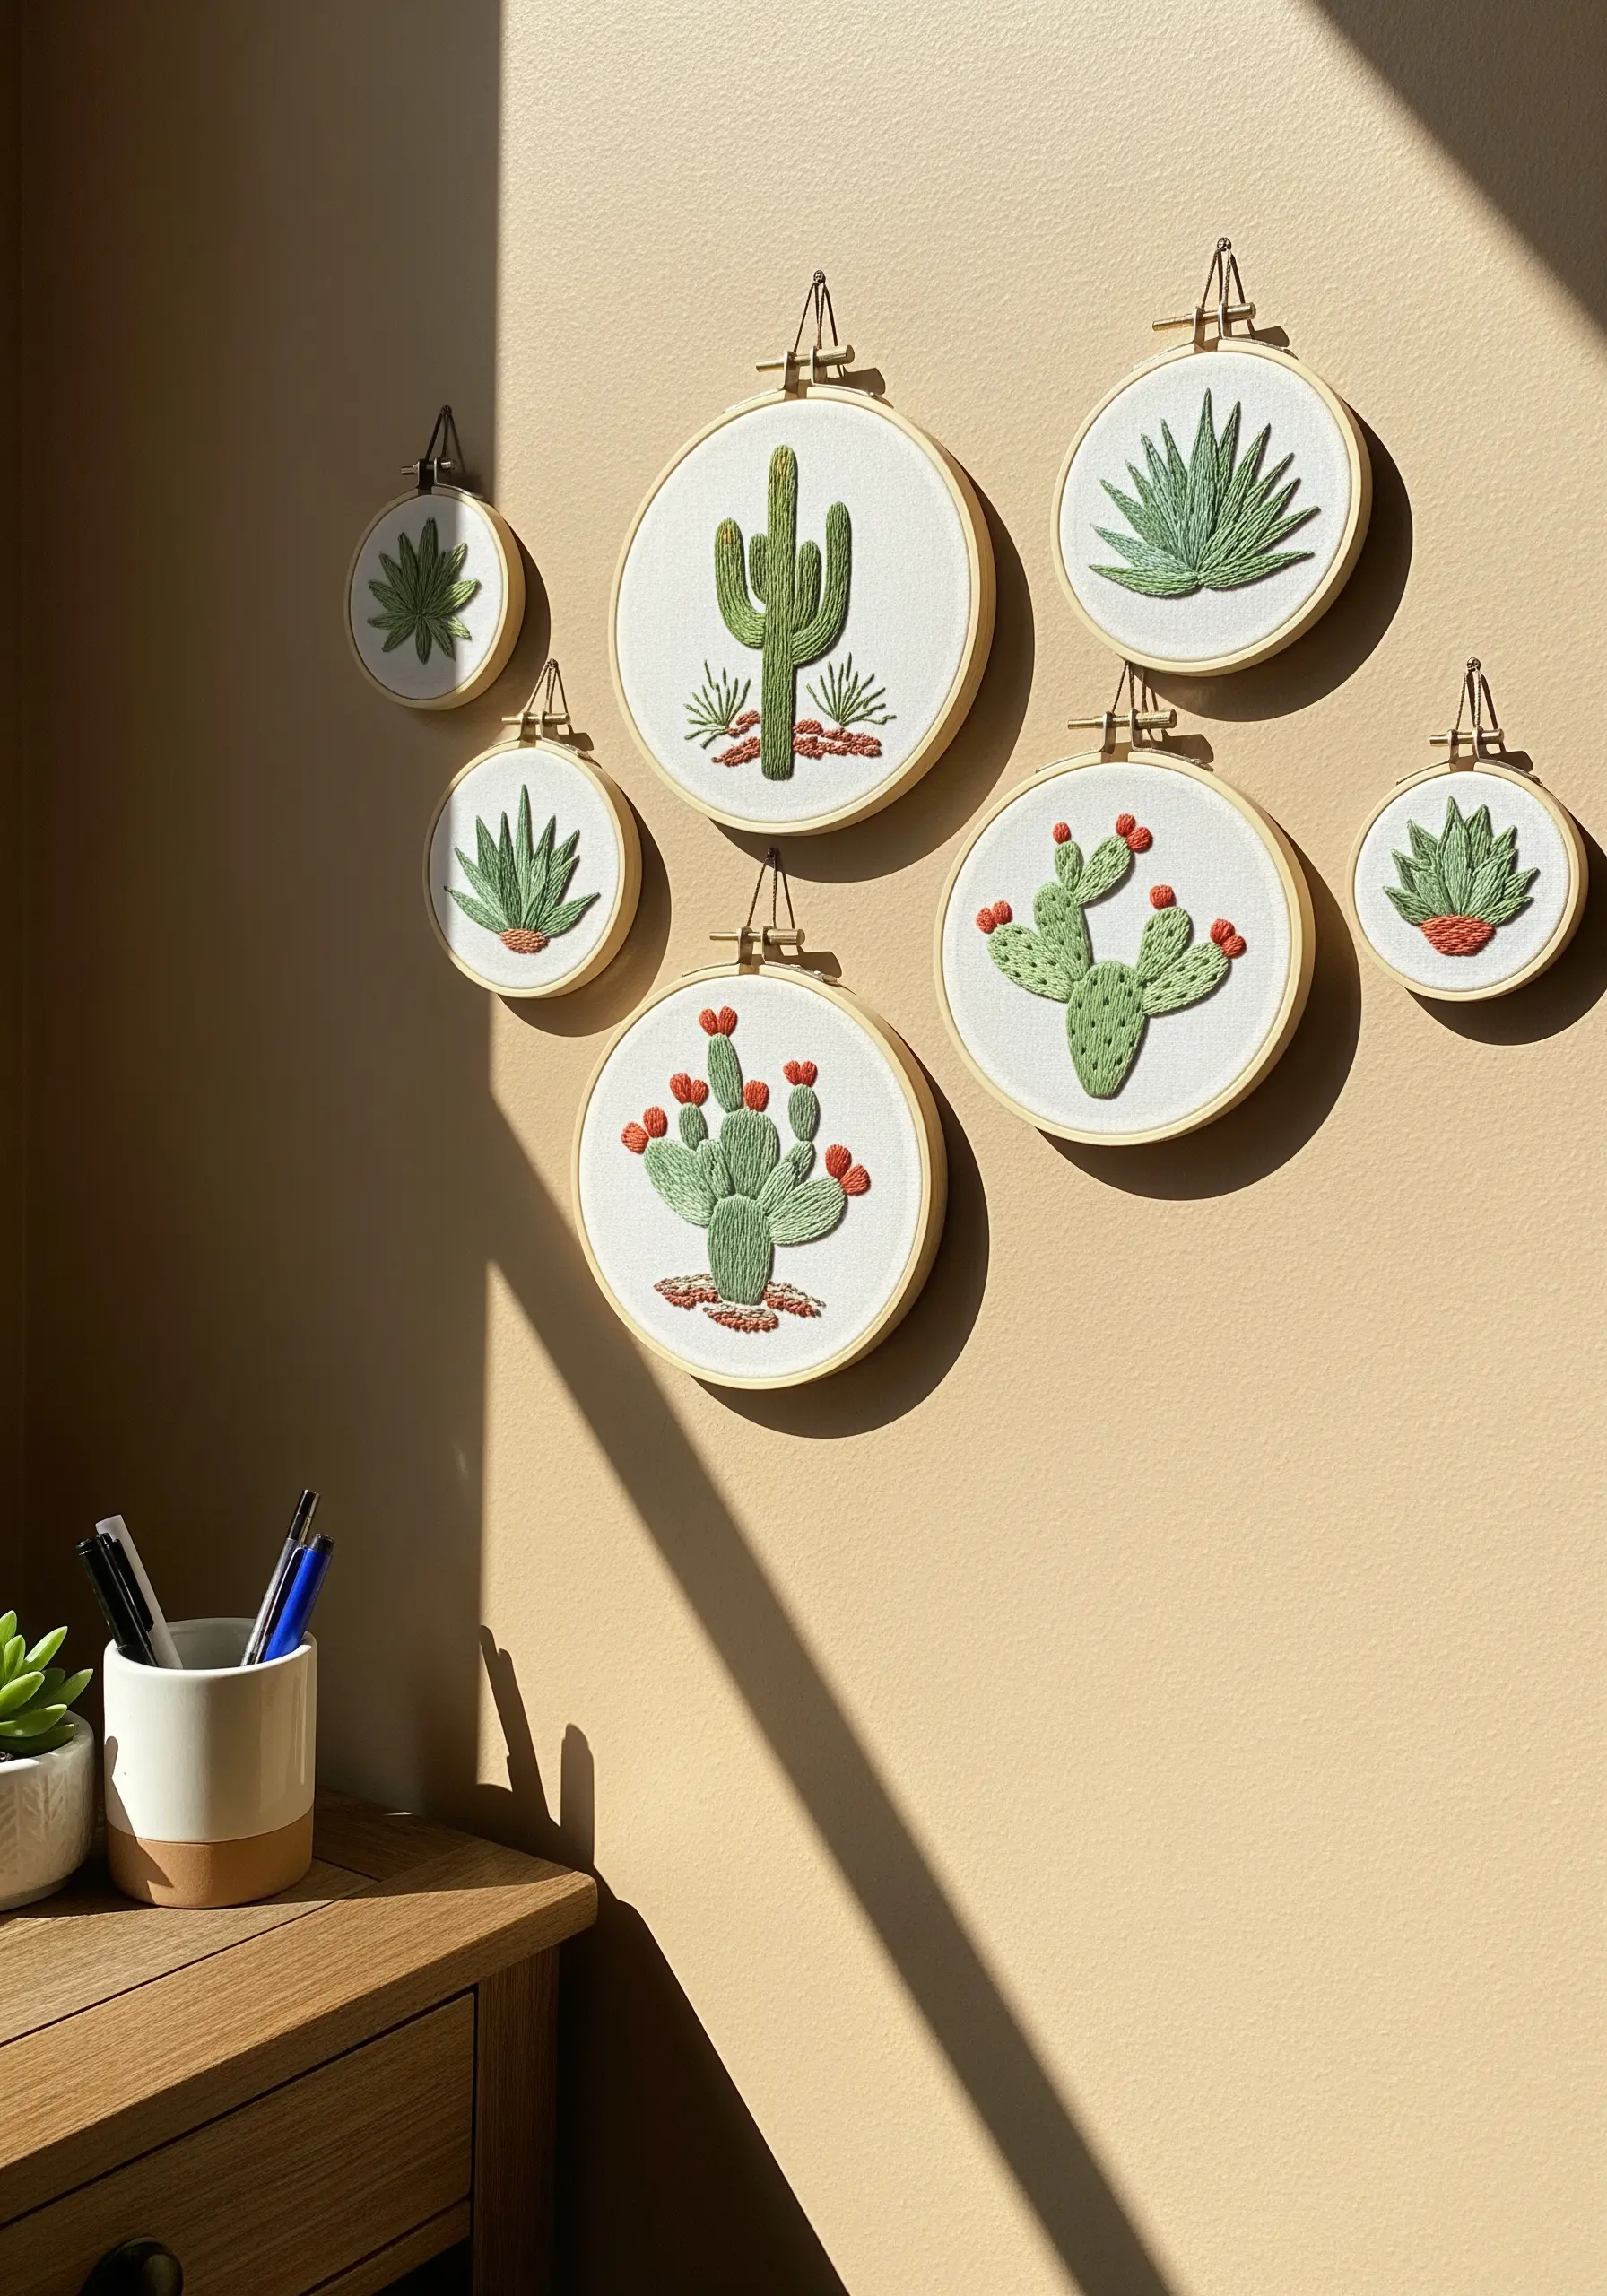
Give your cacti dimension by varying your stitch techniques within a single hoop.
Use a vertical satin stitch for the main body of a saguaro to create height, and then switch to small French knots for the prickly pear’s flowers to add raised, bobbled texture.
For agave leaves, use a fishbone stitch radiating from the center to mimic their natural growth pattern.
Grouping hoops of different sizes creates a dynamic wall display that feels curated and intentional, celebrating the diverse nature’s textures in your work.
4. Stitch Waves with Dynamic Flow
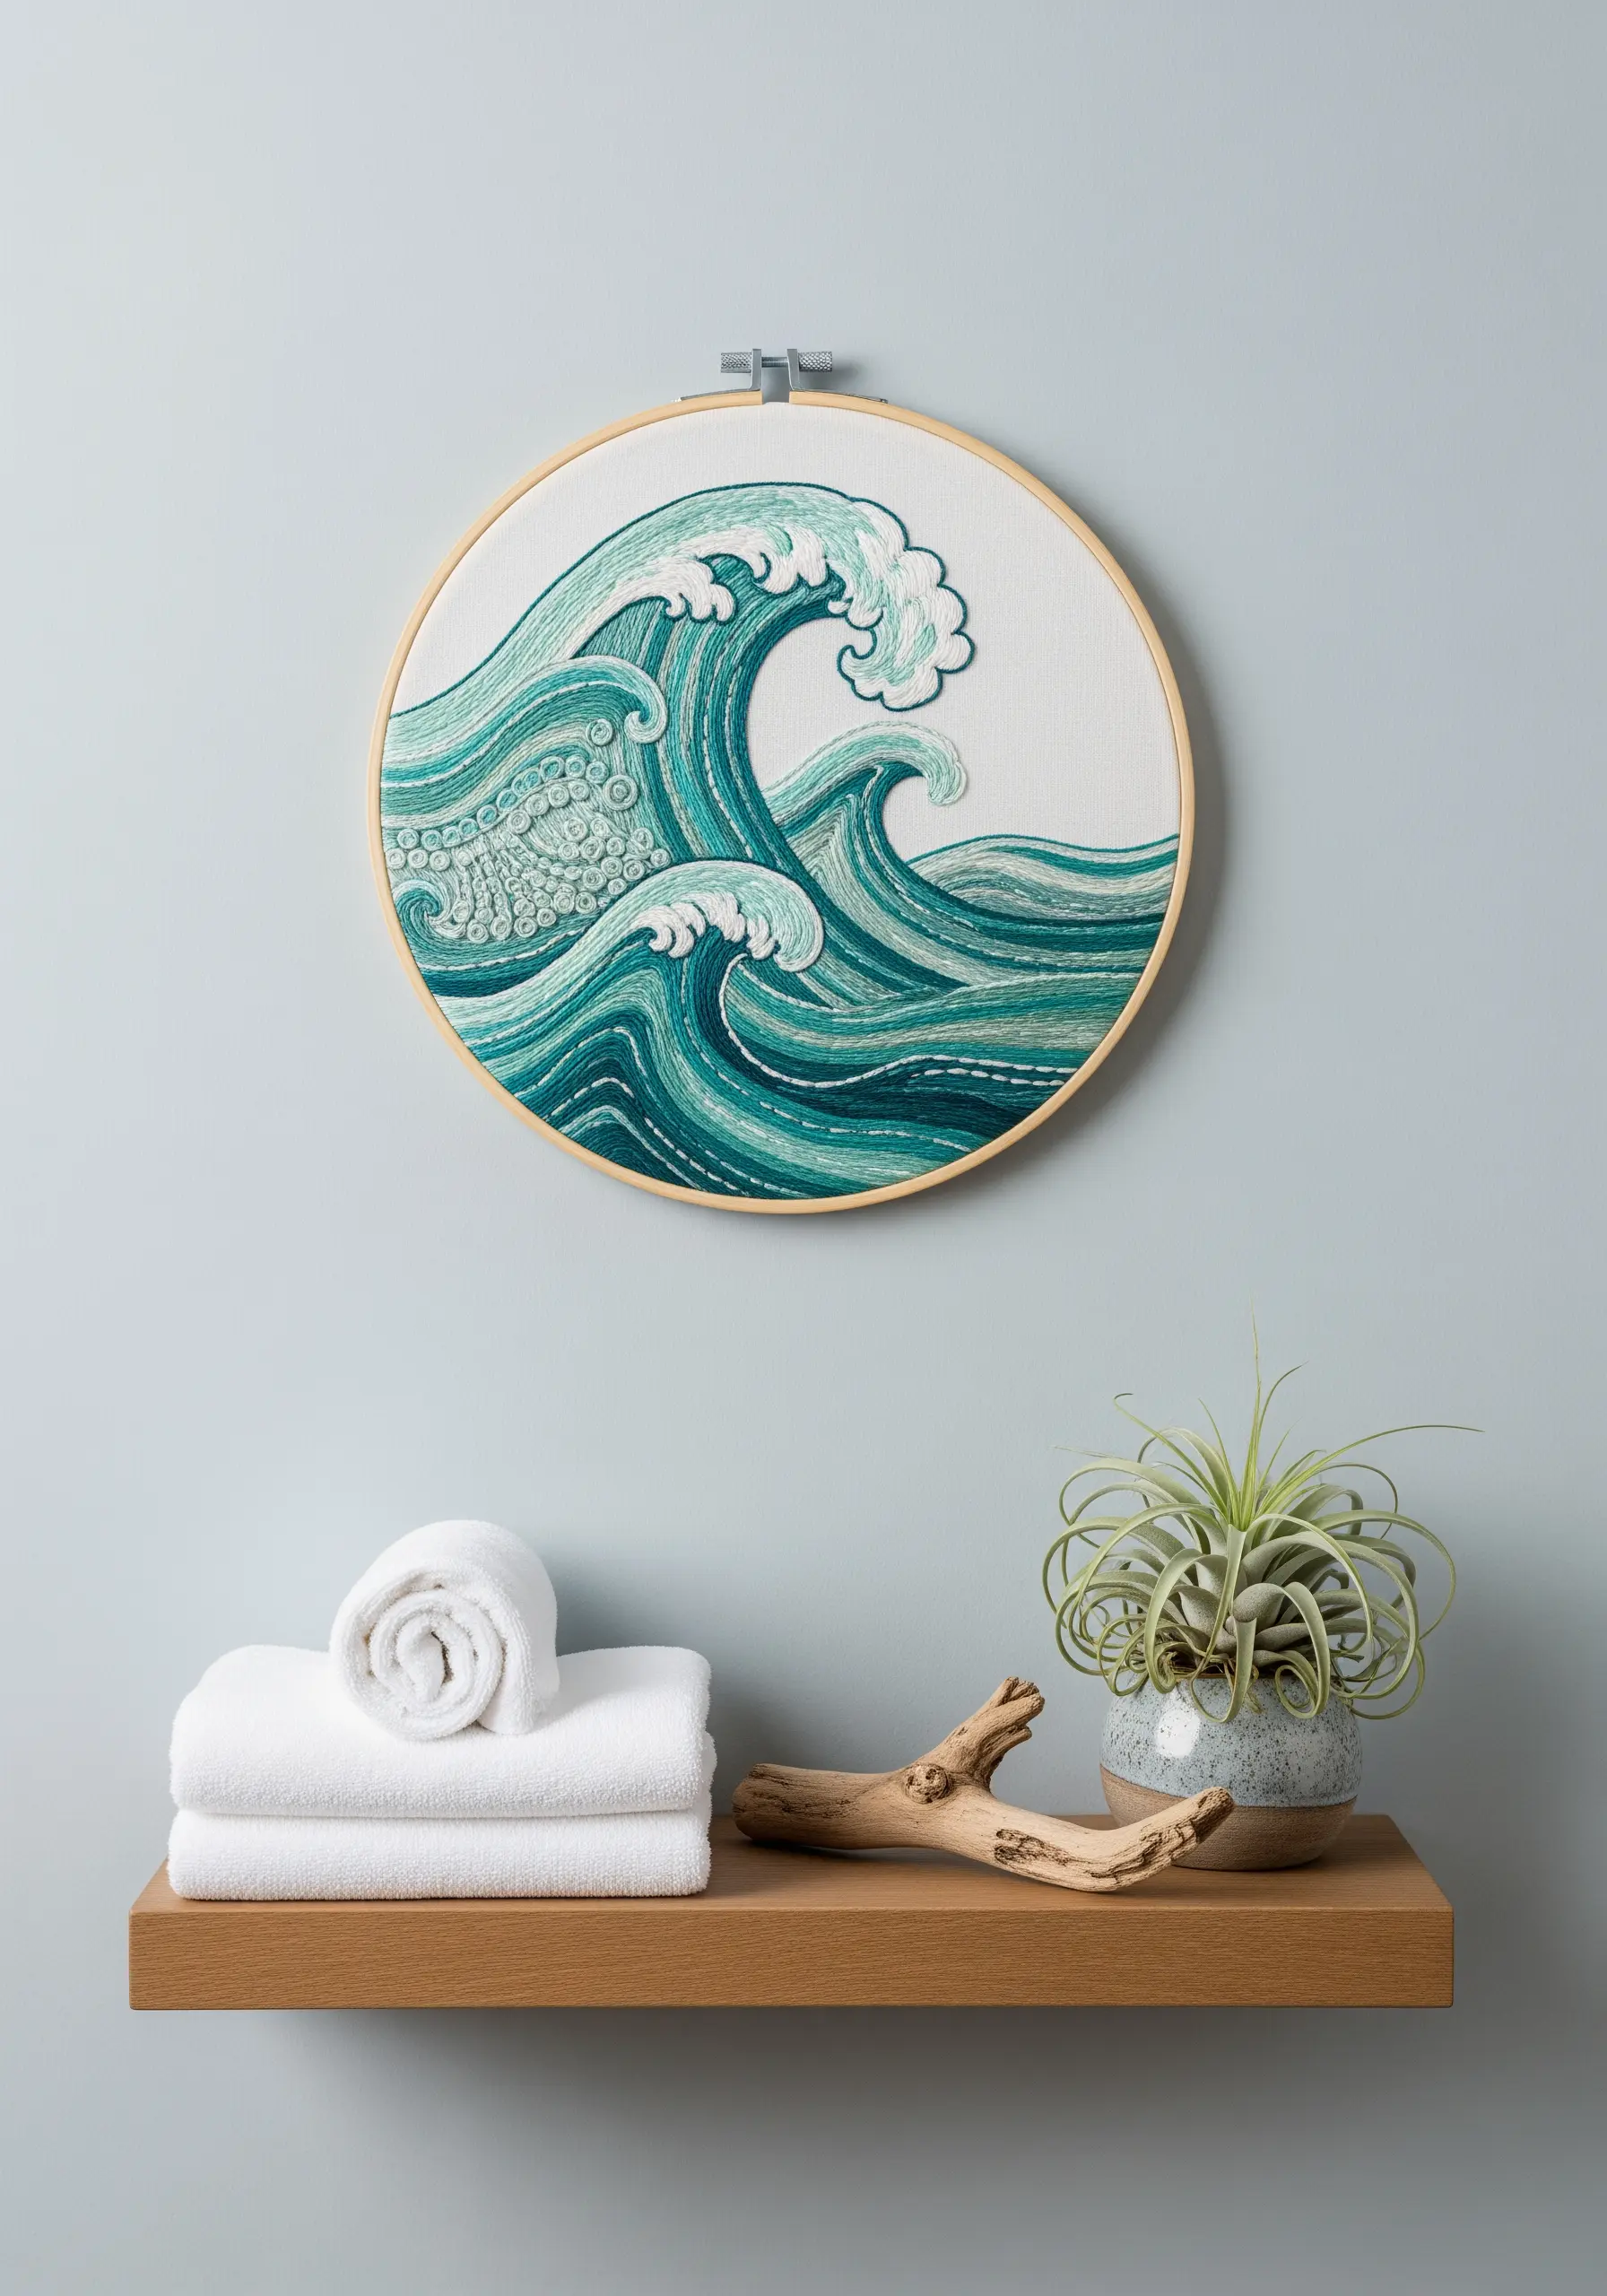
To create the illusion of moving water, use directional split stitch to outline the curves of each wave.
Fill the larger areas with a mix of long and short stitches, blending shades of teal, aqua, and navy to create depth.
For the frothy crests, stitch a dense cluster of French knots using bright white and pale seafoam green thread.
This combination of smooth, flowing lines and textured knots brings your coastal ocean-inspired scene to life, making the waves feel like they could crash right out of the hoop.
5. Frame Your Space with Geometric Arches
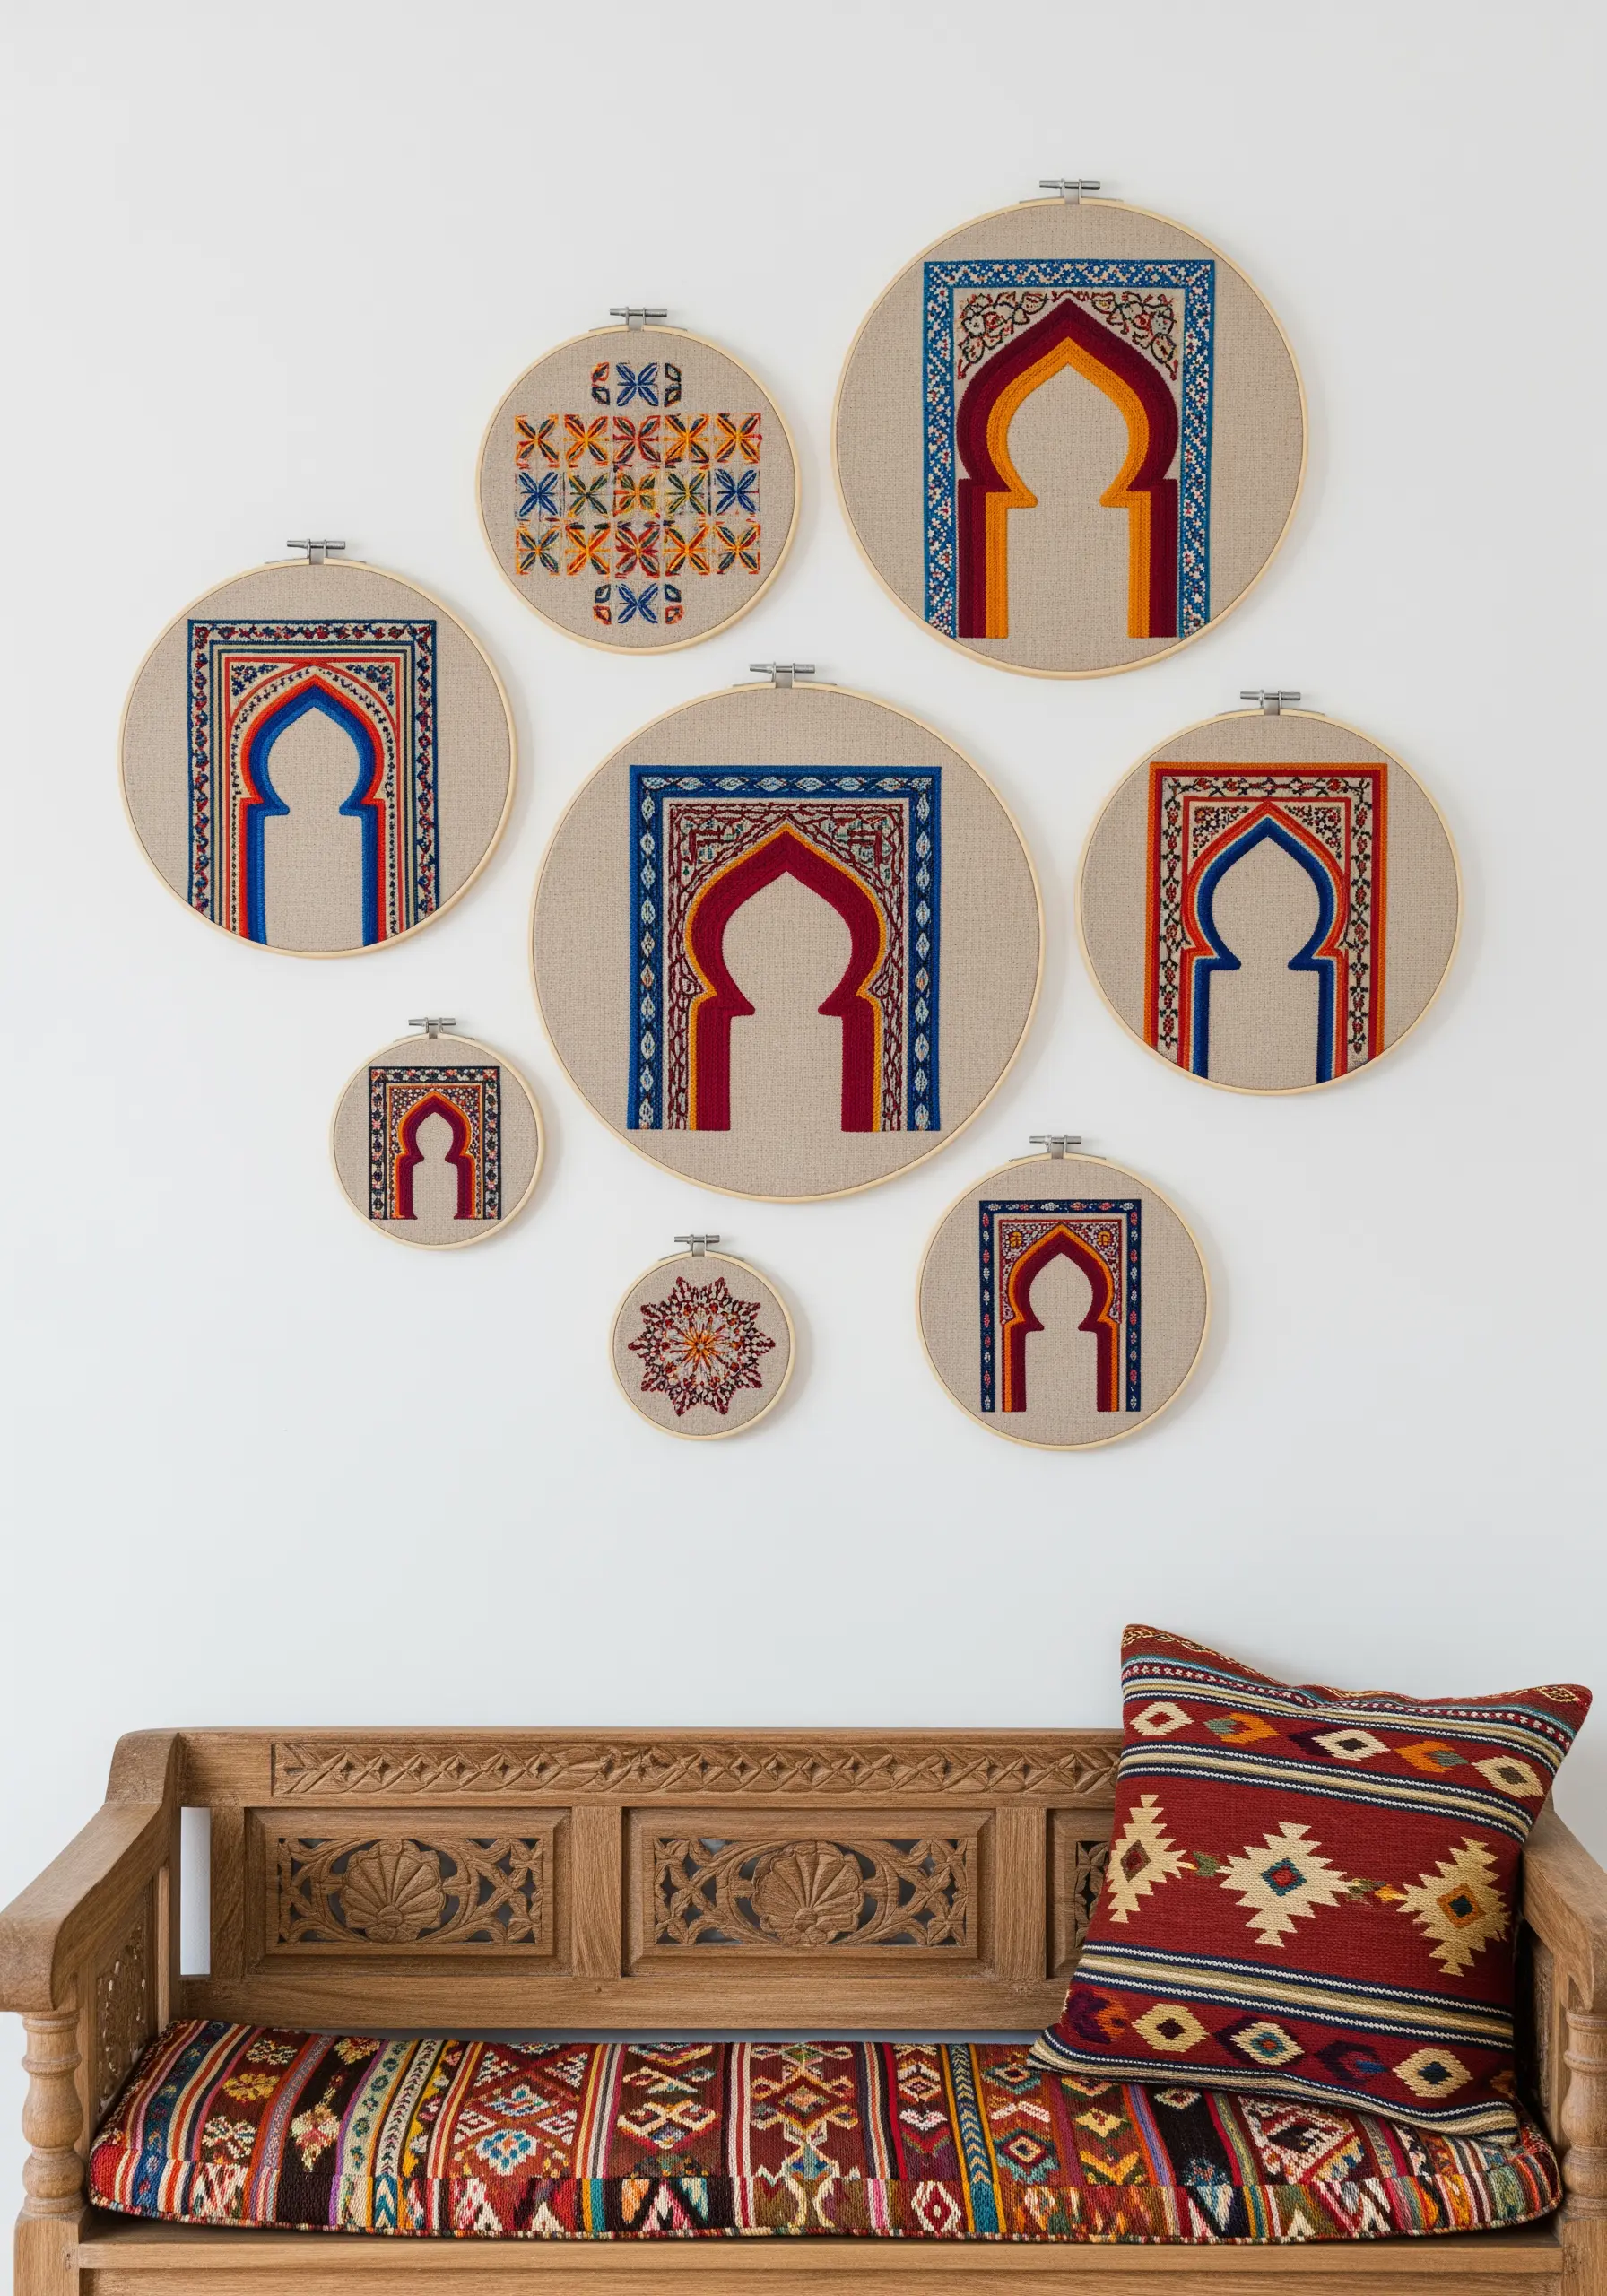
Achieve crisp, symmetrical patterns by using an even-weave linen fabric as your base—its grid-like structure guides your stitches for perfect alignment.
Use a simple backstitch for the outlines and a dense satin stitch for the color blocks within the arches.
Create a cohesive gallery wall by repeating a core color palette of three or four shades across different hoop sizes and arch designs.
This repetition brings harmony to the collection, turning individual hoops into a unified architectural statement.
6. Capture the Essence of Aromatic Herbs
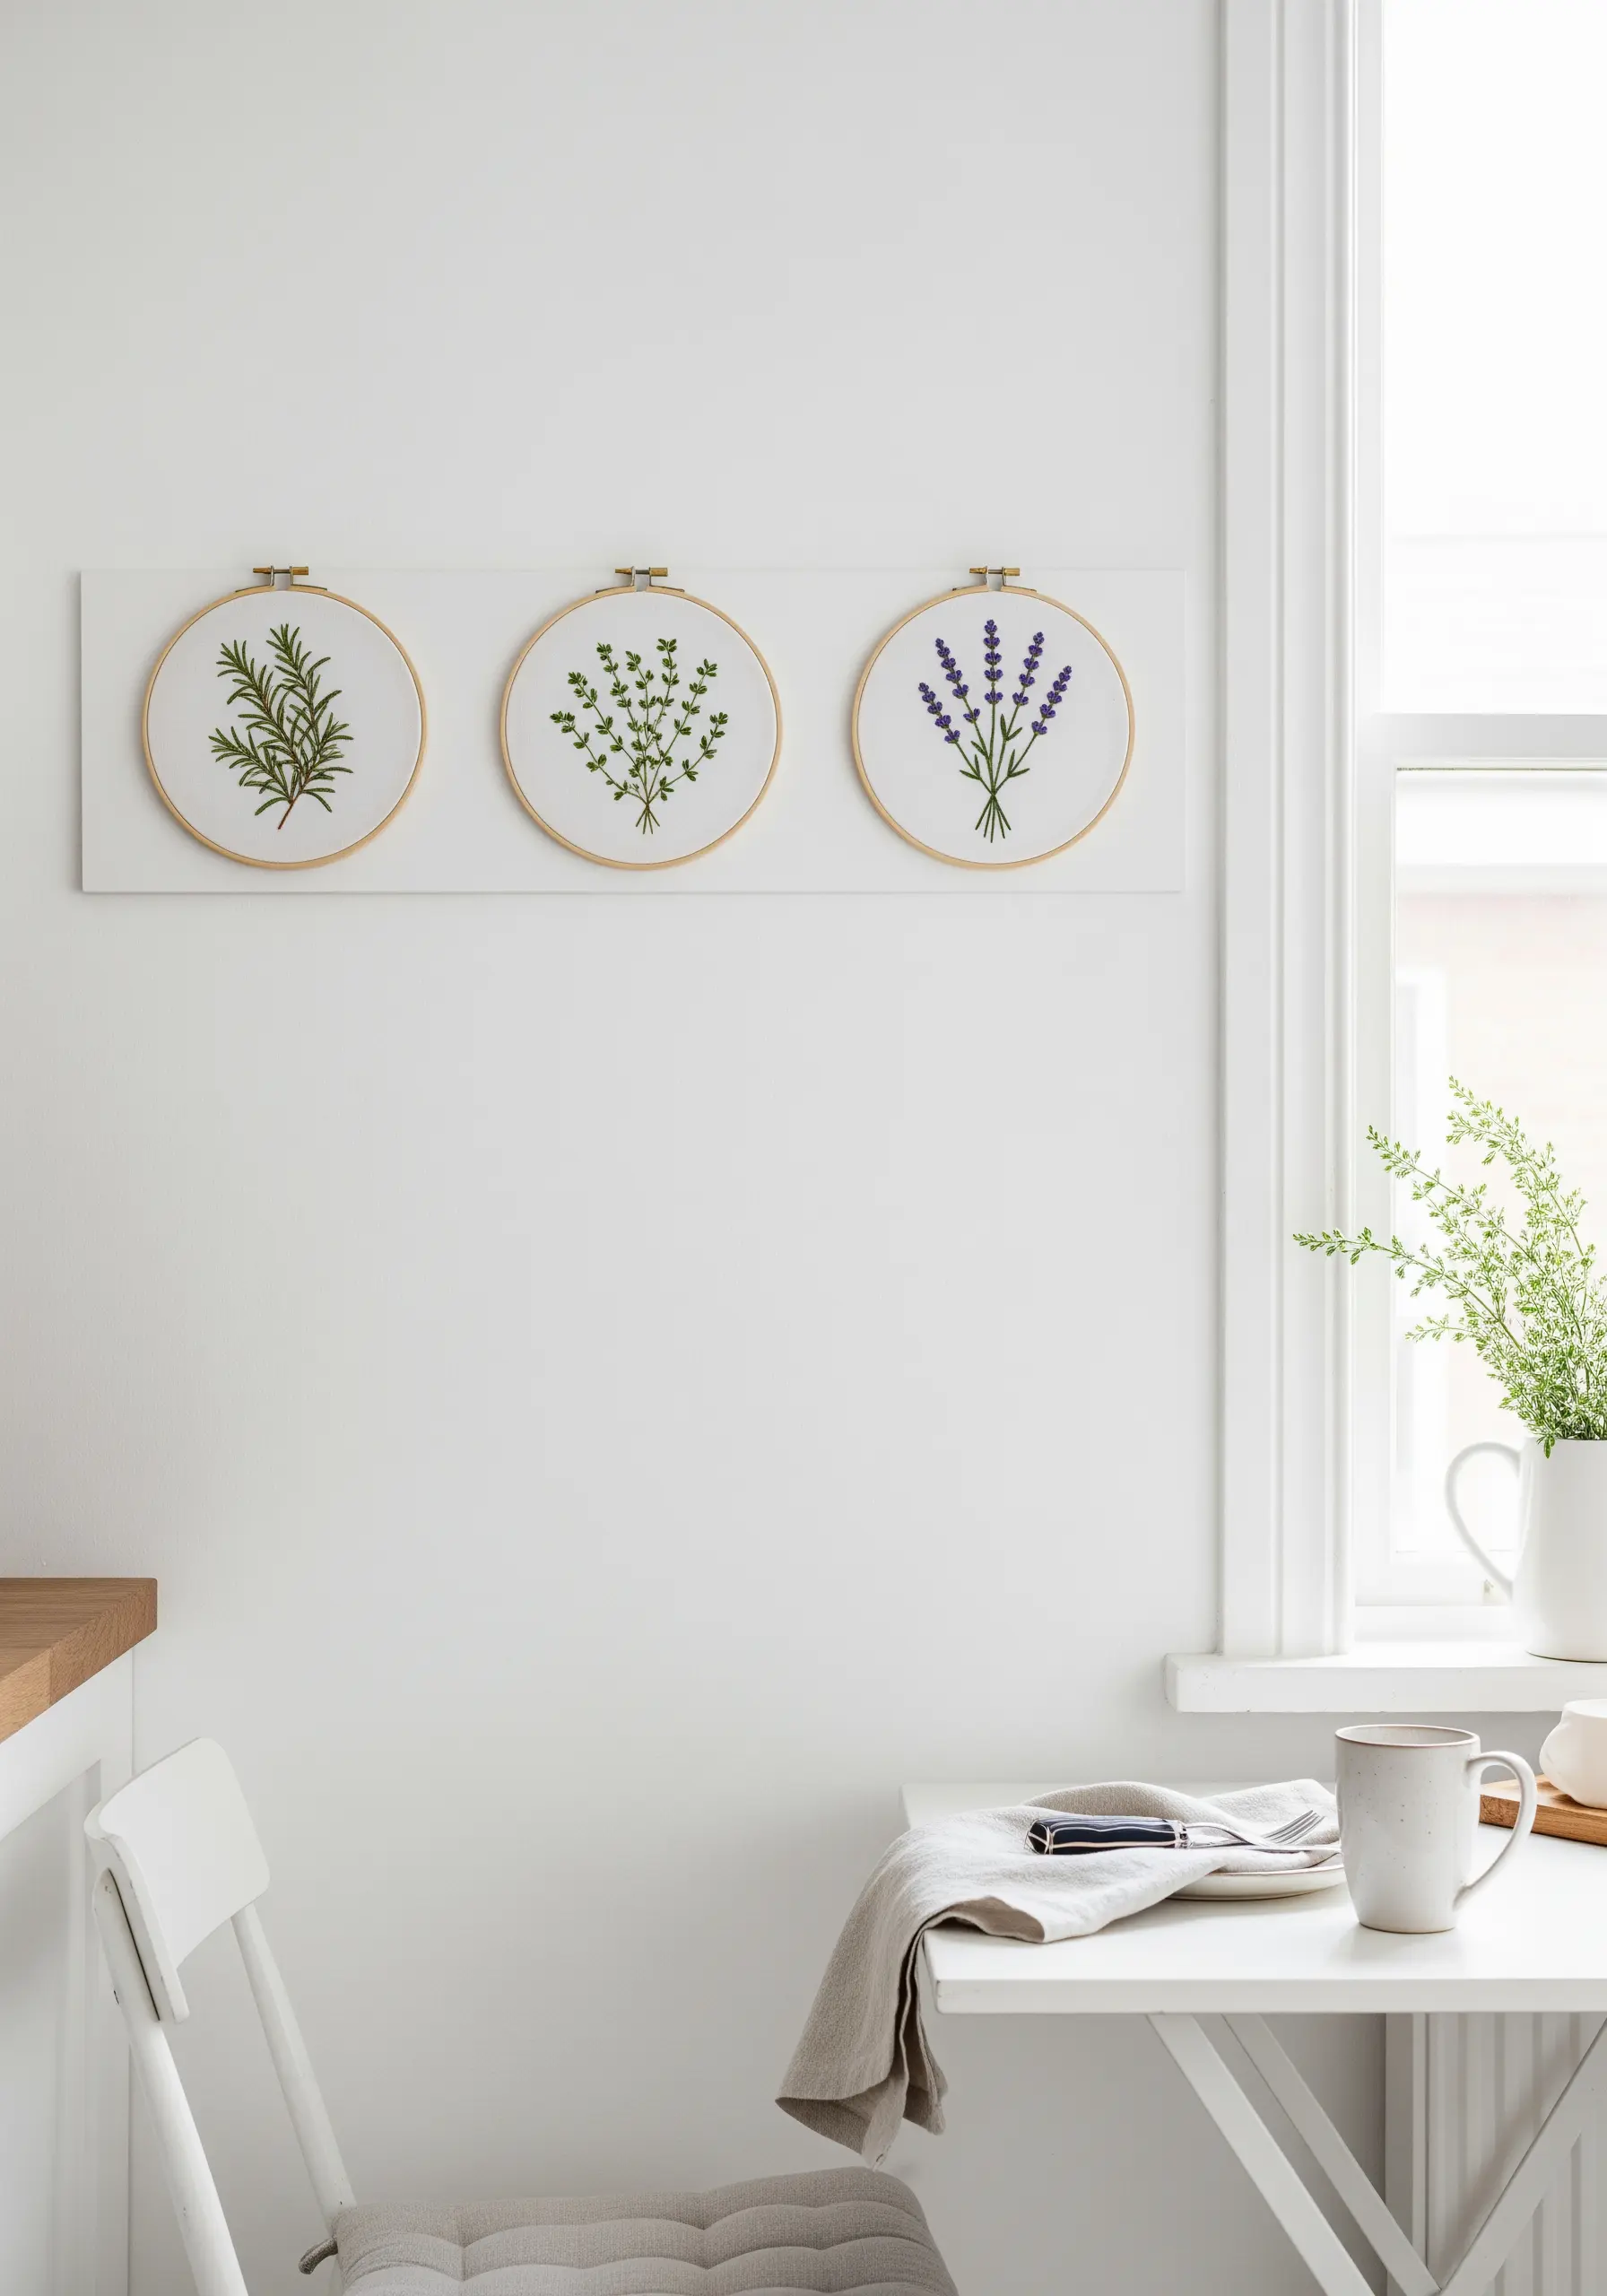
For delicate botanicals, the key is using stitches that mimic their natural forms.
Use detached chain stitches for lavender florets, creating tiny, individual petals that cluster realistically around the stem.
For rosemary, use single, sharp straight stitches angled upwards from a central stem stitch to replicate its needle-like leaves.
This attention to detail in your delicate leaf embroidery stitches results in herbs that look refreshingly lifelike and distinct.
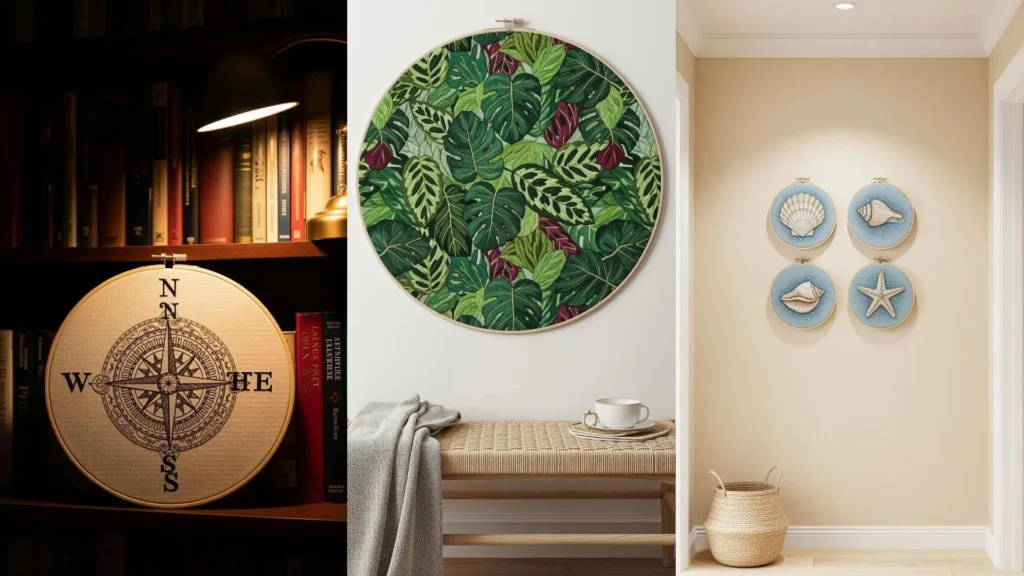
7. Create a Lush Tropical Canopy
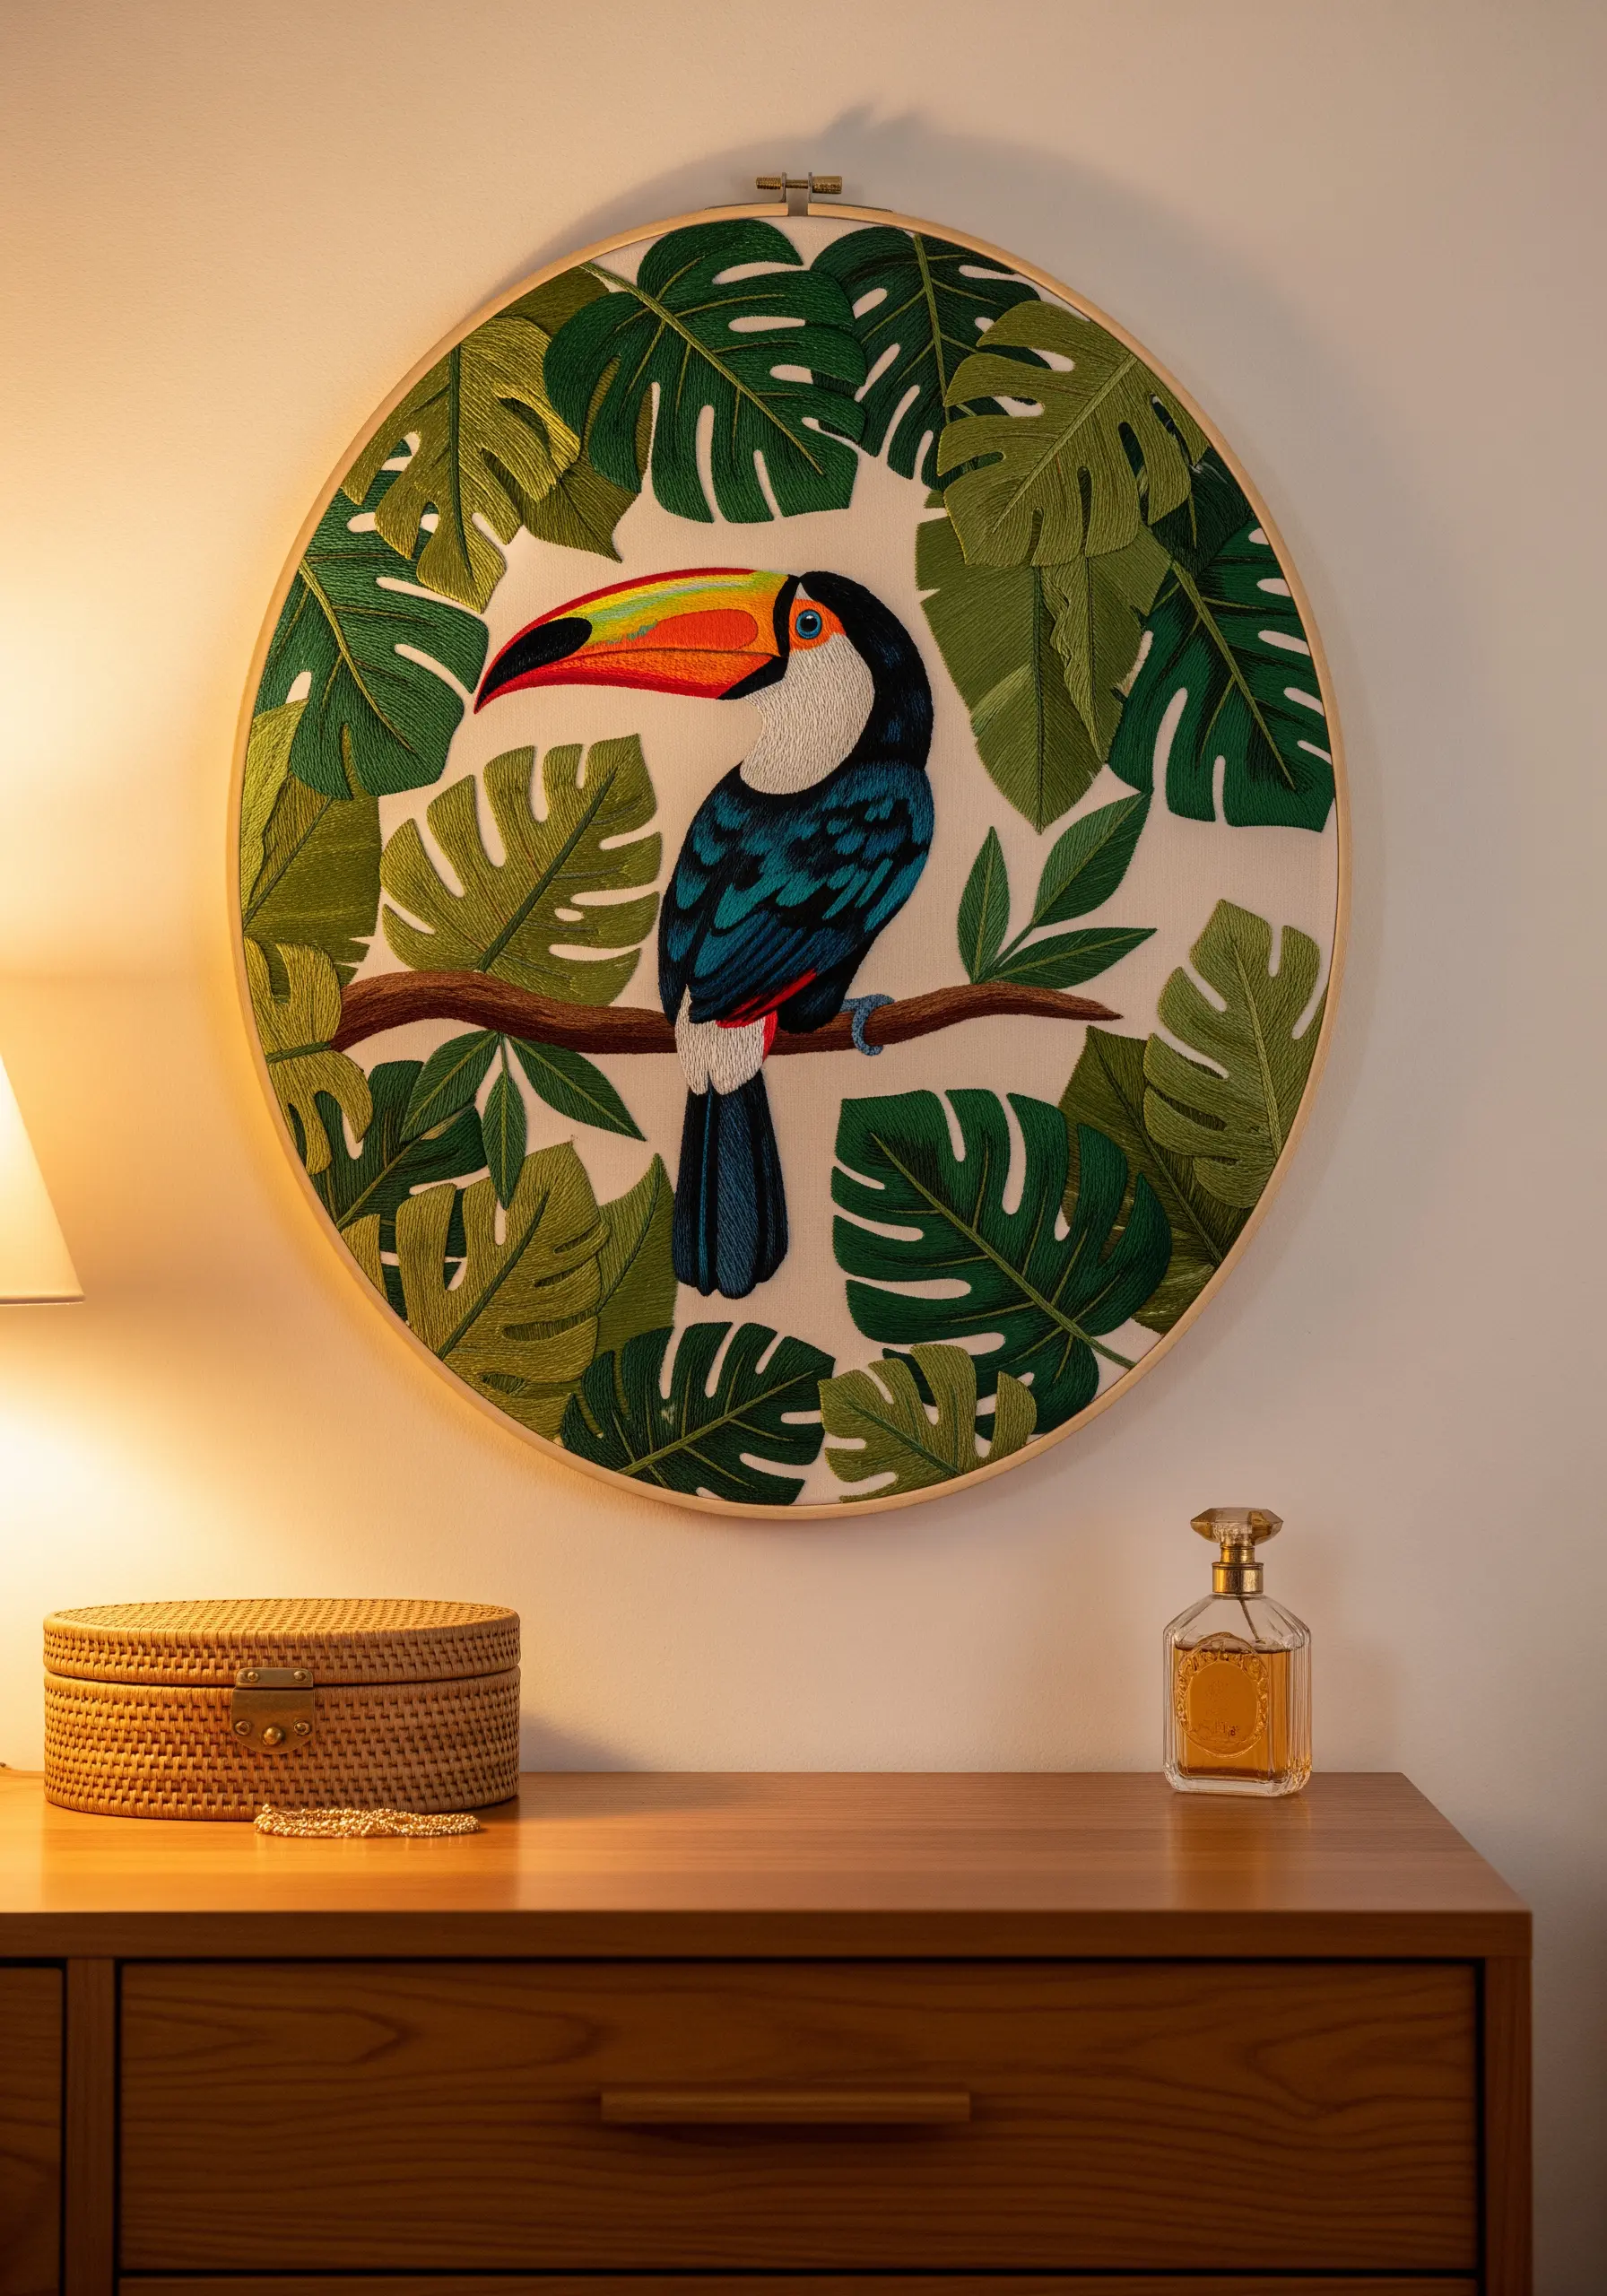
To make foliage feel dense and layered, overlap your leaf stitches slightly.
Stitch the leaves in the background first, then add the foreground leaves on top—this simple trick creates immediate visual depth.
Use fishbone stitch for the Monstera leaves, as it creates a central vein and directional growth in one go.
Varying the greens from deep forest to bright lime adds realism and prevents the design from looking flat, giving your toucan a vibrant jungle to inhabit.
8. Illuminate the Night with Metallic Threads
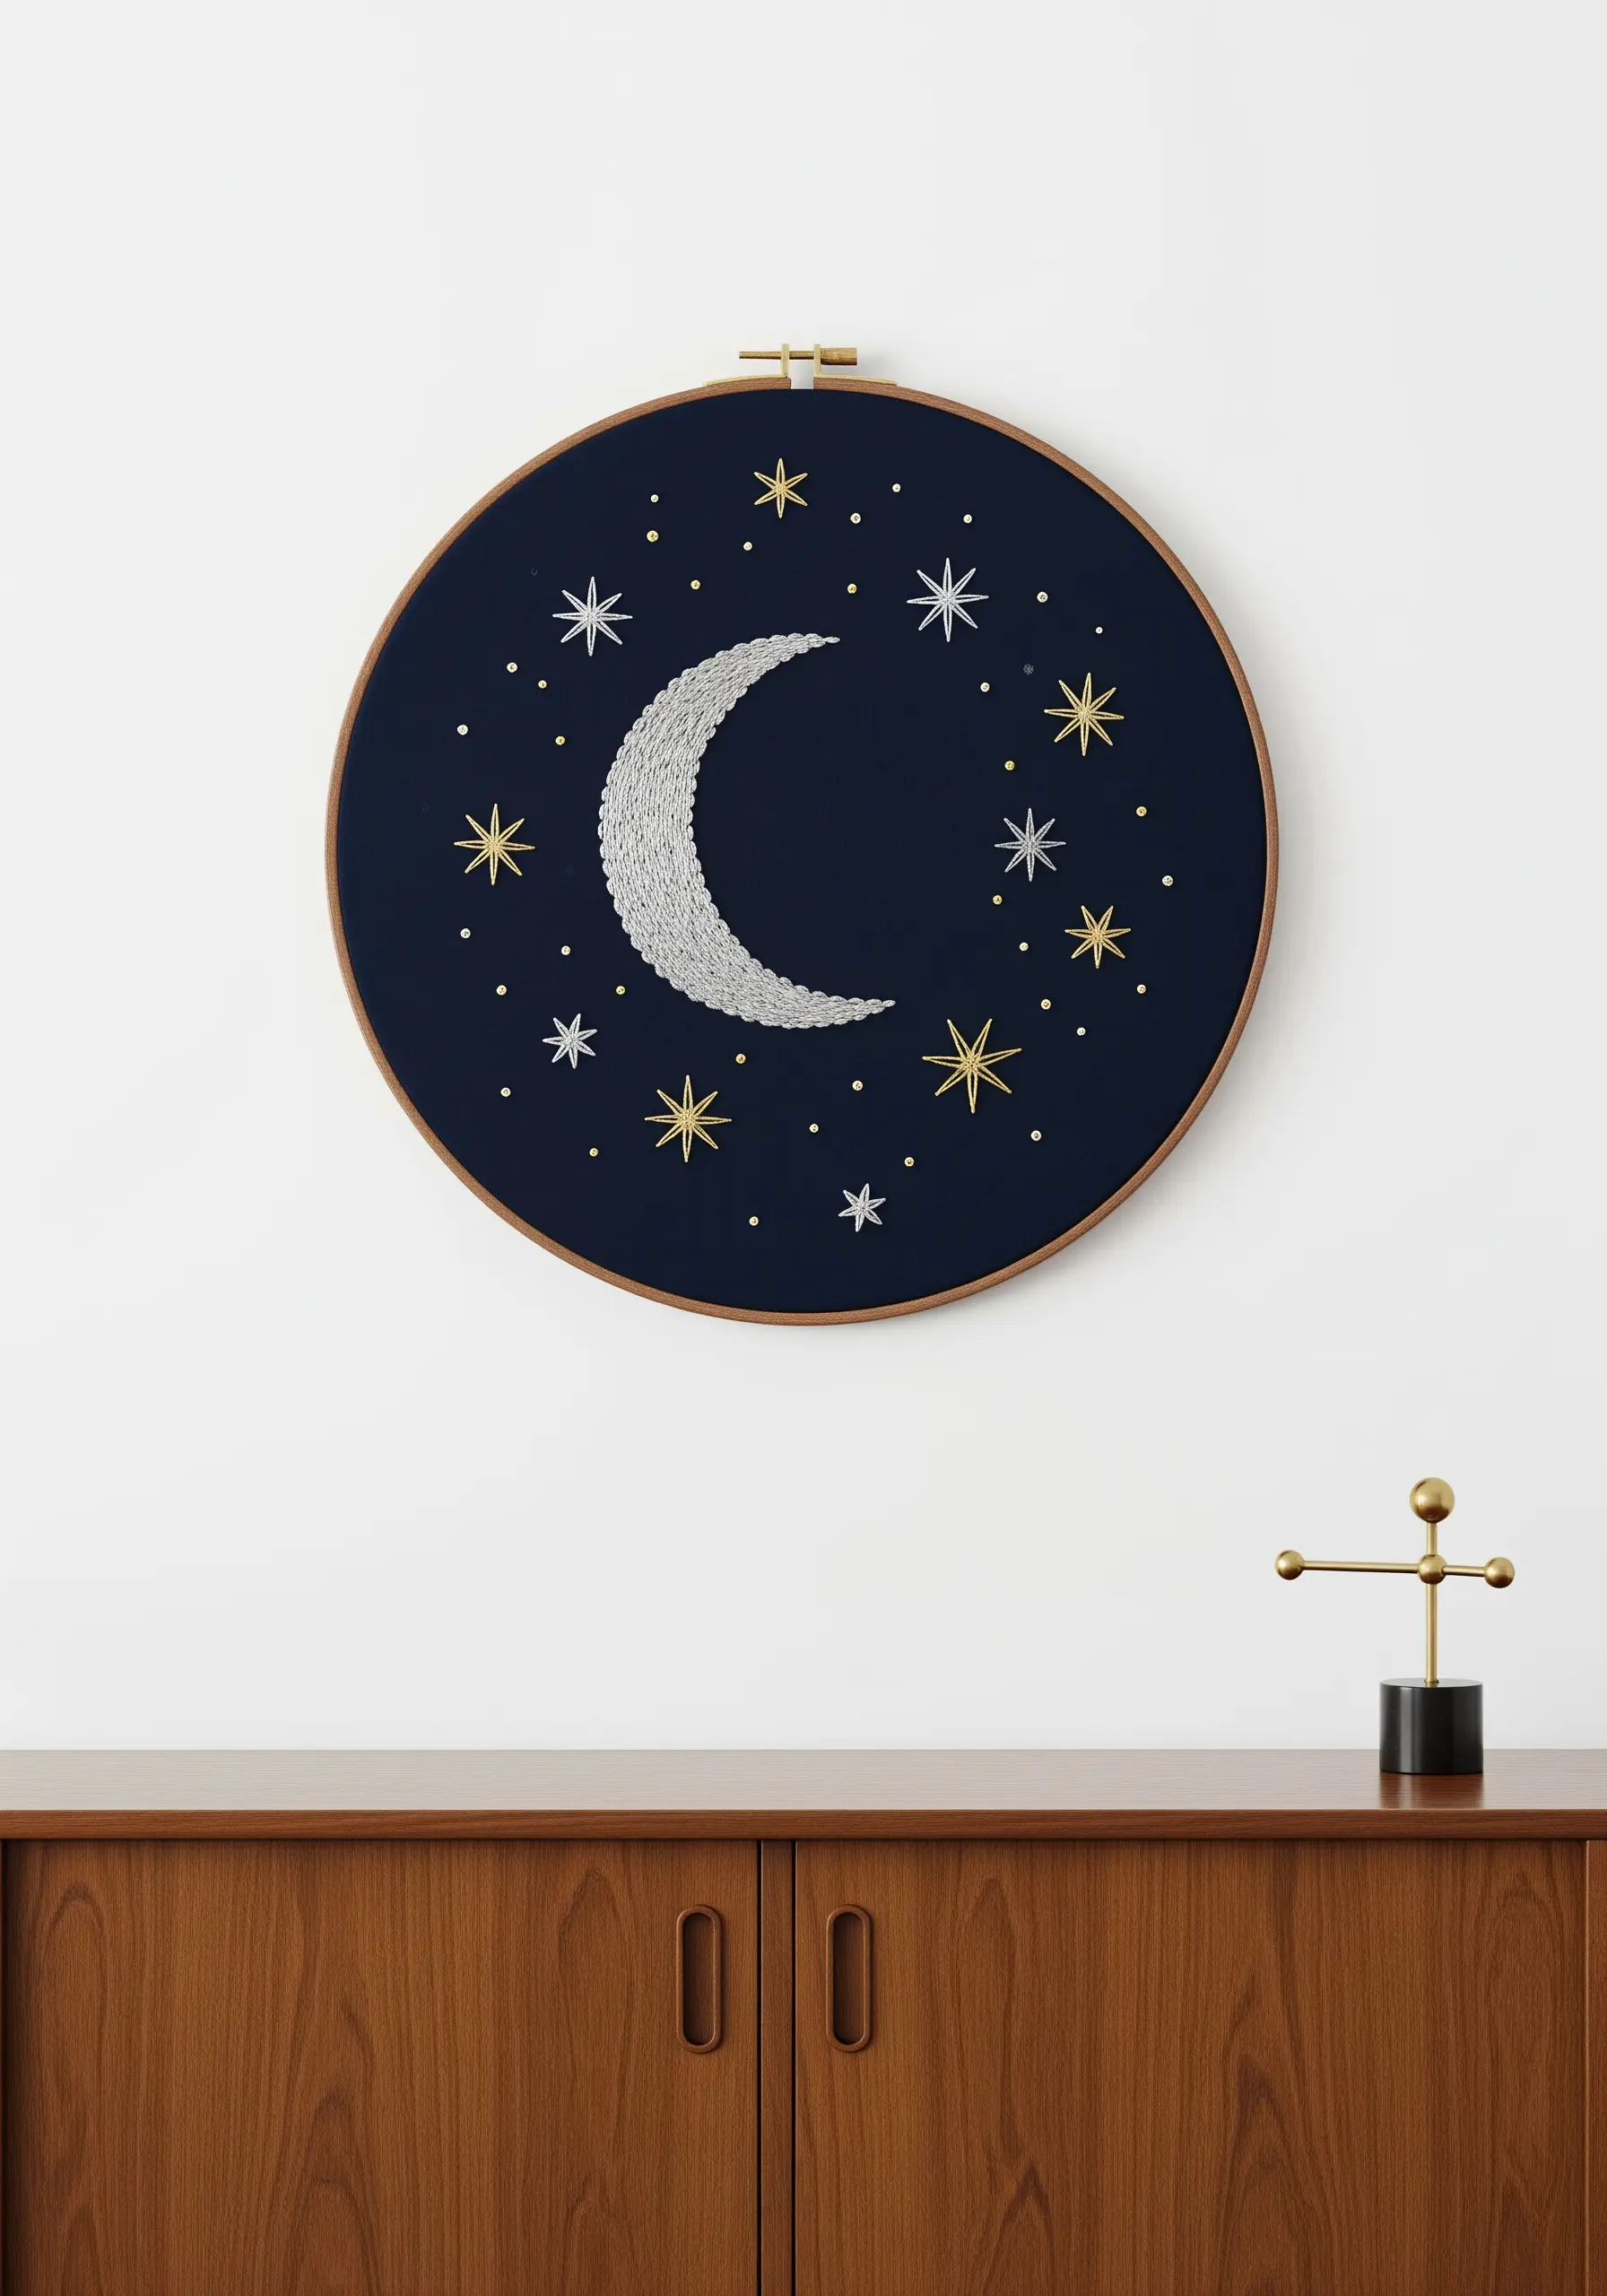
Stitch your celestial scene on a dark navy or black fabric to make your metallic threads truly stand out.
For the crescent moon, use a padded satin stitch with silver thread; this involves creating a base of small stitches underneath, which raises the final satin stitch for a 3D effect.
Use a combination of star stitches and French knots for the stars, alternating between gold and silver metallic floss for variation.
The dark background absorbs light while the metallic threads reflect it, creating a piece that seems to glow.
9. Design a Wildflower Mobile Display
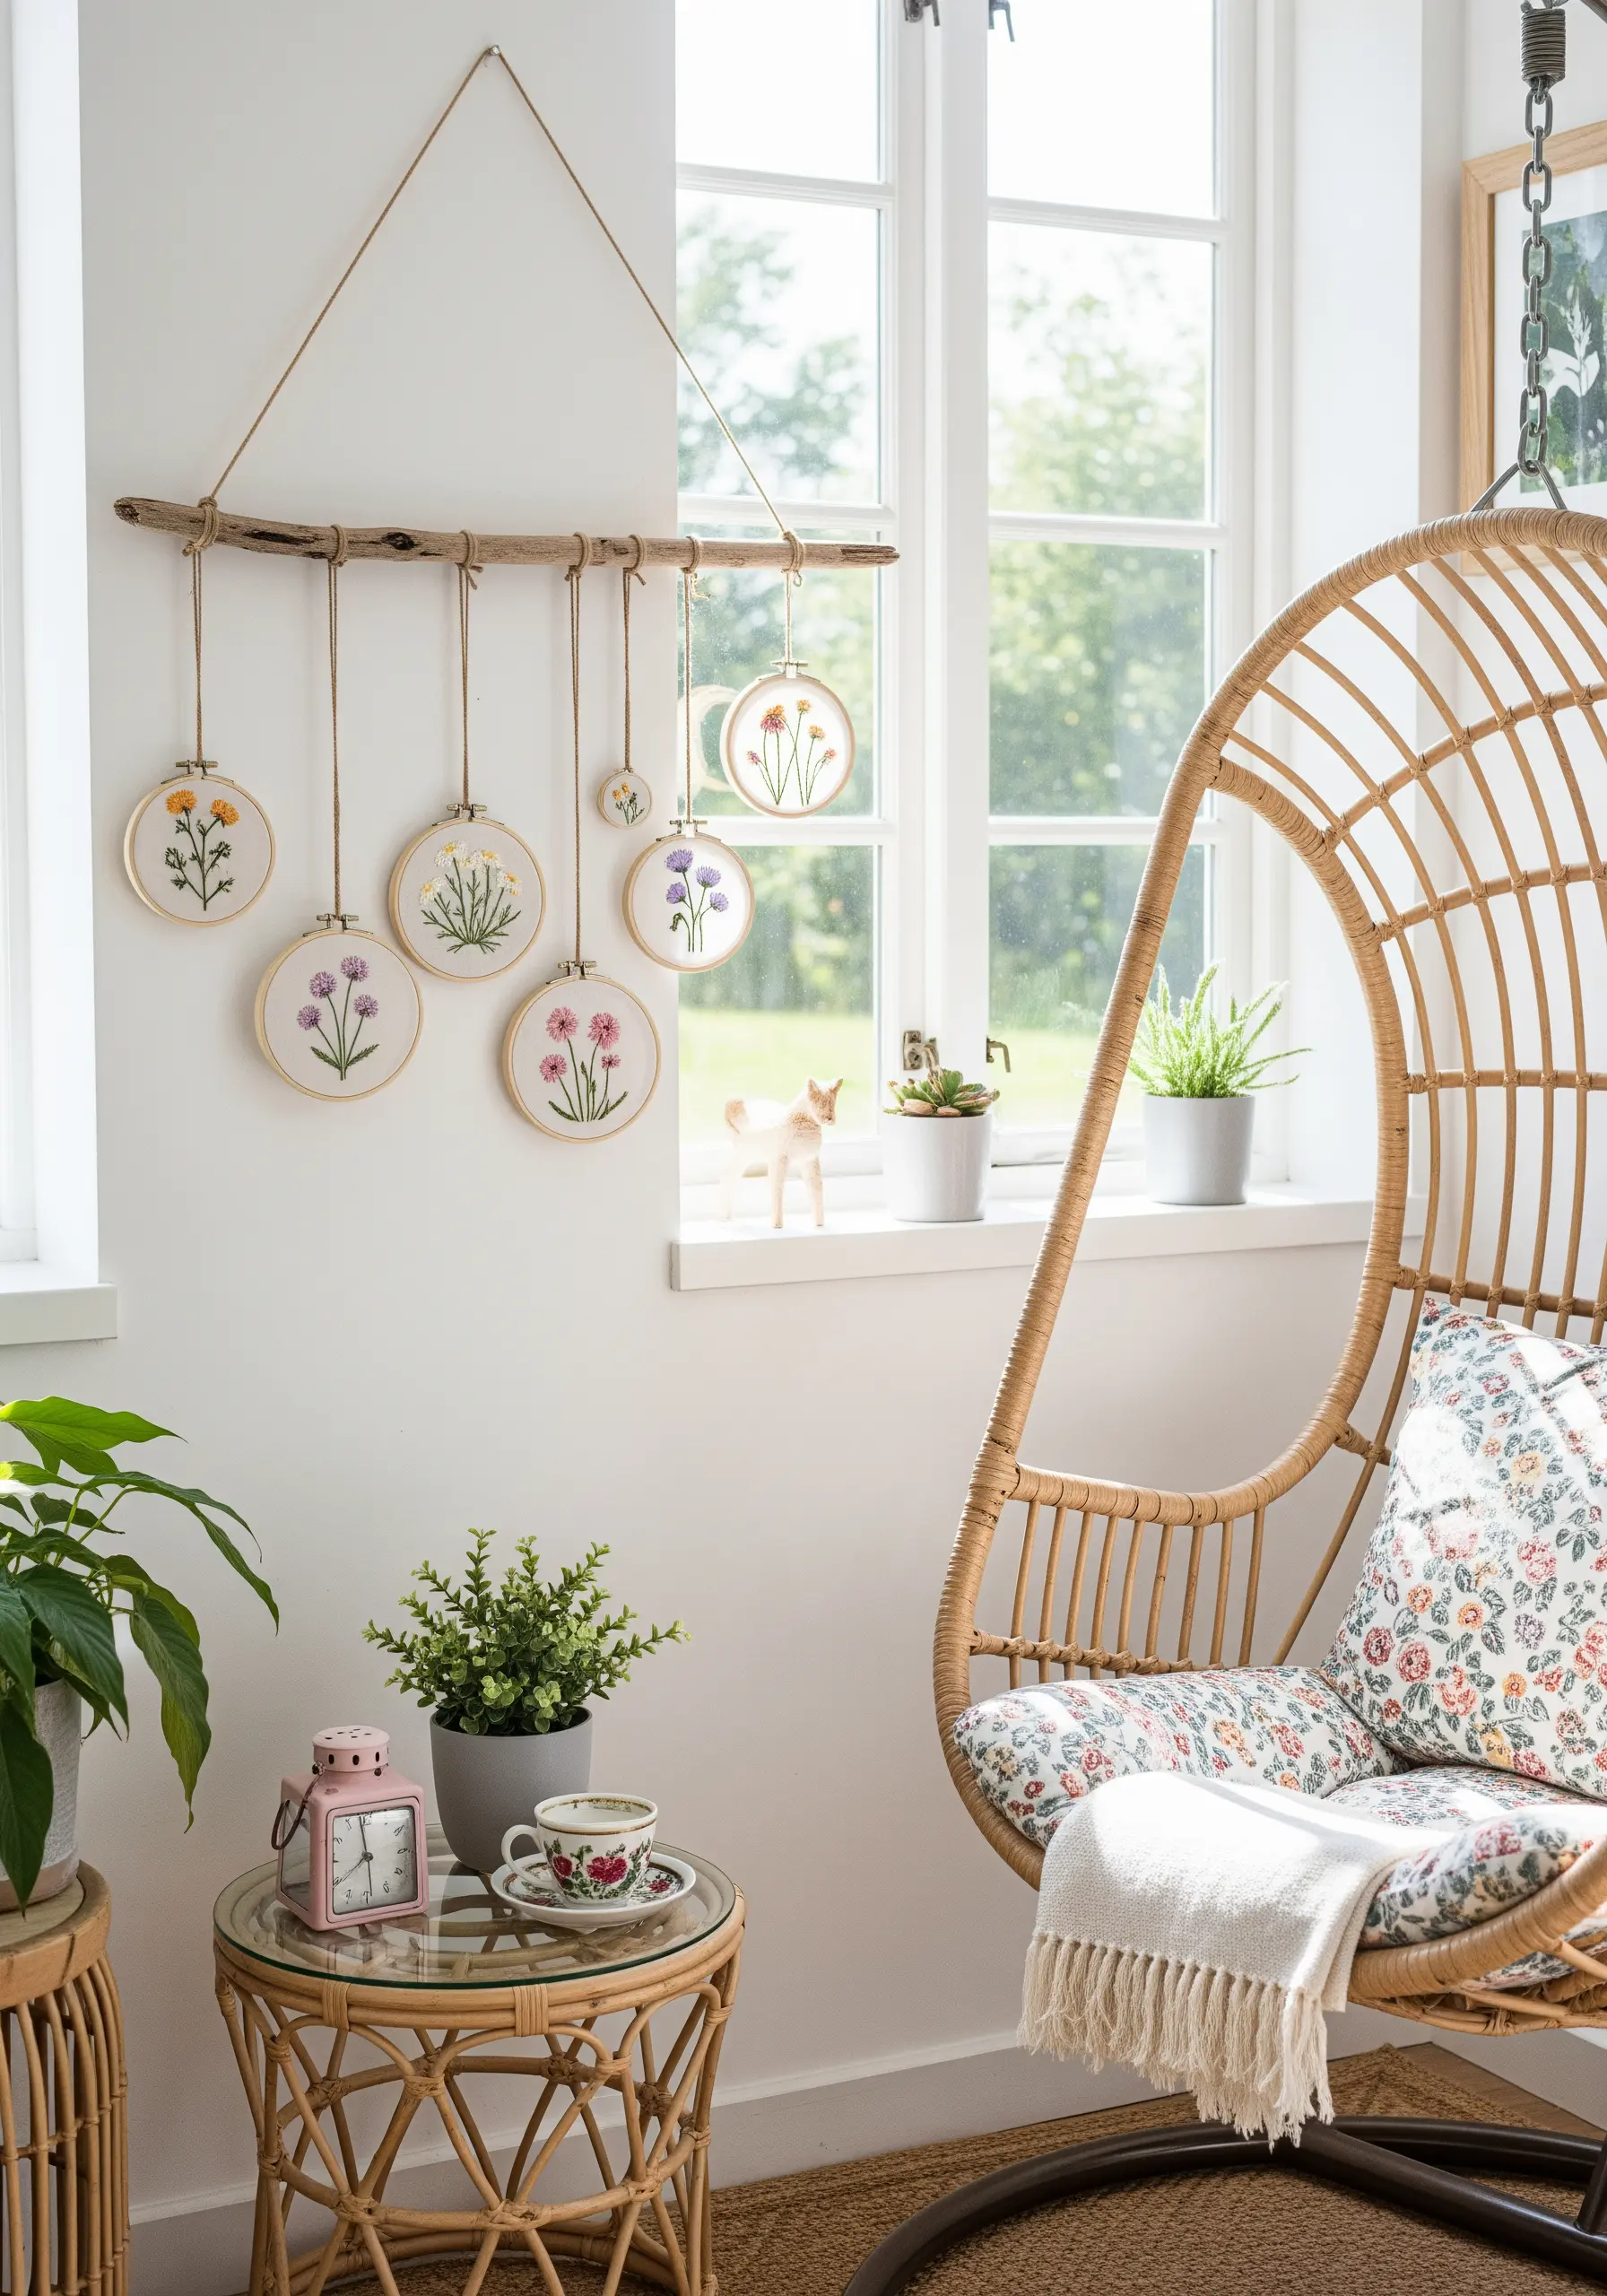
Turn a collection of small floral hoops into a single, cohesive art piece by hanging them from a piece of driftwood.
Use different lengths of twine to stagger the hoops, creating movement and a more organic, cascading effect.
Stick to a simple color palette across all the hoops to ensure the display feels unified, not chaotic.
This approach transforms subtle floral embroidery motifs into an impressive, airy installation perfect for a sunlit corner.
10. Elevate Lettering with Botanical Frames
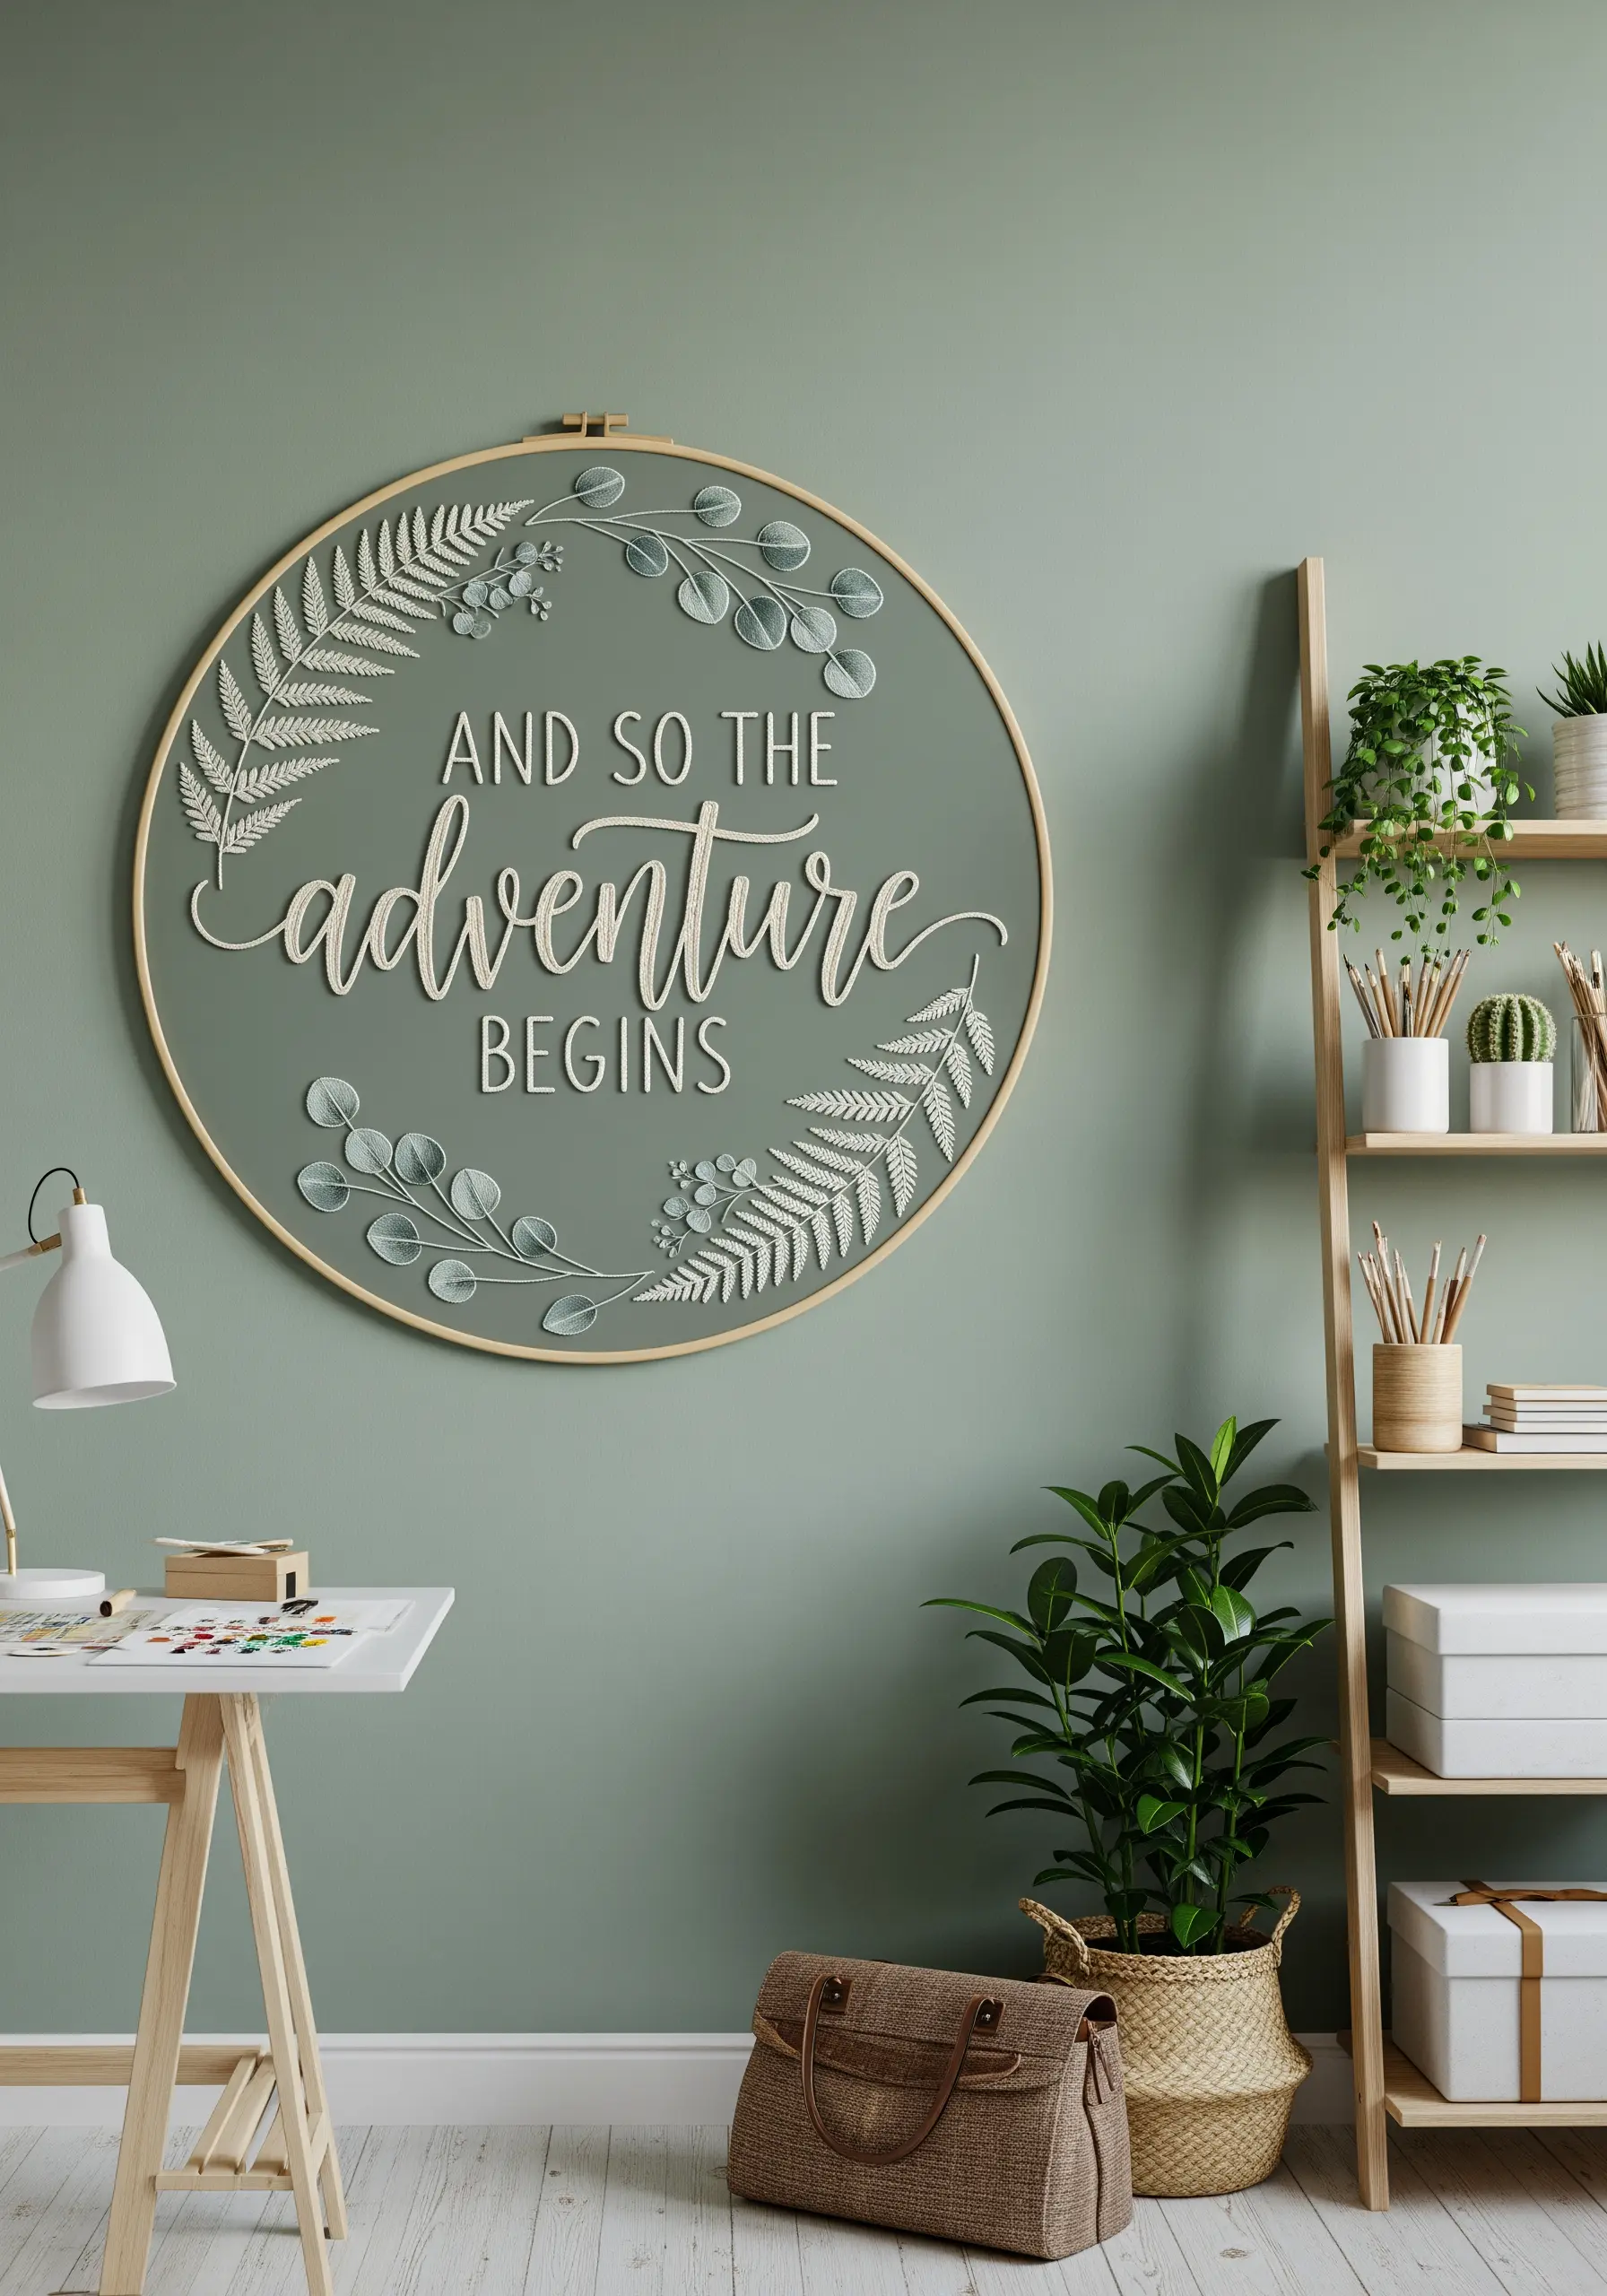
Make your embroidered text the star by framing it with delicate botanicals.
Use a padded satin stitch for the letters to give them a raised, almost embossed appearance that catches the light.
For the surrounding foliage, choose stitches that offer texture without overwhelming the words, like the fishbone stitch for ferns and French knots for berries.
Stitching the entire design in a single color on a contrasting fabric creates a sophisticated, monochrome look that is both modern and timeless.
11. Mimic Mediterranean Tiles with Thread
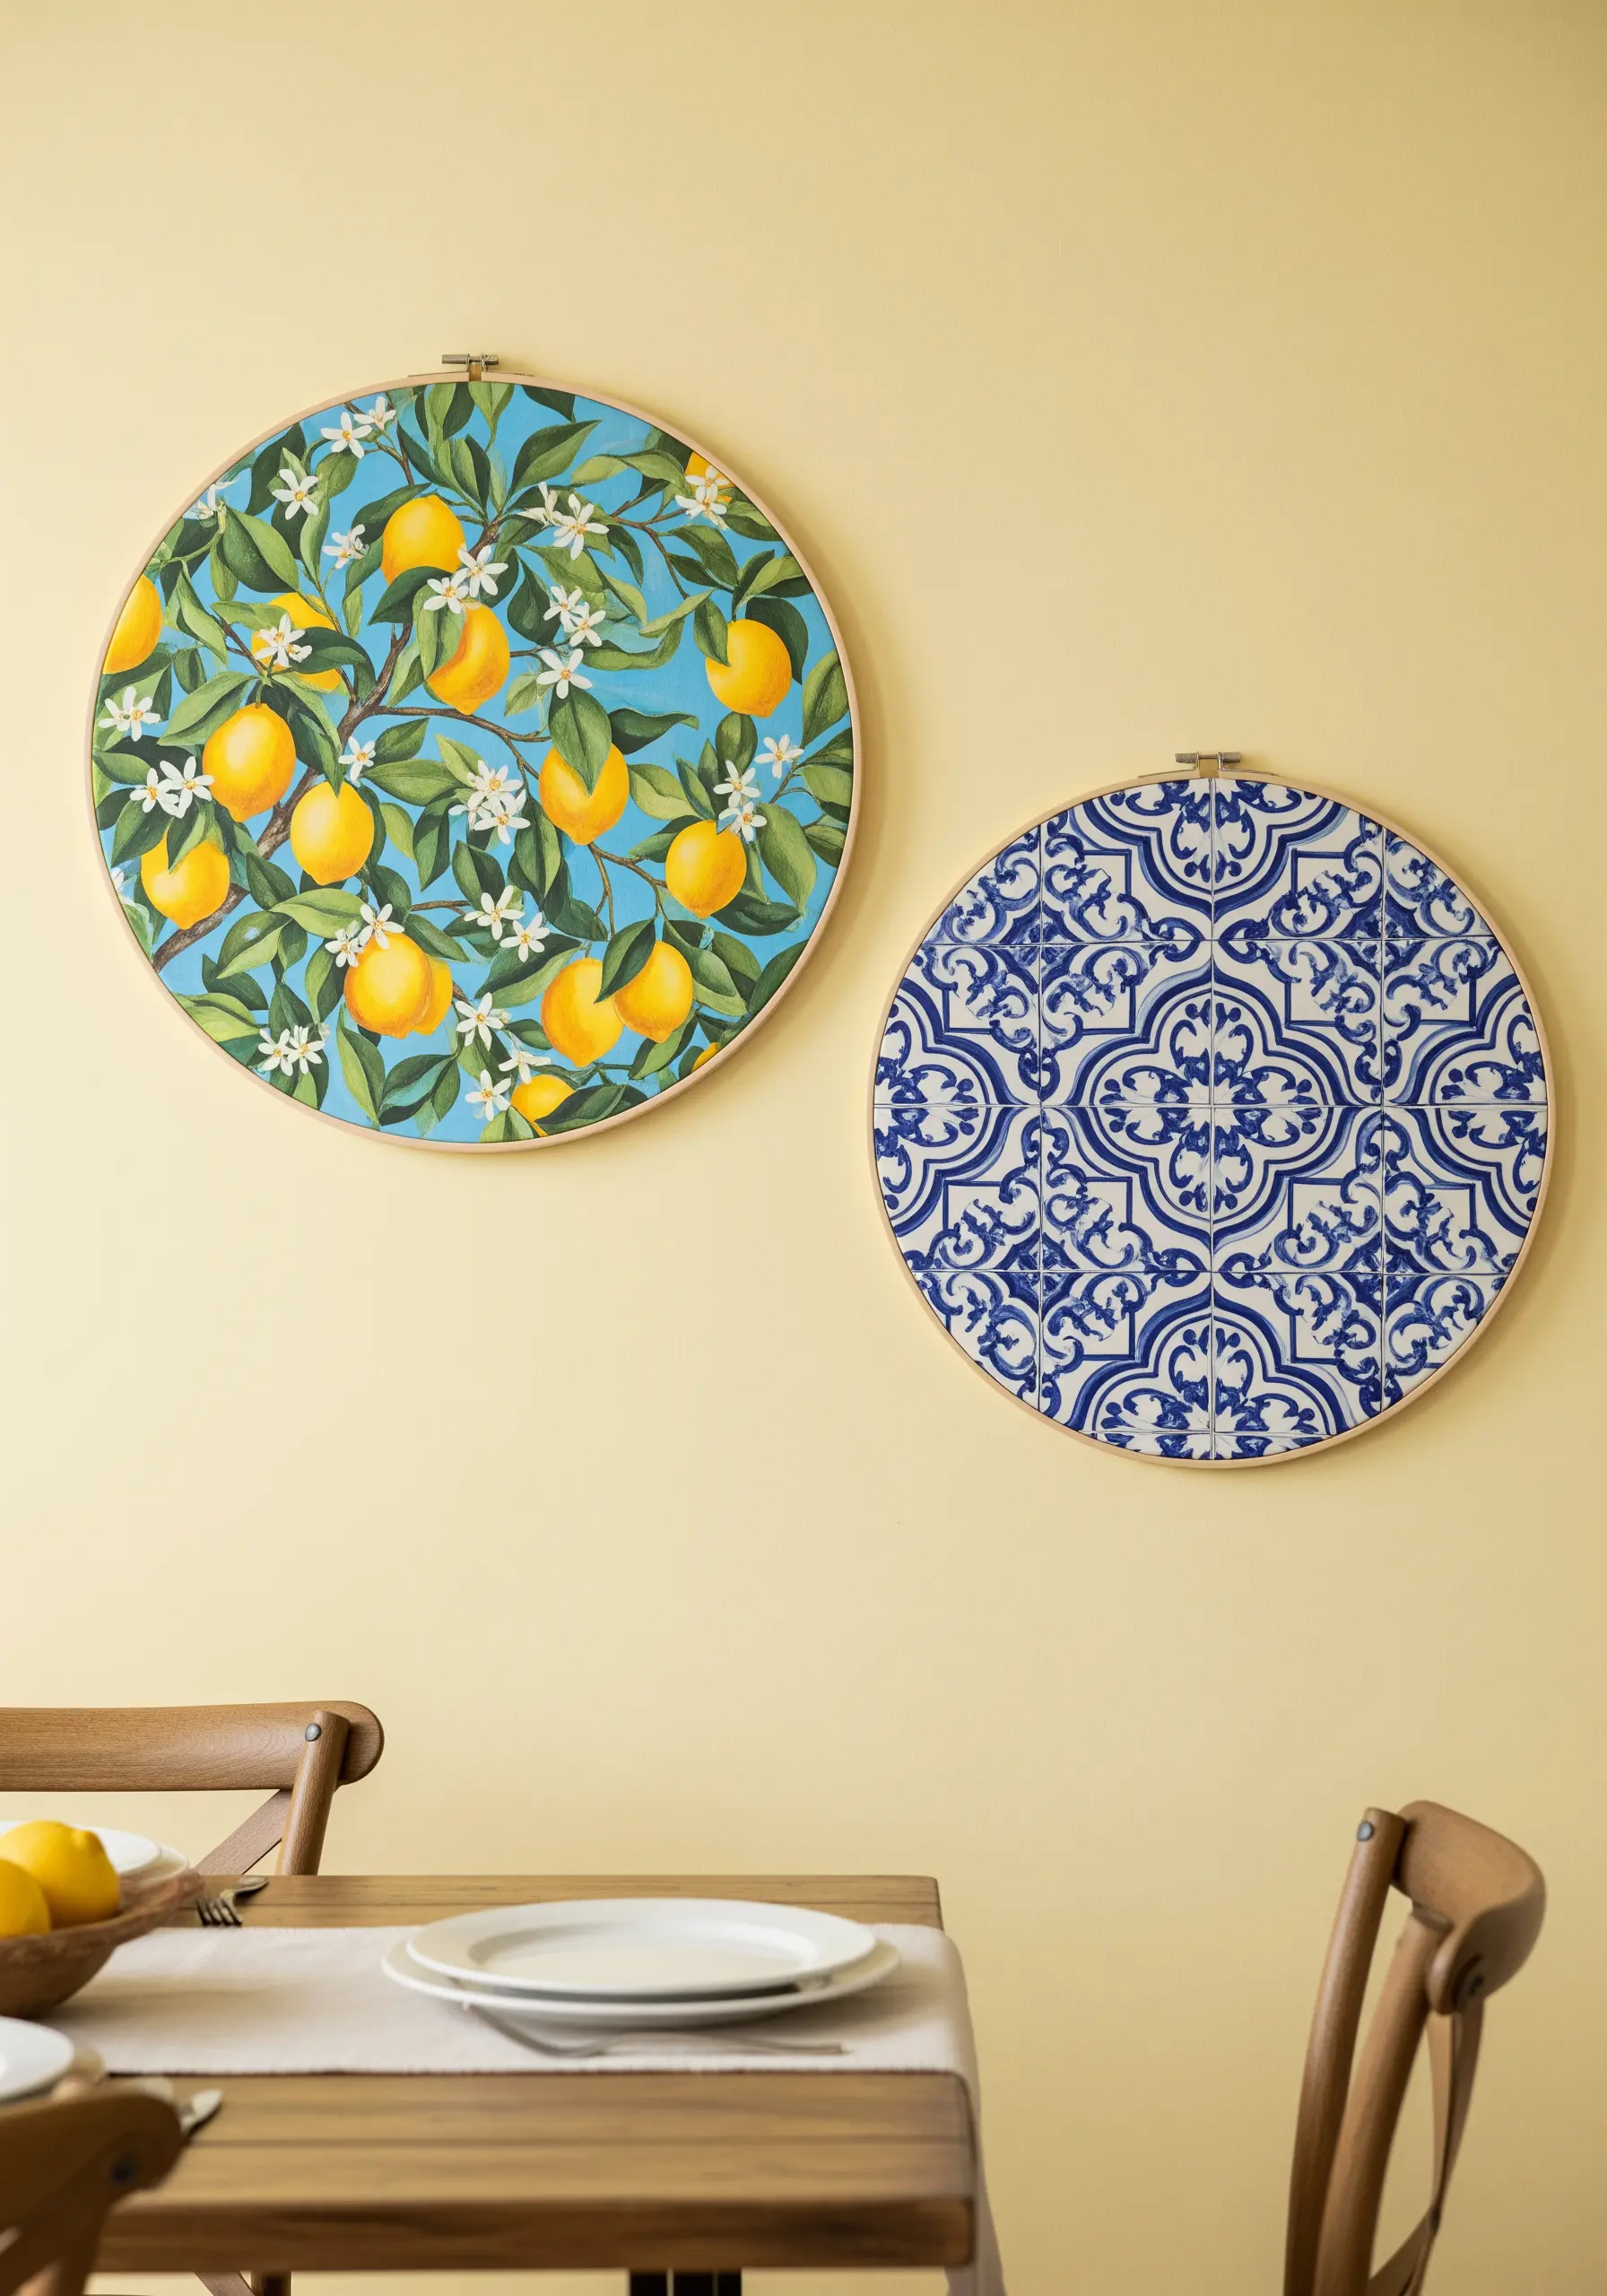
Translate the feeling of vibrant, painted tiles into your embroidery by focusing on bold color blocking.
Use a dense, perfectly smooth satin stitch to fill in each shape, ensuring all stitches lie in the same direction for a uniform, glossy finish that mimics ceramic glaze.
To create the lemon pattern, stitch the bright blue background first, then add the yellow lemons and green leaves on top.
This layering technique, called appliqué stitching, makes the motifs pop against the background, giving your piece a lively, dimensional quality.
12. Capture Serenity with Koi and Ripples
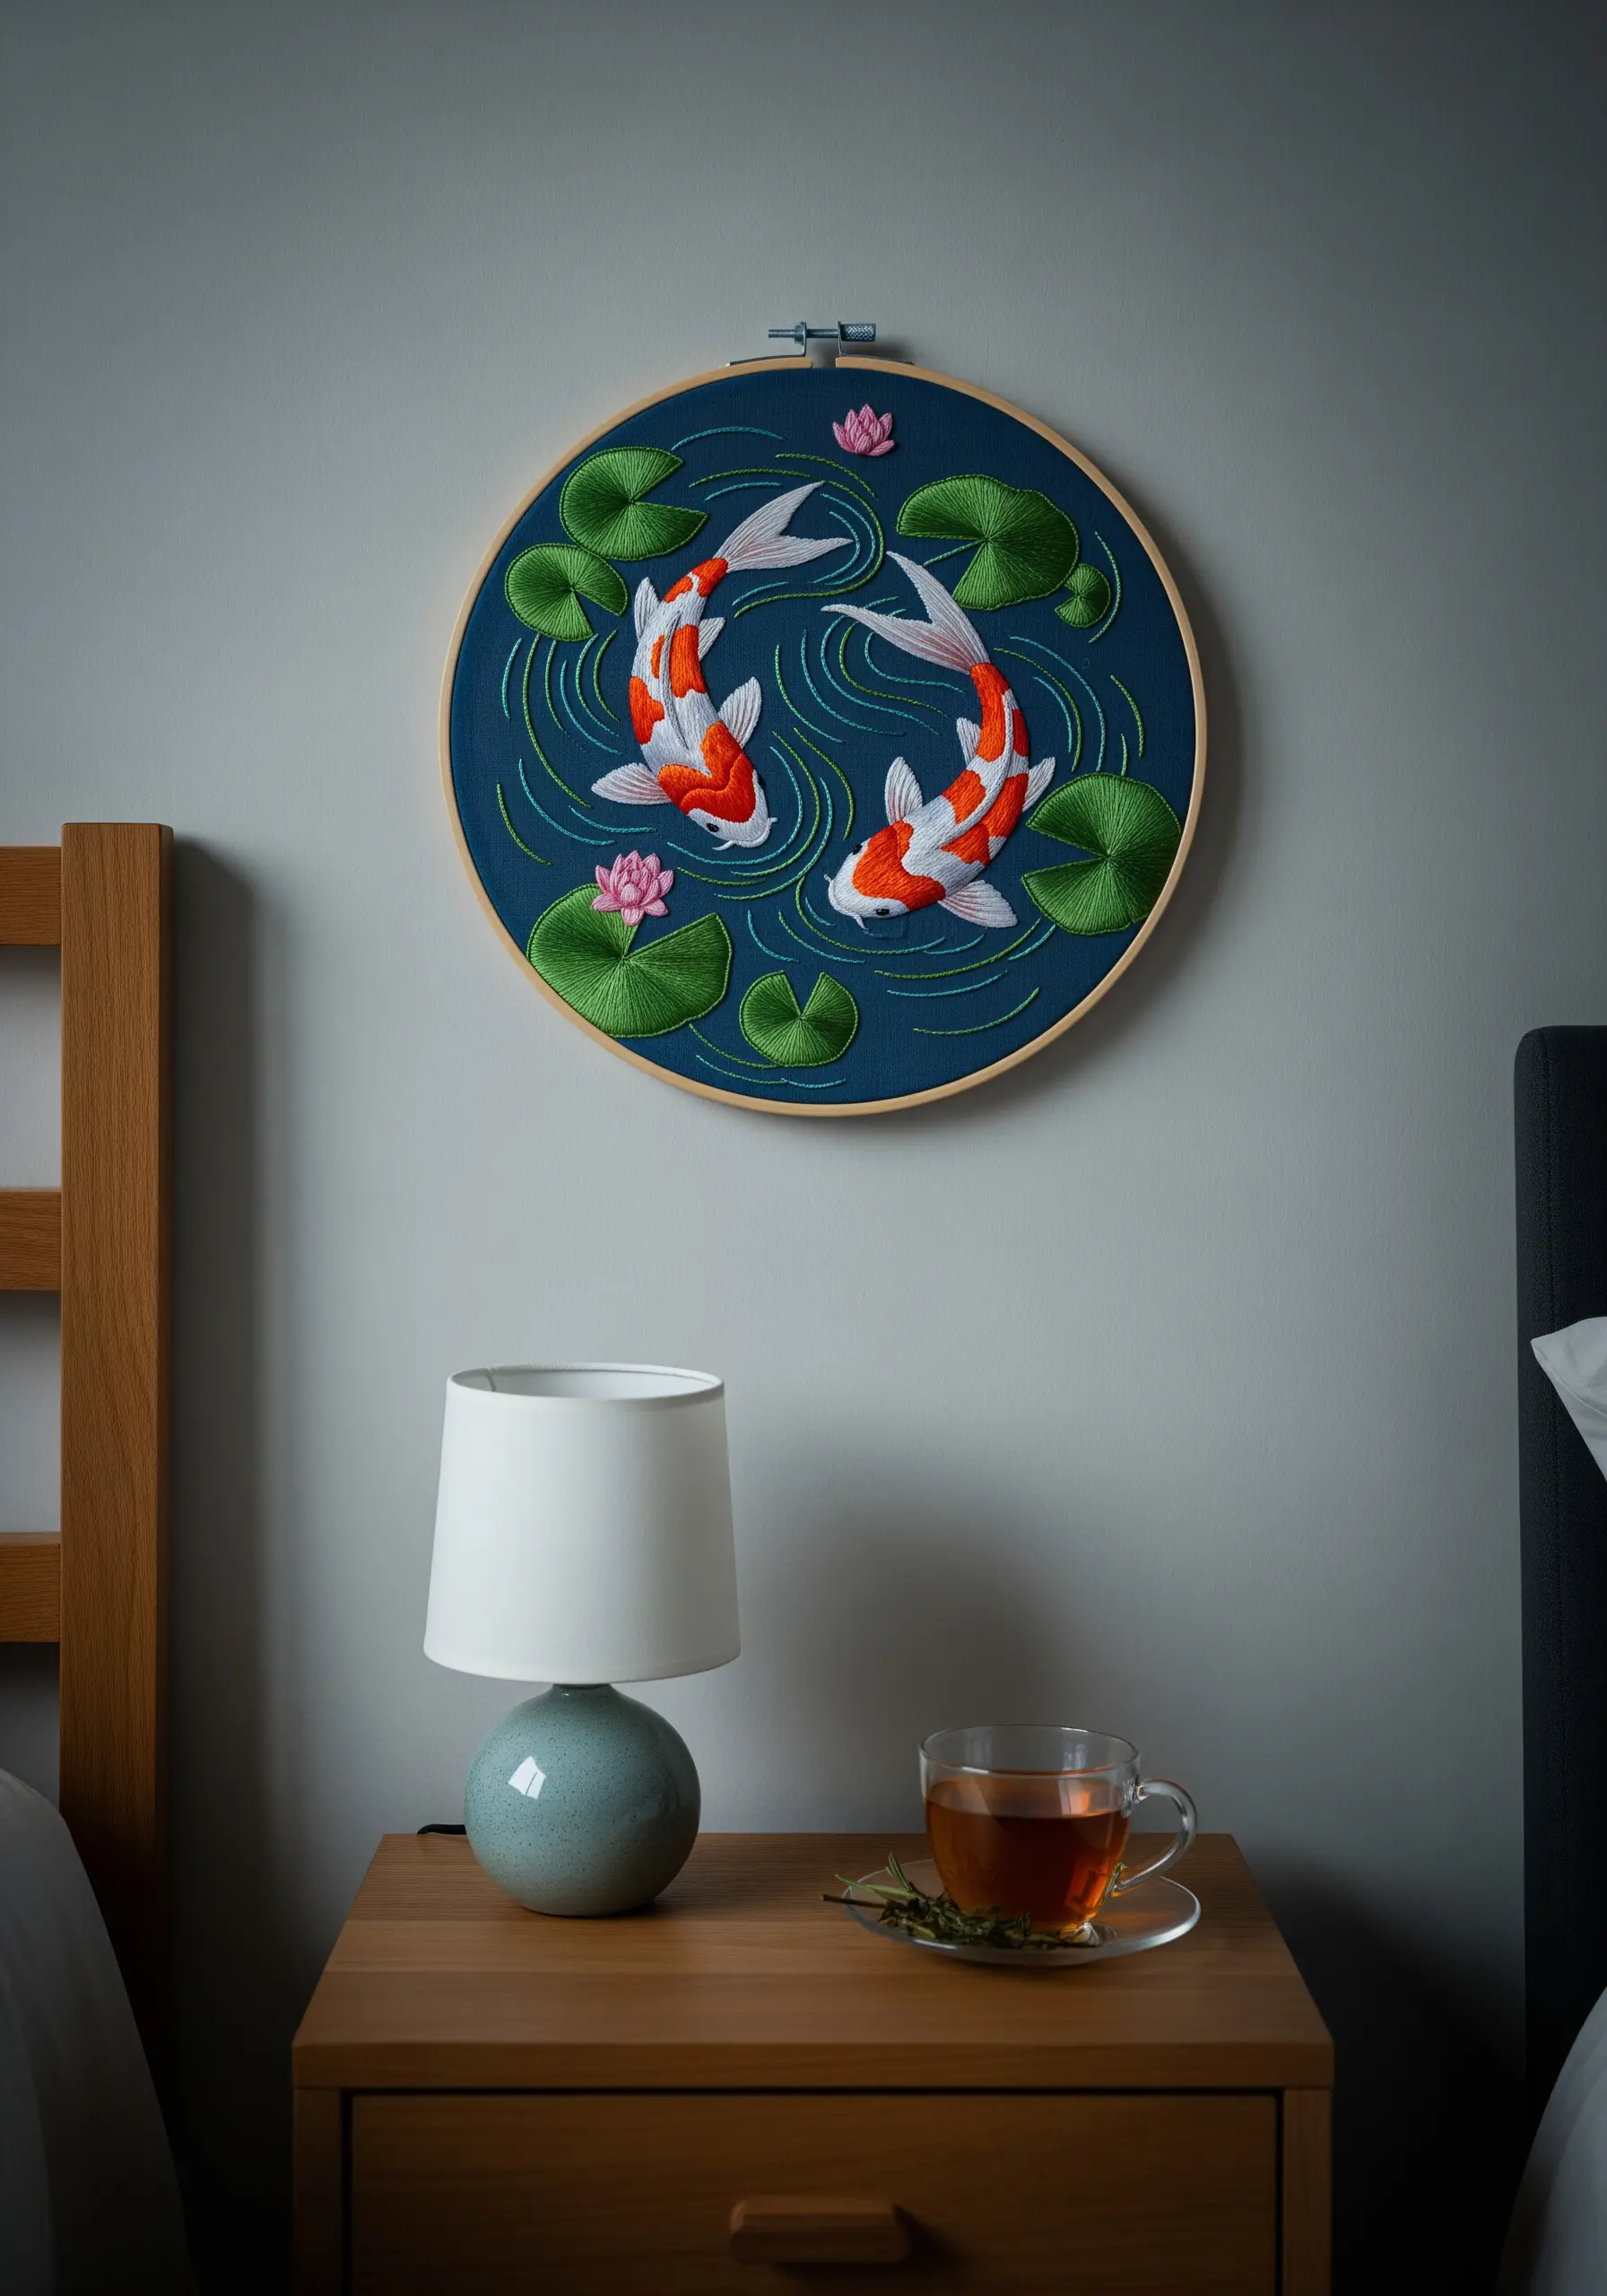
Suggest water’s movement by stitching concentric circles of split stitch around the lily pads.
For the koi fish, use long and short stitch to blend the orange, white, and black scales seamlessly, creating a soft, painterly effect.
Use a single strand of thread for the finest details, like the fish’s whiskers and the delicate veins on the lily pads.
The contrast between the graphic ripples and the smoothly shaded fish creates a piece that is both stylized and realistic, evoking a sense of calm.
13. Add Playful Dimension with Tassels and Pom-Poms
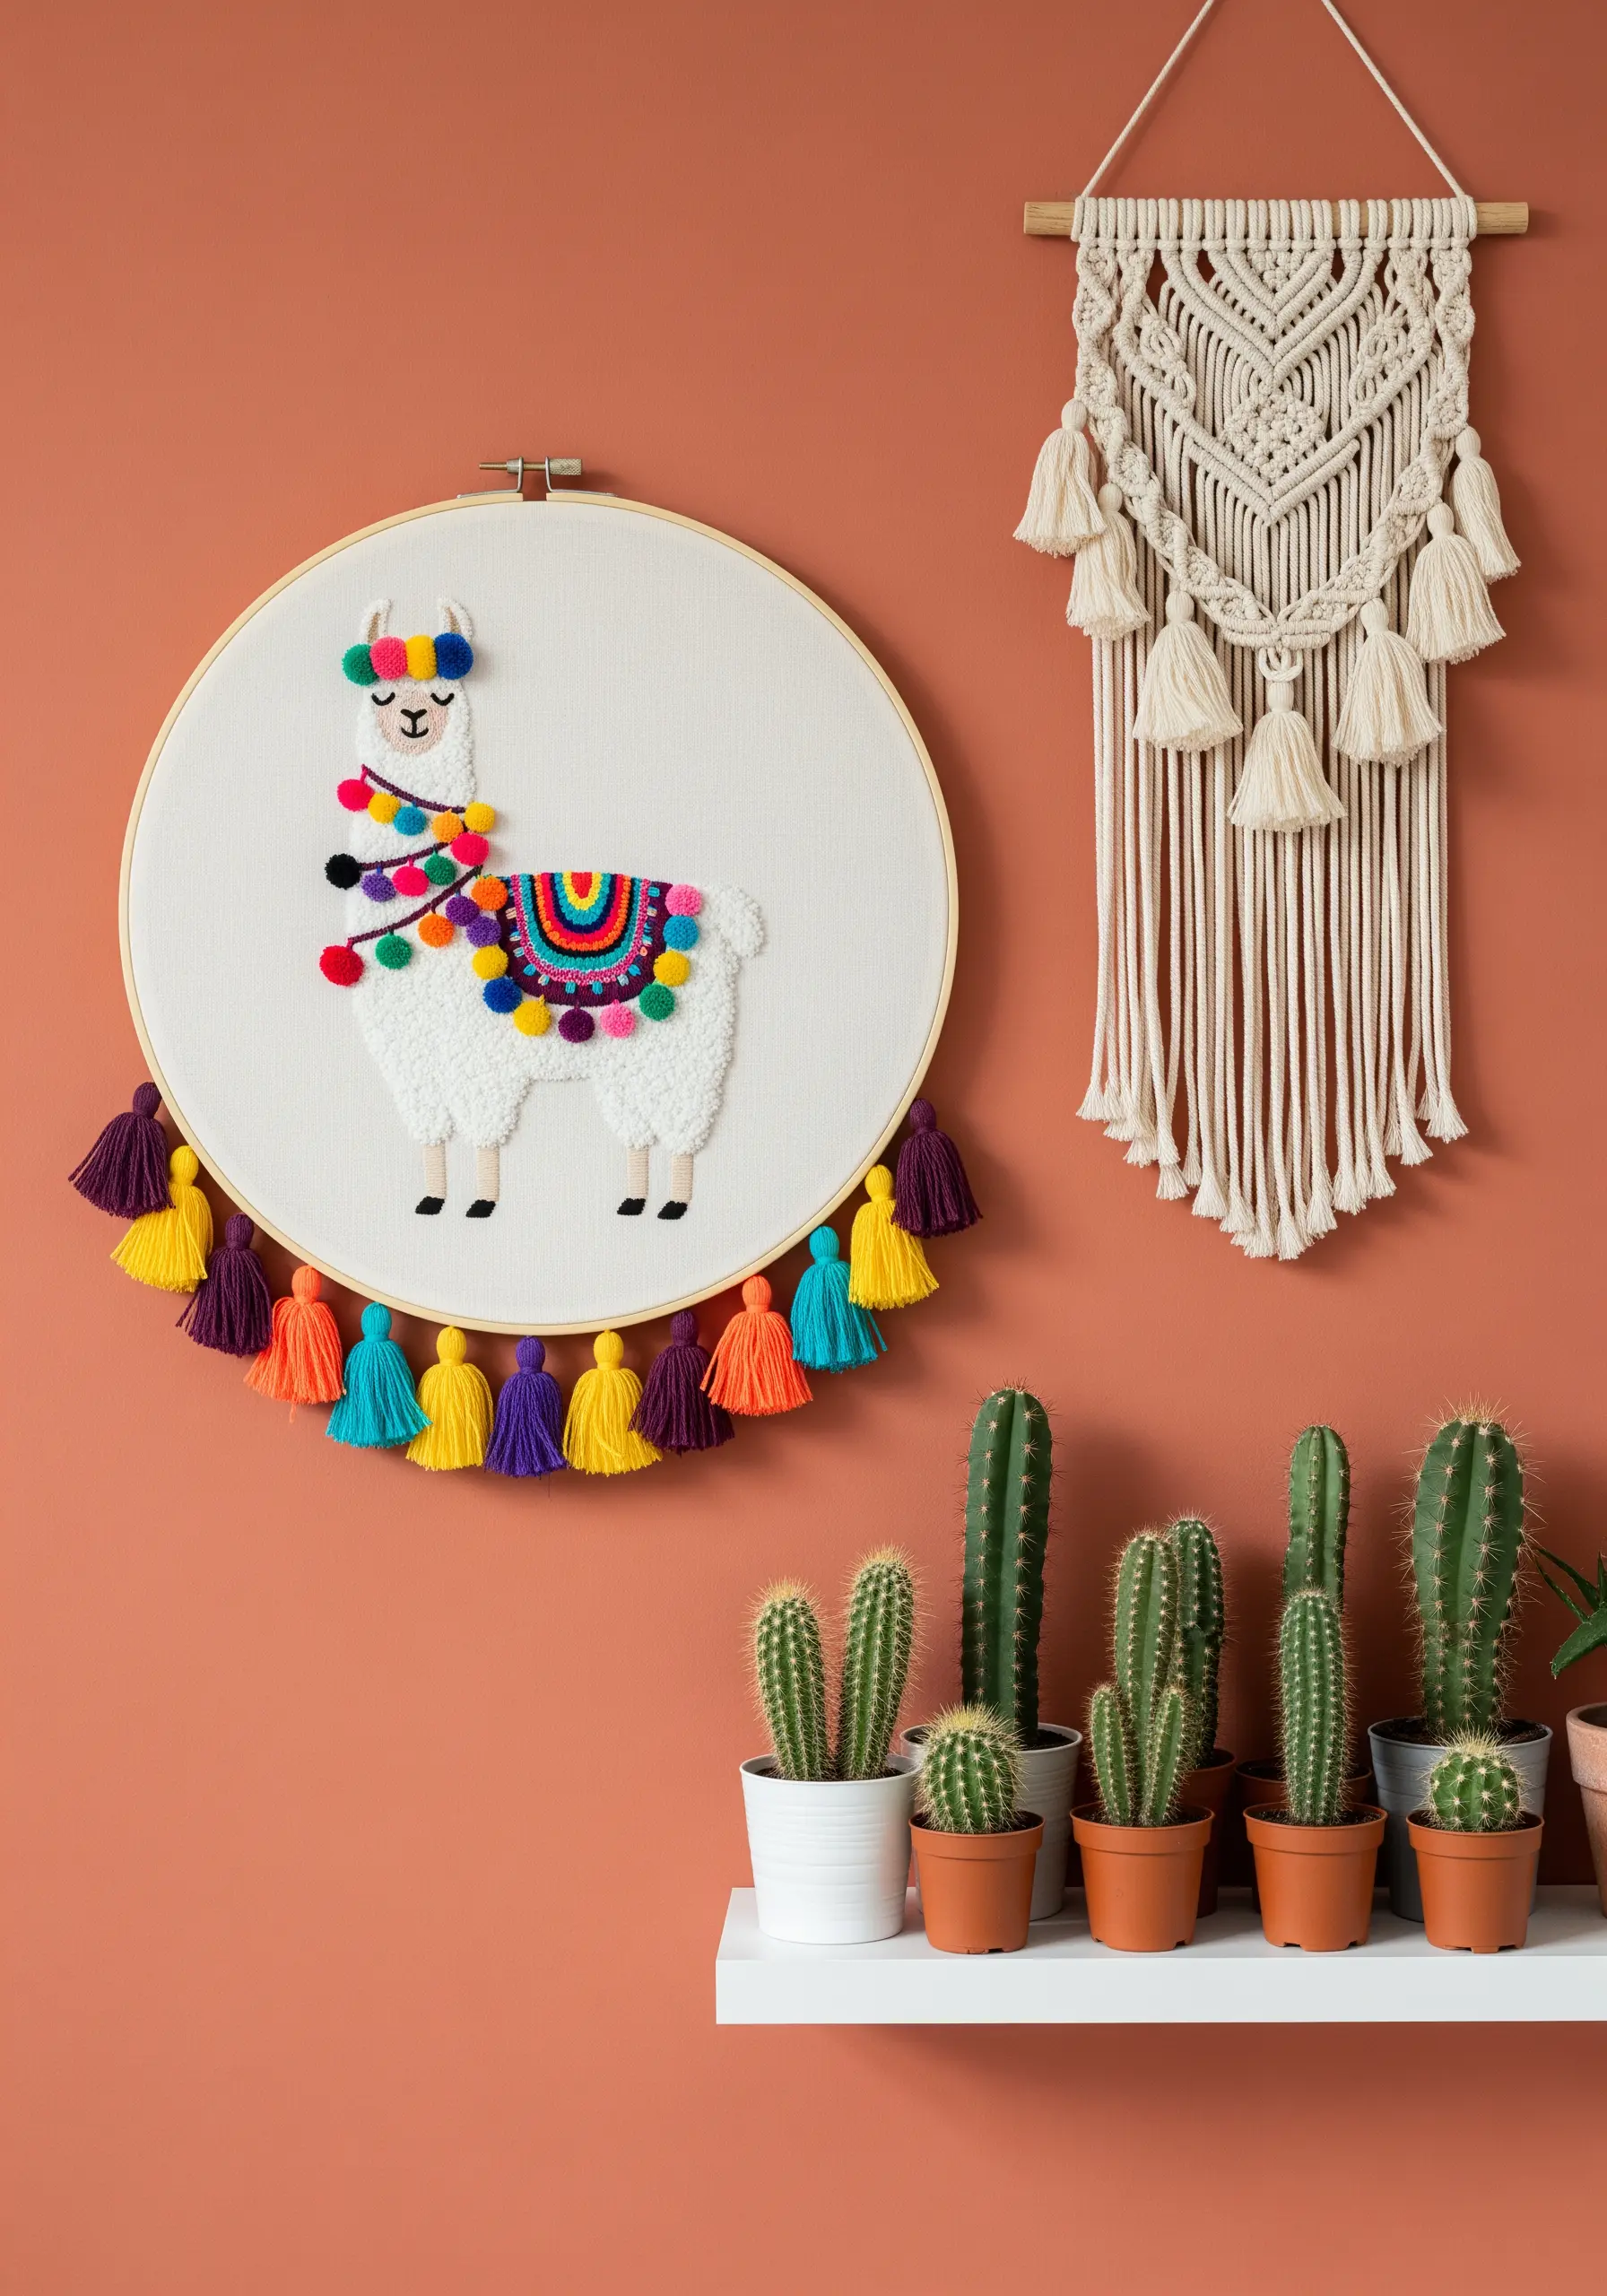
Incorporate off-the-hoop elements to give your embroidery a delightful, tactile quality.
Stitch the llama’s body with turkey work or French knots for a fluffy, touchable coat.
Instead of stitching the saddle tassels, create them separately with embroidery floss and attach them to the finished piece for authentic movement and dimension.
These mixed fiber embroidery ideas break the two-dimensional plane, making your art interactive and irresistibly charming.
14. Trace Abstract Paths with Metallic Thread
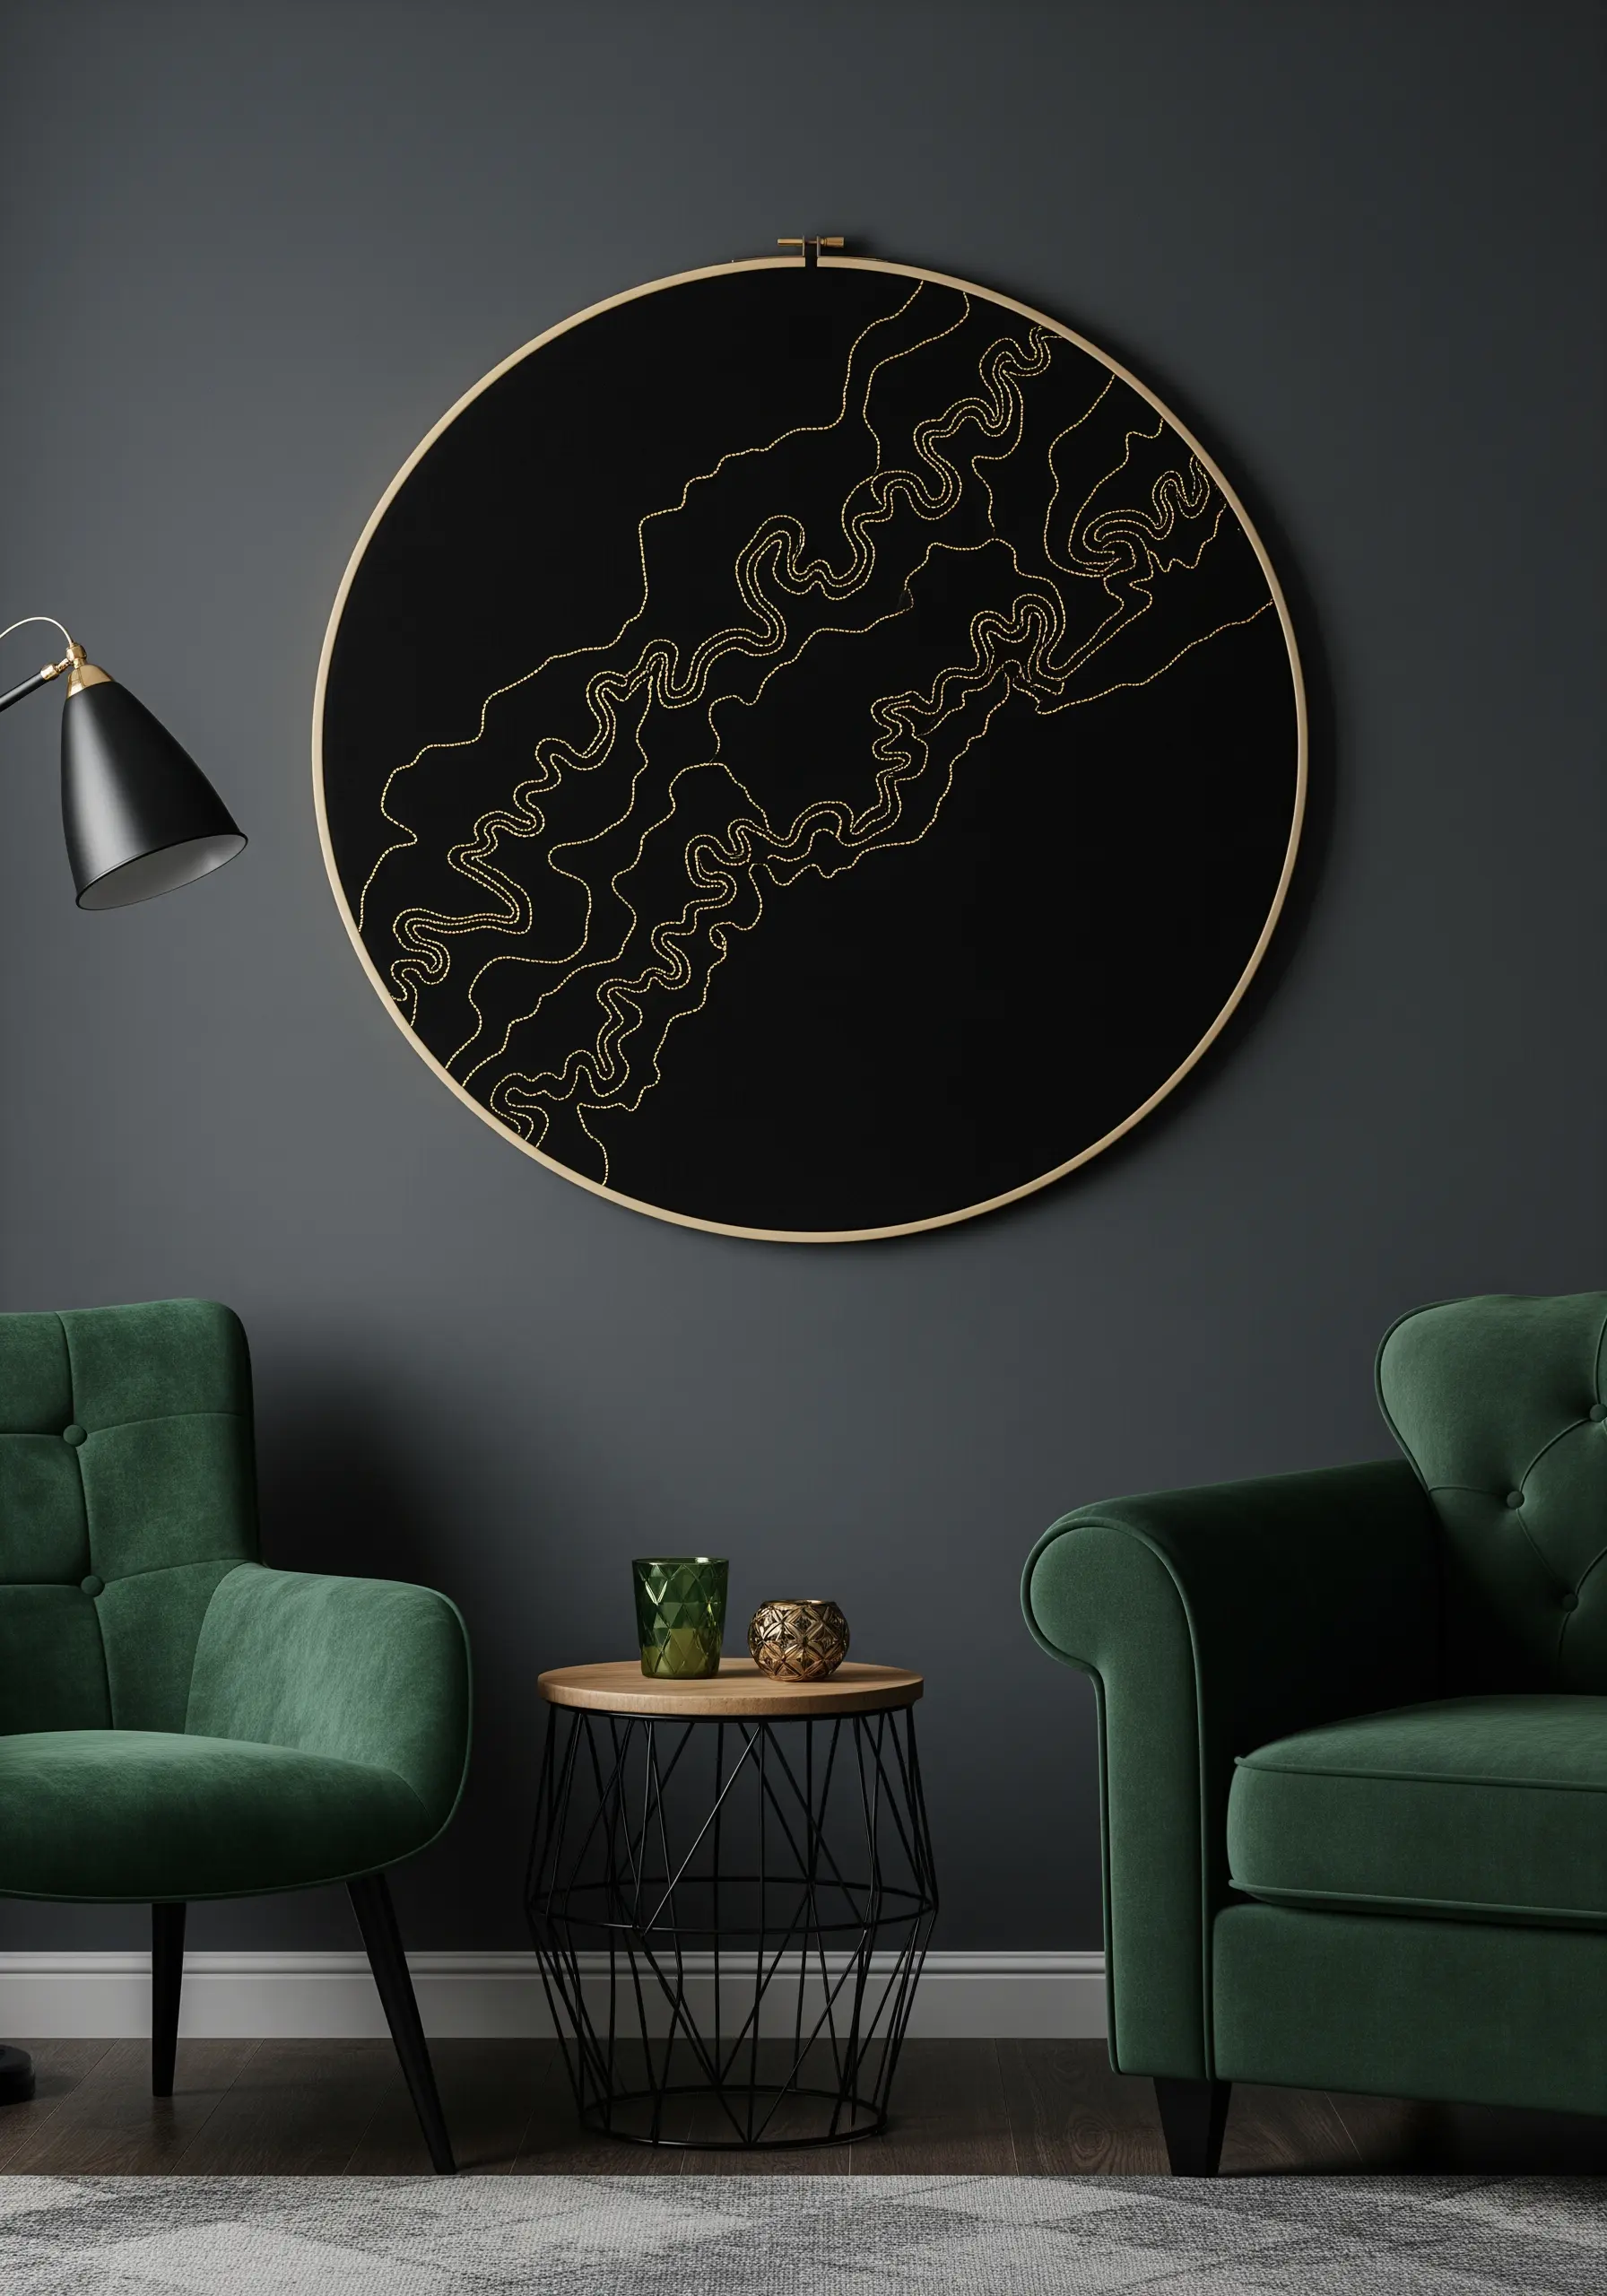
Explore the beauty of abstract line work by using a single, continuous stitch, like the whipped running stitch or stem stitch, to create flowing, river-like patterns.
Stitching with gold metallic thread on a dark, matte fabric like black cotton or velvet creates a dramatic, high-contrast effect.
The metallic thread catches the light, making the lines appear to shimmer and move against the deep background.
This minimalist approach turns a simple line into a sophisticated piece of abstract embroidery art.
15. Replicate Seashell Textures with Seed Stitches
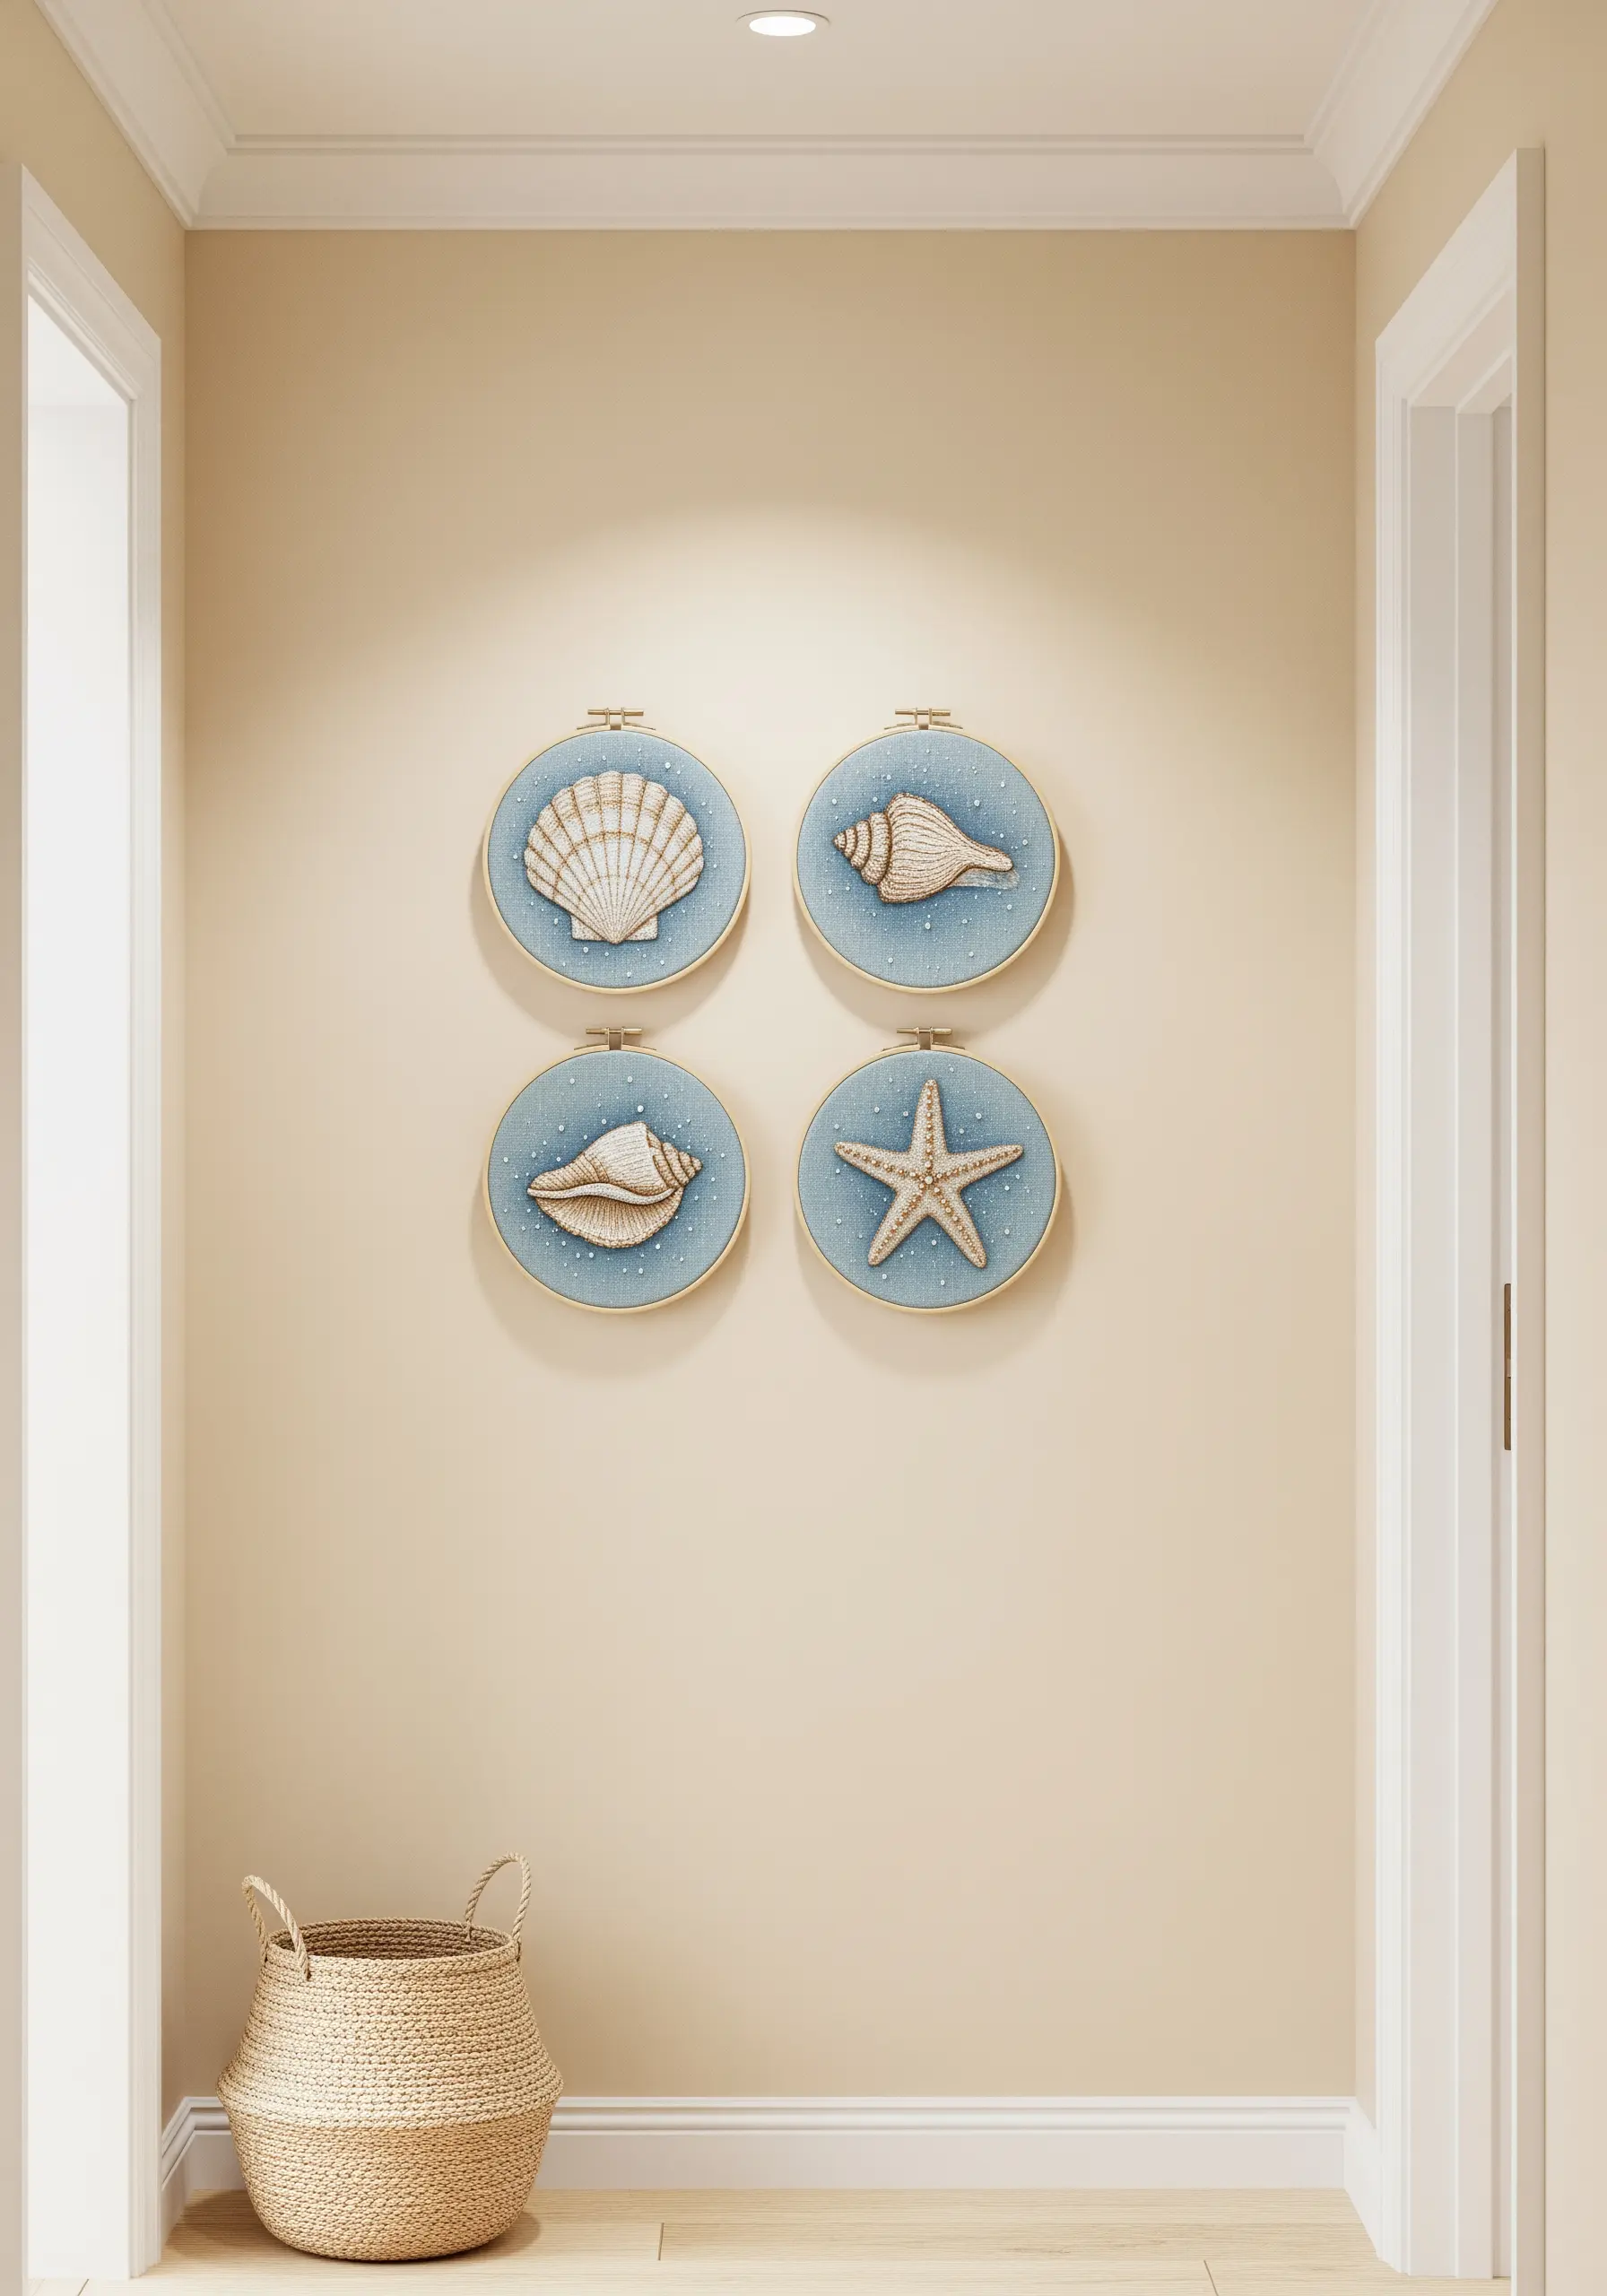
To give your embroidered seashells a realistic, sandy texture, use tiny, scattered straight stitches—also known as seed stitches—to fill their surfaces.
Vary the length and direction of these stitches slightly to avoid a uniform pattern, which mimics the organic imperfections of a real shell.
Outline the shell’s ridges with a slightly darker shade using a single backstitch line to add definition and shadow.
Stitching on a light blue linen or chambray fabric enhances the coastal feel, suggesting a shoreline backdrop.
16. Fill the Frame with Overlapping Foliage
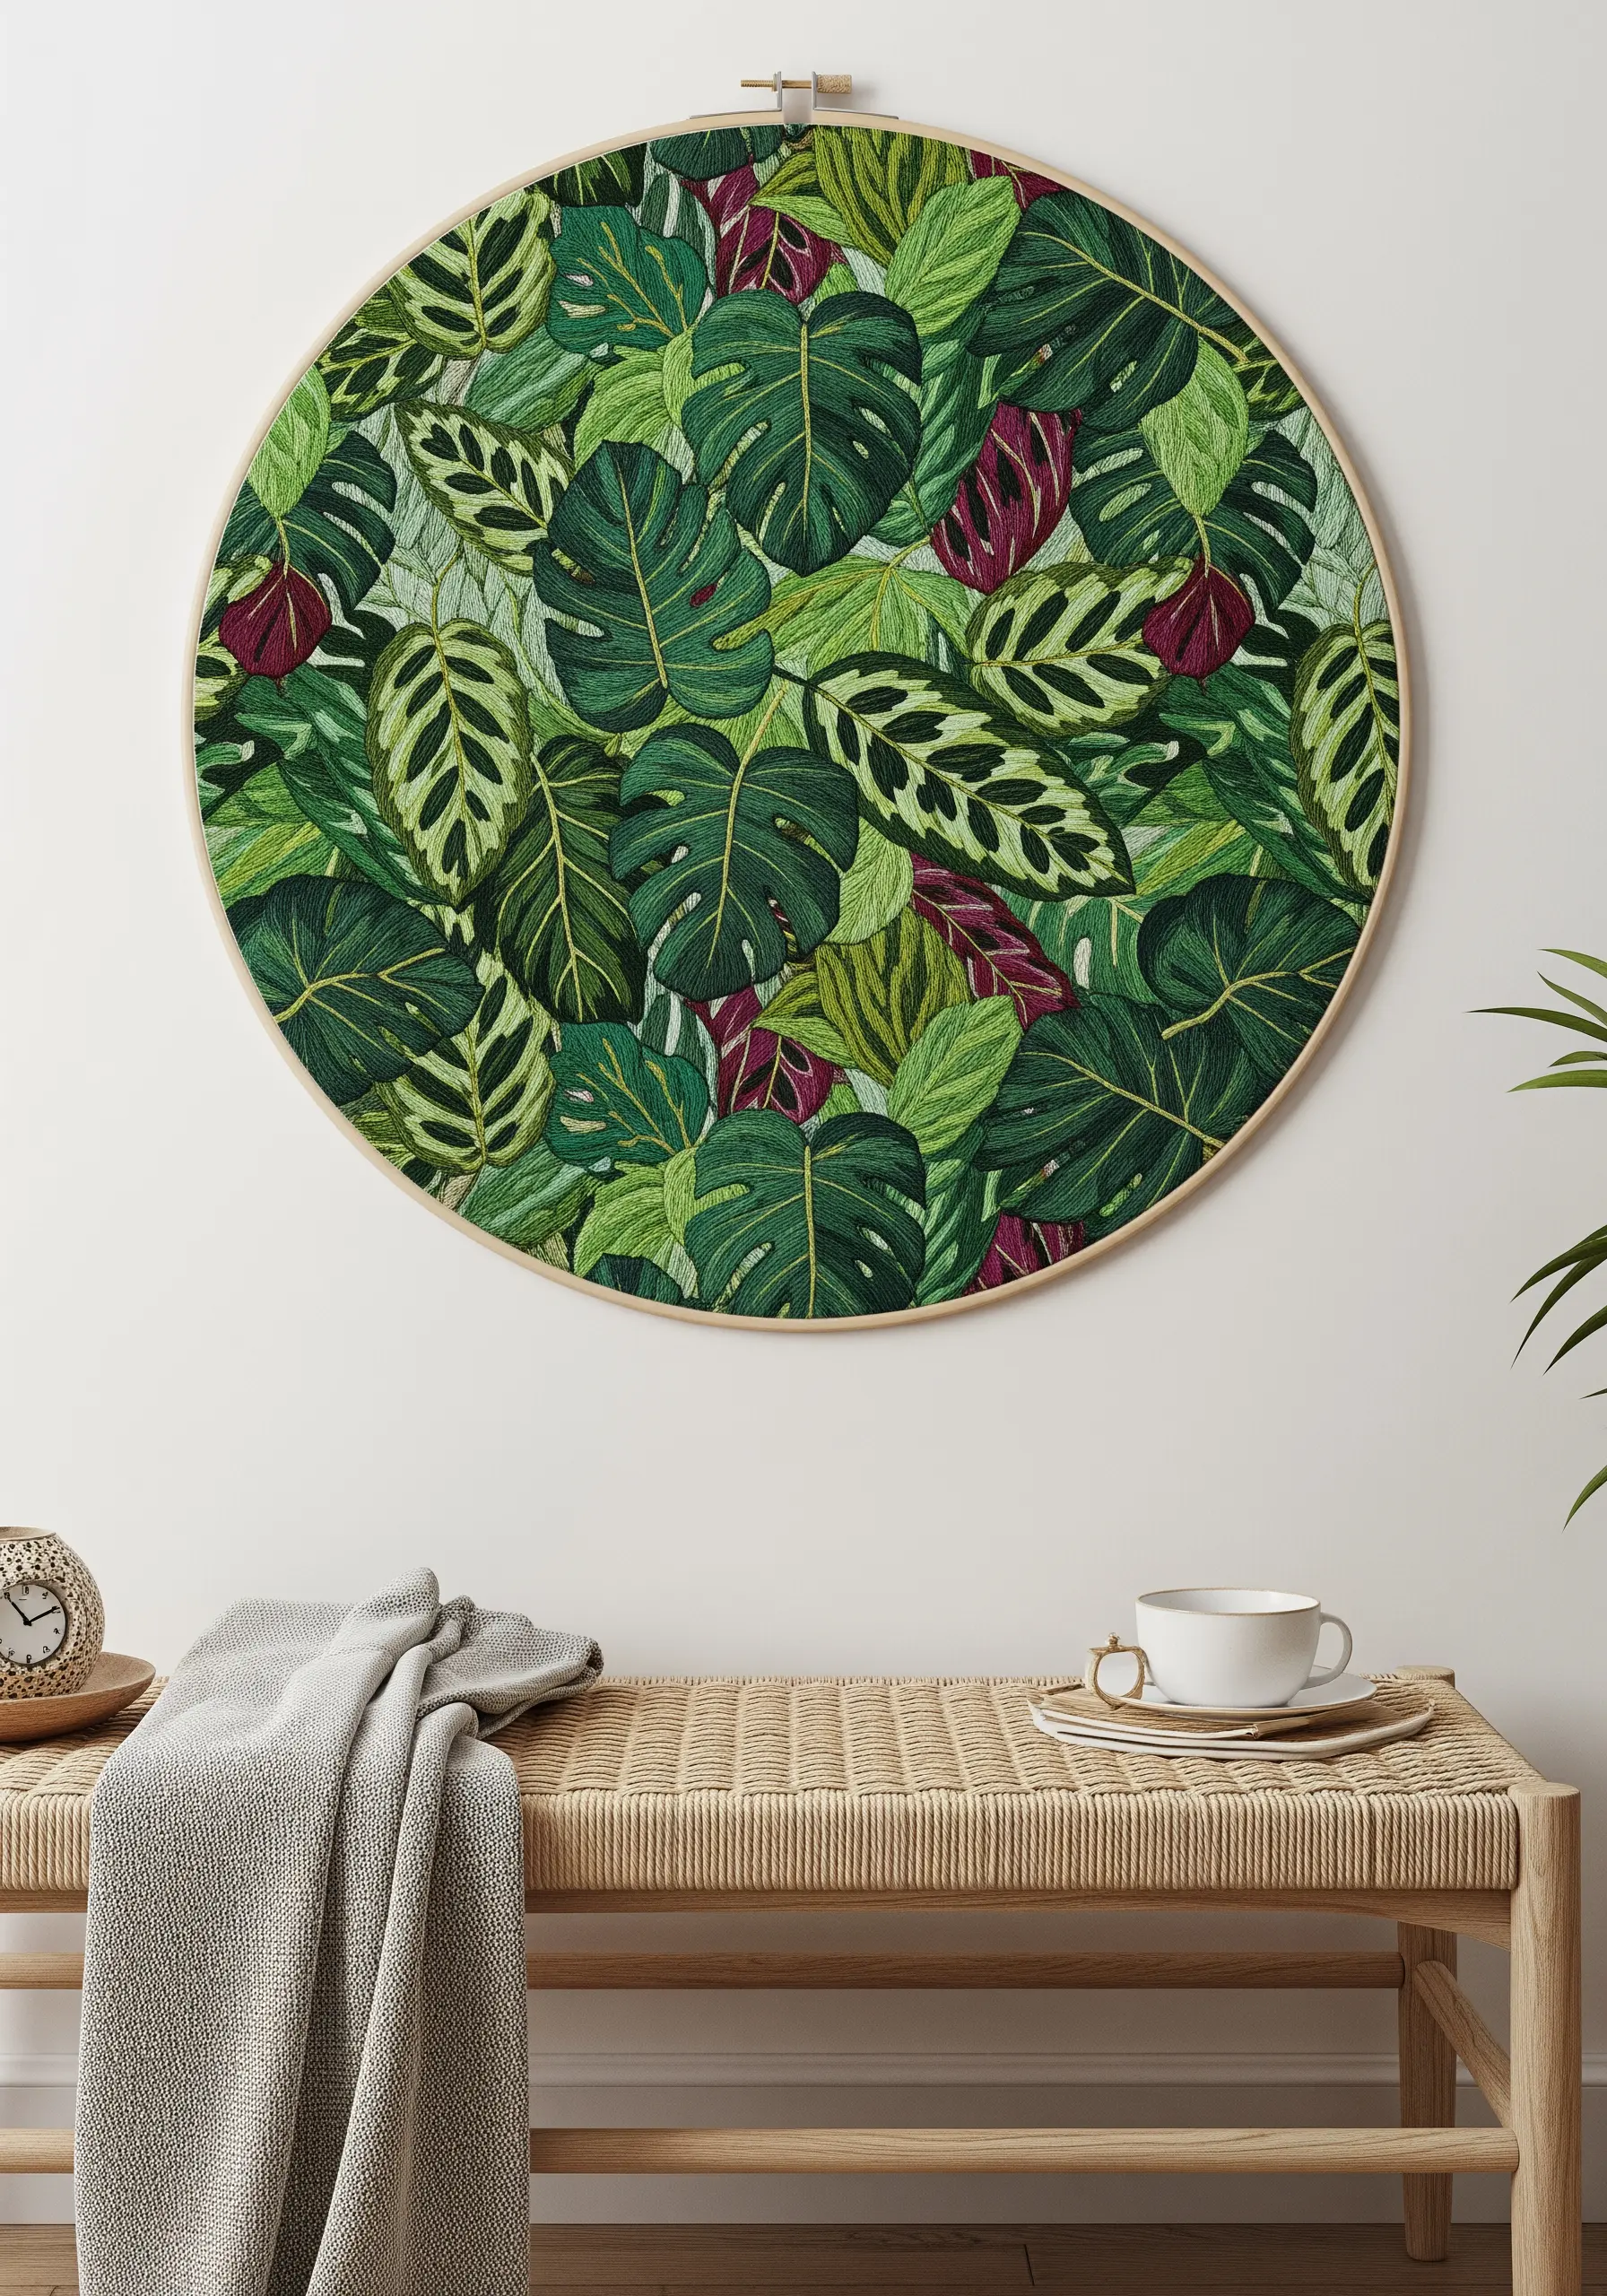
Create a lush, jungle-like density by designing your pattern so that leaves overlap and fill the entire hoop.
Start by stitching the leaves that are furthest in the background, then layer the foreground leaves on top to build realistic depth.
Use a fishbone stitch or satin stitch with a center split to create the prominent veins found in Monstera and Calathea leaves.
This all-over approach transforms the hoop into a window looking directly into a dense canopy of houseplant embroidery motifs.
17. Achieve Delicate Blossoms with French Knots
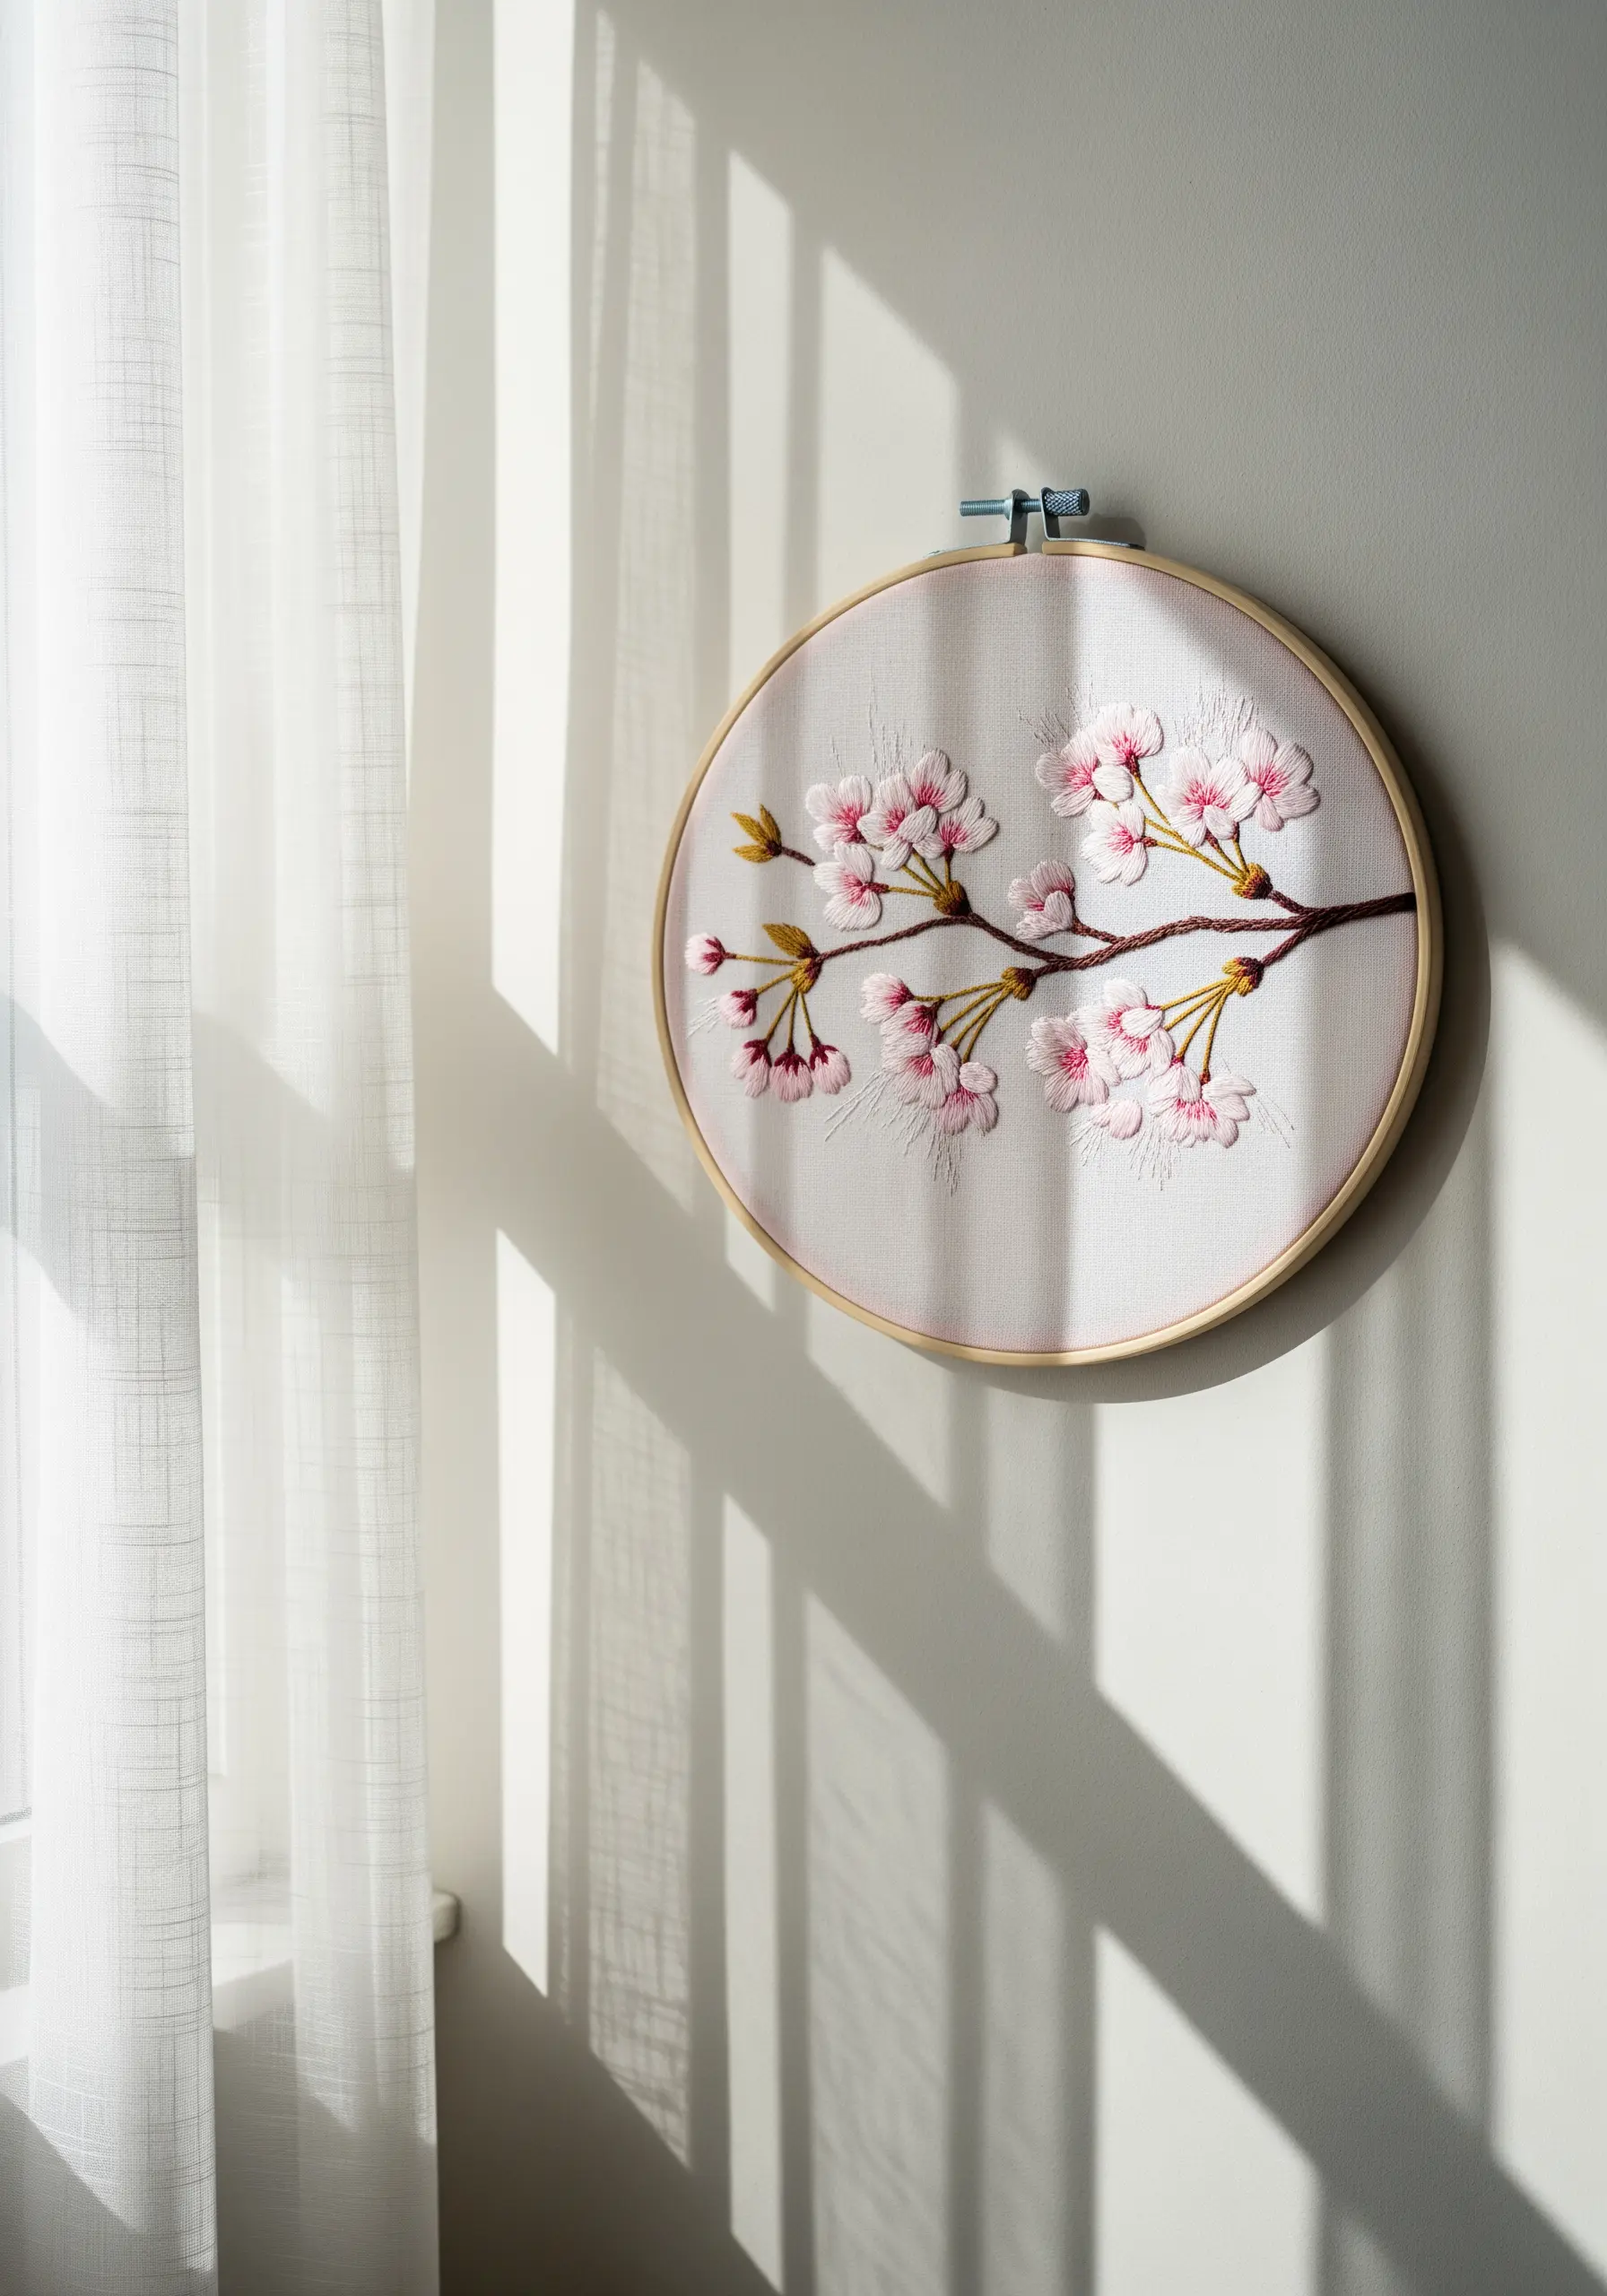
To create the soft, clustered look of cherry blossoms, use French knots with varying numbers of wraps.
Use one or two wraps for the smaller buds and three for the fully opened flowers, creating a subtle difference in size and texture.
Incorporate a darker pink or yellow thread for the knot in the very center of each blossom to add depth and realism.
This technique is beautifully simple yet highly effective for building up realistic, dimensional hand-embroidered flower stitches.
18. Paint the Sky with Vertical Stitches
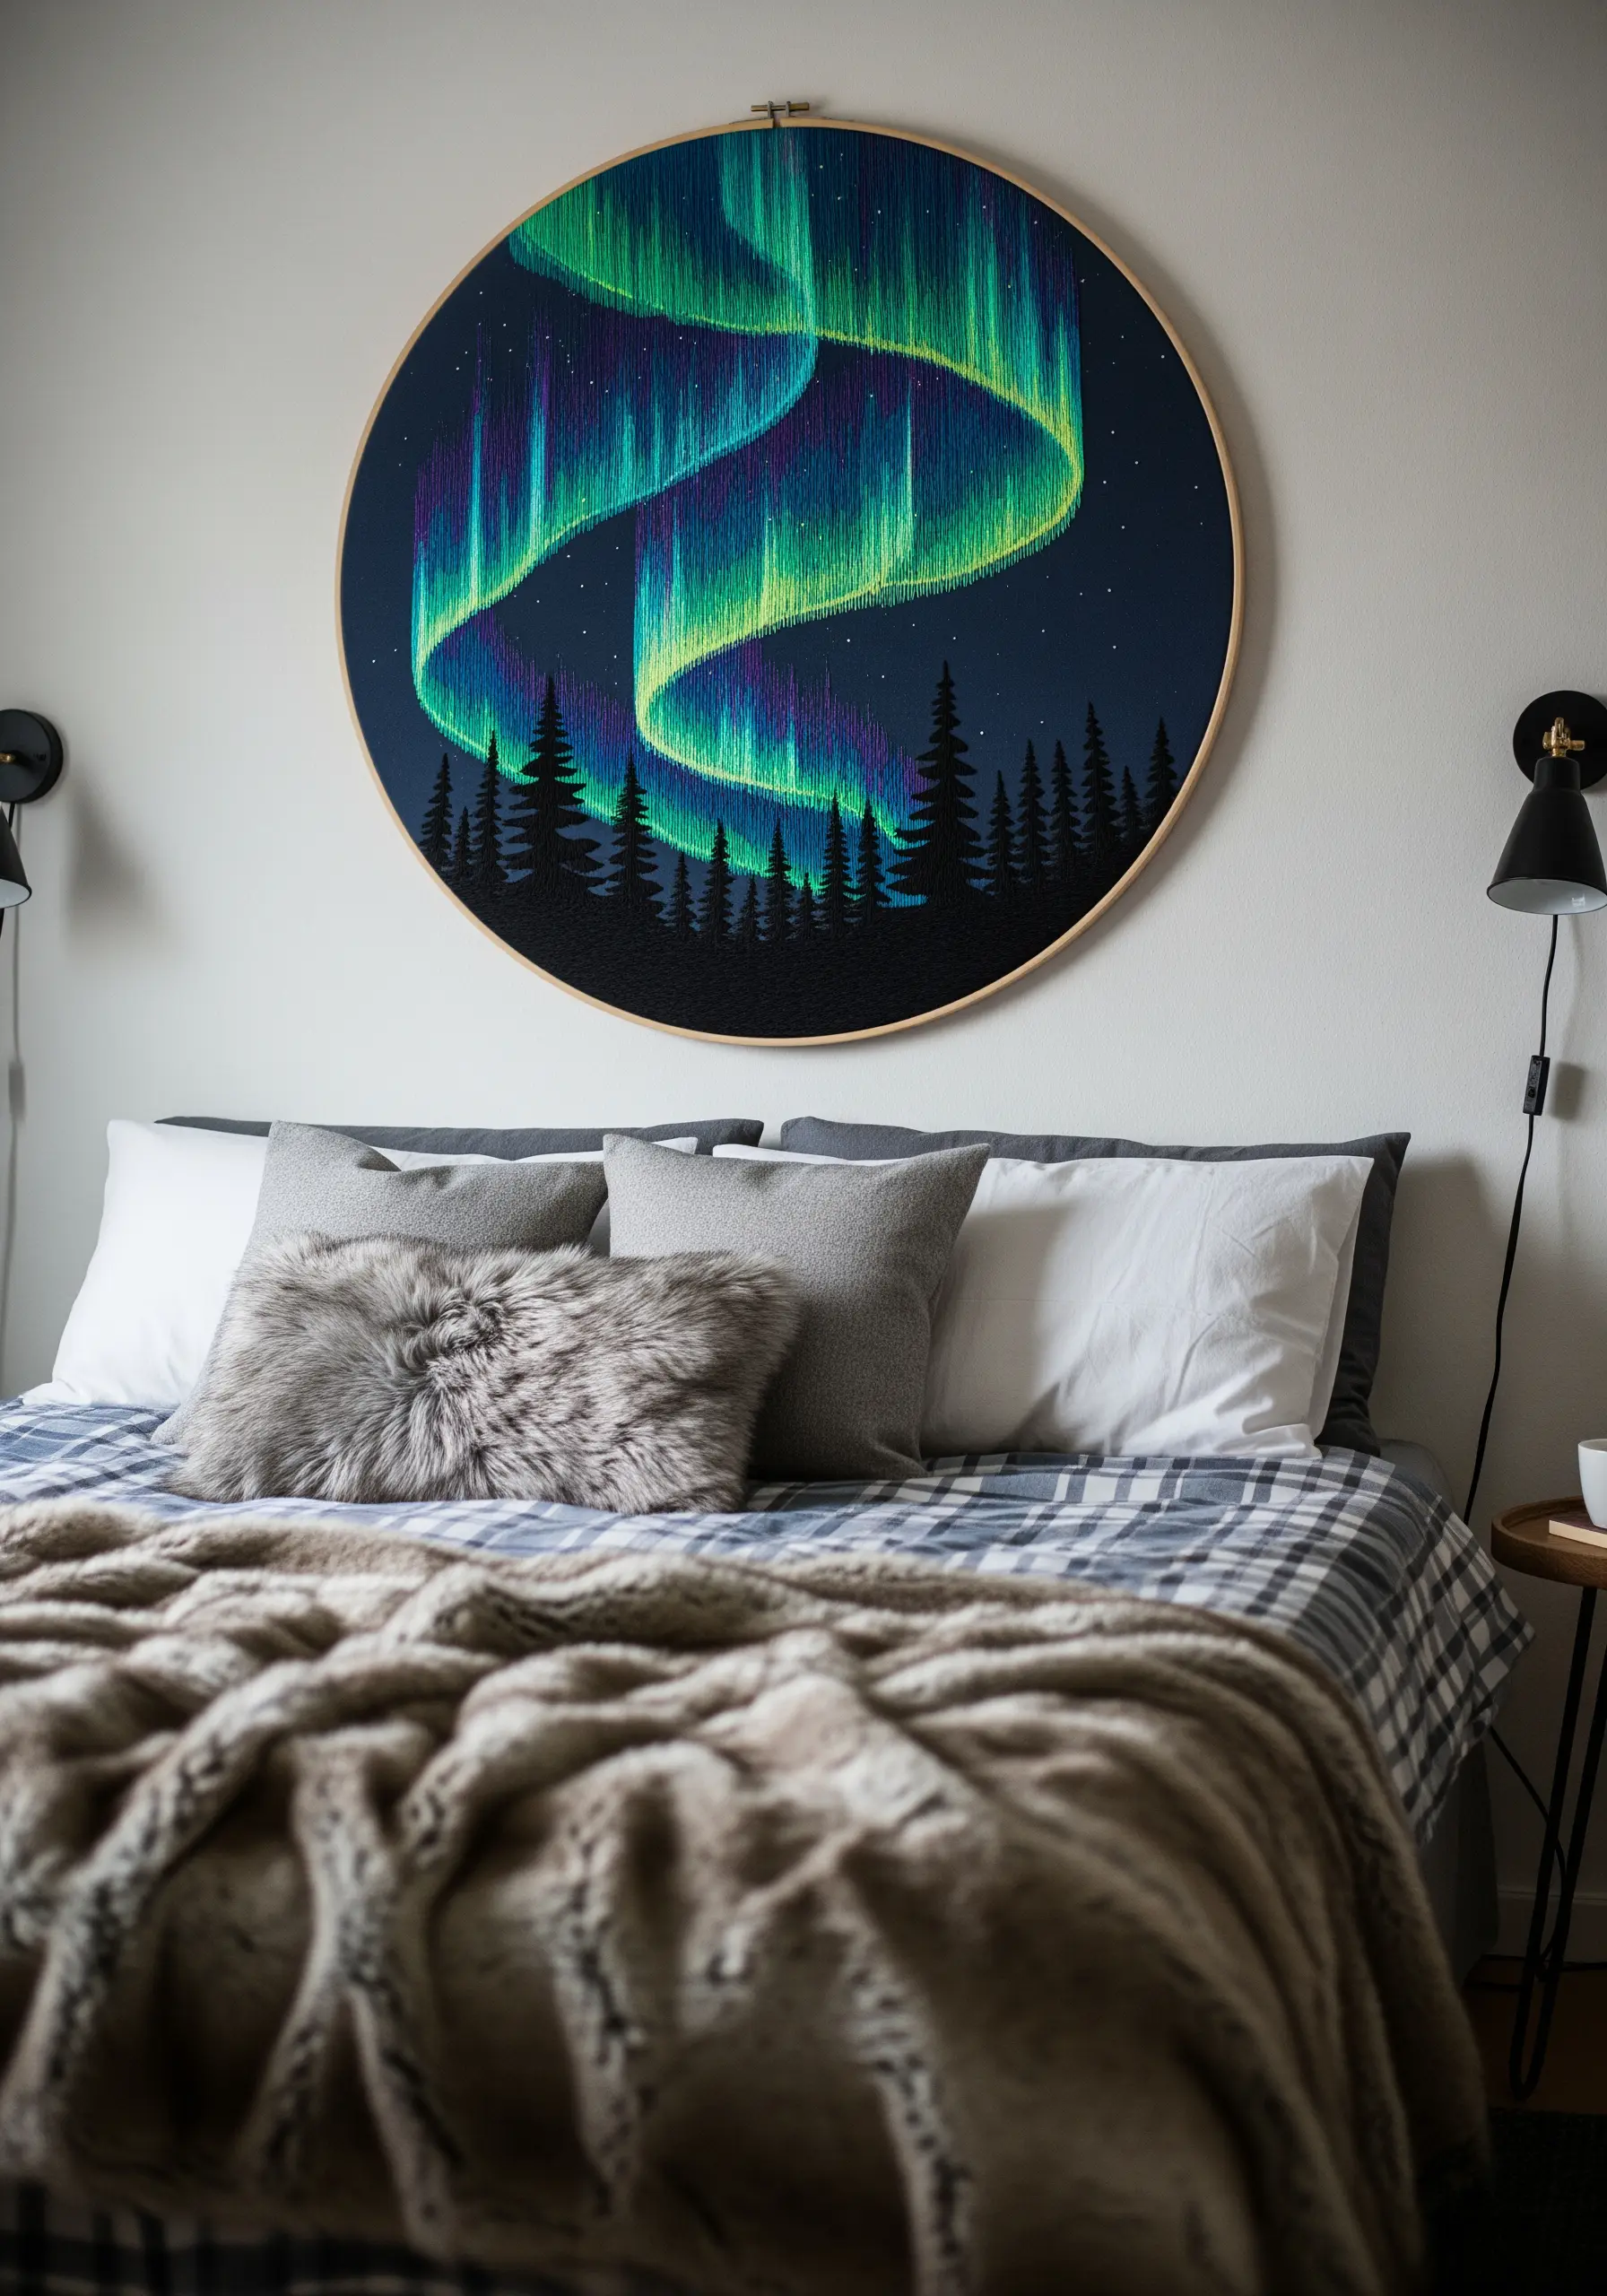
Capture the ethereal glow of the Northern Lights by using long vertical stitches in single strands of floss.
Lay your colors—neon green, electric blue, and vibrant purple—side-by-side without blending them perfectly to mimic the sharp, dancing ribbons of light.
Using a mix of regular cotton floss and shiny rayon or silk threads will add a natural shimmer to the aurora.
This technique of “thread painting” with vertical strokes on a dark fabric background creates a breathtakingly realistic and dramatic night sky.
19. Curate a Vibrant Folk Art Gallery Wall
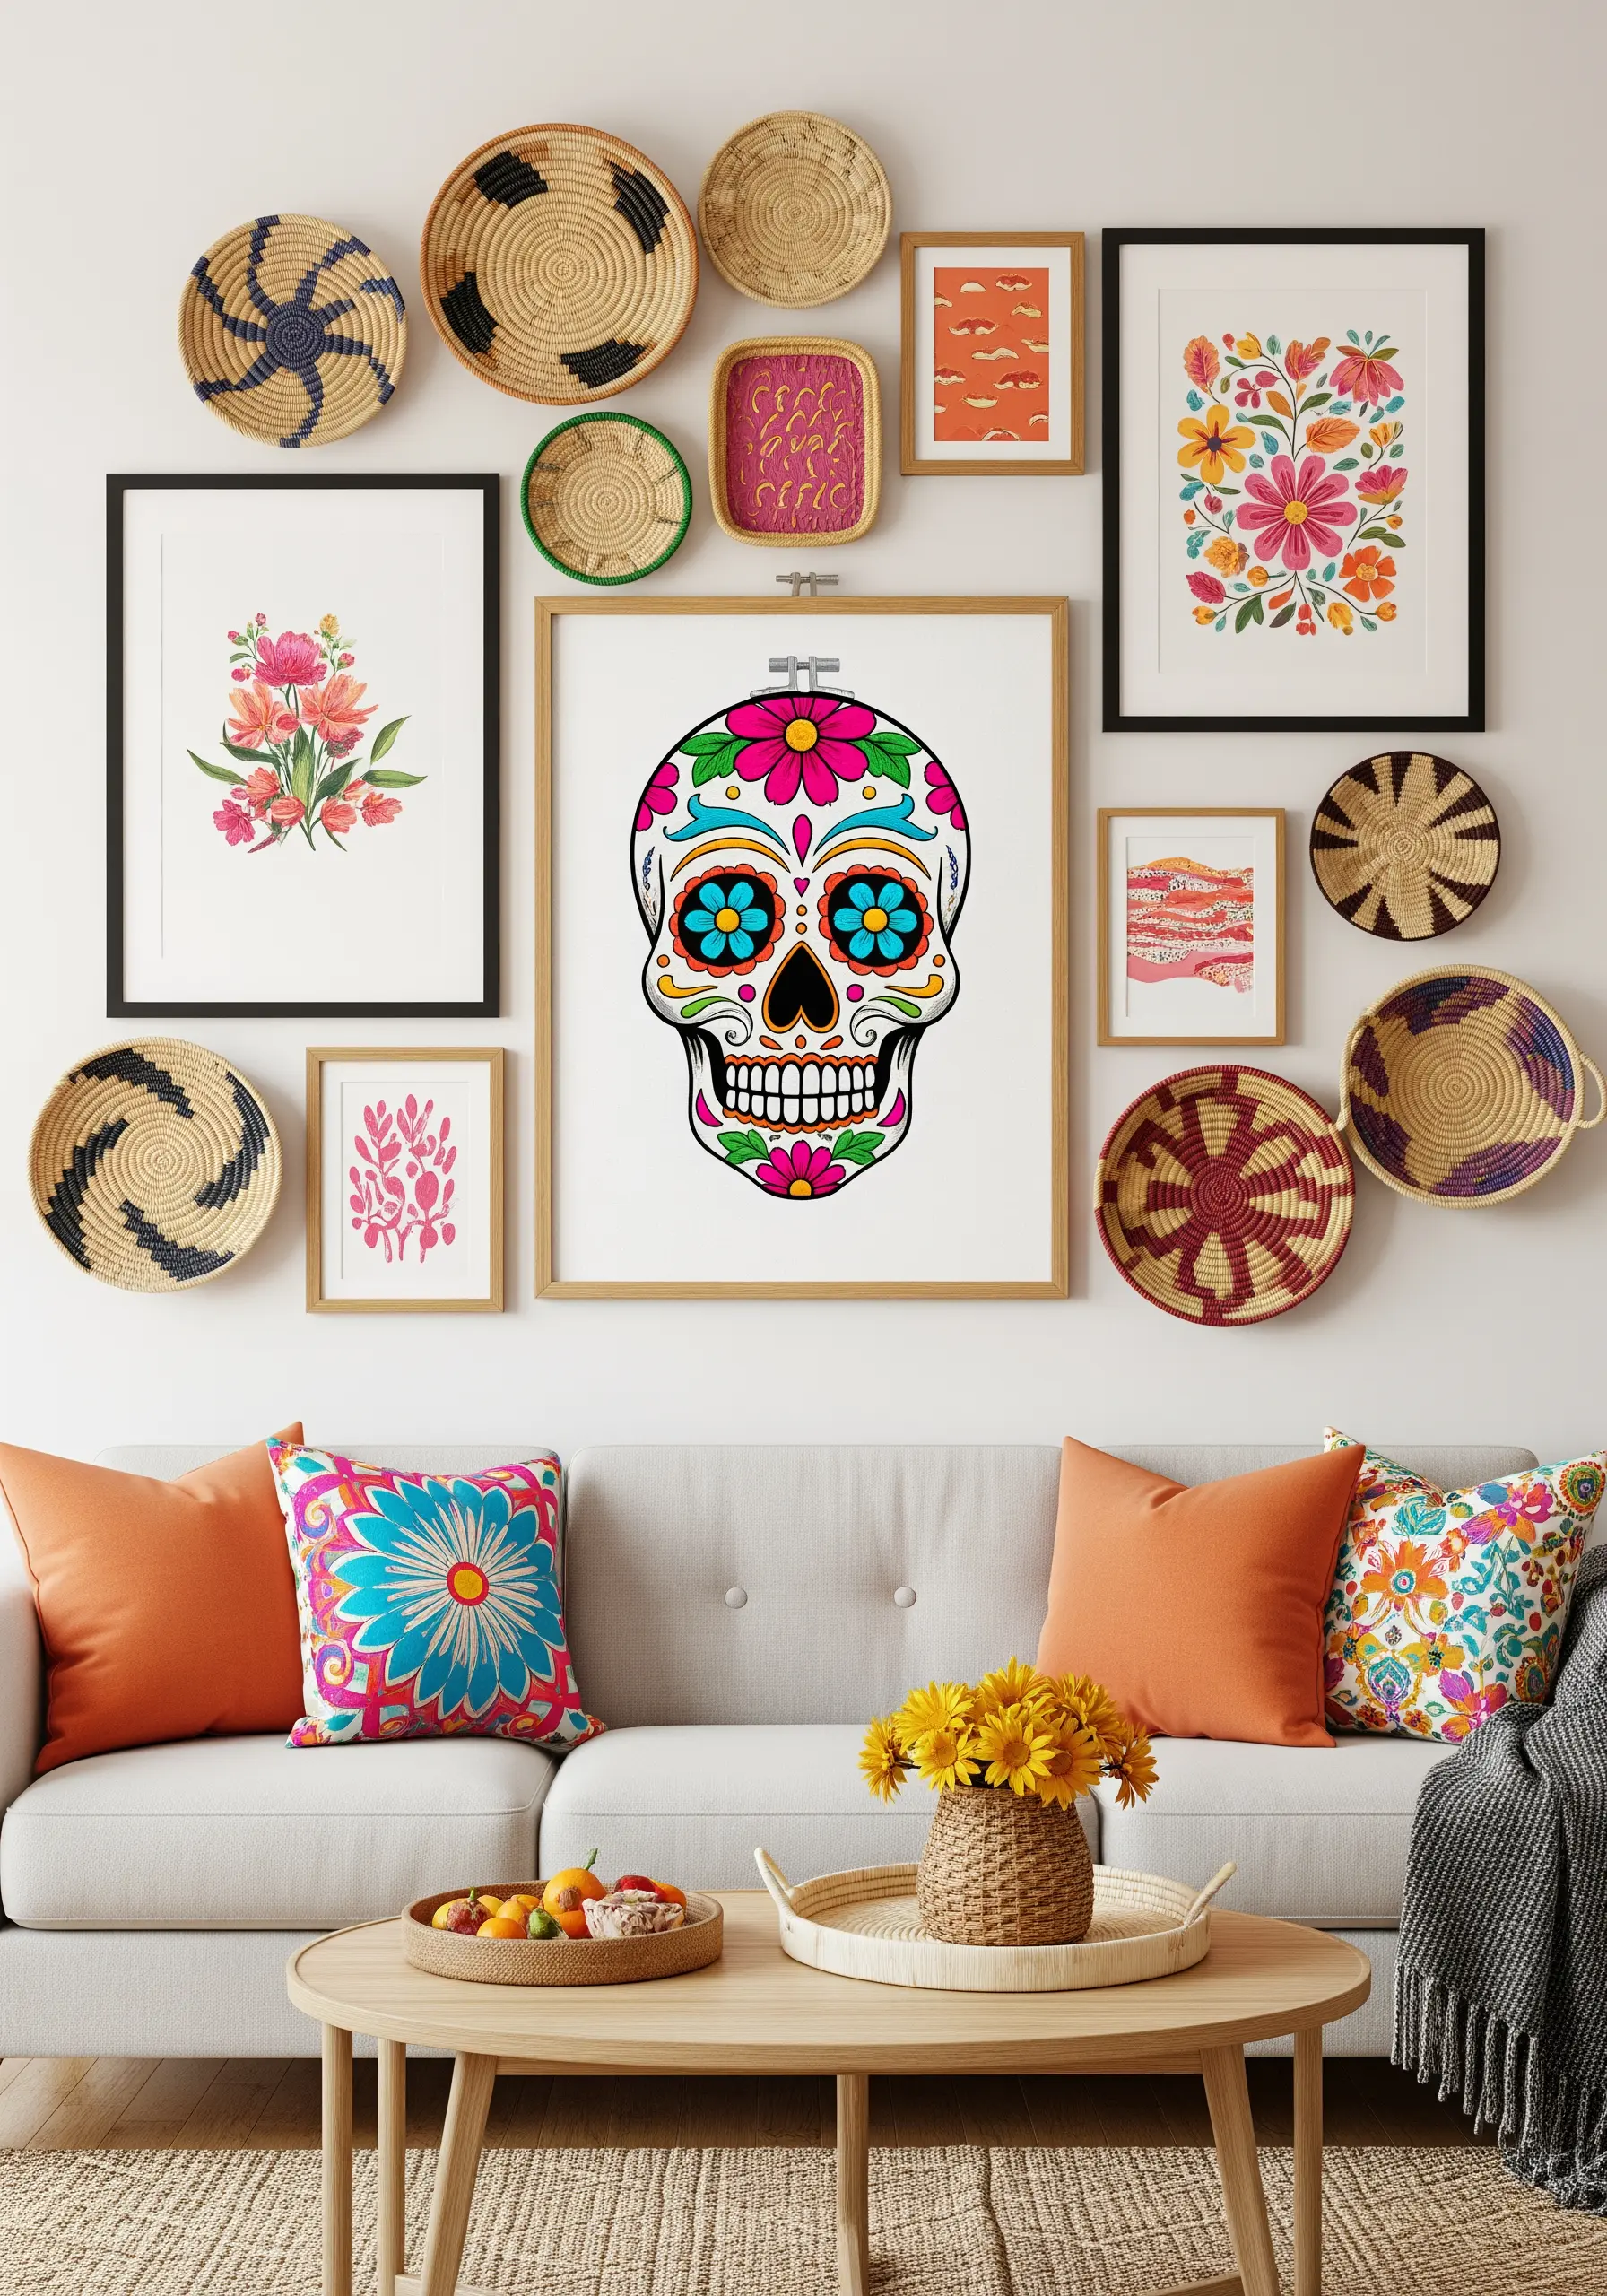
Embrace a maximalist boho style by mixing your embroidered art with other mediums like paintings, prints, and woven baskets.
To make a sugar skull design pop, use bold, contrasting colors and outline each section with a clean black backstitch for a graphic, illustrative effect.
Use a smooth satin stitch to fill the colored sections, creating a look that’s as clean and vibrant as a painted design.
This approach allows your embroidery to be part of a larger, more eclectic story on your wall.
20. Create a Meditative Mandala with Color Gradients
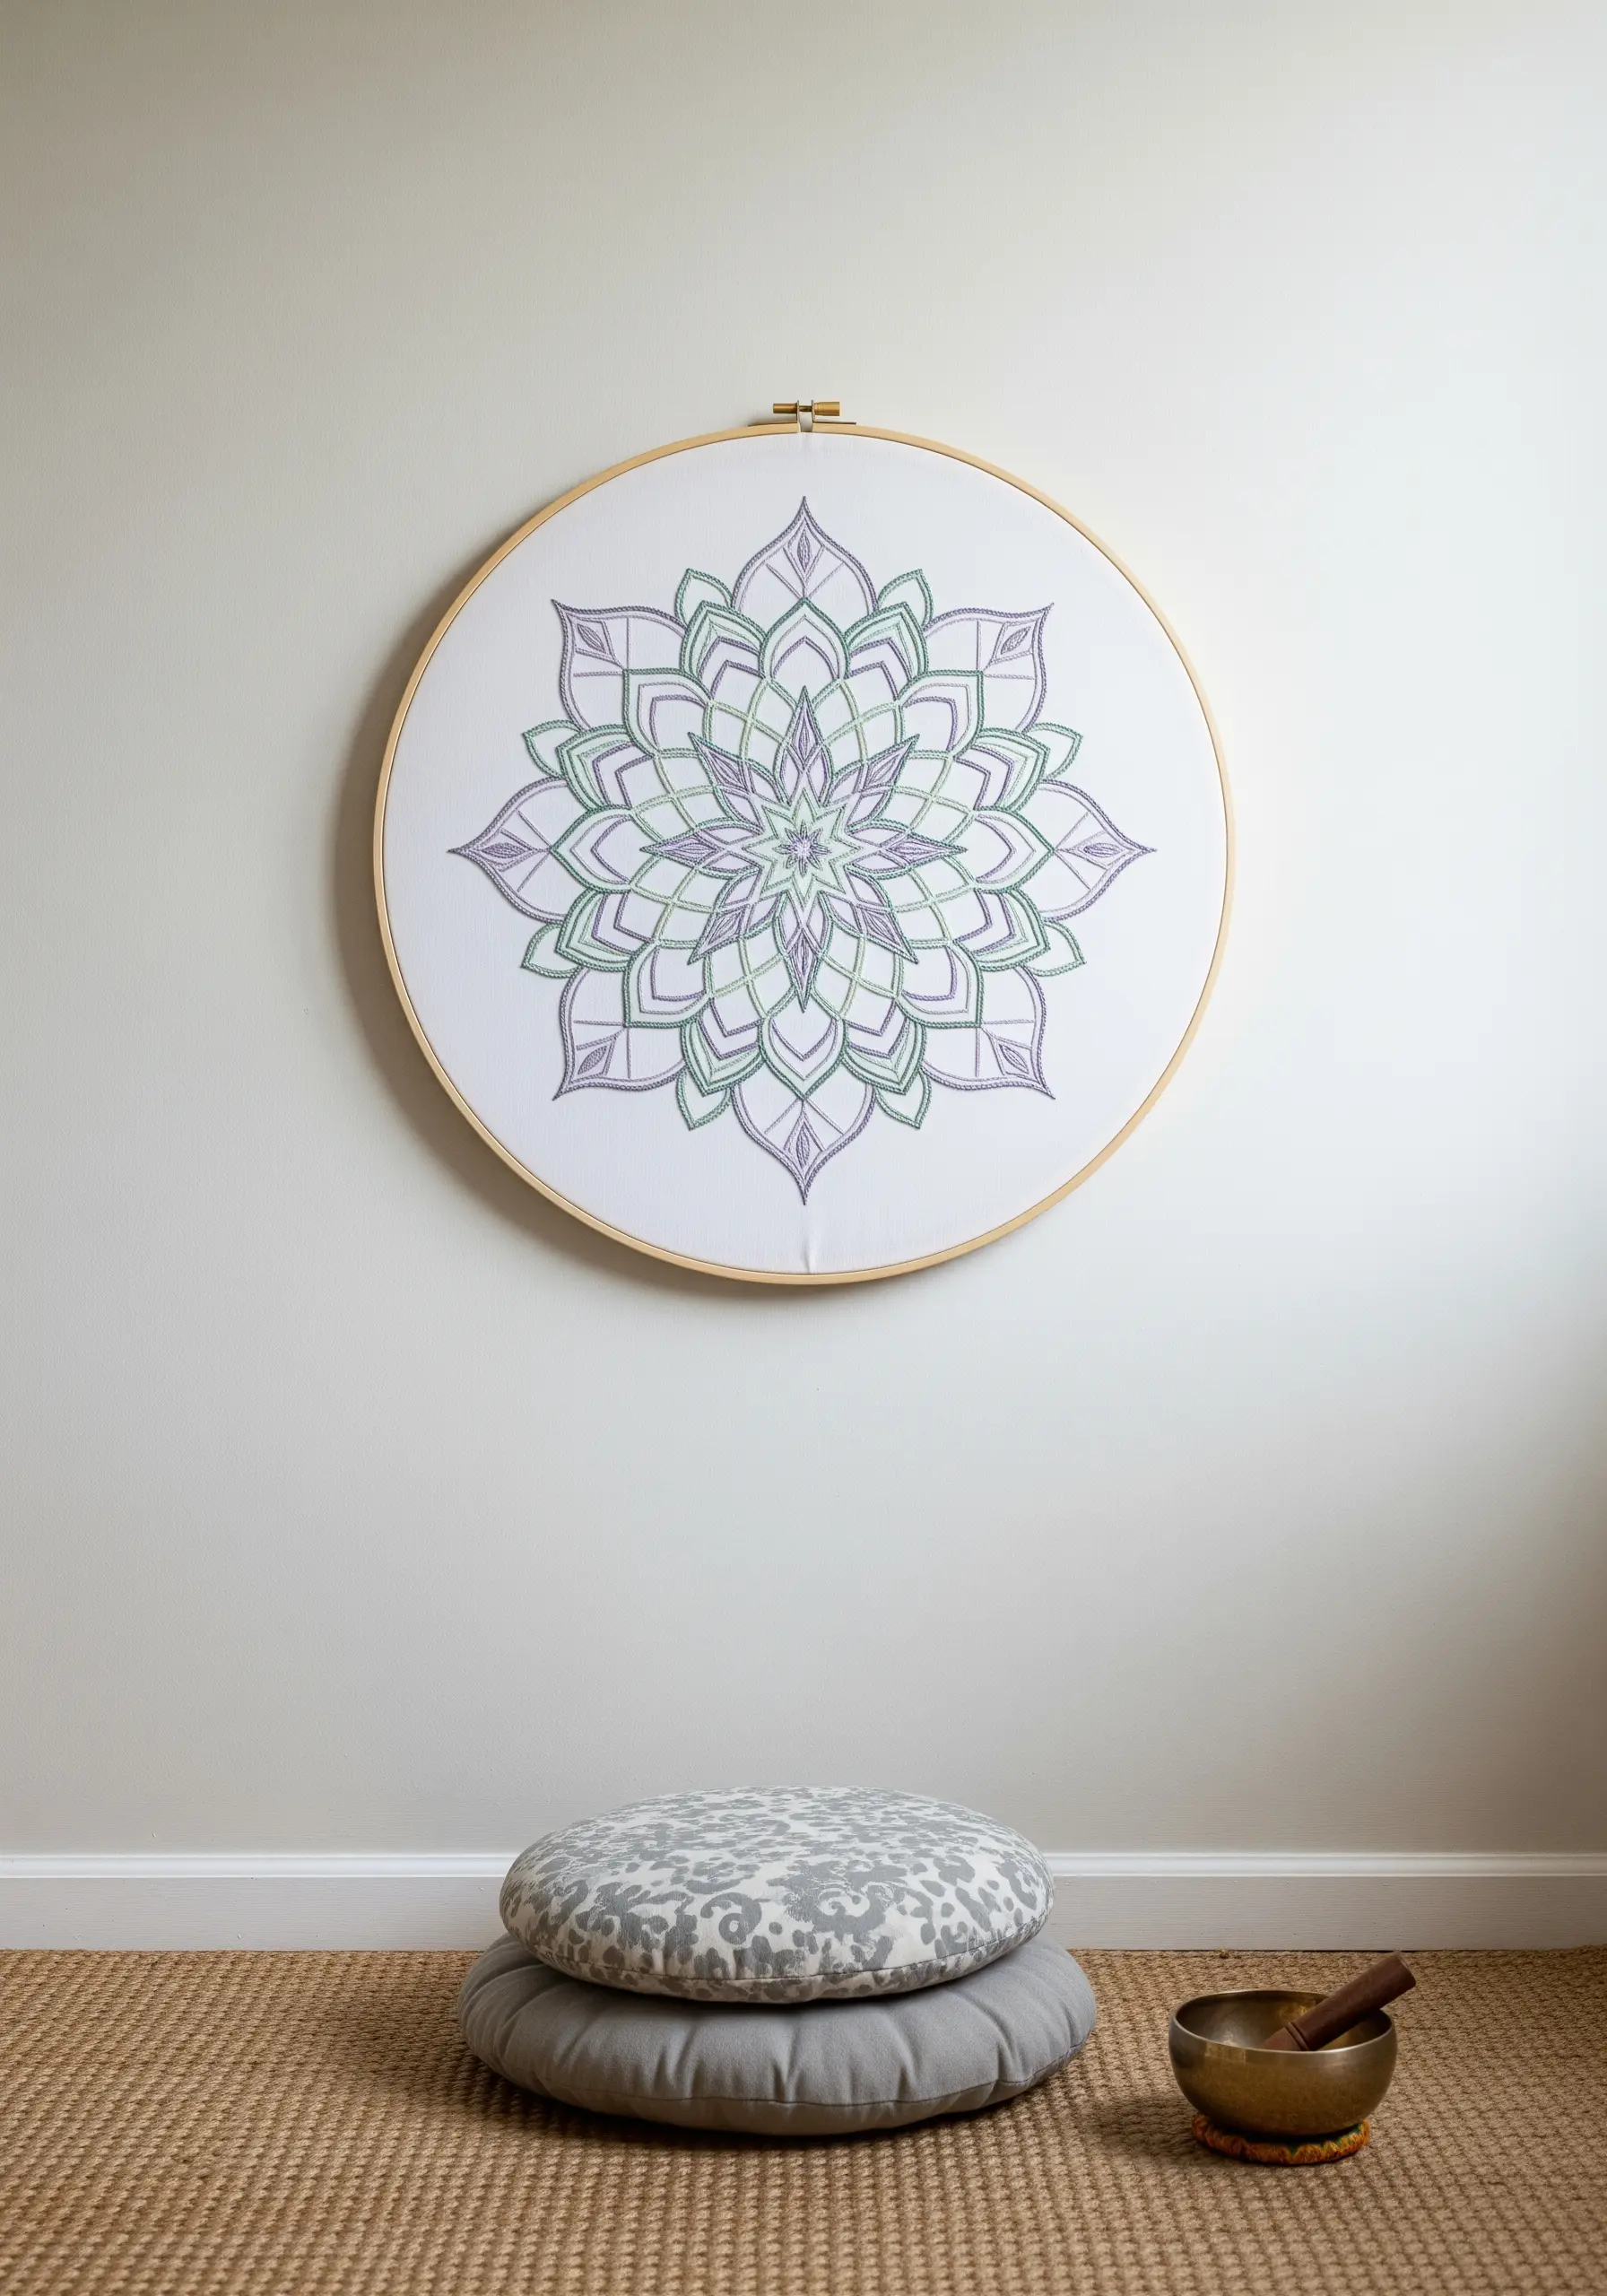
Build a calming visual rhythm in your mandala by using a gradient of three or four harmonious colors, like shades of lavender and sage green.
Assign one color to the outer rings, a medium shade to the middle, and the lightest shade to the center, drawing the eye inward.
Use a simple backstitch for the entire design; its consistency allows the color transitions to be the main focus.
This methodical use of color makes the stitching process itself a meditative act and results in serene, balanced neutral mandala embroidery patterns.
21. Achieve a Vintage Botanical Print Effect
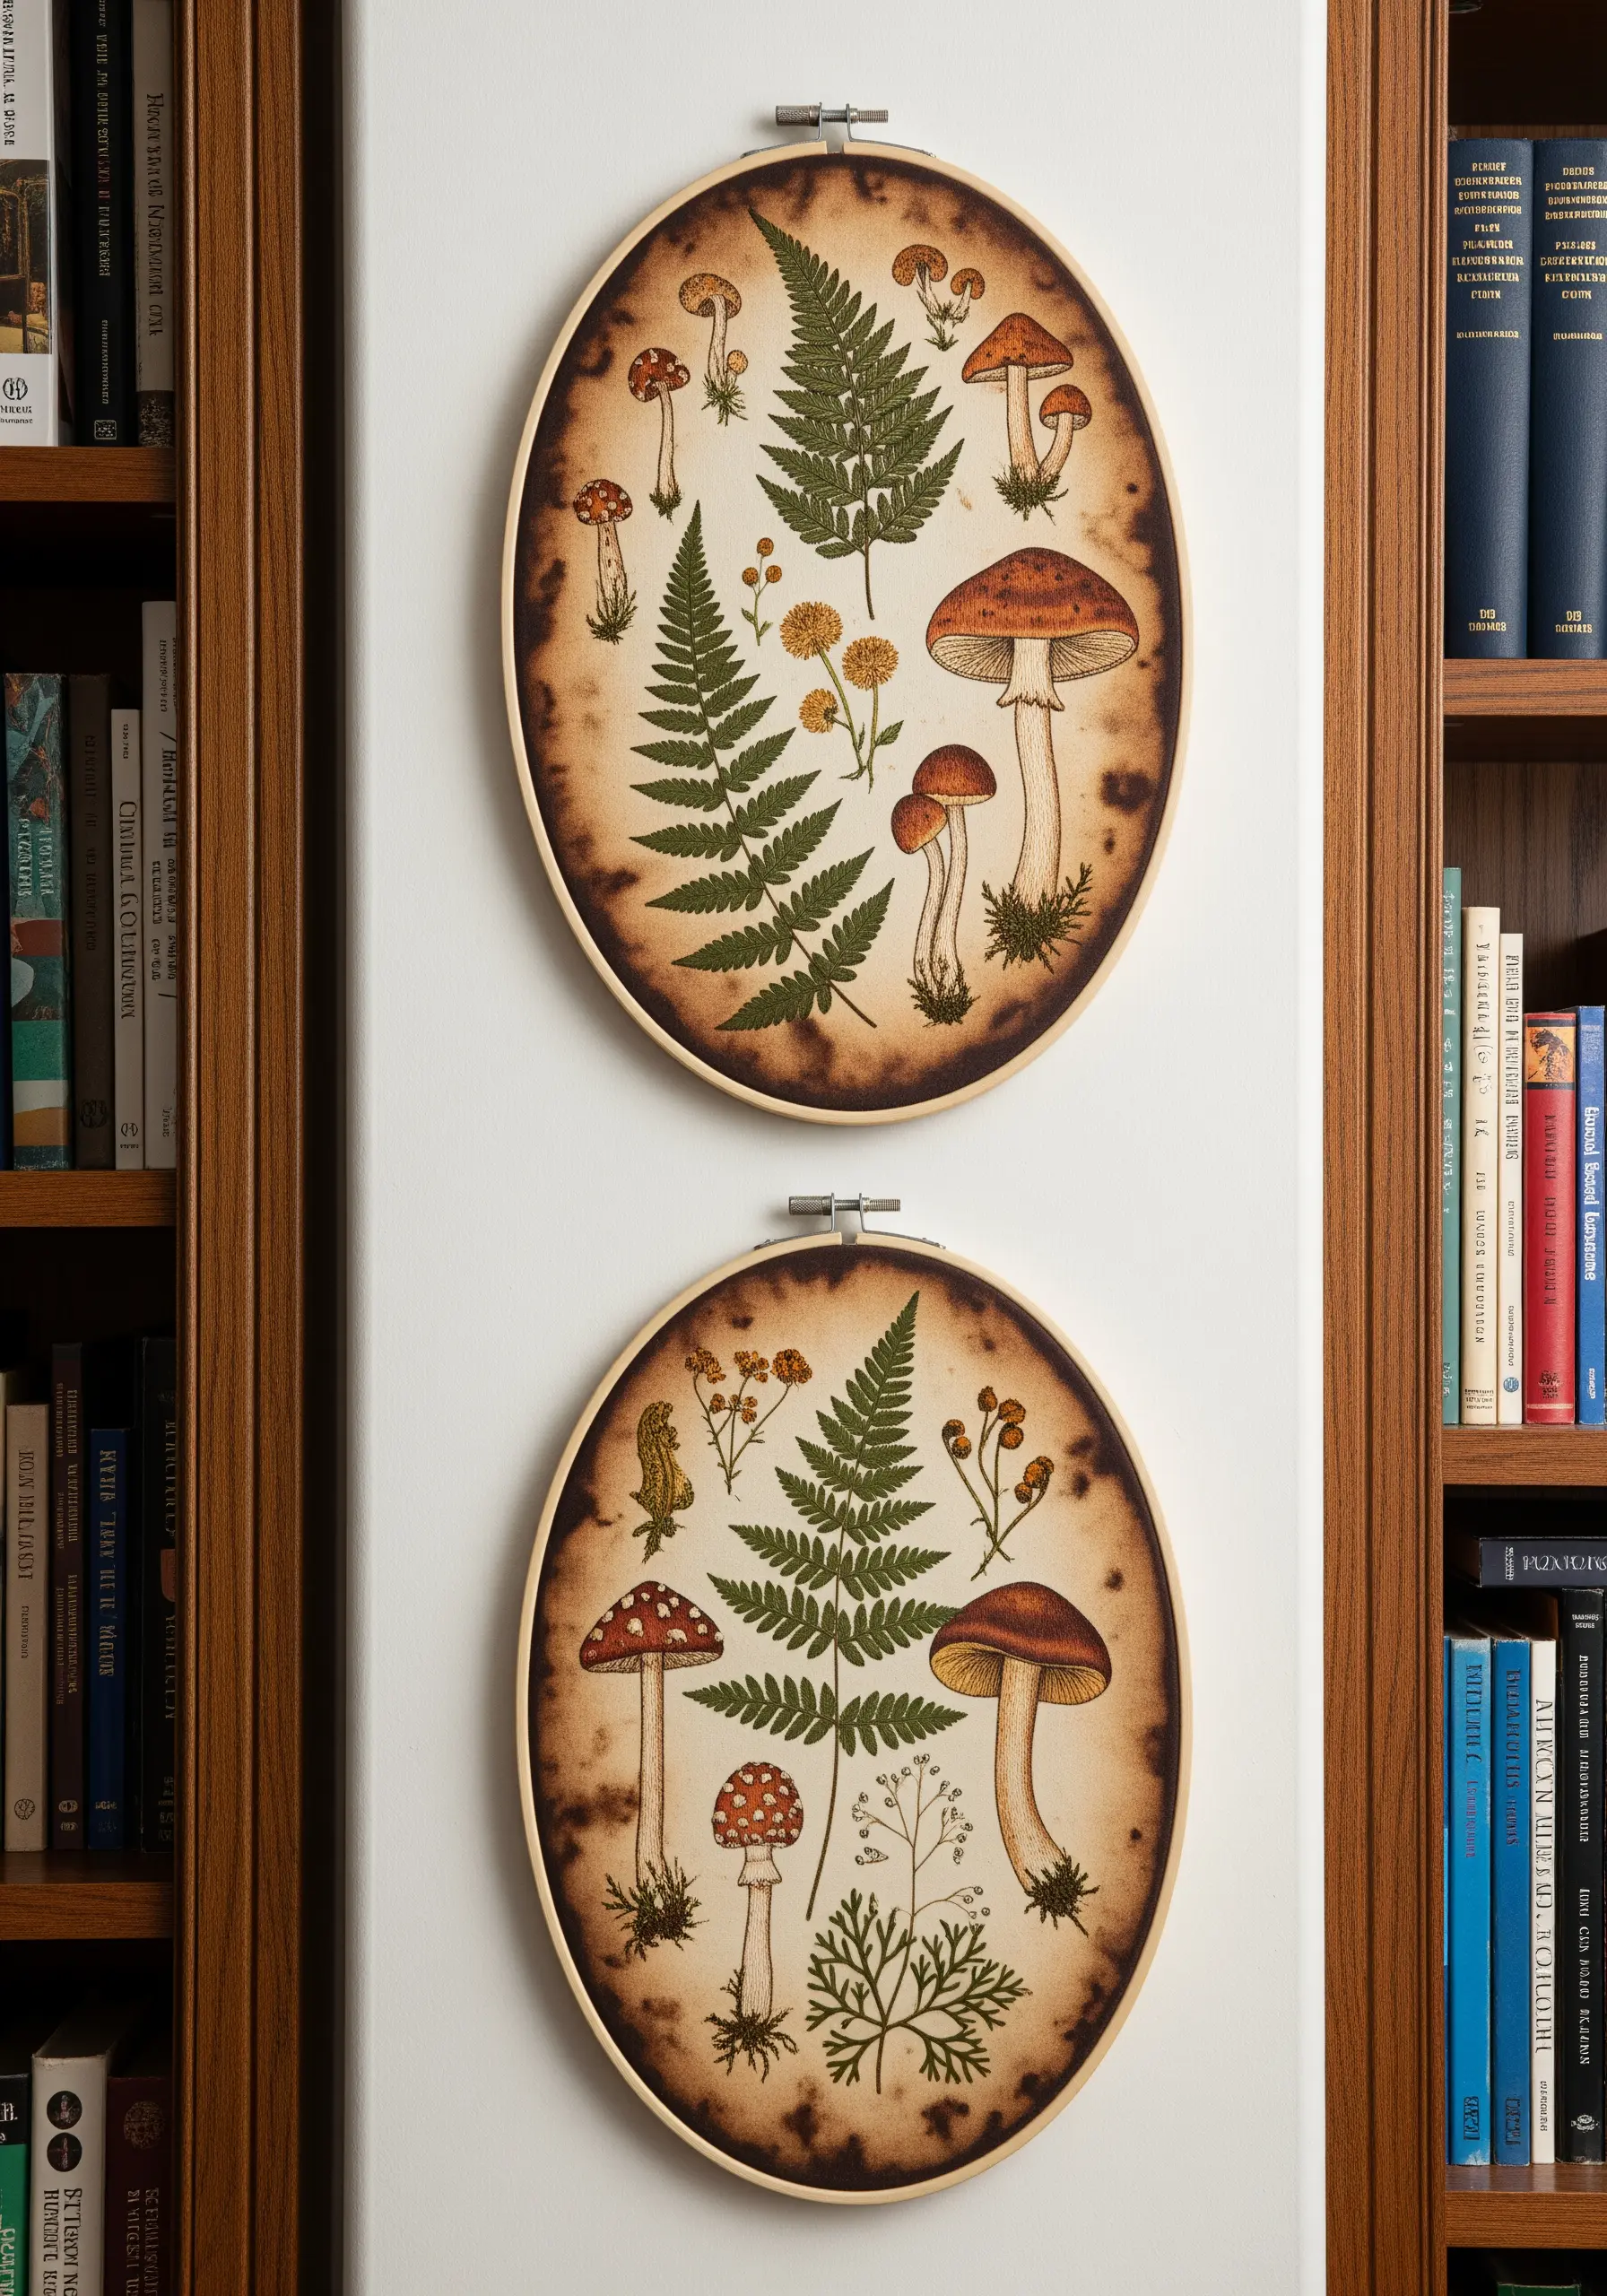
To give your embroidery the look of an aged scientific illustration, stitch on fabric that you’ve pre-dyed with tea or coffee.
This creates a warm, parchment-like background that instantly adds a vintage feel.
Use a very fine backstitch with one or two strands of thread to capture the delicate details of ferns and mushrooms.
Choosing an oval hoop enhances the classic, cameo-like aesthetic, turning your work into a timeless piece of art.
22. Sculpt Fluffy Clouds with French Knots
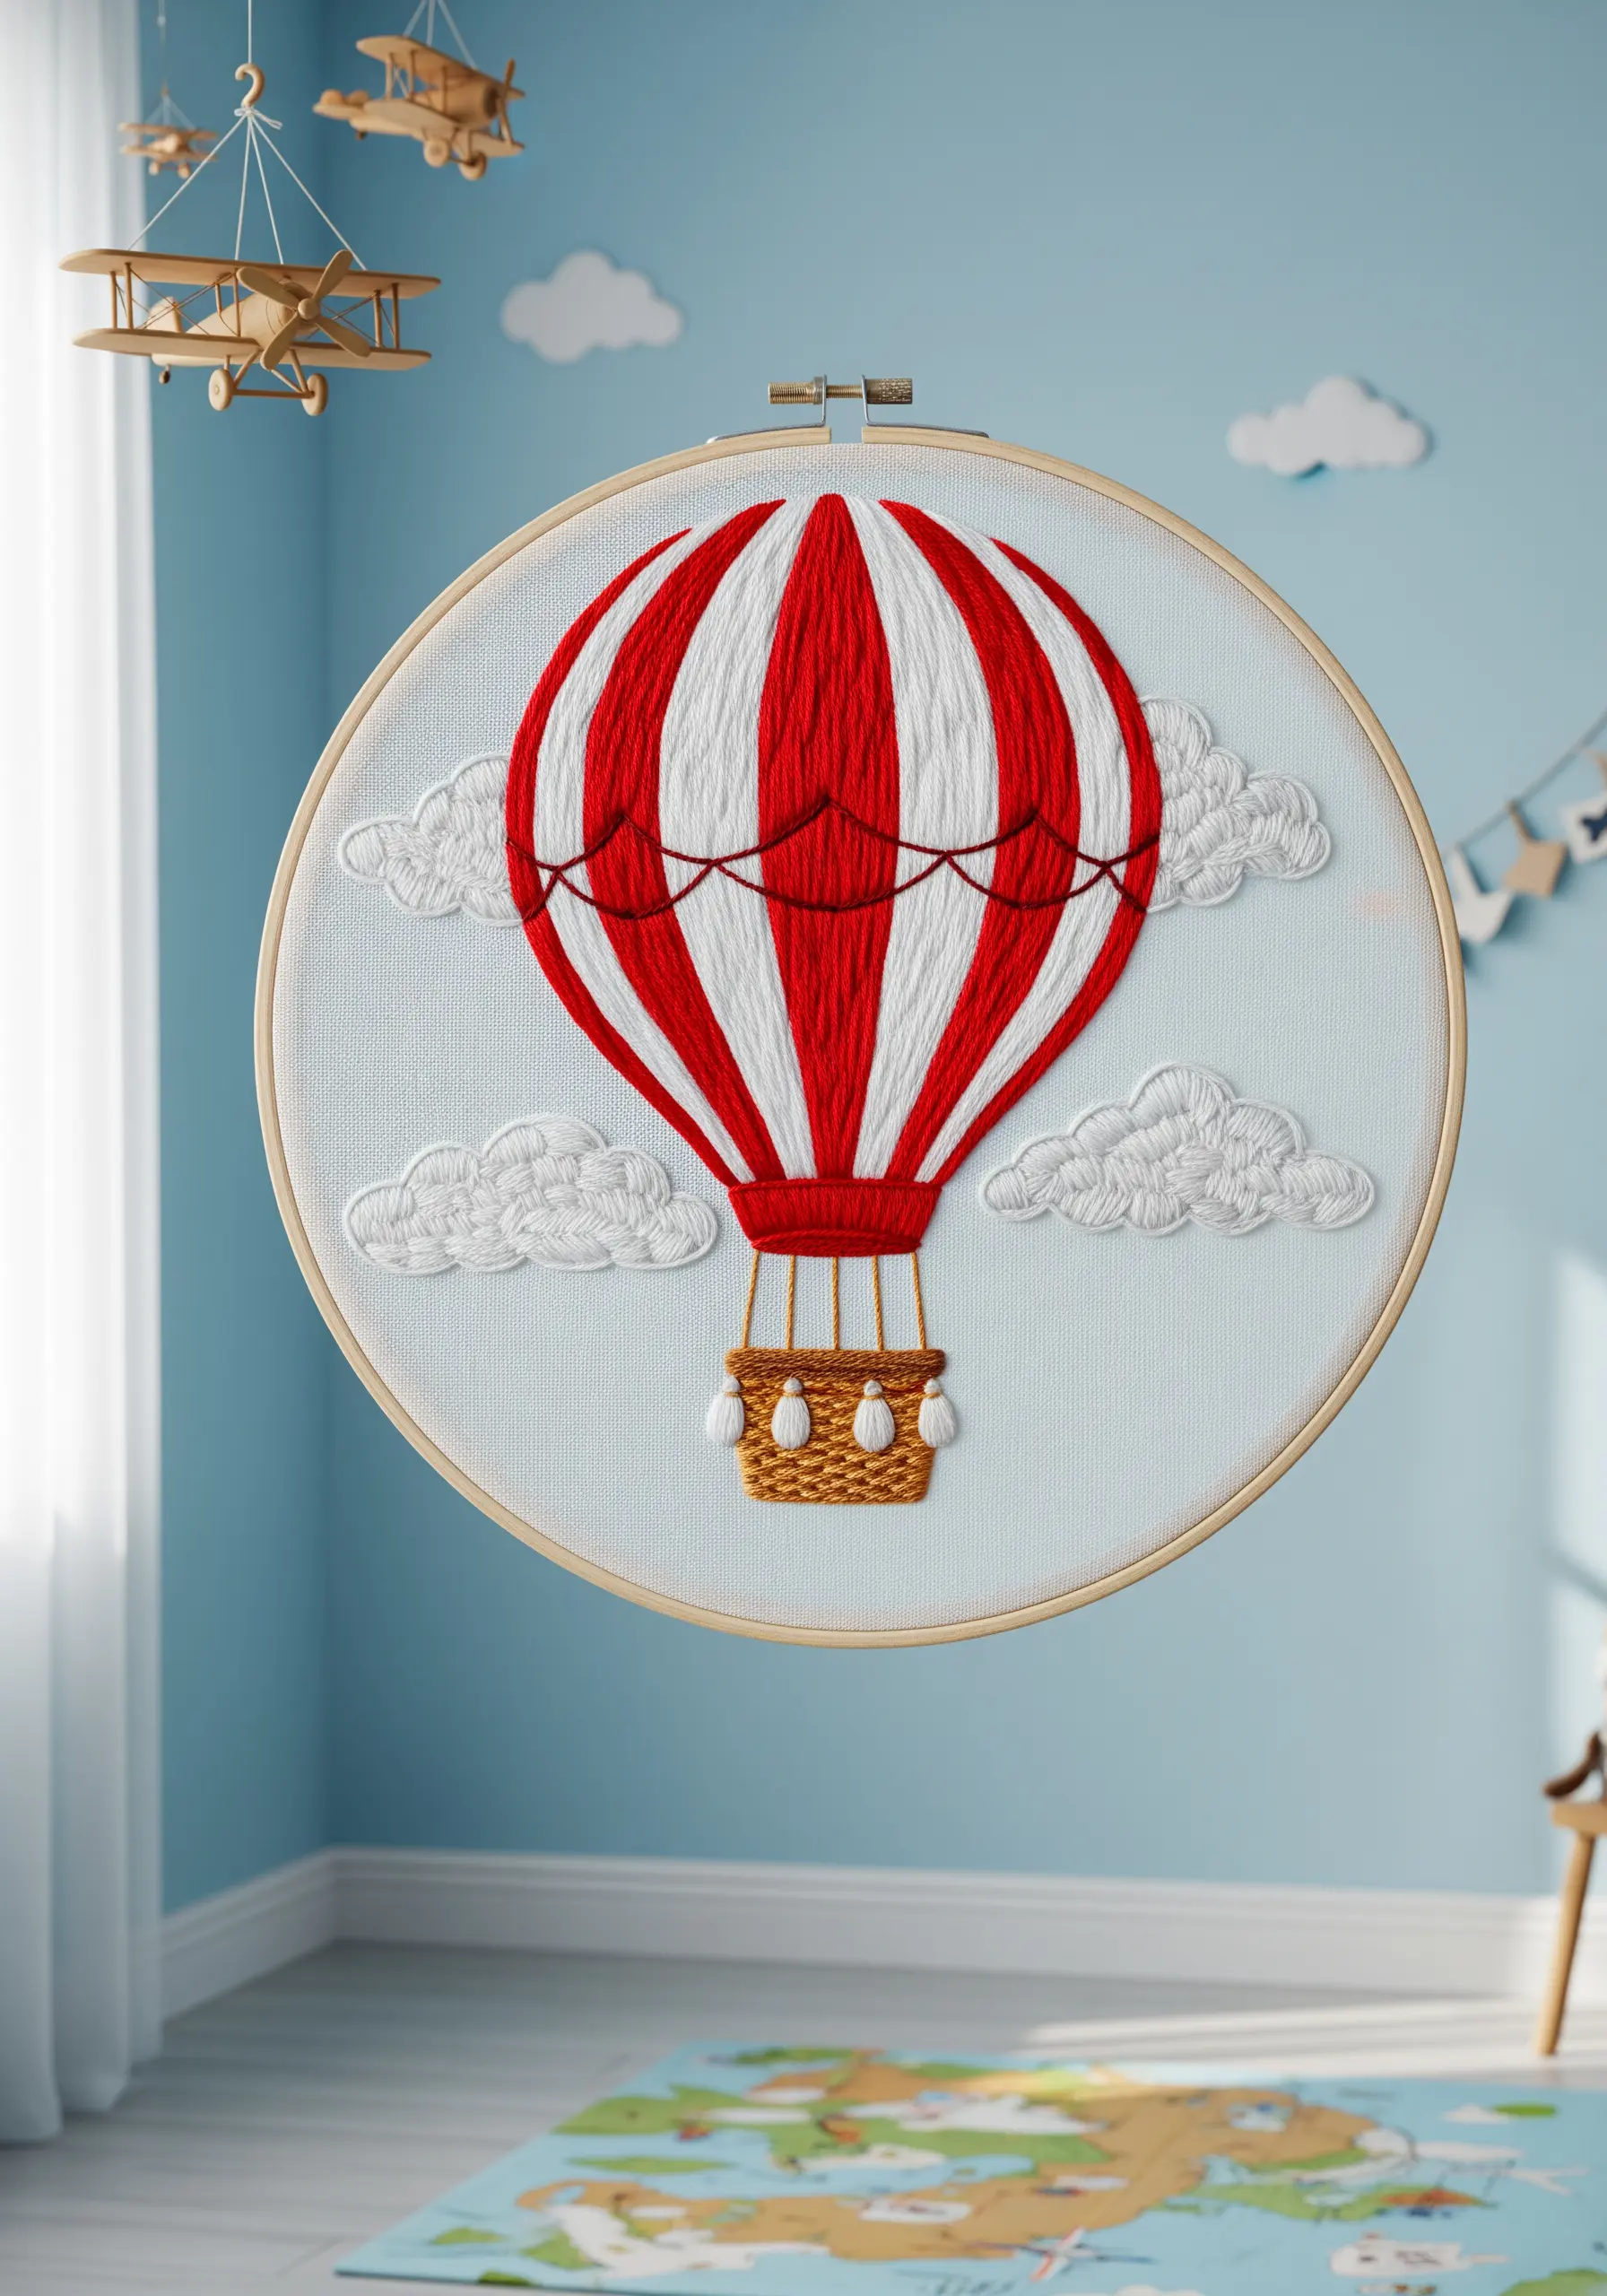
Instead of outlining clouds, fill them entirely with dense French knots to create a soft, billowy texture.
Use a slightly thicker thread, like all six strands of white floss, to make the knots fuller and more cloud-like.
For the hot air balloon, use a directional satin stitch, angling the stitches to follow the balloon’s curved panels—this adds dimension and realism.
The contrast between the smooth balloon and the fluffy clouds makes the entire piece more dynamic and visually interesting.
23. Design a Long-Format Kitchen Sign
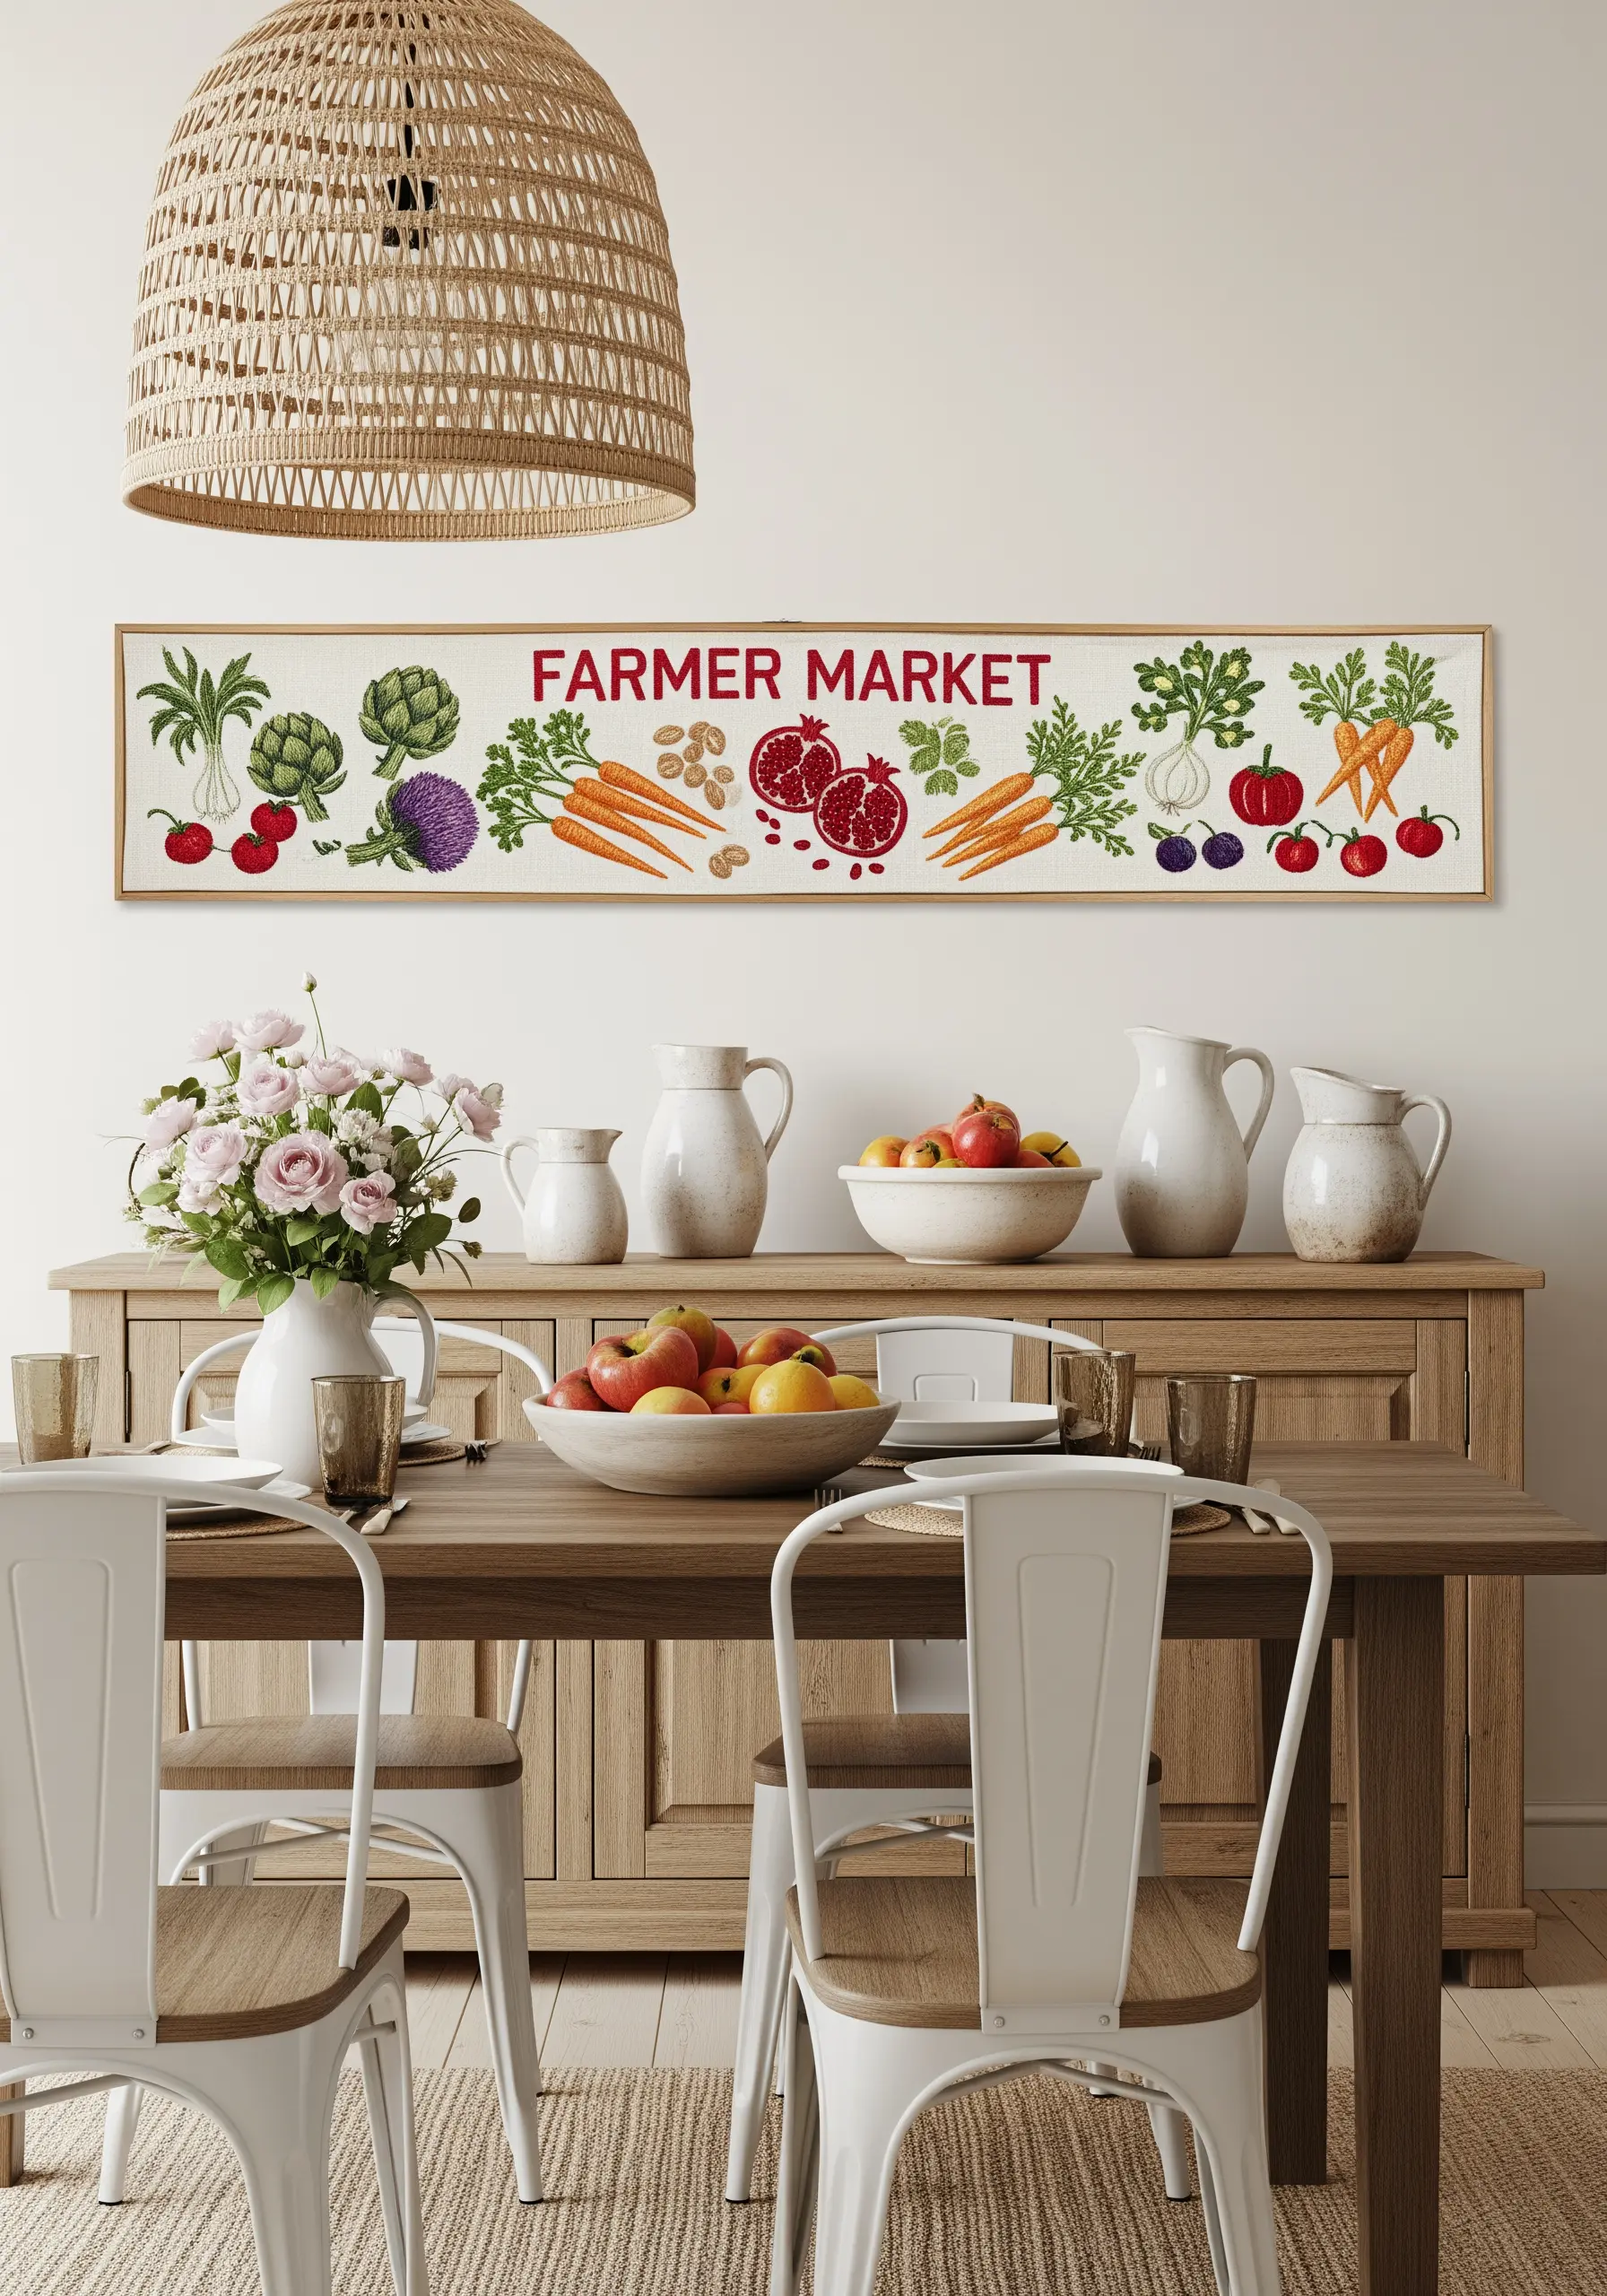
For a panoramic piece, use a long rectangular or oval frame instead of a traditional circular hoop.
This format is perfect for spelling out words or showcasing a lineup of repeating motifs, like market vegetables.
To keep the produce looking crisp and fresh, use satin stitch for solid fills and a simple backstitch for outlines and details.
Using a bright, consistent color palette across all the elements ties the long composition together beautifully.
24. Capture Artistic Expression with Abstract Shapes
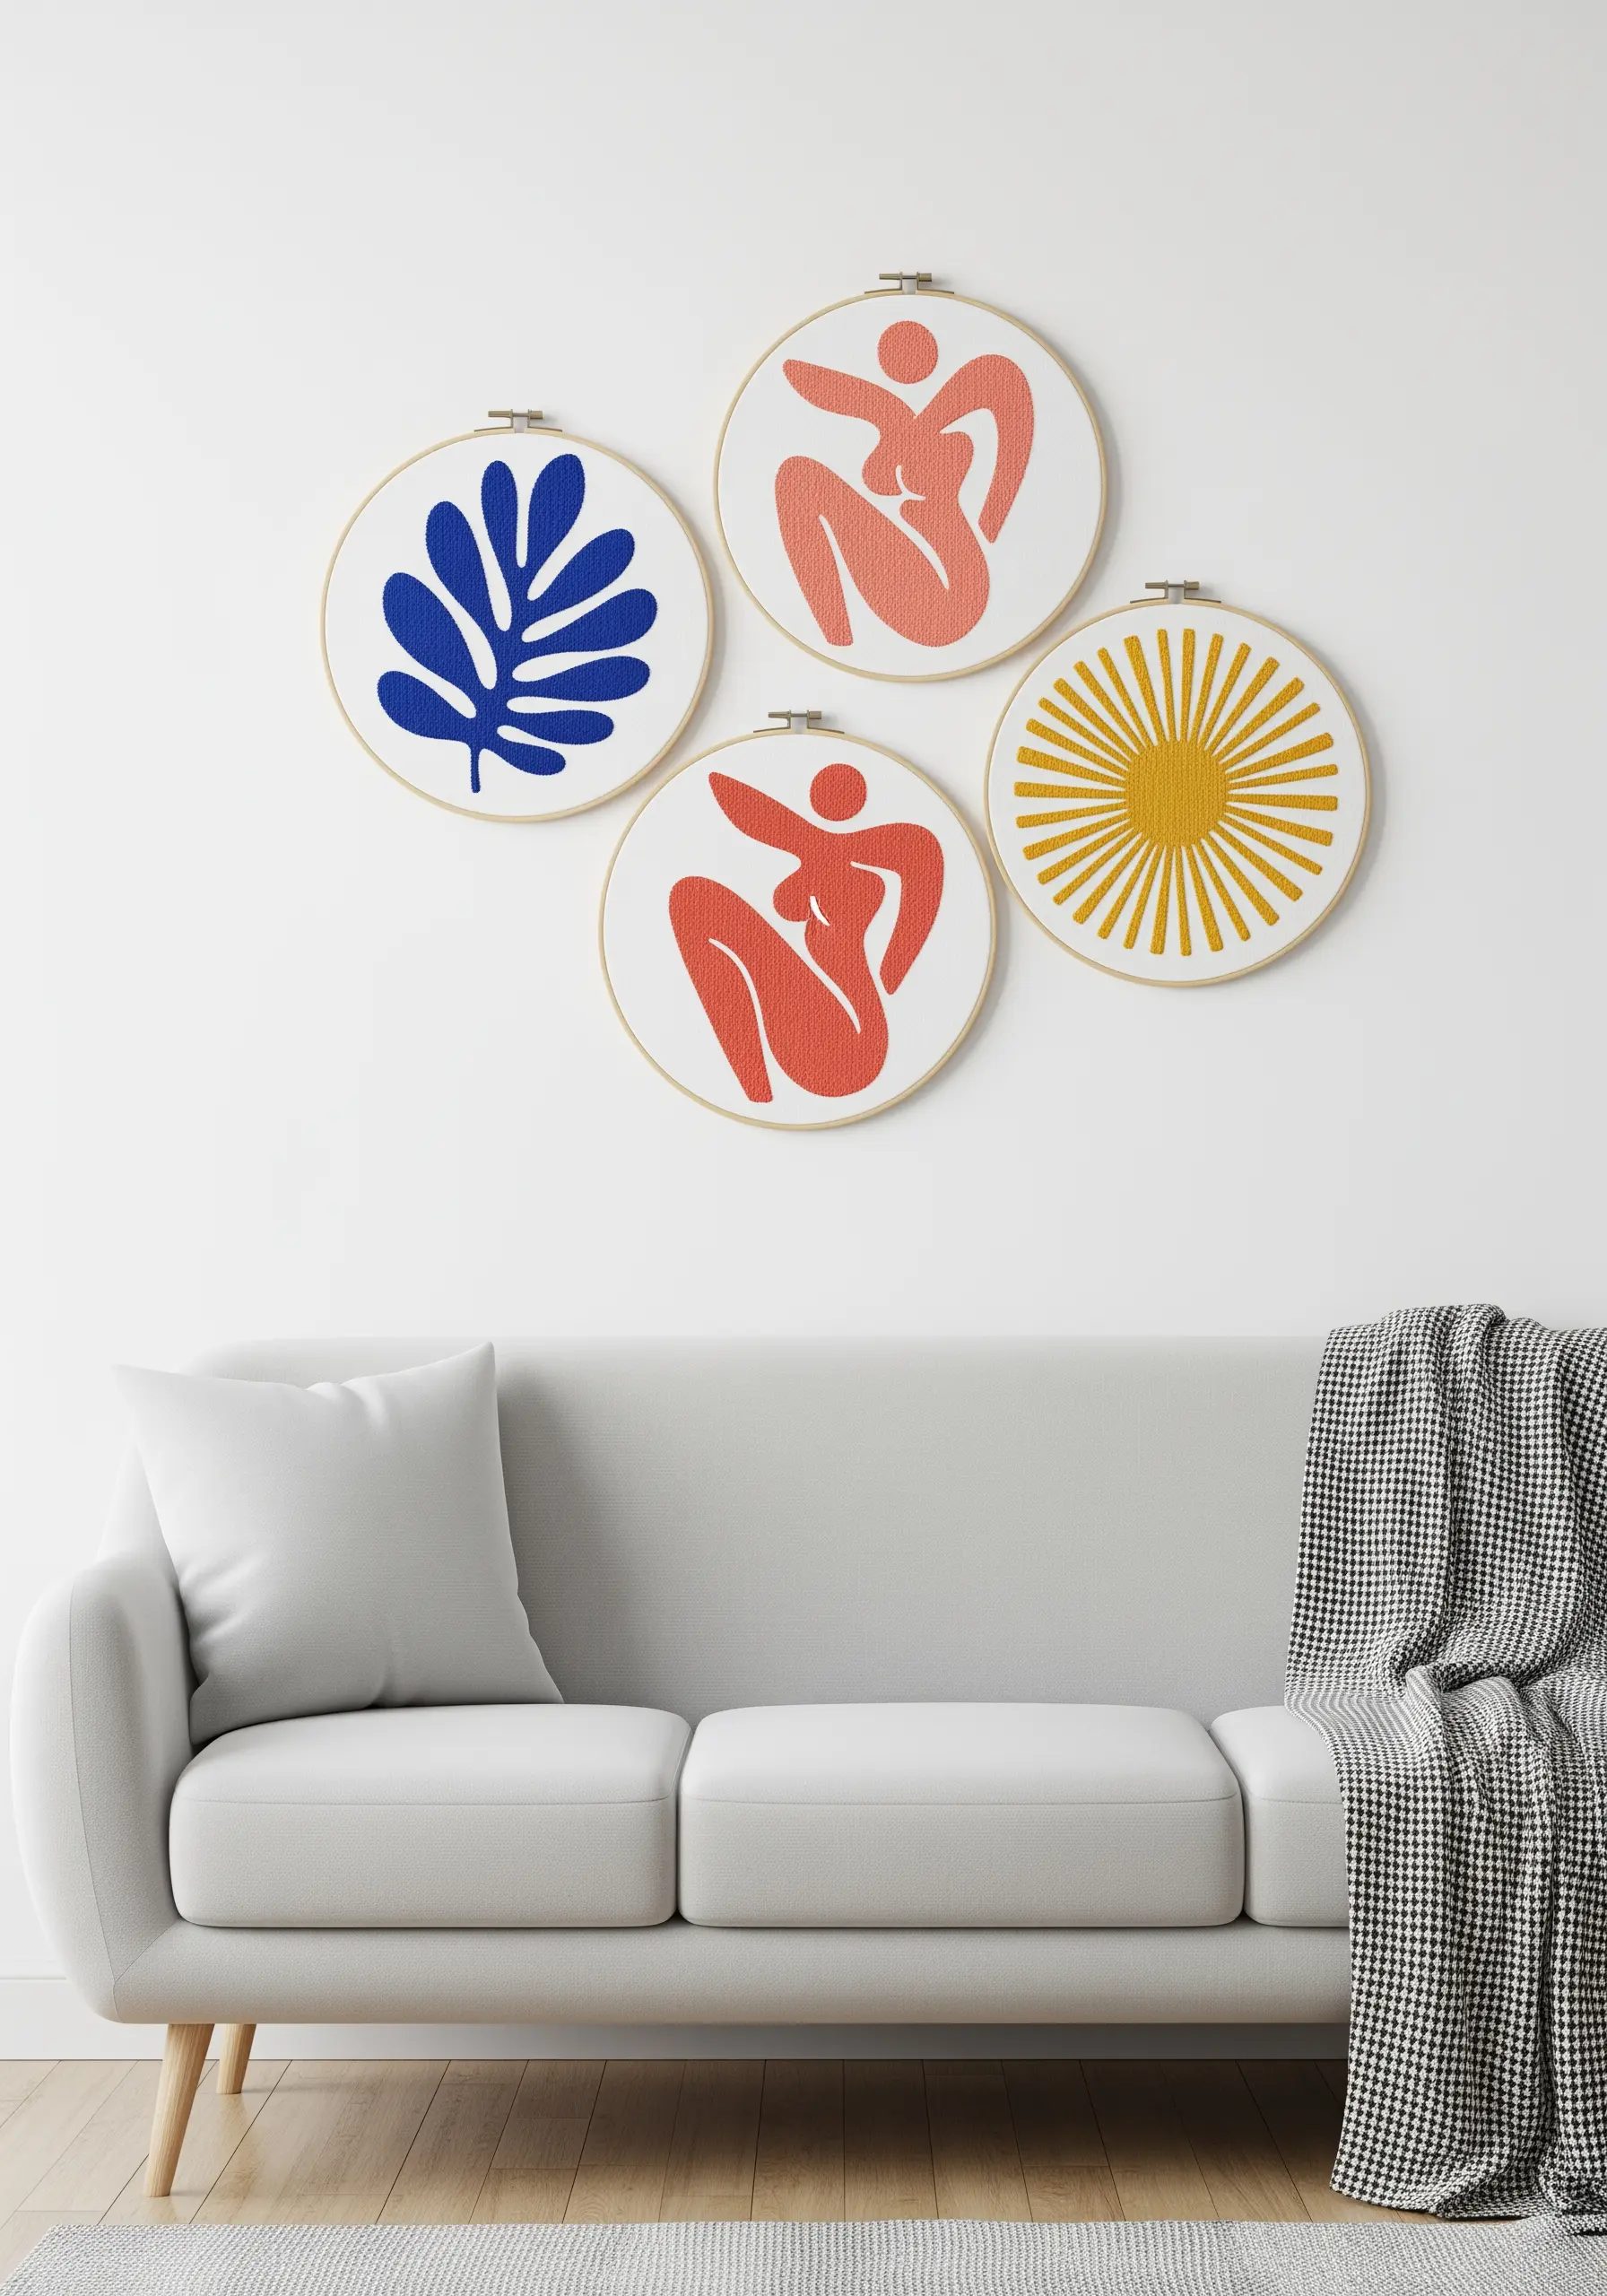
Recreate the bold, cut-out style of artists like Matisse by using a perfectly executed satin stitch.
Draw your organic shapes onto the fabric and fill them with long, straight stitches, keeping the thread tension even to prevent puckering.
Don’t outline the shapes; the power of this style comes from the clean, sharp edges of the color blocks against the neutral fabric.
This technique turns thread into a block of solid color, celebrating shape and form in its purest sense.
25. Achieve Realistic Butterfly Wings

To capture the intricate patterns of a monarch butterfly, treat your needle like a paintbrush with the long and short stitch technique.
Use single strands of floss to smoothly blend the oranges and yellows, creating a soft, natural gradient.
For the delicate black veins, use a single-thread backstitch to achieve razor-sharp lines.
This detailed approach transforms your embroidery into a stunningly realistic bird & butterfly embroidery specimen.
26. Create Iridescence with Variegated Thread
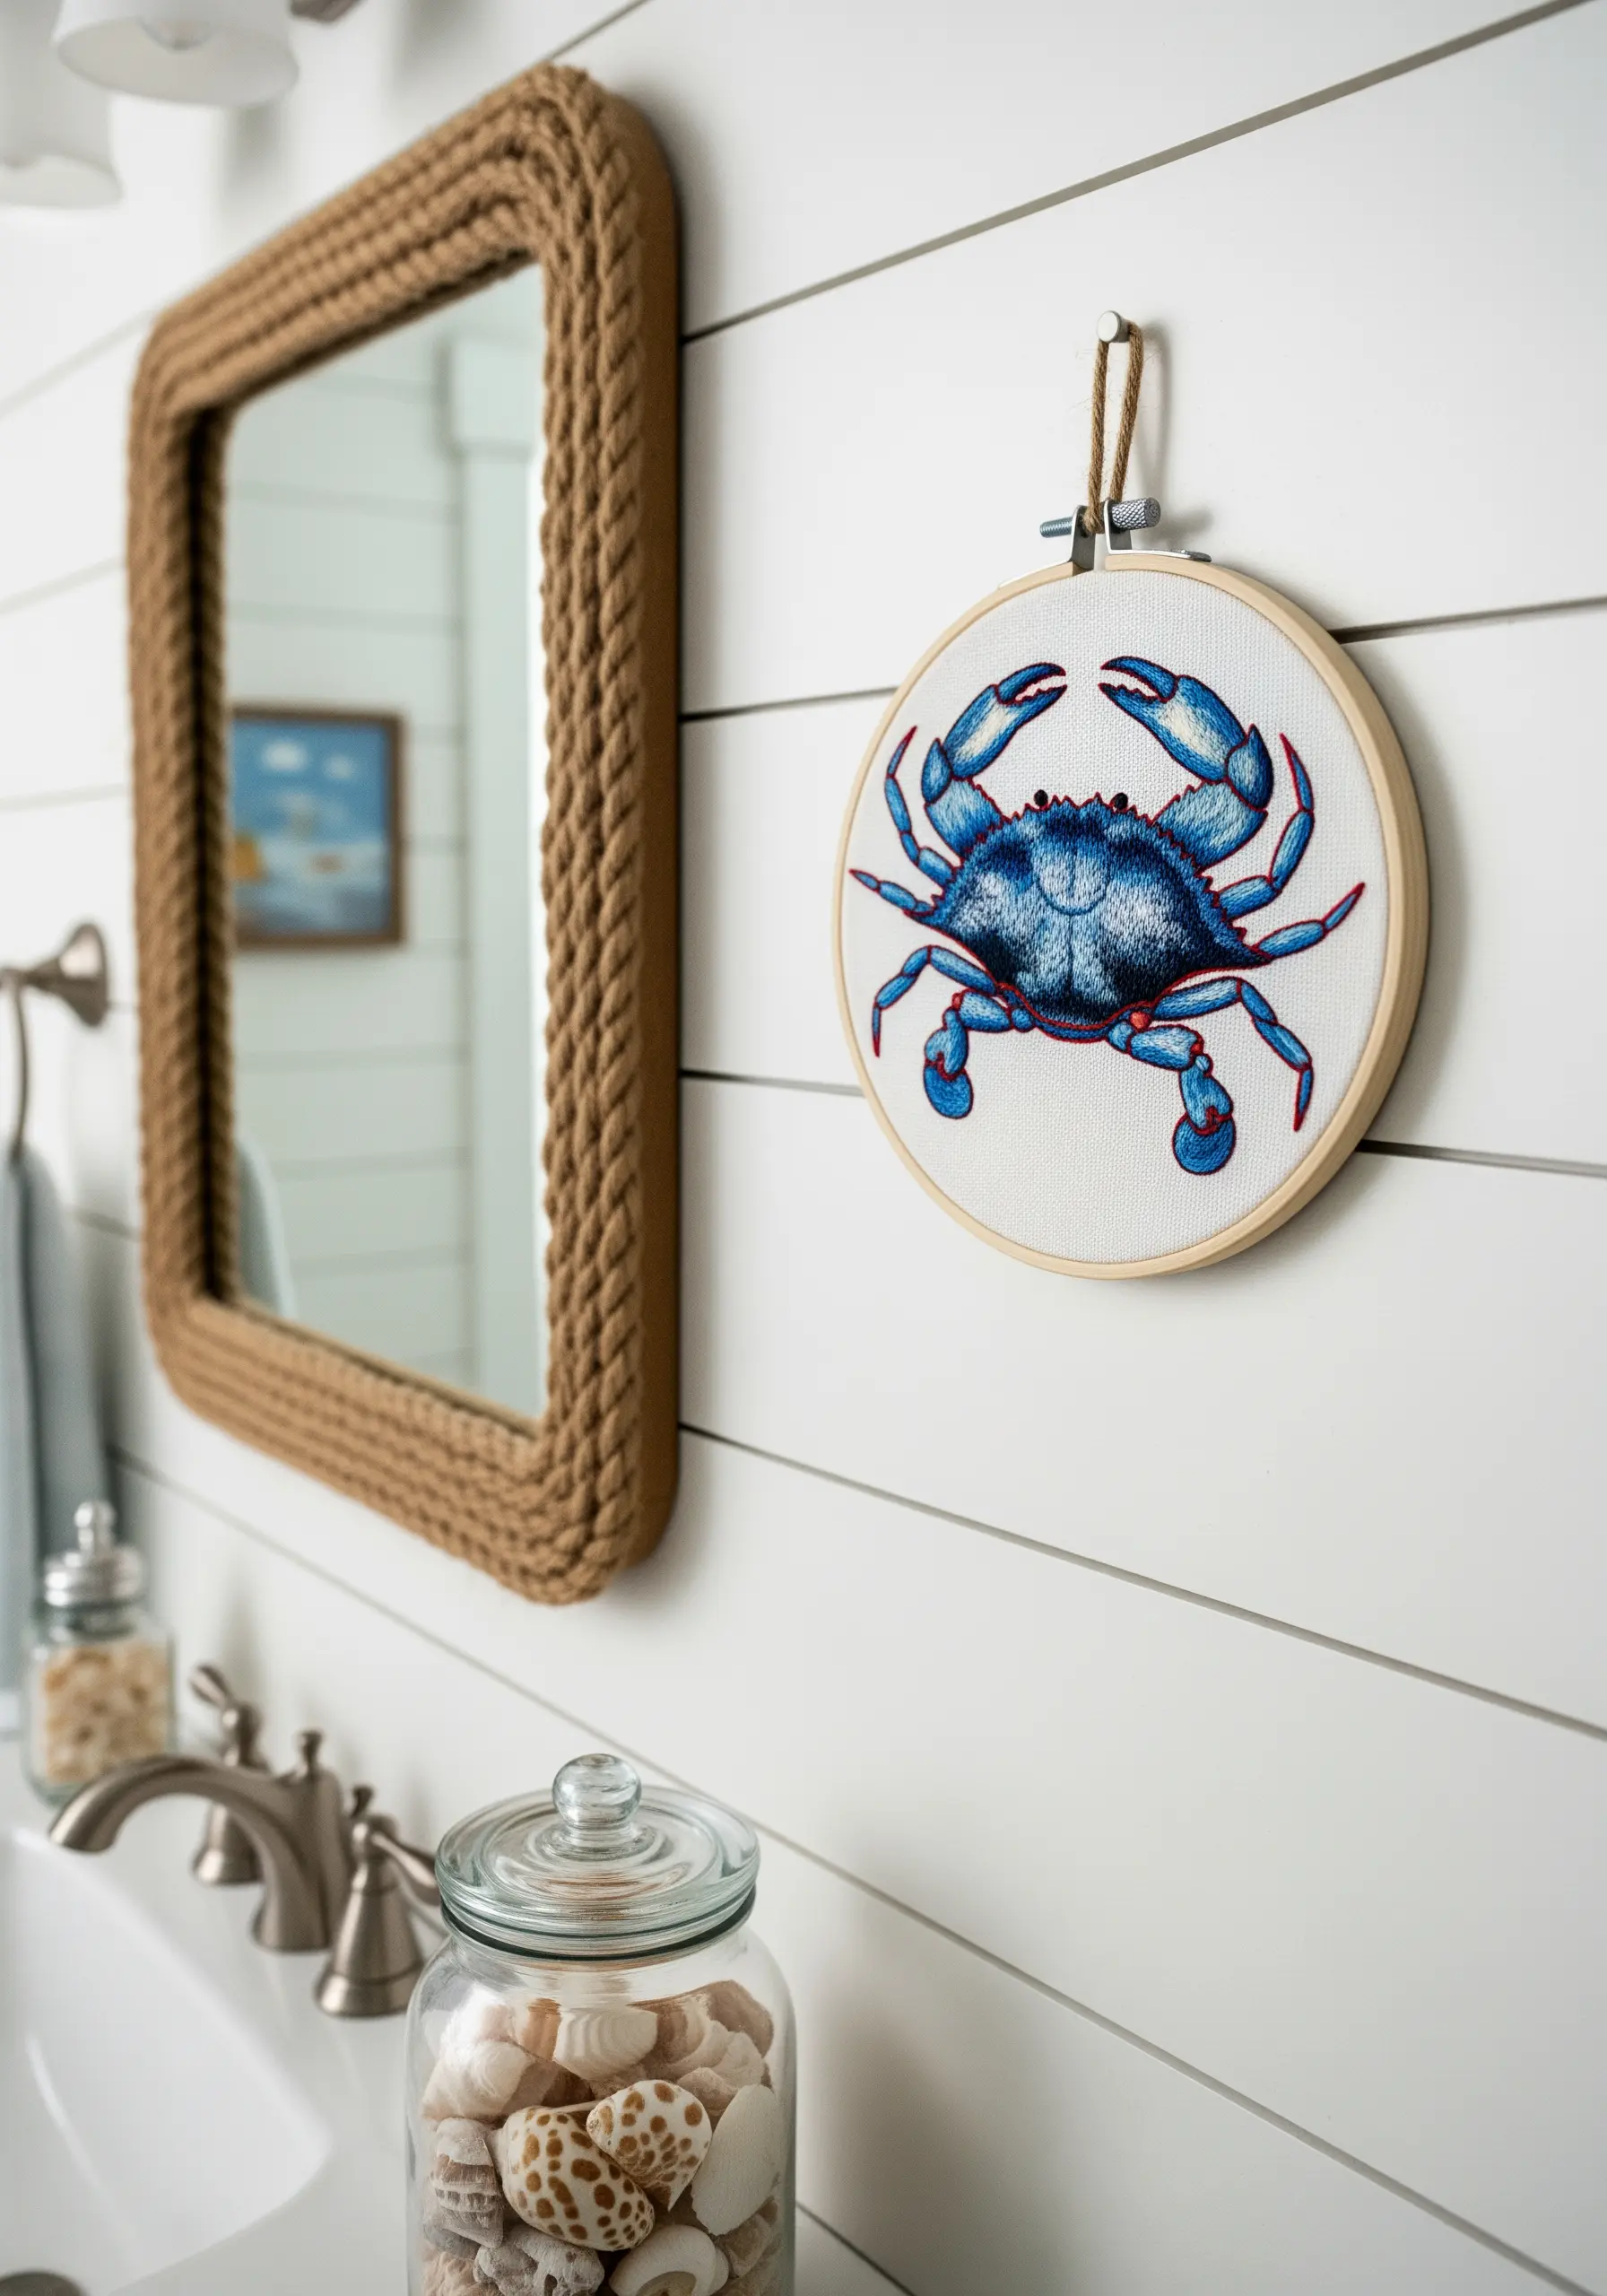
To mimic the shimmering, multi-tonal shell of a blue crab, use a single variegated thread that contains shades of blue, purple, and white.
As you stitch, the colors will change randomly, creating a natural, iridescent effect without you having to switch threads.
Use small seed stitches or cross stitches to allow the color variations to distribute evenly across the crab’s body.
This clever thread choice does the complex color work for you, resulting in a beautifully detailed and dynamic finish.
27. Combine Lettering and Botanicals in a Wreath
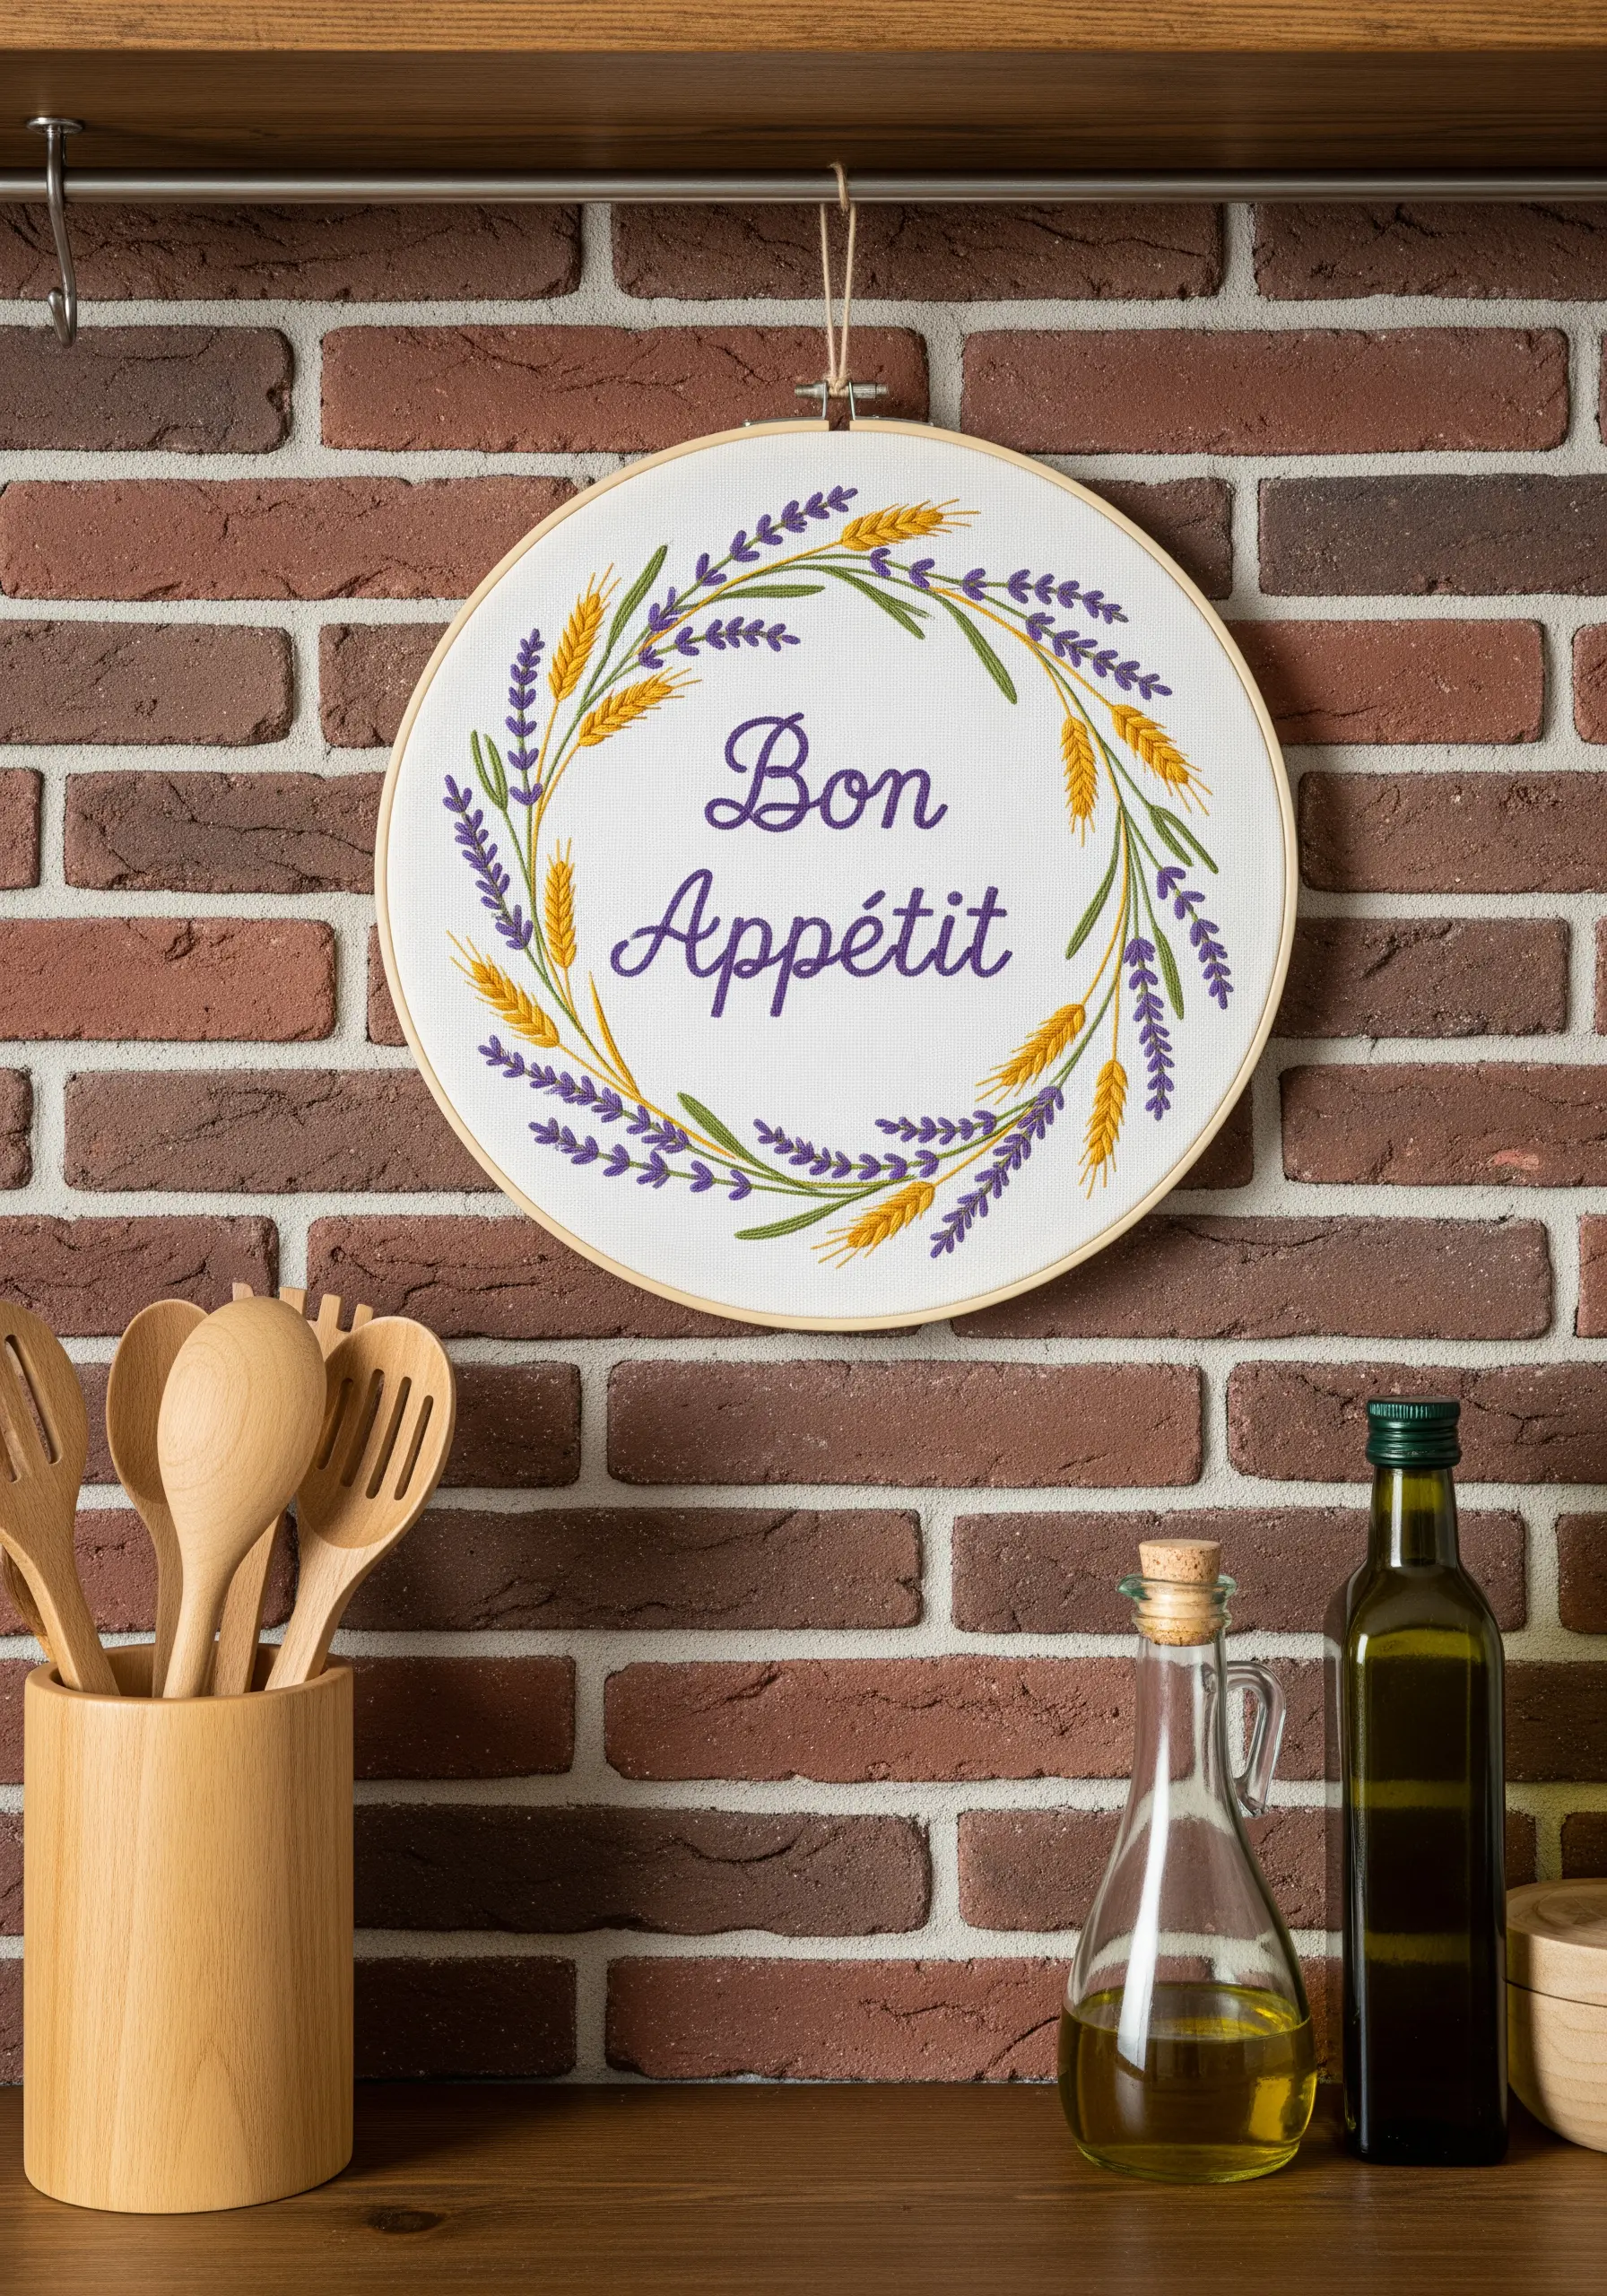
For elegant script lettering, use a whipped backstitch or a stem stitch to create smooth, flowing curves.
Frame your text with a simple botanical wreath composed of two complementary elements, like lavender and wheat.
Use lazy daisy stitches for the lavender buds and straight stitches for the wheat stalks to create textural variety.
This balanced composition feels classic and welcoming, perfect for a kitchen or entryway.
28. Leverage Negative Space for a Light Touch
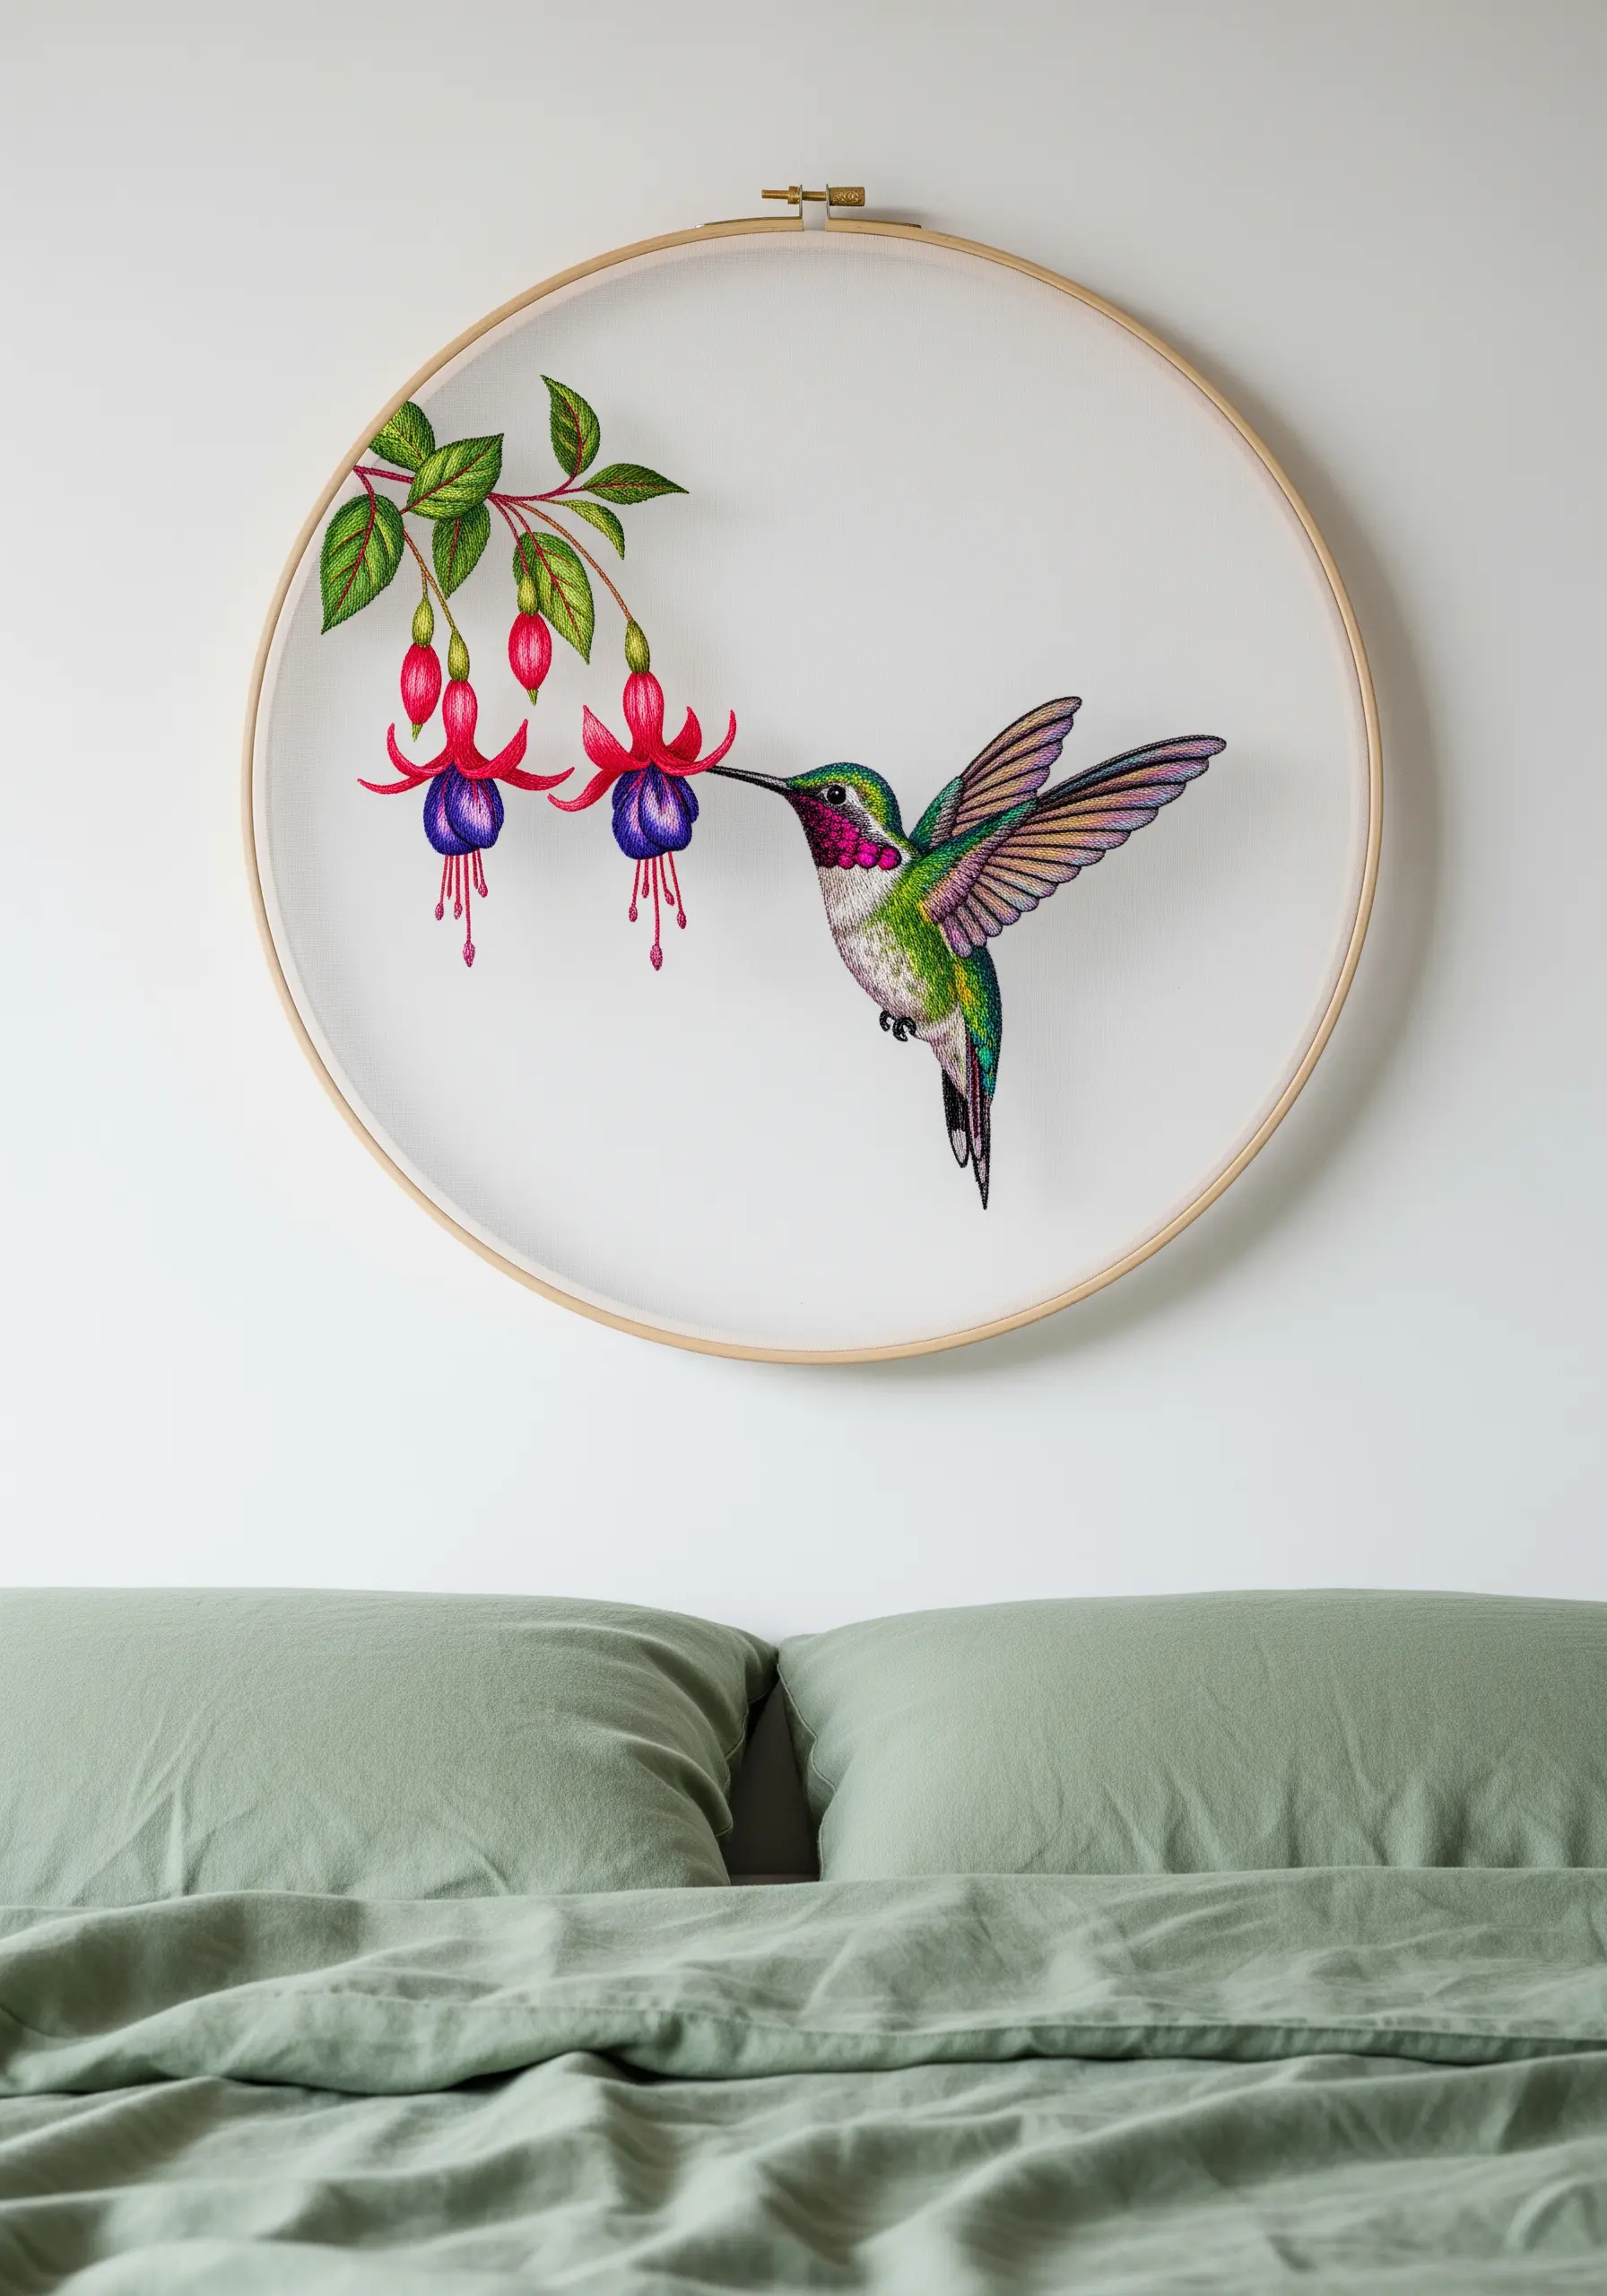
Create a feeling of lightness and delicacy by leaving much of the fabric unstitched.
Instead of filling in the entire hummingbird or flower, focus your detailed stitching on key areas—the bird’s iridescent throat, the flower’s vibrant petals.
Let the clean, empty fabric serve as the background, which makes your stitched elements feel like they are floating.
This minimalist approach emphasizes the beauty of your threadwork and creates an airy, sophisticated composition that’s perfect for a dreamy, nature-inspired bedroom.
29. Tell a Story with a Seasonal Quadtych
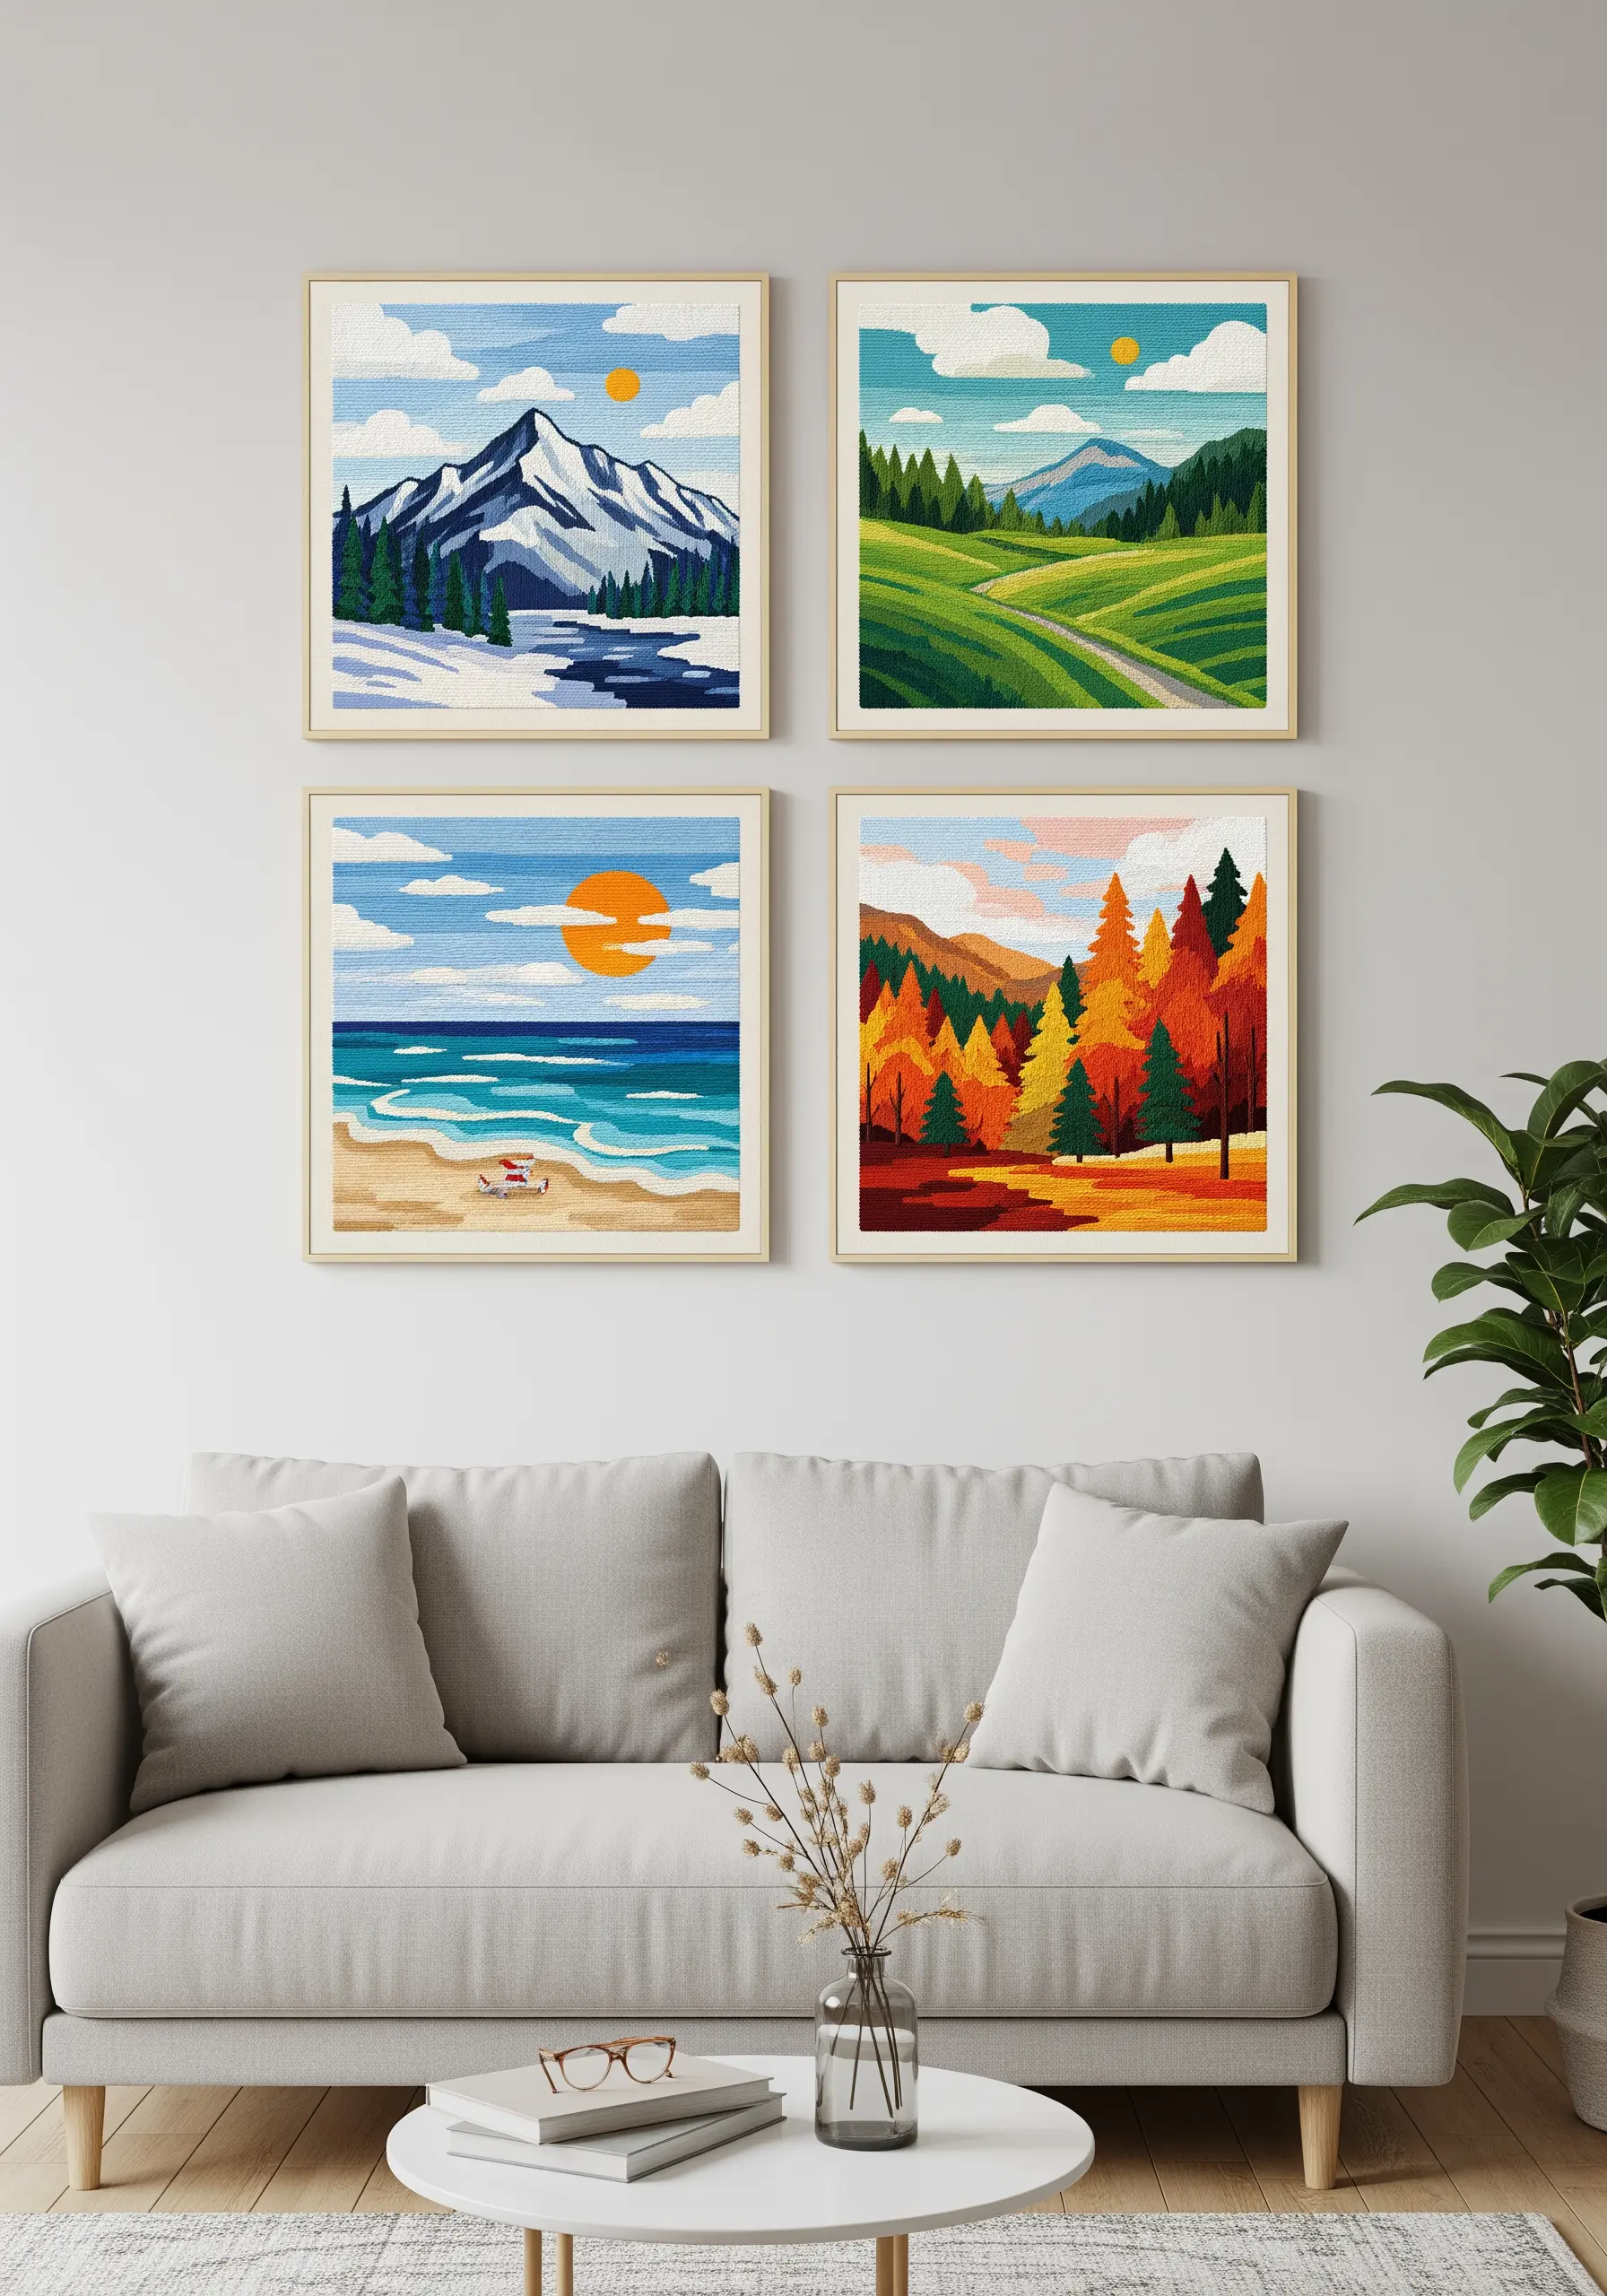
Translate the blocky, graphic style of travel posters into embroidery by using dense, directional satin stitch.
Create a cohesive set of four pieces by using the same color palette and artistic style to depict different seasons or locations.
Instead of hoops, finish your work in simple square frames to enhance the poster-like quality.
This method of creating framed embroidery patterns turns your stitching into a narrative gallery wall.
30. Craft a Sculptural Sunburst with Yarn
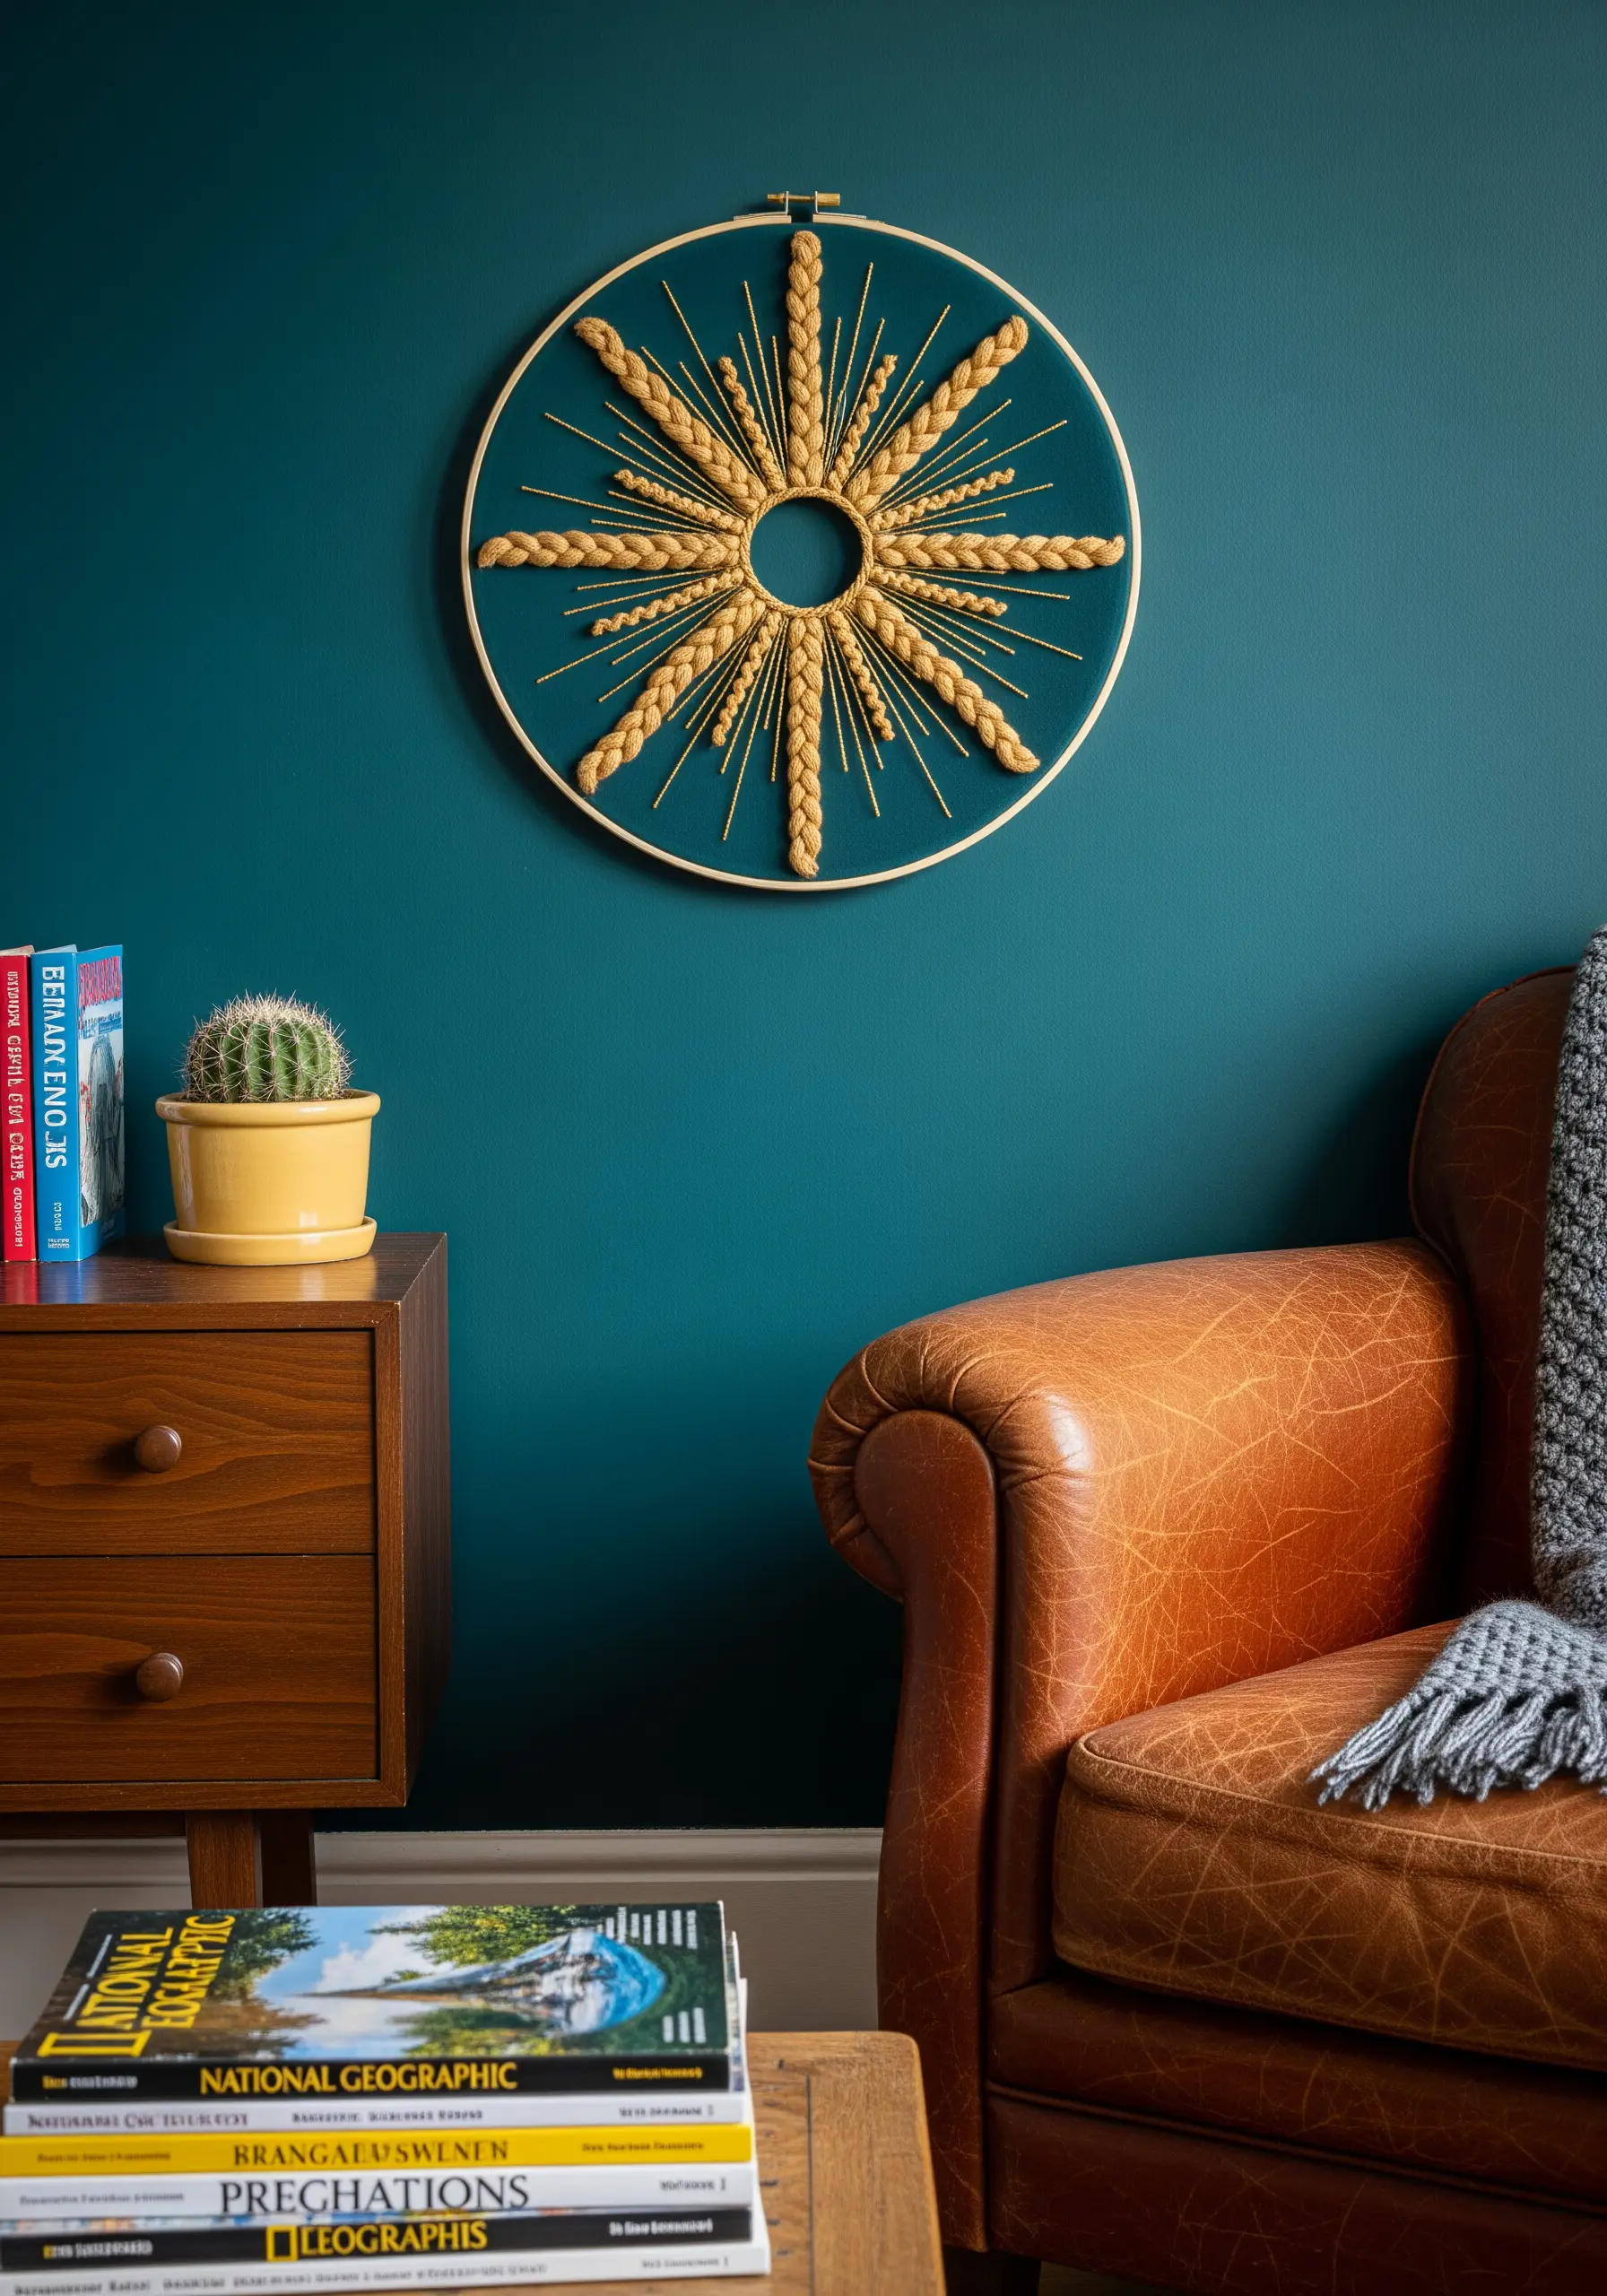
Introduce bold, sculptural texture by swapping embroidery floss for thicker materials like yarn.
Create the sun’s rays by wrapping yarn around the hoop and securing it in the center, or use oversized braided stitches for a chunky, three-dimensional effect.
This technique works best on a colored fabric that contrasts sharply with your yarn, making the texture the undeniable focal point.
It’s a fast, high-impact way to create dramatic yarn wall art that bridges the gap between embroidery and fiber sculpture.
31. Weave a Dreamcatcher with Thread and Macrame
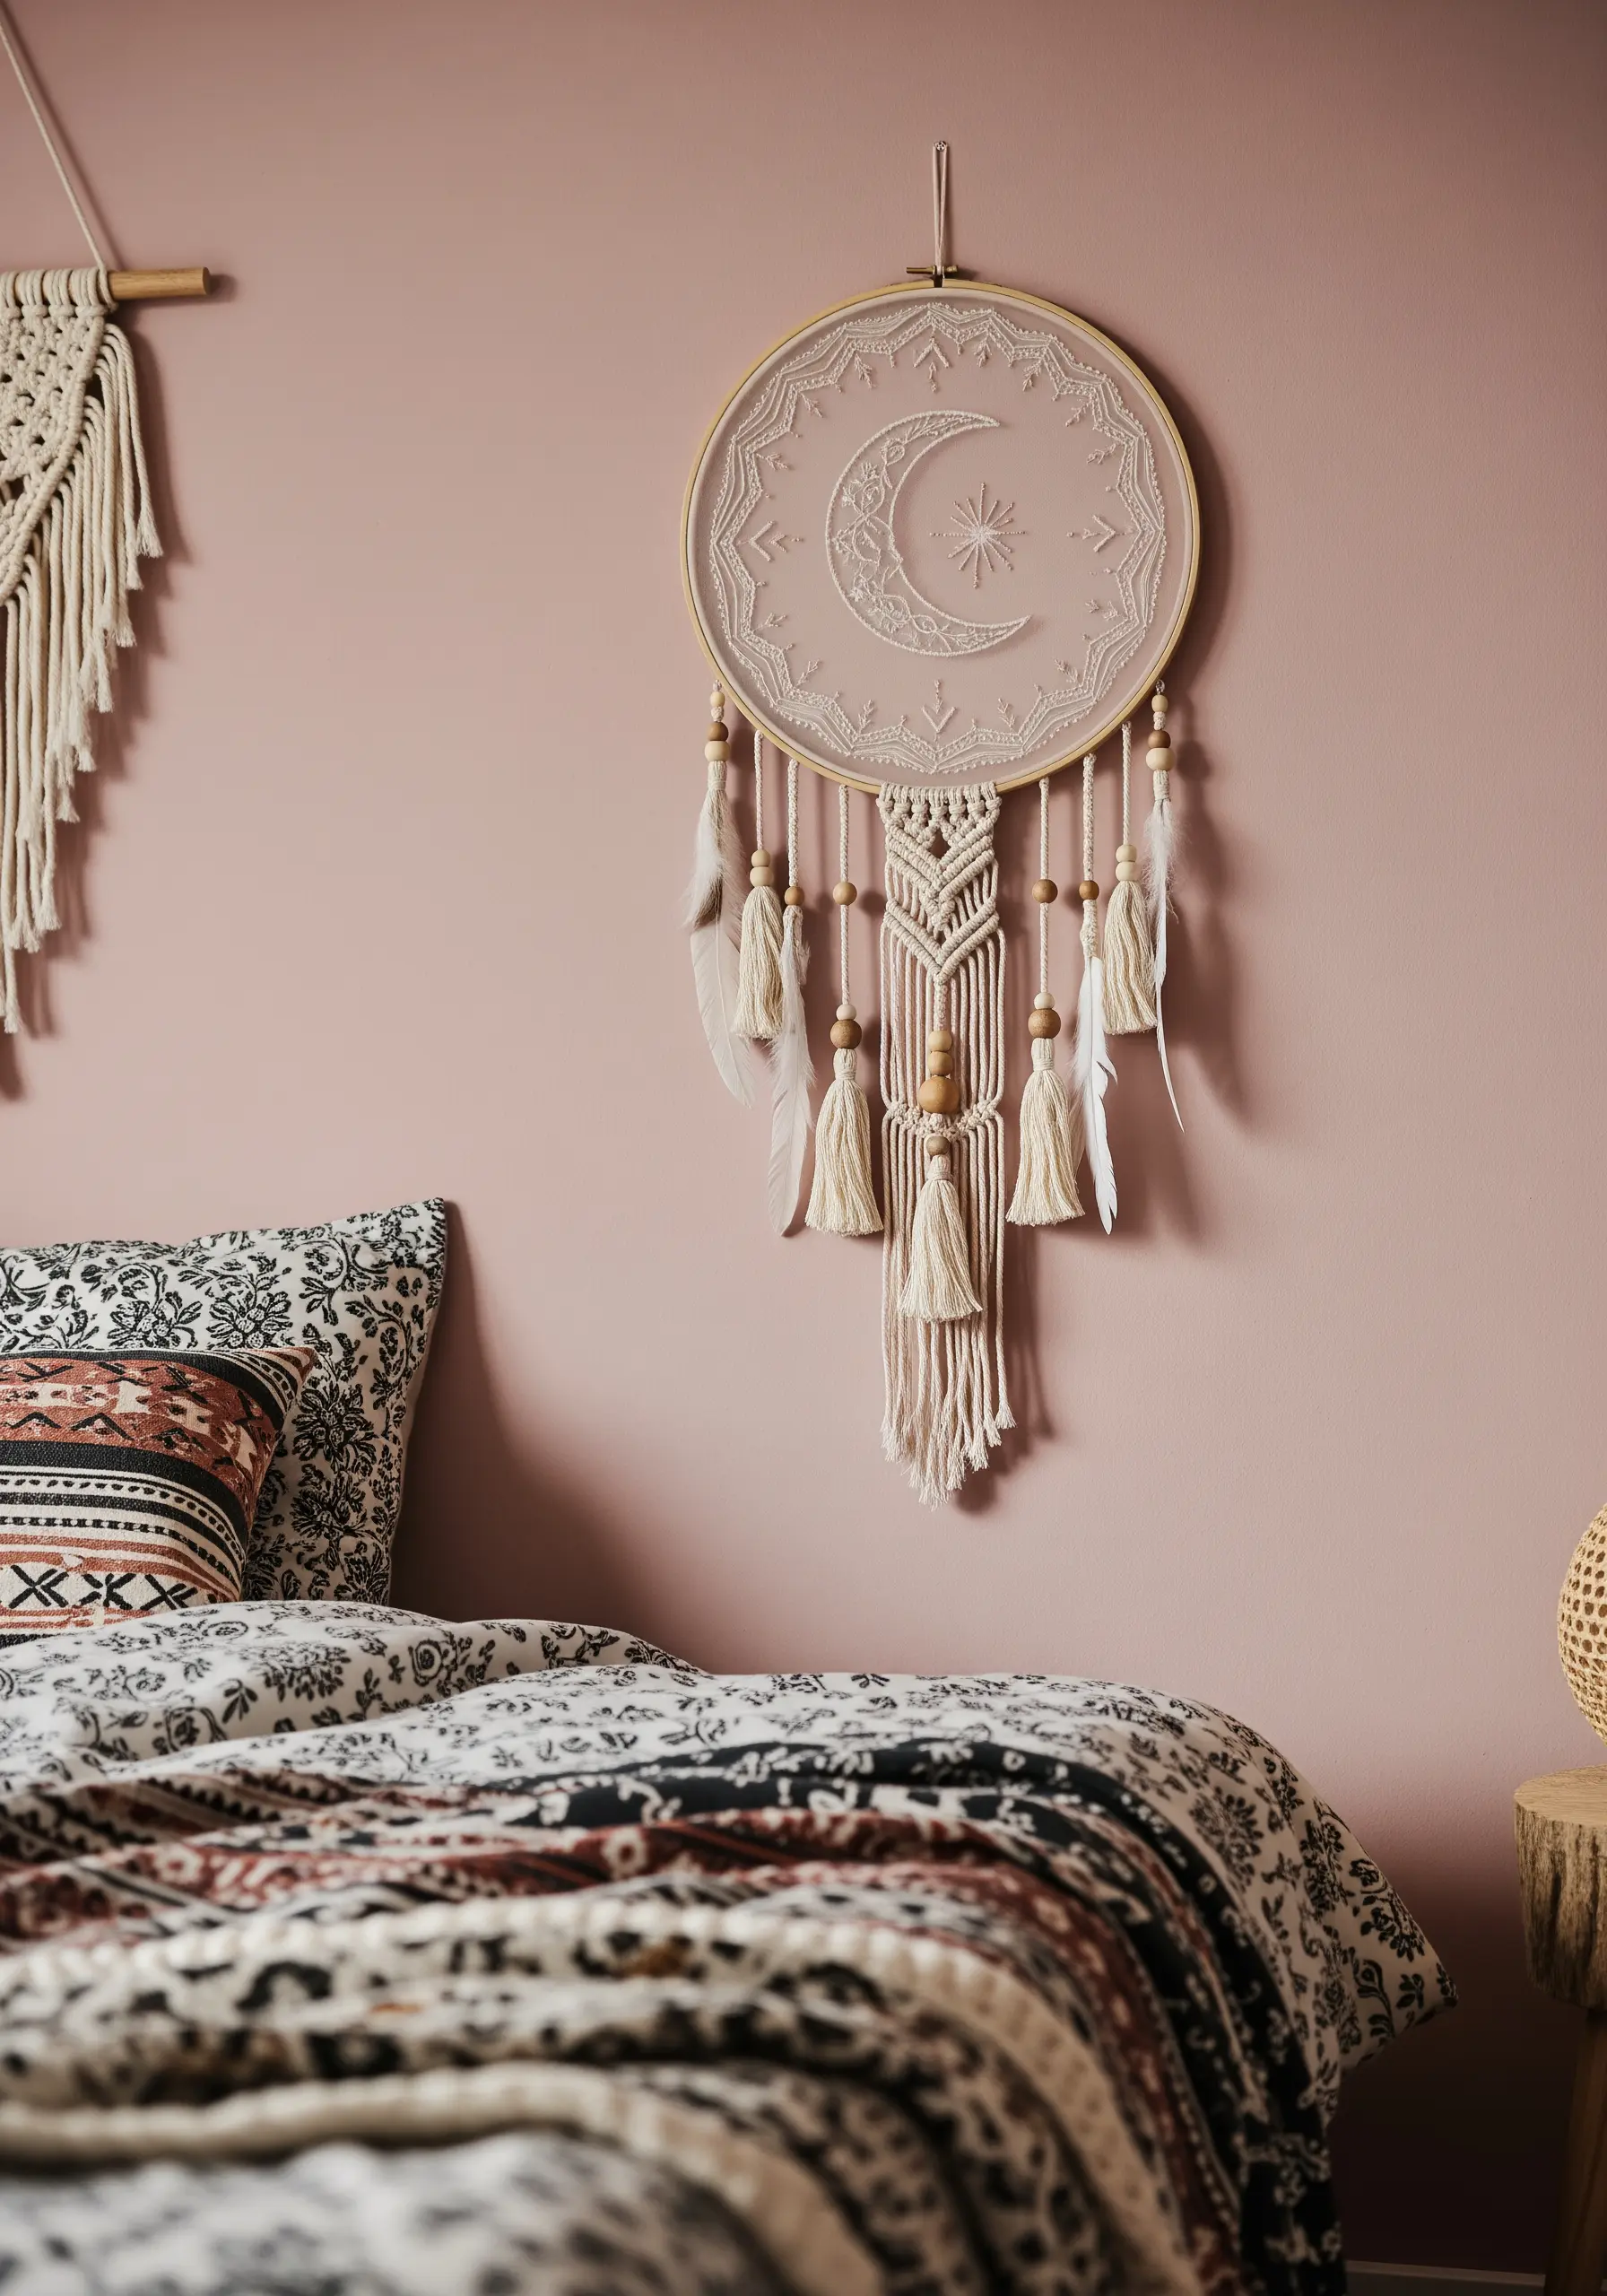
Combine delicate embroidery with the tactile art of macrame to create a stunning dreamcatcher.
Stitch your central design—like a celestial moon—onto a sheer or light-colored fabric within the hoop.
Then, attach macrame cords to the bottom of the hoop, adding knots, tassels, beads, and feathers to complete the look.
This mixed-media textile approach adds layers of texture and meaning, transforming a simple hoop into a powerful bohemian statement piece.
32. Merge Travel Memories and Stitched Scenes
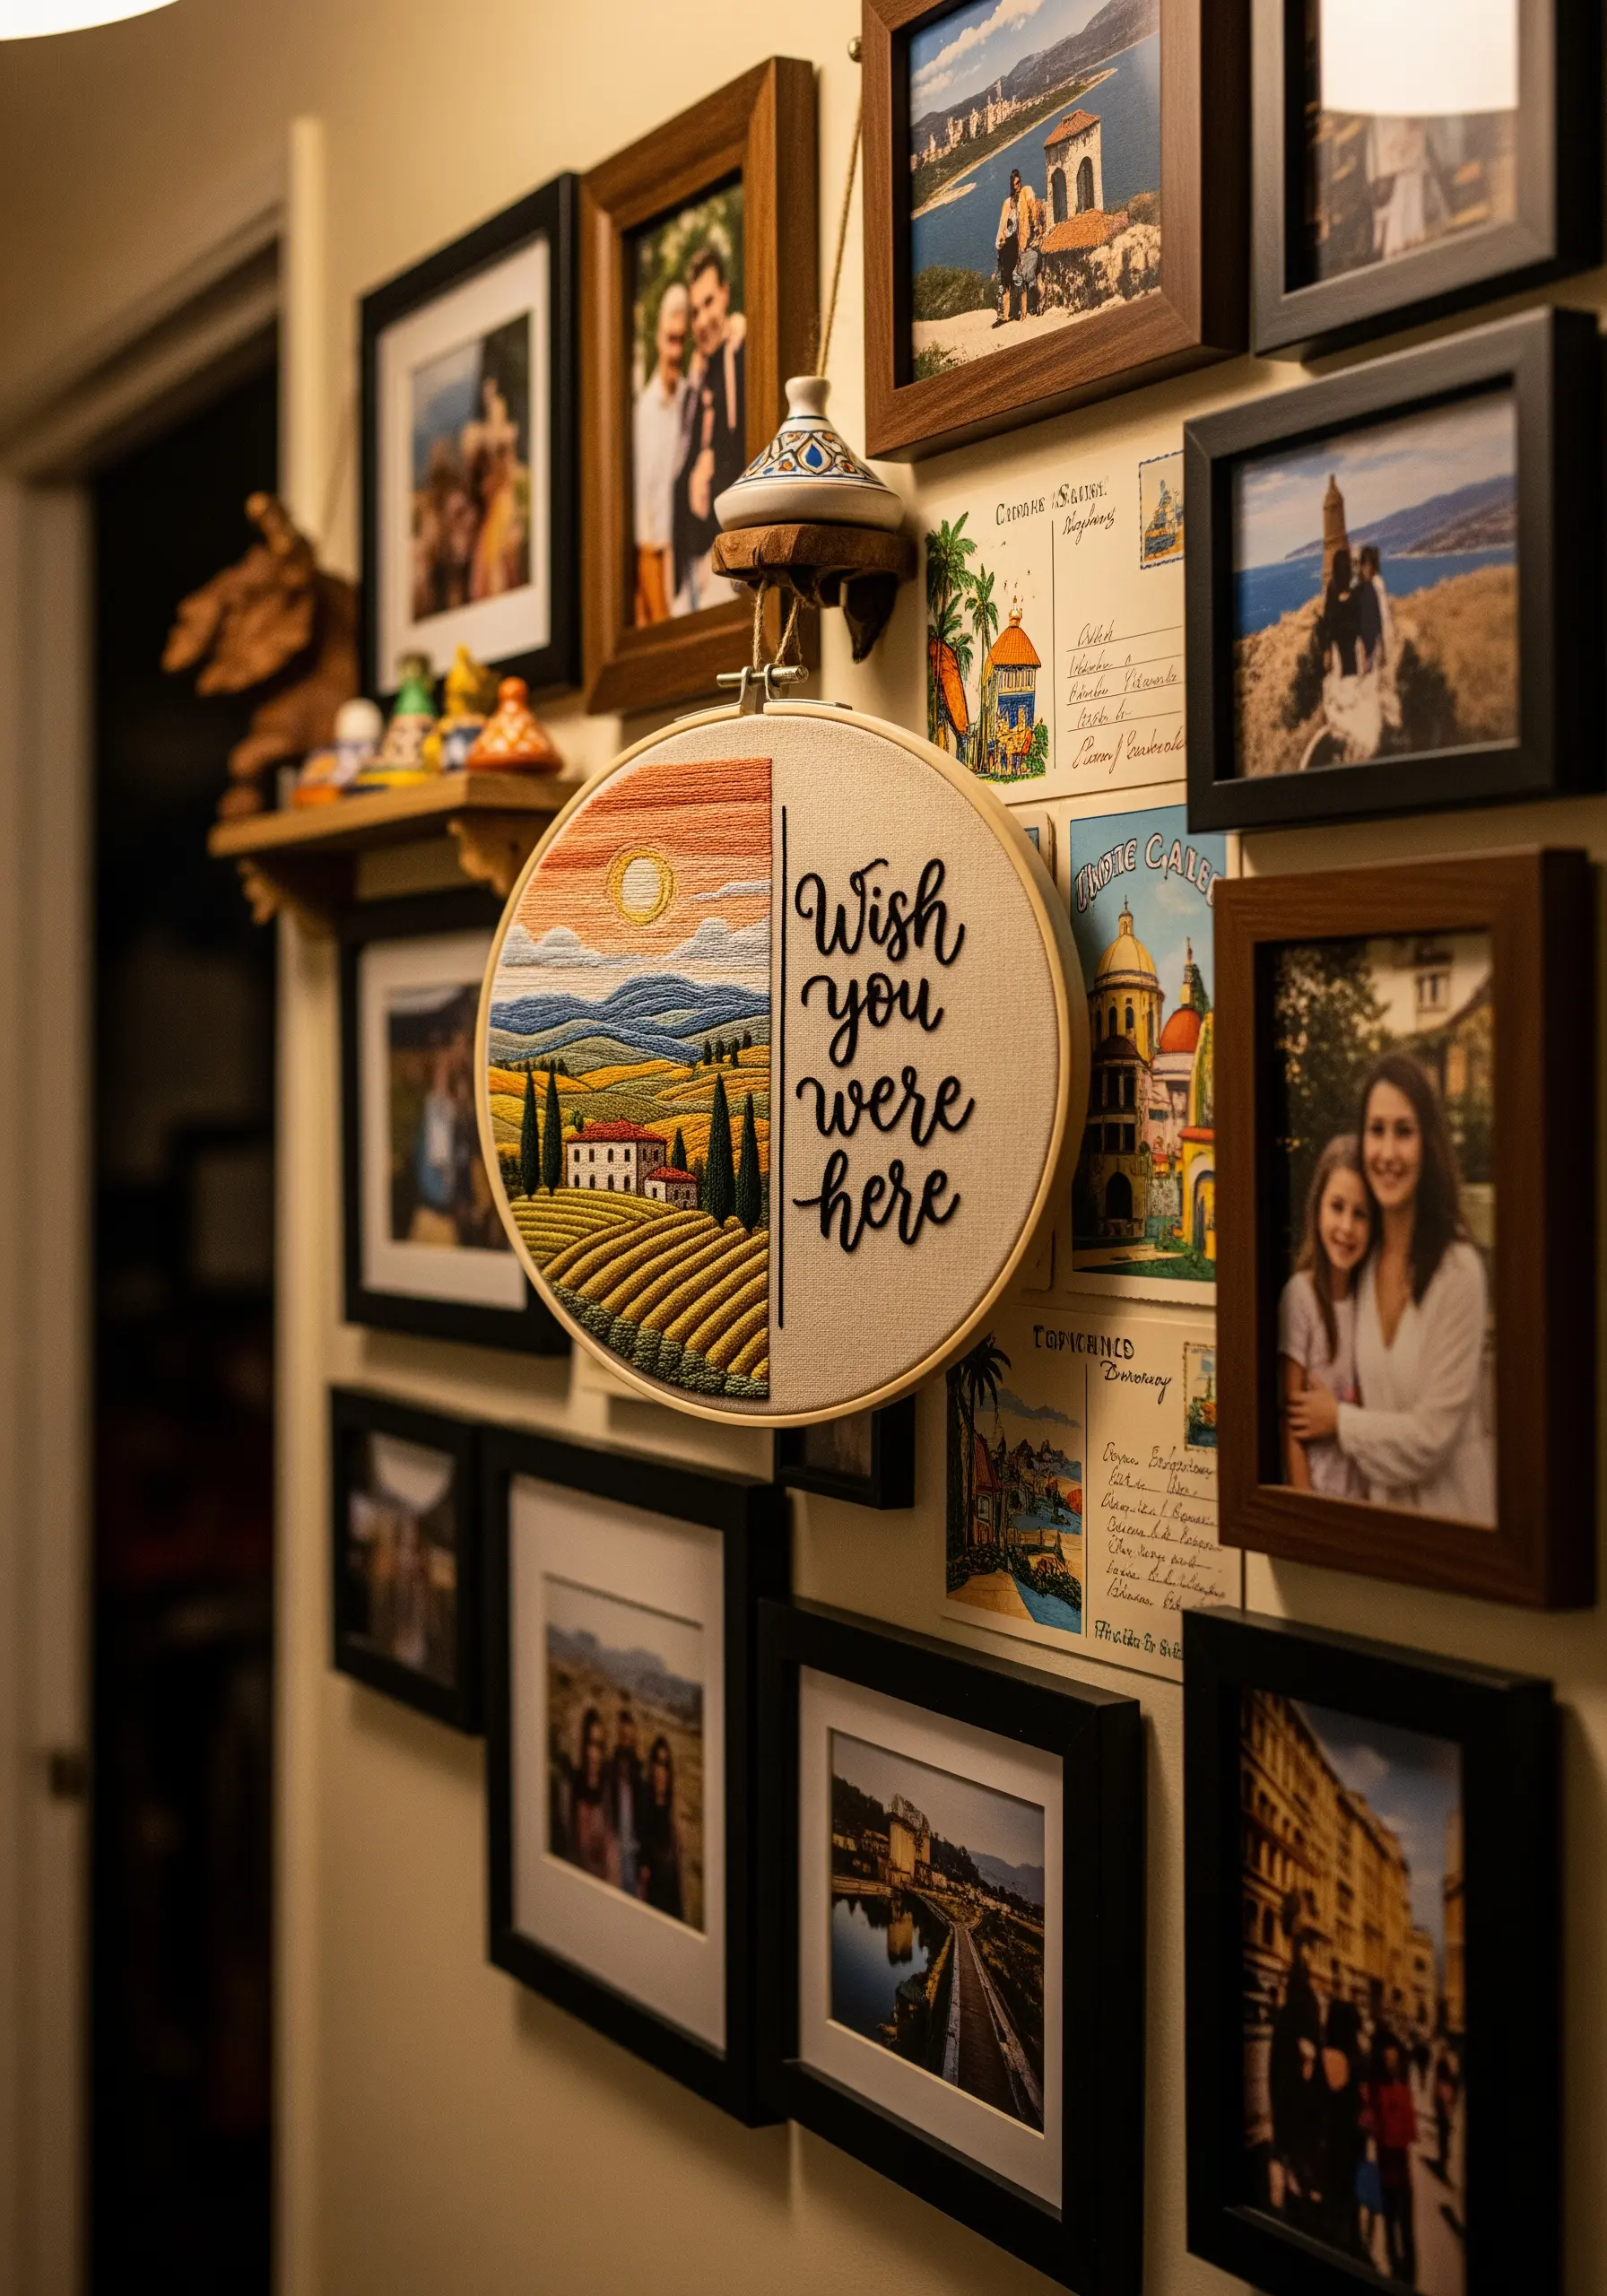
Create a unique piece of memory art by dividing your hoop into two distinct sections.
On one side, stitch a landscape that represents a favorite vacation spot, using thread painting techniques for a rich, scenic feel.
On the other side, use a clean, modern font to stitch a meaningful phrase like “Wish you were here.”
Displaying this hoop within a gallery wall of travel photos creates a beautiful, personal narrative that blends your passions for travel and craft.
33. Master the Cross-Stitch for Graphic Fill
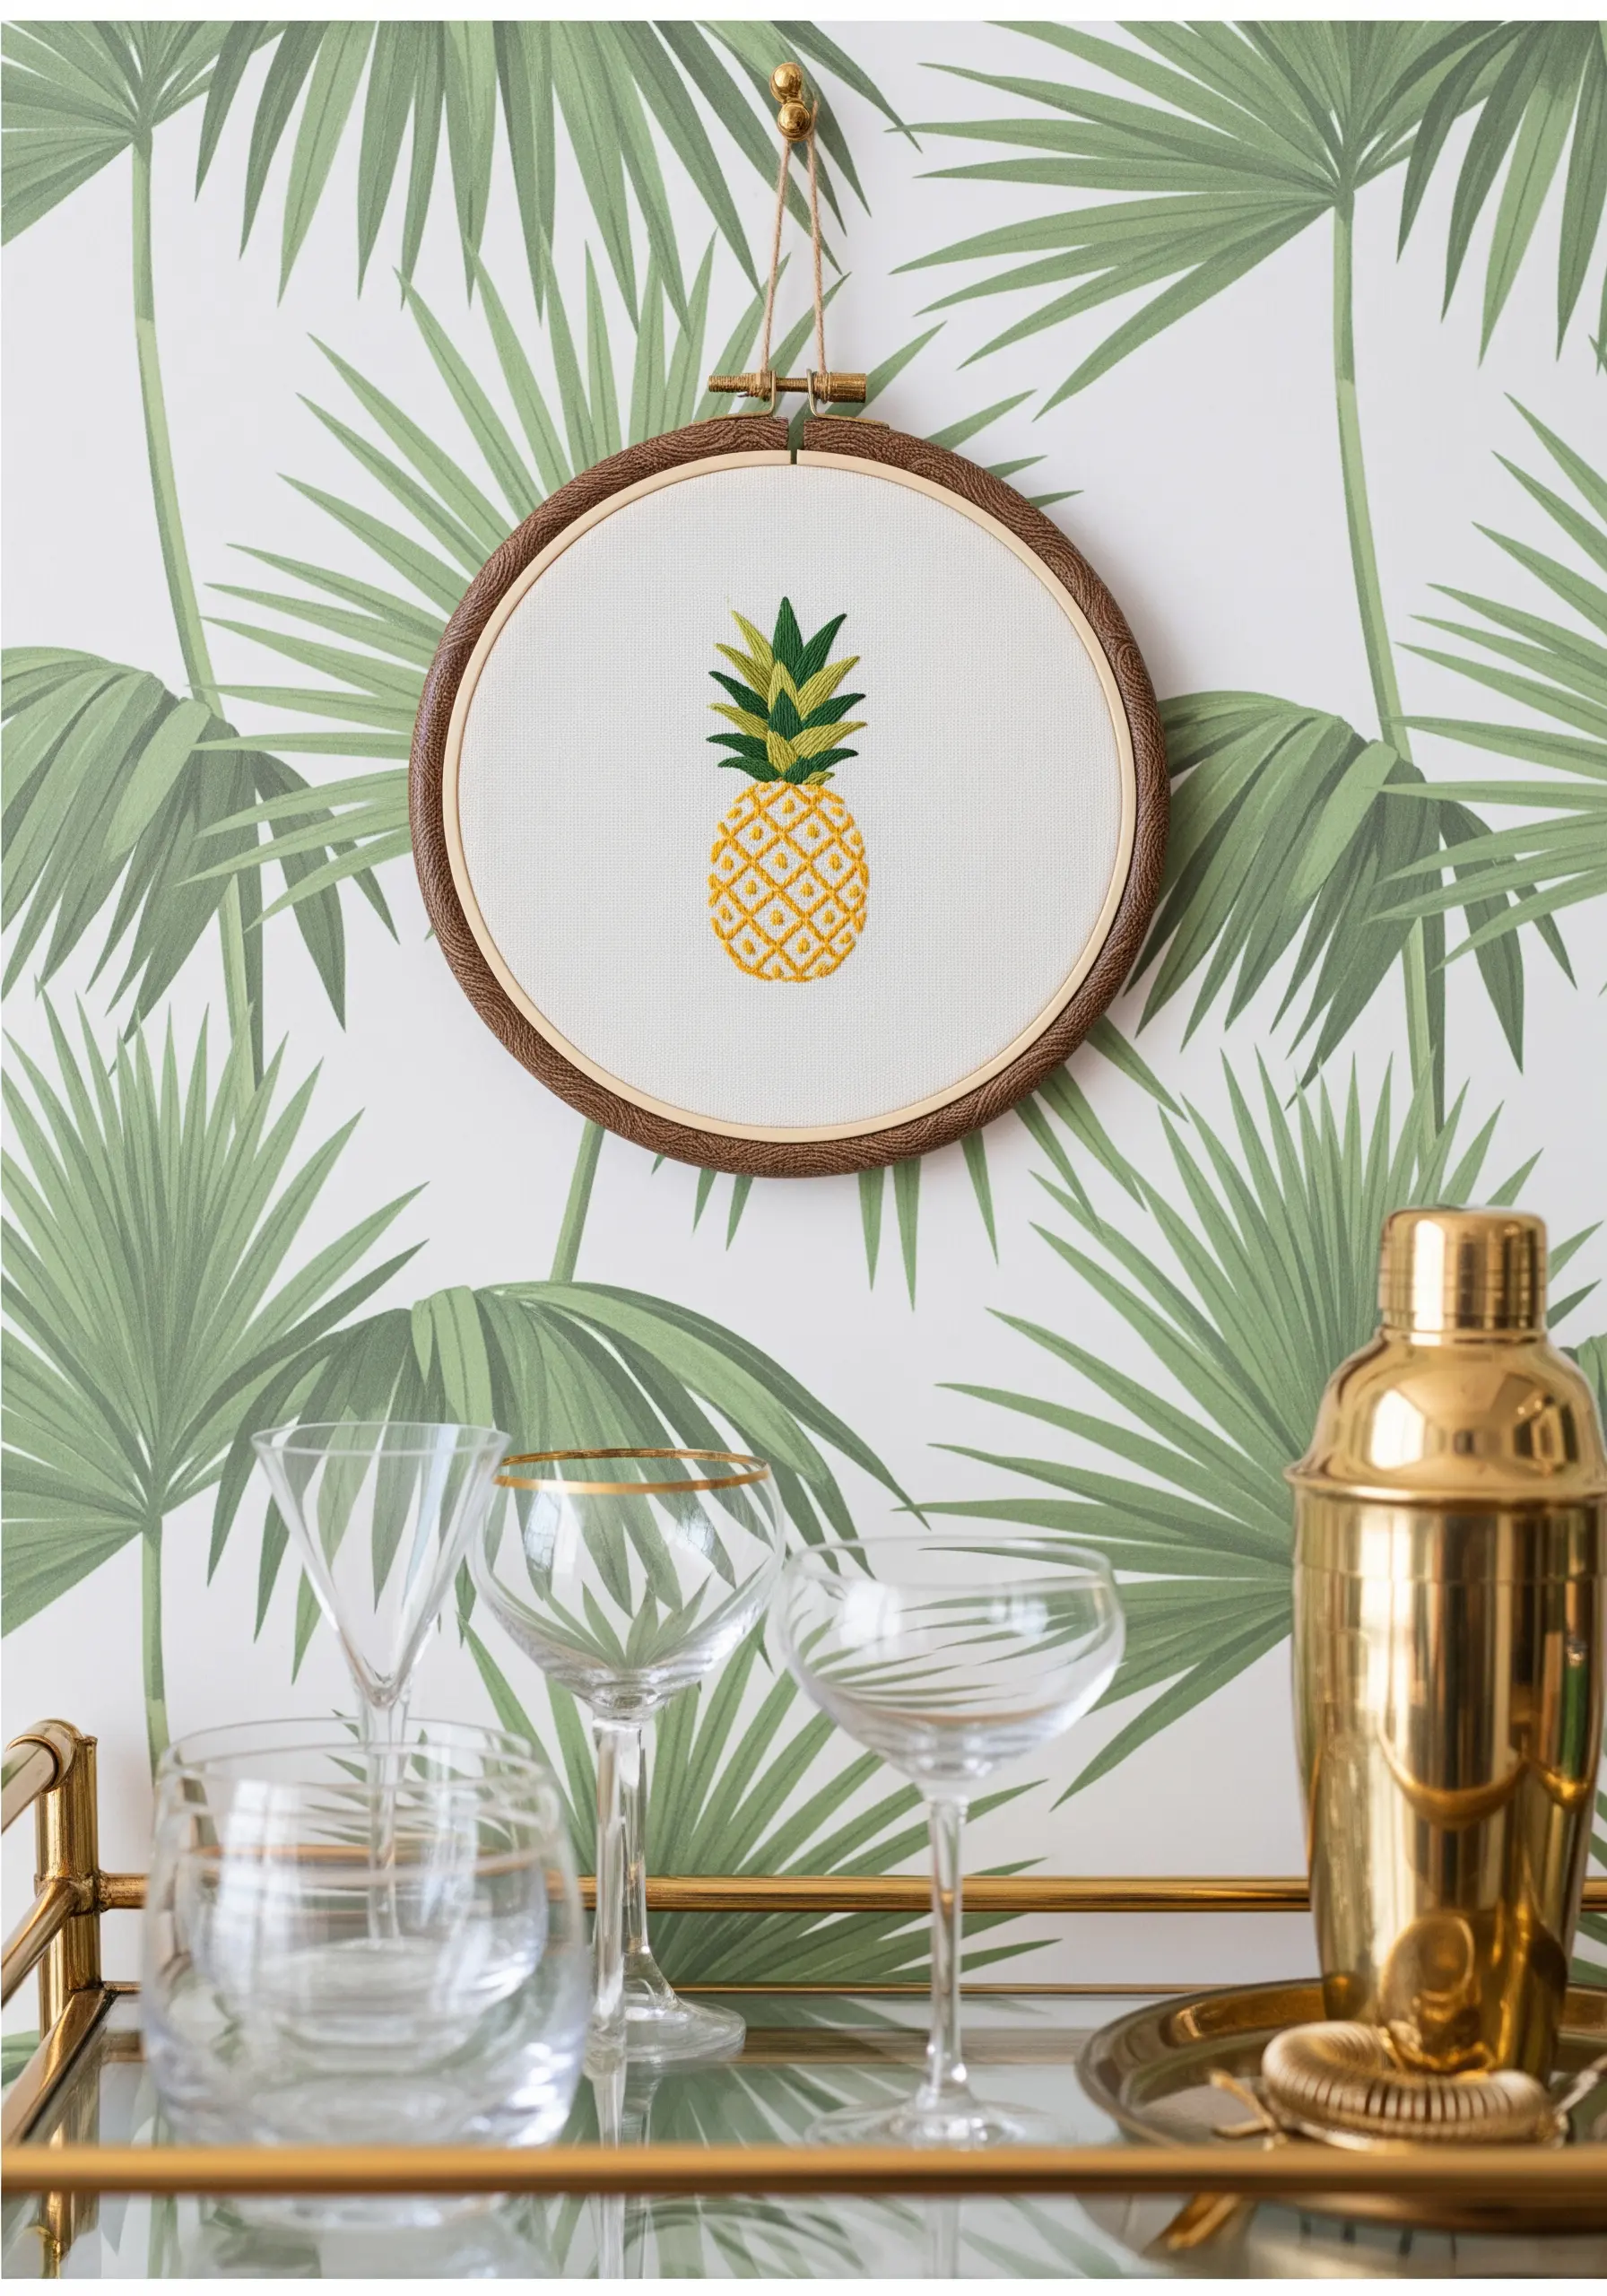
For designs that require a clean, pixelated, or geometric fill, like the texture of a pineapple, switch from embroidery to cross-stitch.
Each ‘X’ acts as a tiny, uniform square of color, creating a wonderfully textured but orderly pattern.
Use two or three strands of floss for full coverage without making the stitches look bulky.
This technique is perfect for capturing patterns that are more about repeated texture than smooth shading.
34. Define Your Path with Precision Blackwork
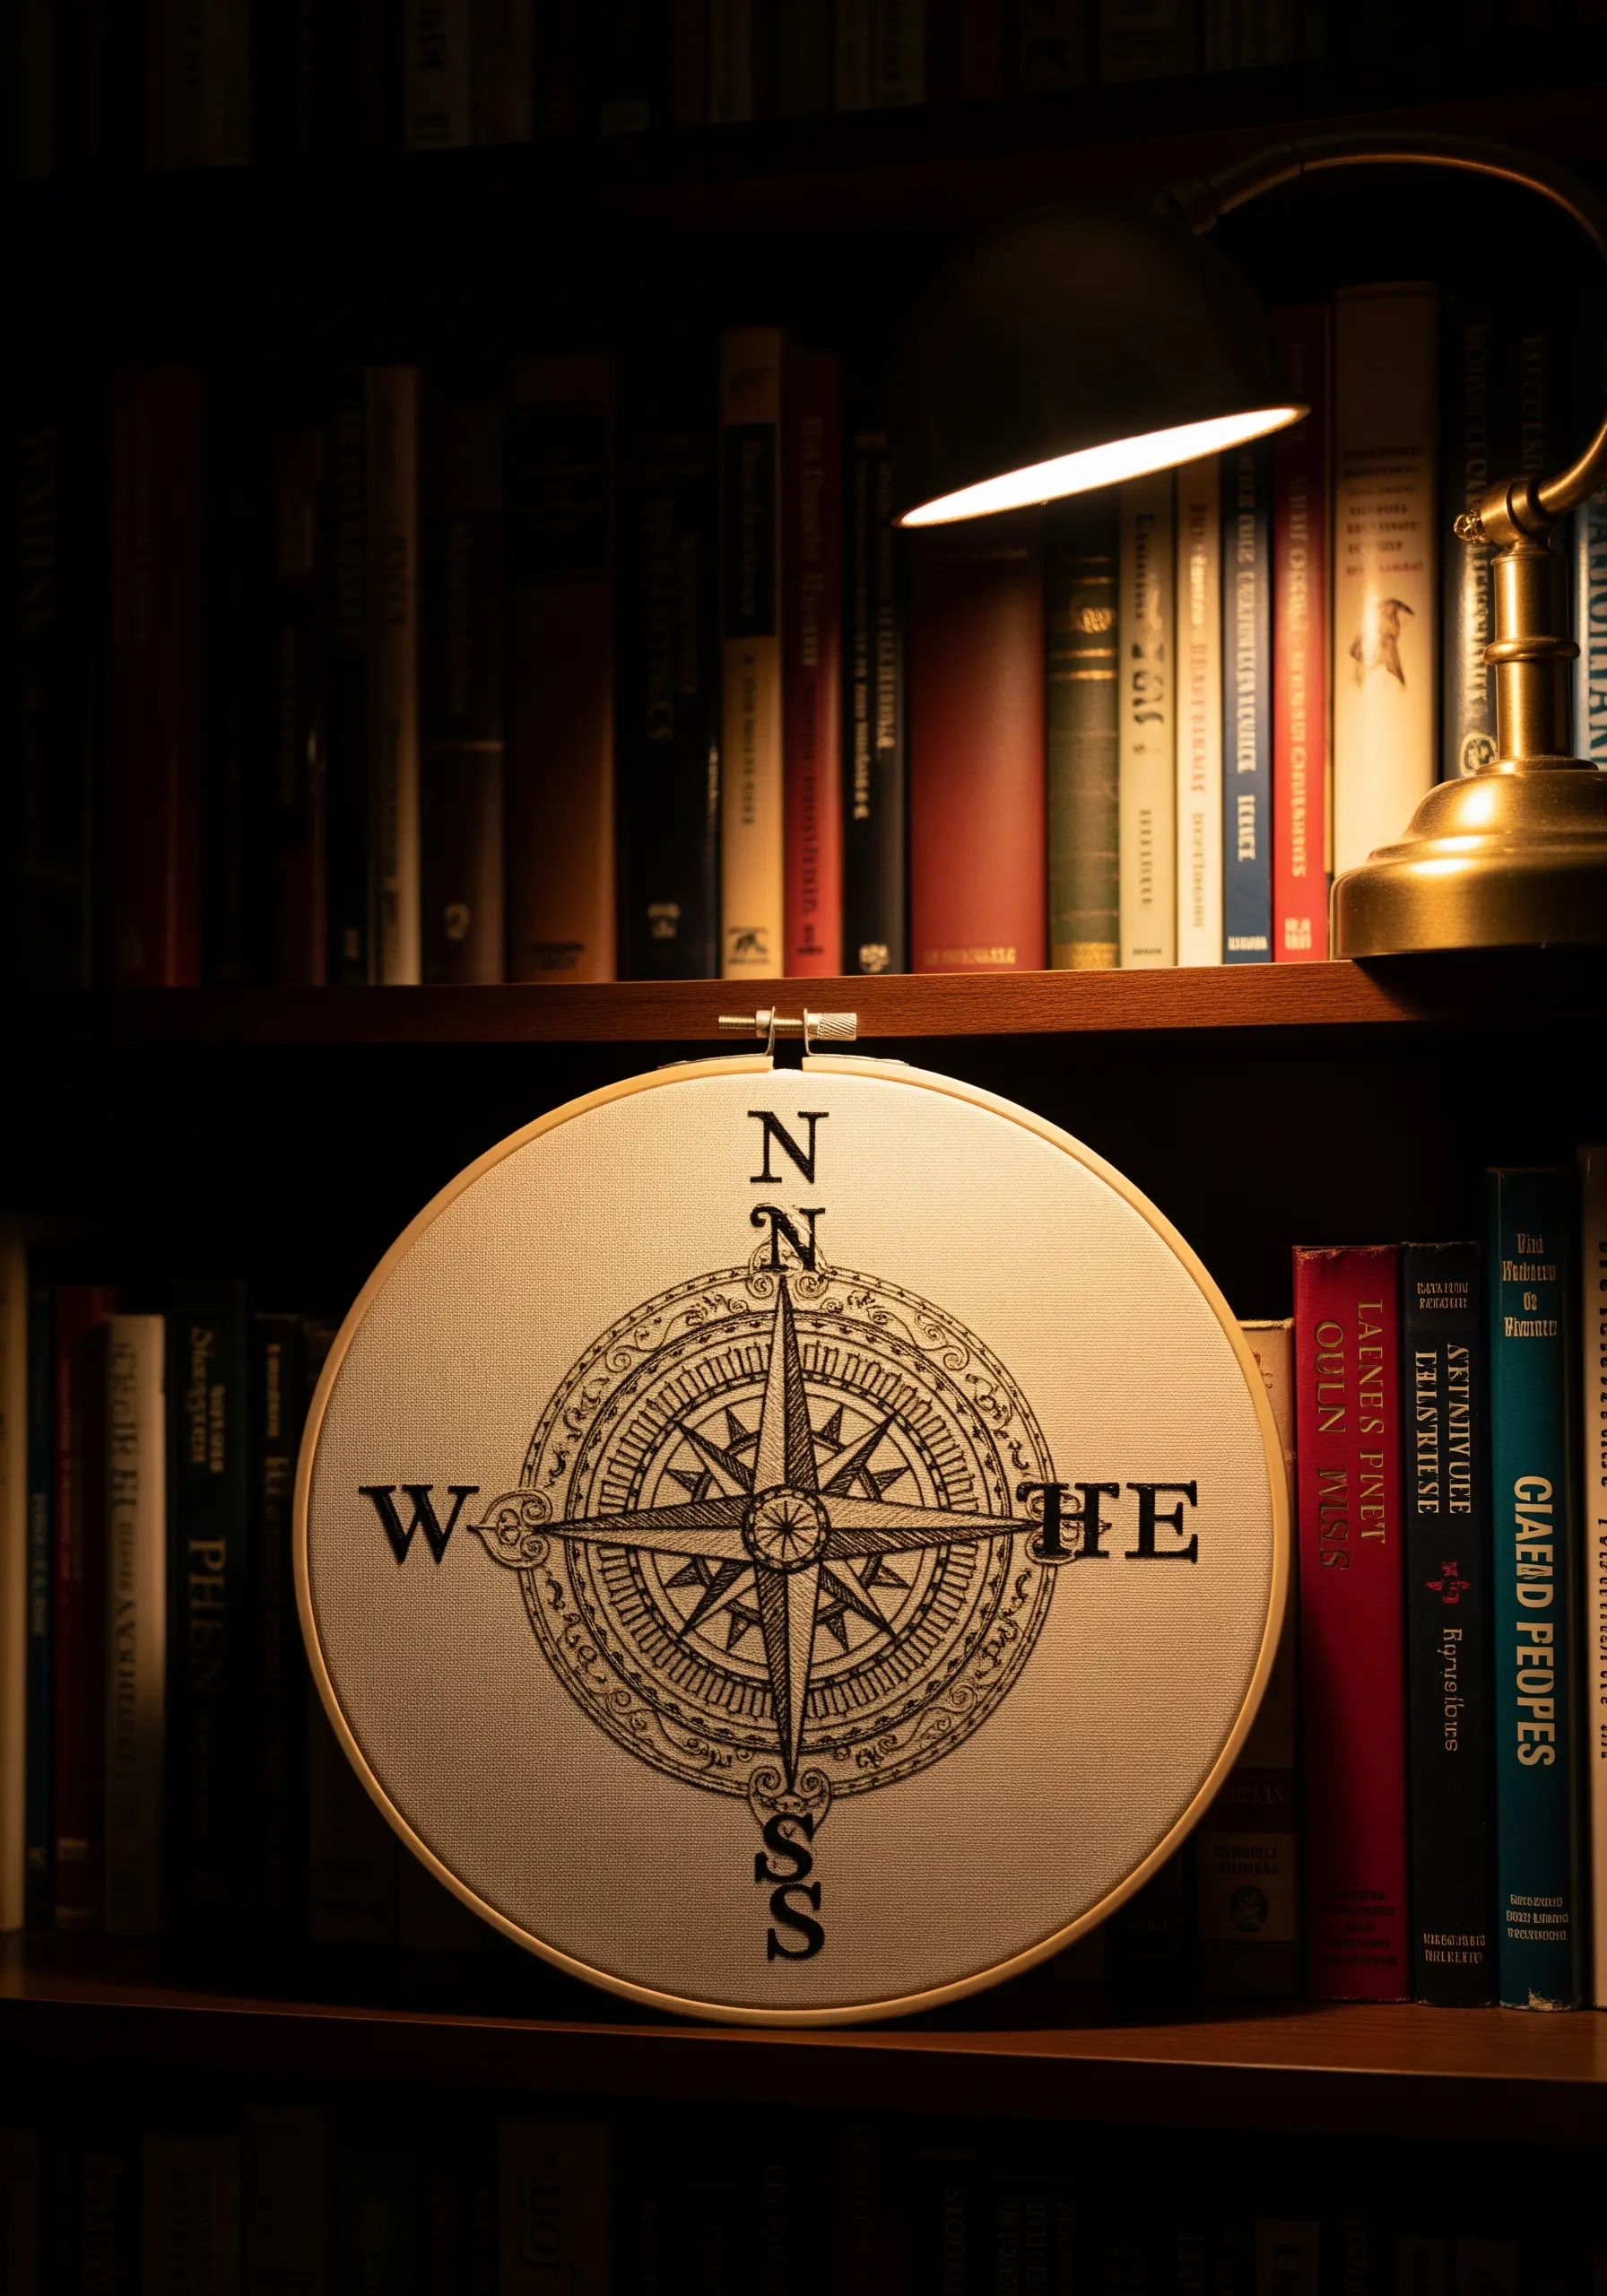
Capture the intricate detail of an antique map or compass rose using blackwork embroidery.
This technique uses repeating geometric patterns, created with simple backstitch or Holbein stitch, to fill shapes and create texture and shading.
Work with a single strand of black thread on a light-colored, even-weave fabric to achieve the finest, most precise lines.
The result is a design that looks incredibly detailed and historic, relying solely on line and pattern rather than color.


