
You have a bag of fabric scraps, a collection of worn-out jeans, a jar of bottle caps. You see potential in these forgotten things, but perhaps you’re unsure how to transform them into art that feels intentional and beautiful. The secret isn’t in buying more supplies—it’s in the thread you already have.
Embroidery is more than just decorating fabric; it is a language of connection, mending, and transformation. With a simple needle and thread, you can bind disparate objects together, add precious detail to disposable materials, and turn the overlooked into something worthy of being displayed.
In these ideas, you will find ways to use stitching not just as embellishment, but as a structural and sculptural tool. Let this be your invitation to look at ‘trash’ differently—as a canvas waiting for the quiet, powerful magic of your stitches.
1. Elevate Denim Patchwork with Appliqué
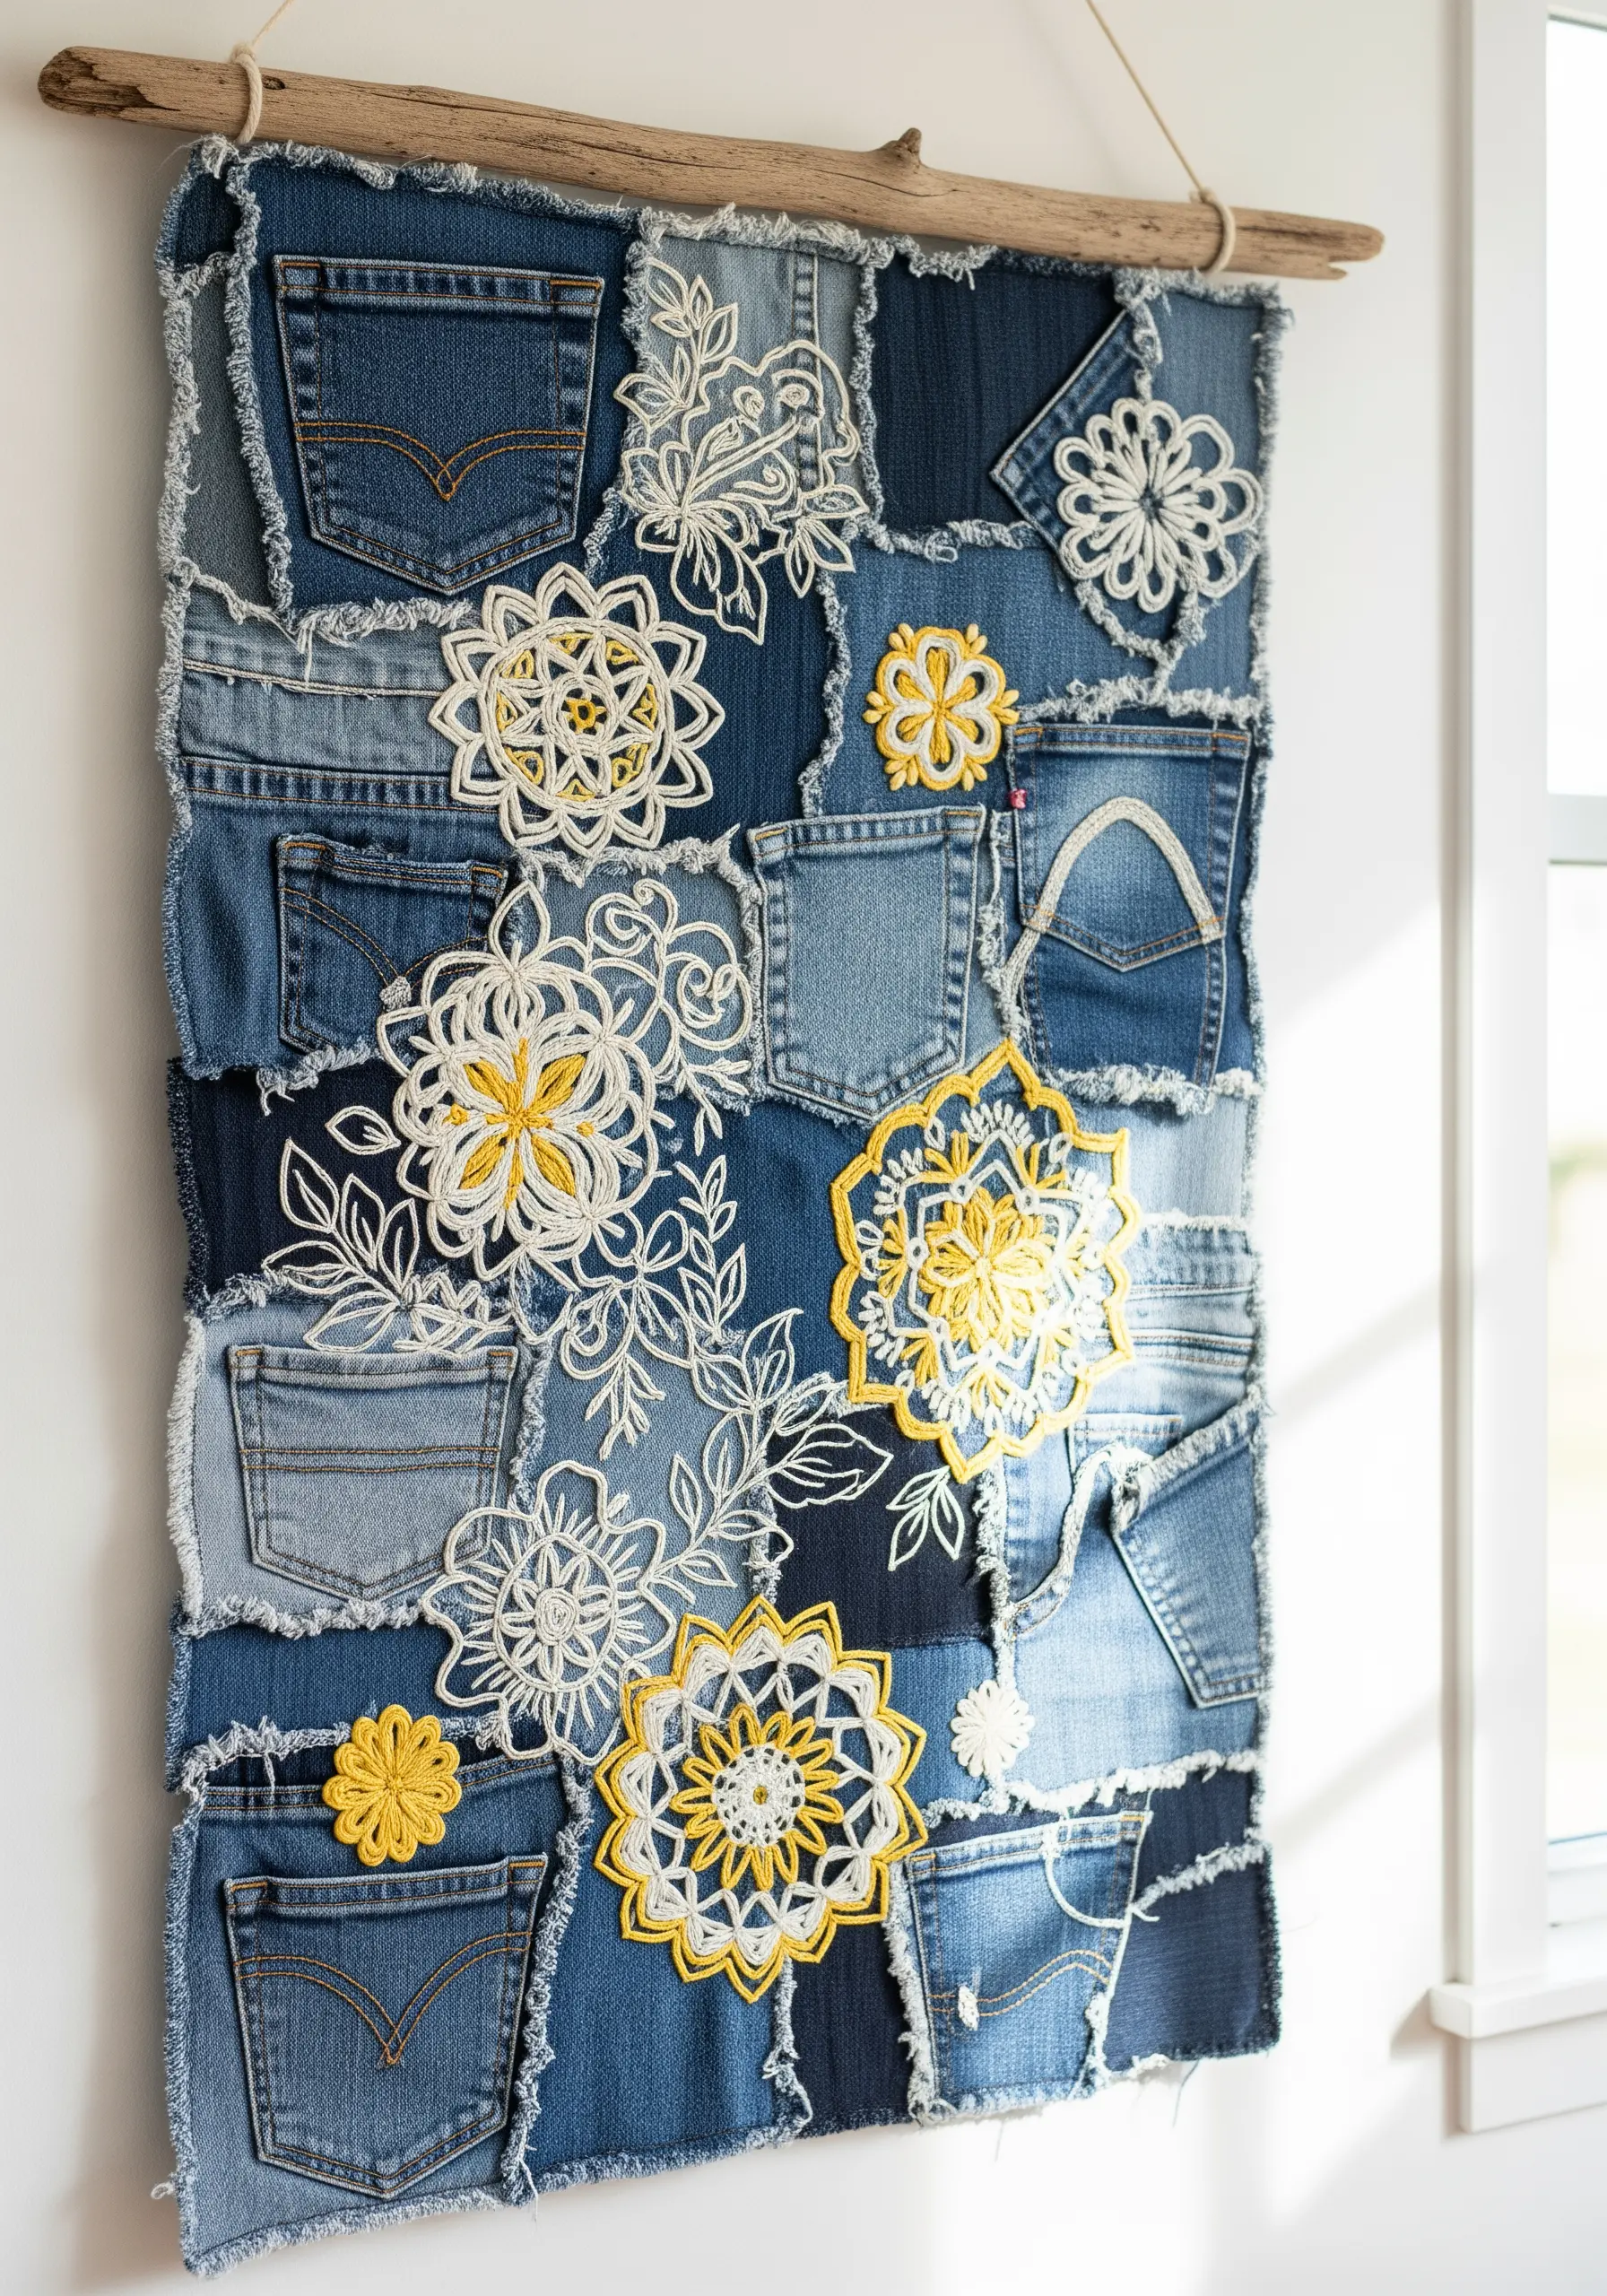
Transform old jean pockets into a textural canvas by layering them into a patchwork wall hanging.
Instead of stitching directly onto the thick, uneven surface, embroider your floral motifs on a separate piece of sheer organza or water-soluble stabilizer.
Once complete, trim the motifs and appliqué them onto the denim using a small, neat whipstitch. This technique ensures your stitches remain clean and detailed, creating a crisp contrast against the rugged fabric.
Use a bright, high-contrast thread like a six-strand cotton floss in white and yellow to make the designs pop.
2. Map Memories with Thread and Bottle Caps
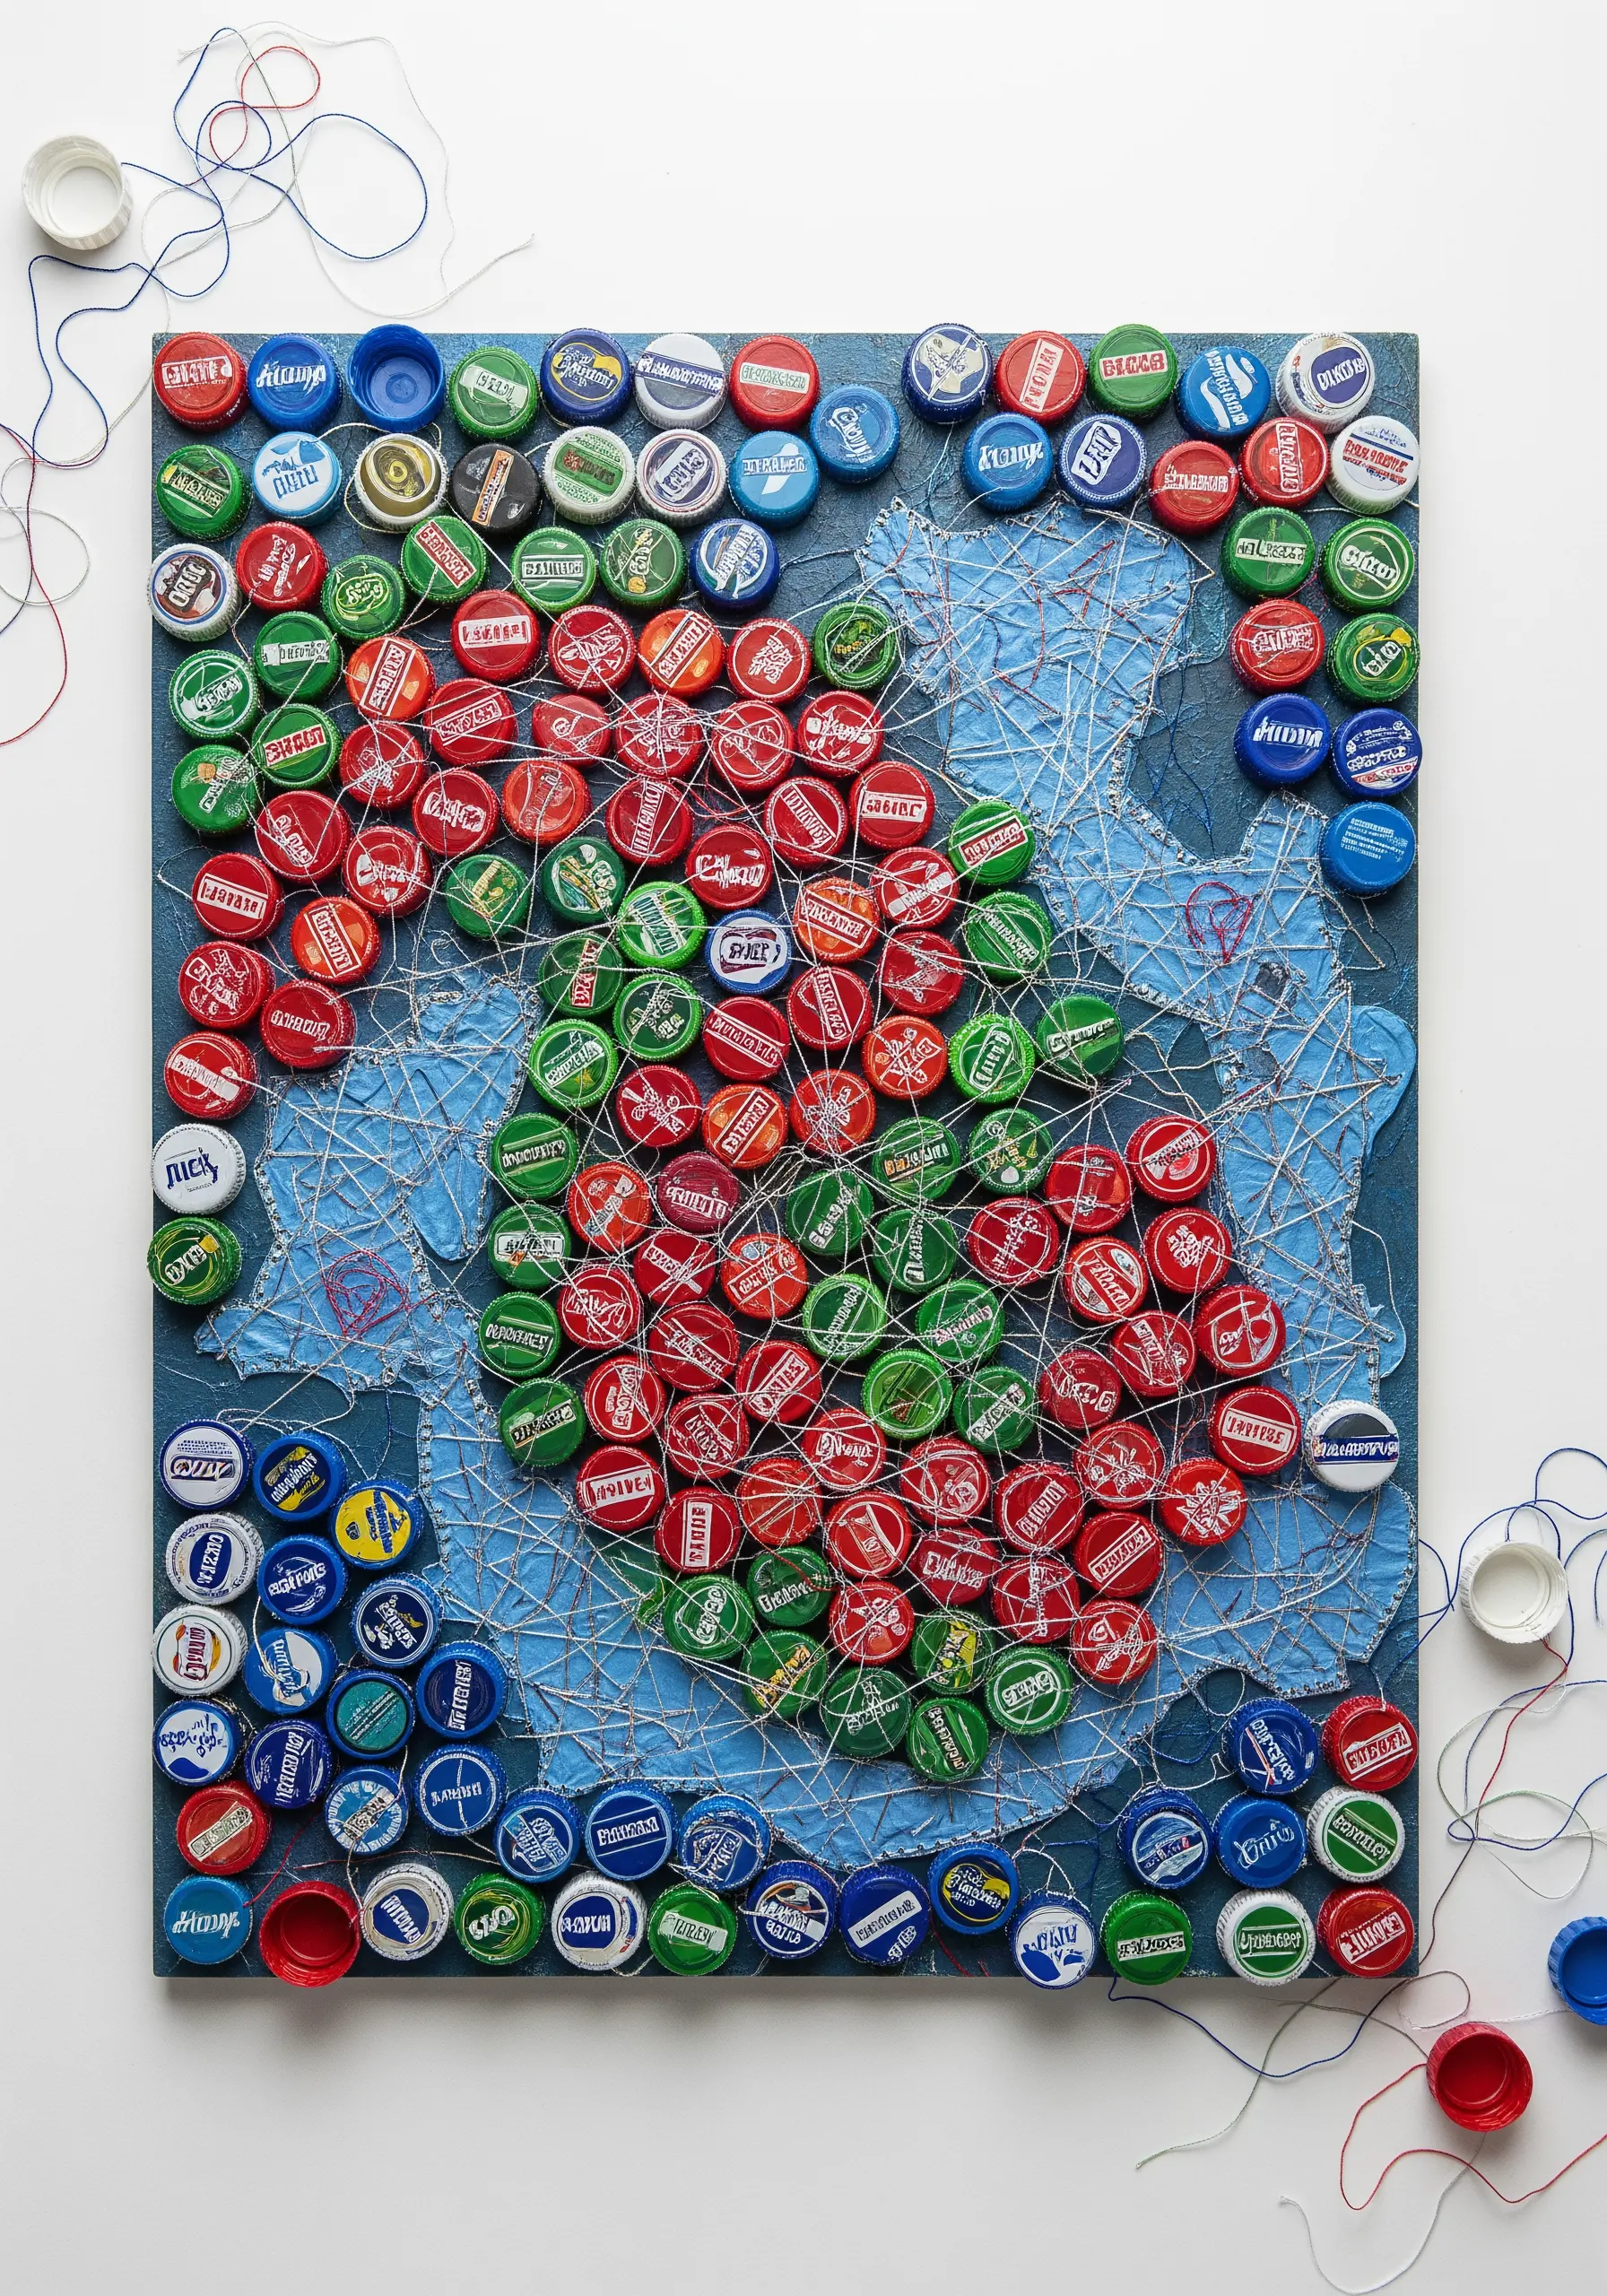
Use string art techniques to turn a collection of bottle caps into a graphic map or abstract design.
First, paint a wooden board and trace your desired outline, such as a country or continent.
Secure the bottle caps within the outline, then hammer small nails around the border of your shapes. The magic happens when you wrap thread tautly between the nails, creating a web that secures the caps and defines the form.
This method turns hard, rigid objects into a cohesive piece held together by the delicate strength of thread.
3. Add Stitched Details to Upcycled Wind Chimes
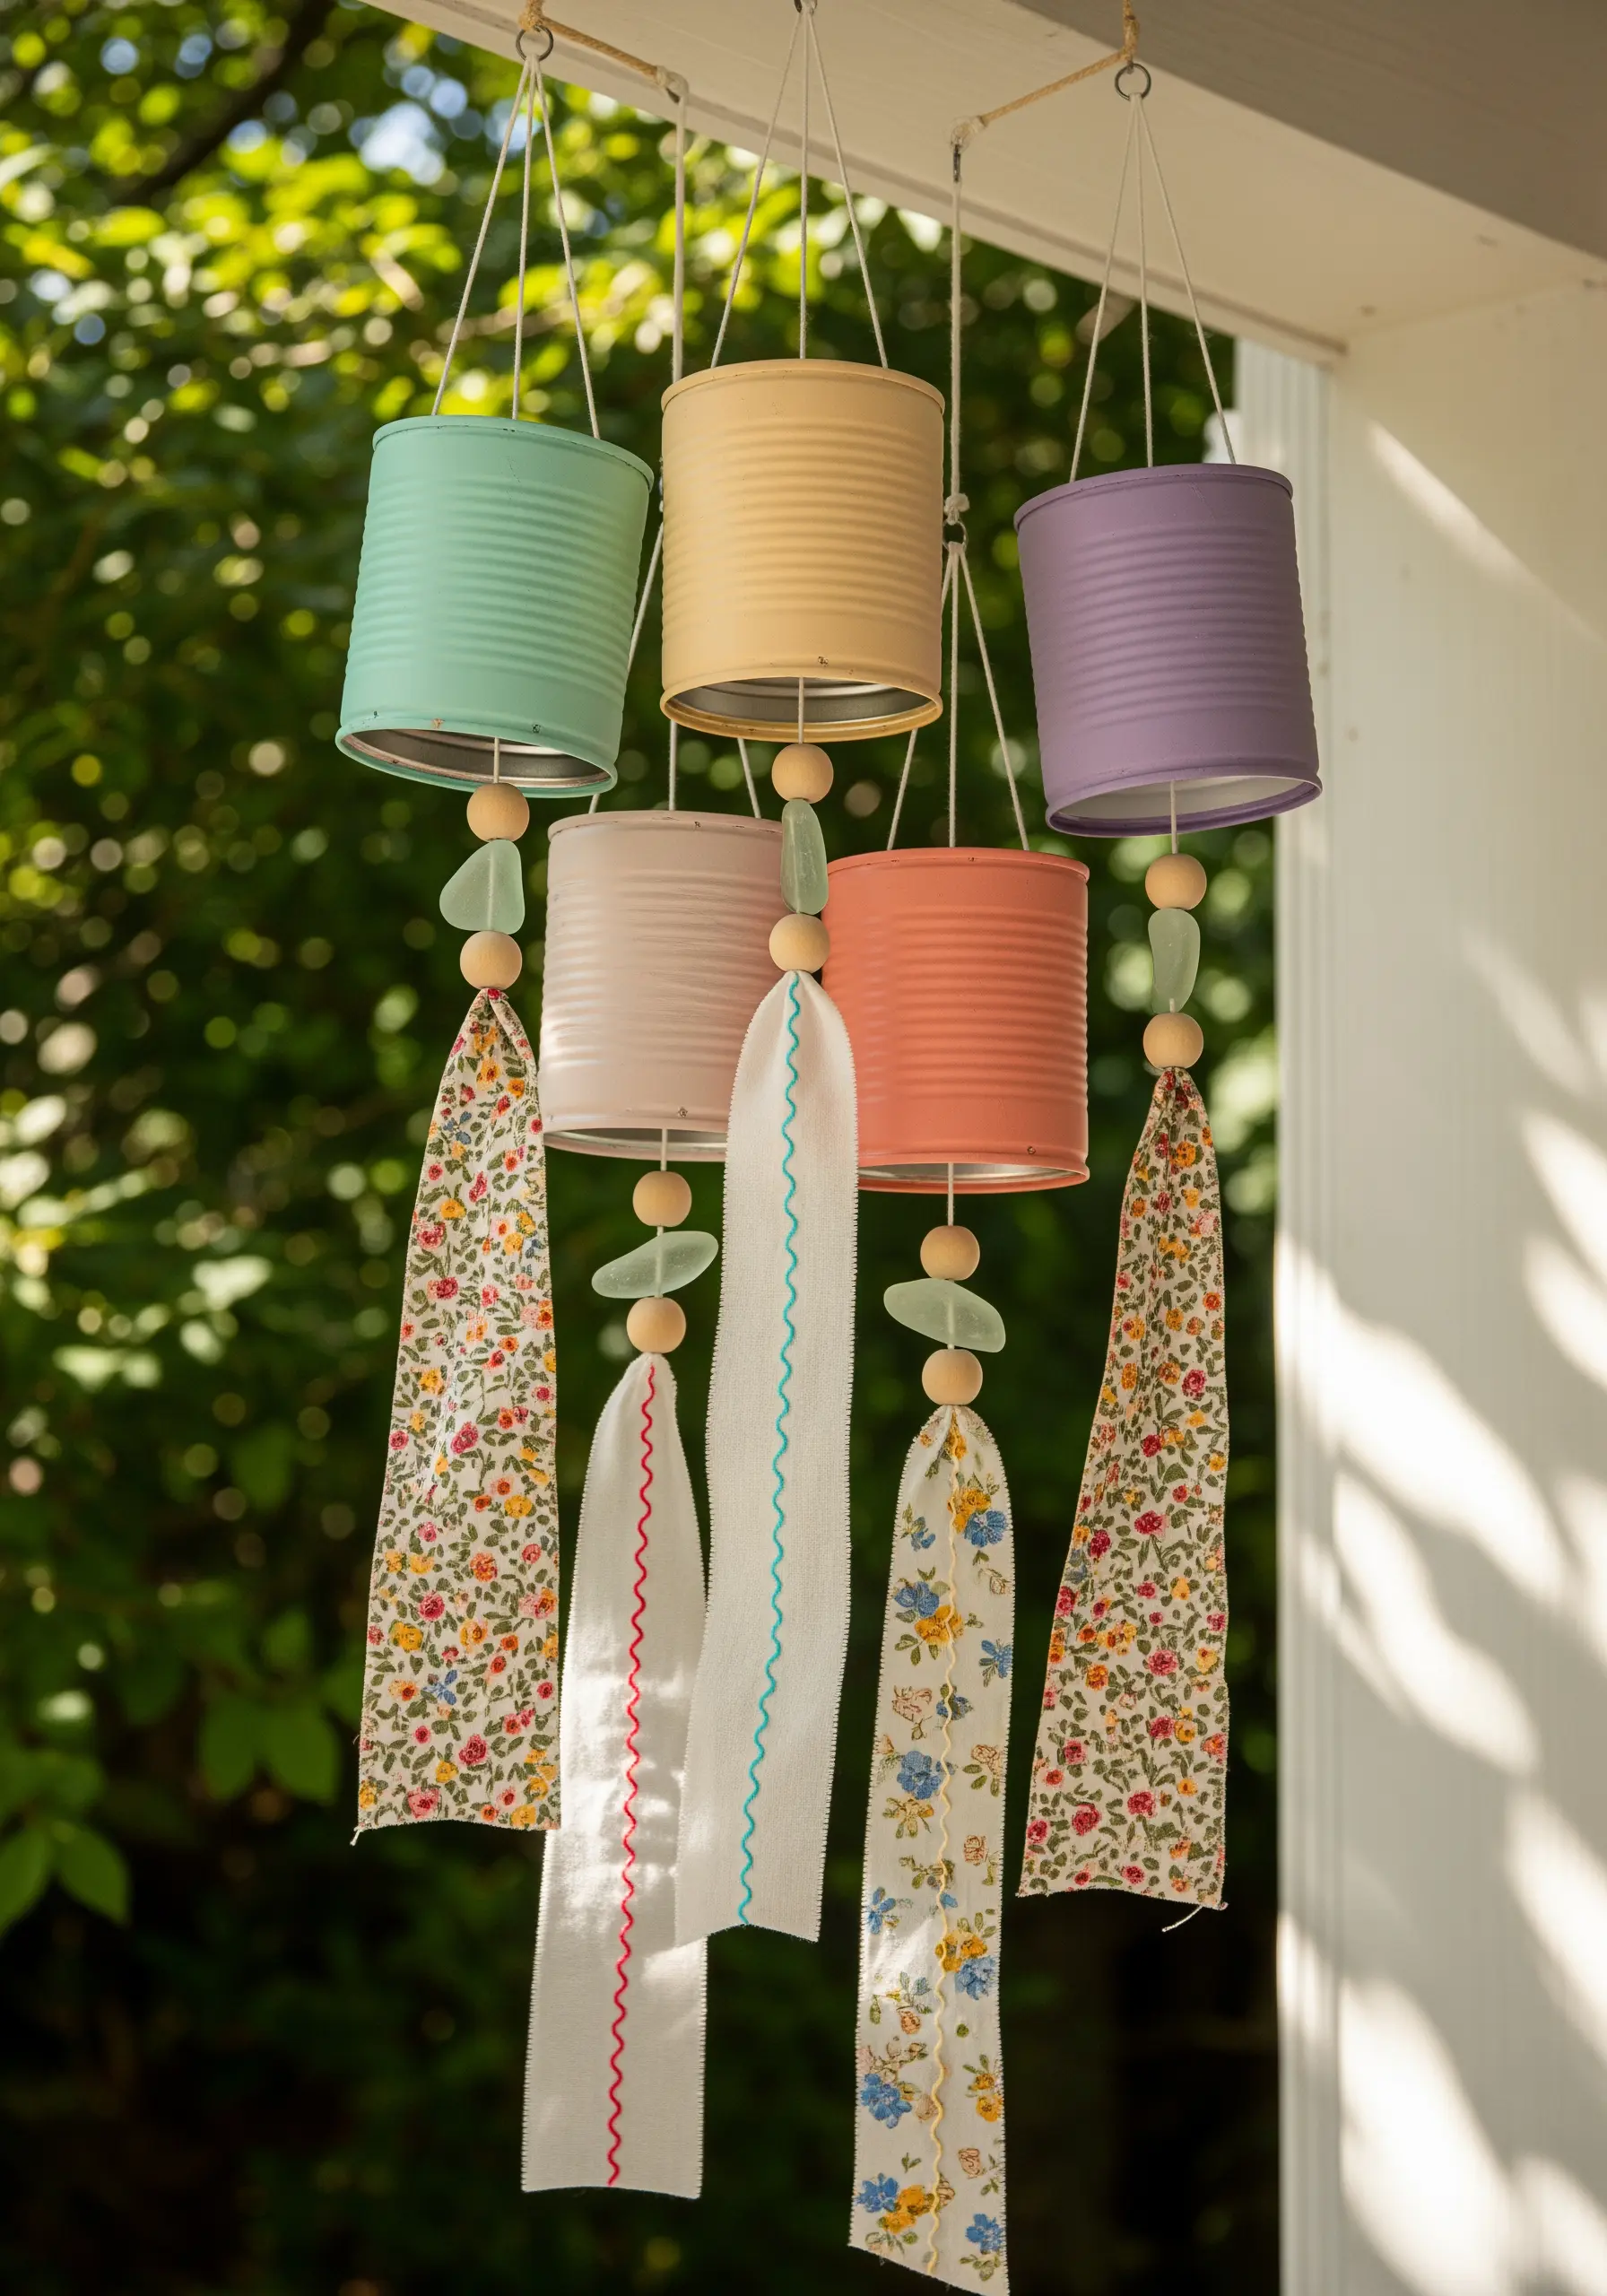
Give repurposed tin cans a softer, more personal touch by adding embroidered fabric tails.
Instead of leaving fabric strips plain, elevate them with simple decorative stitches. A line of chain stitch, a scattering of French knots, or a neat blanket stitch along the edges adds intention and detail.
Choose a thread color that complements both the painted can and the fabric pattern to create a harmonious design.
This small touch transforms a simple craft into a piece of thoughtful cozy embroidered wall art.
4. Weave with Unconventional, Chunky Fibers
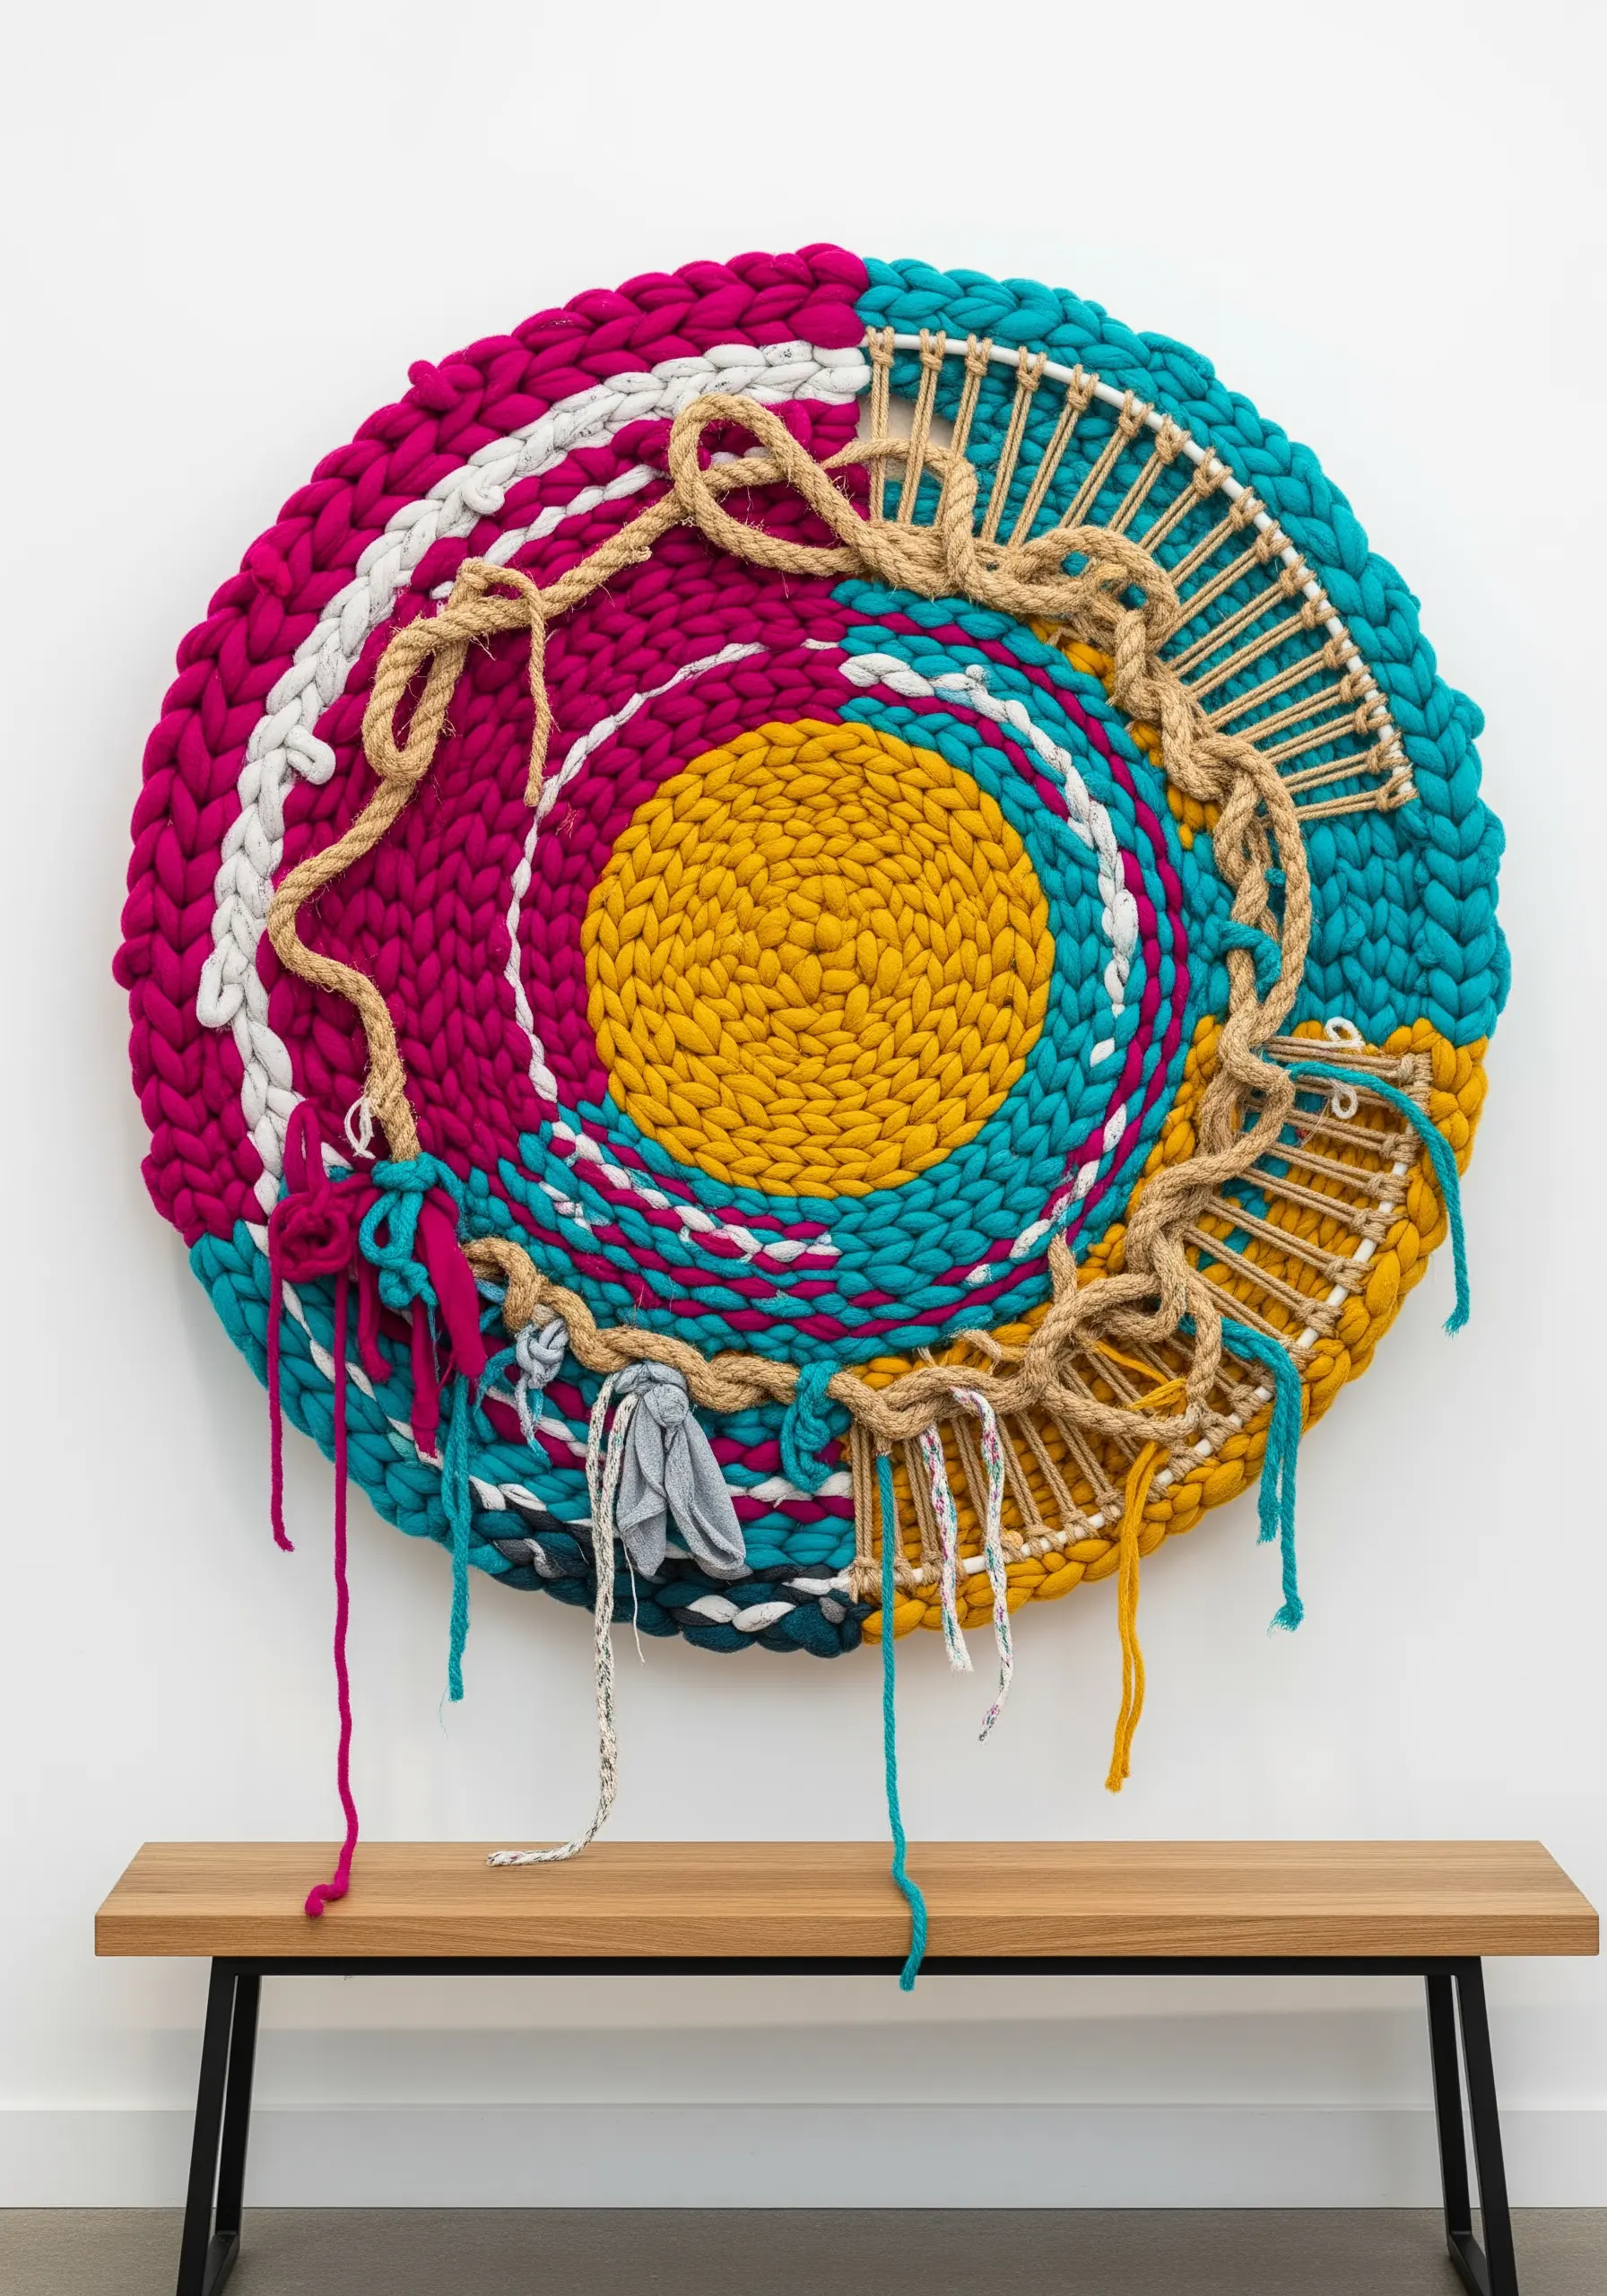
Move beyond traditional yarn by incorporating repurposed materials into a large-scale circular weaving.
Use chunky, felted wool roving, thick jute rope, or even strips of old t-shirts to build dramatic texture quickly.
Vary your weaving techniques—alternating between a tight, dense plain weave and open, looped sections—to create visual rhythm and depth.
This approach transforms discarded textiles into a statement fiber art installation, celebrating texture over intricate detail.
5. Wrap Natural Forms with Sculptural Thread
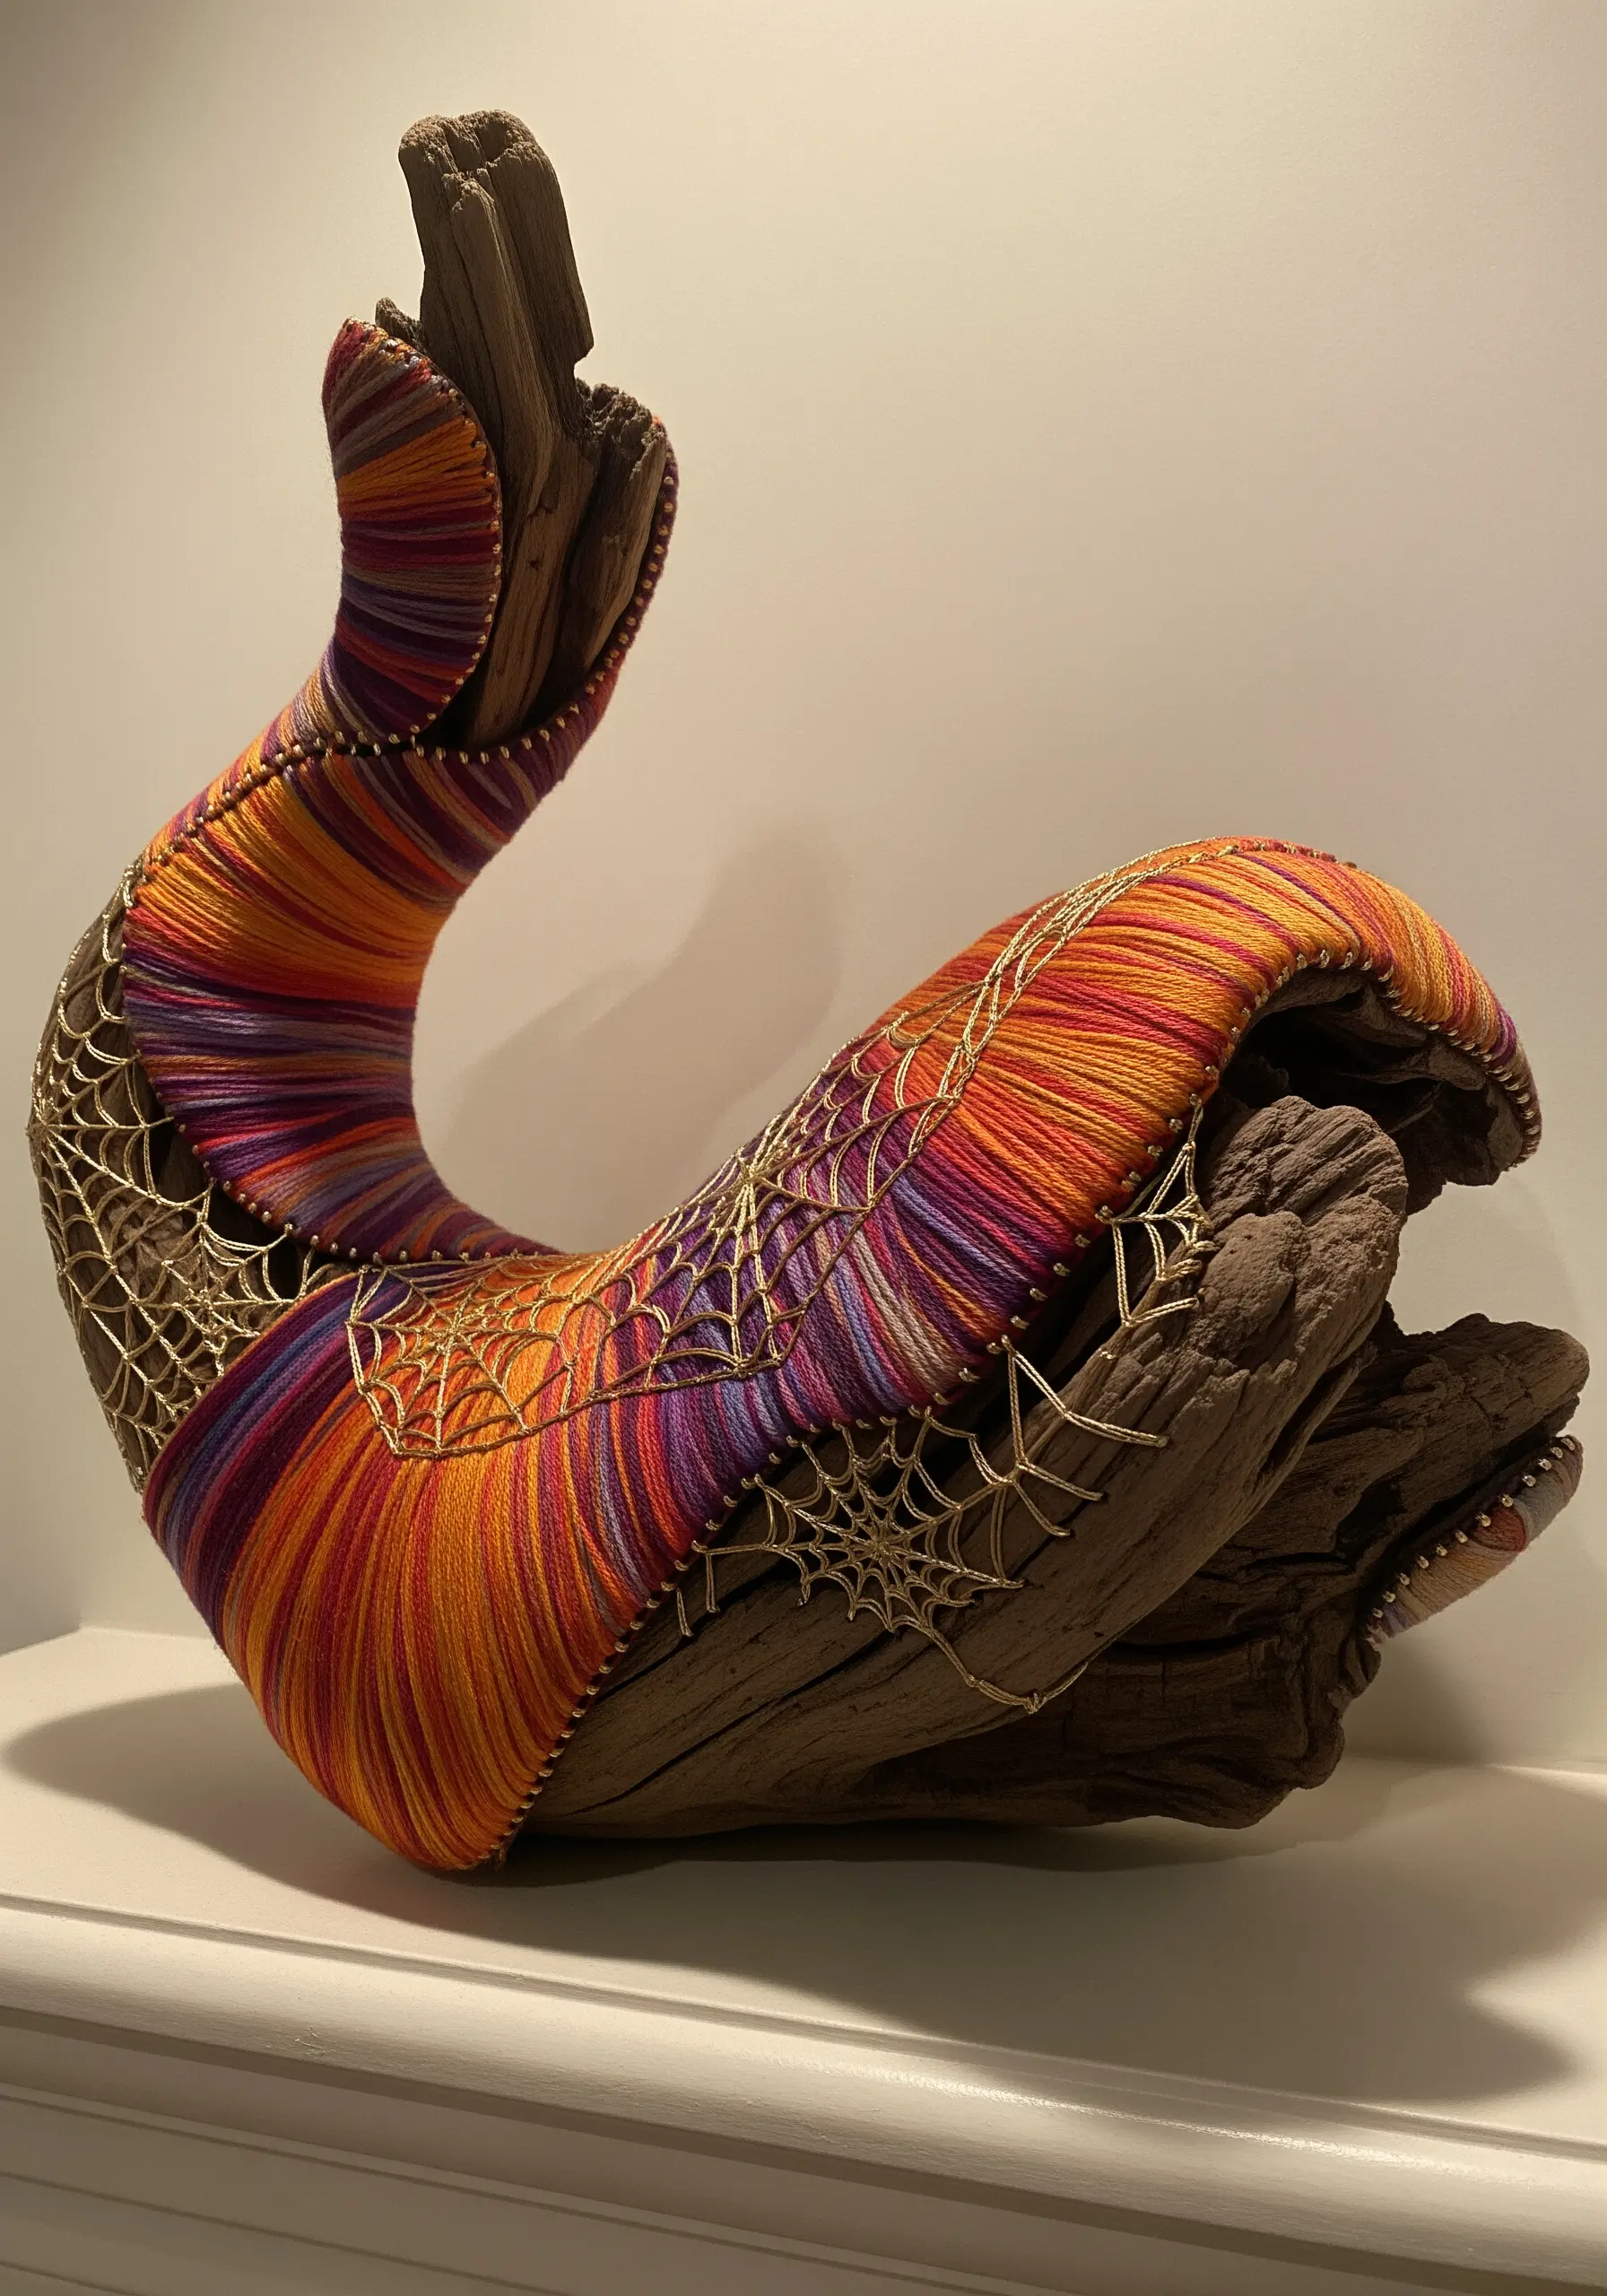
Turn a piece of driftwood or an interesting branch into a sculpture using the simple art of thread wrapping.
Select a variegated embroidery floss to create an effortless, painterly gradient of color as you wrap.
Secure the start of your thread with a small knot, then wrap tightly and evenly, pushing the strands together so no wood shows through.
For an added layer of detail, create delicate, web-like structures in the wood’s natural crevices using a fine metallic thread, turning a found object into a precious artifact.
6. Frame Iridescence with Crocheted Webbing
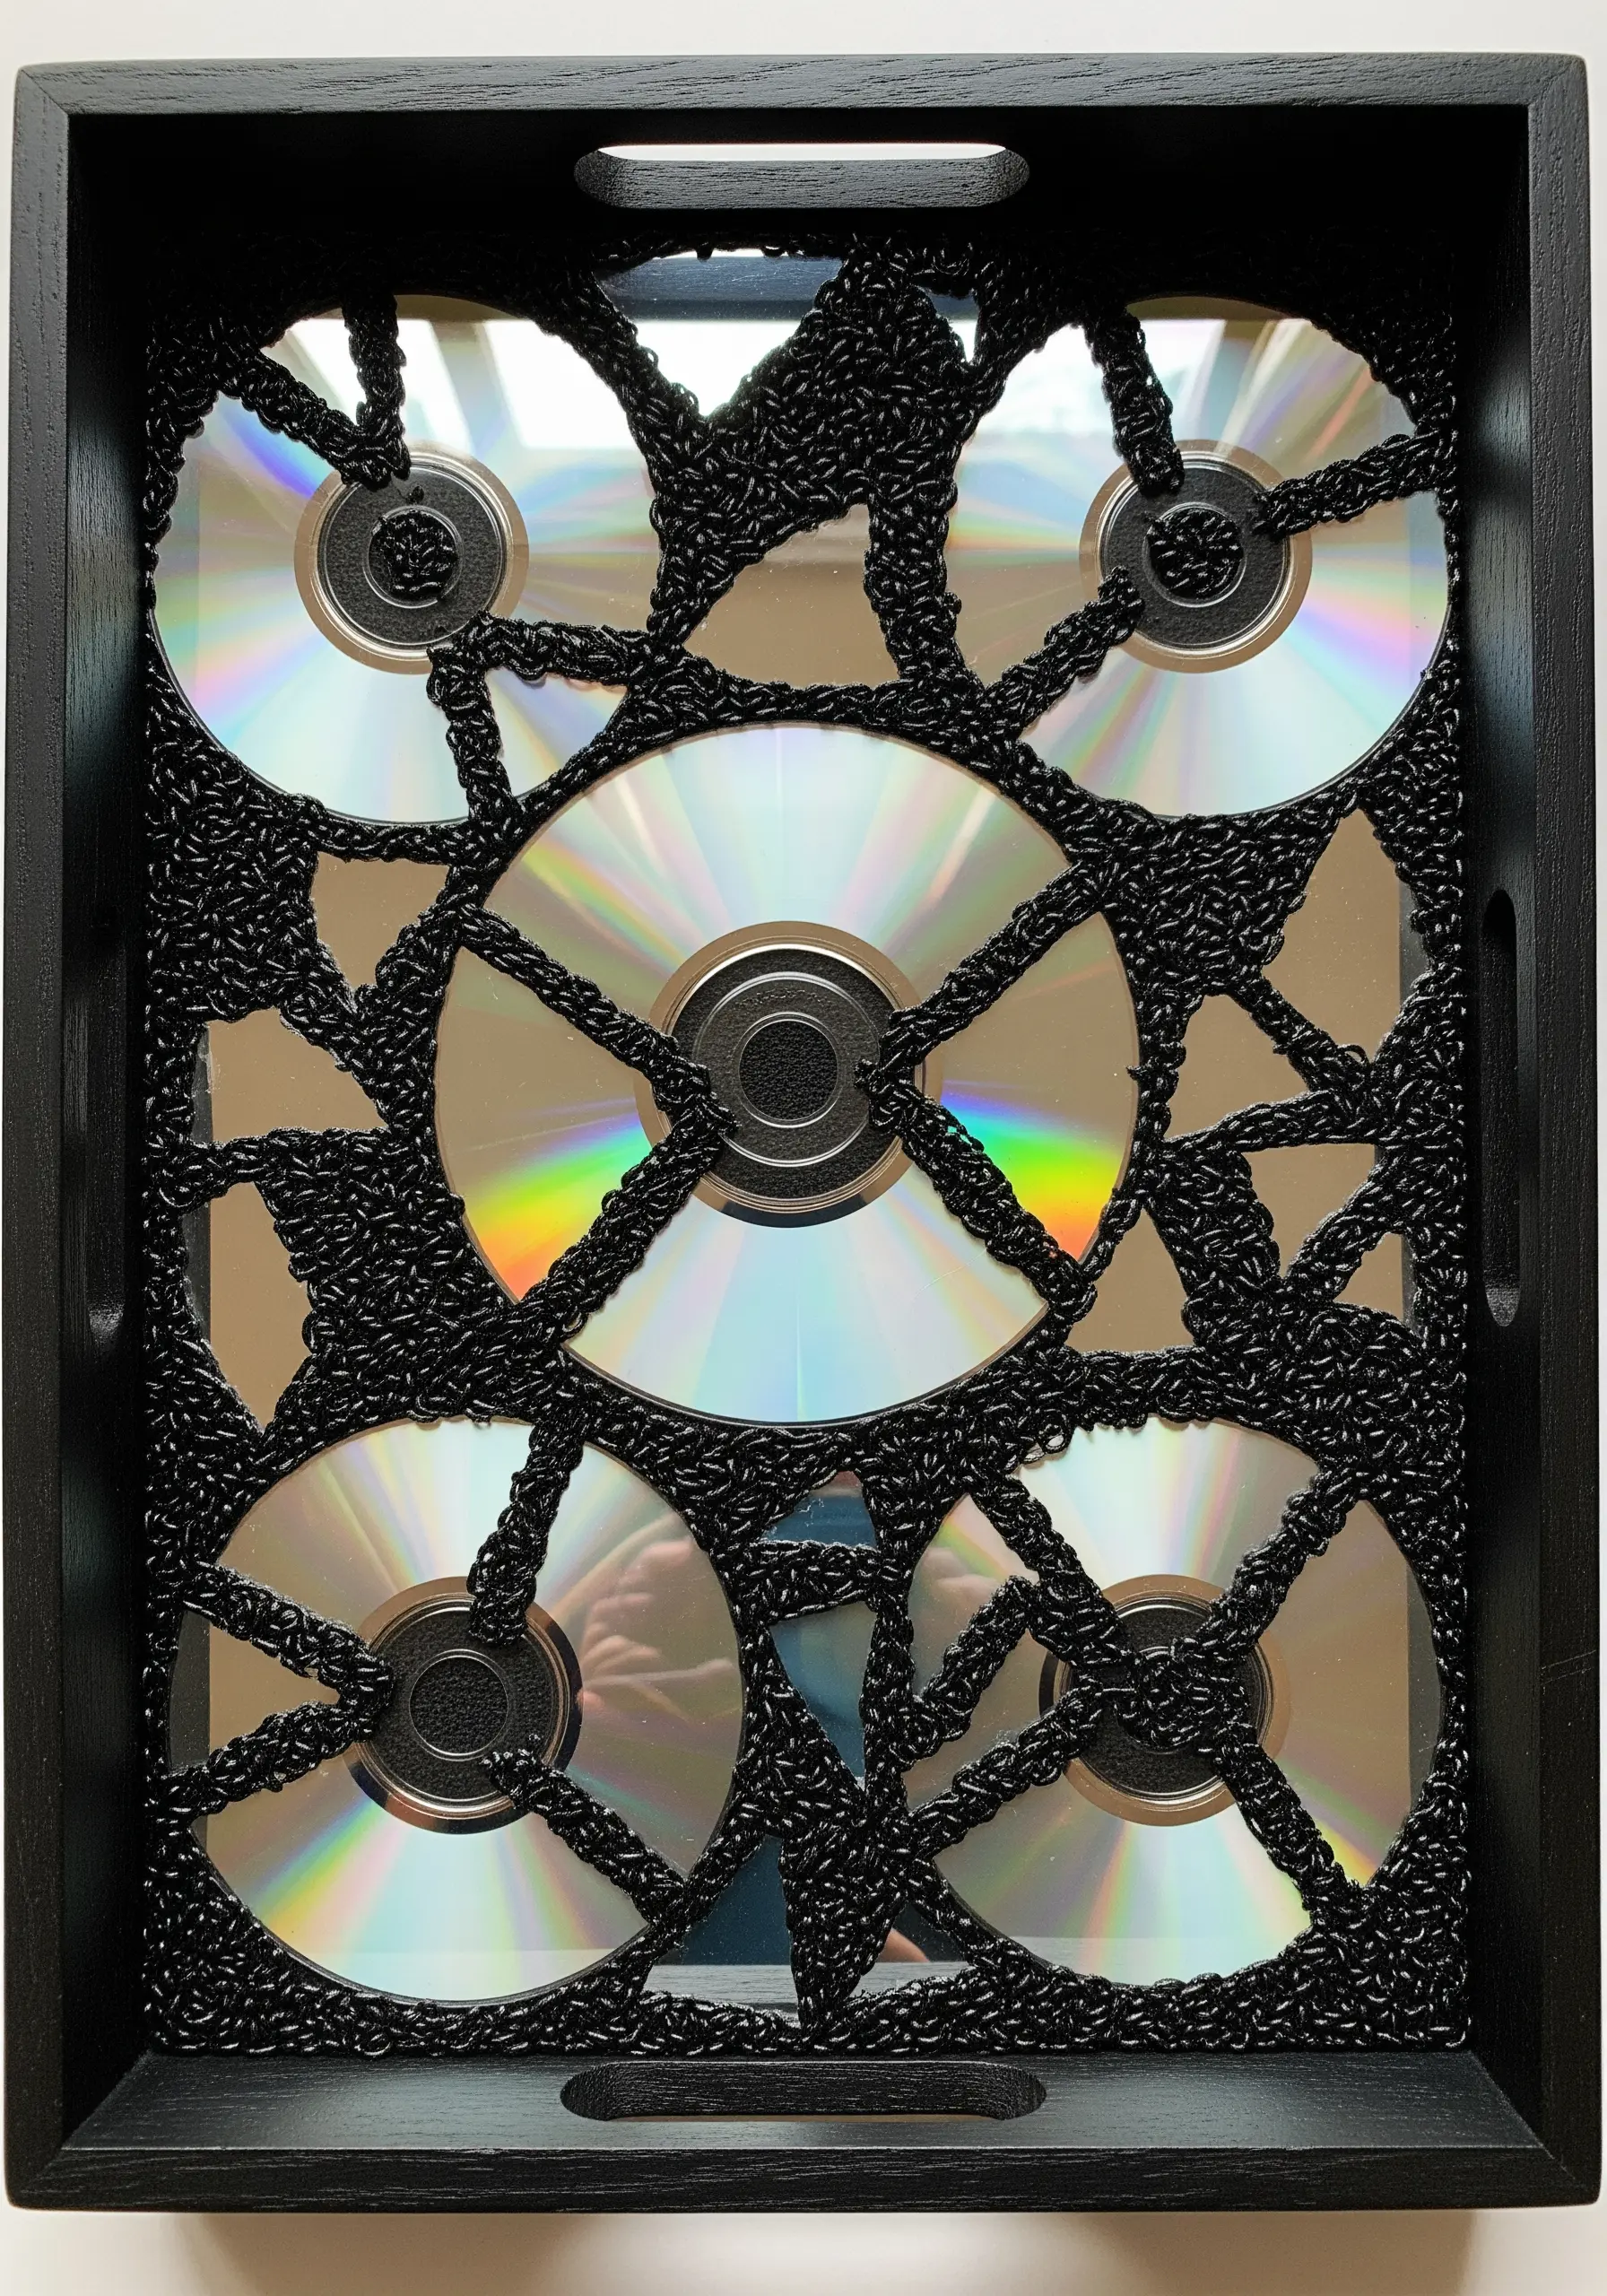
Contrast the cool, reflective surface of old CDs with the soft, tactile quality of yarn.
Arrange CDs on a mirrored surface or inside a tray to amplify their rainbow sheen.
Then, using a simple crochet chain or finger-knitting technique, create a dark, textured yarn network to lay over the top.
This technique physically links the discarded objects, and the stark contrast between the matte black yarn and the holographic CDs creates a powerful, graphic composition.
7. Mend with Thread: A Kintsugi-Inspired Approach
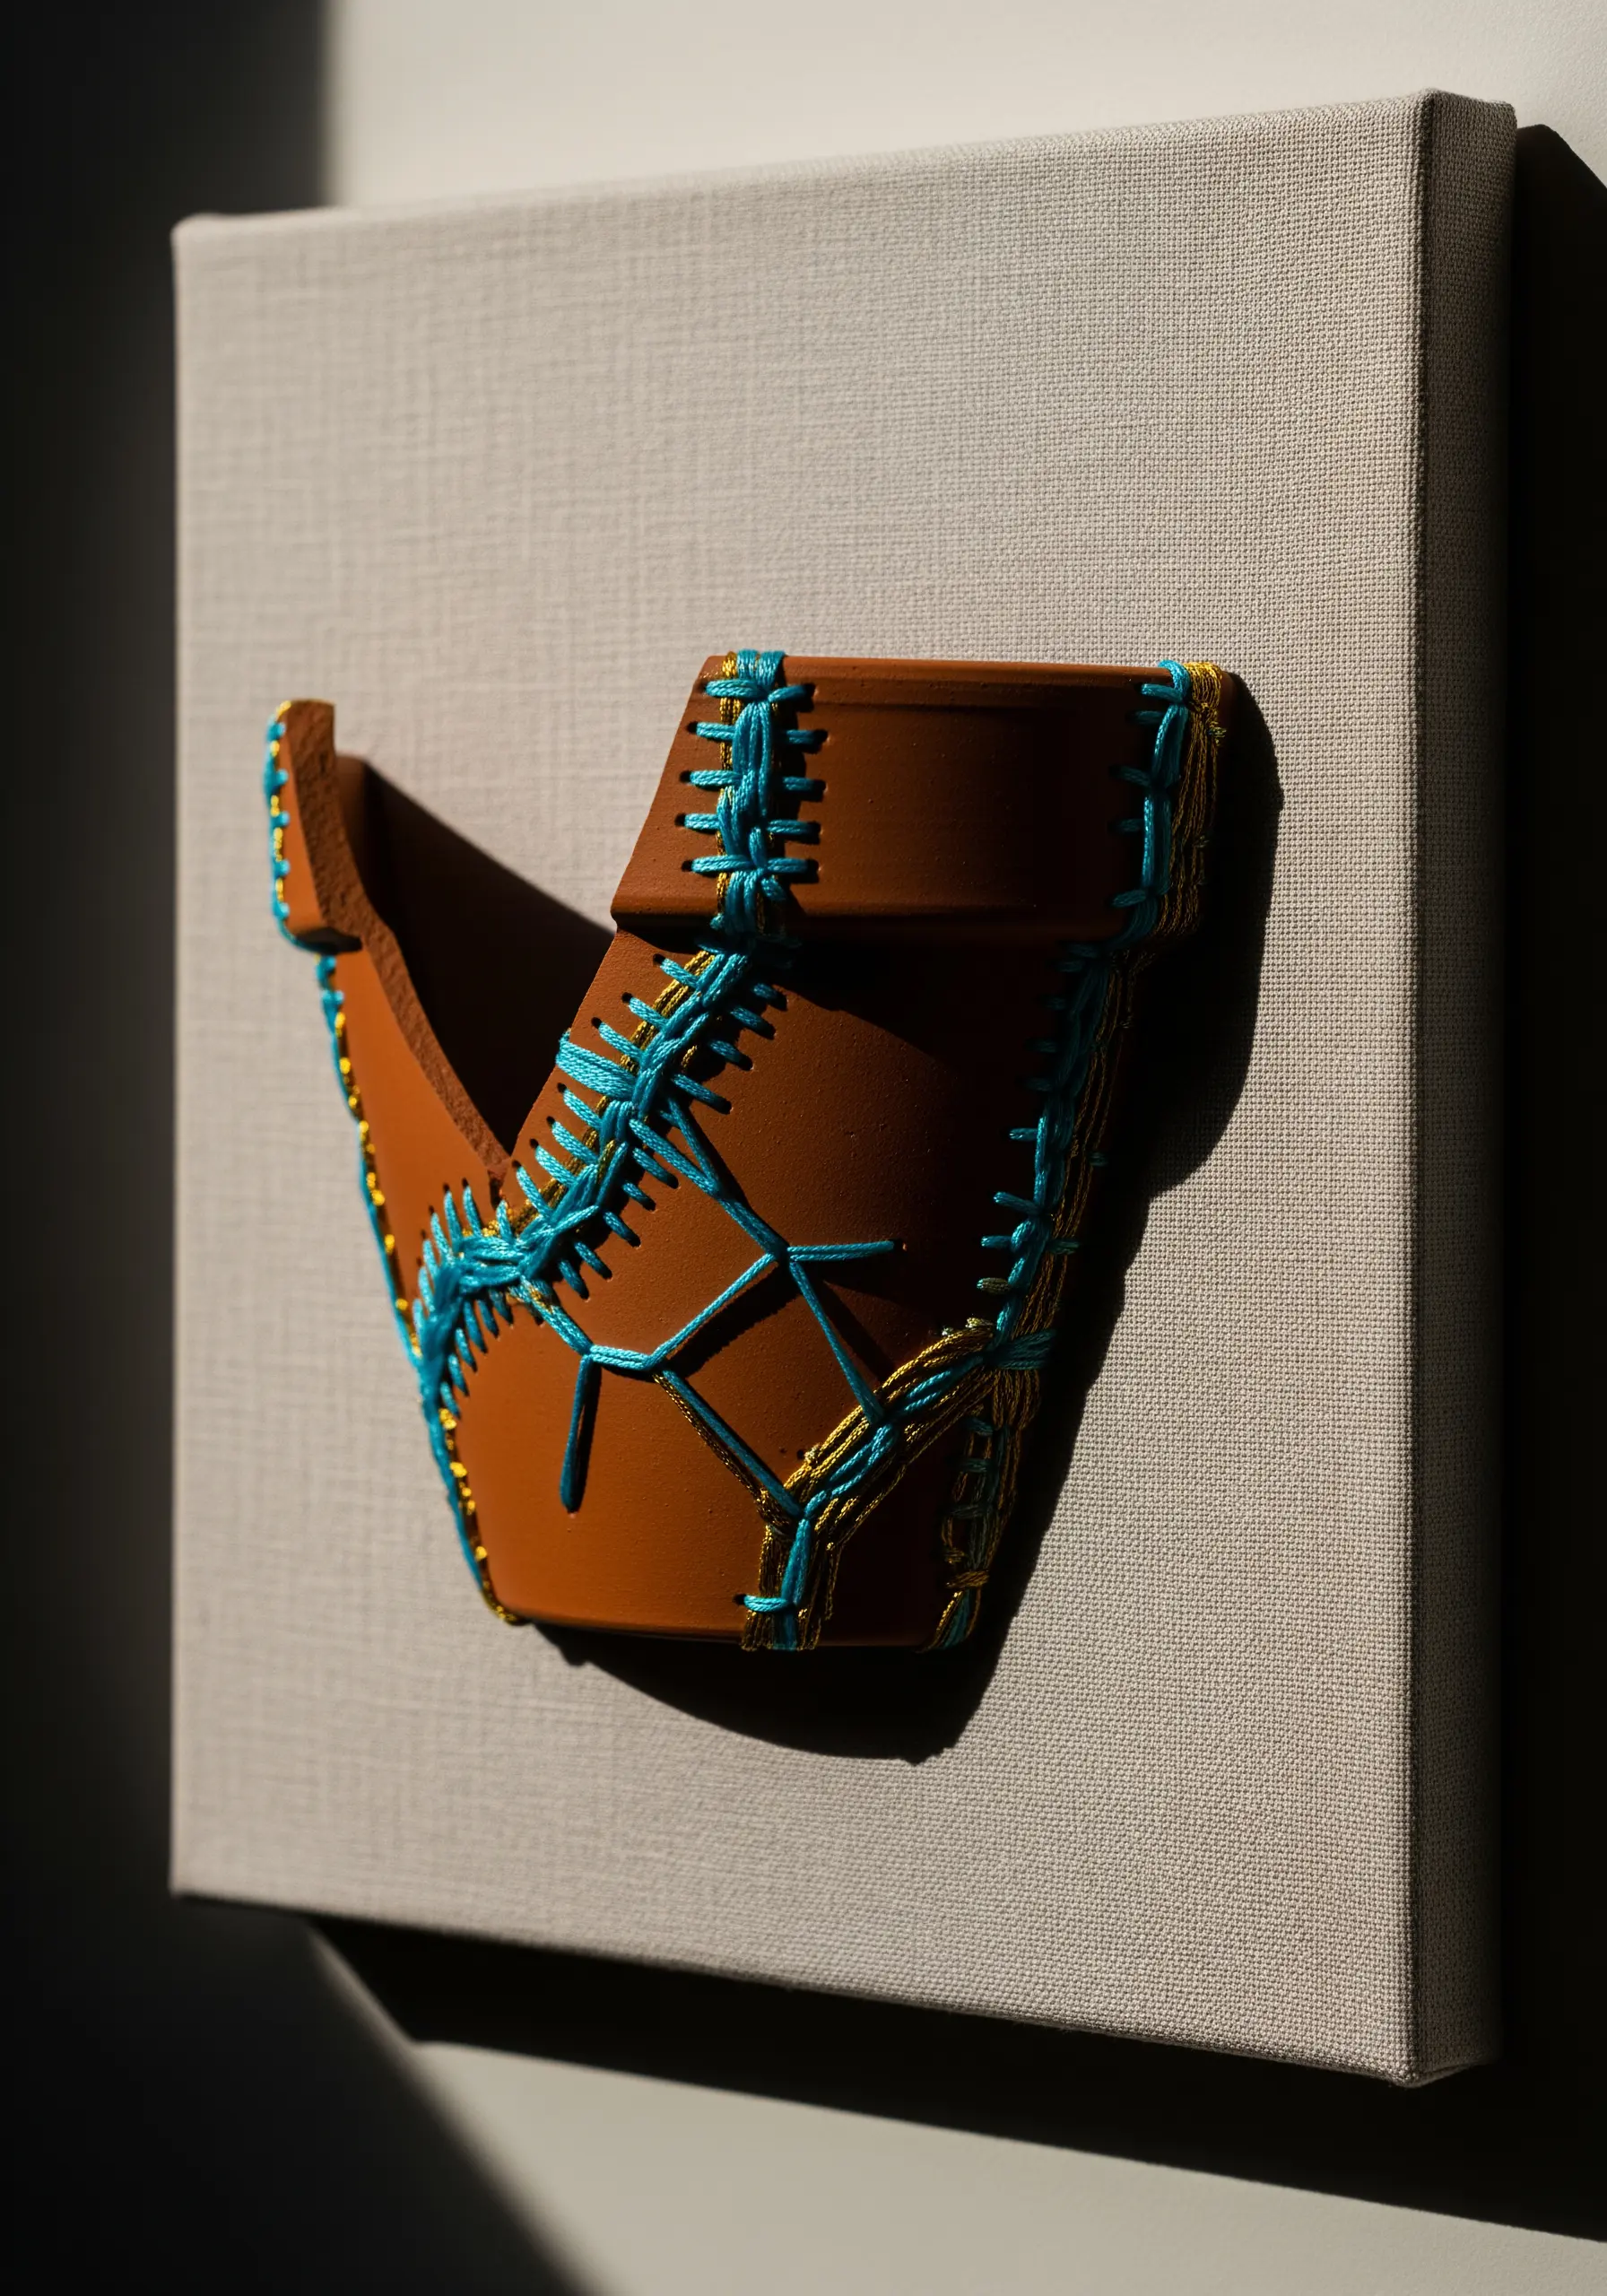
Celebrate imperfection by ‘mending’ a broken piece of pottery with decorative stitches.
Instead of glue, use thread to connect the pieces in a way that highlights the break. Mount the pieces onto a canvas, leaving small gaps between them.
Use a sturdy needle to punch holes and lace a bright, contrasting thread between the shards, creating patterns like crosses or lattices.
This technique, inspired by the Japanese art of Kintsugi, turns a flaw into the most beautiful feature of the artwork.
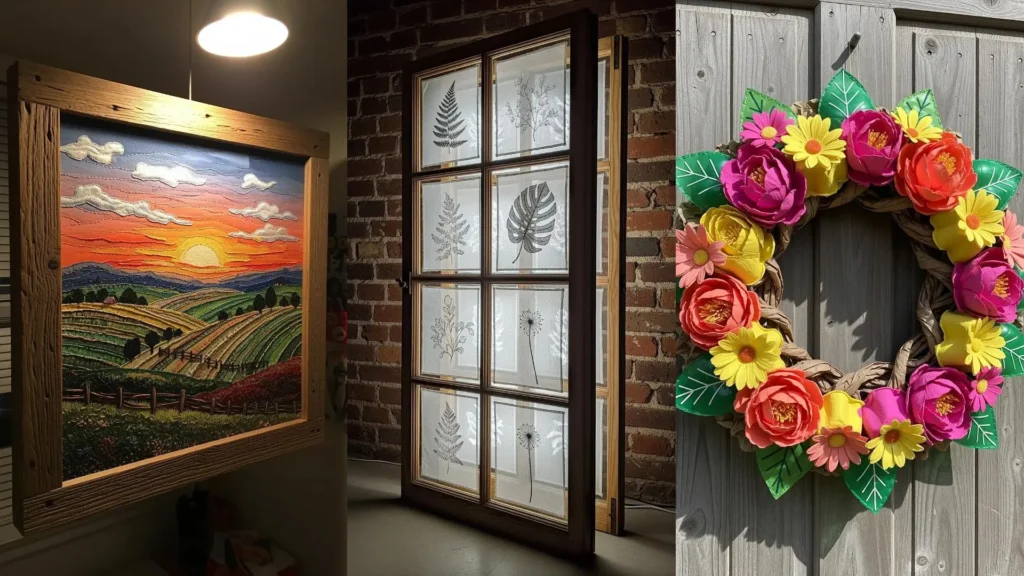
8. Paint Landscapes with Dense, Textural Stitching
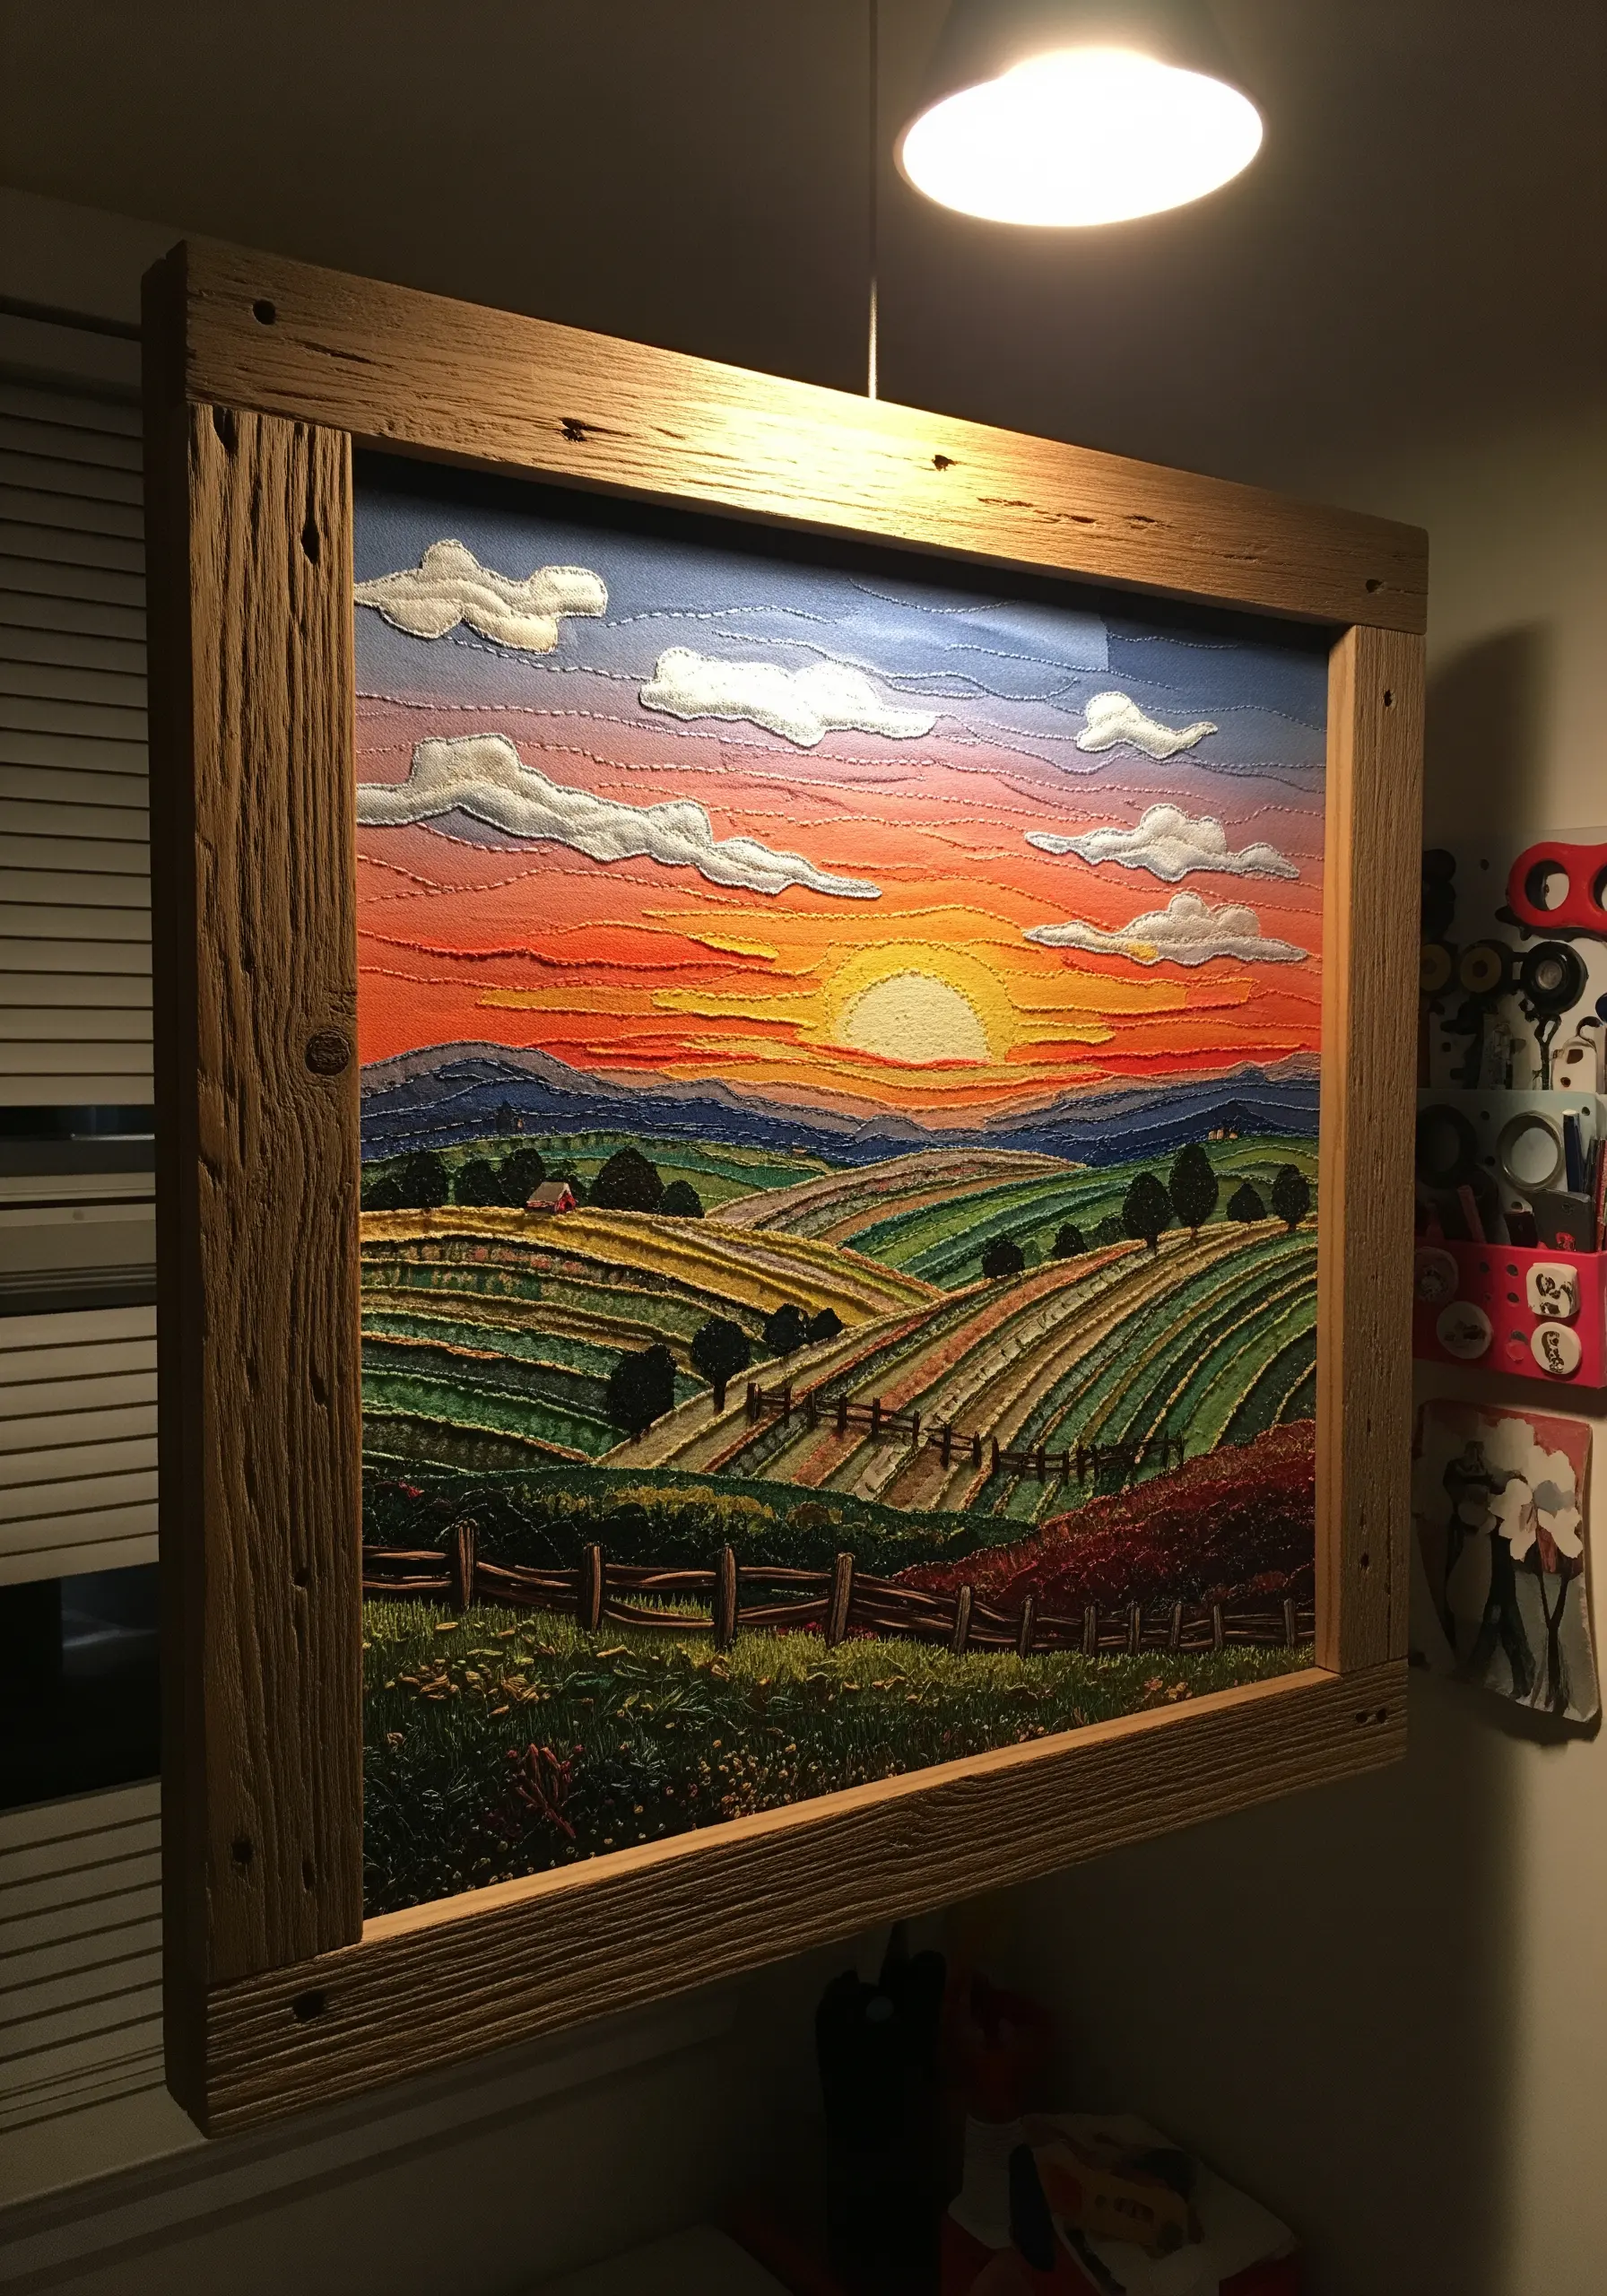
Create a painterly effect by filling large areas with dense, directional seed stitches instead of satin stitches.
Vary the length and angle of your stitches to mimic the texture of rolling hills, grassy fields, and clouds.
To create soft gradients in the sky, use a technique called thread blending, where you combine single strands of two different colors in your needle at once.
This layered approach gives your work incredible depth and turns a simple landscape into a rich, tactile embroidery experience.
9. Combine Perforation and Embroidery on Metal
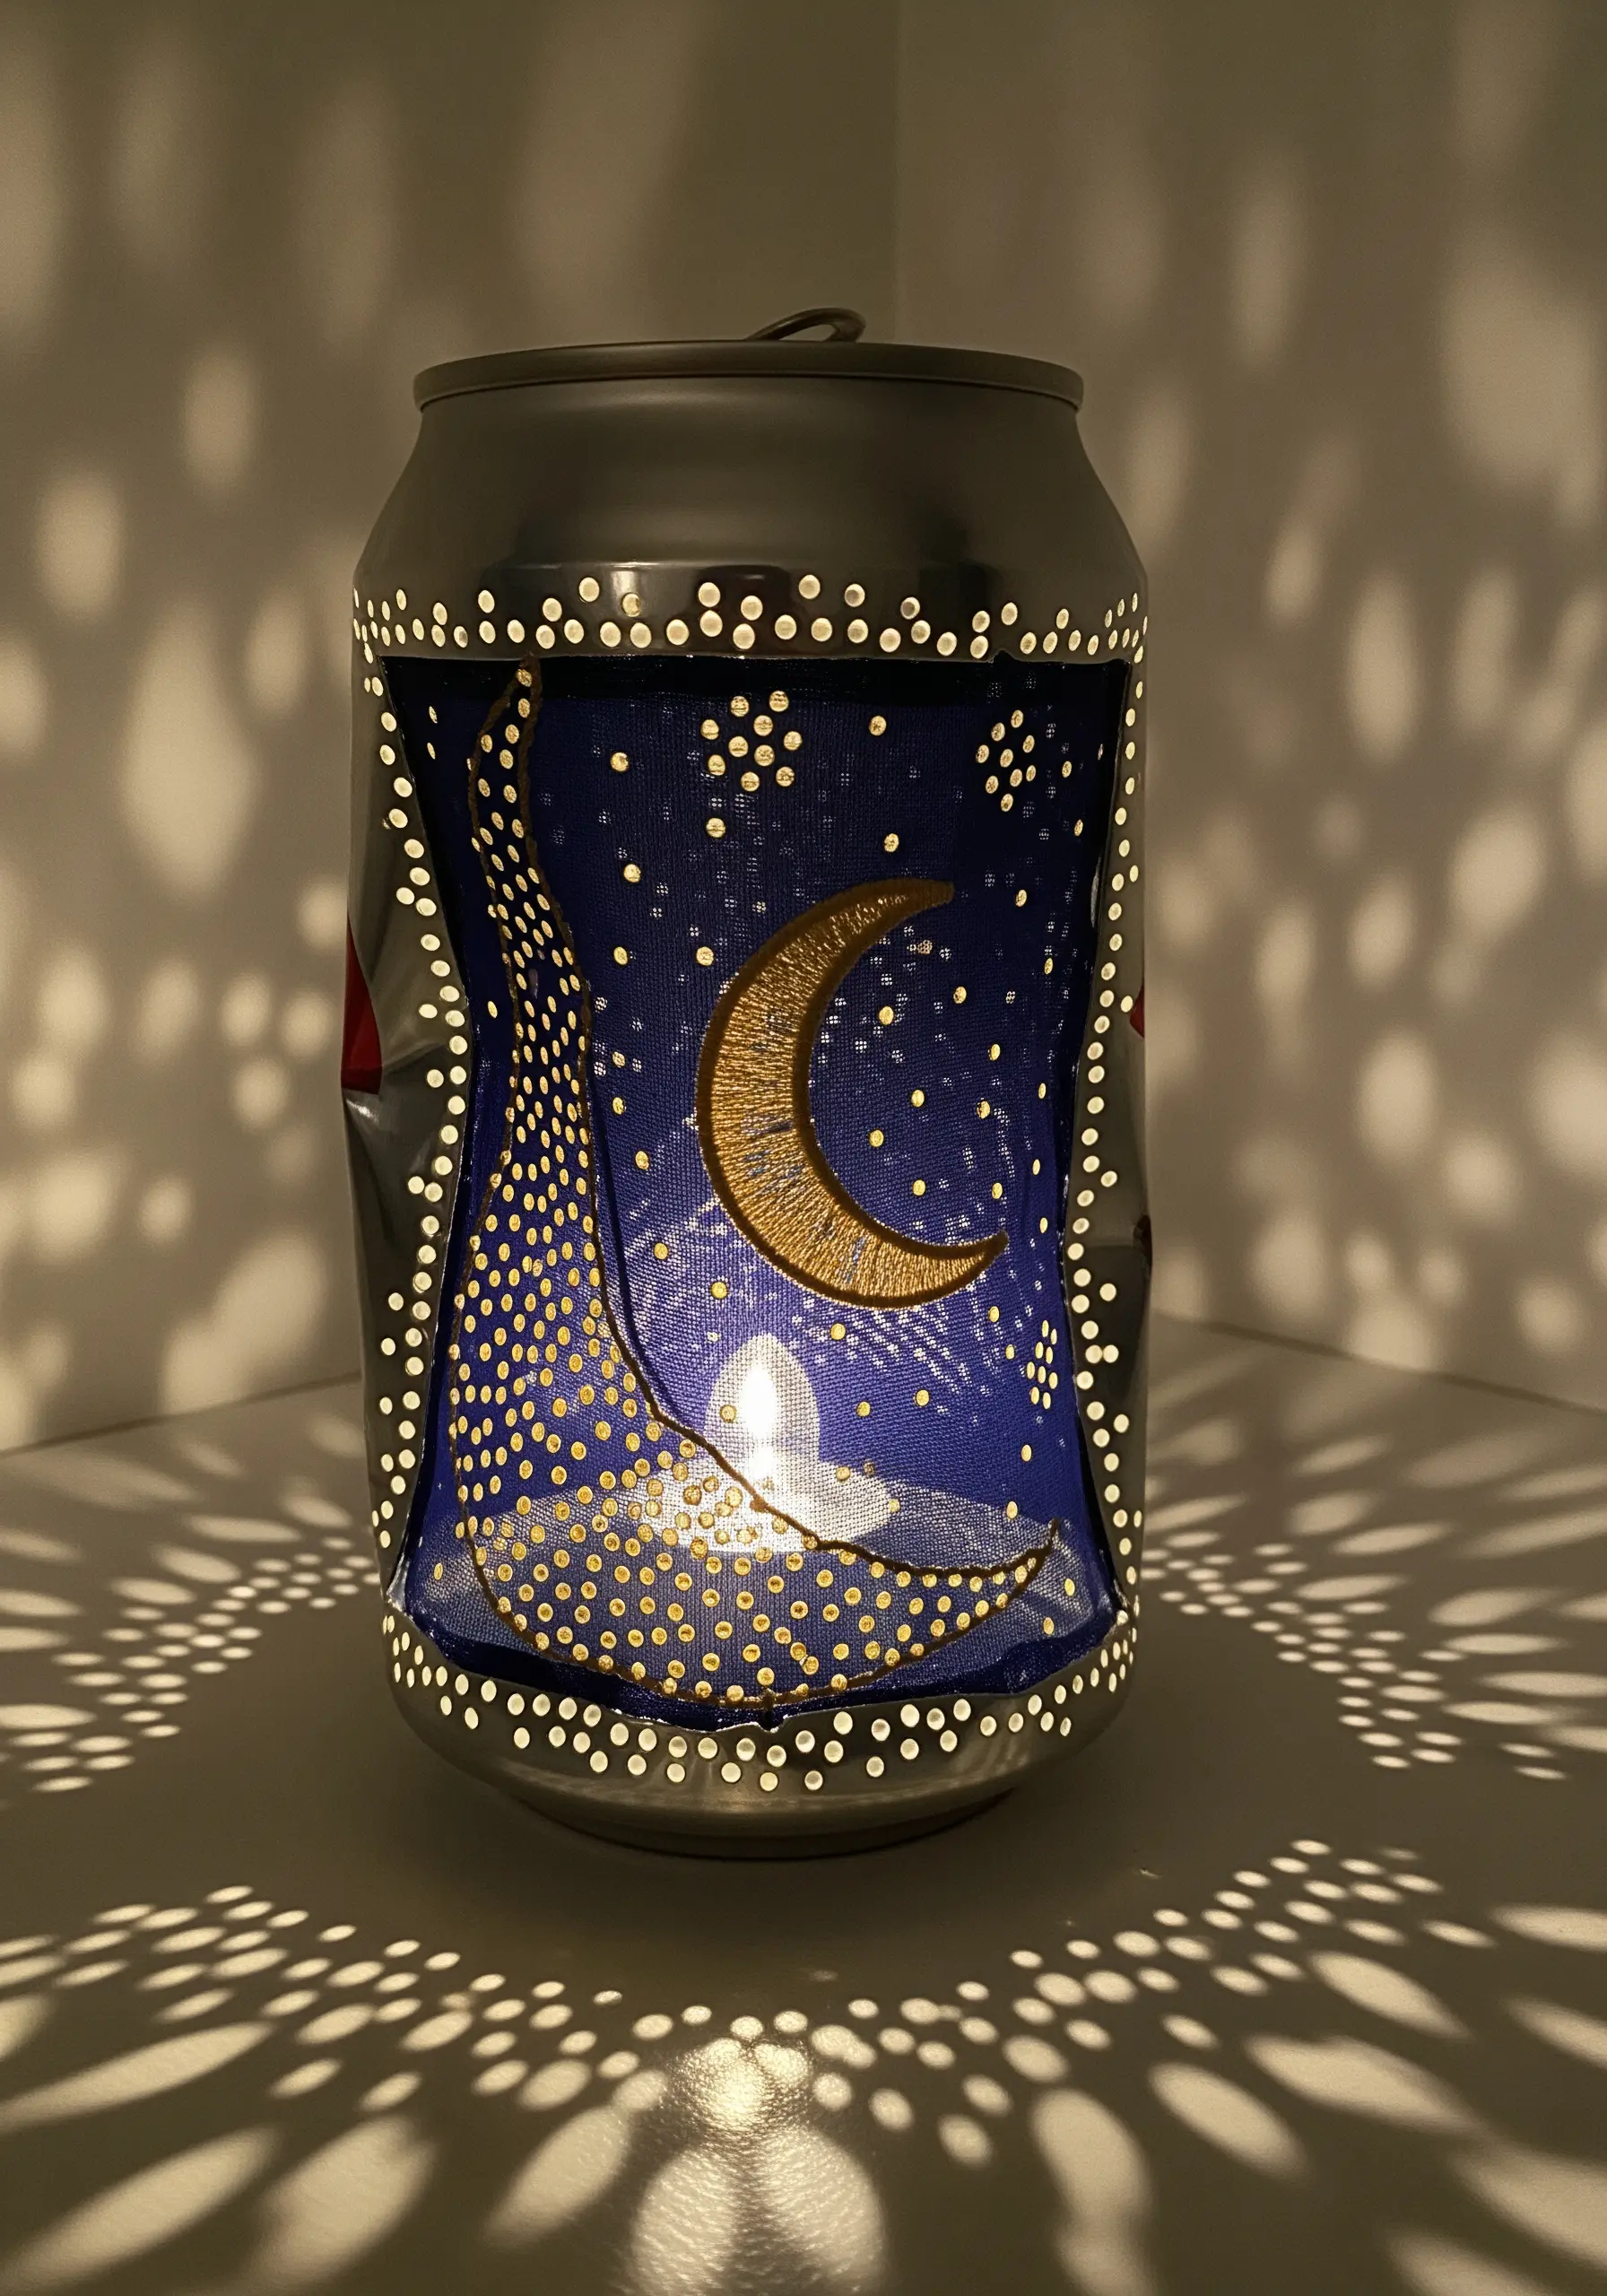
Transform an aluminum can into a lantern by combining pierced designs with delicate embroidery.
First, carefully pierce a pattern of dots into the can with a nail or awl. Then, cut a window into the side.
Embroider a celestial motif, like a satin-stitched moon, onto a piece of sheer navy fabric. Stretch the fabric behind the window, allowing the candlelight to shine through both the embroidery and the perforations.
The combination of pierced light and stitched art creates a truly magical, multi-layered effect.
10. Stitch Stories into Altered Books
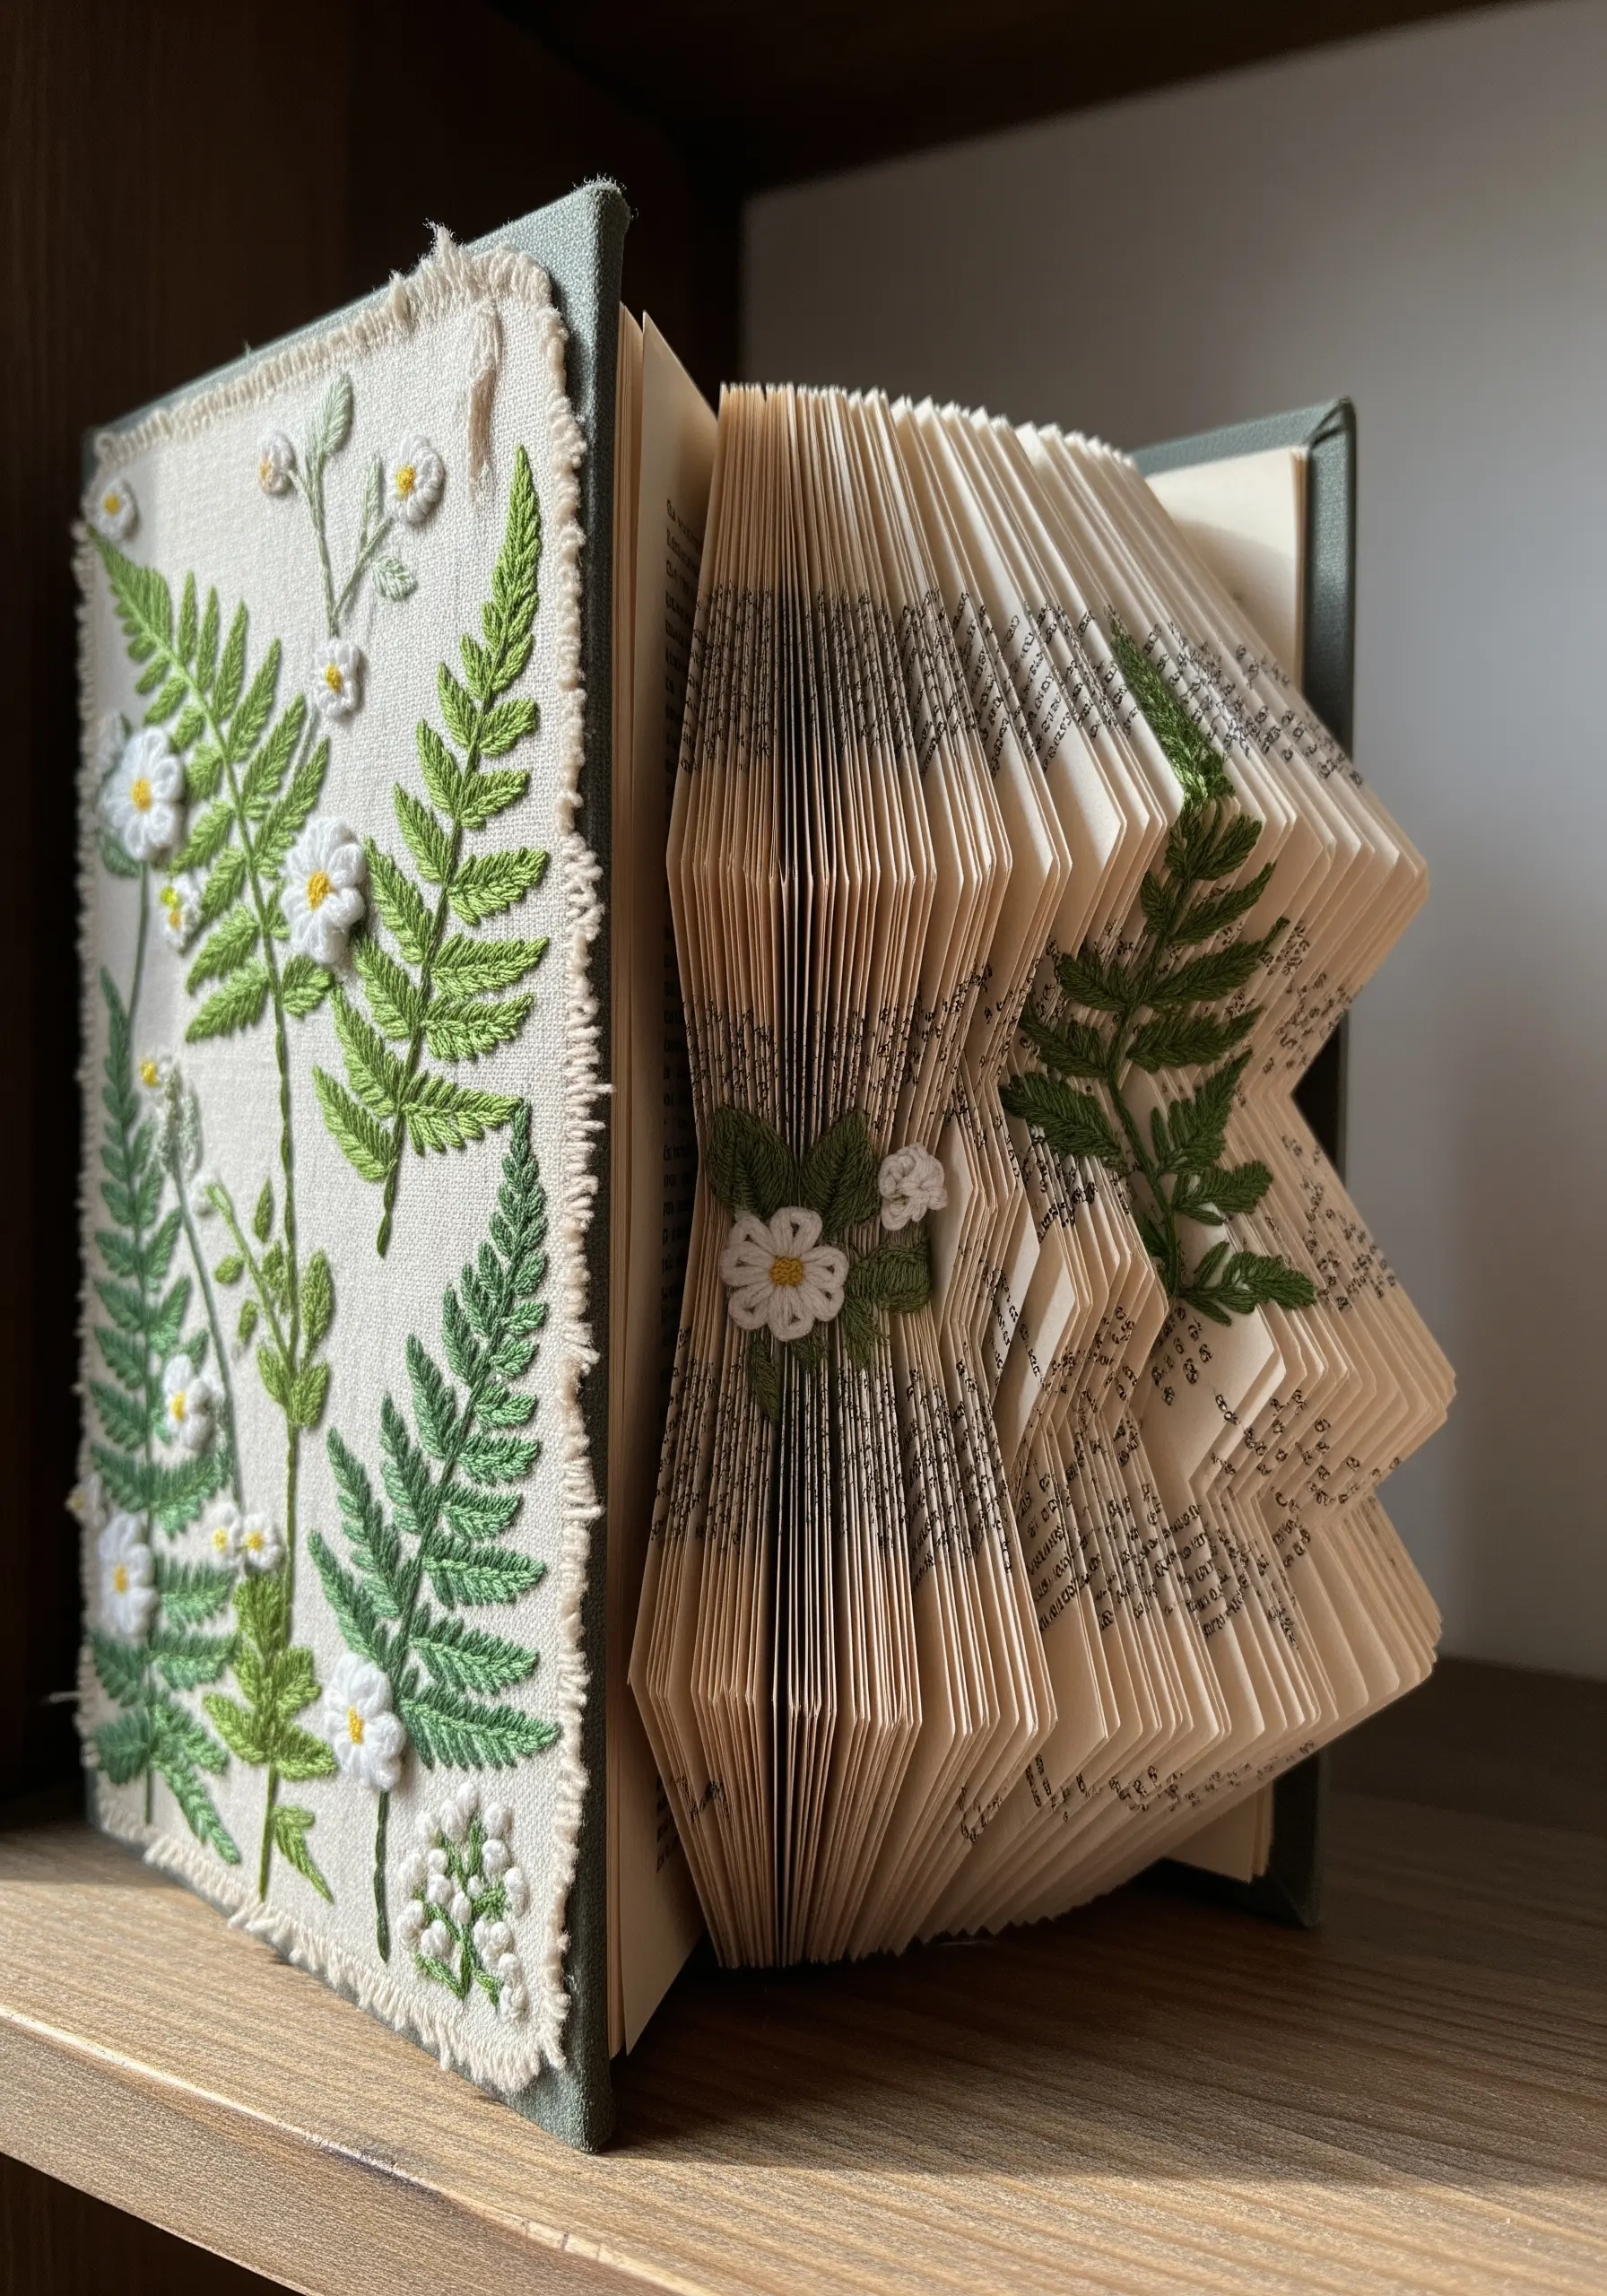
Give a discarded book a new narrative by adding embroidery to its cover and pages.
Embroider botanical designs onto a rugged linen or cotton canvas and use it to re-cover the book. To create the folded page art, gently fold pages into a pattern, then stitch small, decorative elements directly onto the paper edges.
Use a sharp, fine needle and a thimble to avoid tearing the paper. This technique merges the literary and textile arts, creating a beautiful sculptural object.
11. Enhance Paper Flowers with Stitched Veins
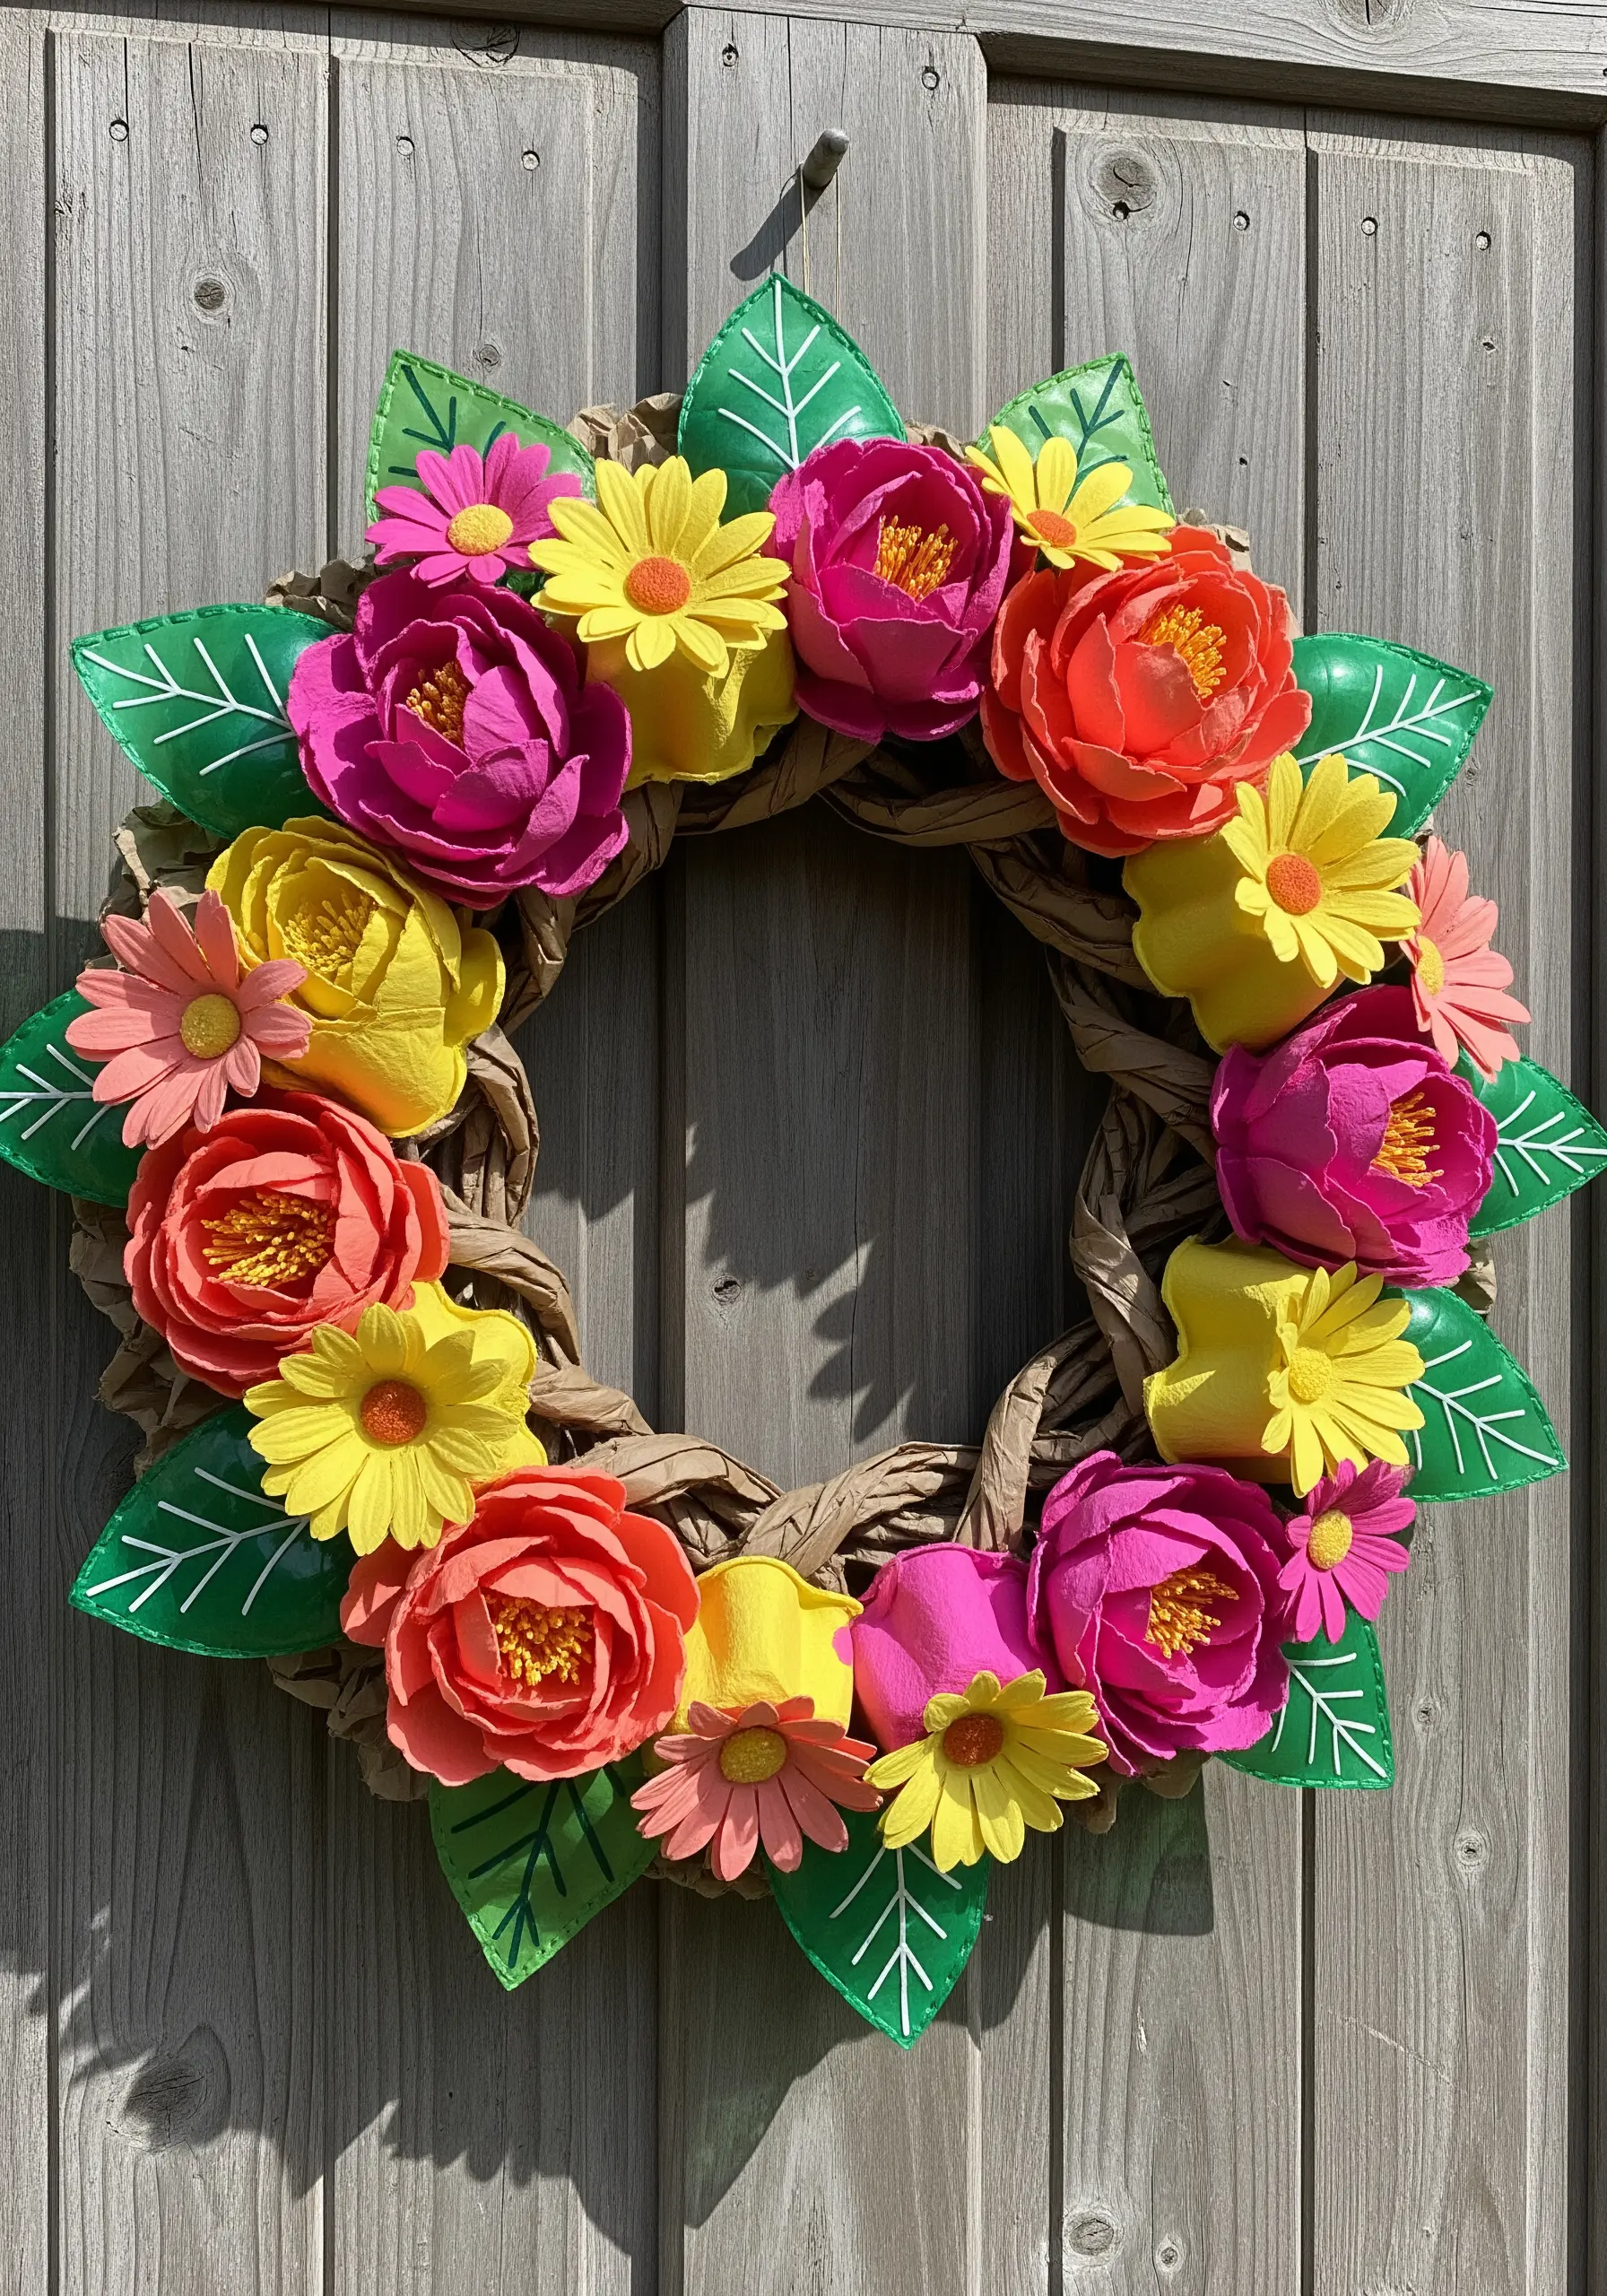
Add a layer of realism and texture to paper or foam flowers by embroidering fine details onto them.
Before assembling the flowers, use a single strand of embroidery floss to stitch delicate veins onto the leaves with a simple backstitch.
You can also add French knots to the flower centers for a pop of texture. This subtle addition of thread elevates a simple craft into a more detailed, handcrafted piece of decor.
12. Create a Cohesive Collection with Mini Hoops
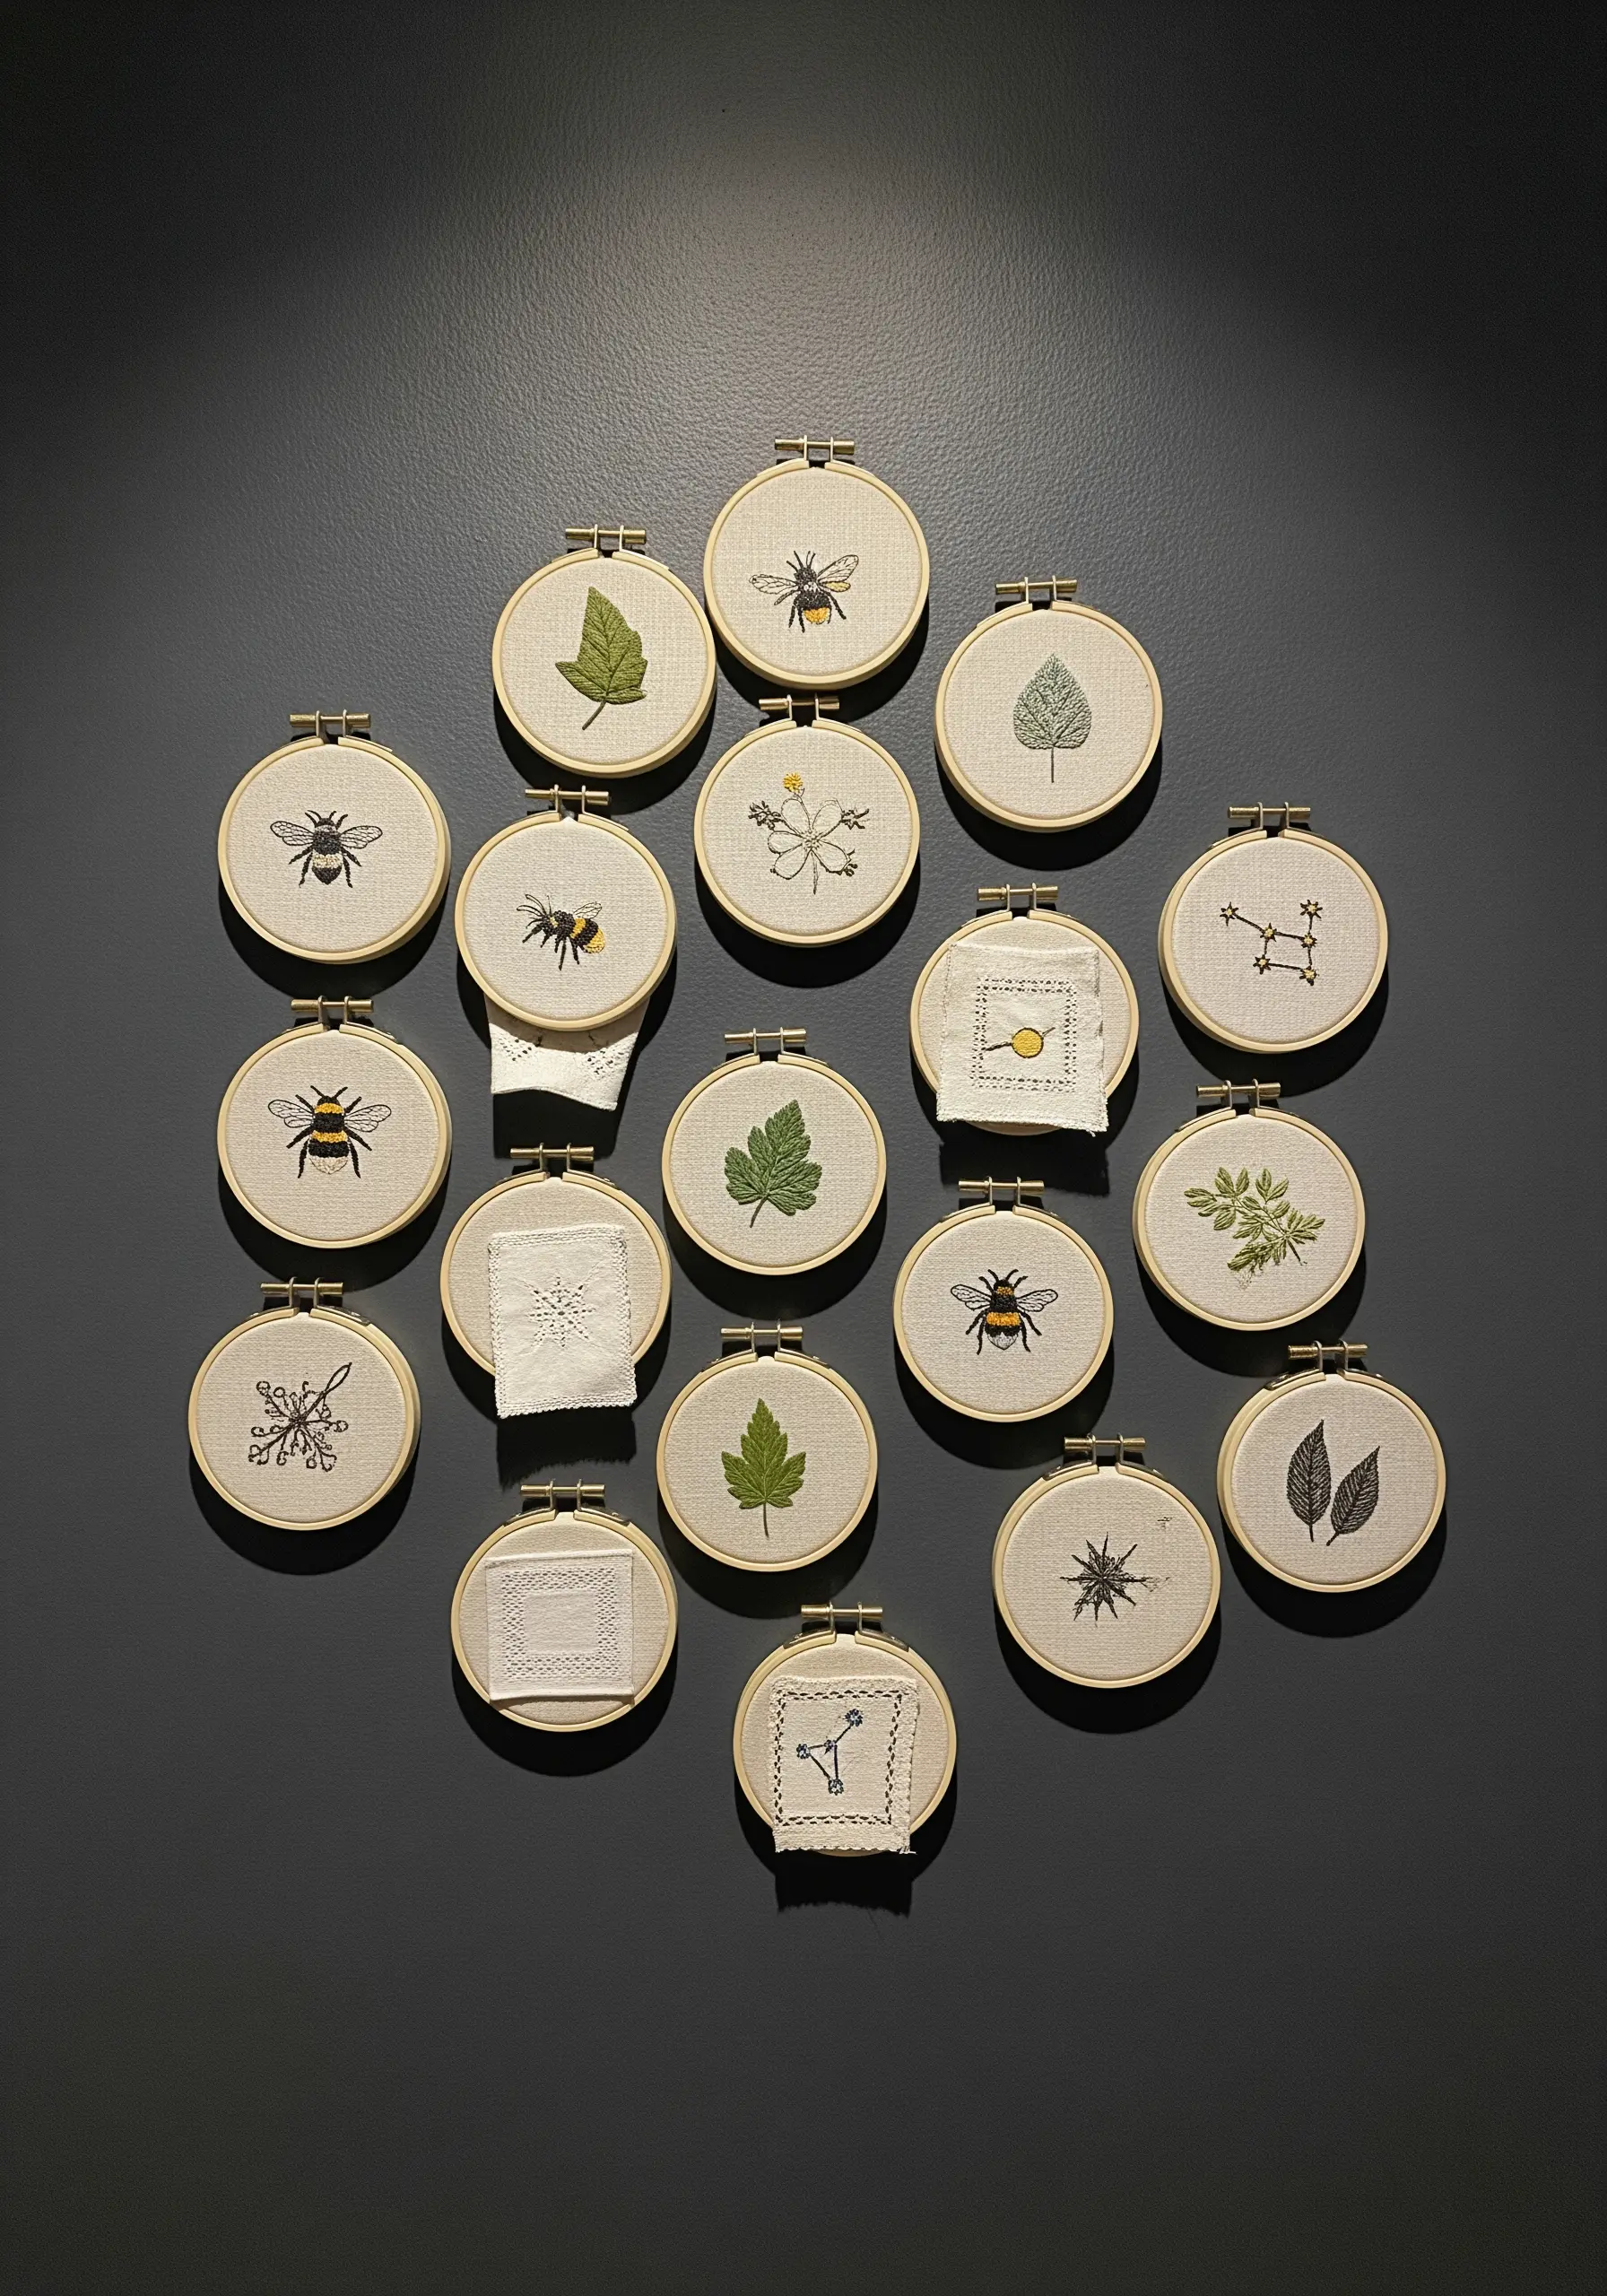
Turn tiny fabric scraps into a sophisticated gallery wall by focusing on a unified theme and color palette.
Choose a simple subject, like botanicals or insects, and stitch them using just one or two colors of thread on a neutral linen background.
Vary the designs—some can be simple line art, others filled with seed stitch—but keeping the material palette consistent makes the collection feel intentional and curated.
This approach transforms small, quick stitches into an impressive, large-scale installation of minimalist embroidery.
13. Juxtapose Textures on Burlap
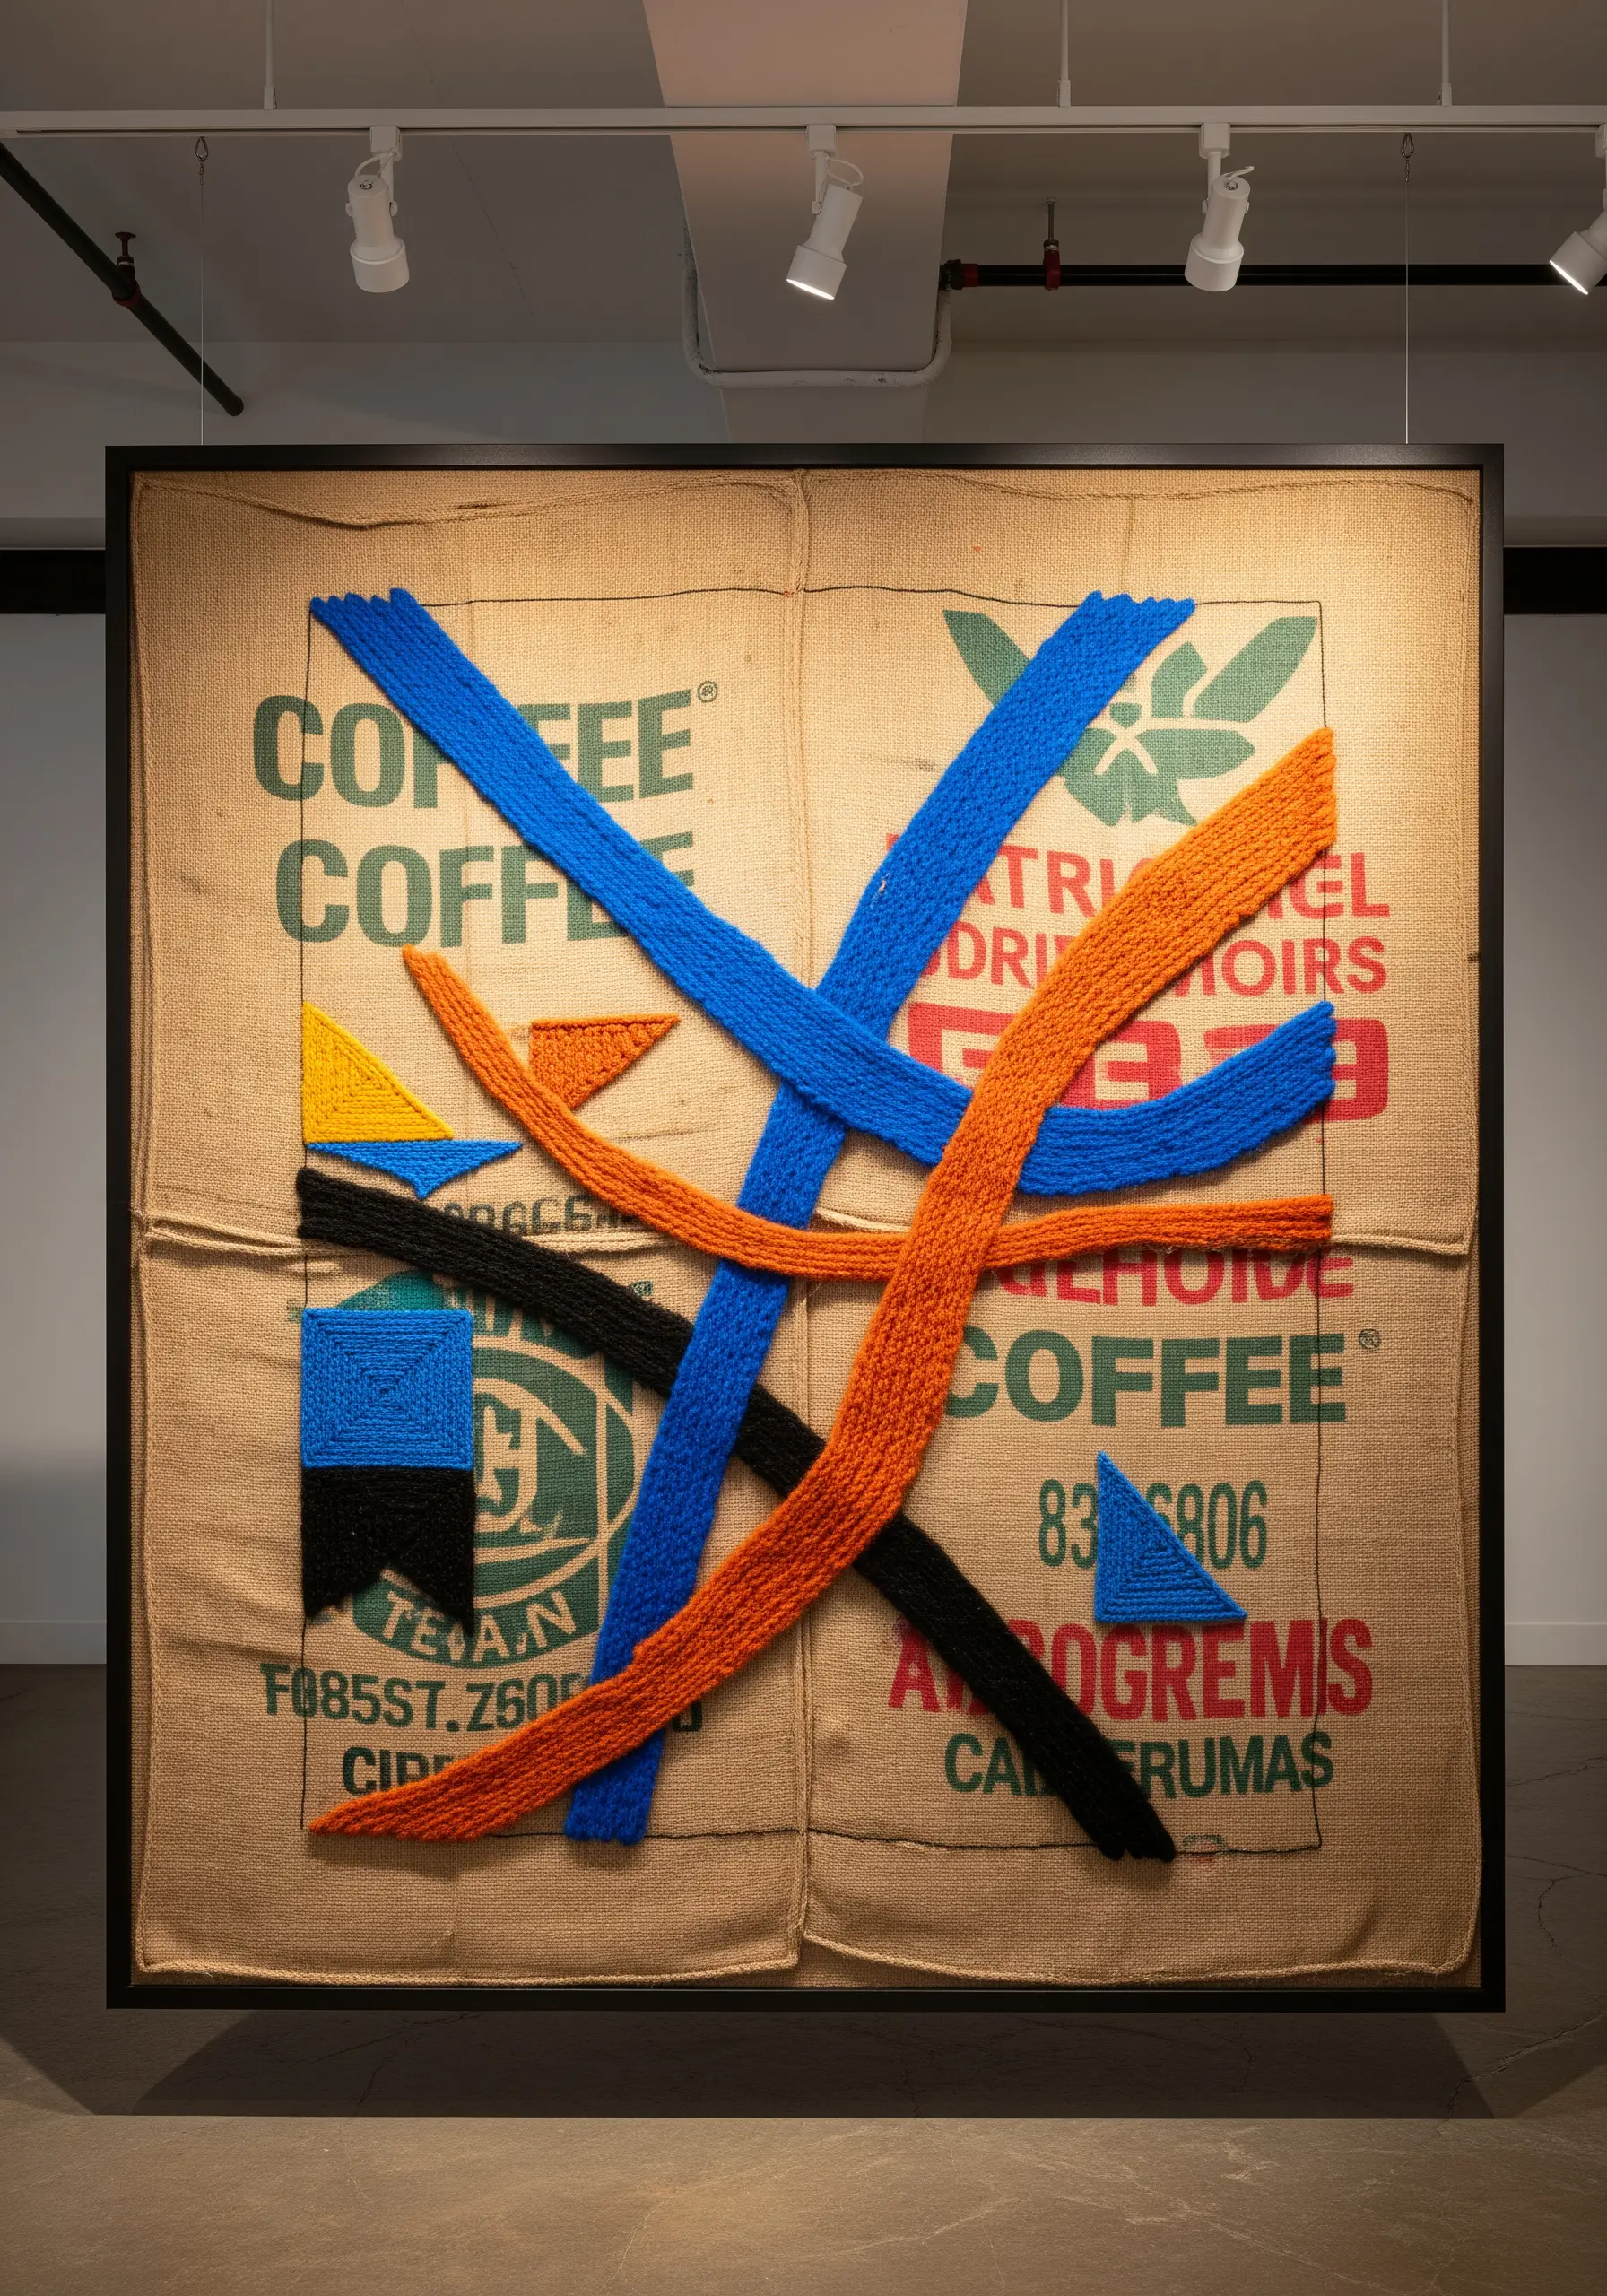
Use the raw, industrial feel of a burlap coffee sack as a canvas for bold, modern fiber art.
The open weave of burlap is perfect for working with thick, chunky yarn. Use a large tapestry needle to create oversized, graphic shapes with a simple running stitch or couching technique.
The contrast between the rough, printed burlap and the soft, vibrant yarn creates a dynamic piece that celebrates its salvaged origins.
14. Weave New Connections on Circuit Boards
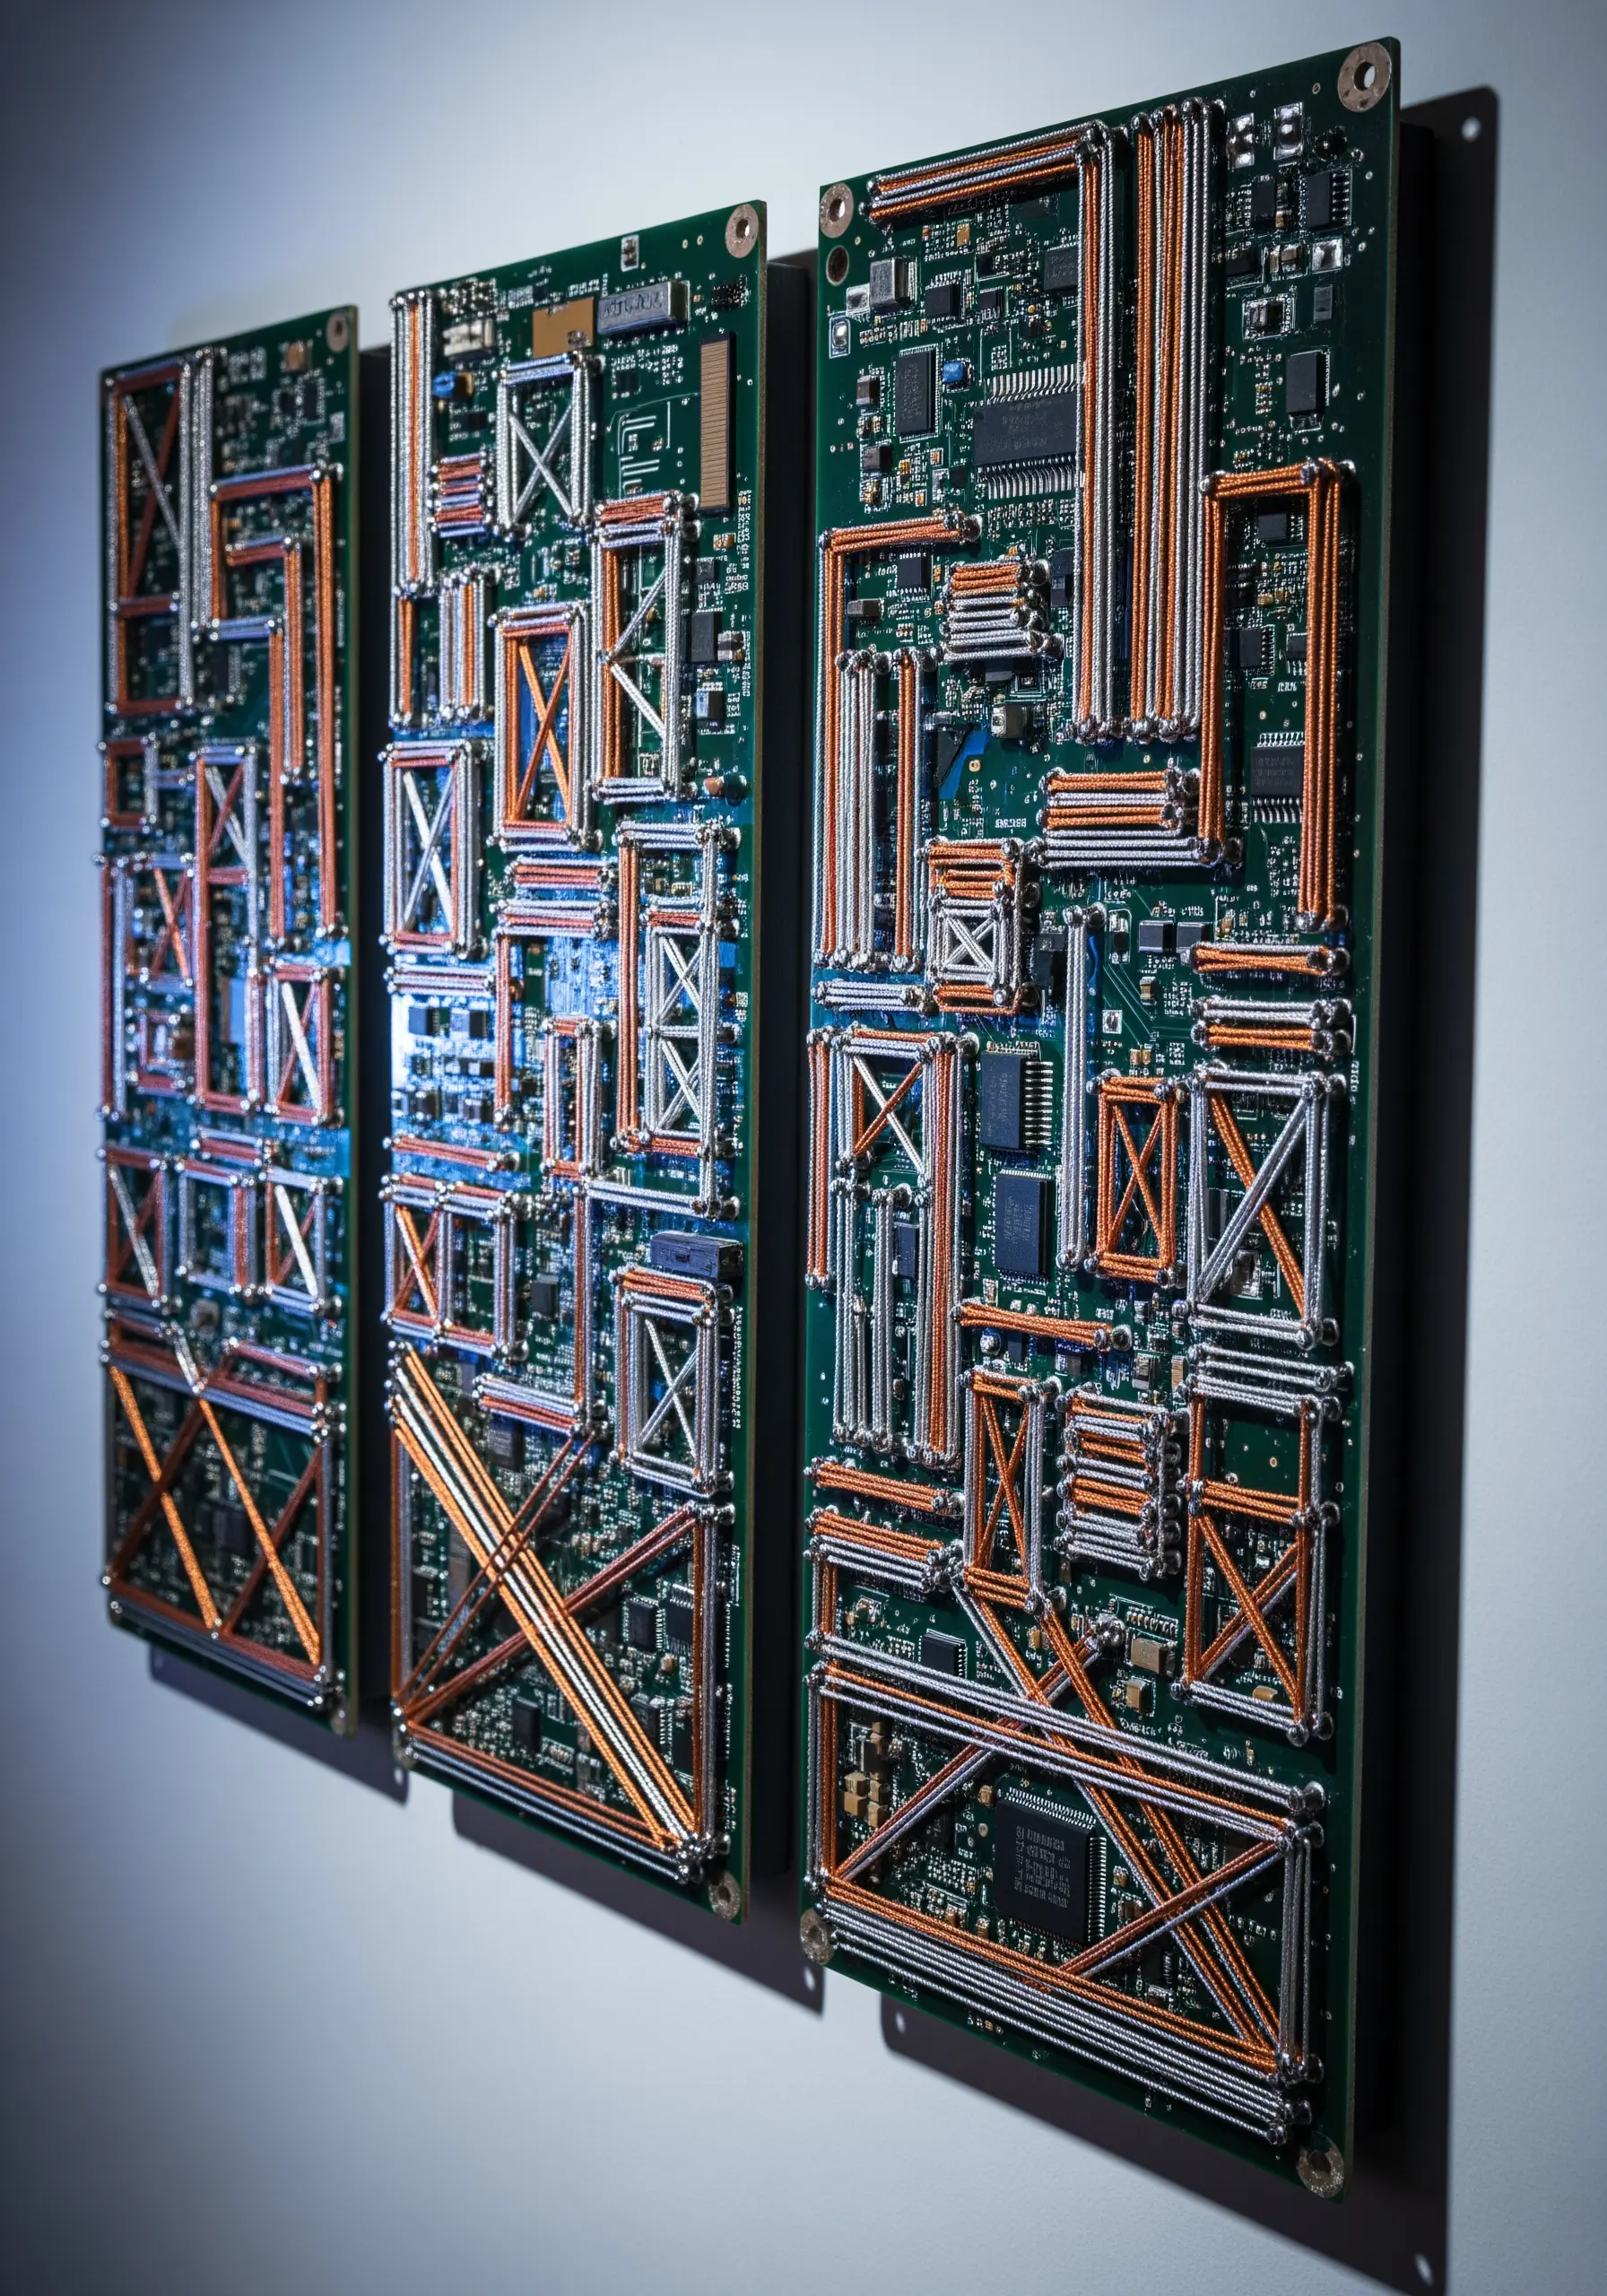
Transform obsolete technology into intricate art by using the existing holes on a circuit board as a loom.
Use metallic or brightly colored thread to create geometric patterns, wrapping the thread between different points on the board.
This string-art approach highlights the inherent grid-like beauty of the technology while overlaying it with a soft, handmade element.
It’s a perfect fusion of the digital and the analog, creating a piece that is both visually complex and conceptually rich.
15. Refine Felt Shapes with a Blanket Stitch
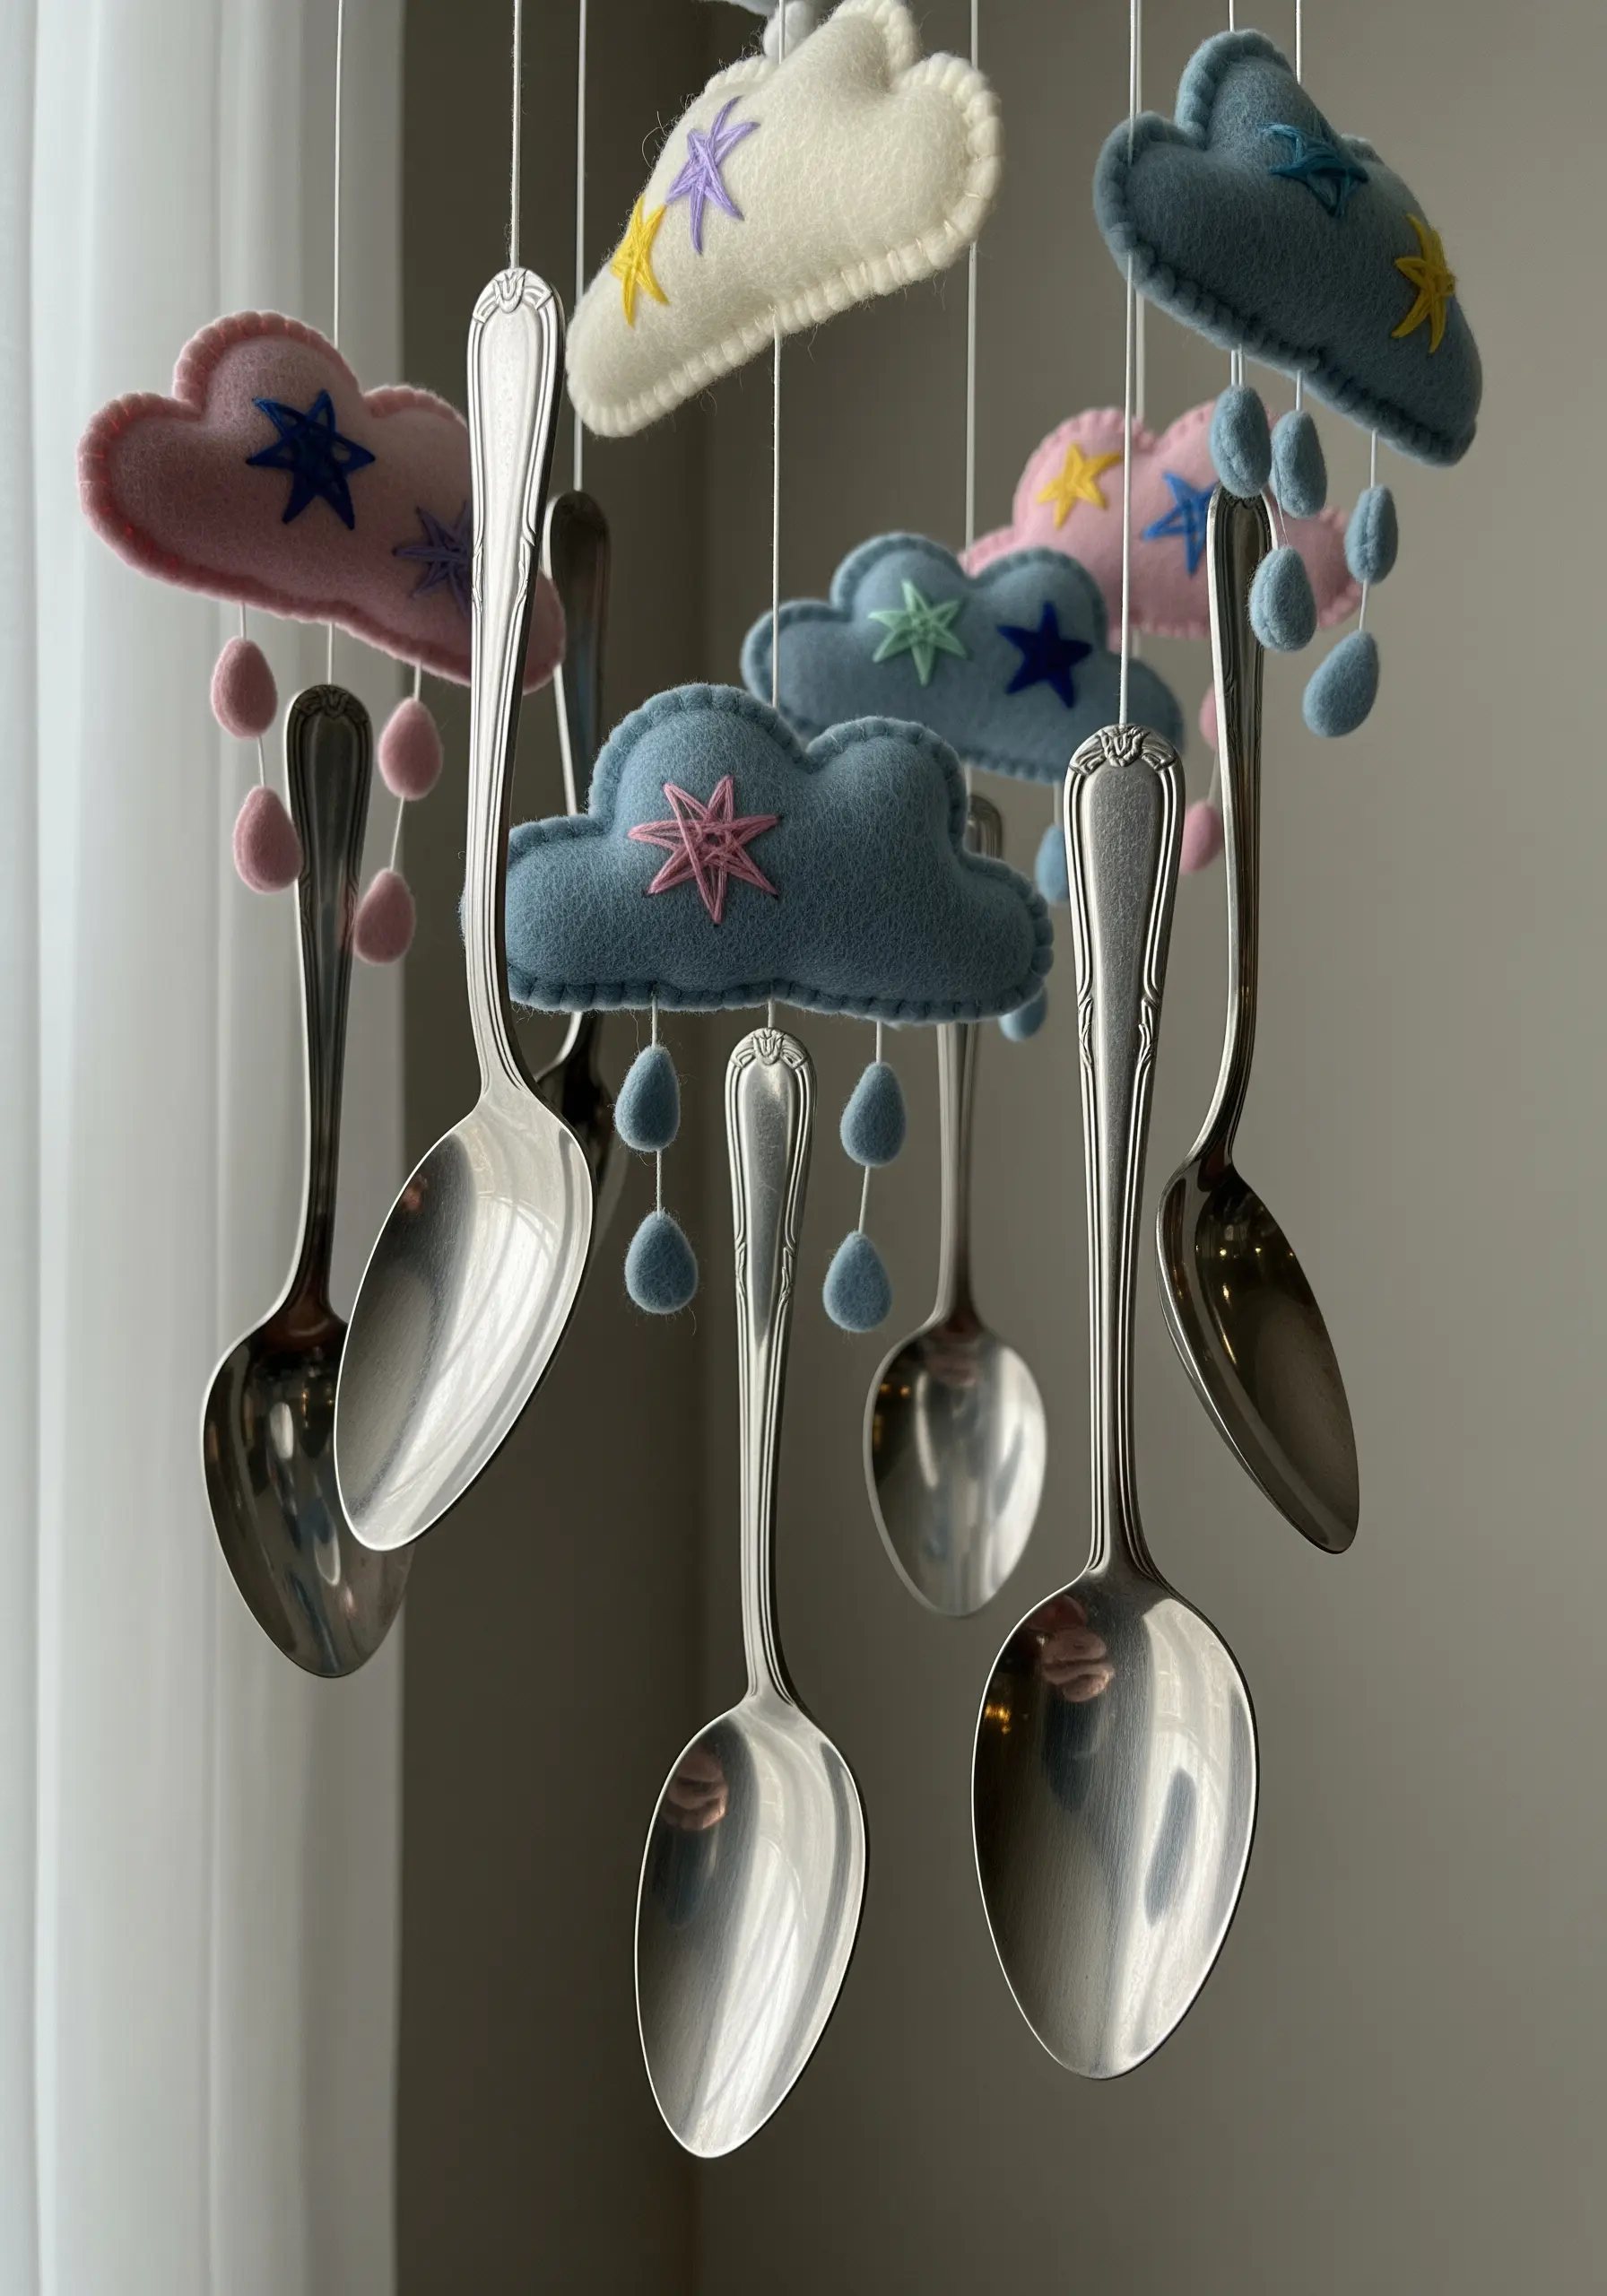
Elevate simple felt cutouts by finishing the edges with a contrasting blanket stitch.
When making mobiles or ornaments, this simple stitch not only secures two pieces of felt together but also adds a clean, decorative border that makes the final piece look polished and professional.
Choose a thread color that stands out against the felt for a playful, illustrative effect. Combine your stitched felt pieces with unexpected items, like vintage spoons, for a whimsical touch.
16. Make a Statement by Stitching on Newsprint
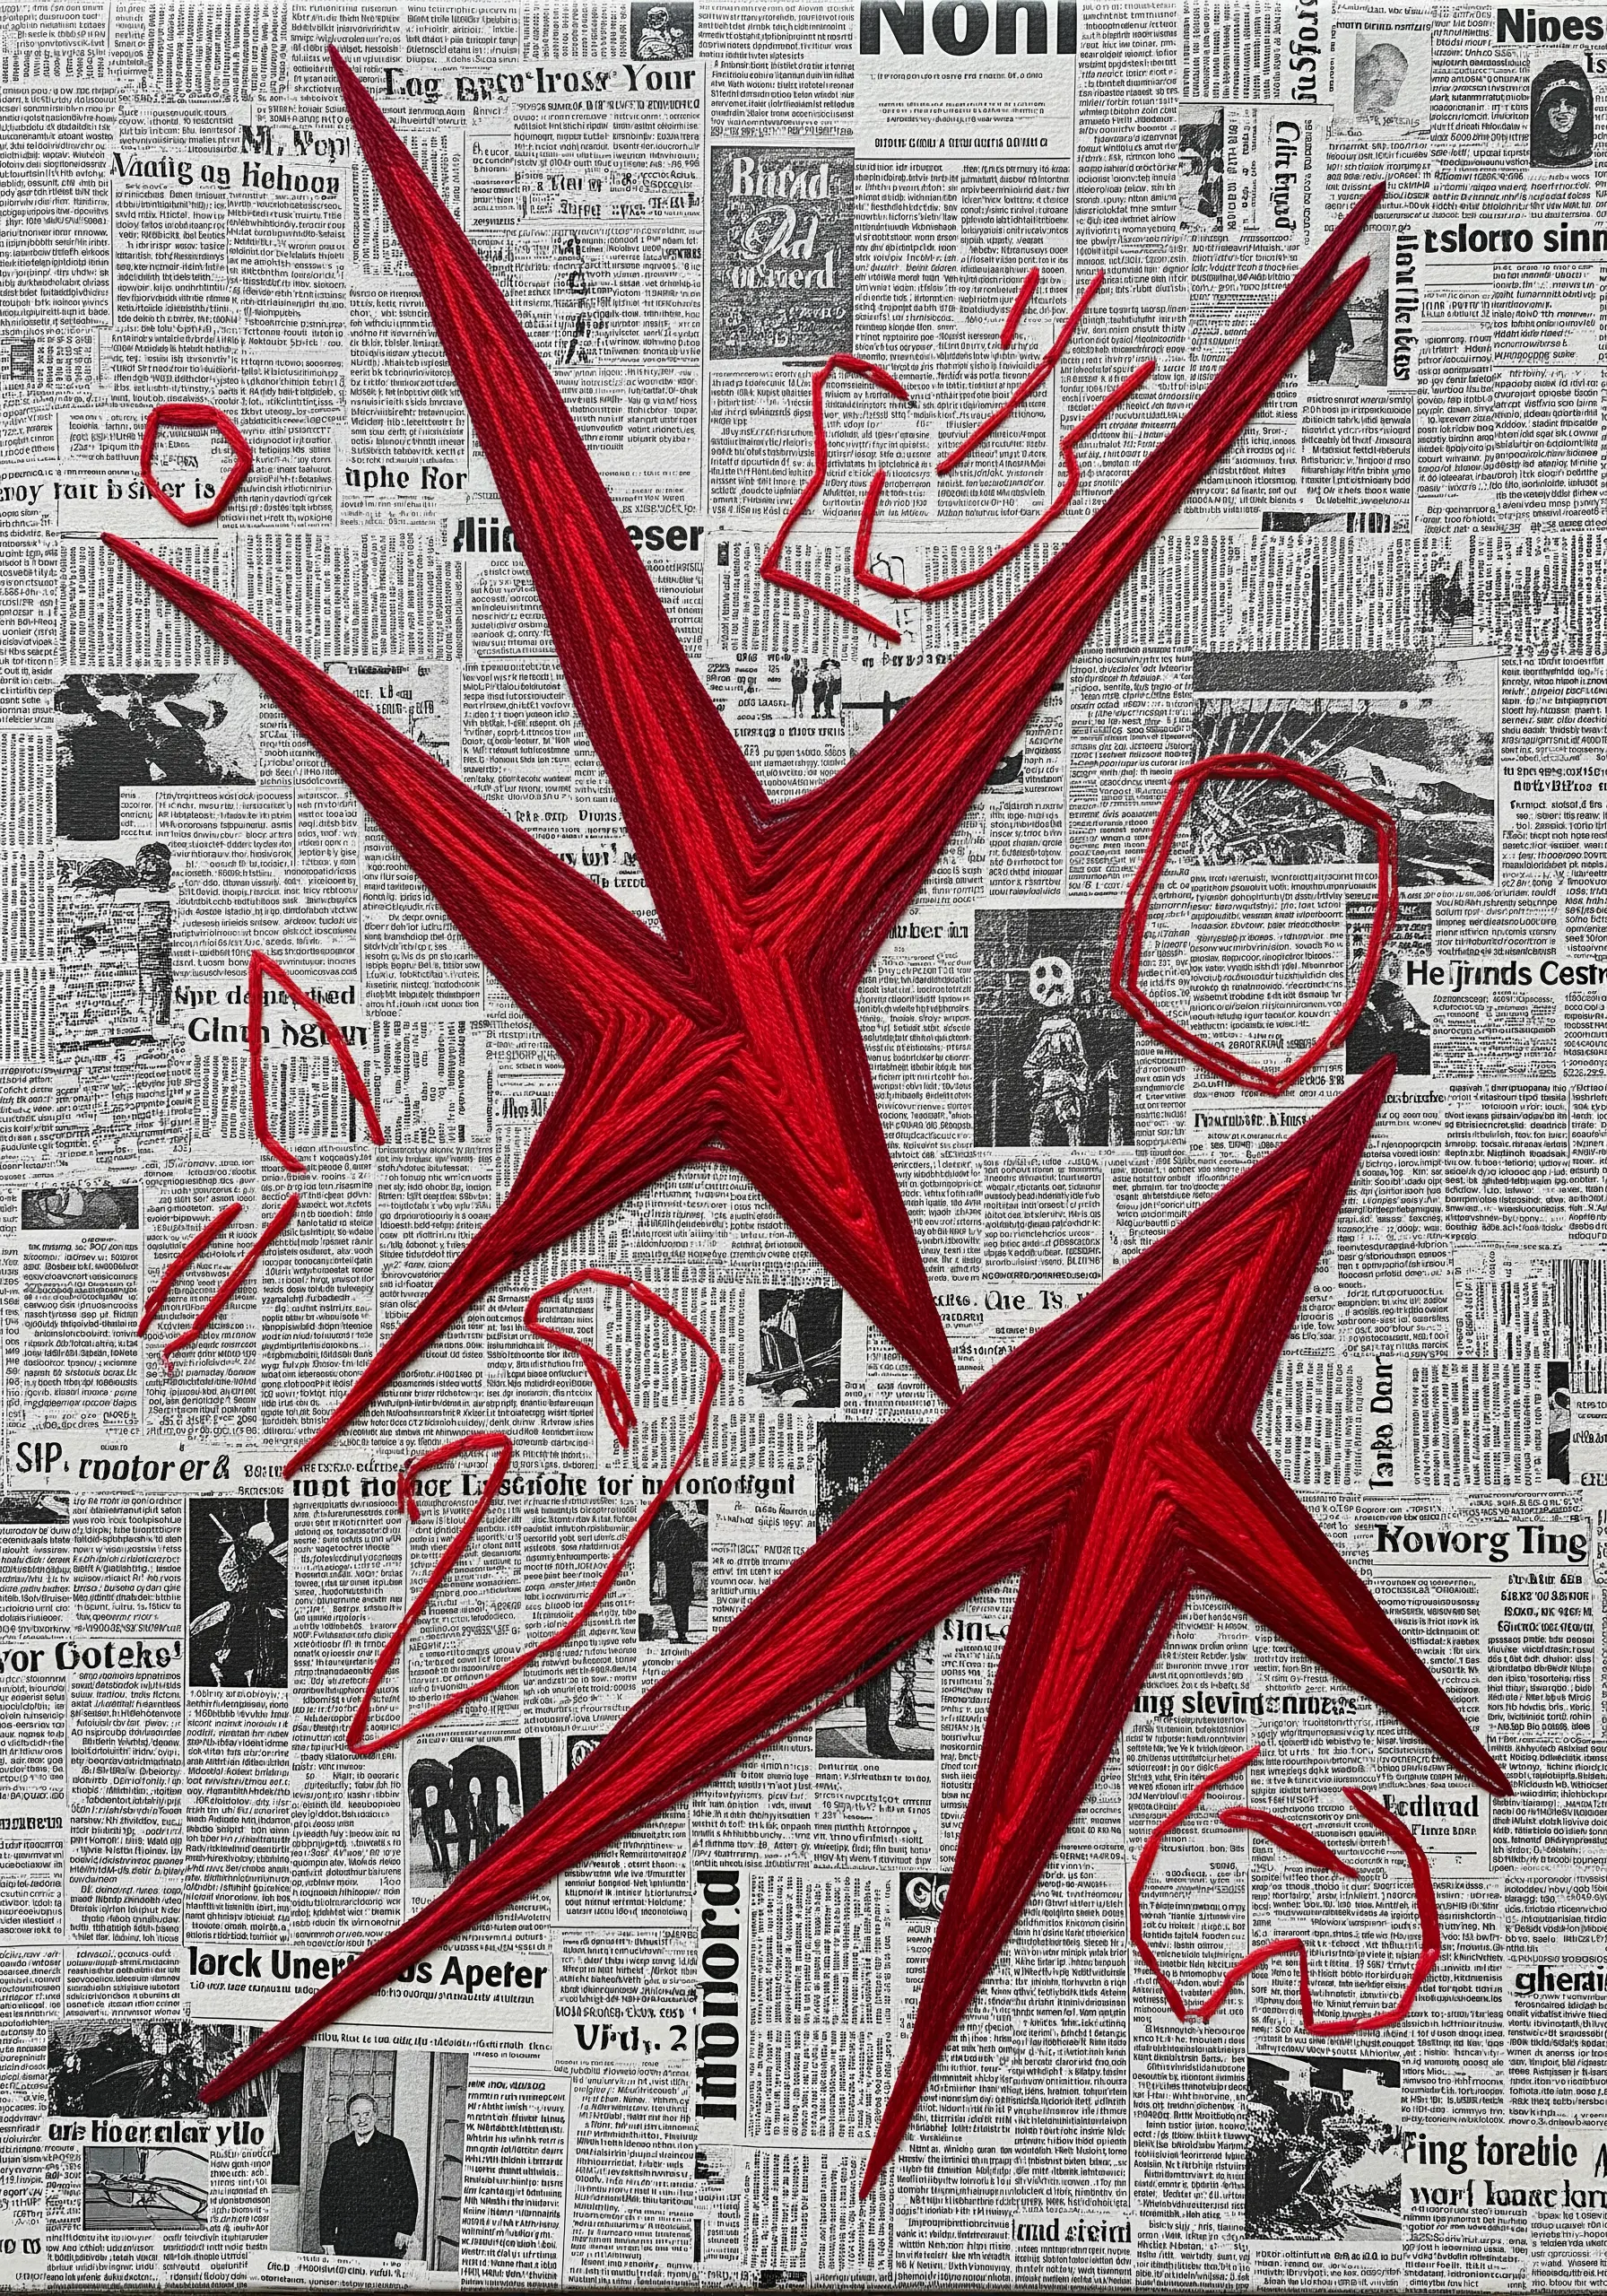
Use the dense, chaotic texture of newsprint as a neutral background for bold, graphic embroidery.
To prevent tearing, reinforce the back of the paper with a lightweight, iron-on interfacing before you begin stitching.
Choose a simple, powerful shape and fill it with a dense satin stitch using a thick thread like pearl cotton. The solid, vibrant block of color will stand out dramatically against the black-and-white text, turning the disposable into the durable.
17. Weave a Tapestry from Fabric Scraps

Give new life to old t-shirts, bedding, or clothing by cutting them into strips and weaving them into a wall hanging.
You don’t need a formal loom; a simple cardboard rectangle with notches cut into the top and bottom will work perfectly.
Mix different textures and colors of fabric to create a vibrant, eclectic tapestry. This technique is wonderfully forgiving and is a beautiful way to preserve memories attached to old clothes.
18. Use Utilitarian Stitches as a Design Element
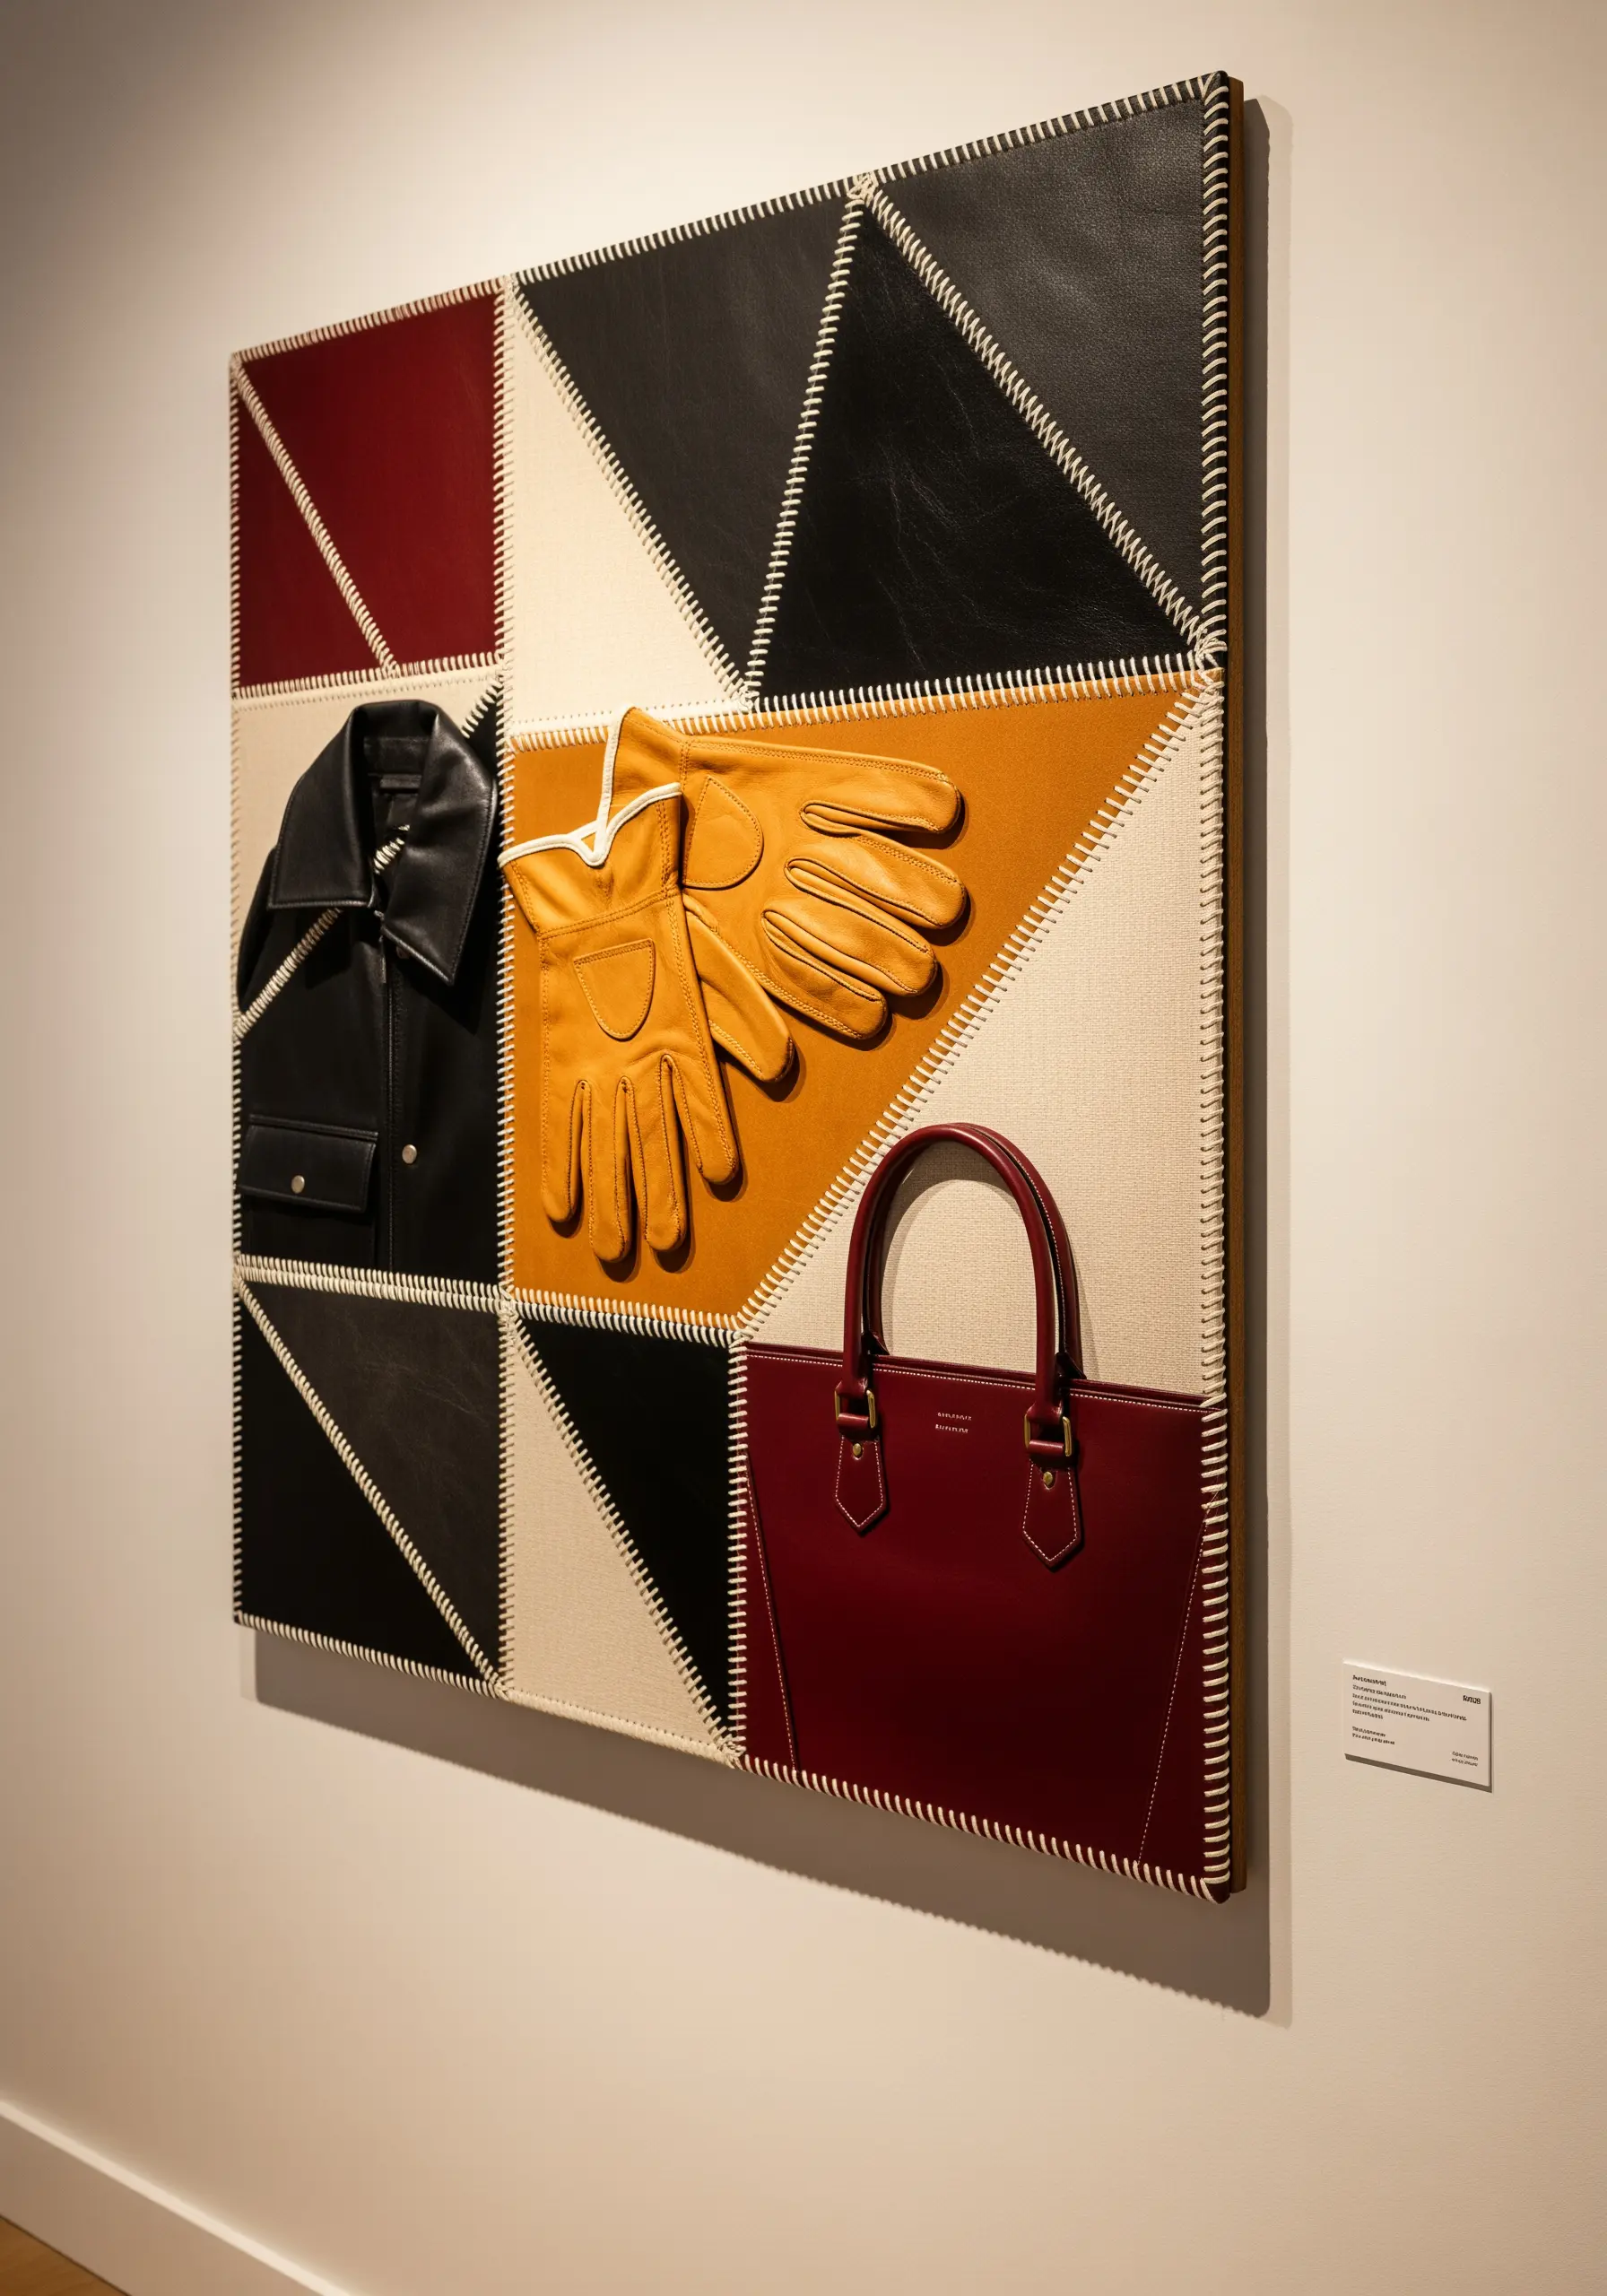
Transform a basic running stitch or whipstitch from a functional tool into a primary design feature.
By using a thick, high-contrast cord or yarn and exaggerating the size of your stitches, you can create a bold, graphic element that defines the composition.
This technique is perfect for joining disparate materials like canvas and leather, turning the seams into a focal point. It celebrates the act of construction and makes the hand of the artist visible and beautiful.
19. Embroider on Sheer Fabric for an Ethereal Glow
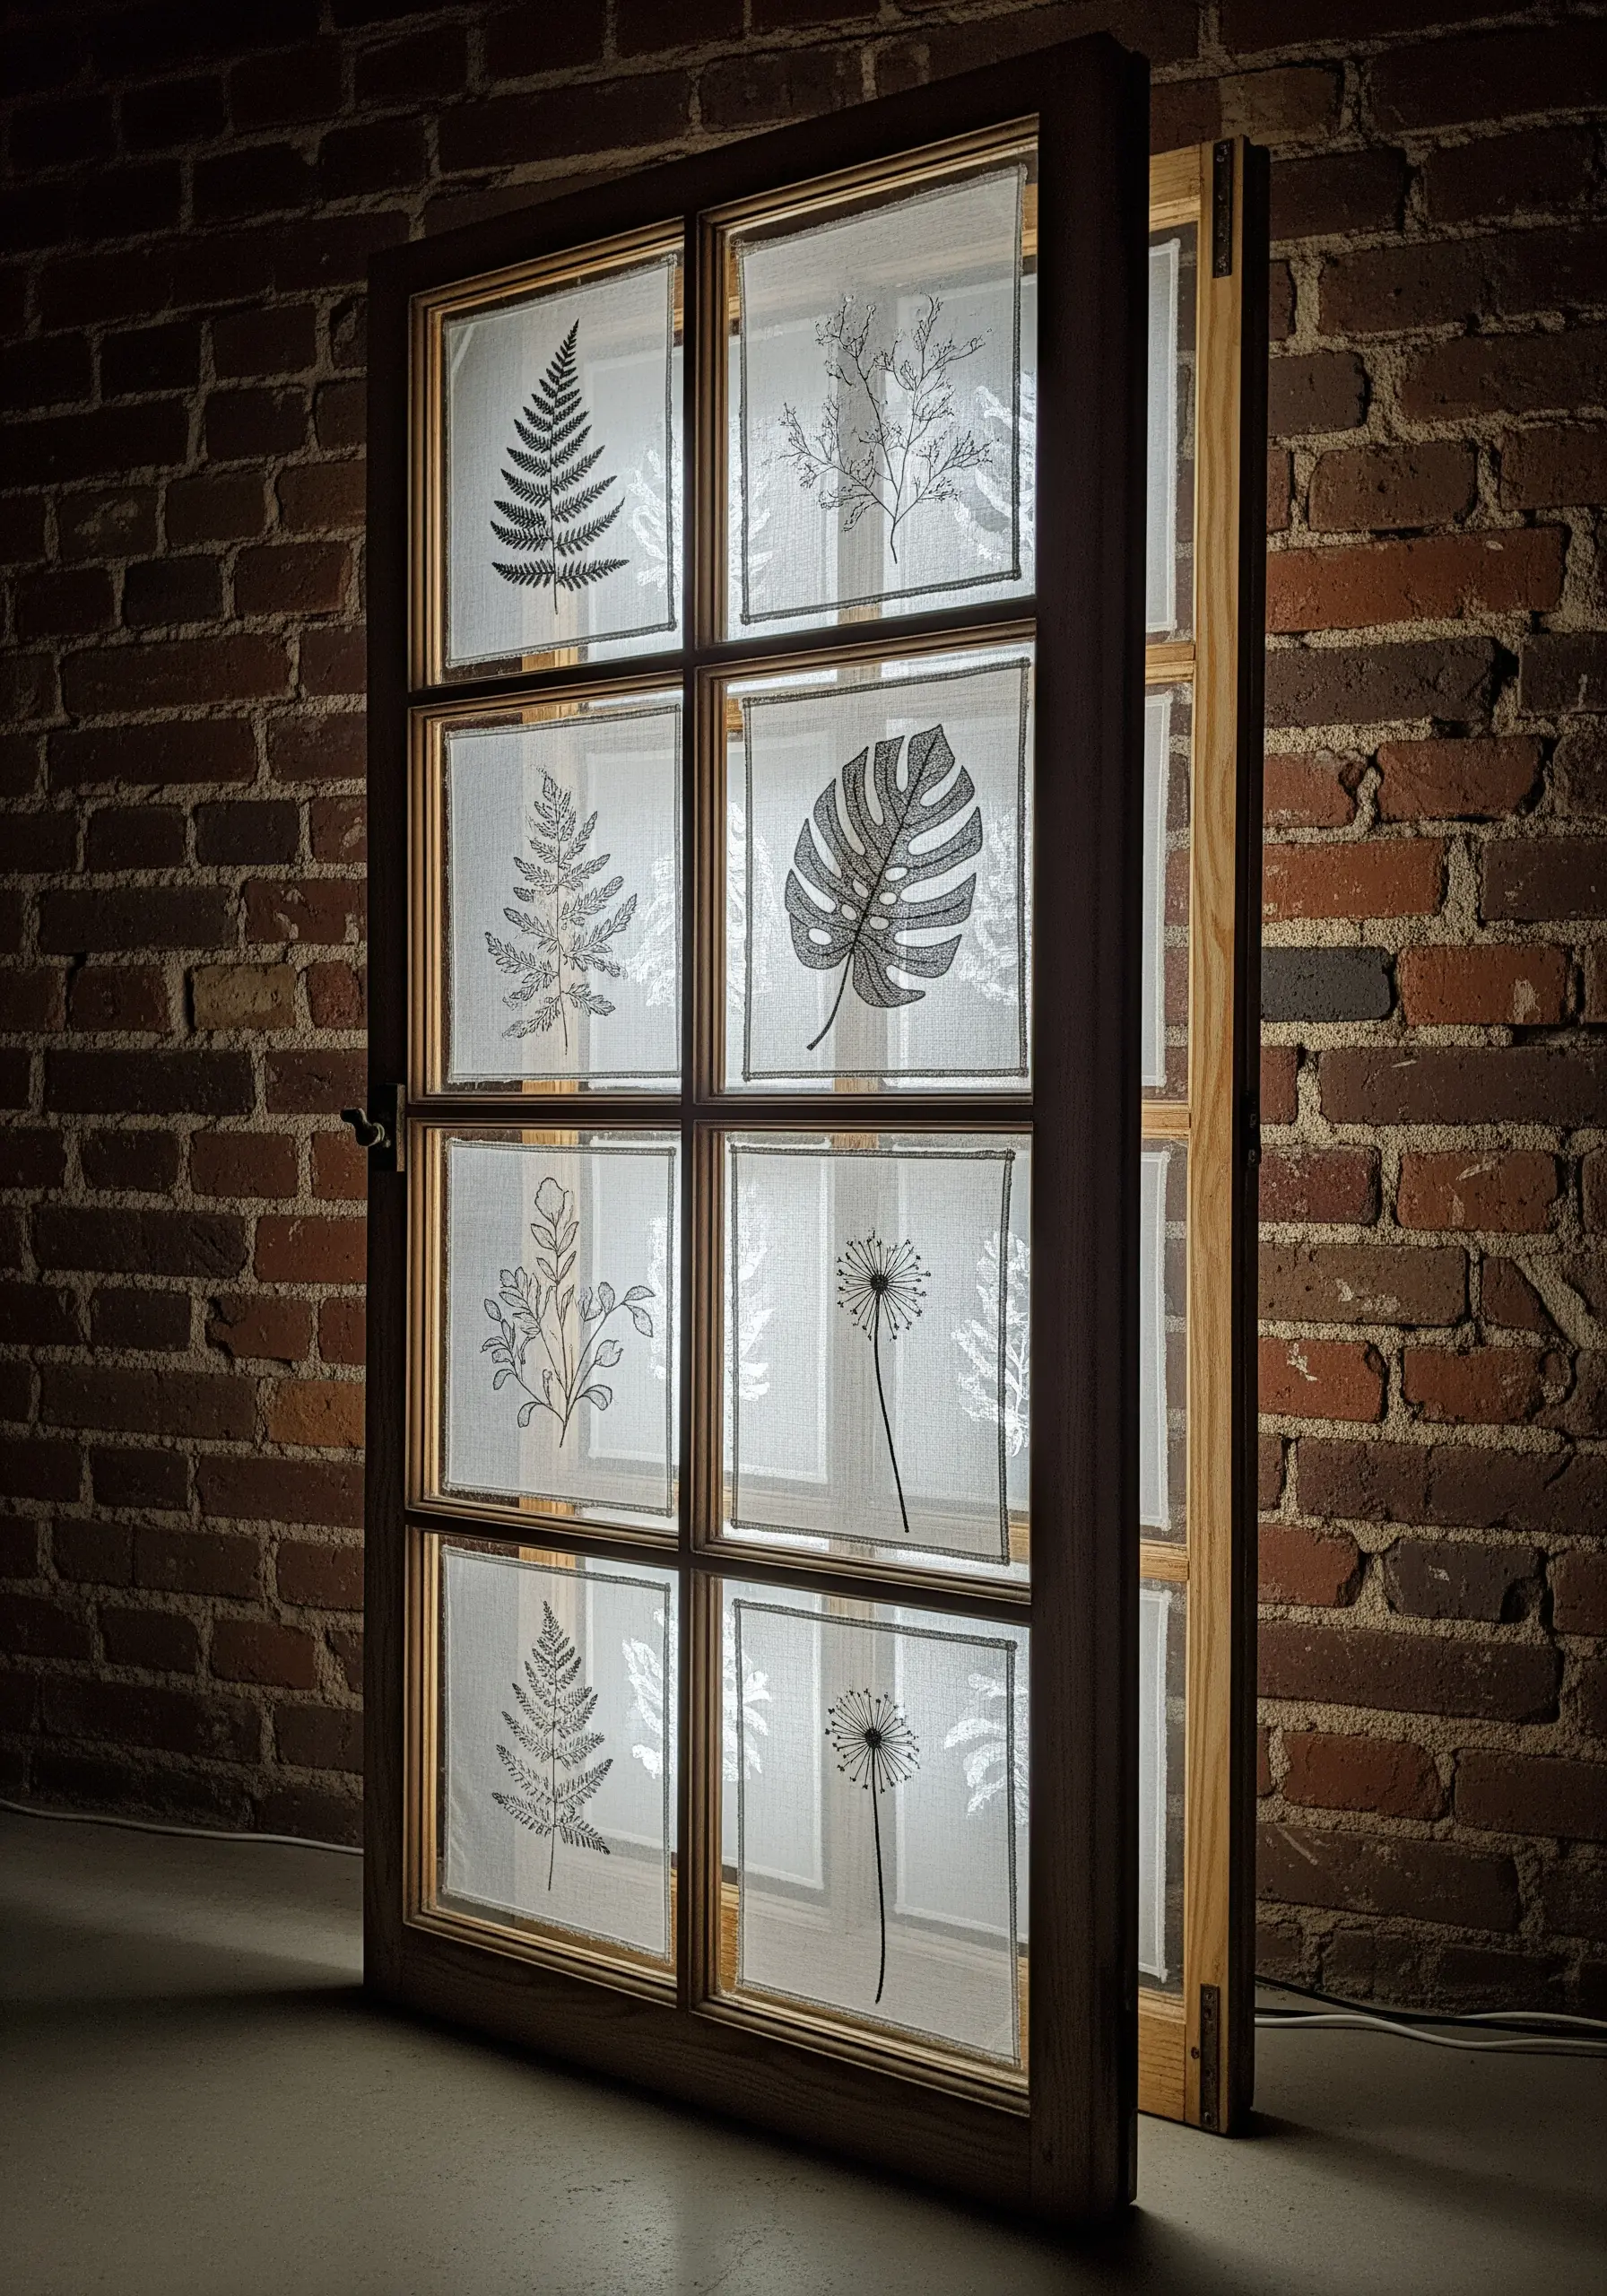
Stitch botanical line art onto sheer, lightweight fabric like organza or voile to create delicate, transparent panels.
When mounted in an old window frame and backlit, the embroidery appears to float in mid-air. Use a simple backstitch or stem stitch for clean, crisp lines.
The transparency of the fabric softens the light, creating a serene and ethereal effect that transforms a simple window into a piece of art.
20. Sculpt with Thread Using Punch Needle
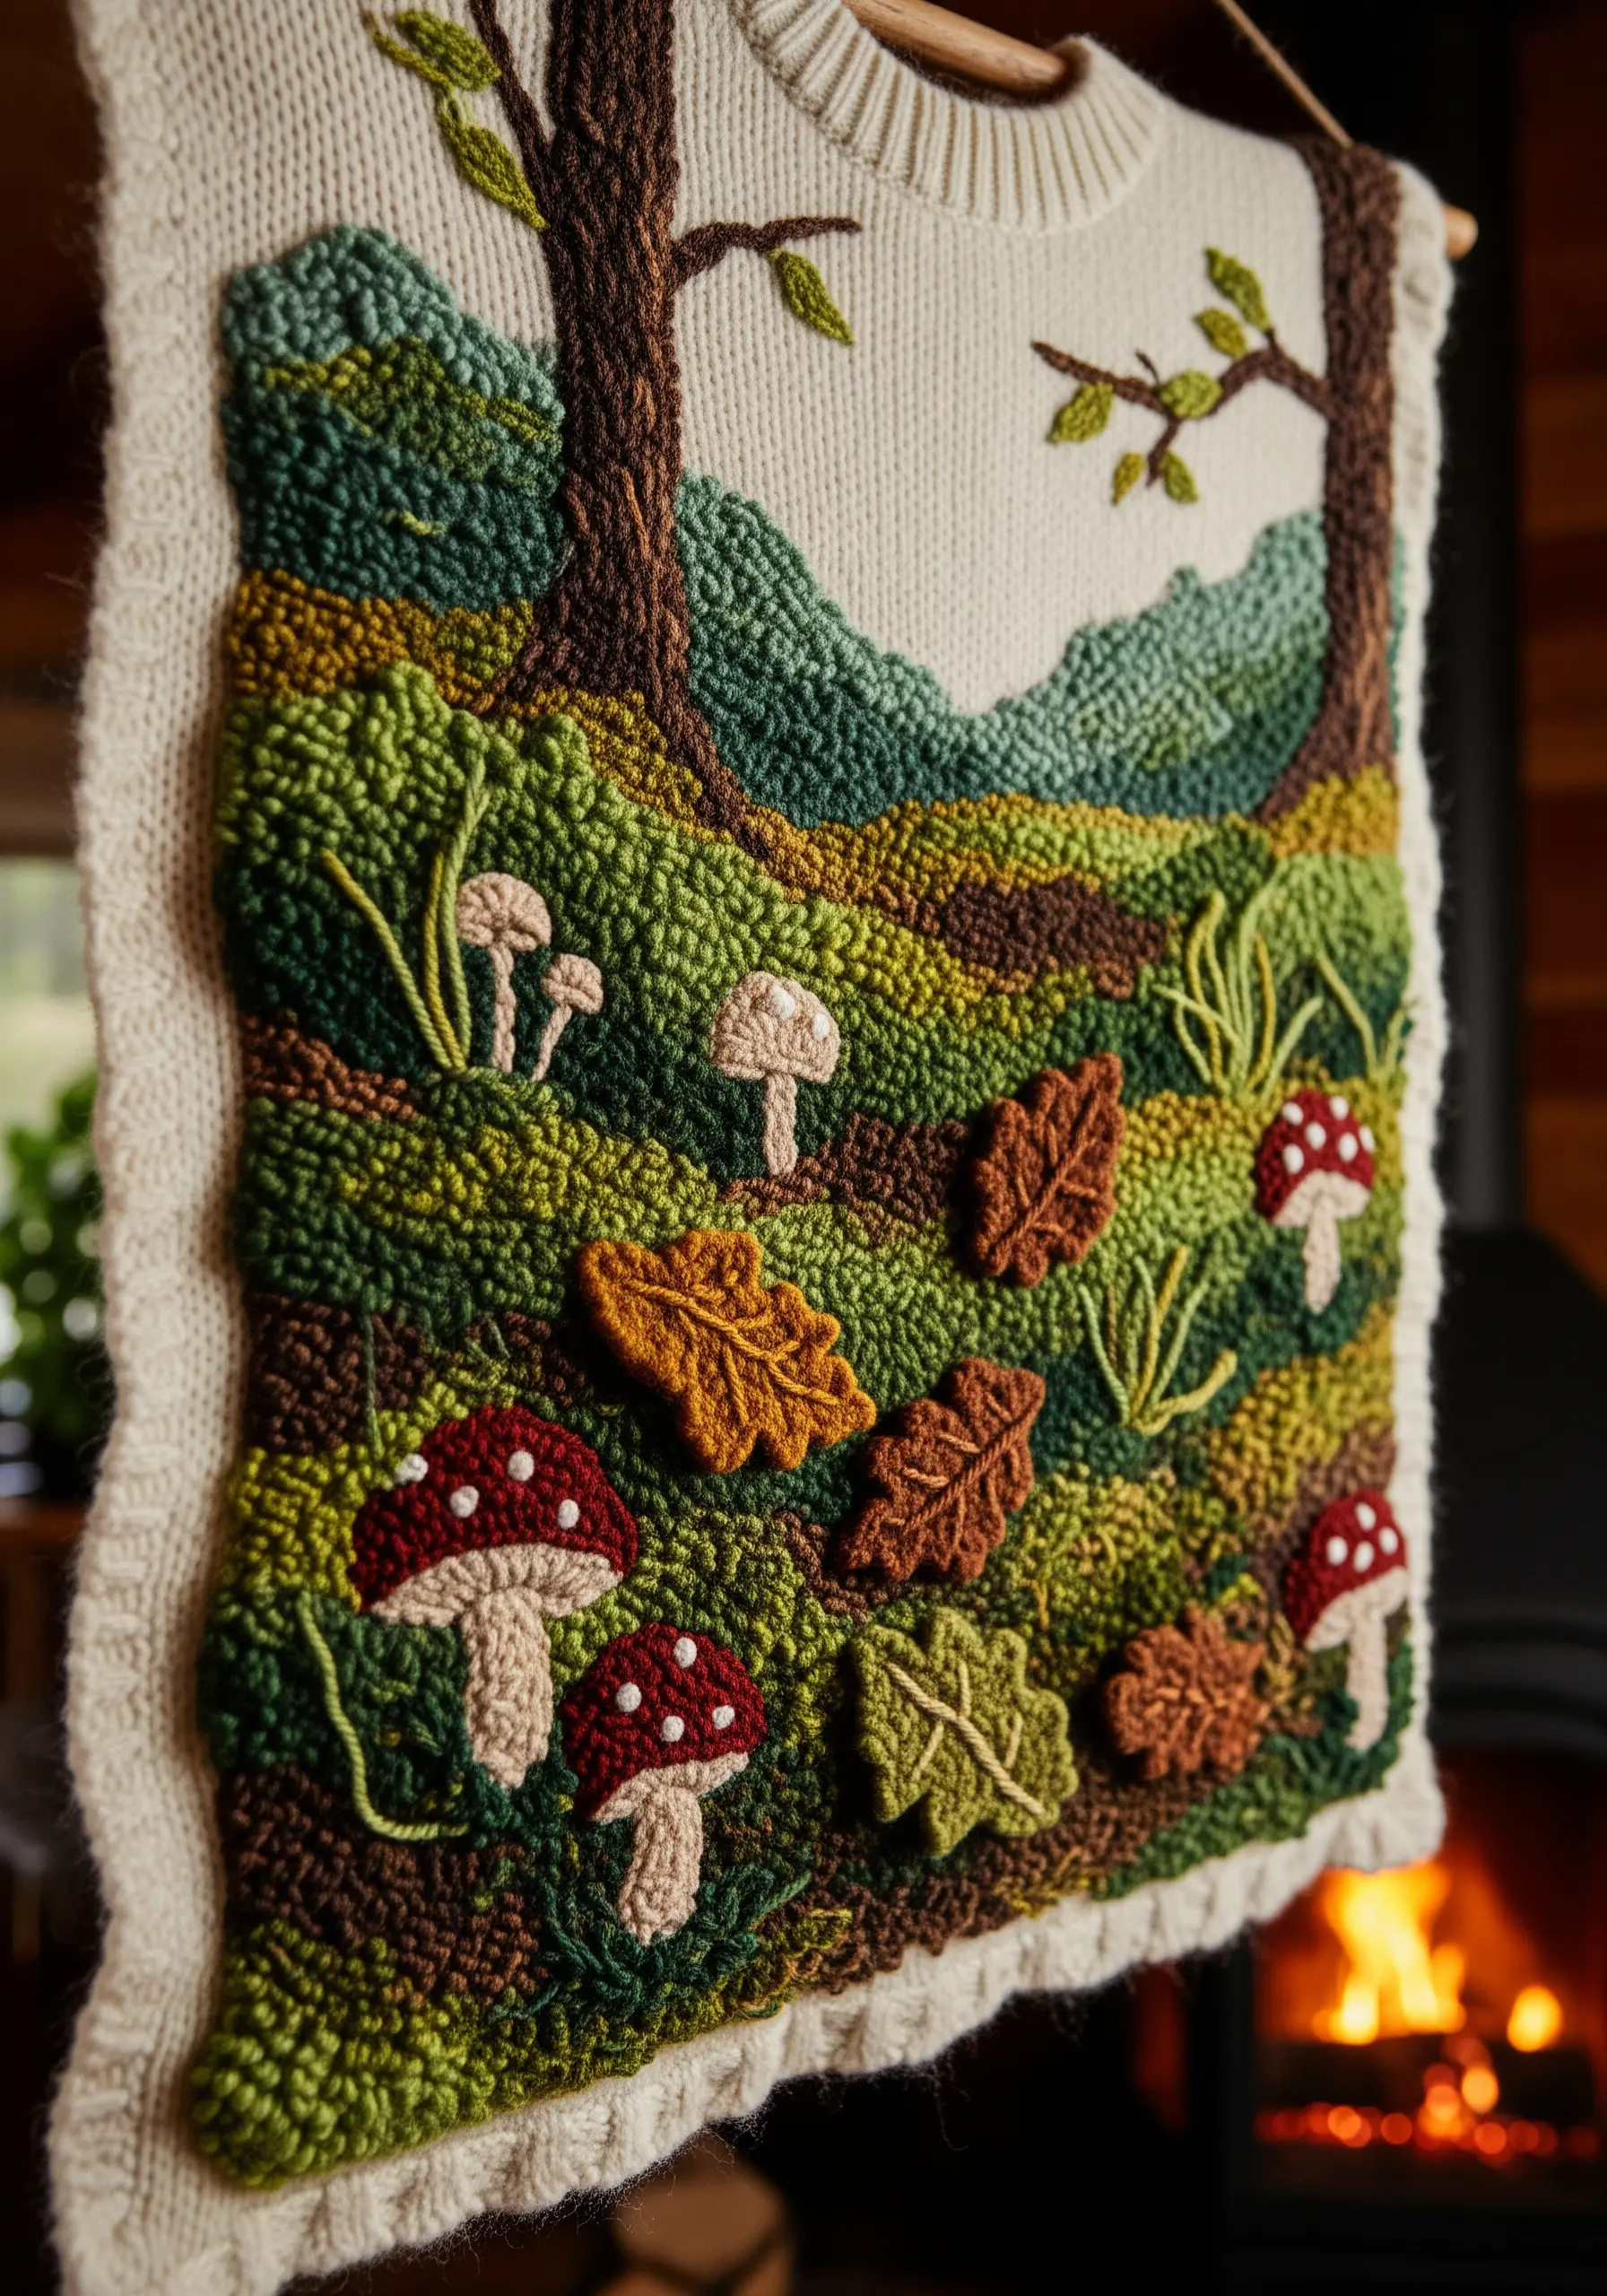
Create plush, textural landscapes with punch needle embroidery, a technique that builds up loops of yarn to create a carpet-like surface.
Use an adjustable punch needle to vary the height of your loops, giving your work a three-dimensional, sculpted quality. This is perfect for depicting mossy ground, leafy trees, and soft mushrooms.
The technique allows you to fill large areas with rich texture and color, making it ideal for creating cozy, tactile wall hangings.
21. Construct a 3D Diorama with Stitched Elements
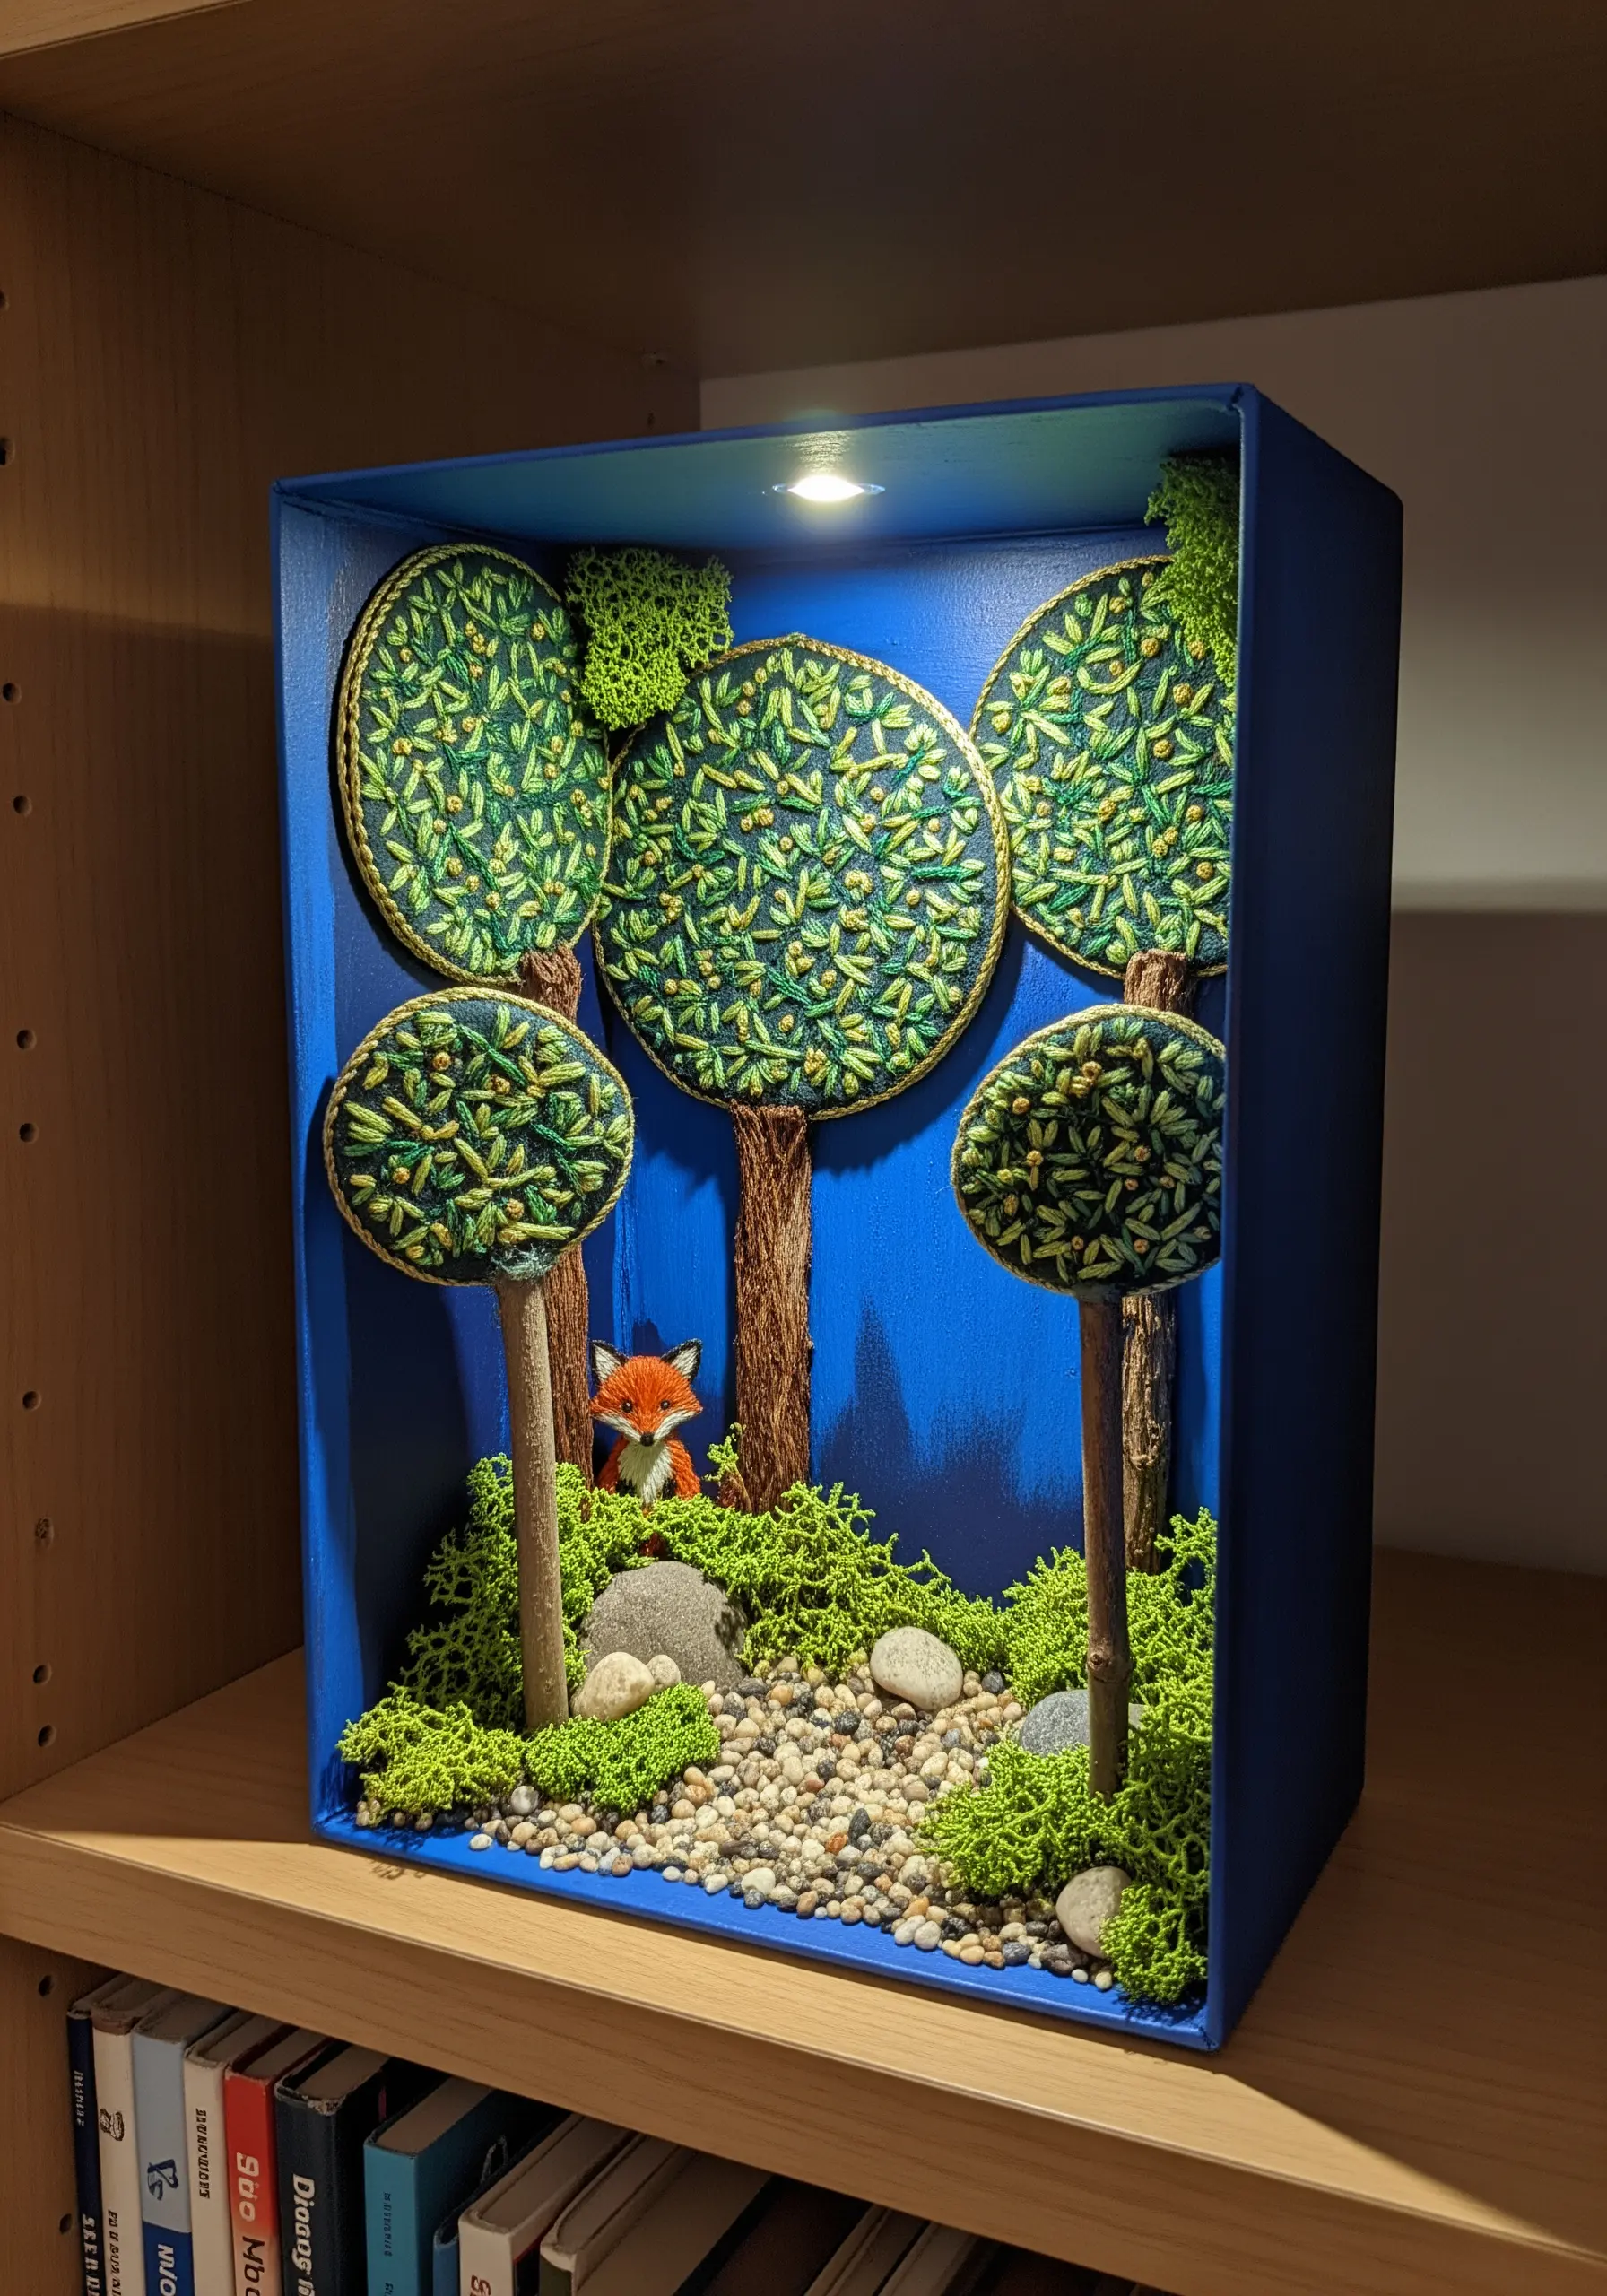
Take your embroidery off the hoop by creating three-dimensional elements for a diorama or shadow box.
Embroider your motifs—like these leafy treetops—onto fabric, then cut them out and wrap them around a sturdy base like cardboard or foam core.
Combine your stitched pieces with natural, found objects like twigs and pebbles to create a scene with incredible depth and personality. It’s a playful way to blend fiber art with sculptural assembly.
22. Weave a Meditative Mandala with Twigs and Yarn
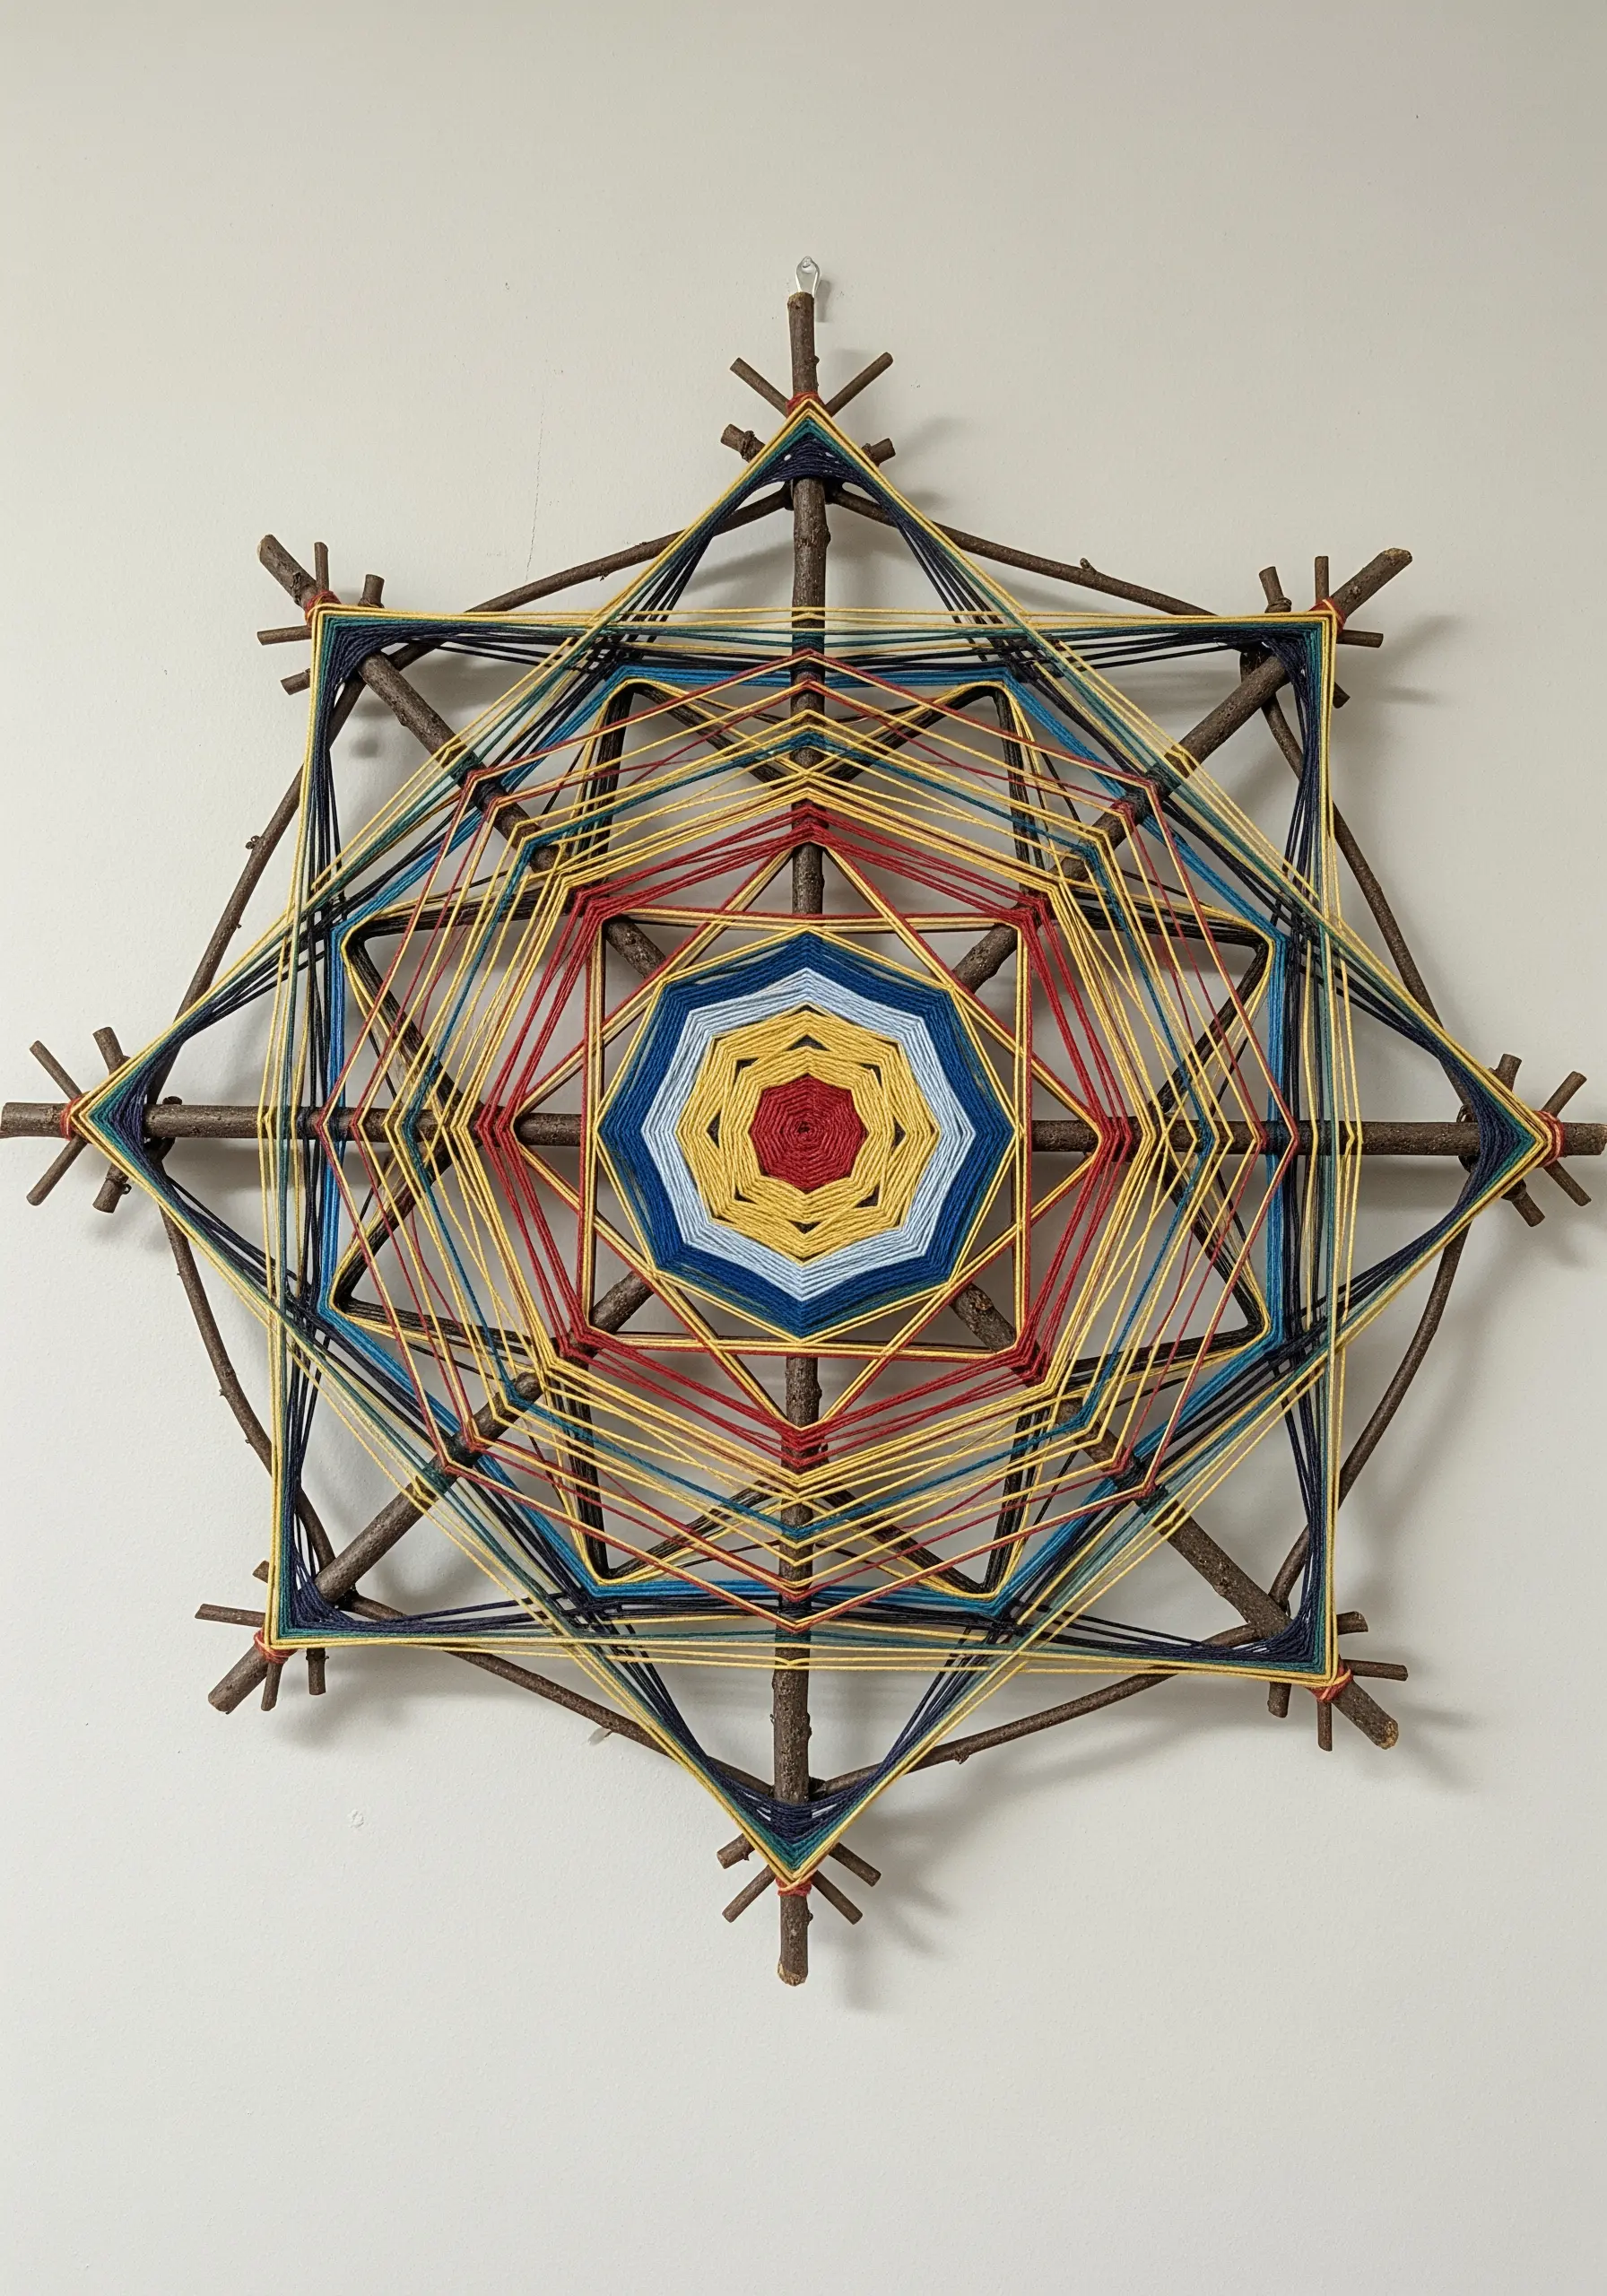
Create a stunning geometric wall hanging using found twigs as your loom.
Lash several twigs together at the center to form a star-shaped frame. Then, begin weaving yarn around the frame, wrapping it around each twig in succession to create the classic ‘Ojo de Dios’ or God’s Eye pattern.
Varying the colors of the yarn creates a mesmerizing, mandala-like effect. This process is both a meditative craft and a beautiful way to combine natural materials with fiber.
23. Create Graphic Tension with Industrial String Art
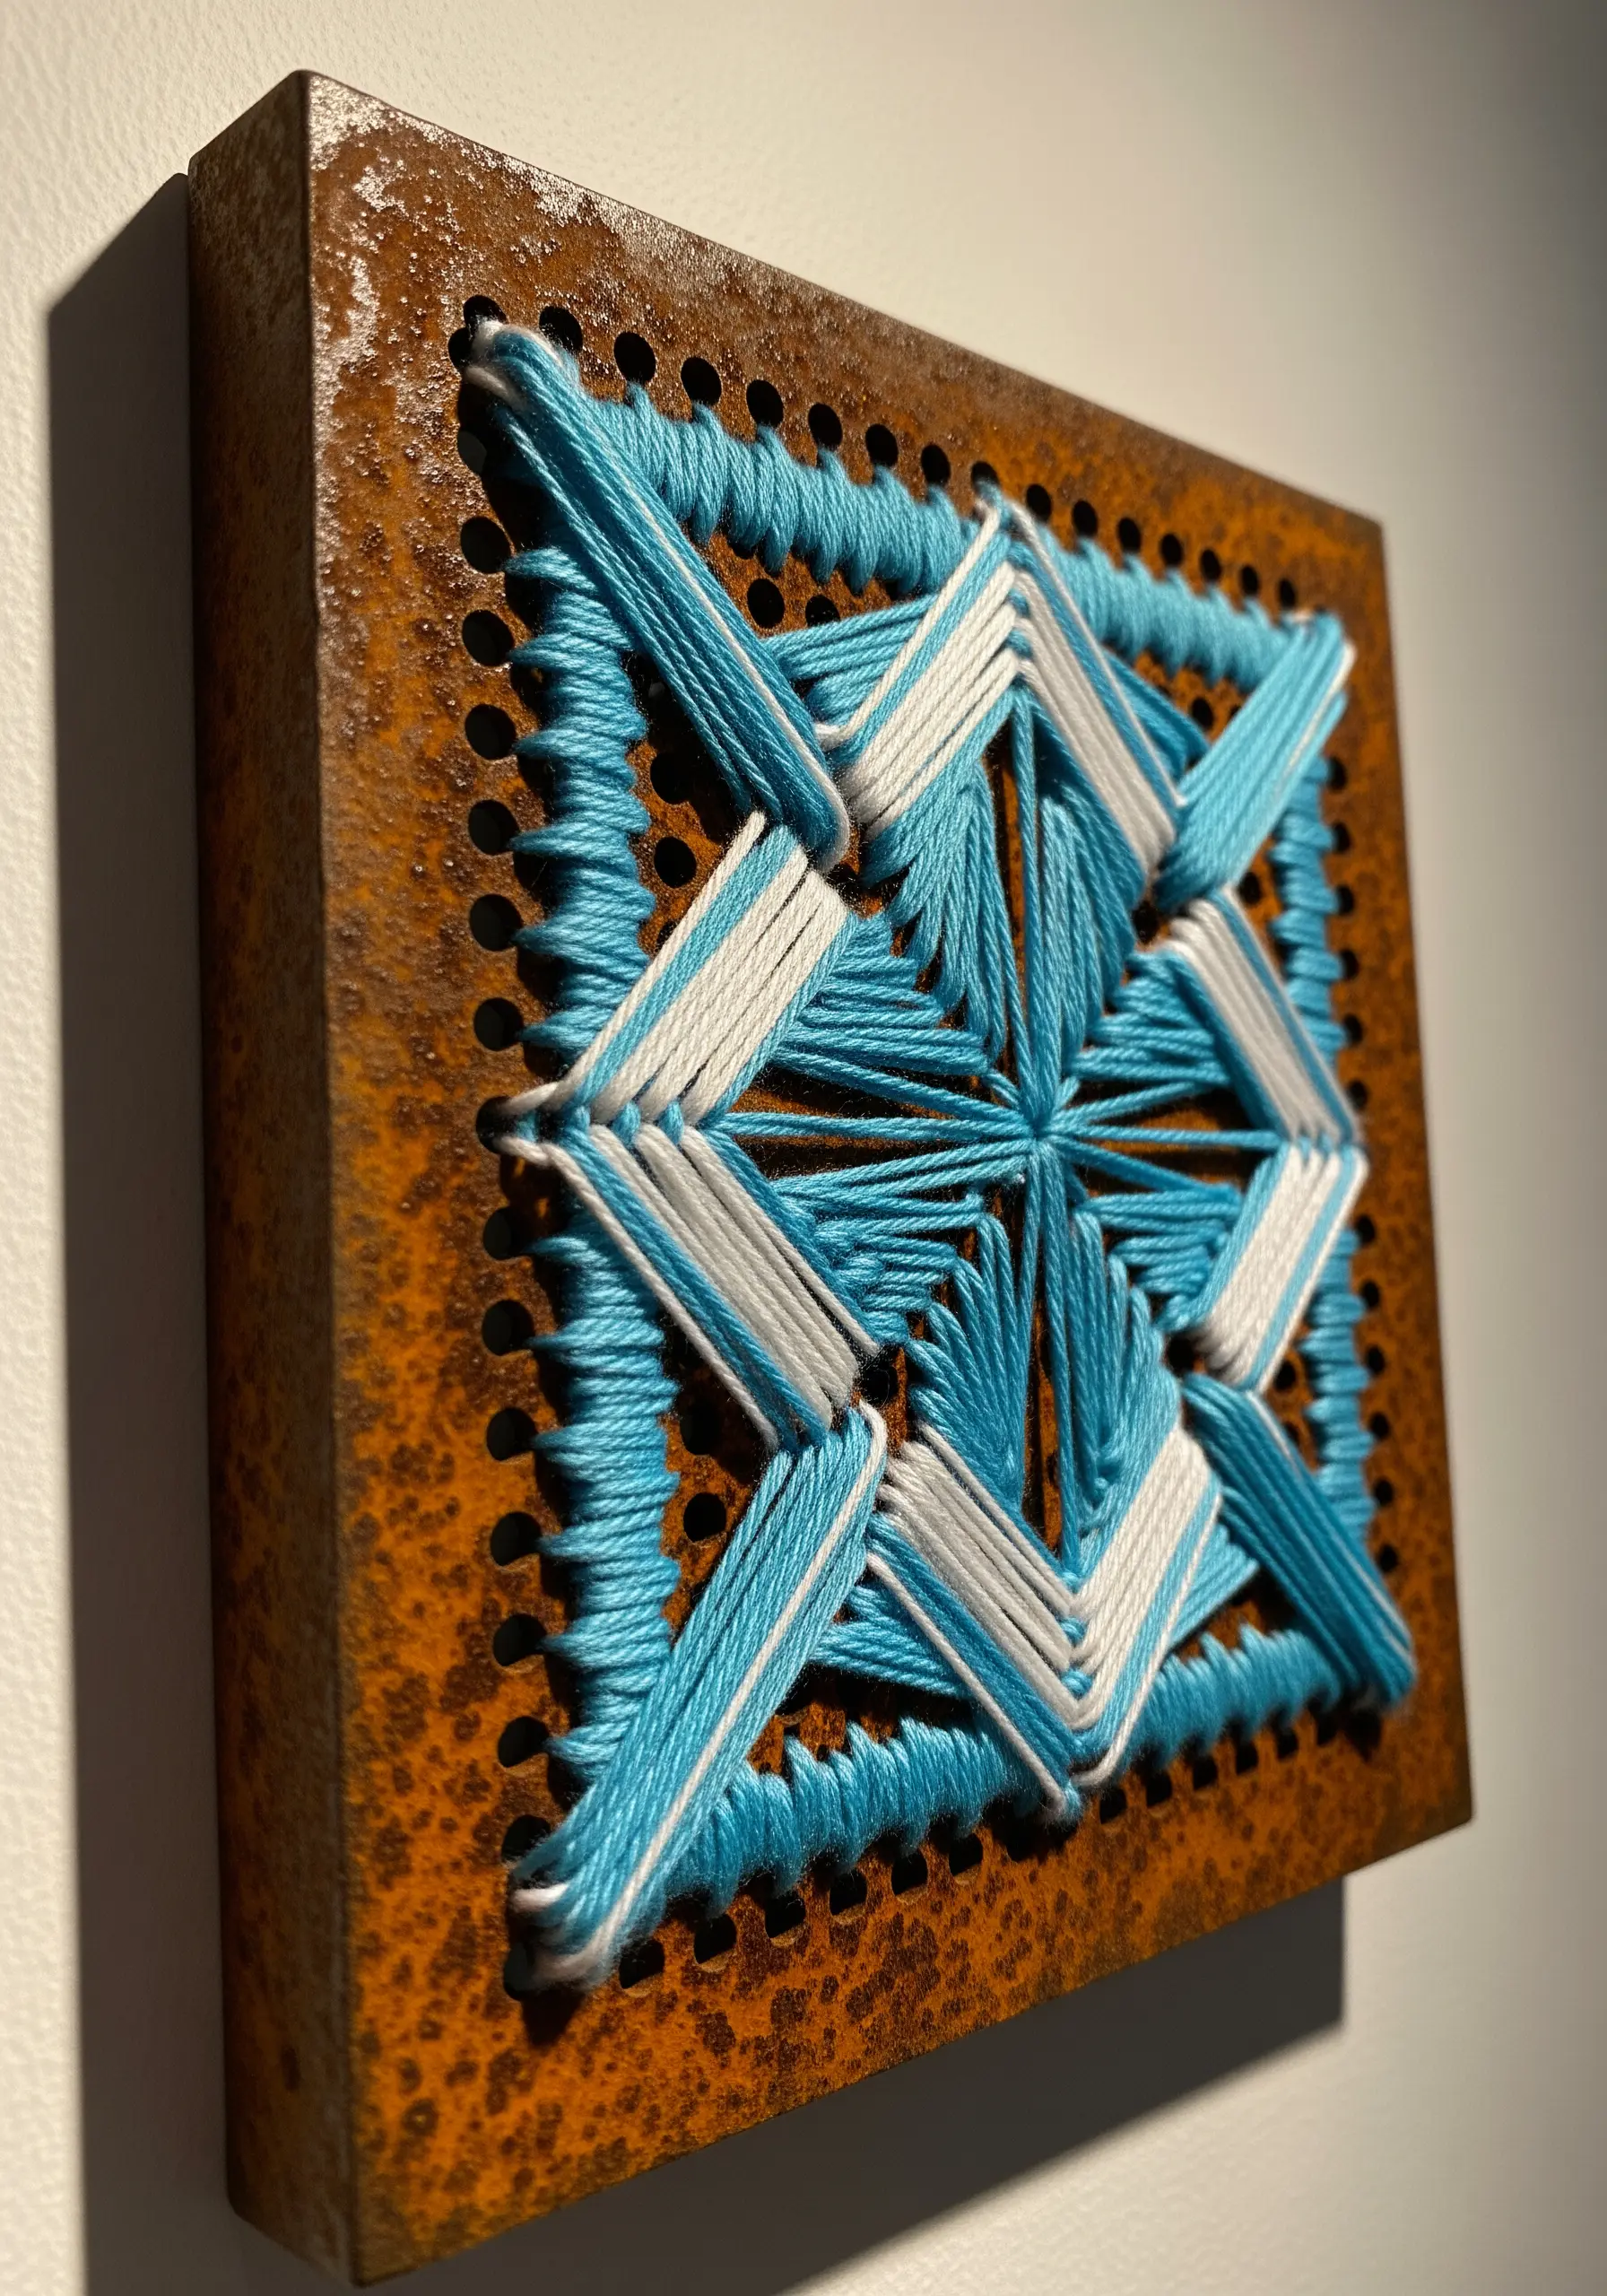
Explore the interplay between industrial and handmade by creating string art on a perforated metal surface.
The grid of pre-drilled holes provides a perfect framework for creating crisp, geometric patterns.
Use a strong, smooth thread like pearl cotton and experiment with layering different colors and angles to build up a design with visual depth.
The cool, rusted patina of the metal provides a stunning contrast to the soft, precise lines of the thread.
24. Embroider on Vinyl for a Retro-Modern Fusion
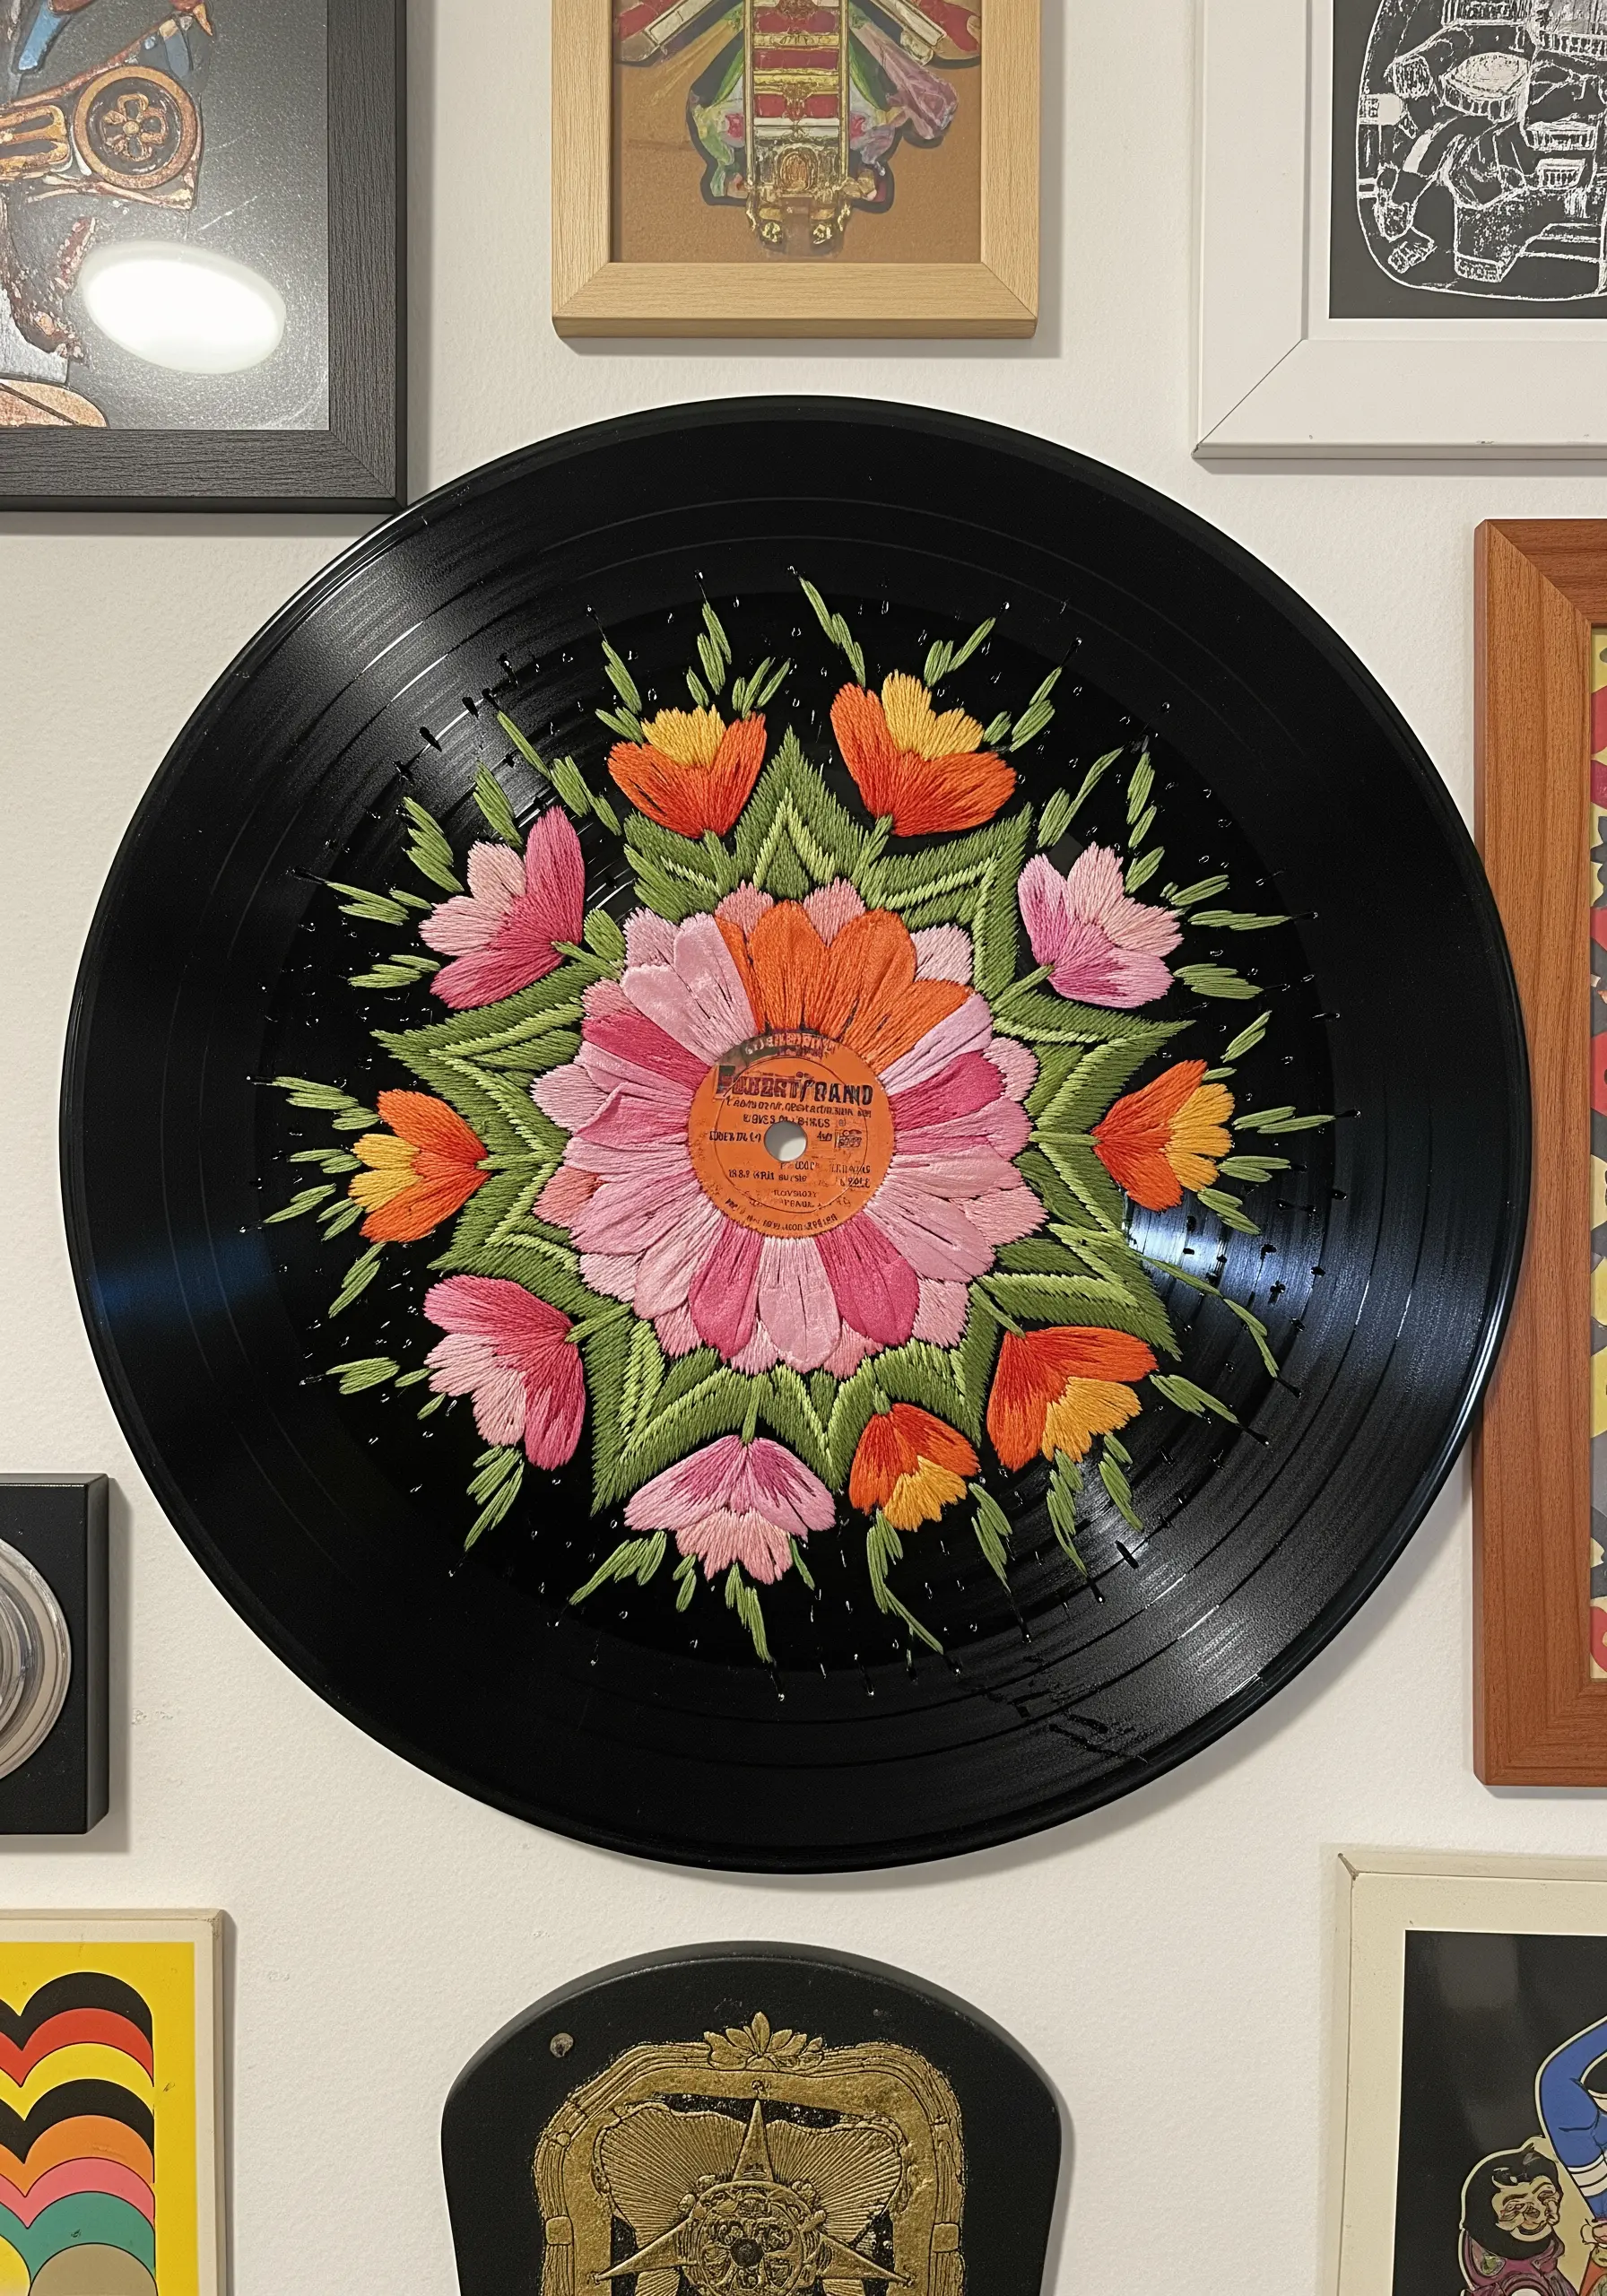
Give a scratched, unplayable vinyl record a new purpose as a unique embroidery canvas.
Carefully drill small holes along your design outline using a fine-bit drill. Once your pattern is drilled, you can stitch through the holes as you would with perforated paper.
Use a satin stitch or long-and-short stitch to fill in the shapes. The glossy black vinyl makes thread colors pop, creating a stunning piece of pop art-inspired decor.
25. Sculpt with Disposables and Delicate Thread
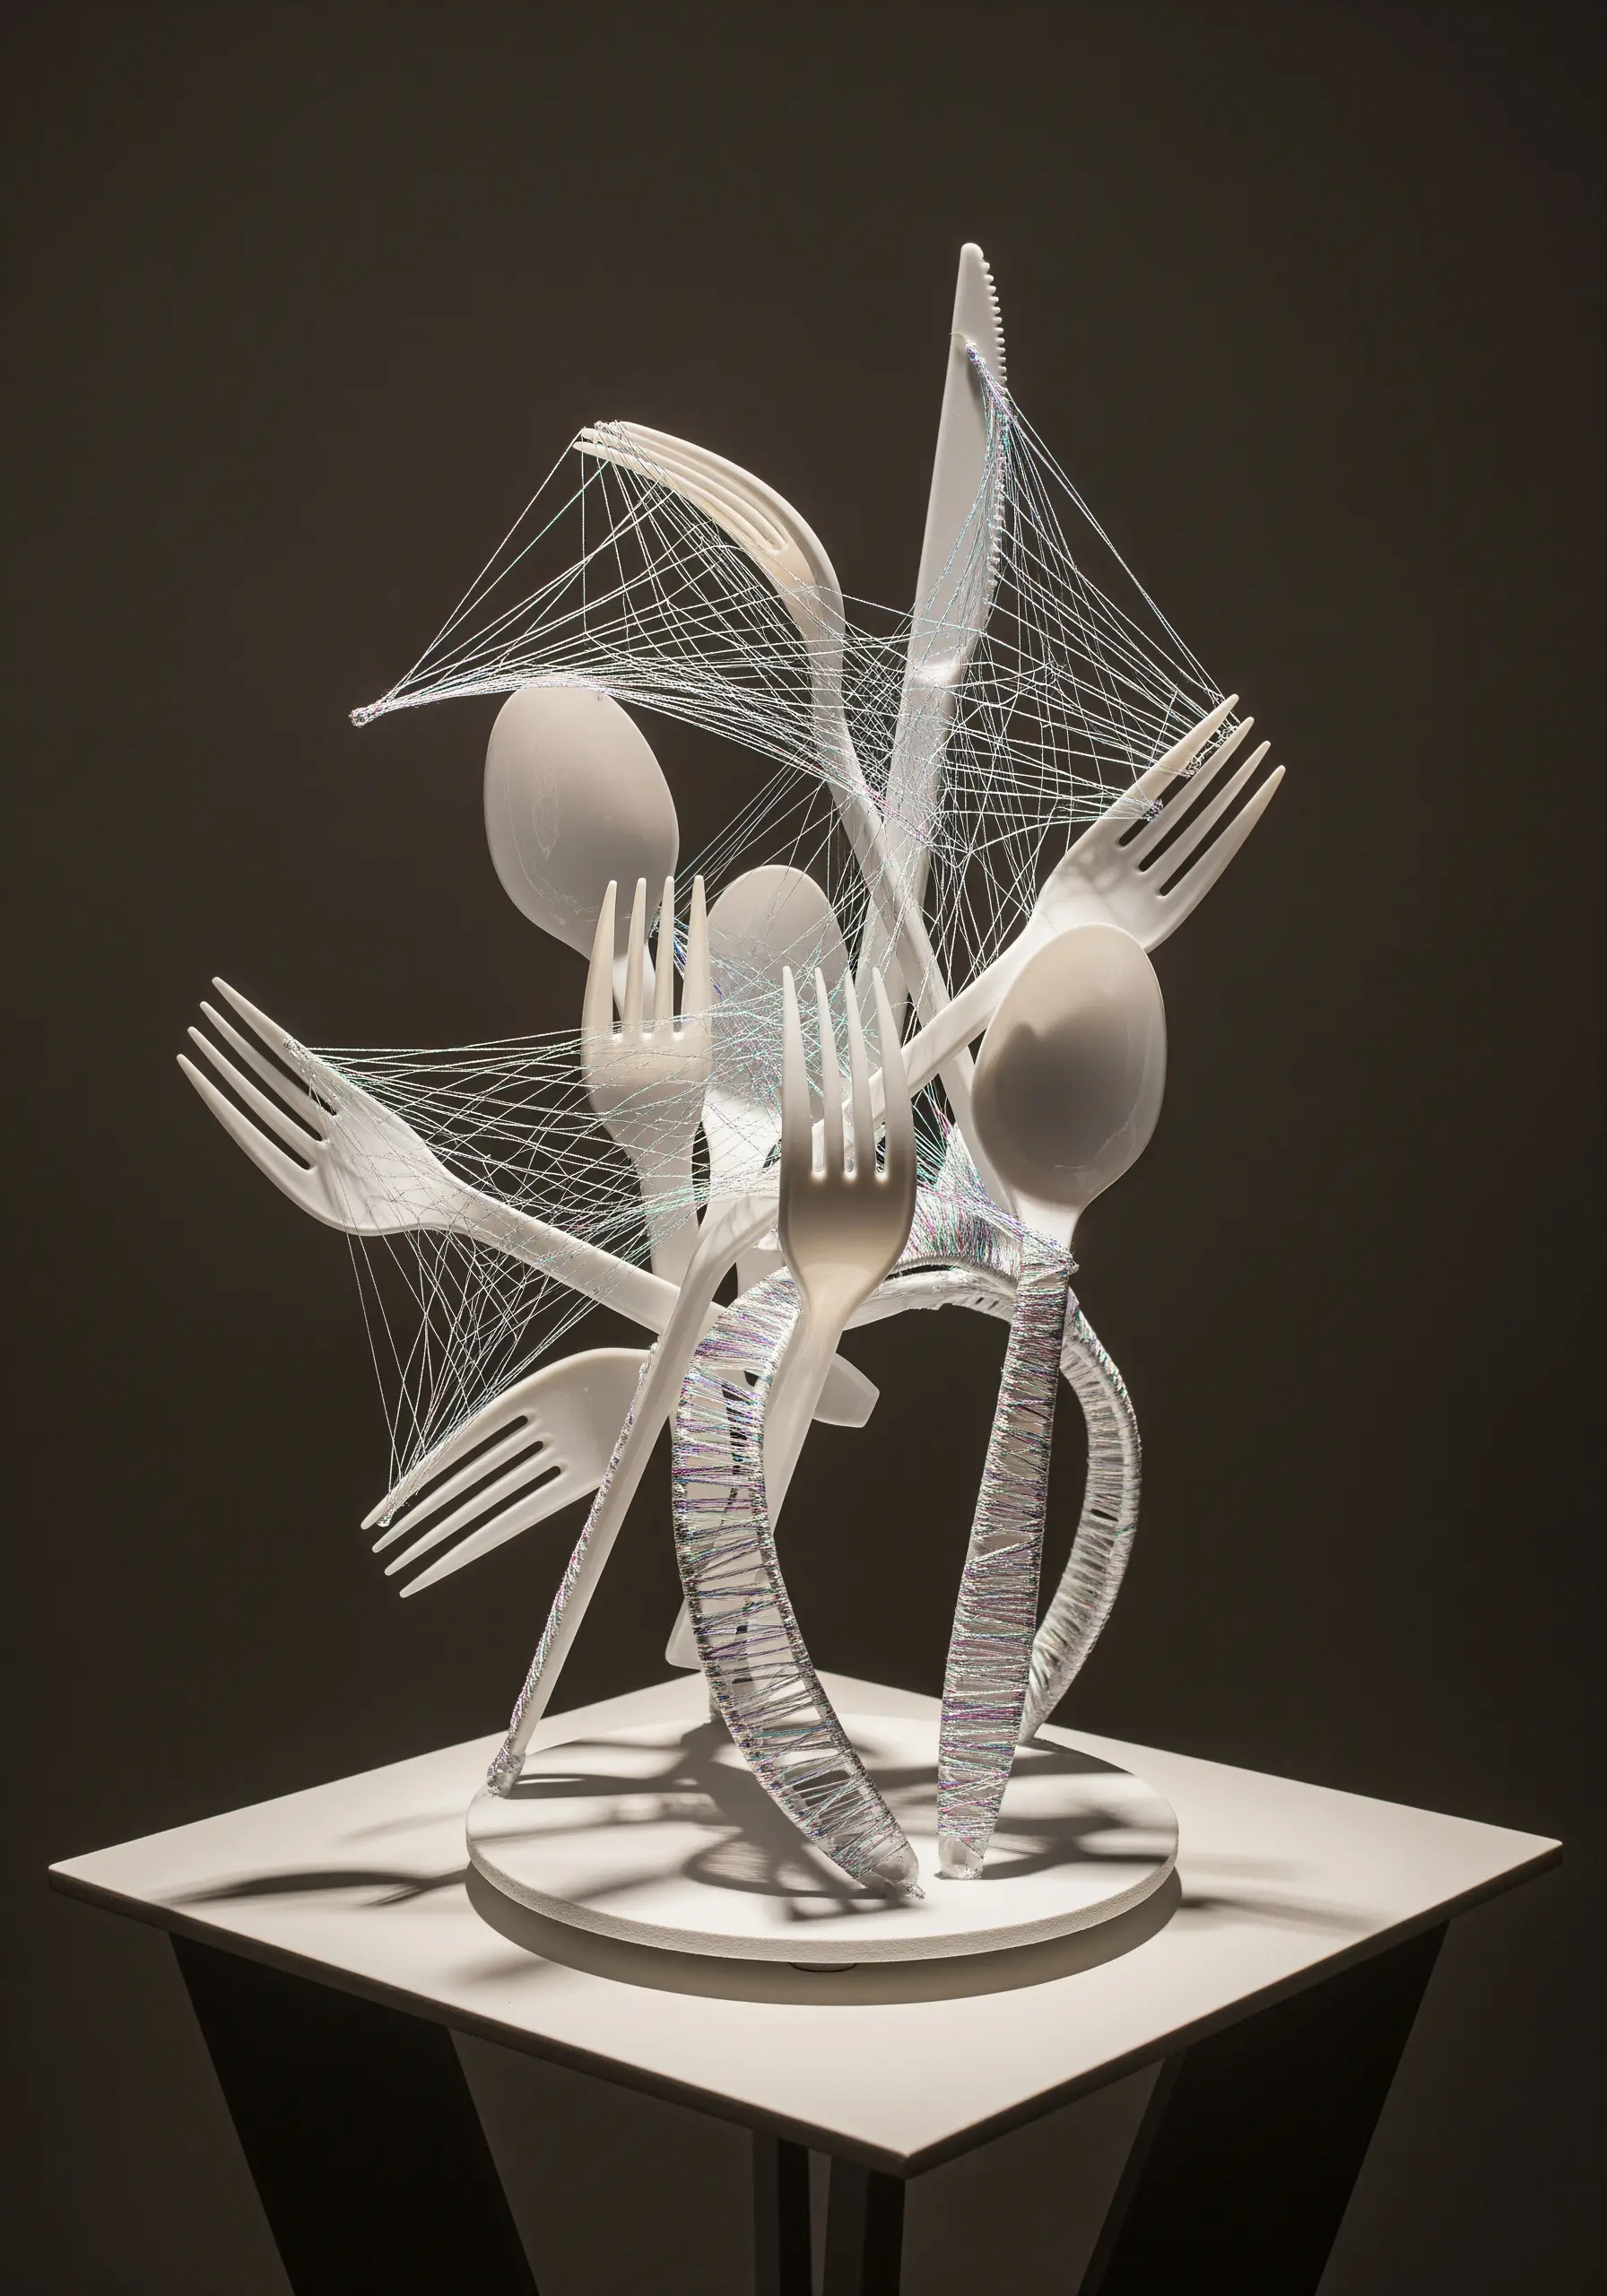
Use thread not just as embellishment, but as a structural element to bind and suspend objects.
Arrange discarded plastic cutlery into a dynamic, explosive composition and use a fine, strong thread to connect the pieces.
Wrap some handles tightly to add texture and color, while using other threads to create taut, web-like structures that hold the sculpture together.
This technique transforms flimsy, everyday trash into an elegant and gravity-defying work of art.
26. Emulate Block Printing with Sashiko-Style Stitches
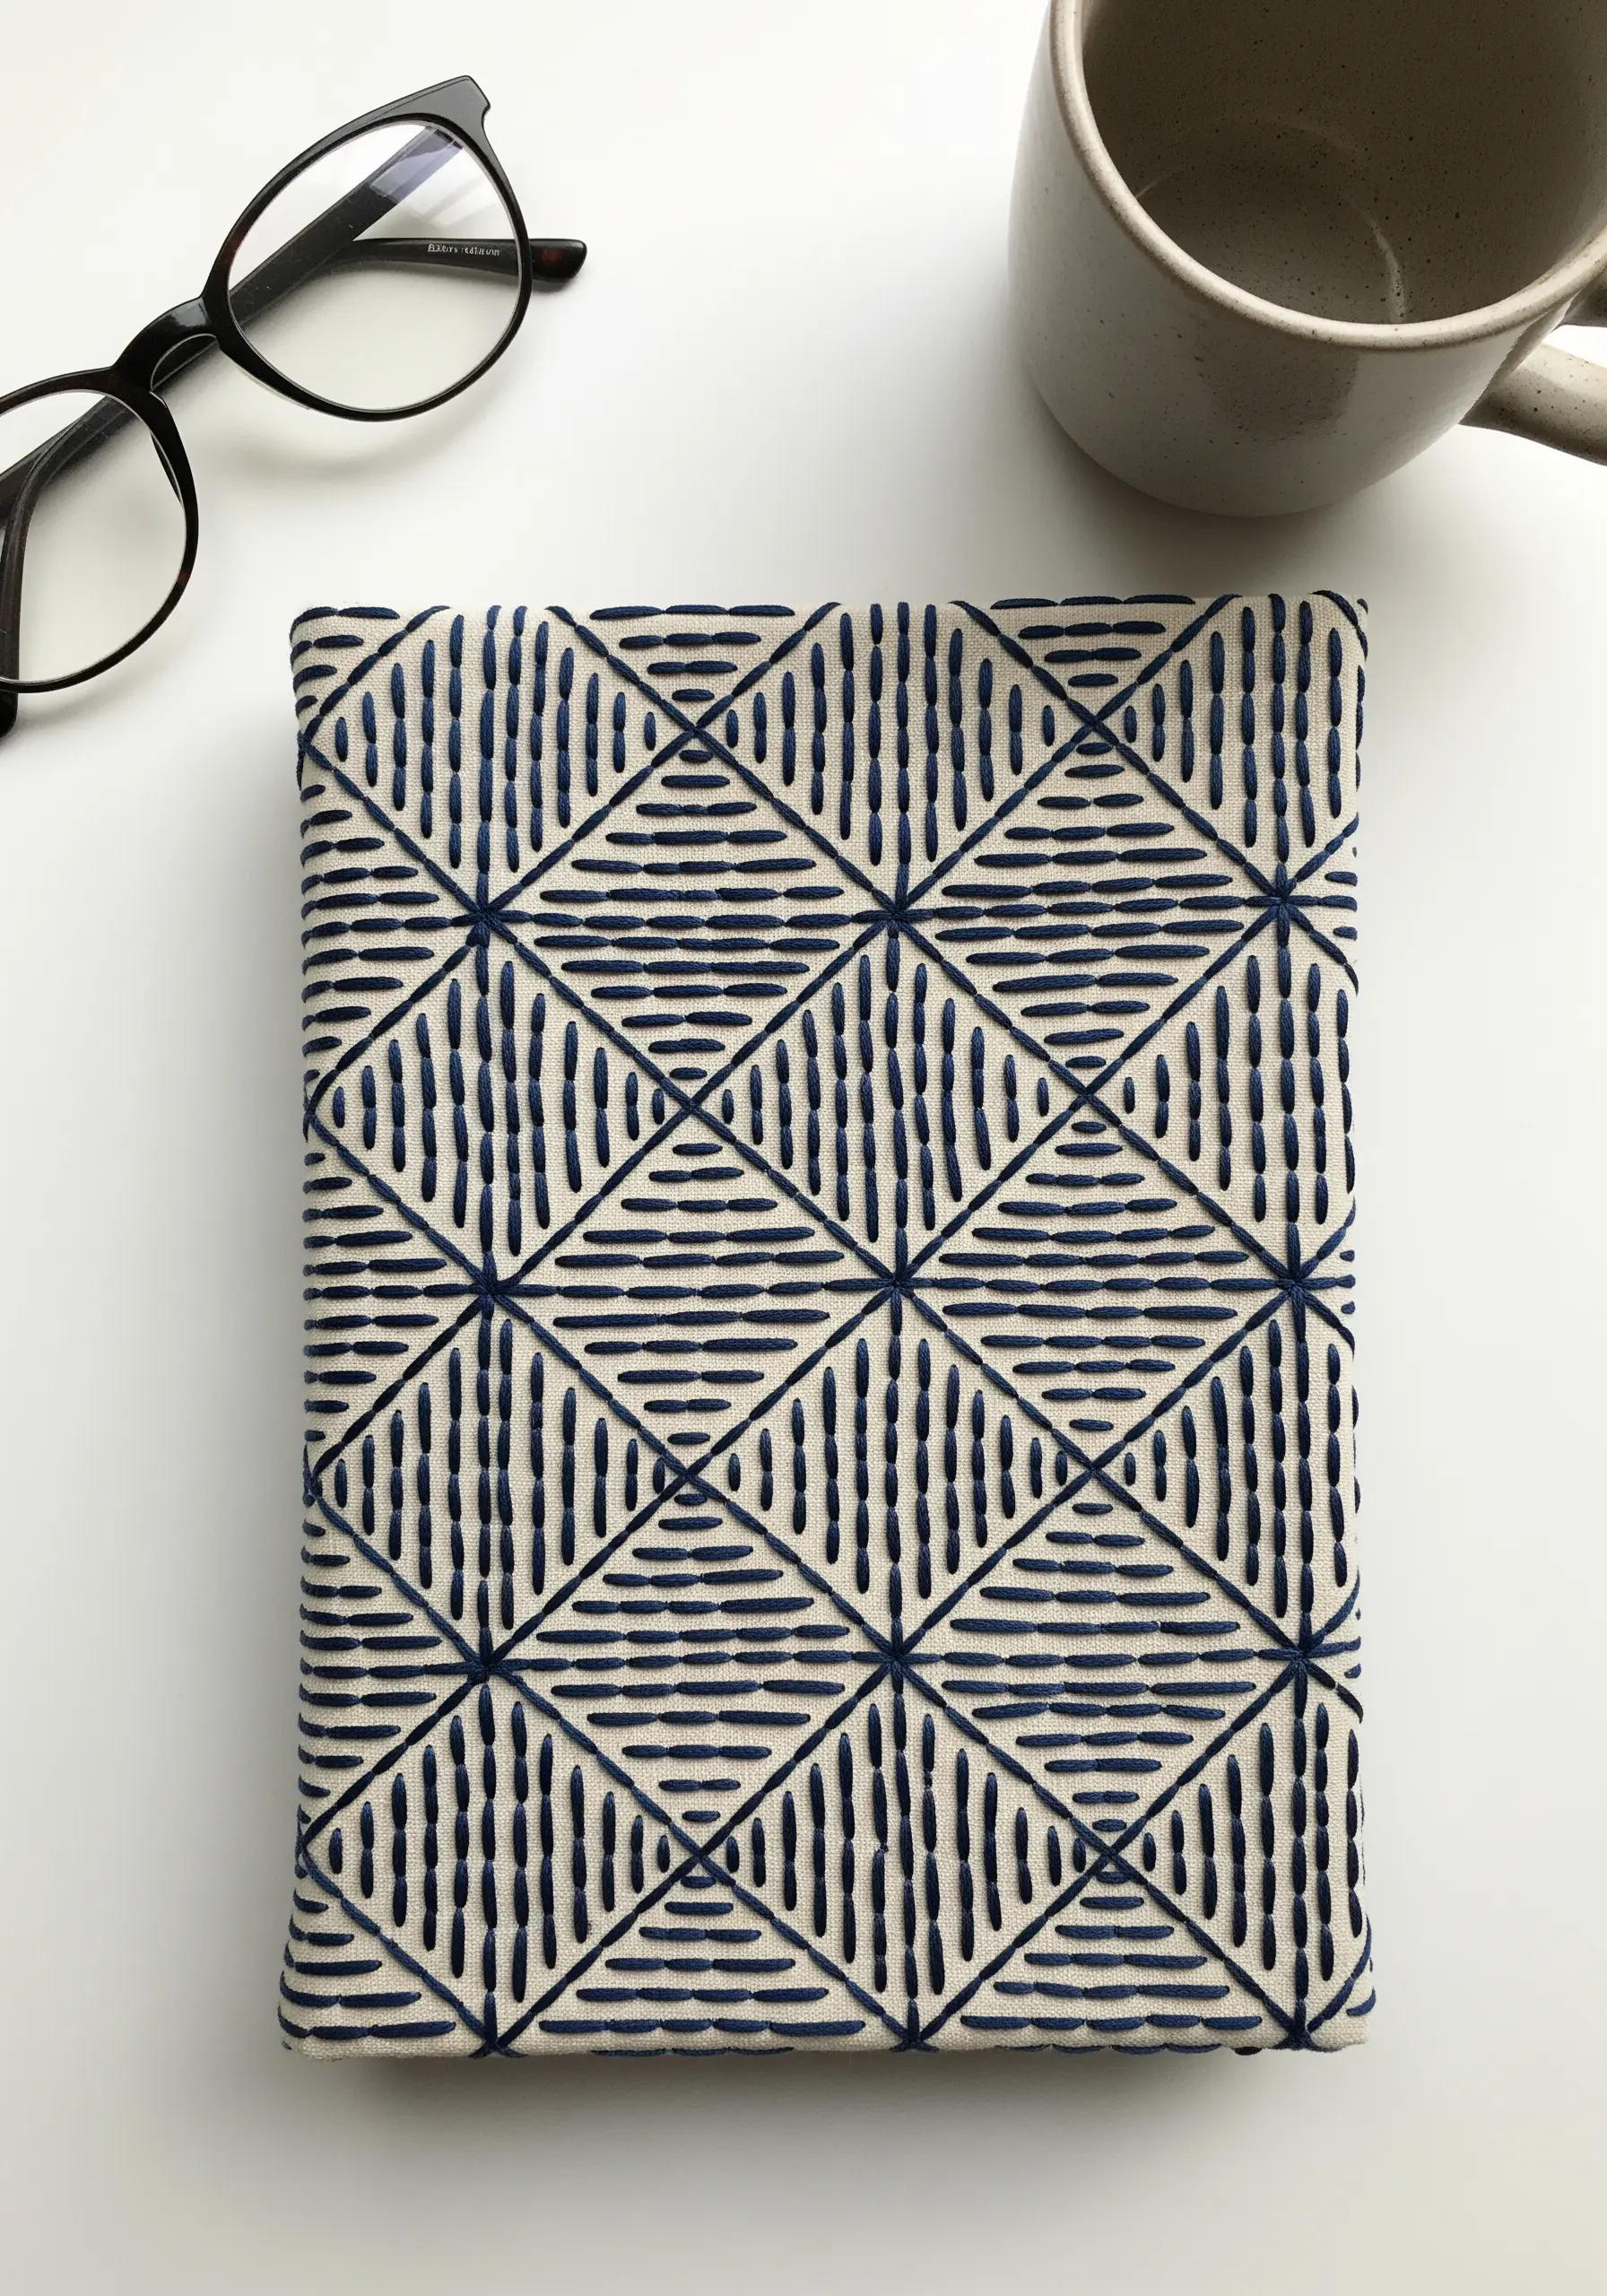
Give a plain fabric book cover the look of intricate block printing using a simple running stitch.
Inspired by Japanese Sashiko, you can create complex-looking geometric patterns with this single, humble stitch. Use a quilting ruler and a fabric marker to draw your grid, then stitch along the lines with a contrasting thread.
Using a thick, matte cotton thread against a natural linen or cotton canvas enhances the graphic, hand-printed aesthetic.
27. Add Stitched Details to Plastic for Wearable Art

Transform cheap plastic items, like these leaf shapes, into a stunning piece of wearable art with embroidery.
Use a sharp needle to carefully pierce the plastic, or gently heat the needle tip to make piercing easier.
Stitch fine details like leaf veins using a contrasting color to add dimension and a sense of preciousness. This method allows you to add texture and intricate detail to smooth, non-porous surfaces, completely elevating the original material.
28. Stitch Delicate Specimens on Translucent Tea Bags
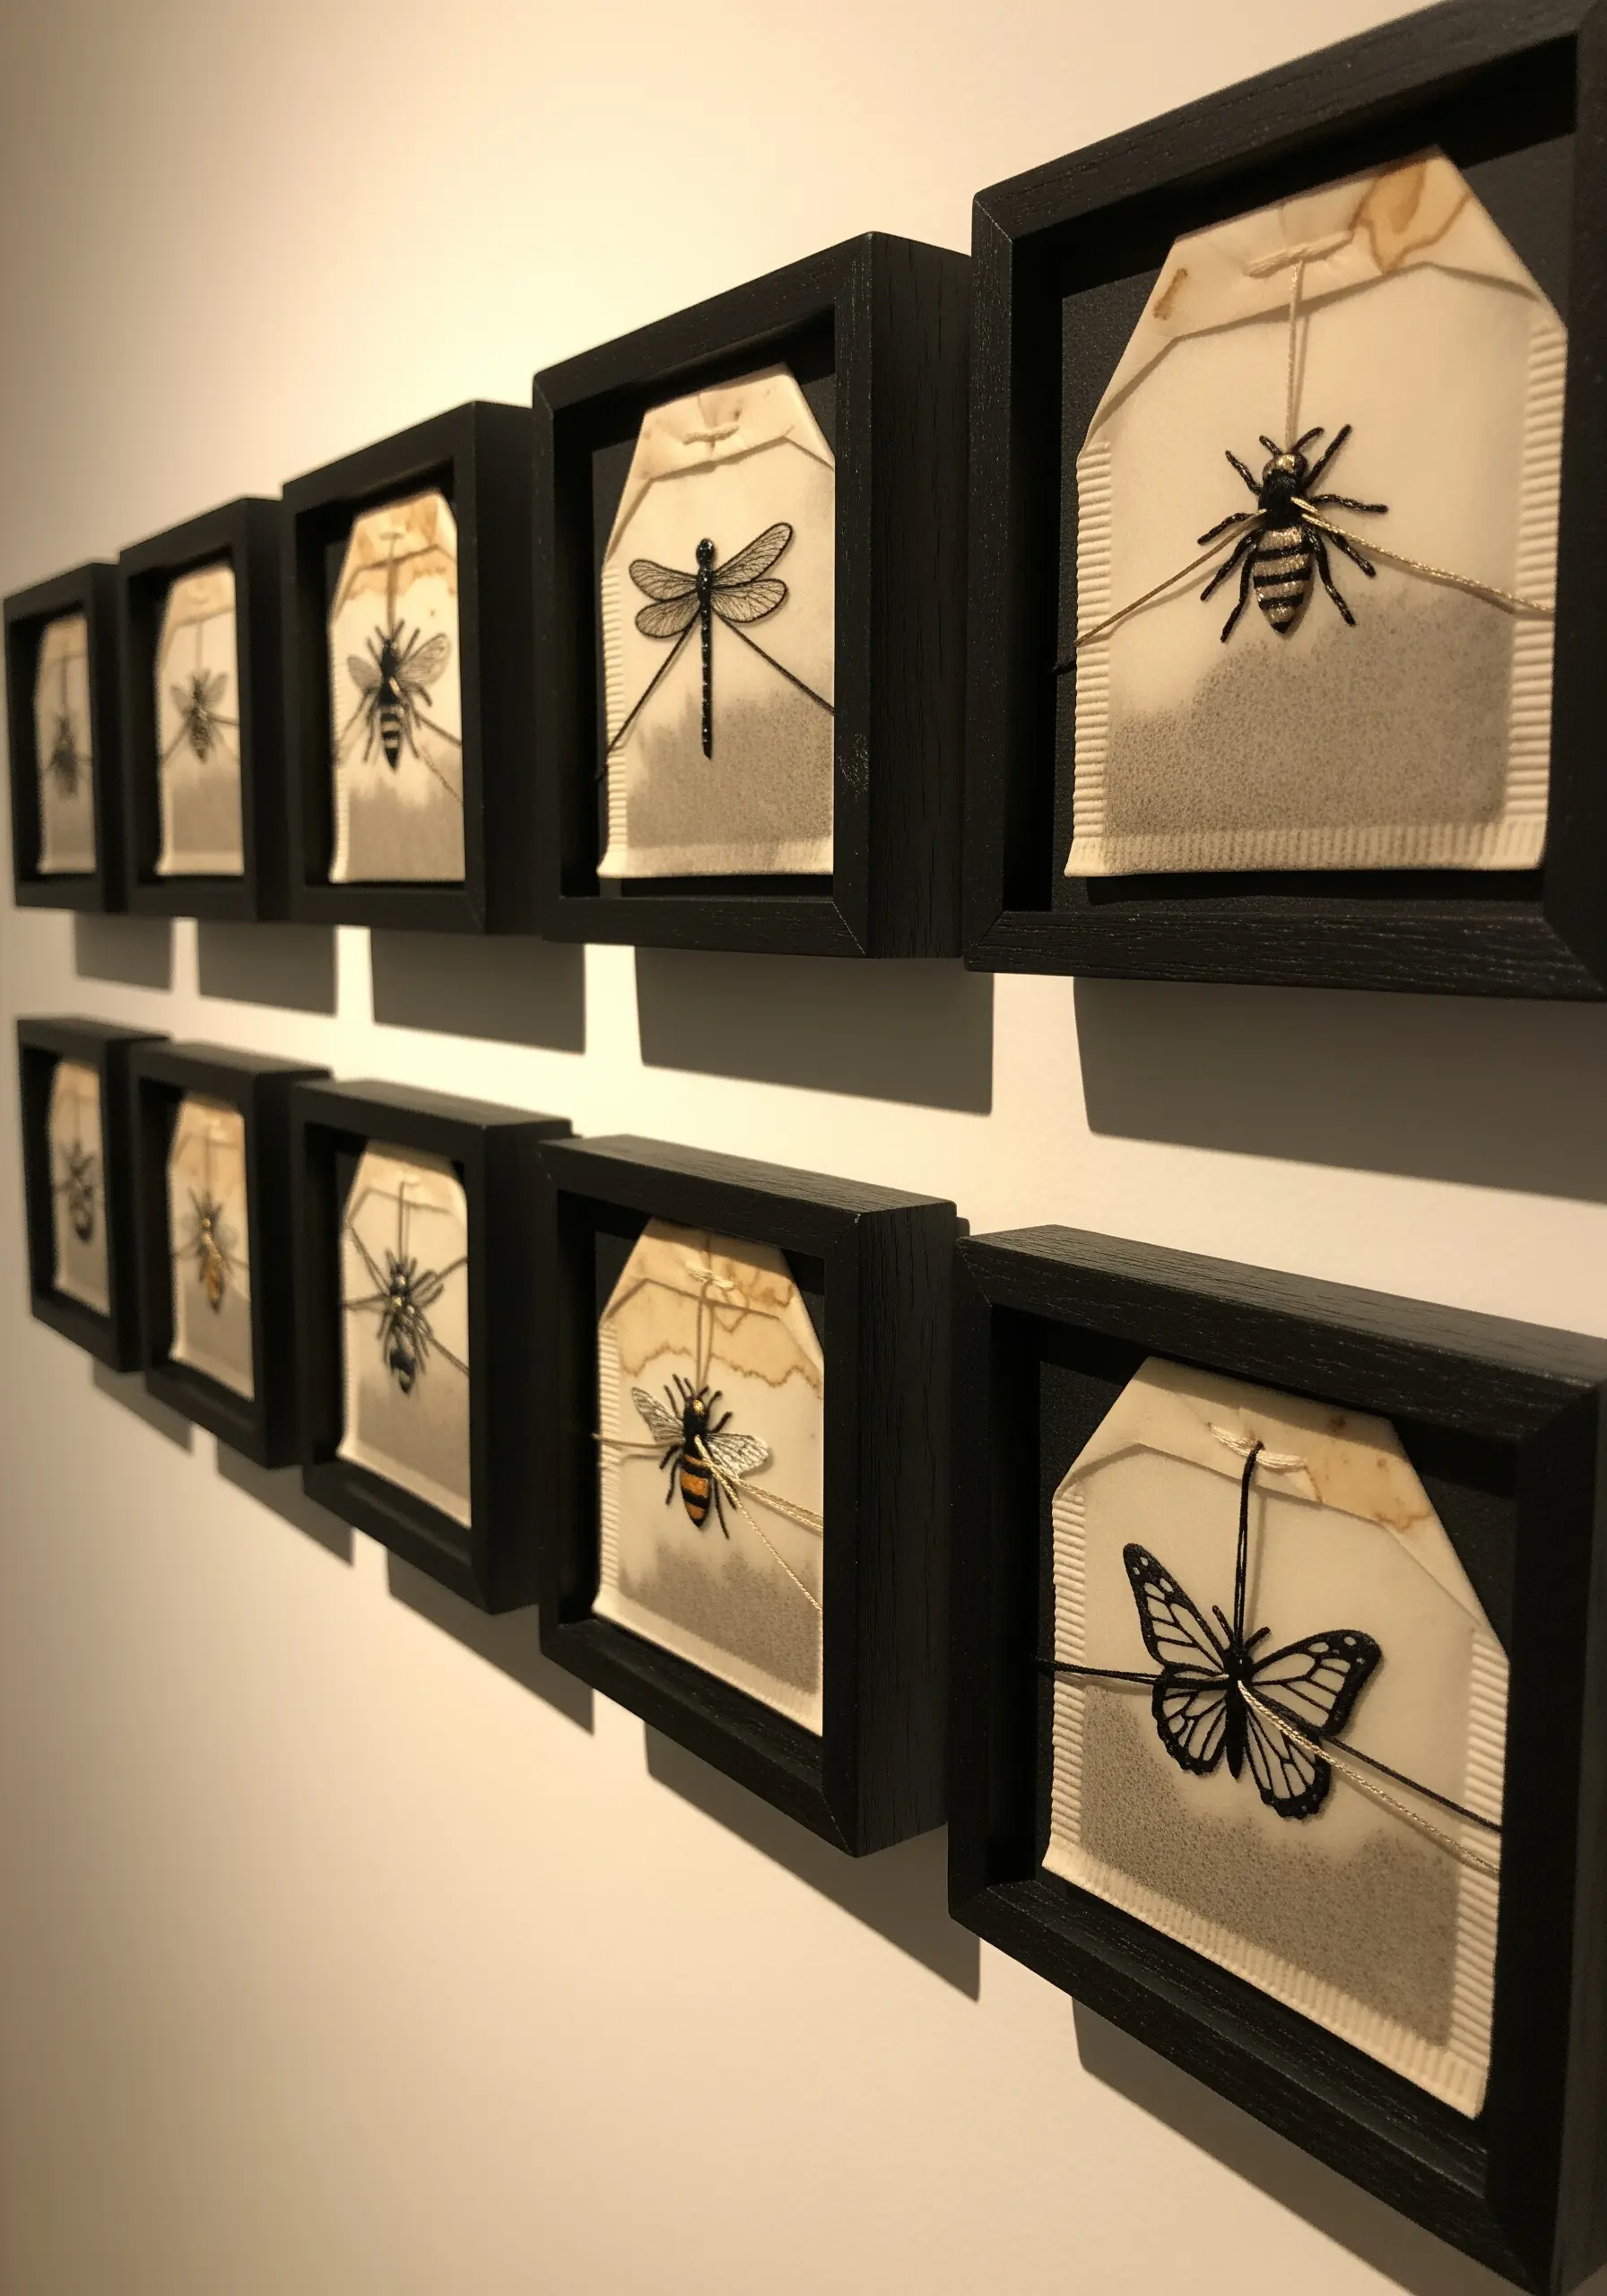
Use the delicate, stained paper of a used tea bag as a unique and meaningful canvas for your embroidery.
The paper is fragile, so use a very fine needle and a single strand of black embroidery floss. A simple backstitch is perfect for creating the intricate, scientific-illustration style of insects or botanicals.
Framing each one individually in a shadow box turns these ephemeral objects into a collection of precious, preserved specimens.
29. Combine Paper Mâché and Coiled Fiber

Create a vessel that marries chaotic exterior texture with a serene, ordered interior.
Construct the outer bowl using paper mâché from old magazines for a burst of random color and text.
For the inside, use a basket-making technique: coil a thick, soft rope and stitch it into place with a sturdy thread. The contrast between the glossy, sharp-edged paper and the soft, neutral rope creates a beautiful sensory experience.
30. Create a Light-Filtering Screen with Stitched Discs
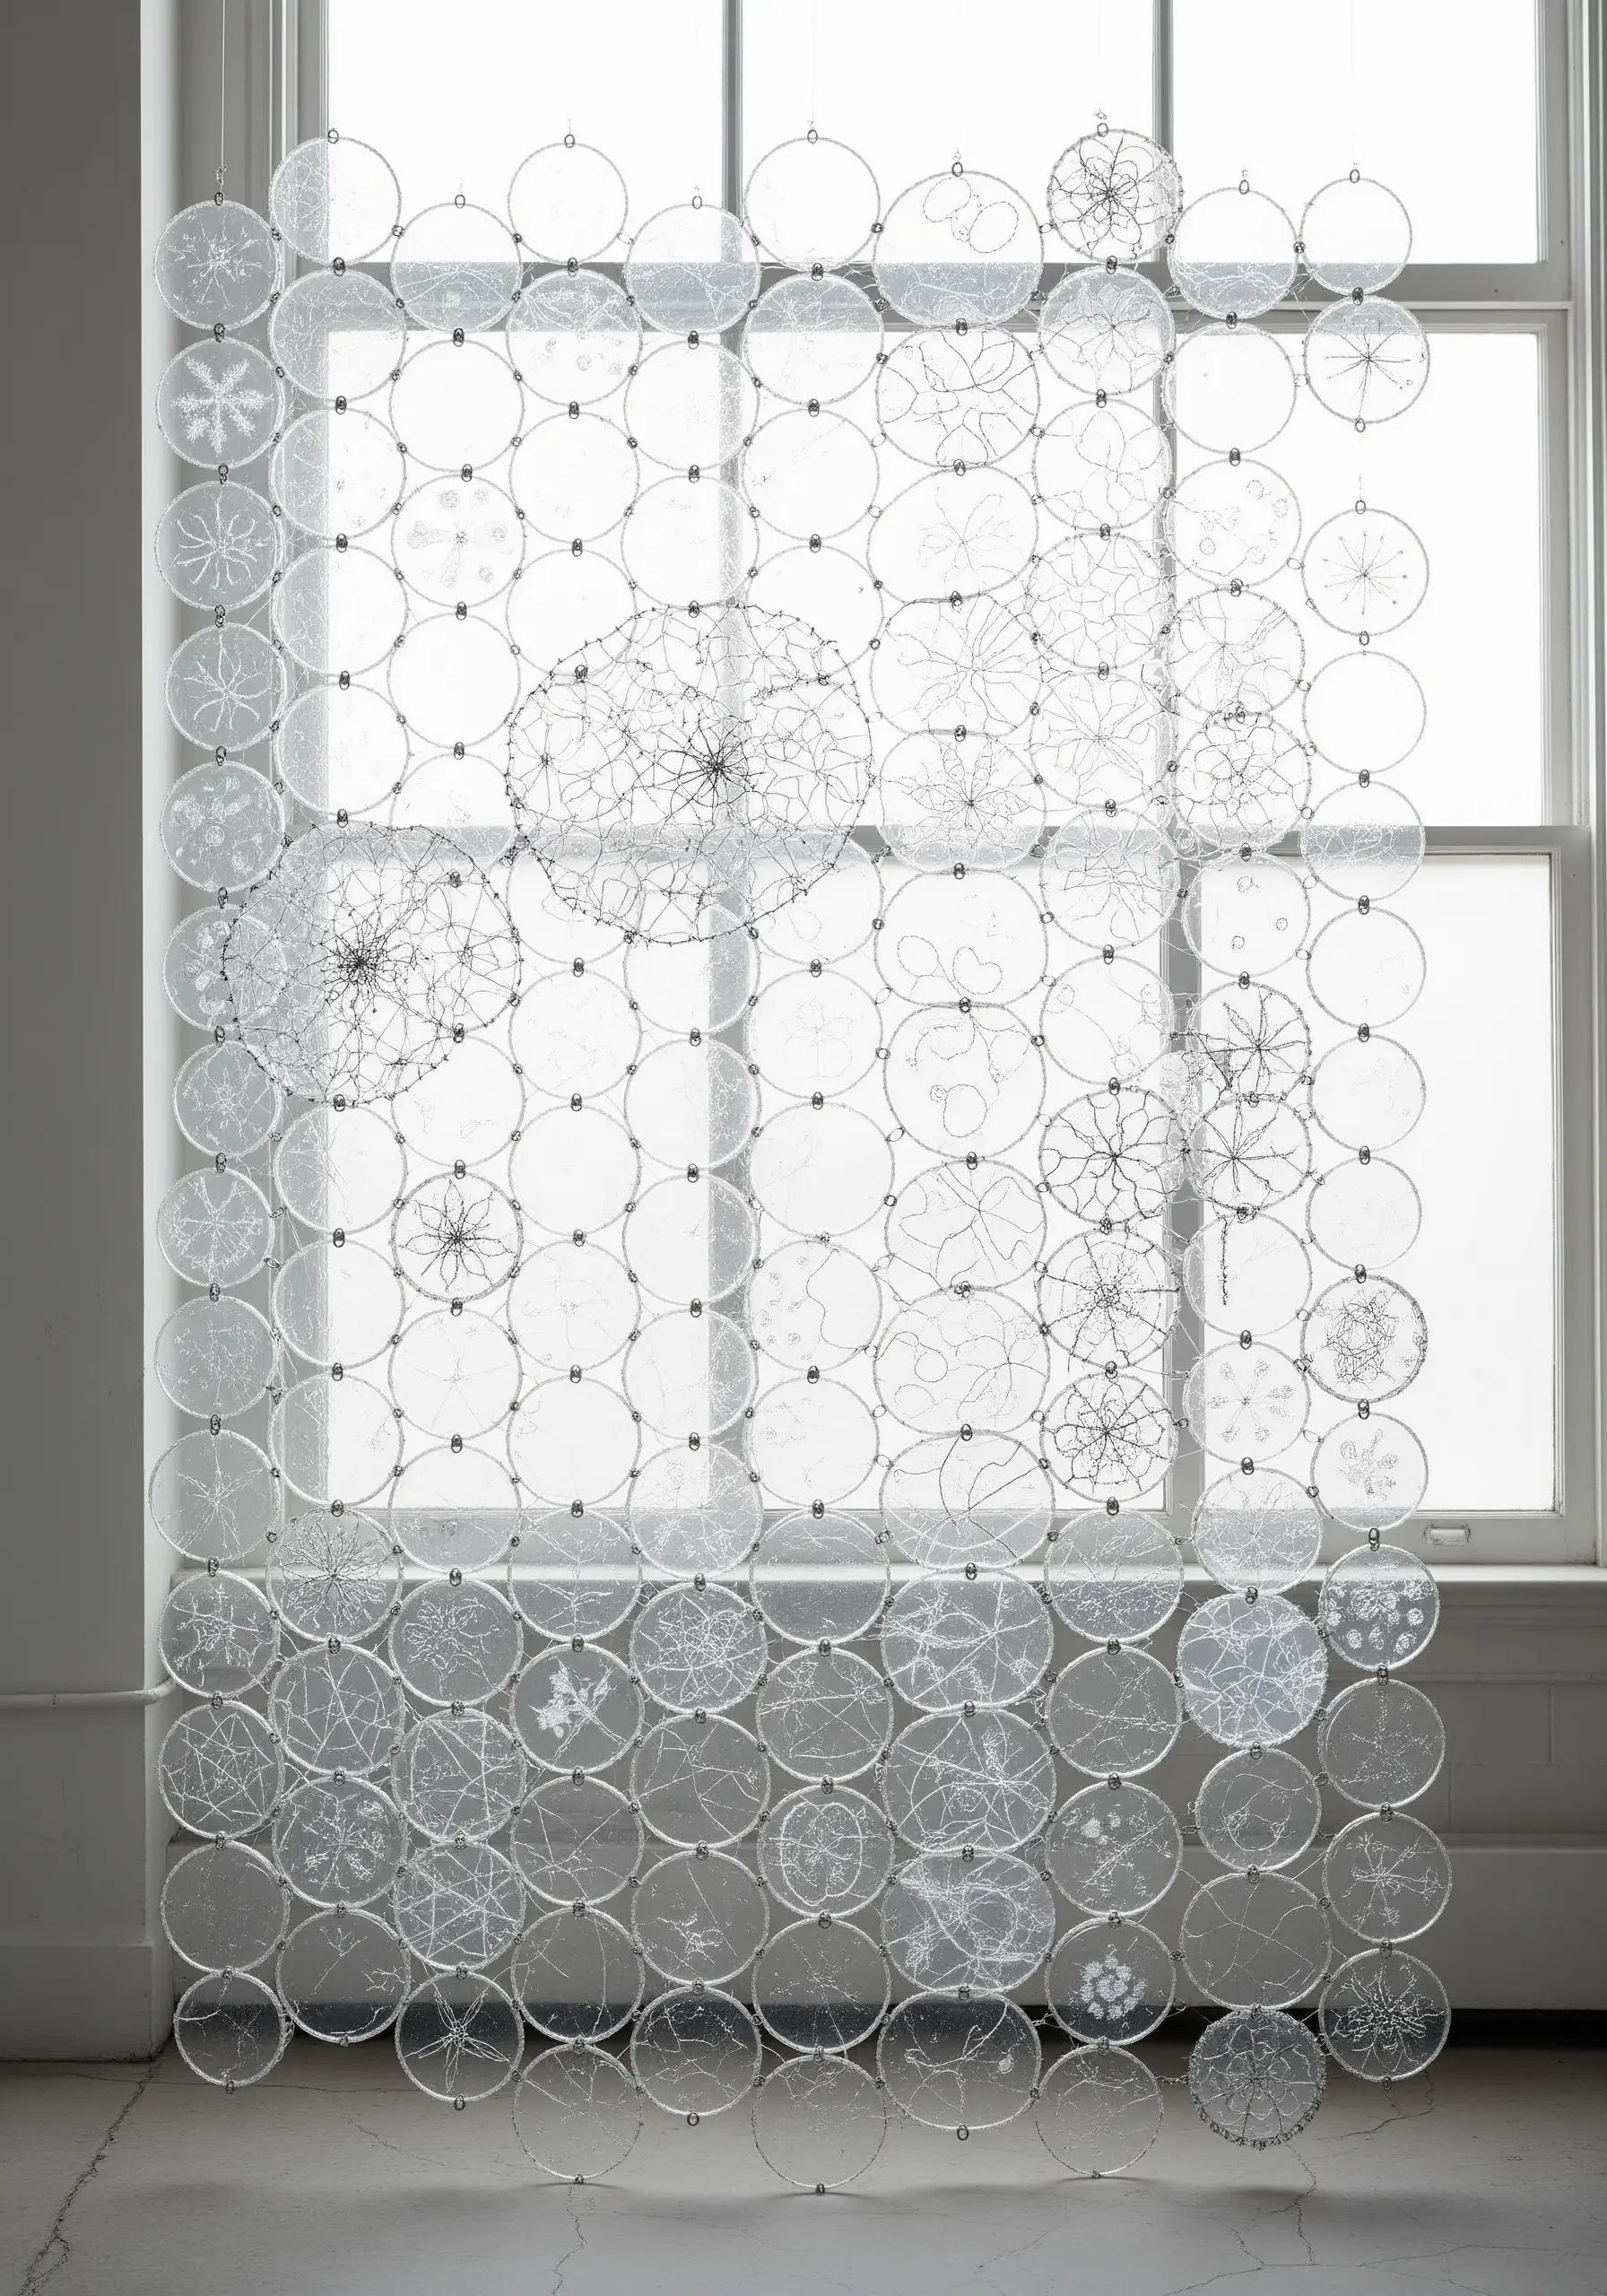
Embroider delicate, snowflake-like patterns onto clear plastic discs or rounds cut from plastic containers.
Use a fine needle to pierce holes or drill them carefully before stitching. A simple backstitch or straight stitch in white or metallic thread works beautifully.
Connect the finished discs with small metal jump rings to create a modular screen or curtain. When hung in a window, it catches the light, casting intricate shadows and showcasing your stitchwork in a completely new way.


