
Your bedroom is more than just a place to sleep; it’s a sanctuary. And the desire to make it feel truly yours, filled with personal, beautiful touches, is a powerful one. But often, the leap from seeing an idea to creating something polished and intentional feels vast.
Here, we close that gap. These are not just projects; they are invitations to rethink the surfaces around you. A plain pillowcase becomes a canvas for a single, perfect lavender sprig. A simple storage basket is elevated with a bold, graphic leaf. It’s about understanding how a simple stitch, a thoughtful color choice, or a surprising placement can transform an everyday object into a piece of quiet art.
You don’t need expensive equipment or years of experience. All you need is a needle, some thread, and the willingness to see your space with new eyes. Let’s stitch a room that feels like home—a thread at a time.
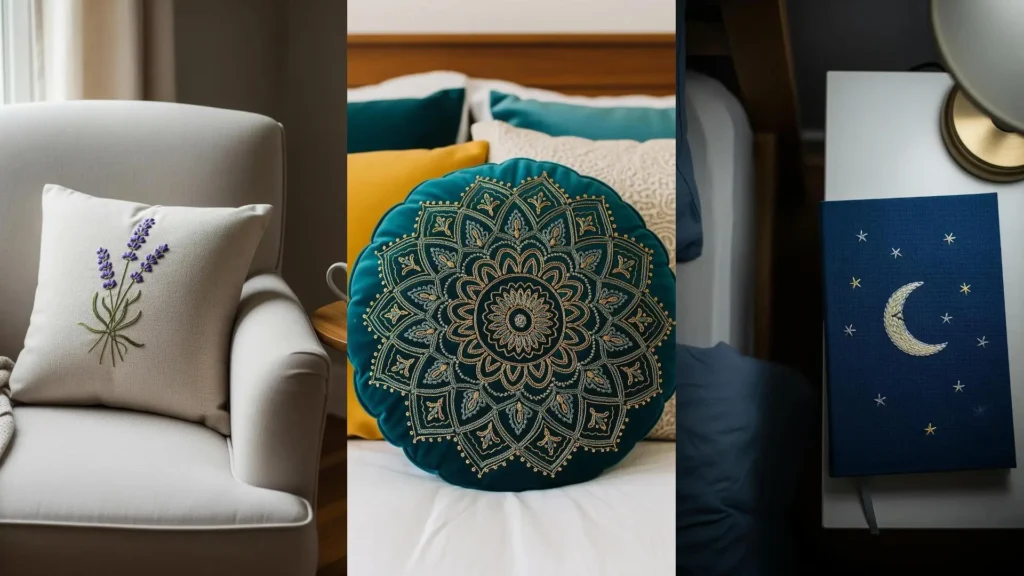
1. Botanical Accents for Soft Furnishings
To give your lavender a lifelike texture, use bullion knots for the florets, varying their tightness for an organic, freshly-picked appearance.
For the stems, a whipped backstitch creates a raised, rounded line that contrasts beautifully with the delicate buds.
Use three strands of floss for the flowers and a finer two strands for the stems; this subtle shift in thread weight draws the eye to the blossoms first.
This combination of stitches transforms a simple floral motif into a texture-rich piece of art for your coziest armchair.
2. Modern Gradients for Statement Wall Art

Achieve this clean, graphic sunset by using long, parallel satin stitches inside an oversized hoop.
The key to a flawless finish on this scale is impeccable thread tension—too tight and the fabric will pucker, too loose and the stitches will sag.
Plan your color gradient in advance, selecting at least eight shades to ensure a smooth, seamless transition from light to dark.
To keep your lines perfectly straight, use a water-soluble pen and a ruler to draw light guidelines before you begin, turning simple stitches into statement-size wall art.
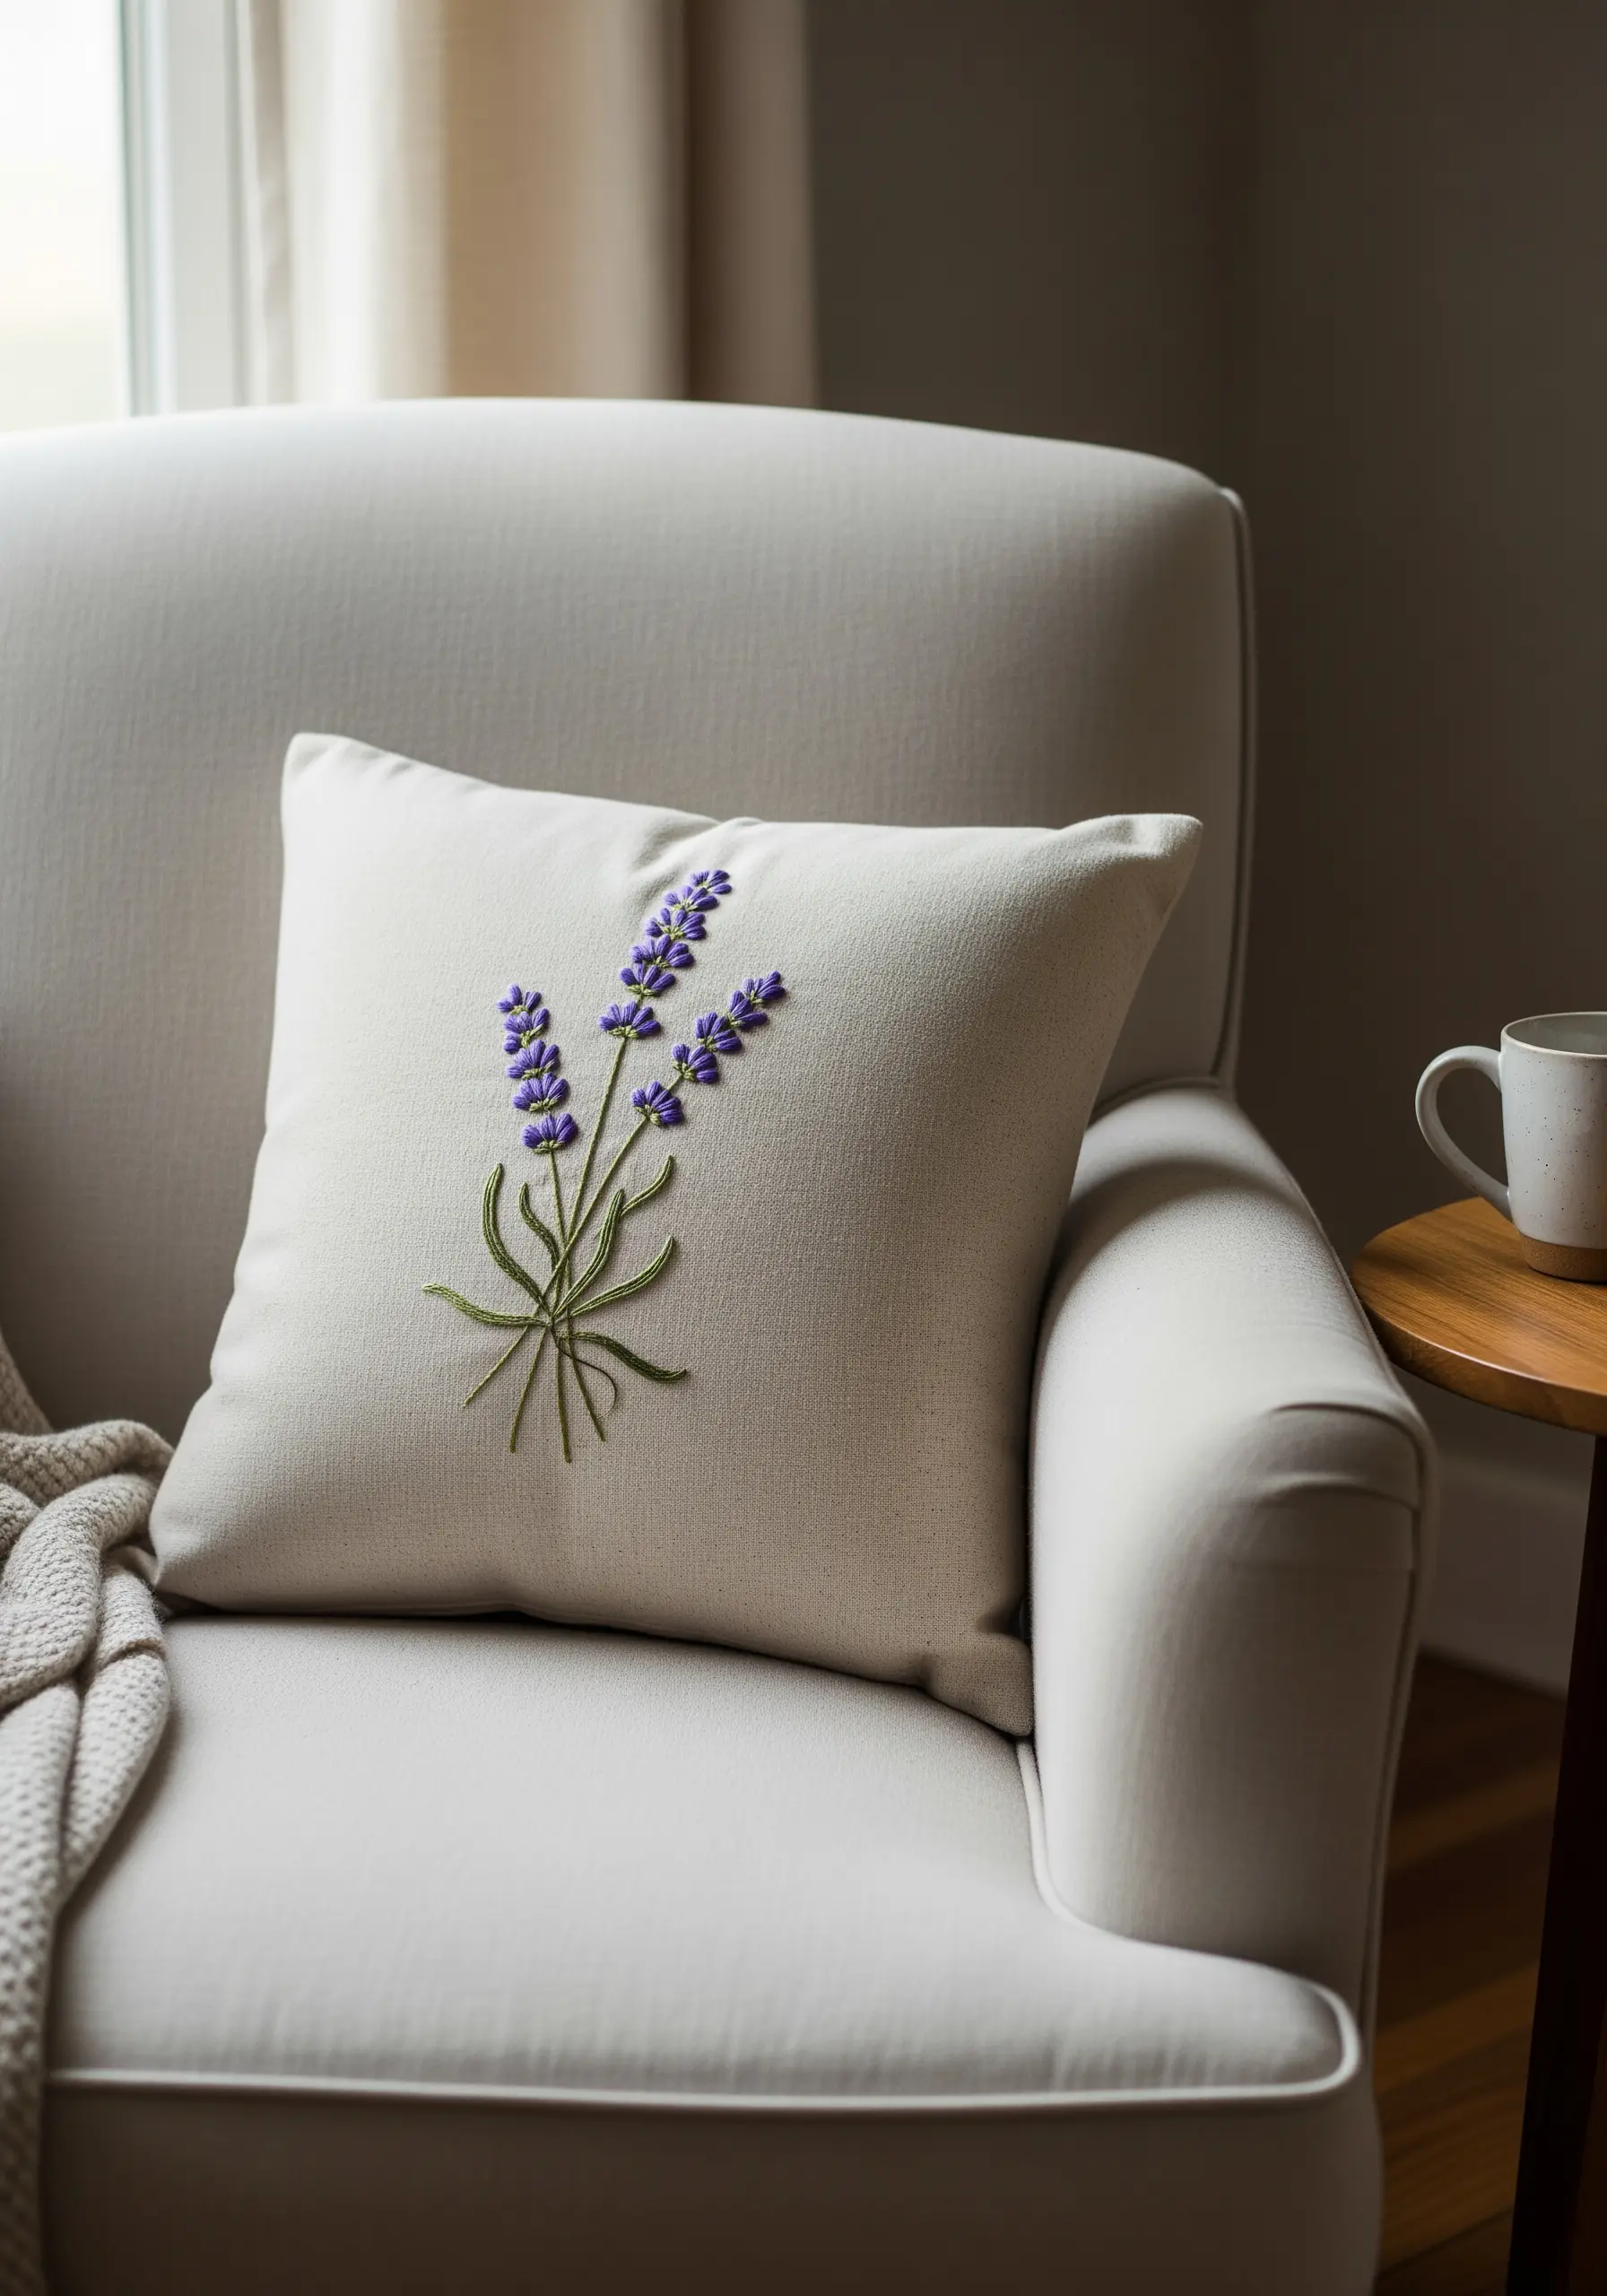
3. Functional Art with Geometric Stitches
When embroidering a functional object like a pen holder, choose a durable stitch like the backstitch for its clean, strong lines.
To ensure perfect symmetry in your geometric pattern, work on an evenweave fabric and count the threads for each stitch—this precision prevents distortion when the piece is assembled.
A restrained two-color palette keeps the design feeling modern and sophisticated, not busy.
Before sewing the fabric into a cylinder, iron on a heavy interfacing to the back; this gives the holder structure and protects your stitches from the inside.
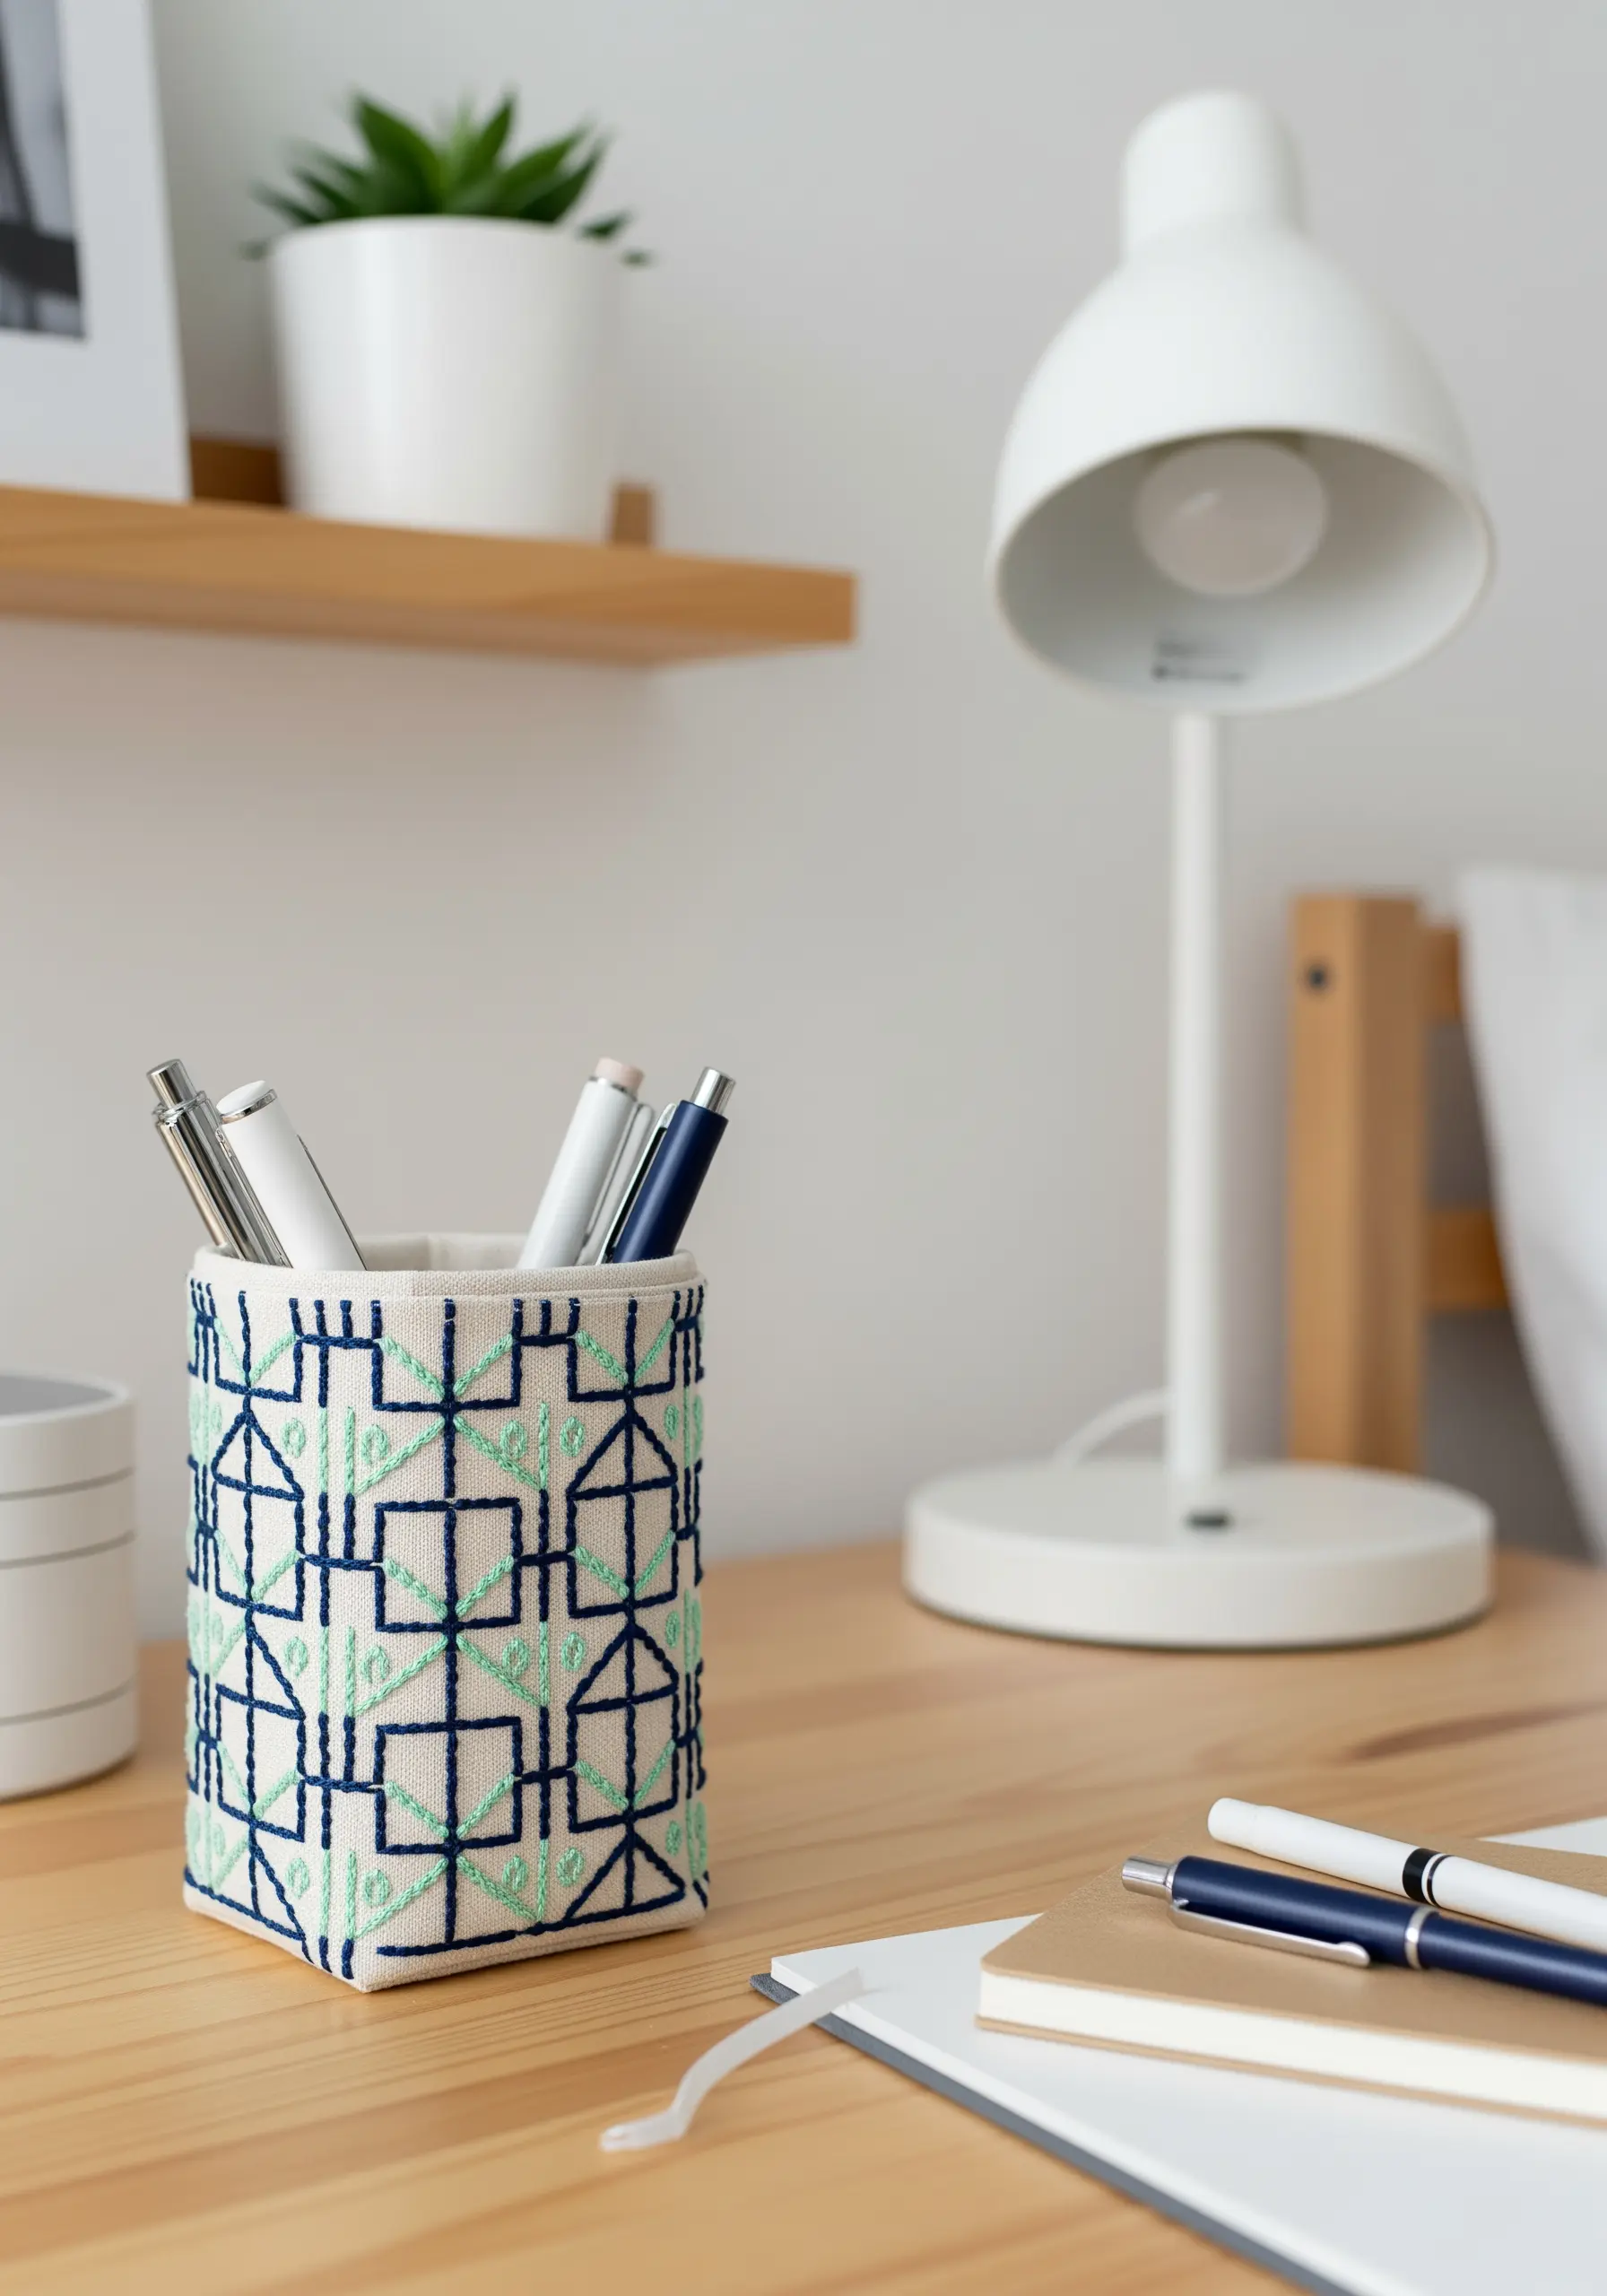
4. Illuminated Stitches on a Fabric Lampshade
Embroidering on a lampshade is all about creating beautiful silhouettes.
Use just a single strand of black embroidery floss to stitch your motifs; this ensures the design is delicate enough not to block the light, creating a crisp, graphic effect when illuminated.
Simple running stitches and straight stitches are perfect for these minimalist dandelion seeds, letting the light do the dramatic work.
Choose a smooth, tightly woven, light-colored fabric shade, as it provides the best canvas for clean stitches and maximum contrast.
5. A Trailing Vine for Custom Bed Linens
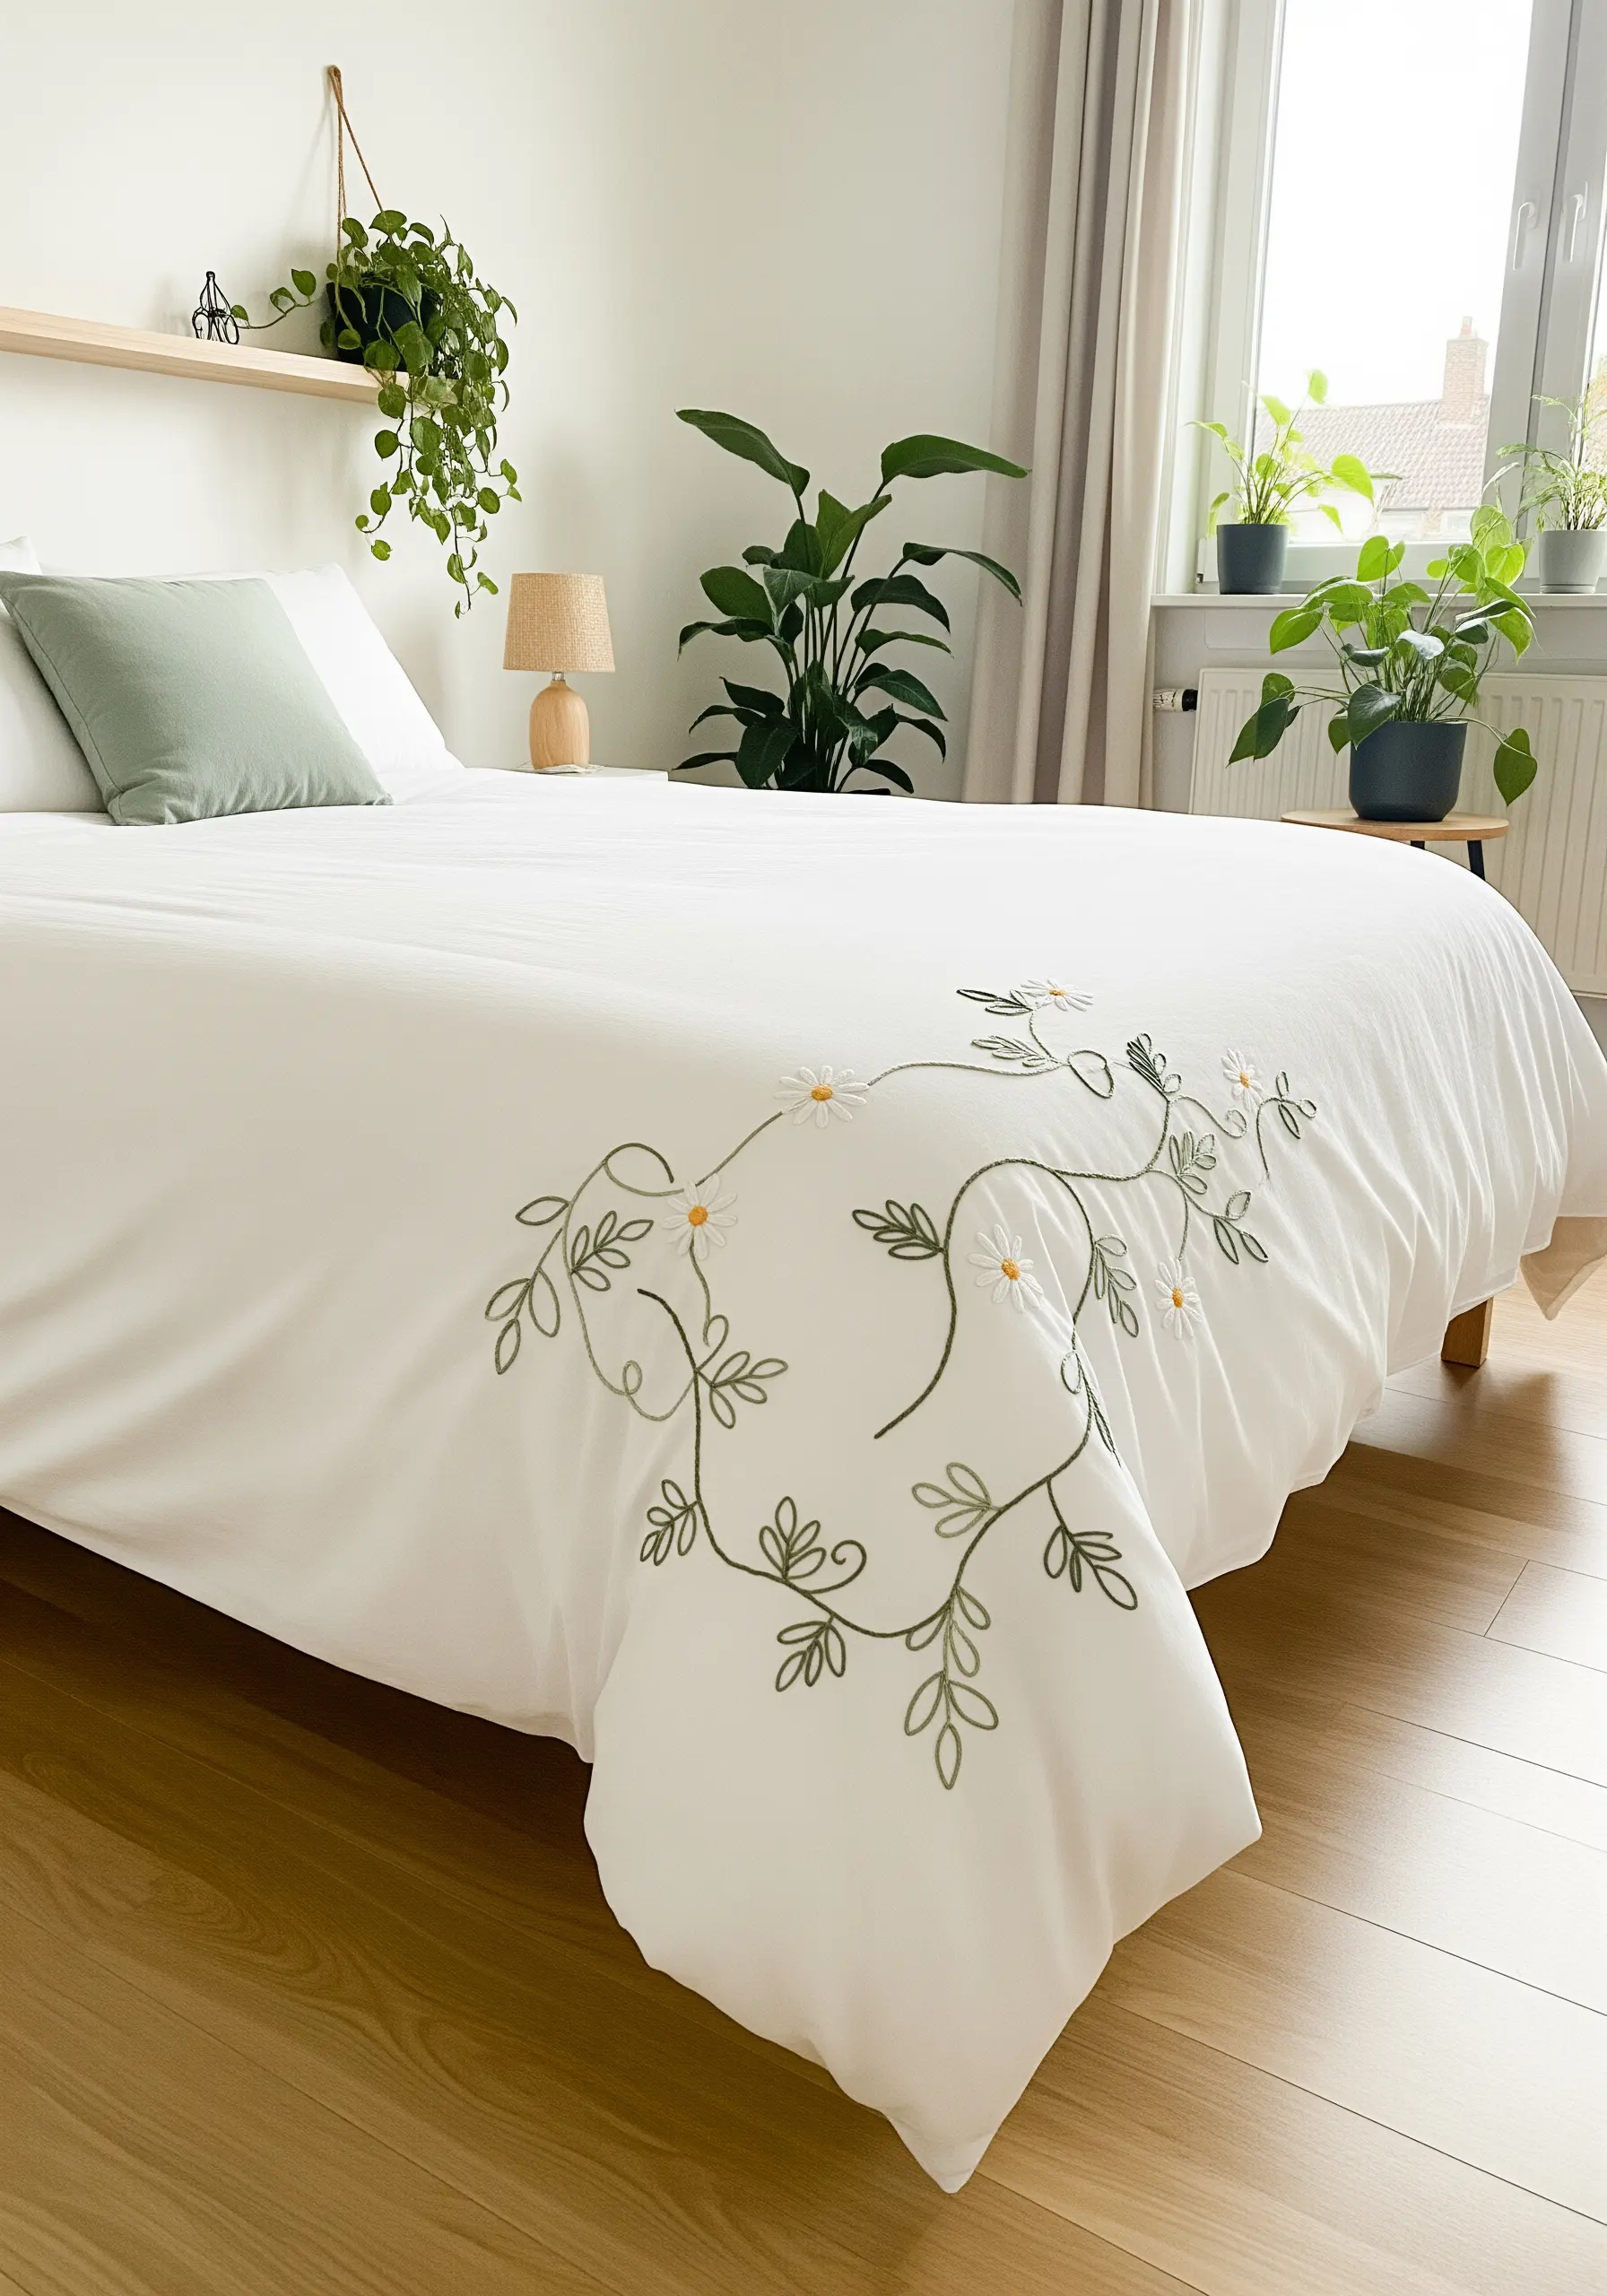
When embroidering on a large surface like a duvet cover, an asymmetrical, flowing design feels more natural and elegant than a centered motif.
Use a stem stitch for the vine to give it a slightly raised, rope-like texture that mimics a real plant stem.
For the daisies, simple lazy daisy stitches for petals and a few French knots for the center create a charming effect without overwhelming the design.
By anchoring the vine to one corner, you create a beautiful focal point that cascades gracefully across the bed.
6. Bold Botanicals on Woven Storage Baskets
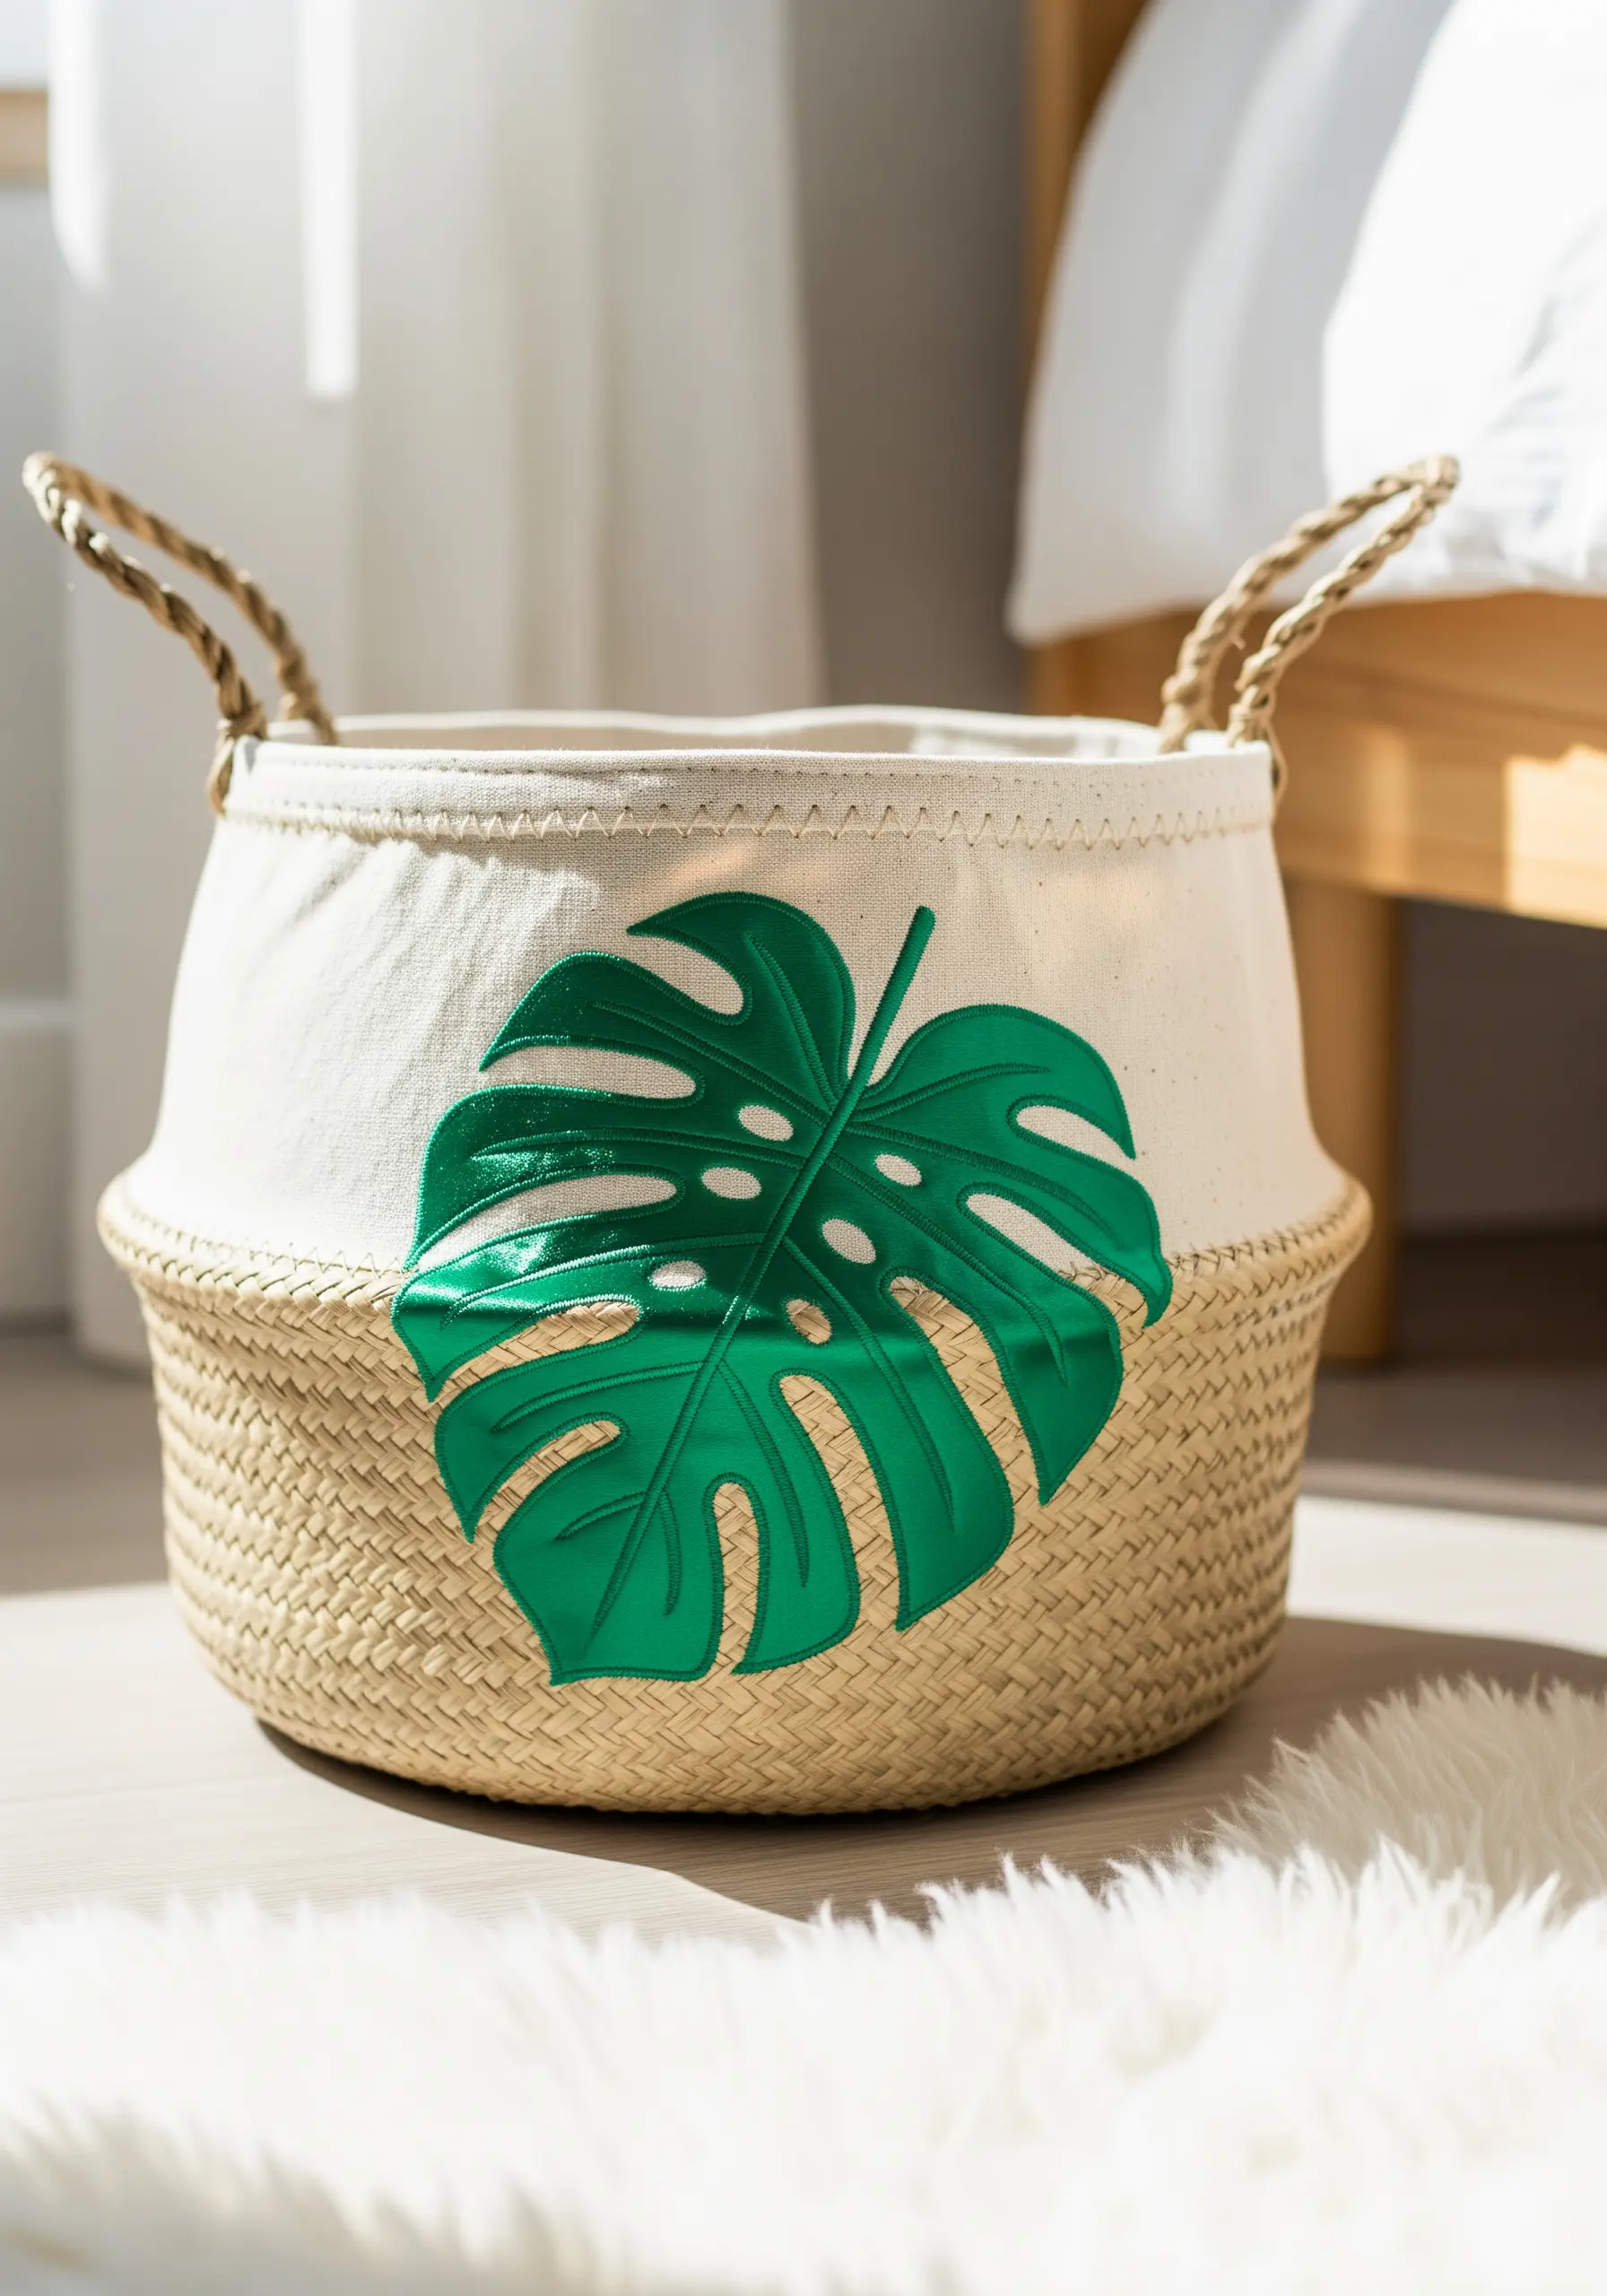
To achieve a smooth, dense satin stitch on a flexible canvas basket, always use a stabilizer on the back of the fabric to prevent puckering and distortion.
First, outline your entire shape with a split stitch; this creates a slightly raised border that acts as a guide, making your satin stitches much neater and more uniform.
Using a single, vibrant color like this emerald green creates a powerful graphic impact, transforming a simple storage item into a decorative piece of tropical leaf art.
7. Three-Dimensional Details for Curtain Tie-Backs
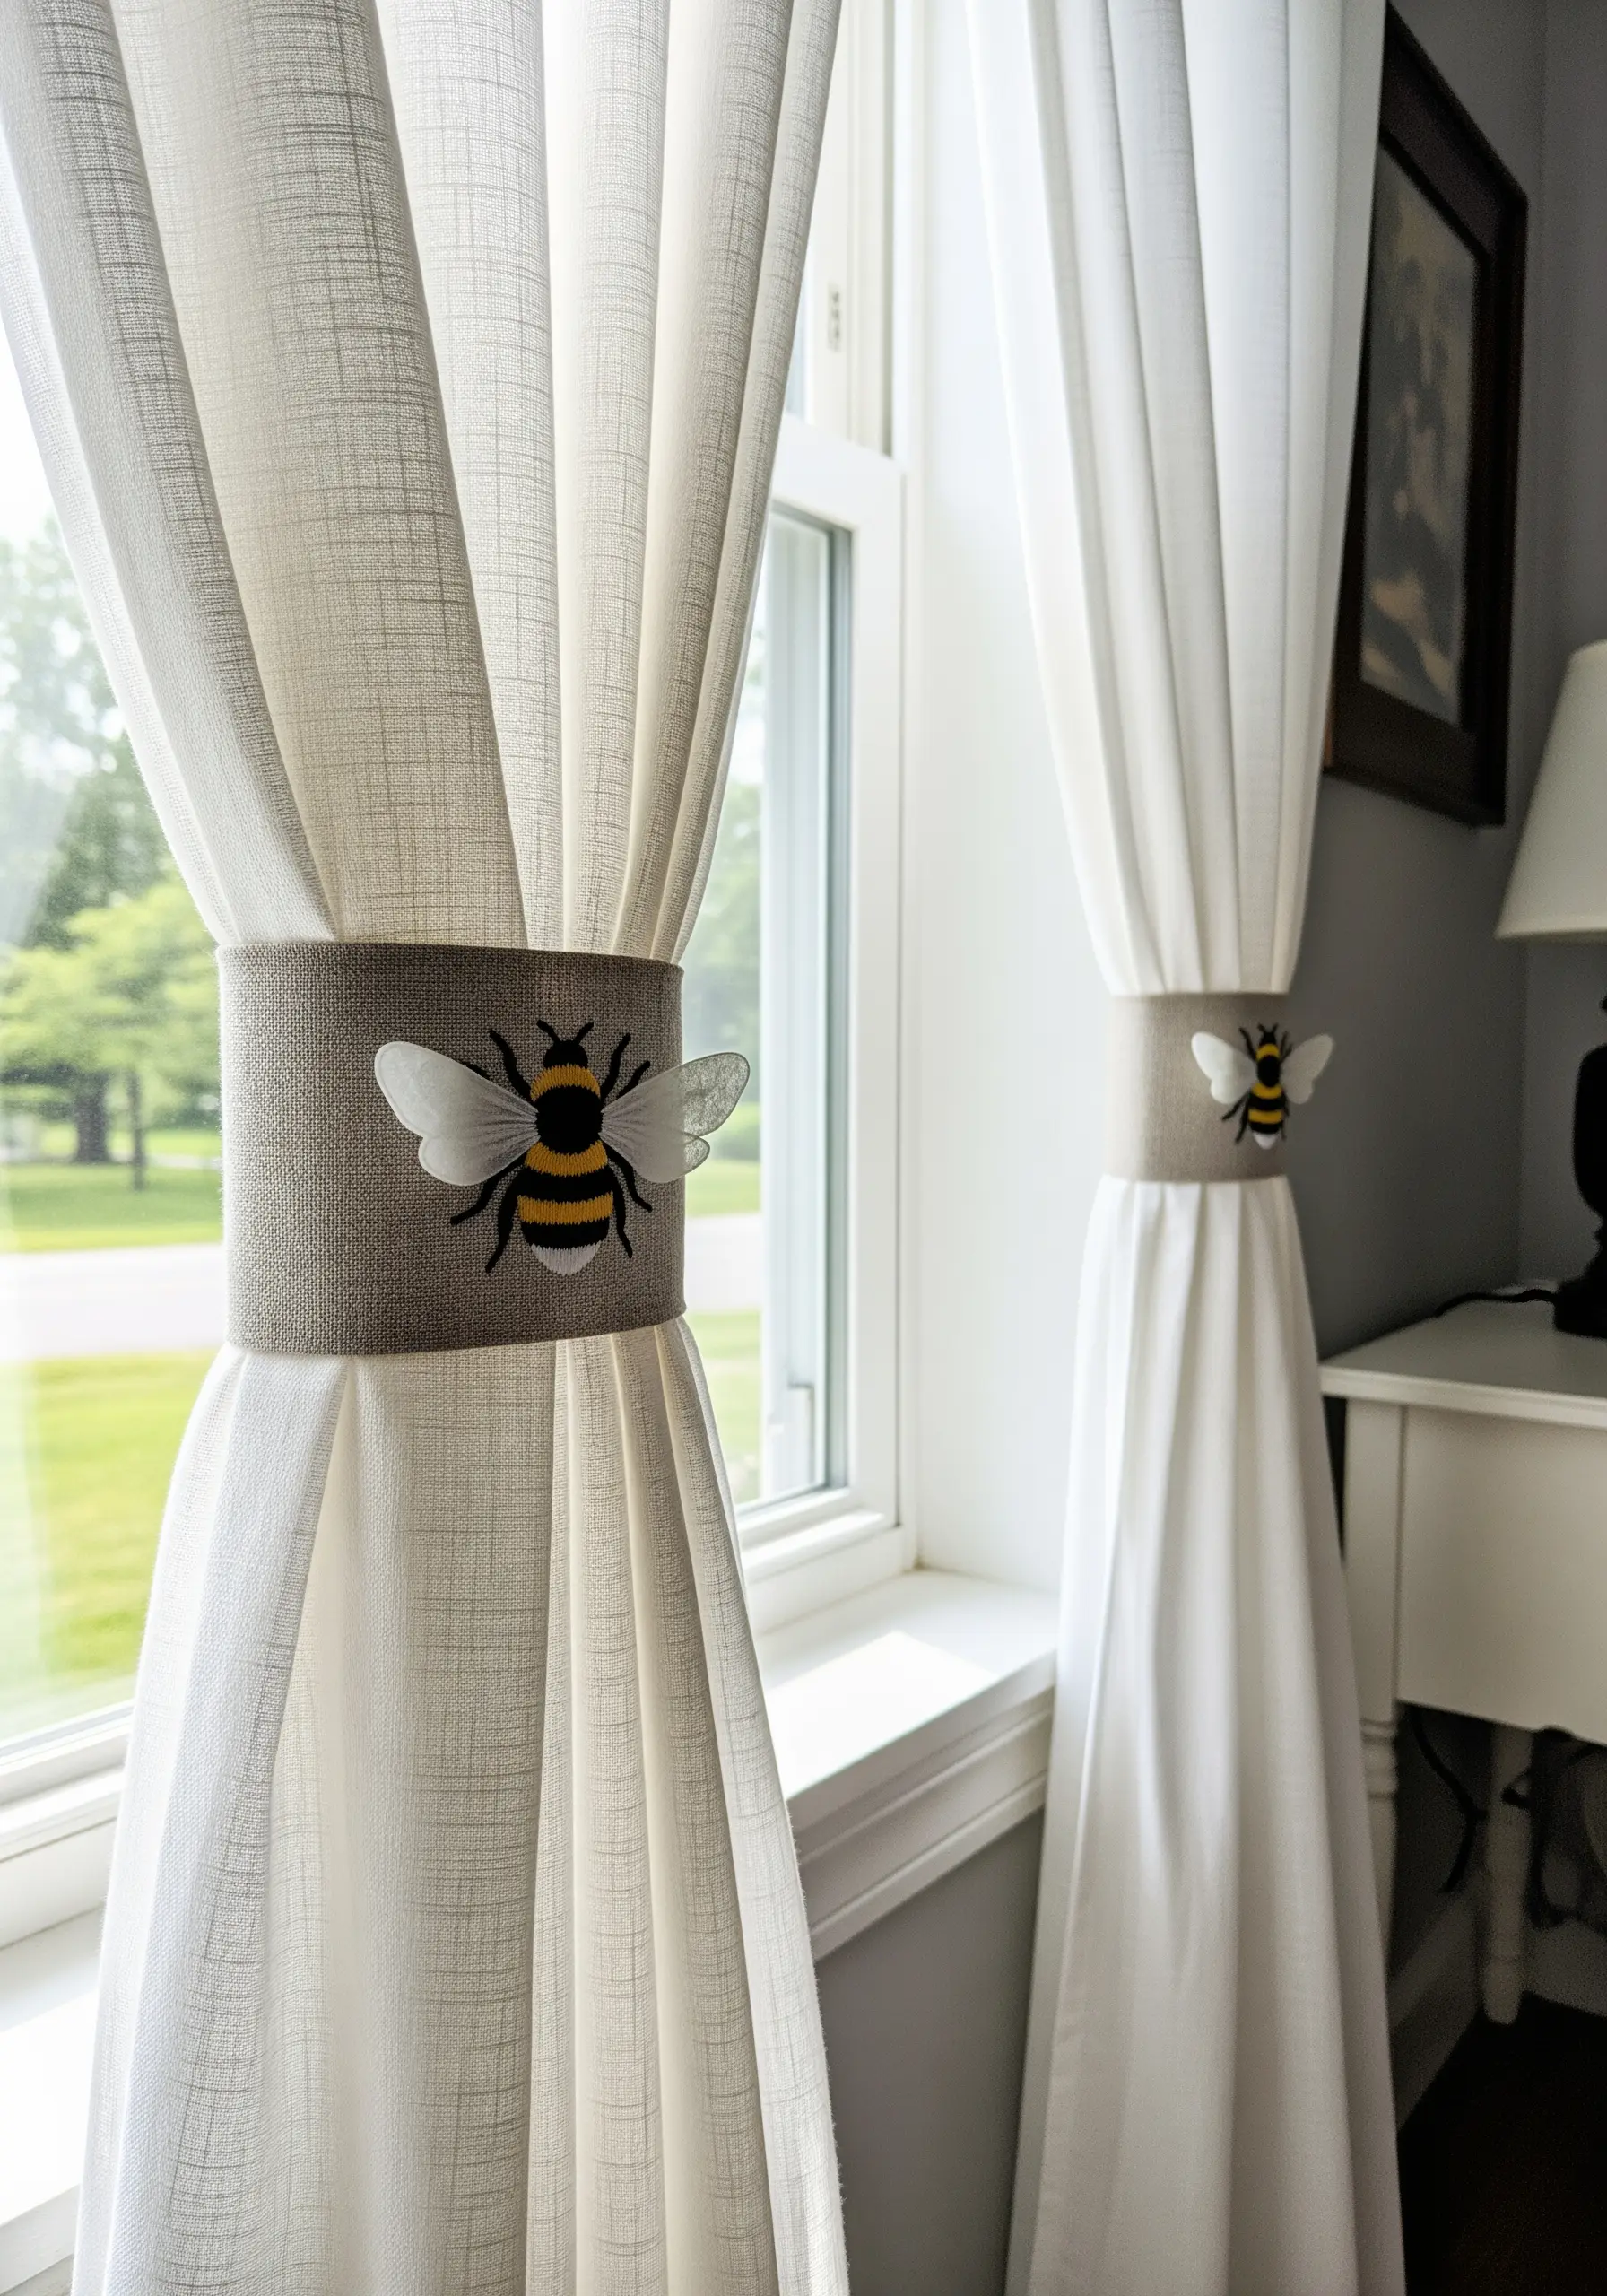
Introduce an element of surprise by adding a three-dimensional detail to your embroidery.
For the bee’s body, use classic satin stitch, but for the wings, stitch the design onto a separate piece of sheer organza fabric using a single strand of gray floss.
Carefully cut out the embroidered organza wings, leaving a tiny margin, and then tack them onto the main fabric at the base.
This appliqué technique creates a delicate, translucent effect that catches the light and adds a layer of sophisticated realism.
8. A Curated Botanical Gallery Wall
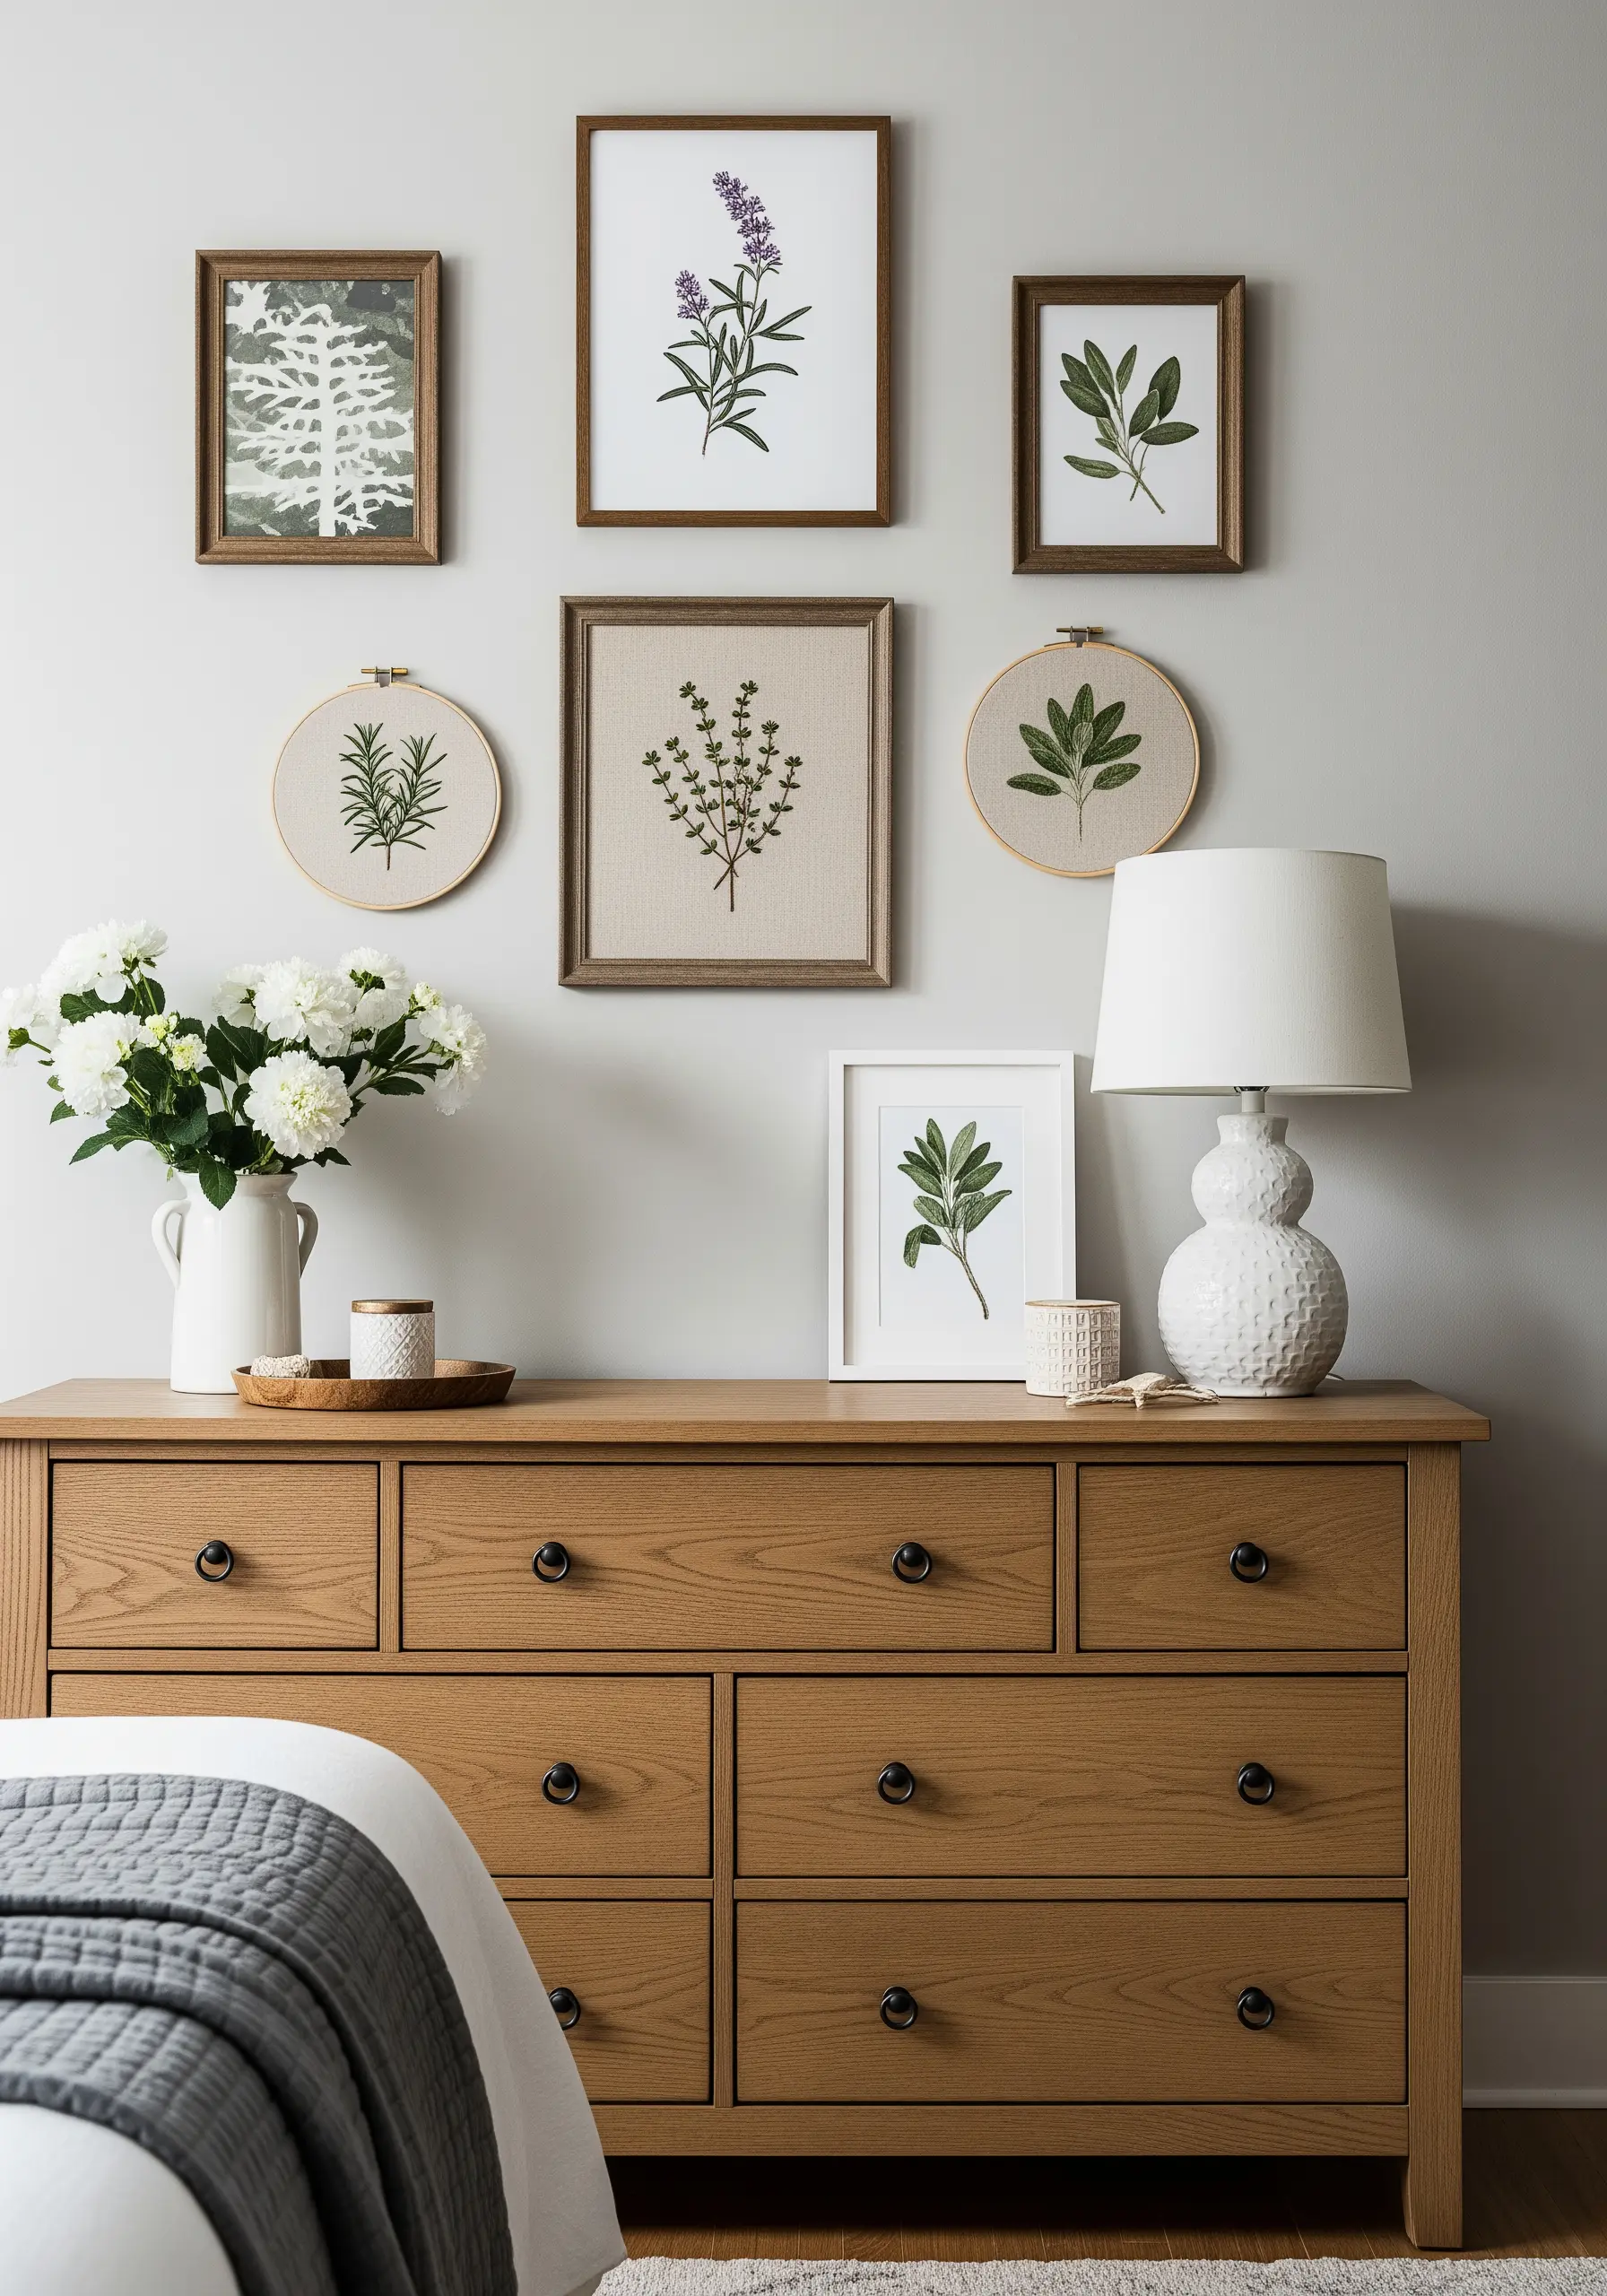
Create a cohesive gallery wall by choosing a single theme, like culinary herbs, and executing it with varied techniques.
Assign a specific stitch to each plant to capture its unique texture: fishbone stitch for the flat leaves of sage, French knots for lavender buds, and short straight stitches for rosemary needles.
This approach turns each piece into a miniature stitch sampler.
Displaying your work in a mix of simple wooden frames and hoops adds visual depth and variety, transforming individual practice pieces into an elegant, curated collection of framed embroidery.
9. Sculptural Yarn Art for a Headboard
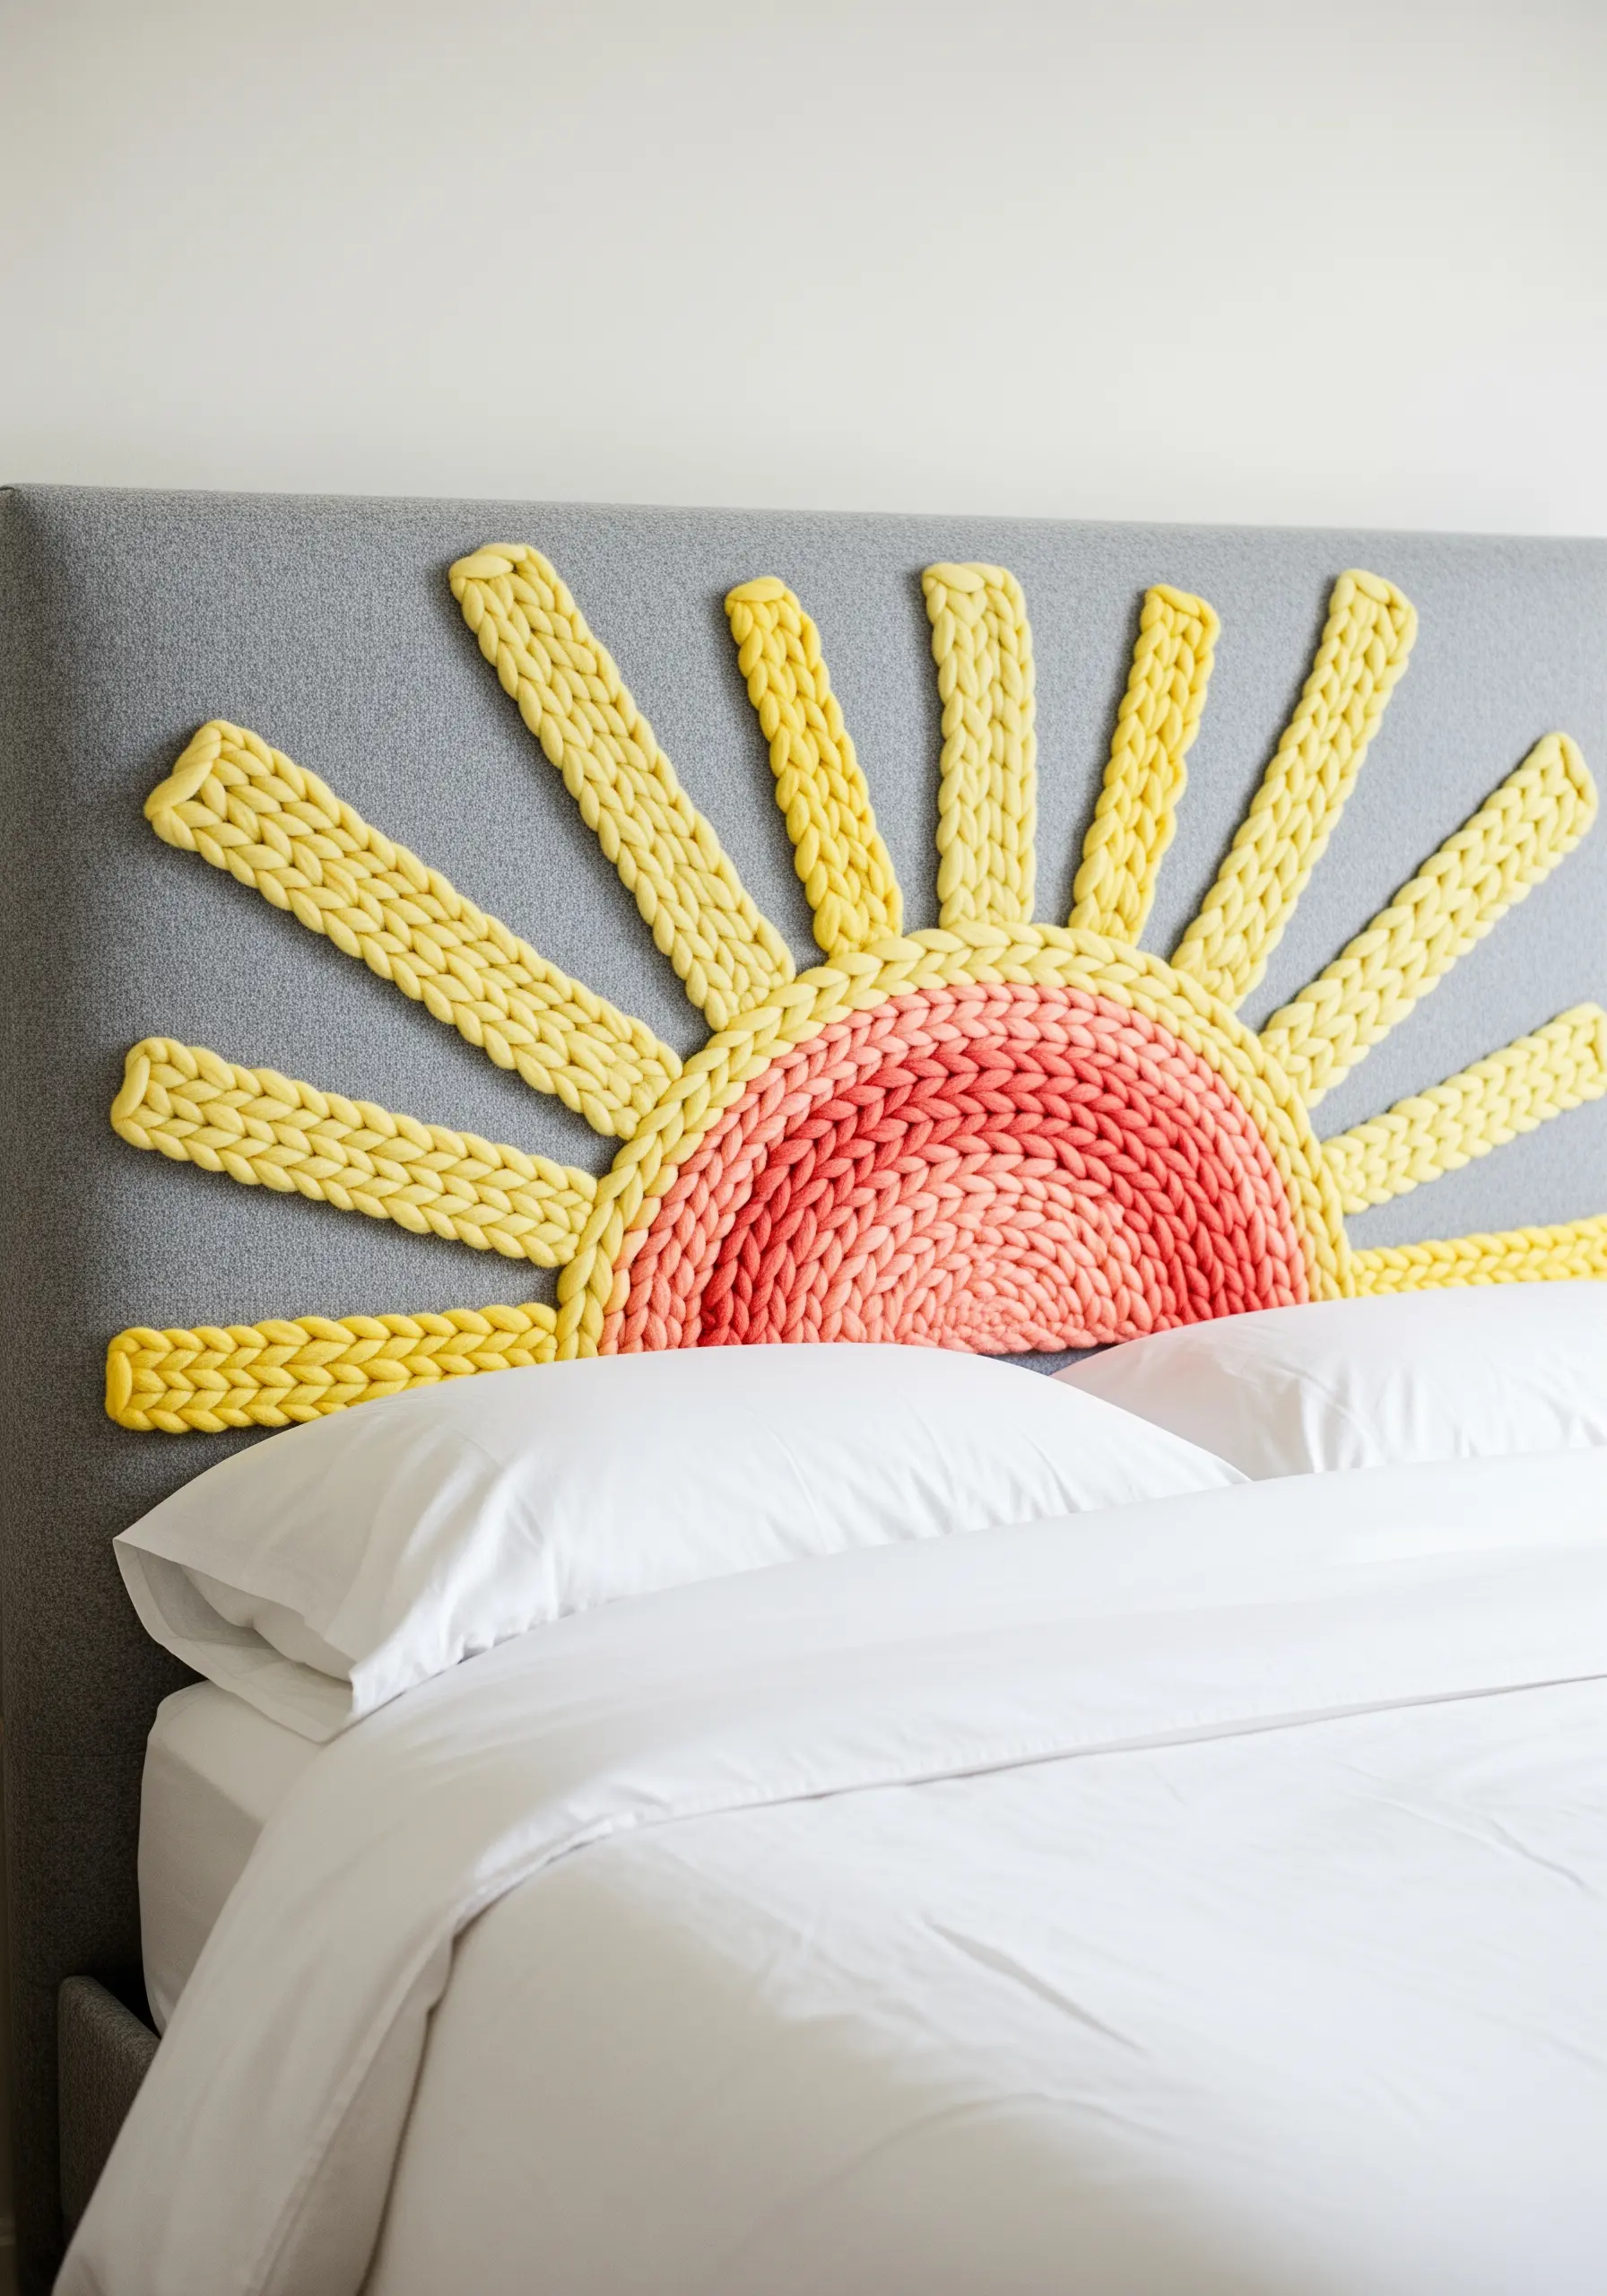
Move beyond thread to transform furniture with touchable, textural fibers.
This sunrise is made by couching chunky yarn directly onto the headboard—laying the yarn in position and securing it with a smaller, matching thread every few inches.
To create the color gradient in the center, simply hold two different colored yarns together and spiral them outwards.
This technique adds softness and a bold, graphic element to your bedroom, proving embroidery isn’t just for hoops.
10. Minimalist Lettering for Chic Organization
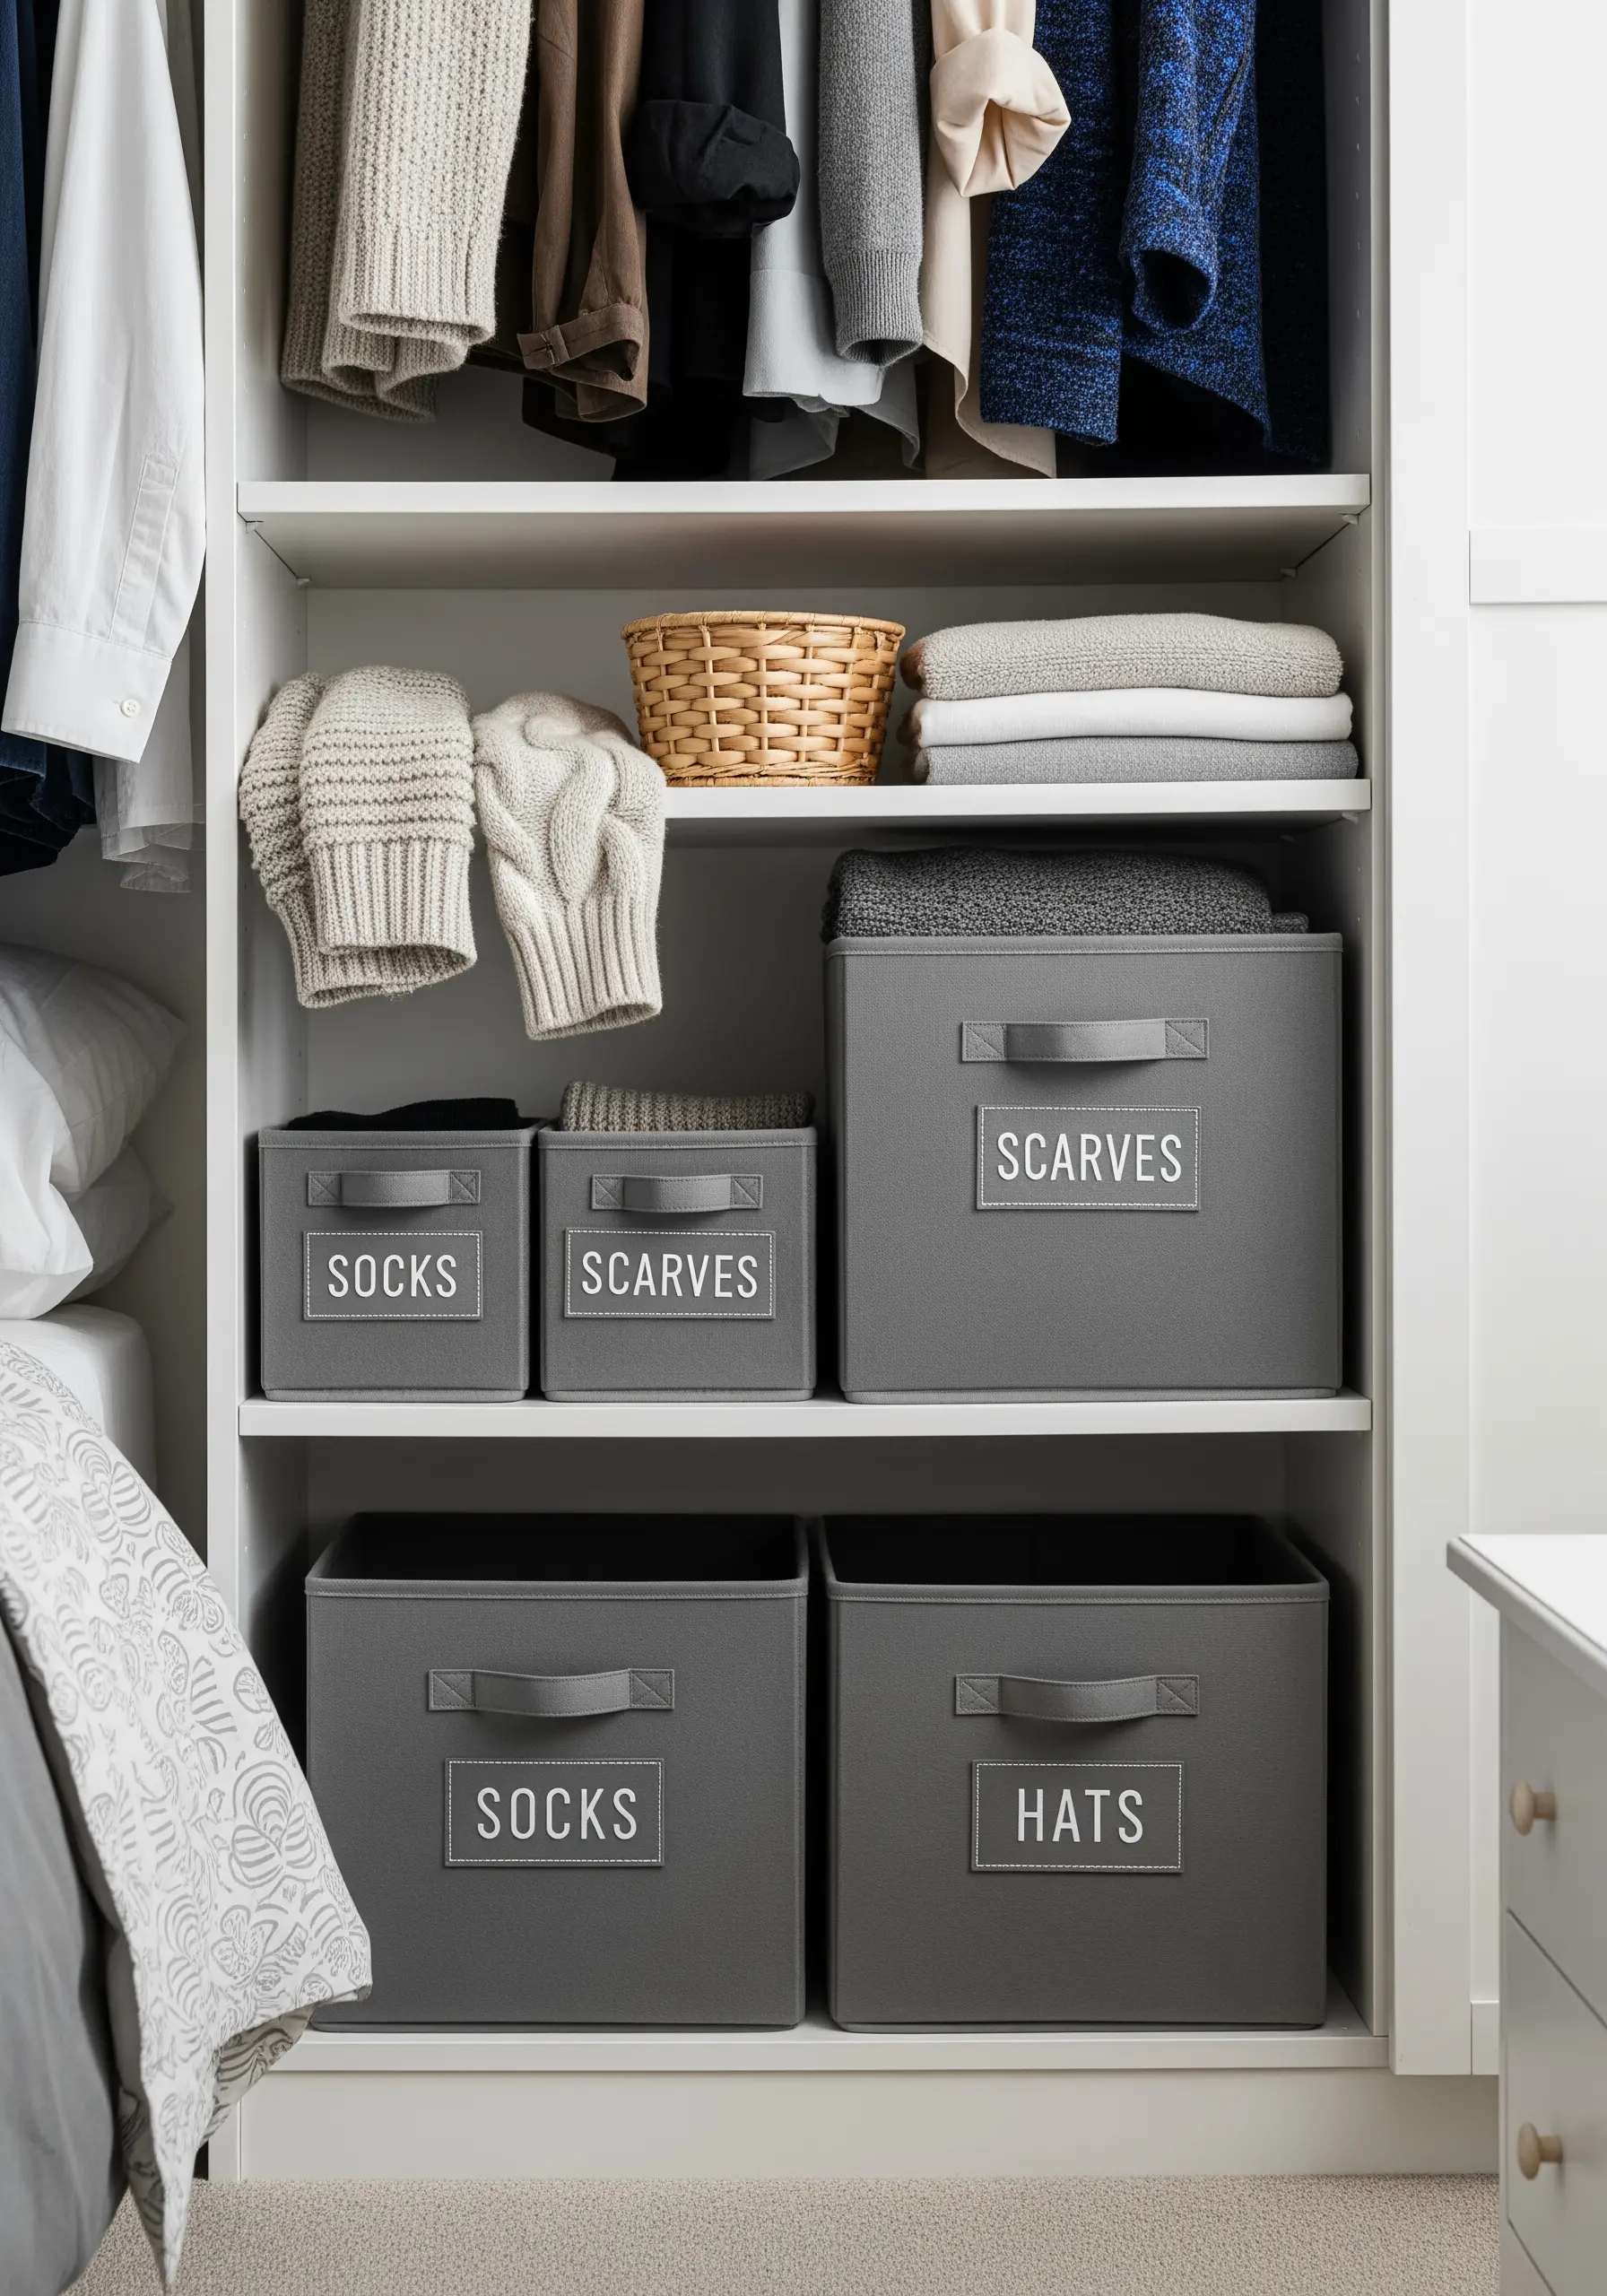
Bring order and style to your closet with clean, embroidered labels on your storage bins.
To achieve perfectly crisp and uniform lettering, print your words onto a sheet of water-soluble stabilizer.
Adhere the stabilizer to the fabric bin, stitch directly over the printed lines using a simple backstitch, and then dissolve the paper with a damp cloth.
This method removes any guesswork and leaves you with sharp, professional-looking text that makes organization feel luxurious.
11. A Scented Sachet with Delicate Stitches

Create a small luxury that engages multiple senses with an embroidered lavender sachet.
Use a simple stem stitch for the stalk and detached chain stitches (lazy daisies) for the tiny florets, keeping the design light and airy.
Using only two strands of floss prevents the motif from feeling too heavy or stiff on the delicate pouch.
For a truly polished finish, close the sachet with a decorative blanket stitch in a contrasting color, framing your work beautifully.
12. An Elegant Border for Luxe Bedding
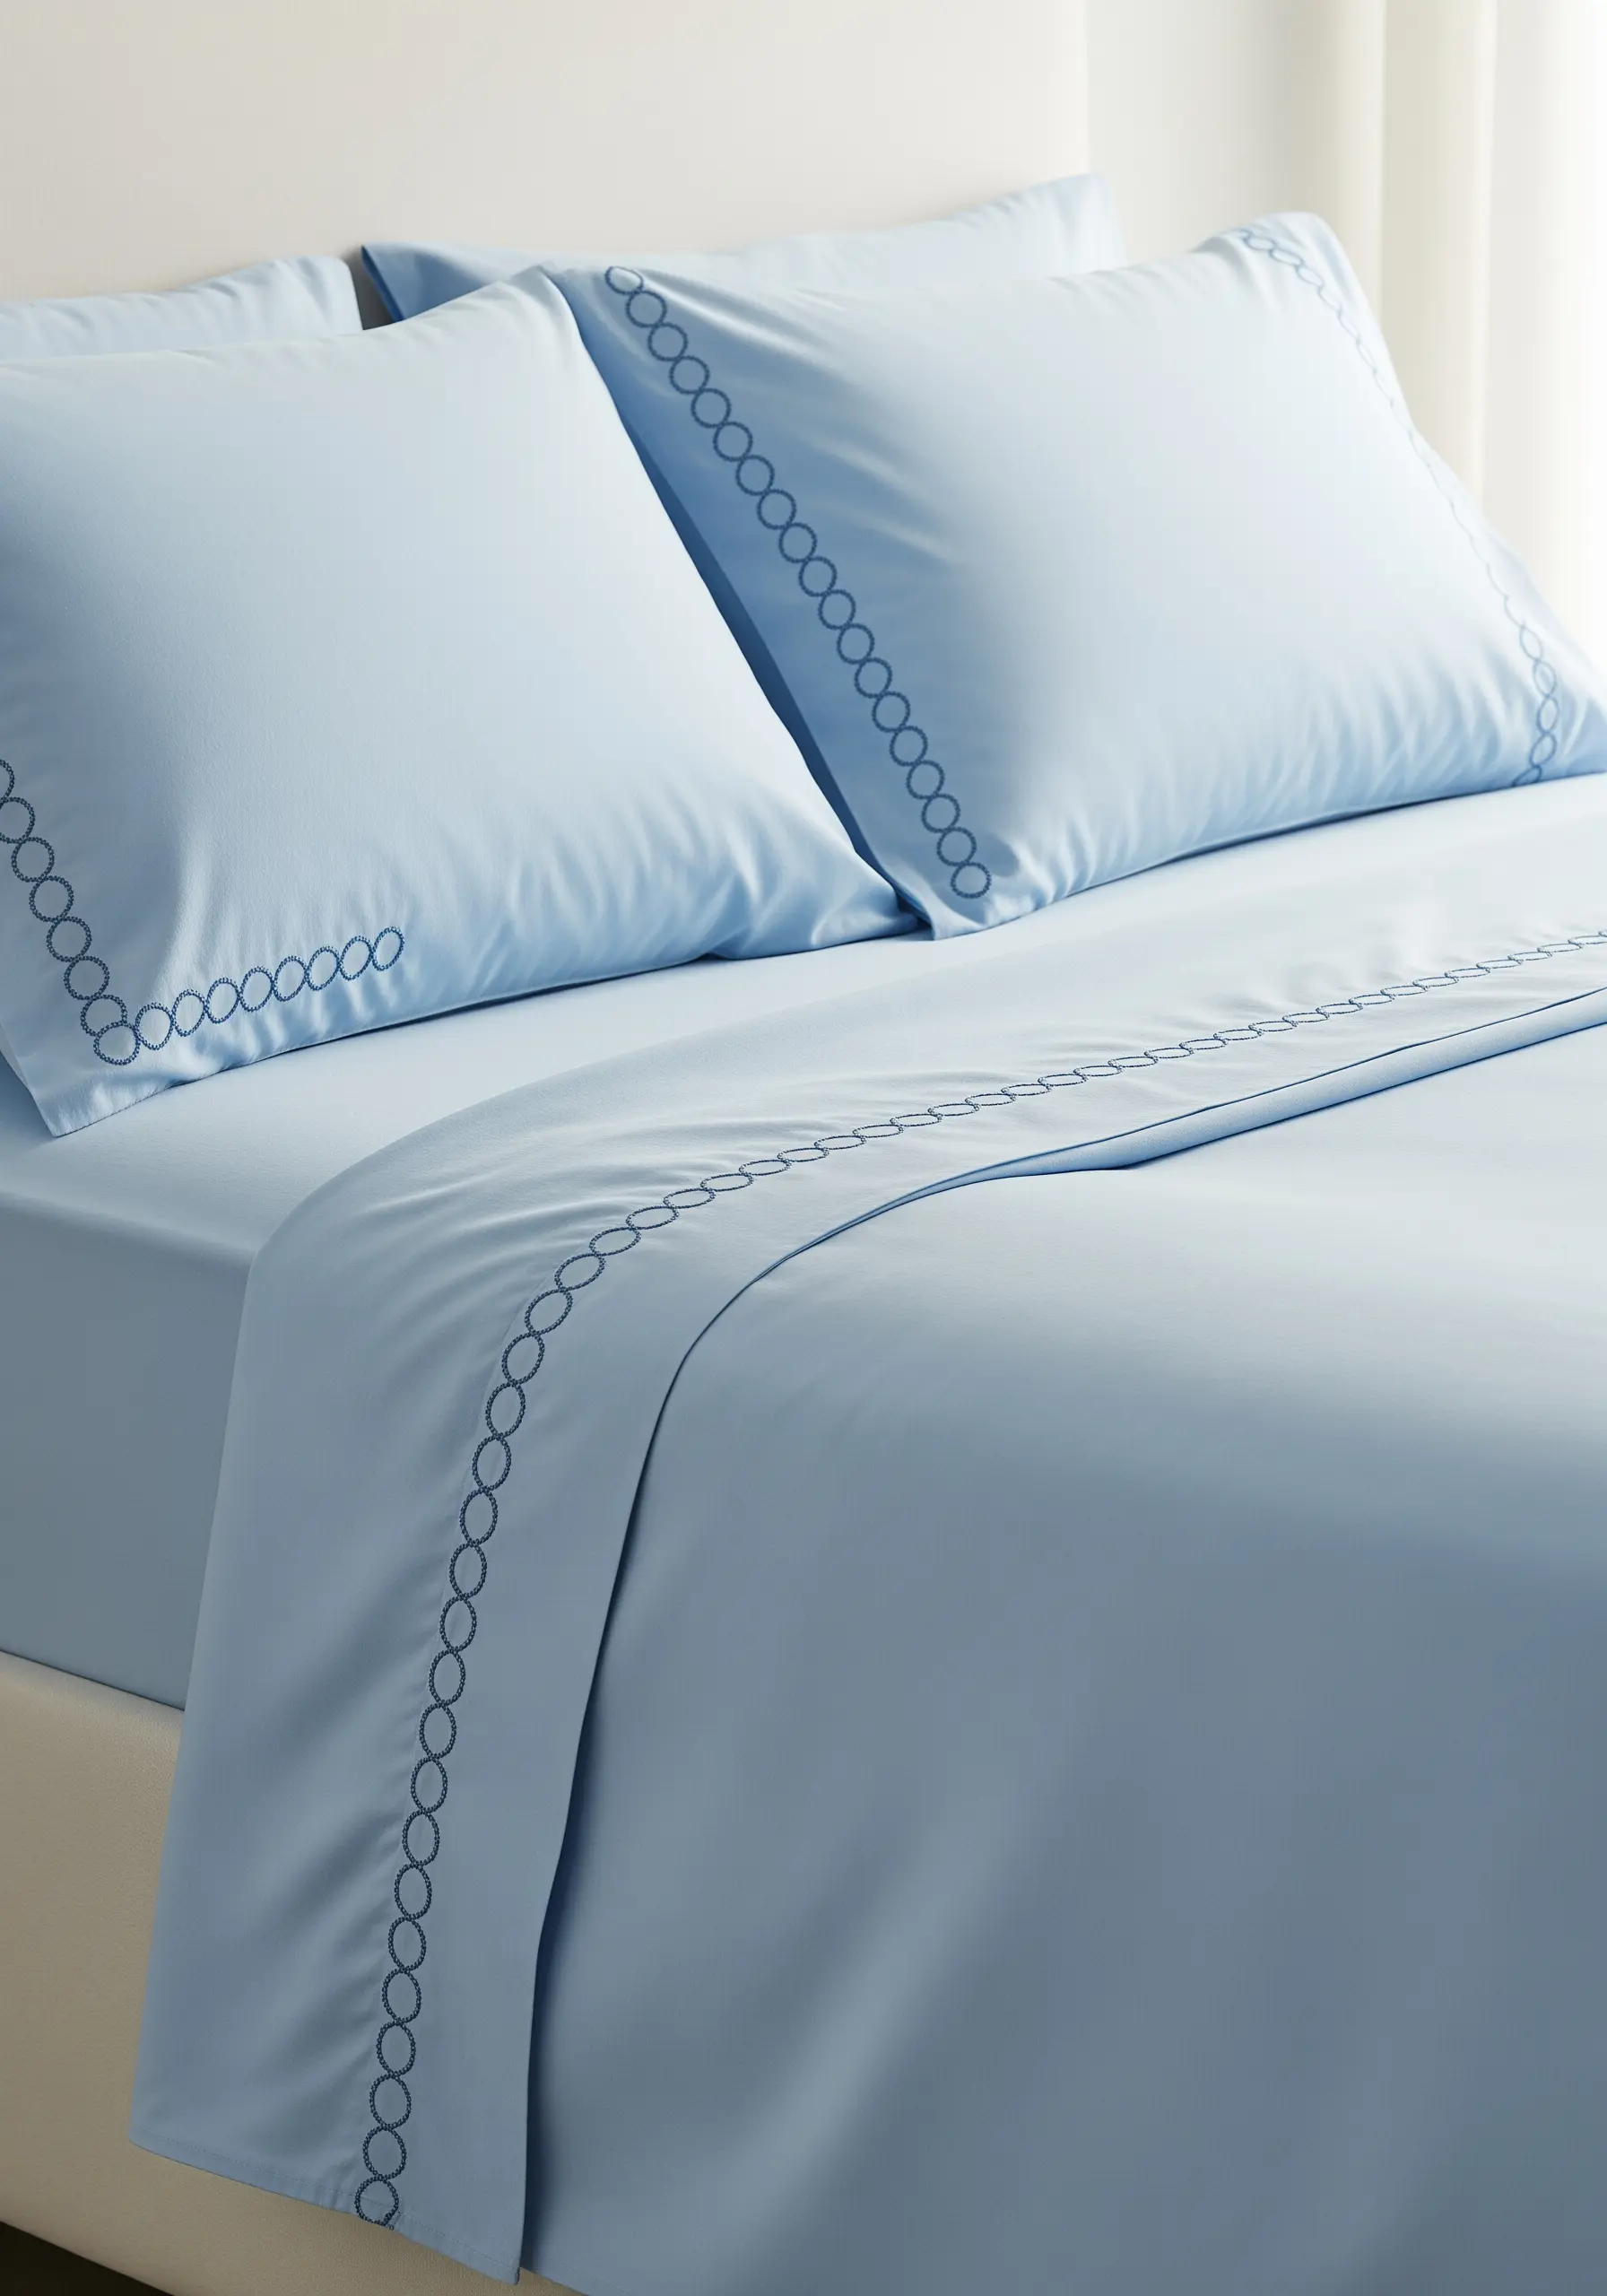
Recreate the feel of high-end hotel bedding with a simple embroidered border on your pillowcases and sheets.
This interlocking circle design is a variation of a threaded running stitch, an incredibly easy technique with a sophisticated result.
To ensure your line is perfectly straight, use a clear quilting ruler and a water-soluble marker to draw a faint guideline before you begin.
Choosing a thread that’s a few shades darker than your fabric creates a subtle, tonal effect that whispers elegance.
13. Playful Stitches for Custom Bunting
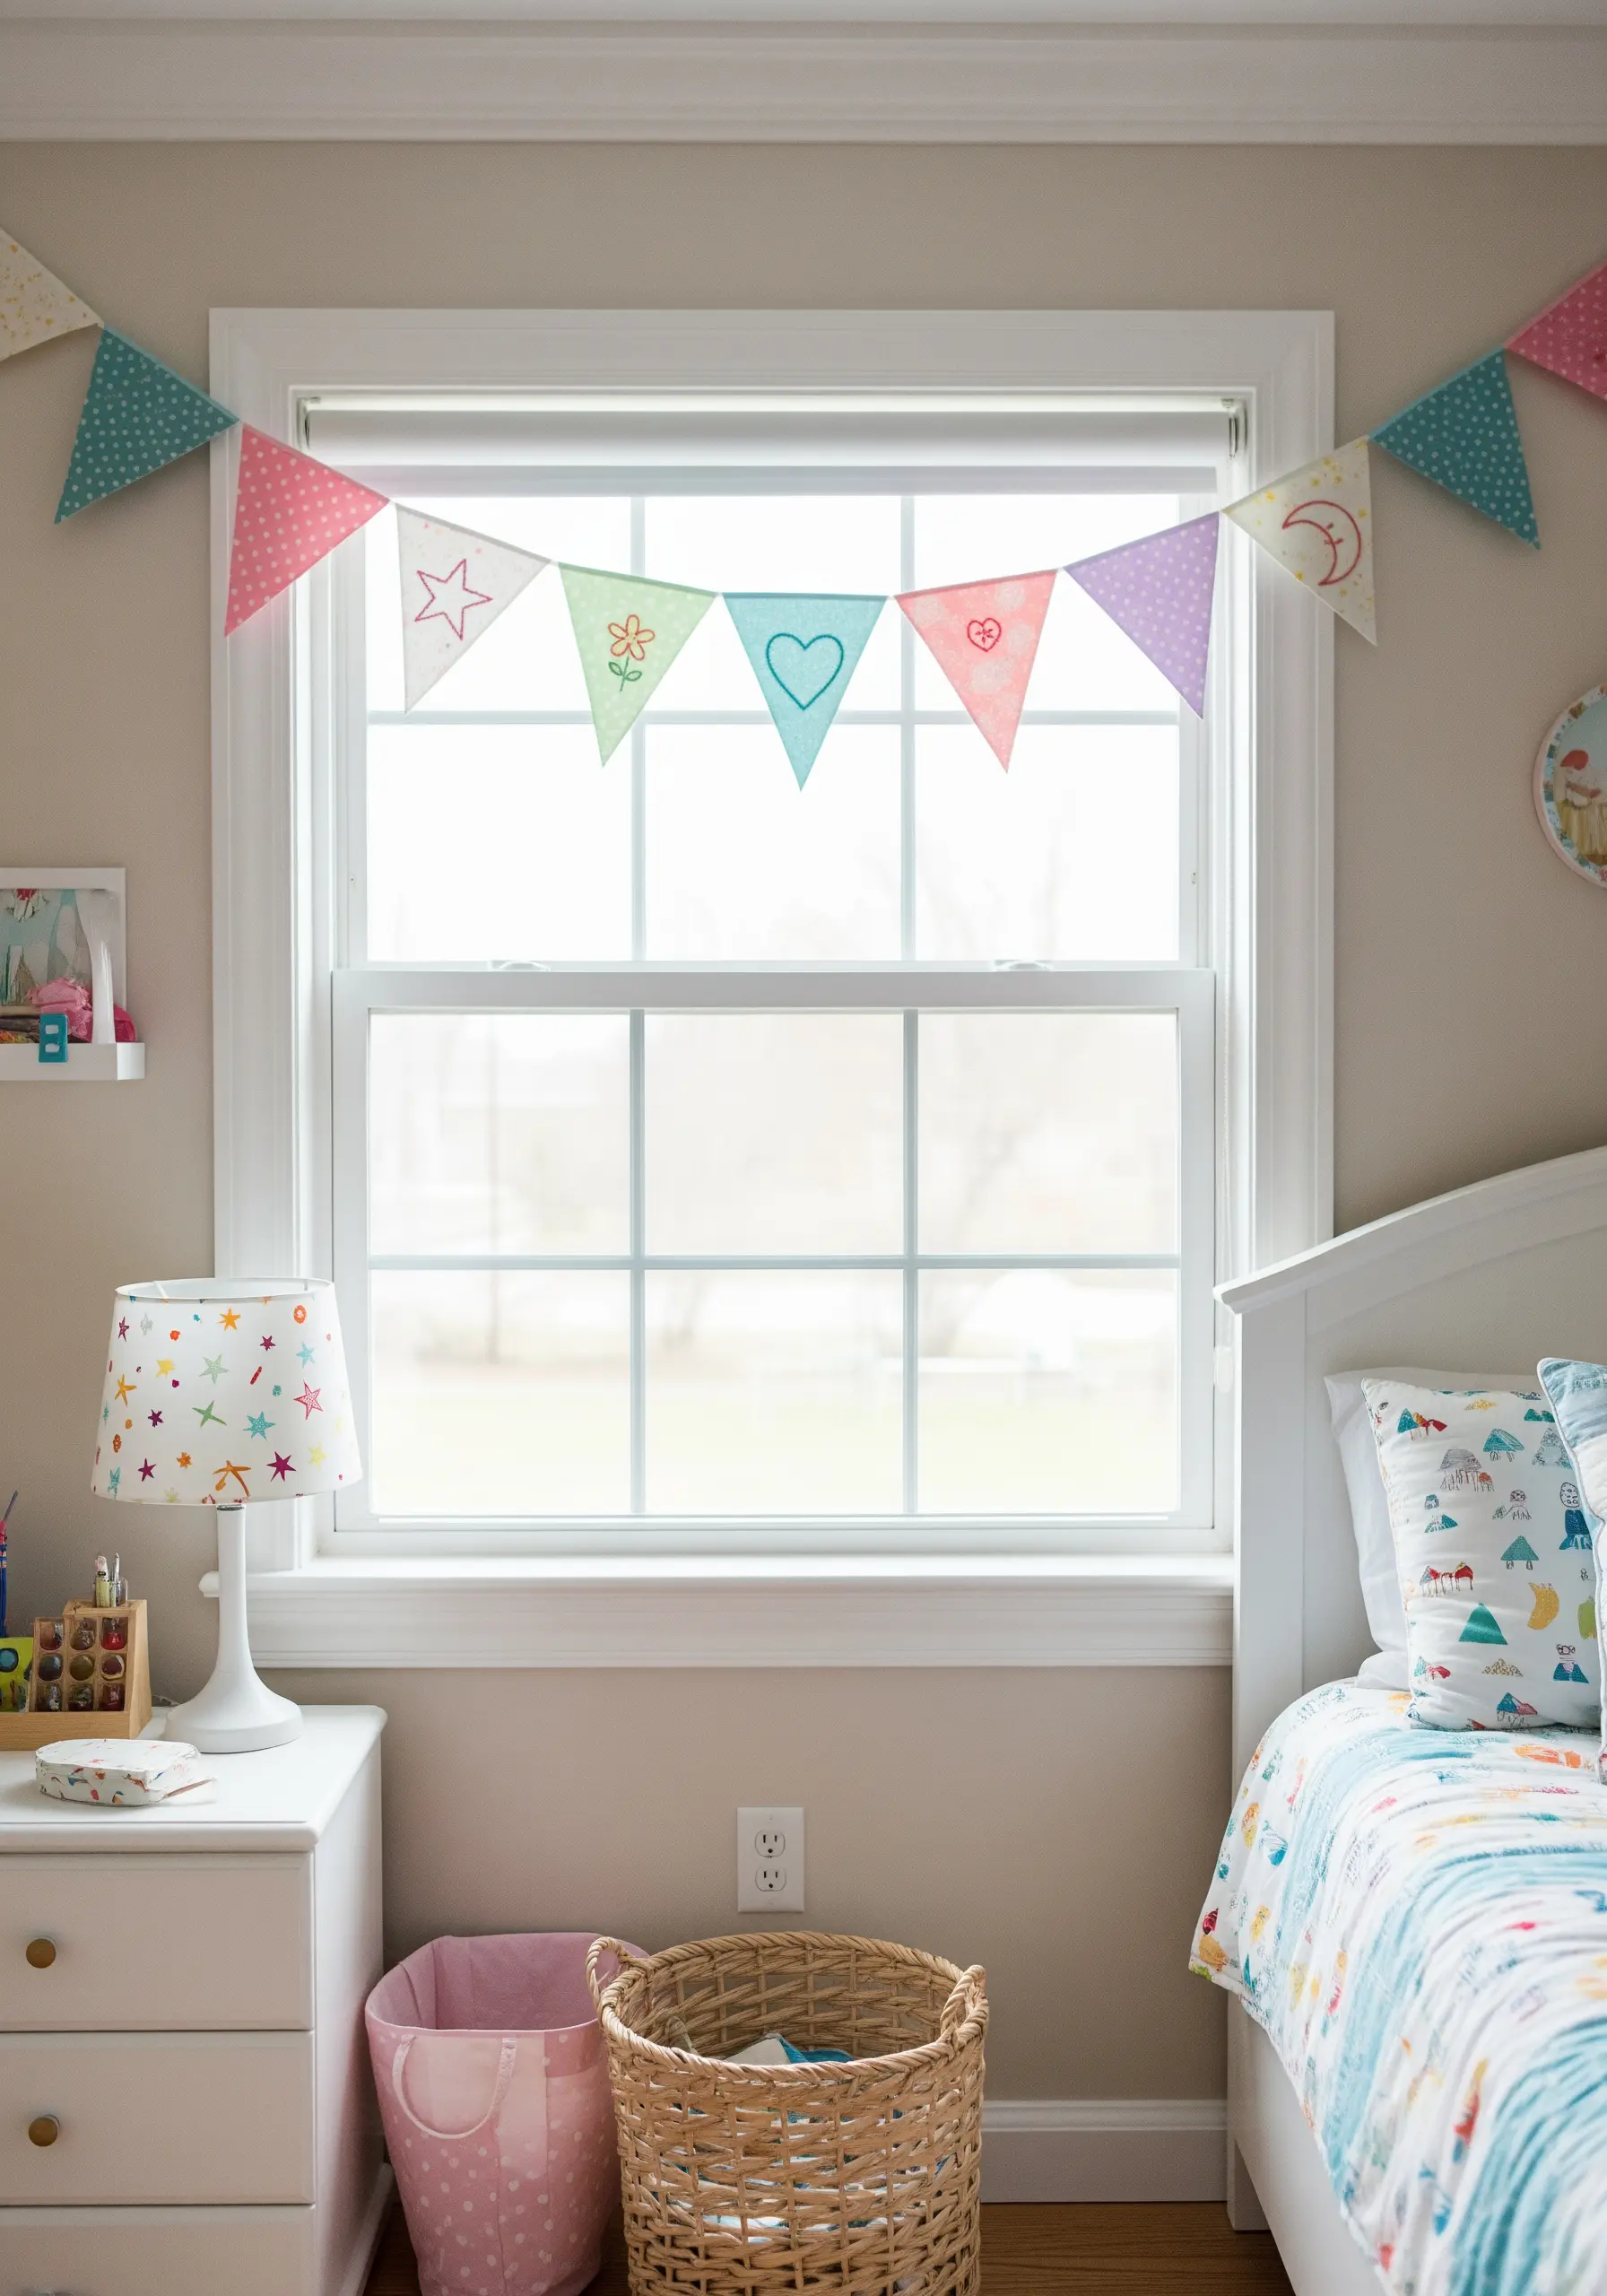
Personalize a simple string of bunting with charming, doodle-like motifs.
A basic backstitch in a high-contrast thread is all you need to create these simple icons.
The key is to embrace a loose, hand-drawn quality; this gives the bunting a joyful, whimsical feel perfect for a child’s room or a celebration.
Stitch onto felt or a double layer of quilting cotton to ensure the flags hang nicely and don’t fray at the edges.
14. Gilded Details for a Silk Sleep Mask
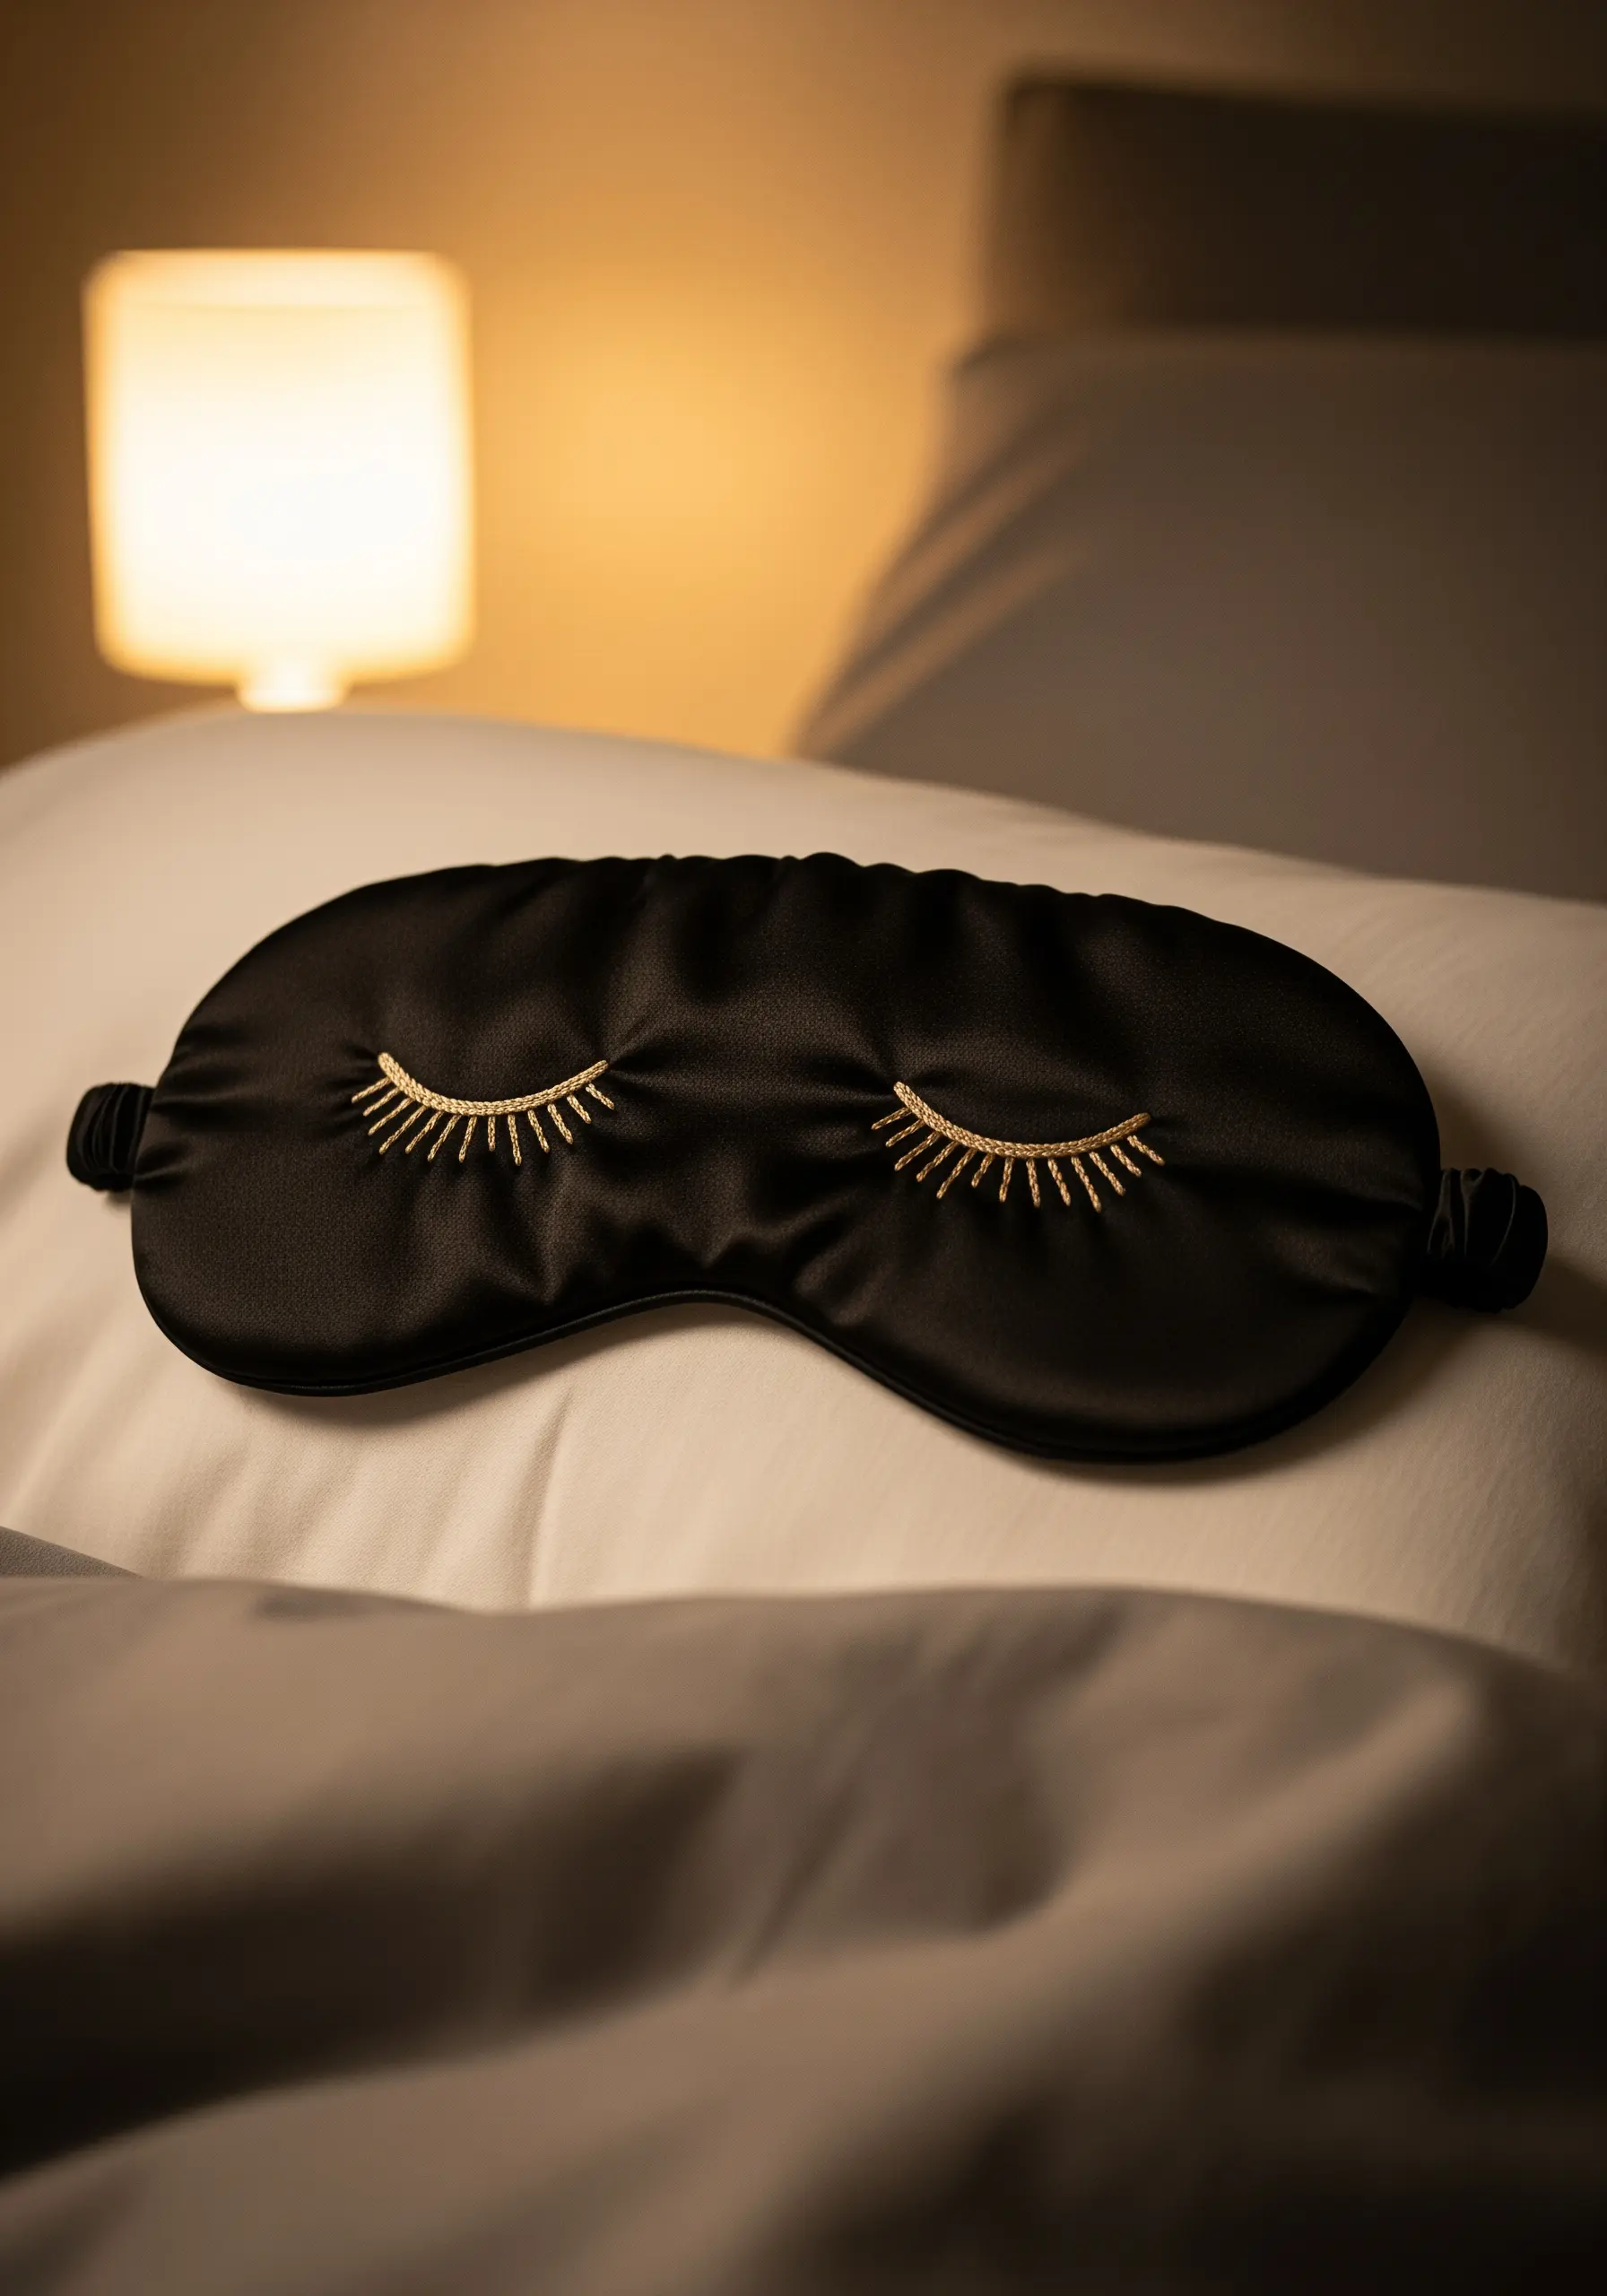
Add a touch of everyday luxury to a plain sleep mask using metallic thread.
Stitch the sleepy eyelash shape using a simple backstitch for the main curve, then add radiating straight stitches for the individual lashes.
The secret to hassle-free stitching with metallic floss is to use short lengths of thread (no more than 12 inches) and a thread conditioner to prevent it from tangling and fraying.
The shimmer of gold on smooth black silk is timelessly glamorous.
15. Graphic Accents for a Knit Throw
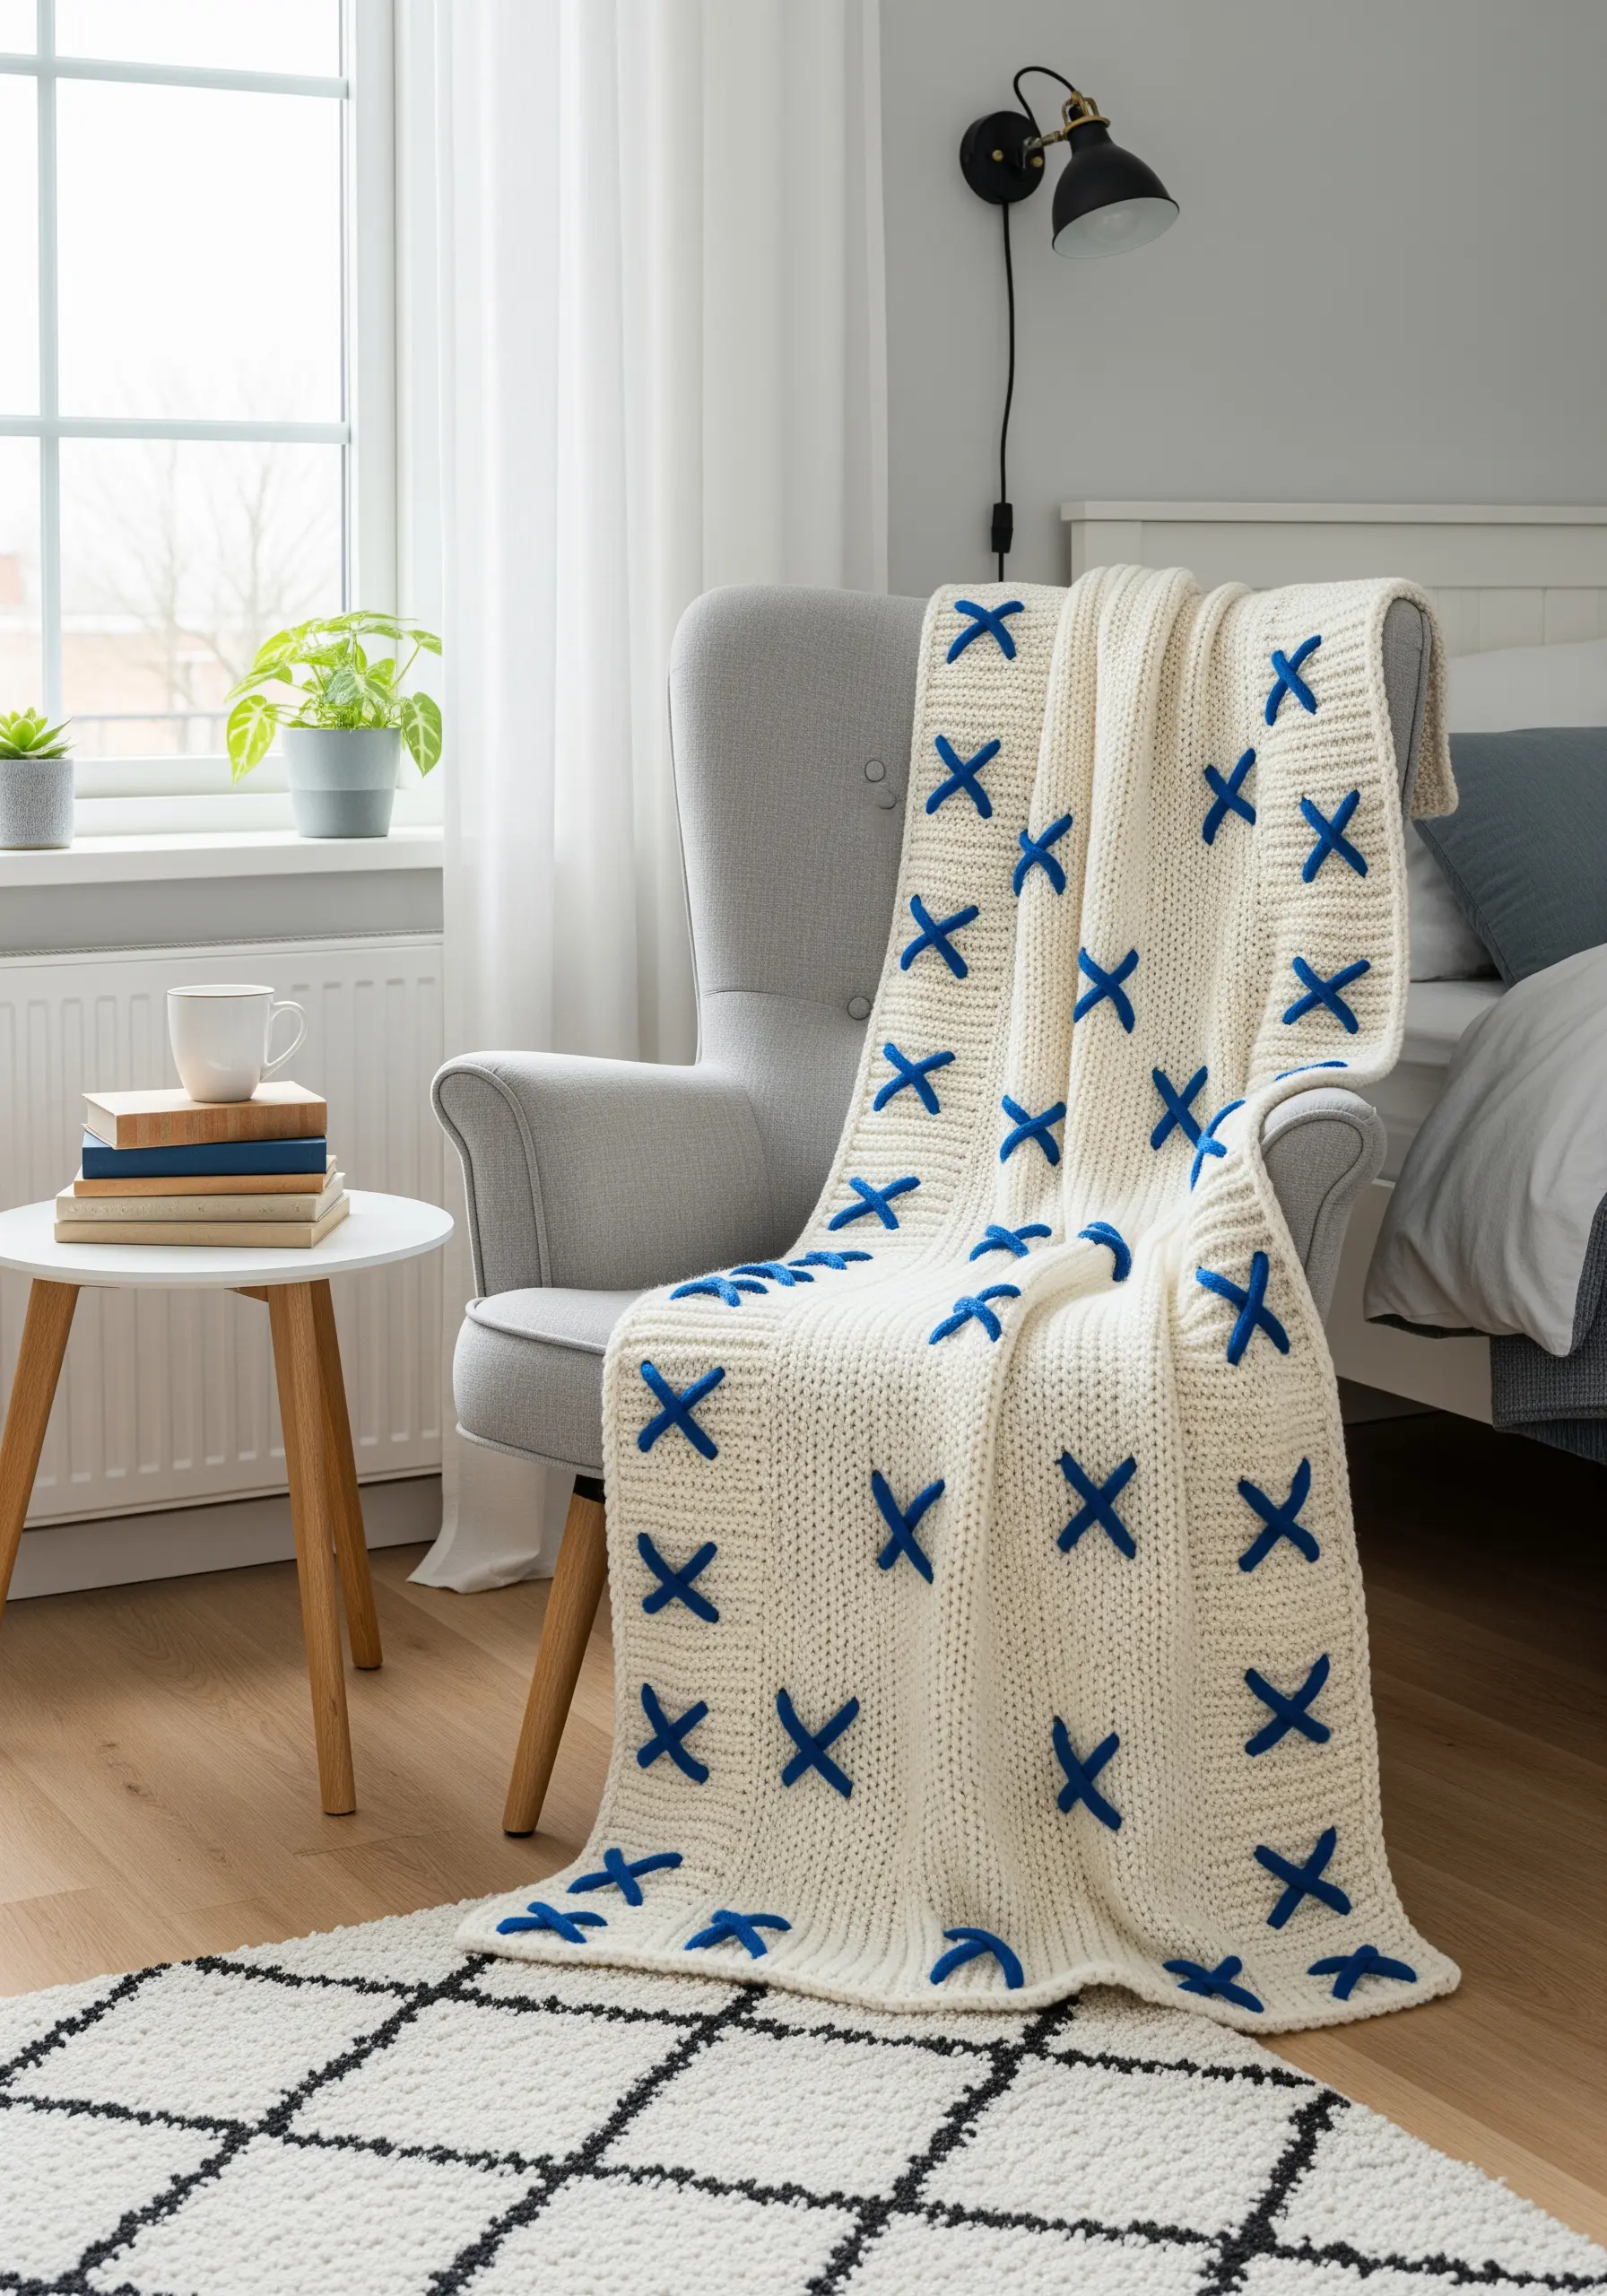
You can add embroidered details to knitwear without piercing the fibers.
This technique uses a tapestry needle and contrasting yarn to create large cross stitches that sit on top of the existing knit structure, a method similar to Swiss darning.
It’s a surprisingly simple way to add a bold, graphic pattern to a plain blanket, giving it a custom, designer look.
This approach adds personality while protecting the integrity of the knitted fabric.
16. Minimalist Icons for Functional Storage
Make a hanging organizer even more intuitive by adding simple, embroidered icons to the pockets.
Use a crisp backstitch with black floss on a light background for a clean, graphic look that is instantly recognizable.
To ensure your icons are consistent, sketch them onto a tear-away stabilizer, stitch through it, and then carefully tear away the excess paper when you’re done.
This project beautifully marries form and function, proving that tiny embroidery details can make everyday items exceptional.
17. Meditative Mandalas on Plush Velvet
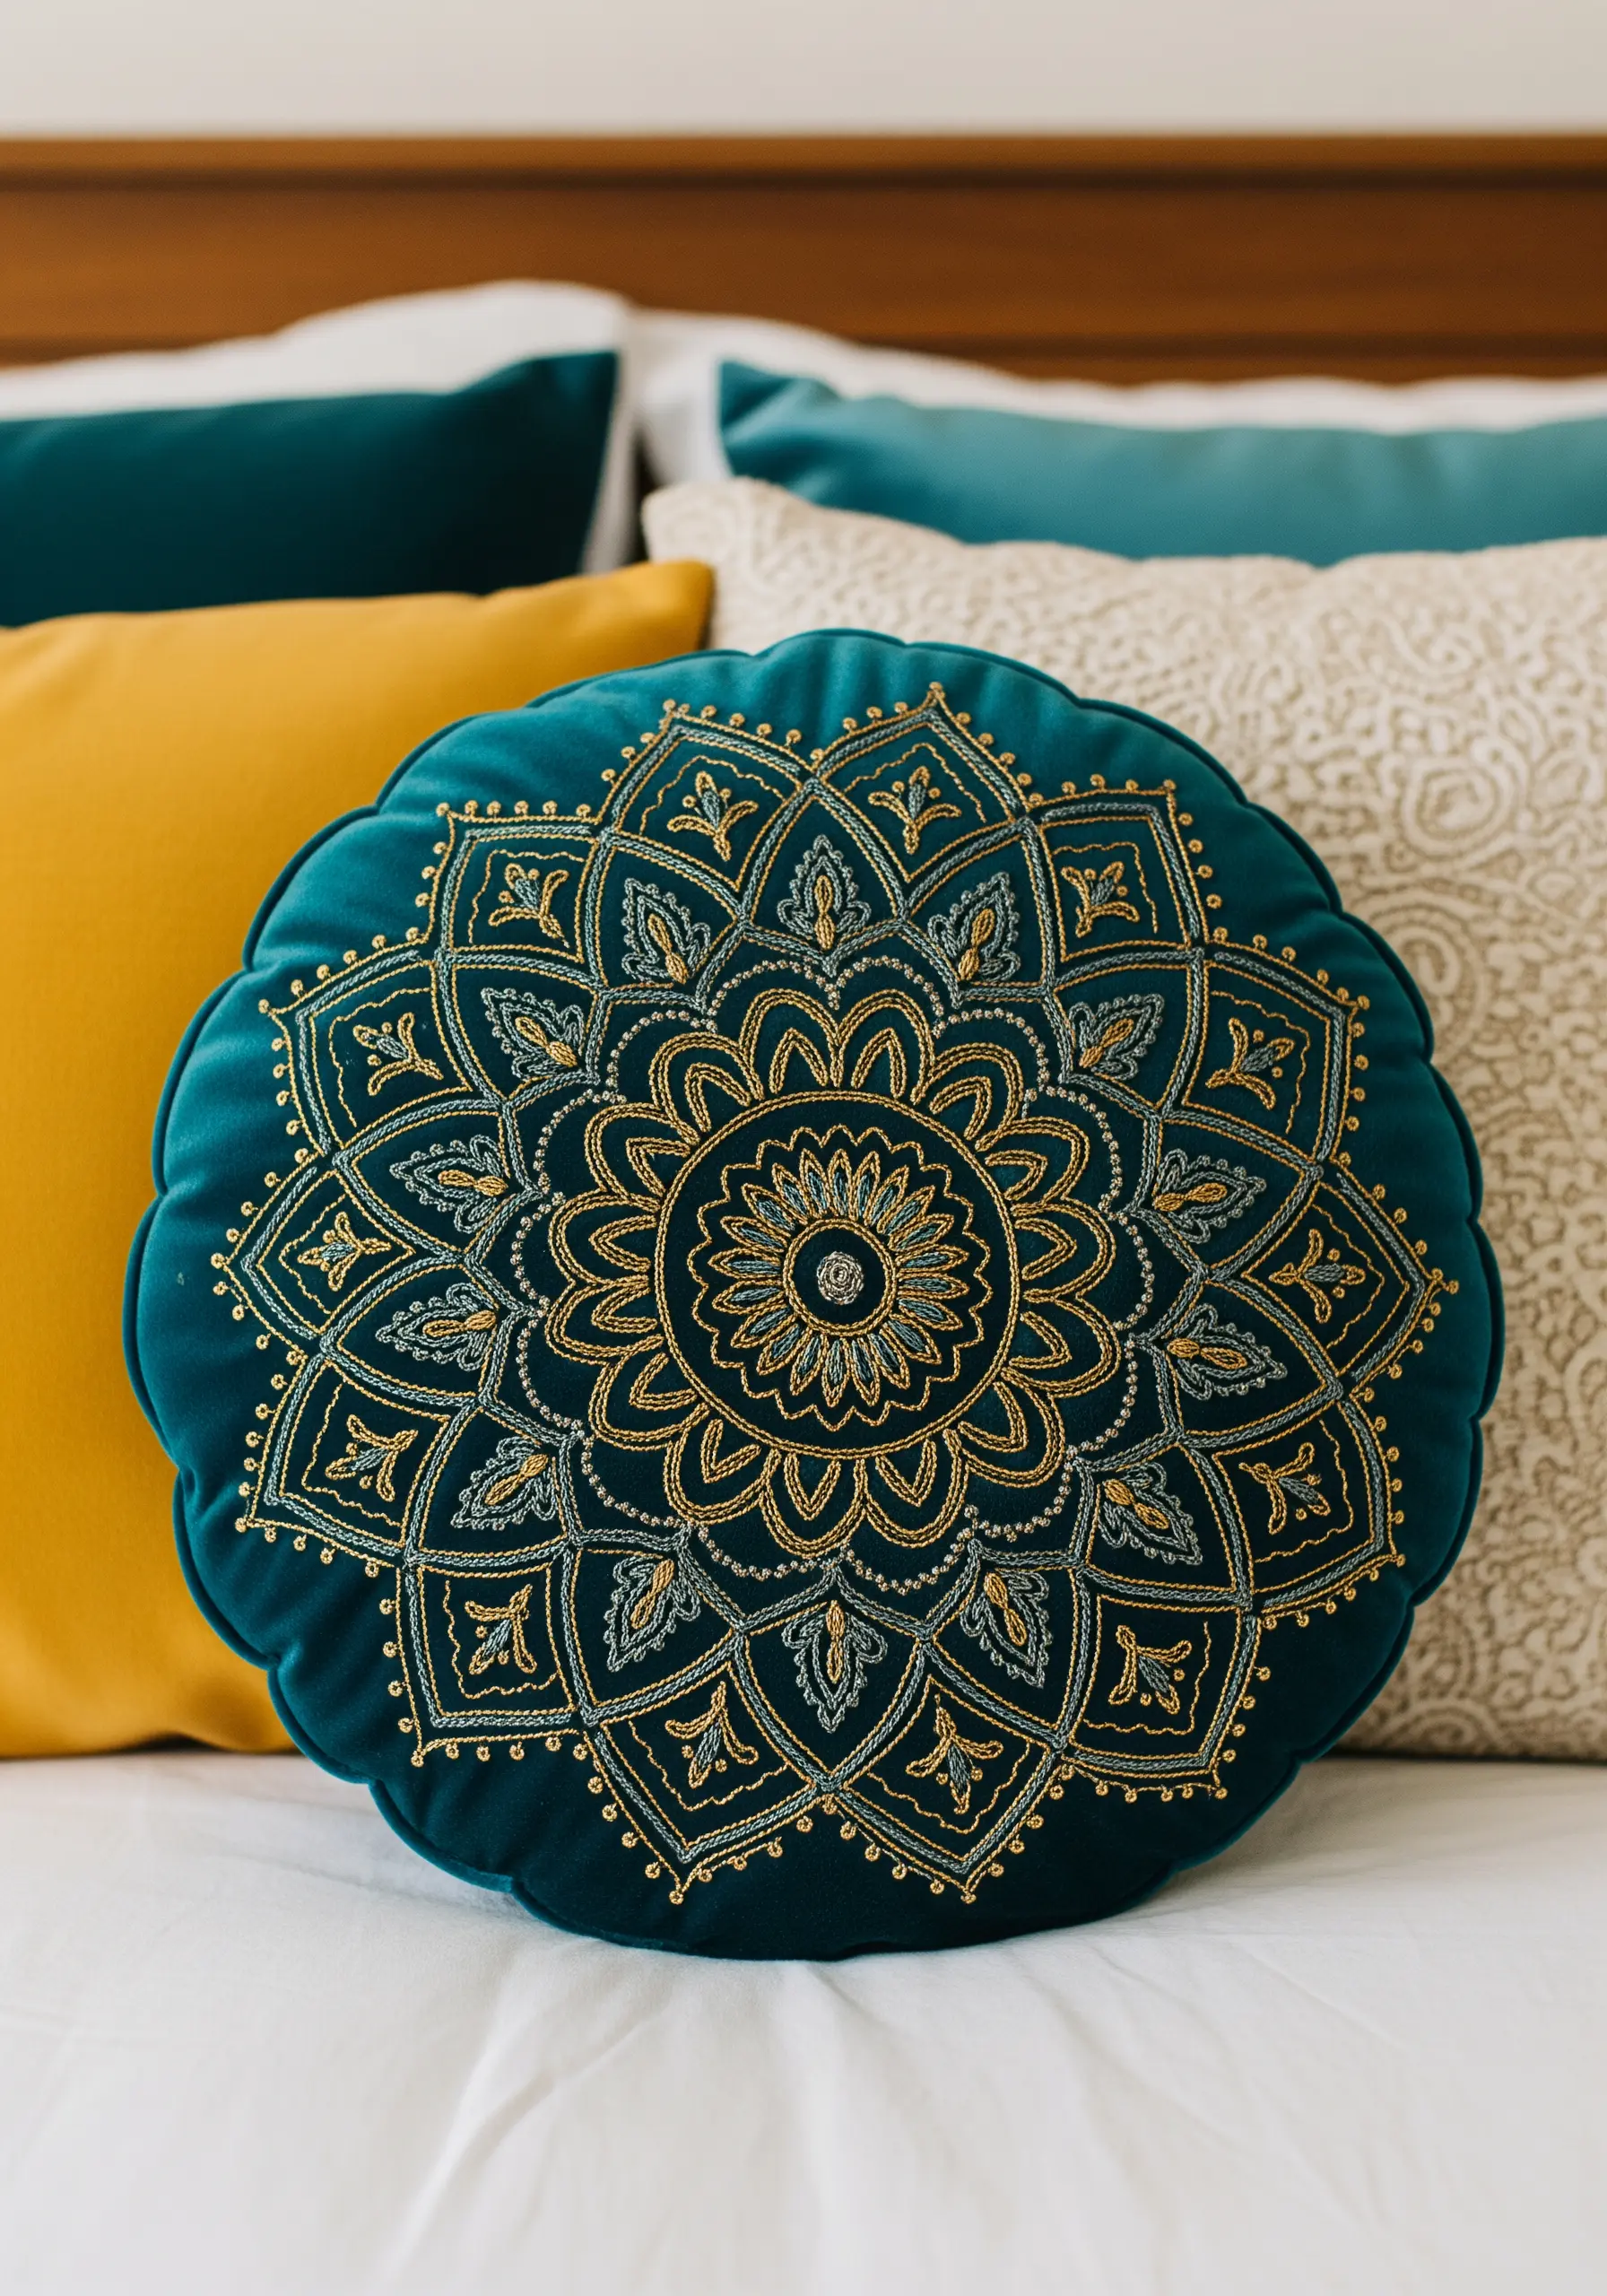
The deep pile of velvet adds a luxurious dimension to embroidery, making your stitches appear richer and more defined.
When stitching a mandala, use a combination of metallic and matte threads to create visual interest and highlight the pattern’s intricate layers.
Always use a stabilizer on the back to prevent the velvet from shifting, and work with a sharp, fine needle that will part the fibers rather than crush them.
The result is a tactile masterpiece perfect for a statement cushion.
18. A Functional Floral Jewelry Holder
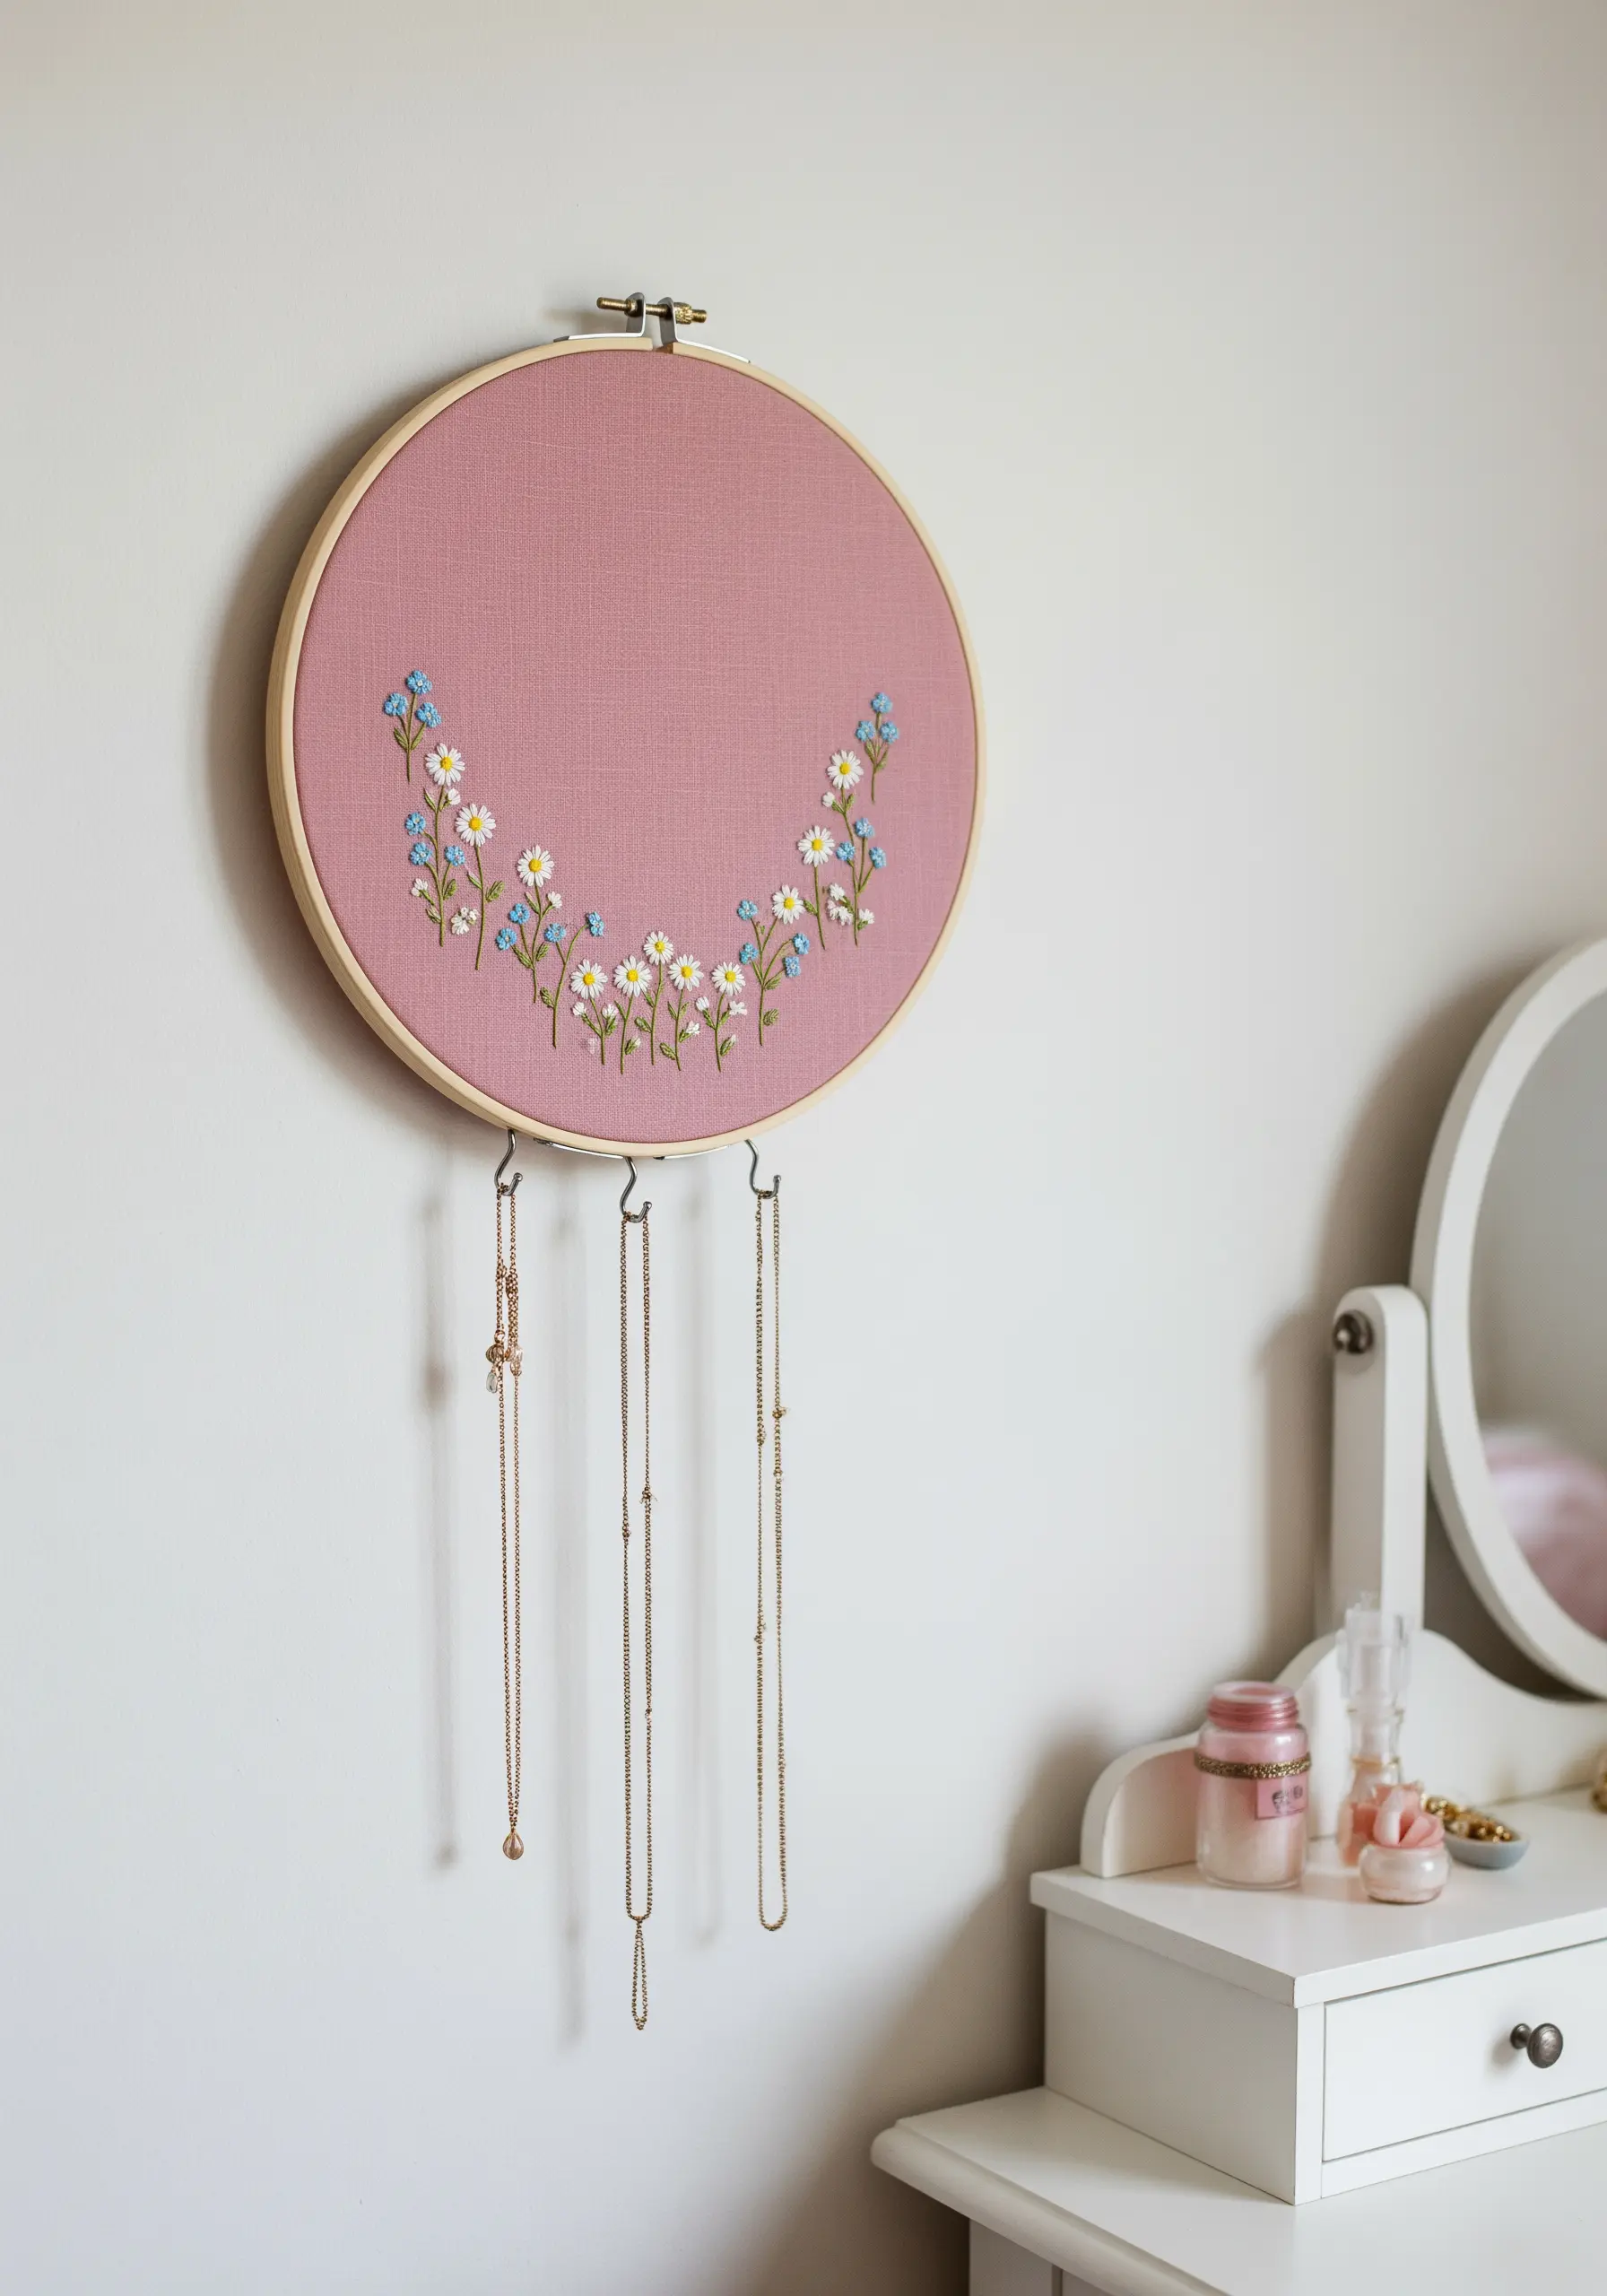
This project cleverly transforms a piece of decorative hoop art into a practical organizer.
Stitch a delicate crescent of wildflowers along the bottom of your fabric, using a mix of lazy daisy stitches, French knots, and stem stitches.
Before you fully tighten and finish the back of the hoop, insert and secure small metal hooks along the bottom edge, just below your stitching.
Now your beautiful piece of floral hoop art is also an elegant way to display your favorite necklaces.
19. Celestial Stitches on a Journal Cover
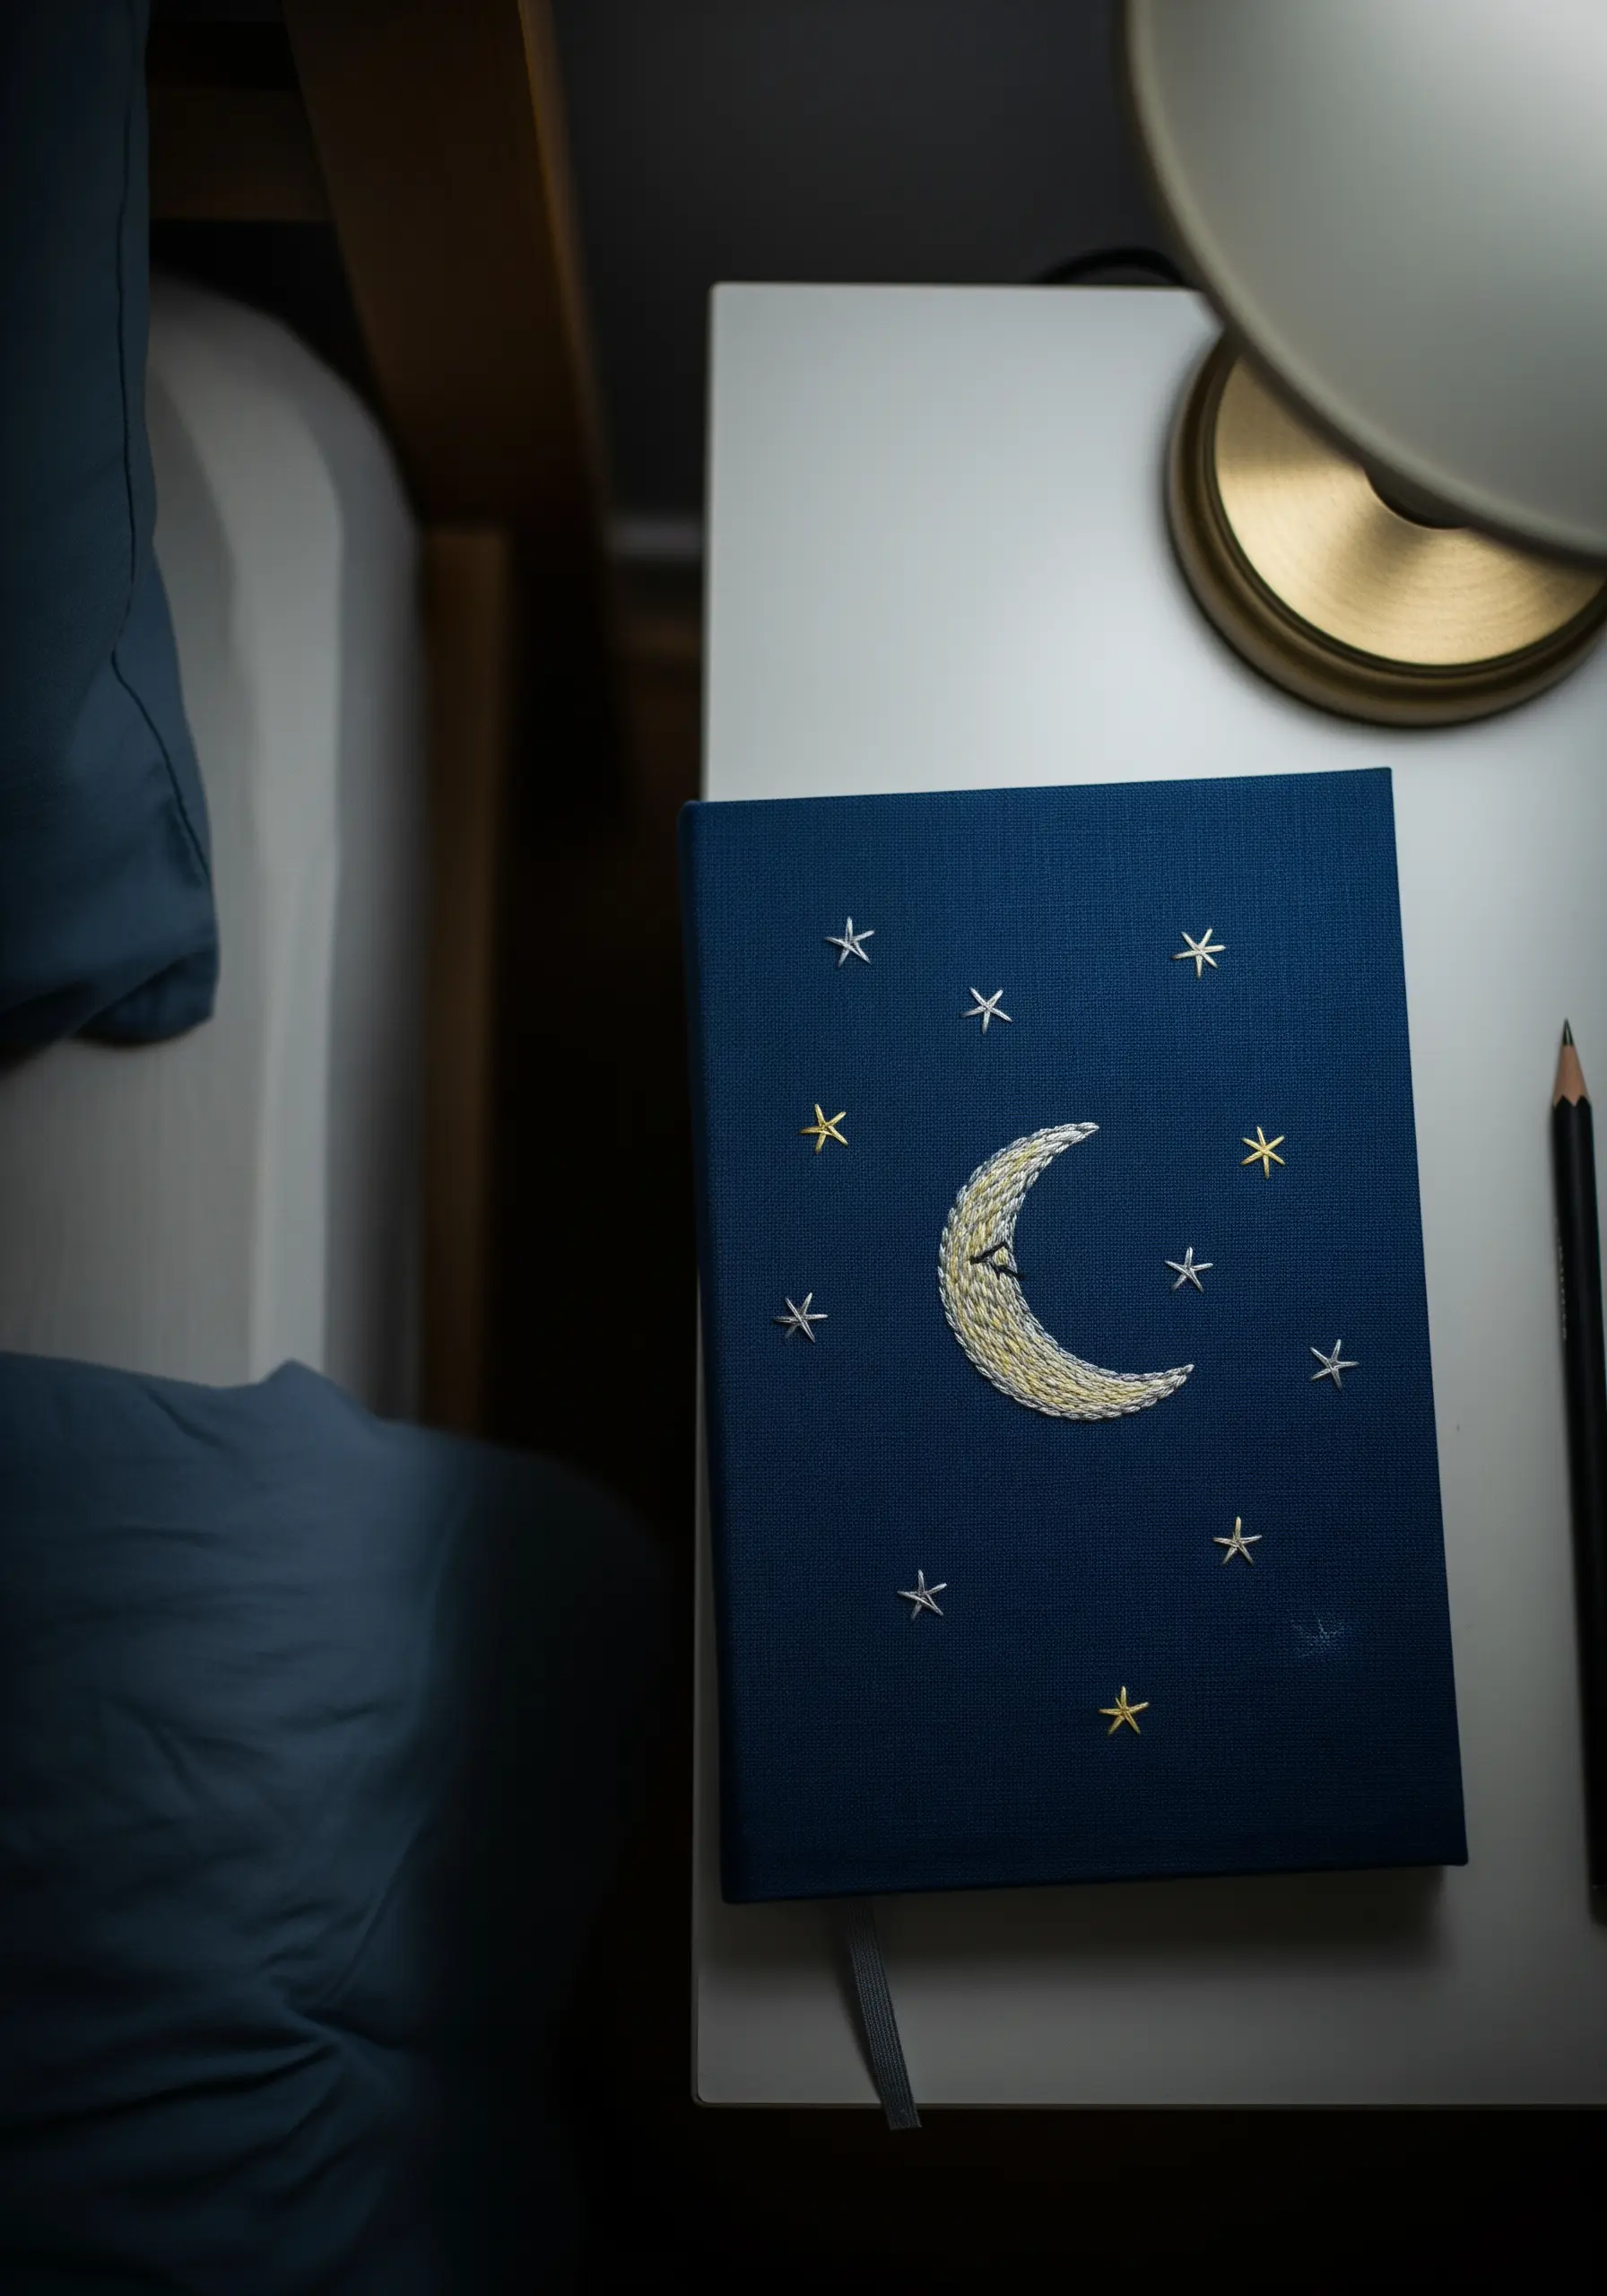
Embroidering on a hard surface like a book cover requires a different approach: you must pre-punch the holes for your stitches.
Use a paper template of your design and a sharp awl to carefully pierce the cover along the stitch lines before you even thread your needle.
For the moon’s texture, use a filled stitch like Roumanian couching, and use metallic thread for the stars to make them catch the light.
This thoughtful process turns a simple notebook into a personal cosmic treasure.
20. Custom Pockets for an Armchair Caddy
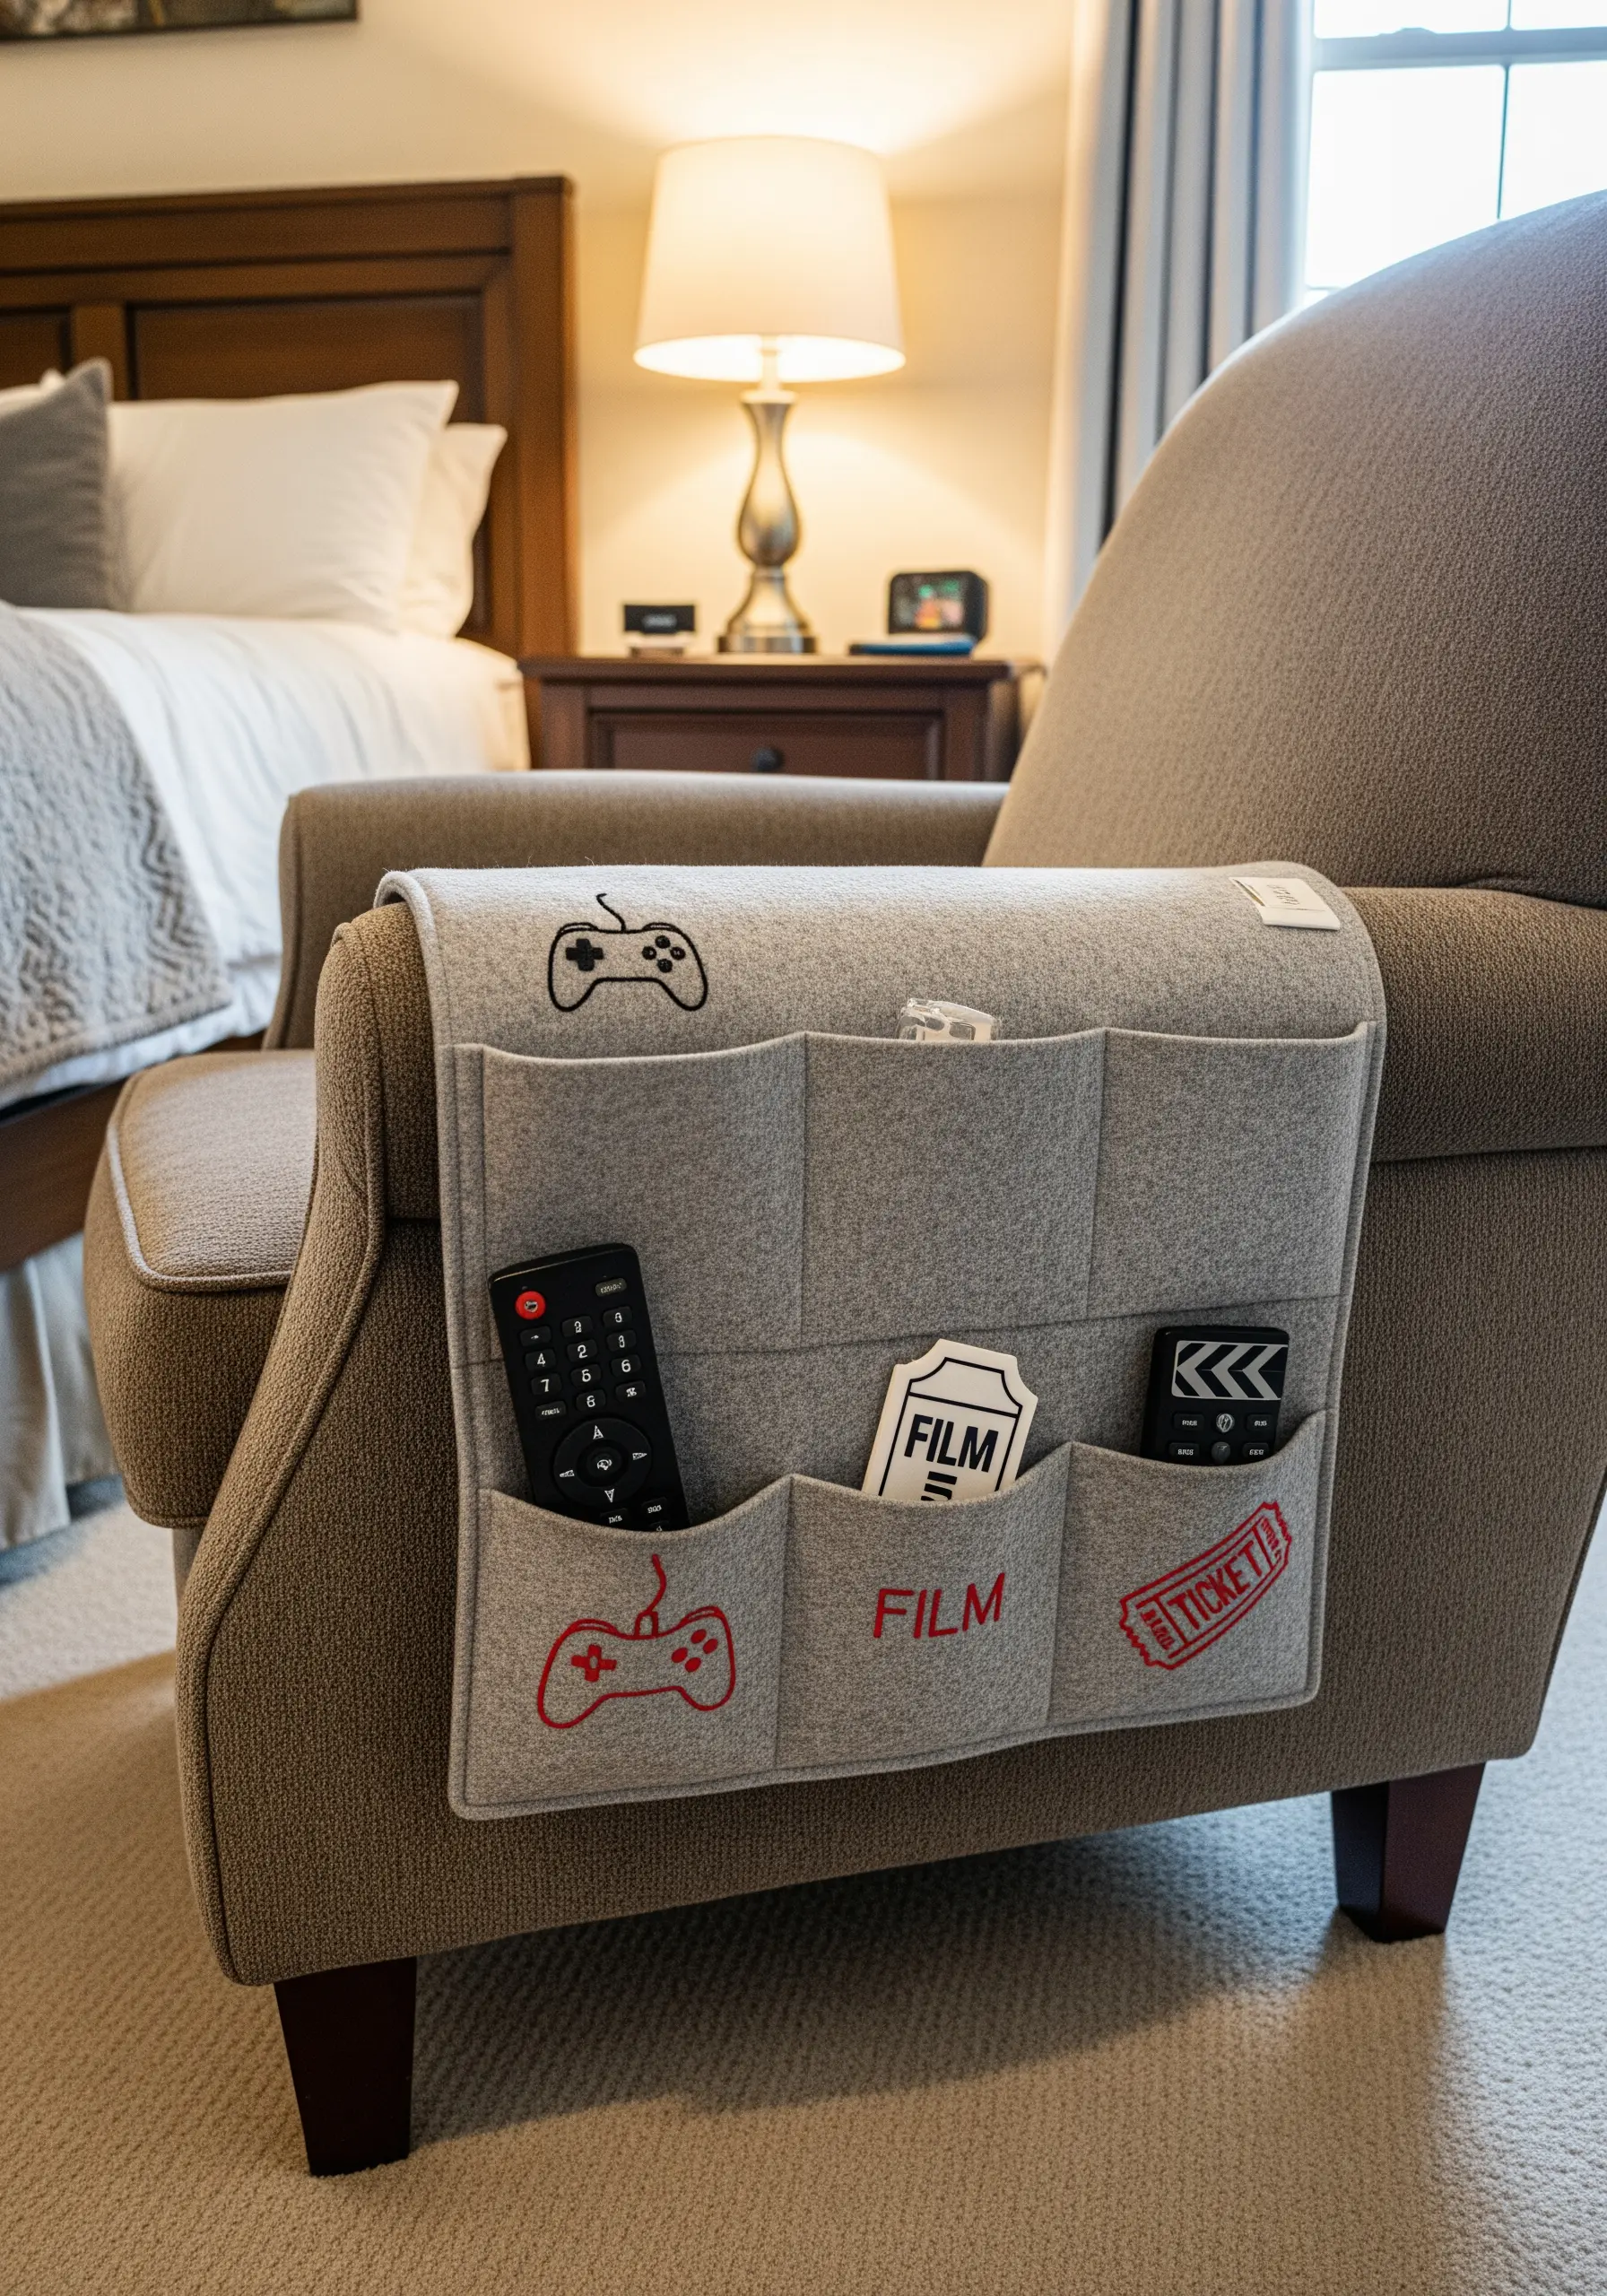
Instantly personalize a generic felt organizer with simple, line-art icons that hint at the contents within.
Felt is an ideal fabric for beginners as it’s stable and doesn’t fray, allowing for clean, crisp stitches.
Use a simple backstitch in a high-contrast thread to create graphic symbols for your favorite pastimes.
This small act of customization transforms a purely functional item into something that reflects your personality and brings a bit of joy to your space.
21. Dimensional Lettering with Couched Cord
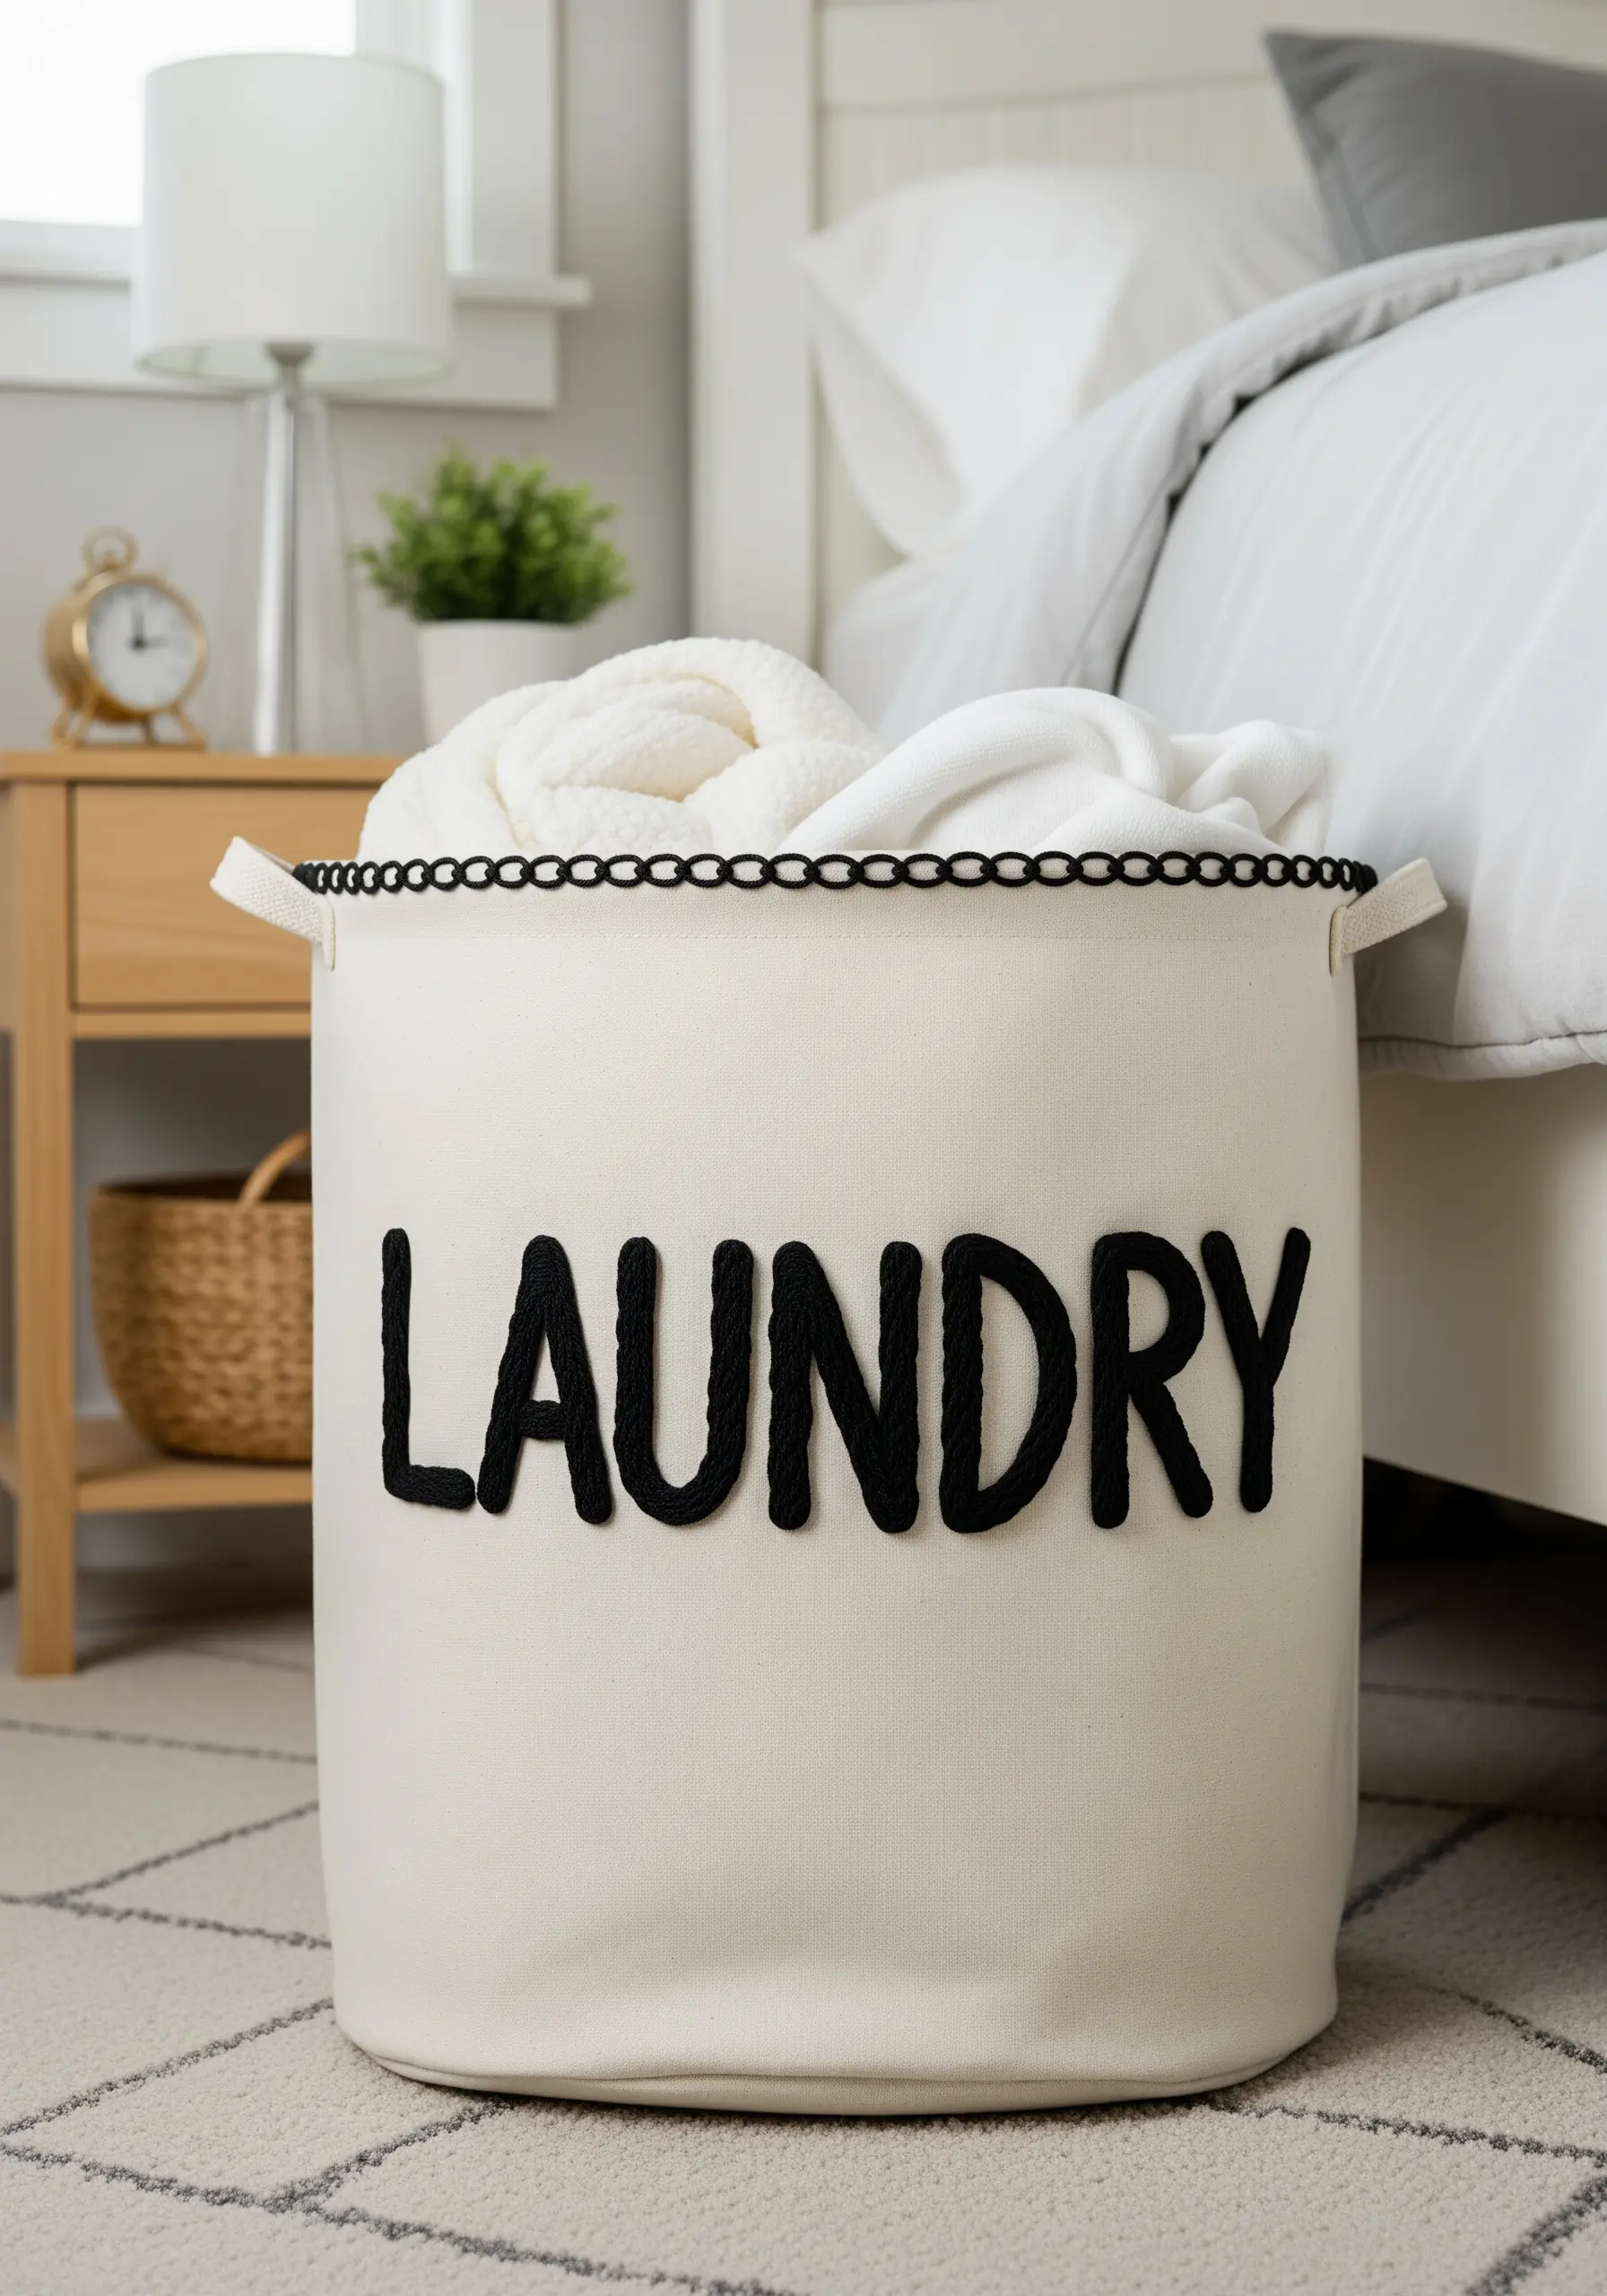
To create large-scale, impactful lettering without the time-consuming process of satin stitching, use the couching technique.
Simply lay a thick cord or yarn onto your fabric in the shape of your letters.
Then, using a standard embroidery floss, make small, evenly spaced tacking stitches over the cord to secure it in place.
This method adds incredible dimension and texture, giving a utilitarian object like a laundry hamper a bold, graphic designer look.
22. An Unexpected Detail on a Light Switch Plate
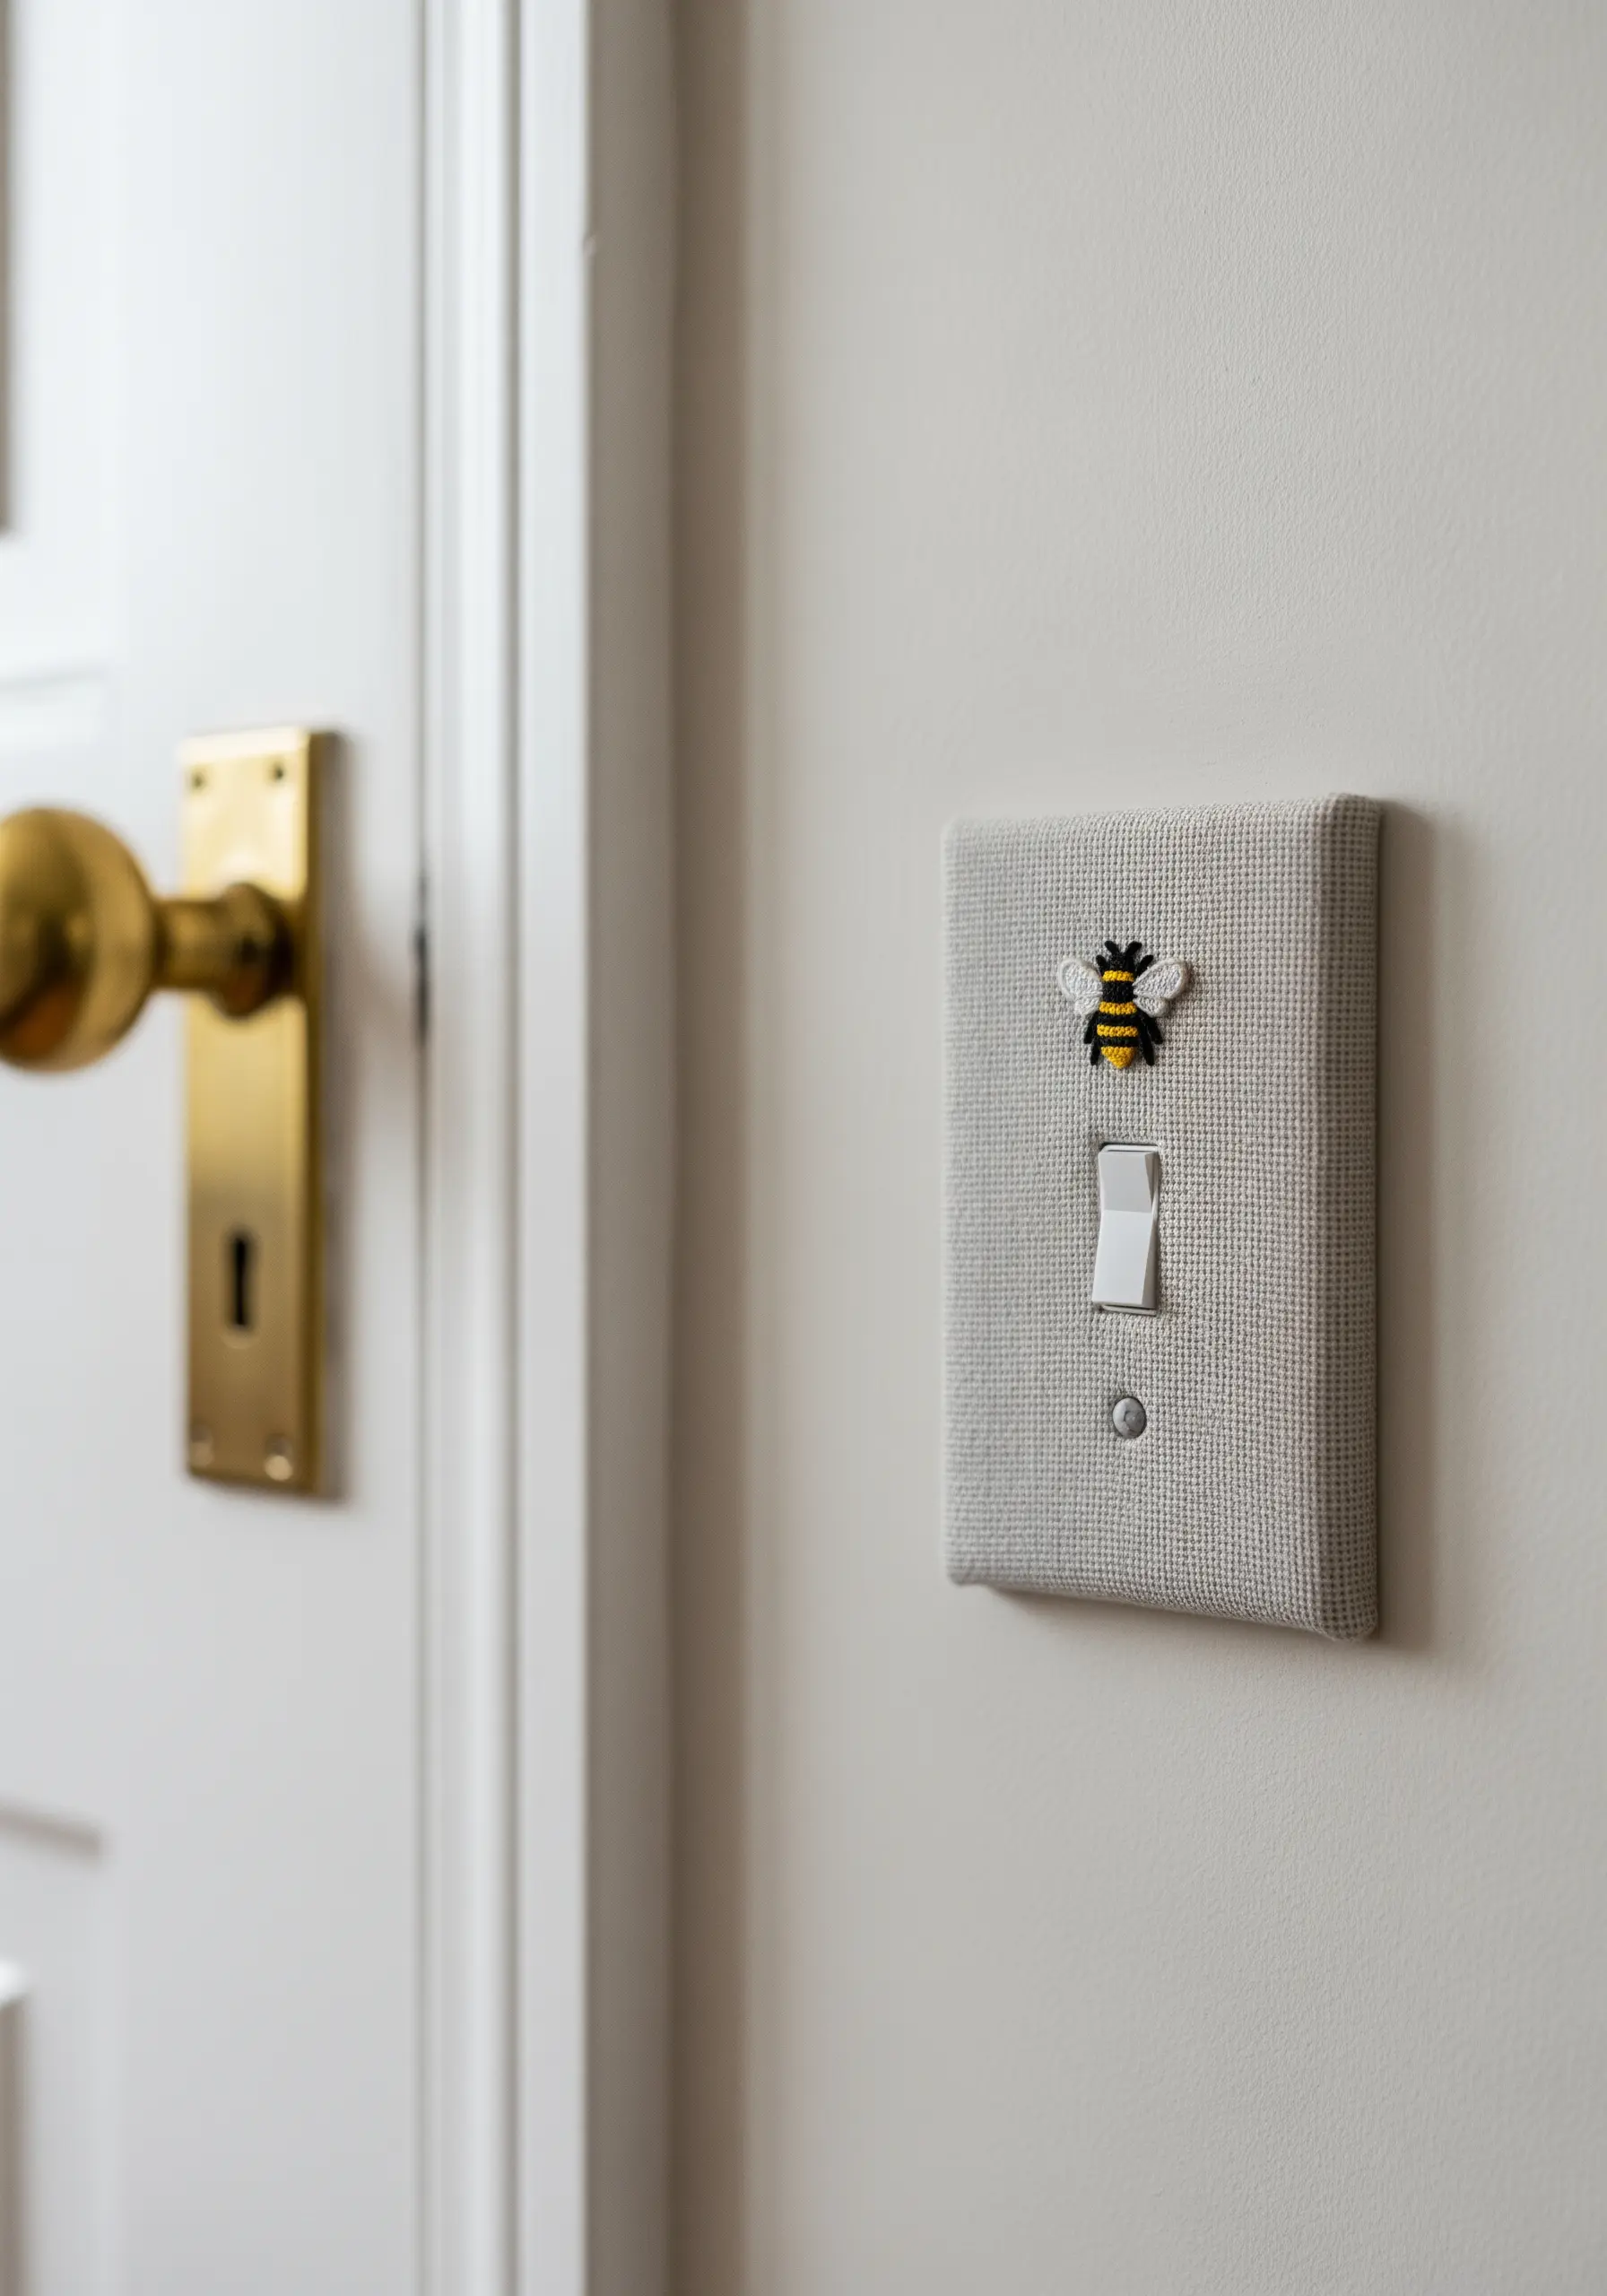
Elevate the most overlooked details in your bedroom by wrapping a light switch plate in embroidered fabric.
Stitch a single, tiny motif onto a piece of sturdy evenweave linen—a single strand of floss is all you need for such a small detail.
To assemble, cut the fabric about an inch larger than the plate on all sides, wrap it tightly around, and secure it on the back with strong craft glue.
It’s a subtle touch of handmade artistry that adds immense charm and signals a deep attention to detail in your decor.


