

You already know that embroidery is more than just a craft—it’s a way to slow down, to connect with your hands, and to bring quiet beauty into your home. But what if your stitches could do more? What if they could actively shape the atmosphere of your most personal space, your bedroom, turning it into a sanctuary of calm?
Forget complex patterns that feel overwhelming. The key to elevating your work lies in subtle shifts of technique and texture. It’s in choosing a matte cotton thread over a high-sheen rayon for a softer finish, or using a padded satin stitch to give a single word a plush, touchable quality. These are the details that transform a simple pillow cover into a piece of functional art that soothes you before you even close your eyes.
In this collection, I’ll guide you through specific ideas that focus on creating softness, tranquility, and visual rest. You won’t just see a finished project; you’ll understand the ‘why’ behind each choice—from stitch direction to color harmony—so you can apply these principles with confidence and make something truly restorative.
1. Render Botanicals with Restful Delicacy

To achieve this light, airy feel for lavender and eucalyptus, use a single strand of six-strand floss.
This fine thread prevents the stems from looking bulky and allows the natural texture of the linen to show through.
For the lavender buds, use French knots, but wrap the thread only once around the needle to keep them small and delicate.
Work the eucalyptus leaves in a fishbone stitch, keeping the stitches slightly open to create a sense of translucency, as if light is passing through them.
2. Couch Metallic Threads for Flawless Celestial Accents
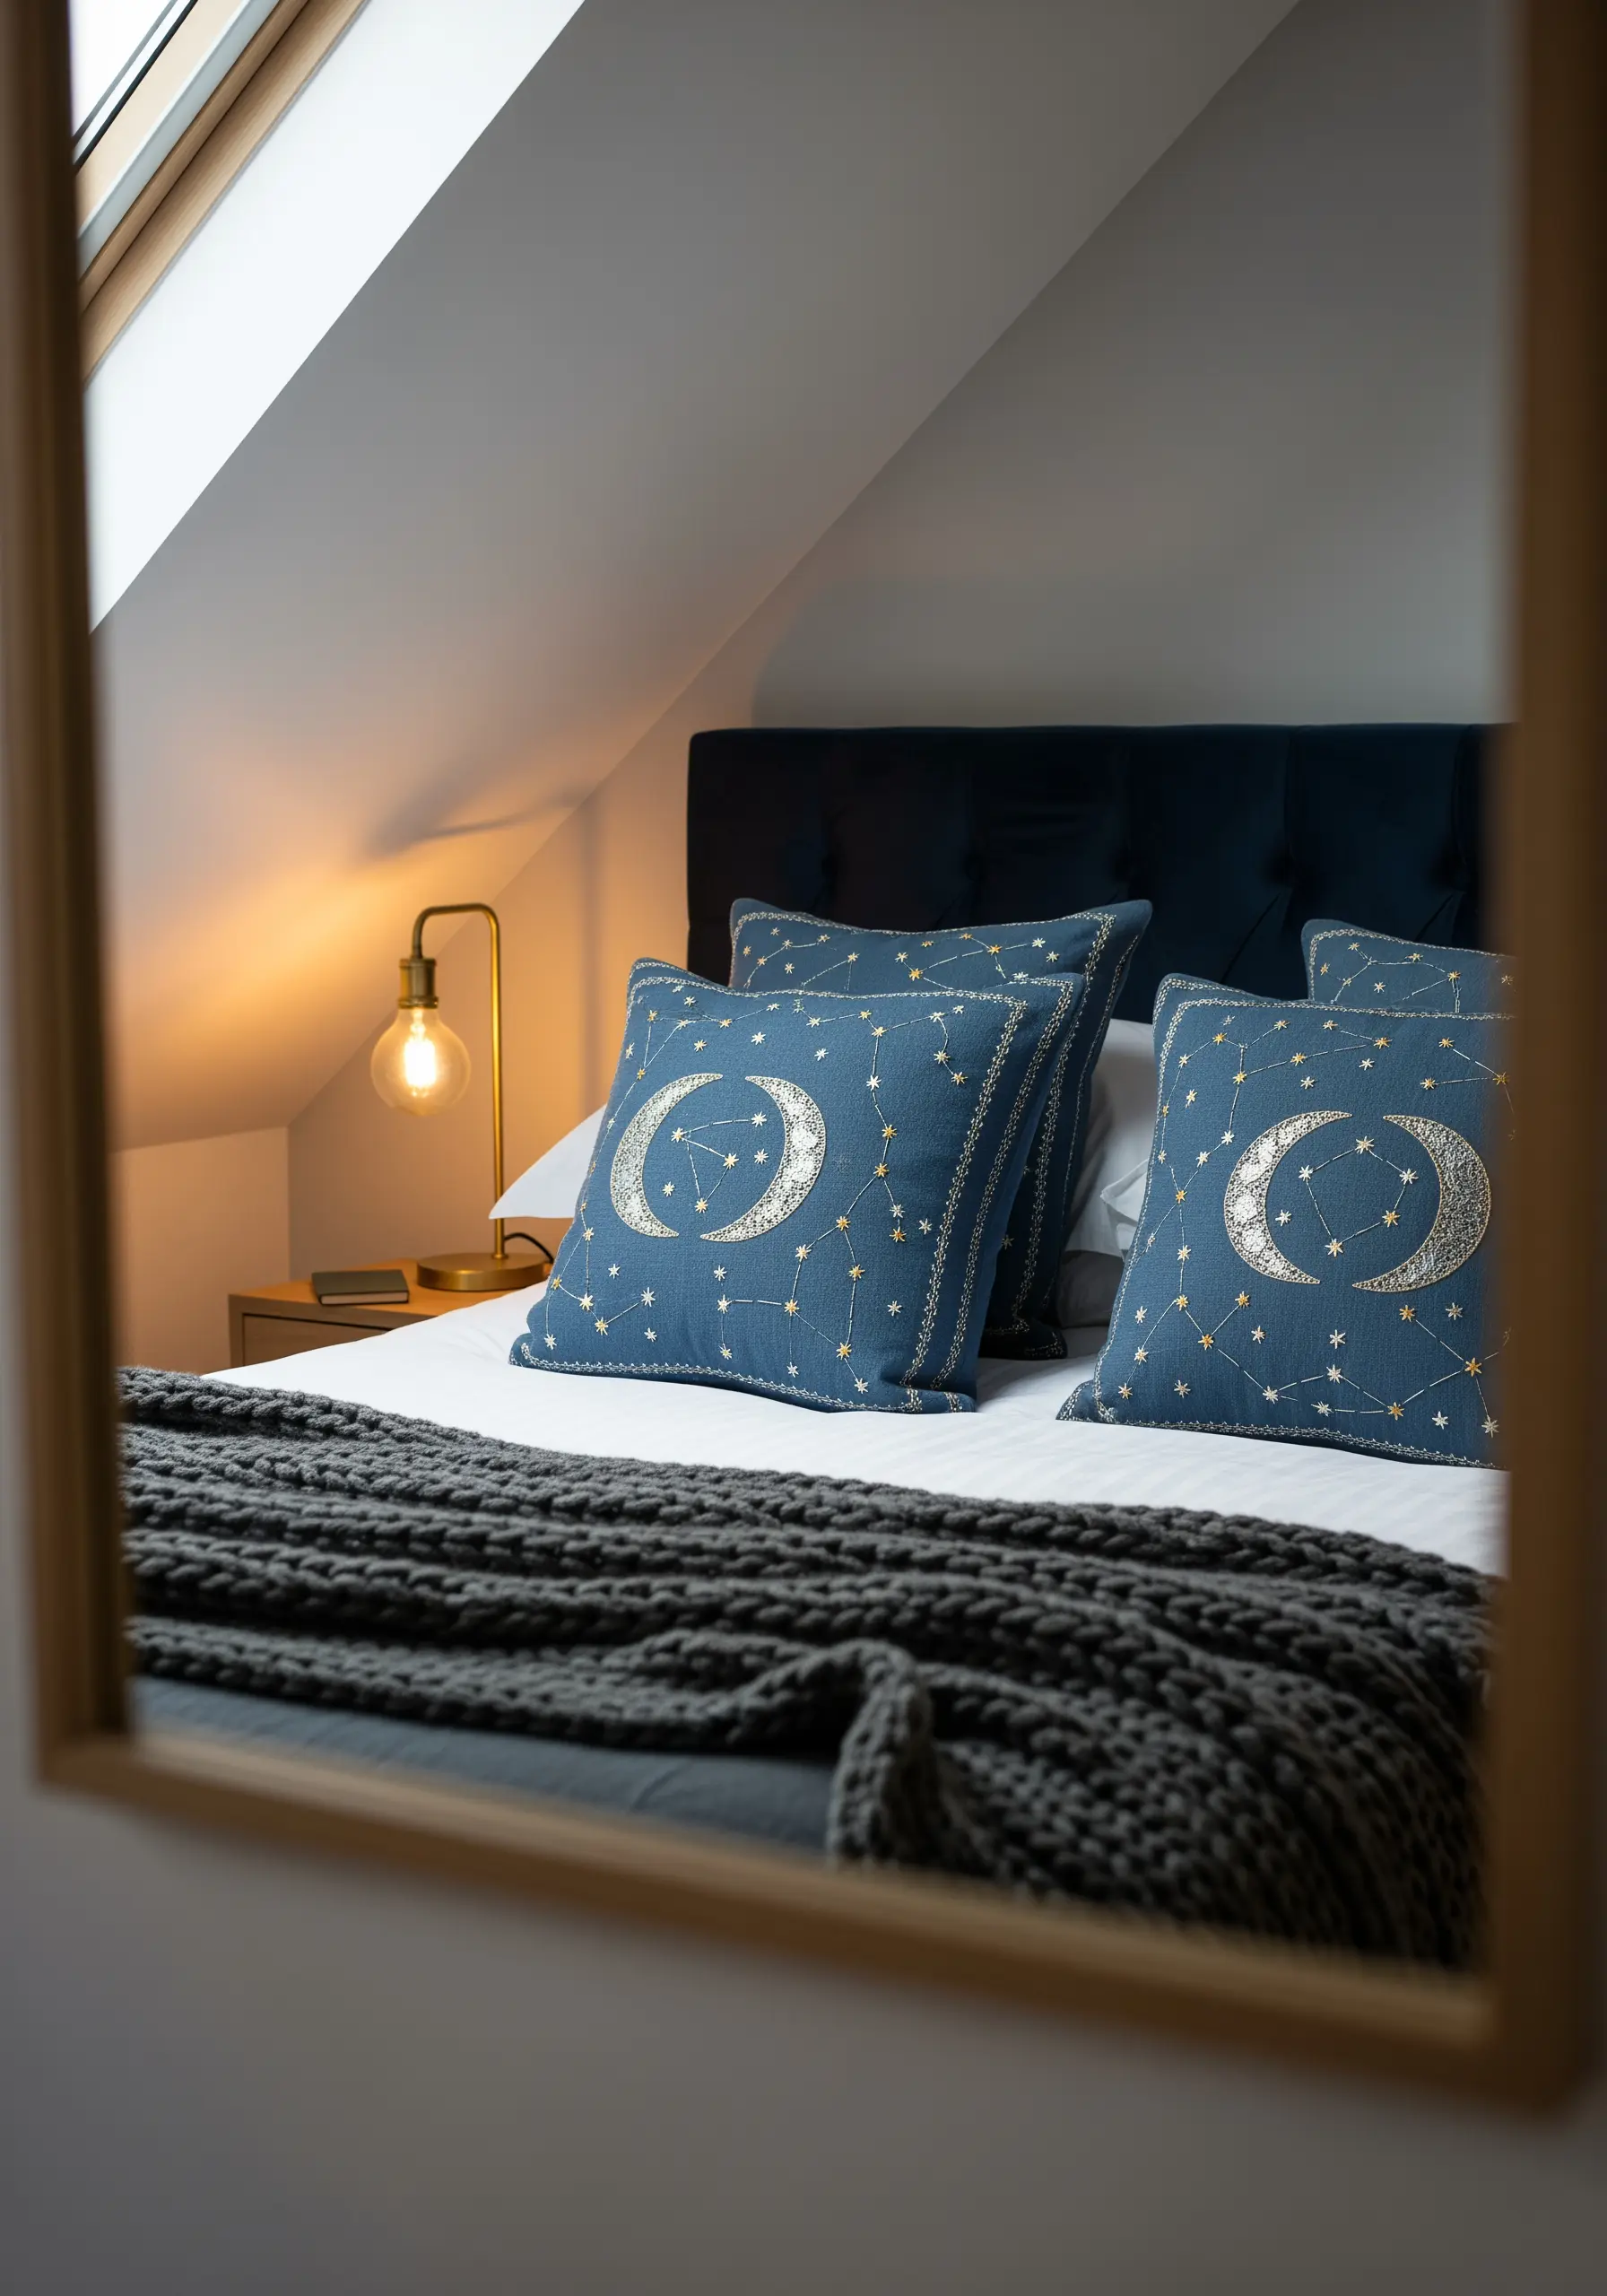
Metallic threads can twist and snag, but you can tame them for these beautiful celestial accents.
Instead of pulling the metallic thread through the fabric, lay it on the surface and tack it down with a second, finer thread in a matching color—a technique called couching.
This preserves the metallic sheen and gives you perfect, smooth crescents.
For the constellations, use a simple backstitch, and scatter tiny seed stitches for the smaller stars to create a varied, organic night sky.
3. Fill with Punch Needle for Plush, Modern Shapes
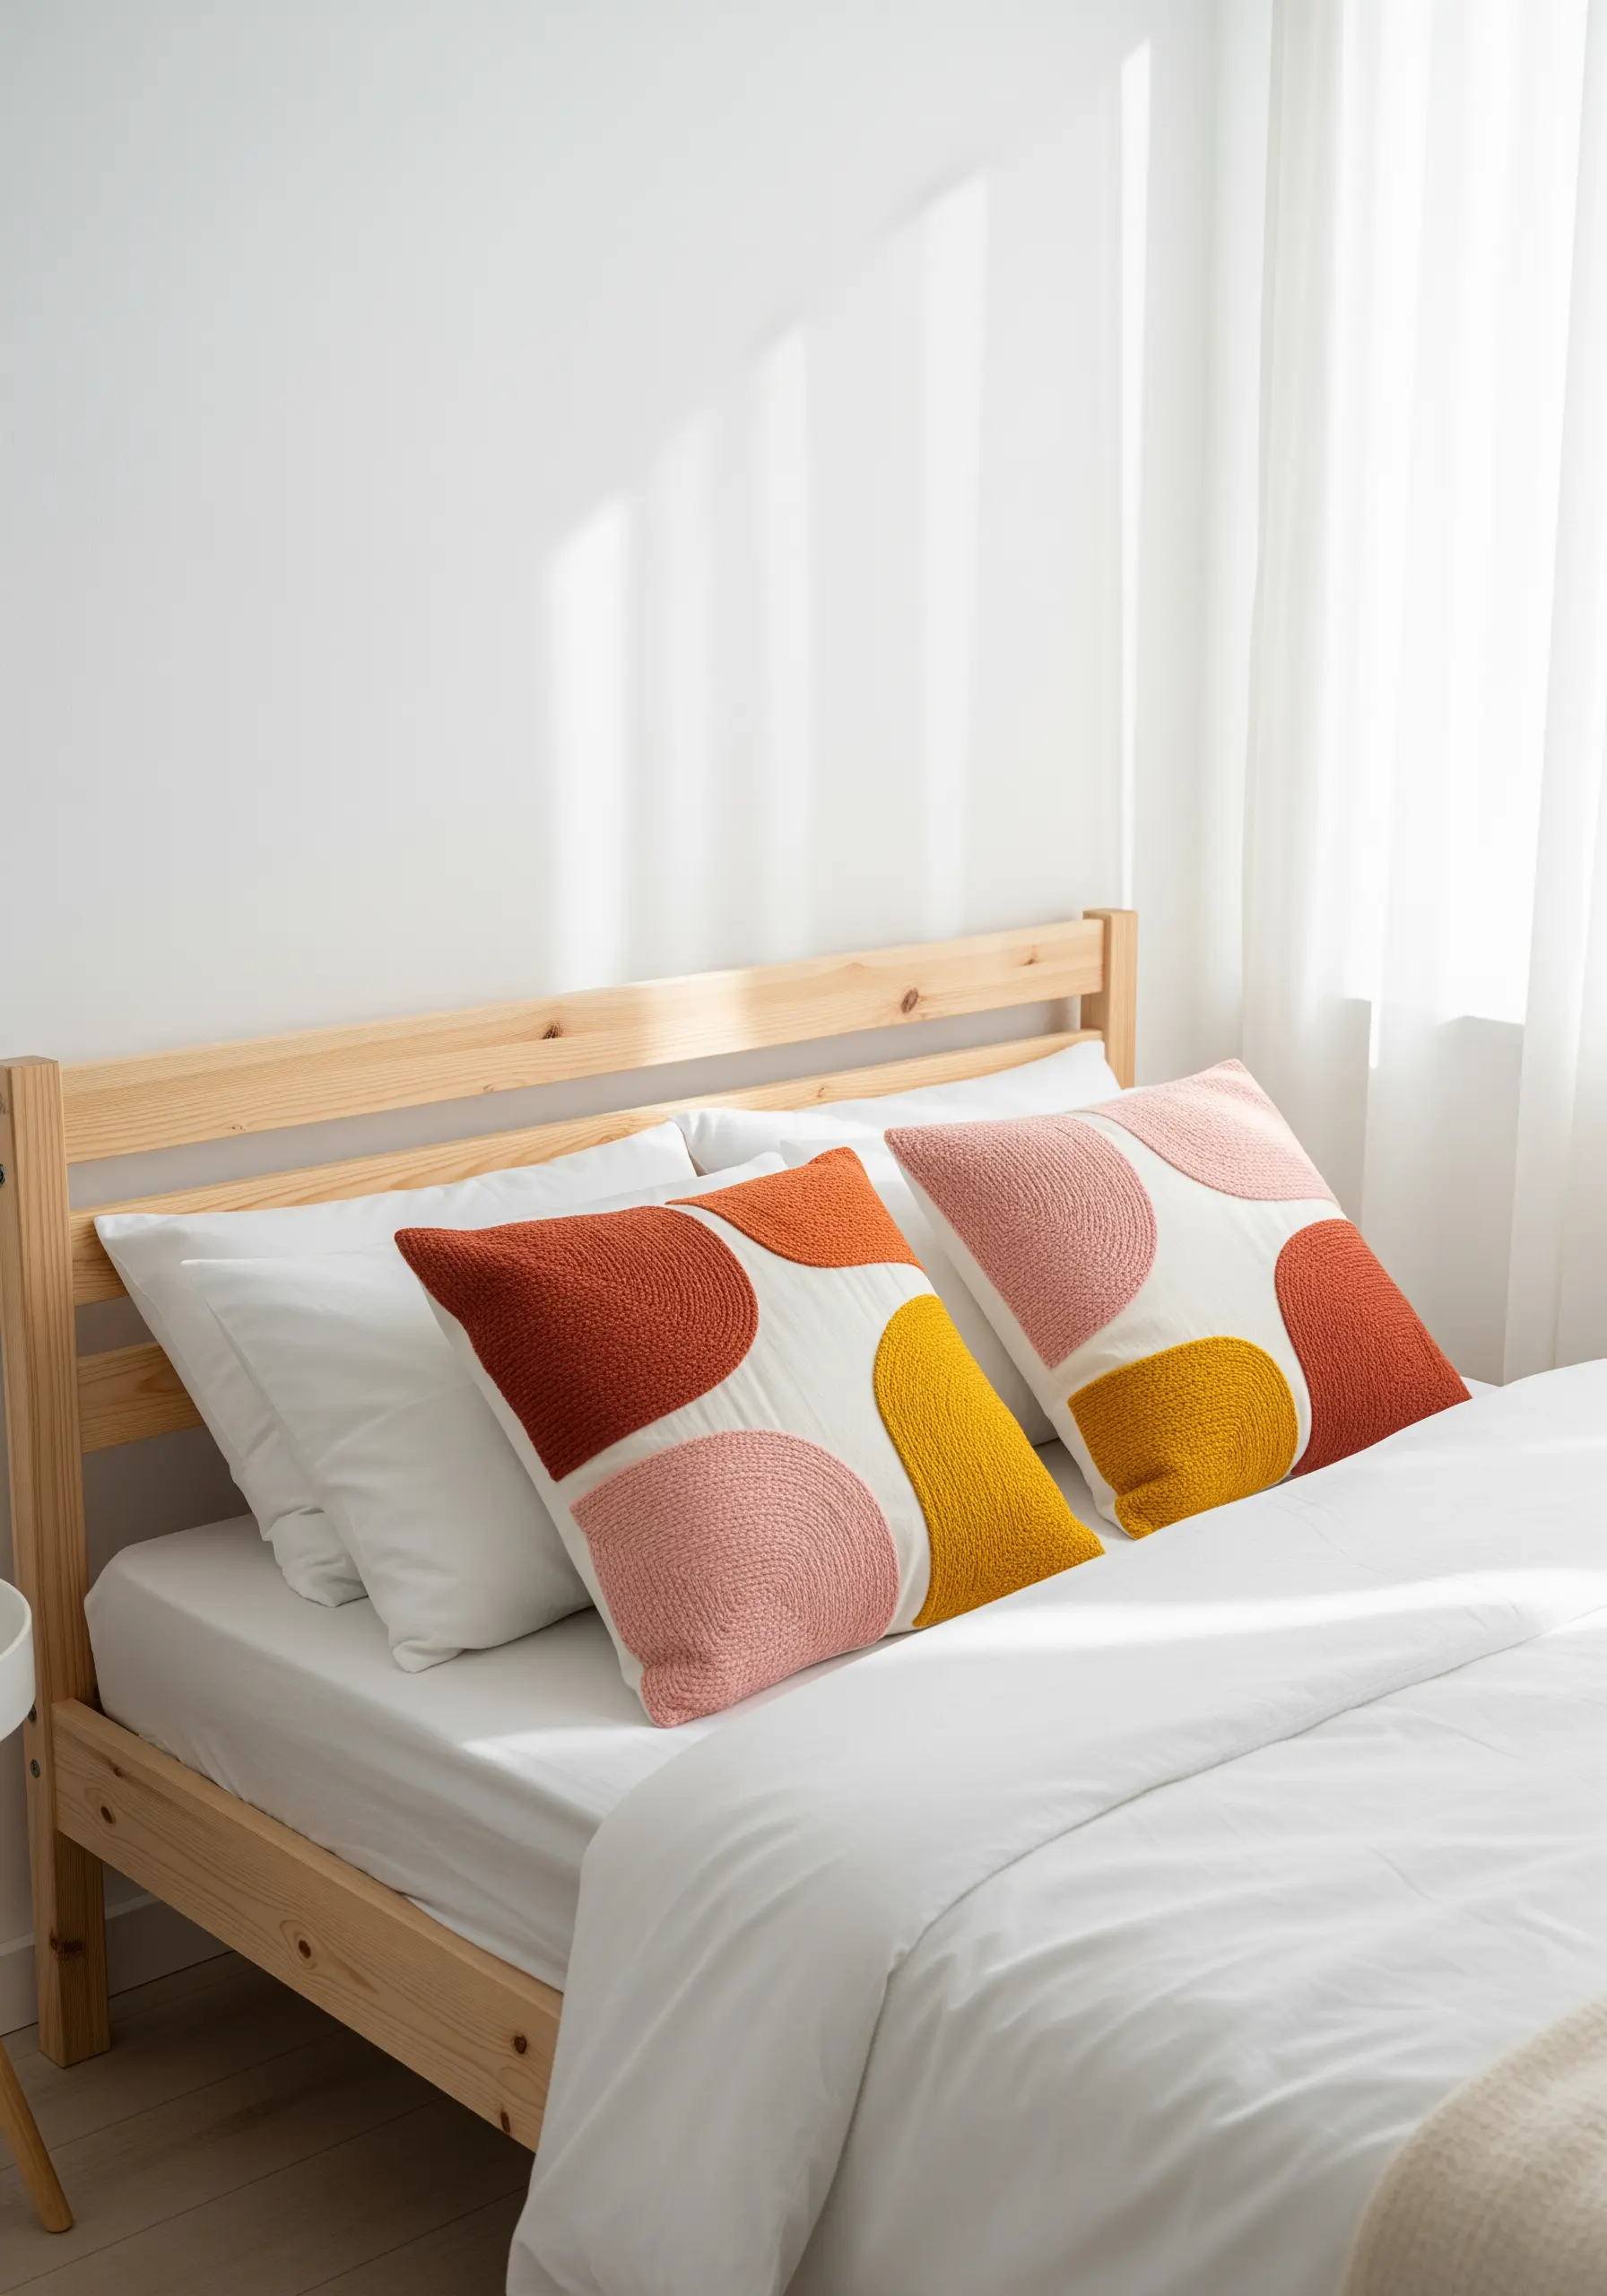
To create these bold abstract shapes with a satisfyingly plush texture, punch needle embroidery is your best tool.
Use a medium-to-chunky weight yarn and keep your loop height consistent across each color block for a uniform, carpet-like finish.
The key to this modern aesthetic is the clean edge between colors.
To achieve this, outline your shape with a row of stitches first, then fill inwards—this creates a crisp border that defines the composition.
4. Create Rhythmic Texture with Varied Running Stitches

A simple running stitch gains incredible sophistication when used to create a large-scale pattern.
Choose a thicker thread, like a #8 pearl cotton, to give your stitches presence against the fabric.
Instead of uniform stitches, vary their length in a repeating sequence to build a subtle, grid-like texture that feels both organic and structured.
Working in a monochrome palette—like cream on oatmeal linen—focuses all the attention on this beautiful, calming rhythm.
5. Stitch Undulating Lines for a Sense of Calm
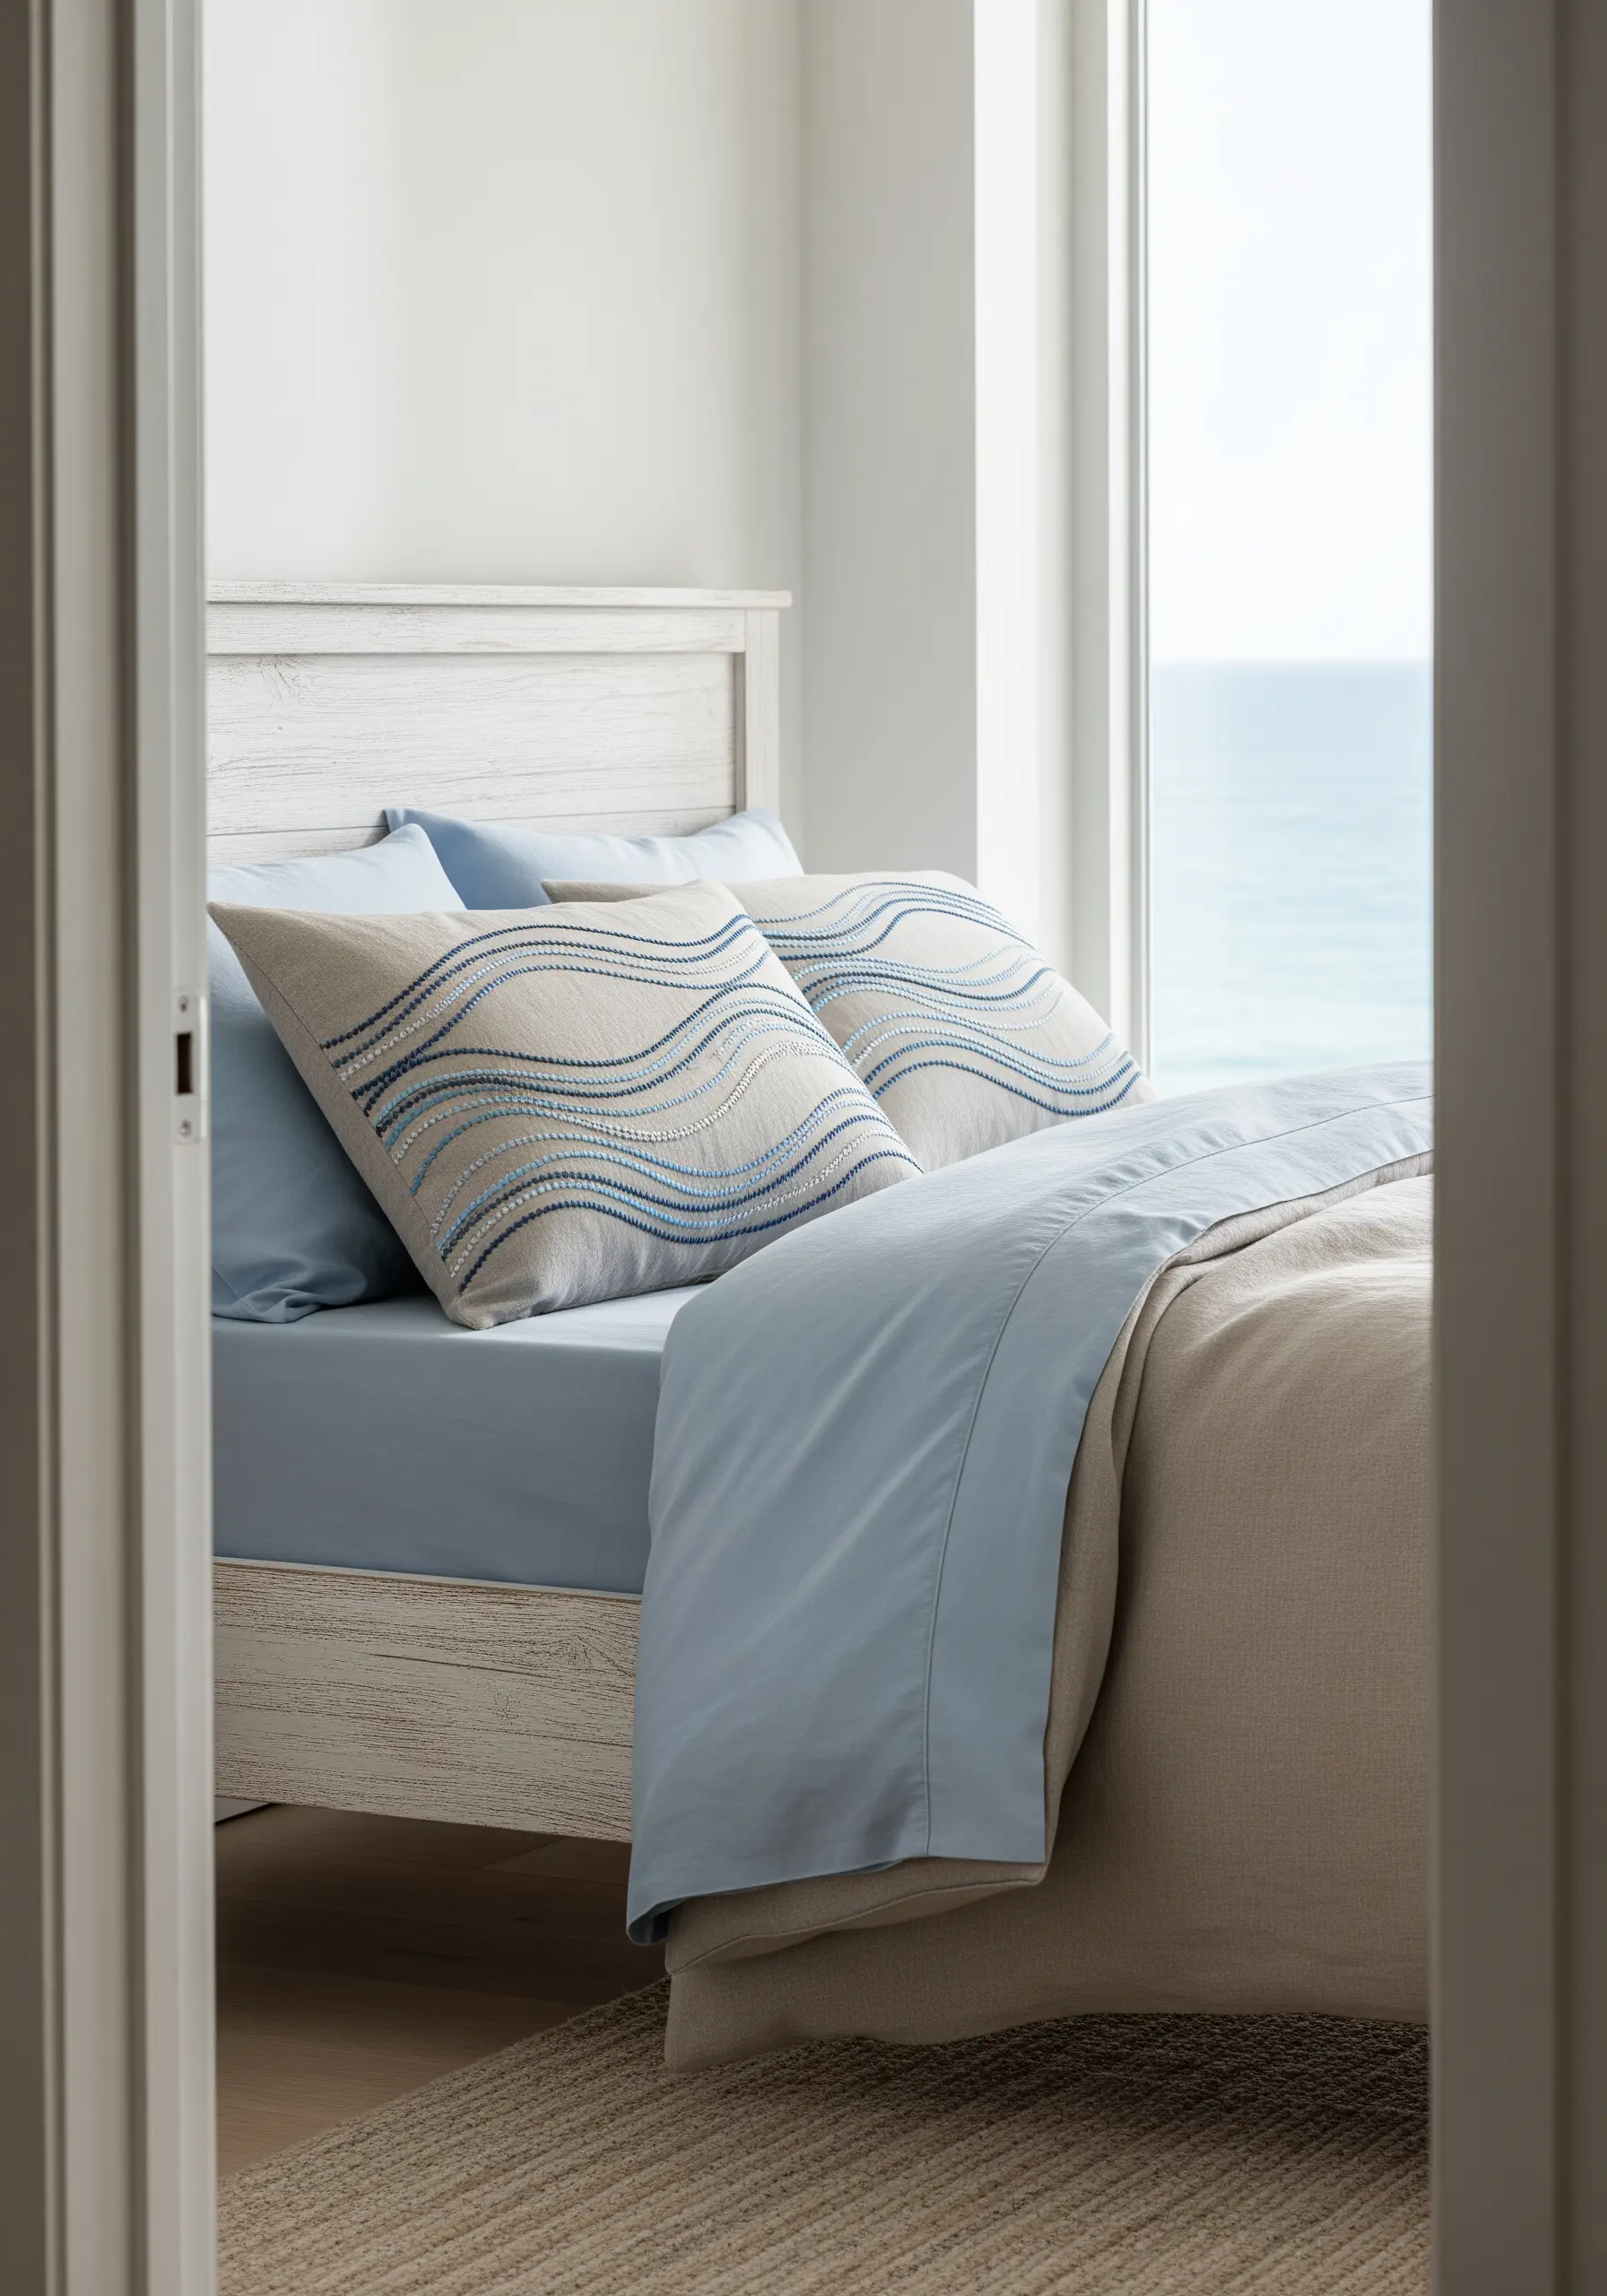
Capture the soothing motion of water by embroidering gentle, flowing lines.
Use a whipped backstitch or a chain stitch to create raised, rope-like waves that have dimension and smoothness.
To enhance the effect, use an ombré color palette, transitioning from a deep blue to a pale seafoam and white.
Arrange the stitched lines with uneven spacing to mimic natural wave patterns, making the design feel more dynamic and restful.
6. Build a Meditative Mandala with Layered Stitches
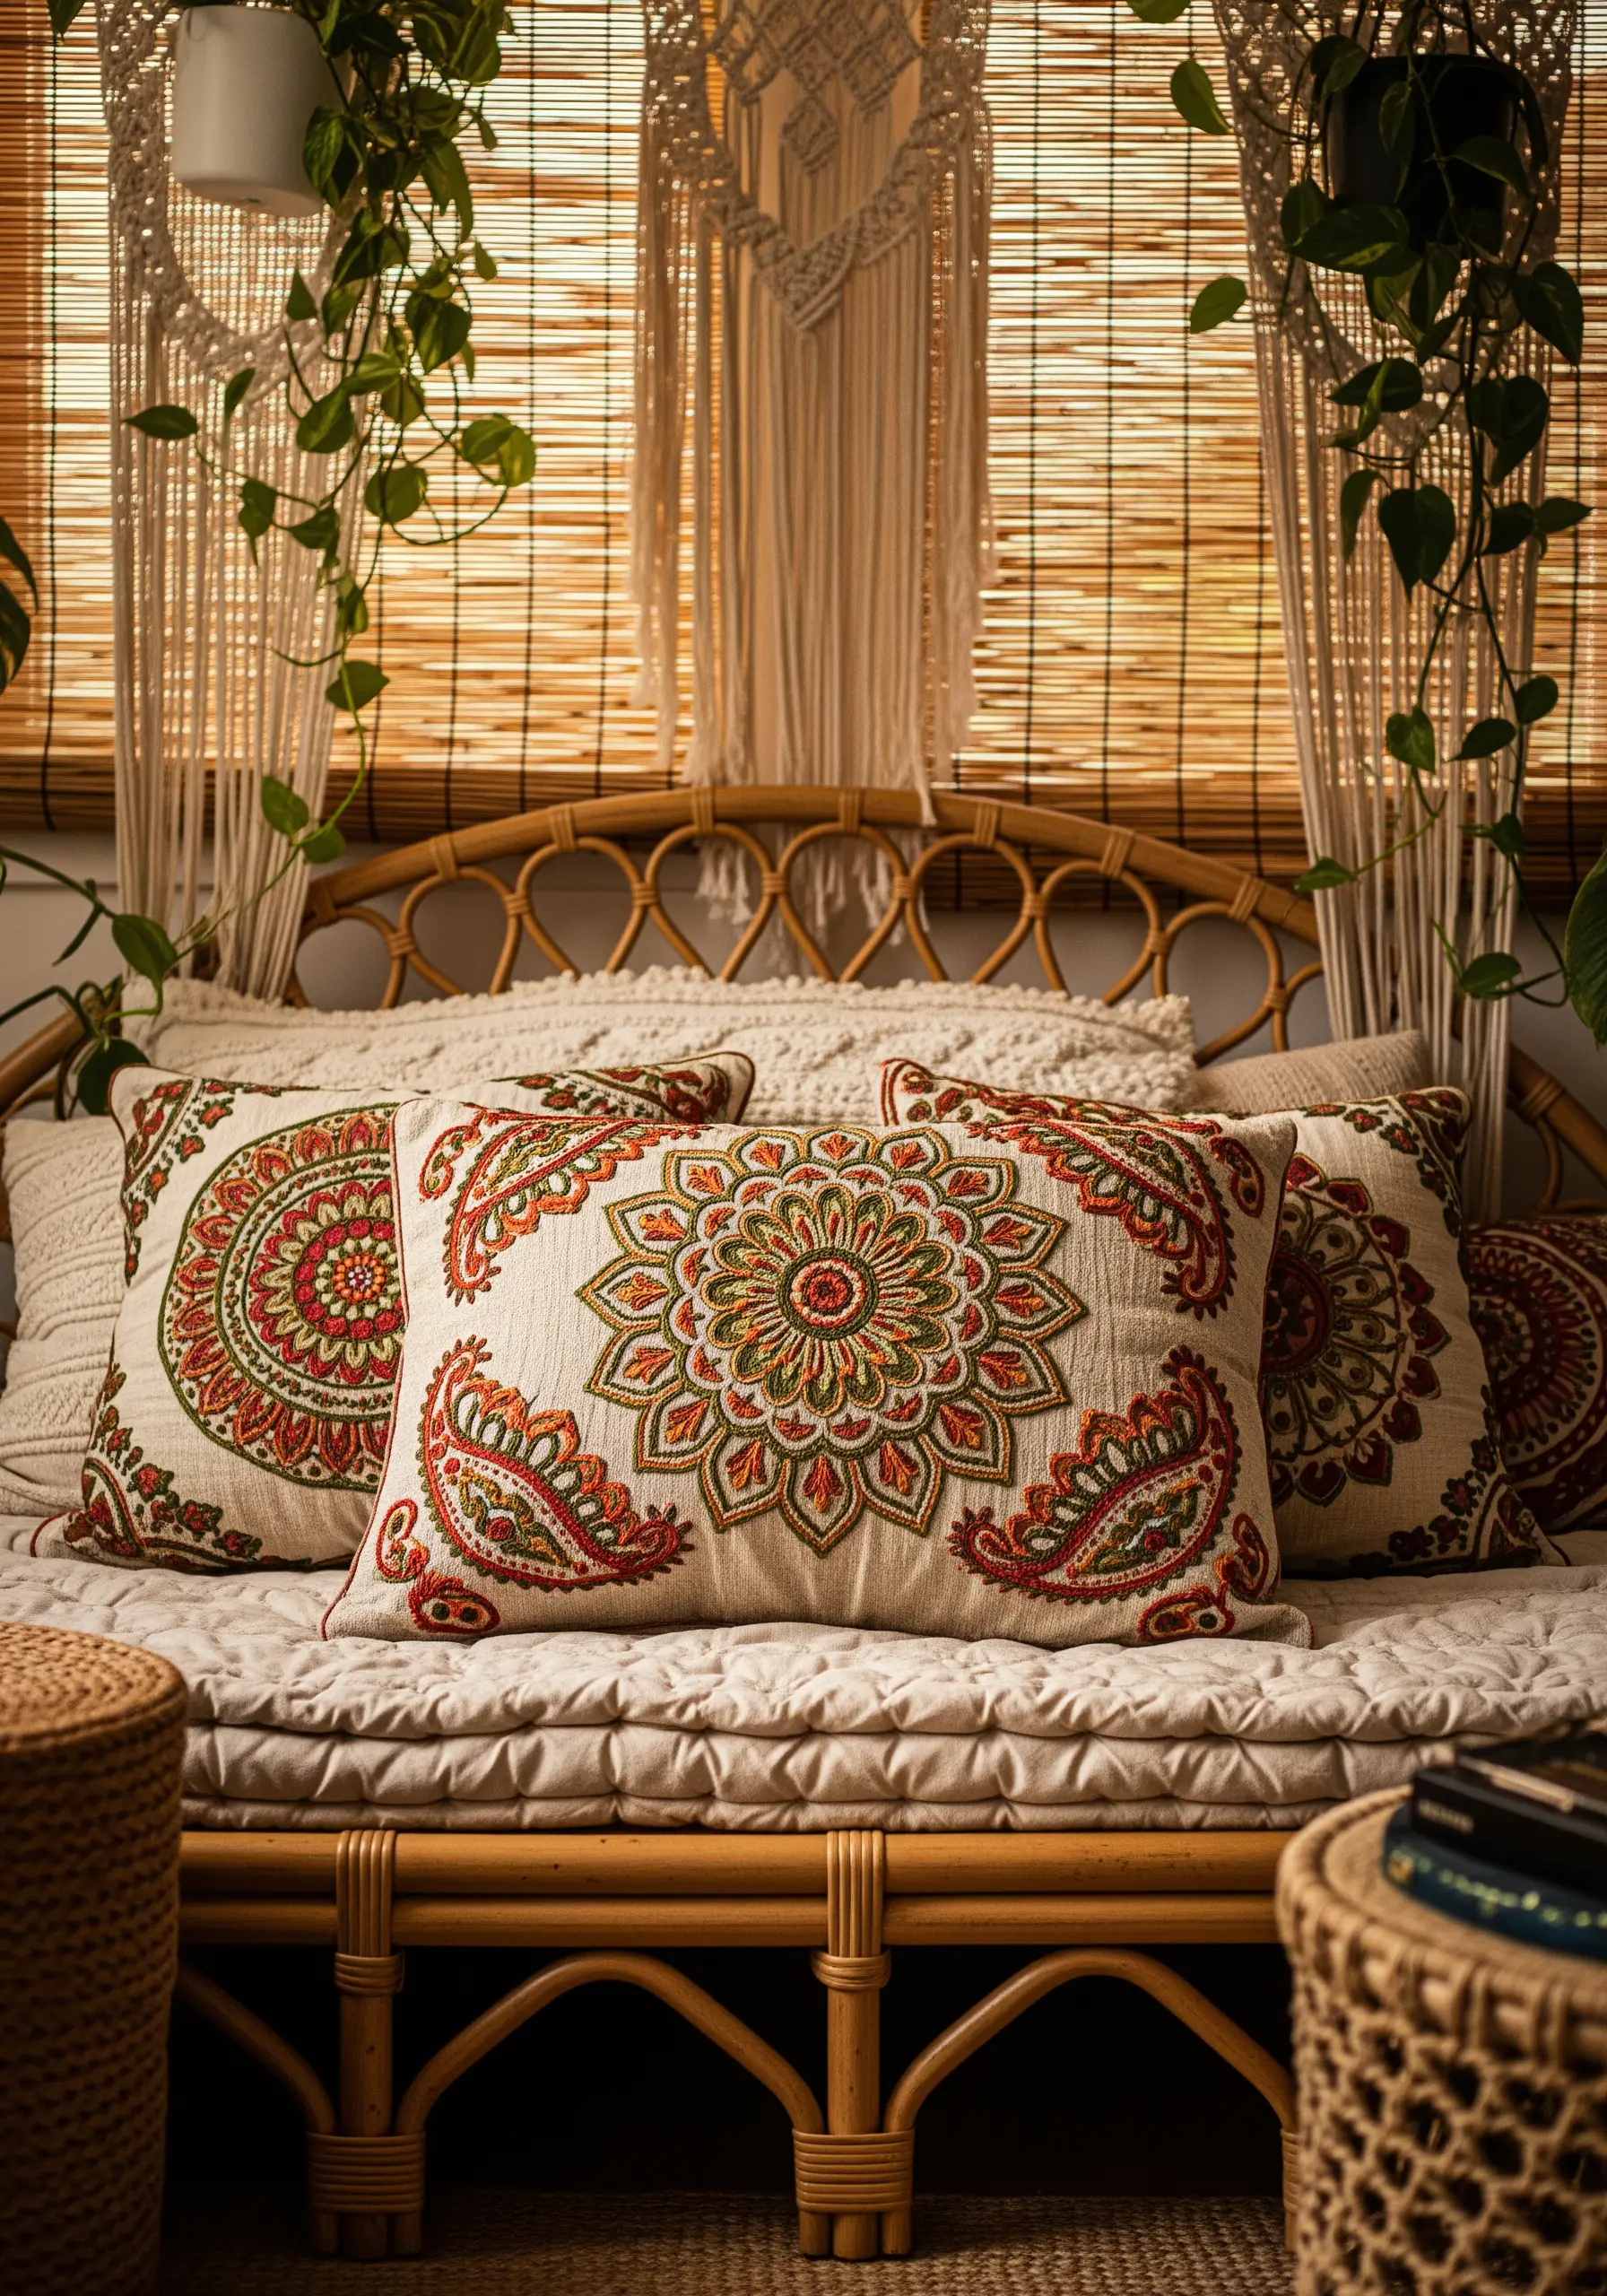
A complex meditative mandala becomes manageable when you approach it in layers.
Start from the center and work your way out, completing one ring of the pattern at a time.
Combine different stitches to create varied textures: use satin stitch for bold, solid shapes, chain stitch for delicate outlines, and French knots for dotted accents.
A warm, analogous color scheme of rust, olive, and gold keeps the intricate design feeling harmonious and grounded, not busy.
7. Add Bold Dimension with Couched Braided Cord
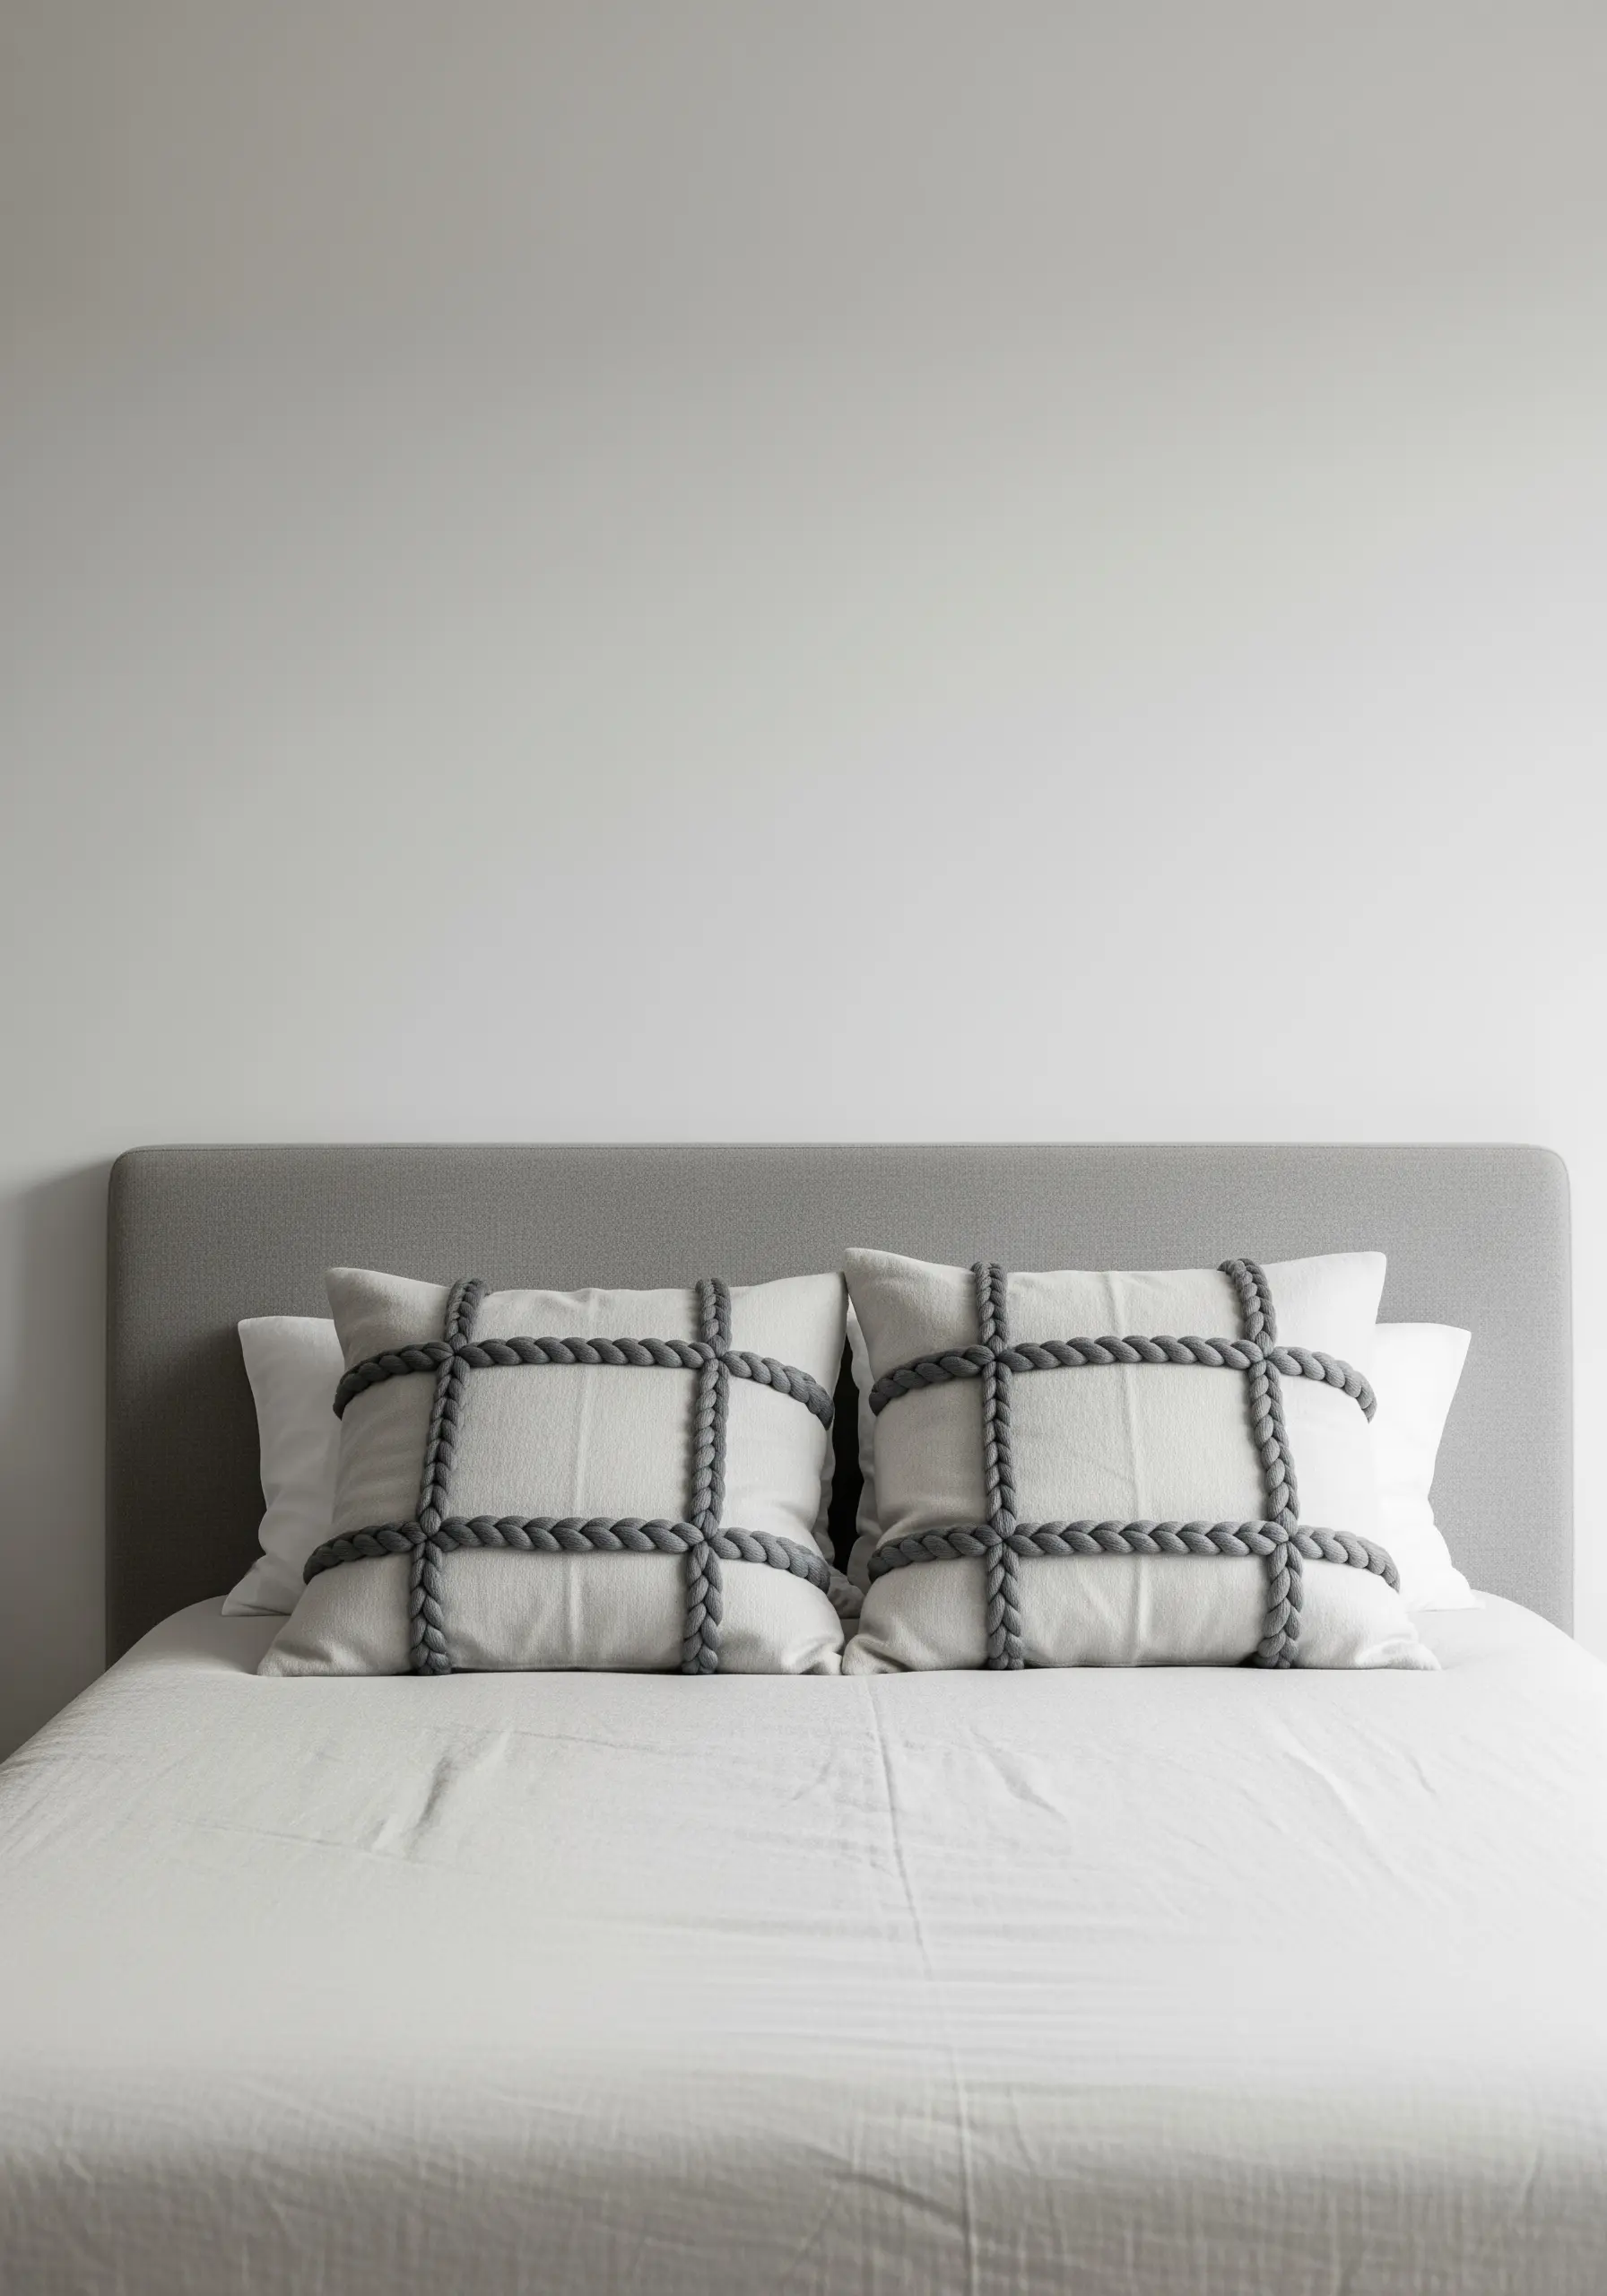
For a high-impact, three-dimensional grid, work with a thick, pre-braided cord or yarn.
You won’t stitch *with* this material, but *onto* it.
Lay the cord on your pillow cover and use a durable, matching embroidery floss to tack it down with small, evenly spaced couching stitches.
This technique allows you to add dramatic, sculptural lines and mixed-fiber textures that would be impossible with a needle alone.
8. Achieve Art Deco Elegance with Graphic Outlines
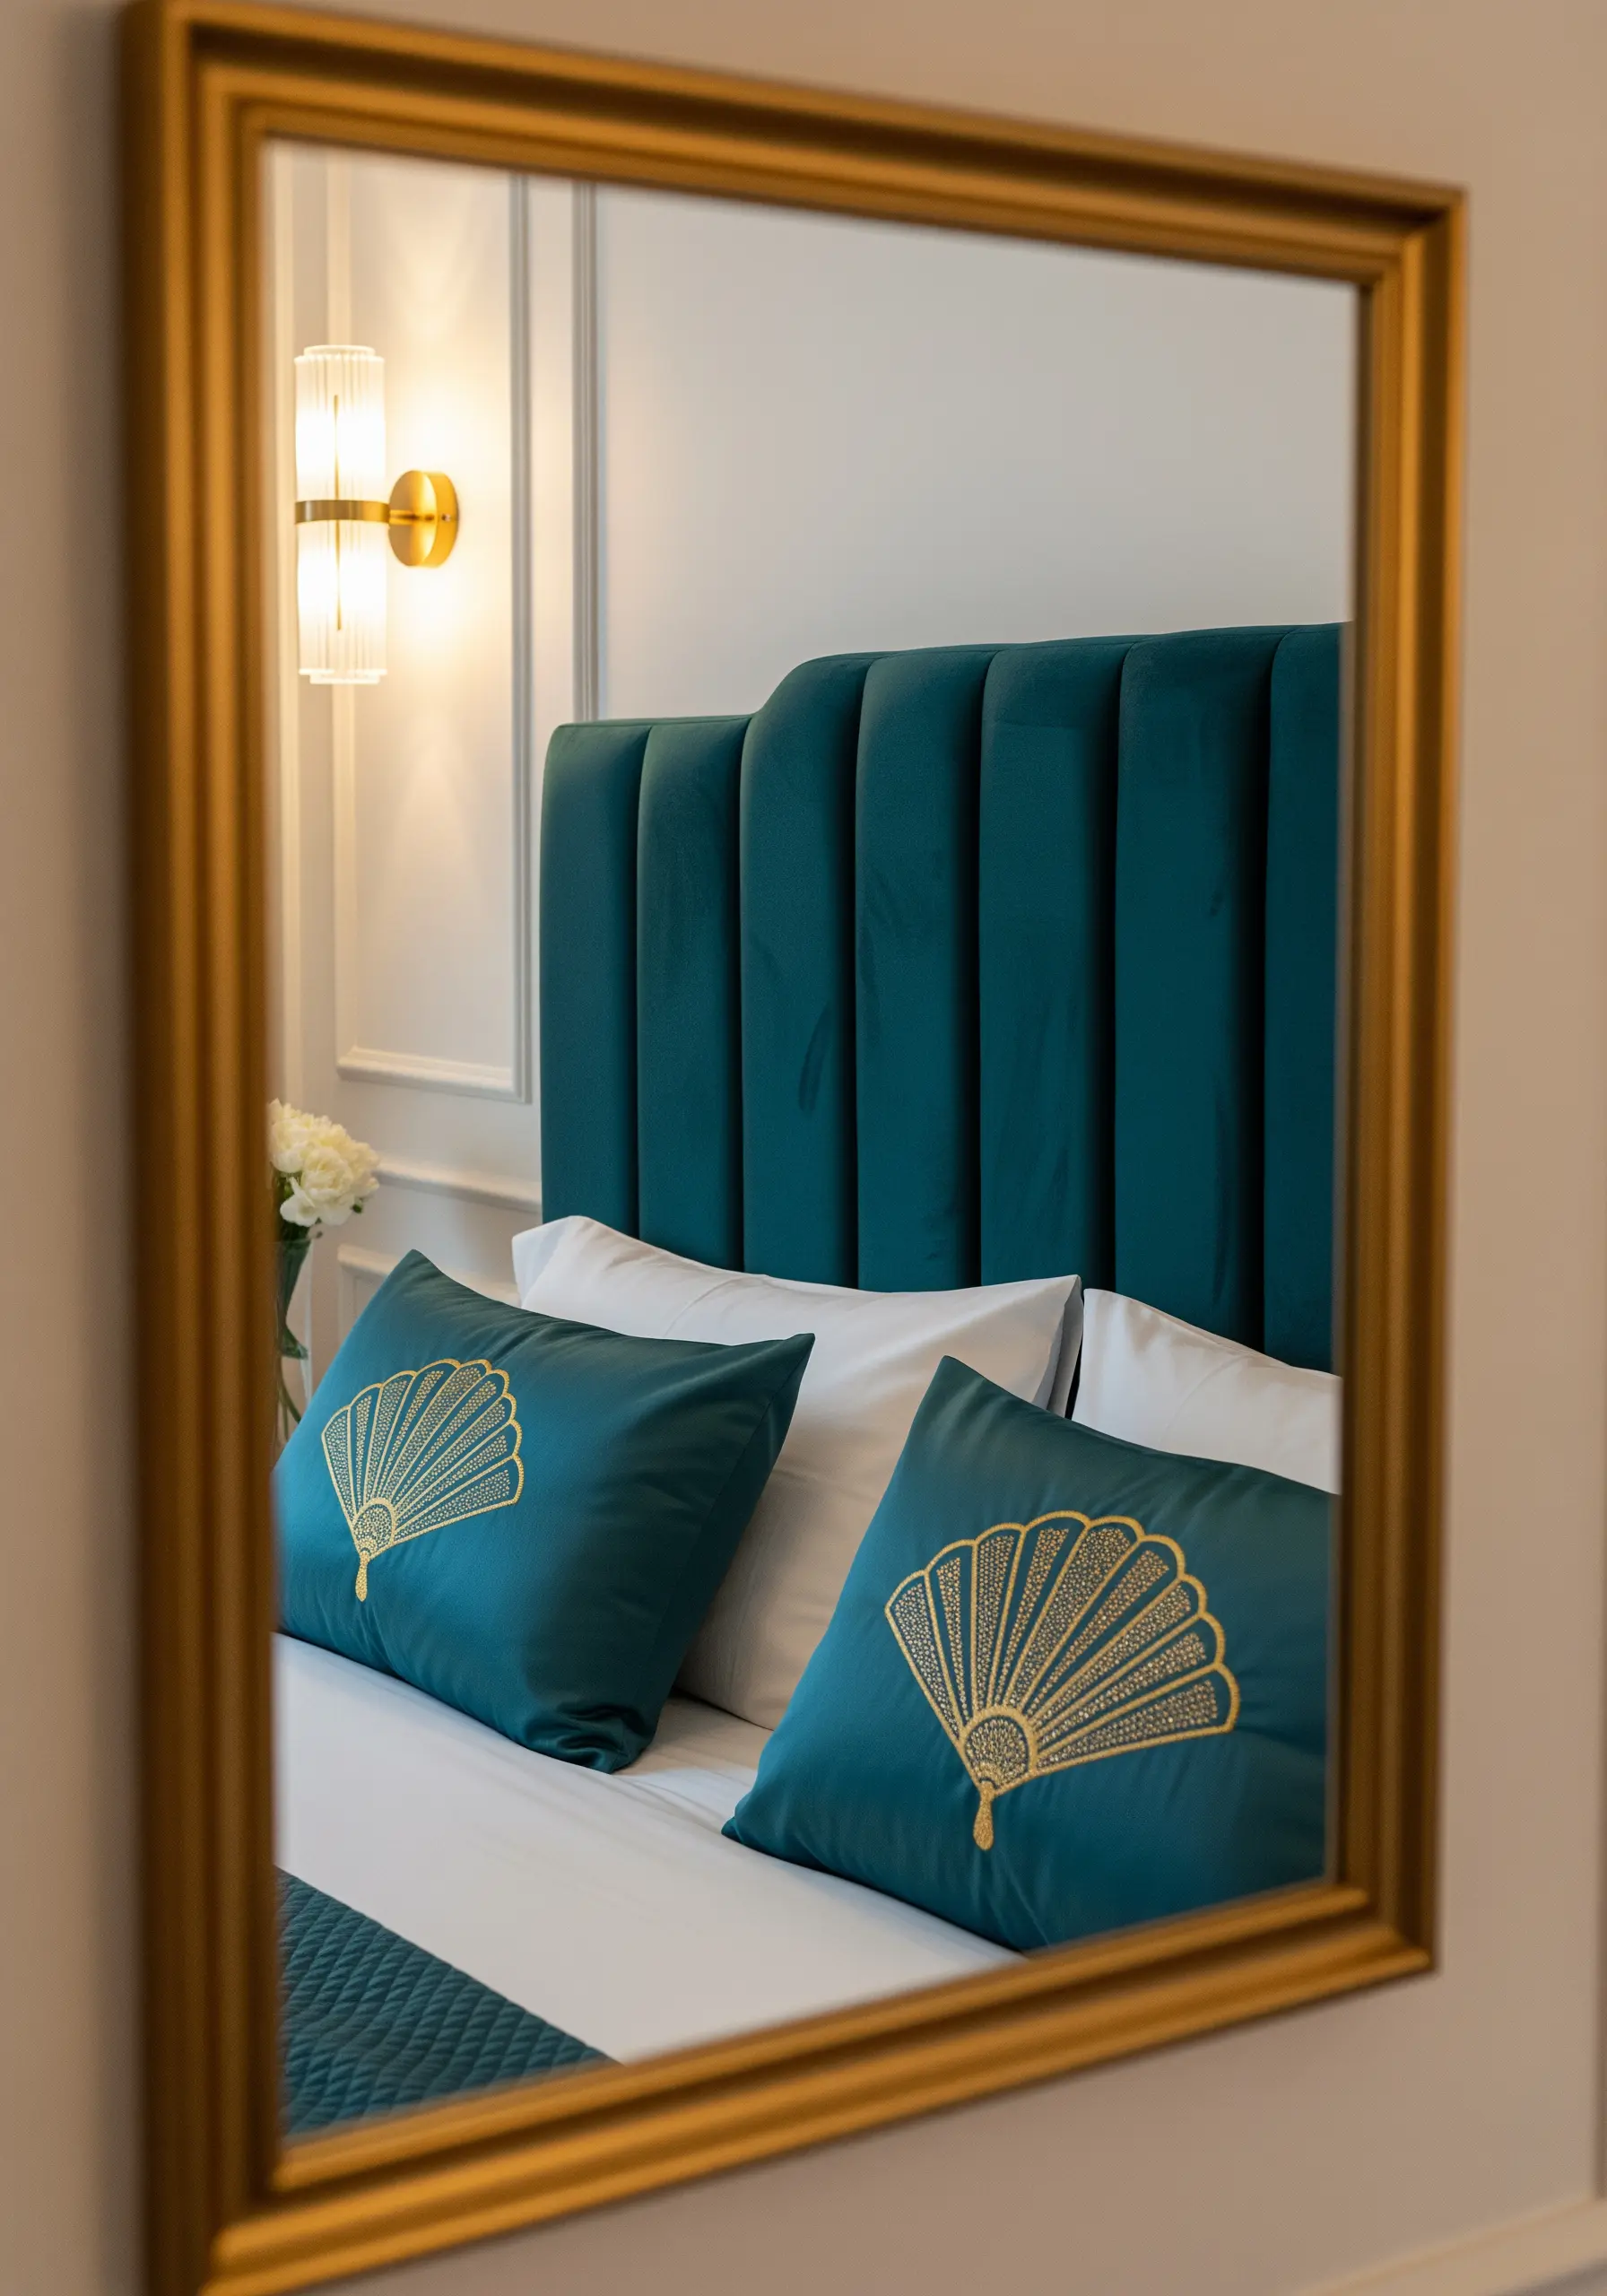
The key to this sharp, Art Deco-inspired fan is flawless linework.
Before filling the shape, outline every edge with a precise split stitch. This creates a subtle, raised border that will contain your satin stitches and give them a clean, sharp edge.
Use a single color of metallic thread against a dark background, like gold on teal silk or velvet, for a look that feels both luxurious and confidently modern.
9. Embrace Calm with Minimalist Single-Stem Florals
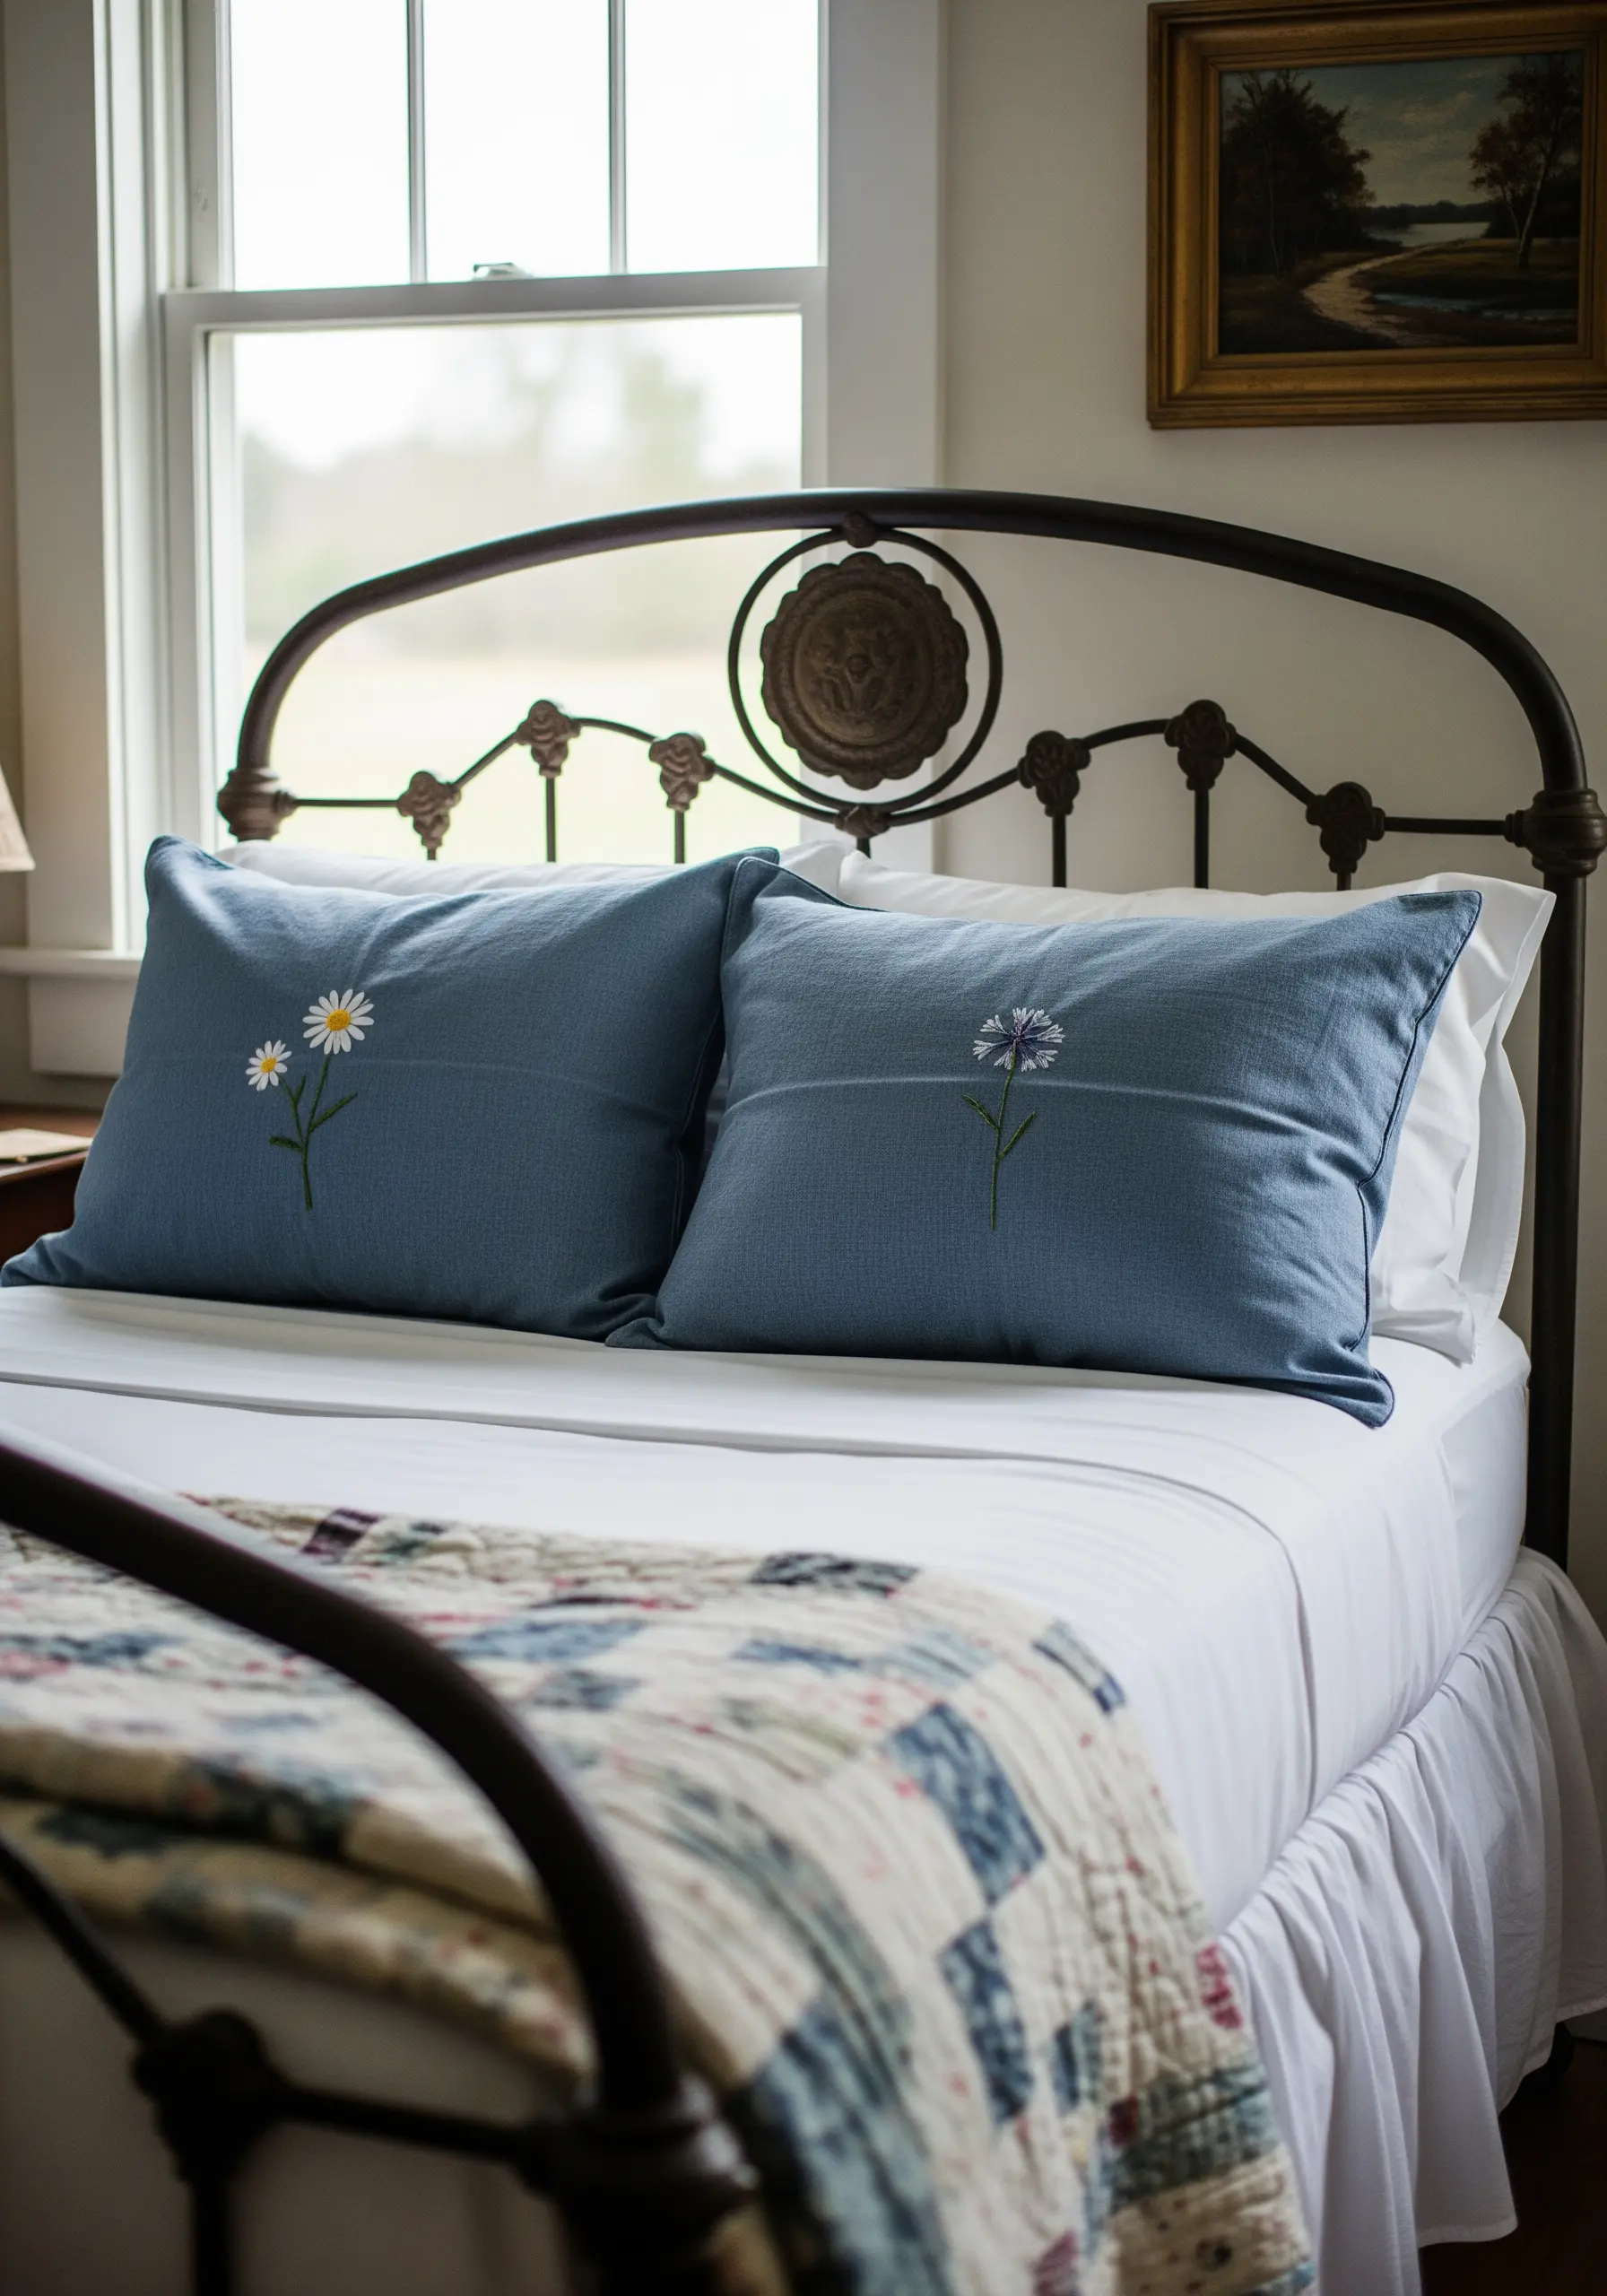
You don’t need a dense pattern to make an impact. A single, well-placed flower on each pillow creates a feeling of quiet contemplation.
Use a detached chain stitch (also known as a lazy daisy) for the petals and a few French knots for the center.
The negative space around the motif is just as important as the stitches themselves, allowing the design to breathe. This is one of the easiest and most effective Minimalist embroidery projects for a serene bedroom.
10. Explore Freeform Texture with Organic Lines
Move beyond grids and symmetrical patterns by couching thick, braided yarn in organic, abstract lines.
Let the cord twist and turn freely, securing it with small, invisible stitches on the back.
The beauty of this technique is its spontaneity. There’s no precise pattern to follow, allowing you to create a unique, sculptural piece that emphasizes movement and texture.
A neutral color palette keeps the focus entirely on the intriguing, tactile forms.
11. Capture Natural Grace with Cascading Stitches
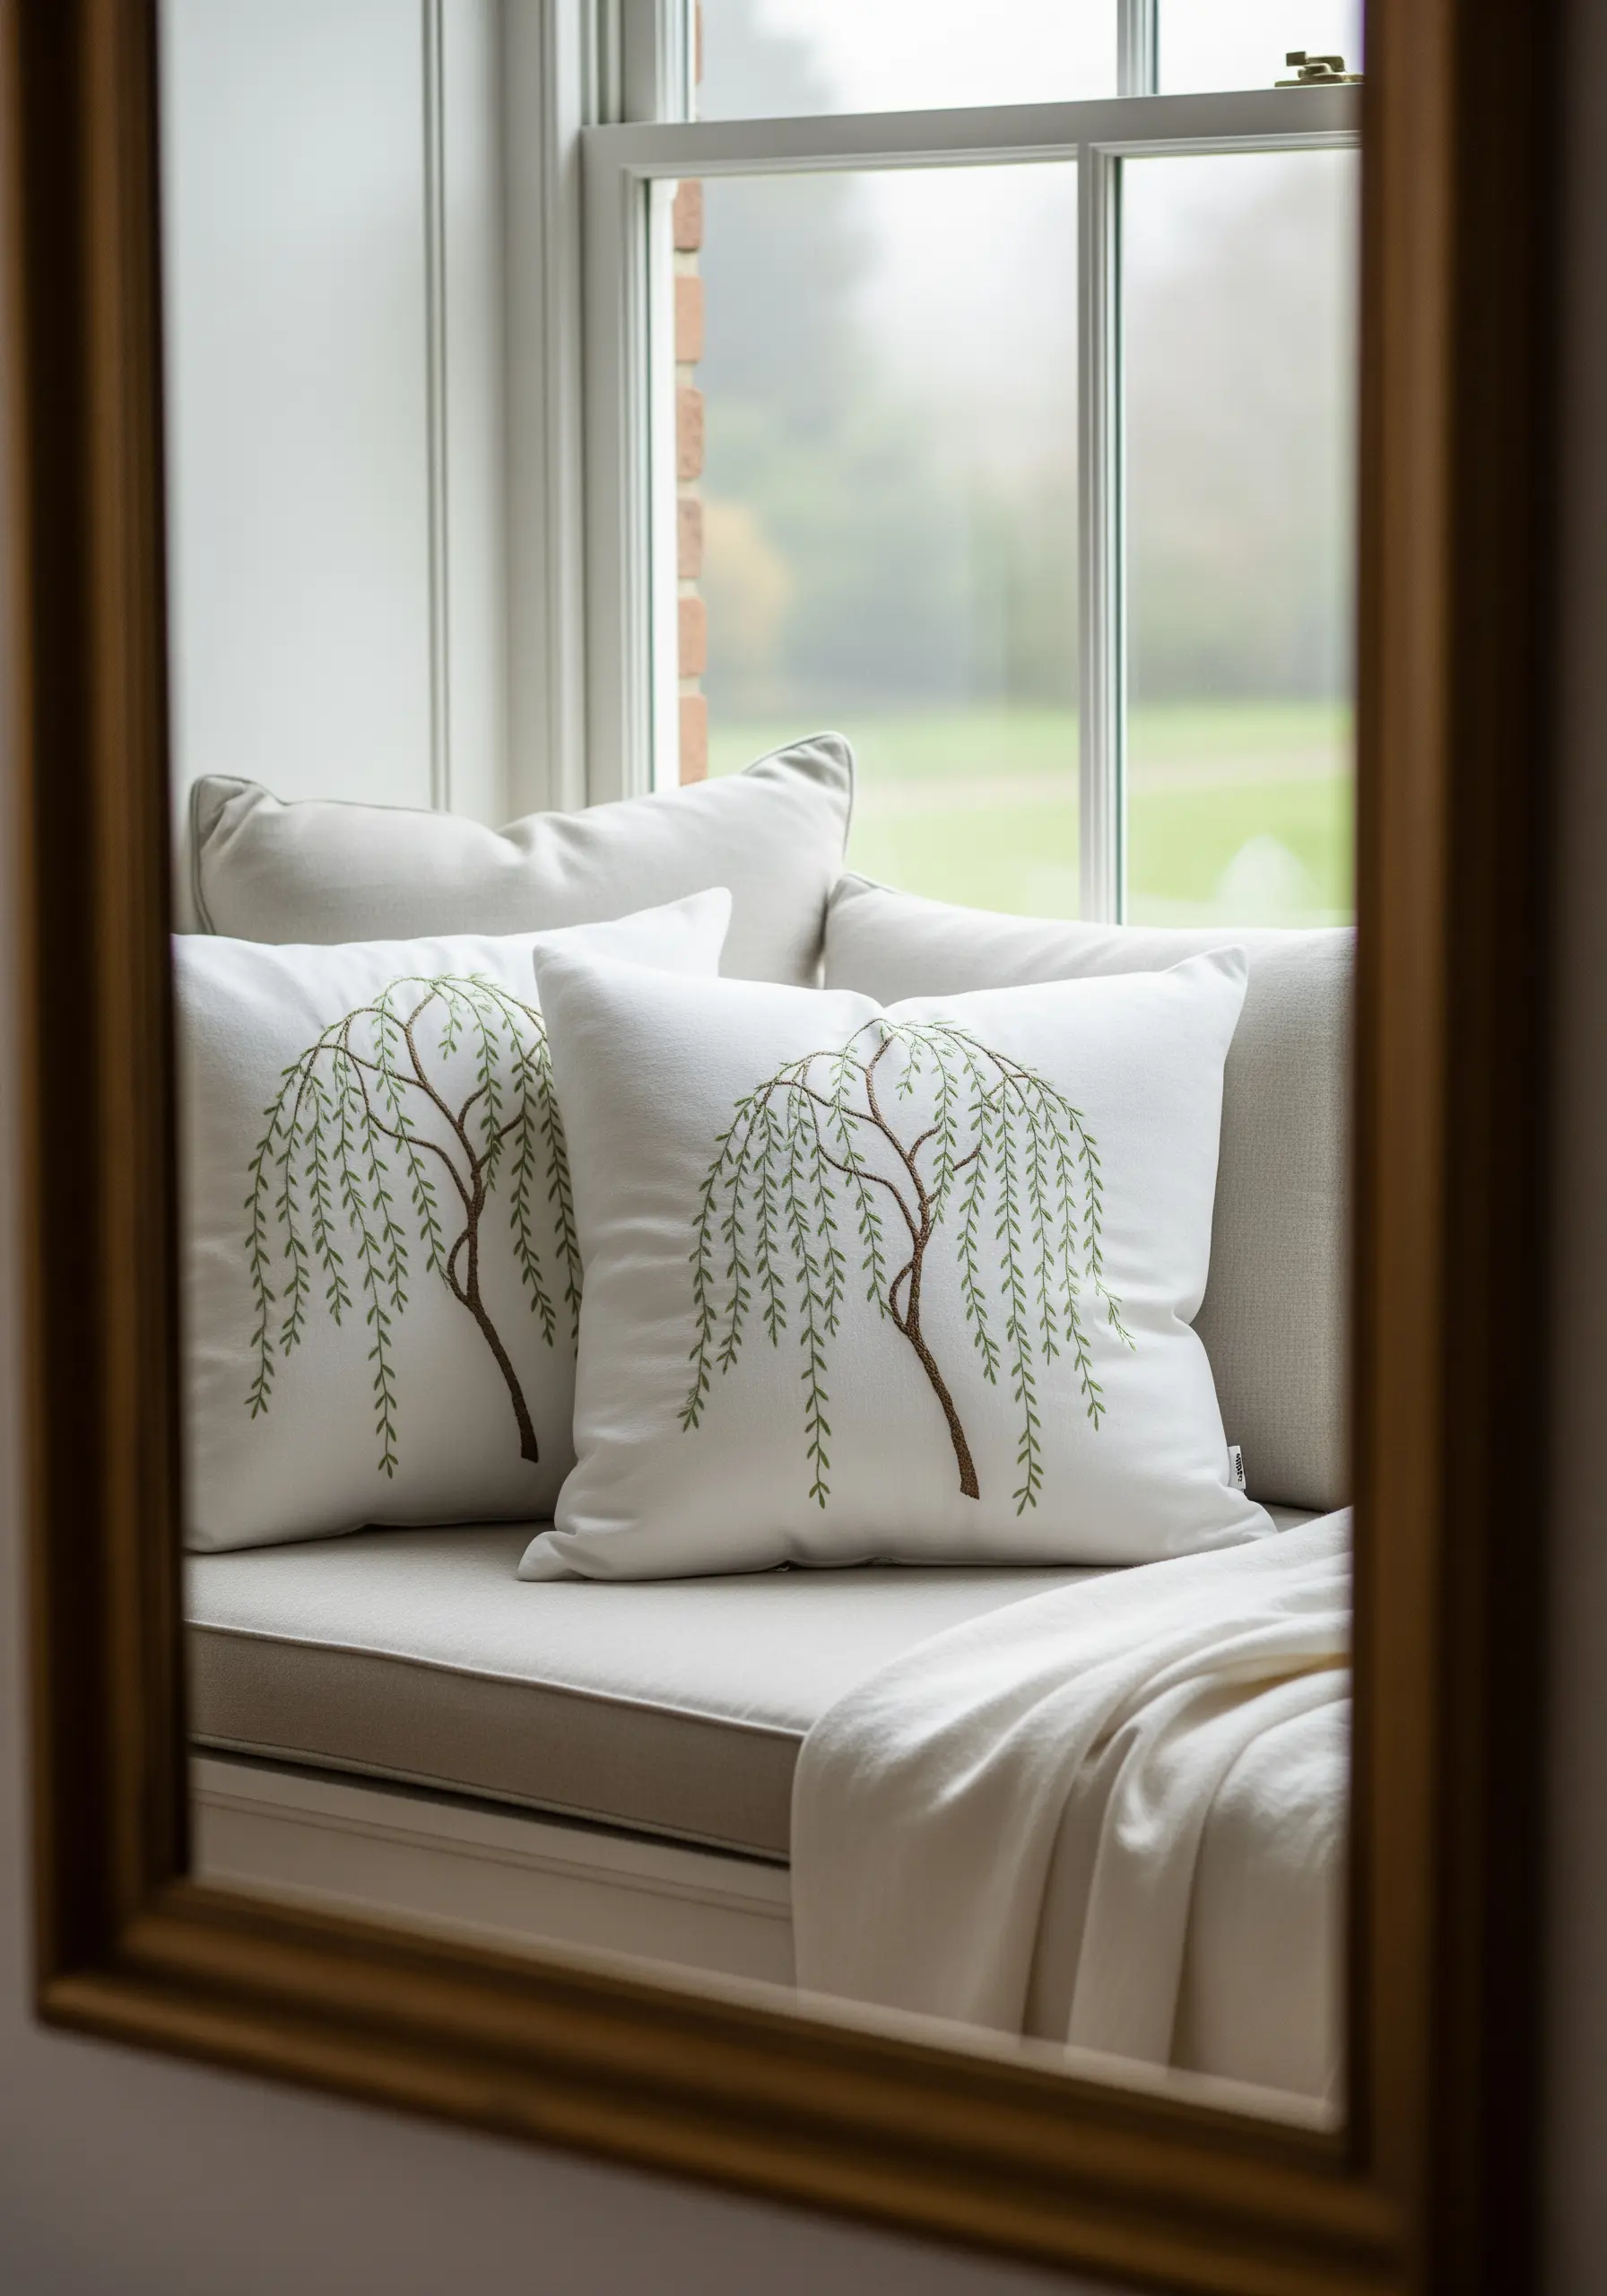
To embroider a weeping willow that truly feels like it’s draping, the direction of your stitches is everything.
Use a simple straight stitch for the hanging branches, but vary the length and angle of each one, letting them curve and overlap slightly.
This subtle variation is what creates the illusion of movement and depth.
For the delicate leaves and branches, use just one or two strands of floss to keep the design from feeling heavy.
12. Master Texture with Whitework Embroidery
White-on-white embroidery is a masterful study in texture, proving that you don’t need color to create a stunning design.
To make the motifs pop, use a variety of raised stitches. A padded satin stitch, where you lay down a foundation of straight stitches first, will make floral elements dimensional.
Combine this with dense fields of seed stitch and French knots to create shadows and highlights, letting the light do the work of color.
This is a perfect way to transform plain linen into an heirloom piece.
13. Add Intrigue with Interlocking Knotted Stitches
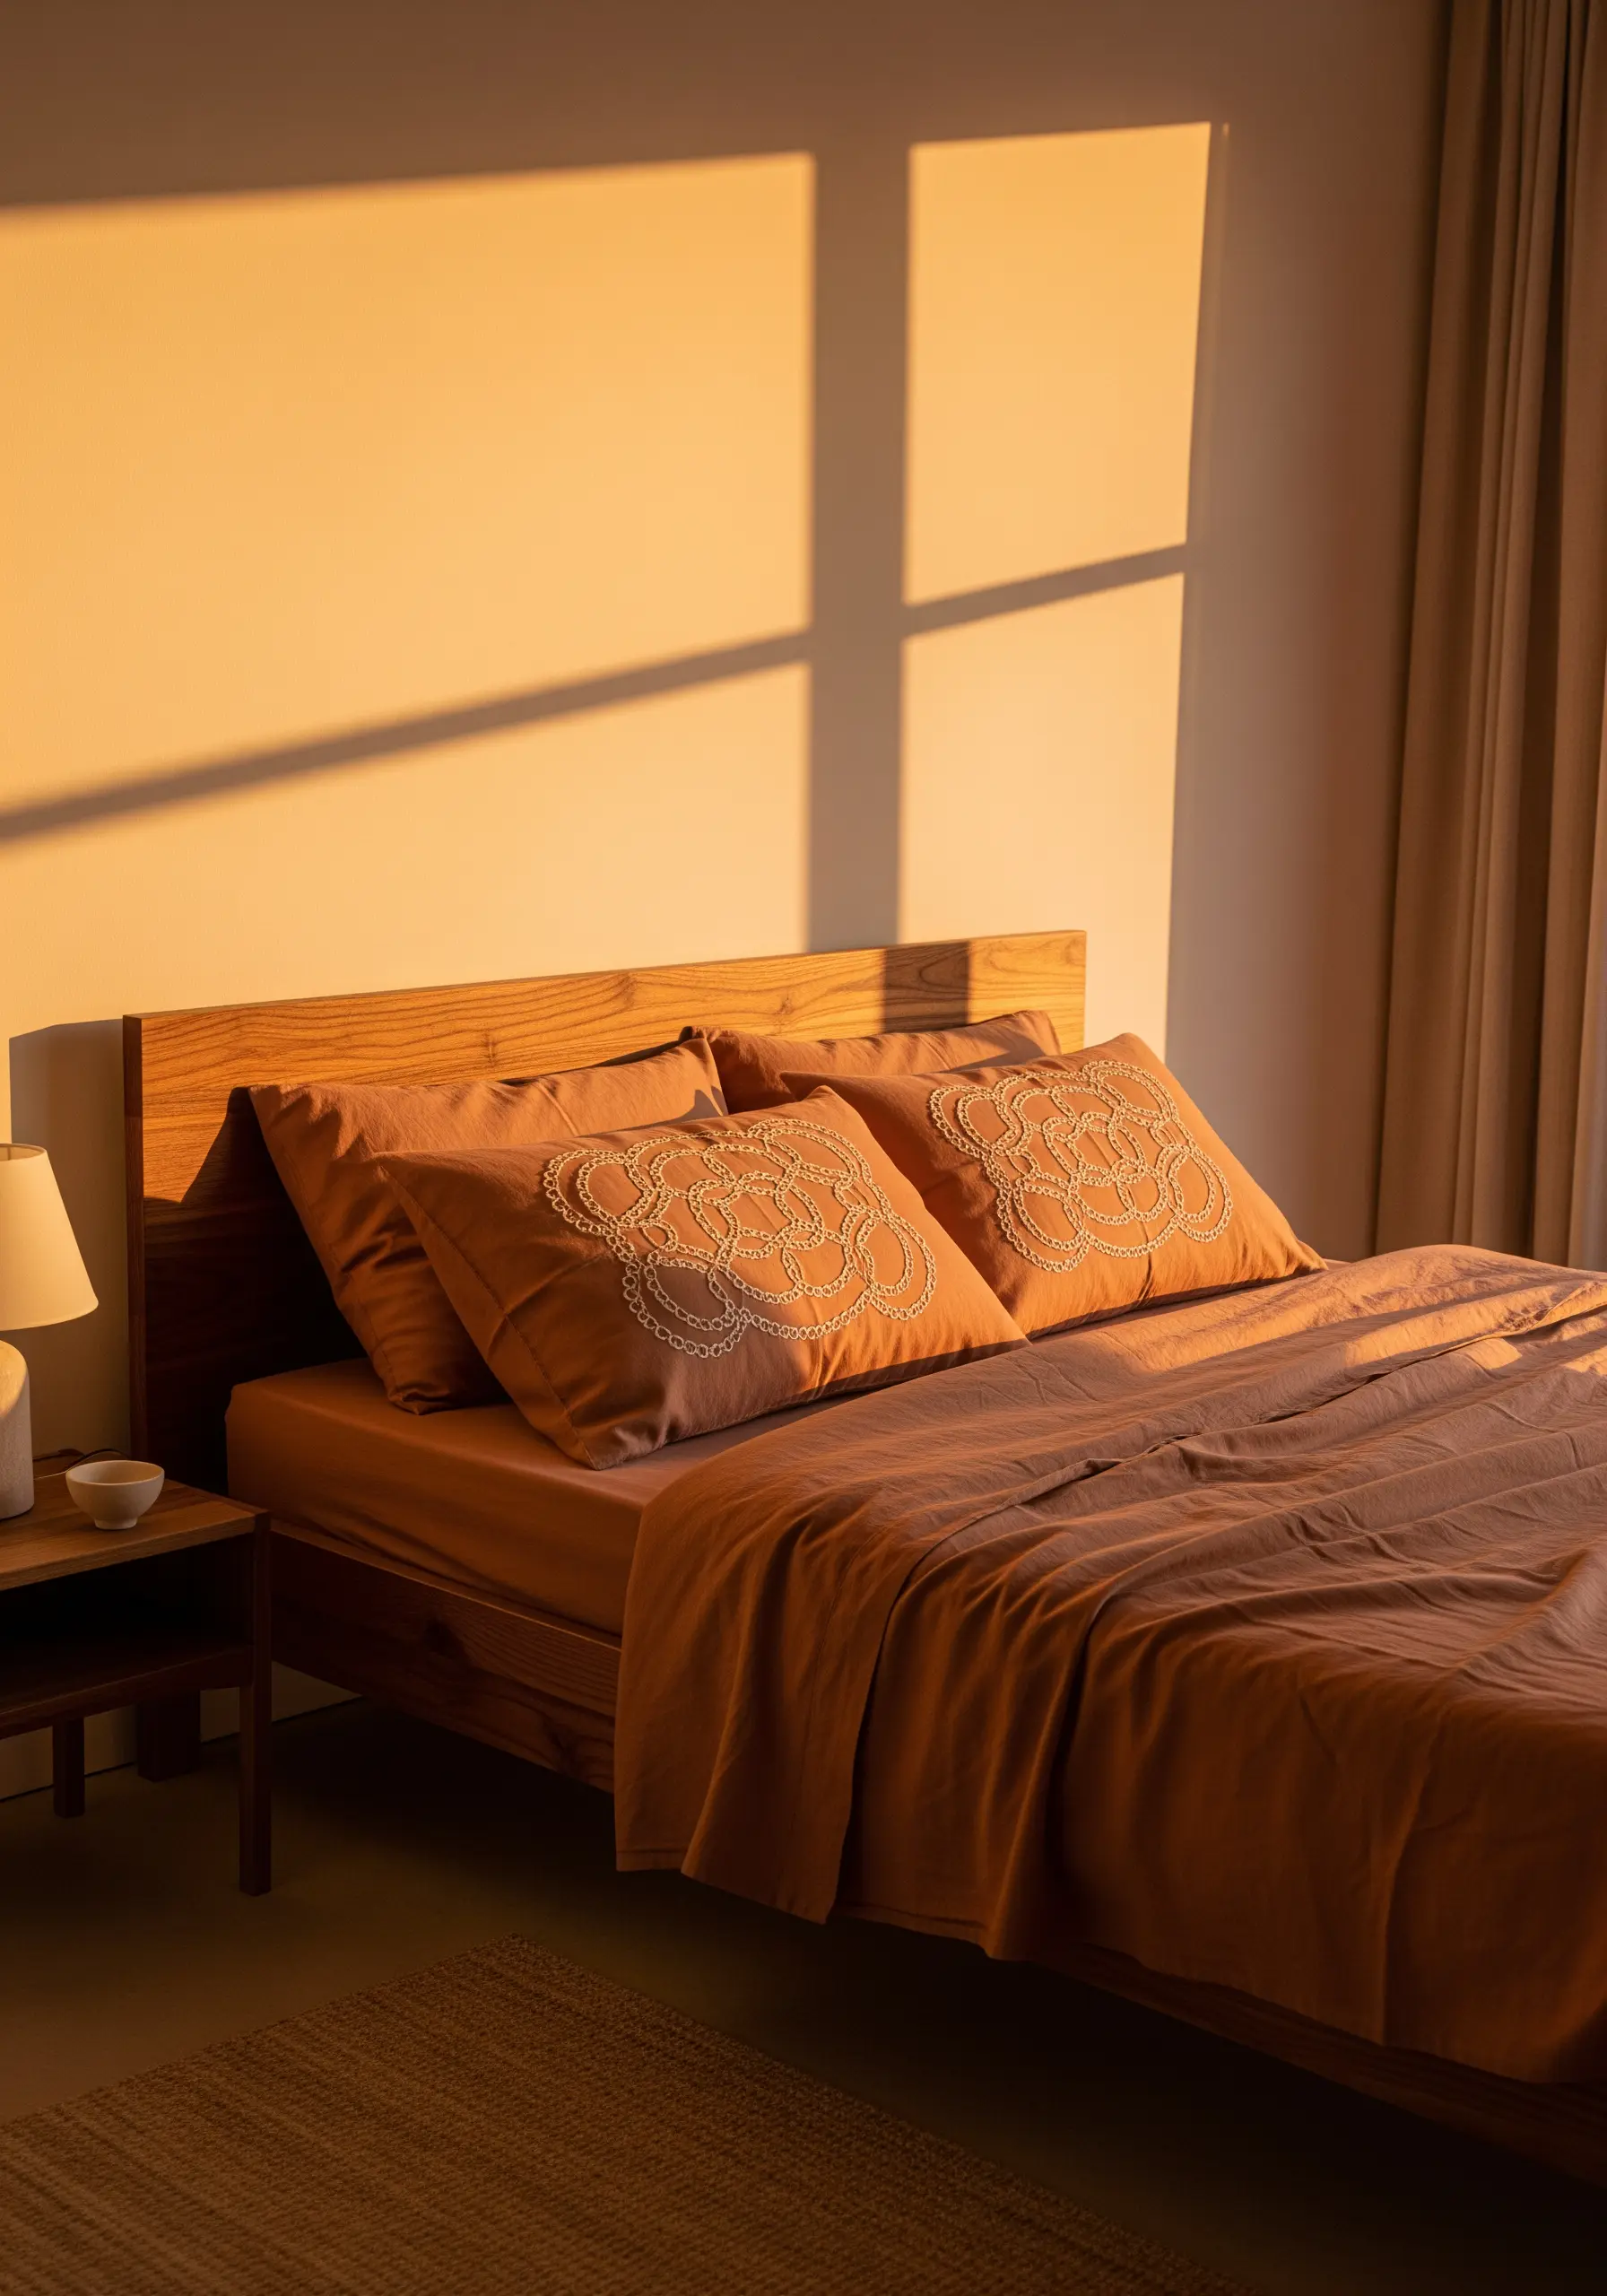
Create a pattern that invites a closer look by using a decorative, linked stitch like the Pekinese stitch or the Guernsey stitch.
These stitches build upon a simple backstitch foundation, weaving a second thread through to create a looped or knotted chain effect.
The result is far more intricate than a simple line but just as easy to work once you find your rhythm.
Using this technique in warm earth tones like terracotta adds a touch of grounded, handmade luxury.
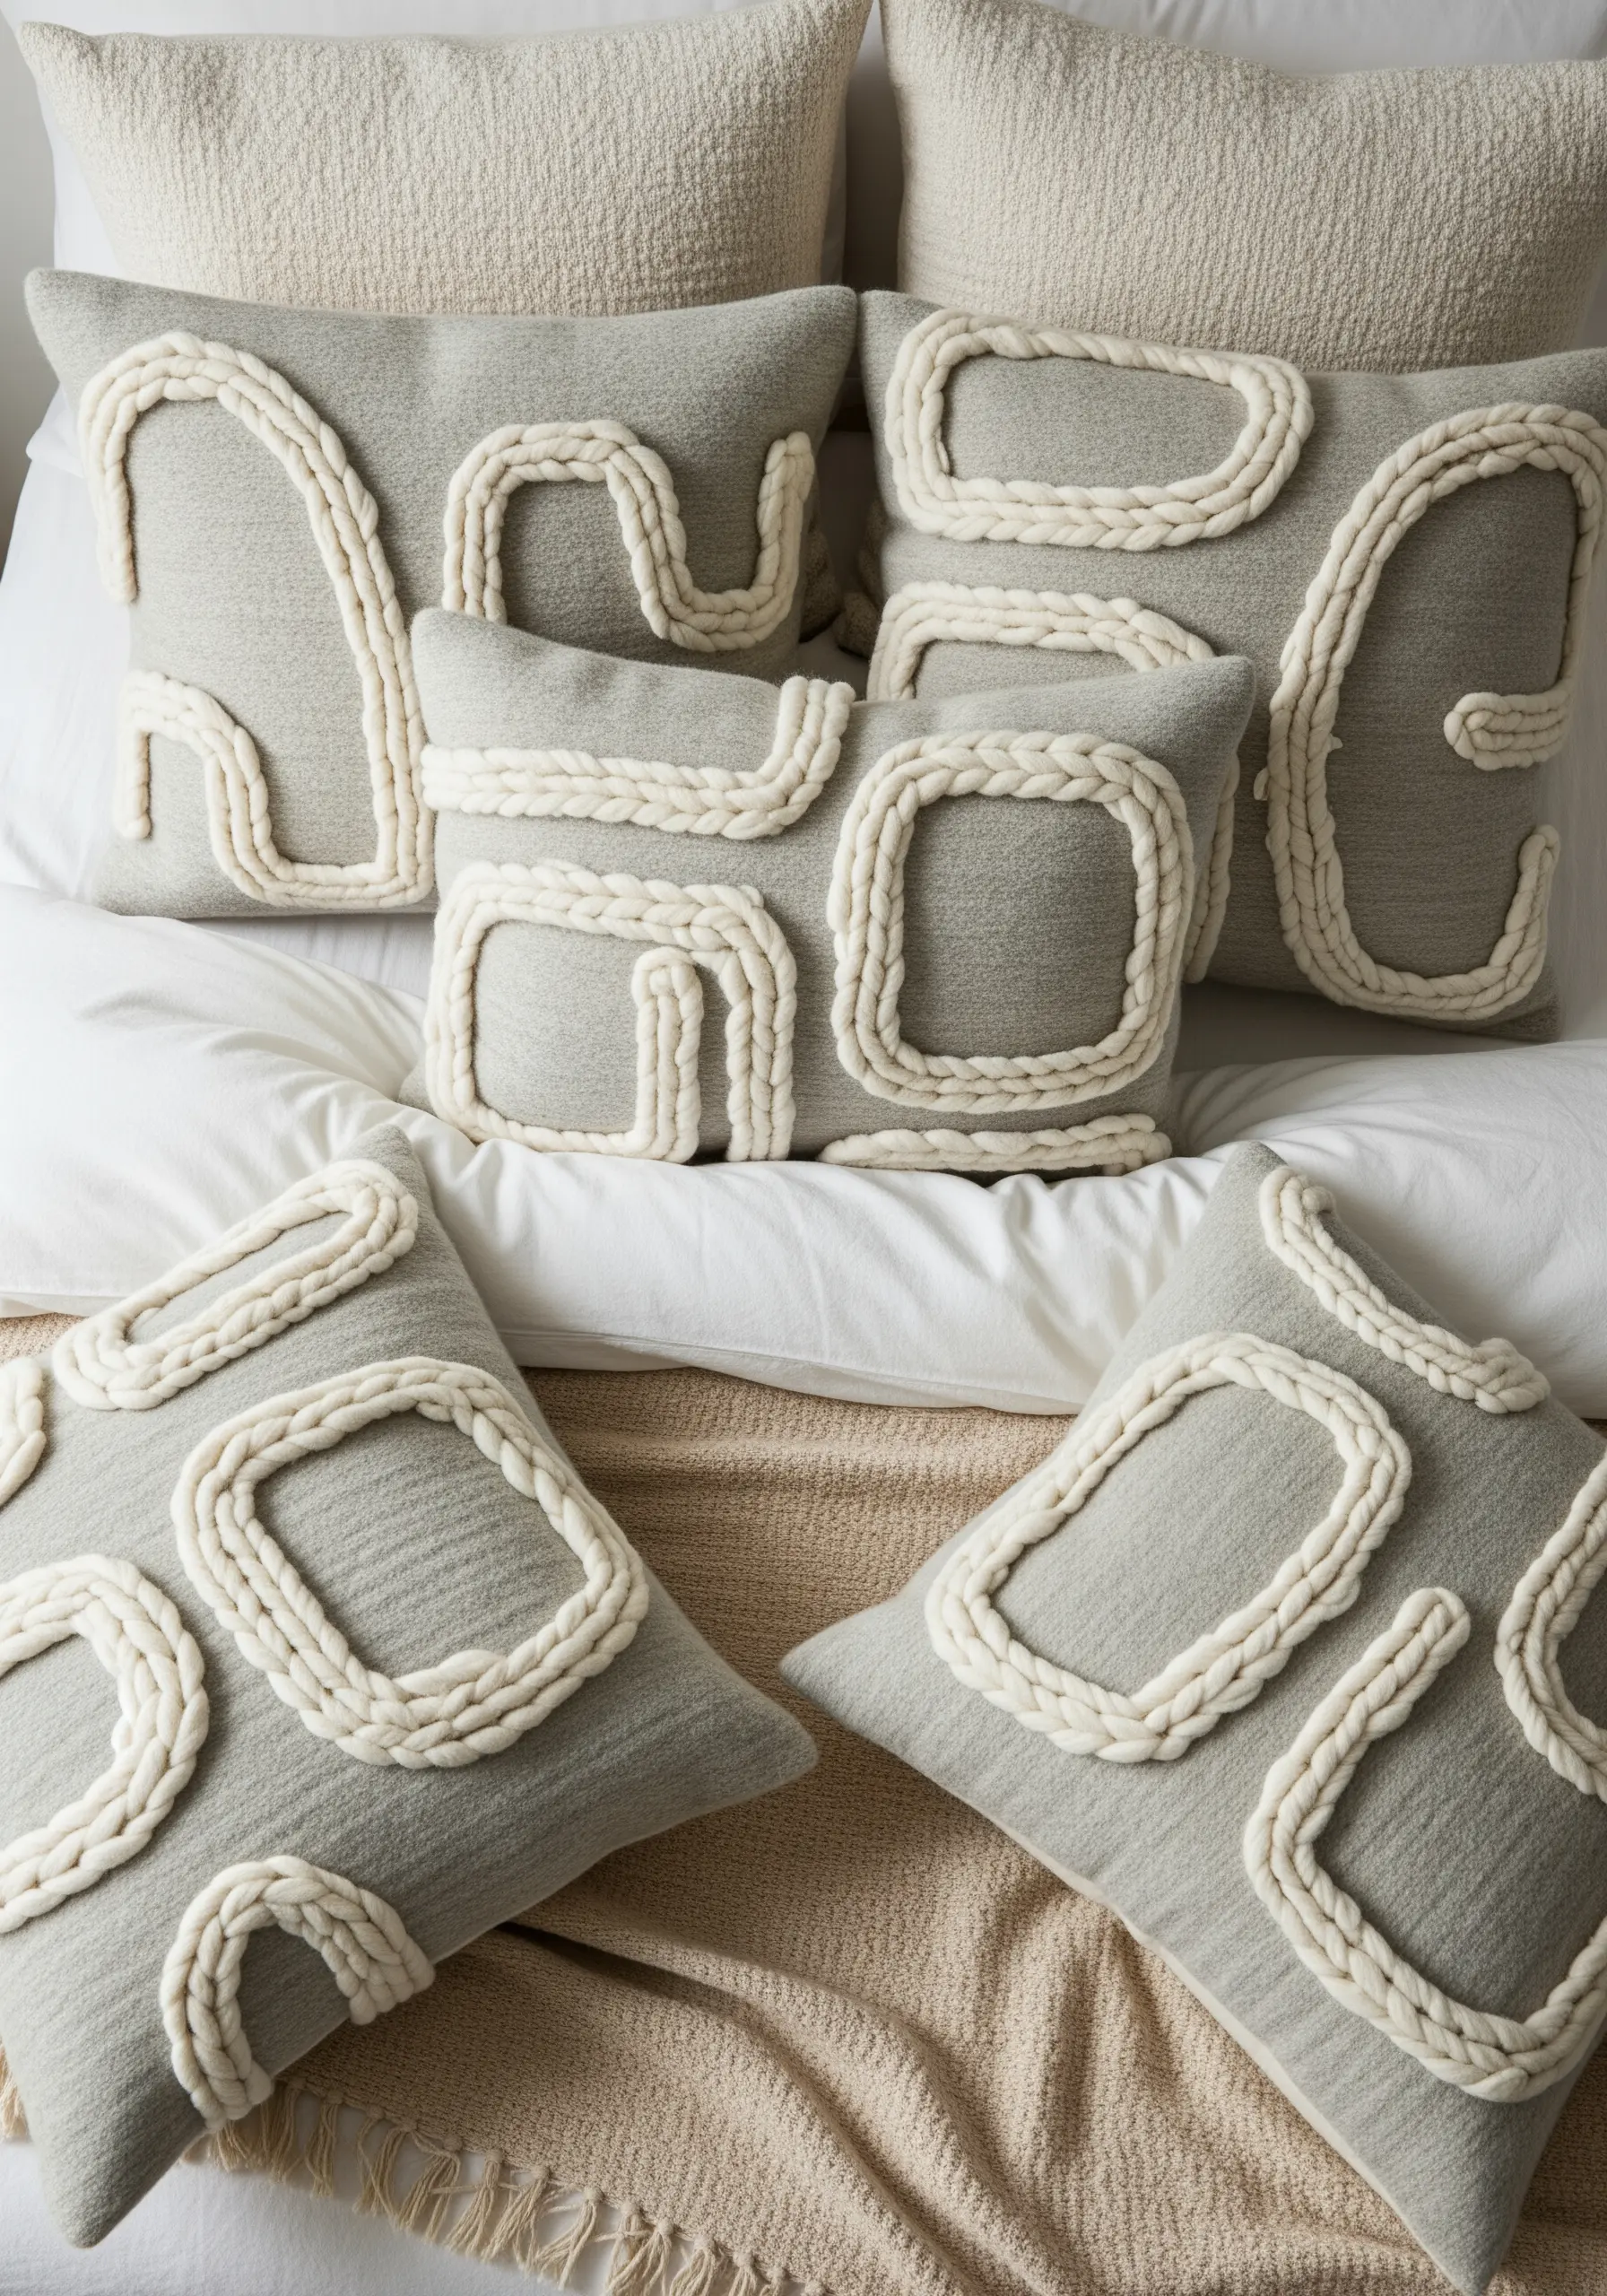
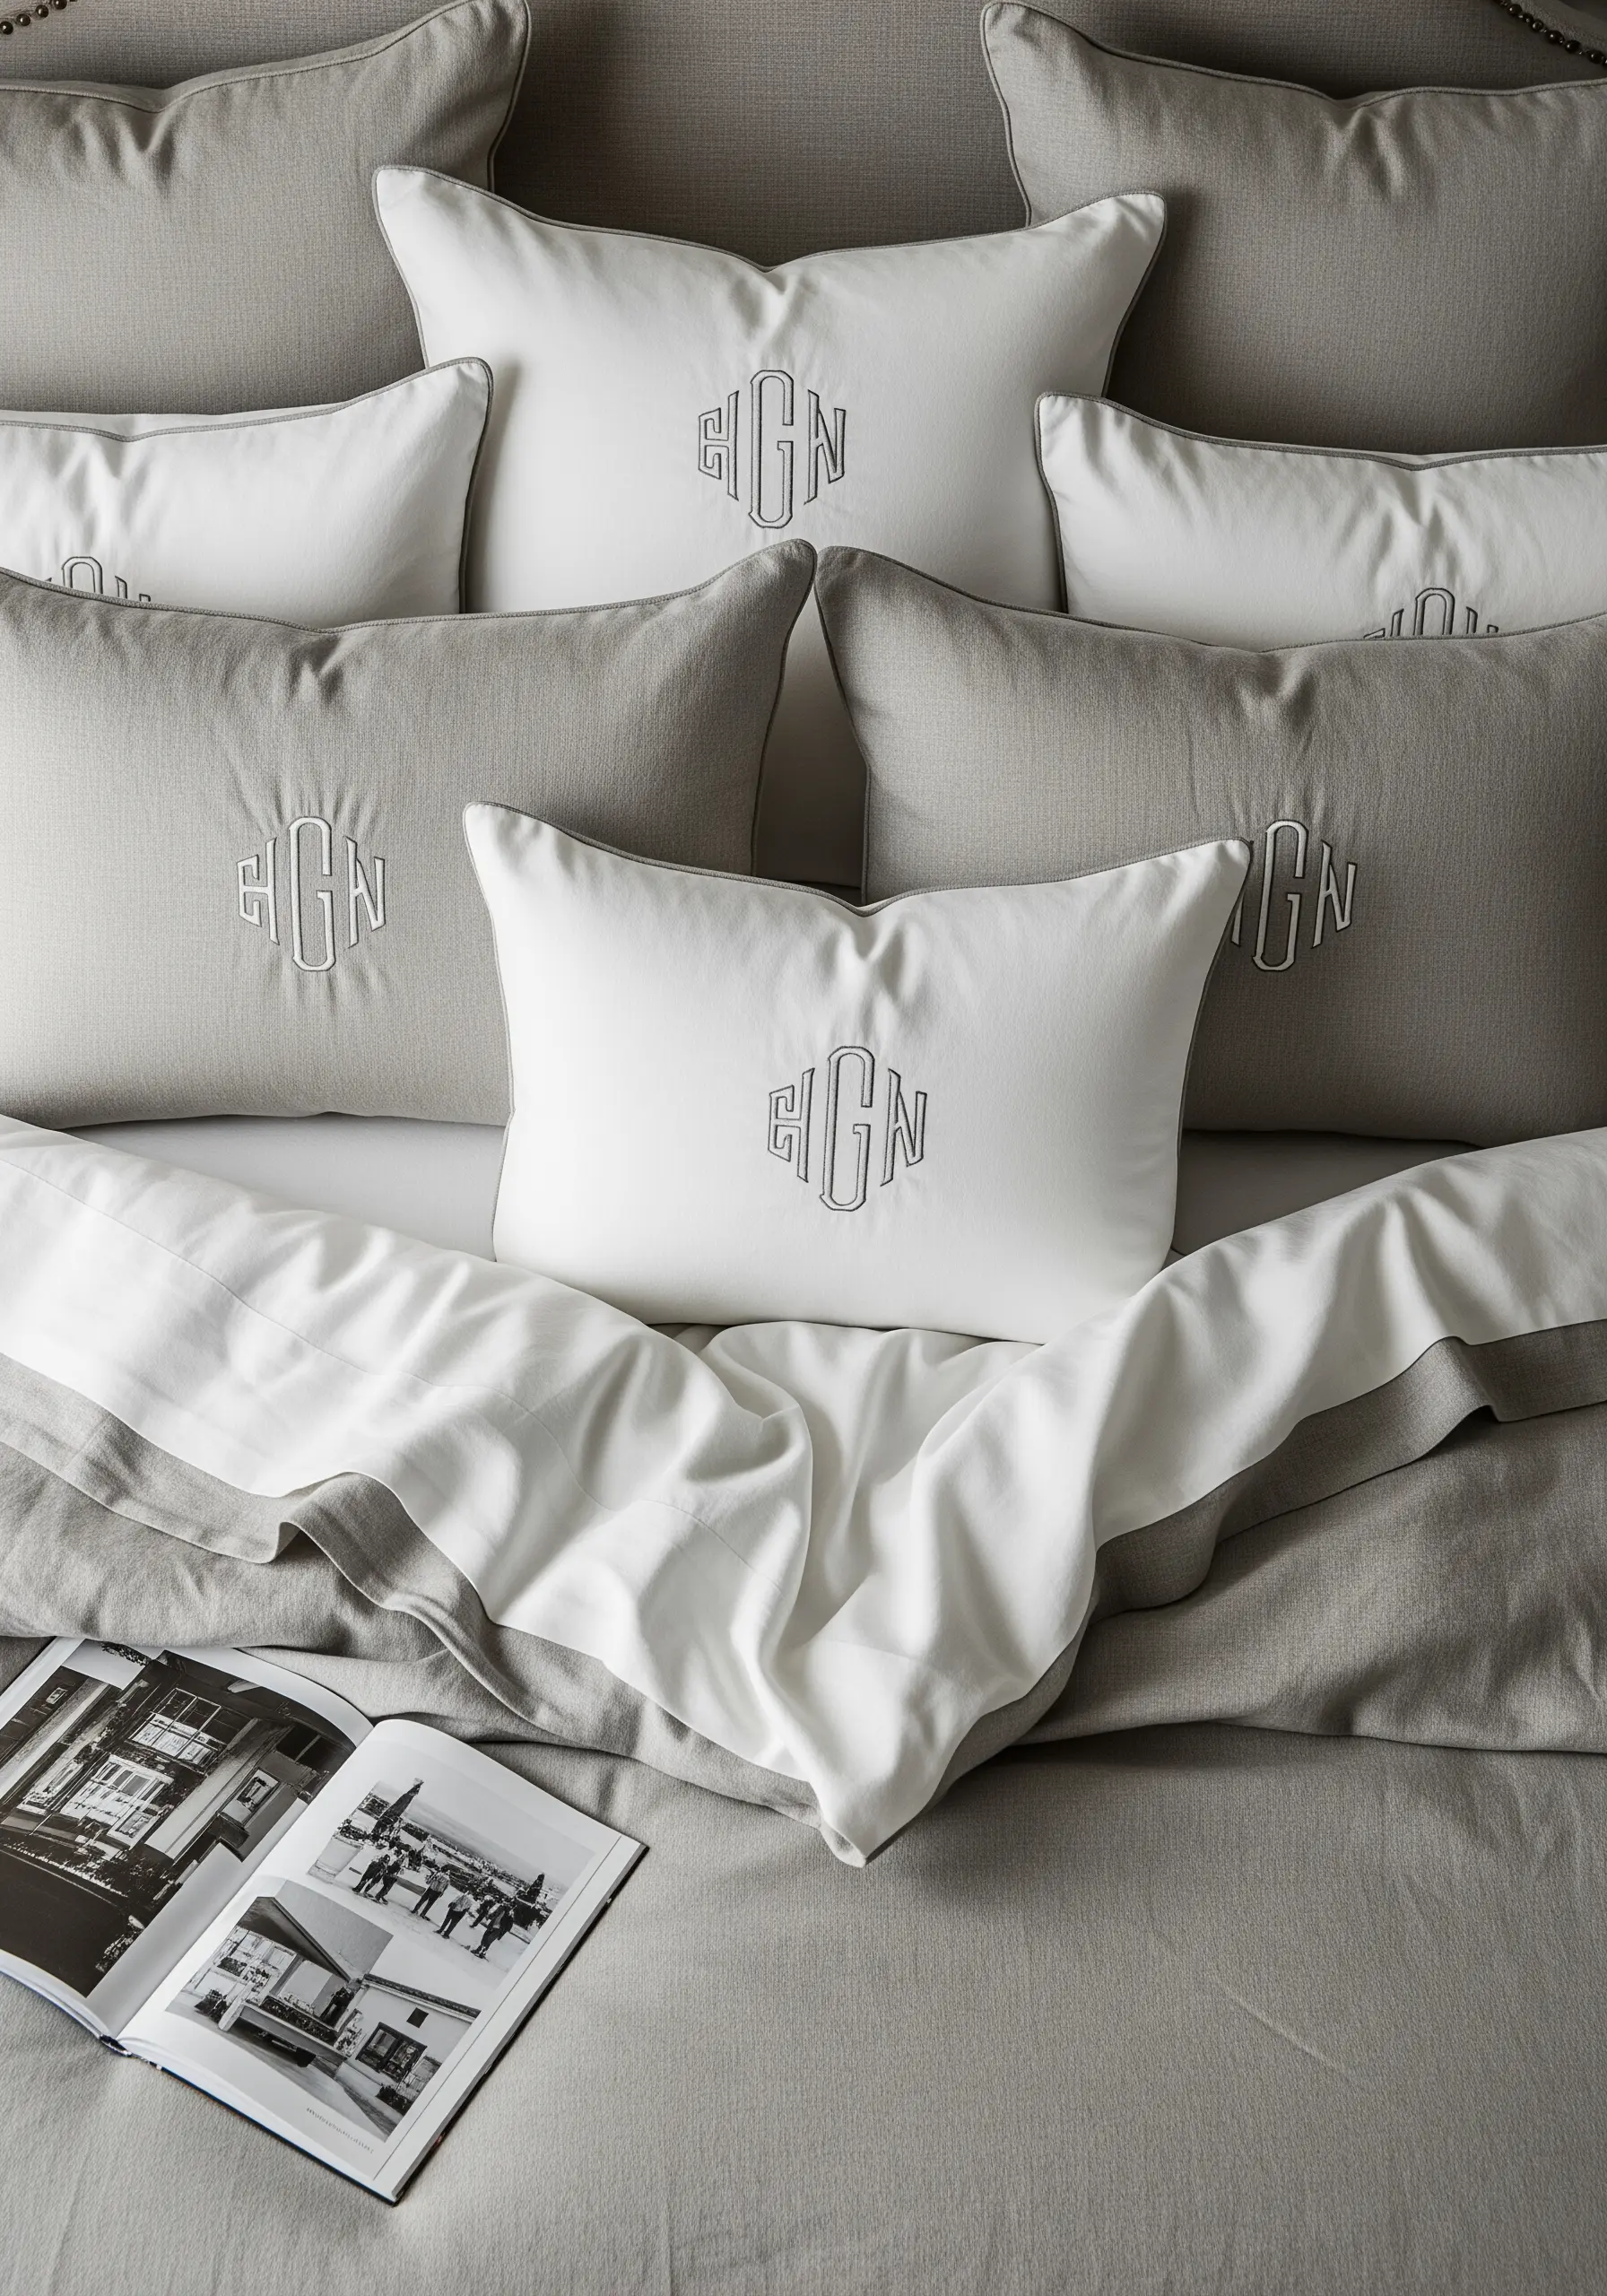
14. Give Lettering a Plush, Raised Finish

To make personalized lettering look truly professional and luxurious, use a padded satin stitch.
First, stitch the outline of your letters with a split stitch. Then, fill the inside of this outline with small, horizontal straight stitches to create a padded base.
Finally, cover the entire shape with vertical satin stitches, going just beyond your split stitch outline.
This simple, three-step process creates a beautifully raised, smooth, and touchable script.
15. Paint with Thread for Realistic Floral Depth
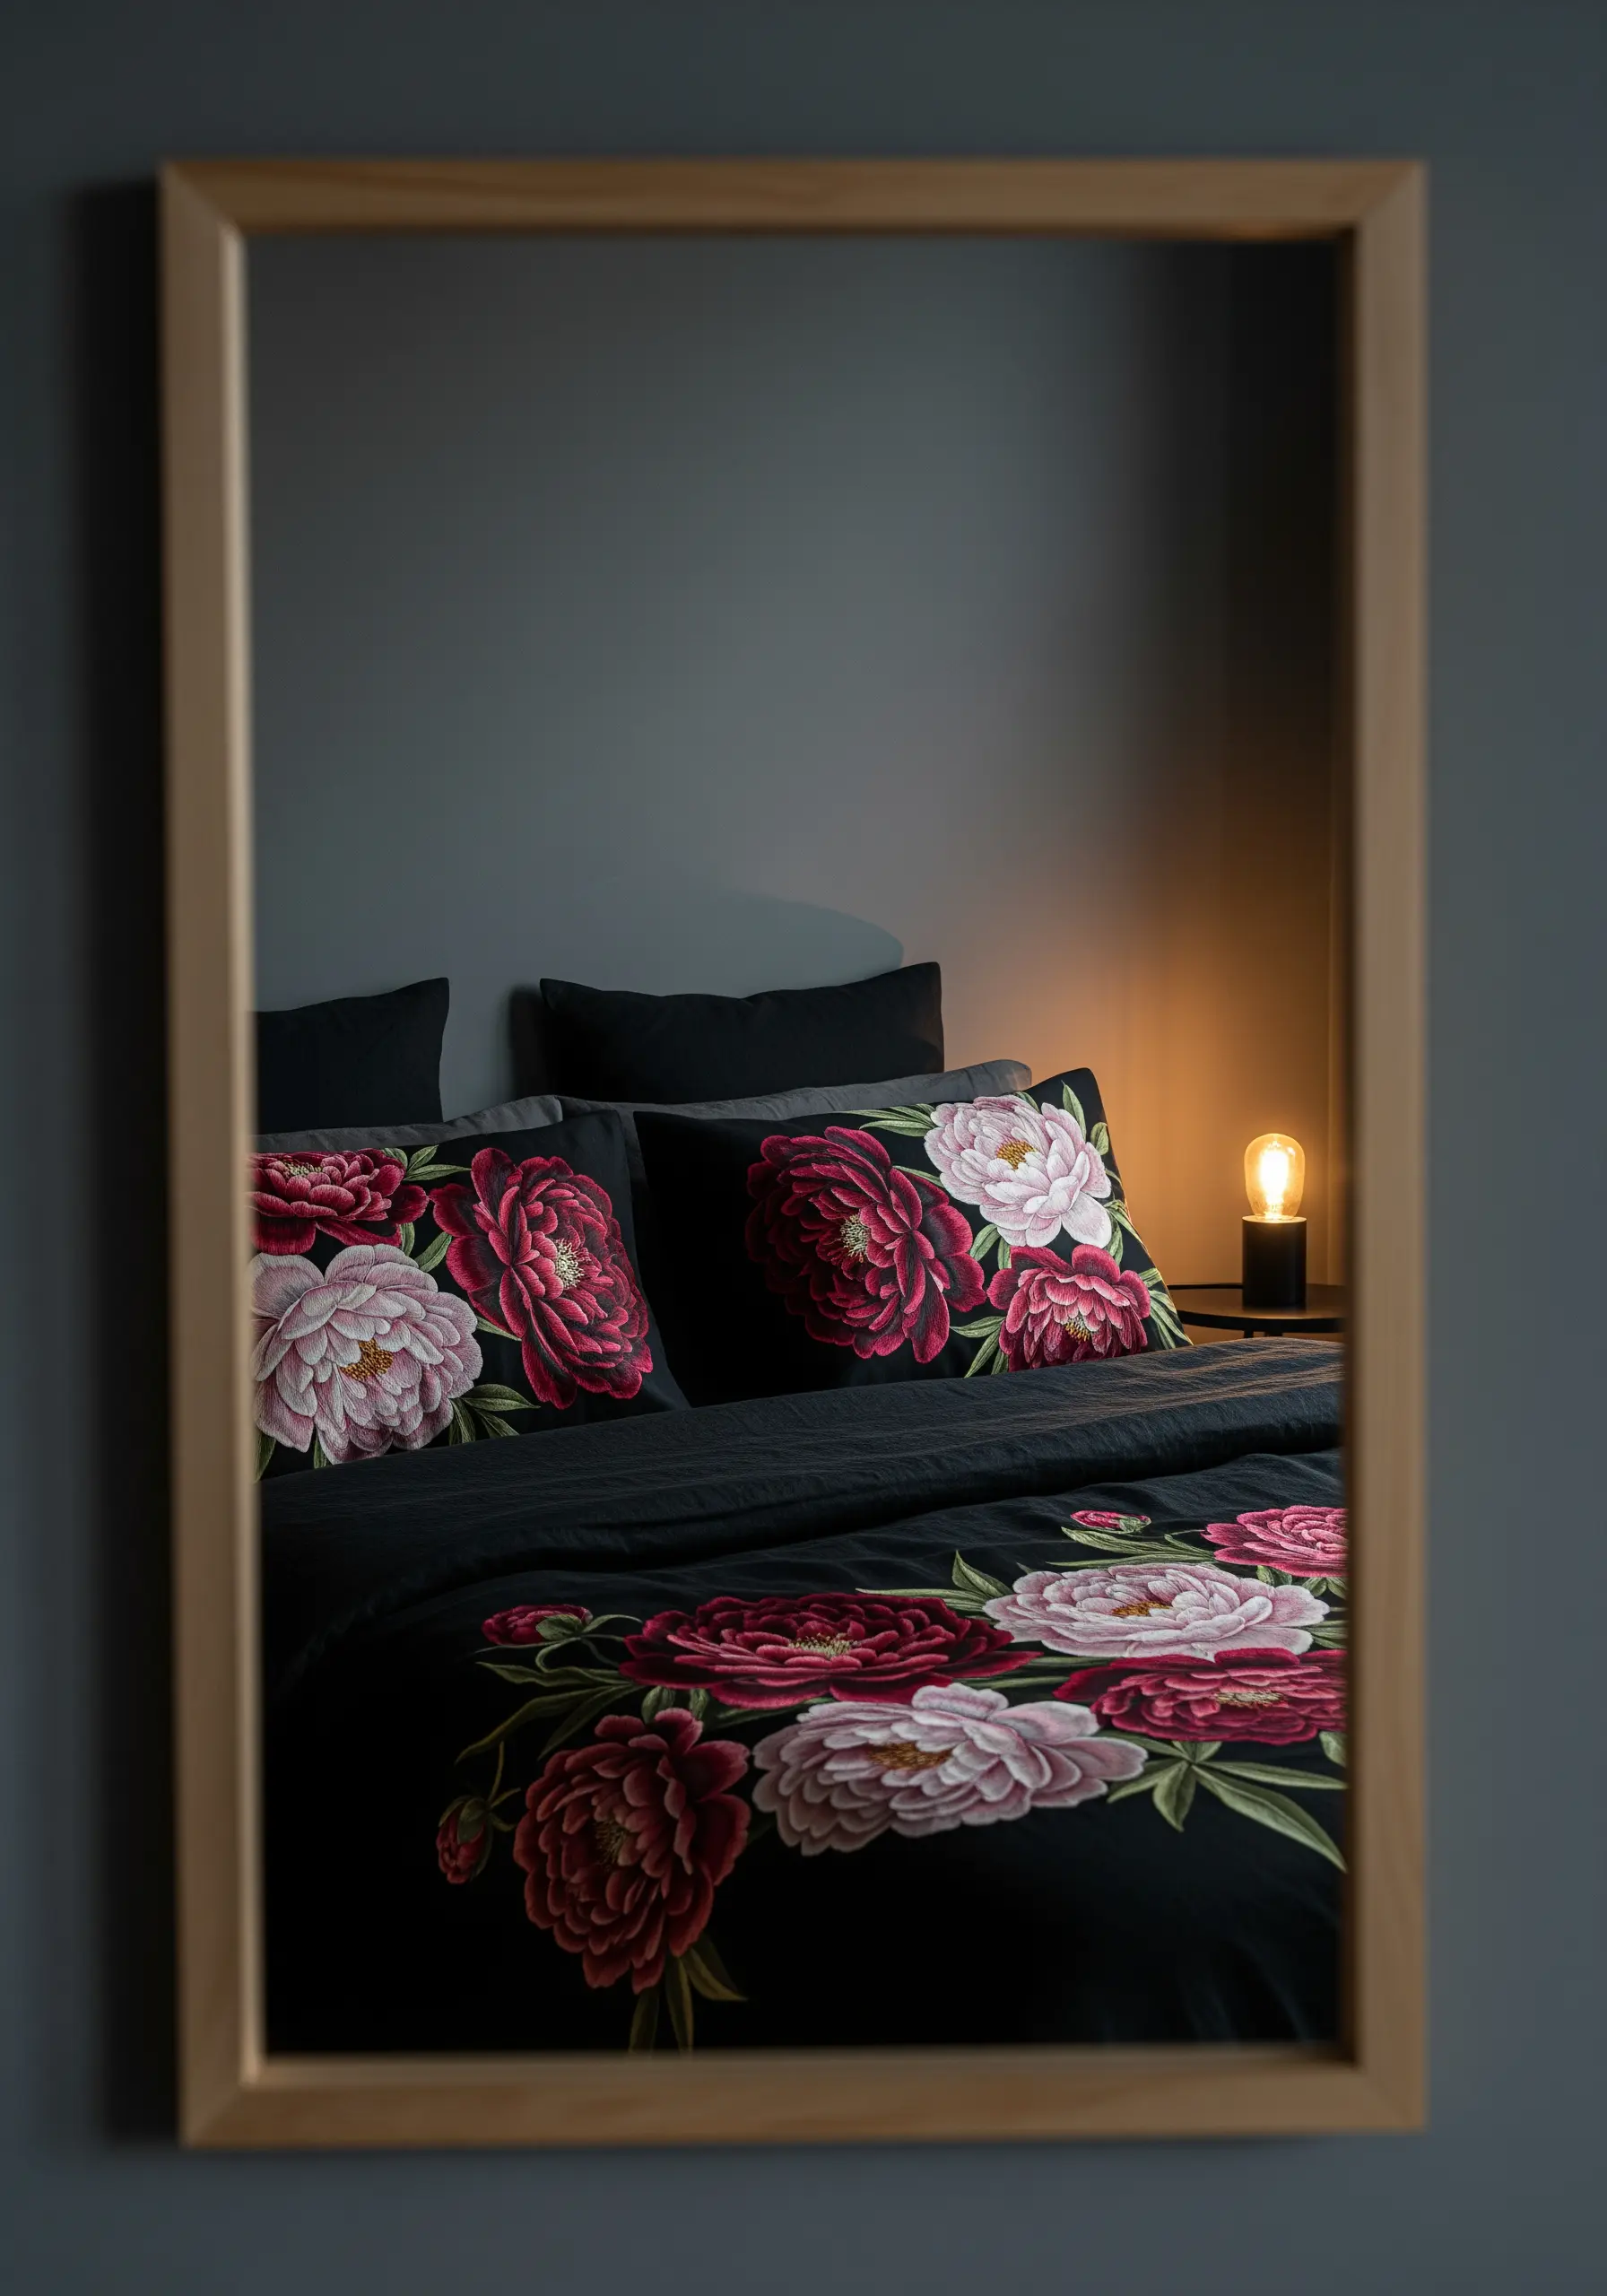
For large, dramatic florals like these peonies, thread painting is the ultimate technique for realism.
Use the long and short stitch to blend multiple shades of a color seamlessly within a single petal.
The key is to always angle your stitches to follow the natural curve and direction of the petal’s growth.
This directional stitching creates highlights and shadows, giving the flowers a breathtaking, three-dimensional quality that pops against a dark fabric.
16. Convey Serenity with Minimalist Mountainscapes
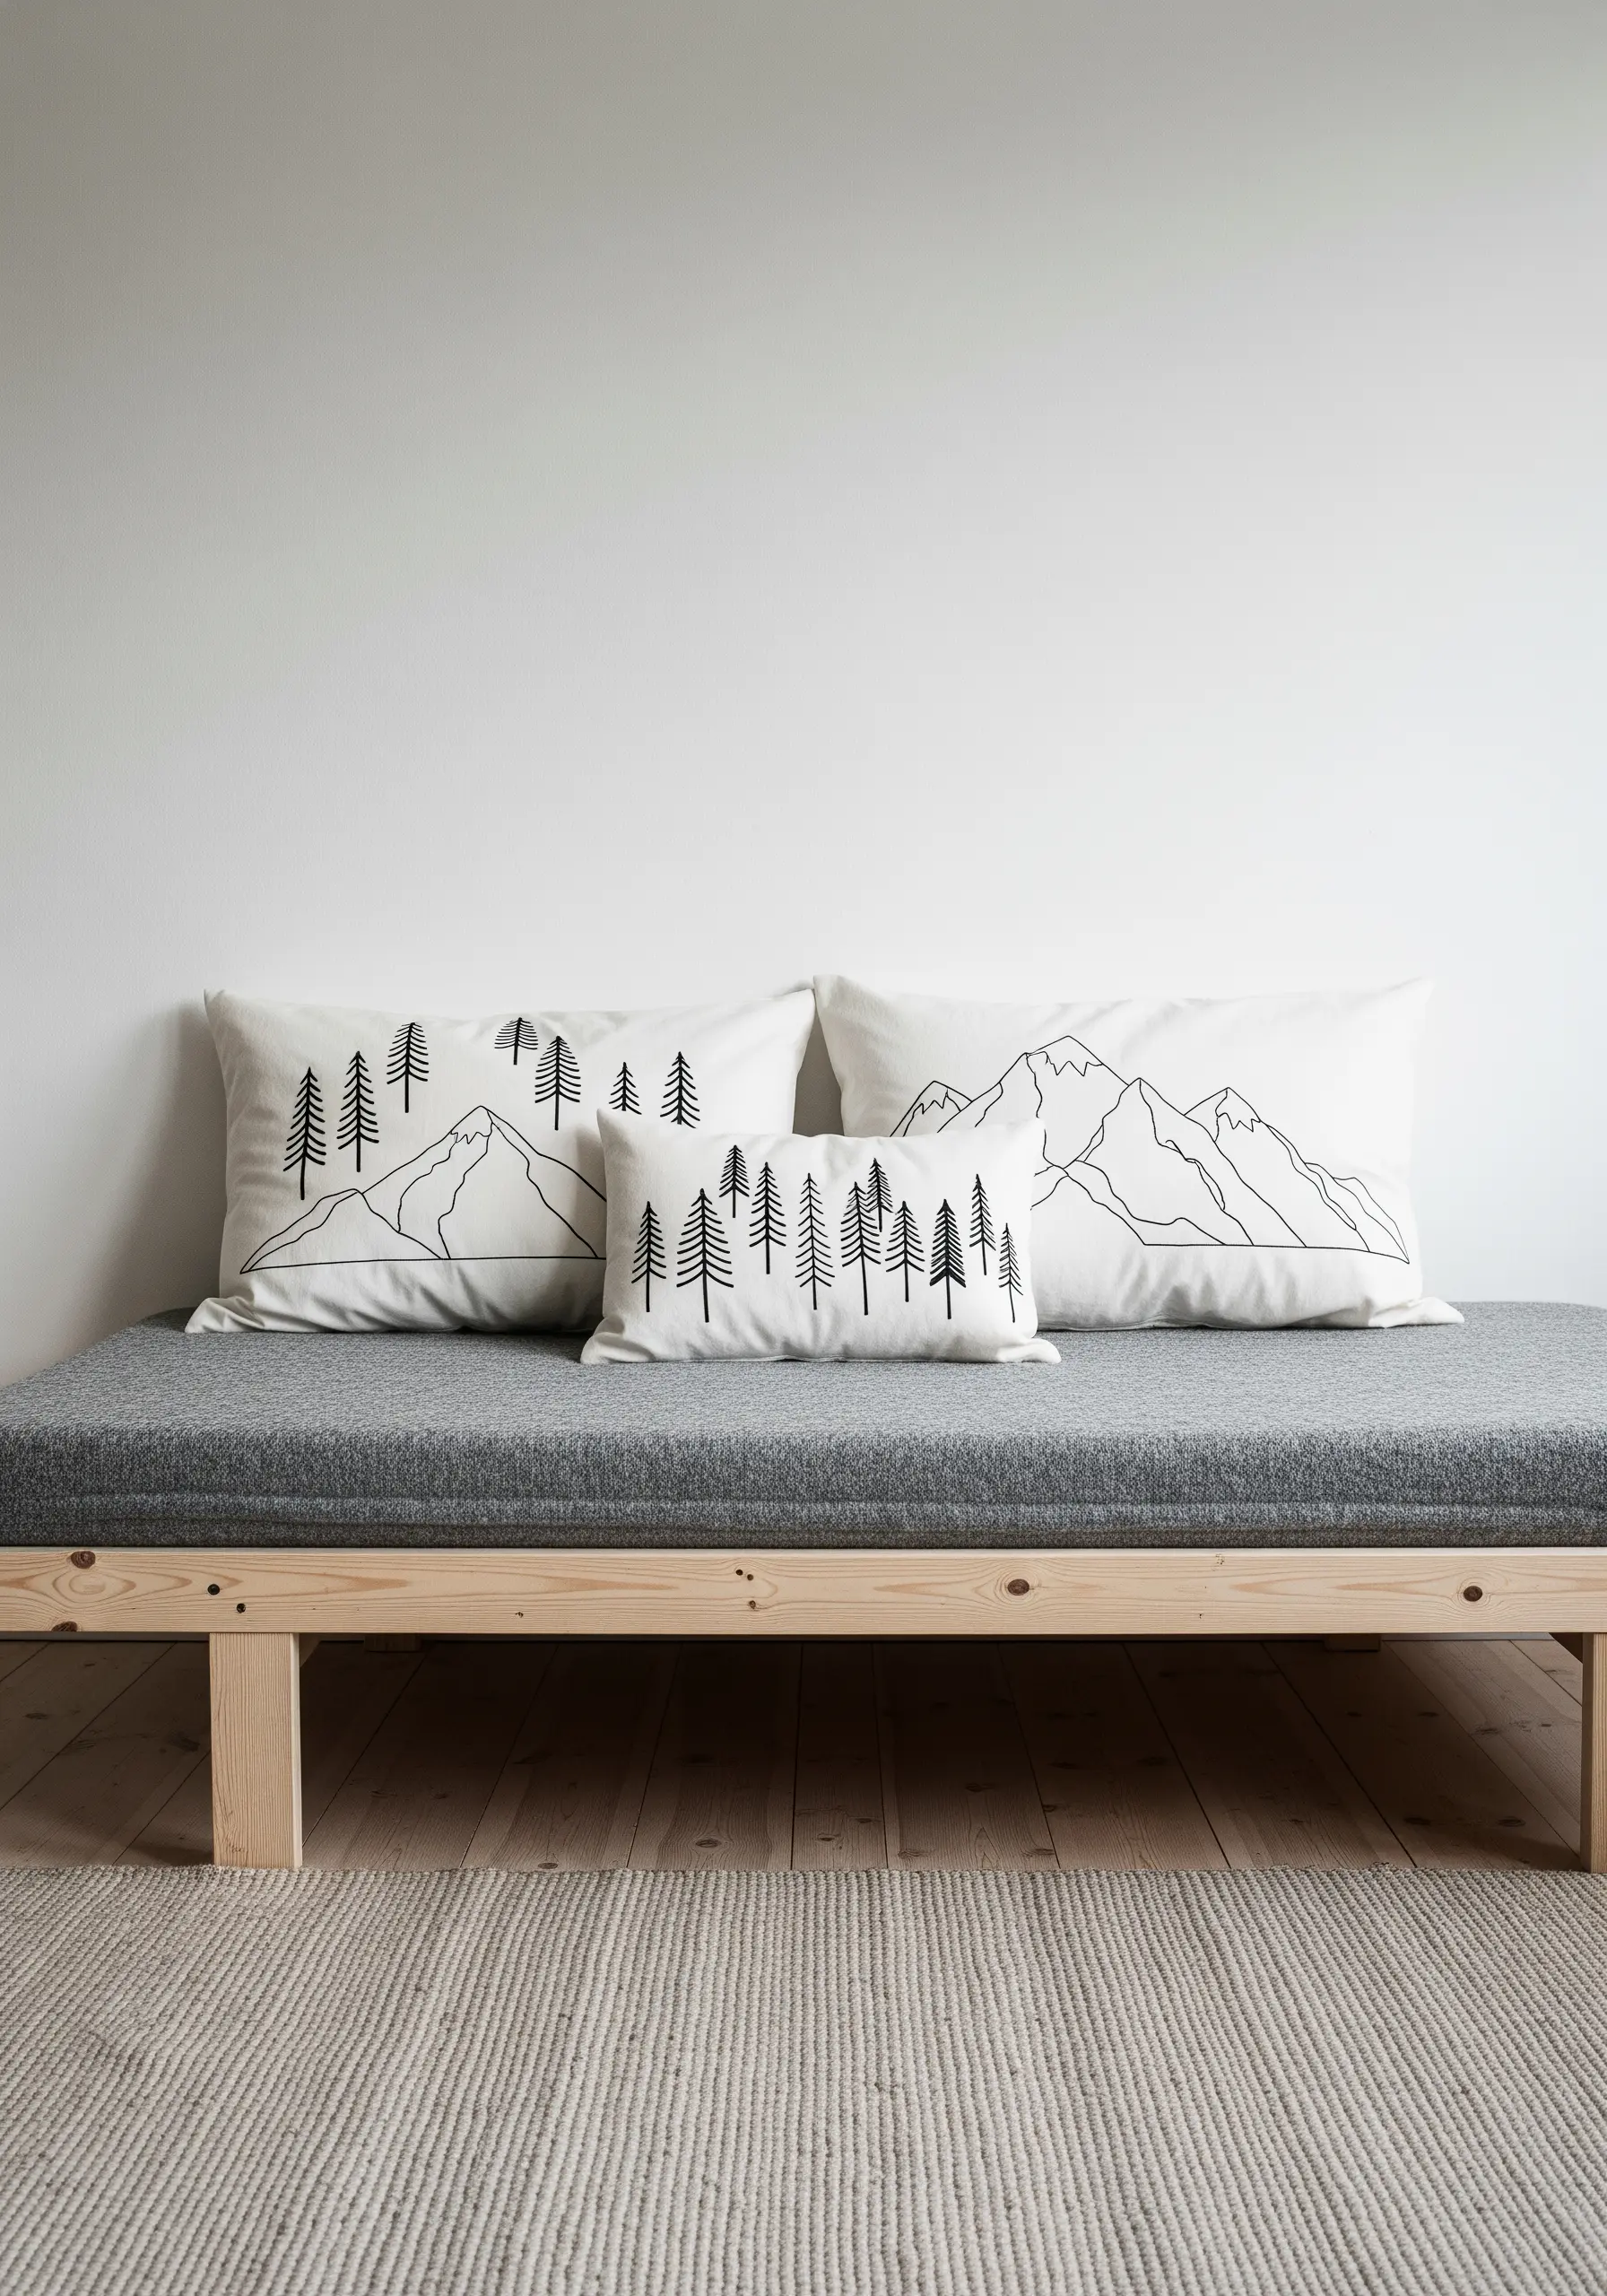
Capture the quiet majesty of a mountain range with nothing more than a simple backstitch.
Choose a fine thread—two or three strands at most—to keep the lines crisp and graphic.
The power of this design lies in its restraint. Let the unstitched white space define the scene, creating a sense of openness and calm.
This style of delicate line art is perfect for a modern, uncluttered bedroom aesthetic.
17. Create Painterly Effects with Abstract Stitches
You can achieve a spontaneous, painterly look with hand embroidery by varying your stitch type and density.
Lay down blocks of straight stitches at different angles, then overlap them with grids of running stitches or dense satin stitch bars.
Think of your needle as a paintbrush and the floss as your paint.
The goal isn’t perfect uniformity but to create expressive, abstract marks that build texture and suggest movement, much like a brushstroke on canvas.
18. Blend Threads to Capture Iridescent Beauty
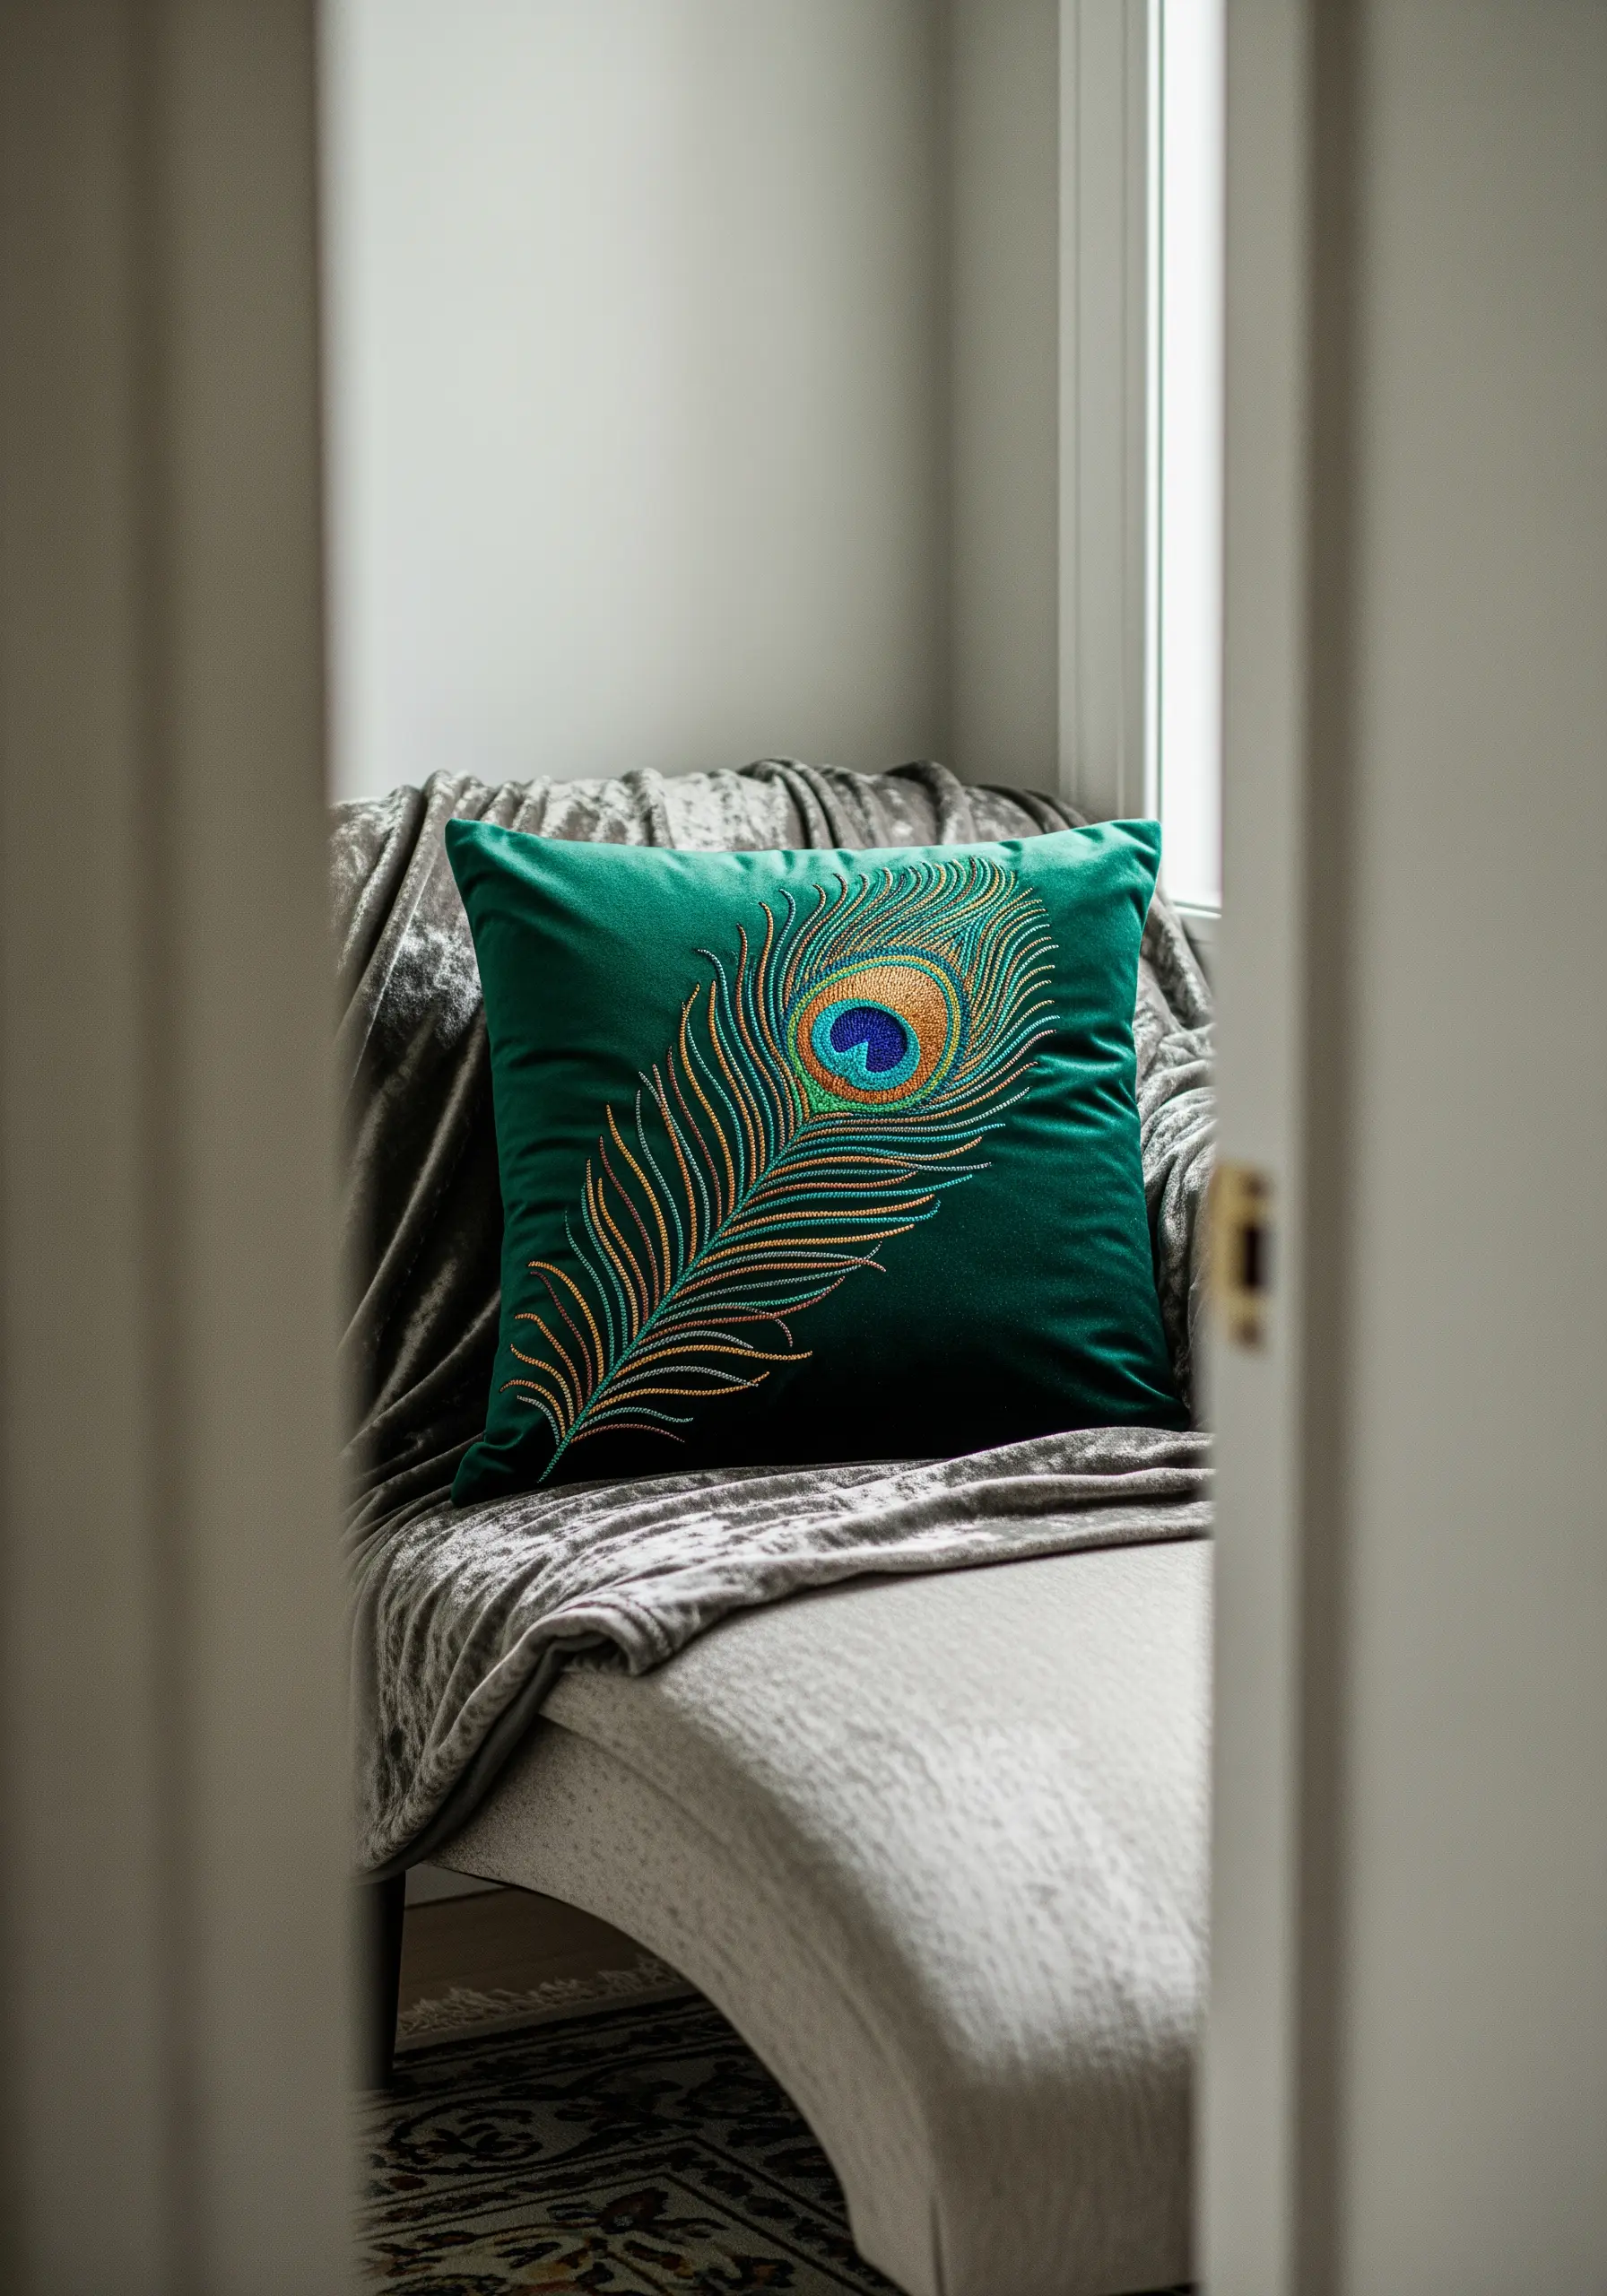
To replicate the shimmer of a realistic feather, you need to think about how light reflects off its surface.
Instead of using a single thread color, blend two or more different types in your needle at the same time—try one strand of silk with one strand of metallic floss.
Use a fishbone stitch for the feather’s barbs, angling your stitches outward from a central spine.
This technique creates a subtle, light-catching effect that is far more dynamic than a single flat color.
19. Form a Tranquil Pattern with Textured Knots
Create a calming, all-over pattern by grouping simple stitches into larger motifs.
These small, leafy sprigs are formed by three detached chain stitches (lazy daisies) arranged in a fan shape. This is an efficient way to build small, repeating patterns.
Working this motif in a grid across the pillow cover creates a gentle, rhythmic texture that is visually soft and wonderfully tactile.
A monochrome color scheme, like sage green on sage green, enhances the tranquil, restorative feel.
20. Craft an Elegant Monogram with Satin Stitch
A sophisticated monogram relies on the perfection of its satin stitch.
To ensure your stitches are perfectly smooth and lie flat, always use a stabilizer on the back of your fabric, especially on linen or cotton with a loose weave.
For the thin outlines, use a simple backstitch with fewer strands of floss to contrast with the thicker, padded satin stitch of the main letters.
This contrast between thick and thin lines is what gives classic monograms their timeless elegance.
21. Suggest Motion with Open Fill Stitches
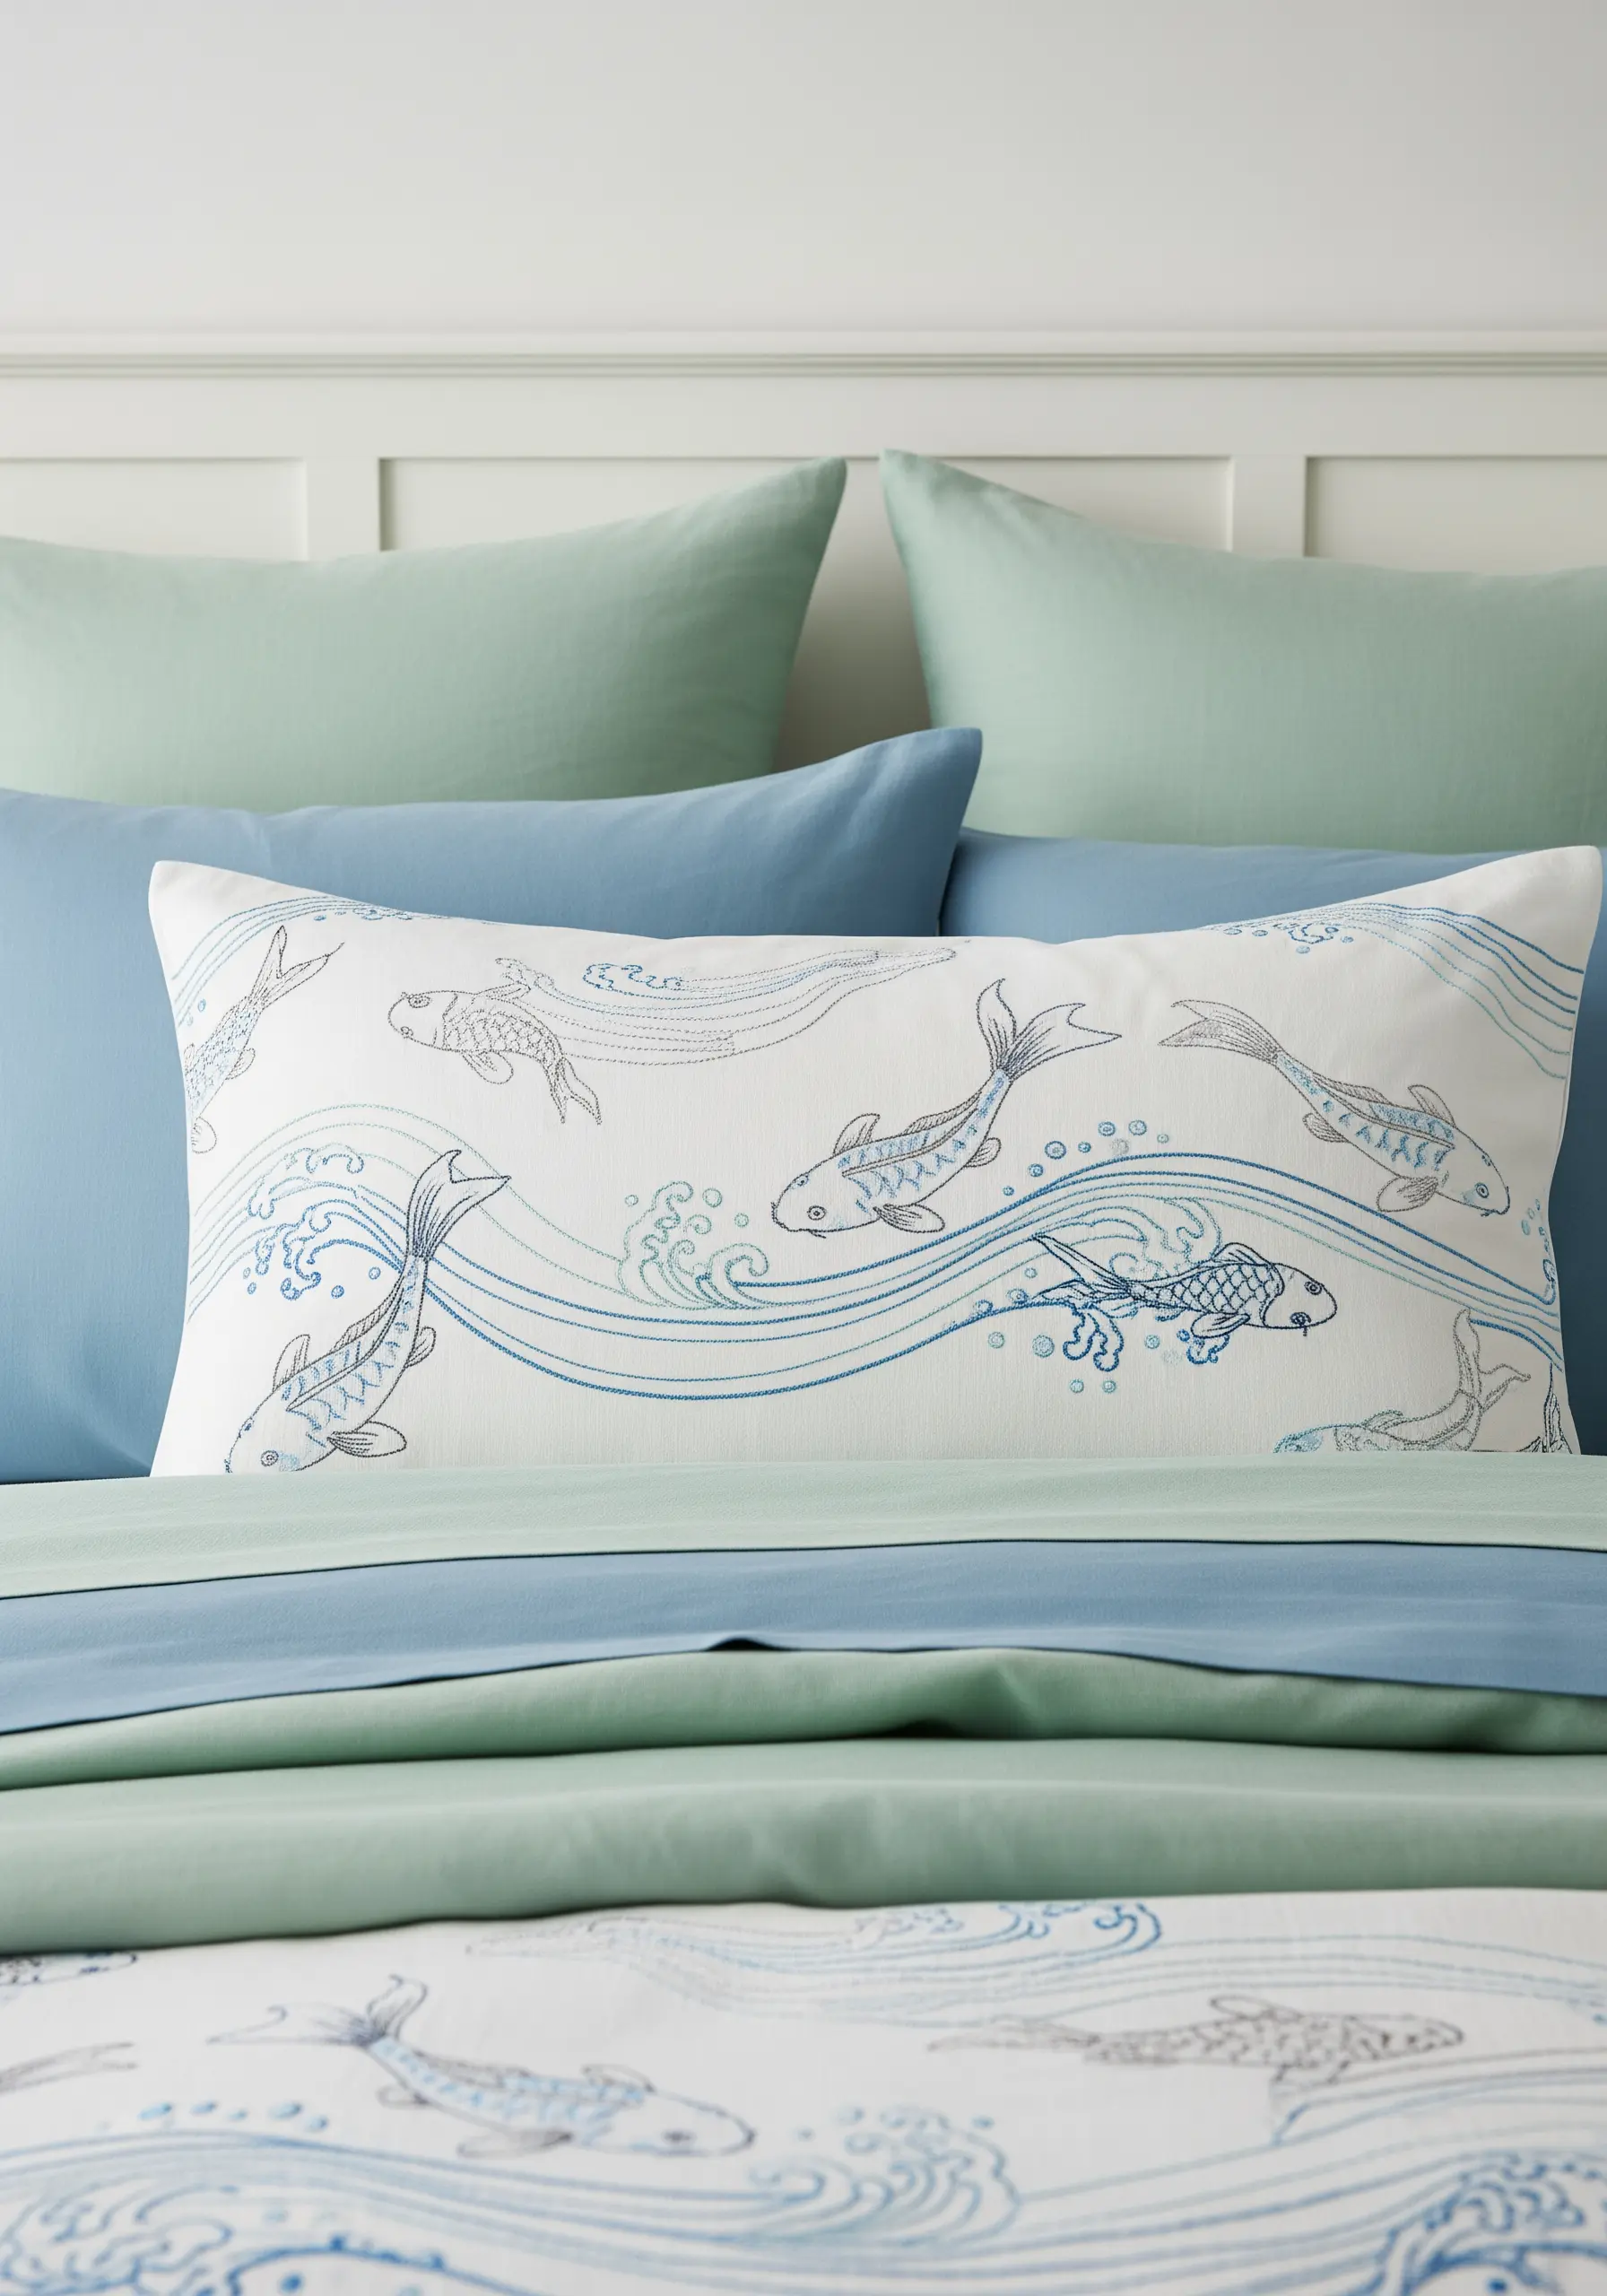
You don’t need to fill a shape completely to give it form and texture.
For these koi fish, a delicate outline in backstitch defines the shape, while an open fill of sparse seed stitches suggests scales and movement.
This technique allows the base fabric to play a role in the design, creating a light, illustrative quality.
It’s an elegant use of simple line art combined with minimal texture for a design that feels both detailed and uncluttered.
22. Mimic Starlight with Strategically Placed Stitches
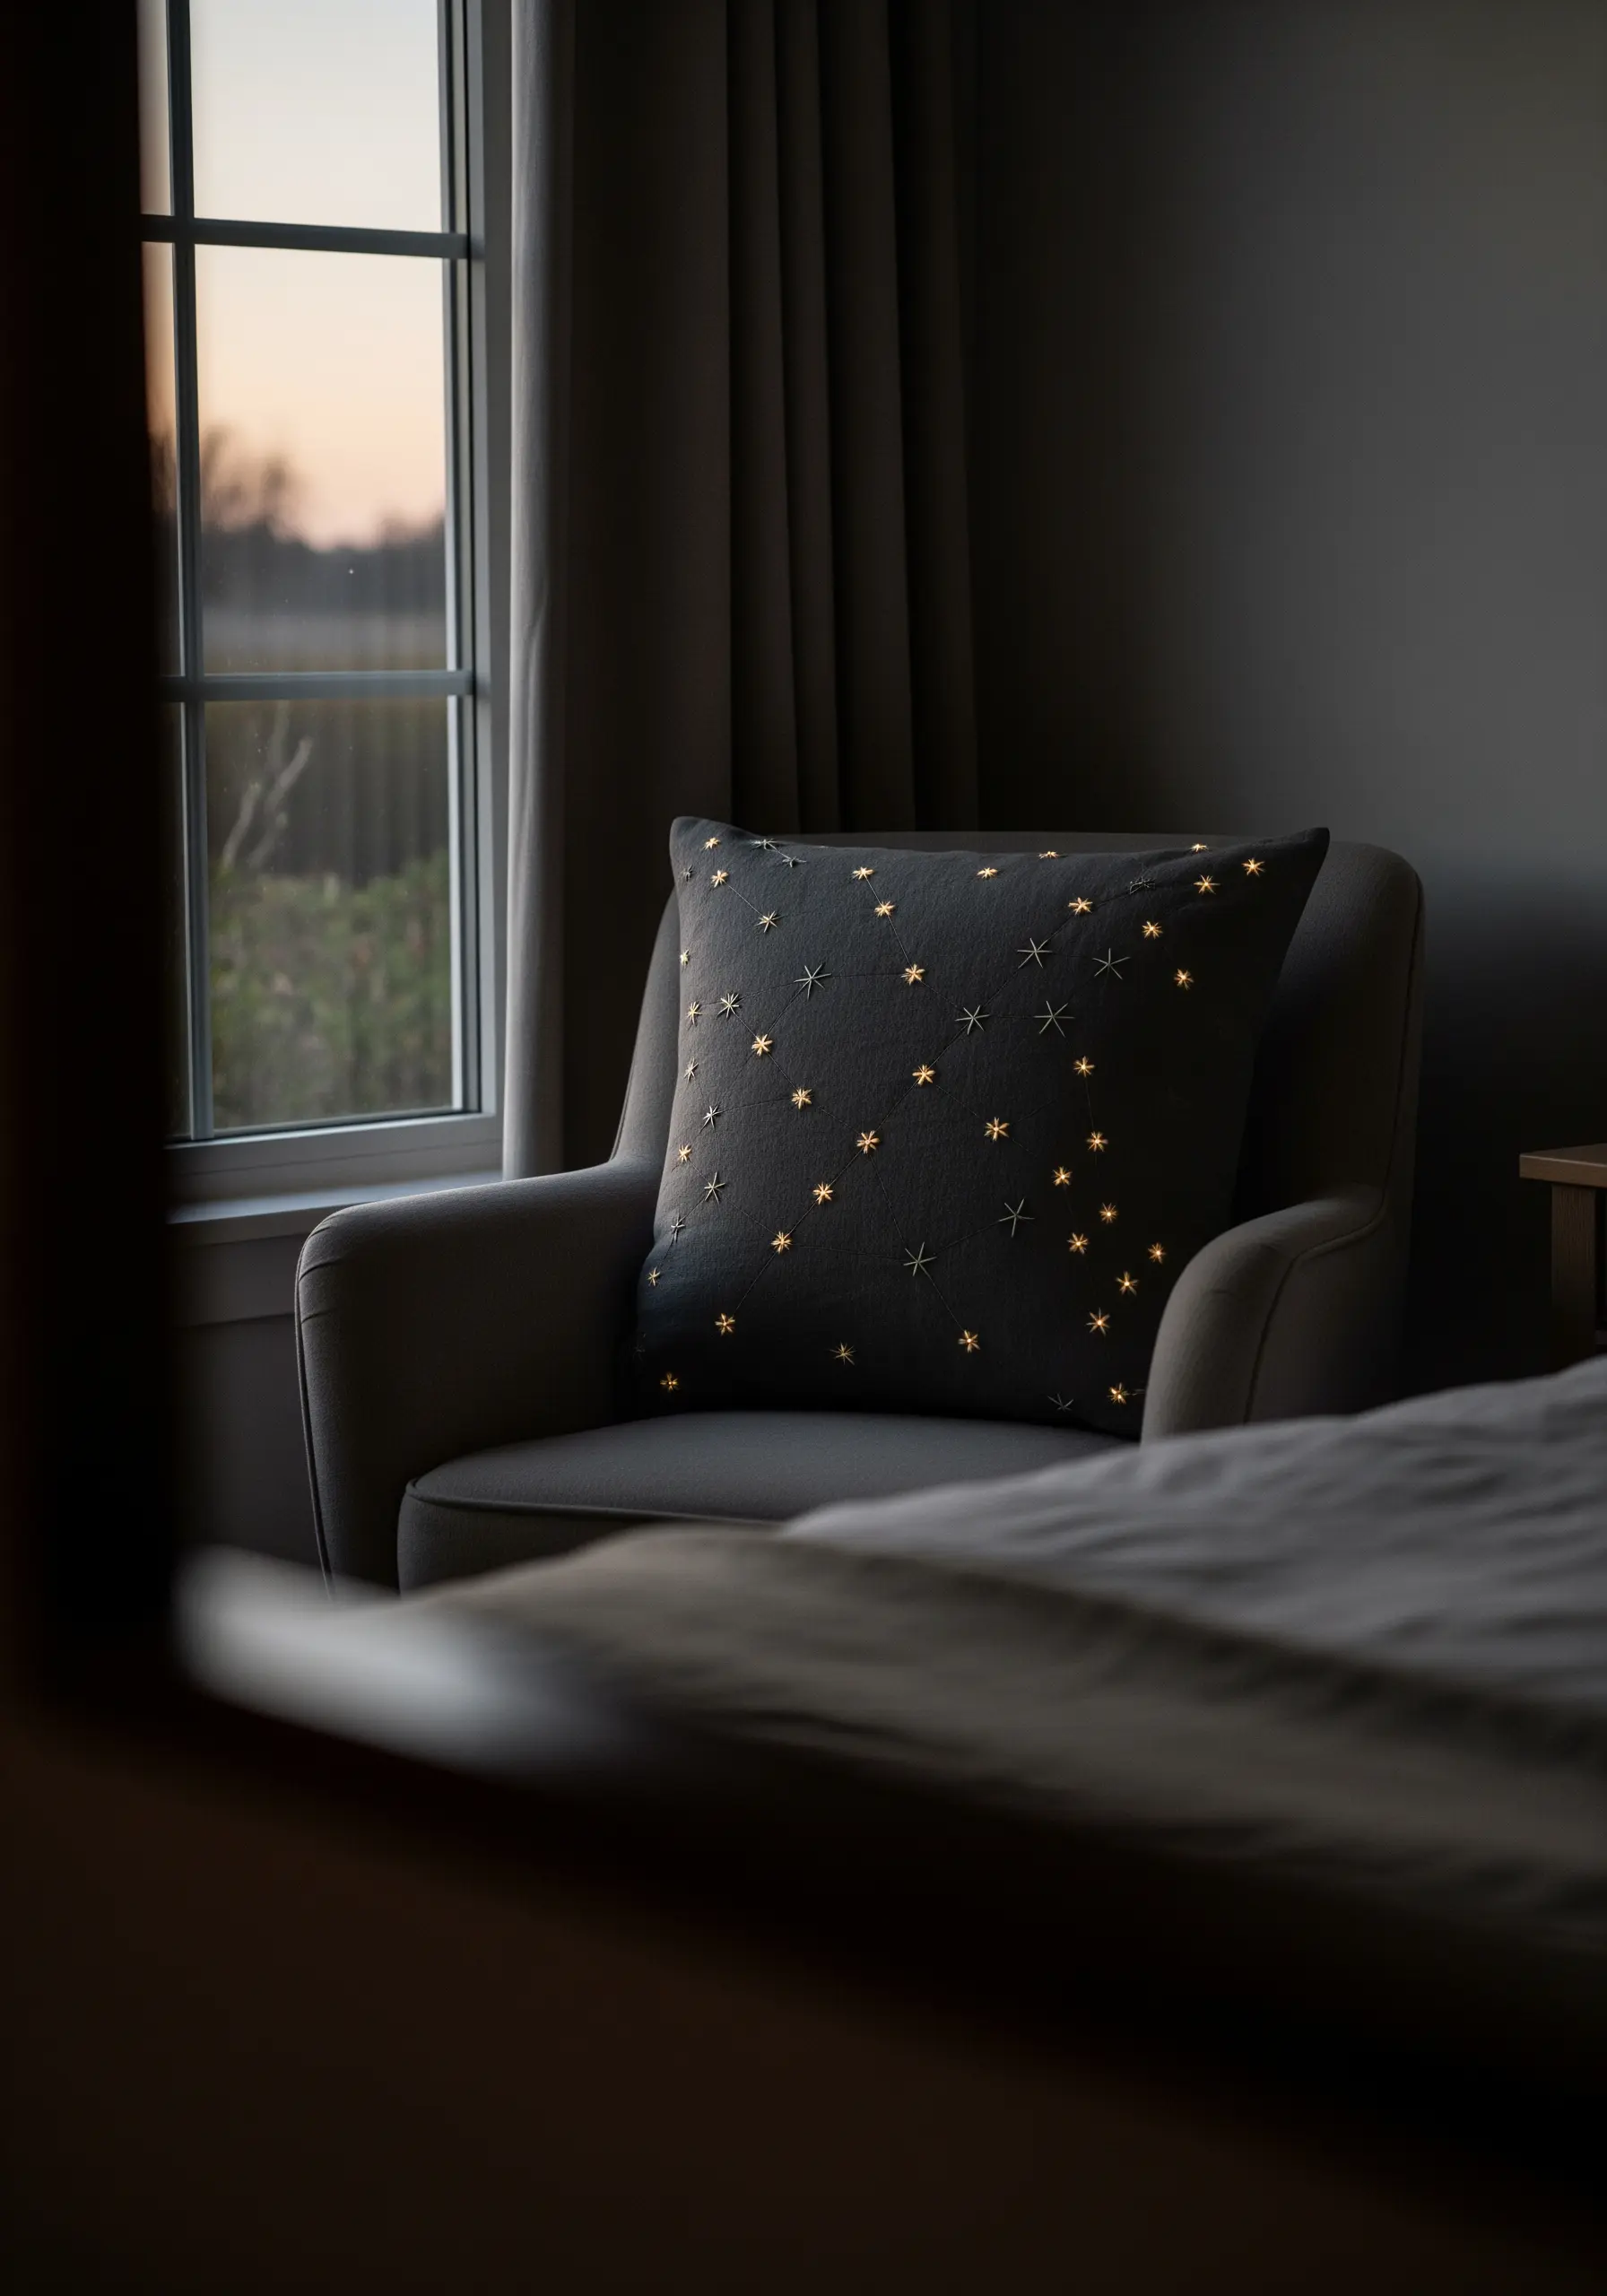
To create the illusion of a sparkling night sky, thread choice and placement are key.
Use a high-quality metallic thread in gold or silver that reflects light well.
Instead of stitching uniform stars, create variety: use simple star stitches (made of overlapping straight stitches) in different sizes, and scatter tiny single straight stitches in between.
This variation tricks the eye into seeing a field of shimmering, distant stars, adding a touch of magic to a dark pillow cover.
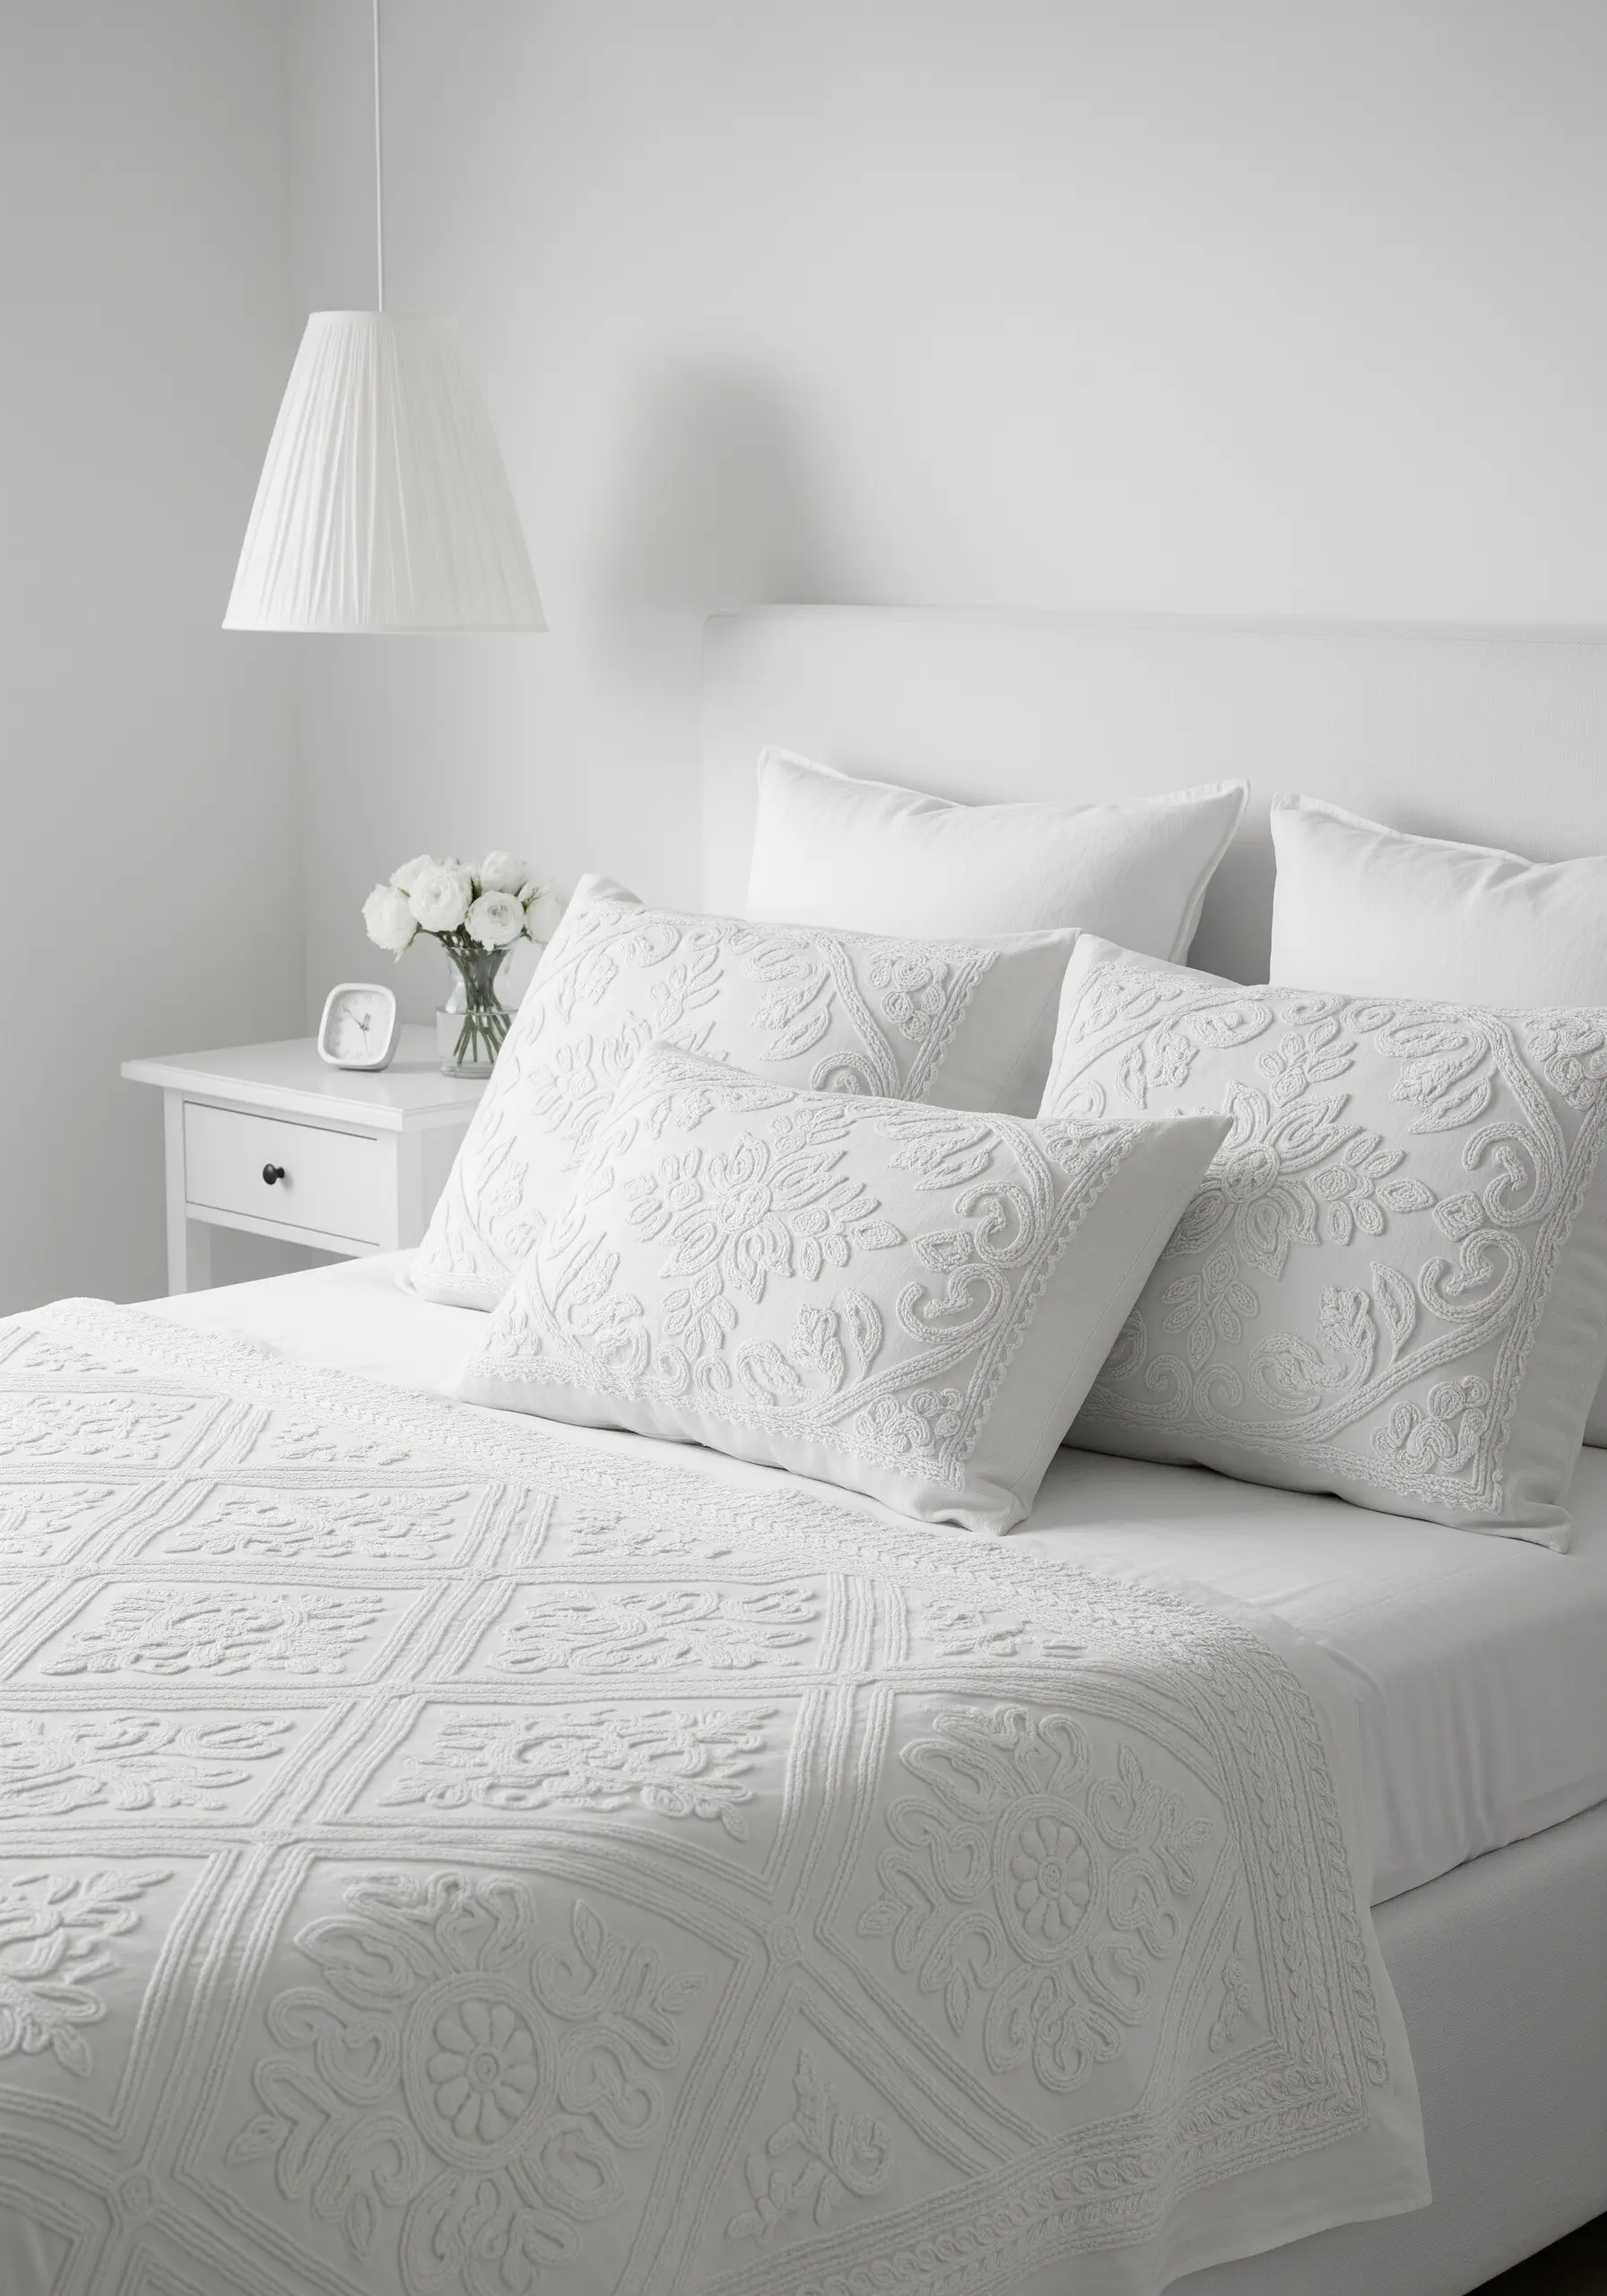
23. Balance Intricacy and Airiness in a Damask Motif
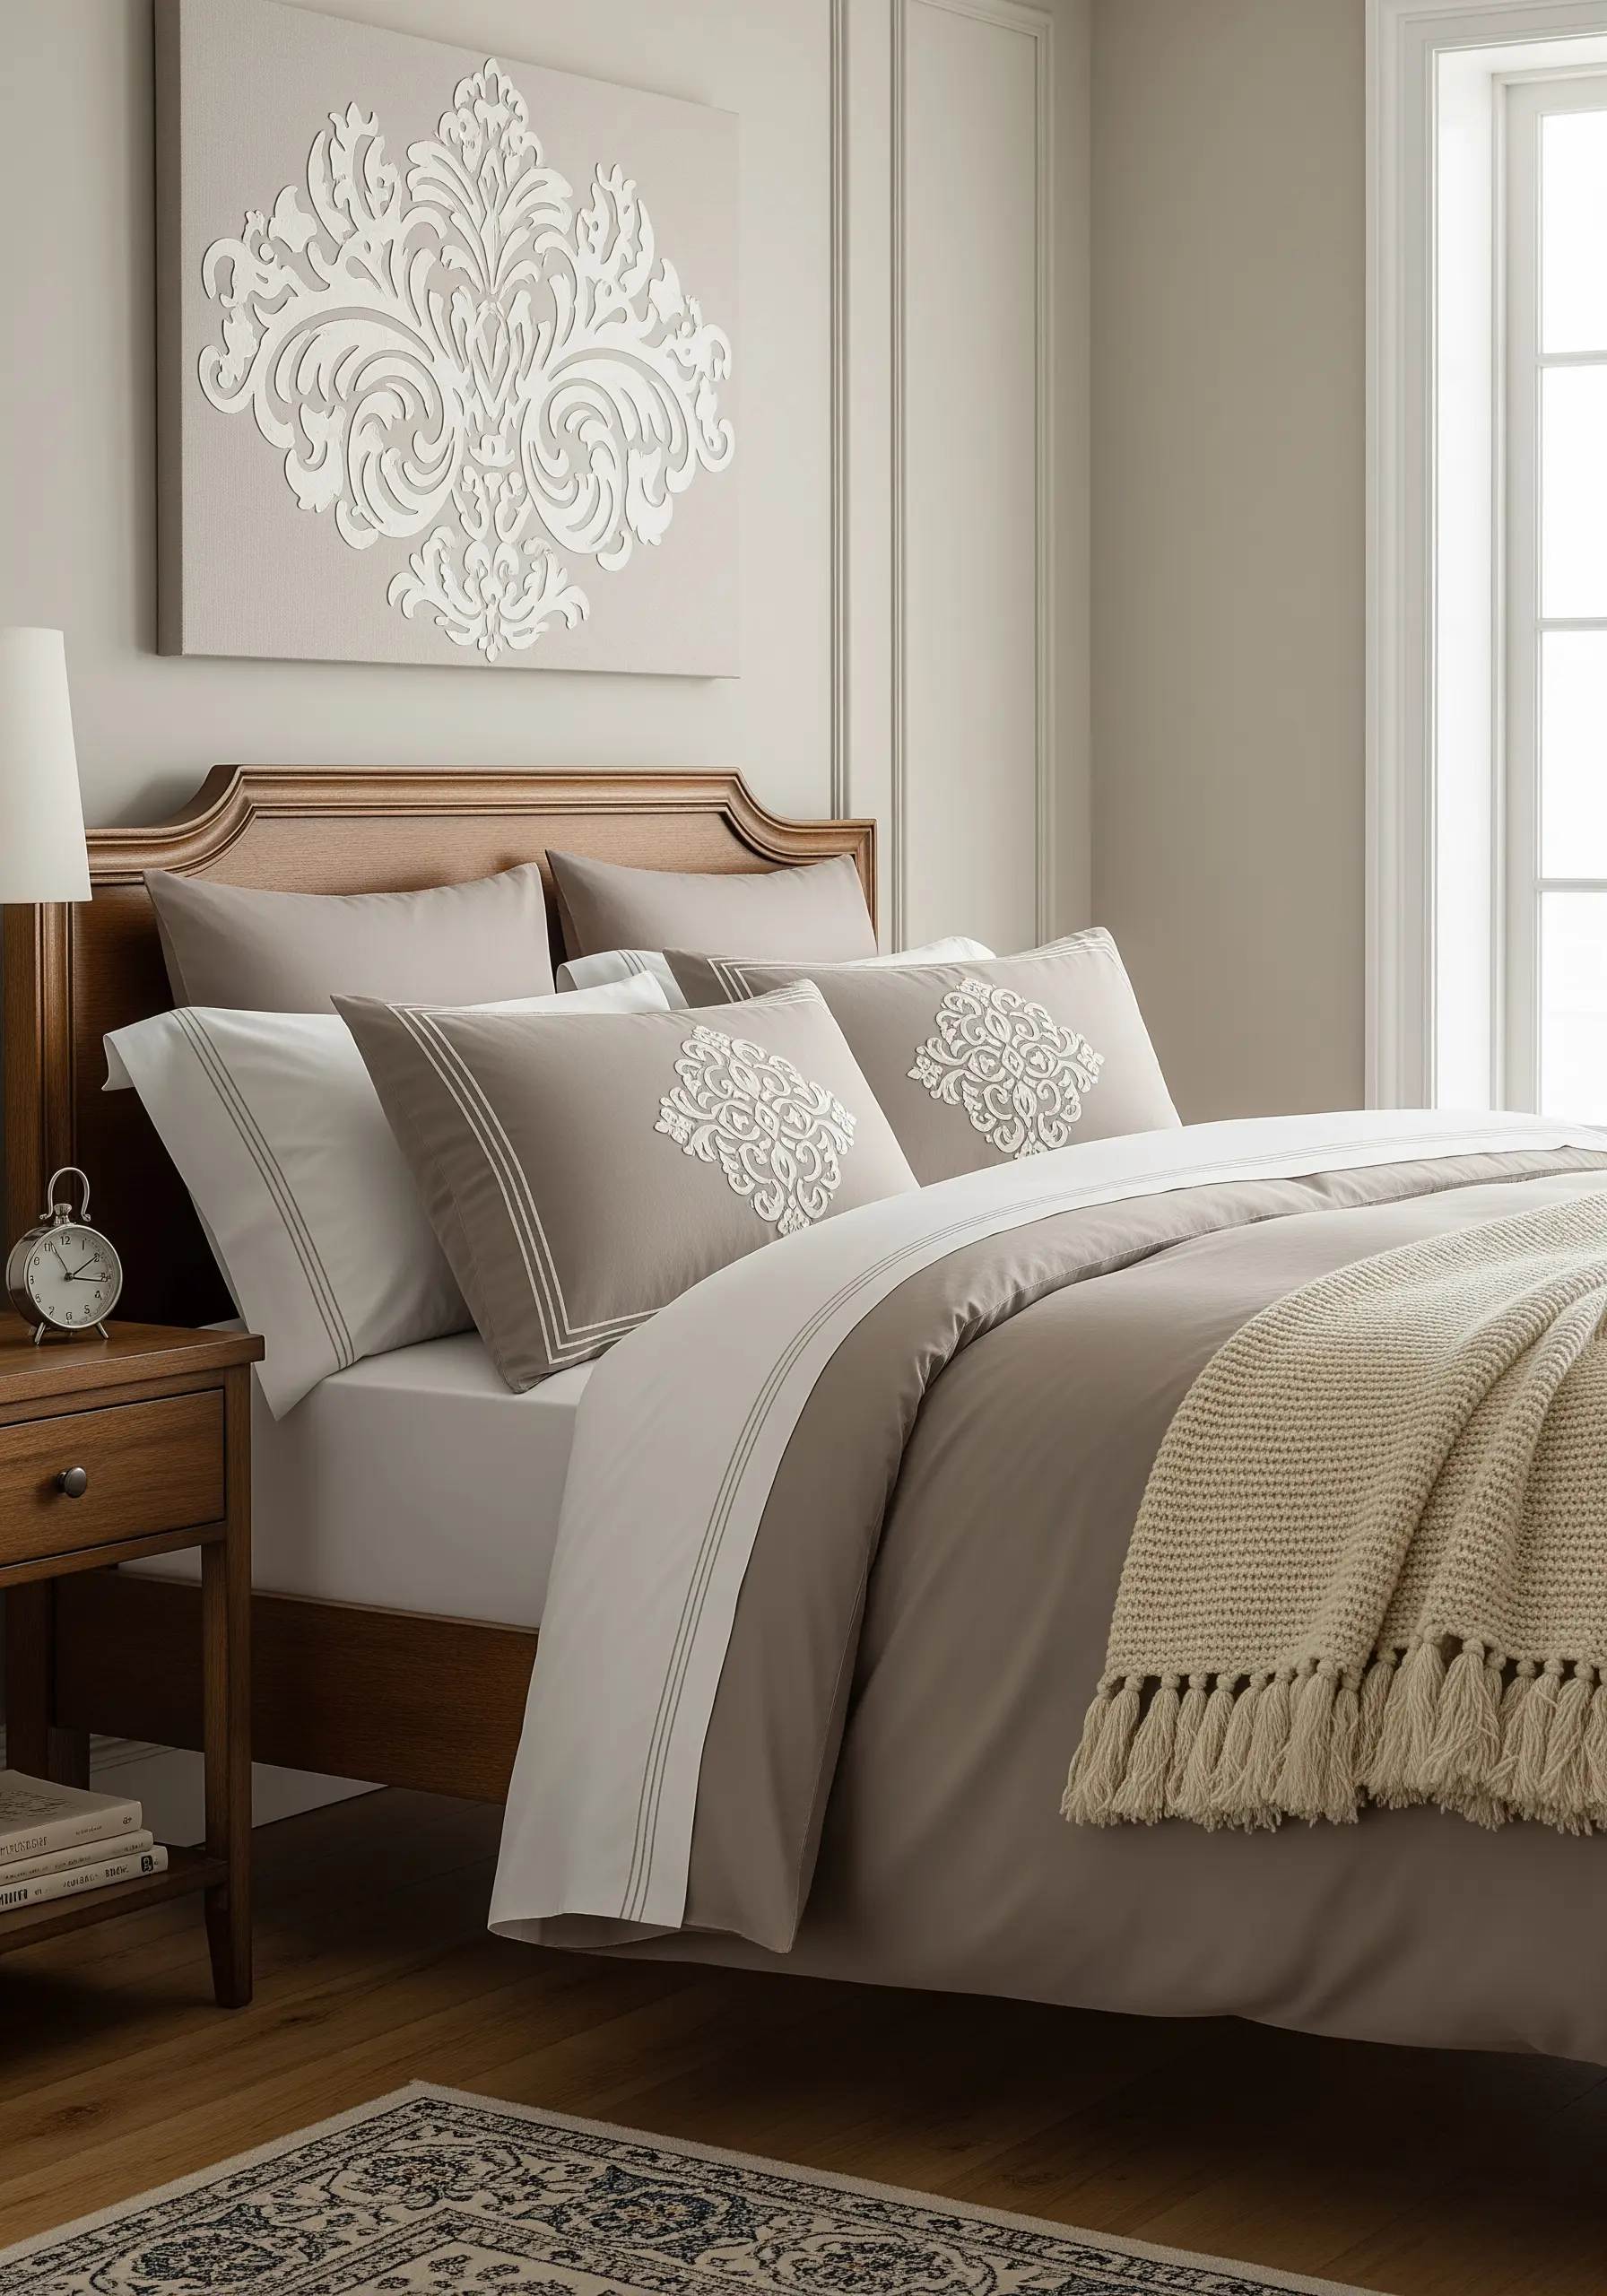
For a large, classic motif like this damask pattern, the balance of stitched and unstitched areas is crucial.
Use a padded satin stitch for the main, bold parts of the design to give them prominence and a luxurious, raised texture.
For the more delicate, swirling elements, switch to a simple backstitch or stem stitch.
This combination of heavy and light stitches prevents the design from feeling overwhelming and maintains an air of sophisticated elegance.
24. Use Satin Stitch for Bold Geometric Impact
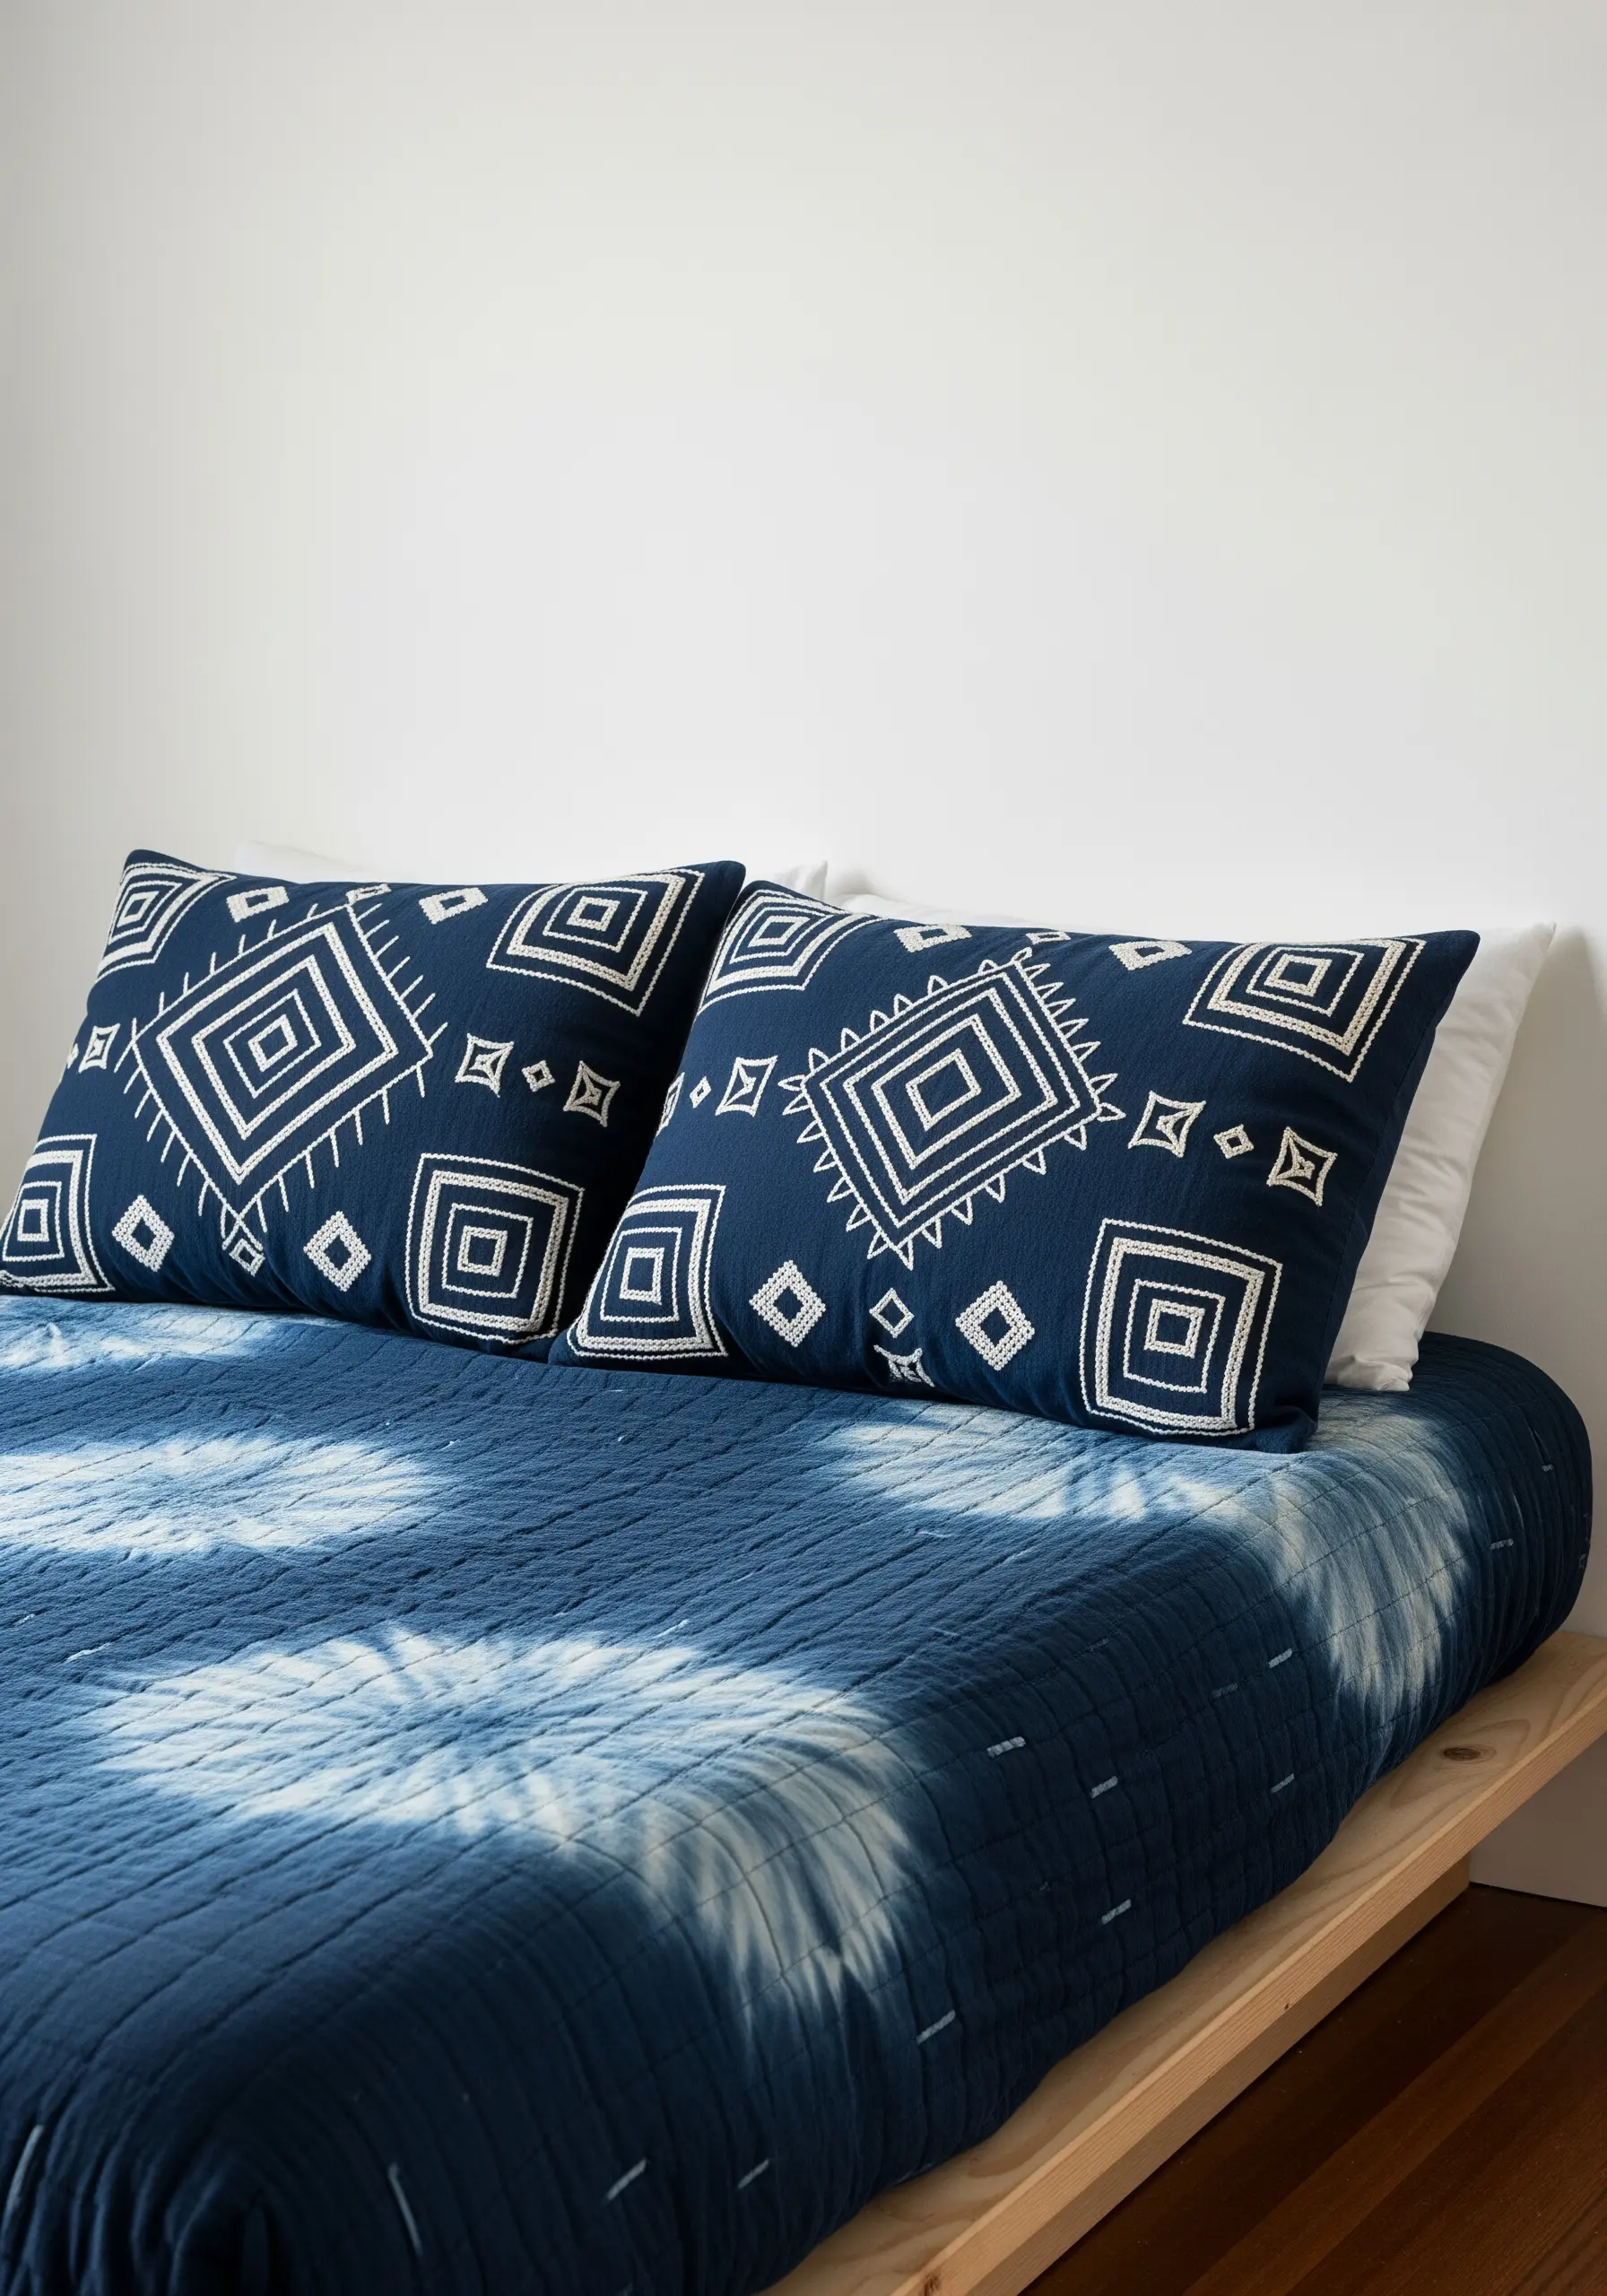
To make bold geometric shapes feel clean and impactful, a perfectly executed satin stitch is essential.
The key is to keep your stitches parallel and your tension even to achieve a smooth, seamless block of color.
To create the nested diamond effect, work from the outermost shape inward. This helps you maintain crisp lines and sharp corners.
The high contrast of white thread on a deep indigo fabric makes the graphic pattern command attention.
25. Add a Touch of Romance with Bullion Knot Rosebuds
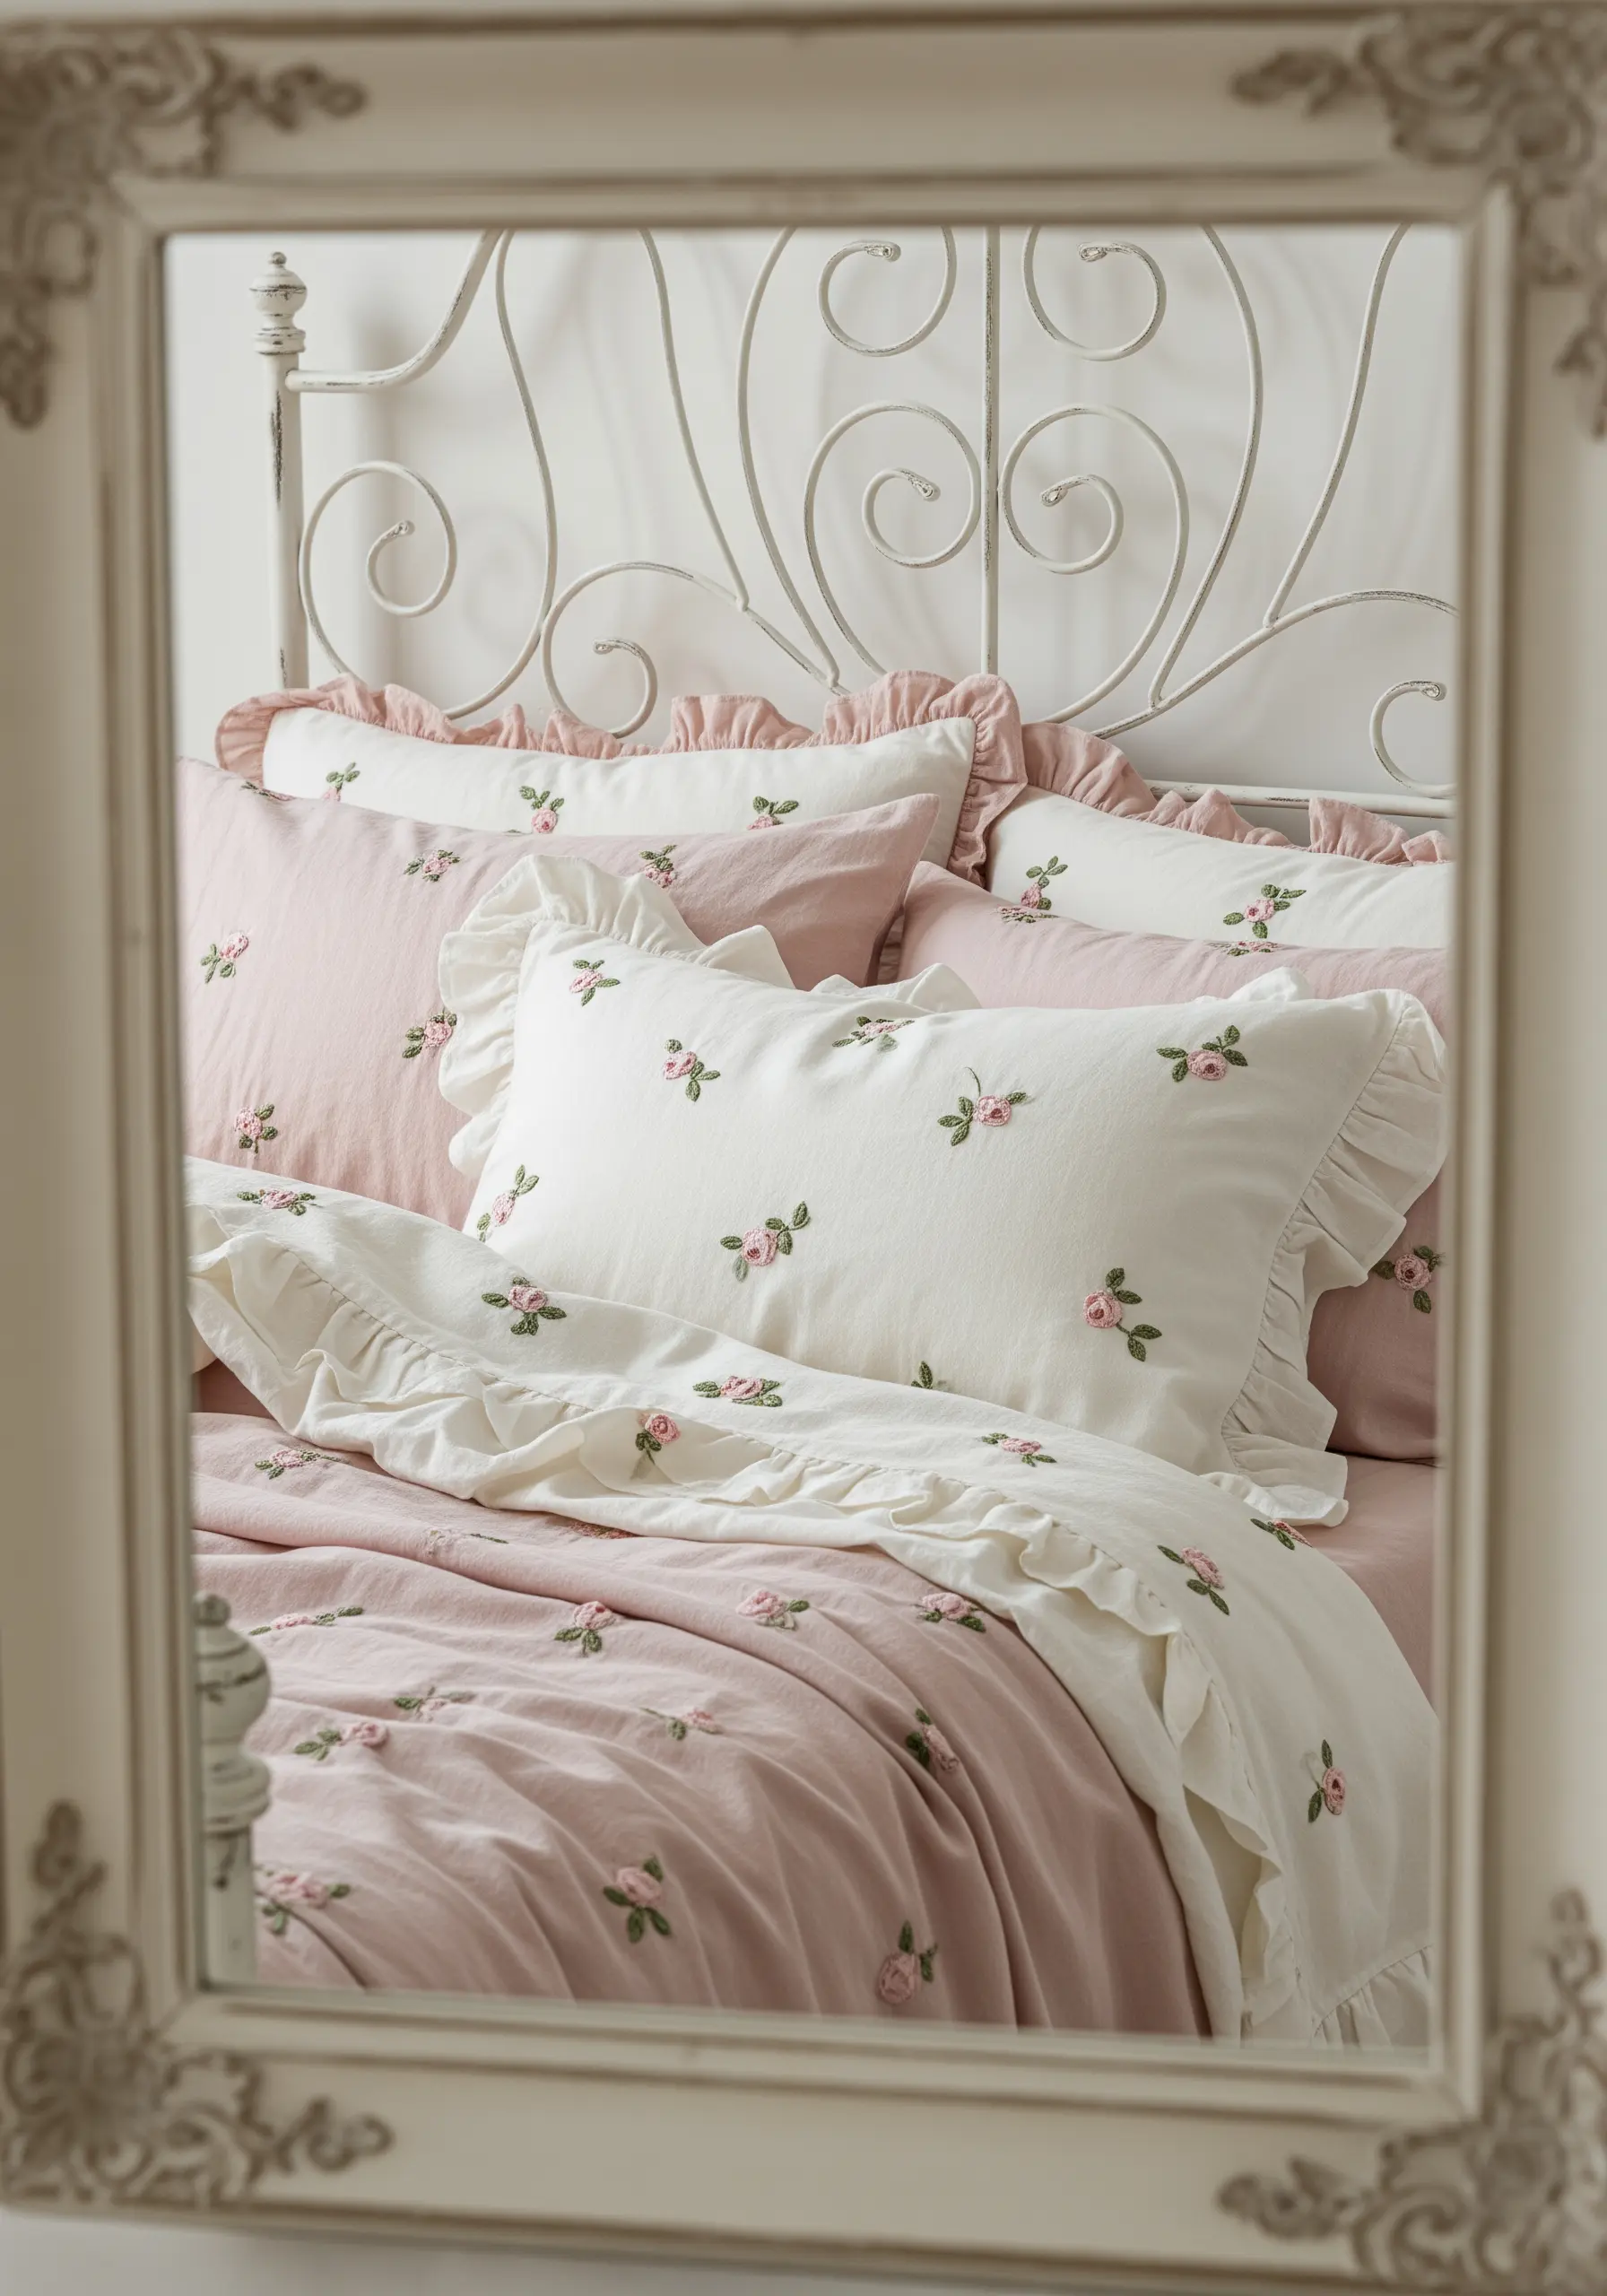
Create charming, dimensional florals using the bullion knot.
This stitch involves wrapping the thread multiple times around the needle before pulling it through, creating a small, textured coil.
By stitching three or four bullion knots together in a cluster, you can form a perfect, tiny rosebud. Add two small detached chain stitches for leaves.
Scattering these tiny floral motifs across a ruffled pillowcase creates an effortlessly romantic, vintage-inspired look.
26. Recreate Woven Plaid with Simple Running Stitches
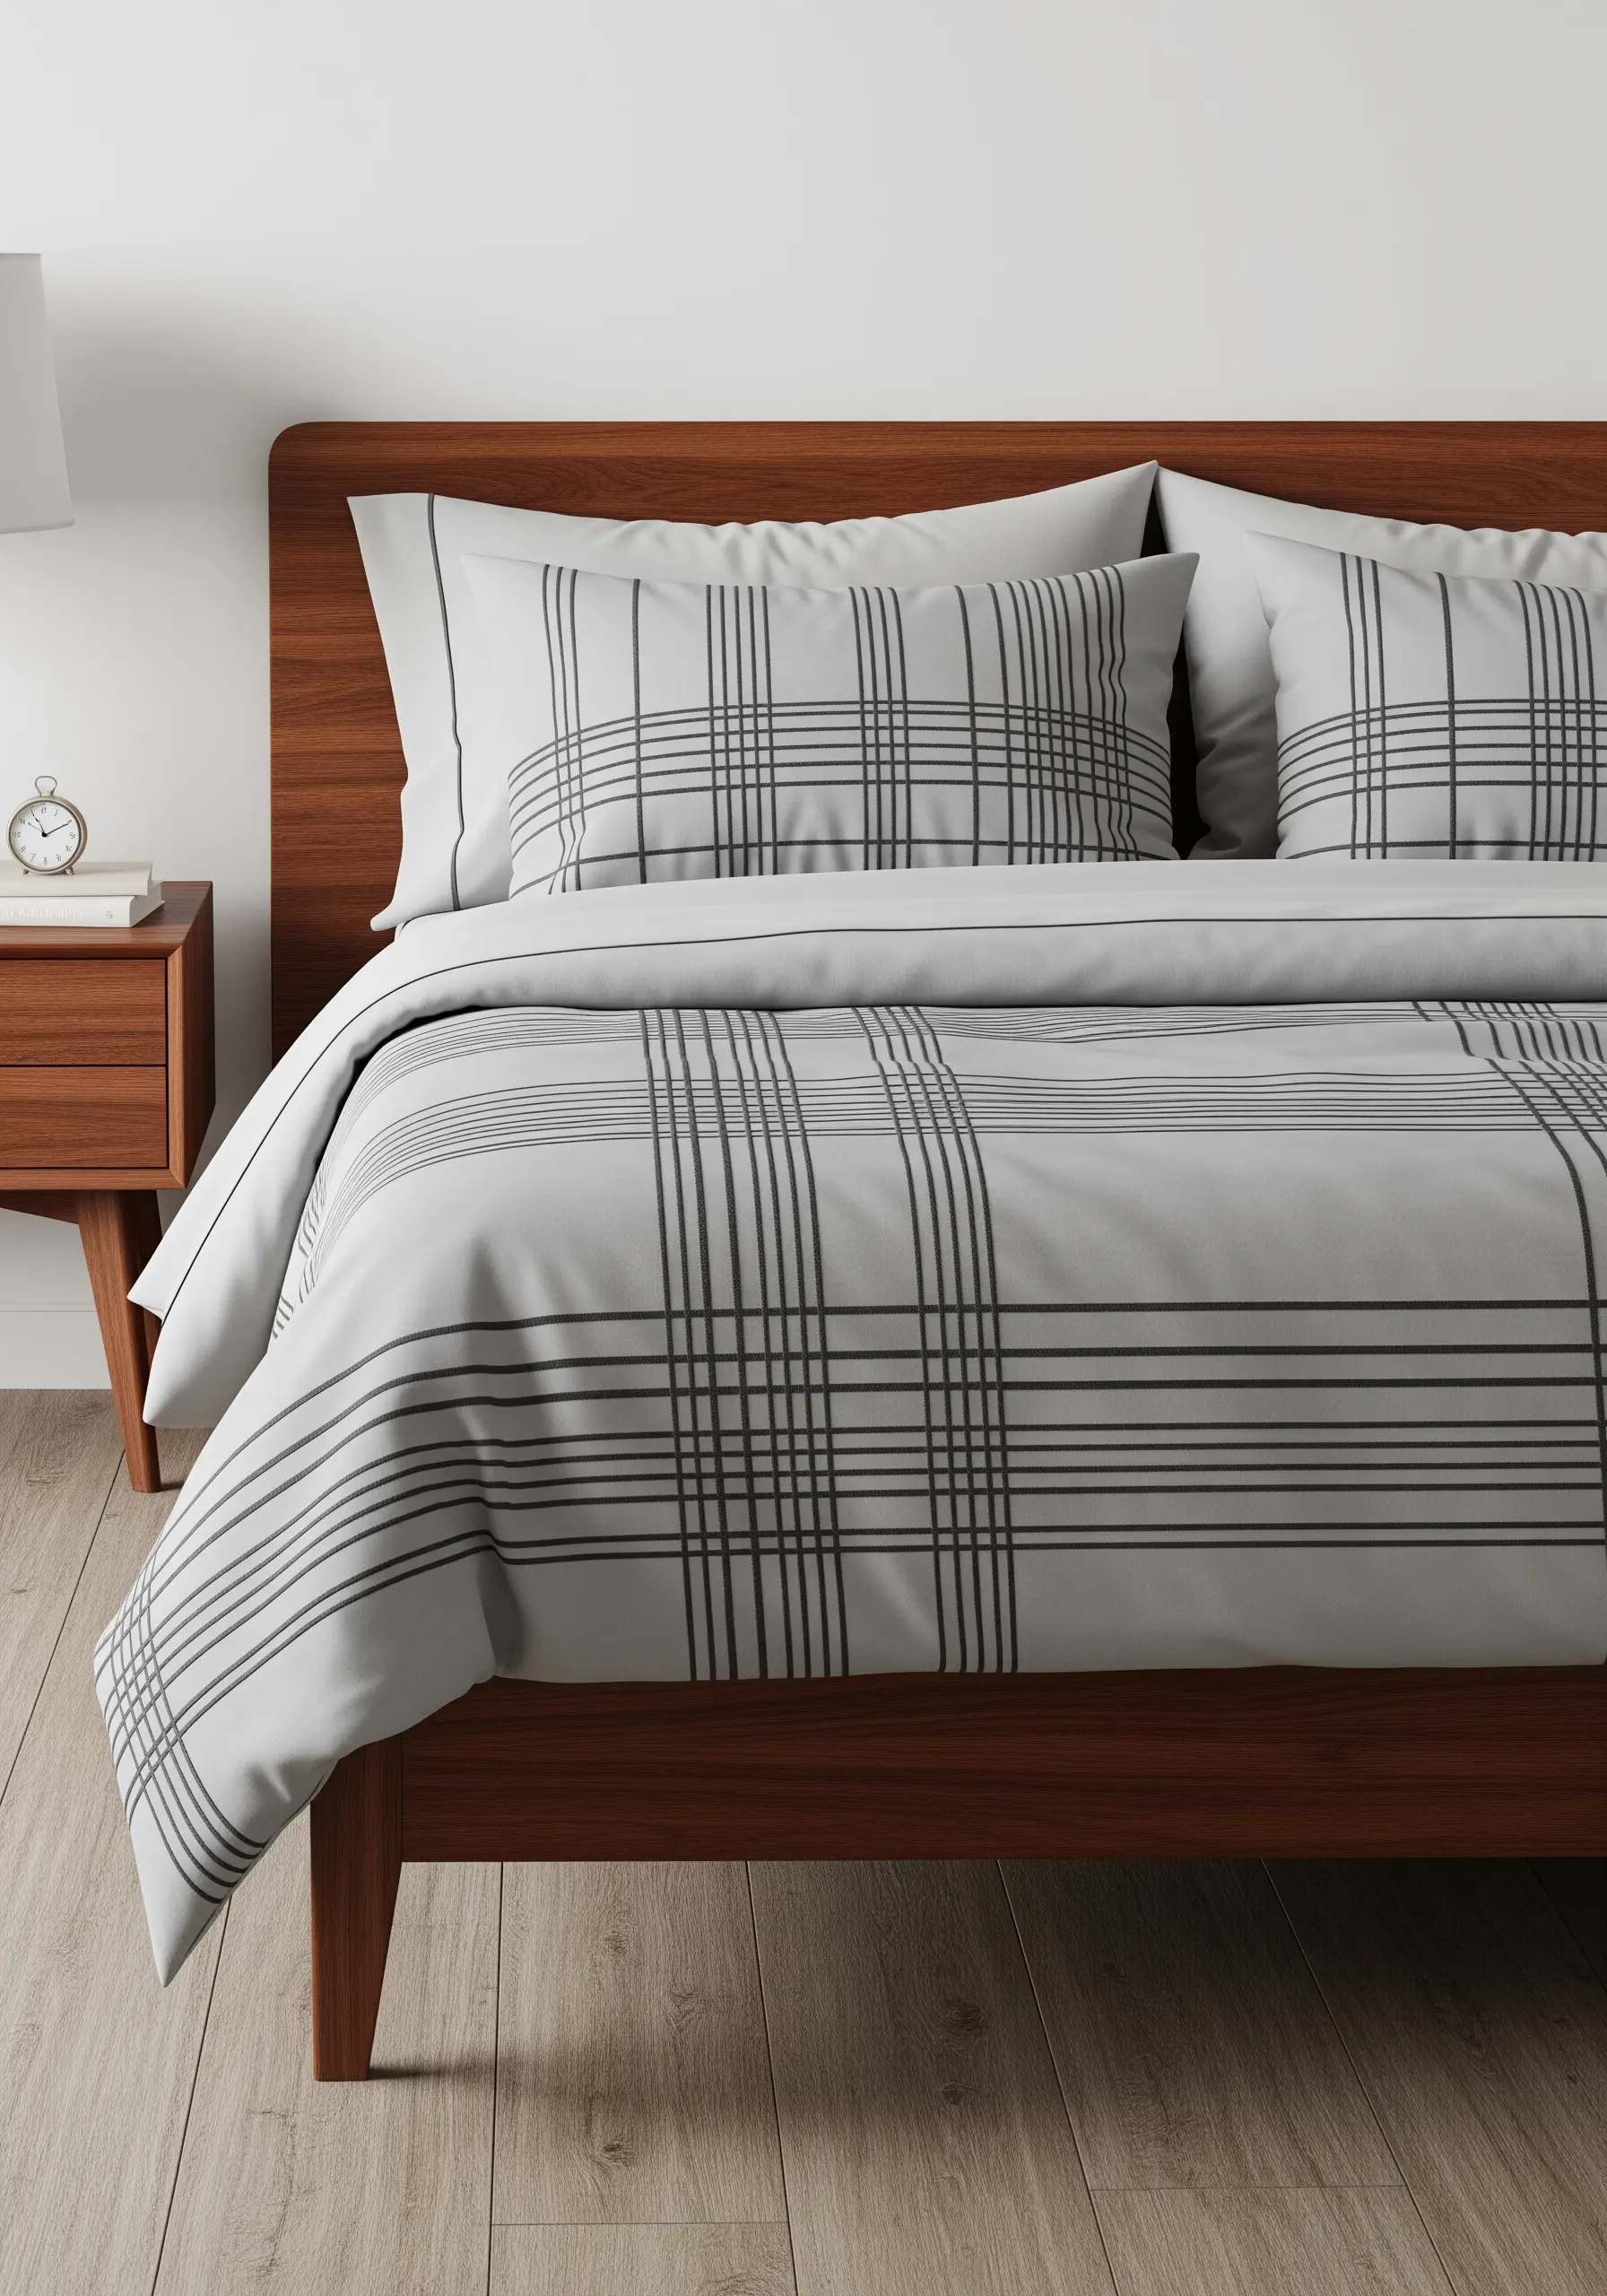
You can mimic the look of woven fabric with a thoughtfully designed grid of running stitches.
To create a realistic plaid, vary the weight of your lines. Use more strands of floss (e.g., four or five) for the dominant stripes and fewer strands (two or three) for the secondary lines.
This subtle shift in thread thickness adds visual depth and accurately reflects the structure of a woven textile.
A simple, two-color palette keeps this modern grid feeling clean and sophisticated.
27. Capture Effortless Movement with Contour Line Art
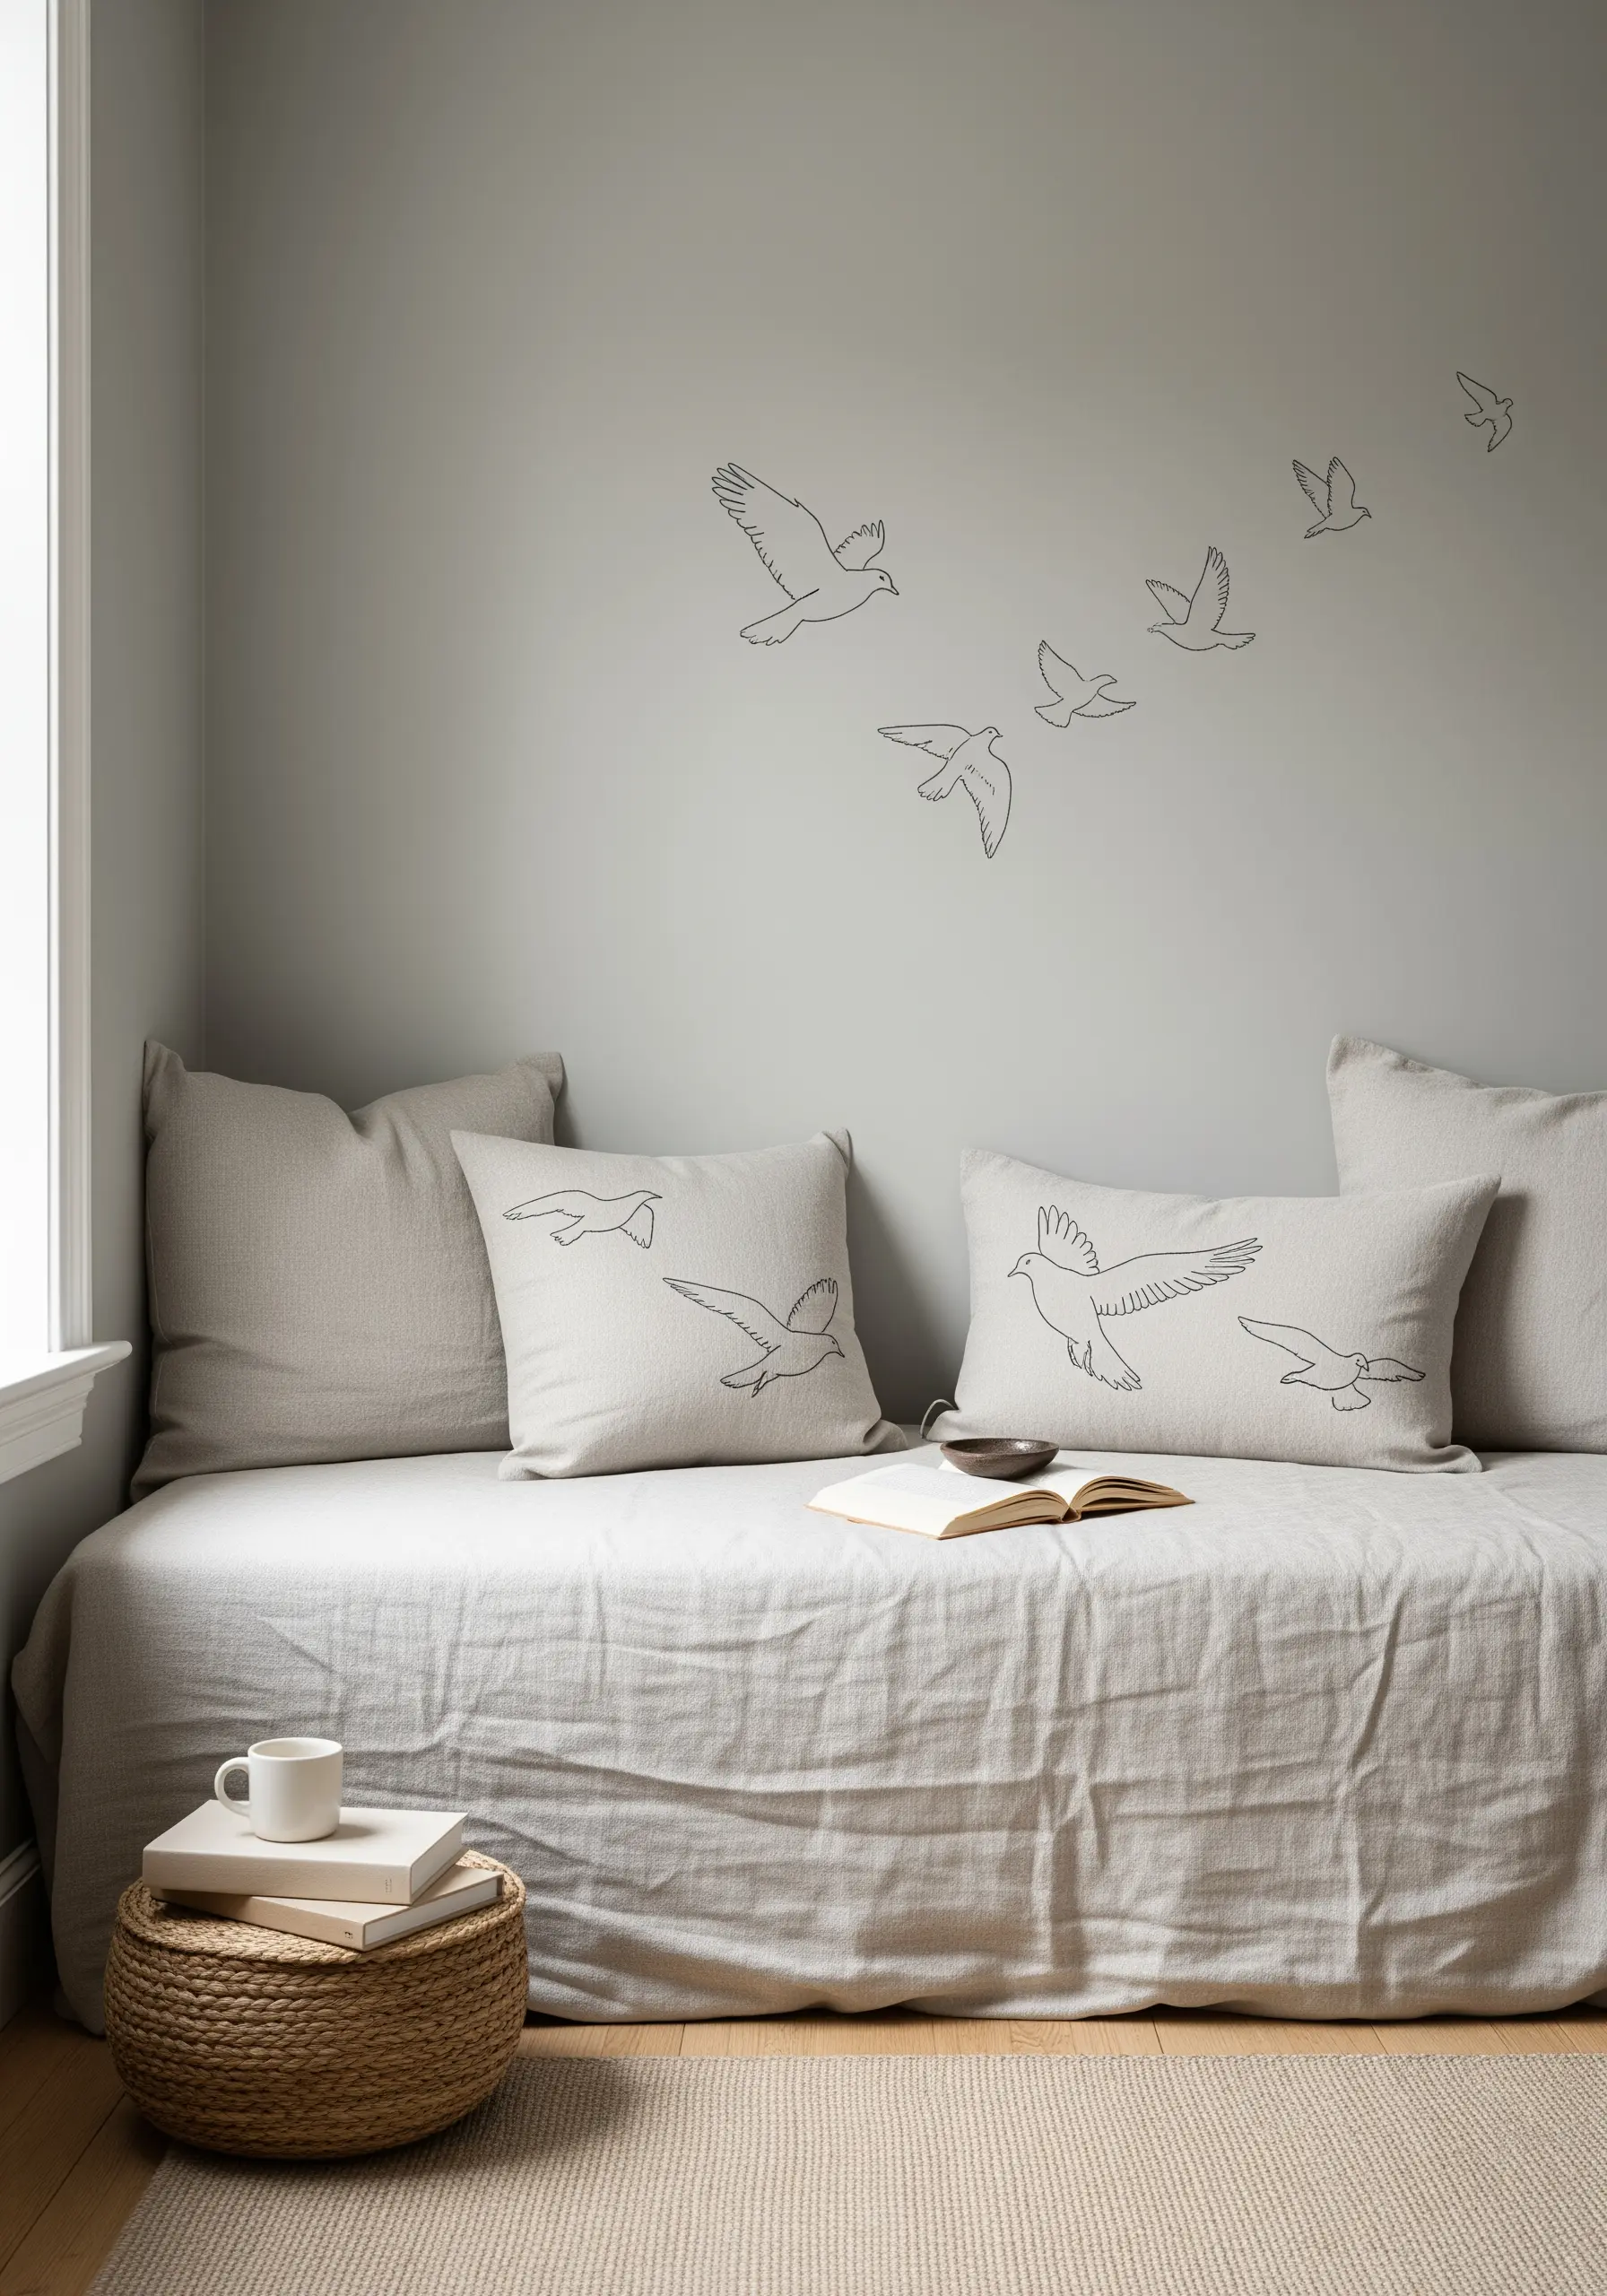
For a design that feels light and free, embrace the simplicity of contour line drawing.
Use a single, dark thread on a light, neutral fabric to create a strong but elegant contrast.
Work the birds in a simple backstitch, focusing on capturing the curve of the wing and the sense of flight in as few lines as possible.
Extending the design from the pillows onto the wall creates a beautiful, cohesive look that adds a sense of lightness and space to the room.
28. Build a Radiant Sunrise with Concentric Stitches

To create a gentle gradient effect that suggests a rising sun, use concentric rows of a textured stitch like chain stitch or split stitch.
Start with the darkest color at the center and work your way out, switching to a slightly lighter shade every few rows.
The texture of the stitches helps to blend the colors visually, creating a soft transition from one hue to the next.
Finish with radiating straight stitches for the sun’s rays to complete the warm, optimistic design.


