
Your embroidery hoop is more than just a tool—it’s a frame for a piece of art that belongs on your wall.
But perhaps you feel that something is missing, a small gap between the work you envision and the piece you create. The secret to bridging that gap often lies in subtle shifts in technique: the direction of a stitch, the weight of a thread, the balance of color and negative space.
Think of your blank walls as an invitation. Here, you will find not just patterns, but the technical and artistic choices that transform simple stitches into a stunning focal point. It’s time to stitch with intention and turn your home into a gallery of your own making.
1. Master Directional Satin Stitch for Sculptural Landscapes

Create rolling hills by changing the direction of your satin stitches to follow the curves of the landscape.
This simple shift adds movement and depth, making the scene feel alive.
Use a thicker thread, like pearl cotton or even fine wool, to build texture quickly and add a soft, tactile quality.
For the sun, stitch a tight spiral of satin stitches, which provides a beautiful contrast to the linear flow of the hills.
This technique turns a flat design into a dynamic, touchable piece of string art landscape.
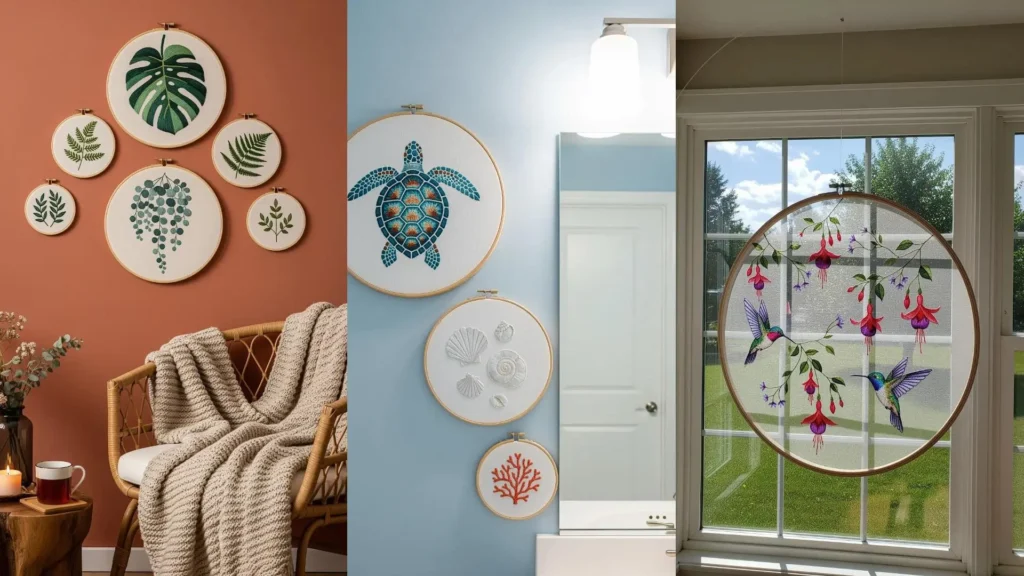
2. Curate a Cohesive Botanical Gallery Wall

To create a balanced arrangement, vary the hoop sizes and leaf designs but maintain a consistent style.
Use the same color palette and background fabric across all hoops to unify the collection.
Achieve realistic textures by using fishbone stitch for delicate ferns and a dense satin stitch for the broad monstera leaf.
This contrast in stitch technique makes each plant distinct yet part of a whole.
The result is a sophisticated botanical installation, not just a random assortment of hoops.
3. Embrace Precision with High-Contrast Geometric Art
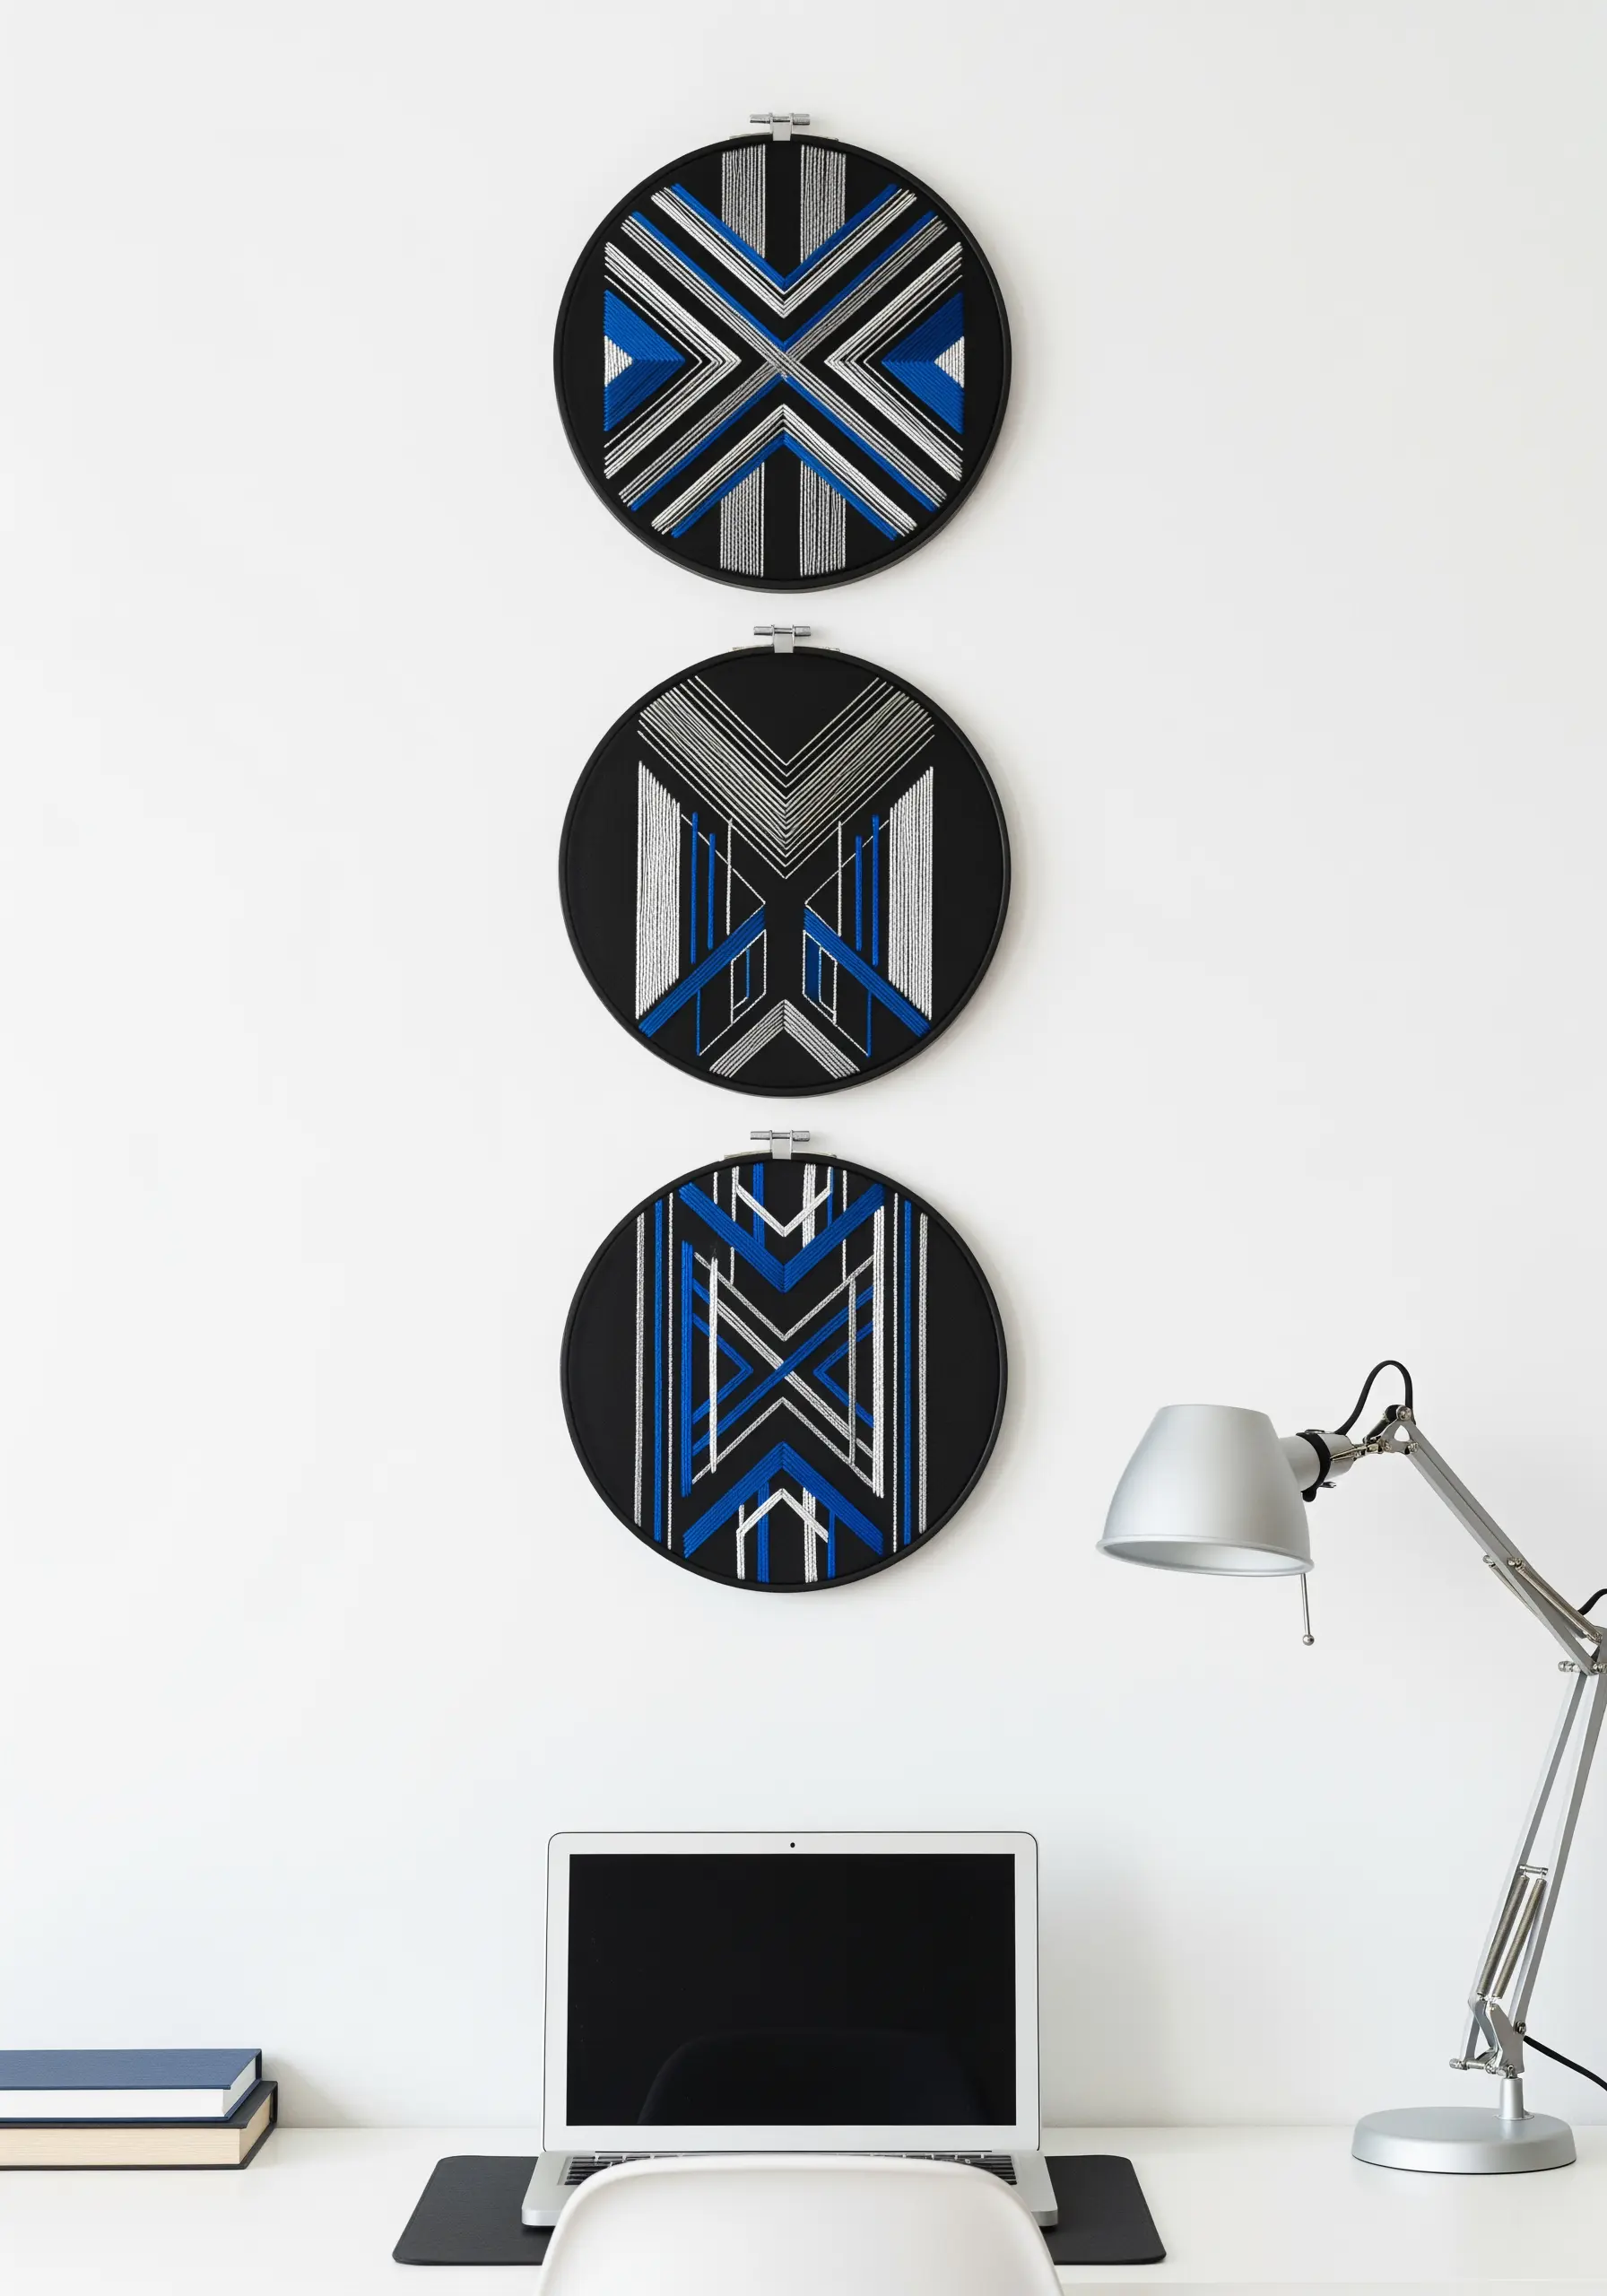
For crisp, clean lines in geometric designs, use a water-soluble stabilizer to transfer your pattern perfectly.
Stitching on black fabric makes colors pop dramatically, especially when using metallic or high-sheen threads.
Work with straight stitches, pulling them taut to ensure they don’t sag.
This technique creates a sharp, architectural feel that is both modern and visually striking.
4. Build a Dreamy Nursery Scene with 3D Textures

Add dimension to your celestial designs by incorporating raised stitches.
Create plush clouds with dense clusters of French knots or by using a padded satin stitch over a felt base.
For the flowers, stitch woven wheel roses, which sit beautifully raised off the fabric surface.
These textural elements invite touch and transform a simple hoop into an enchanting, multi-sensory piece for a magical nursery.
5. Capture a Wildflower Meadow with Rustic Stitches

Recreate the imperfect beauty of a wildflower field by choosing stitches that feel organic and free.
Use lazy daisy stitch for daisy petals and detached chain stitch for poppy buds, allowing for slight variations in shape and size.
For lavender, clusters of French knots in varying shades of purple give a natural, textured look.
Stitching on a rustic linen or burlap-style fabric enhances the earthy, cottagecore aesthetic.
6. Design an Eclectic Gallery Wall with Confidence

A successful maximalist display is about curated variety, not chaos.
Combine different hoop sizes, shapes (like ovals), and background colors to create visual interest.
Unite the collection with a strong wall color that makes every piece pop.
Experiment with diverse techniques—from detailed thread painting on the beetle to fluid, abstract thread swirls—to showcase your range and personality.
7. Convey Elegance with Delicate Weeping Willow Branches

Capture the graceful drape of a willow tree using long, flowing lines of split stitch or stem stitch.
A single strand of thread will give you the most delicate result.
Work with a tonal color palette—multiple shades of beige, taupe, or grey—to create subtle depth without overwhelming the design.
This minimalist approach focuses on form and movement, resulting in a serene and sophisticated piece of art.
8. Create Cheerful Pop Art with Bold Fruit Motifs

Achieve a clean, graphic look by filling your fruit shapes with dense, smooth satin stitch.
Pay close attention to stitch direction to create a subtle sheen that mimics light hitting the fruit’s surface.
To make the motifs truly pop, define them with a crisp backstitch or split stitch outline in a darker, contrasting color.
Arranging the hoops in a simple grid transforms them into a bright, modern art installation.
9. Evoke Art Deco Glamour with Metallics and Beads
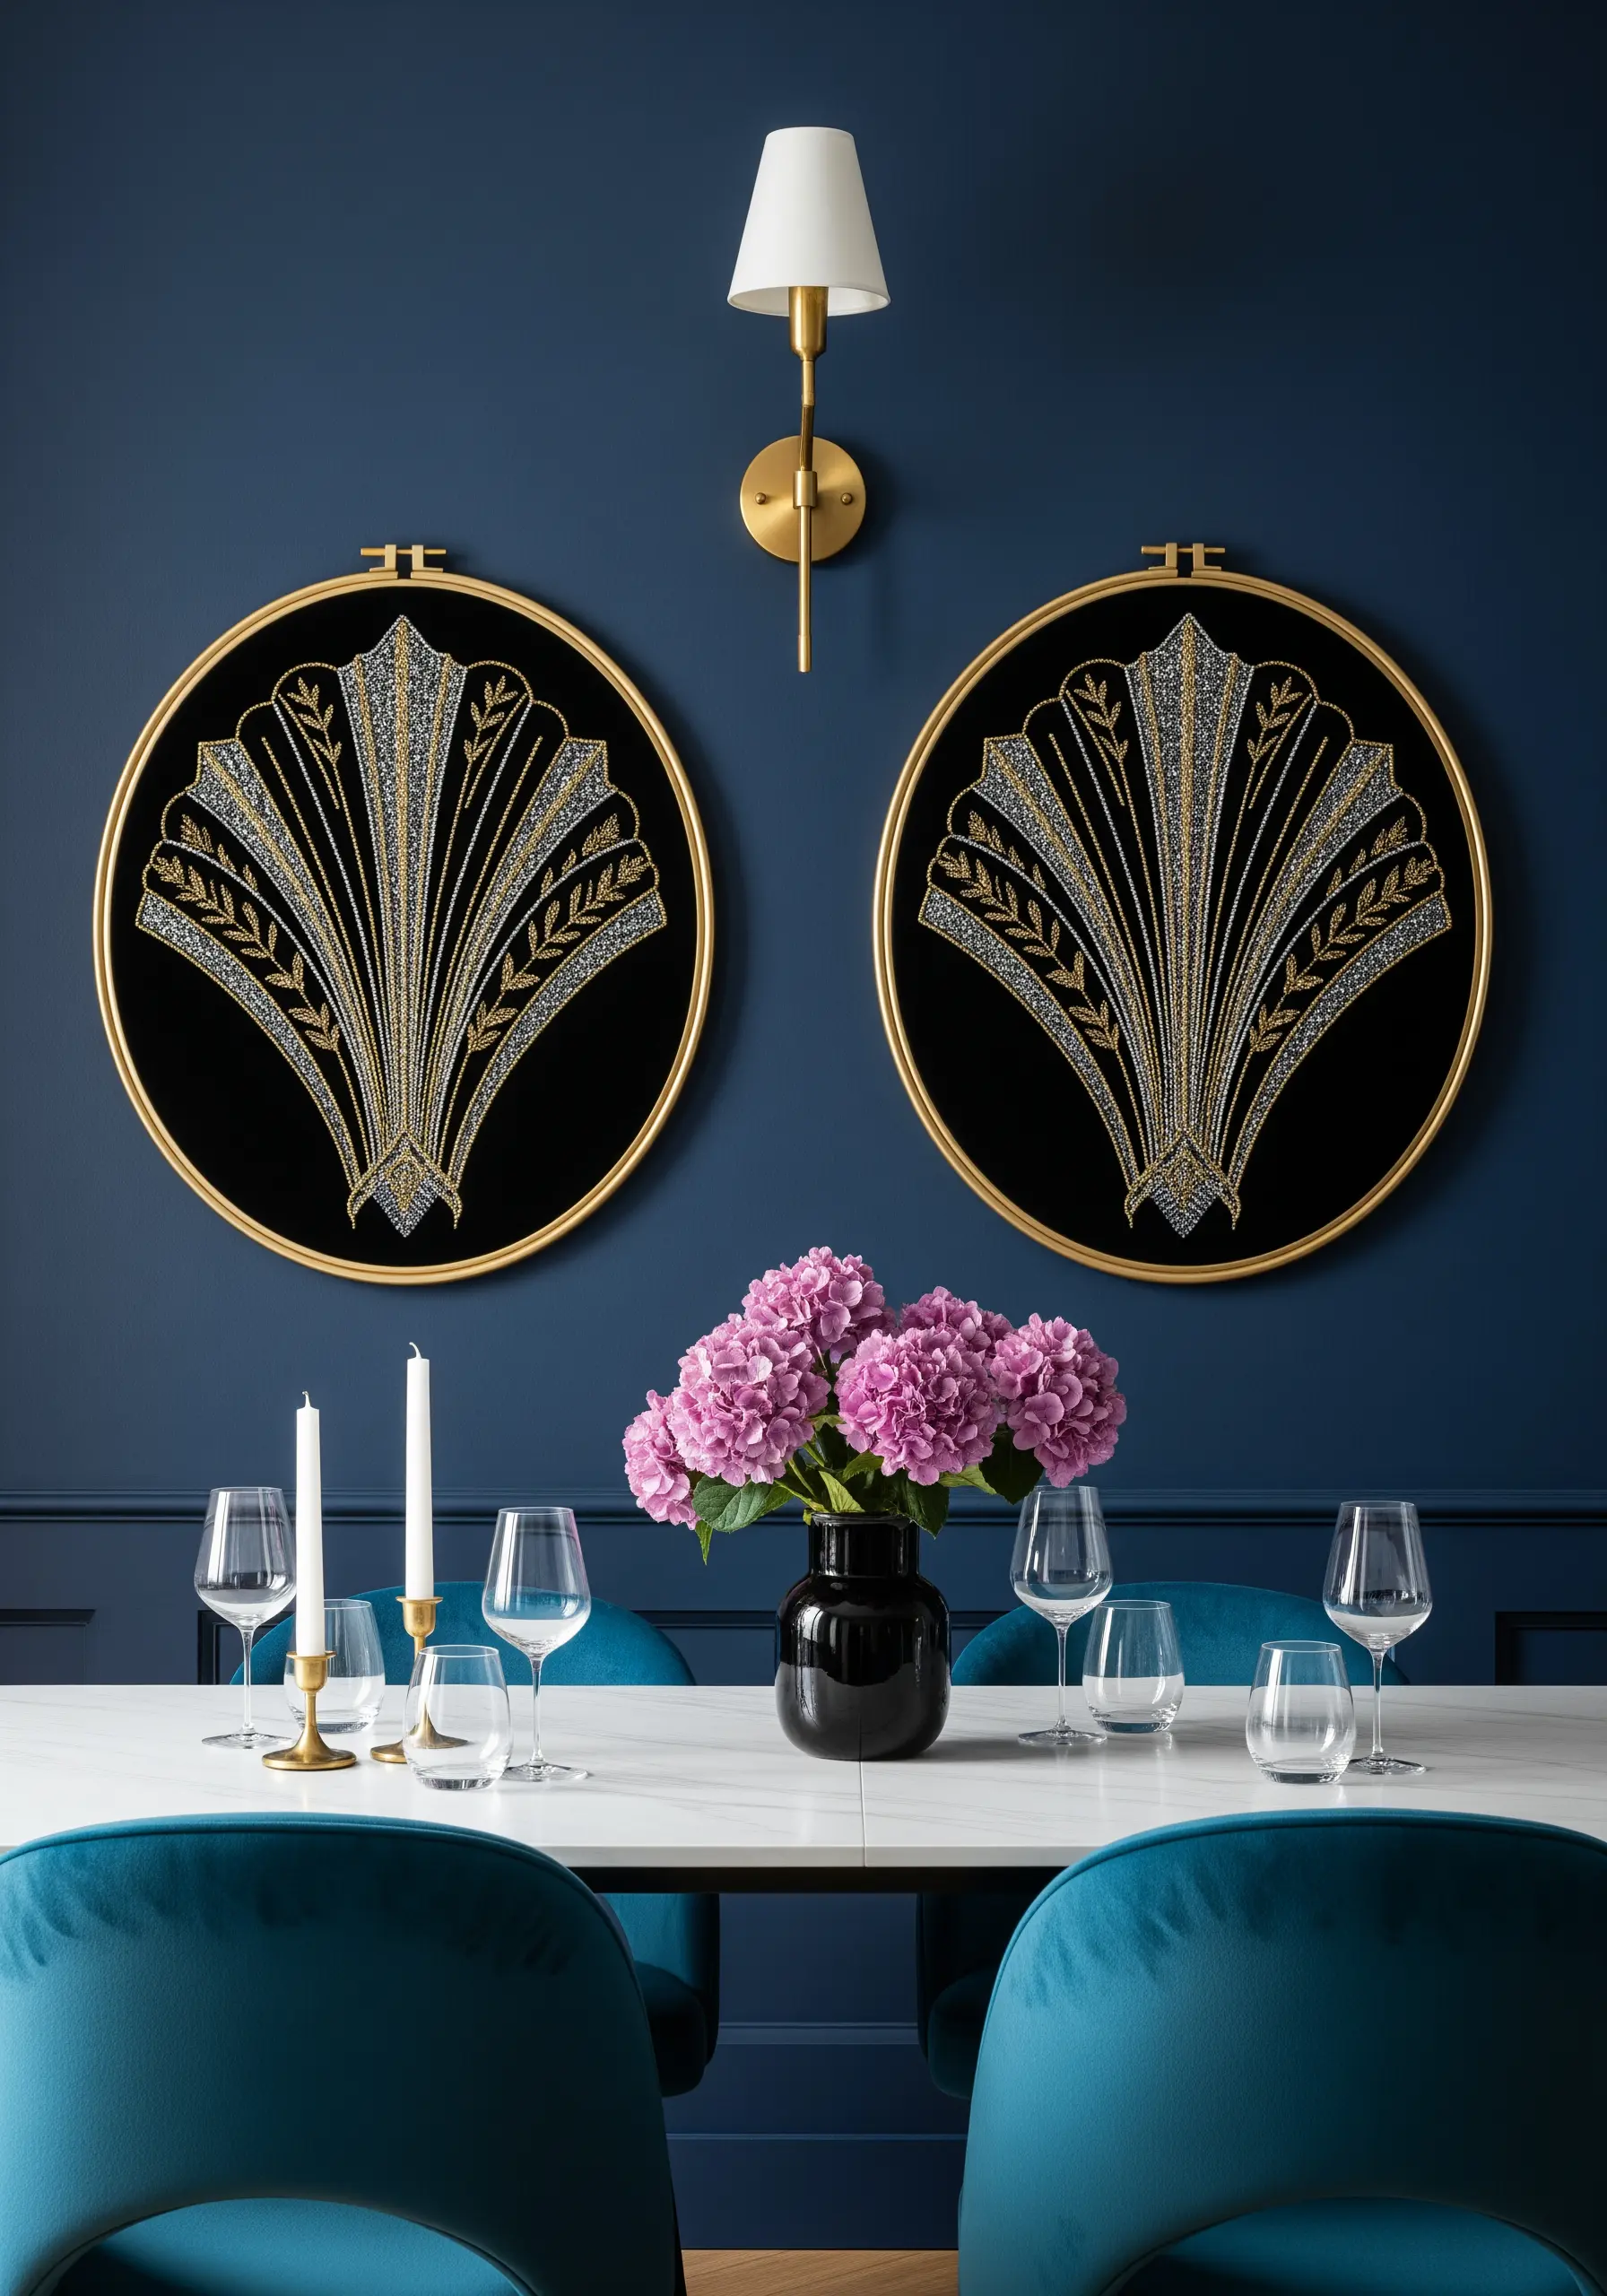
Stitch on black velvet to create a luxurious canvas that makes metallic threads intensely vibrant.
Use a couching stitch to lay down metallic threads smoothly, preventing them from twisting or snagging.
Incorporate tiny silver or gold seed beads to add texture and catch the light, elevating the design from simple embroidery to opulent textile art.
These abstract metallic thread projects create a dramatic focal point in any room.
10. Render Architectural Details with Minimalist Line Work
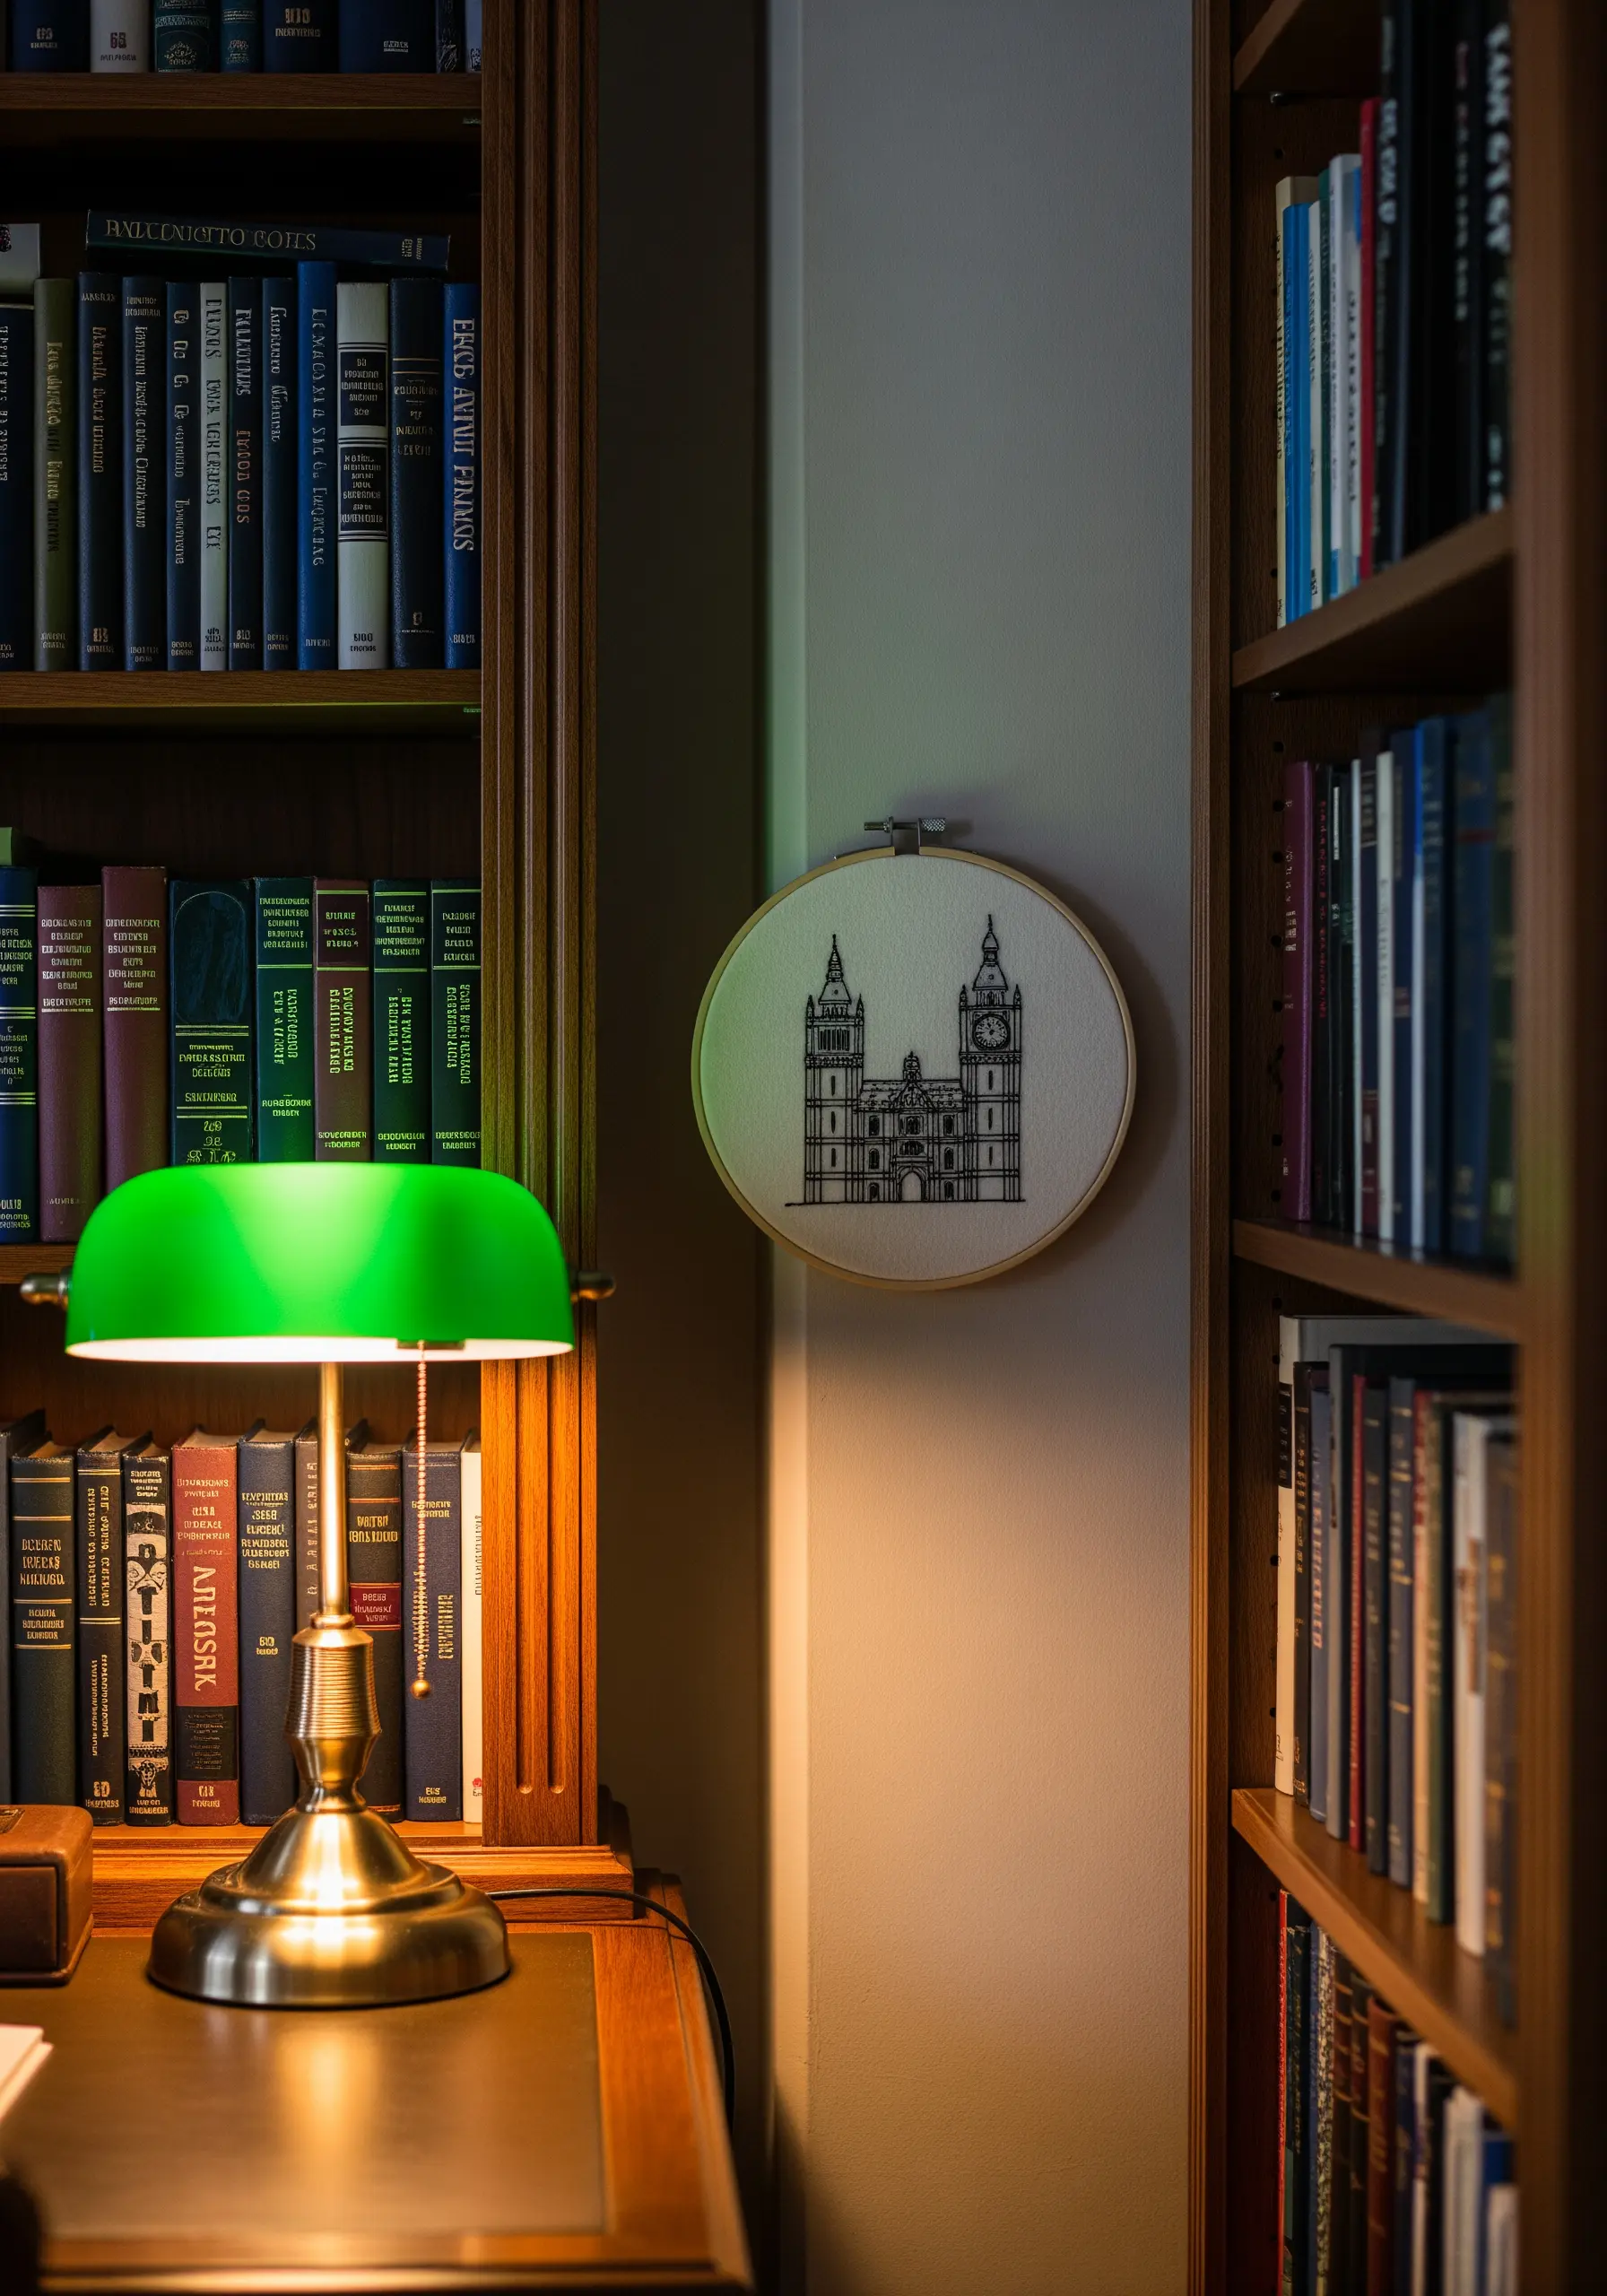
Capture the essence of a building not with dense stitches, but with clean, precise lines.
Use a single strand of black embroidery floss and a neat backstitch on a high-count linen or cotton fabric.
The negative space is just as important as the stitched lines, allowing the viewer’s eye to fill in the details.
This restrained technique creates sophisticated, gallery-worthy pieces that feel both timeless and modern, like these embroidered city skyline wall decor ideas.
11. Explore Coastal Themes with Raised and Patterned Stitches

Bring your seaside art to life with texture.
For the seashells, use stumpwork techniques or padded satin stitch over felt shapes to create a three-dimensional effect.
To render the sea turtle’s shell, fill each segment with a different directional satin stitch or a small geometric pattern.
This variation in texture not only adds realism but also creates a compelling tactile quality.
12. Craft Elegant Lettering with Padded Satin Stitch
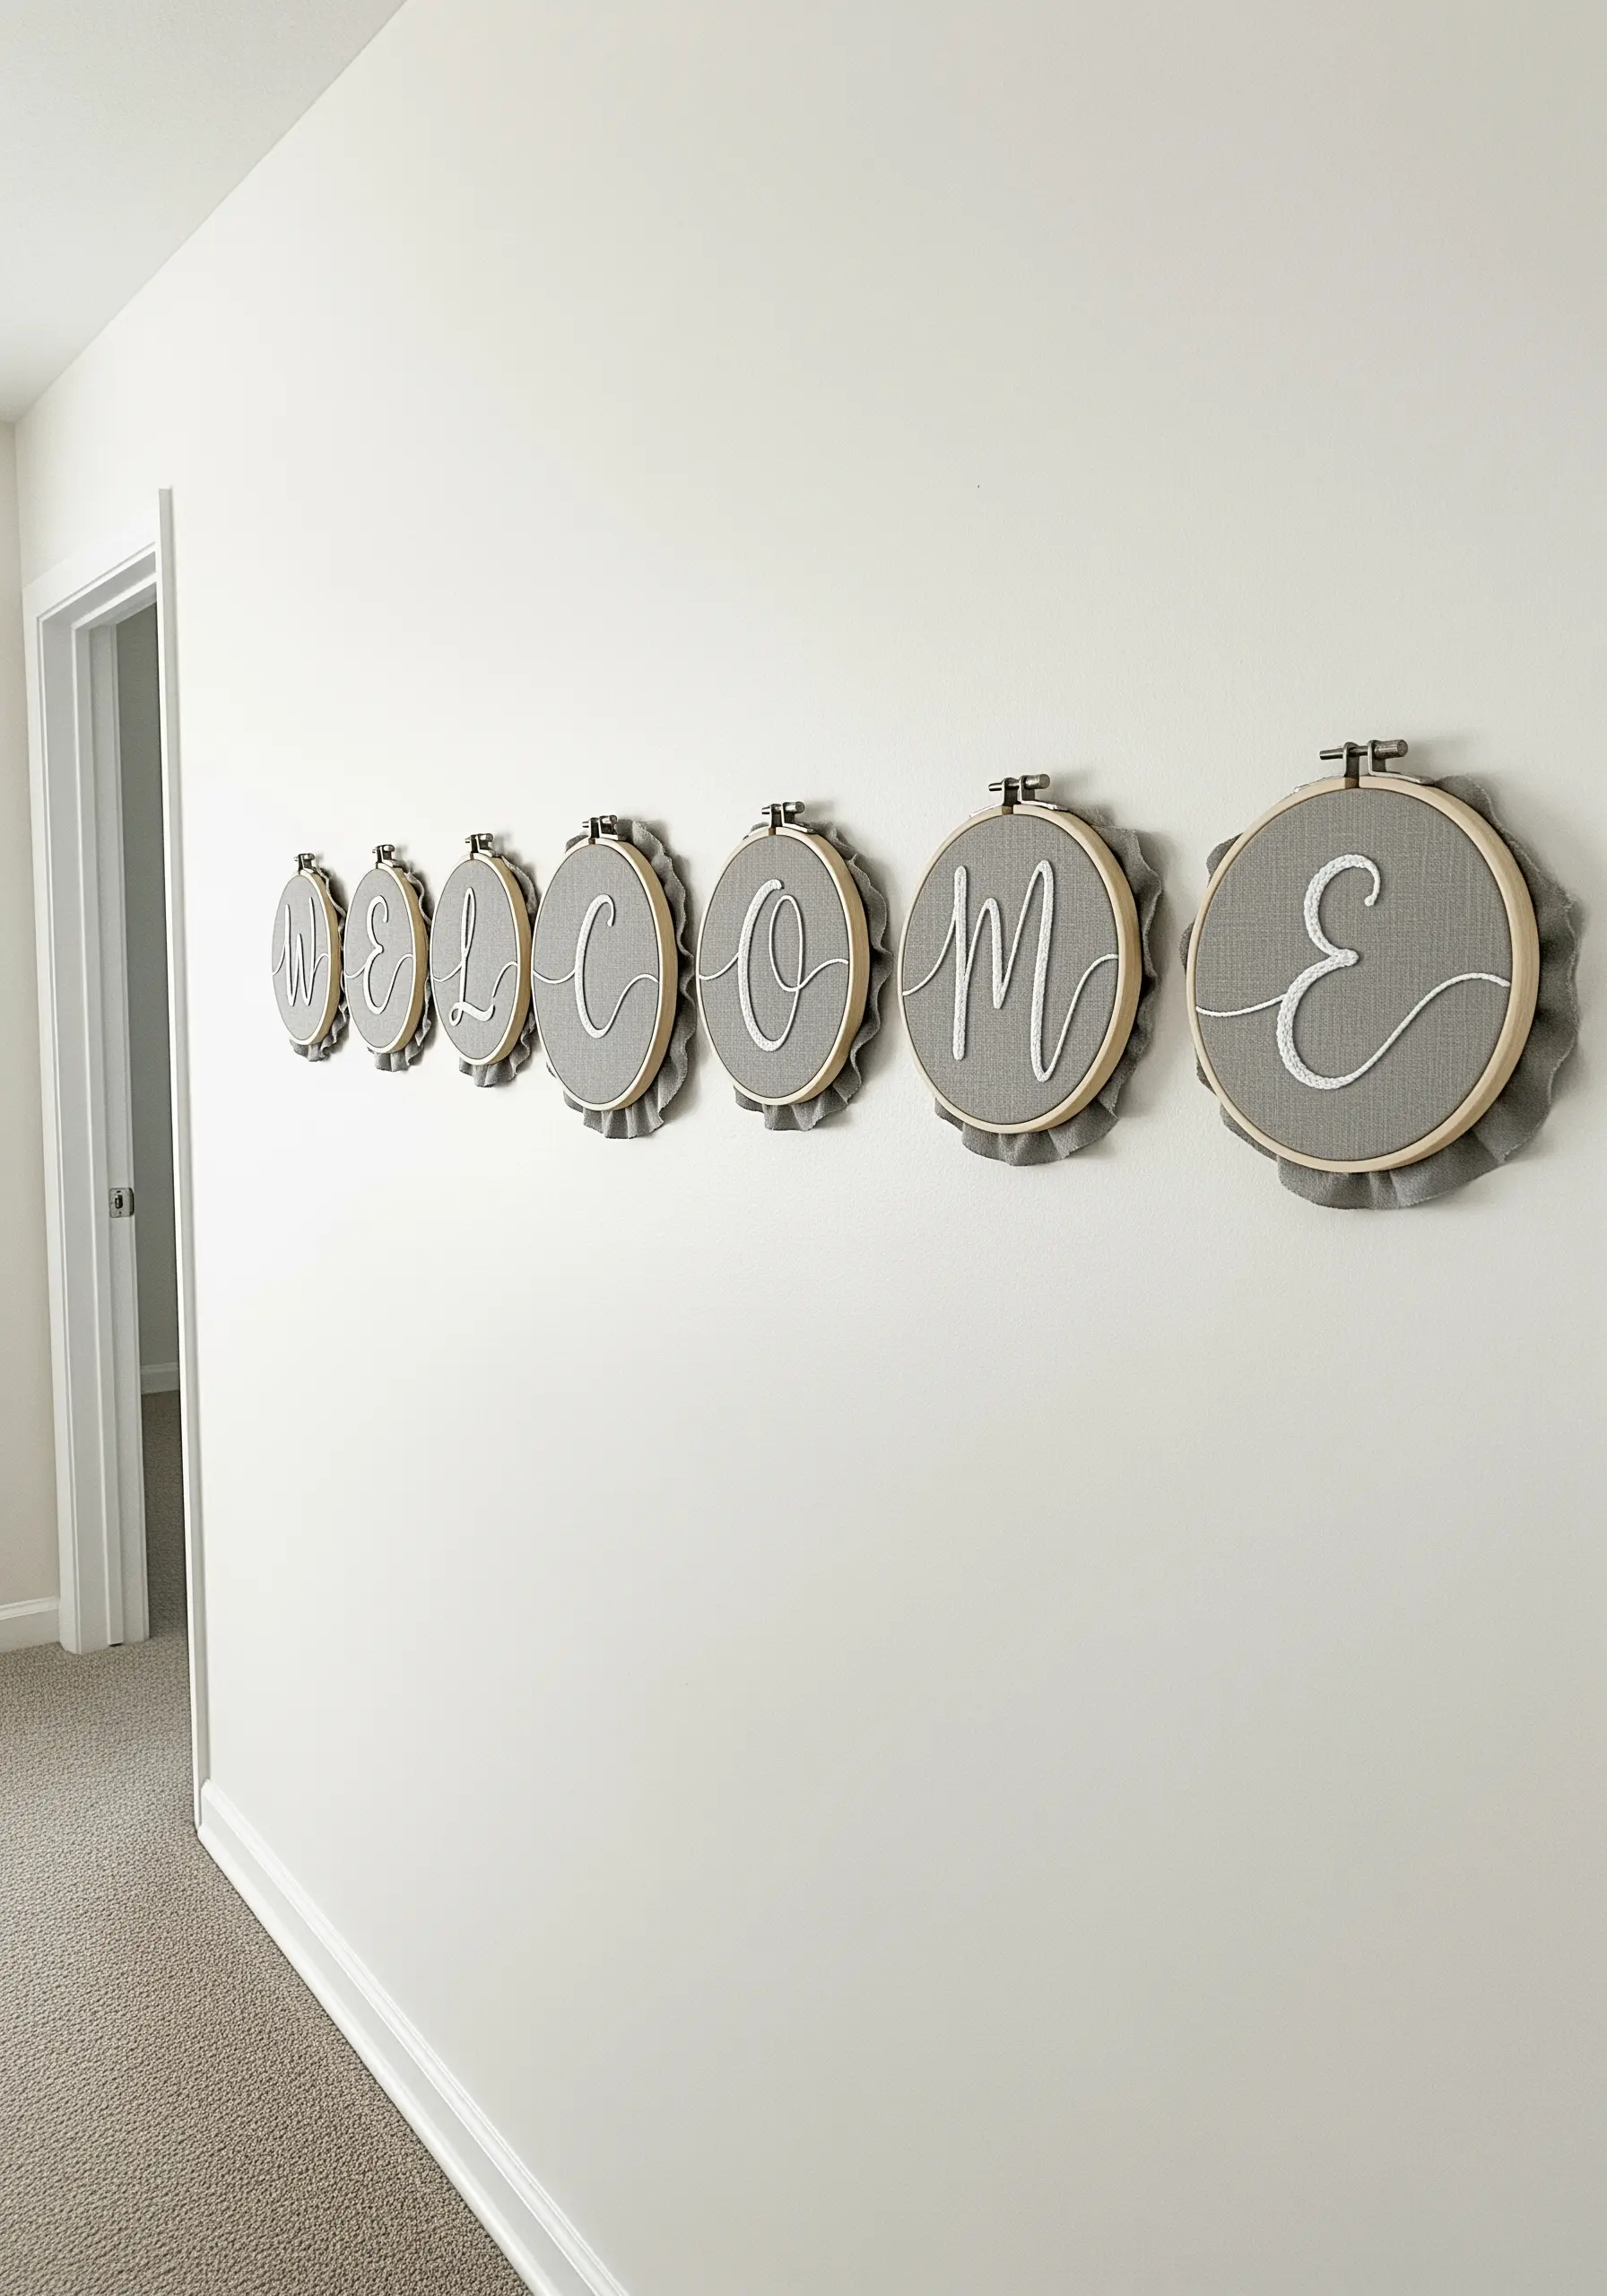
To give your embroidered text a professional, raised appearance, use a padded satin stitch.
First, create a base layer of small straight stitches within the letter’s shape, then cover it with smooth satin stitches perpendicular to the base.
For flawless curves, outline your letters with a split stitch before filling them in.
This technique ensures your lettering is bold, smooth, and dimensional.
13. Stitch a Vibrant Abstract Bouquet with Textural Fills
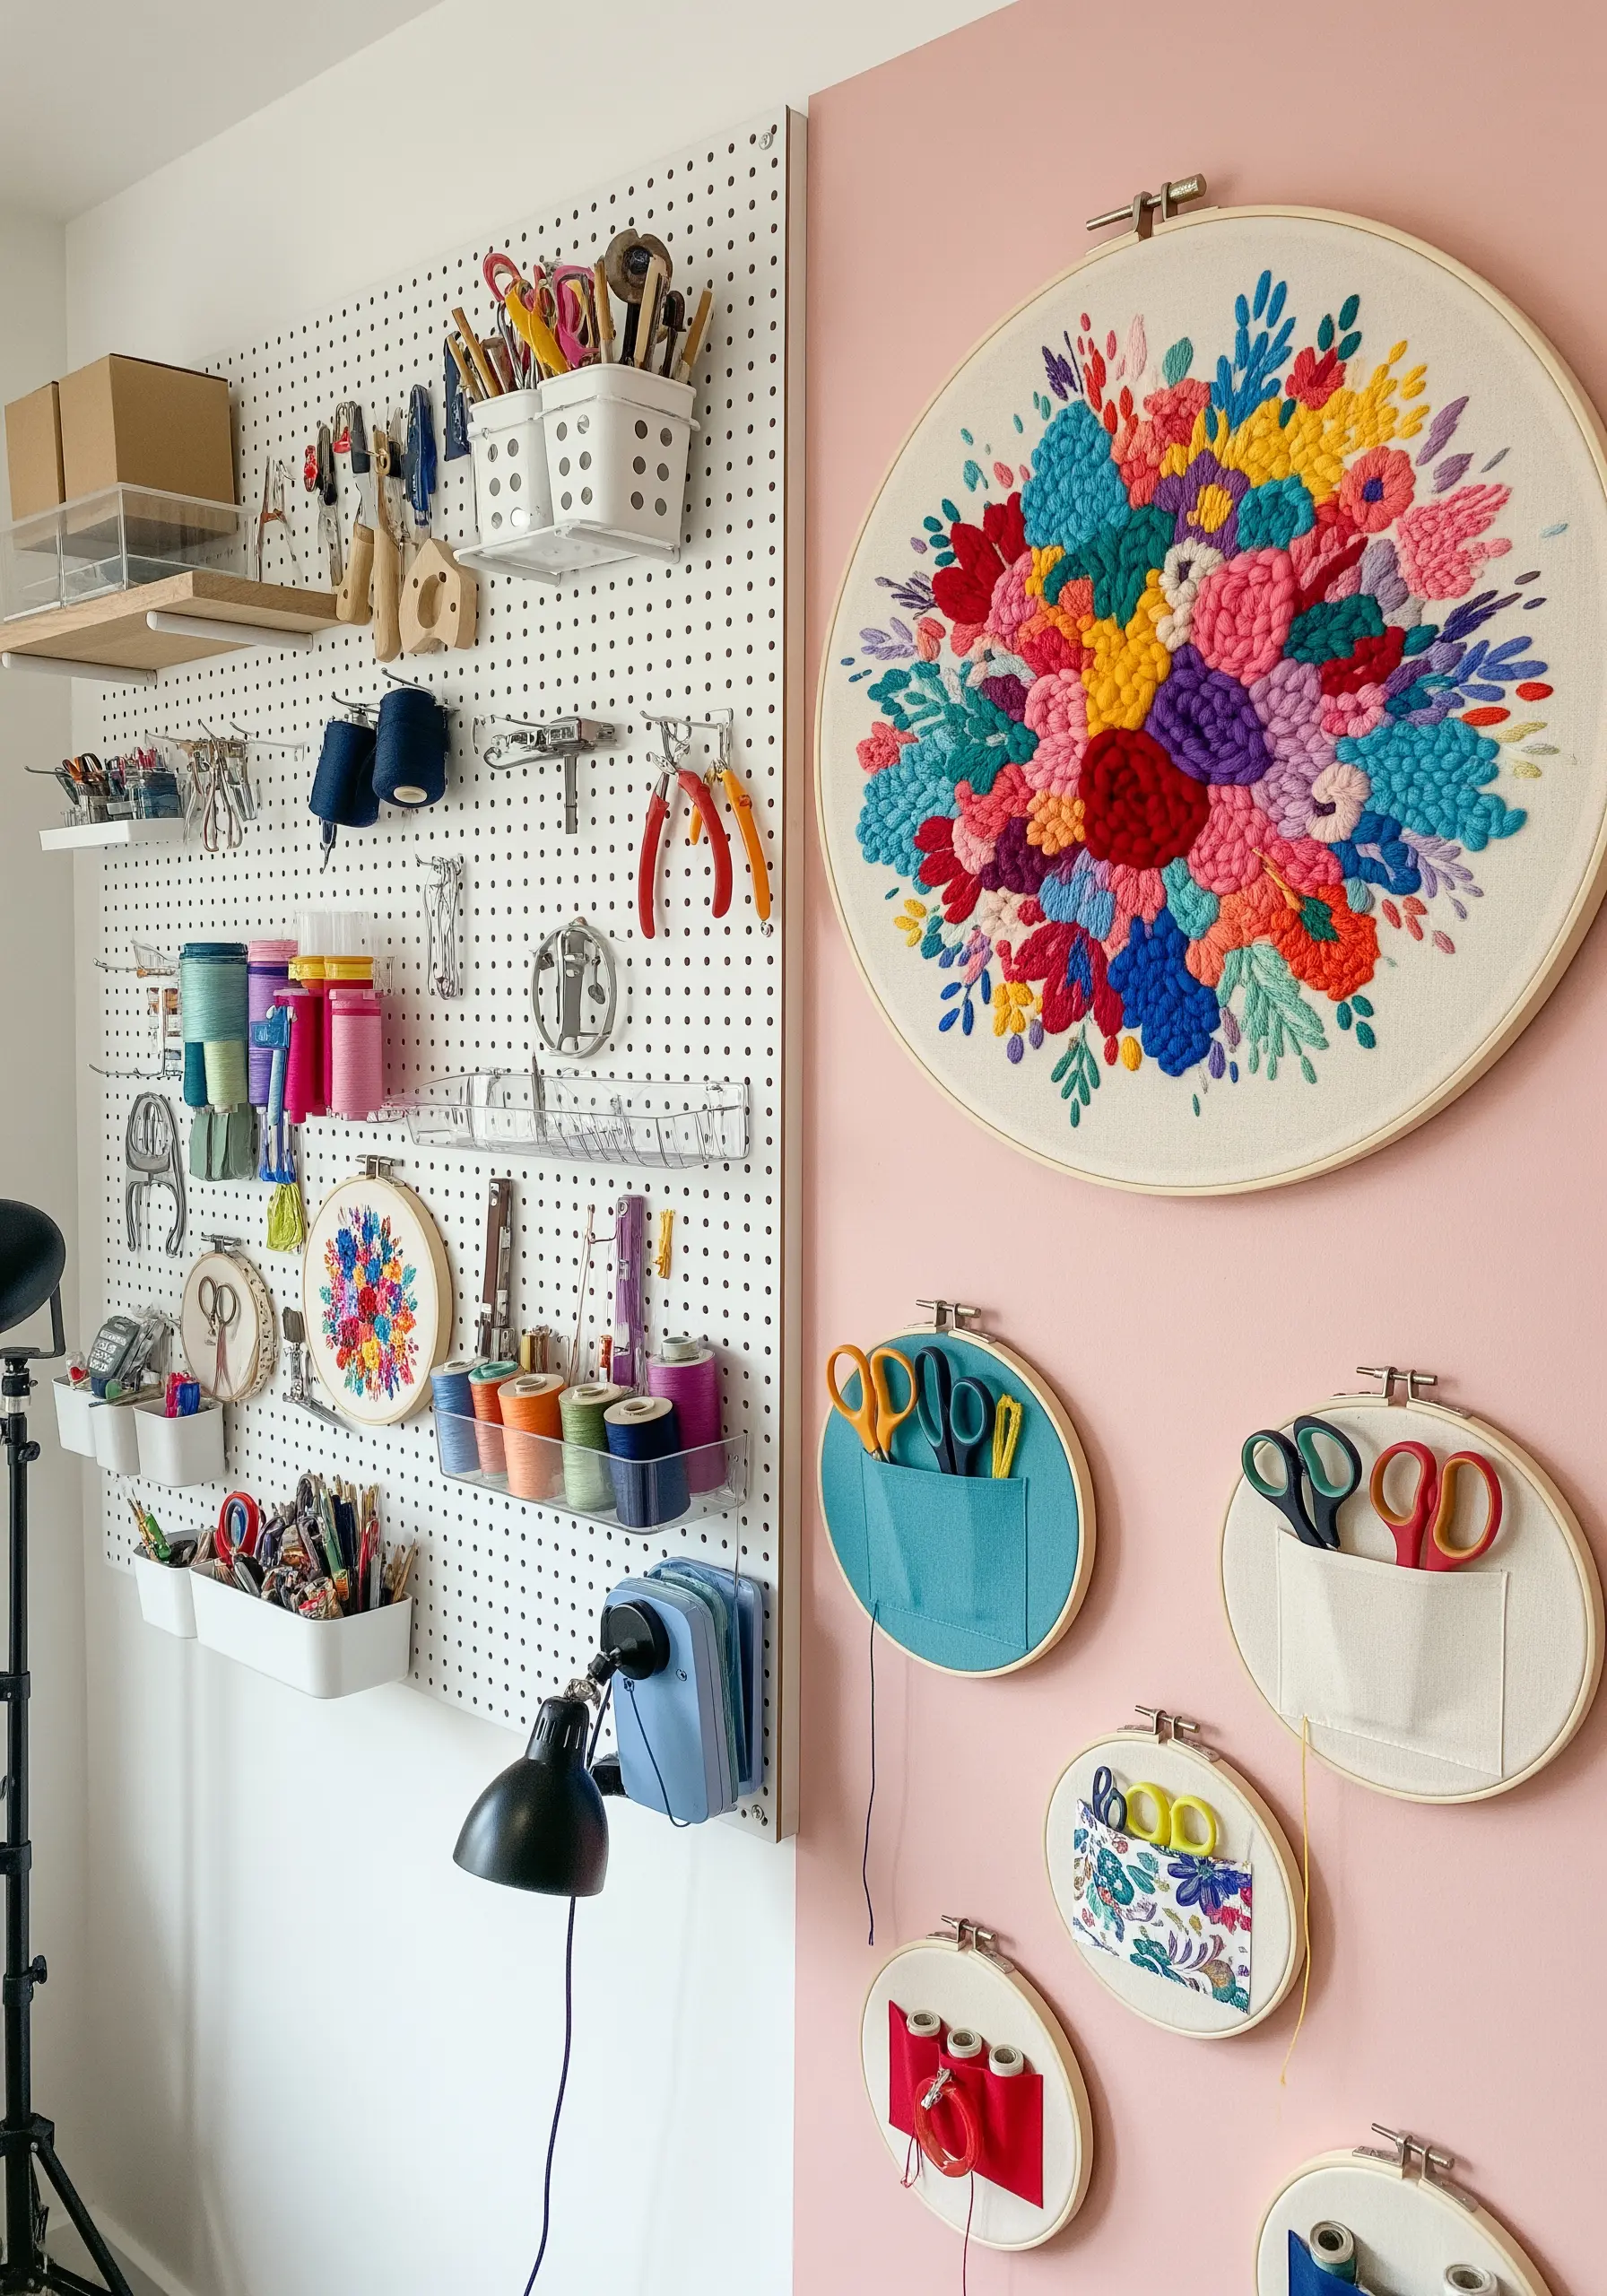
Create a stunning, high-texture floral piece by abandoning traditional stitches for dense, clustered fills.
Pack small areas with French knots, bullion knots, and woven wheel stitches in a riot of harmonious colors.
This technique creates an incredible tactile surface that looks painterly from a distance.
The key is to vary the stitch types and colors closely to create a rich, tapestry-like effect, perfect for oversized hoop wall displays.
14. Capture Zen Simplicity with an Expressive Enso Circle
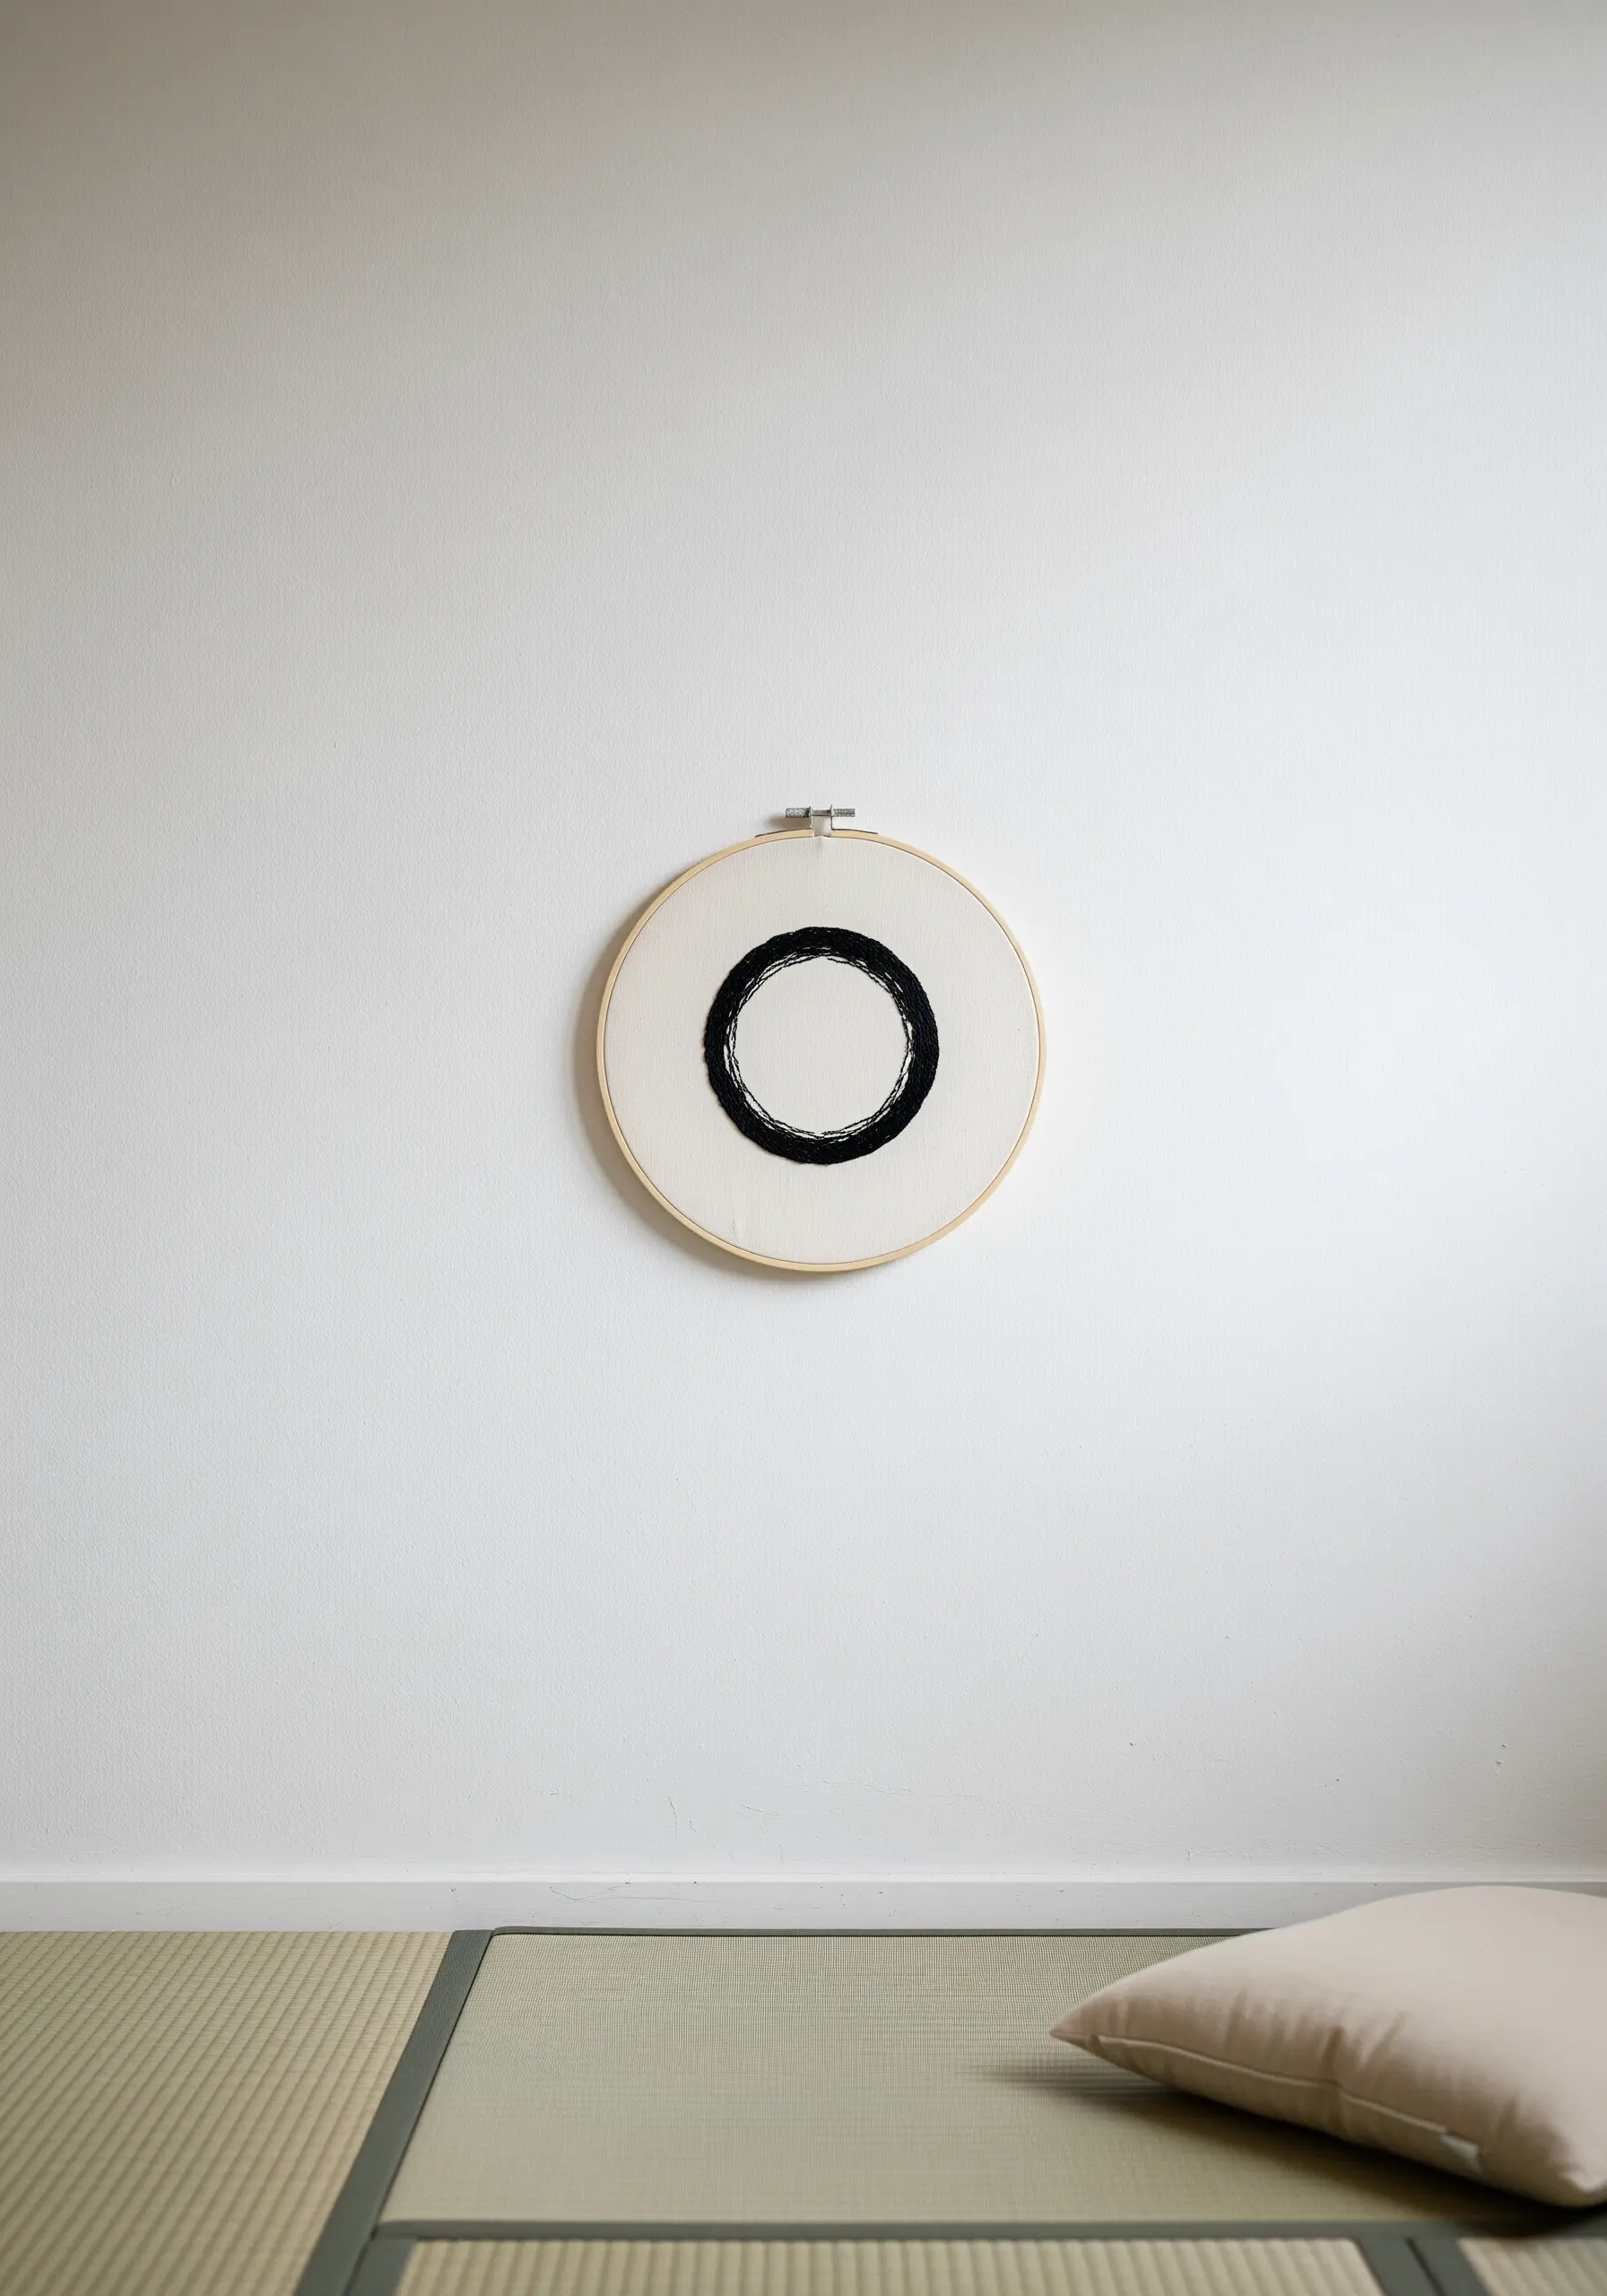
The beauty of an Enso circle is in its imperfection and spontaneity.
Recreate this feeling by using a deliberately messy satin stitch with overlapping threads and varied stitch lengths, or couch a thick black yarn onto the fabric in a single, fluid motion.
This approach prioritizes expression over precision, resulting in a meditative piece that embodies calm and focus.
It’s a perfect example of minimalist embroidery ideas for a modern, chic look.
15. Create Striking Portraits with High-Contrast Thread Painting

To achieve a photorealistic effect with just black thread, think like a sketch artist.
Map out the areas of light, shadow, and mid-tone on your subject’s face.
Use dense, directional stitches for the darkest shadows and sparser, shorter stitches for lighter areas, letting the dark fabric show through for mid-tones.
The direction of your stitches should follow the contours of the face to create dimension and realism.
16. Embroider on Tulle for a Floating, Ethereal Effect
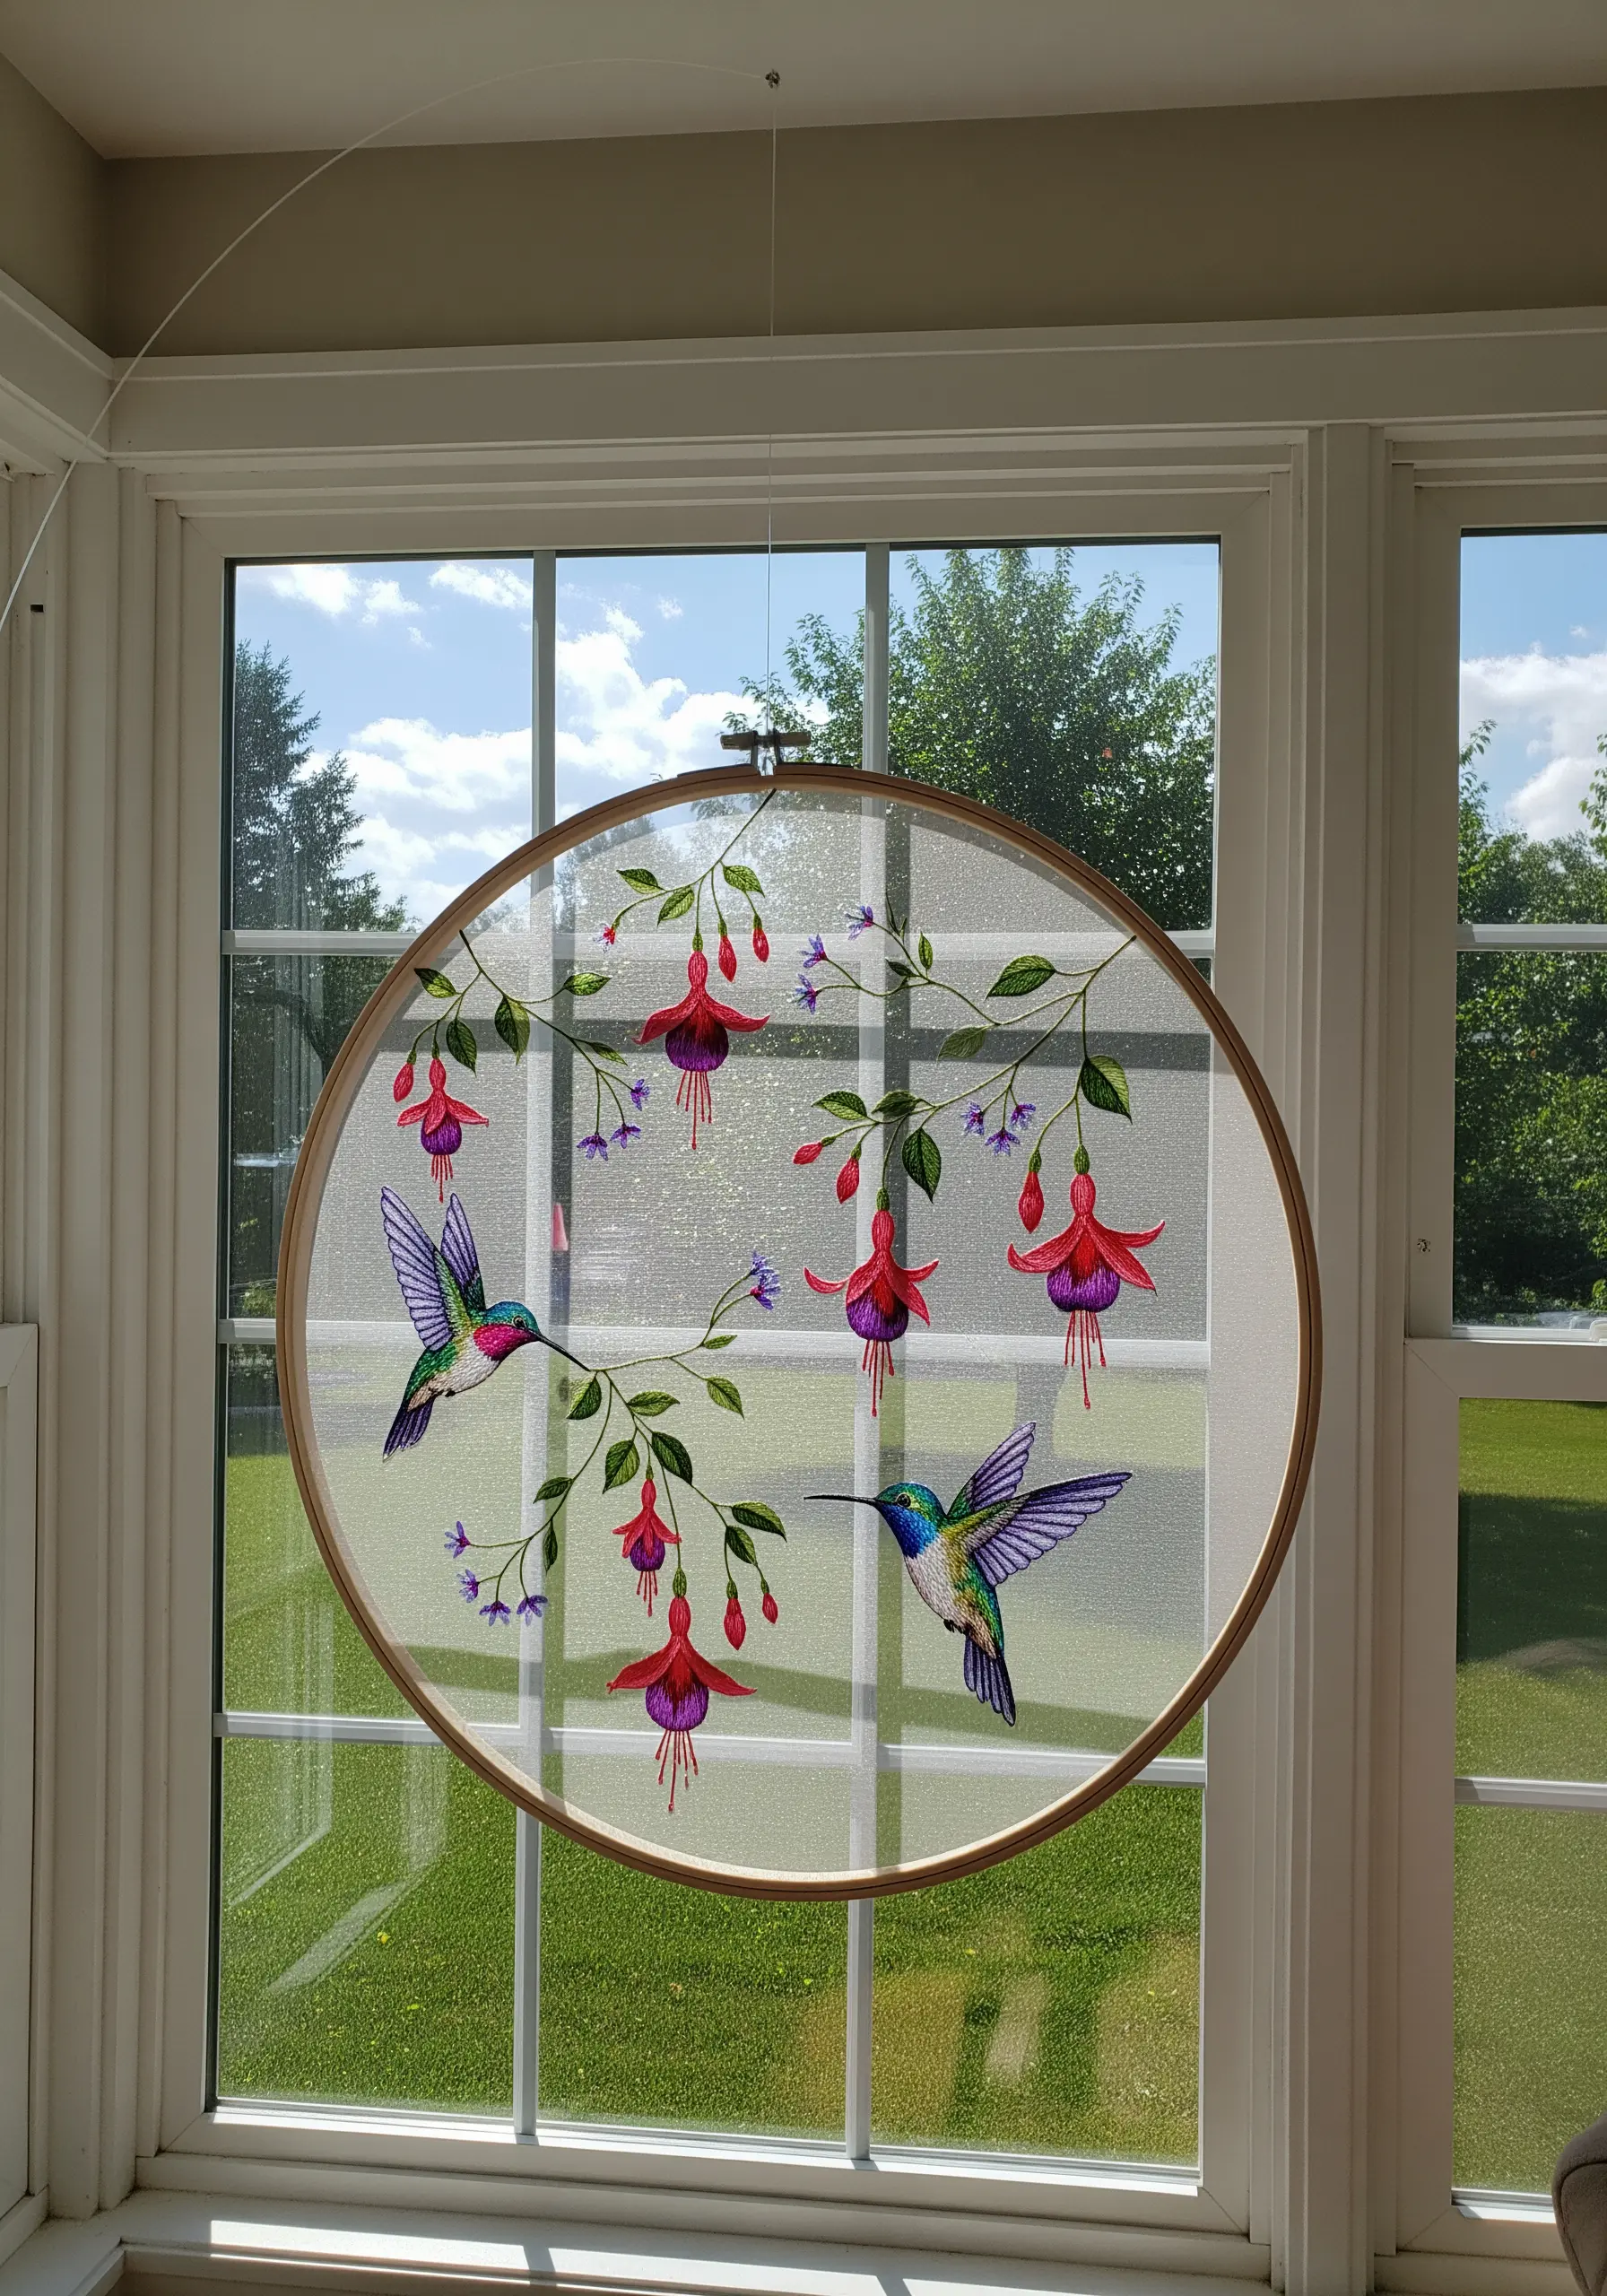
Stitching on sheer fabric like tulle or organza creates a magical illusion where your design appears to float in the air.
You must use a stabilizer—either a wash-away or heat-away film—to support your stitches.
When the stabilizer is removed, only the thread remains.
This technique works beautifully for delicate subjects like hummingbirds and flowers, enhancing their sense of weightlessness.
17. Achieve Hyper-Realism with Advanced Thread Painting

To create lifelike animal portraits, use the long-and-short stitch technique with a wide palette of colors.
For the stag’s fur, you might blend a dozen shades of brown, grey, and tan.
Keep your stitches small and directional, following the natural growth of the fur to create realistic texture and contour.
This meticulous process transforms thread into a painterly medium, capturing the spirit of the animal.
18. Stitch Chic Fashion Motifs with Graphic Fills

For a clean, illustrative style, focus on bold shapes and sharp outlines.
Use a perfectly smooth satin stitch to fill in areas of color, like the red of the lips or the black of the shoe.
Then, define the entire design with a precise backstitch outline using a single strand of black thread.
This combination of block color and fine line work creates a sophisticated, magazine-inspired aesthetic, like these modern thread art ideas inspired by everyday objects.
19. Craft Detailed Insect Studies for a Naturalist’s Wall

To capture the delicate intricacy of insects, focus on combining different stitches for varied textures.
Use long-and-short stitch with a single strand of silk or rayon thread to mimic the iridescence of a dragonfly’s wings.
For the fuzzy body of a bumblebee, try a turkey stitch that you can trim down to create a soft, velvety pile.
This attention to detail turns simple hoops into beautiful realistic animal & insect embroidery patterns.


