

Perhaps you’re looking at your embroidery and feel something is missing—that final touch that transforms it from a craft project into a piece of art. It’s not about mastering a hundred different stitches or buying every color of thread. It’s about learning to see differently.
The true artistry is in the choices you make before the first stitch. It’s in the way you direct your thread to mimic the texture of a leaf, or how you use negative space to make a simple shape feel profound. It’s understanding that a single strand of thread on dark fabric can hold more drama than a dozen colors on white.
Here, you’ll find not just ideas, but the thinking behind them. We will explore how to add depth, emotion, and a quiet confidence to your work. Think of this as a conversation—one that will help you trust your creative instincts and turn the vision in your head into something beautiful in your hands.
1. Create Depth with Directional Satin Stitch
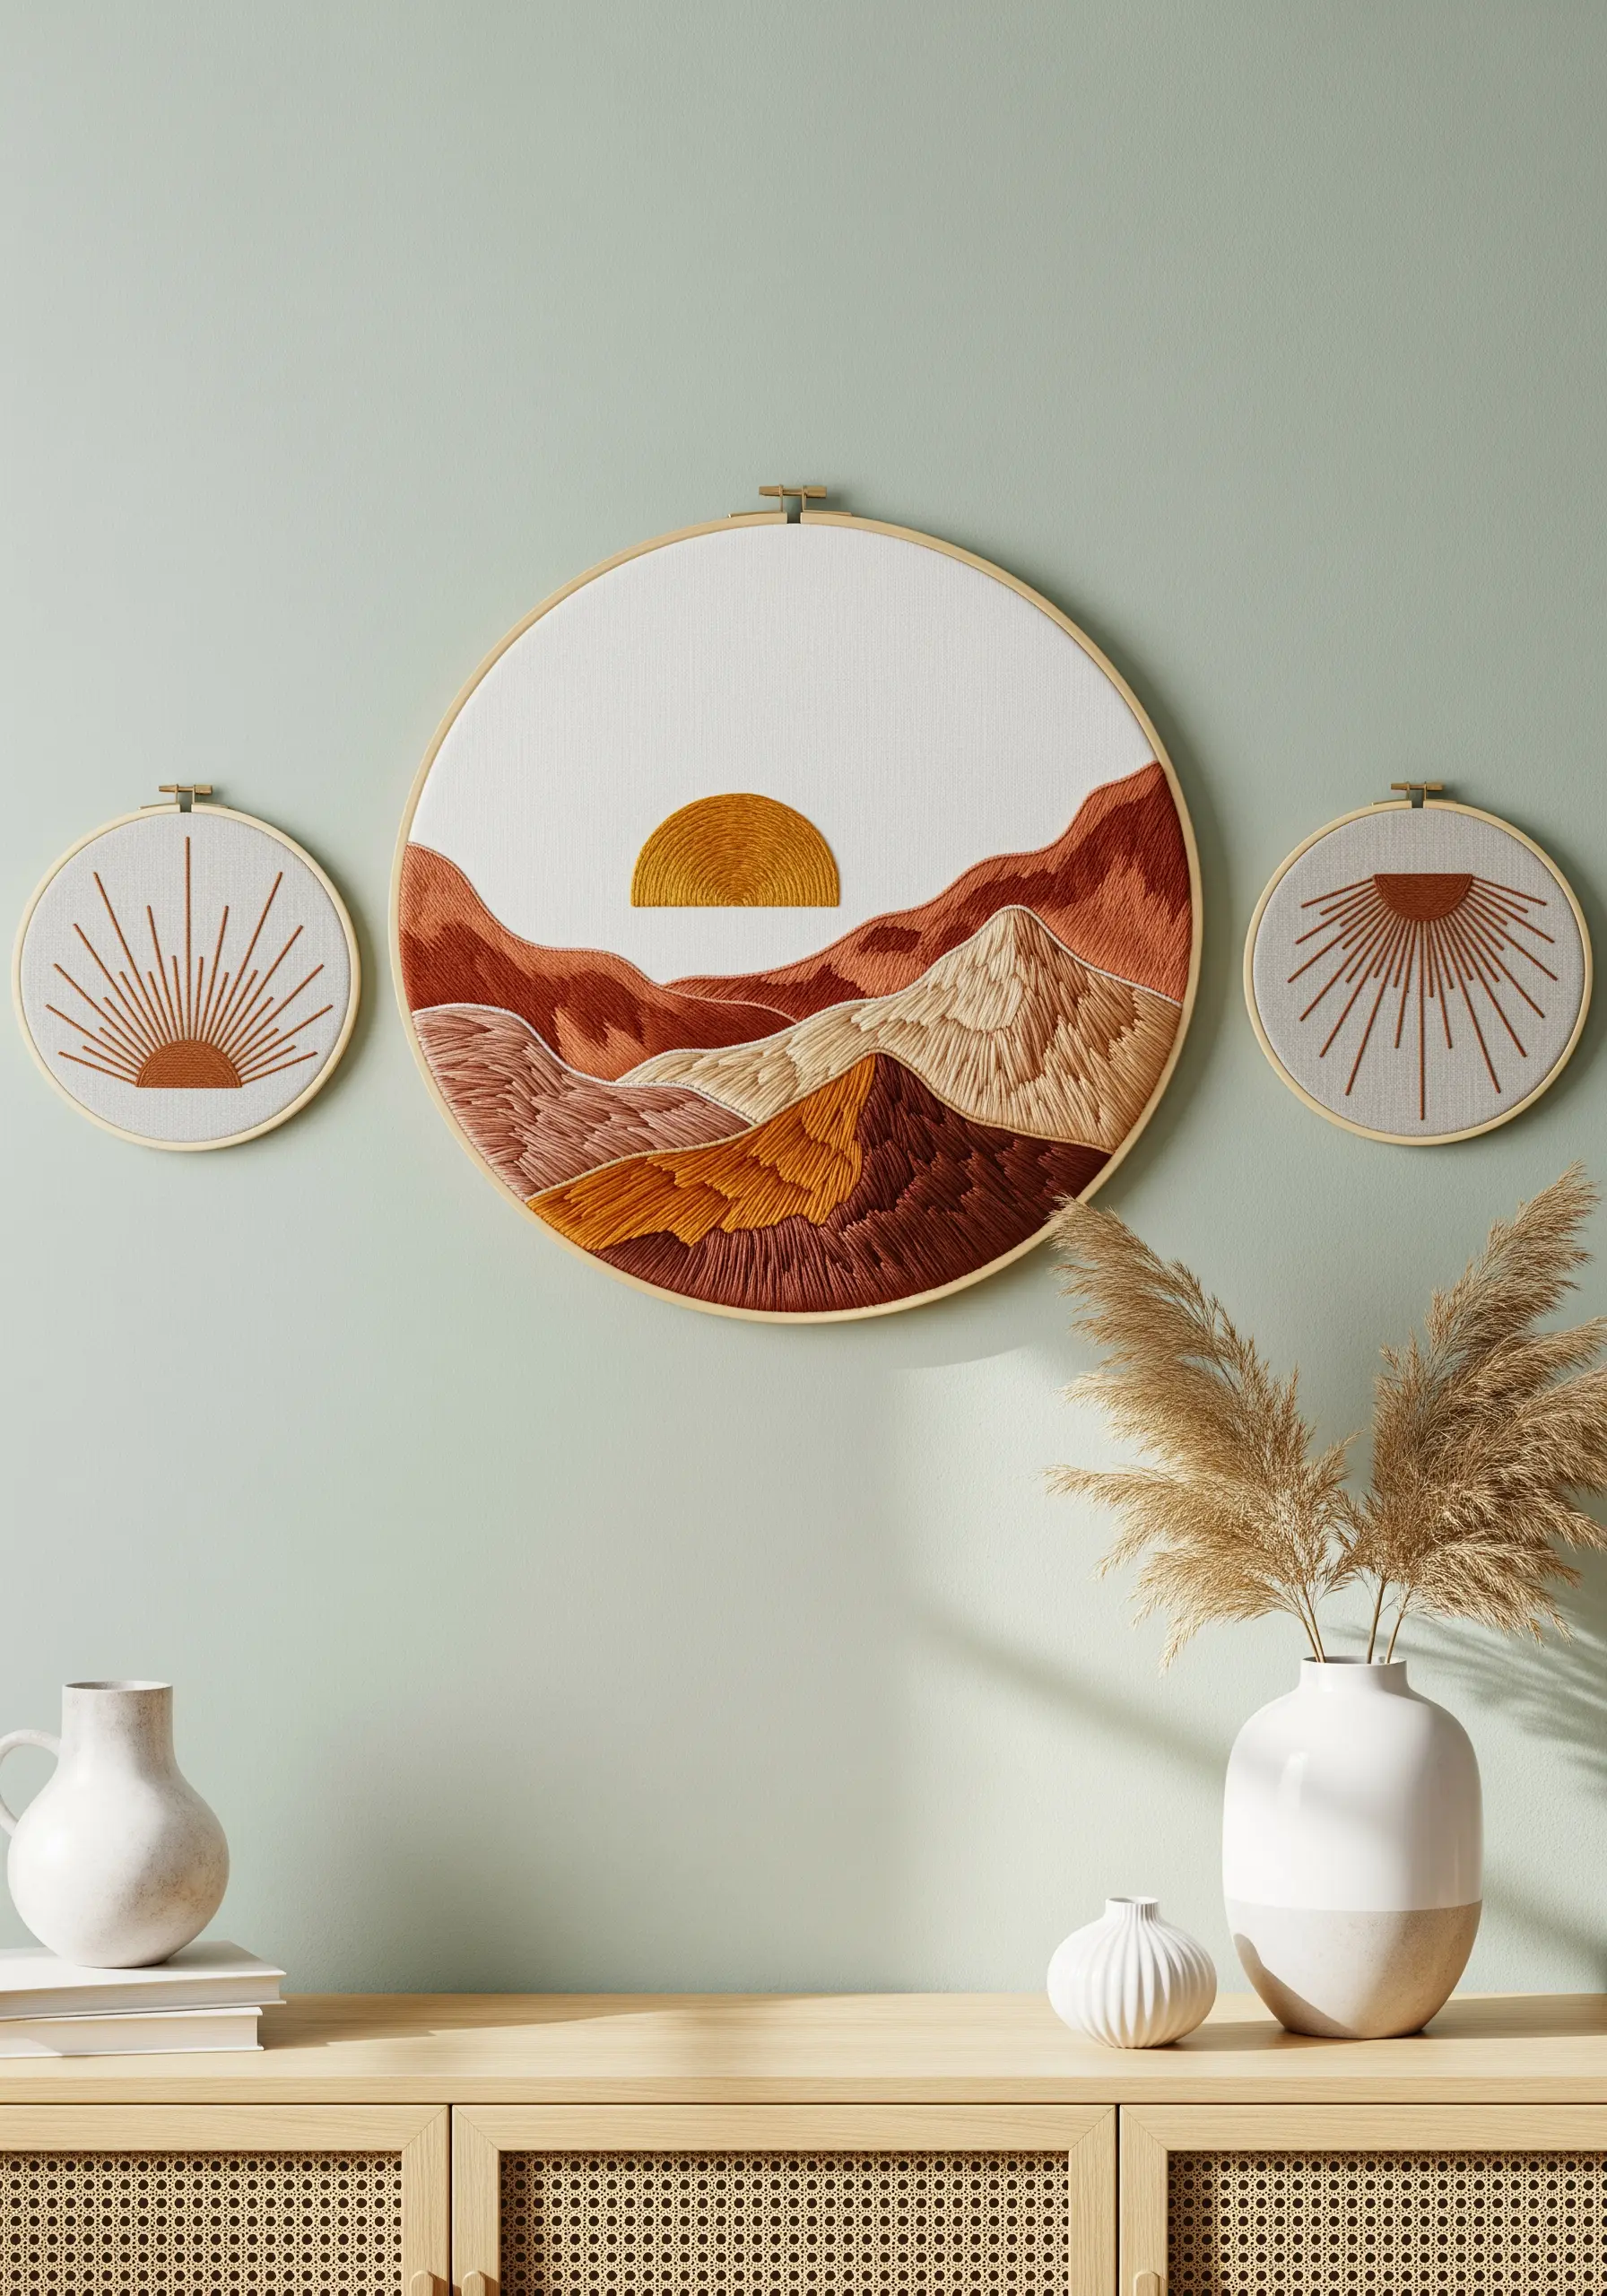
To give your landscapes a sense of dimension, fill each section with satin stitches that follow the natural contours of the land.
Vary the angle of your stitches for each mountain range or hill—this subtle shift tricks the eye into seeing depth and shadow.
Use a cohesive, earthy color palette, but choose threads with slightly different sheens (matte cotton versus silky rayon) to add another layer of textural interest.
For the sun, stitch in a radiating circular pattern to create a focal point with energy and light.
2. Master Contrast on Dark Fabric
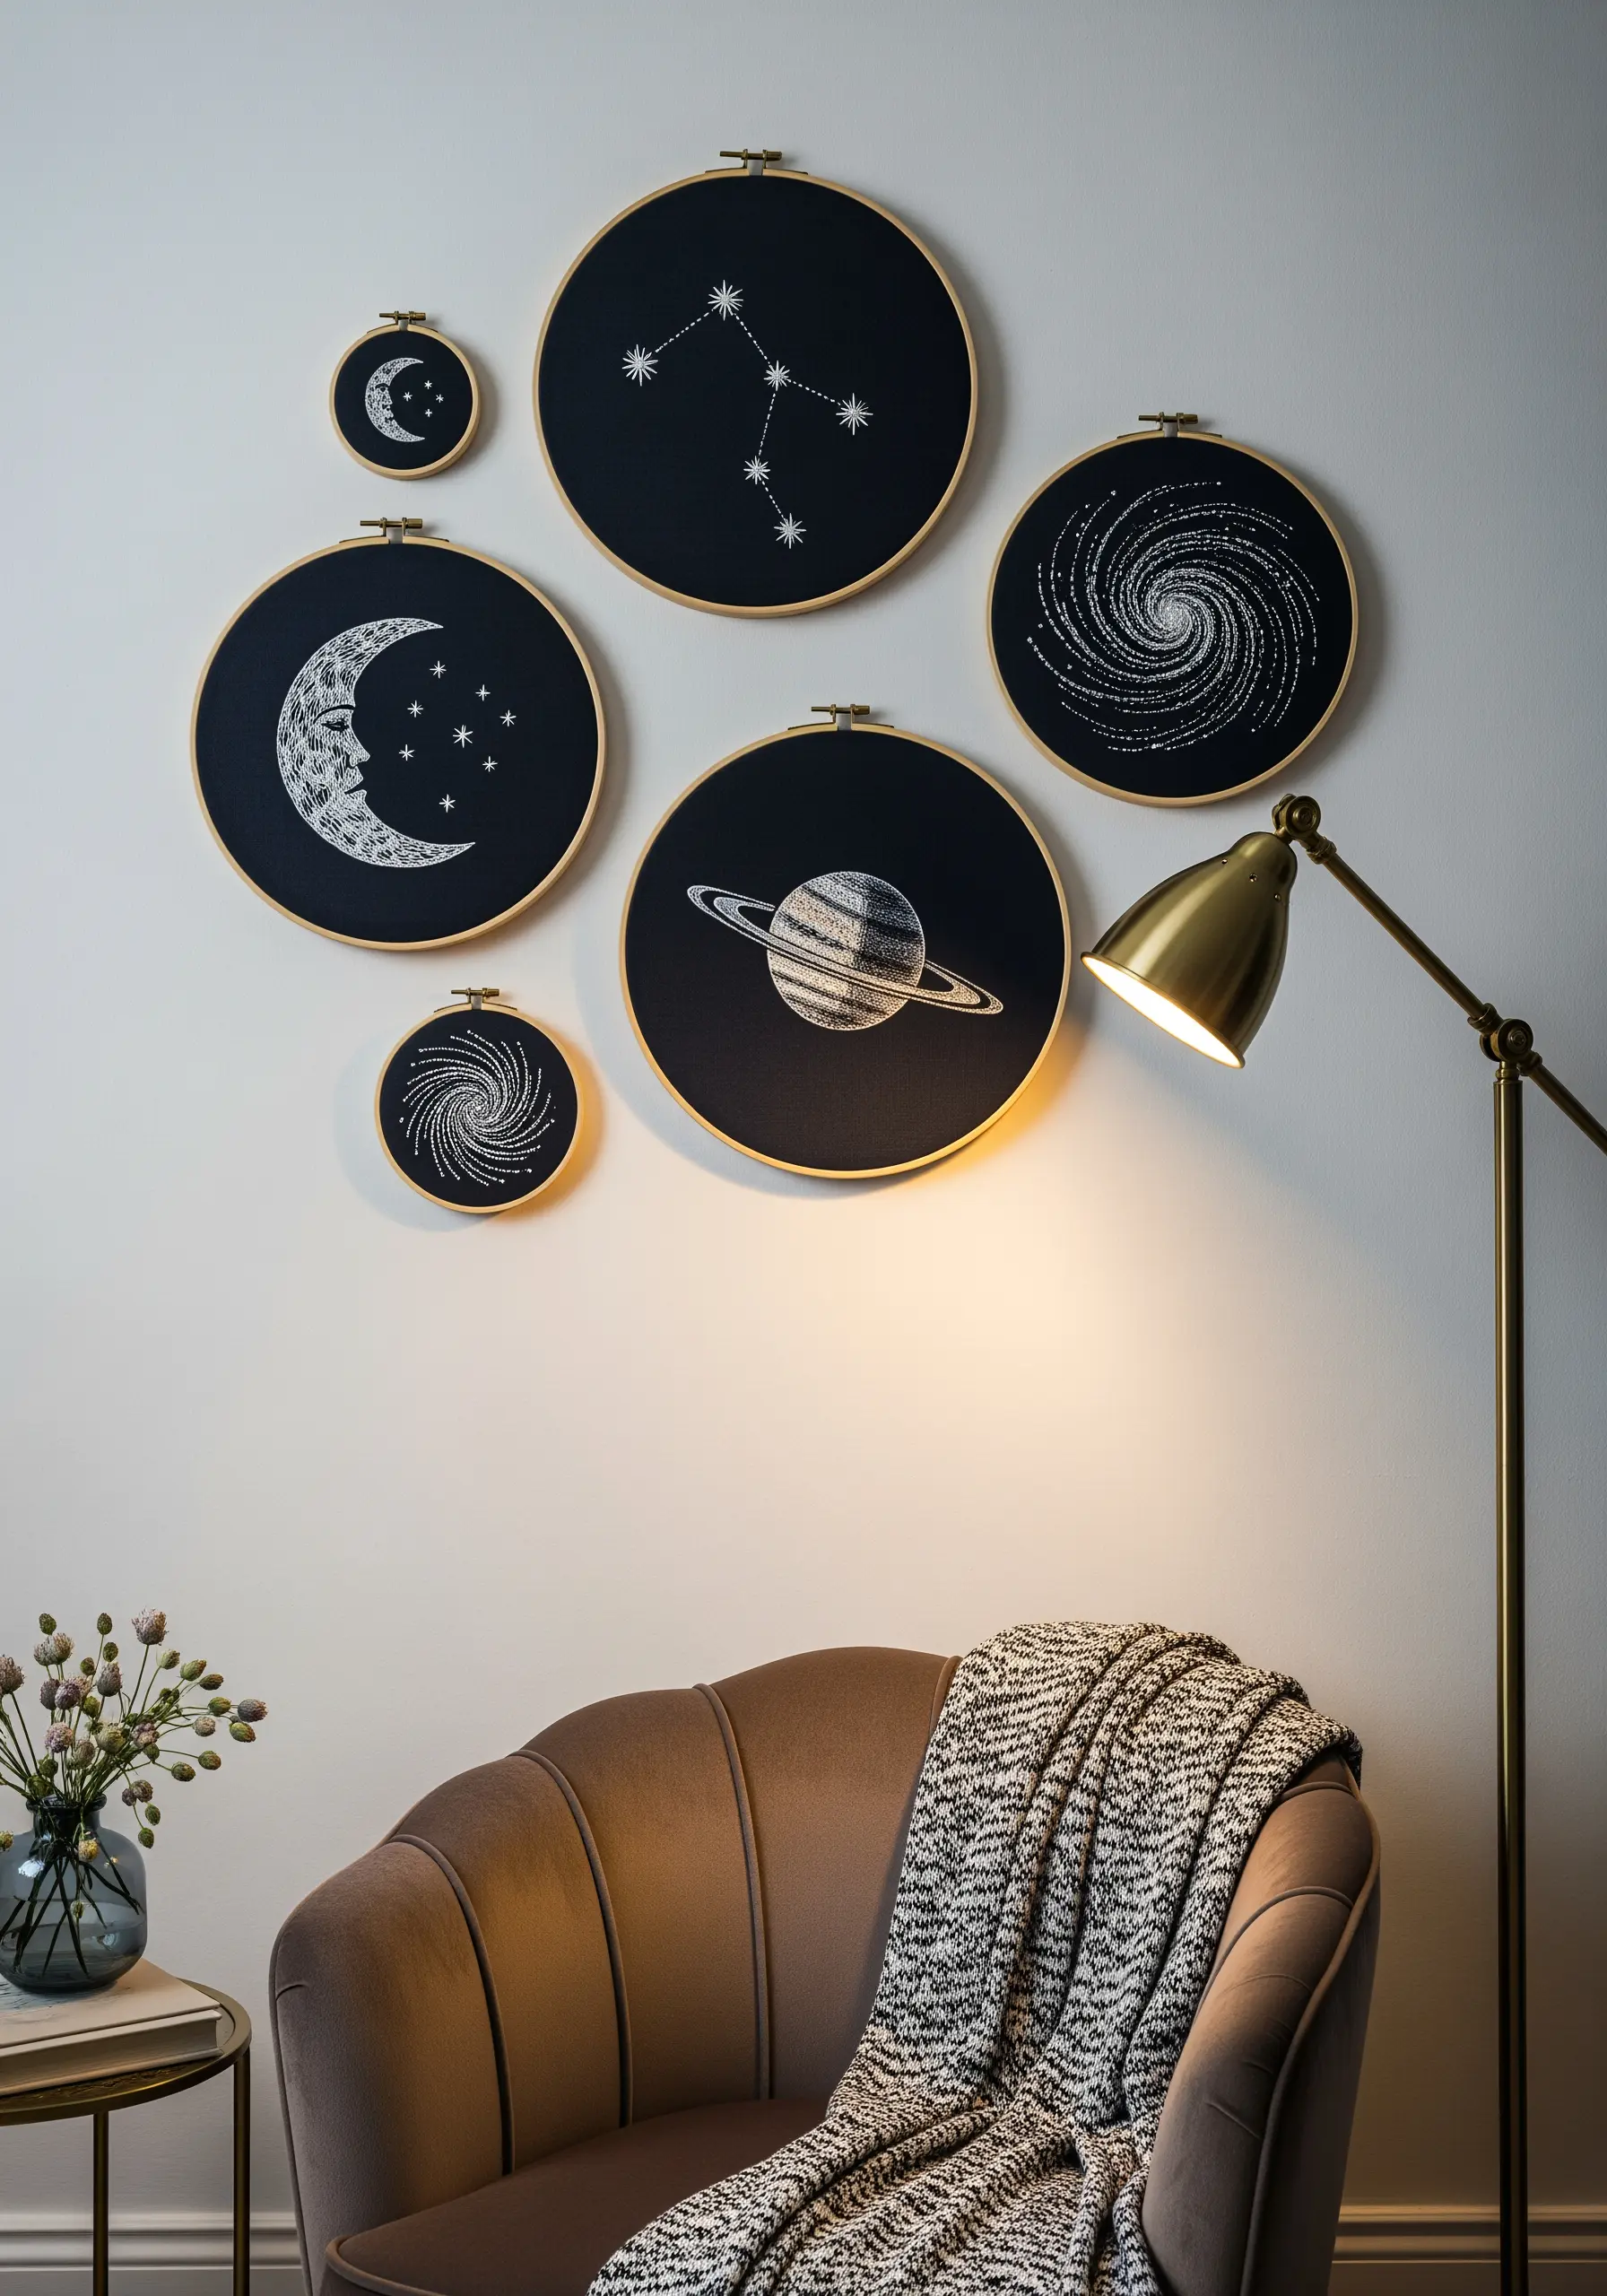
When working on black or navy fabric, the key to a polished look is sharp, clean lines.
Use a single strand of high-contrast thread, like a bright white or a fine metallic silver, for delicate constellation work.
A simple backstitch will give you the most precise and consistent outlines for stars and planetary rings.
For filled areas like the moon, use tiny seed stitches to create a stippled texture that catches the light, suggesting a cratered surface without complex shading.
3. Use Negative Space to Define Your Motif
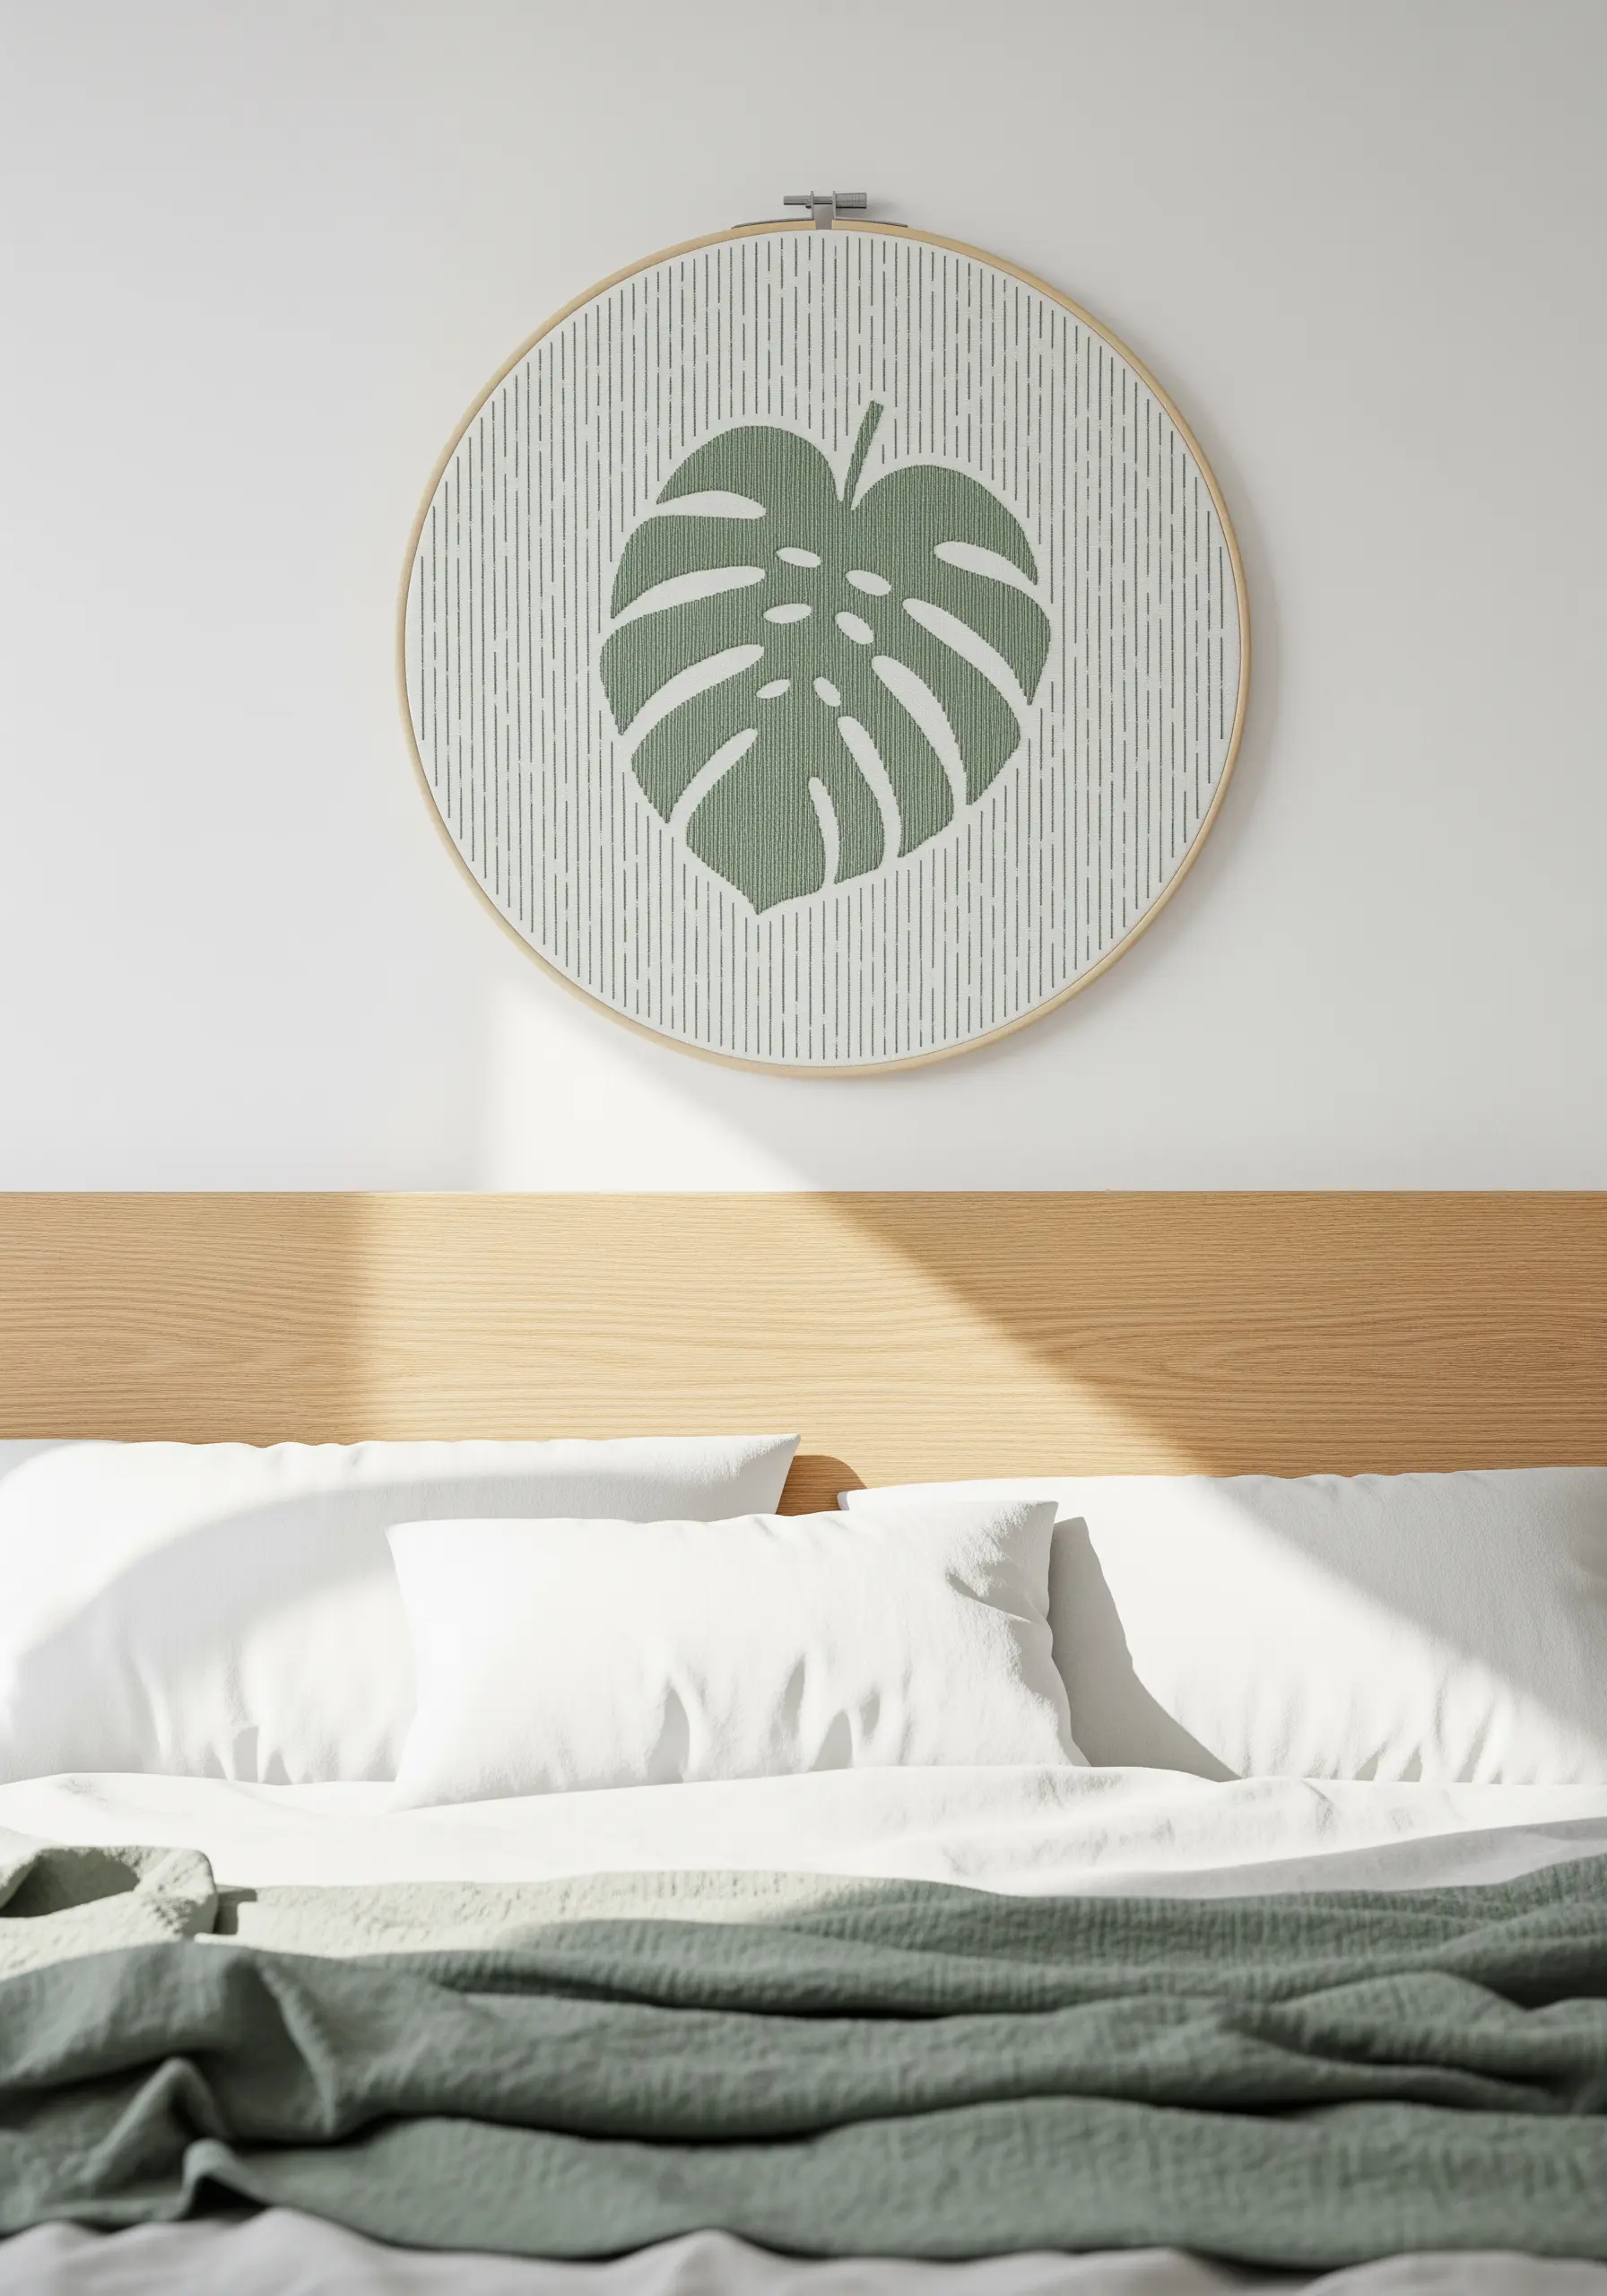
Instead of stitching the main subject, embroider the background to make your central motif pop.
Create a pattern of simple vertical backstitches, leaving the shape of the leaf unstitched.
This technique turns the fabric itself into a core design element, resulting in a modern, graphic effect.
Use a water-soluble marker and a ruler to ensure your background lines are perfectly parallel, which is crucial for a clean, professional finish.
4. Combine Embroidery with Patterned Fabric
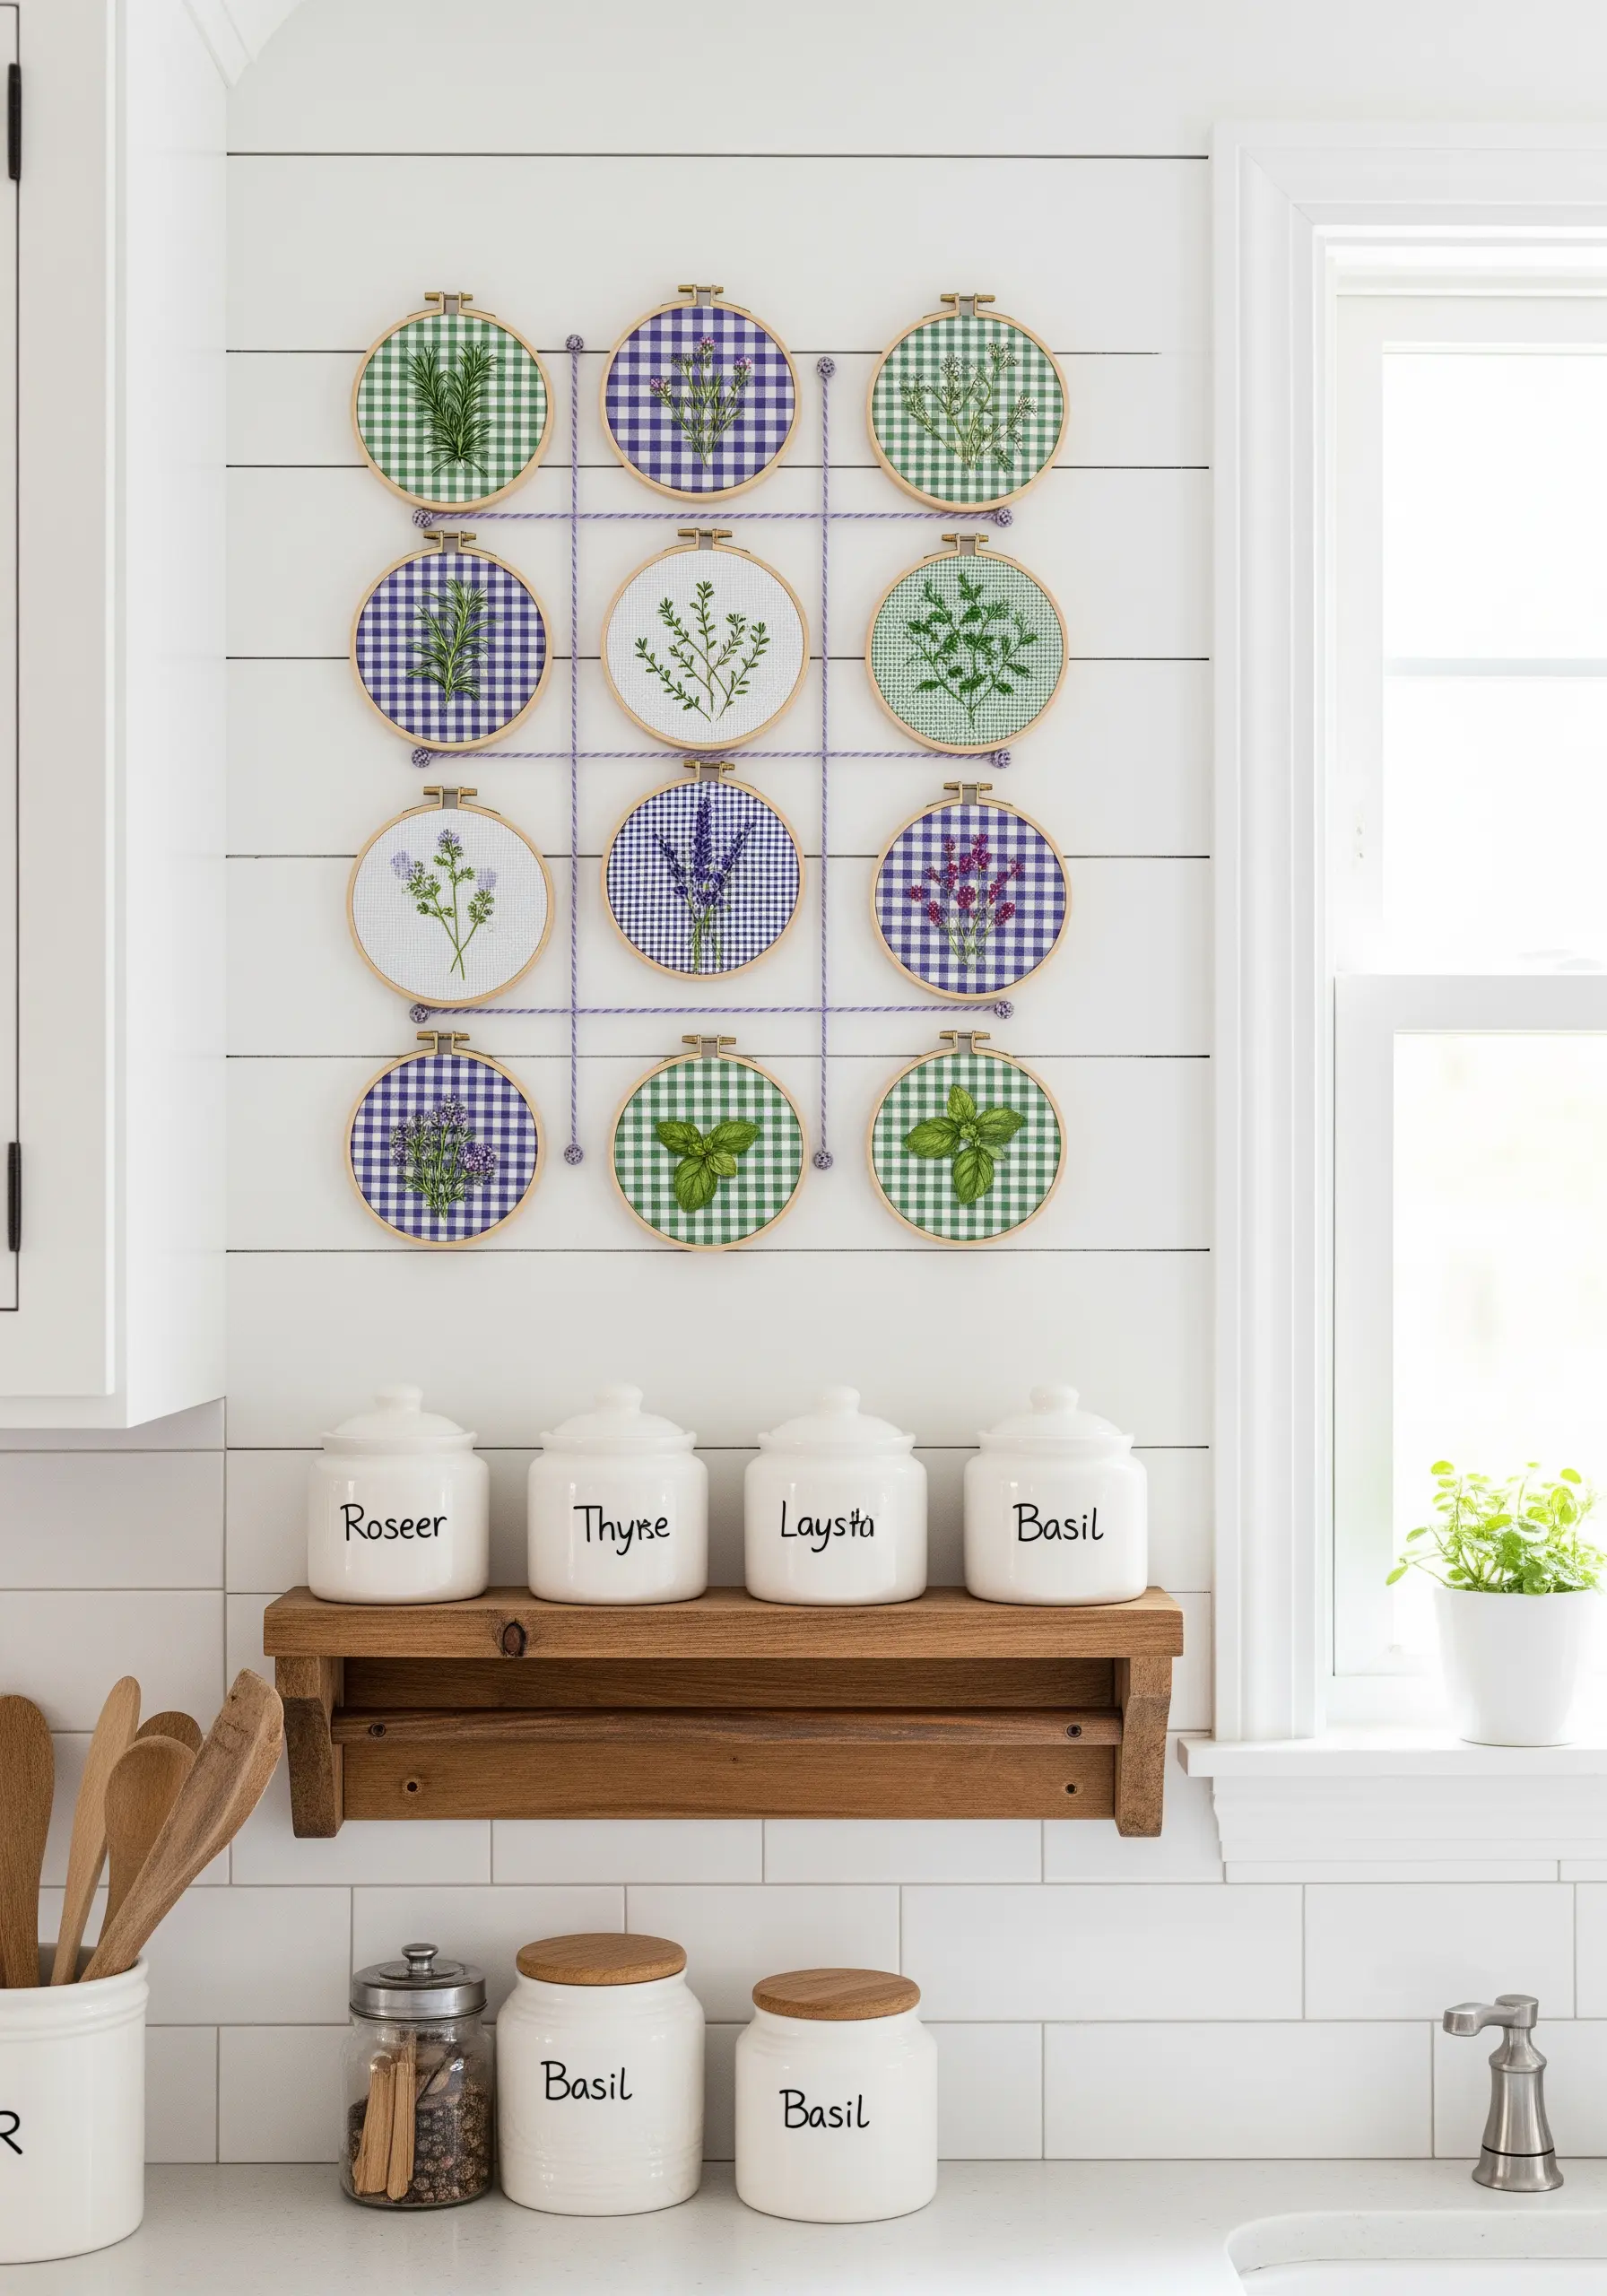
Elevate simple line-work botanicals by stitching them onto a subtle patterned fabric like gingham or ticking stripes.
The key is balance: choose a small-scale, two-tone pattern that complements your thread colors without overwhelming your delicate stitches.
Use foundational stitches like stem stitch for outlines and lazy daisy stitches for leaves to ensure your designs remain clear and legible against the print.
Arrange your hoops in a grid to create a cohesive, quilt-like display that feels both rustic and organized.
5. Build Complexity with Geometric Overlays
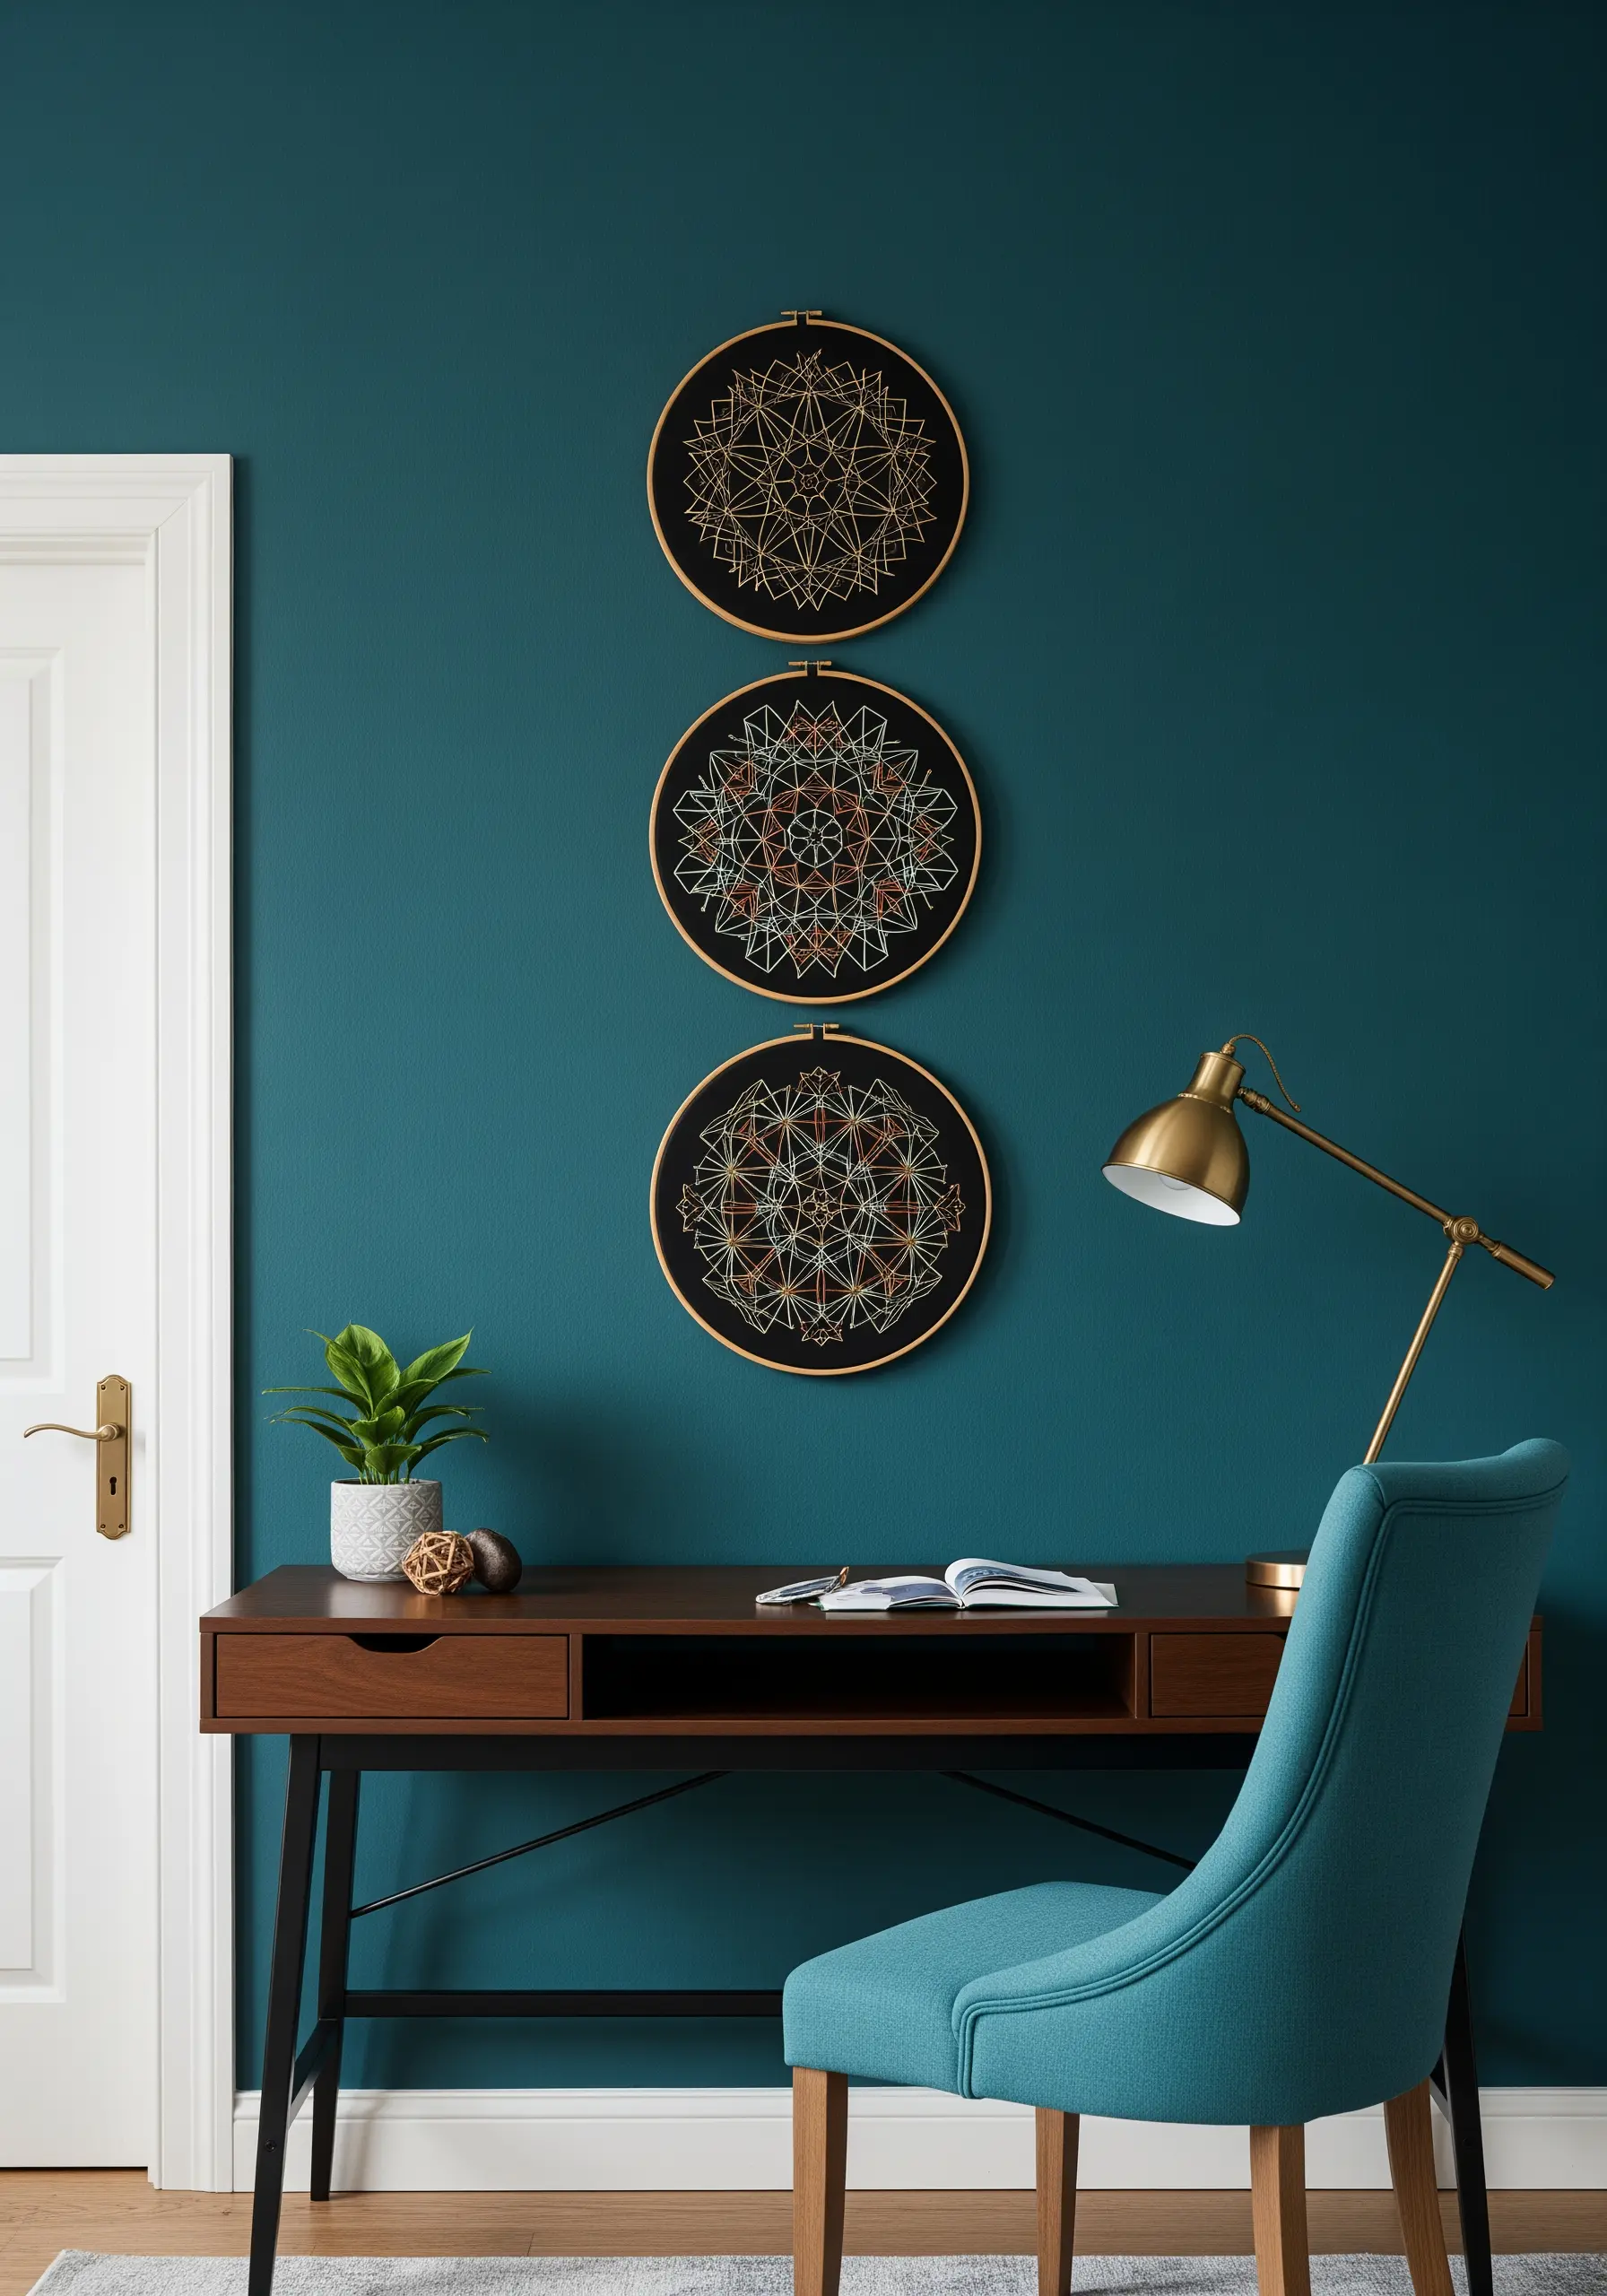
Create intricate, mandala-like designs using only straight stitches layered in geometric patterns.
Start with a base shape, like a hexagon or star, and methodically add layers of stitches in different colors, crossing over previous lines.
Using metallic or variegated thread against a dark background adds visual depth and a touch of opulence.
This method allows you to create incredibly detailed work that relies on precision and color theory rather than complex stitch knowledge.
6. Curate a Maximalist Gallery Wall

To create a vibrant, maximalist gallery wall, unify your collection with a bold background—in this case, the floral wallpaper.
Mix different techniques within the display: combine thread painting, appliqué, 3D stitches like woven wheel roses, and simple text-based hoops.
The variety in style and scale is what makes it feel personal and curated, rather than cluttered.
Pull key colors from your background pattern into your embroidery threads to ensure the entire composition feels intentional and harmonious.
7. Add Dimension with Fabric Appliqué

Incorporate fabric appliqué into your embroidery to create bold, color-blocked sections with clean edges.
Cut your shapes from fabrics with interesting textures, like waffle weave or corduroy, and secure them with a neat blanket stitch around the perimeter.
This technique is perfect for filling large areas quickly and adding a soft, dimensional quality that thread alone cannot achieve.
Finish by adding small embroidered details on top of the fabric pieces to integrate them seamlessly into the design.
8. Achieve Realism with Thread Painting

For hyper-realistic portraits, master the art of thread painting using the long-and-short stitch.
Work with a single strand of floss and blend colors just as you would with paint, using dozens of shades to capture subtle shifts in light and shadow.
Always follow the direction of fur or foliage growth with your stitches to create natural-looking texture and movement.
This is a slow, meditative process, but it transforms your needle into a paintbrush, allowing for unparalleled detail and depth.
9. Embrace Minimalist Architectural Lines

Capture the essence of a cityscape with a clean, continuous line style using a simple backstitch or stem stitch.
Select a fine, single-strand black thread on a crisp white or neutral linen to emphasize the graphic quality of the architecture.
The beauty of this approach lies in its restraint; you are suggesting complex forms rather than rendering them in detail.
Stretch your finished work over a rectangular frame instead of a hoop for a piece that feels like a sophisticated architectural drawing.
10. Create Movement with Unfinished Threads

Give your work a dynamic, ethereal quality by intentionally leaving threads long and un-anchored.
For a jellyfish’s tentacles, use a variety of thread types—silky rayon, matte cotton, fine metallic—and let them hang freely from the hoop.
This technique adds literal movement and a delicate, sculptural element to your wall art.
Stitch the main body with contouring stitches that follow the bell shape, creating a solid anchor point from which the loose threads can flow.
11. Integrate Hoop Art into a Photo Gallery

Personalize your gallery wall by mixing embroidered pieces with framed photographs and prints.
Stitch simple family portraits or meaningful quotes in hoops that match the wood tone of your picture frames for a cohesive look.
This combination adds warmth, texture, and a handmade touch that makes the entire wall feel more intimate and curated.
By varying the shapes—mixing round hoops with rectangular frames—you create a more dynamic and visually interesting layout.
12. Stitch on Sheer Fabric for a Floating Effect

Create the illusion of floating motifs by embroidering on sheer organza or tulle.
This technique allows light to pass through the fabric, making your stitches appear suspended in mid-air—perfect for sun-catchers or window displays.
You must be exceptionally neat with your starts and stops, as the back of your work will be visible.
Use a stabilizer that is either water-soluble or tear-away to support your stitches on the delicate fabric, then remove it completely for a transparent finish.
13. Go Oversized for a Statement Piece
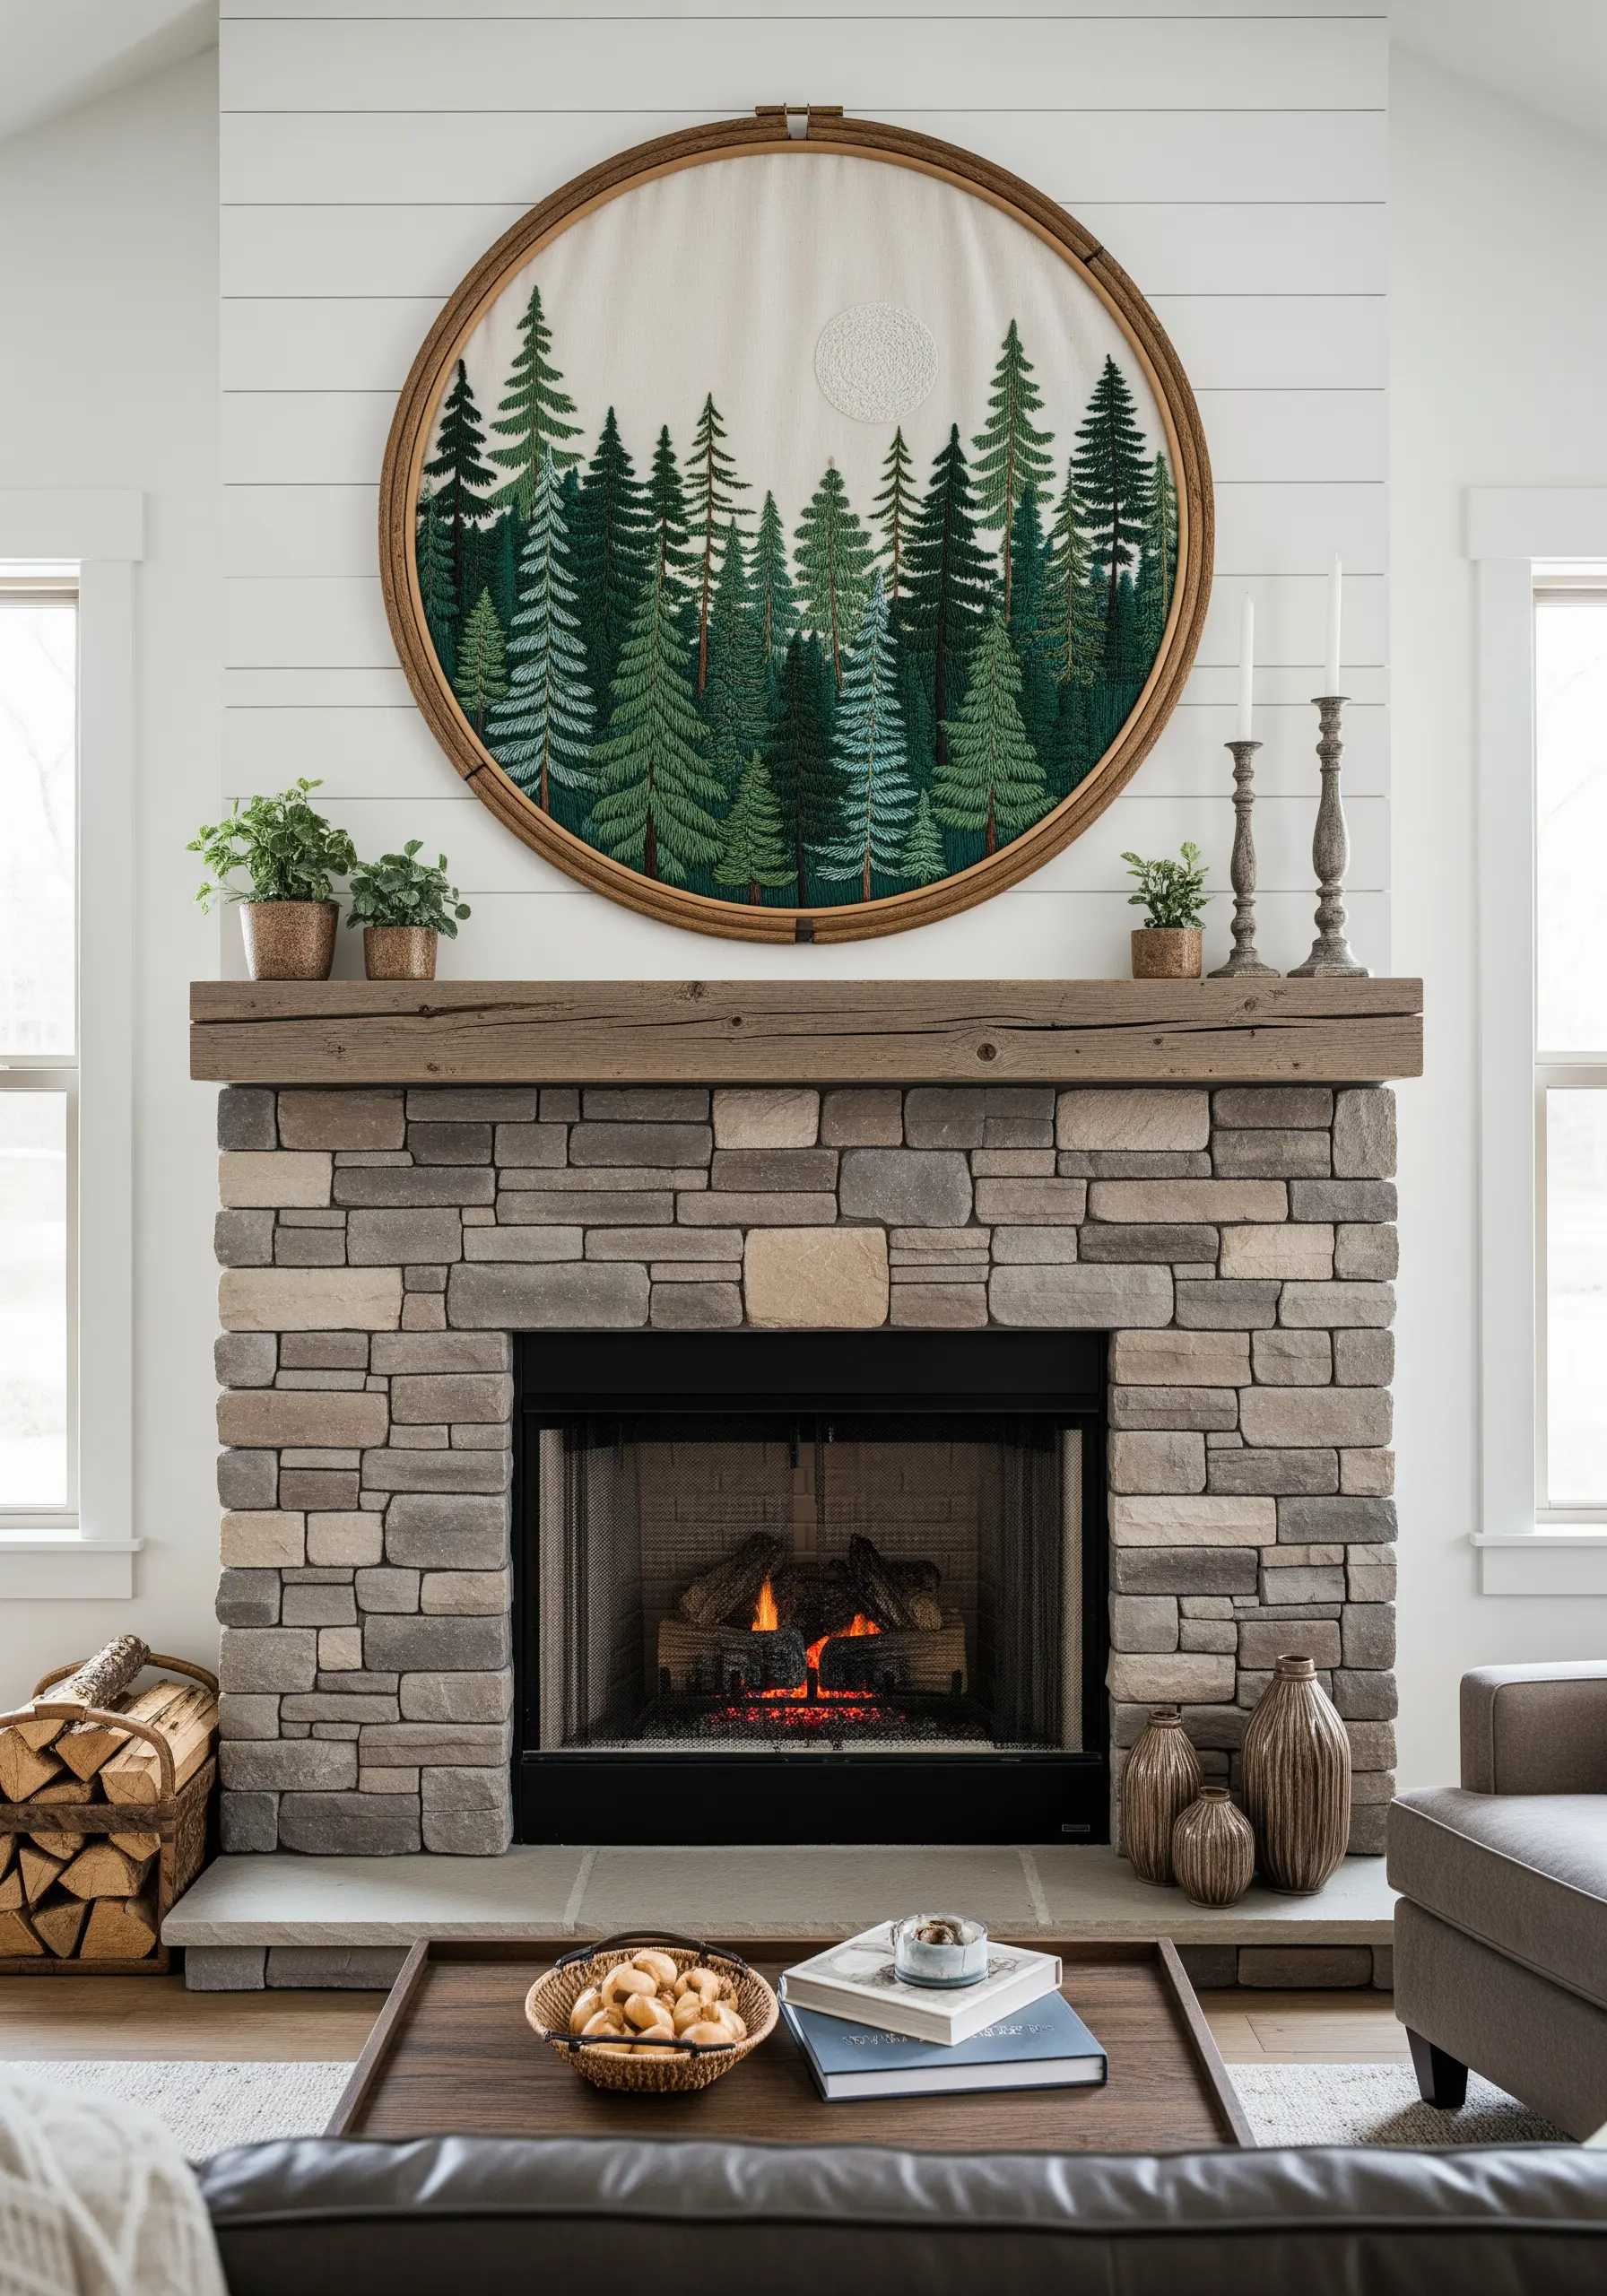
Transform your embroidery from a small craft into a significant piece of art by working on an oversized hoop.
Use thicker threads, like tapestry wool or multiple strands of floss, to ensure your stitches are proportionate to the large scale.
Layer simple stitches, like seed stitch or straight stitch, to build up rich texture that can be appreciated from a distance.
This approach is perfect for creating a focal point above a mantelpiece or sofa, offering the softness of textiles with the impact of a large painting.
14. Design an Interactive Wall Decal

Combine embroidery with wall decals to create a large-scale, interactive installation for a child’s room.
Apply a simple tree branch decal to the wall, then hang small, lightweight hoops with embroidered motifs—like fruits, animals, or letters—from the branches.
This creates a whimsical, three-dimensional scene that can be changed or added to over time.
Keep the individual embroidered pieces simple and graphic so they are easily recognizable and contribute to a playful, educational environment.
15. Blend Illustration with Embroidery
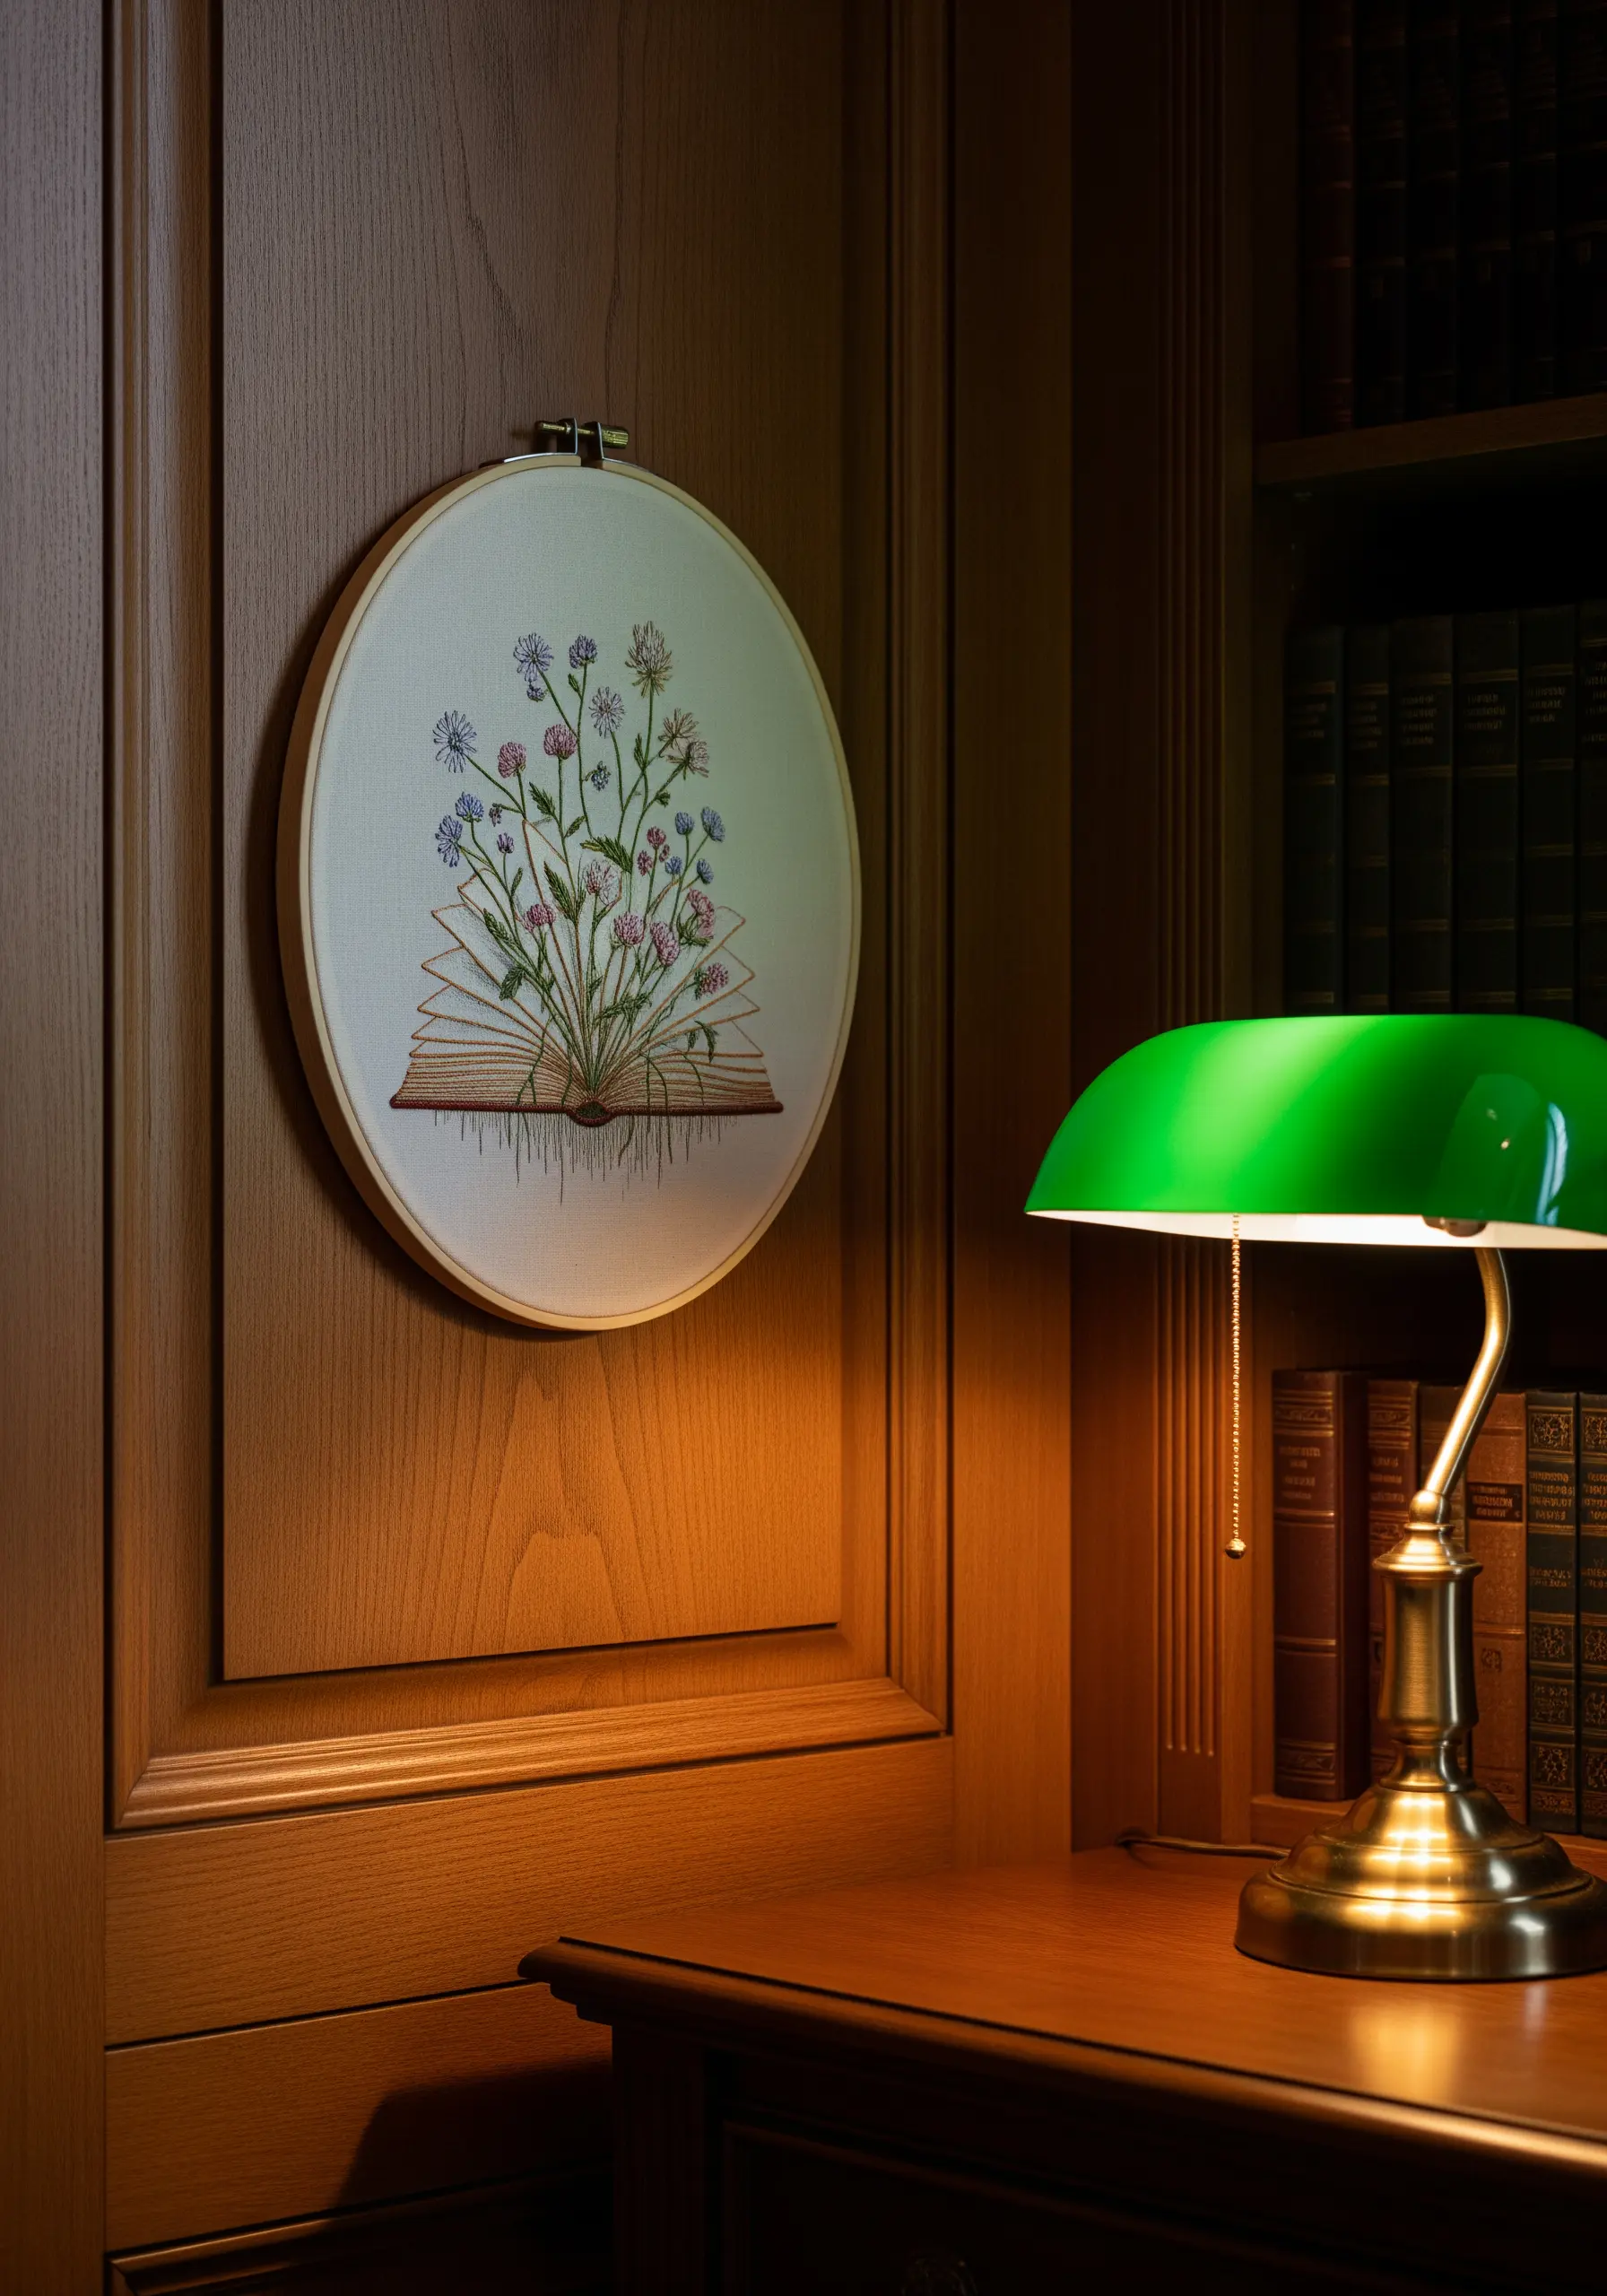
Create a design where the embroidery appears to magically grow out of an illustrated element.
Begin by drawing or transferring a simple line-art image onto your fabric, like the pages of an open book.
Then, use that base as a starting point for lush, dimensional embroidery, allowing the stitched botanicals to overlap and extend beyond the drawn lines.
This mixed-media approach adds a layer of narrative and wonder, turning a simple hoop into a small story.
16. Build a Cohesive Themed Collection

Design a gallery wall by creating a series of hoops that explore variations on a single theme.
Maintain consistency by using a limited color palette—here, warm desert tones—and a repeating motif, like the sun or a cactus.
Vary the composition and scale within each hoop to keep the collection dynamic and engaging.
Arranging them in a loose cluster allows the individual pieces to feel connected while maintaining a relaxed, organic feel that suits a bohemian or Southwestern aesthetic.
17. Tell a Story with Sculptural Stitches

Push the boundaries of the hoop by allowing your embroidery to spill out of its circular frame.
Use detached, three-dimensional stitches like bullion knots or cast-on stitches to create cascading floral vines that hang below the hoop.
This technique transforms the piece from a flat image into a small-scale textile sculpture, adding unexpected drama and movement.
Anchor the composition with a detailed central element, allowing the trailing stitches to feel like a natural extension of the core design.
18. Capture Detail with Fine-Line Blackwork

For highly detailed illustrations like a charcuterie board, use black thread to create your initial outlines, just like an ink drawing.
This blackwork provides structure and definition, ensuring that small elements like seeds, crackers, and fruit remain distinct.
Once the outlines are complete, fill the shapes with color using satin stitch or long-and-short stitch.
The black lines contain the colors, giving the final piece a clean, graphic quality that feels both classic and modern.
19. Document Your Travels in Thread
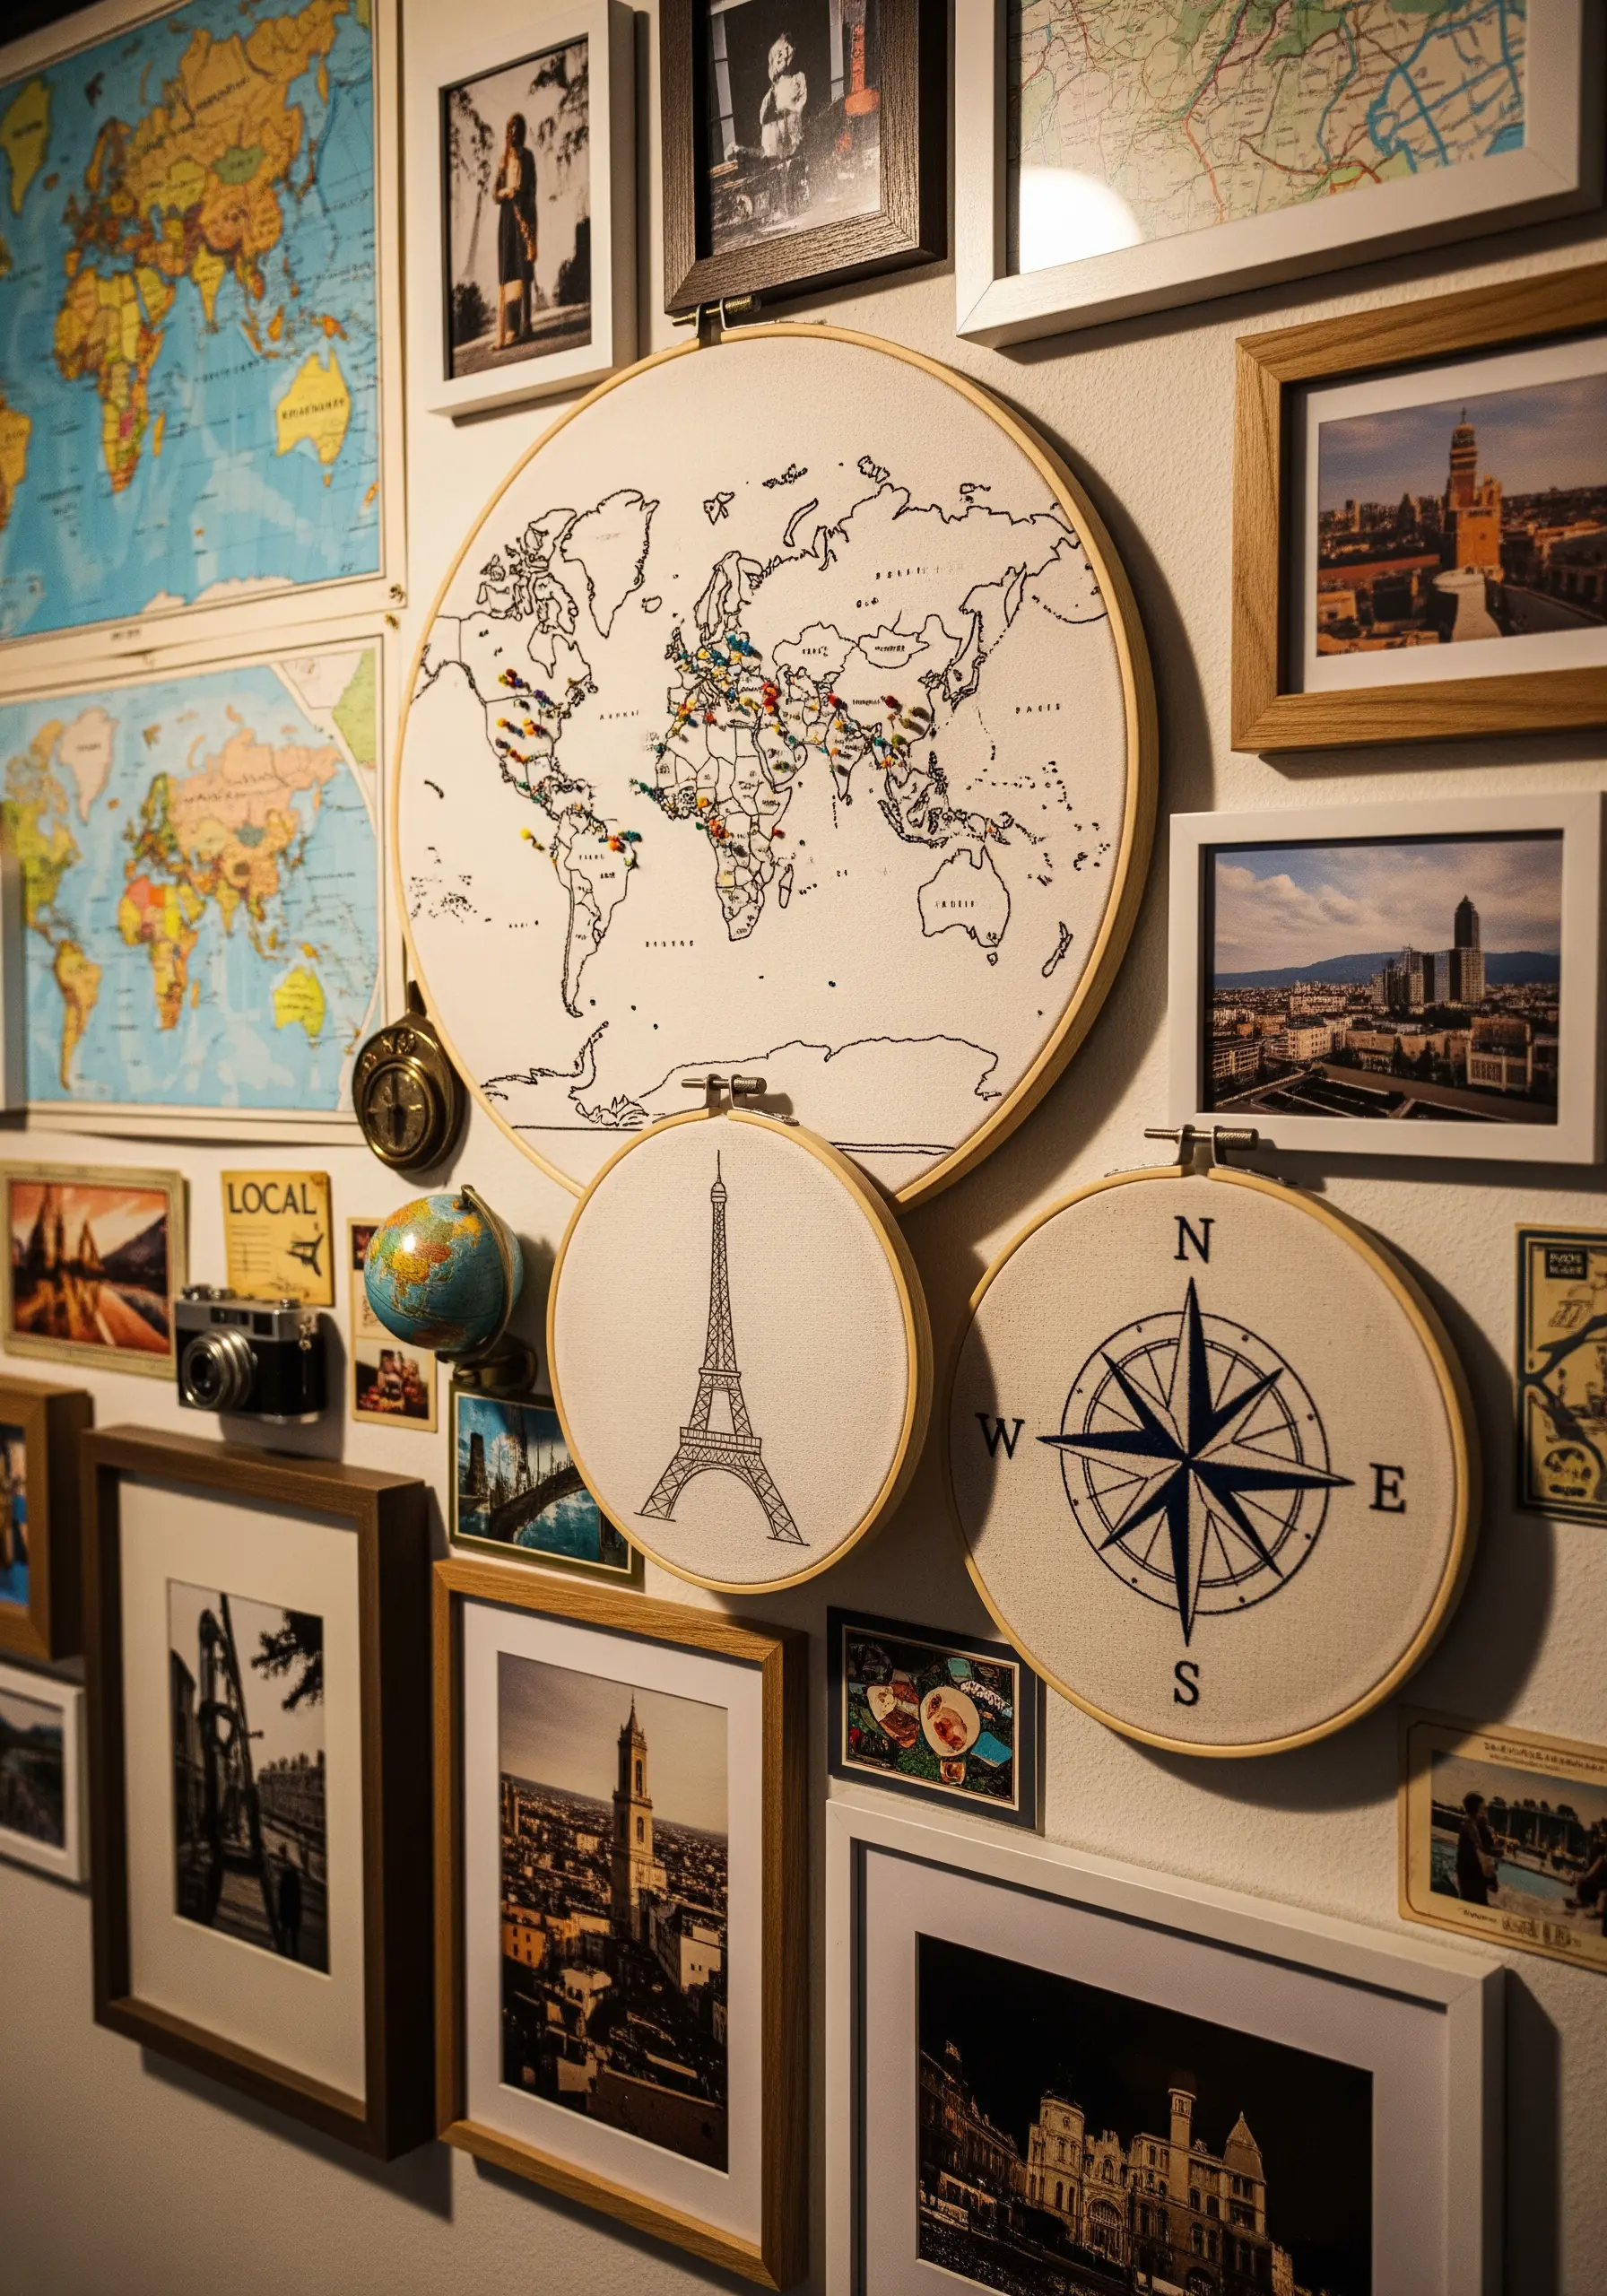
Create a truly personal piece of art by turning a world map into a stitched travel journal.
Start by embroidering a simple outline of the continents using backstitch on a neutral fabric.
Then, use colorful French knots or tiny star stitches to mark the places you’ve visited.
You can color-code your stitches by trip, by person, or simply use a rainbow of threads to create a vibrant and evolving record of your adventures.
20. Find Calm in Symmetrical Stitching

Use the meditative process of stitching a mandala to create a piece that brings a sense of calm and order to your space.
The key to a perfect mandala is a precisely drawn guide. Use a water-soluble pen to transfer your pattern, ensuring all your sections are symmetrical.
Work your way from the center out, using a limited, harmonious color palette to maintain a serene visual flow.
Simple stitches like chain stitch or satin stitch are perfect for outlining the intricate shapes, allowing the power of the geometry to shine through.
21. Make Your Stitches Break the Frame
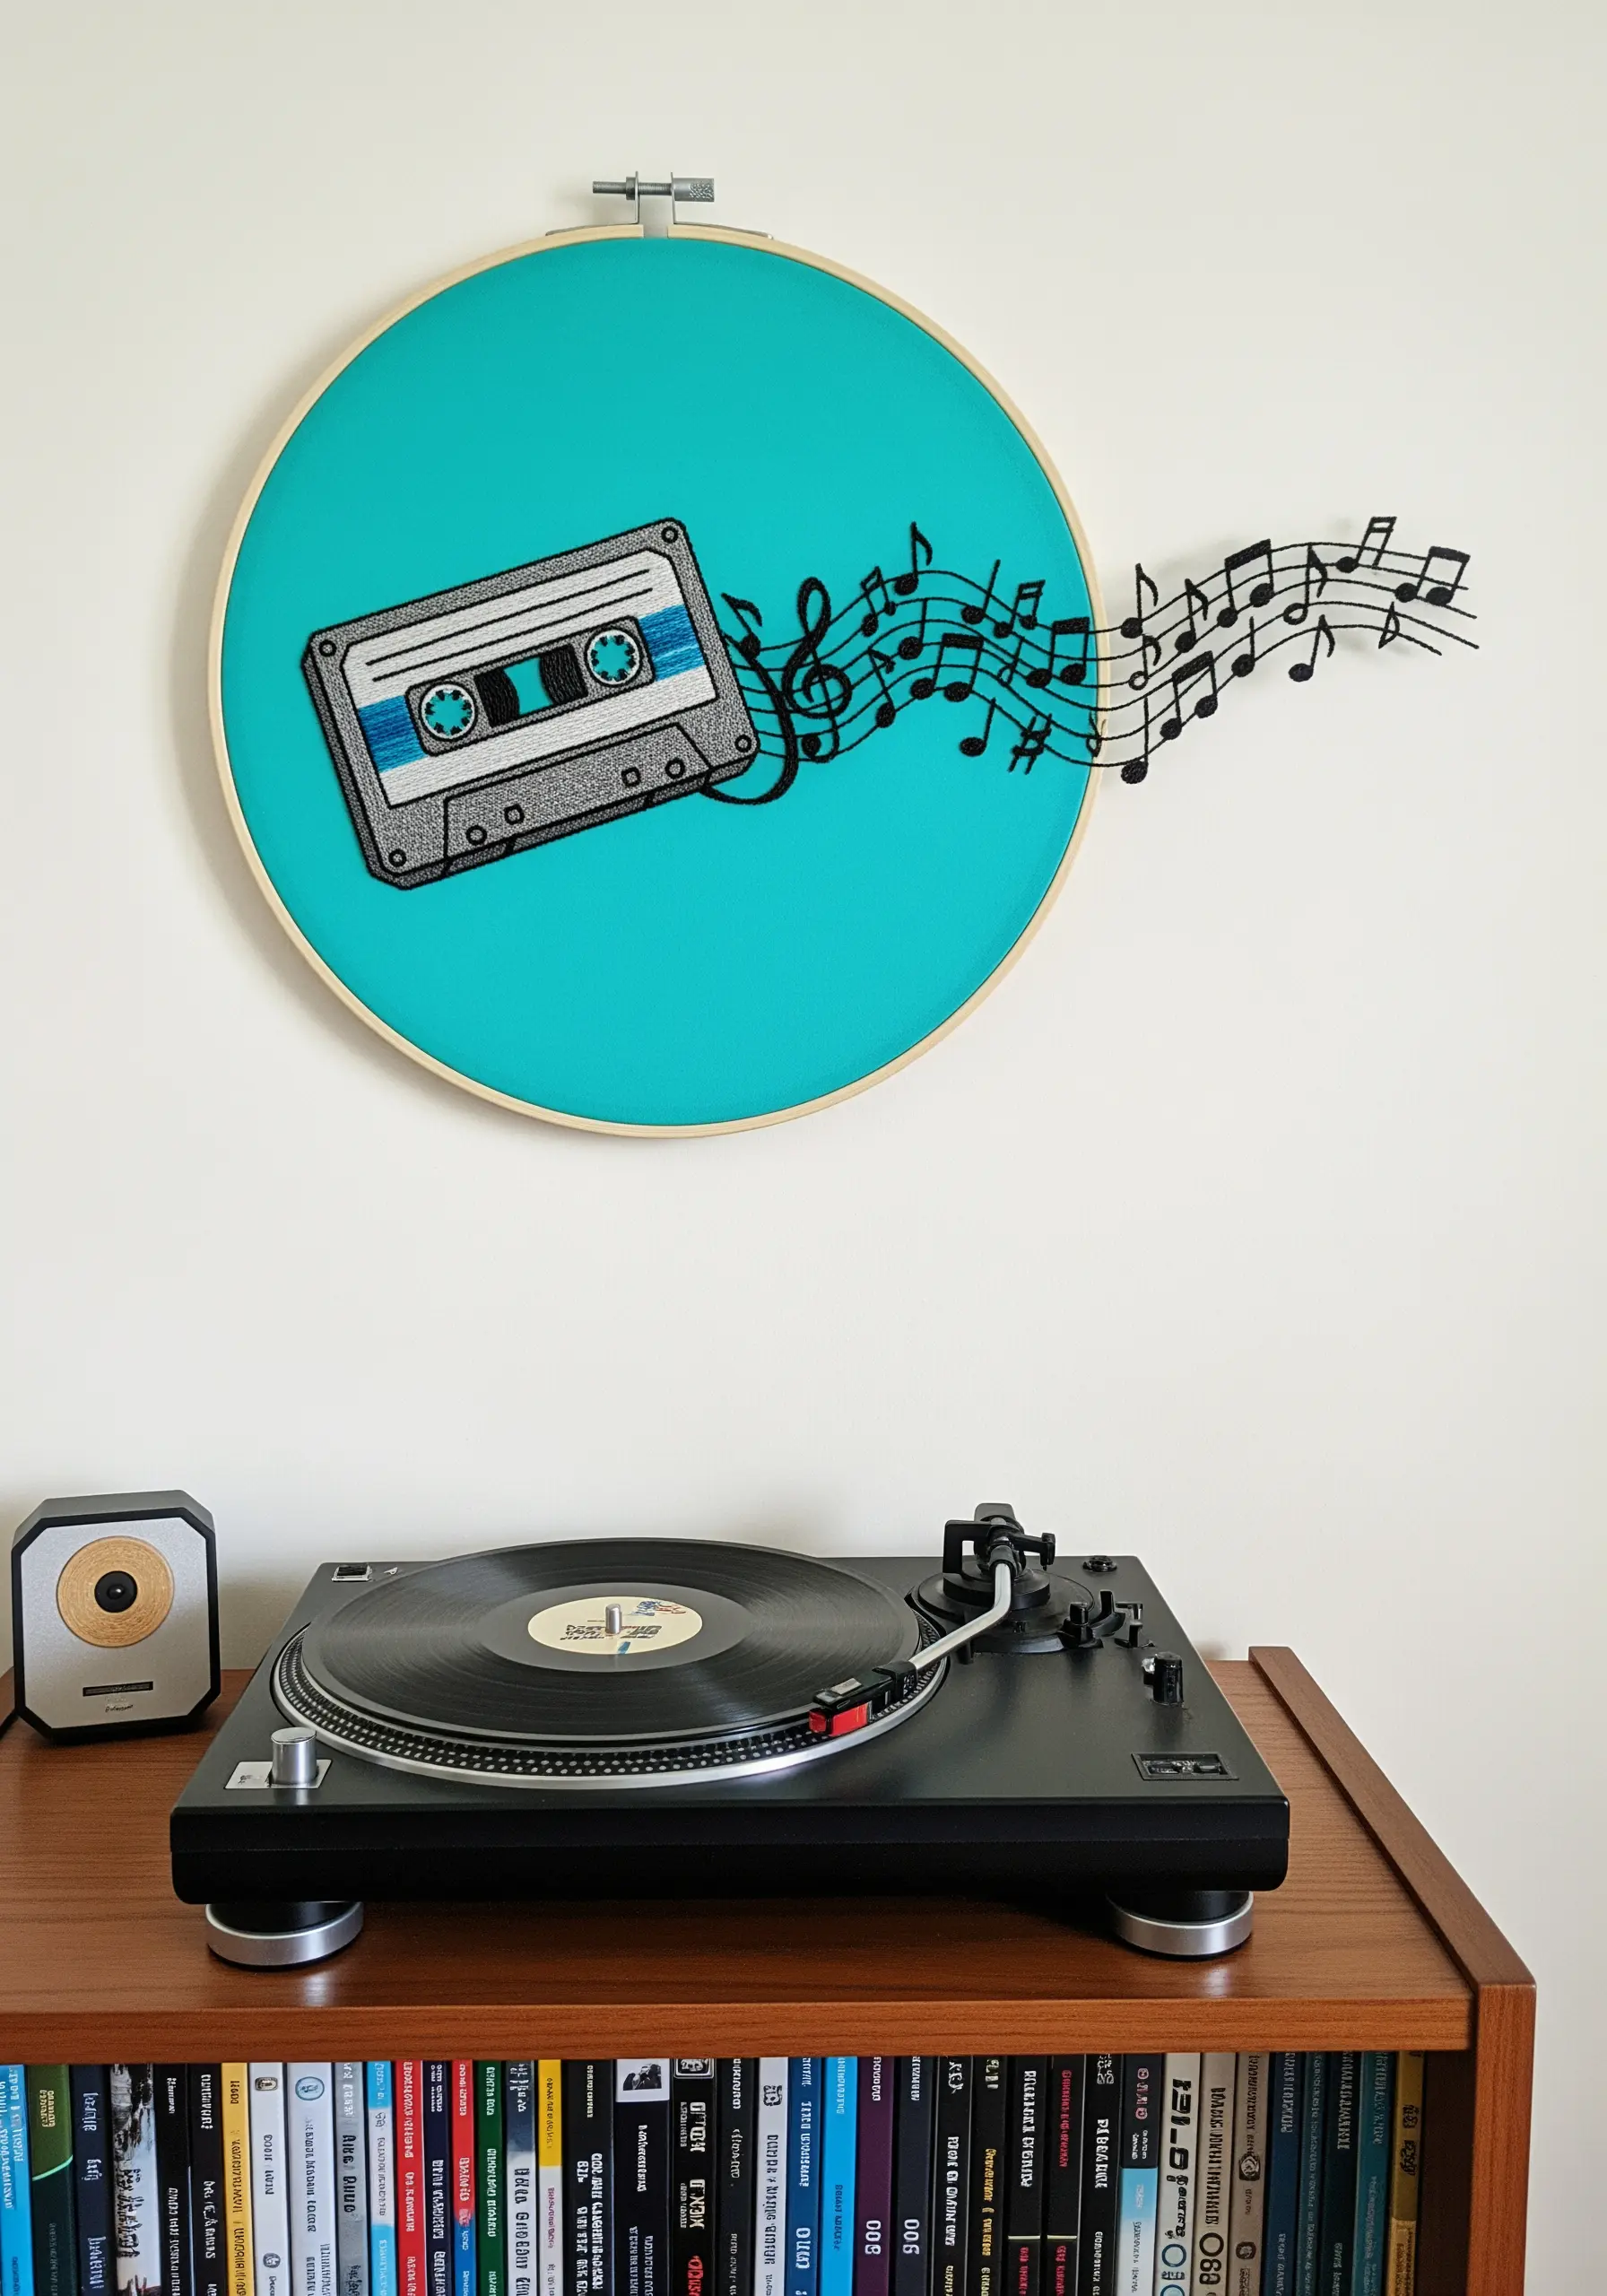
Add a playful, dynamic element to your hoop art by stitching part of your design directly onto the wall.
Embroider your main subject—like a cassette tape—within the hoop, then extend a part of the design, such as the musical notes, beyond the fabric edge.
You can achieve this effect by using a wall-safe decal, a paint pen, or even carefully arranged black thread tacked to the wall.
This clever trick creates an illusion of movement and sound, making the artwork feel alive and integrated with the space around it.
22. Master Elegant Lettering with Whipped Backstitch

To achieve smooth, cursive lettering that looks like calligraphy, use a whipped backstitch.
First, create your letters with a standard backstitch. Then, without piercing the fabric, slide your needle under each stitch, wrapping it with a second thread.
This technique smooths out the segmented look of a regular backstitch, creating a fluid, uninterrupted line.
Choose a high-contrast thread color against a dark fabric to make your elegant script the undeniable star of the piece.
23. Create Sparkle with Beading and Sequins
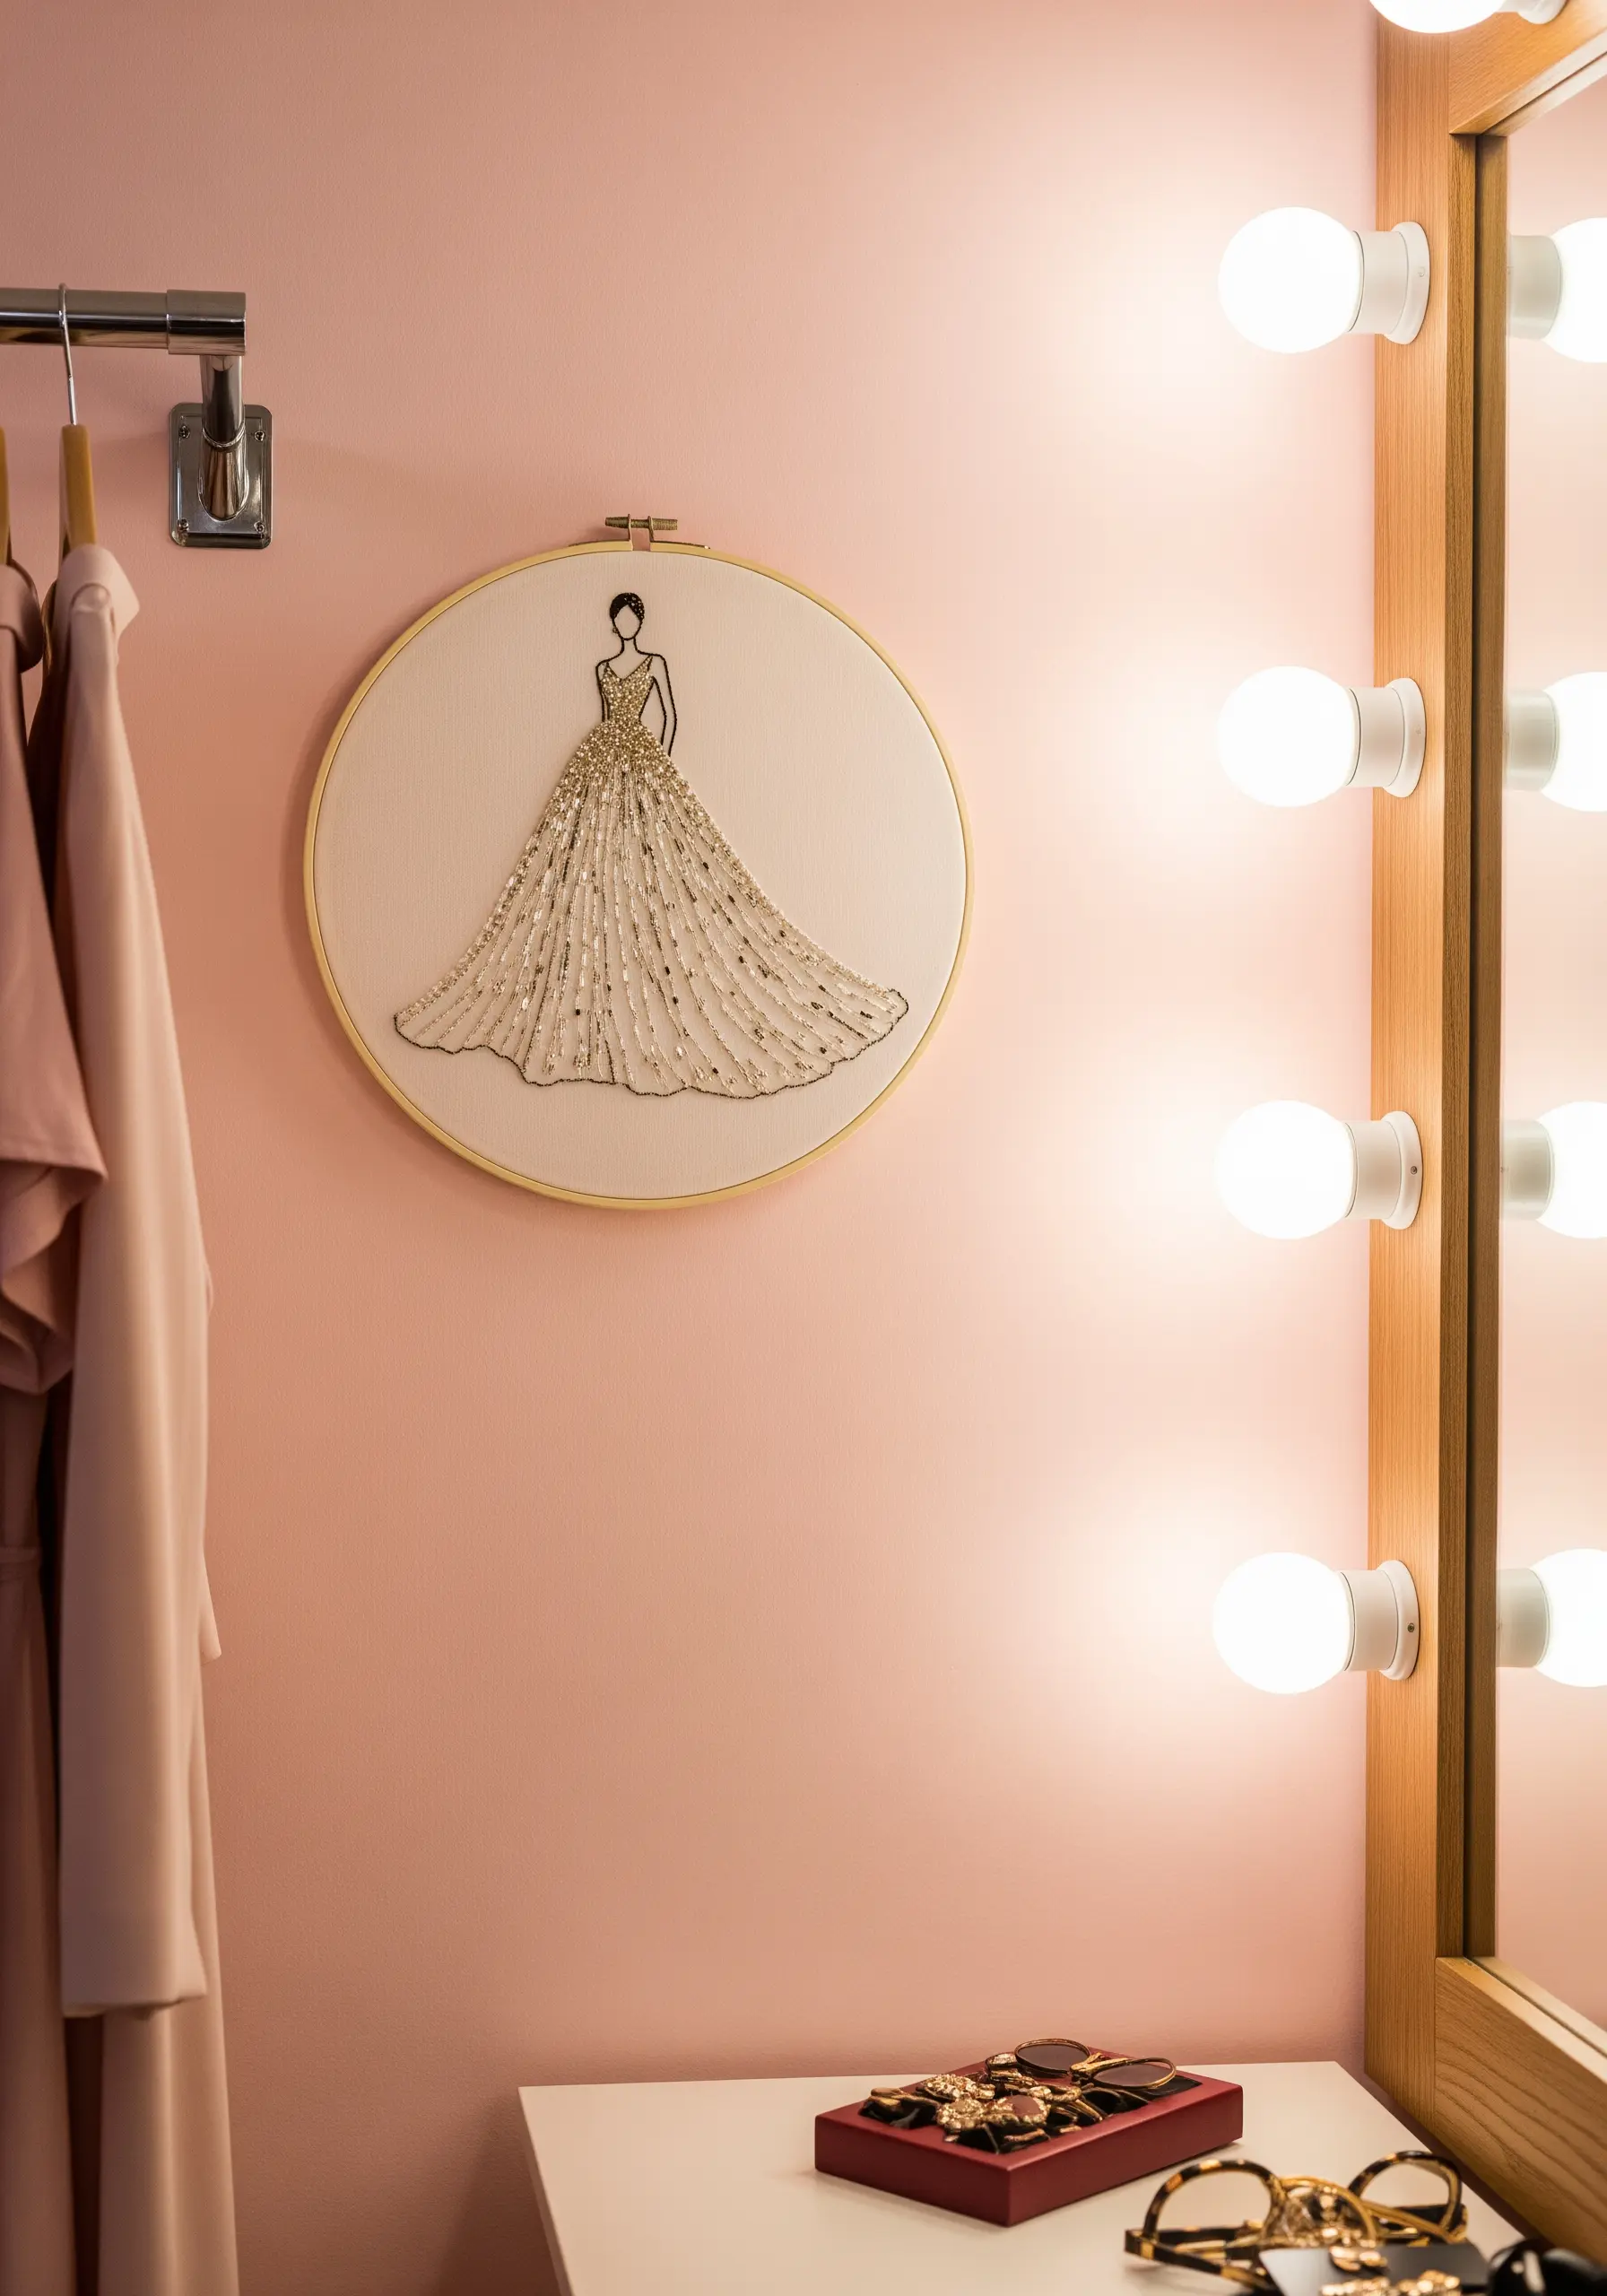
Incorporate beadwork to add texture, light, and a touch of glamour to your embroidery.
Outline the main silhouette with a simple backstitch, then fill the area with a dense layer of beads and sequins.
To create an ombré effect on the gown, gradually transition from silver beads at the top to gold sequins at the hem.
This mixed-media approach is perfect for fashion illustrations, adding a luxurious, couture feel that thread alone can’t replicate.
24. Capture a Pet’s Personality in Stitches
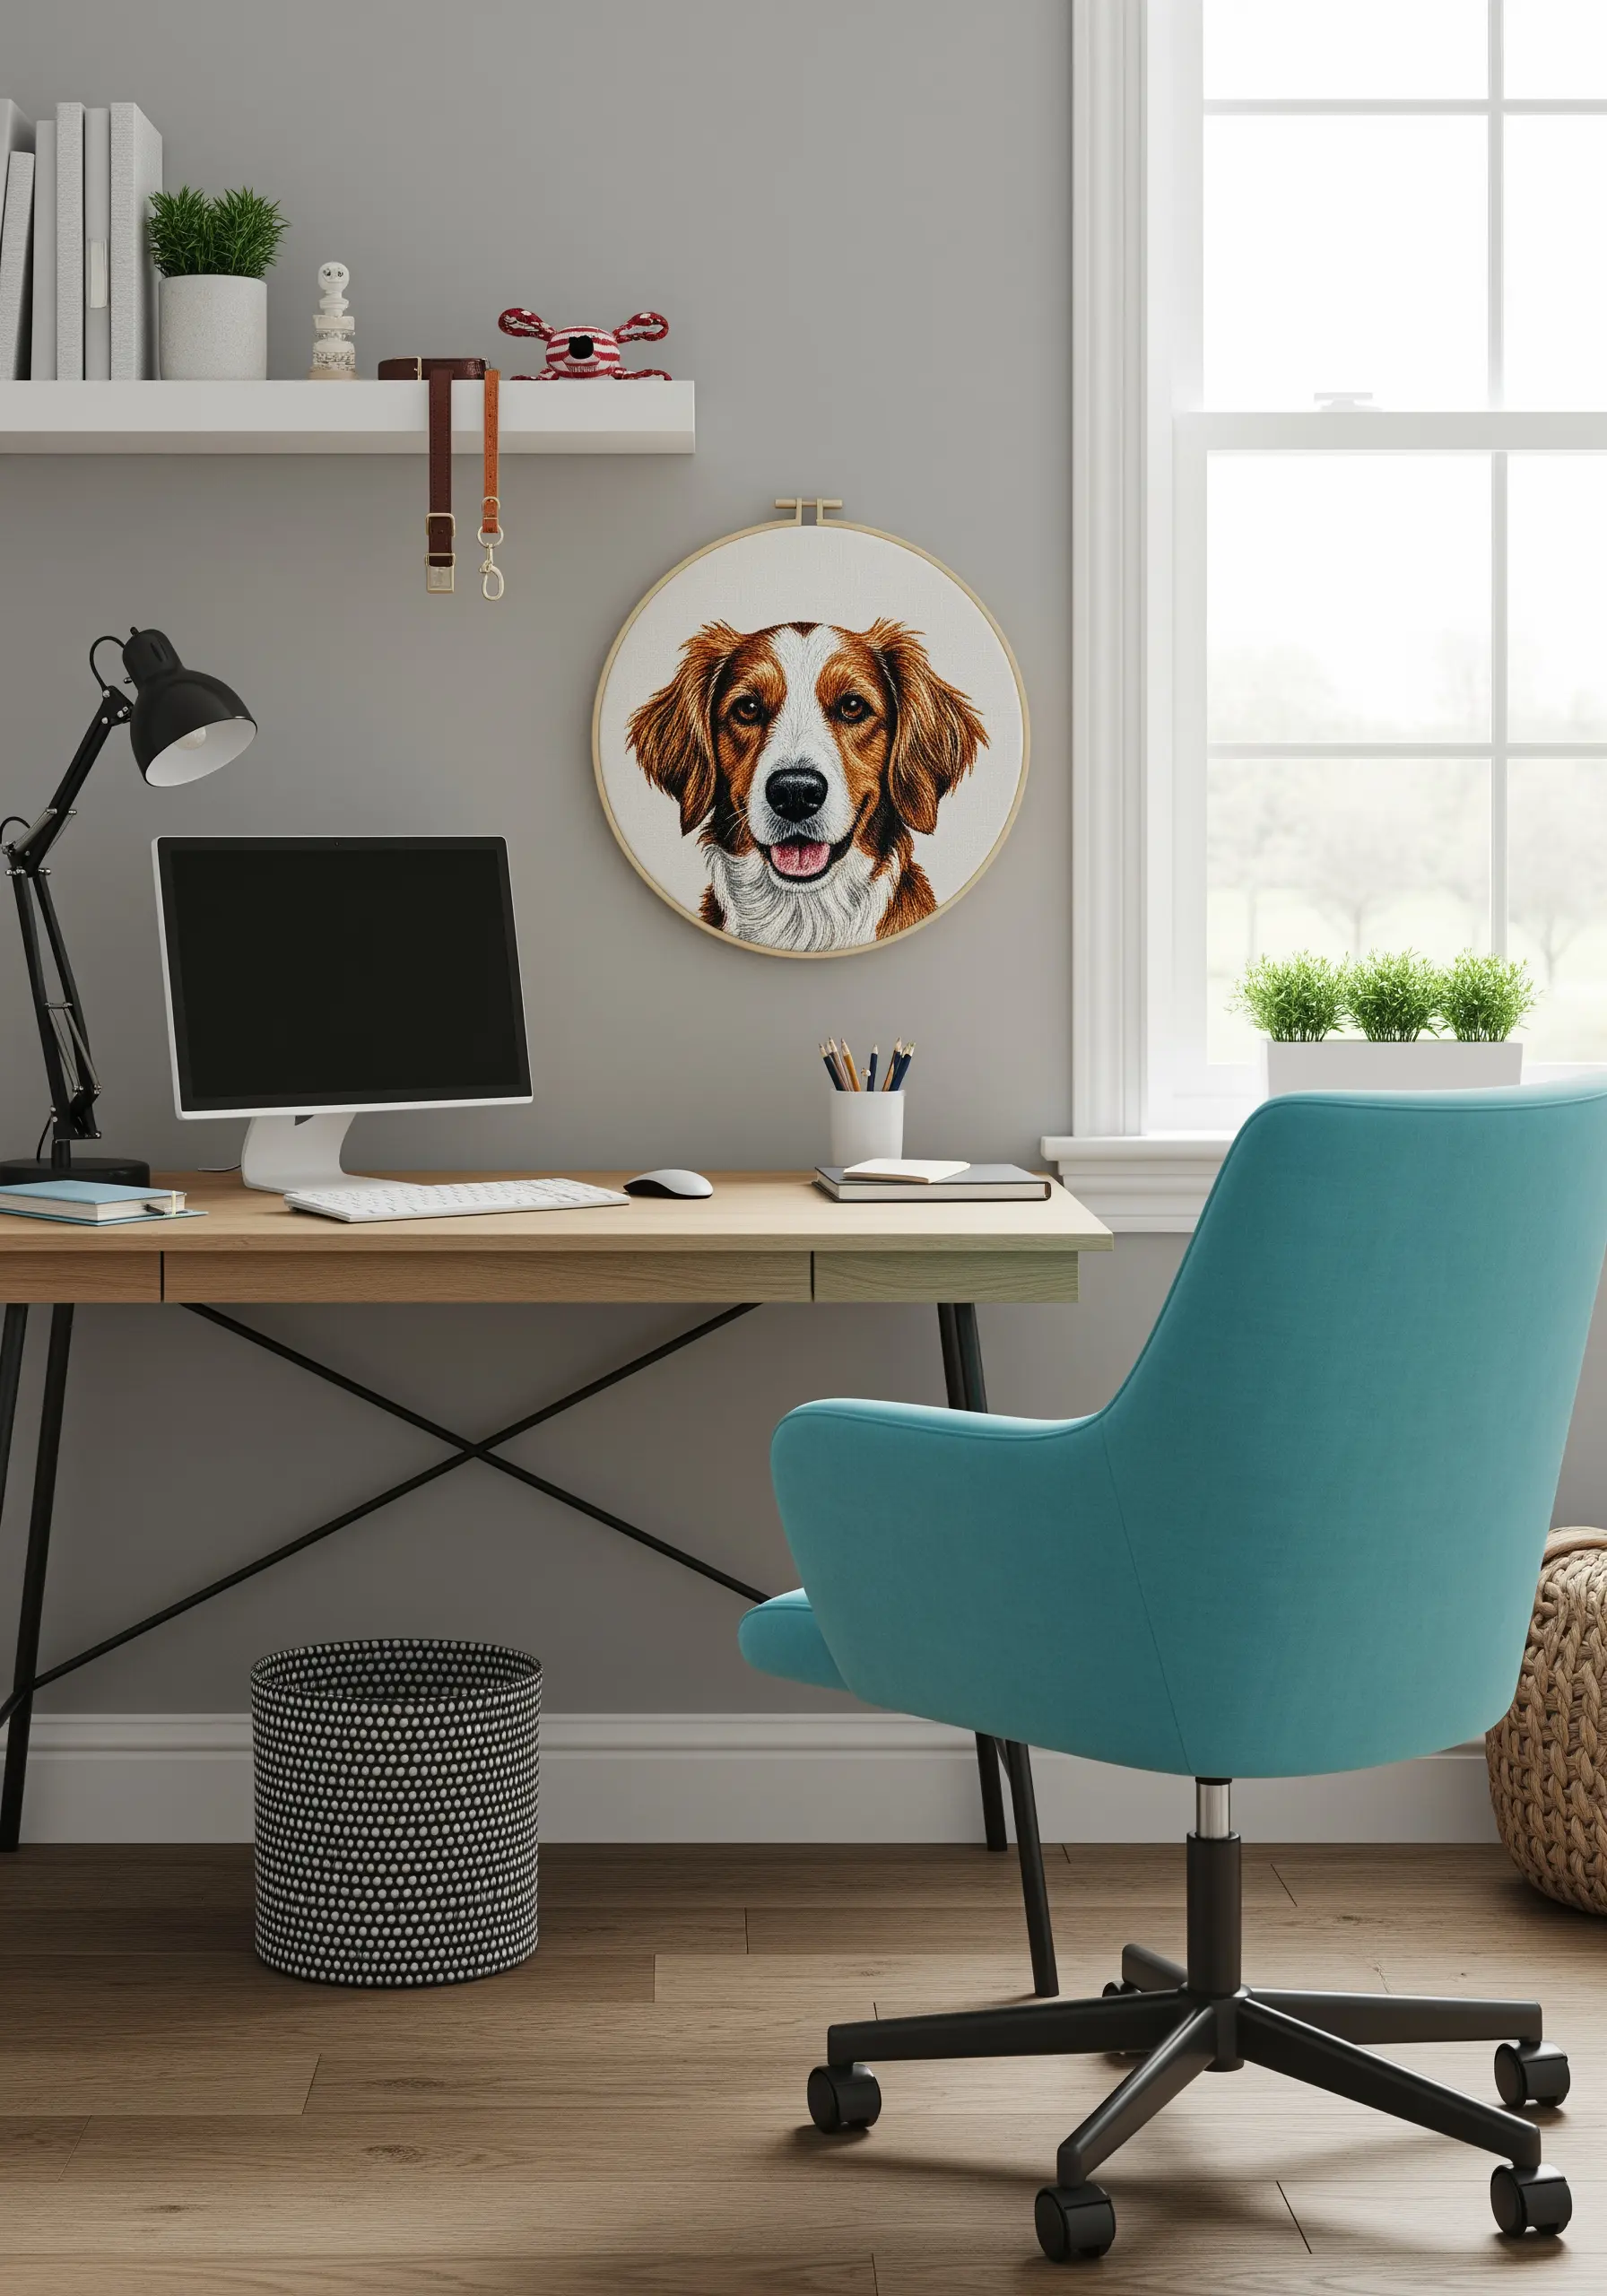
When creating a pet portrait, focus on the eyes to capture their spirit and personality.
Use tiny, directional stitches and multiple shades of thread to create the reflection and depth in their eyes—a single white stitch can bring the entire face to life.
For the fur, use long-and-short stitch, always following the natural direction of hair growth. This creates a realistic texture and sense of volume.
Don’t be afraid to use unexpected colors, like blues or purples, in the shaded areas to add richness and realism to the portrait.
25. Mix Traditional Stitches with Modern Fibers

Create a stunning tactile display by combining traditional embroidery with chunky, modern fibers.
Fill one hoop with thick, woven yarn using a needle punch or weaving technique for a bold, textural statement.
Contrast this with nearby hoops featuring delicate, traditional patterns like blackwork or cross-stitch.
This juxtaposition of scale, texture, and technique creates a visually rich wall that showcases the vast possibilities of fiber art.
26. Design a Cohesive Series for Framing
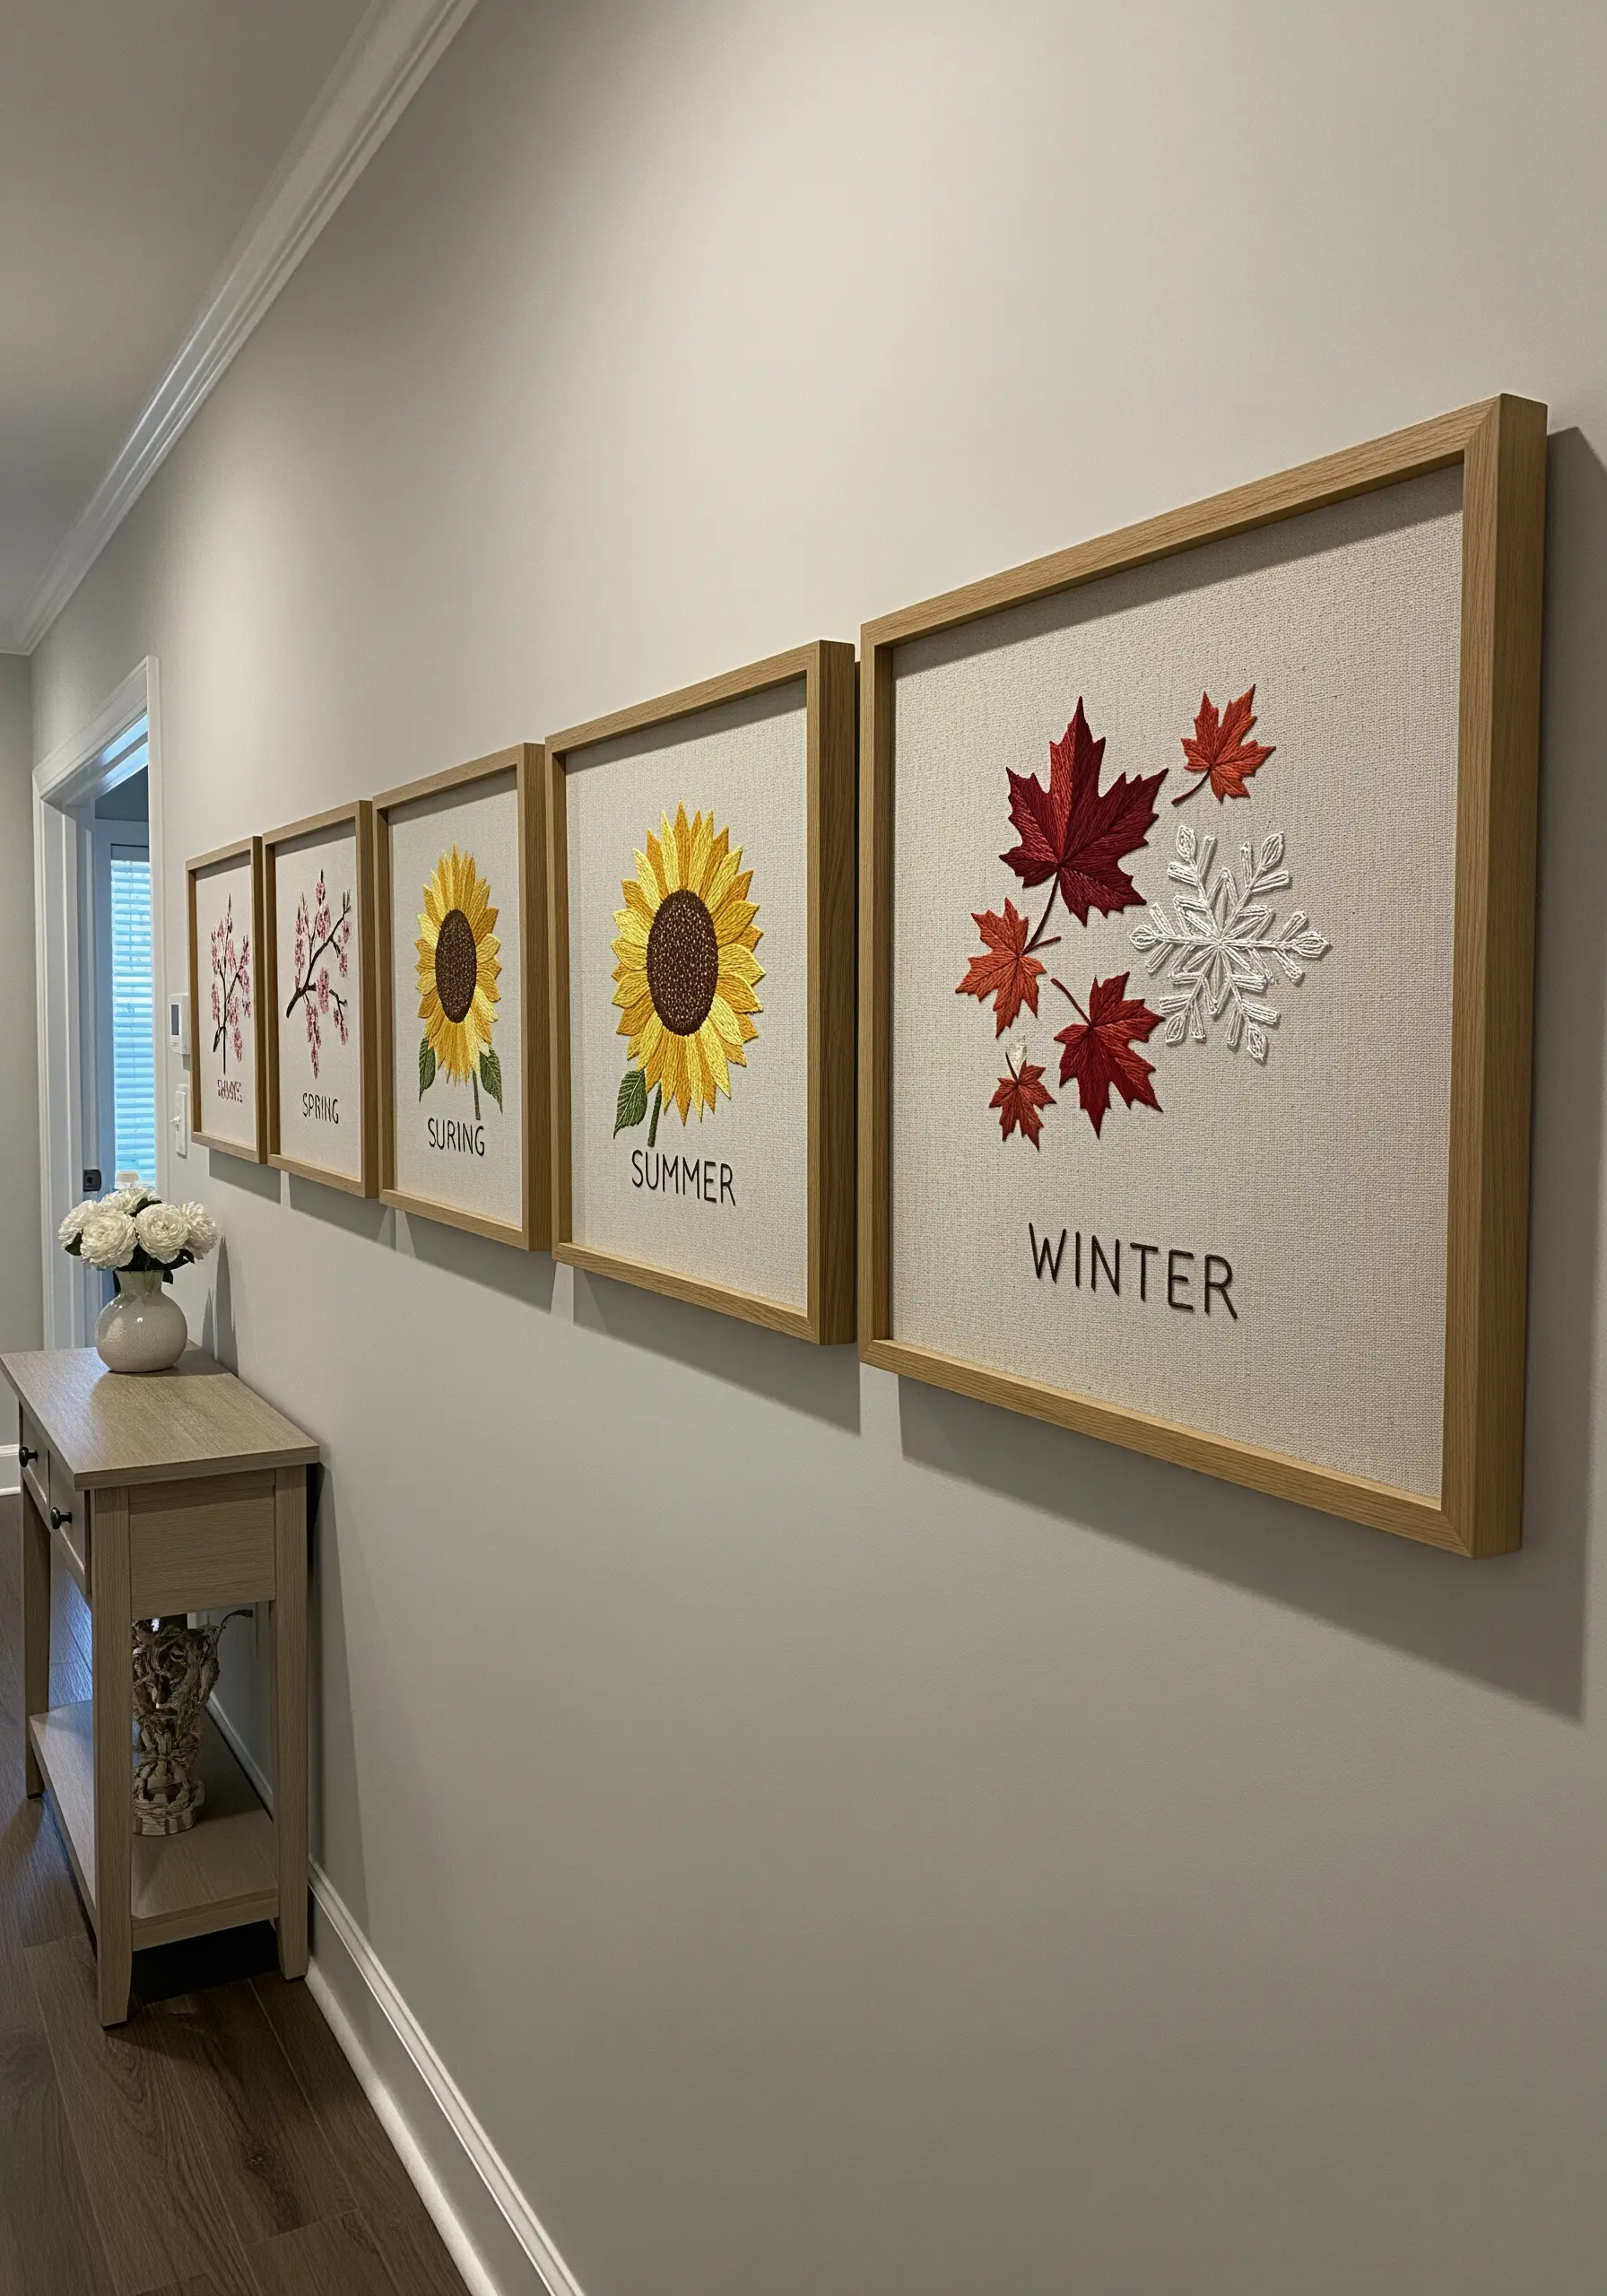
Elevate your embroidery by planning it as a series intended for traditional framing rather than finishing in the hoop.
Create four distinct designs representing the seasons, but keep them cohesive by using a consistent fabric, font style, and frame choice.
This approach transforms your stitching into a polished collection of framed embroidery artworks that can be displayed together or throughout your home.
When stitching, leave ample fabric around your design to make stretching and mounting it in the frame much easier.
27. Make a Statement with Pop Art Embroidery
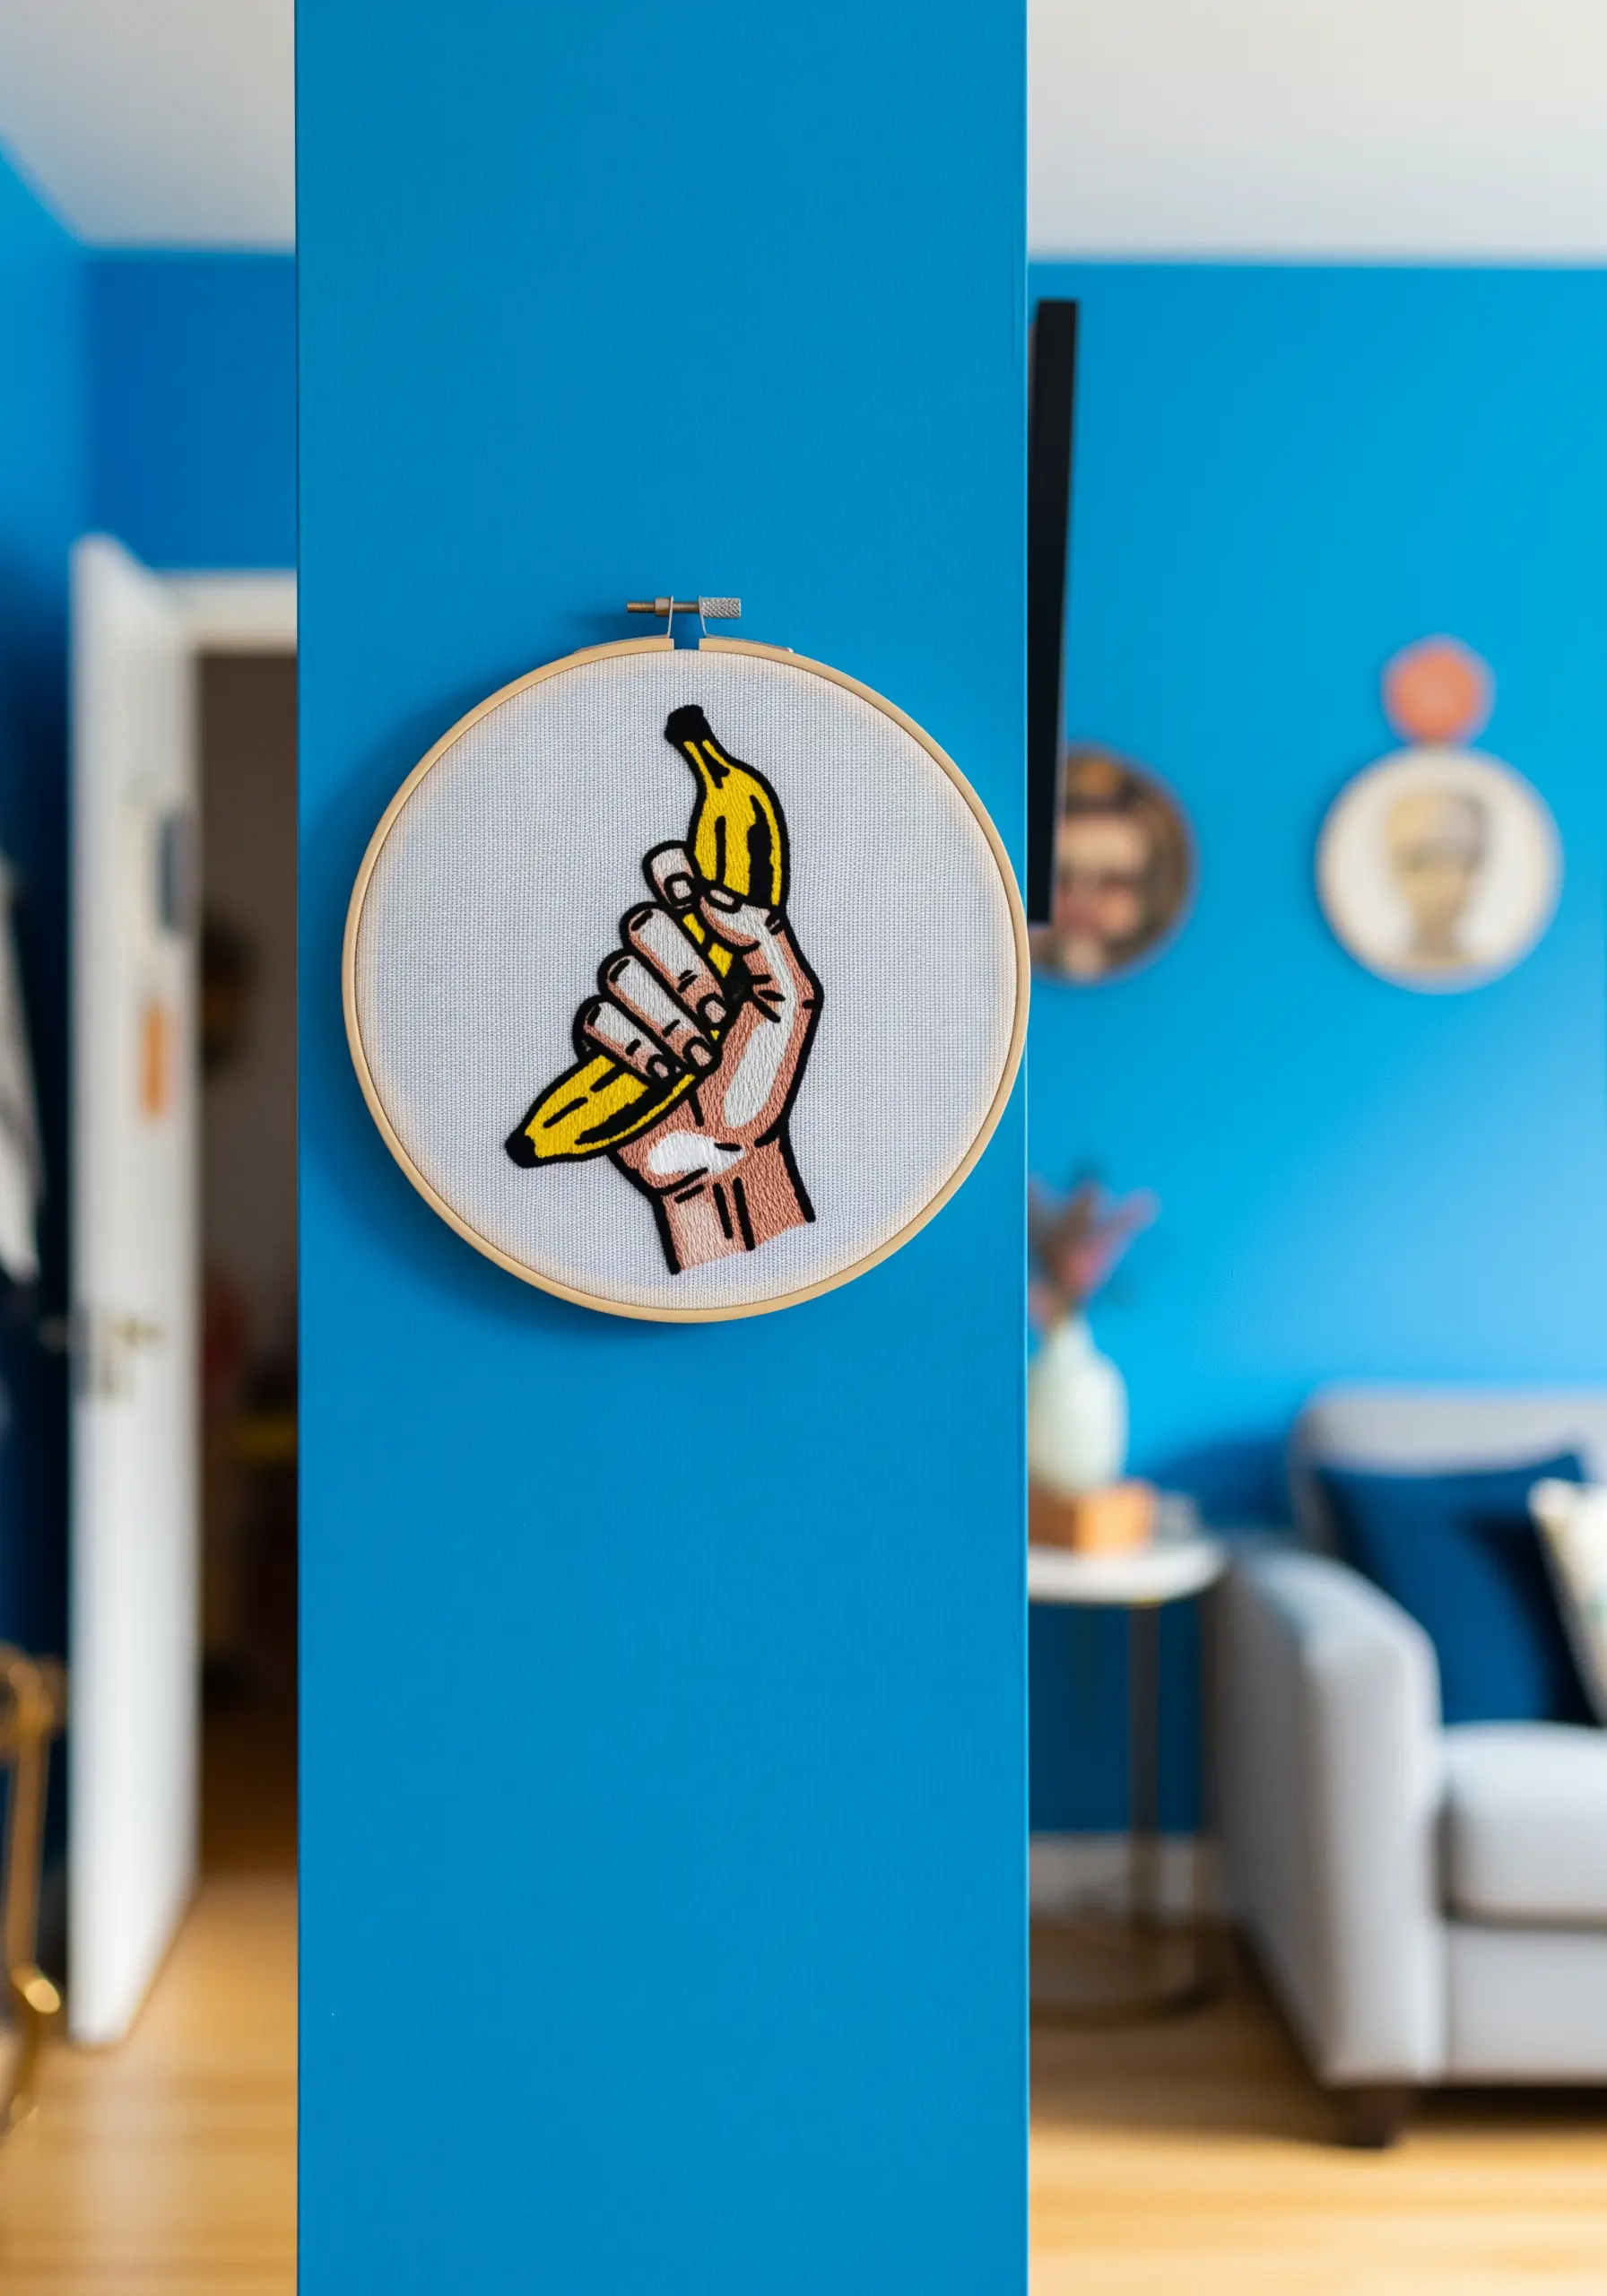
Channel the spirit of Pop Art by using a bold, graphic style with a limited, high-contrast color palette.
Use a thick black outline, created with a stem or split stitch, to mimic the look of comic book illustrations.
Fill the sections with flat, dense satin stitch in vibrant, saturated colors. This technique emphasizes shape and color over subtle shading.
Choosing an unexpected or iconic subject adds to the playful, modern energy of the piece.
28. Create a Sculptural Hanging Installation
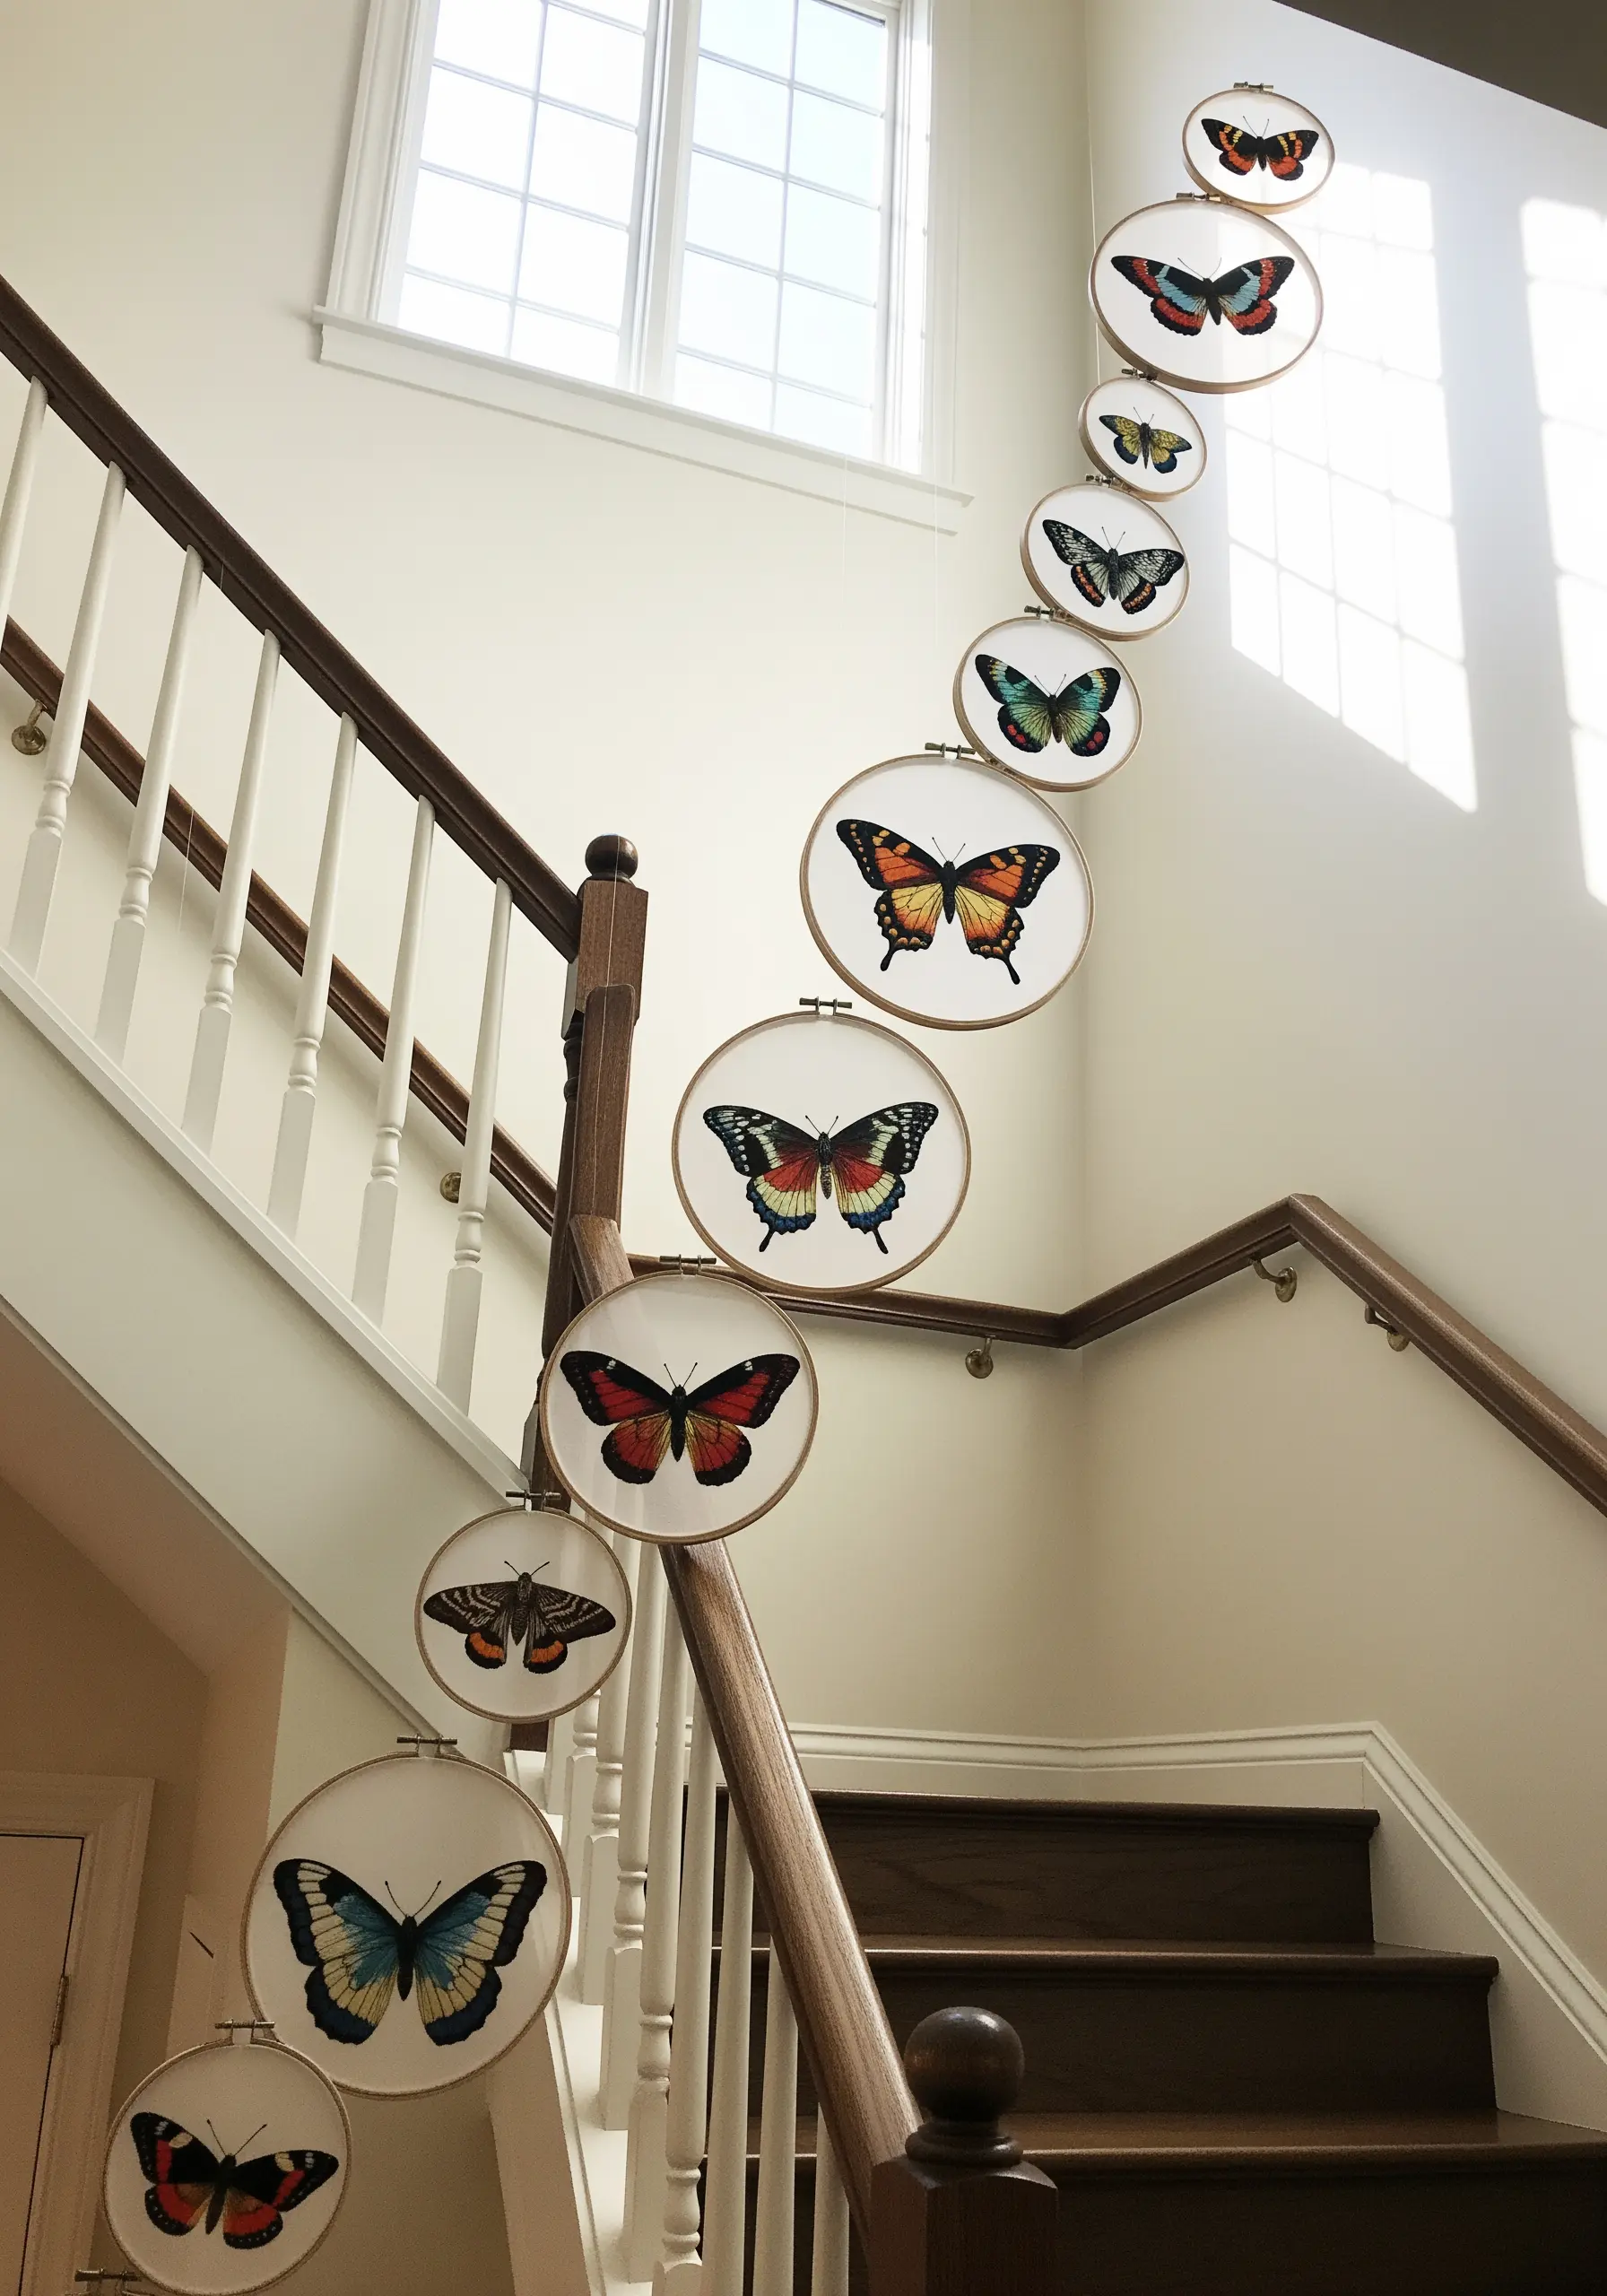
Arrange a series of hoops vertically to create a dynamic, cascading installation that draws the eye upward.
By stitching similar motifs, like butterflies, on sheer fabric, you enhance the feeling of lightness and movement.
Hang the hoops from a single point using clear fishing line, staggering their heights to create a graceful, flowing line.
This is a brilliant way to decorate a narrow space like a stairwell, turning an awkward area into a stunning focal point.
29. Combine Text and Image for a Narrative Piece

Give your hoop art a voice by pairing a simple illustration with a complementary quote or phrase.
Keep the image and text balanced in scale and visual weight to ensure they work together harmoniously.
Use a simple backstitch for the lettering to maintain readability, while using satin stitch for the illustration to add a block of color and focus.
This combination turns your embroidery into a thoughtful piece that communicates a clear idea or sentiment, perfect for a library or study.
30. Use Printed Fabric as Your Canvas

Instead of starting with plain fabric, choose a printed cotton with a delicate pattern, like a floral chintz, as your background.
Let the fabric’s design inform your embroidery. You can either stitch a completely new motif over it or use your thread to accent parts of the existing pattern.
Here, a clothesline is stitched over the floral print, creating a charming, layered scene with built-in texture and color.
Finish the hoop by wrapping the outer ring with a coordinating ribbon for an extra touch of polish.
31. Create a Scientific Specimen Collection

Design a series of hoops that mimic the look of classic botanical or entomological illustrations.
Stitch each specimen with careful attention to detail, using thread painting to capture its unique colors and textures.
Add a label with its “scientific name” using tiny, precise backstitching to complete the scholarly aesthetic.
Grouping them in a tight grid against a dark, moody wall enhances the feeling of a curated collection in a natural history museum.
32. Paint with Thread on a Grand Scale

Think of your hoop as a canvas and your threads as paint to create a large-scale abstract color study.
Instead of intricate stitches, use long, straight stitches pulled taut across the hoop to create blocks of translucent, overlapping color.
By layering threads on sheer fabric, you can explore color theory in a unique, luminous way as light filters through the piece.
This technique transforms embroidery into a form of minimalist, geometric art that plays with light, color, and transparency.
33. Capture Motion with Silhouette and Line

Convey a powerful sense of movement using a simple, solid silhouette.
Fill the shape of the tree with dense black satin stitches, all oriented in the same horizontal direction to suggest wind sweeping through the branches.
The stark contrast between the black thread and the neutral linen fabric makes the dynamic shape the sole focus of the piece.
This minimalist approach proves that you don’t need complex colors or stitches to create a design that is full of energy and emotion.


