
When you decide to make a gift by hand, you’re choosing to give something more than an object—you’re offering your time, your focus, and a piece of your heart. The challenge is often translating that intention into a finished piece that feels as special as the person you’re giving it to.
The secret isn’t in mastering hundreds of complex stitches. It’s in the small, deliberate choices: using a single strand of thread instead of two for finer detail, changing the direction of your satin stitch to catch the light, or combining the softness of watercolor with the crispness of a backstitch.
These are the techniques that elevate your work from a simple craft to a personal work of art. Here, you’ll find ideas that are not just beautiful, but achievable—each one a new way to turn your care into something they can see, touch, and treasure.
1. The Art of Thread Painting a Pet Portrait
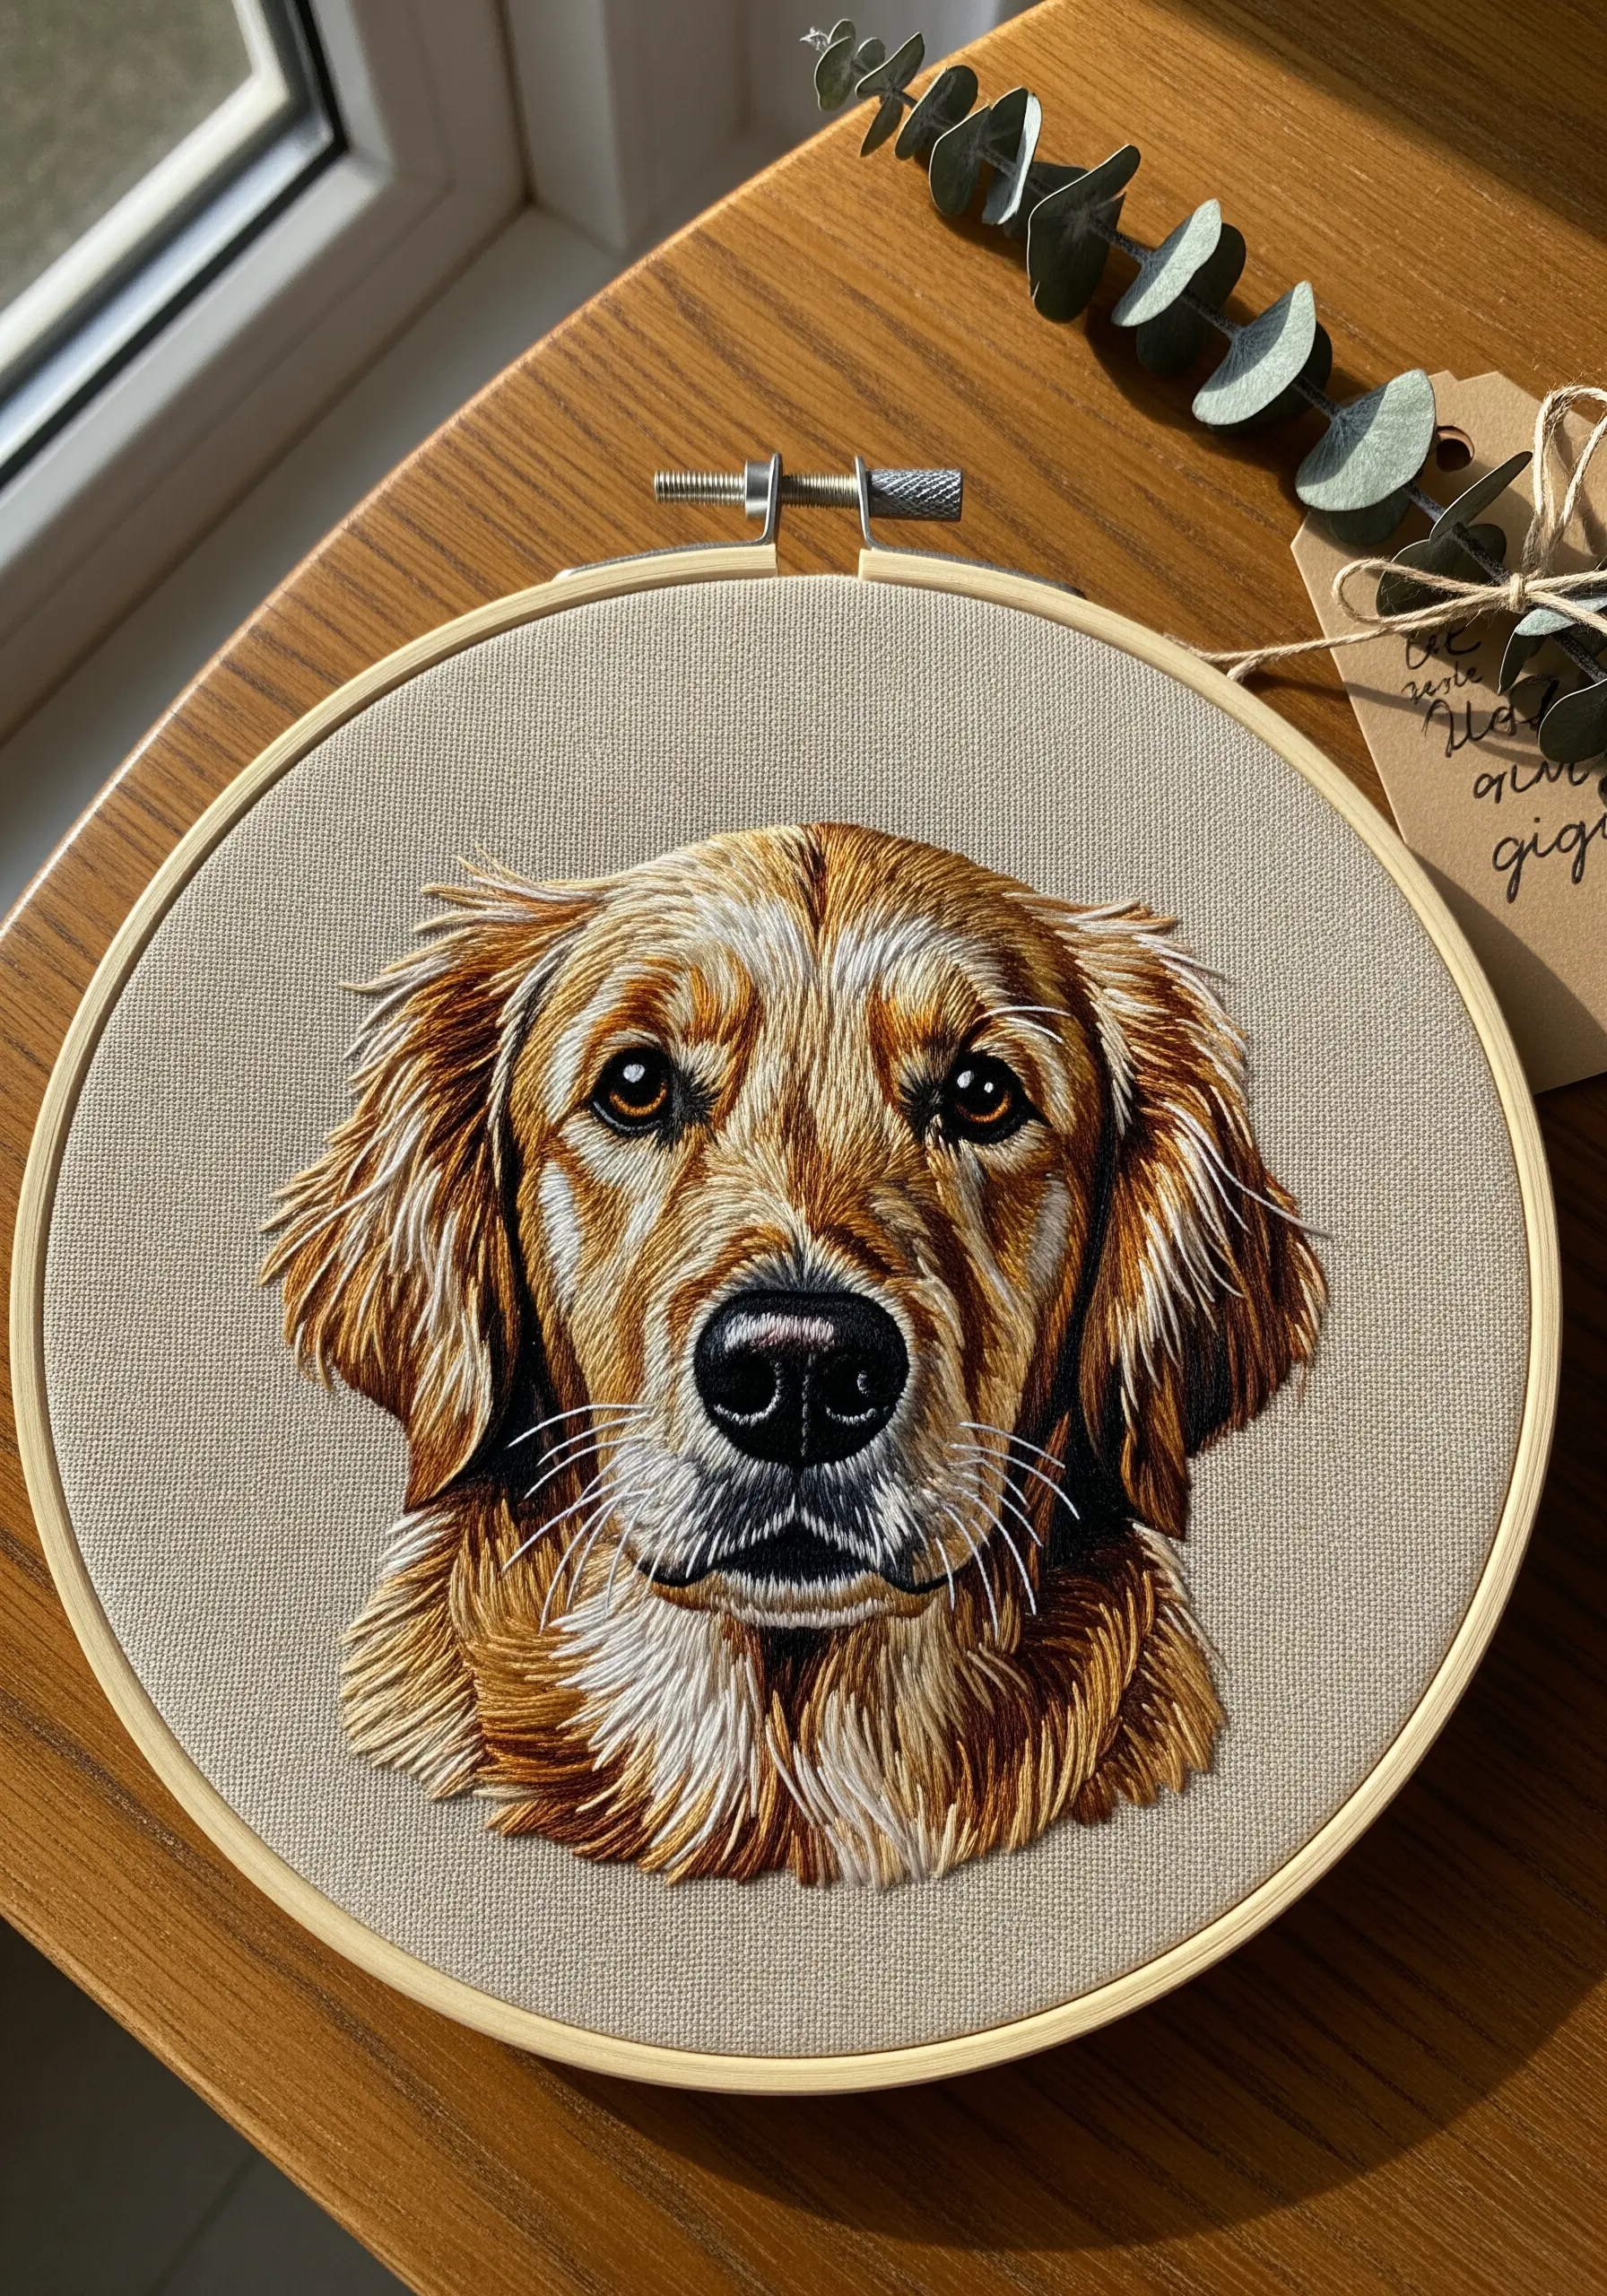
To capture the life in an animal’s fur, you need to think like a painter, using thread as your medium.
Work with a single strand of six-strand floss to achieve fine, realistic detail, especially around the eyes and nose.
Use long-and-short stitches, always following the natural direction of fur growth; this simple step creates movement and realism.
Layer multiple shades of brown, gold, and cream to build depth, allowing the colors to blend organically just as they would in a real coat.
This technique transforms a simple embroidery into a deeply personal pet portrait they will cherish forever.
2. Weaving Tactile Landscapes with Yarn
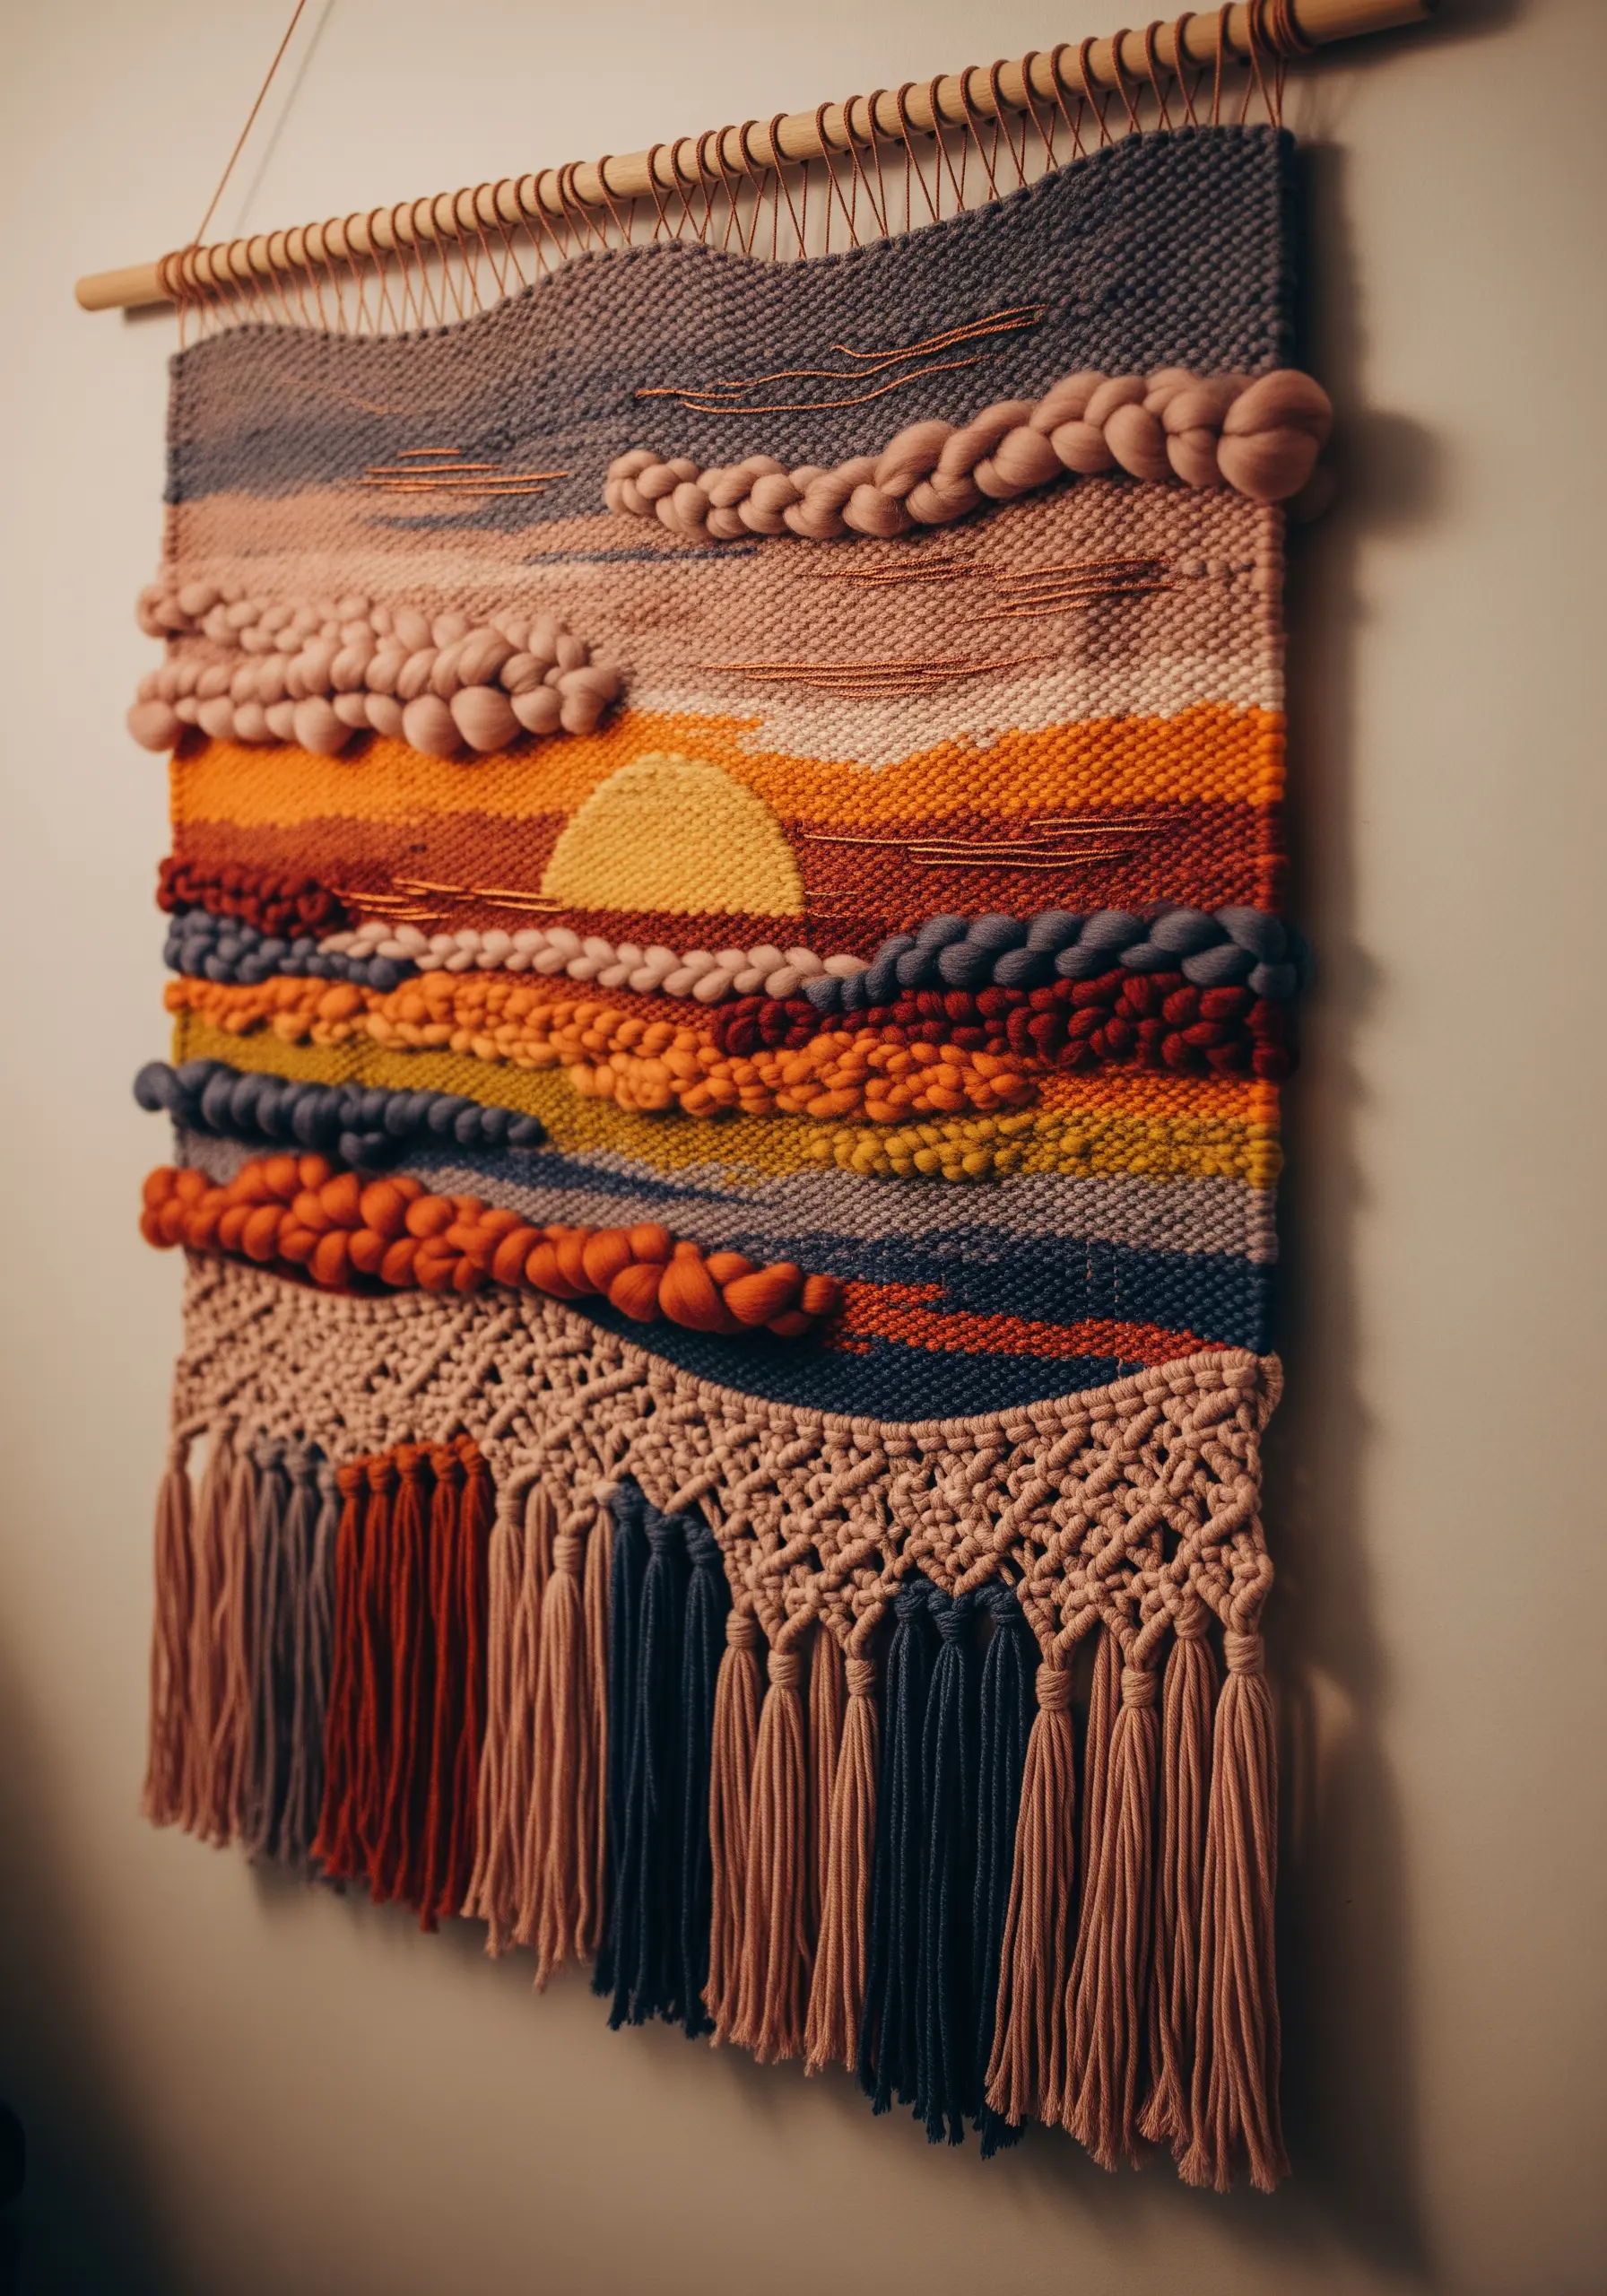
Move beyond the hoop and explore the sculptural possibilities of weaving to create a gift with incredible texture.
Use thick, unspun wool roving to create voluminous, cloud-like shapes that add soft, three-dimensional form to your piece.
Incorporate soumak weaving or raised knots to build ridges and define horizons, giving your landscape a tangible topography.
Finish with a macrame fringe, blending colors from your sunset palette to ground the composition and add a final layer of handcrafted detail.
3. Celestial Embellishments for Velvet Surfaces
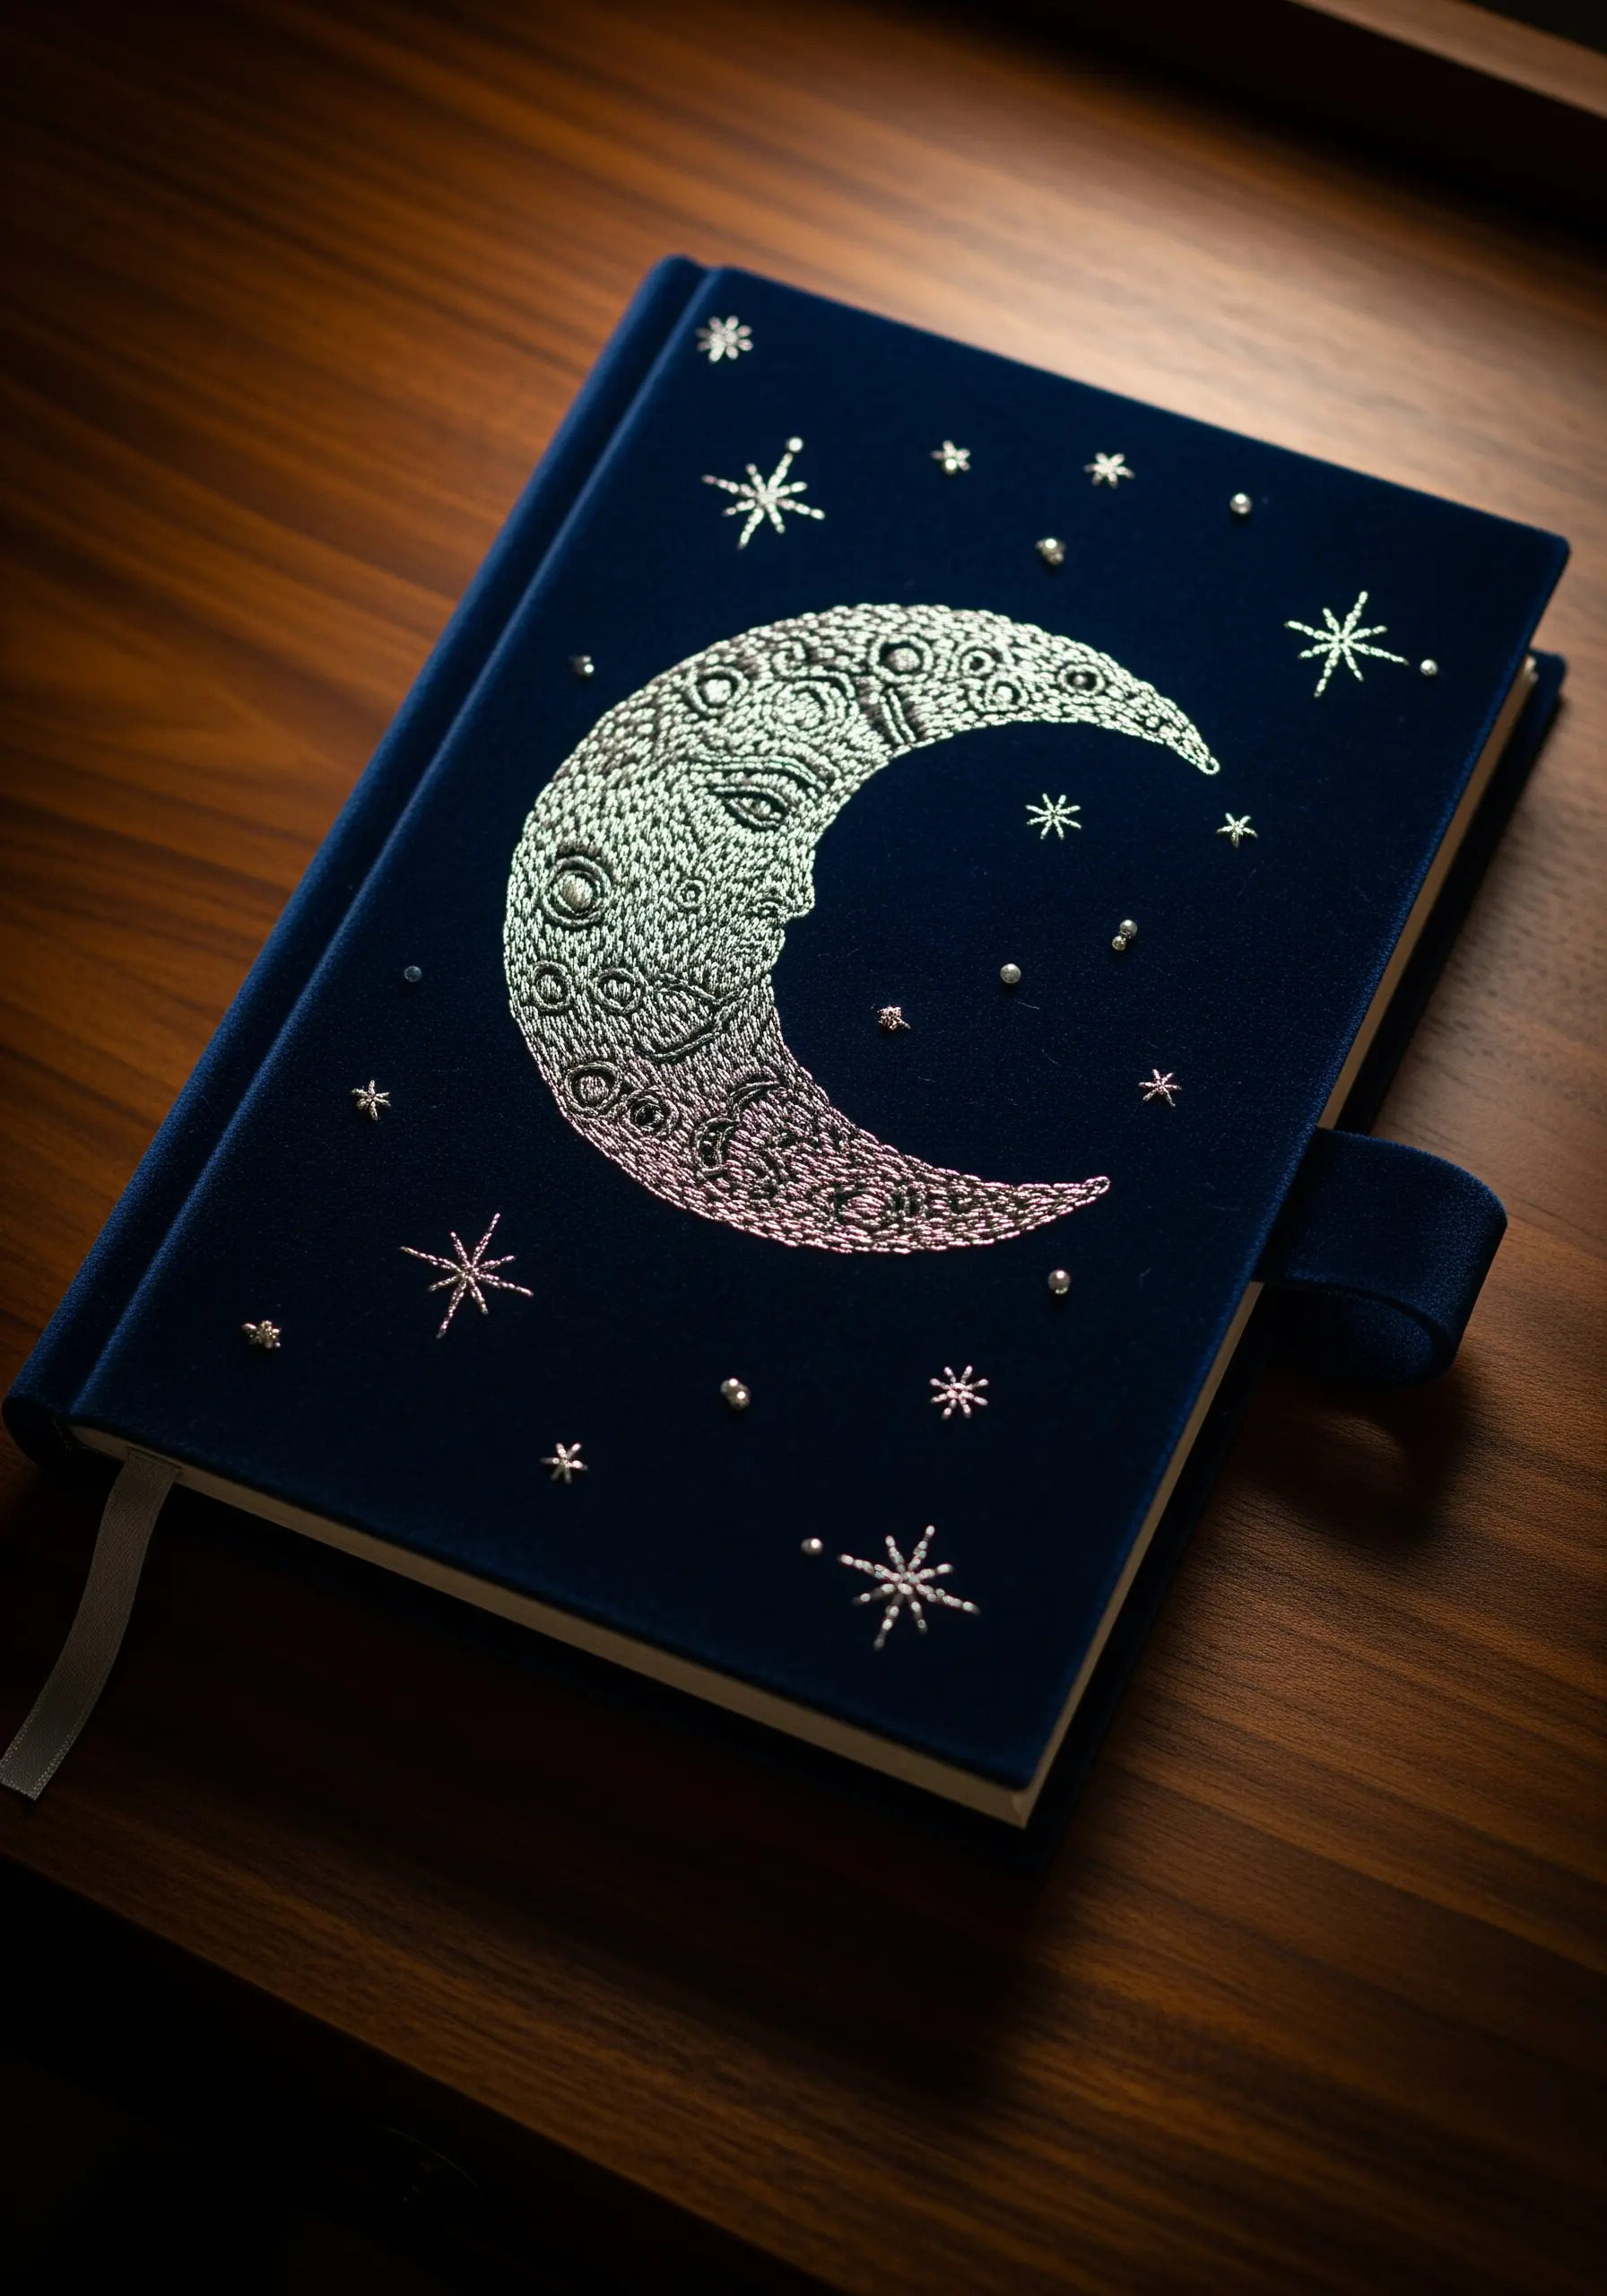
Stitching on a textured fabric like velvet creates a stunning contrast that makes your thread work appear to float.
Always use a lightweight, iron-on stabilizer on the back of the velvet to prevent the fabric from stretching and your stitches from sinking.
Choose a high-sheen metallic or silvery thread for celestial motifs; the way it catches the light against the matte pile of the velvet is magical.
Incorporate tiny seed beads or silver French knots as stars to add a subtle, light-reflecting sparkle that elevates the entire design.
4. Layered Stumpwork for Lifelike Botanicals
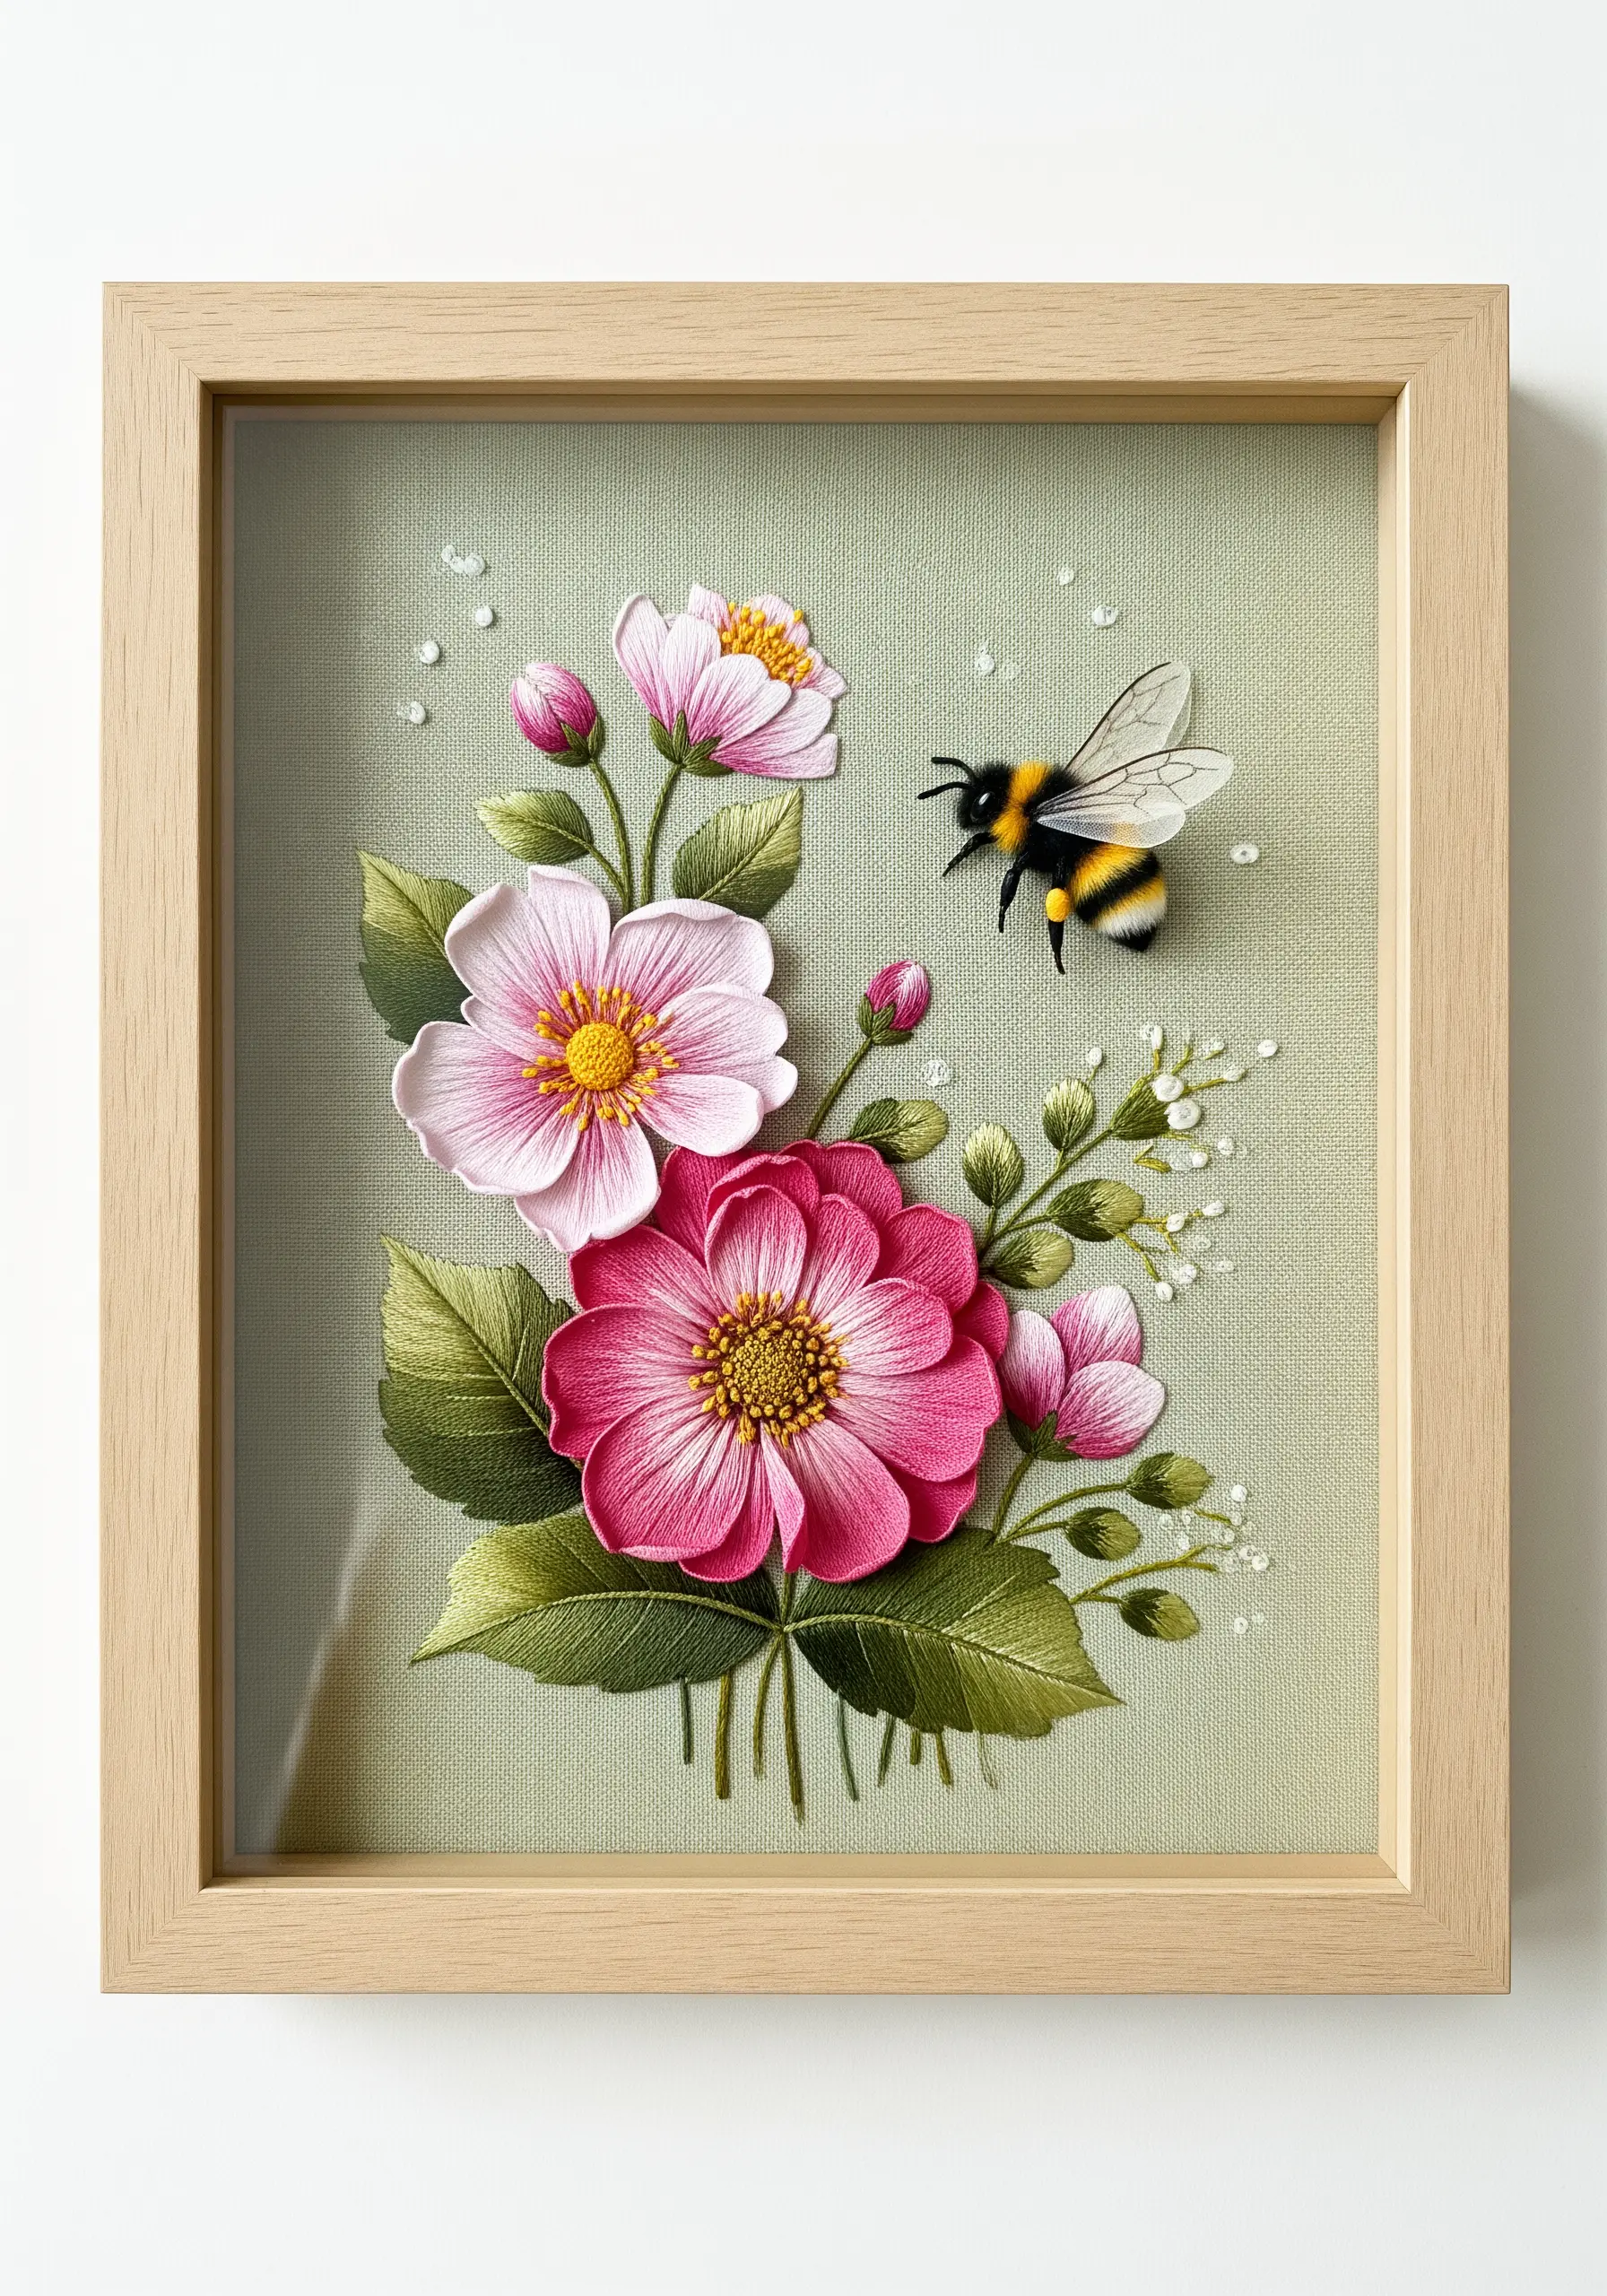
To make your embroidered flowers feel truly alive, build them in layers rather than stitching them flat against the fabric.
Create wired slips for the petals: stitch onto a piece of organza, lay a thin wire along the edge, and secure it with a buttonhole stitch before cutting it out.
Attach these 3D elements at the base, allowing you to shape the petals into natural, curved forms.
For the bee, use a padded appliqué technique—stitching over a small piece of felt—to give its body a plump, realistic dimension.
5. Sculptural Line Art with Corded Couching
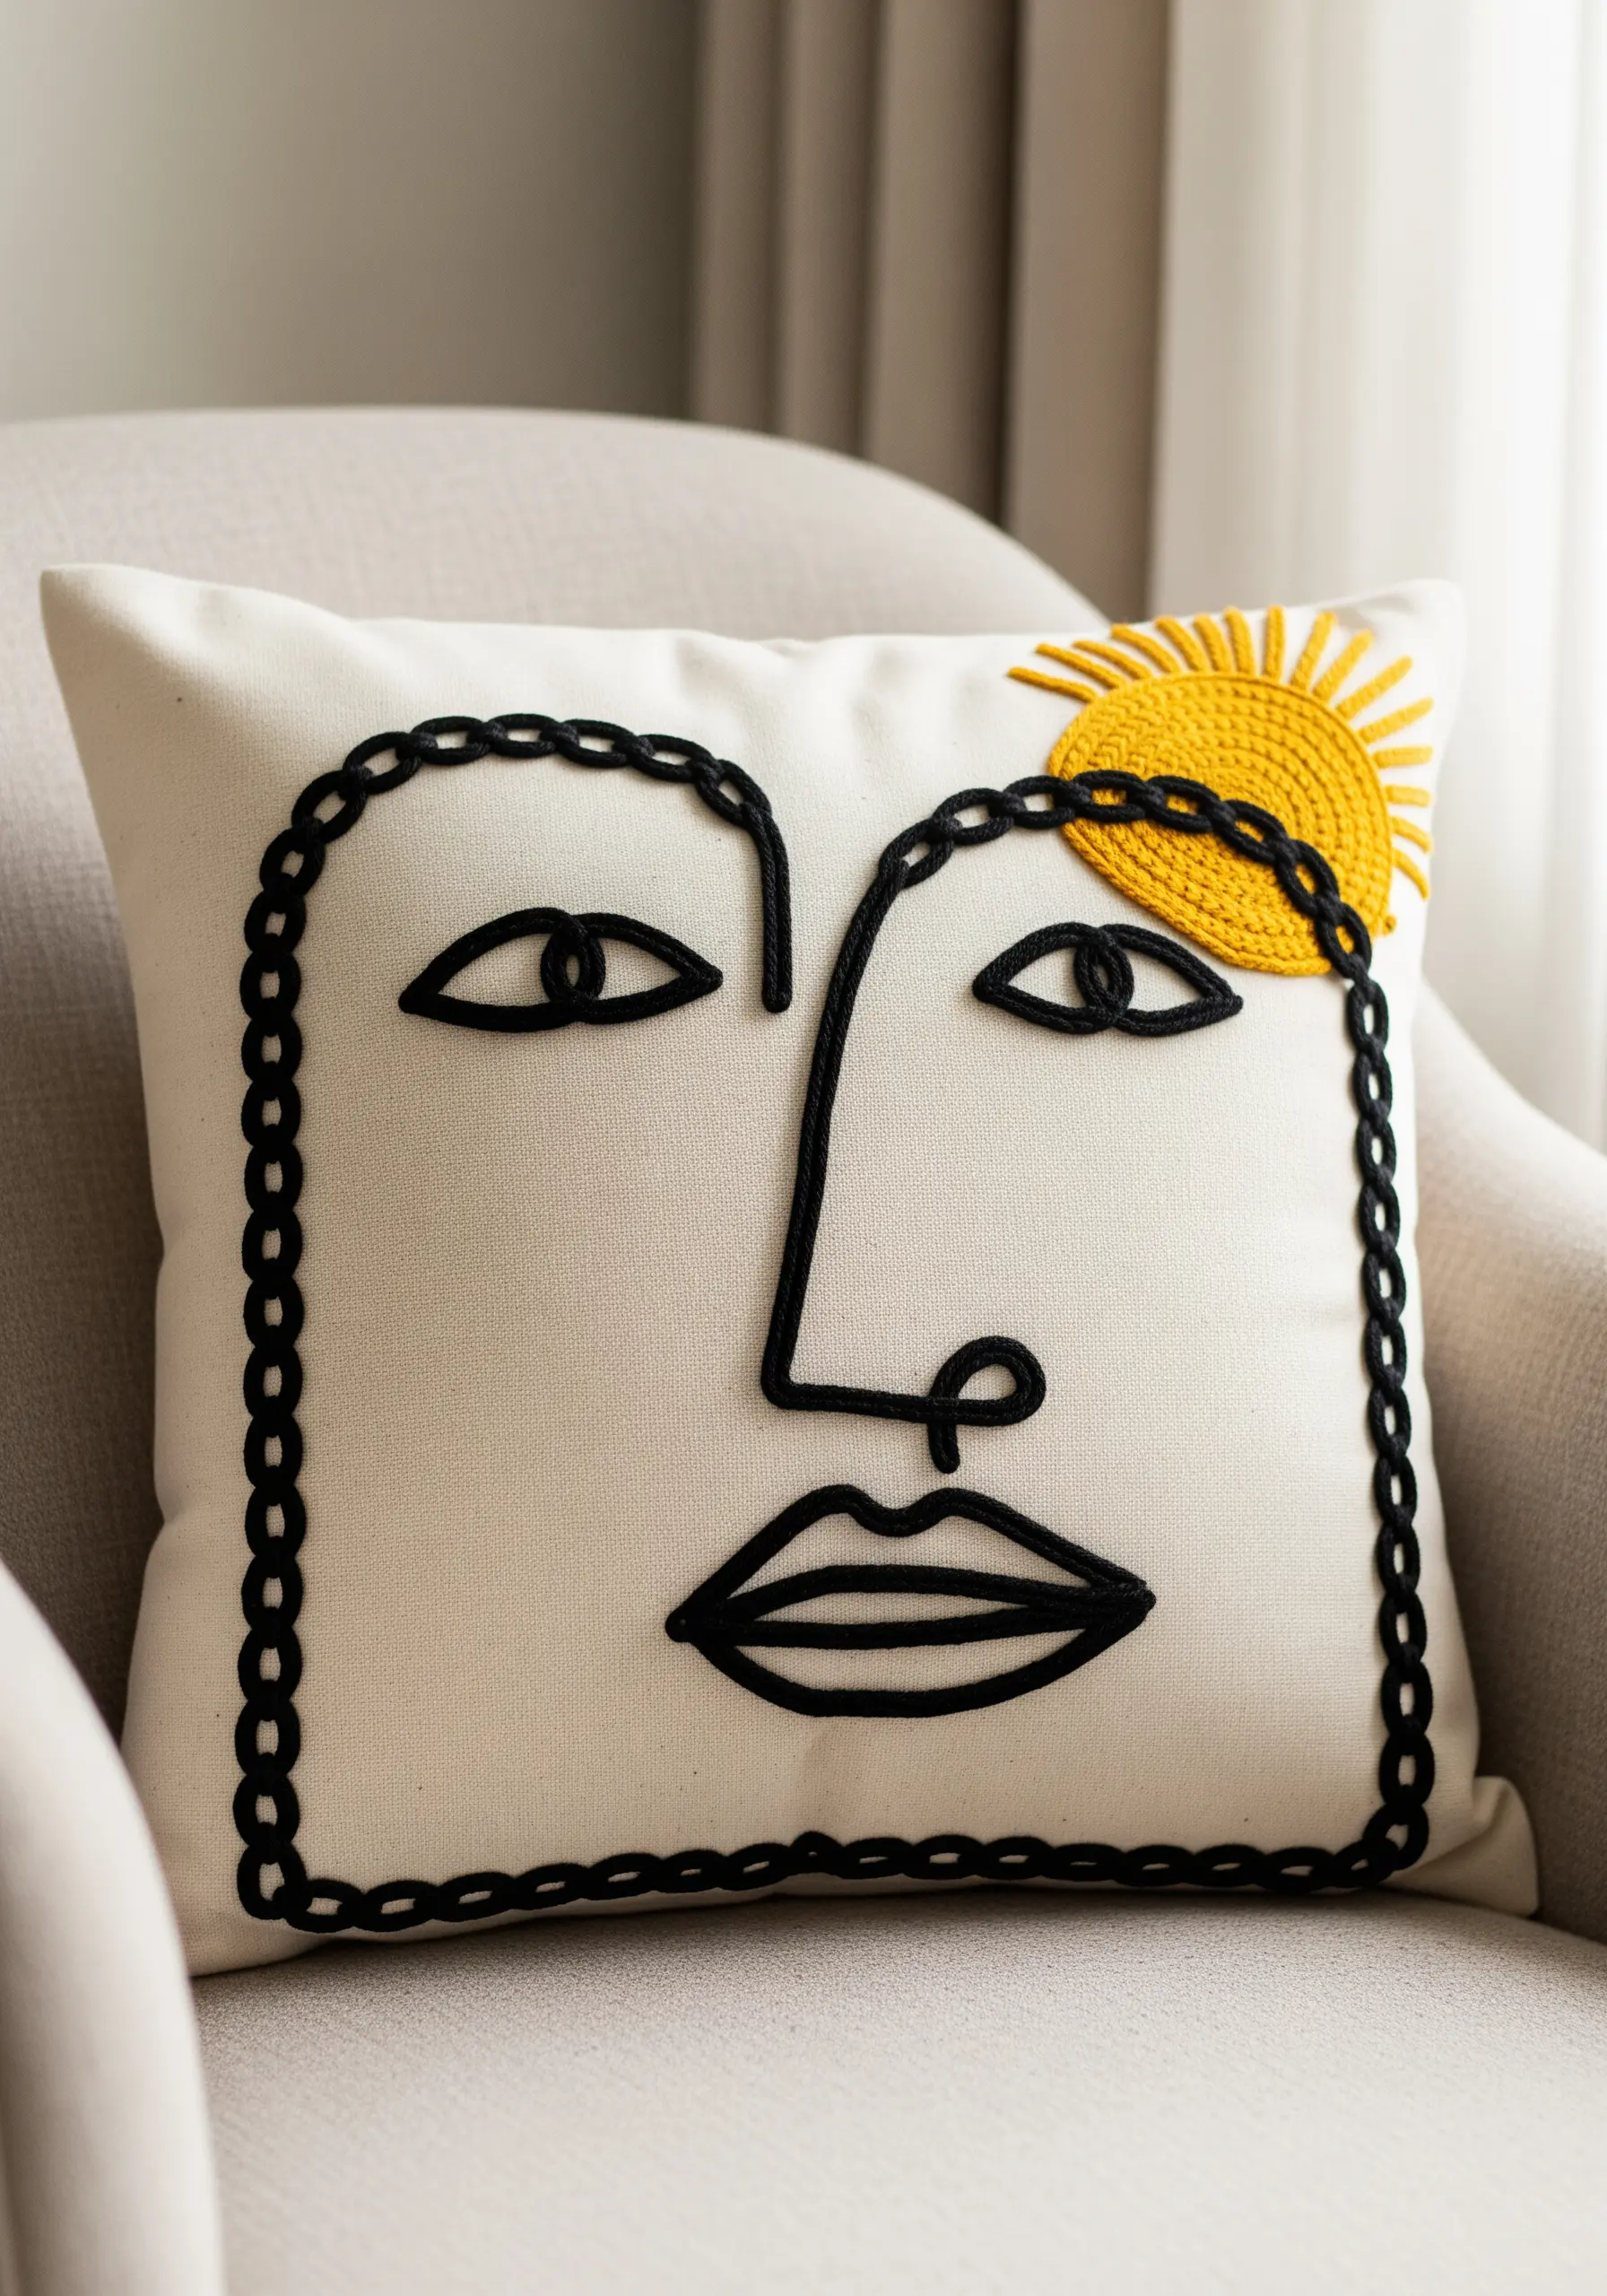
For bold, minimalist designs, swap your embroidery floss for a thick cord to create lines with graphic impact.
This technique, called couching, involves laying the cord along your design line and tacking it down with a thinner, matching thread every few millimeters.
The tacking stitches should be small and perpendicular to the cord, sinking into the fabric so they become nearly invisible.
This method produces a perfectly clean, raised line that is ideal for abstract faces, lettering, and continuous-line drawings.
6. Precision Star Charts on Dark Canvas
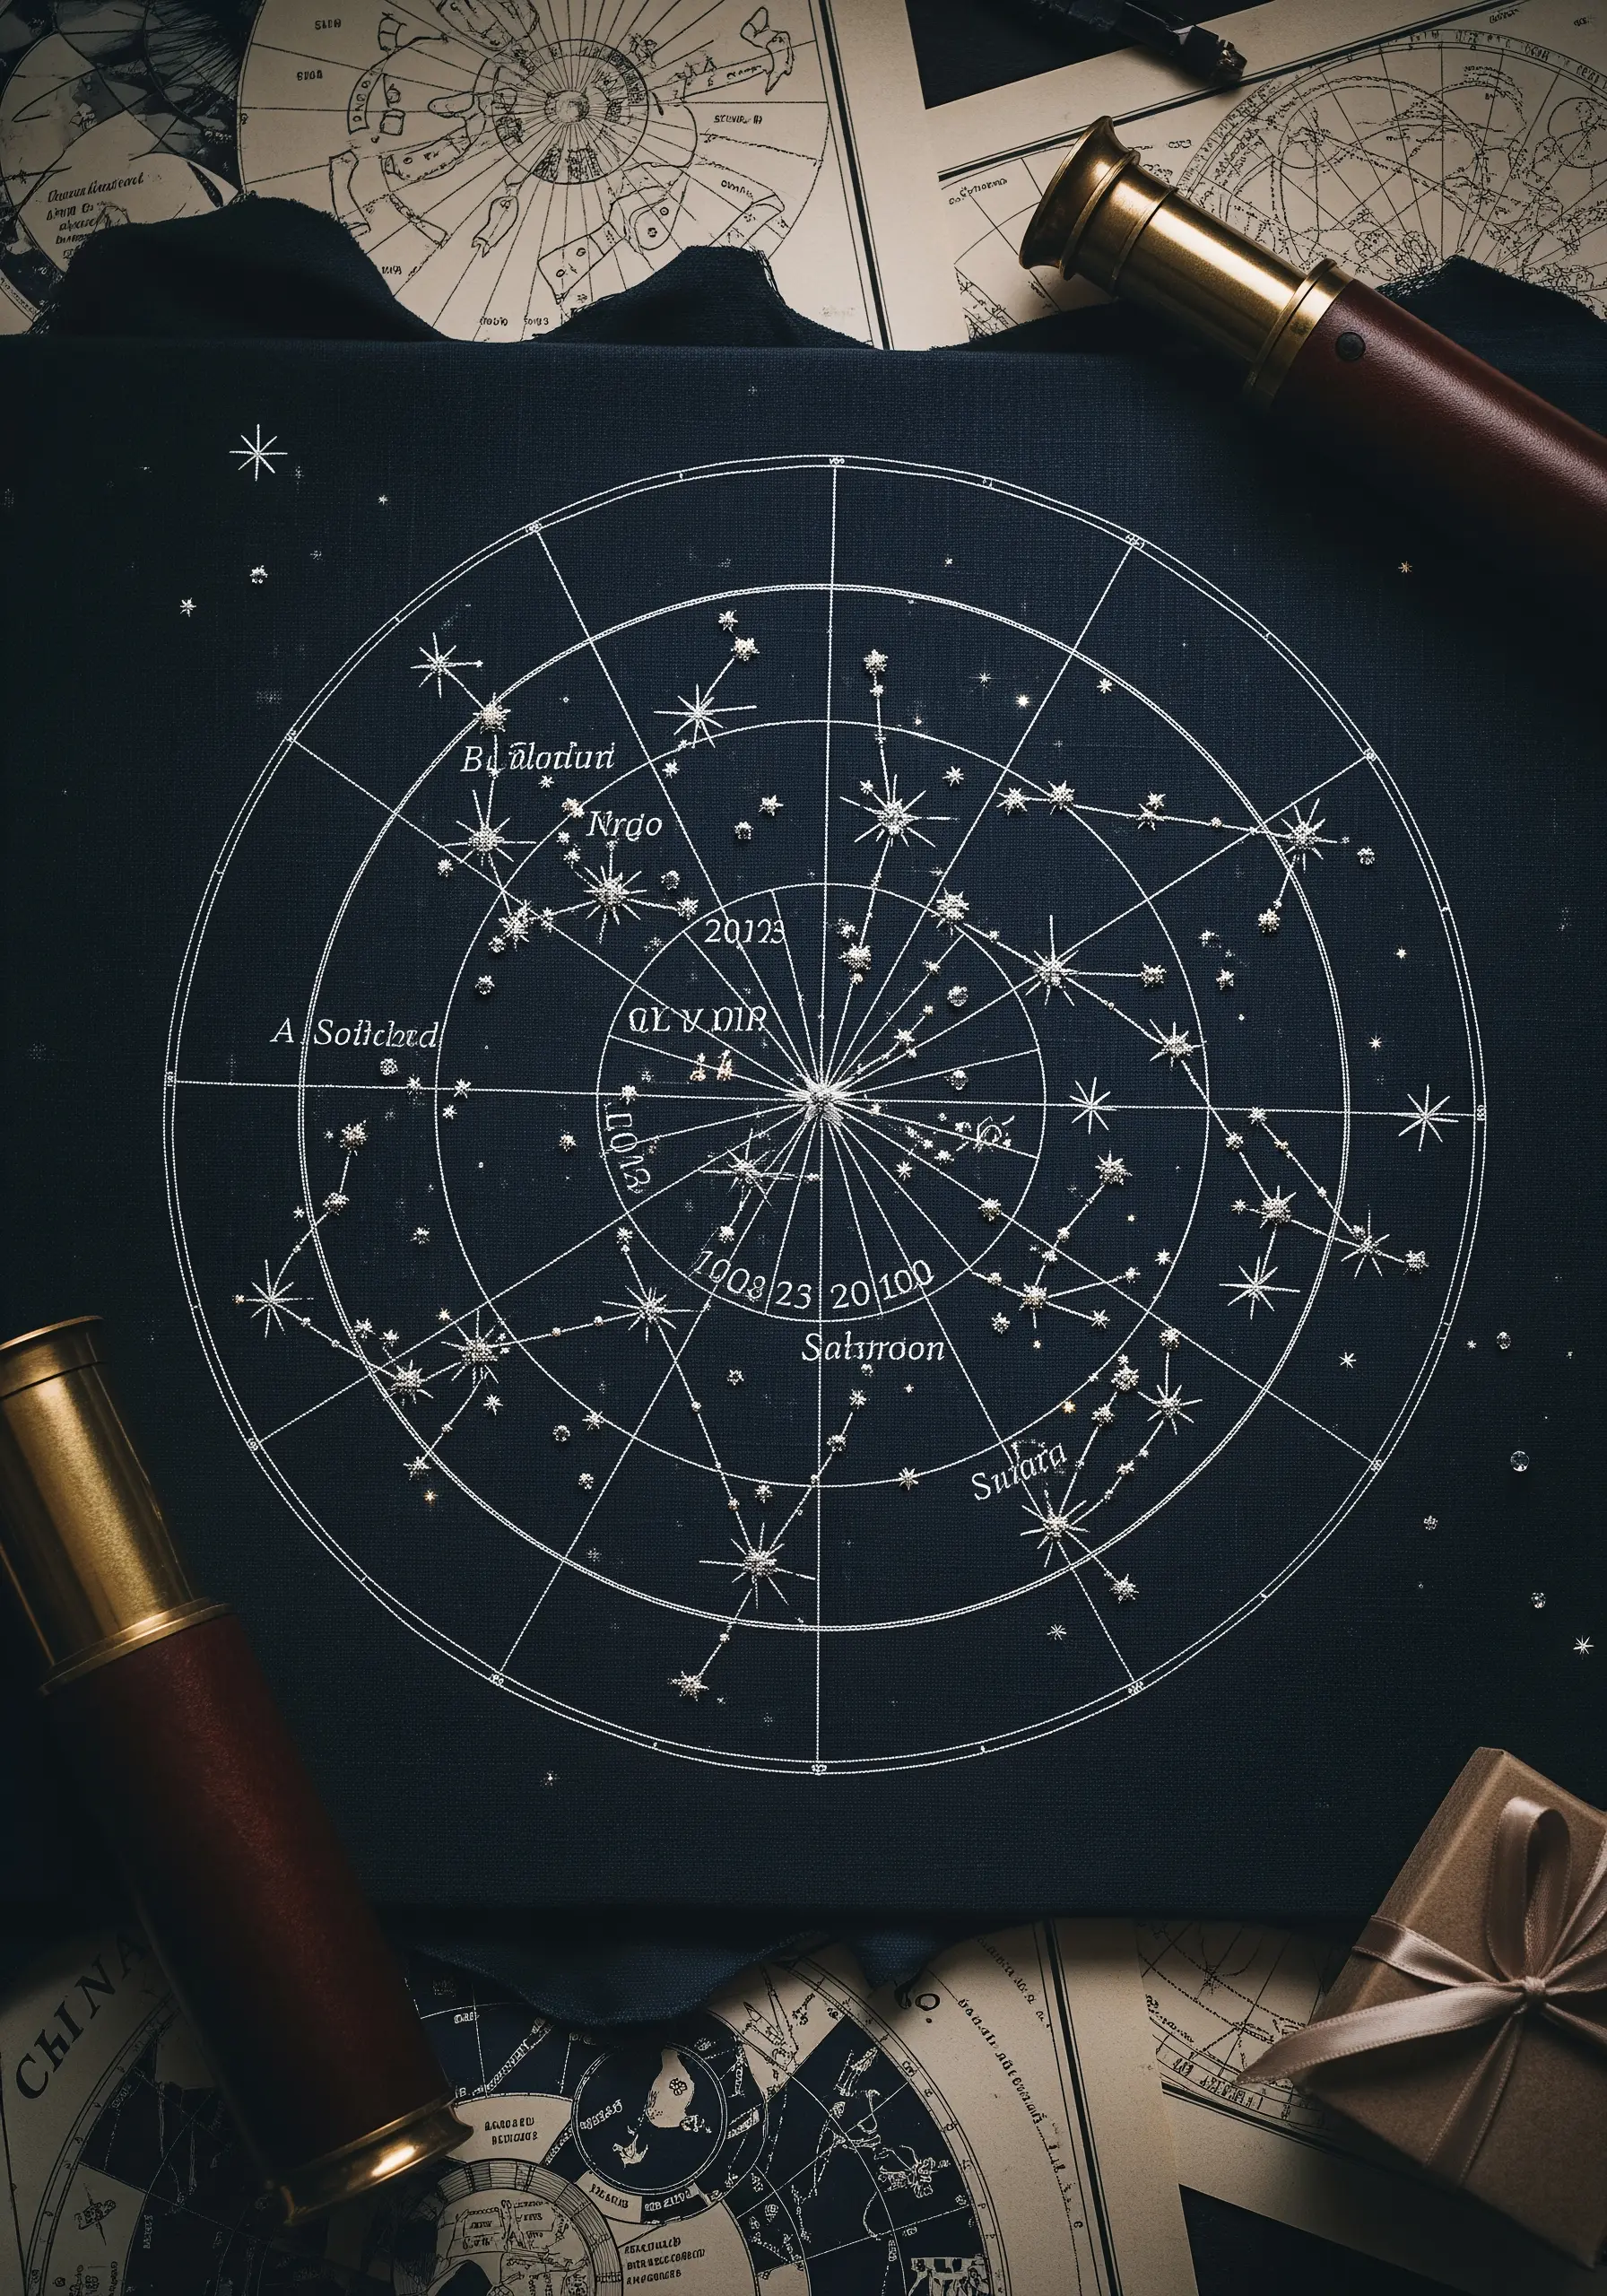
A dark background makes light threads pop, creating the perfect canvas for a celestial map gift.
Use a single strand of a bright white or metallic silver thread to ensure your constellation lines are crisp and delicate.
For the stars themselves, use a mix of tiny French knots and seed beads to create varied brightness and a subtle 3D texture.
Transfer your design using a white chalk pencil or a fine-tipped water-soluble pen, as graphite will be difficult to see and remove from dark fabric.
7. Abstract Forms with Coiled Fiber
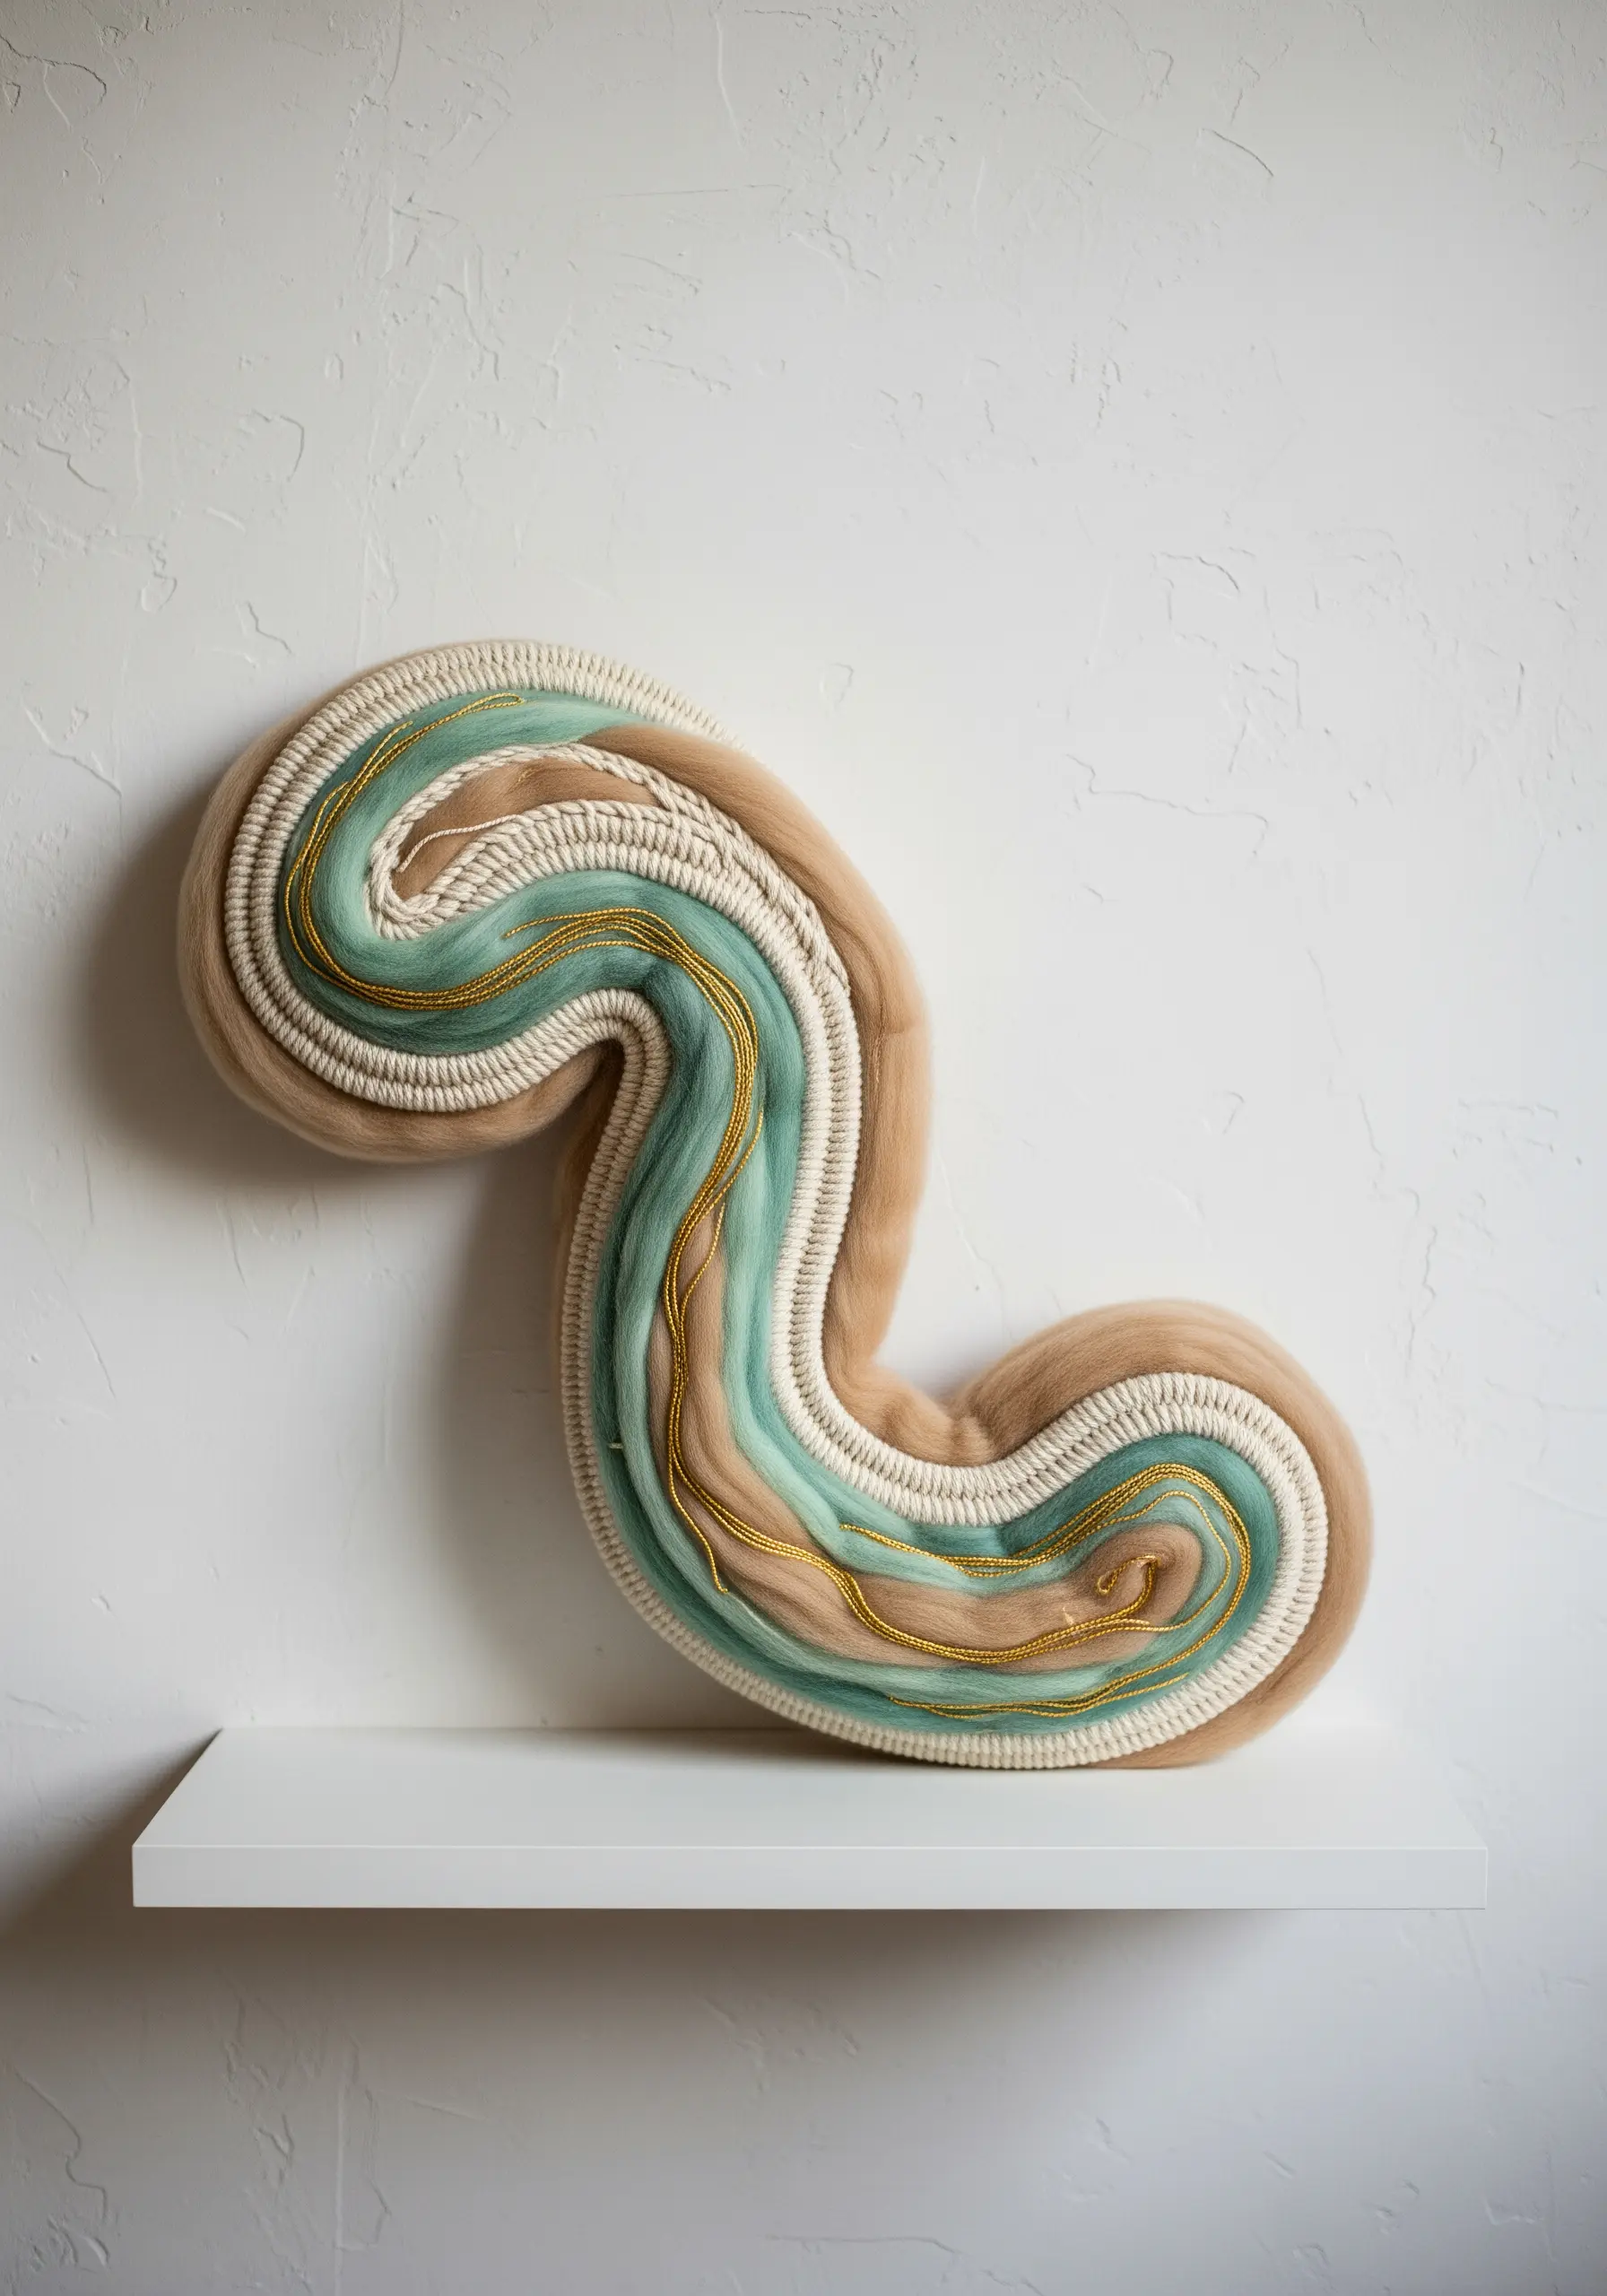
Create stunning, sculptural wall art by coiling and wrapping fibers instead of stitching through fabric.
Use a thick rope as your core material to give the sculpture structure and substance.
Tightly wrap this core with wool roving, yarn, or even fabric strips, changing colors to create a flowing, organic pattern.
Incorporate a fine metallic thread into your wrapping for a subtle line of light that catches the eye and adds a touch of modern elegance.
8. Delicate Herbal Motifs for Functional Art
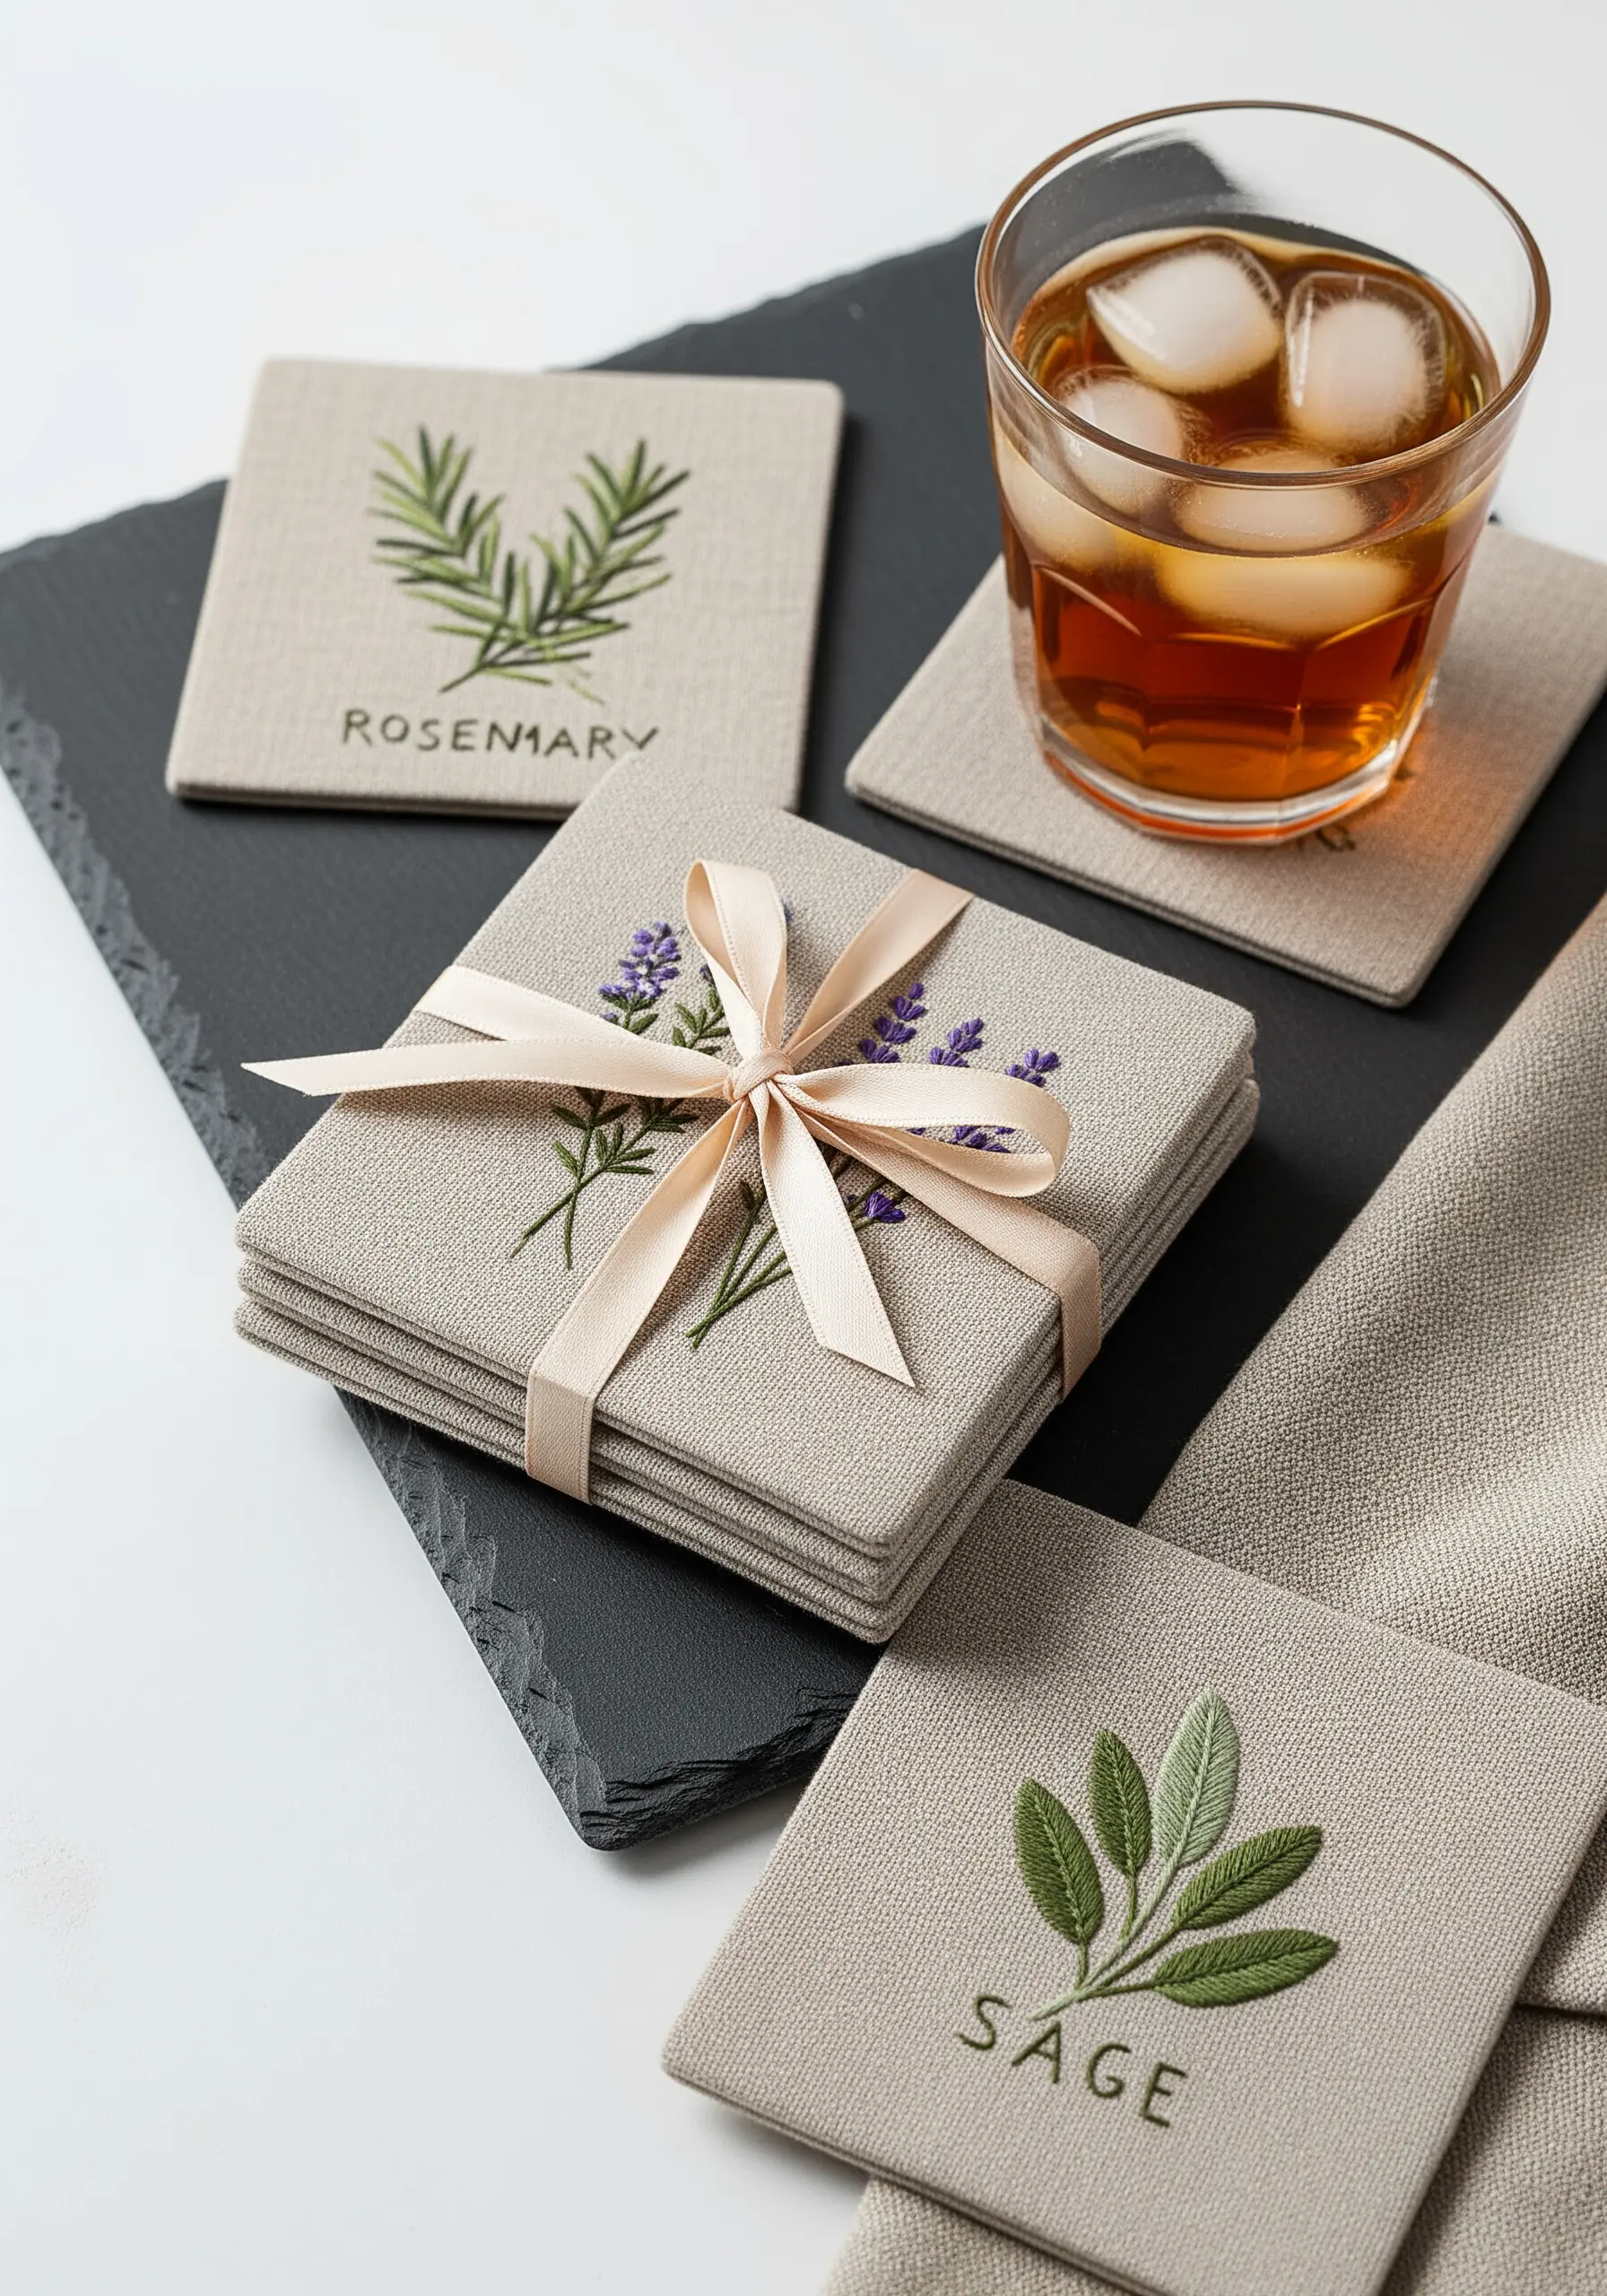
Transform simple linen coasters into a thoughtful, personalized gift with minimalist botanical embroidery.
Choose a durable, tightly woven linen that can withstand use and potential washing.
Use simple, elegant stitches: a stem stitch for the stalks, lazy daisy stitches for leaves, and French knots for tiny lavender buds.
The beauty of this project lies in its restraint; a single, well-executed sprig is more sophisticated than a dense, complex design.
9. Architectural Portraits in Thread
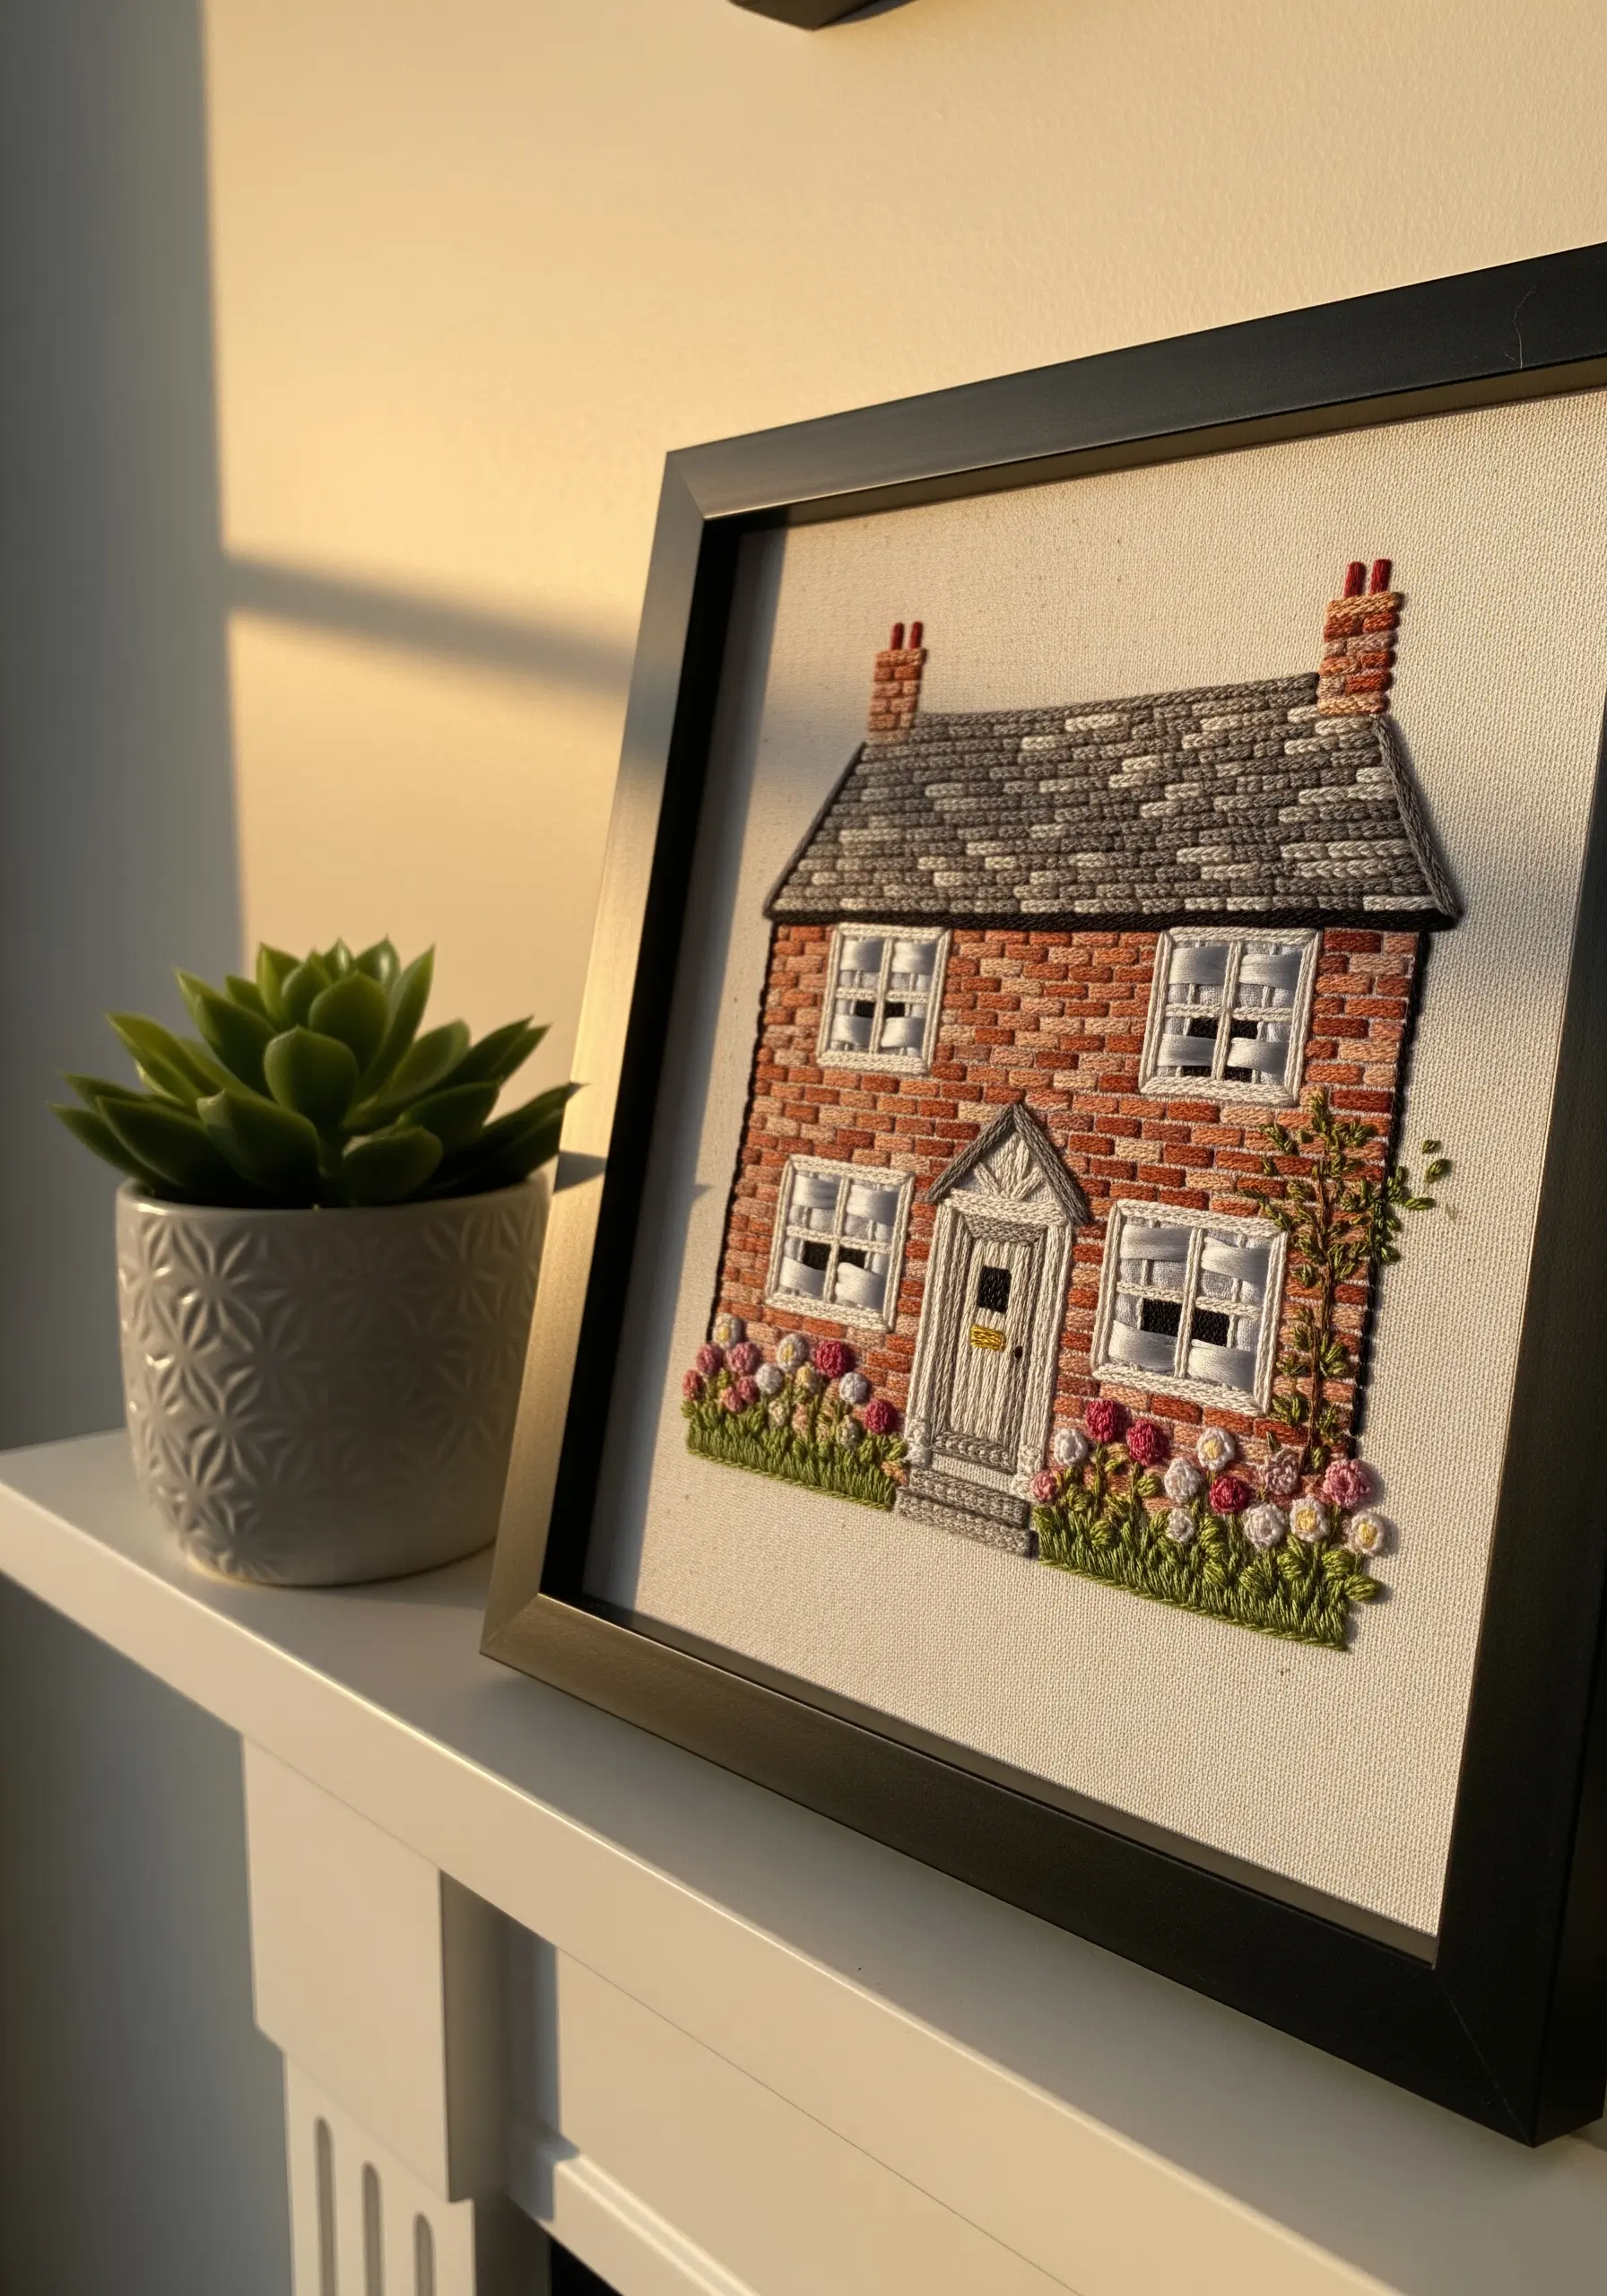
Capture the character of a beloved home by translating its architectural details into specific stitch textures.
Use single-thread backstitch to define sharp lines like window frames, gutters, and door panels.
Fill in larger areas like brickwork or siding with directional satin stitch; changing the angle of your stitches can mimic light and shadow.
For varied textures like roof shingles or stone, use a brick stitch or a pattern of dense French knots to create a tactile, realistic surface.
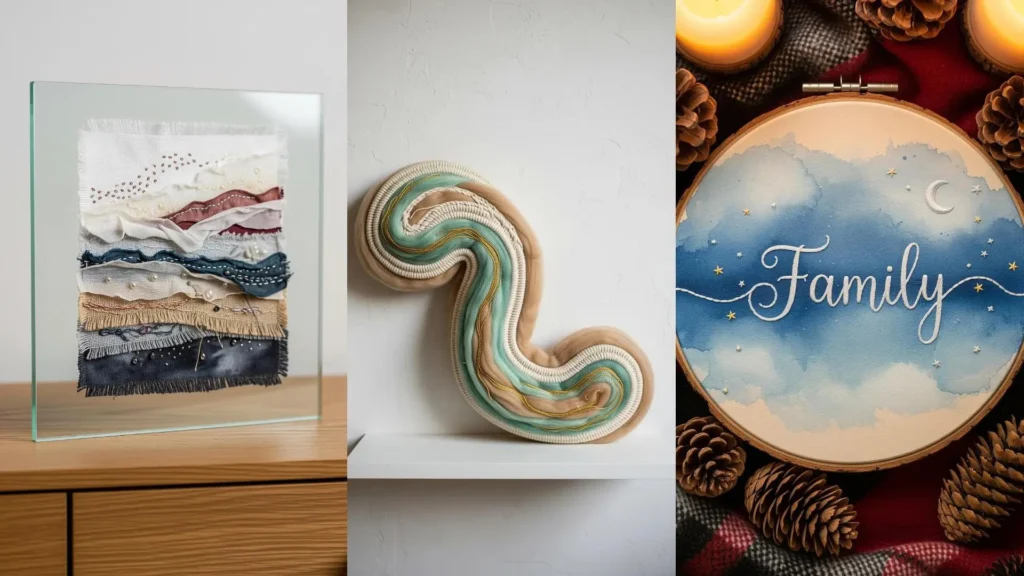
10. Blending Watercolor and Stitches for Ethereal Effects
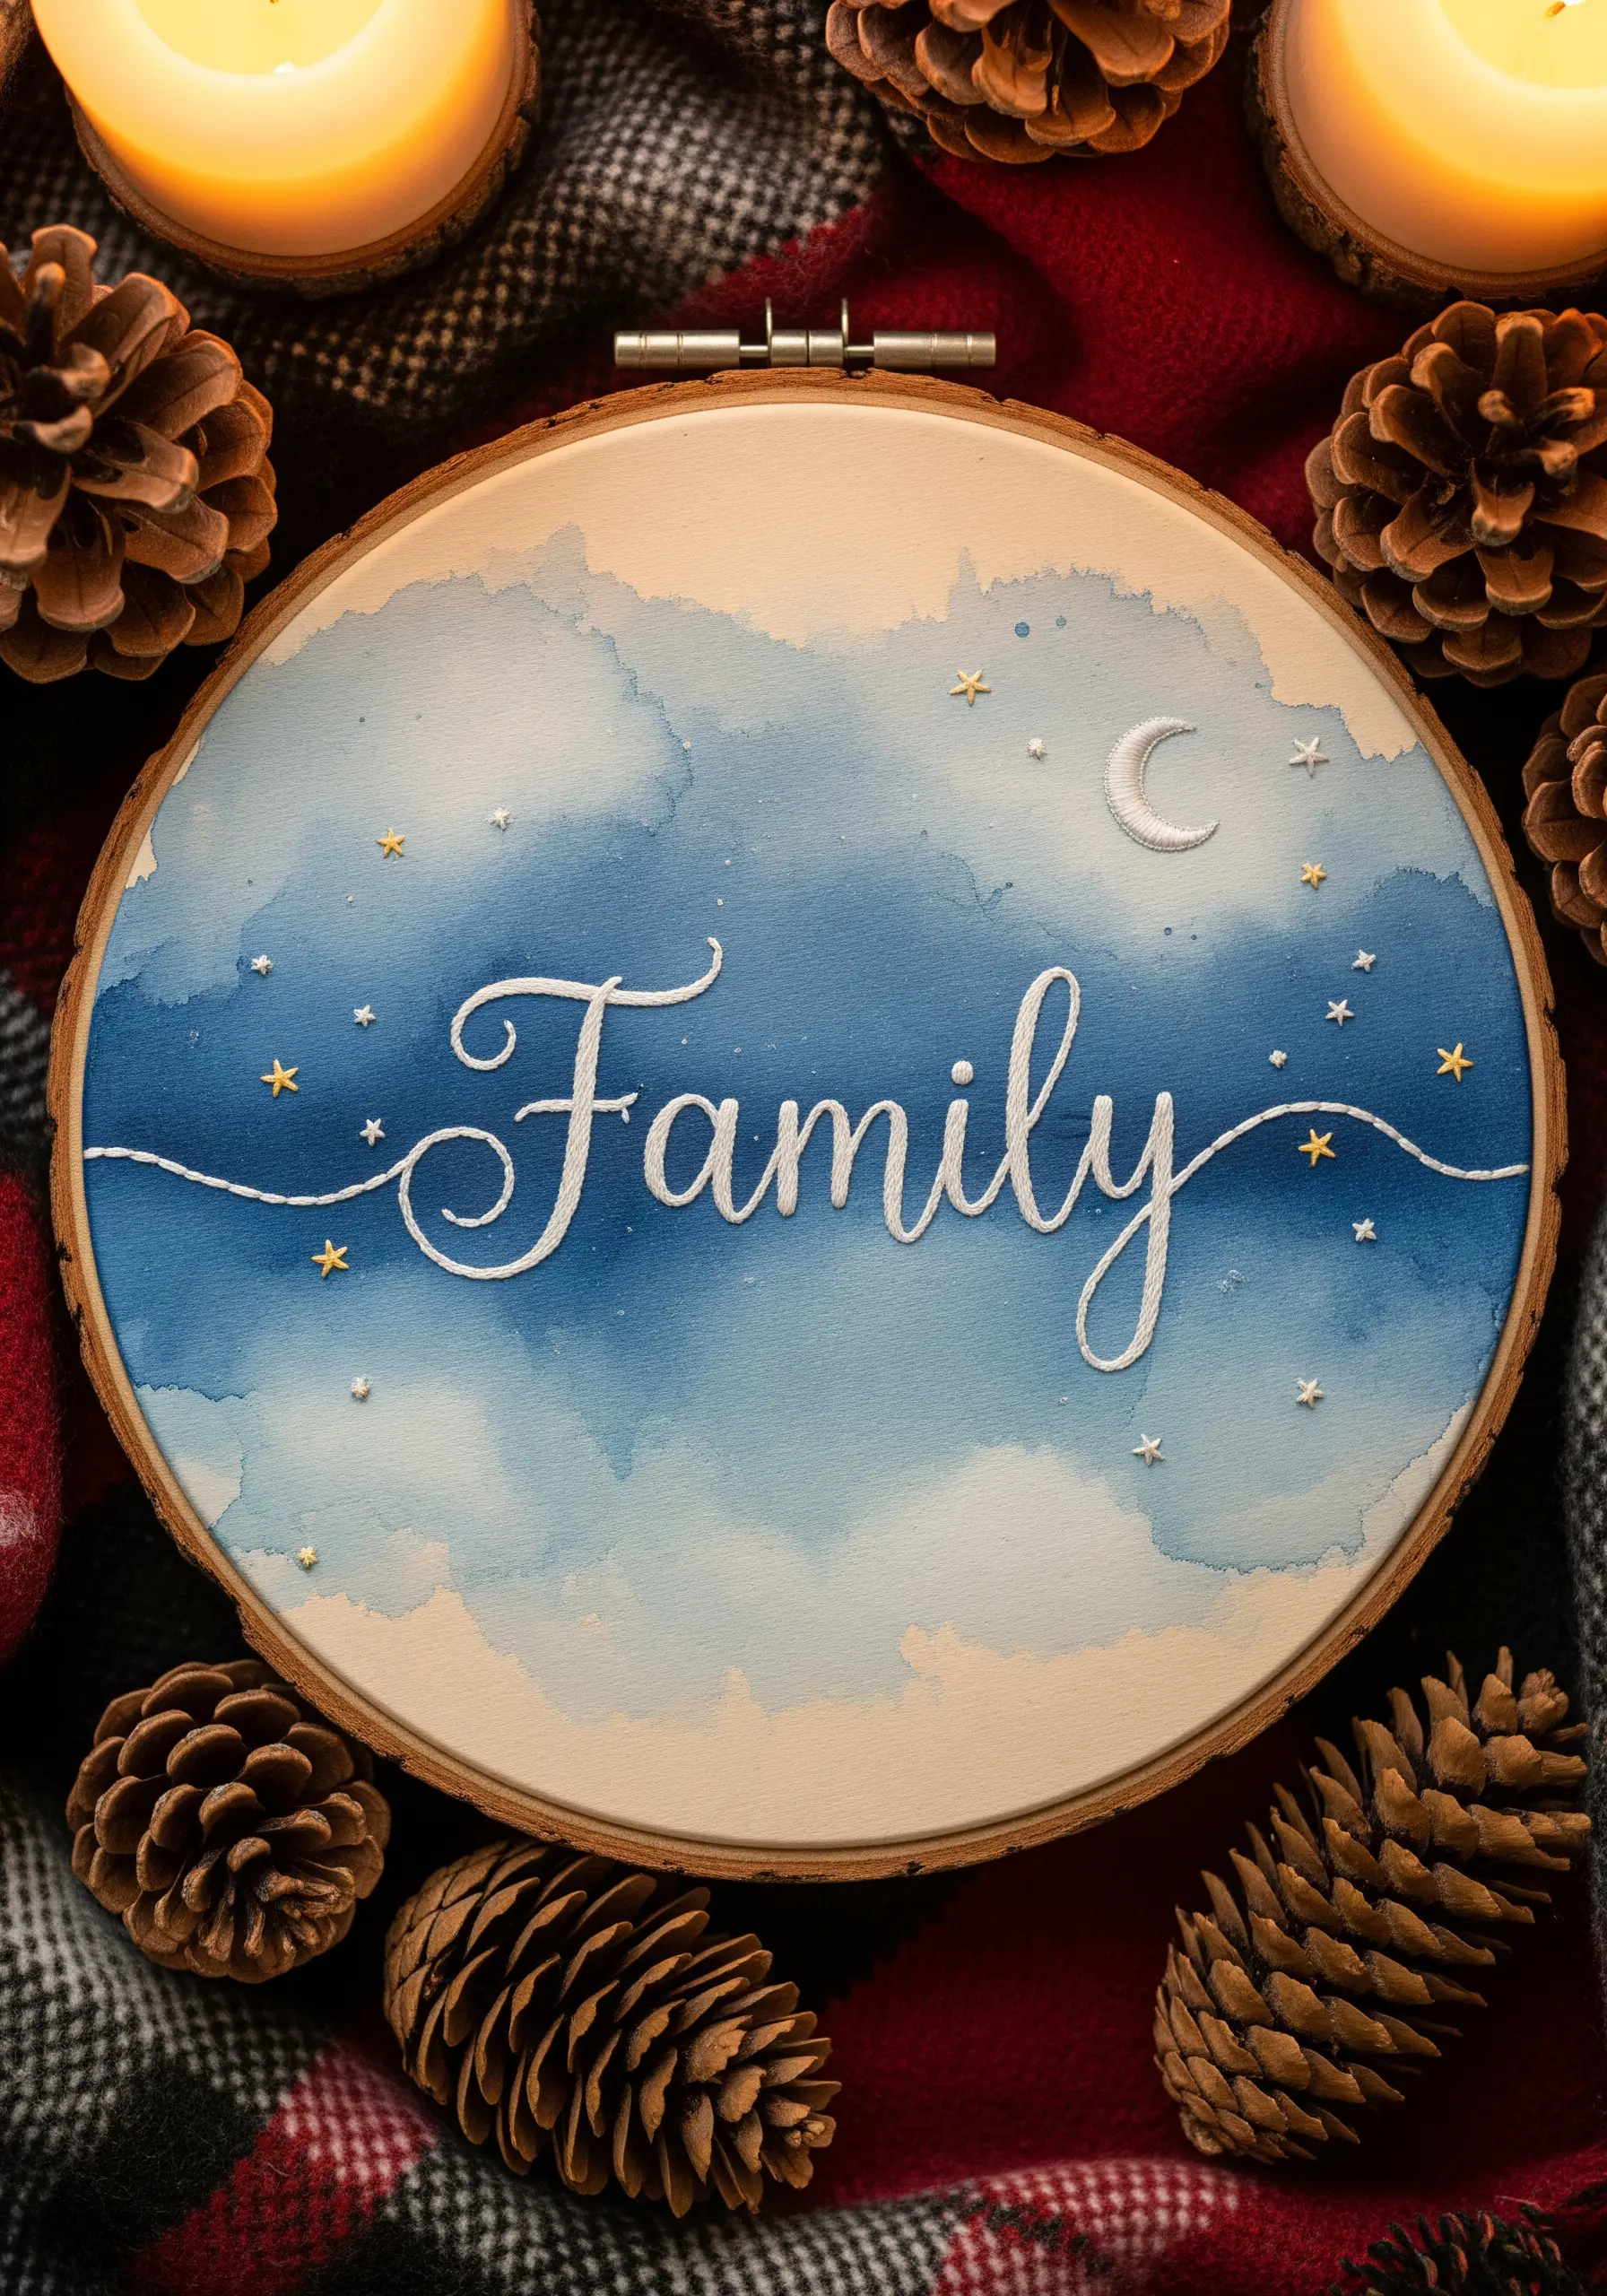
Combine the softness of paint with the sharpness of thread to create a gift with unique depth and an artistic feel.
Begin by stretching your fabric tightly in the hoop, then apply a light watercolor wash directly onto the material, letting colors bleed together for a dreamy effect.
Allow the fabric to dry completely before you begin stitching. This is a crucial step to prevent thread discoloration and fabric warping.
Use a crisp backstitch or whipped backstitch for lettering and details, creating a sharp focal point that stands out against the soft, painted background.
11. Abstract Collages with Fabric and Beads
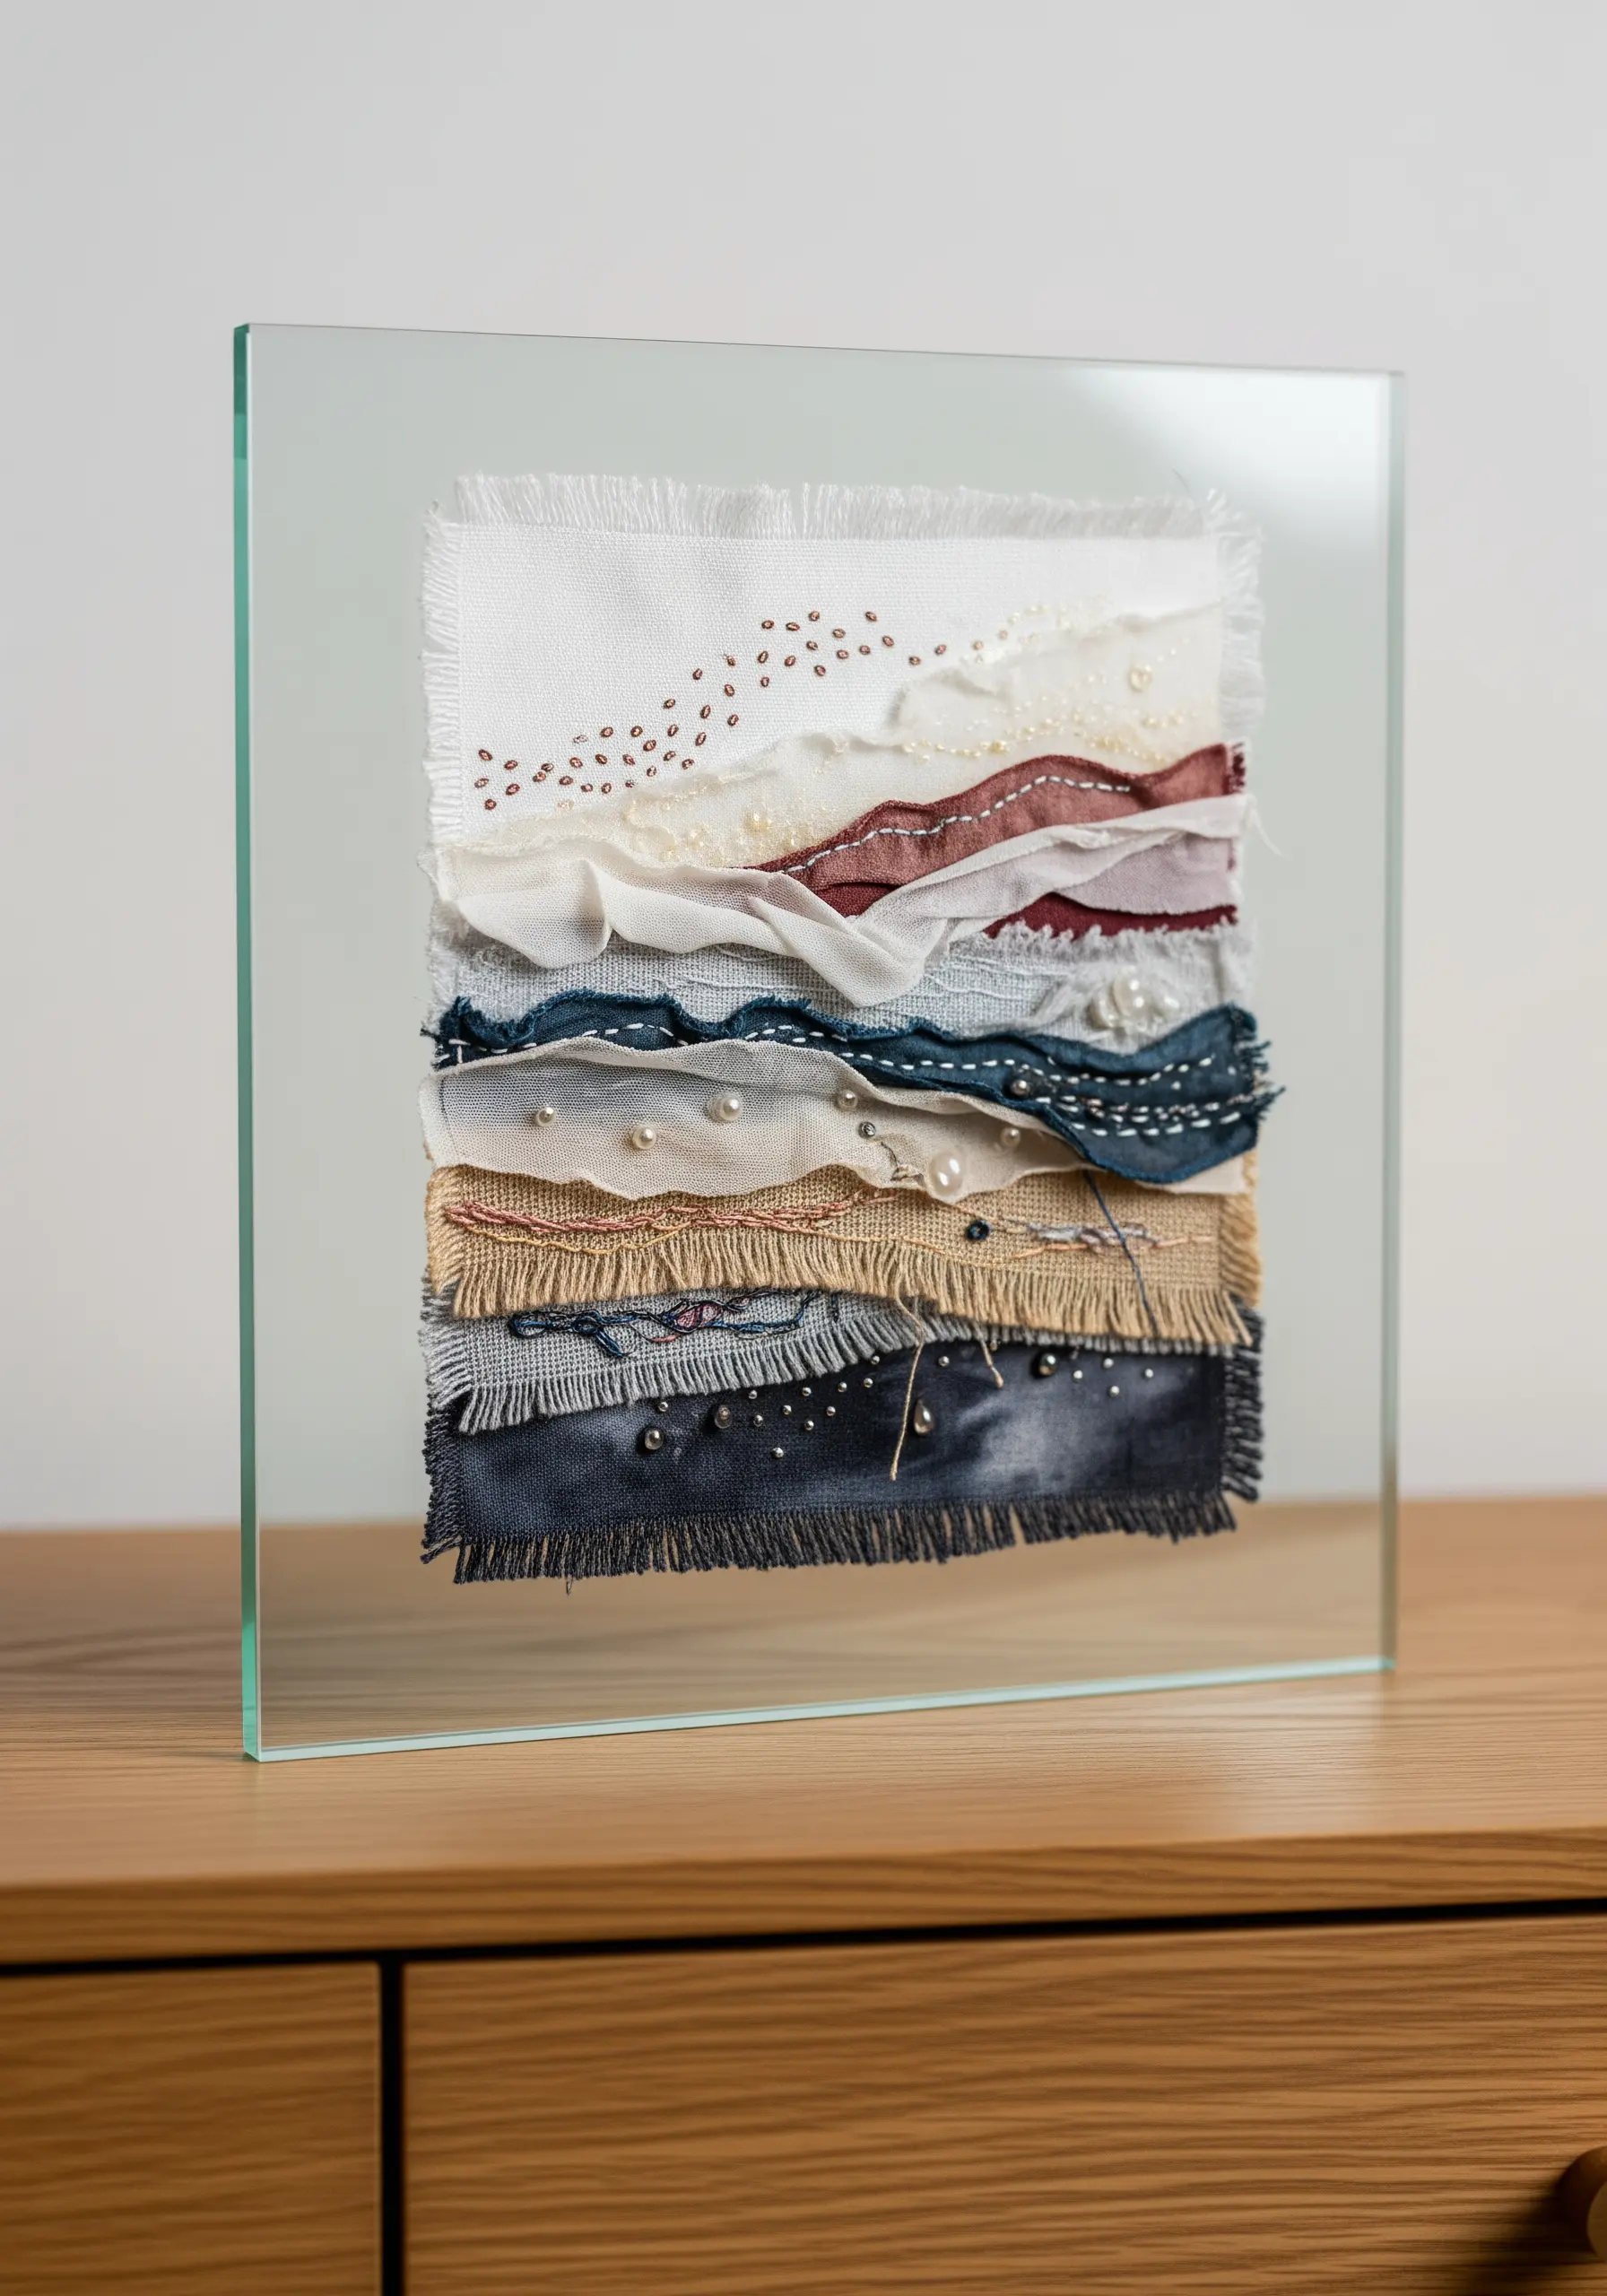
Create a stunning piece of mixed-media textile art by layering scraps of fabric to build a composition rich with texture and history.
Choose fabrics with different weights and weaves, such as raw linen, frayed burlap, and smooth cotton, letting the raw edges show.
Arrange the scraps in an overlapping, wave-like pattern and secure them with simple, spaced-out running stitches.
Add clusters of seed beads, sequins, or tiny pearls to catch the light and provide a subtle, elegant contrast to the matte, organic fabrics.
12. Heirloom Monograms with Raised Satin Stitch
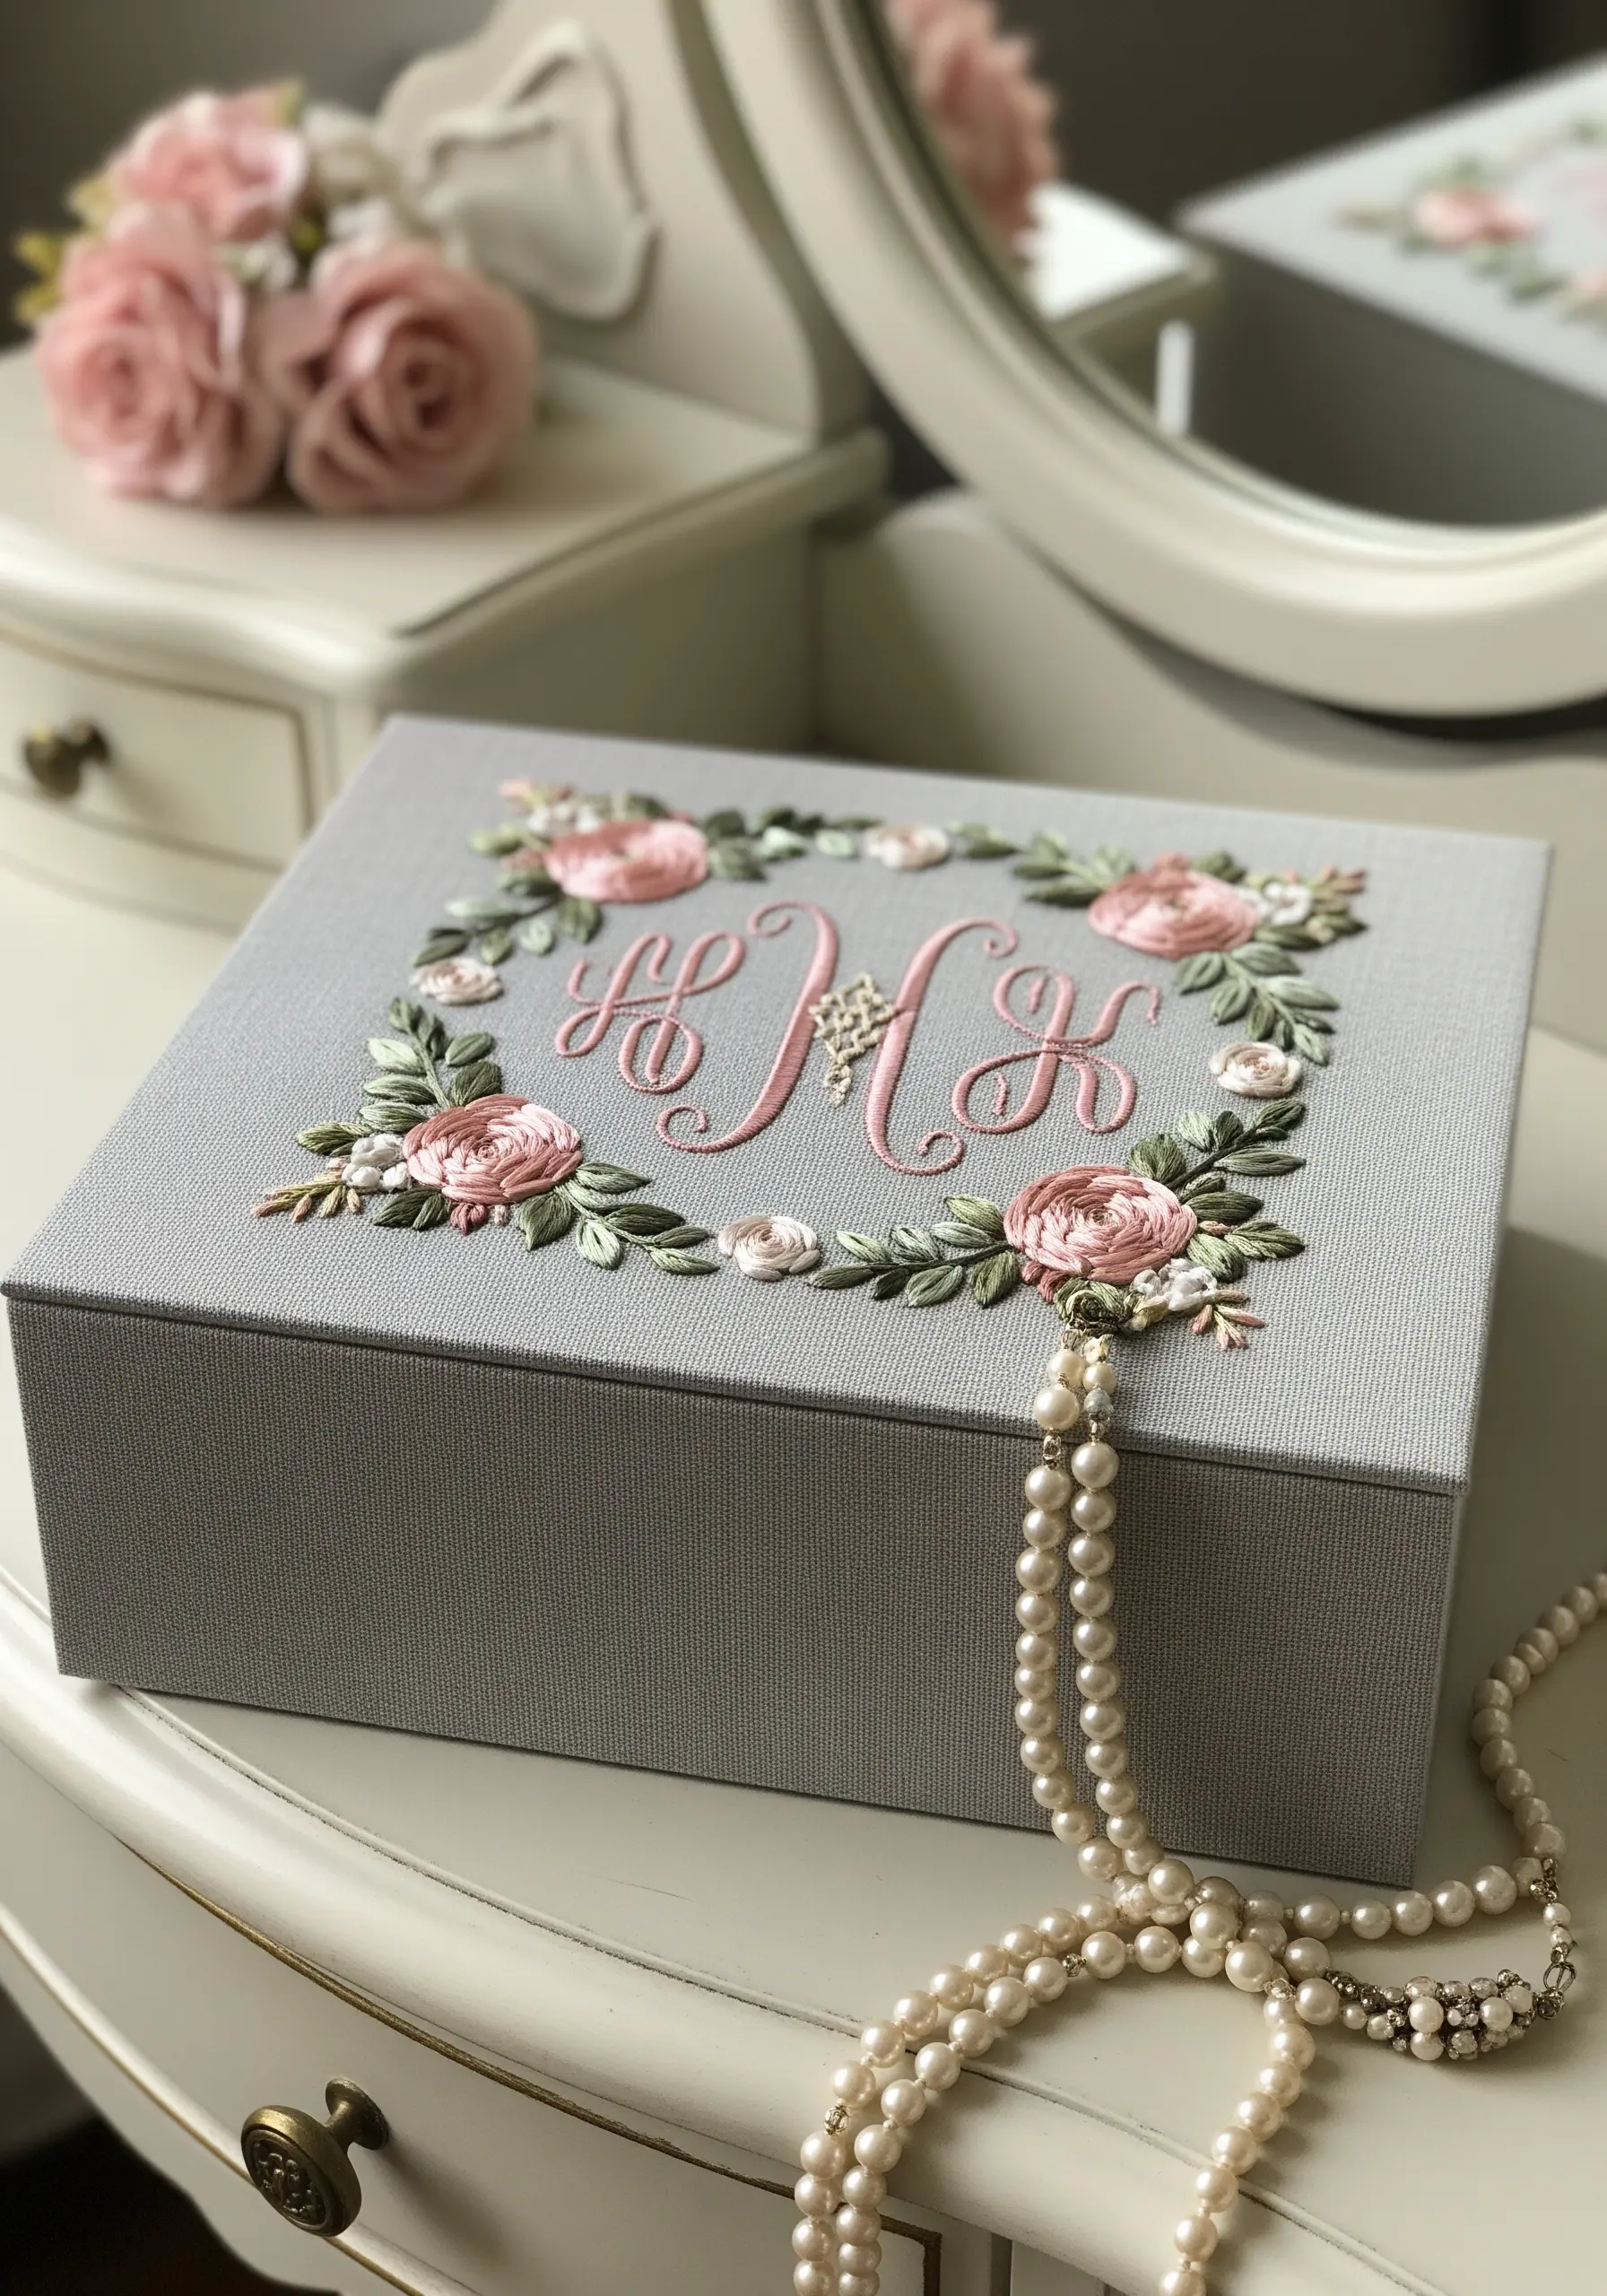
To give your embroidered lettering a luxurious, three-dimensional quality, use a padding technique before you lay down your final stitches.
First, fill the shape of the letters with a foundation of small, horizontal seed stitches or a grid of running stitches.
Then, work your final satin stitch vertically over this padded base. The underlying stitches will lift the top layer, creating a beautiful, raised effect.
This technique makes Heirloom Monograms look incredibly professional and turns a simple box into a treasured keepsake.
13. Graphic Rhythm with Concentric Running Stitches

You don’t need complex stitches to create a visually striking design; precision and repetition are powerful tools.
Use a compass and a water-soluble marker to draw perfect concentric circles as your guide on the tote bag.
Stitch along these lines with a simple running stitch, focusing on keeping your stitch length and the spaces between them perfectly consistent.
The modern, hypnotic effect of this design comes entirely from its clean execution and the interplay of overlapping colors.
14. Illuminating Stitches on a Lampshade
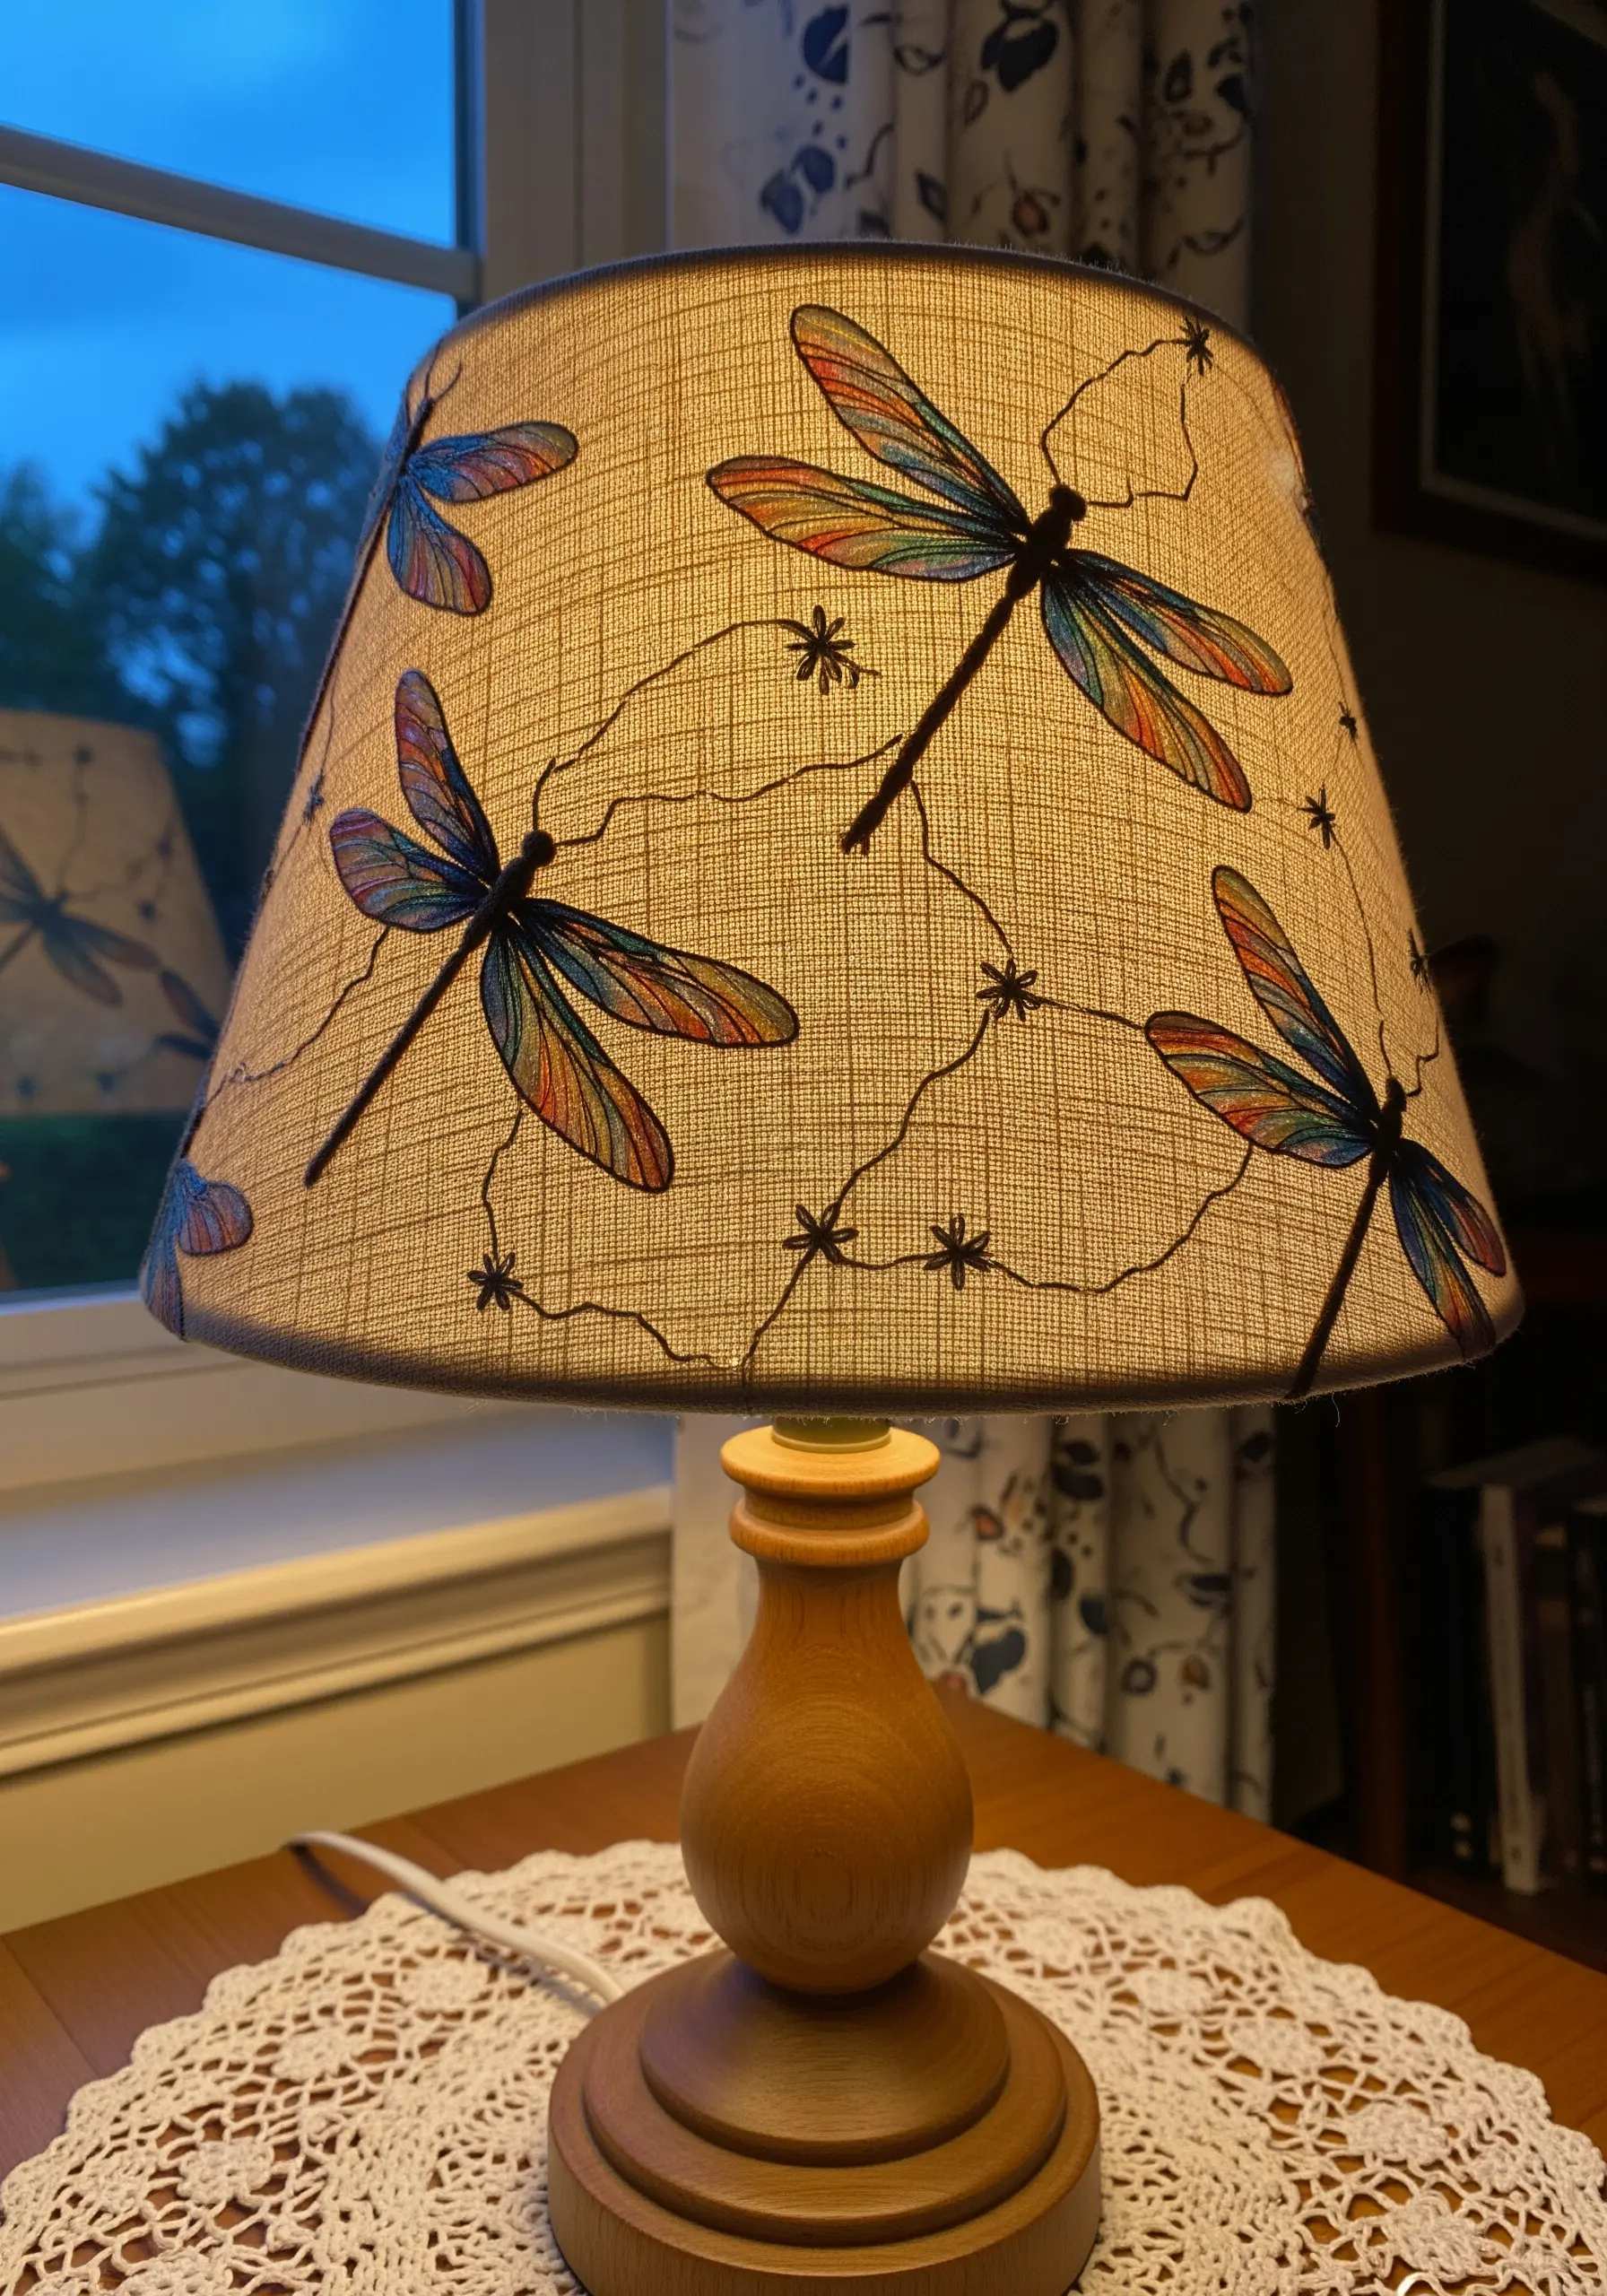
Embroidering on a lampshade turns a functional object into a piece of art that interacts with light.
Choose a fabric lampshade made from linen or burlap that can handle a needle and thread. If the shade is rigid, you can embroider on a separate fabric panel and glue it on.
For elements like dragonfly wings, use open, airy stitches like the seed stitch or detached chain stitch with a single strand of floss.
These less dense stitches allow light to filter through, making the embroidered motifs appear to glow from within when the lamp is on.
15. Storytelling with Appliqué and Quilting
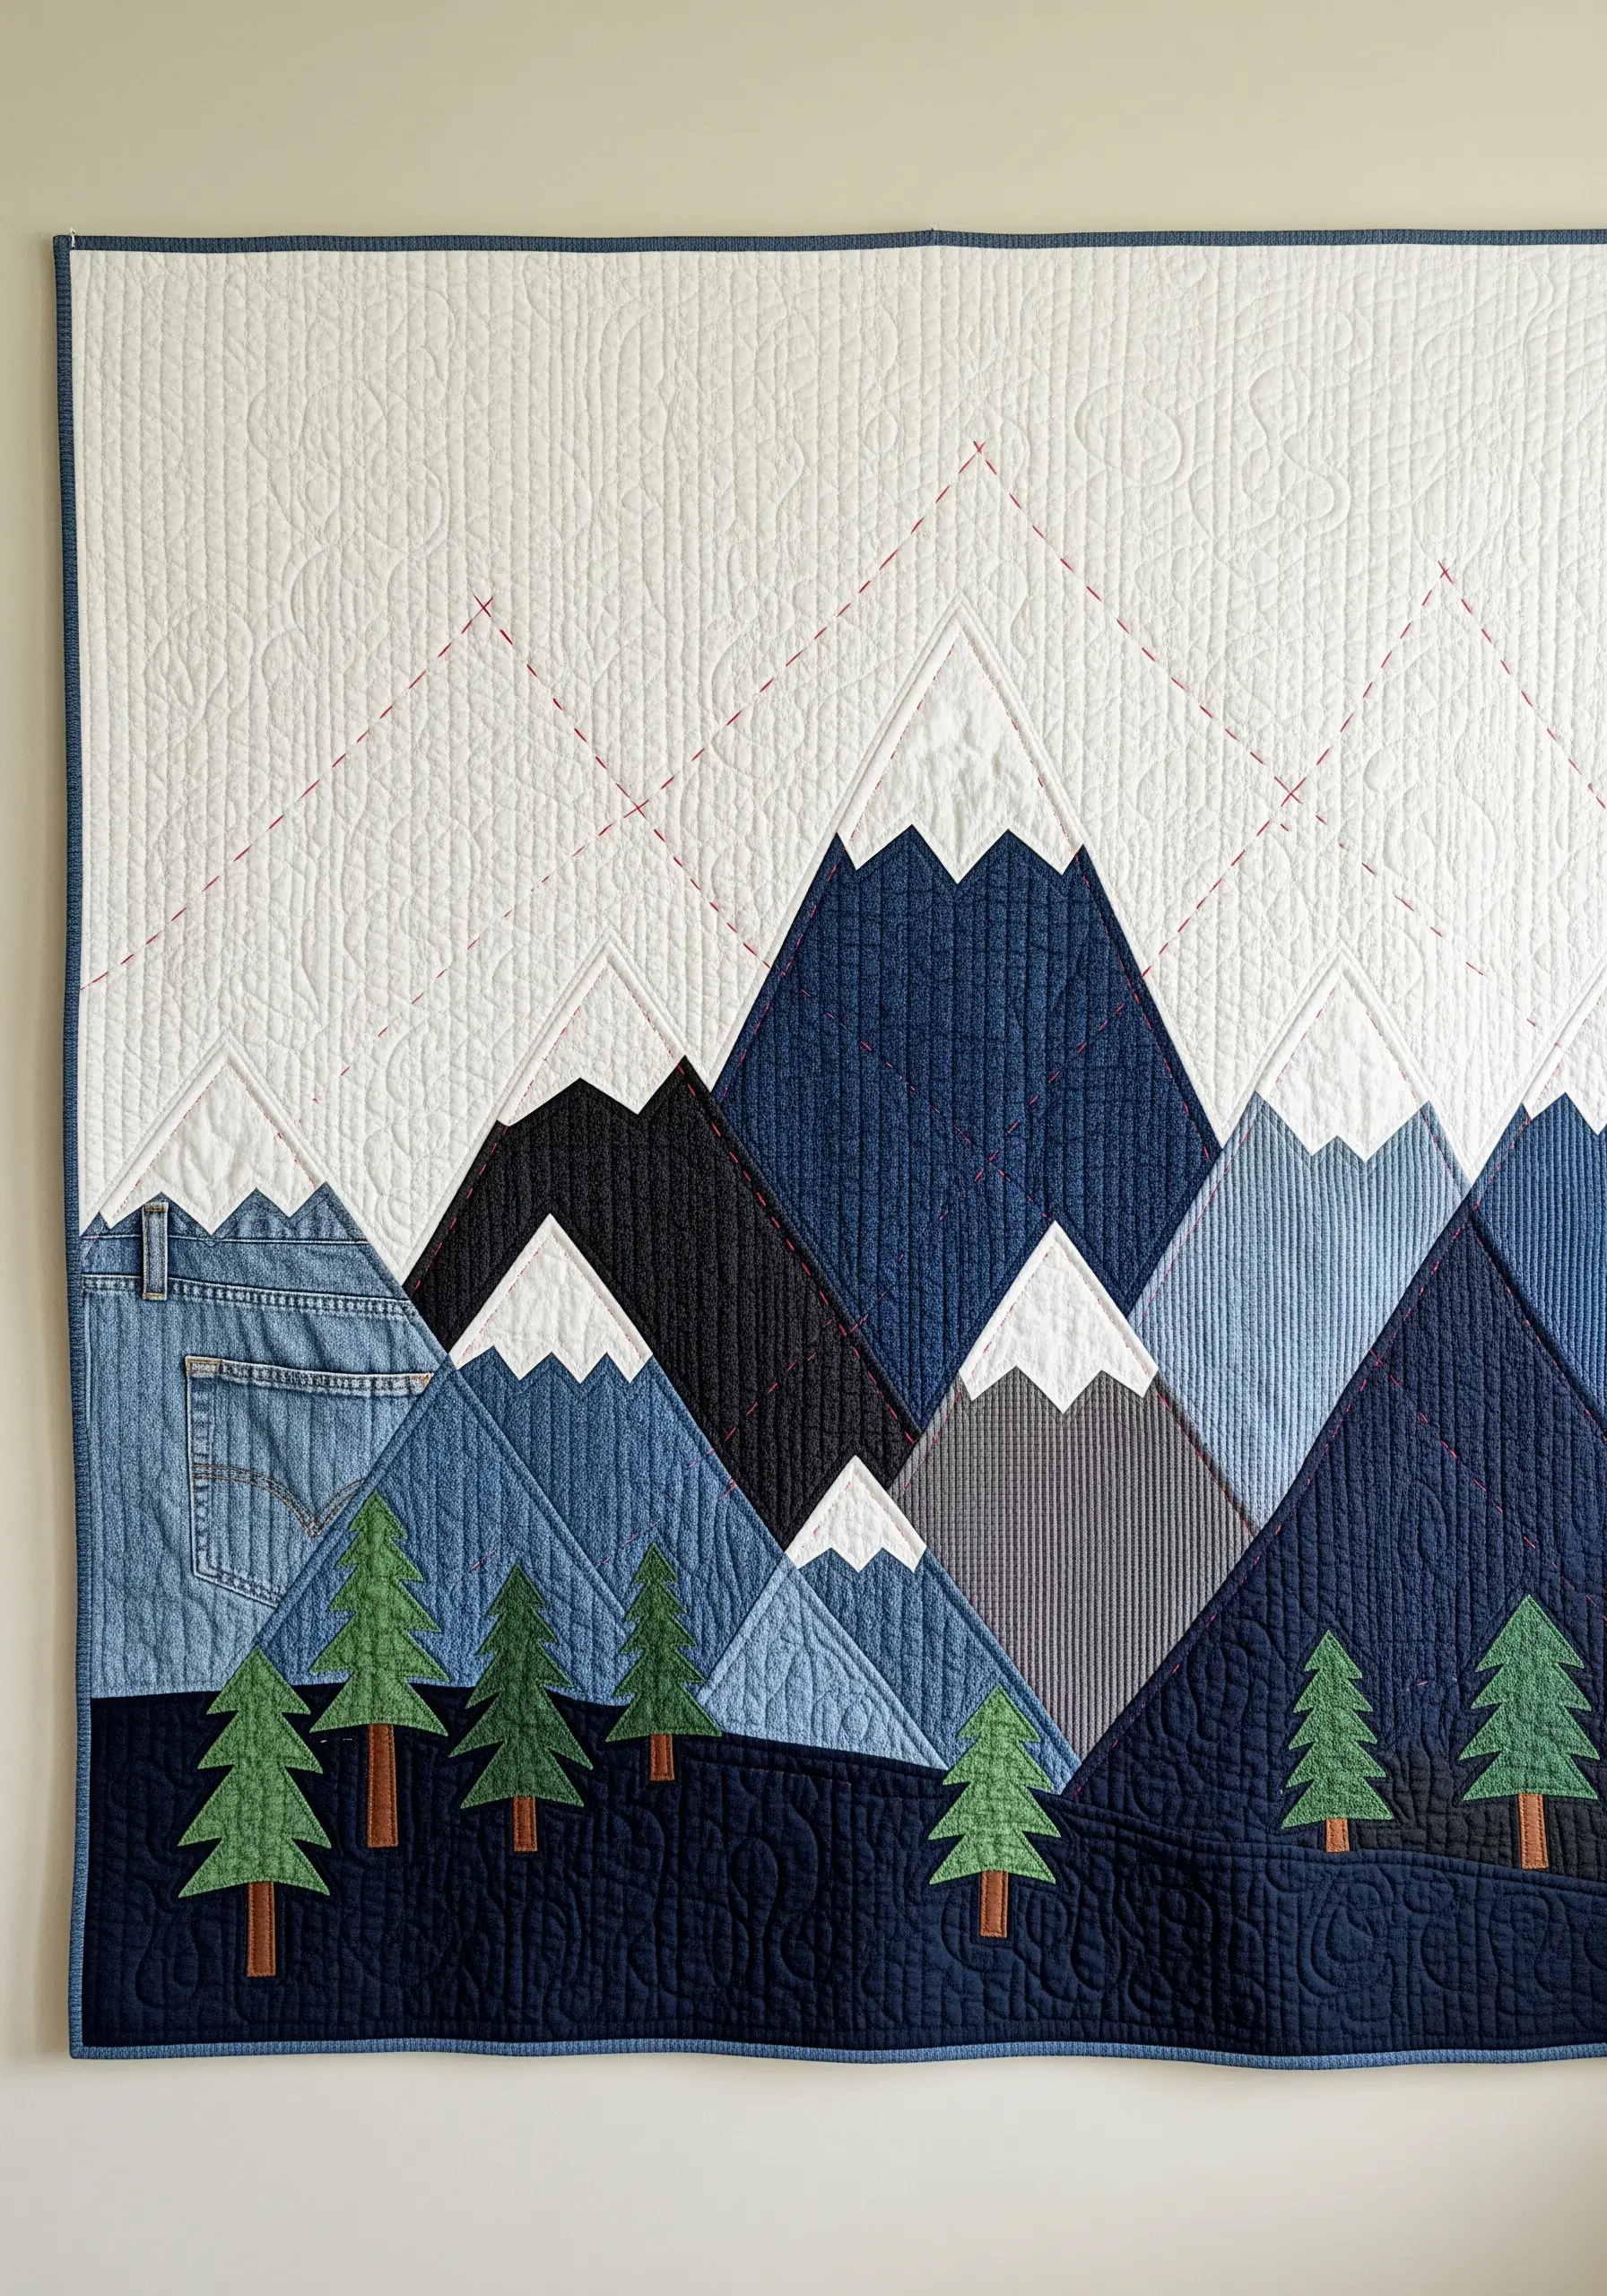
Combine fabric appliqué and simple quilting to build a textured landscape rich with personal meaning, perfect for a wall hanging.
Cut your mountain shapes from fabrics with varied textures, like old denim, corduroy, and patterned cotton, to add instant visual interest.
Arrange your fabric pieces on a backing and stitch them down around the edges using an appliqué stitch or a tight zigzag stitch on a machine.
Finally, add quilting lines to create topographic details and embroider small elements like trees to complete your scenic story.
16. Thread Painting on Watercolor Paper
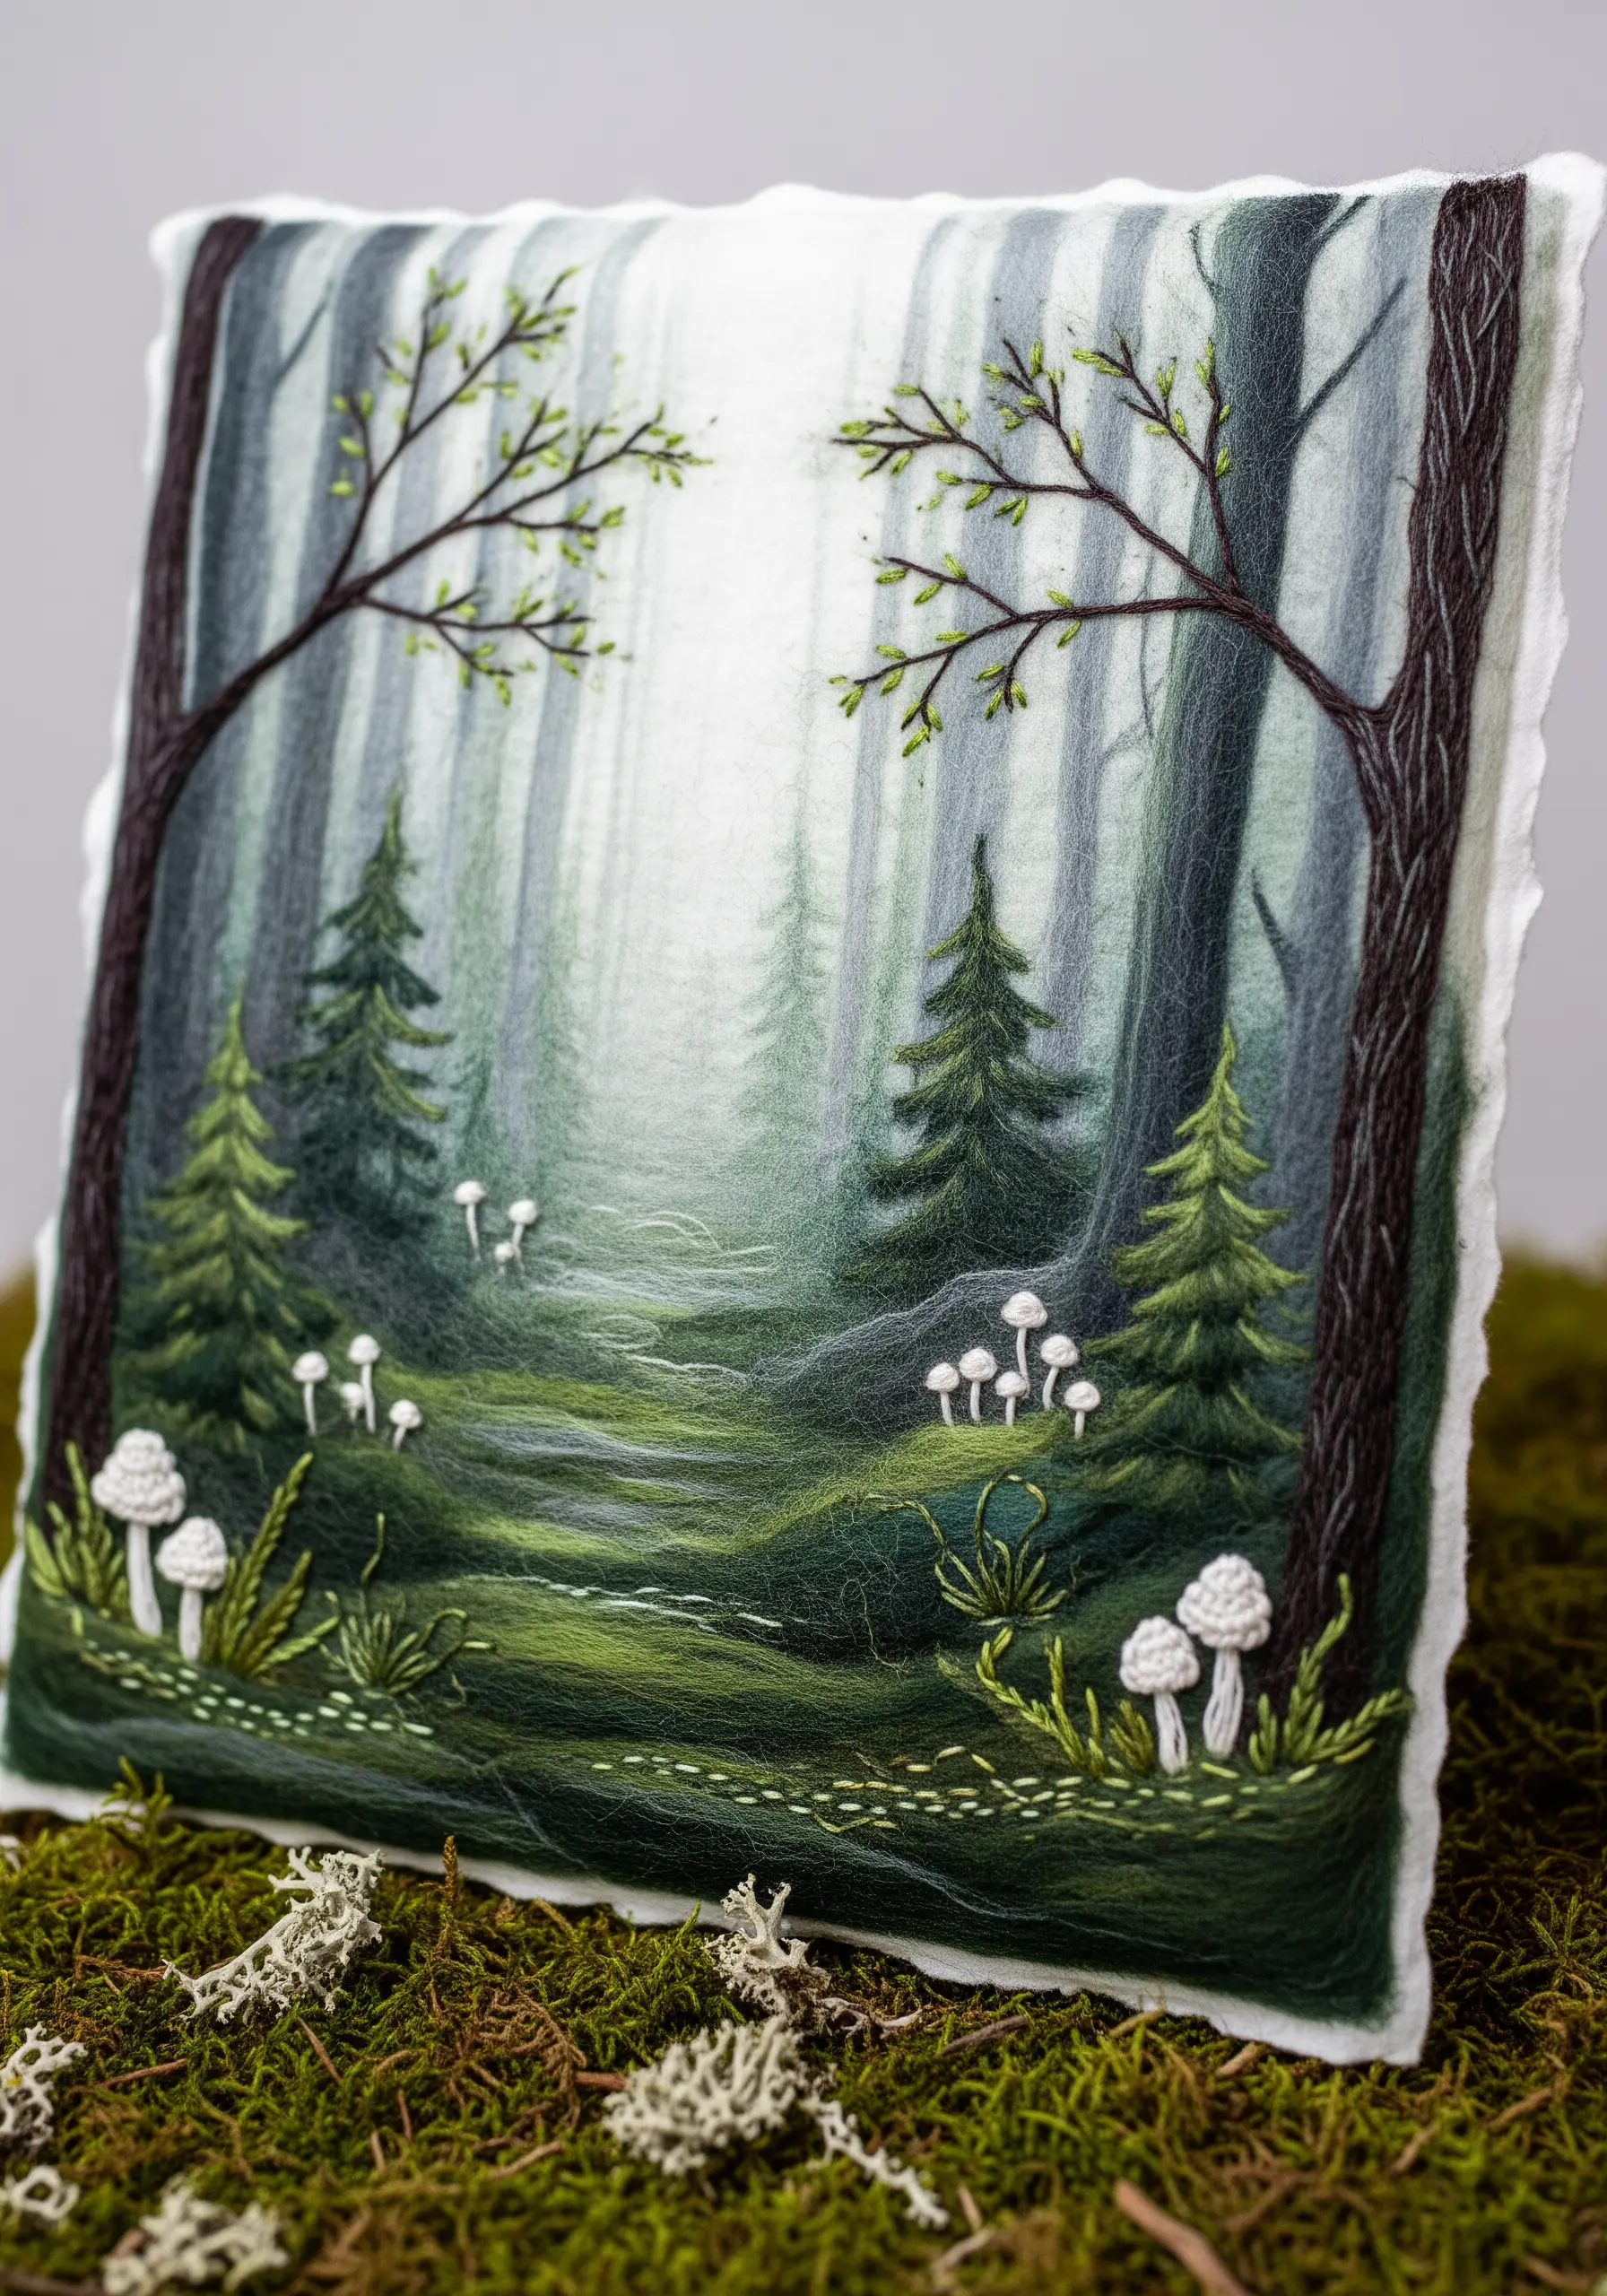
Stitching on heavy, textured paper creates a uniquely atmospheric piece that blends the worlds of illustration and embroidery.
Always pre-pierce your stitching holes with a needle to prevent the paper from tearing as you pull the thread through.
Use long, straight stitches with single strands of floss to ‘paint’ the background, blending colors to create a sense of misty depth.
Reserve more defined stitches, like backstitch for tree trunks and French knots for mushrooms, to bring foreground elements into sharp focus.
17. Embellishing Suede and Velvet Accessories
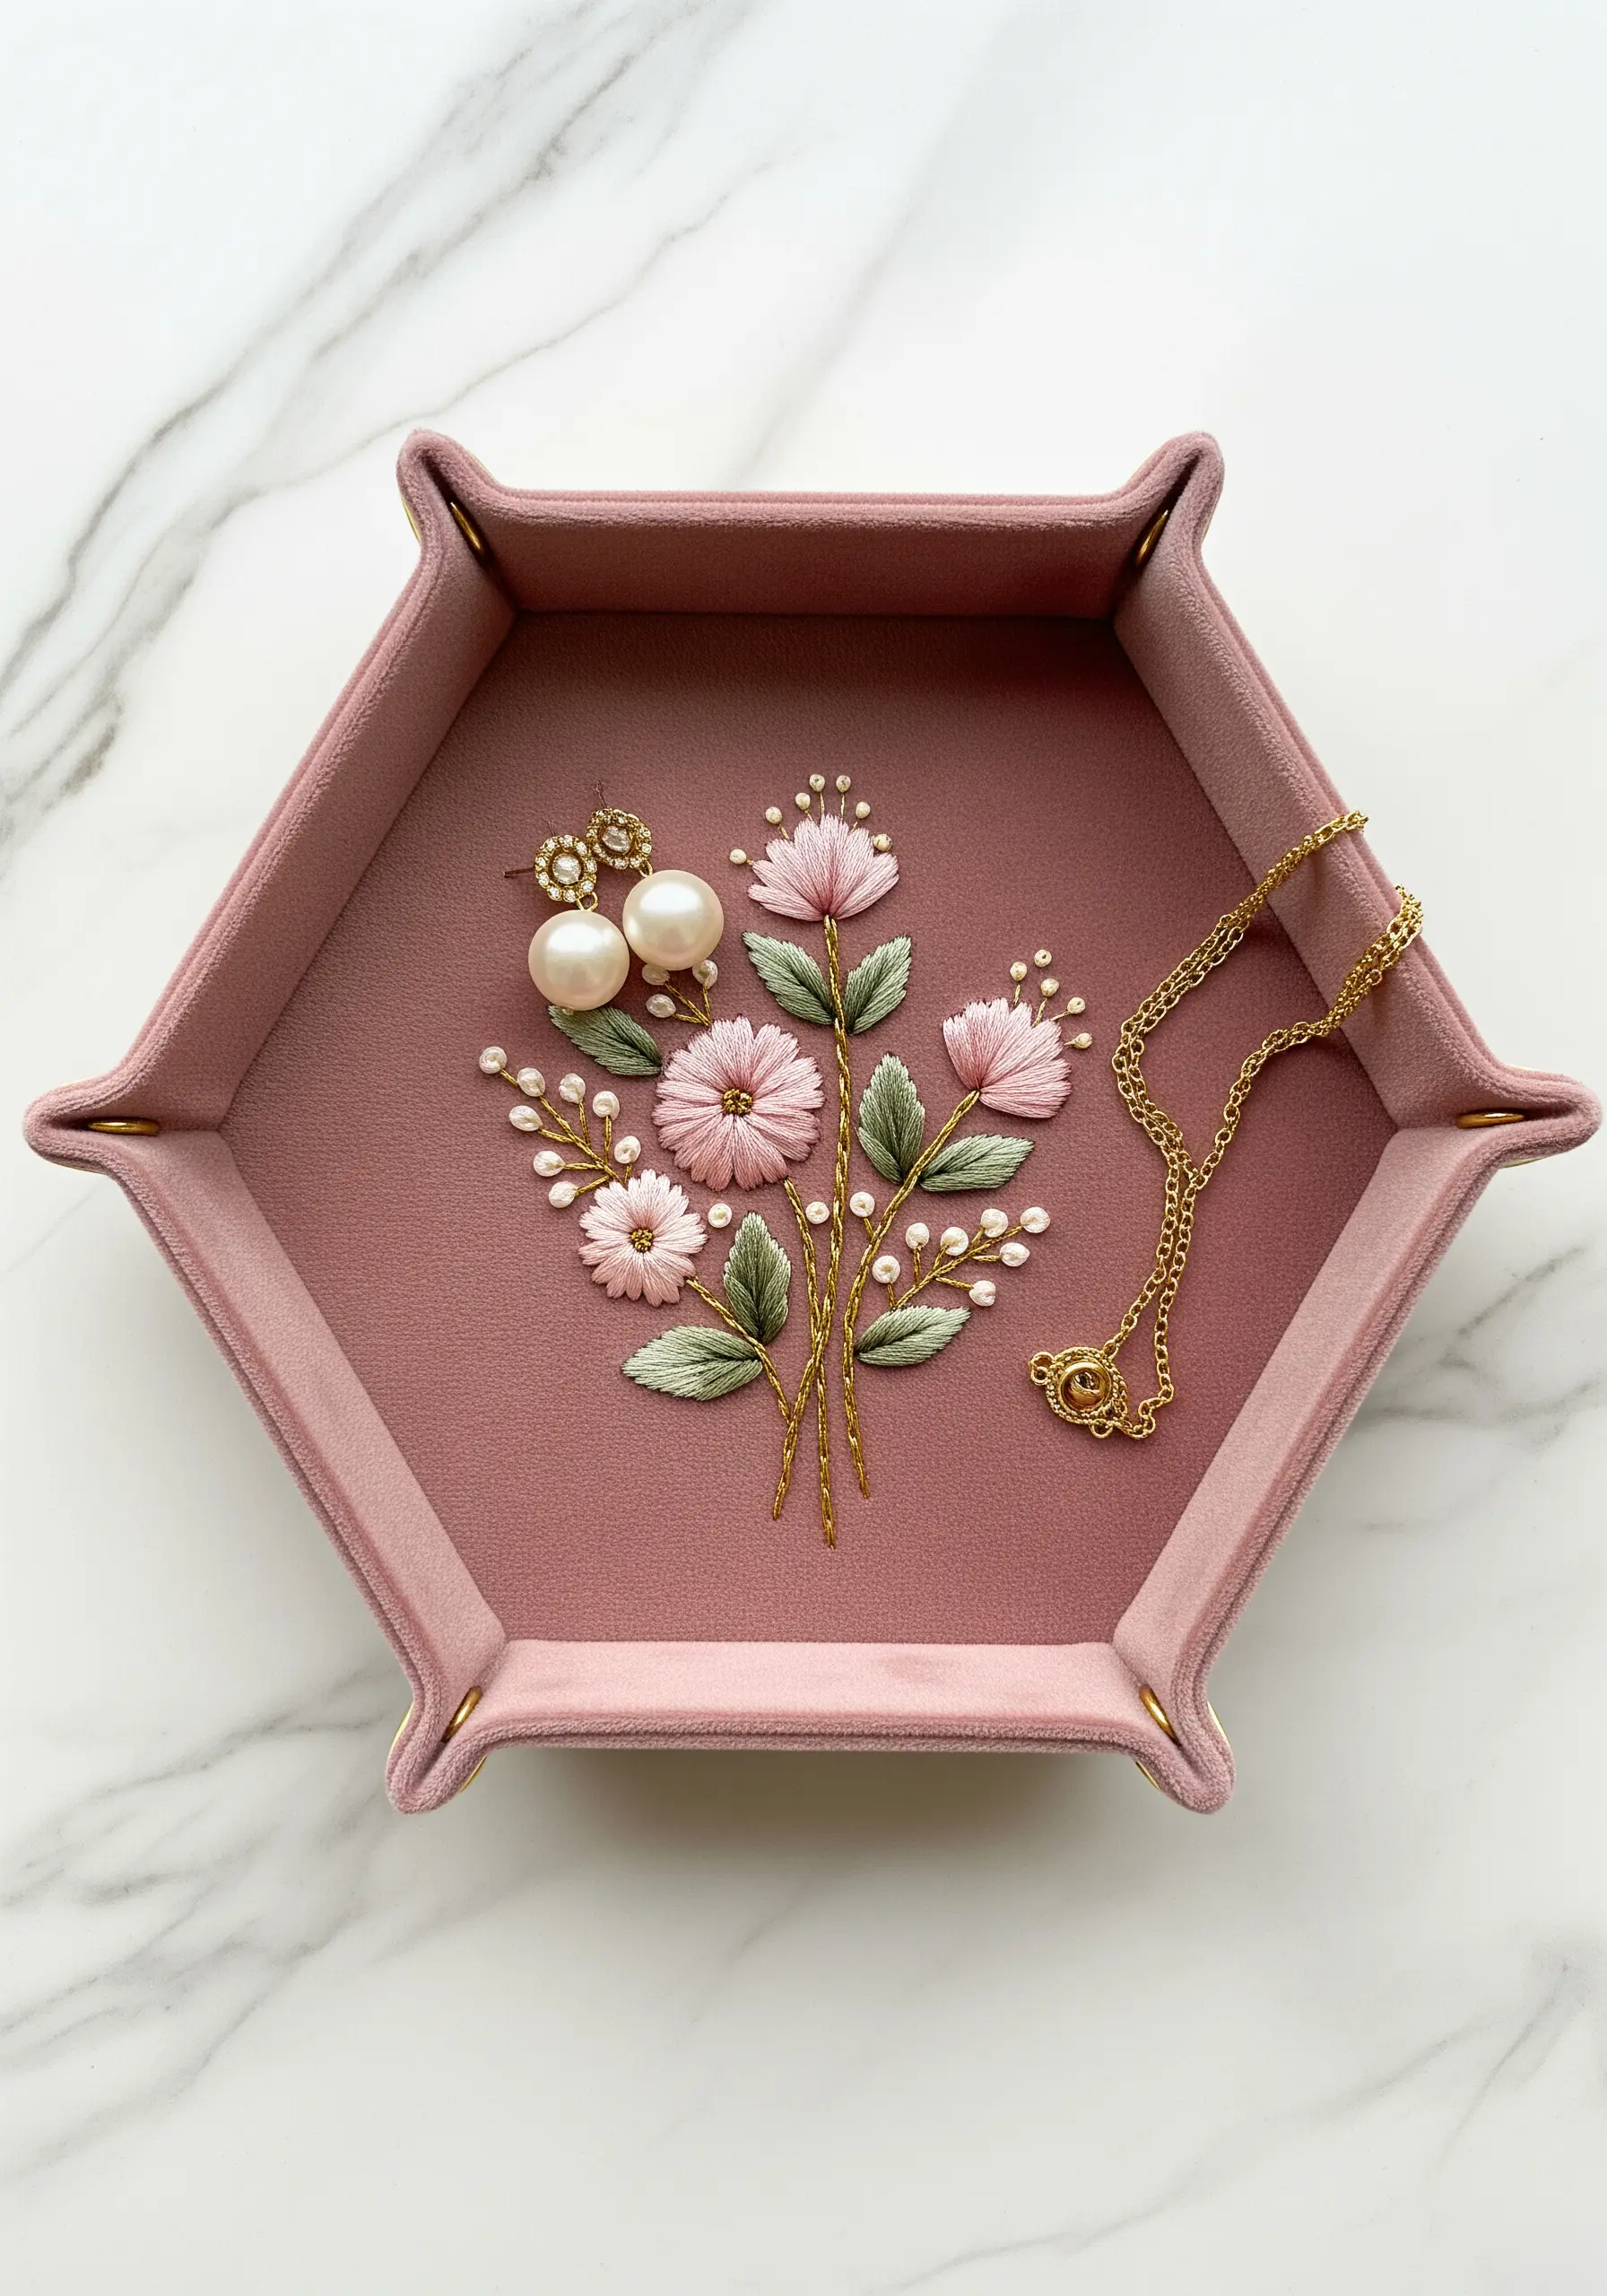
Adding embroidery to a velvet or suede valet tray transforms a simple organizer into a bespoke, luxurious gift.
To prevent puckering on these soft materials, use a tear-away stabilizer on the back of your stitching area.
A simple, elegant bouquet is all that’s needed. Use a smooth satin stitch for petals and delicate French knots for baby’s breath.
The contrast between the soft, matte texture of the fabric and the slight sheen of the cotton floss makes the design on these accessories feel incredibly refined.
18. Botanical Sprigs for Elegant Table Linens
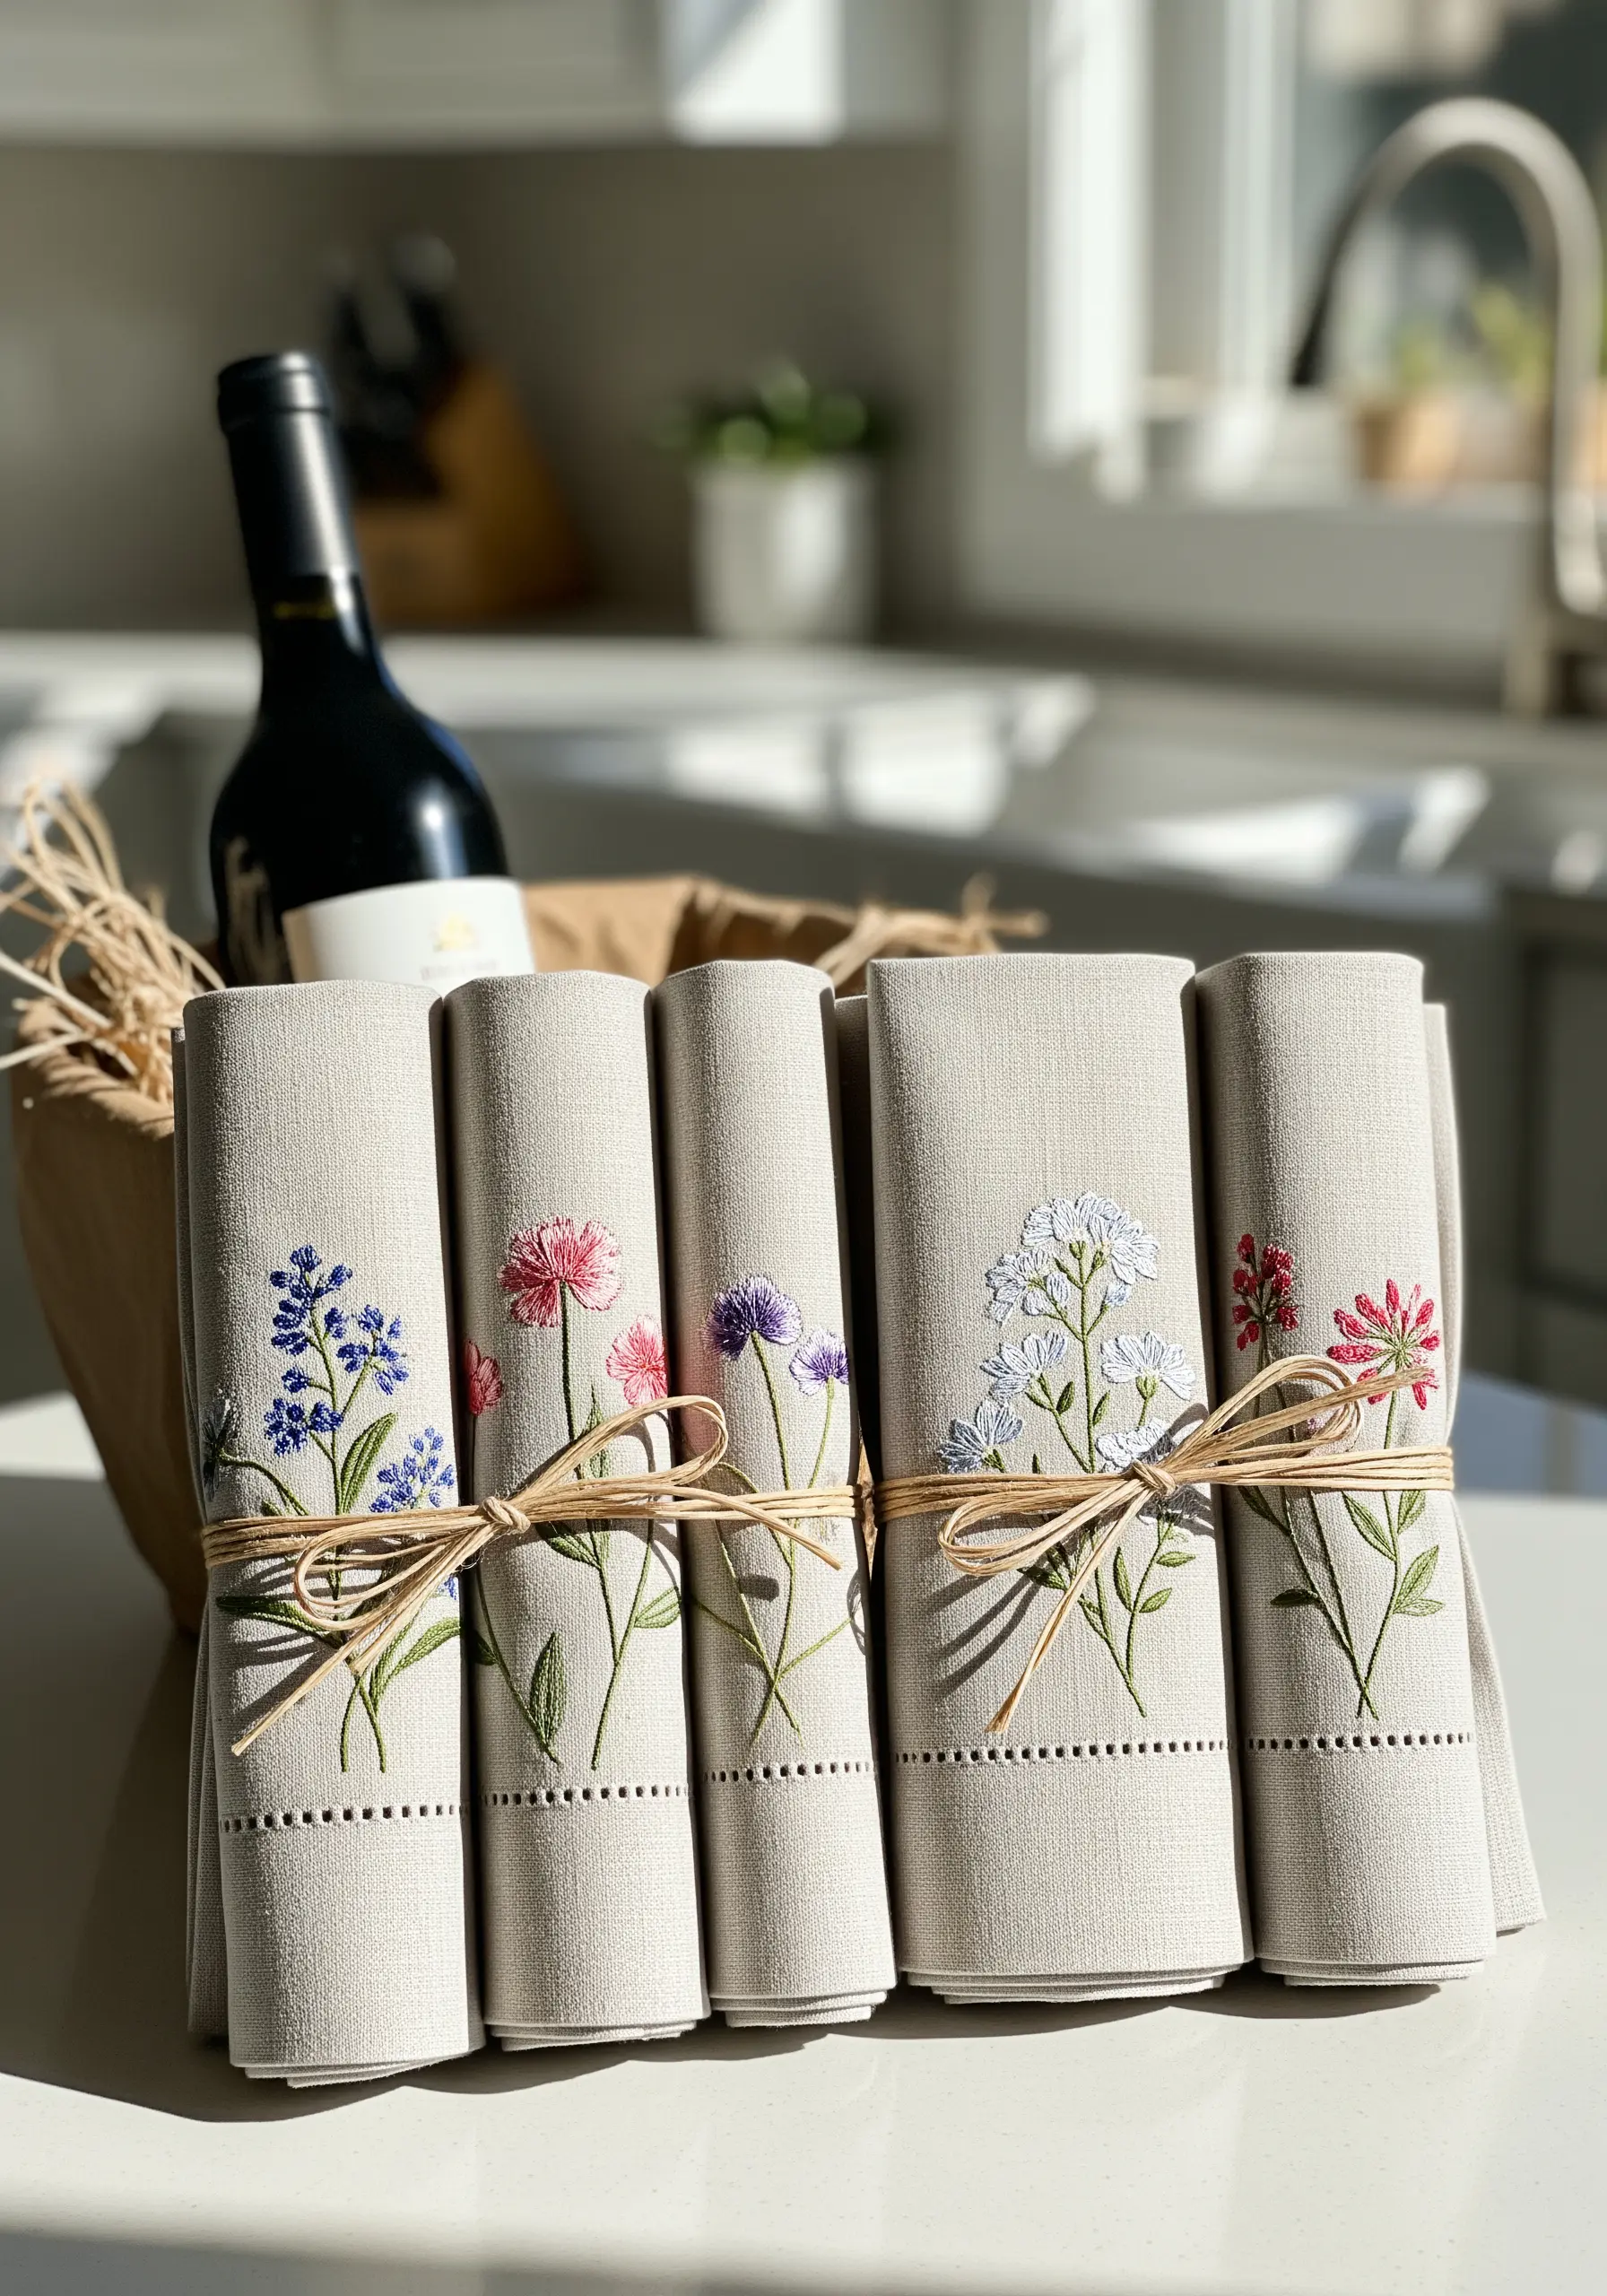
Elevate a set of simple linen napkins into a perfect hostess gift with delicate, individually stitched wildflowers.
Choose a single, graceful botanical motif for each napkin, placing it in a corner for a subtle, sophisticated touch.
Use a fishbone stitch to give the leaves a central vein and natural dimension, and keep the petals light with lazy daisy or satin stitches.
By giving each napkin a different flower in a coordinated color palette, you create a beautiful, cohesive set that still feels unique.
19. Painting with Beads for Luminous Detail
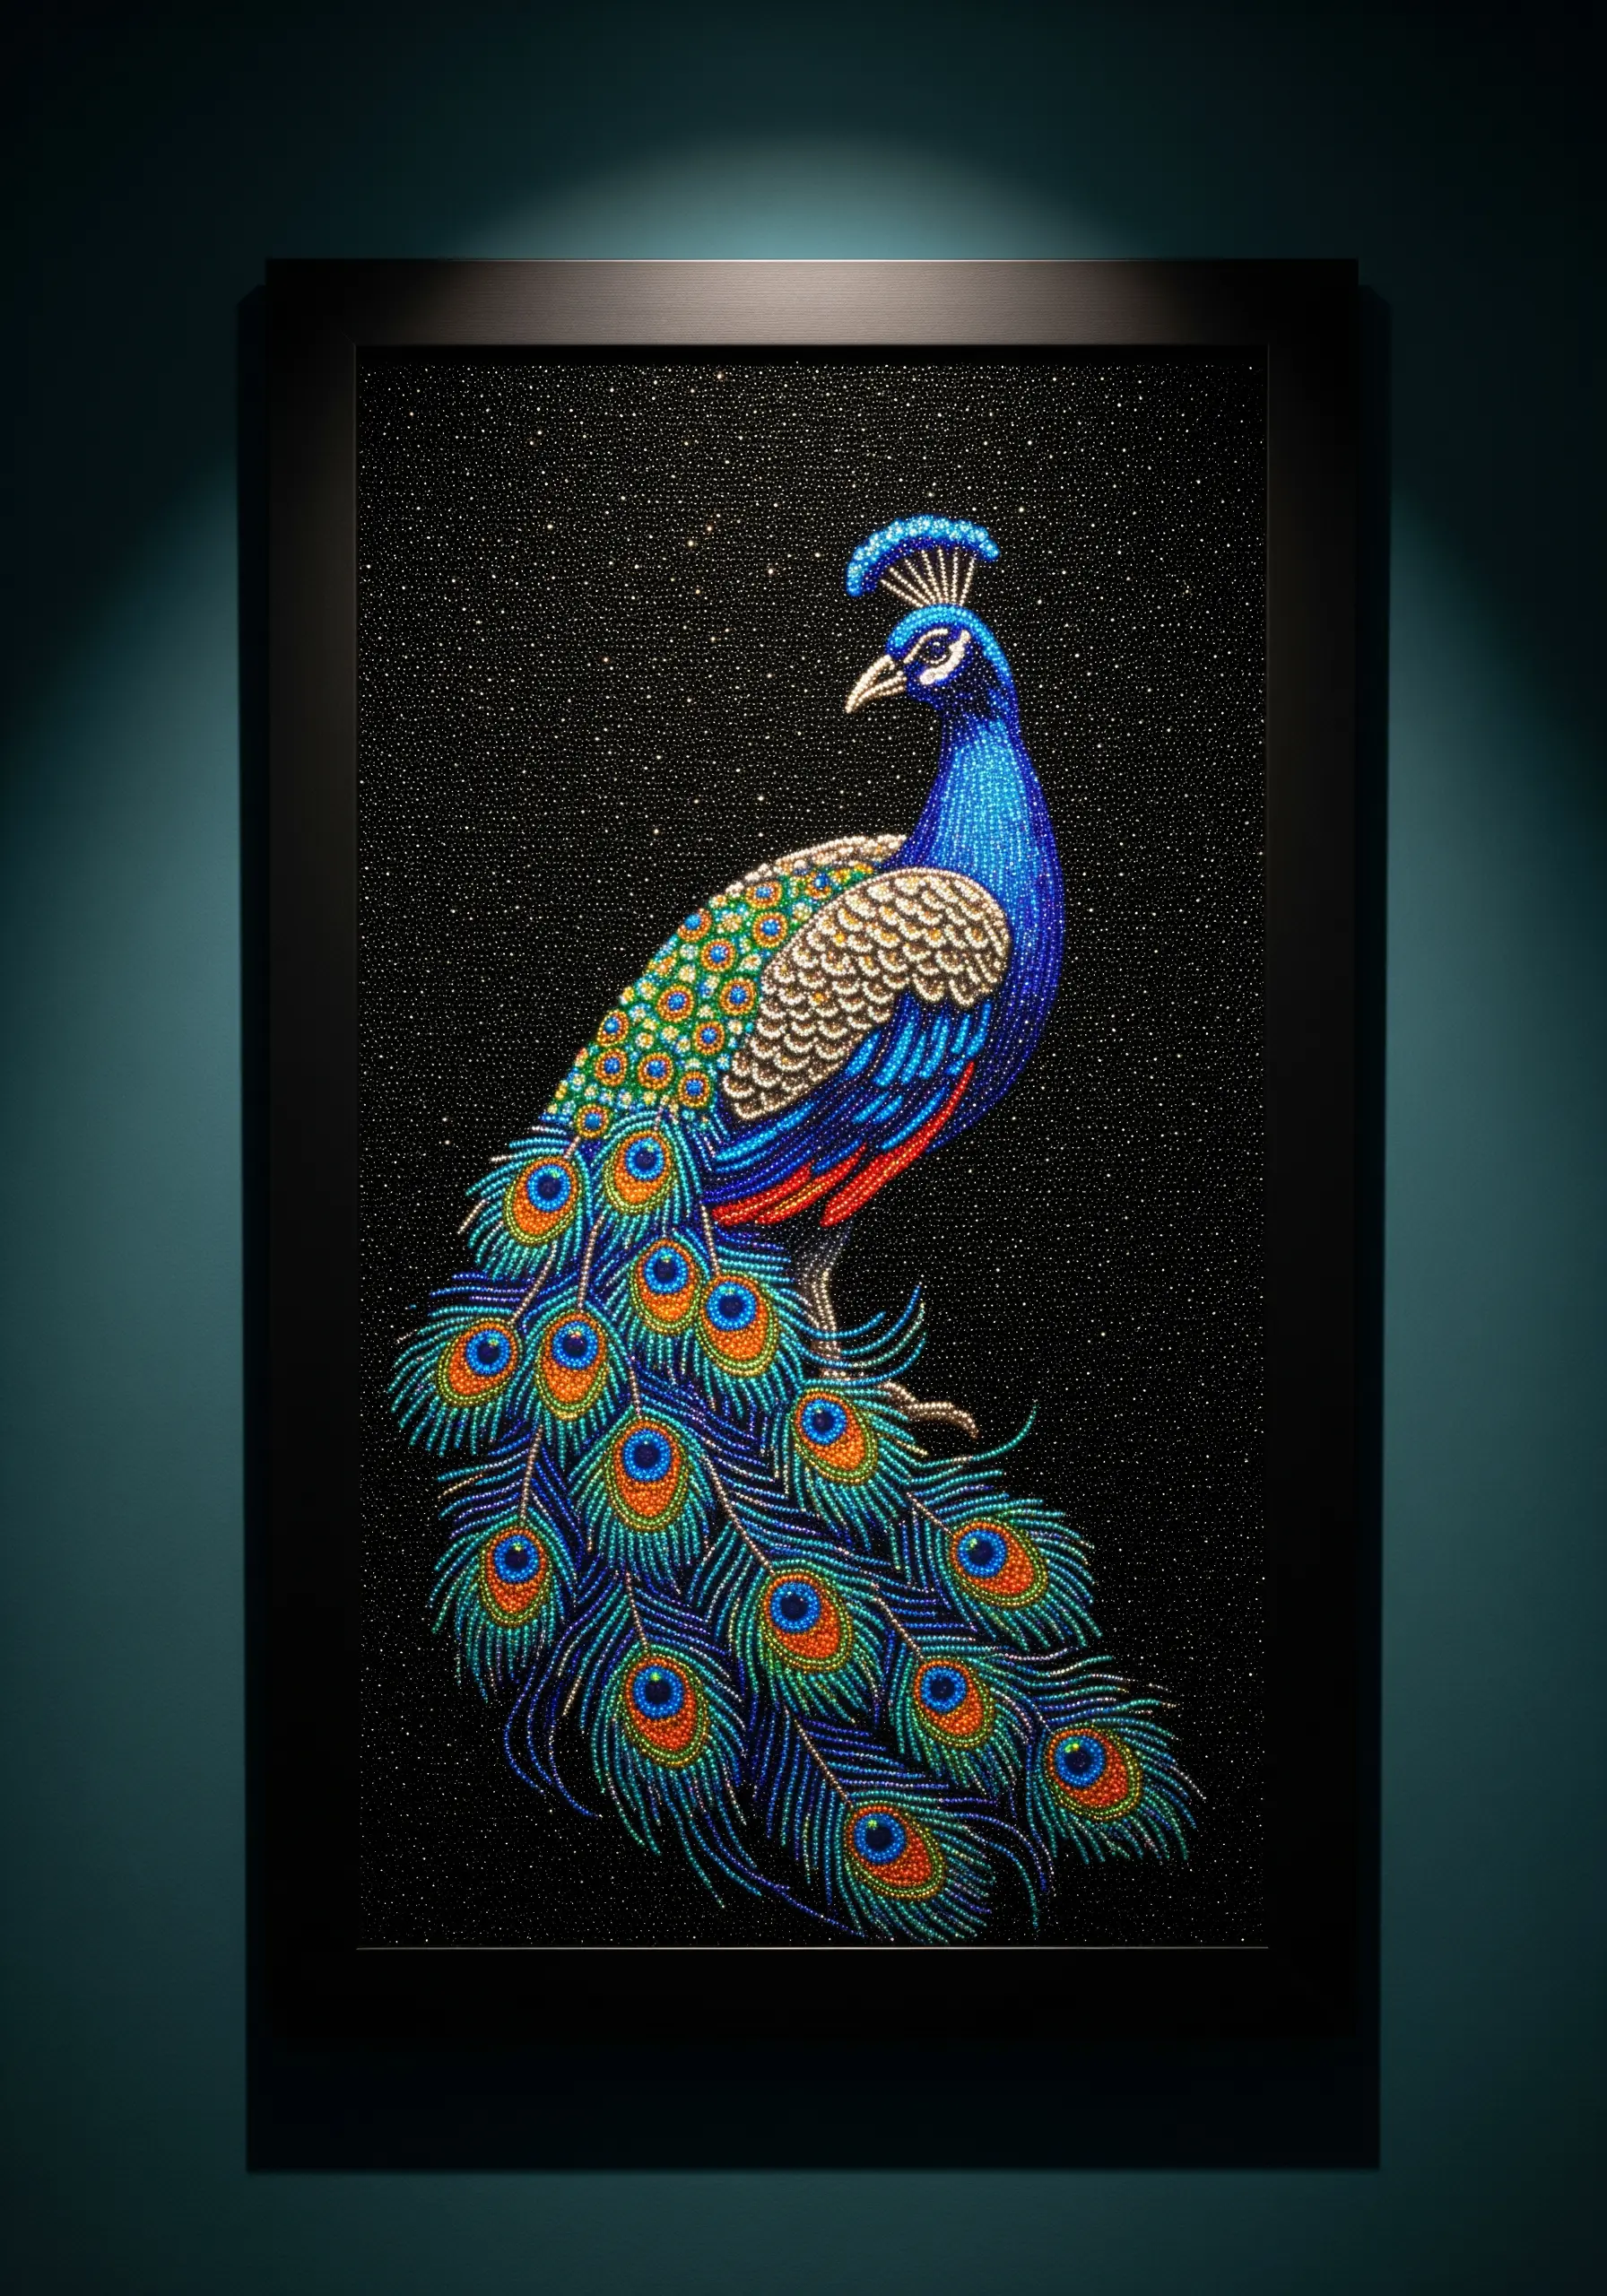
For a gift that truly dazzles, move beyond thread and explore the art of bead embroidery to ‘paint’ with light and color.
This technique involves stitching tiny seed beads onto fabric, much like pixels in a digital image, to create intricate, shaded designs.
You can sew them on individually or use a tambour hook, which allows you to apply beads from the underside of the fabric with a chain stitch.
The result is an artwork with unparalleled texture and luminosity, as each bead catches and reflects the light.
20. Gradient Shading for Realistic Leaves
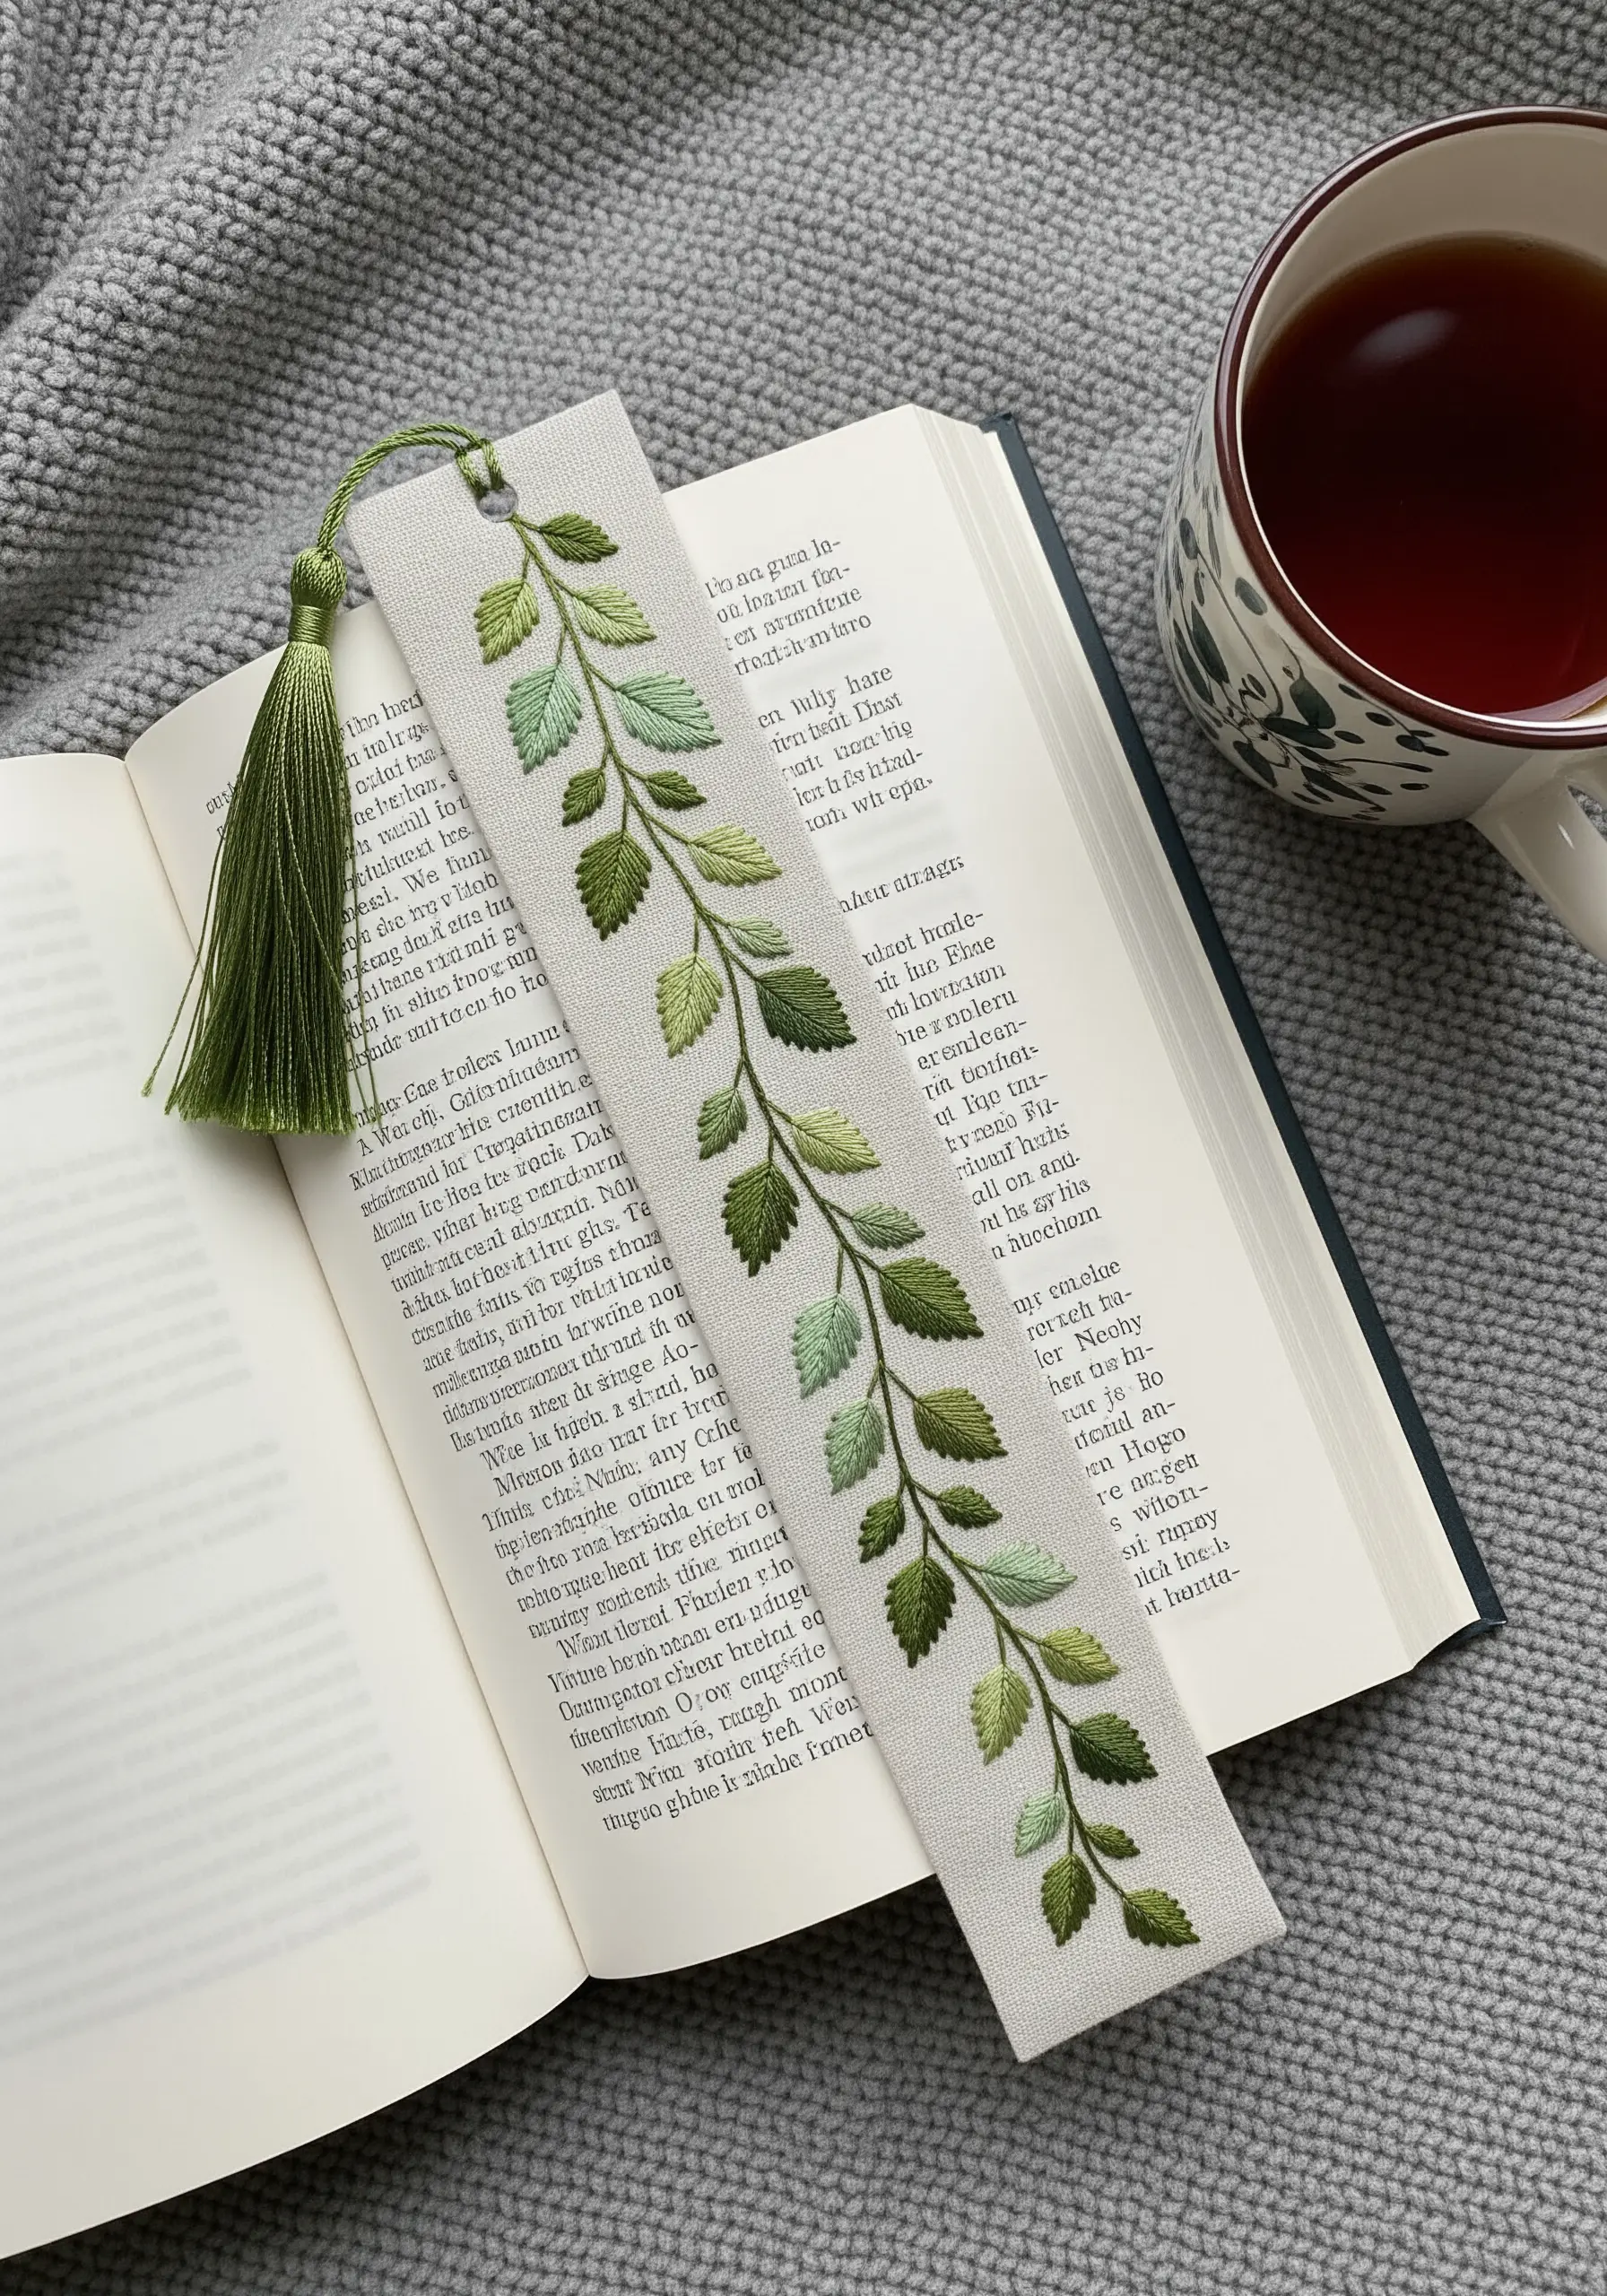
To make foliage look natural rather than flat, blend multiple shades of thread within a single leaf.
The long-and-short stitch is the key to achieving a smooth, paint-like gradient without harsh lines.
Start with your darkest shade at the base of the leaf, then introduce a medium tone, staggering your stitch lengths to interlock the two colors seamlessly.
Finish the tip of the leaf with your lightest shade, blending it back into the medium tone. This creates beautiful, Realistic Leaves with lifelike depth.
21. Soft-Sculpture Stitching for Nursery Mobiles

Create a gentle, whimsical gift for a new baby by crafting a mobile from soft, hand-stitched felt shapes.
Cut two identical shapes for each cloud or bird from a sheet of high-quality wool-blend felt.
Use a contrasting thread and a simple blanket stitch around the edges. This stitch is not only decorative but also strong and durable.
Leave a small gap to fill with soft poly-fil stuffing before stitching it closed, turning a flat shape into a plush, cuddly form for charming Nursery Mobiles.
22. A Dimensional Family Tree on Canvas
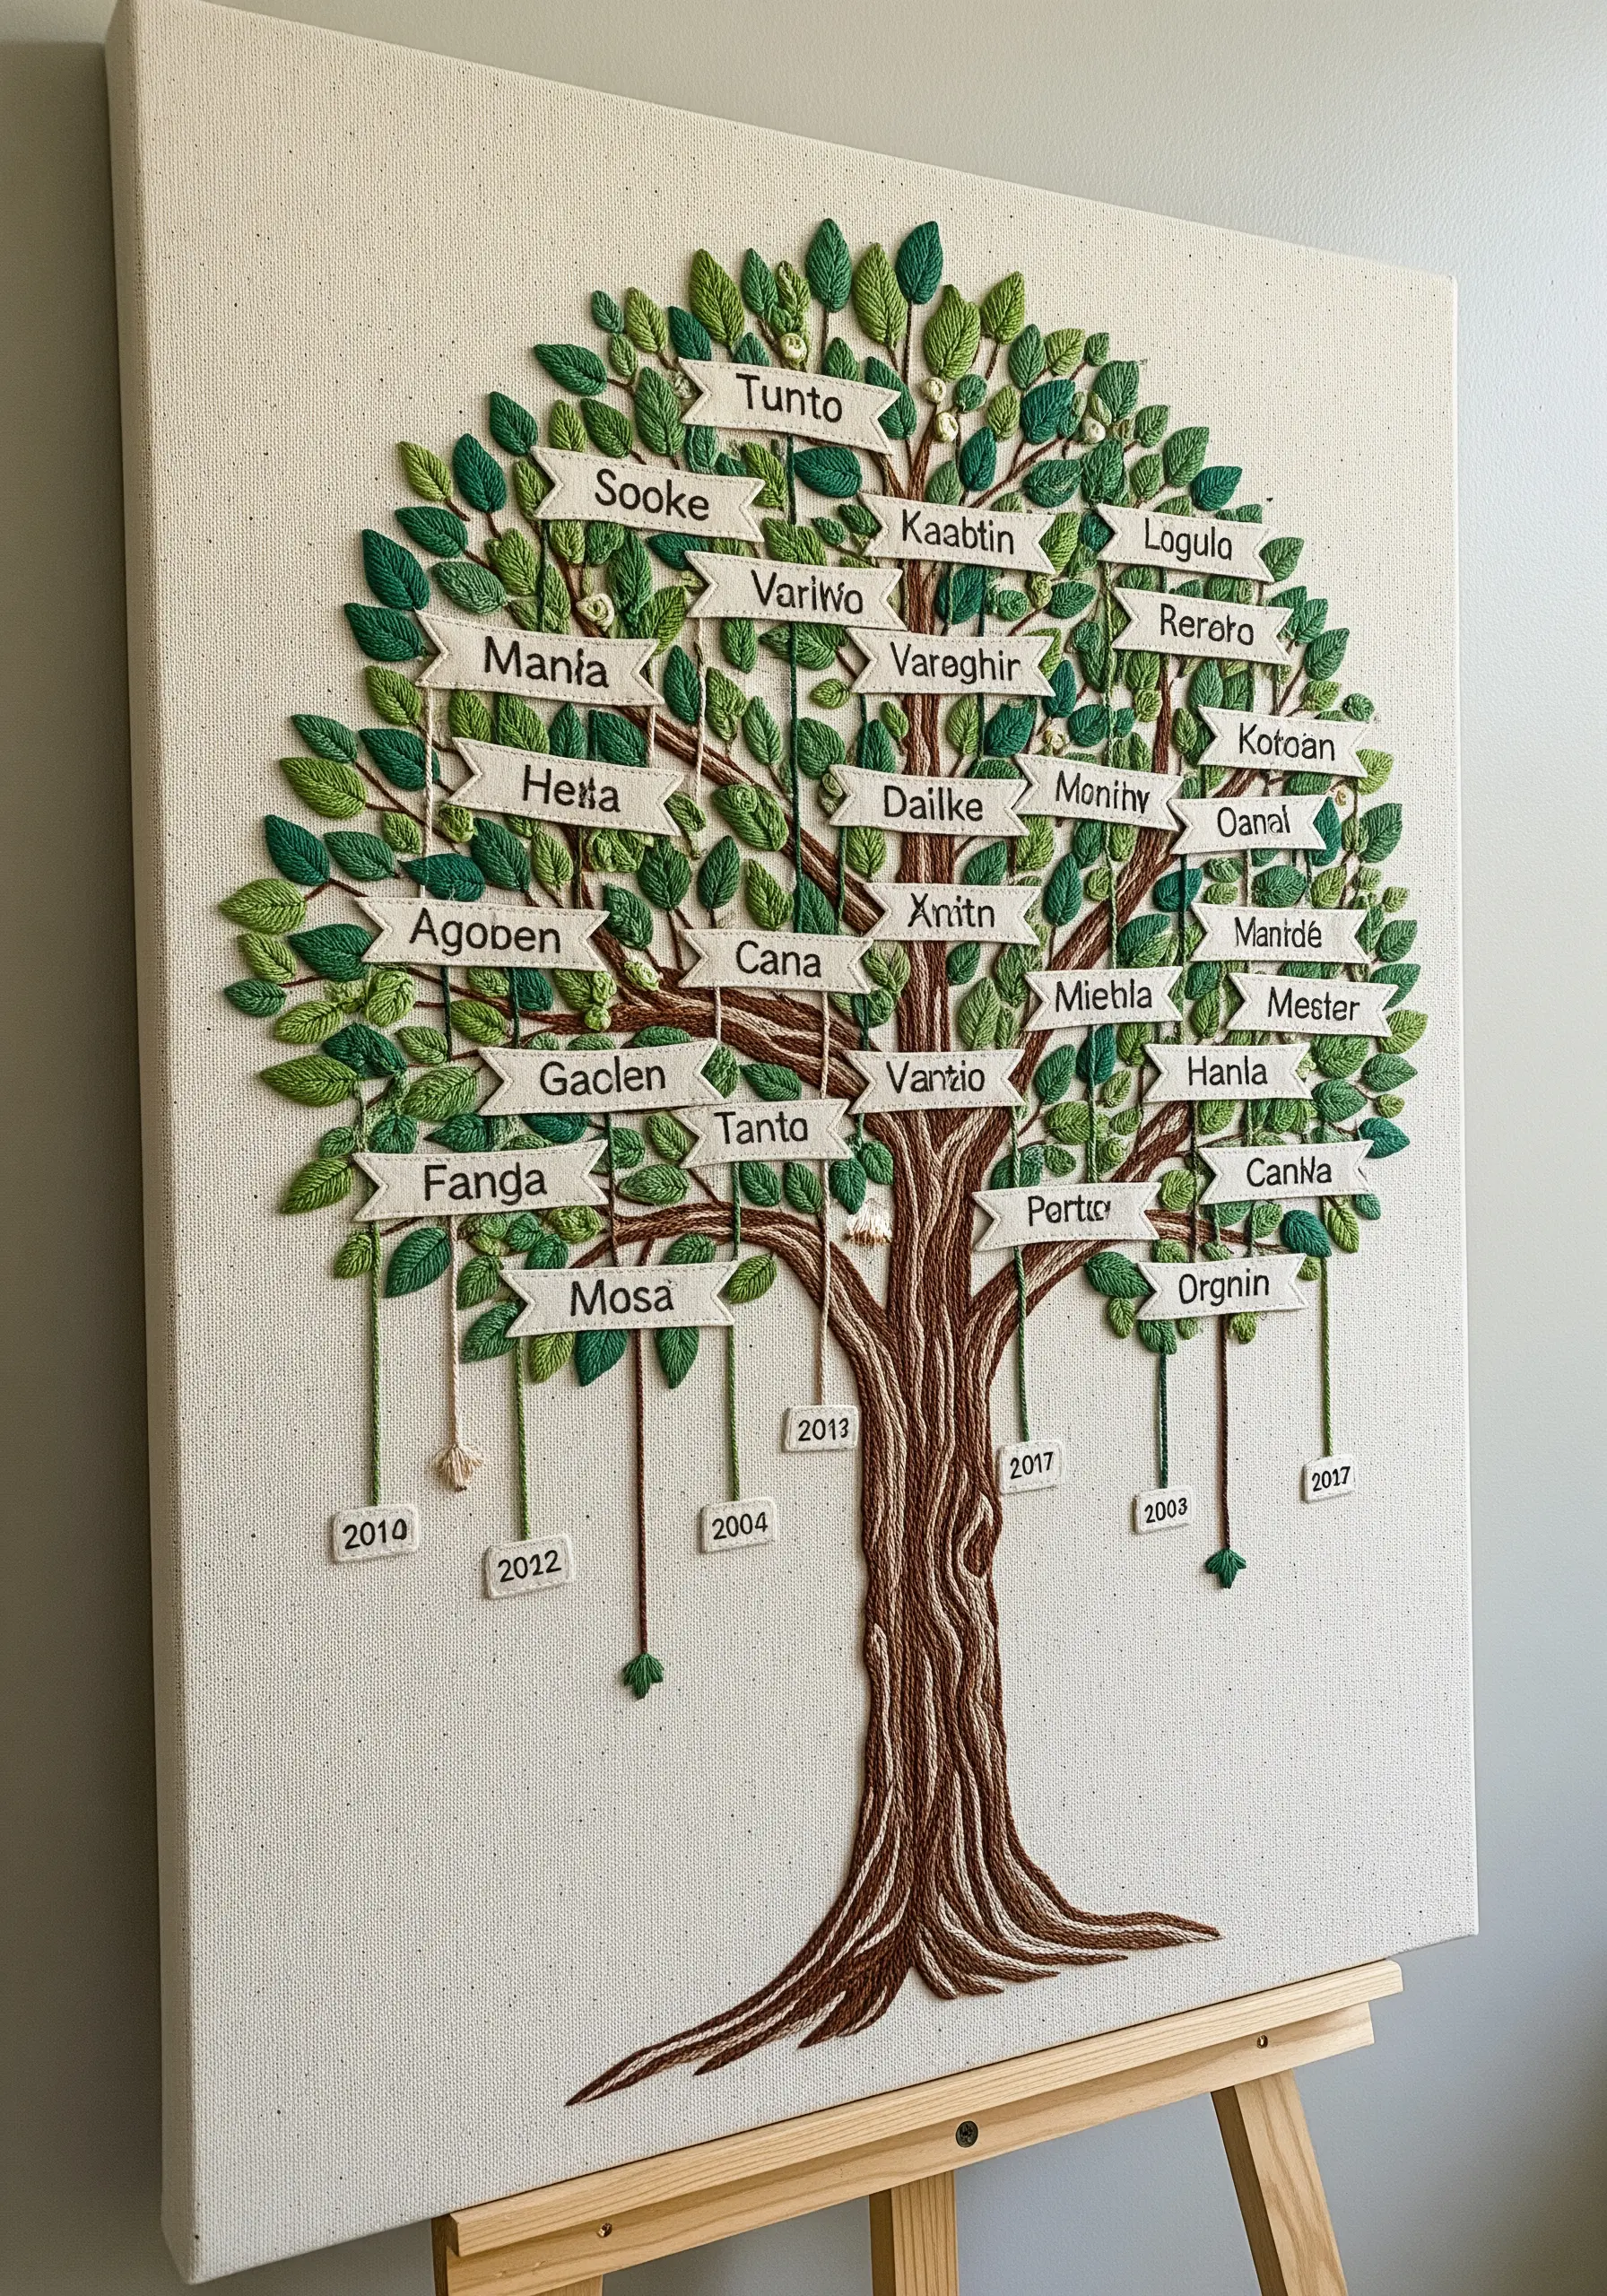
A family tree is a deeply meaningful gift; make it a true work of art by building it with varied textures on Canvas.
For the tree trunk and branches, couch thick brown yarn onto the canvas to create a raised, bark-like texture that stands out.
Create a lush canopy by filling the leaf areas with a dense mix of French knots and lazy daisy stitches in at least three different shades of green.
Embroider names onto small strips of linen or cotton and appliqué them as banners, adding a final layer of dimension and personalization.
23. Luxe Monograms with Metallics and Pearls
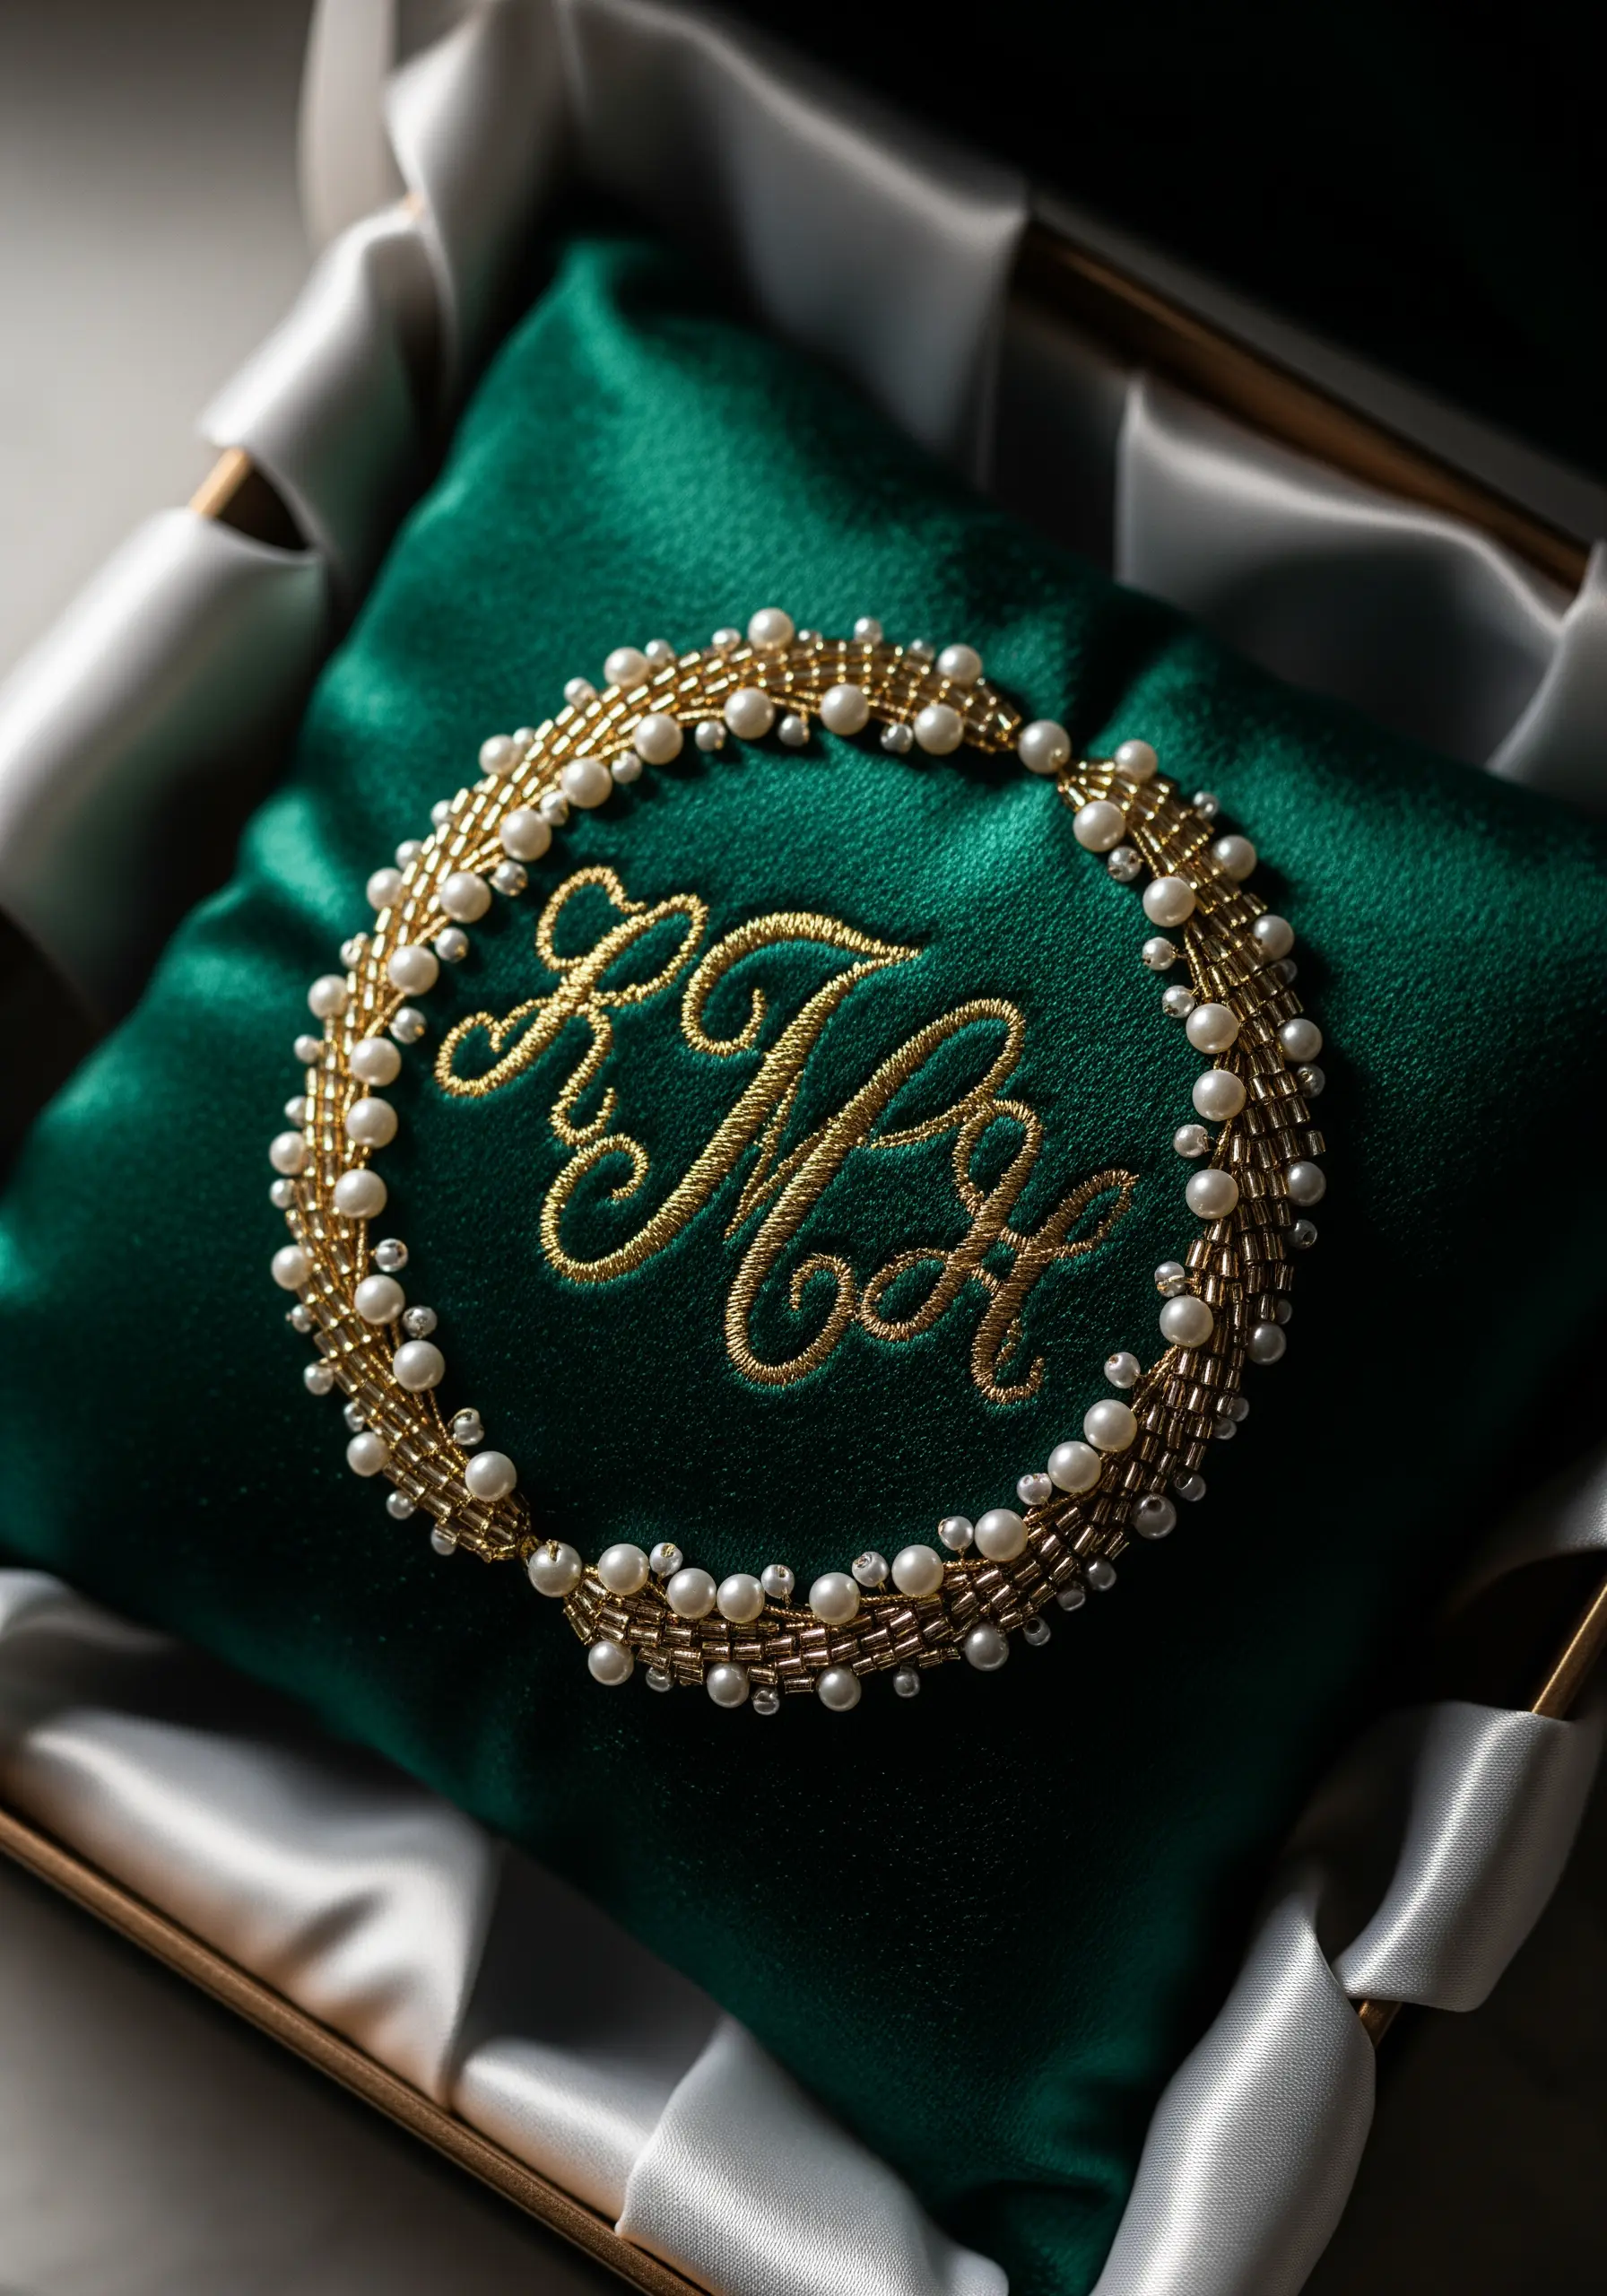
For a truly special occasion like a wedding, combine classic materials to create a ring pillow that feels like a precious heirloom.
Use a high-quality gold metallic thread for the monogram. To avoid the frustration of splitting, try a thread conditioner or use a couching technique with a metallic cord.
Frame the monogram with a delicate border of hand-sewn pearls and gold seed beads, which adds opulence and complements the rich velvet fabric.
This combination of textures—plush velvet, gleaming metal, and lustrous pearl—creates a timeless and elegant finish.
24. Gifting the Joy of a First Stitch
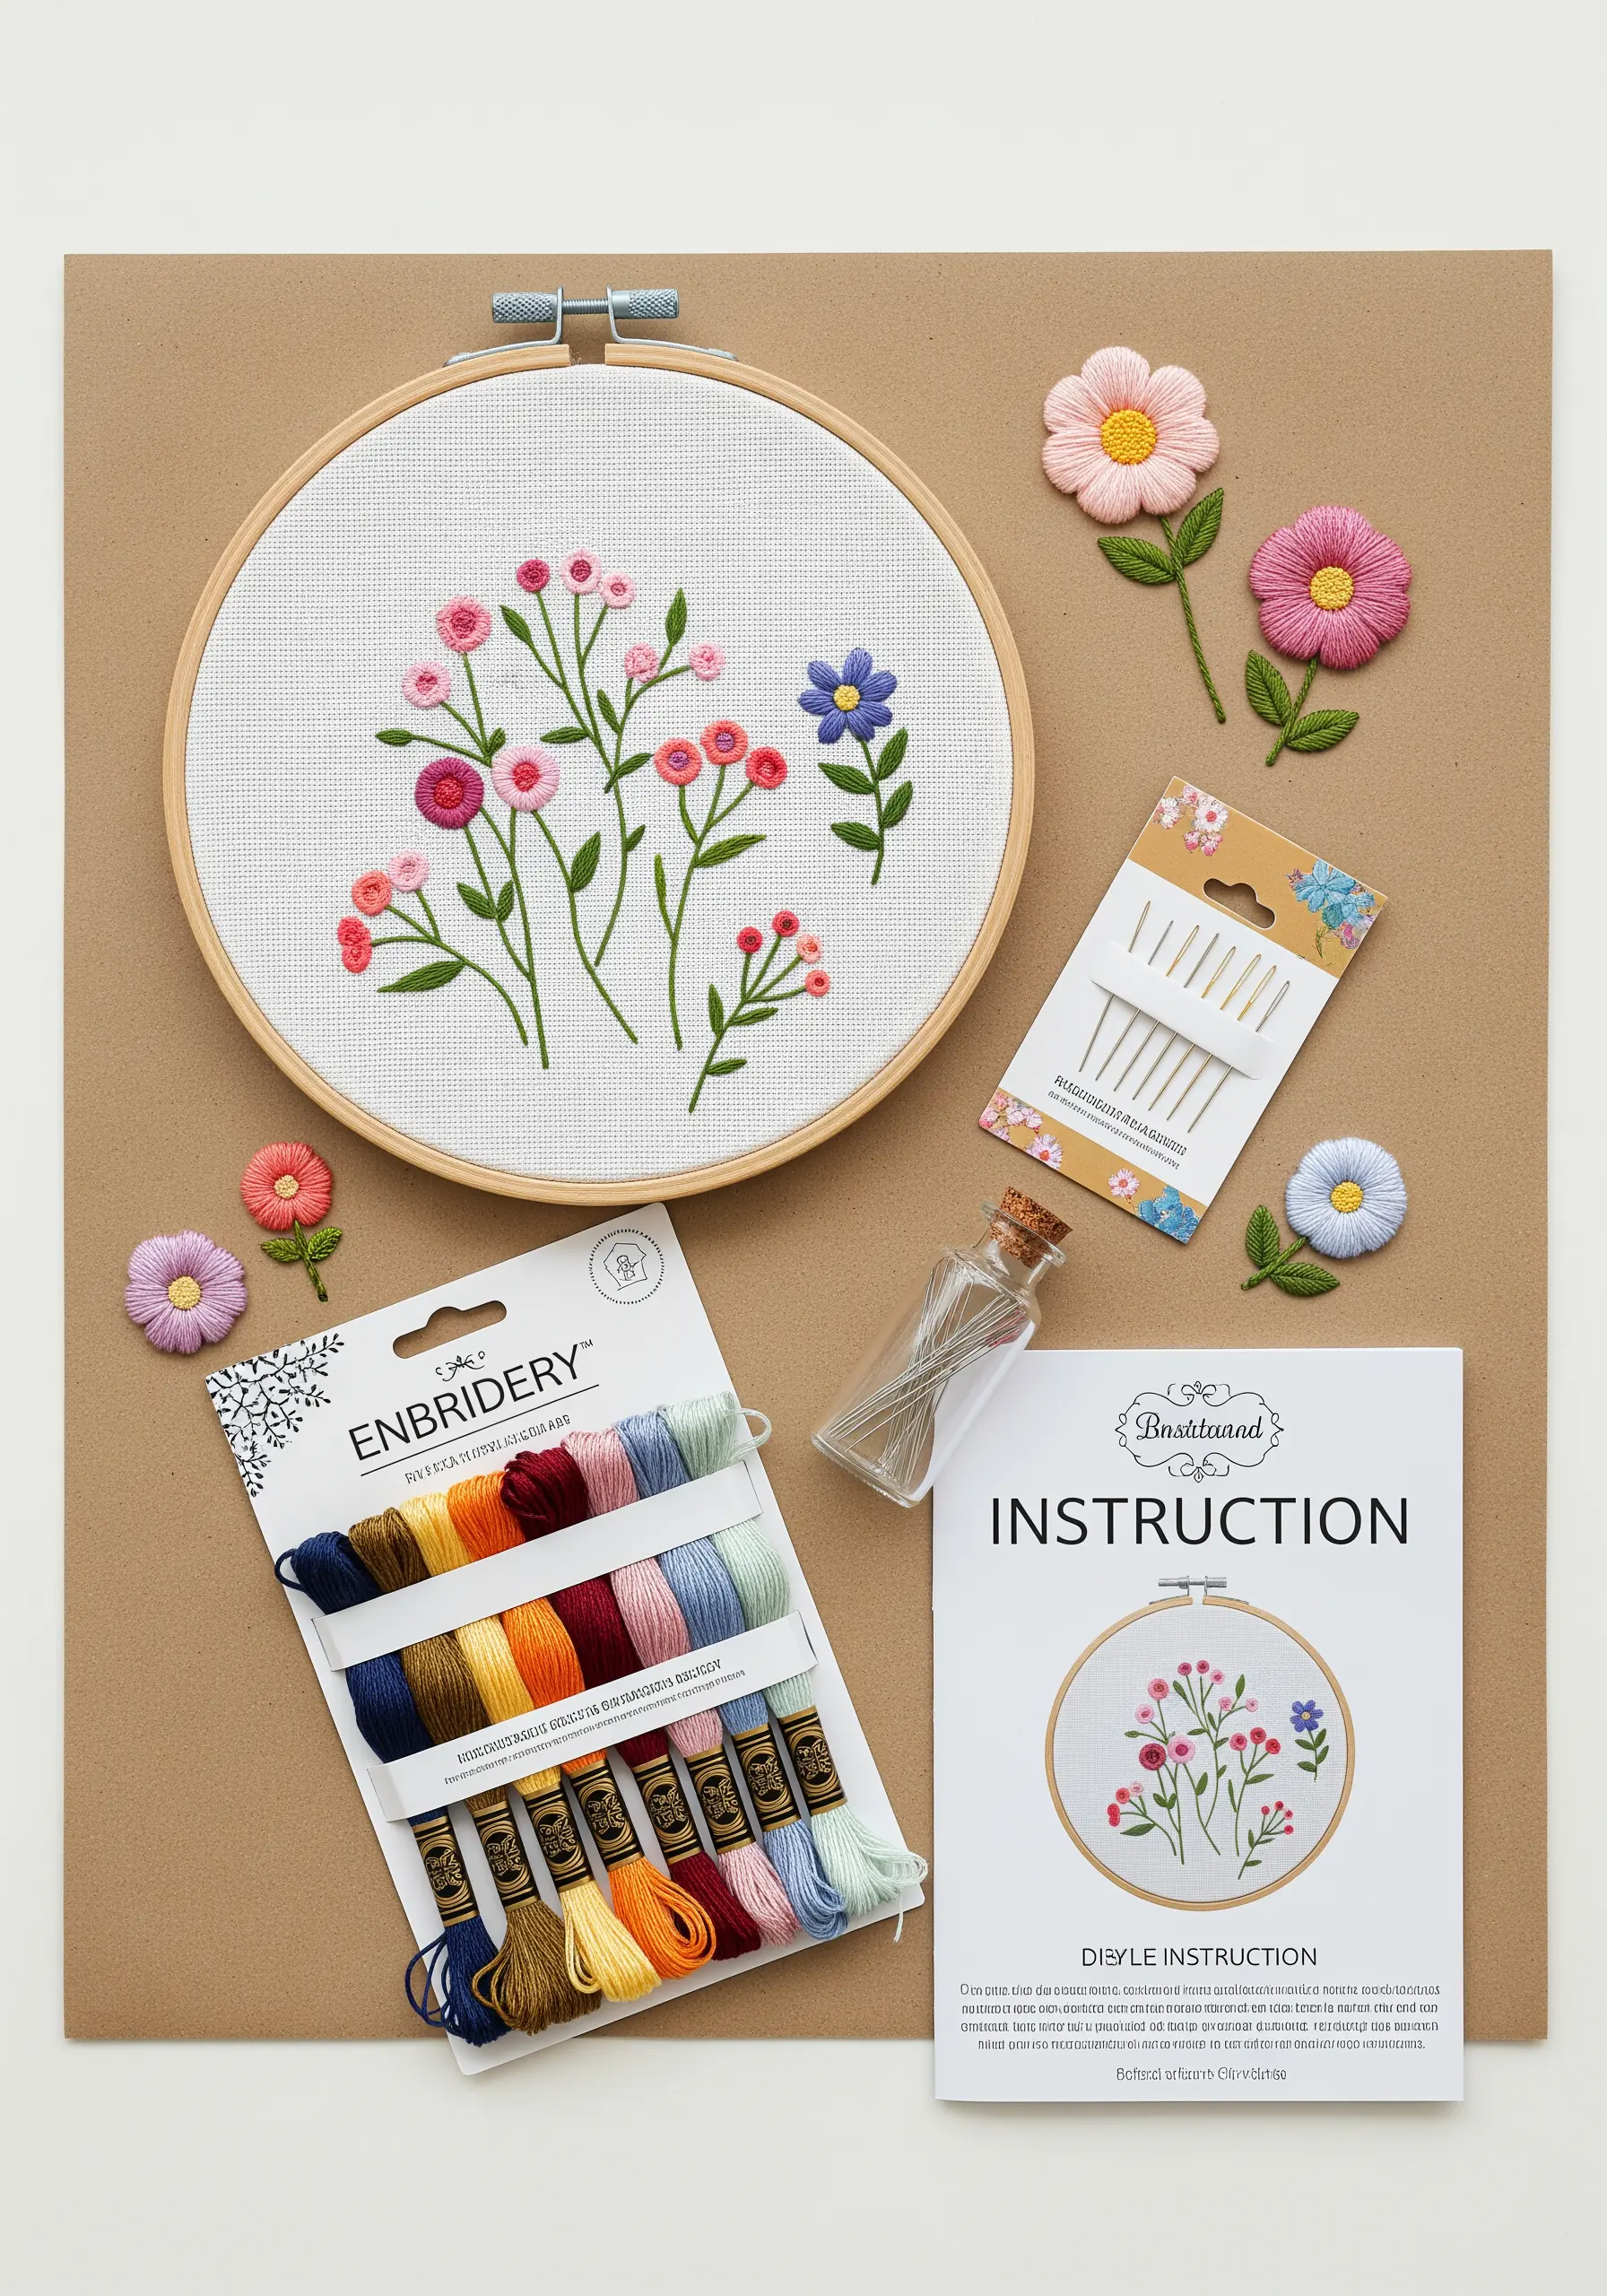
Sometimes the best gift isn’t a finished object, but the experience of creating one.
A well-curated embroidery kit is a thoughtful gift that invites a loved one to discover the calm, meditative joy of stitching.
Look for kits that include high-quality materials: DMC thread, tightly woven fabric with a pre-printed pattern, and clear, easy-to-follow instructions.
By giving a kit, you’re offering more than a craft project; you’re sharing an opportunity for mindfulness, creativity, and the pride of making something beautiful with their own hands.


