
I know the feeling. You see a piece of minimalist embroidery that looks so calm, so complete, and you wonder how to achieve that same sense of intention in your own work. It’s not about using fewer stitches, but about making every single stitch matter.
Minimalism in embroidery is an exercise in restraint and precision. It’s found in the subtle shift from a backstitch to a split stitch for a softer outline, or in the decision to use a single strand of thread instead of two. It’s about understanding how the weight of your thread and the space around your motif can completely change the mood of a piece.
Think of these ideas not as patterns to be copied, but as techniques to be understood. Pay attention to the way a simple stitch can create complex texture, or how a single, bold line can define an entire canvas. This is how you move from simply stitching to designing with thread, creating work that feels quiet, confident, and entirely your own.
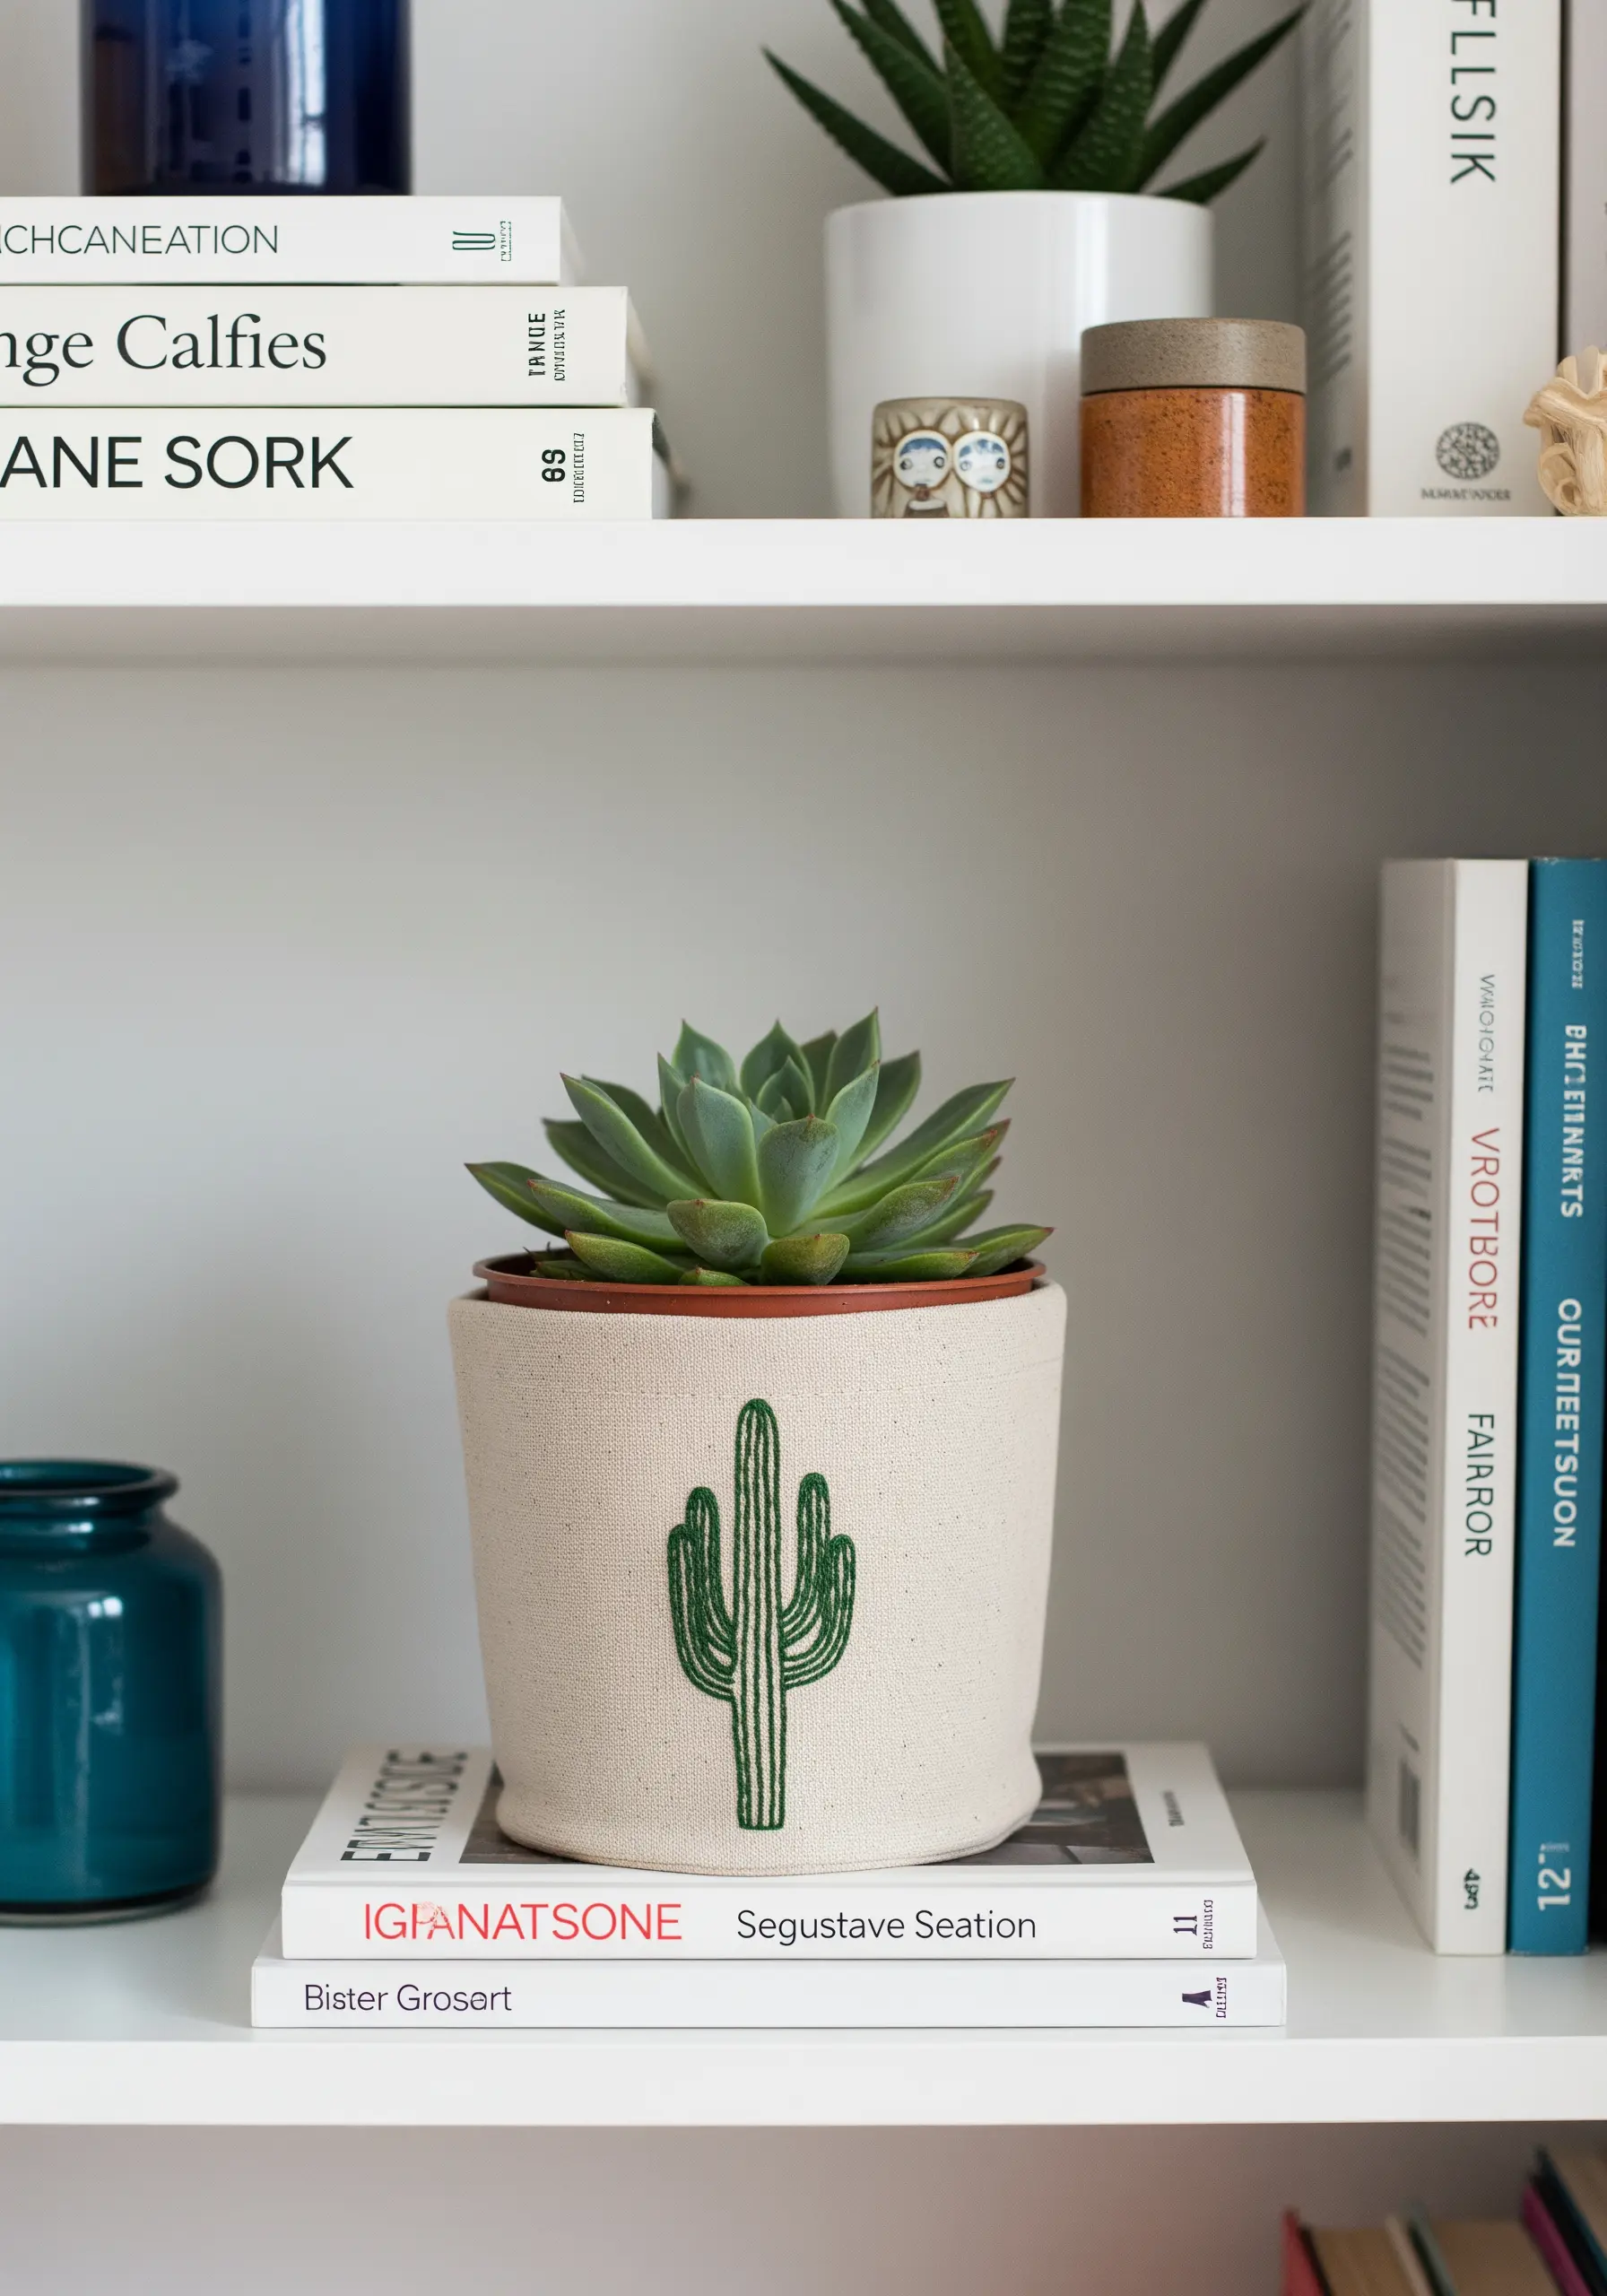
1. The Art of Radiating Straight Stitches
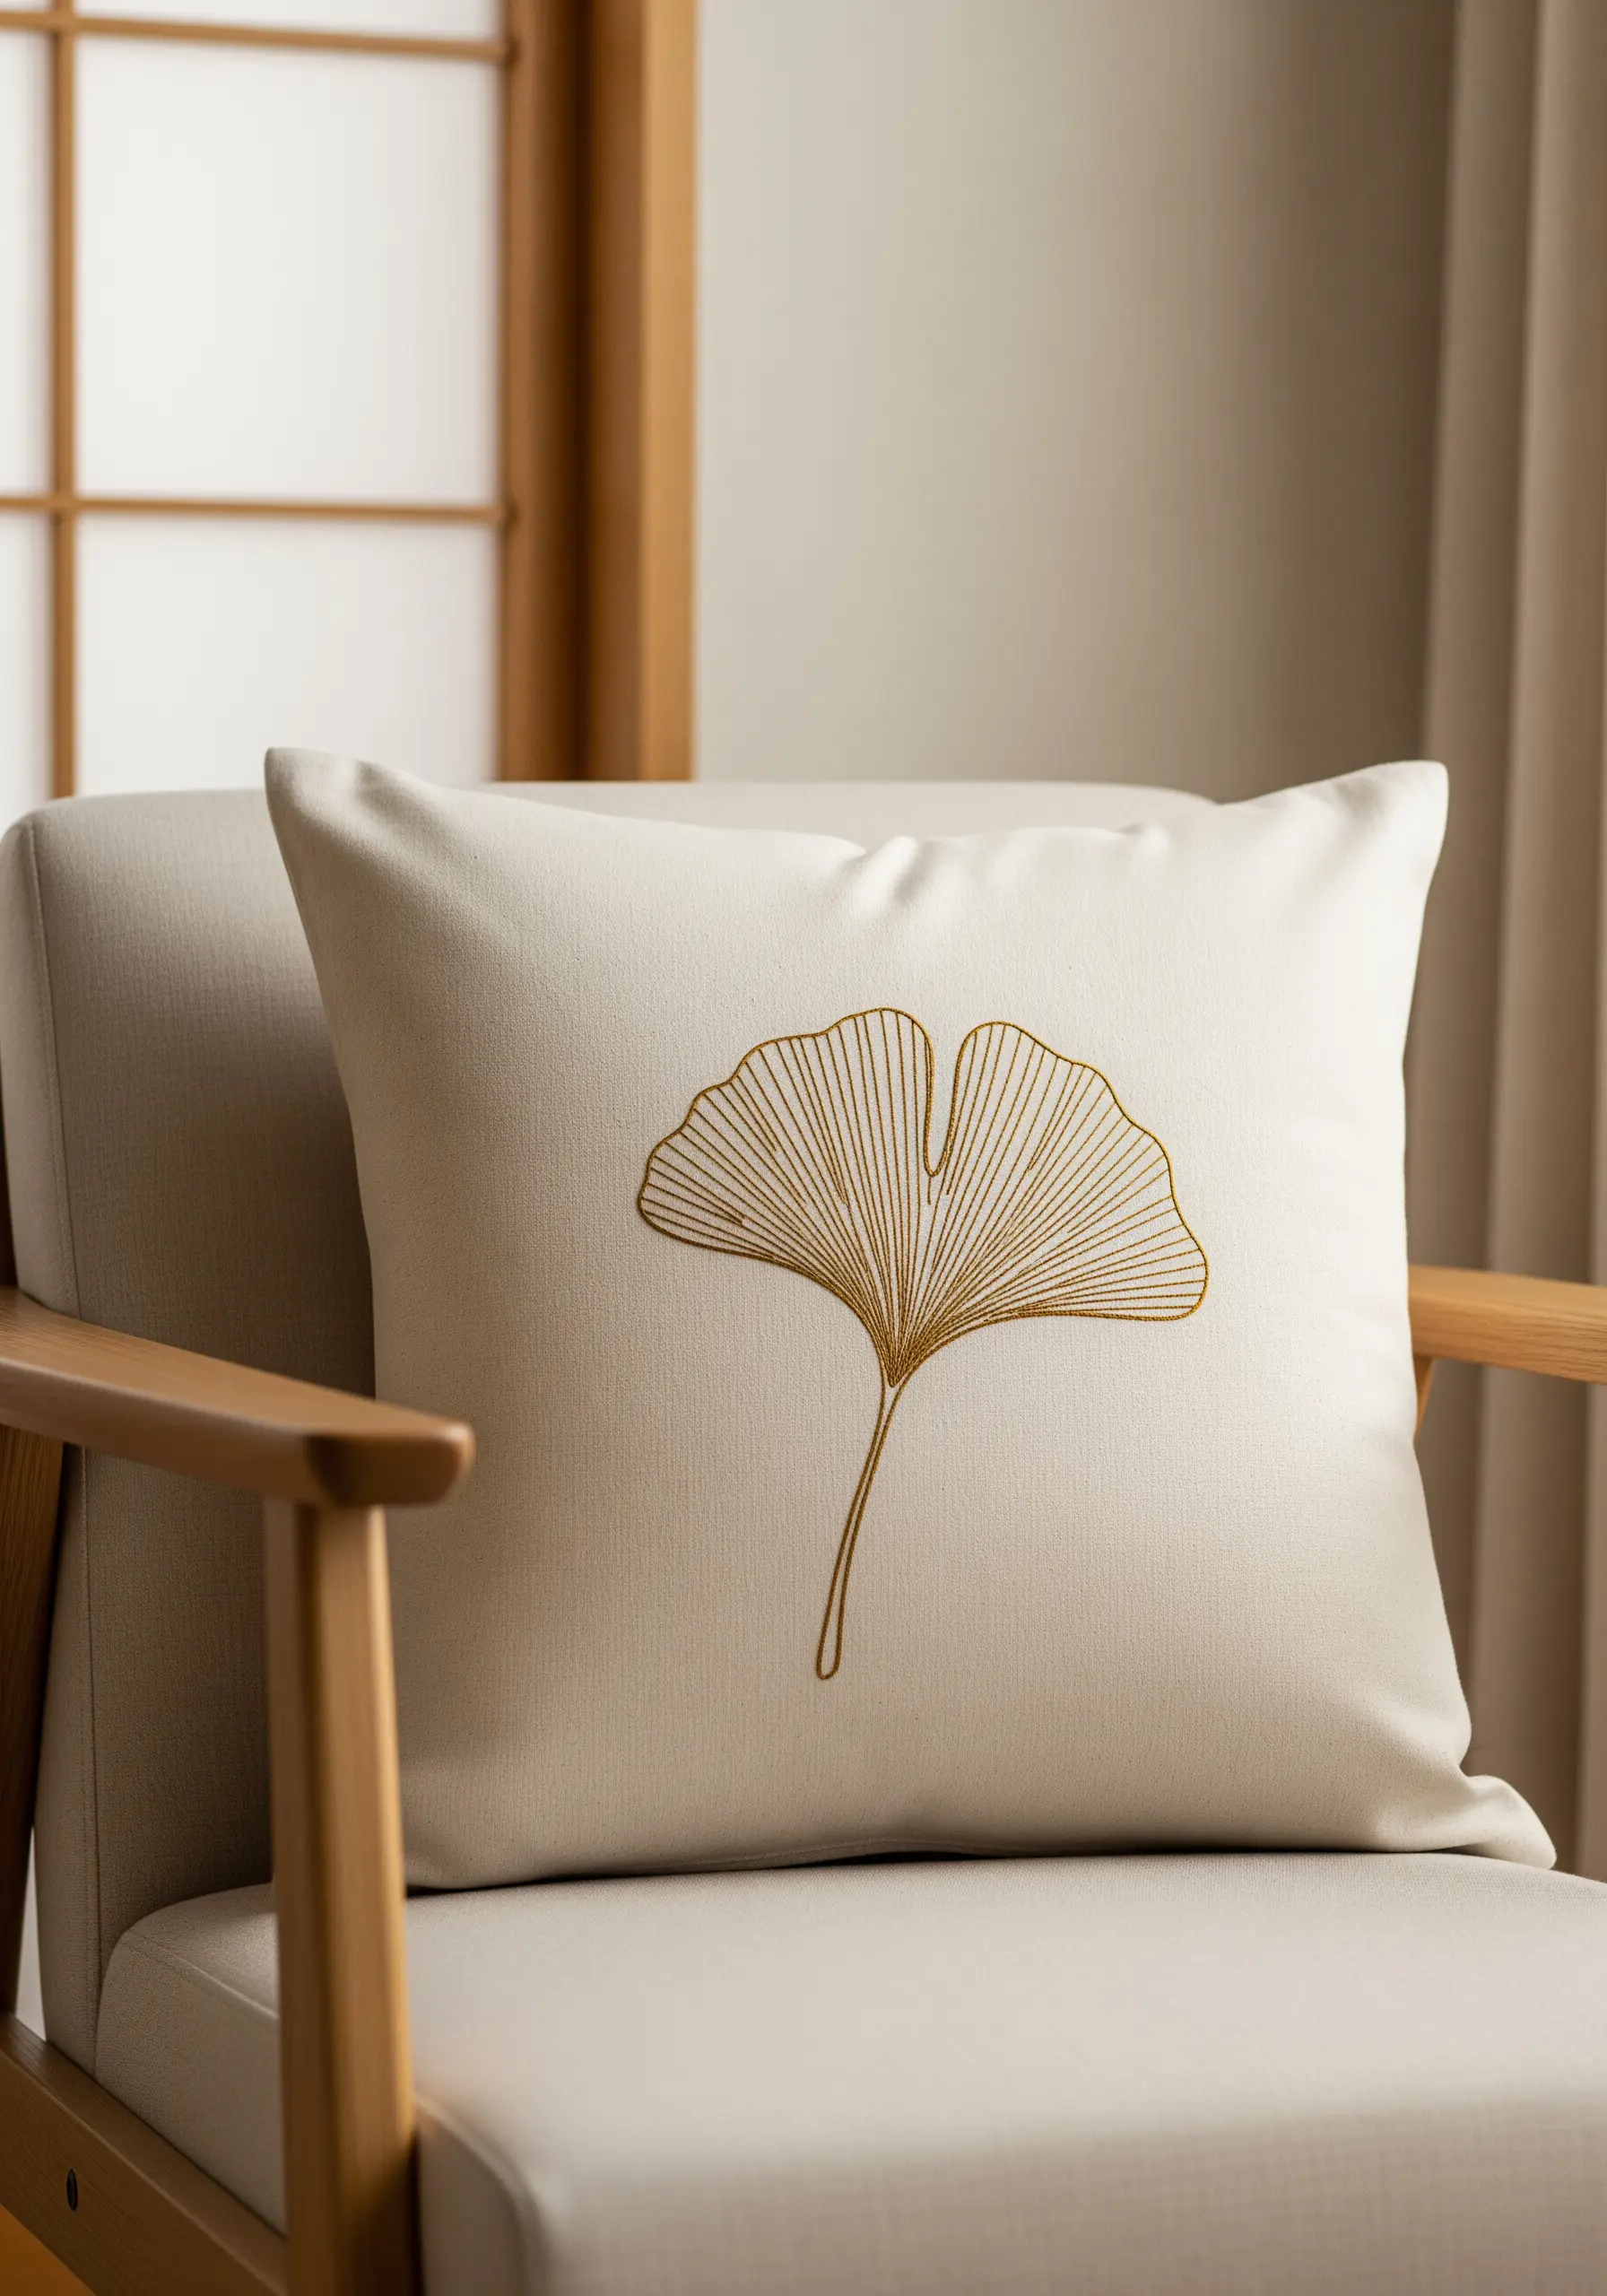
To achieve this graphic, elegant look, use radiating straight stitches that all meet at a central point on the stem.
The key to success is maintaining perfect thread tension—pull each stitch taut enough to lie flat, but not so tight that it puckers the fabric.
For a touch of quiet luxury, choose a single-strand metallic thread that catches the light without overwhelming the minimalist design.
Remember that the negative space between each line is just as crucial as the stitch itself; it’s what gives the ginkgo leaf its delicate, airy structure.
2. Large-Scale Line Art with a Single Stitch
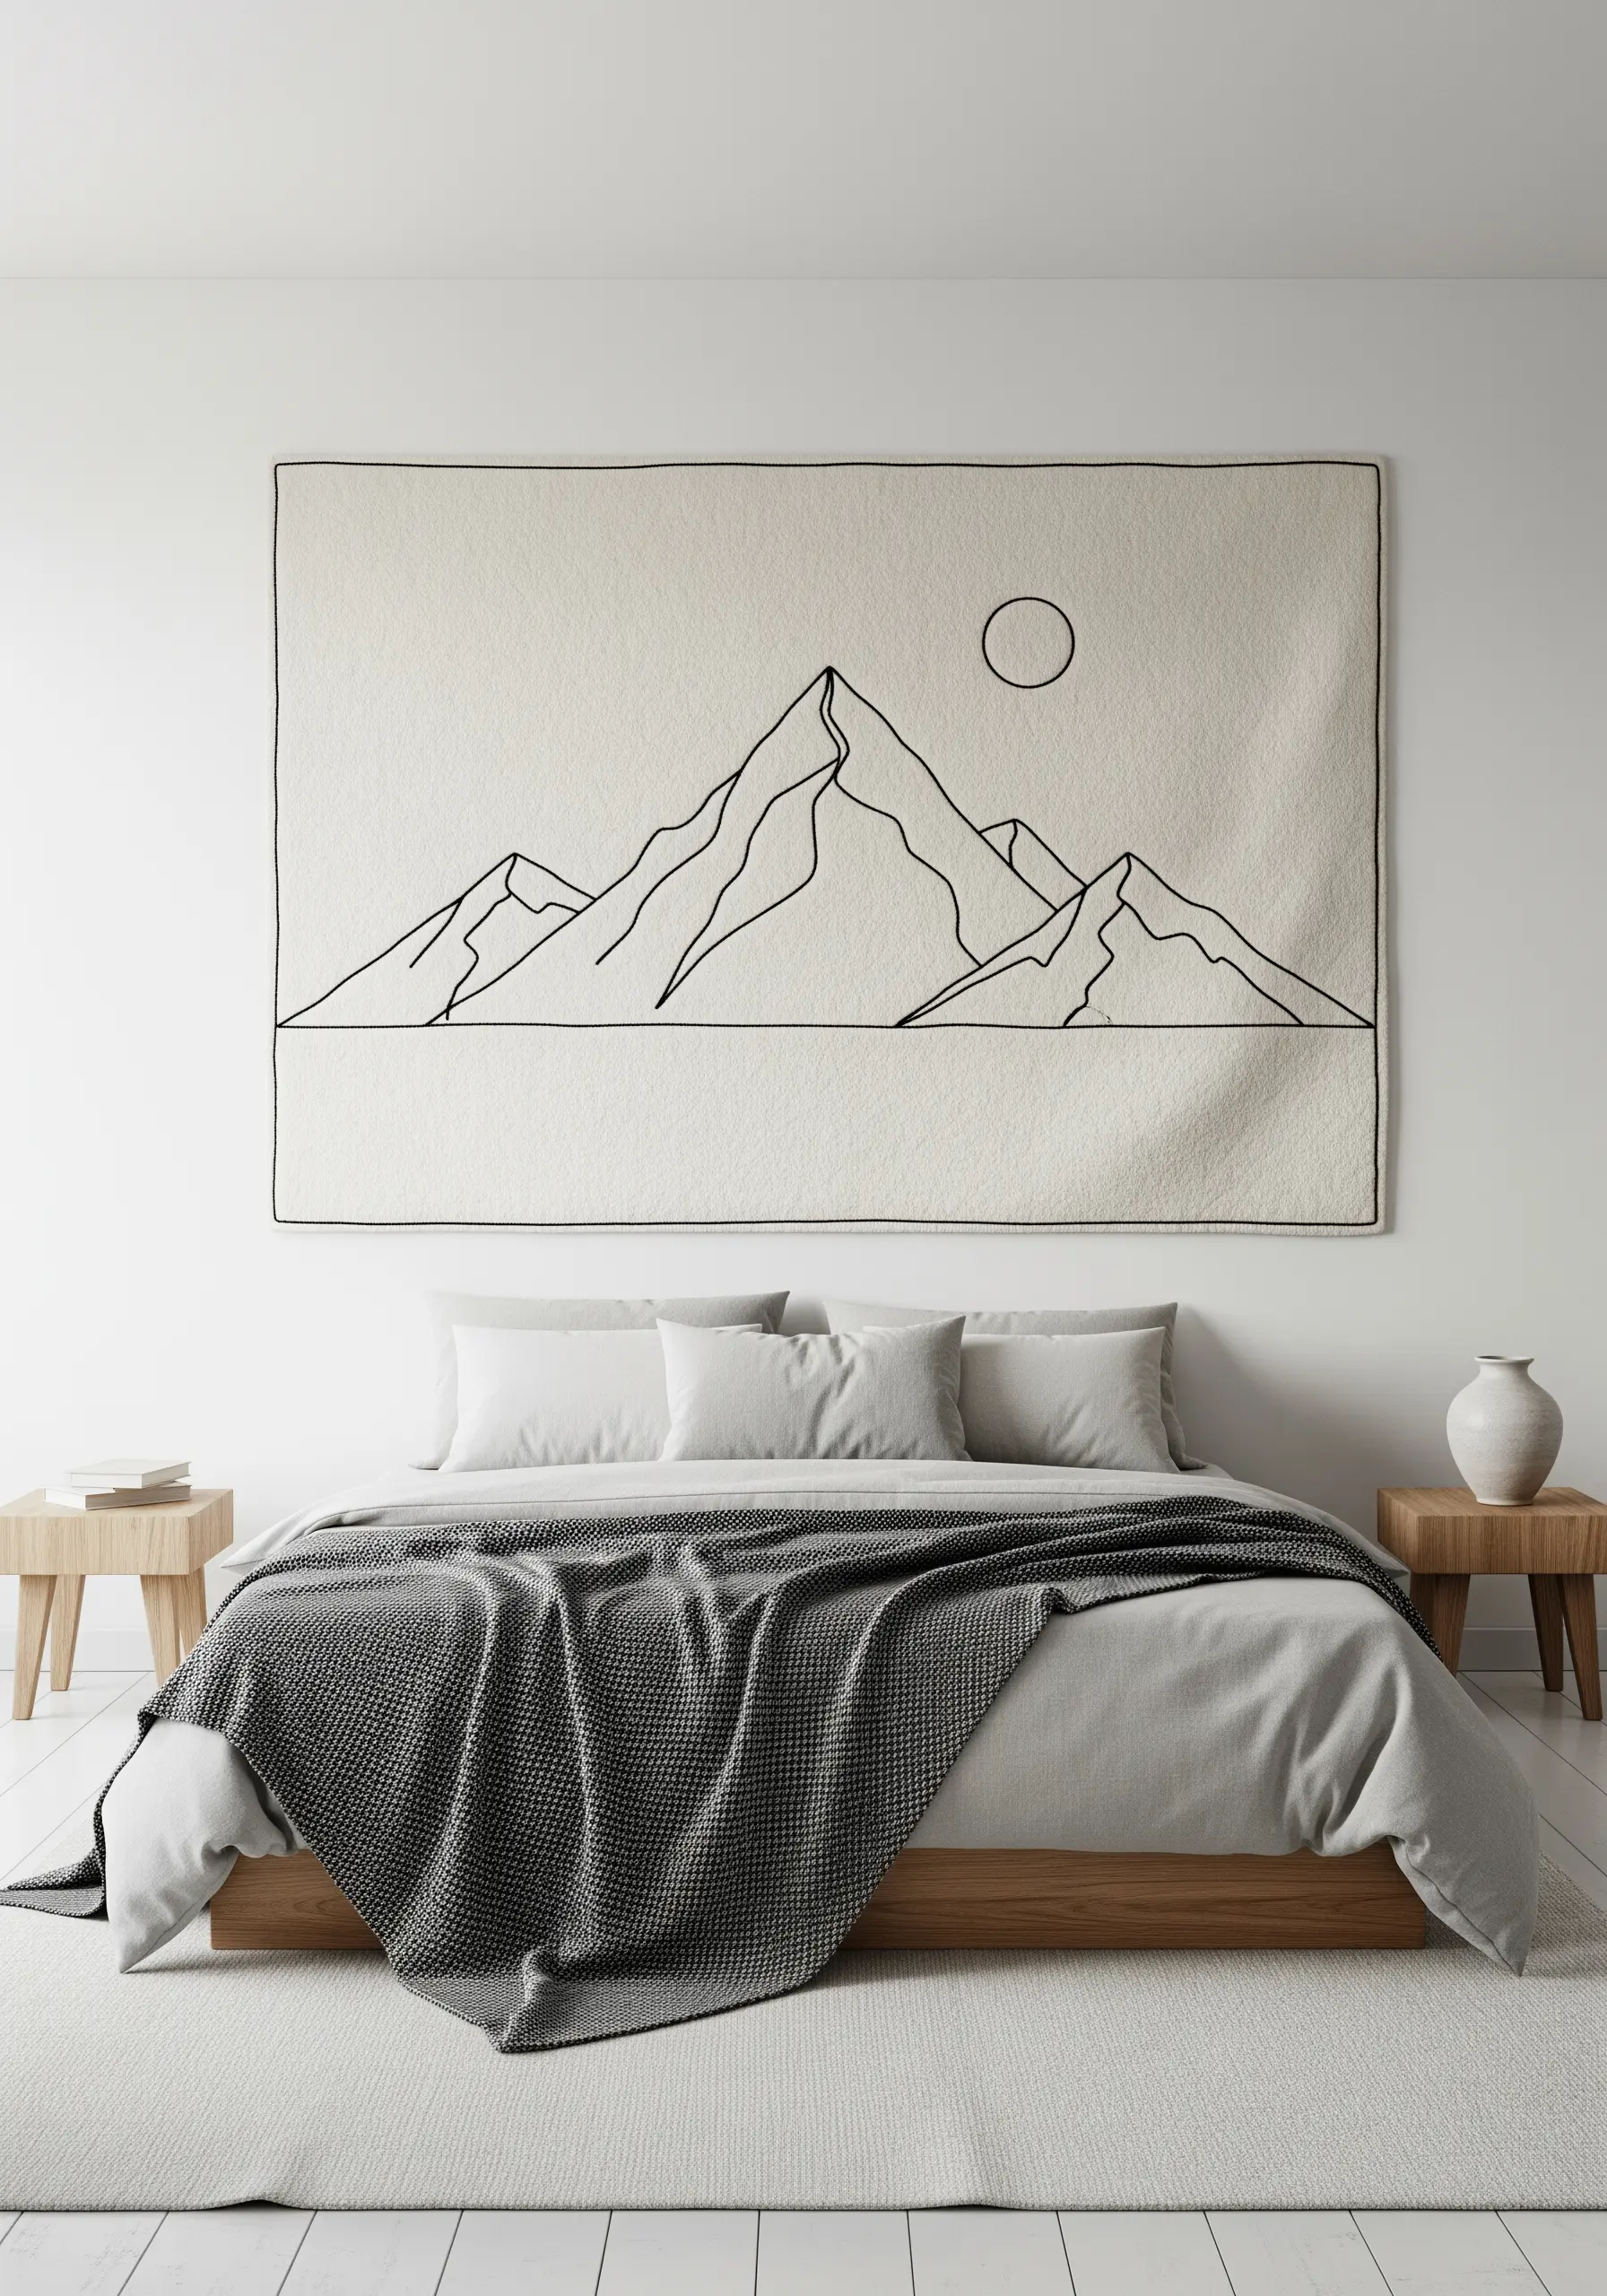
When you scale up an embroidery design, consistency is everything.
Use a single, bold stitch like a stem stitch or a whipped backstitch to ensure your lines have presence and don’t get lost on the large canvas.
Choose a thick thread, such as a #5 pearl cotton, to give the line art a graphic weight that feels intentional.
To prevent sagging on large-scale embroidery tapestries, you must work with the fabric stretched taut in a frame, even if you have to work in sections.
3. Tone-on-Tone Texture for Subtle Elegance
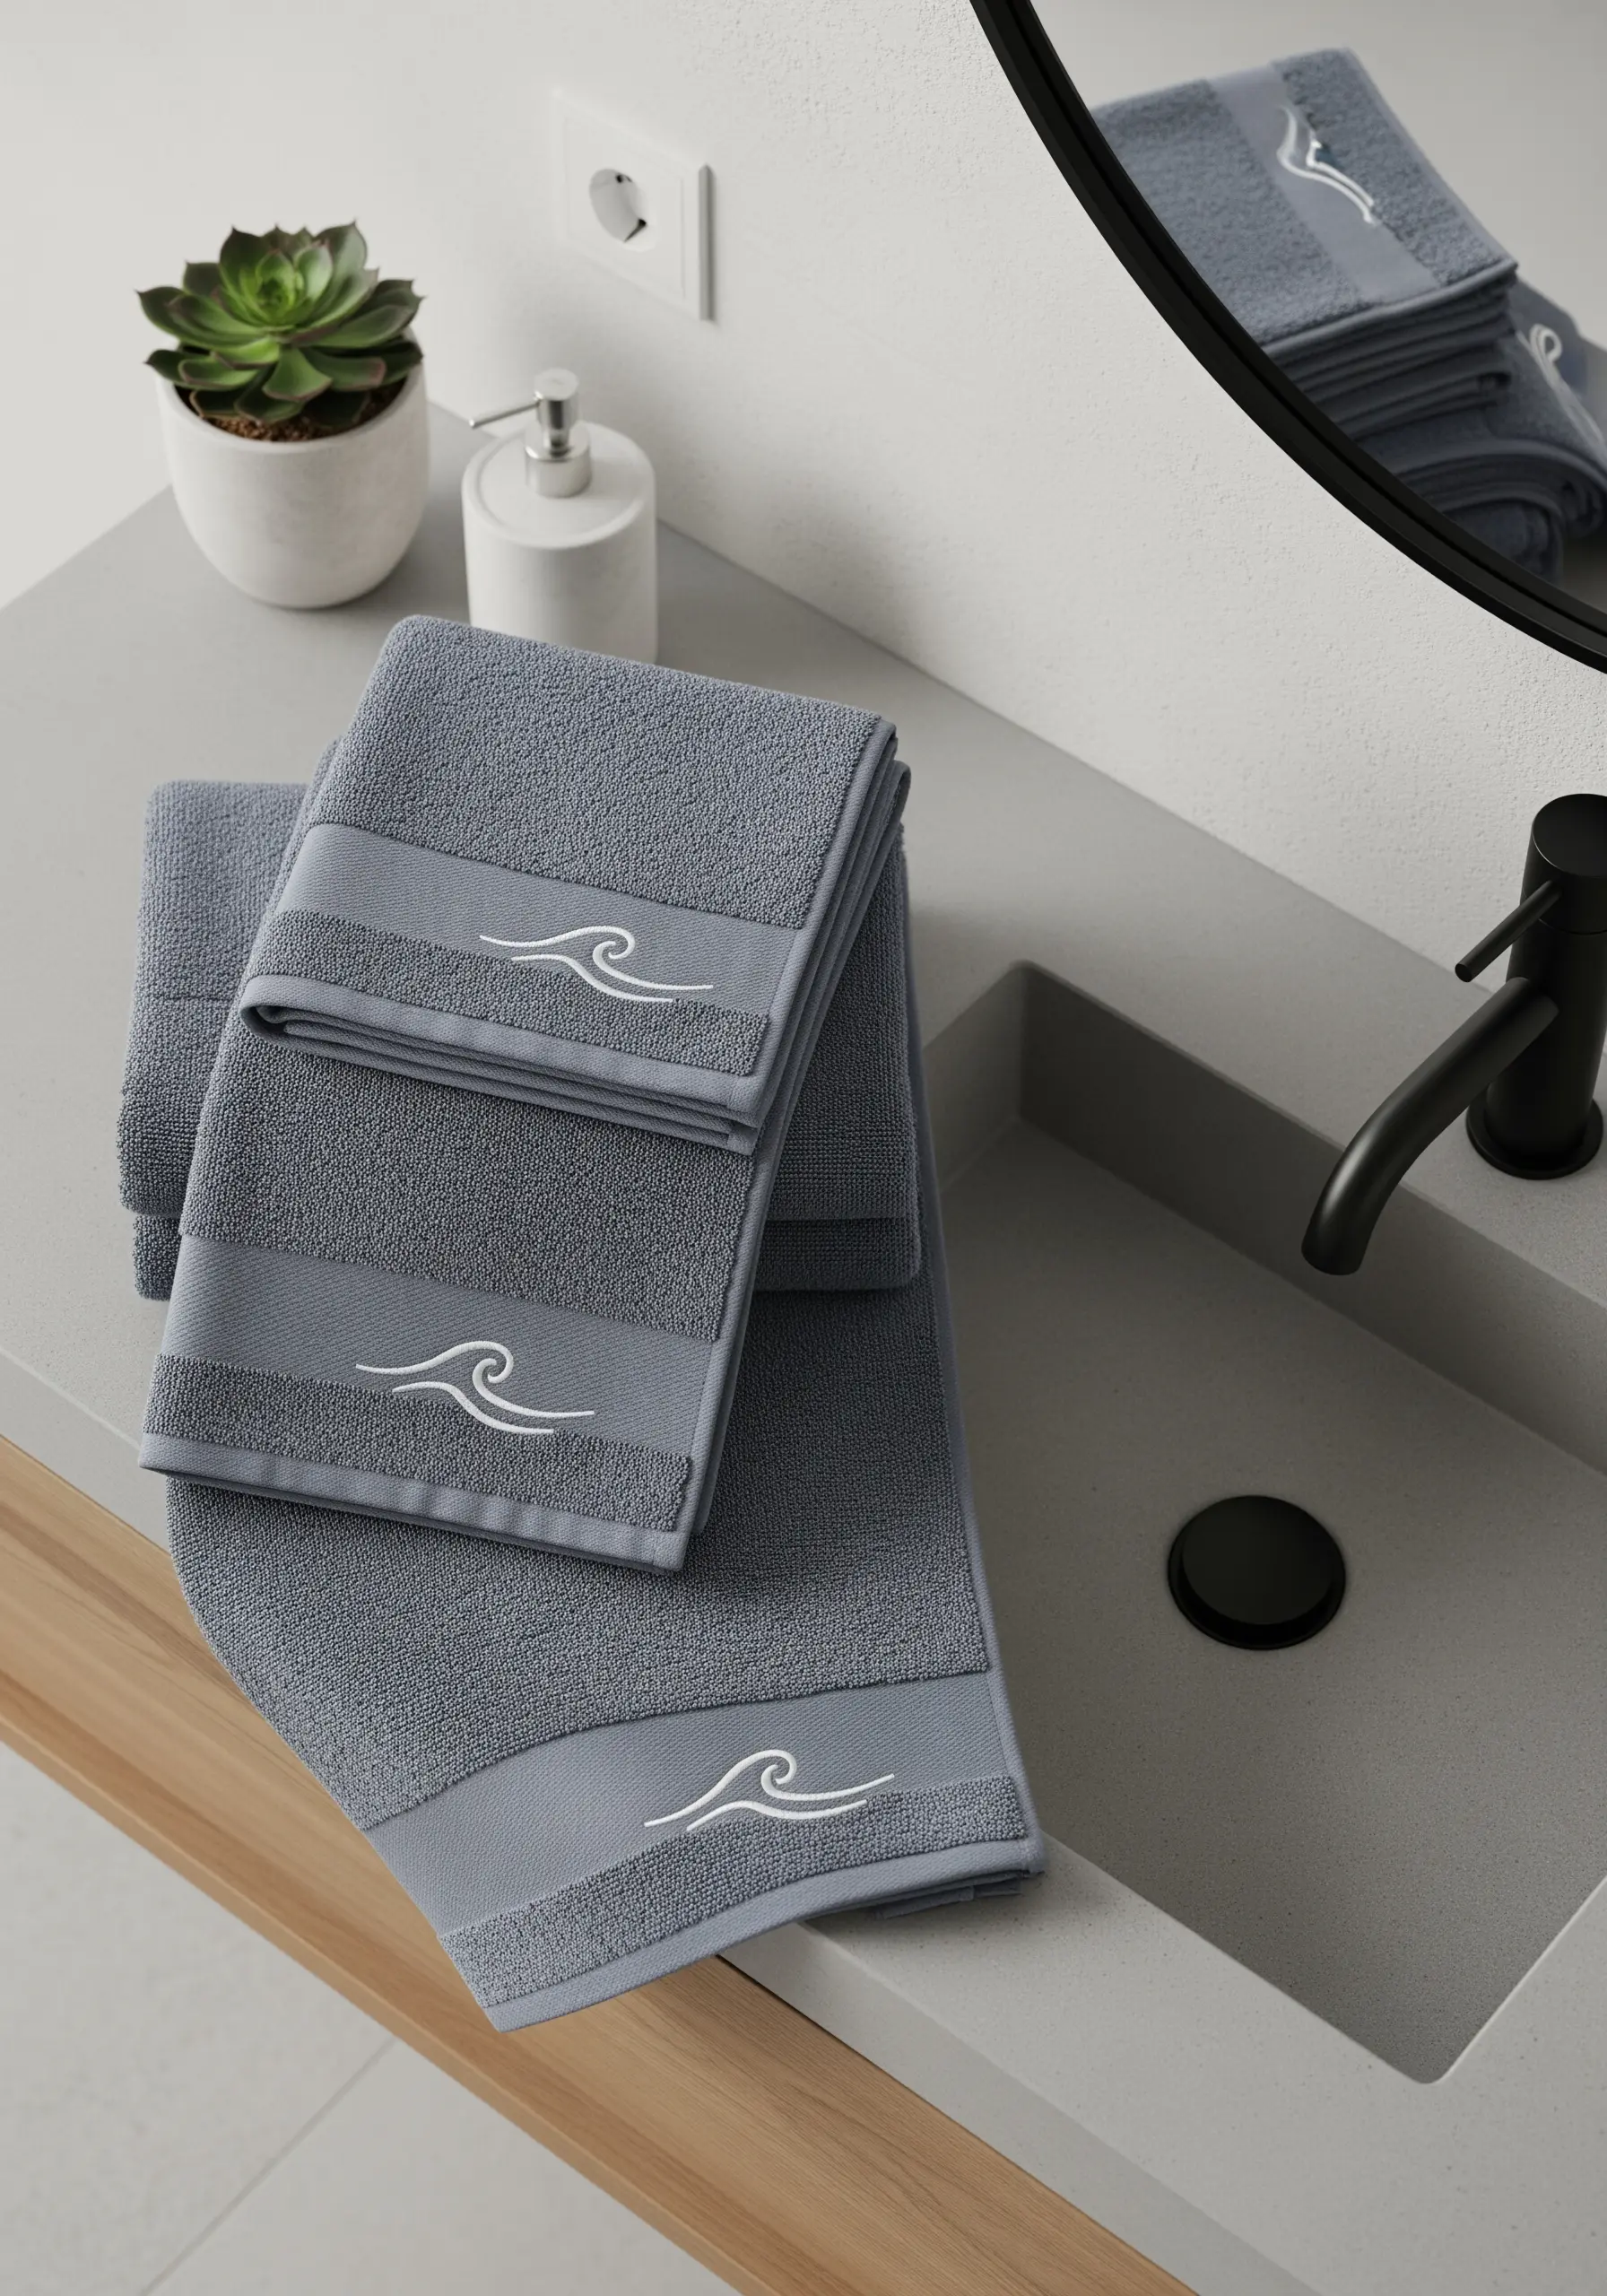
Embroidering on a high-pile fabric like terry cloth requires a topper, such as a water-soluble stabilizer.
This simple film sits on top of the fabric, preventing your stitches from sinking into the loops and ensuring a crisp, clean finish.
A tone-on-tone embroidery effect, achieved by using a thread just a shade lighter or darker than the towel, creates a subtle detail that feels luxurious and custom-made.
Keep the design simple—a single, flowing line works better than intricate details on this texture.
4. Delicate Stitches on Sheer Fabrics
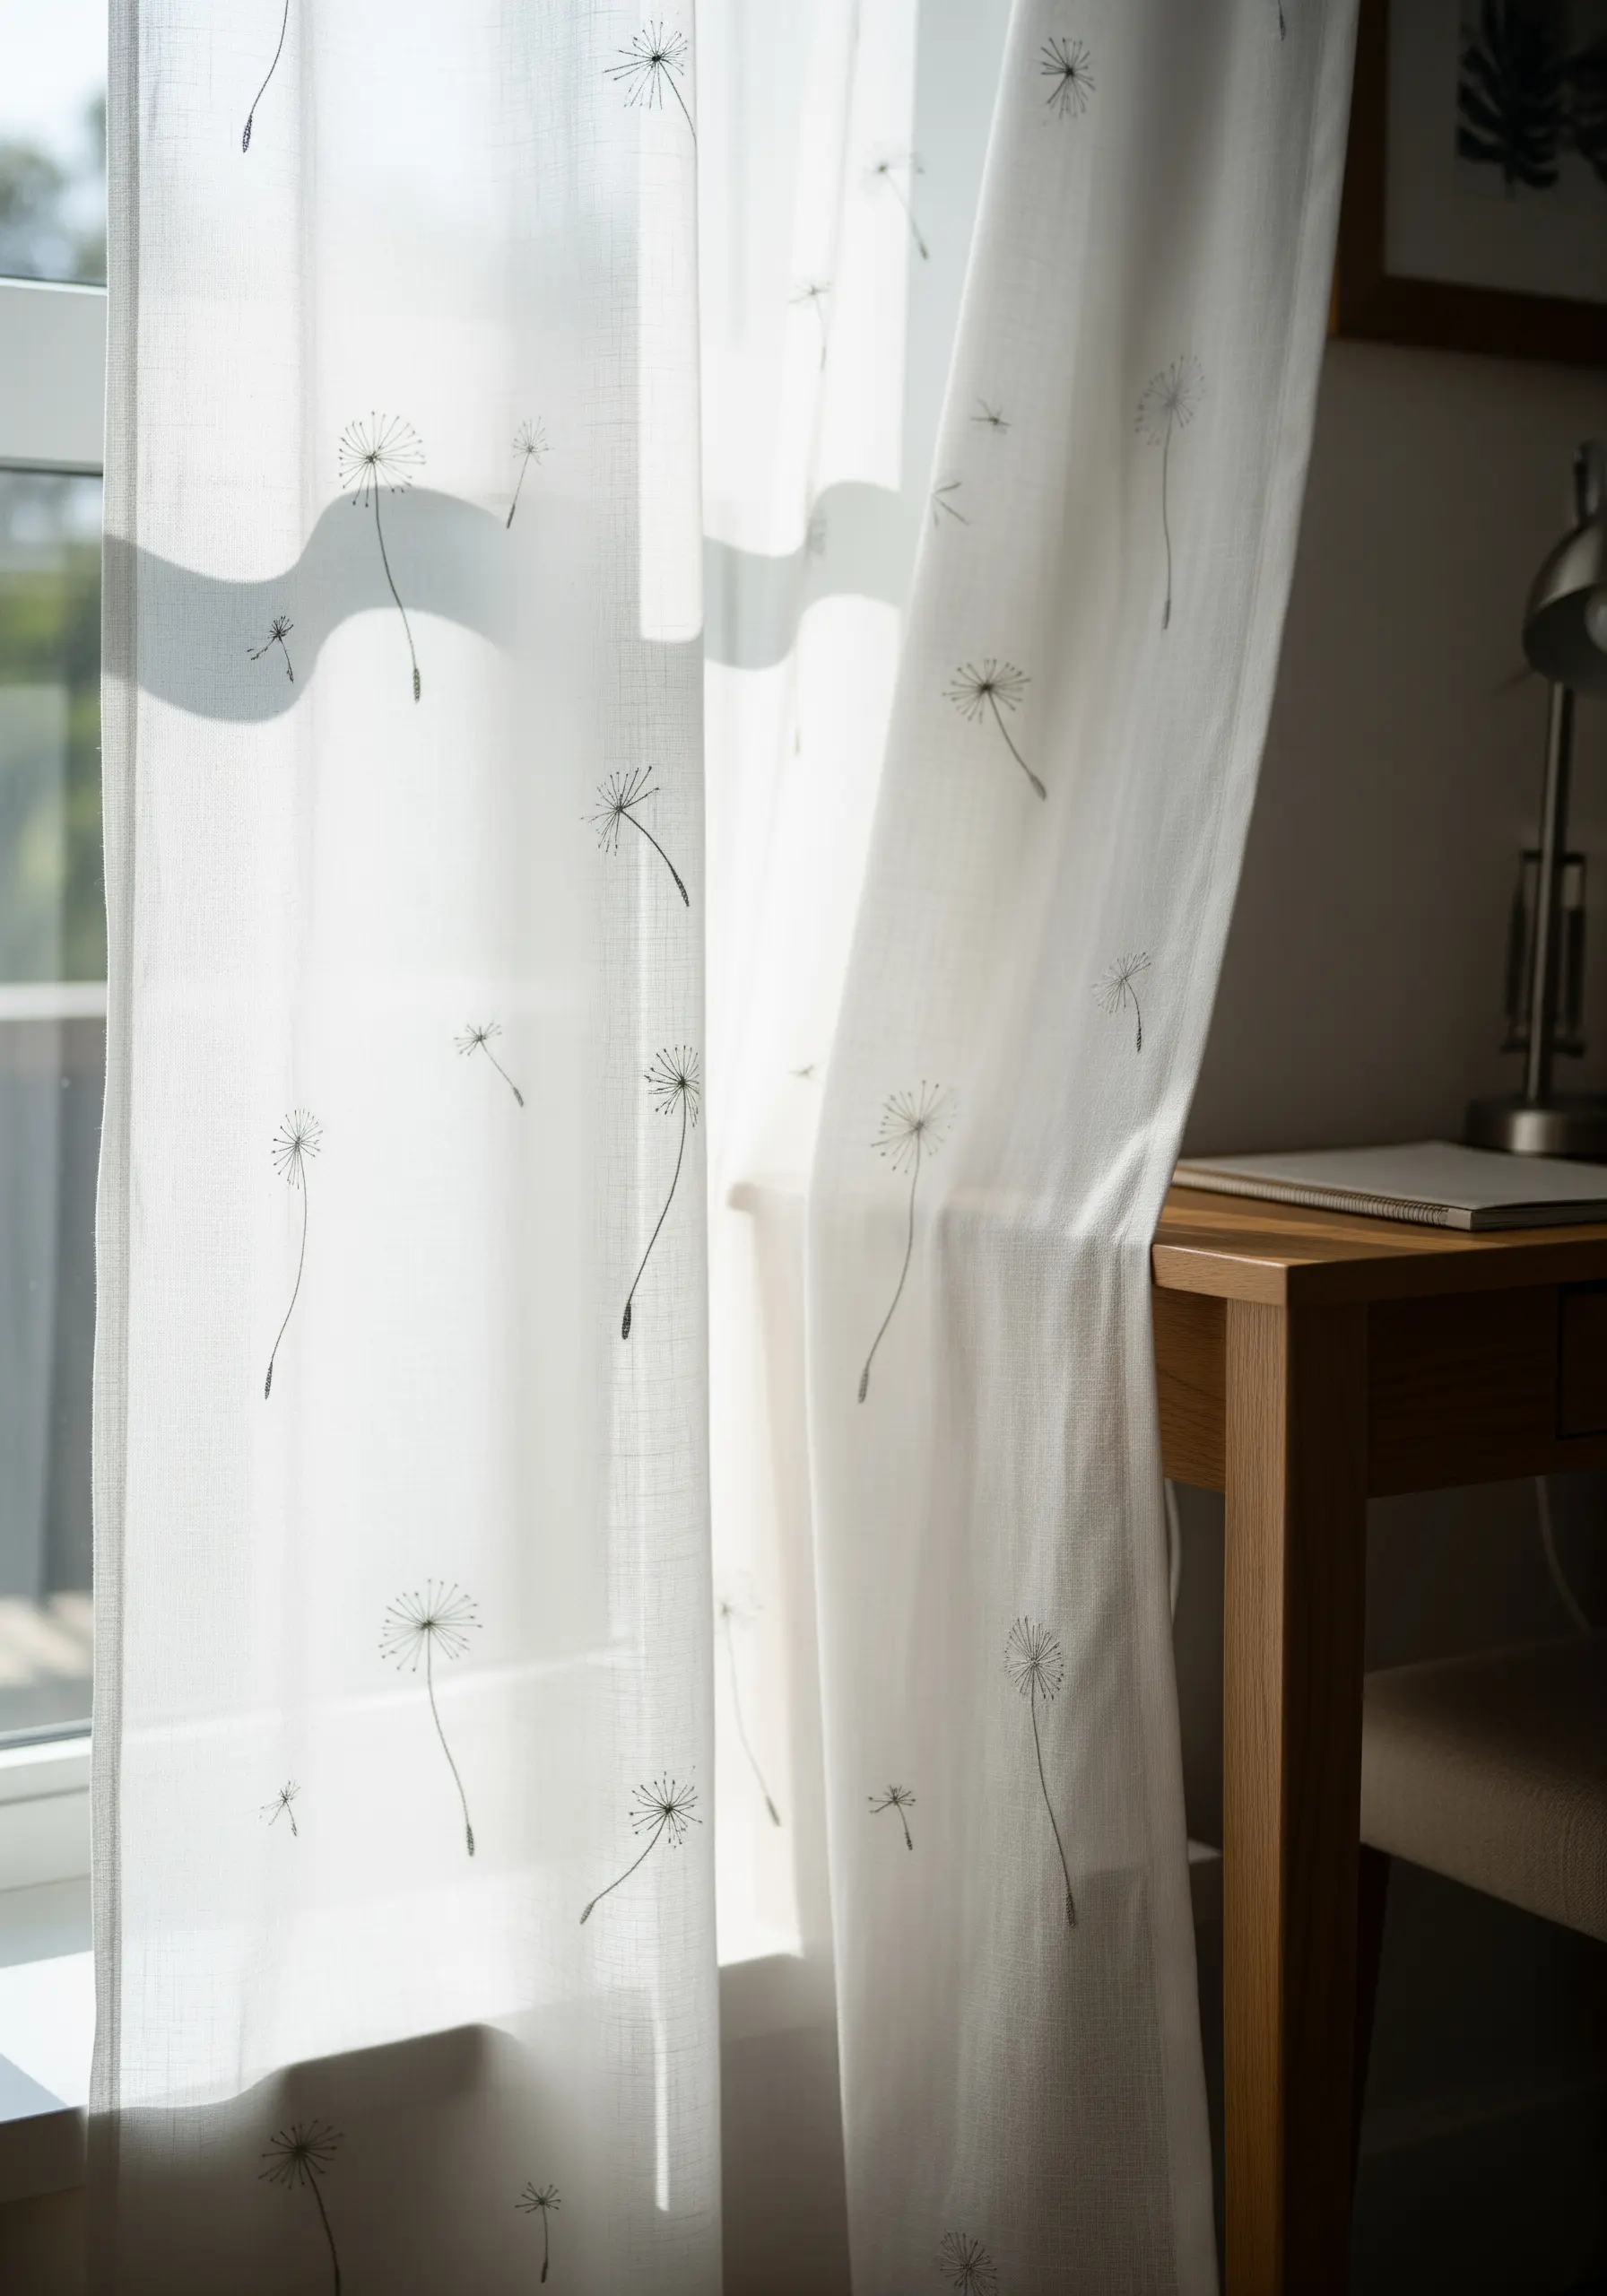
When embroidering on sheer or lightweight fabrics like linen curtains, your technique must be equally light.
Use only one or two strands of floss and a fine, sharp needle (like a size 9 or 10) to minimize holes and prevent puckering.
A simple backstitch for the stems and tiny straight stitches for the seeds maintain the design’s airy quality, allowing it to interact beautifully with the light.
Avoid heavy knots on the back; secure your threads by weaving them into existing stitches instead.
5. Celestial Mapping with Running Stitch
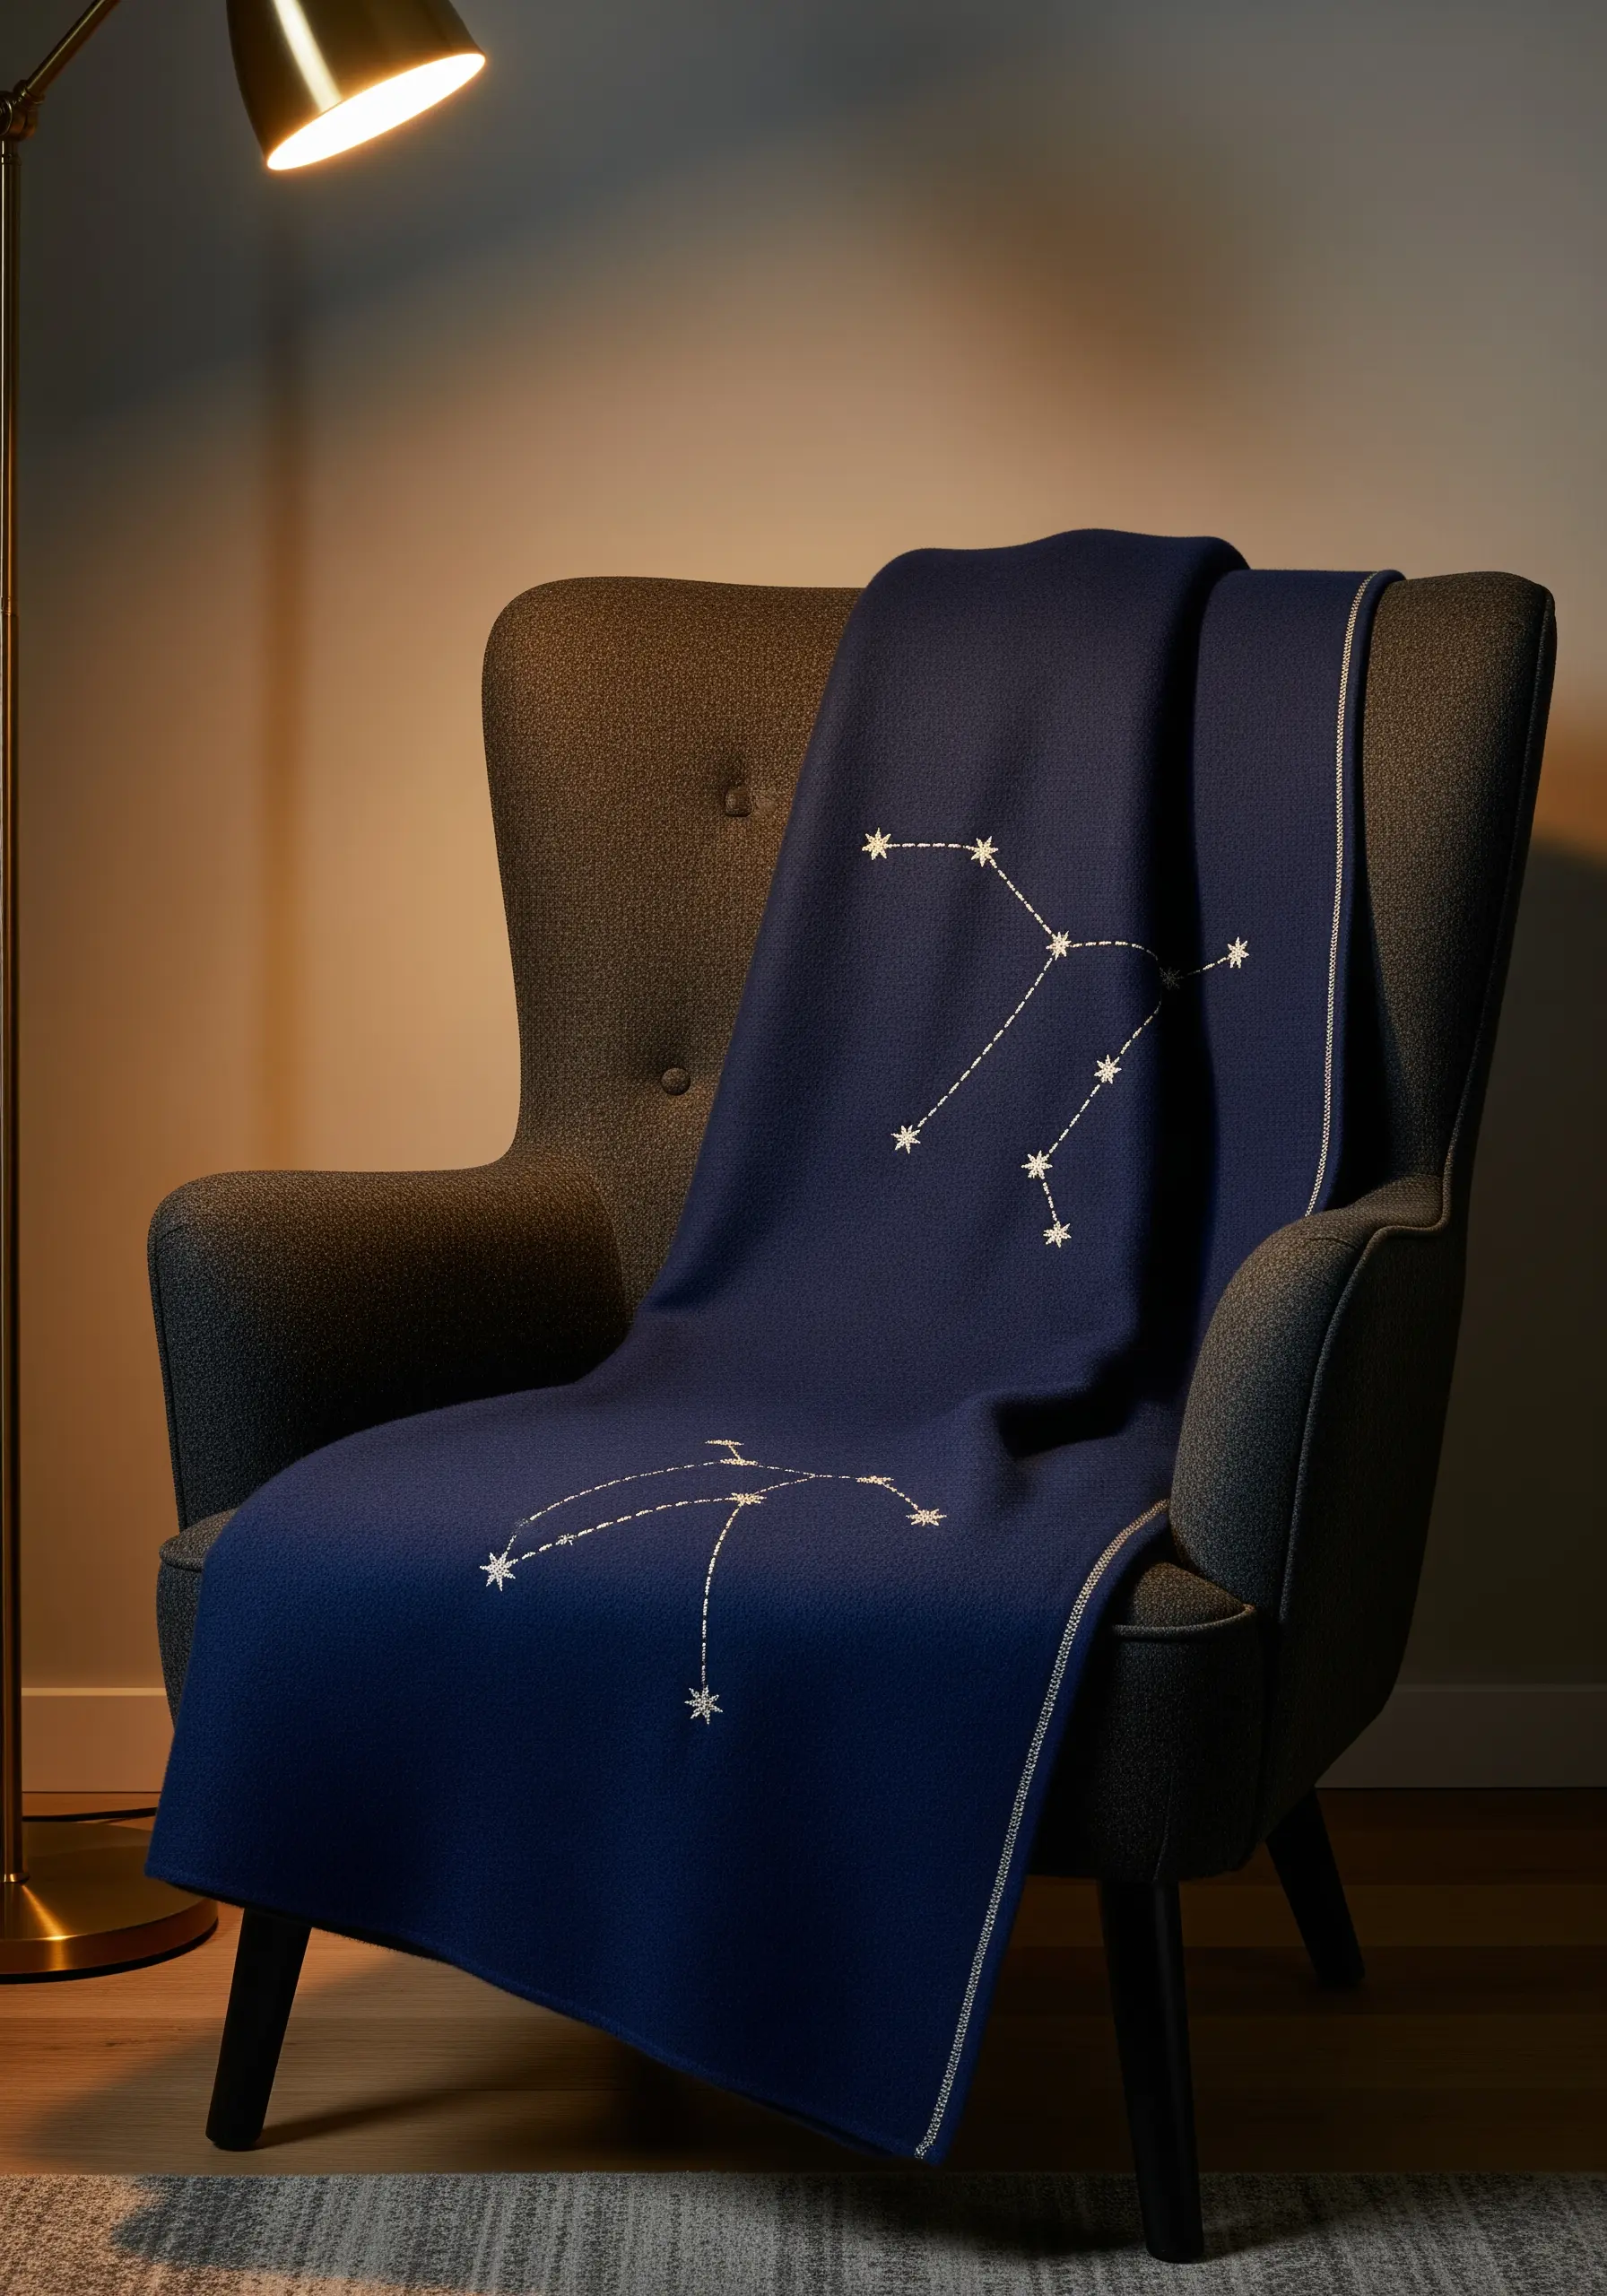
You can map out your favorite constellation using the humble running stitch for a piece of deeply personal art.
To ensure your stars are perfectly placed, use a water-soluble transfer pen to mark the points before you begin.
A single French knot can represent a brighter star, while the running stitch connects them, creating a clean, graphic representation of the night sky.
Stitching with a bright white or silver metallic thread on a dark, woolly fabric like this blanket adds a beautiful textural contrast.
6. Achieving Natural Texture with Fishbone Stitch
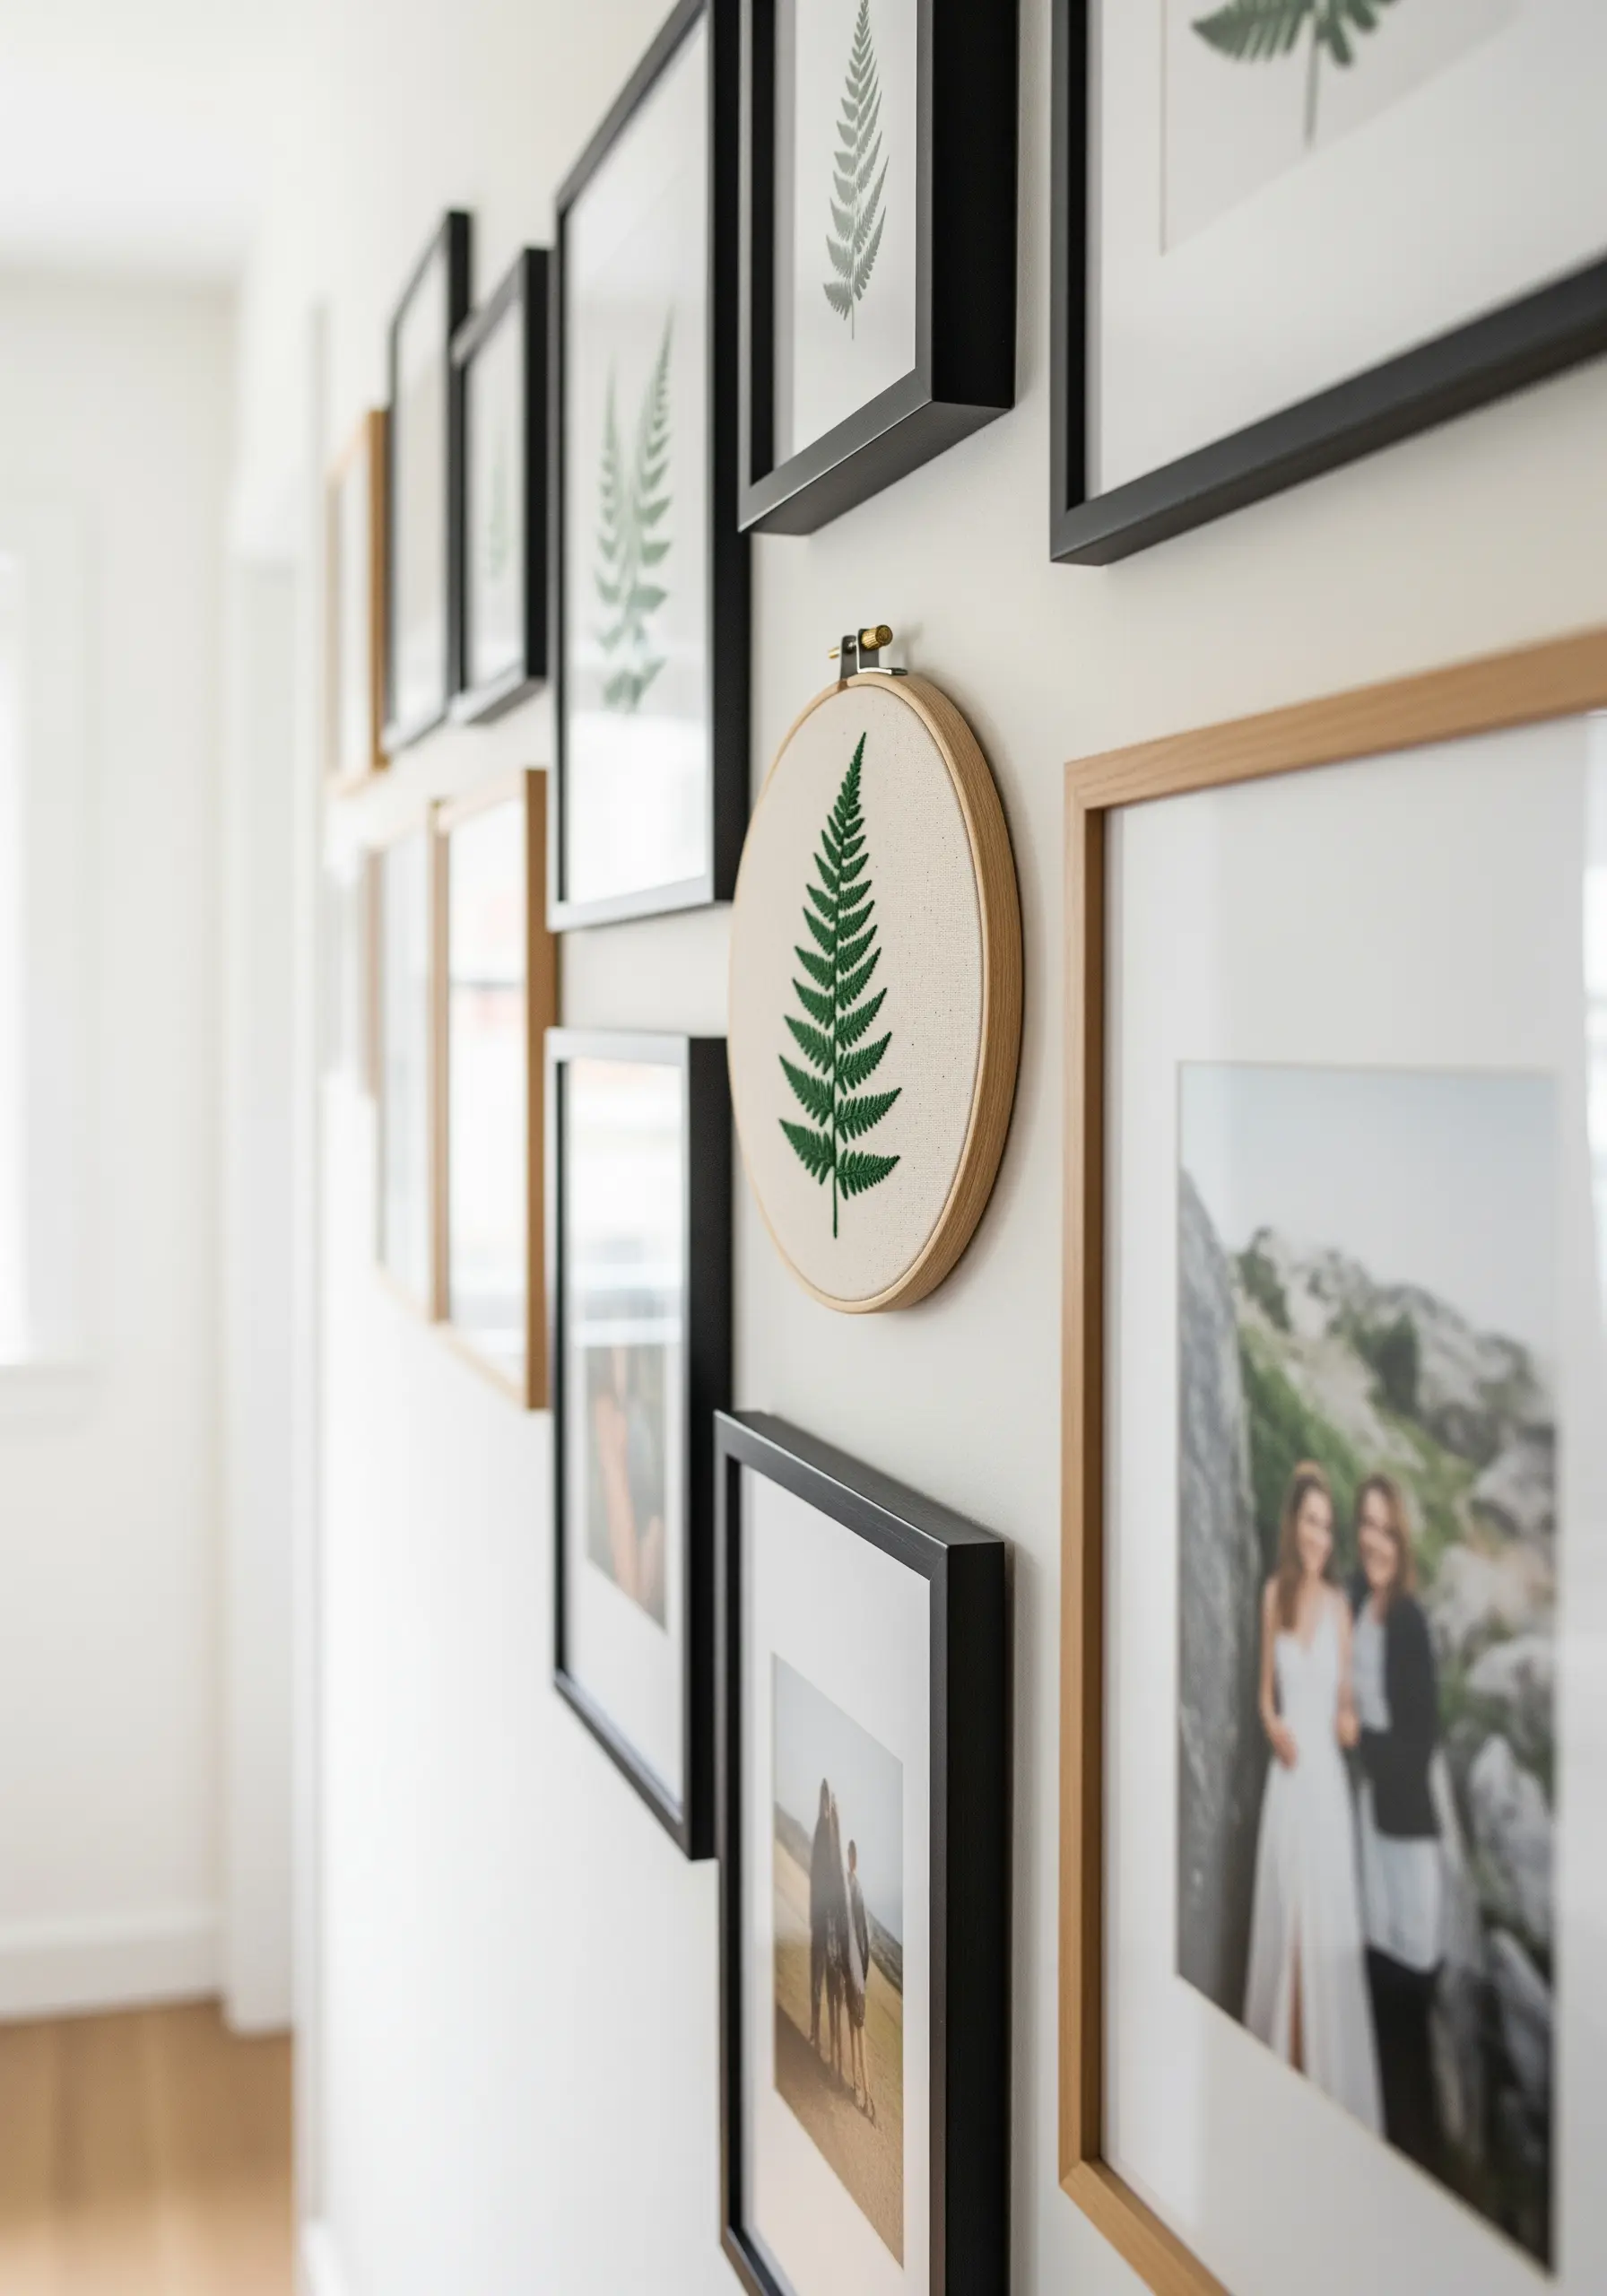
The fishbone stitch is your best tool for creating leaves and ferns that have a natural, organic texture.
The stitch works from the tip downwards, with alternating stitches overlapping in the center to create a built-in central vein.
This method allows you to fill the shape and create realistic texture in one fluid motion.
By keeping it to a single color, you allow the stitch’s beautiful structure to become the main focus, making it a perfect addition to a gallery wall of framed embroidery patterns.
7. Soft Botanical Outlines for Elegant Linens
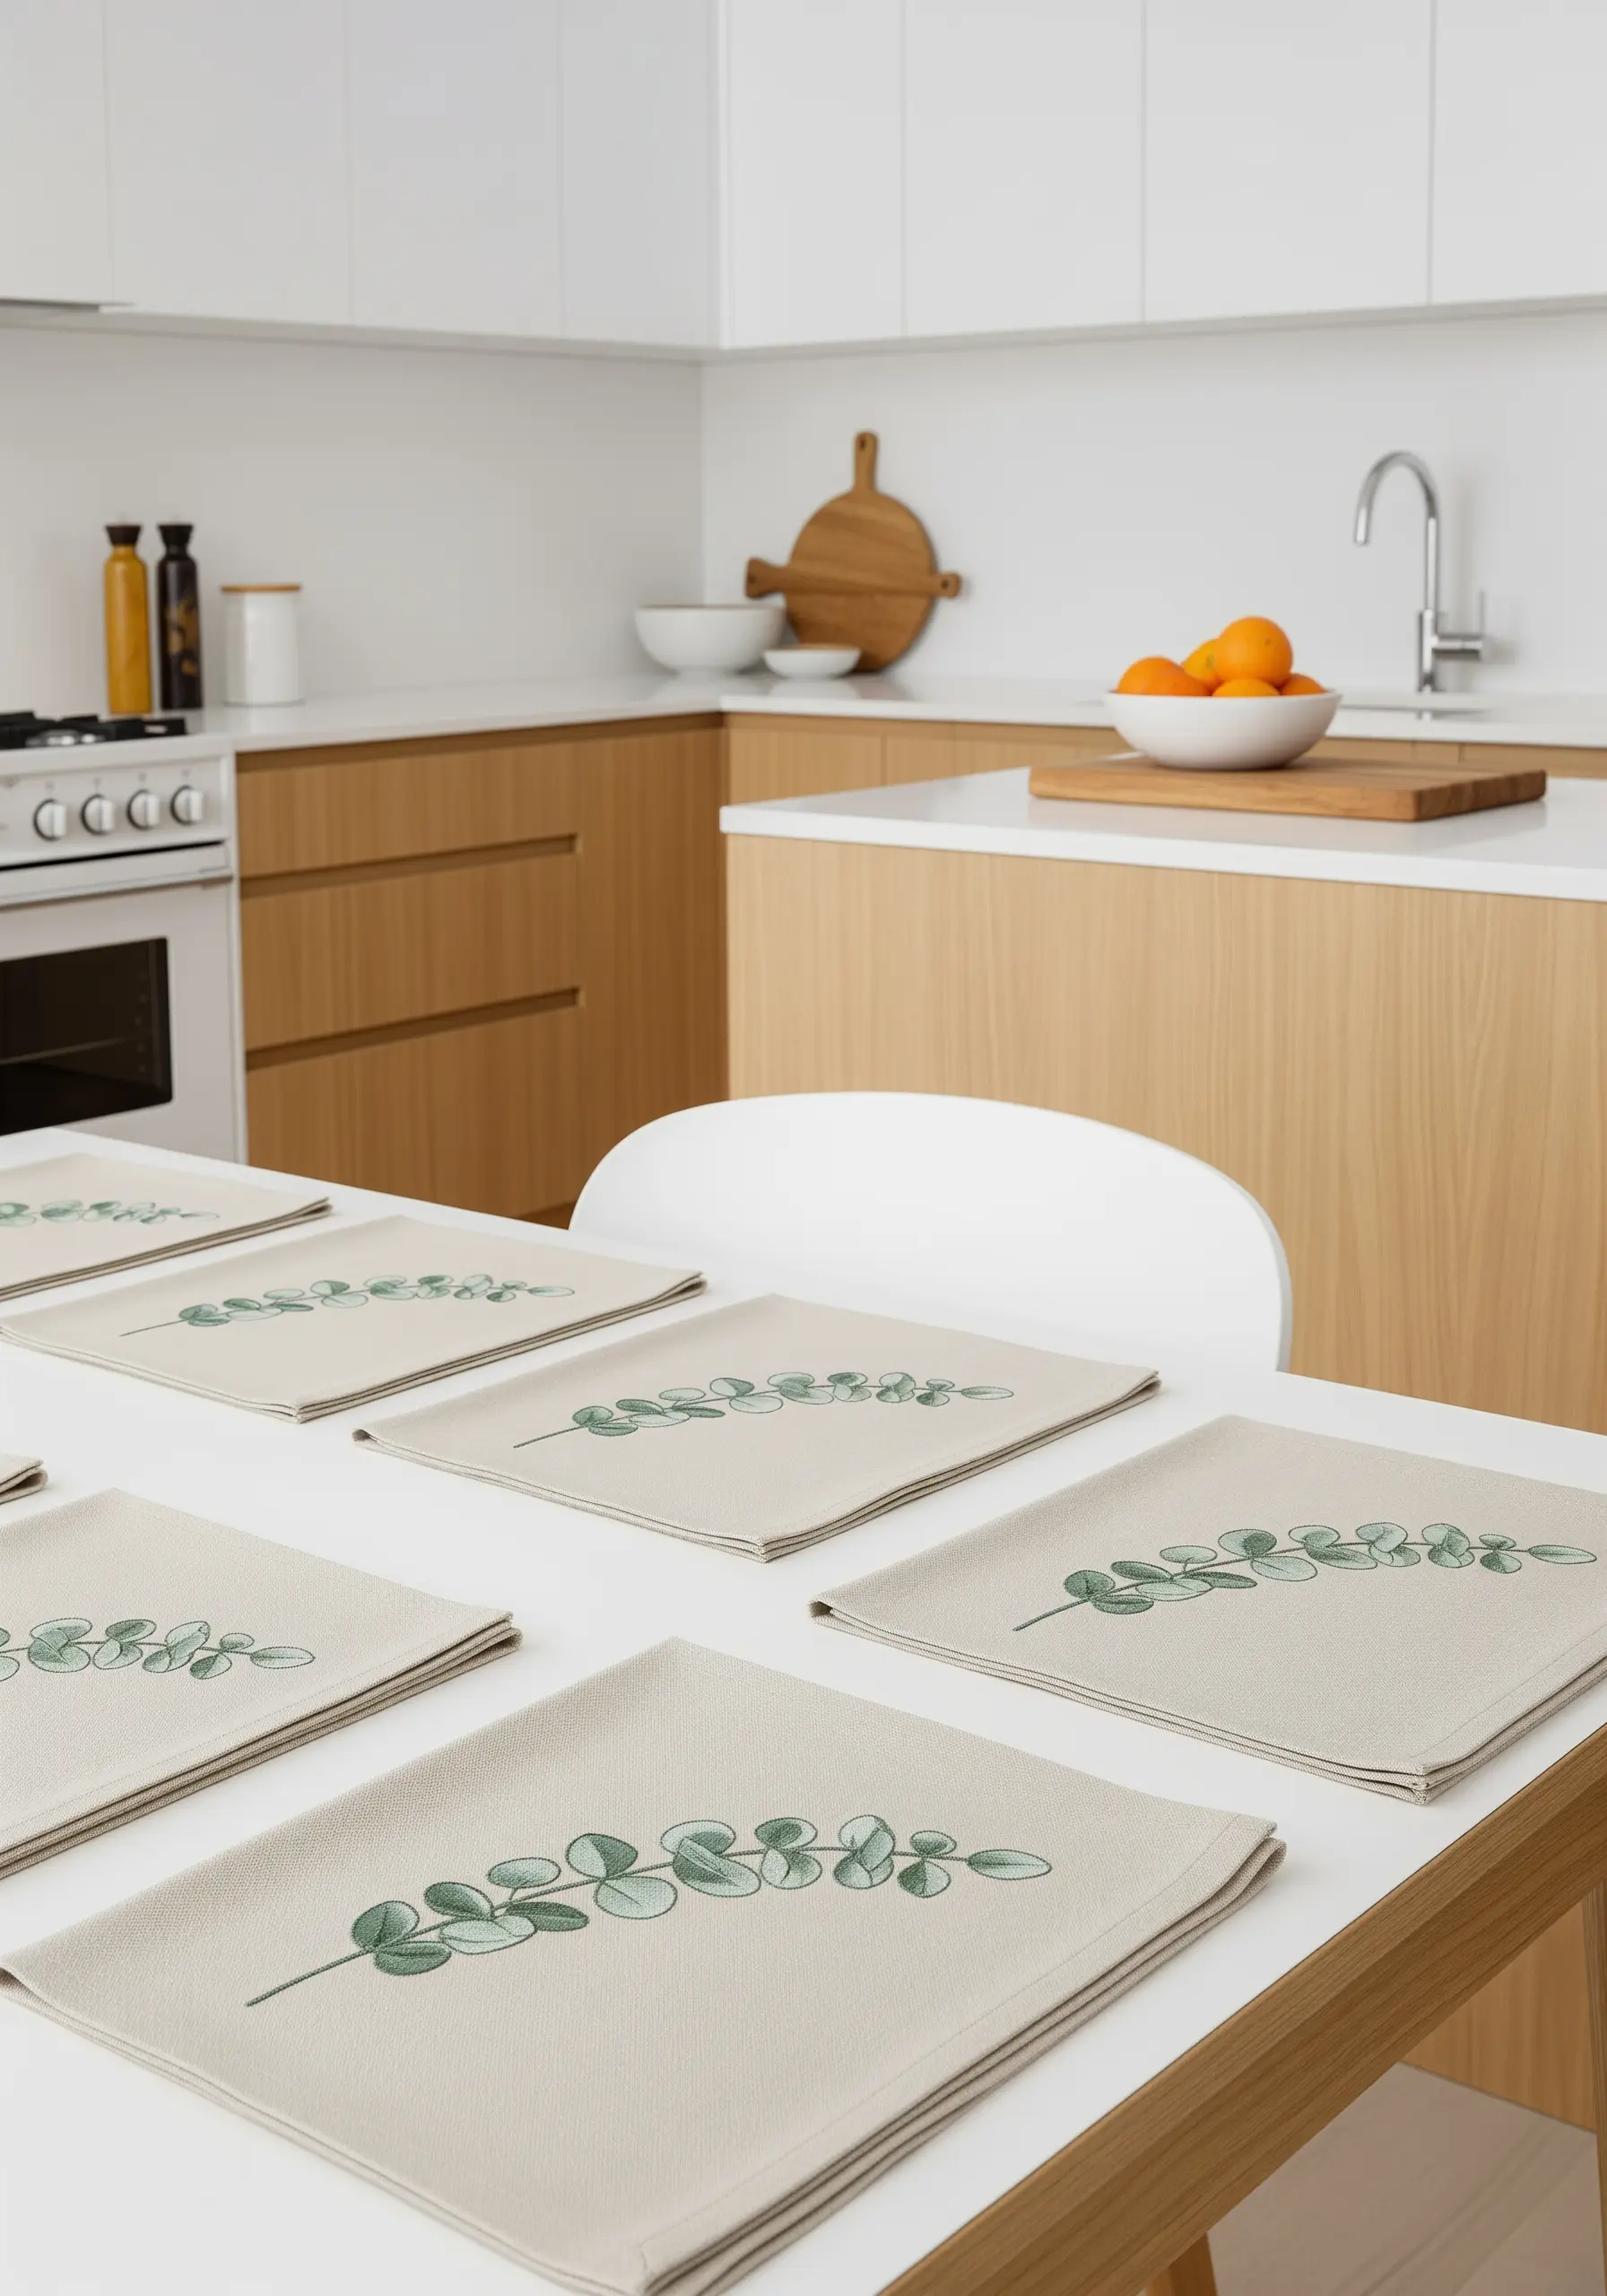
For a soft, illustrative look on table linens, choose a split stitch for your outlines.
Unlike the more defined backstitch, the split stitch creates a line that resembles a miniature chain, giving it a softer edge that blends beautifully with natural fabrics like linen.
Use two or three strands of floss in a muted, botanical hue to maintain a delicate feel that complements, rather than competes with, your table setting.
This approach keeps your modern minimalist table linen embroidery feeling fresh and uncluttered.
8. Playful Sophistication with Patterned Line Art
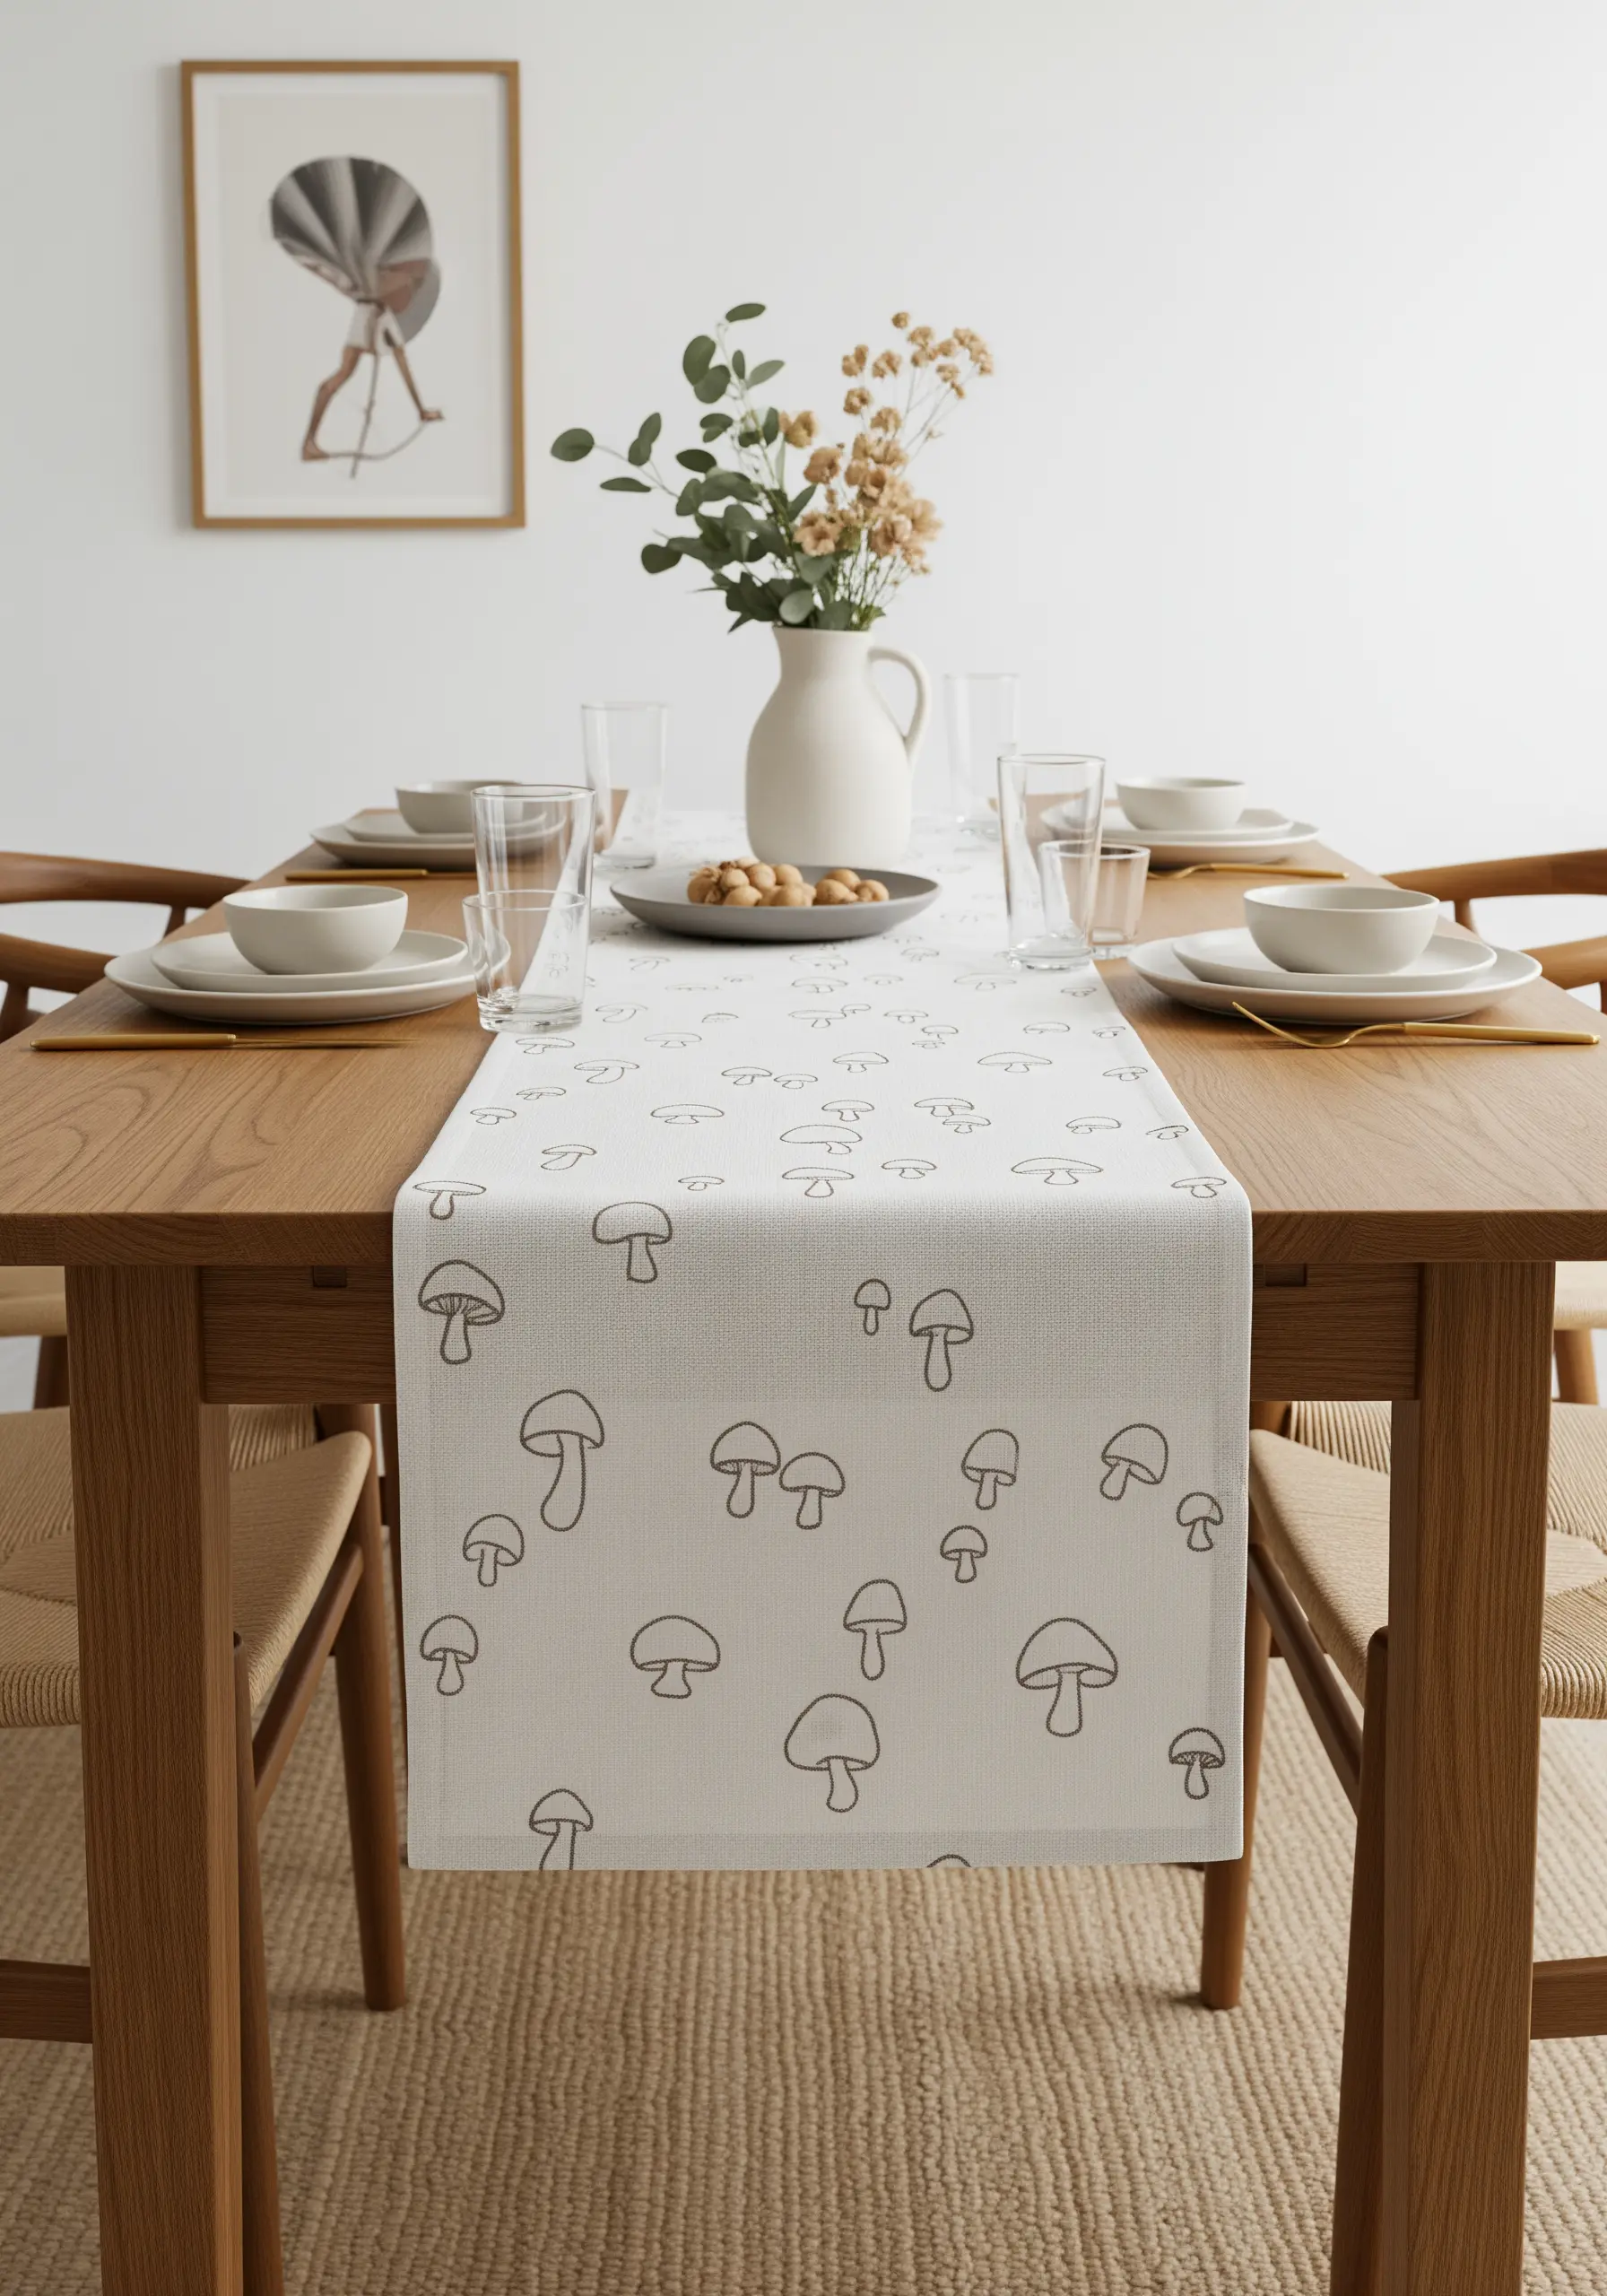
Transform a simple line drawing into a sophisticated textile by creating a repeating pattern.
To keep the look clean and modern, use a single strand of floss and a crisp backstitch.
Vary the scale and orientation of the motif—in this case, mushrooms—to create a sense of organic movement and prevent the pattern from looking too rigid.
This is a wonderful way to add a playful yet understated personality to a hand-stitched table runner or kitchen towels.
9. Using Appliqué for Bold, Graphic Shapes
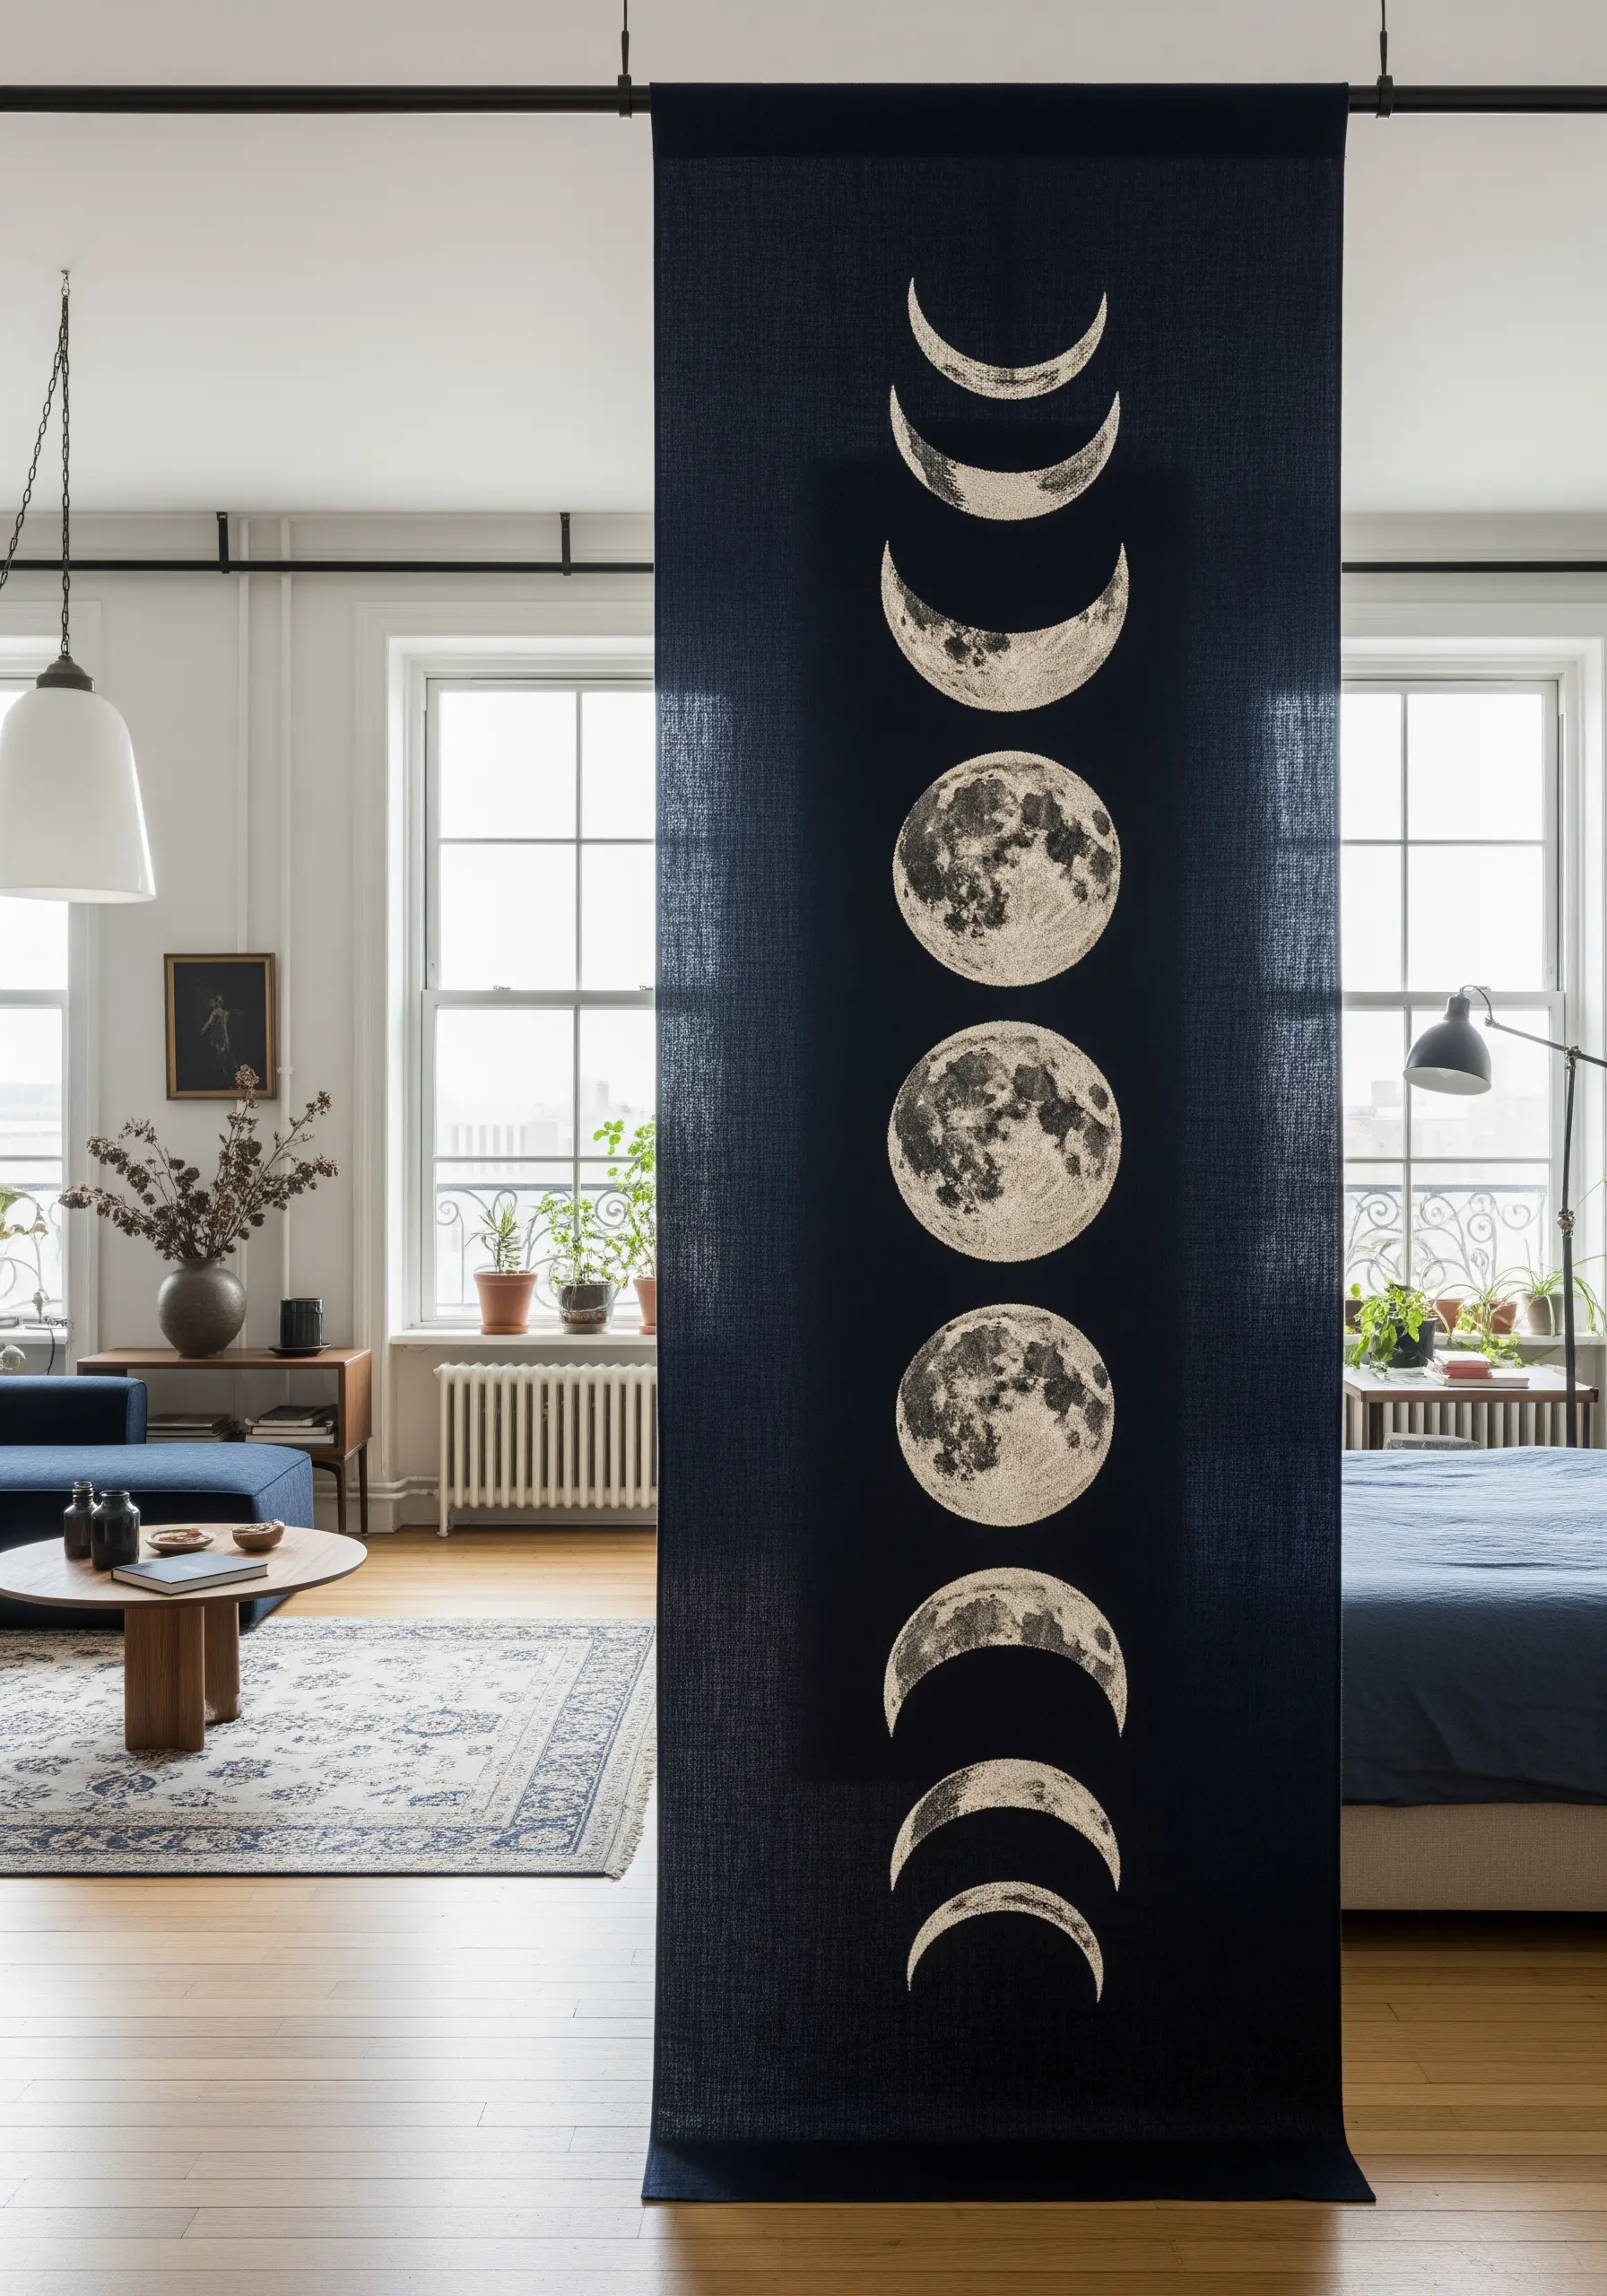
For large, solid shapes like these moon phases, combining appliqué with embroidery is far more efficient than satin stitch.
First, cut your shapes from a fabric with a subtle texture and secure them with a fusible bonding web.
Then, finish the edge with a simple backstitch or a decorative blanket stitch to secure the shape and add a clean, defining line.
This mixed-media technique gives you bold, graphic results perfect for statement-size wall art ideas without the immense time investment of thread painting.
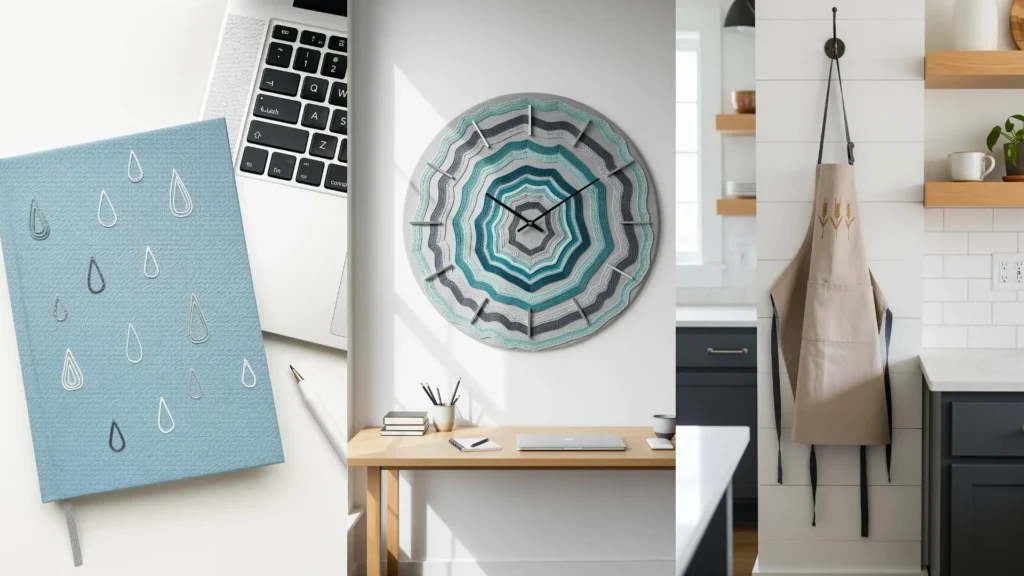
10. Precision Stitching on Paper and Bookcloth
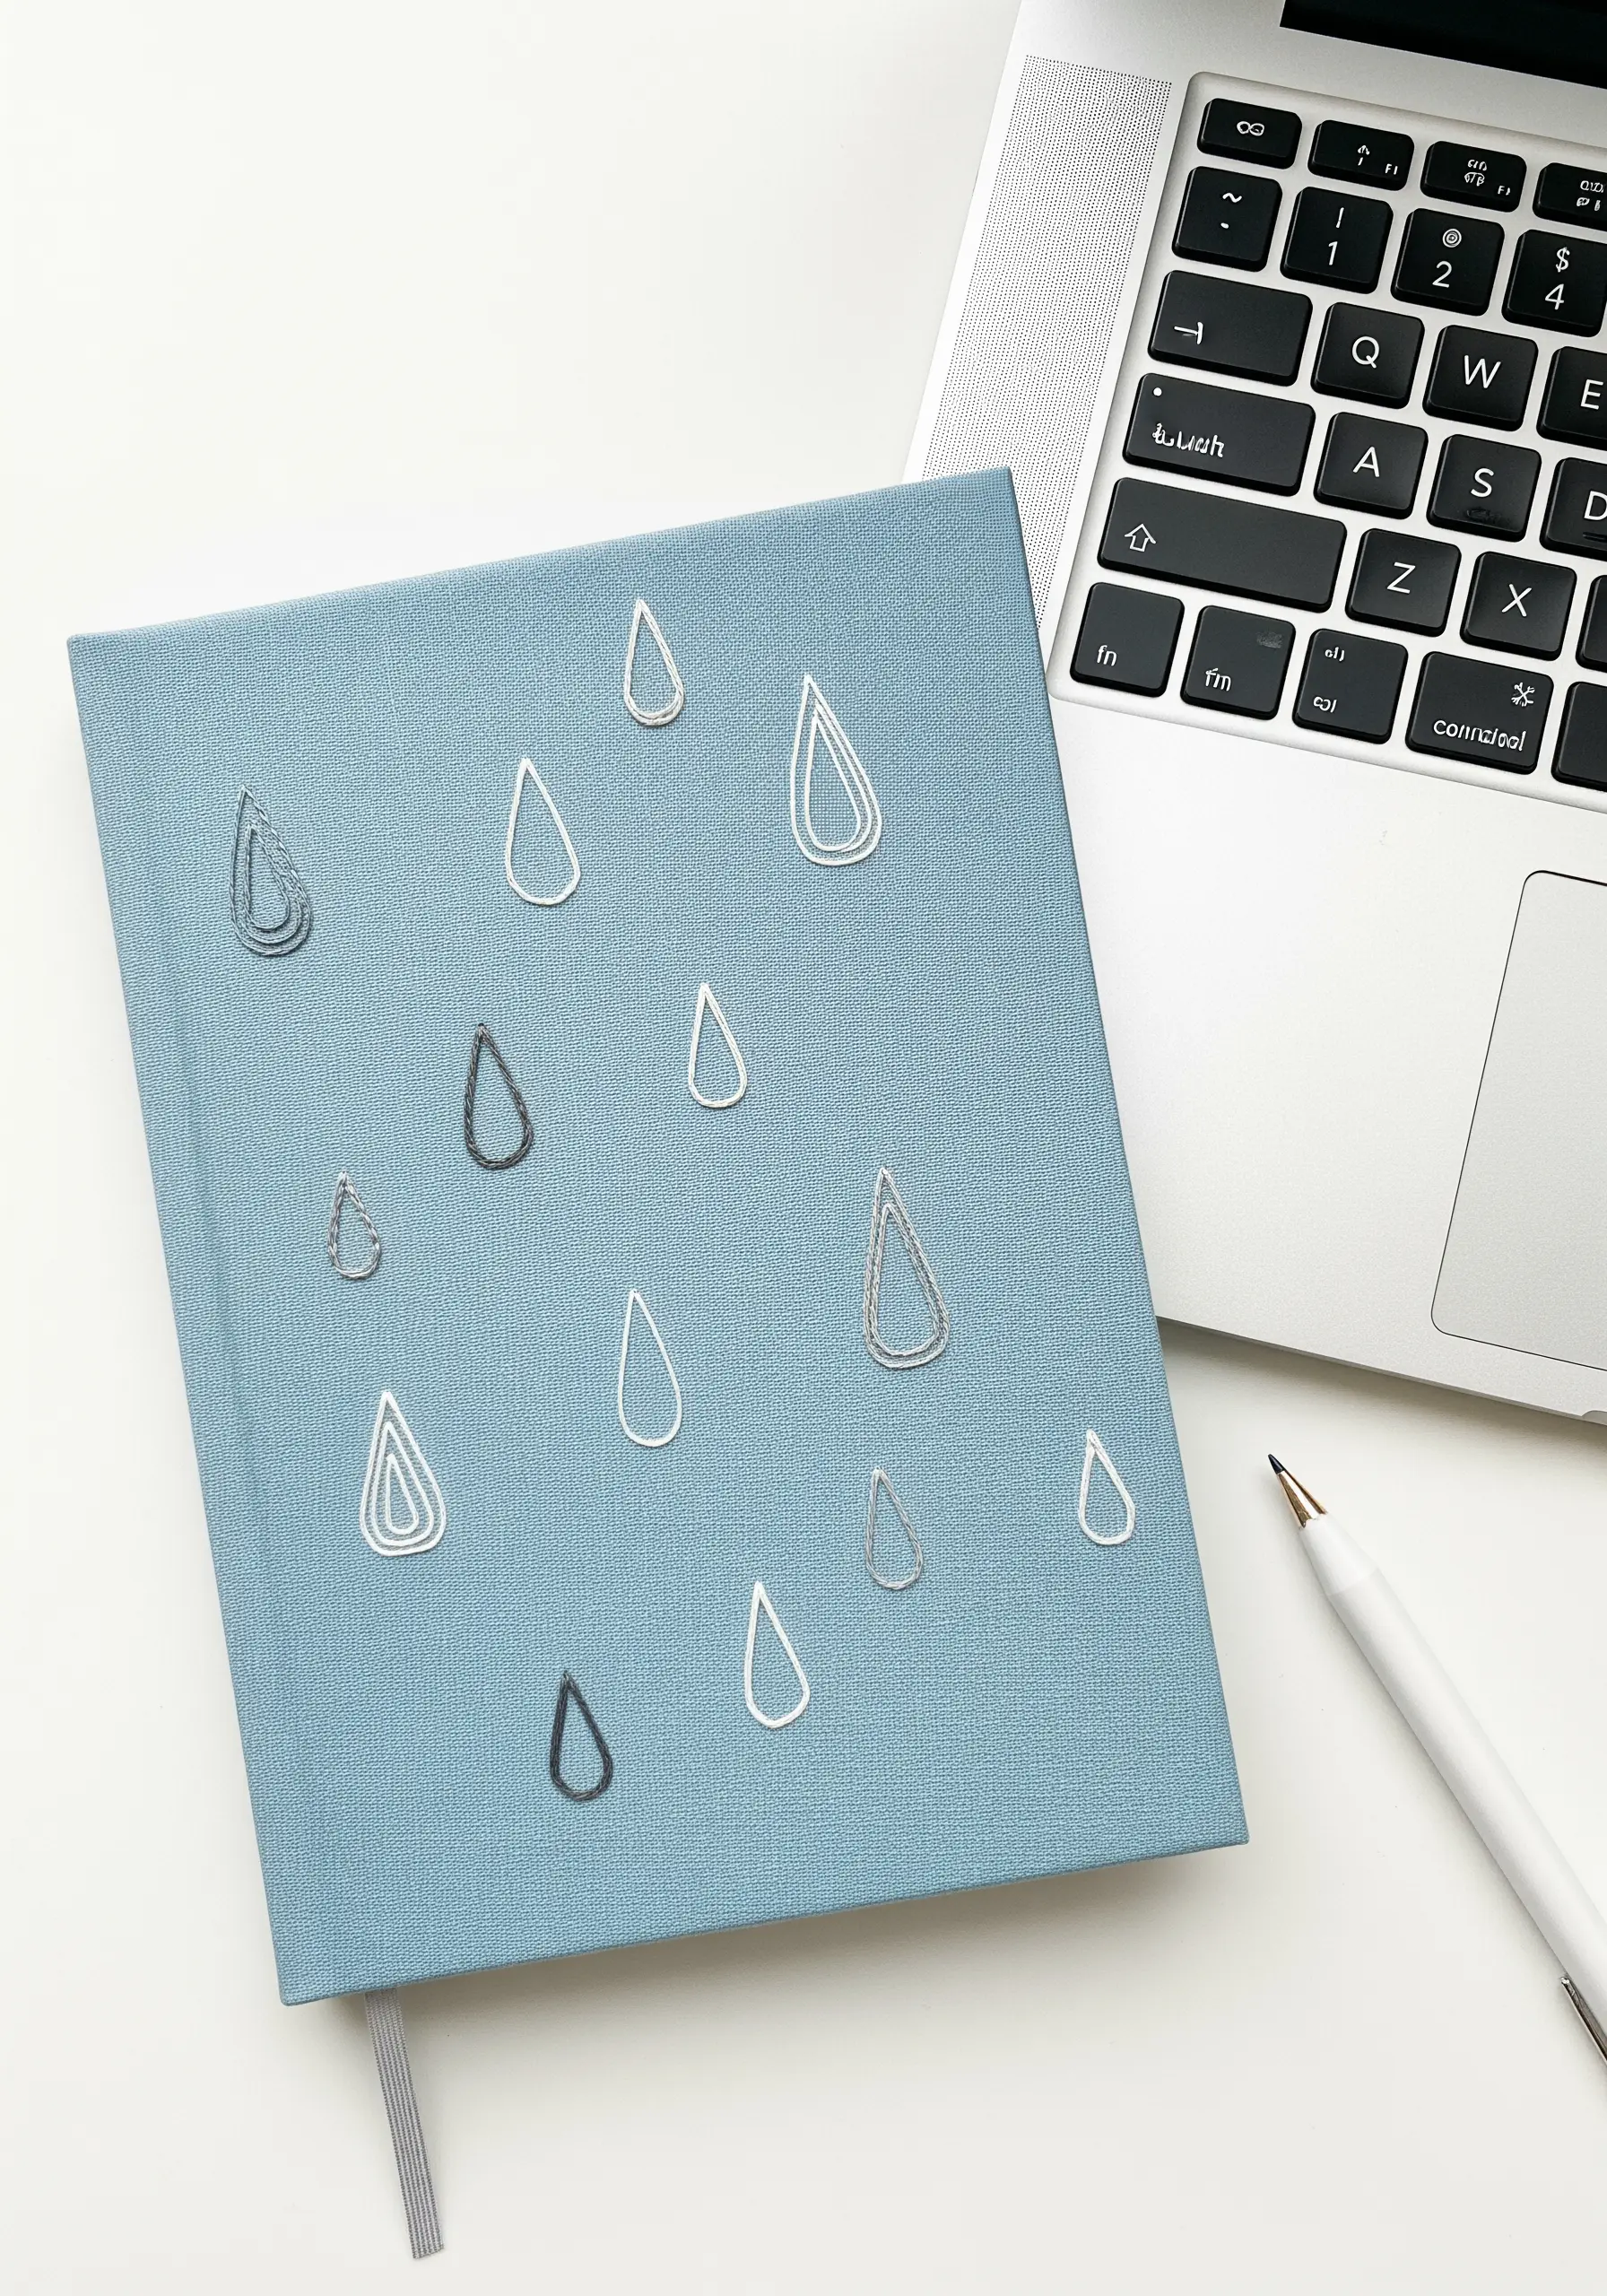
You can absolutely embroider on paper or bookcloth, but it requires a different approach than fabric.
First, you must pre-pierce your stitching holes along the design line with a sharp awl or a thick needle to prevent tearing.
Use a simple backstitch for clean lines, and pull your thread gently to avoid warping the paper.
Mixing metallic and matte threads, as seen in these raindrops, adds a subtle but effective layer of texture and shine.
11. Dynamic Energy with Radiating Straight Stitches
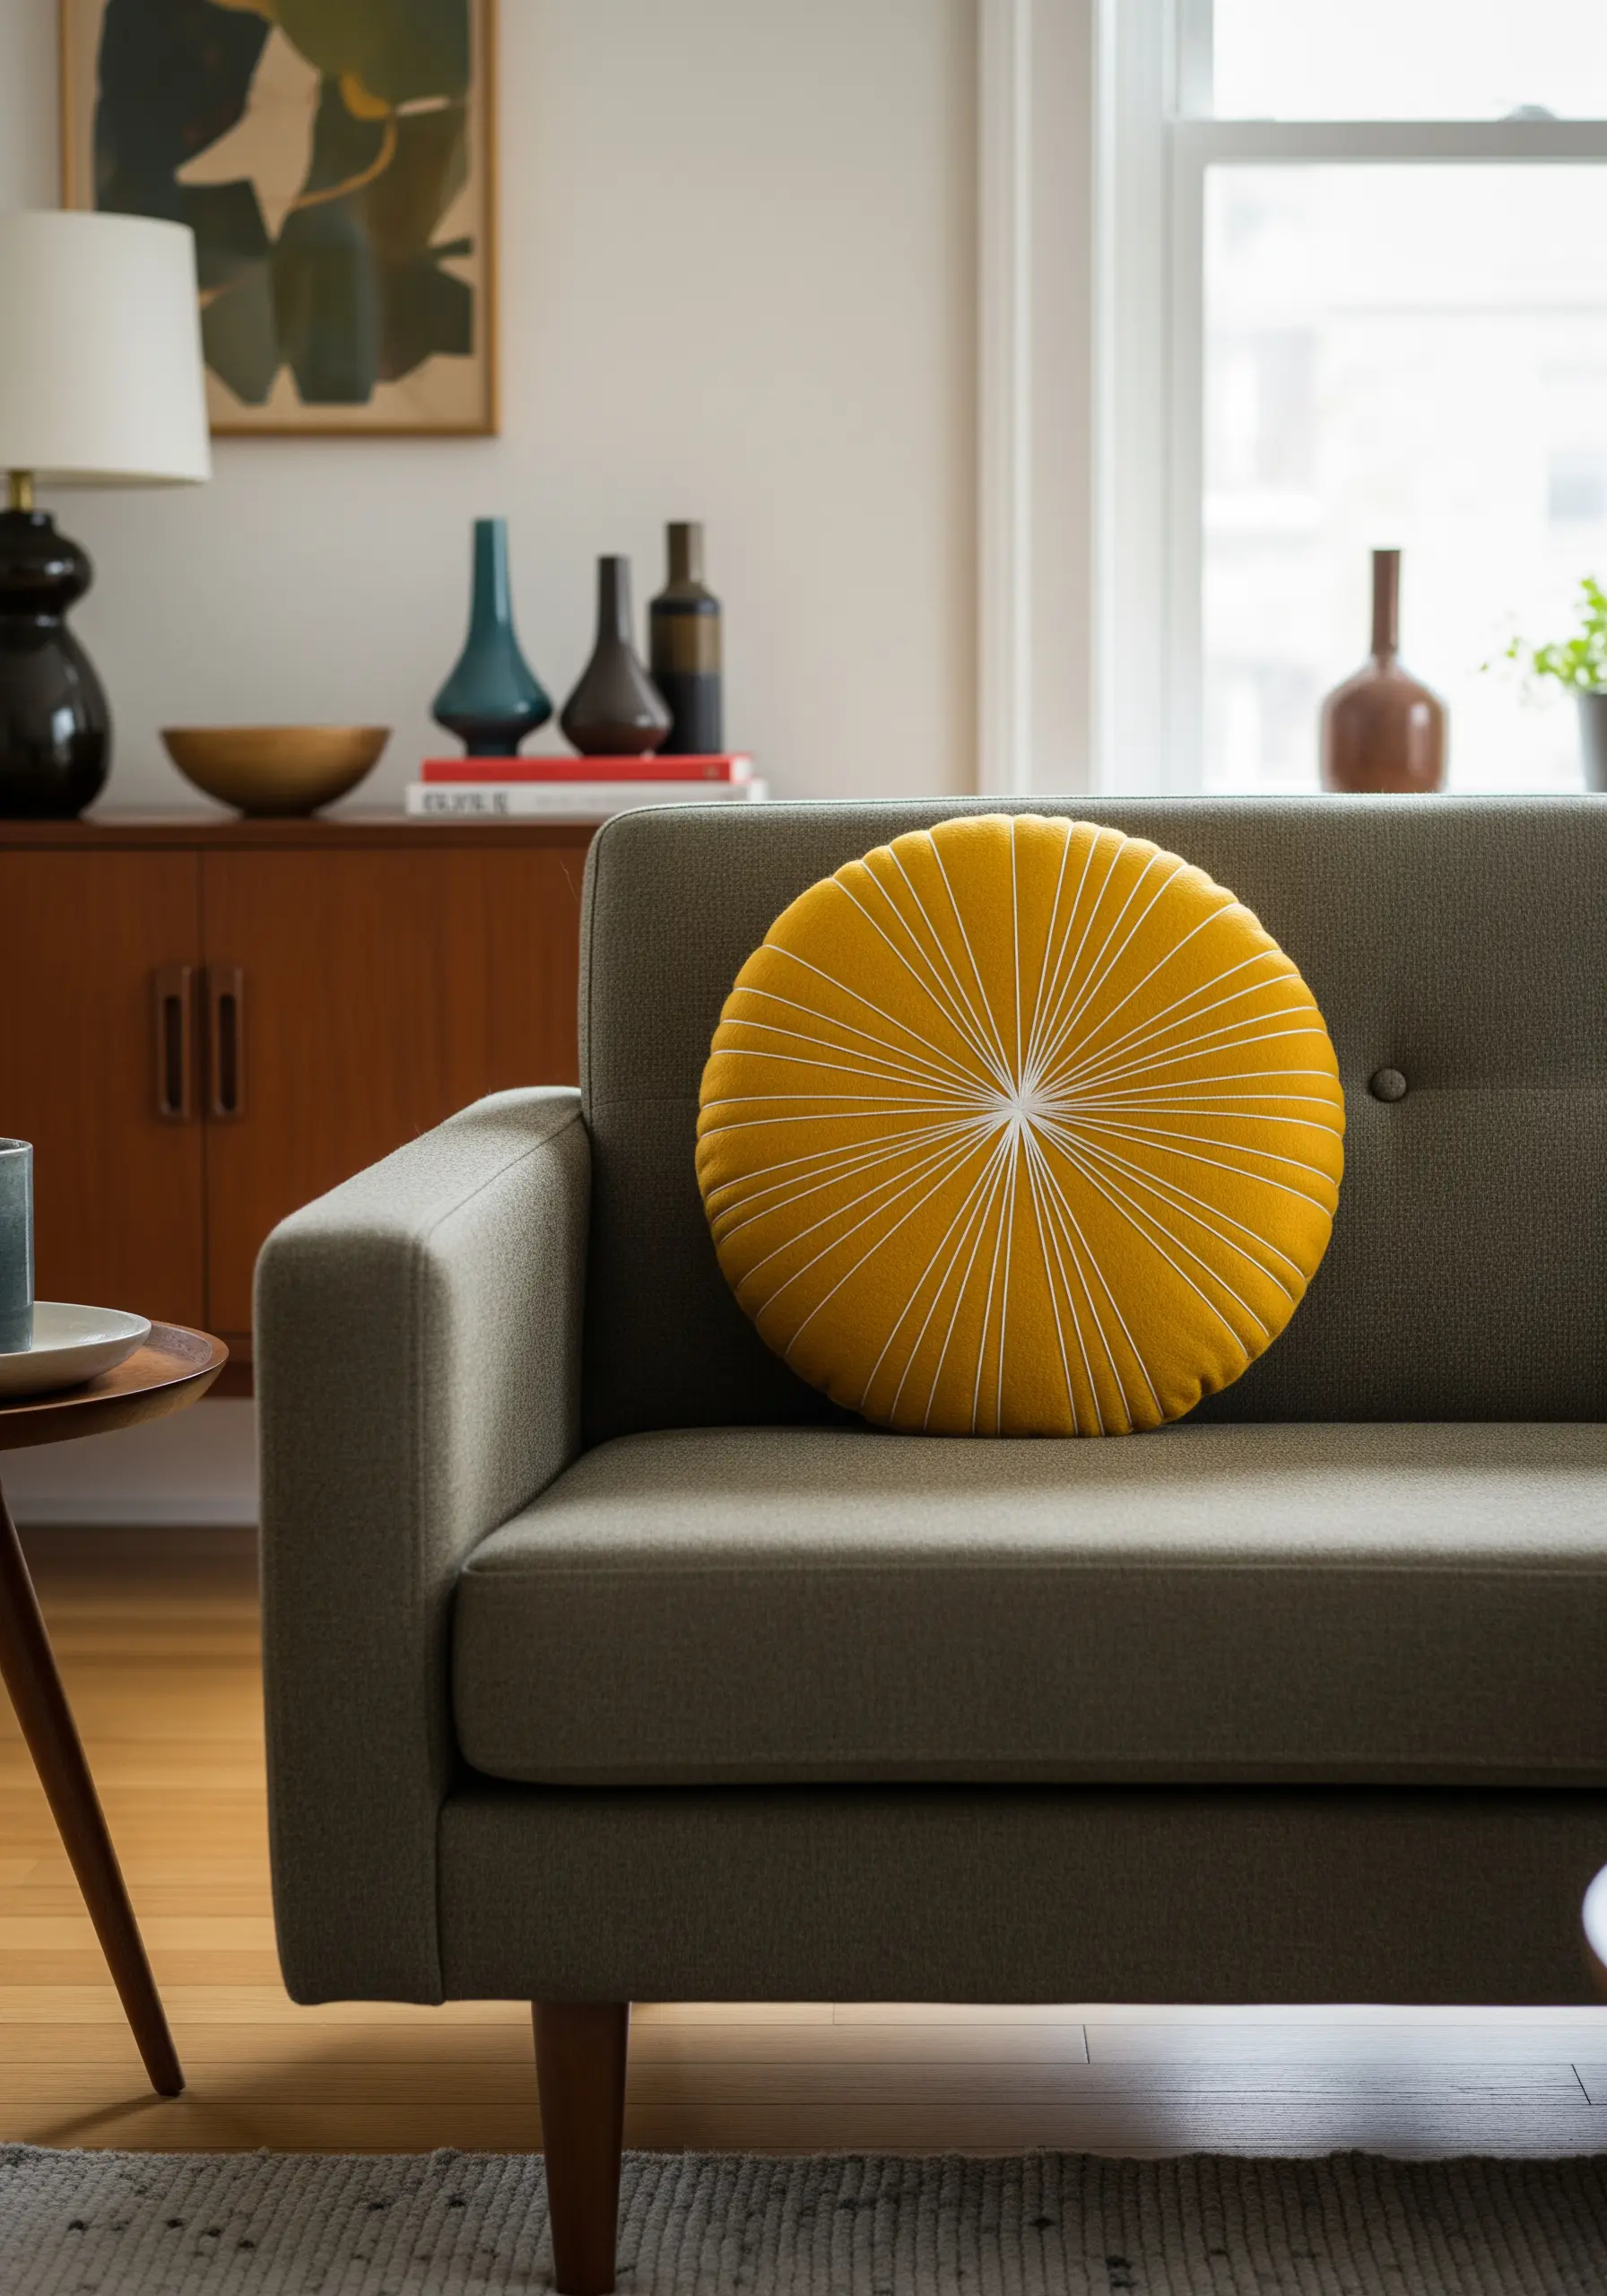
This powerful sunburst design proves that you only need one stitch—the straight stitch—to create incredible visual energy.
To achieve this precise radial effect, first mark a central point and then evenly spaced points around the outer circle.
Stitch from the outside in for each line, which gives you more control over placement.
Using a thick, high-contrast thread like a white pearl cotton on a bold color makes the graphic quality of the lines the undisputed star of the piece.
12. Creating Smooth Outlines with a Whipped Stitch
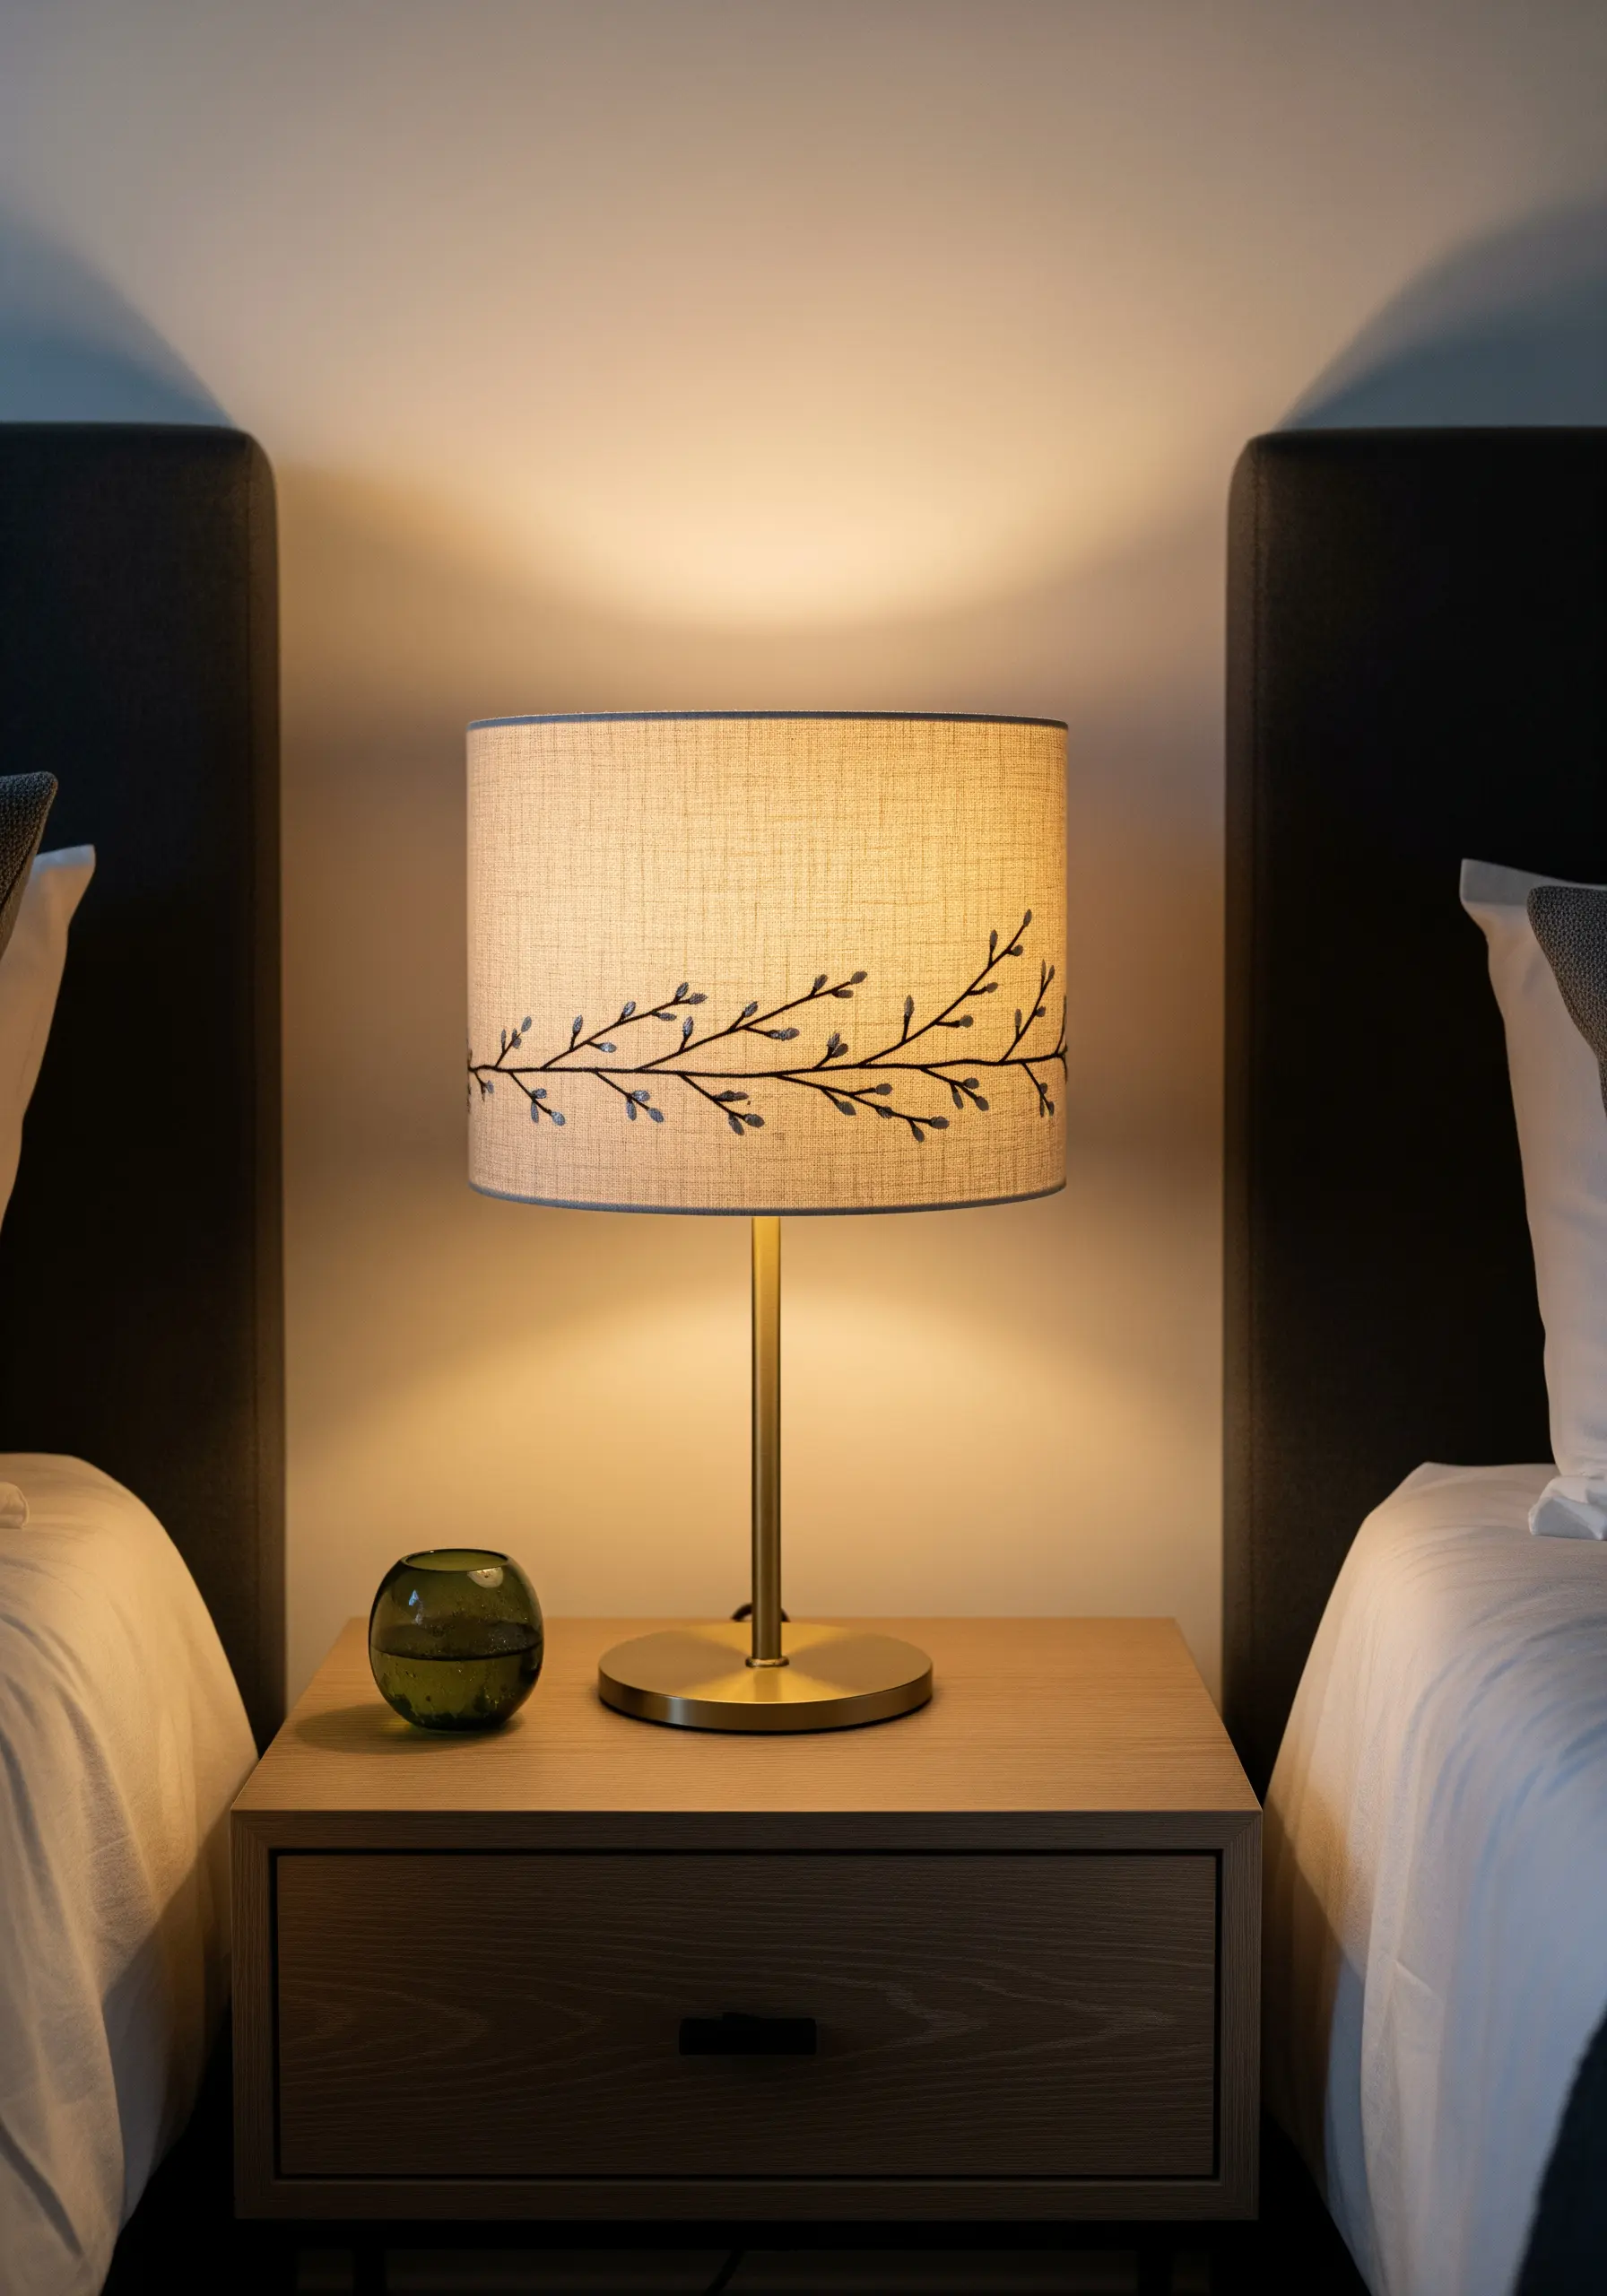
If you find your backstitch looks gappy or uneven, elevate it with a whipped backstitch.
First, complete your line of backstitches as usual.
Then, take a second thread and, without piercing the fabric again, weave it under and over each backstitch.
This technique covers the gaps, creating a smooth, slightly raised line with a rope-like texture that looks incredibly polished and professional, especially for delicate vine or branch motifs.
13. The Power of a Single, Bold Motif
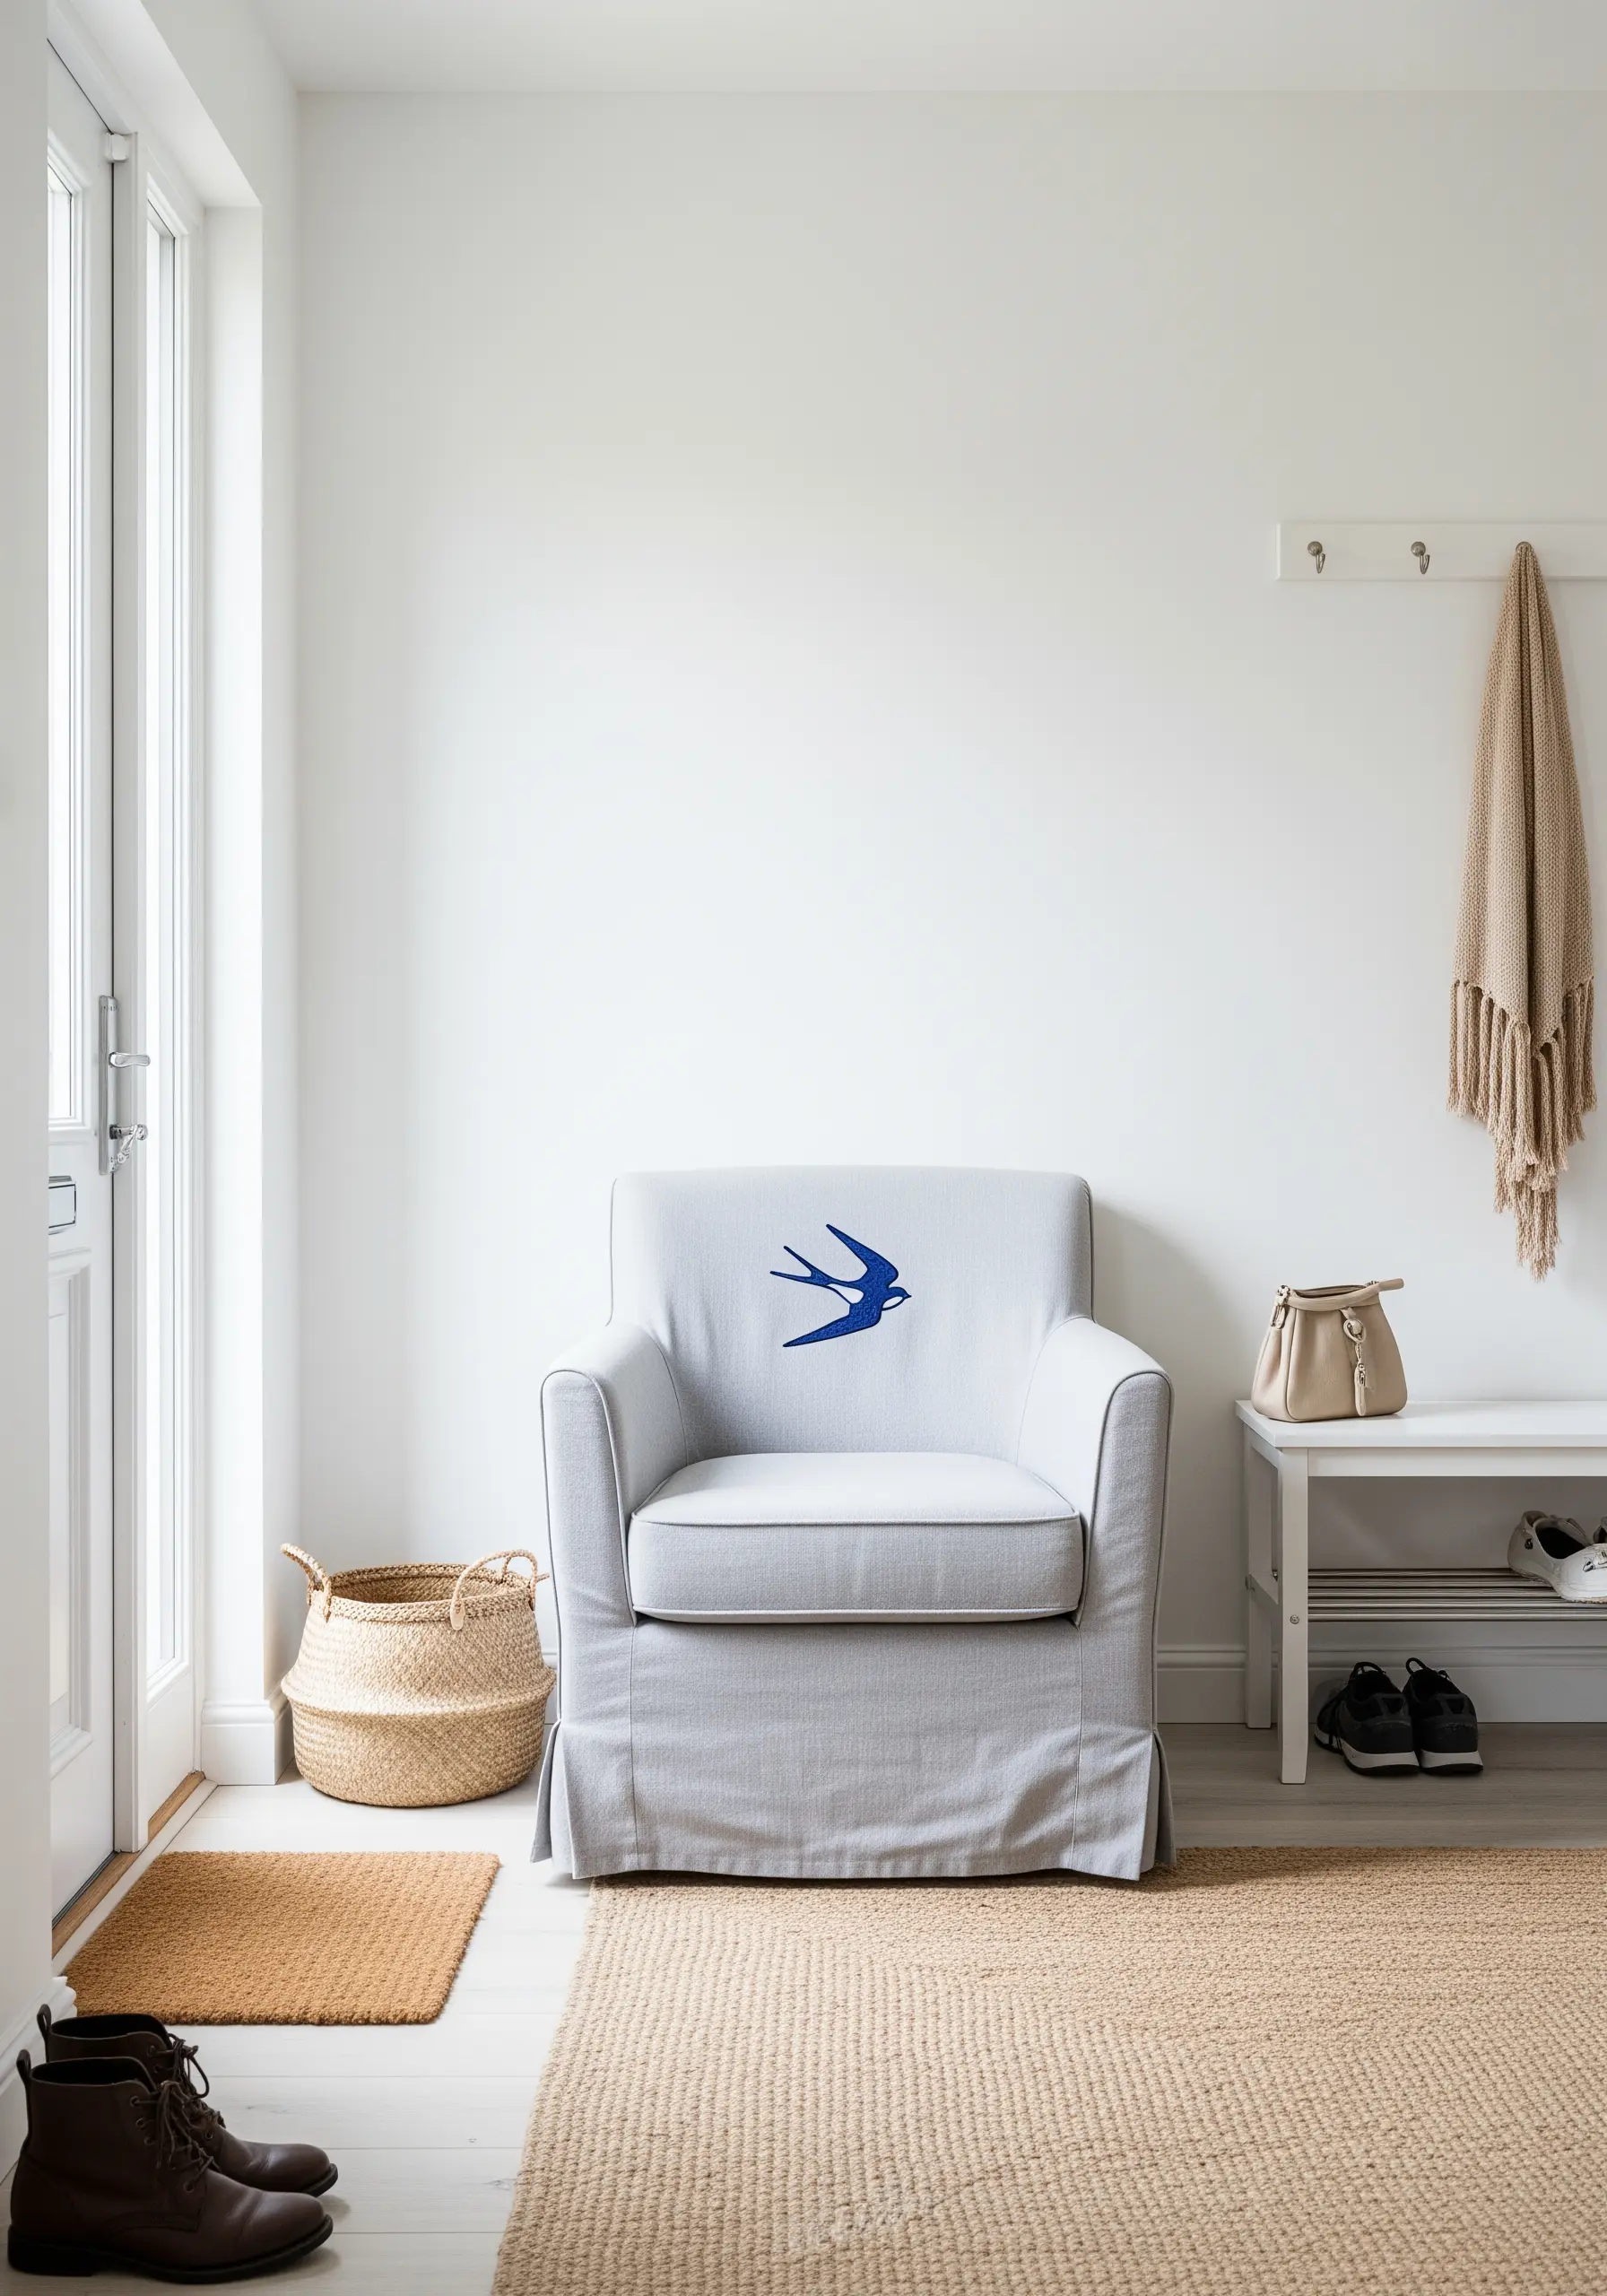
A single, beautifully executed motif can turn a simple piece of furniture into a statement.
To achieve perfectly crisp edges on a large satin-stitched area, first outline the entire shape with a split stitch.
This creates a tiny, raised border that acts as a guide for your satin stitches, preventing them from bleeding and ensuring a razor-sharp silhouette.
This small preparatory step makes a world of difference in the final quality of your work.
14. Building Tactile Maps with Couching
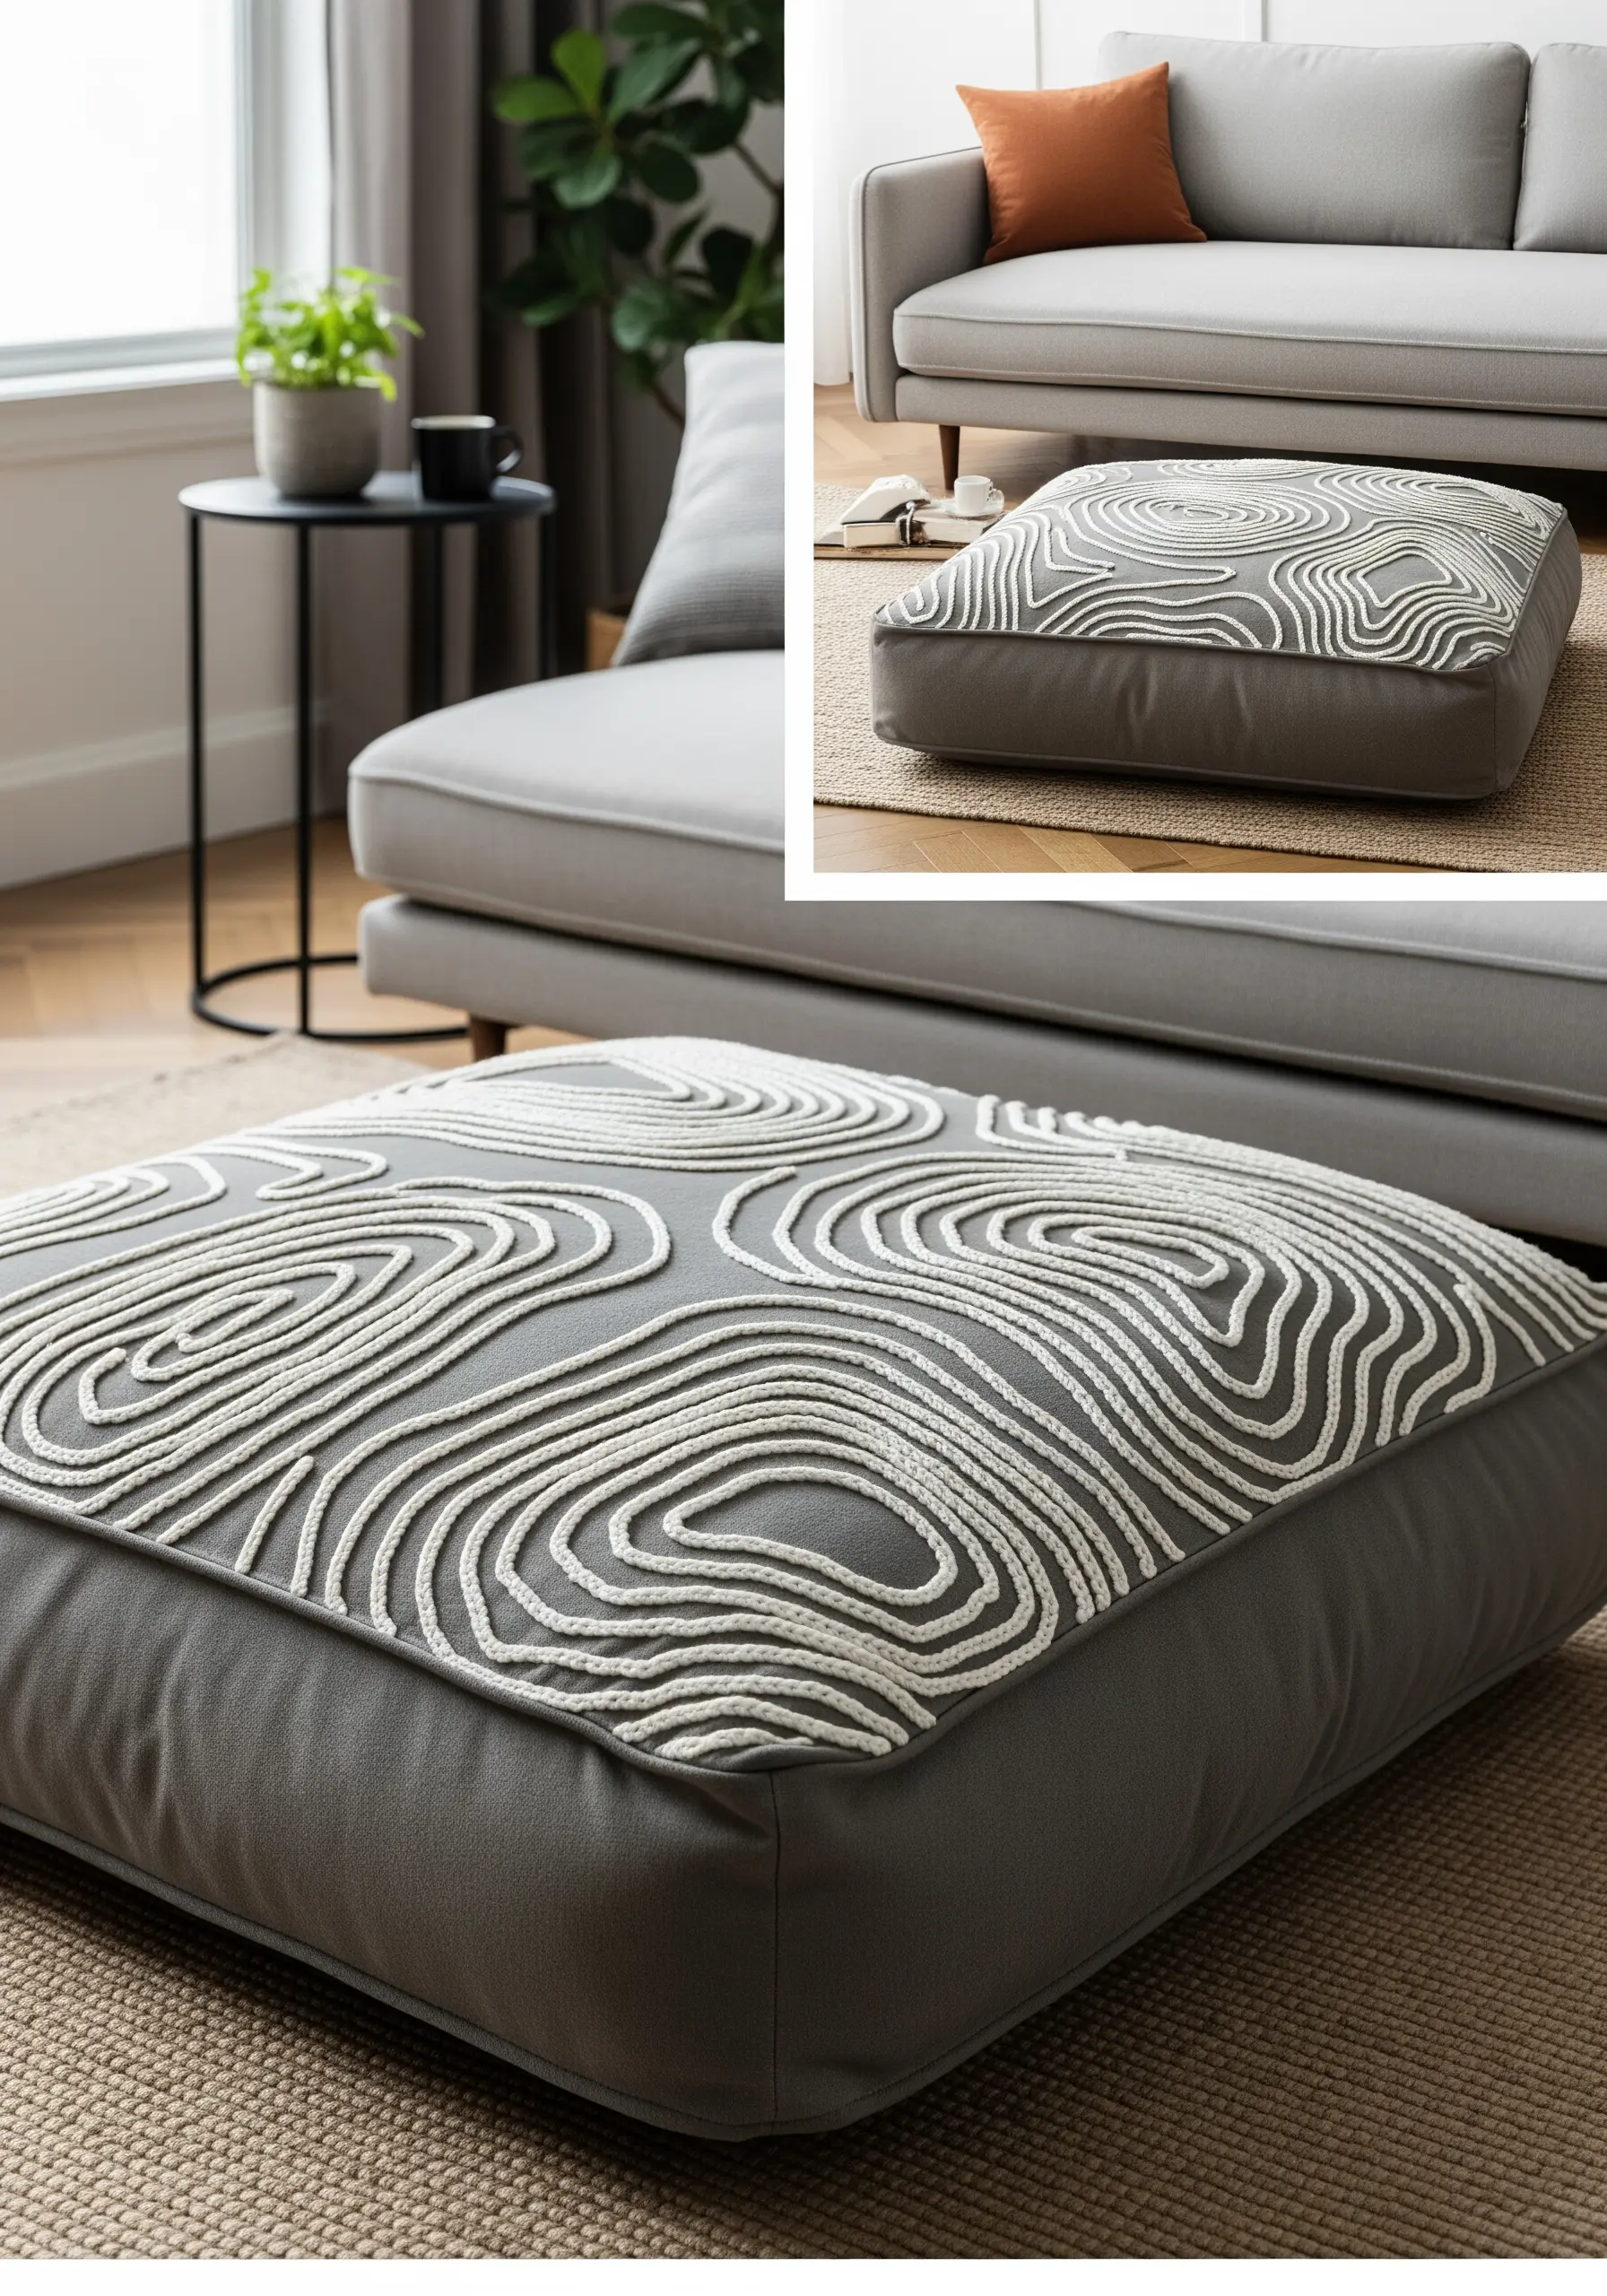
To create thick, raised lines that mimic topographic maps or wood grain, the couching technique is your best friend.
Simply lay a thick fiber, like yarn or cord, onto your fabric surface along your design line.
Then, use a thinner, standard embroidery floss to tack it down with small, perpendicular stitches.
This method allows you to add incredible dimension and a highly tactile quality to your work, perfect for durable home decor items like this floor cushion.
15. High-Contrast Outlines on Felt
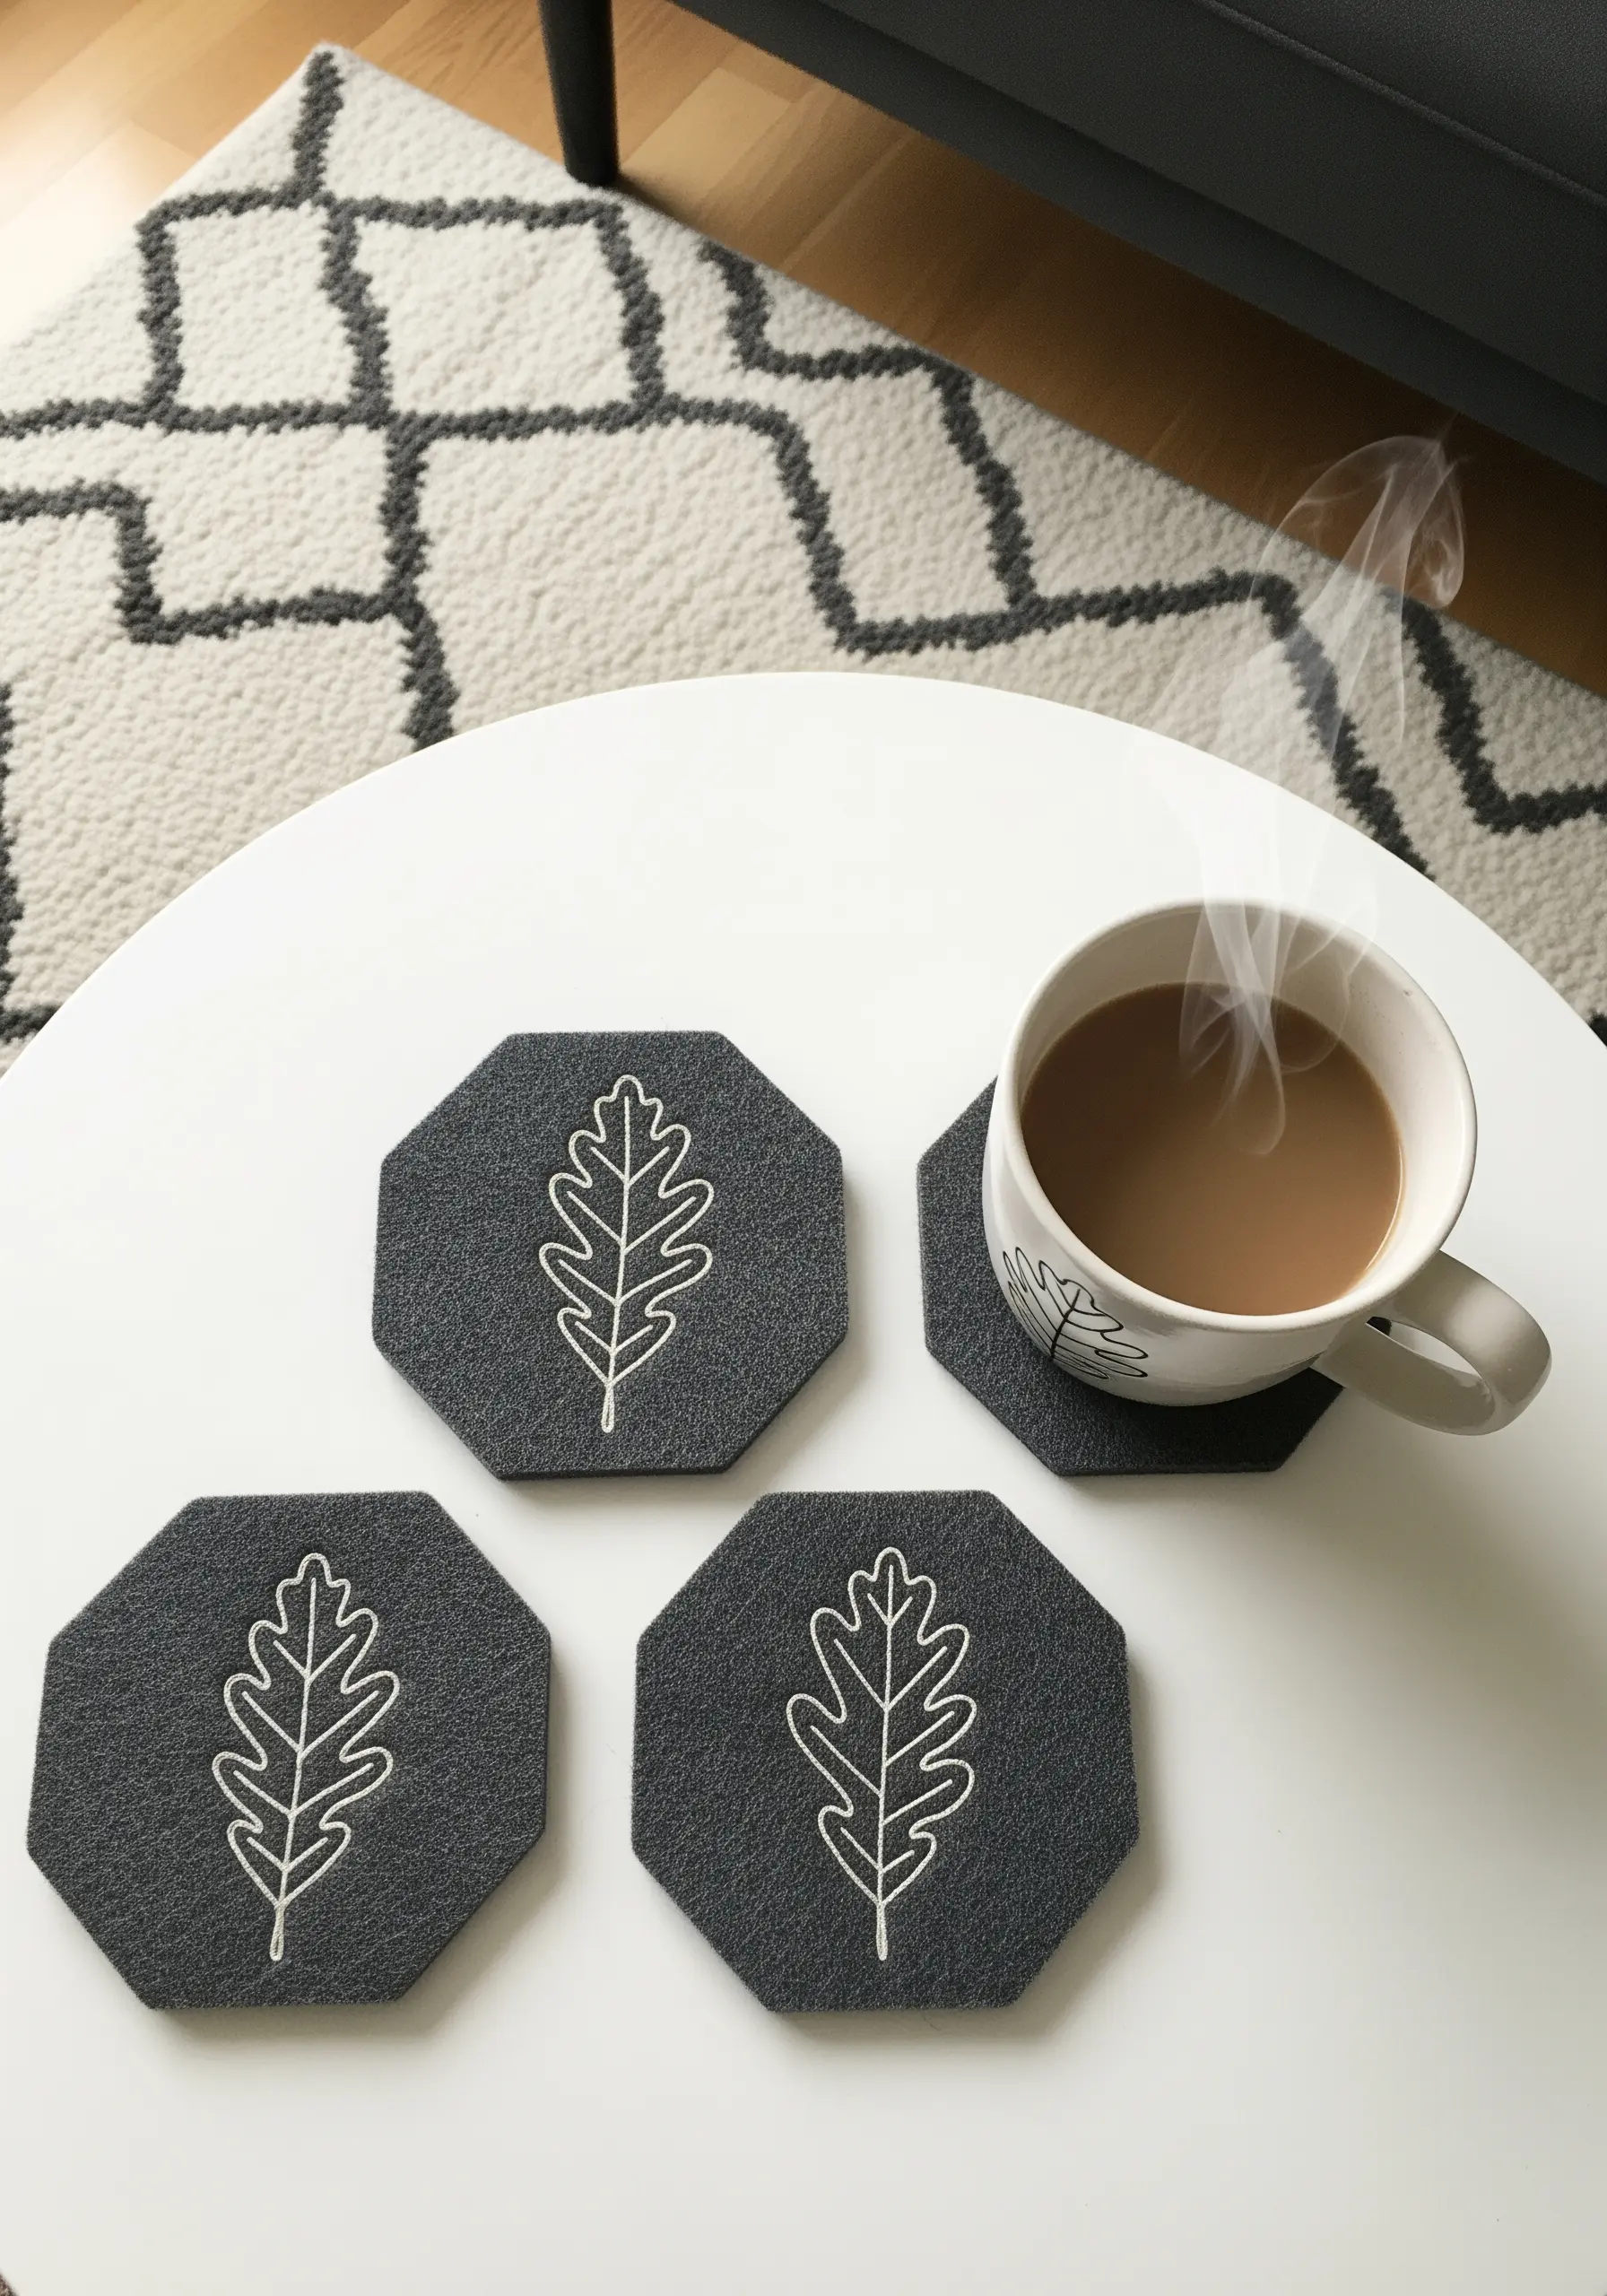
Felt is an ideal canvas for beginner and expert stitchers alike because its matted fibers provide a stable, no-fray base.
For a clean, graphic look, you can’t beat the simplicity of a high-contrast backstitch outline.
Use all six strands of your embroidery floss to create a line that is bold and clear against the dark felt.
The combination of a simple stitch, a bold line, and a high-contrast palette results in a design that is effortlessly modern.
16. Composing a Scene Across Multiple Panels
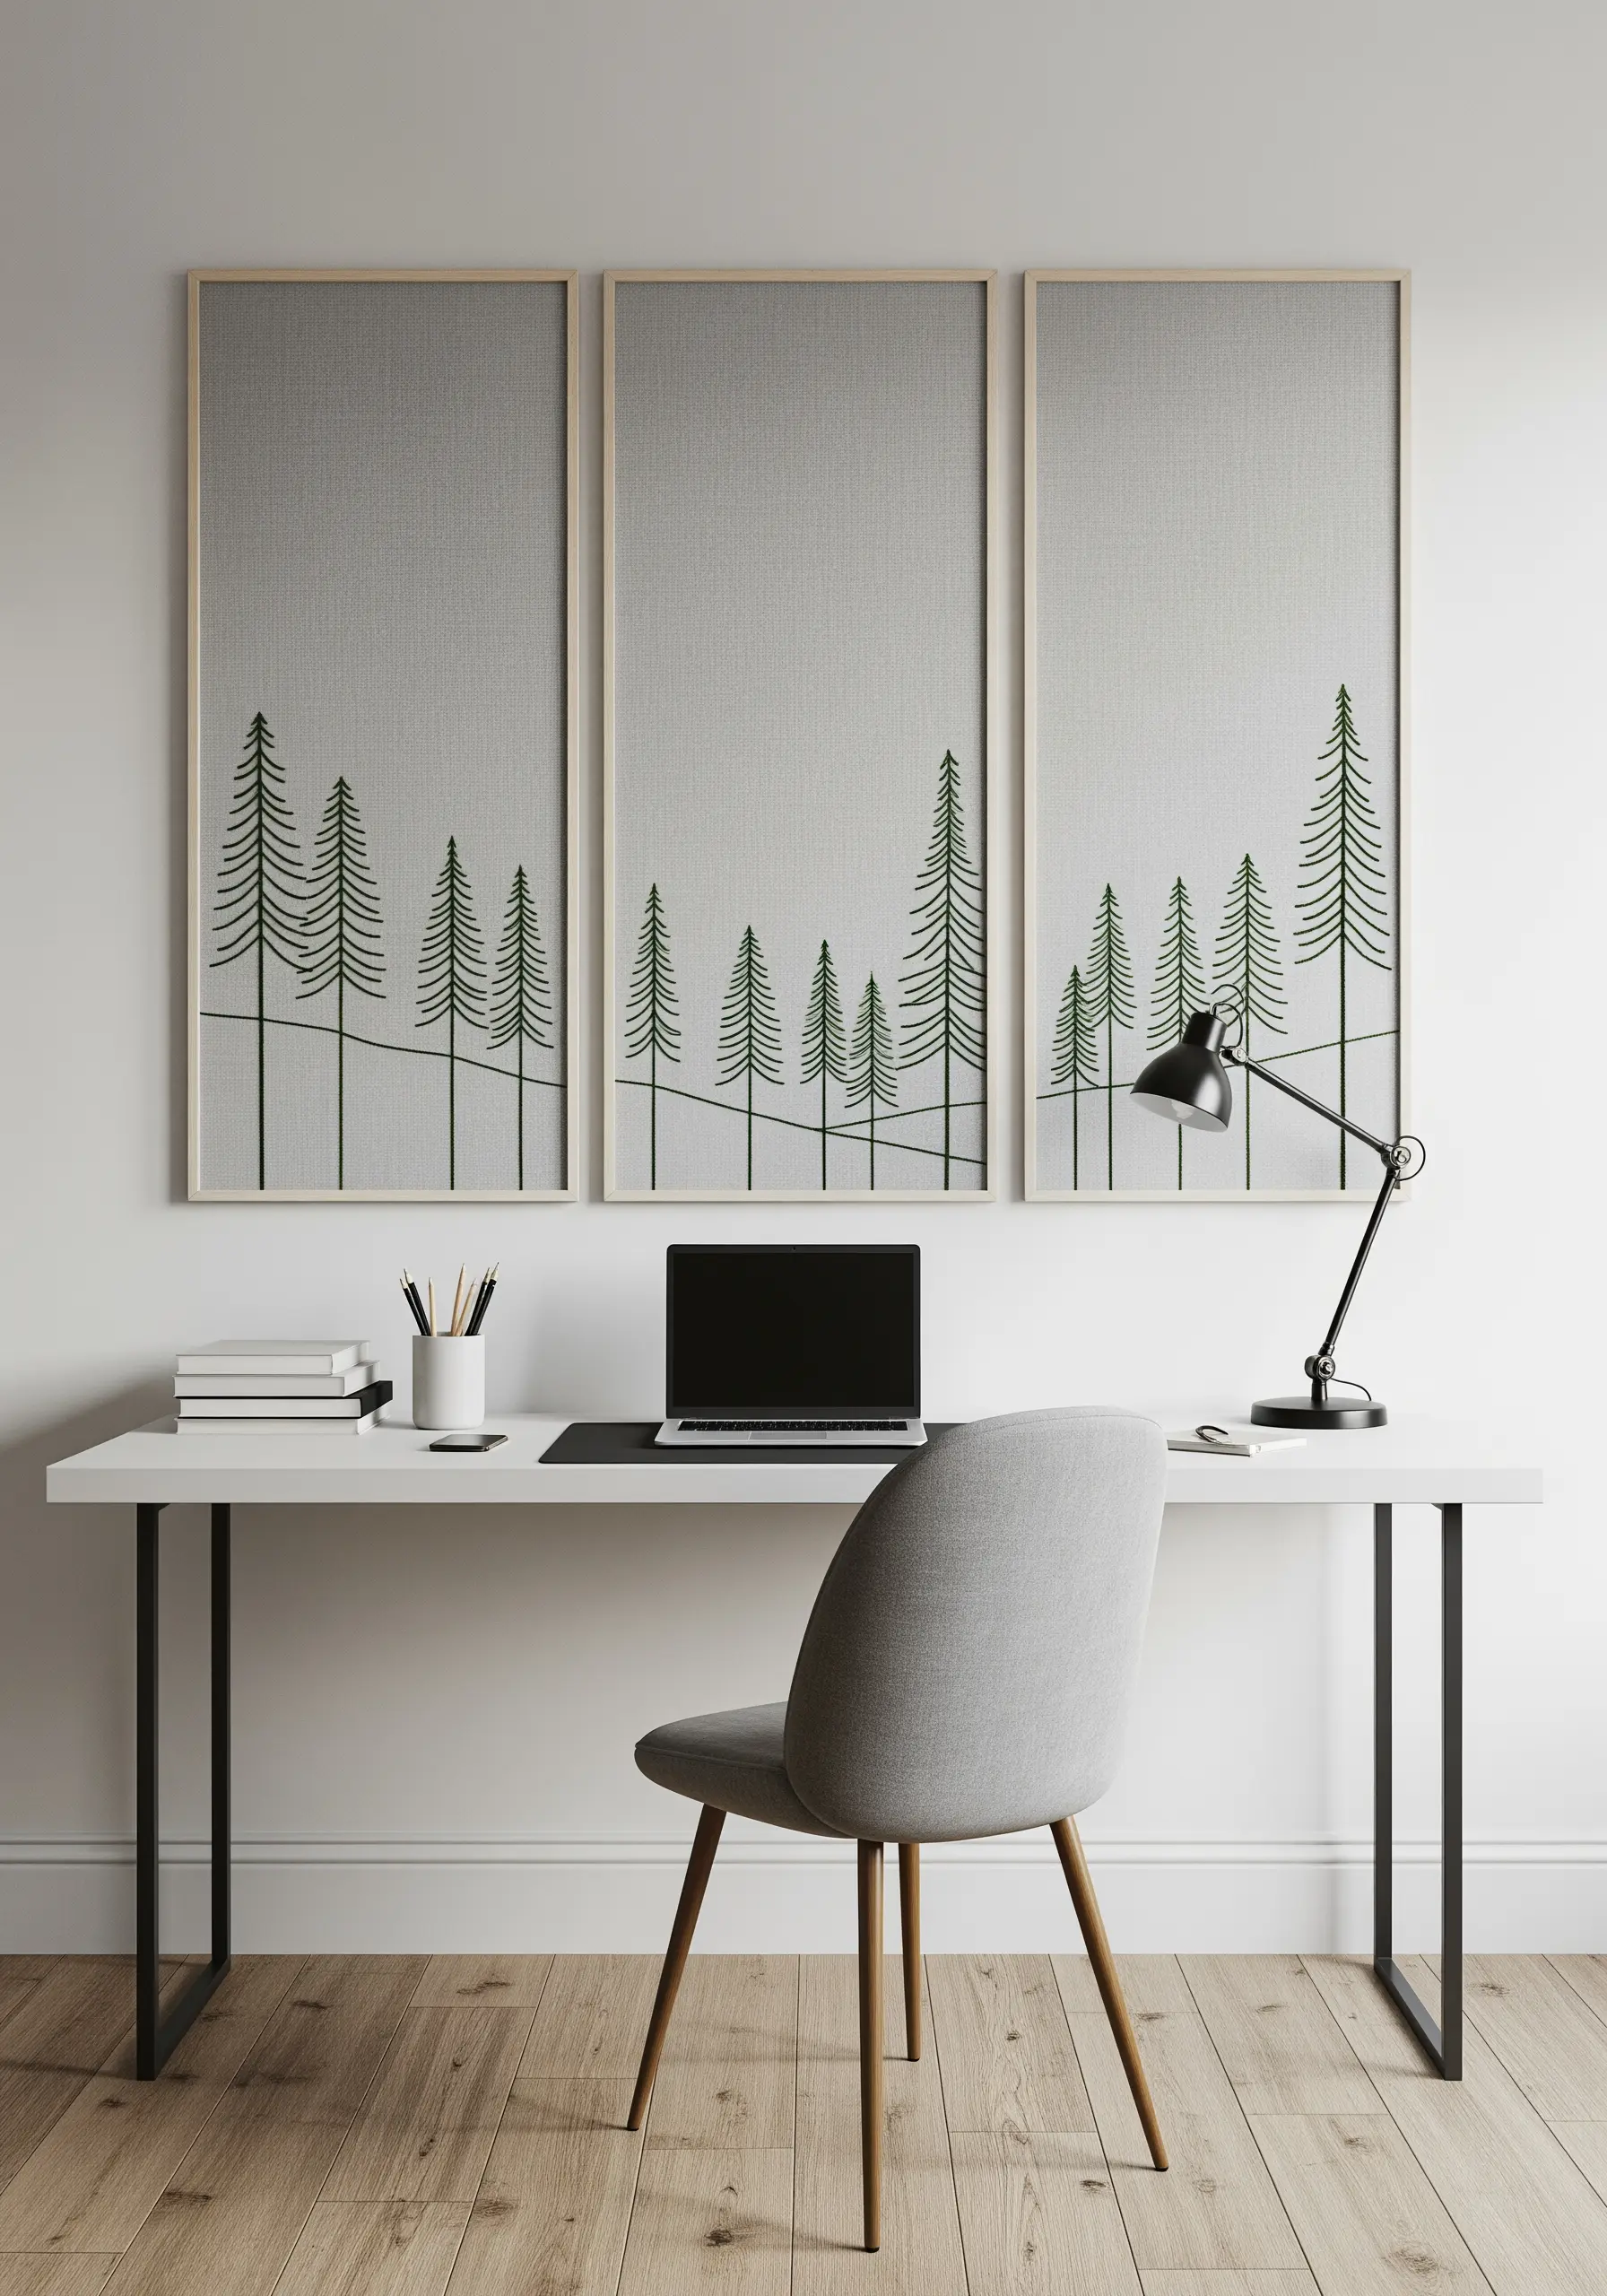
Create a stunning piece of large-scale art by dividing a single, minimal landscape across three panels.
This triptych format instantly elevates a simple design, giving it a modern, gallery-like feel.
Use a basic backstitch for the ground and tree trunks, and add radiating straight stitches for the pine needles.
Maintaining a consistent stitch length and thread weight across all three pieces is the key to making this minimalist line art nature embroidery feel cohesive and intentional.
17. Balancing Detail and Simplicity in Line Art
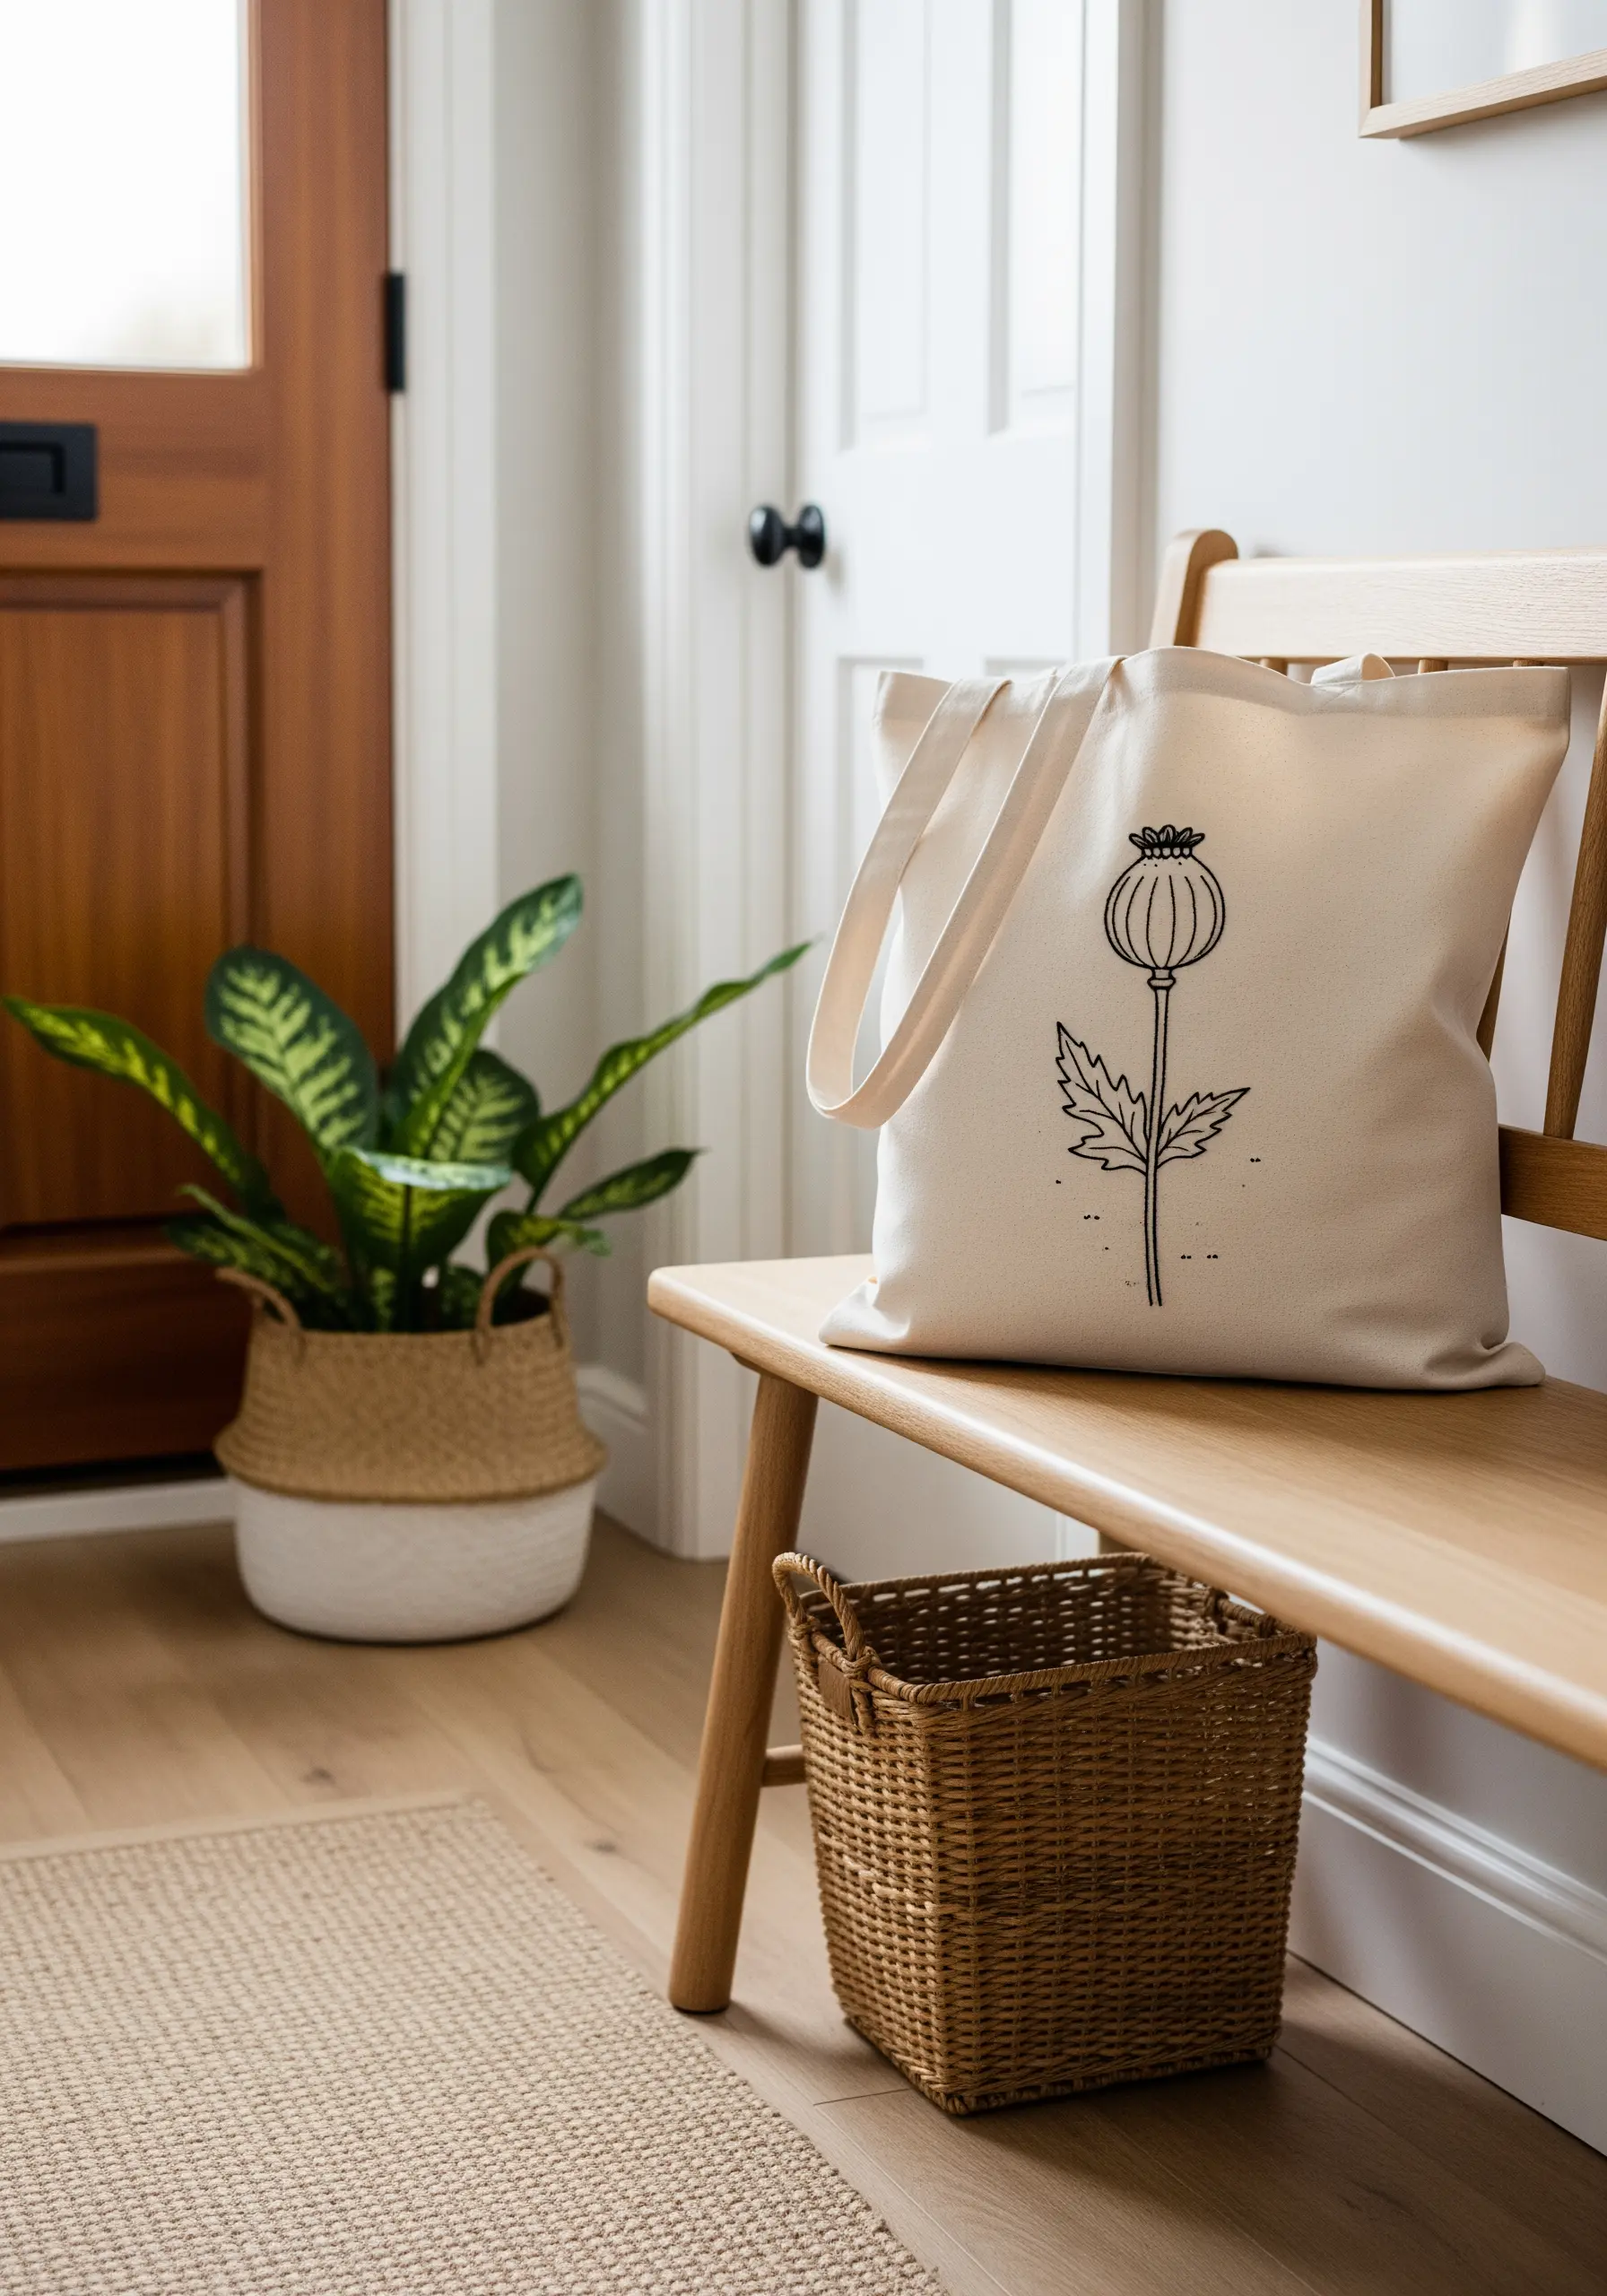
This poppy seed head shows how to add texture to a line drawing without losing its minimalist spirit.
Use a clean backstitch for the main outlines.
Then, add dimension and detail with a small cluster of French knots at the crown and a few strategically placed straight stitches to suggest texture on the pod.
This balance of clean lines and contained texture is what makes a simple motif compelling, and it’s a great way to turn plain tote bags into chic everyday fashion.
18. Minimalist Color Blocking with Satin Stitch
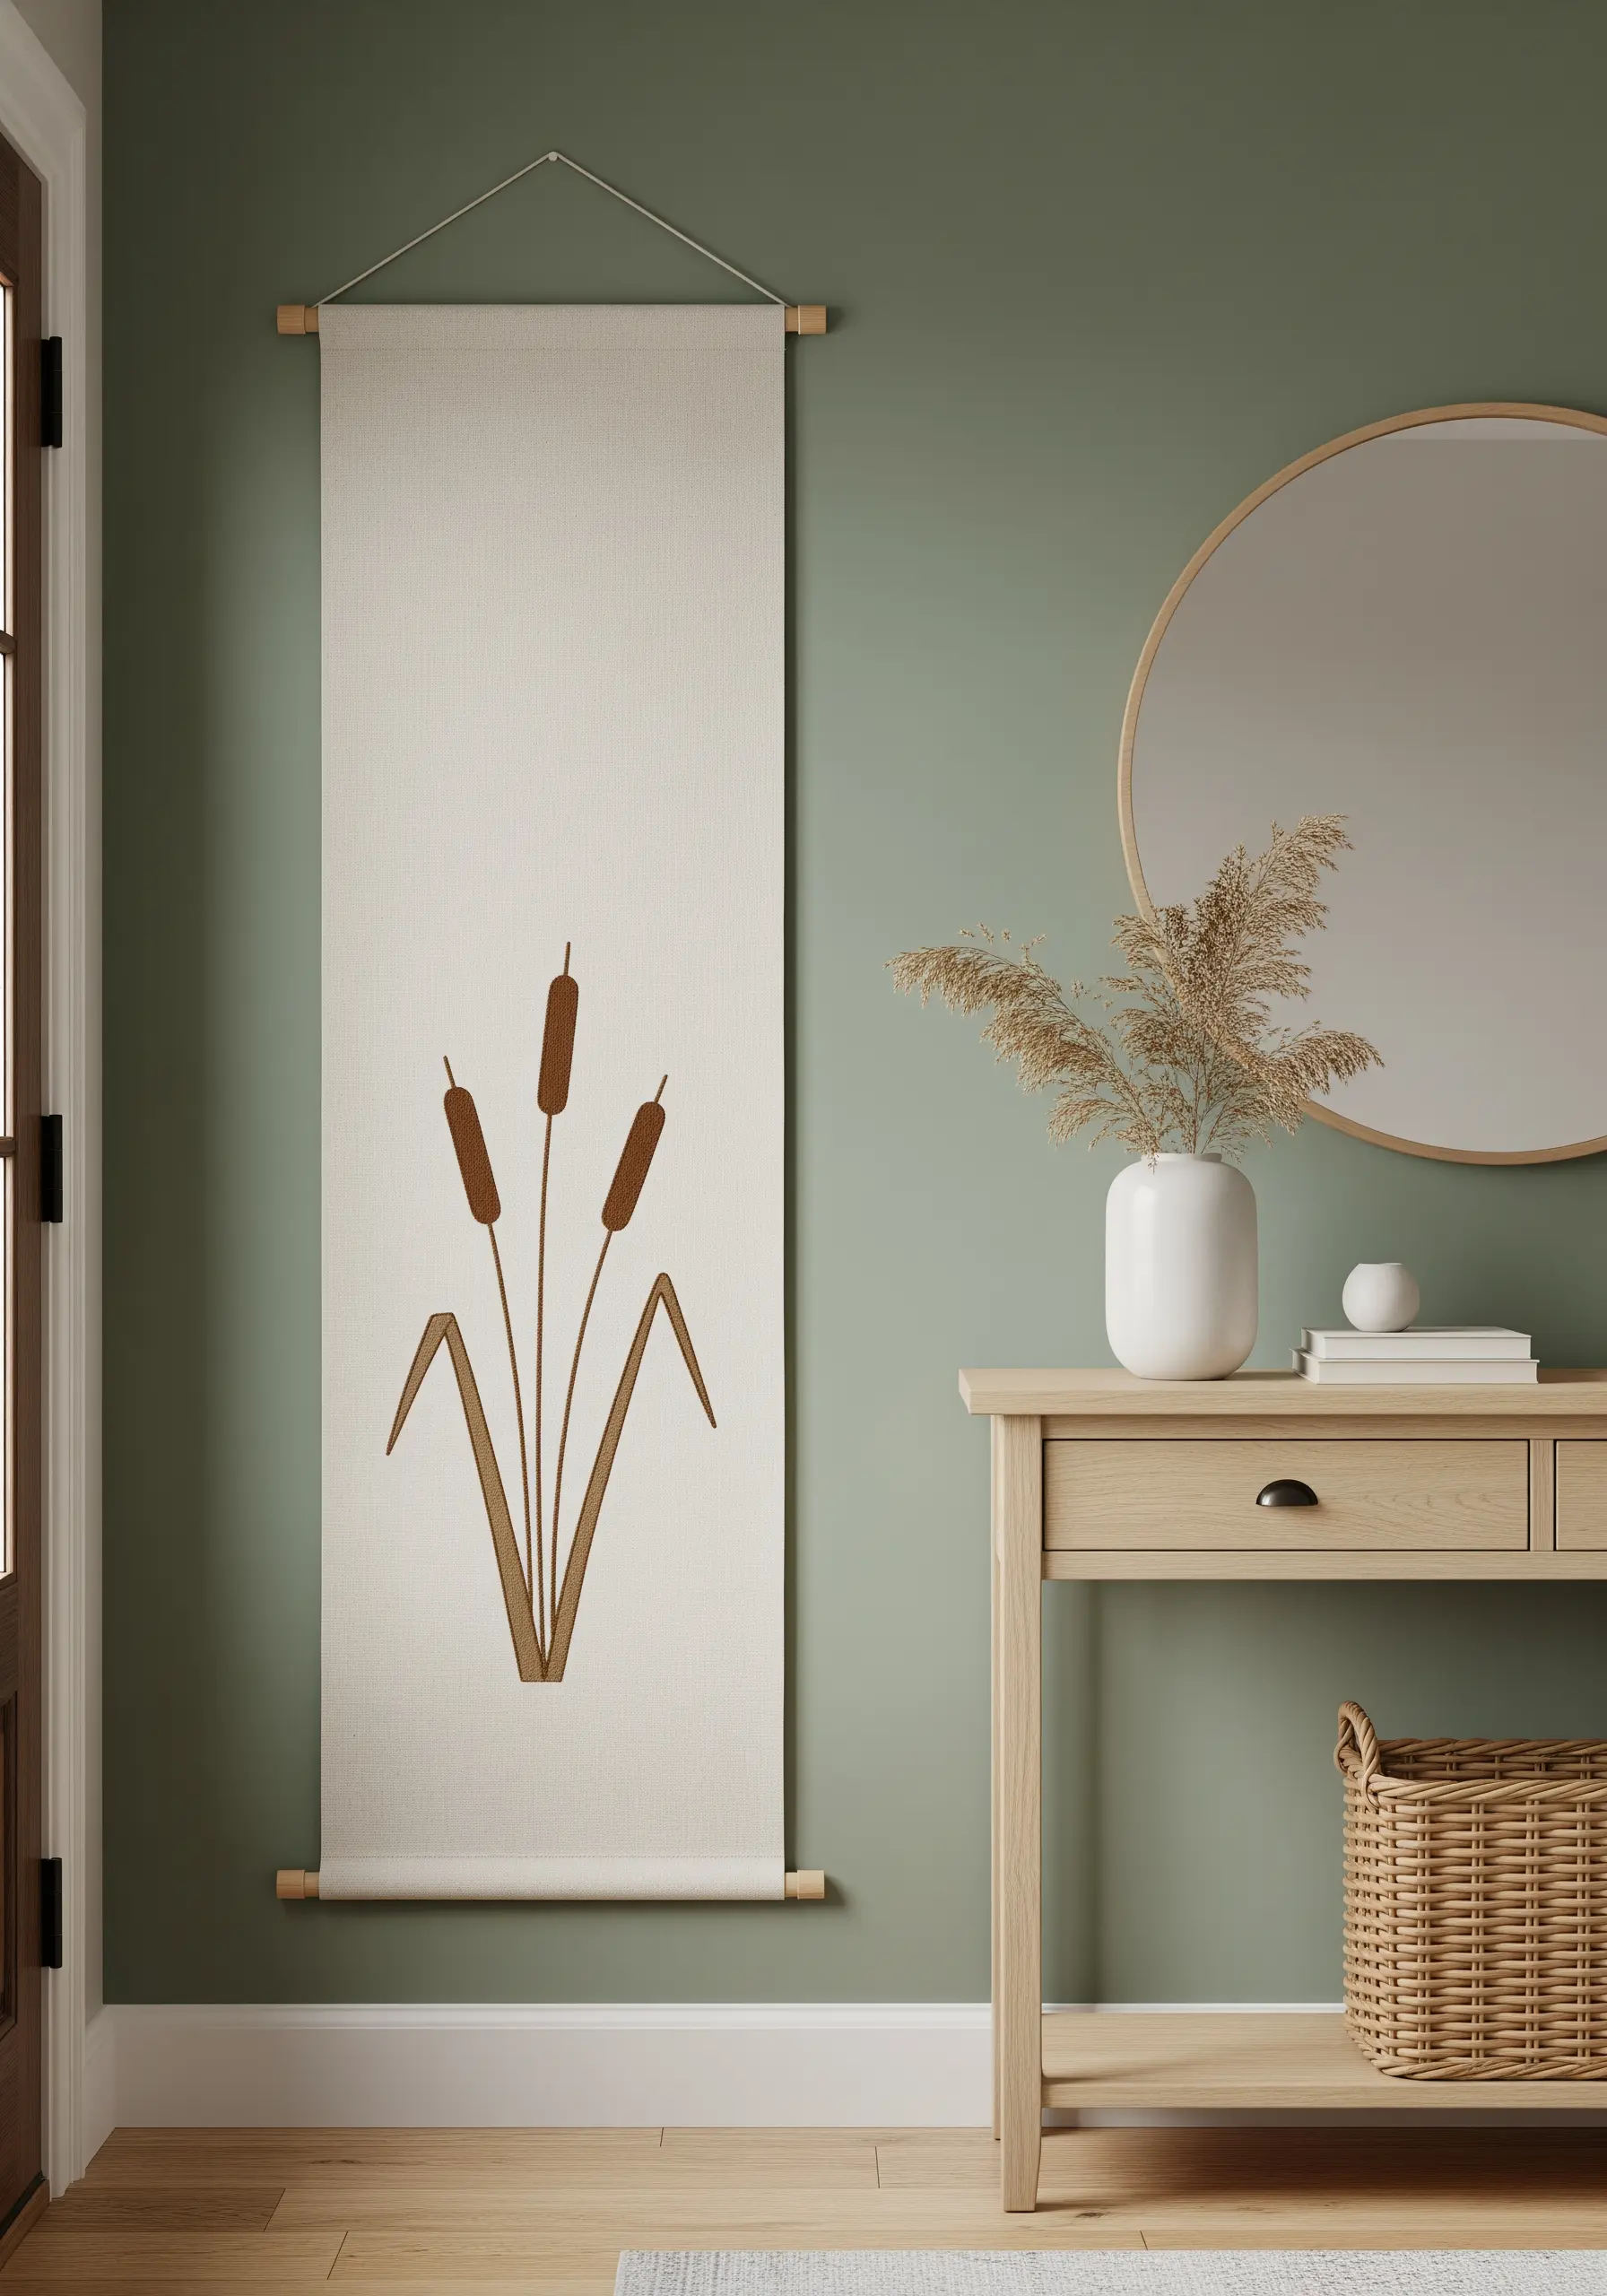
You can achieve a bold, graphic effect reminiscent of paper-cut art by using satin stitch for color blocking.
To keep the edges of your filled shapes perfectly neat, outline them first with a split stitch.
For the long, slender leaves, a simple backstitch provides a delicate contrast to the solid, filled cattails.
This interplay between solid shapes and fine lines creates a balanced and visually striking composition.
19. Building Organic Dimension with French Knots
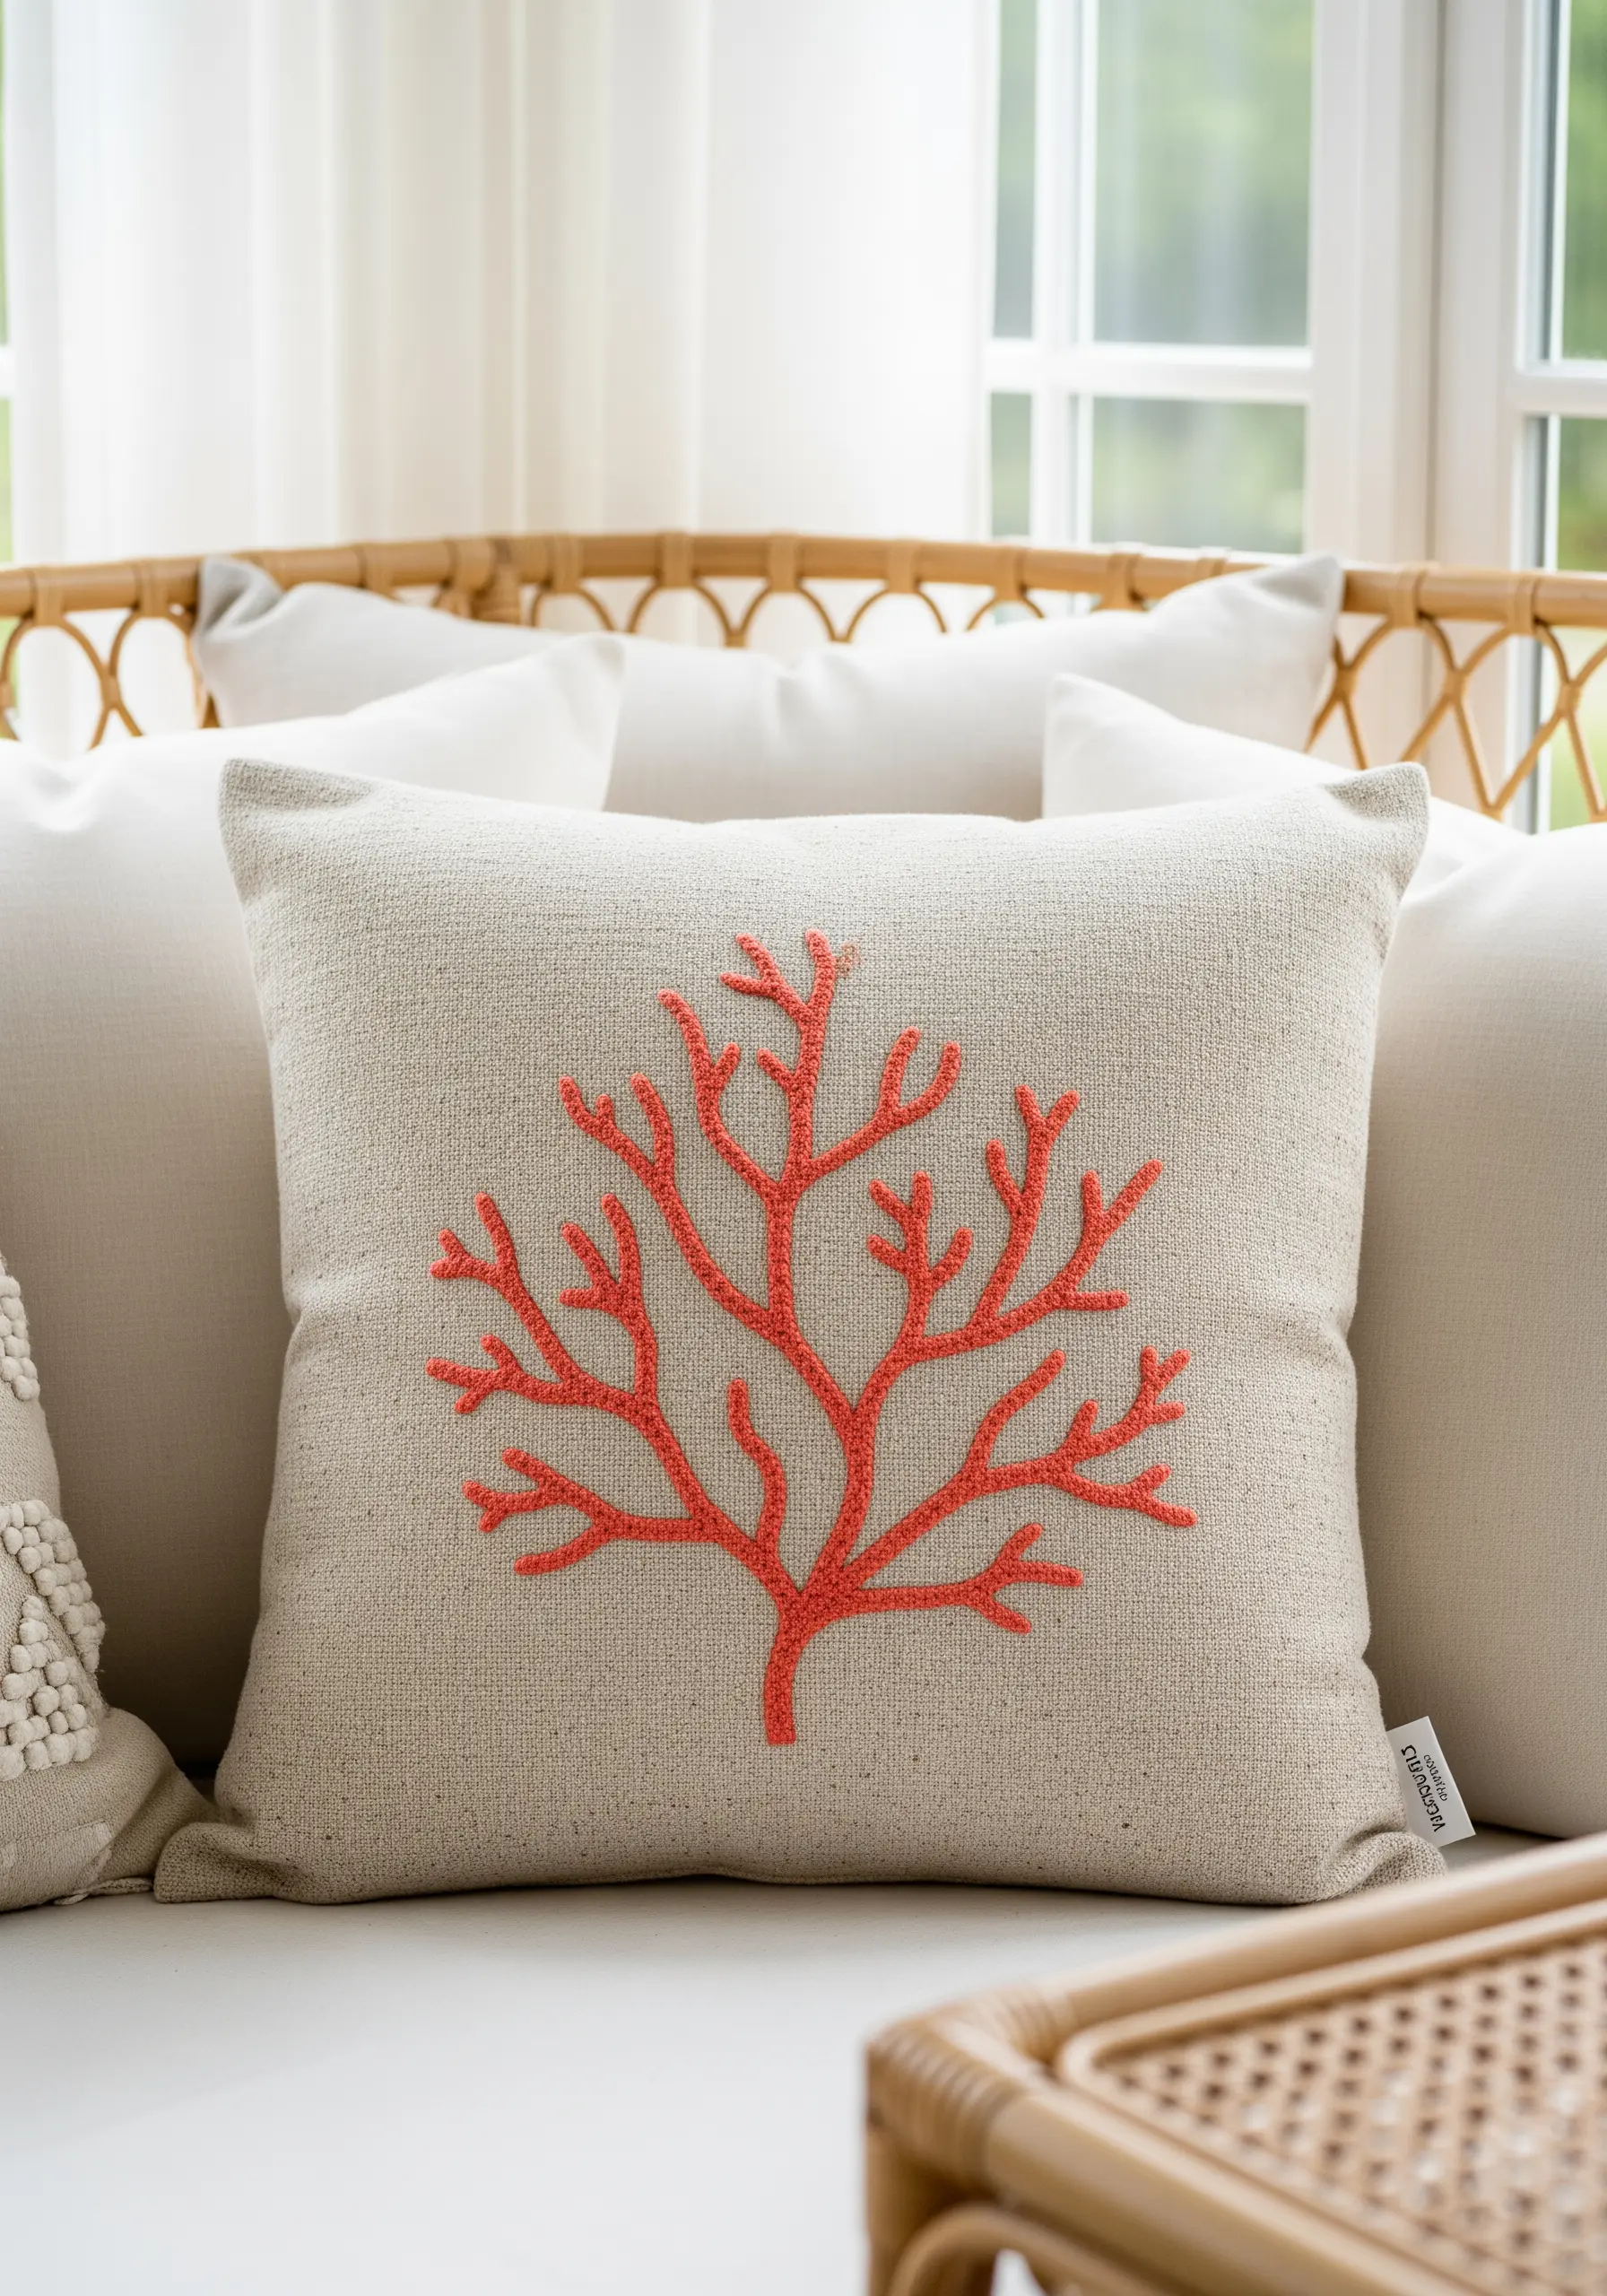
To replicate the wonderfully bumpy, organic texture of coral, fill the entire shape with French knots.
The secret to a natural look is variation: create knots of different sizes by wrapping the thread around your needle once, twice, or three times.
Scatter these different sizes throughout the shape to create depth and a tactile quality that begs to be touched.
A bright, saturated color like this coral red against a neutral linen makes the texture the star of the show.
20. The Unbroken Elegance of a Flowing Line
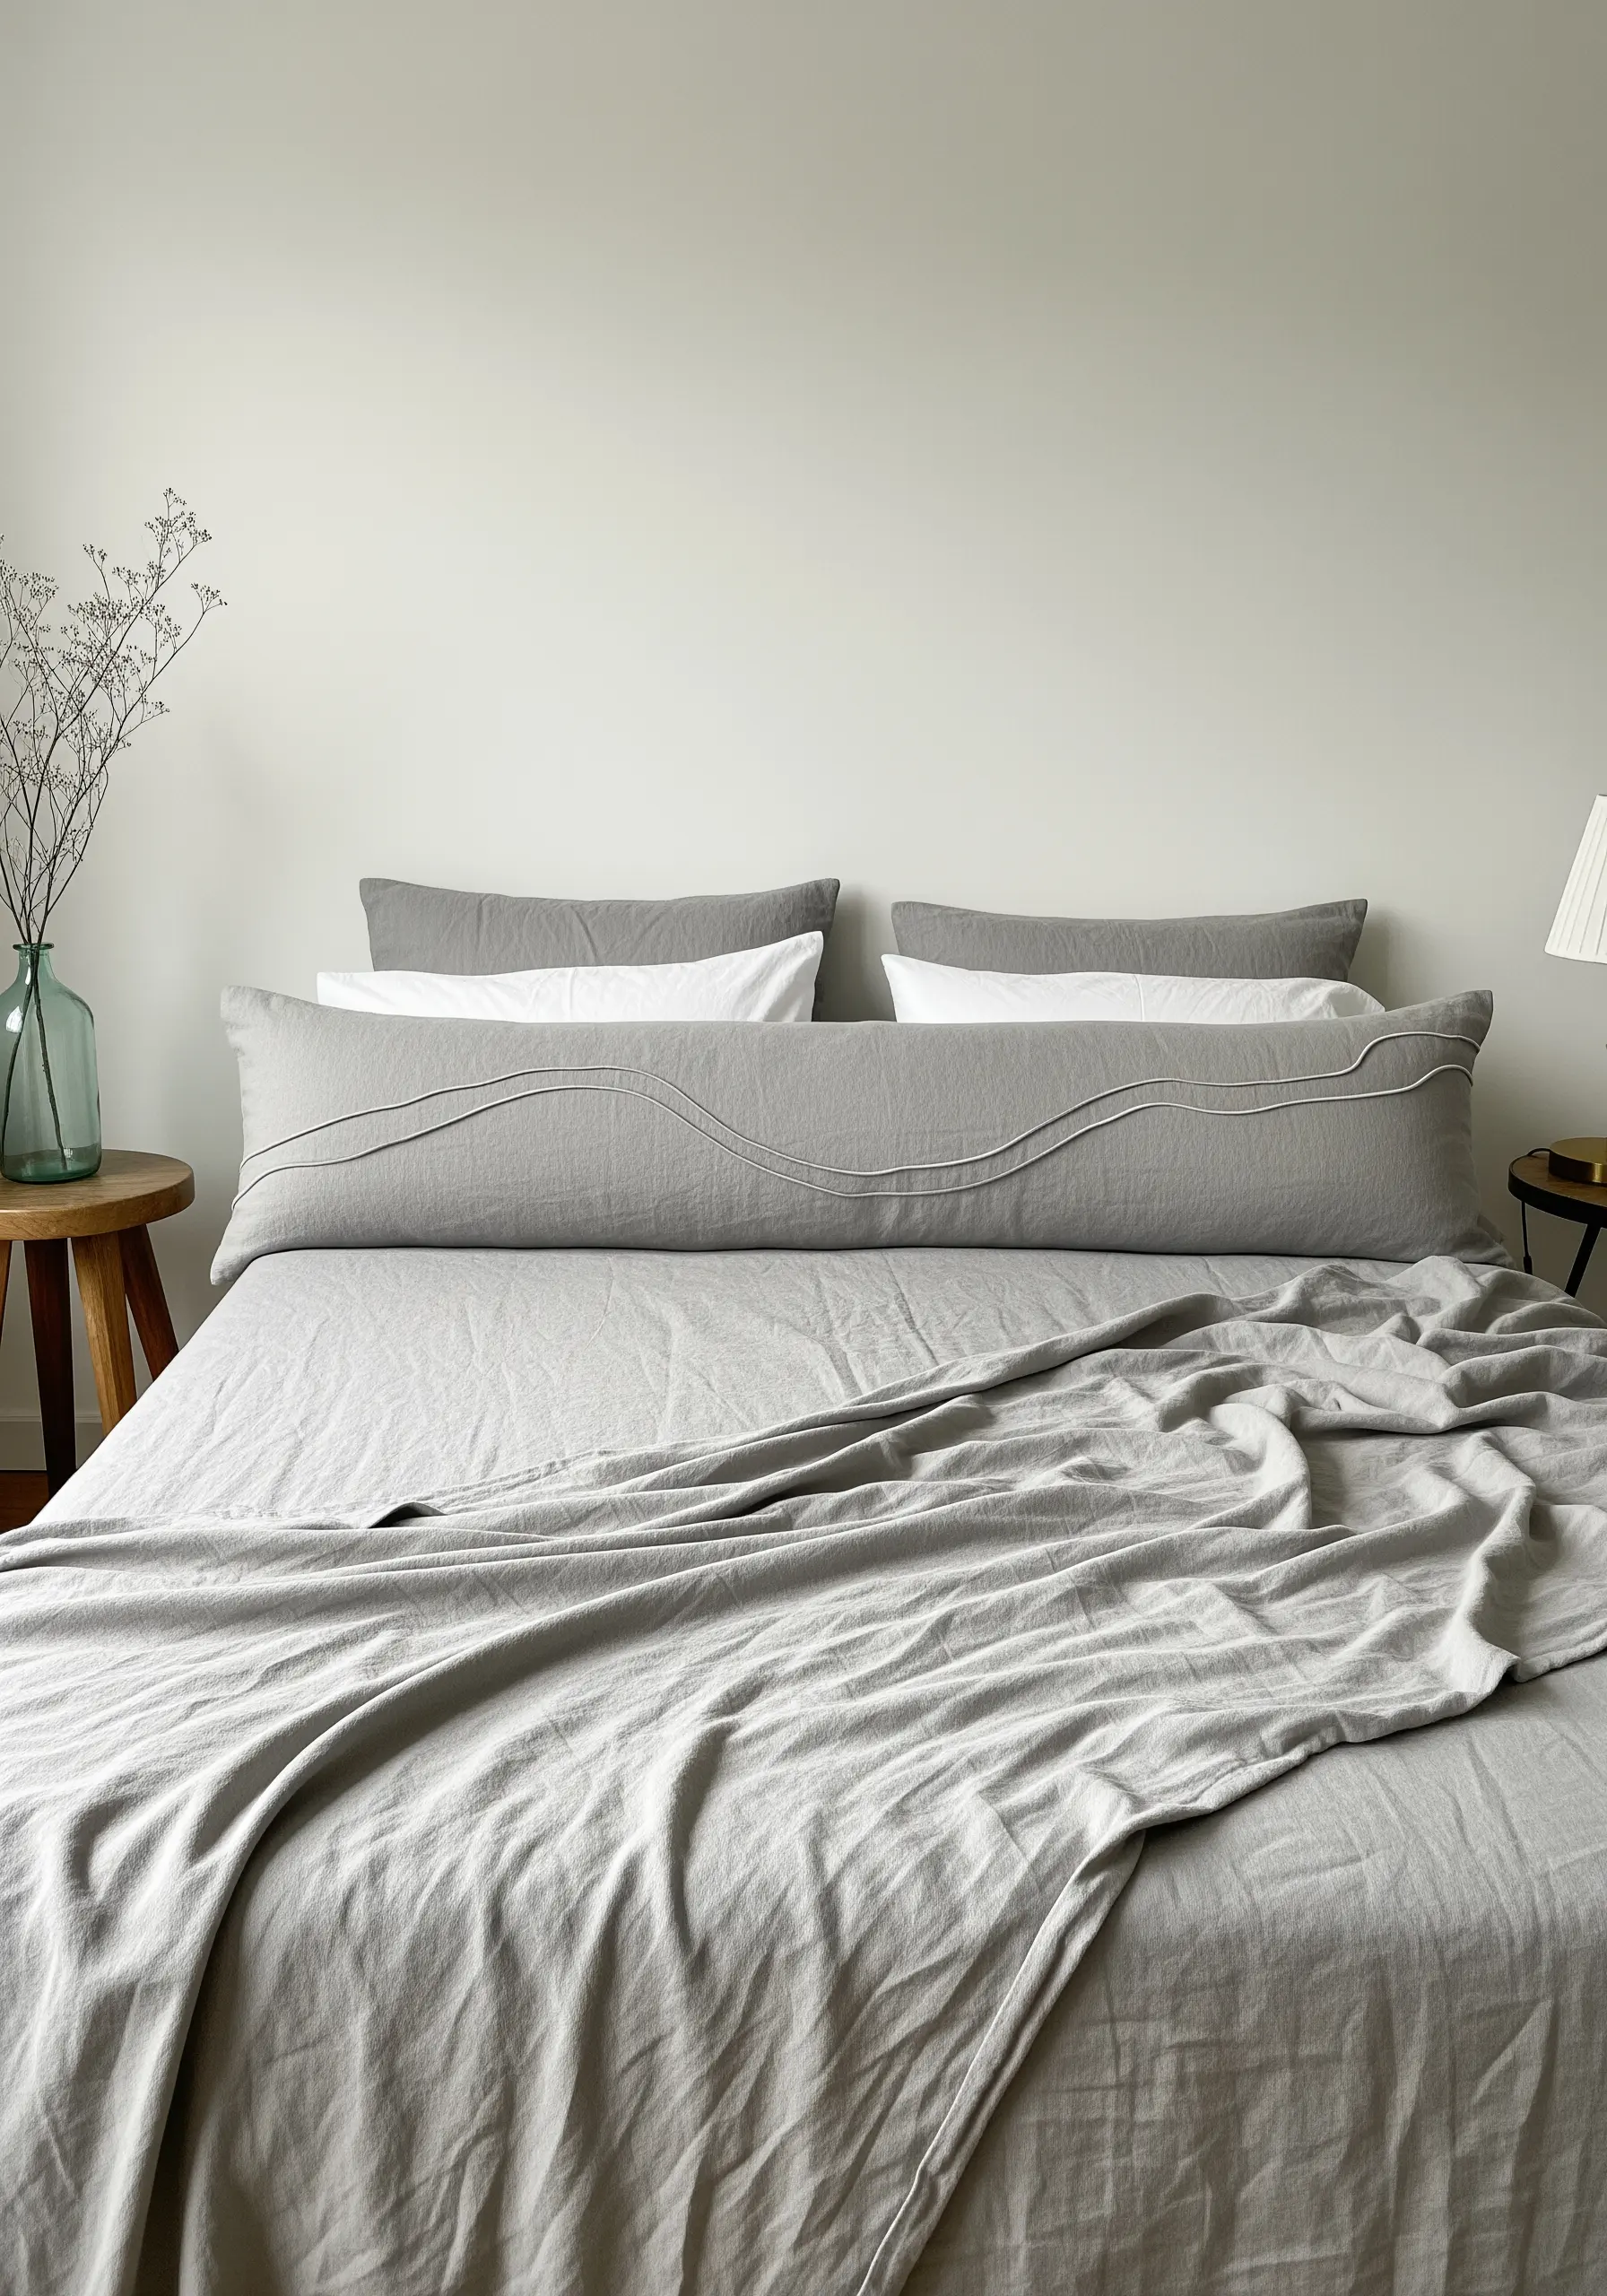
A single, uninterrupted line can carry more elegance and movement than a dozen complex motifs.
The stem stitch is the perfect choice for creating smooth, flowing curves, as it twists slightly to form a beautiful, rope-like line.
To ensure your line is perfectly placed across a long surface like this bolster, draw it on first with a heat- or water-erasable pen.
This simple act of preparation guarantees a graceful, confident final stitch.
21. Crisp Geometry with Felt Appliqué
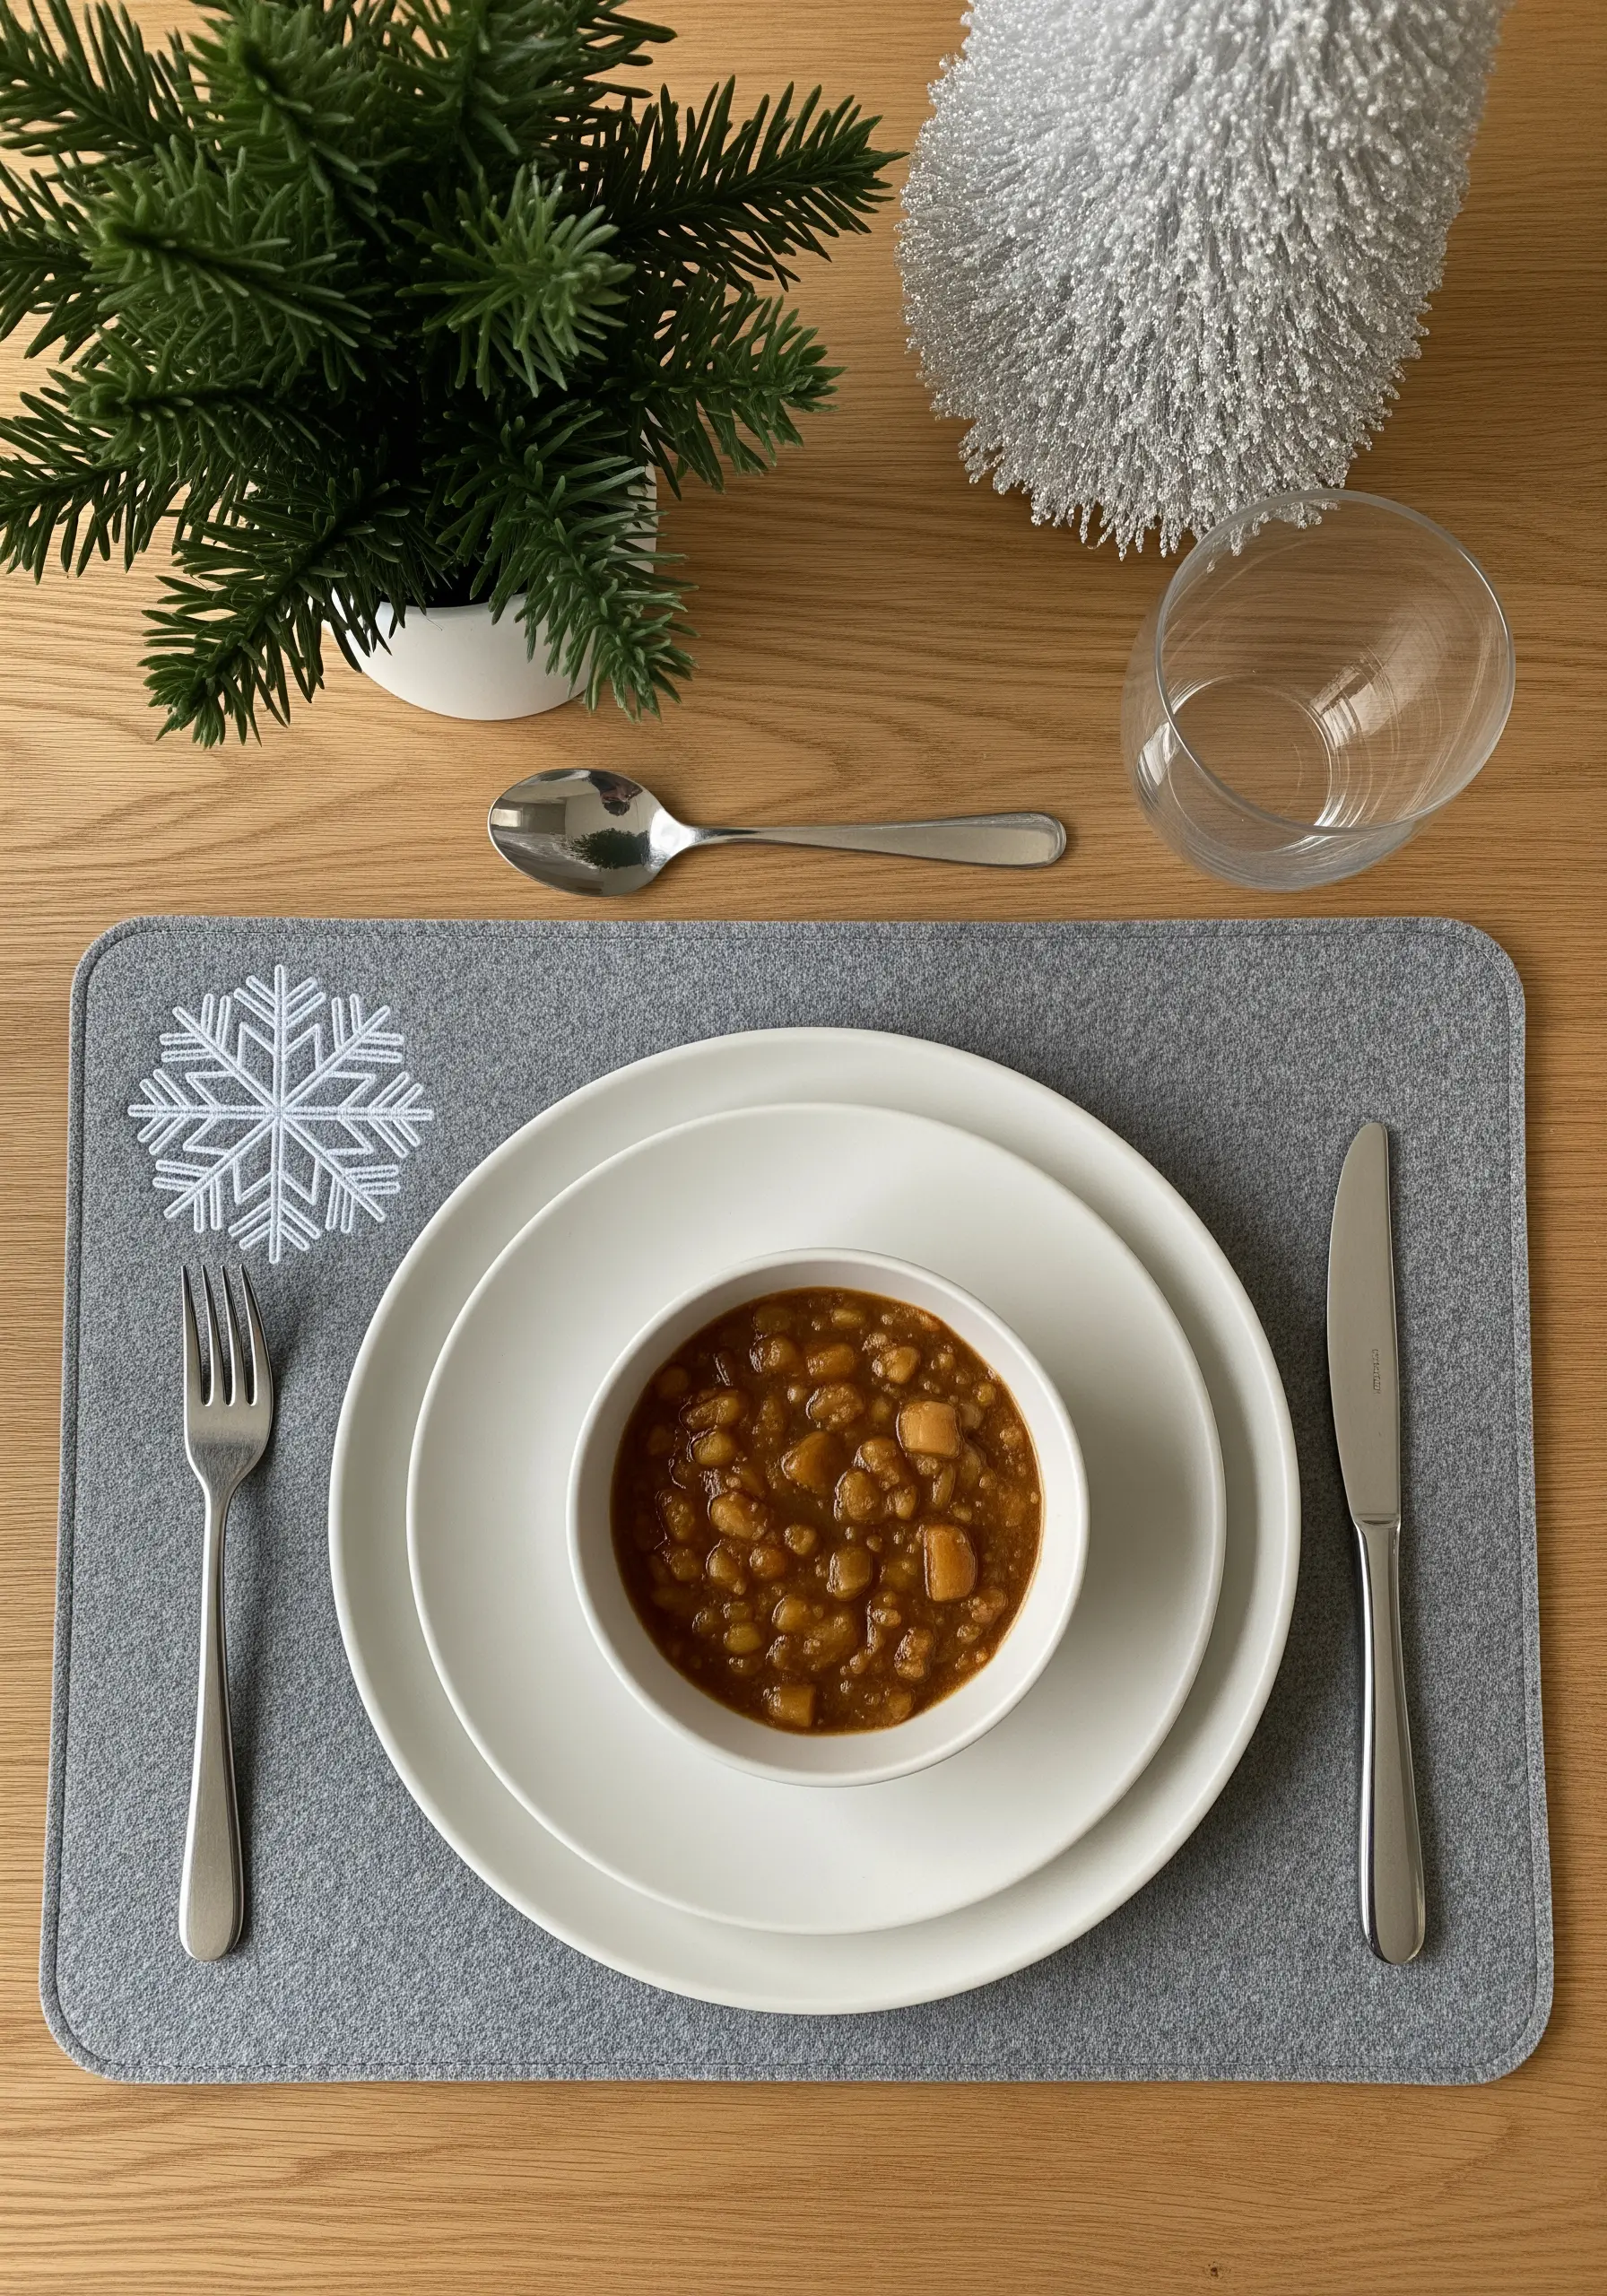
For a perfectly crisp geometric shape like a snowflake, combine appliqué with embroidery.
Cut the main shape from a stiff, high-quality felt and secure it with a few tiny, hidden stitches in a matching thread.
Then, you can add finer details, like the radiating lines, with simple straight stitches directly on top.
This mixed-media approach is faster than filling the entire shape with satin stitch and delivers an exceptionally clean, modern result for your seasonal embroidery decor.
22. Creating Soft Fills with Seed Stitch
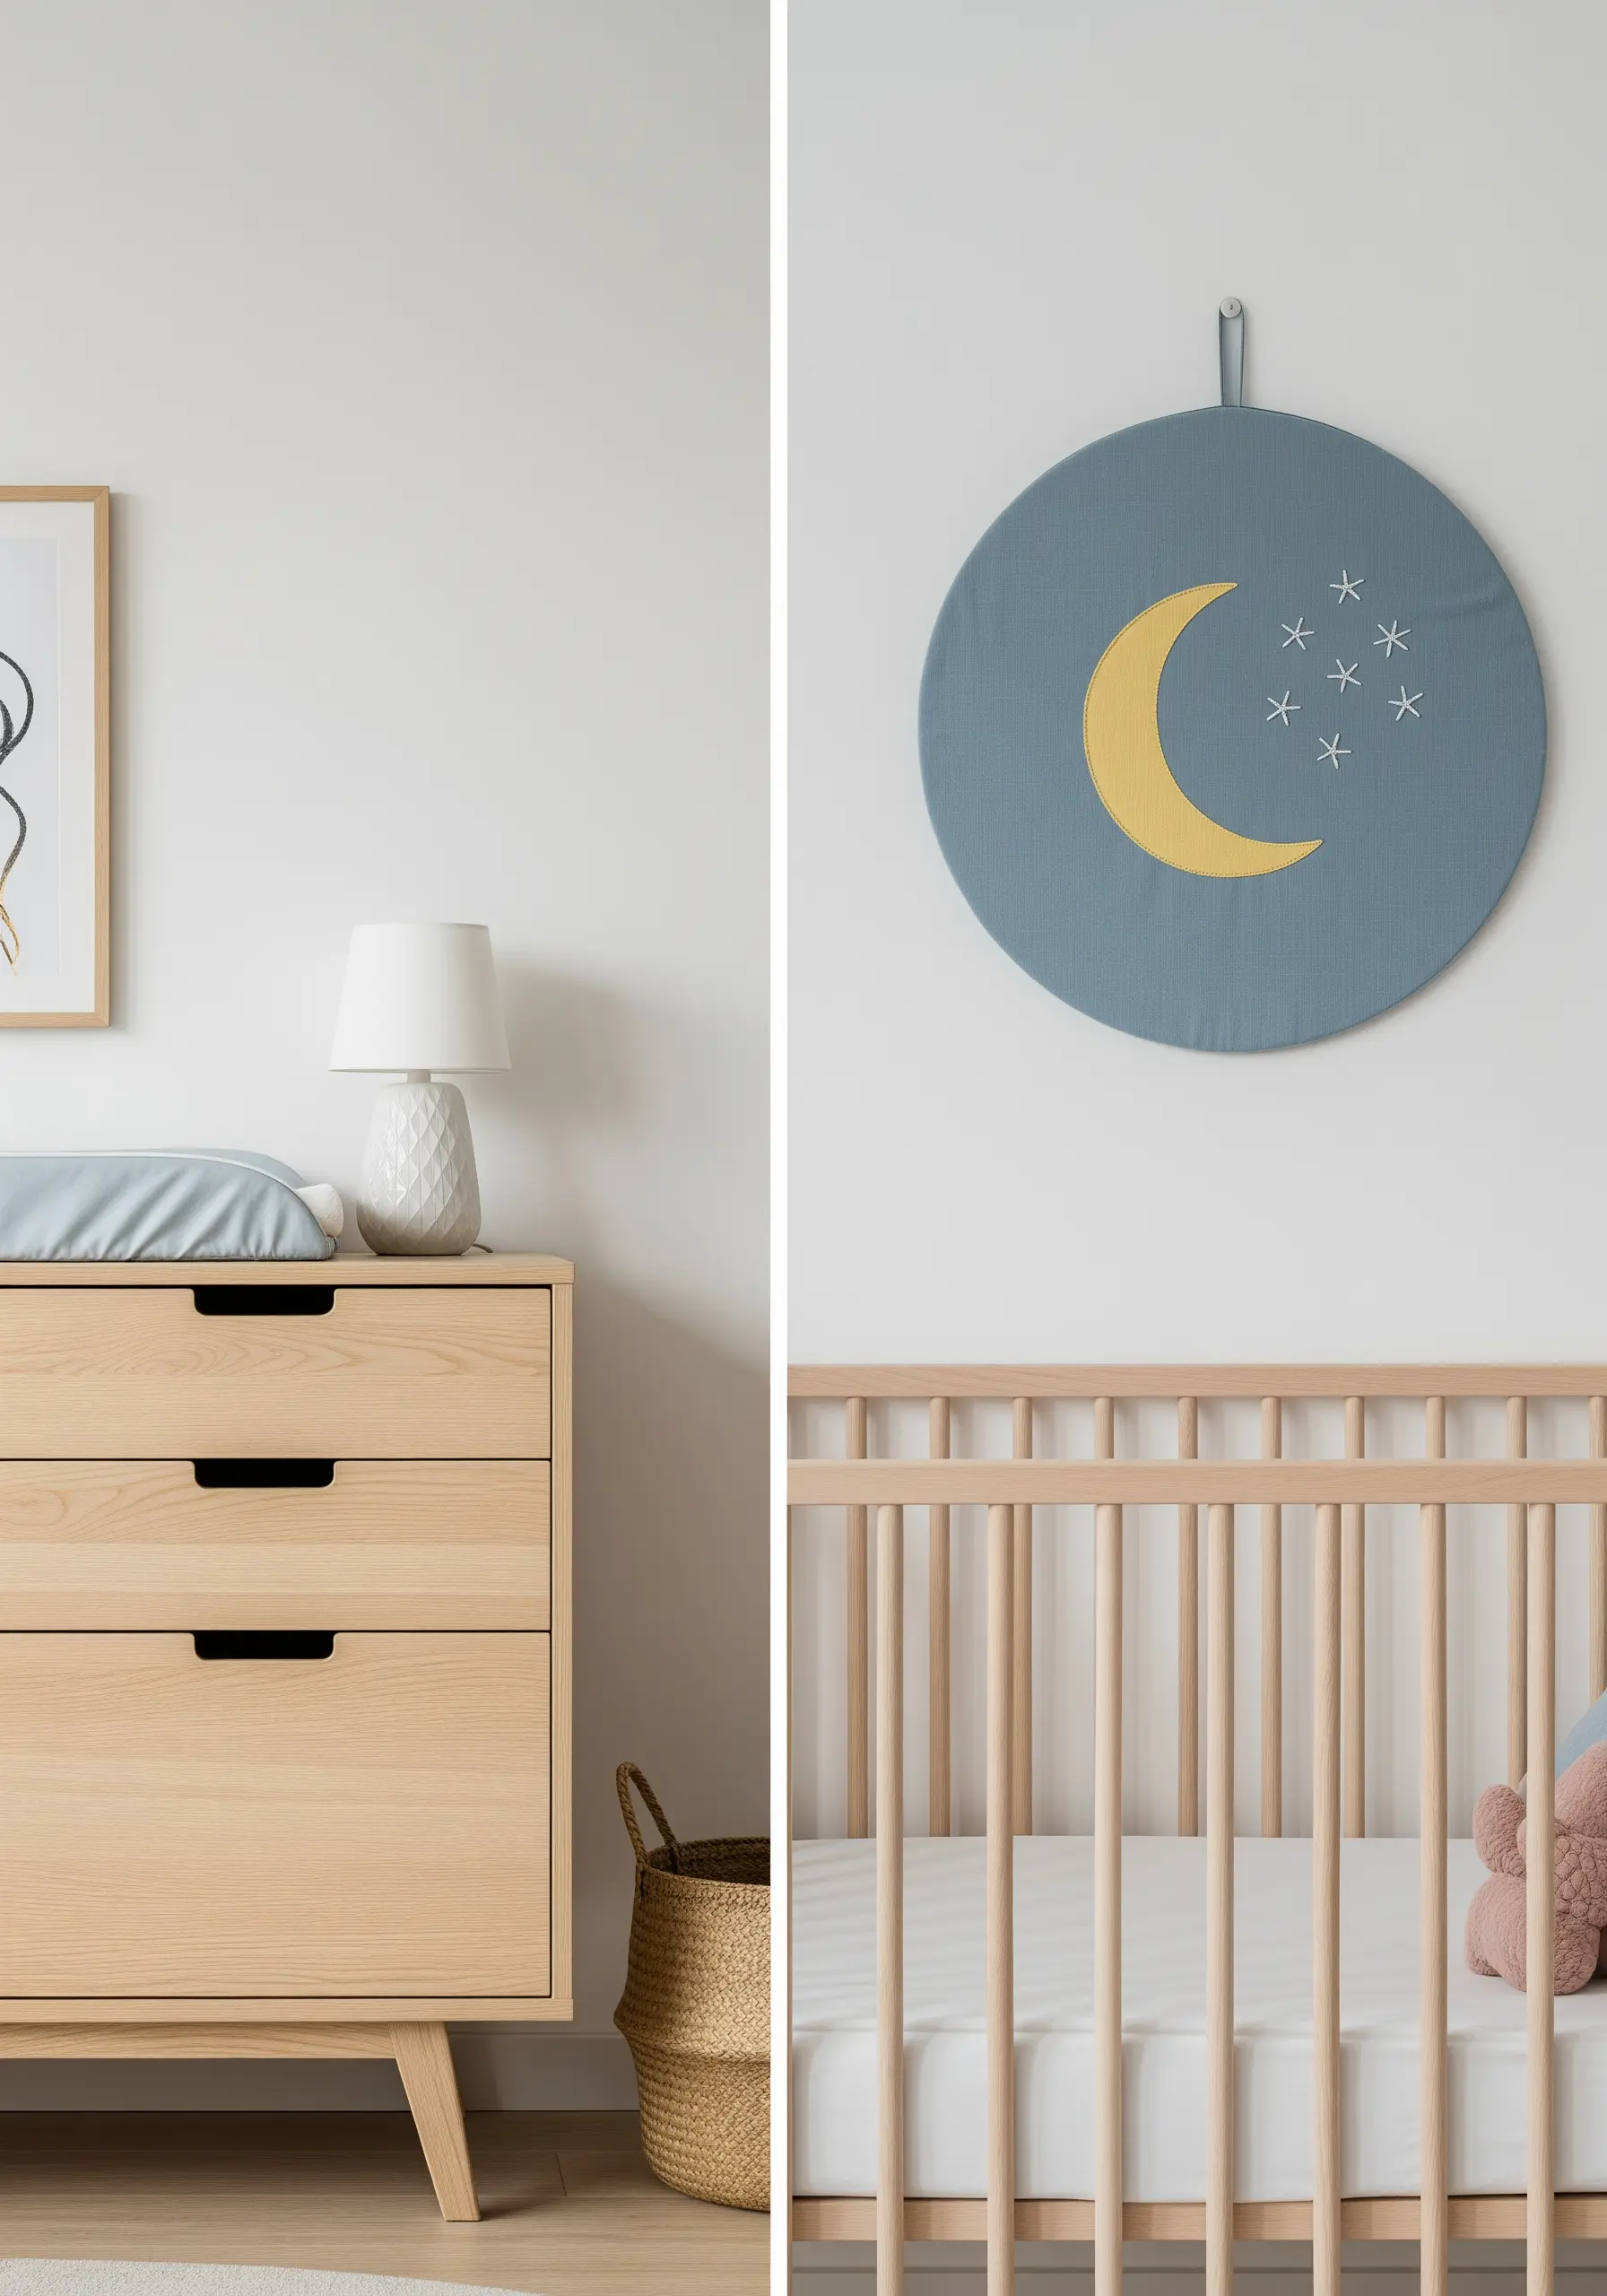
When you want to add color and texture to a shape without the solid density of a satin stitch, the seed stitch is the perfect solution.
It consists of small, straight stitches scattered randomly within an outline, creating a gentle, speckled fill.
This technique gives the crescent moon a soft, dreamy quality that is perfect for nursery decor.
Paired with tiny star-like stitches, it creates a scene that feels both handmade and wonderfully serene.
23. Suggesting Form with Minimal Stitches
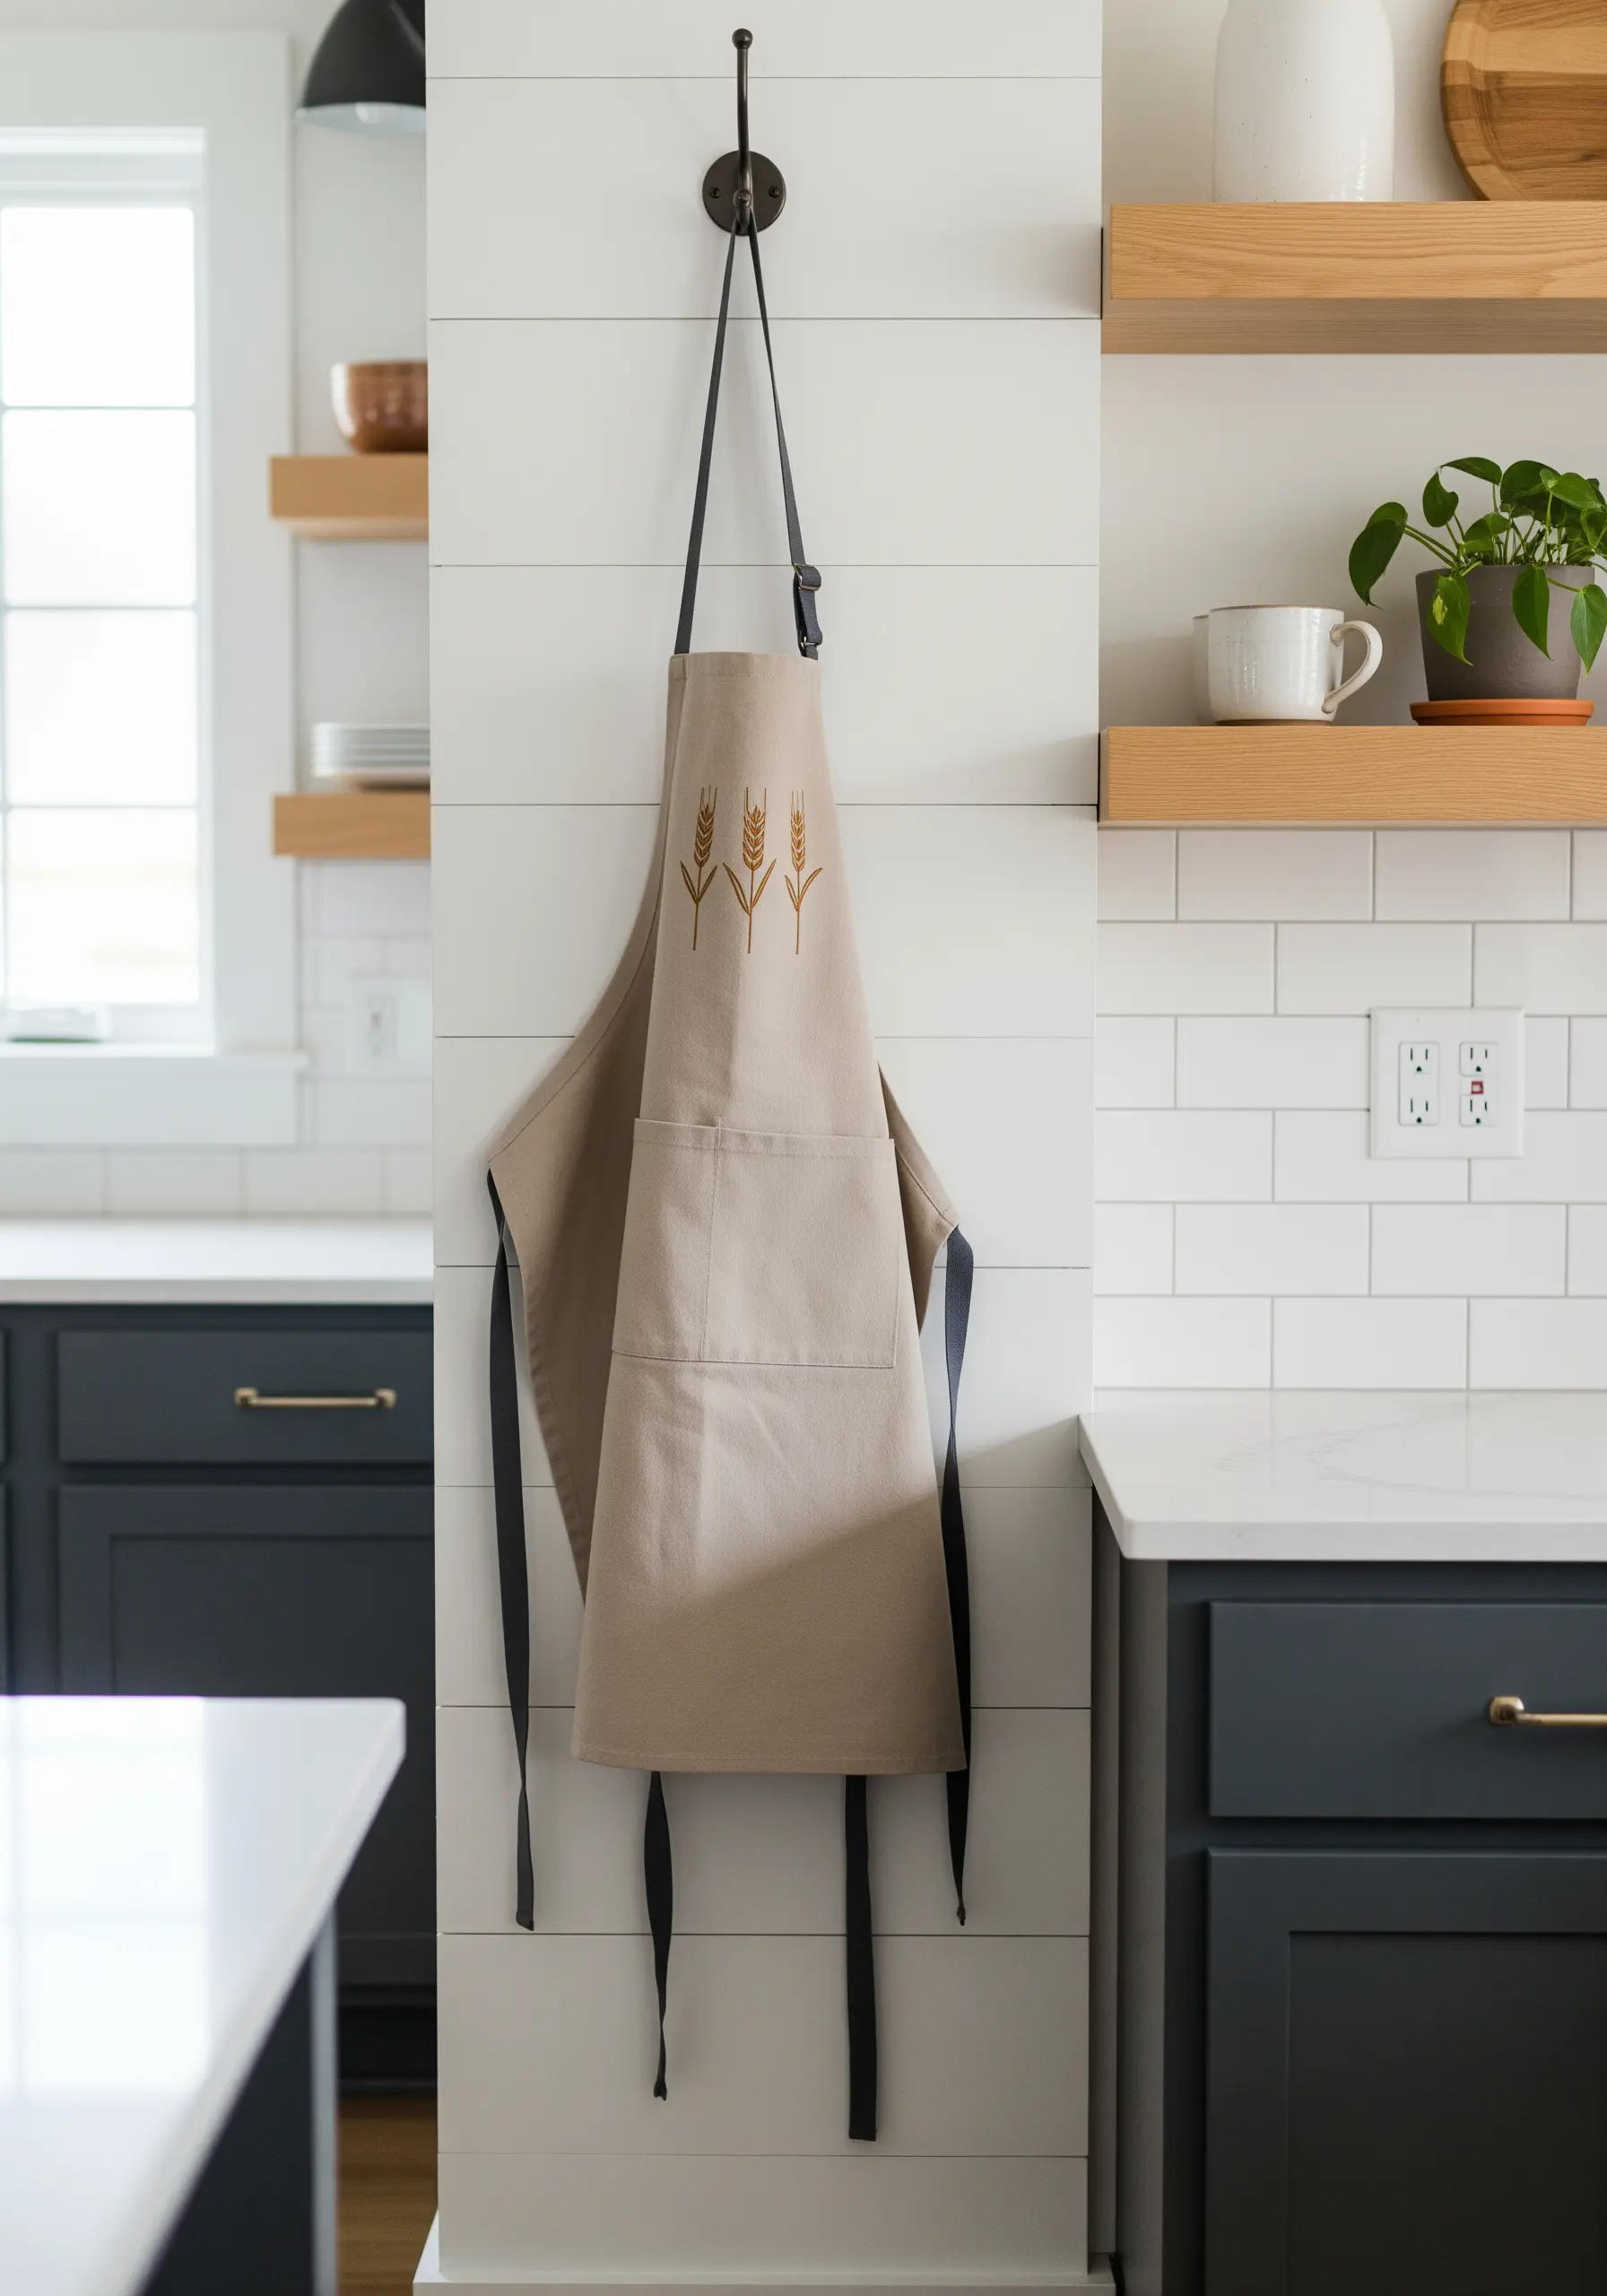
Minimalism is about conveying an idea with the fewest possible marks.
To capture the essence of wheat stalks, you only need two simple stitches: a long straight stitch for the stem and detached chain stitches (or lazy daisies) for the individual grains.
The beauty of this design lies in its restraint and the ample negative space, which allows the delicate forms to breathe.
It’s proof that you don’t need complexity to create something recognizable and beautiful.
24. Pattern and Texture with Whipped Running Stitch
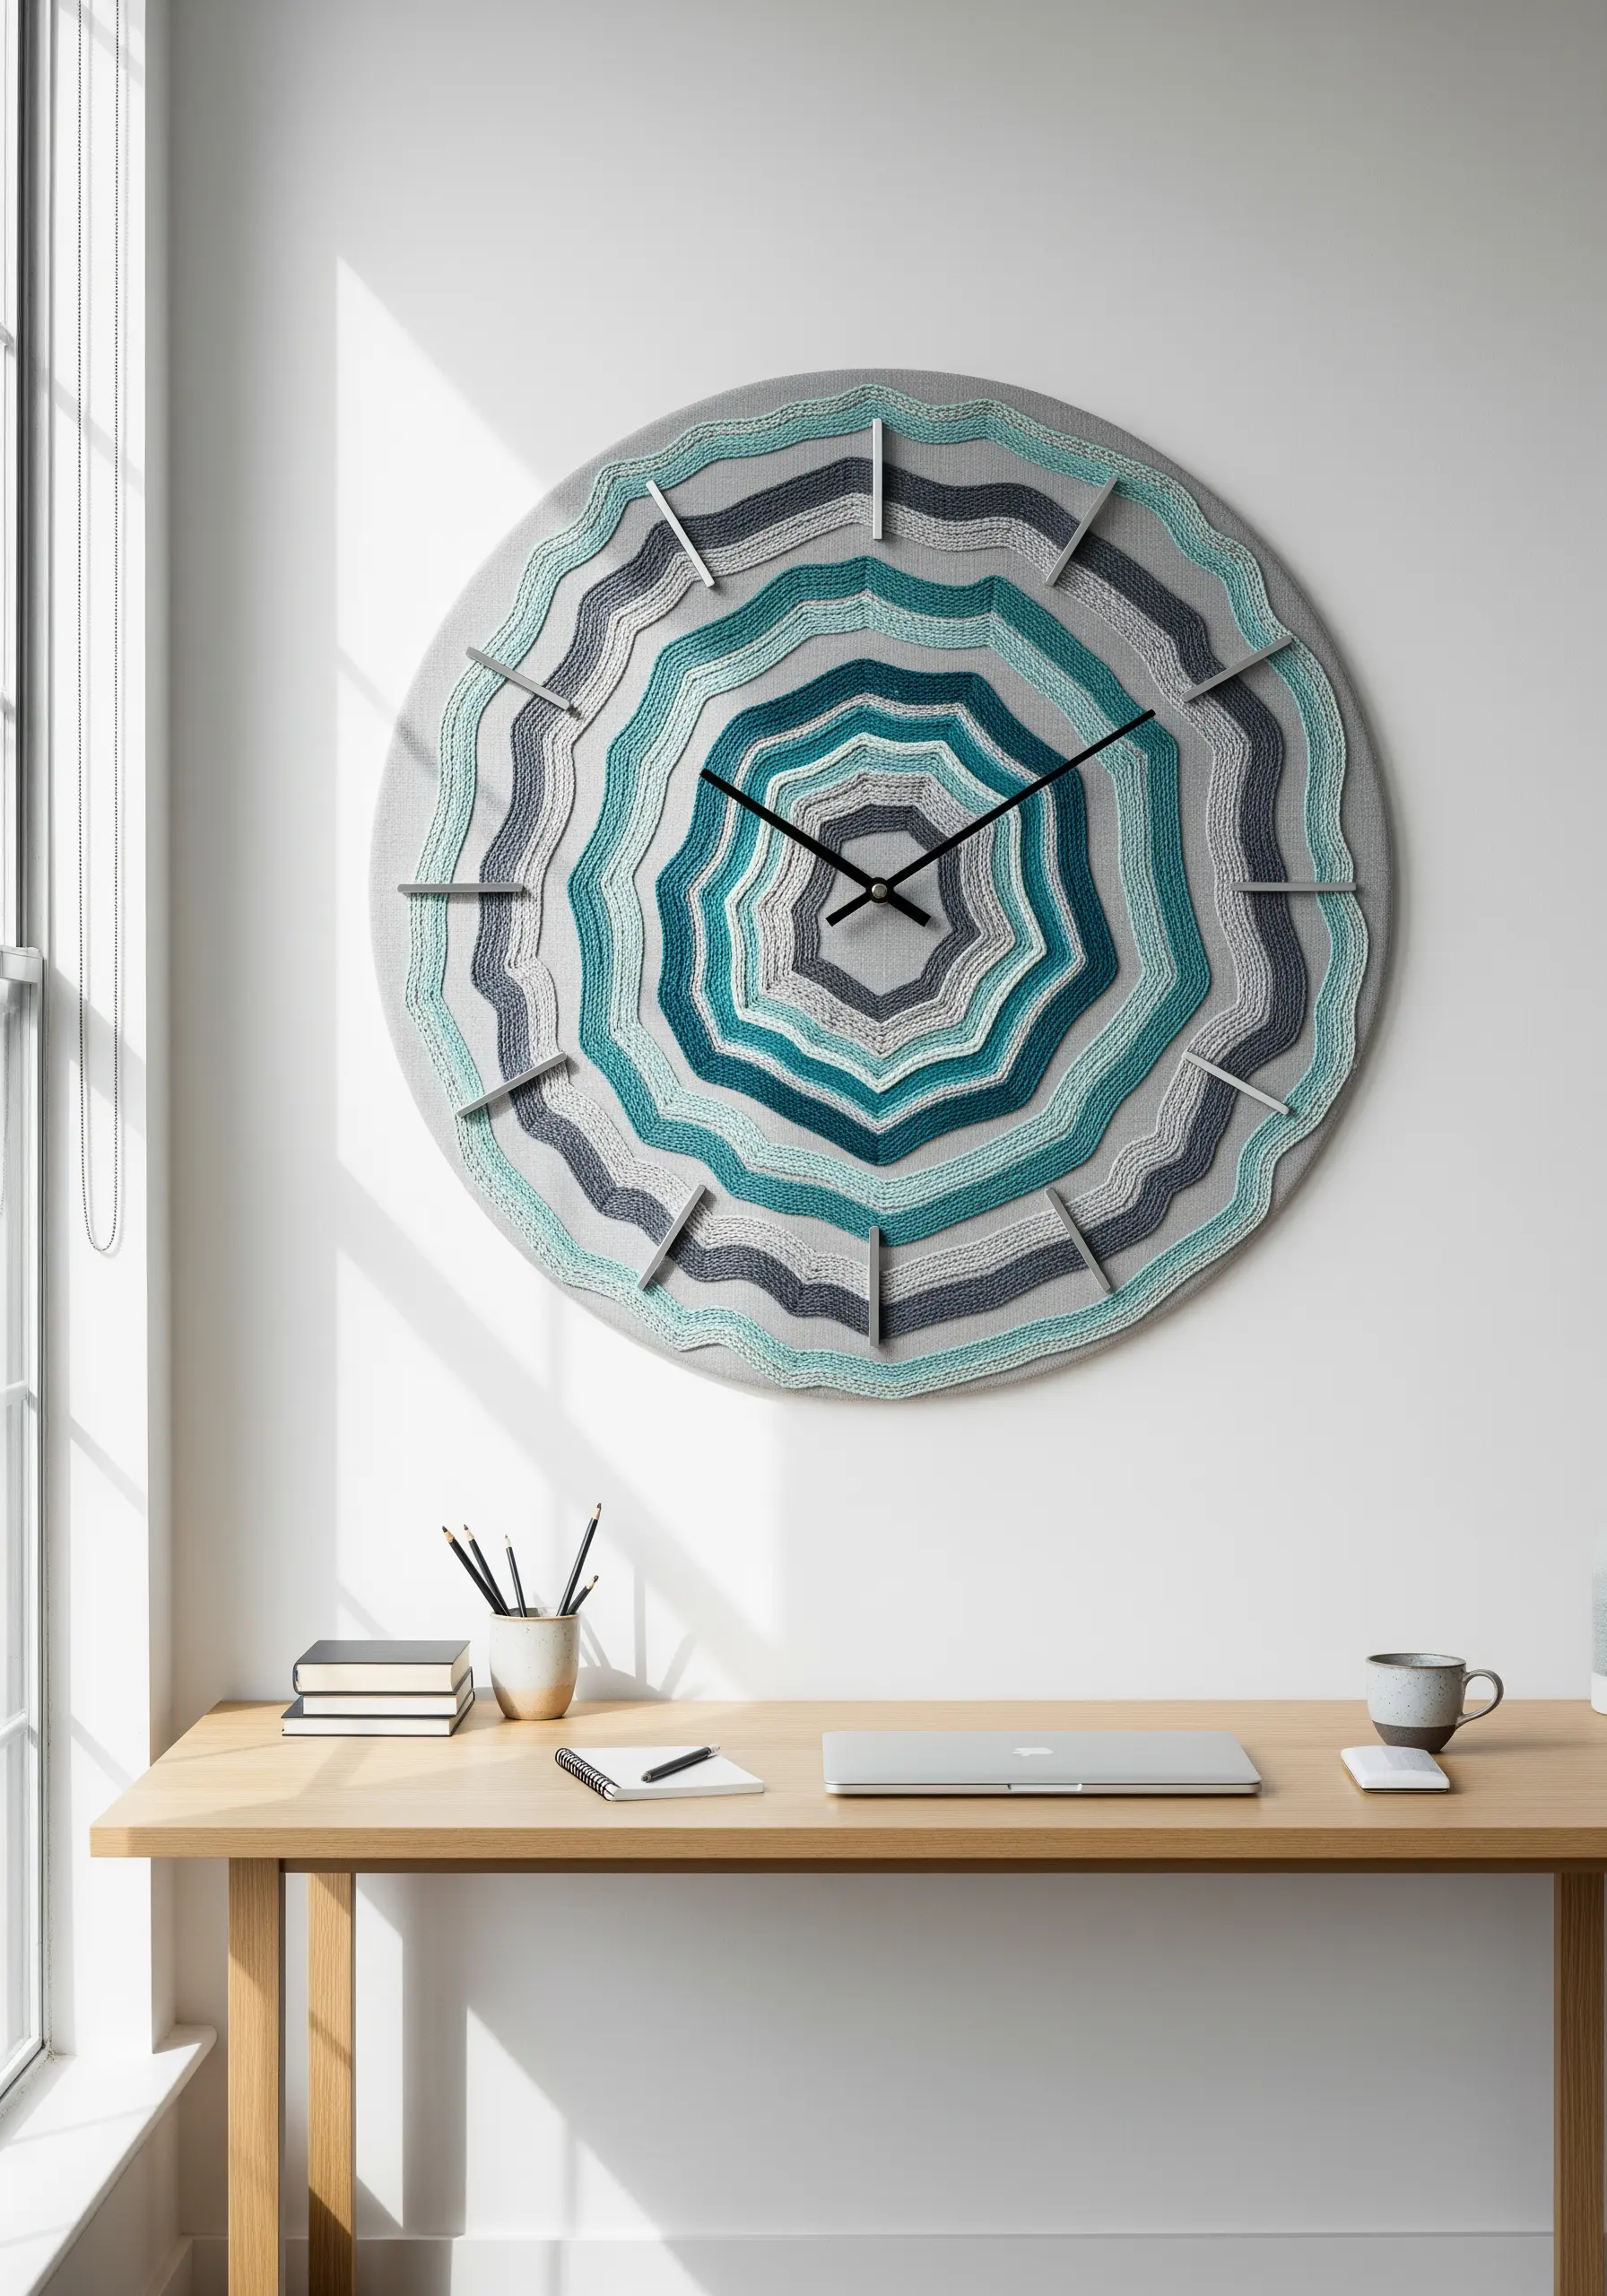
This intricate, layered texture is created with a surprisingly simple technique: the whipped running stitch, repeated in concentric circles.
First, stitch a basic running stitch. Then, take a second, often thicker or contrasting, thread and weave it through the running stitches without piercing the fabric.
By alternating colors and thread textures, you can build up a design with incredible depth and pattern that mimics the natural growth rings of a tree.
25. An Impressionistic Approach to Floral Borders
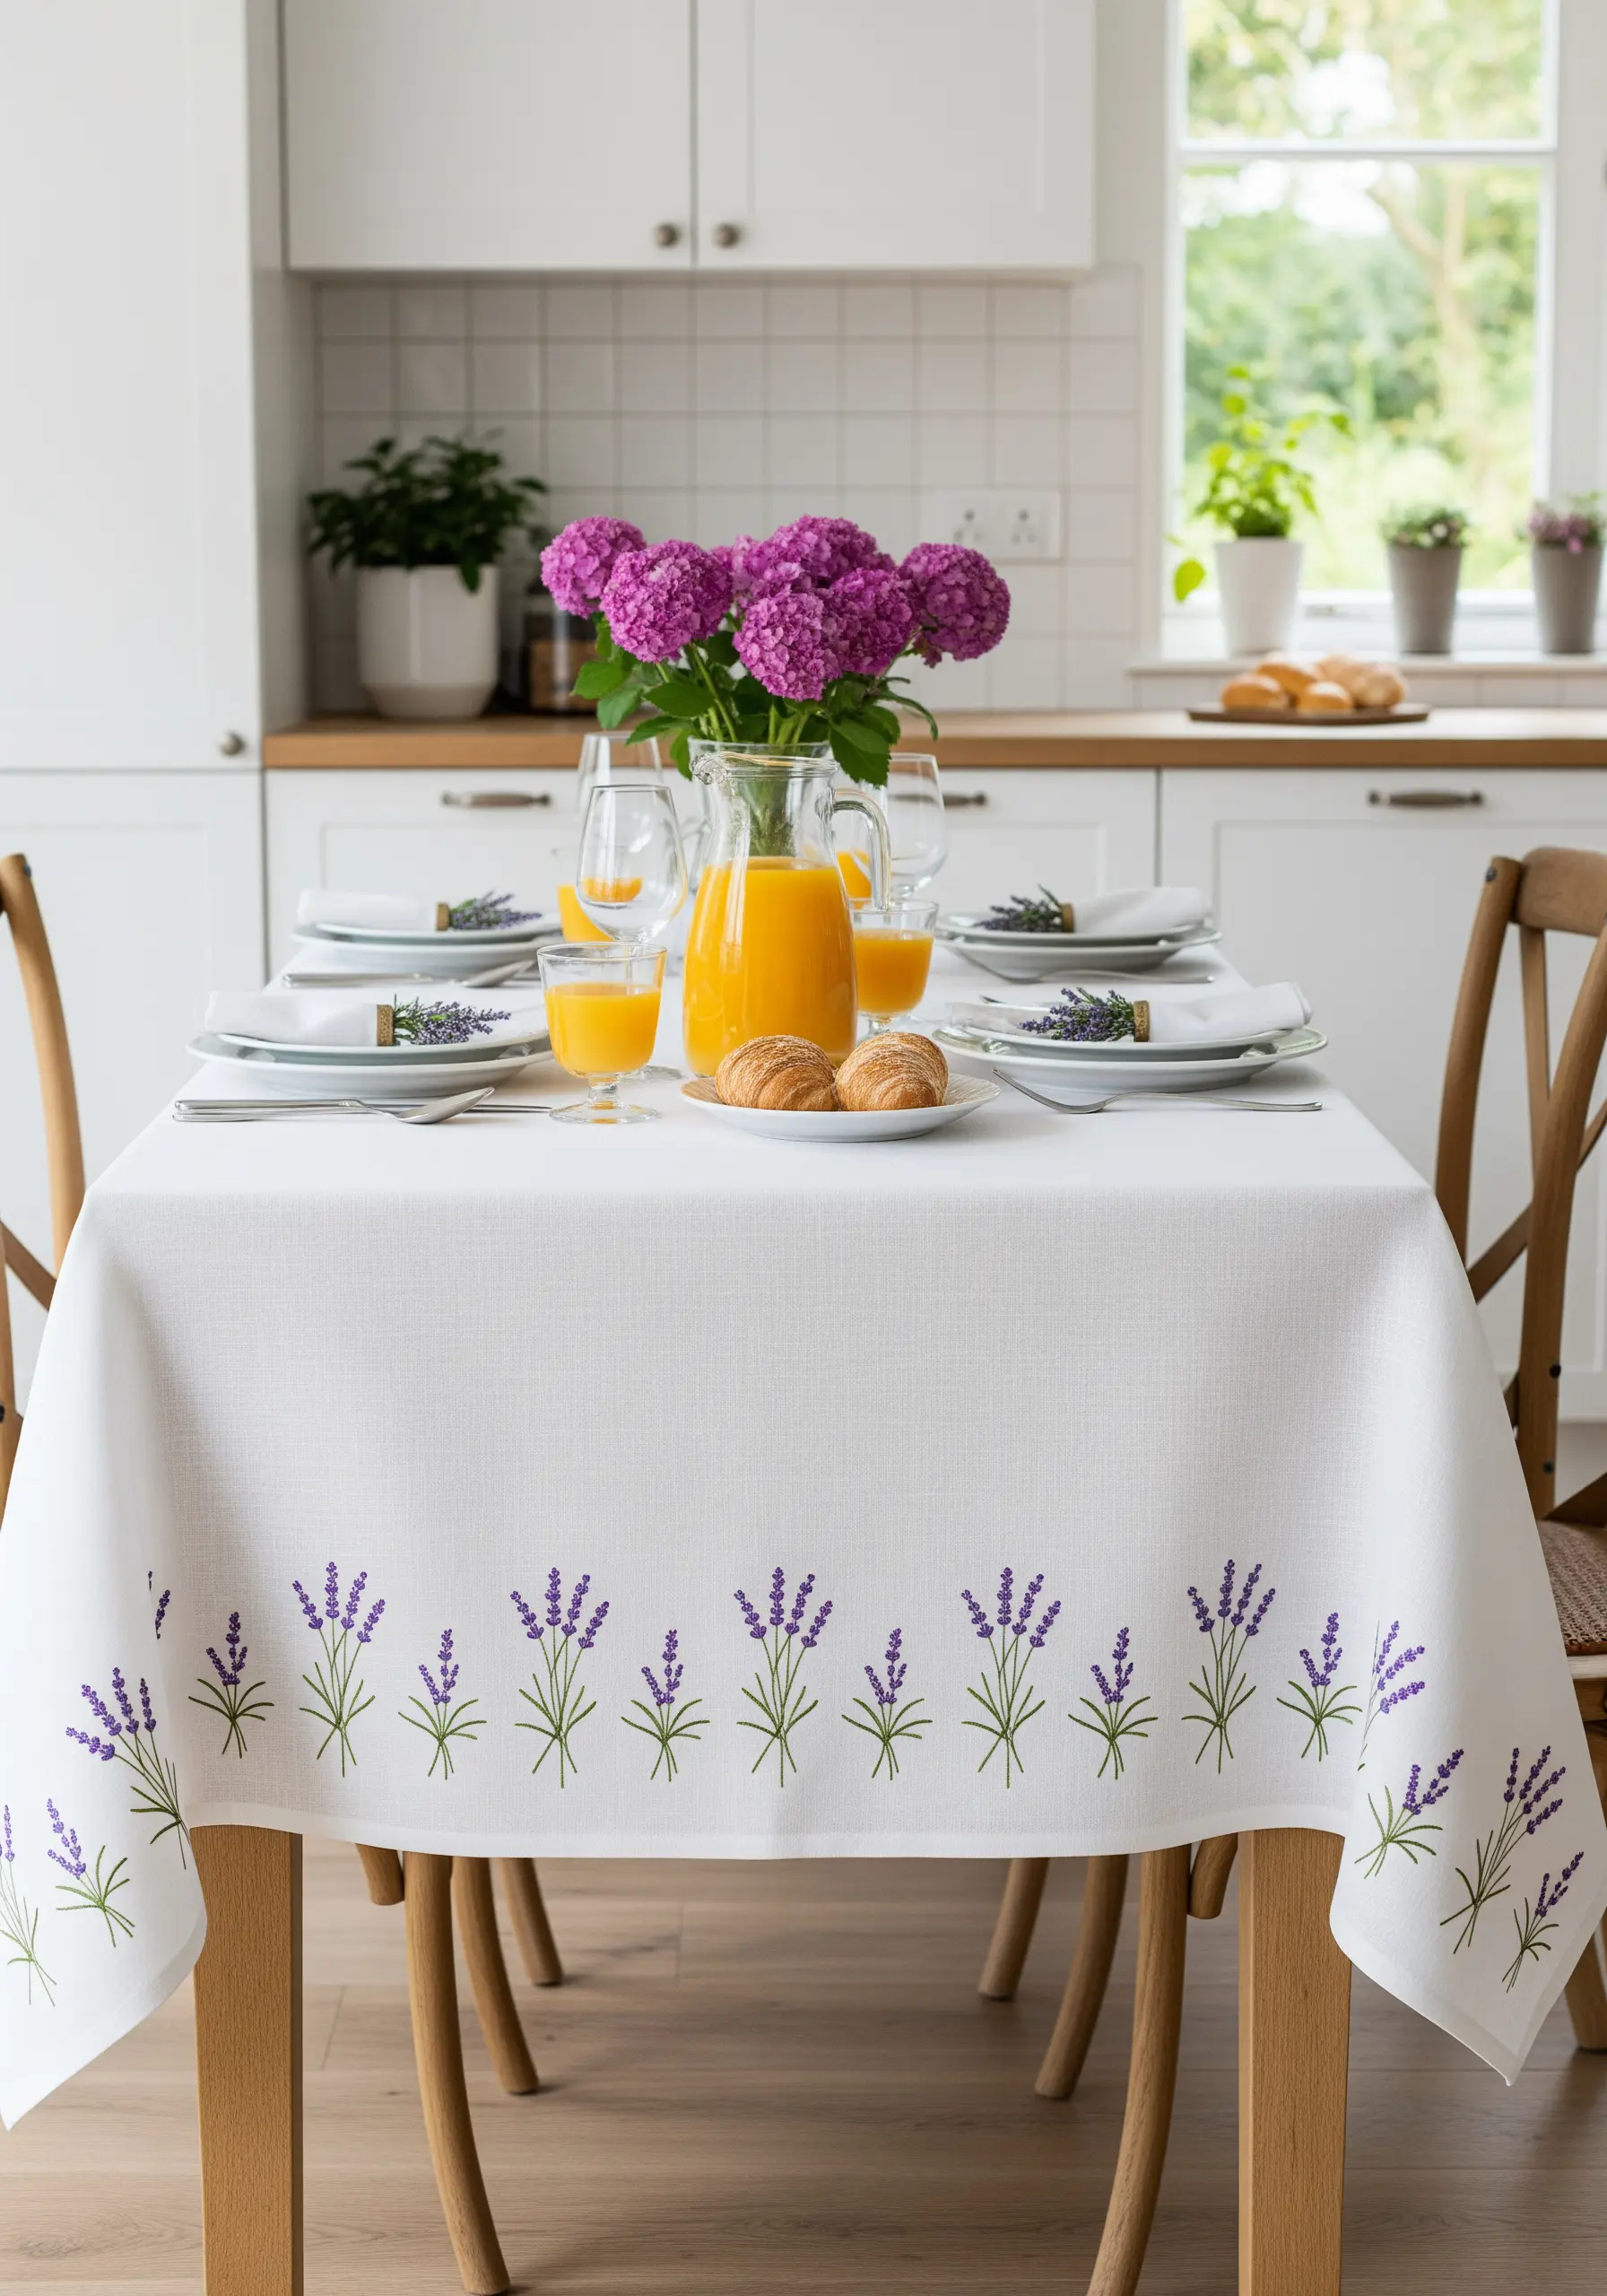
You don’t need to stitch every single petal to evoke a field of lavender.
Create an impressionistic effect by using a simple straight stitch for the stem and a small cluster of French knots for the blossoms.
By repeating this simple, two-step motif, you can create a beautiful and rhythmic border that feels lush and detailed without being overworked.
This technique is perfect for adding a touch of botanical charm to tablecloths and linens.
26. Bold Appliqué with a Blanket Stitch Finish
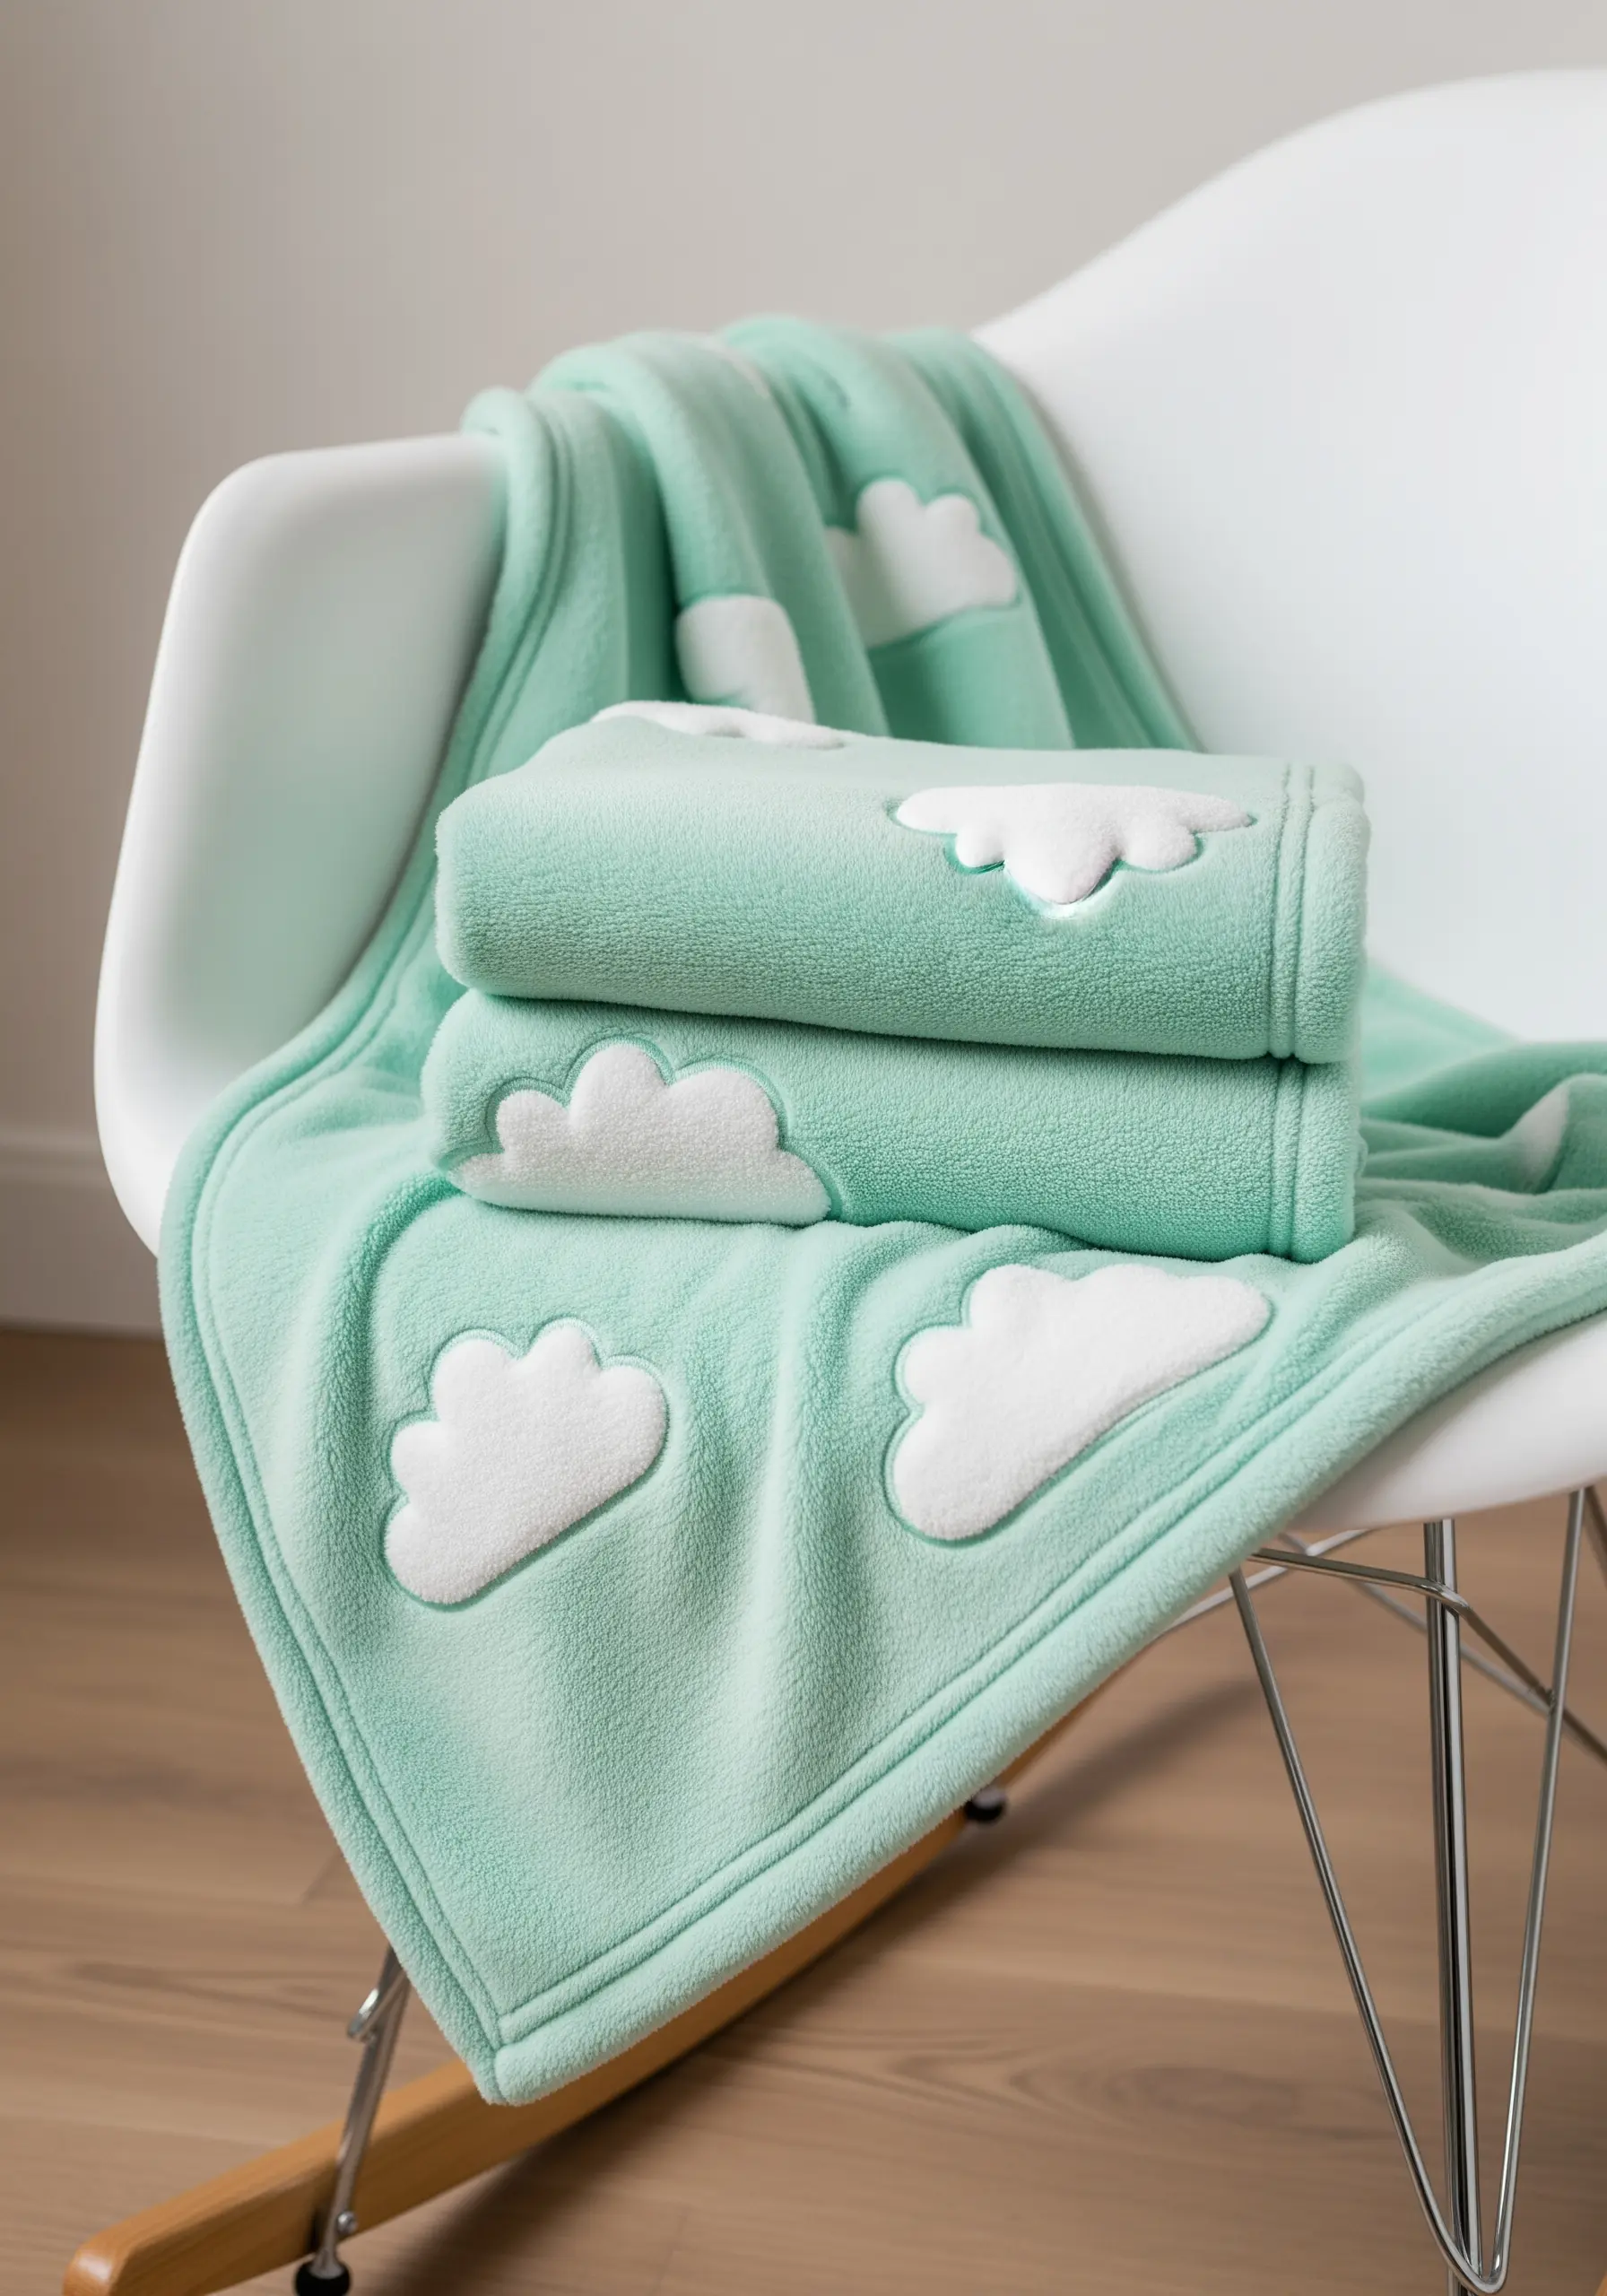
When working on soft, plush fabrics like fleece, appliqué is the best way to add a bold, graphic shape.
Cut your cloud shapes from a contrasting fleece or felt, which won’t fray.
To secure the shapes and add a charming, handcrafted detail, use a blanket stitch around the entire edge.
Using a contrasting thread for your blanket stitch helps to define the silhouette and turns a simple construction method into a key design element.
27. Creating Depth with Varied Line Weights
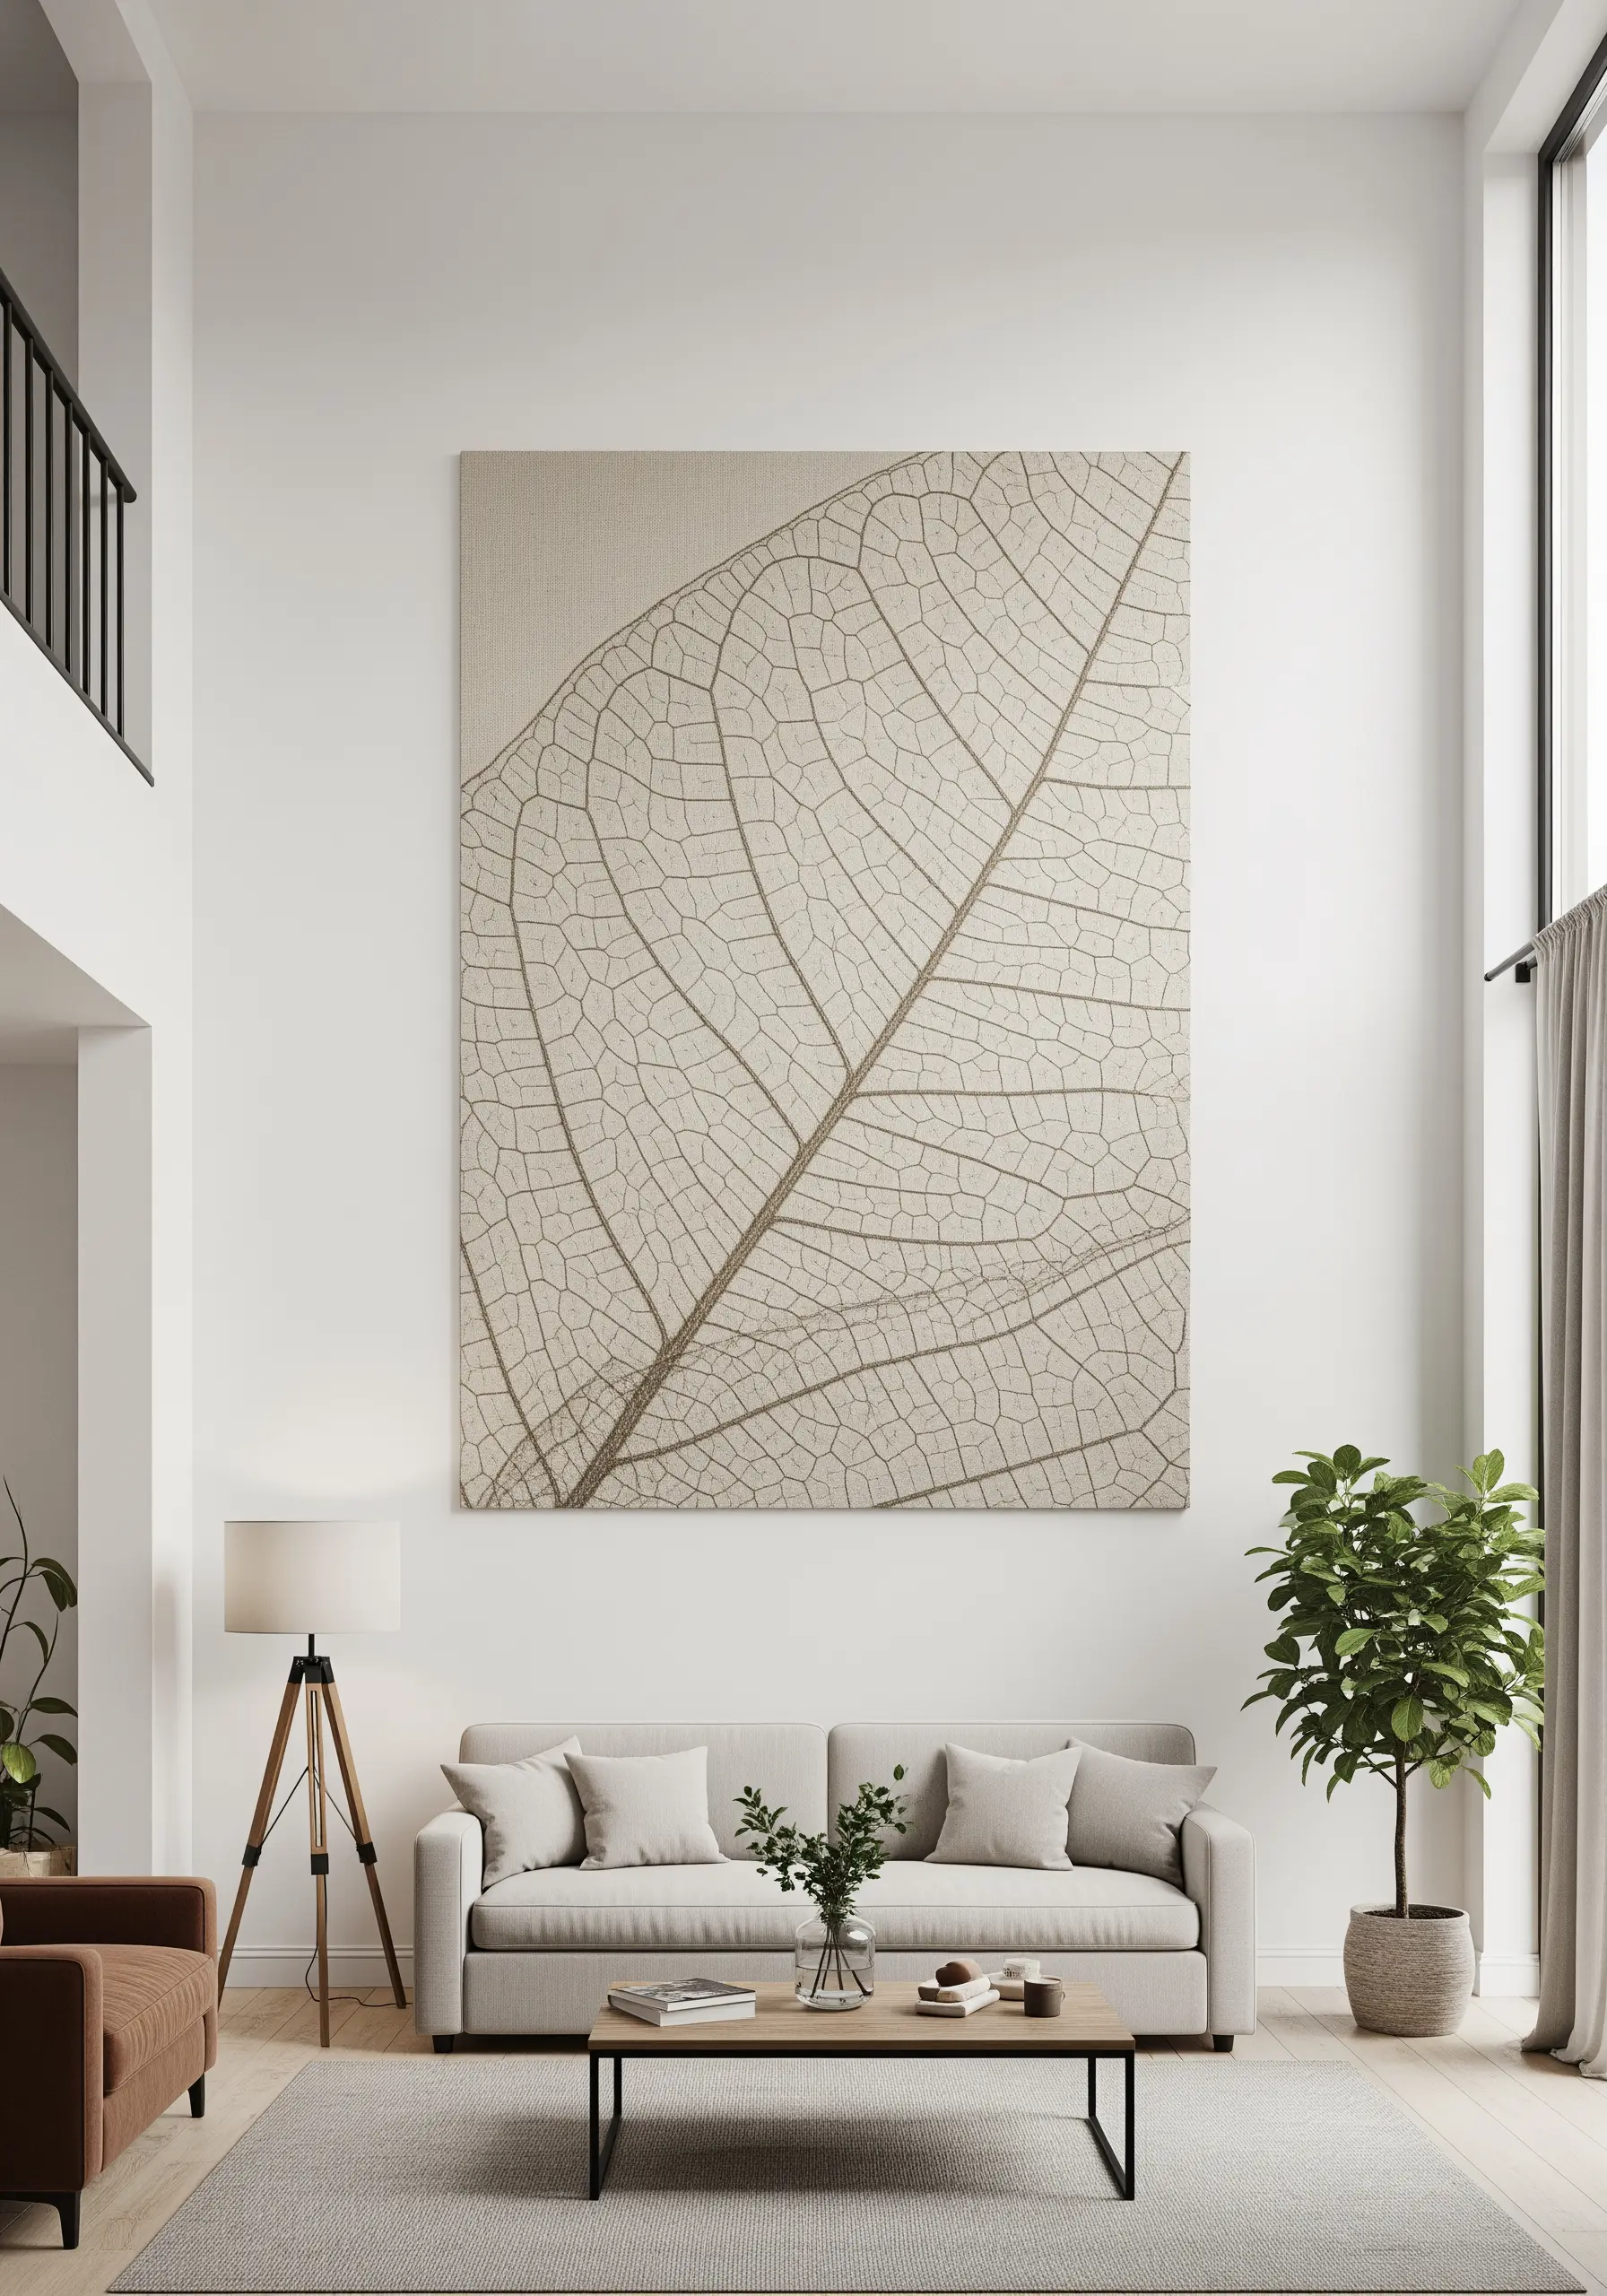
To prevent a complex line drawing like this leaf skeleton from looking flat, you need to create a visual hierarchy.
Stitch the primary, thickest veins first using three or four strands of floss.
Next, stitch the secondary veins with two strands.
Finally, fill in the finest, most delicate veins using only a single strand.
This subtle variation in line weight is how you can ways to capture nature’s textures in your next embroidery project, adding depth and realism to your work.
28. Graphic Outlines for High-Pile Fabrics
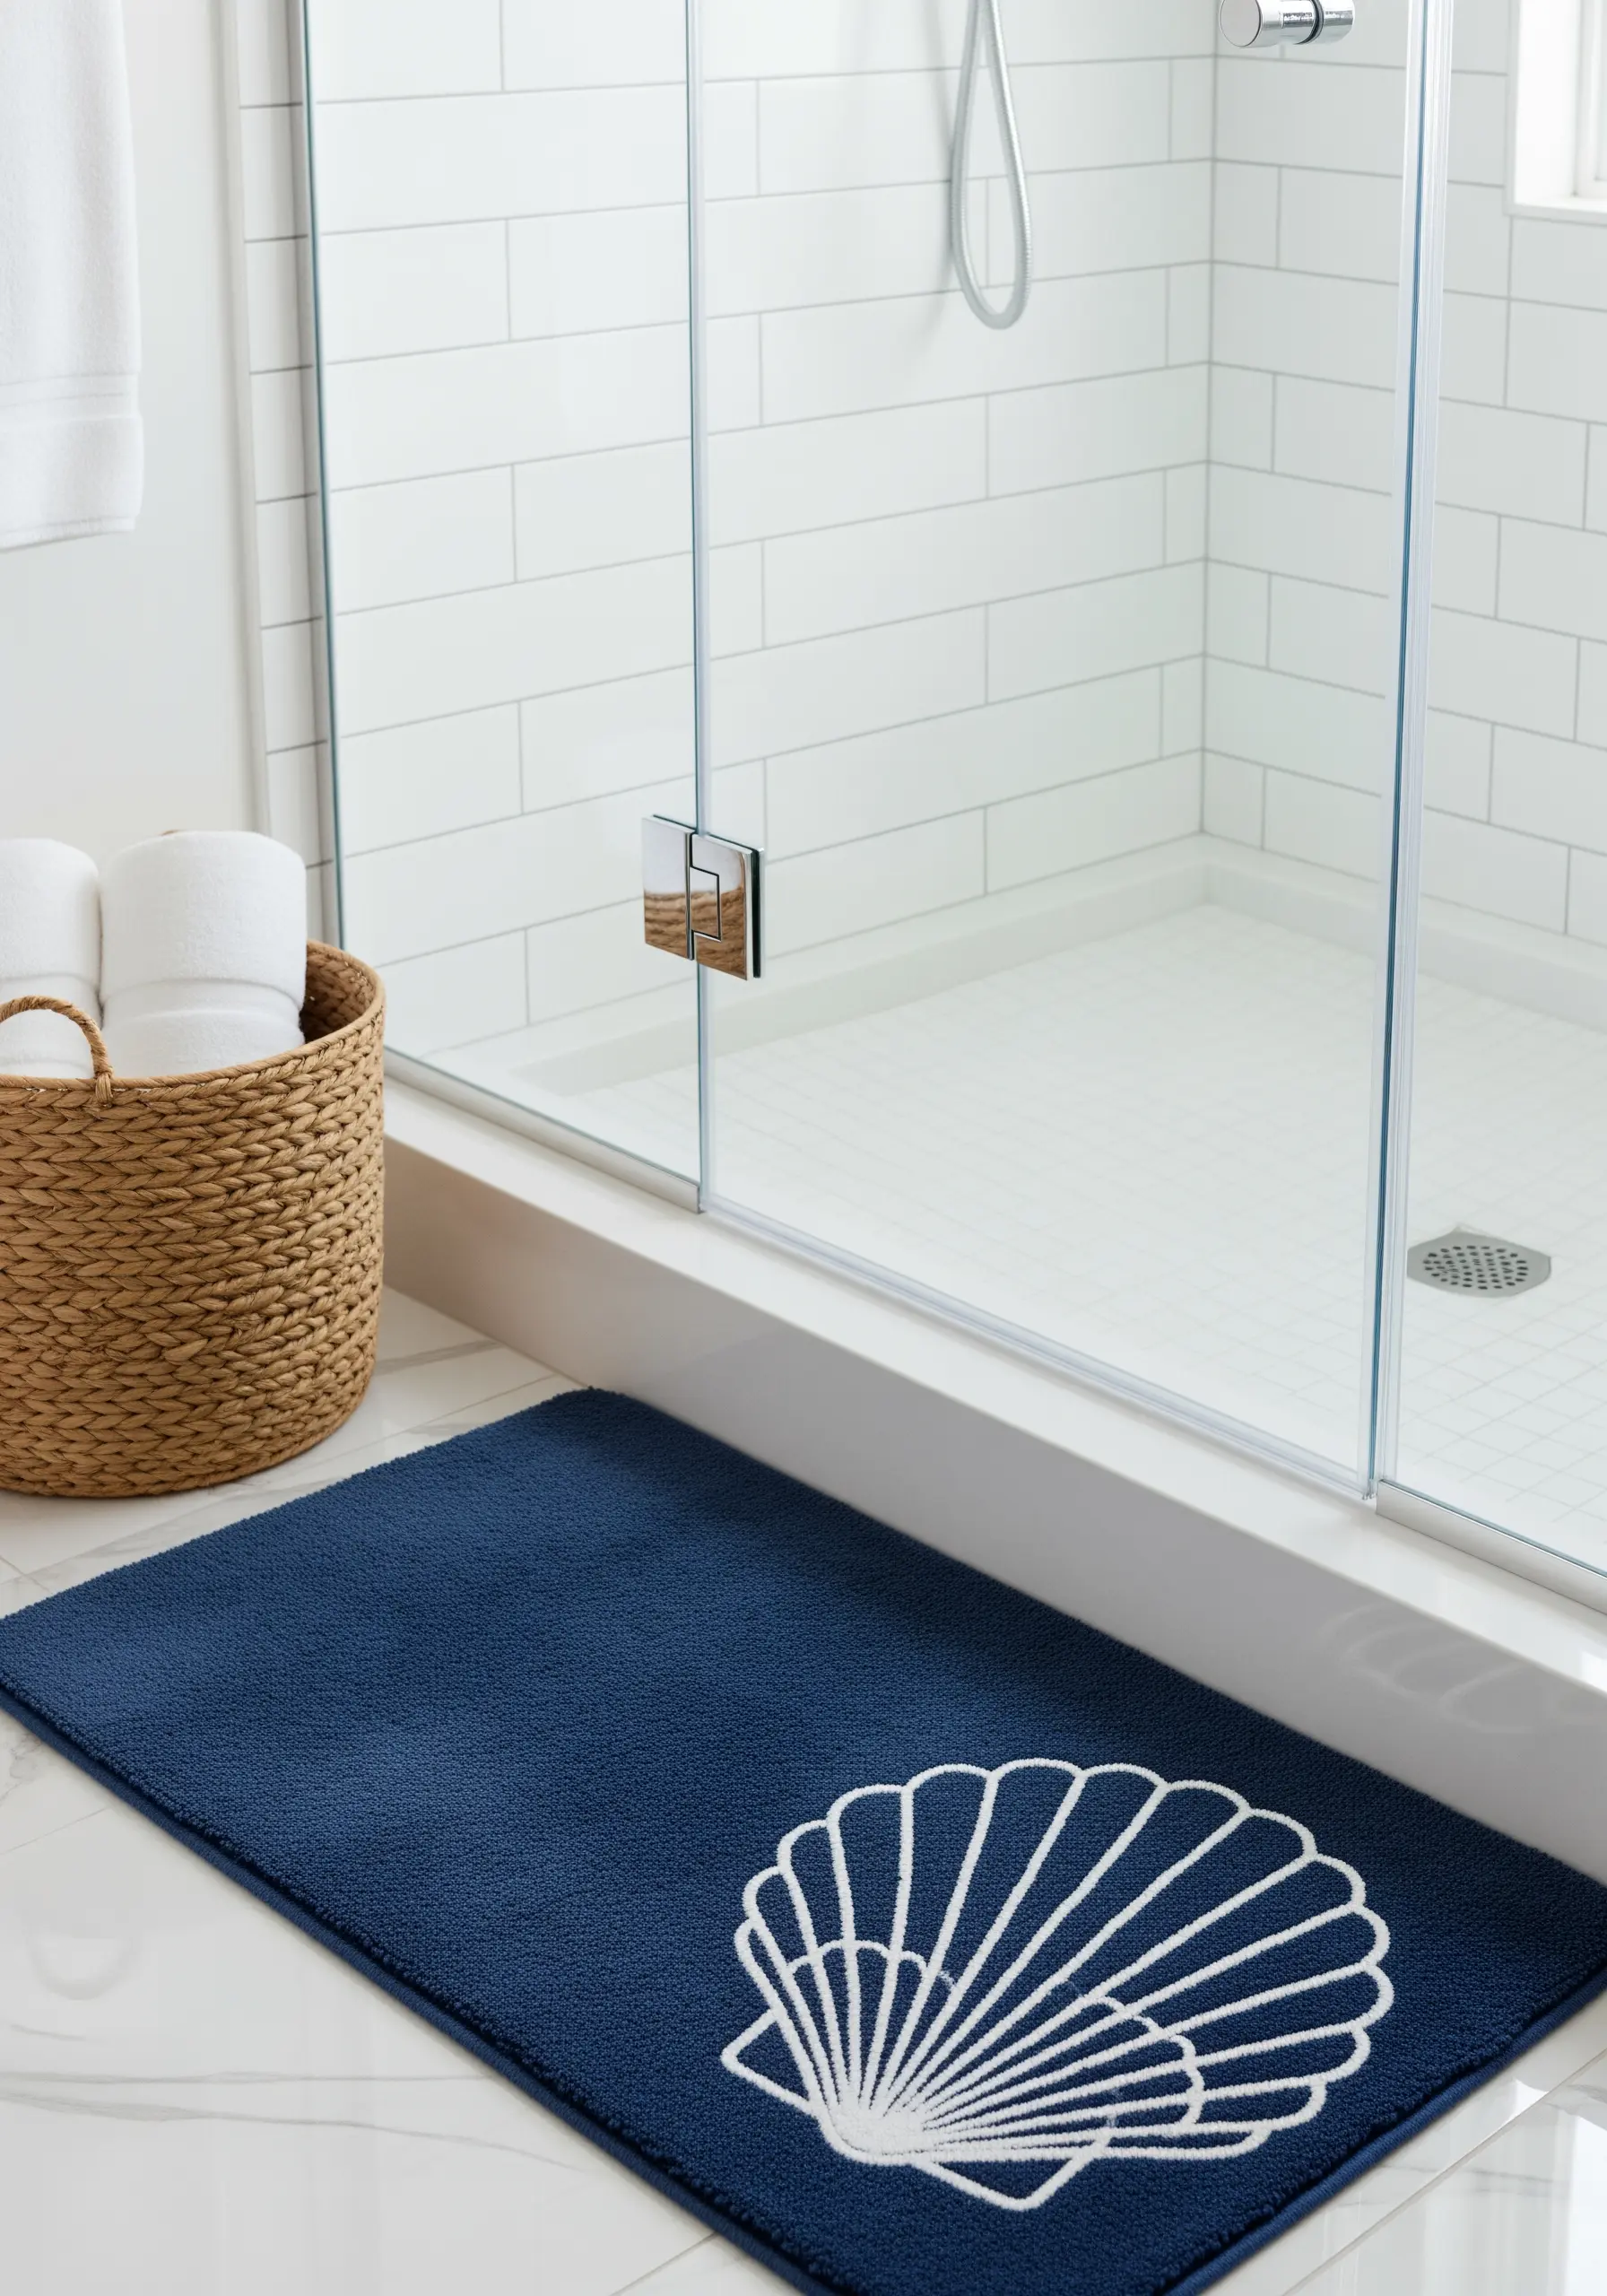
A delicate stitch would be completely lost in the thick texture of a bath mat.
For a design to have impact on such a surface, it needs to be bold and dimensional.
Achieve this by using the couching technique with a very thick material, like a cotton cord or rope.
Lay the cord along your design line and tack it down firmly with a strong, matching thread. This creates a powerful, graphic outline that sits proudly on top of the pile.
29. The Secret to a Perfect Satin Stitch Edge
If you want your satin stitch to look impeccably clean and professional, never skip the outline.
Before you begin filling the shape, trace the entire perimeter with a split stitch or backstitch.
This creates a slightly raised edge that acts as a perfect boundary for your fill stitches.
As you work your satin stitch, make sure your needle goes down just on the outside of this stitched line. The result is a beautifully defined, contained shape.
30. The Power of Asymmetry and Negative Space

Minimalism is often about what you choose to leave out.
By placing the spiderweb motif in just one corner of the large black canvas, the design gains immense power from the vast expanse of negative space.
This asymmetrical composition feels modern, dynamic, and intentional.
To execute those long, precise straight stitches, use a ruler and a chalk pencil to mark your guidelines first, ensuring every line is perfectly taut and straight.
31. Building Texture with Layered Chain Stitch
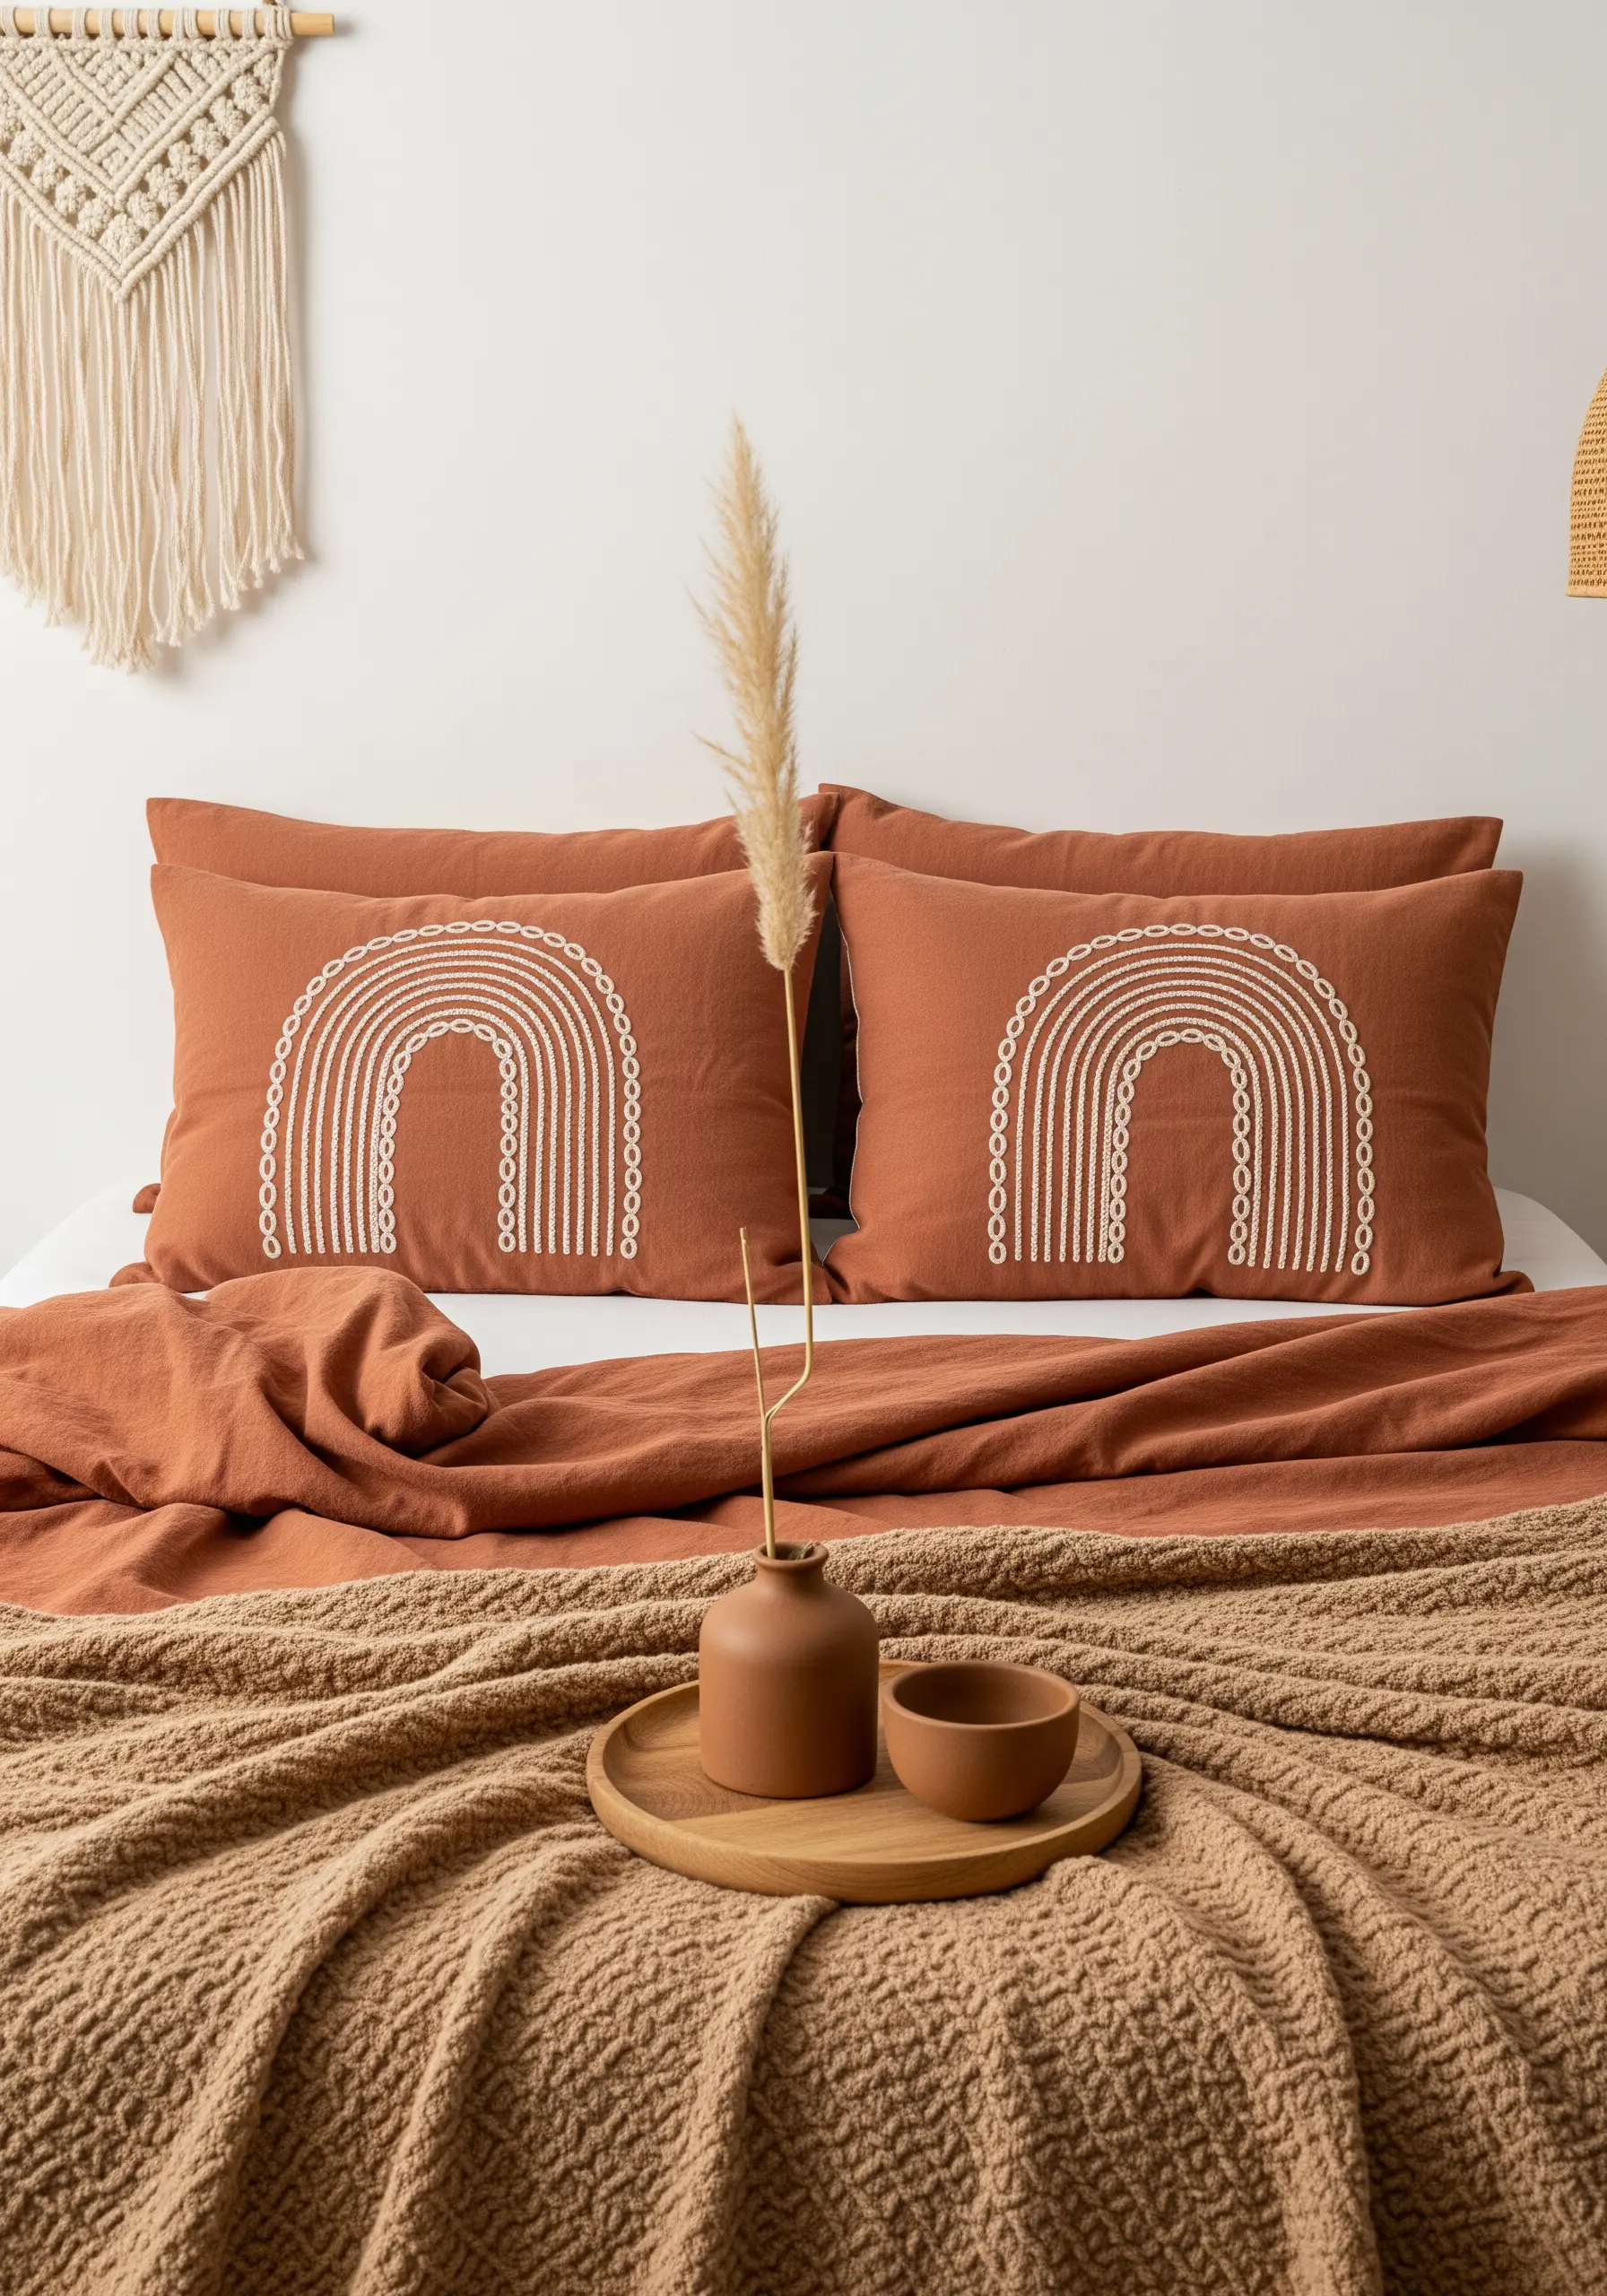
The chain stitch is a wonderful choice for creating bold, textured lines that have more presence than a simple backstitch.
You can create a beautiful, rope-like rainbow motif by stitching concentric arcs of chain stitch.
For added depth, use a slightly heavier thread (like a #8 pearl cotton) for the outer lines and a standard six-strand floss for the inner ones.
This subtle shift in weight and texture elevates a simple design, making it a perfect fit for boho-inspired textile wall art.


