
Your bedroom should be a sanctuary, a place where the noise of the world fades into a quiet hum. Embroidery, with its gentle, rhythmic process, is a natural way to cultivate that serenity—not just in the making, but in the finished art you live with every day.
But a calm aesthetic isn’t about simplicity for simplicity’s sake. It’s about intention. It’s found in the subtle contrast between a matte cotton thread and the soft sheen of linen, in the dimensional shadow cast by a French knot, and in the clean, confident arc of a single stitched line.
Here, a neutral palette becomes your greatest asset. It isn’t a limitation; it is a canvas for texture, form, and light. Let these ideas guide you not as strict patterns to be copied, but as invitations to explore the quiet language of thread, and to create pieces that genuinely make your space feel like your own.
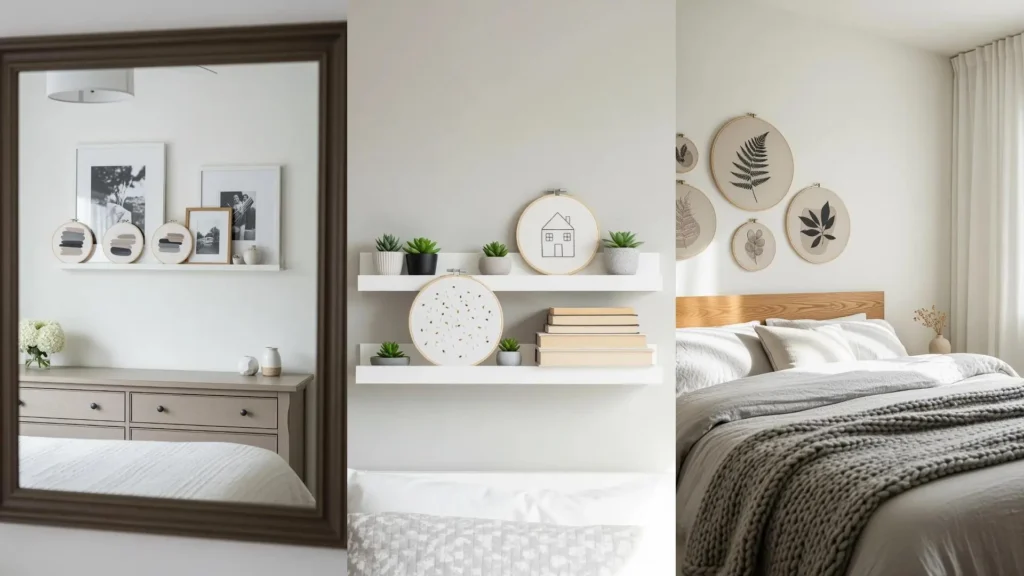
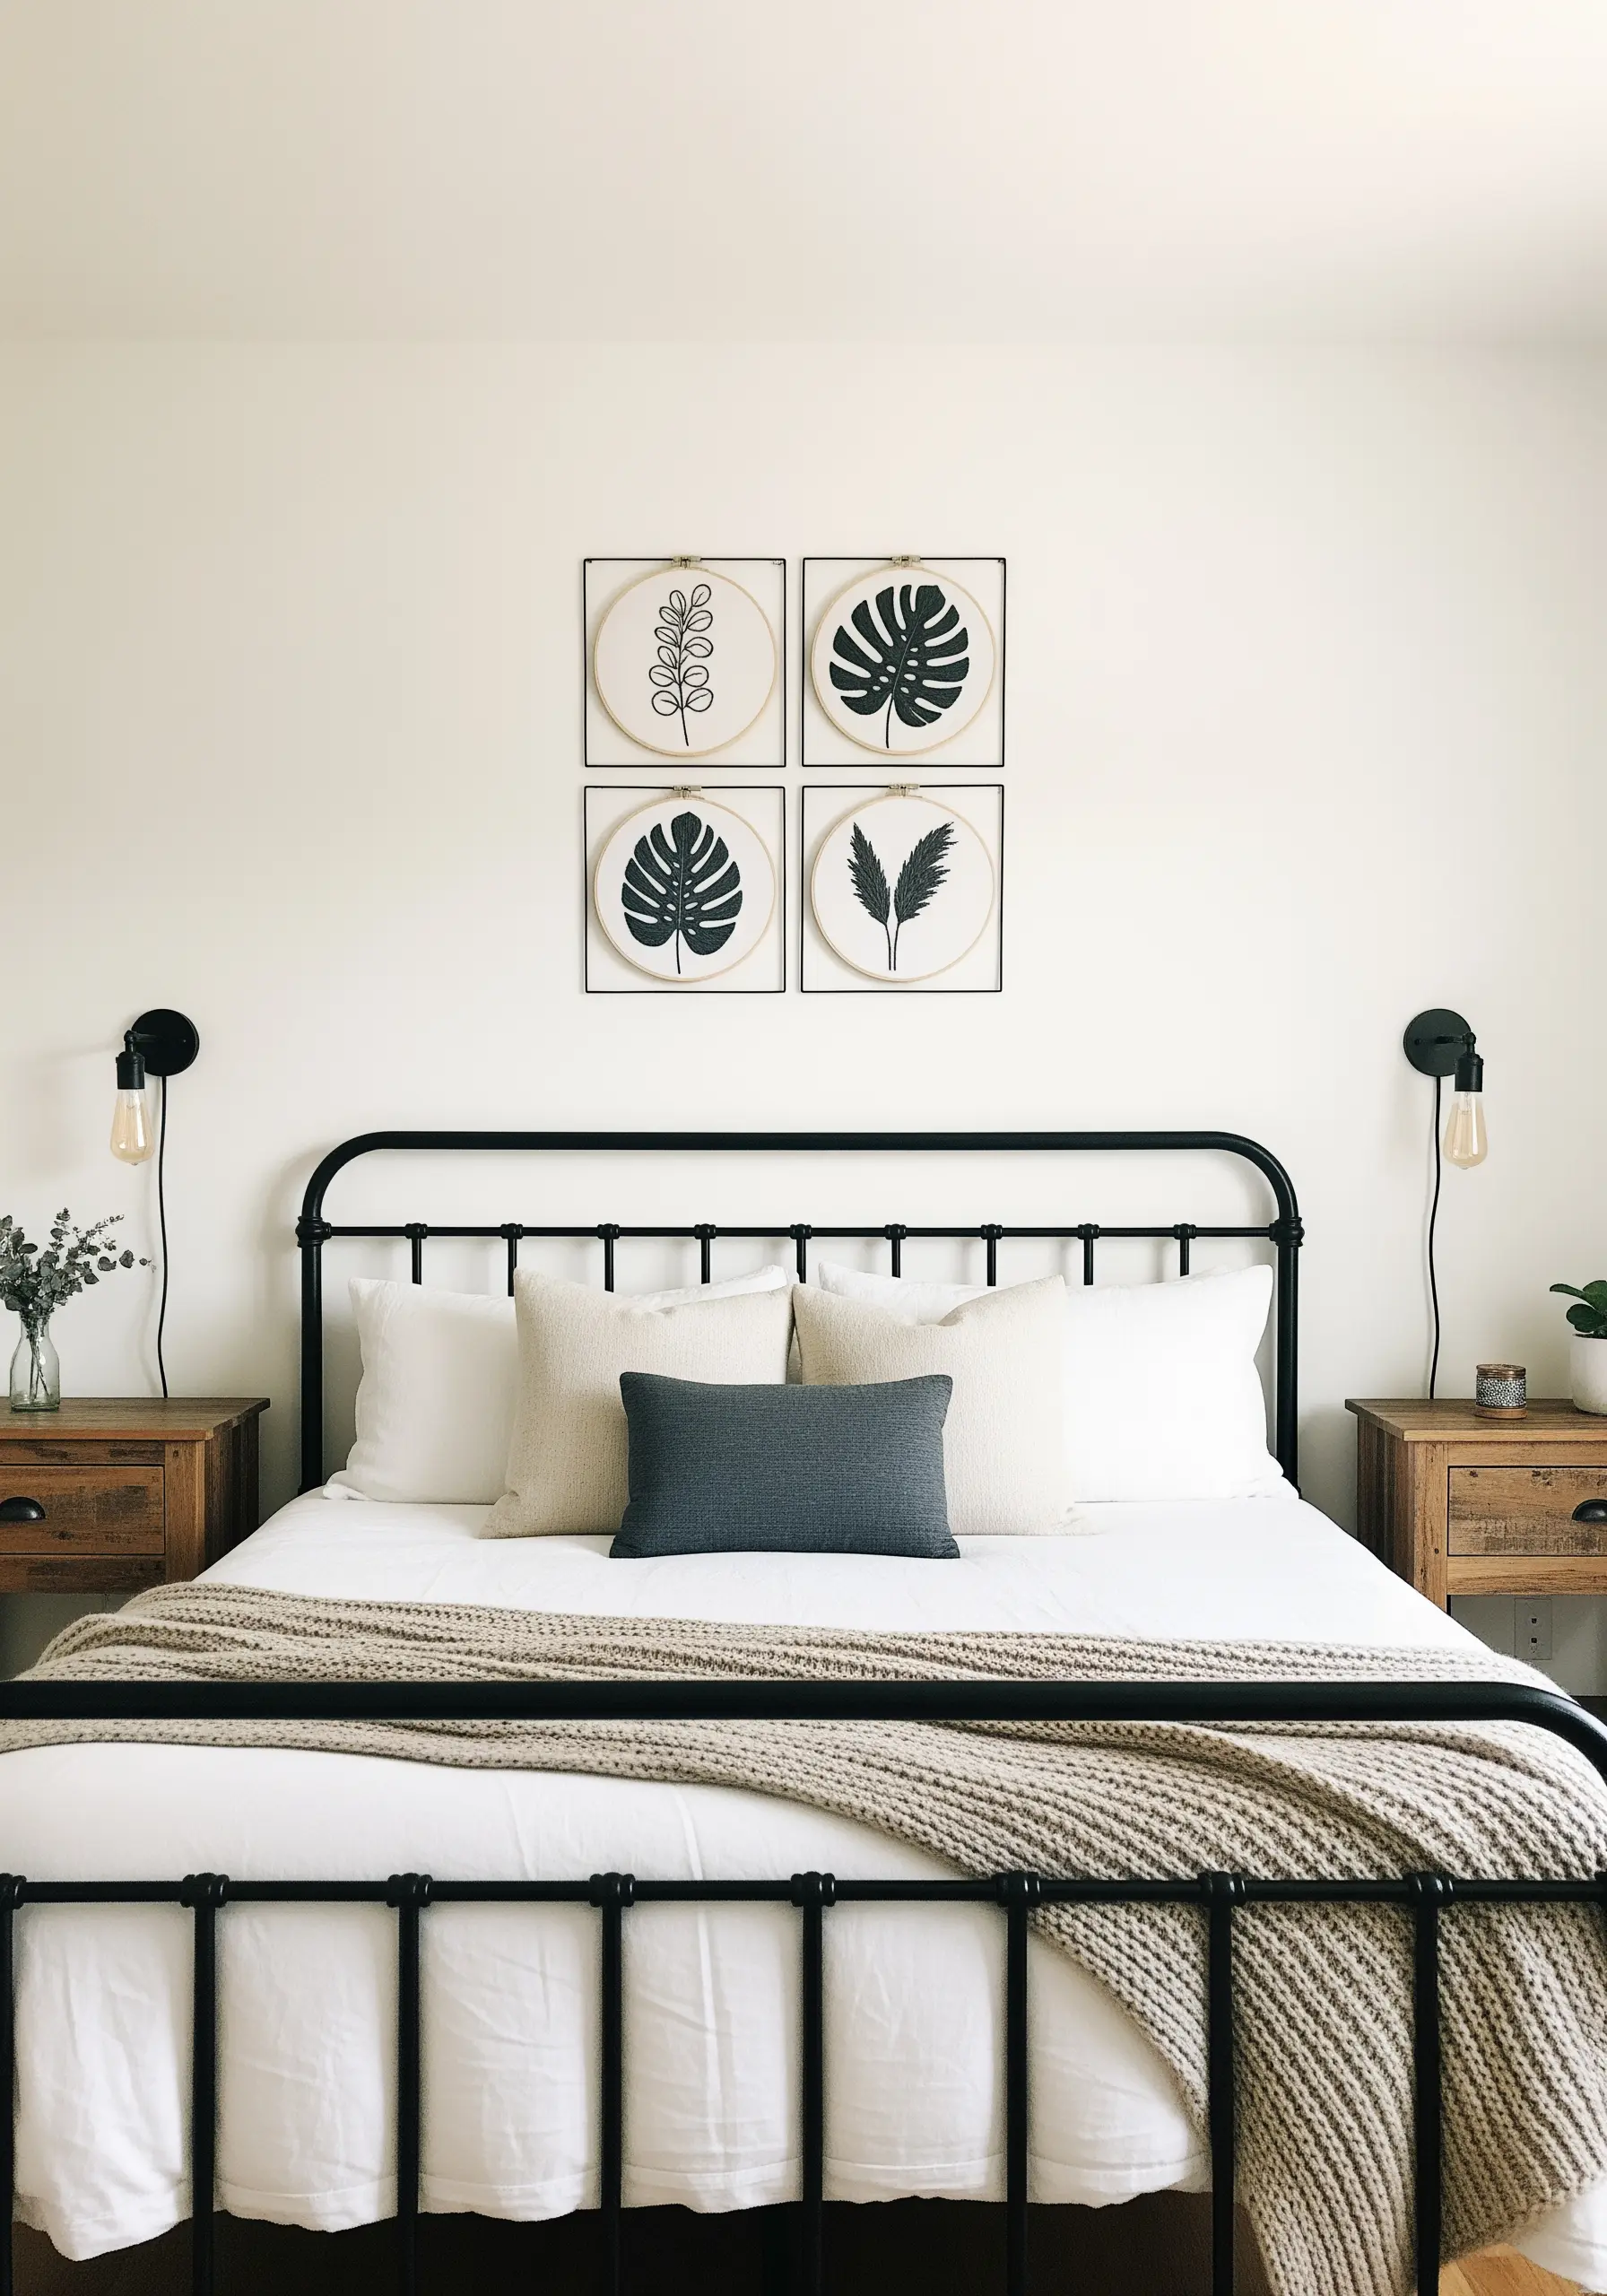
1. Curate a Botanical Gallery Wall

Create a sophisticated focal point by grouping hoops of varying sizes.
To maintain a serene feel, unify the collection with a consistent color palette—like charcoal thread on natural oatmeal linen.
Use simple backstitch for delicate stems and satin stitch for leaves, allowing the negative space to give each motif room to breathe.
This approach transforms individual pieces into a cohesive installation, turning your wall into a calm, botanical story.
It’s the perfect way to build circle frame minimal embroidery compositions to build a gallery wall without visual clutter.
2. Weave Texture into Abstract Landscapes
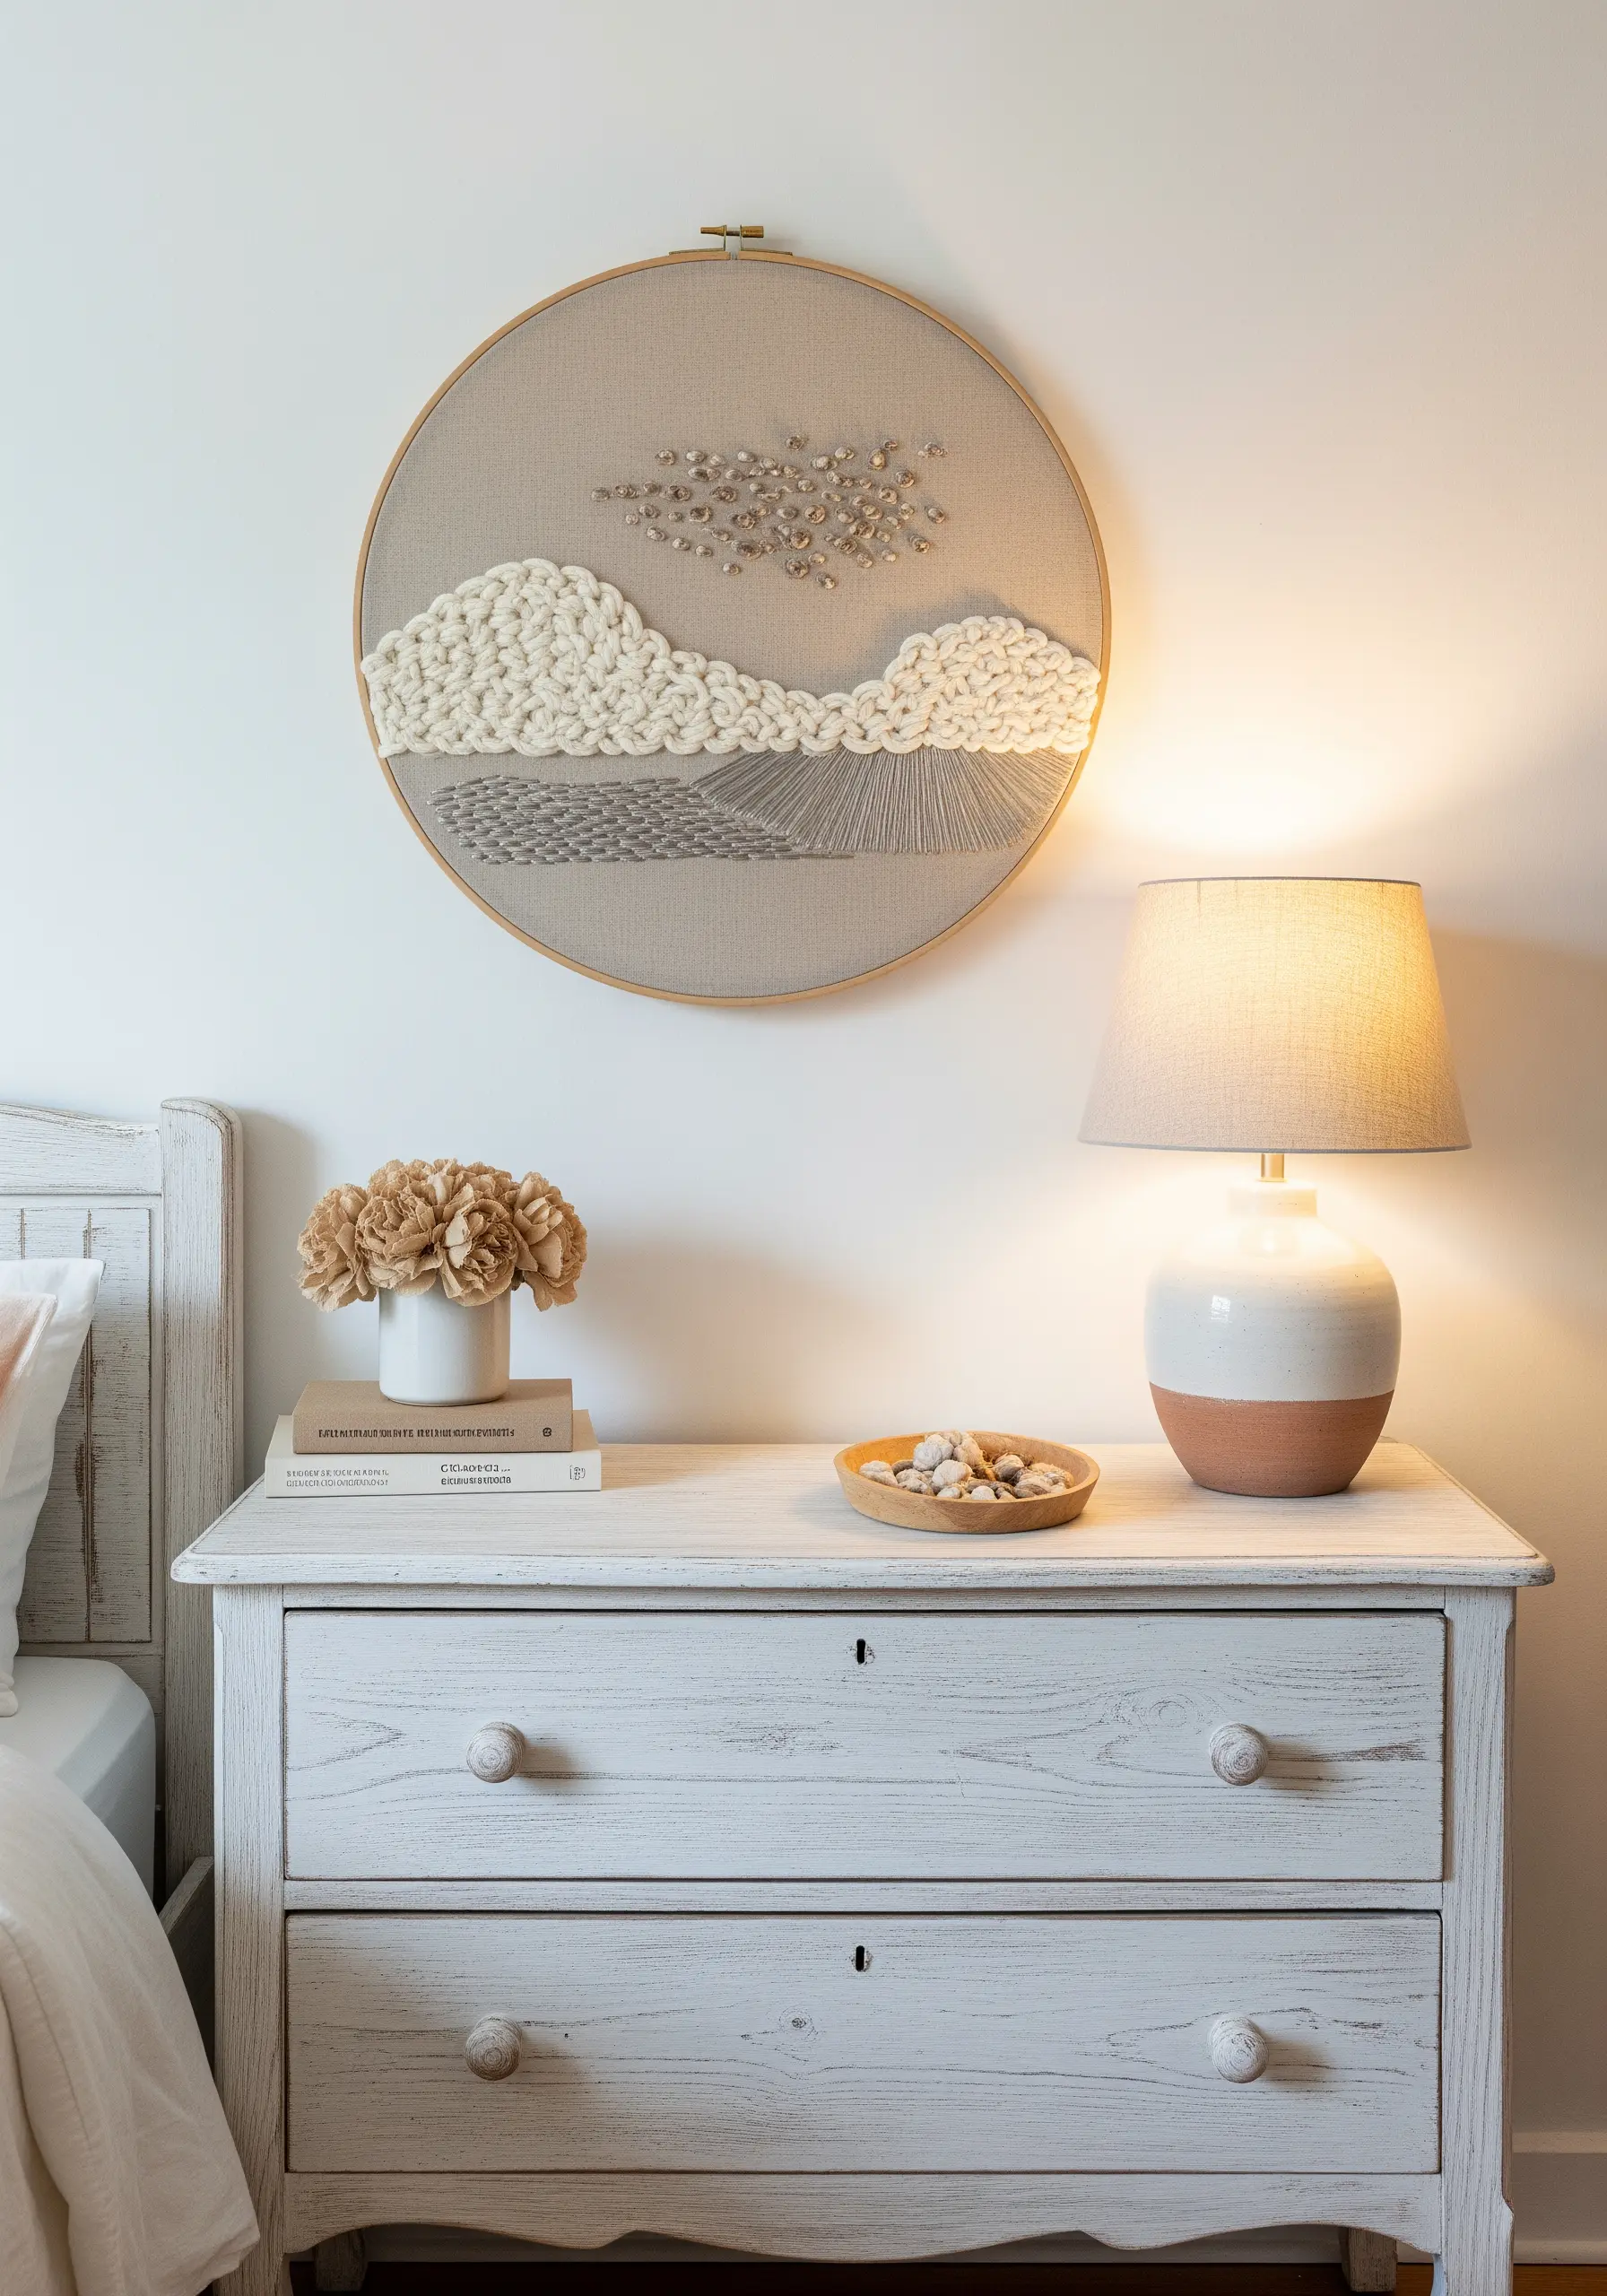
Move beyond thread to incorporate unexpected materials like chunky yarn and delicate beads.
First, couch thick yarn onto your fabric to form soft, rolling hills, securing it with a matching fine thread.
Then, introduce a contrasting texture by scattering seed beads across the sky area, using single stitches to create a shimmering, diffuse effect.
This juxtaposition of soft and hard, matte and gloss, is what gives texture-rich embroidery ideas for bedroom spaces built for rest their incredible depth.
3. Master Precision with Geometric Motifs
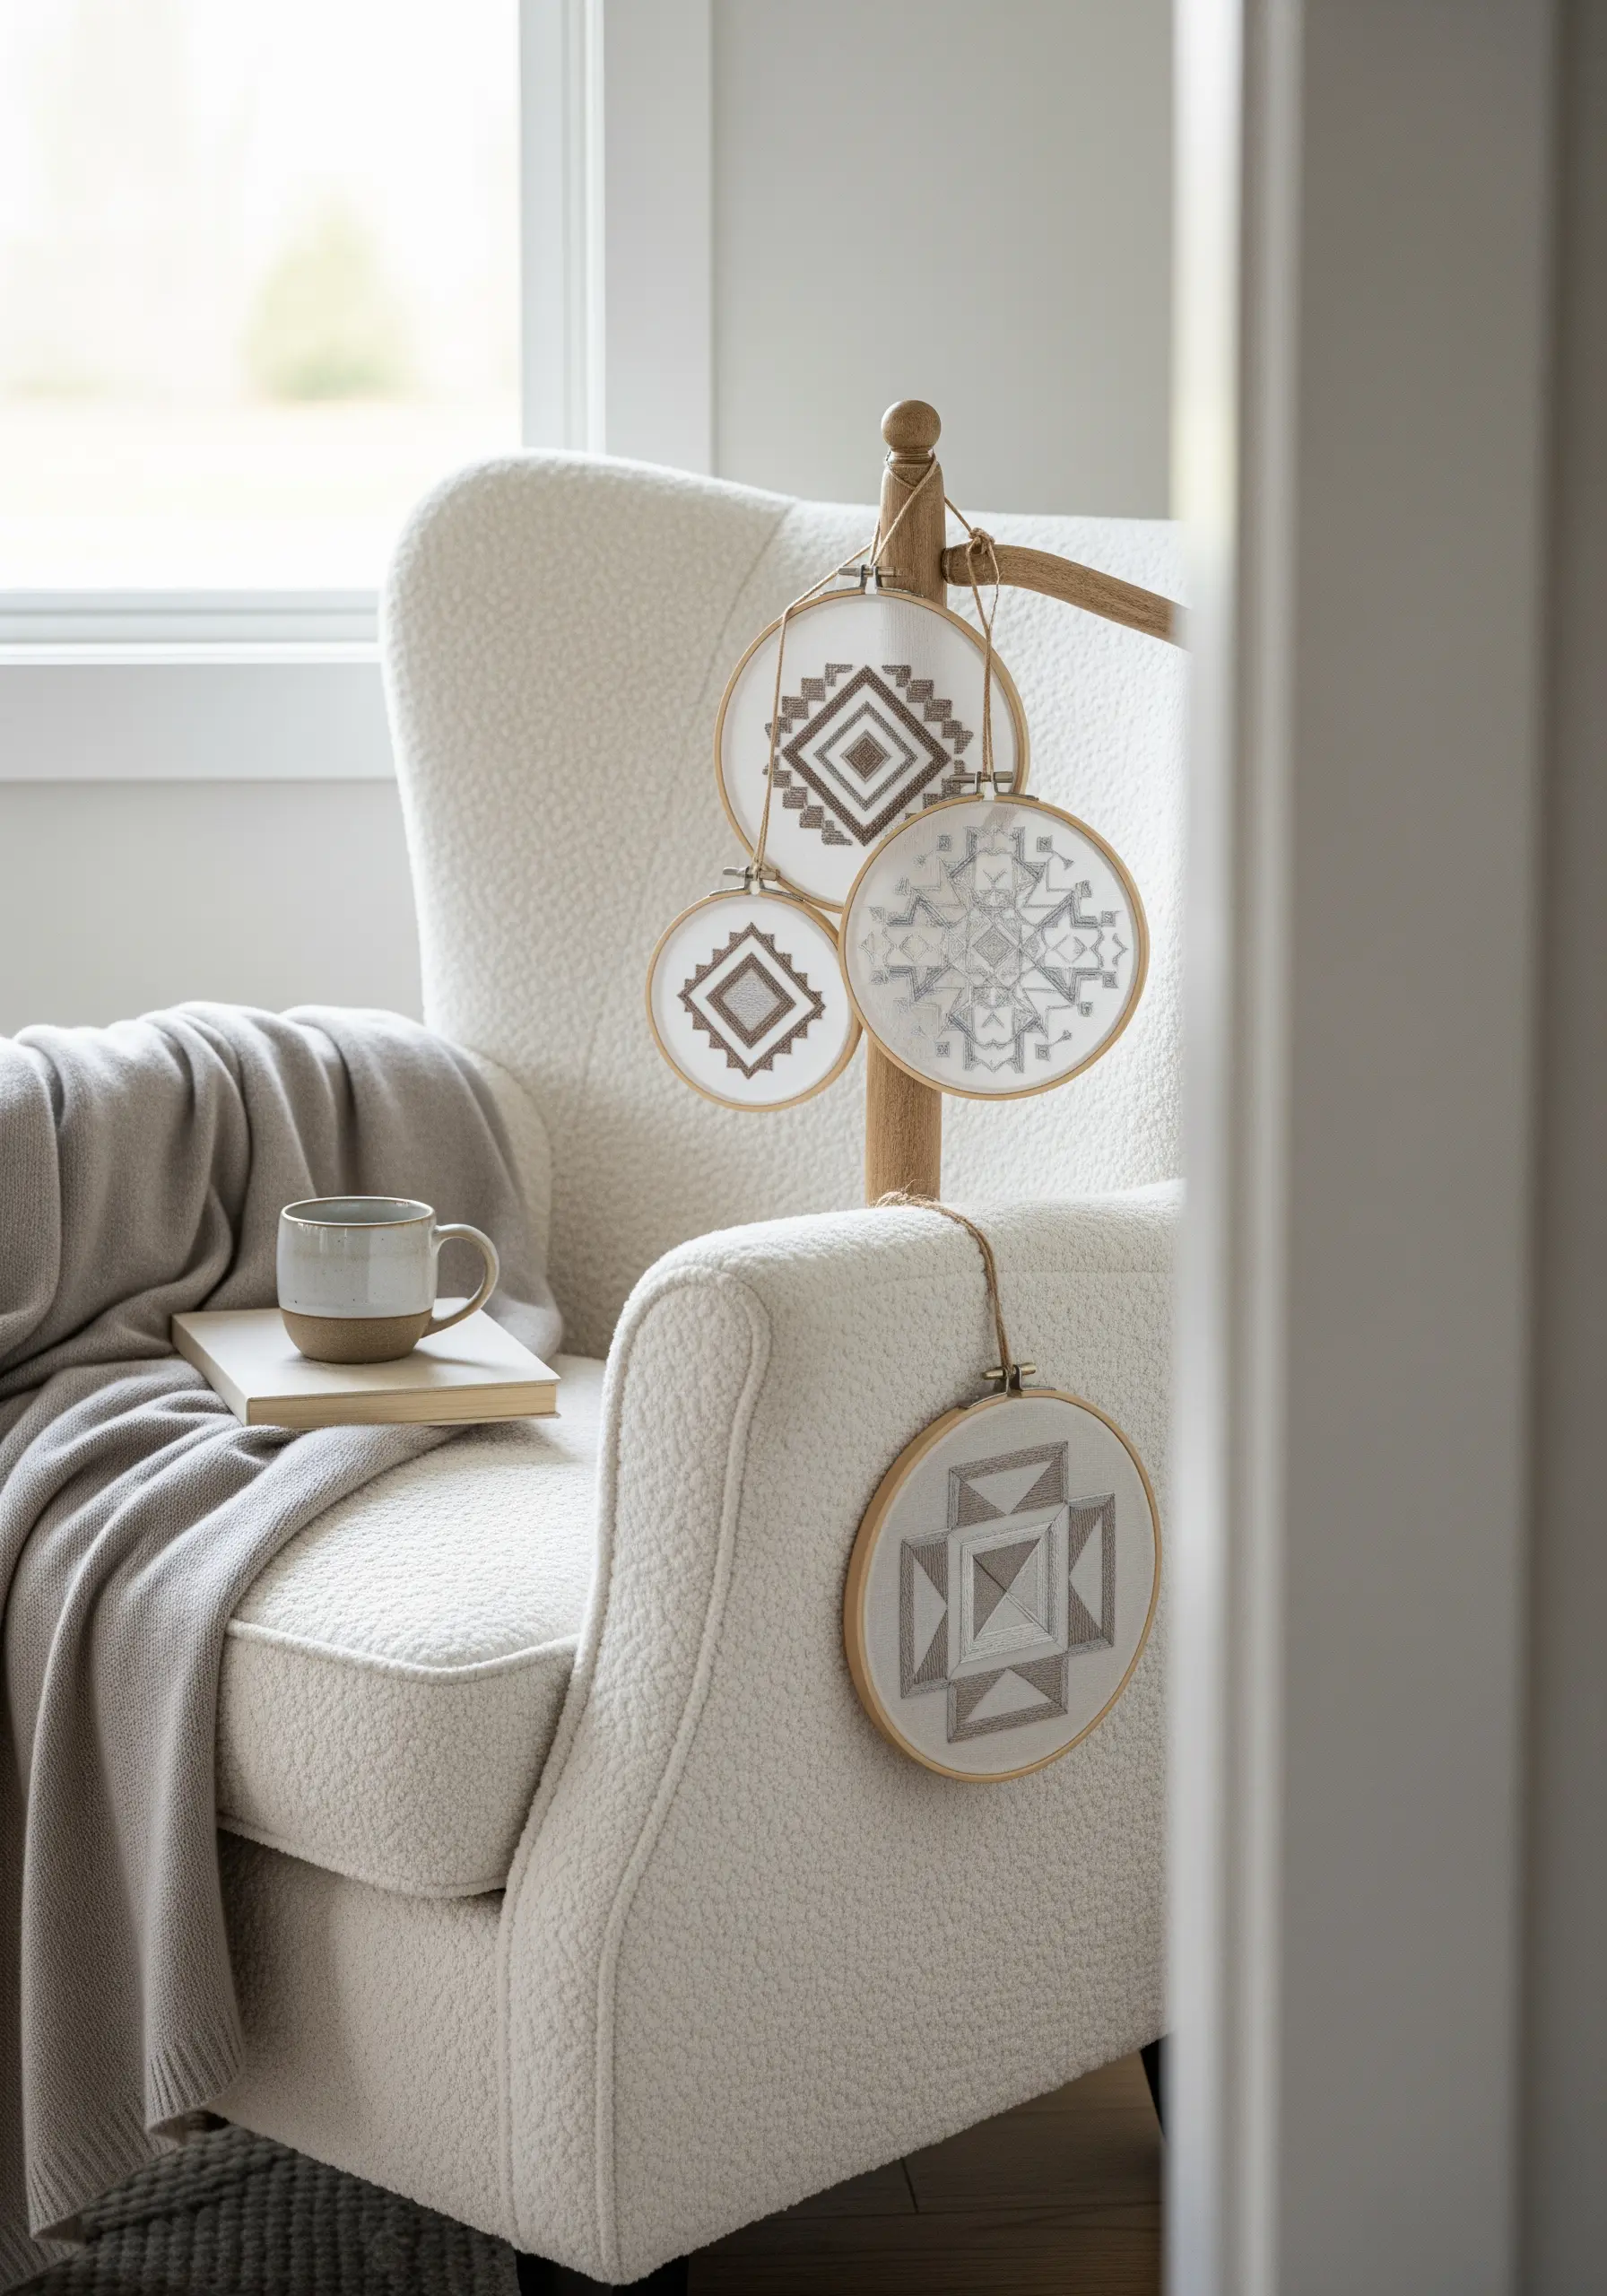
Achieve clean, sharp geometric patterns by using the fabric’s weave as your guide.
Choose an evenweave linen or Aida cloth, where the grid structure helps you place each satin stitch with perfect accuracy.
Use a single strand of floss for the sharpest definition, and vary the direction of your satin stitches within each block to create subtle shifts in how the light reflects off the thread.
This attention to detail elevates simple shapes into sophisticated modern geometric thread art ideas.
4. Capture Serenity with Celestial Line Art
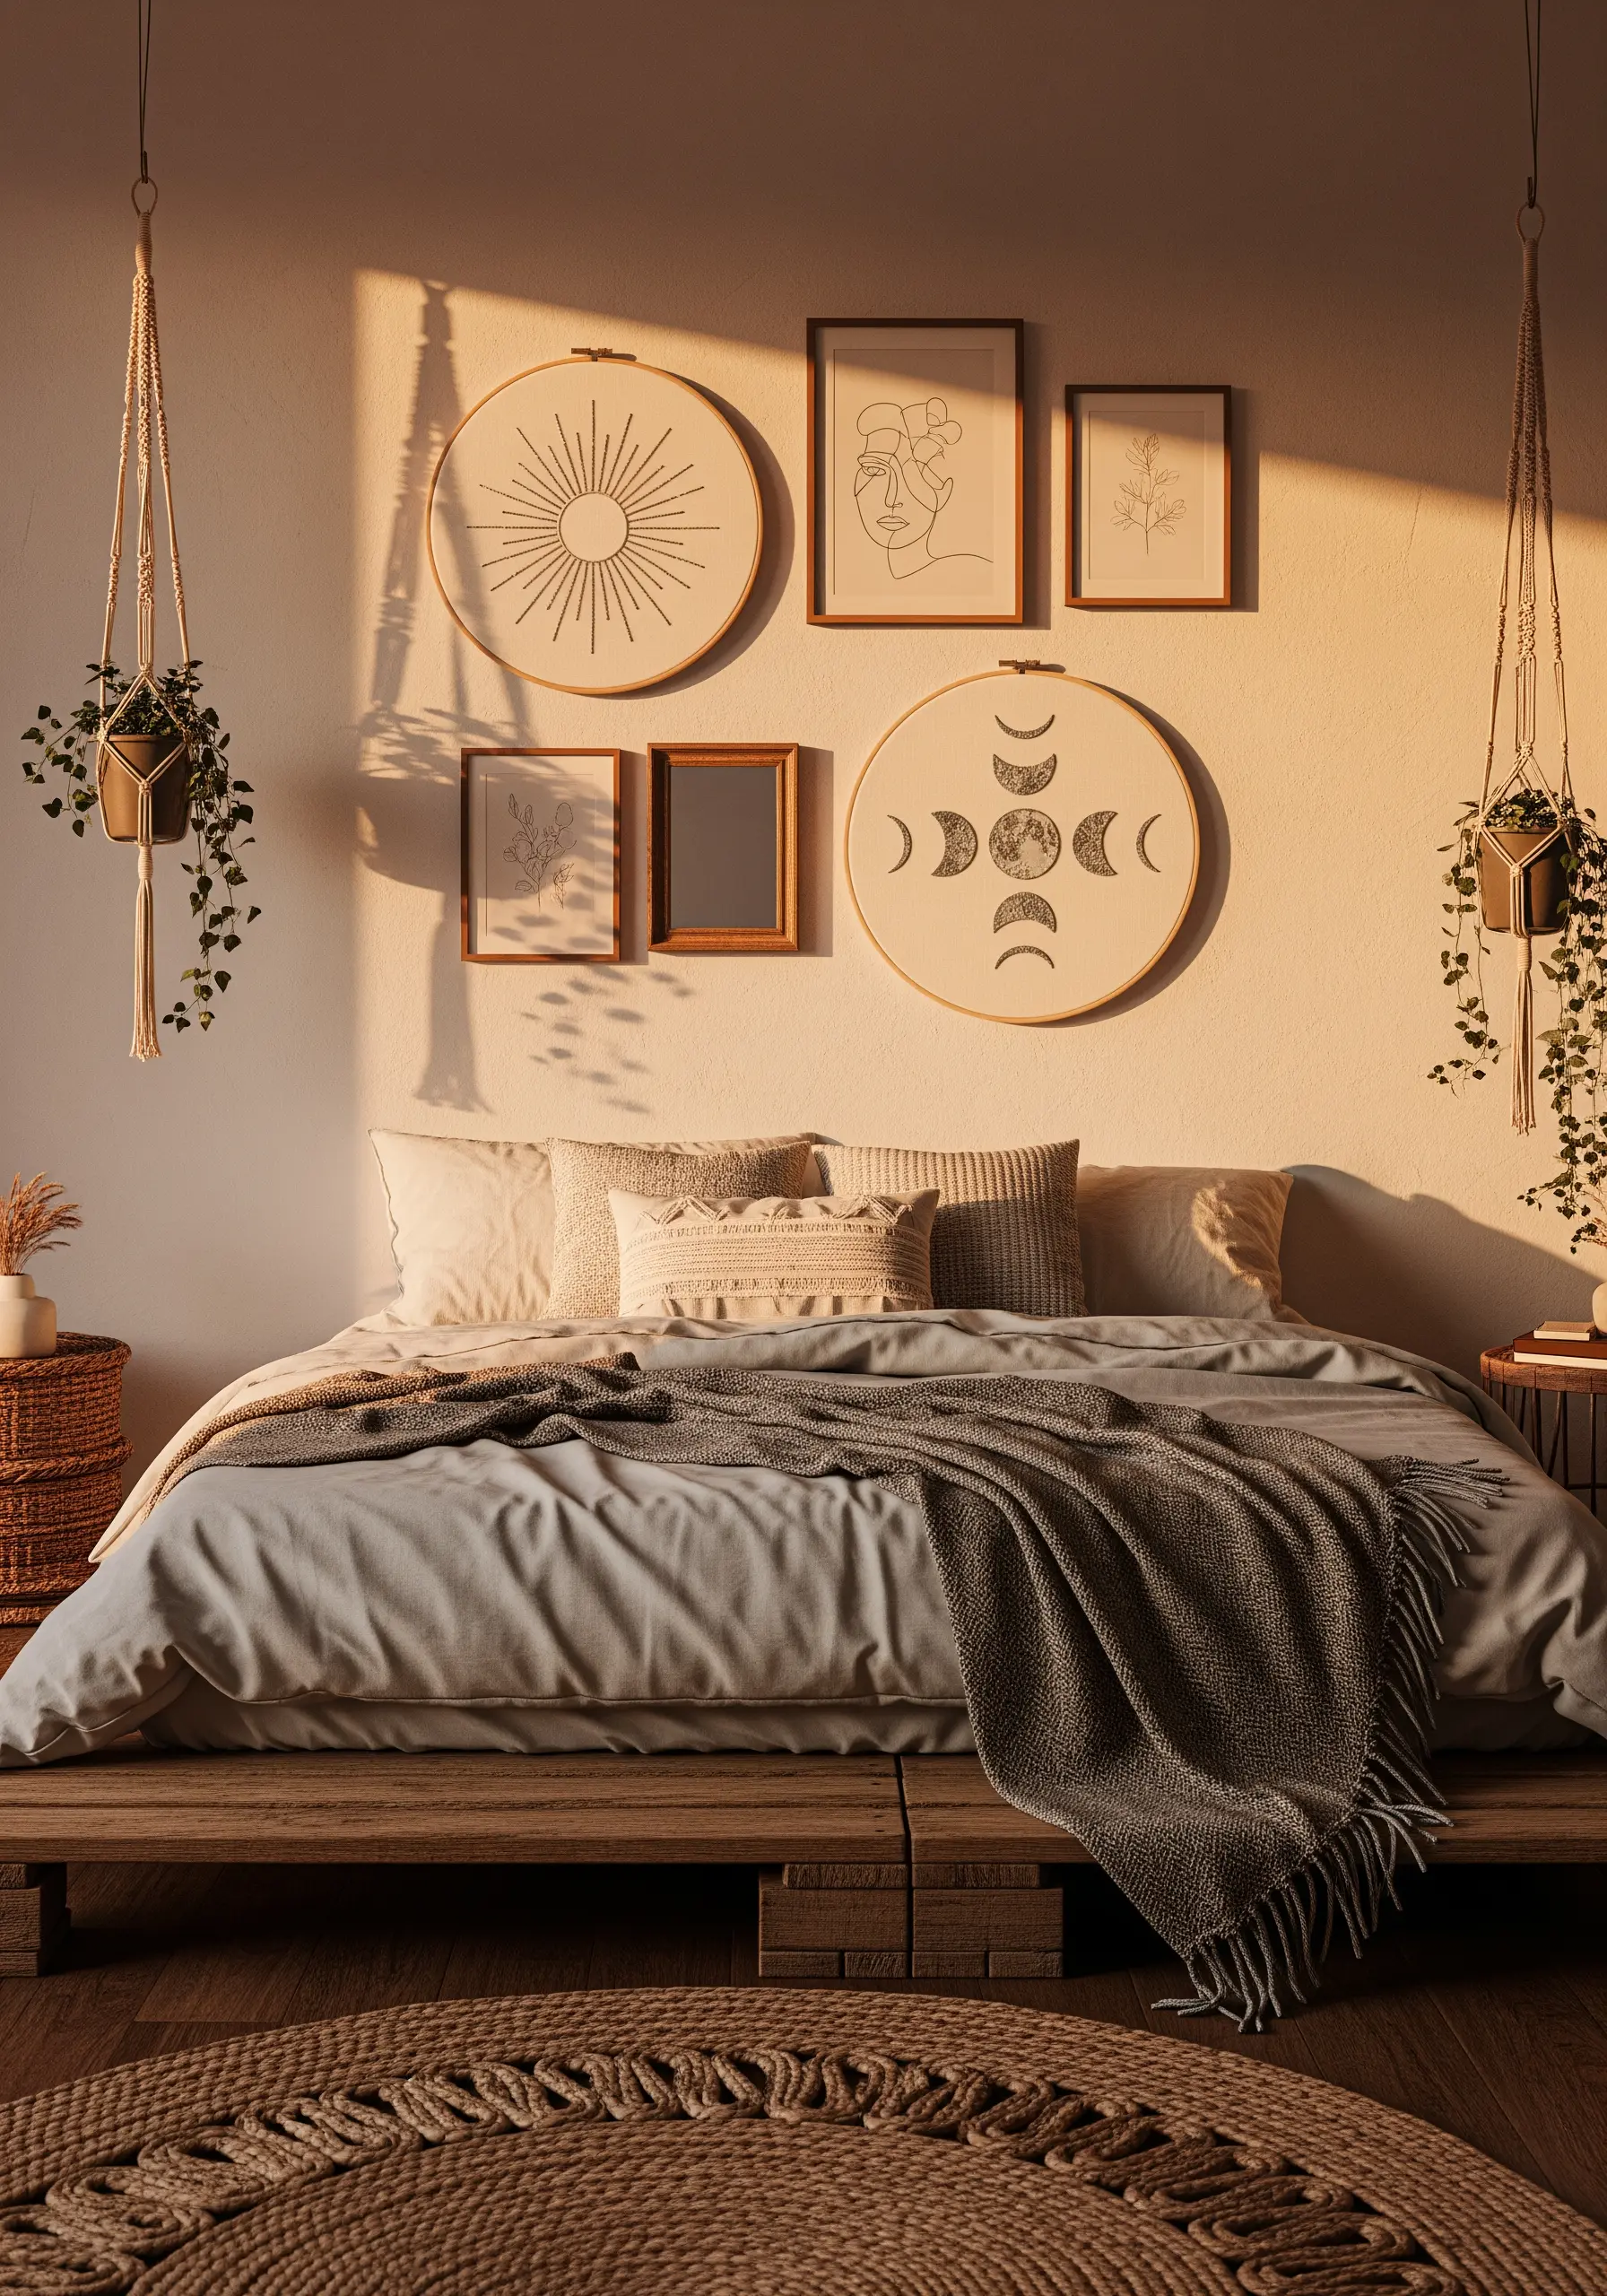
For minimalist celestial designs, a clean, unbroken line is essential.
Opt for a whipped backstitch to create a smooth, rope-like line without the jagged edges a standard backstitch can produce.
First, lay down a foundation of backstitches, then weave a second thread through them without piercing the fabric.
This simple adjustment is the secret to making your delicate line art embroidery ideas look effortlessly fluid and professional.
5. Explore a Triptych of Neutral Textures
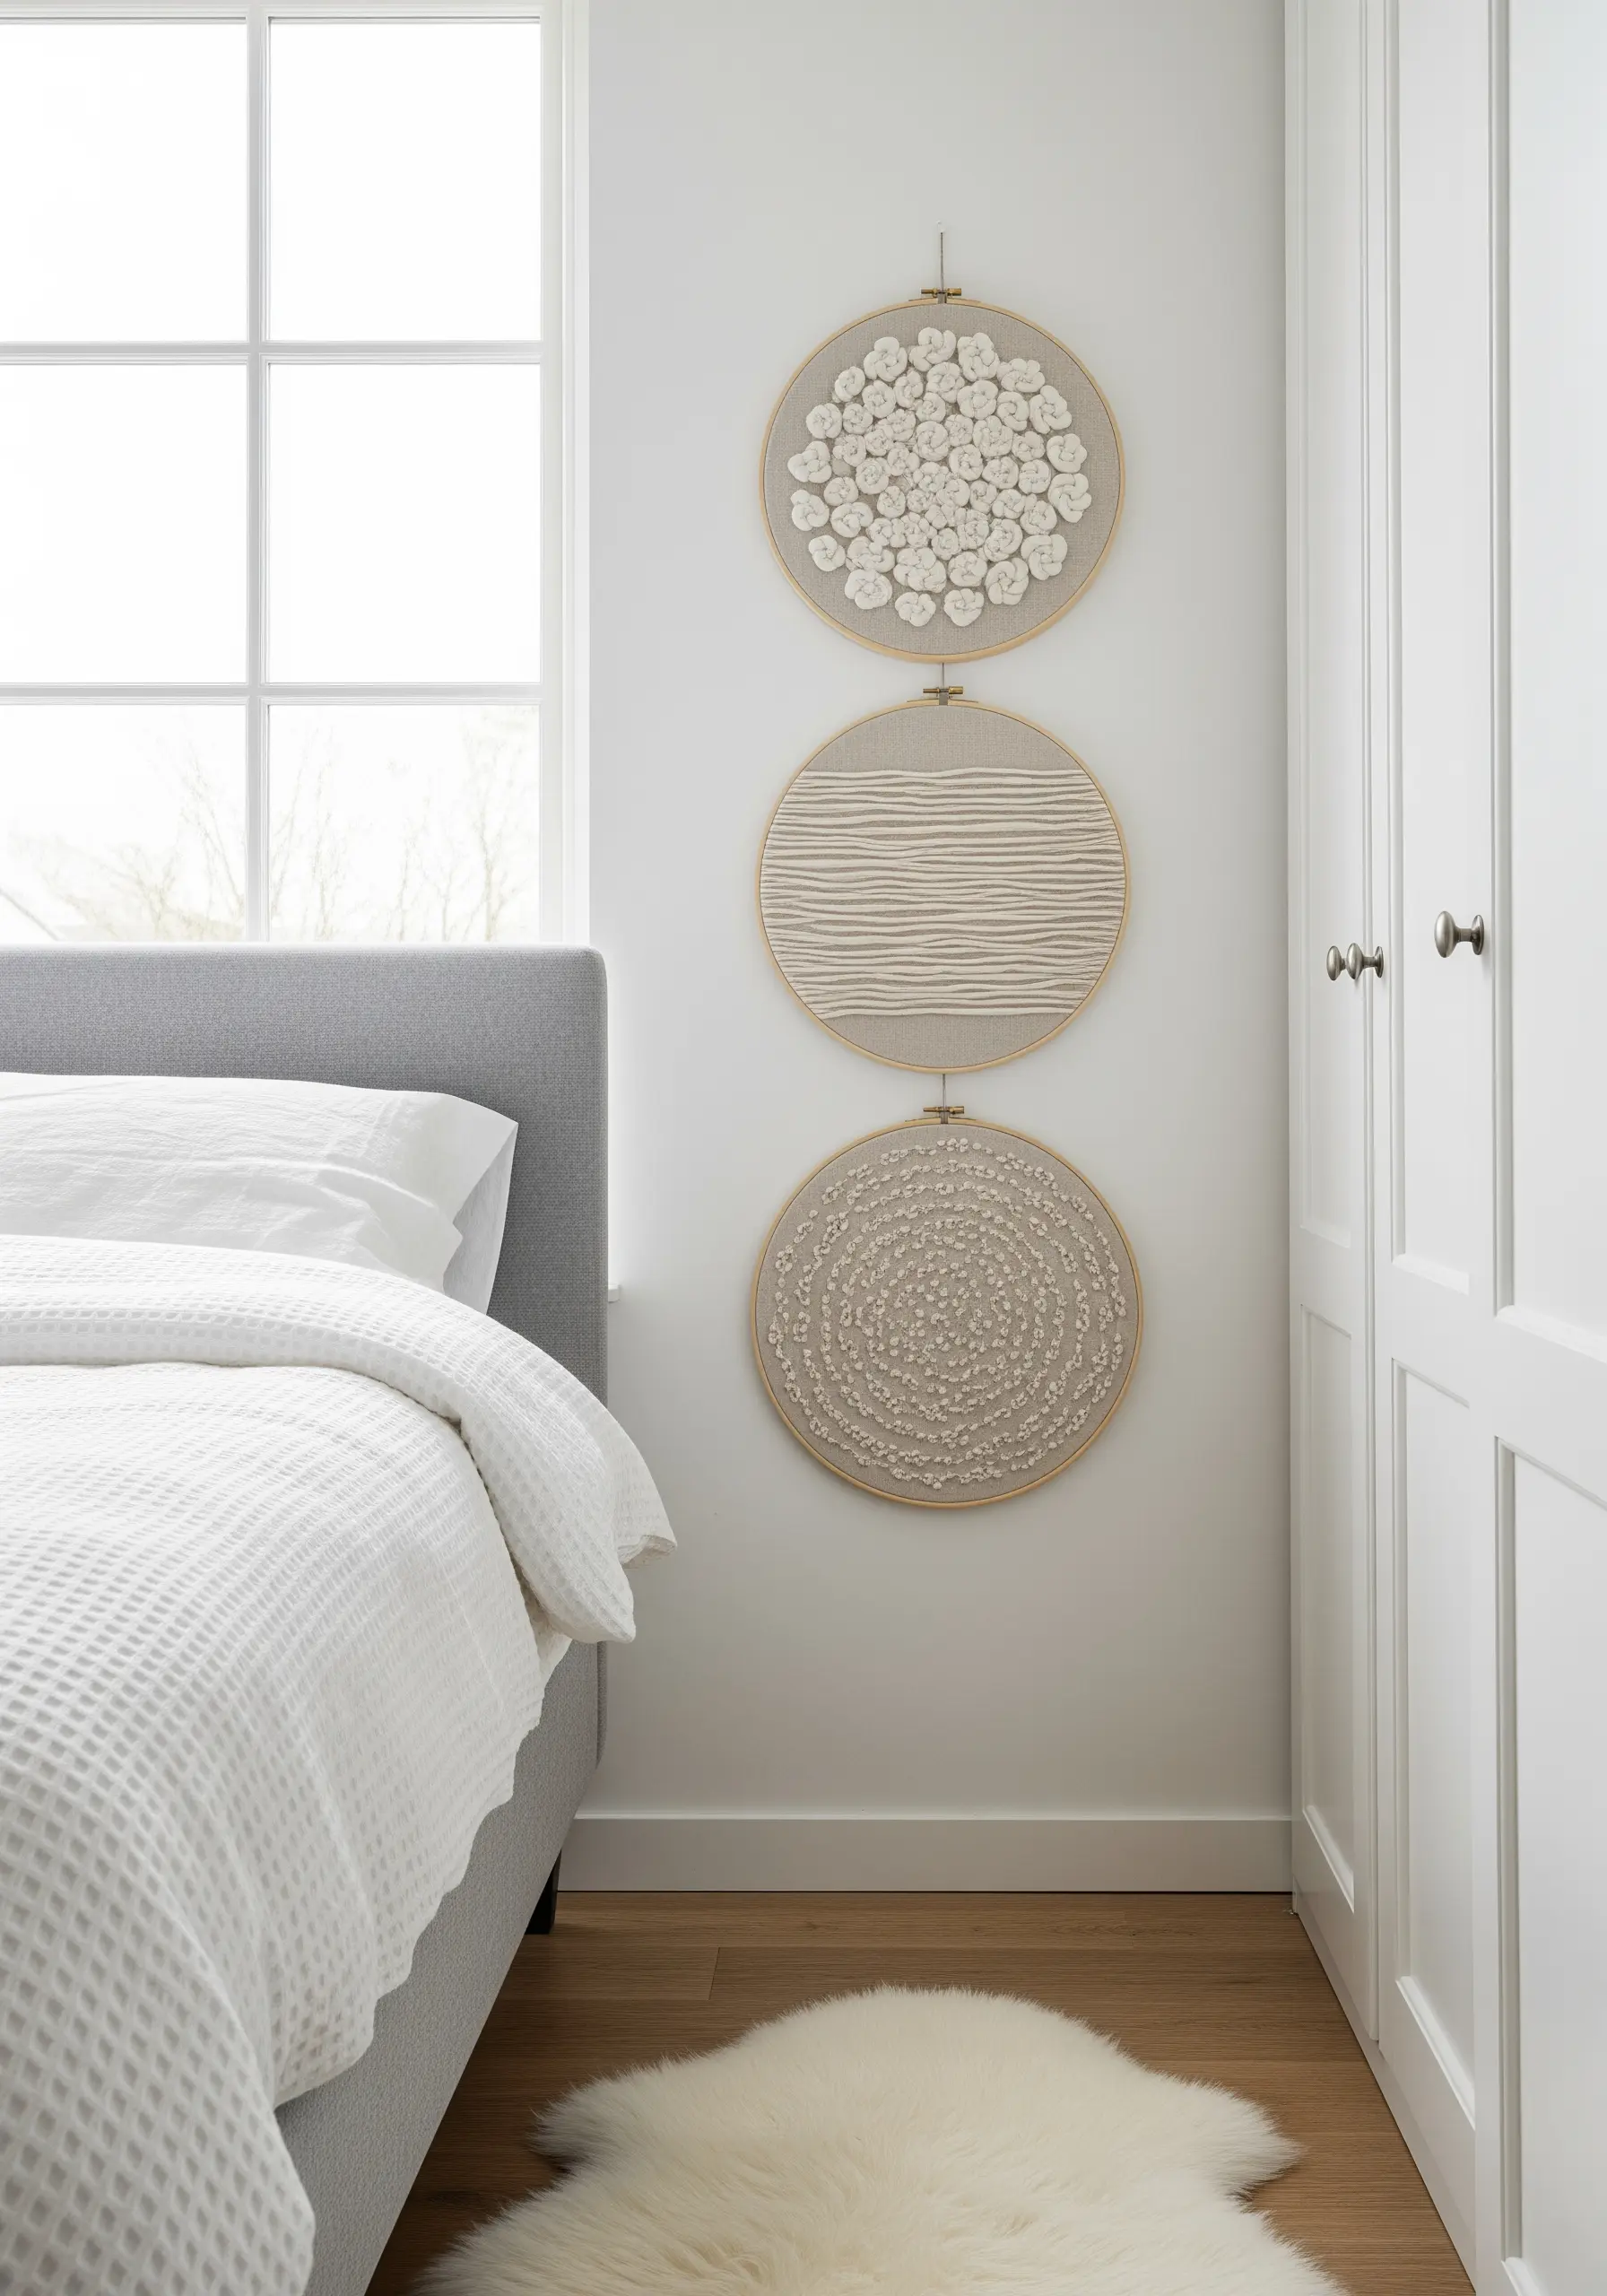
Dedicate an entire composition to the beauty of texture by creating a trio of complementary hoops.
In one, fill the space with tightly packed French knots using six-strand floss for a plush, bumpy surface.
For another, stitch raised woven wheel flowers for a sculptural, 3D effect.
In the third, create calm, flowing lines with a heavier pearl cotton thread.
Grouping these single-stitch studies together creates a powerful statement on the versatility of natural texture embroidery patterns.
6. Create Bold Contrast with Graphic Botanicals
Make a simple botanical motif pop by choosing a high-contrast palette and a modern frame.
Using a bold black thread on a stark white background instantly creates a graphic, contemporary feel.
Pair this with a black-painted hoop, which acts as a sharp, deliberate frame, enhancing the artwork within.
For a dense, opaque fill, ensure your satin stitches lie flat next to each other, never overlapping. This technique is key for striking monochrome floral embroidery ideas.
7. Weave a Gradient with Thread Wrapping

This captivating design isn’t stitched in the traditional sense—it’s woven directly onto the hoop.
To create this effect, you wrap thread from one point on the hoop to another, building up layers to form geometric shapes.
Achieve a smooth gradient by methodically changing your thread color from dark to light as you build the layers.
The key is maintaining consistent, taut tension throughout, which ensures the lines remain crisp and the pattern holds its shape. It’s a striking way to execute neutral color gradient embroidery ideas.
8. Stitch a Word of Quiet Intention
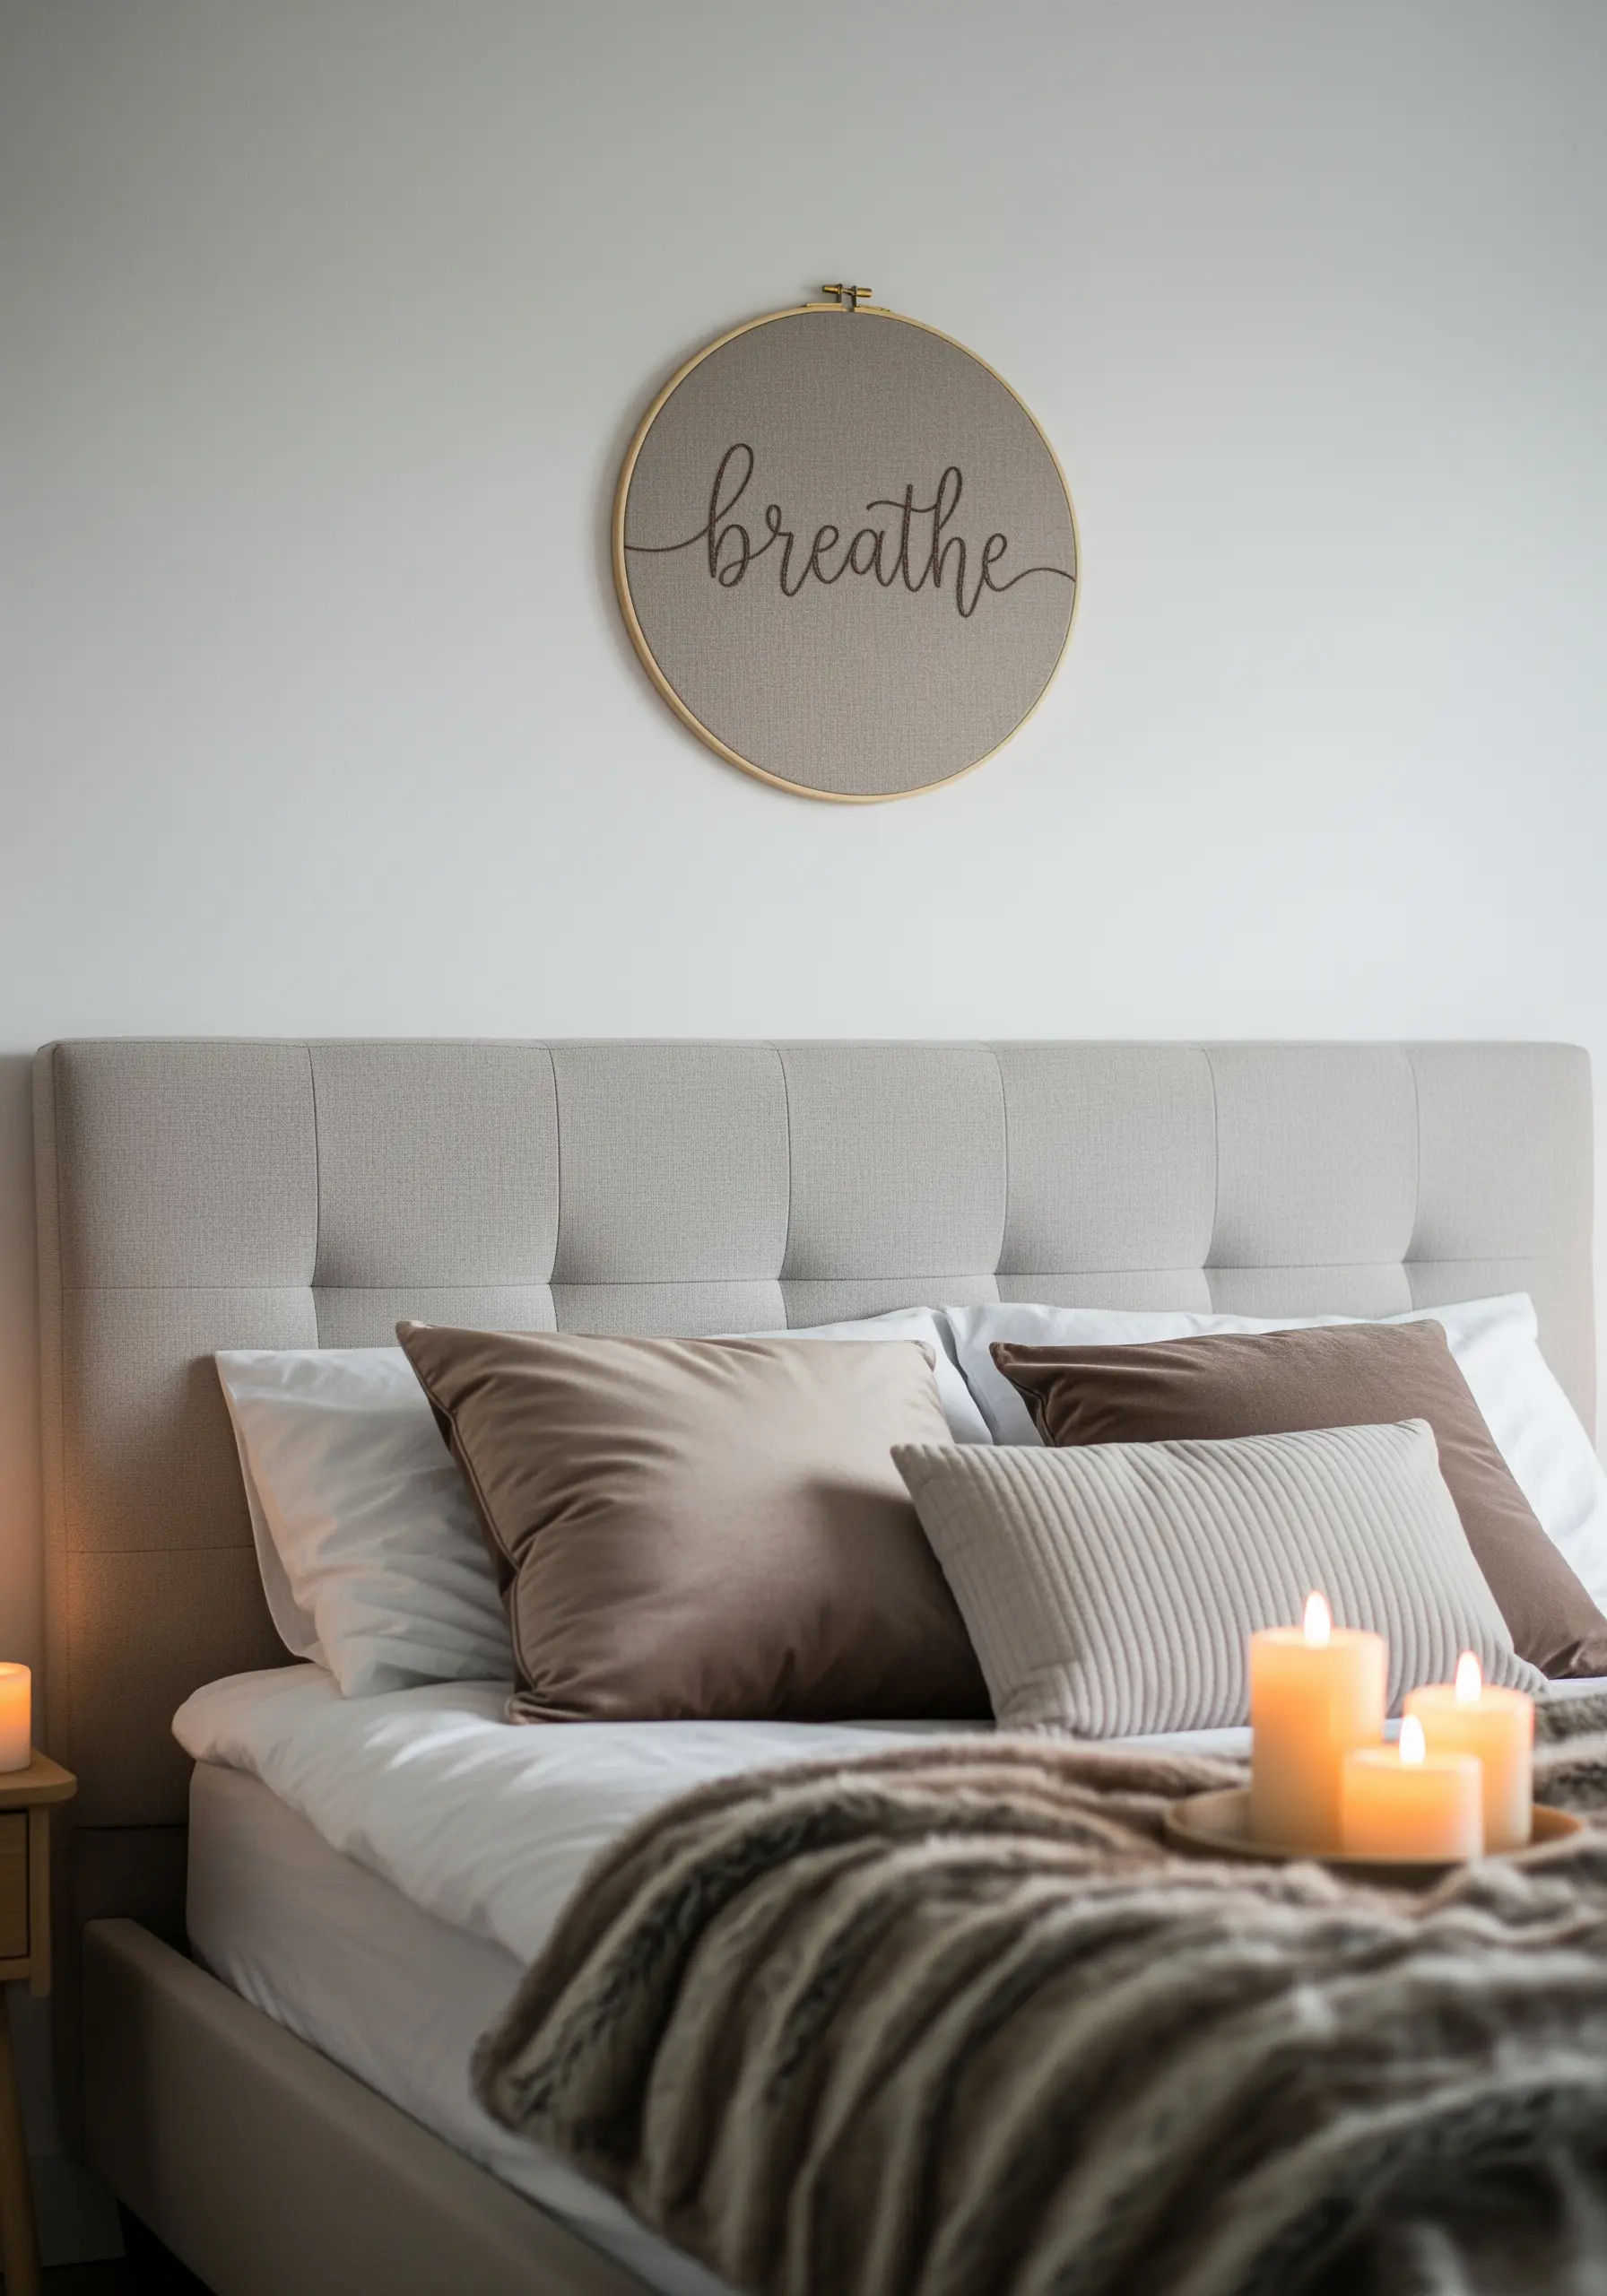
Embroidering a single, meaningful word can transform a piece into a personal mantra.
To give your script a raised, elegant finish, use a heavy chain stitch or a padded satin stitch.
For the padded satin stitch, first fill the letter shapes with a base of seed stitches, then cover this layer with smooth, vertical satin stitches.
This underlayer provides lift, making the final lettering appear embossed and luxurious. It’s an ideal technique for peaceful, poetic quote embroidery hoops for bedrooms.
9. Add Artistic Depth with Layered Hoops
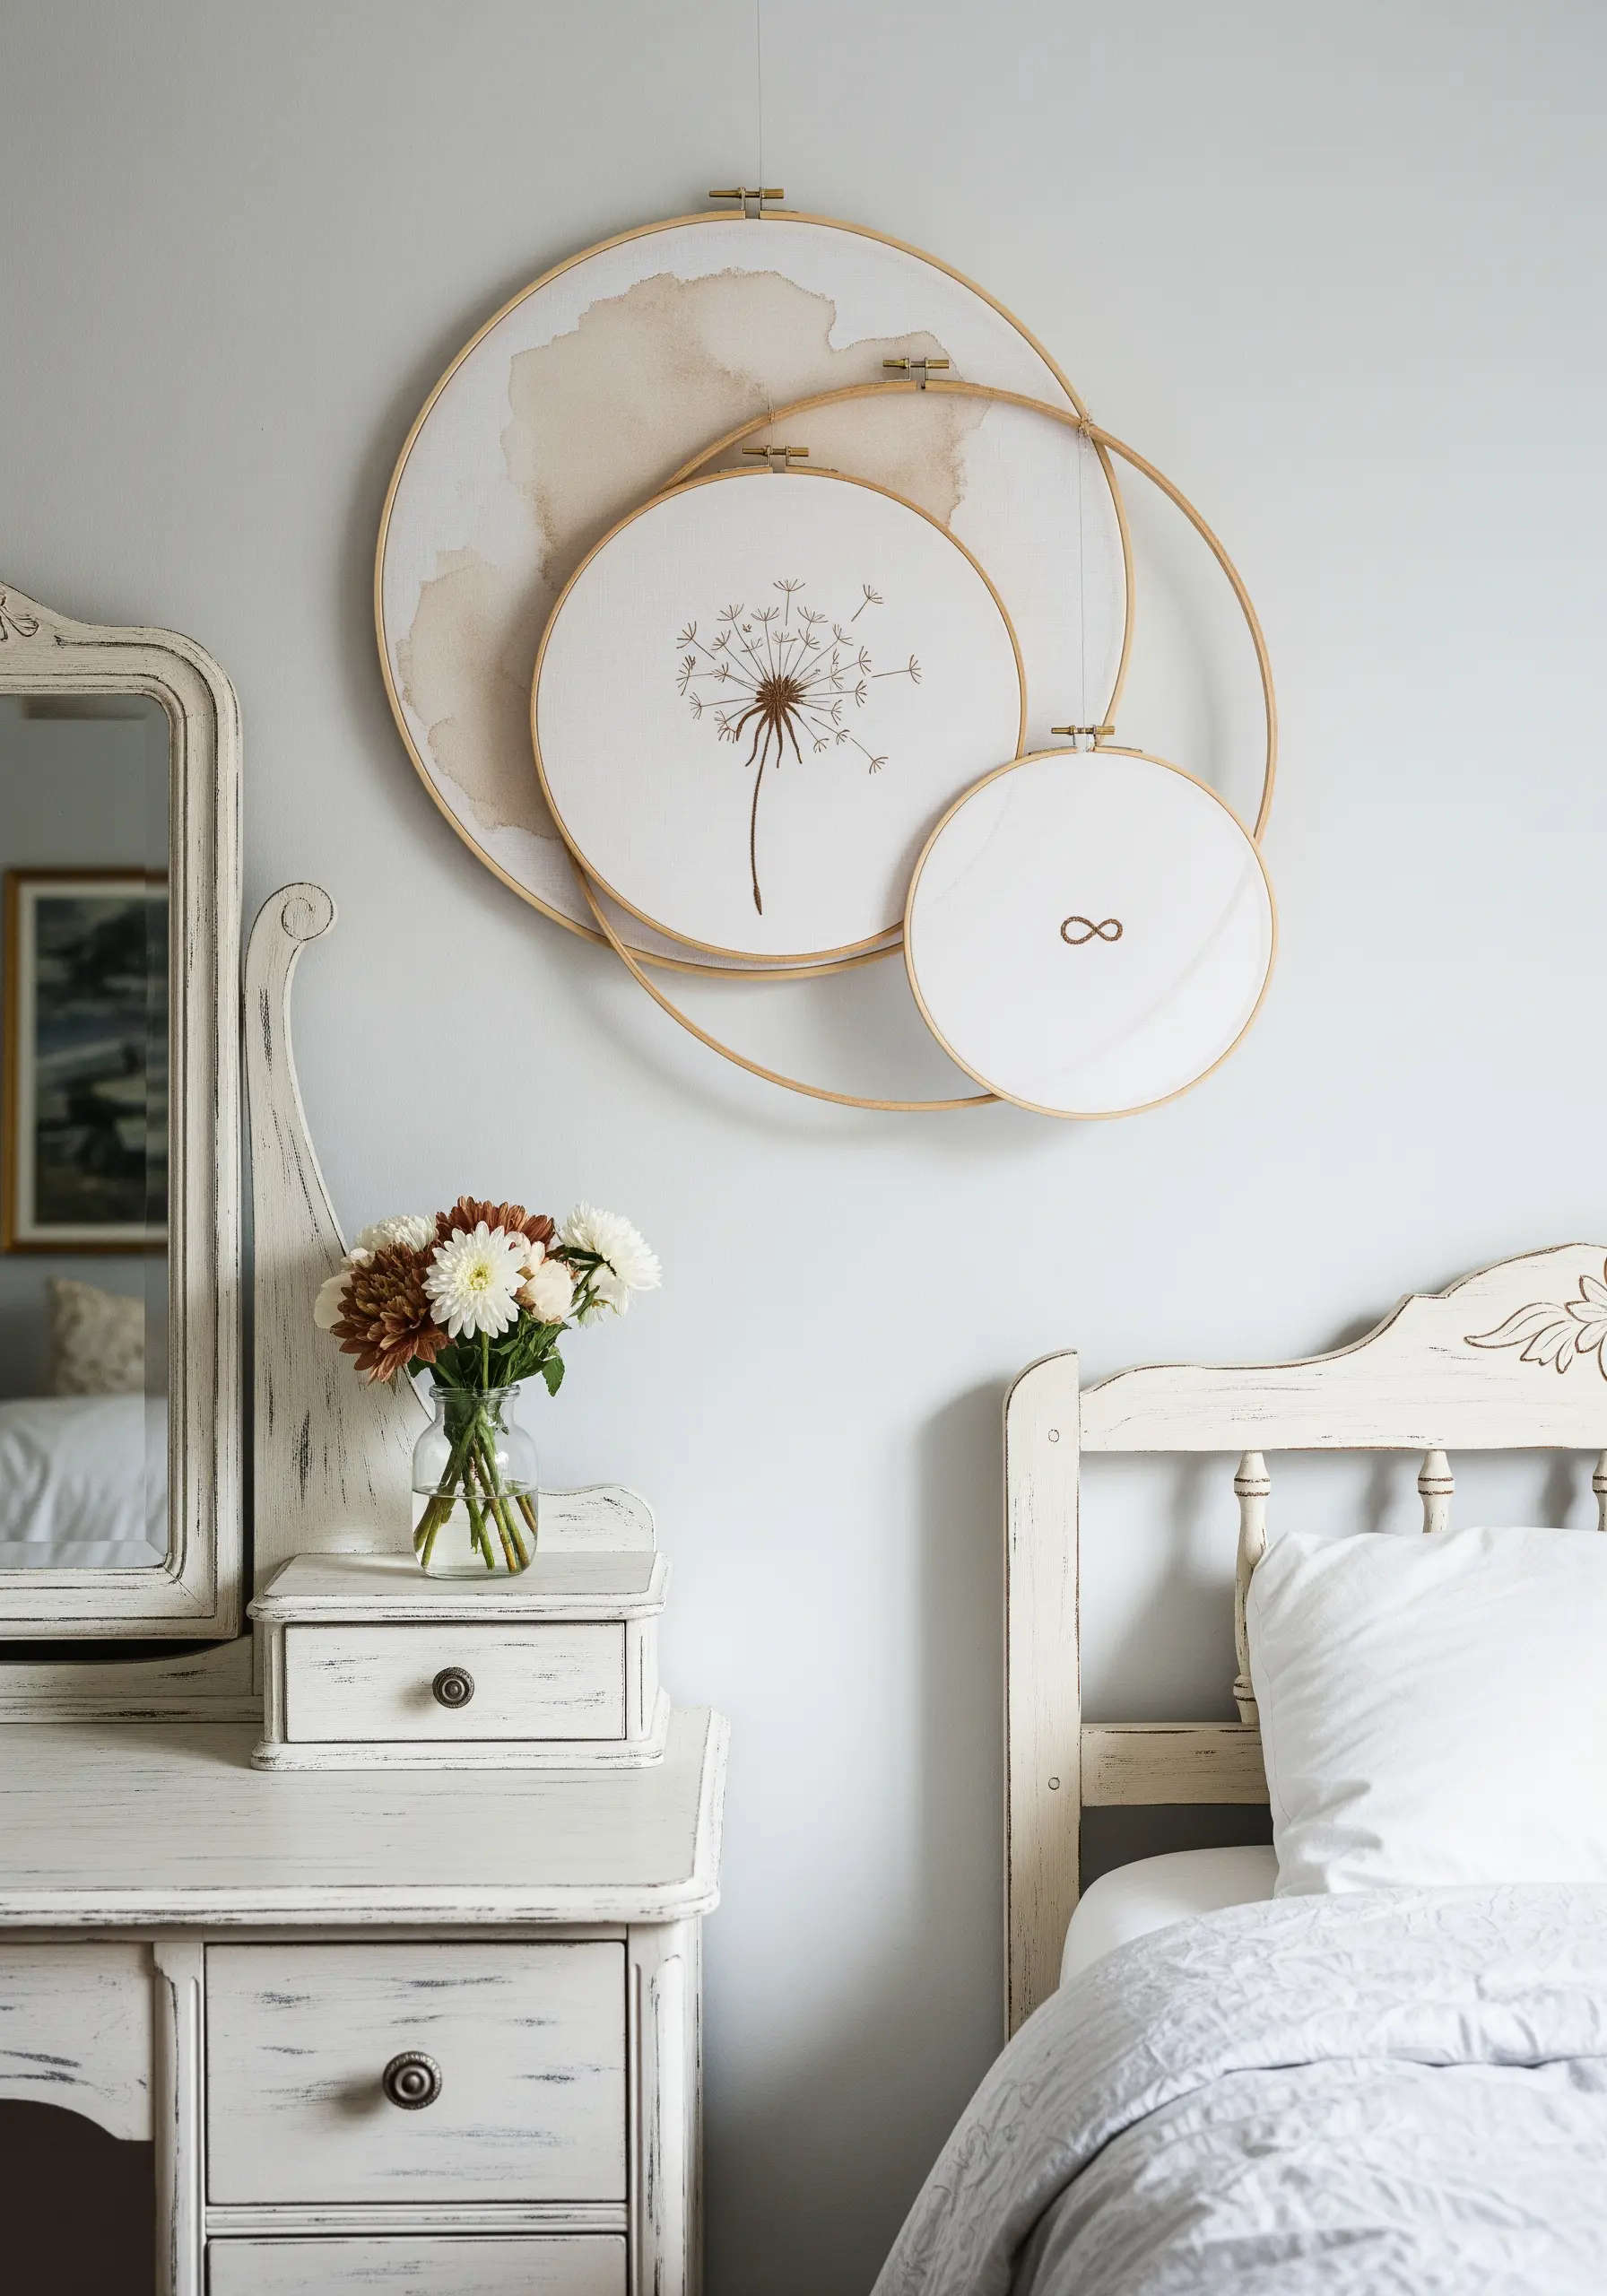
Create a sculptural, multi-dimensional piece by layering embroidery hoops of different sizes.
Prepare your background fabric first by applying a soft wash of color with diluted fabric paint or even tea for a subtle, aged effect.
Once your individual pieces are stitched, arrange the hoops and secure them from behind with a few stitches of strong, invisible thread.
This simple assembly technique turns flat hoops into dynamic abstract concept art.
10. Design an Organic Branch Display
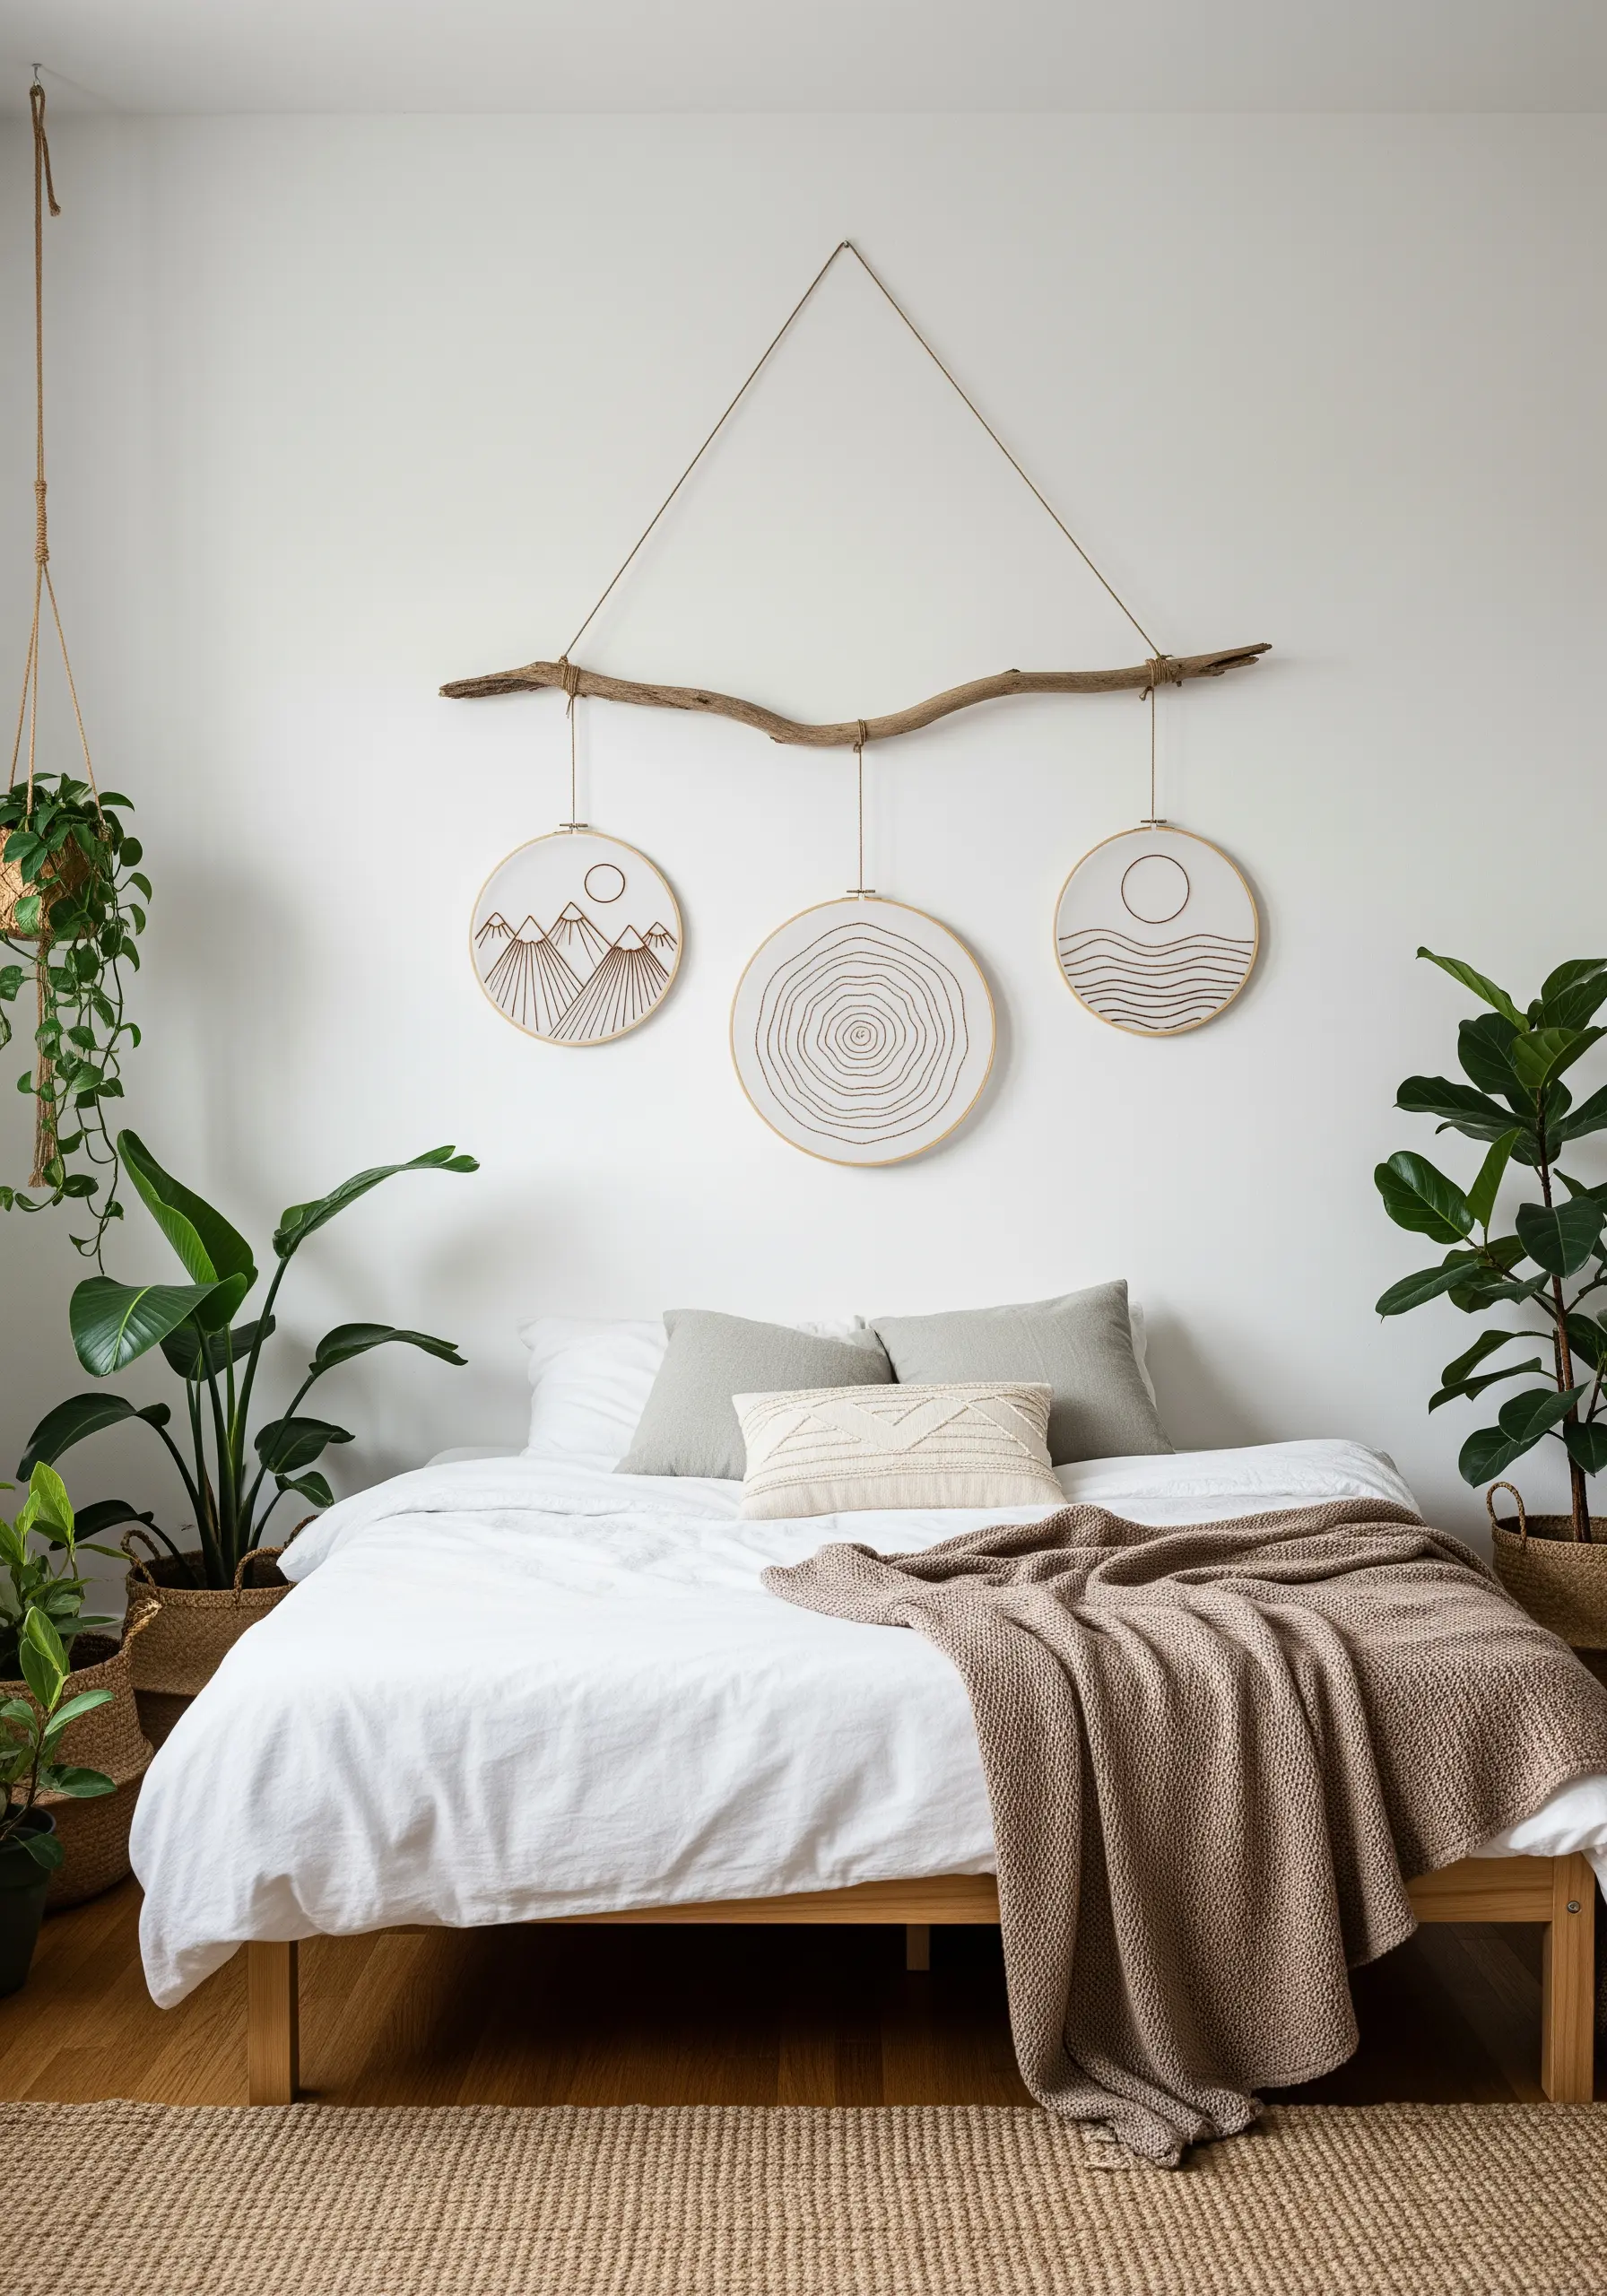
Elevate your finished hoops by swapping a traditional wall hook for a natural element, like a beautiful branch.
Hang the hoops at varying lengths using natural jute or twine to enhance the organic, rustic feel.
The key to this display’s success is the simplicity of the embroidery itself; the minimal, single-color line art complements the natural wood without competing with it.
This presentation turns a collection of minimal embroidery patterns into a cohesive, nature-inspired installation.
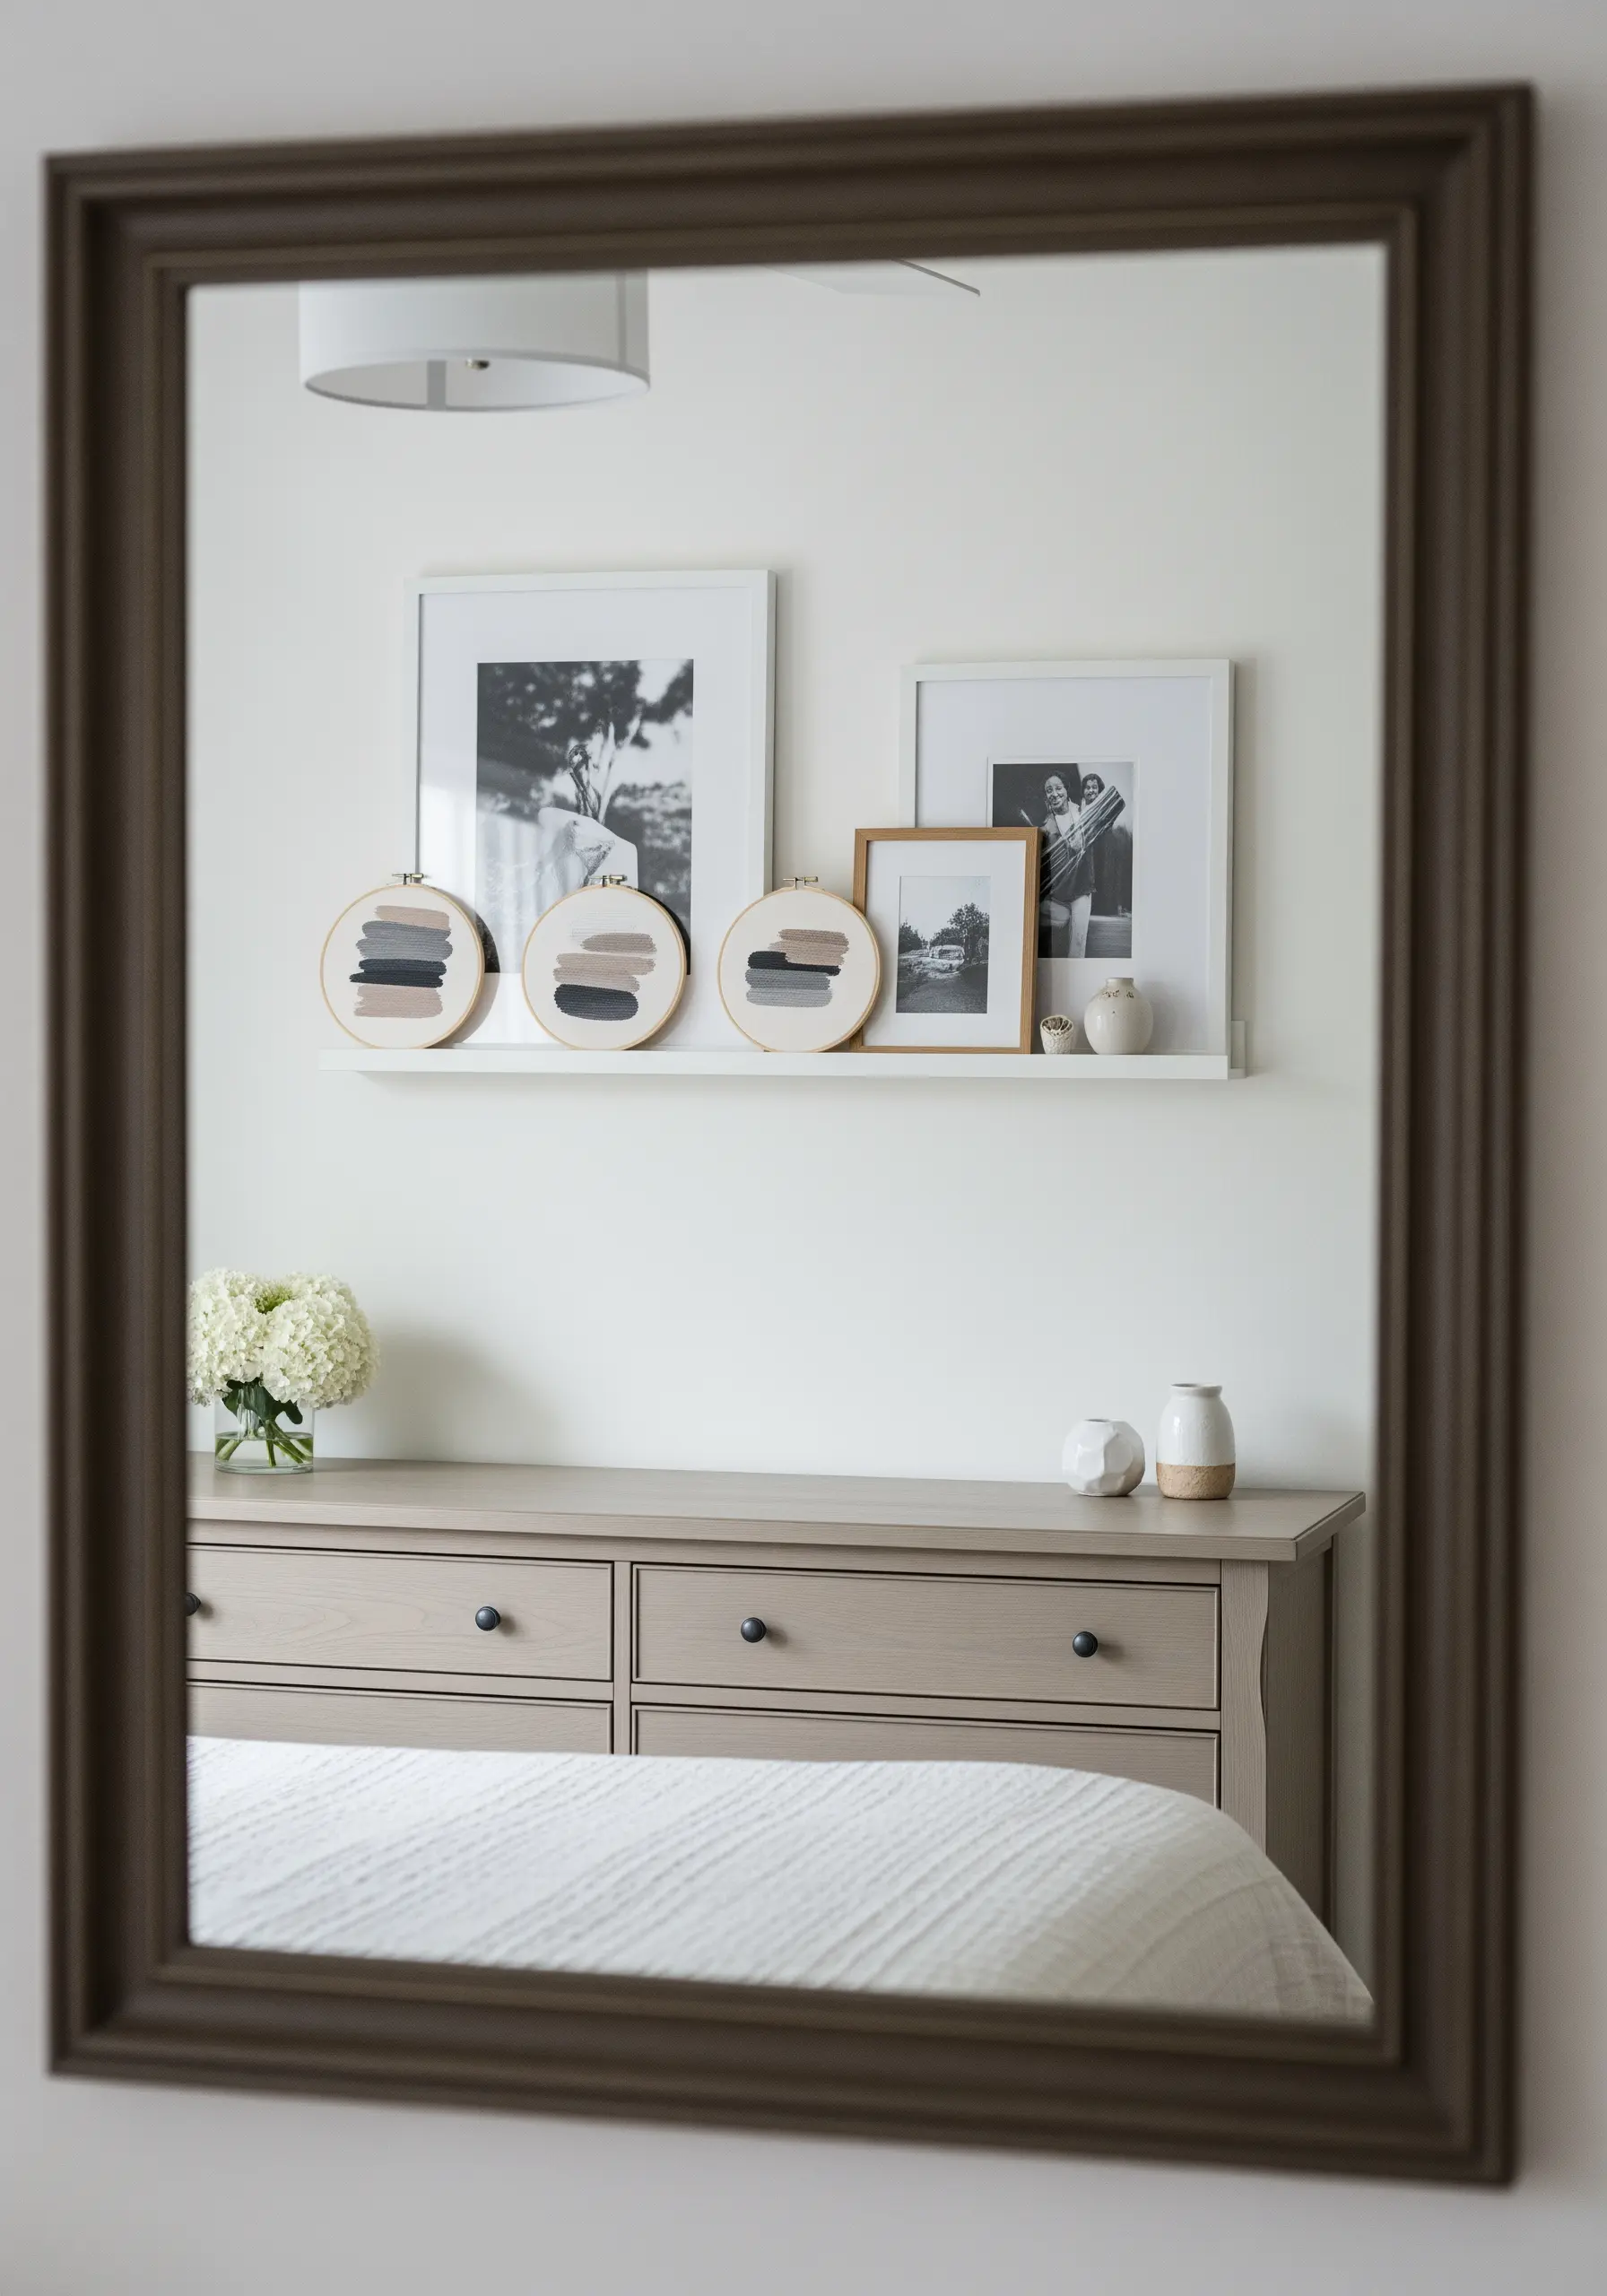
11. Style Your Shelves with Stitched Accents
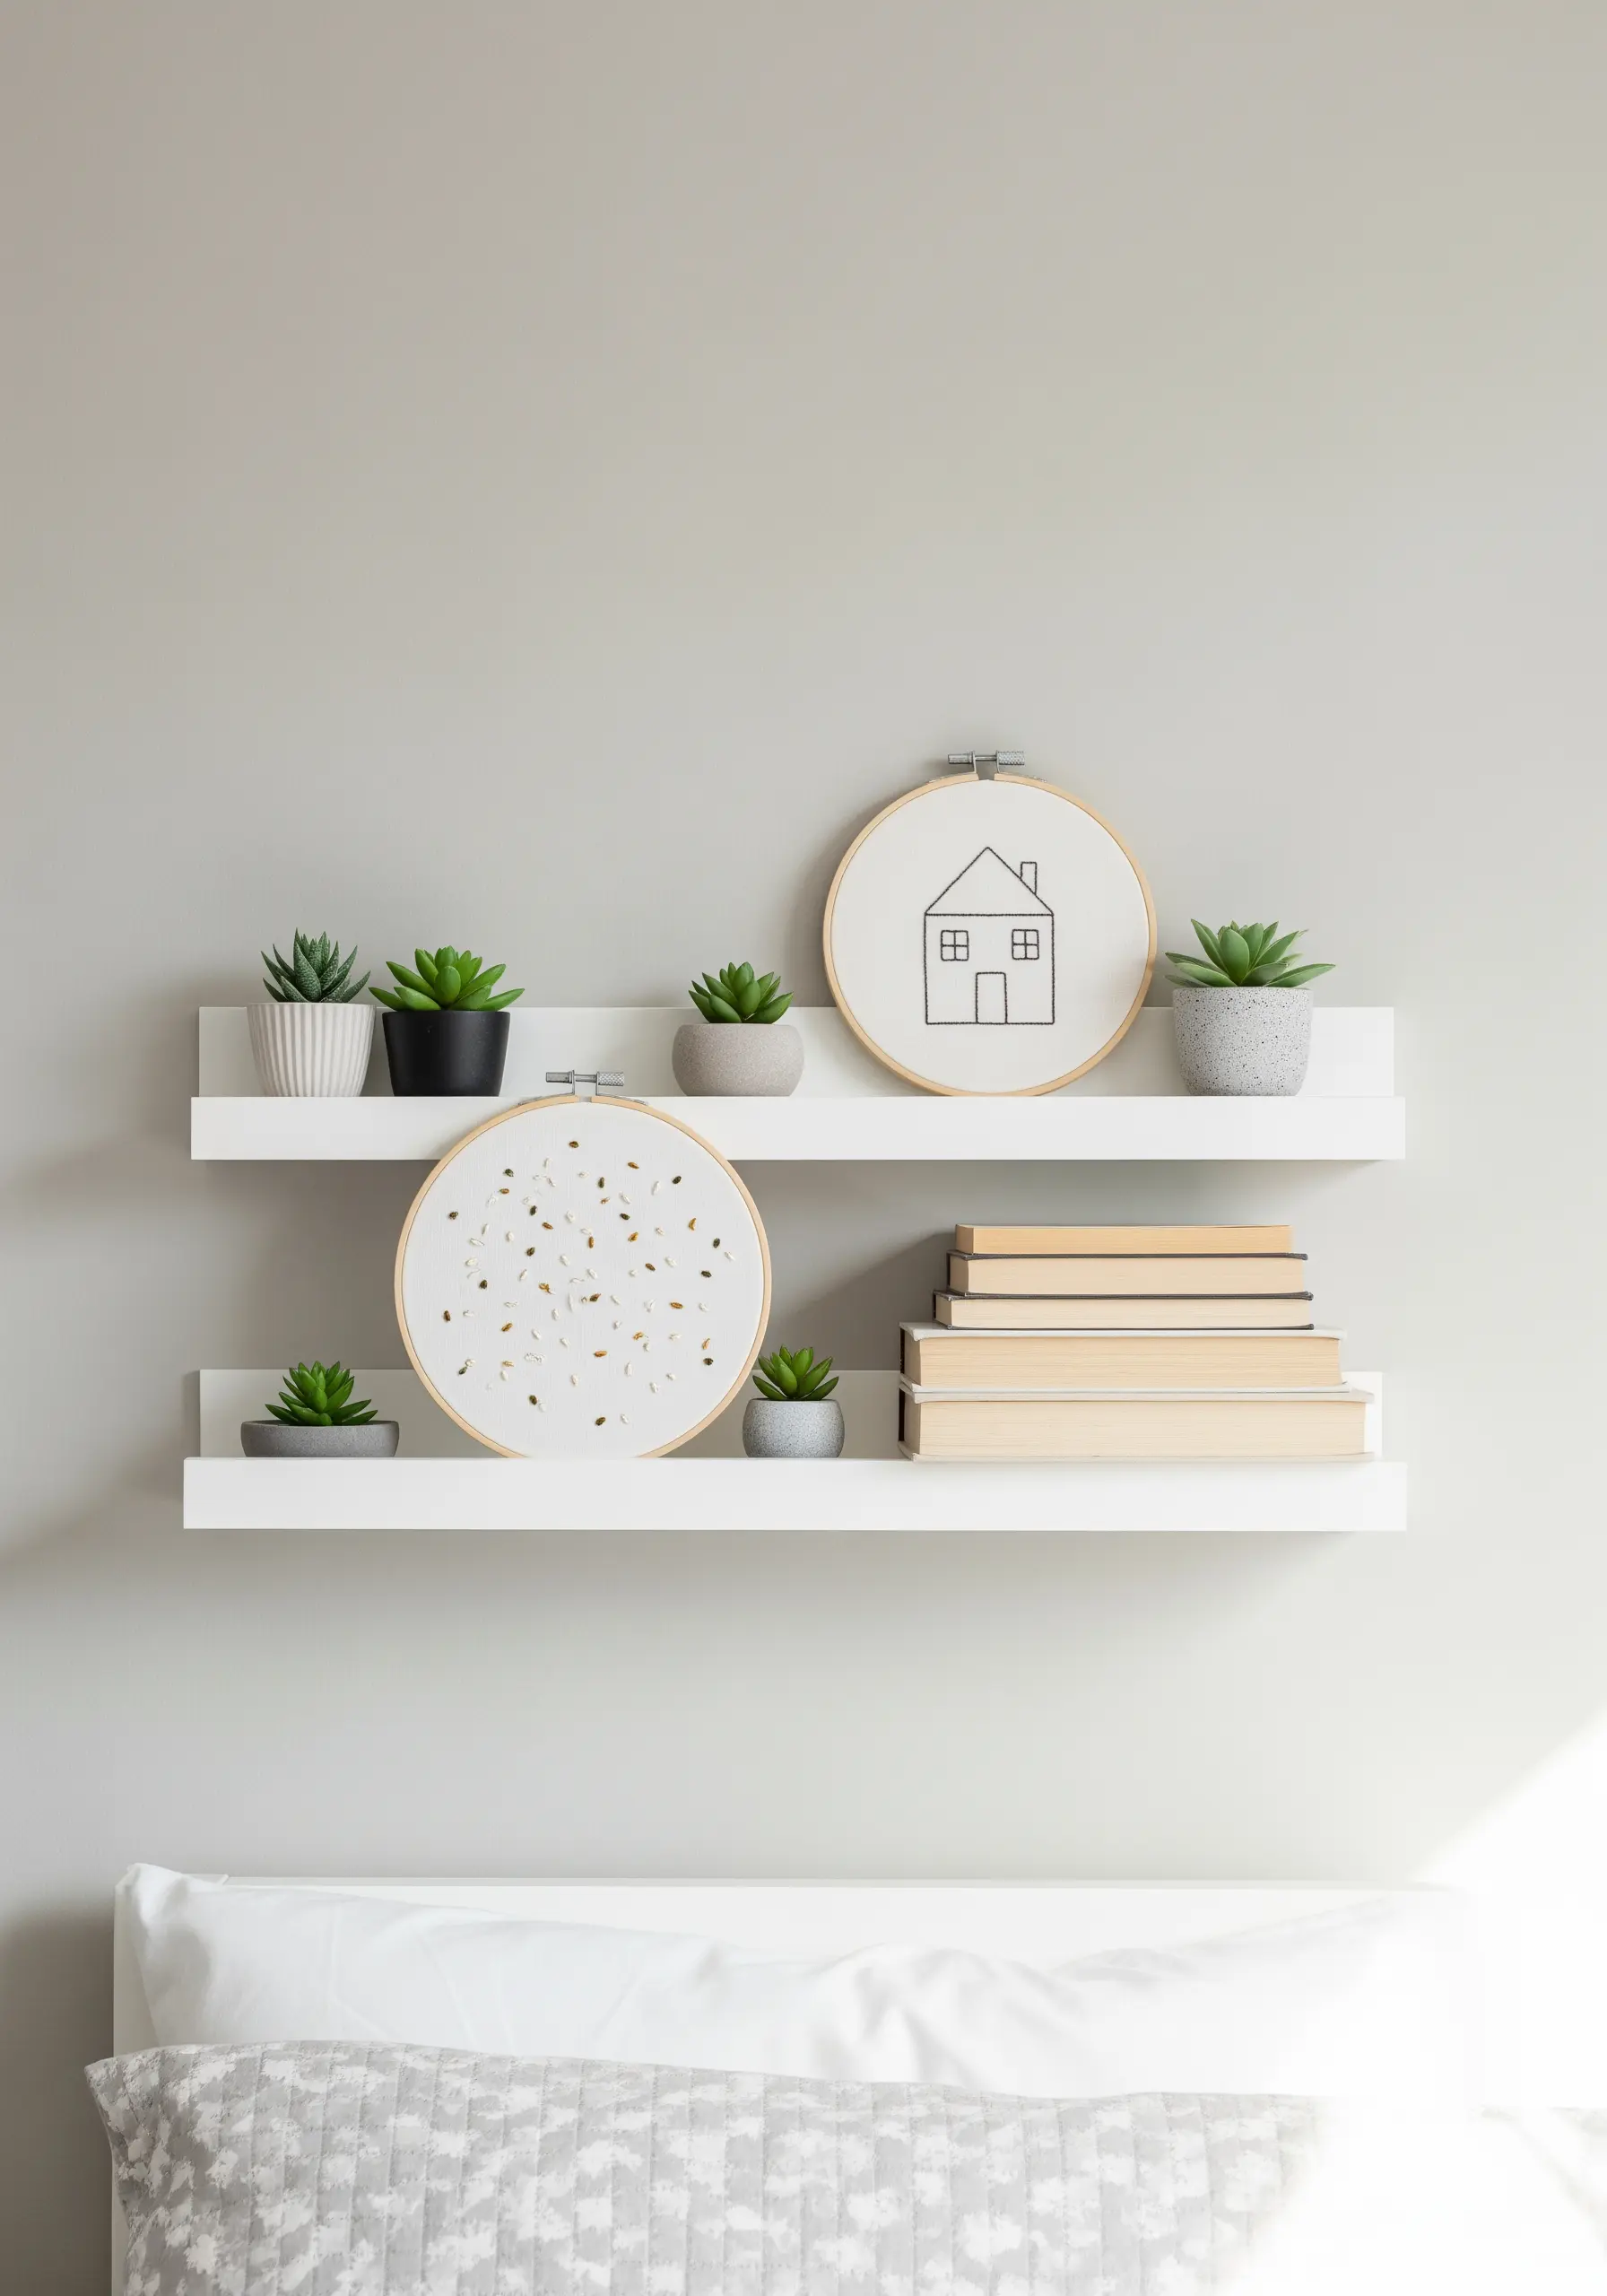
Integrate your embroidery into your home decor by styling small hoops on shelves alongside books and plants.
Create a playful ‘confetti’ effect by scattering tiny seed stitches or French knots across the fabric in a mix of neutral and metallic threads.
This design is wonderfully freeform and an excellent way to use up small scraps of leftover floss.
These small embroidery patterns to customize your home decor add a soft, handmade touch to any vignette.
12. Create a Contemplative Single-Line Portrait
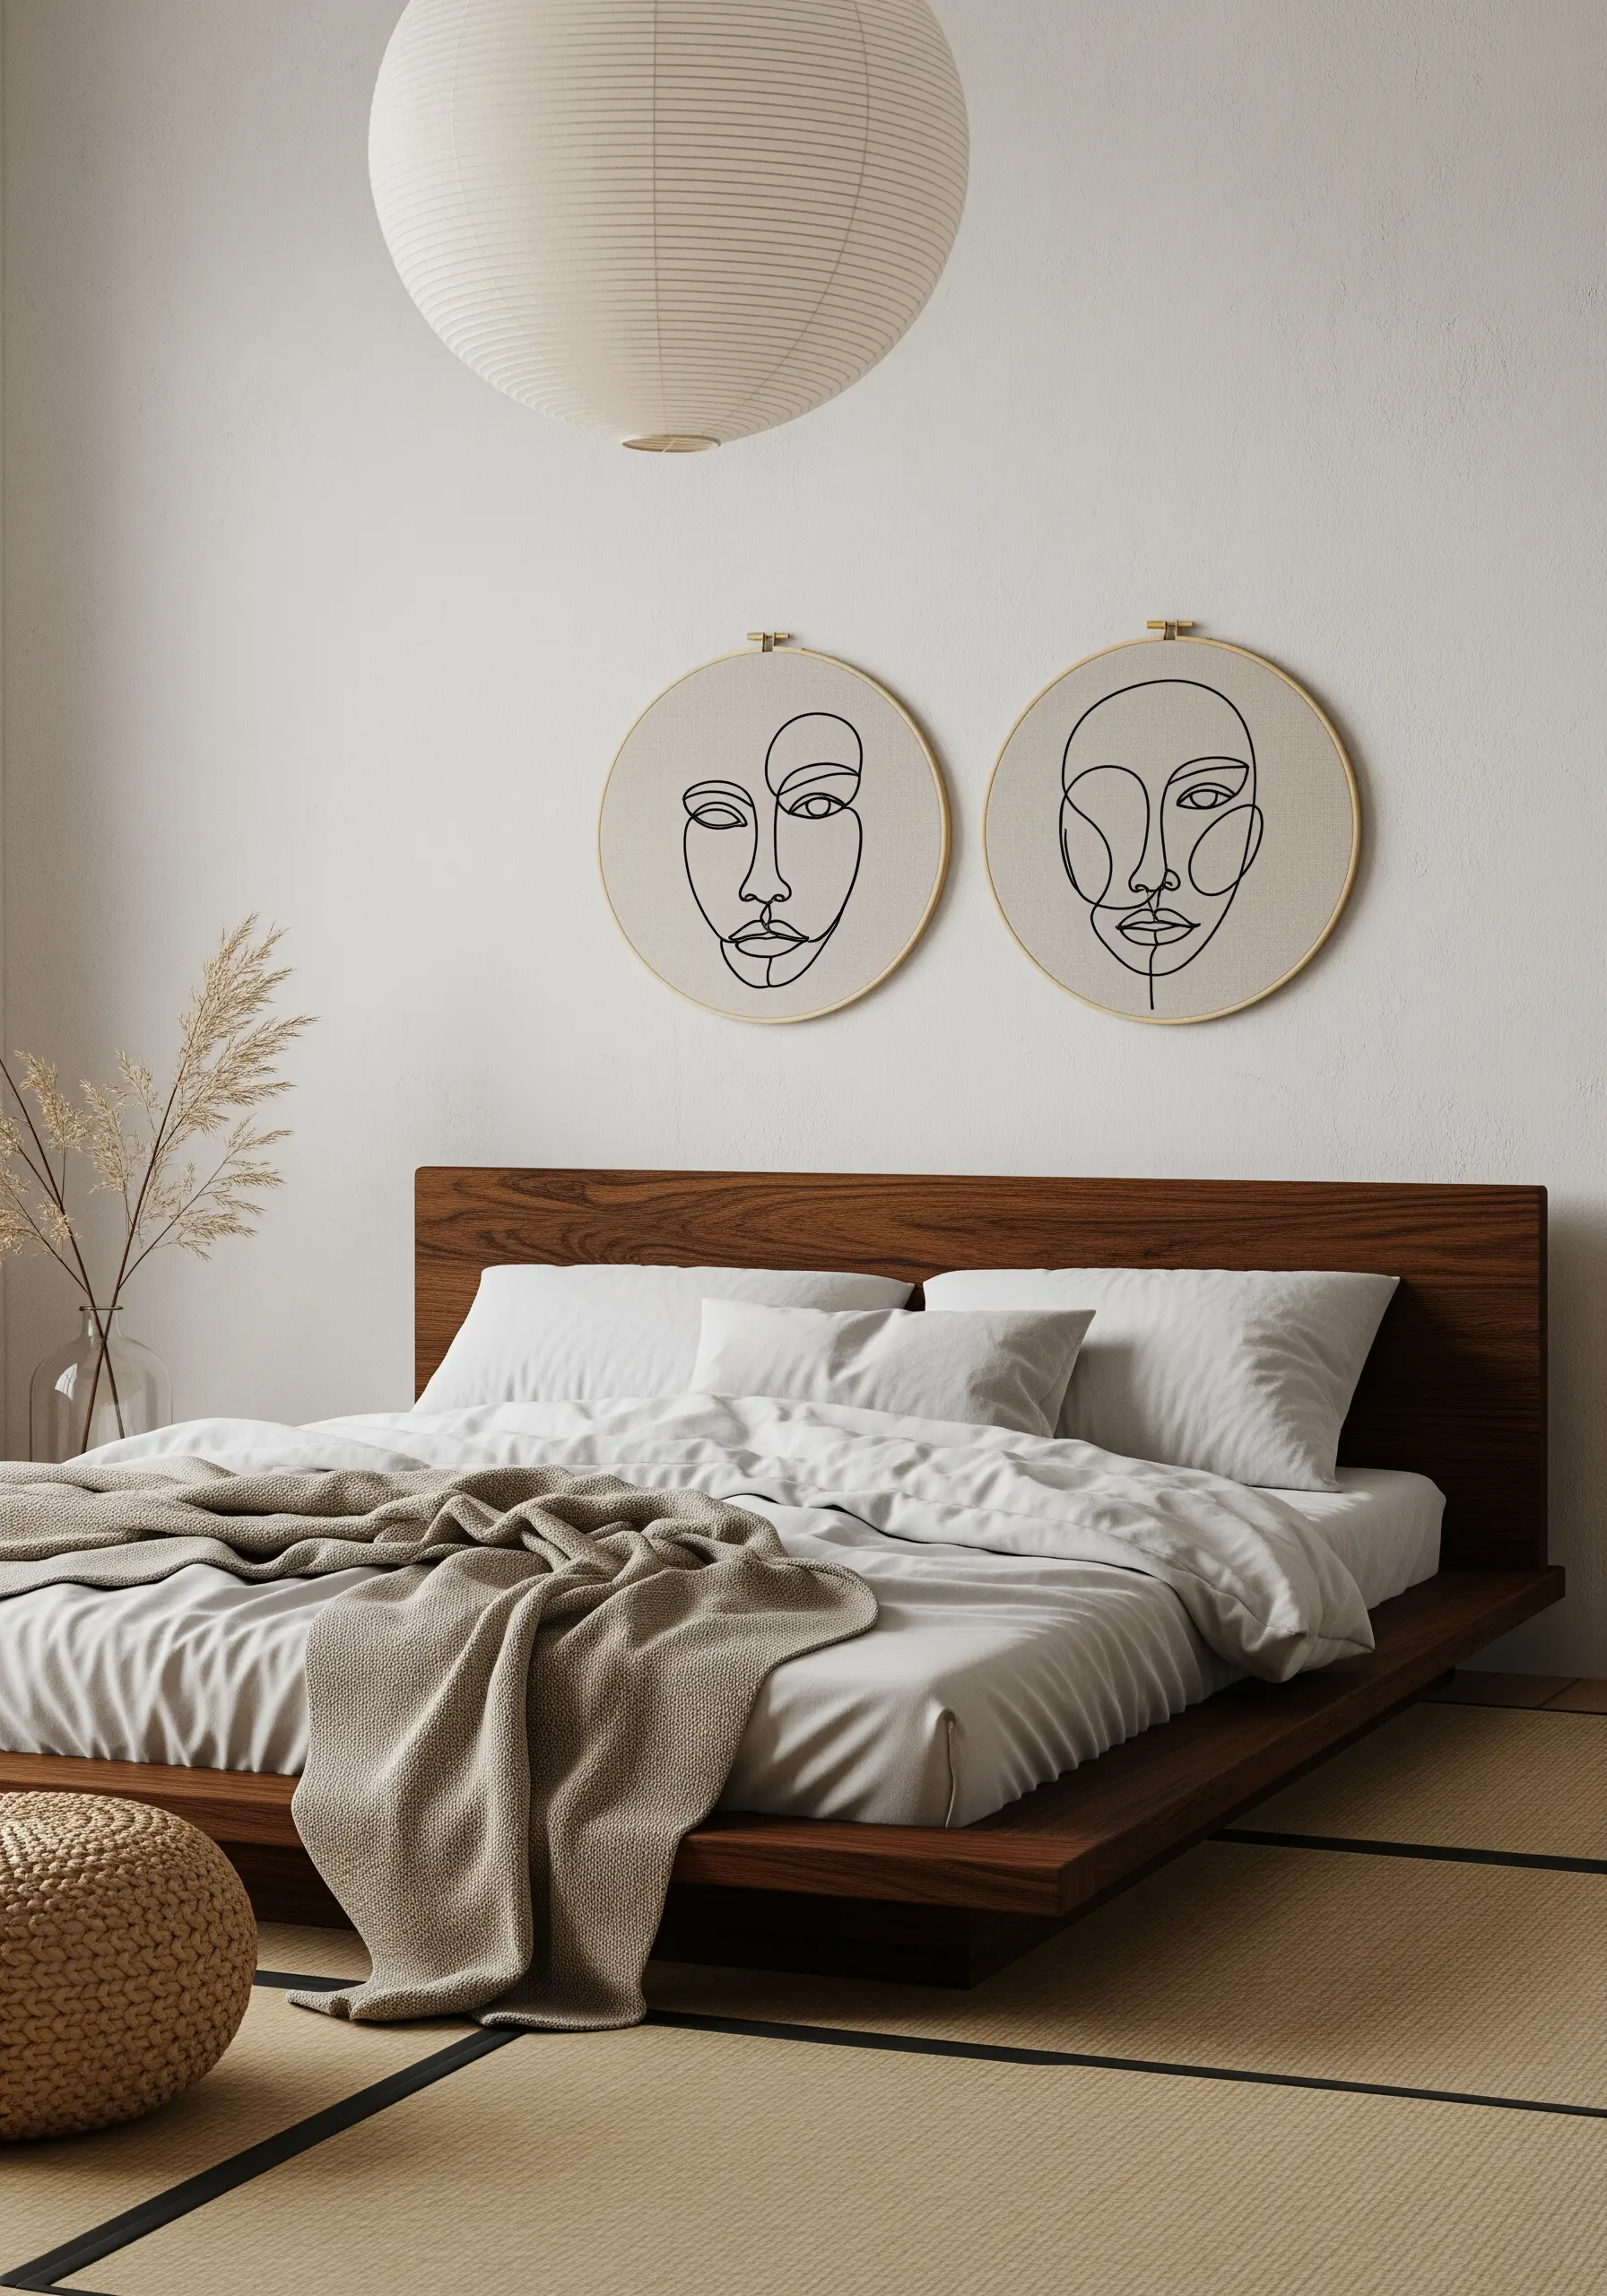
The beauty of a single-line design lies in its continuous, flowing quality.
To achieve this, use a stem stitch, which creates a slightly raised, rope-like texture that gives the line substance and definition.
Before you begin, trace your design onto the fabric with a water-soluble pen and plan your stitching path to minimize any need to jump or break the thread.
This thoughtful approach is essential for creating elegant single-line face profiles that create gallery-style hoop art.
13. Fuse Embroidery with Ethereal Macrame
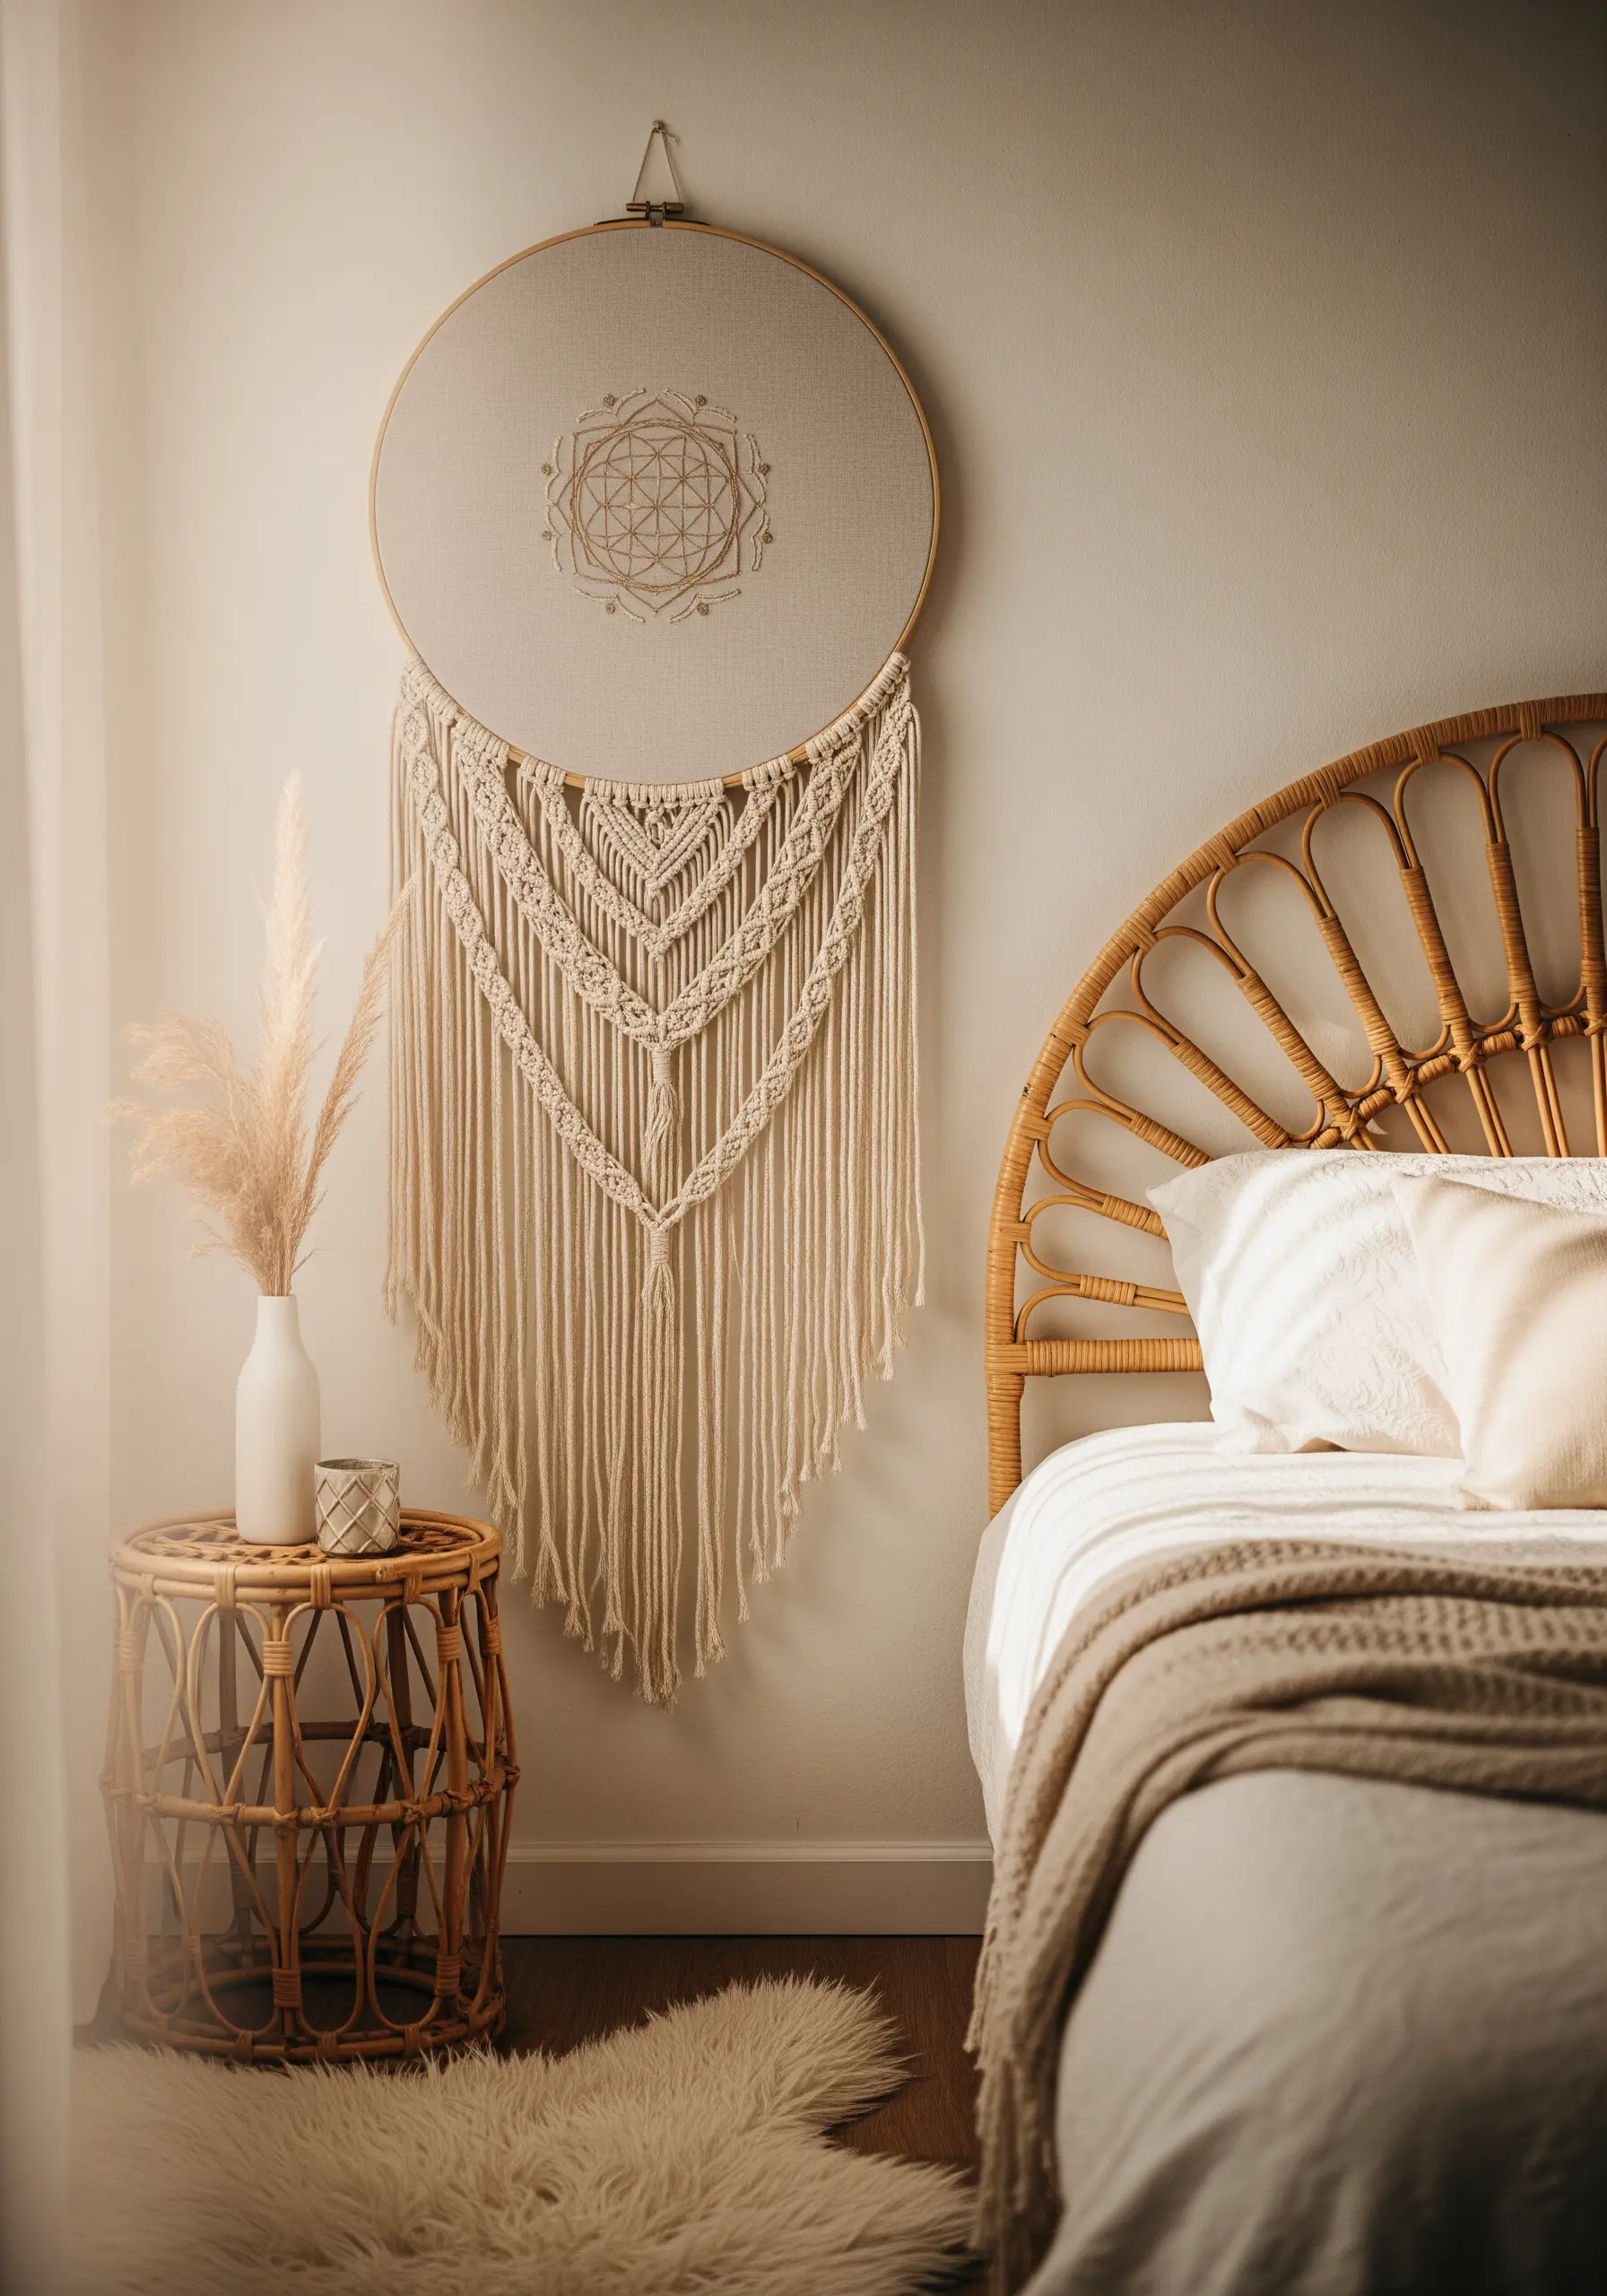
Combine two beloved fiber arts into one stunning statement piece.
Begin by stitching a delicate, central motif onto your fabric, like a geometric mandala.
After hooping your finished embroidery, use the bottom curve of the hoop as an anchor for adding macrame cords, just as you would use a dowel.
This fusion creates beautiful, stunning embroidered wall hangings with both intricate detail and soft, flowing texture.
14. Chart the Moon with Textural Knots
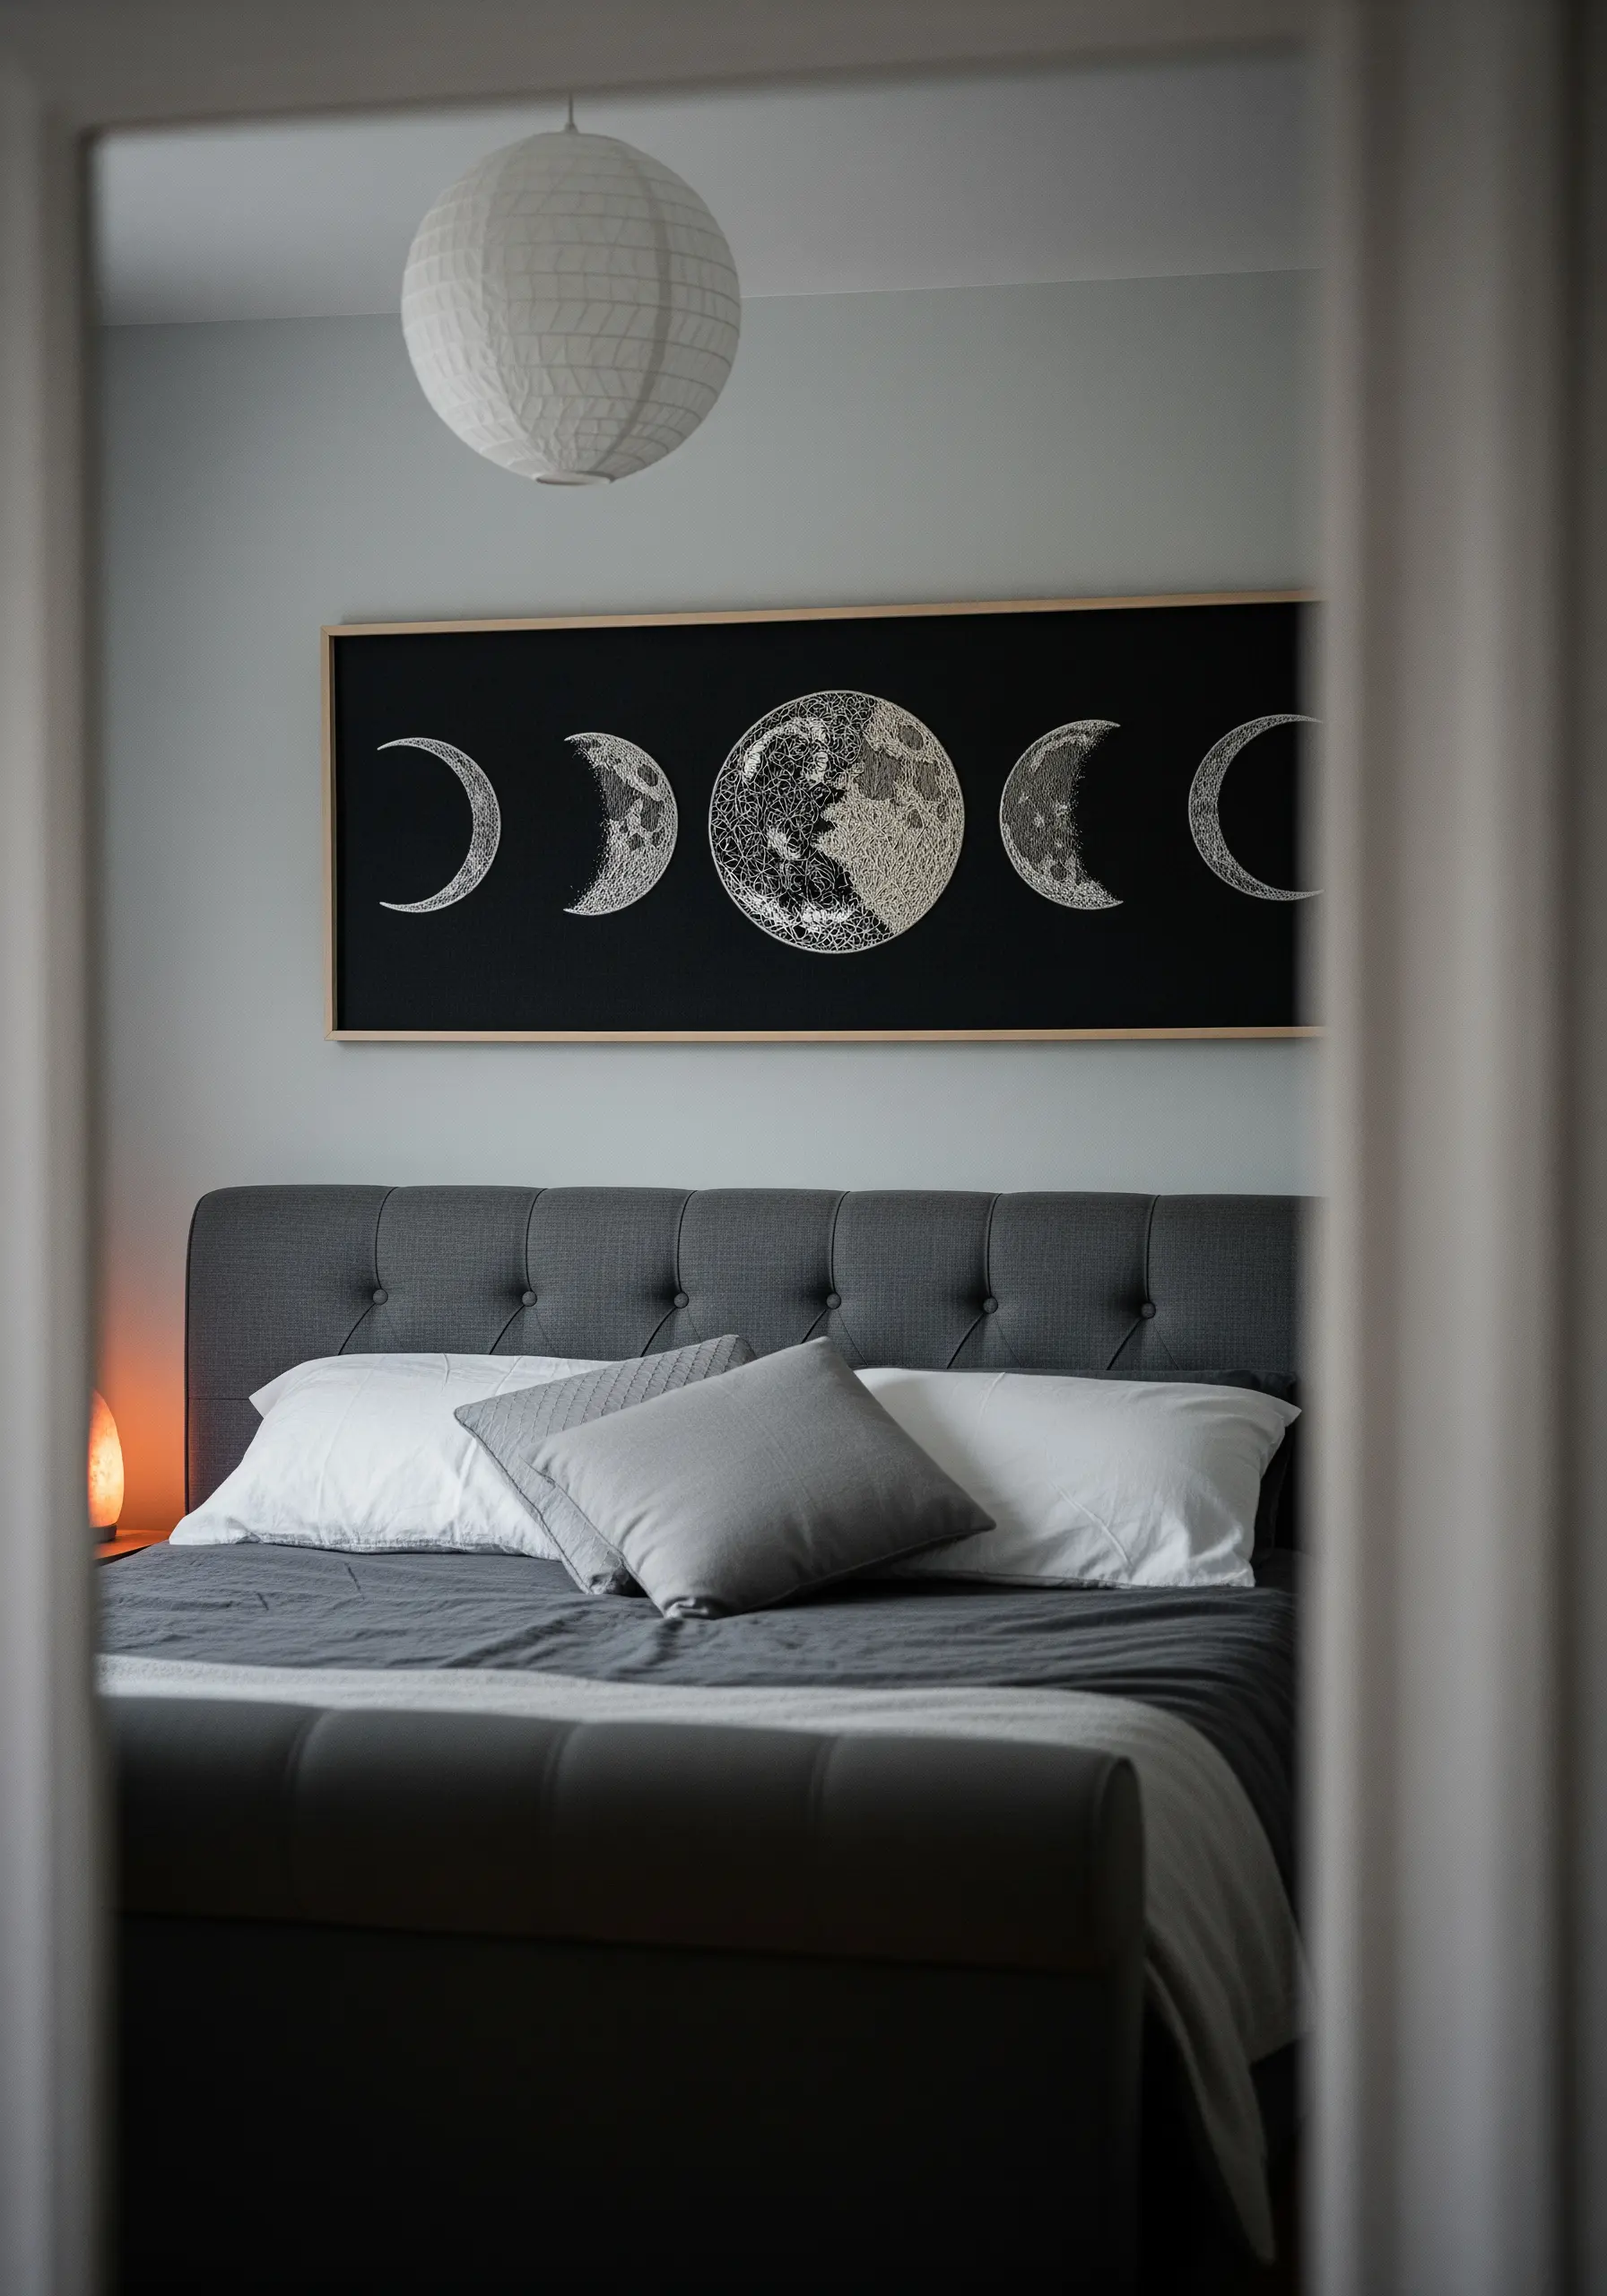
Recreate the textured surface of the moon using a high-contrast palette and dimensional stitches.
On a dark navy or black fabric, use a silvery-white thread to densely pack areas with French knots, varying their size and spacing to mimic lunar craters and plains.
The contrast between the dark ‘sky’ and the textured knots creates a dramatic and tactile celestial portrait.
This is a perfect project for exploring how minimal sky & moon designs can be elevated with texture.
15. Craft a Sculptural Yarn Spiral
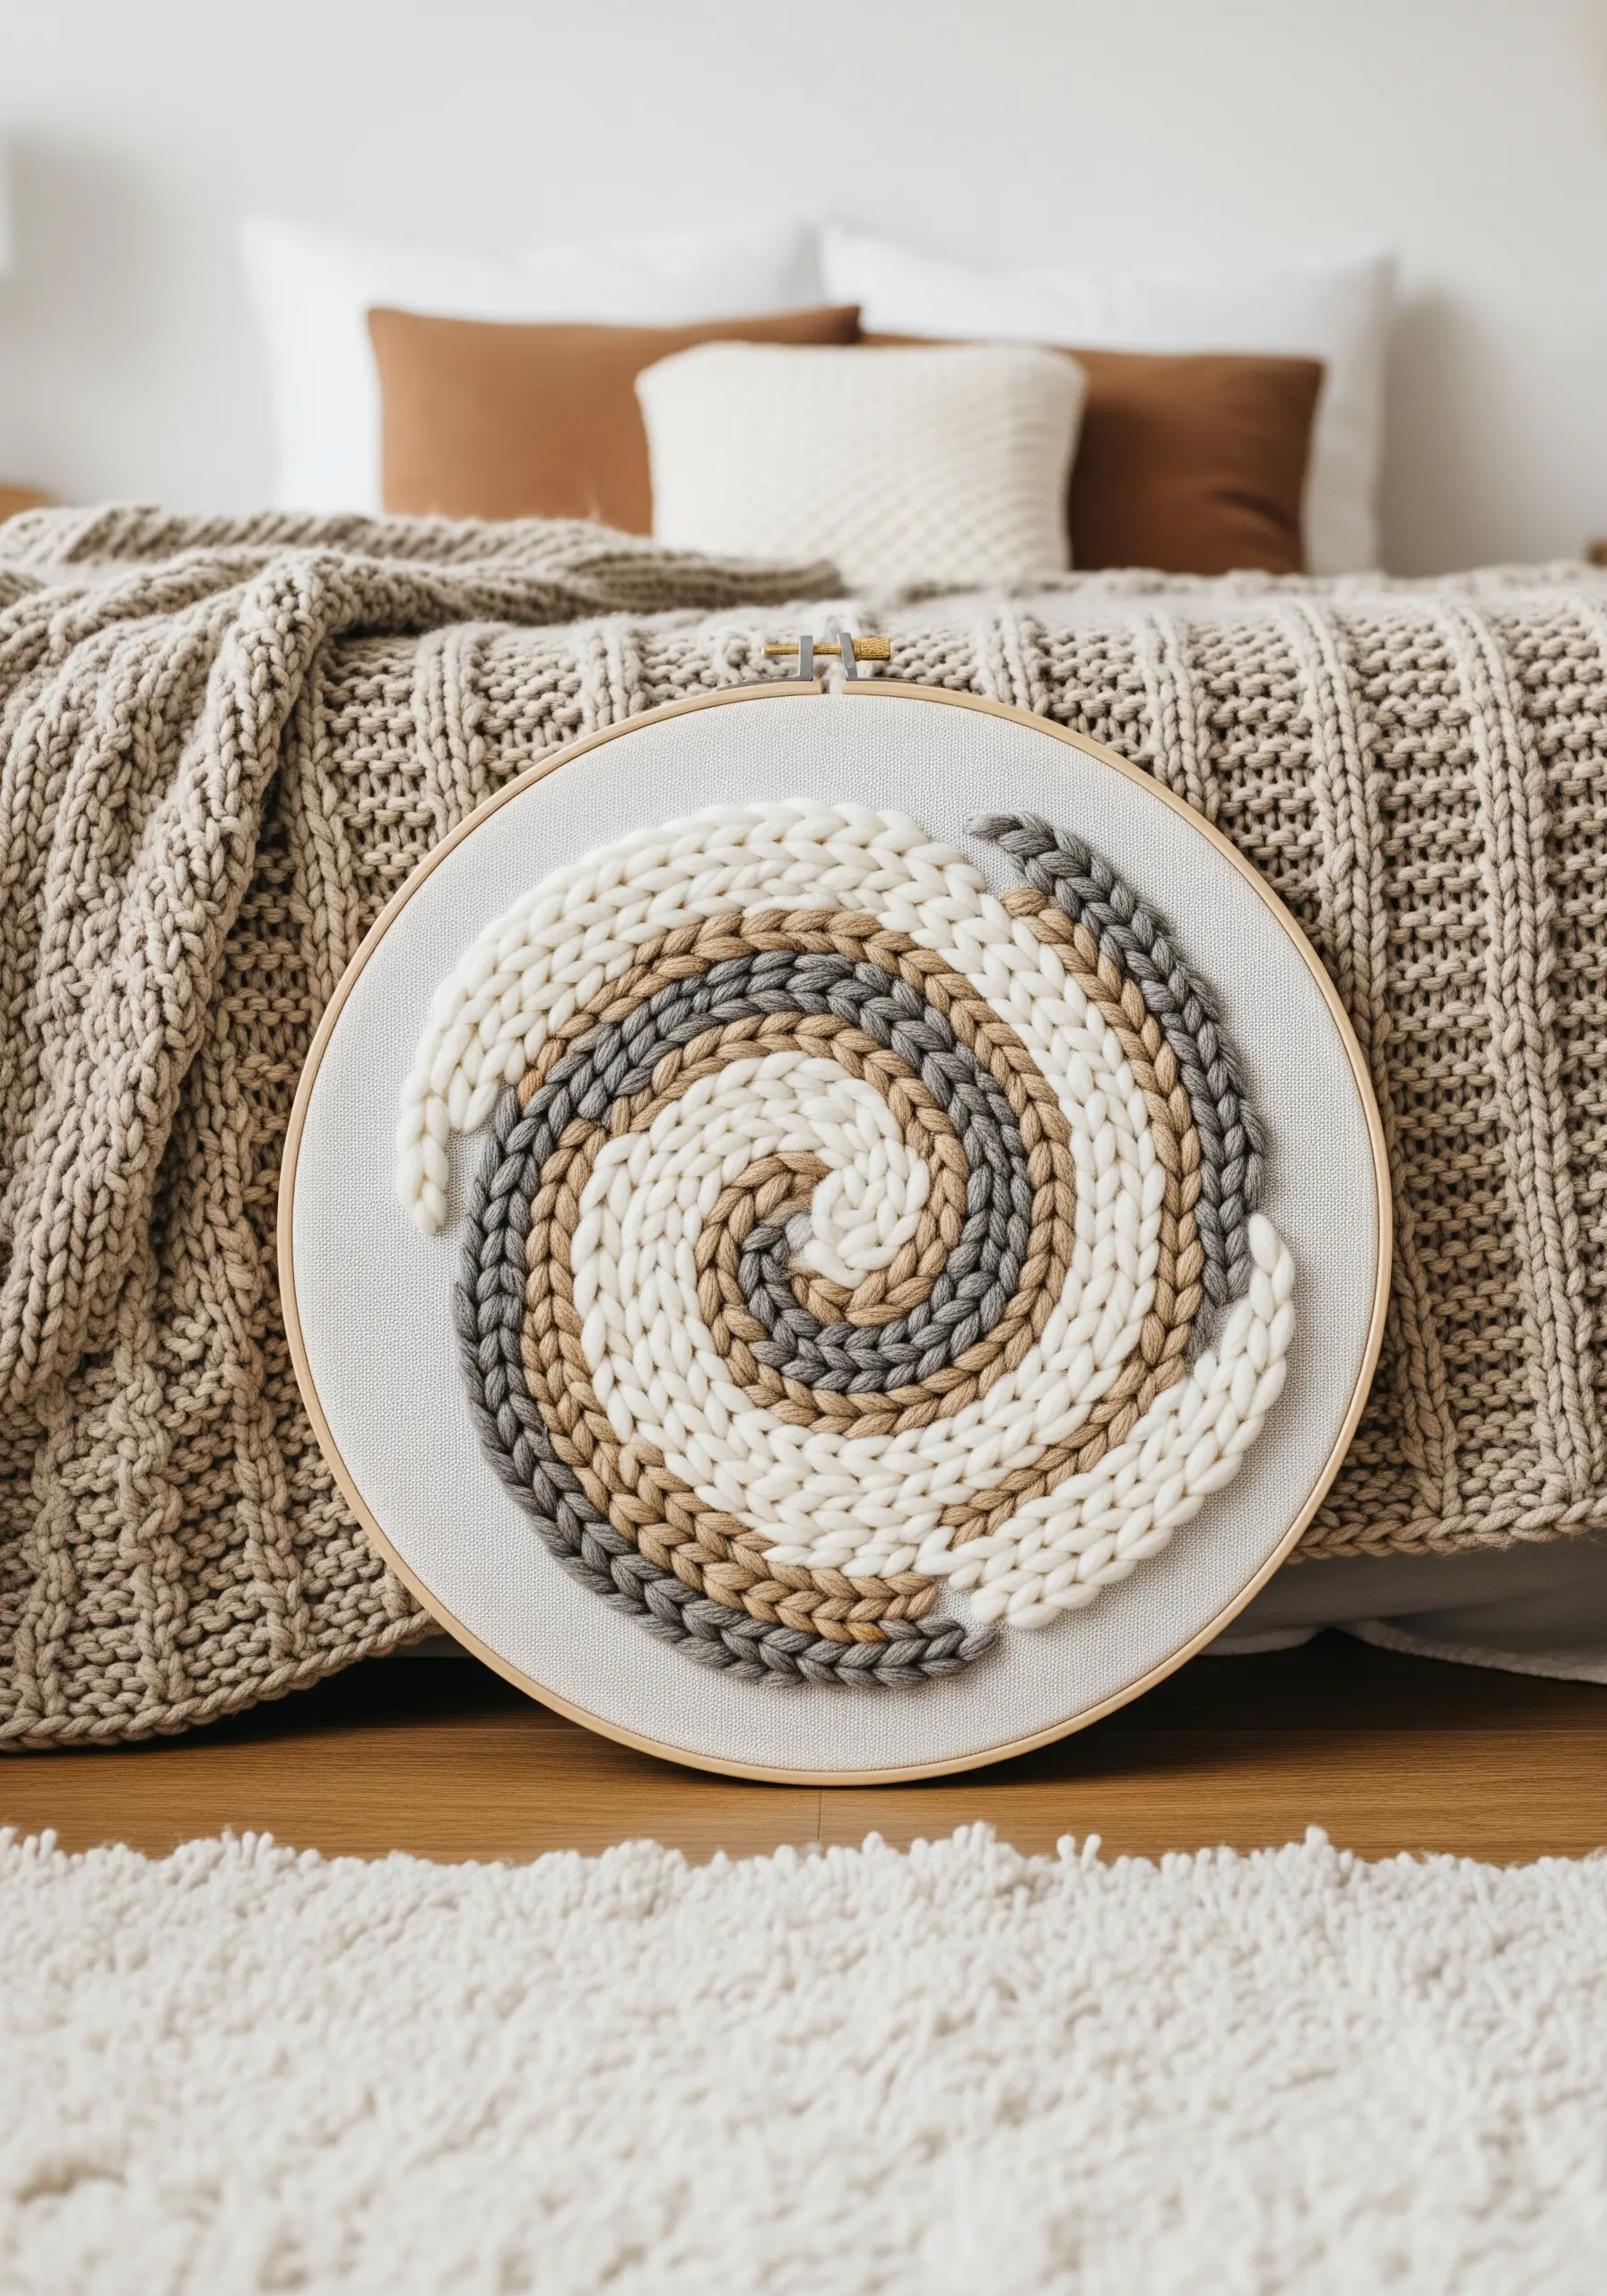
Create a bold, three-dimensional effect by couching thick yarn onto your fabric.
Arrange a chunky, braided yarn in a spiral pattern, then use a thinner, matching embroidery floss to tack it down with small, evenly spaced stitches that sink into the yarn’s texture.
This technique adds sculptural depth and a wonderfully tactile quality, turning your hoop into a piece of soft, graphic art.
It’s an accessible entry into creating impressive yarn wall art projects inspired by geometric patterns.
16. Paint with Abstract Embroidery Strokes
Use your needle and thread like a paintbrush to create a modern, abstract composition.
Instead of neatly filling a shape, lay down broad ‘brushstrokes’ of satin stitch in varying lengths and angles.
Work with a tonal palette of three or four neutral shades, allowing the strokes to overlap slightly to create a sense of movement and depth.
This expressive technique is ideal for abstract thread splatter-inspired projects for artists who love controlled chaos.
17. Add a Touch of Sparkle with Stitched Stars
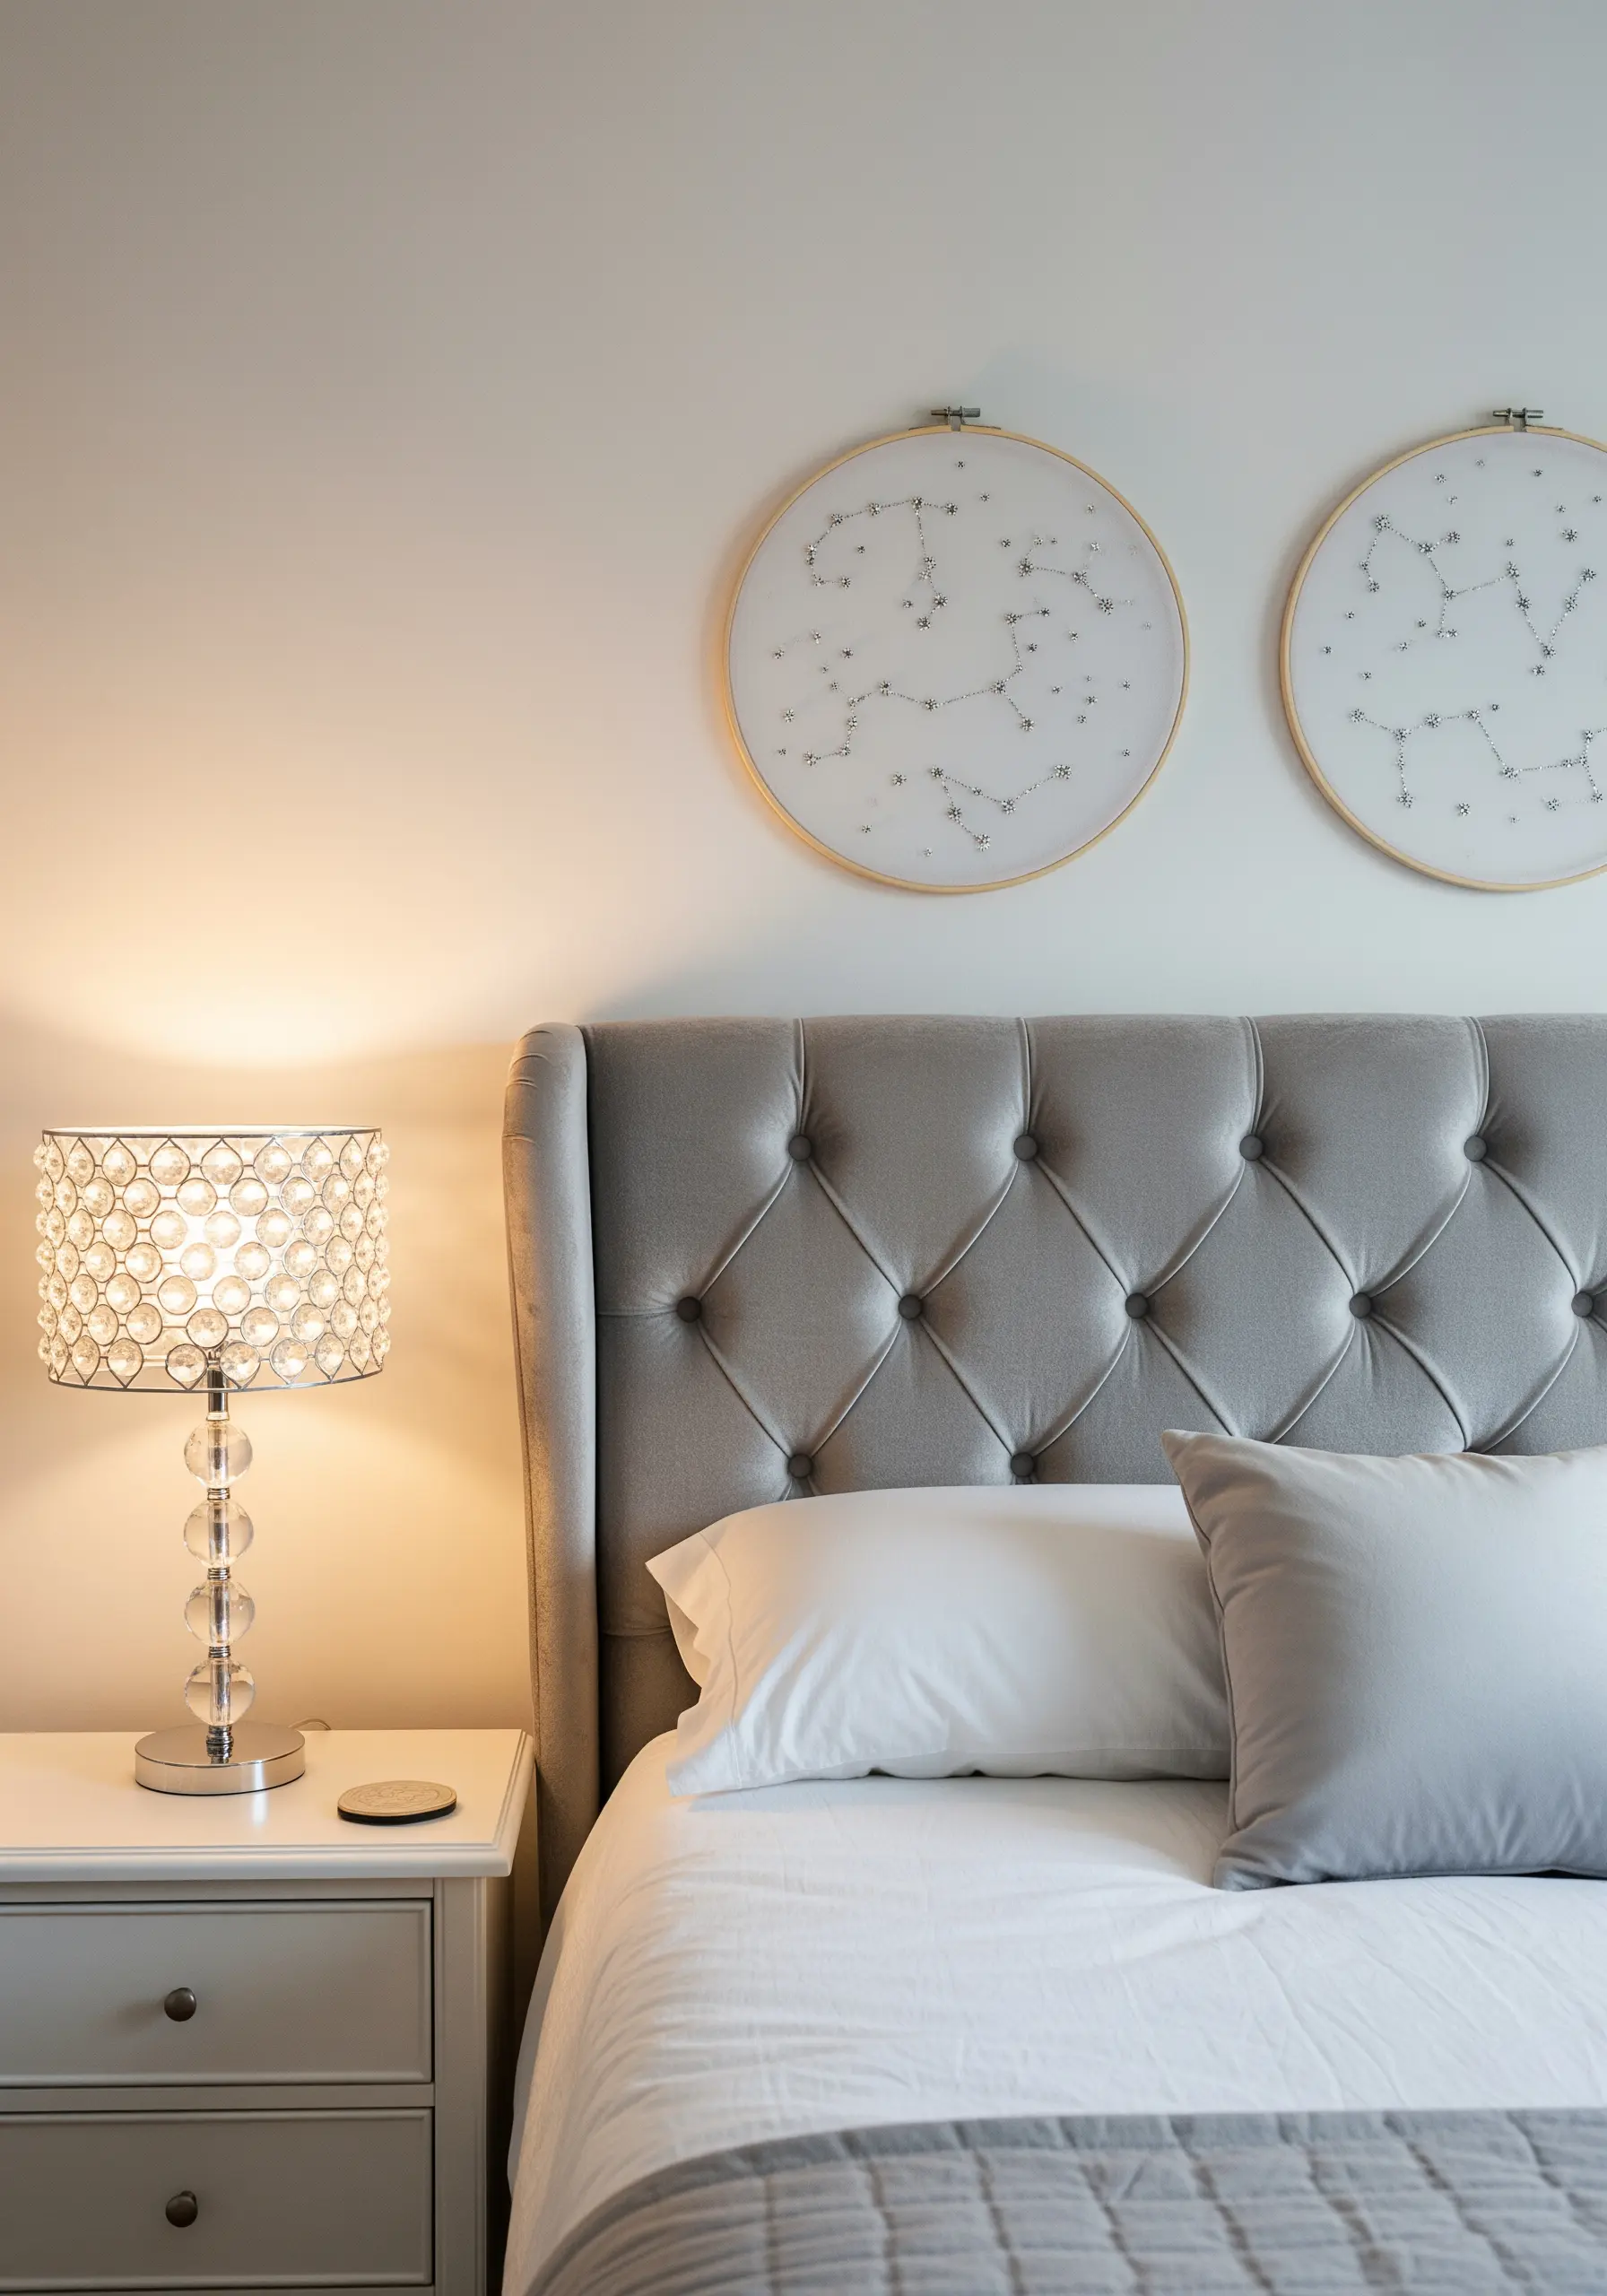
Create delicate constellation art that shimmers with subtle elegance.
Use a single strand of silver metallic floss against a crisp white fabric for an ethereal, barely-there effect.
Connect the stars with simple straight stitches, and form the stars themselves using tiny French knots or seed beads.
Beads are particularly effective as they catch the light from different angles, making your constellations gently twinkle. This is a lovely approach for celestial micro-embroidery ideas.
18. Achieve a Luxurious Embossed Monogram
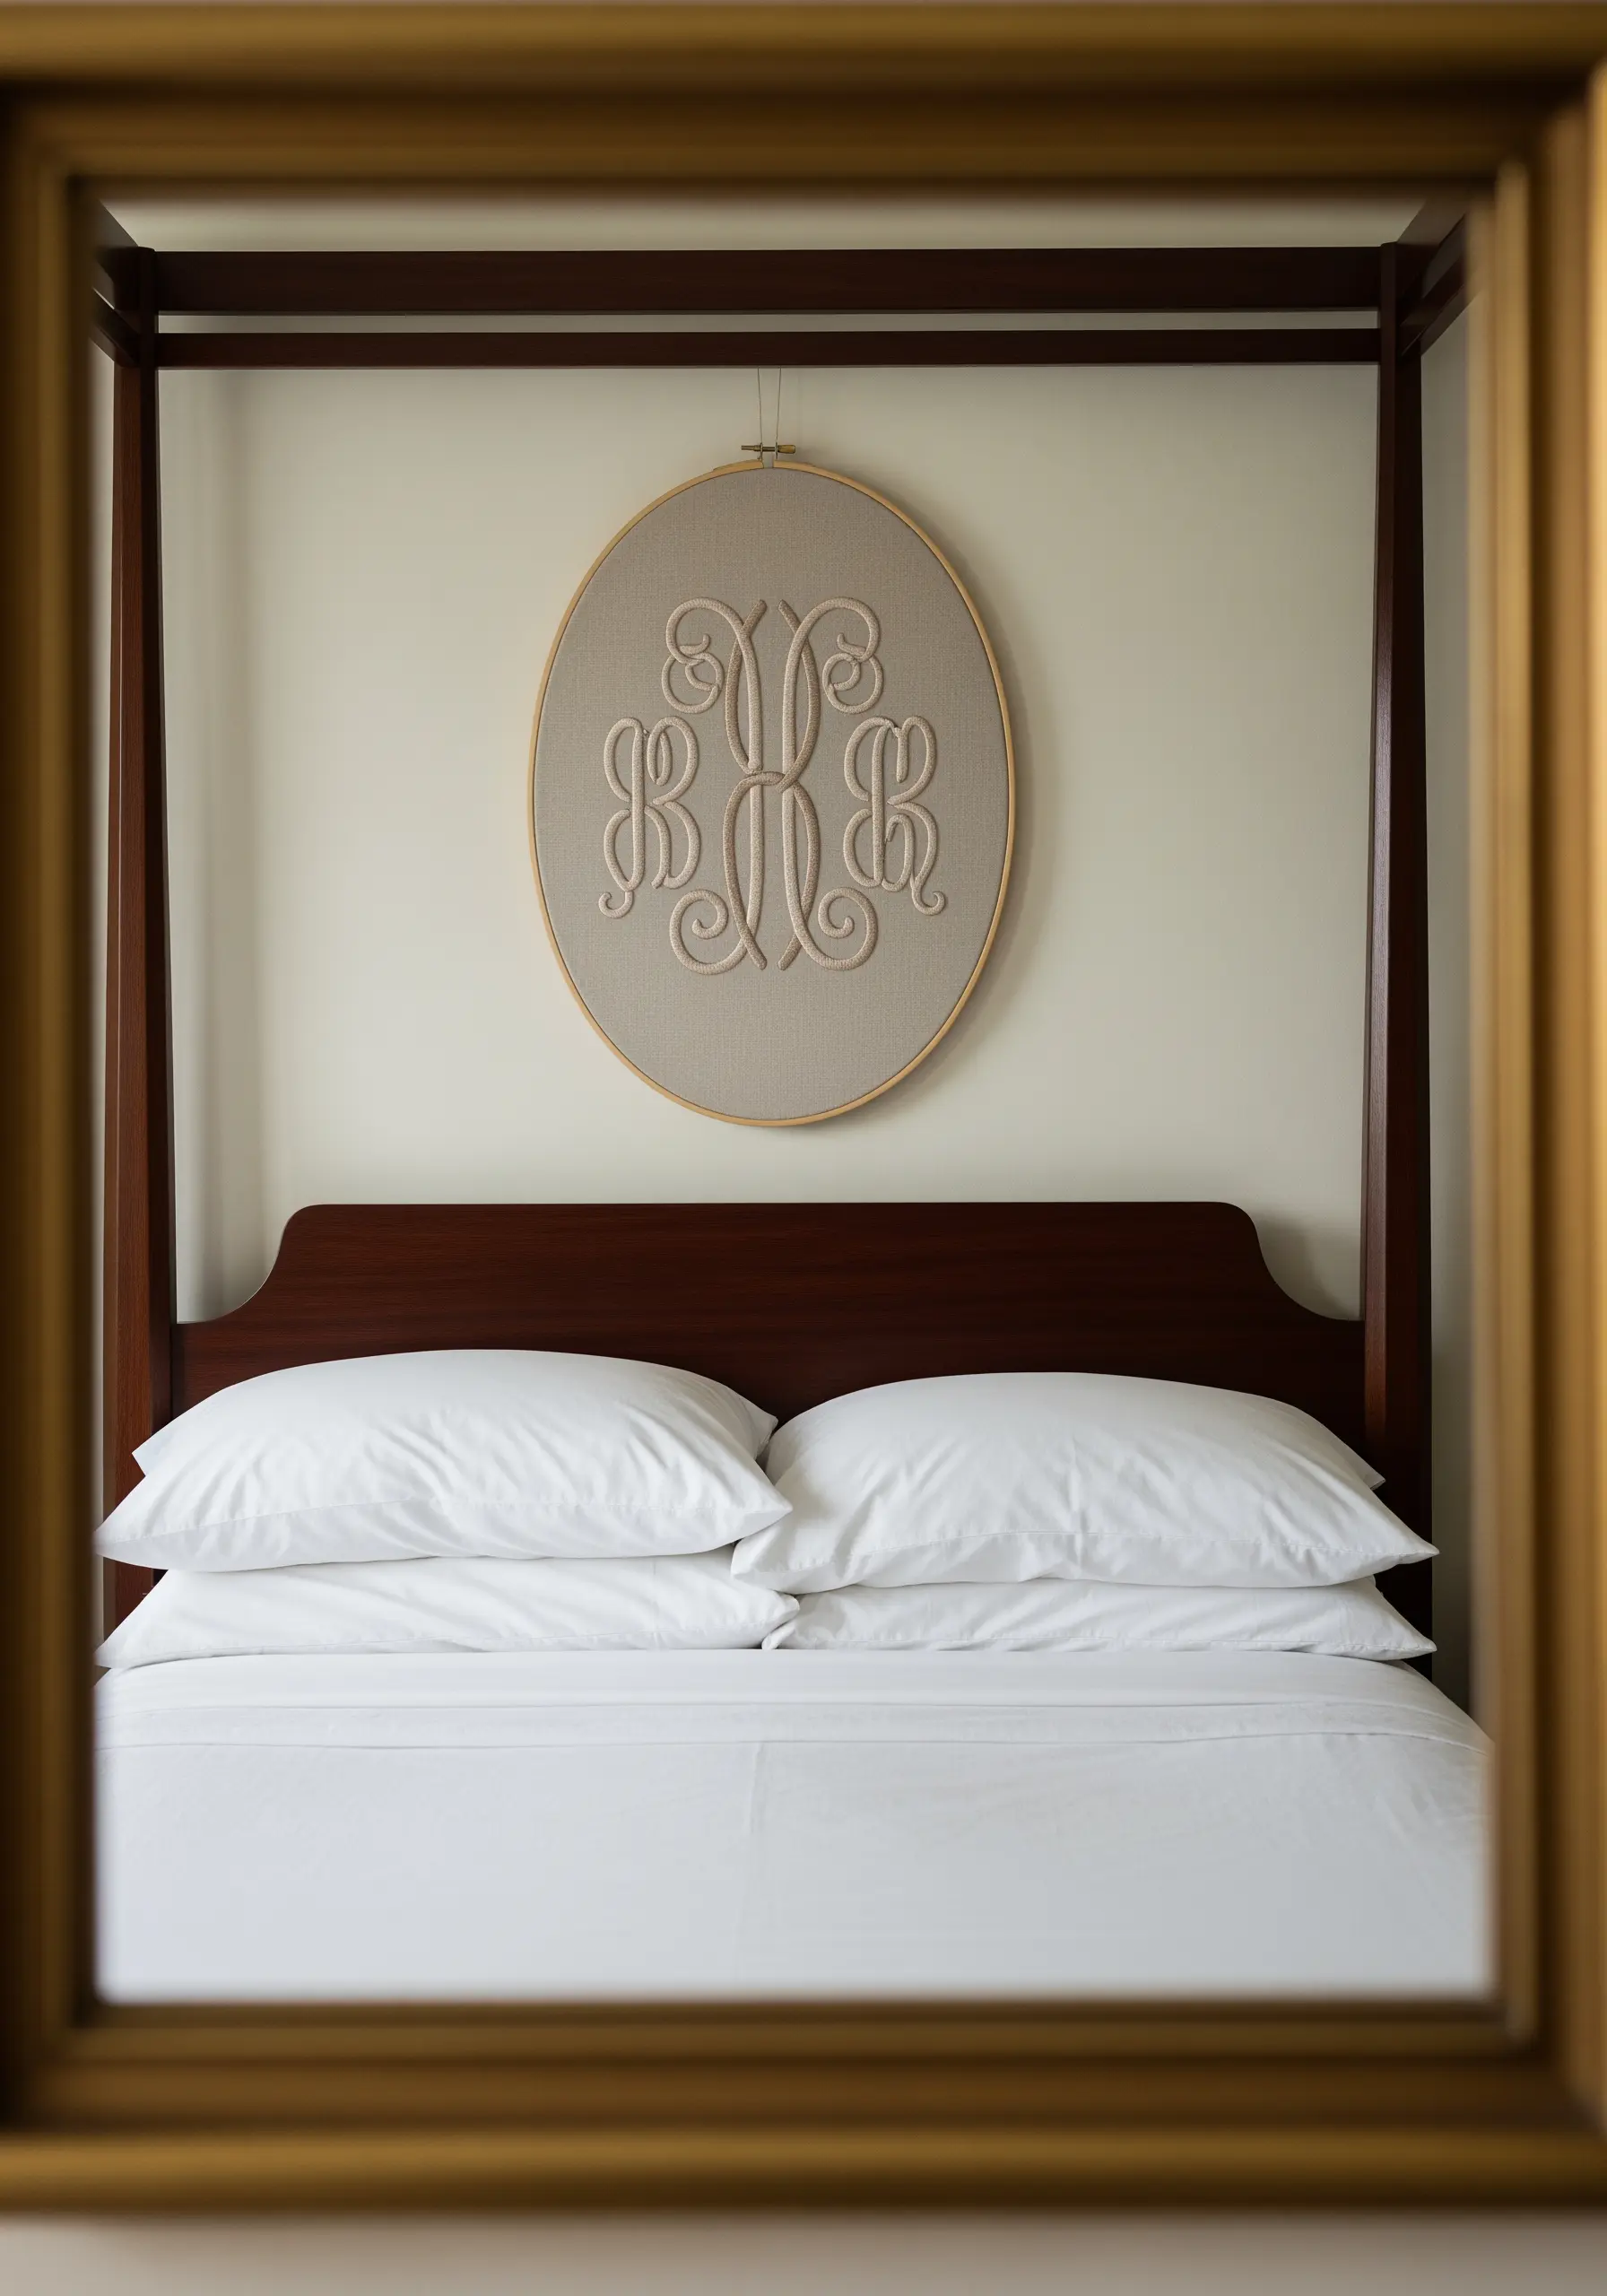
Elevate a simple monogram with padded satin stitch for a stunning, three-dimensional effect.
First, create a dense foundation within your letter outlines using a filler like seed stitch or split stitch.
Then, work your final layer of satin stitches over this padding; the underlying texture will push the top layer up, creating a raised, pillowy finish.
This classic technique makes minimal monogram styles that make personalized gifts look high-end feel exceptionally luxurious.
19. Design a Panoramic Mountainscape Triptych
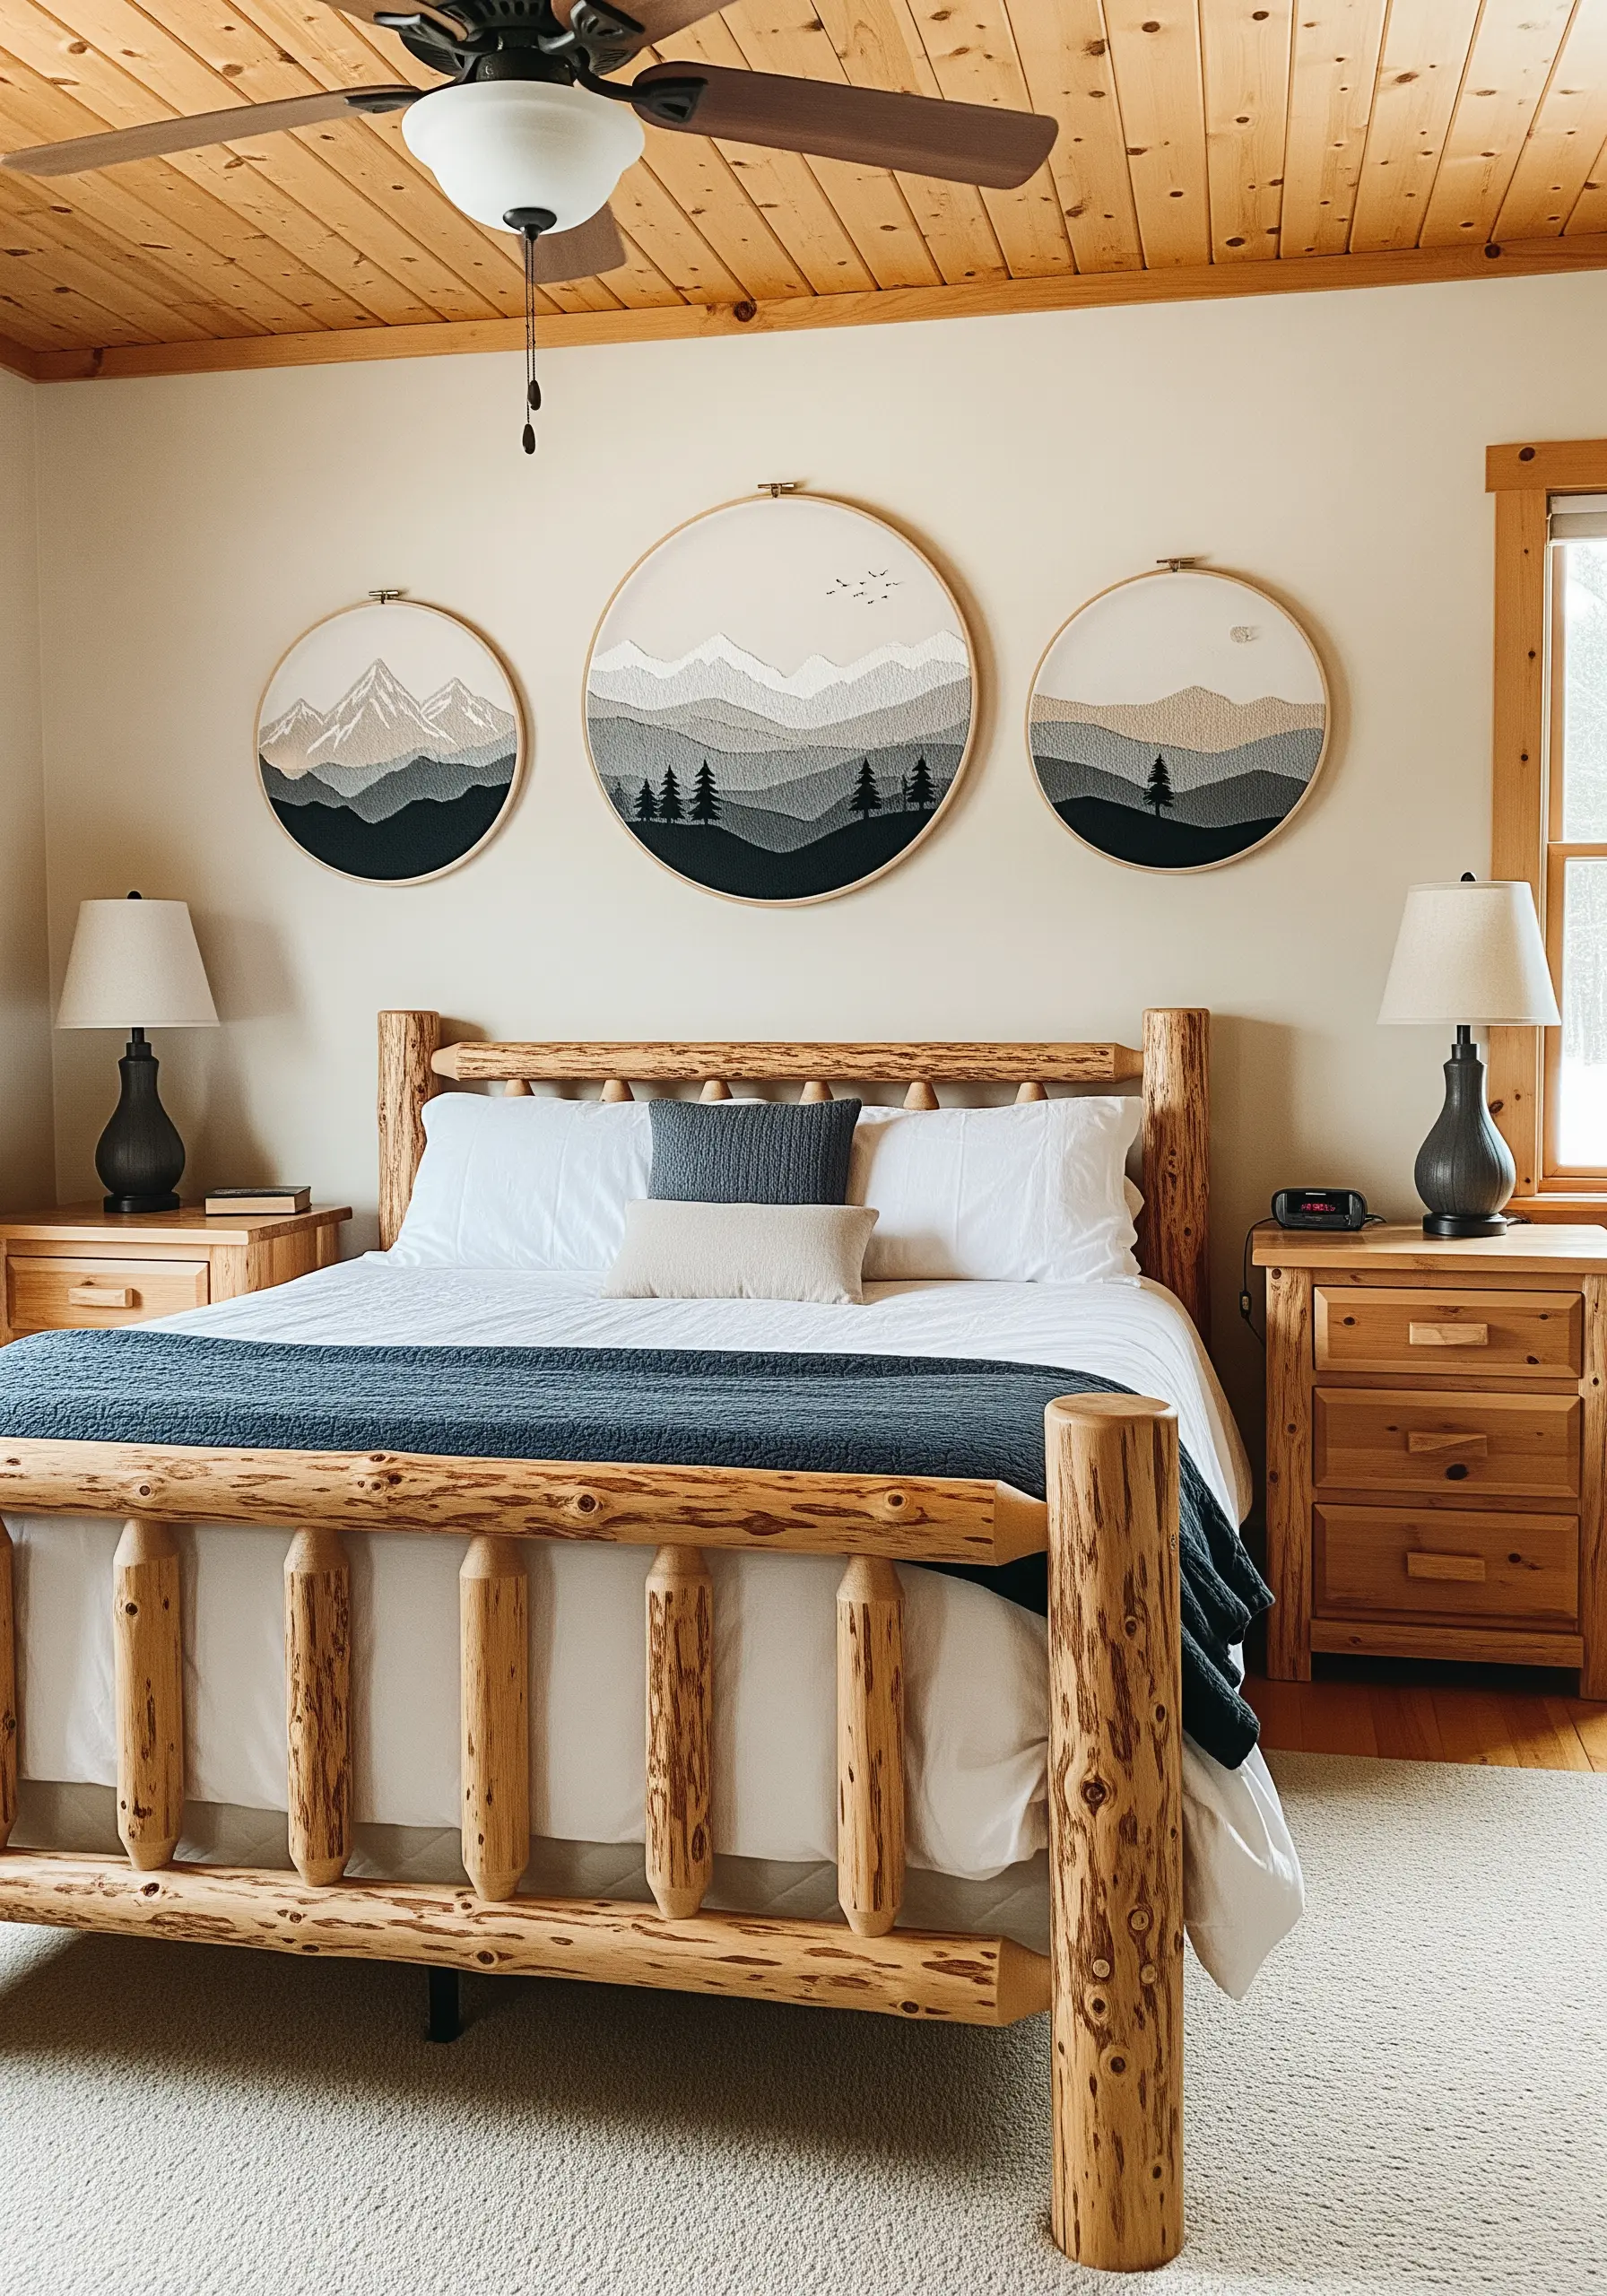
Tell a larger story by extending a single landscape across a series of three hoops.
To get the soft, painterly look of layered mountains, use the long-and-short stitch to fill each colored section.
This stitch allows you to blend the shades together seamlessly, avoiding the hard edges of satin stitch and creating a beautiful atmospheric depth.
Sketch your full design across all three hoops before you begin to ensure the horizon lines connect perfectly. It’s a beautiful way to interpret string art nature trails featuring mountains & rivers.


