
Inviting your child to embroider with you is about more than just keeping them busy. It’s an opportunity to create something beautiful and lasting together, moving beyond messy crafts to make art you’ll be proud to display in your home.
The key is to embrace techniques that are forgiving for small hands yet yield polished, impressive results. Think in layers and textures: soft felt that’s easy to cut, chunky yarn that fills space quickly, and simple, bold stitches that make a big impact. These projects are designed to be collaborative, celebrating the charm of imperfection while teaching the joy of making.
Here, you’ll discover how to transform basic materials into playful, modern decor. Each idea is a starting point for building your child’s creative confidence and making memories, one stitch at a time.
1. Build Tactile Safari Animals with Felt and Yarn
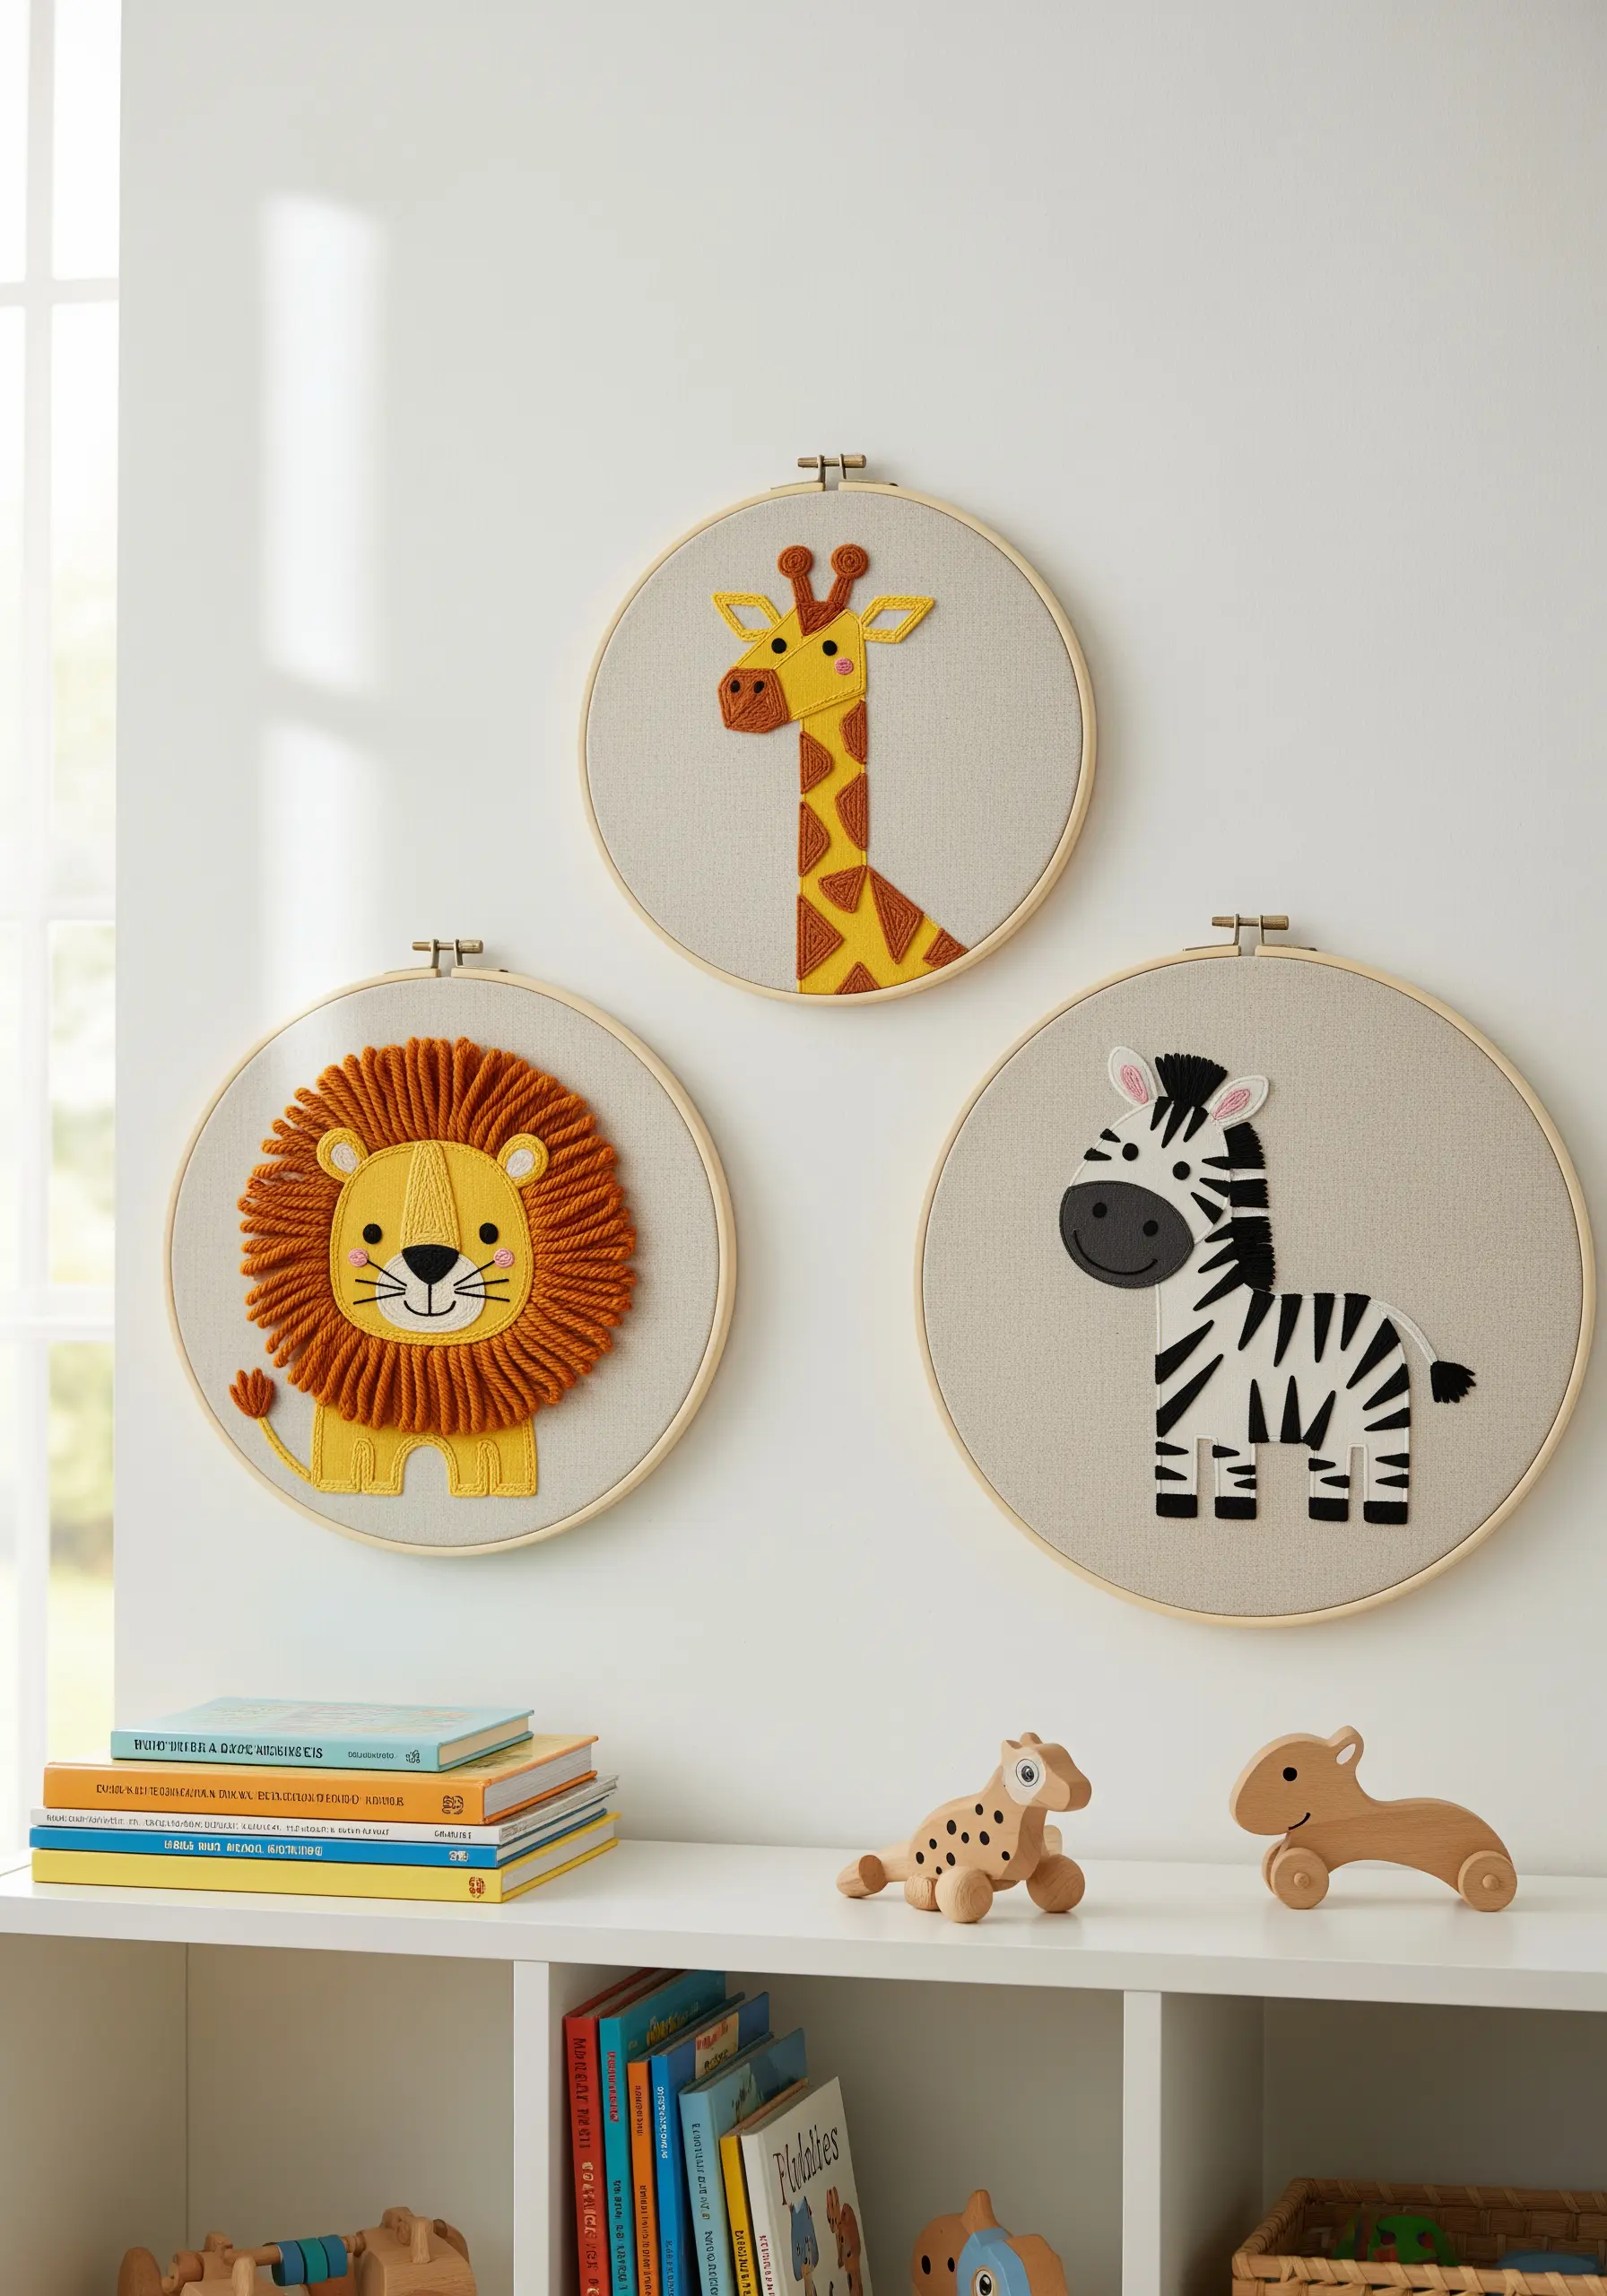
Combine the simplicity of felt appliqué with textured stitching for a design that is both visually striking and delightful to touch.
For the lion’s mane, guide your child in couching thick, chunky yarn in a spiral pattern, tacking it down every half-inch with a single strand of matching floss.
This technique adds impressive dimension without requiring complex stitches, making it perfect for involving little hands.
Use felt for the main bodies of the animals; it provides bold, flat color that contrasts beautifully with the stitched details and won’t fray, ensuring clean edges every time.
2. Launch a Galactic Scene on Dark Fabric
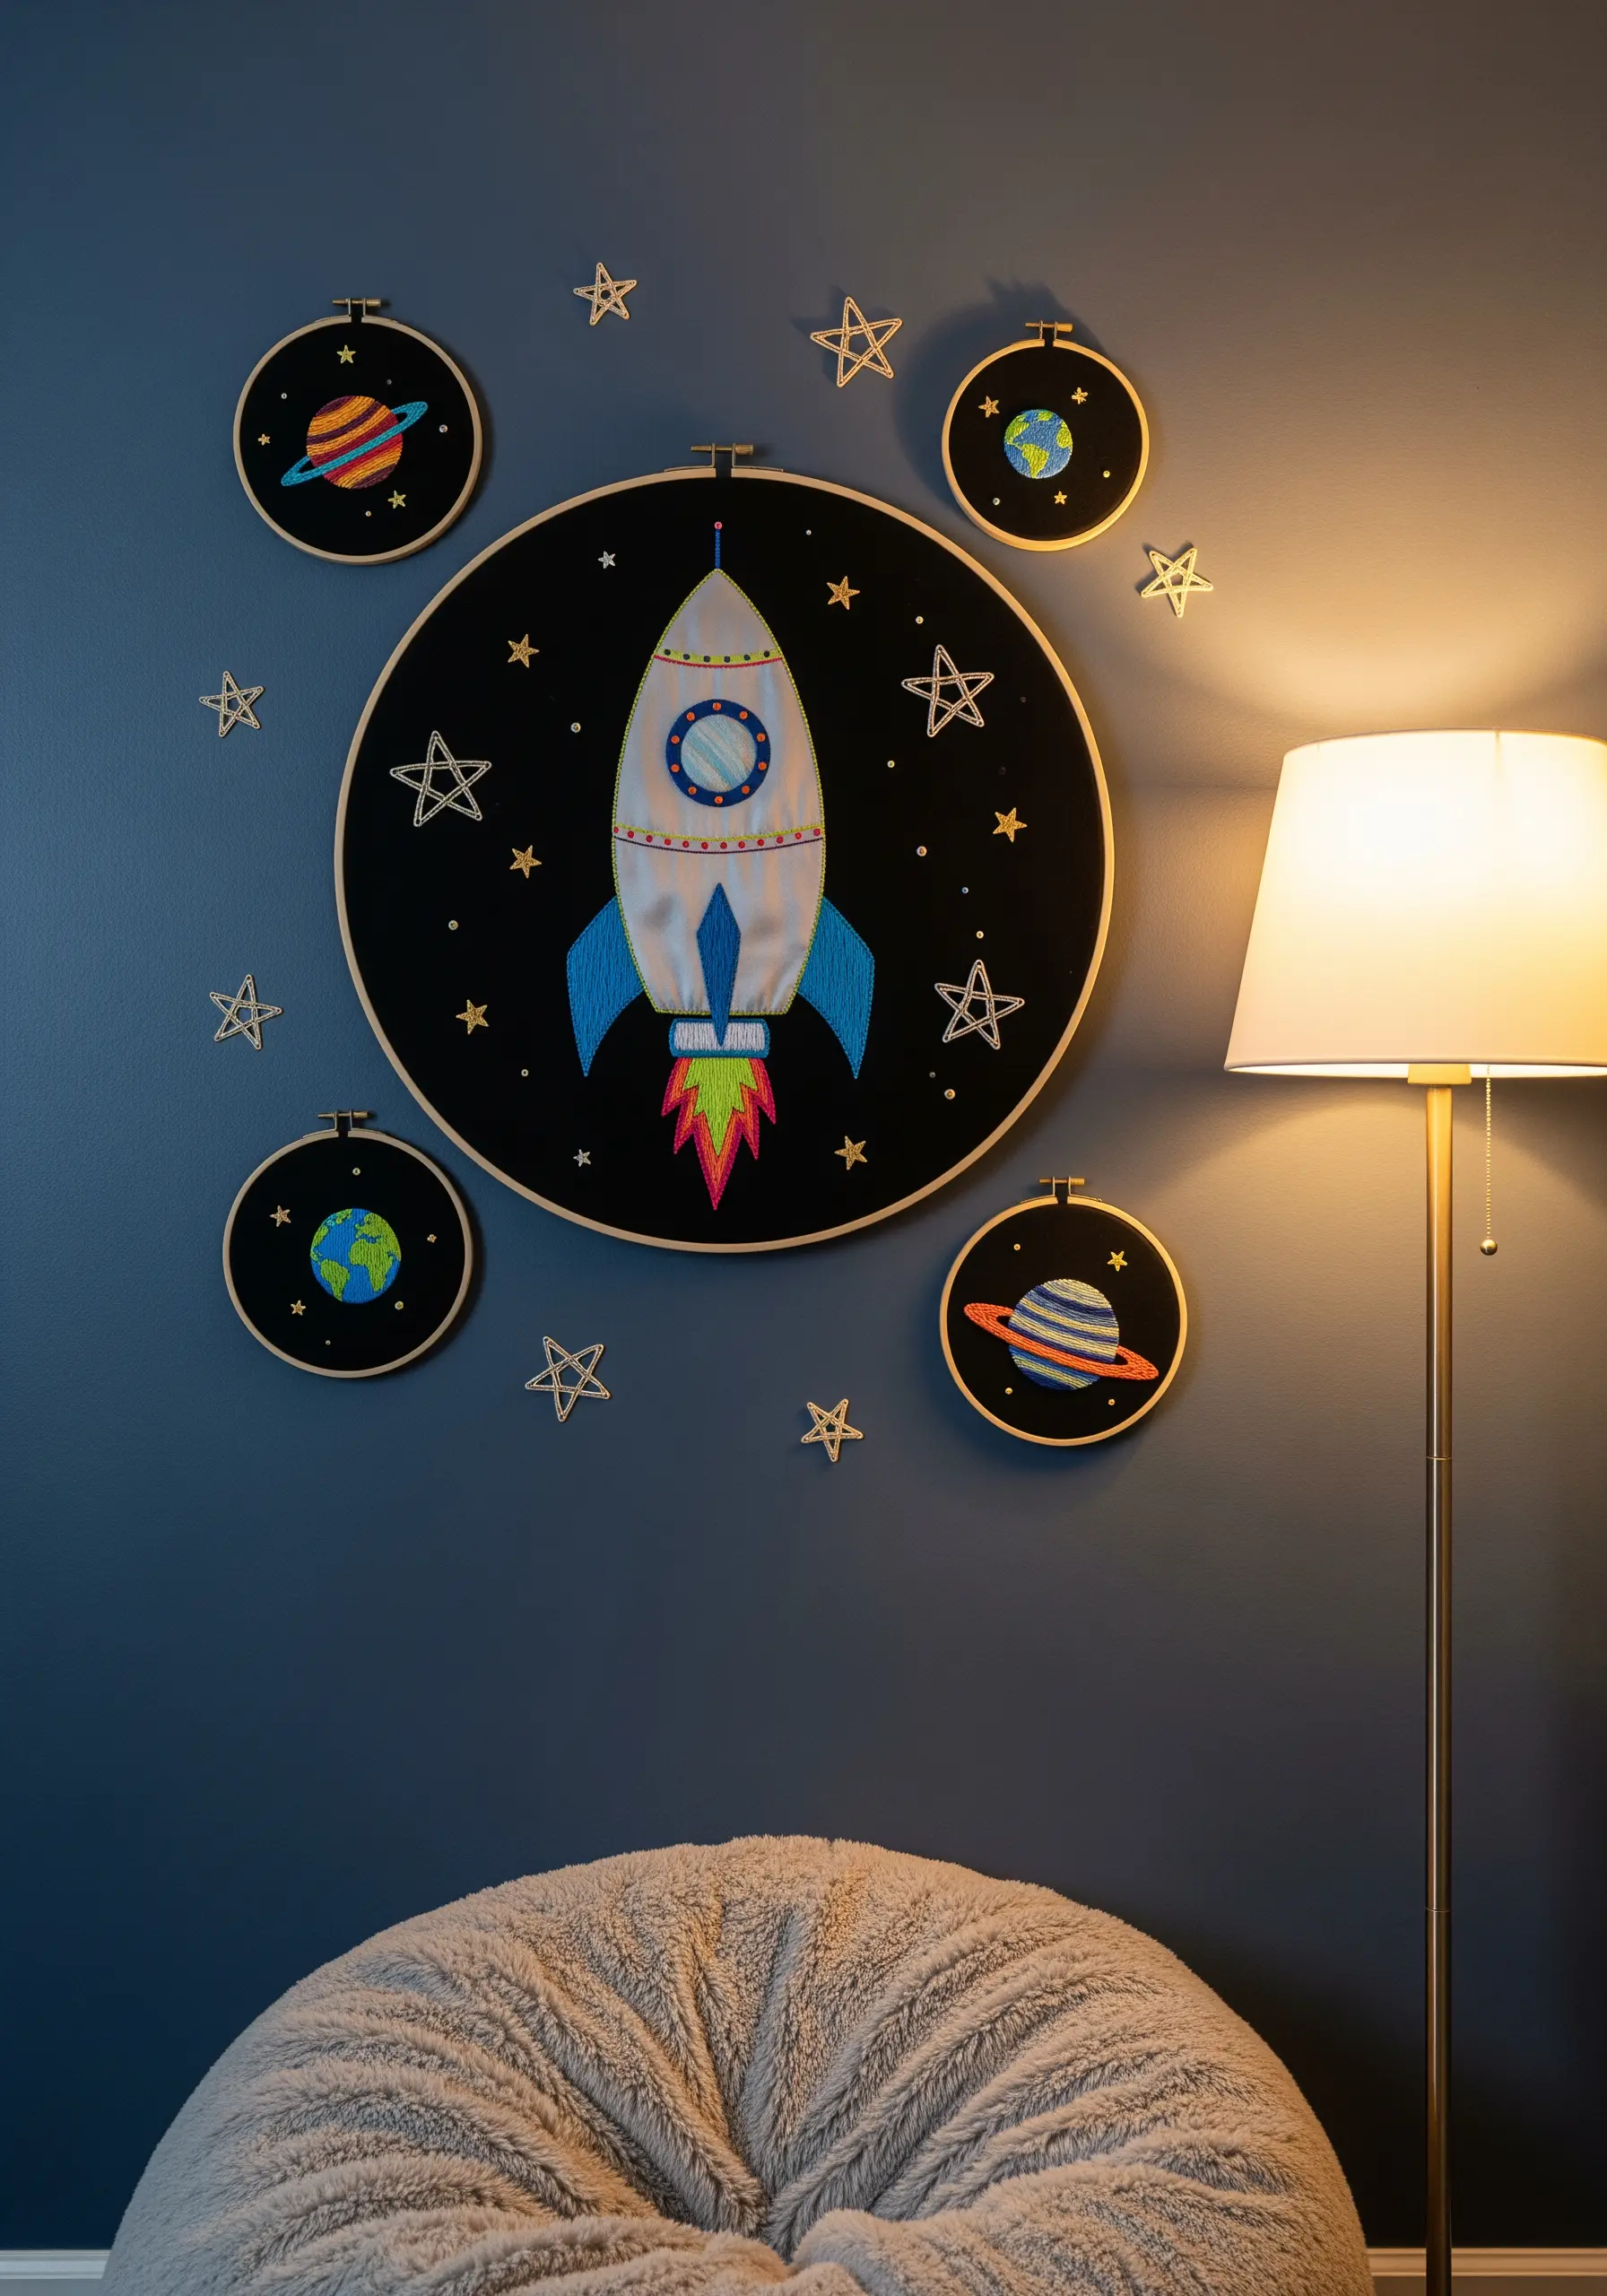
Stitching on black or navy blue fabric instantly makes bright colors appear more vibrant and luminous—perfect for a space theme.
Use a simple satin stitch with a silver or white metallic thread to fill the body of the rocket, creating a sleek, shimmering surface.
For the stars, let your child scatter French knots and straight stitches randomly across the background using glow-in-the-dark thread for a magical nighttime effect.
Arrange multiple hoops of varying sizes to create a dynamic solar system that feels expansive and full of movement.
3. Craft an Underwater World with Layered Felt
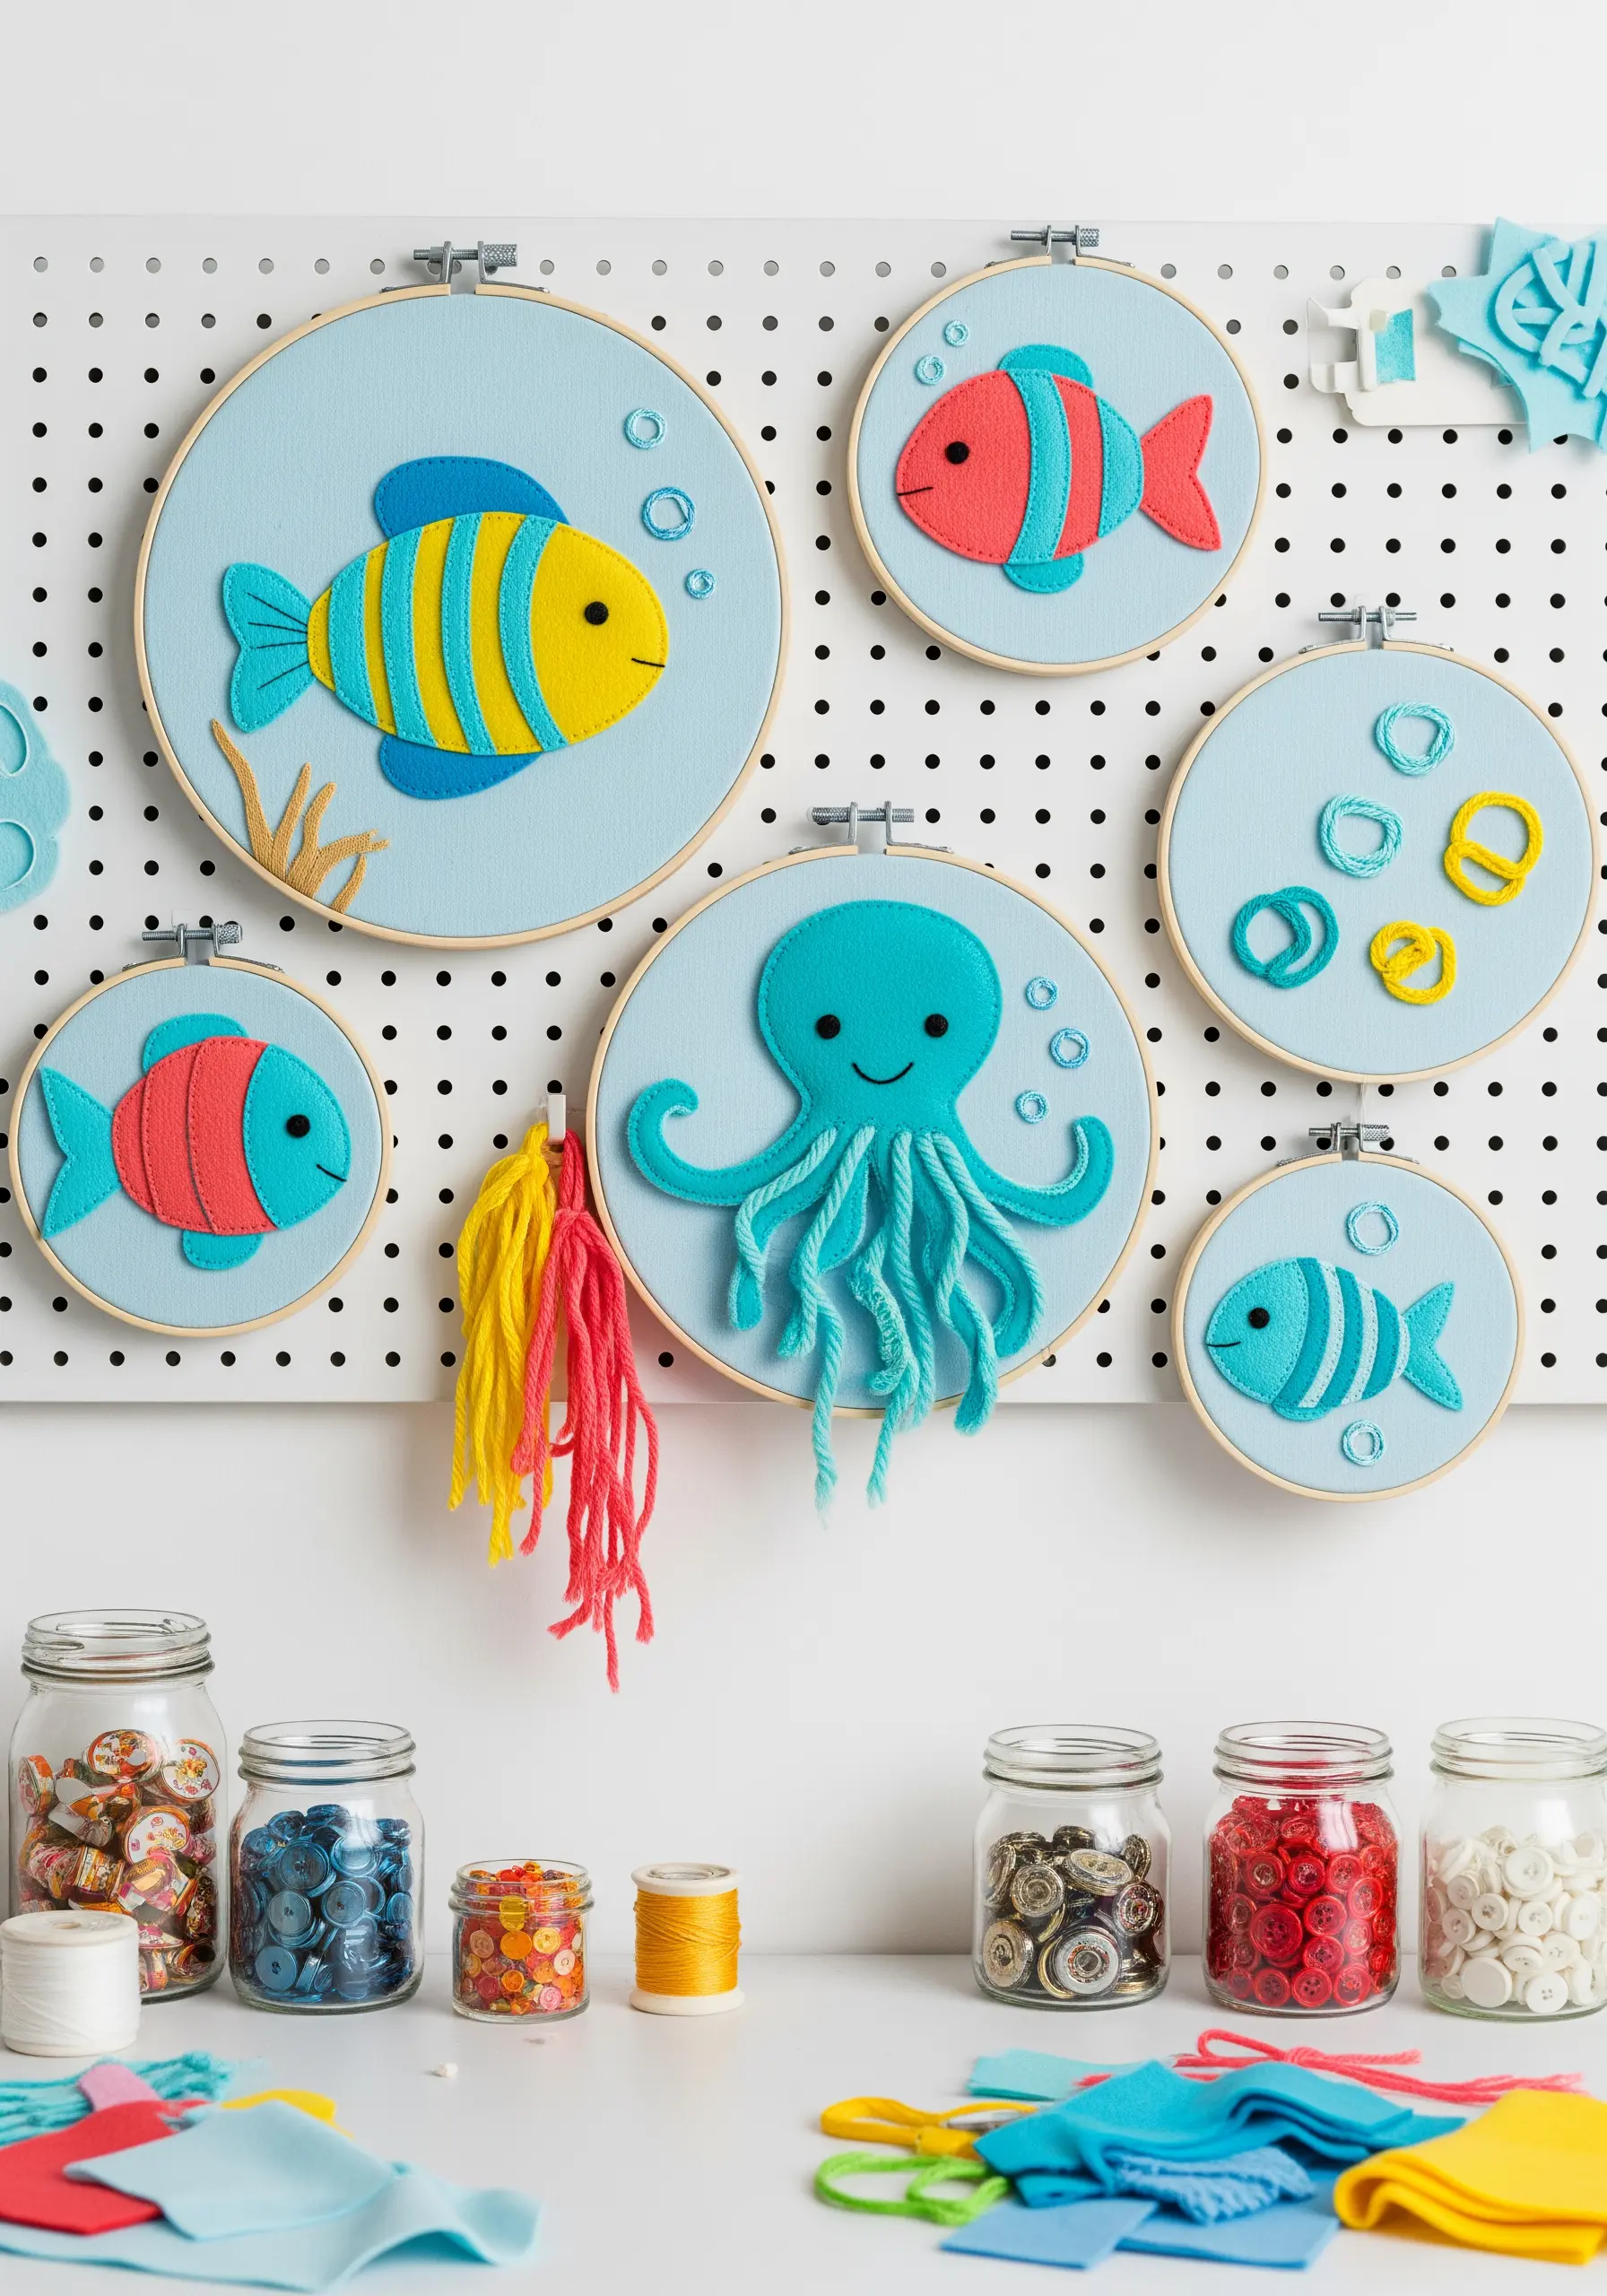
Create a playful aquatic scene by layering simple felt shapes, which is far quicker than filling large areas with satin stitch.
For the octopus, secure the felt body with a few anchoring stitches, then let your child help braid or twist thick yarn for dangling tentacles.
The fish are made by stacking a smaller felt shape onto a larger one for stripes and fins, a simple technique that teaches layering and composition.
Add bubbles with a few white French knots or tiny seed beads to complete your ocean-inspired fabric collage embroidery.
4. Sculpt Fuzzy Monsters with the Turkey Stitch
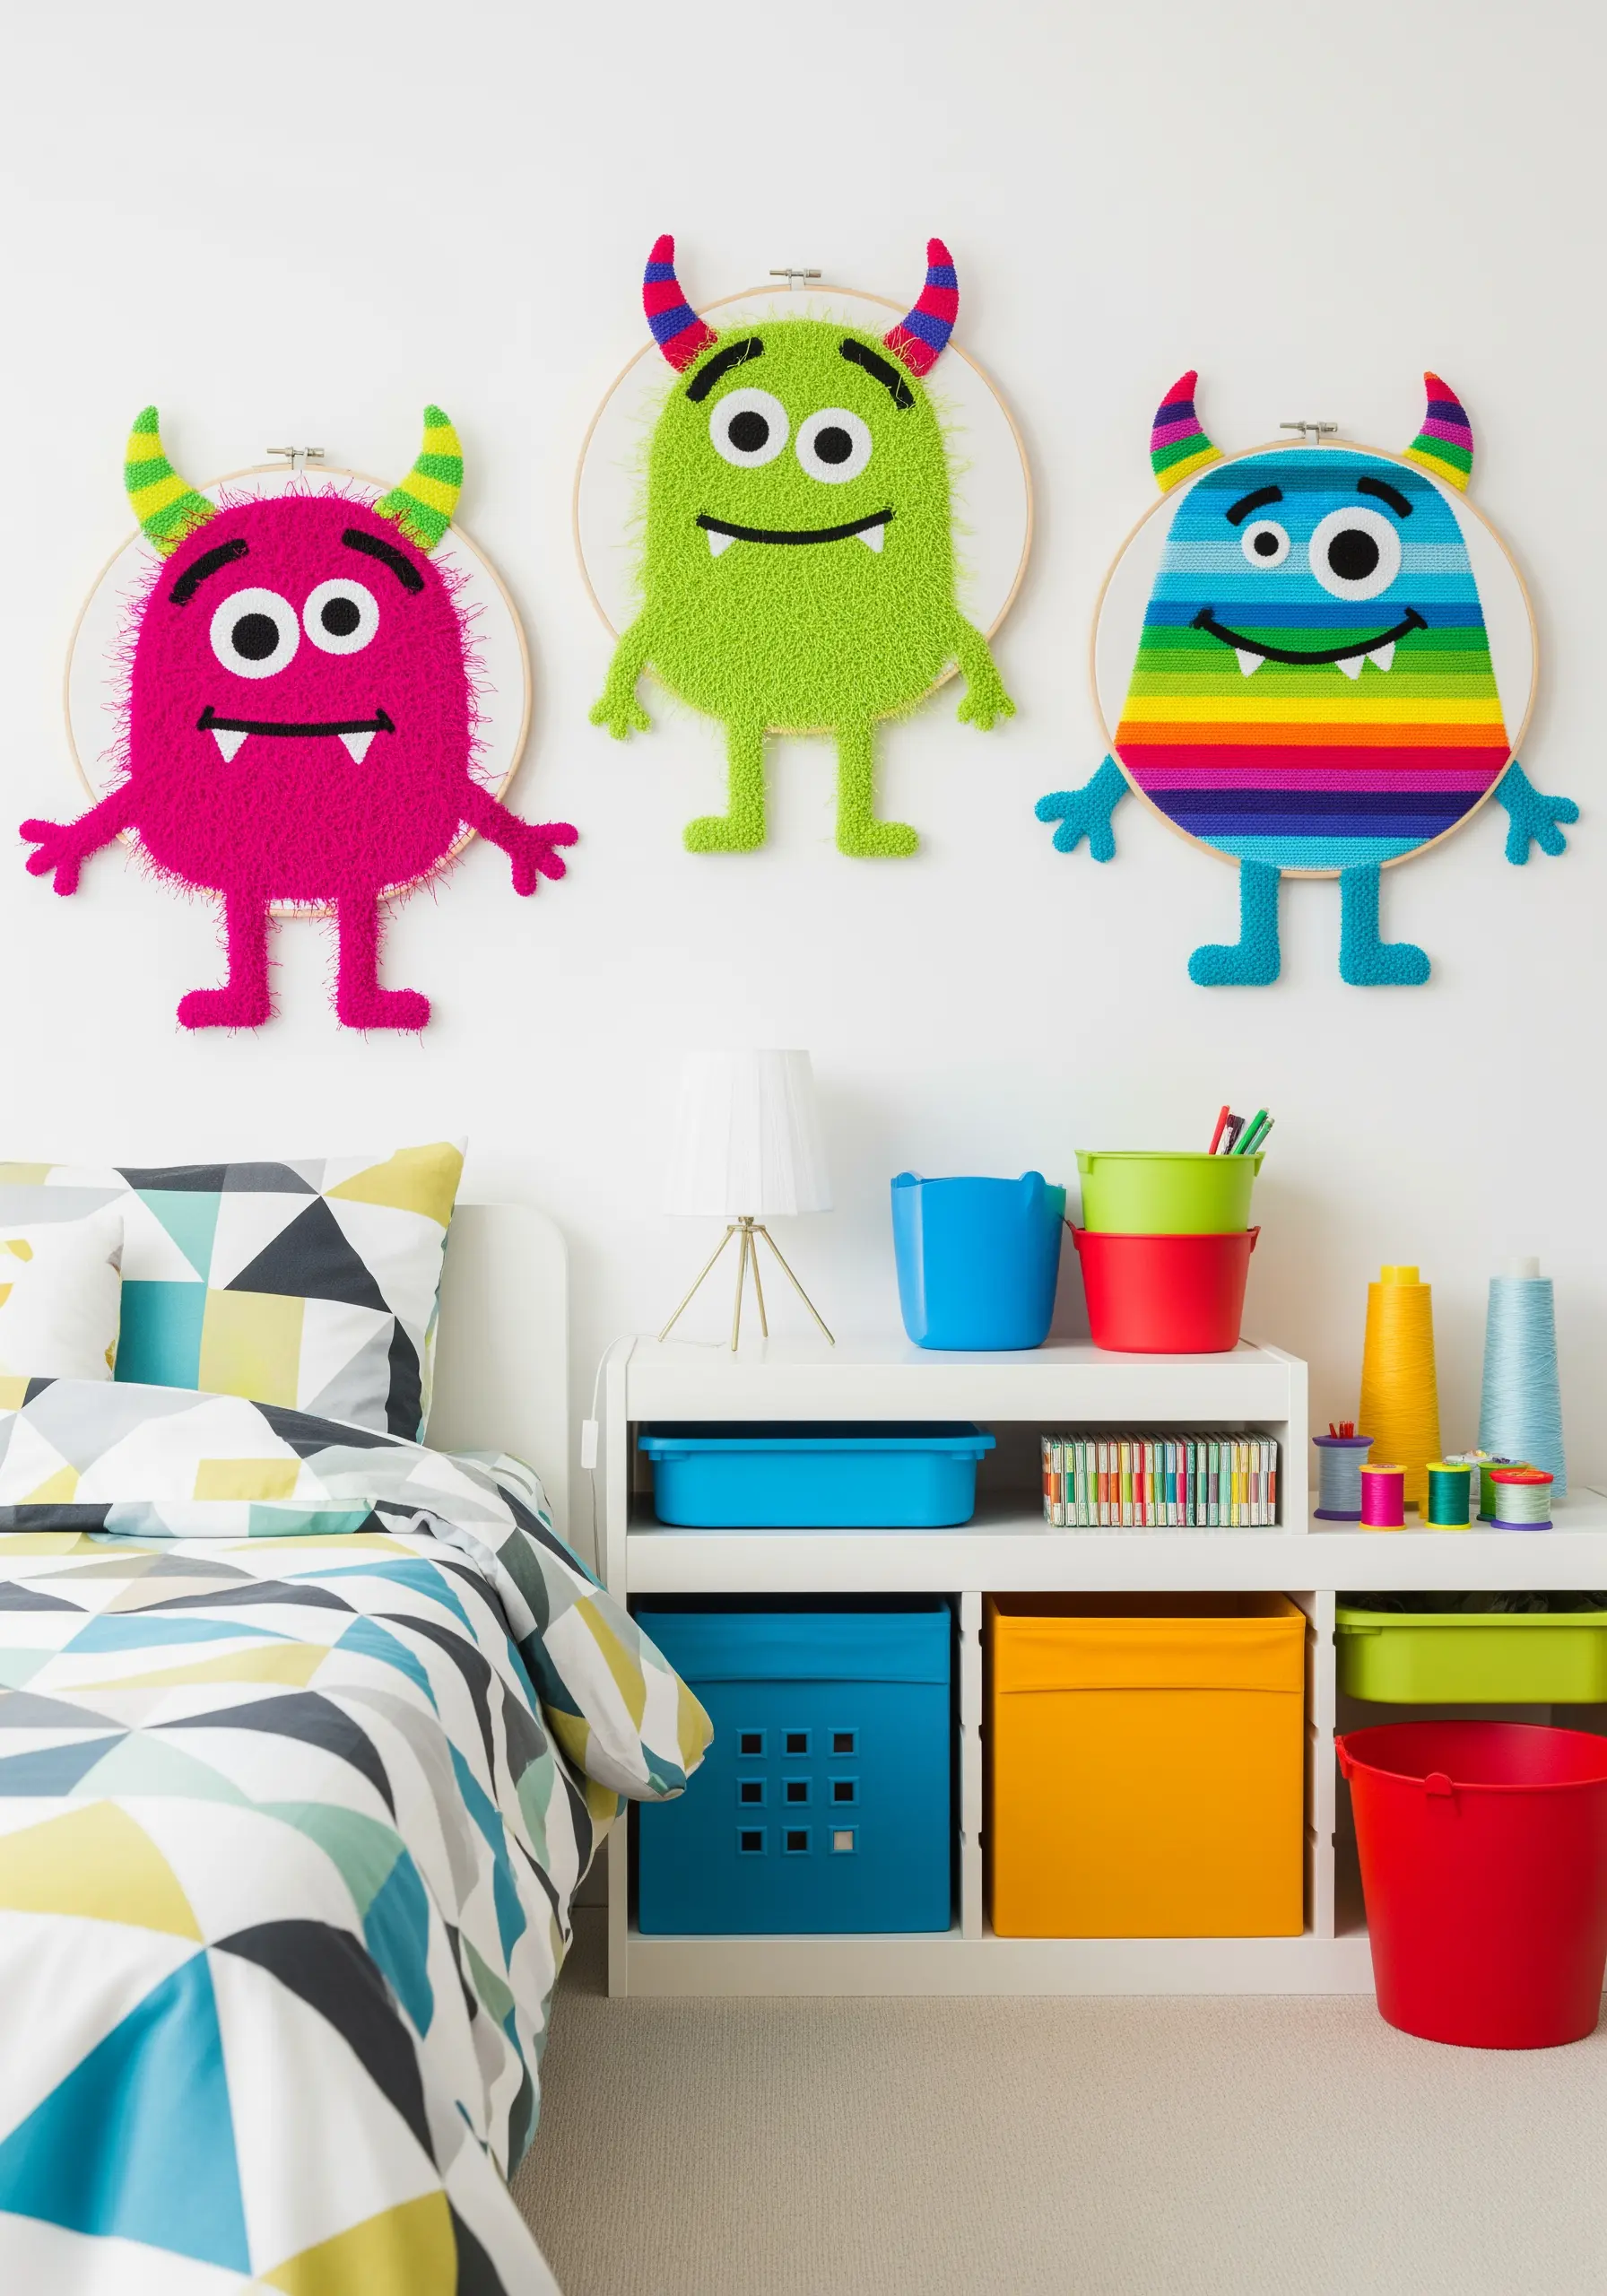
The Turkey stitch is your key to creating a shaggy, plush texture that kids will find irresistible.
Work the stitch in dense rows across your monster’s body using a bulky, soft yarn in neon colors for a bold impact.
Once the loops are stitched, you and your child can trim them to the desired length—shorter for a dense pile or longer for a wild, fuzzy look.
The eyes and mouths can be made from simple felt circles, which provides a smooth contrast to the high-texture body.
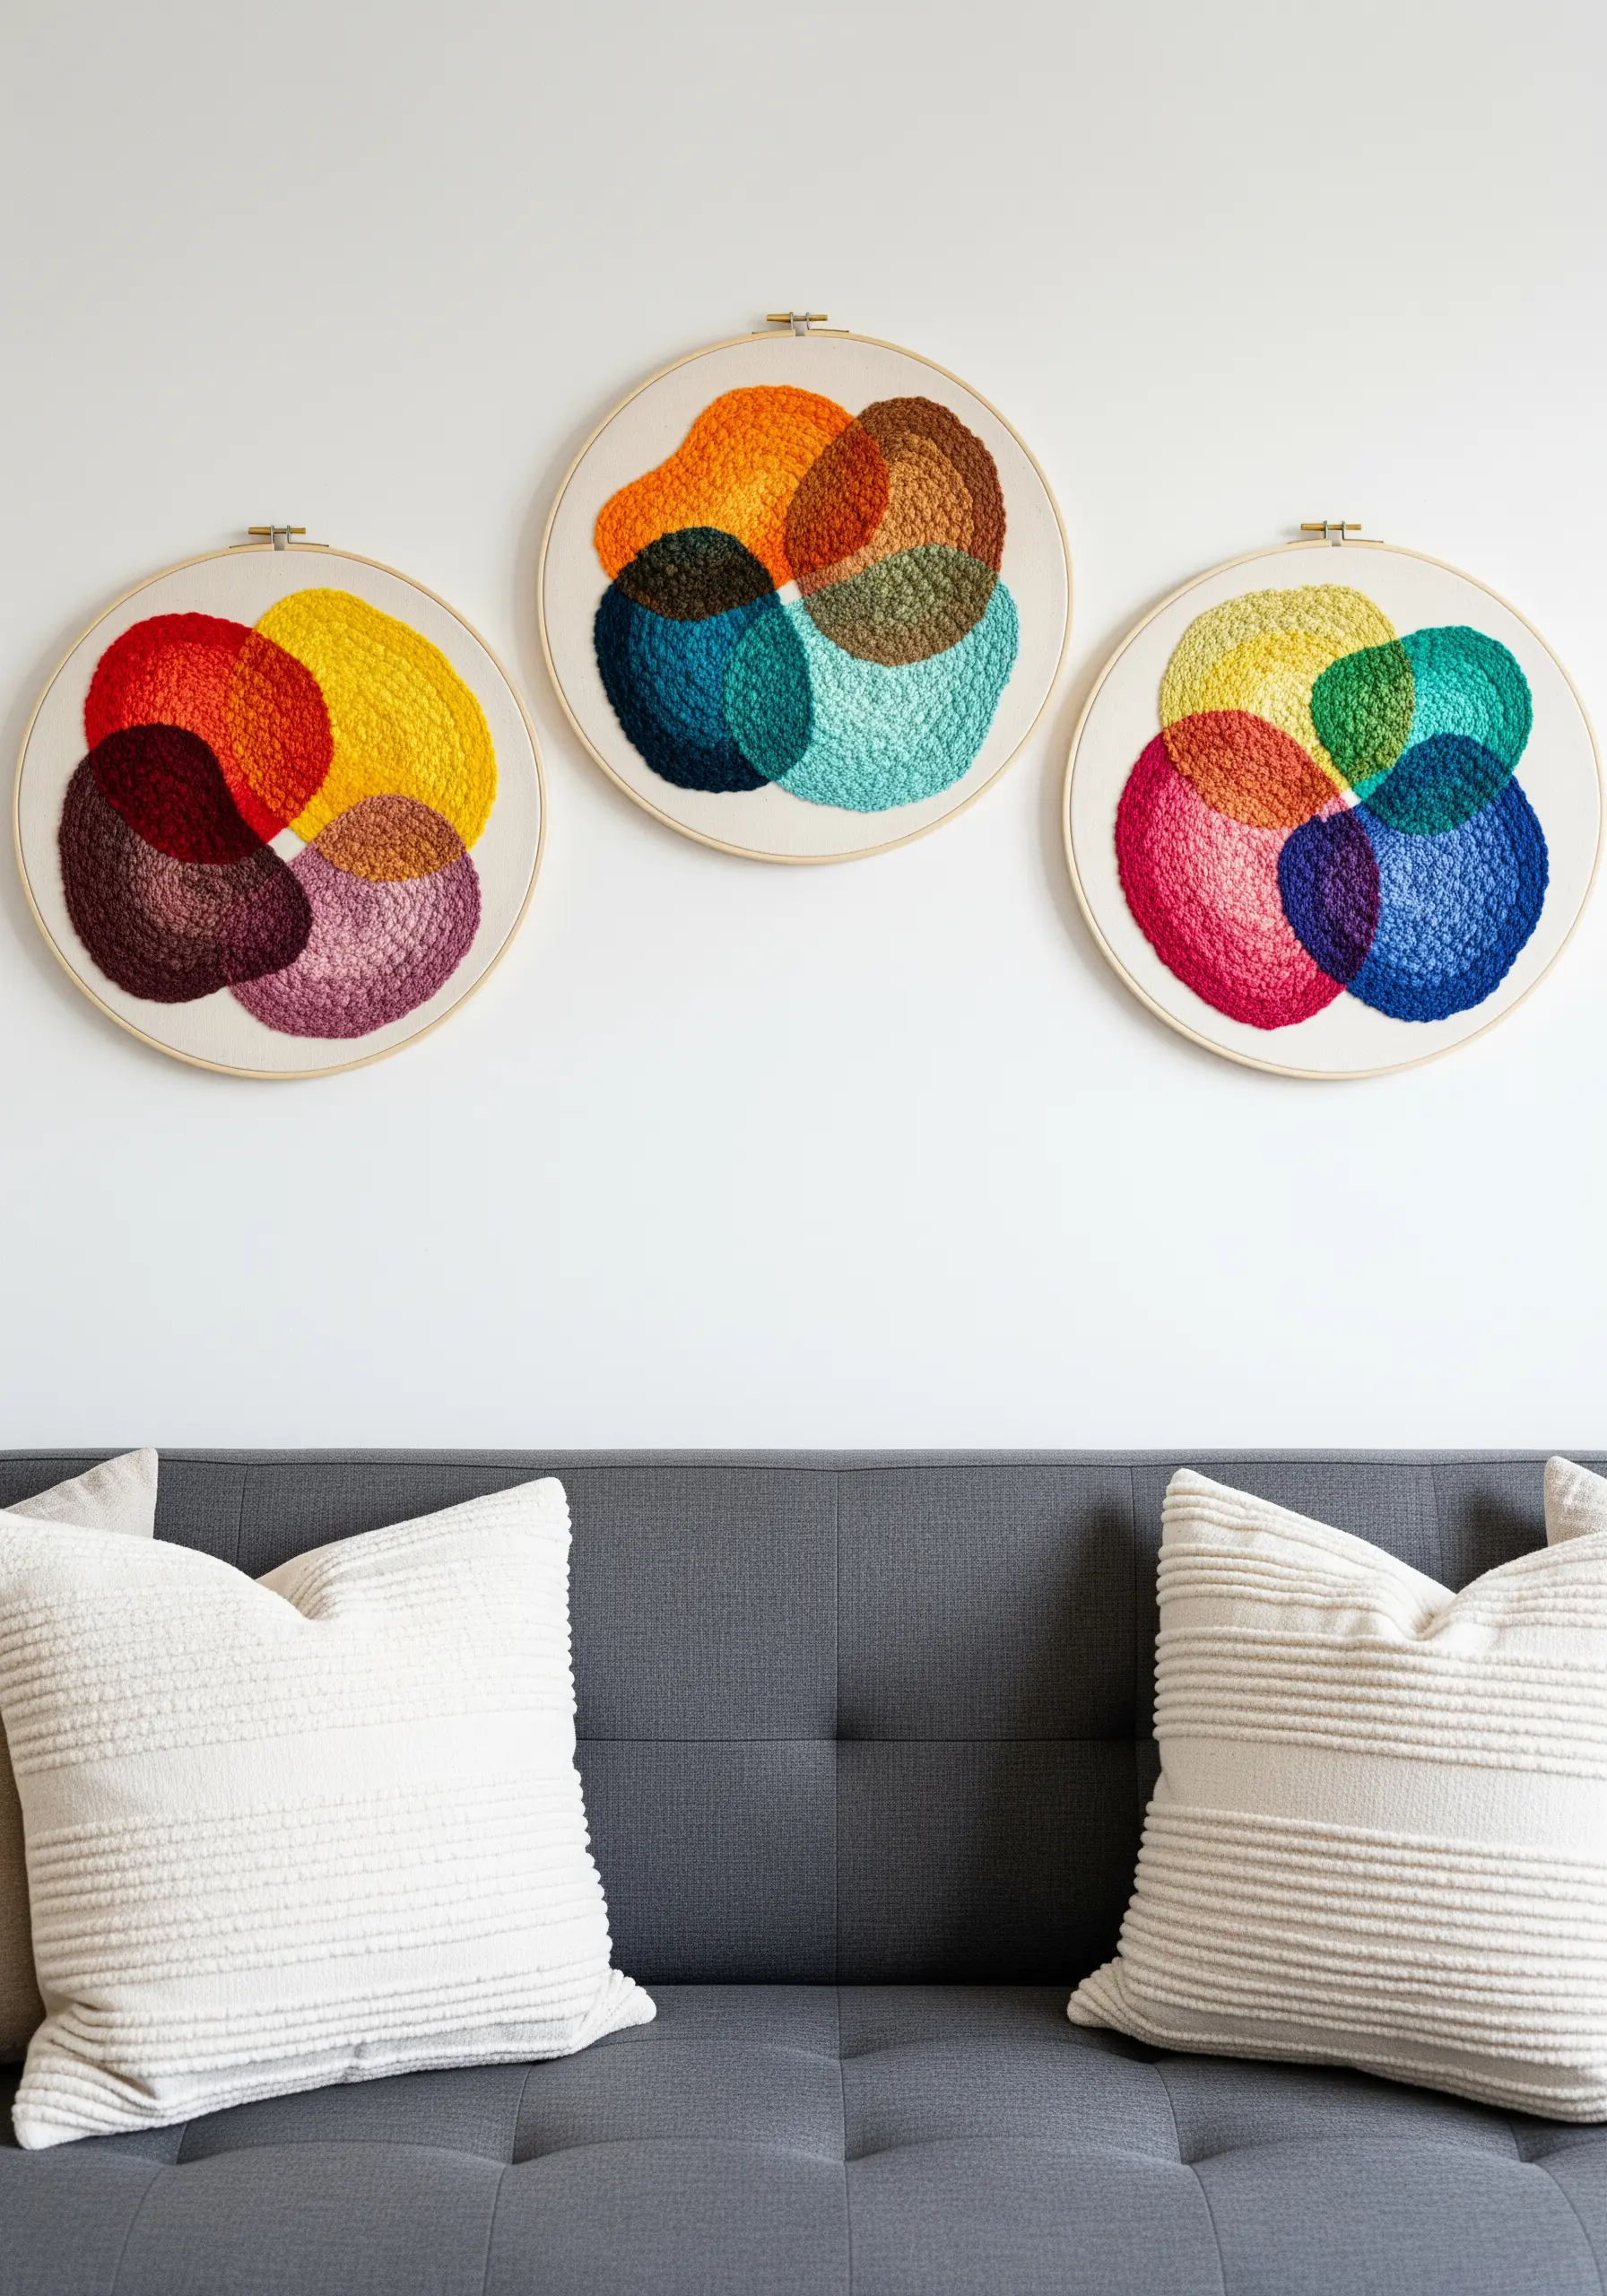
5. Practice Stitches with a Rainbow Cascade
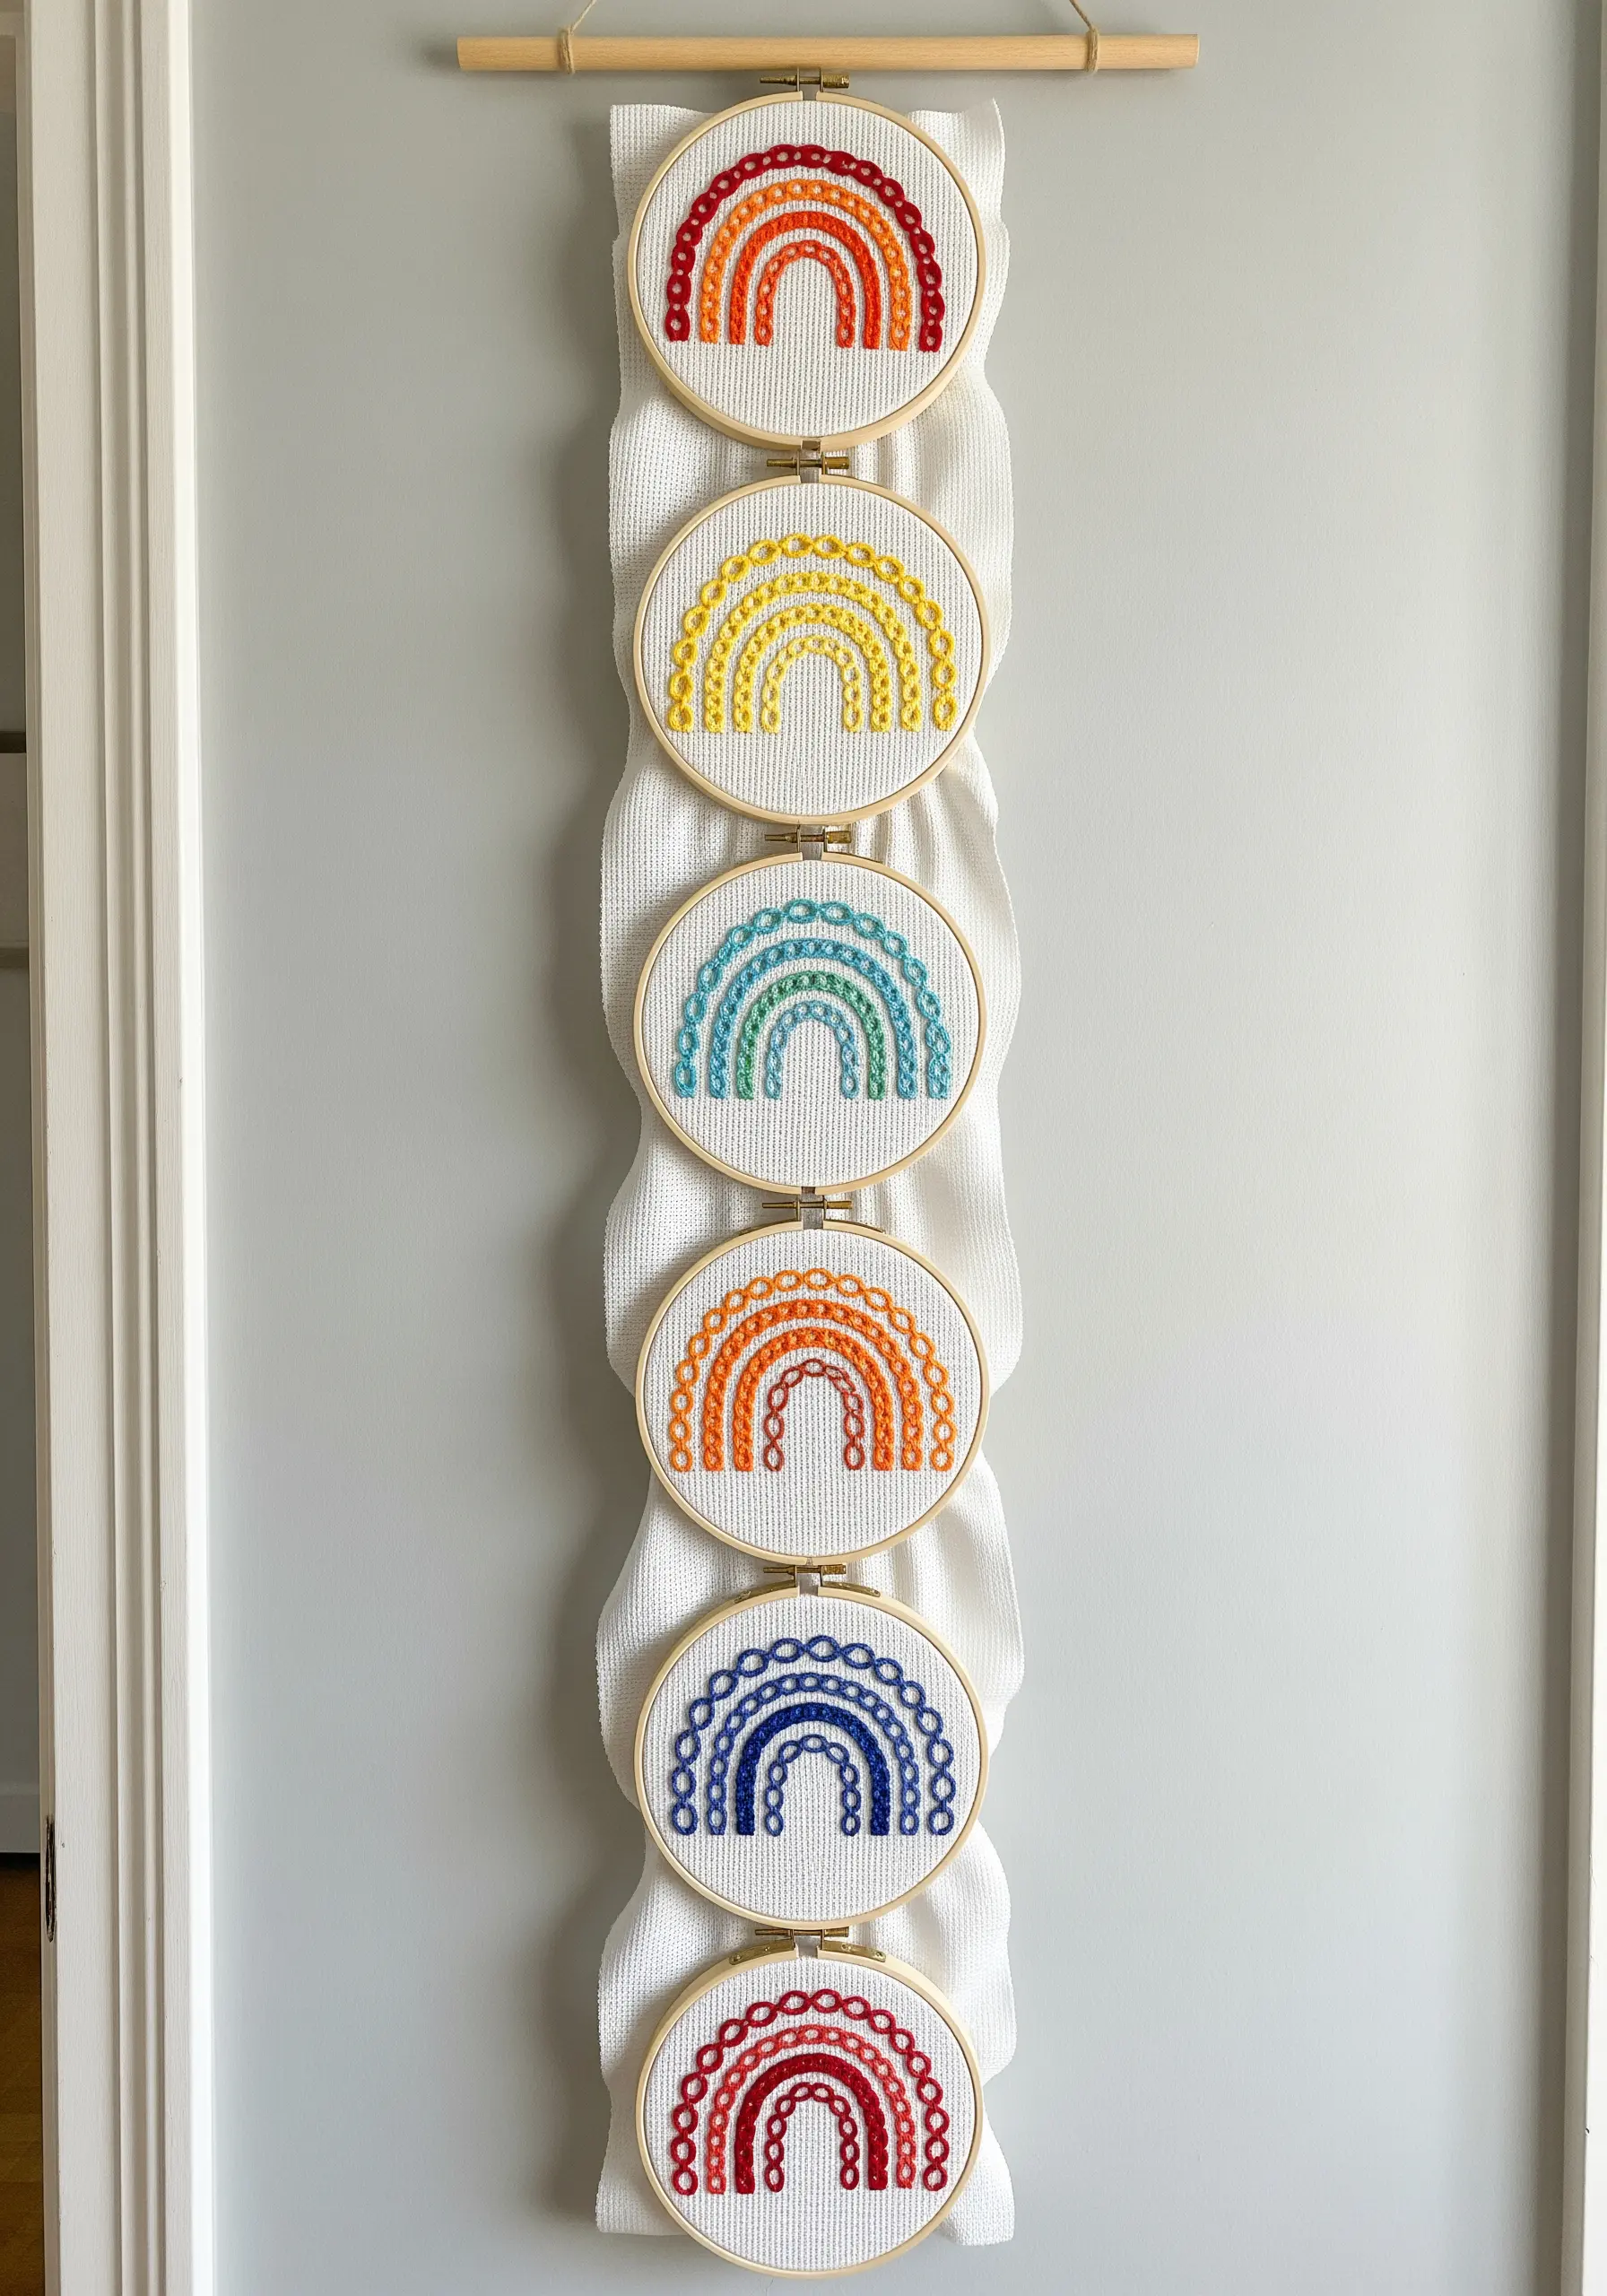
Transform a simple stitch into a stunning piece of art through repetition and color.
Use a single, easy-to-learn stitch, like the chain stitch or backstitch, to create concentric arcs of a rainbow in each hoop.
This project is perfect for teaching stitch consistency and color theory in a manageable way.
Display the hoops vertically on a single strip of fabric to create a beautiful, cohesive hanging banner that celebrates your child’s progress.
6. Outline Dinosaurs with Chunky Yarn Couching
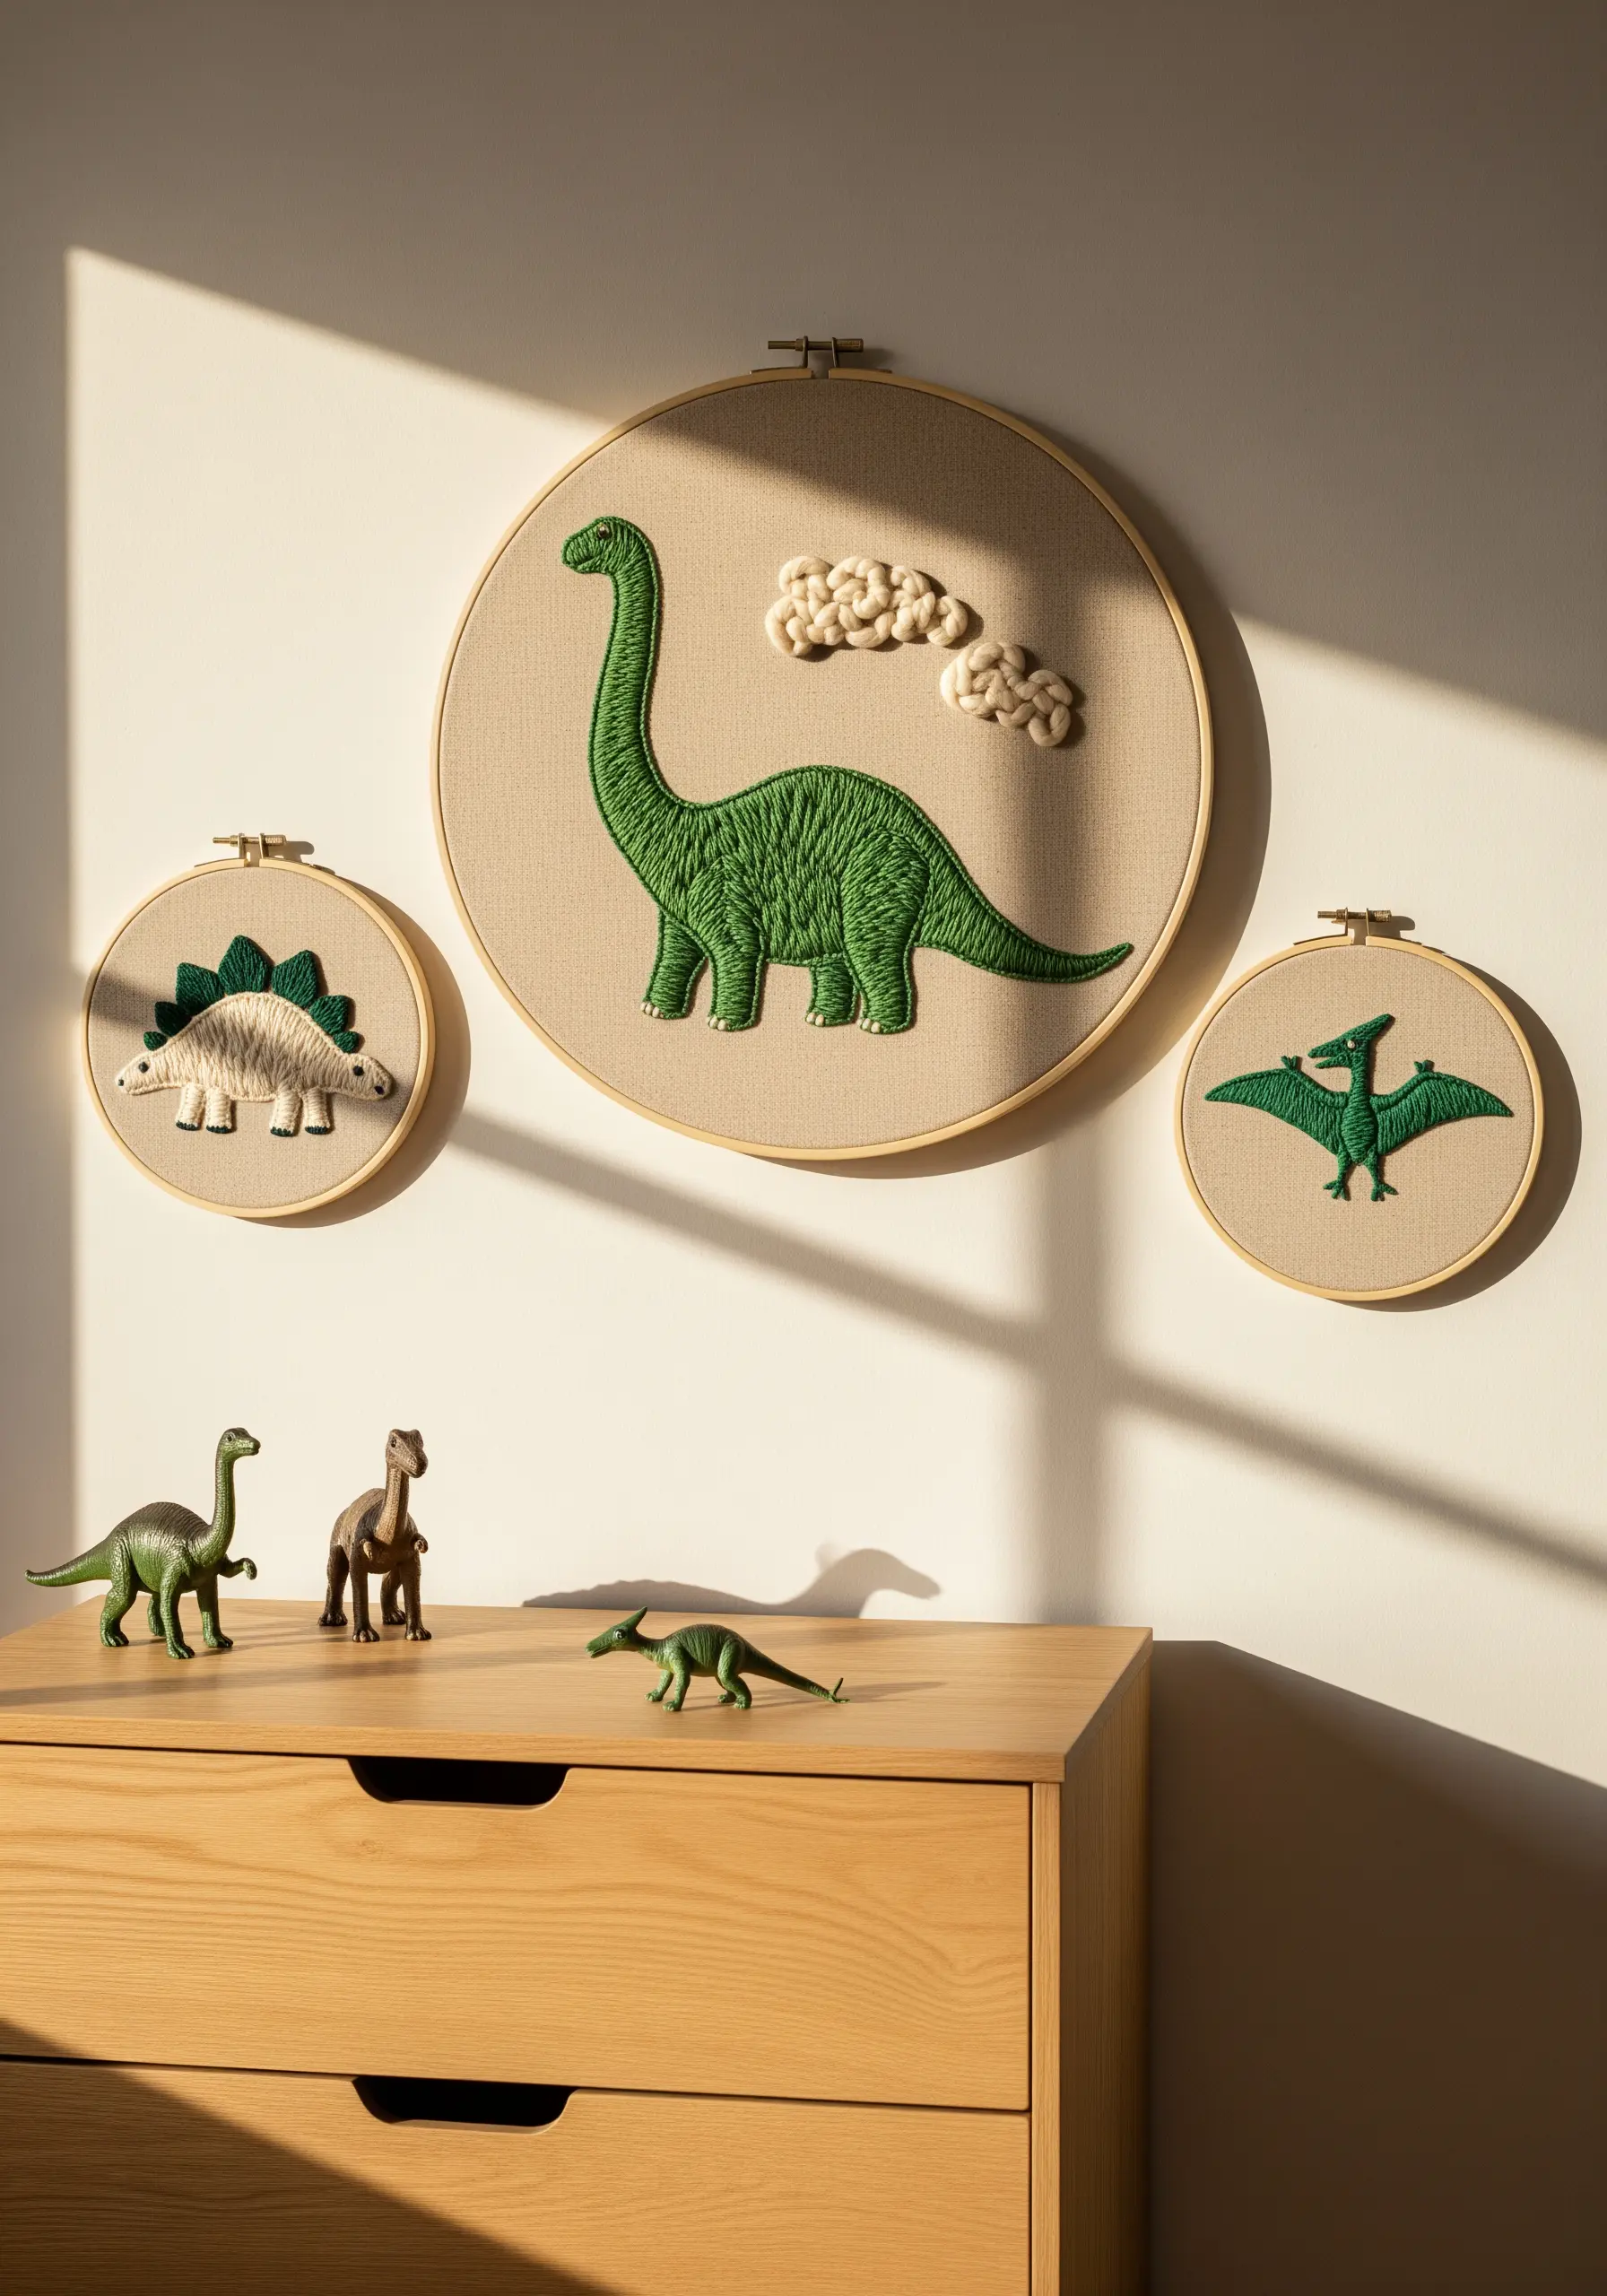
Couching is an ideal technique for young collaborators, as it allows you to create bold, clean outlines with thick yarn that would be too bulky for a needle.
Lay down a thick green yarn along your dinosaur pattern, then use a single strand of matching embroidery floss to tack it in place with small, perpendicular stitches.
For the fluffy clouds, use a plush, loopy chenille or boucle yarn and secure it with just a few anchor stitches to maintain its airy volume.
This method adds incredible texture and dimension, turning a simple outline into a tactile piece of art.
7. Frame Playful Bugs on Patterned Fabric
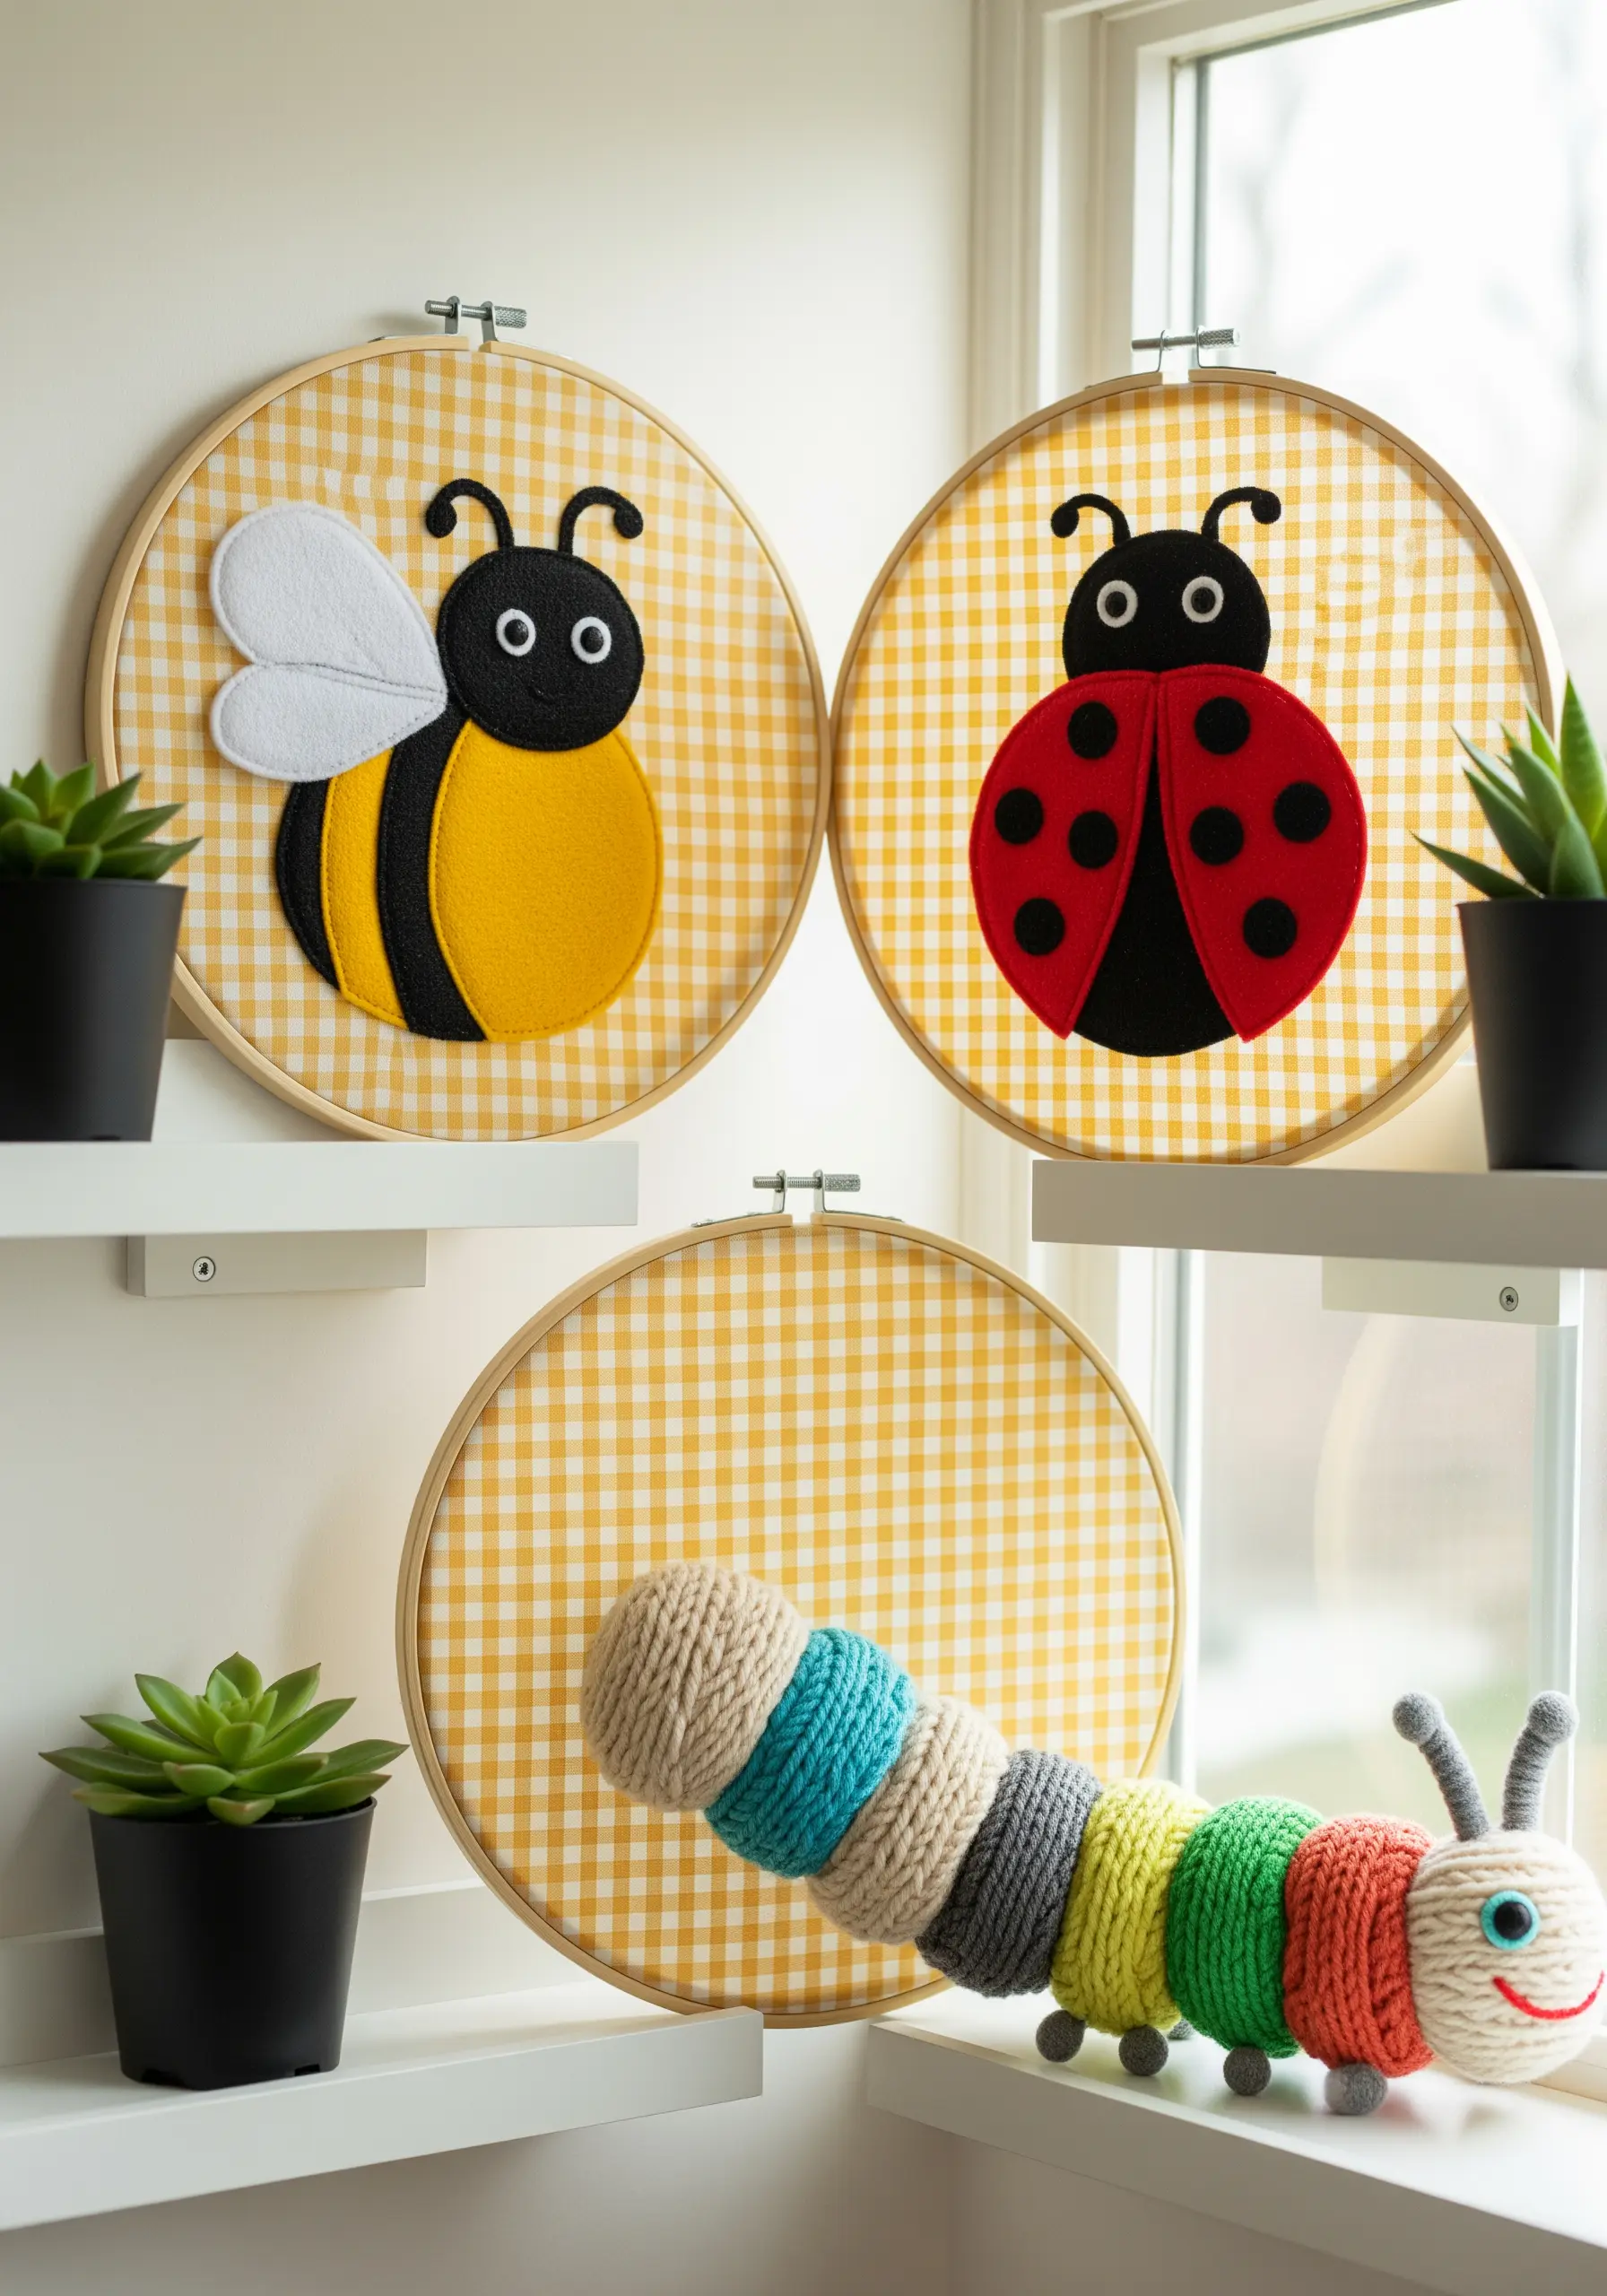
Let your background fabric do some of the design work for you by choosing a playful pattern like gingham or polka dots.
Cut simple bug shapes from brightly colored felt—circles for a ladybug’s body, ovals for a bee—and secure them with a simple running stitch around the edge.
This project relies on beginner-friendly fabric collage, minimizing complex stitching and allowing kids to focus on placement and color.
Add antennae with a couple of straight stitches in black floss to bring your charming critters to life.
8. Construct a Cheerful Embroidered Mobile
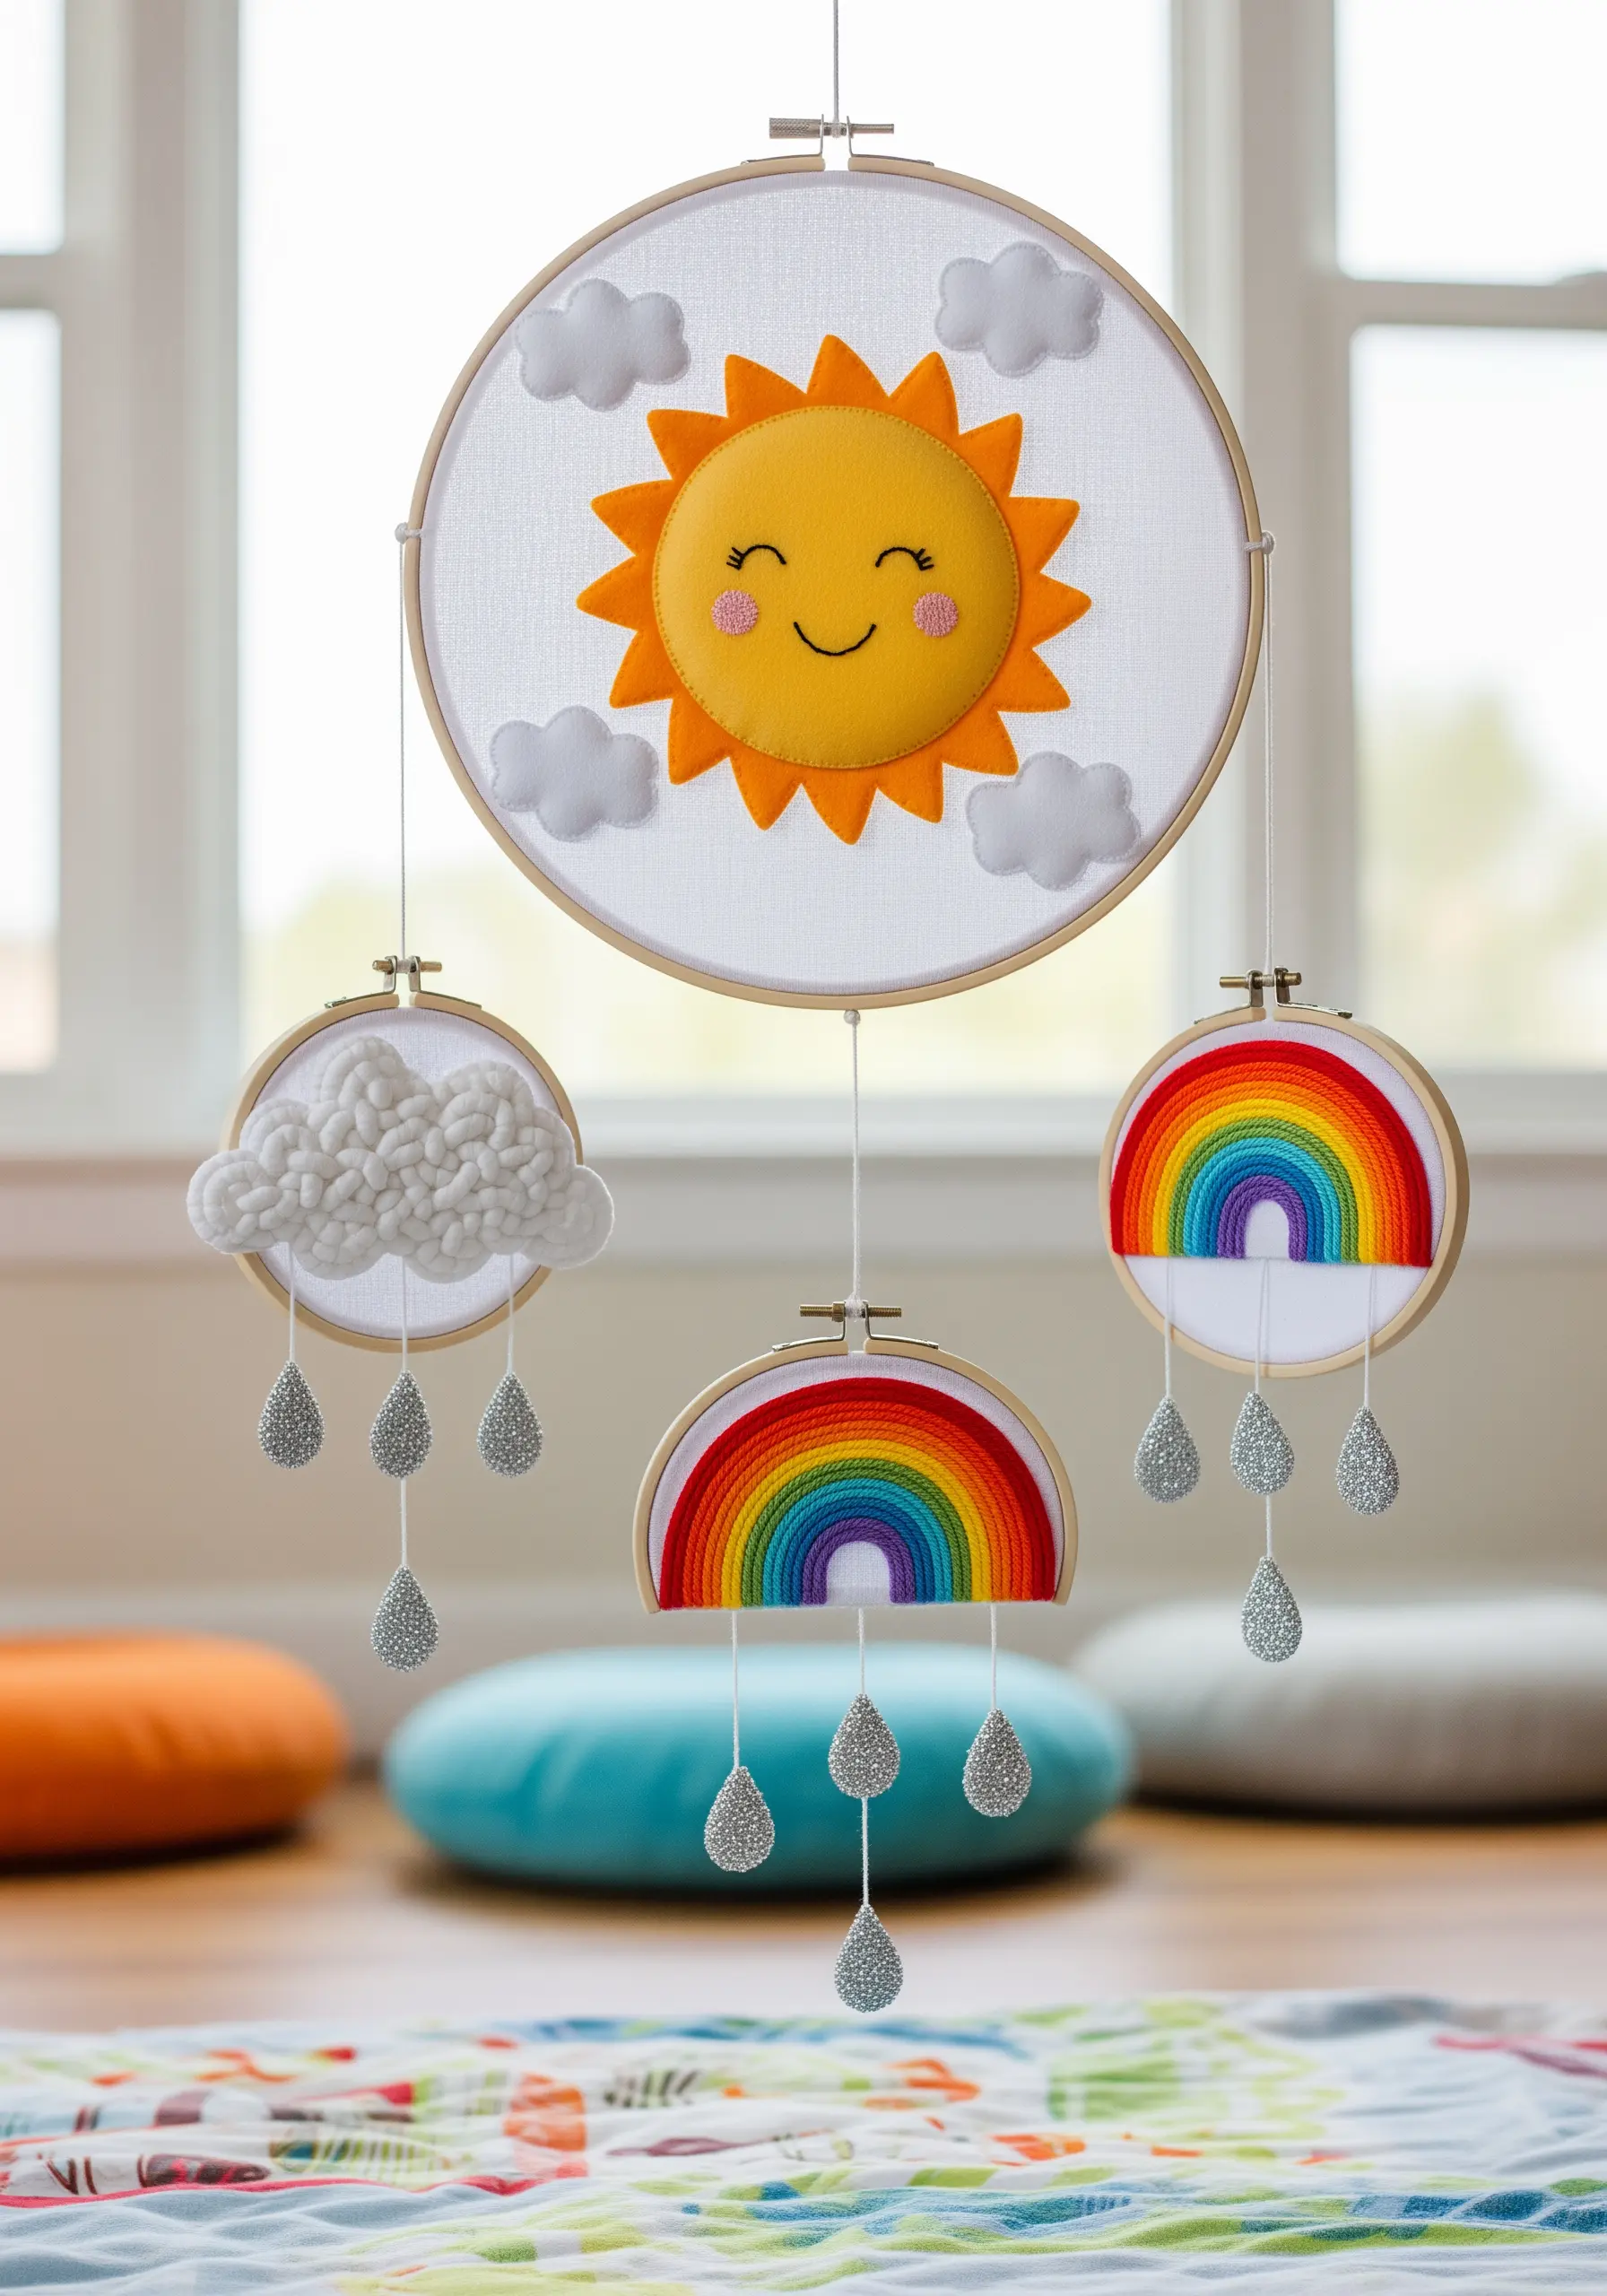
Move beyond wall art by assembling multiple hoops into a delicate, dangling mobile.
Use a large hoop for a central element like the sun, and smaller hoops for accompanying clouds and rainbows.
Incorporate different textures: fluffy wool roving or chunky yarn for clouds, smooth satin stitch for rainbow arcs, and felt for the sun’s face.
Attach glittery felt raindrops with clear nylon thread so they appear to float, adding a final touch of magic.
9. Design a Modular Alphabet Sampler
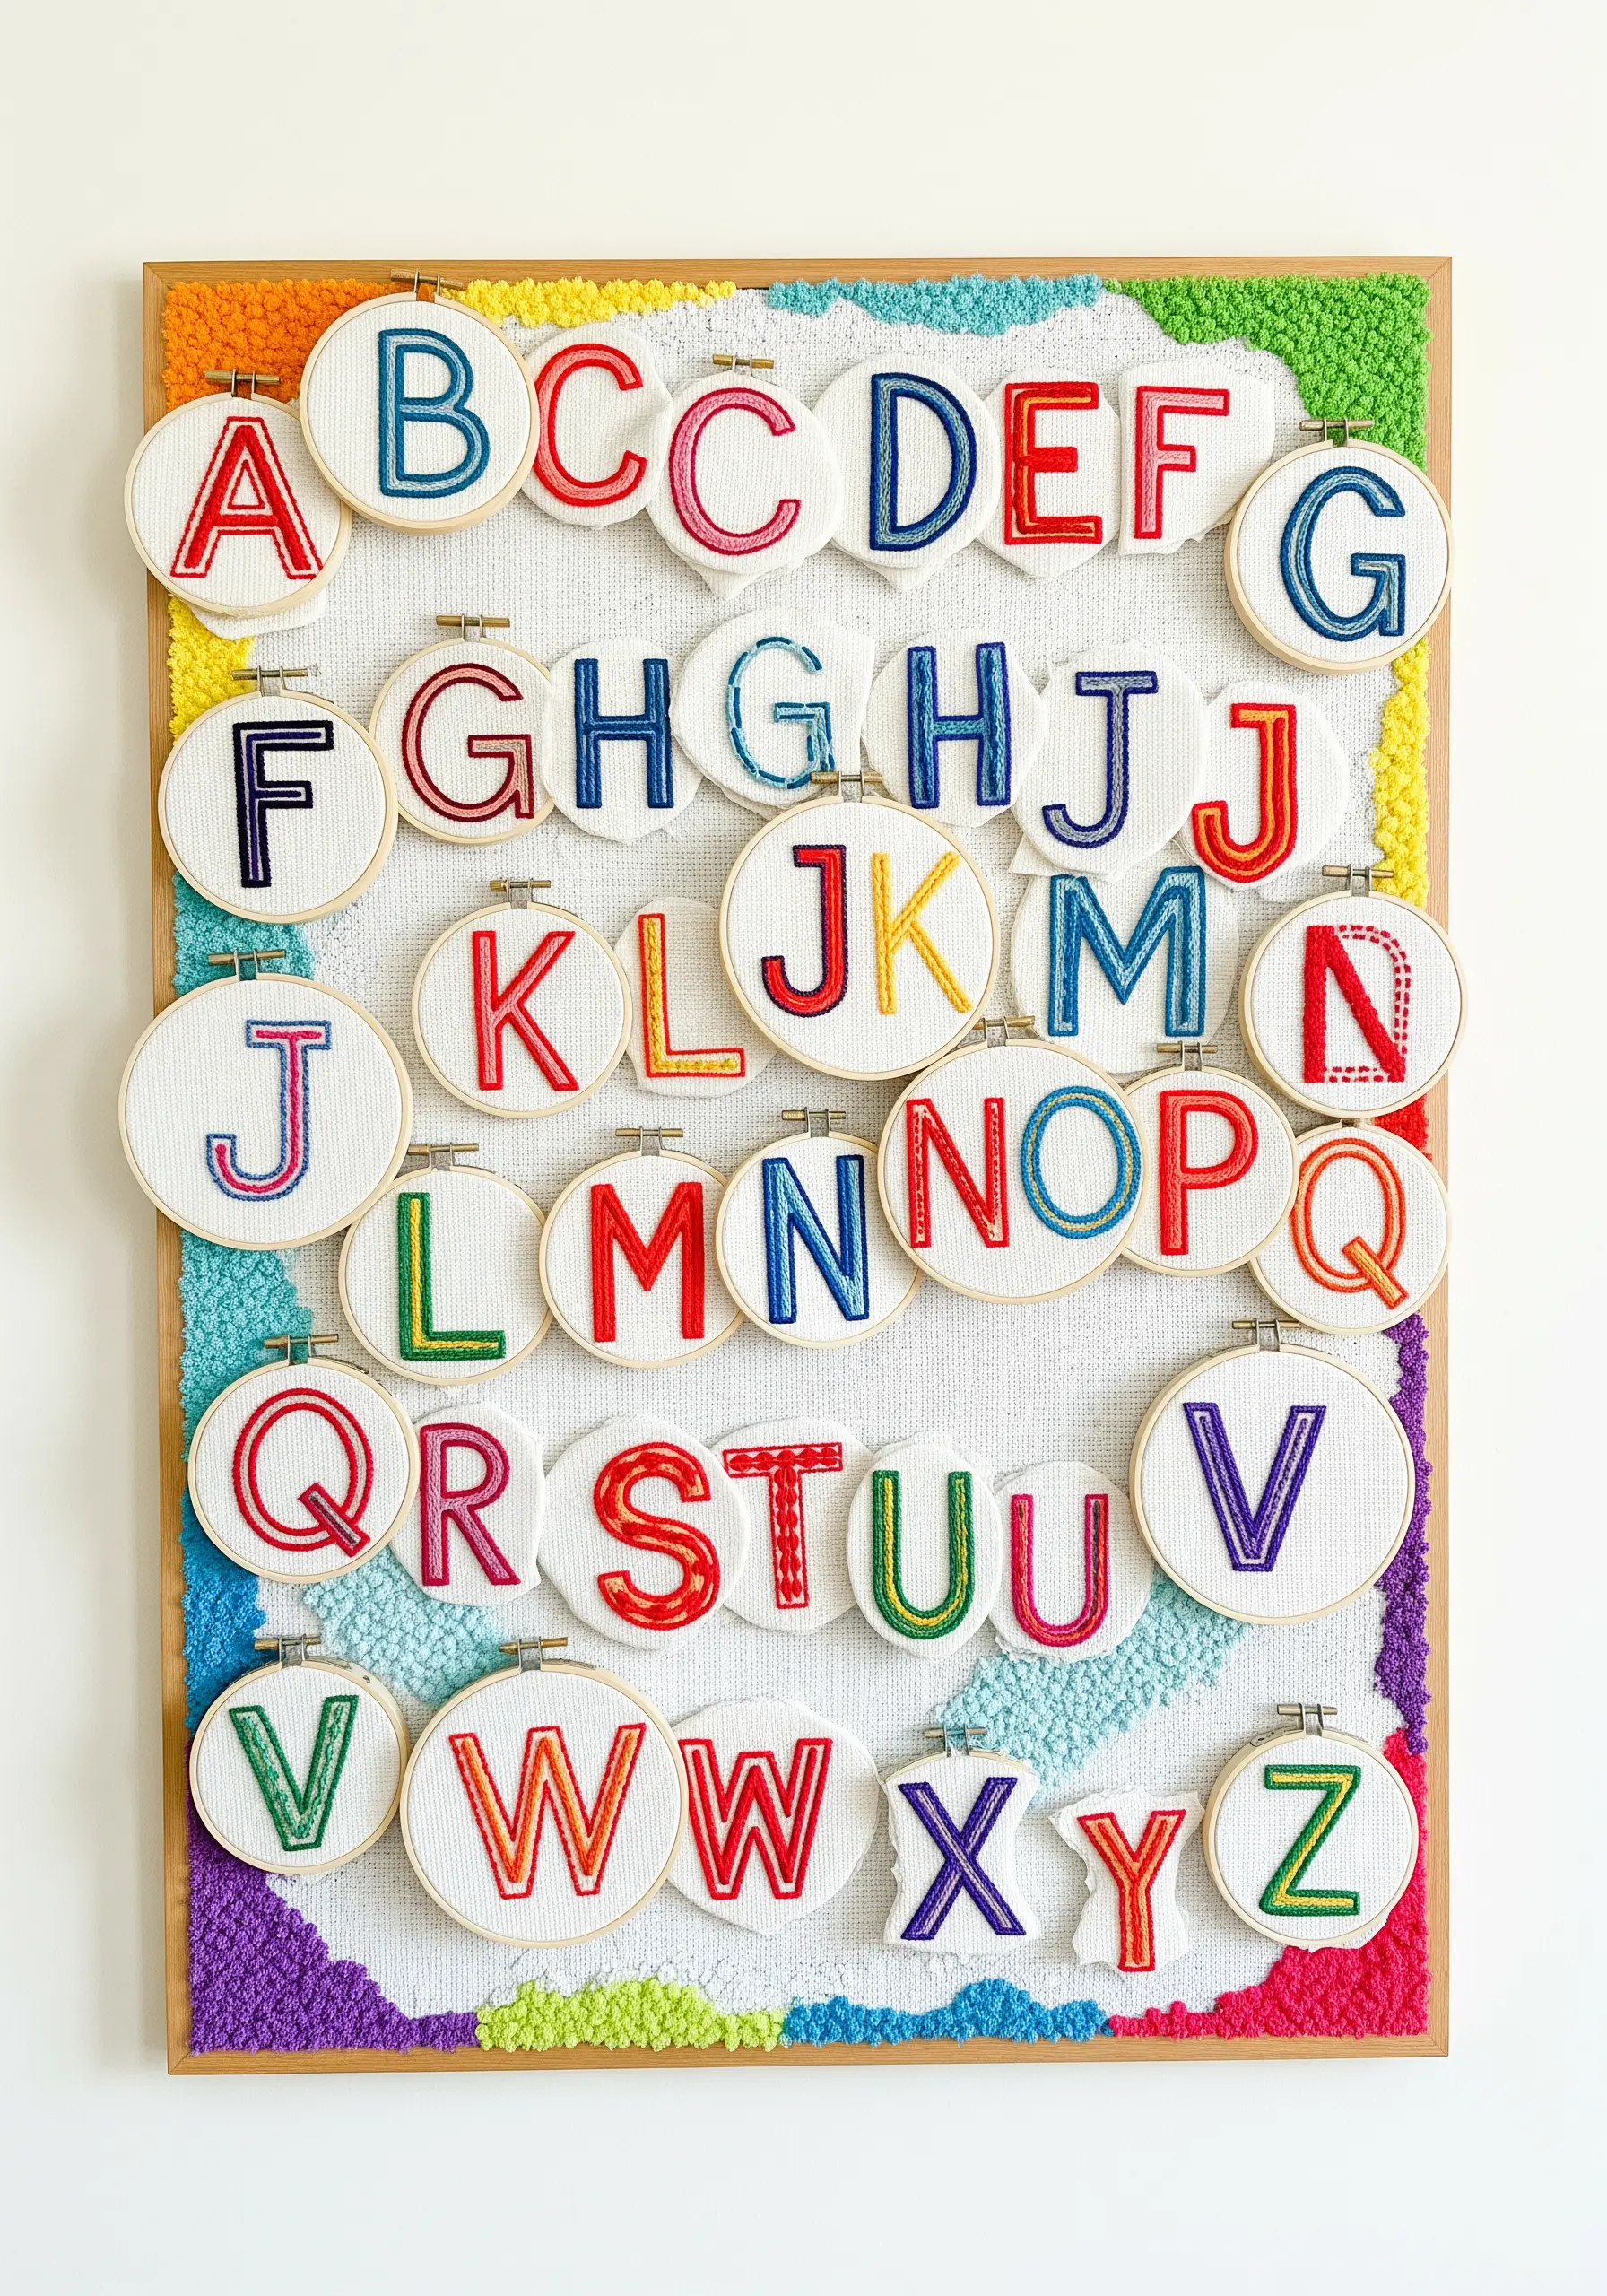
Create a beautiful and educational piece of decor by stitching each letter of the alphabet in its own mini hoop.
This modular approach breaks a large project into small, satisfying wins, which is perfect for maintaining a child’s interest.
Experiment with different stitches for each letter to build skills—try a backstitch for ‘A’, satin stitch for ‘B’, and French knots for ‘C’.
Mount the finished hoops onto a larger frame covered in punch needle or felt to create a stunning, cohesive display.
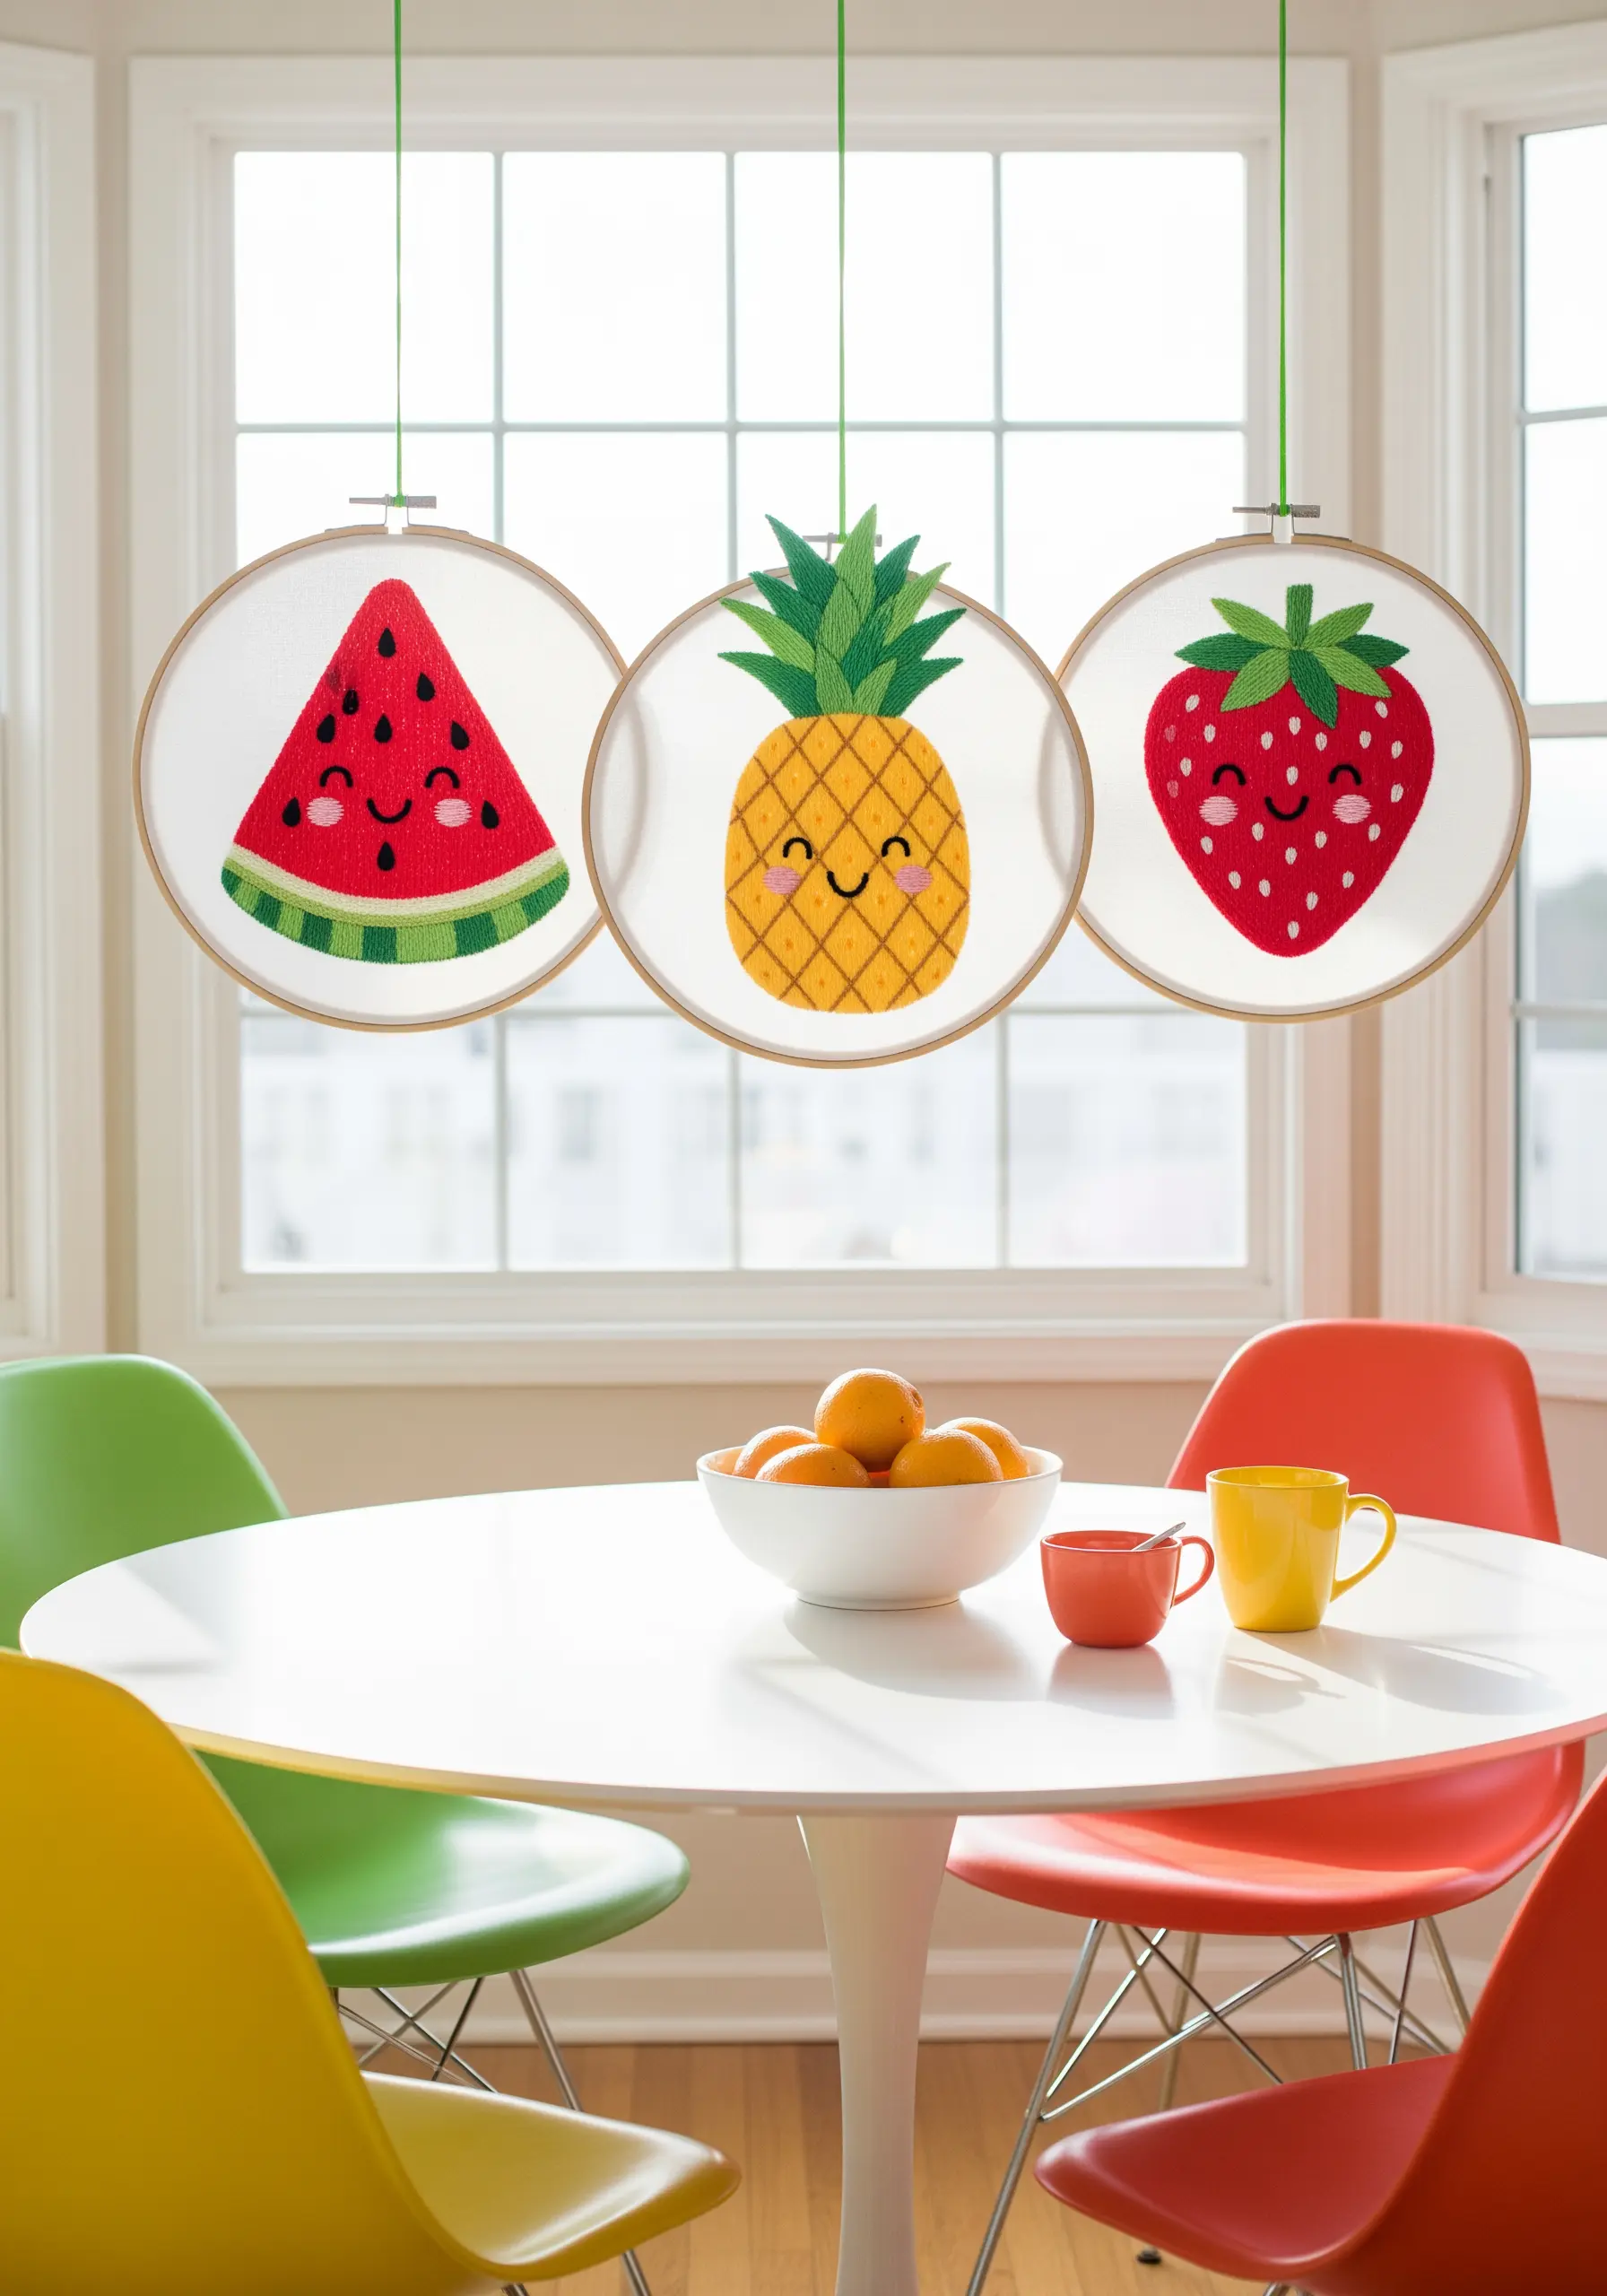
10. Stitch a Collection of Sweet Treats
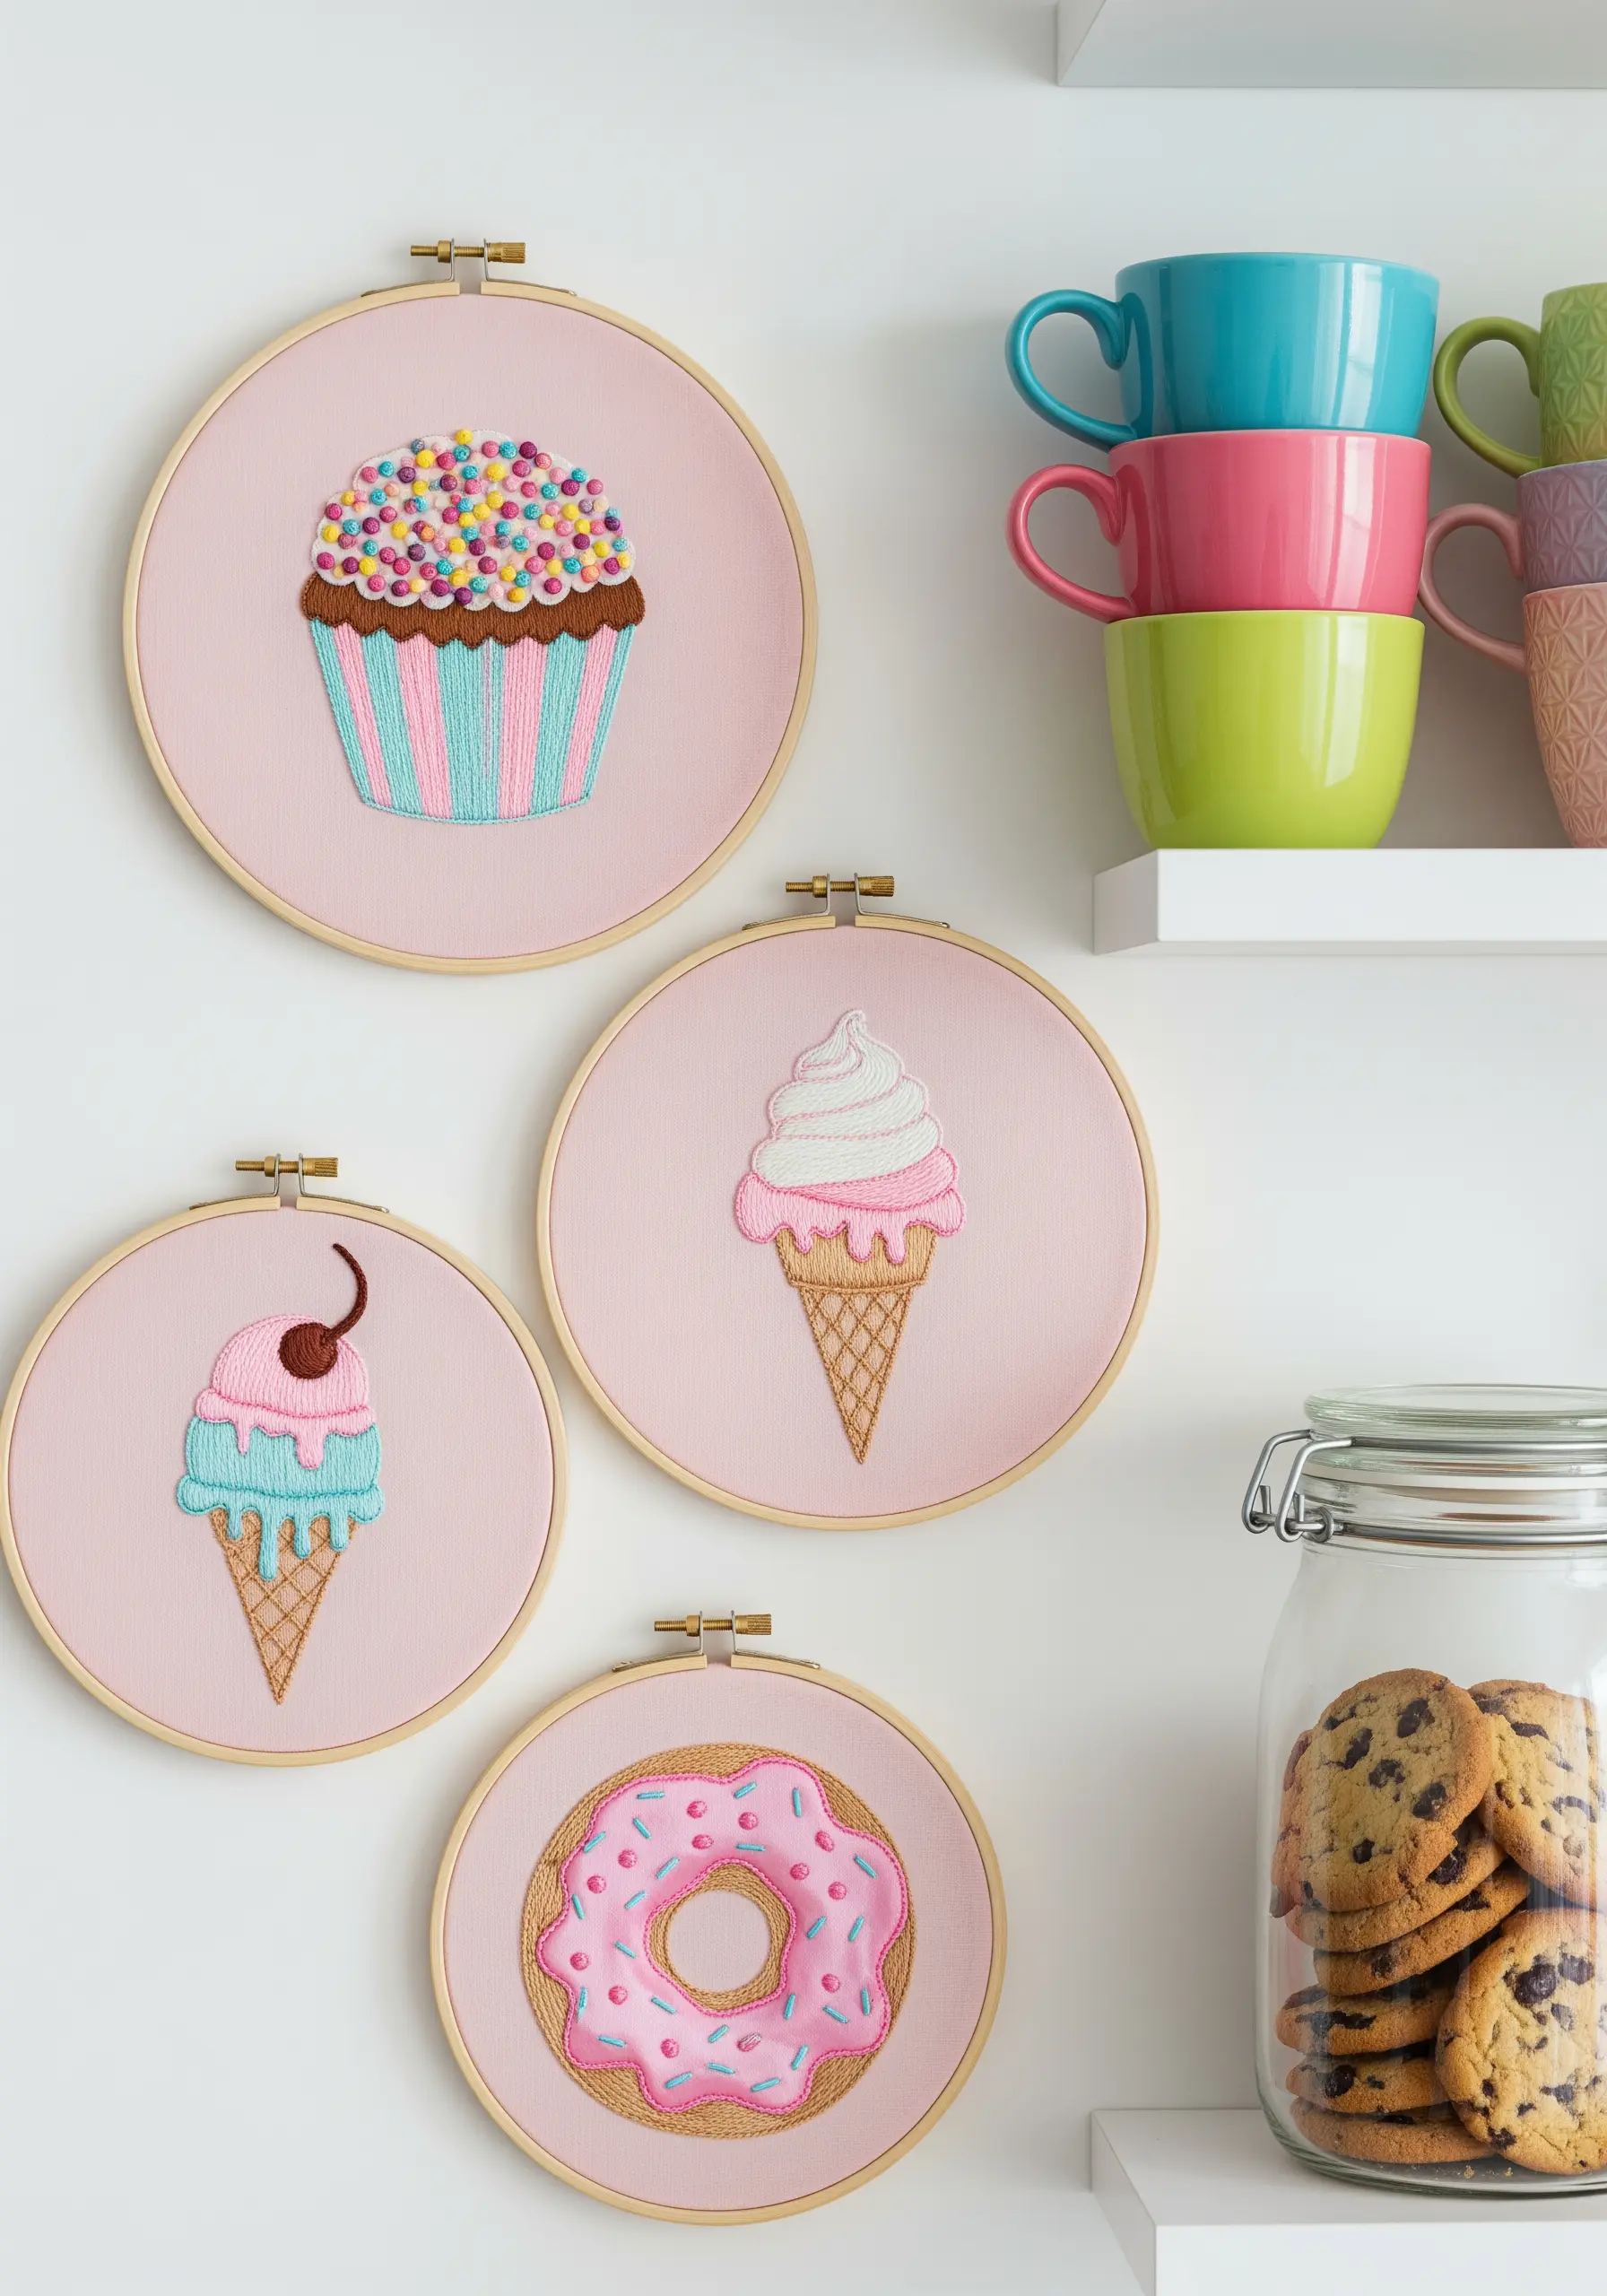
Translate the textures of favorite desserts into thread to create a deliciously themed gallery wall.
Use hundreds of multi-colored French knots to mimic the look of sprinkles on a cupcake, a wonderfully repetitive task for a focused child.
Fill the ice cream cone with a directional satin stitch to suggest its classic waffle texture, and use soft, whipped chain stitches for the swirled frosting.
Working on a pastel pink fabric enhances the sweet, playful aesthetic of these cute dessert motifs.
11. Curate a Woodland Creature Gallery Wall

Design a cohesive story by stitching a collection of woodland animals and foliage using a unified color palette.
For the fox’s bushy tail, use a long-and-short stitch to blend shades of orange and white, creating a realistic, furry texture.
Keep the surrounding trees and mushrooms simple with clean satin stitch fills; this ensures the central animal remains the focal point.
Stitching on a neutral linen or cotton fabric provides a calm, earthy backdrop that allows the autumnal colors to stand out beautifully.
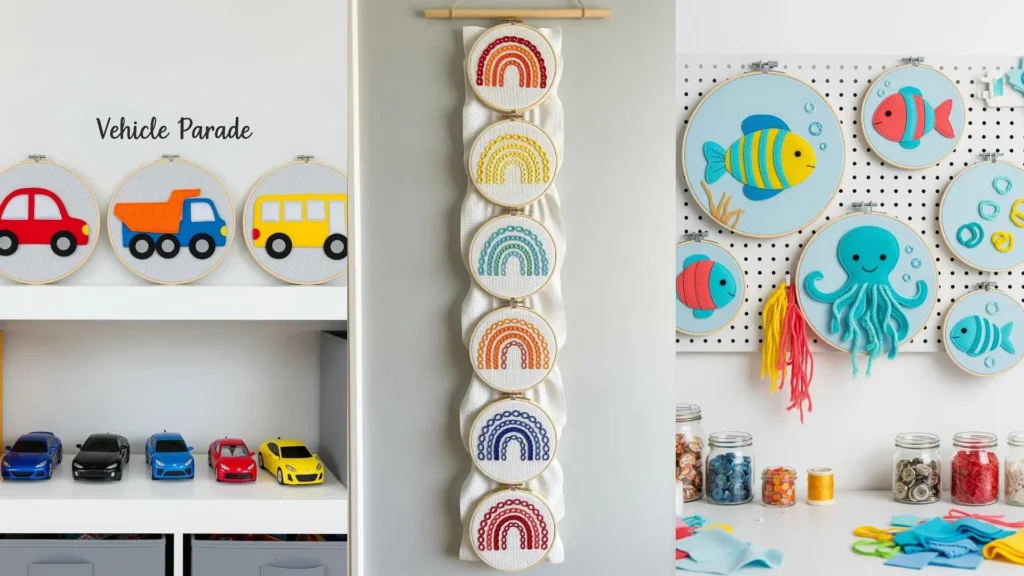
12. Assemble a No-Sew Vehicle Parade
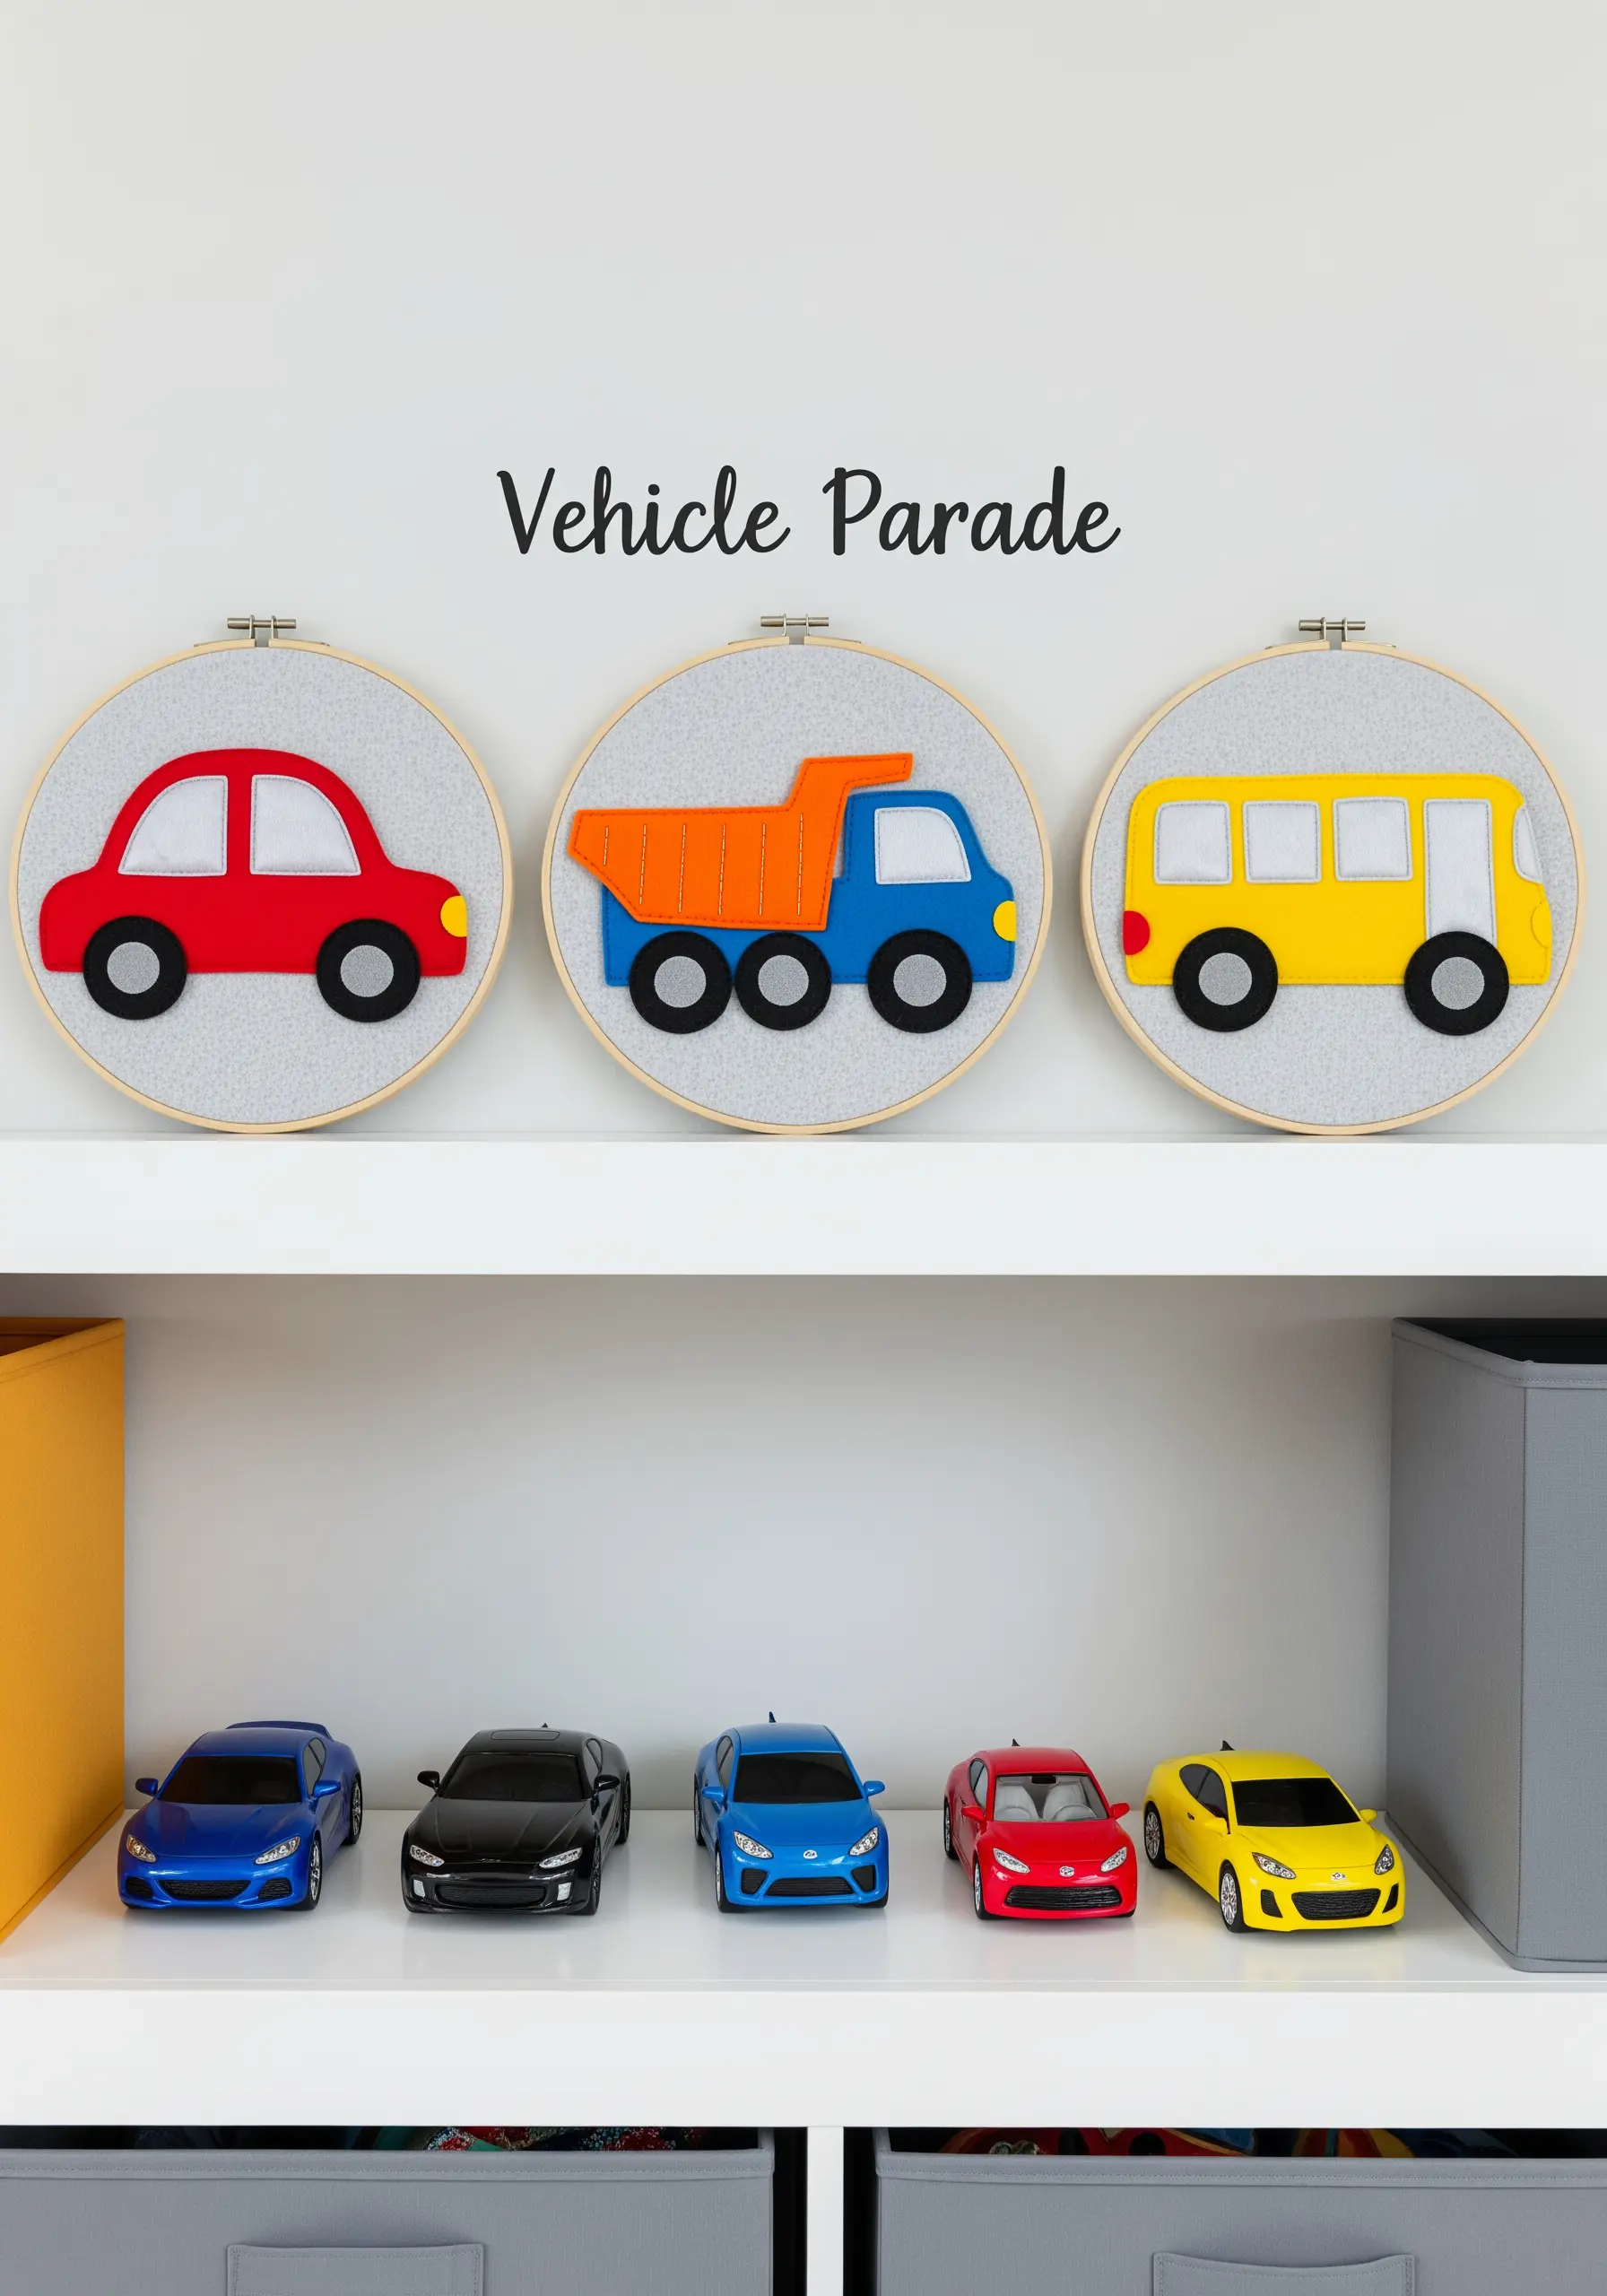
This project is a perfect introduction to composition, using simple felt shapes that require no sewing at all.
Have your child help cut out basic geometric shapes from felt—rectangles for the bus body, circles for wheels, a triangle for the dump truck’s bed.
Arrange the pieces on your hooped fabric and secure them with fabric glue for a quick, no-fuss creative session.
This technique allows for easy repositioning until the design is just right, building confidence in young designers.
13. Create Floating Fruit Art on Tulle
Stitching on sheer fabric like tulle or organza creates a magical, floating effect that makes your designs pop.
Hoop the tulle with a piece of stabilizer behind it for support while you stitch, then carefully trim the excess stabilizer away when you’re finished.
Use a dense satin stitch to fill in the fruit shapes, ensuring the colors are bold and opaque against the transparent background.
Add charming faces with just a few simple backstitches, an easy detail that gives each fruit a cheerful personality.
14. Add Playful Dimension with 3D Felt Details
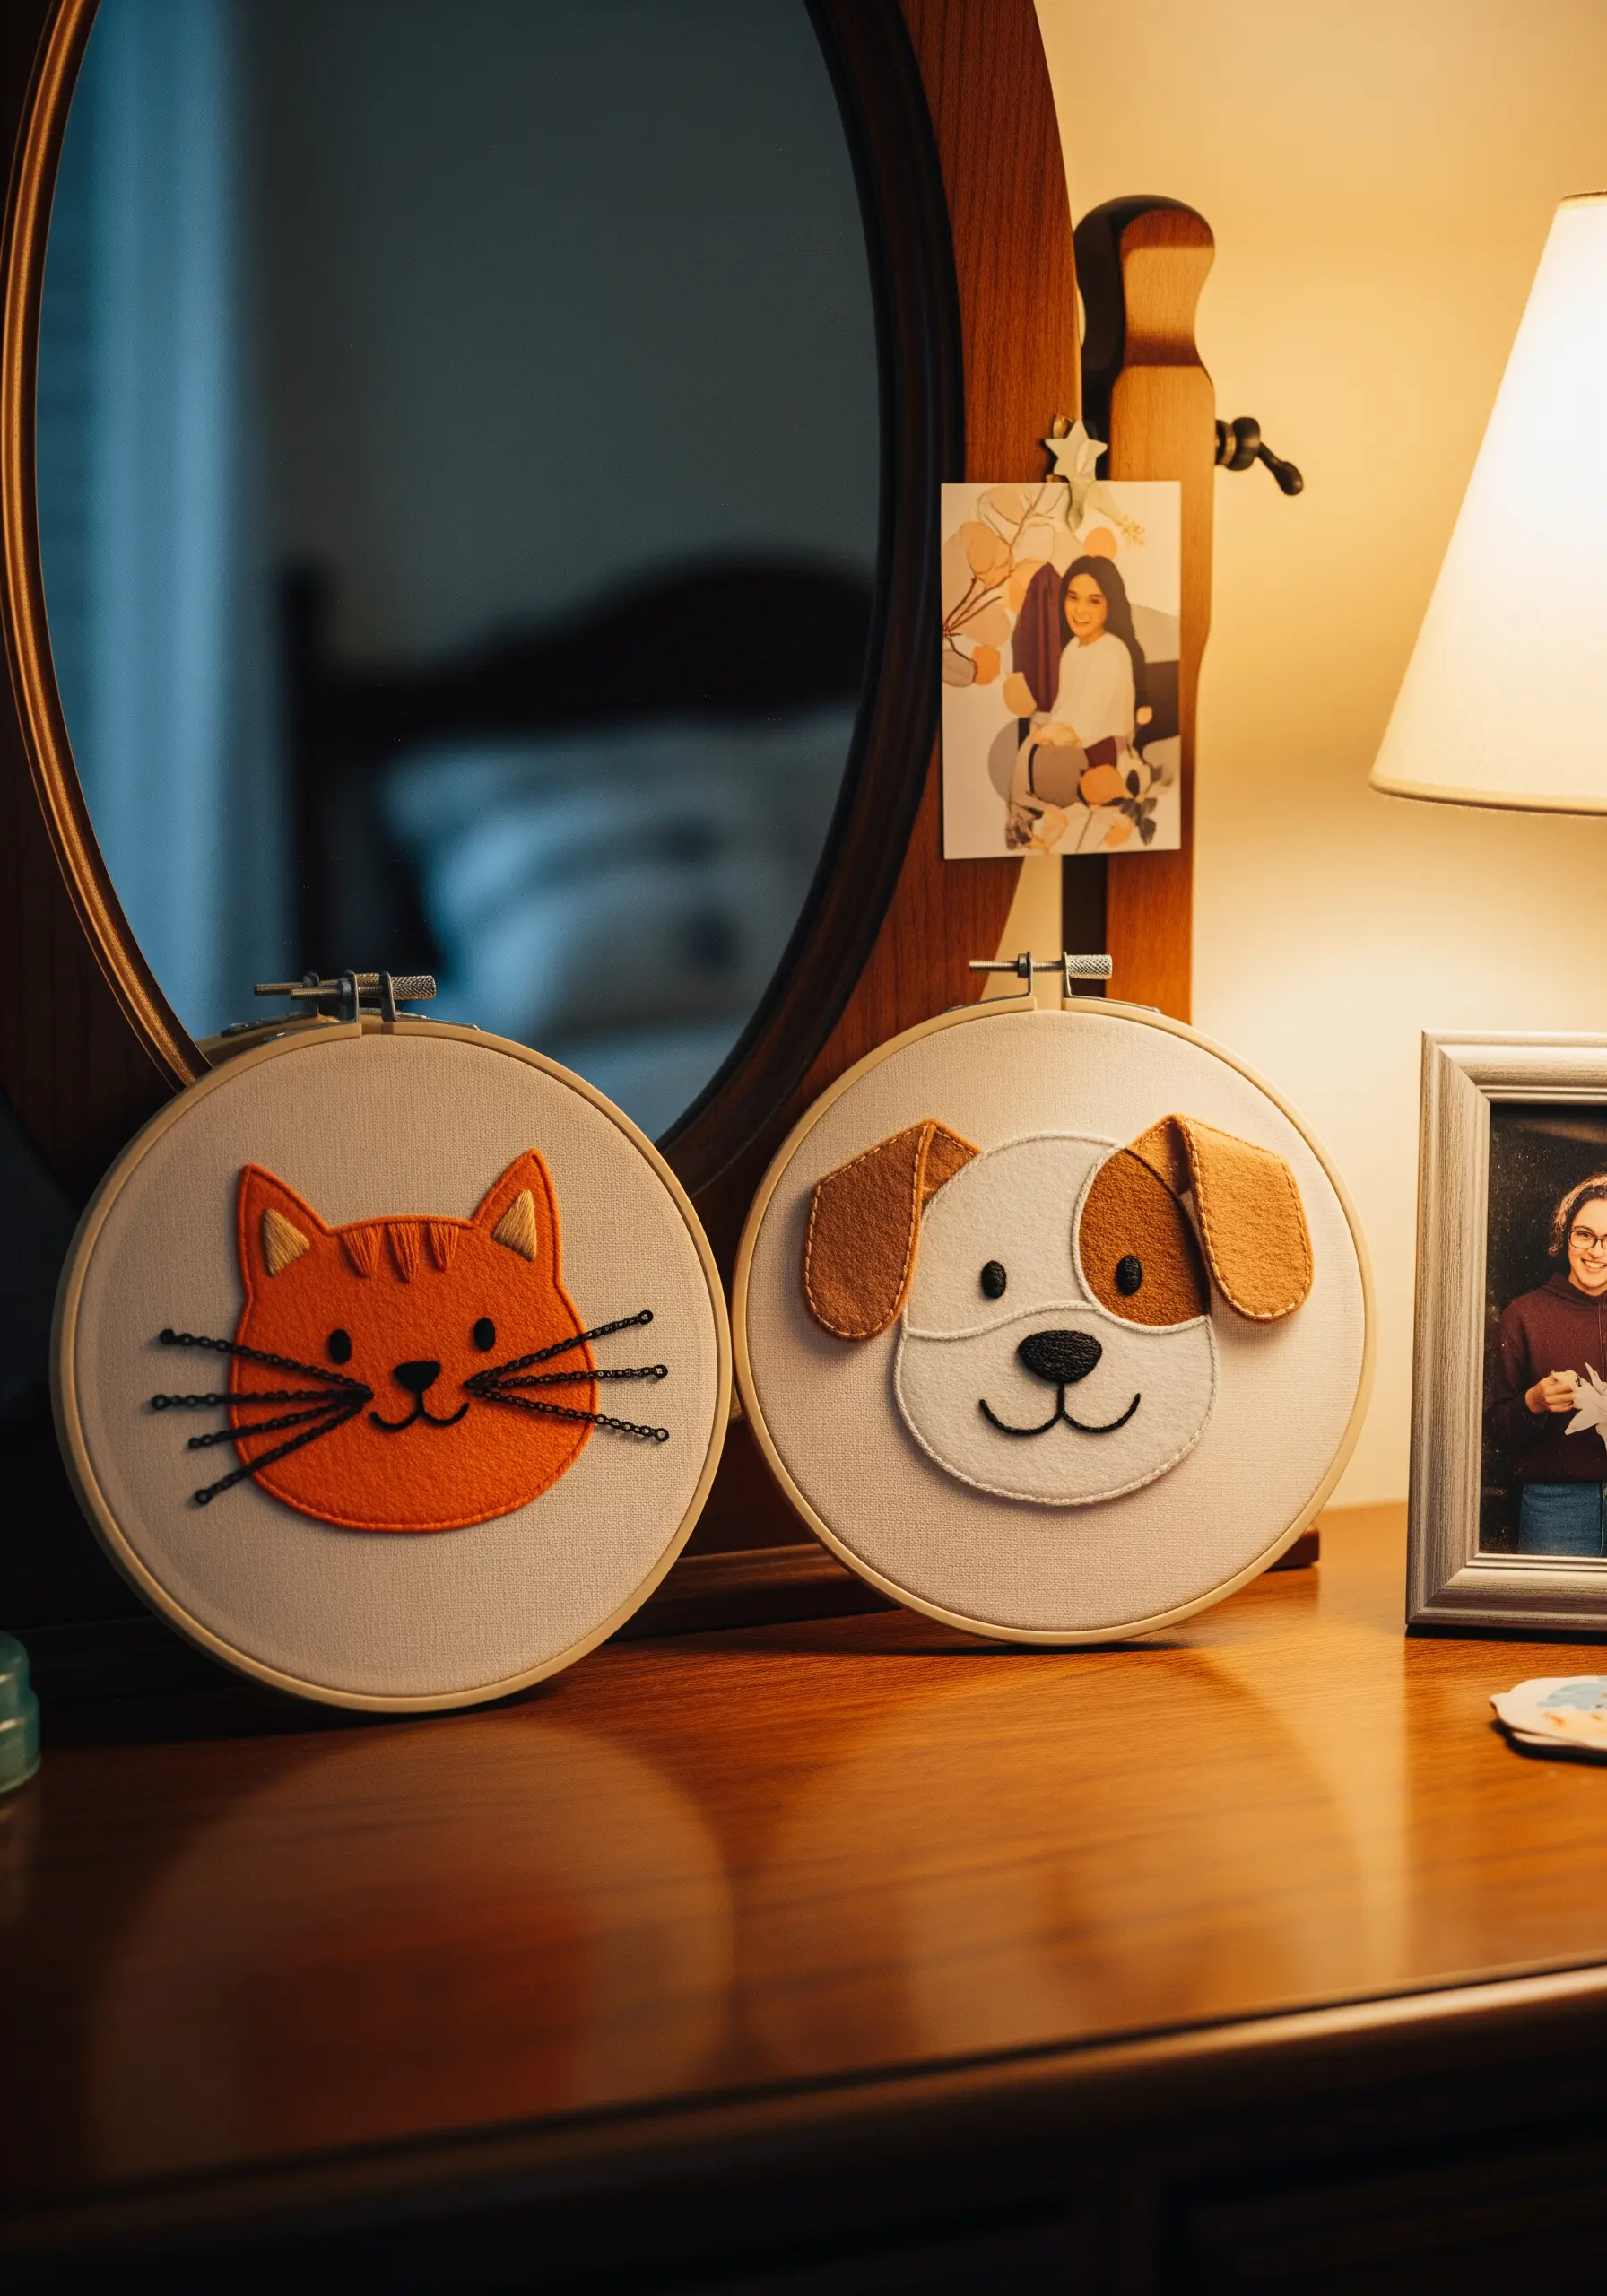
Bring your embroidered characters to life by incorporating three-dimensional elements that extend beyond the hoop.
For the dog, create floppy ears from two layers of felt stitched together, then attach just the top edge to the main fabric so they can be lifted and moved.
This technique adds an interactive, playful quality that children love.
Combine this with simple stitched features like backstitched whiskers and a satin-stitched nose for a piece that mixes textures and dimensions.
15. Explore Abstract Art with Sheer Fabric Collage
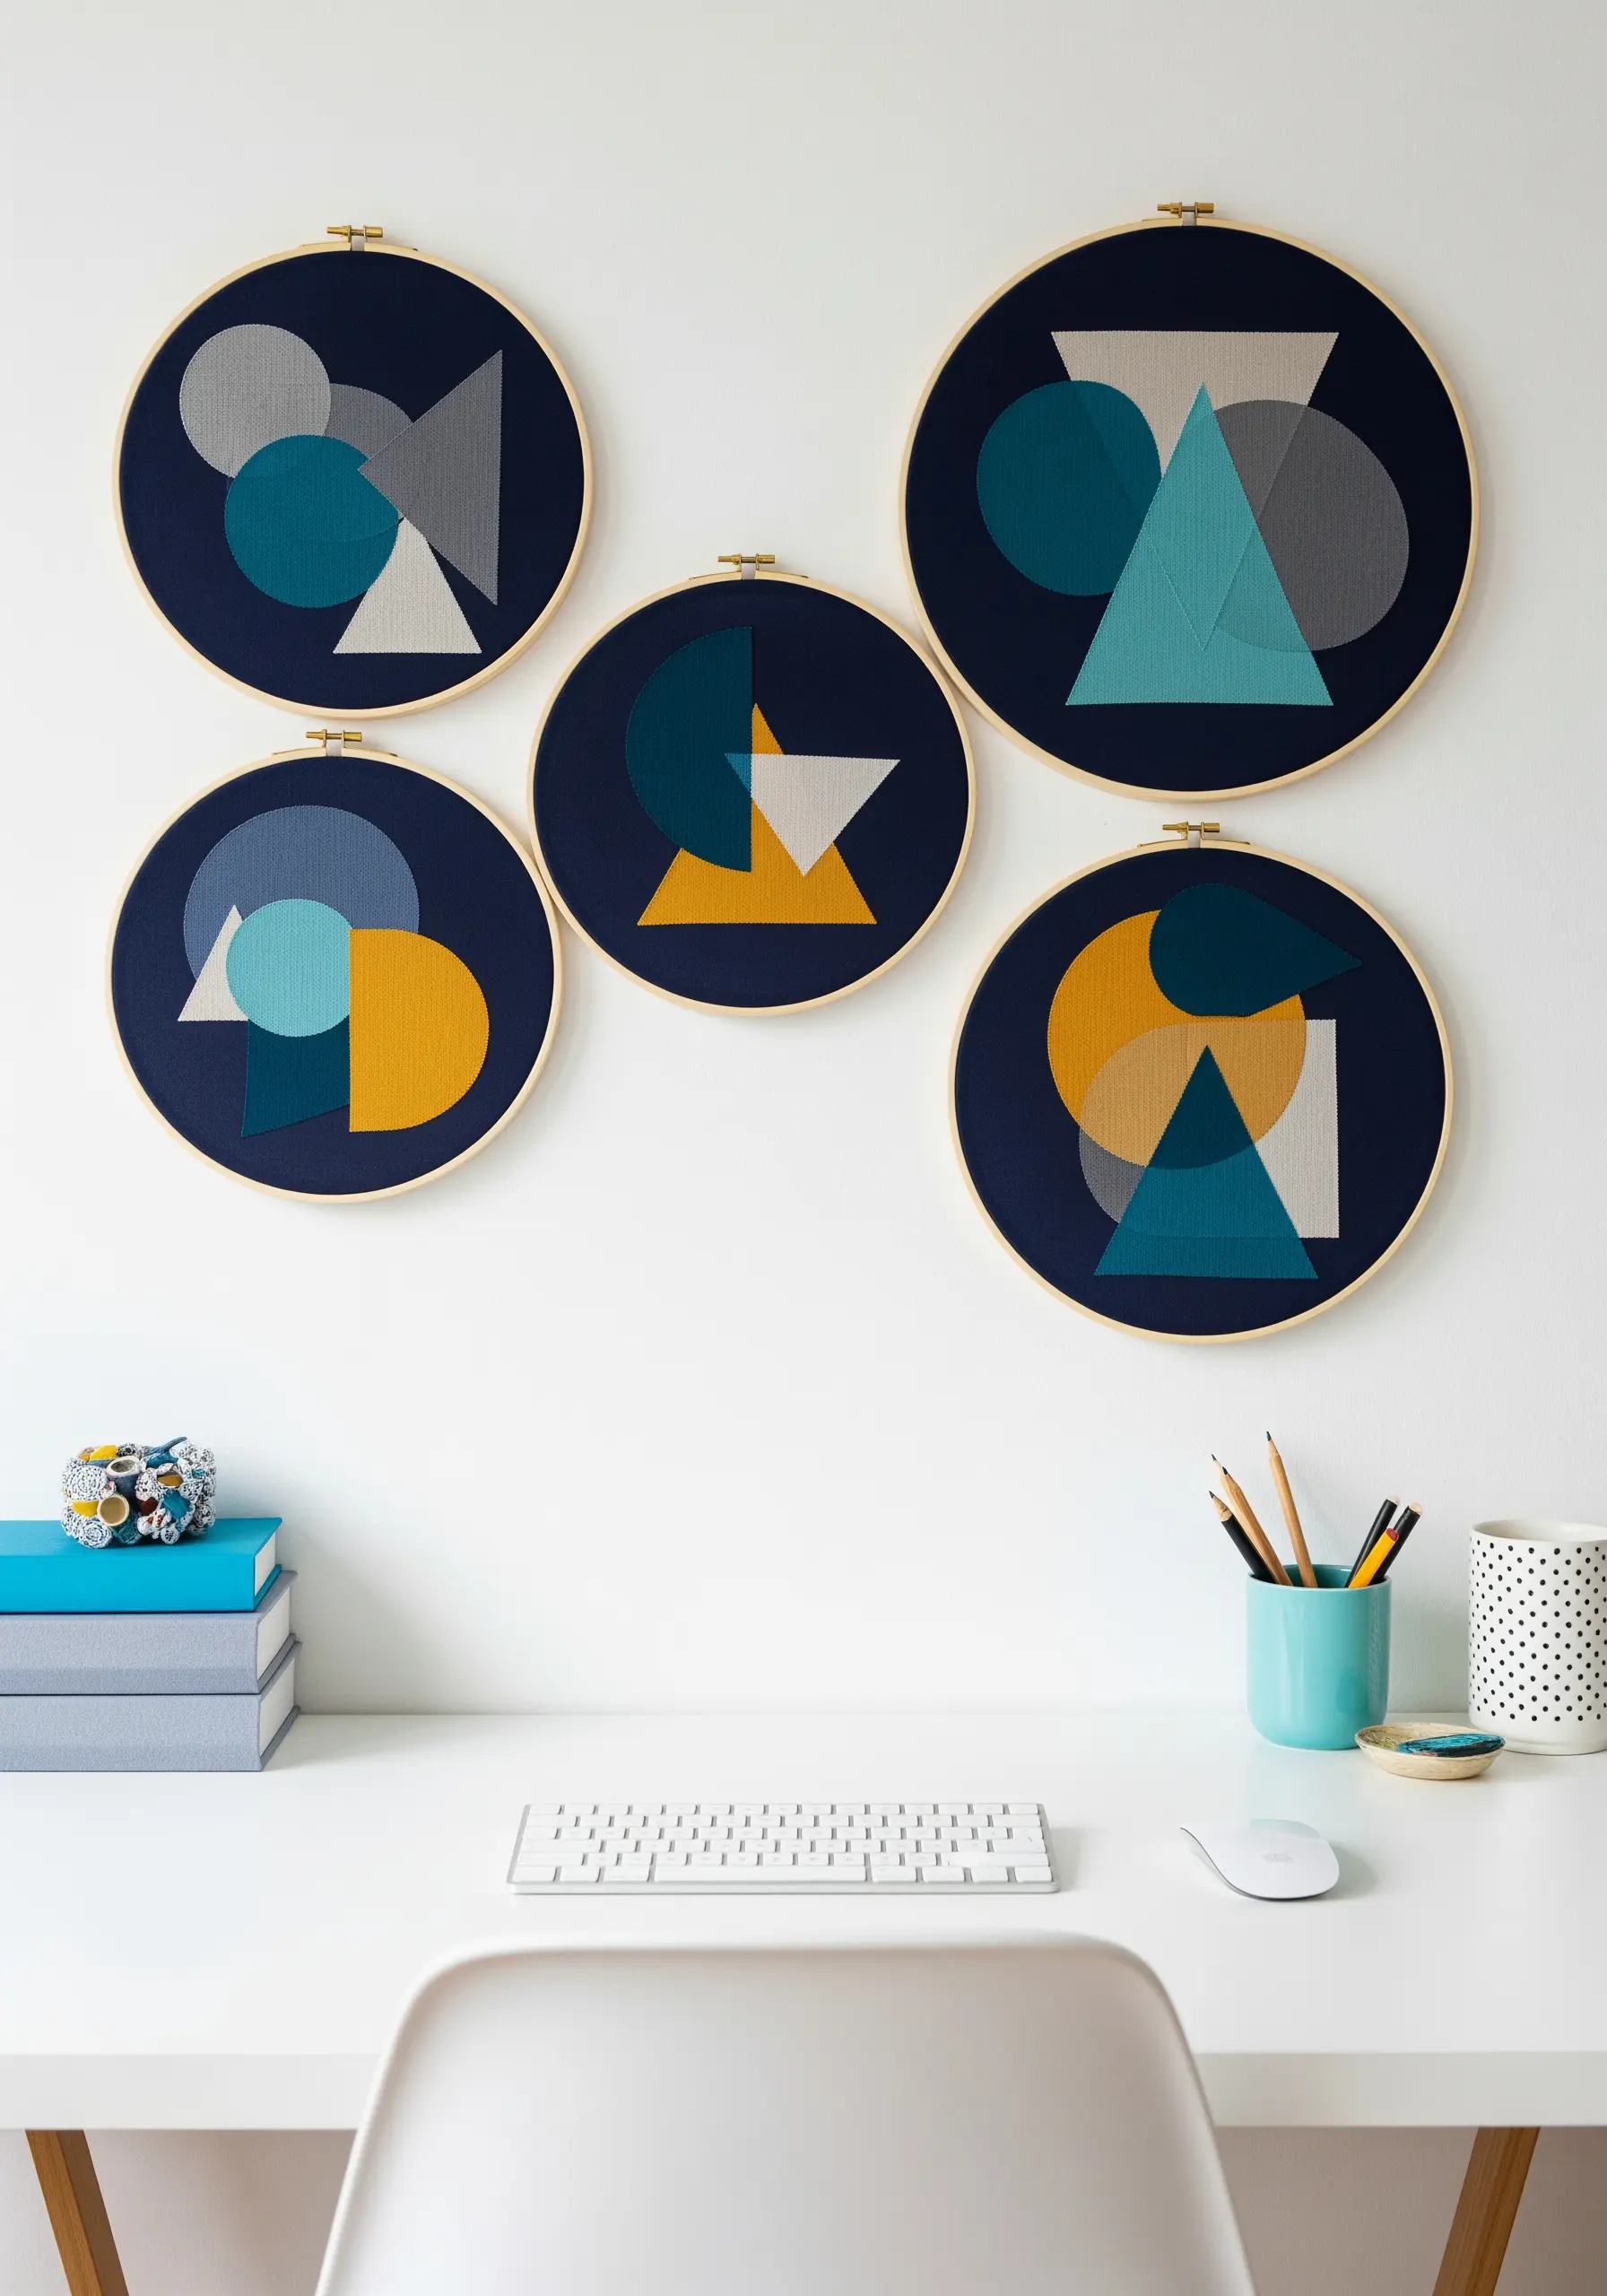
Introduce older children to the principles of color theory and composition with this sophisticated yet simple technique.
Cut geometric shapes from various colors of sheer organza or chiffon fabric.
Layer the shapes directly onto your dark background fabric, observing how the colors interact and create new tones where they overlap.
Secure the pieces with a few tiny, discreet stitches, creating a minimalist piece that looks like a modern graphic print.
16. Design a Dreamy Night Sky with Glitter Fabric
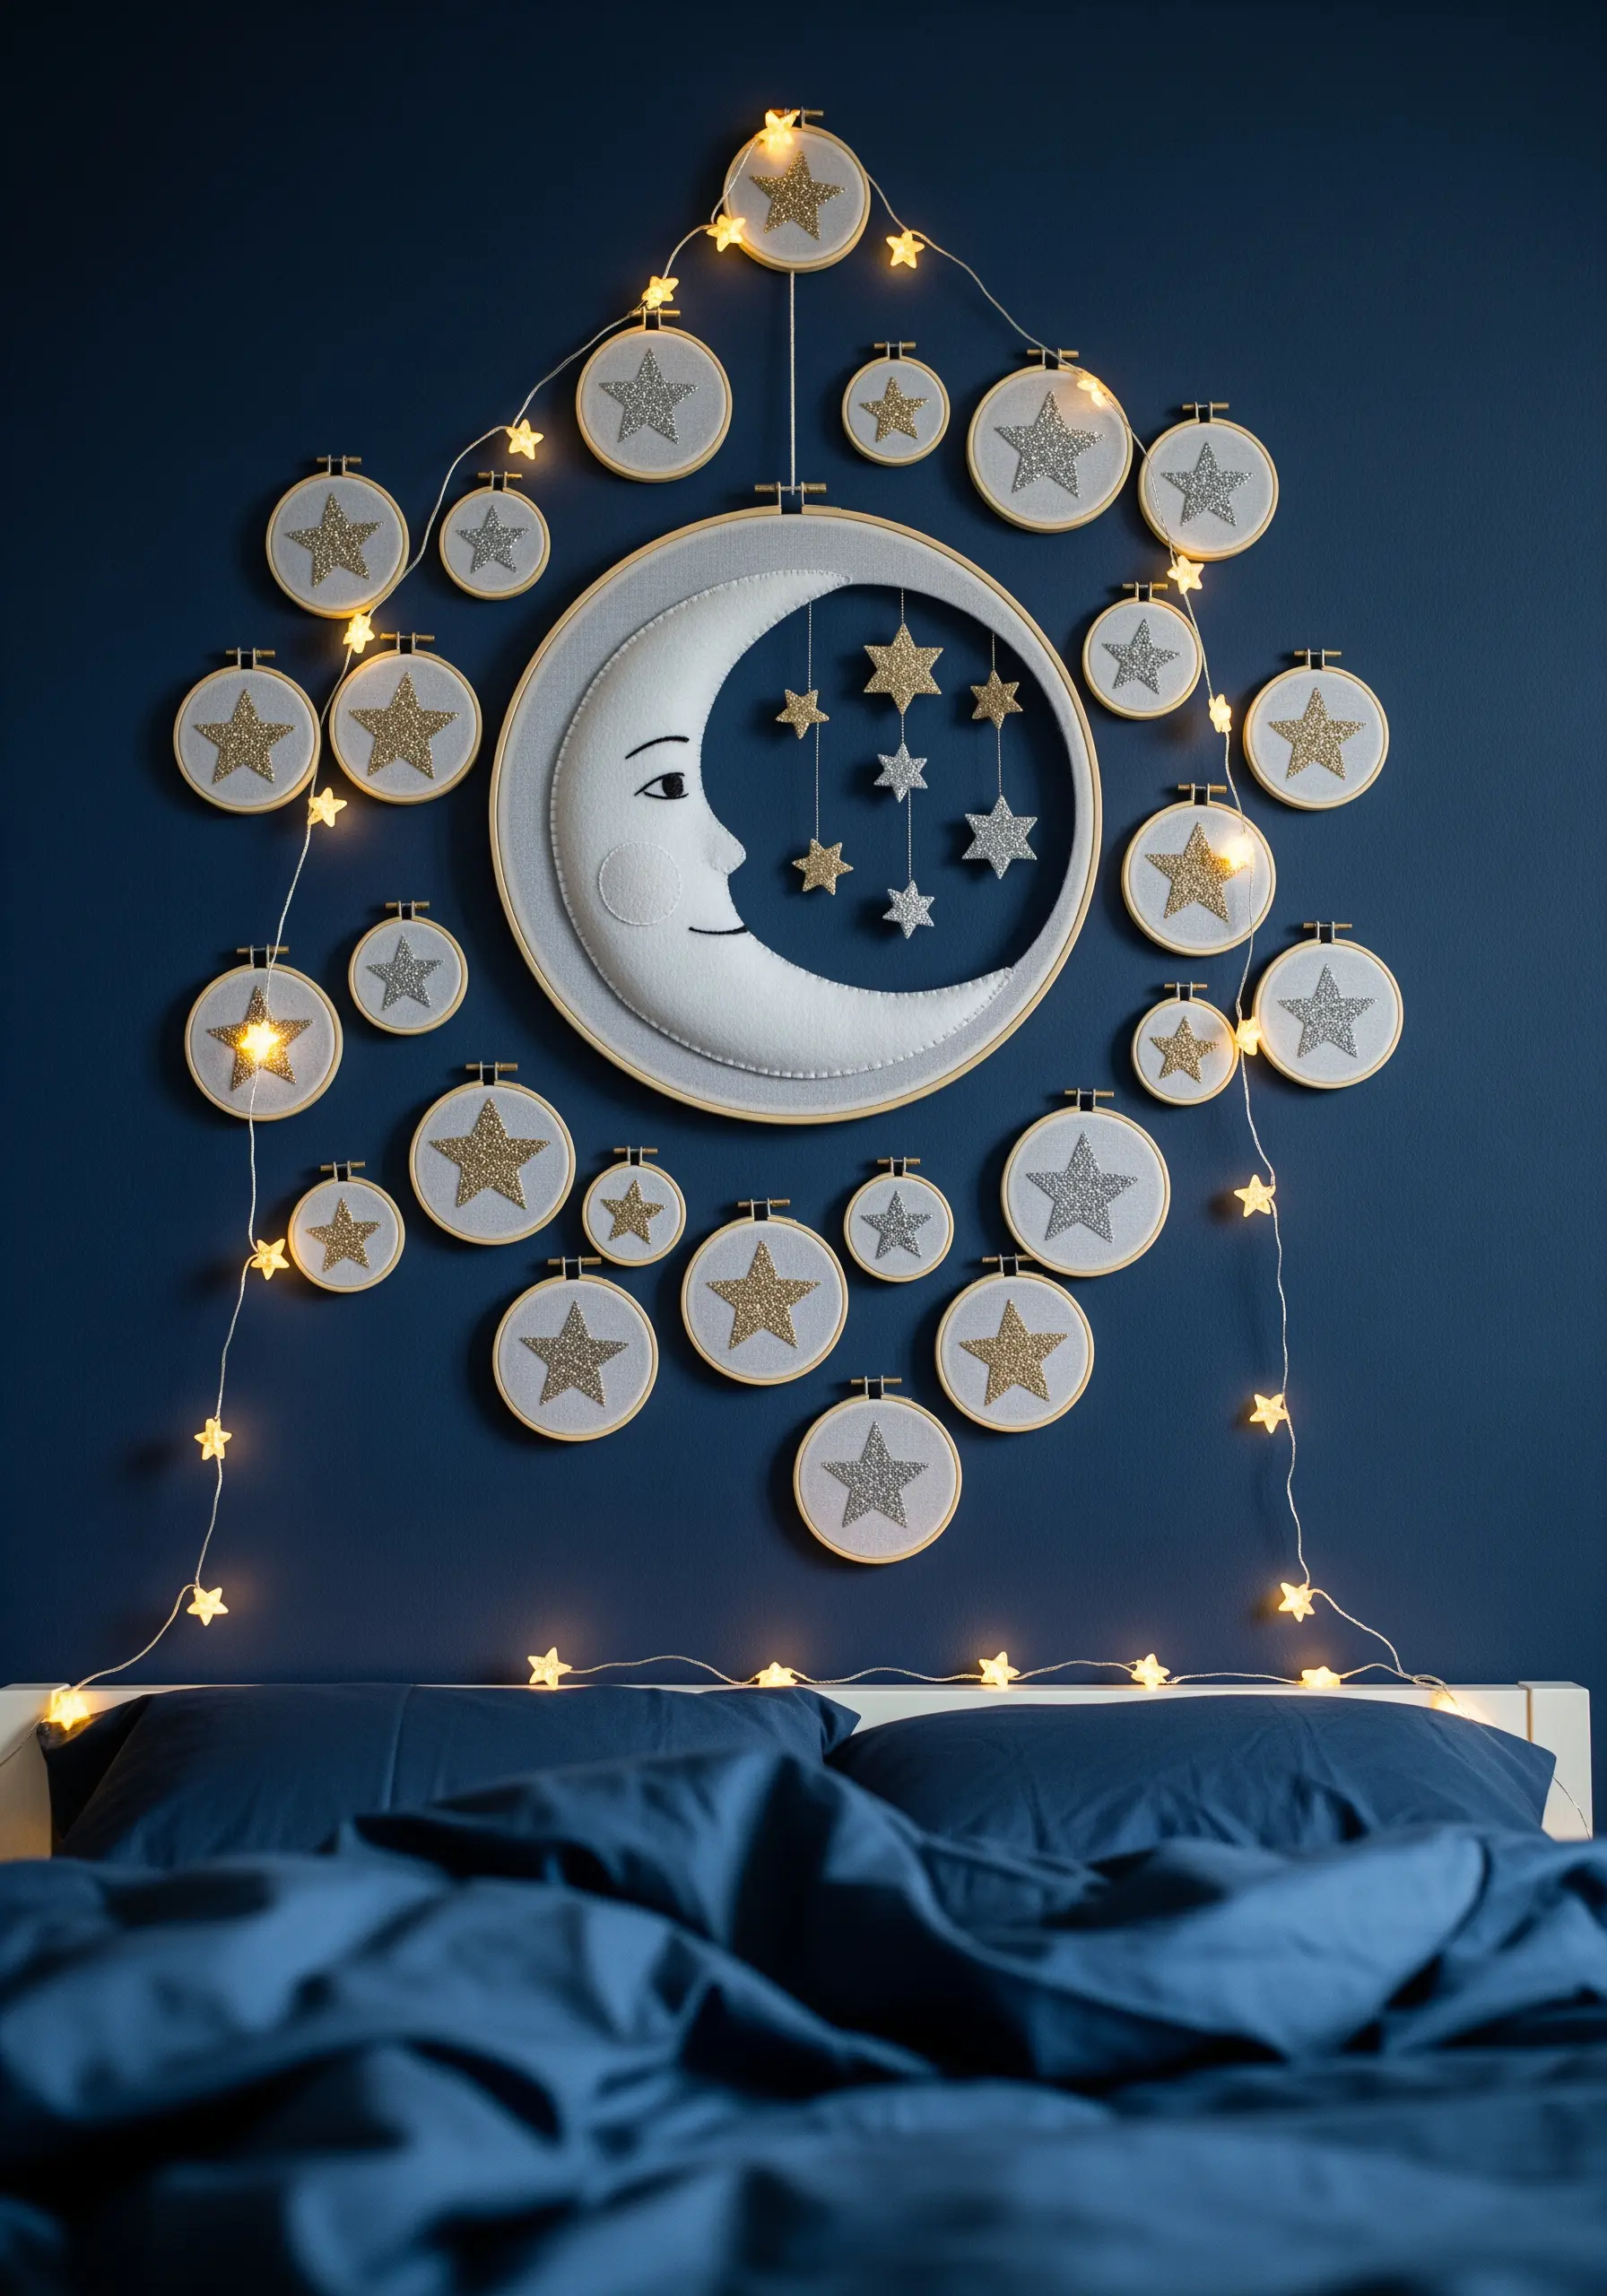
Add sparkle and magic to a celestial theme by using glitter-infused fabric as an appliqué element.
Cut star shapes from gold glitter fabric or felt and secure them with a simple running stitch using a matching metallic thread.
For the central moon, use a soft white felt and add gentle dimension by lightly stuffing it with a bit of polyester fill before stitching it closed.
Arrange the smaller star hoops around the moon and weave in fairy lights to create a truly enchanting bedroom wall feature.
17. Paint with Thread Using Freeform Seed Stitch
Encourage expressive creativity by filling abstract shapes with tiny, randomly placed seed stitches.
Draw organic, overlapping color blobs on your fabric as a loose guide.
Using two or three shades of a similar color, let your child fill each section with small, scattered straight stitches, blending the colors where the shapes meet.
This technique is wonderfully forgiving, as there is no right or wrong way to place the stitches, making it a perfect exercise in abstract color blending.
18. Craft a Welcoming Mobile with Simple Icons
This project transforms small, simple embroideries into a meaningful piece of entryway art.
Use burlap or a coarse-weave linen for a rustic, textural background in each mini hoop.
Stitch simple, recognizable icons—a heart, a house, the sun—using basic stitches like satin stitch and backstitch.
Let your child help twist colorful yarns together to create decorative hangers, and assemble the hoops on a piece of driftwood for a natural, handmade feel.
19. Build a Layered Felt Cityscape
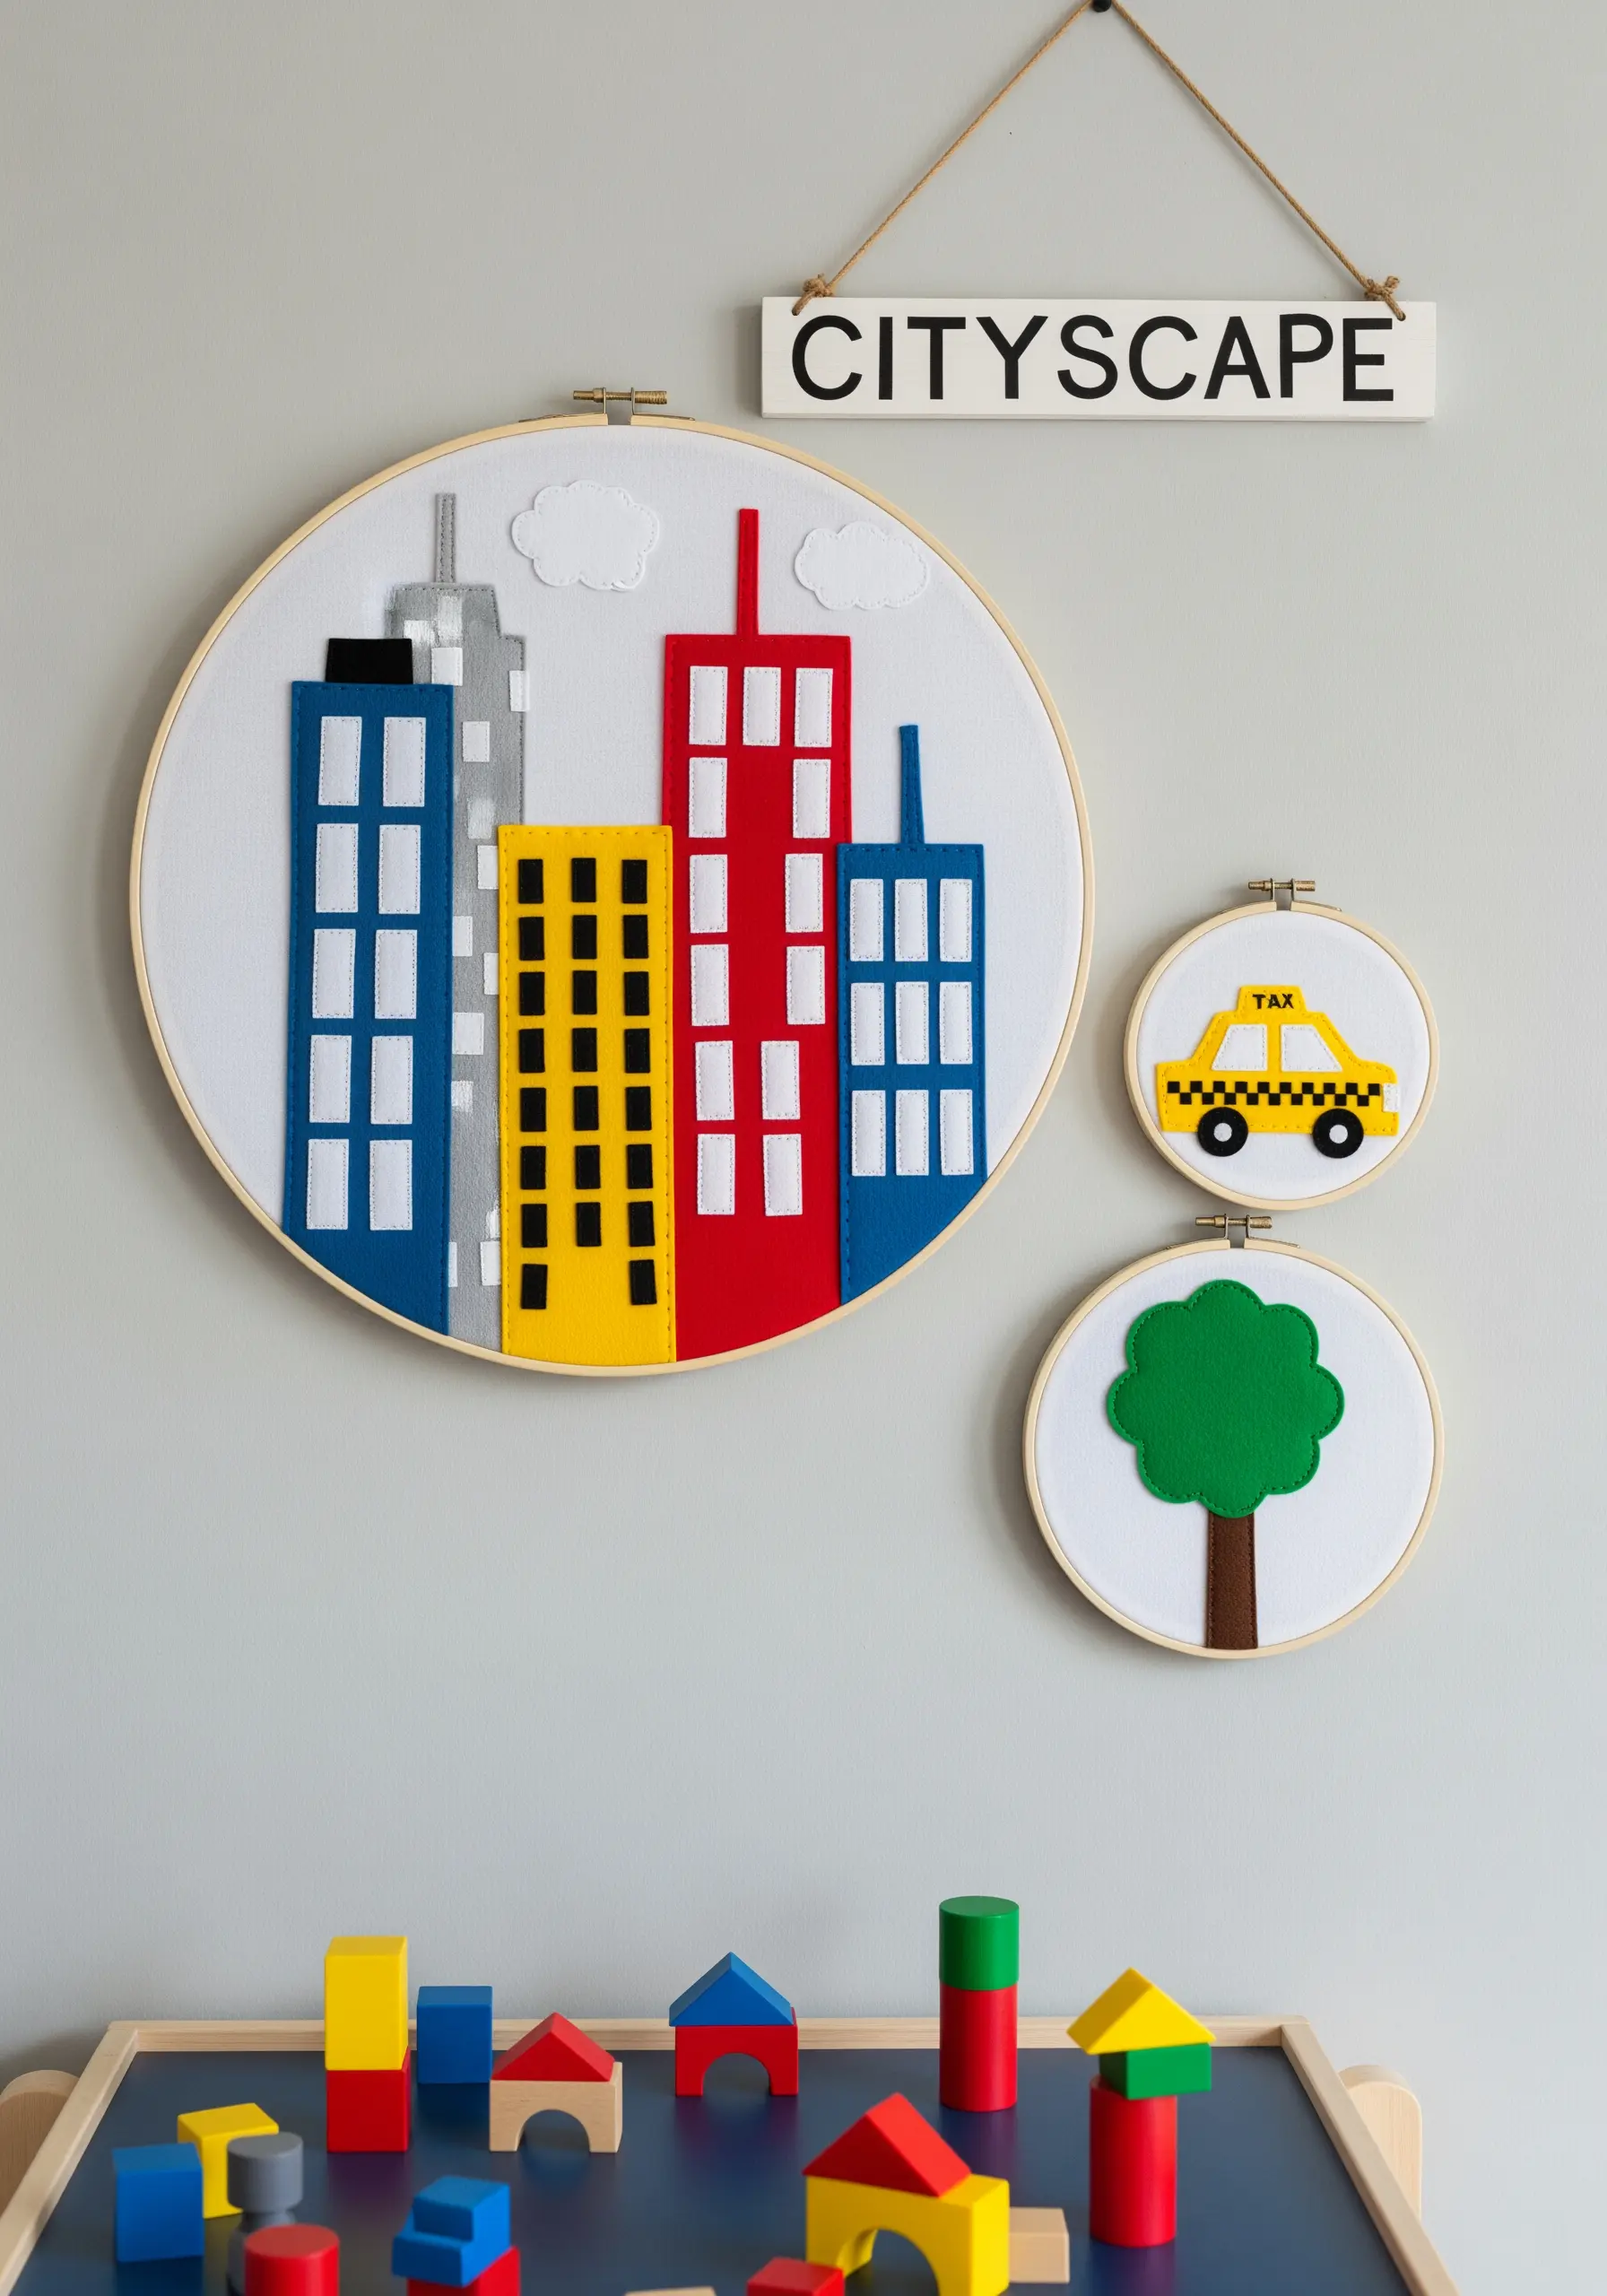
Create a sense of depth and perspective in this urban scene by layering felt shapes.
Start by placing the background buildings first, then add the foreground buildings on top, allowing them to overlap.
This is a great opportunity to teach basic concepts of perspective in a simple, hands-on way.
Let your child add details by cutting tiny yellow squares for lit windows, adding another layer of storytelling to your cozy embroidered wall art.
20. Spell It Out with a Floral Letter Garland

Combine appliqué and embroidery to create a beautiful, personalized banner perfect for a playroom or bedroom door.
Cut letters from patterned fabric and secure them to sheer organza in each hoop using an iron-on adhesive for stability.
Outline the letters with a neat backstitch to define their shape, then let your child add simple decorative flowers using lazy daisy stitches for petals and French knots for centers.
Connect the finished hoops with a colorful ribbon to complete your custom garland.


