
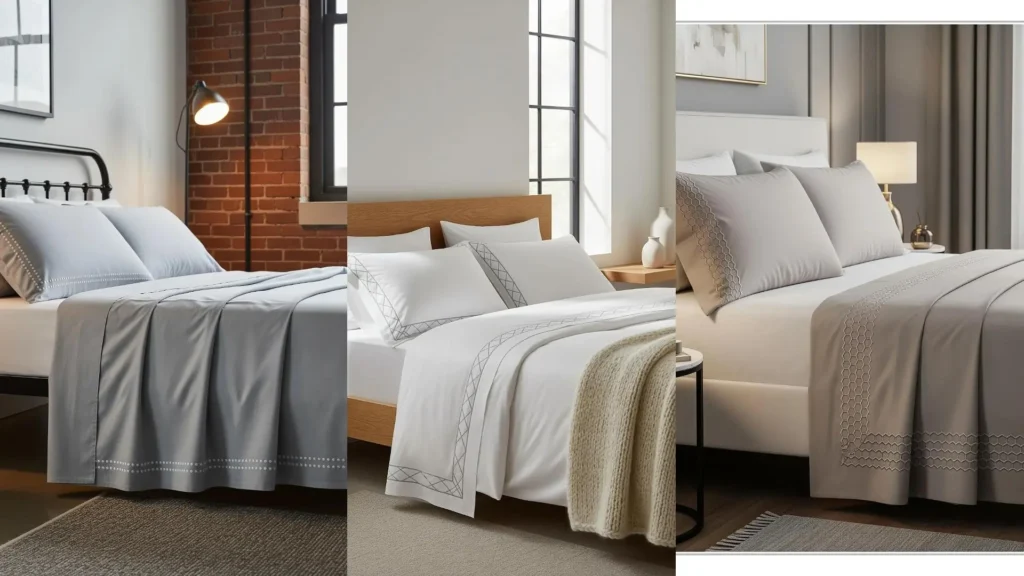
You have the threads, the fabric, and the desire to create something beautiful. But sometimes, the finished piece doesn’t quite capture that feeling of quiet luxury you were aiming for. The secret isn’t in more complex stitches or more colors—it’s in the thoughtful, intentional details that turn simple linens into a personal sanctuary.
A well-placed border can transform your entire bed. It’s a frame for rest, a subtle line of texture that catches the eye and invites you to touch. It’s about creating a piece that feels cohesive and considered, elevating the everyday with just a needle and thread.
Here, you’ll find ideas that focus on precision, texture, and the quiet power of a neutral palette. Think of this not just as a collection of patterns, but as a new way to approach your craft—with confidence, artistry, and the pleasure of making something truly special for your home.
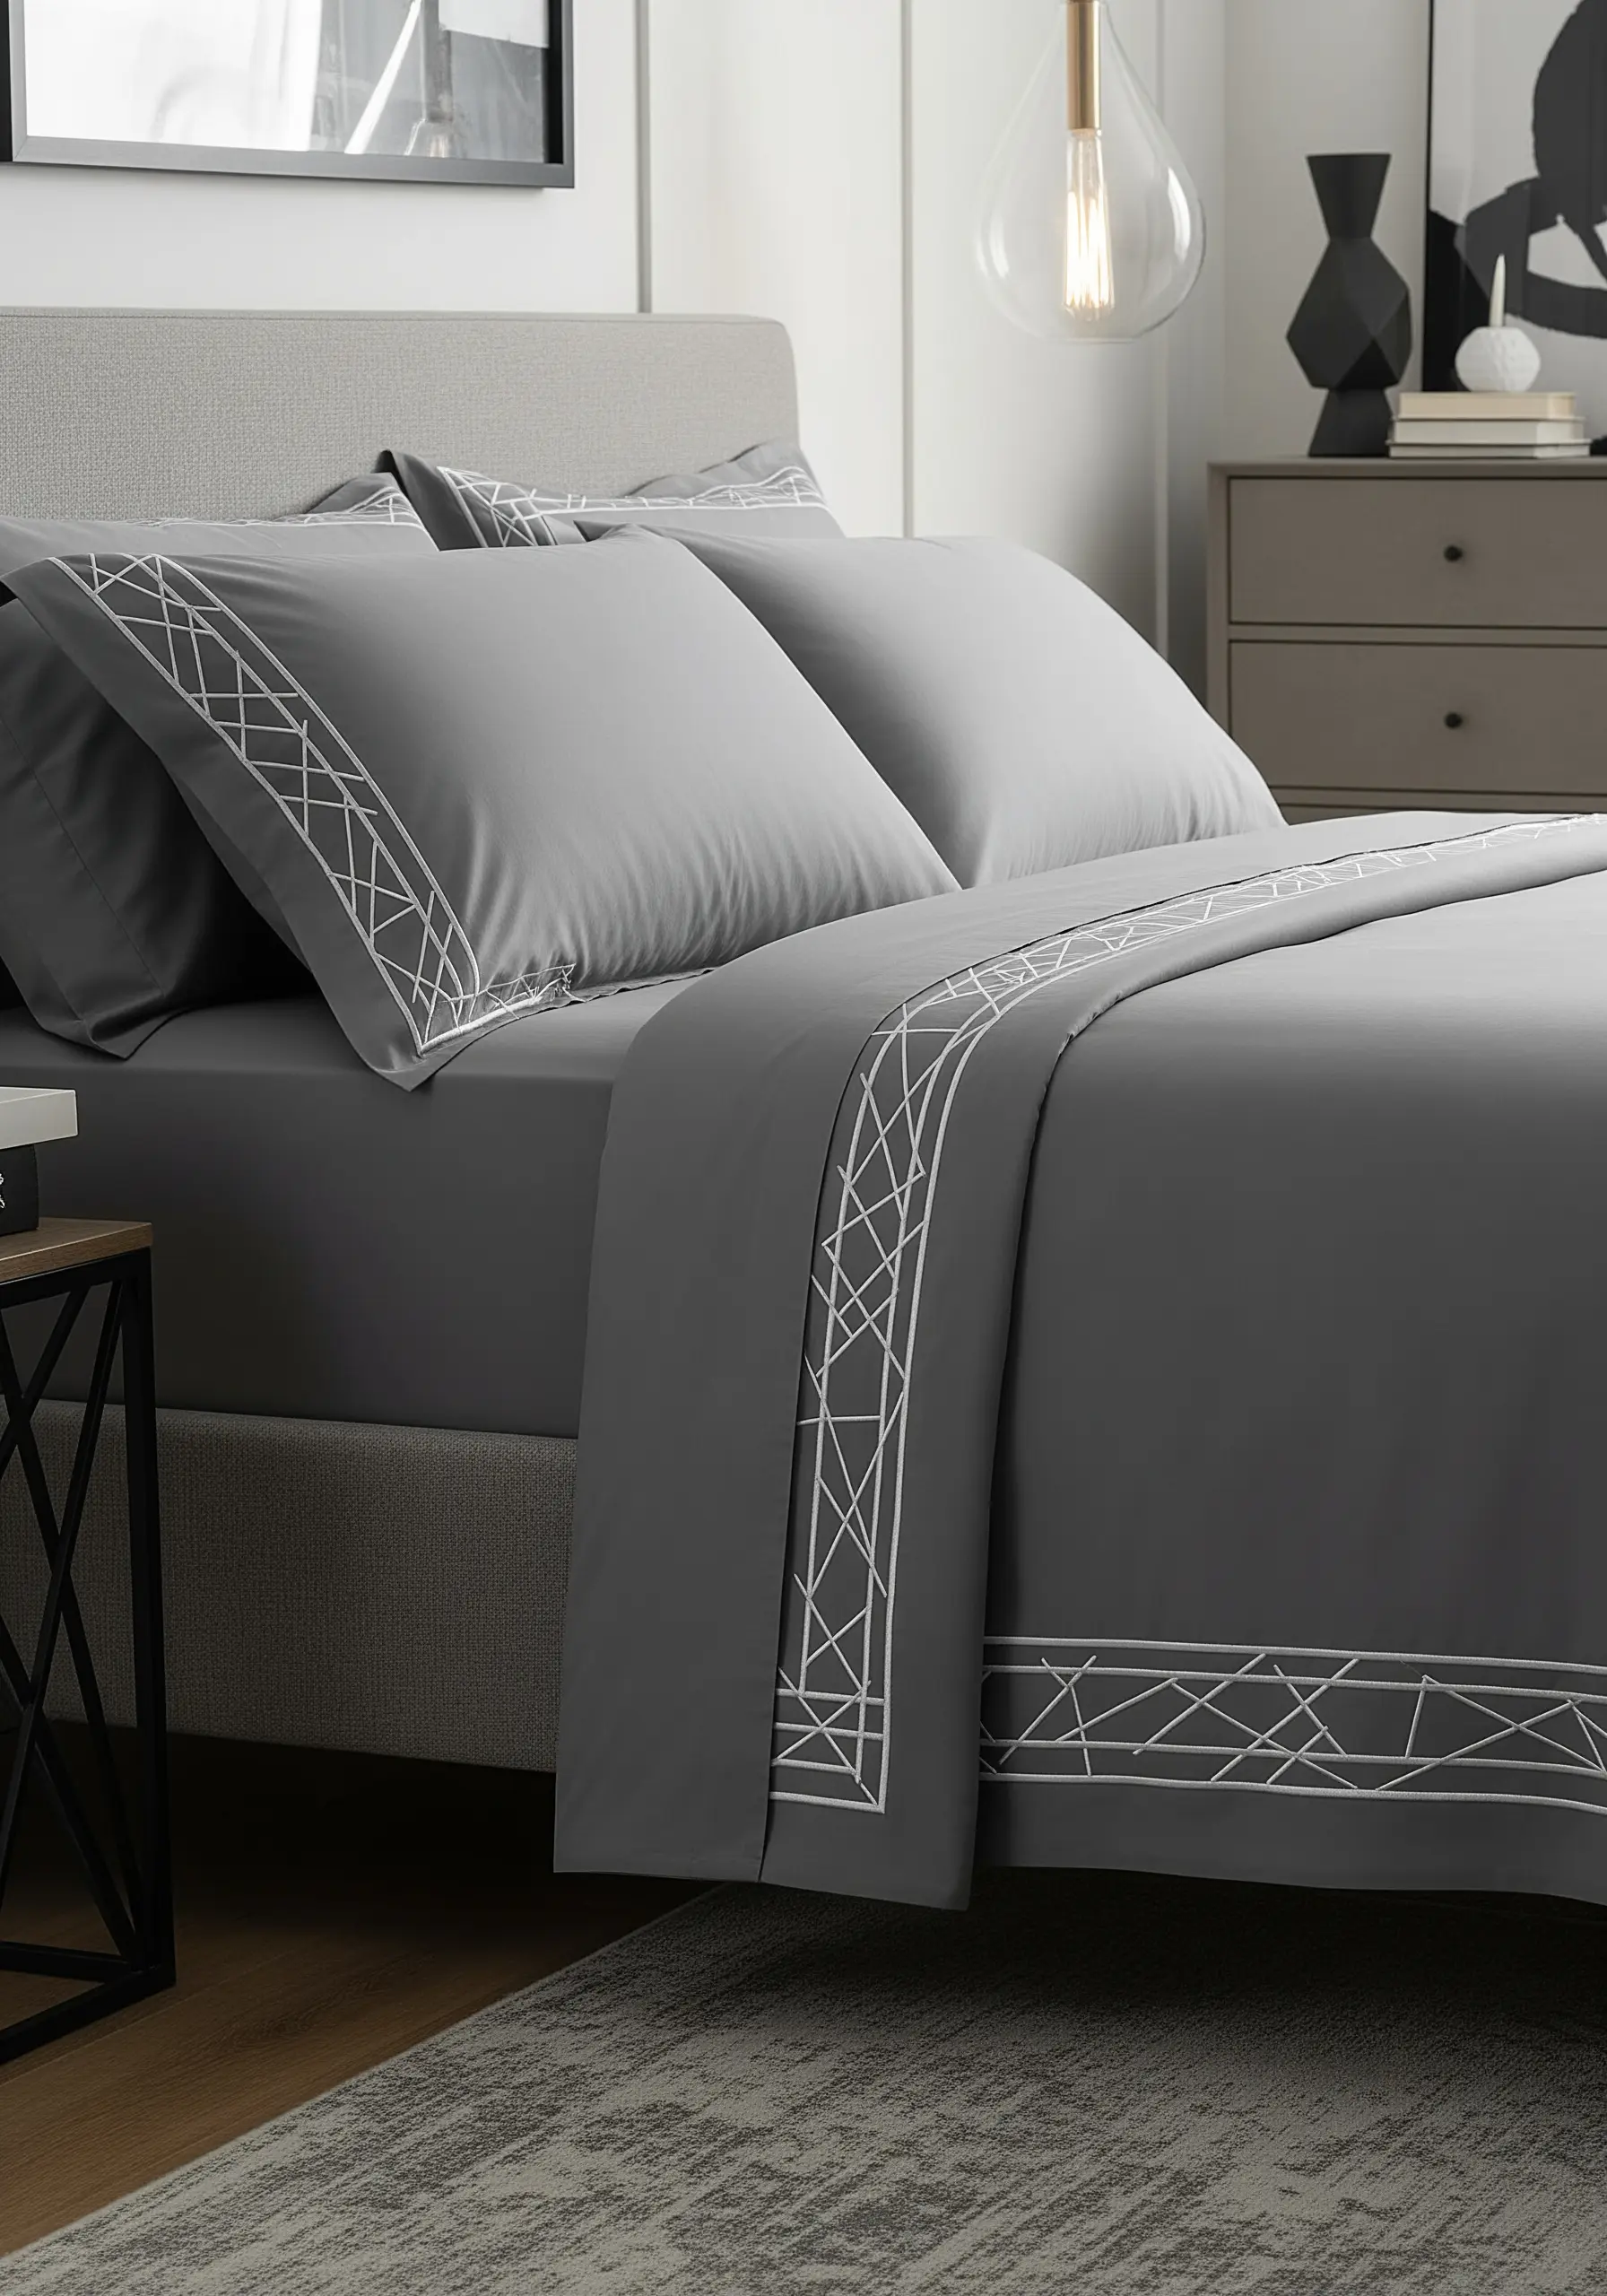
1. The Architectural Line
Create this crisp, hotel-inspired border using a disciplined stem stitch or split stitch, which gives your lines a sharp, defined edge.
For ultimate precision on cotton percale, use only one or two strands of floss and trace your geometric pattern with a water-soluble marker first.
This ensures every angle is perfect, giving the minimalist design a powerful, architectural feel.
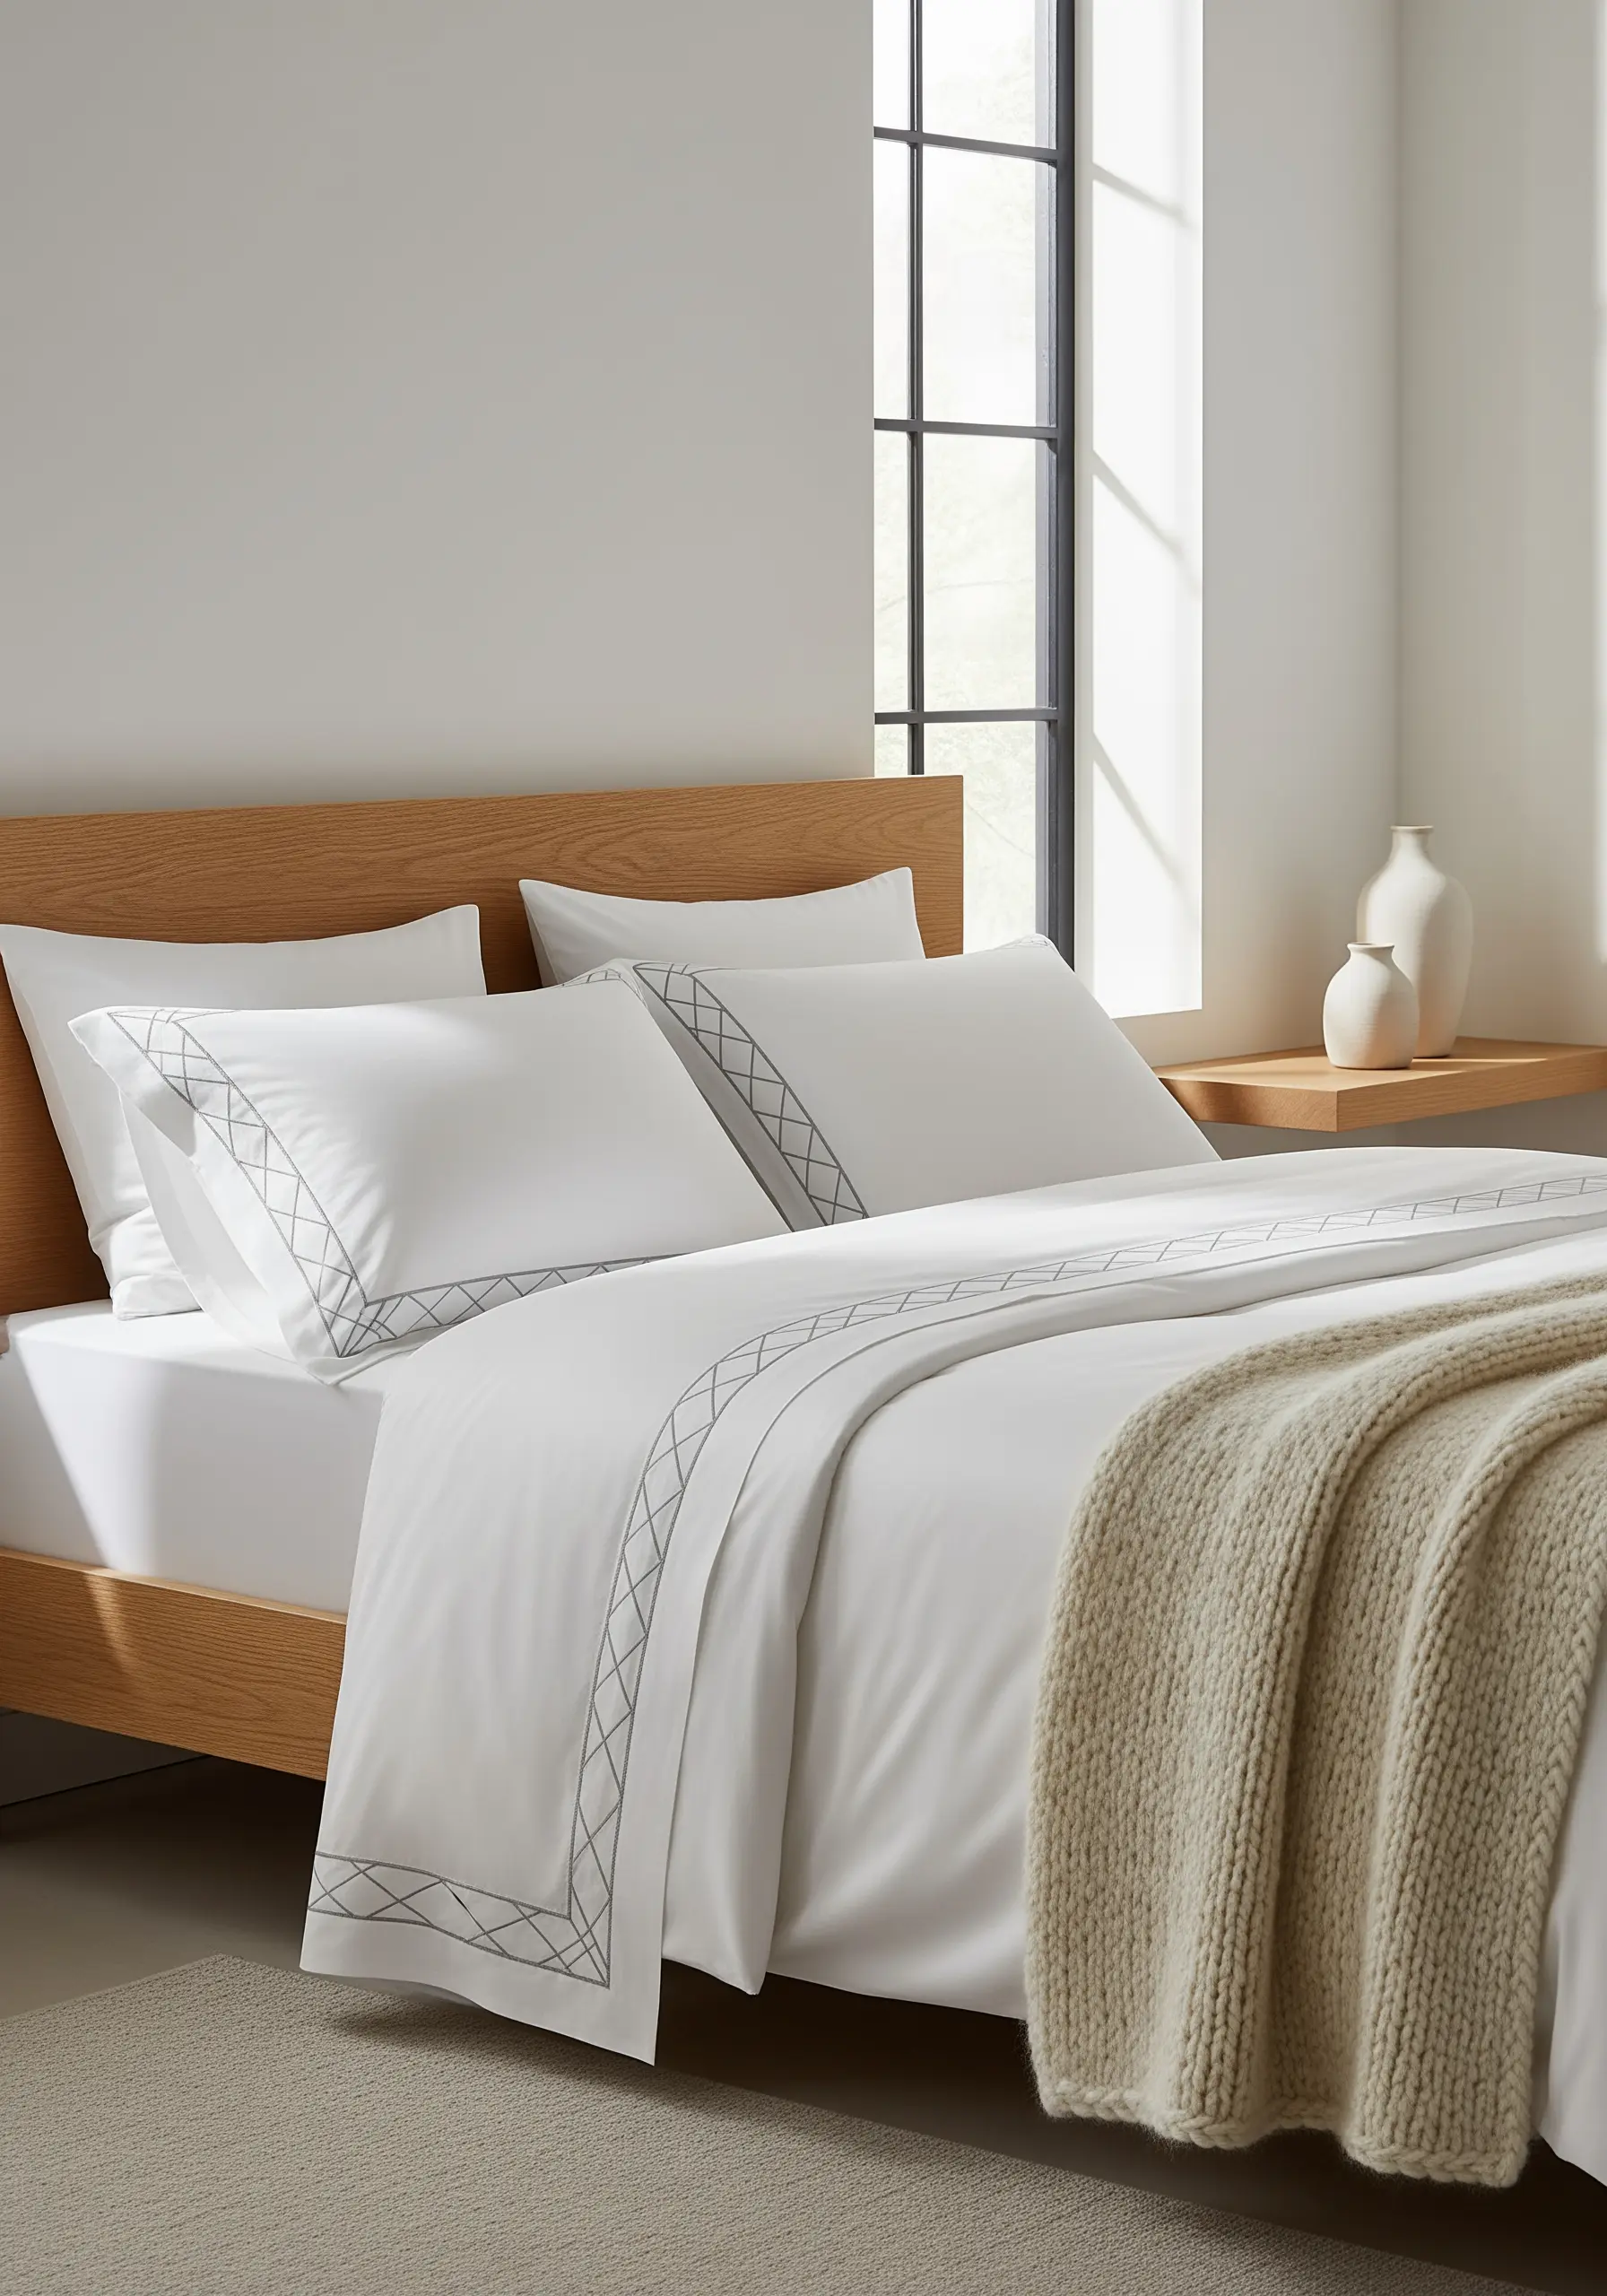
2. The Trailing Botanical Vine
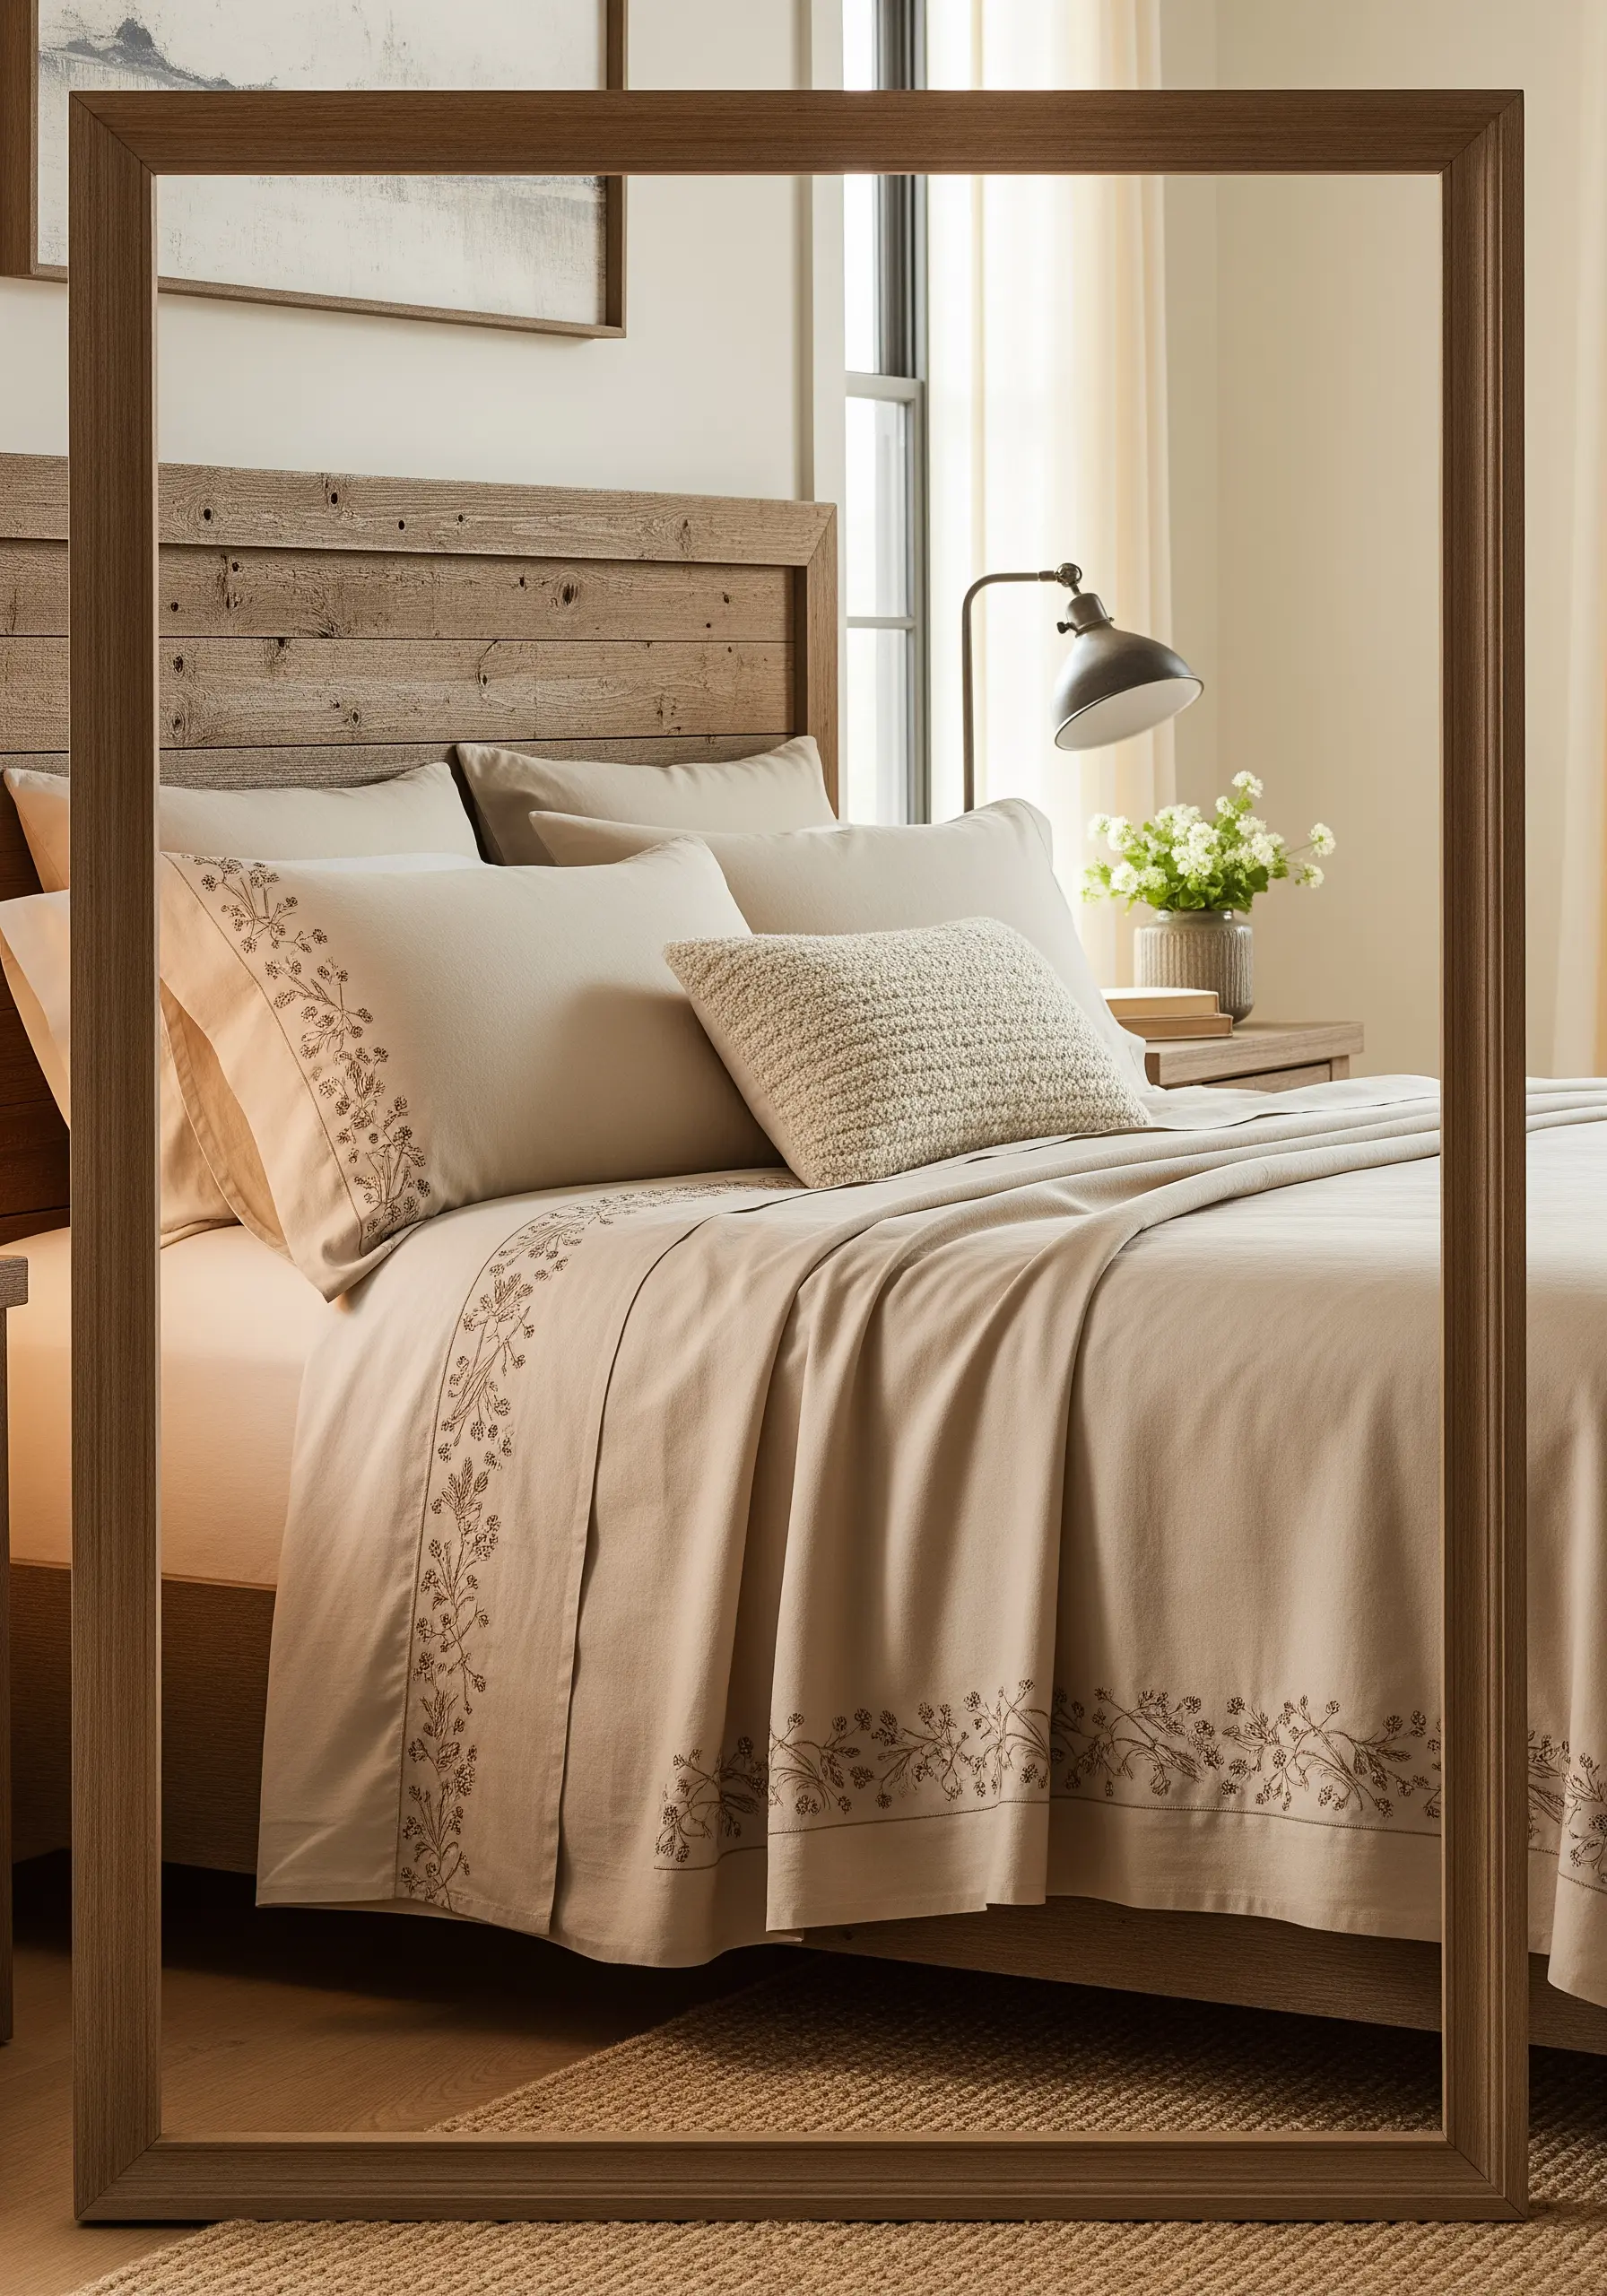
To achieve this soft, organic flow, use a whipped backstitch for the main vine, which creates a smooth, rounded line without any gaps.
Form the leaves and buds with simple lazy daisy stitches and scattered French knots, varying their placement to avoid a stiff, repetitive look.
Sticking to a single, muted thread color on a neutral fabric ensures the result is sophisticated and calming, not busy.
3. The Modern Sashiko Accent
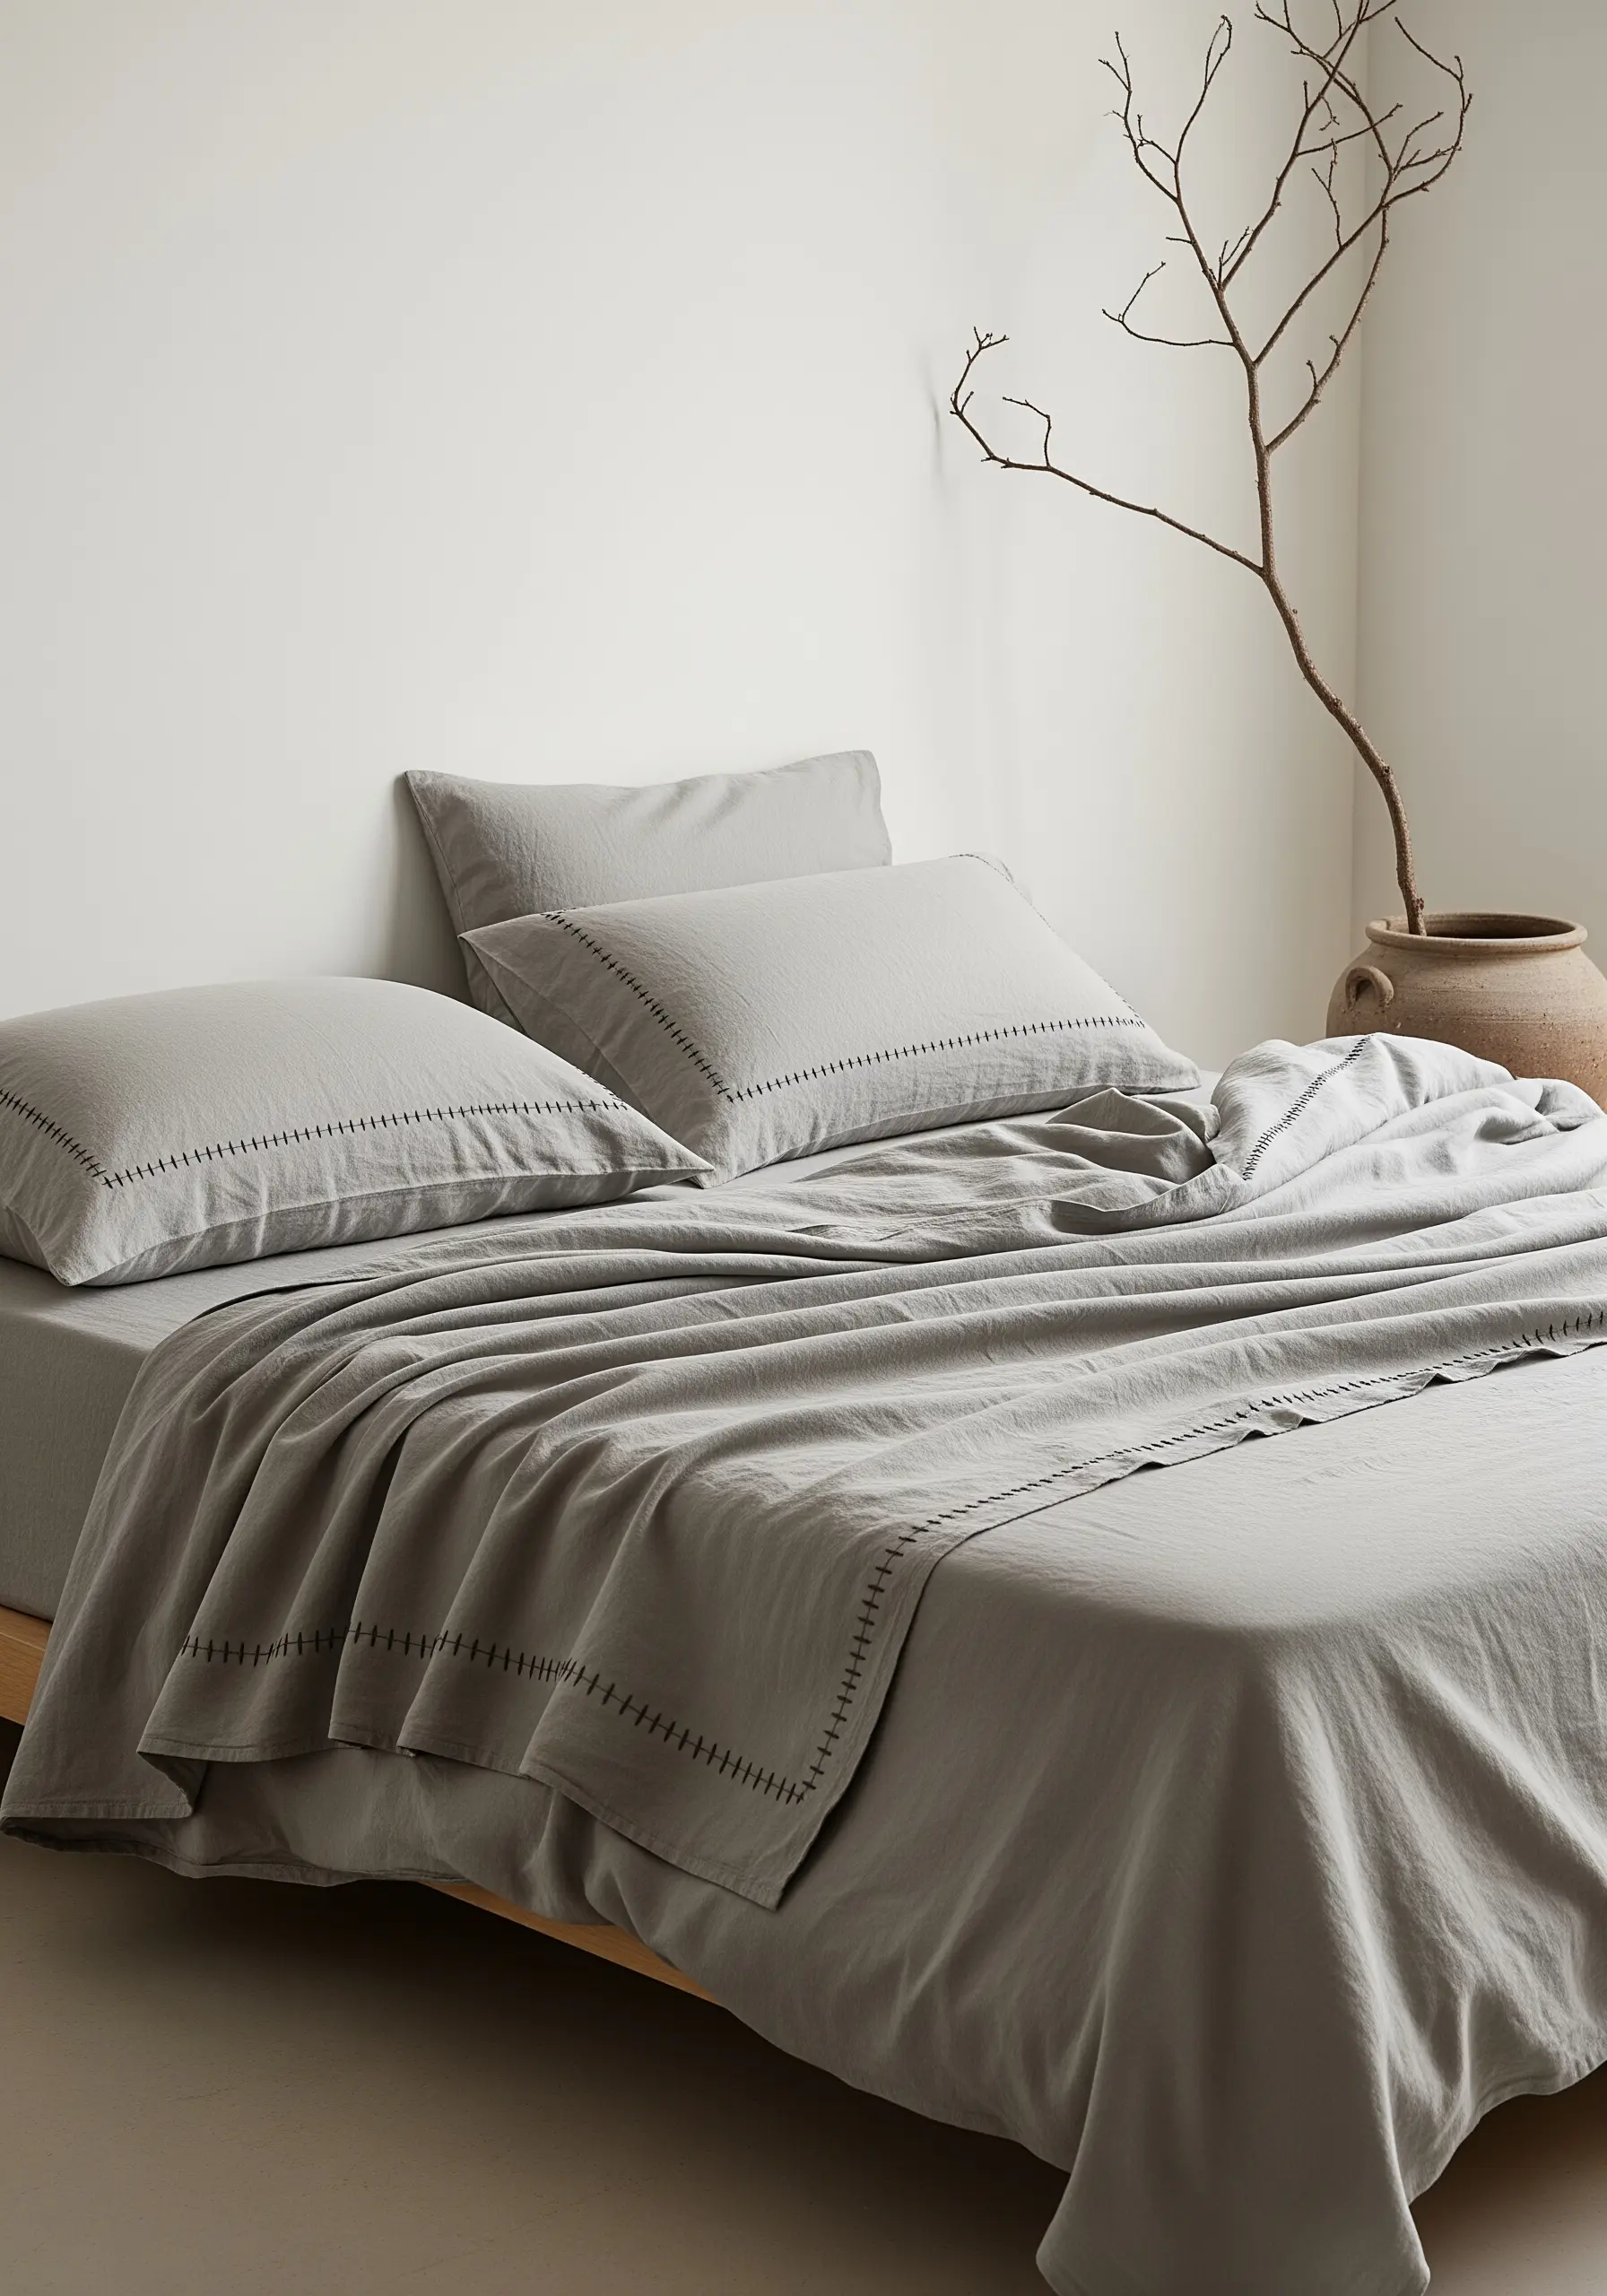
This design celebrates the beauty of a simple running stitch, elevated by intentional choices.
Use a thicker thread, like a cotton perle or three strands of standard floss, to give each stitch weight and texture against the linen.
Focus on maintaining consistent stitch length and spacing; this rhythm is what transforms a basic stitch into a refined, minimalist statement.
4. The Refined Scrollwork Border
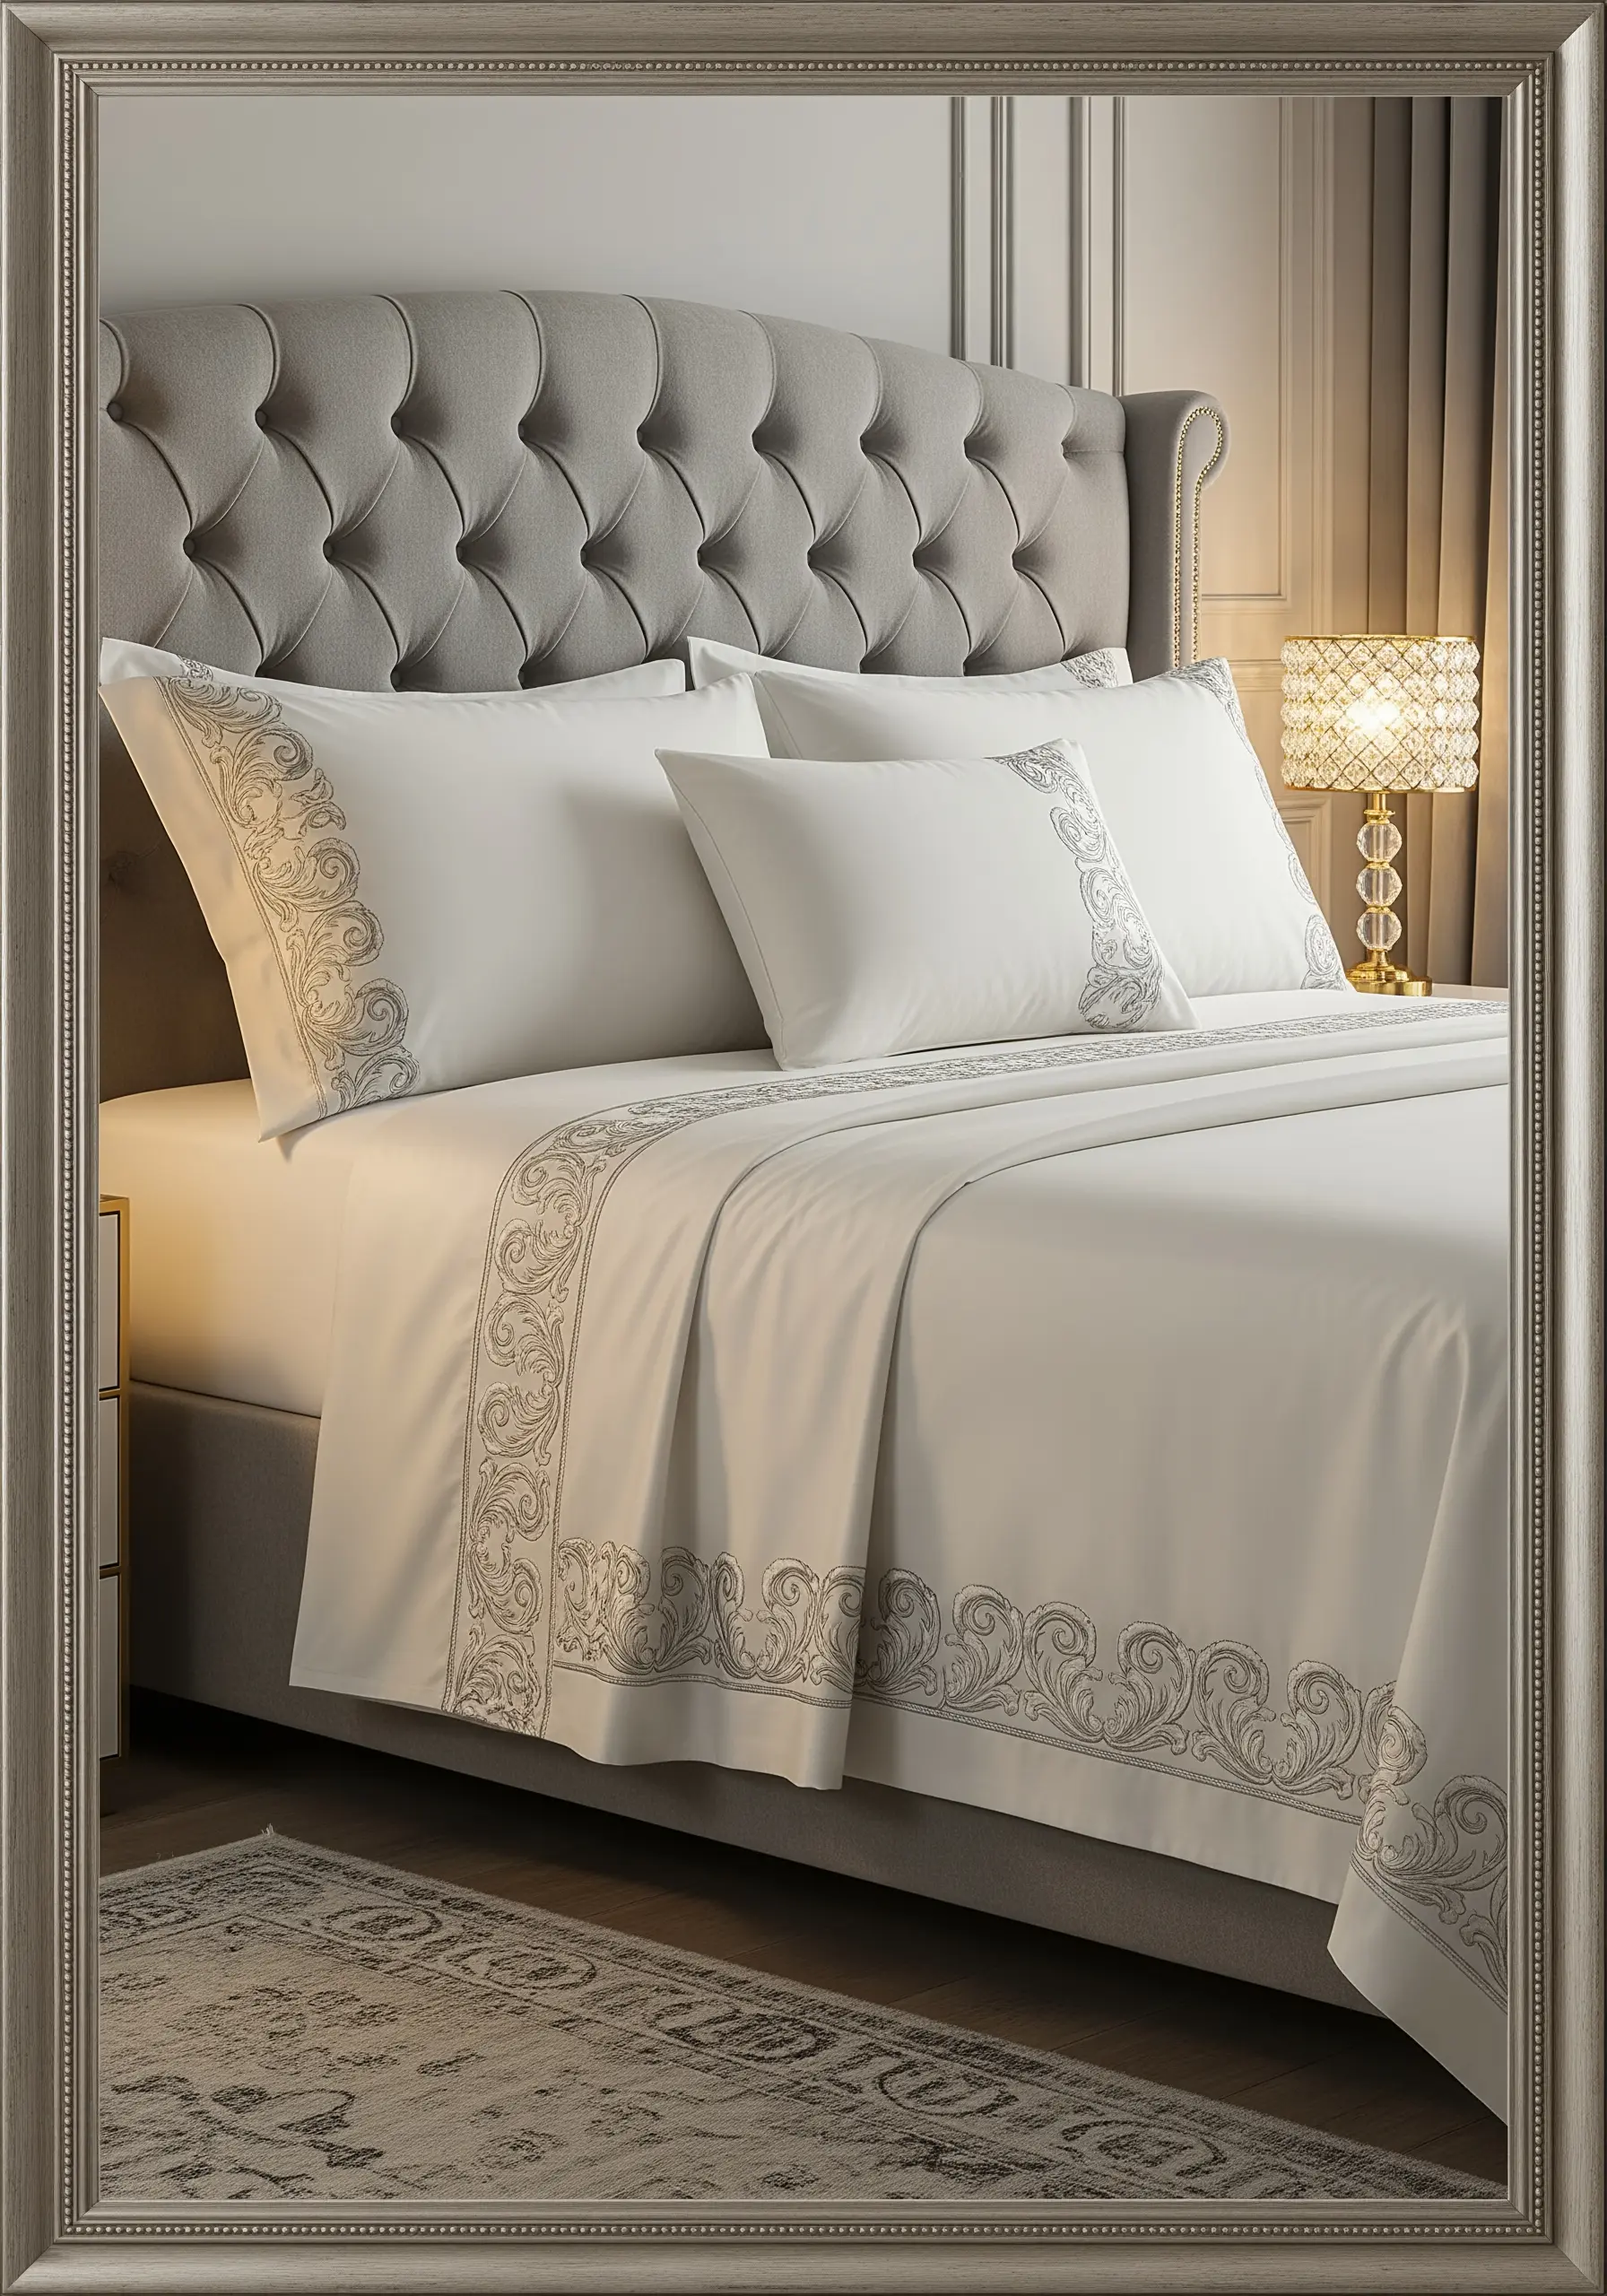
For this opulent look, combine two key stitches: a smooth satin stitch for the wider, filled areas and a delicate backstitch for the fine outlines.
Choose a thread with a subtle sheen, like rayon or a silk blend, to catch the light and enhance the feeling of luxury, especially on sateen fabric.
To prevent the dense stitching from puckering the fabric, always use a tear-away or water-soluble stabilizer on the back.
5. The Coastal Scallop Edge
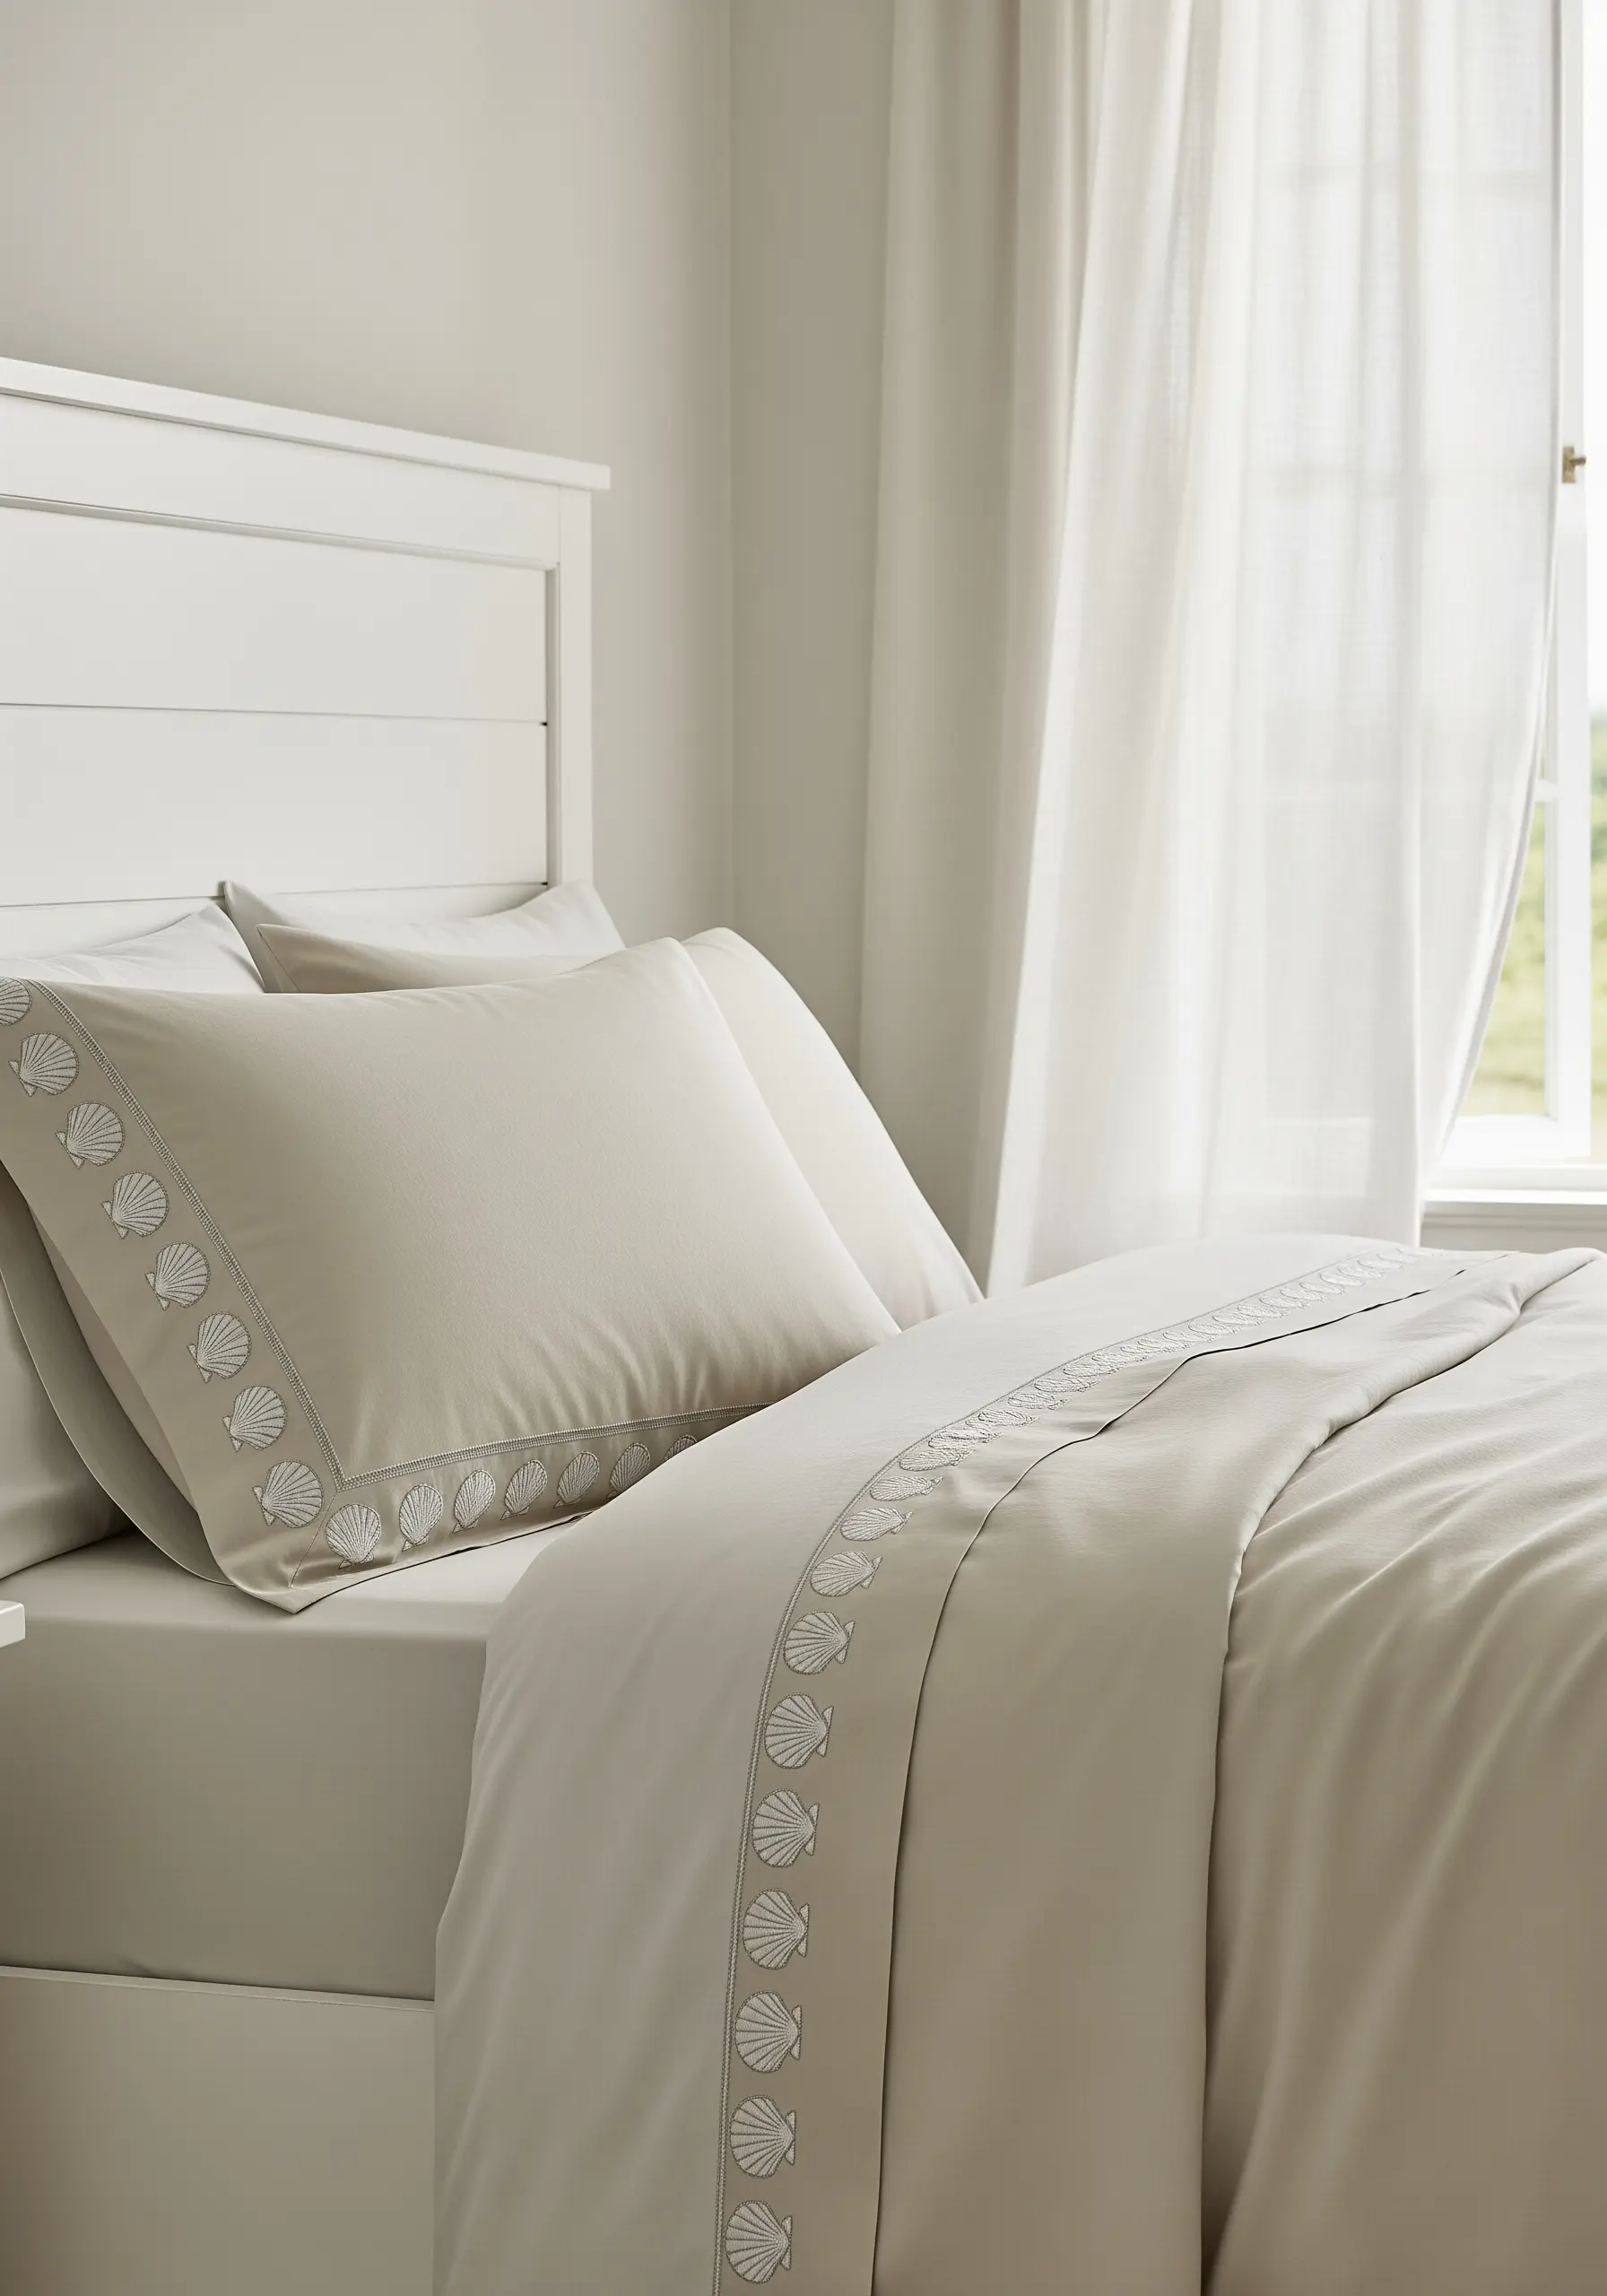
Create these charming shells using satin stitch, angling your stitches from the outer edge toward the base to mimic the natural ridges.
Add definition by outlining each shell with a single-strand backstitch in a thread that is one shade darker than your main fill color.
The rhythmic repetition of this simple coastal motif creates a border that feels both playful and serene.
6. The Minimalist Twin Line

The power of this design is its flawless precision. Use a stem stitch for a slightly raised, rope-like line or a backstitch for a flat, graphic look.
Before you begin, draw two perfectly parallel lines with a ruler and a water-soluble pen to use as your guide.
The high contrast of black thread on crisp white fabric delivers a bold, modern statement with the least possible effort.
7. The Tactile Bohemian Diamond
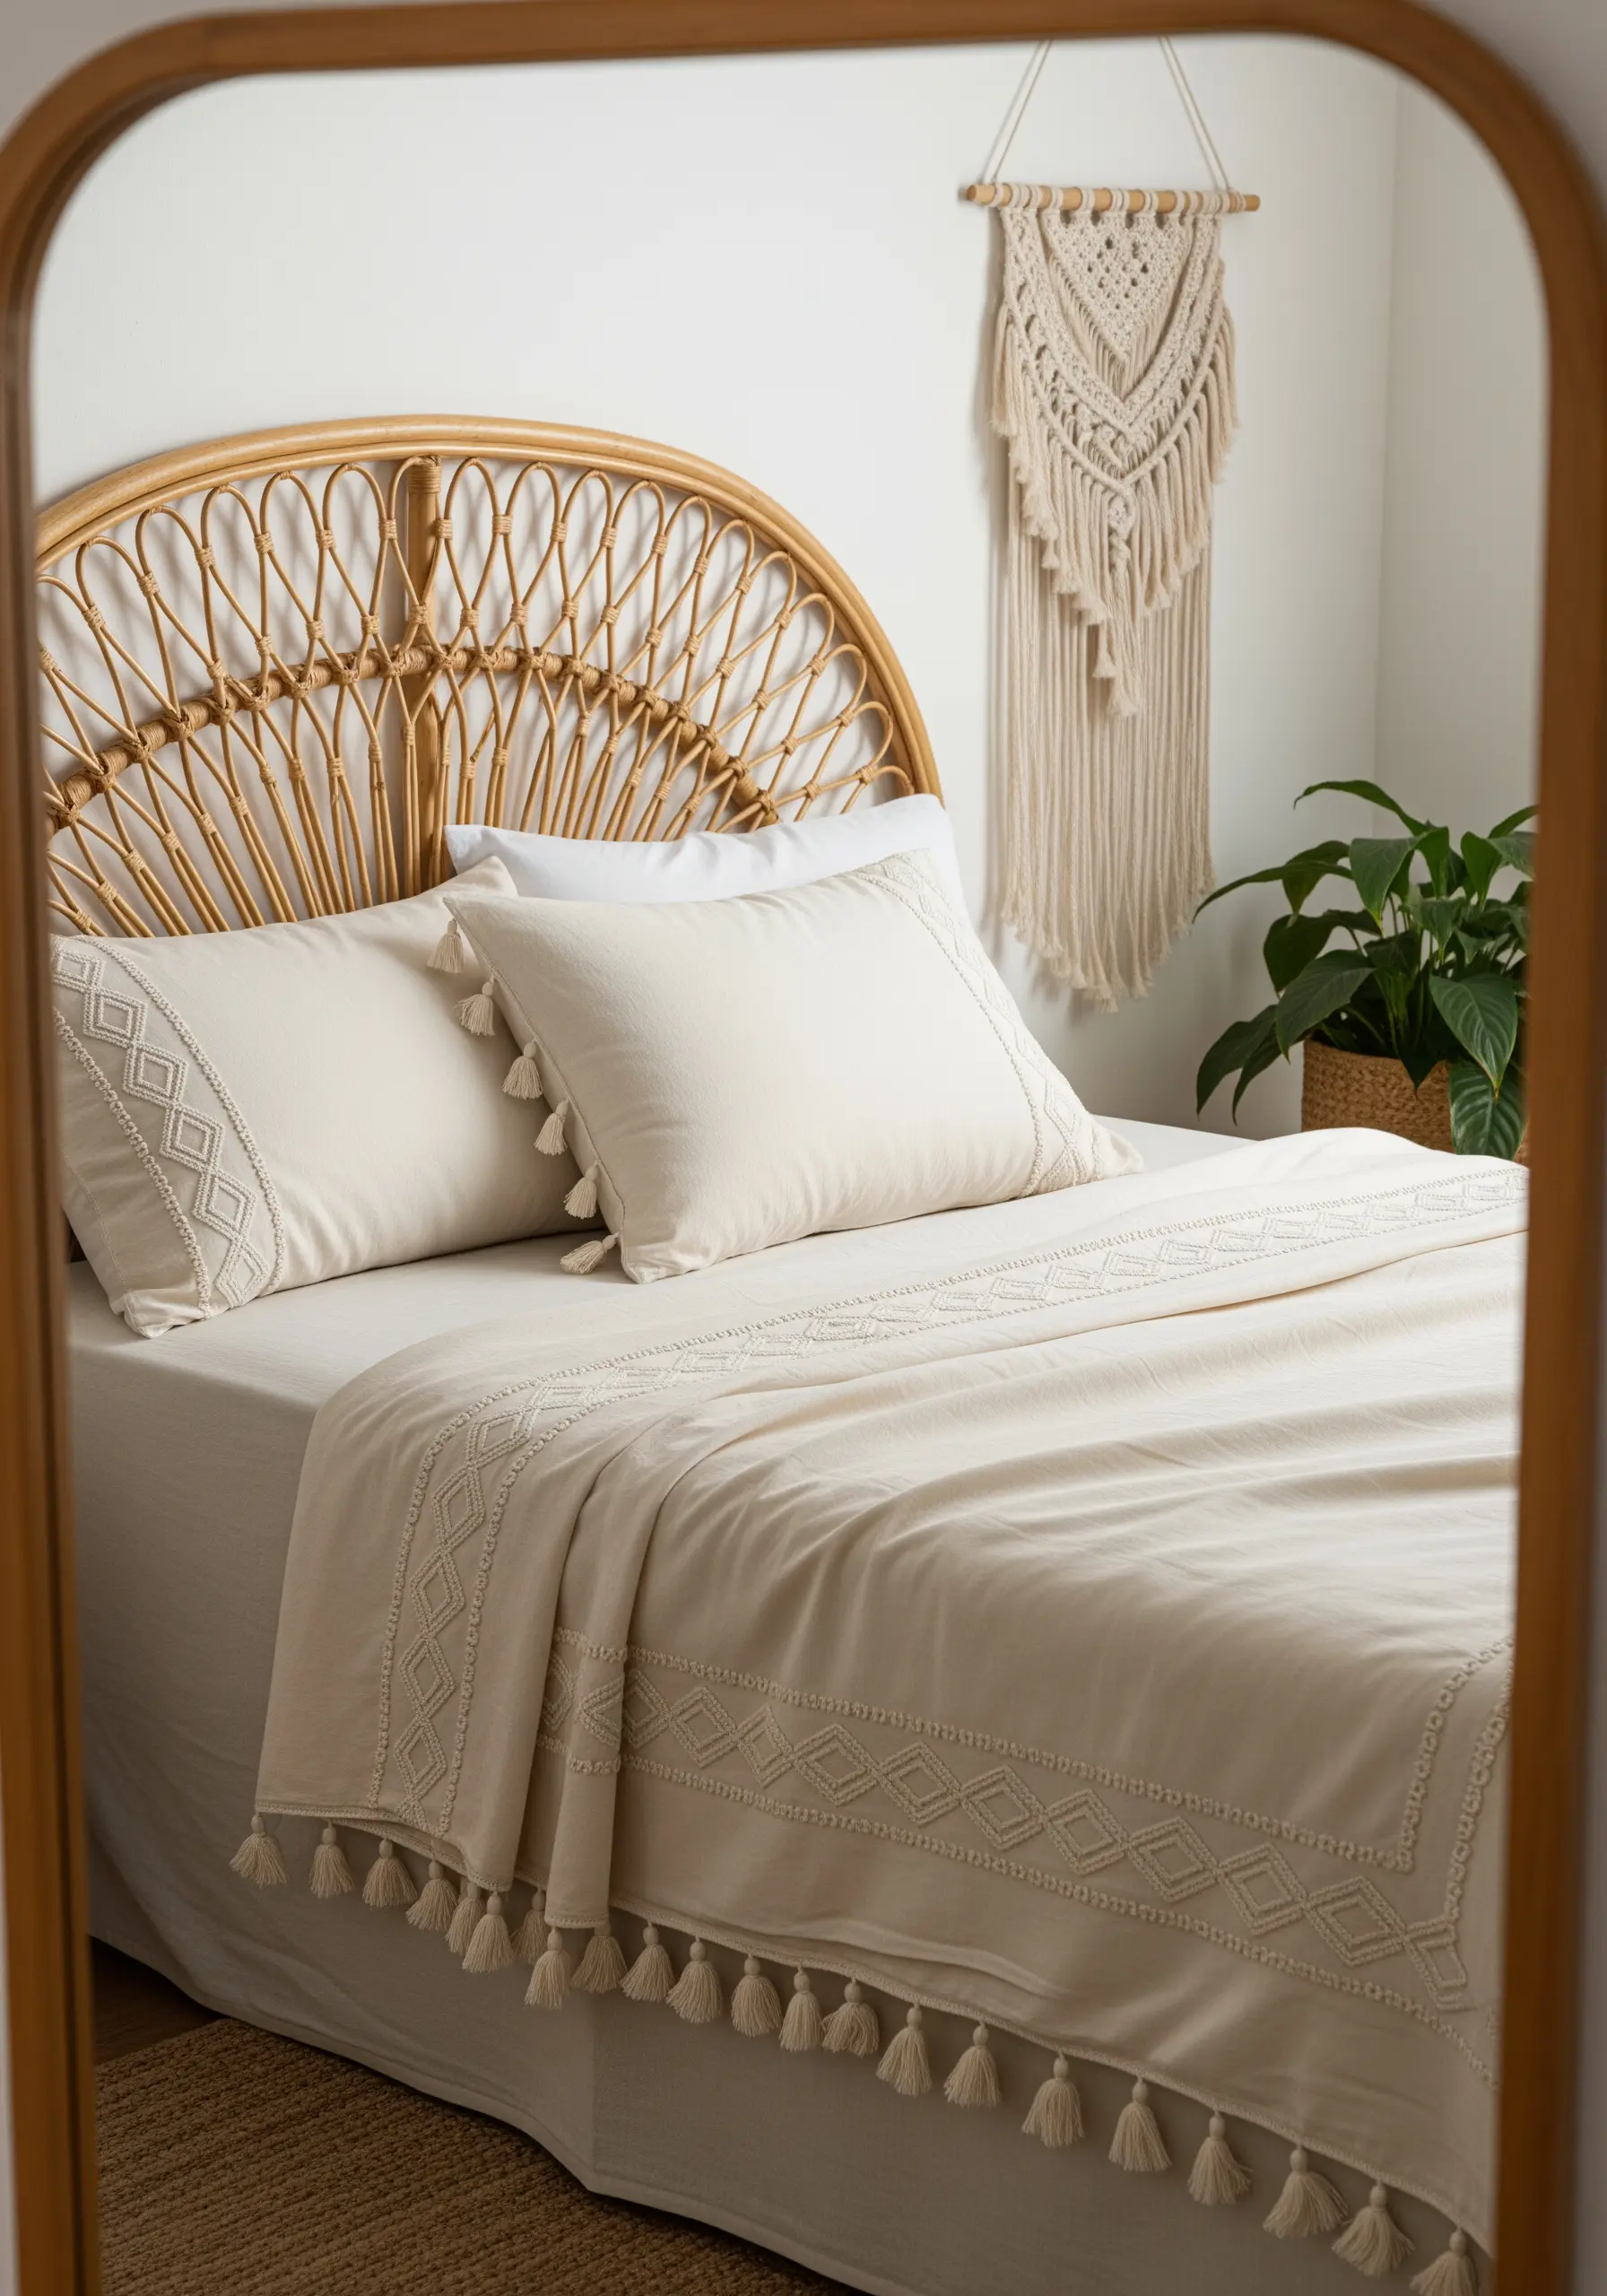
This border is all about touchable texture. Create the raised diamond shapes with a thick chain stitch or by couching a heavier yarn onto the fabric surface.
The goal is to create a design that has physical dimension, adding a cozy, handcrafted weight to the edge of the fabric.
By matching the tassels to your embroidery floss, you create a cohesive, polished look that ties the entire piece together.
8. The Art Deco Fan Scallop
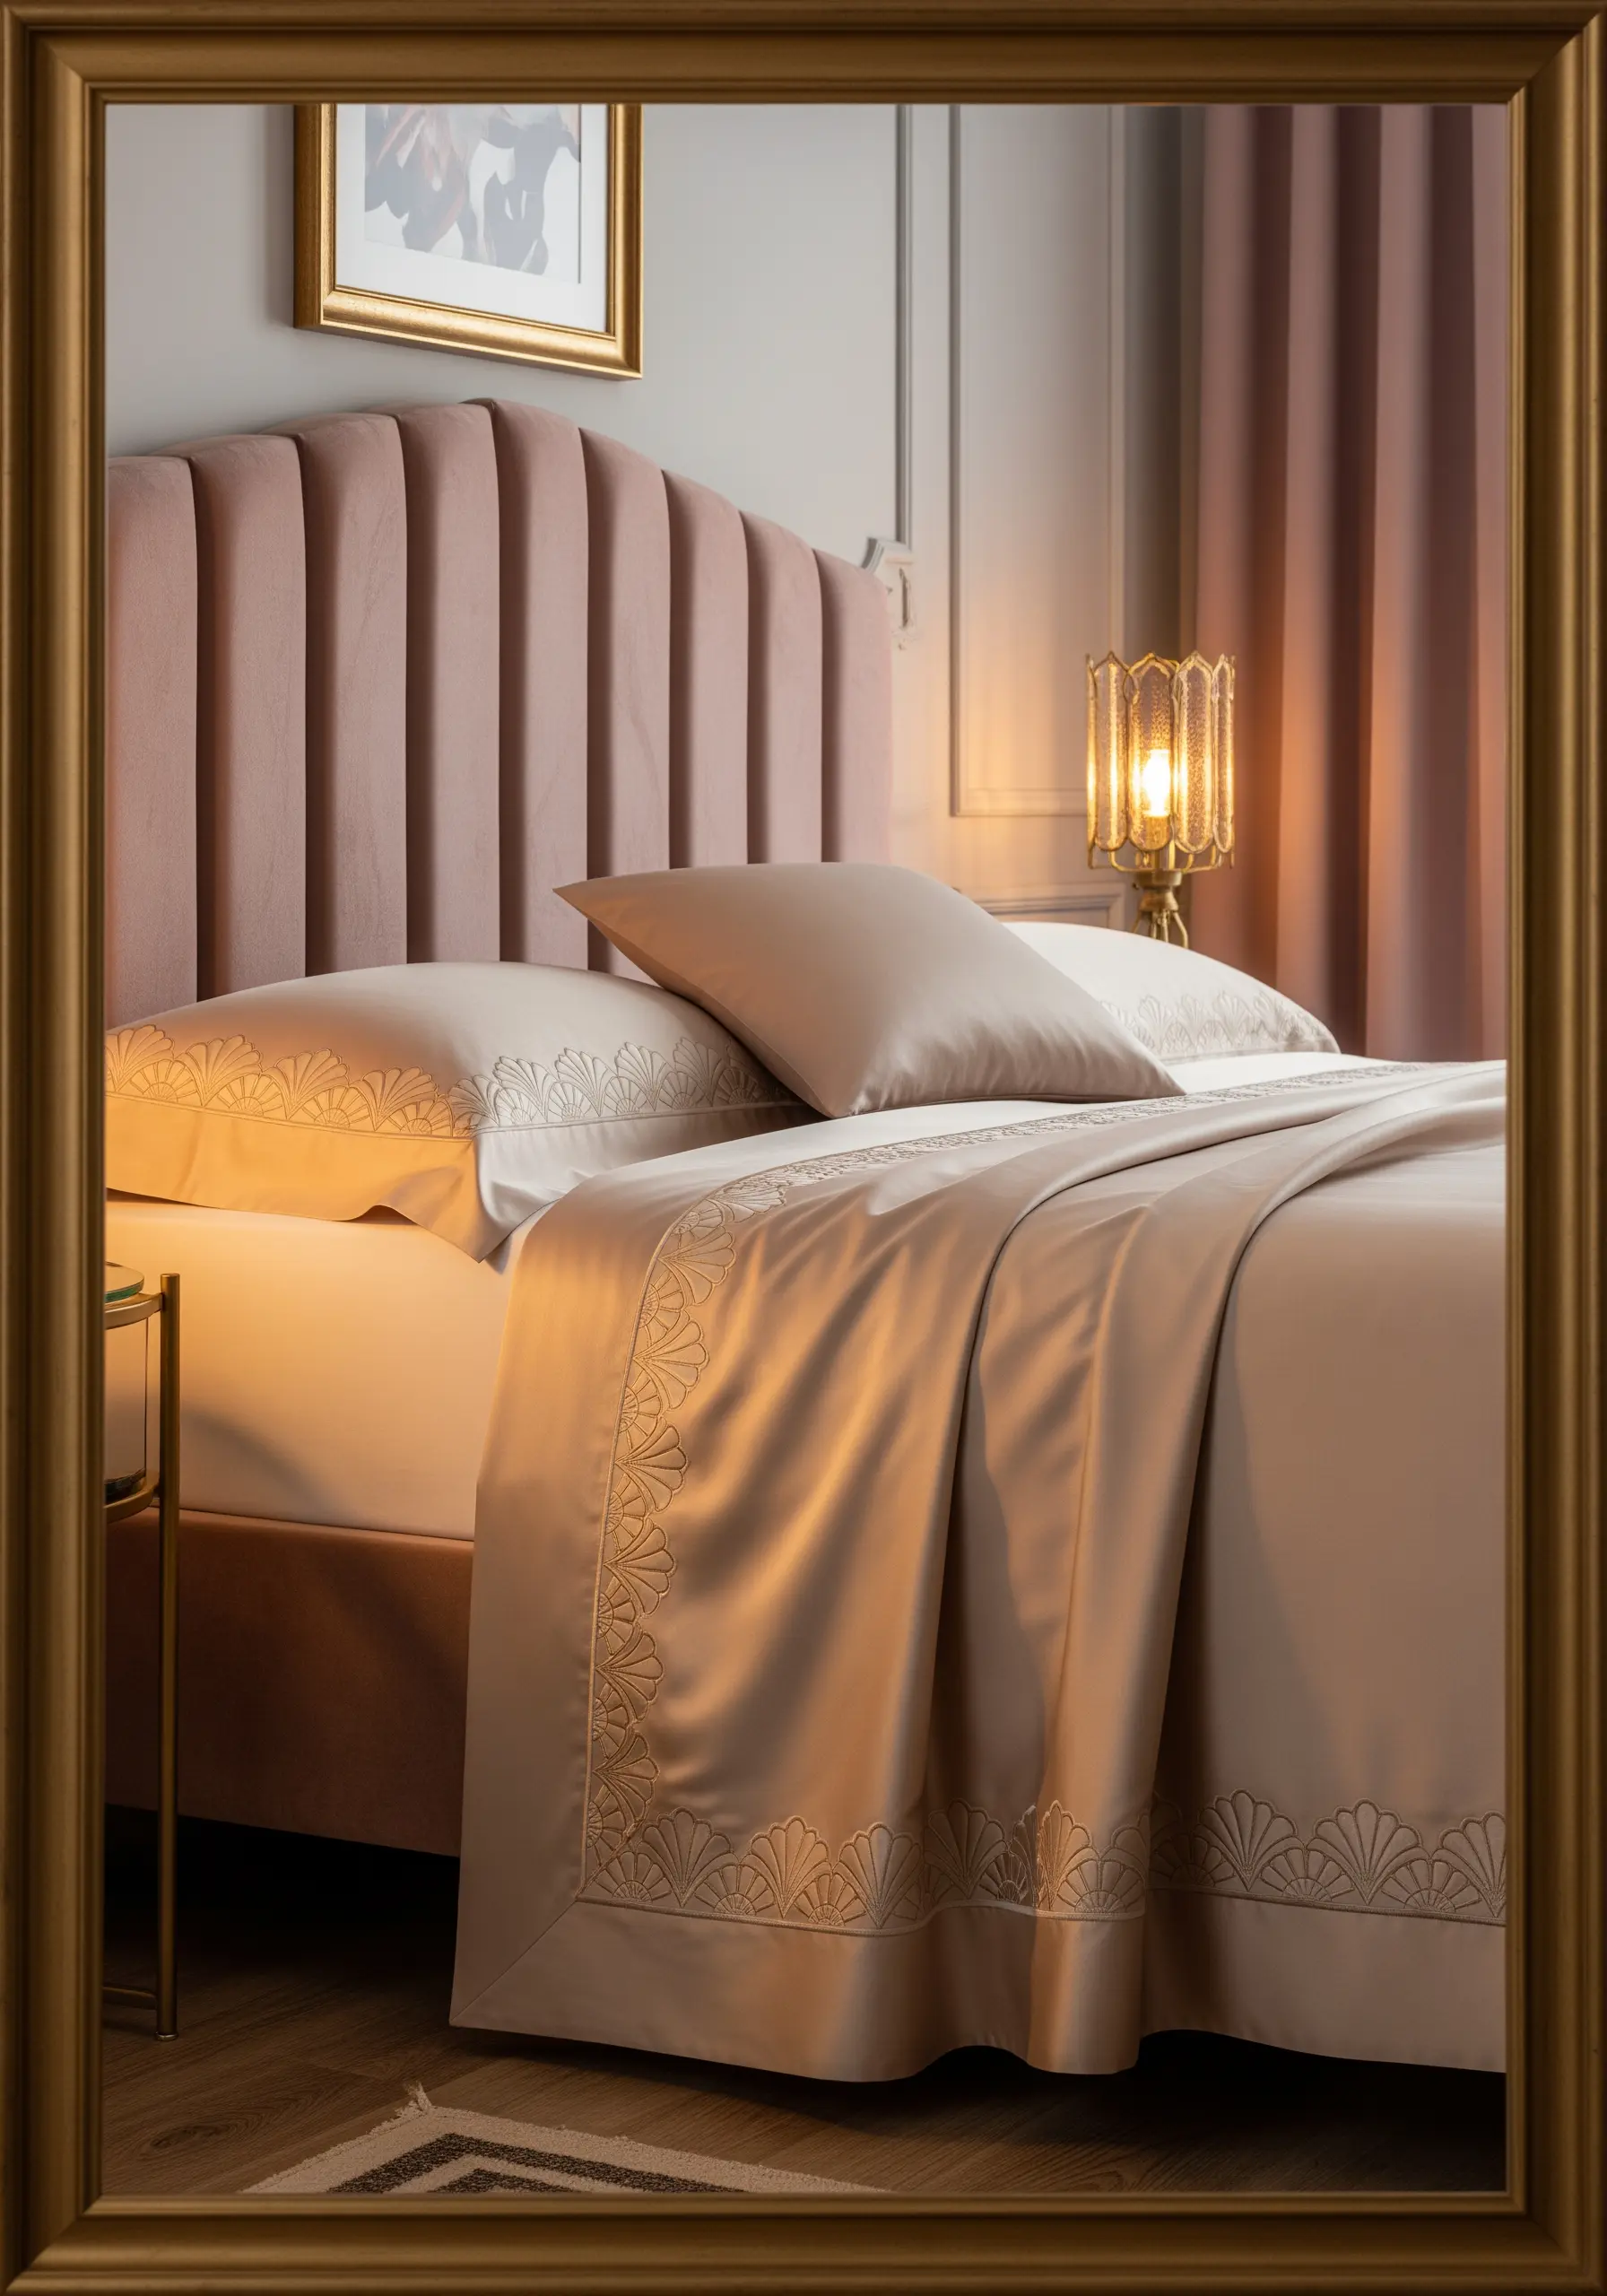
Replicate this elegant, vintage-inspired fan using a clean satin stitch for the radiating lines.
For a subtle textural contrast, fill the solid area at the base of the fan with tiny, scattered seed stitches.
This design works exceptionally well with a lustrous thread on a sateen or silk-blend fabric, as the sheen will highlight the precise angles of the fan shape.
9. The Calming Lavender Sprig
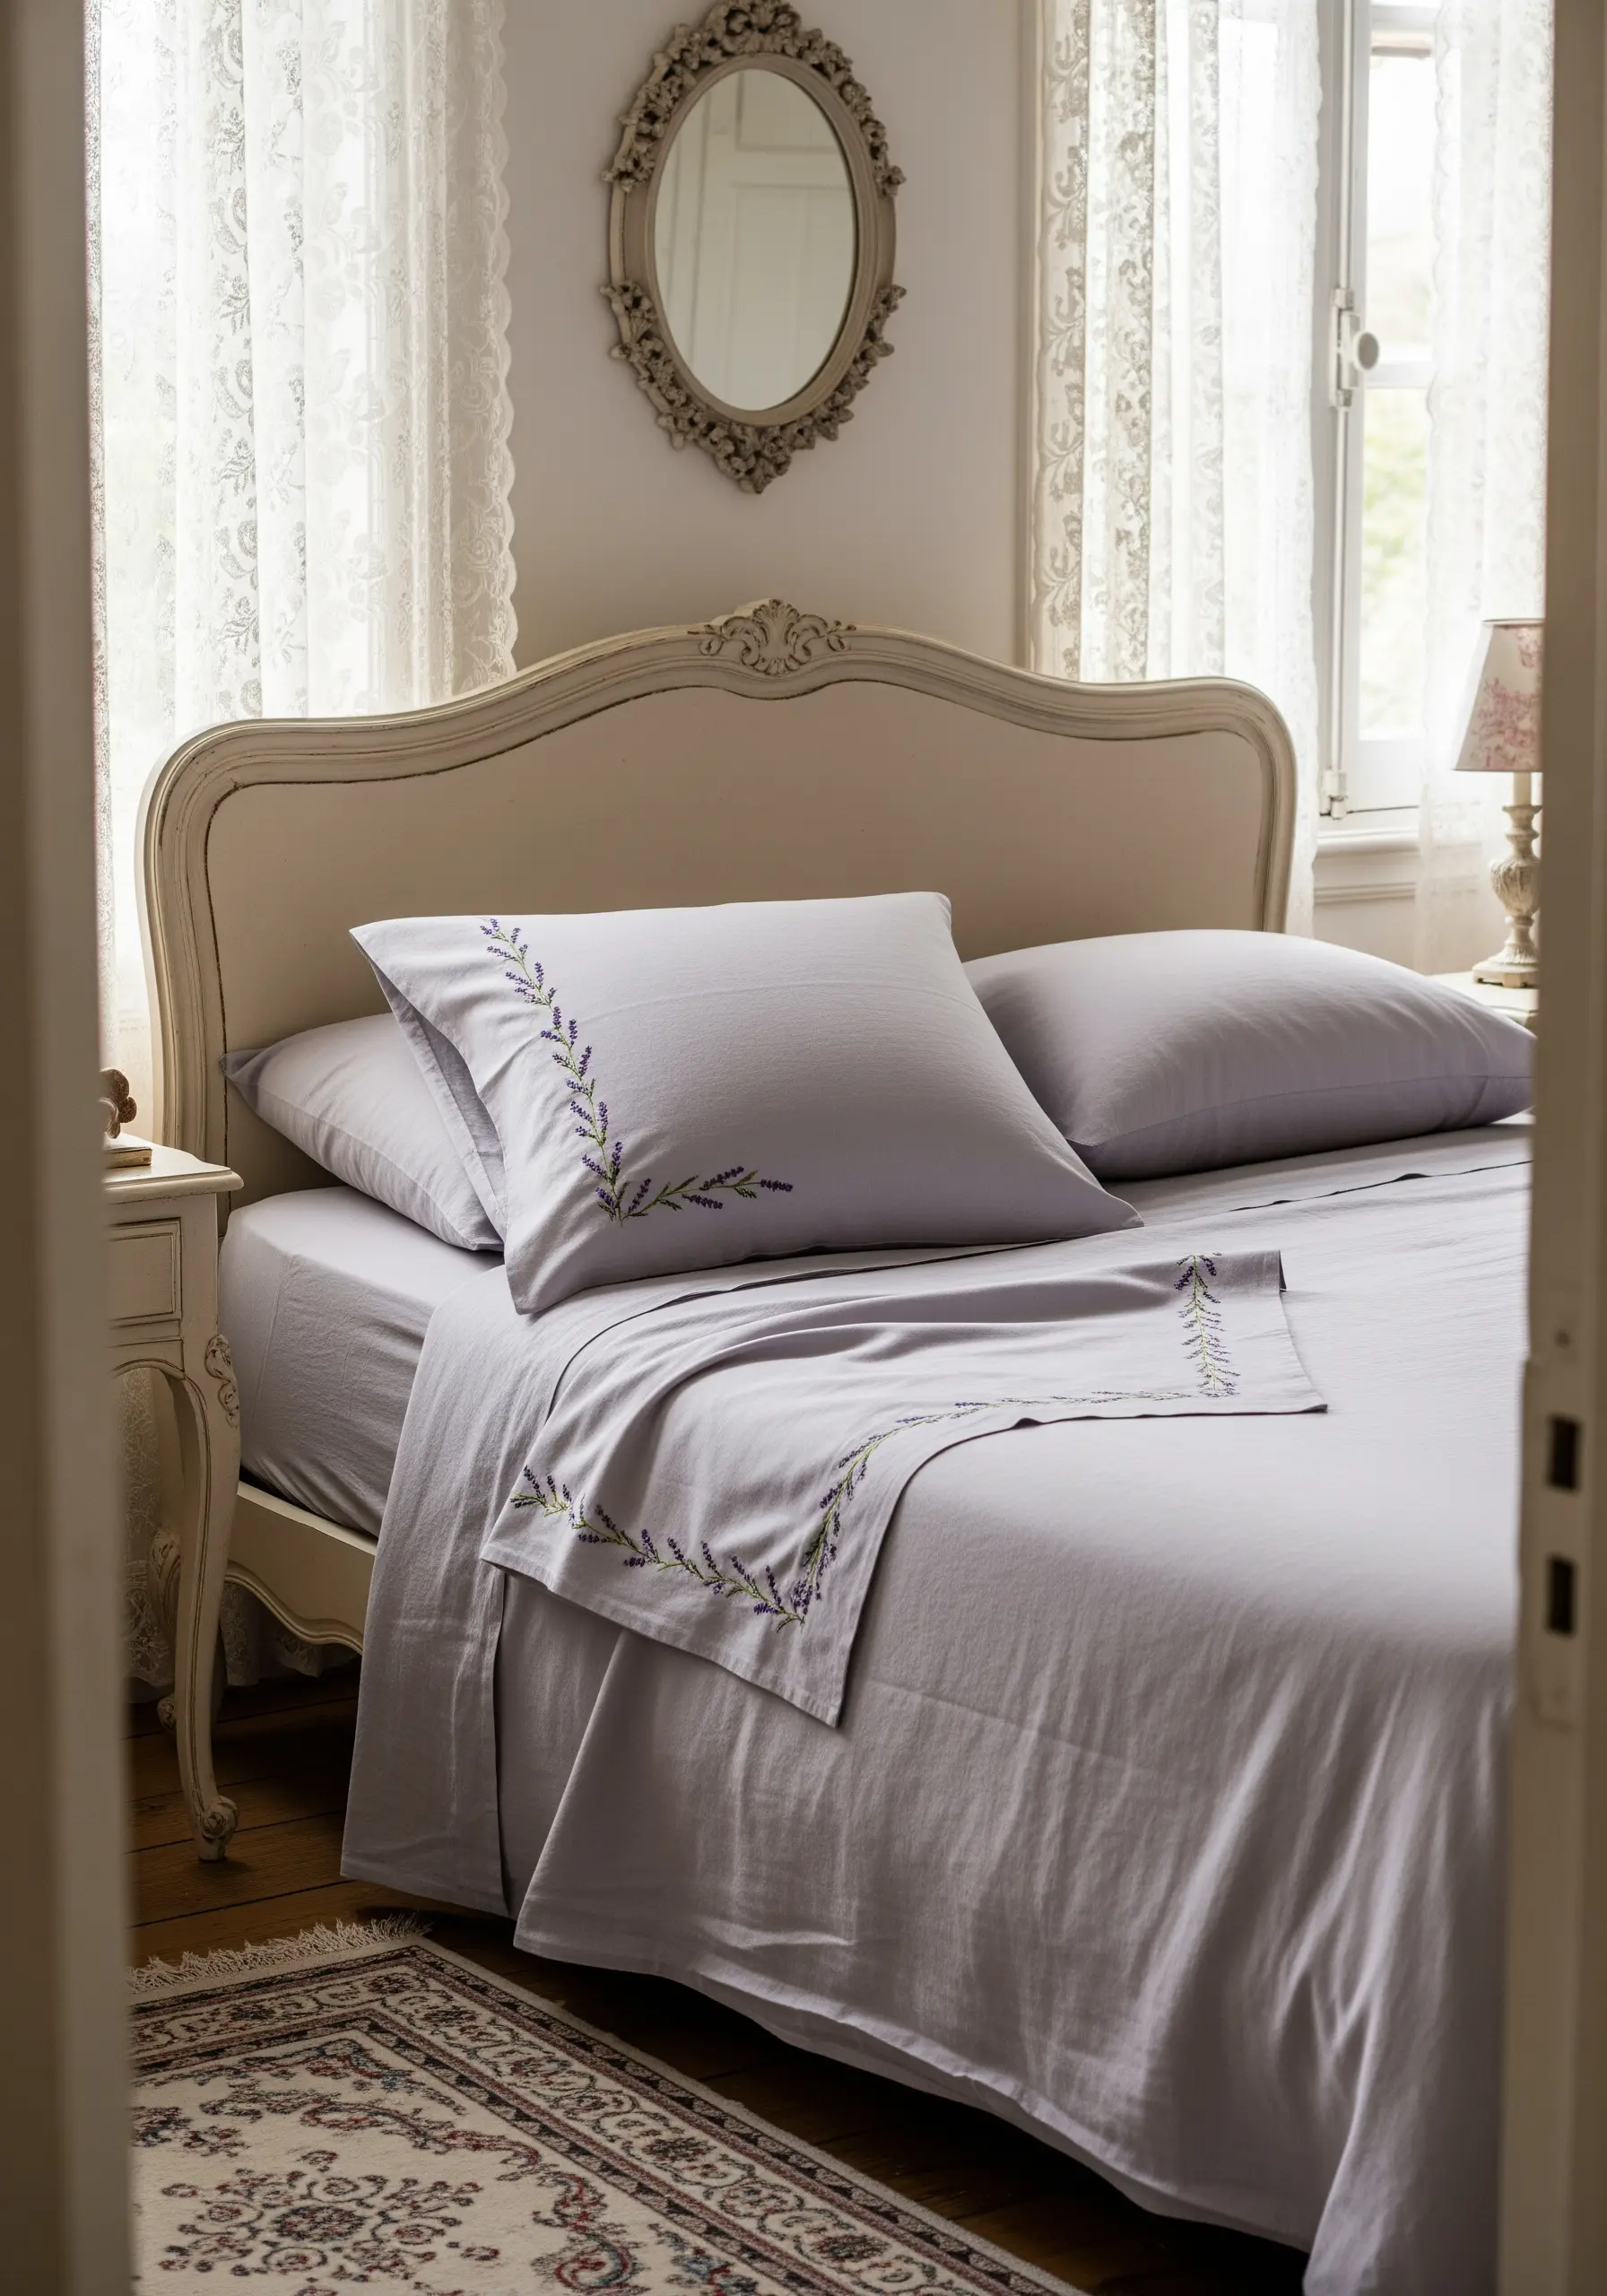
To form the delicate lavender blossoms, cluster tiny French knots or colonial knots at the top of the stem.
Use two or three closely related shades of purple and mix them randomly to give the flowers realistic depth and dimension.
A simple, fine stem stitch in a soft olive green is all you need for the stalks, creating a graceful, asymmetrical accent perfect for a pillowcase corner.
10. The Dotted Hemstitch Line

This minimalist border elevates a simple French knot into a sophisticated detail. The key to success is perfect consistency in knot size and spacing.
Use a quilting ruler or fabric tape to mark precise, evenly spaced dots with a disappearing ink pen before you start stitching.
This modern interpretation of traditional hemstitching creates a clean, textural line that feels both handmade and impeccably polished.
11. The Architectural Greek Key
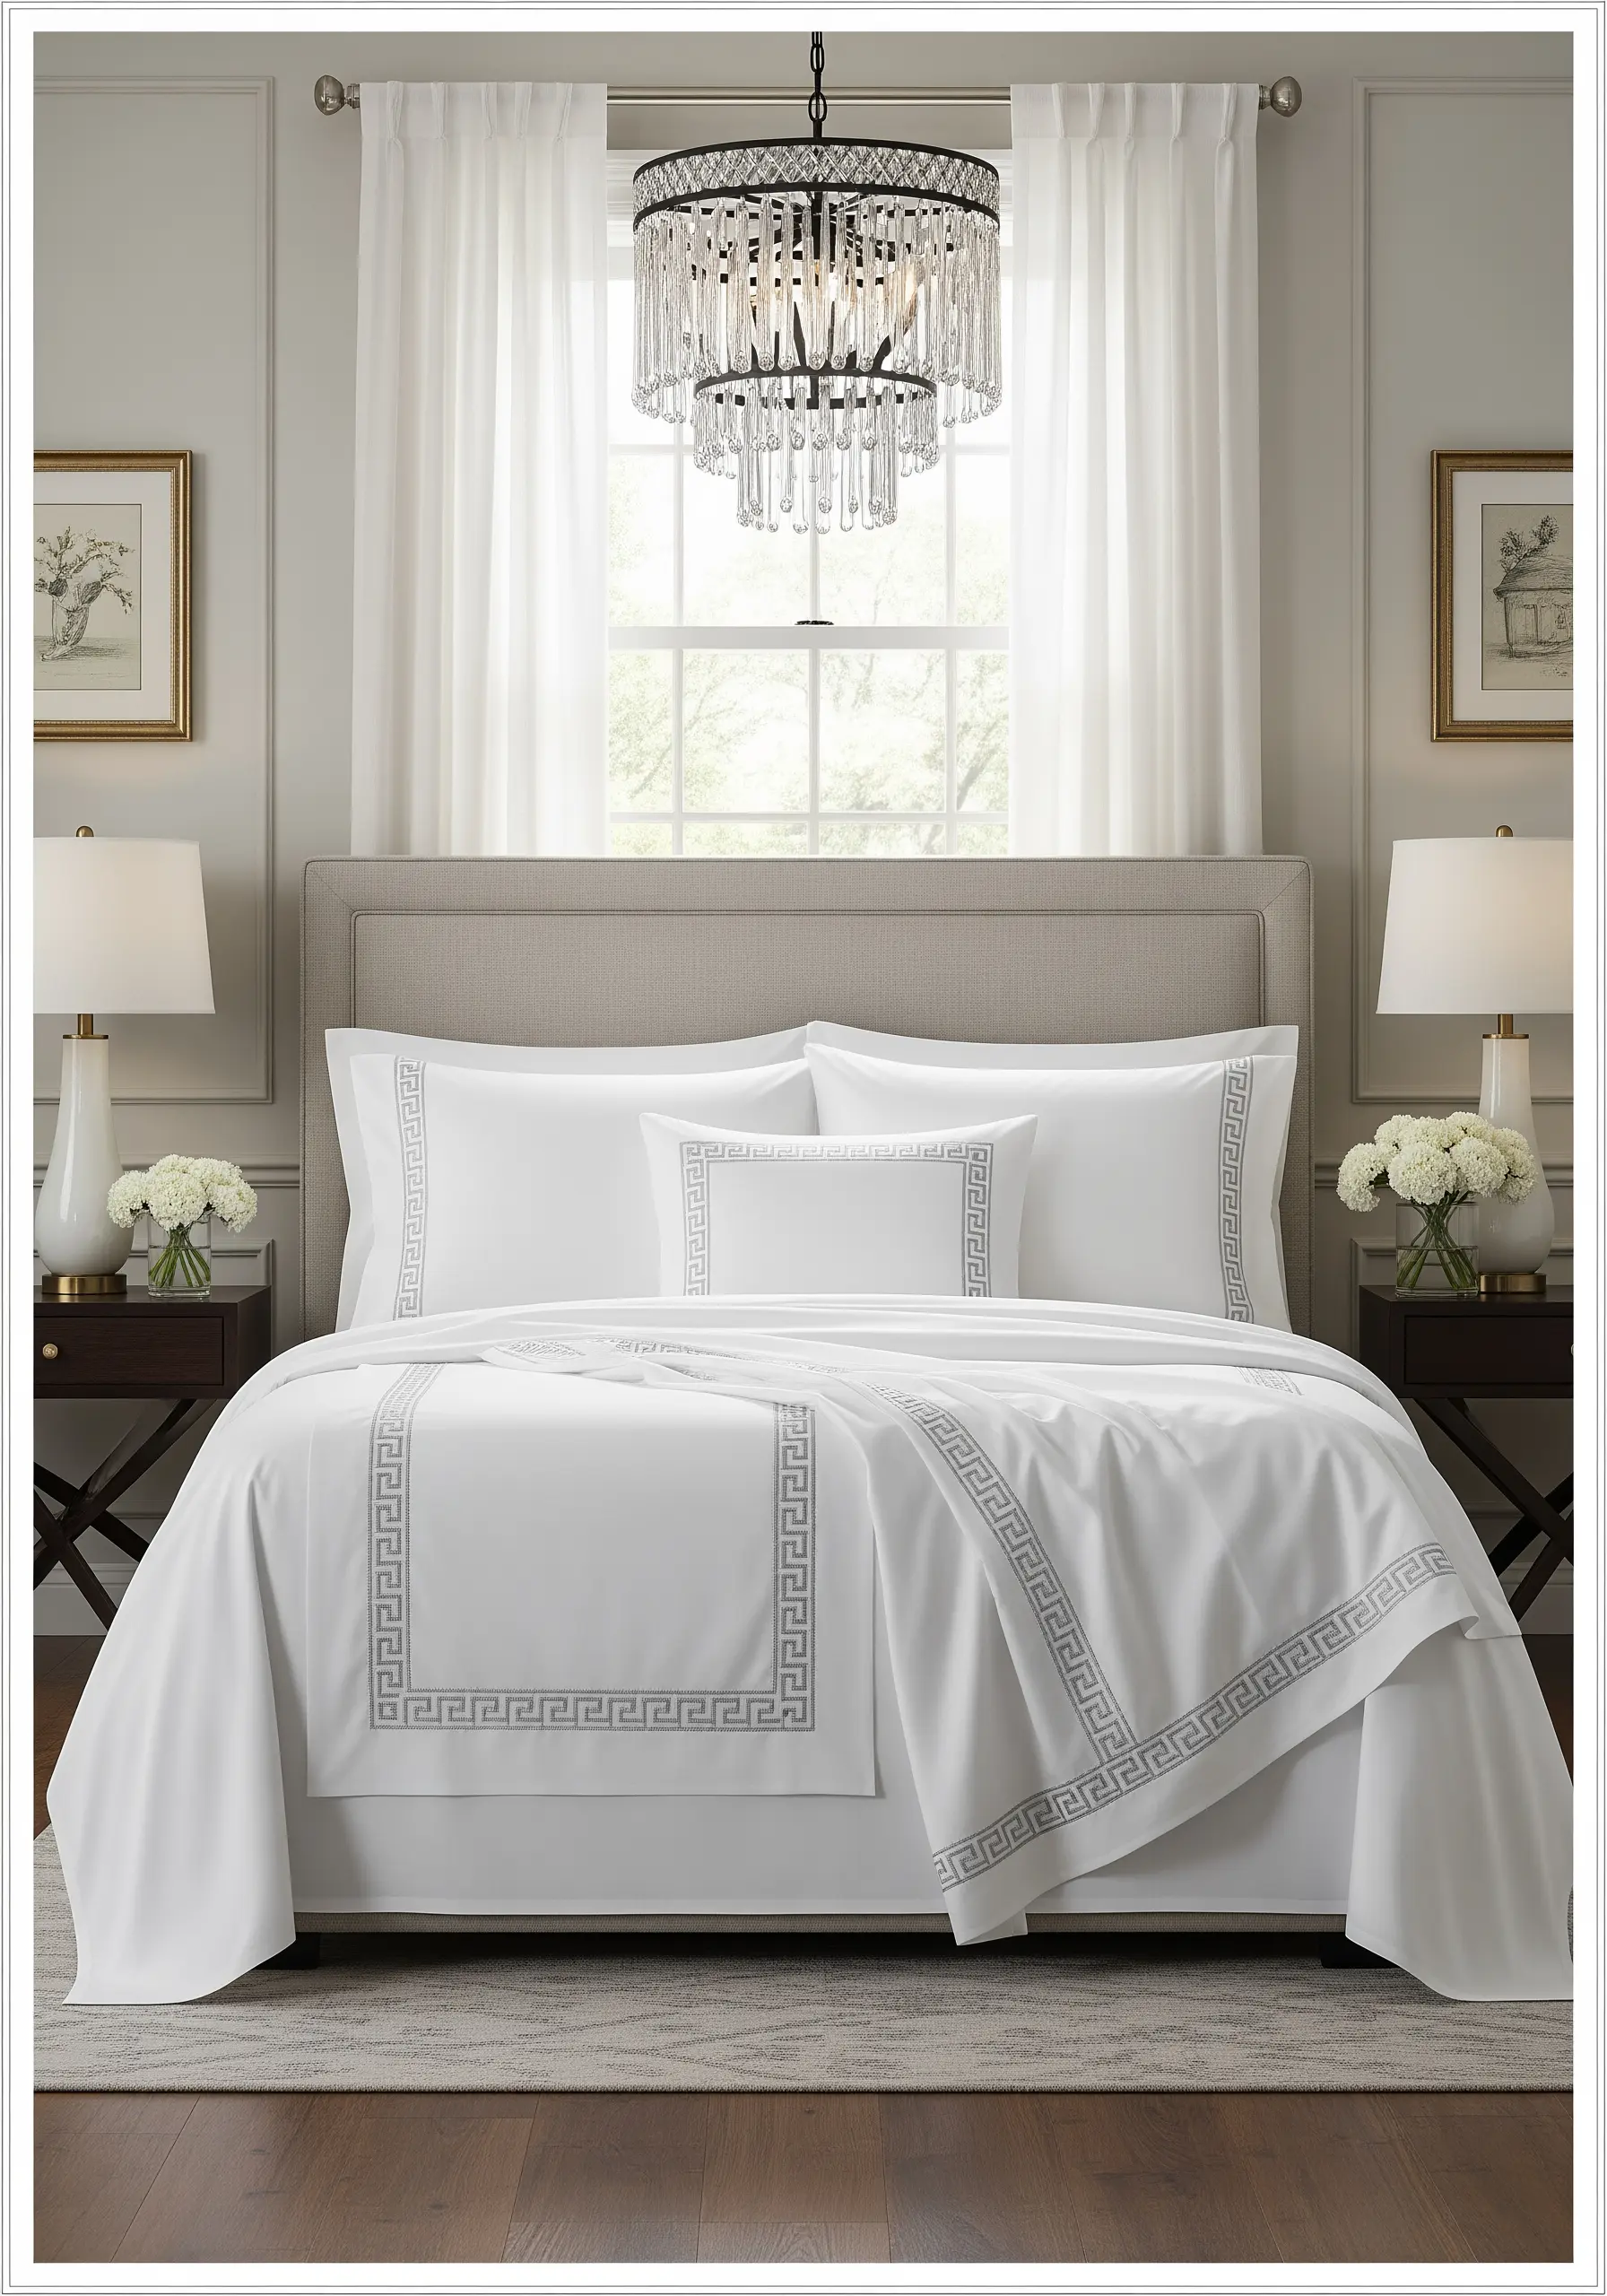
For a sharp, defined Greek key pattern, use a split stitch. This stitch creates a solid line that is perfect for navigating the crisp 90-degree angles of the design.
Using a water-soluble transfer pattern is the best way to ensure your spacing and proportions are absolutely perfect before you make the first stitch.
This timeless motif adds a sense of structure and classic elegance to any bedding.
12. The Verdant Ivy Corner

Give your ivy leaves a natural, realistic appearance by working them in fishbone stitch. This creates a central spine and angles the stitches outward, just like a real leaf.
For the trailing vine, a slightly irregular stem stitch will give it organic movement.
Stitch with two different shades of green, alternating them between leaves to create subtle, natural variation in the foliage.
13. The Playful Pom-Pom Edge
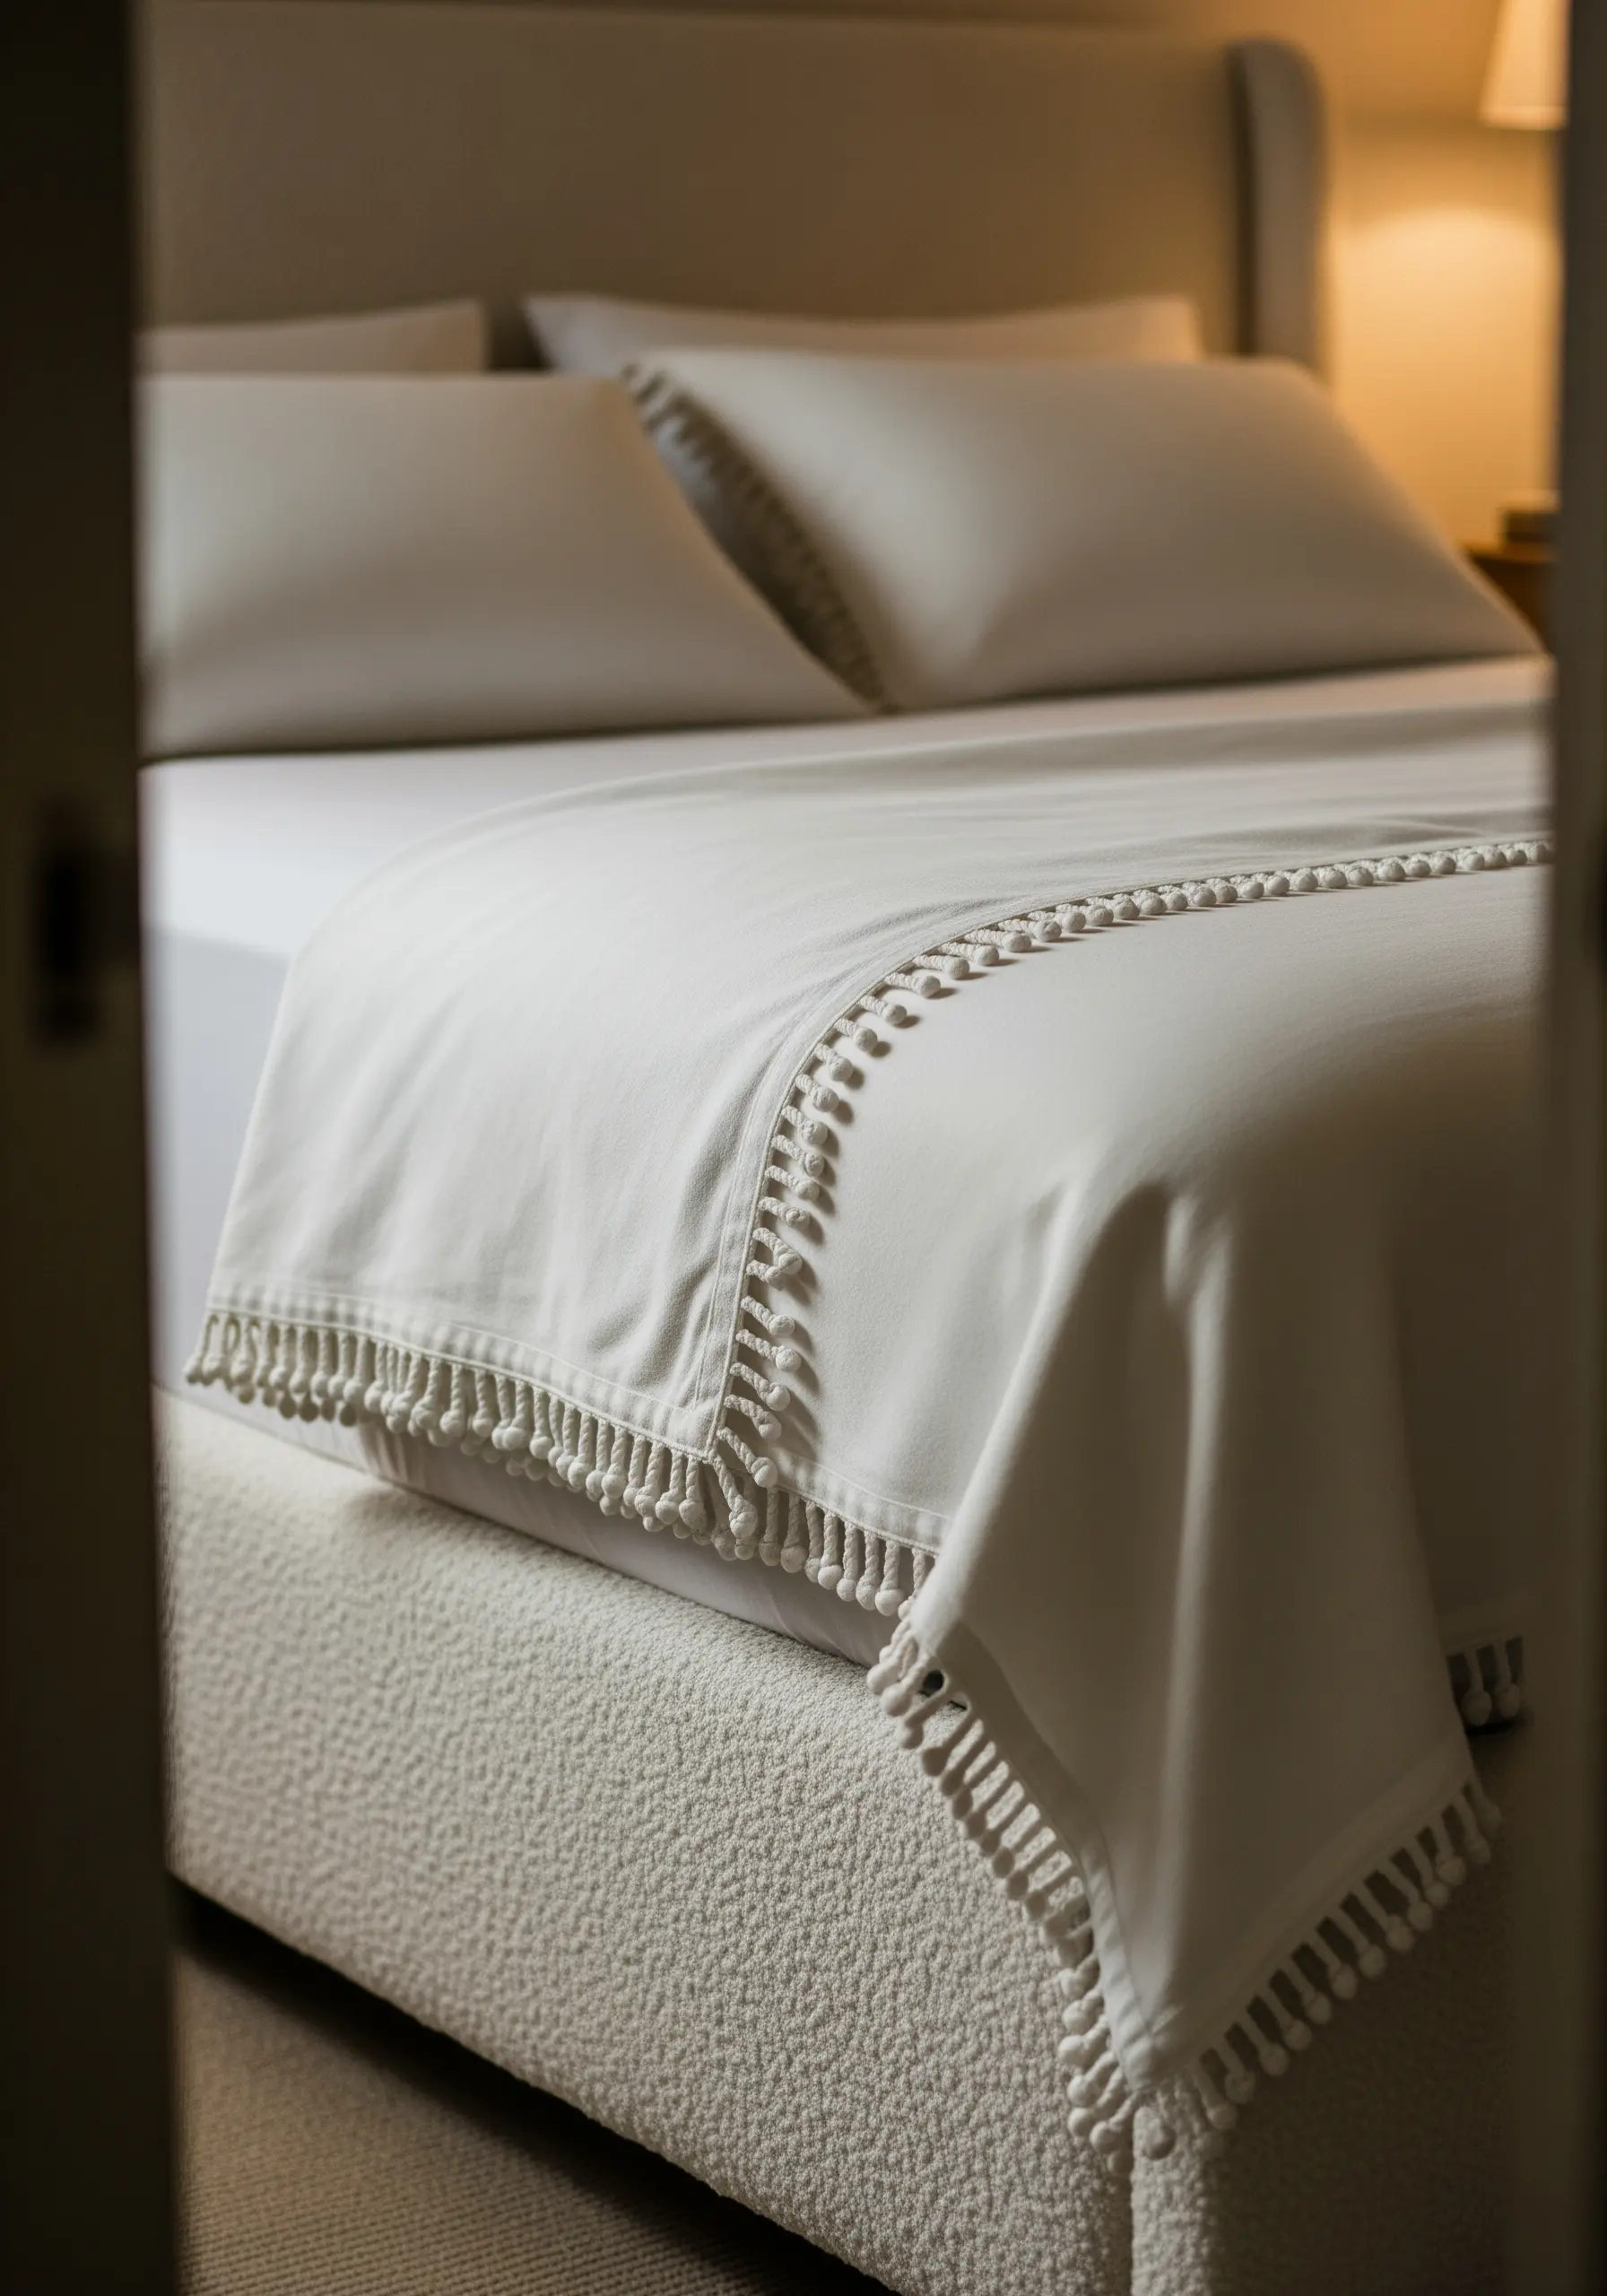
While you can buy pre-made trim for this effect, you can also integrate it more thoughtfully for a truly custom look.
Secure the trim with a simple running stitch, then stitch a decorative border just above it, like a feather stitch or blanket stitch, using a matching thread.
This extra embroidered detail connects the trim to the fabric, making it feel intentional and thoughtfully handcrafted.
14. The Modern Honeycomb Repeat

Outline this clean, geometric pattern with a simple backstitch for sharp definition.
To create the subtle texture inside each hexagon, use a thread that is only one shade lighter than your fabric and fill the space with light seed stitches.
This tone-on-tone technique creates a beautiful, textural effect that reveals itself up close, adding depth without visual clutter.
15. The Celestial Night Sky Border
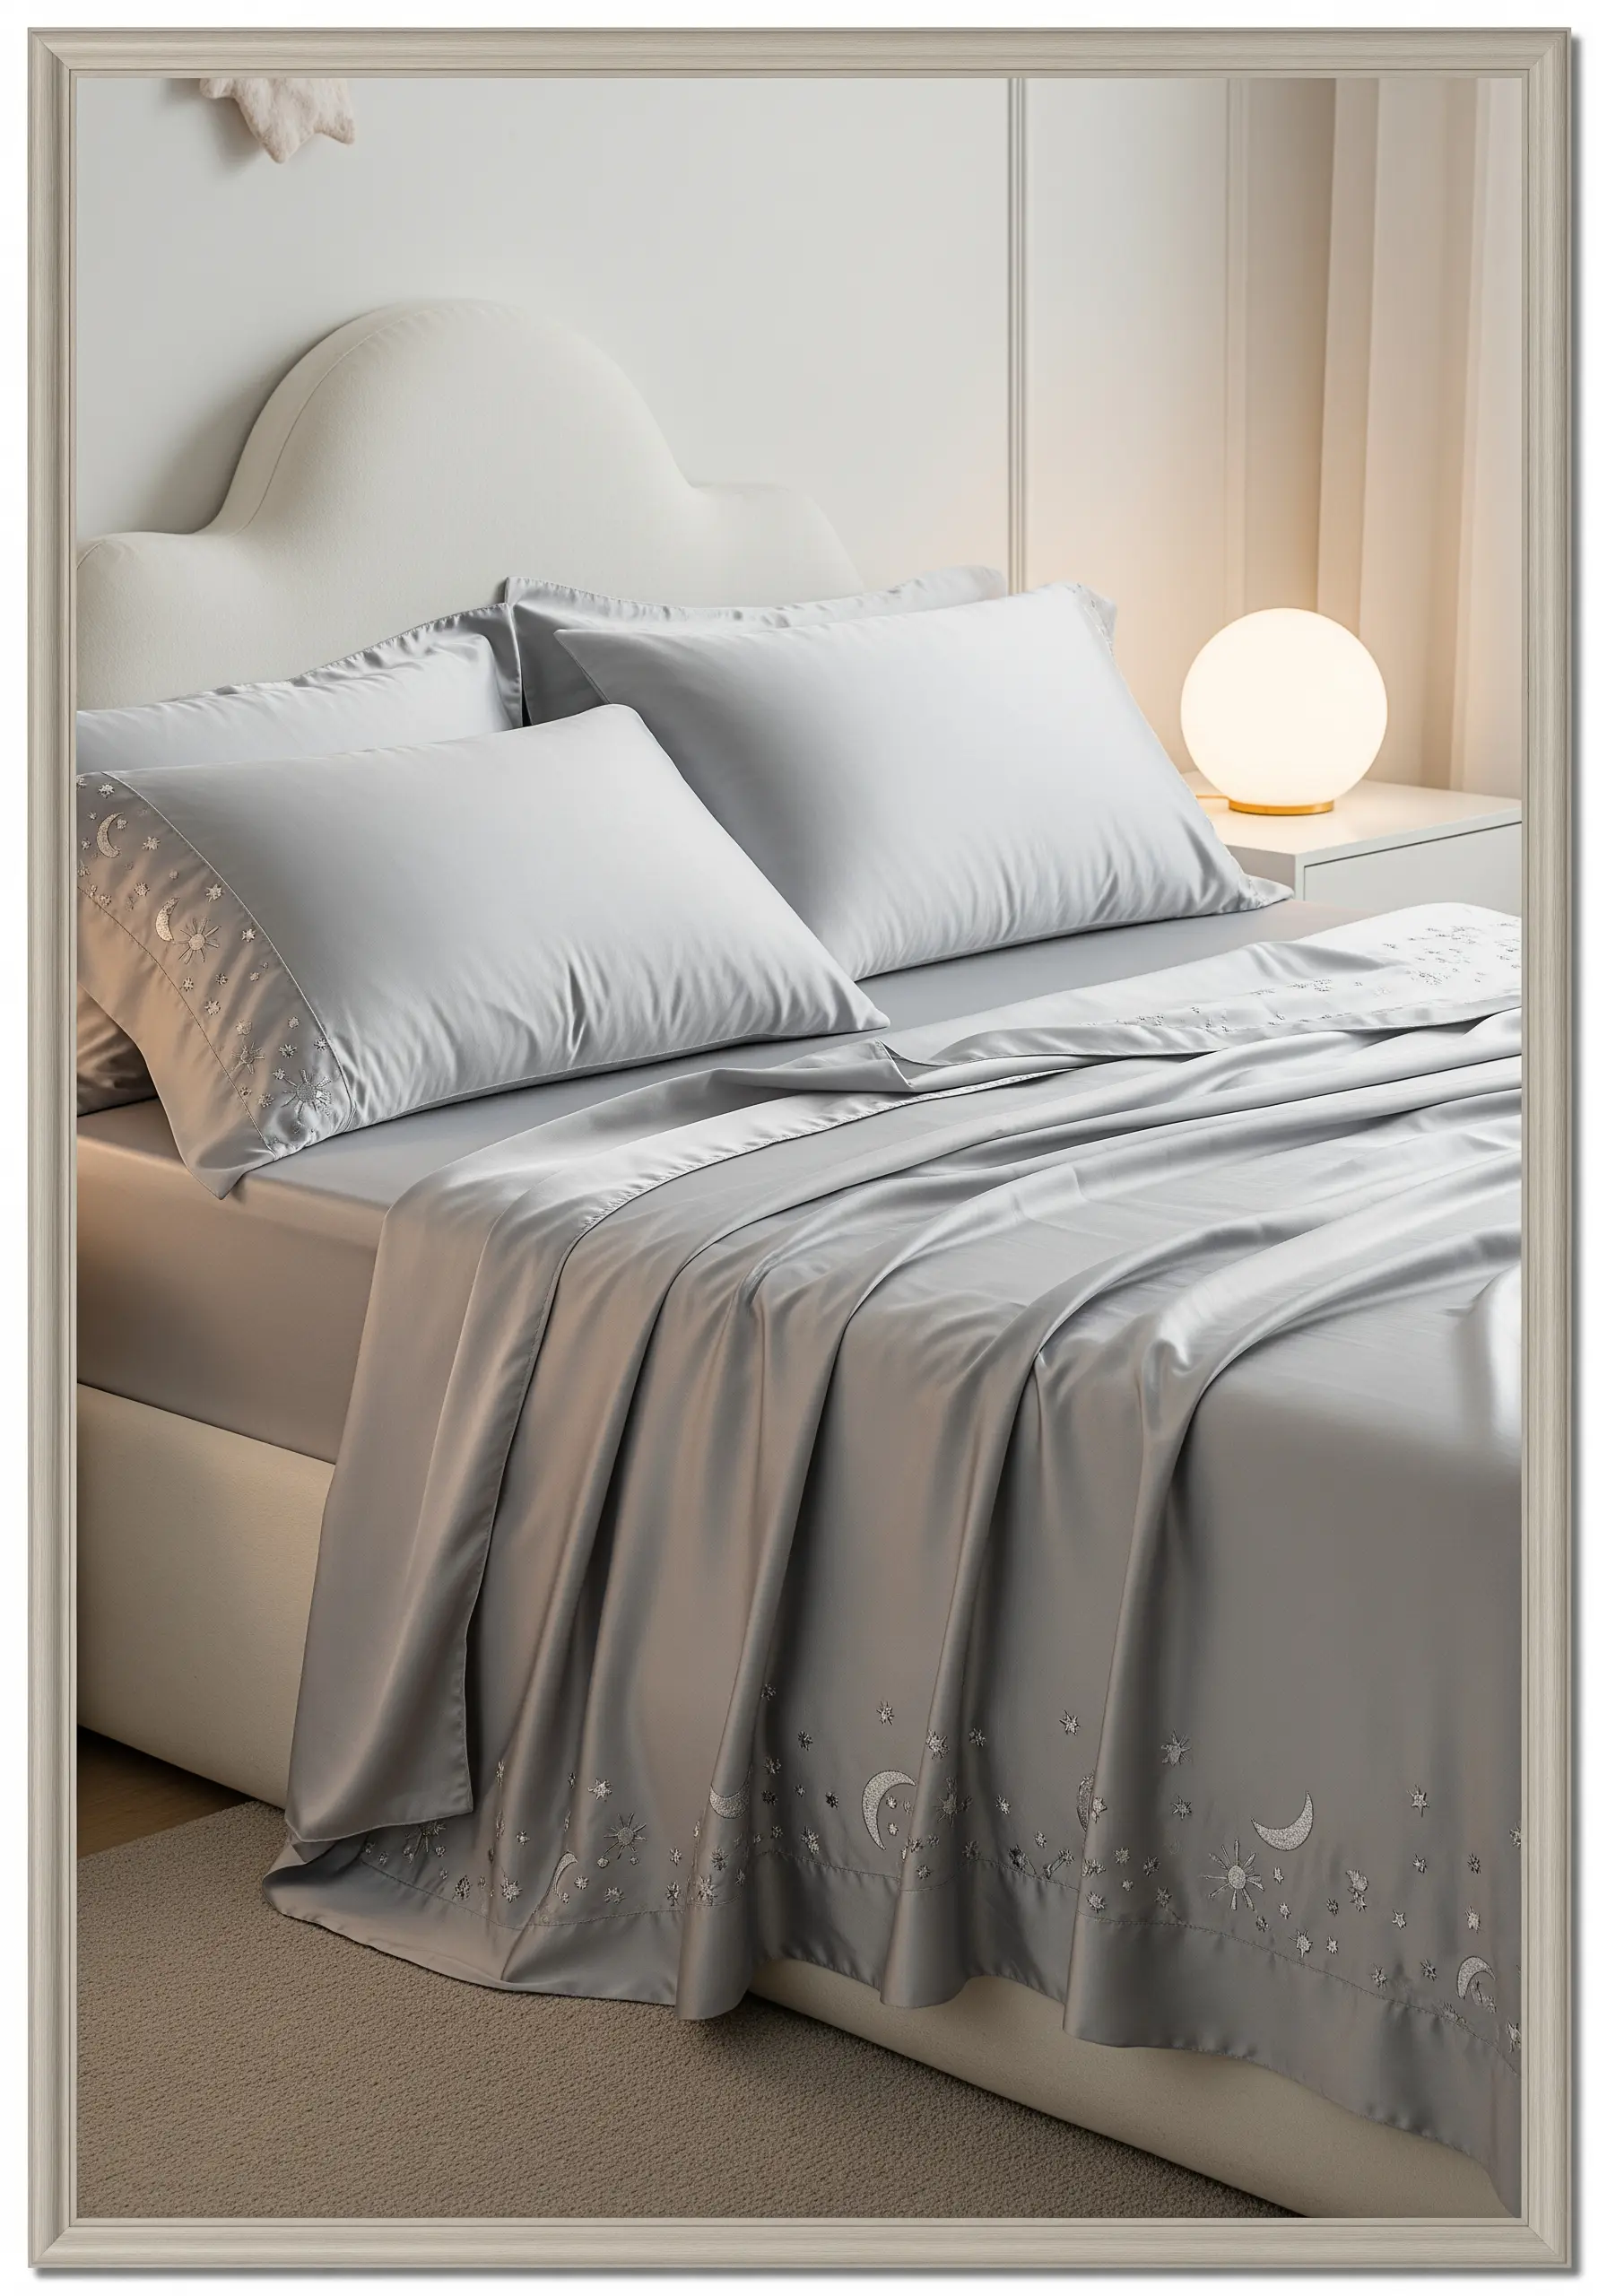
Create a magical, scattered border of celestial motifs. Form crescent moons with a tight satin stitch and stitch radiant stars using straight stitches of varying lengths.
Choose a thread with a bit of sparkle, like a metallic floss or a silky white rayon, to mimic starlight against the deeper fabric color.
The scattered, asymmetrical placement is key to making this design feel dreamy and ethereal.
16. The Woven Herringbone Band
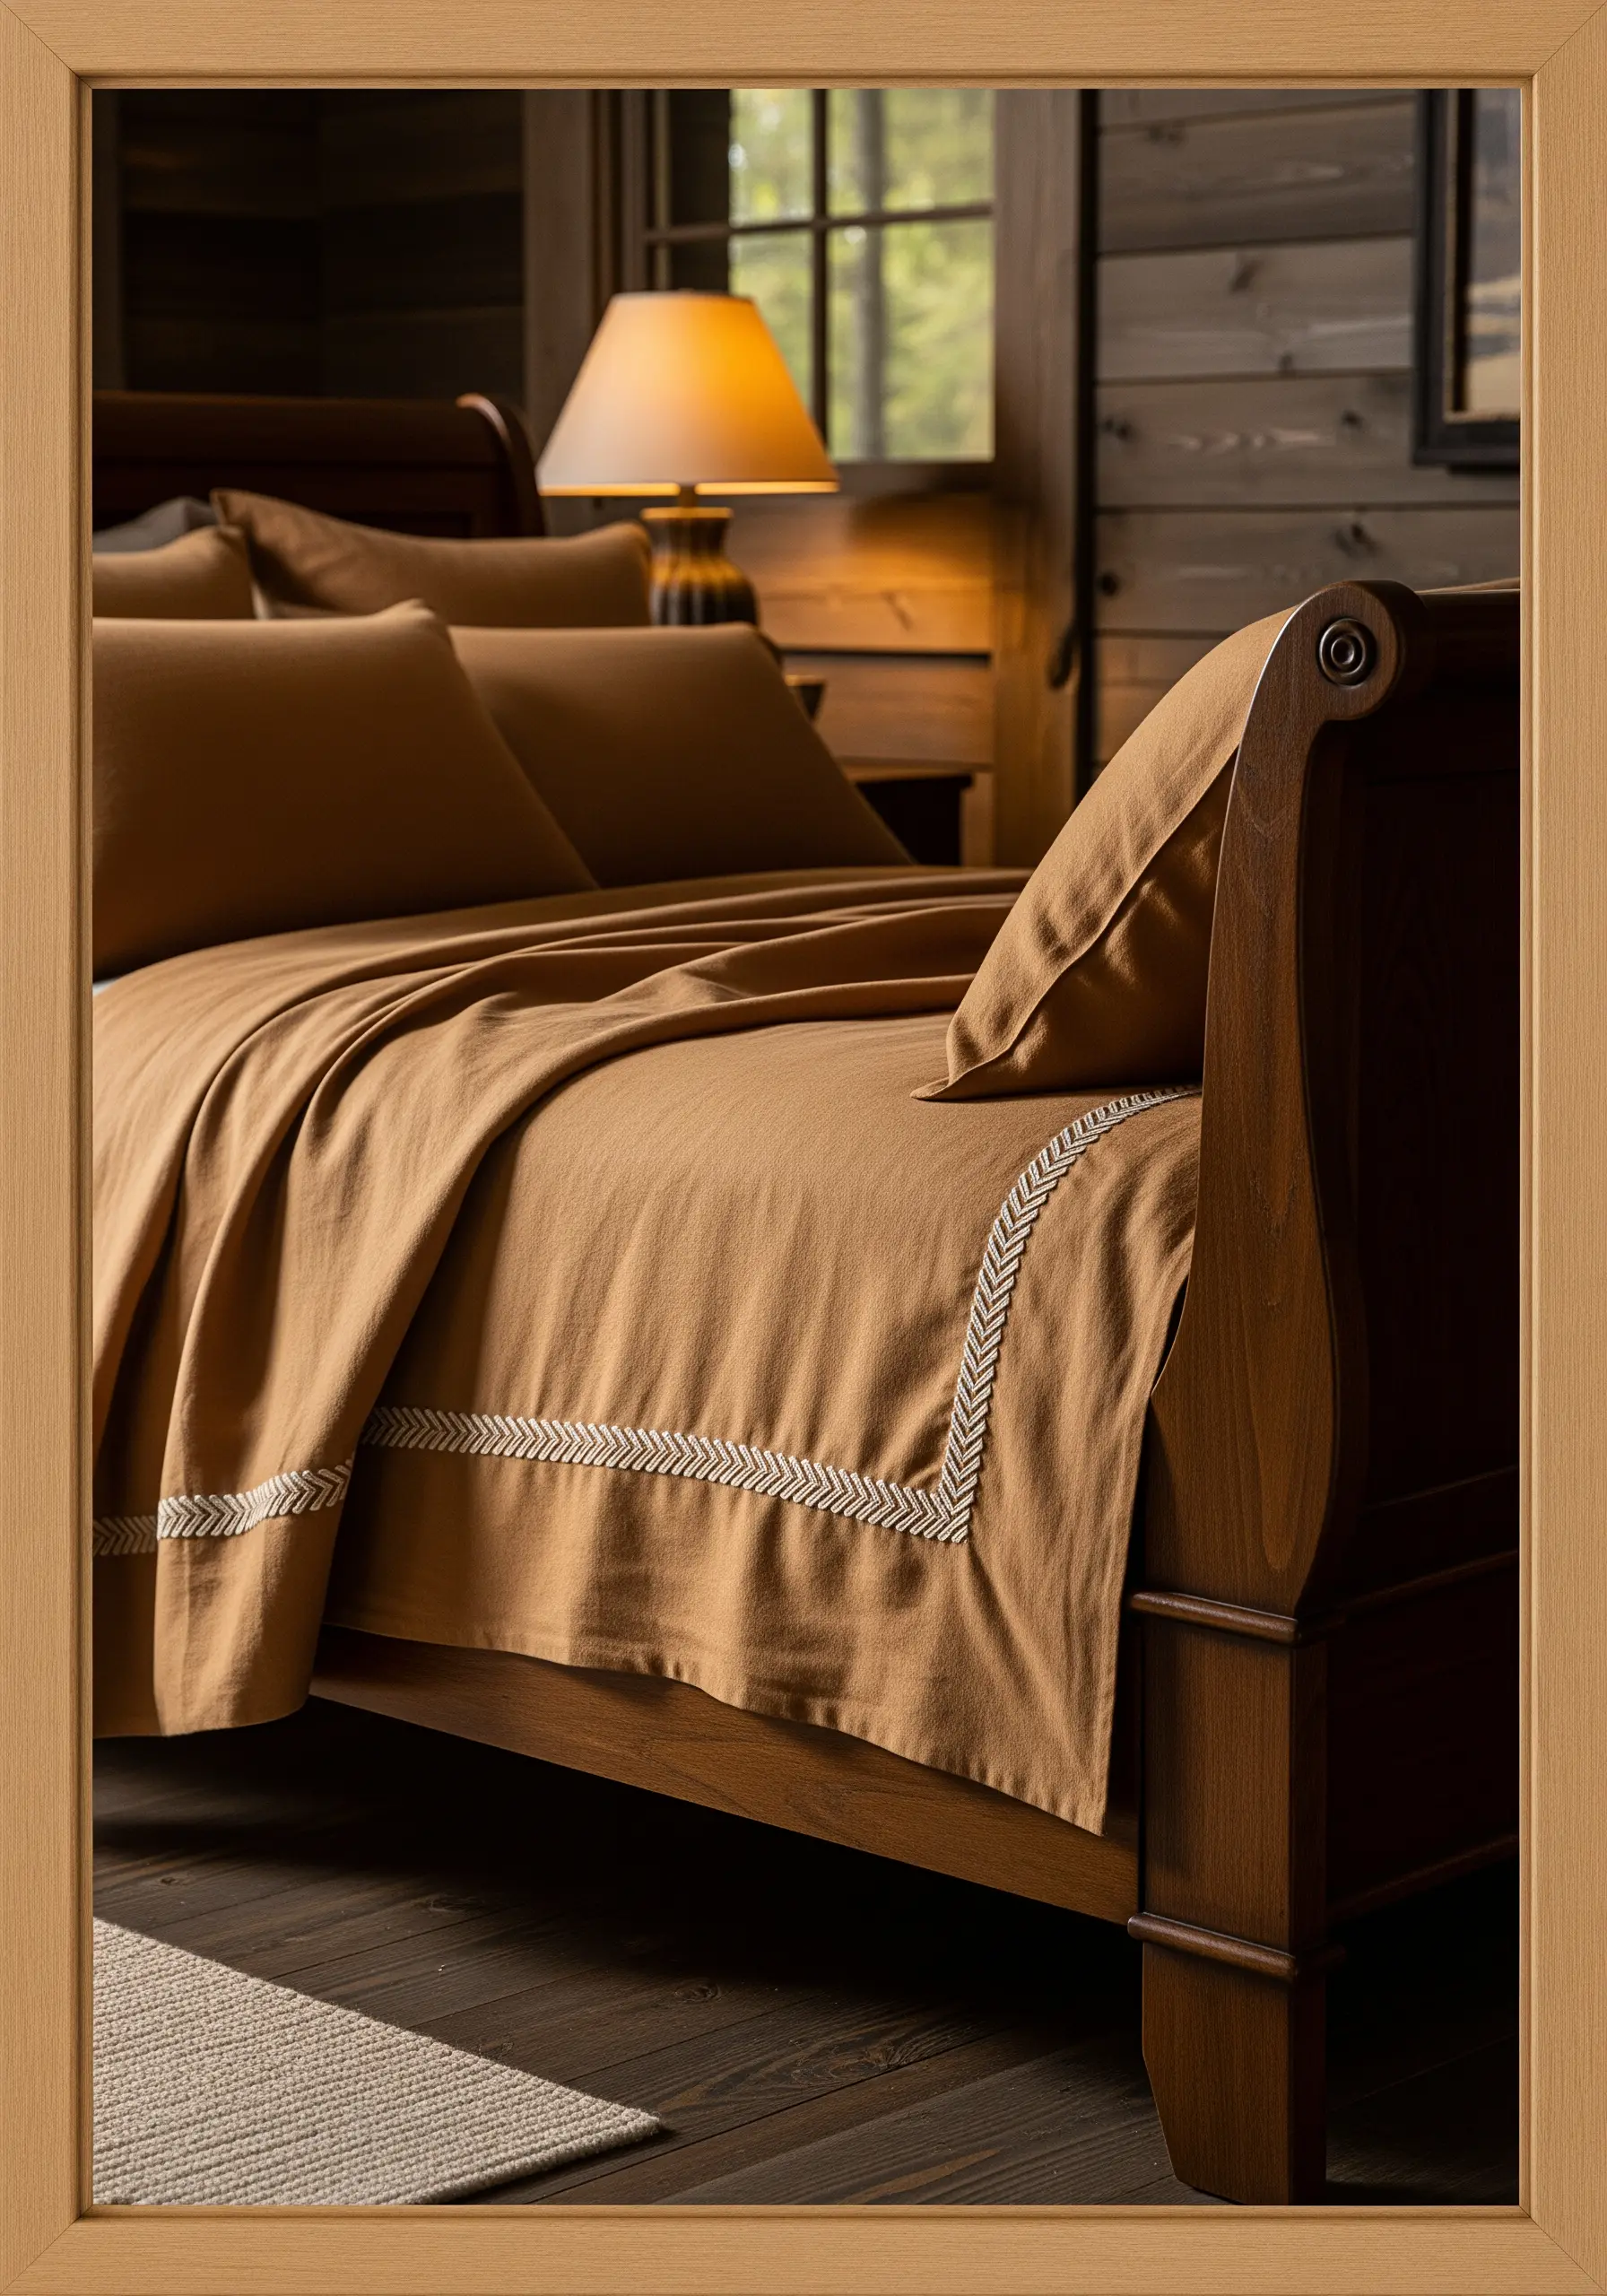
A classic herringbone stitch creates this beautiful woven effect, adding a substantial, textural band to your linens.
To keep the border perfectly uniform, draw two parallel lines as a guide and ensure each stitch touches those lines.
Using a high-contrast thread, like cream on this warm camel fabric, makes the intricate texture the focal point of the design.
17. The Heirloom Eyelet Lace Border
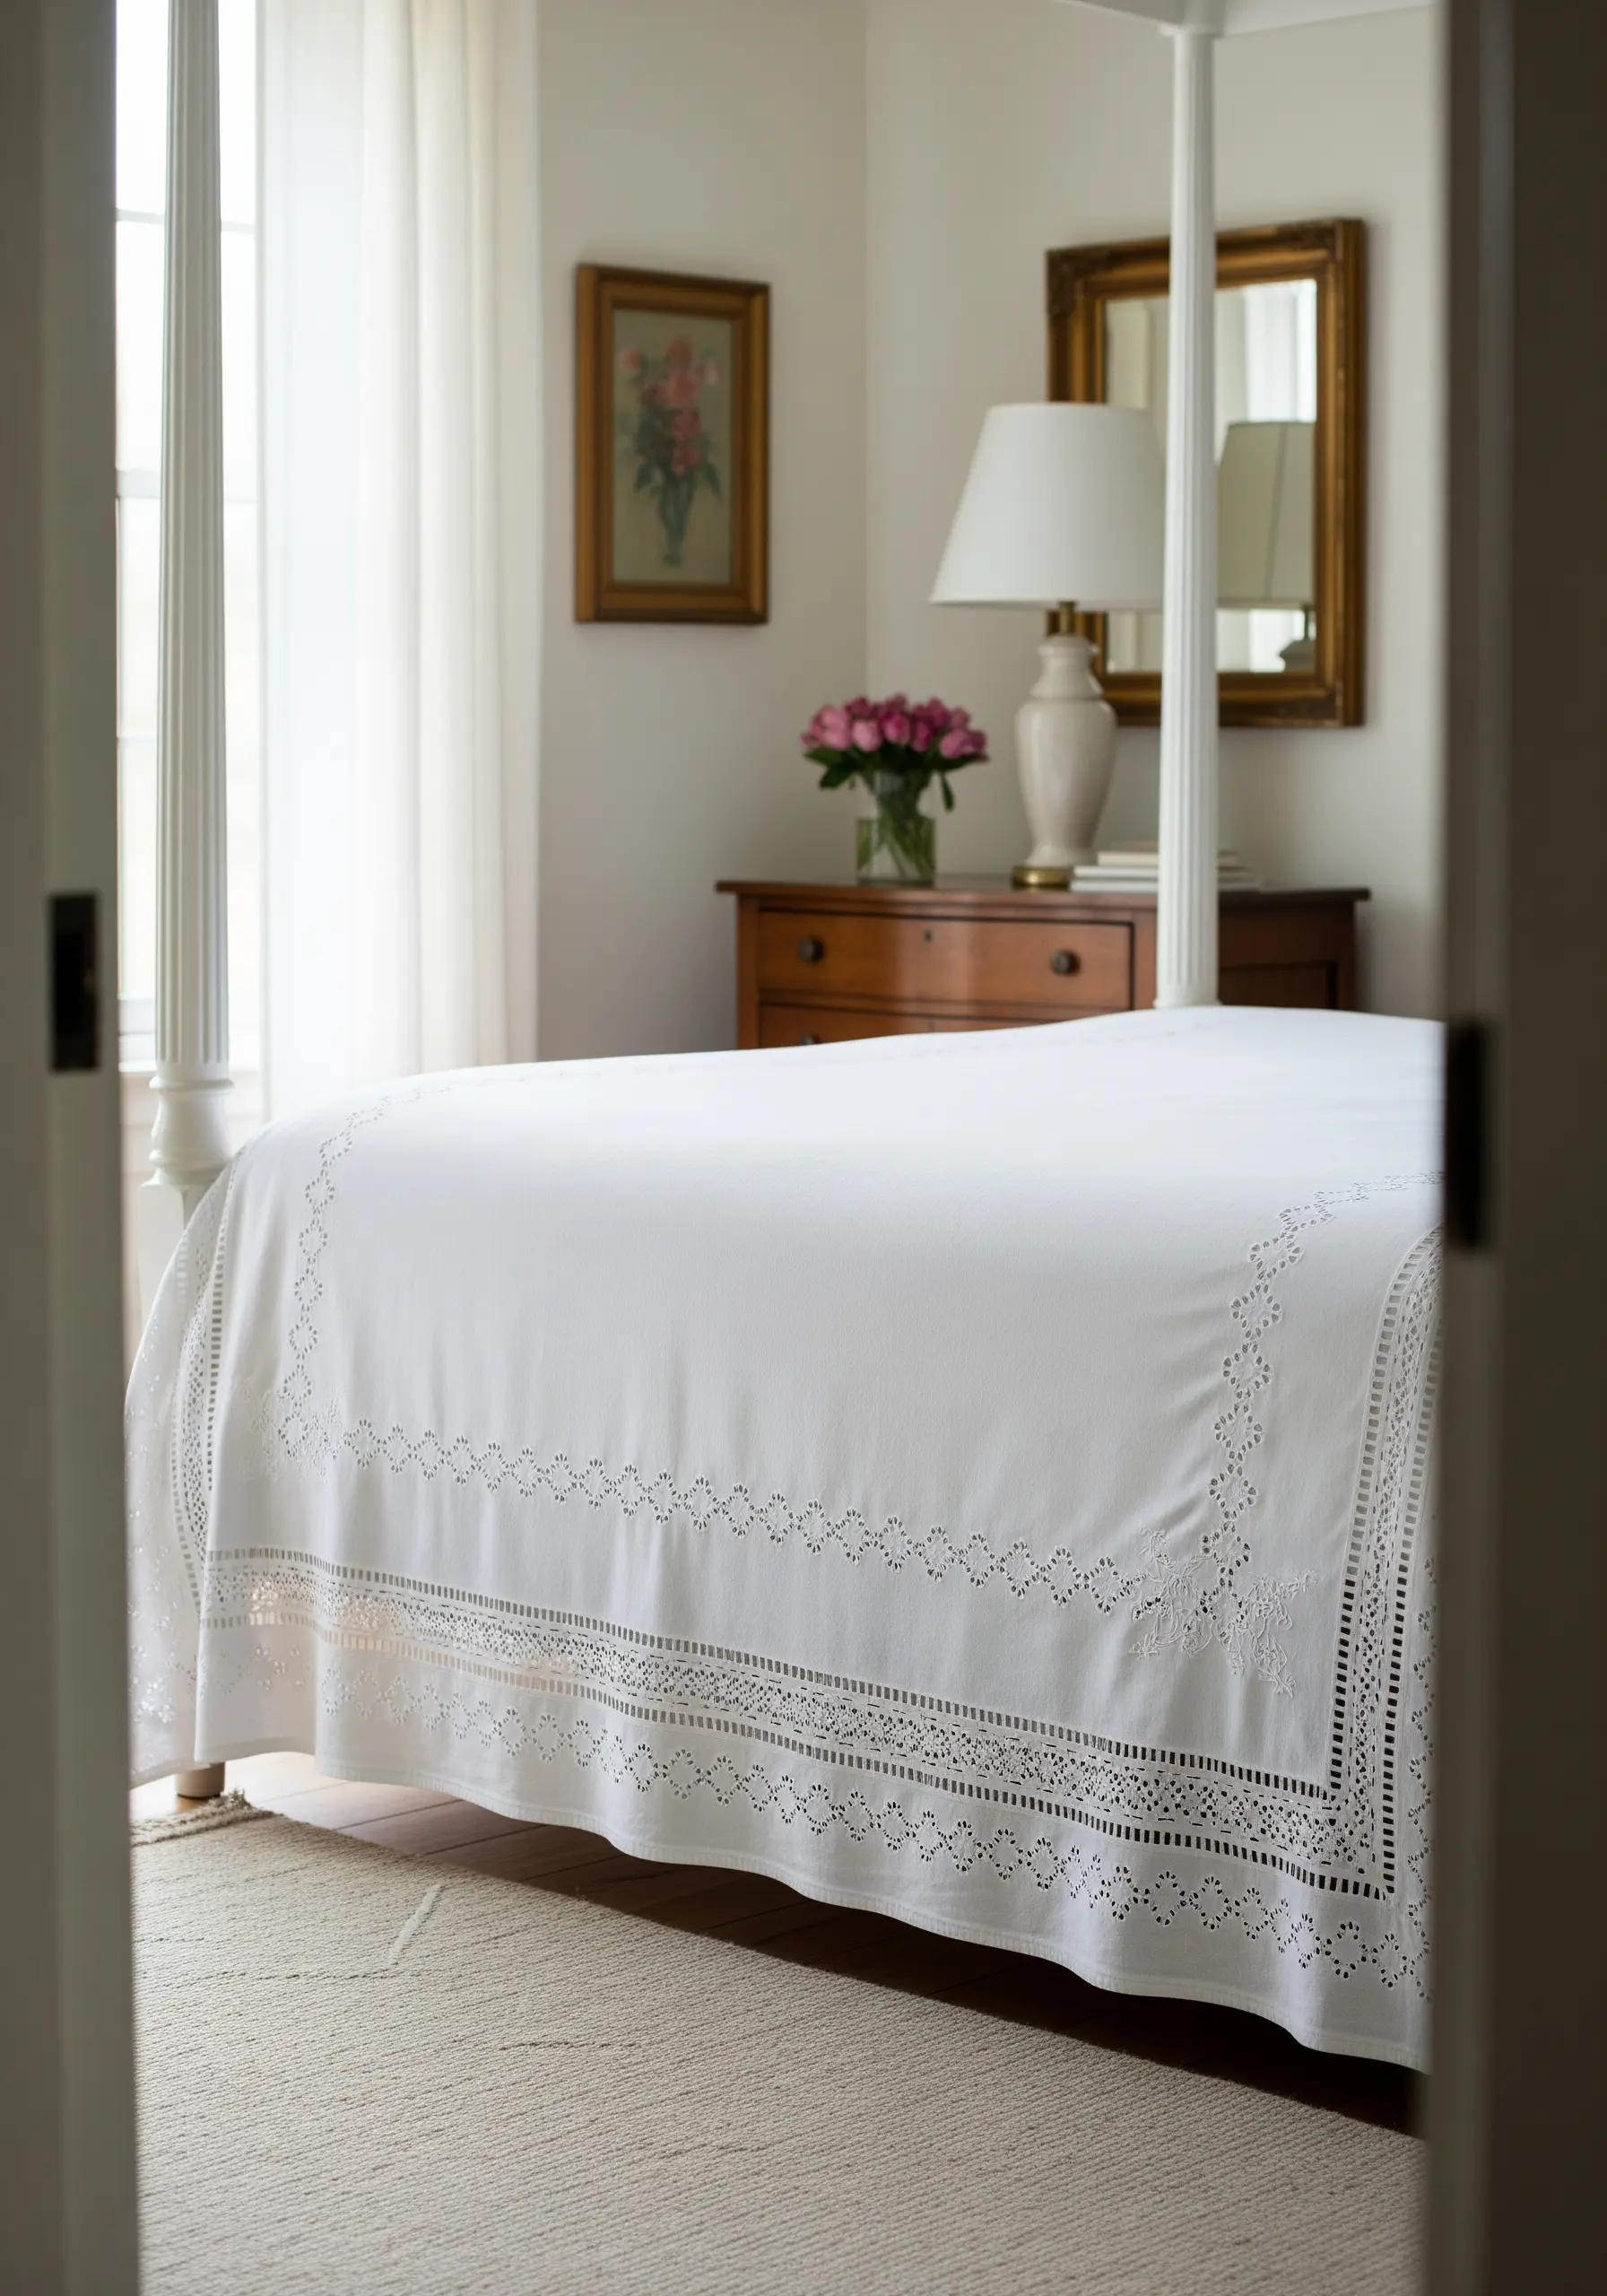
This delicate look is inspired by drawn thread work, an advanced technique where threads are removed from the fabric weave.
You can achieve a similar airy aesthetic by stitching rows of tiny, precise eyelet stitches, or by using fagoting stitch to connect two parallel folded hems.
This creates a beautiful, lace-like effect that gives your bedding a timeless, heirloom quality.
18. The Abstract Organic Flow

Embrace modern, freeform design with these soft, pebble-like shapes. Give them a raised, three-dimensional effect by using a padded satin stitch.
To do this, simply fill your shape with a base of small running stitches before covering it with your final satin stitch.
This is a perfect example of abstract thread embroidery that feels both artistic and serene, especially when worked in a harmonious neutral palette.
19. The Subtle Tone-on-Tone Scroll
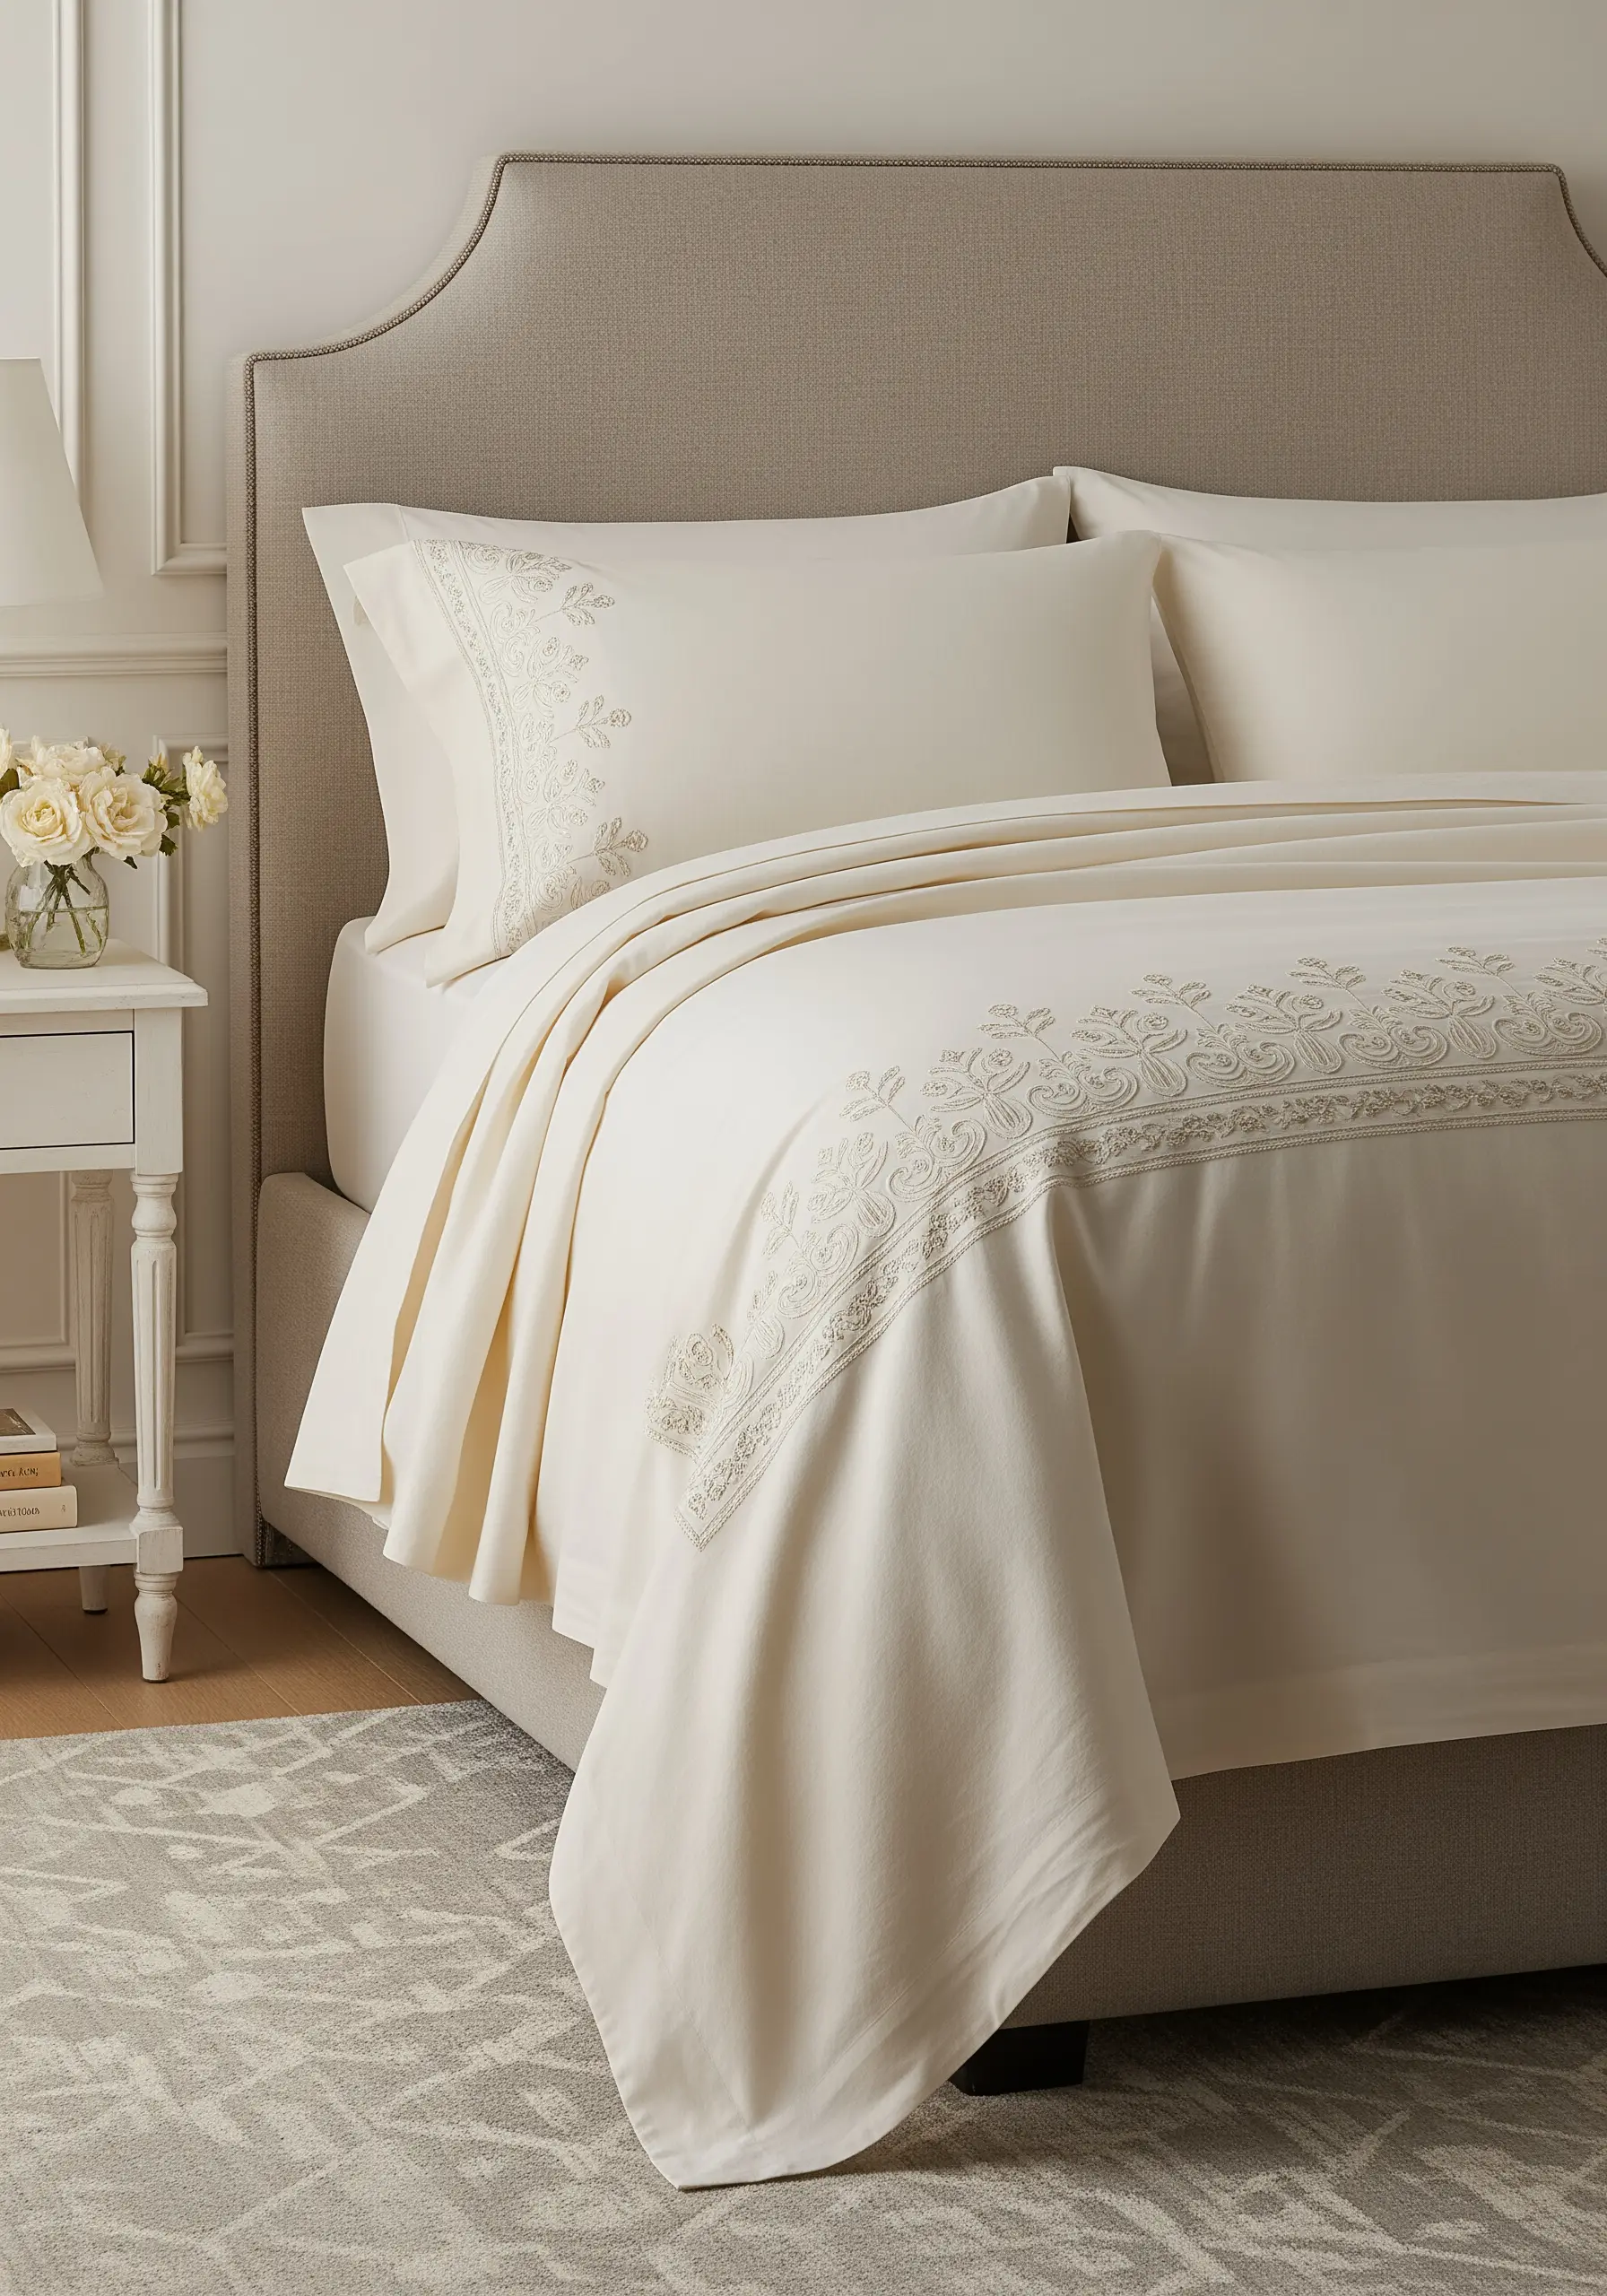
The elegance of this design is its quietness. You achieve this by choosing a thread that is only one or two shades lighter or darker than your base fabric.
Use a combination of stem stitch for the delicate vines and small satin stitches for the leaves.
The result is a design that focuses on the subtle play of light on texture, adding a layer of sophistication without shouting for attention.
20. The Woodland Fern Border
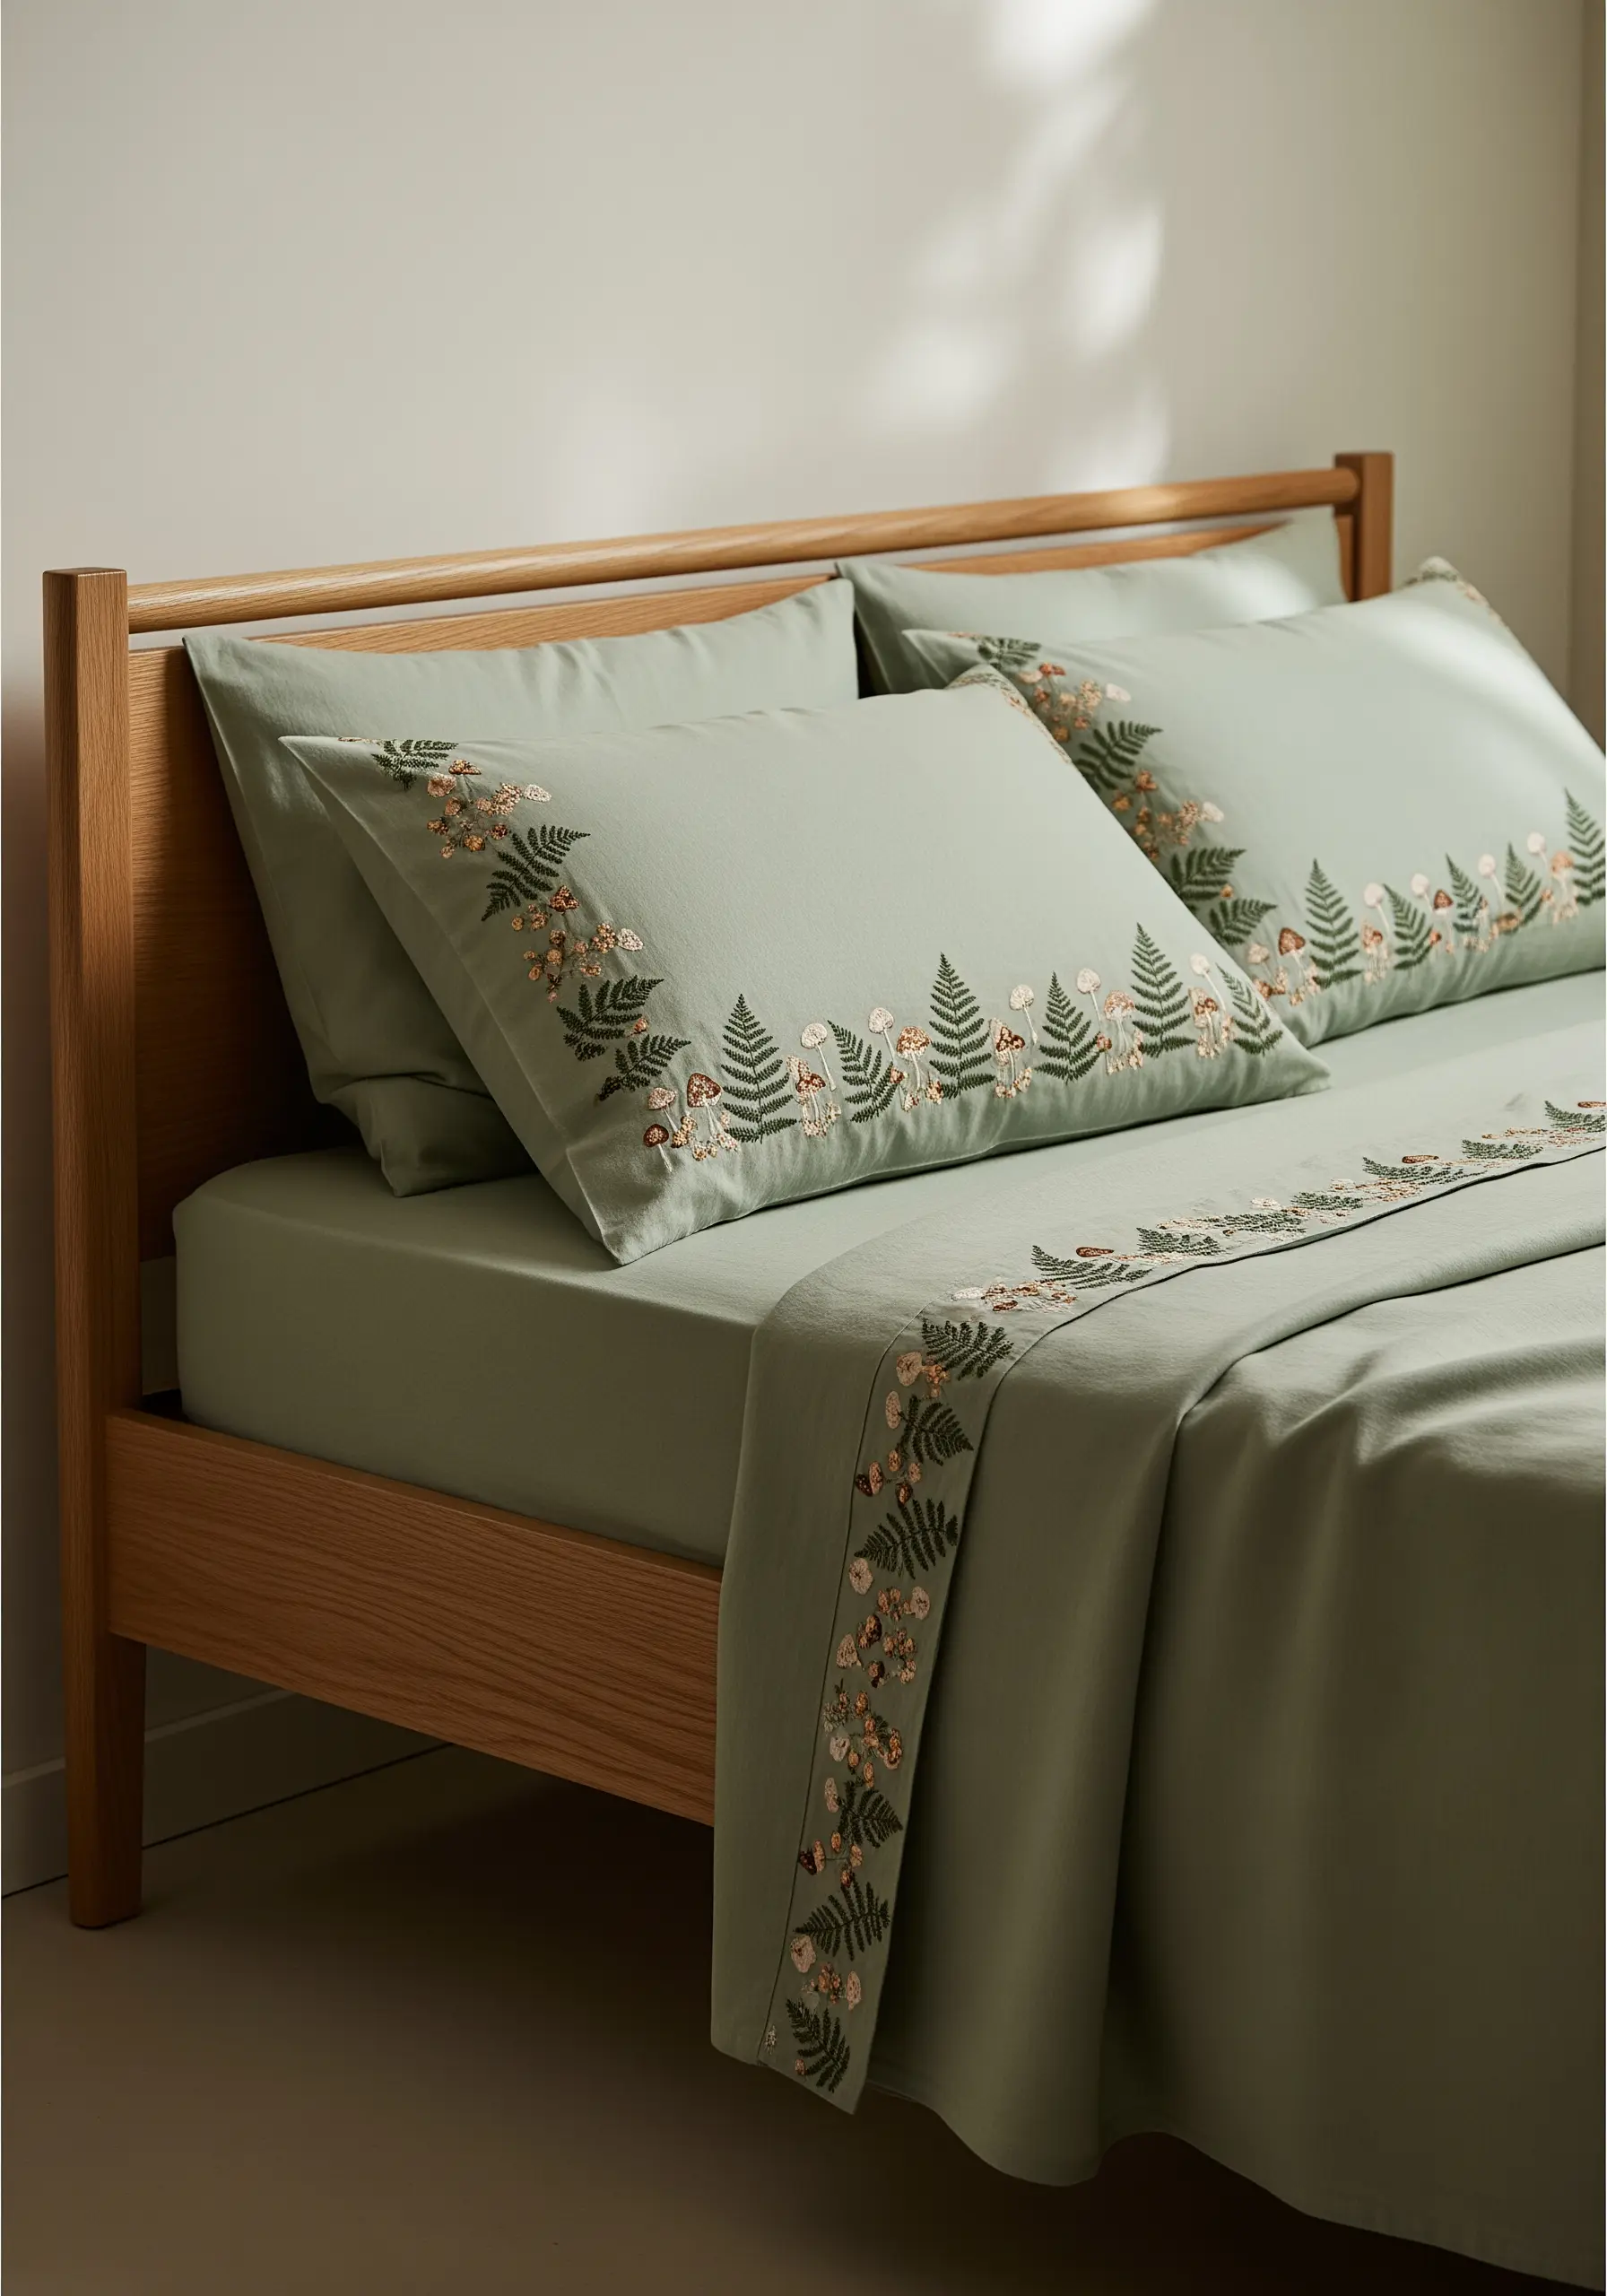
Stitch a charming woodland scene using a variety of textural stitches. Use fishbone stitch for fern fronds to create a realistic central vein, and a padded satin stitch for mushroom caps to give them a rounded shape.
By incorporating several earthy, natural tones for the different elements, your botanical border will feel rich, detailed, and full of life.
21. The Collected Seashell Border

Instead of a single repeating shell, create a more interesting border by stitching a variety of different types, as if collected from a walk on the beach.
Use a split stitch for fine outlines, then fill with long-and-short stitch to create gentle color gradients within each shell.
A palette of sand, cream, and taupe against a pale blue fabric instantly evokes a calm, serene shoreline.
22. The Art Deco Graphic Line
This border commands attention through its bold contrast and geometric precision. Use a bright white or silver thread against a dark fabric for maximum impact.
A whipped backstitch is an excellent choice here, as it creates a solid, slightly raised line that will stand out beautifully.
Carefully marking your design with a chalk pencil or water-soluble pen is essential for achieving those perfectly crisp lines and angles.
23. The Personal Script Border
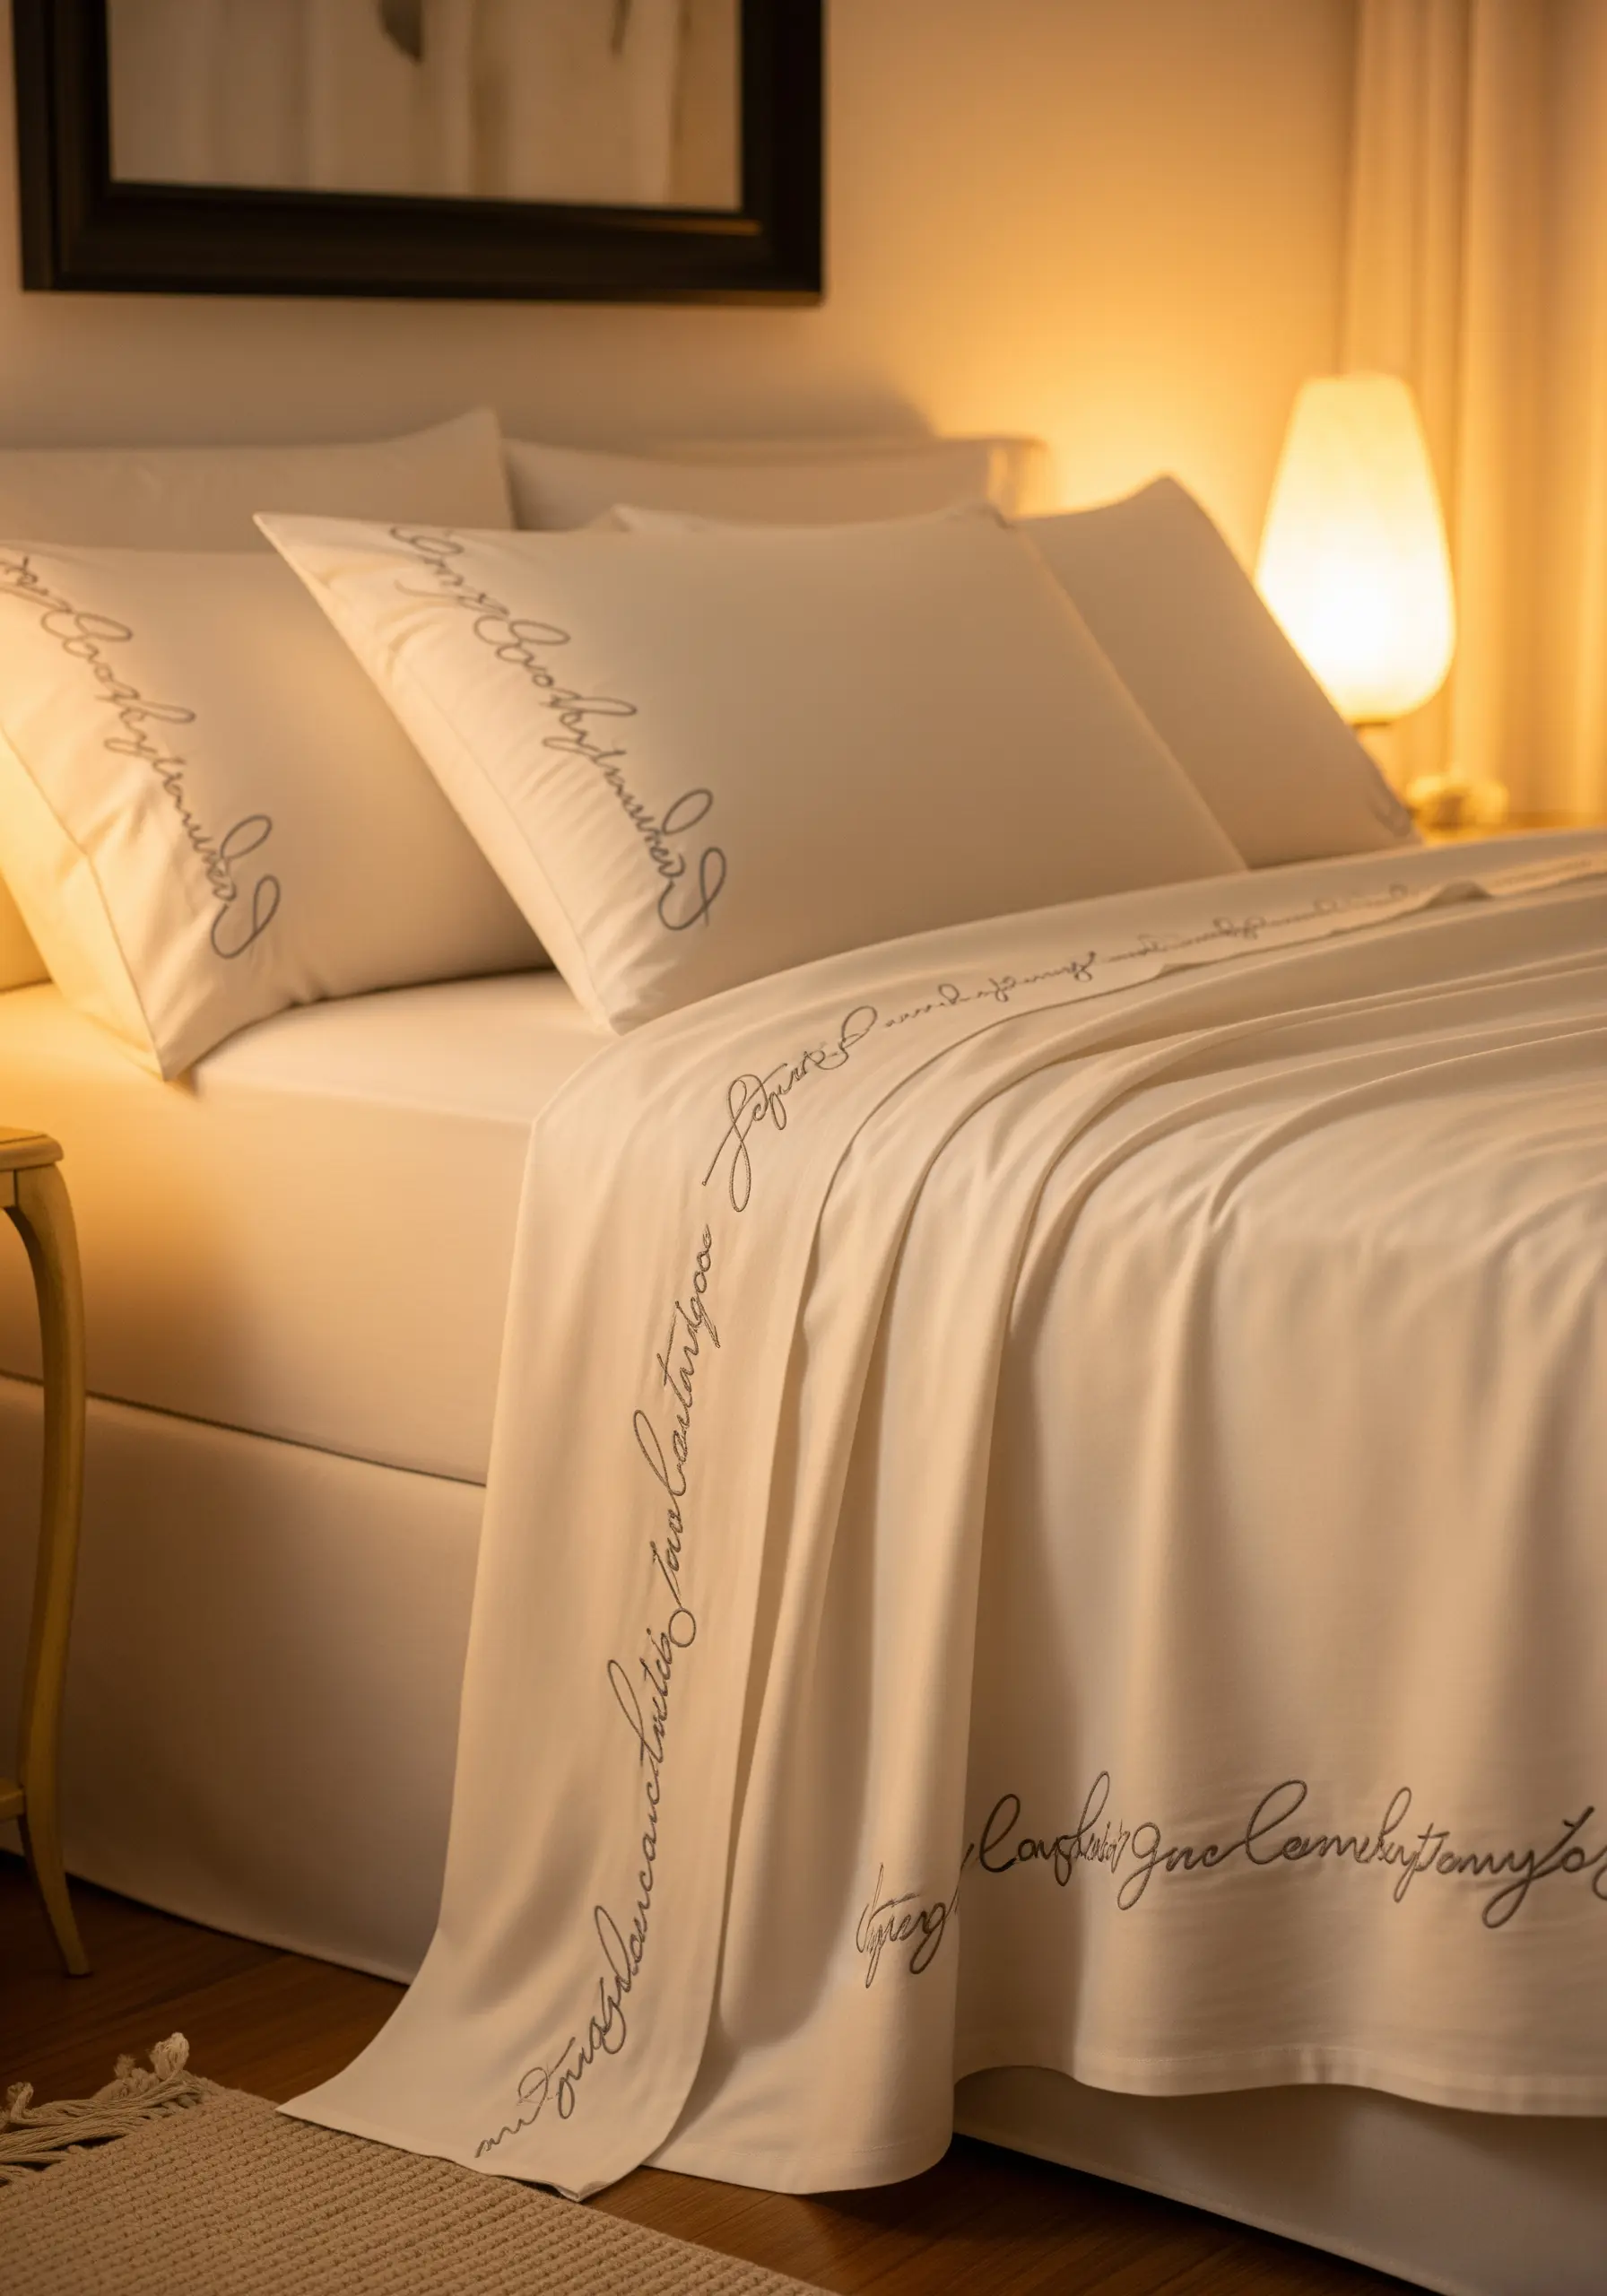
To capture the smooth, elegant flow of cursive handwriting, use a stem stitch or a whipped backstitch.
These stitches eliminate the broken look of a standard backstitch, creating a truly continuous line perfect for a favorite quote or a loved one’s name.
Keep the thread fine (one or two strands) and the scale delicate to ensure the script feels intimate and refined, not heavy-handed.
24. The Whimsical Dandelion Drift
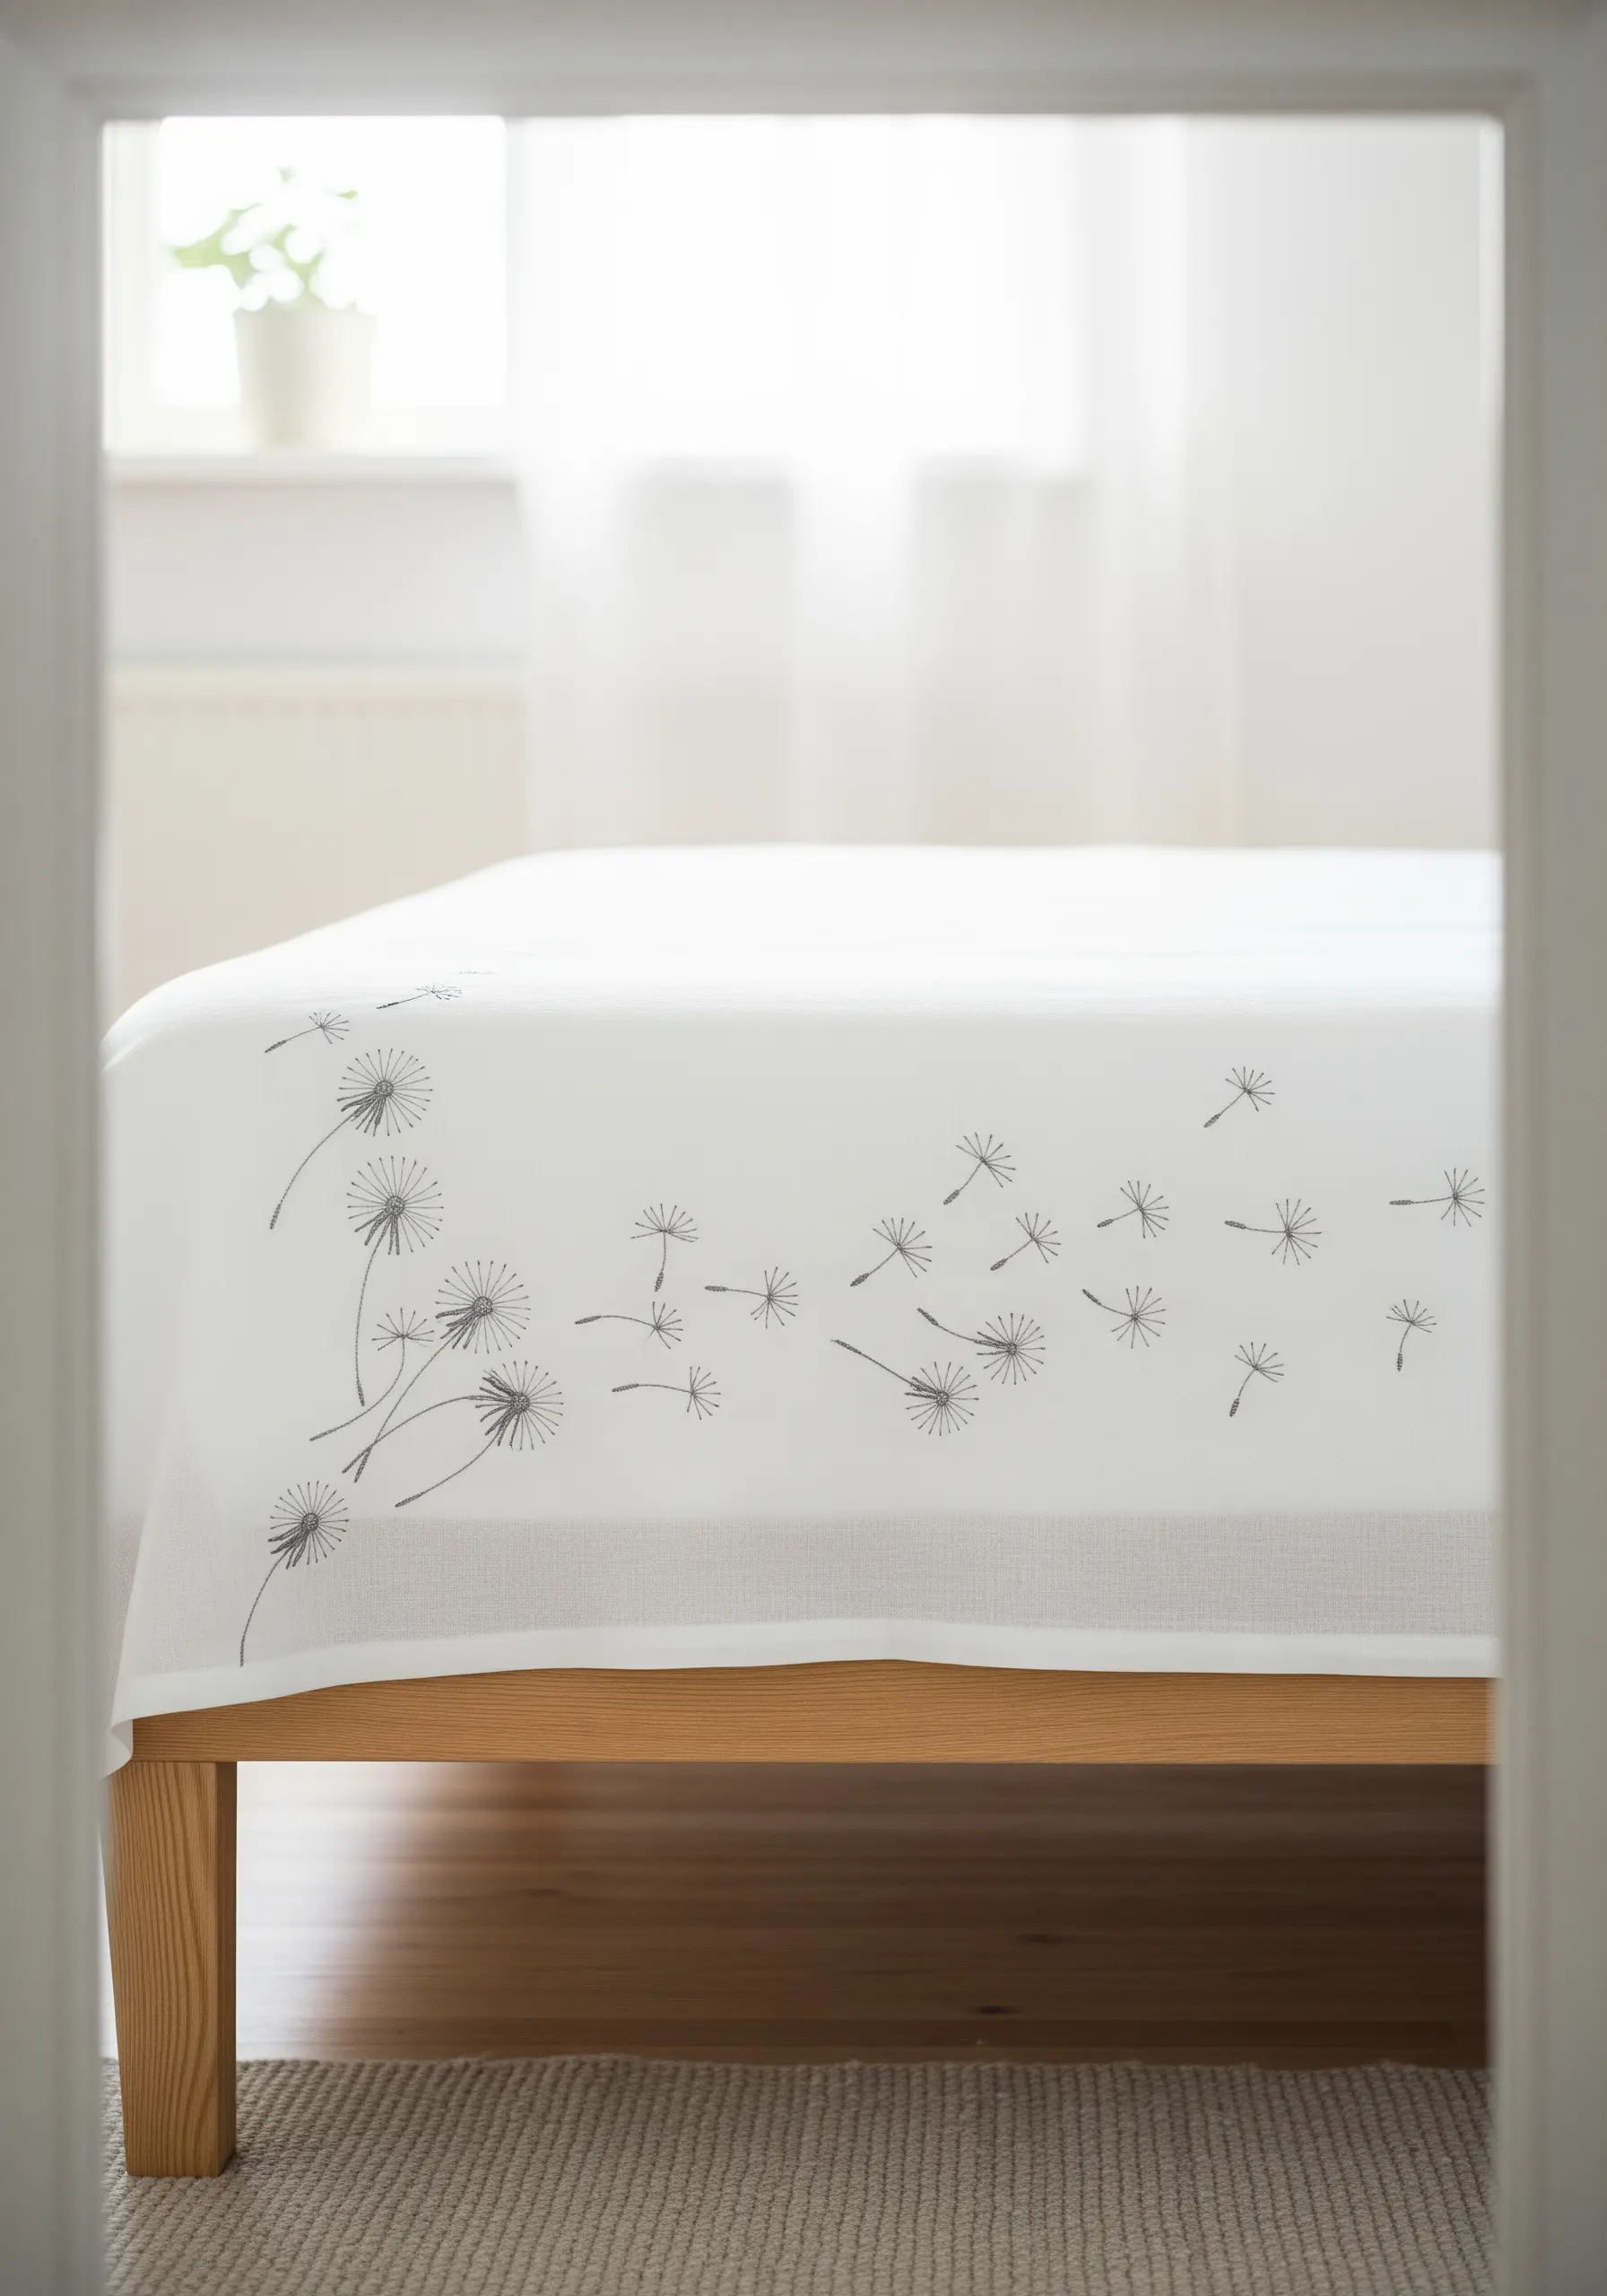
Create the delicate, airy feeling of dandelion seeds with a few simple stitches. Use straight stitches radiating from a center point for the main seed head.
For the individual seeds drifting away, a single detached chain stitch with a short straight stitch for the tail is perfect.
The key to this design’s charm is the asymmetrical, scattered placement, which creates a wonderful sense of movement.
25. The Crystalline Snowflake Border

Stitch these intricate snowflakes using a fine, single-strand white or metallic silver thread to give them a delicate, frosty appearance.
Construct each snowflake from a base of straight stitches, then add details like tiny French knots or V-shapes at the tips of the arms.
By varying the size and pattern of each snowflake, your border will look like a unique and natural flurry.
26. The Warm Desert Horizon
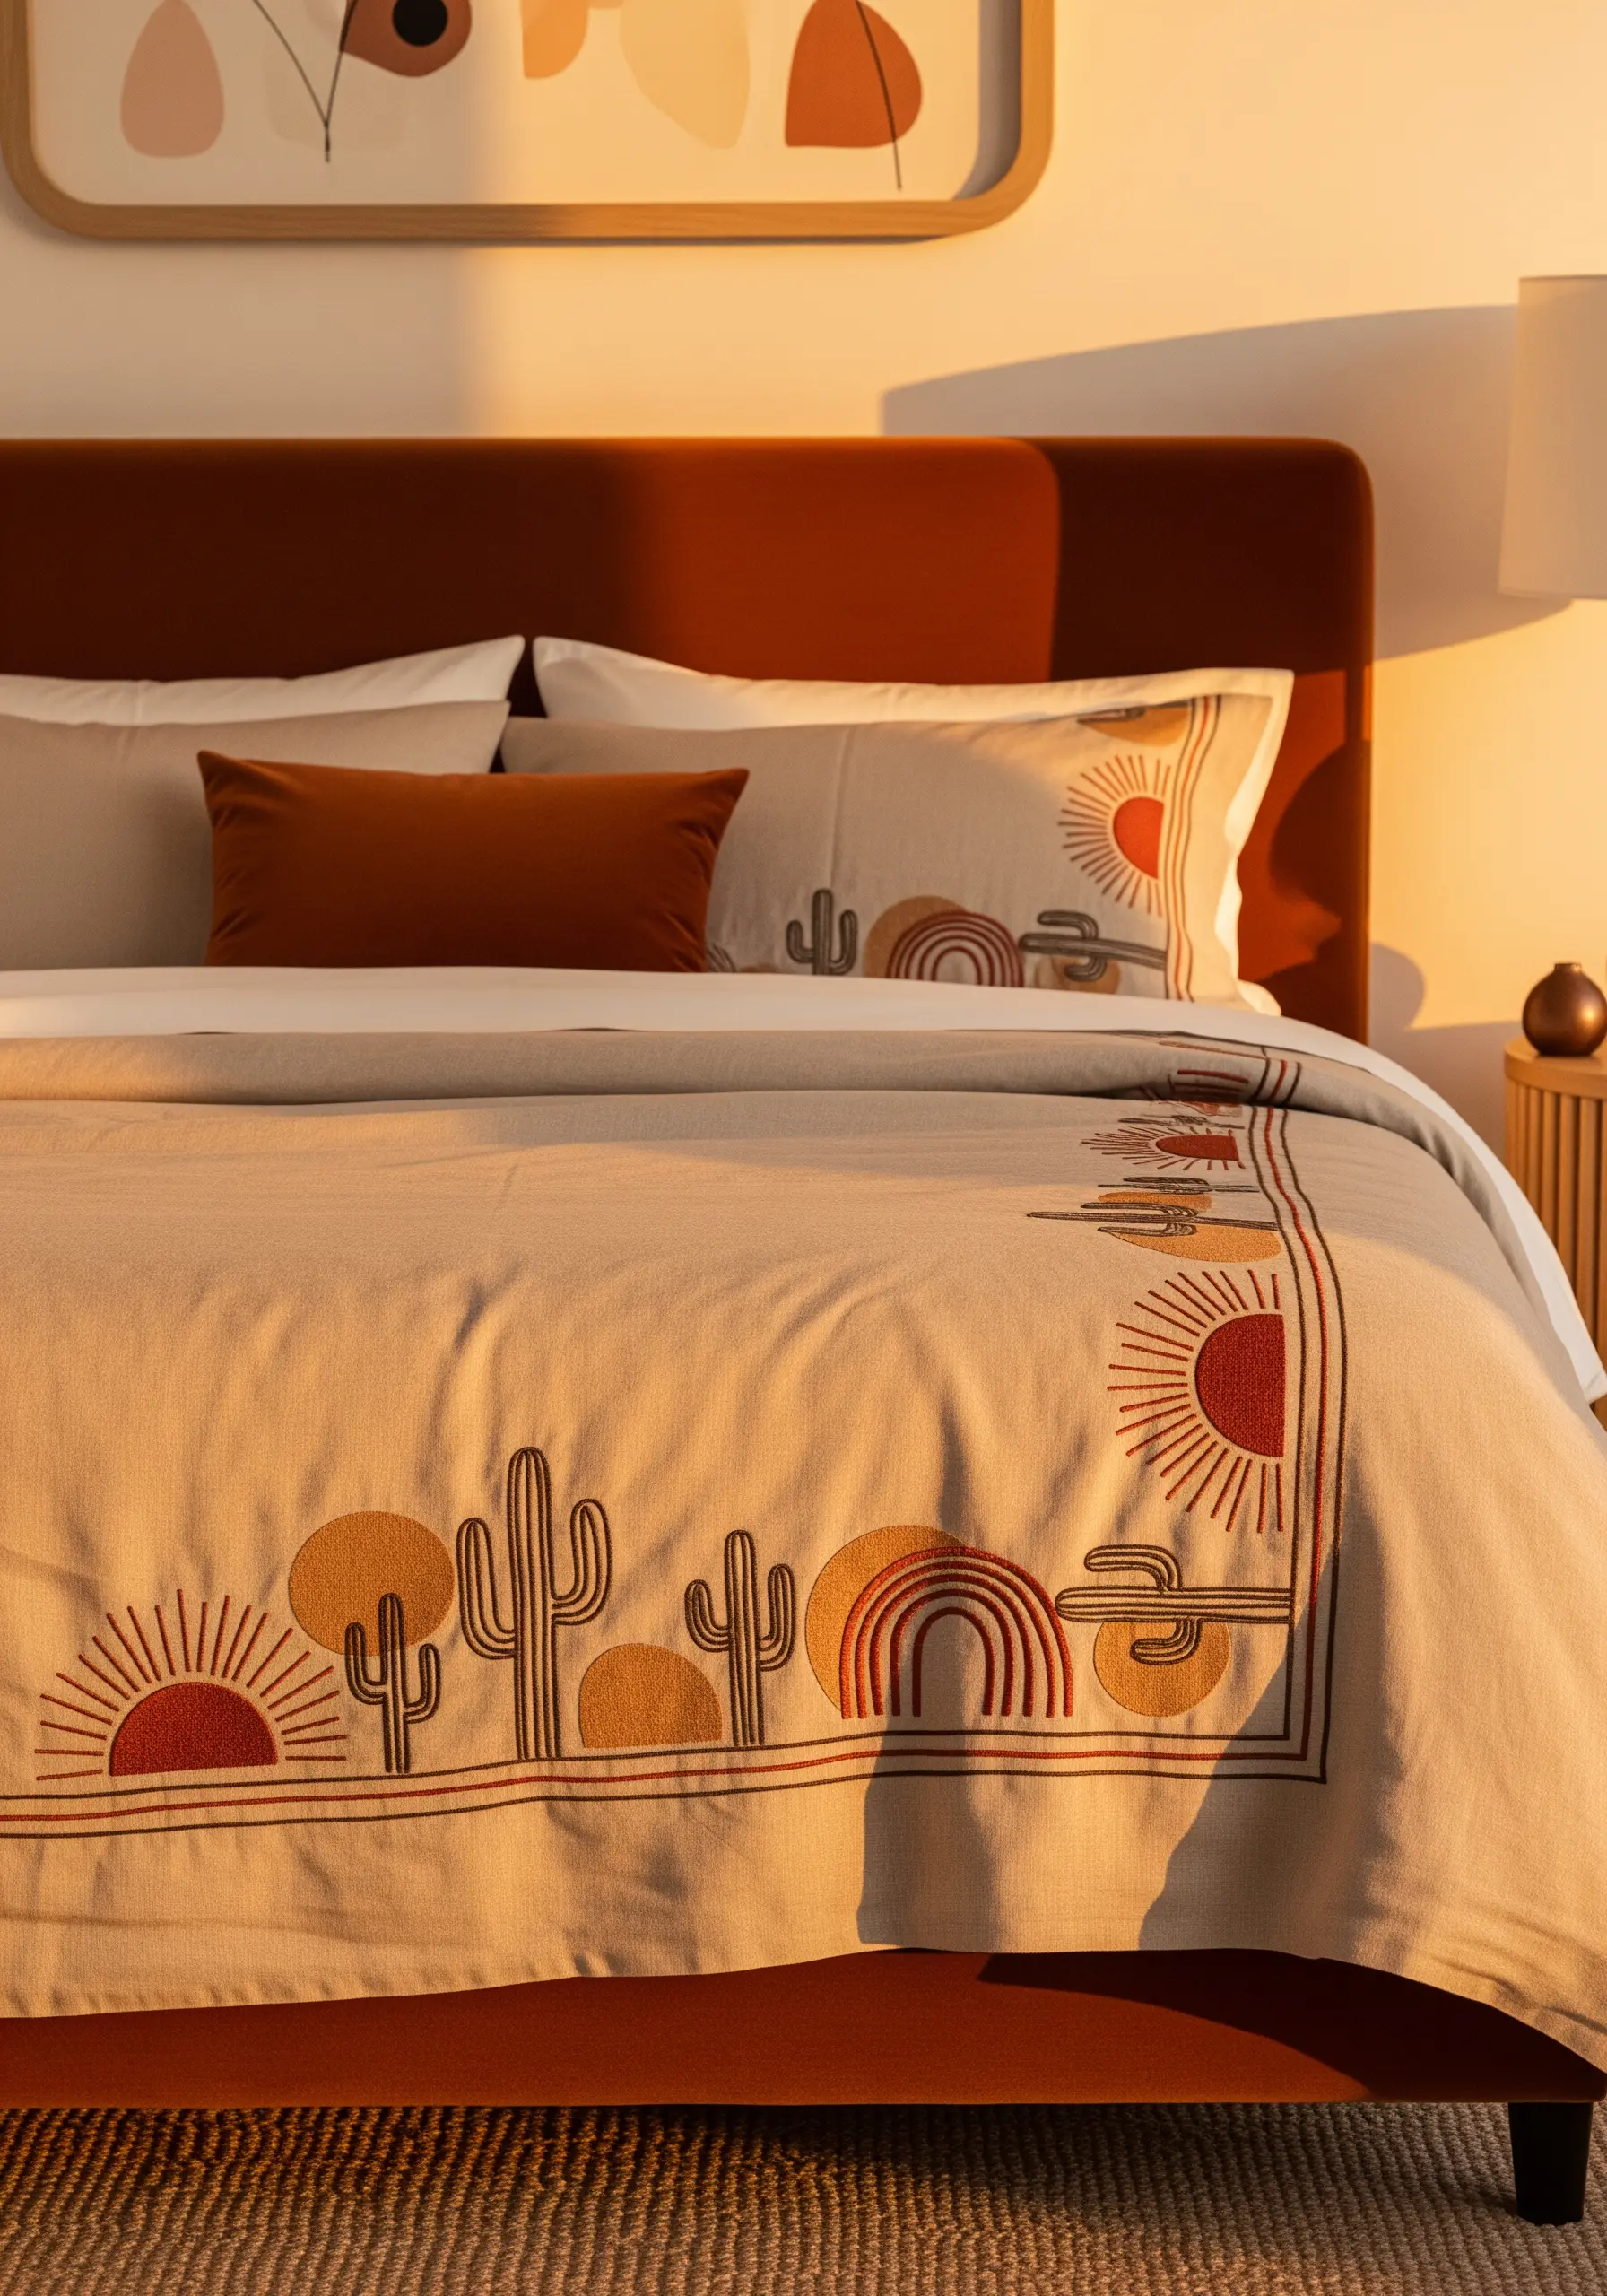
This stylized desert border gets its character from bold shapes and warm colors. Use a chain stitch to outline the cacti and suns, which adds a lovely textural line.
Fill the larger shapes with a smooth satin stitch, ensuring your stitches are parallel and even for a clean, graphic look.
The palette of terracotta, ochre, and warm brown against a sandy beige fabric creates a cozy, sun-drenched aesthetic.


