

Perhaps you’ve found yourself staring at a finished piece, feeling that it’s missing a certain depth or character. Merging paper collage with hand embroidery isn’t about adding complexity; it’s about introducing a new language of texture and dimension into your work. It allows you to move beyond the flat surface and create art that asks to be not just seen, but felt.
Think of paper as your canvas and thread as your finest ink. With a simple running stitch, you can etch delicate details onto a paper leaf. With thick yarn, you can give a portrait a crown of tangible, touchable hair. This isn’t just crafting—it’s a thoughtful dialogue between materials, where the crispness of paper highlights the softness of thread, and vice versa.
In the ideas that follow, you won’t find complicated instructions. Instead, you’ll find invitations to explore. See how a torn edge can feel more organic than a scissor cut, how a single line of thread can tell a story, and how the simplest stitches can transform paper cutouts into something with soul and substance. It’s time to pick up your needle and thread with a new sense of possibility.
1. Layer Torn Paper for Botanical Depth
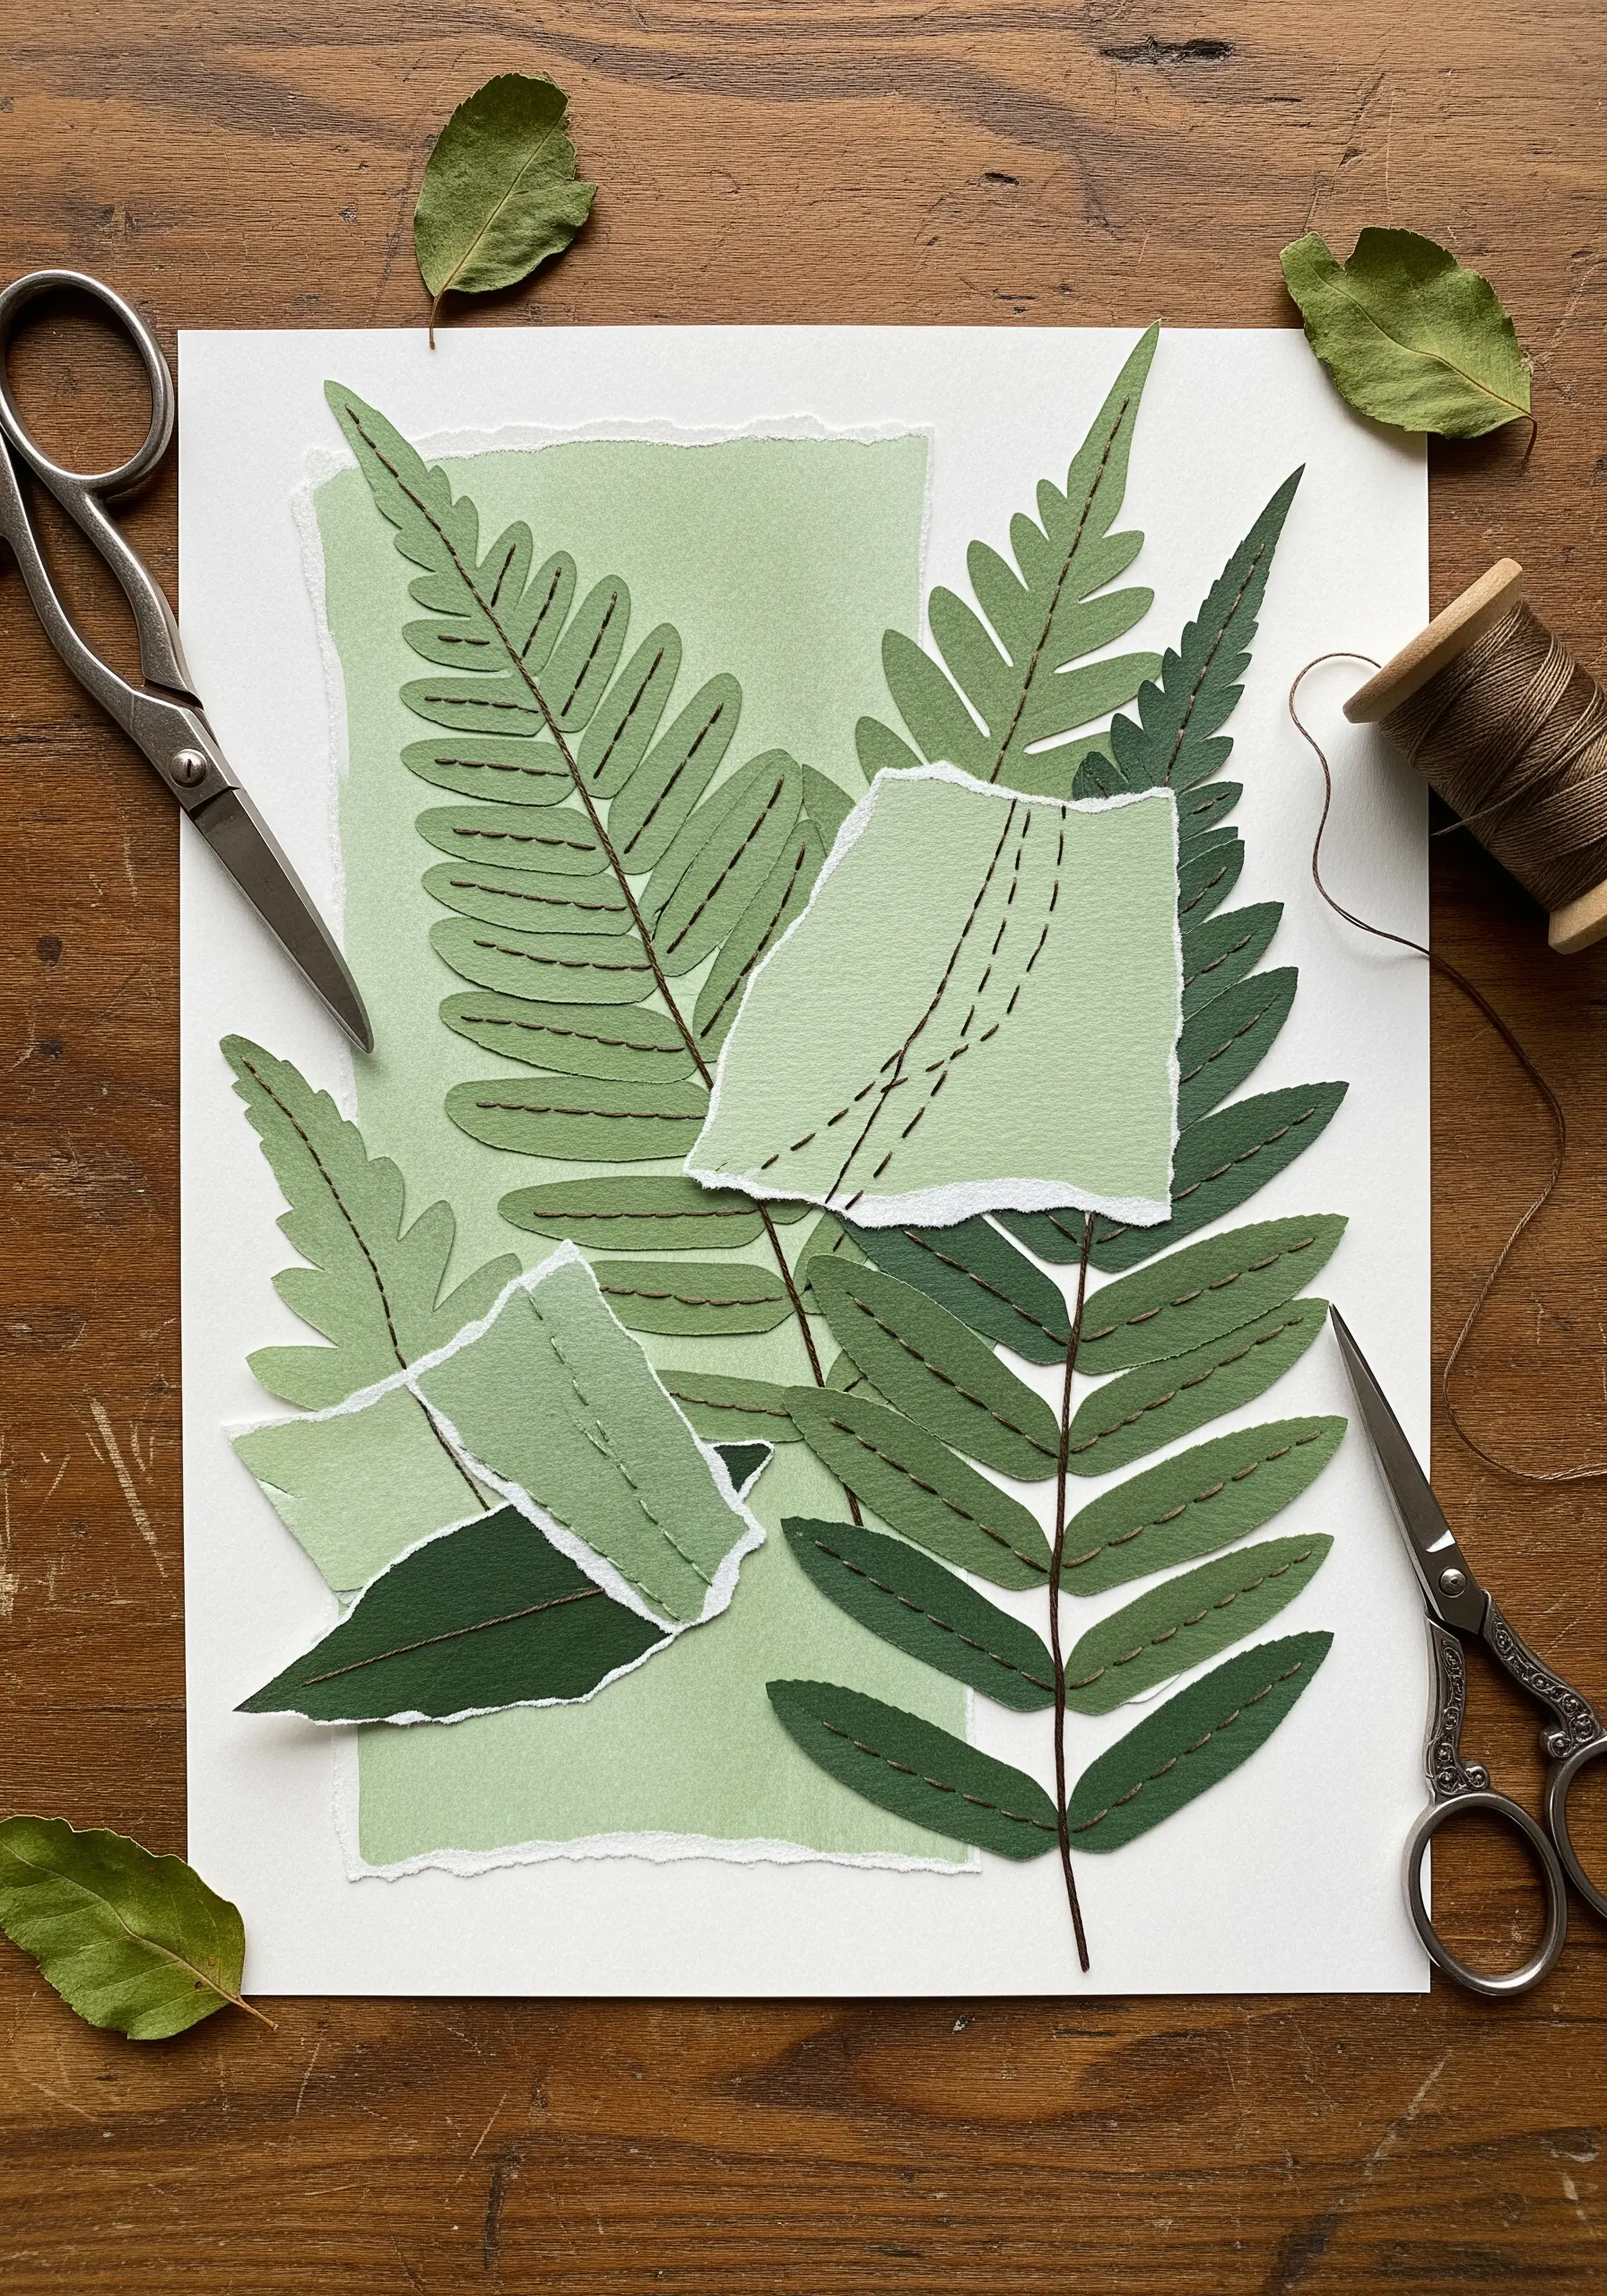
Create organic, textured foliage by layering torn pieces of colored paper instead of using precise cutouts.
The torn edge adds a soft, natural quality that mimics the imperfection of real leaves.
Use a simple running stitch in a contrasting darker thread to add vein details, stitching through both the paper and the background.
This technique allows you to build up color and shadow with minimal effort, transforming flat paper into something with life and dimension.
Consider using handmade or textured papers to enhance the tactile feel of the final piece.
2. Stitch Icy Accents onto Paper Landscapes
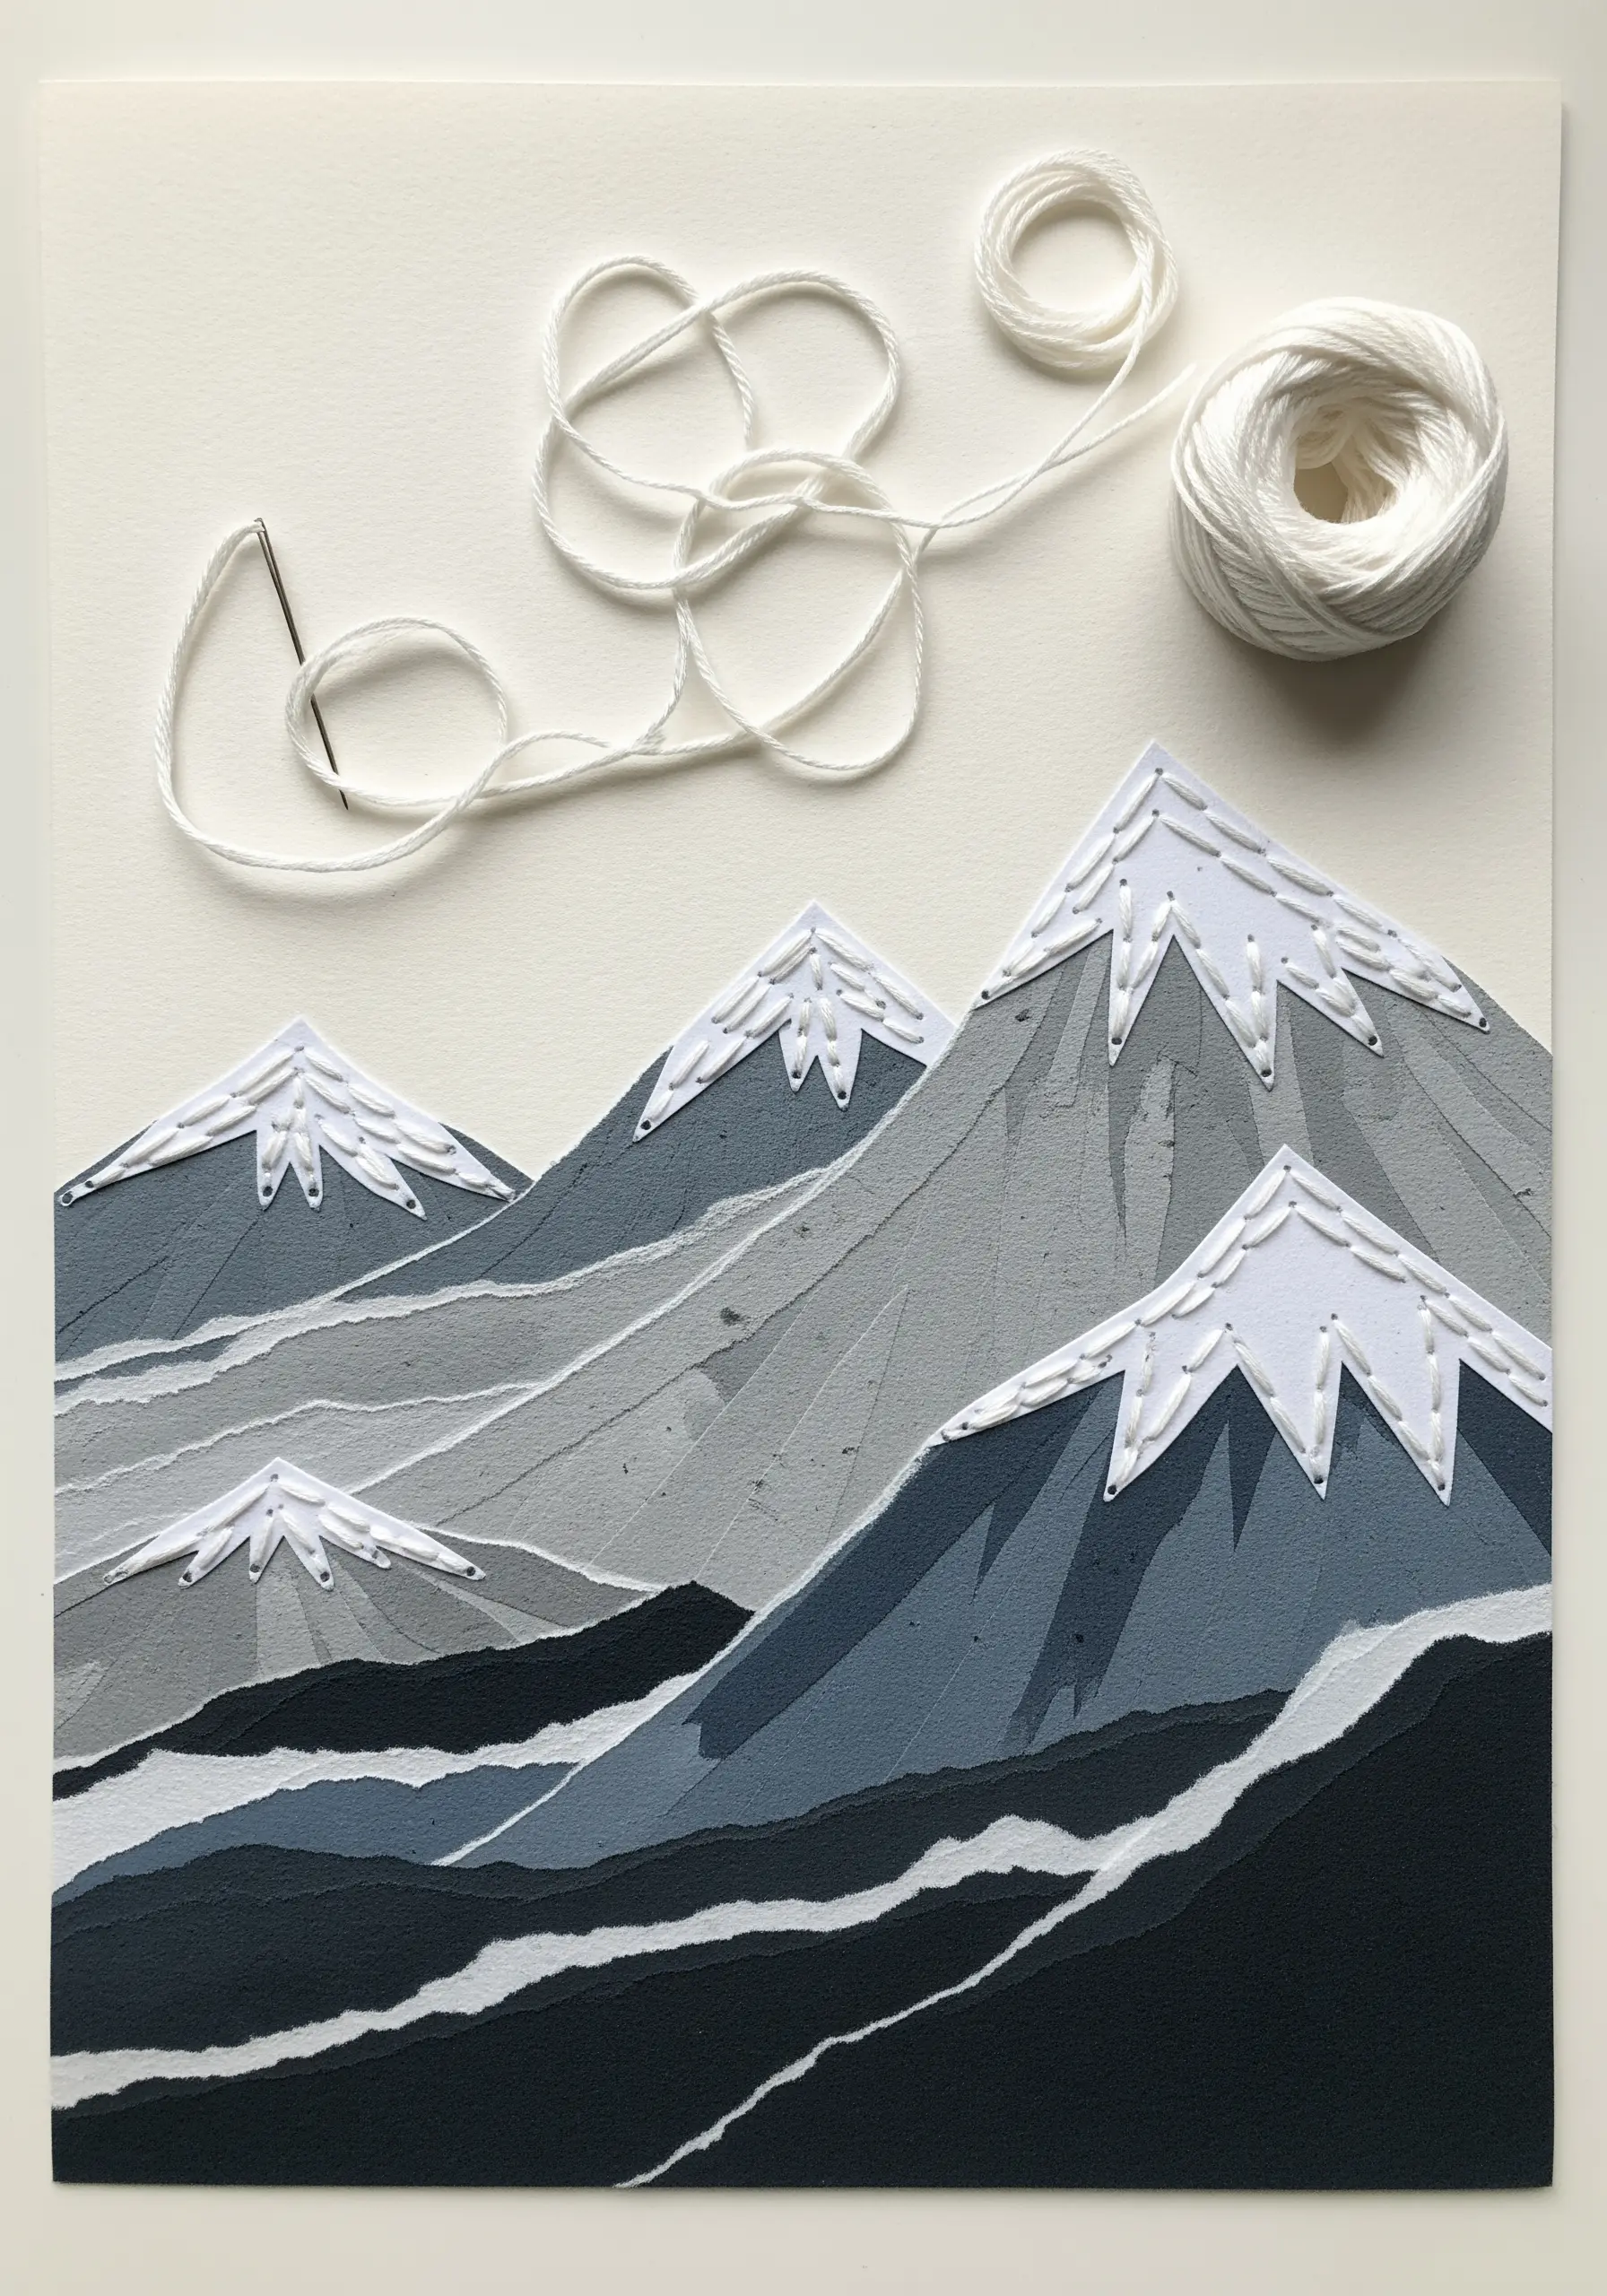
Give your paper mountainscapes a crisp, frozen texture by adding stitched snow caps.
Layer shades of grey and blue paper with torn edges to create a sense of atmospheric perspective and depth.
For the snow, use a thick, bright white cotton floss and a combination of straight stitches and seed stitches.
This contrast between the flat paper and the raised, textural thread makes the peaks feel more dramatic and tangible.
It’s a simple way to introduce a focal point and a tactile element to an otherwise smooth composition.
3. Use Thread as a Defining Line in Abstract Compositions
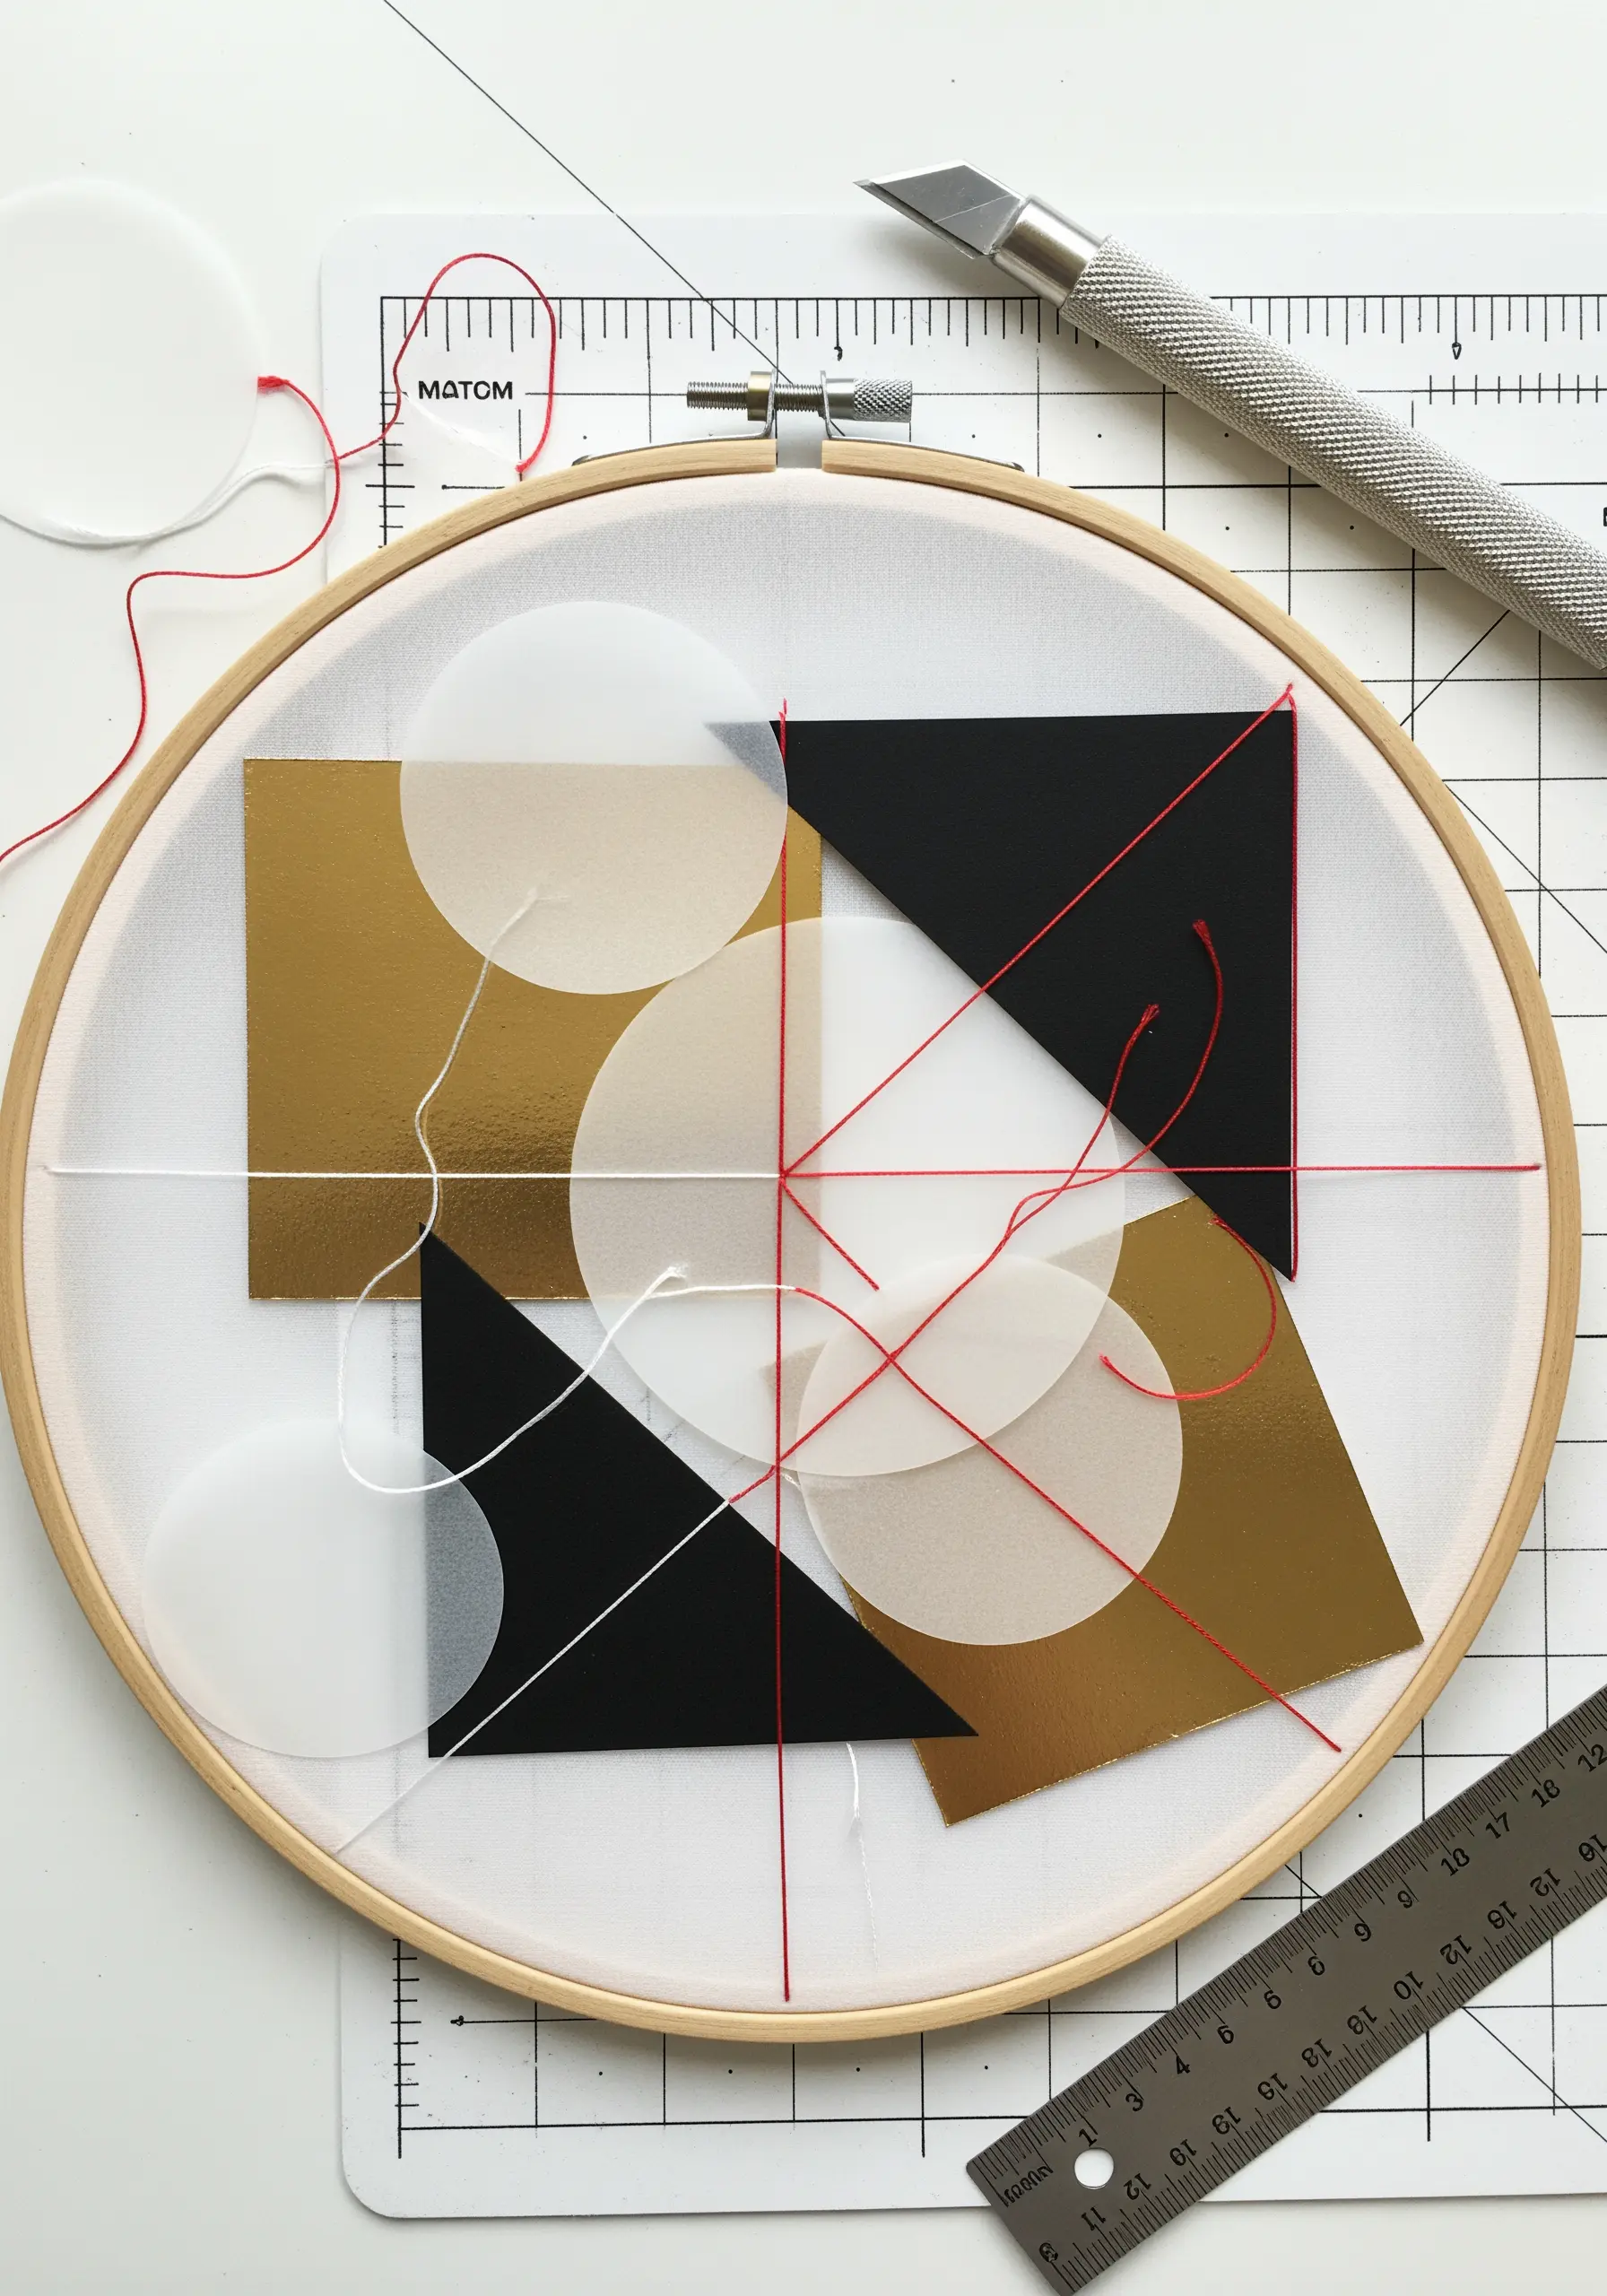
Move beyond decorative stitching and use thread as a primary graphic element in your abstract collages.
Arrange geometric shapes cut from contrasting materials like metallic, vellum, and matte cardstock on a stretched fabric surface.
Instead of stitching the shapes down, run long, taut stitches across the composition to create intersecting lines that unify the disparate elements.
This approach treats the entire hoop as a canvas where thread acts like ink, drawing connections and creating a dynamic visual tension.
The result is a clean, modern piece that feels both delicate and architectural.
4. Create Celestial Trails with Metallic Threads and Sequins
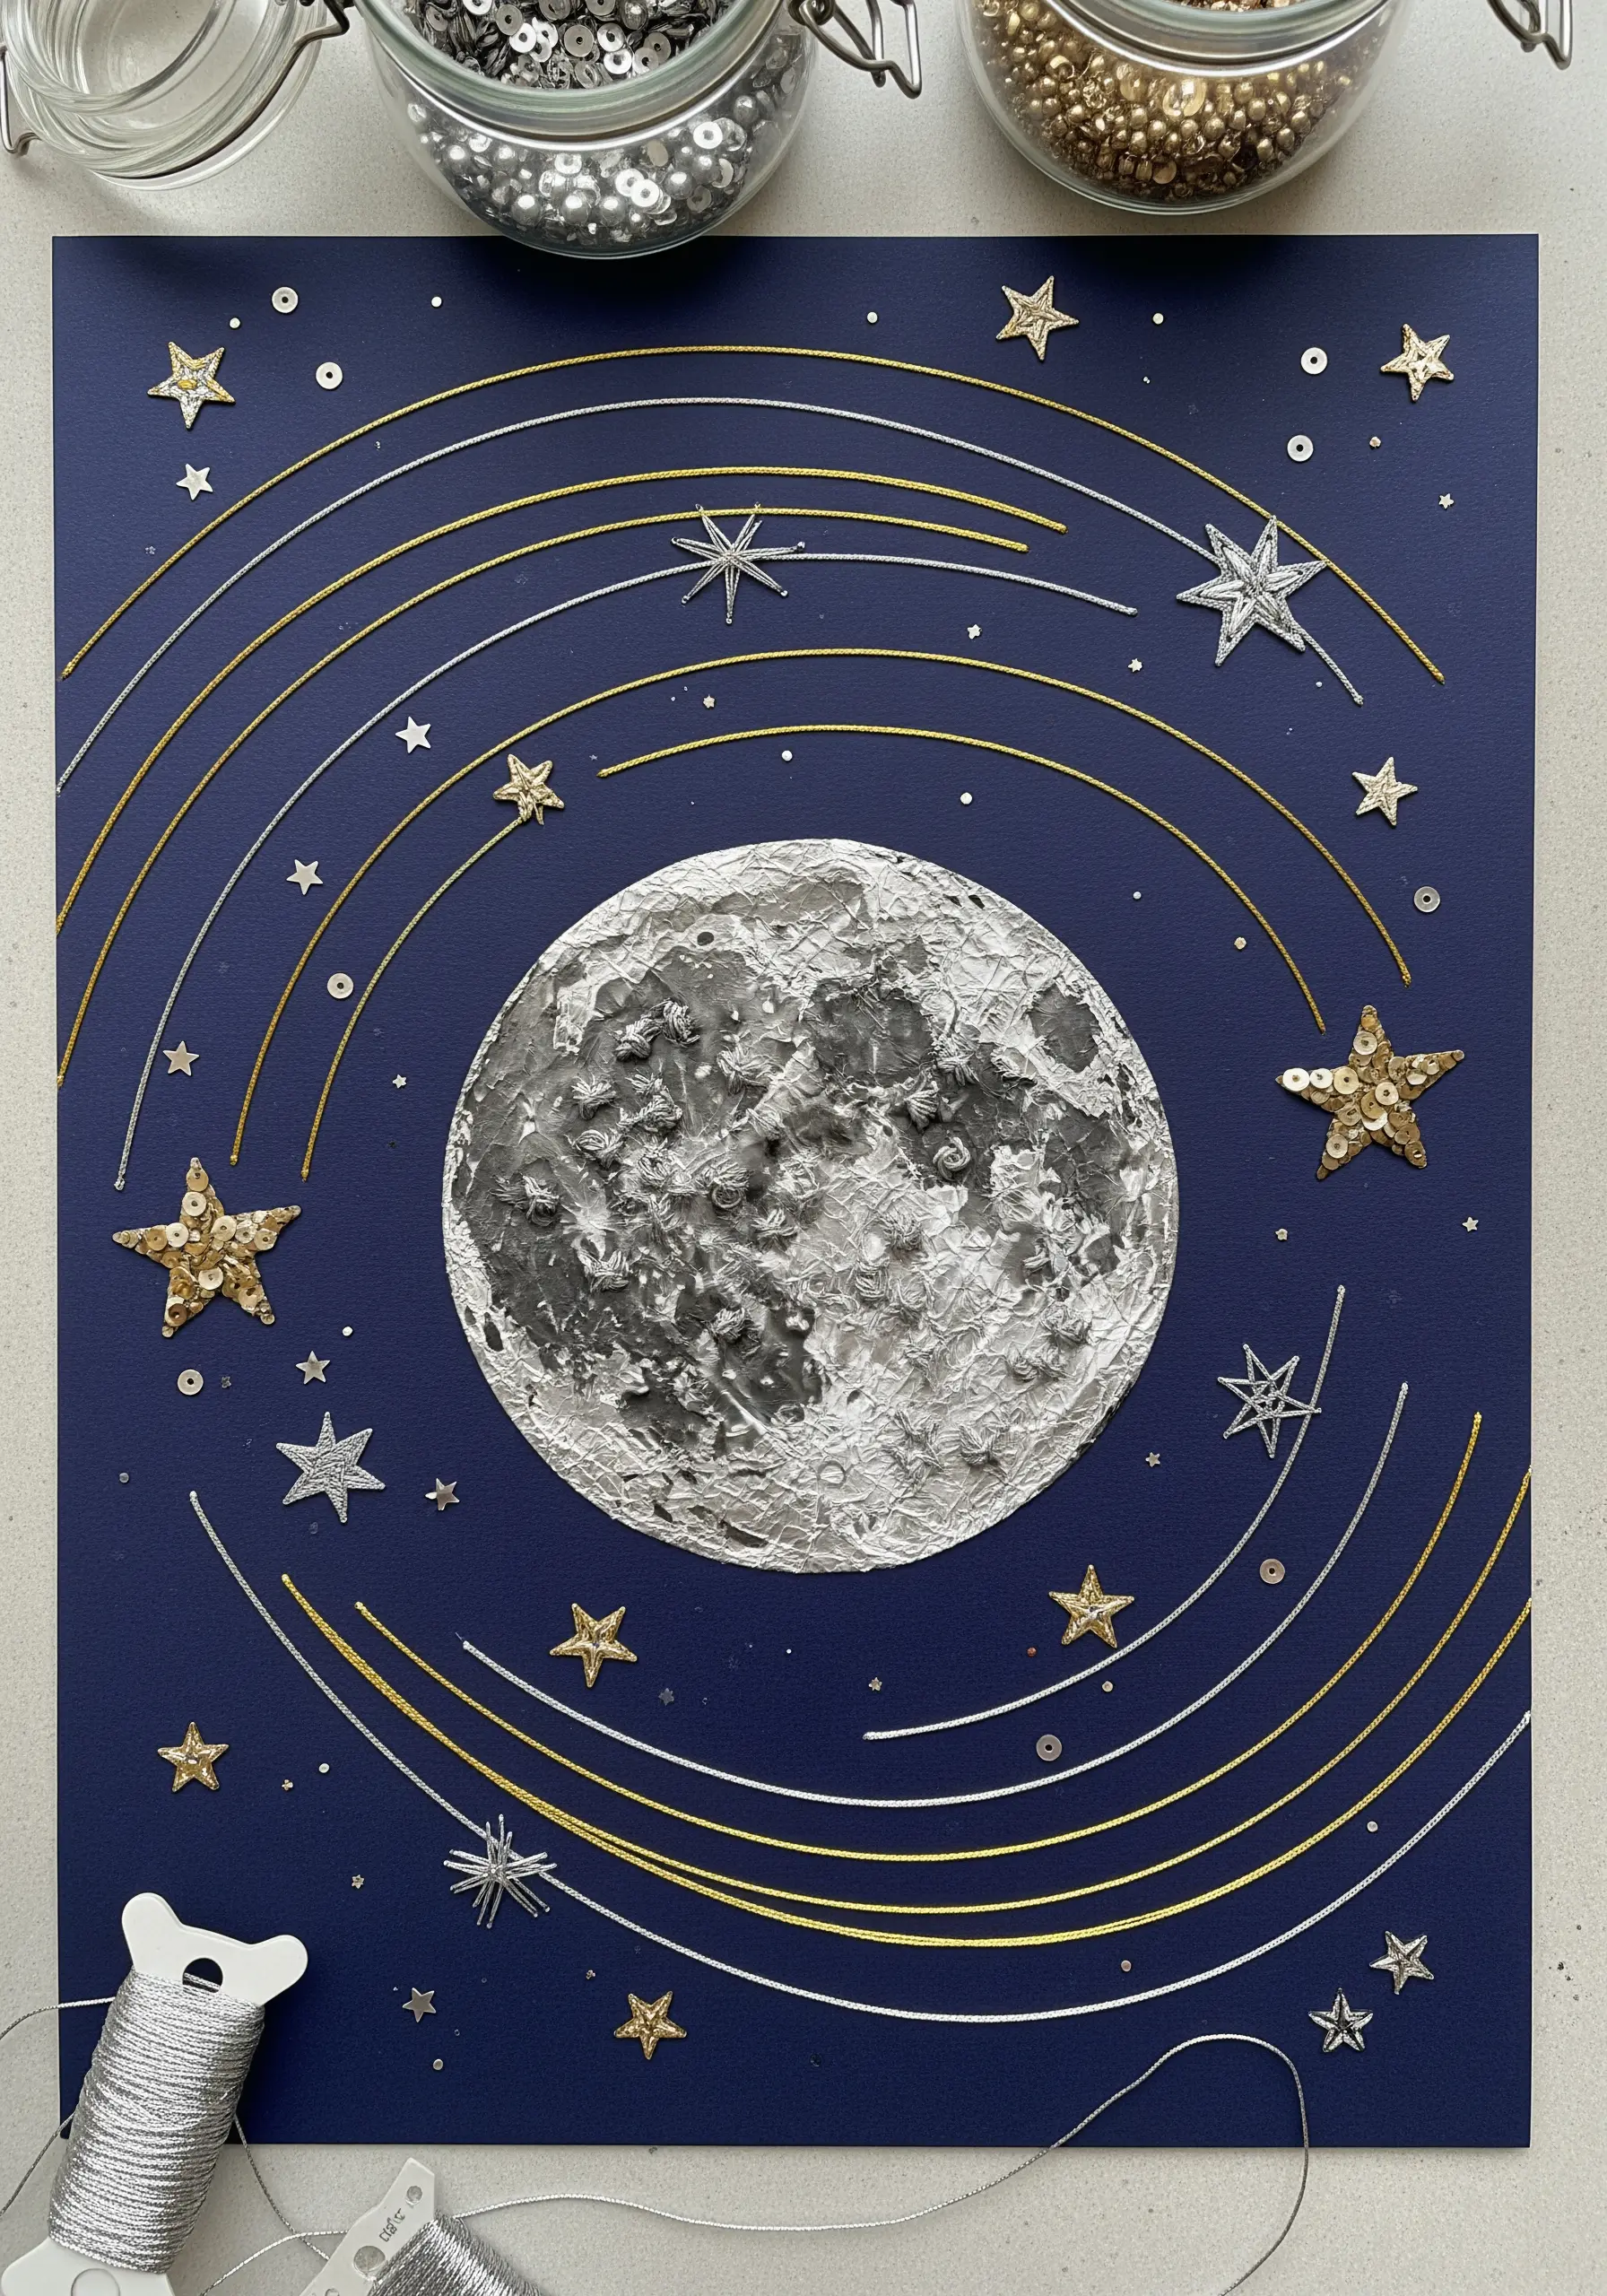
Illustrate orbital paths and cosmic dust by combining metallic threads, beads, and sequins over a dark paper background.
Use a couching stitch to lay down smooth, curved lines with fine metallic thread, which gives you more control than a standard backstitch.
To create a sense of movement, stitch star-shaped sequins and tiny seed beads along these paths.
For a central element like a moon, use textured silver paper or aluminum foil and add dimension with French knots.
This mixed-media approach turns a flat surface into a sparkling, tactile galaxy.
5. Outline Appliqué Shapes with a Bold Border Stitch
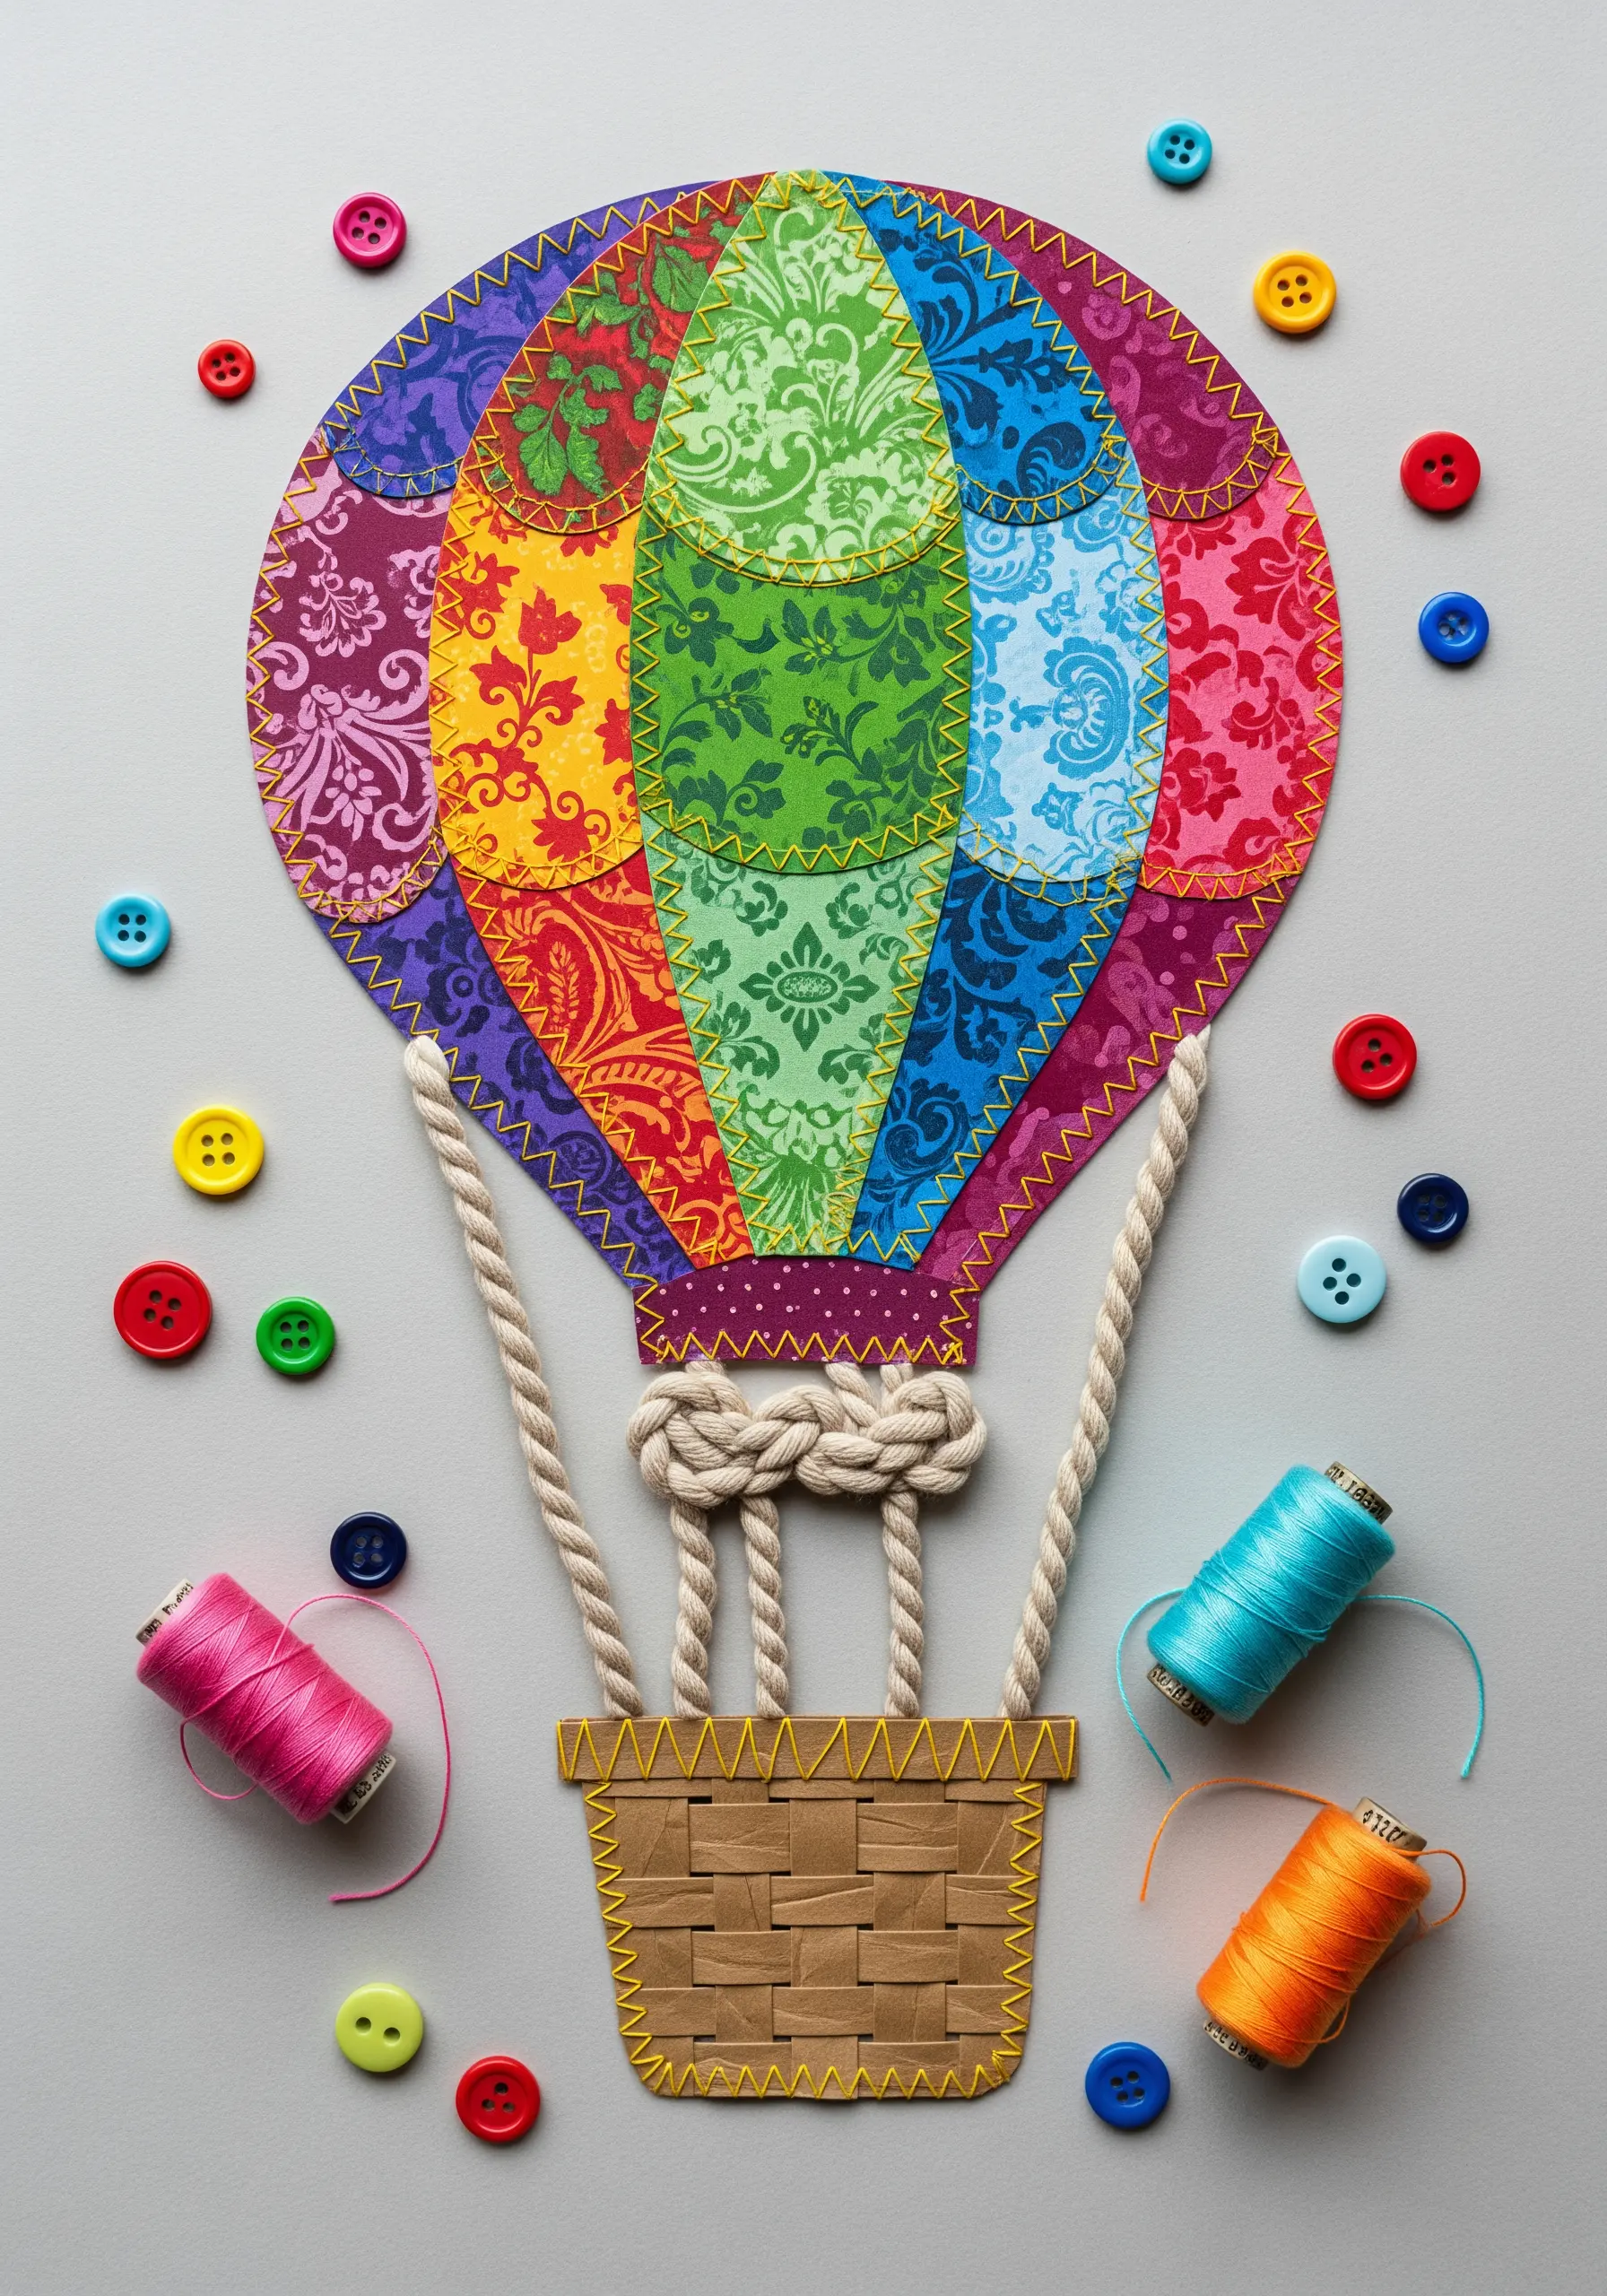
Turn fabric or paper cutouts into appliqué pieces by securing them with a strong, decorative border.
Arrange your patterned paper or fabric scraps to form a larger image, using a light adhesive to hold them in place temporarily.
Instead of an invisible stitch, choose a contrasting color and use a blanket stitch or a visible whipstitch around the edges of each segment.
This not only secures the pieces but also adds a charming, handcrafted feel that defines each shape and makes the colors pop.
It’s a technique that adds both structural integrity and aesthetic polish.
6. Build Architectural Forms with Text-Based Paper
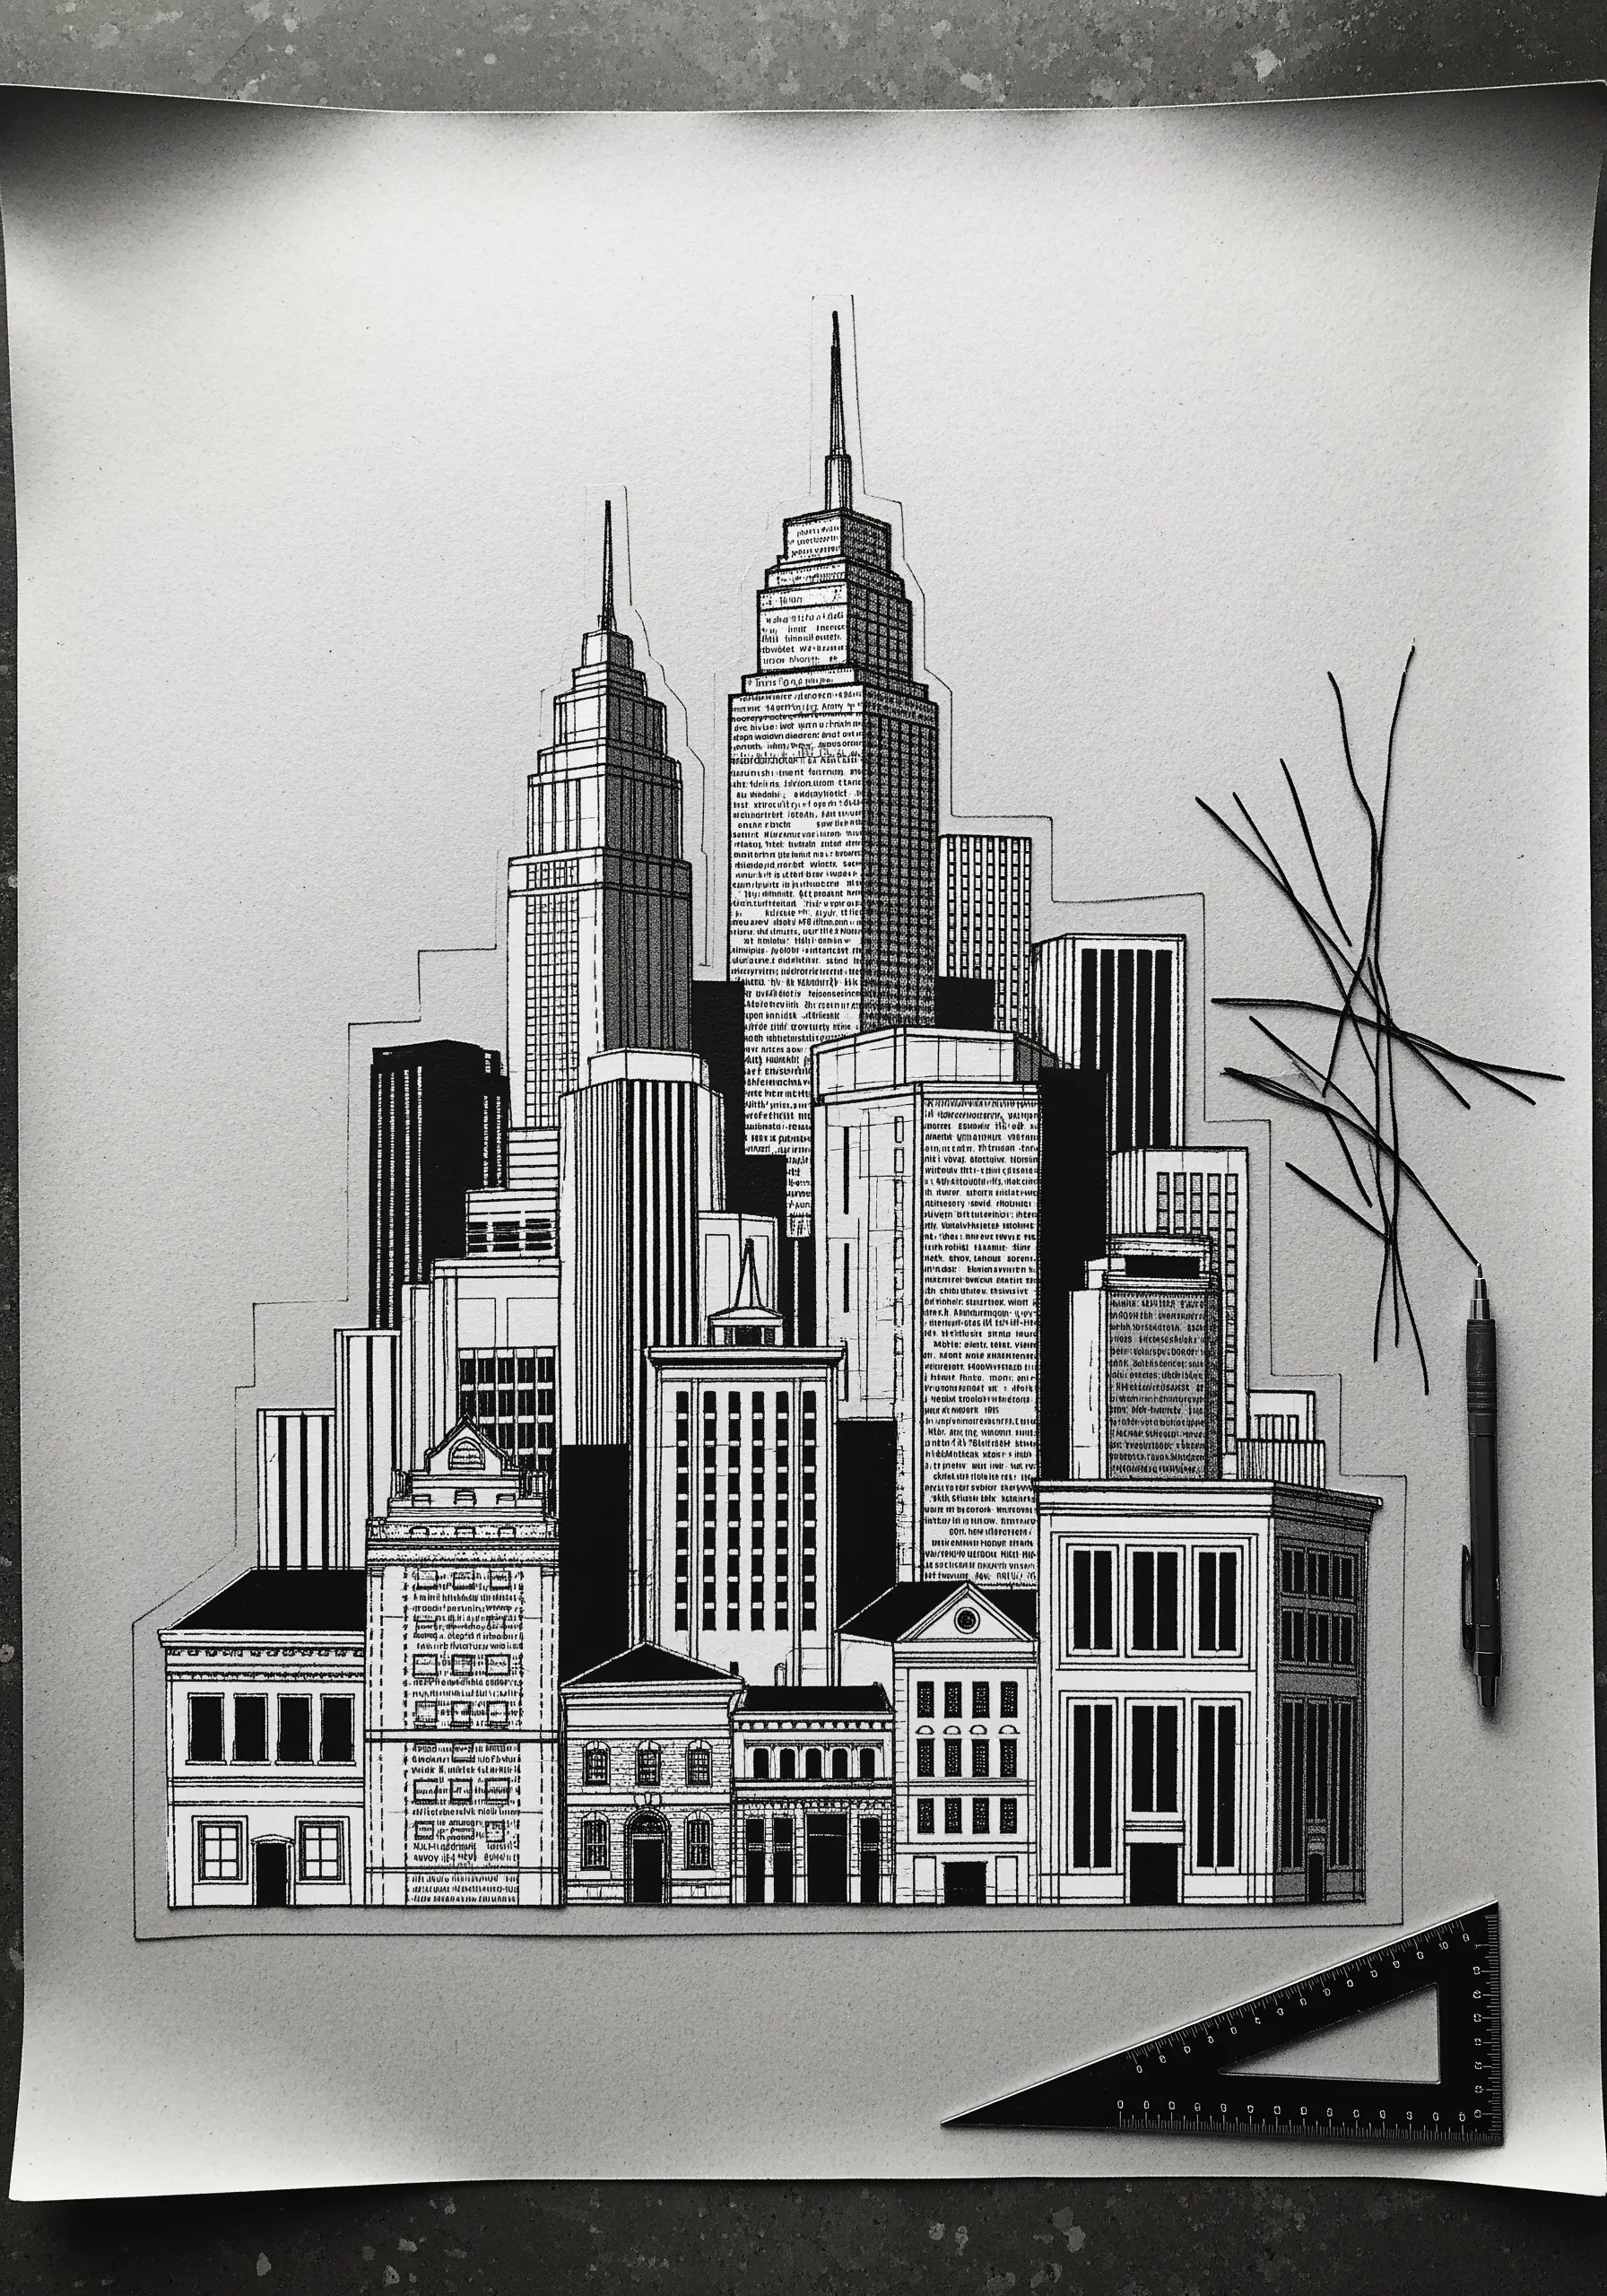
Add subtle complexity to architectural illustrations by using paper with printed text as your primary material.
Cut shapes from old book pages, letters, or newspapers to construct the facades of buildings.
The tiny, uniform lines of text create a unique texture that suggests windows or brickwork without needing to be literal.
Keep the stitching minimal; use fine black thread to add sharp outlines or structural details, letting the paper itself do most of the textural work.
This technique elevates a simple line drawing into a piece of narrative art.
7. Sculpt Seafoam with Coiled Paper and Thread
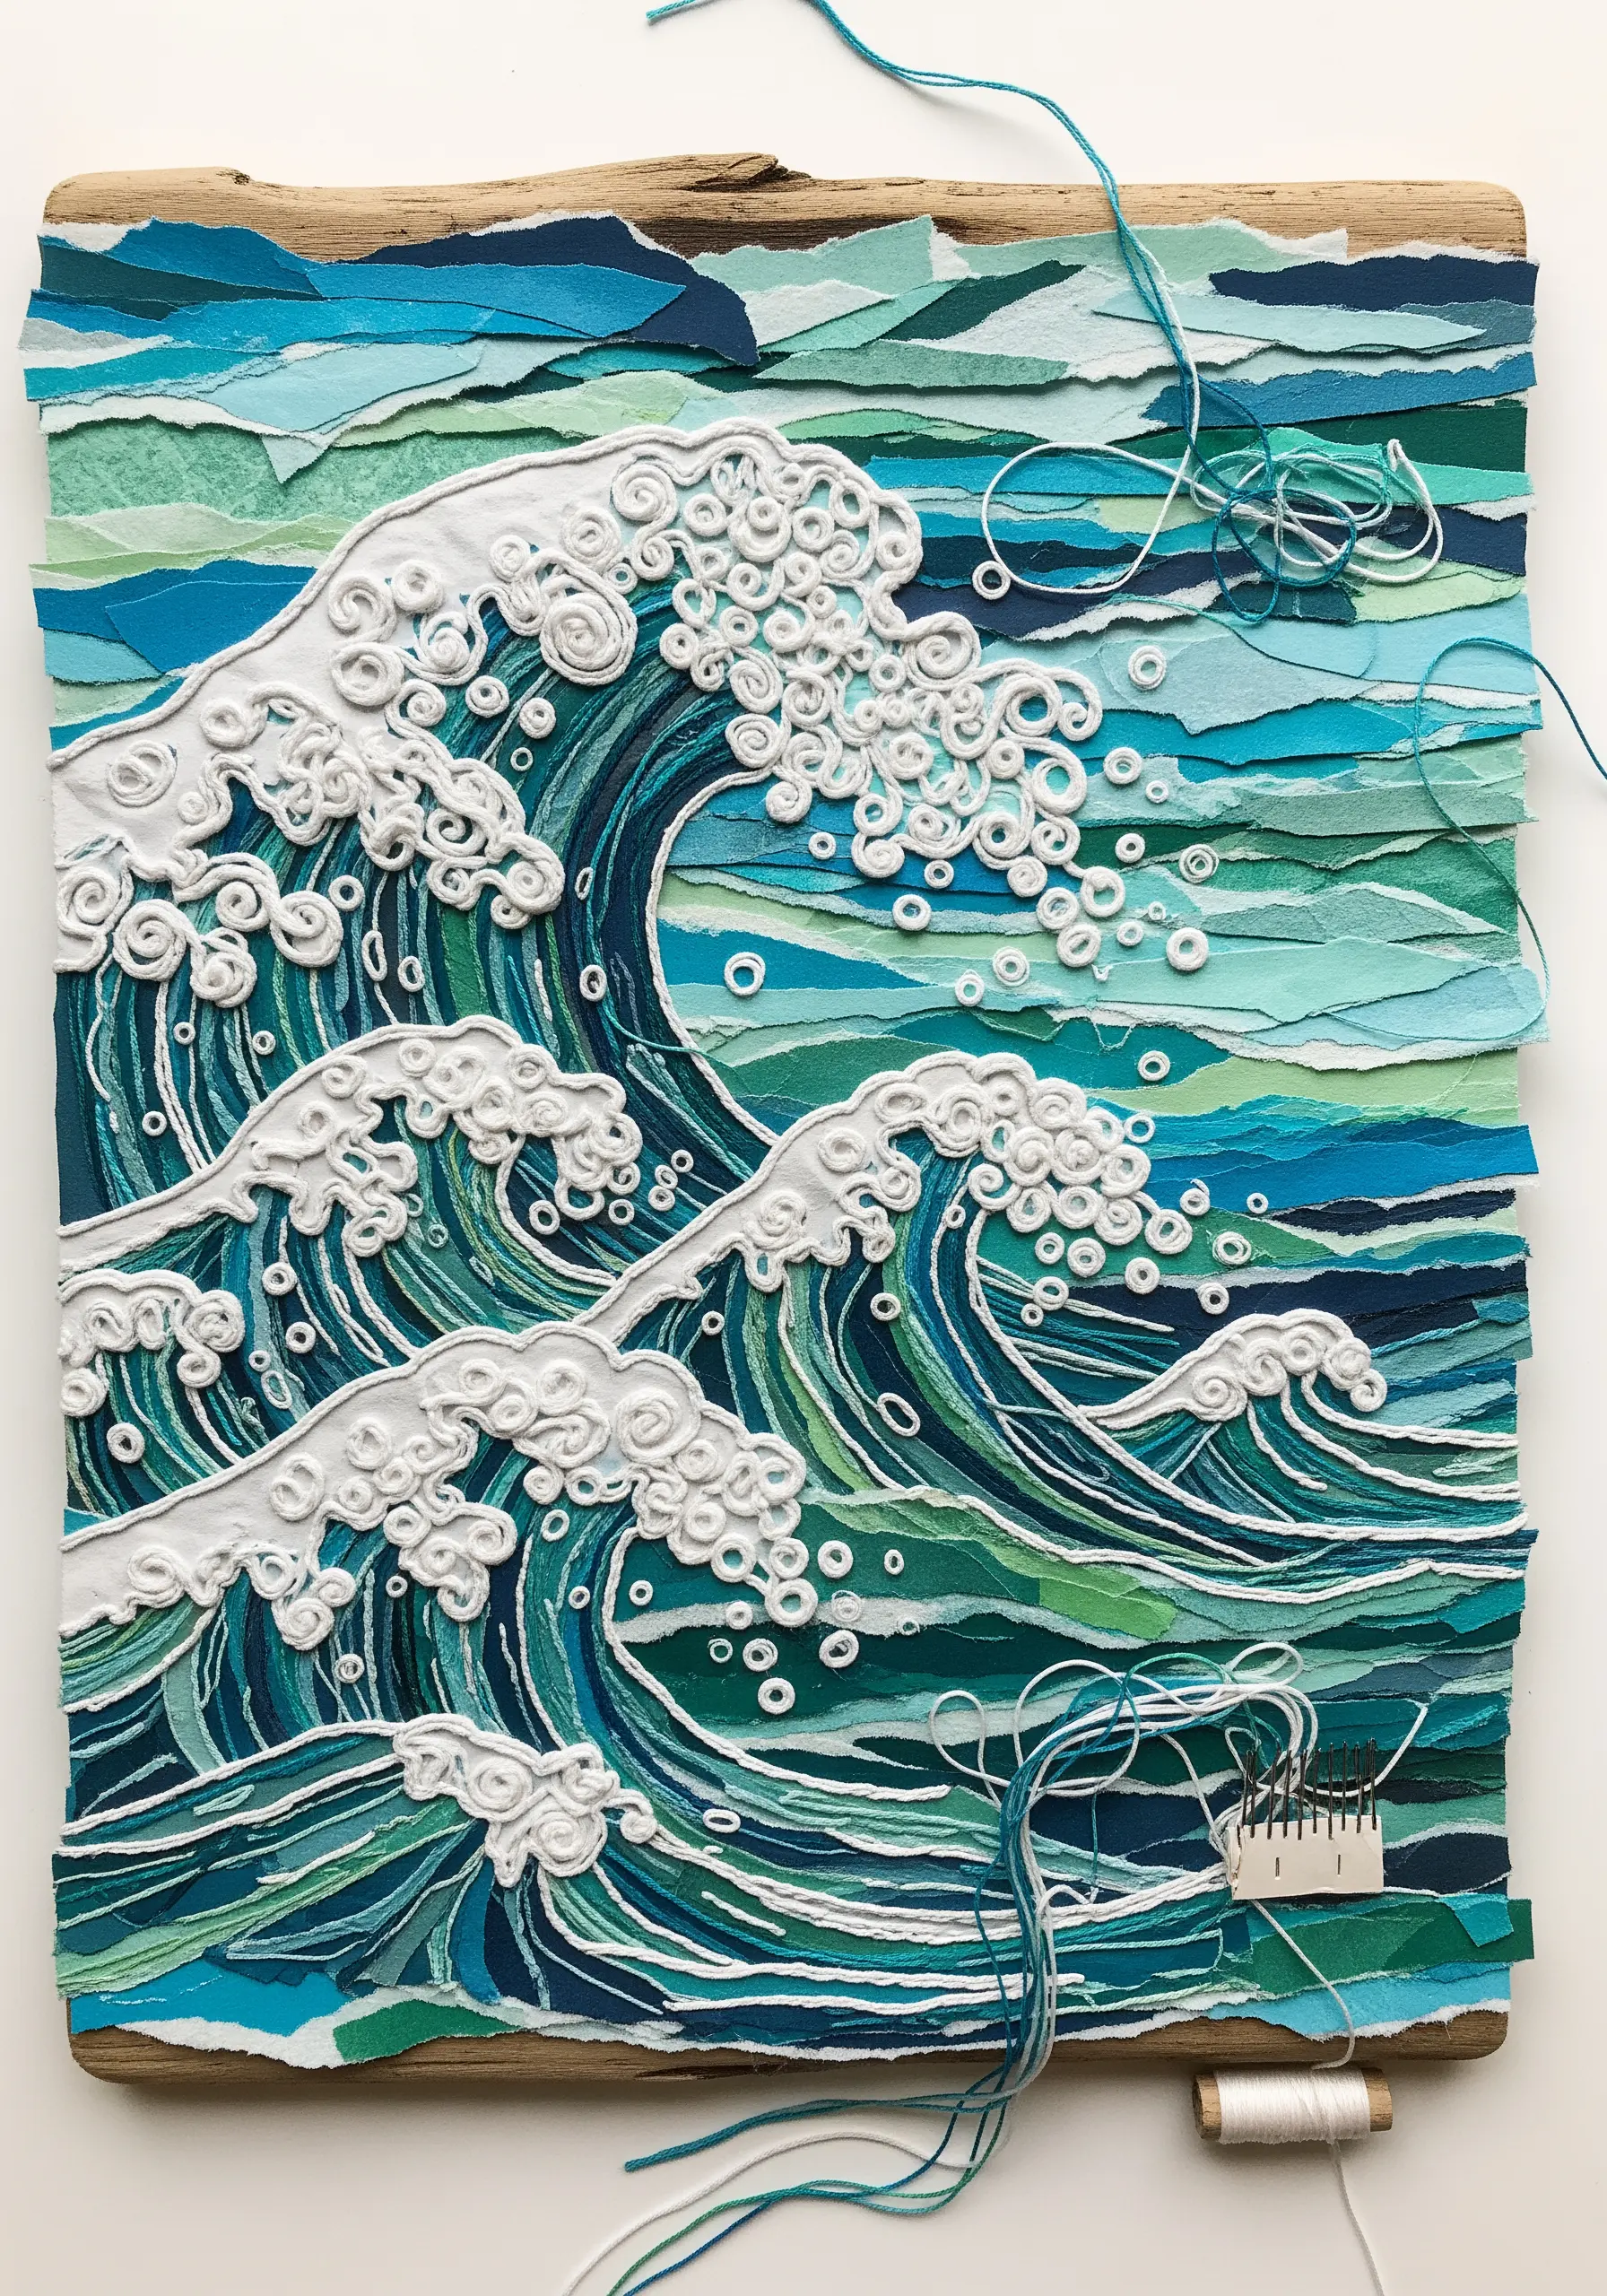
Recreate the energetic froth of ocean waves by combining paper quilling with contour stitching.
Layer torn strips of blue and green paper to form the body of the waves, creating depth and movement.
For the seafoam, tightly coil thin strips of white paper and glue them along the crests of the waves.
Finally, use white thread to outline these coiled shapes with a simple backstitch, which secures them and adds a sharp, graphic definition.
This method brilliantly captures the chaotic, bubbling texture of surf.
8. Weave Tactile Hair with Thick Yarn and Braids
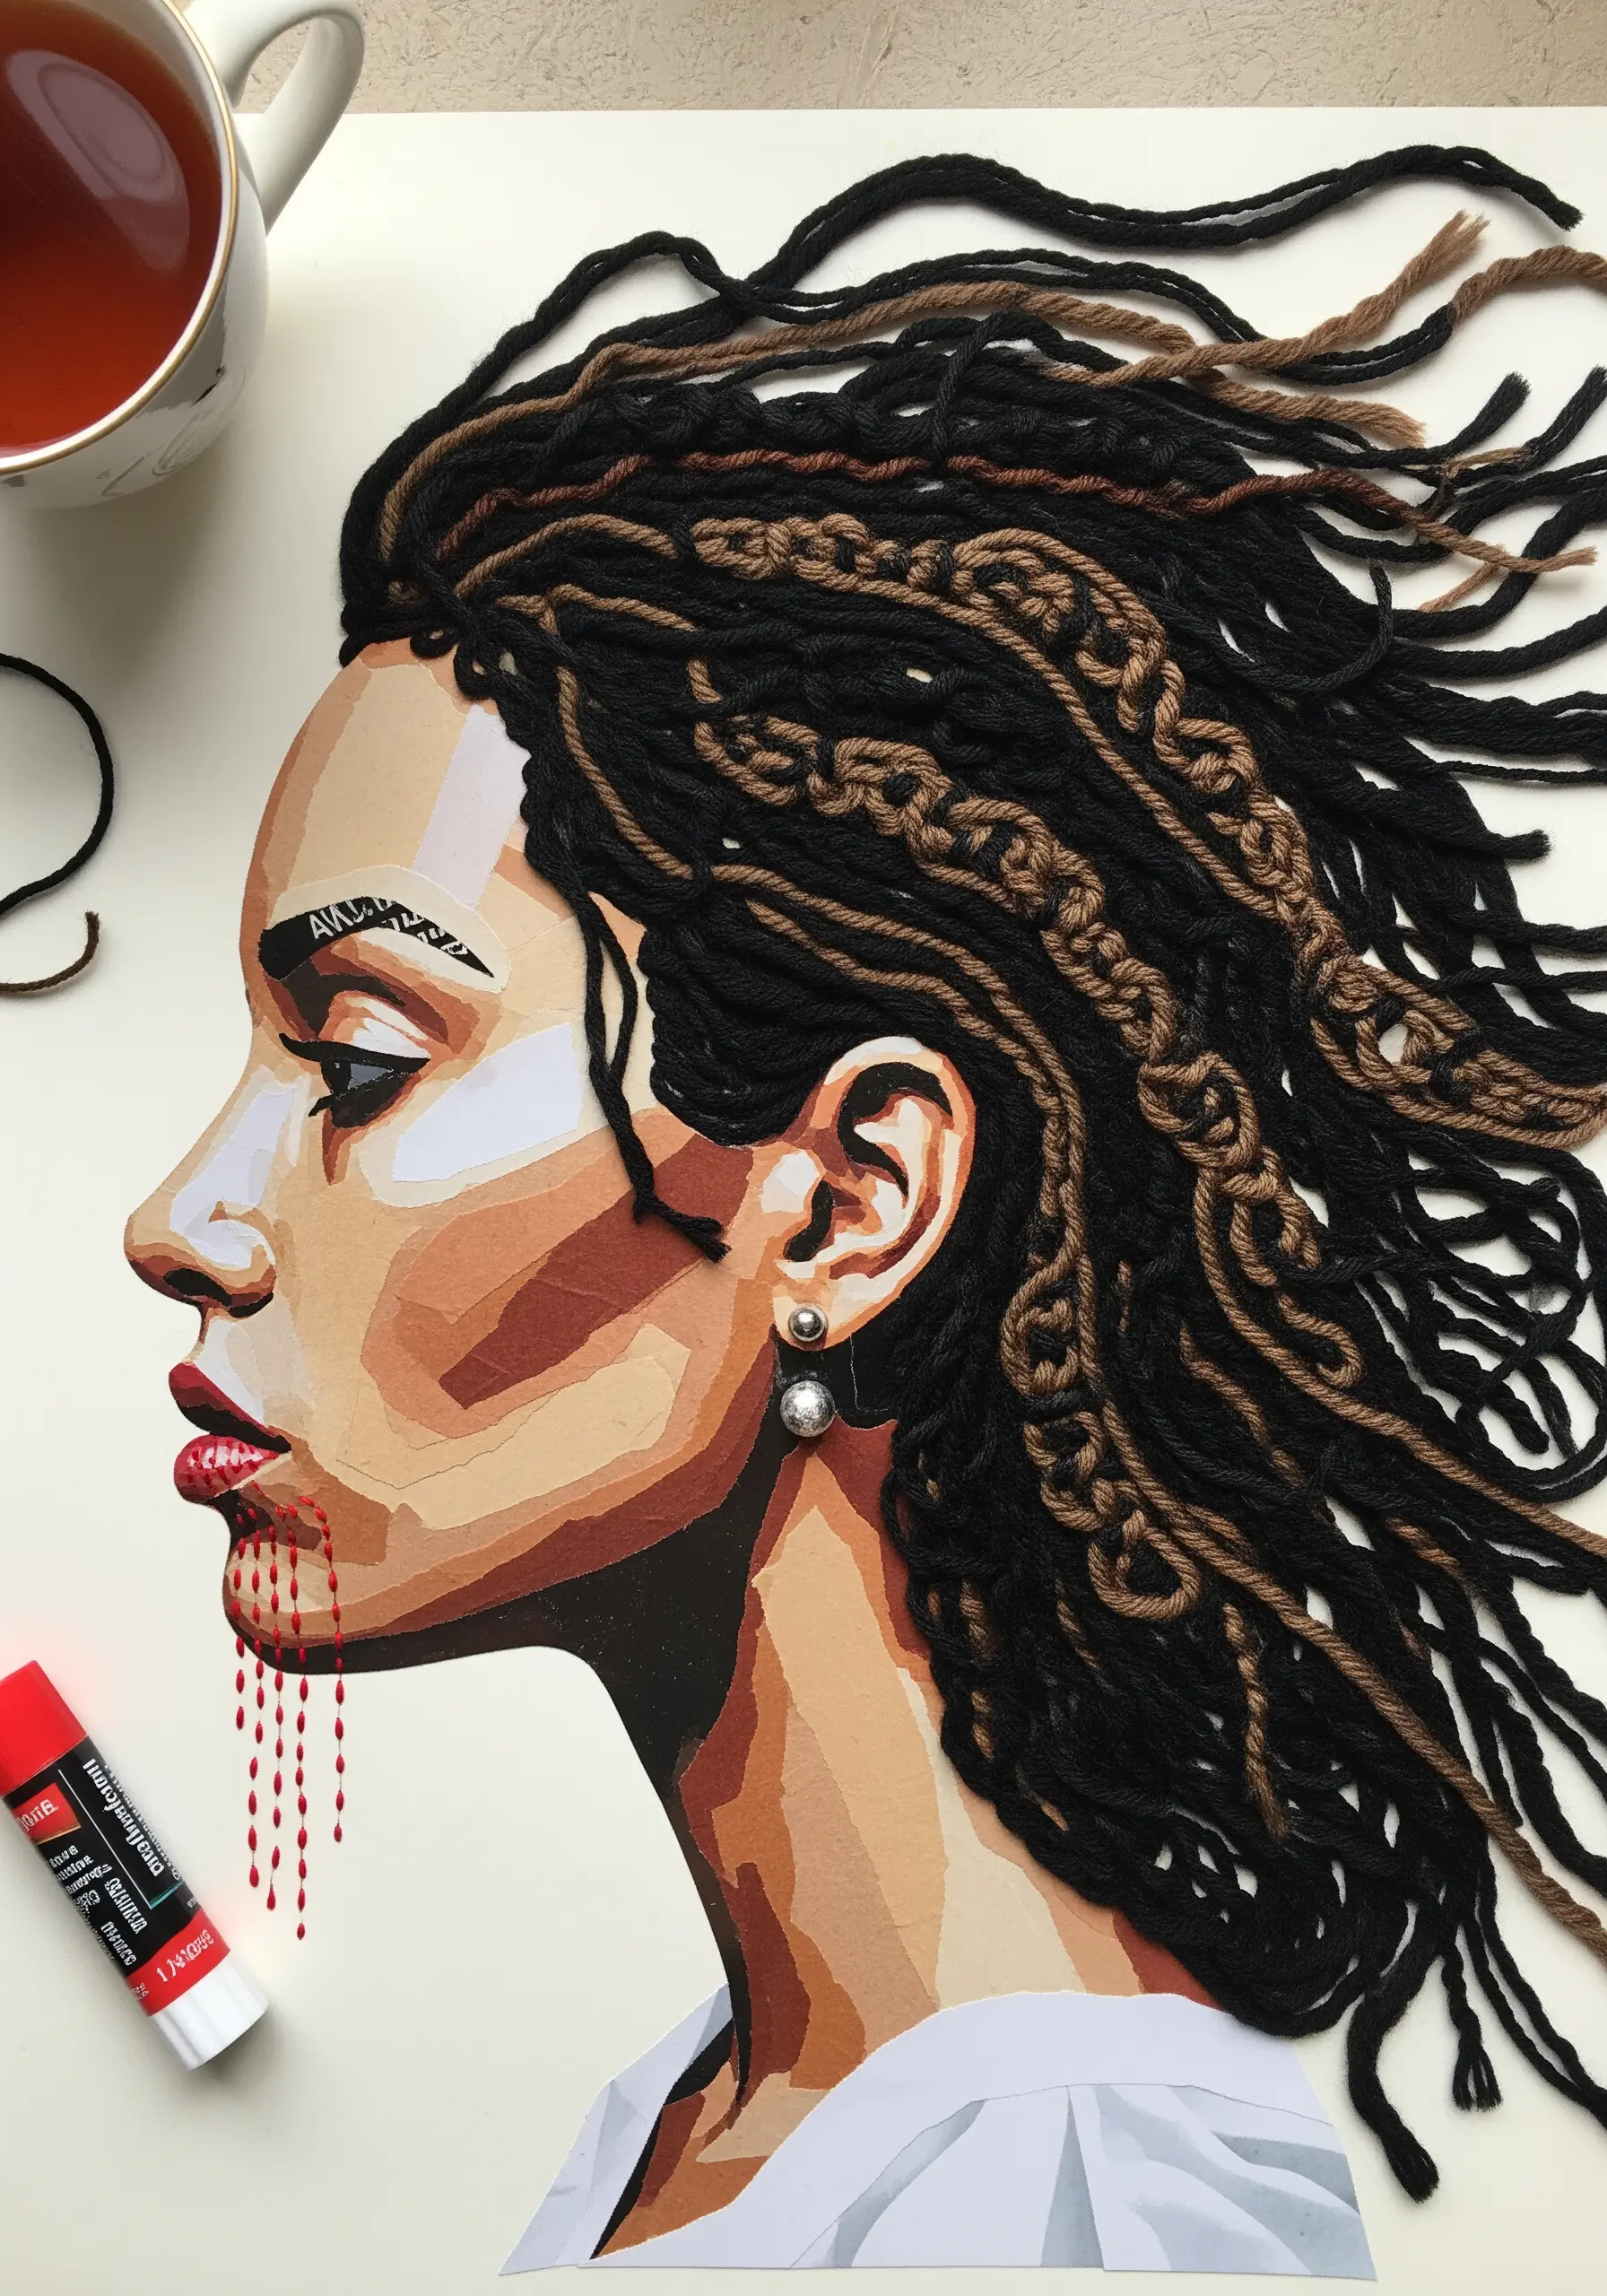
Bring a paper collage portrait to life by adding three-dimensional hair crafted from yarn or thick floss.
After assembling the facial features from paper cutouts, use the paper itself as your canvas.
Create dreadlocks or braids by plaiting strands of yarn, then couch them onto the paper with a thinner, matching thread.
For looser sections, use long satin stitches or lay down individual strands of yarn, securing them at the roots.
This contrast between the flat paper portrait and the highly tactile hair creates a stunning, dynamic focal point.
9. Etch Delicate Veins onto Paper Leaves
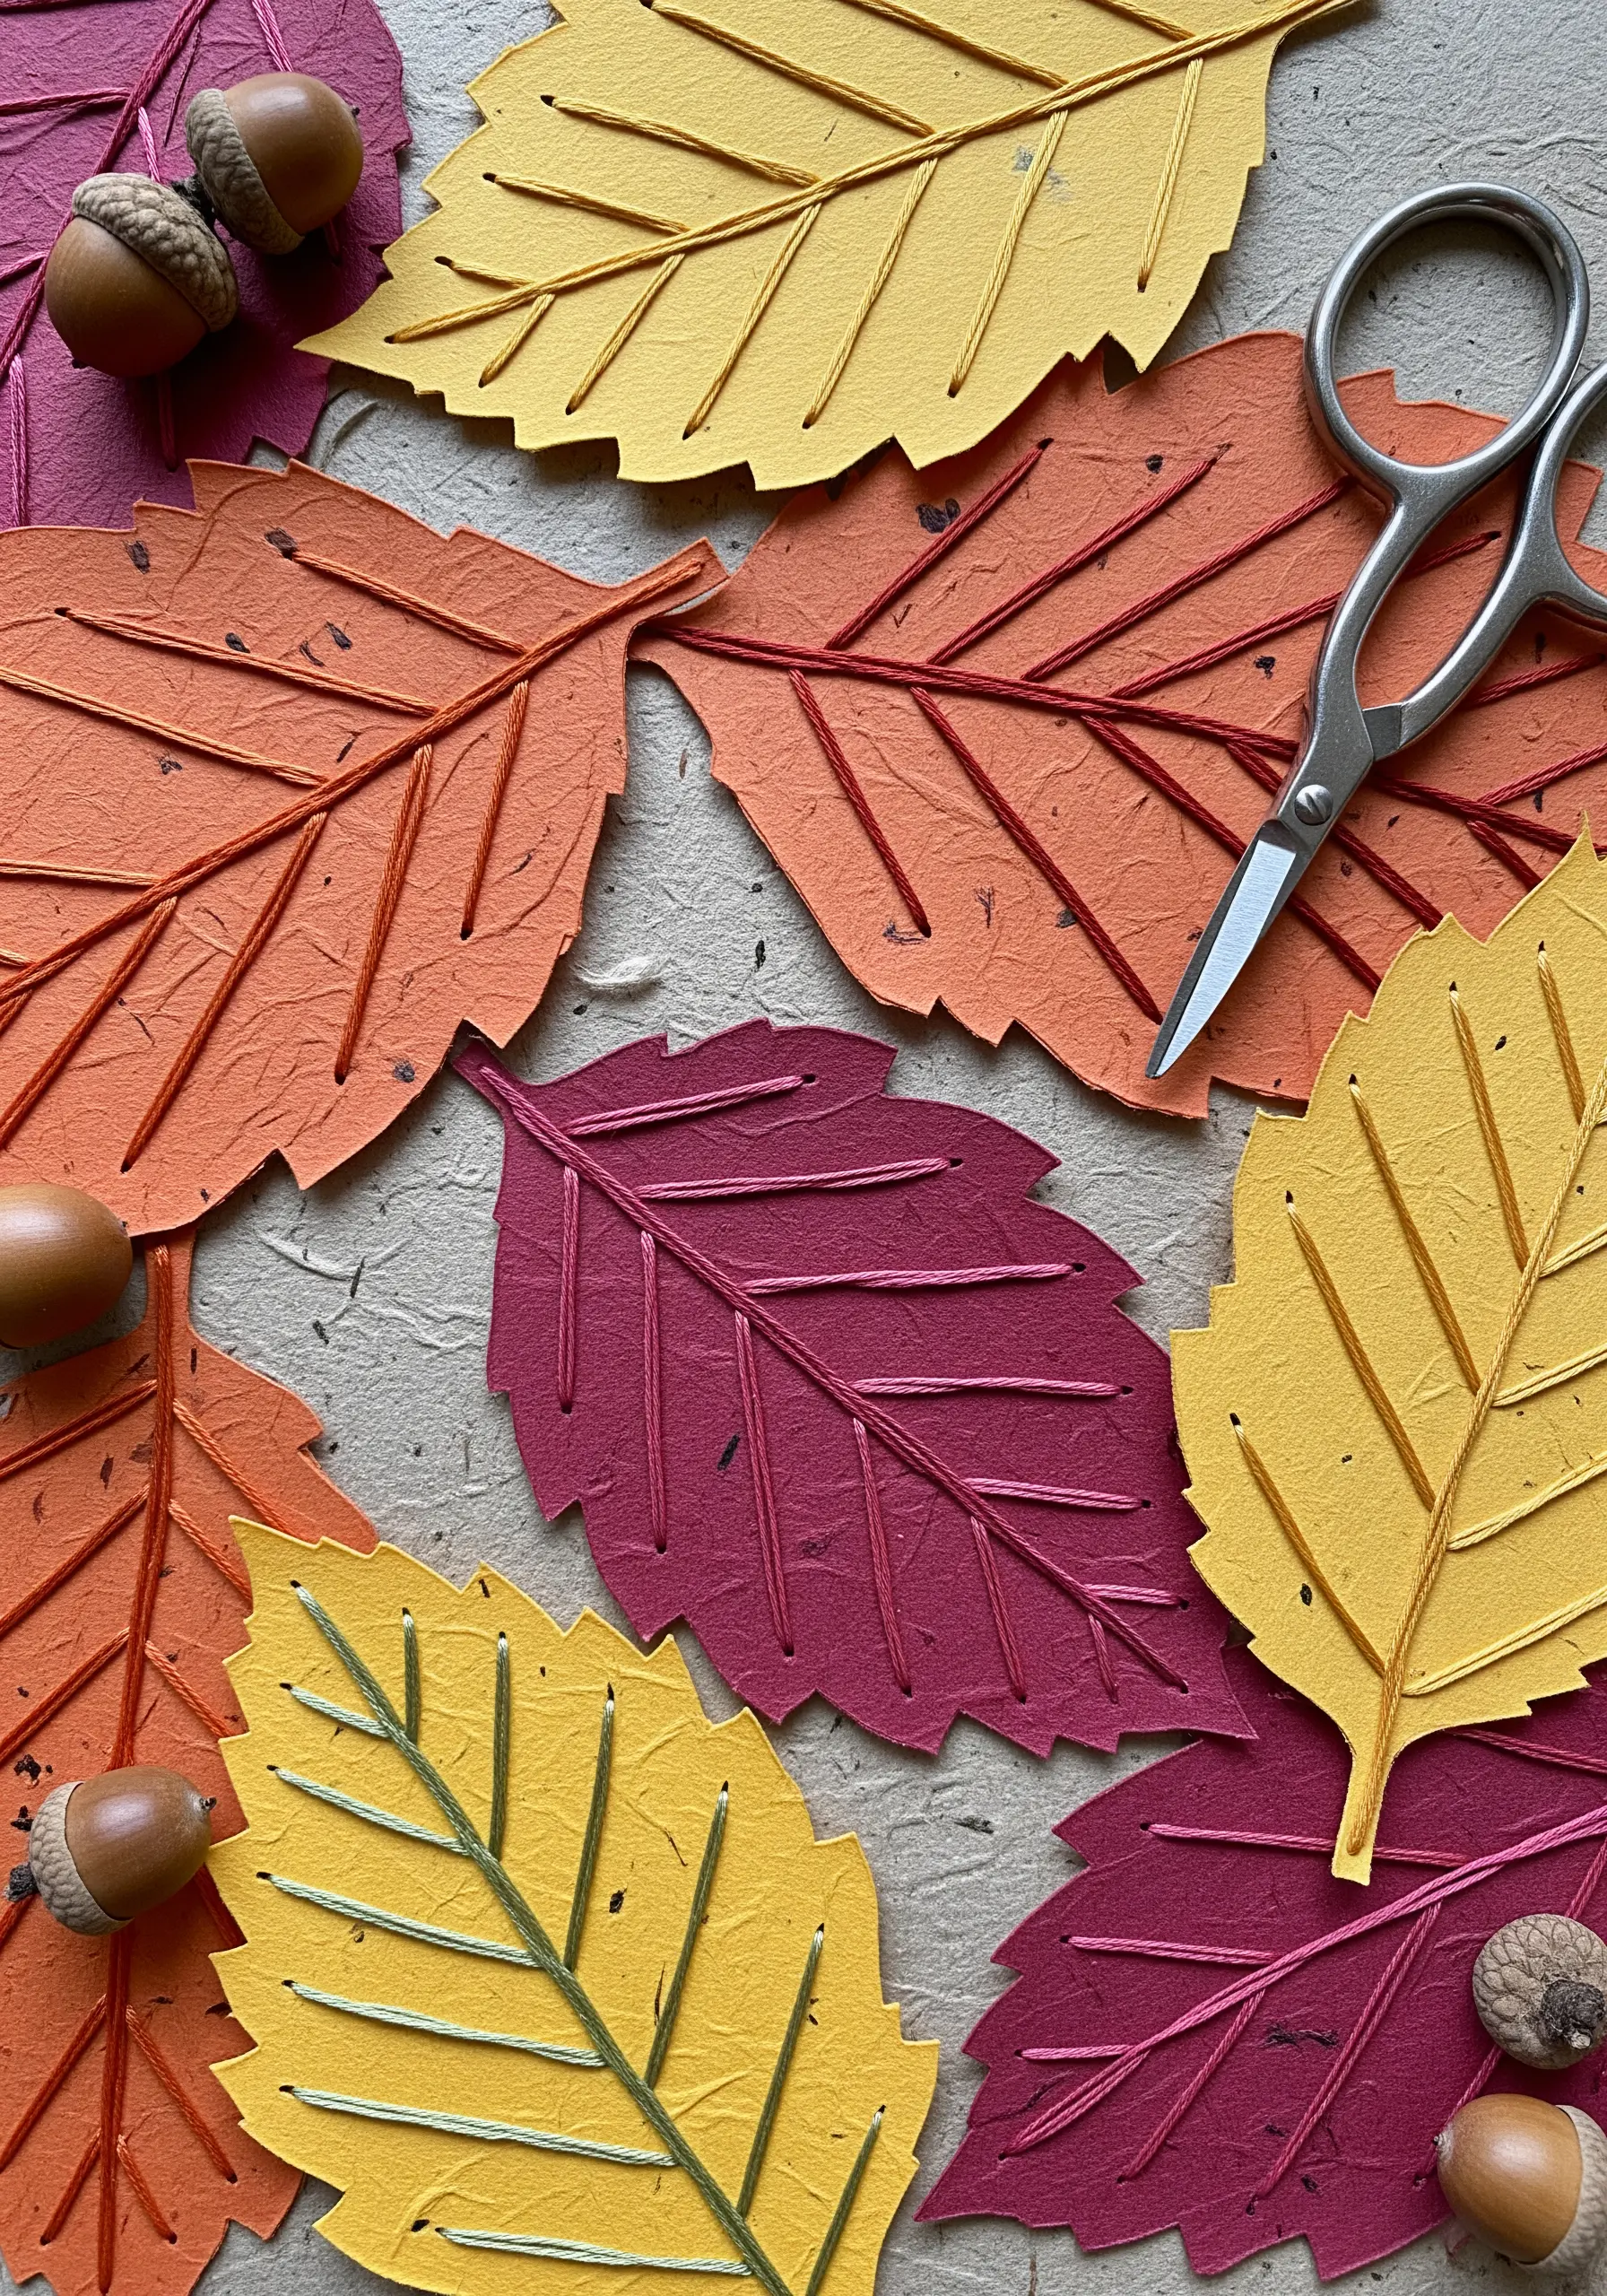
Enhance simple paper leaf cutouts with the delicate precision of hand stitching.
Choose textured paper in autumnal tones to give the leaves an inherently organic feel before you even add thread.
Use a single strand of embroidery floss to stitch the central stem with a backstitch for a solid line.
From there, add the smaller veins with single straight stitches radiating outwards. This minimalist approach adds realistic detail without overwhelming the simplicity of the shape.
It’s a meditative technique that celebrates the quiet beauty of natural forms.
10. Combine Paper Piecing with Wrapped Thread Textures
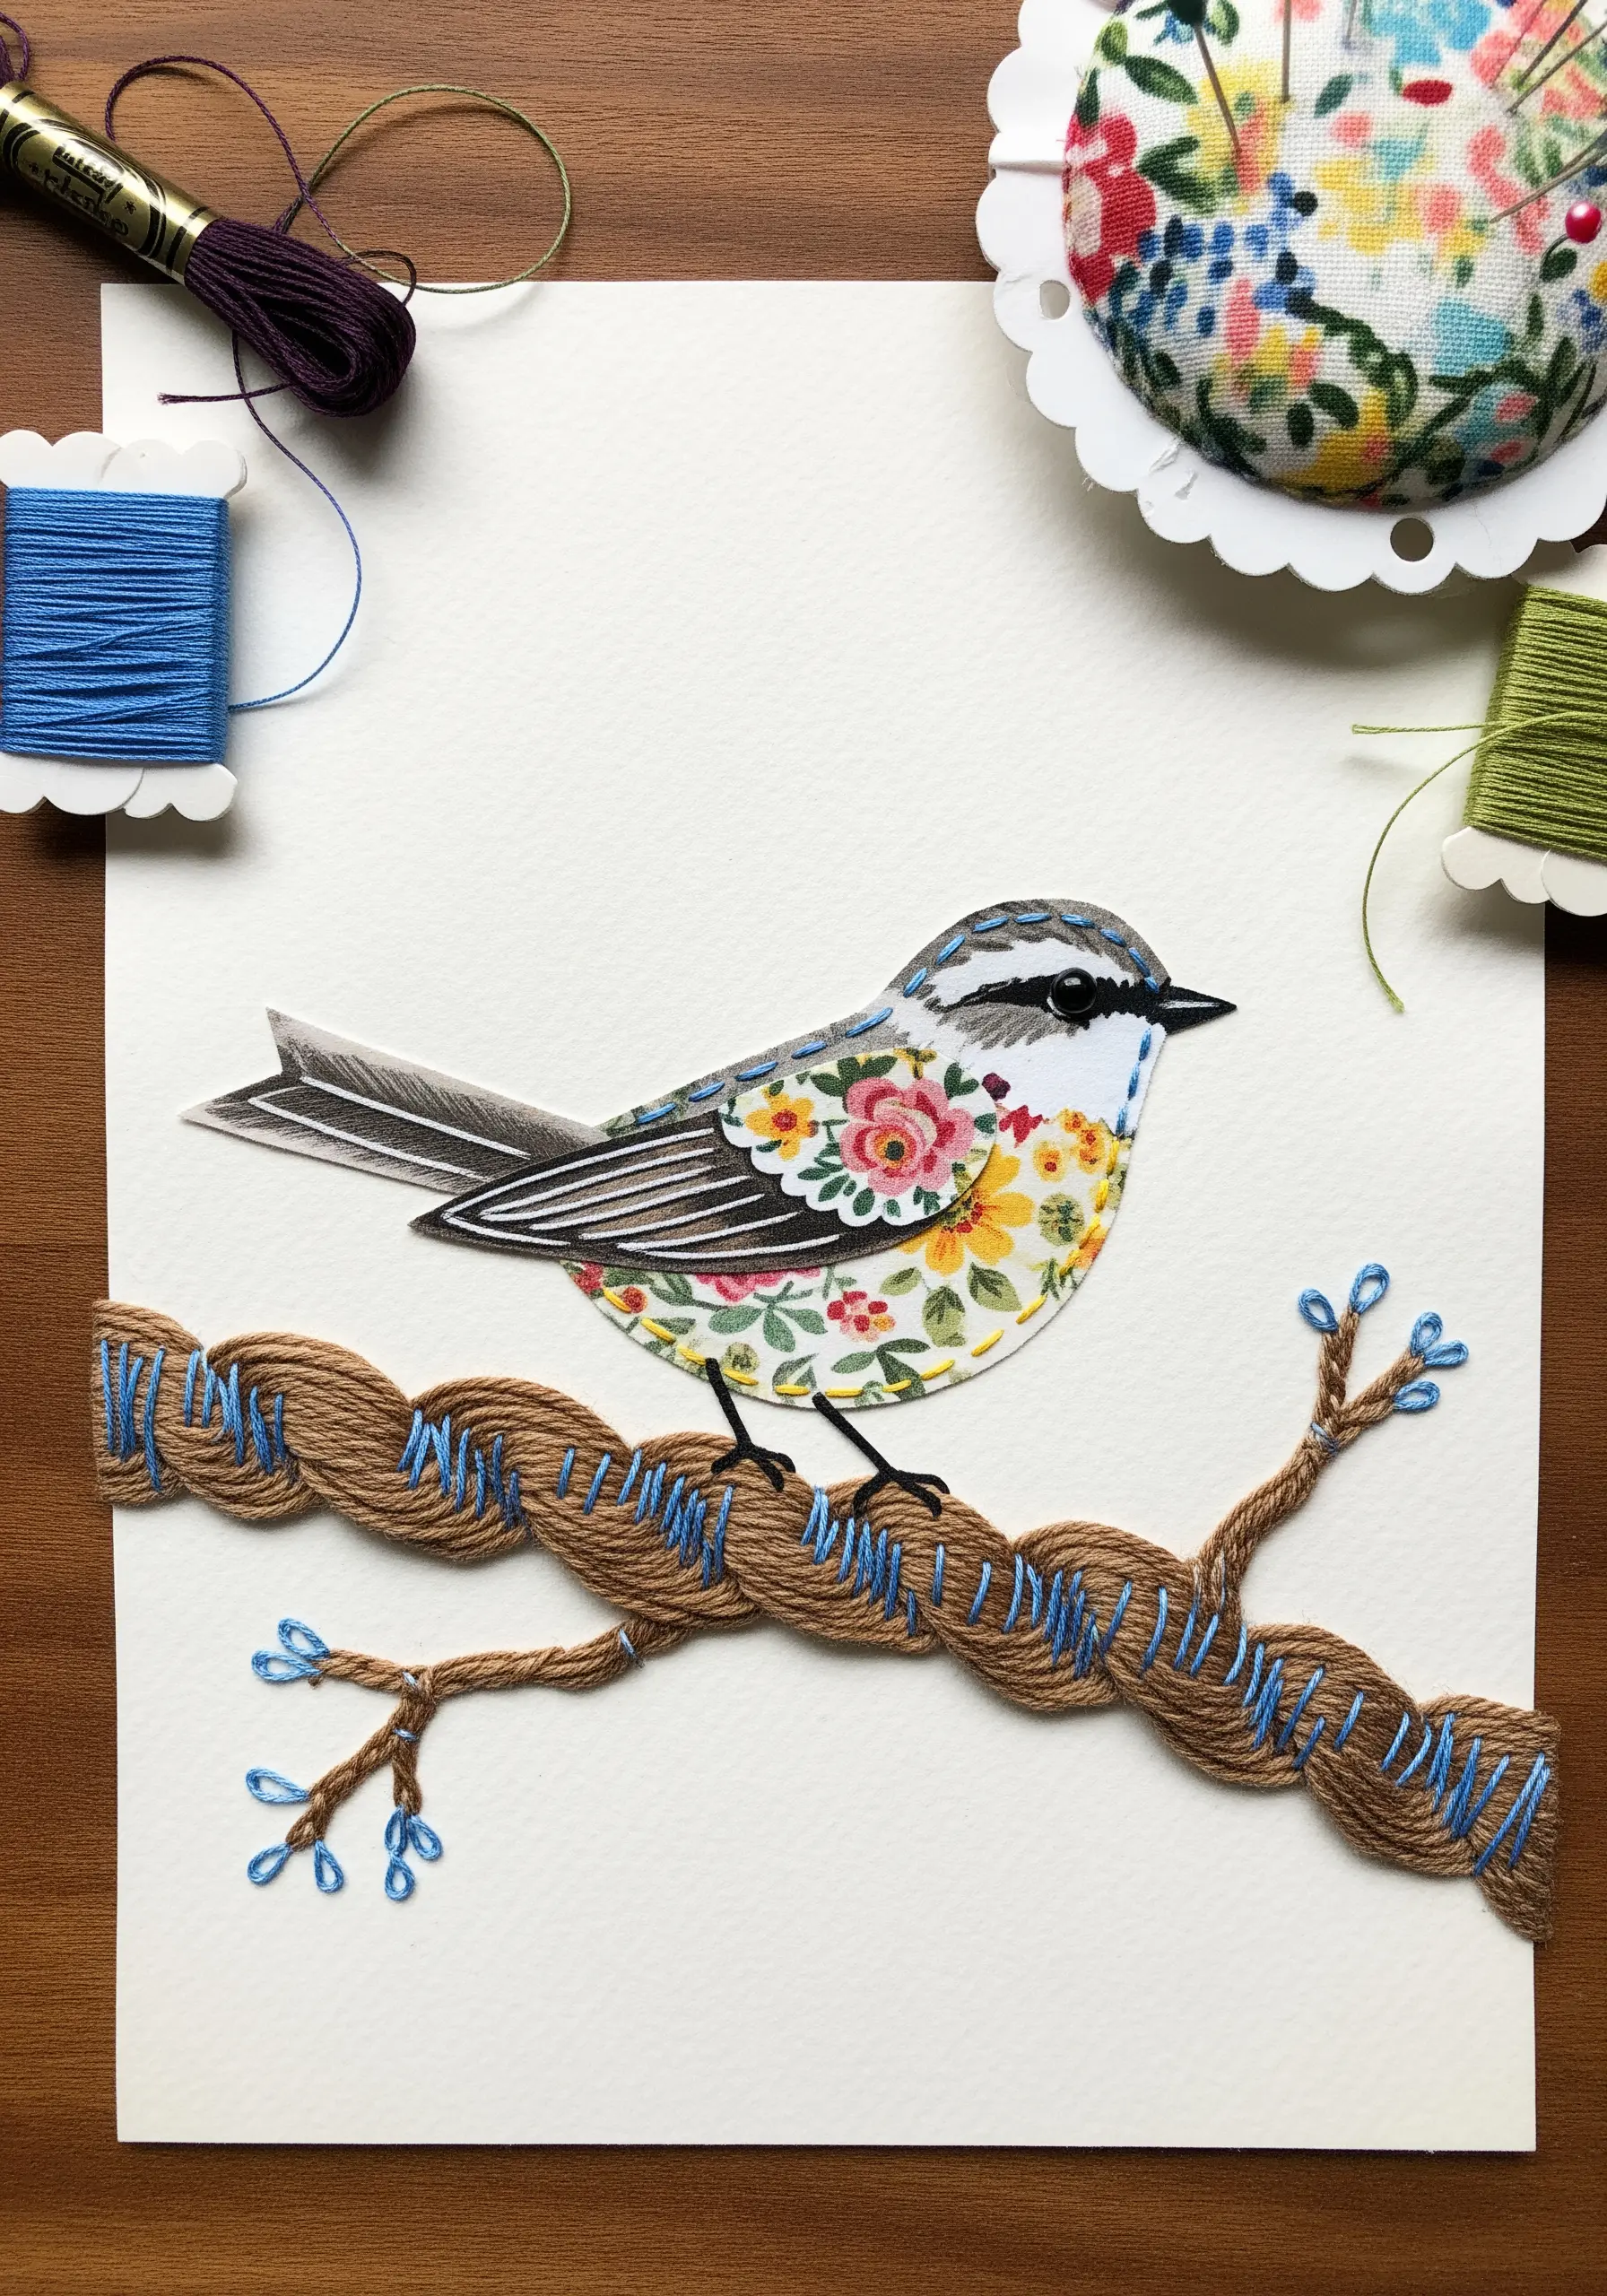
Create a dynamic scene by pairing flat paper elements with highly textured stitched objects.
Use patterned paper to cut out the main subject, like a bird, to establish a central motif with intricate detail.
For surrounding elements like branches, create a thick, dimensional form by wrapping or couching heavy yarn or multiple strands of floss.
A contrasting, thinner thread can then be used to add smaller details, like the blue cross-stitches on the branch, adding another layer of visual interest.
This technique creates a clear distinction between flat and dimensional elements, making the piece visually engaging.
11. Add Dimensional Details with French Knots
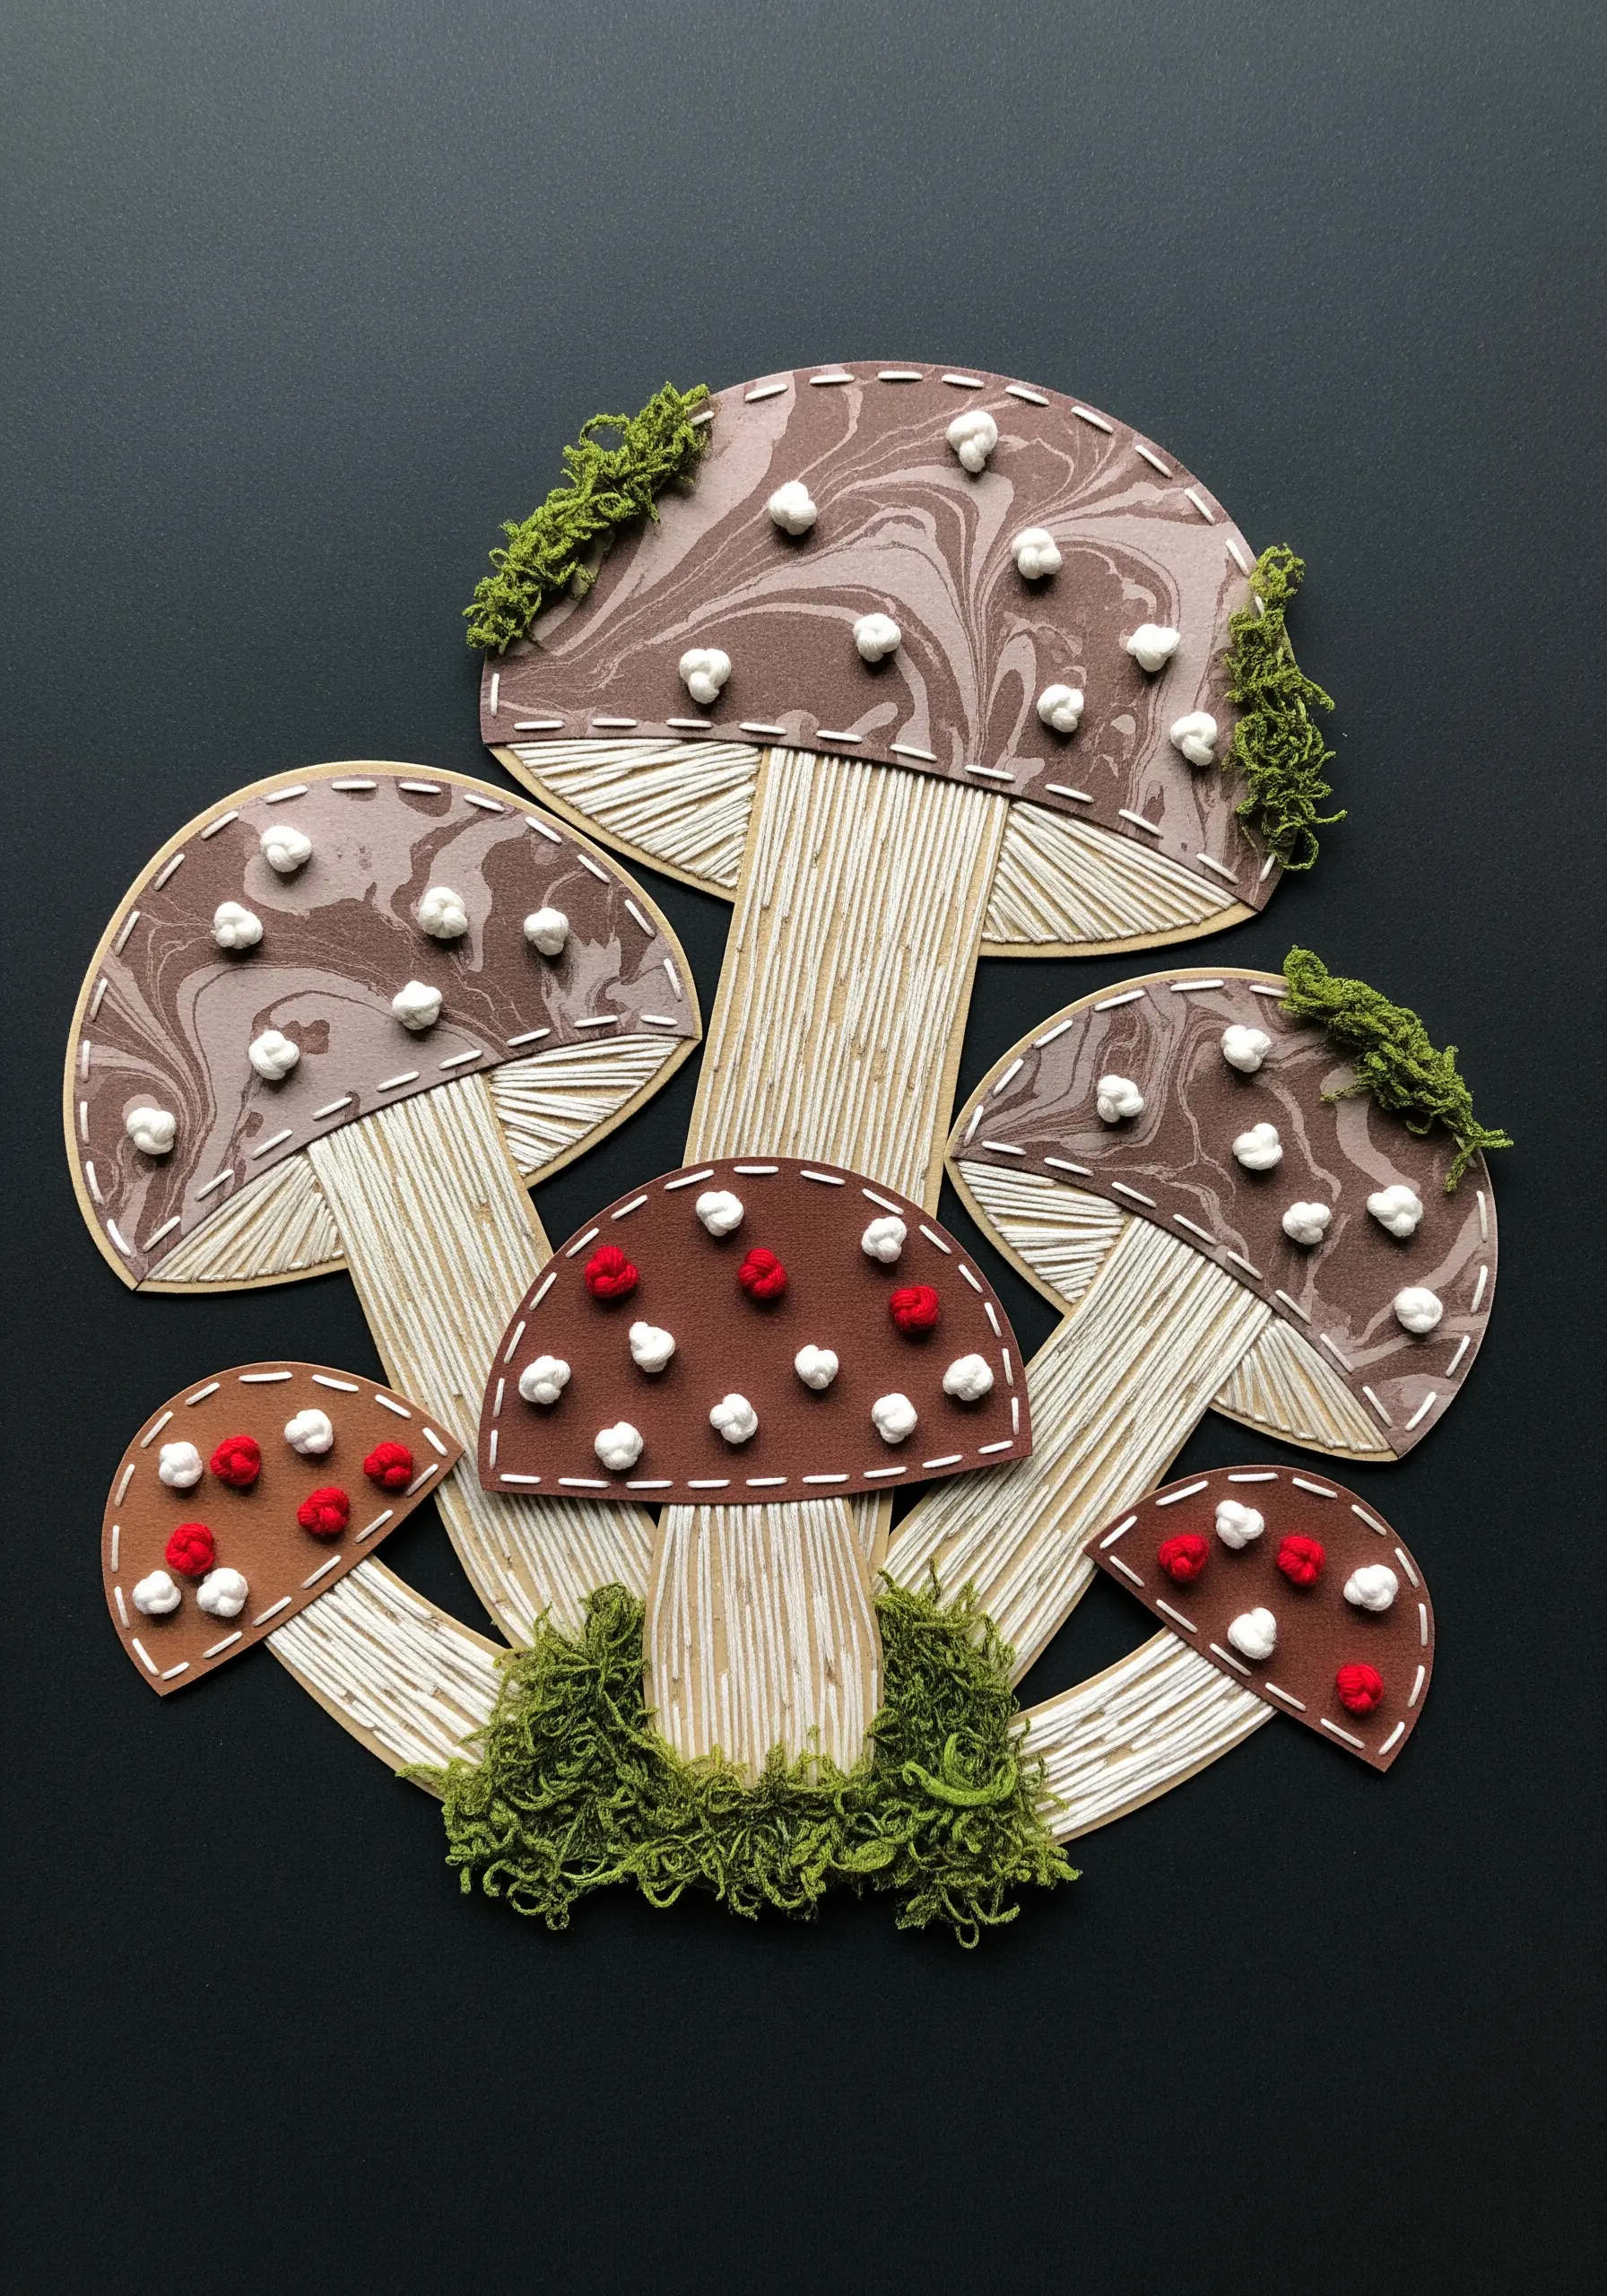
Elevate simple paper cutouts by adding small, highly tactile details using French knots.
After creating your main shapes, like these mushrooms, use a sharp needle to pierce the paper where you want to add texture.
Use a contrasting, thick thread to make French knots that stand out as spots or textural elements.
The raised, bumpy texture of the knots provides a wonderful counterpoint to the smooth or marbled paper surfaces.
You can also incorporate other materials, like faux moss, to push the mixed-media effect even further.
12. Trace a Narrative Path with a Simple Backstitch
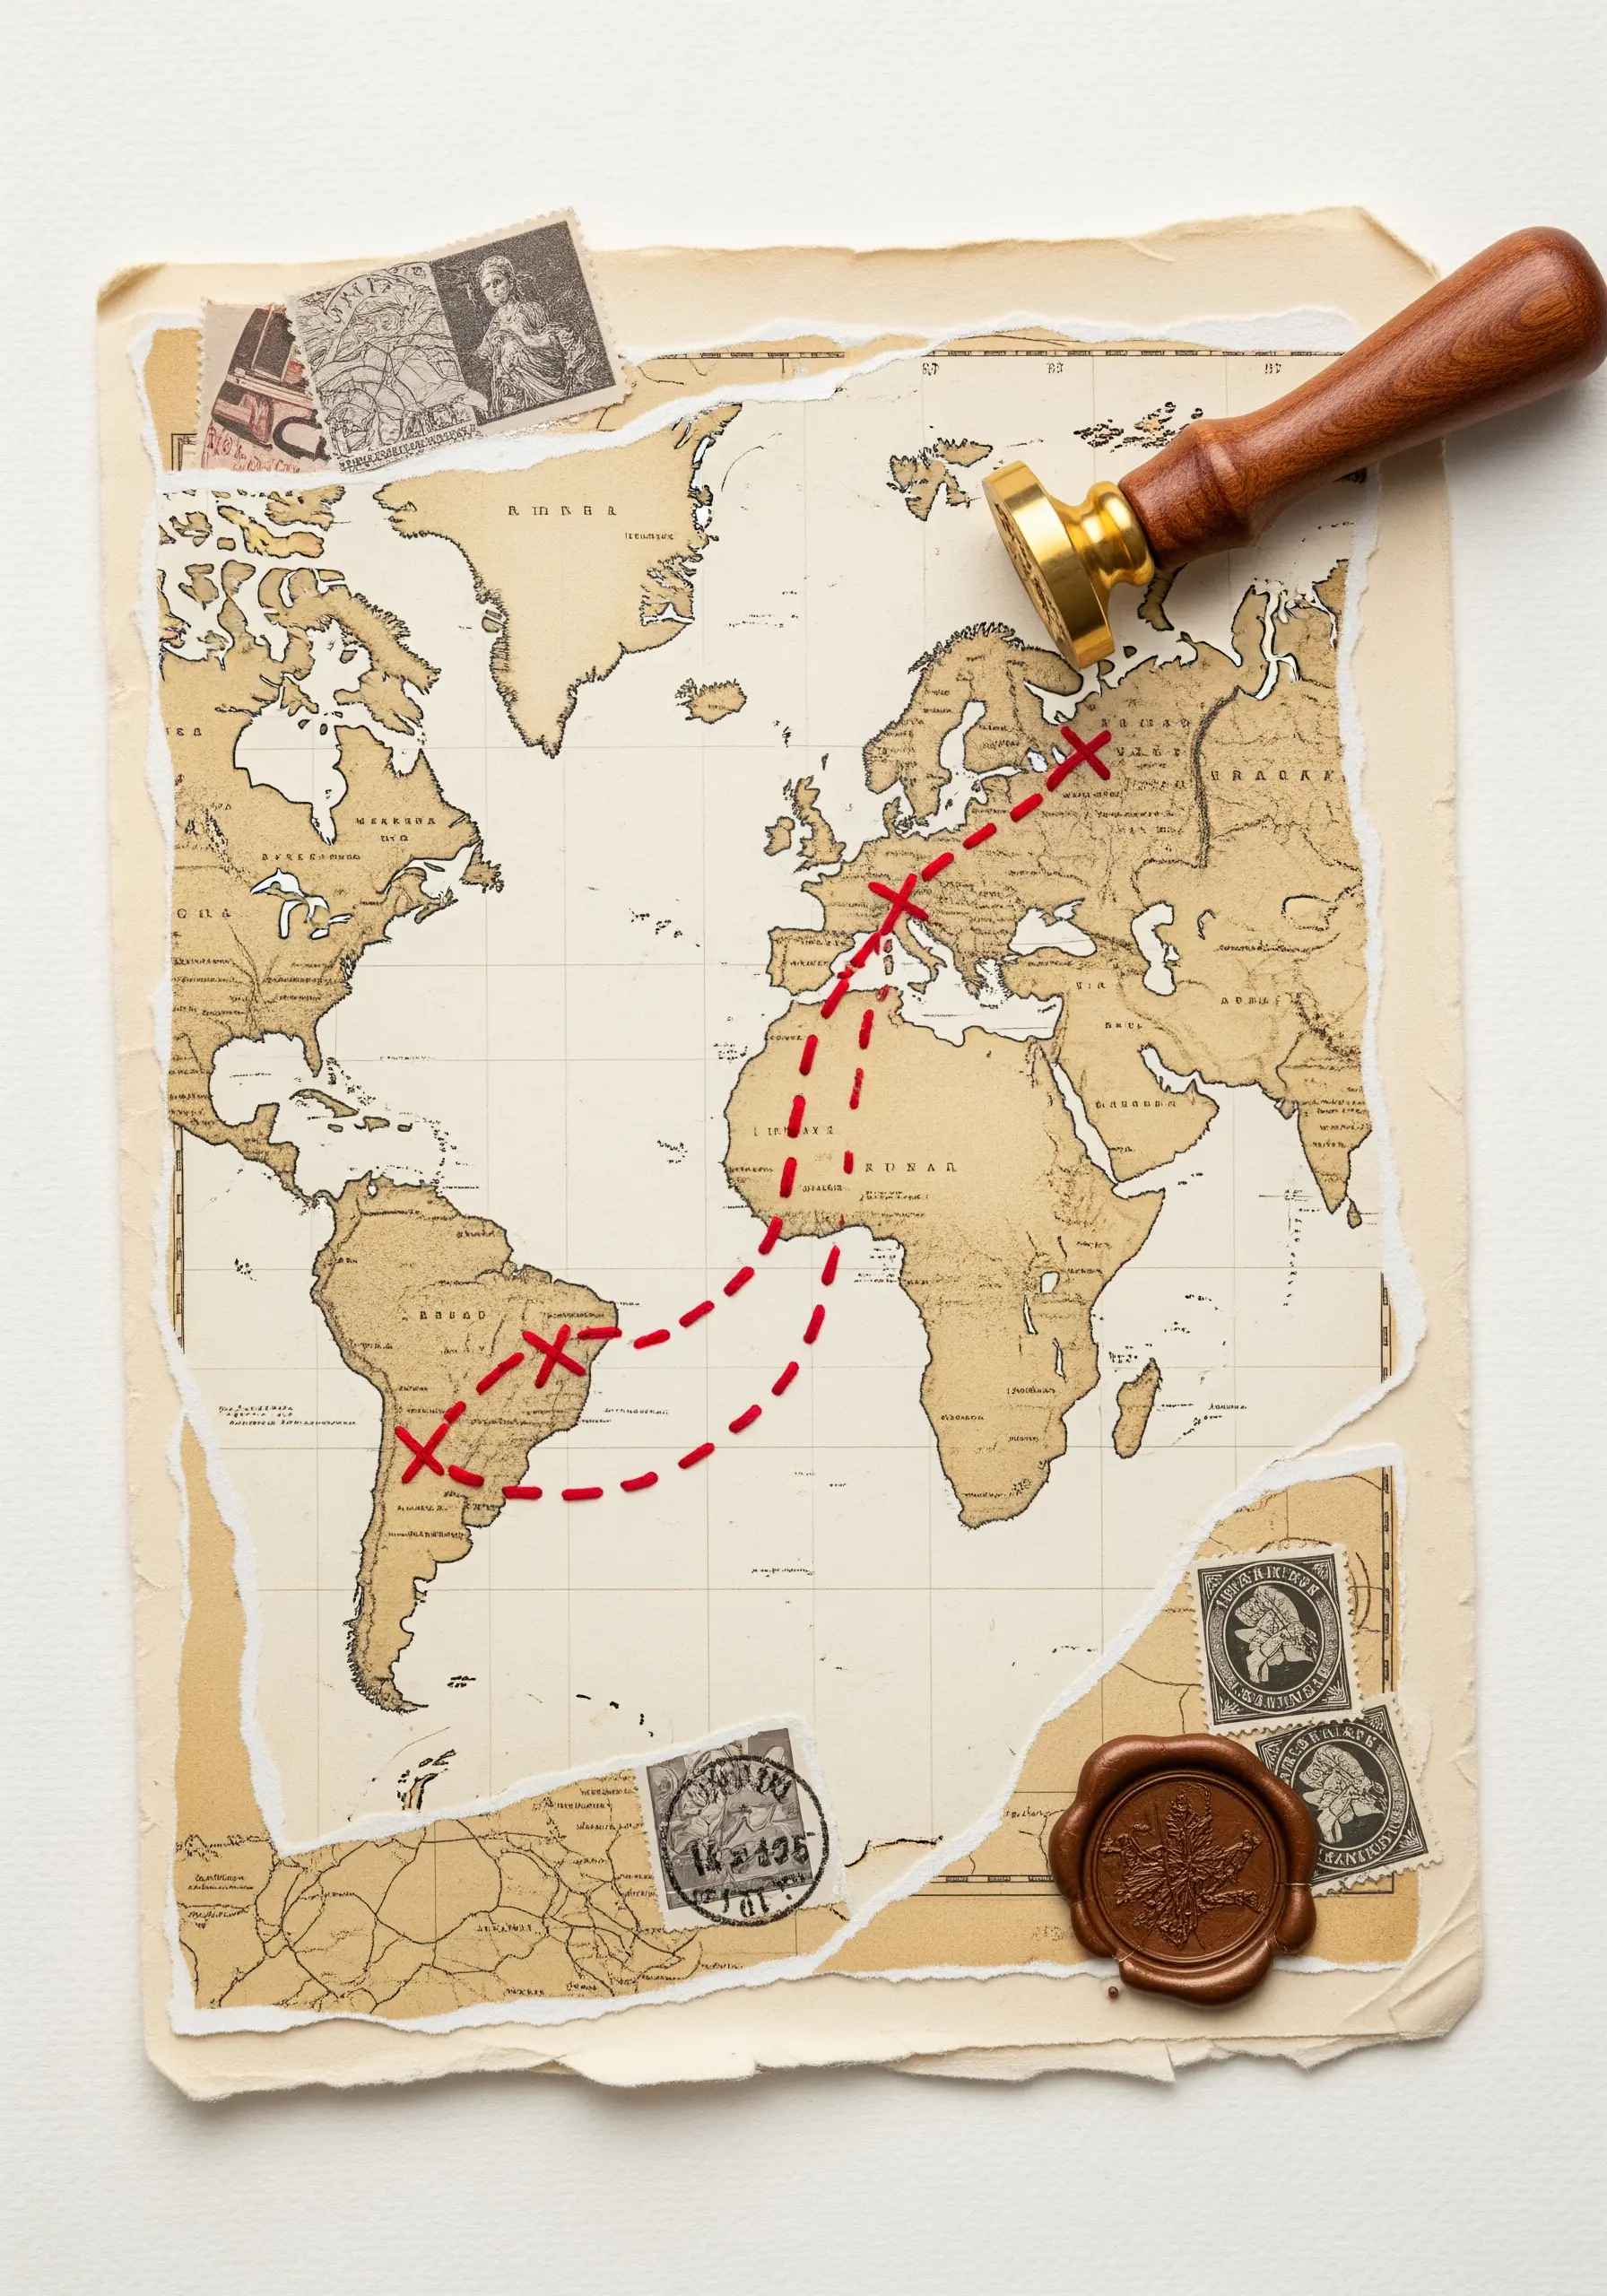
Turn a static collage into a story of movement by stitching a path directly onto its surface.
On a layered paper background, like a vintage map, use a bold, contrasting thread to mark a journey or connection.
A simple dashed line using a running stitch or a solid line with a backstitch works perfectly.
The thread acts as a graphic overlay that immediately draws the eye and communicates a sense of direction and purpose.
This is one of the most effective ways to embed a personal narrative into your artwork.
13. Construct Botanical Stems with Wrapped Thread
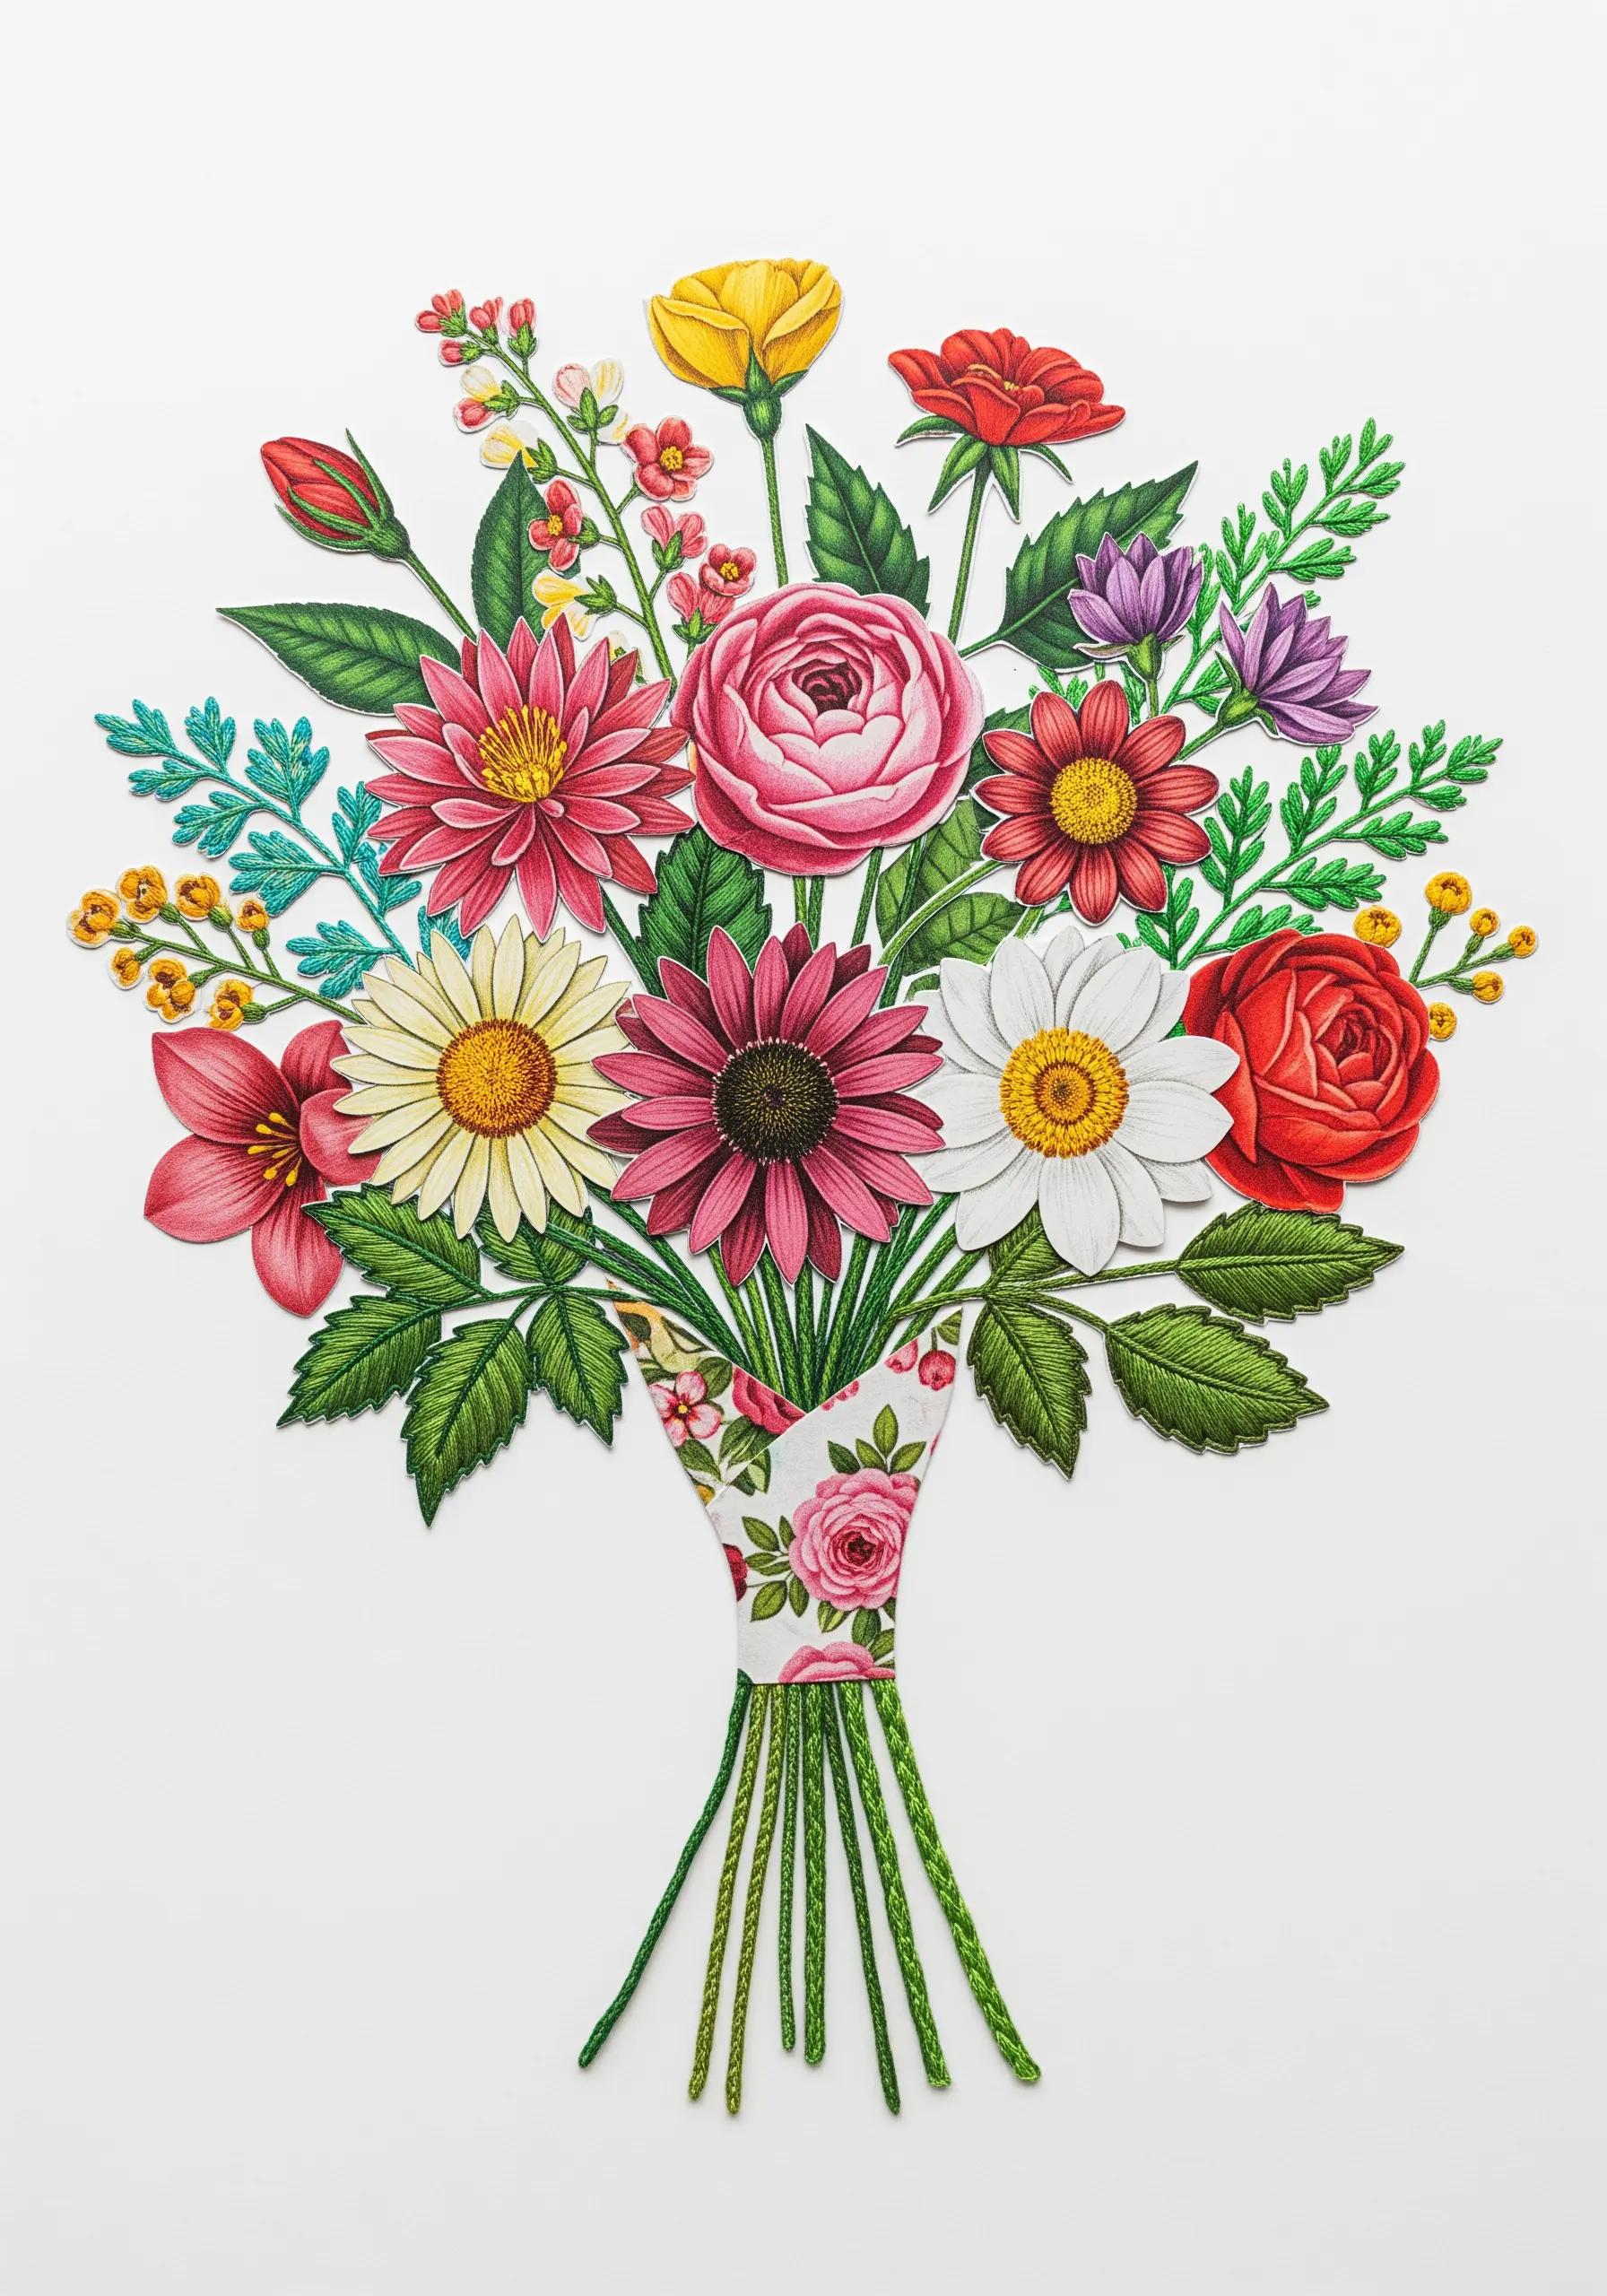
Give your paper flower arrangements a realistic, bundled look by crafting the stems from thread.
Once you have your paper flower heads arranged, create the stems by gathering multiple strands of green floss.
Use a single strand in a slightly different shade to wrap tightly around the bundle, securing it to the background paper every few centimeters.
This technique creates sturdy, dimensional stems with a beautiful, corded texture that feels much more organic than a simple stitched line.
It’s the perfect finishing touch to ground a vibrant paper bouquet.
14. Contrast Iridescent Paper with Matte Stitches
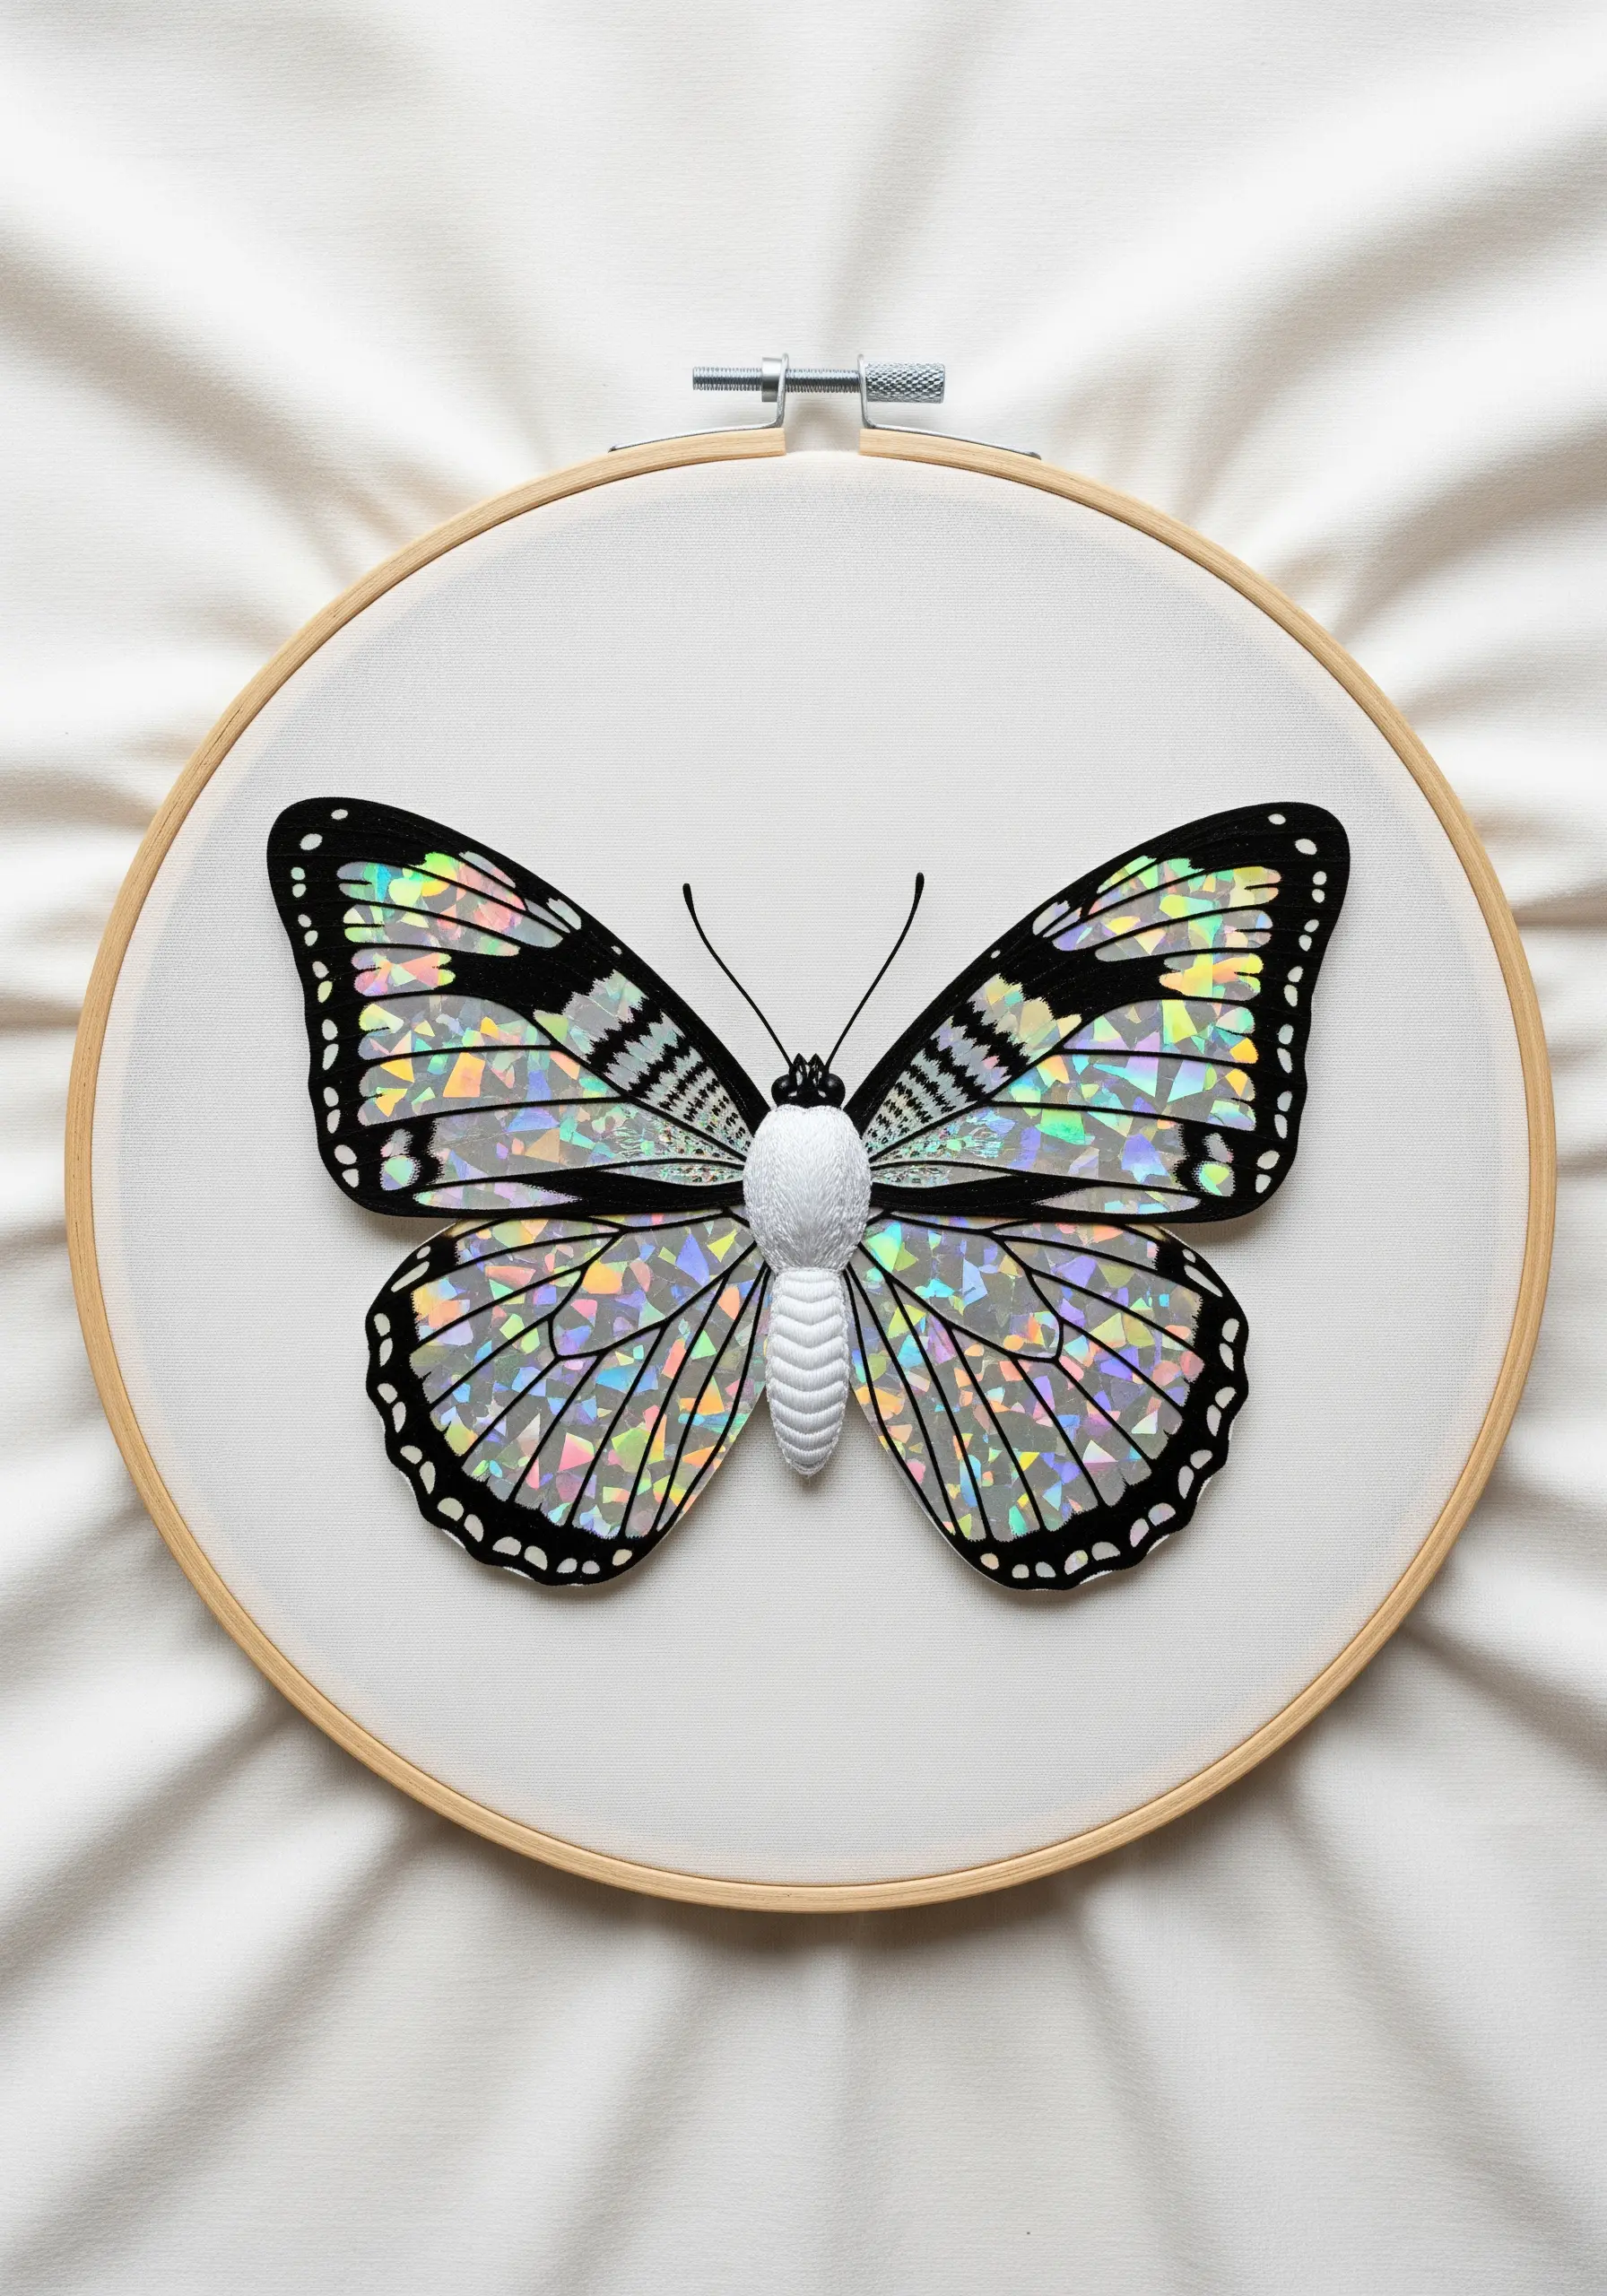
Create a striking visual effect by pairing a light-catching material with a soft, matte texture.
Use holographic or iridescent paper for the wings of a butterfly, allowing them to shimmer and change color with the light.
For the body, use a dense satin stitch with a soft, non-reflective thread like matte cotton floss.
This contrast makes the wings appear even more luminous and ethereal, while the stitched body provides a soft, grounding anchor point.
The final piece feels both magical and exquisitely crafted, playing with light and texture in a sophisticated way.
15. Evoke Whimsy with Curled Thread Details
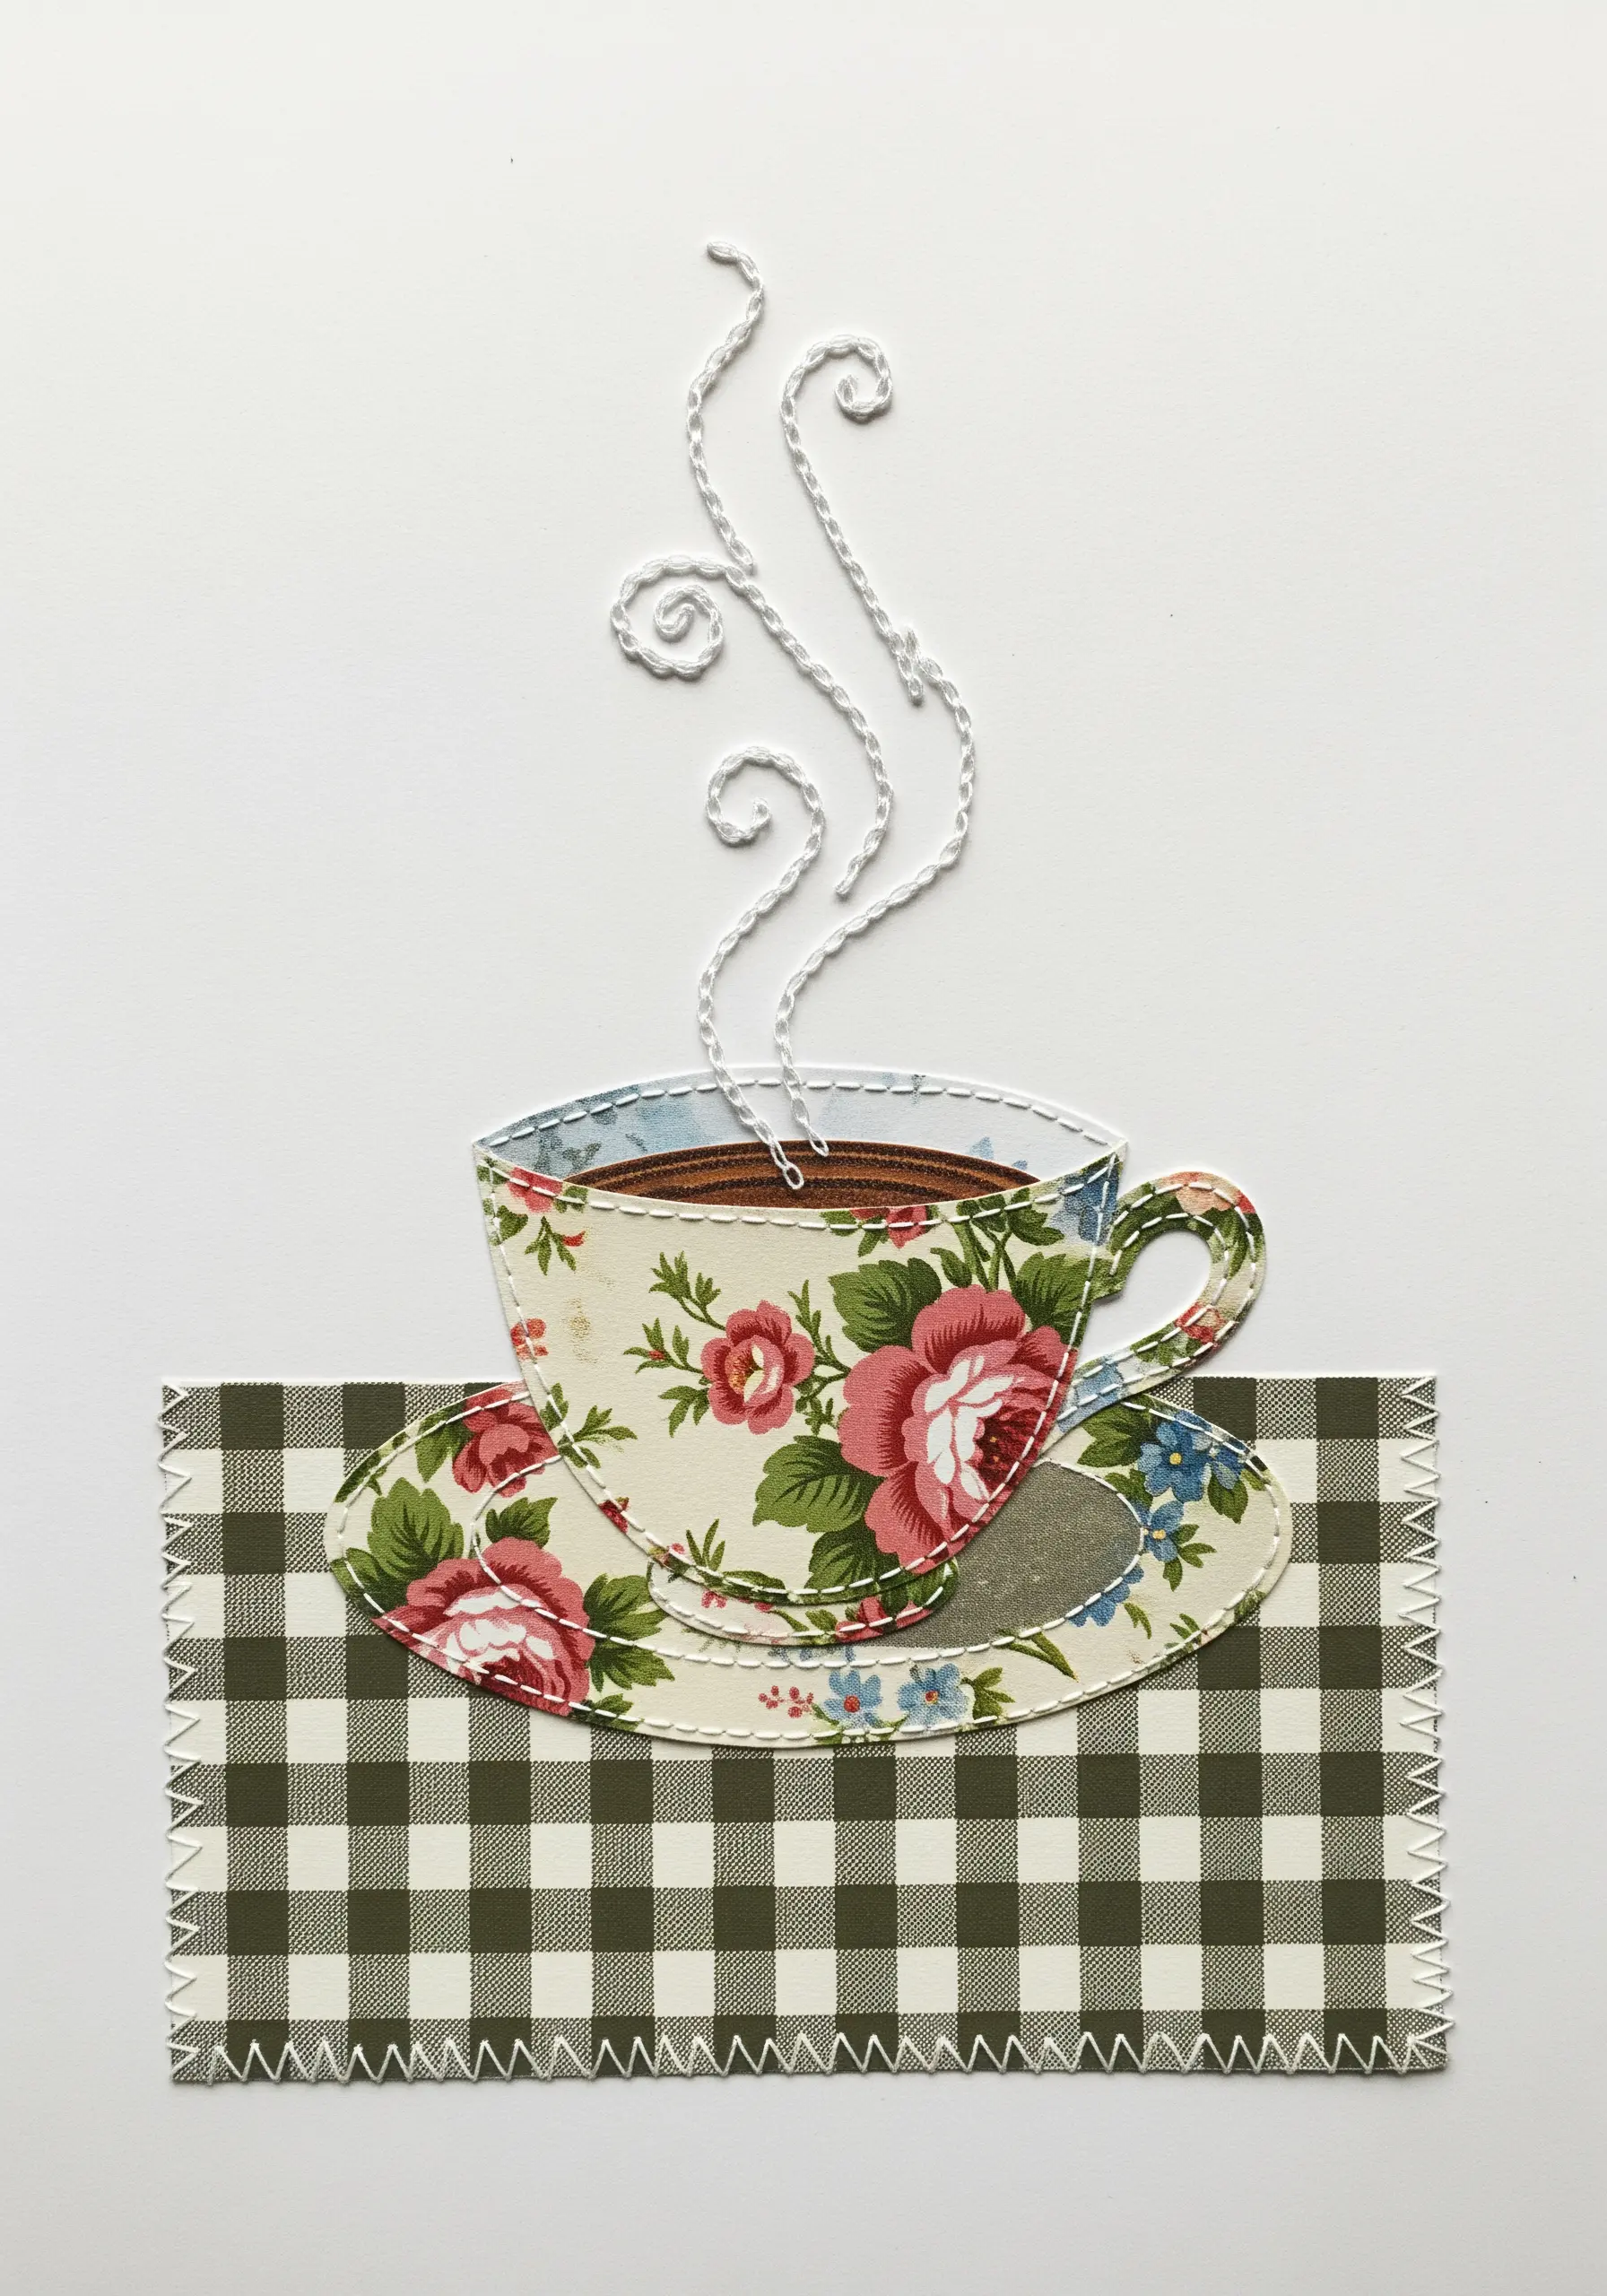
Suggest movement and ephemerality by allowing your thread to escape the confines of the stitch.
After creating your main collage from fabric or paper scraps, use thread for details that are difficult to render with cutouts, like steam.
Instead of stitching a line, couch a piece of thread onto the background in a swirling pattern, leaving the ends loose.
You can stiffen the thread with a bit of glue or starch to help it hold its curled shape.
This technique adds a touch of playful, three-dimensional whimsy to your work.
16. Radiate Energy with Long Straight Stitches
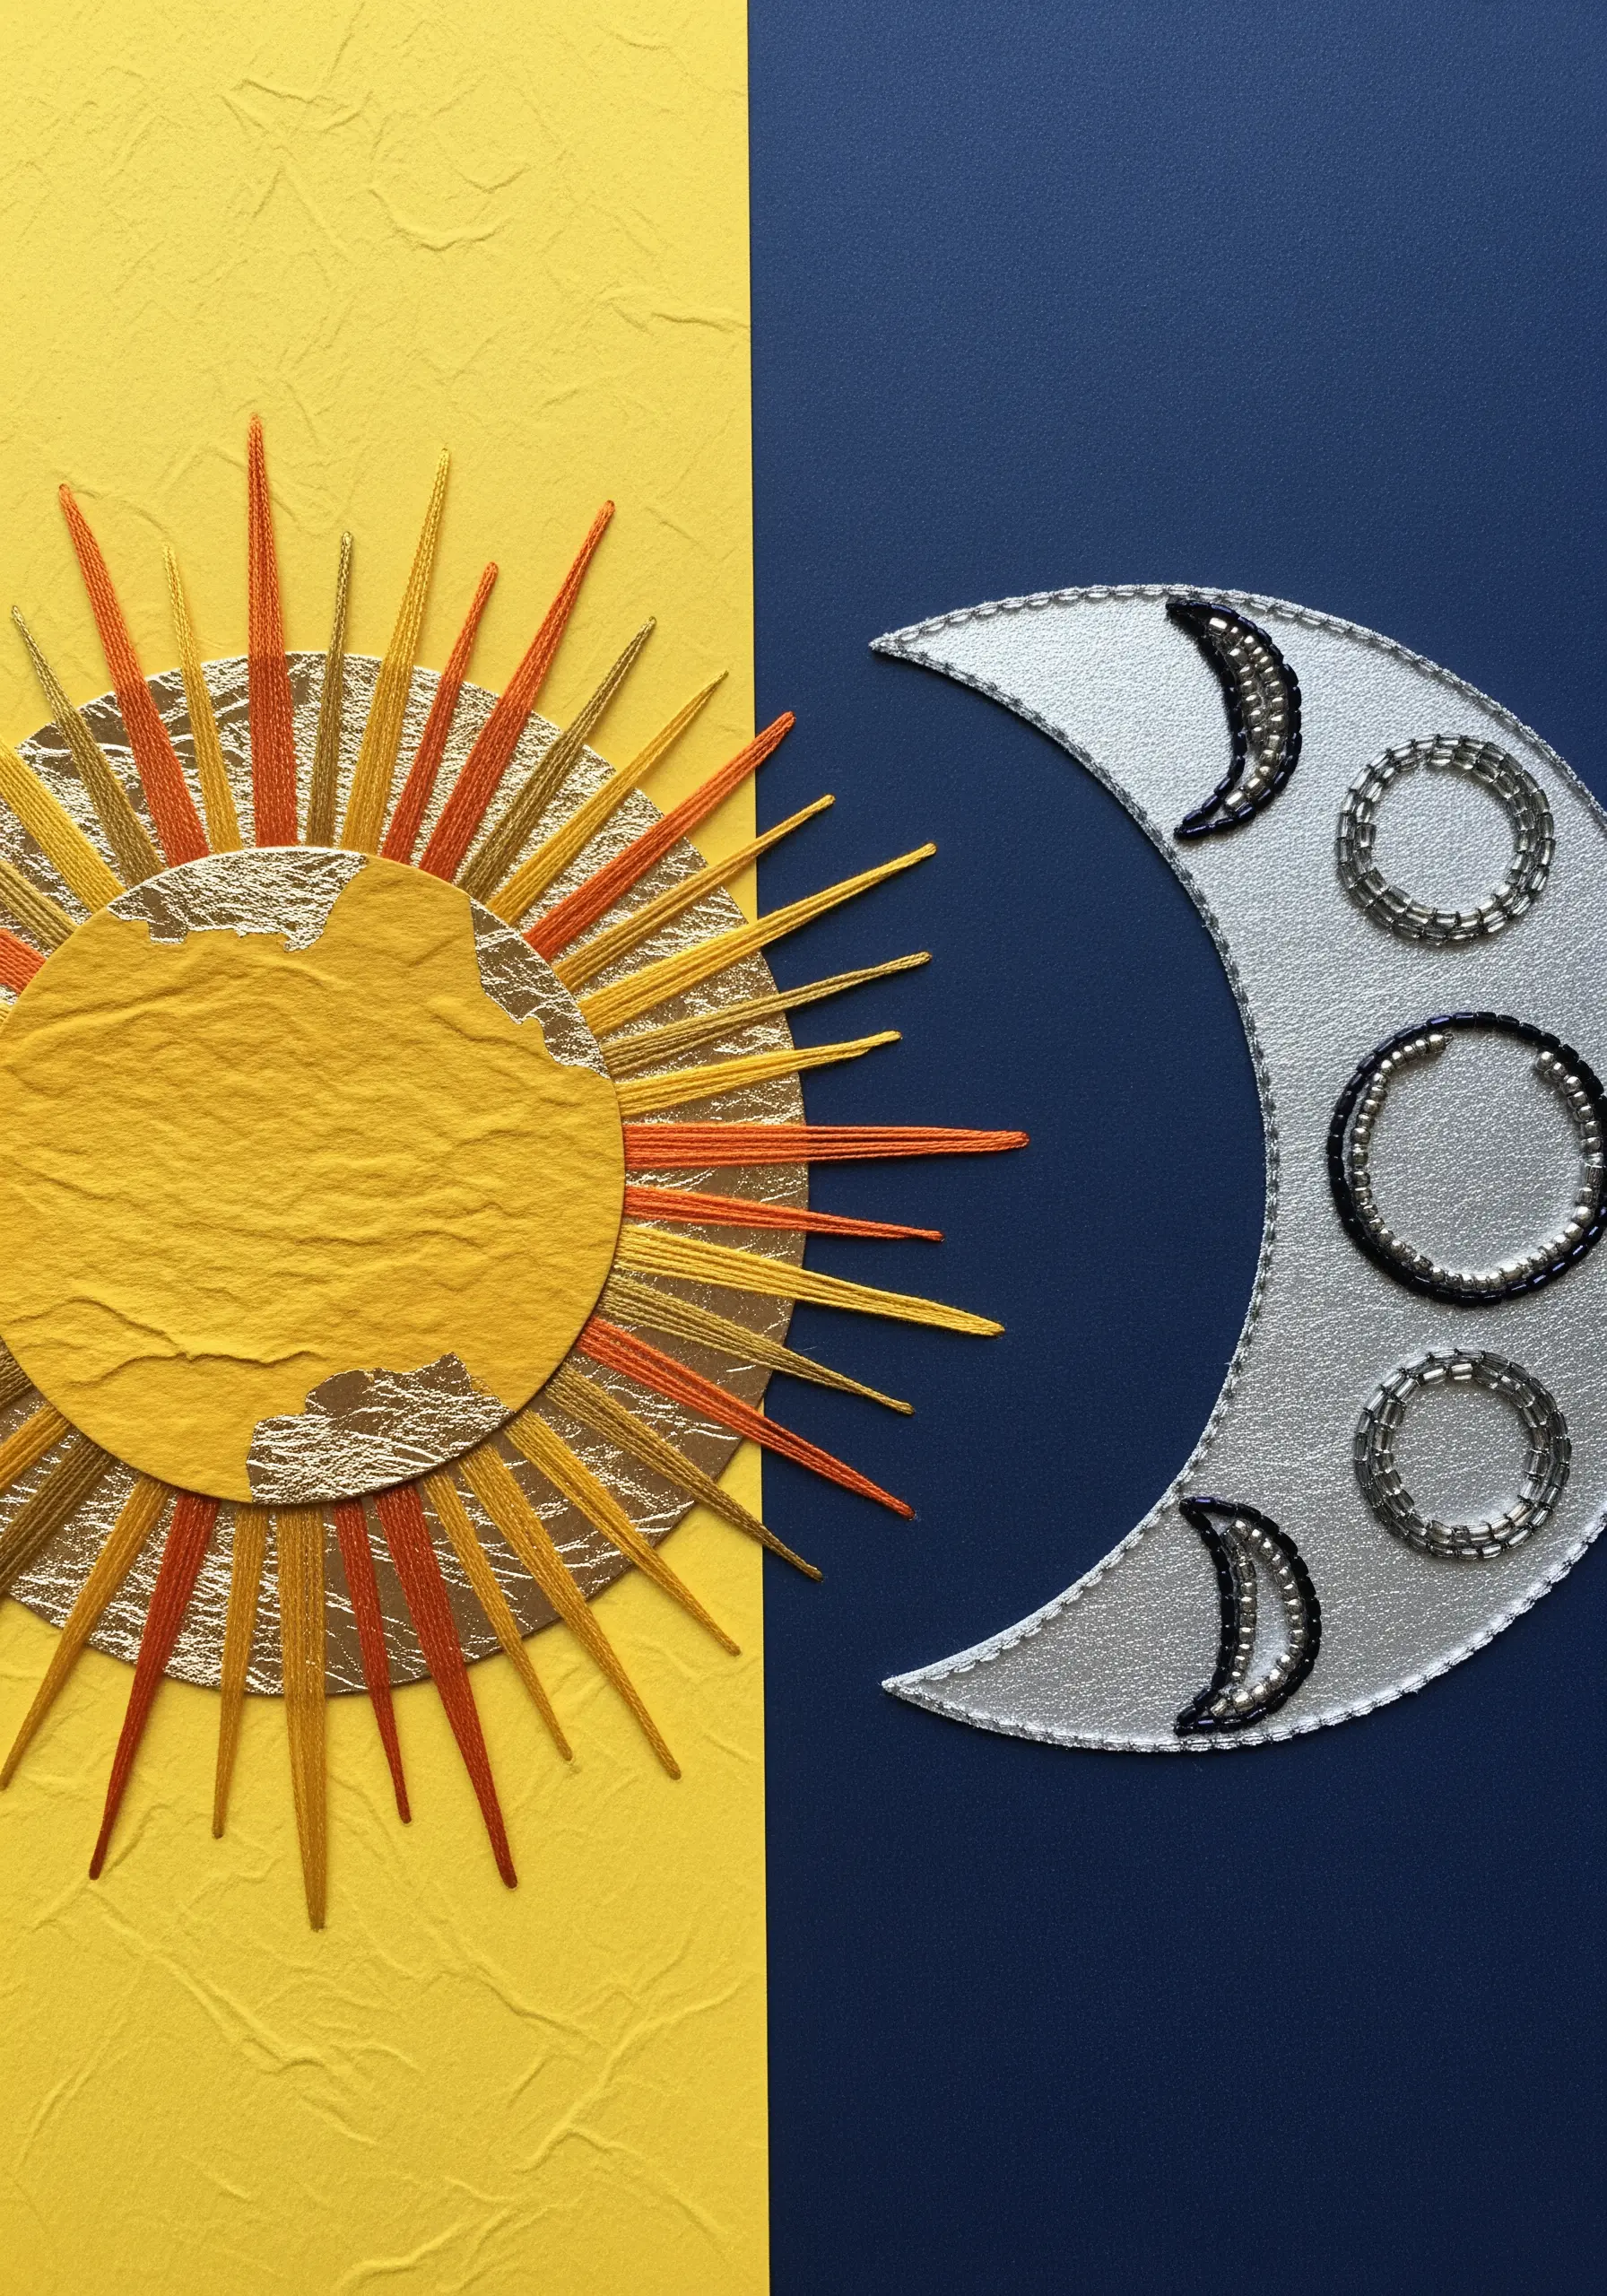
Use long, dramatic straight stitches to represent rays of light or energy in a celestial design.
Start with a central paper element, like a textured gold sun, as your anchor point.
Using a variegated or multi-toned thread, create the sun’s rays by stitching long straight stitches that radiate outwards.
This technique is fast, impactful, and creates a powerful sense of energy and direction.
Pair it with contrasting elements, like a cool-toned moon with beaded details, to create a balanced and dynamic composition.
17. Build Up Coral Textures with Stitches and Embellishments
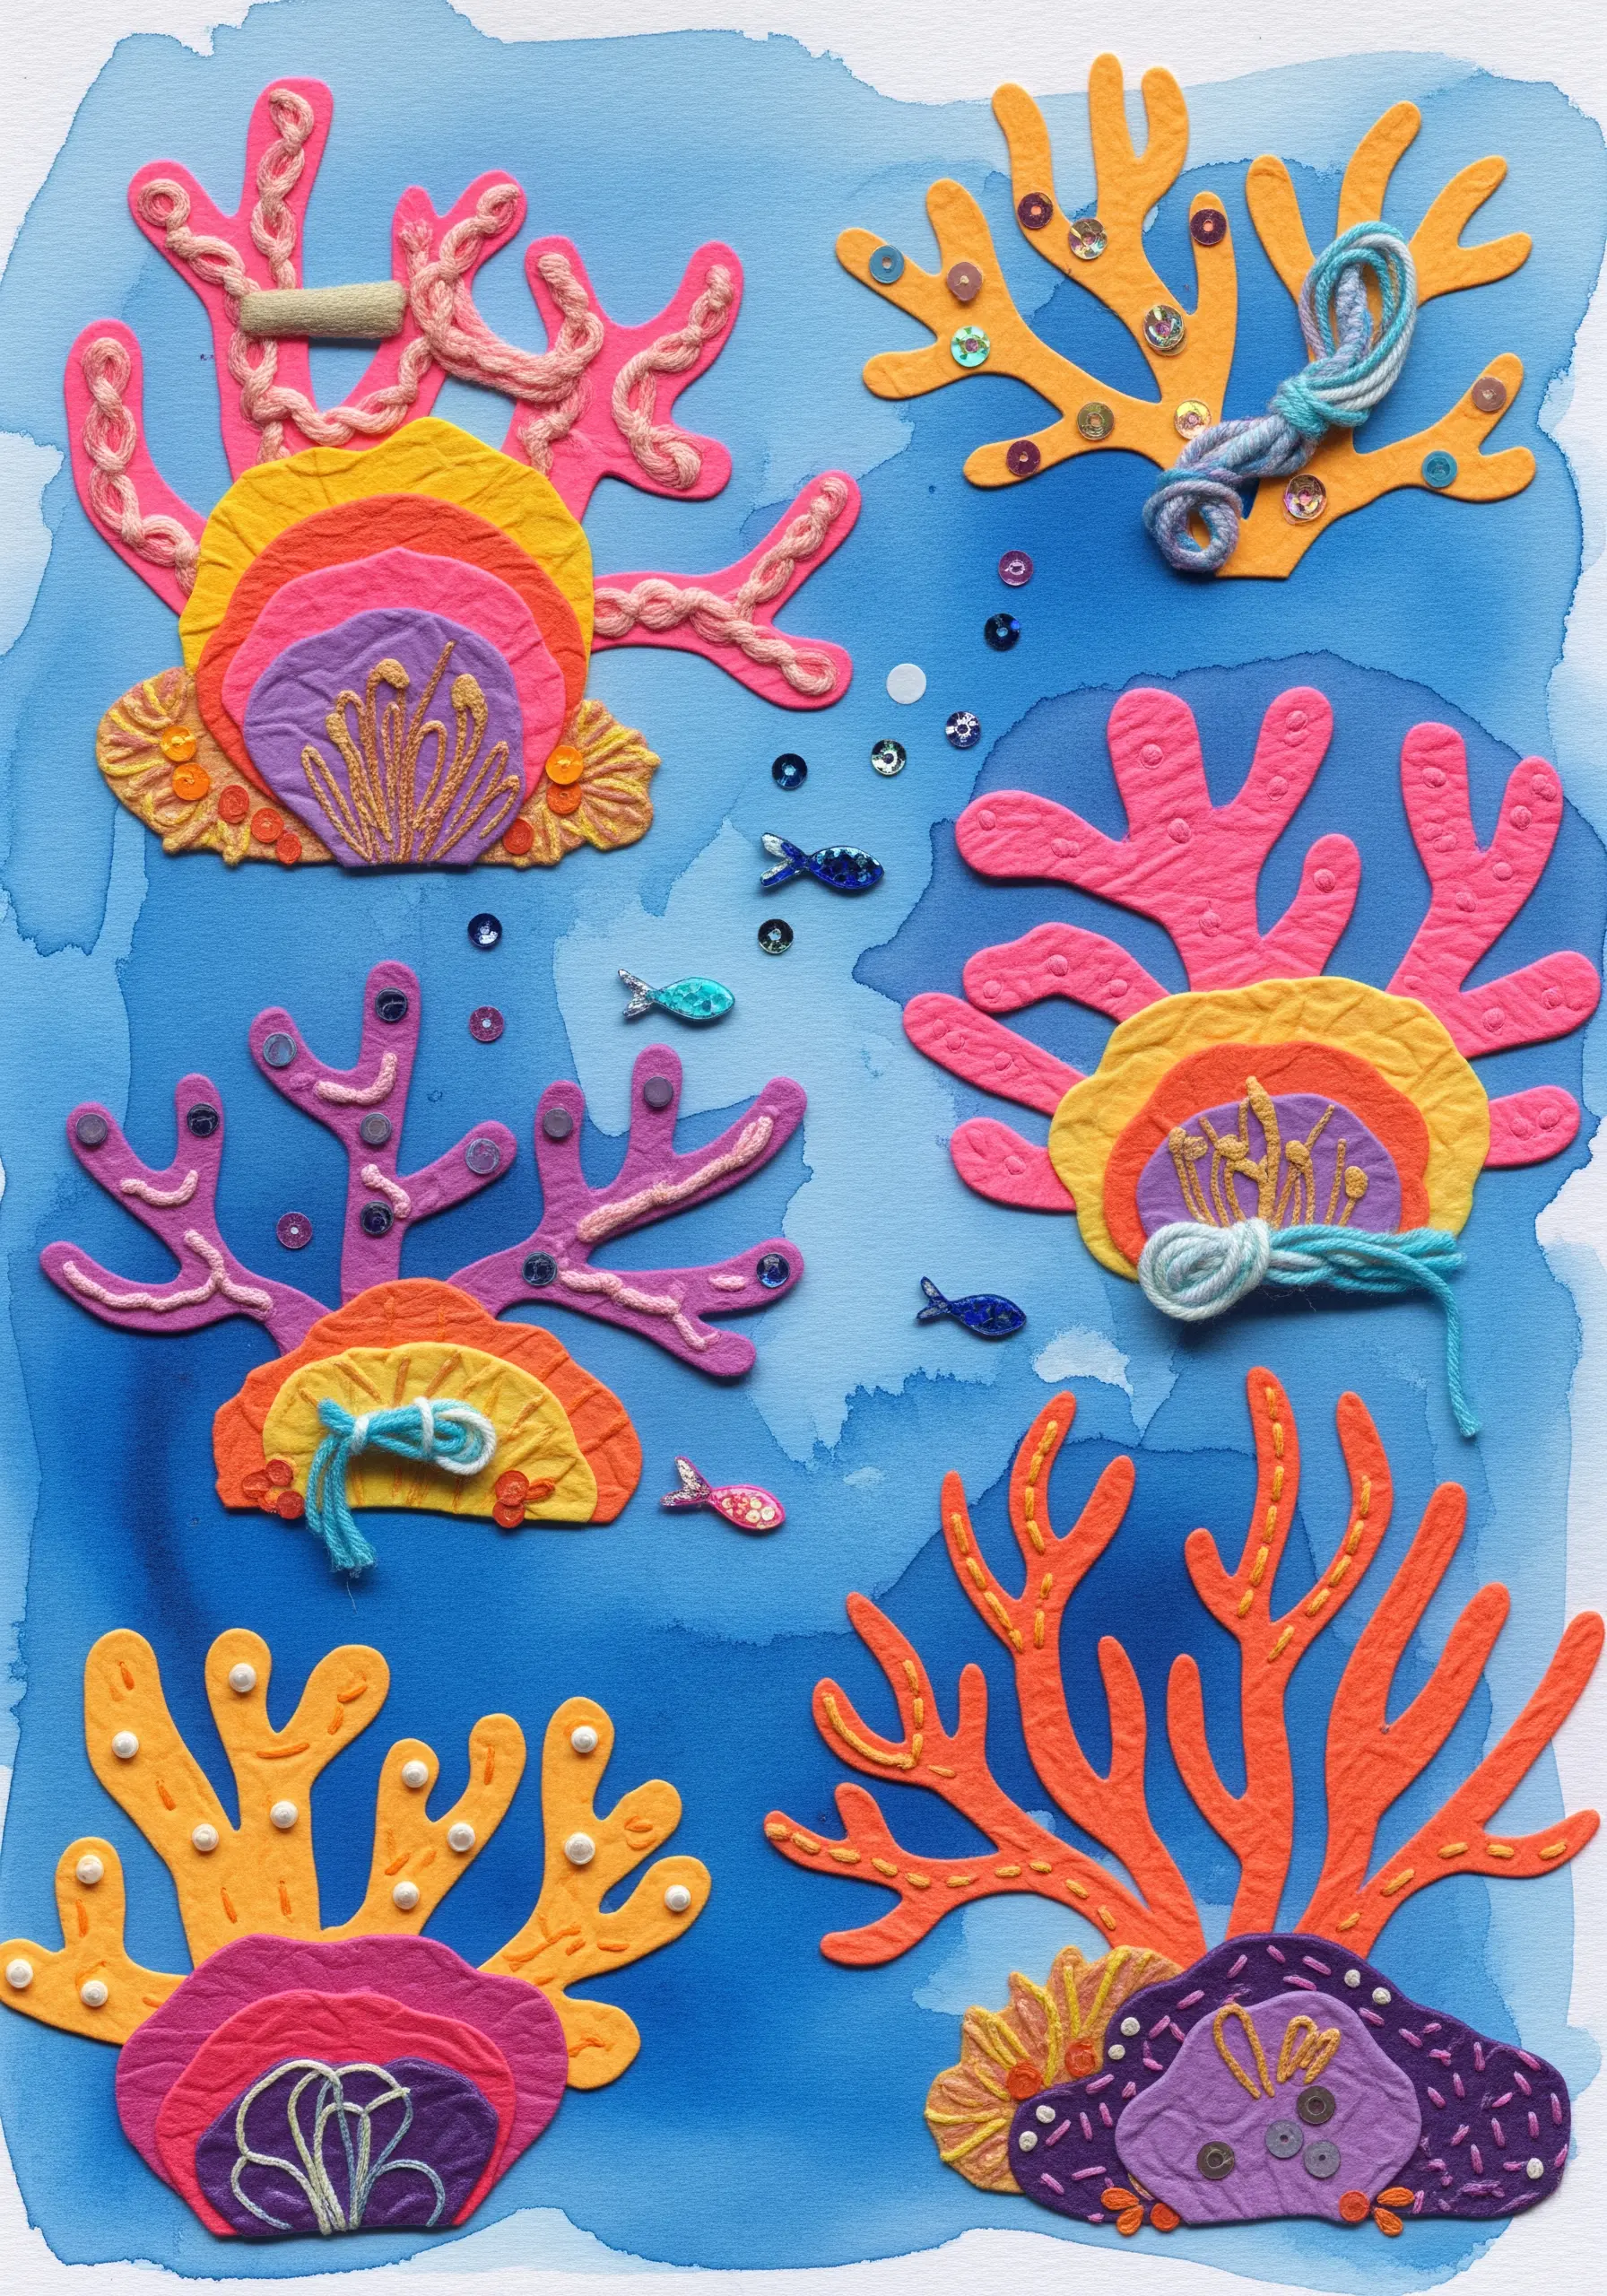
Recreate the rich, varied textures of a coral reef by layering stitches and embellishments onto paper shapes.
Start with brightly colored paper cutouts on a watercolor background to establish your base.
Add dimension with couched yarn, French knots, seed stitches, and scattered sequins or beads.
Vary the density of your stitching to create areas of focus and visual rest.
This maximalist approach to texture results in a vibrant, tactile underwater world that invites closer inspection.
18. Fill Letterforms with Directional Stitches
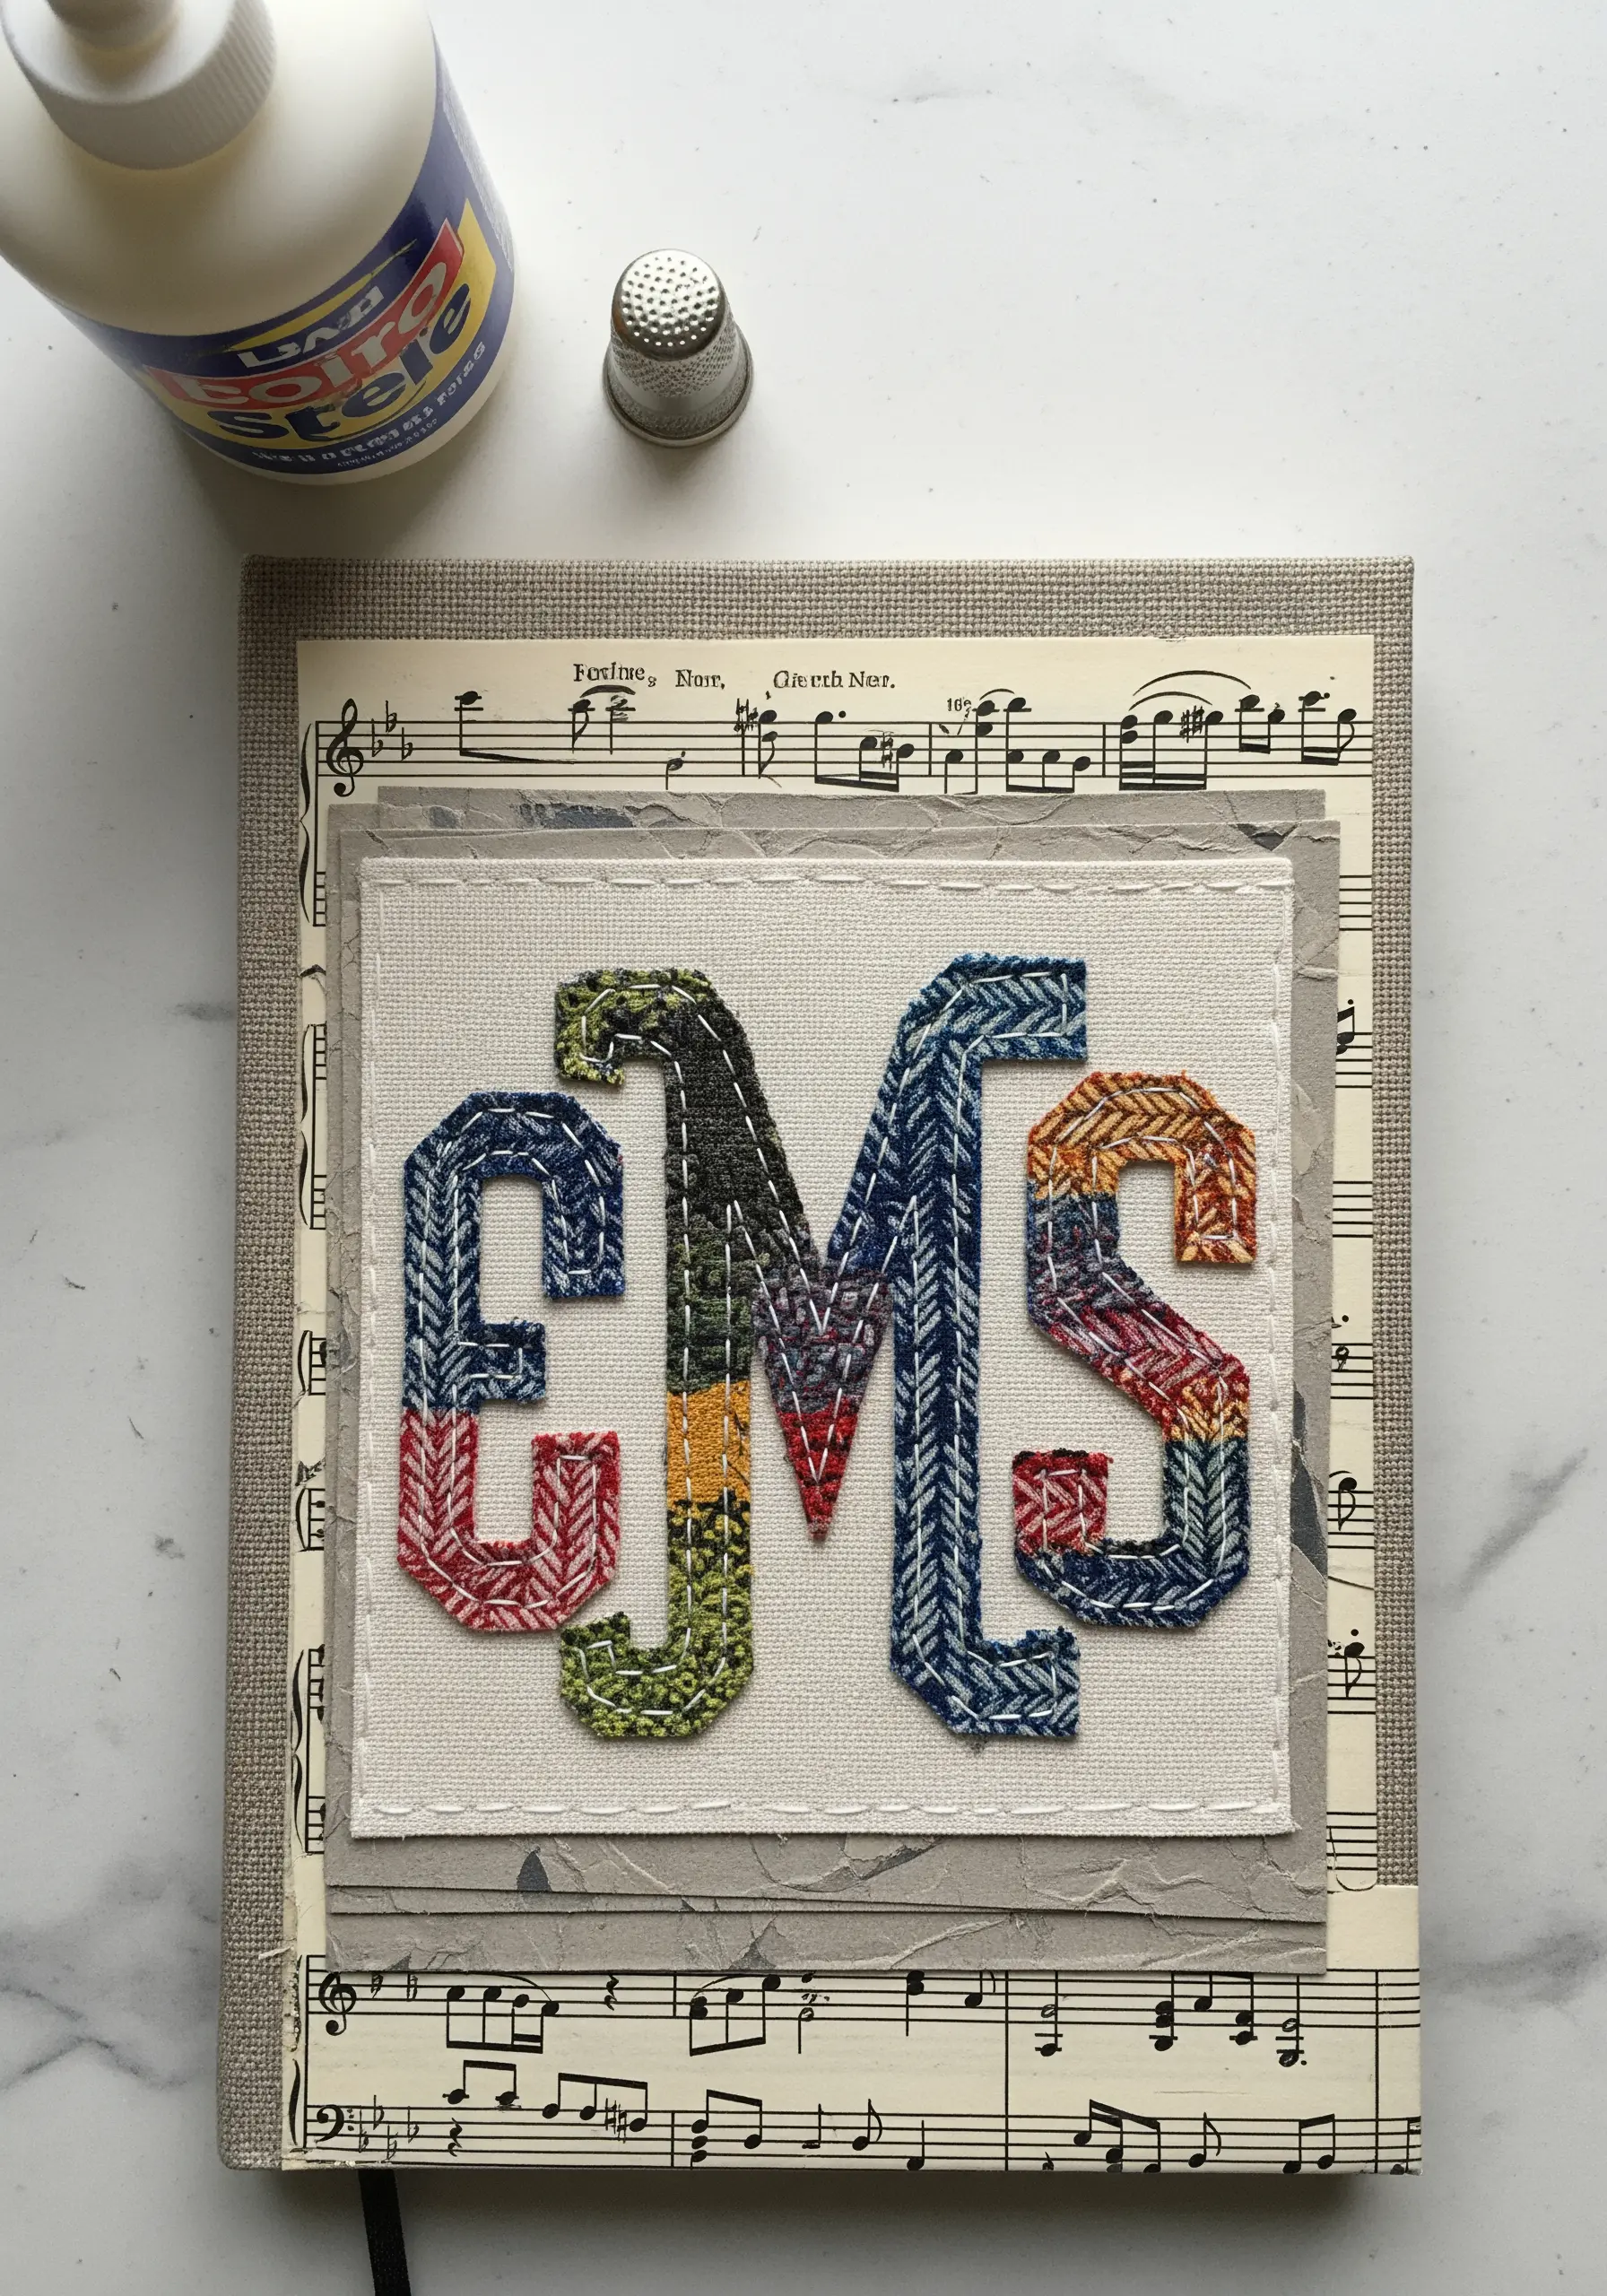
Turn a simple monogram into a textural masterpiece by filling it with a dense, directional stitch.
Use a paper or fabric cutout of a letter as your guide, lightly adhering it to a fabric background.
Fill the shape with a stitch that has a clear direction, like a long-and-short stitch or, as seen here, a brick or satin stitch variation.
By changing the direction of the stitches within different parts of the letter, you create subtle shifts in light and texture that add sophistication.
Variegated thread enhances this effect, creating beautiful, organic color transitions.
19. Define Geometric Shapes with a Simple Running Stitch
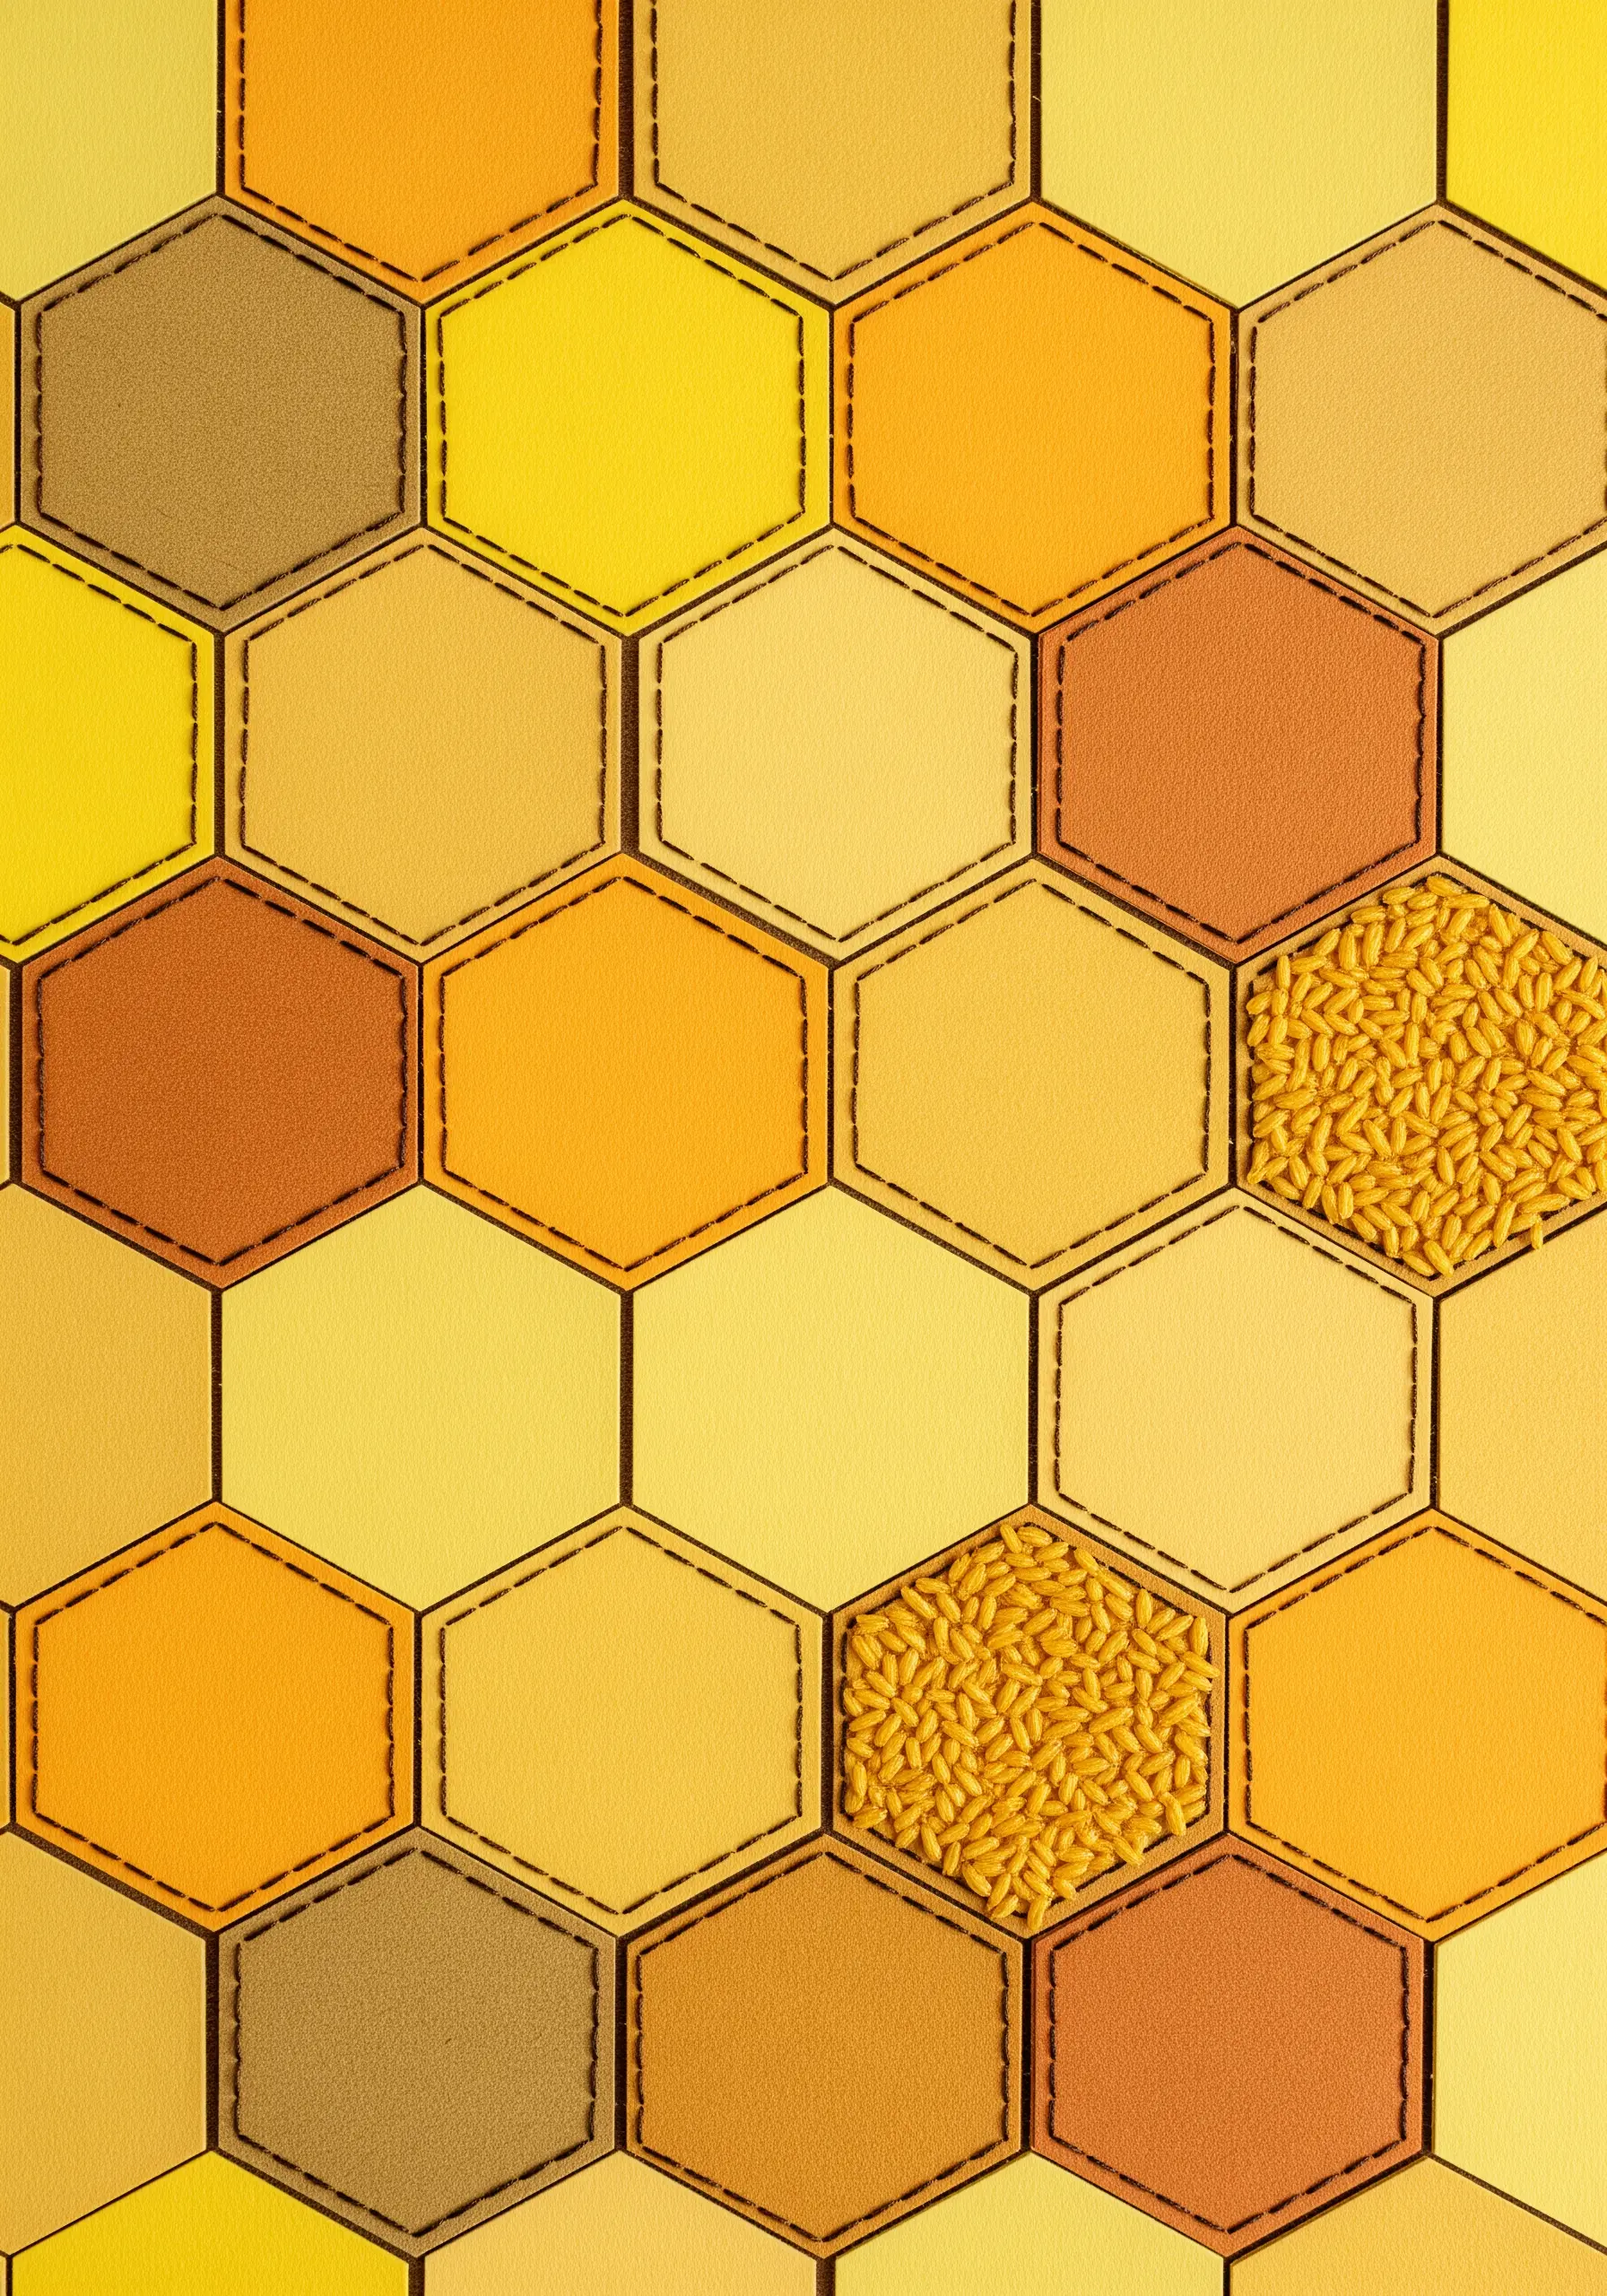
Add a soft, handcrafted touch to a crisp geometric pattern by outlining each shape with thread.
Arrange paper hexagons in a honeycomb pattern, playing with a tonal color palette for a subtle, modern look.
Instead of leaving the edges raw, use a simple running stitch just inside the border of each hexagon.
This stitch adds a gentle definition and a pleasing handmade quality that softens the sharp geometry.
For extra interest, fill a few of the shapes with a dense seed stitch or tiny beads for a pop of unexpected texture.
20. Stitch Delicate Barbs onto Paper Feathers
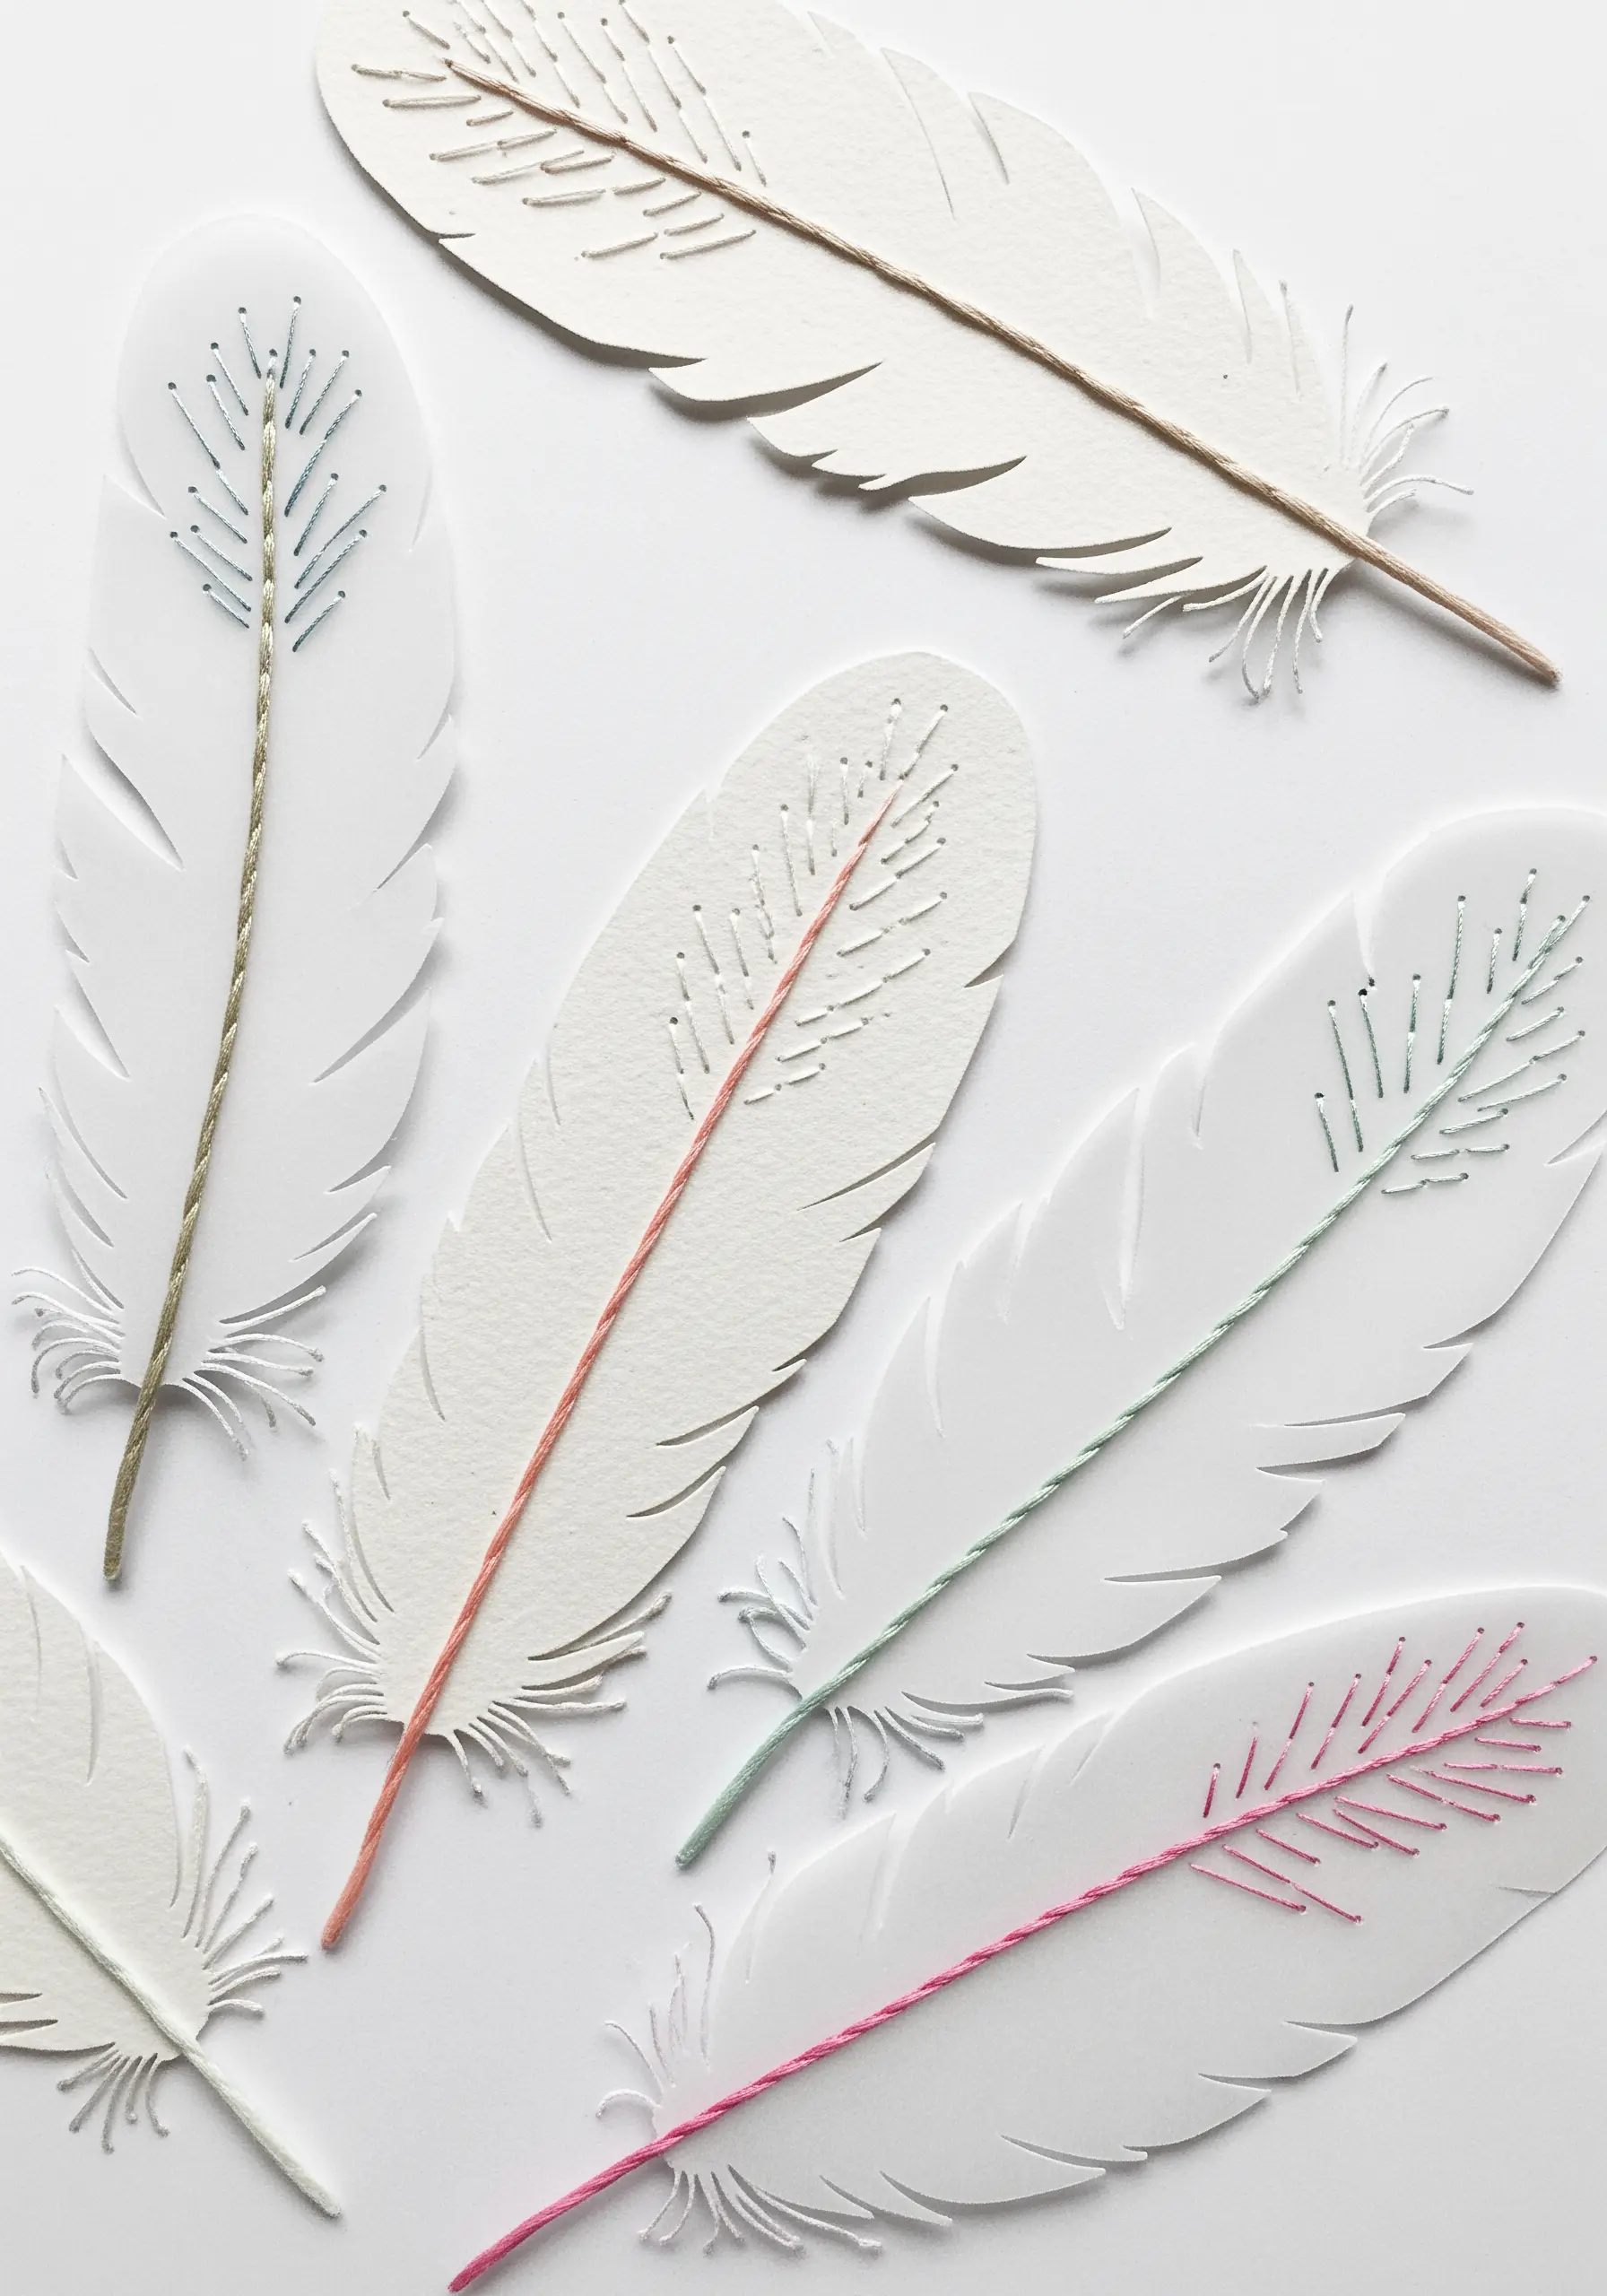
Capture the ethereal quality of feathers by adding light, airy stitches to simple paper cutouts.
First, cut your feather shapes from sturdy paper, adding small snips along the edges for a realistic, frayed look.
Use a single strand of floss for the central quill, creating it with a solid backstitch or couched thread.
For the delicate barbs, use tiny, angled straight stitches or fly stitches extending from the center.
The key is to keep the stitching sparse and light, suggesting texture rather than rendering it completely.
21. Add a Tactile Border with a Crocheted or Blanket Stitch Edge
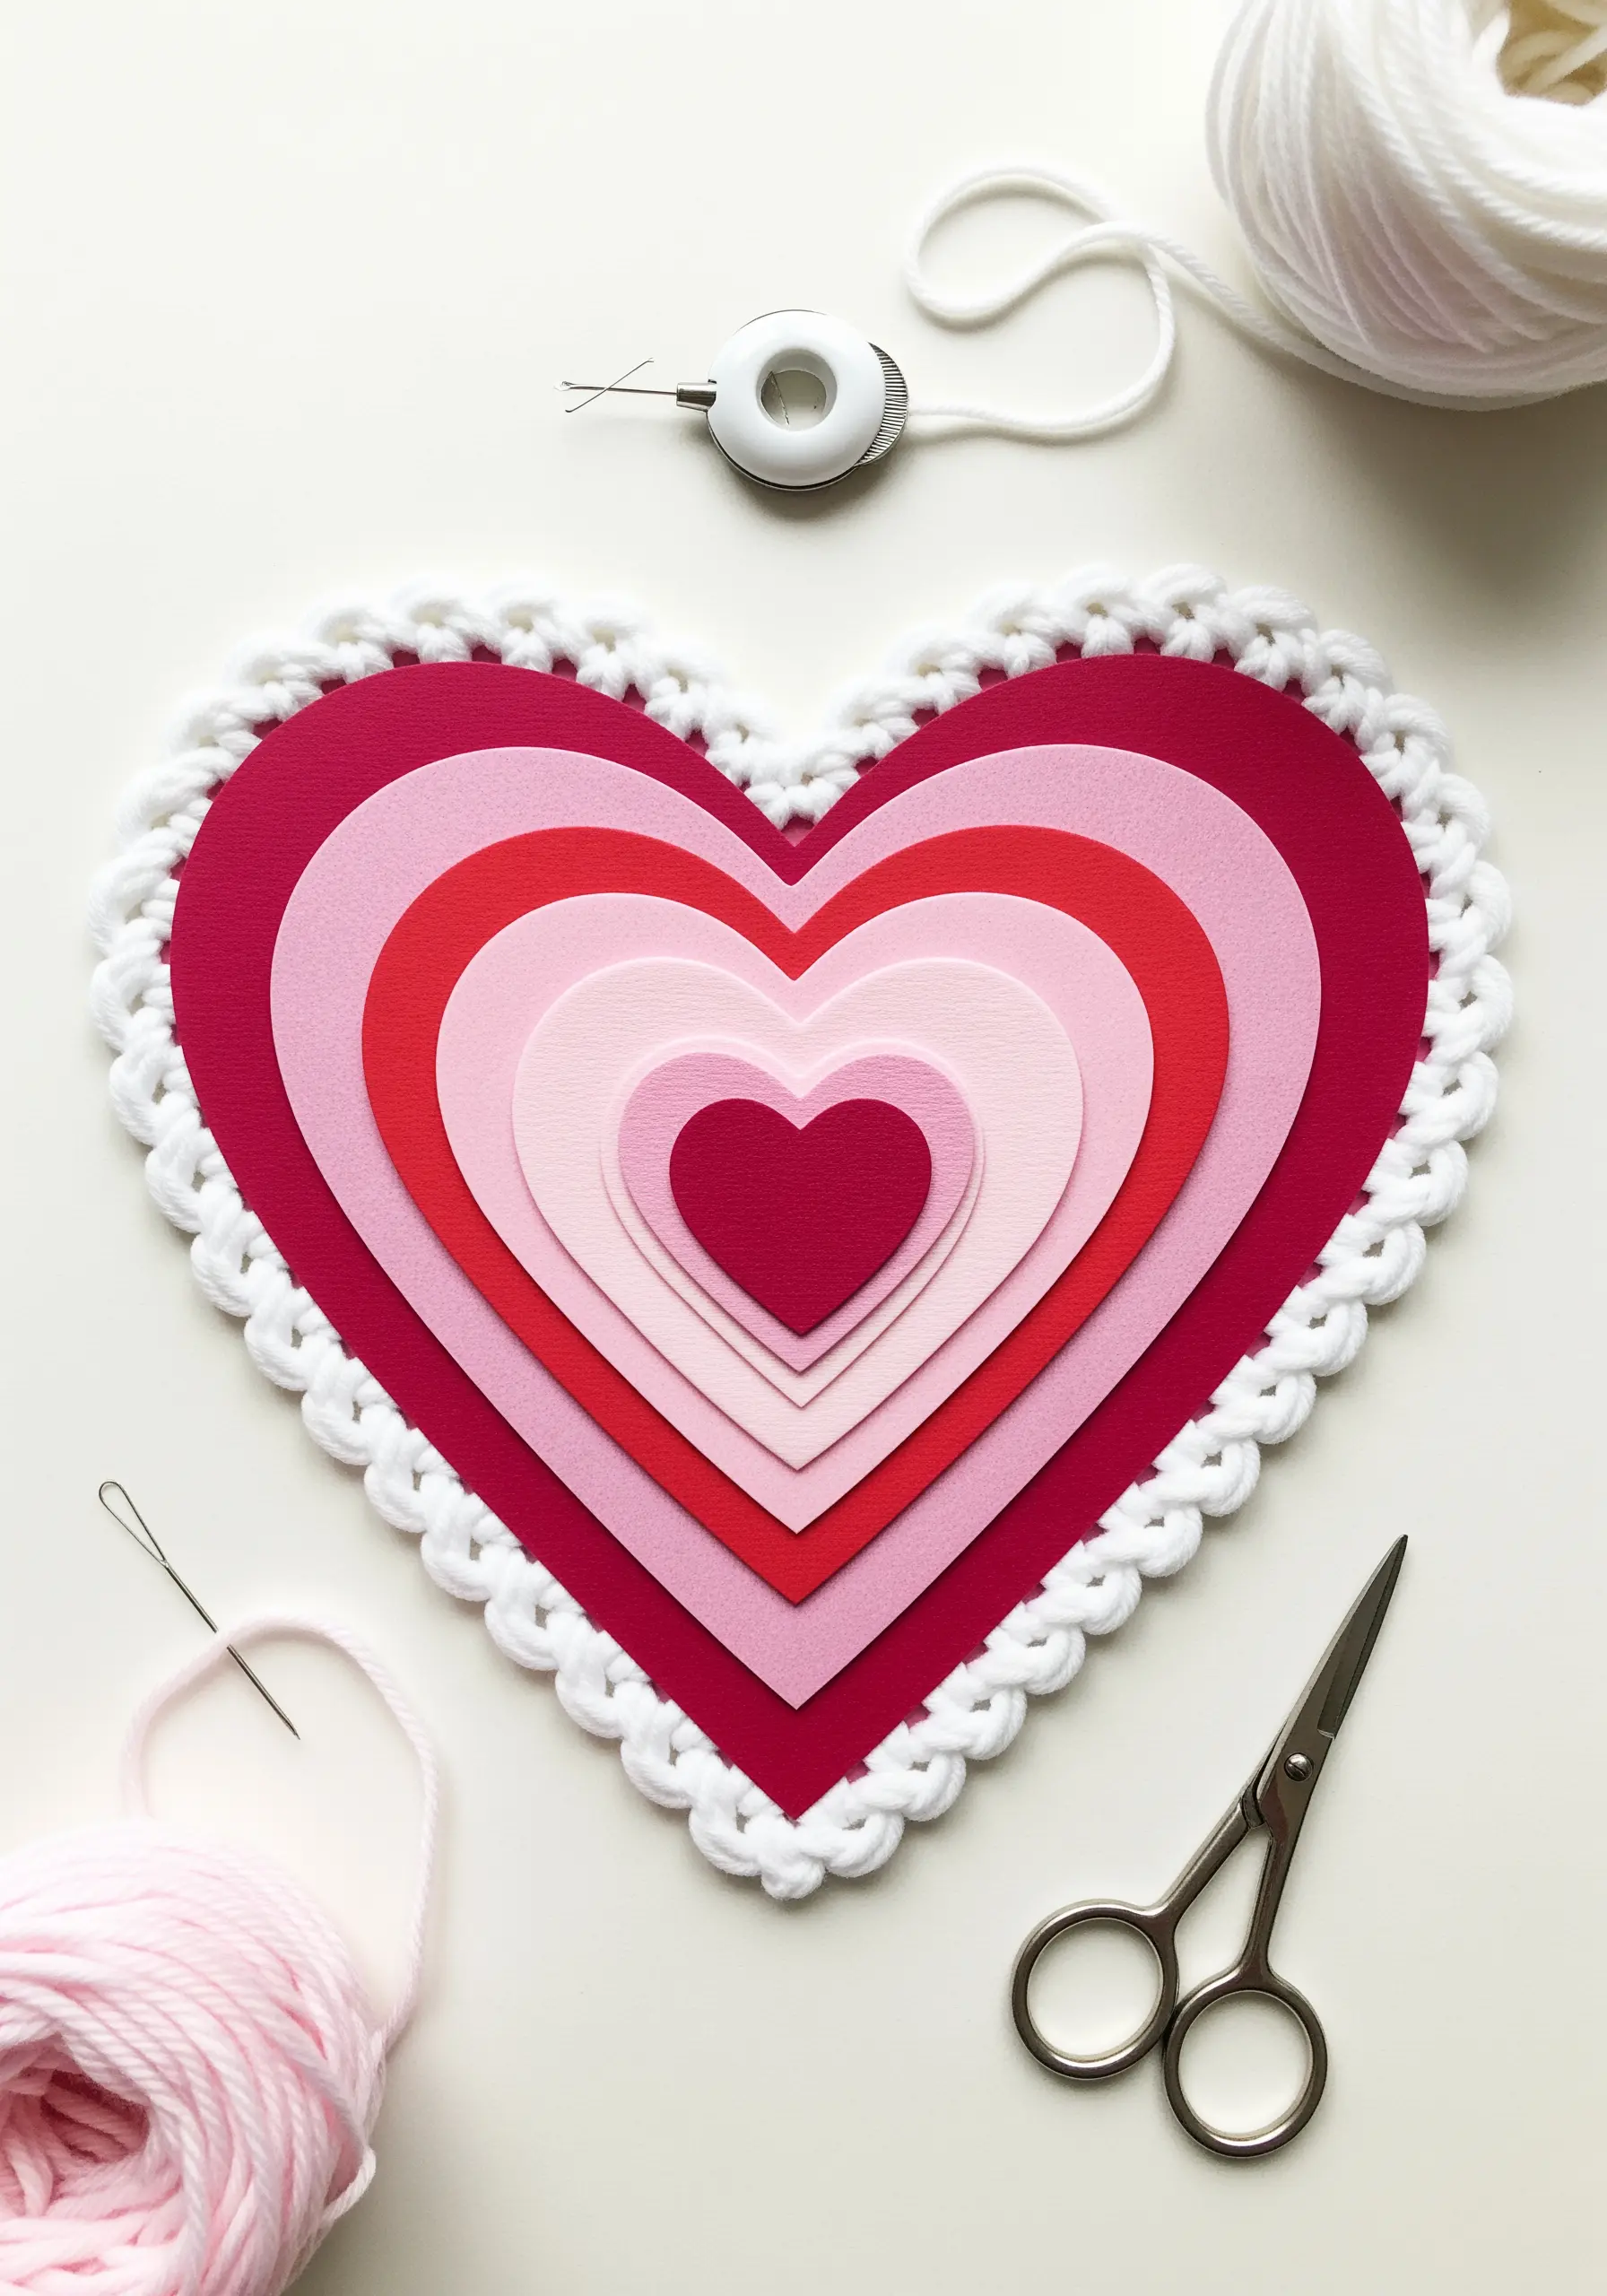
Frame a layered paper collage with a soft, textural border to give it a finished, cohesive feel.
After assembling your concentric paper shapes, use an awl or a large needle to pre-punch holes evenly around the outermost edge.
Using a thick yarn or cotton cord, add a decorative border with a blanket stitch or a simple single crochet stitch worked directly into the holes.
This technique adds a charming, handcrafted warmth and provides a beautiful textural contrast to the flat paper layers.
22. Mimic Quilting with Sashed Paper Blocks
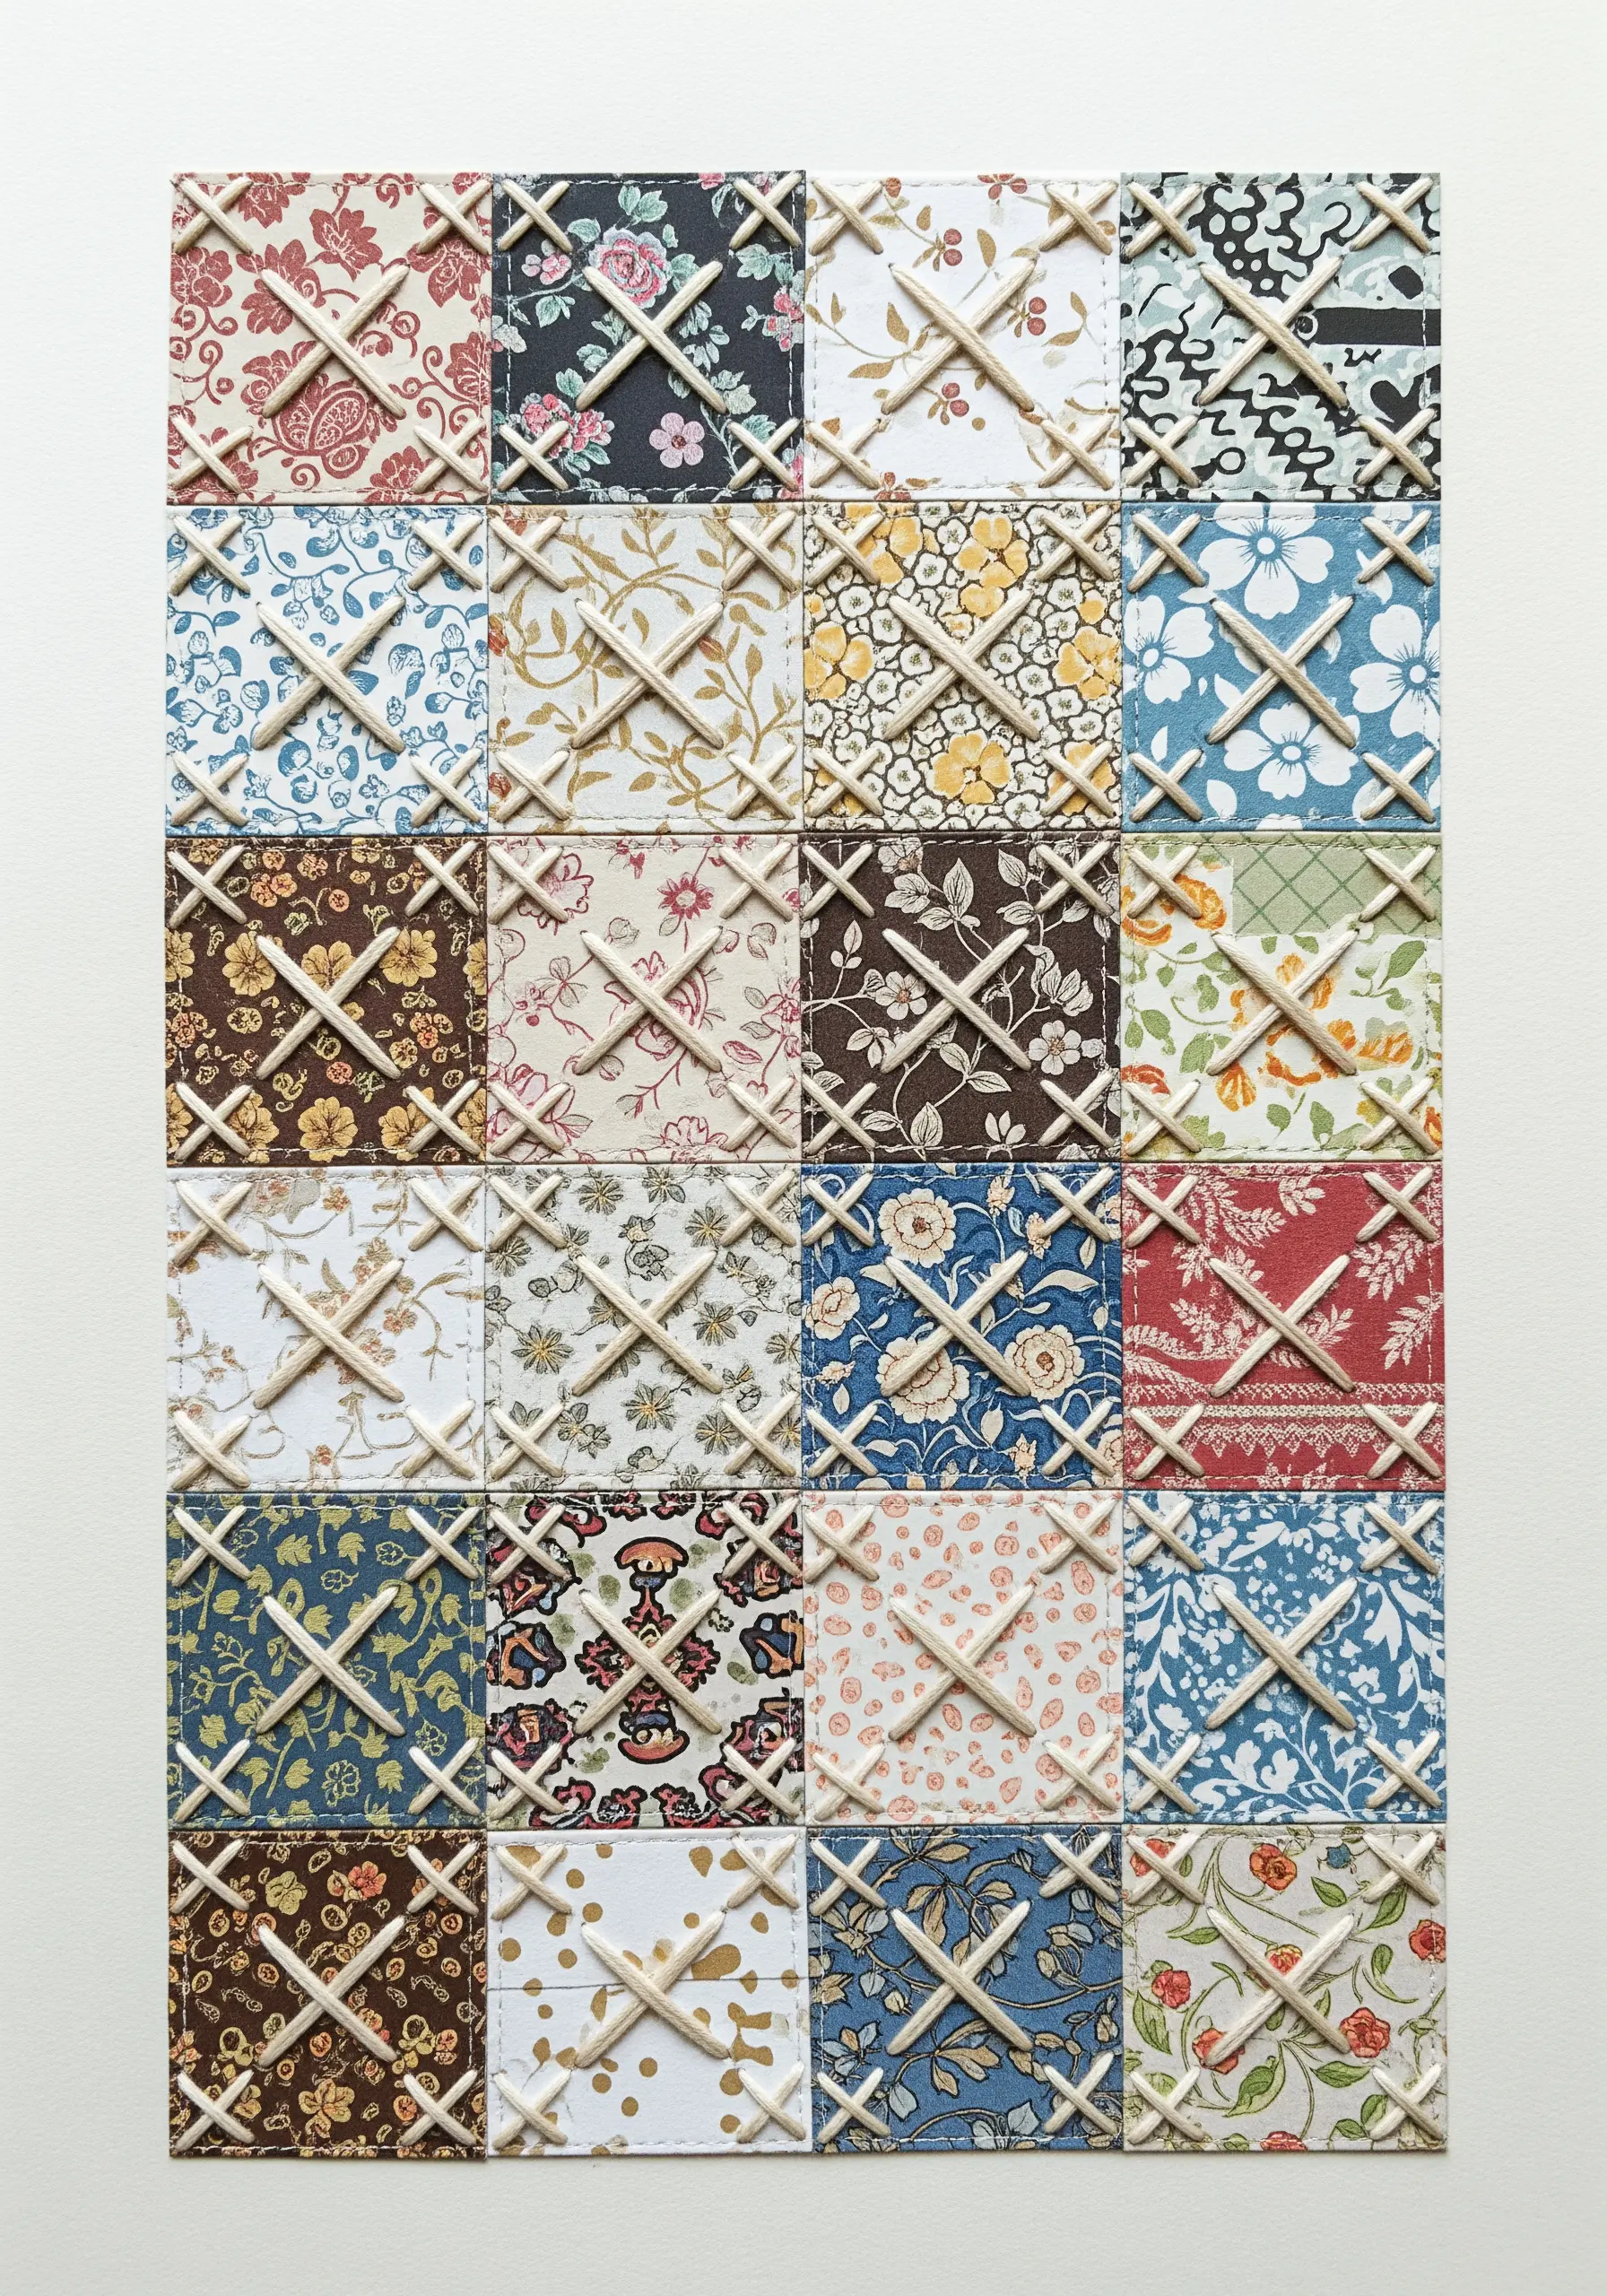
Evoke the charm of traditional quilting by joining paper or fabric squares with bold, graphic stitches.
Arrange your patterned squares in a grid on a sturdy backing paper.
Instead of sewing them together, use a thick, contrasting thread like pearl cotton or sashiko thread to create large ‘X’ stitches over the corners where four blocks meet.
This technique is purely decorative but effectively mimics the look of a hand-tied quilt, adding a rustic, tactile dimension to your collage.
It’s a wonderful way to use up precious scraps of your favorite papers or fabrics.
23. Visualize Data with Vertical Thread Bars

Transform abstract data, like a soundwave, into a striking piece of tactile art.
Use a paper printout of your chosen graphic as a guide behind a piece of translucent fabric, or draw it directly onto your background.
Create the design using dense, vertical straight stitches or satin stitch bars of varying heights.
The precision required for this technique results in a clean, graphic, and highly modern aesthetic.
Playing with a gradient background or a bold, monochromatic color scheme enhances the visual impact.
24. Create Atmospheric Light with Floating Stitches
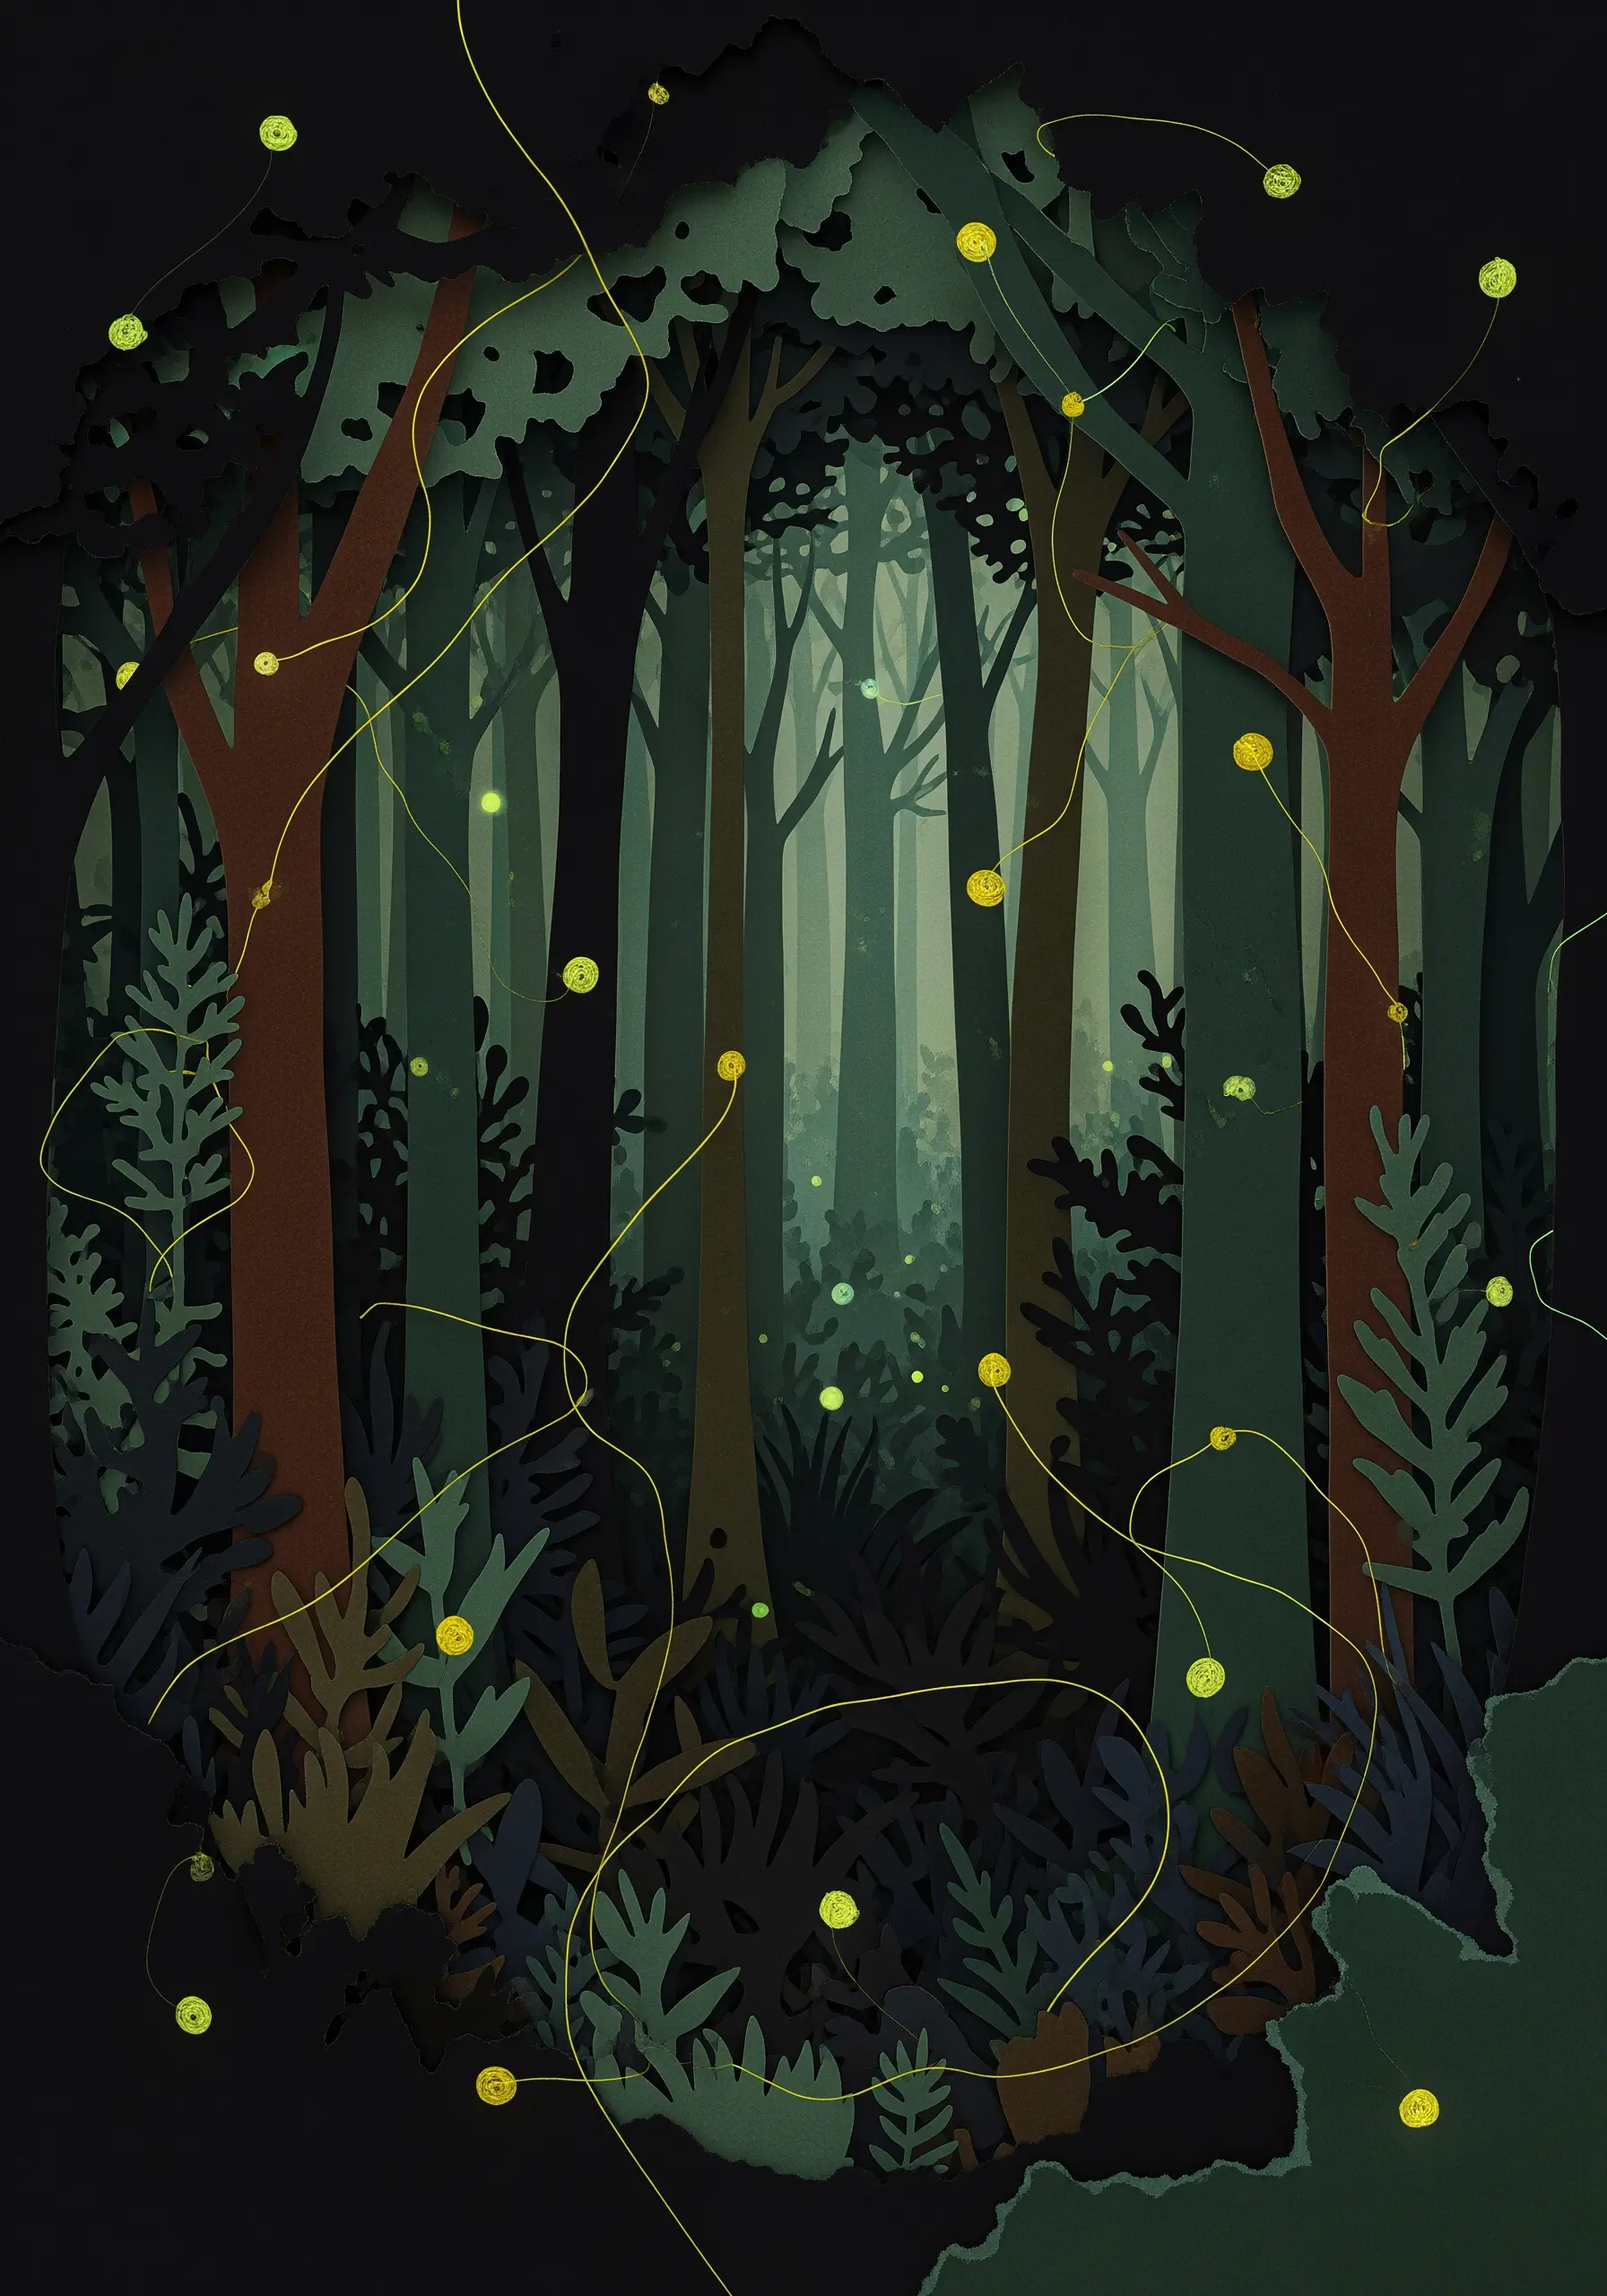
Suggest the magical glow of fireflies by connecting stitched points with loose, meandering threads.
Build a deep, layered paper forest scene to create a sense of mystery and enclosure.
For the fireflies, make bright yellow or chartreuse French knots or add small sequin dots.
Then, connect these dots with long, gently curving stitches using a fine metallic or yellow thread.
Don’t pull the thread taut; allowing it to float slightly above the paper surface creates a beautiful illusion of light trails dancing in the dark.
25. Transform Typography into a Stitch Sampler
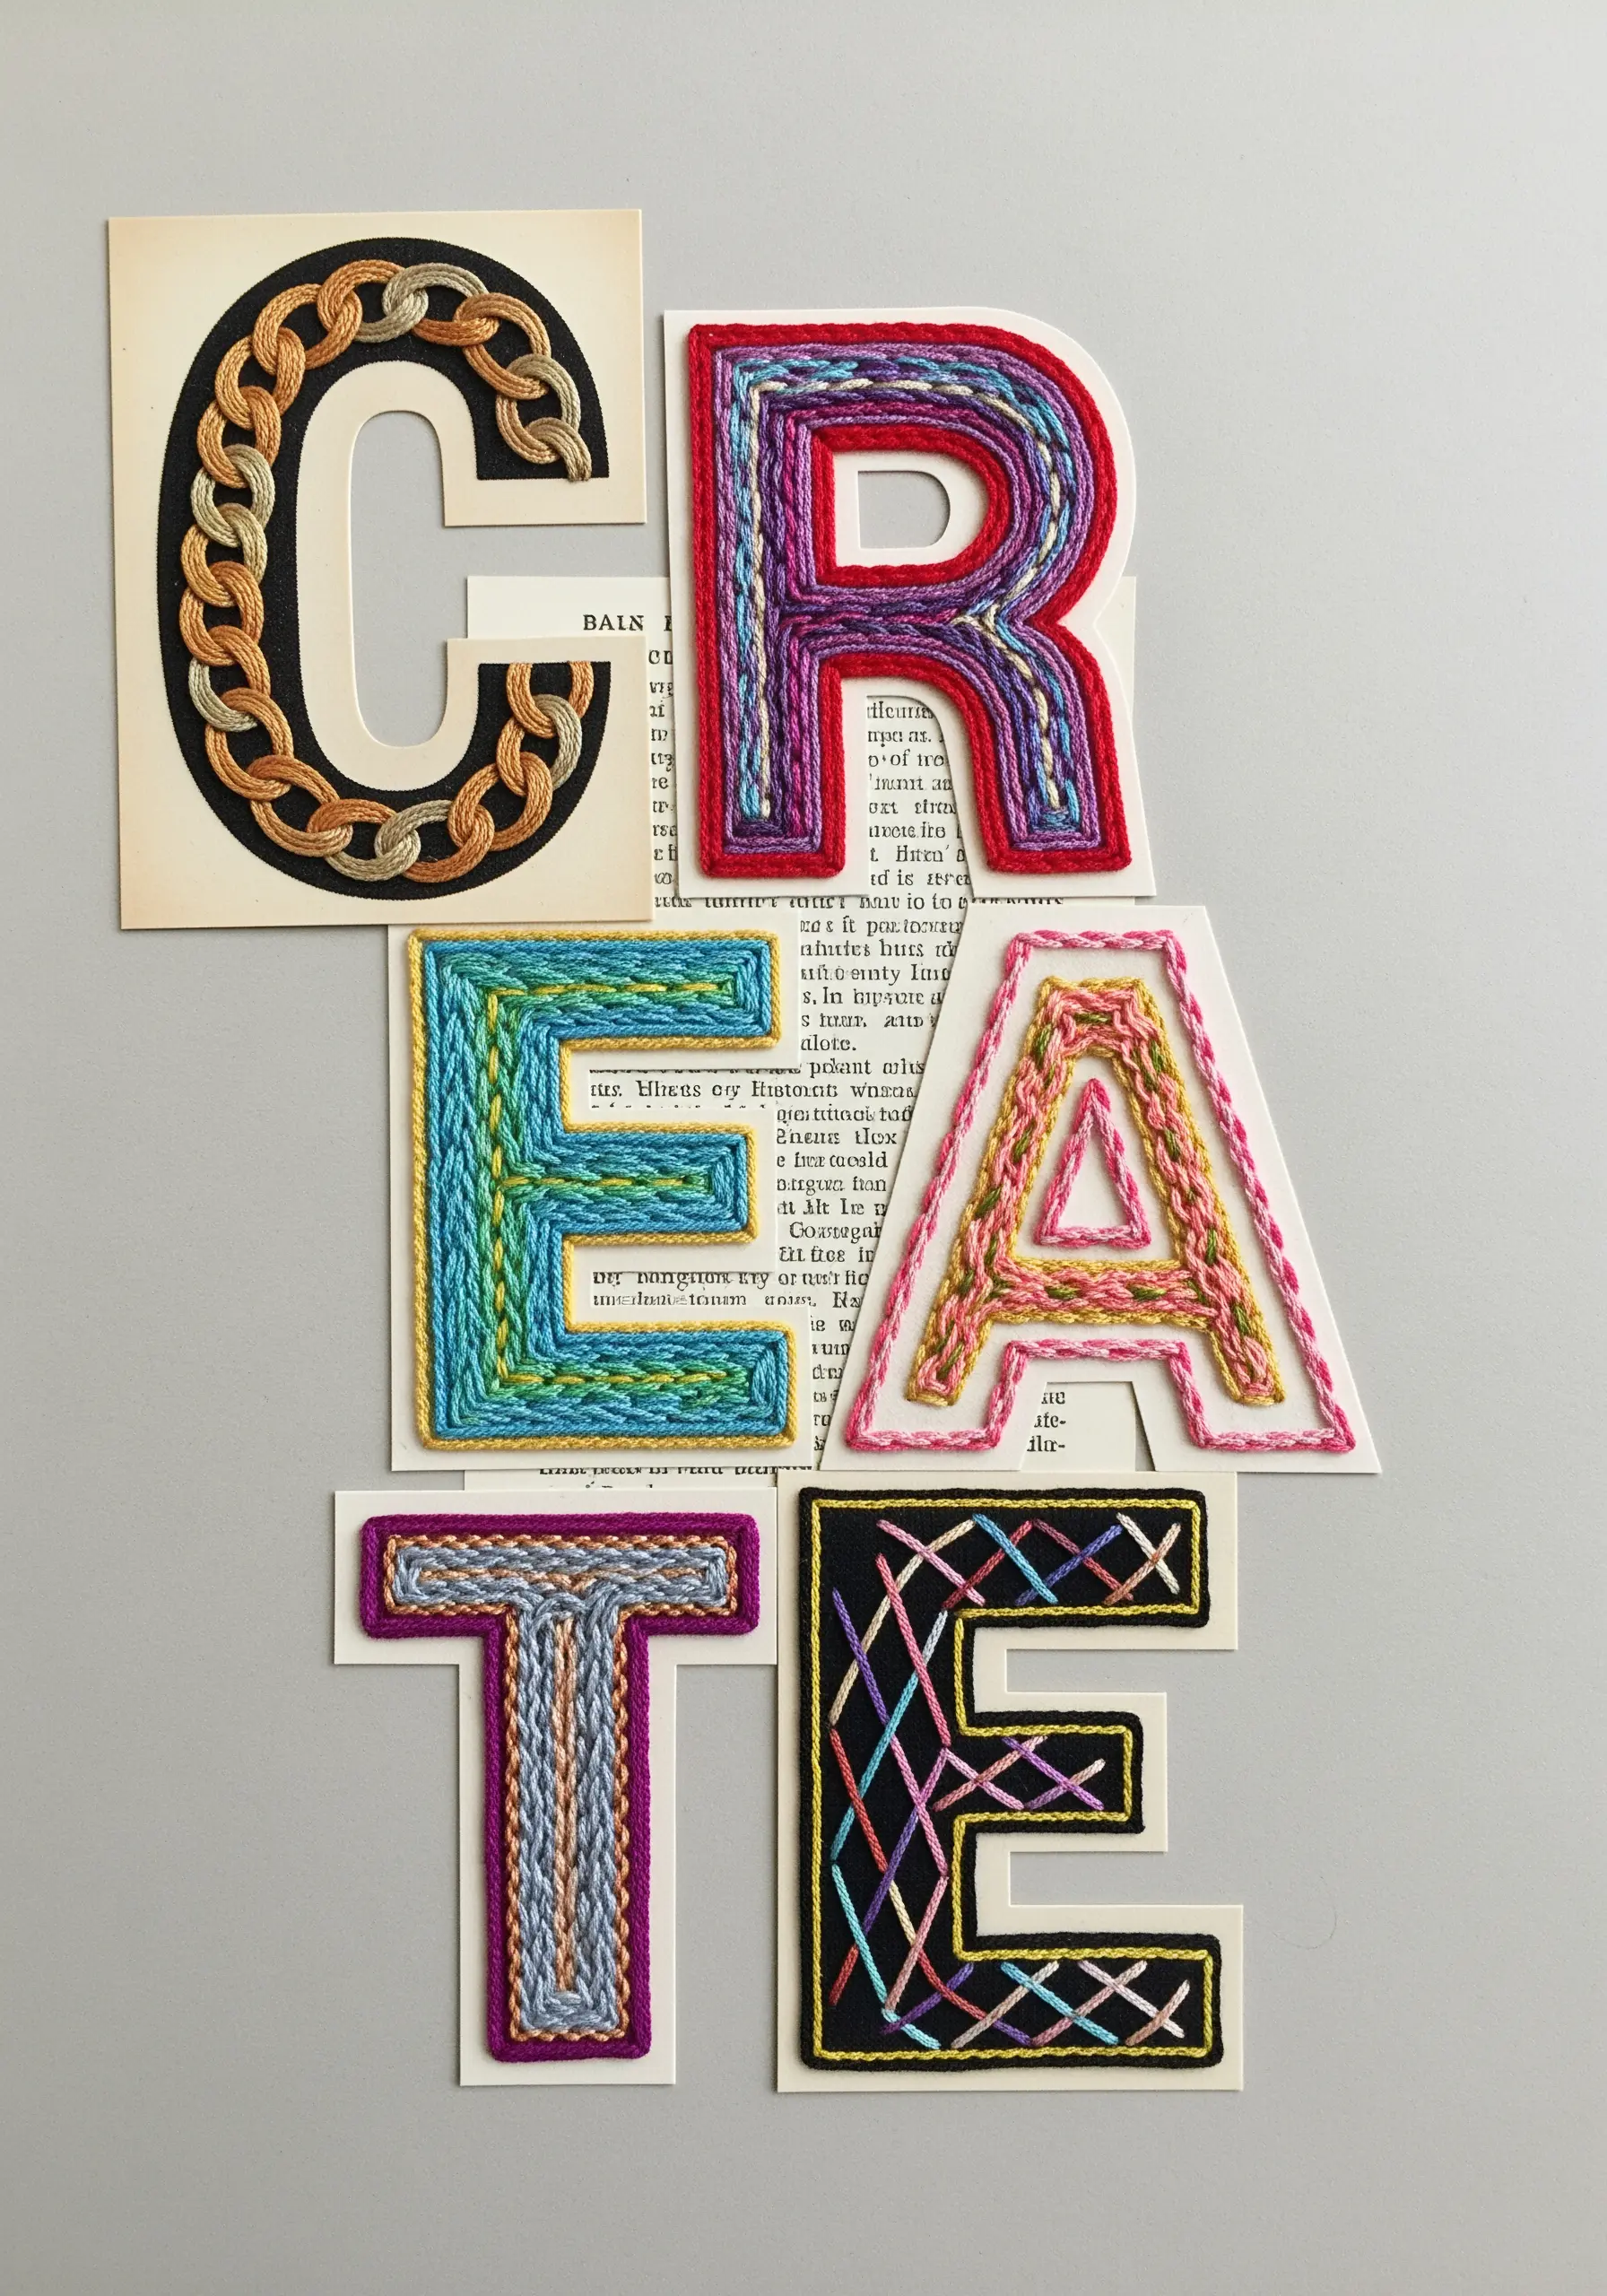
Use large paper letters as a canvas to explore and showcase different stitches and textures.
Cut out bold, simple letterforms to act as your guides.
Fill each letter with a different stitch or color palette: experiment with couching, satin stitch, weaving, or chain stitch fills.
This approach turns typography into a playful exercise in texture and color theory.
It’s a fantastic way to practice new techniques on a small, manageable scale while creating a vibrant, expressive piece of art.


