Perhaps you have a collection of beautiful papers, saved fabric scraps, and threads in every color, but you feel a hesitation when it comes to bringing them together. You know they belong in the same piece, but the bridge between materials feels missing. How do you make the final artwork feel intentional and cohesive, not just like a collection of parts?
The secret is to rethink the role of your thread. Instead of seeing it as just a way to add color or detail to fabric, begin to see it as a powerful tool for connection, texture, and line. Thread can be the line that draws everything together, the border that defines a paper shape, or the sculptural element that brings a flat surface to life.
In these projects, you will learn to use stitching not as an afterthought, but as a fundamental part of your collage process. You will see how a simple backstitch can transform paper into a quilt, how a French knot can add dimension to a photograph, and how a single, flowing thread can become the focal point of an entire composition. It’s time to pick up your needle and create art that is layered, textured, and uniquely yours.
1. Stitching Constellations on a Paper Night Sky
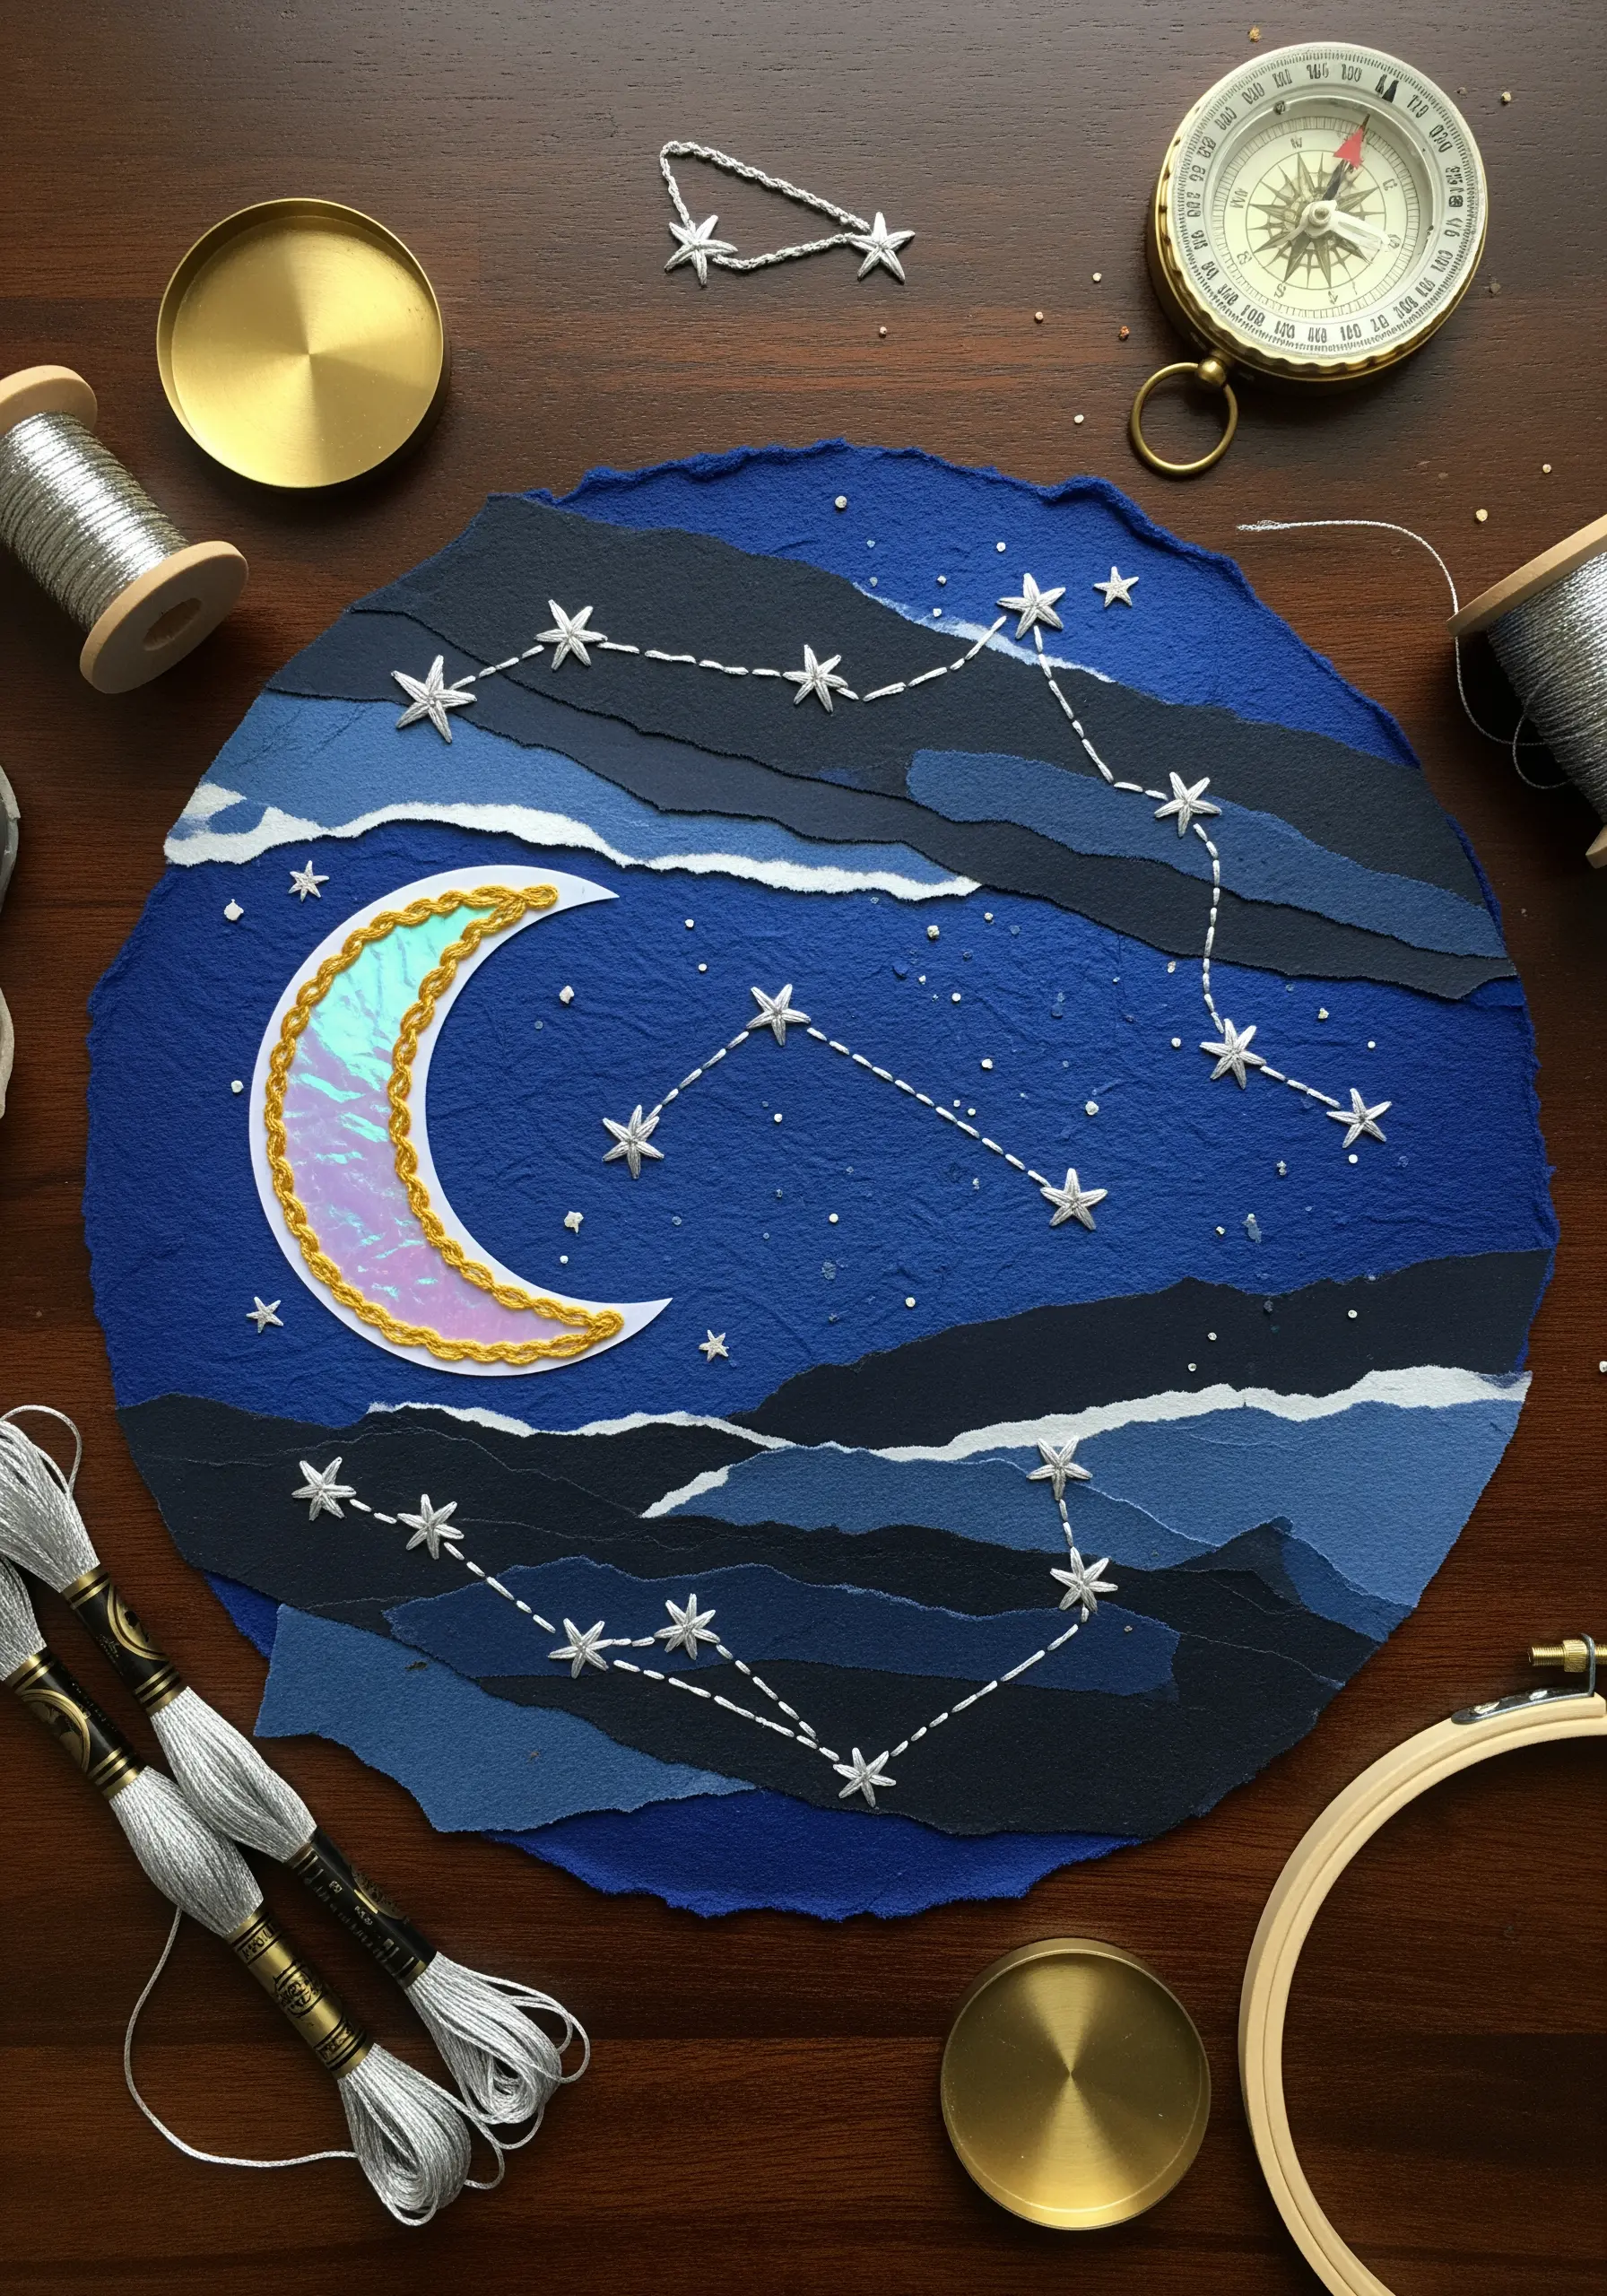
Create depth in your background by layering torn, textured paper in shades of blue and black.
For the celestial bodies, stitch directly onto the paper using a high-sheen metallic thread to catch the light.
Before you stitch, gently pierce the paper with your needle at each entry and exit point to prevent tearing and ensure clean, defined star points.
Elevate the moon by using a small piece of iridescent fabric or specialty paper, outlined with a tight satin stitch for a luminous finish.
This method transforms simple paper into a rich, tactile canvas for exploring soft cosmic vibes.
2. Tracing Nature’s Veins with Variegated Thread
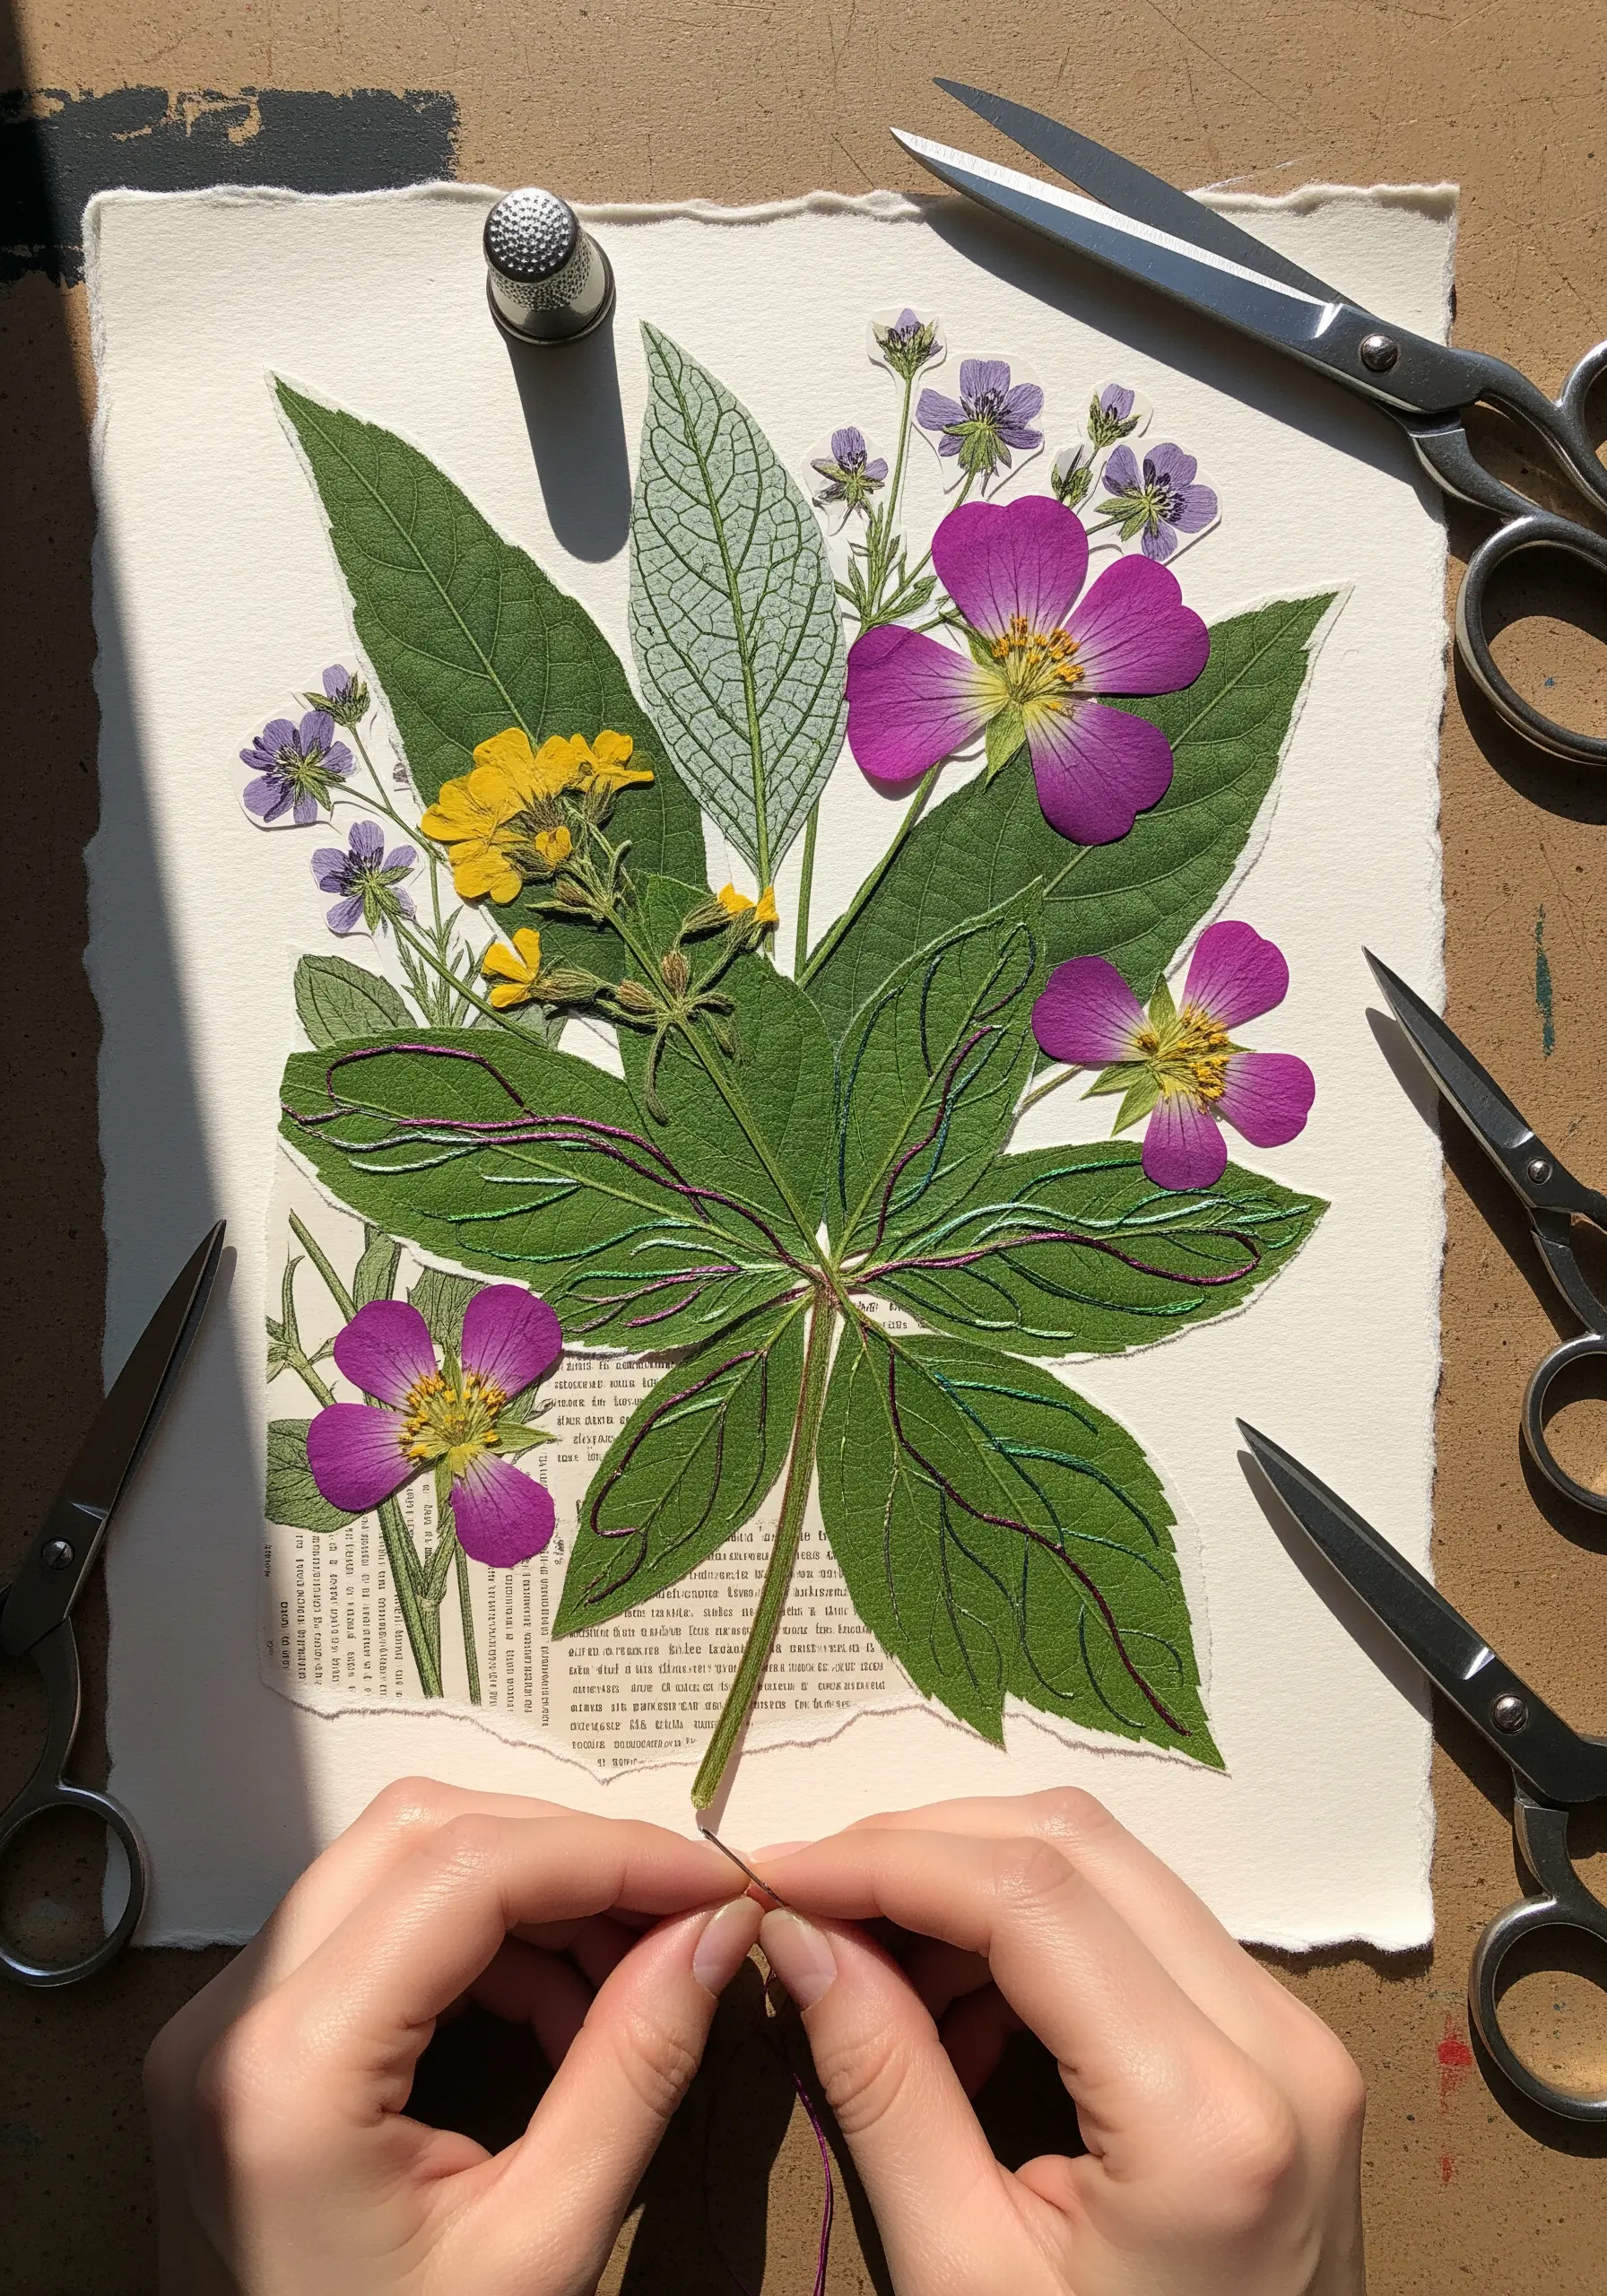
Give pressed botanicals a second life by stitching directly onto them.
To prevent delicate leaves from cracking, reinforce their backs with a thin layer of archival PVA glue and let it dry completely before you begin.
Use a single strand of variegated green or brown floss with a fine, sharp needle to trace the natural veins with a simple backstitch.
This technique adds subtle texture and dimension, turning fragile ephemera into durable art and is one of the most beautiful pressed flower art projects you can create.
3. Geometric Tension with Thread and Cardstock
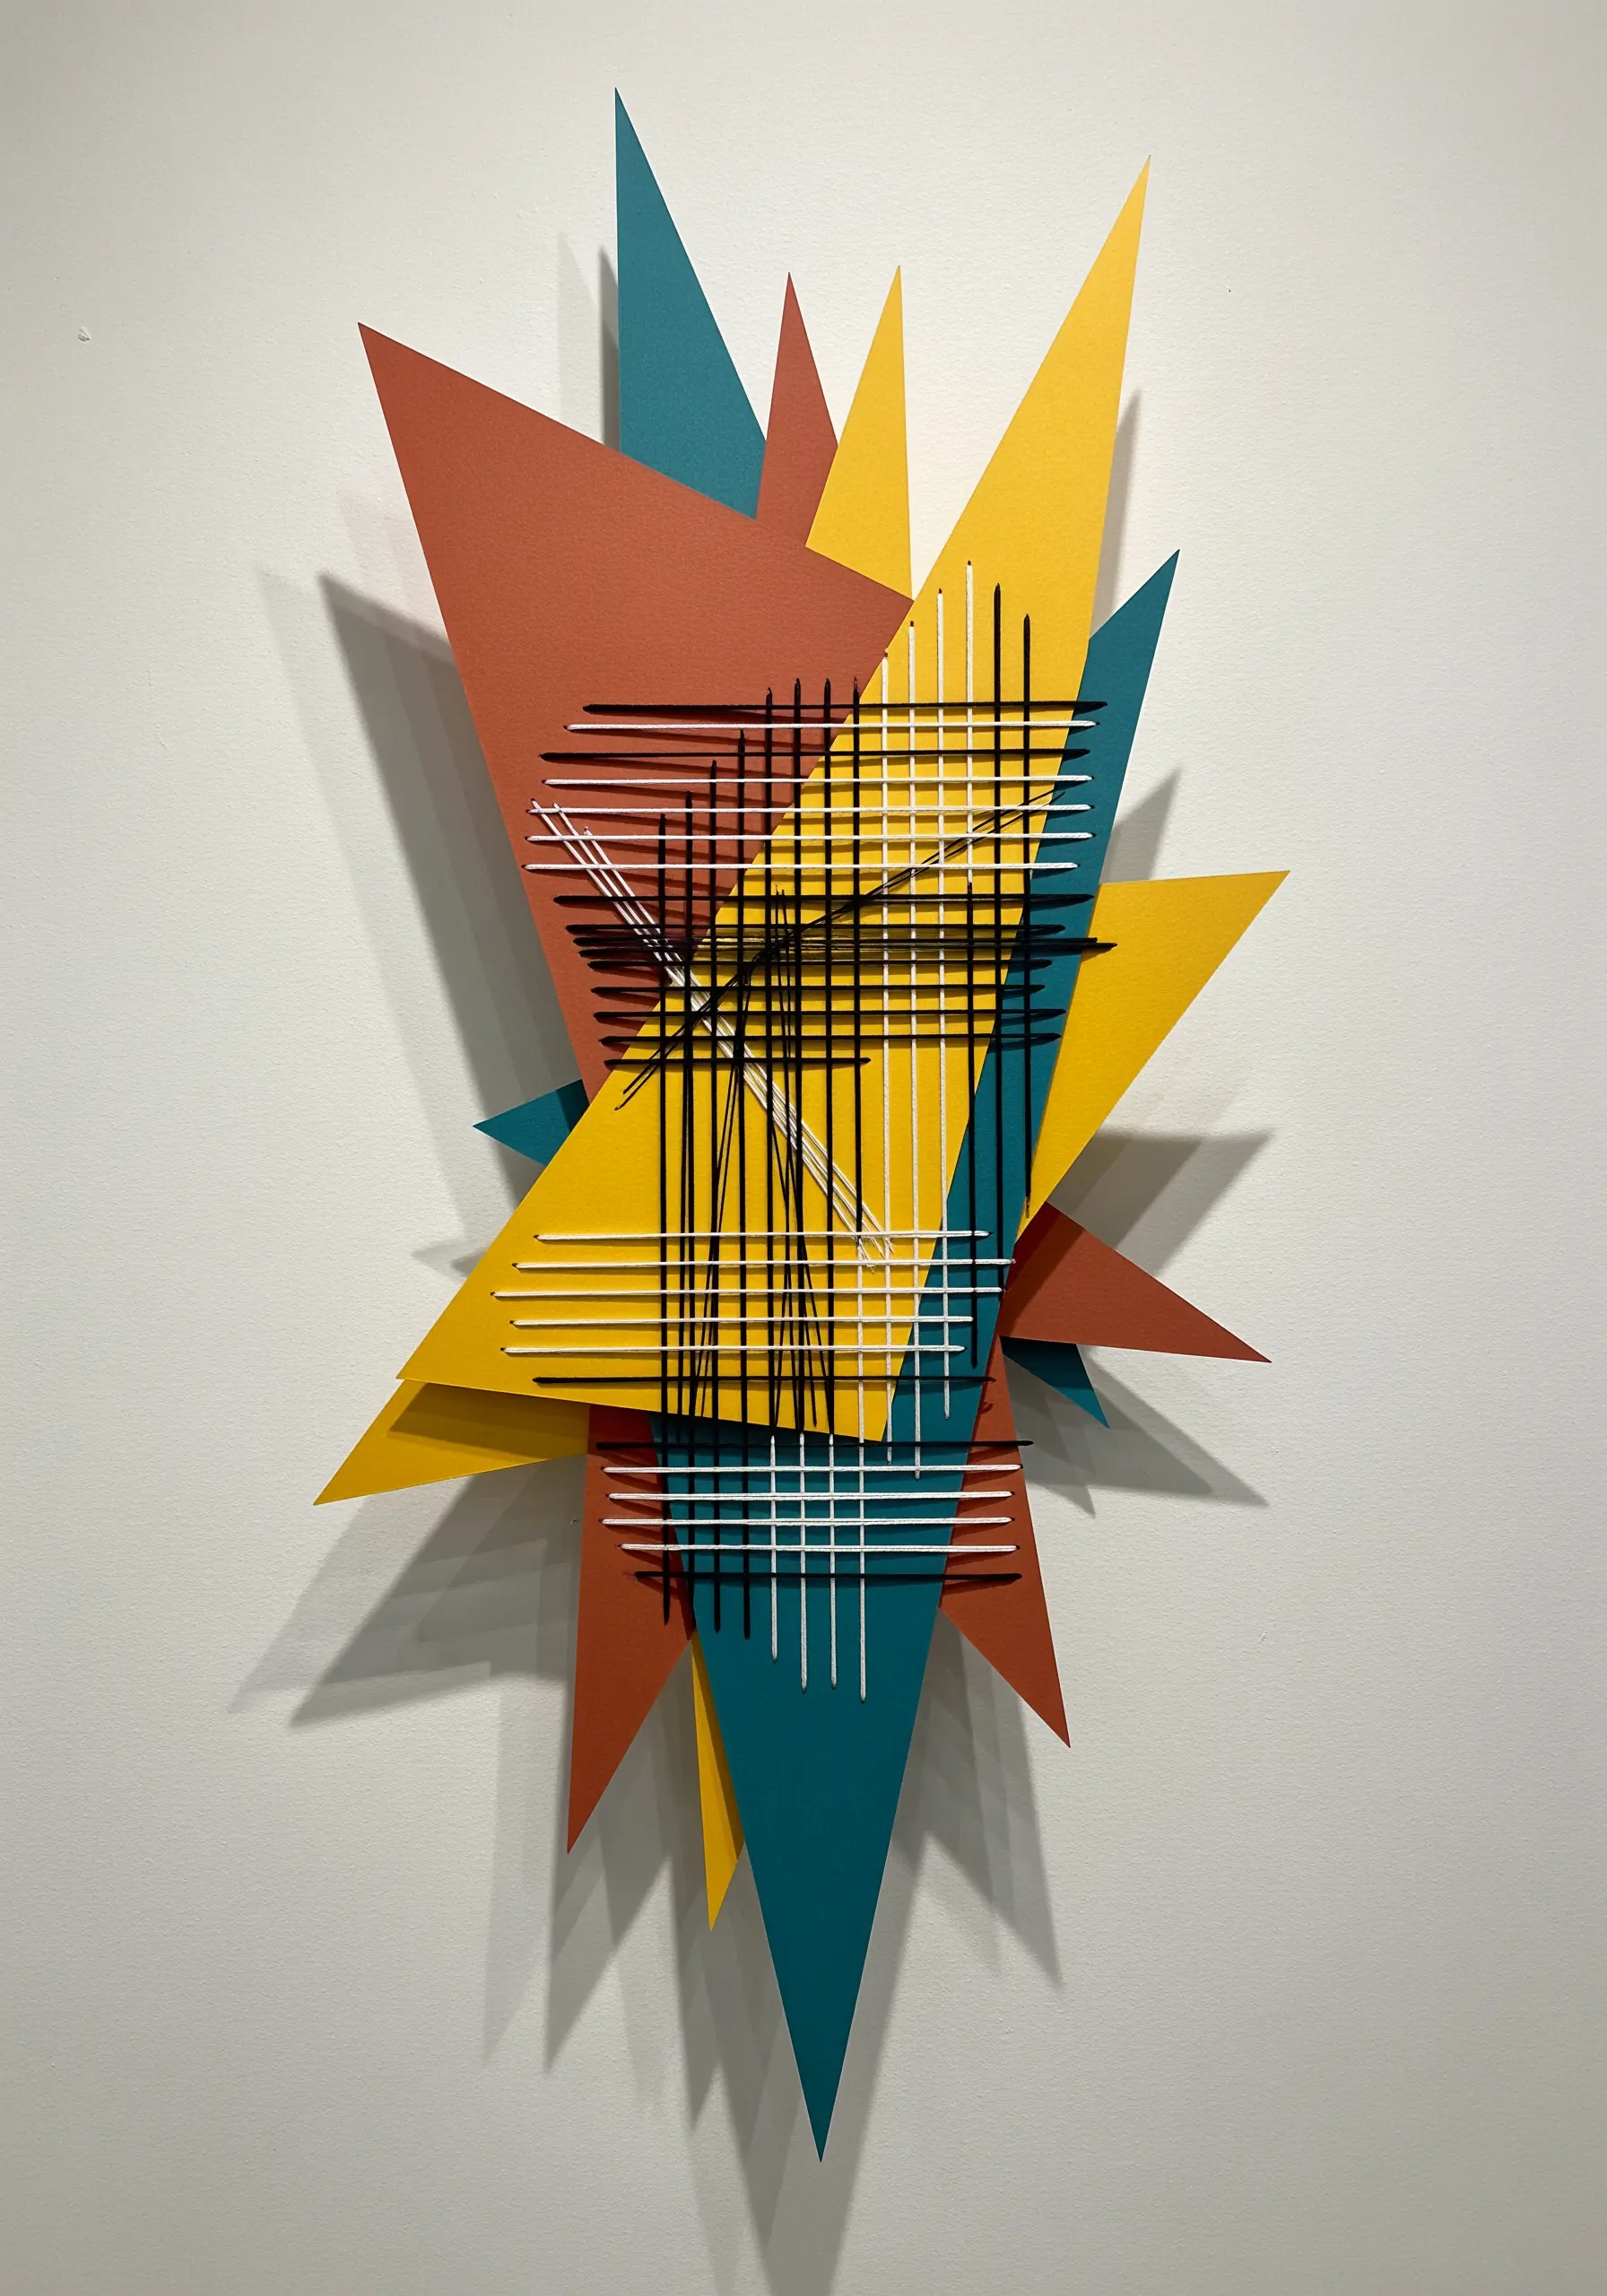
Explore the interplay of line and form by stretching threads across a sharp, geometric paper collage.
Choose heavy cardstock in a contrasting color palette to ensure the paper doesn’t warp under the thread’s tension.
Lightly mark your stitch points on the back of the collage before threading your needle, allowing for precise, grid-like patterns.
This project is less about traditional embroidery stitches and more about using thread as a structural and graphic element, creating dynamic yarn wall art projects on paper.
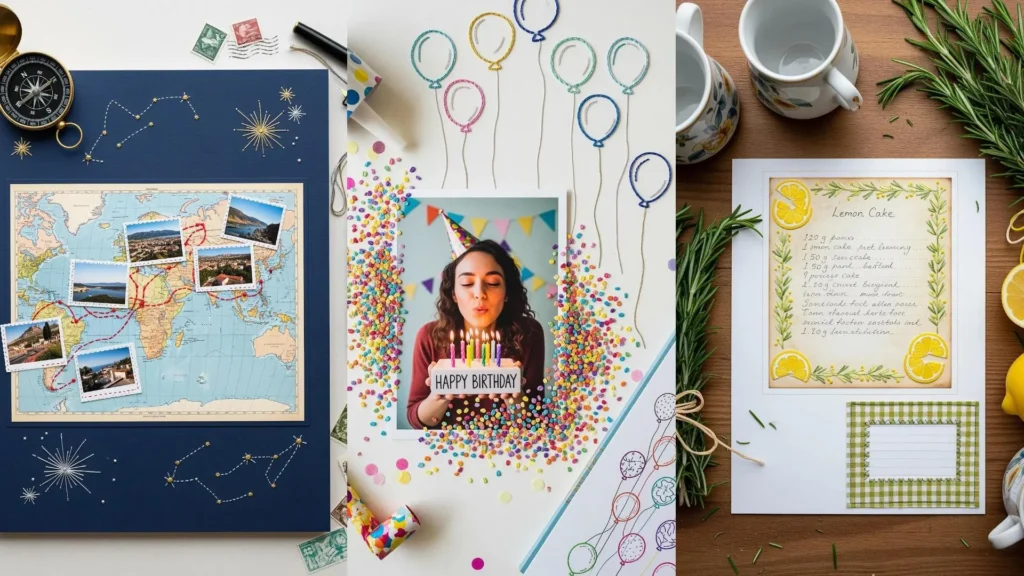
4. Charting Your Course with a Stitched Compass
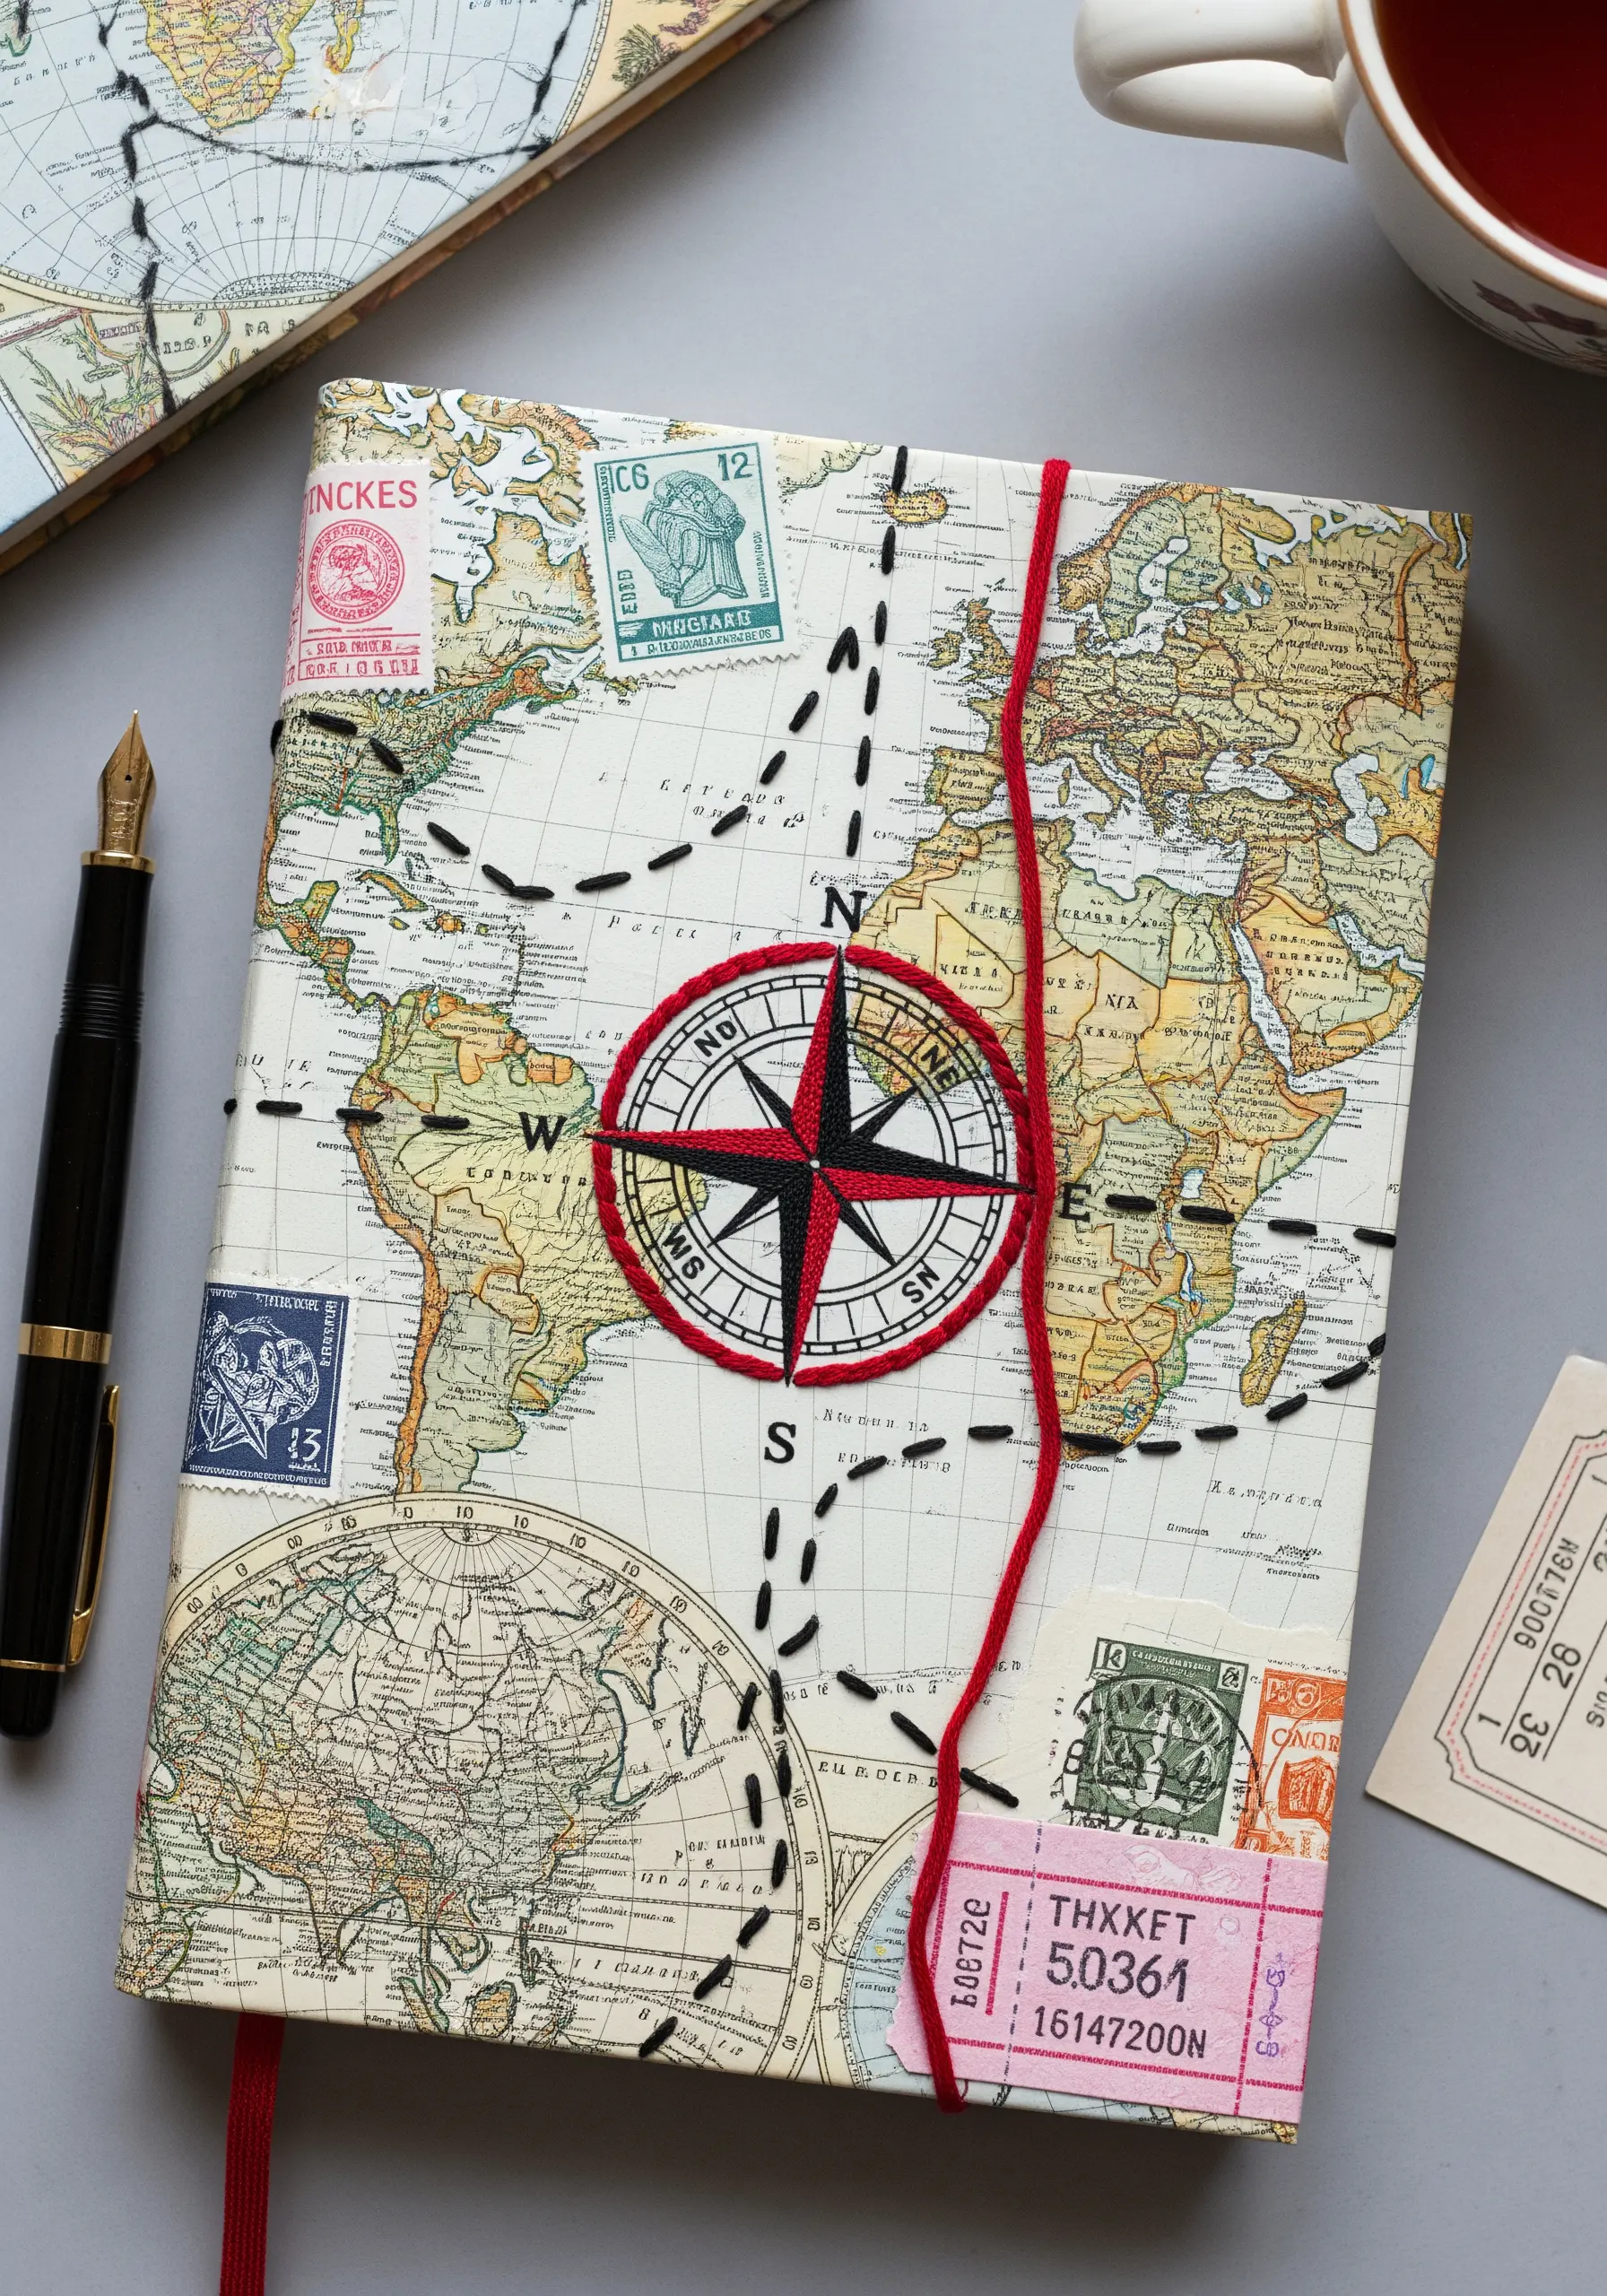
Transform a simple journal cover by adding embroidered details that interact with the underlying paper collage.
Use a bold satin stitch for the compass points to create a raised, tactile centerpiece that stands out against the flat map.
A simple, large running stitch in a contrasting color creates a visual path, guiding the eye across the composition.
Before starting, place a protective piece of cardstock inside the cover to prevent your needle from piercing the journal’s pages.
This is a perfect way to create travel-inspired string art maps that feel personal.
5. Sculpting Portraits with Yarn, Paper, and Dense Stitching
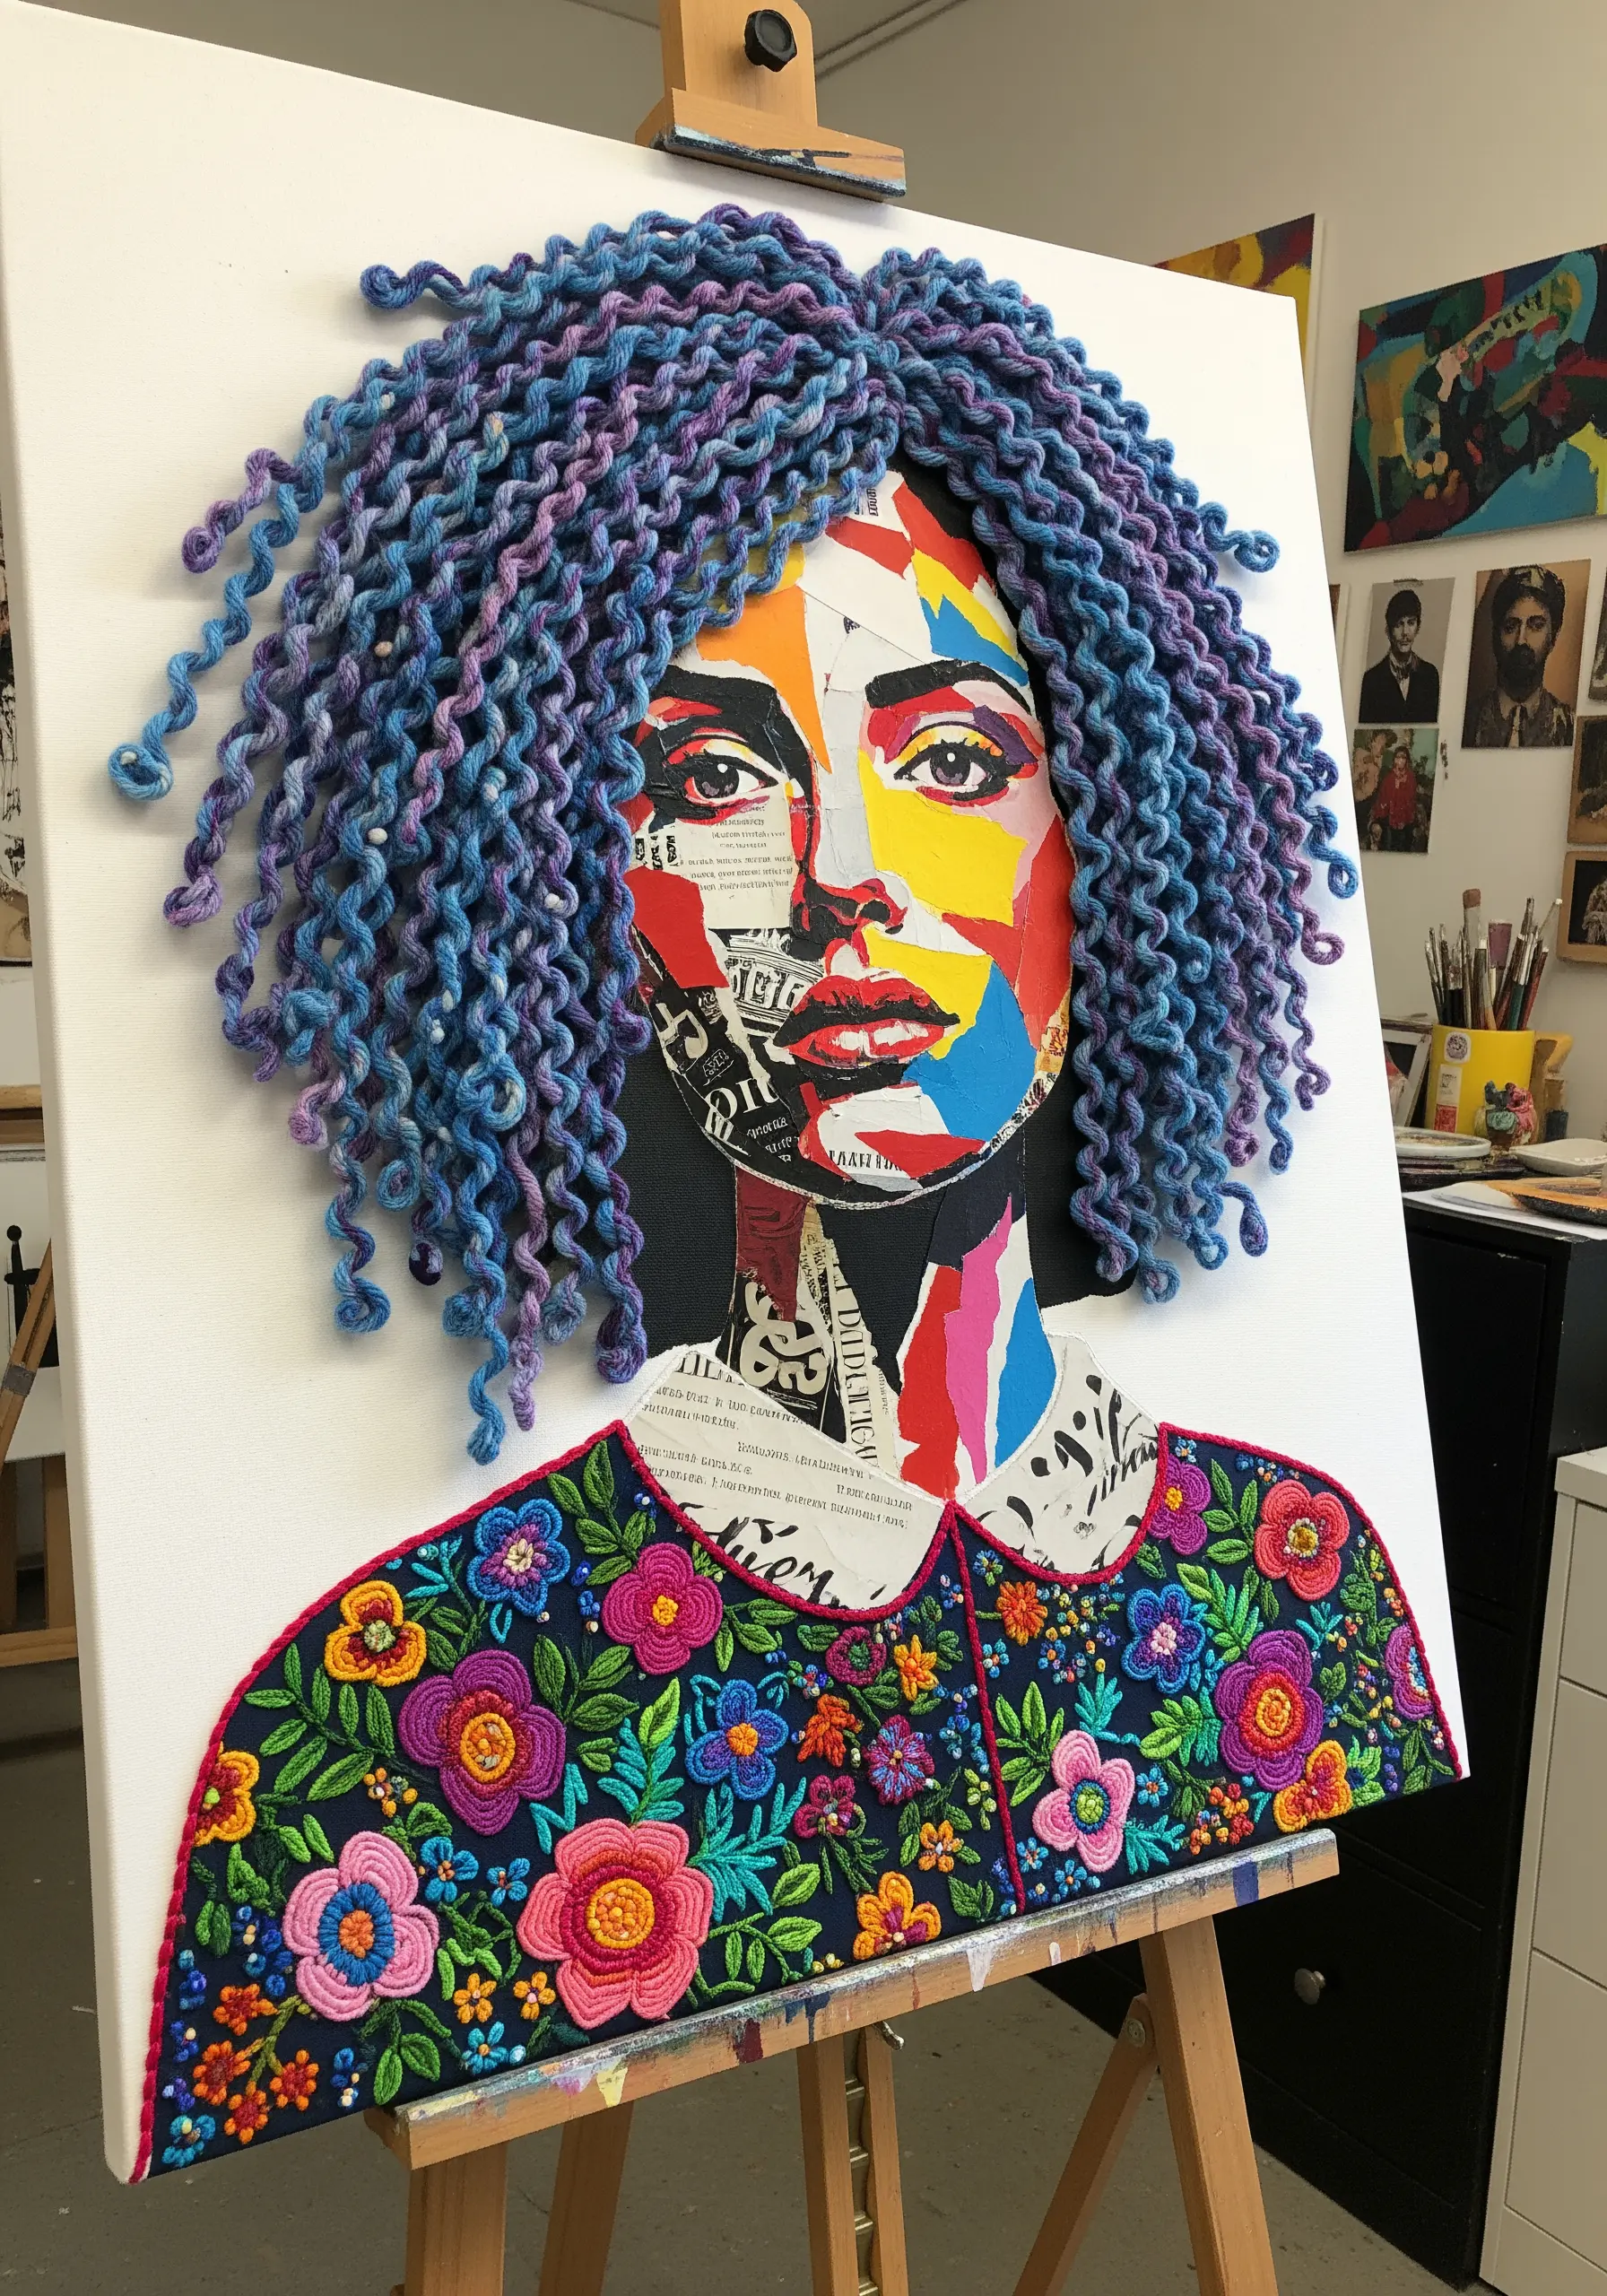
Build a powerfully expressive portrait by combining disparate textures: flat paper, dense embroidery, and sculptural yarn.
Start with the paper collage face on a sturdy canvas base.
Next, work the densely embroidered collar using stitches like French knots and satin stitch for a rich, fabric-like finish.
For the hair, twist thick yarn and attach it with couching stitches, allowing it to sit high above the canvas for dramatic dimension.
This ambitious layering turns a collage into one of the fiber art installations you can create at home.
6. Crafting Seascapes with Layered Paper and Lace
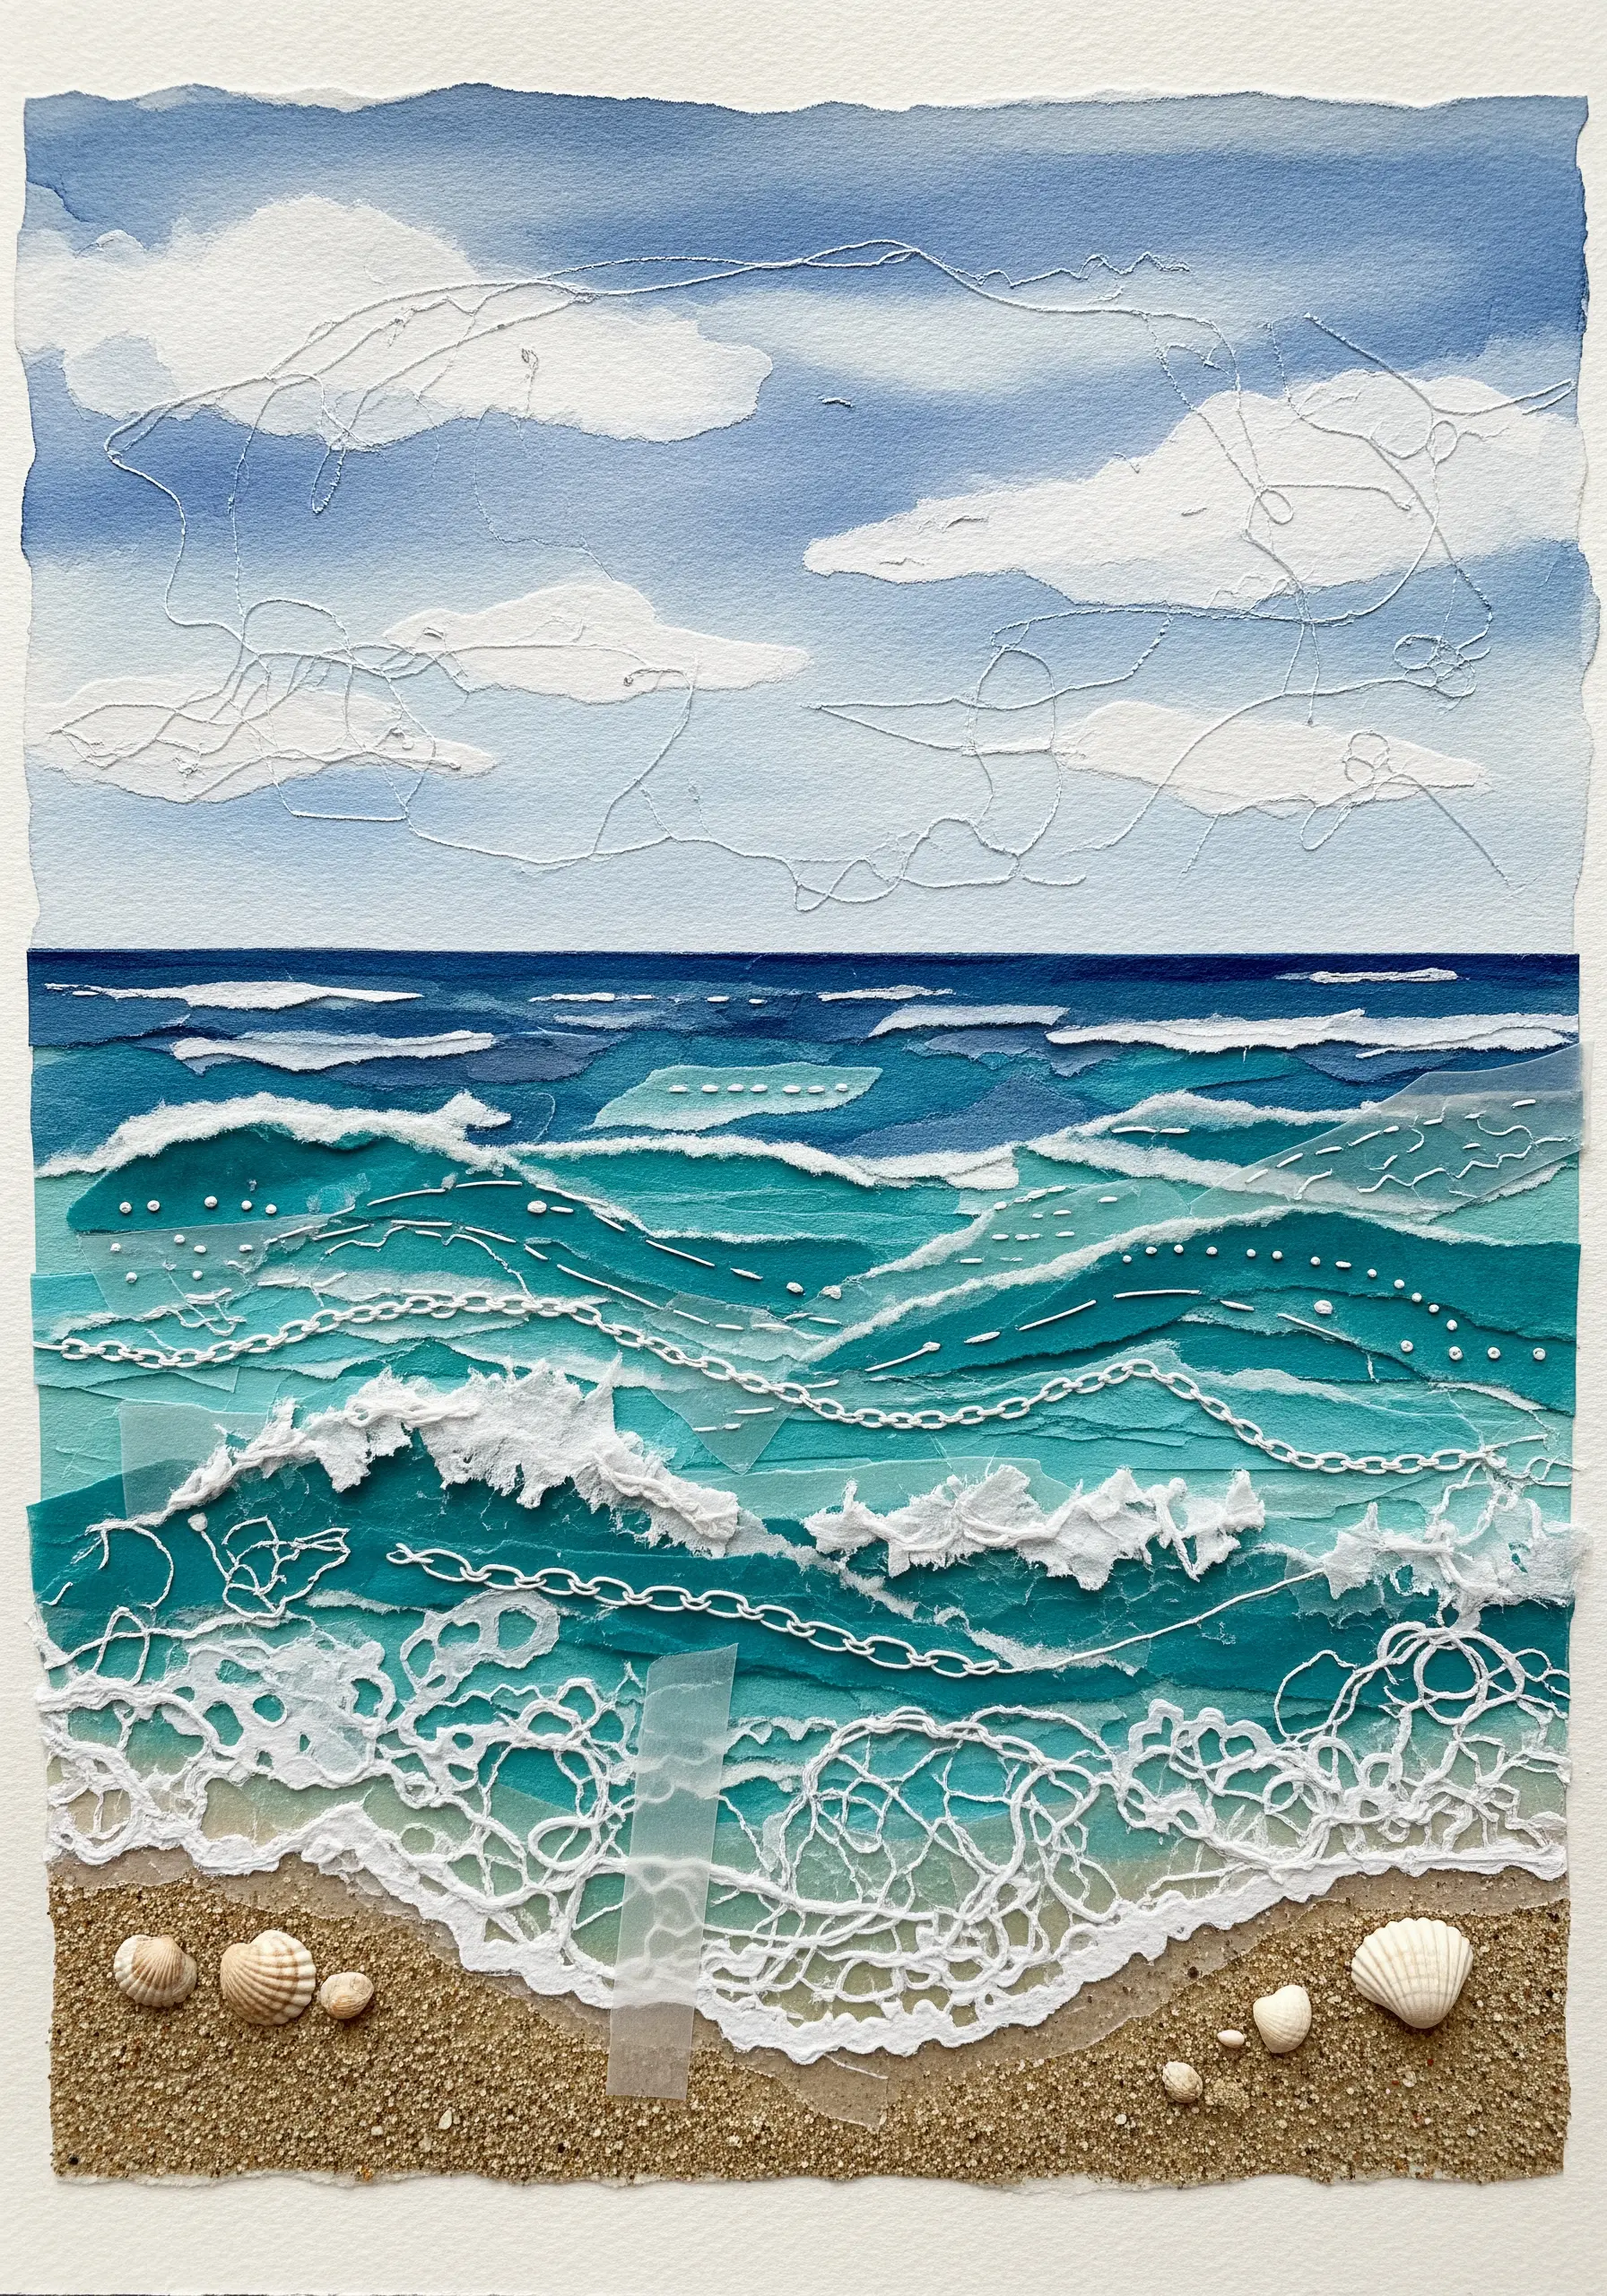
Capture the movement of water by layering torn paper, fine lace, and sheer fabrics.
Use different paper textures—from smooth vellum to rough, handmade paper—to represent the sky, sea, and sand.
Create sea foam by layering snippets of lace and organza along the wave crests.
If you don’t use a sewing machine for free-motion stitching, you can achieve a similar effect with scattered seed stitches or a meandering backstitch in fine white thread to suggest sea spray.
This method is perfect for creating coastal-theme tiny embroidery art with incredible depth.
7. Mapping a City with Ribbon, Beads, and Thread
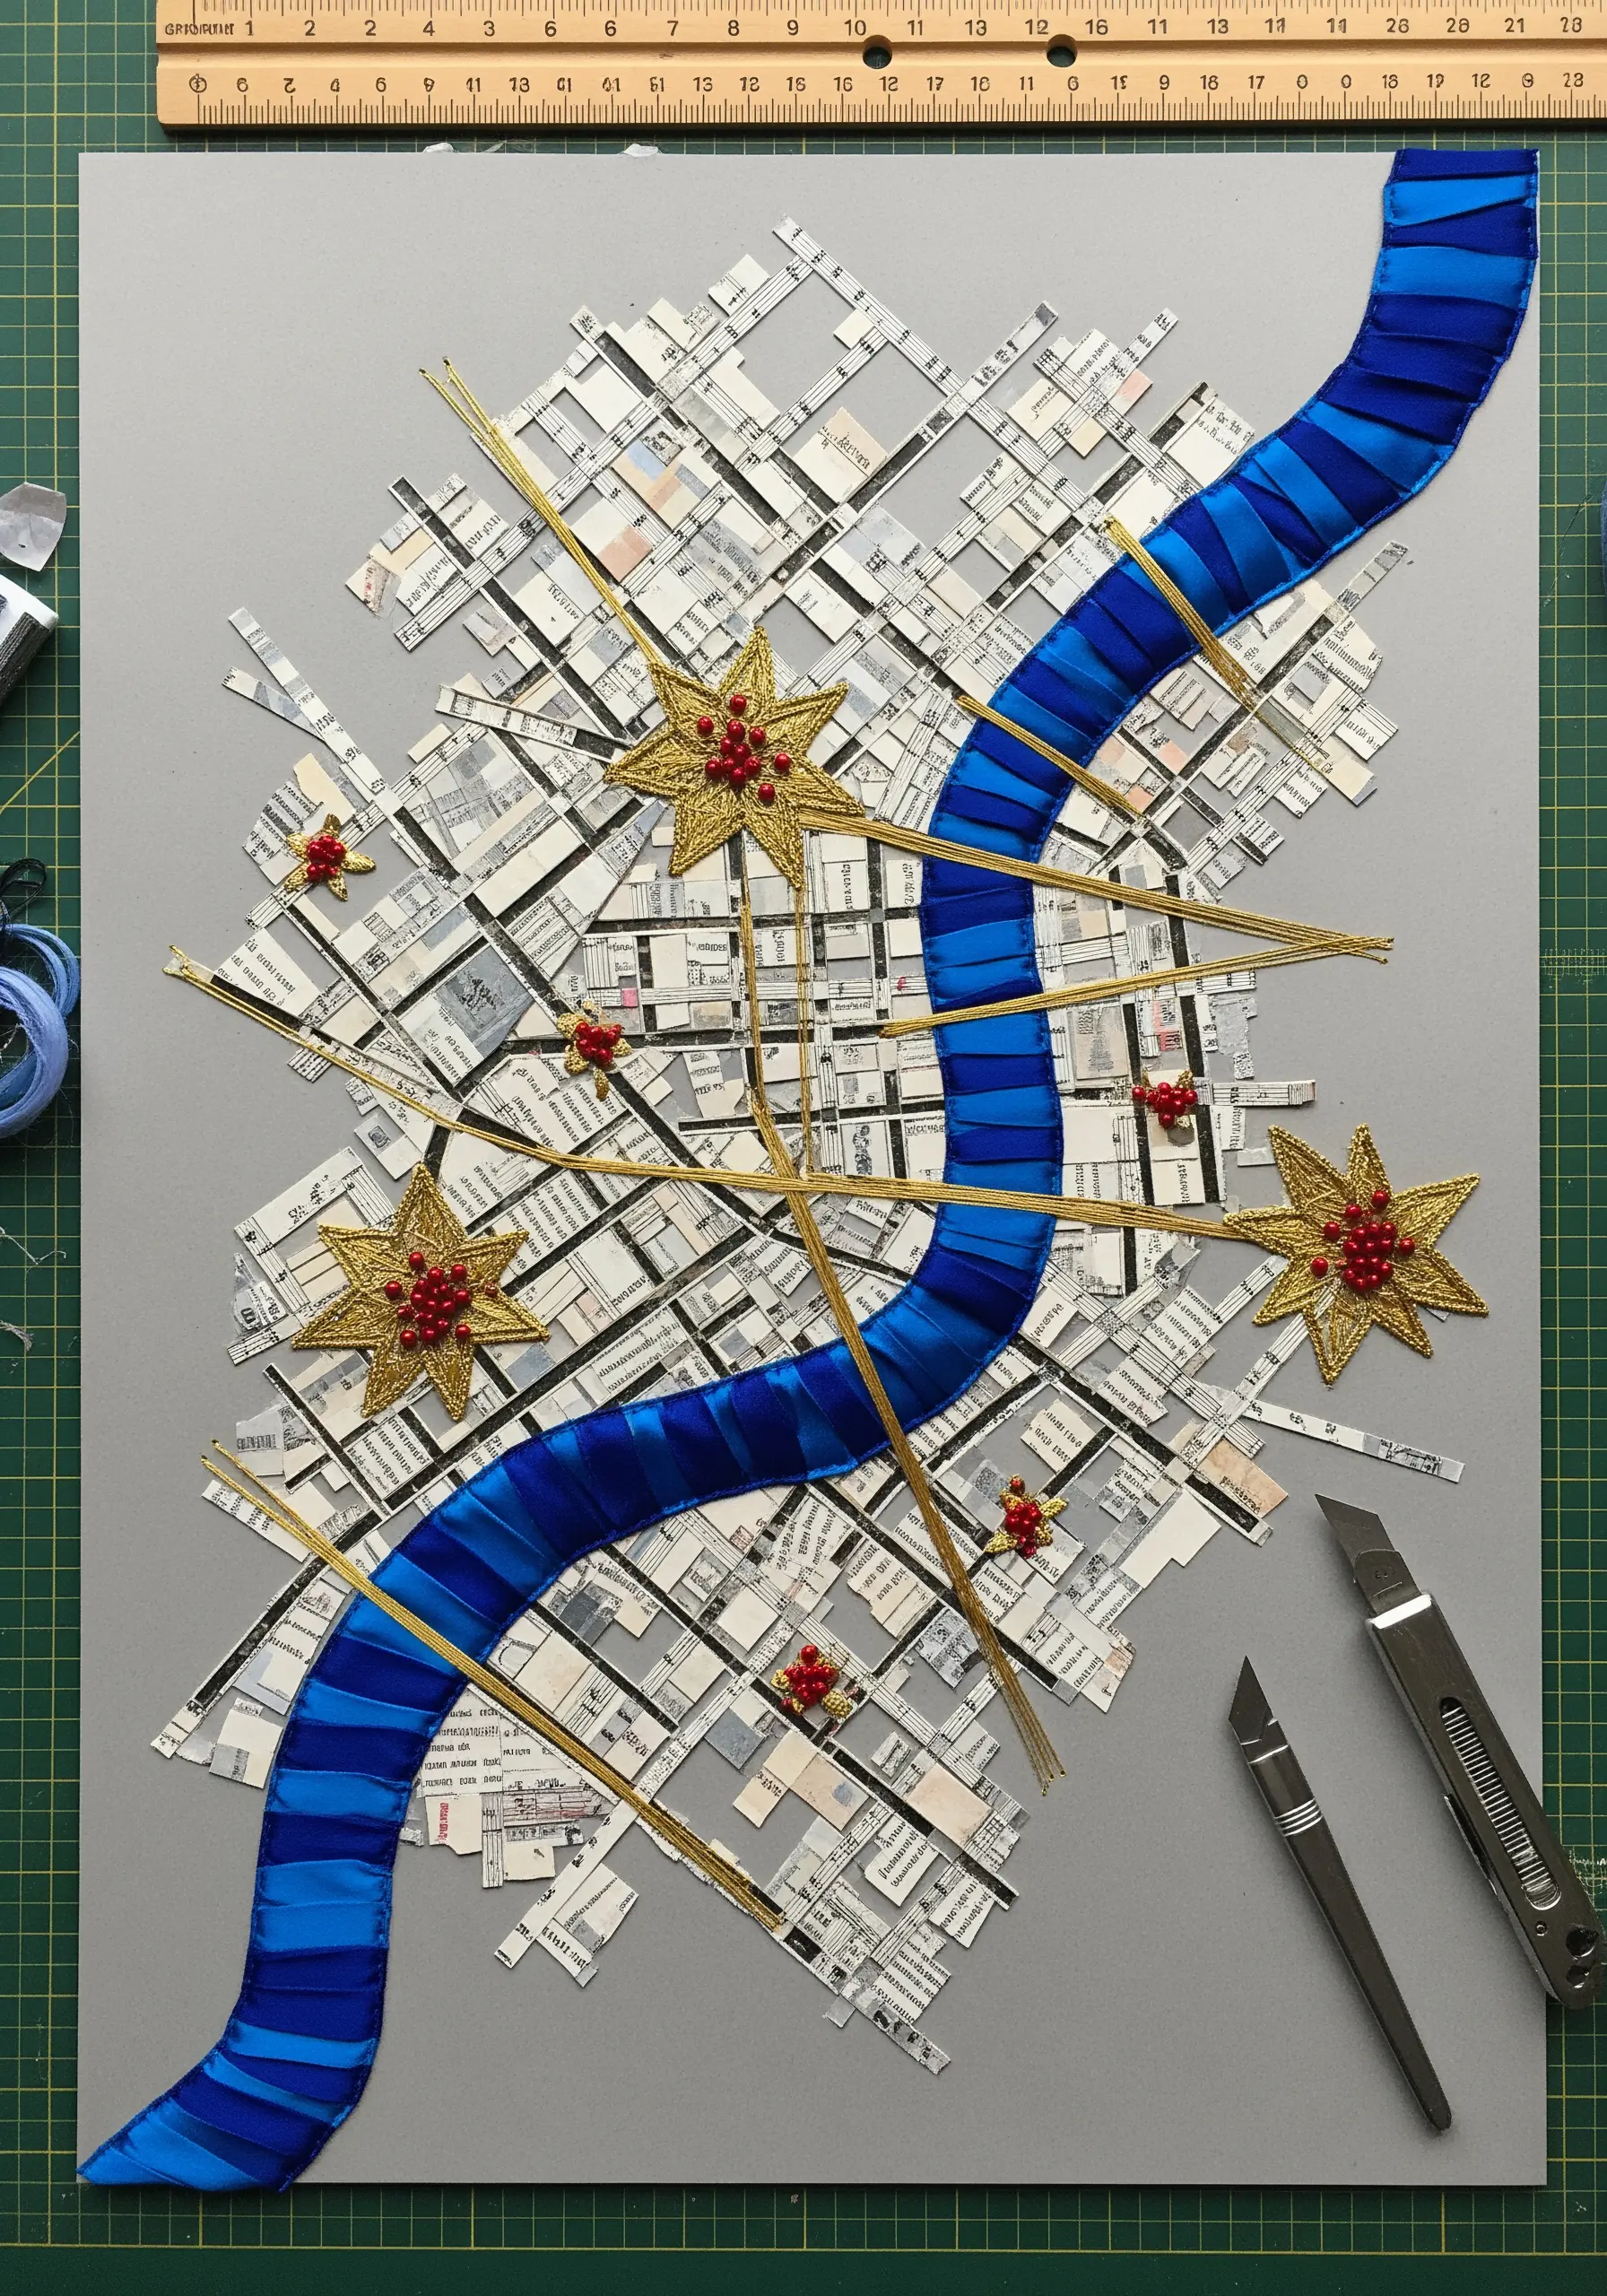
Design a conceptual map using unconventional materials to represent landmarks and pathways.
Use a wide satin ribbon to create a bold, flowing river, securing it with small, hidden whip stitches in a matching thread color.
For key locations, create raised starbursts with straight stitches and fill the centers with tiny seed beads for a touch of sparkle and importance.
This approach transforms a map from a literal guide into a piece of personalized art, much like embroidered city skyline wall decor.
8. Illuminating Seasons with Gilded Leaf Contours
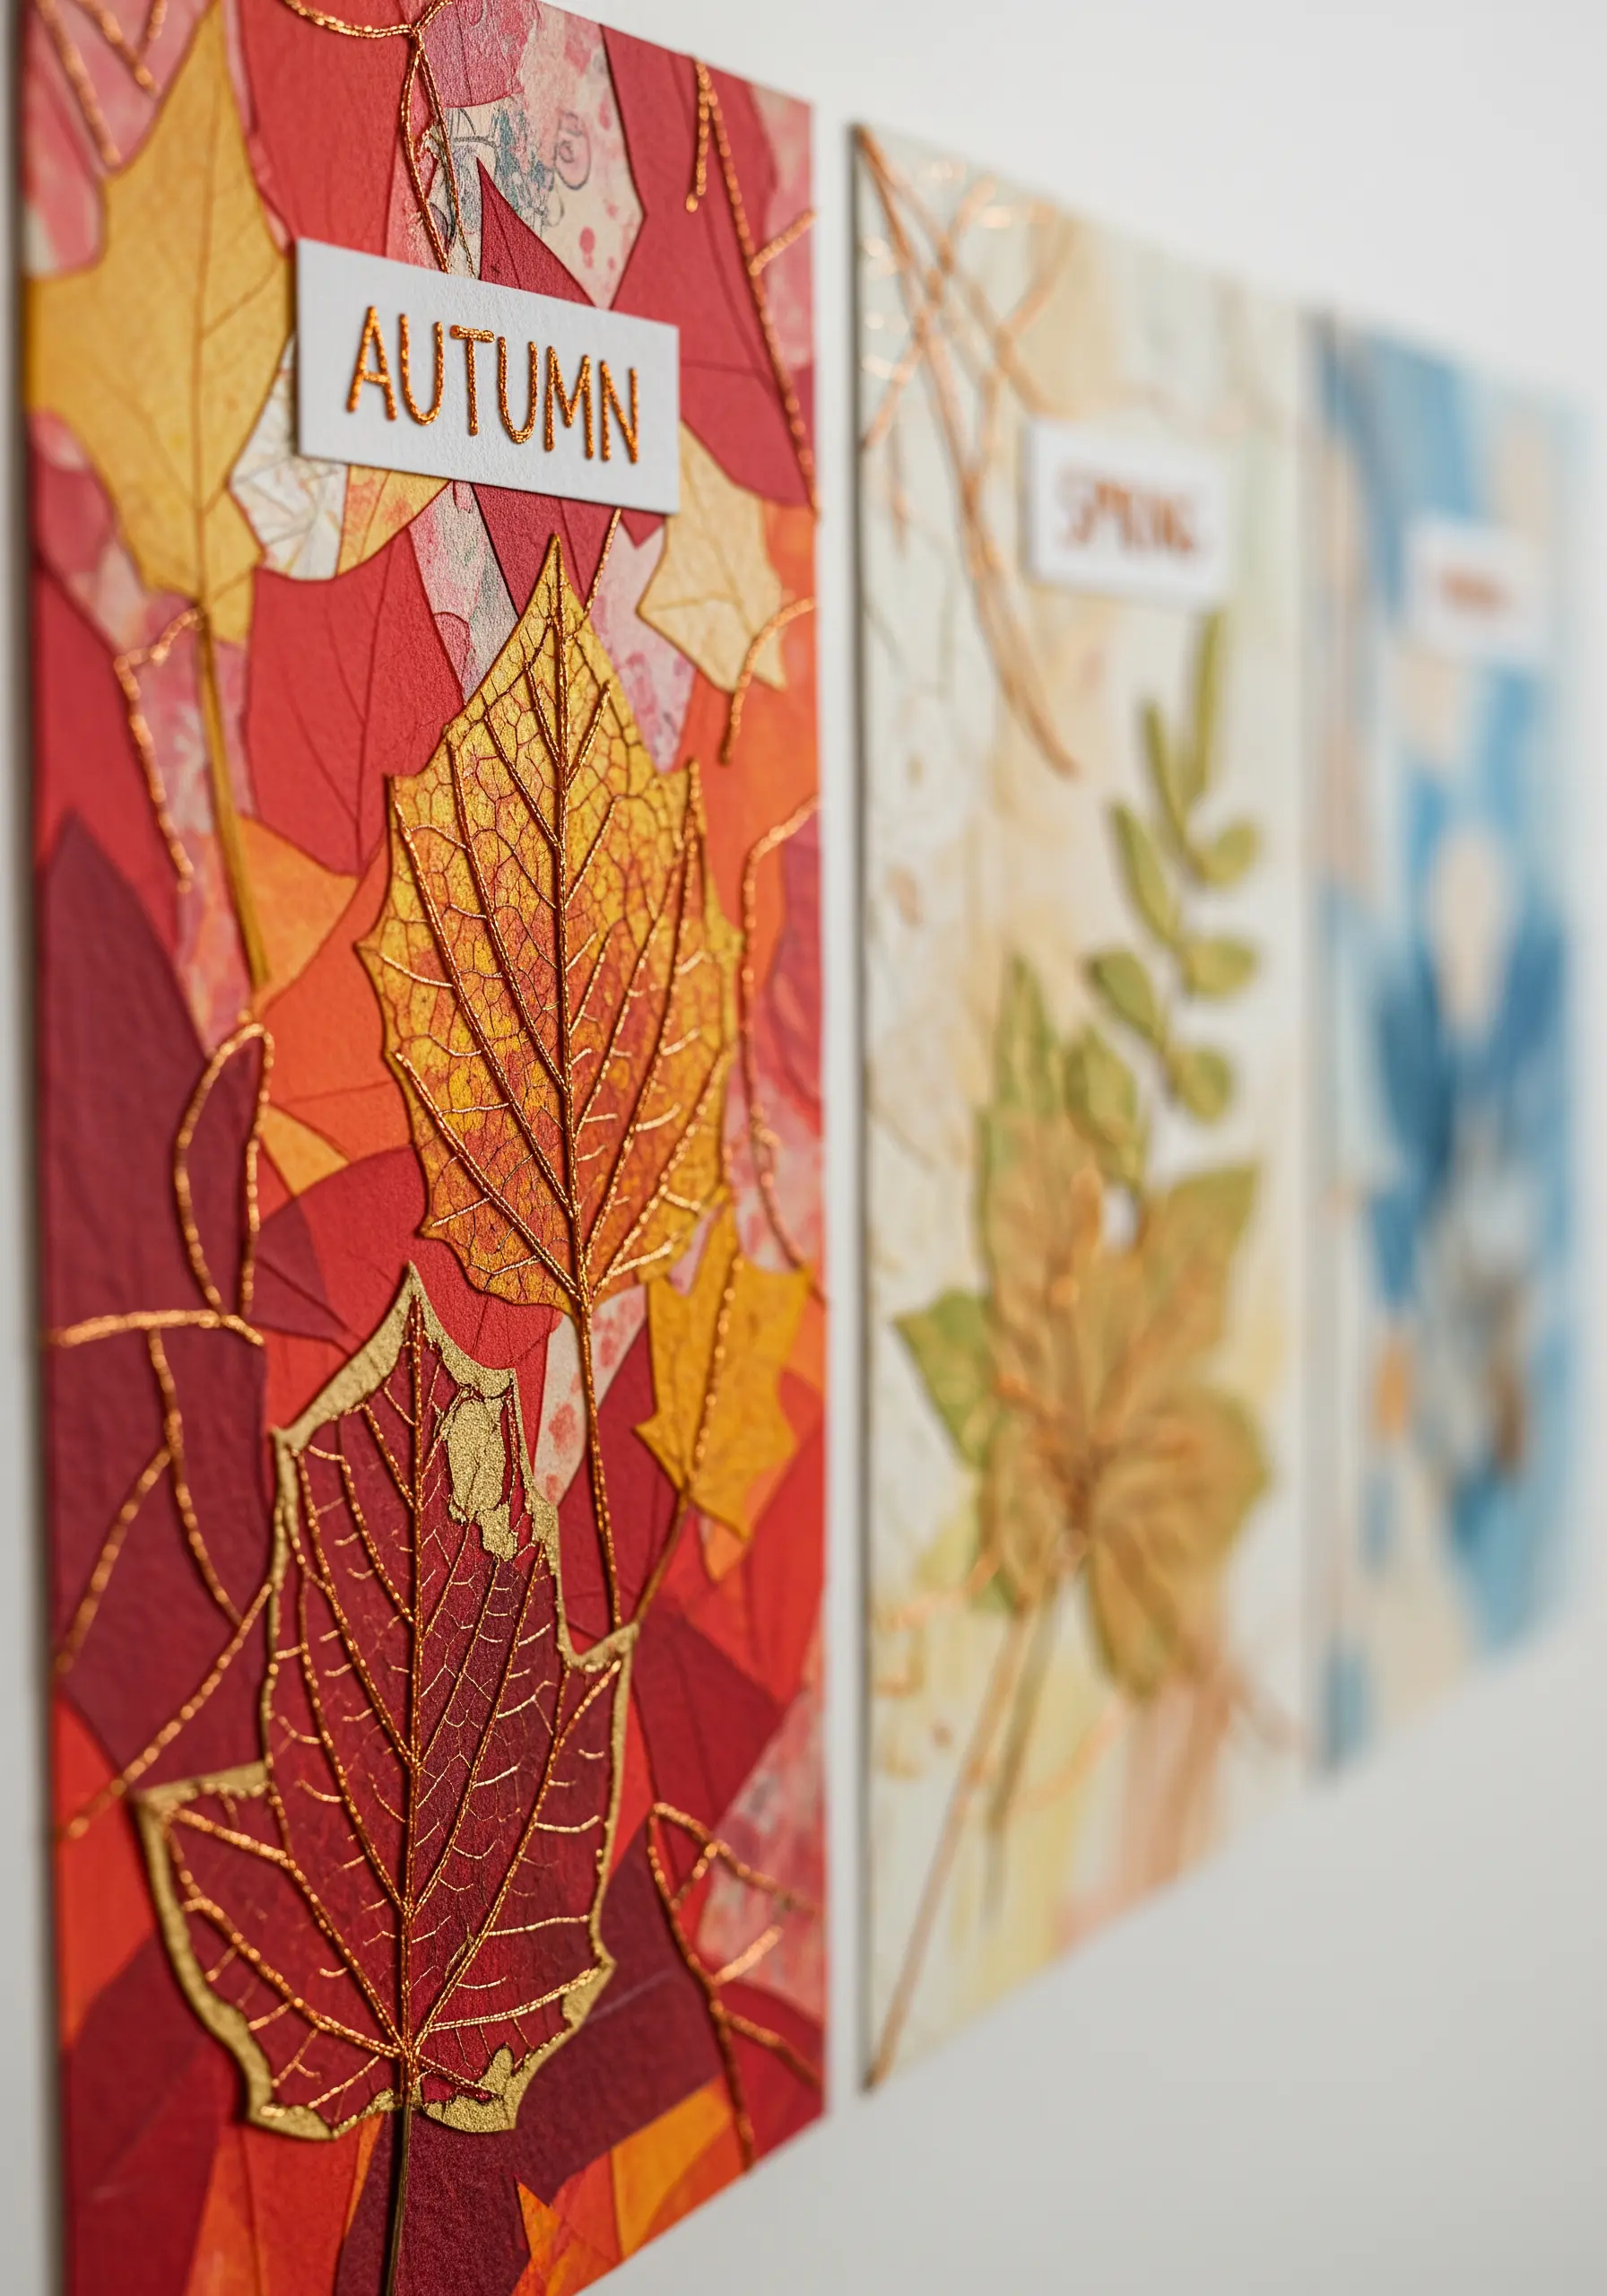
Elevate pressed leaves or delicate paper cutouts by outlining them with a fine metallic thread.
Secure the leaves to a textured paper background with a few dots of archival glue.
Using a single strand of gold thread, carefully trace the leaf’s perimeter and main veins with a simple backstitch or stem stitch.
This technique adds a touch of luxury and definition, turning natural forms into refined botanical illustrations.
It’s a perfect project for those looking to try rare leaf patterns with a mixed-media twist.
9. Constructing a Patchwork Balloon with Paper and Stitches

Mimic the look of fabric quilting by using patterned paper scraps and definitive stitch work.
Cut your paper pieces using a consistent template to ensure they fit together perfectly.
Once your paper pieces are arranged and glued down, use a dark, contrasting floss to add a backstitch along the ‘seams,’ which cleanly defines the patchwork effect.
This technique is one of the most charming beginner-friendly fabric collage embroidery methods, translated for paper.
10. A Single Thread as a Bold Graphic Line
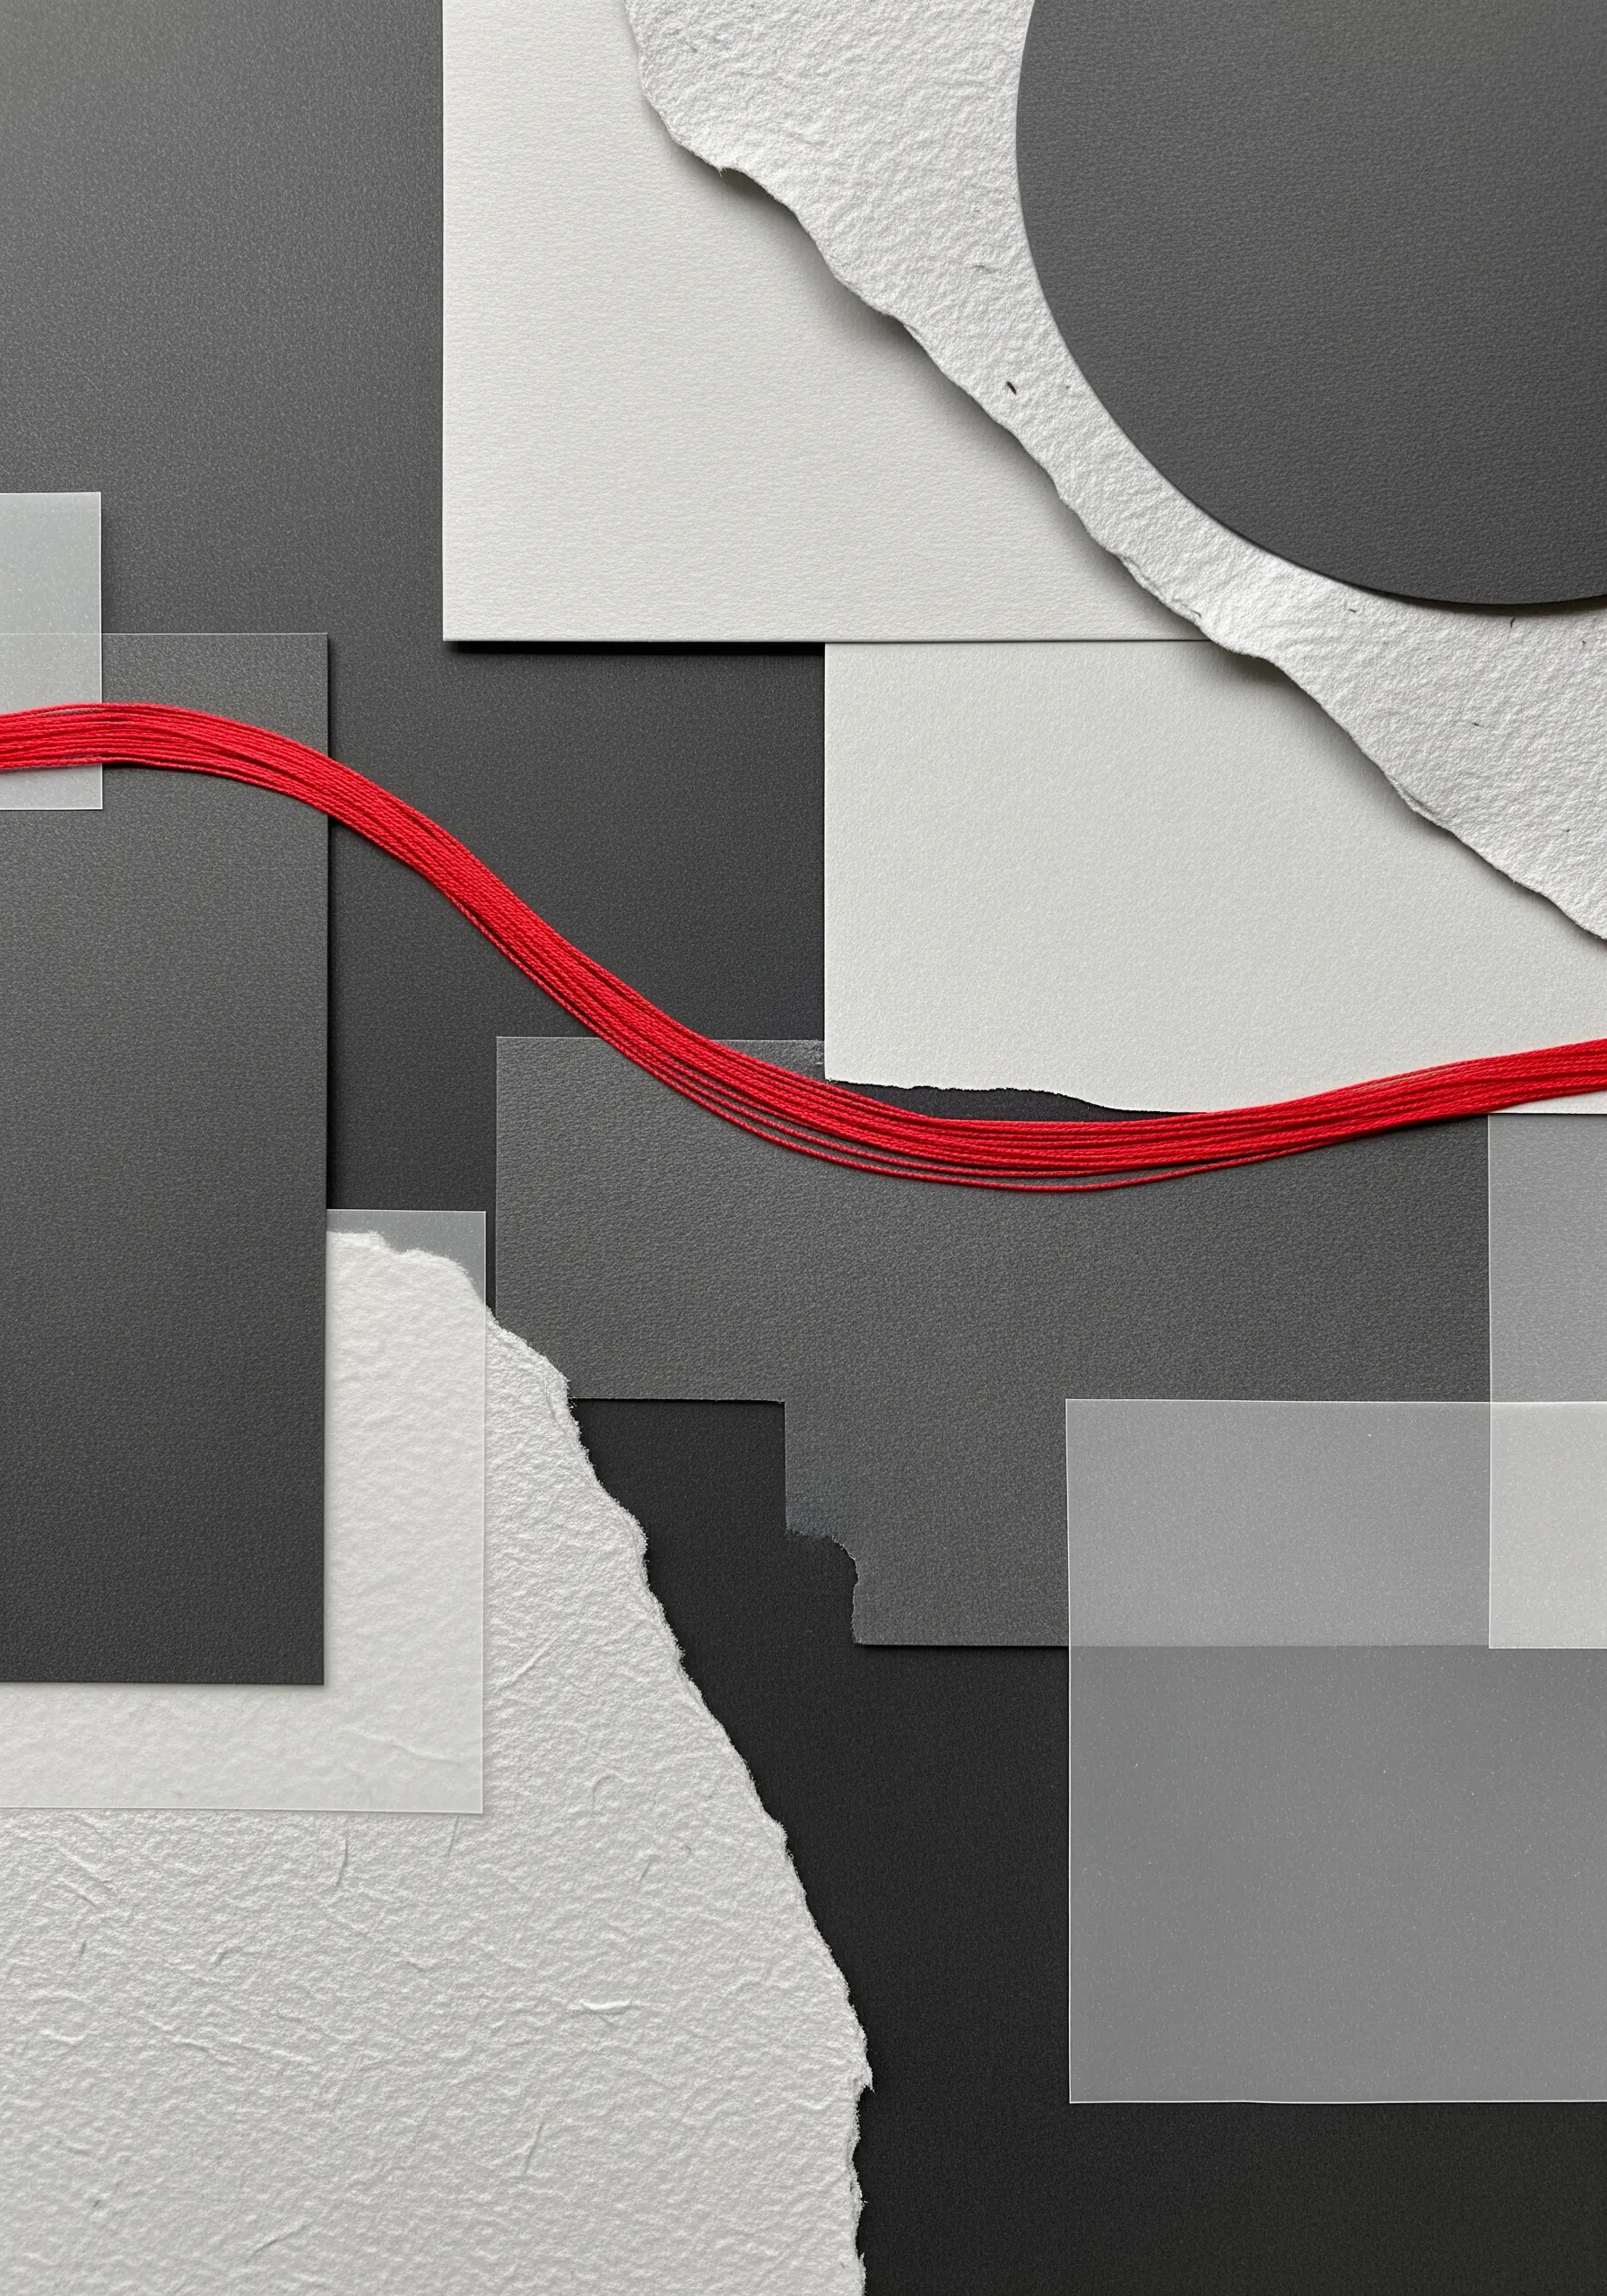
Explore minimalism by using a single, vibrant thread as the focal point of a monochrome paper collage.
Layer different textures of paper—matte, glossy, and handmade—to create subtle interest in the background.
Secure the thread on the back of the artwork and let it travel across the composition with intention, creating a powerful visual path.
Using a thick, multi-strand floss or perle cotton will give the line the weight and presence it needs to stand out.
This idea fits perfectly within minimalist embroidery wall art ideas.
11. Weaving Celestial Duality with Sun and Moon Stitches
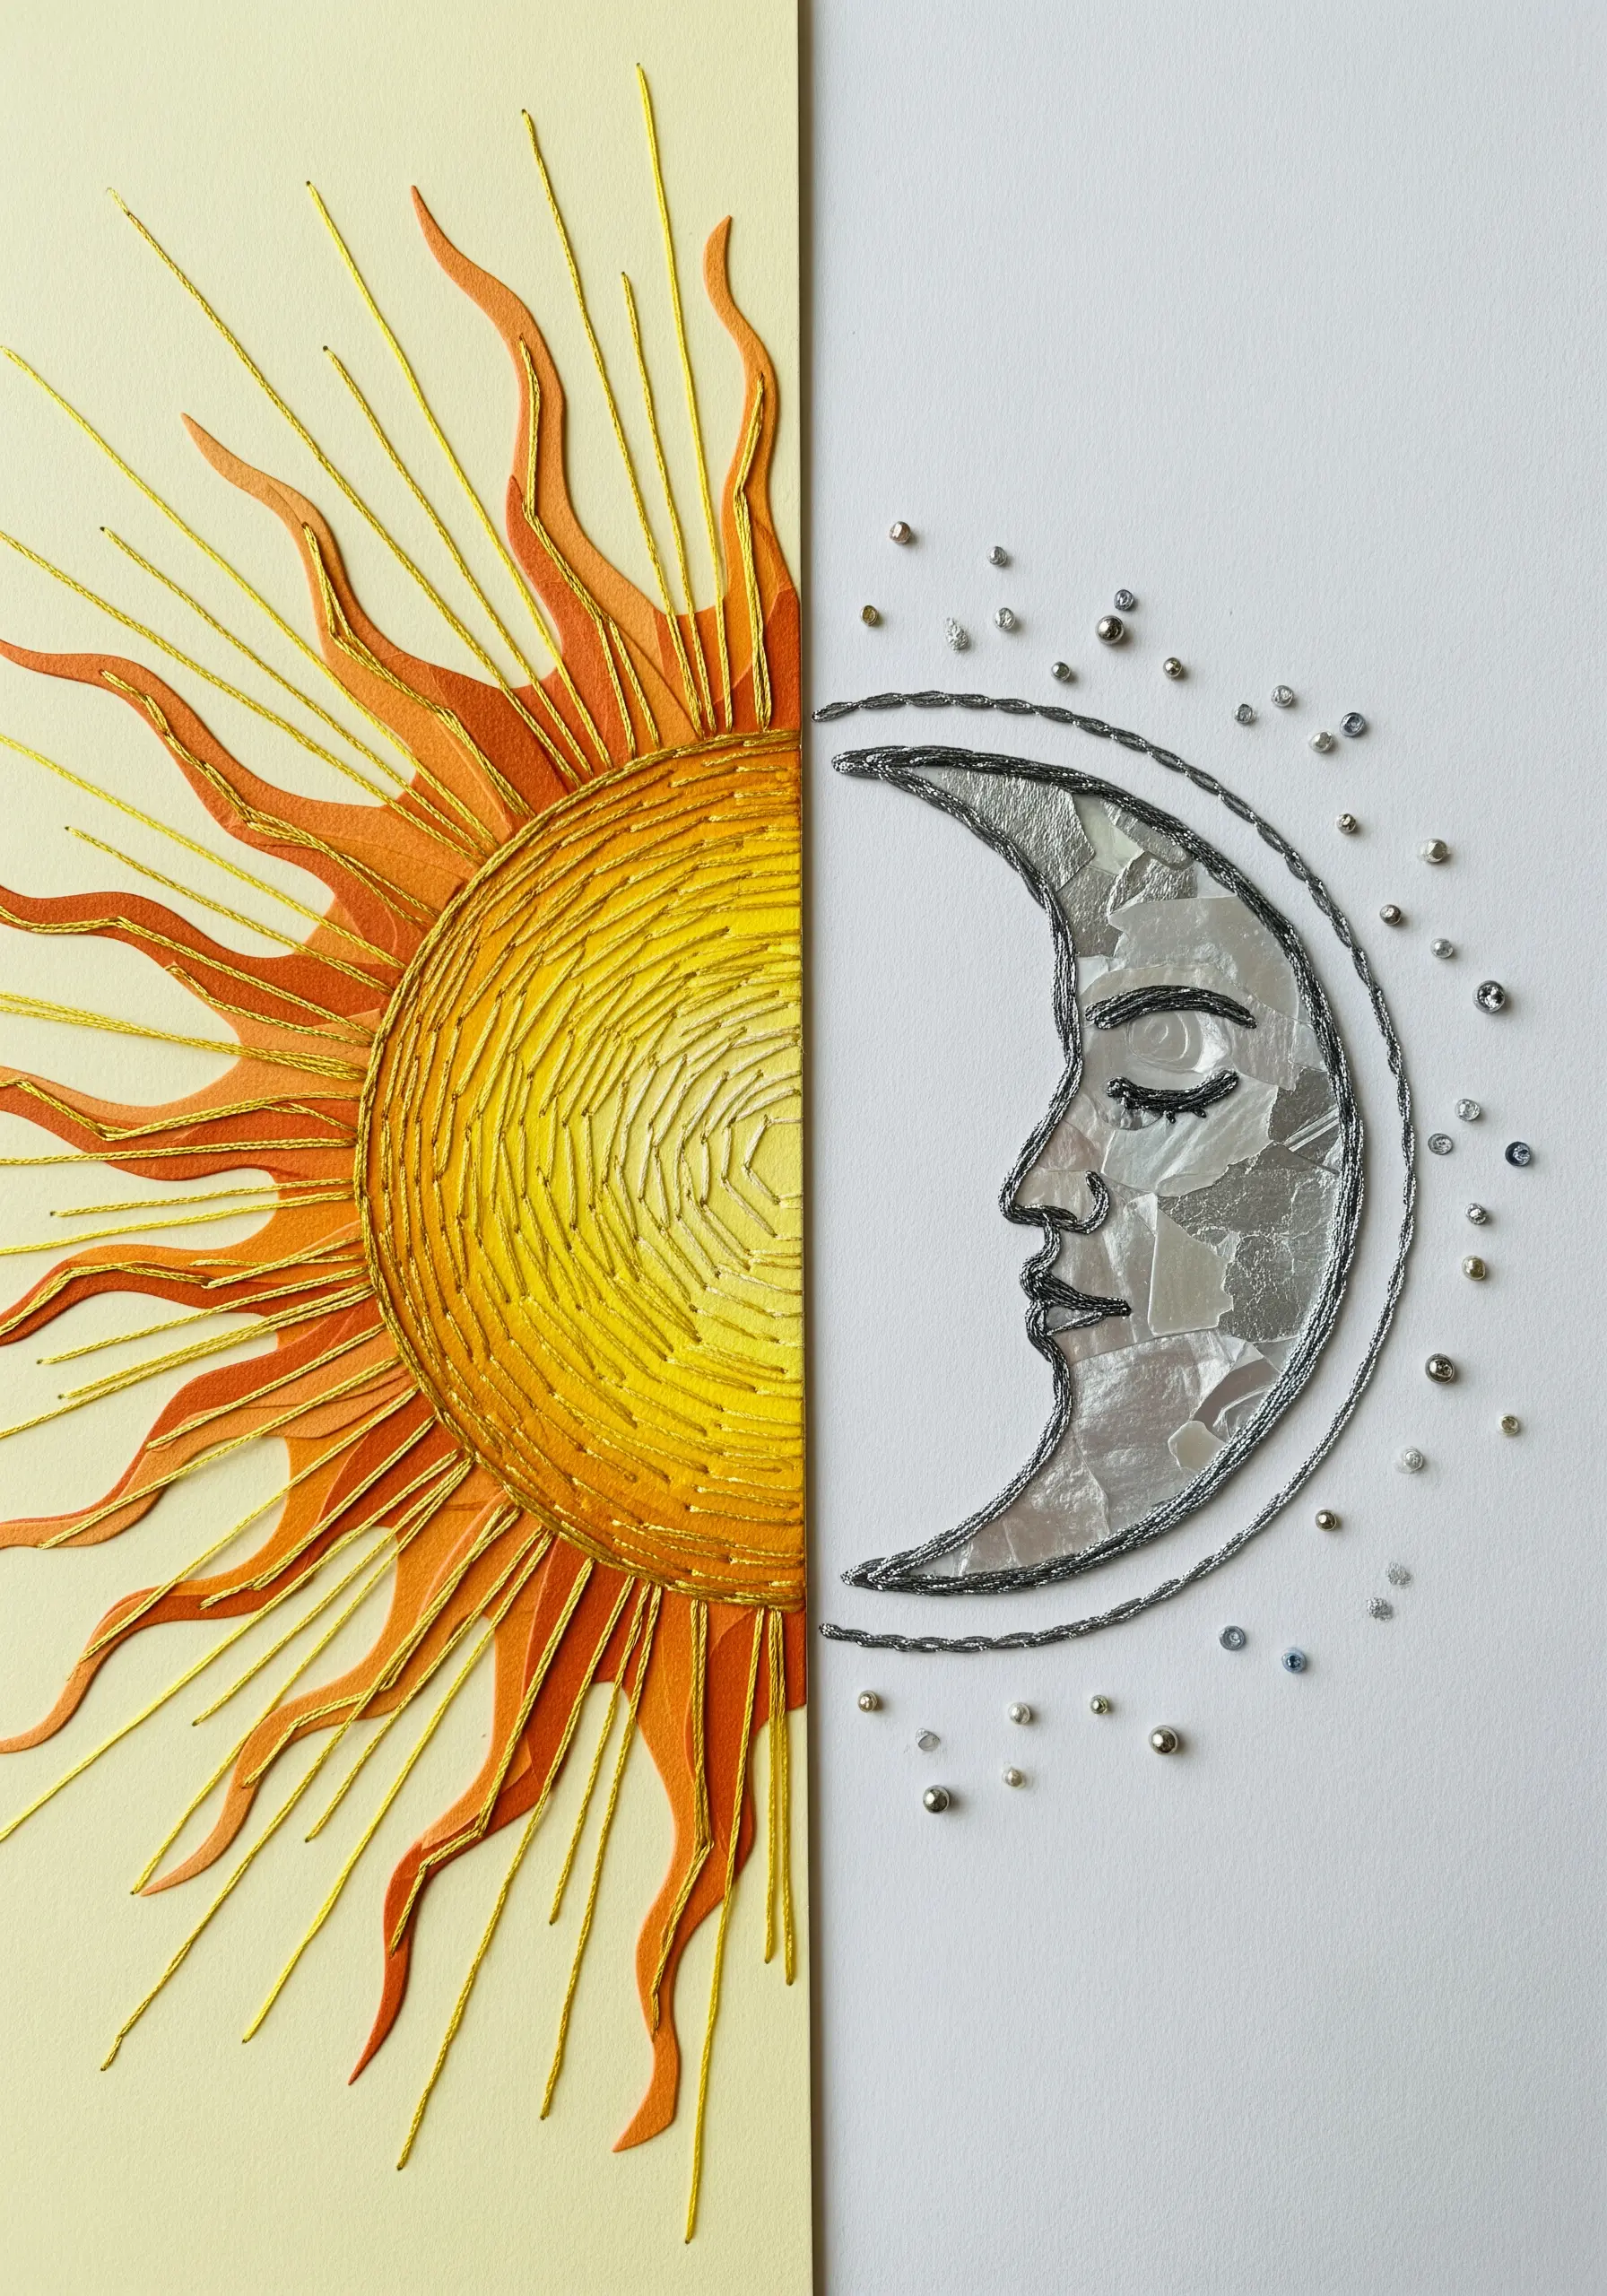
Create a powerful visual contrast by assigning different textures to the sun and moon.
For the sun, fill the shape with a dense satin stitch or radiating straight stitches in warm, gradient tones to convey energy and light.
For the moon, use a metallic paper or foil appliqué outlined with a delicate silver backstitch.
Accent the moon’s side with scattered seed beads and French knots to represent stars, enhancing its cool, quiet nature.
These are the kinds of DIY framed embroidery art projects that command attention.
12. Building Feather Textures with Thread Wrapping
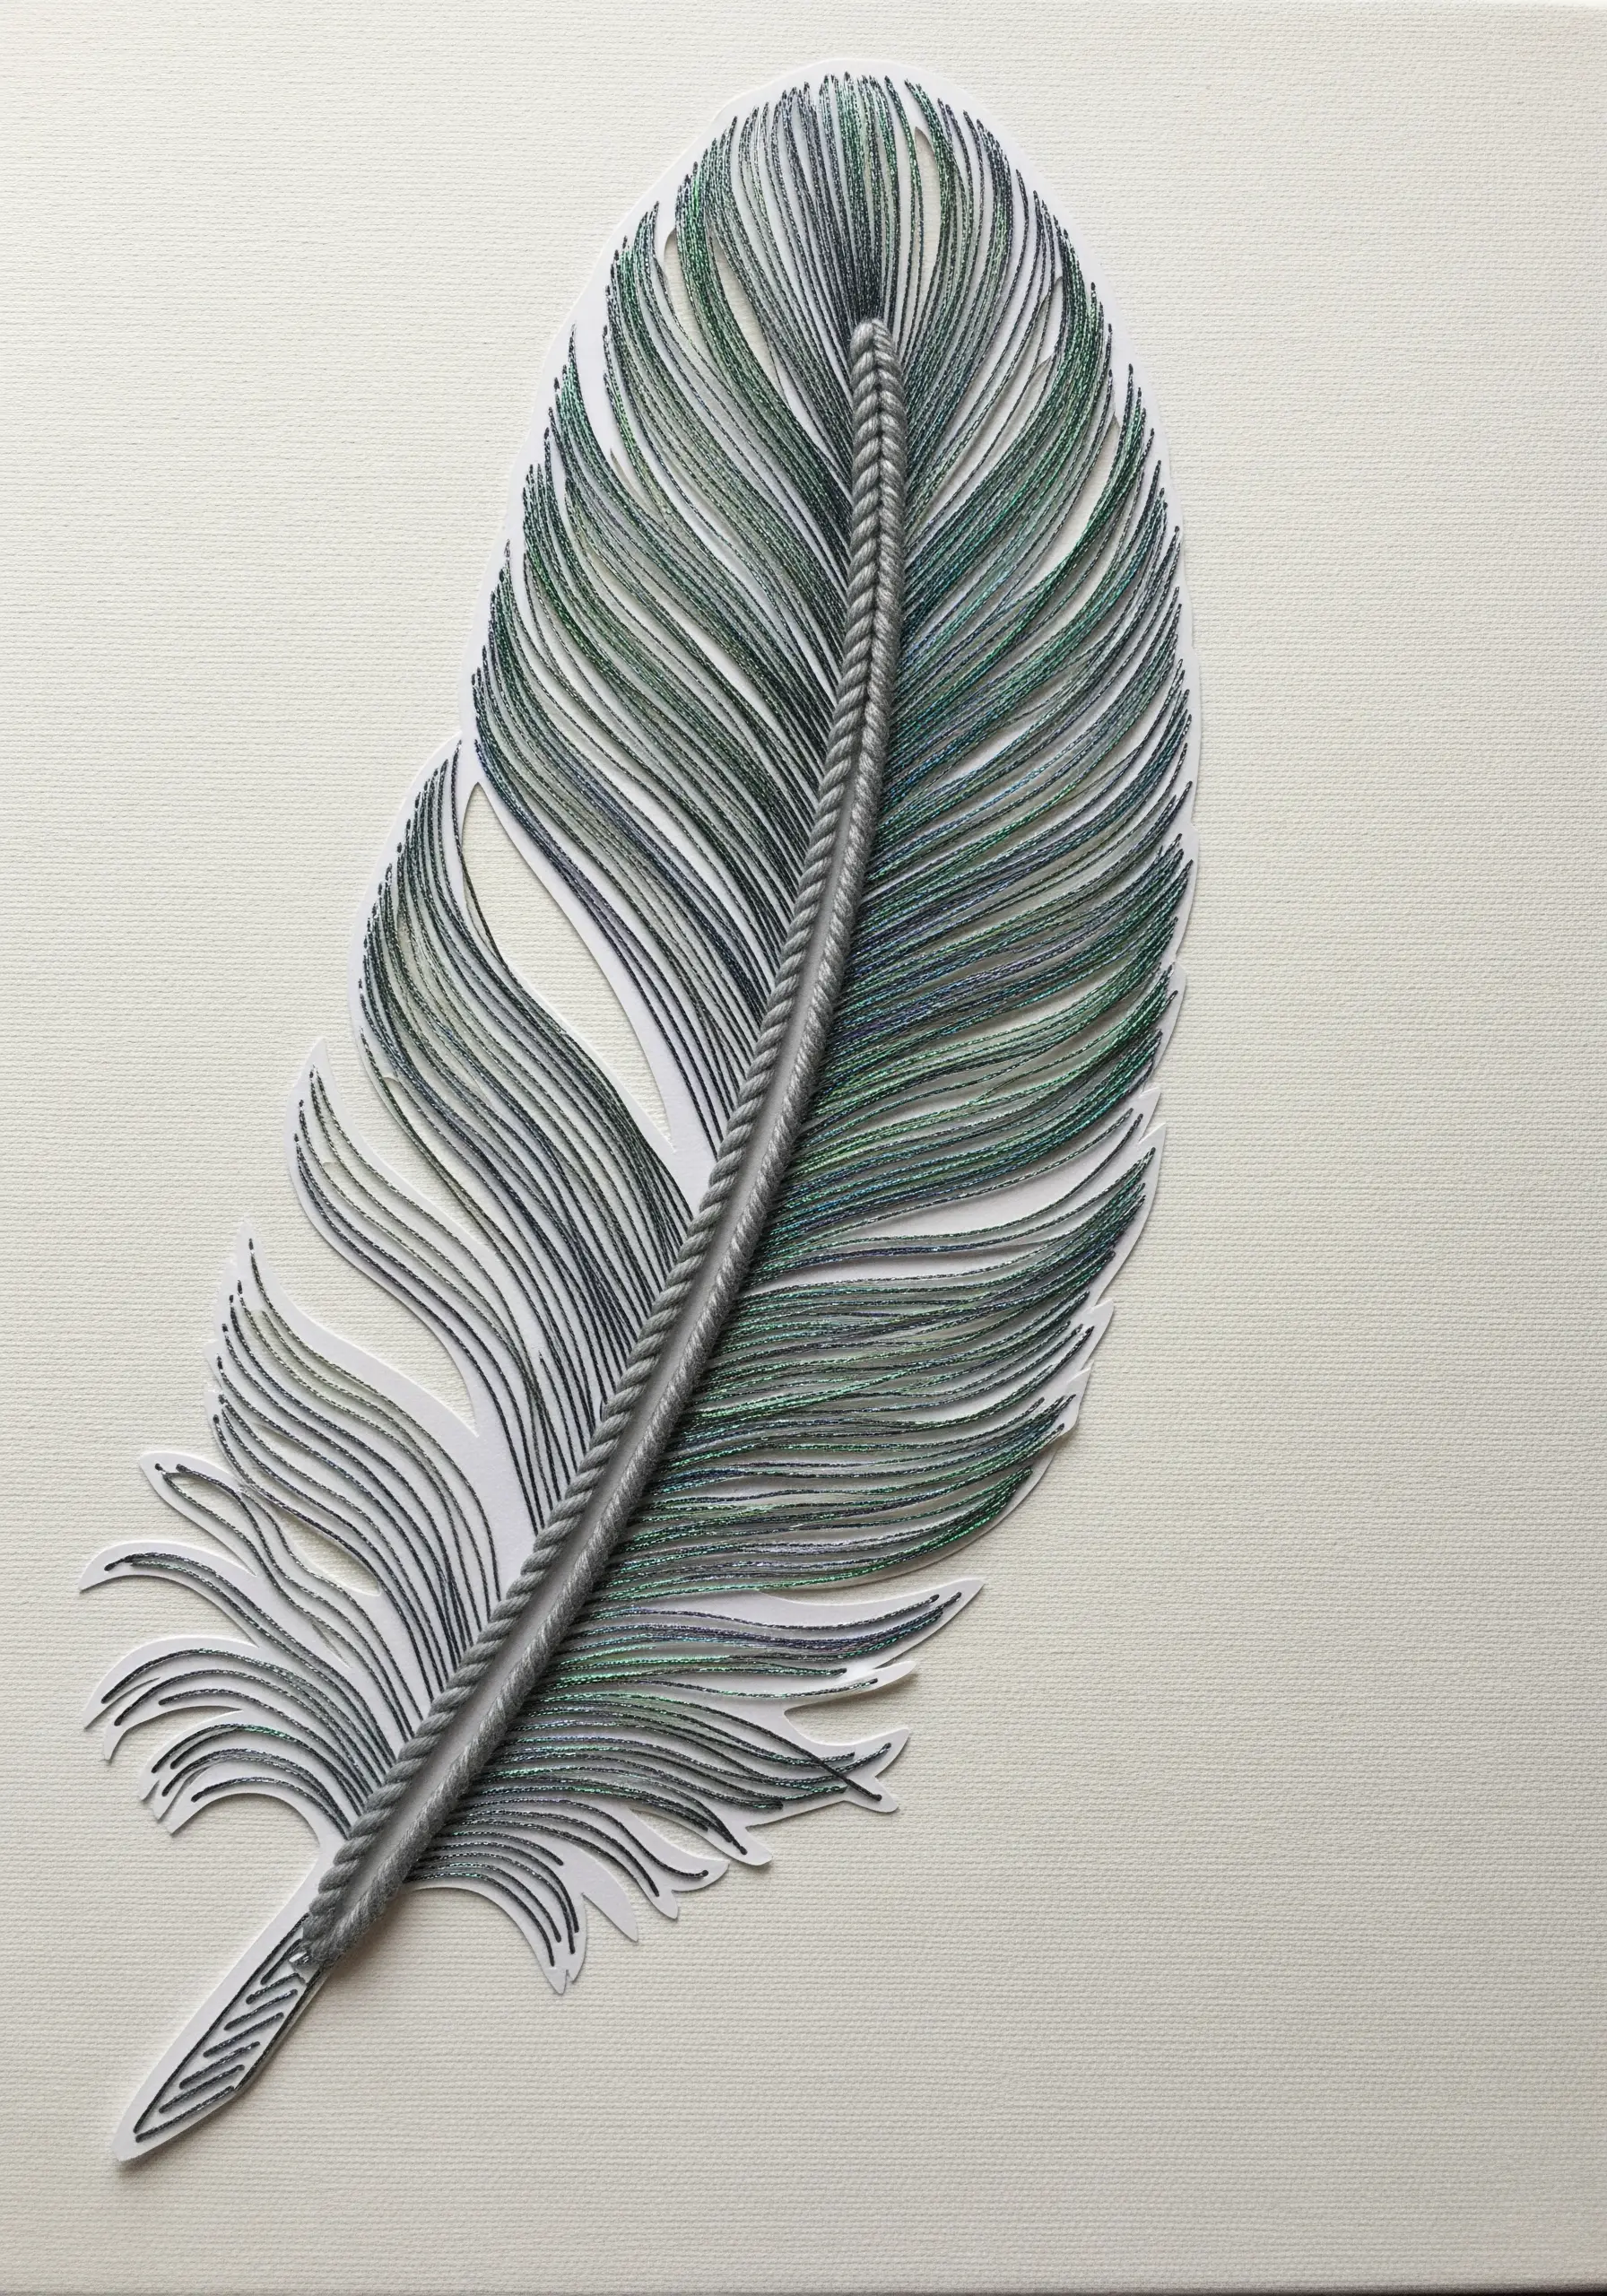
Achieve a photorealistic effect by wrapping thread over a solid paper base rather than stitching through it.
Cut a precise feather shape from sturdy cardstock.
For the central shaft (rachis), use a raised stem stitch band or wrap thread tightly around a thin wire glued in place.
Then, meticulously wrap fine, variegated thread around the cardstock form, ensuring the strands lie flat and close together to mimic the fine barbs of a real feather.
It’s a wonderful technique for realistic animal & insect embroidery patterns.
13. A Sampler Grid of Stitched and Printed Memories
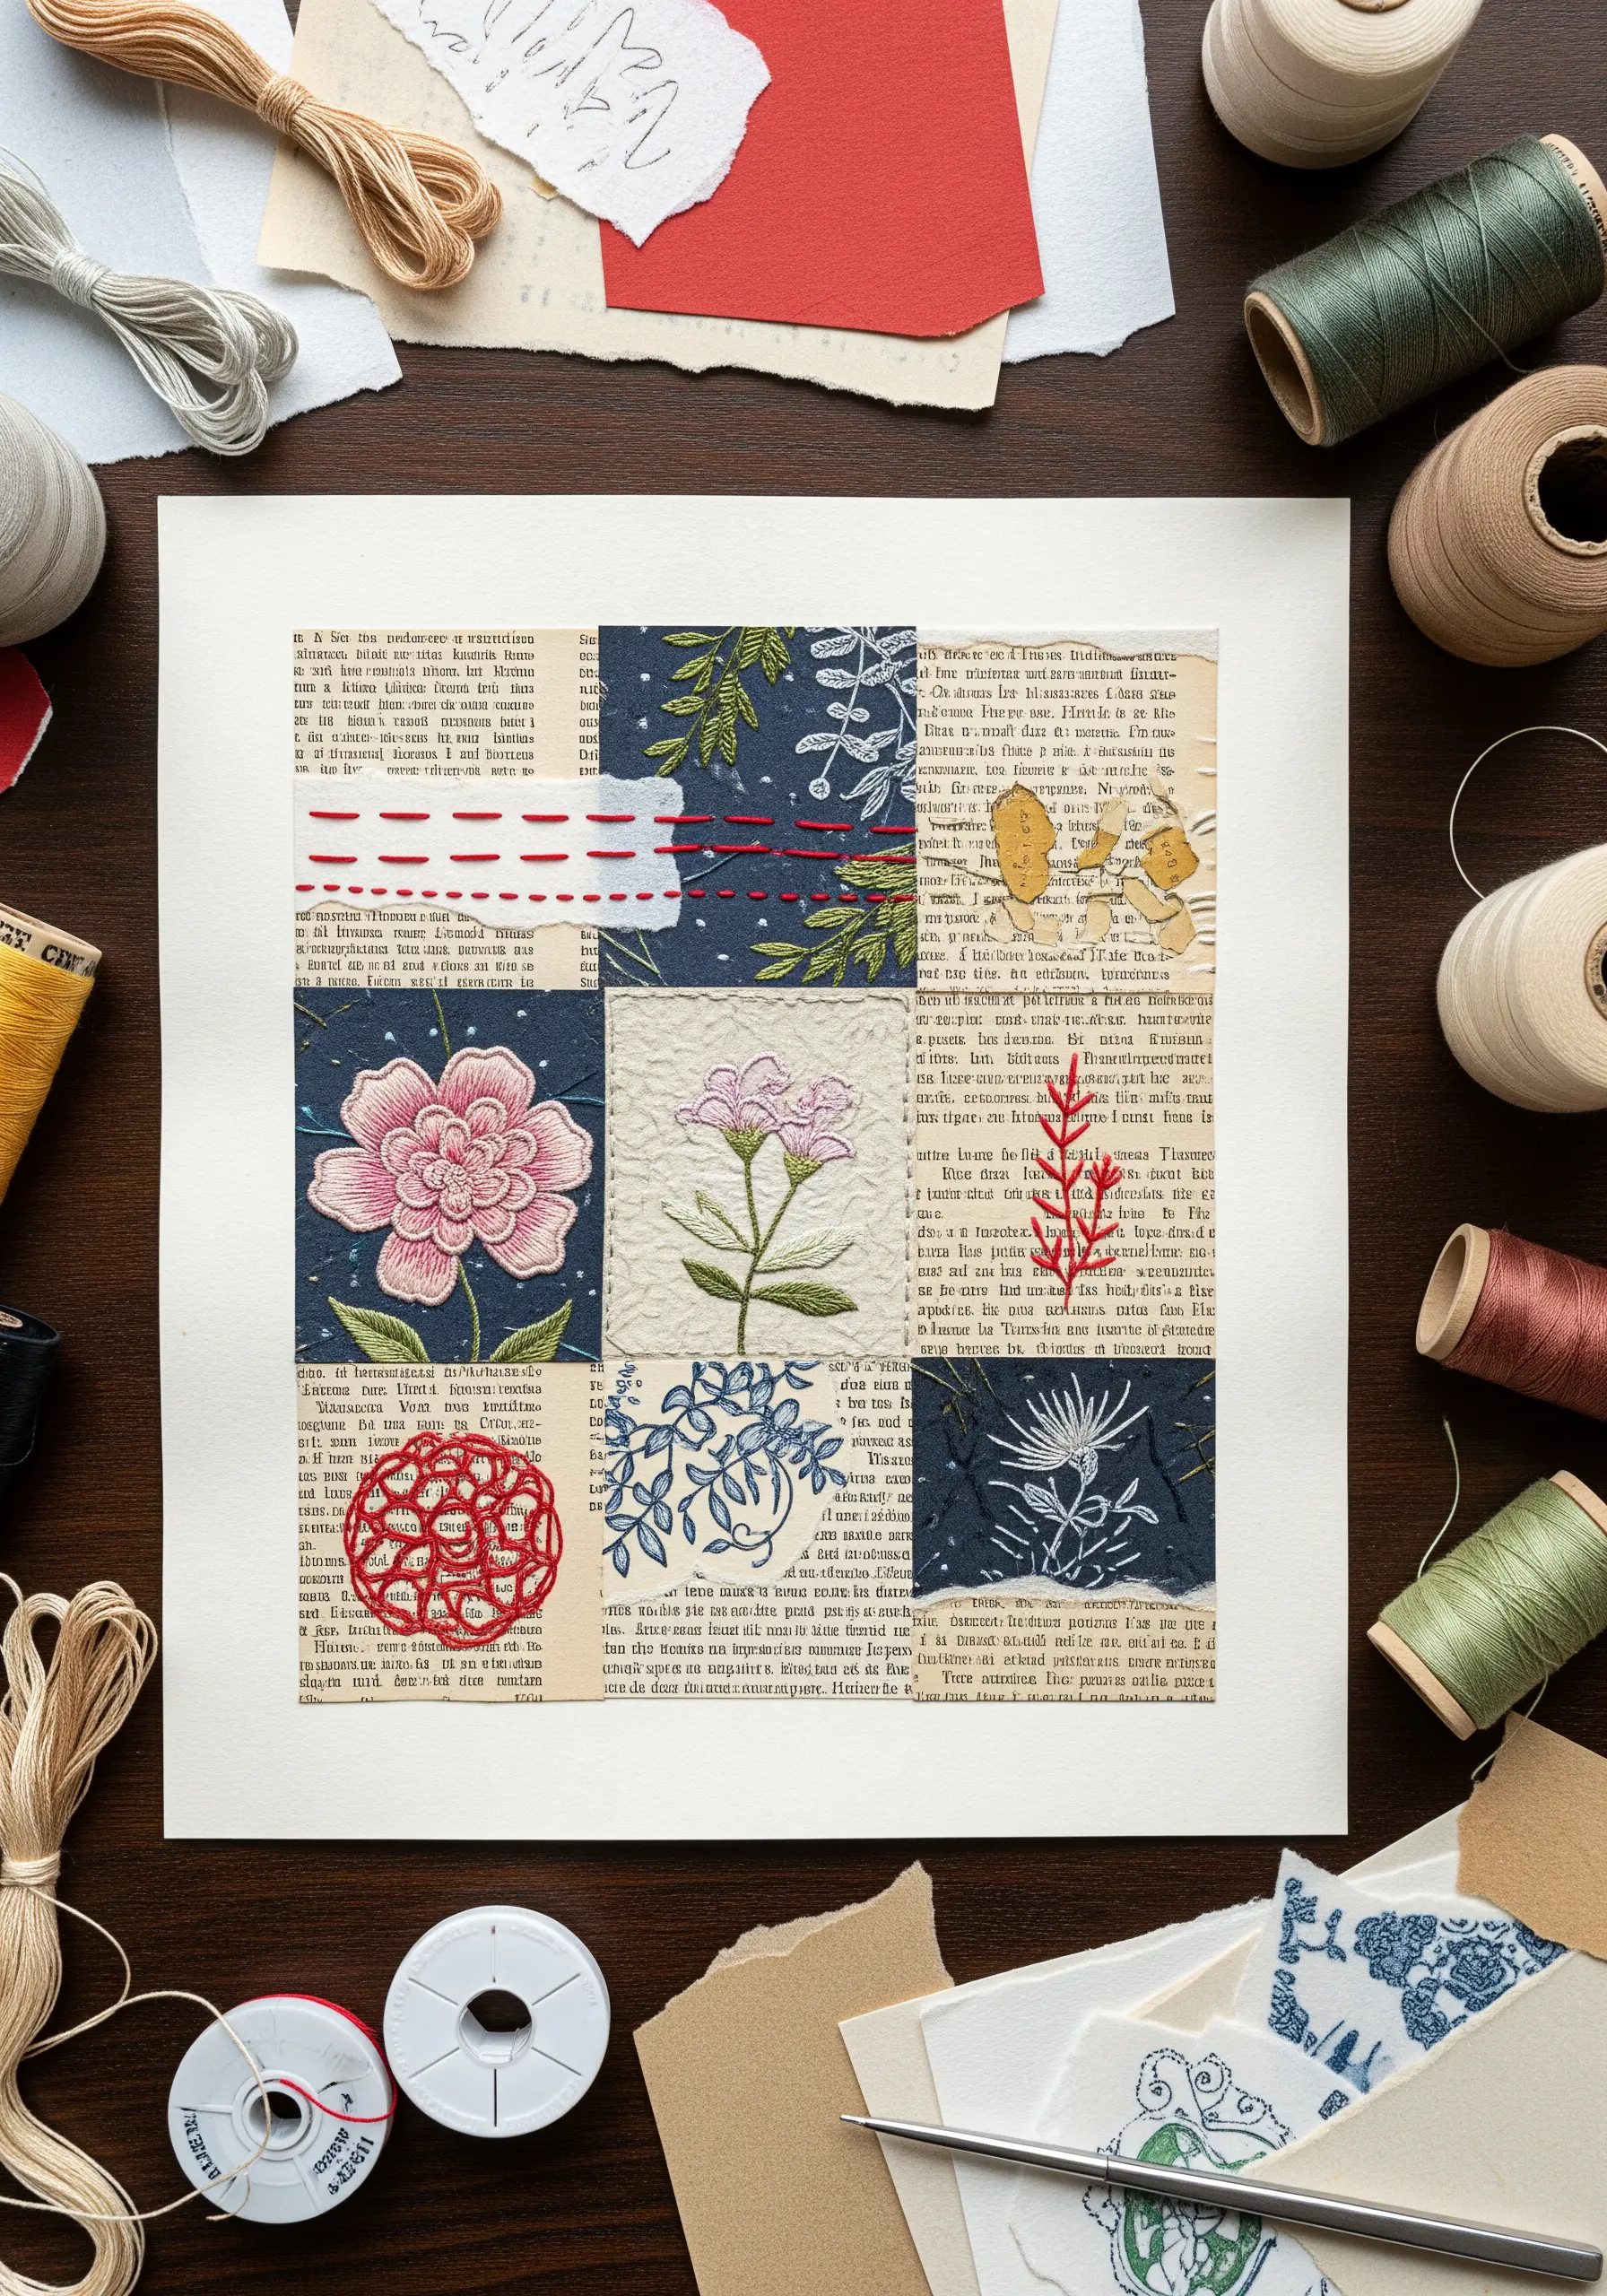
Create a cohesive artwork from disparate elements by arranging them in a structured grid.
Combine small squares of embroidered motifs on fabric with interesting paper scraps, like book pages or patterned prints.
The grid format provides a sense of order and allows each small piece to be appreciated individually while contributing to the whole.
This is the perfect way to experiment with new stitches and use up your most cherished embroidery patterns to bring life to boring fabric scraps.
14. Weaving Miniature Worlds with Embroidery Floss
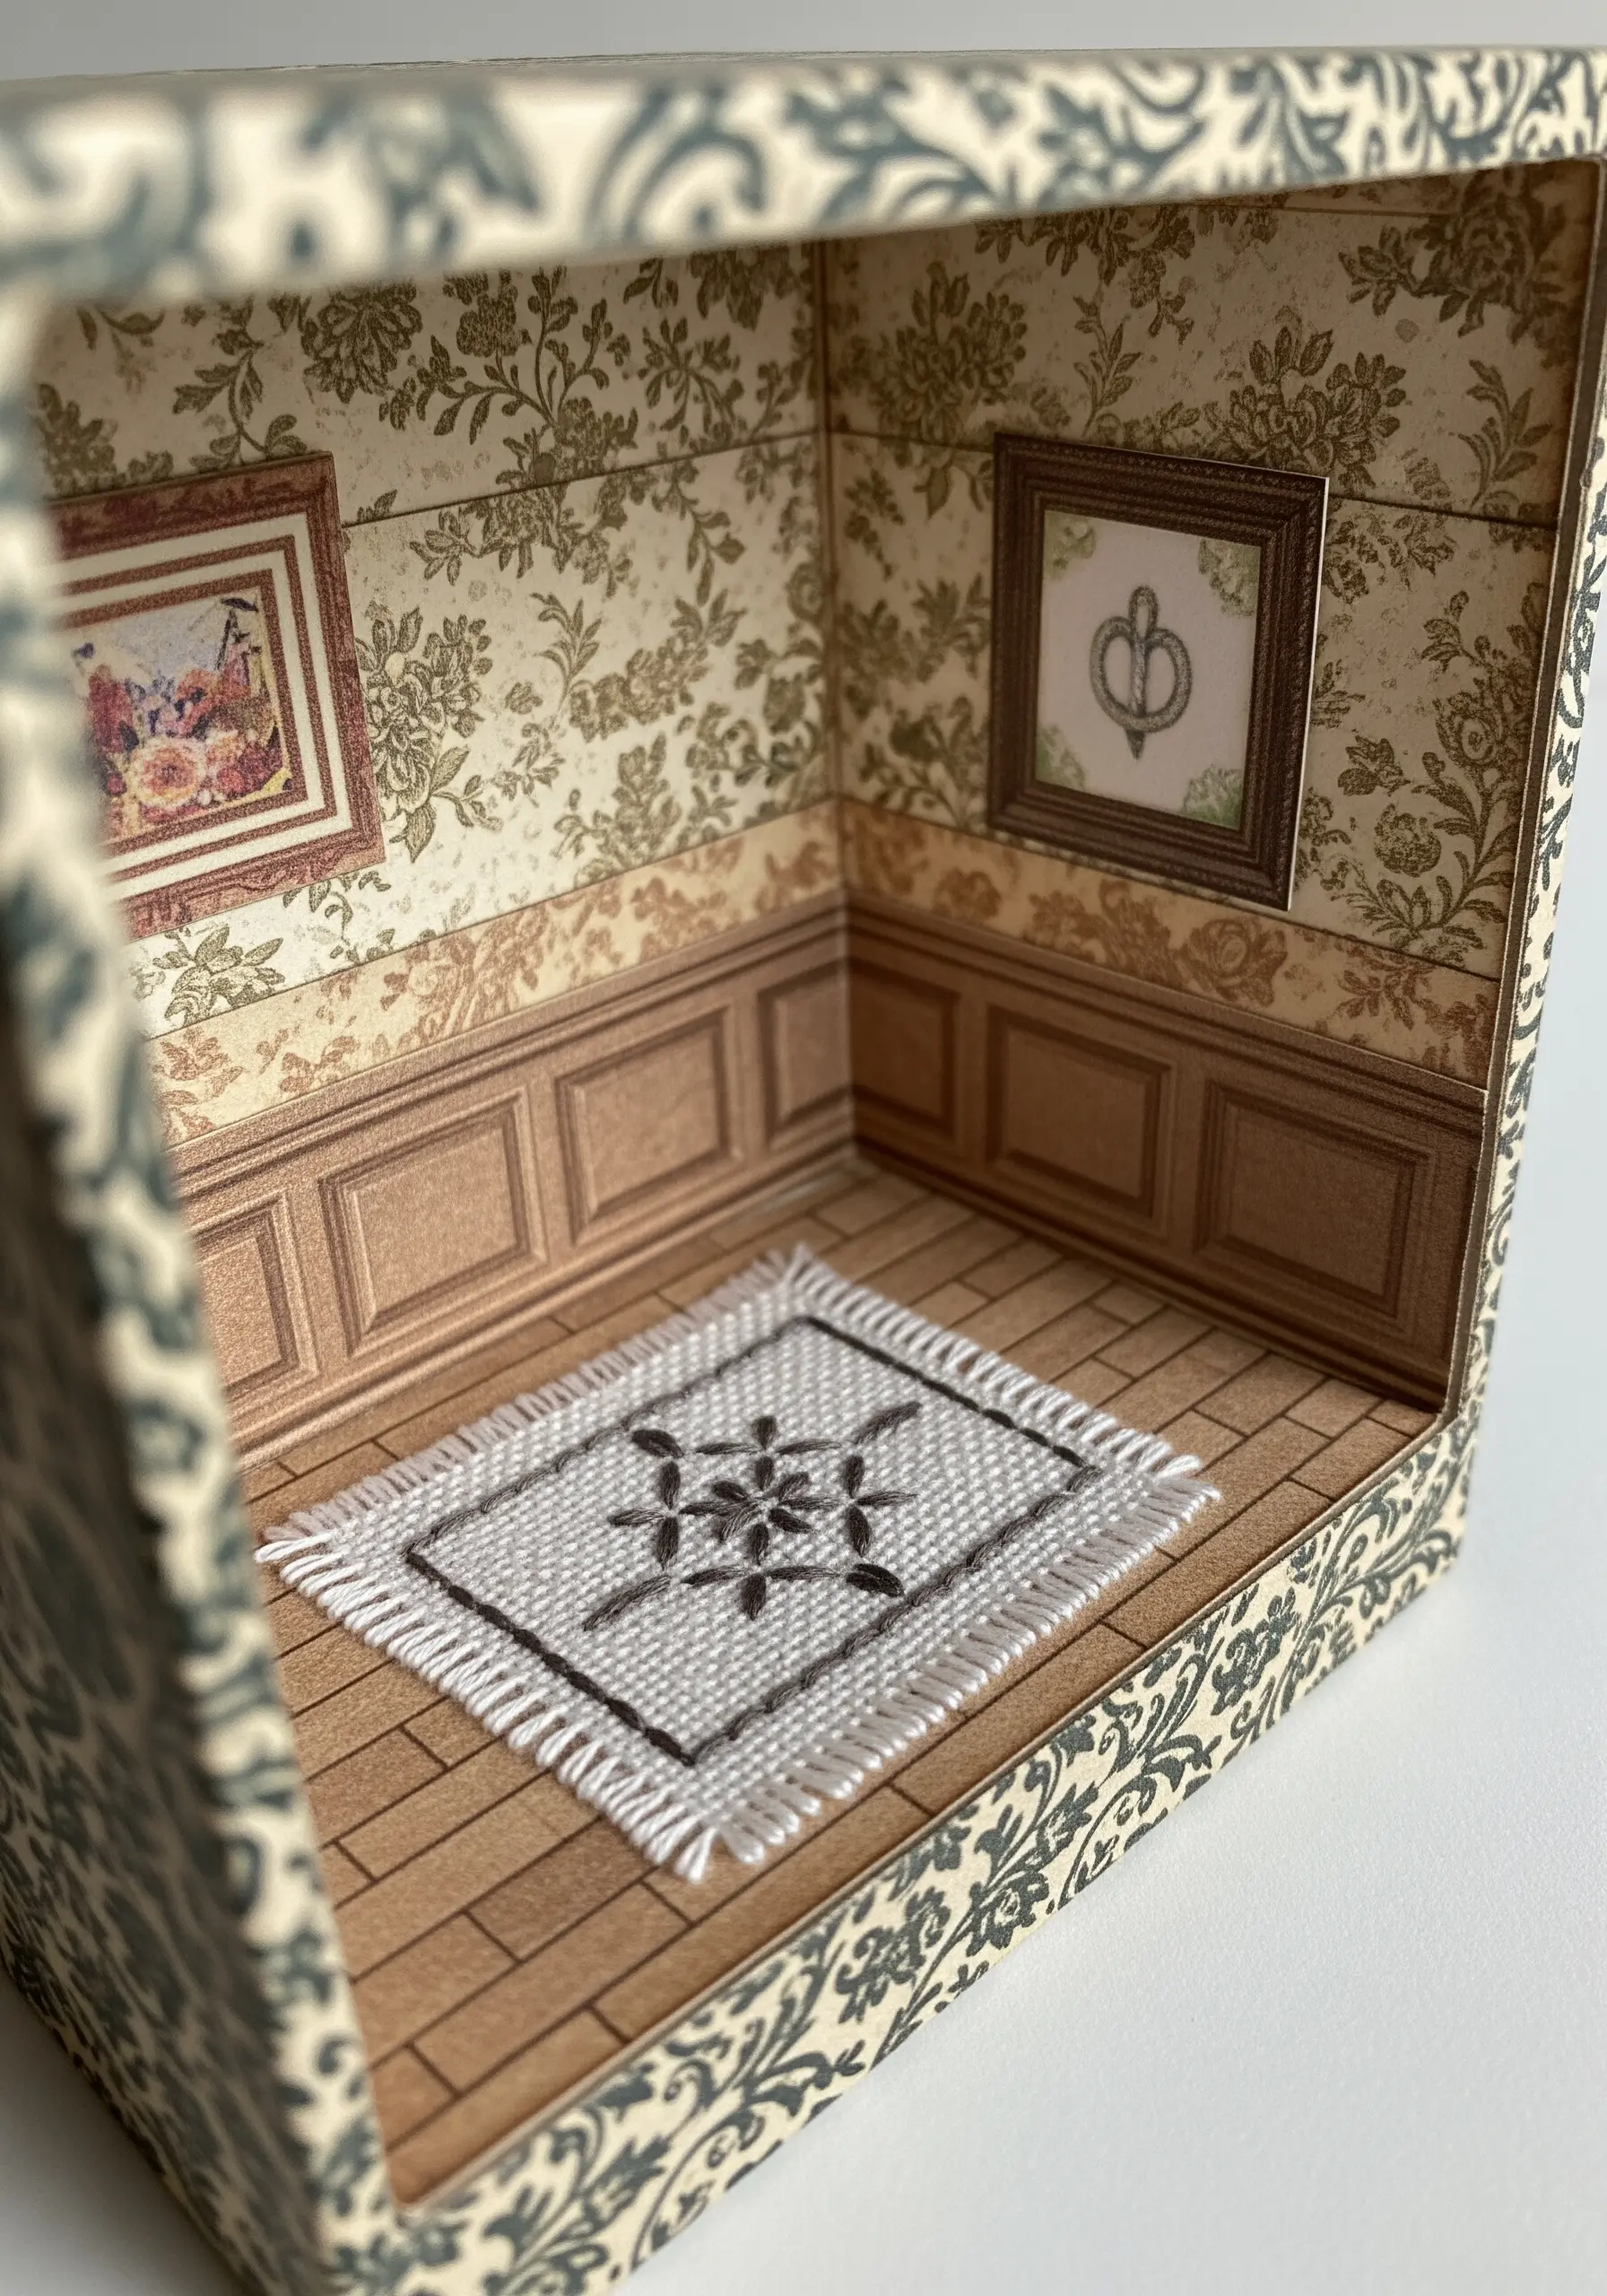
Incorporate tiny textiles into your paper dioramas for an unexpected layer of realism and charm.
To create the miniature rug, build a small loom by cutting notches into a sturdy piece of cardboard.
Warp it with a strong neutral thread, then use a tapestry needle to weave embroidery floss back and forth, creating patterns as you go.
Leaving the warp threads long at the end allows you to create a tiny, authentic fringe, making it one of those tiny handmade decor ideas that delights the viewer.
15. An Embroidered Cabinet of Curiosities
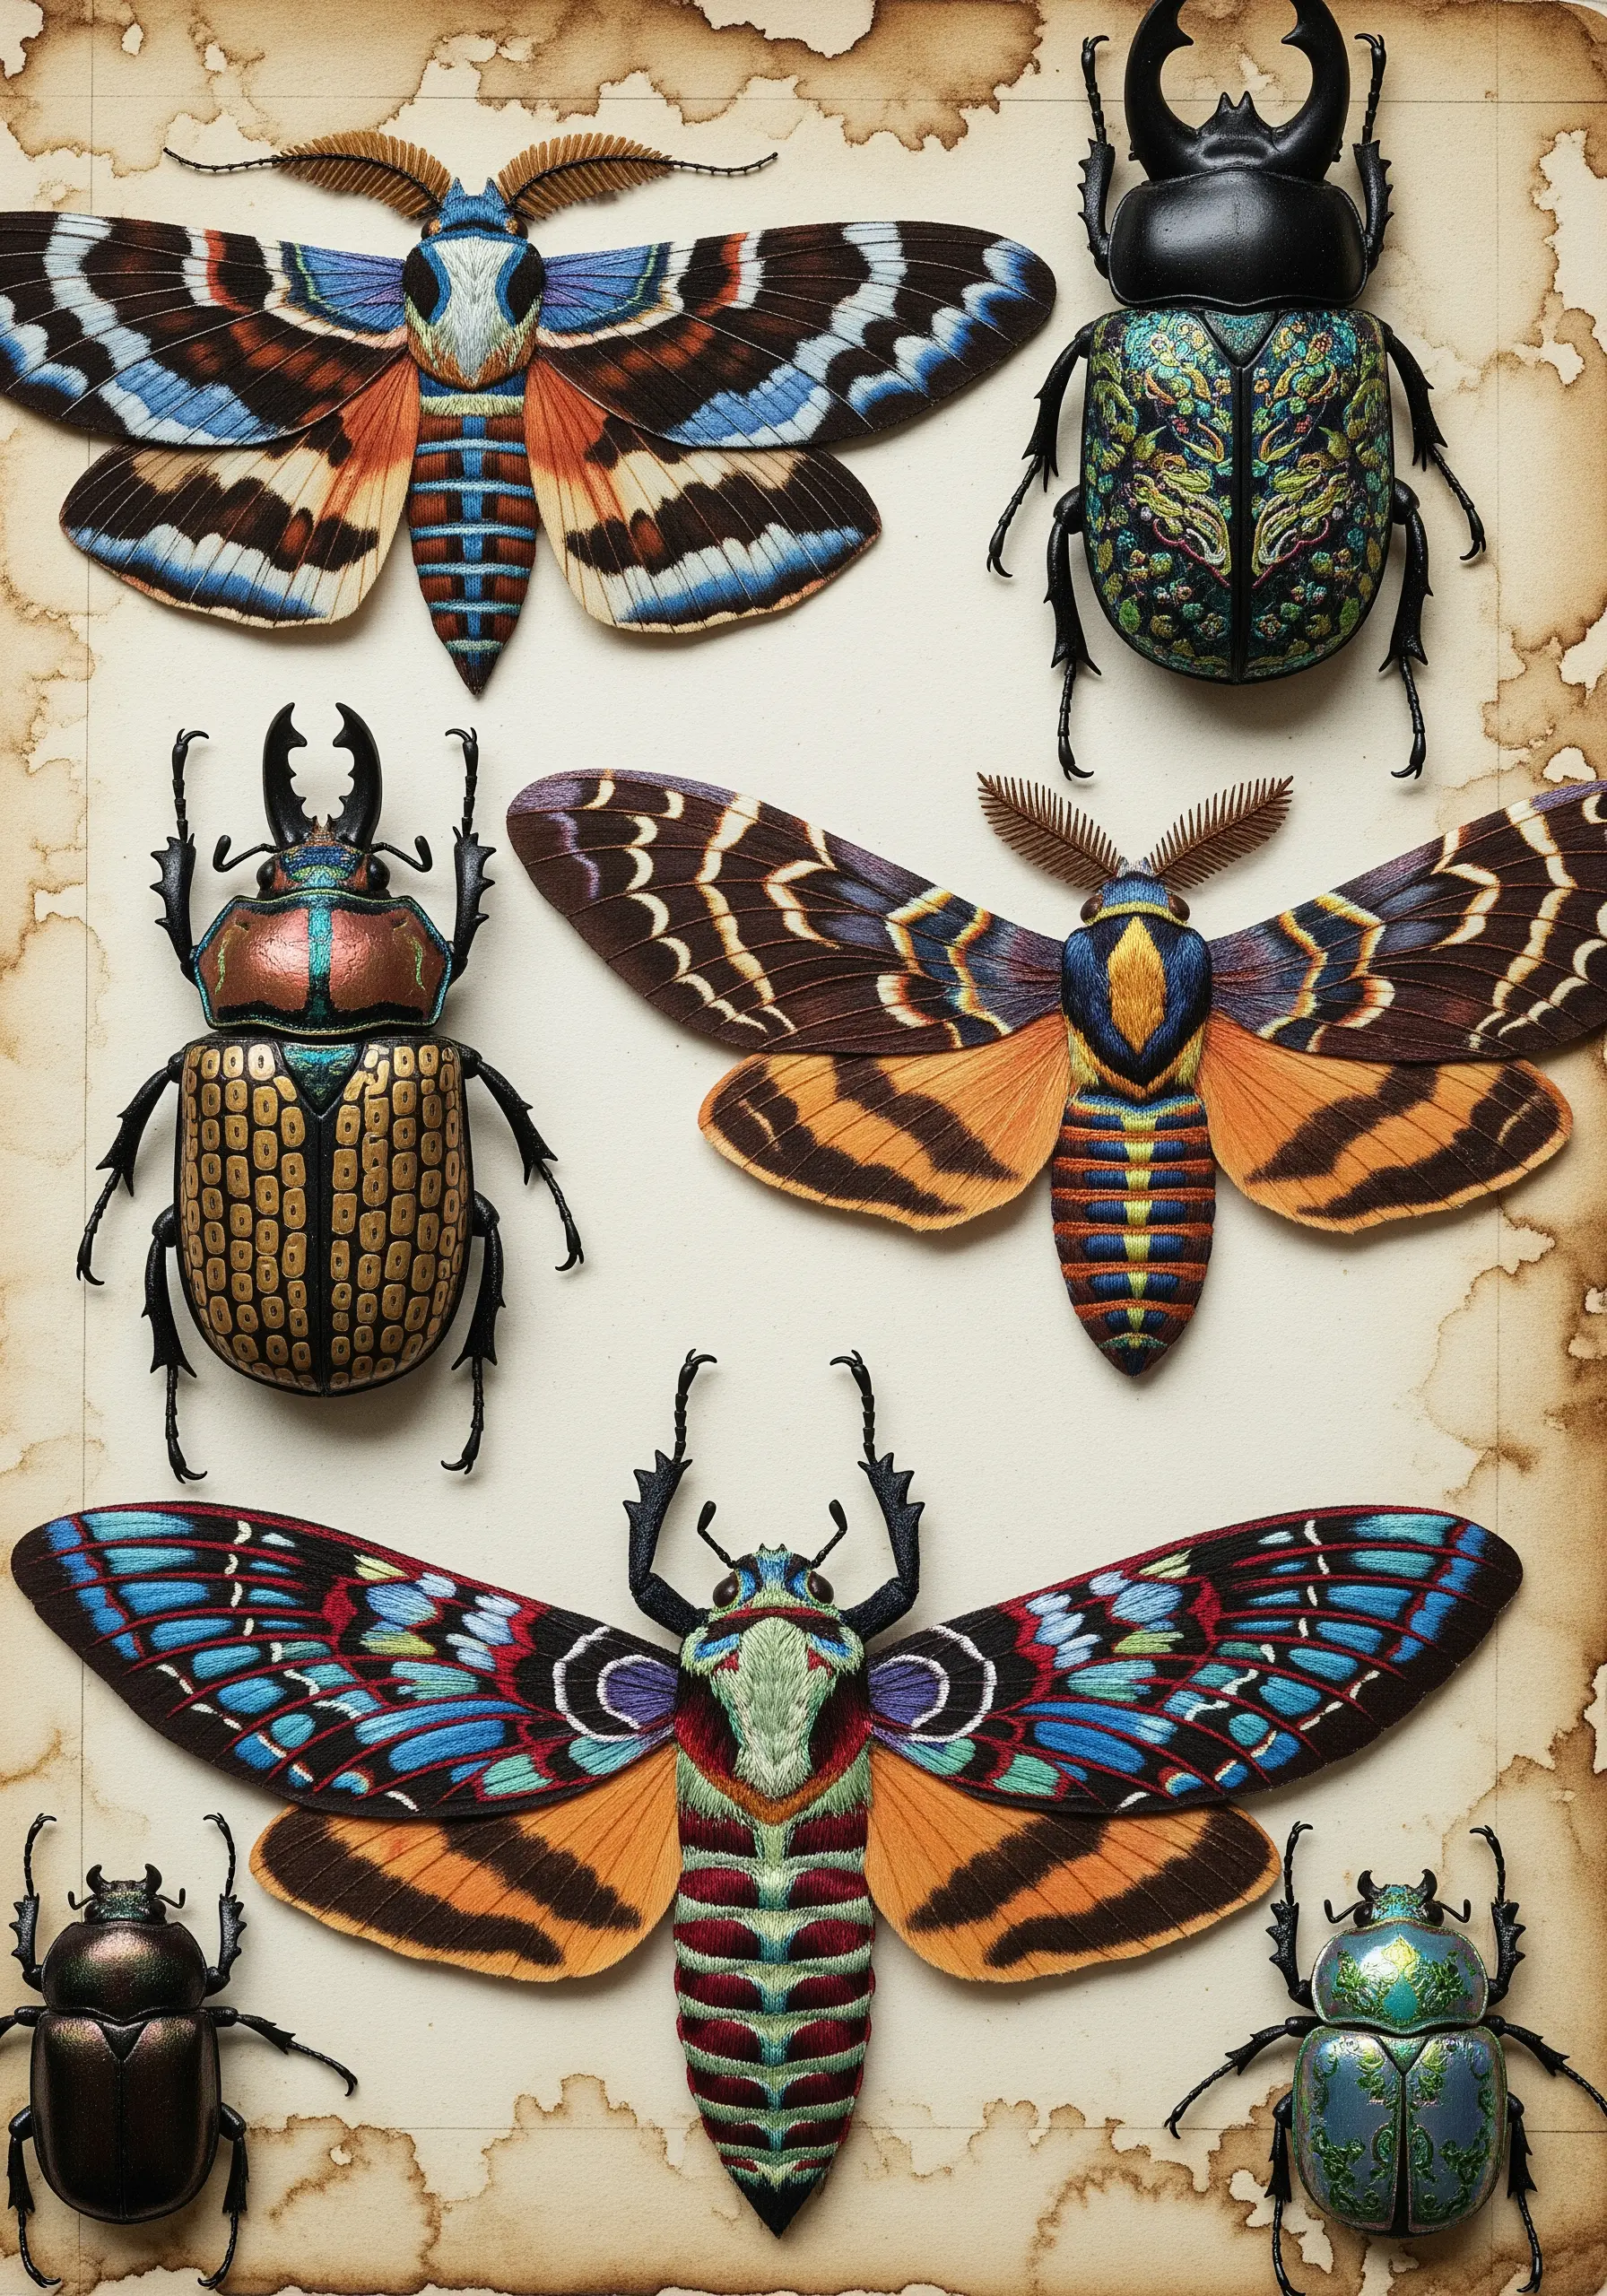
Give your embroidered subjects a three-dimensional feel by stitching them separately and applying them to a collaged background.
Use long-and-short stitch to blend colors seamlessly on the insect wings, creating a painted, realistic effect.
After stitching, carefully cut each insect out, leaving a tiny fabric border, and use fabric glue to mount it onto your prepared, stained-paper background.
This appliqué method adds a subtle shadow and lift, enhancing the specimen-like quality and exploring ways to embroider realistic shadows.
16. Framing a Paper Mosaic with Calligraphic Stitches
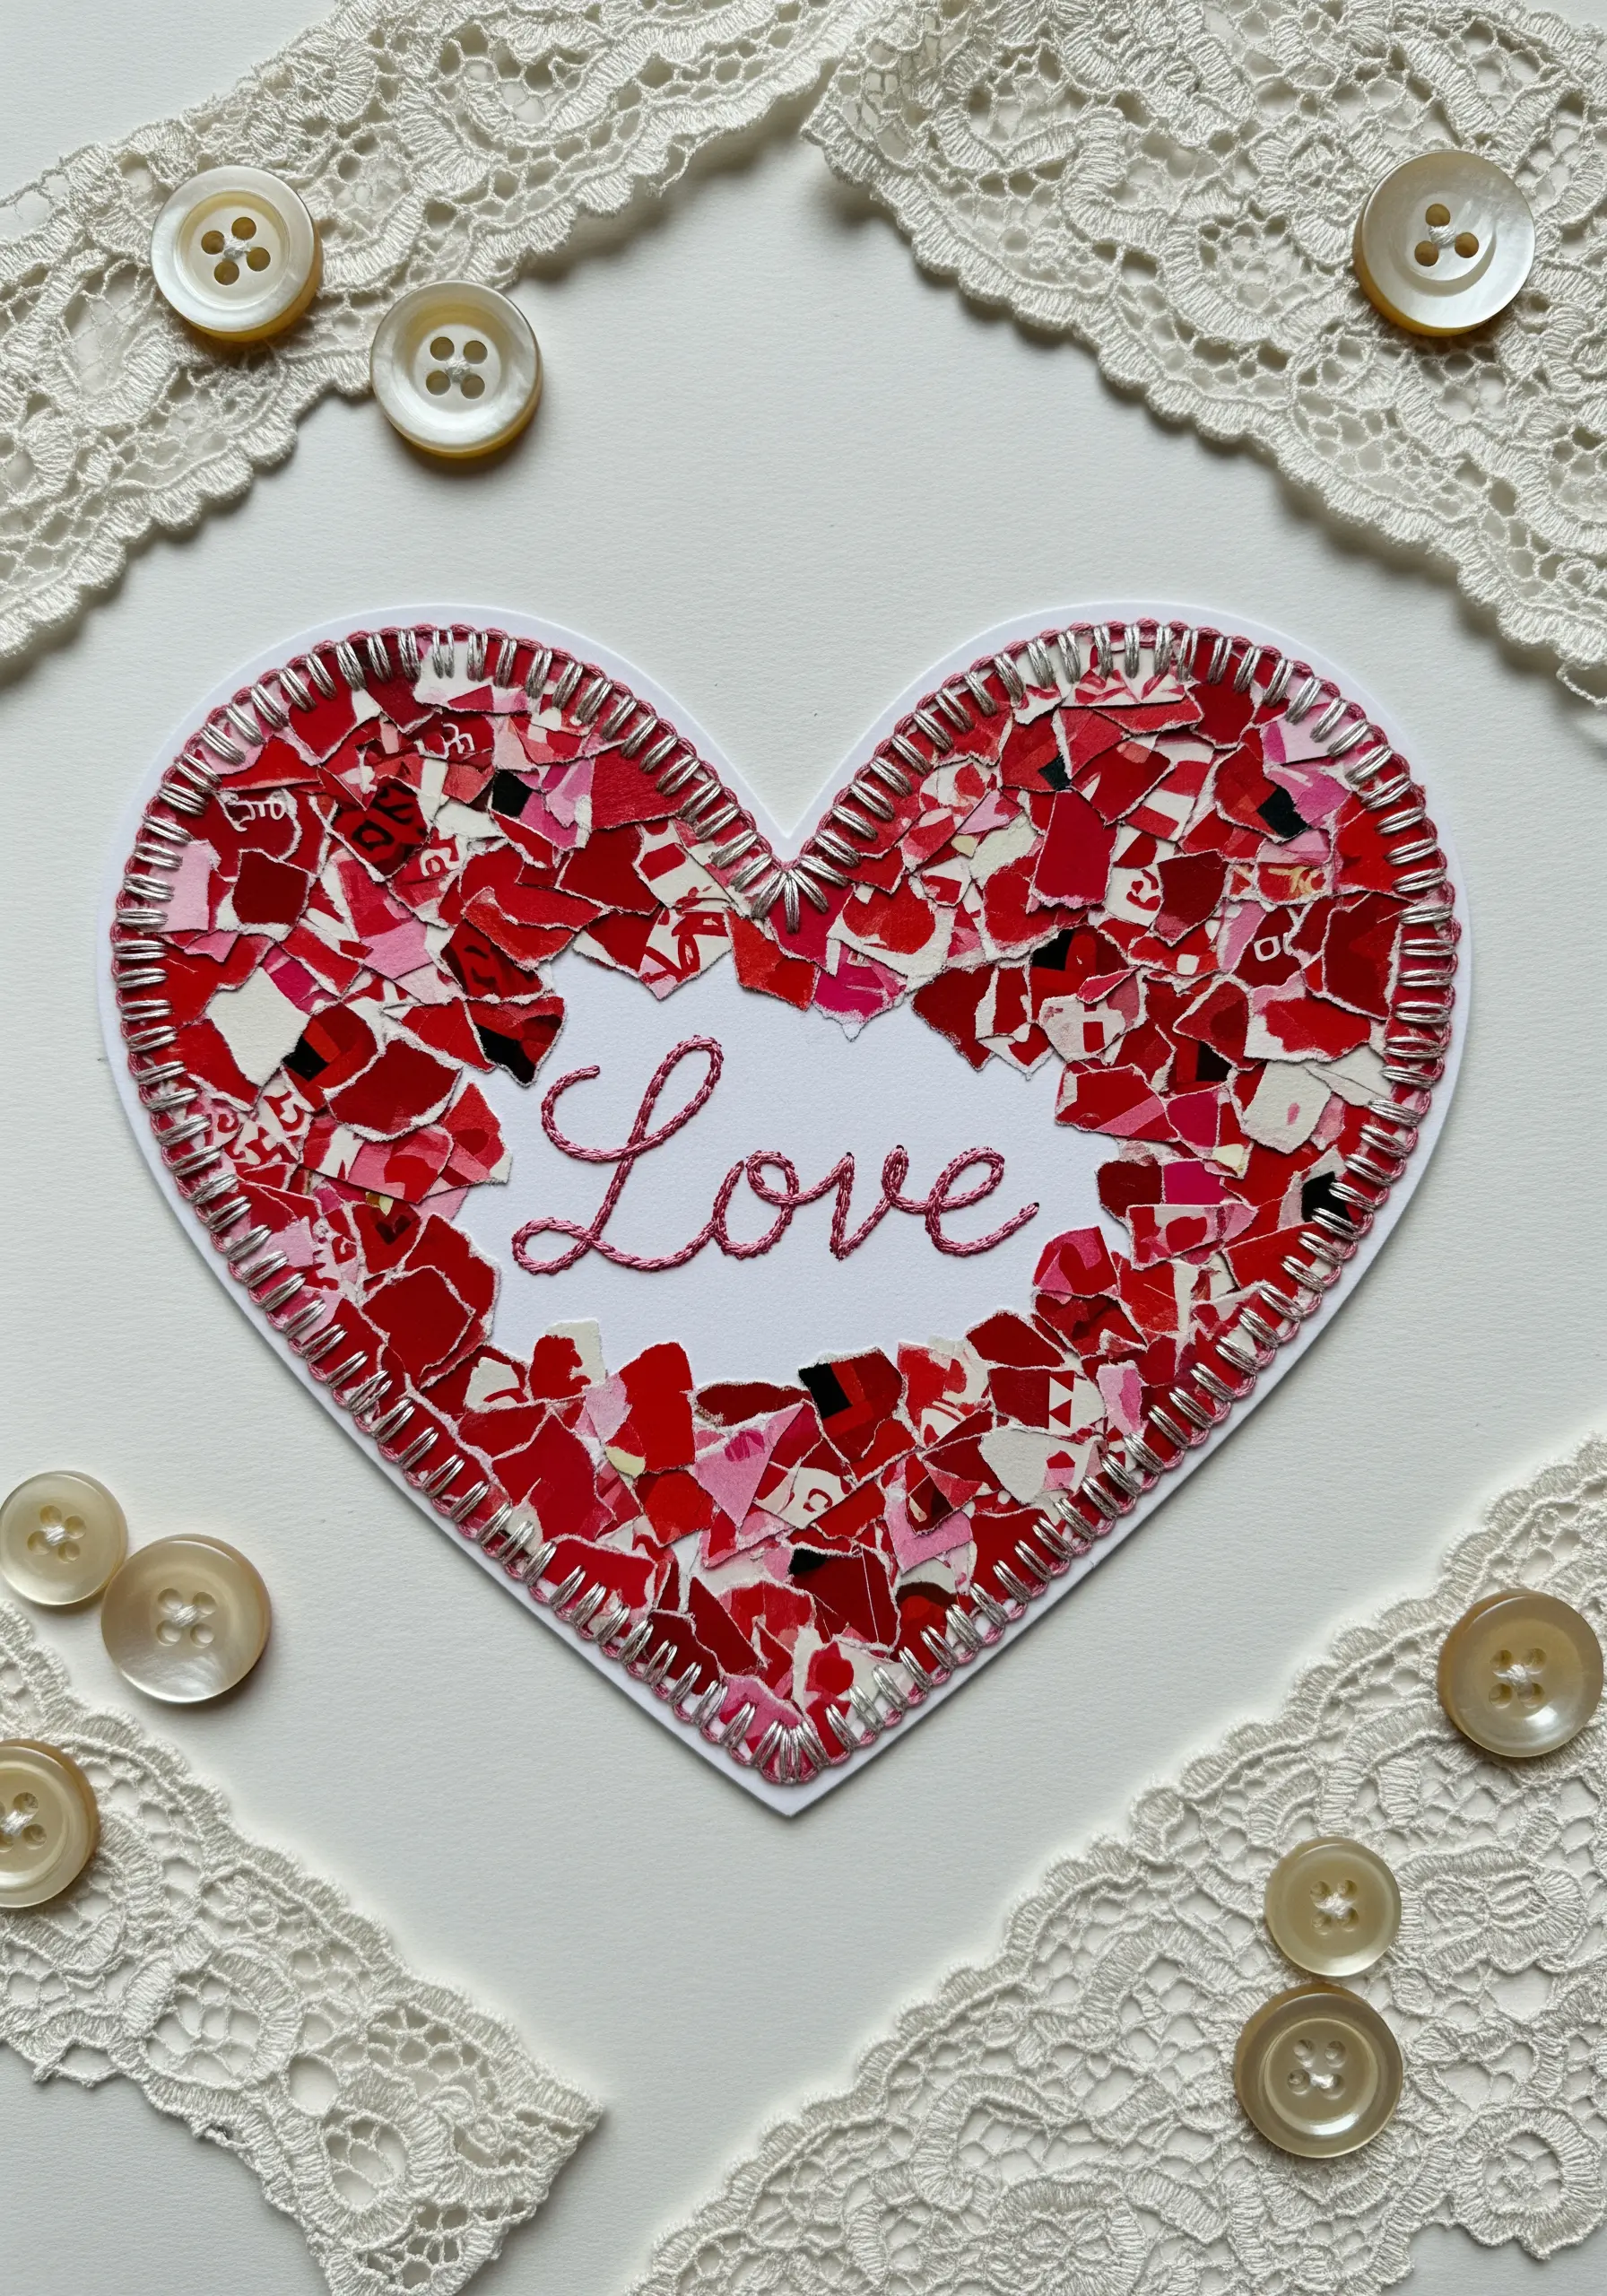
Combine the chaotic texture of a paper mosaic with the clean elegance of embroidered script.
Create a crisp, defined border for your heart shape by using a tight buttonhole stitch around the edge.
This not only frames the mosaic beautifully but also adds a subtle, raised texture.
For the word ‘Love’, use a smooth stem stitch or split stitch to achieve fluid, calligraphic curves that contrast with the sharp paper fragments.
You can use this technique for all kinds of subtle heart & star motifs.
17. Sculpting a Tree from Cardboard and Thread

Utilize the inherent texture of corrugated cardboard to build a powerful, sculptural tree.
Tear strips of cardboard and layer them to form the trunk and branches, exposing the ribbed interior for a bark-like effect.
For the leaves, add a simple touch of embroidery—a single straight stitch or a V-shape in yellow thread serves as a minimal, effective vein.
This project is a masterclass in high-texture fabric collage embroidery projects, using the most humble of materials.
18. Drawing with Controlled and Unraveled Threads
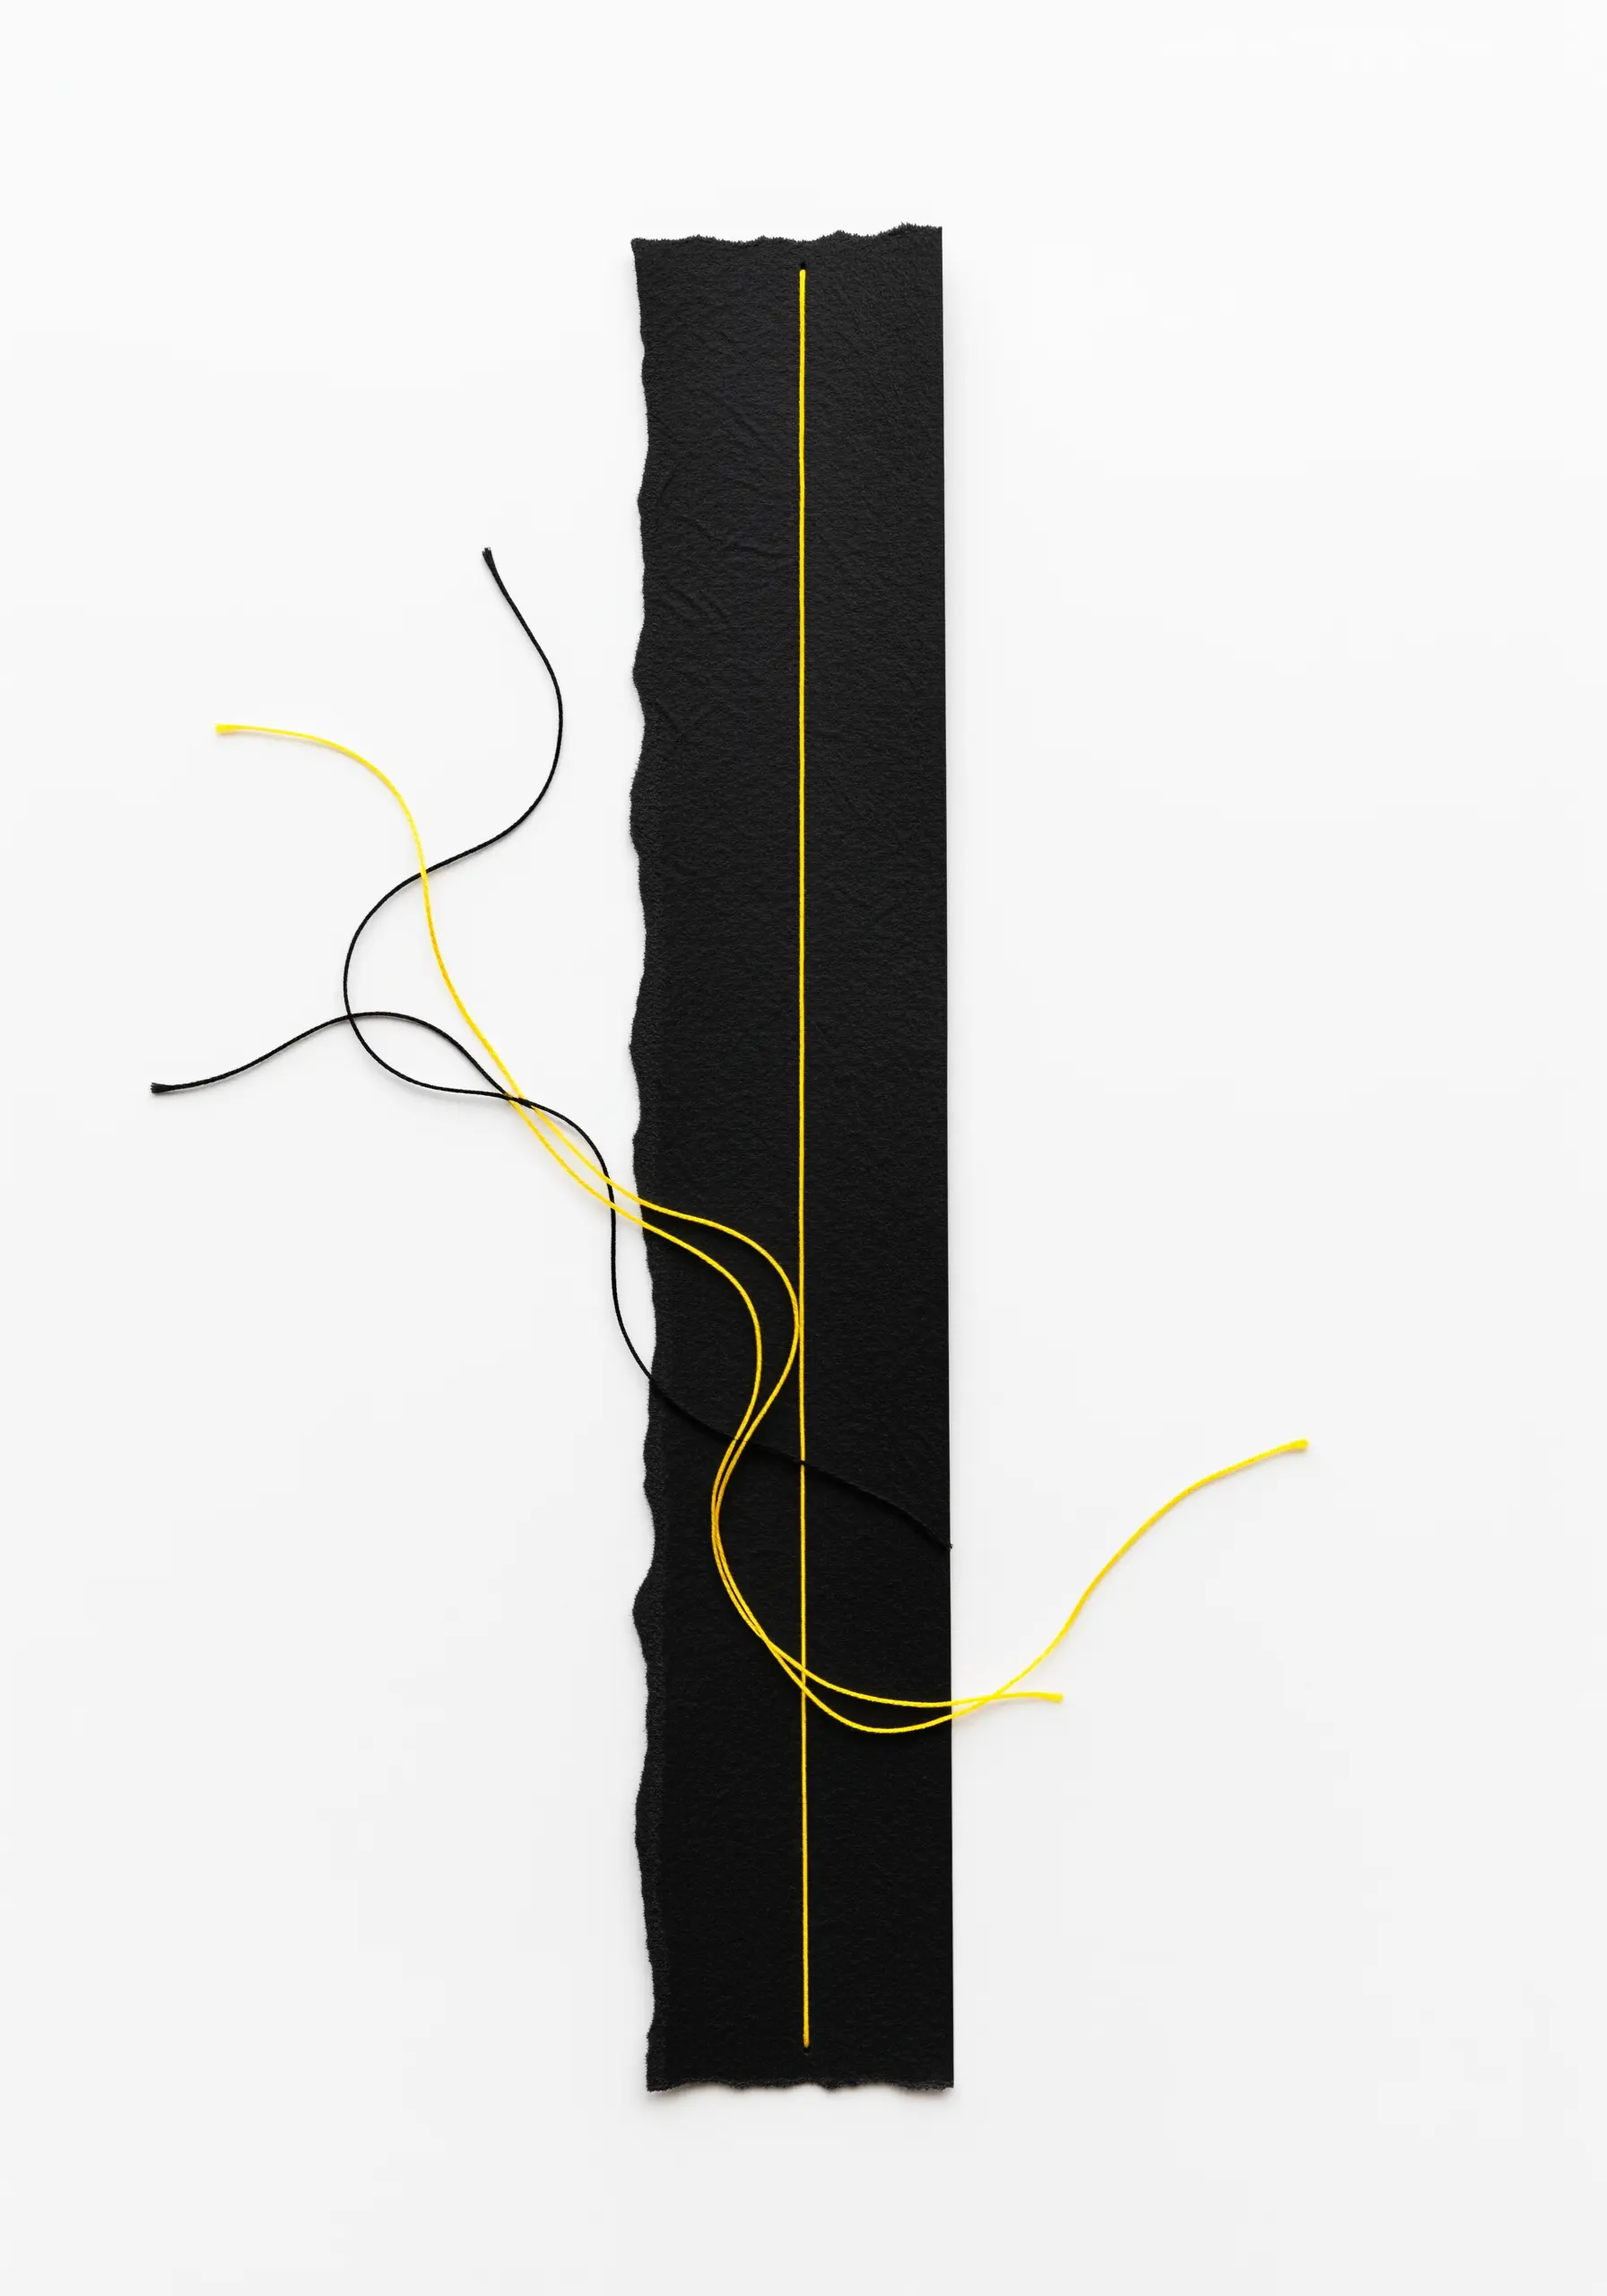
Create a dynamic abstract piece by contrasting a perfectly straight stitched line with the organic chaos of loose threads.
Start by stitching a single, taut line down a strip of textured black paper.
Then, pierce the paper in a few places and pull threads through, securing them on the back but allowing the front ends to remain free.
This juxtaposition of control and freedom creates a compelling visual narrative with very few elements, perfect for minimal embroidery designs.
19. A Stitched Garland of Geometric Meditations
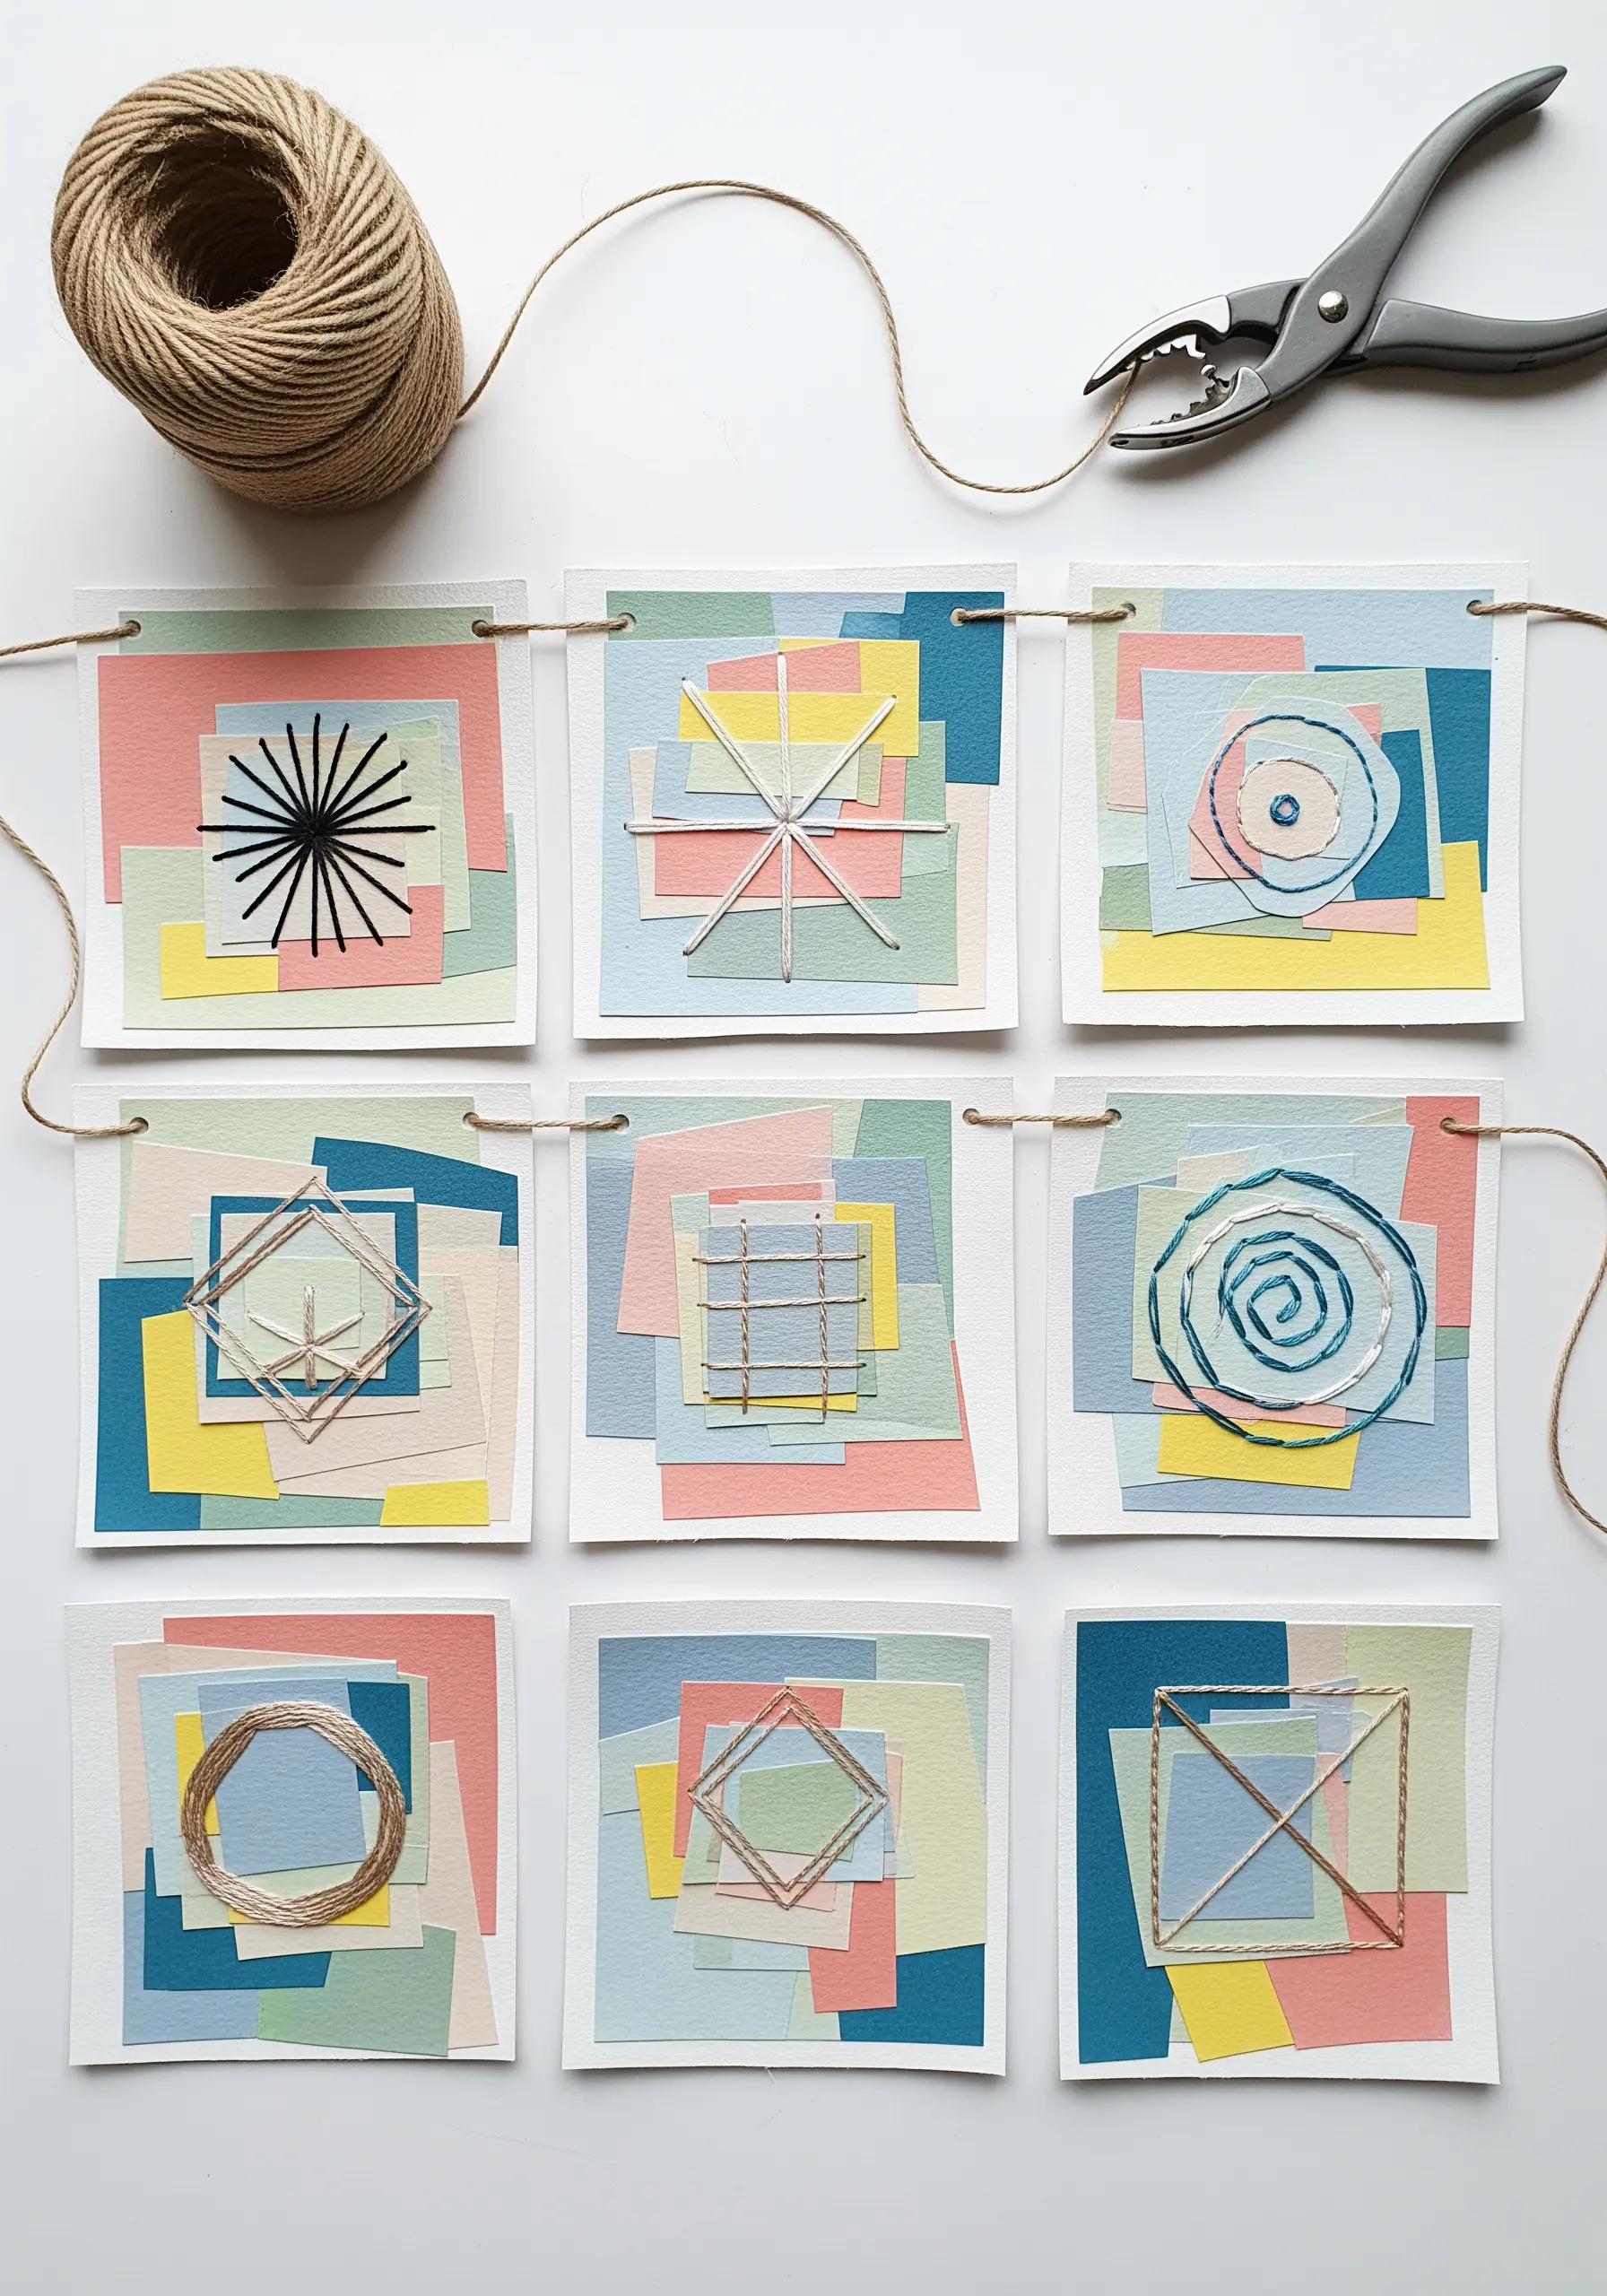
Turn a series of small studies into a single, impactful piece of art by stringing them together as a garland.
On each card, create a mini-collage with layered paper in a coordinated color palette.
Use each card to explore a different geometric stitch pattern: radiating lines, grids, spirals, or concentric squares.
The repetition of colors and shapes across the series creates a cohesive and sophisticated decorative piece.
Explore modern grid & dot stitch concepts to expand your geometric vocabulary.
20. Adding Sculptural Knots to a Photo Collage
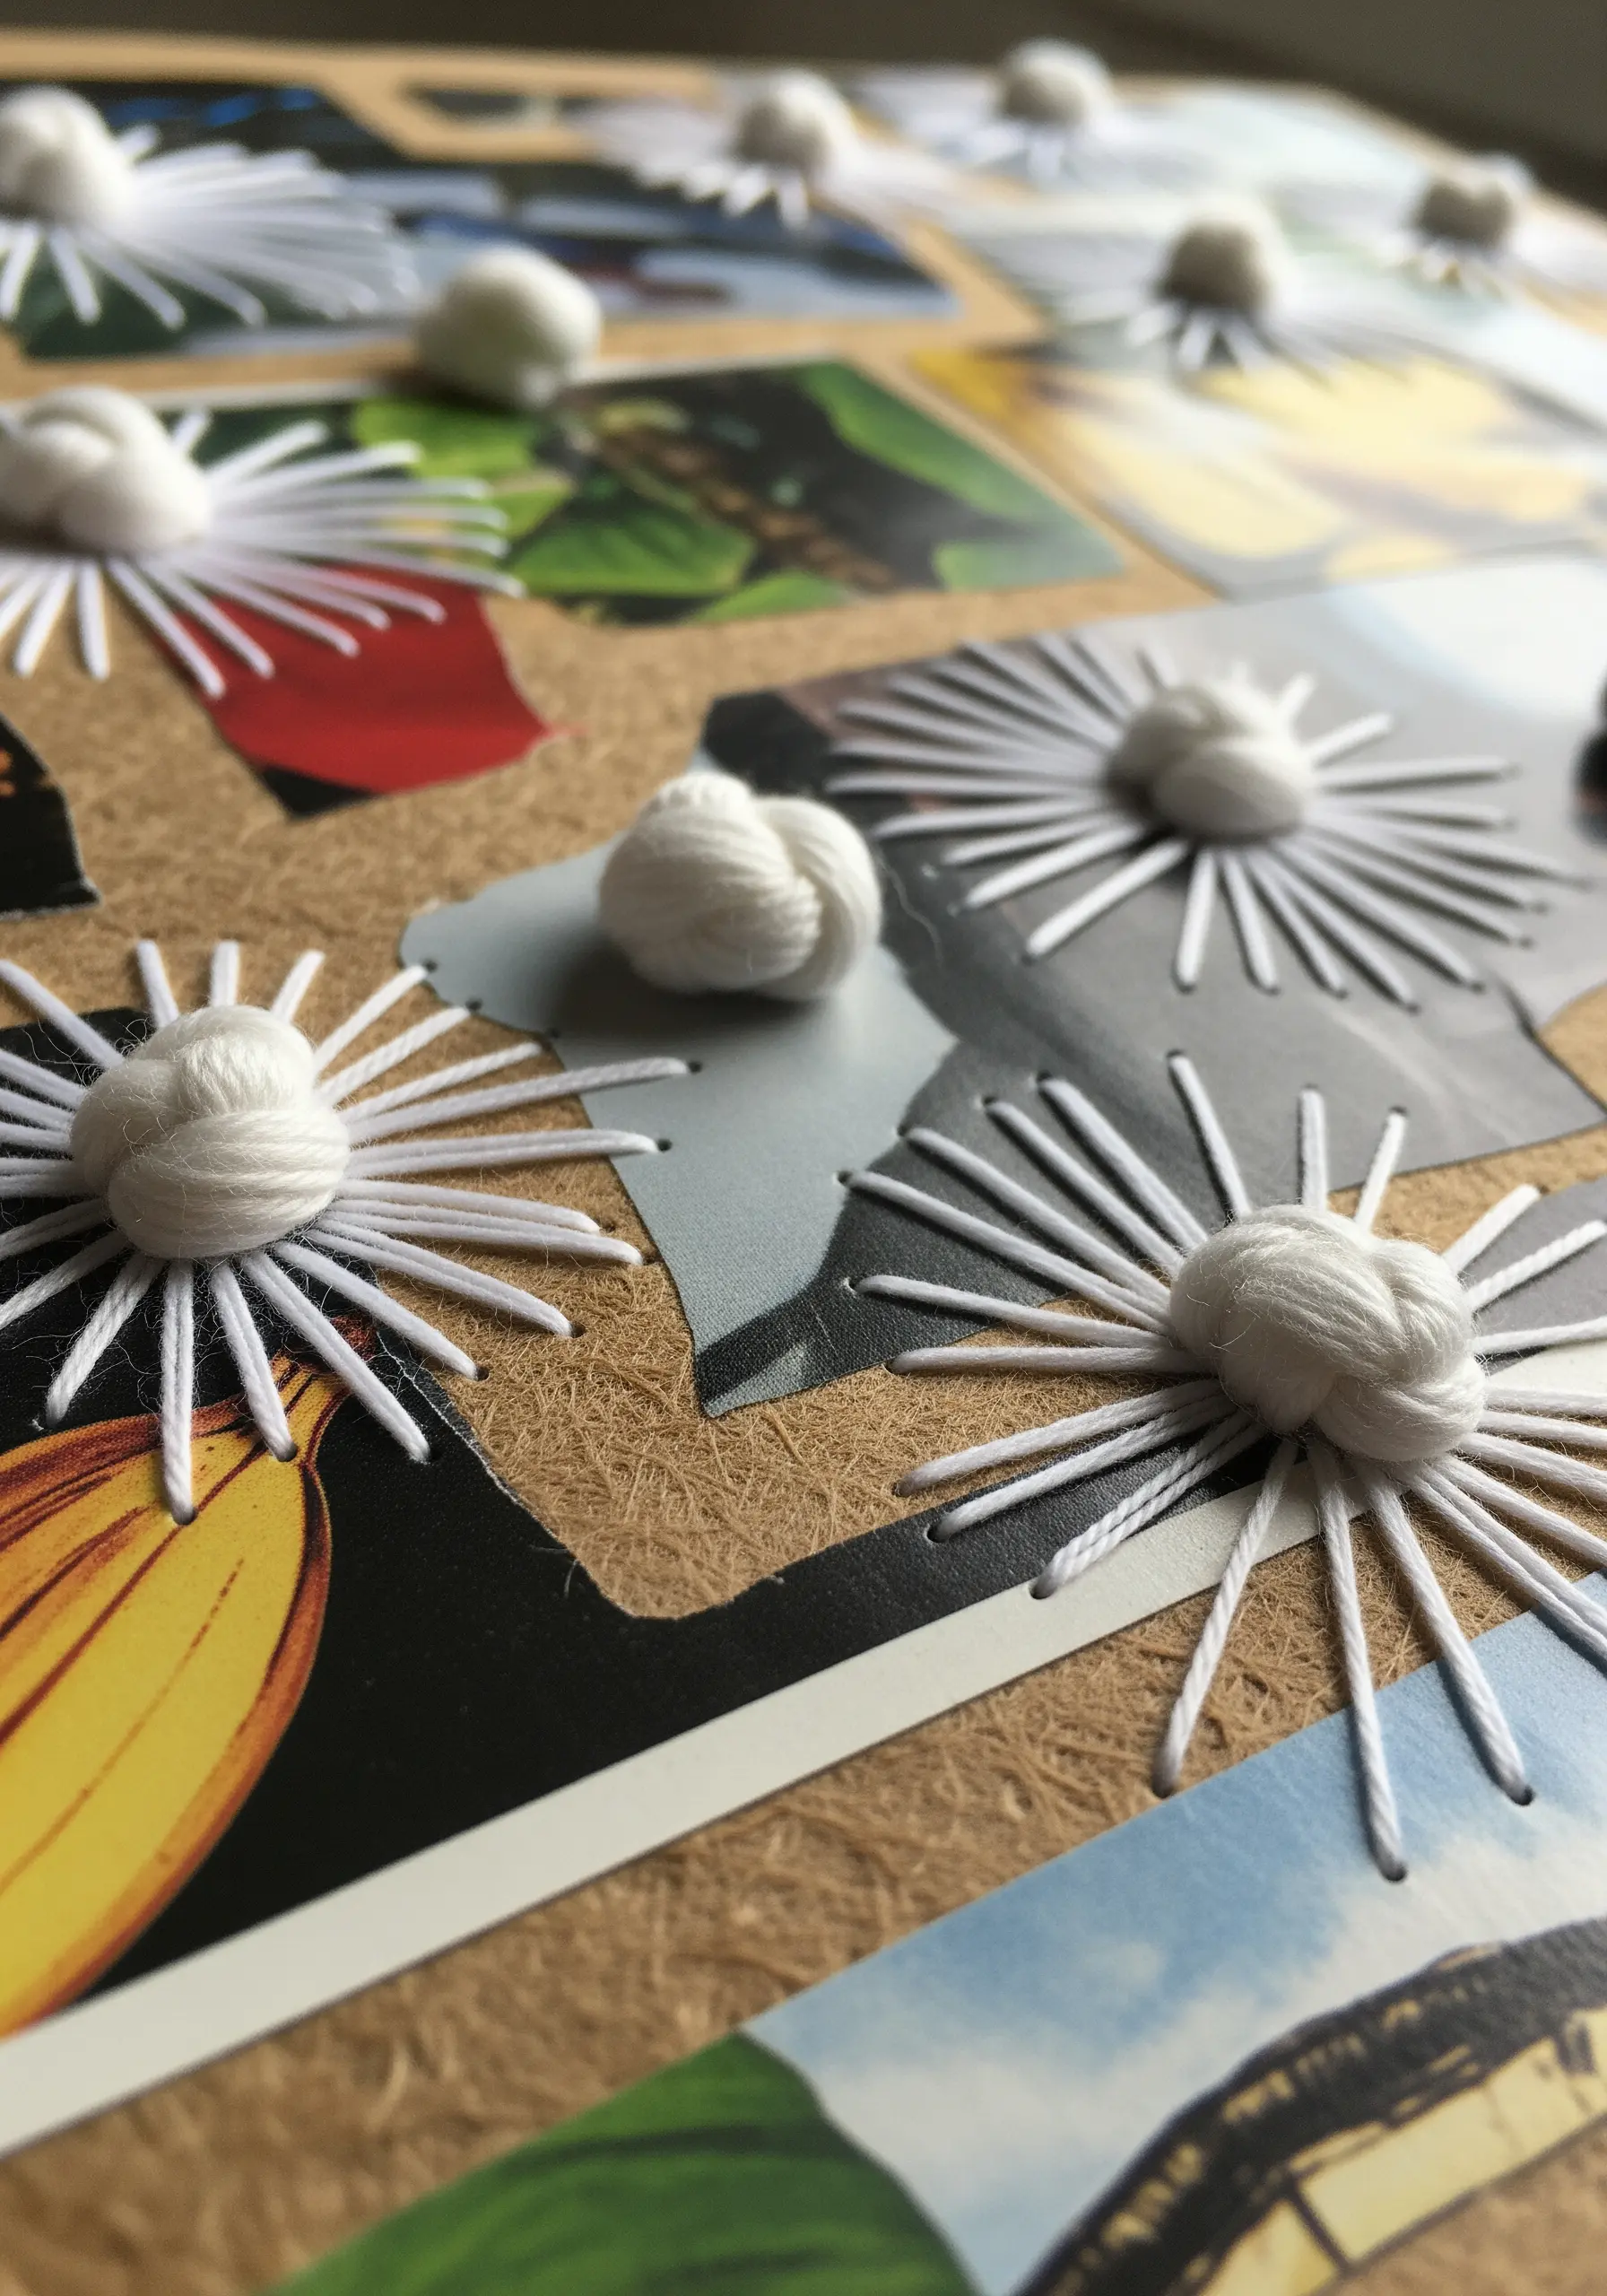
Introduce a bold, tactile element to your flat collages by incorporating dimensional yarn knots.
After arranging your photos and paper on a sturdy base like cork or matboard, use an awl to pierce holes for stitching.
Create radiating straight stitches with standard embroidery floss, then top the center with a large, soft knot made from thick yarn, like a Colonial or bullion knot.
This is one of the easiest creative collage inspirations for adding immediate dimension.
21. Creating Faux Stained Glass with Paper and Gold Cord

Replicate the luminous look of stained glass by using black paper as your base and couched thread as your ‘leading’.
Cut geometric shapes from brightly colored paper and glue them onto the black background, leaving a consistent, narrow gap between each piece.
Lay down a thick gold metallic cord or thread in these gaps and secure it with tiny, nearly invisible stitches in a matching fine thread.
The result is a set of stunning framed embroidery pieces with vibrant, graphic appeal.
22. Decorating Paper Pastries with Stitched Sprinkles
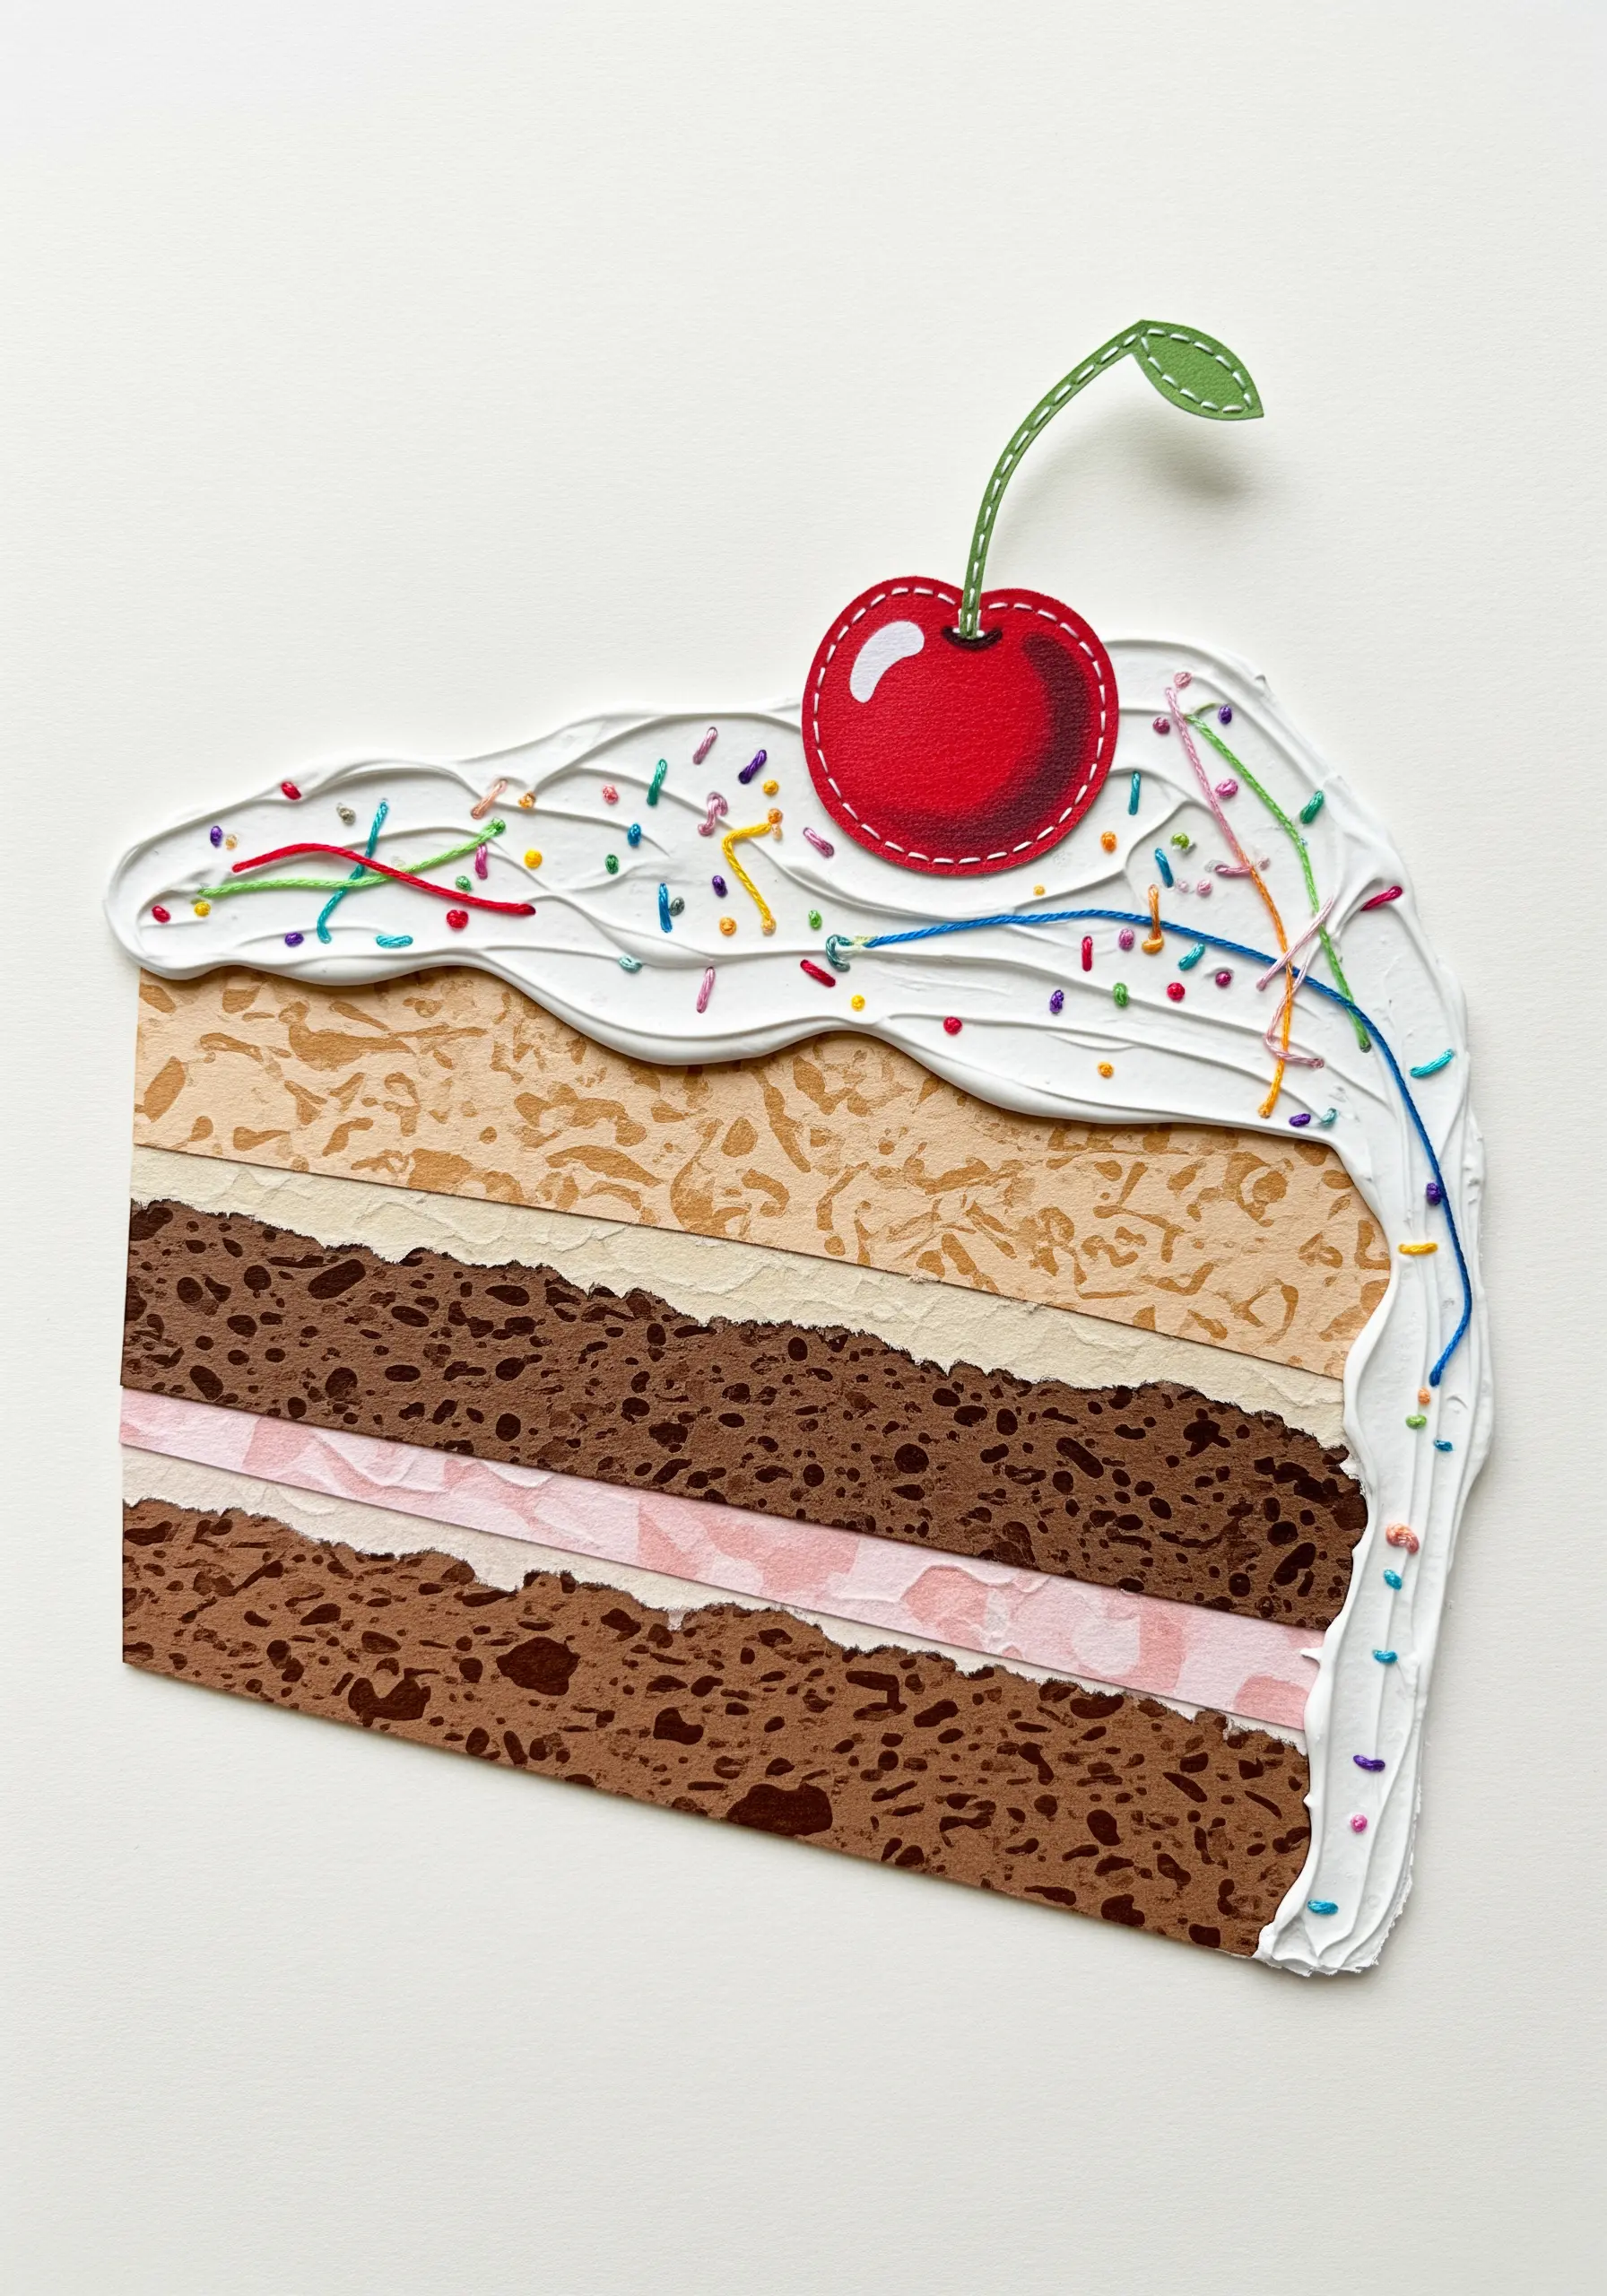
Bring a paper collage to life with tiny, playful stitch details.
After layering your paper to create the cake slice, use floss in a rainbow of colors to add ‘sprinkles’.
A mix of single, short straight stitches and tiny French knots will create the most realistic and whimsical effect.
For the cherry, a few curved white stitches can suggest a glossy highlight, adding another layer of thoughtful detail to your cute dessert & tea theme table linen embroidery motifs on paper.
23. An Alphabet Sampler of Stitches and Textures
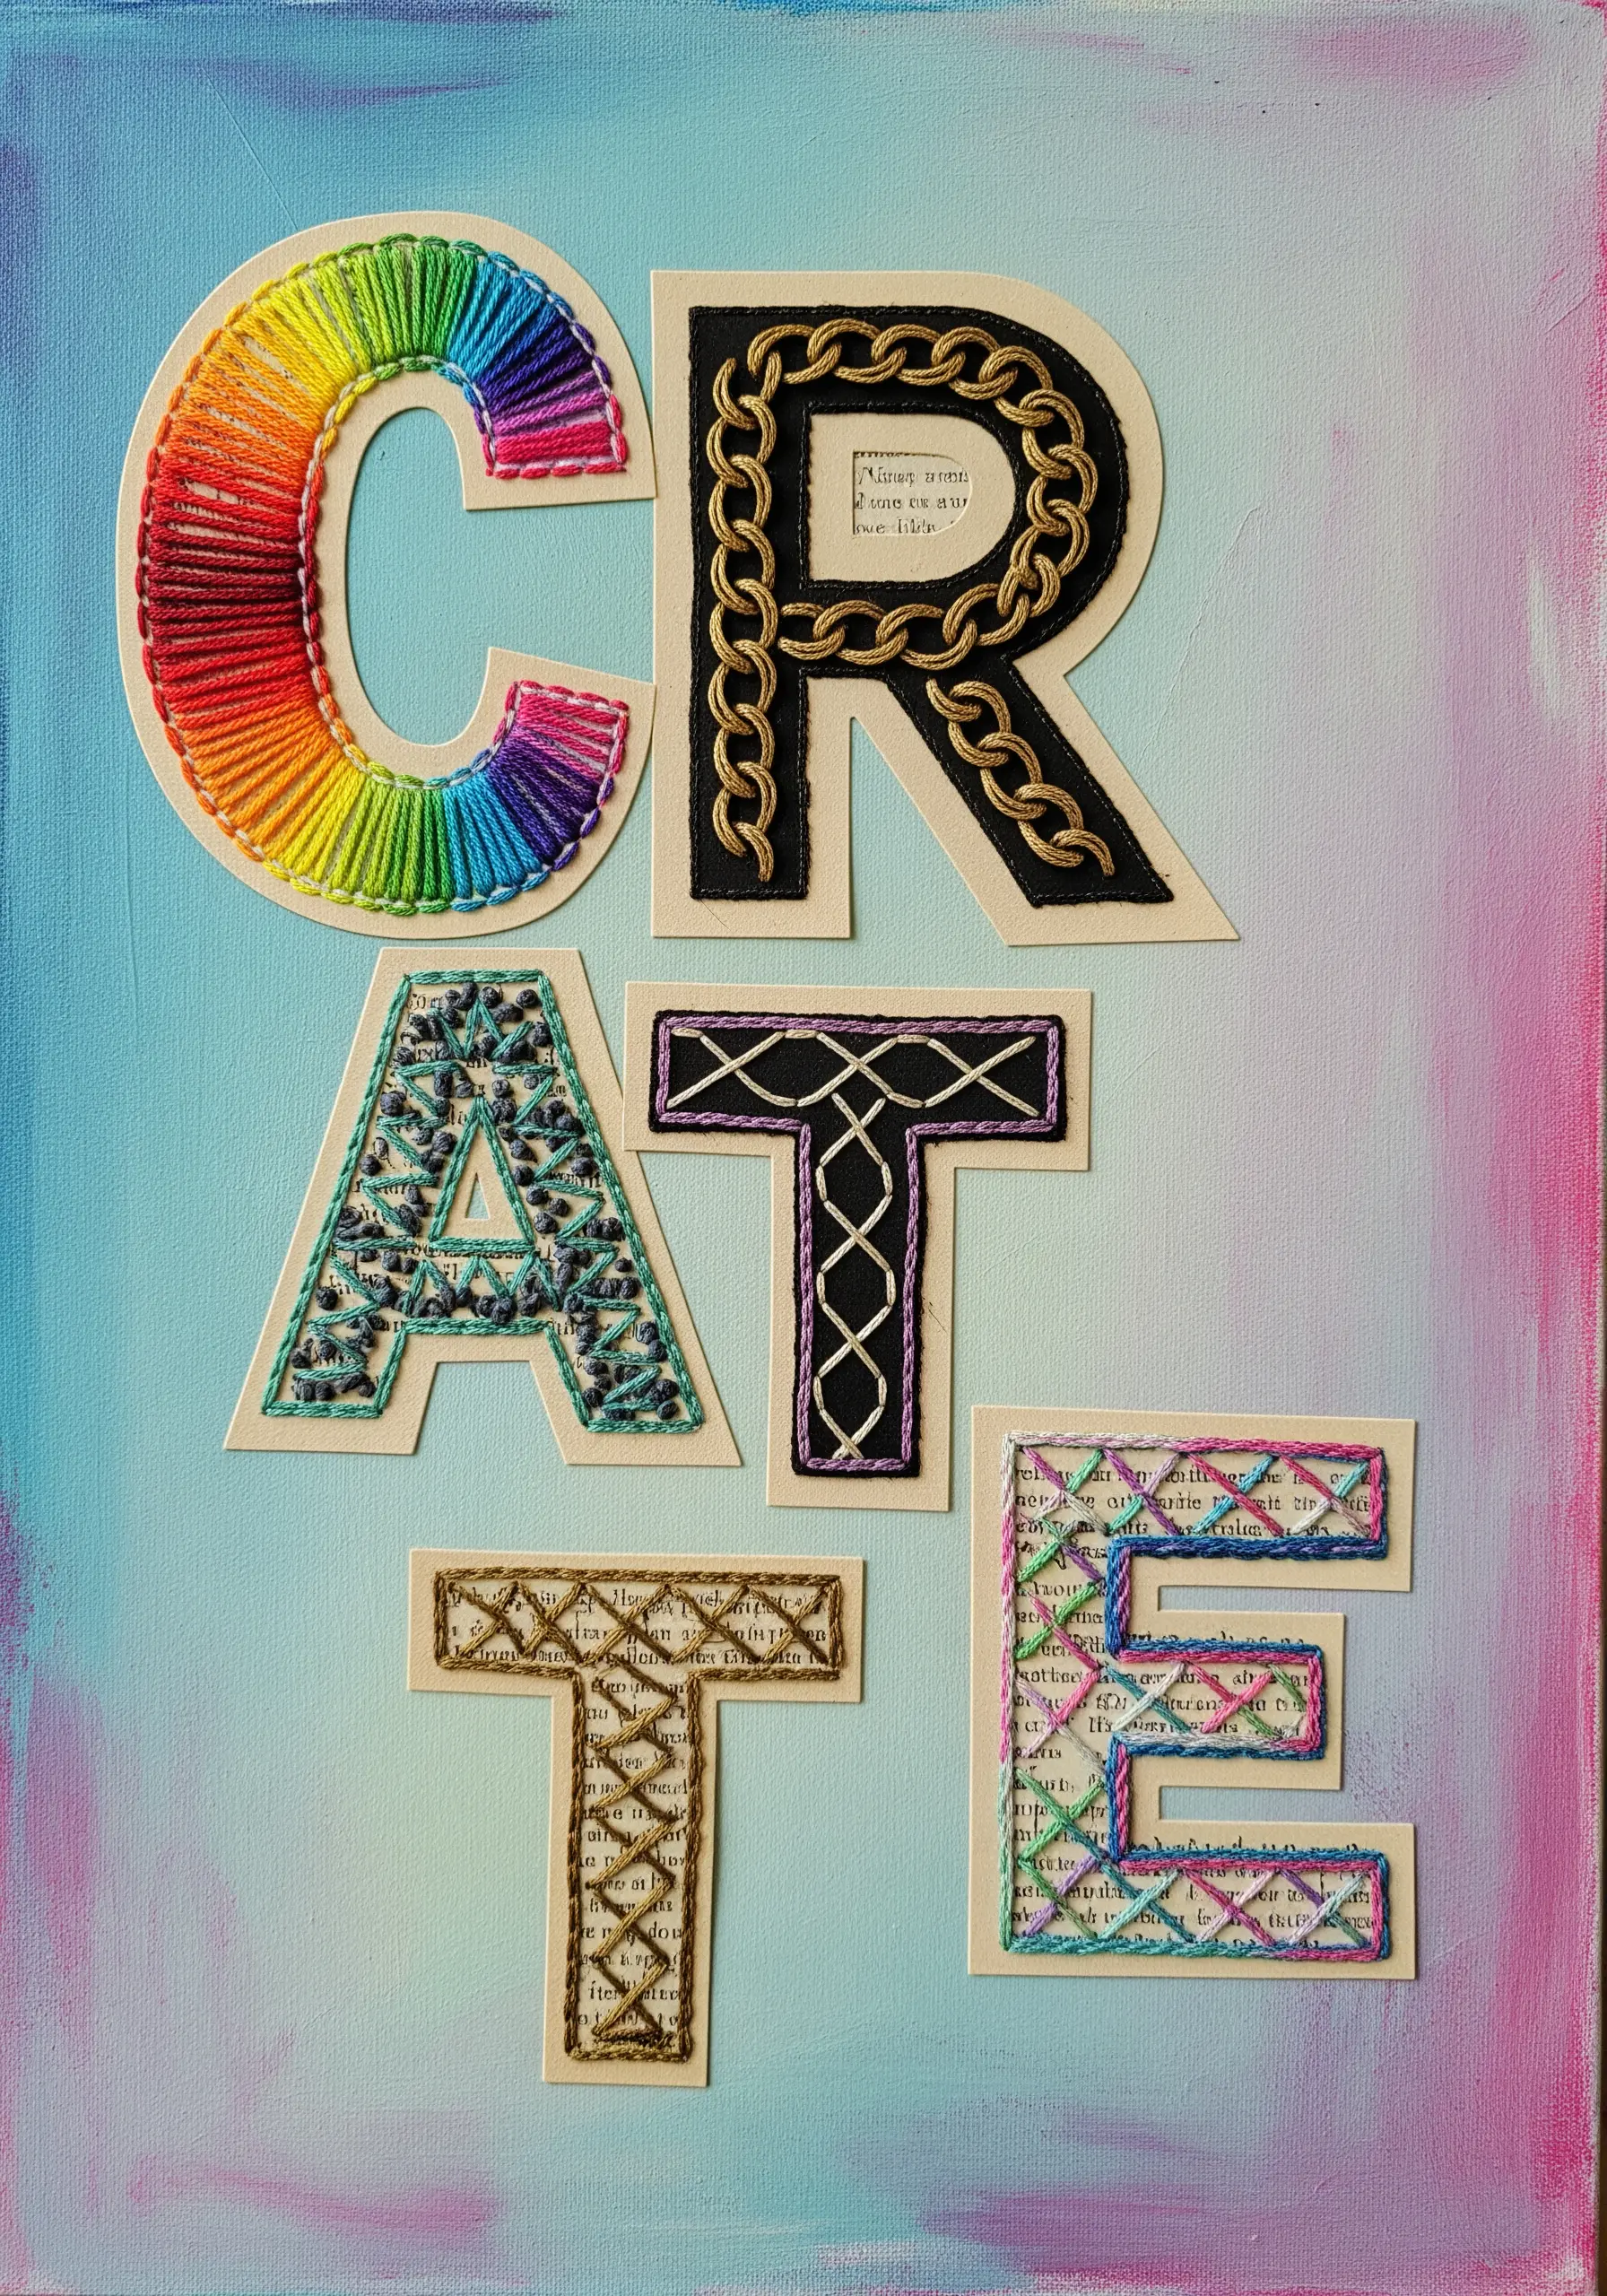
Use block letters as a framework to practice and showcase a variety of stitch techniques.
Cut each letter from paper and lightly glue it to your canvas or background paper.
Treat each letter as a mini-sampler, filling it with a different stitch: try a satin stitch gradient, a woven spider web, couched cords, or a cross-stitch pattern.
This approach turns practice into a finished piece of art, similar to creating inspirational quote string art designs with more texture.
24. A Sunlit Landscape Combining Fabric, Paper, and Thread
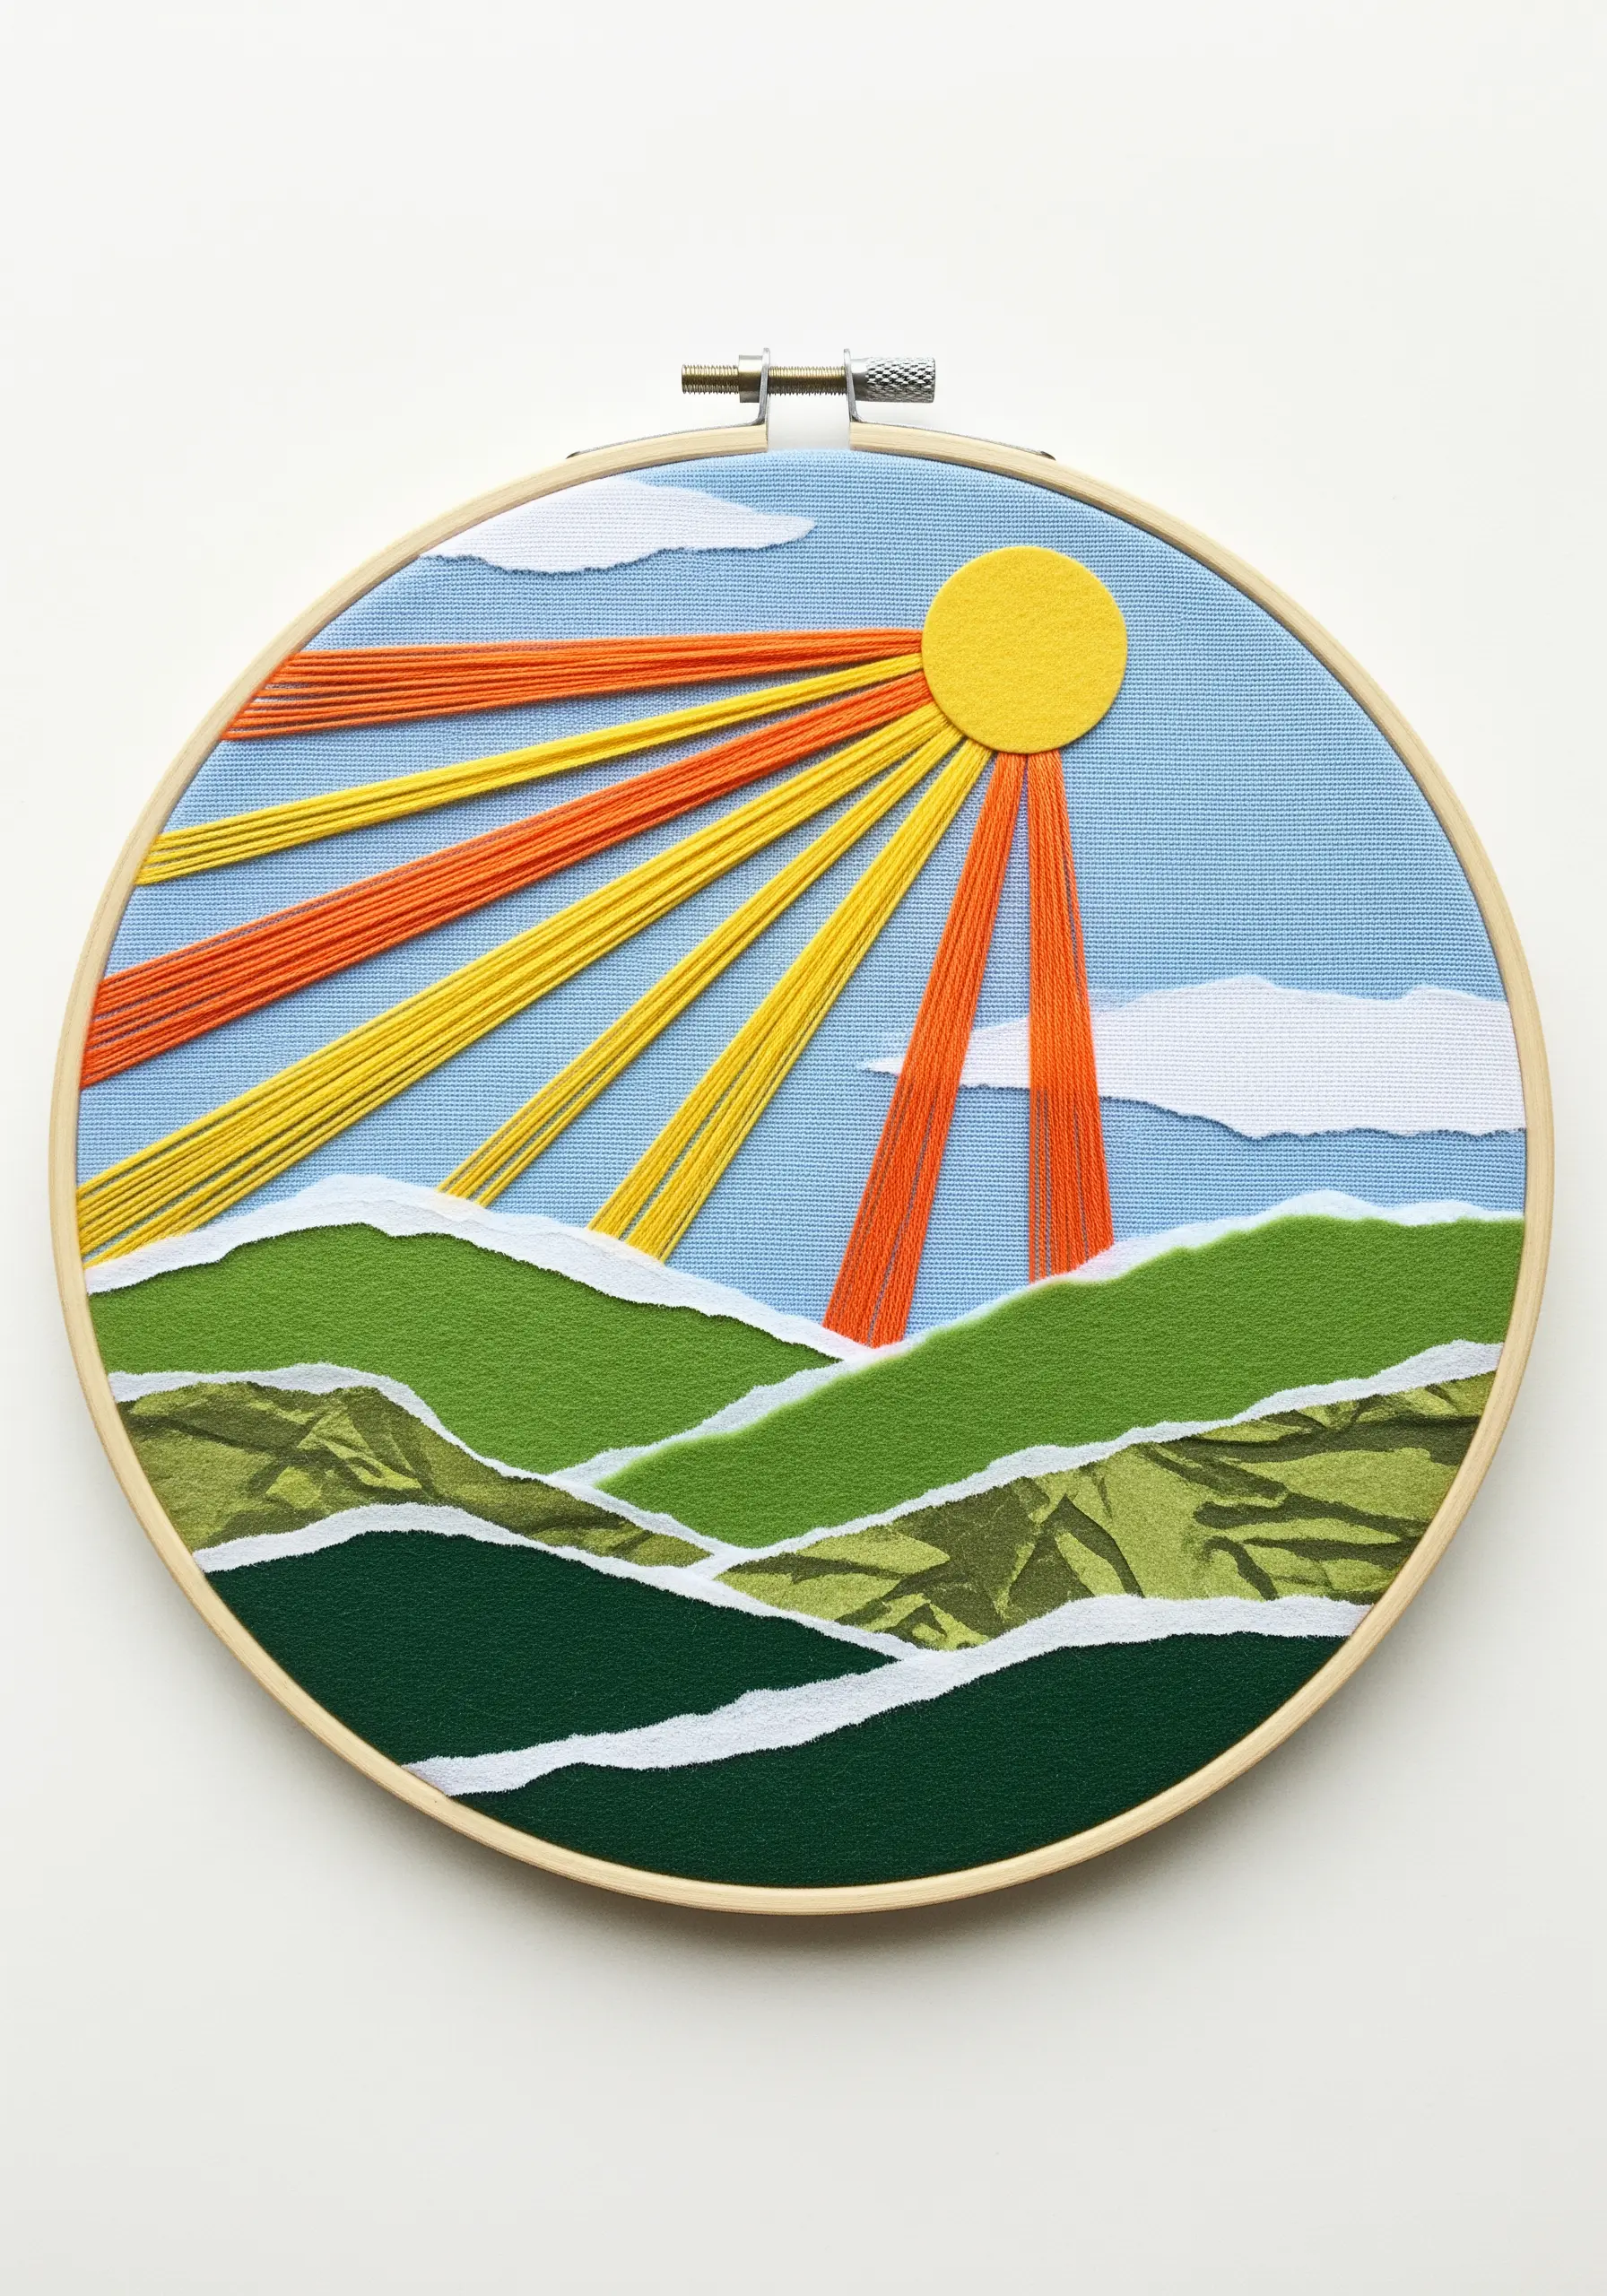
Integrate paper collage directly into your hoop art for dynamic, layered landscapes.
Secure your background fabric in the hoop, then arrange and glue down torn paper strips to form hills and mountains.
Create dramatic sun rays with long, taut straight stitches that extend from a central point, piercing through both the fabric and paper layers.
This technique unifies the different materials and is especially effective for oversized hoop wall displays.
25. Capturing Motion with Trailing Threads
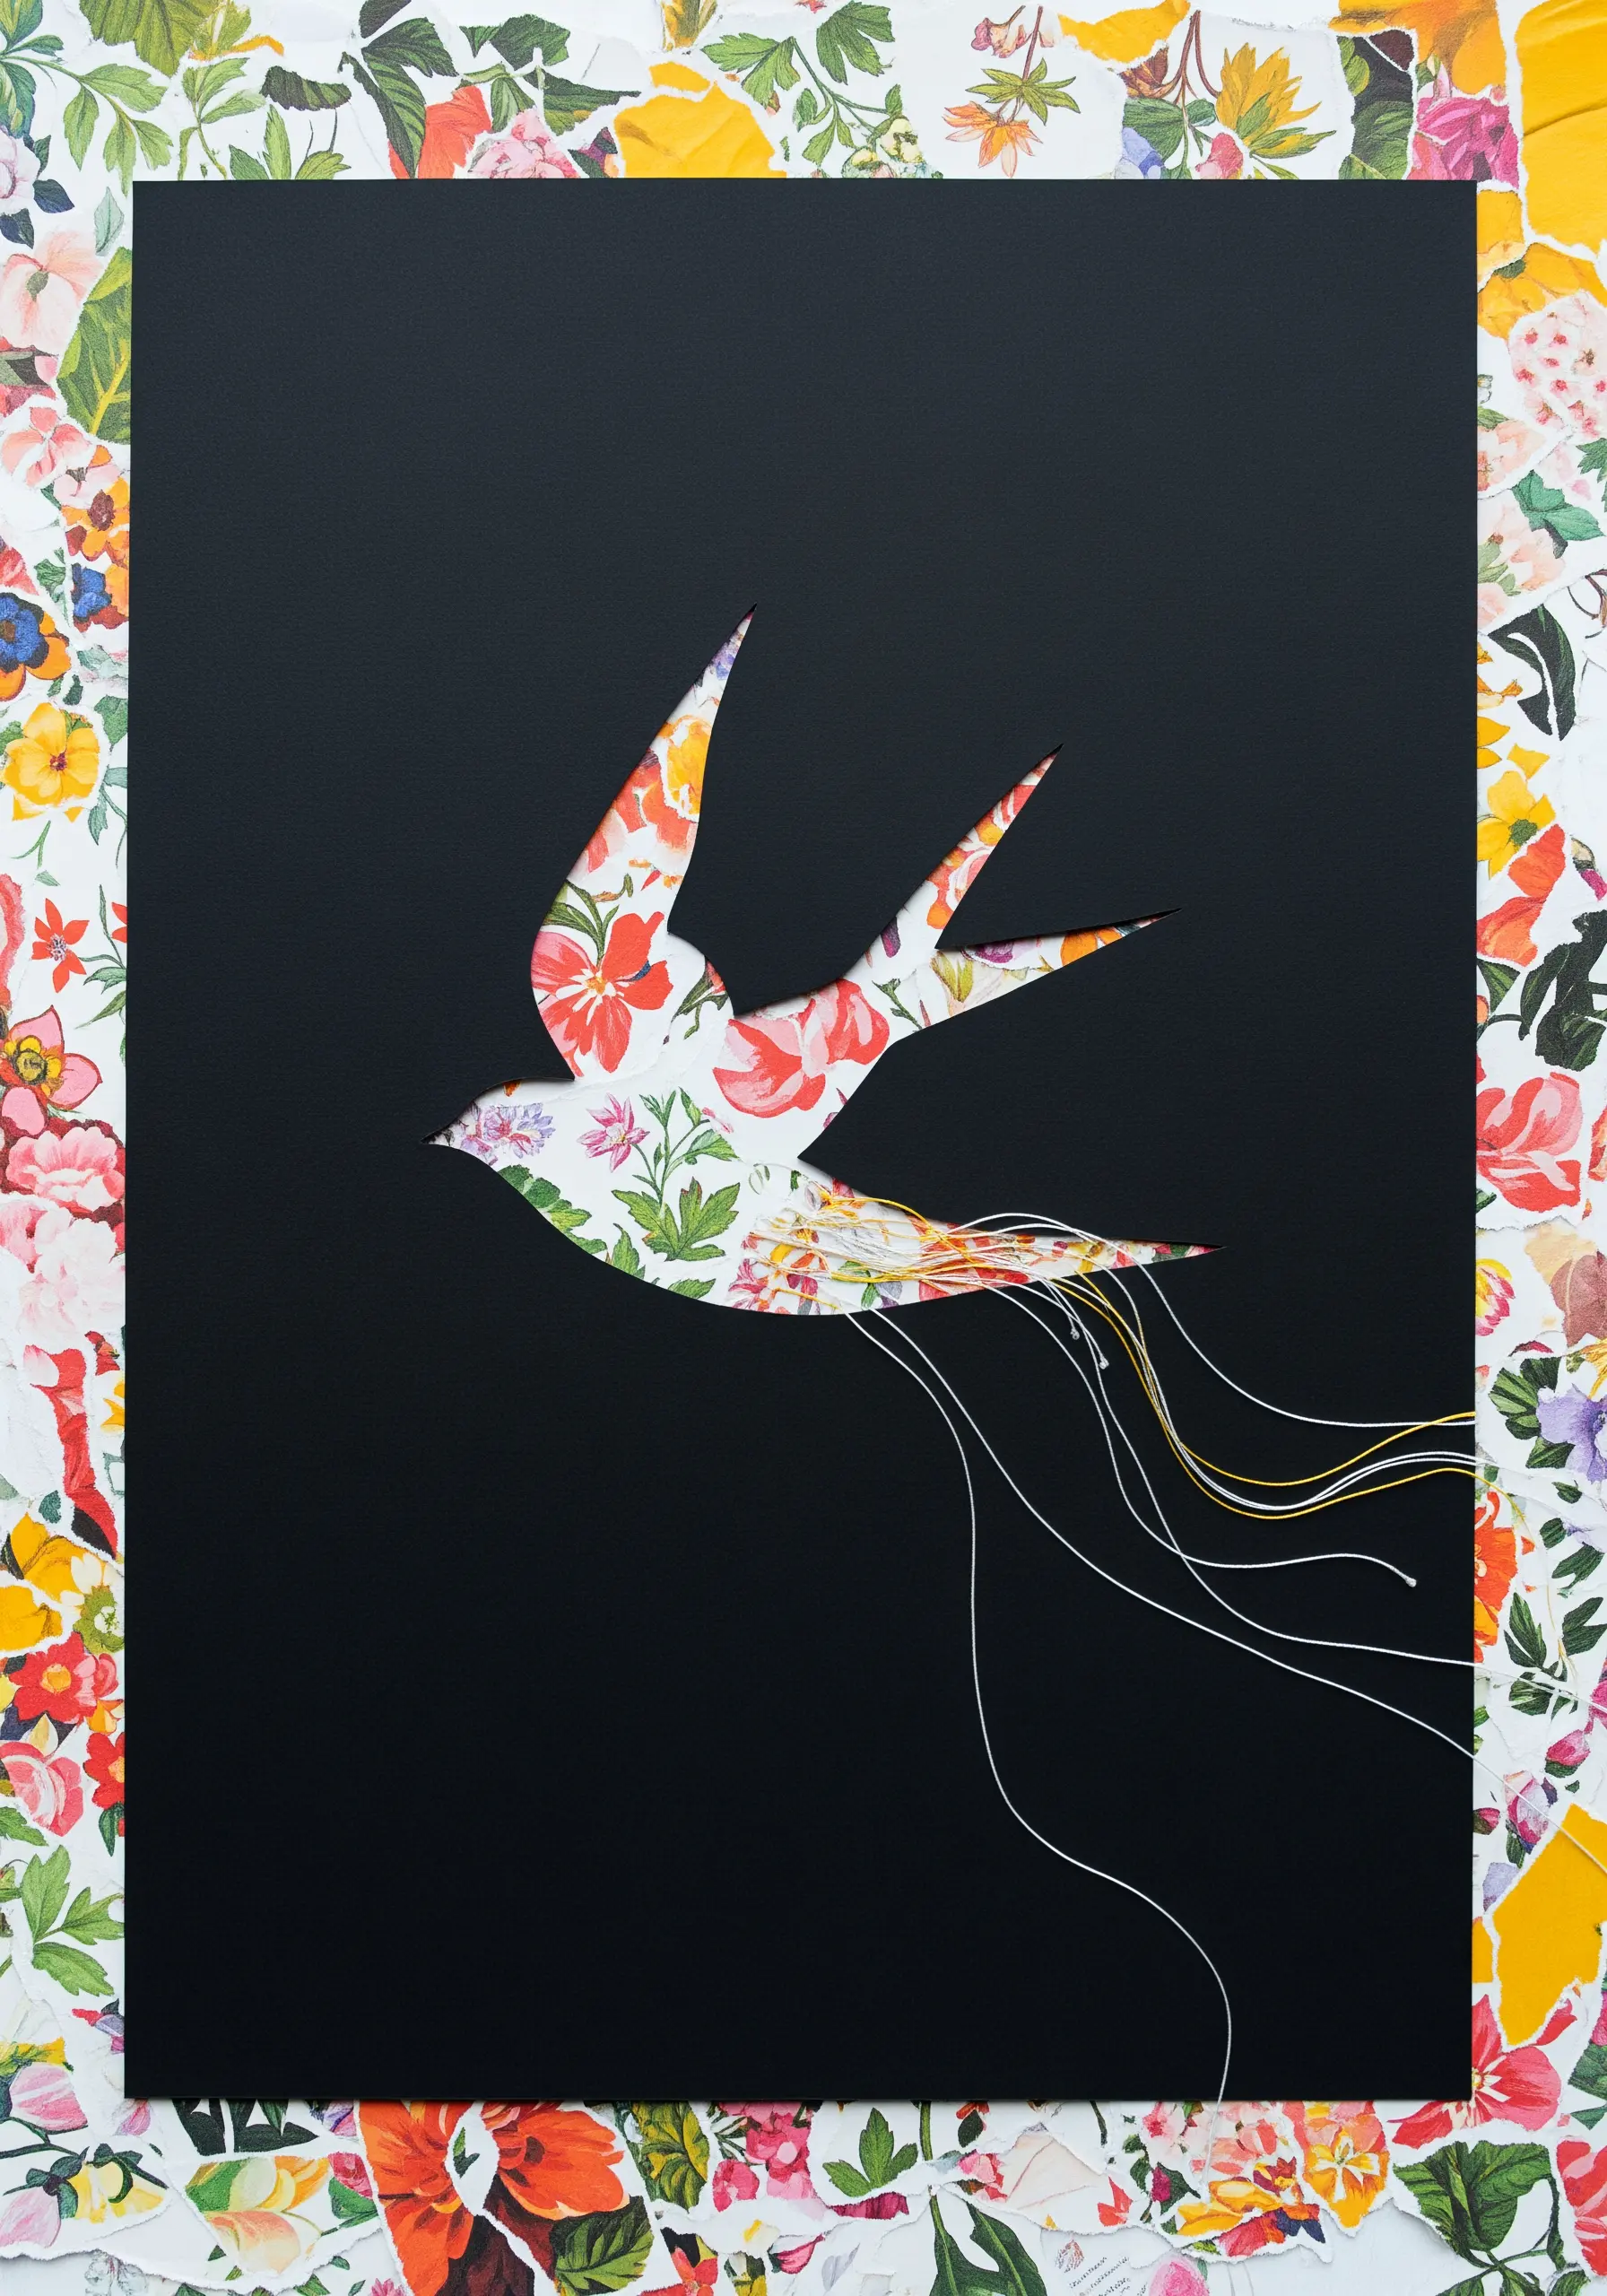
Suggest movement and energy in a static image by allowing your threads to flow freely.
Create a crisp silhouette by cutting a shape from patterned paper and mounting it on a high-contrast background.
Pierce several holes along the edge where you want to imply motion—like the tail of a bird—and pull threads of varying lengths and colors through.
Don’t stitch them down; let them hang loose to create a beautiful, dynamic effect, perfect for pieces like colorful tropical bird embroidery stitches.
26. Embellishing Keepsake Boxes with Oceanic Stitches
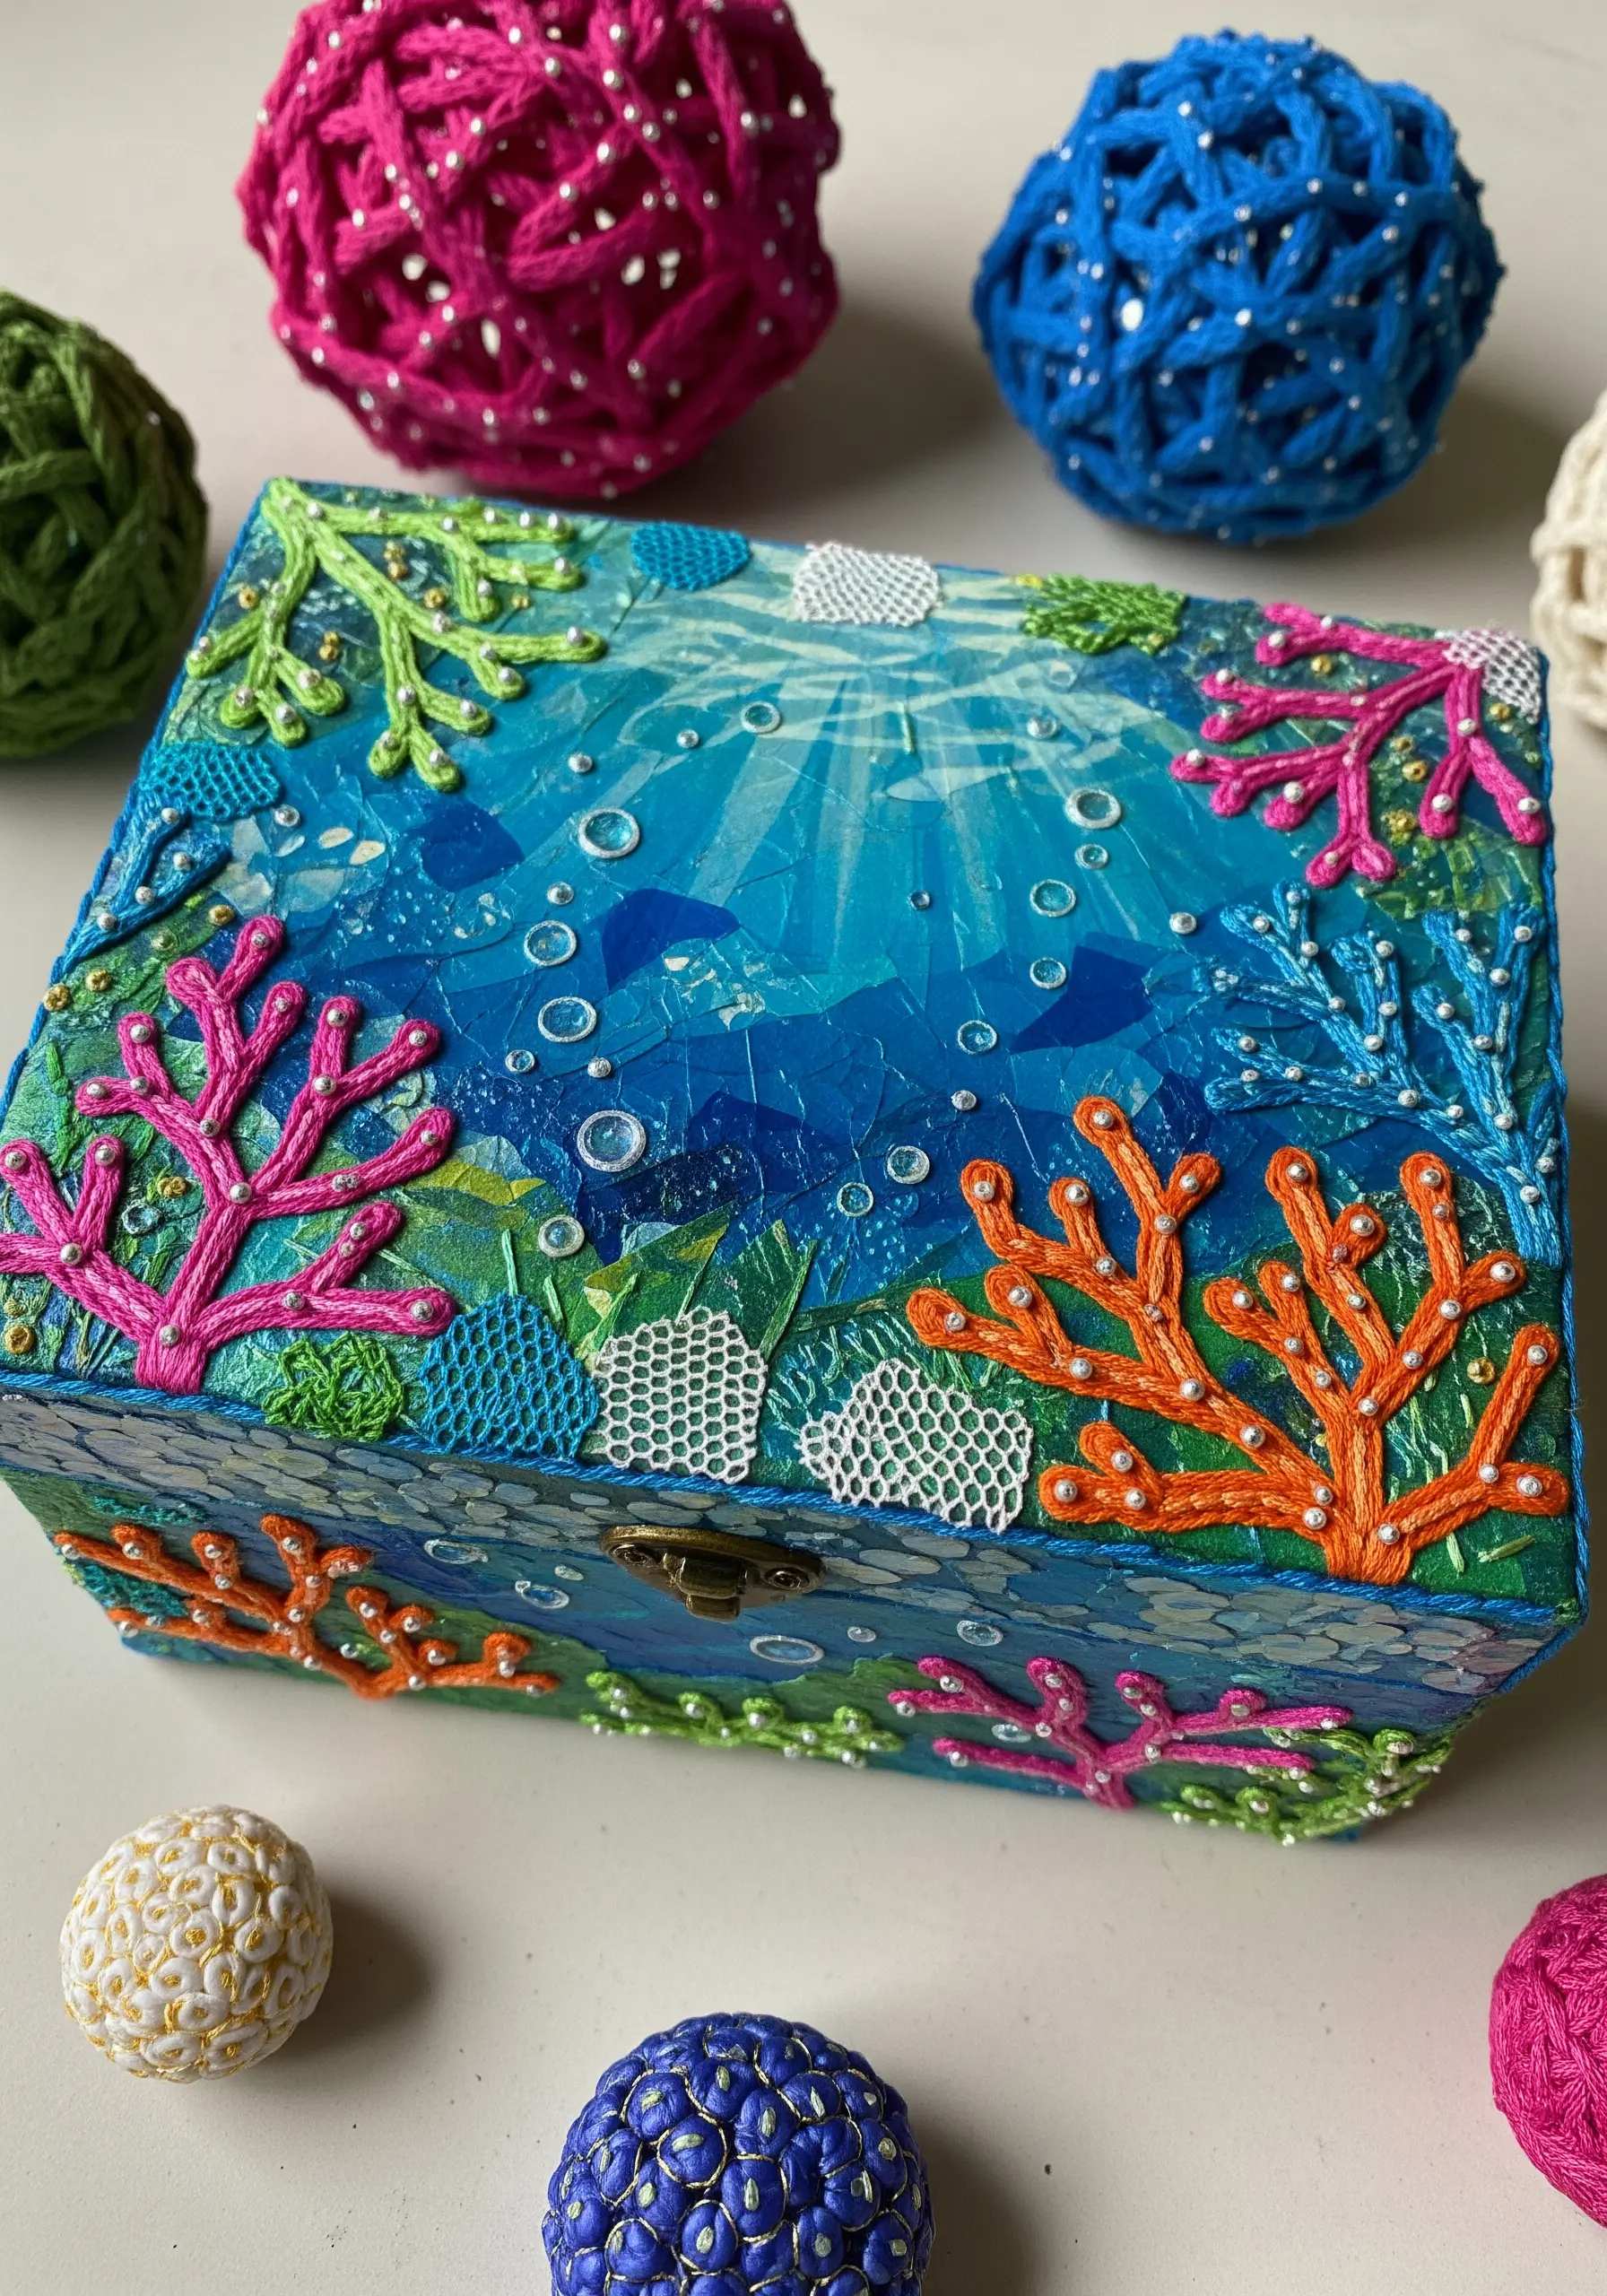
Extend your collage and embroidery skills to three-dimensional objects for a truly unique creation.
First, cover your box with a paper collage using decoupage medium.
Once dry, use an awl to pre-punch holes for your stitches.
Use dimensional stitches like French knots, bullion knots, and lazy daisy stitches to build up the texture of coral and sea plants.
This makes for one of the most thoughtful handmade embroidery projects to give as thoughtful birthday gifts.
27. Mapping Memories onto Architectural Blueprints
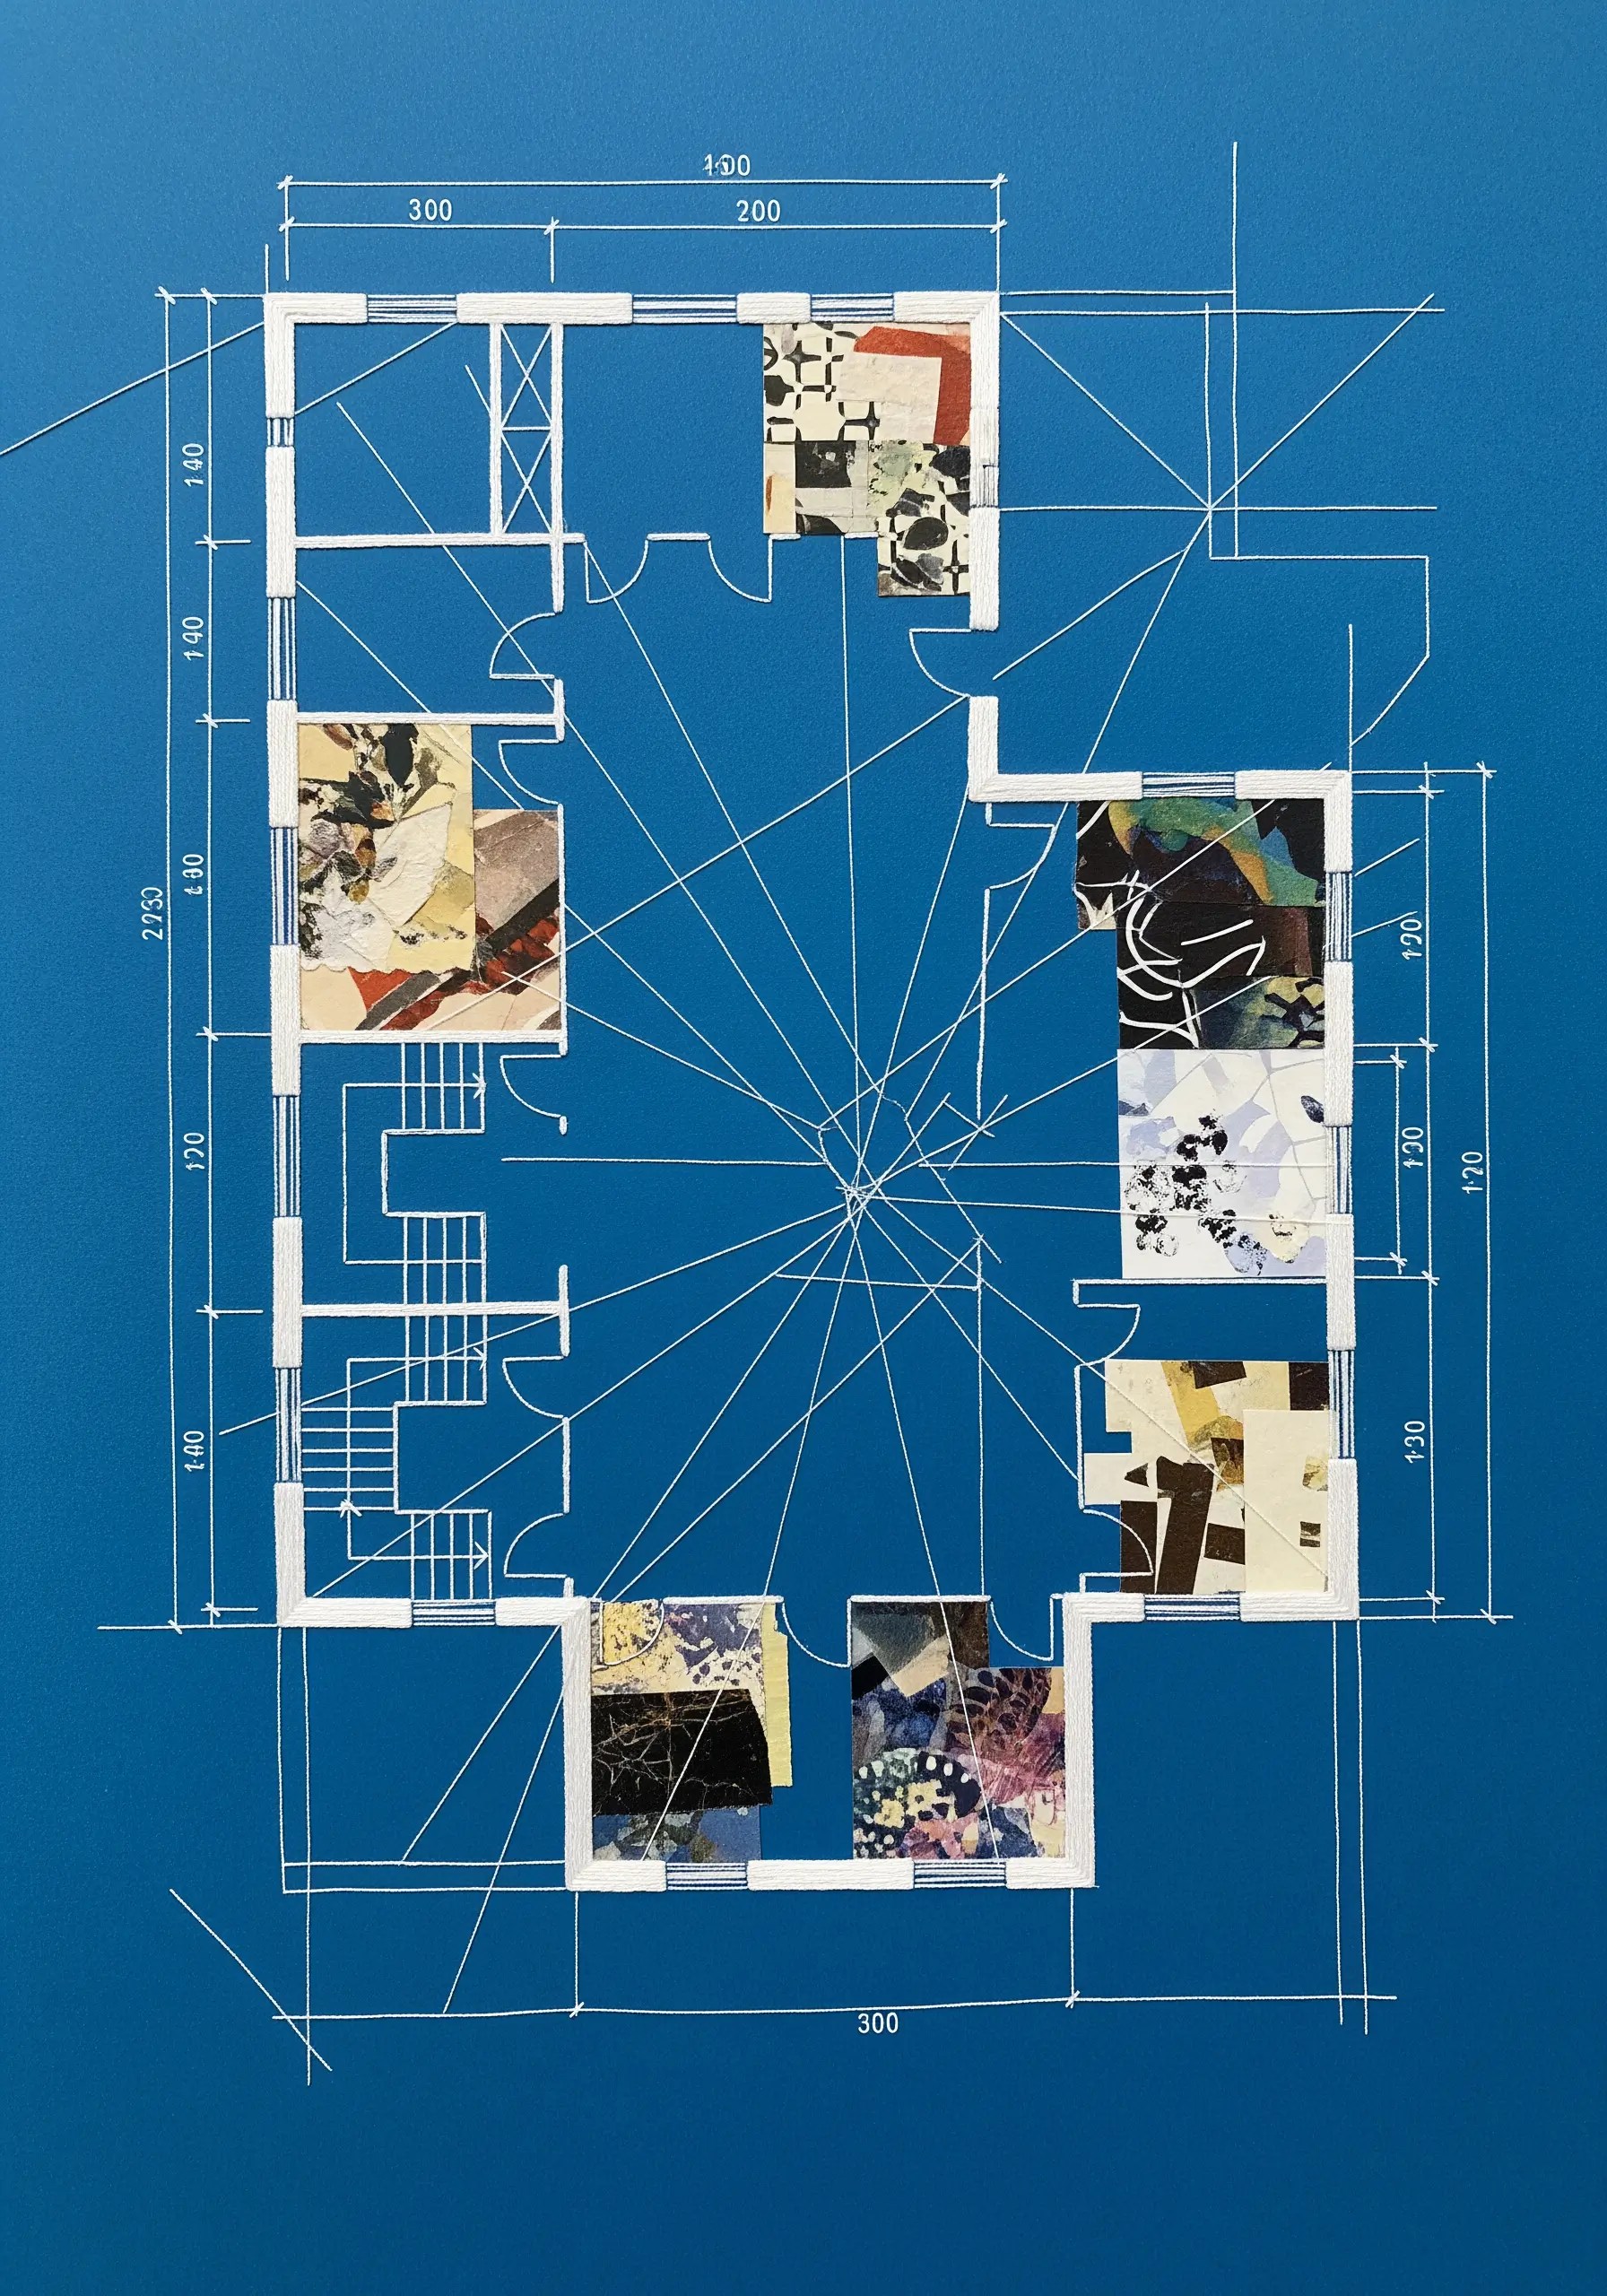
Combine the precision of a technical drawing with the expressive freedom of abstract collage.
Start with a clean blueprint or floor plan as your base.
Select specific rooms or areas and fill them with small, abstract paper collages that evoke the feeling, color, or memories associated with that space.
The contrast between the rigid lines of the plan and the organic nature of the collage creates a deeply personal and visually compelling narrative.
It’s a fantastic foundation for abstract mixed media embroidery ideas.
28. Designing Fashion with Pleated Paper and Stitch

Move beyond flat surfaces by using paper sculpture to add dramatic volume to an illustration.
Start with a simple pencil sketch of a figure.
For the garment, carefully accordion-fold a large piece of paper and secure the pleats at the ‘waistline’ by stitching it directly onto the drawing.
A simple running stitch along the paper’s edge can define the hem and prevent the pleats from fanning out too much.
You can use these ideas to elevate aesthetic embroidery ideas from clothes to paper.
29. Adding Stitched Accents to Woven Paper
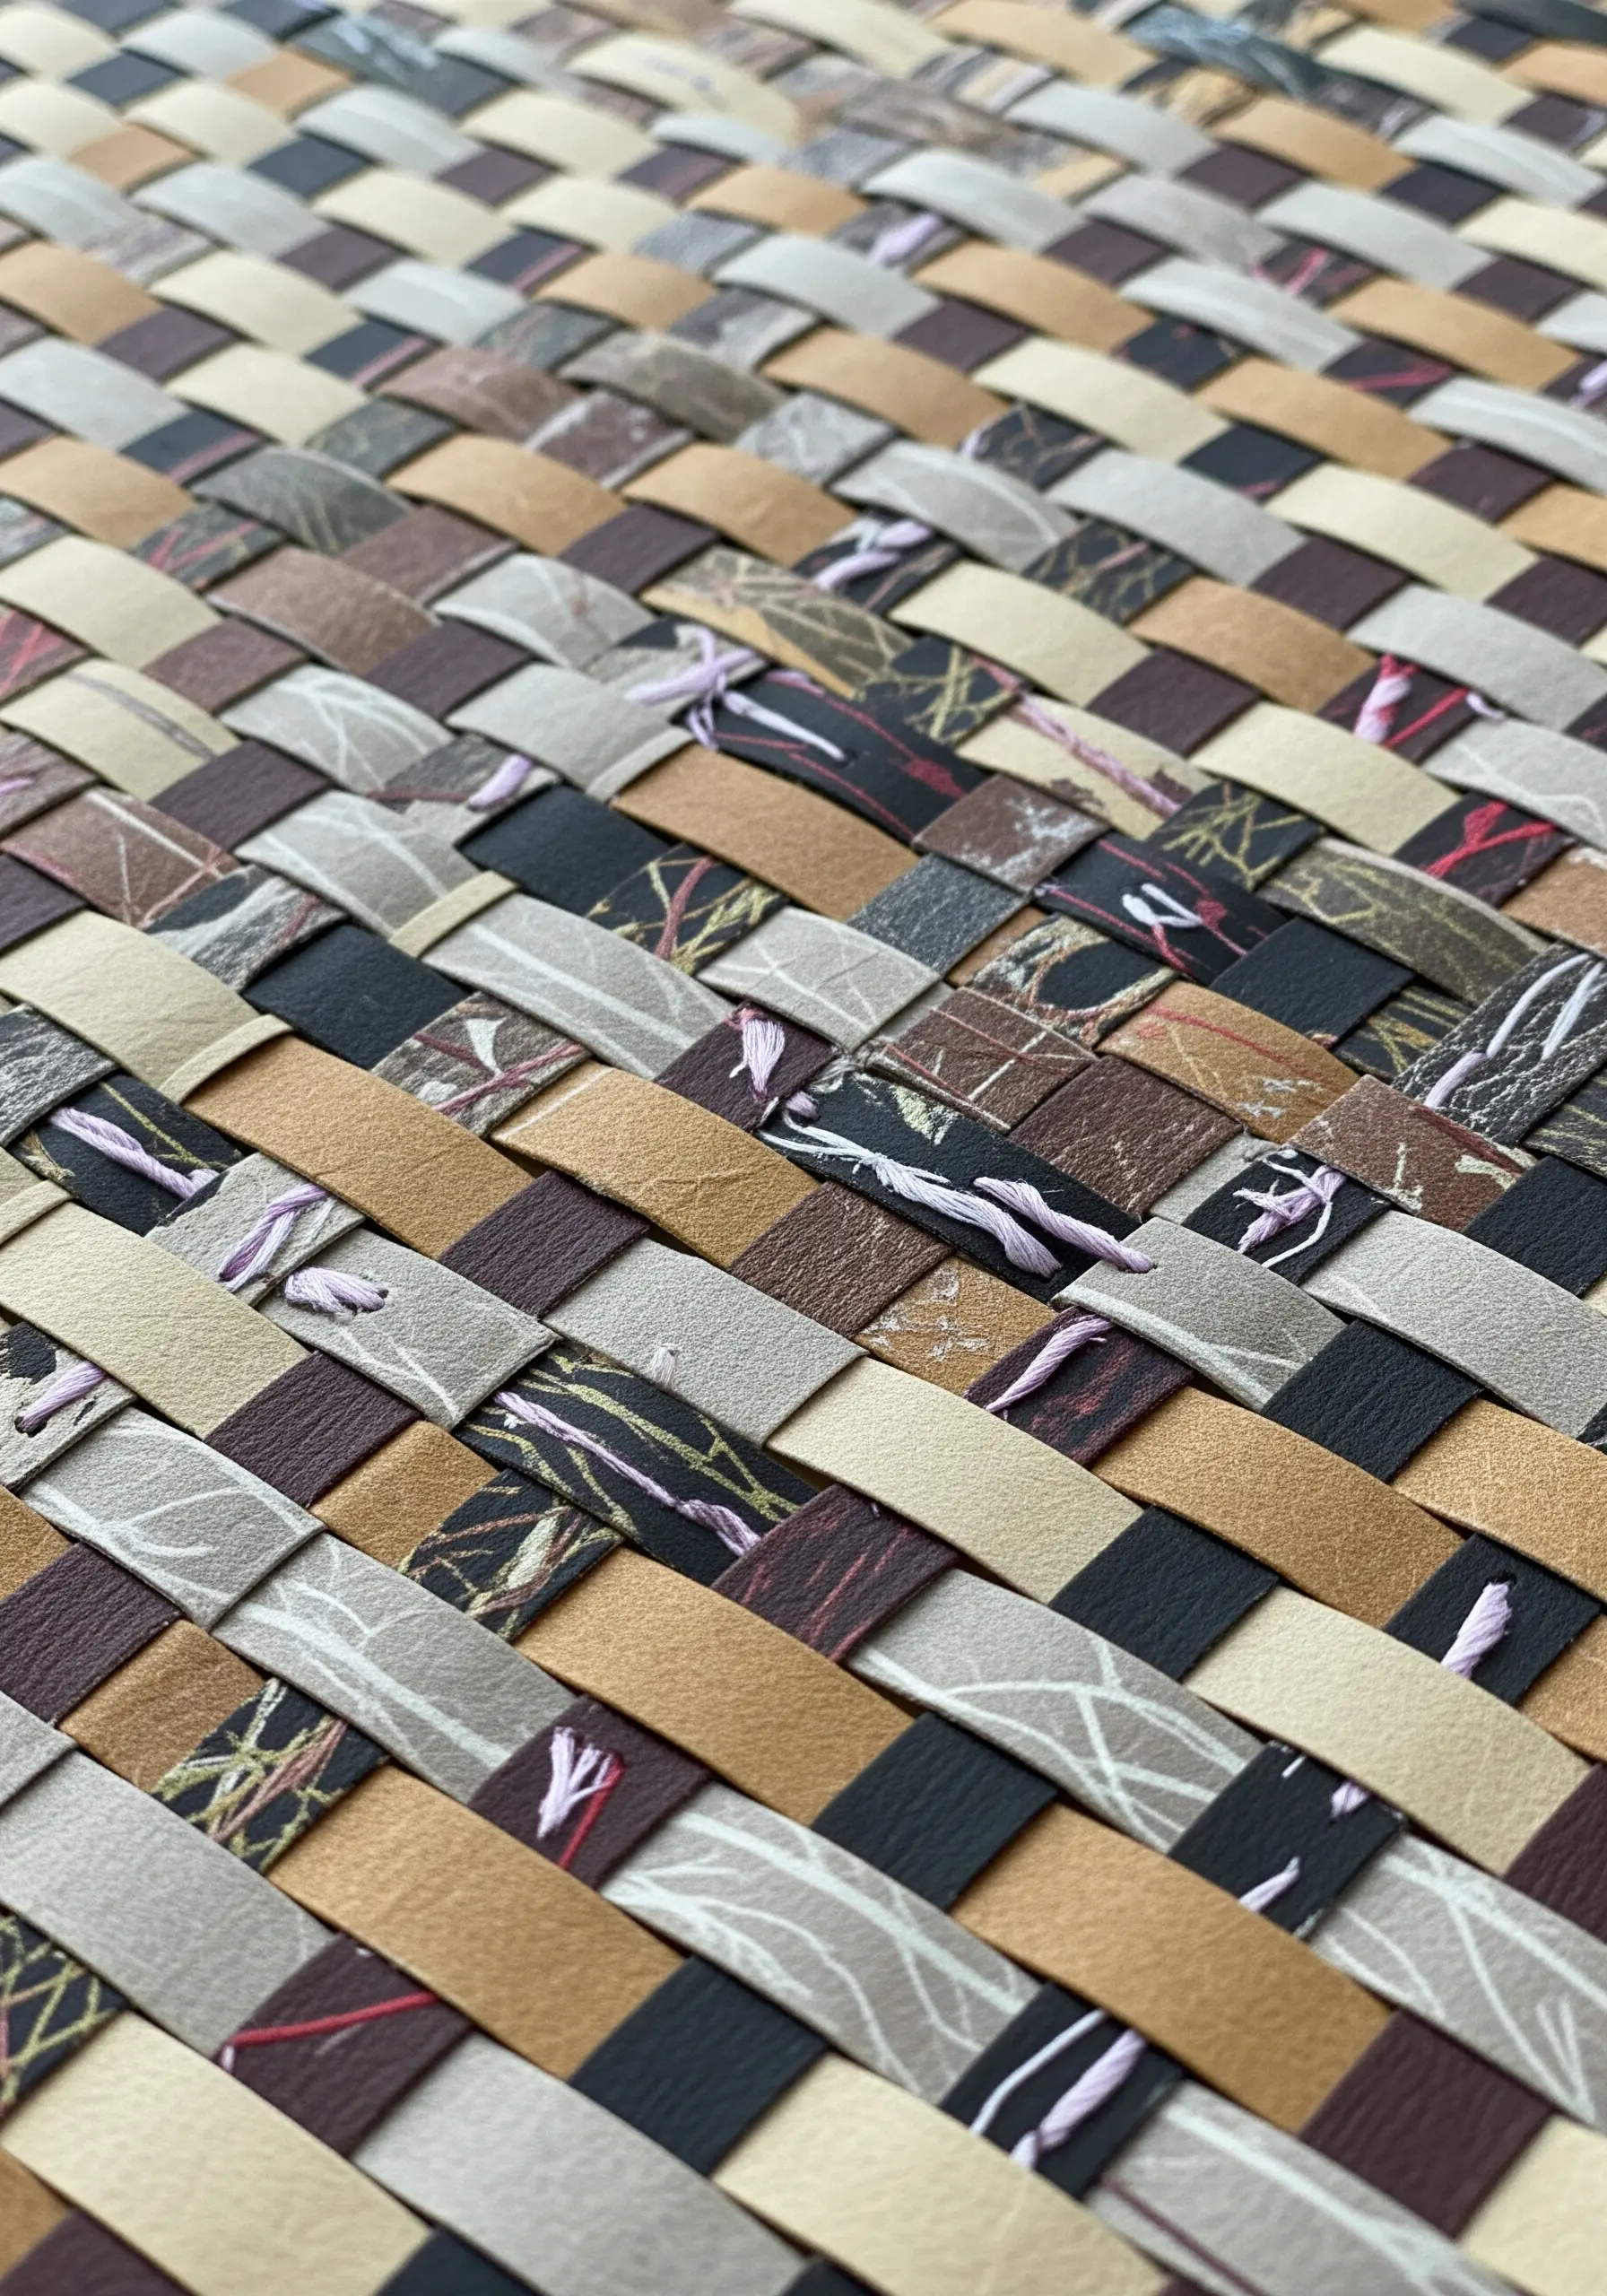
Introduce a subtle, tactile detail to woven paper surfaces with minimal embroidery.
After you have woven your strips of paper, choose a few points where the strips intersect to add a decorative stitch.
A simple cross stitch, a small tied knot, or a French knot is all you need.
Use a contrasting thread color to draw the eye, adding a touch of softness and handcrafted detail to the geometric grid of the weaving.
This simple touch can elevate your work and help you discover natural texture embroidery patterns in new materials.
30. Stitching the Shape of Sound
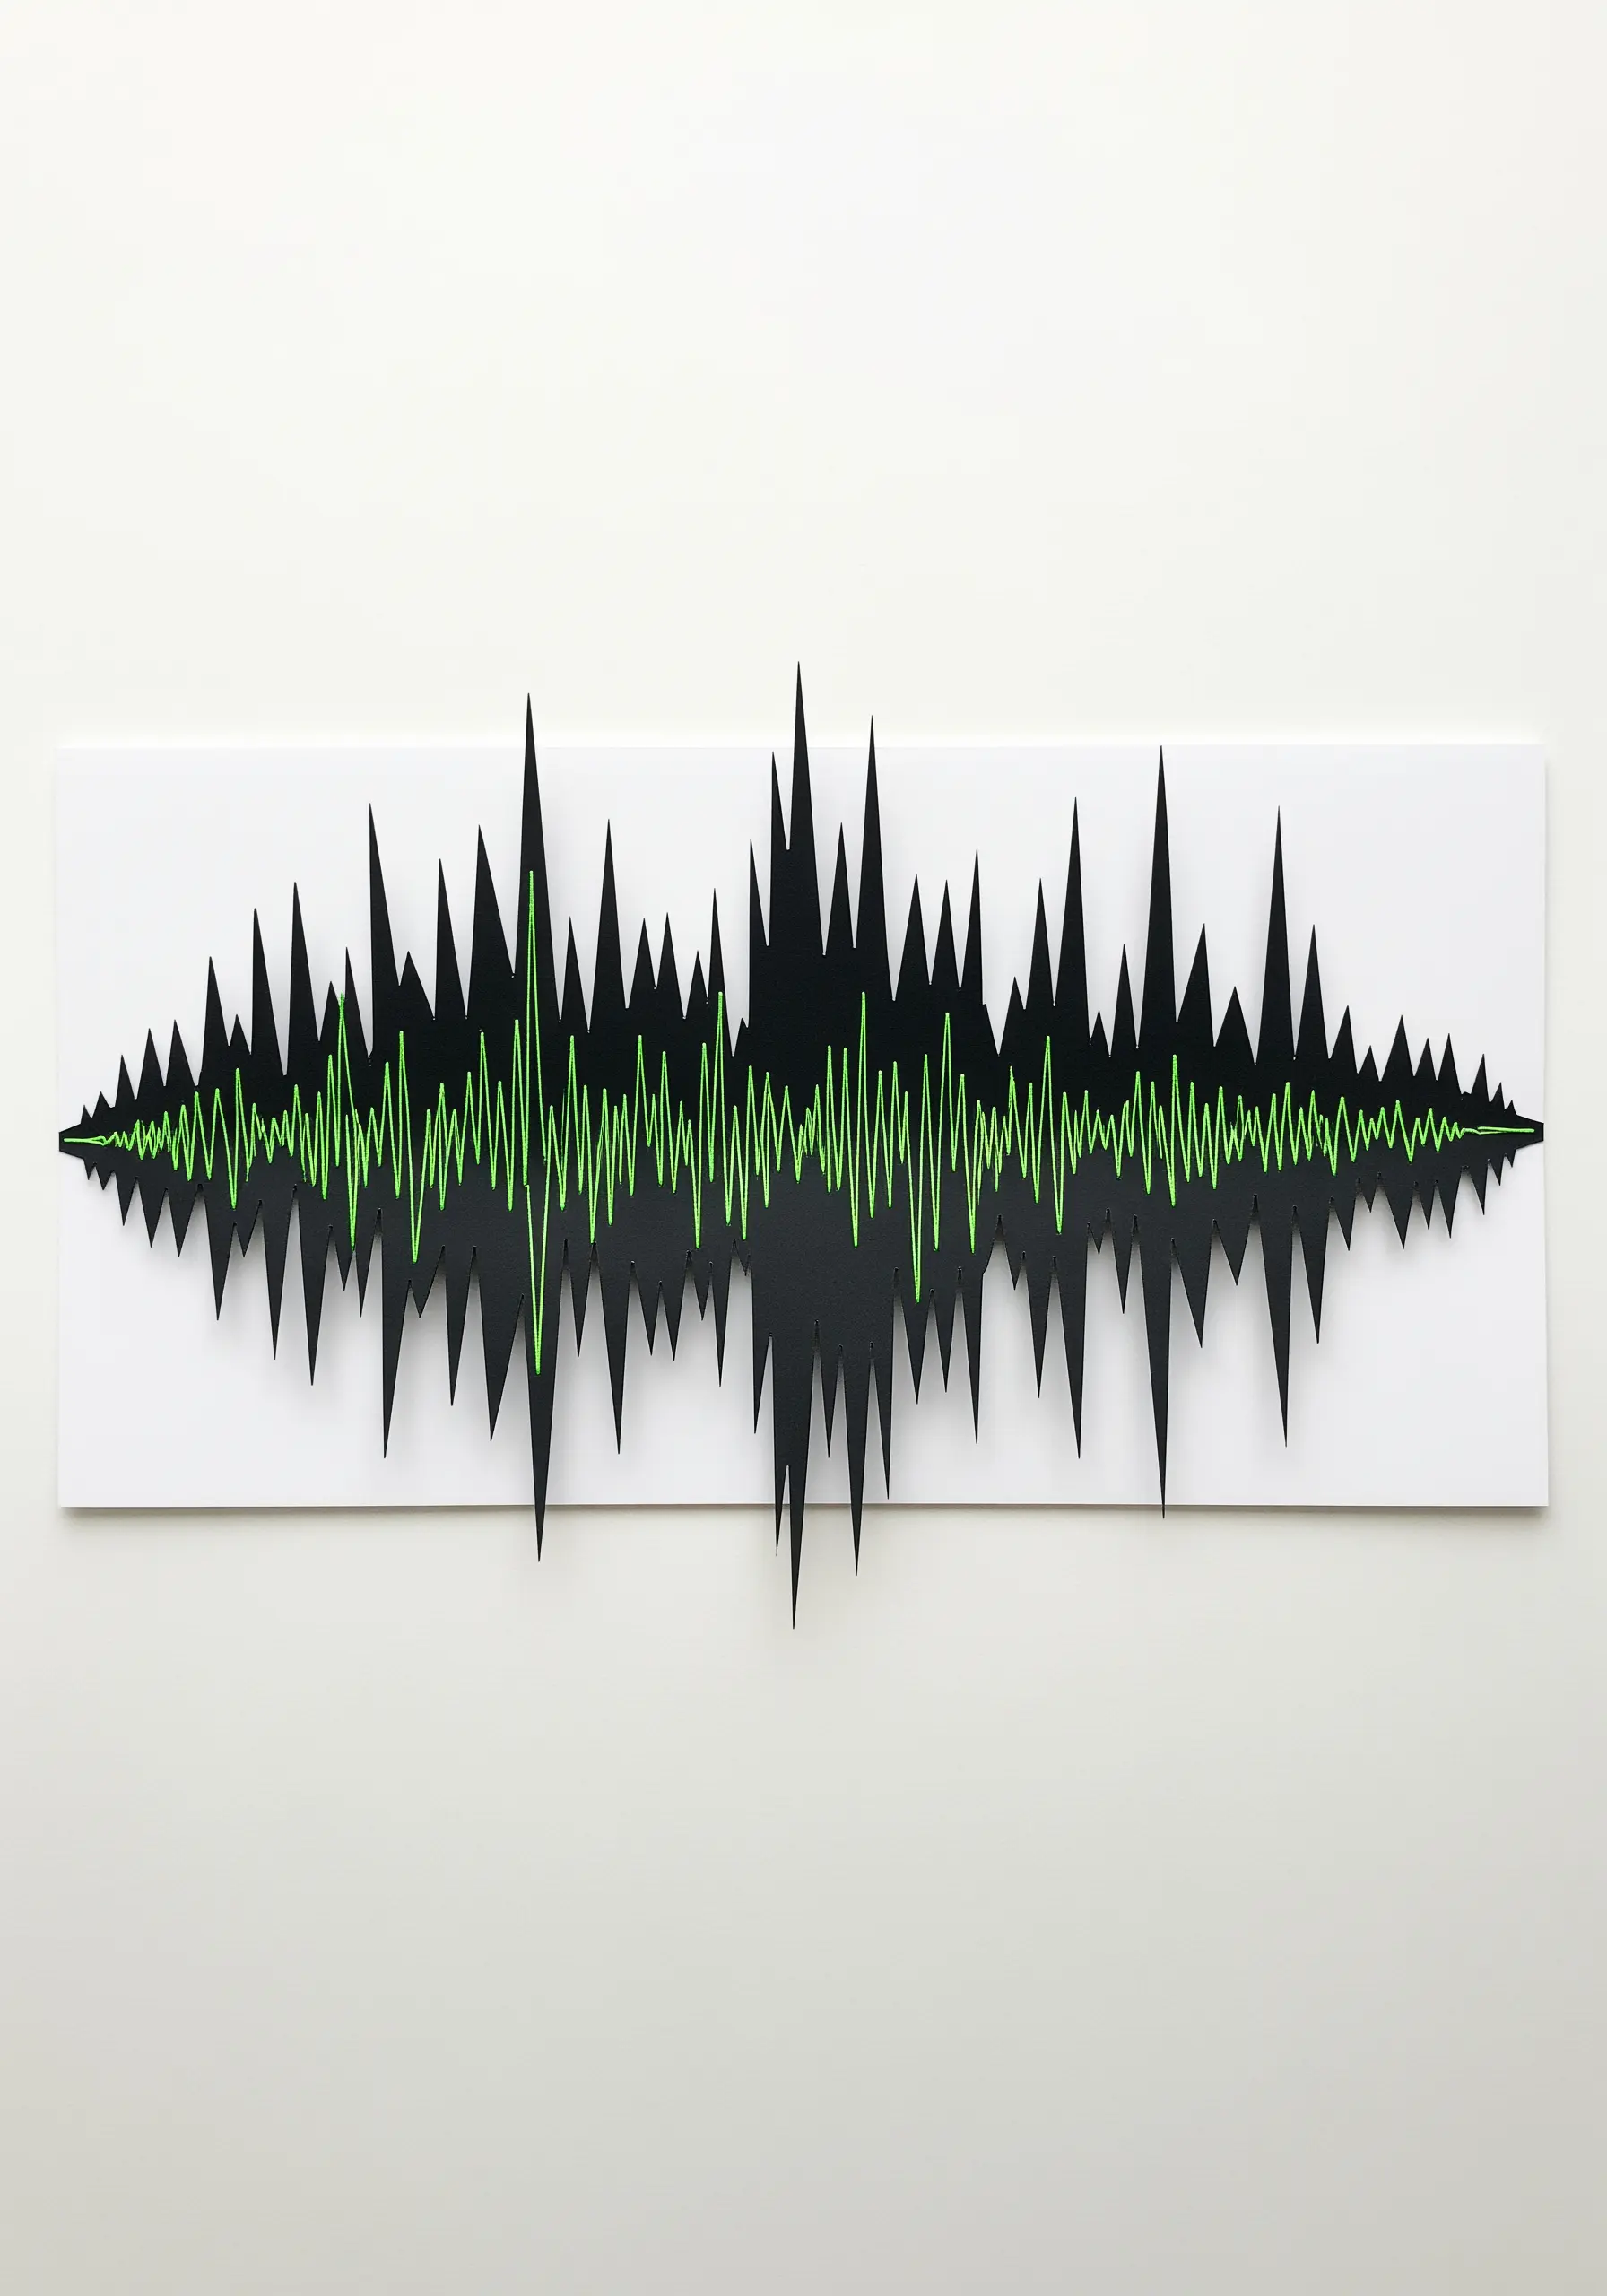
Translate a digital soundwave into a powerful piece of physical art using paper and thread.
Use a printed image of a soundwave as a template to cut the main silhouette from black cardstock for a sharp, graphic look.
Then, with a vibrant, contrasting thread color, use a continuous backstitch or stem stitch to trace the intricate line of the audio waveform.
This is a great way to explore modern thread art ideas by visualizing the invisible.
31. Paper Folk Art with Hand-Stitched Charm
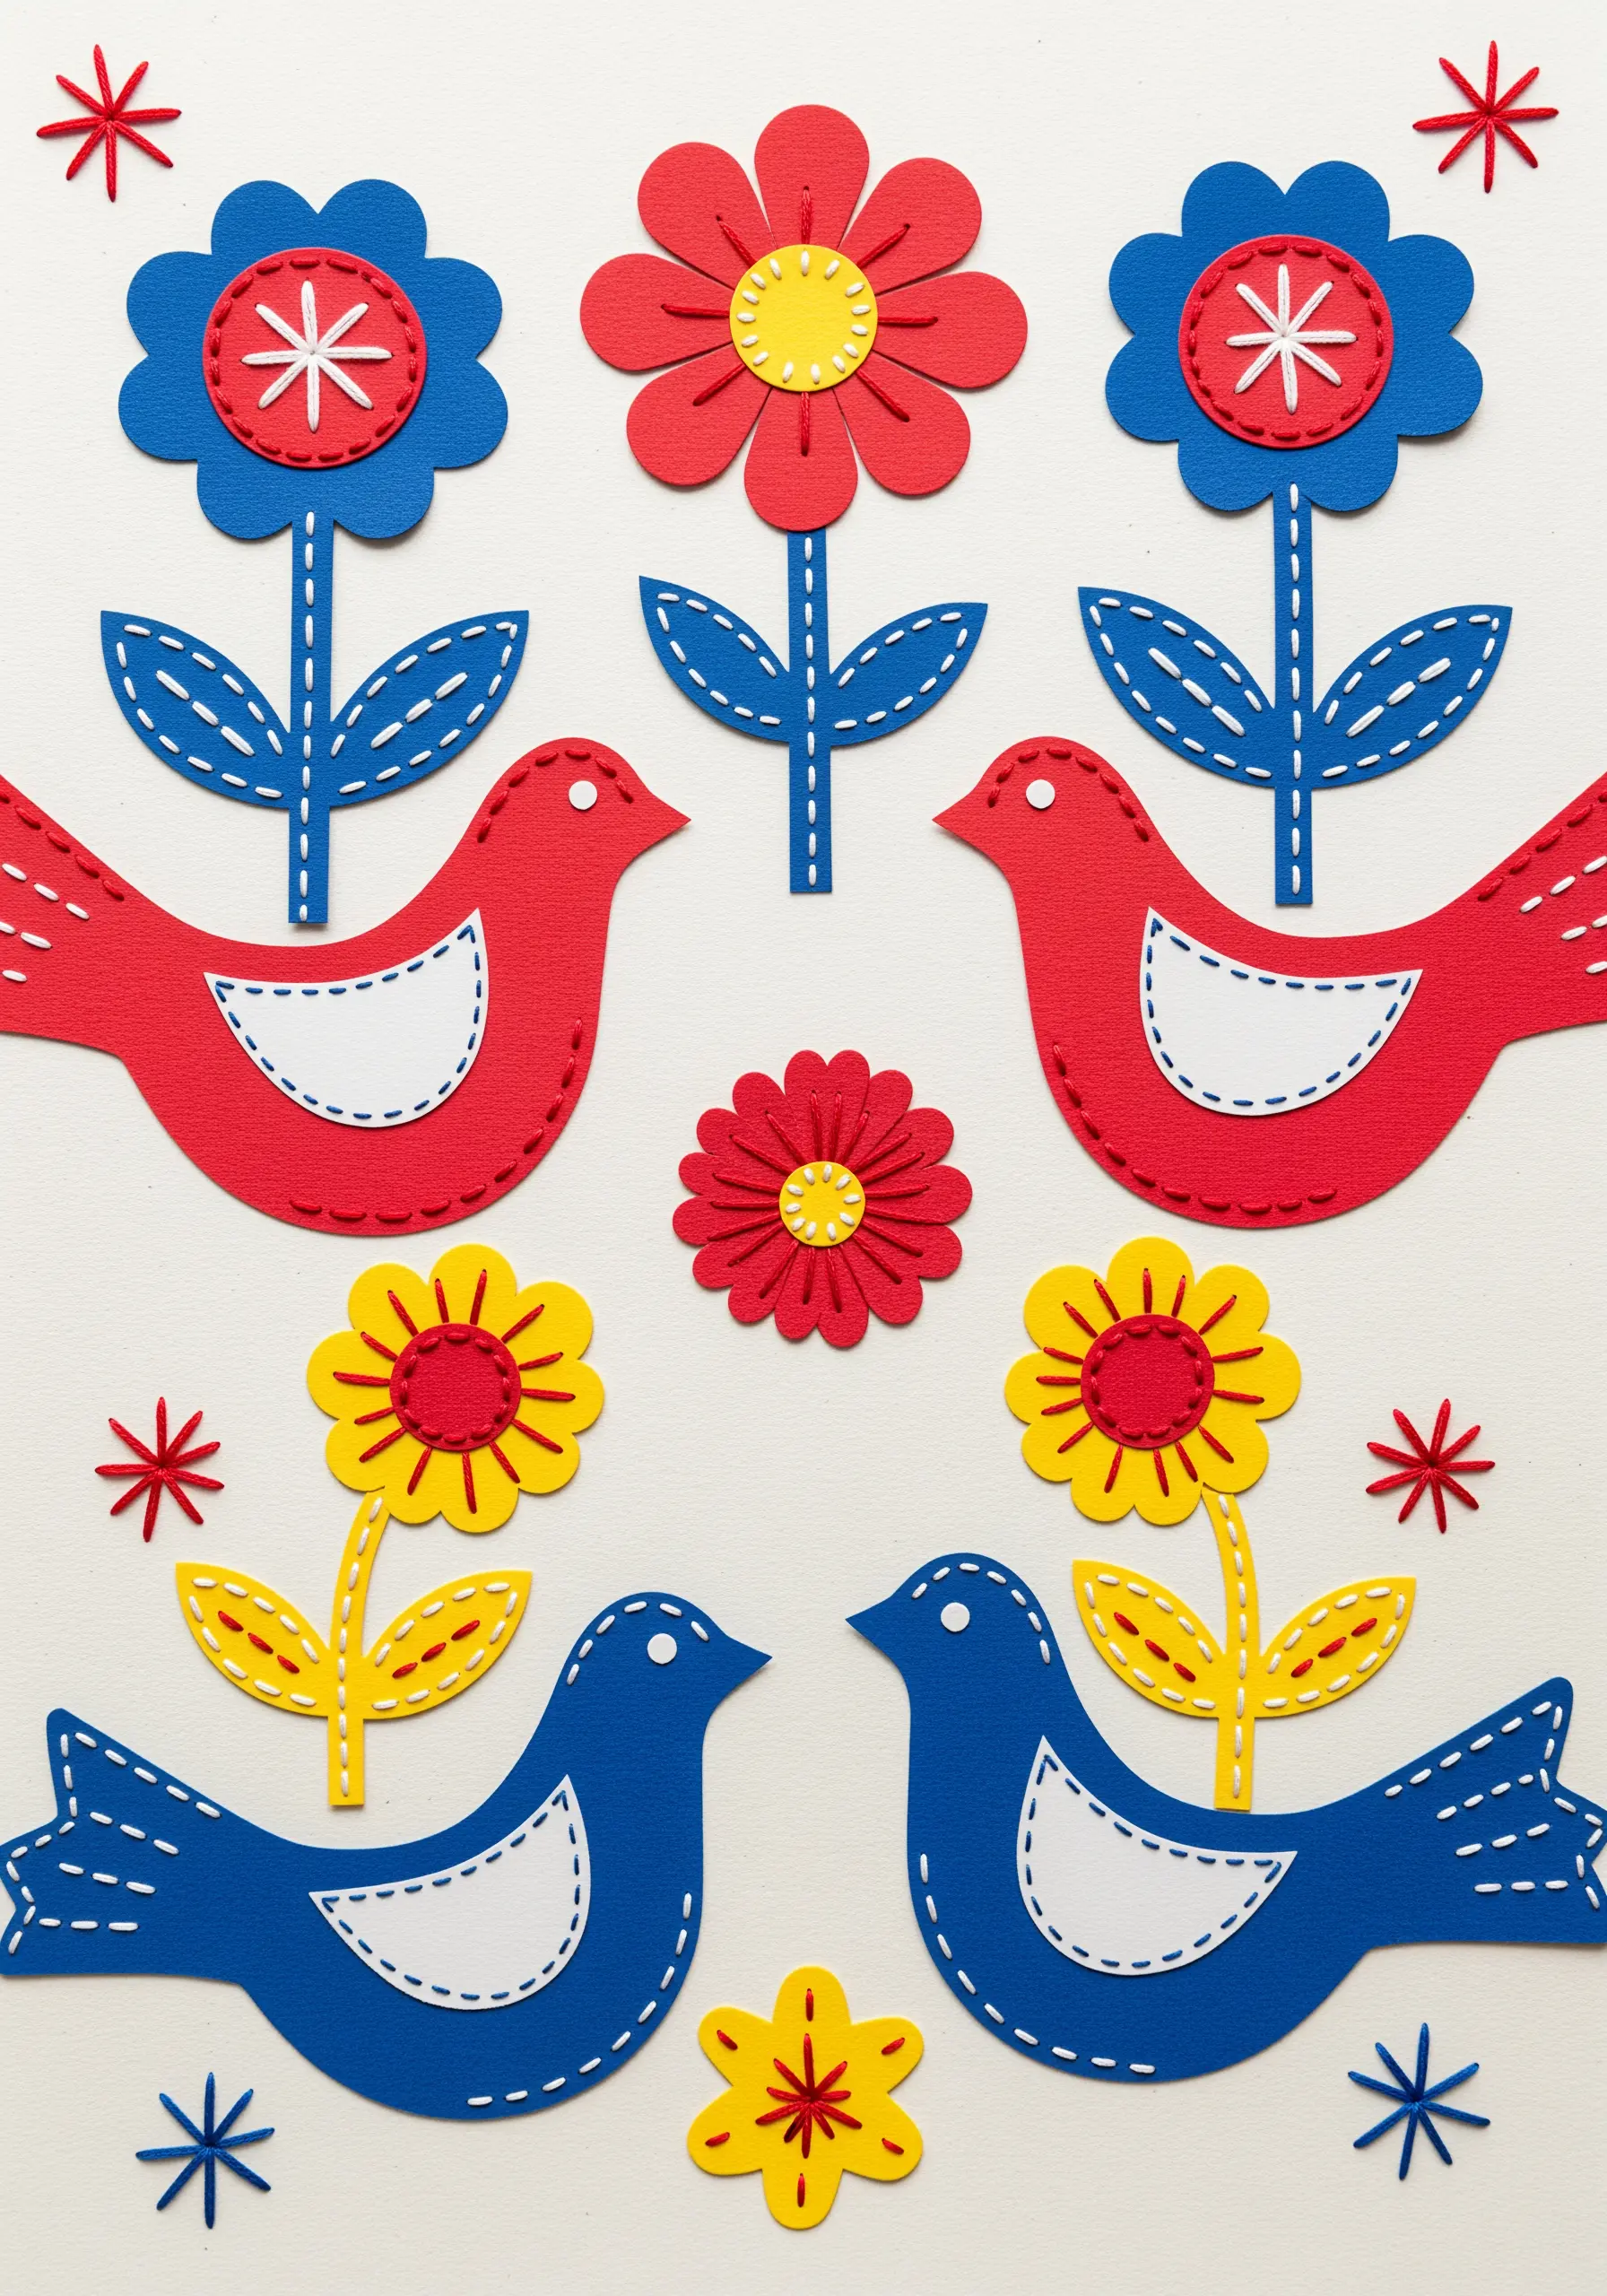
Capture the spirit of traditional folk art by adding simple, decorative stitches to layered paper cutouts.
Arrange your colorful paper shapes to create symmetrical bird and flower motifs.
Then, use basic embroidery stitches to add pattern and definition: a running stitch to outline a wing, lazy daisy stitches for small petals, and straight stitches for leaf veins.
This technique gives your paper art a warm, handcrafted feel, perfect for creating your own cottagecore floral patches on paper.
32. Drawing with Thread over Vintage Memories

Create a bridge between past and present by adding modern, linear stitch work to a collage of vintage ephemera.
Arrange your old photos, letters, and paper scraps into a balanced composition.
Then, use a single, continuous line of thread in a neutral color to ‘draw’ a simple, graphic motif—like a flower or a face—over the entire collage.
This stitched overlay unifies the disparate elements and adds a layer of contemporary artistry, similar to creating single-line face profiles on a textured background.