

I know you love the feel of thread and fabric, but perhaps you feel your work is missing that final layer of polish—the kind that turns a pleasant craft into a piece of art. It’s a common feeling, but the solution is closer than you think. It isn’t about buying more supplies or mastering impossibly complex techniques.
Instead, it’s about learning to see with your hands. It’s about understanding how a simple shift in stitch direction can mimic the grain of wood, or how varying the size of a French knot can create the texture of moss. It’s about choosing your materials not just for their color, but for the way they absorb or reflect light.
These ideas are your invitation to stitch with more intention. Each one is a small adjustment—a different way to layer thread, a new combination of textures, a thoughtful compositional choice—that offers a significant, visible improvement. This is how you create work that feels as good to look at as it does to make.
1. Build Immersive Depth with Punch Needle Texture
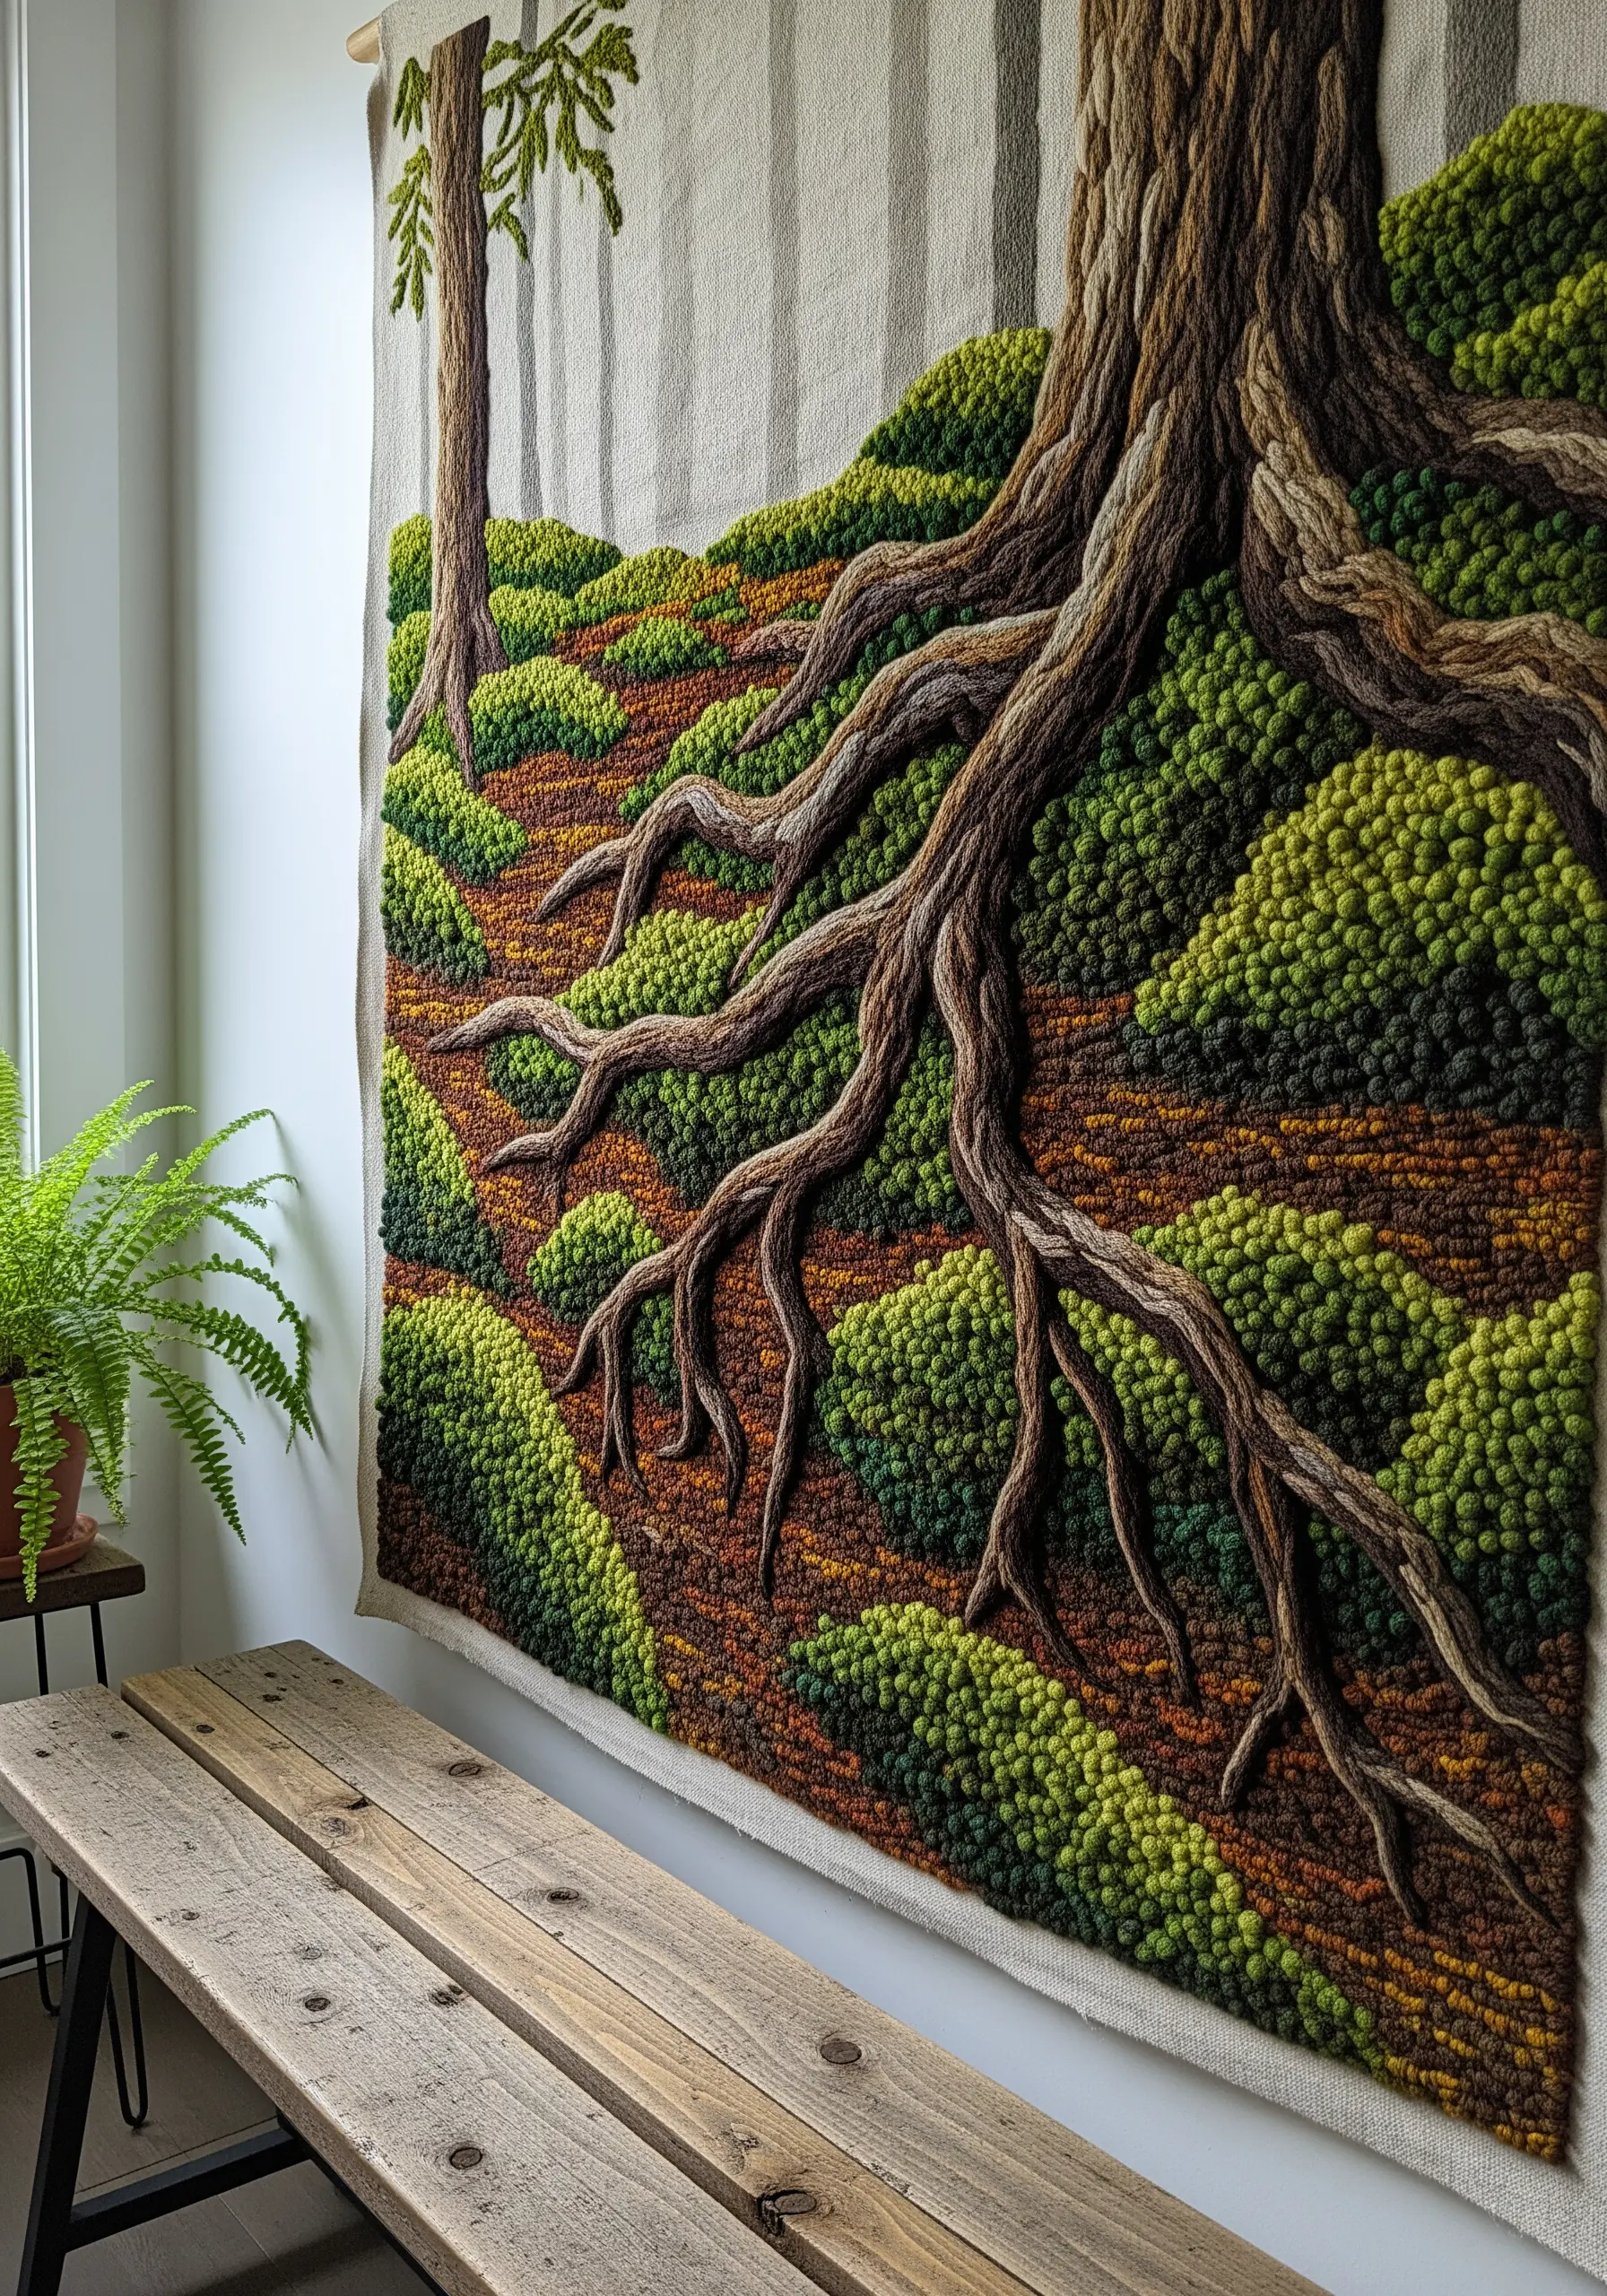
To create a landscape that invites you in, move beyond flat stitches and embrace punch needle techniques for mossy ground cover.
Use a variety of loop heights to build layers of dimension, making closer elements physically higher than those in the background.
For the solid, woody texture of tree roots, switch to couching—stitching down thick yarn or cord—to create bold, raised lines that contrast beautifully against the soft, tufted moss.
This combination of high-pile texture and strong linear elements gives your work a sculptural quality that feels both realistic and expressive.
2. Master the Art of Coiled Thread Appliqué
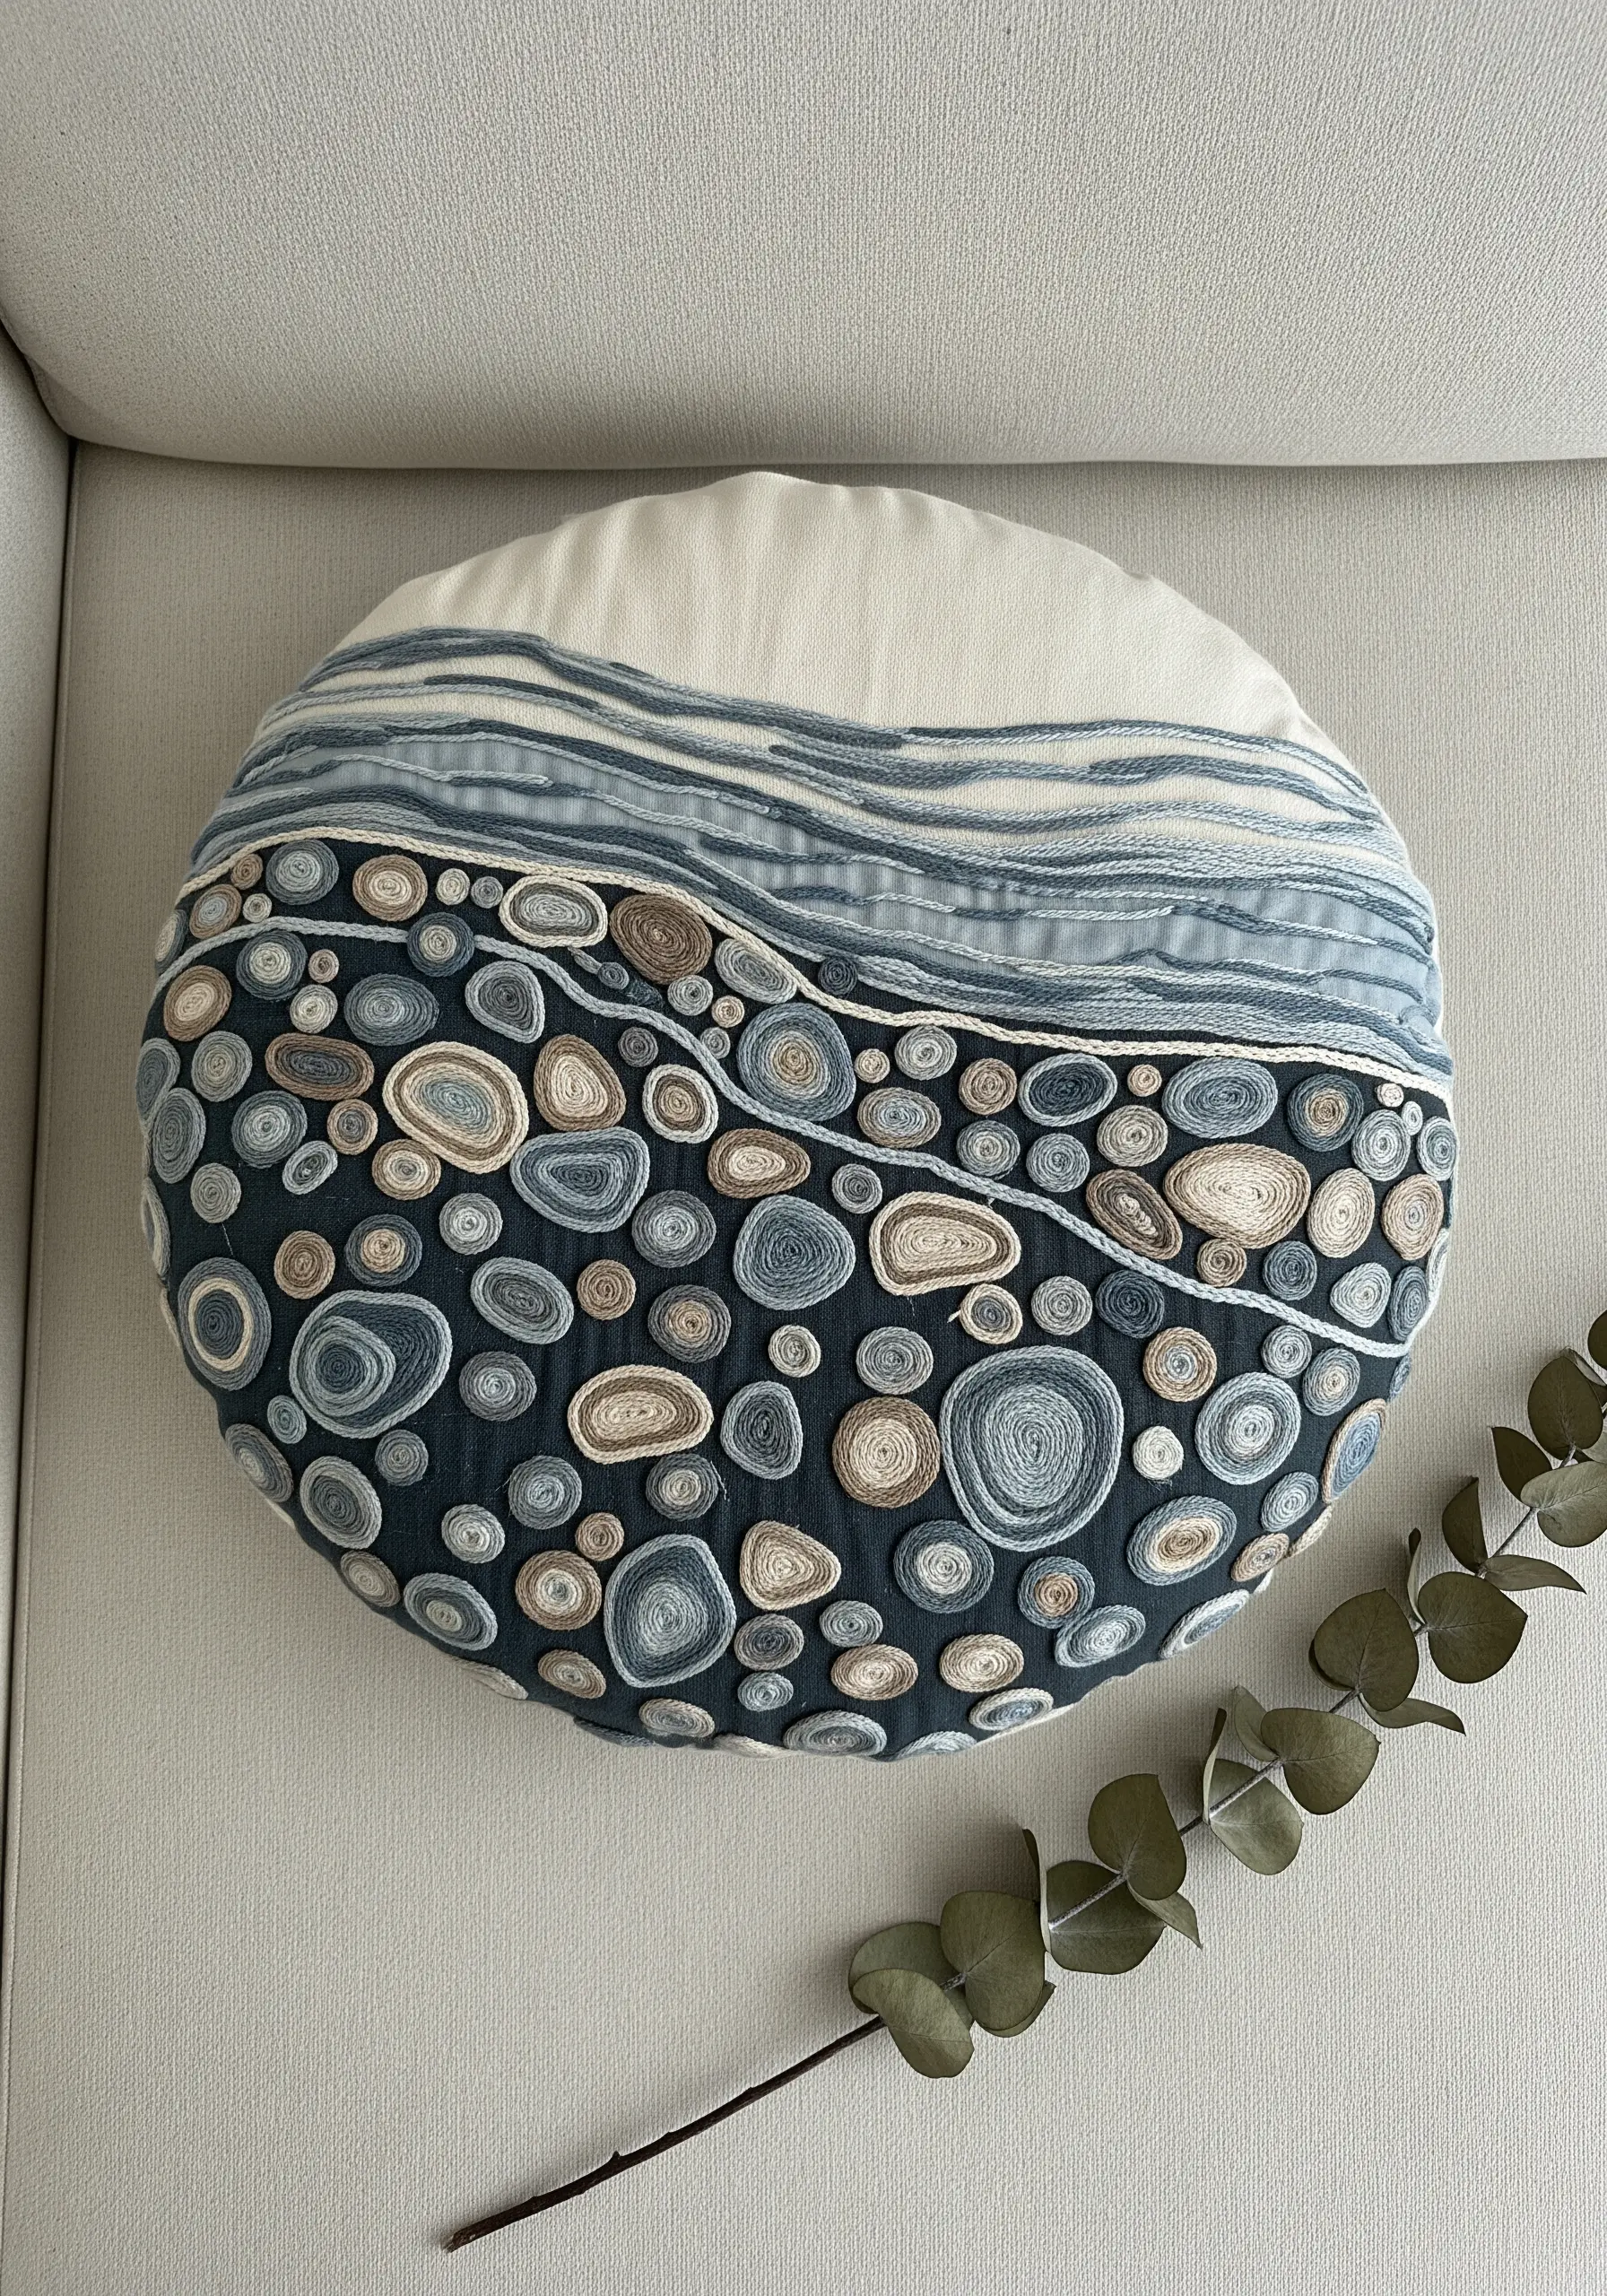
Transform a simple cushion into a tactile work of art by creating coiled medallions from yarn or thick embroidery floss.
To start, wrap your thread into a tight spiral, securing it with tiny, discreet stitches on the back as you go. Vary the colors within a single coil to mimic the rings of a stone or agate.
Arrange your finished coils on the fabric, playing with density and spacing to create a composition that flows. This method is incredibly meditative and turns leftover threads into a central design feature.
3. Recreate Natural Patterns with Strategic Stitching
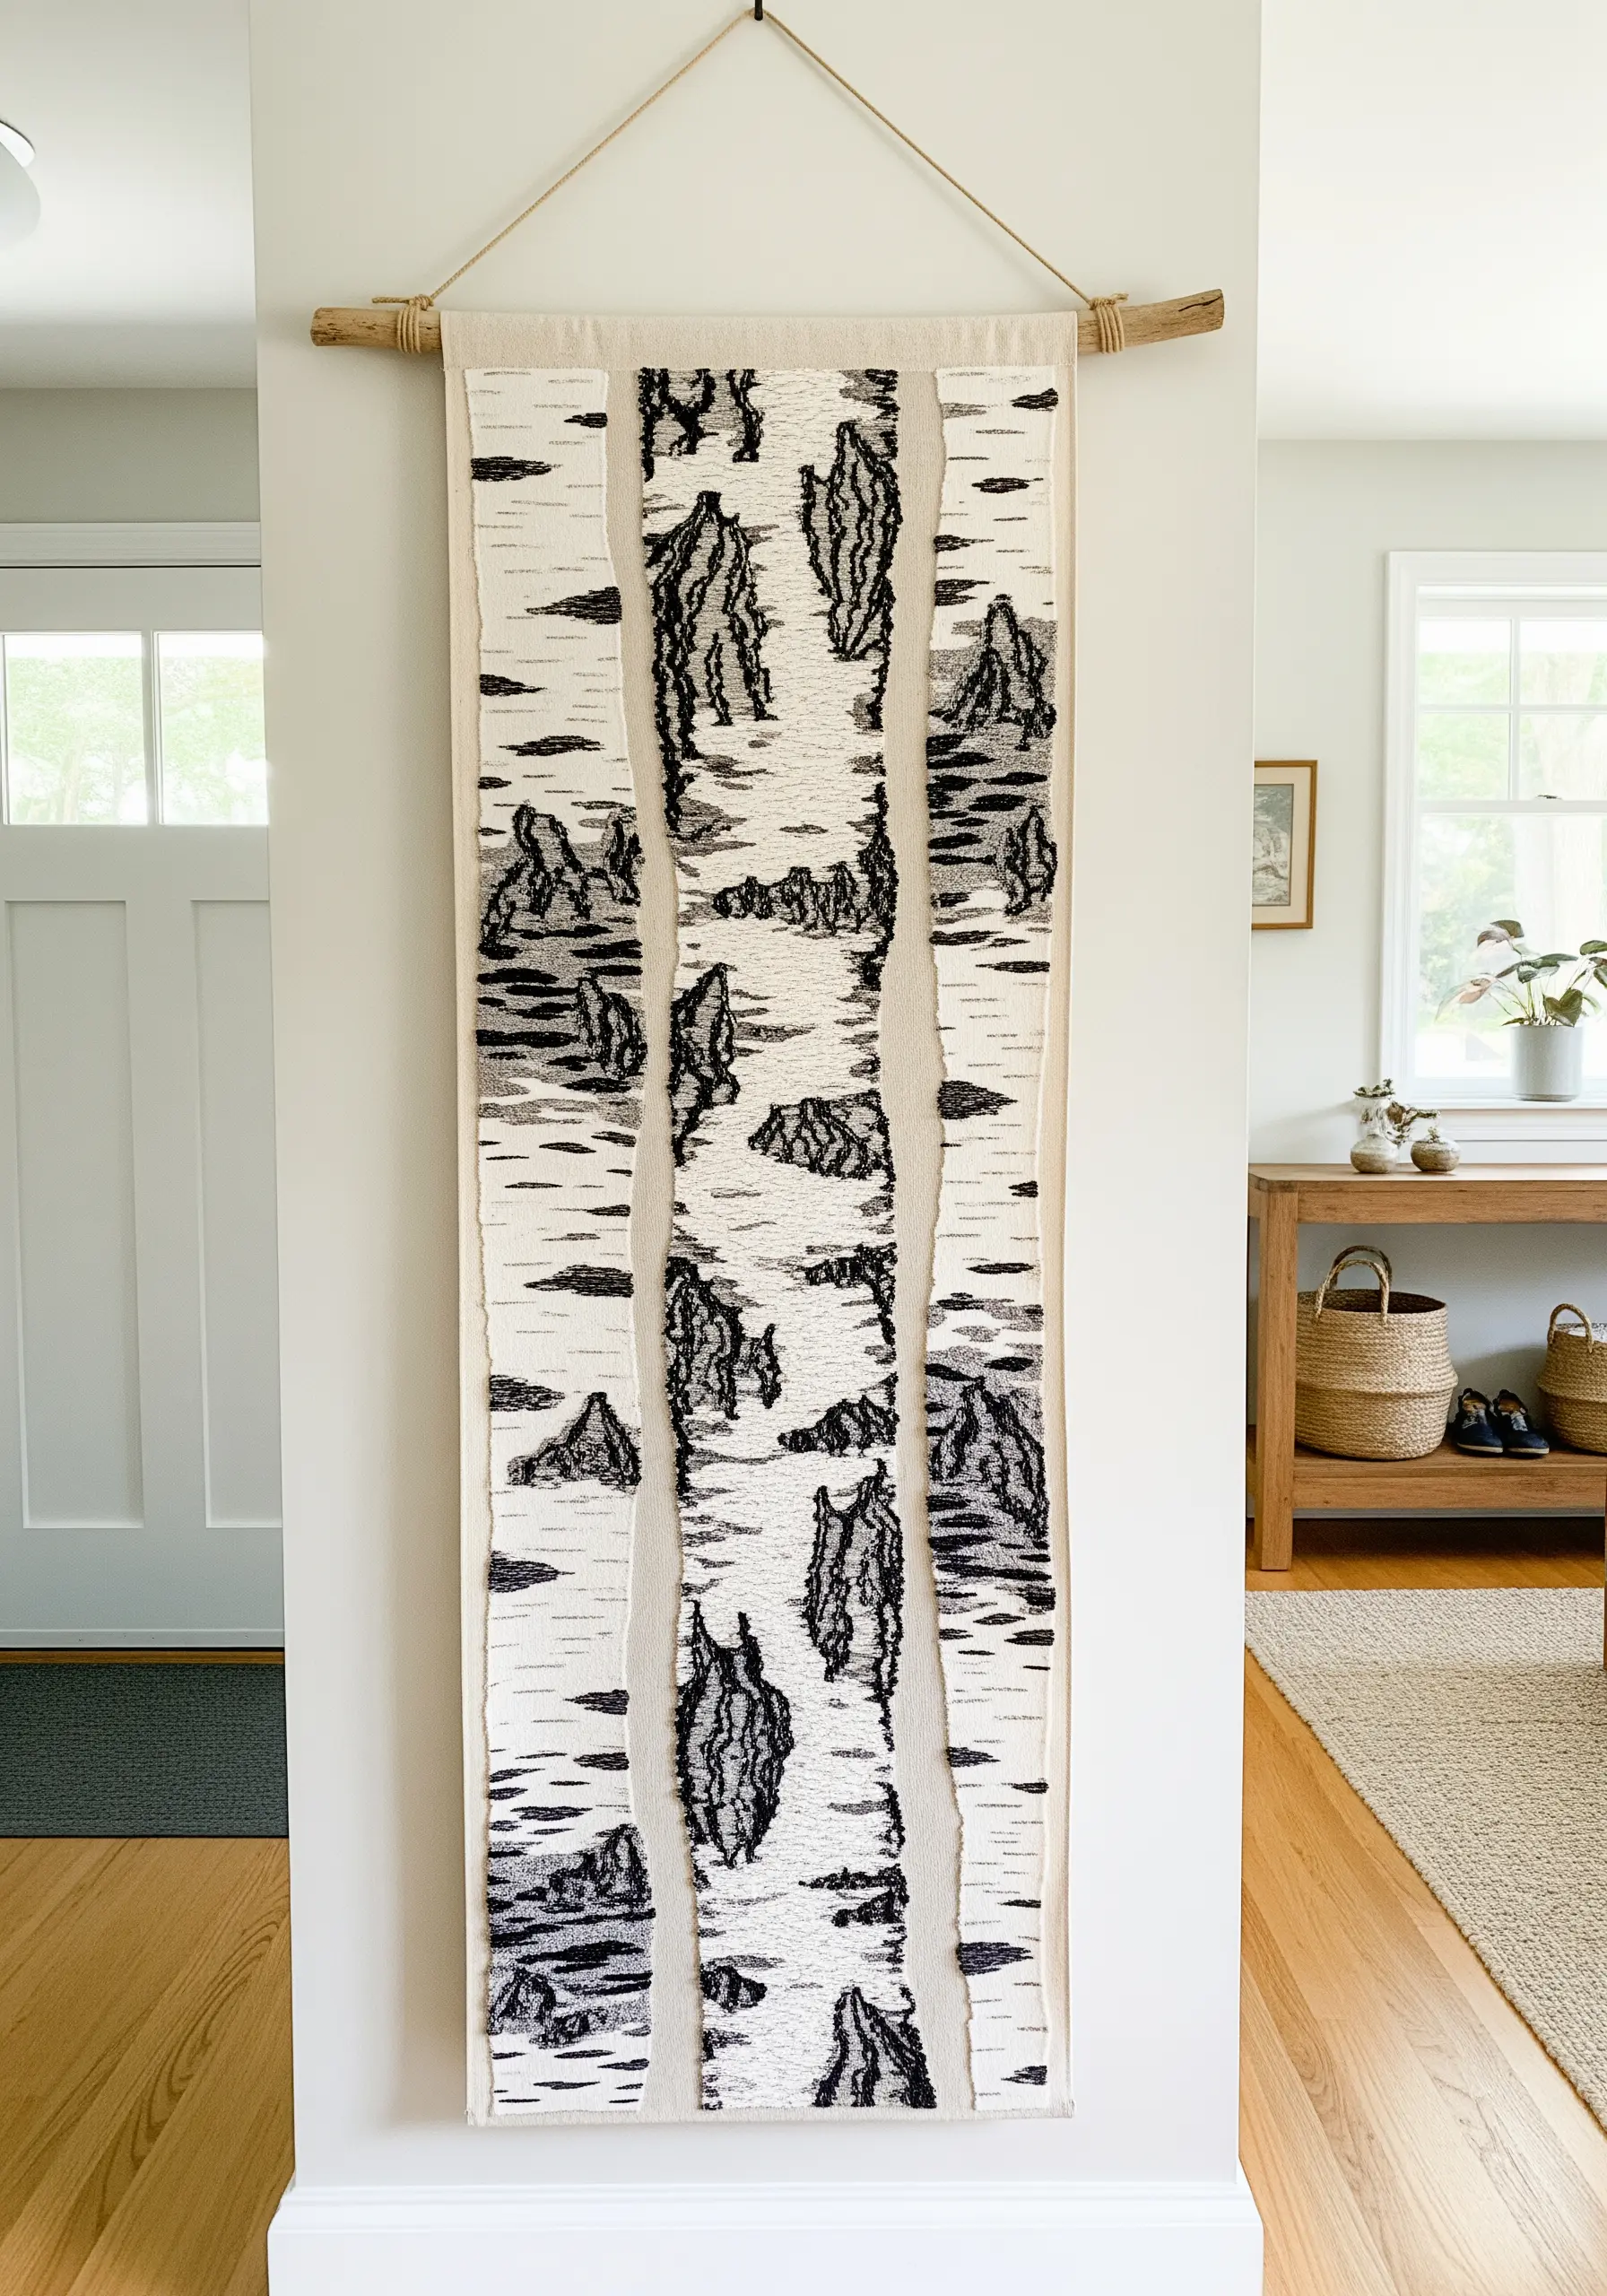
To capture the distinct texture of birch bark, you don’t need complex stitches—just strategic placement of simple ones.
Use short, scattered straight stitches or seed stitches in black and charcoal grey against a cream or white background fabric. Concentrate the stitches in organic clusters and lines to mimic the bark’s markings.
For a modern gallery look, present the work in vertical panels. This compositional choice breaks up the pattern, guiding the eye and adding a layer of thoughtful design to the raw texture.
4. Layer Your Landscapes with Varied Yarn Weights
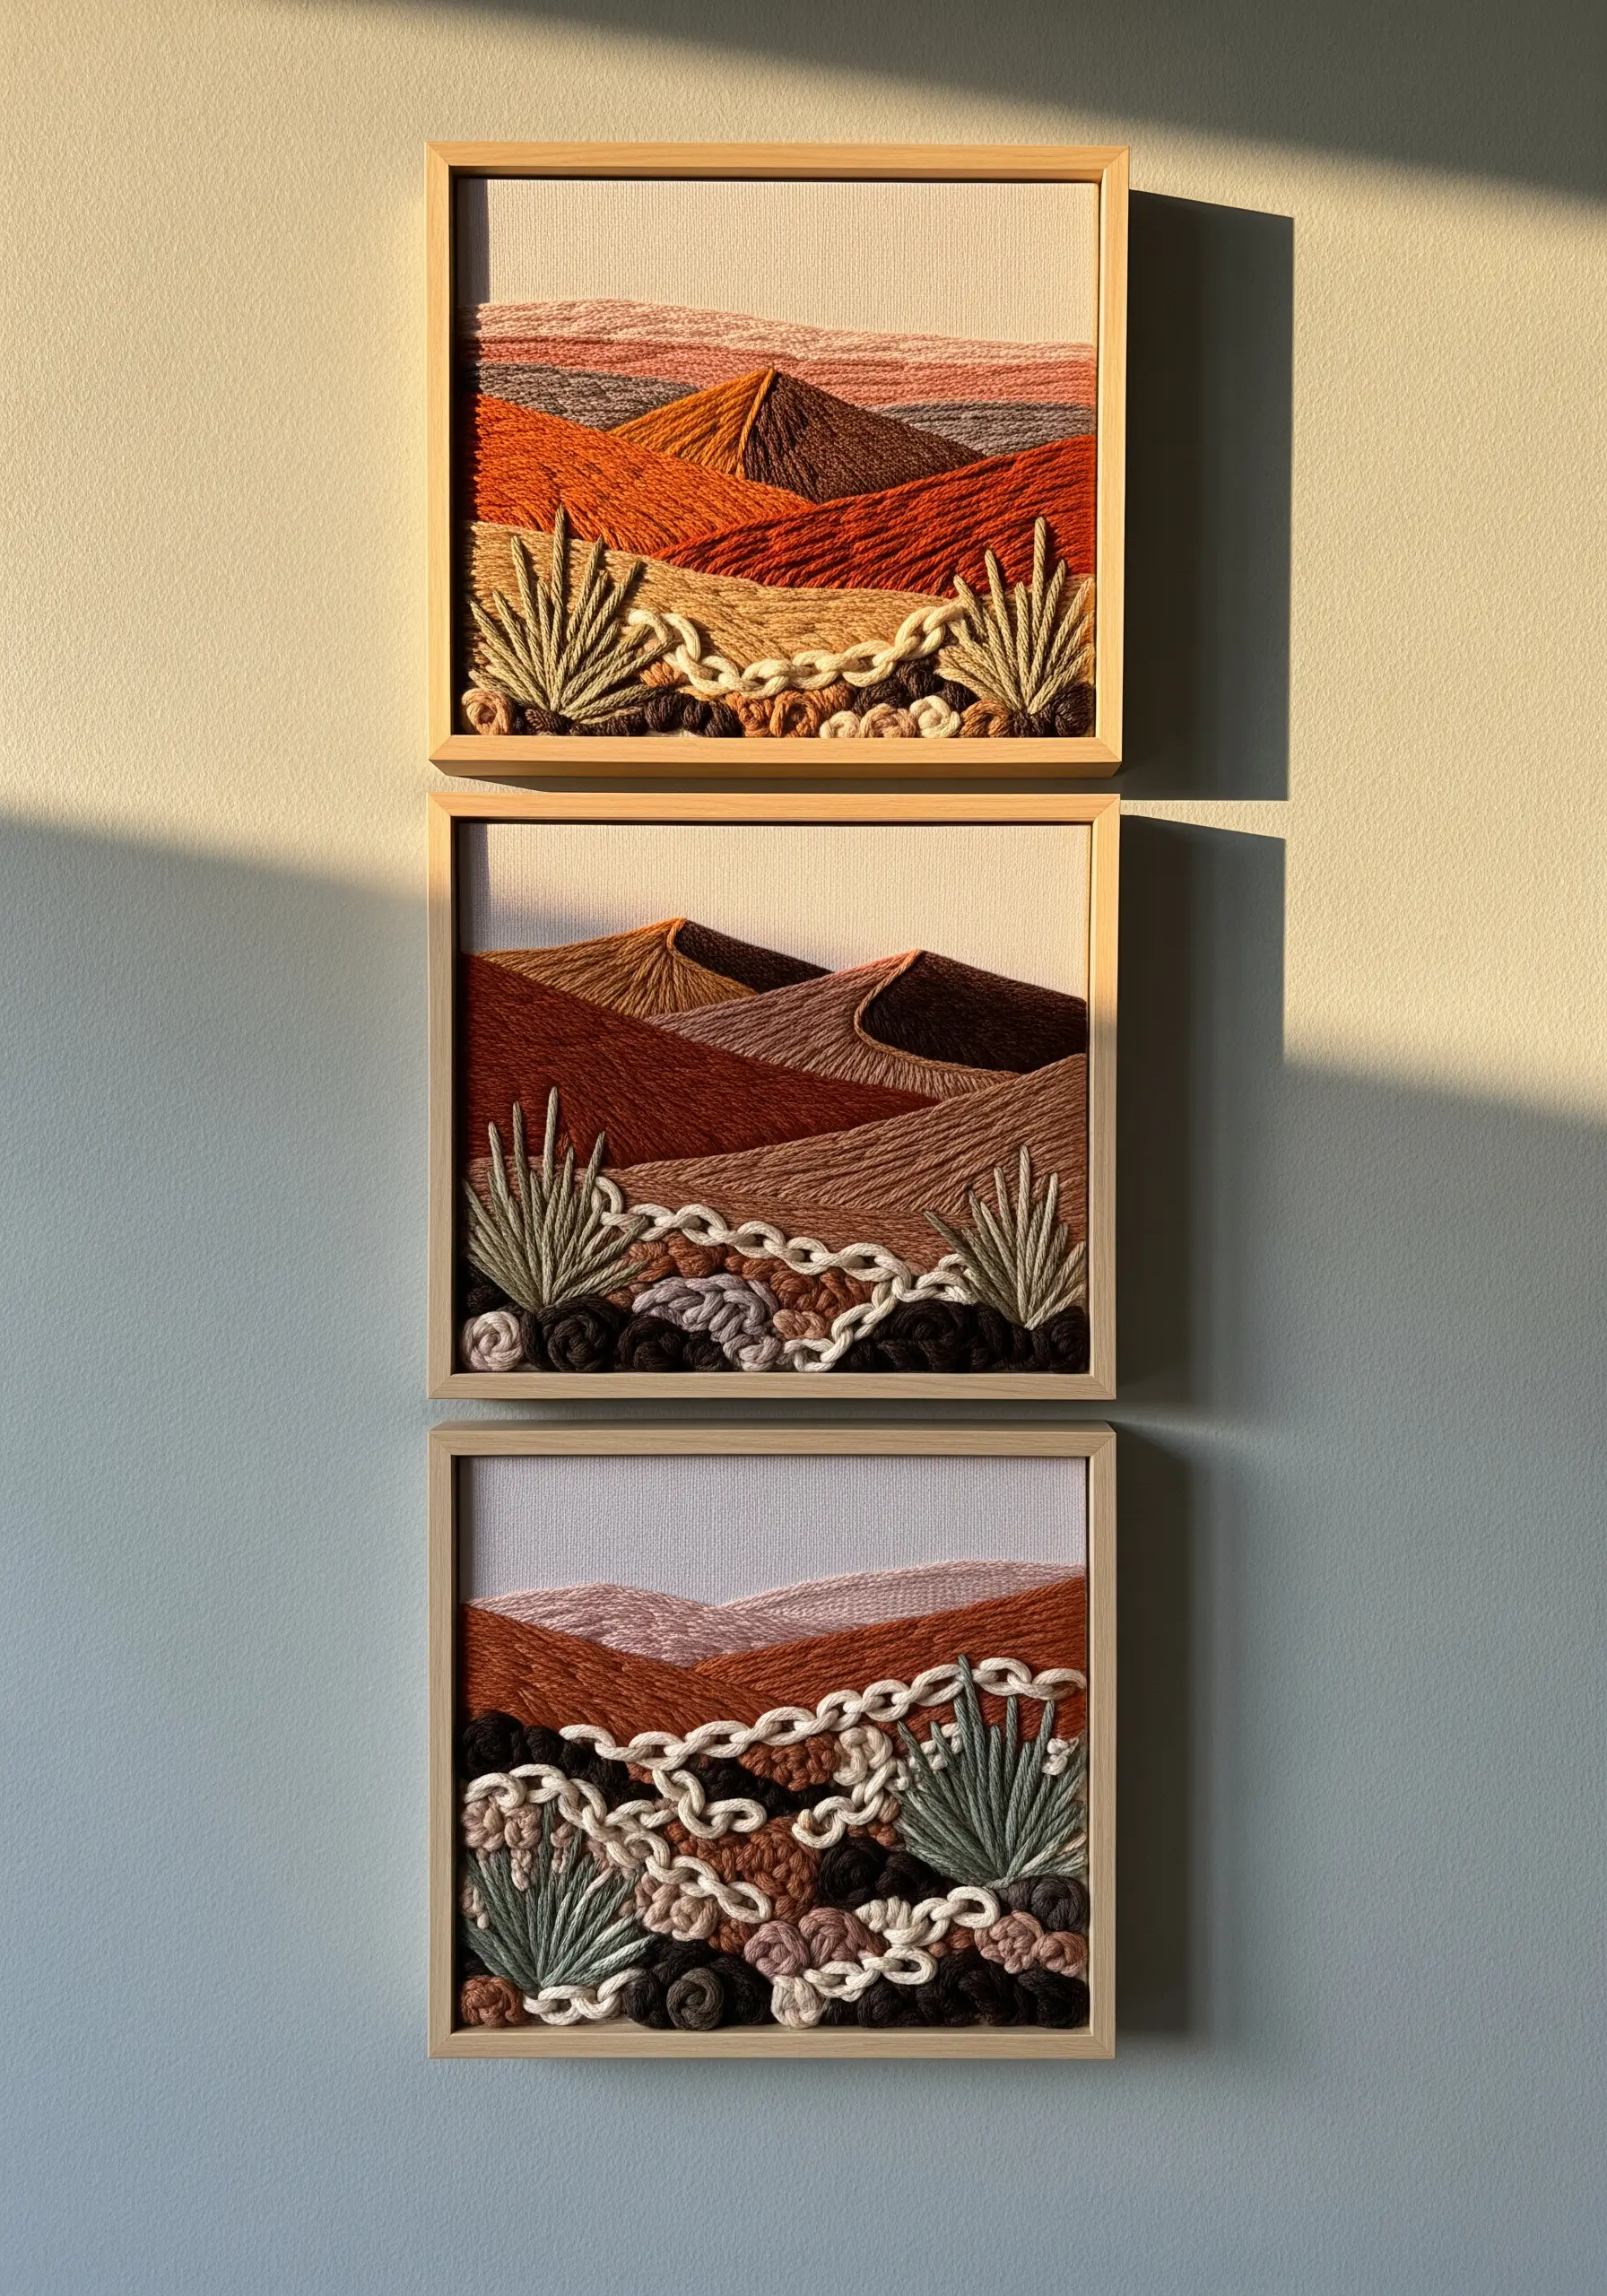
Give your landscape pieces immediate depth by using different thicknesses of yarn and thread to define the foreground, midground, and background.
Use chunky, textural yarns in the foreground for elements like rocks and foliage, applying them with techniques like couching or weaving.
As you move toward the horizon, switch to finer embroidery floss for distant hills and skies, using satin stitch or long-and-short stitch for a smoother finish.
This shift in texture creates an atmospheric perspective that makes your two-dimensional art feel vast and immersive.
5. Cultivate Organic Growth with French Knot Clusters
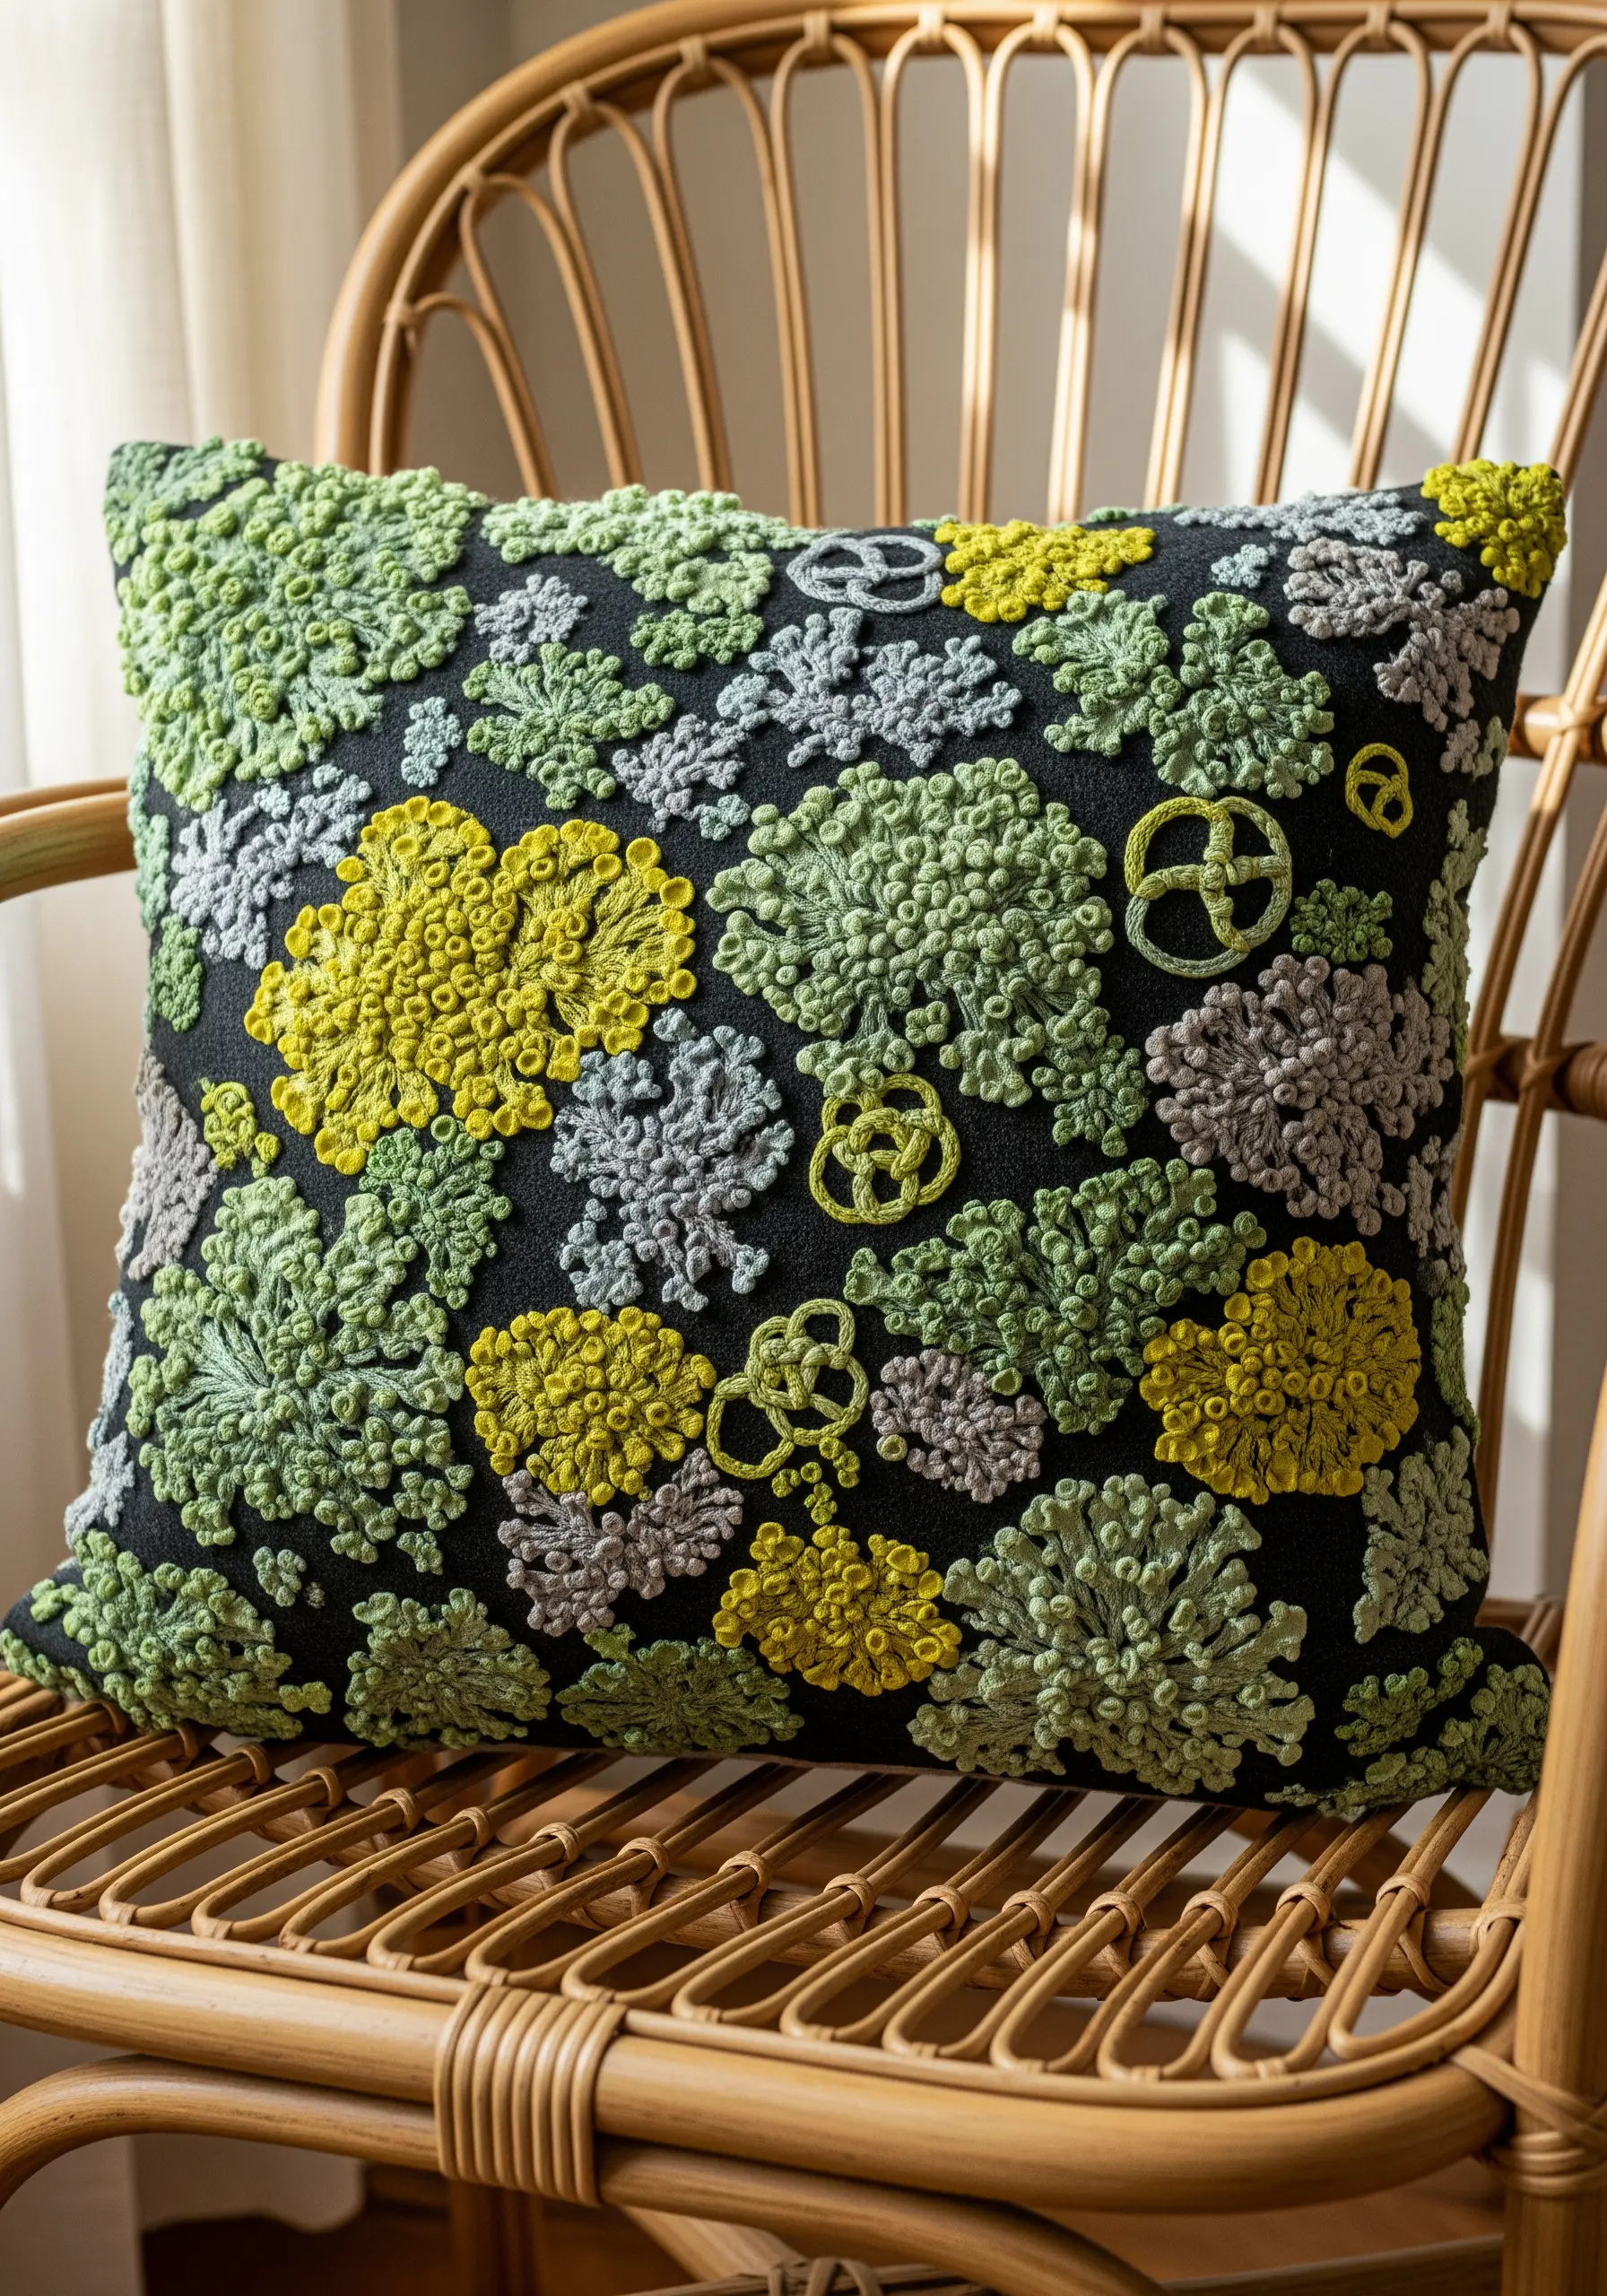
To achieve a rich, lichen-like texture, rely on the humble French knot—but use it with intention. Create dense, overlapping clusters instead of evenly spaced dots.
Vary the number of times you wrap the thread around the needle (once, twice, or three times) to create knots of different sizes, mimicking the organic irregularity of nature.
Use an analogous color palette, like chartreuse, olive, and grey, to give the clusters a natural sense of light and shadow. The dark background fabric makes these textures pop, creating a dramatic and tactile effect.
6. Weave Emotion into Your Work with Roving and Mixed Fibers
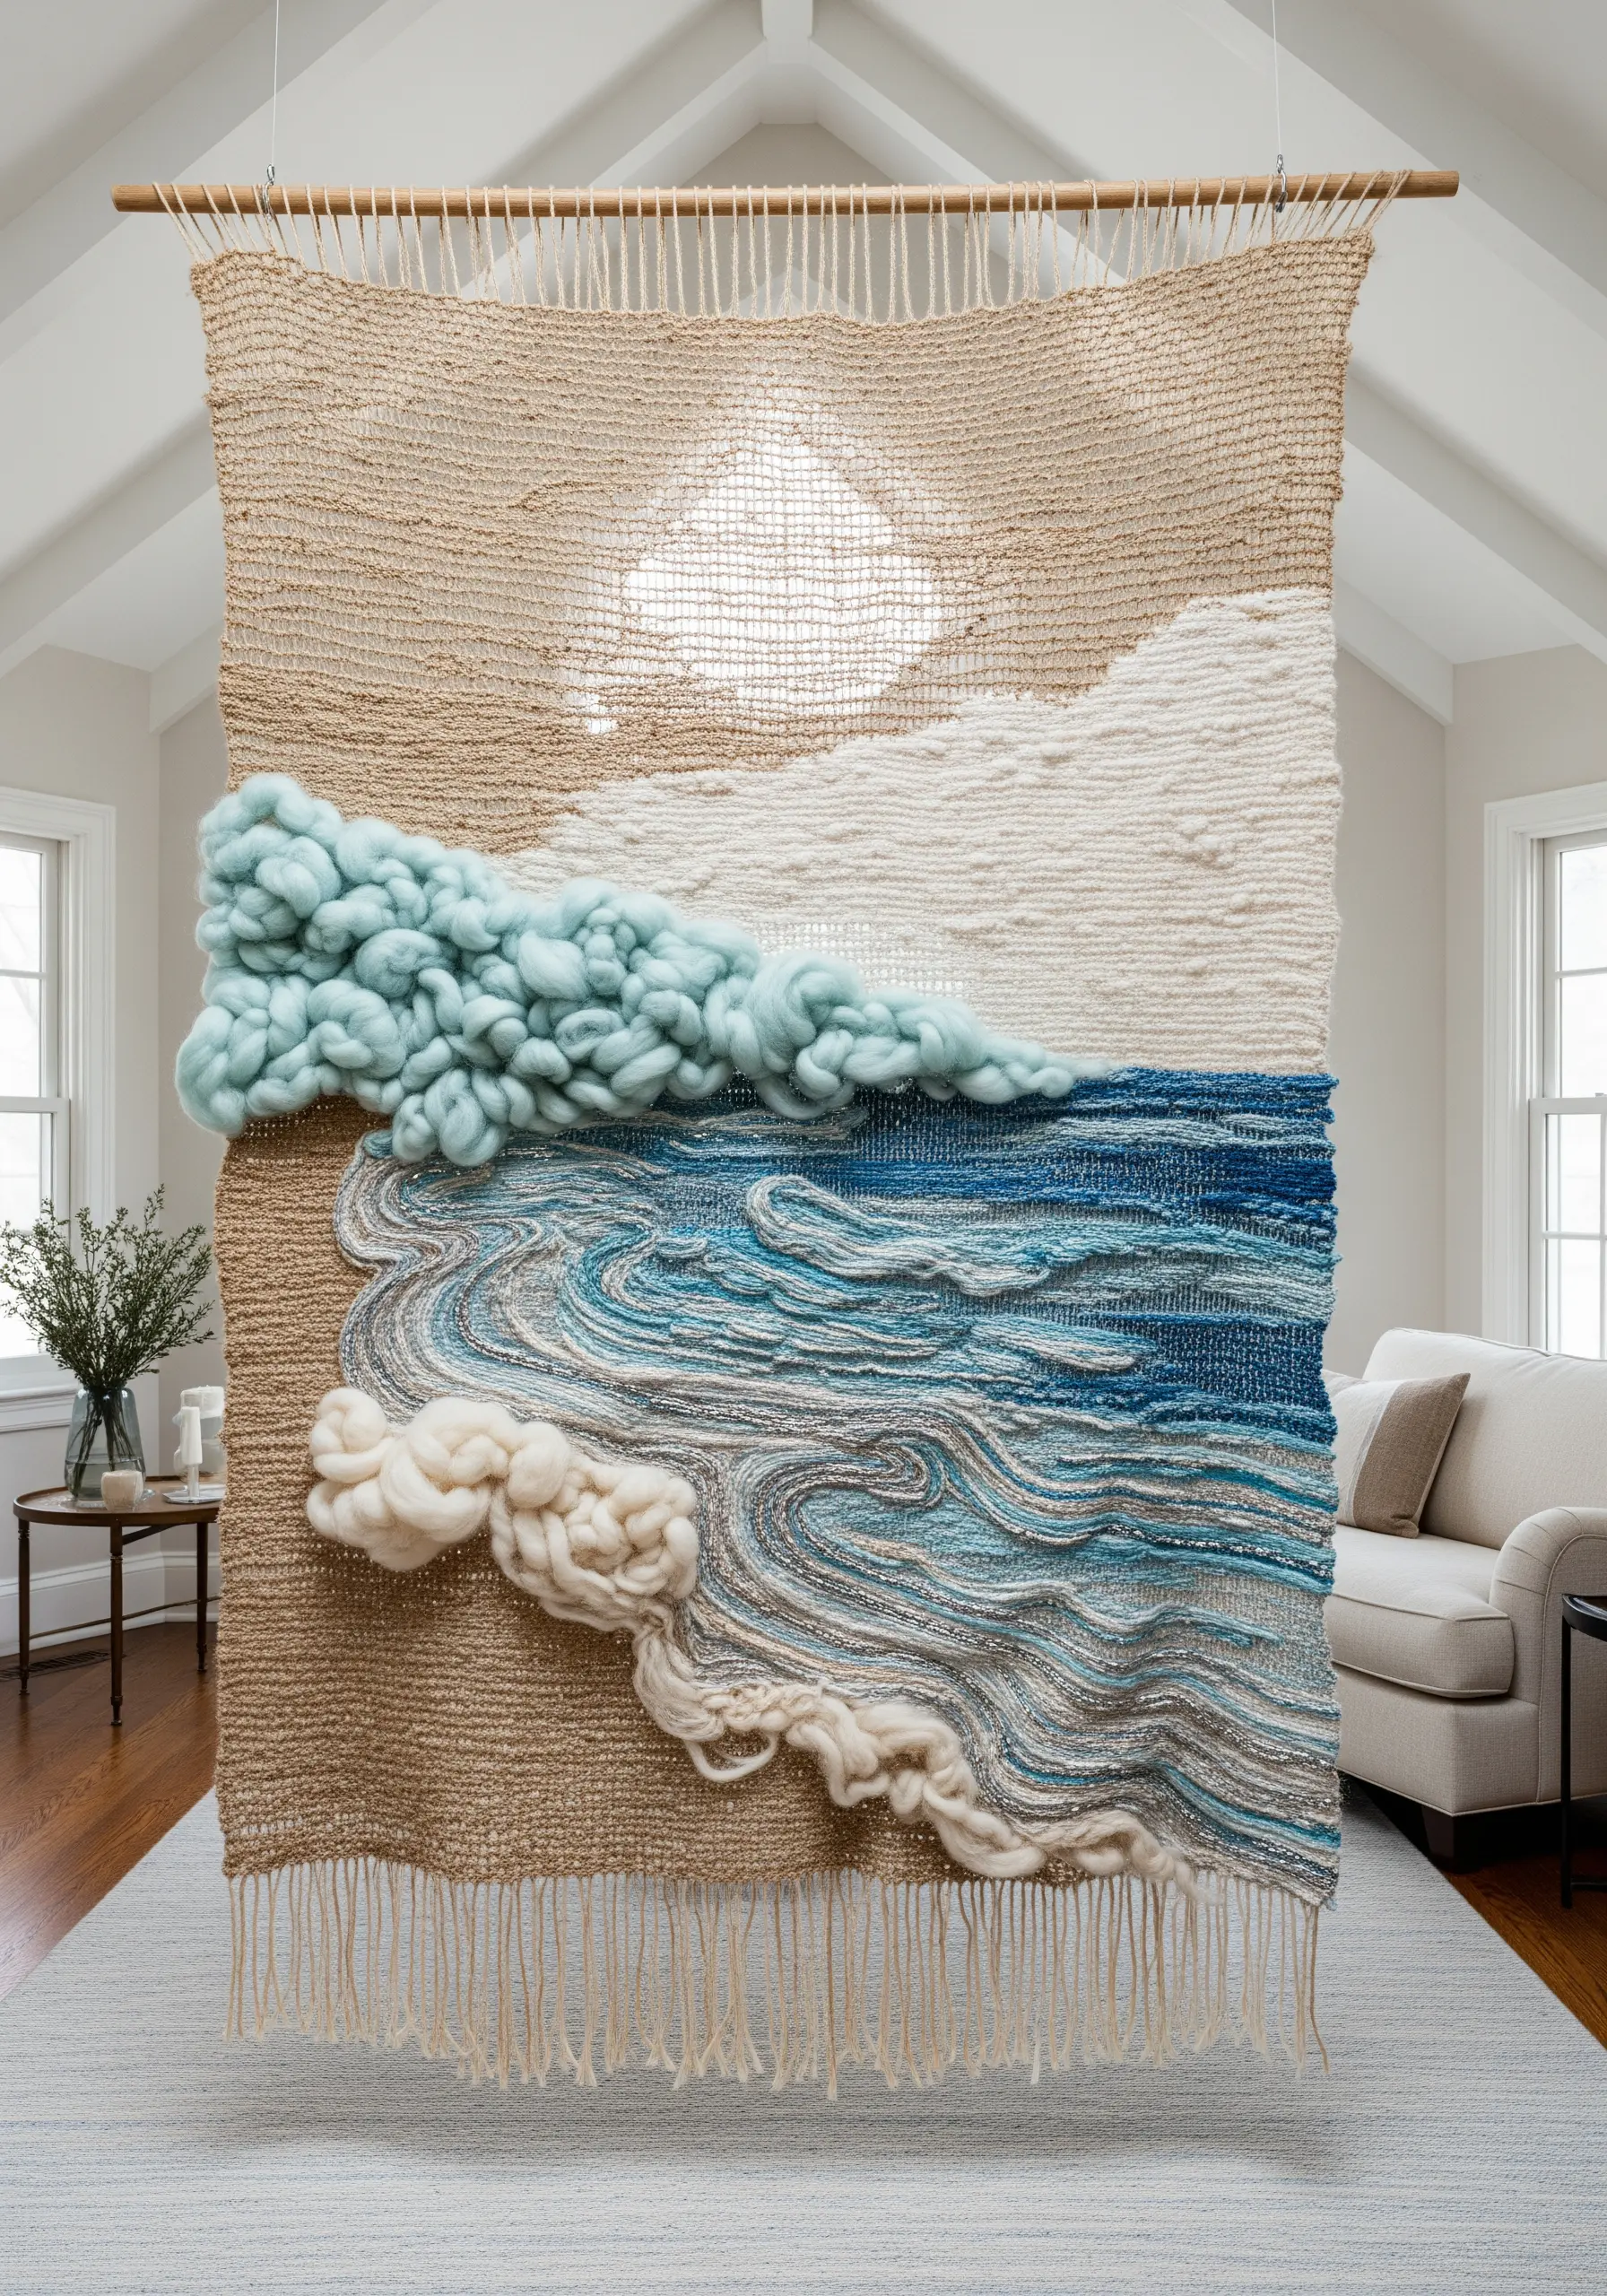
Break free from the grid of traditional weaving by incorporating unspun wool roving and other mixed fiber ideas directly into your piece.
Allow chunky, cloud-like sections of roving to billow out from the flat-woven background, creating dramatic 3D relief that captures the movement of waves or clouds.
Contrast these soft forms with tightly spun, variegated yarns to add detail and visual interest. This technique transforms a simple wall hanging into a dynamic, sculptural statement.
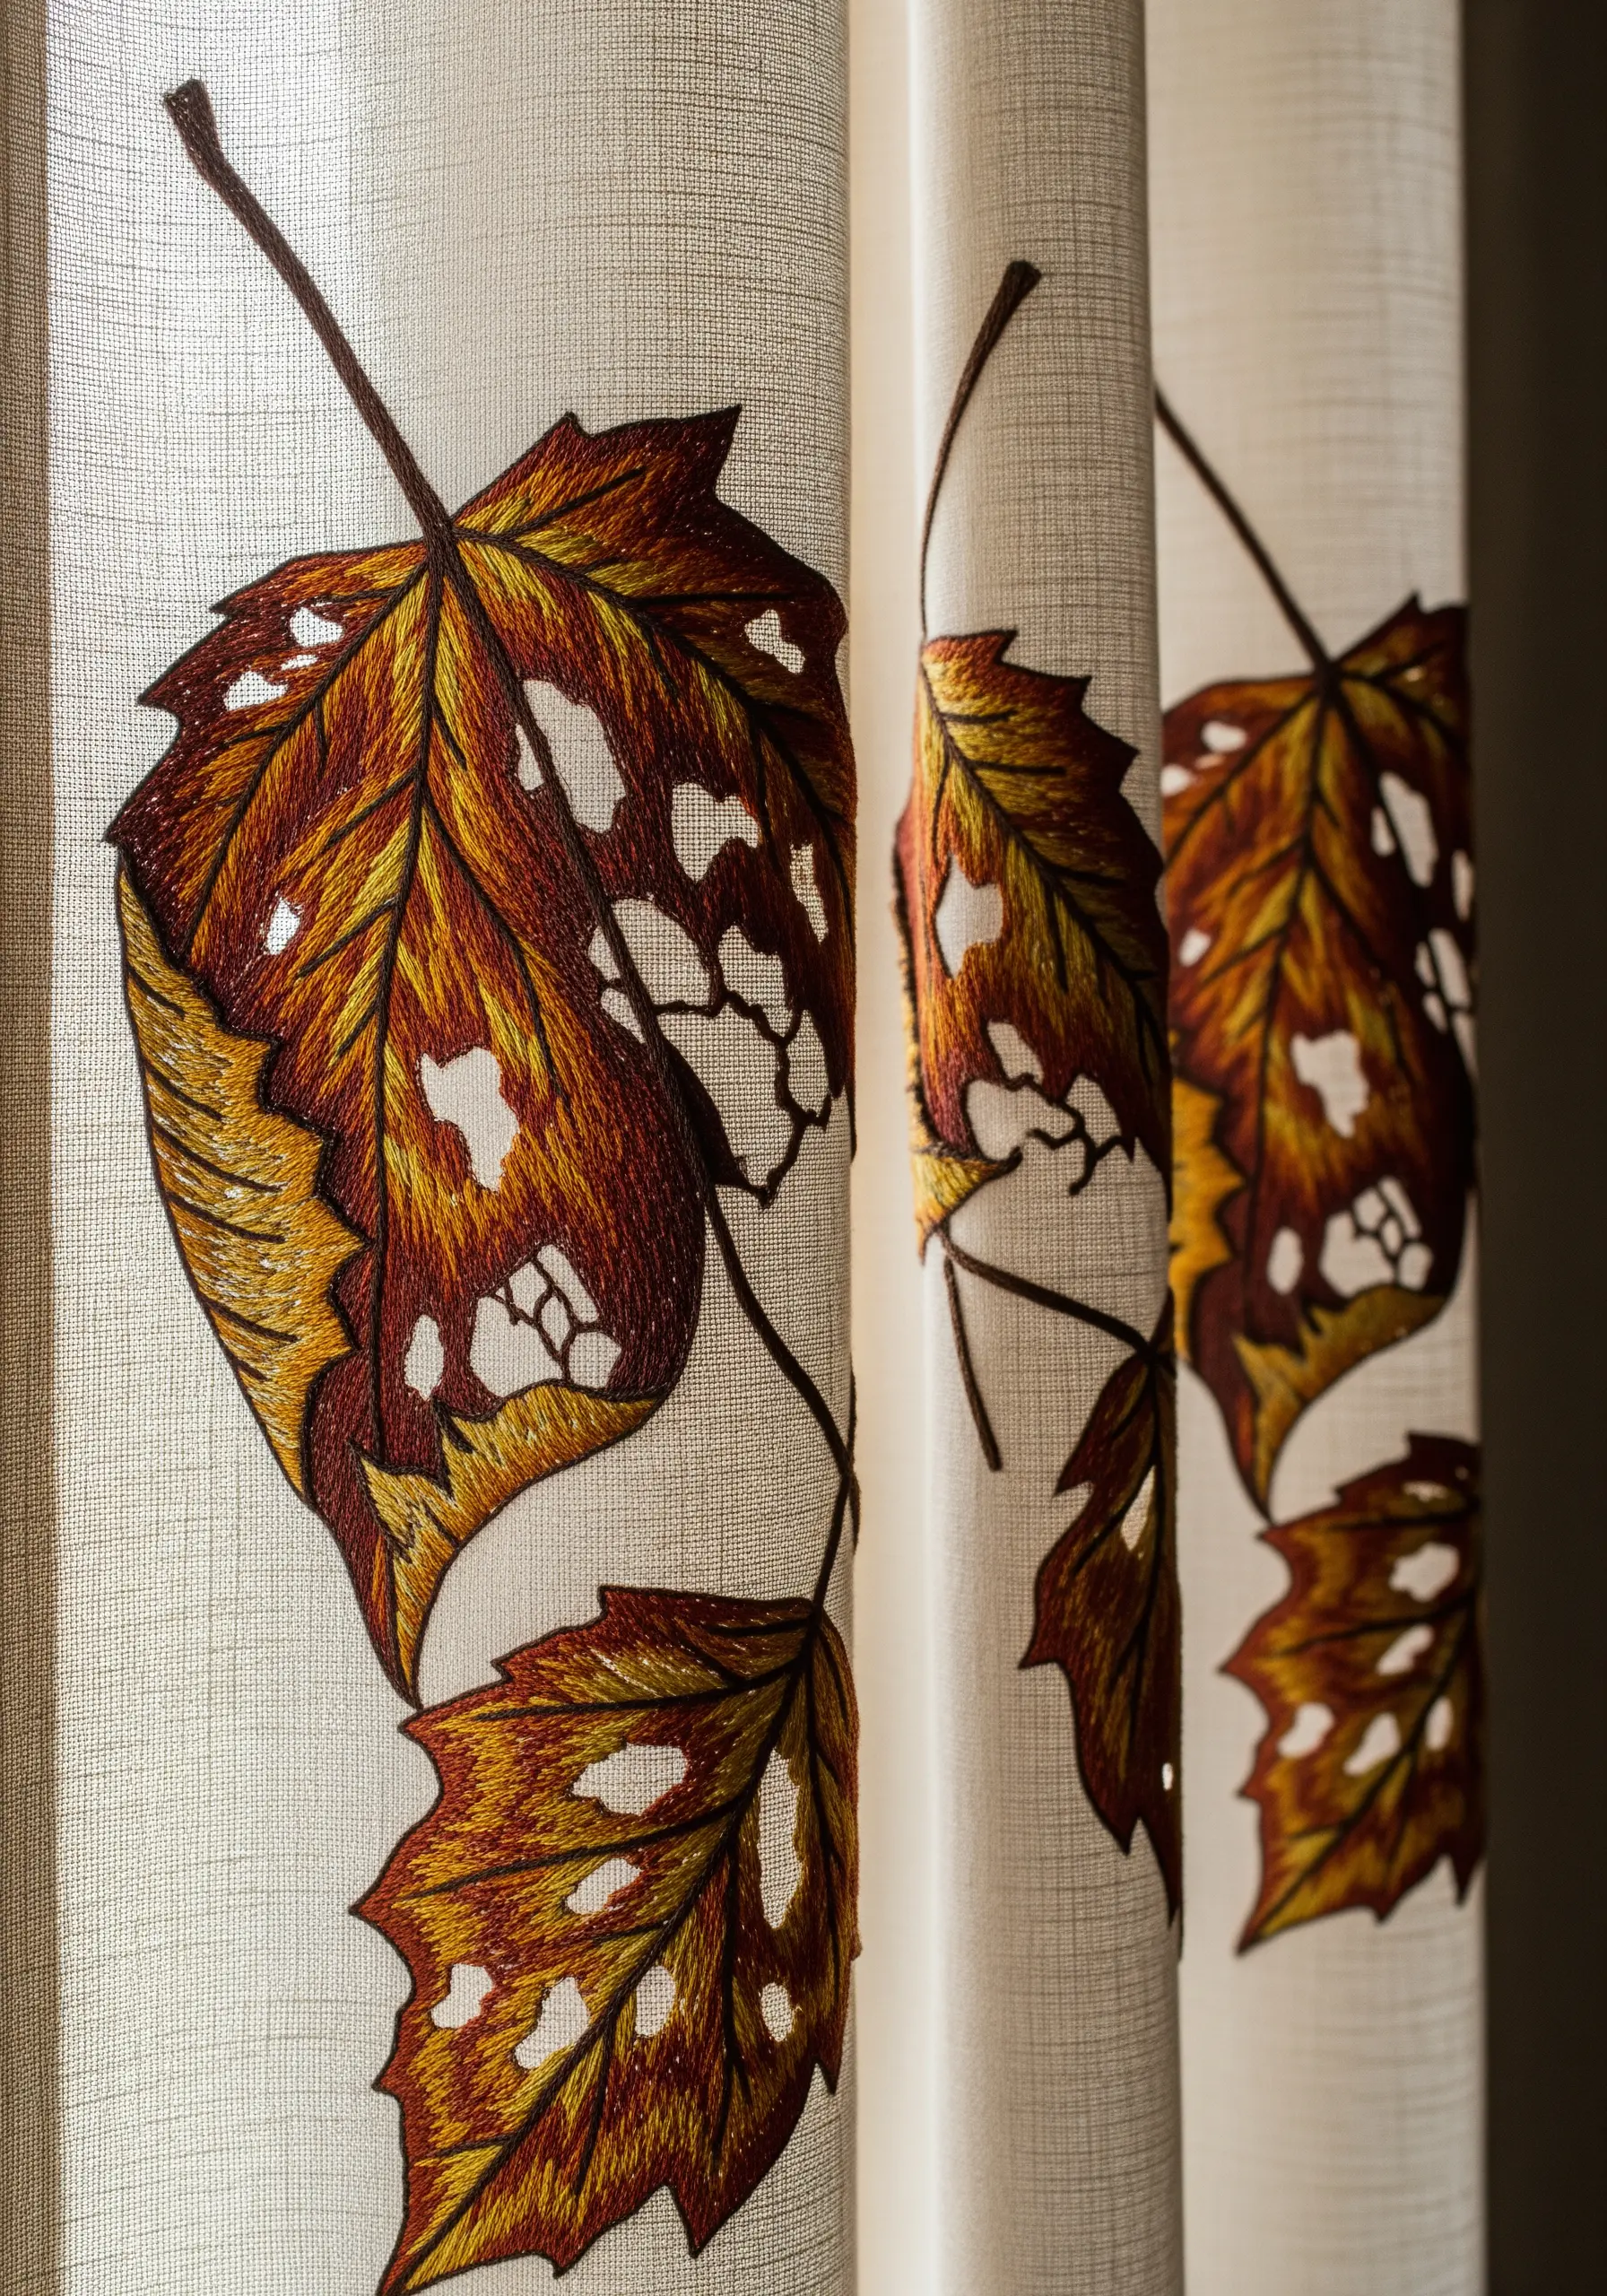
7. Elevate Line Work with High-Contrast Elegance
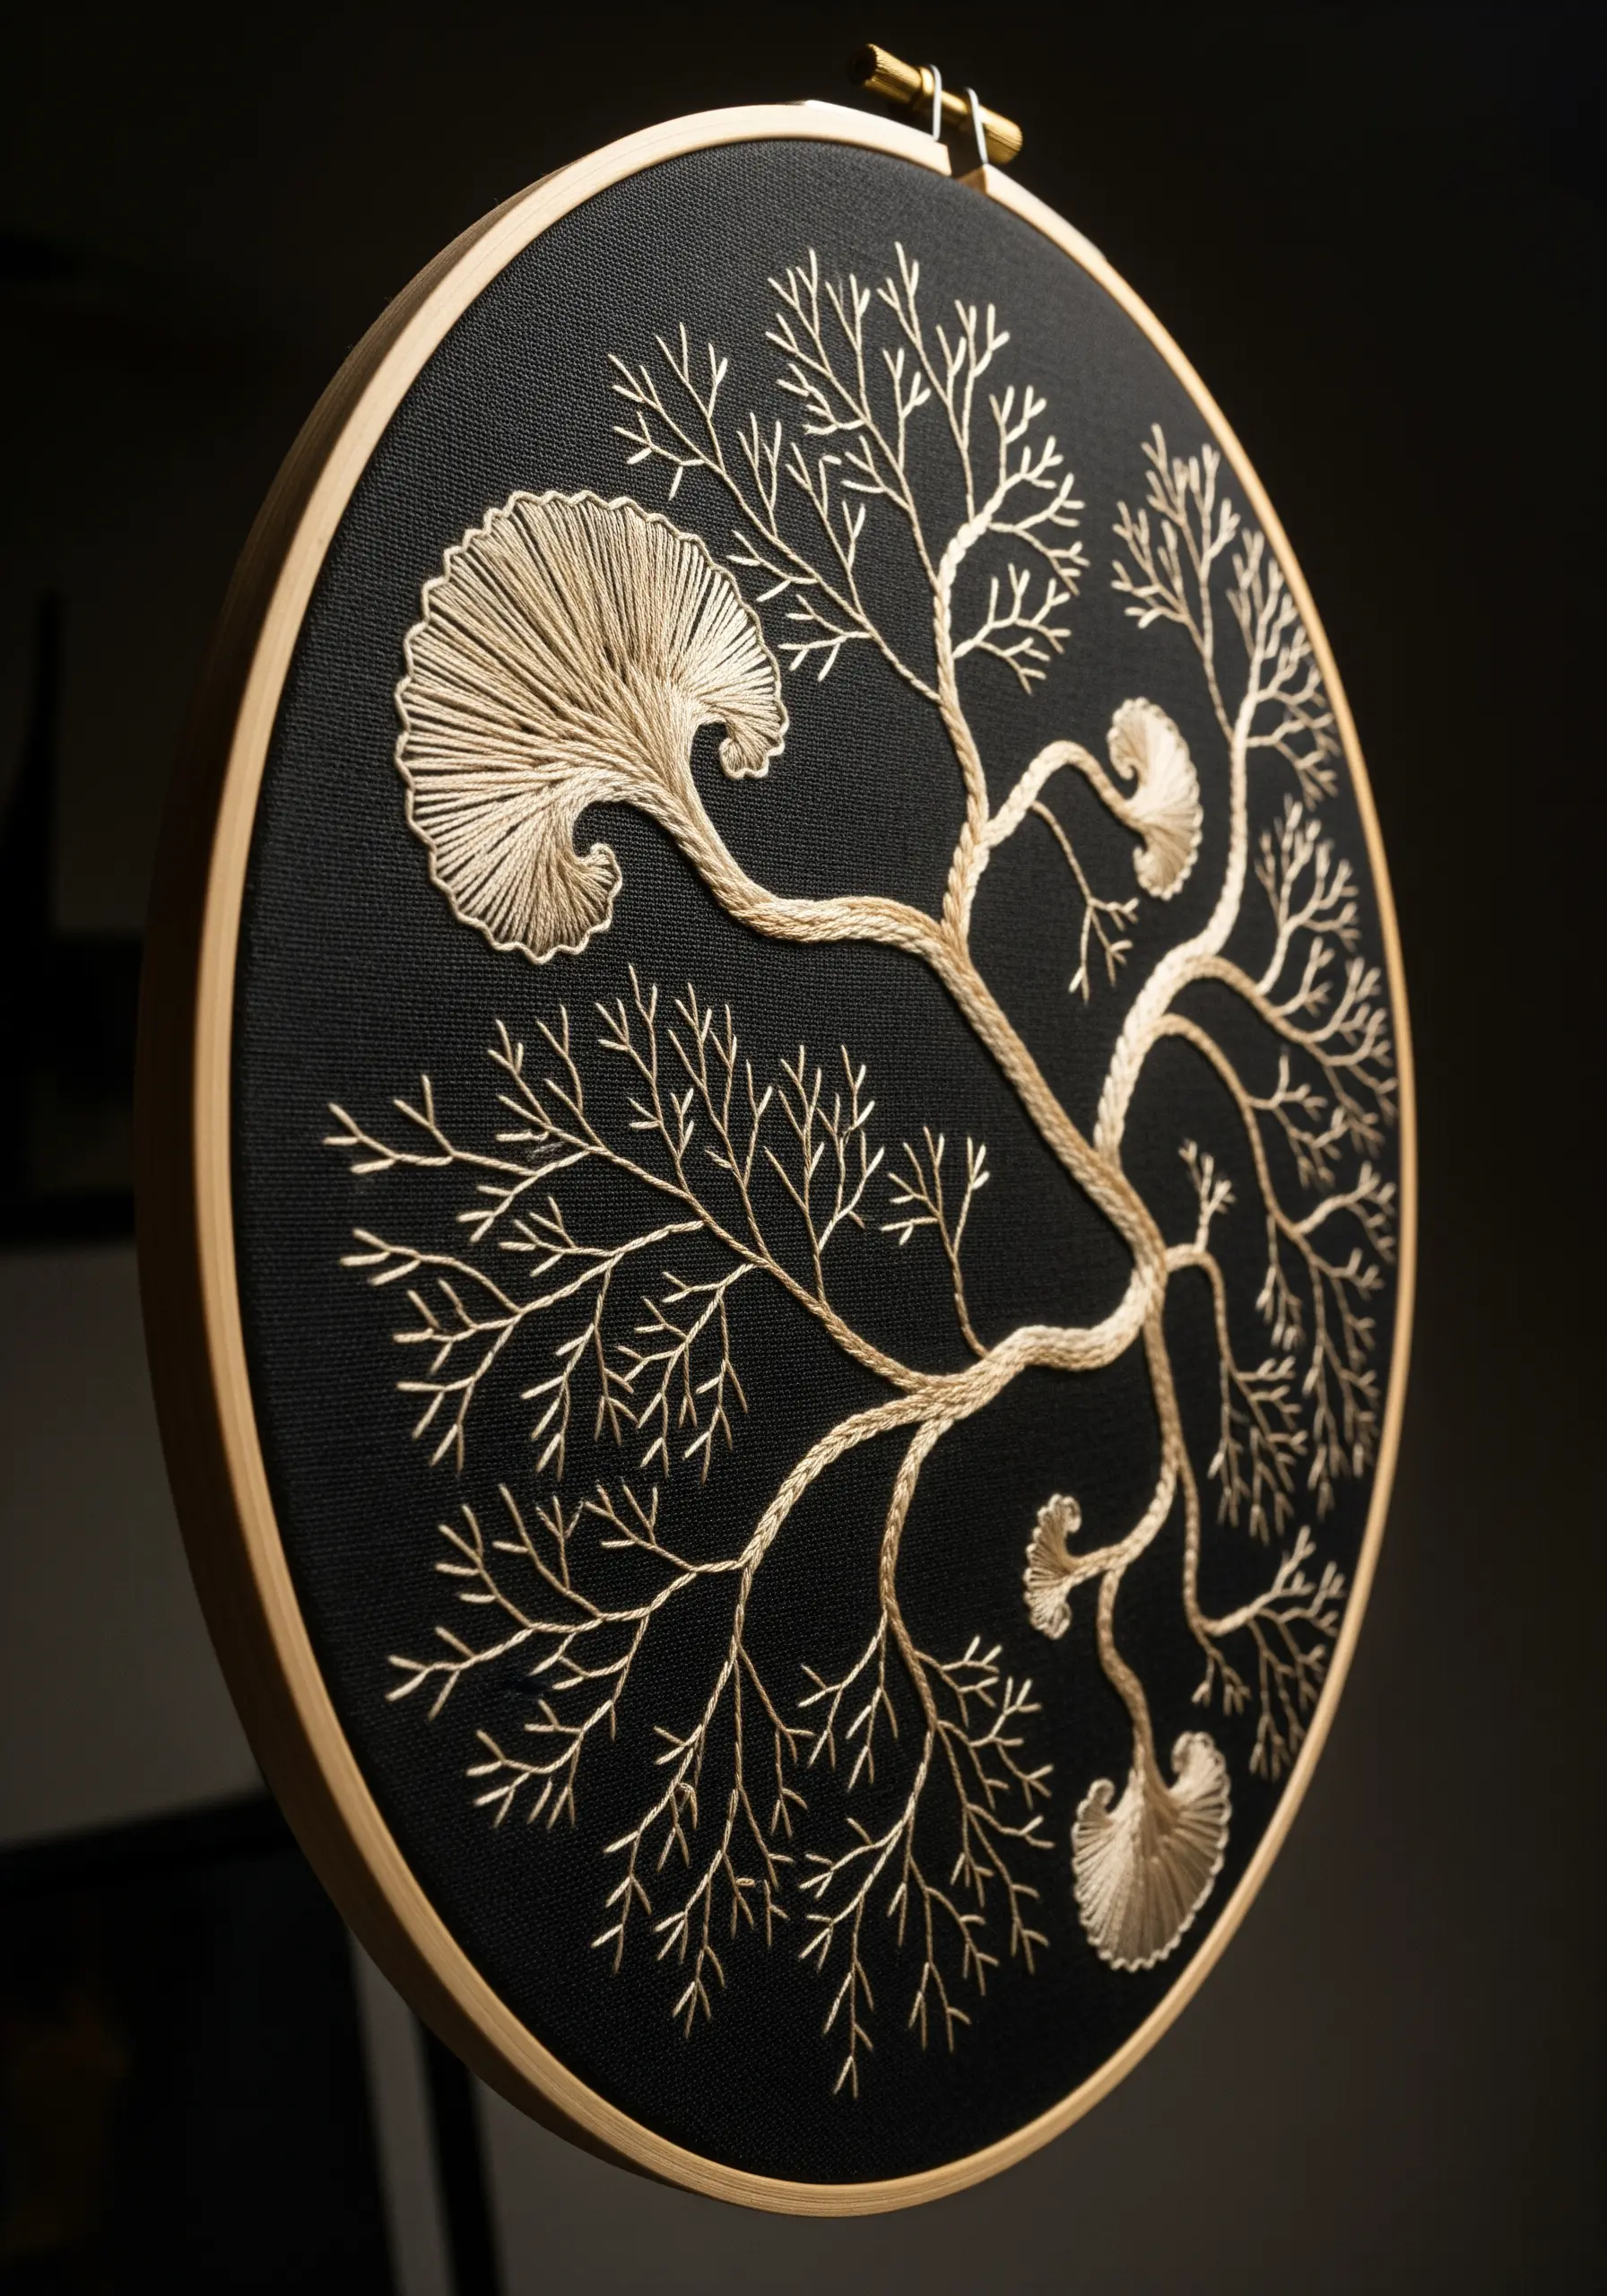
For a design that feels both organic and incredibly refined, choose a single, luminous thread color against a dark, matte fabric.
Use a smooth, consistent stem stitch or whipped backstitch for the branches to ensure your lines are fluid and unbroken. This creates a strong foundation for the piece.
For the fan-shaped leaves, employ a directional satin stitch, angling your stitches to radiate from the base. This simple adjustment creates a subtle sheen that catches the light, making the design feel alive and dynamic.
8. Design an Airy Botanical Scatter for Linens
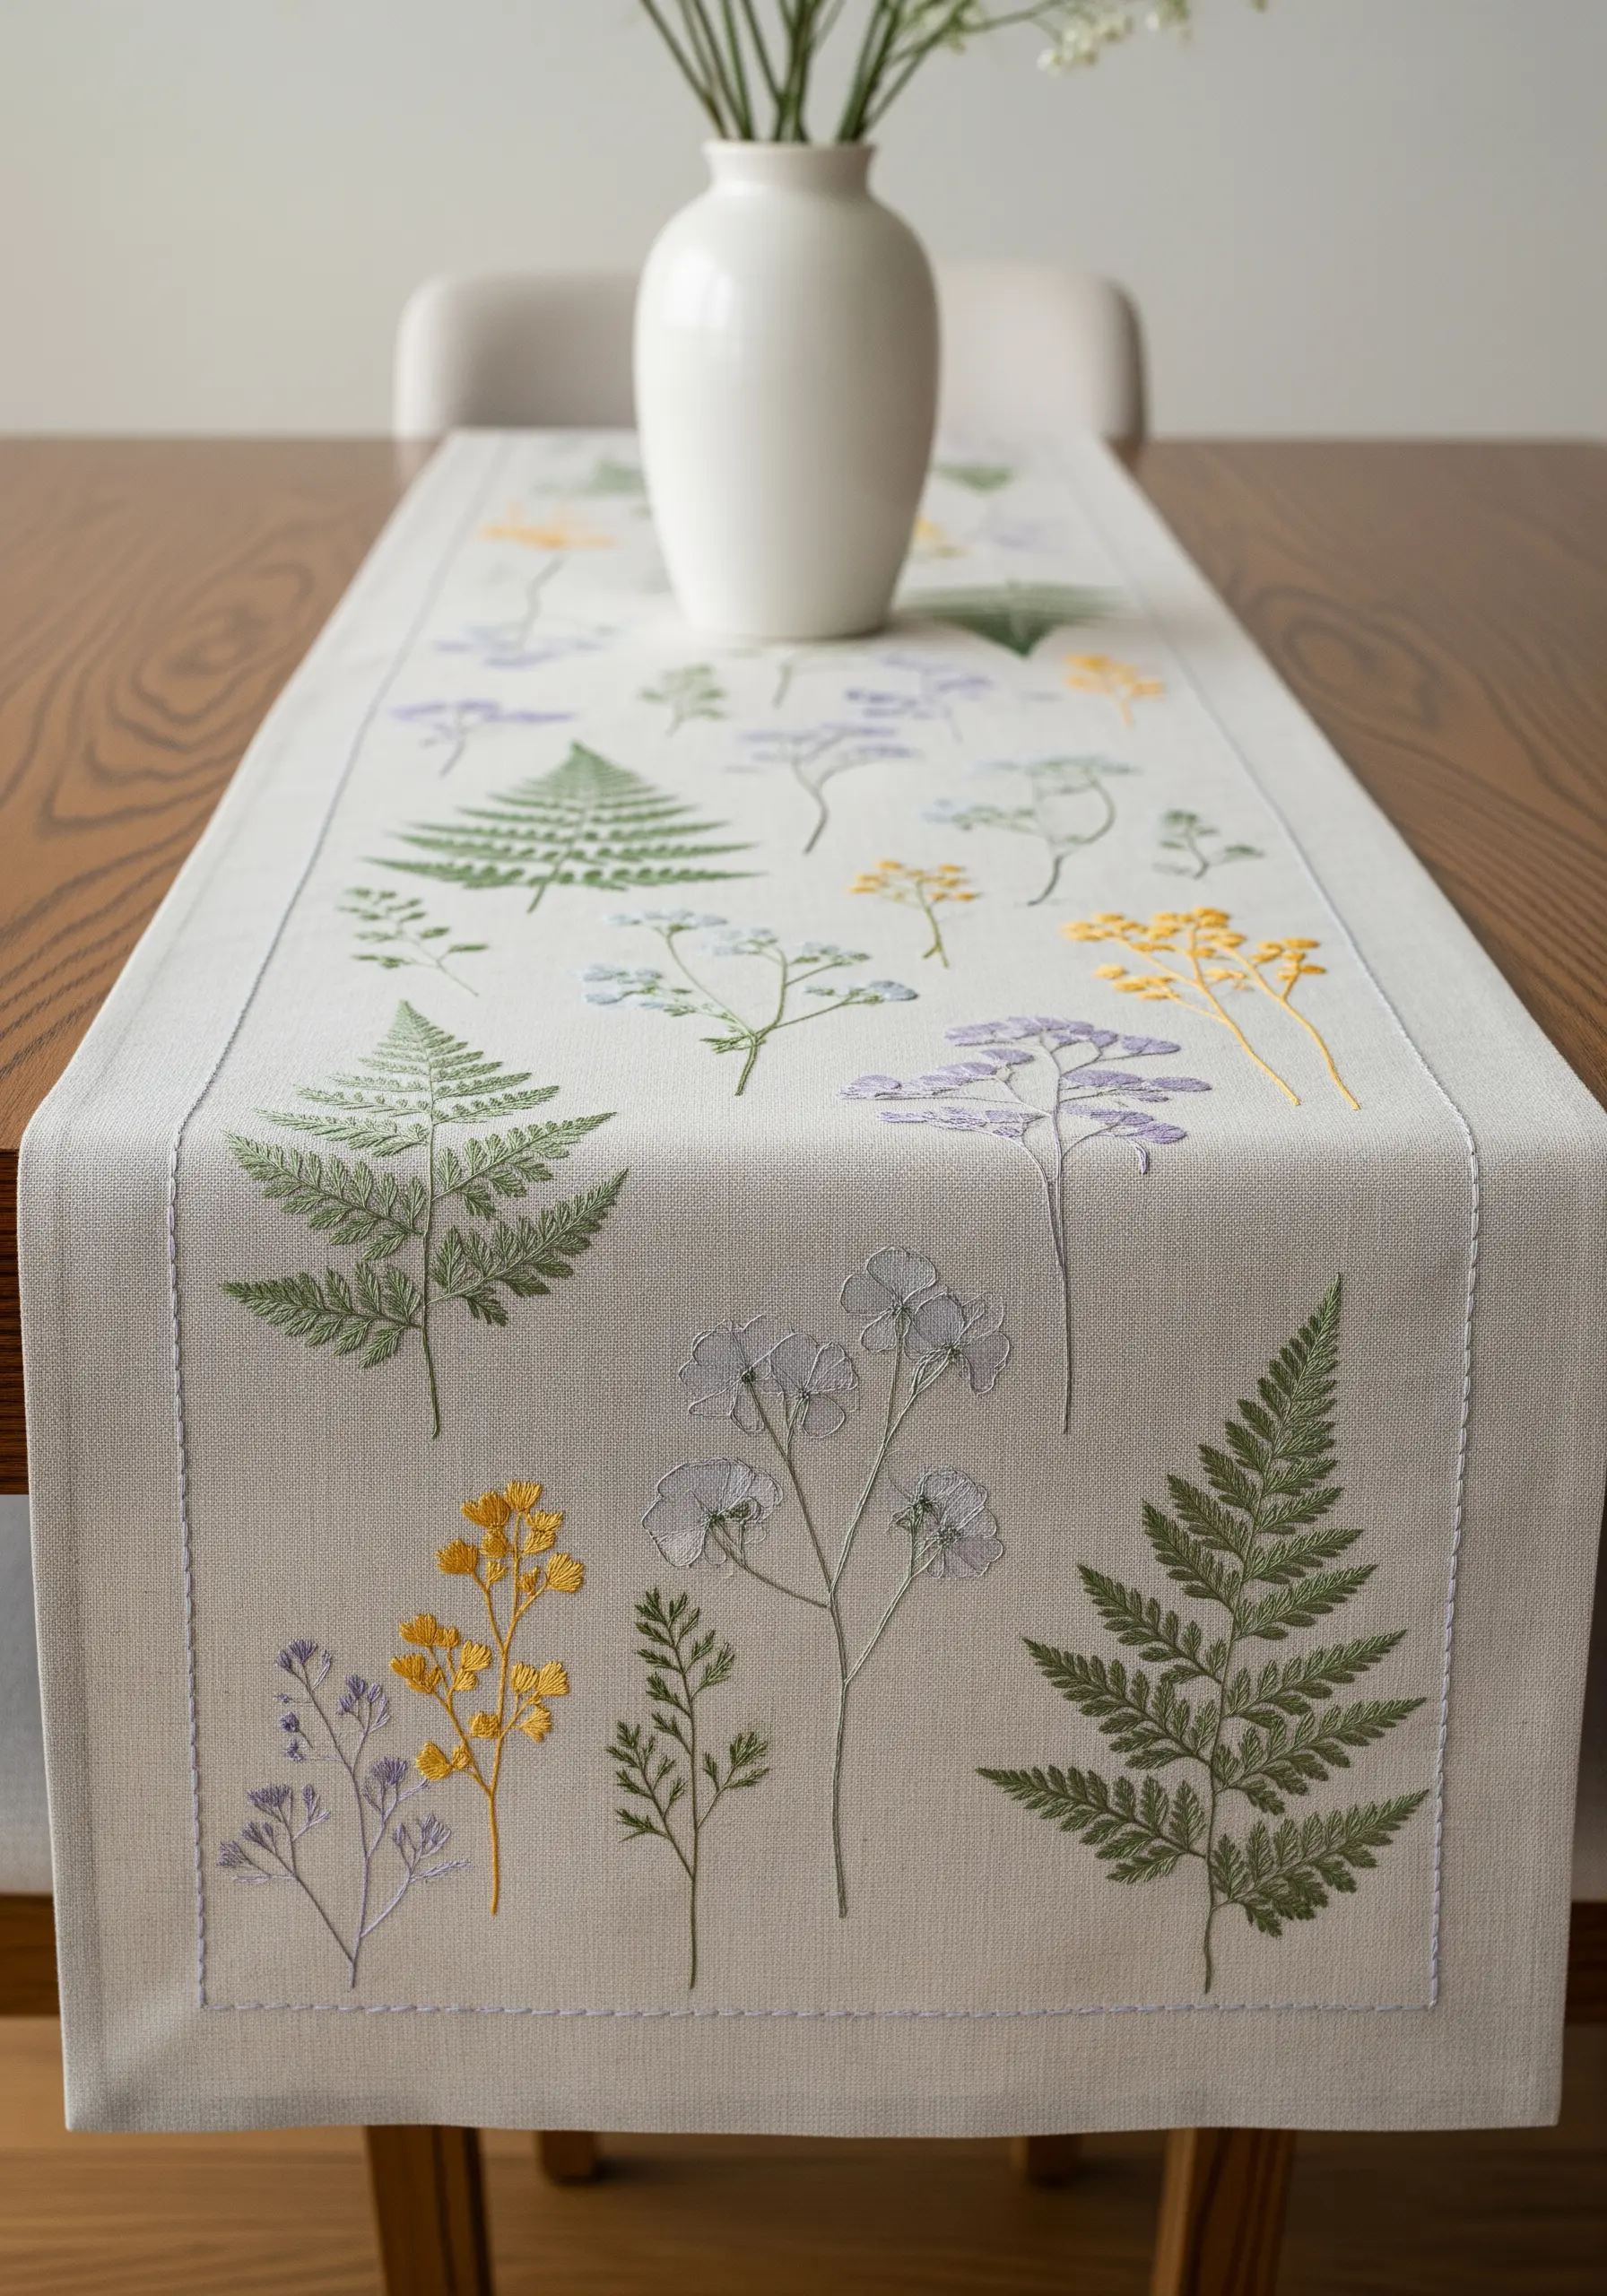
To create an elegant table runner, avoid dense, heavy patterns. Instead, scatter delicate, individual botanicals across the fabric.
Vary the shape and scale of your motifs—mix delicate ferns made with fishbone stitch, small floral clusters using lazy daisy stitch, and linear stems in backstitch.
This approach, inspired by botanical illustrations, feels light and modern. The negative space between each element is just as important as the stitching itself, creating a balanced and breathable composition for your hand-stitched table runner.
9. Sculpt Monumental Landscapes with Thread Painting
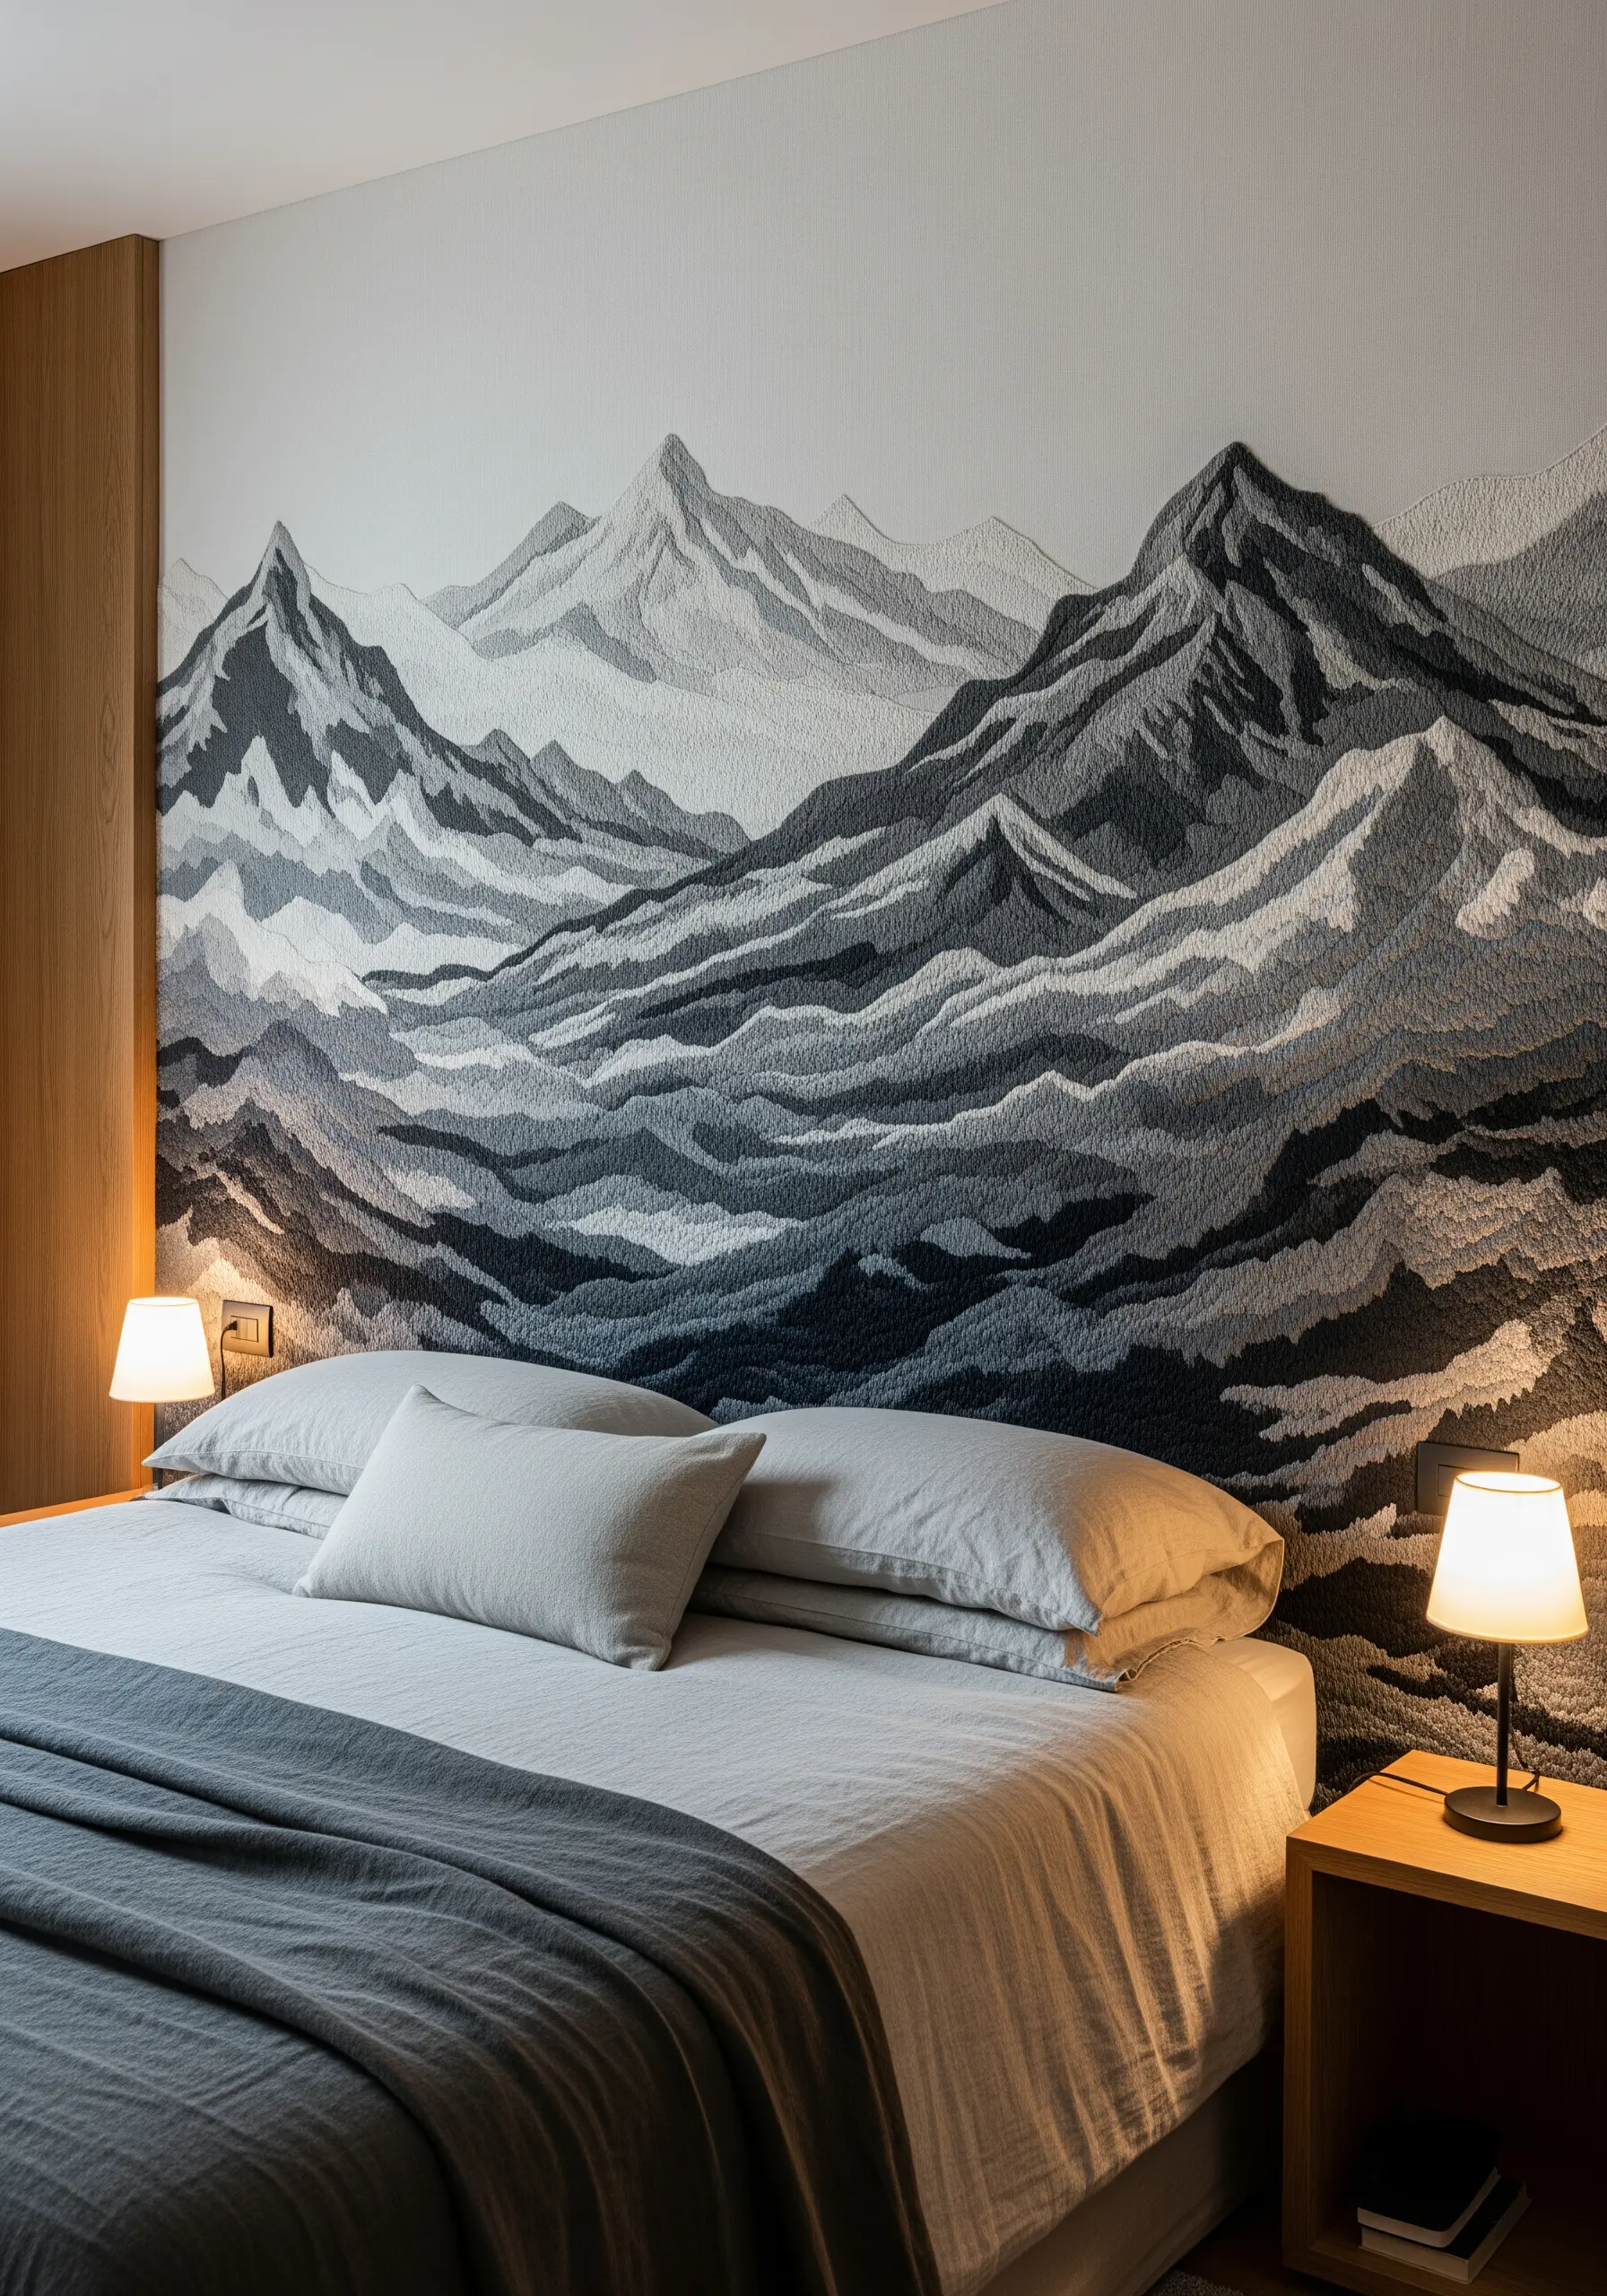
For a large-scale piece like a wall mural, use long-and-short stitch to create texture and shading that reads from a distance.
Work with a limited palette of greys, blacks, and whites, treating each shade like a different value in a pencil drawing. Blend the shades carefully to create smooth transitions that suggest rolling fog and rocky shadows.
Vary the direction of your stitches to follow the contours of the mountains. This not only adds realism but also enhances the sense of monumental scale and movement across the piece.
10. Mimic Agate and Geodes with Couching and Beading
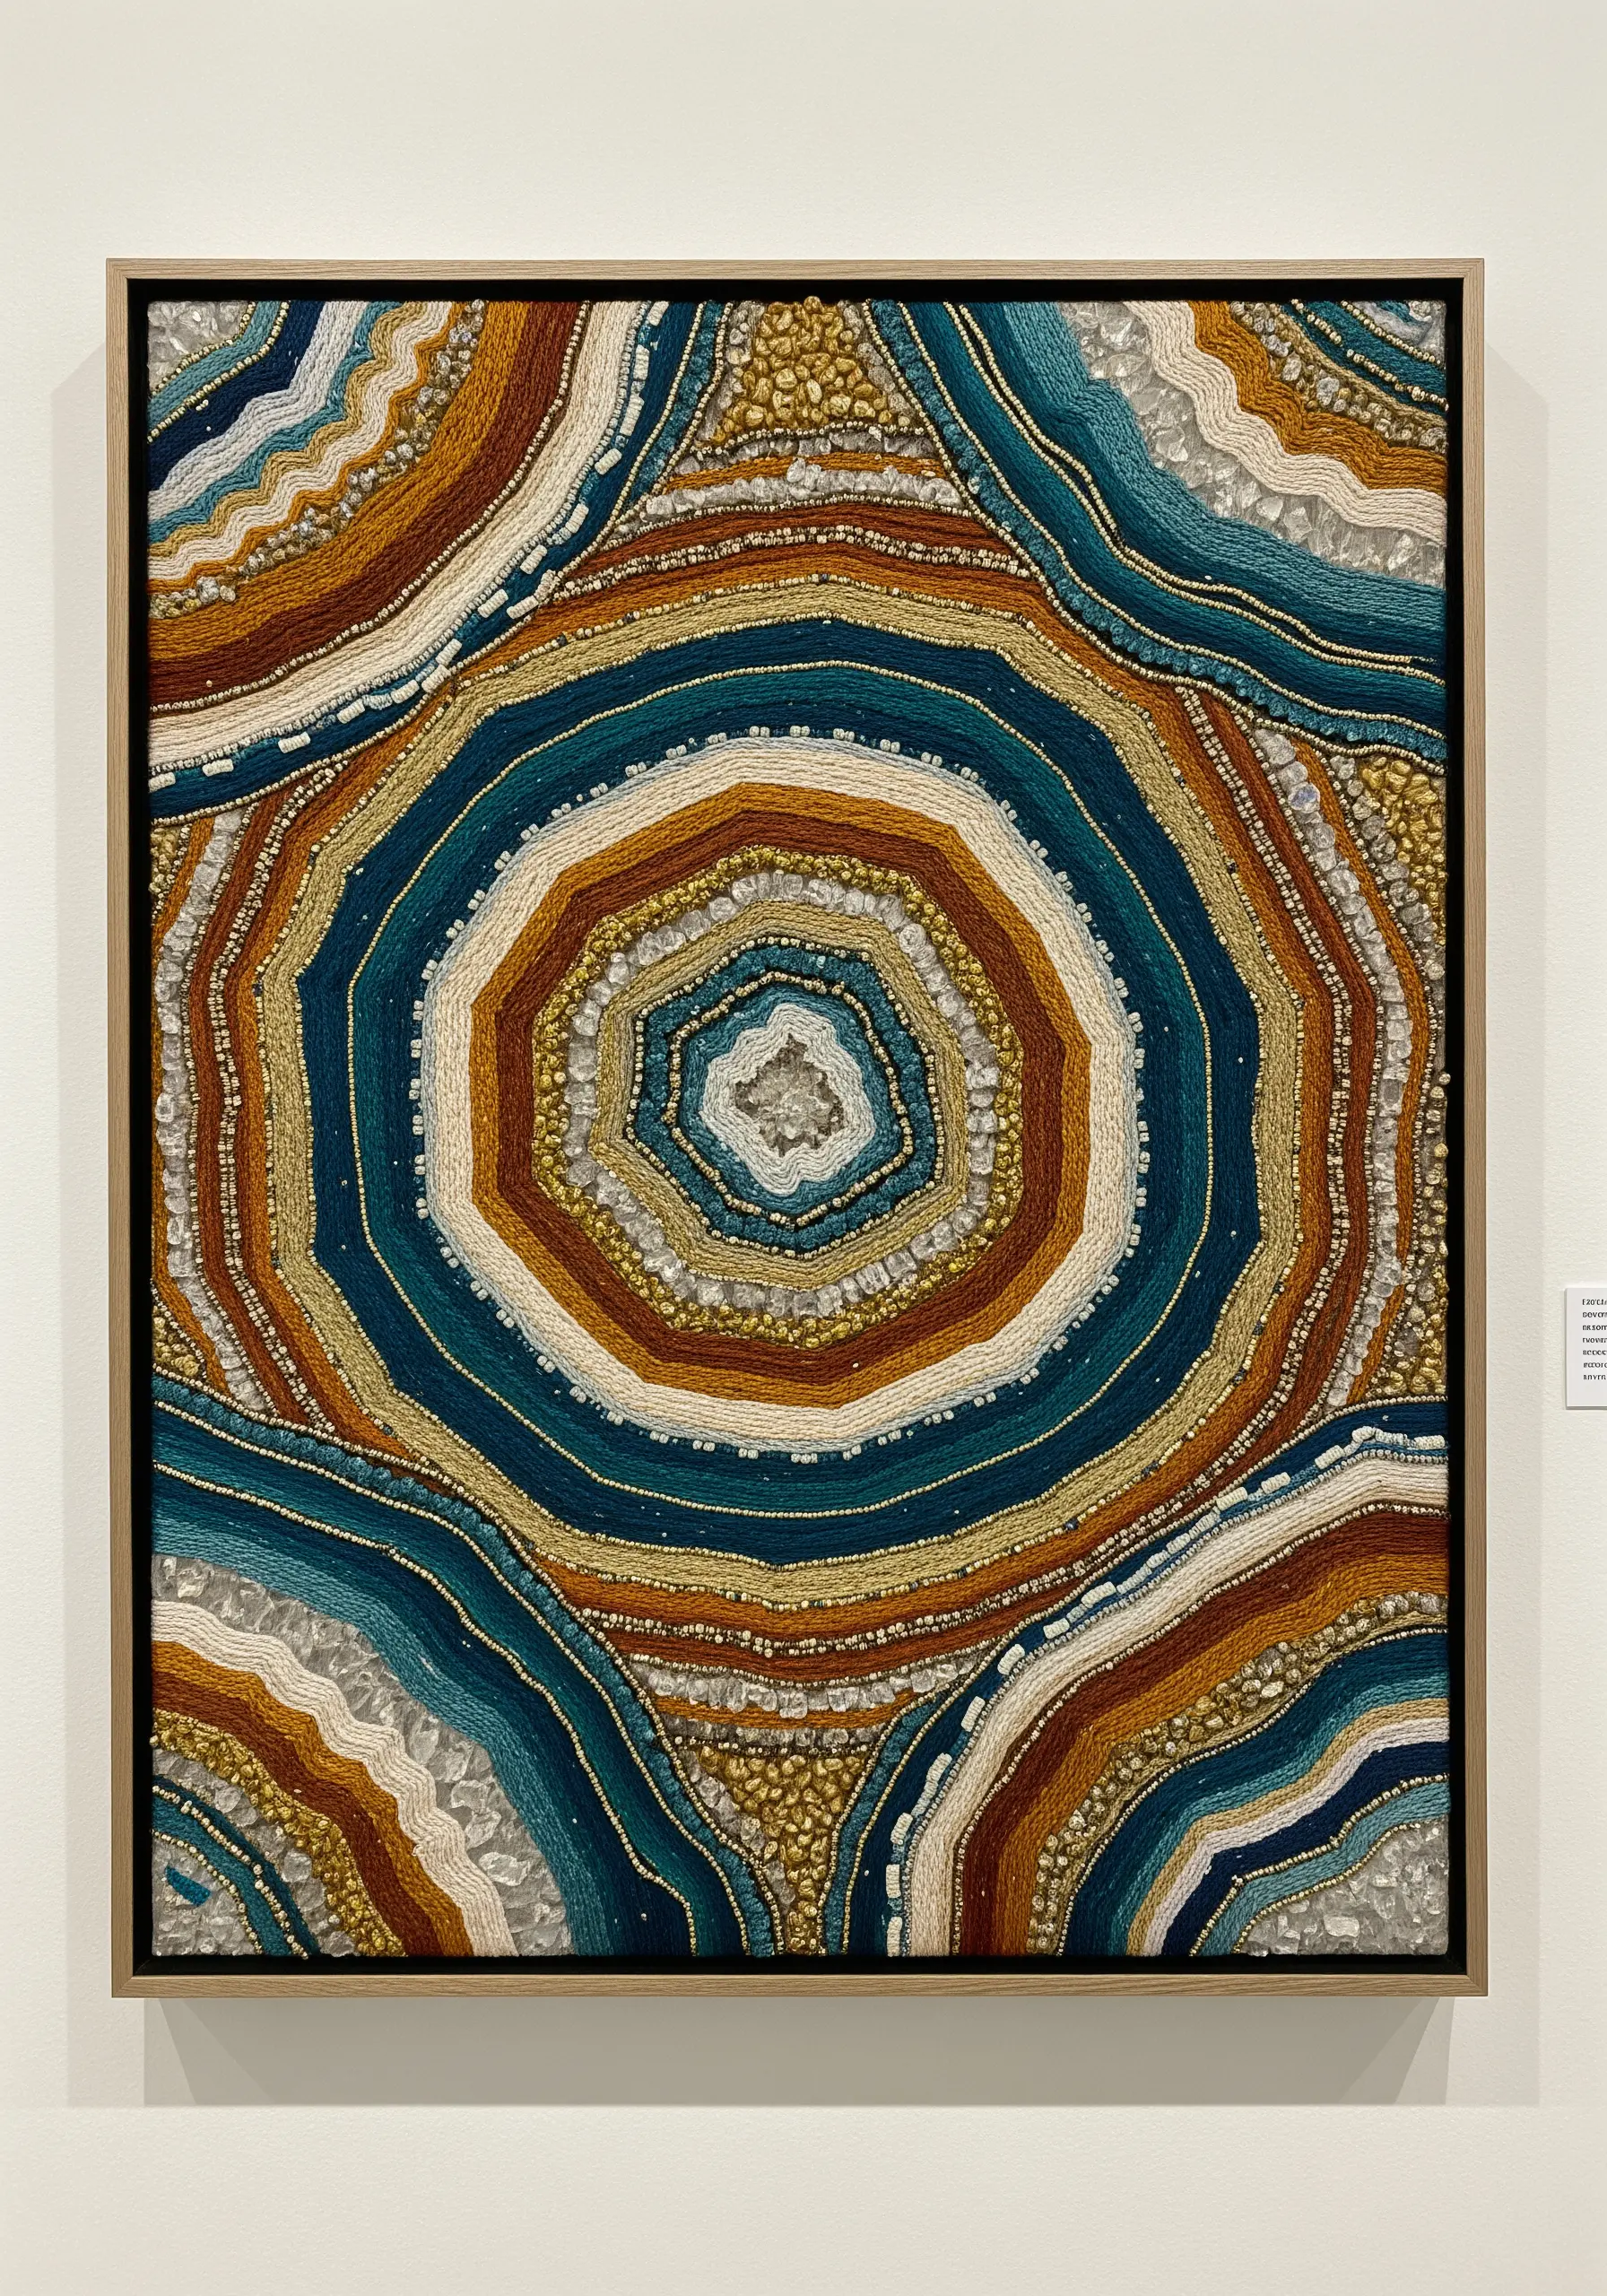
To capture the crystalline structure of a geode, combine the linear definition of couching with the textural fill of beads or knots.
Outline each concentric ring with a thick, couched cord or metallic thread to create clean, defined borders. This step provides the structure for your entire piece.
Fill the sections with tiny seed beads, French knots, or even small polished stones to replicate the sparkling, mineral texture of the inside of the geode. This mix of textures is the key to a convincing finish.
11. Construct 3D Forms with Freeform Thread Sculpting
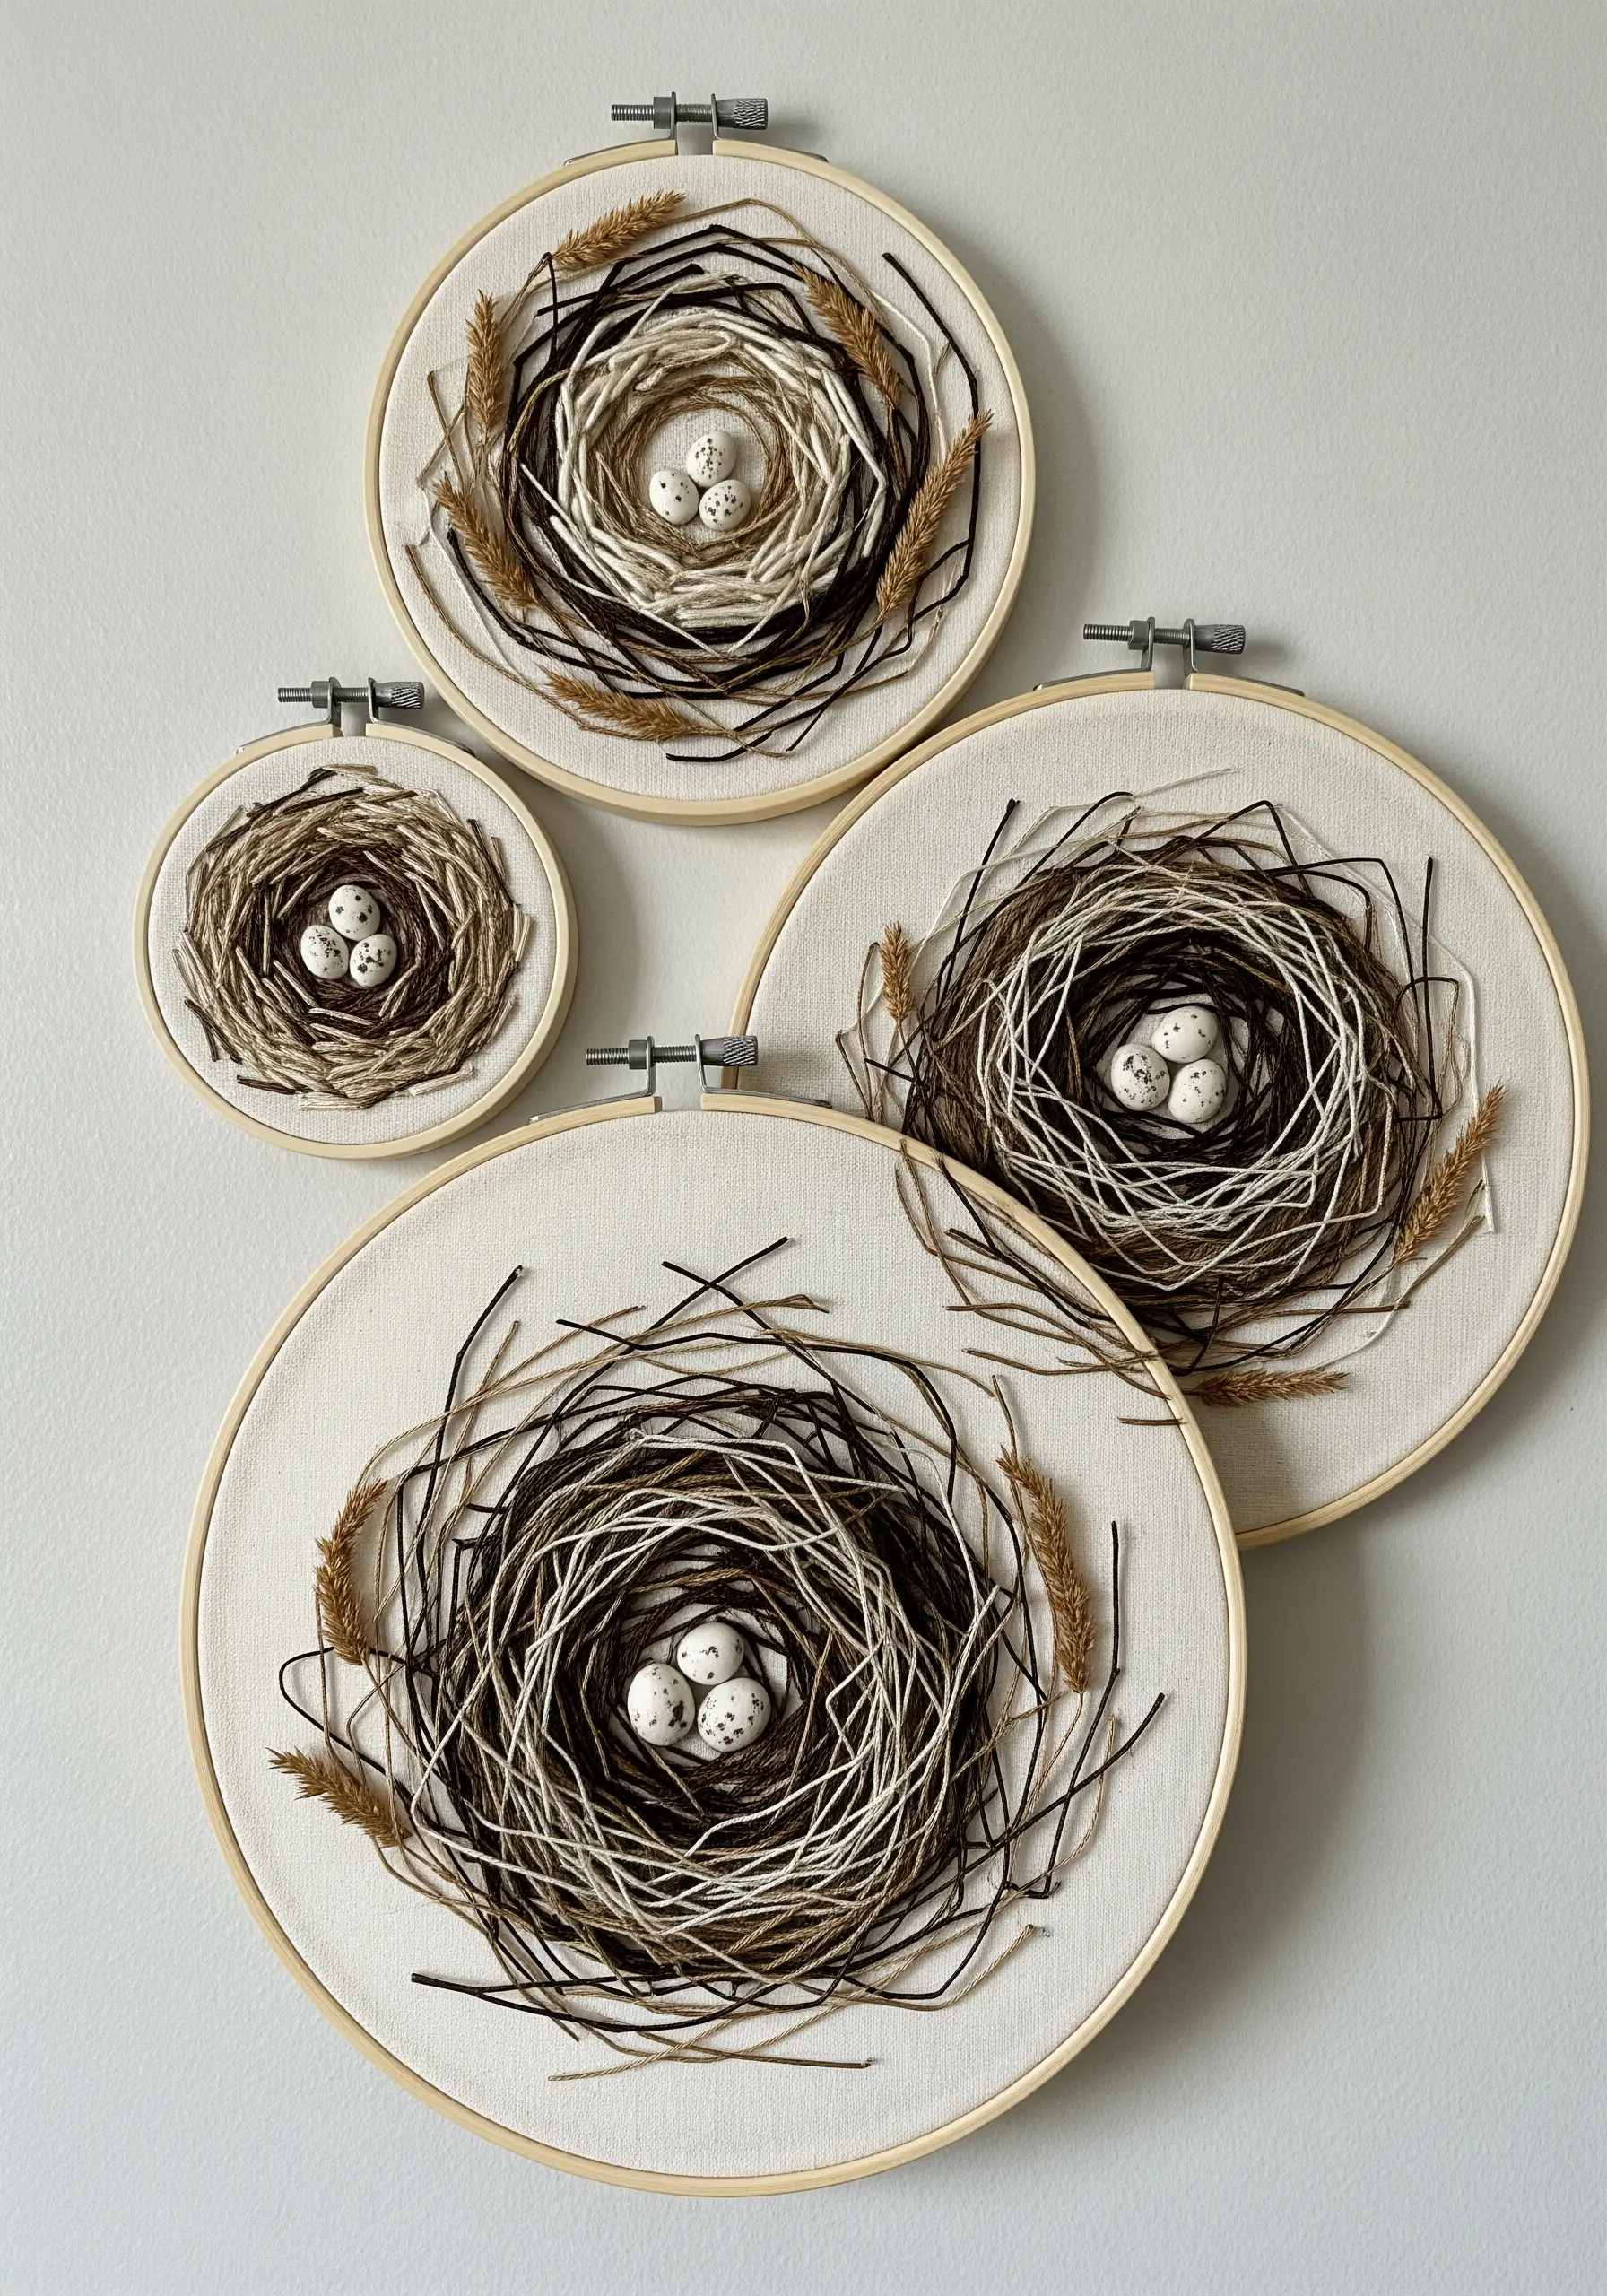
Build a bird’s nest that feels truly organic by abandoning precise stitches in favor of controlled chaos.
Use multiple strands of thread in varying weights and shades of brown, black, and cream. Loop and layer them loosely over your fabric, tacking them down with tiny, invisible stitches only where necessary.
Incorporate other natural materials like dried grasses or tiny twigs, securing them within the threads. This technique is less about stitching and more about sculpting with fiber to create nature-texture embroidery projects that feel amazingly real.
12. Use Stitch Direction to Create Realistic Surfaces
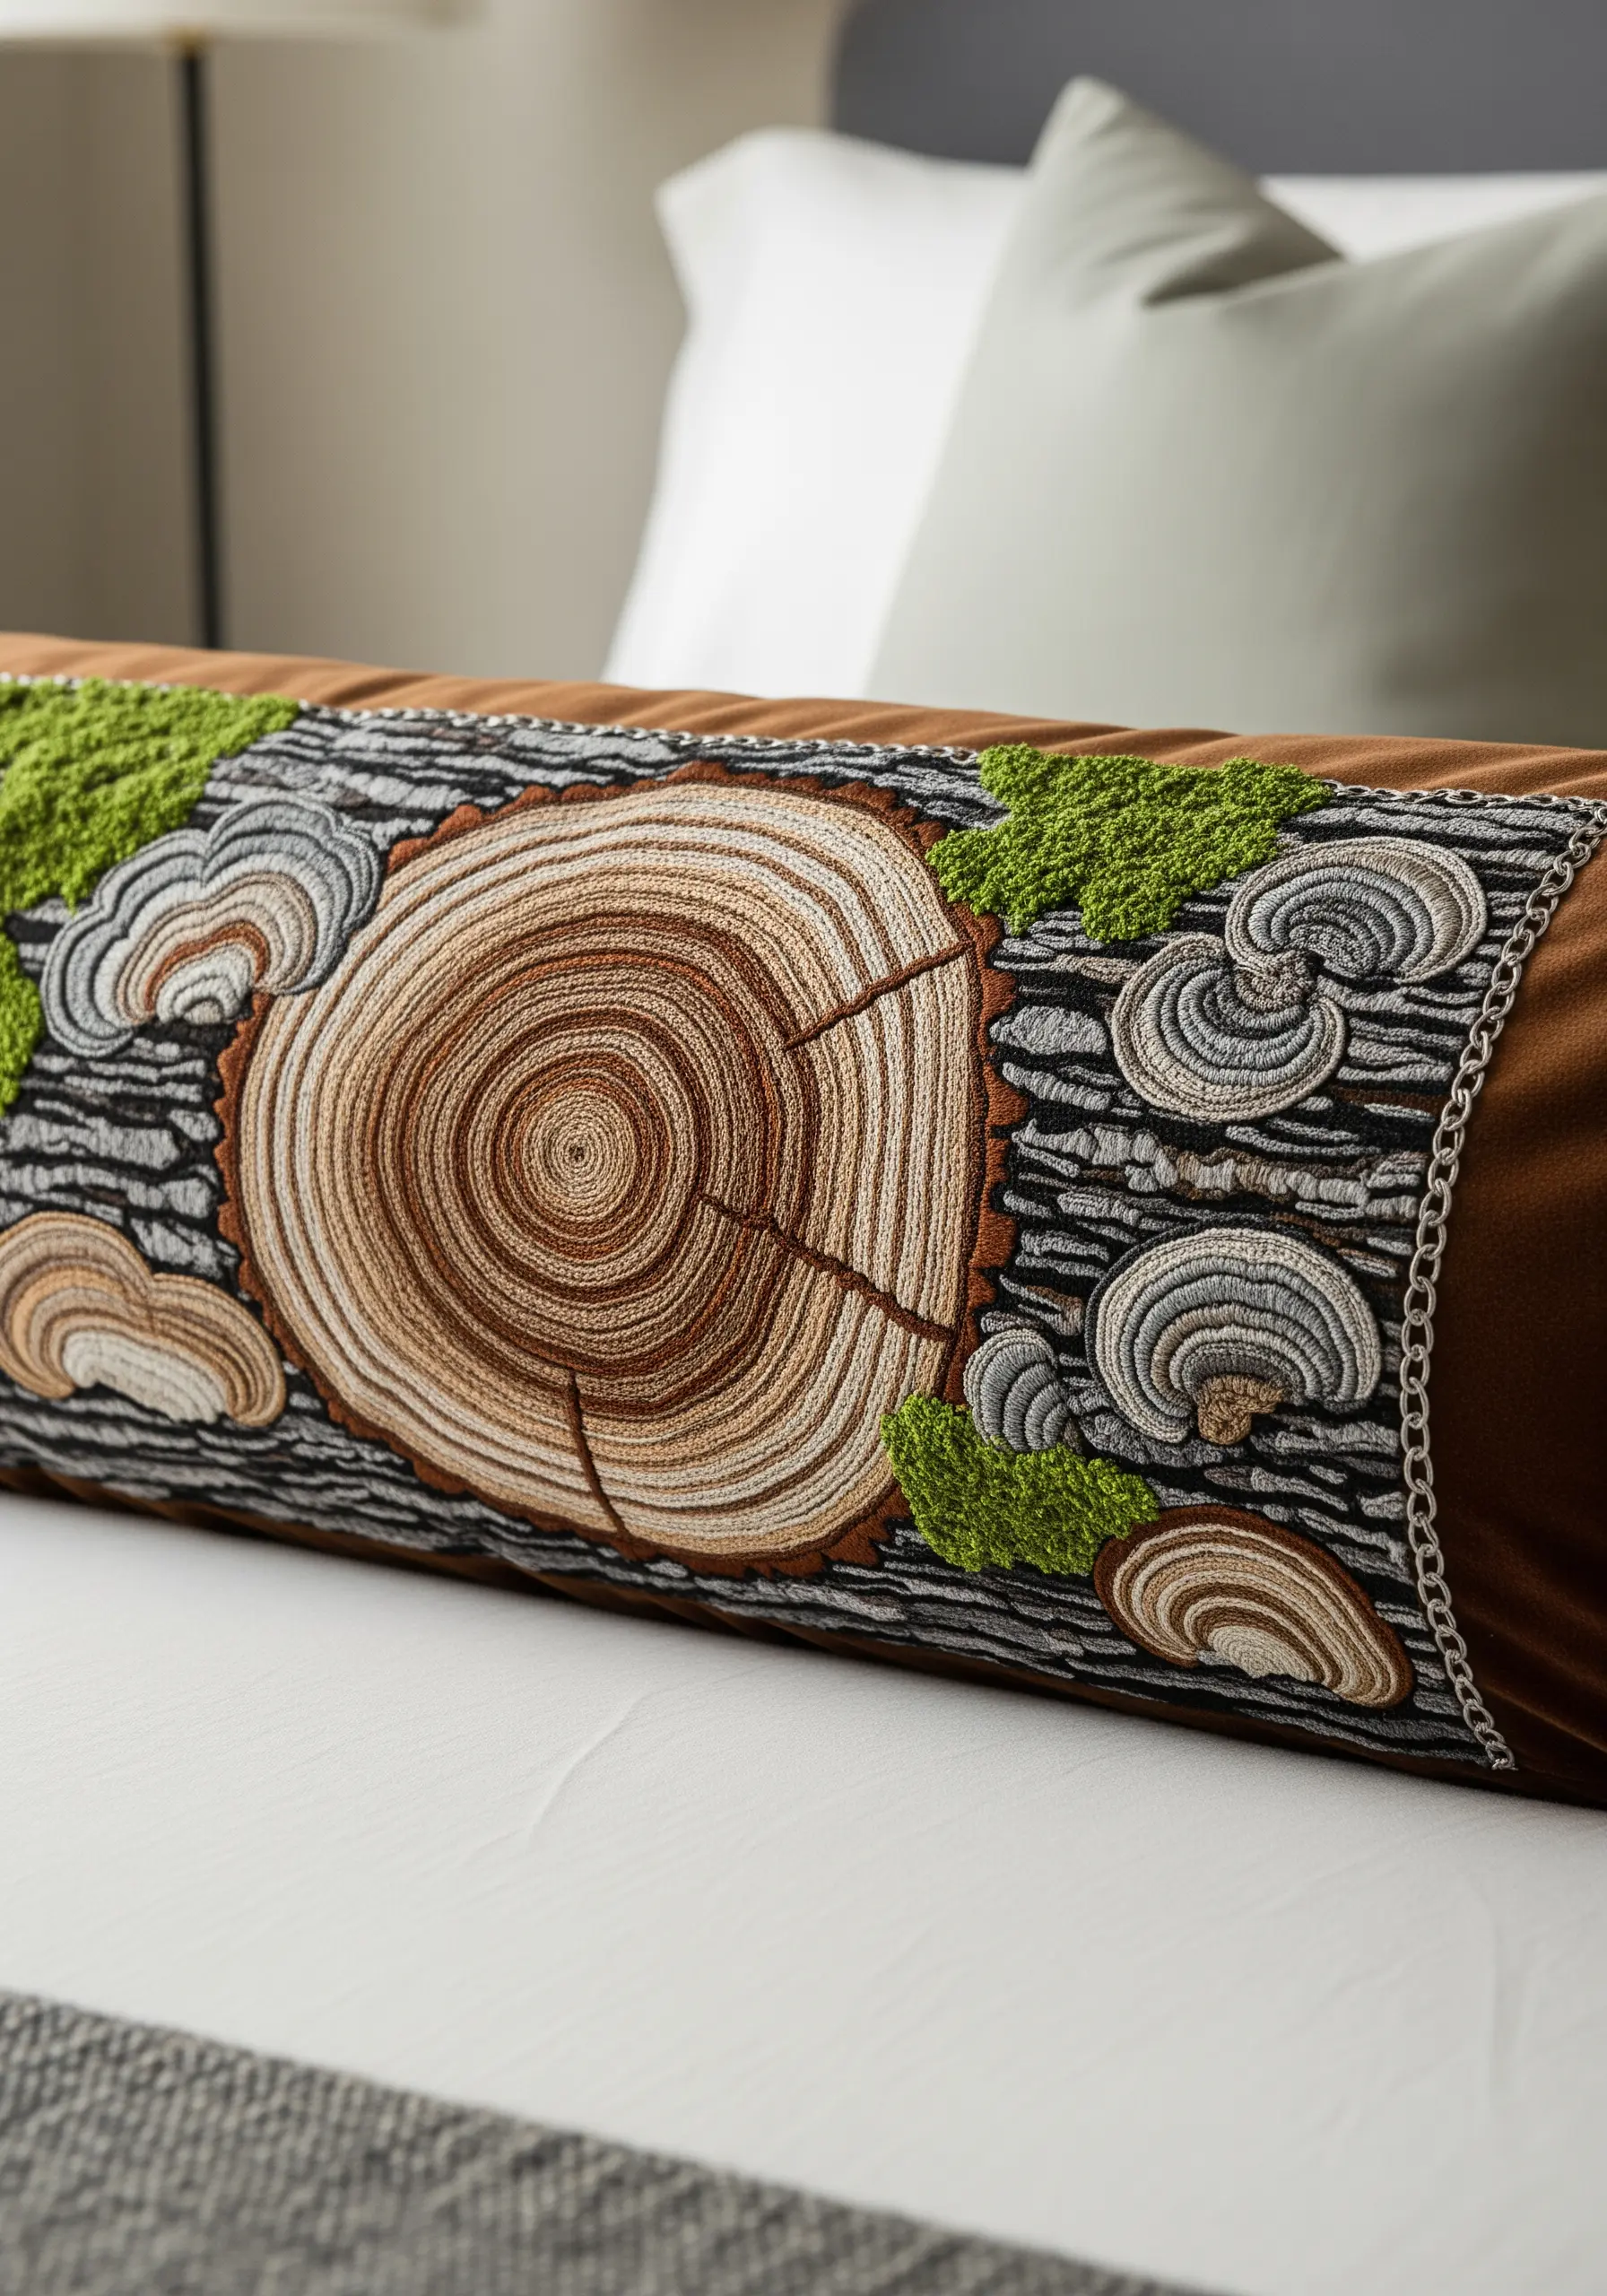
The secret to embroidering realistic wood textures lies entirely in the direction of your stitches.
For the cross-section of the log, use a circular satin stitch or split stitch, following the tree rings from the center outward. This creates the illusion of concentric growth.
For the outer bark, switch to long, vertical straight stitches that mimic the grain of the wood. Using slightly different shades of grey and brown will add depth and realism to the bark’s rough surface.
13. Create Tactile Earth Layers with Mixed-Media
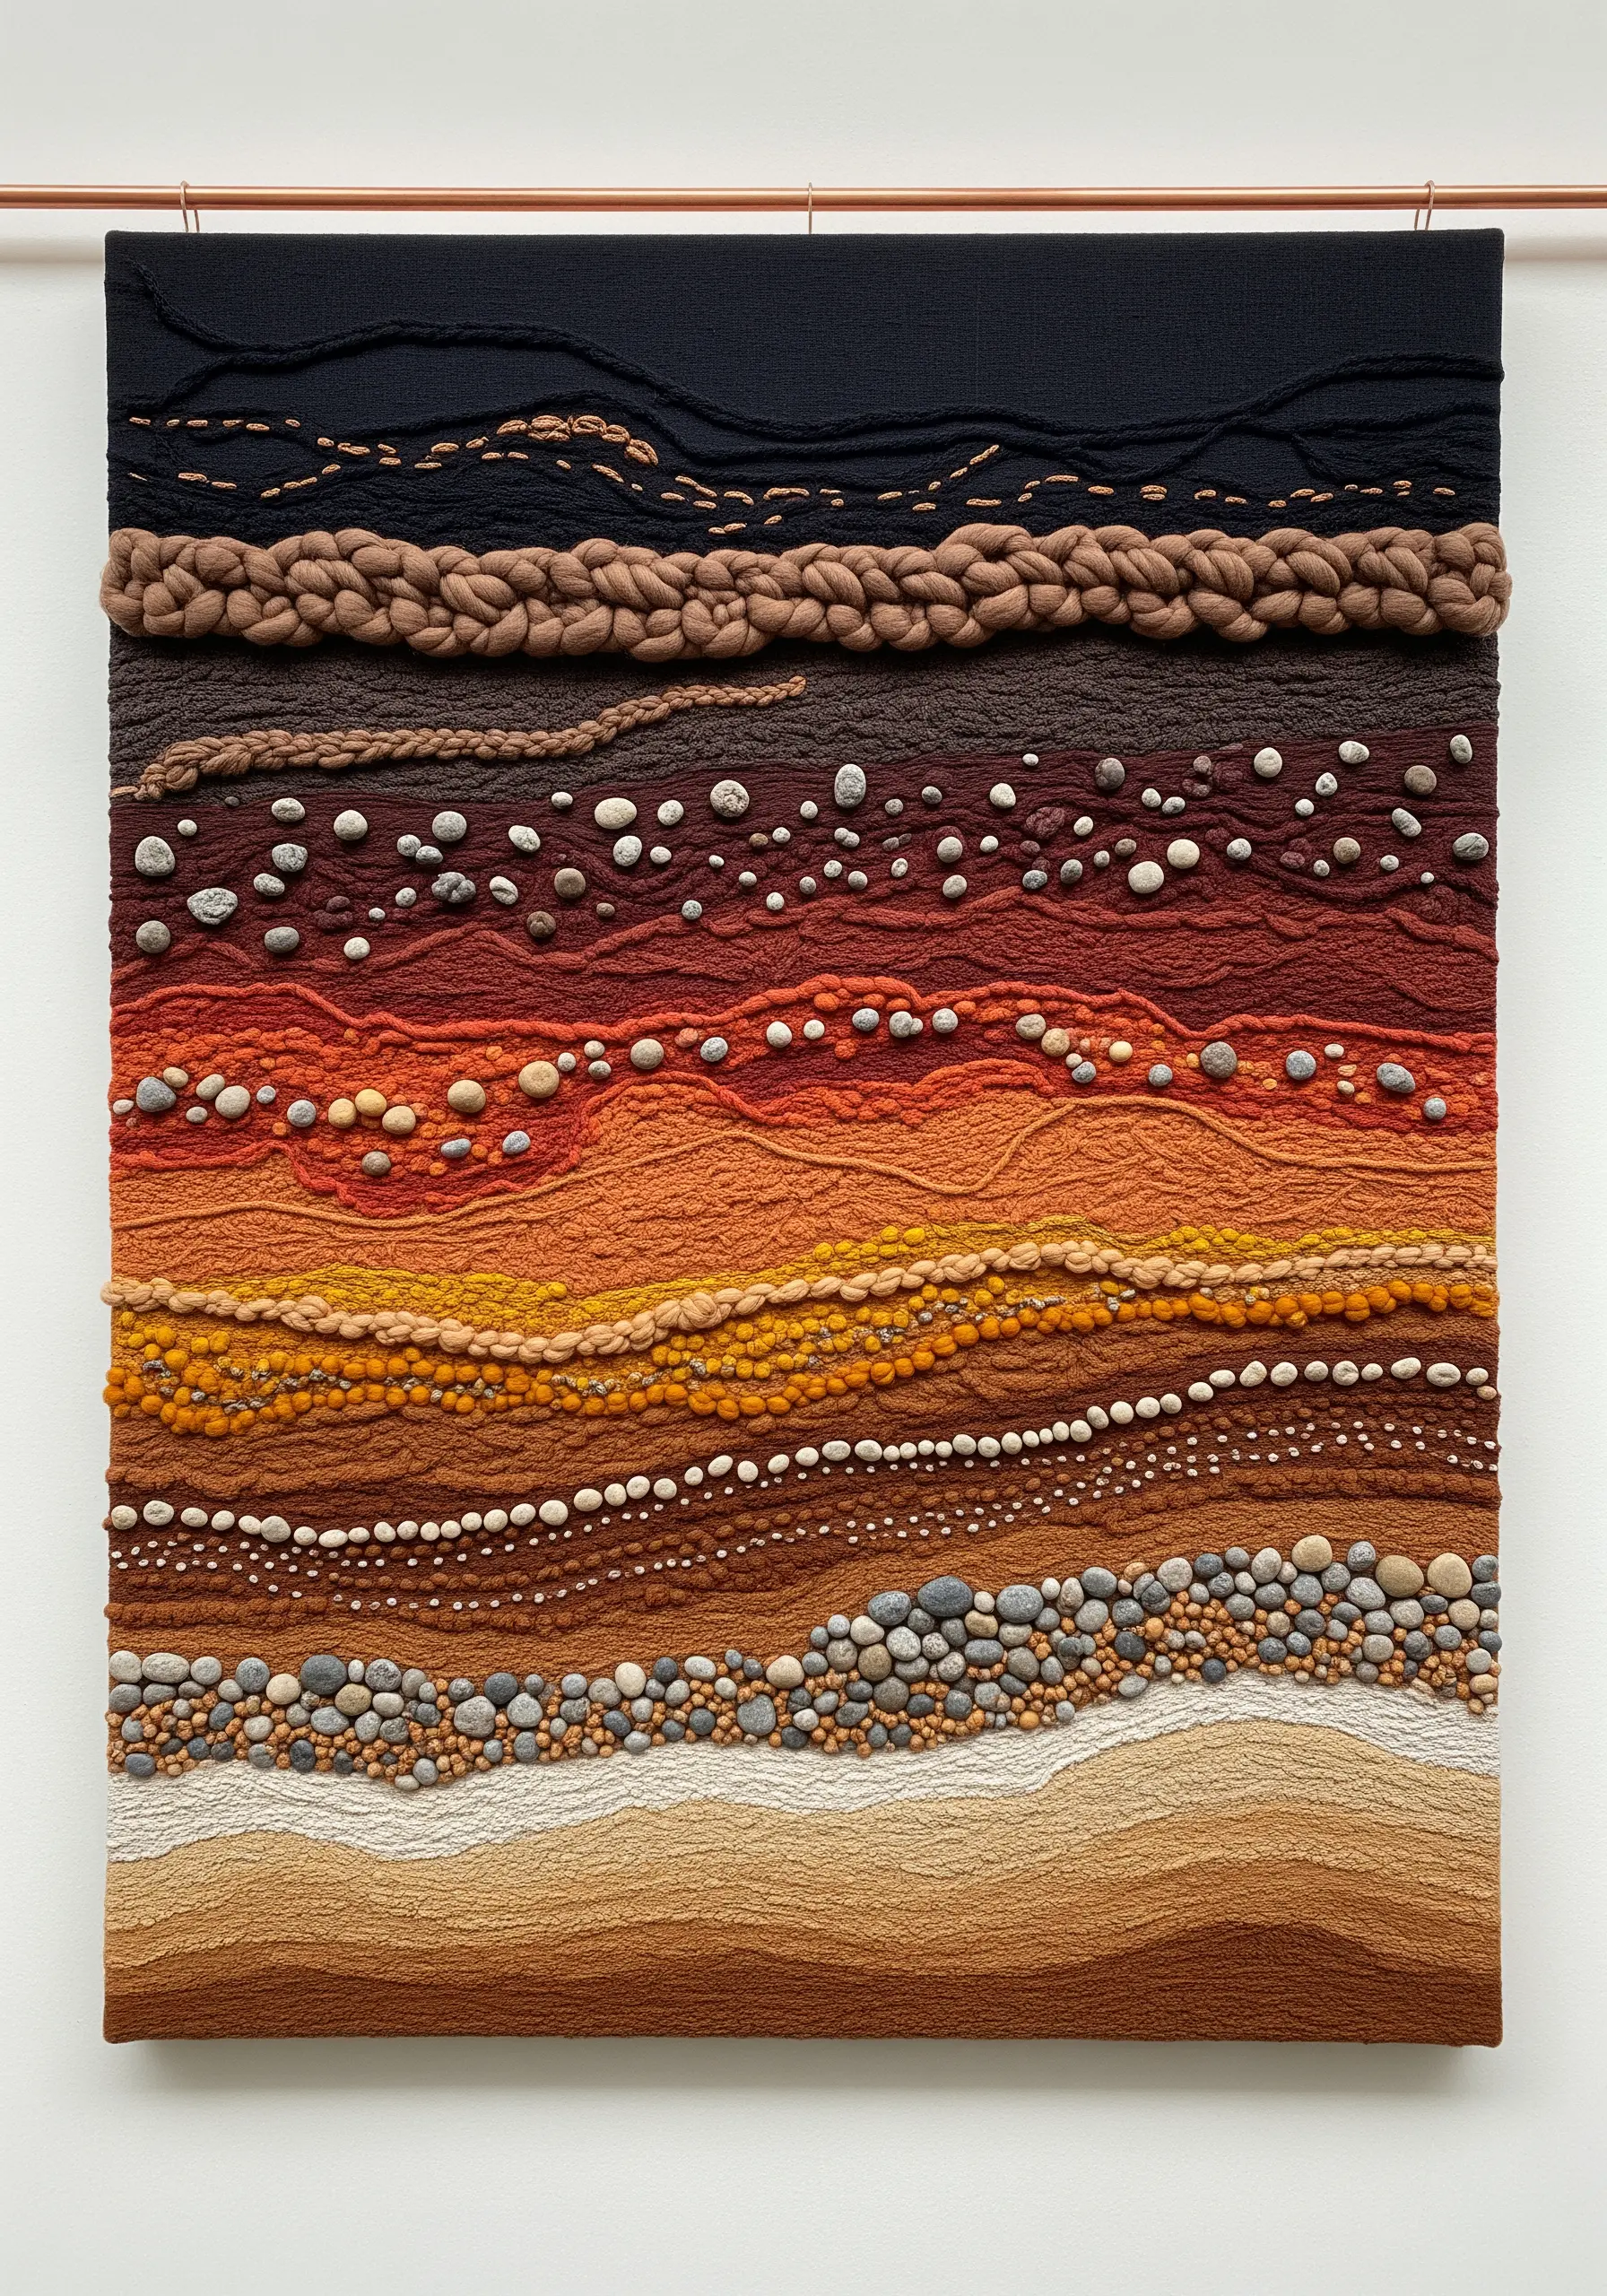
Evoke the rich, layered complexity of geological strata by incorporating a variety of textures and materials into your work.
Assign a different stitch or material to each layer: dense French knots for soil, thick couched cords for rock veins, and smooth satin stitch for clay.
Don’t be afraid to integrate non-thread elements like tiny pebbles, sand, or seed beads, stitching them directly onto the canvas. This multi-sensory approach transforms your piece from a visual representation into a tactile experience.
14. Capture Fluid Motion with Unanchored Threads
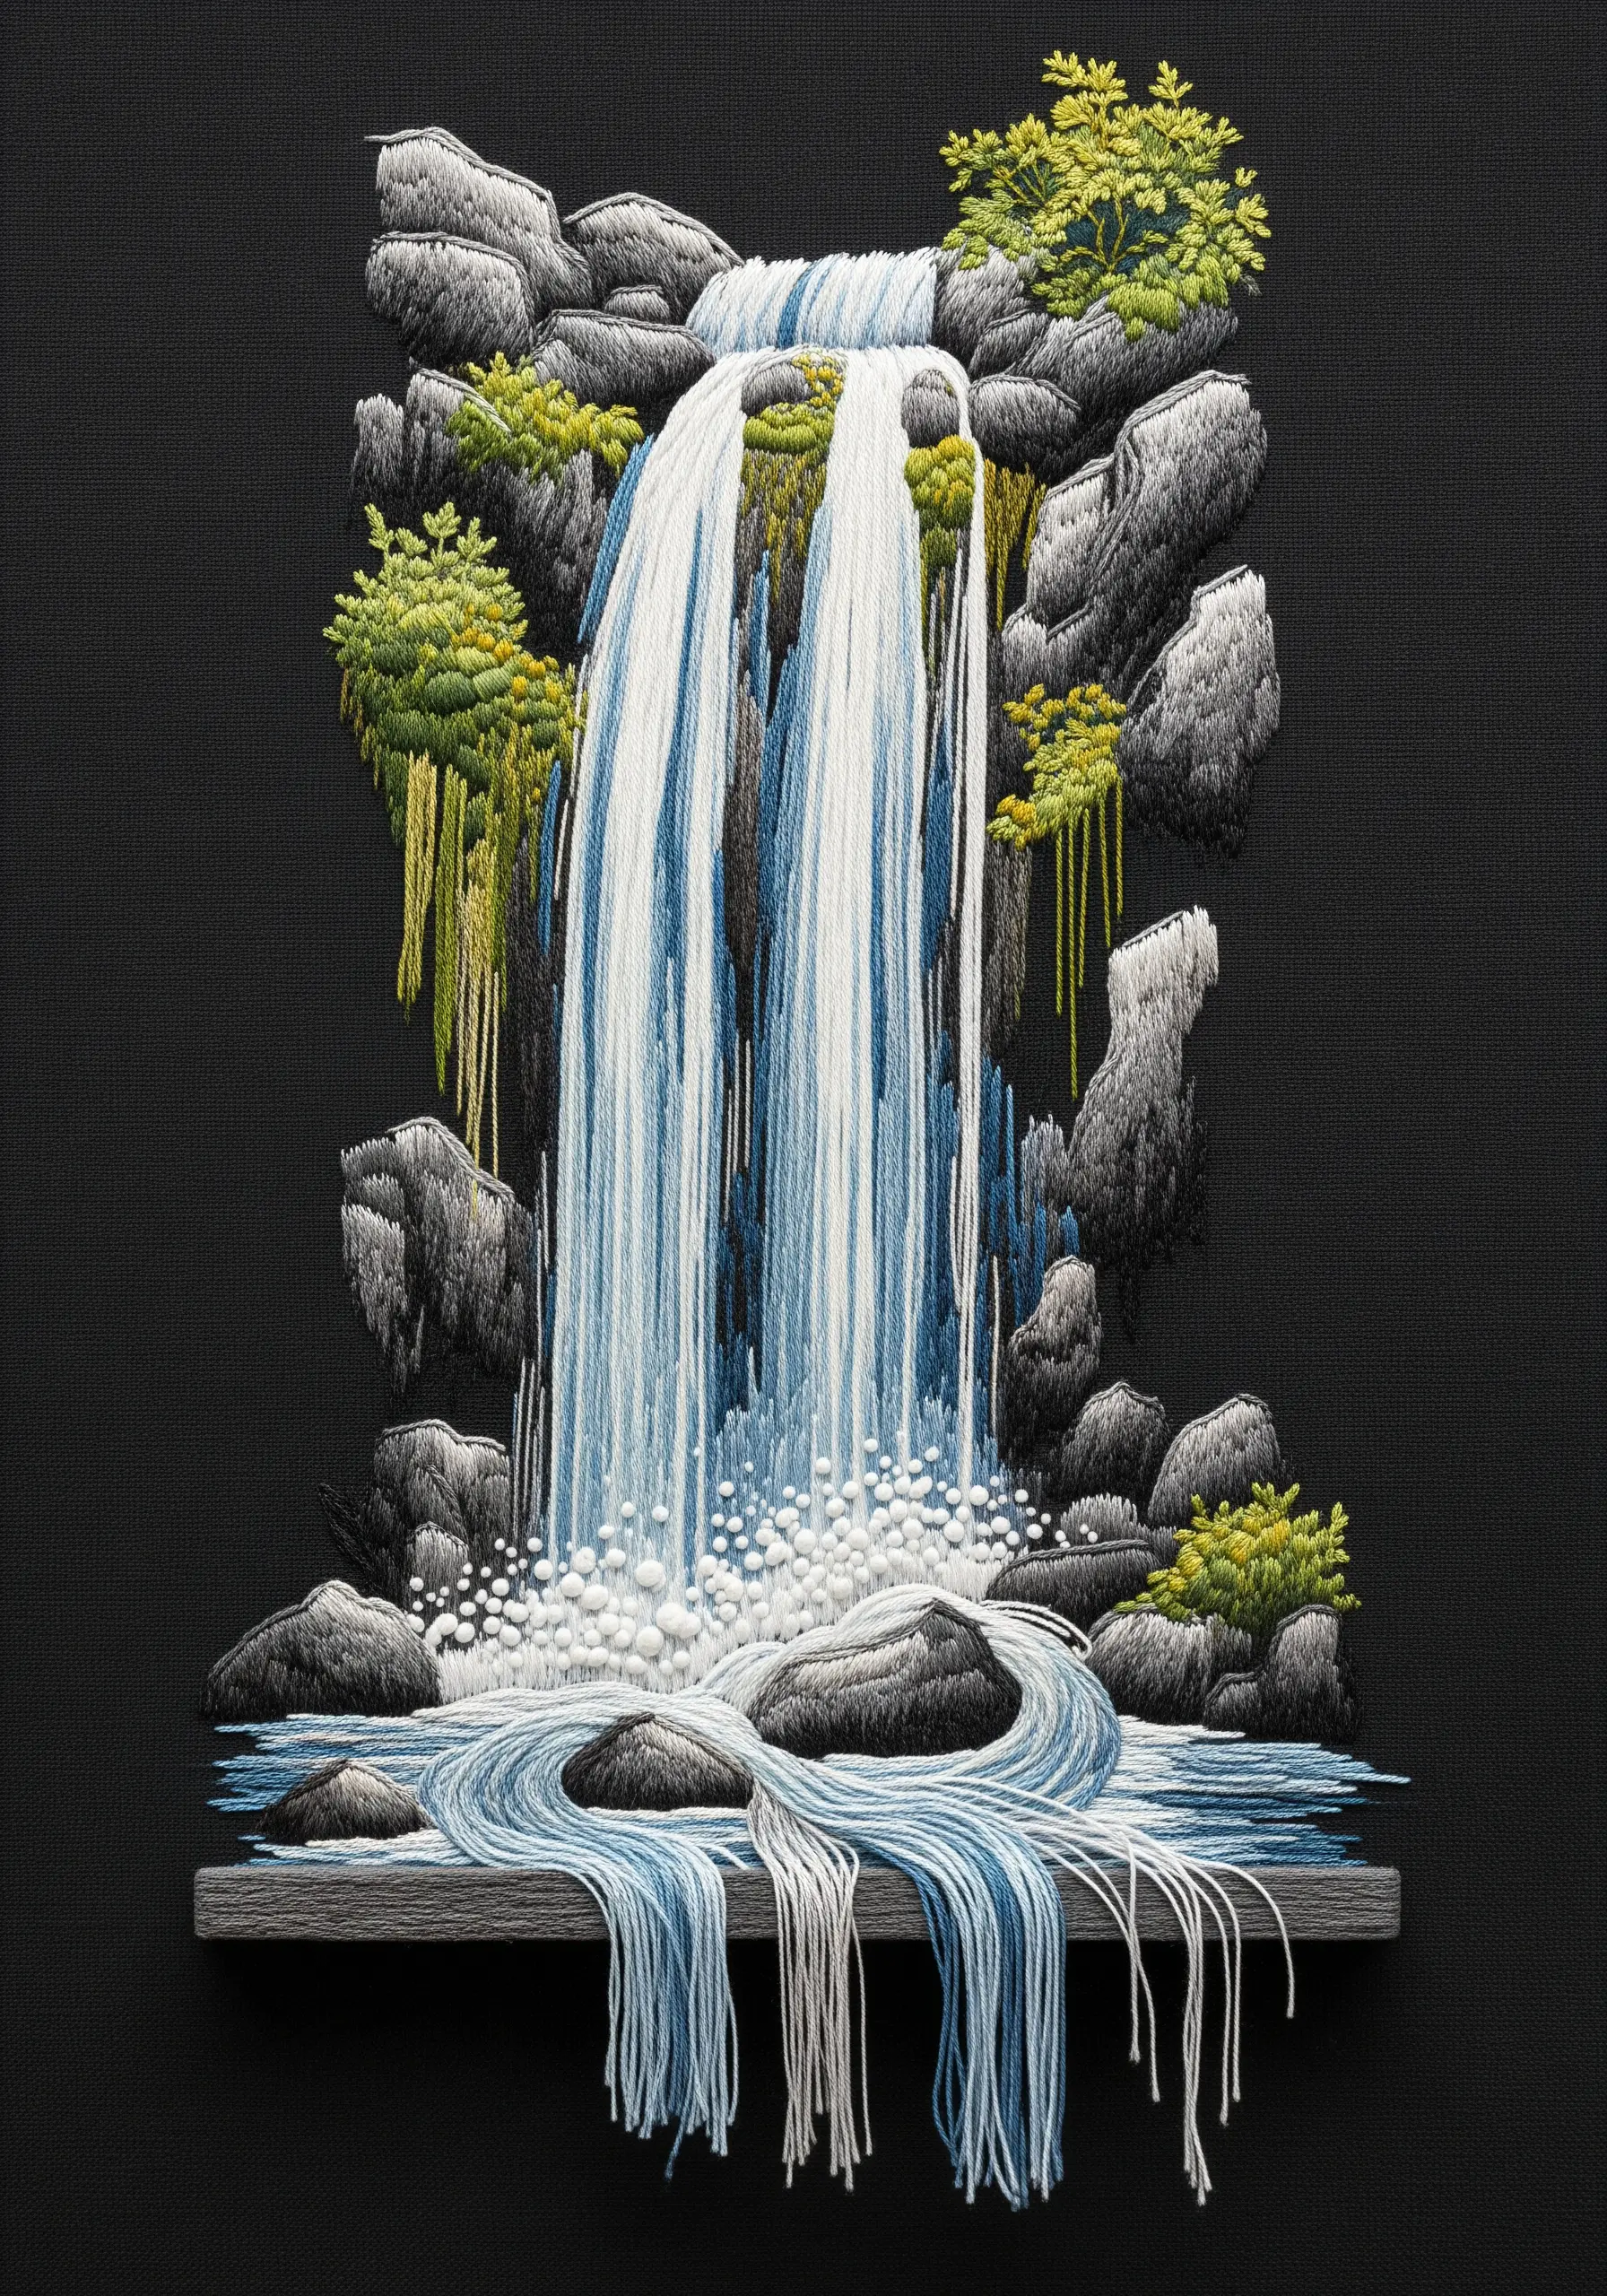
To give embroidered water a sense of life and movement, allow your threads to break free from the fabric.
Use long, vertical straight stitches for the falling water, blending blues, greys, and whites to create highlights and shadows. Instead of ending the stitches at the bottom, let them hang loose for several inches.
For the splashing water at the base, use a dense cluster of white French knots and bullion knots. The contrast between the tight knots and the flowing, unanchored threads creates a dynamic and captivating effect.
15. Build a Coral Reef with Dimensional Stitches
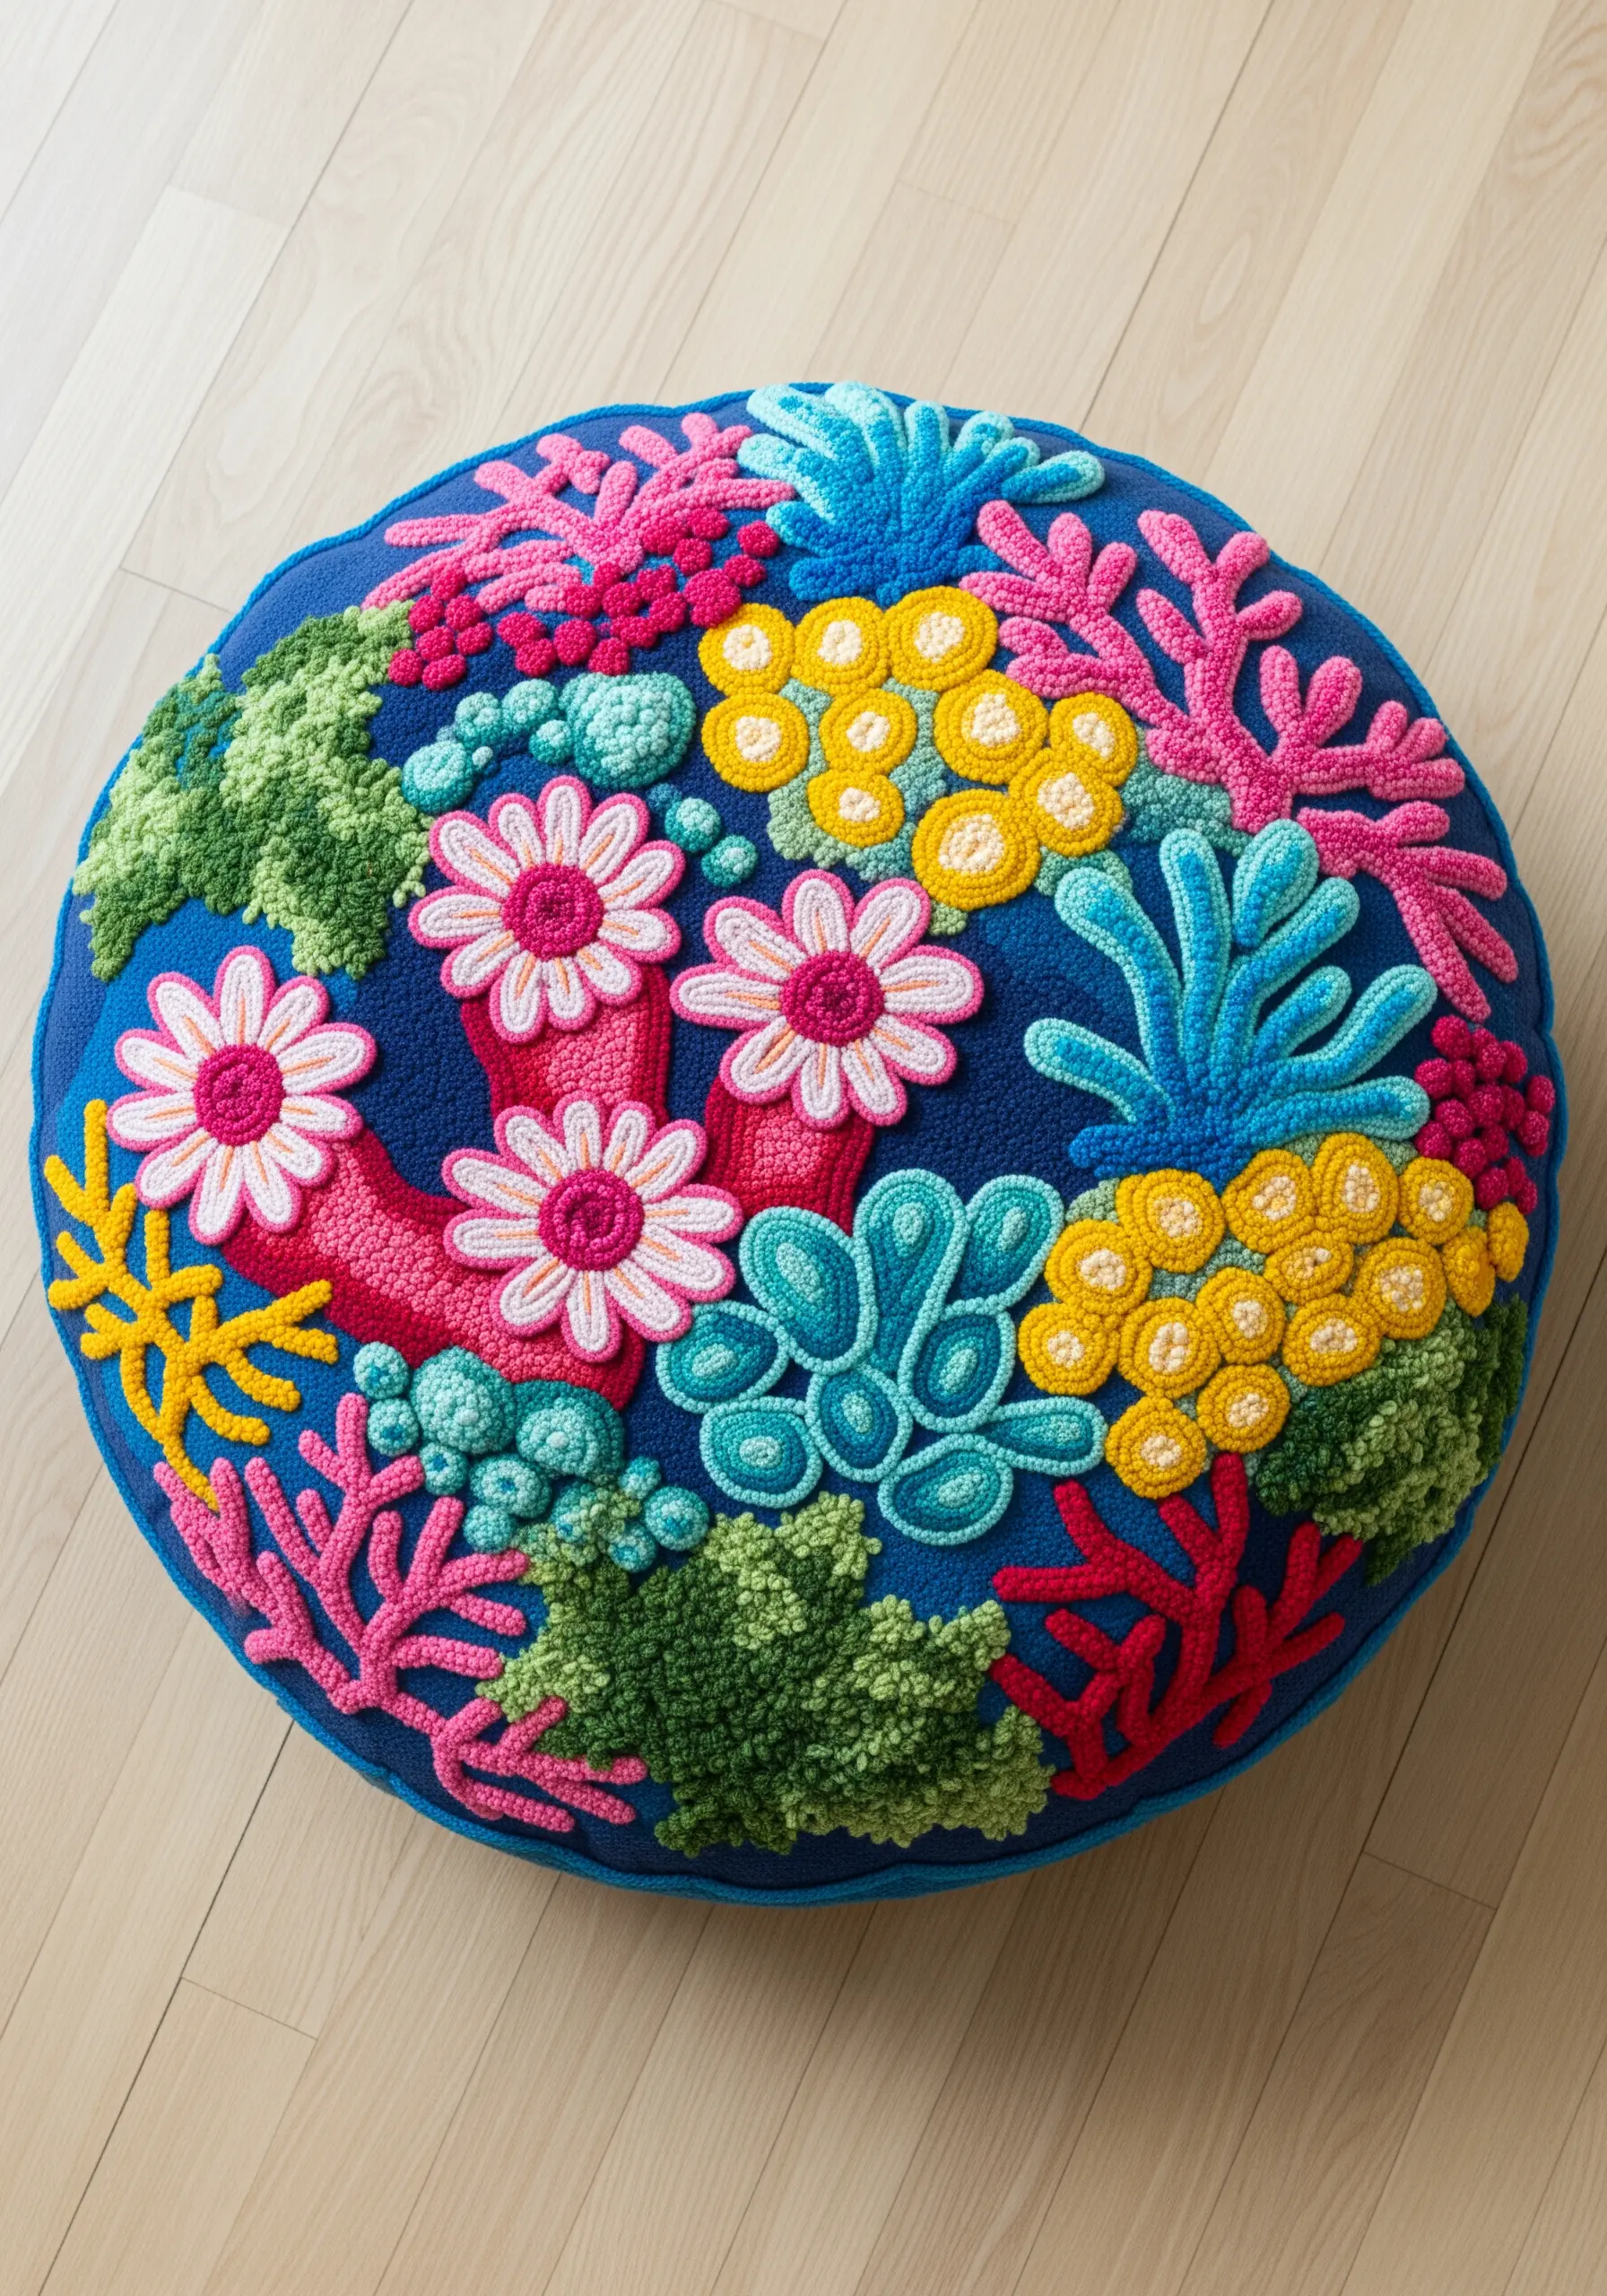
To create an underwater world that feels alive, you need stitches that grow up and away from the fabric surface.
Use cast-on and bullion stitches to form worm-like coral shapes, and create fan coral with woven picot stitches. For softer textures, fill areas with dense French knots.
A bold, vibrant color palette is essential. Don’t shy away from bright pinks, electric yellows, and deep blues to capture the otherworldly beauty of a thriving coral reef.
16. Achieve Botanical Realism with Blended Long-and-Short Stitch
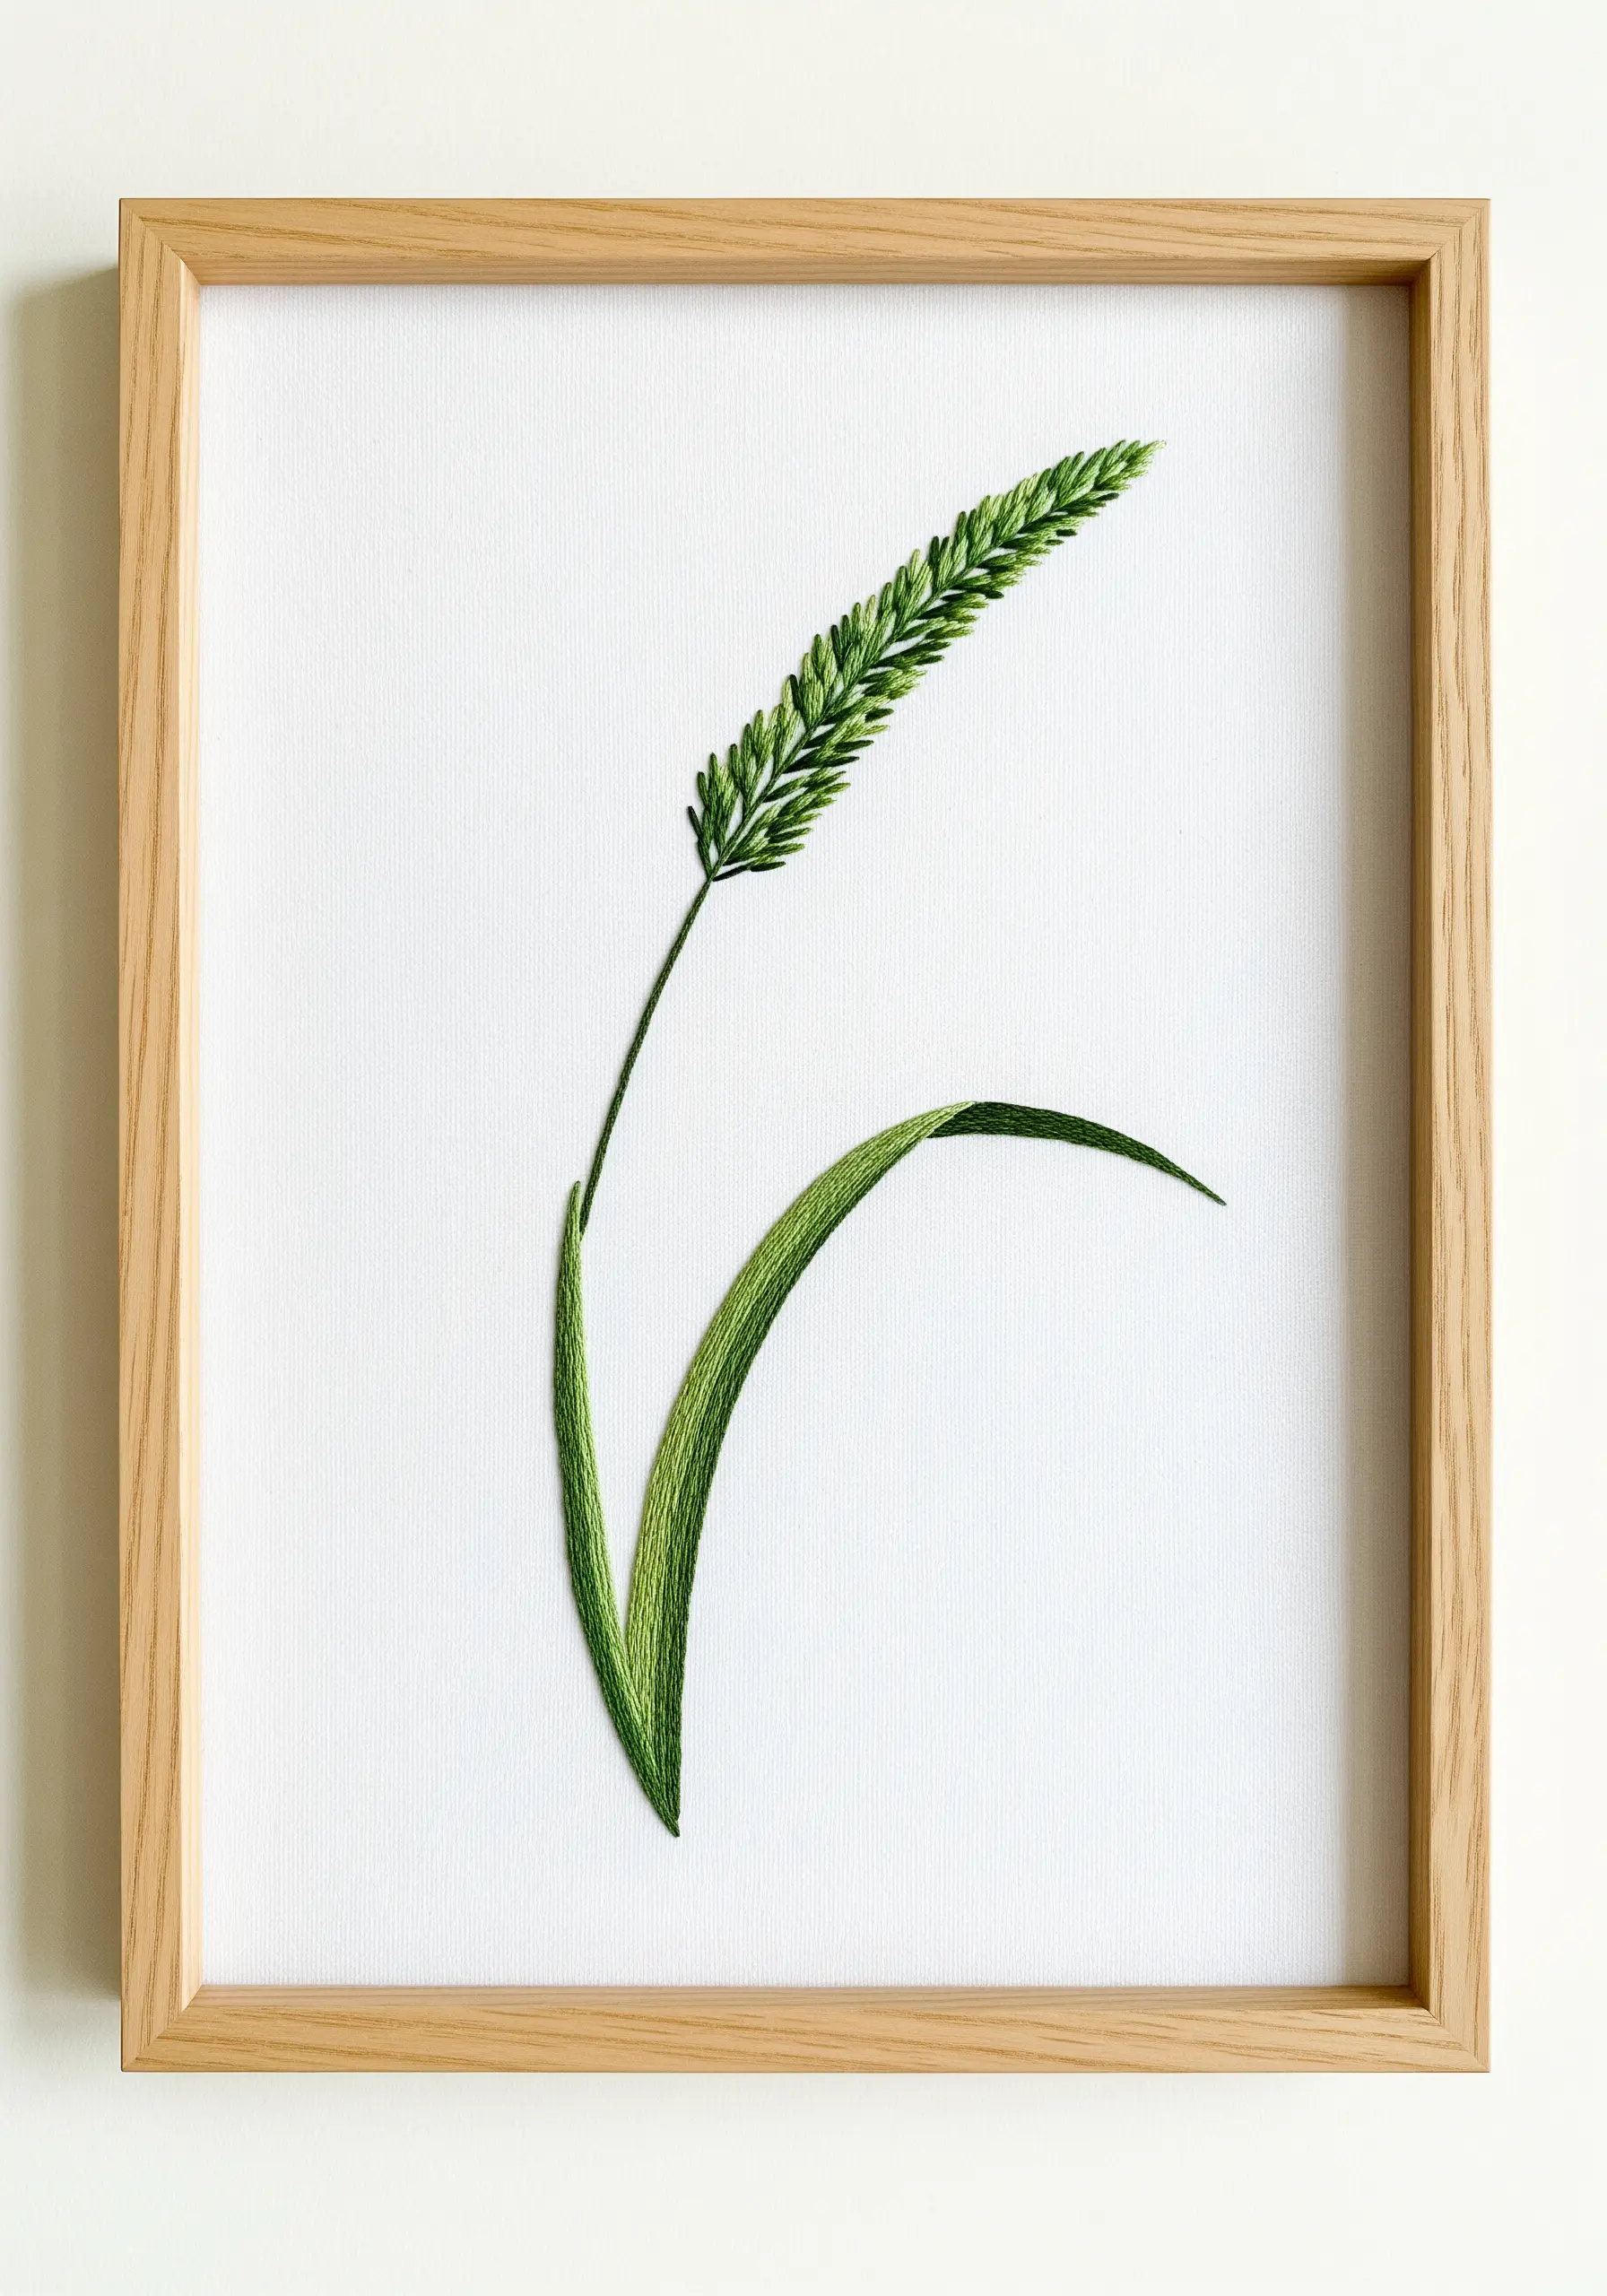
For a single leaf or blade of grass to look truly realistic, you need smooth, seamless color transitions.
The long-and-short stitch is your best tool for this. Begin at the tip of the leaf and work your way down, using two or three closely related shades of green.
Keep your stitches angled to follow the natural curve of the leaf. This careful blending and directional stitching will create subtle highlights and shadows, giving the simple form a lifelike quality.
17. Embroider on Unexpected Surfaces for a Touch of Magic
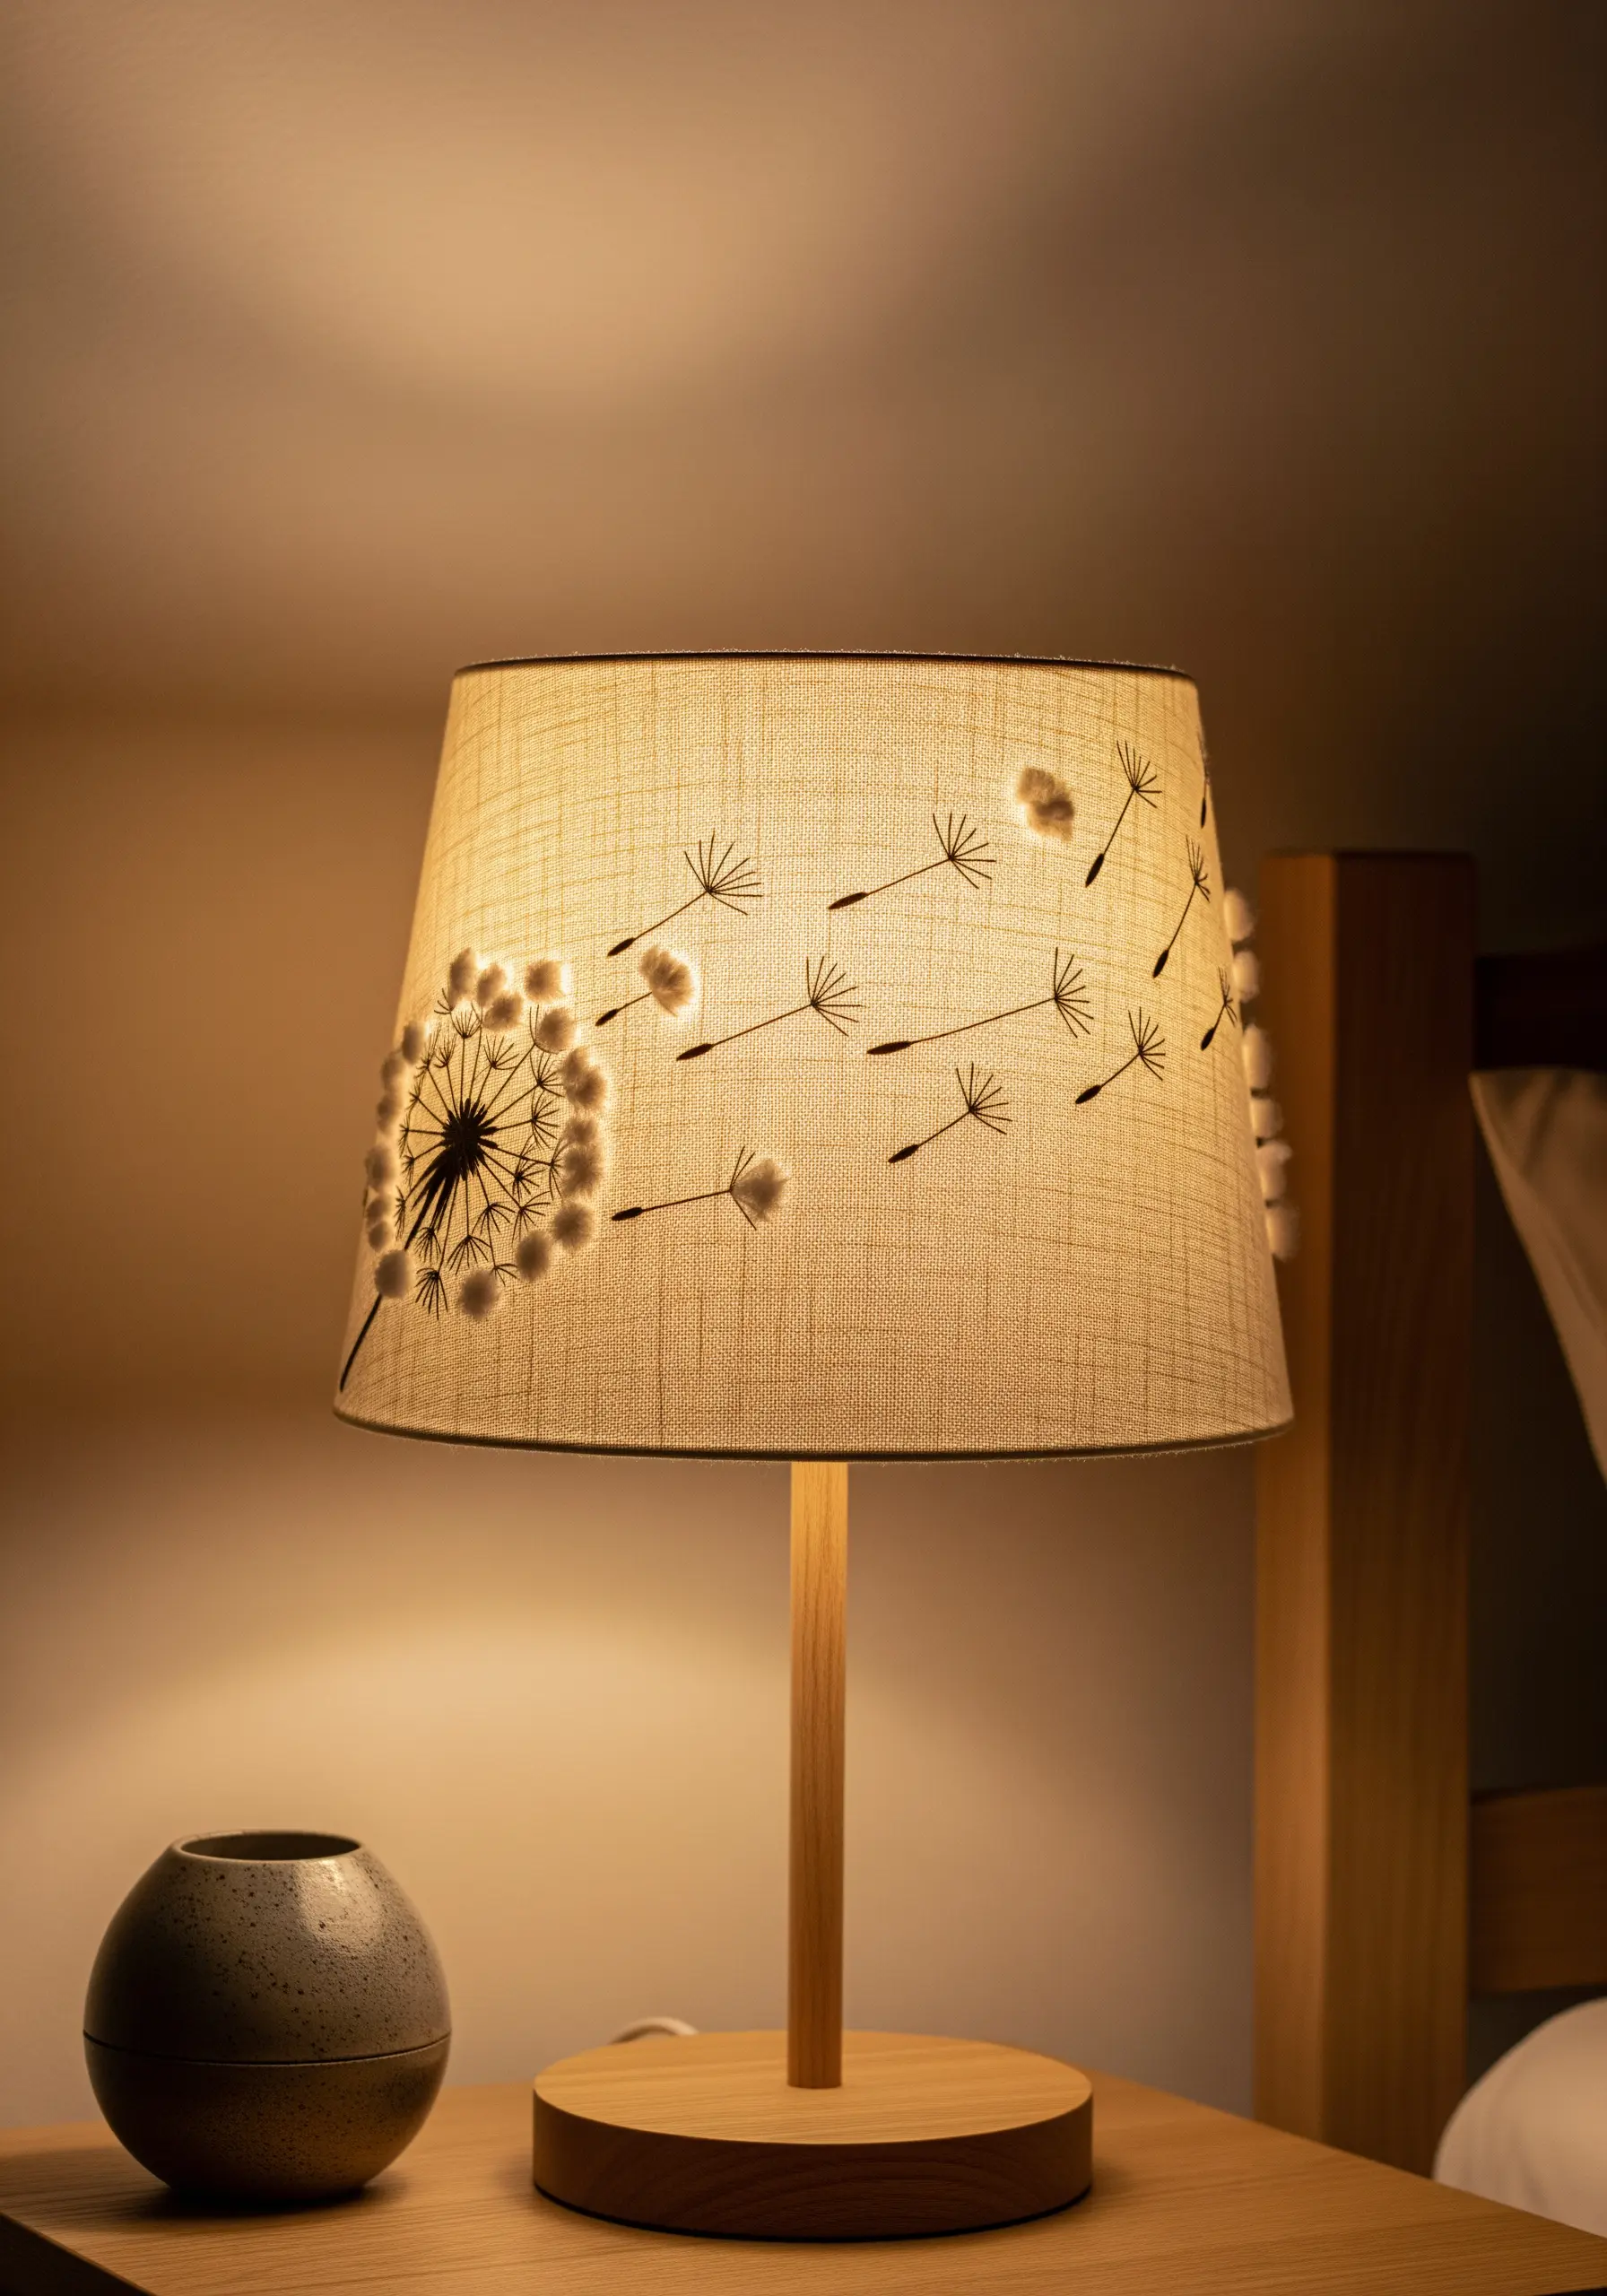
Take your embroidery off the hoop and onto functional objects like a lampshade for a truly unique piece of décor.
Choose a simple, graphic design that will work well as a silhouette when lit from behind. Use basic stitches like straight stitch and stem stitch, as complex knots may not lie flat.
Always test on a discreet corner first. Use a sharp, fine needle and light tension to avoid puckering or damaging the lampshade material. The result is a subtle, handmade touch that transforms an everyday object.
18. Add Sculptural Form with Plush Appliqué
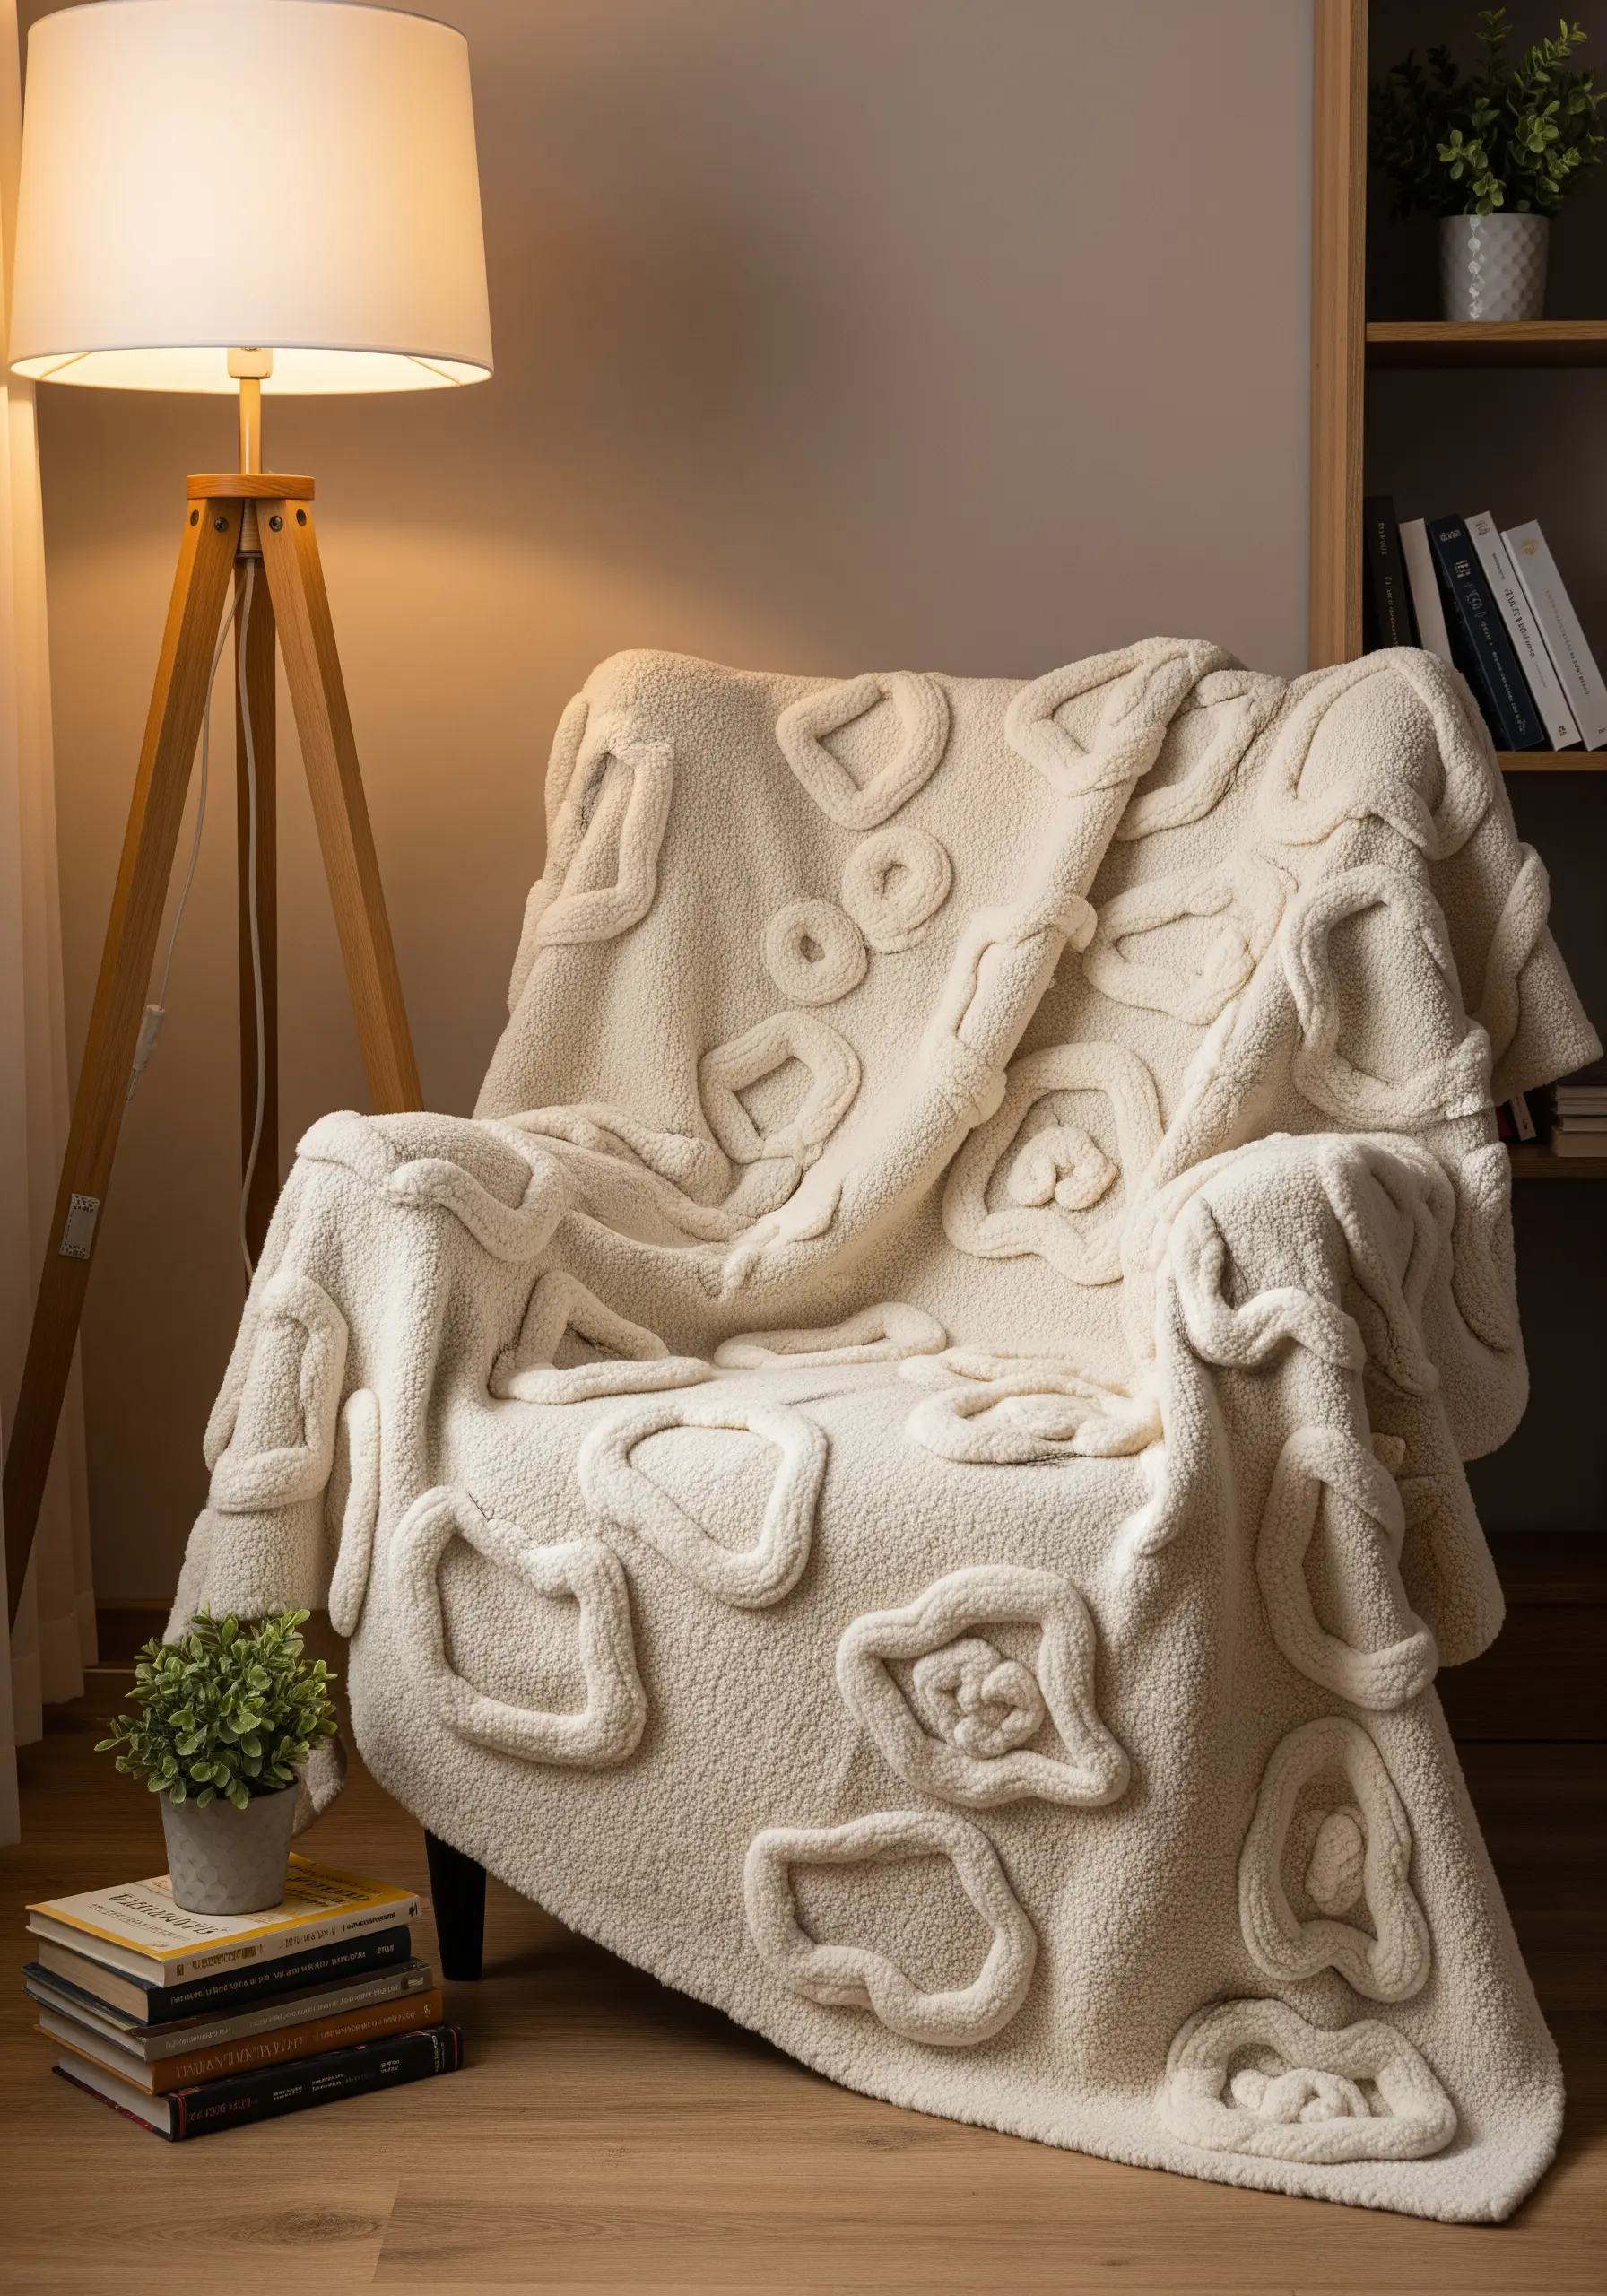
Create bold, high-relief texture on a throw blanket or cushion using appliqué with a plush fabric like fleece or sherpa.
Cut your desired organic shapes from the plush fabric and arrange them on your base material—a matching color creates a subtle, tone-on-tone effect.
Secure the shapes using a simple whipstitch or a decorative blanket stitch around the edges. This technique adds incredible softness and sculptural dimension without requiring any complex embroidery stitches.
19. Etch Delicate Frost Patterns with Metallic Thread
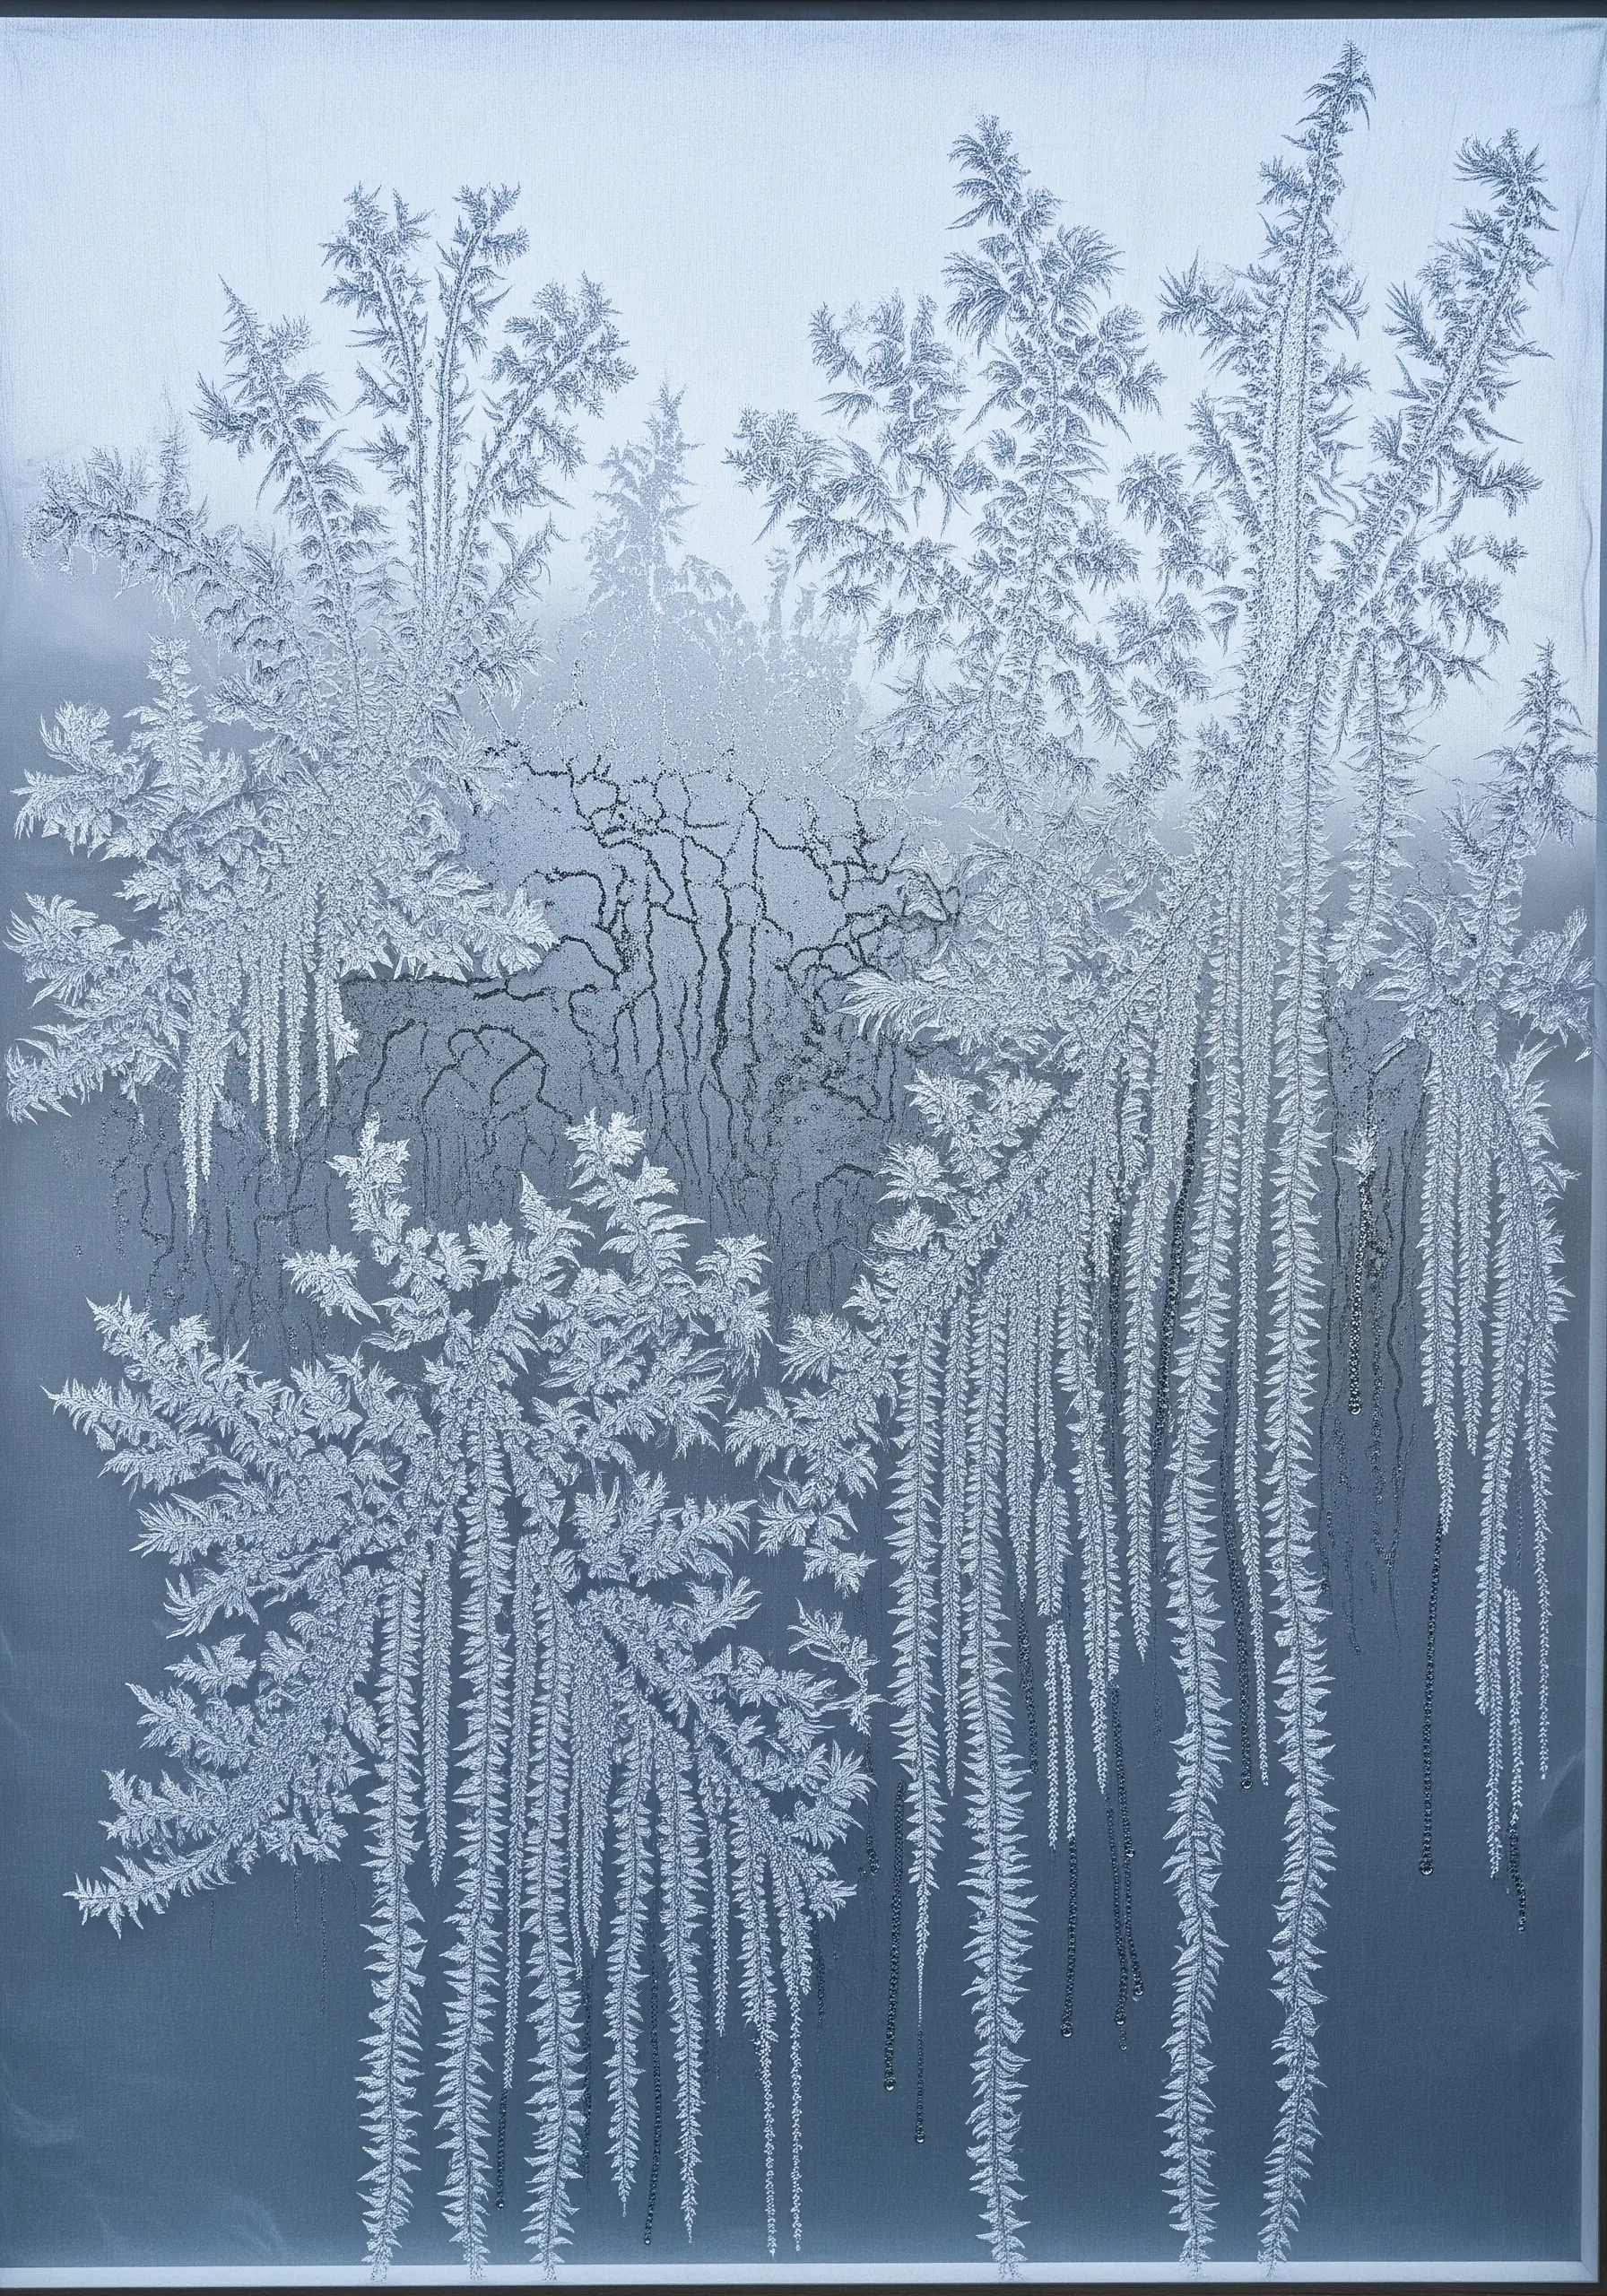
To capture the crystalline magic of frost, work on a sheer or semi-sheer fabric like organza or voile with a fine metallic or silvery-white thread.
Use delicate, open stitches that mimic the fractal patterns of ice crystals, such as the fern stitch, fly stitch, or carefully placed straight stitches.
The transparency of the fabric allows light to pass through, making the metallic threads shimmer and enhancing the icy, ethereal quality of your work. This is one of the most elegant nature-inspired embroidery projects you can try.
20. Upholster with Yarn for Ultimate Tactile Appeal
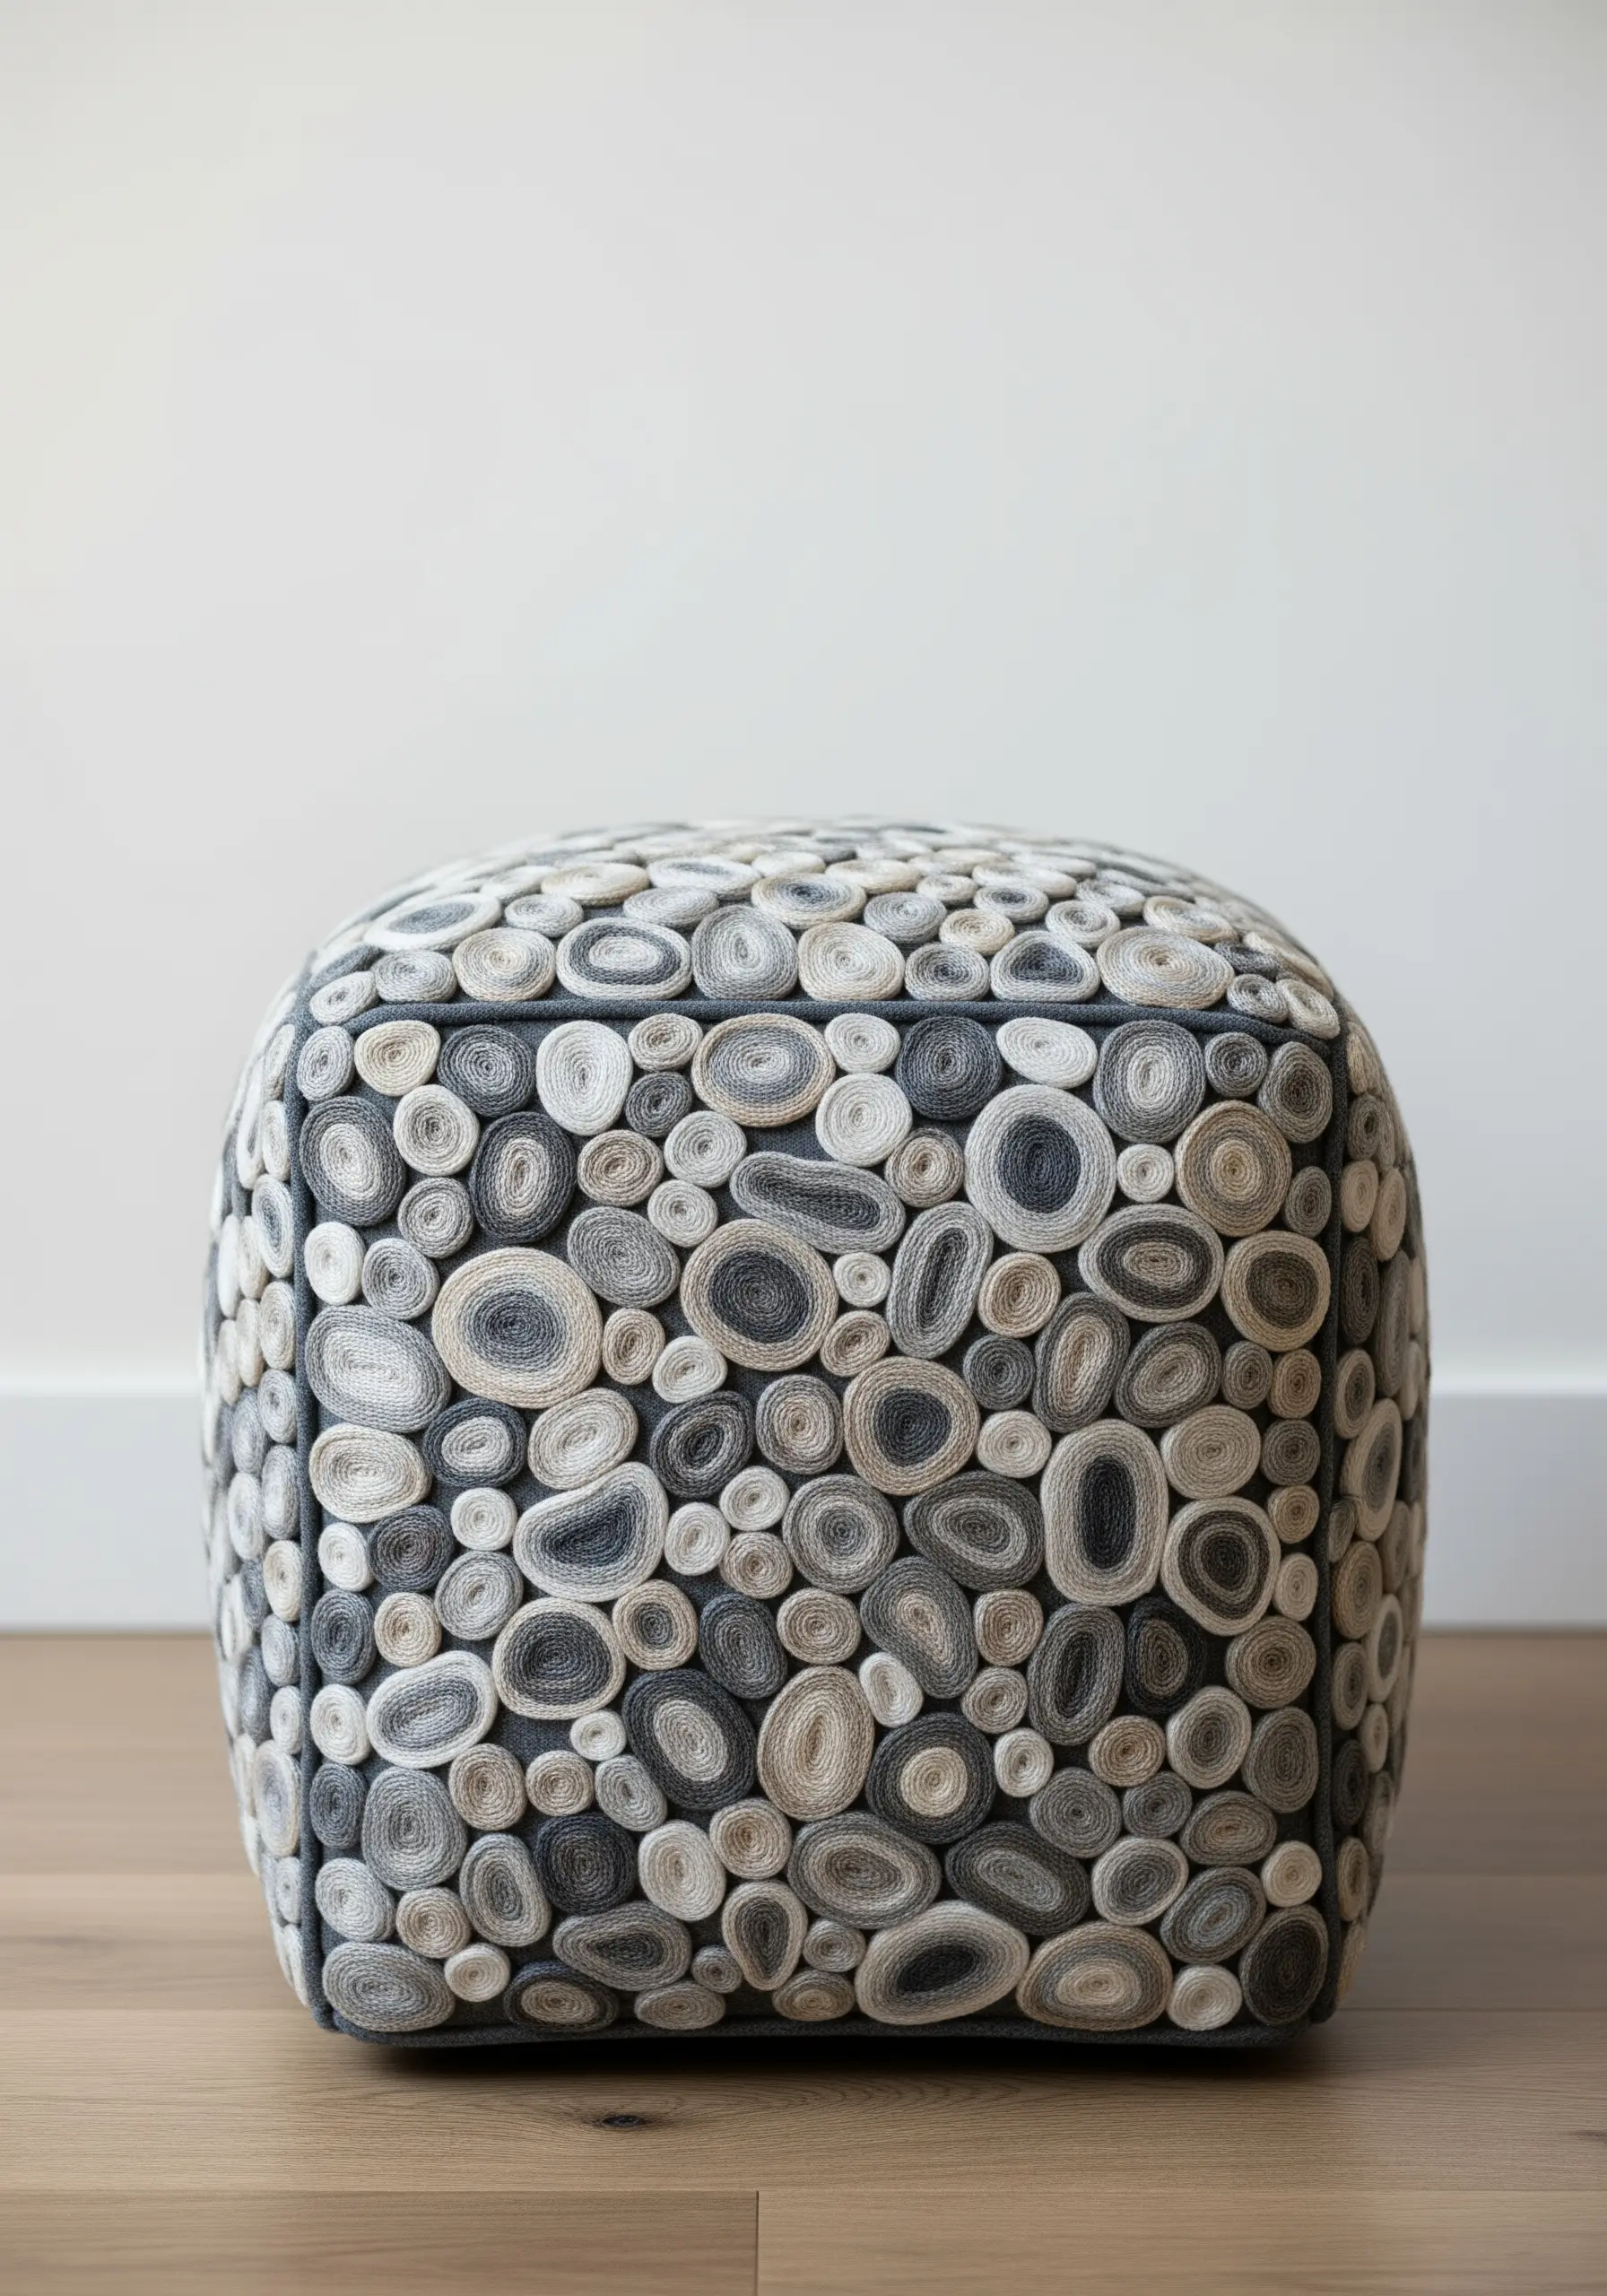
For a truly statement piece, use the same coiling technique from smaller projects to upholster an entire object, like an ottoman or stool.
Work with a thick, durable yarn in a neutral, variegated colorway to create a sophisticated, stone-like texture. Create dozens of individual coils and then stitch them securely to a fabric base that has been fitted to the furniture.
This ambitious project results in a functional piece of art that is incredibly durable and adds unparalleled organic texture to a room.
21. Juxtapose Soft Weaving with Hard Surfaces

Create a surprising and modern wall piece by combining the soft texture of a simple weaving with a hard, glossy element like ceramic tiles.
Weave a simple, neutral background with plain weave, creating a calm canvas for your focal point.
Securely stitch or glue your hard elements—like these honeycomb tiles—onto the surface of the weaving. The contrast between the matte, pliable fiber and the shiny, rigid tile creates a dynamic tension that is visually captivating.
22. Create a Room Divider with Graphic Line Art
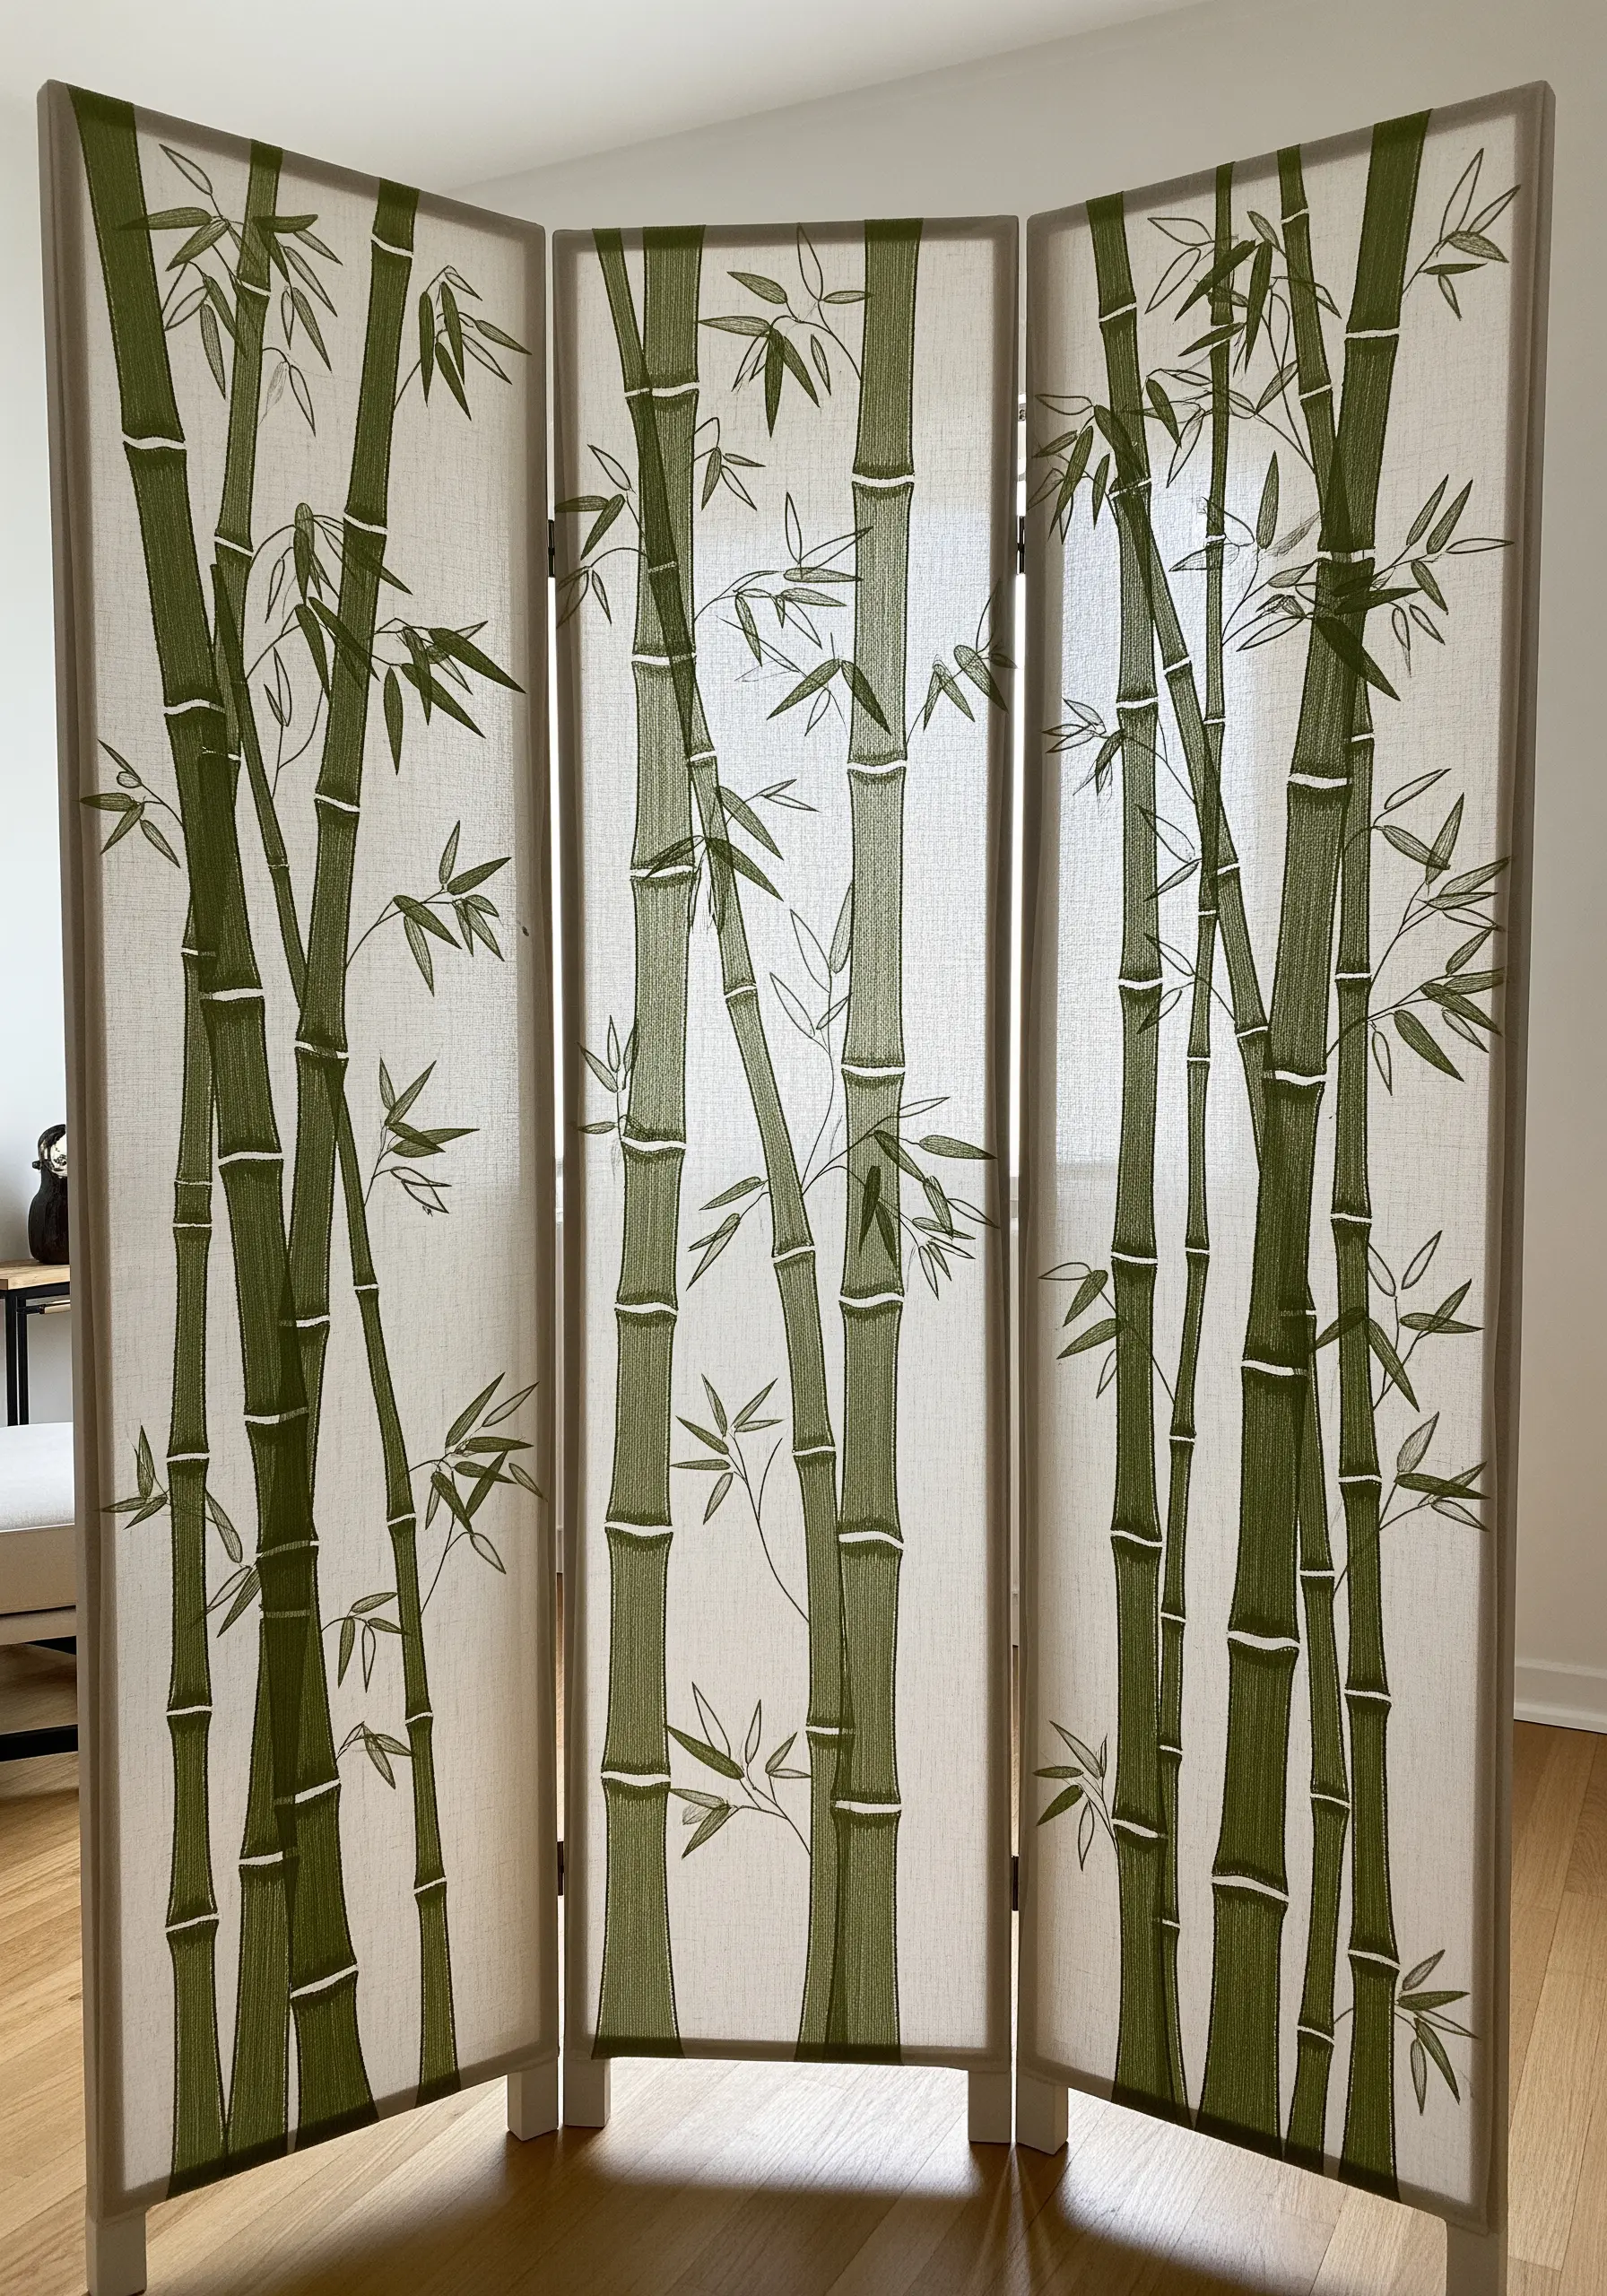
Transform a simple folding screen into a functional piece of art by embroidering directly onto stretched linen panels.
Choose a bold, graphic design like bamboo stalks that complements the vertical format of the screen. A simple, confident backstitch or stem stitch in a contrasting color is all you need.
The key here is scale and repetition. By repeating the motif across multiple panels, you create a cohesive and immersive environment that feels both peaceful and intentional.
23. Integrate Cutwork for Delicate, Light-Filtering Designs
Elevate your embroidery by incorporating cutwork, also known as broderie anglaise, especially for pieces that will interact with light, like curtains.
First, stabilize the edges of the area you intend to cut by outlining it with a dense satin stitch or buttonhole stitch. This is a critical step to prevent fraying.
Once the edges are secure, carefully snip away the fabric from the inside of your stitched shape. This creates a lace-like effect that allows light to filter through, adding a layer of delicate beauty to your design.
24. Paint with Thread to Capture Ethereal Light
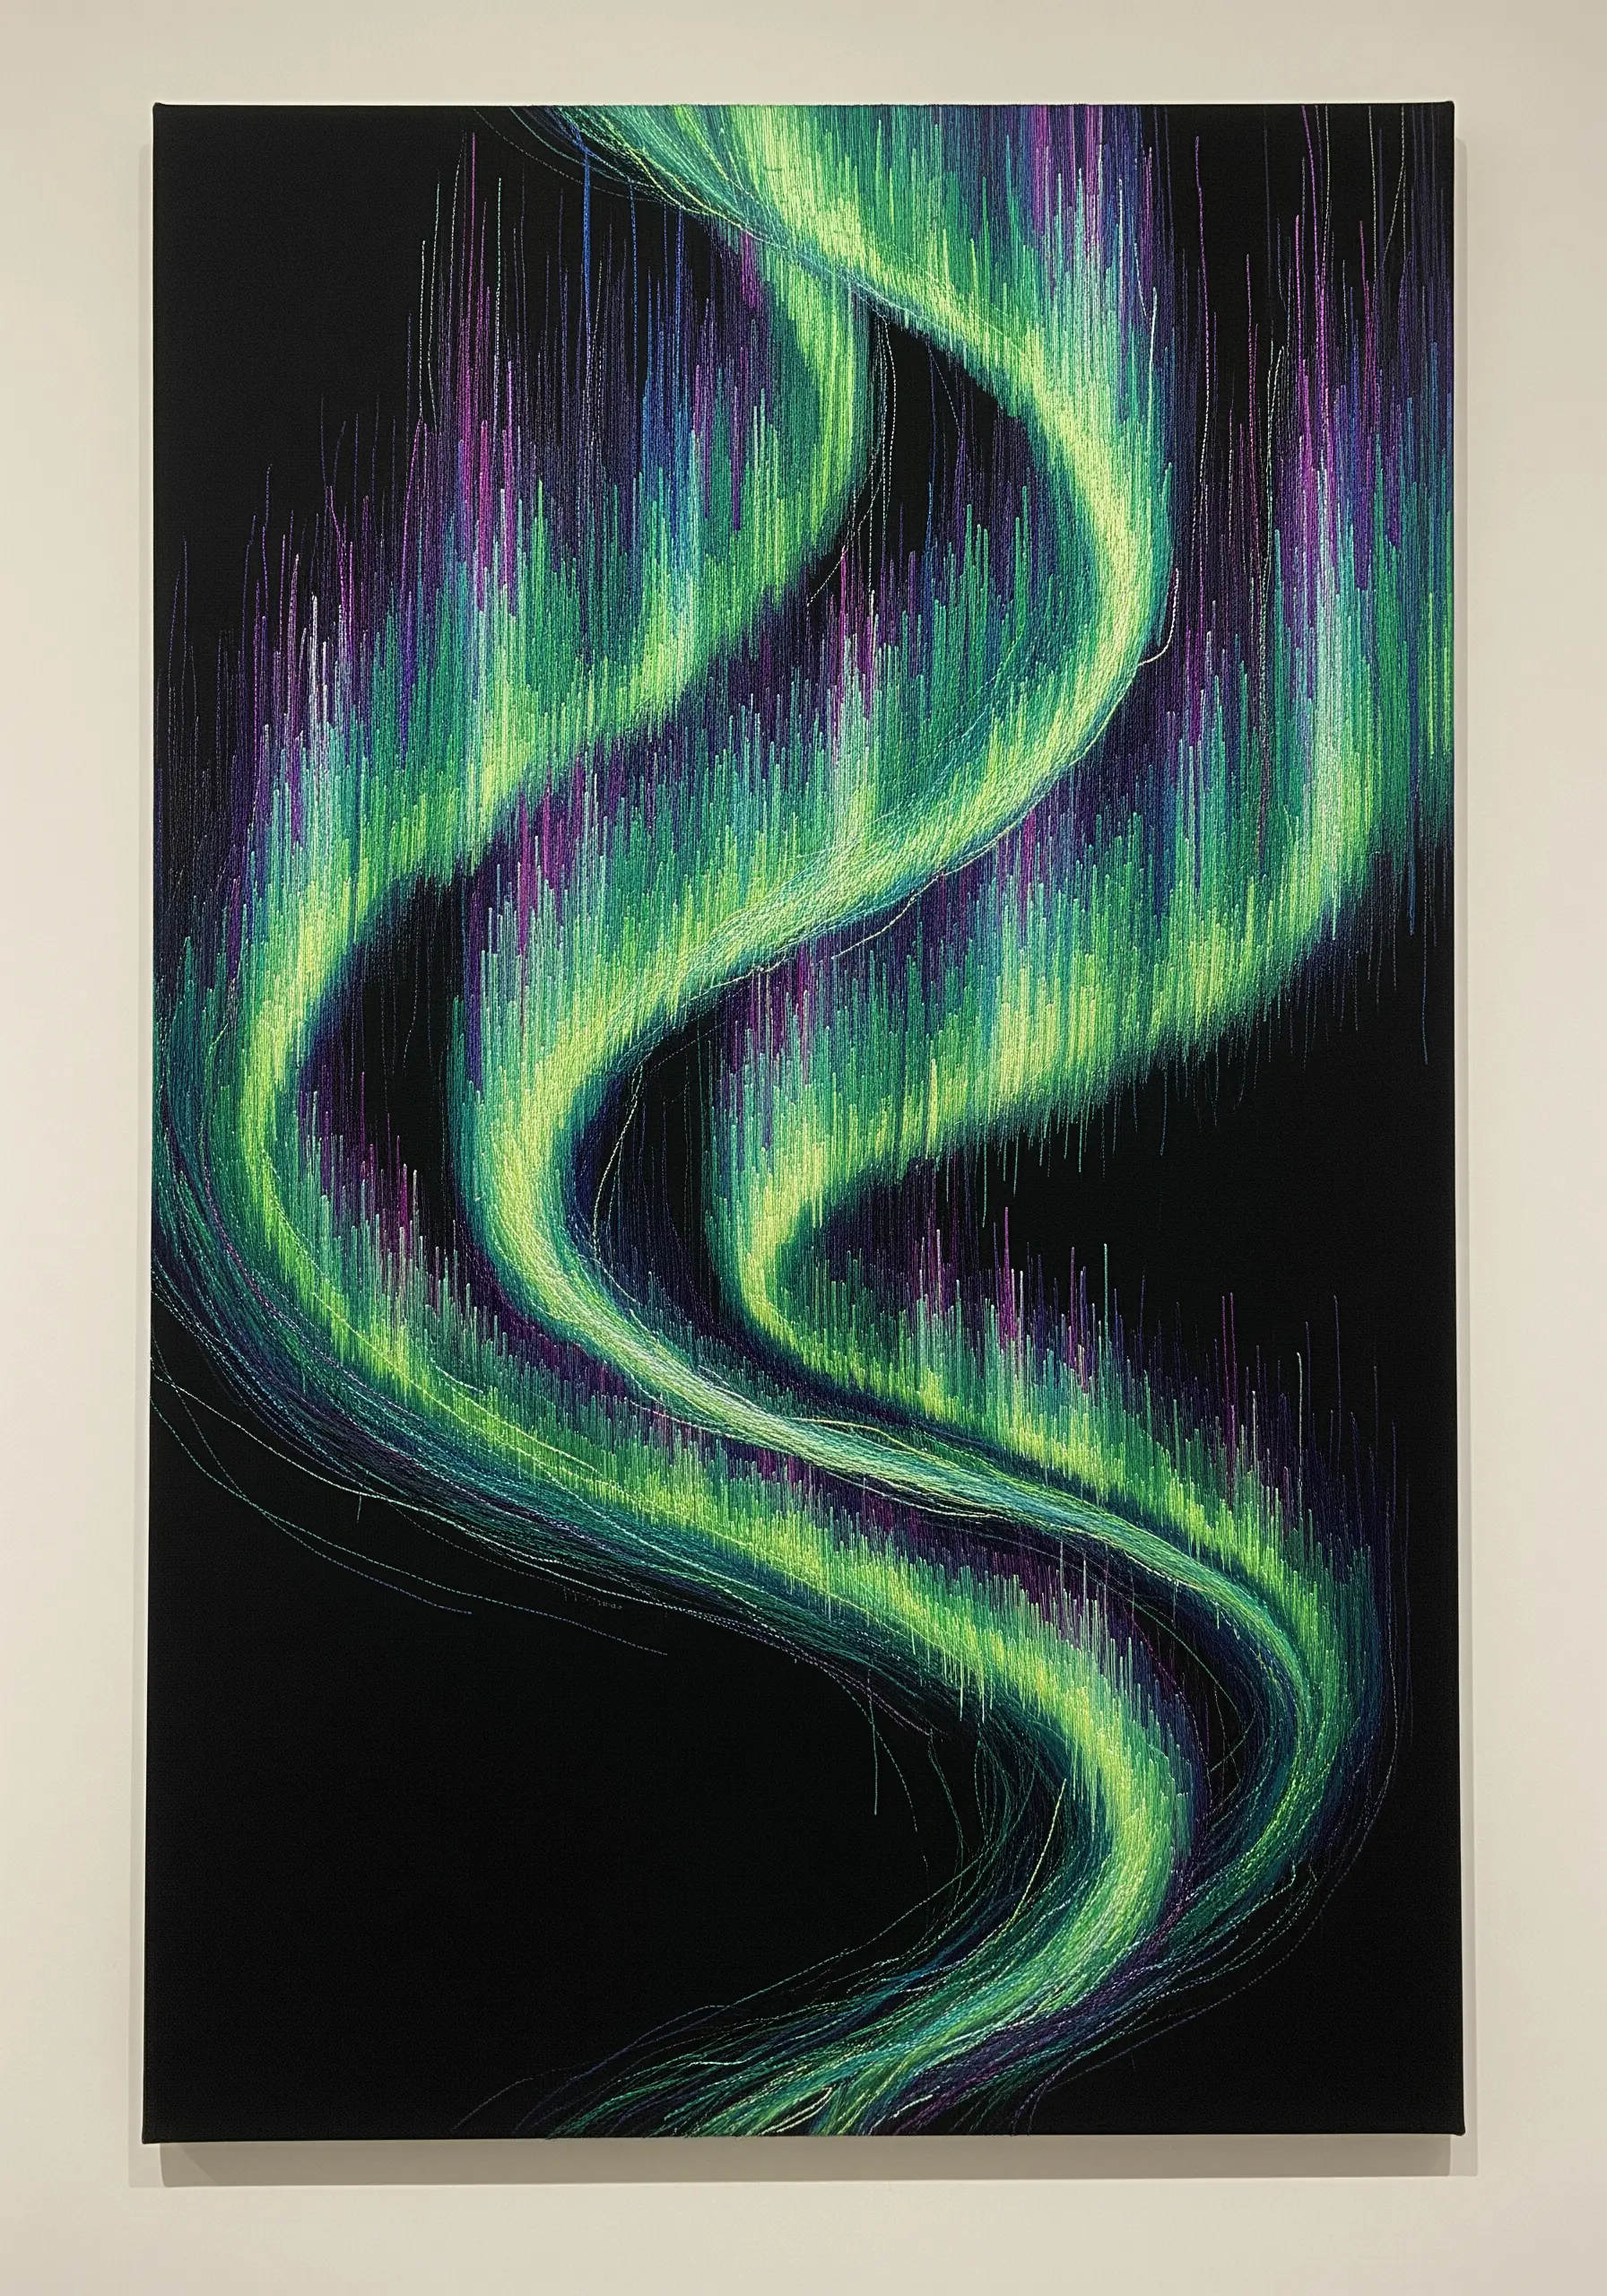
To replicate the shimmering, dancing quality of the aurora borealis, think of your thread as paint and your needle as a brush.
Use thousands of long, vertical straight stitches, allowing the colors to blend and overlap organically. Work with a palette of vibrant greens, purples, and blues, feeding multiple shades into your needle at once for a painterly effect.
Vary the length and density of your stitches to create brighter, more intense areas of light and softer, fading edges. The black background is essential for making the colors appear to glow.
25. Study Mushroom Textures with Precision Stitching
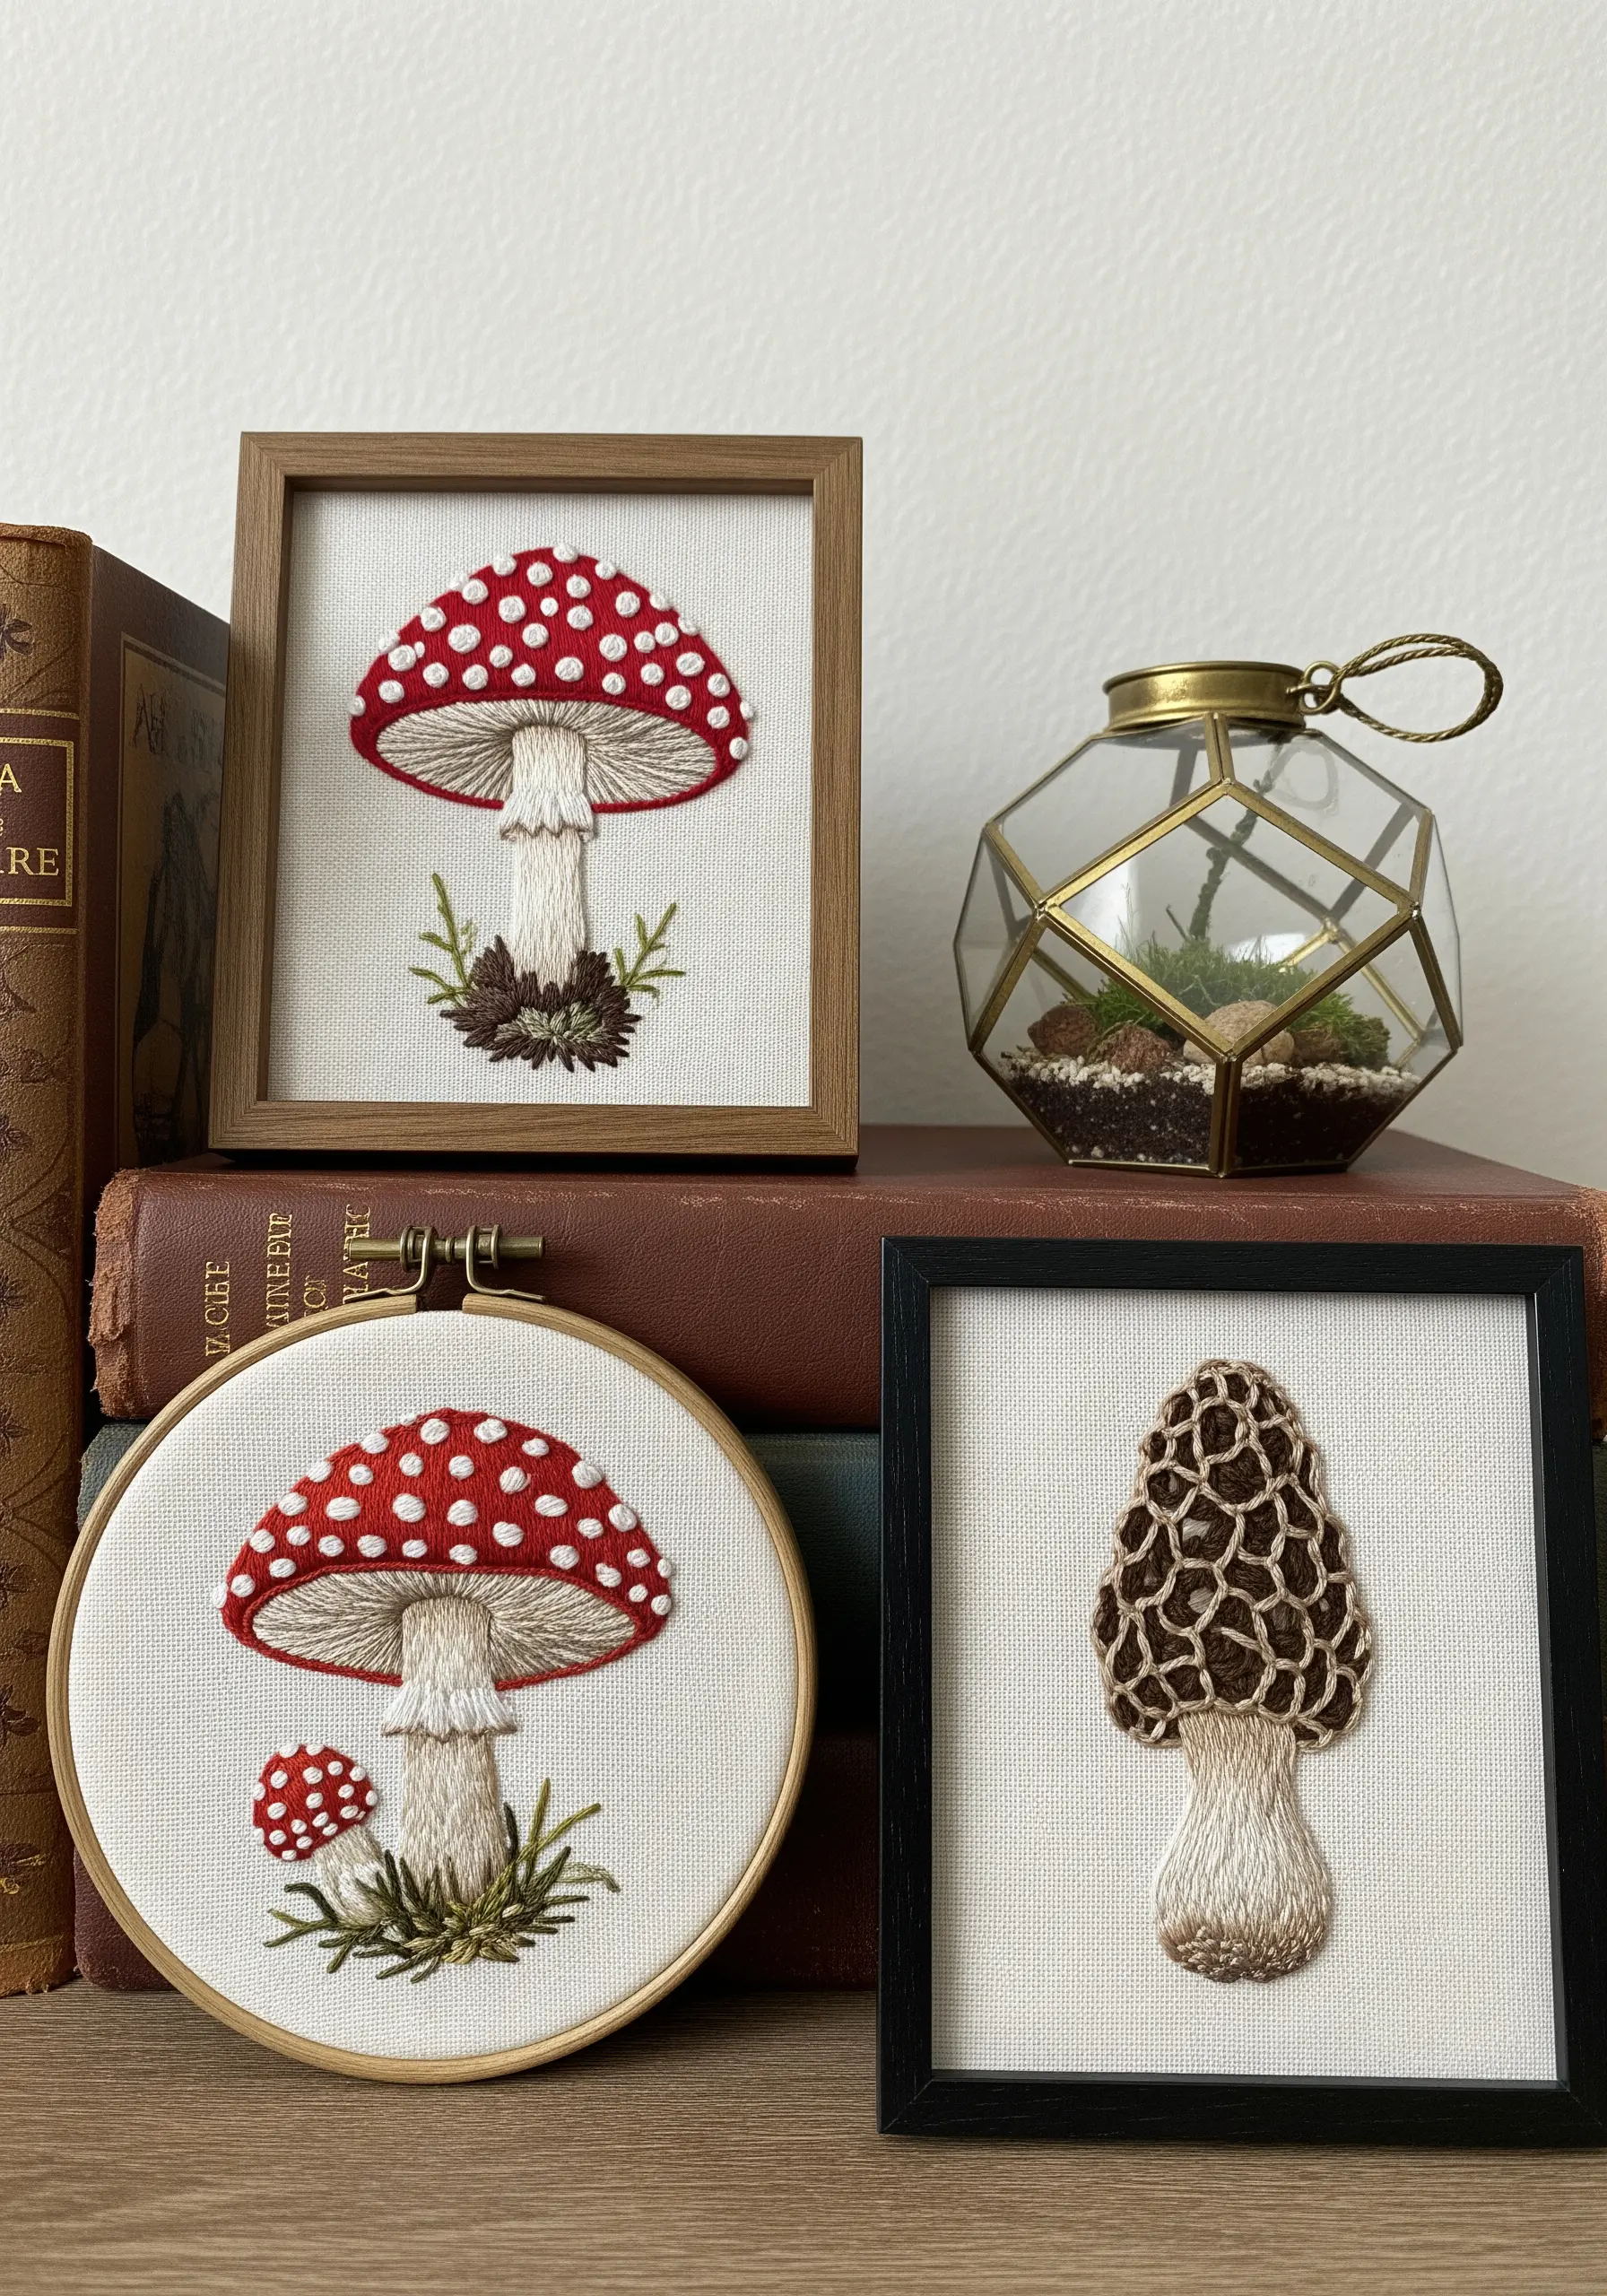
To capture the unique character of different mushroom species, you must adapt your stitch vocabulary for each one.
For the iconic Fly Agaric, use a smooth, padded satin stitch for the red cap, adding crisp white French knots for the spots. For the Morel, create its pitted texture with a dense field of French knots or bullion knots in earthy browns.
Presenting your studies in different frames and hoops turns them into a beautiful, curated collection of realistic mushroom forest floor embroidery projects.
26. Embrace Deconstruction in Large-Scale Fiber Art
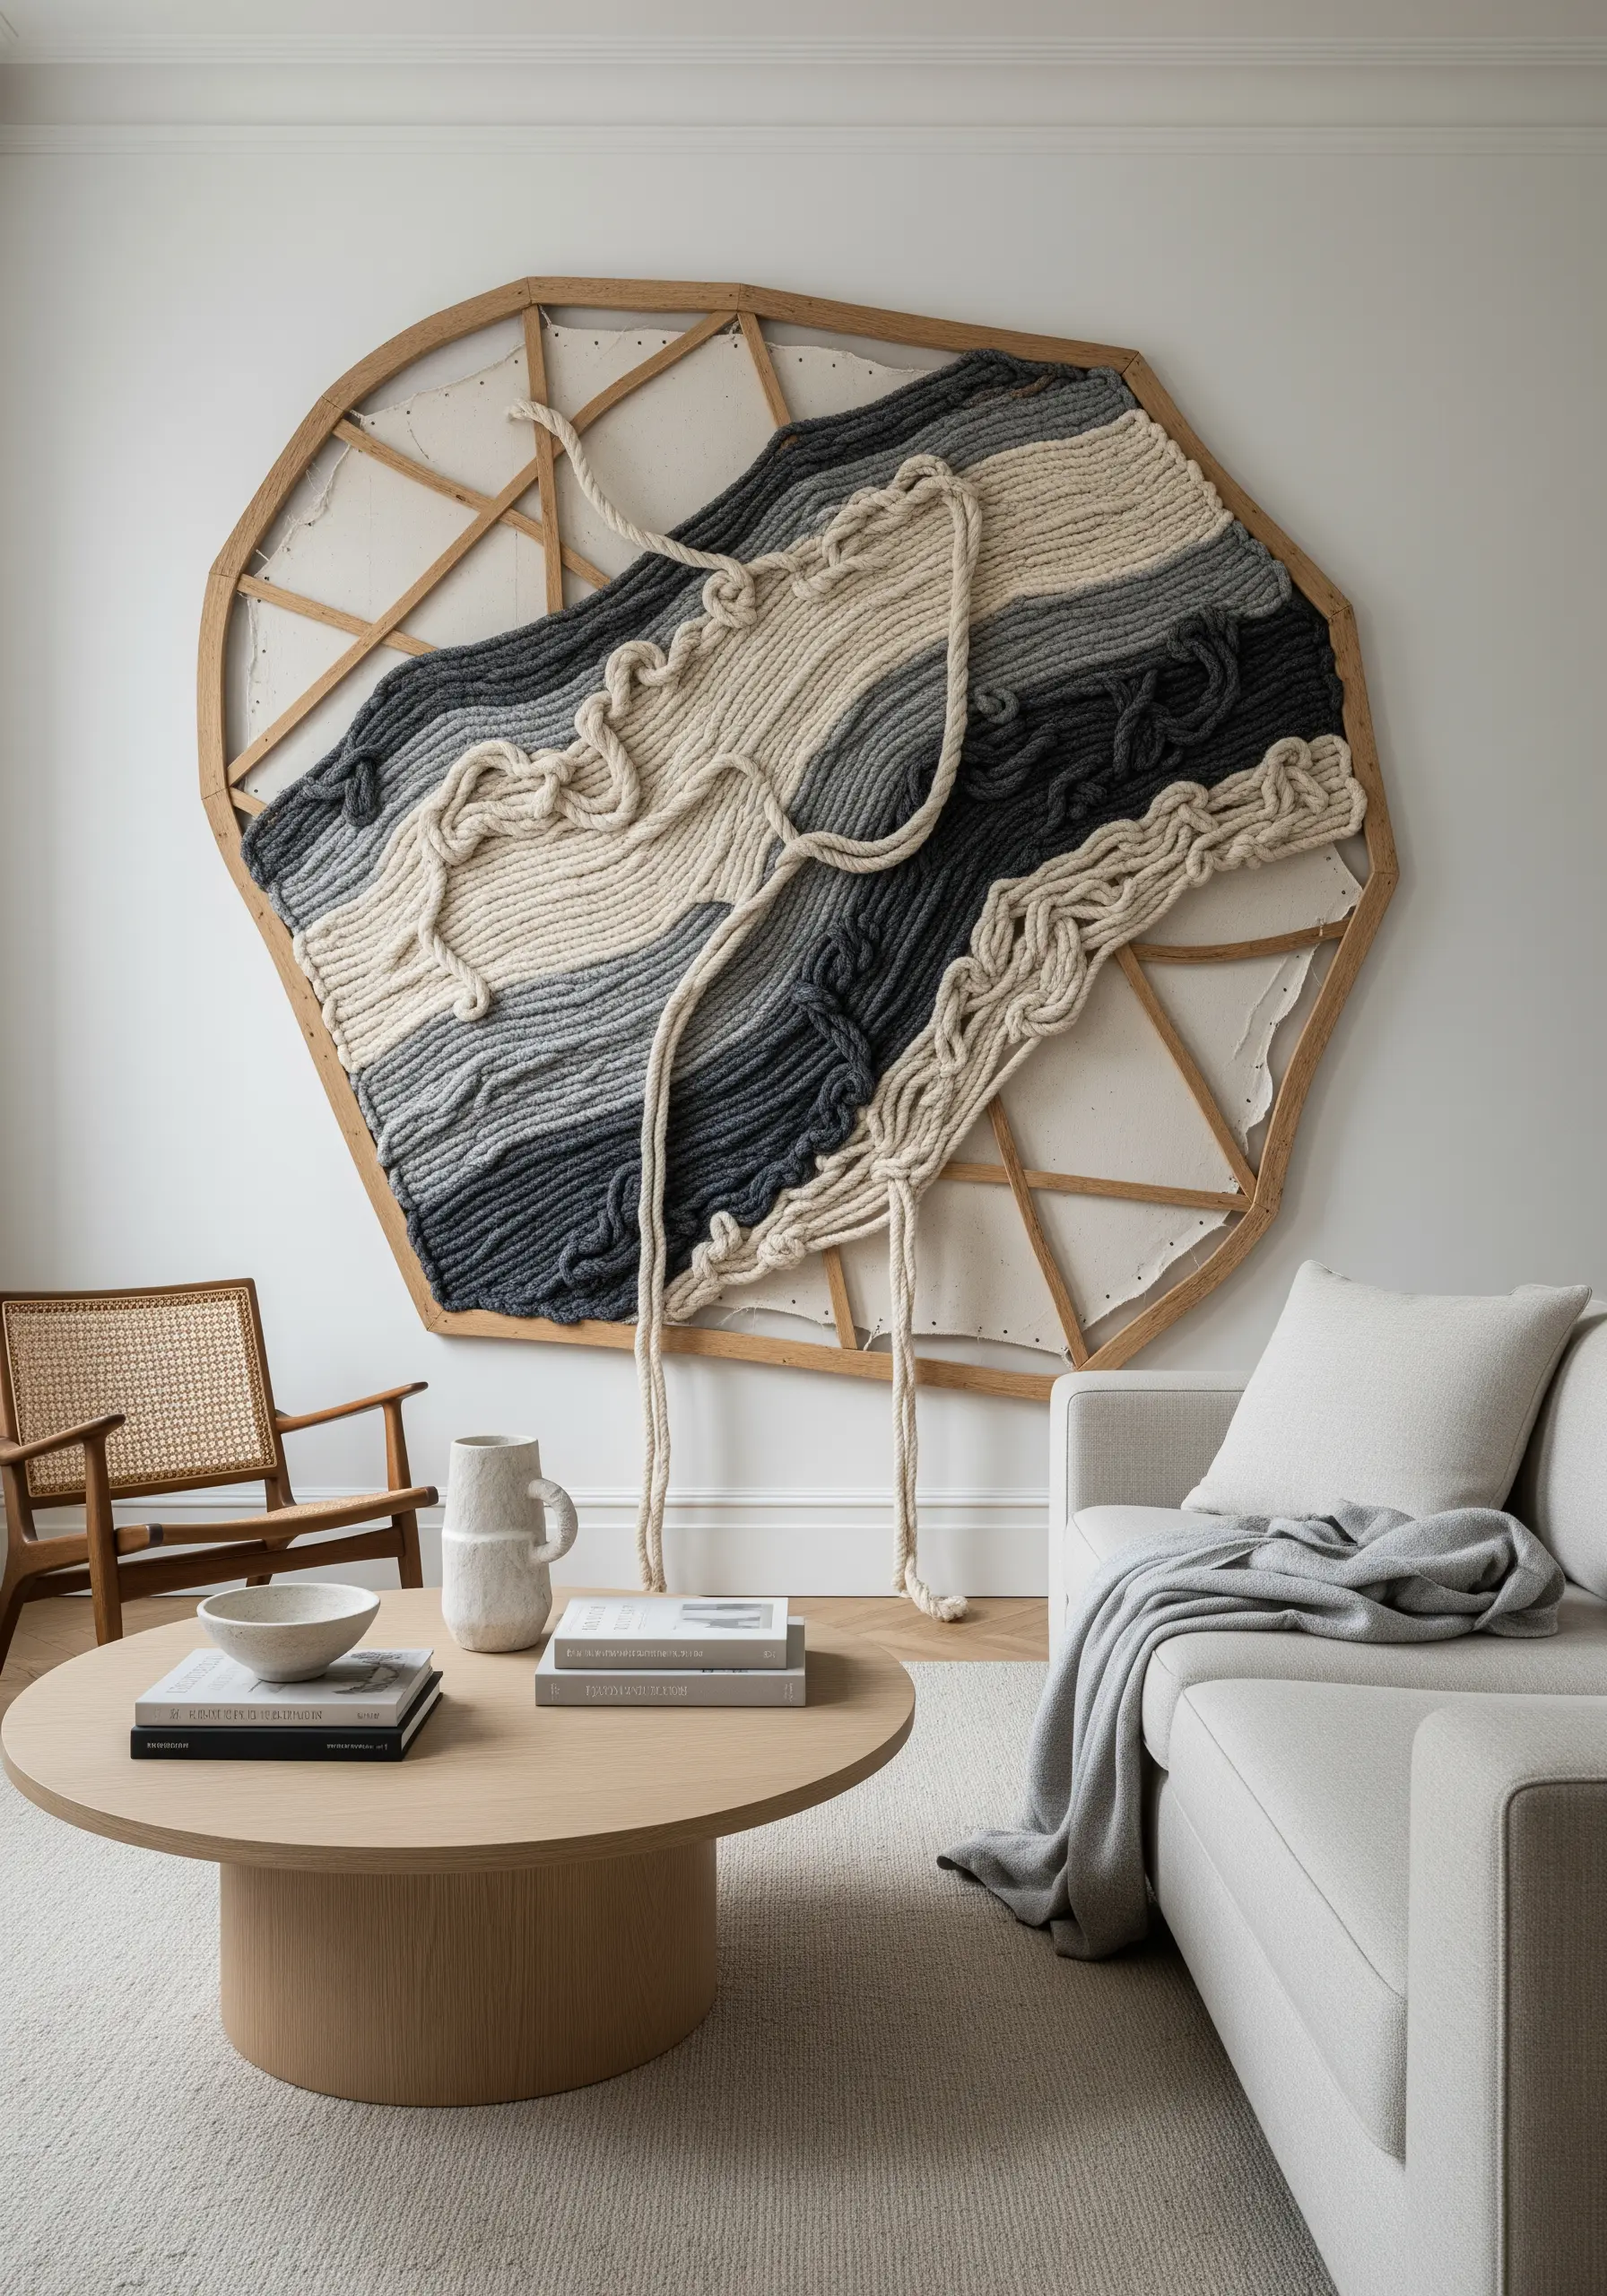
Make a powerful statement by revealing the structure of your work. Use an unconventional, exposed frame as an integral part of your design.
Combine sections of tight, traditional weaving with loose, draping ropes and unspun fibers. Allow these elements to flow beyond the confines of the frame, breaking the traditional rectangular format.
The negative space—the areas where you can see the wall and the frame behind the weaving—is as crucial as the woven sections themselves. This deconstructed approach feels modern, honest, and sculptural.
27. Contrast Hard Lines with Soft Textural Fill
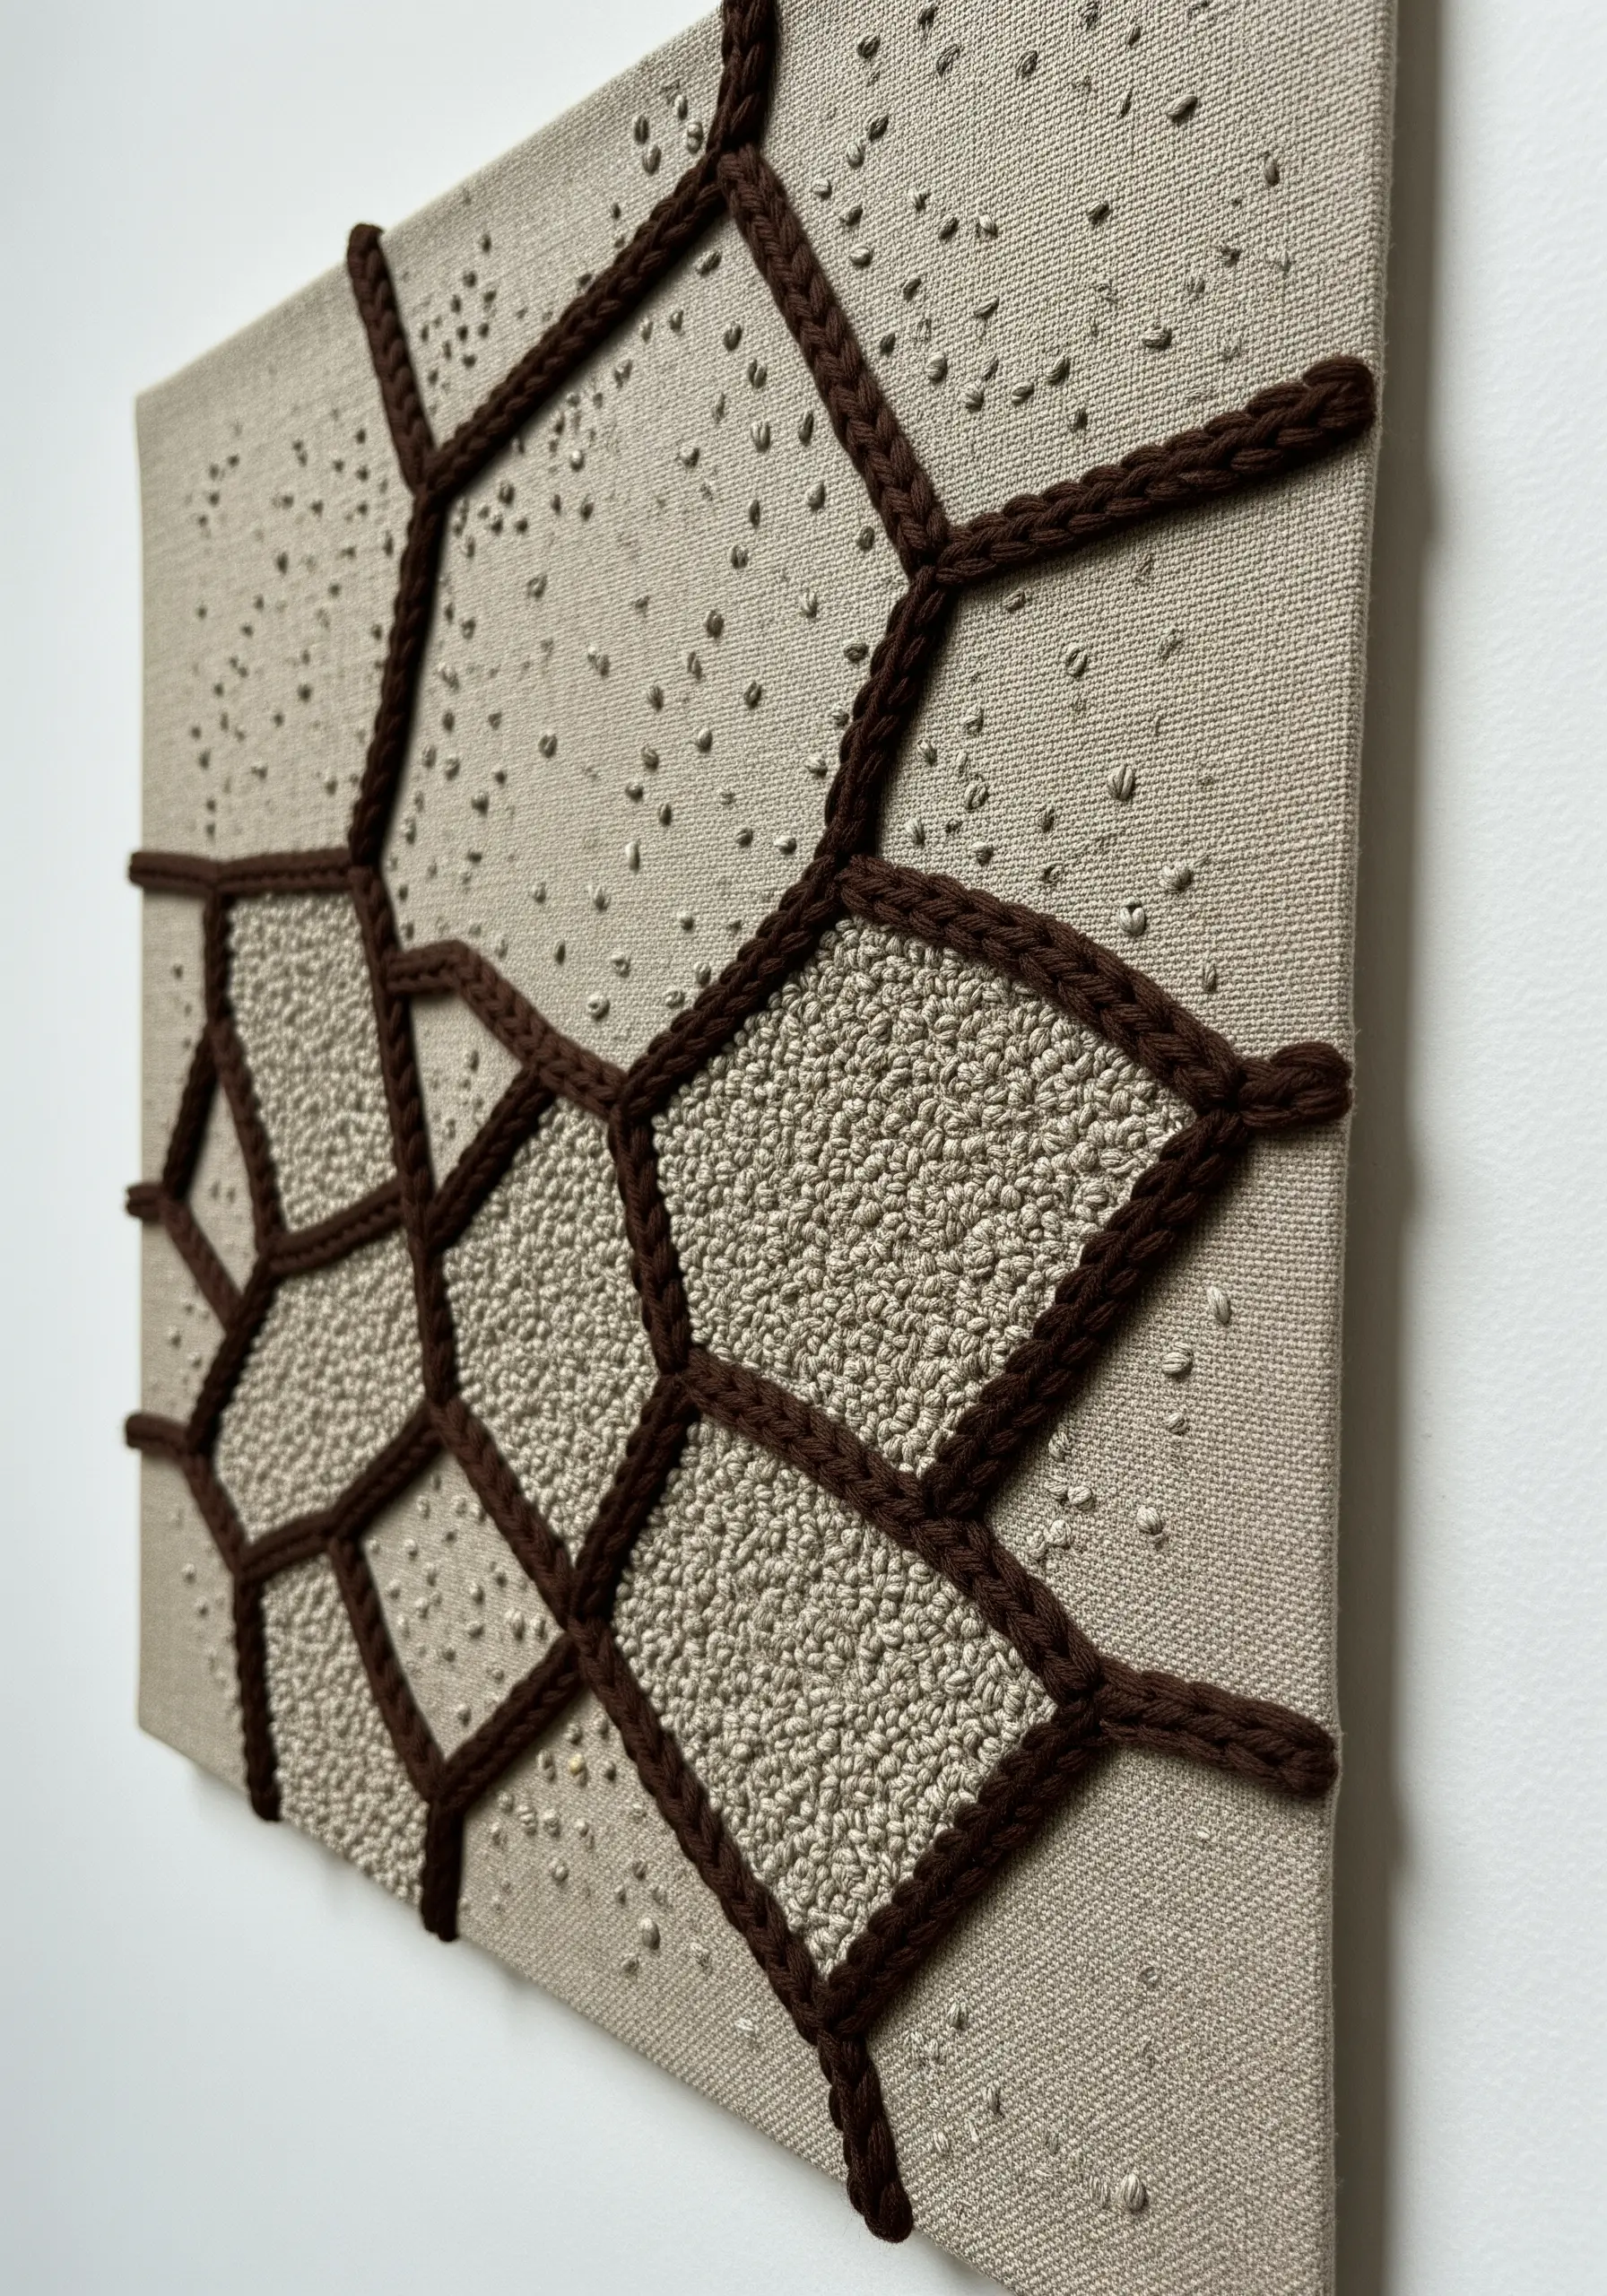
Create a compelling design by pairing a rigid geometric framework with a soft, tactile interior.
First, establish your structure by couching a thick, braided cord onto the canvas, creating strong, defined lines and shapes. This provides the architectural backbone of the piece.
Fill the resulting geometric cells with a dense field of French knots in a slightly lighter, contrasting color. The tension between the sharp, graphic lines and the soft, pillowy fill is what gives this technique its sophisticated appeal.
28. Build a Monochrome Sculpture with Dimensional Stitches
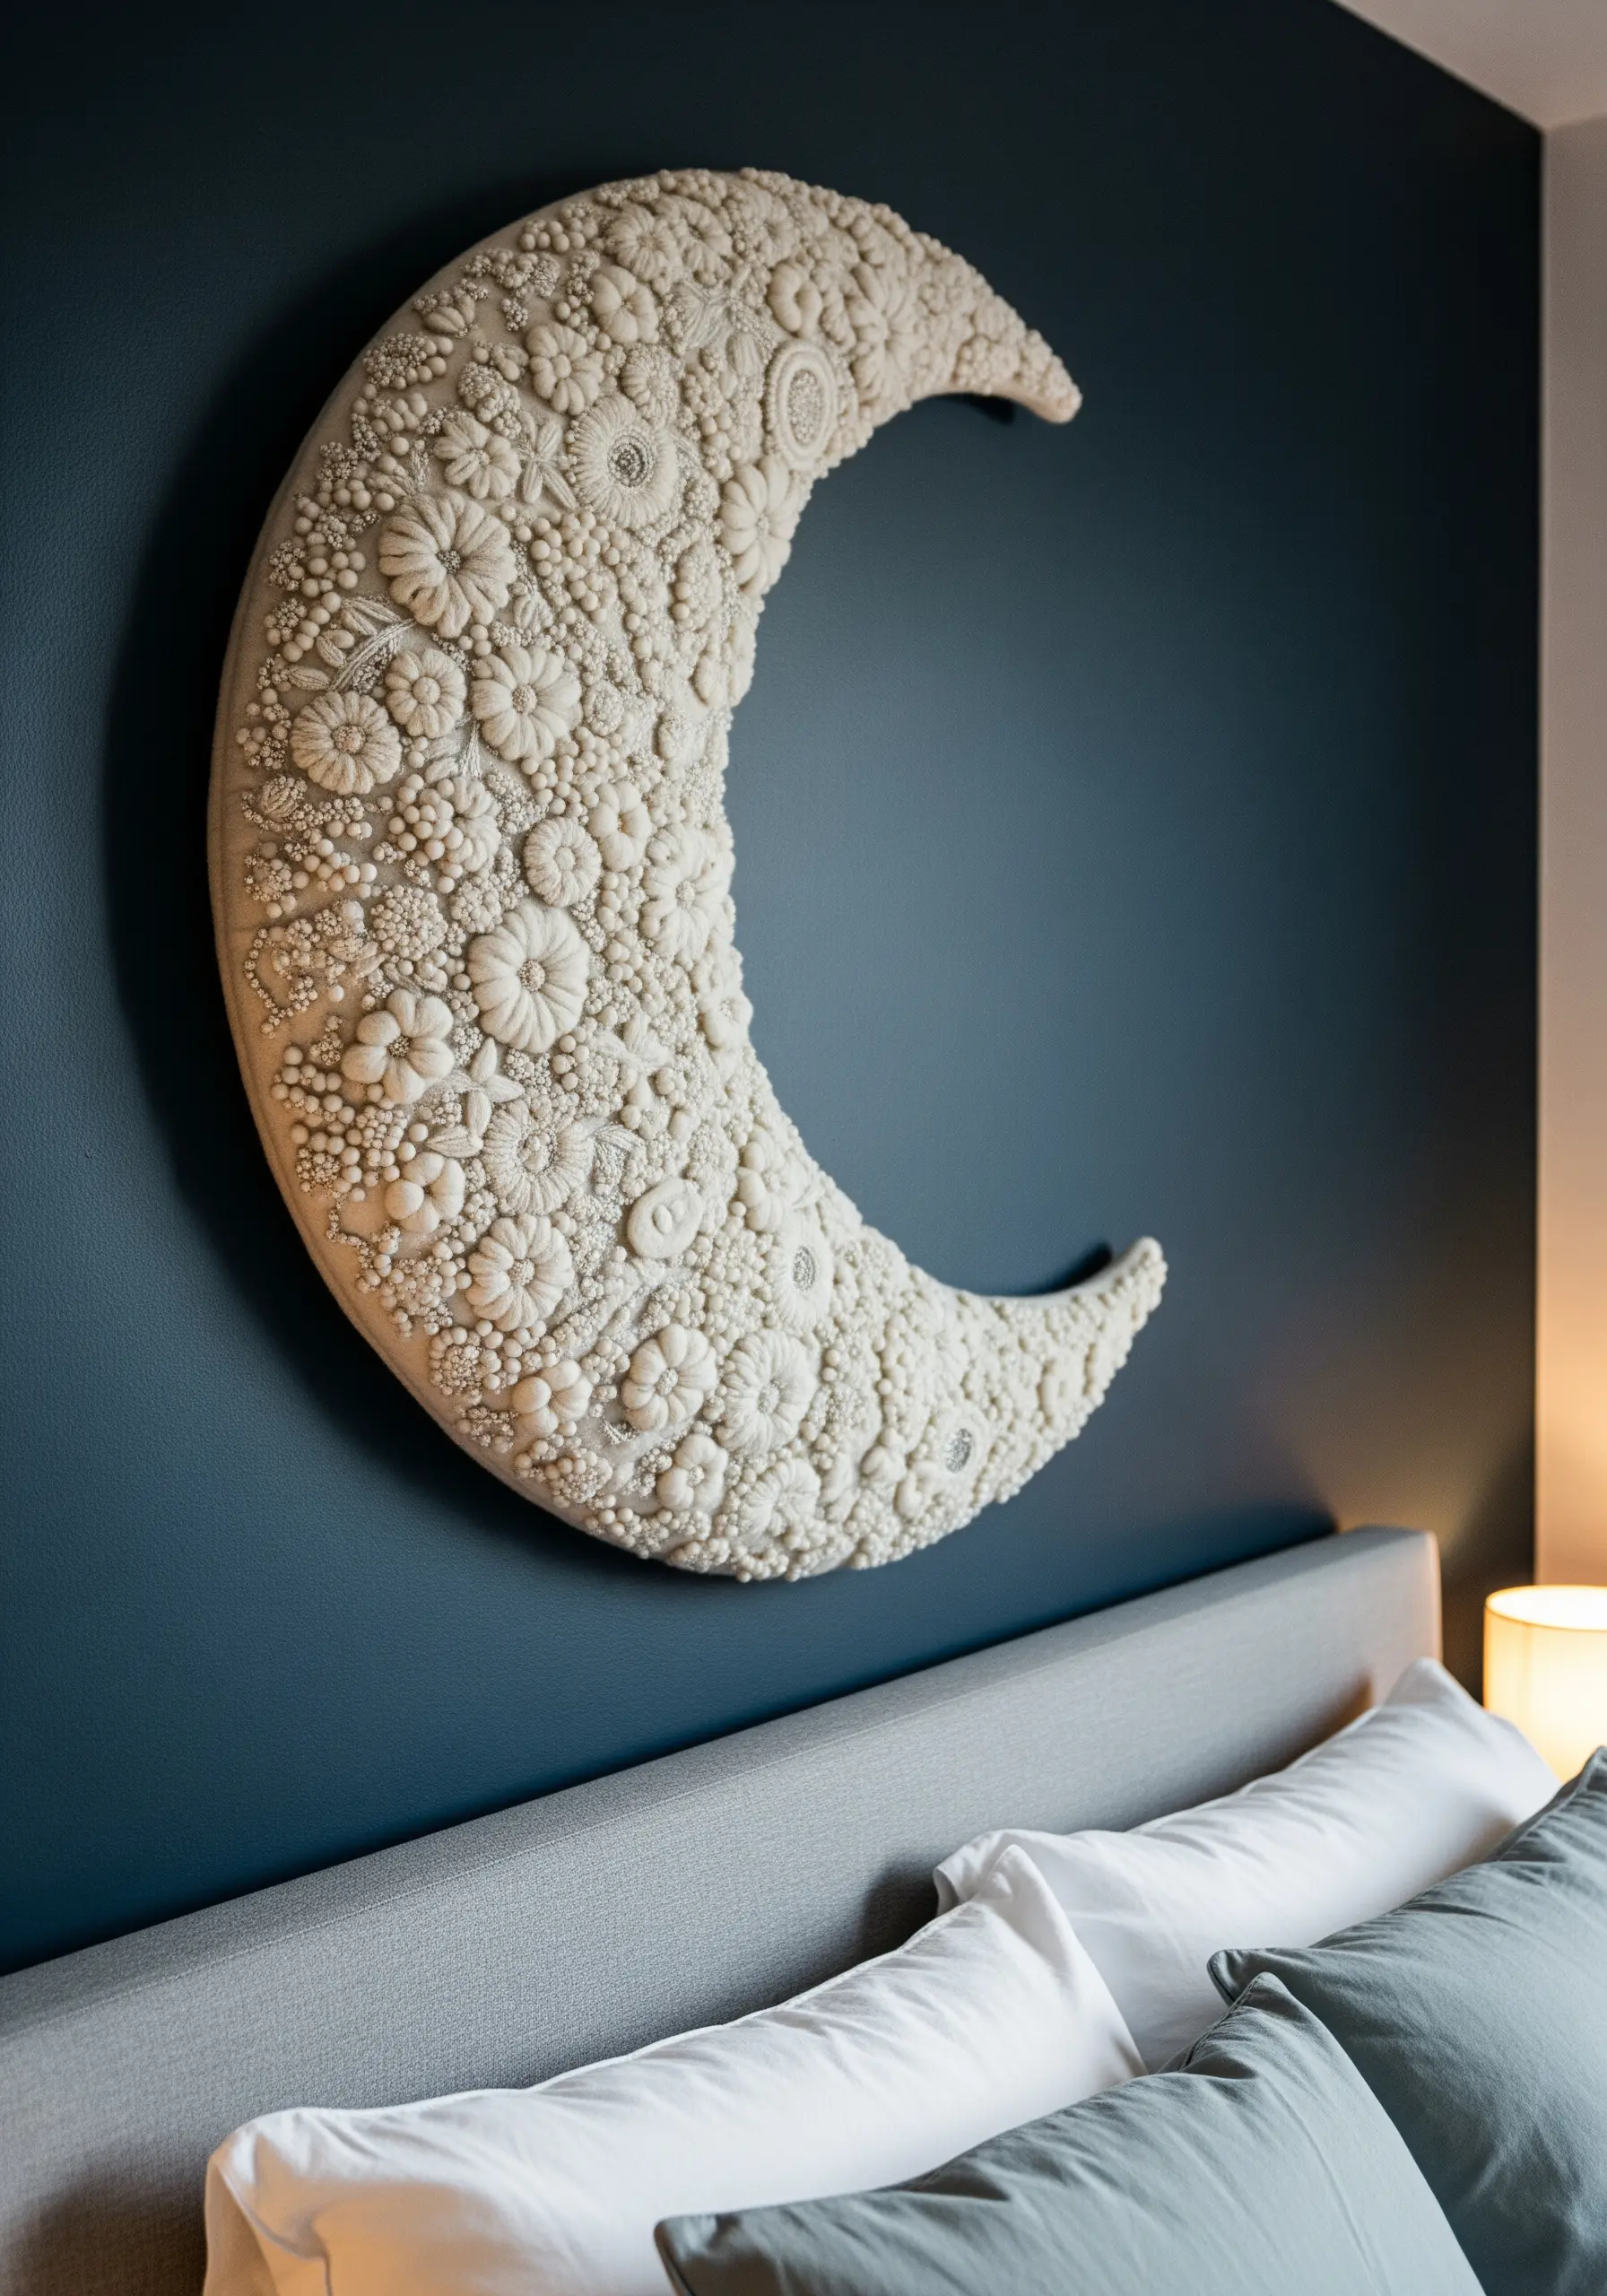
Create a breathtaking, sculptural piece by working entirely in shades of a single color, like ivory or cream. This forces the focus onto texture alone.
Use a dense collage of highly dimensional stitches: woven wheel roses, plump bullion knots, cast-on stitches, and clusters of French knots. Vary their scale and placement to create an intricate, layered surface.
Applying this technique to a shaped form, like this crescent moon, elevates it from a simple embroidery to a true piece of textile sculpture that draws viewers in for a closer look.


