
When you look at string art, you see the beauty of tension, geometry, and clean lines. It feels modern, precise, and intentional. What if you could bring that same graphic power directly to your embroidery, transforming your fabric with nothing more than a needle and thread?
These designs challenge you to think differently about filling space. Instead of traditional satin or fill stitches, you’ll learn to use long, taut straight stitches anchored at strategic points. This technique allows you to create faceted shapes, build sculptural texture, and capture a sense of dynamic motion that is difficult to achieve with other methods.
Here, you won’t find vague suggestions. You’ll find concrete ways to map your designs, choose the right threads for a high-impact finish, and layer your stitches to create depth and dimension. It’s time to stitch with confidence and create wildlife art that feels both timeless and strikingly modern.
1. Geometric Majesty in Metallic Thread
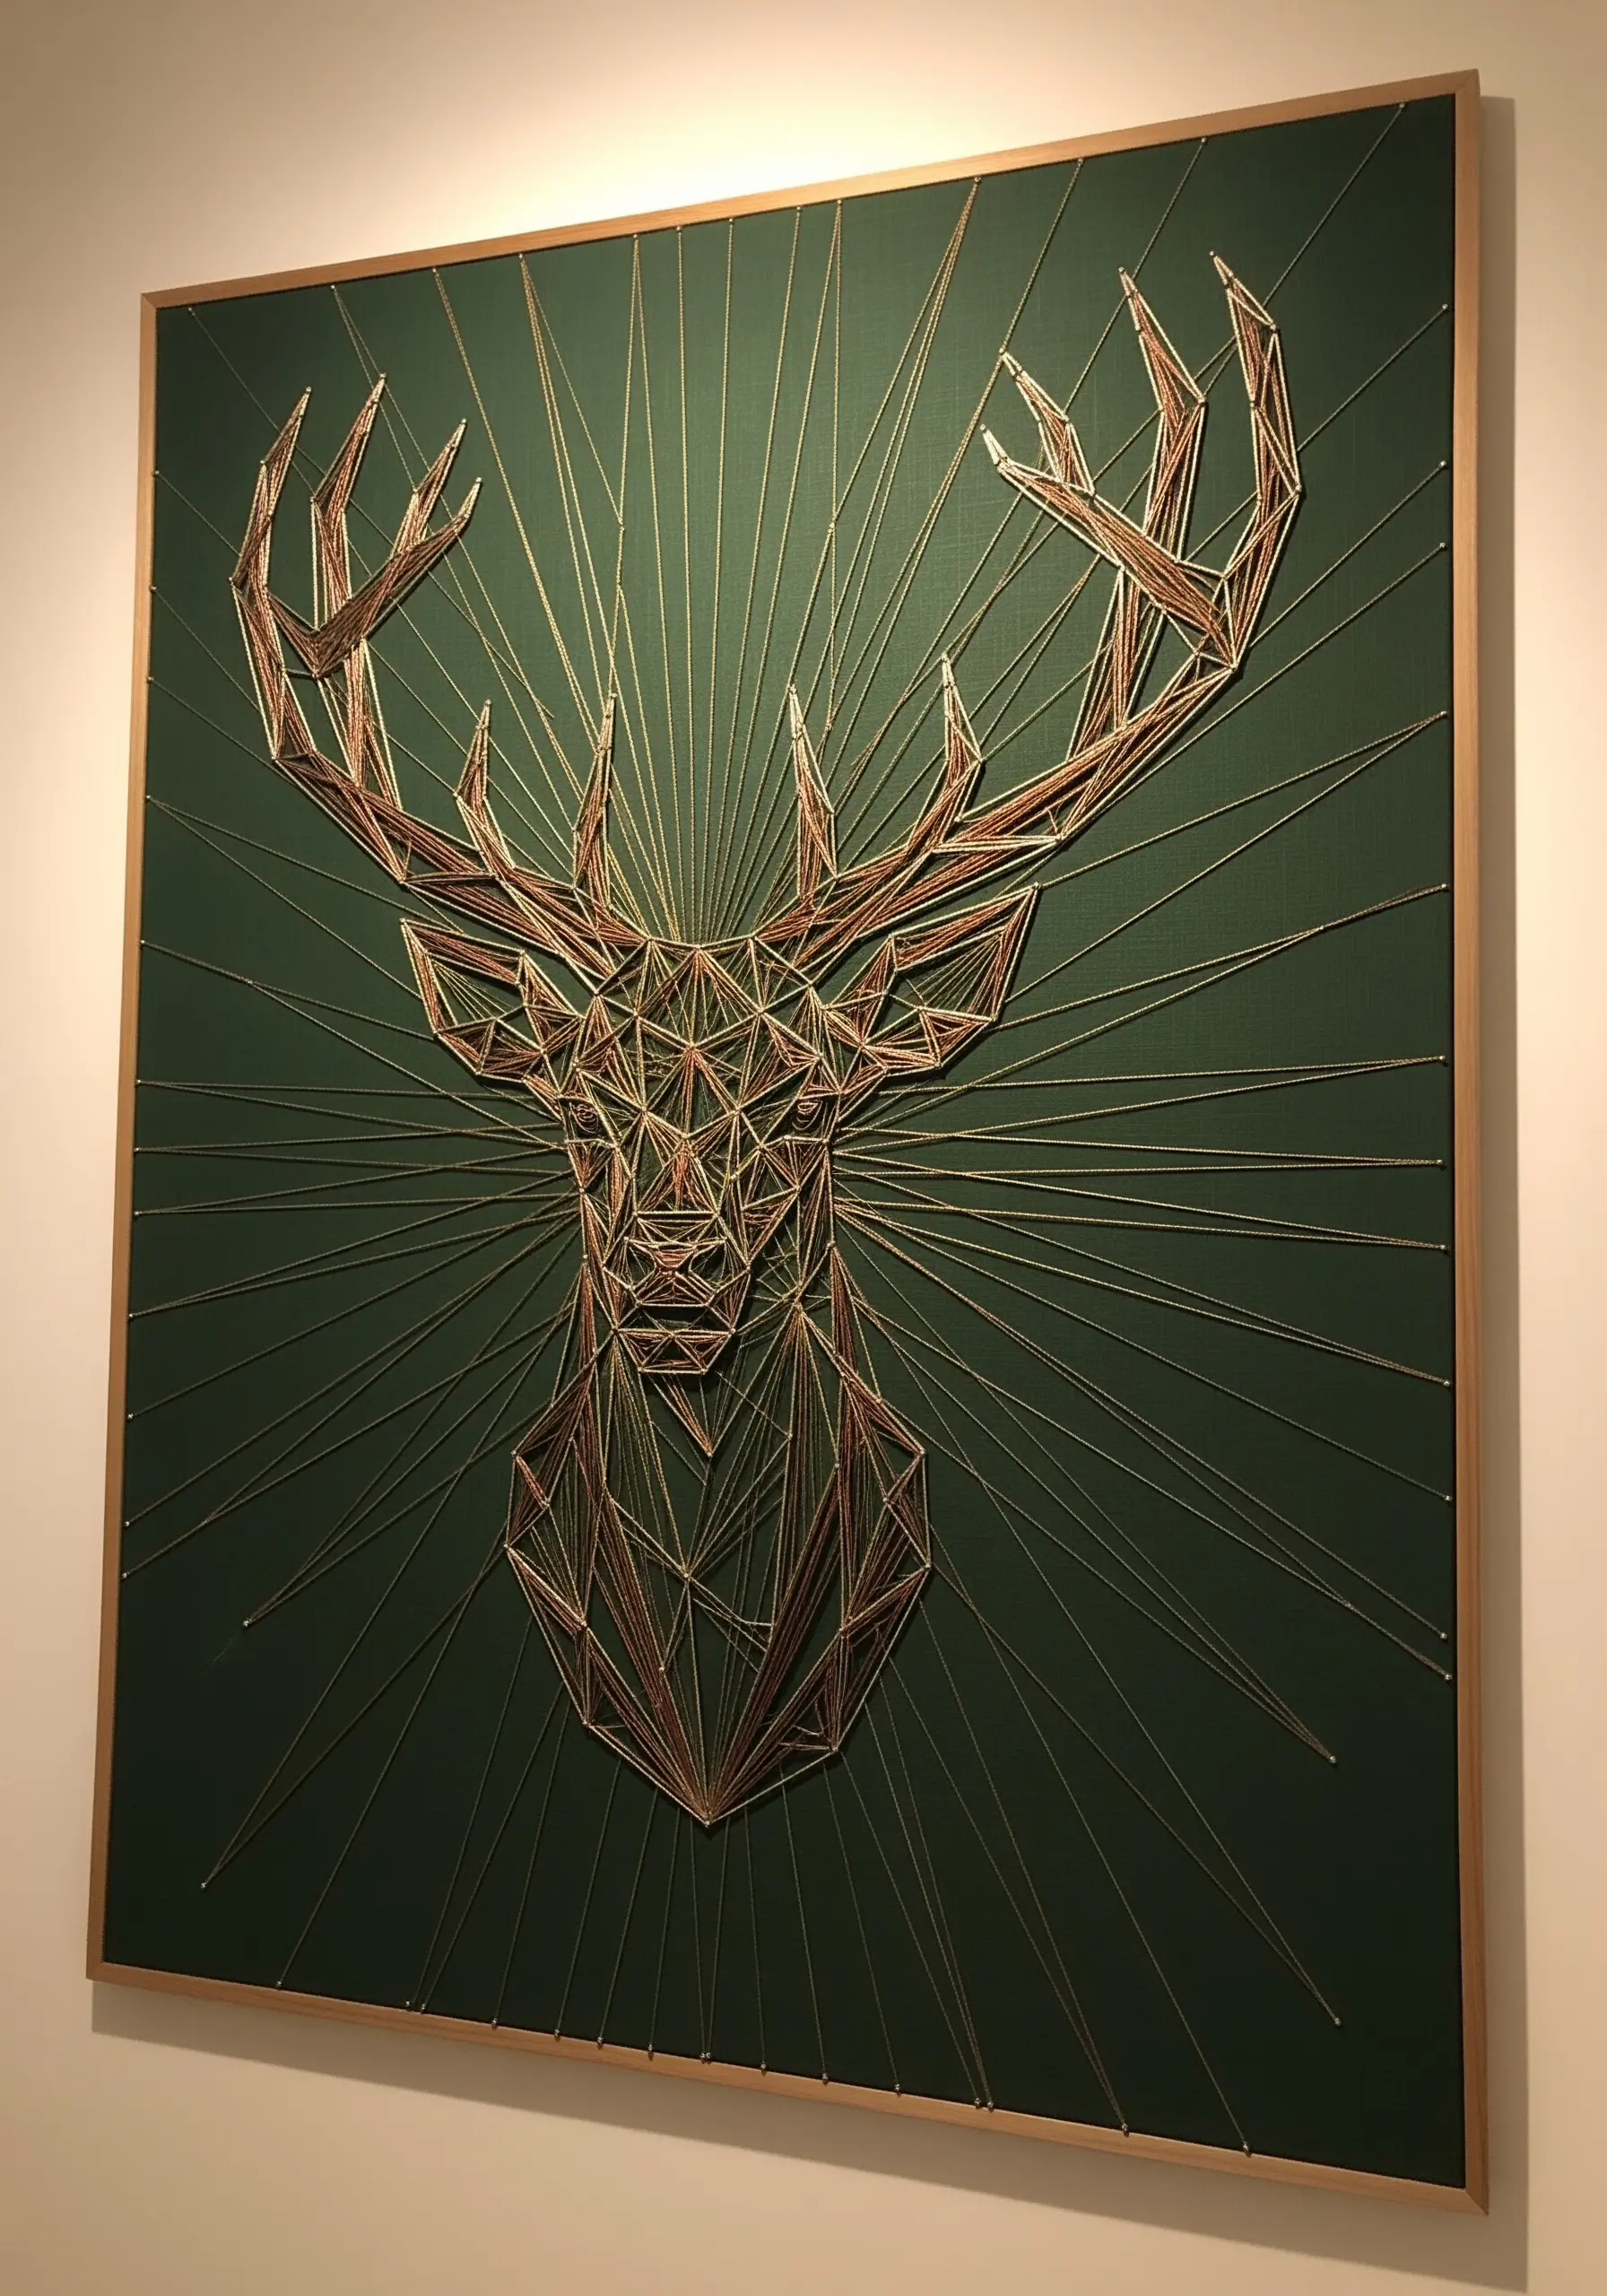
To achieve this string-art effect in embroidery, begin by marking out your anchor points with discreet chalk dots.
Instead of nails, create tiny, secure backstitches or use small seed beads at each point to guide your long stitches.
Use a fine metallic or high-sheen perle cotton against a dark, matte fabric like deep green linen; the contrast creates a dramatic, light-catching effect.
Build the design in layers, starting with the main outline before filling the geometric planes with crisscrossing threads.
The radiating background lines add immense depth and energy—stitch these last to frame the stag without overwhelming its intricate details. This style is perfect for statement-size wall art ideas.
2. Layered Grayscale for Sculptural Texture
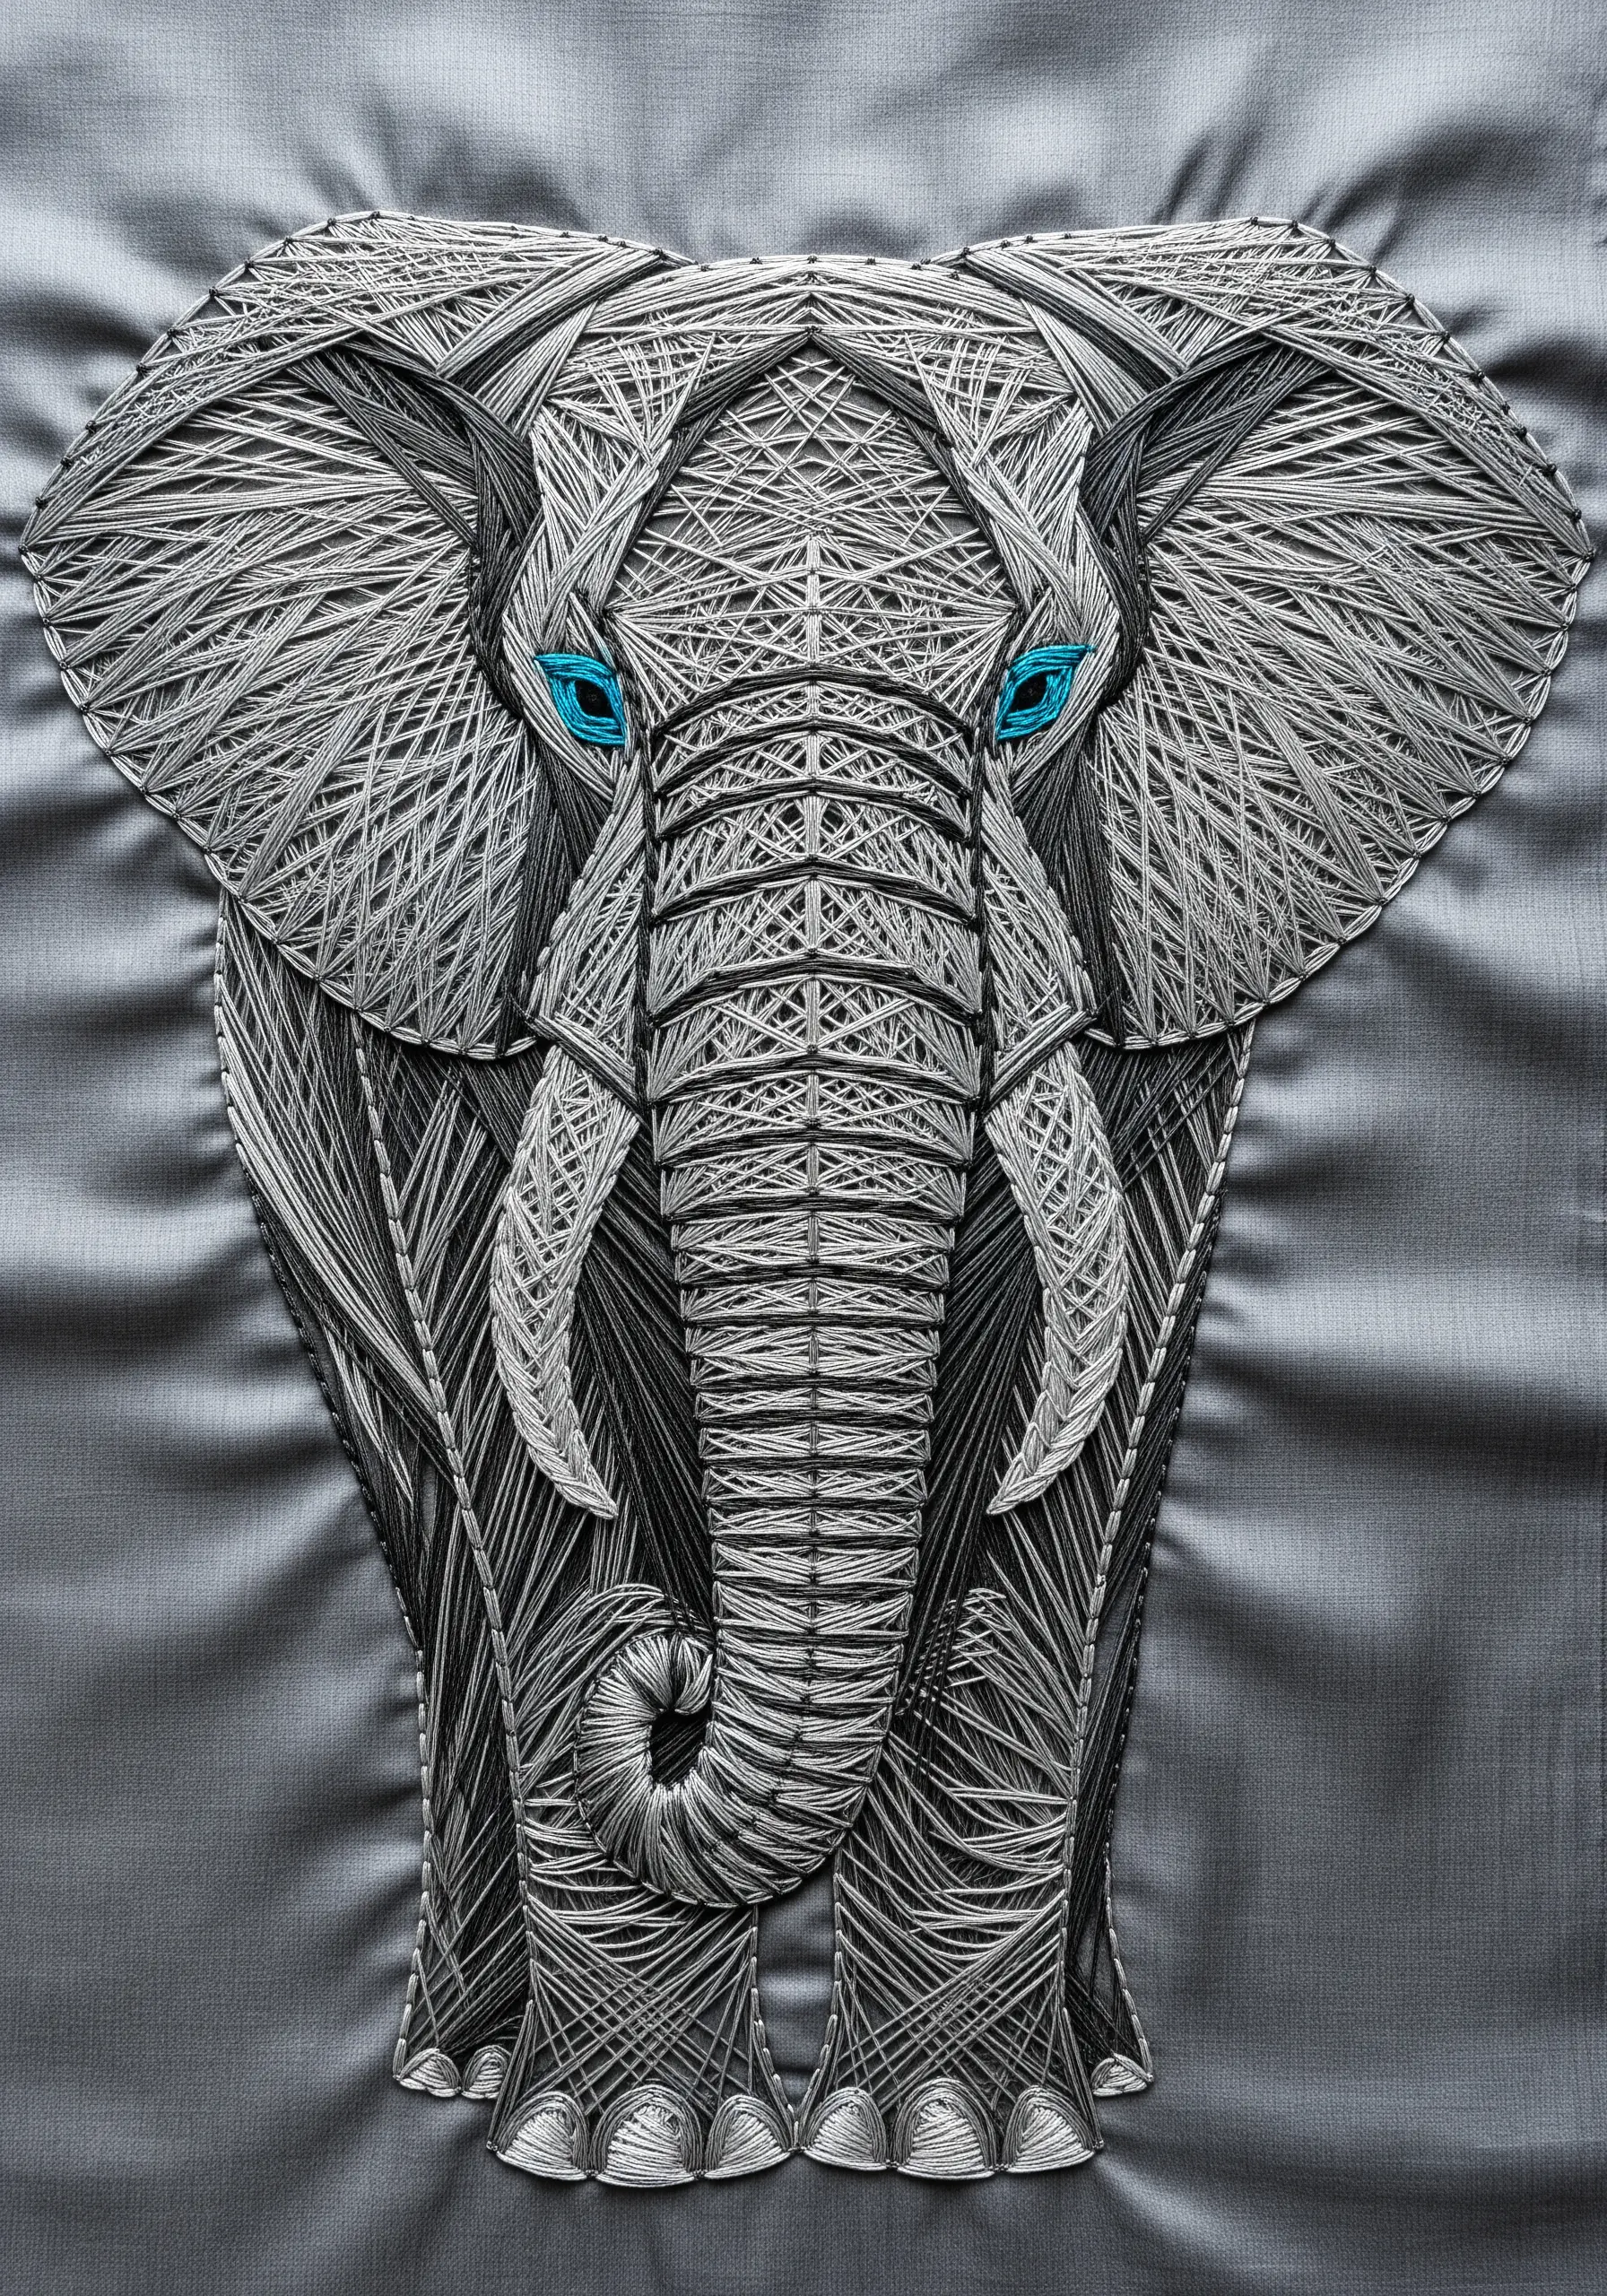
Create this dense, sculptural look by methodically layering straight stitches in a tight grayscale palette—from near-white to deep charcoal.
Work in small, defined geometric sections, completely filling one before moving to the next. This methodical approach maintains control and prevents thread tangling in complex areas.
Vary the direction of your stitches within each panel to mimic the way light hits different planes, giving the elephant’s skin a realistic, faceted texture.
For the eyes, use a high-sheen rayon thread in a vibrant, contrasting color. Fill the small area with a dense satin stitch to make it the undeniable focal point.
3. Warm Gradients for a Vibrant Finish
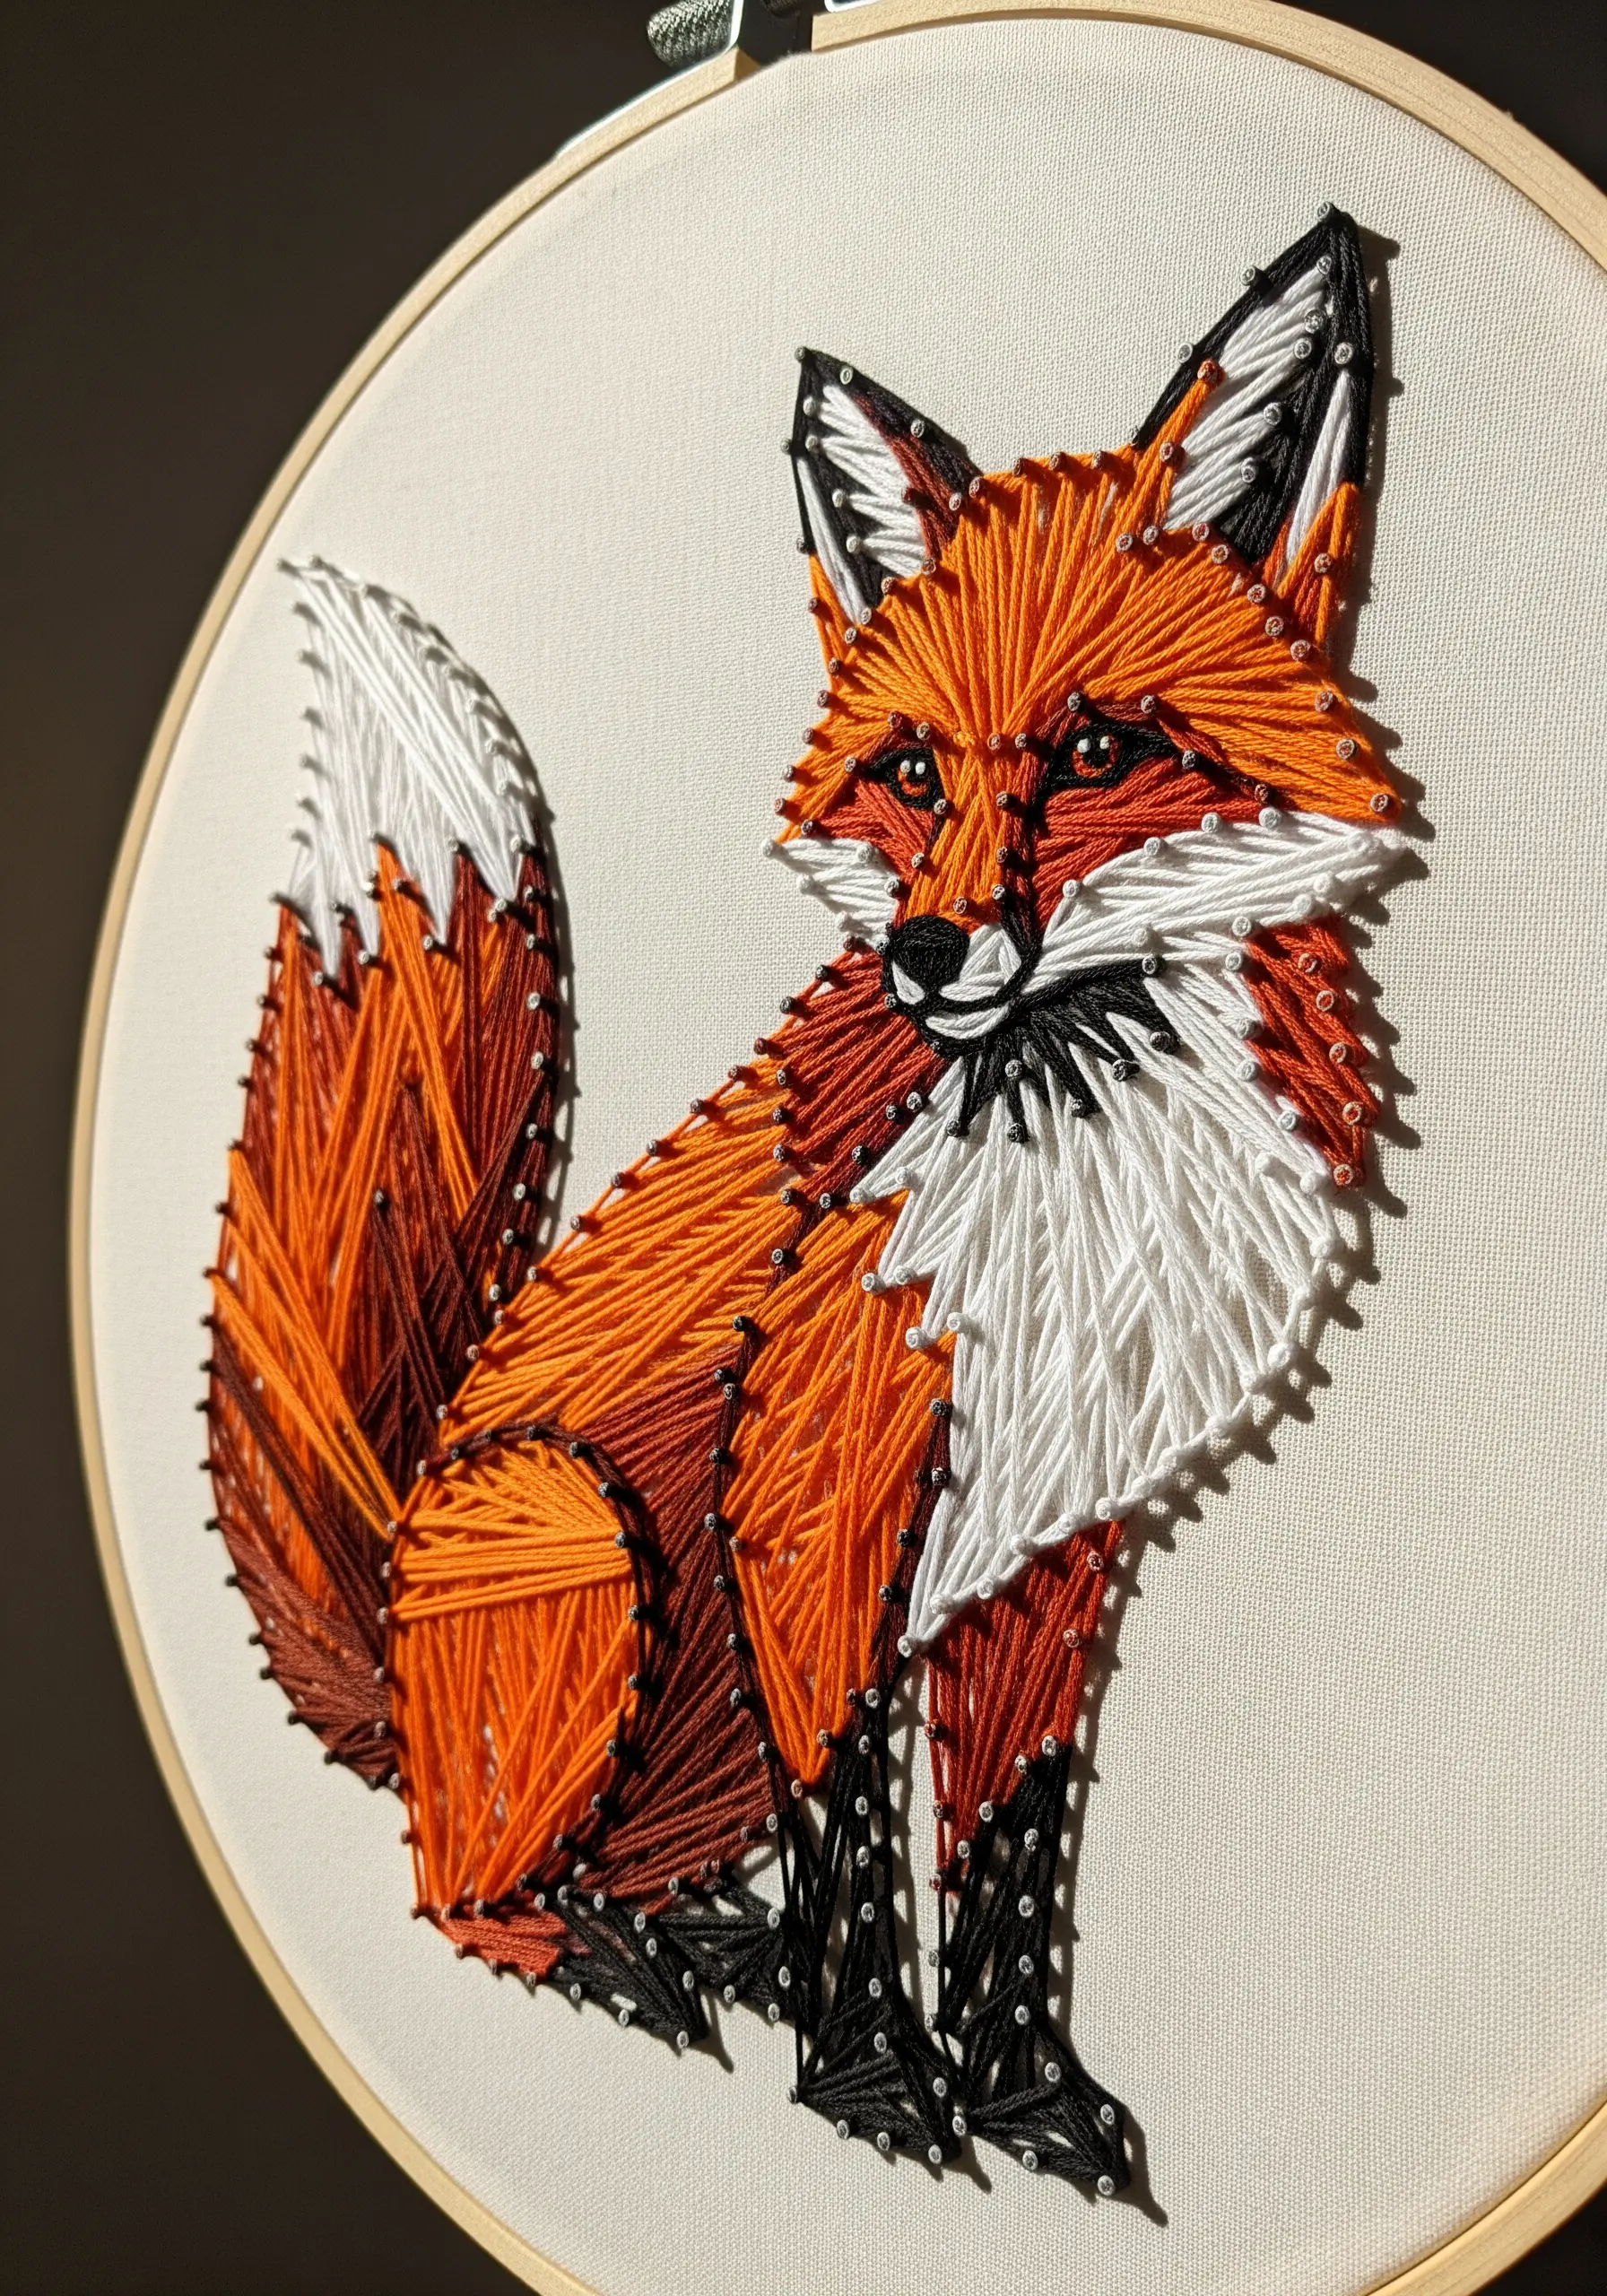
Bring your fox to life by blending threads in a warm ombré, transitioning smoothly from deep russet to bright orange and crisp white.
Instead of filling shapes randomly, apply your straight stitches from the outer edges inward. This creates a clear sense of direction and suggests the natural growth of fur.
Use black thread for the anchor points and outlines; this sharpens the silhouette against the lighter colors and makes the form pop.
To achieve the tail’s fluffy appearance, layer the white threads over the darker auburn tones, allowing just a hint of the base color to show through for depth. These fox & deer embroidery patterns rely on smart color blending to feel alive.
4. Monochromatic Blues for a Lunar Scene
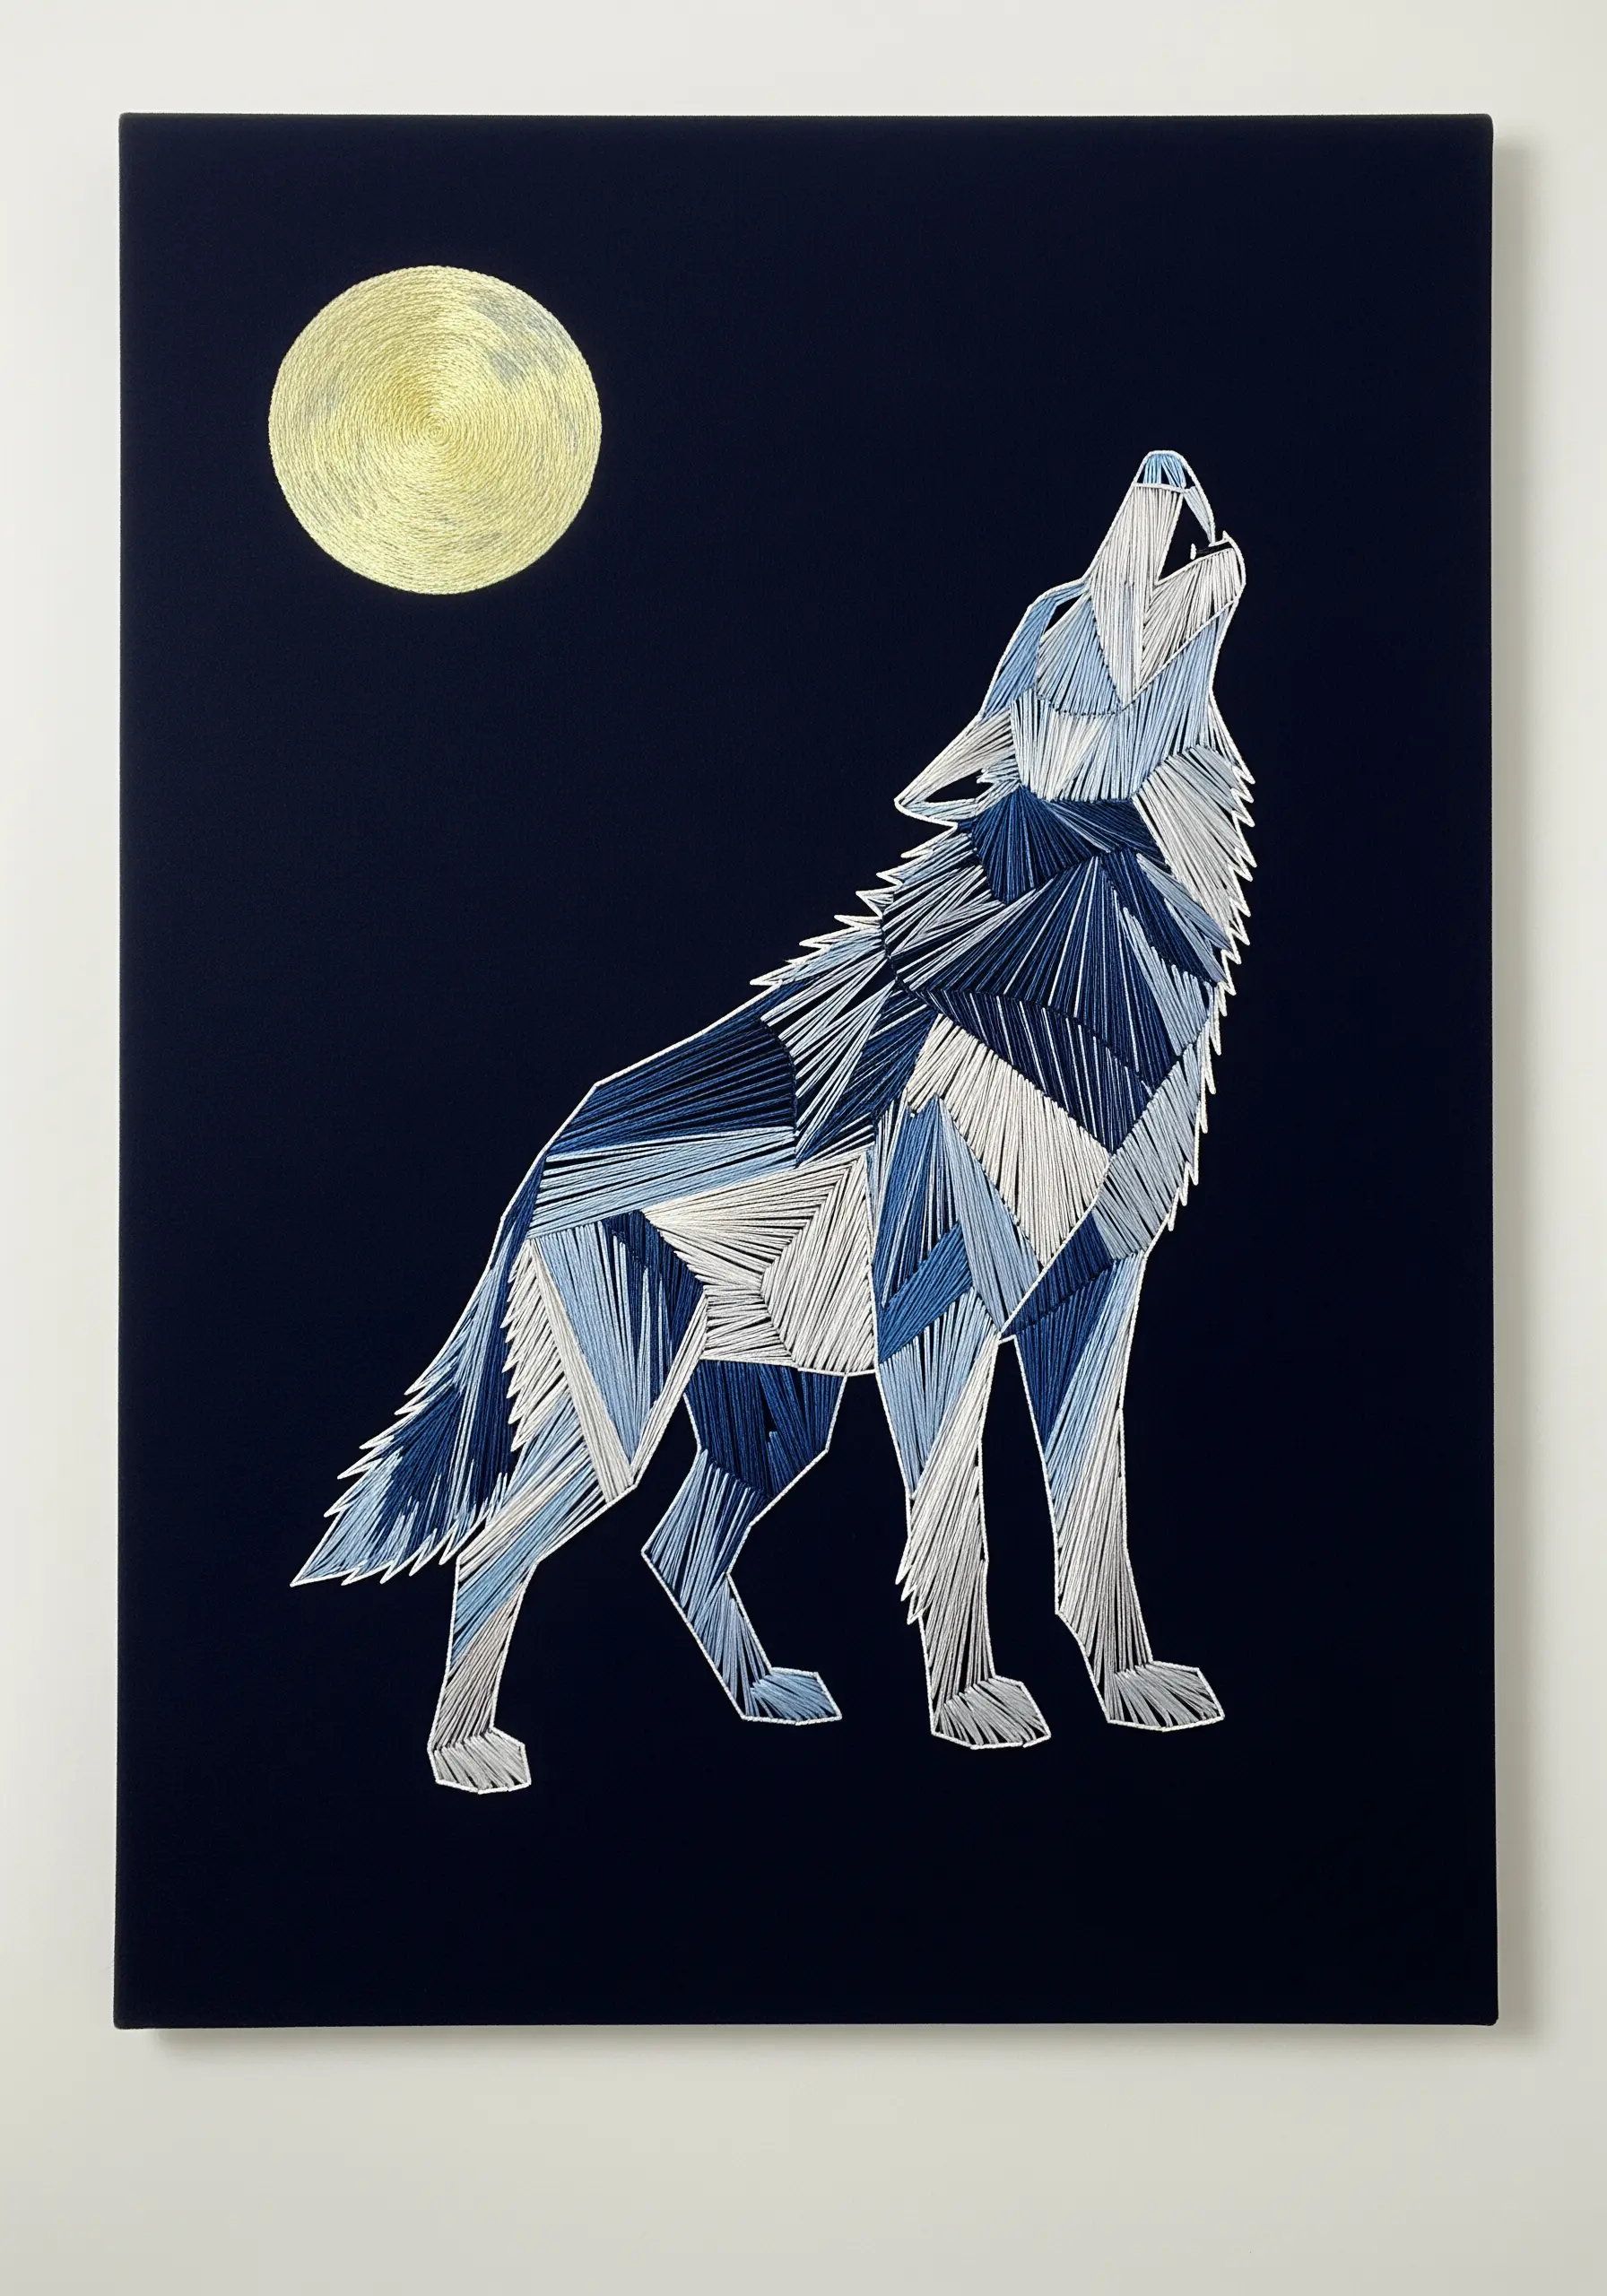
Evoke a powerful, atmospheric mood by committing to a limited color palette of icy blues, whites, and deep navy.
For the moon, use a single shade of metallic or pale yellow thread. Wrap it in tight, concentric circles or use a spiral trellis stitch to create a smooth, glowing orb.
Contrast the moon’s soft texture by filling the wolf’s body with sharp, intersecting straight stitches. This juxtaposition makes the animal feel dynamic and energetic.
Stitching on dark navy or black fabric is essential—it enhances the feeling of night and makes your lighter threads stand out with greater intensity. This approach elevates simple realistic wolf embroidery motifs into art.
5. Peacock With Beaded Embellishments
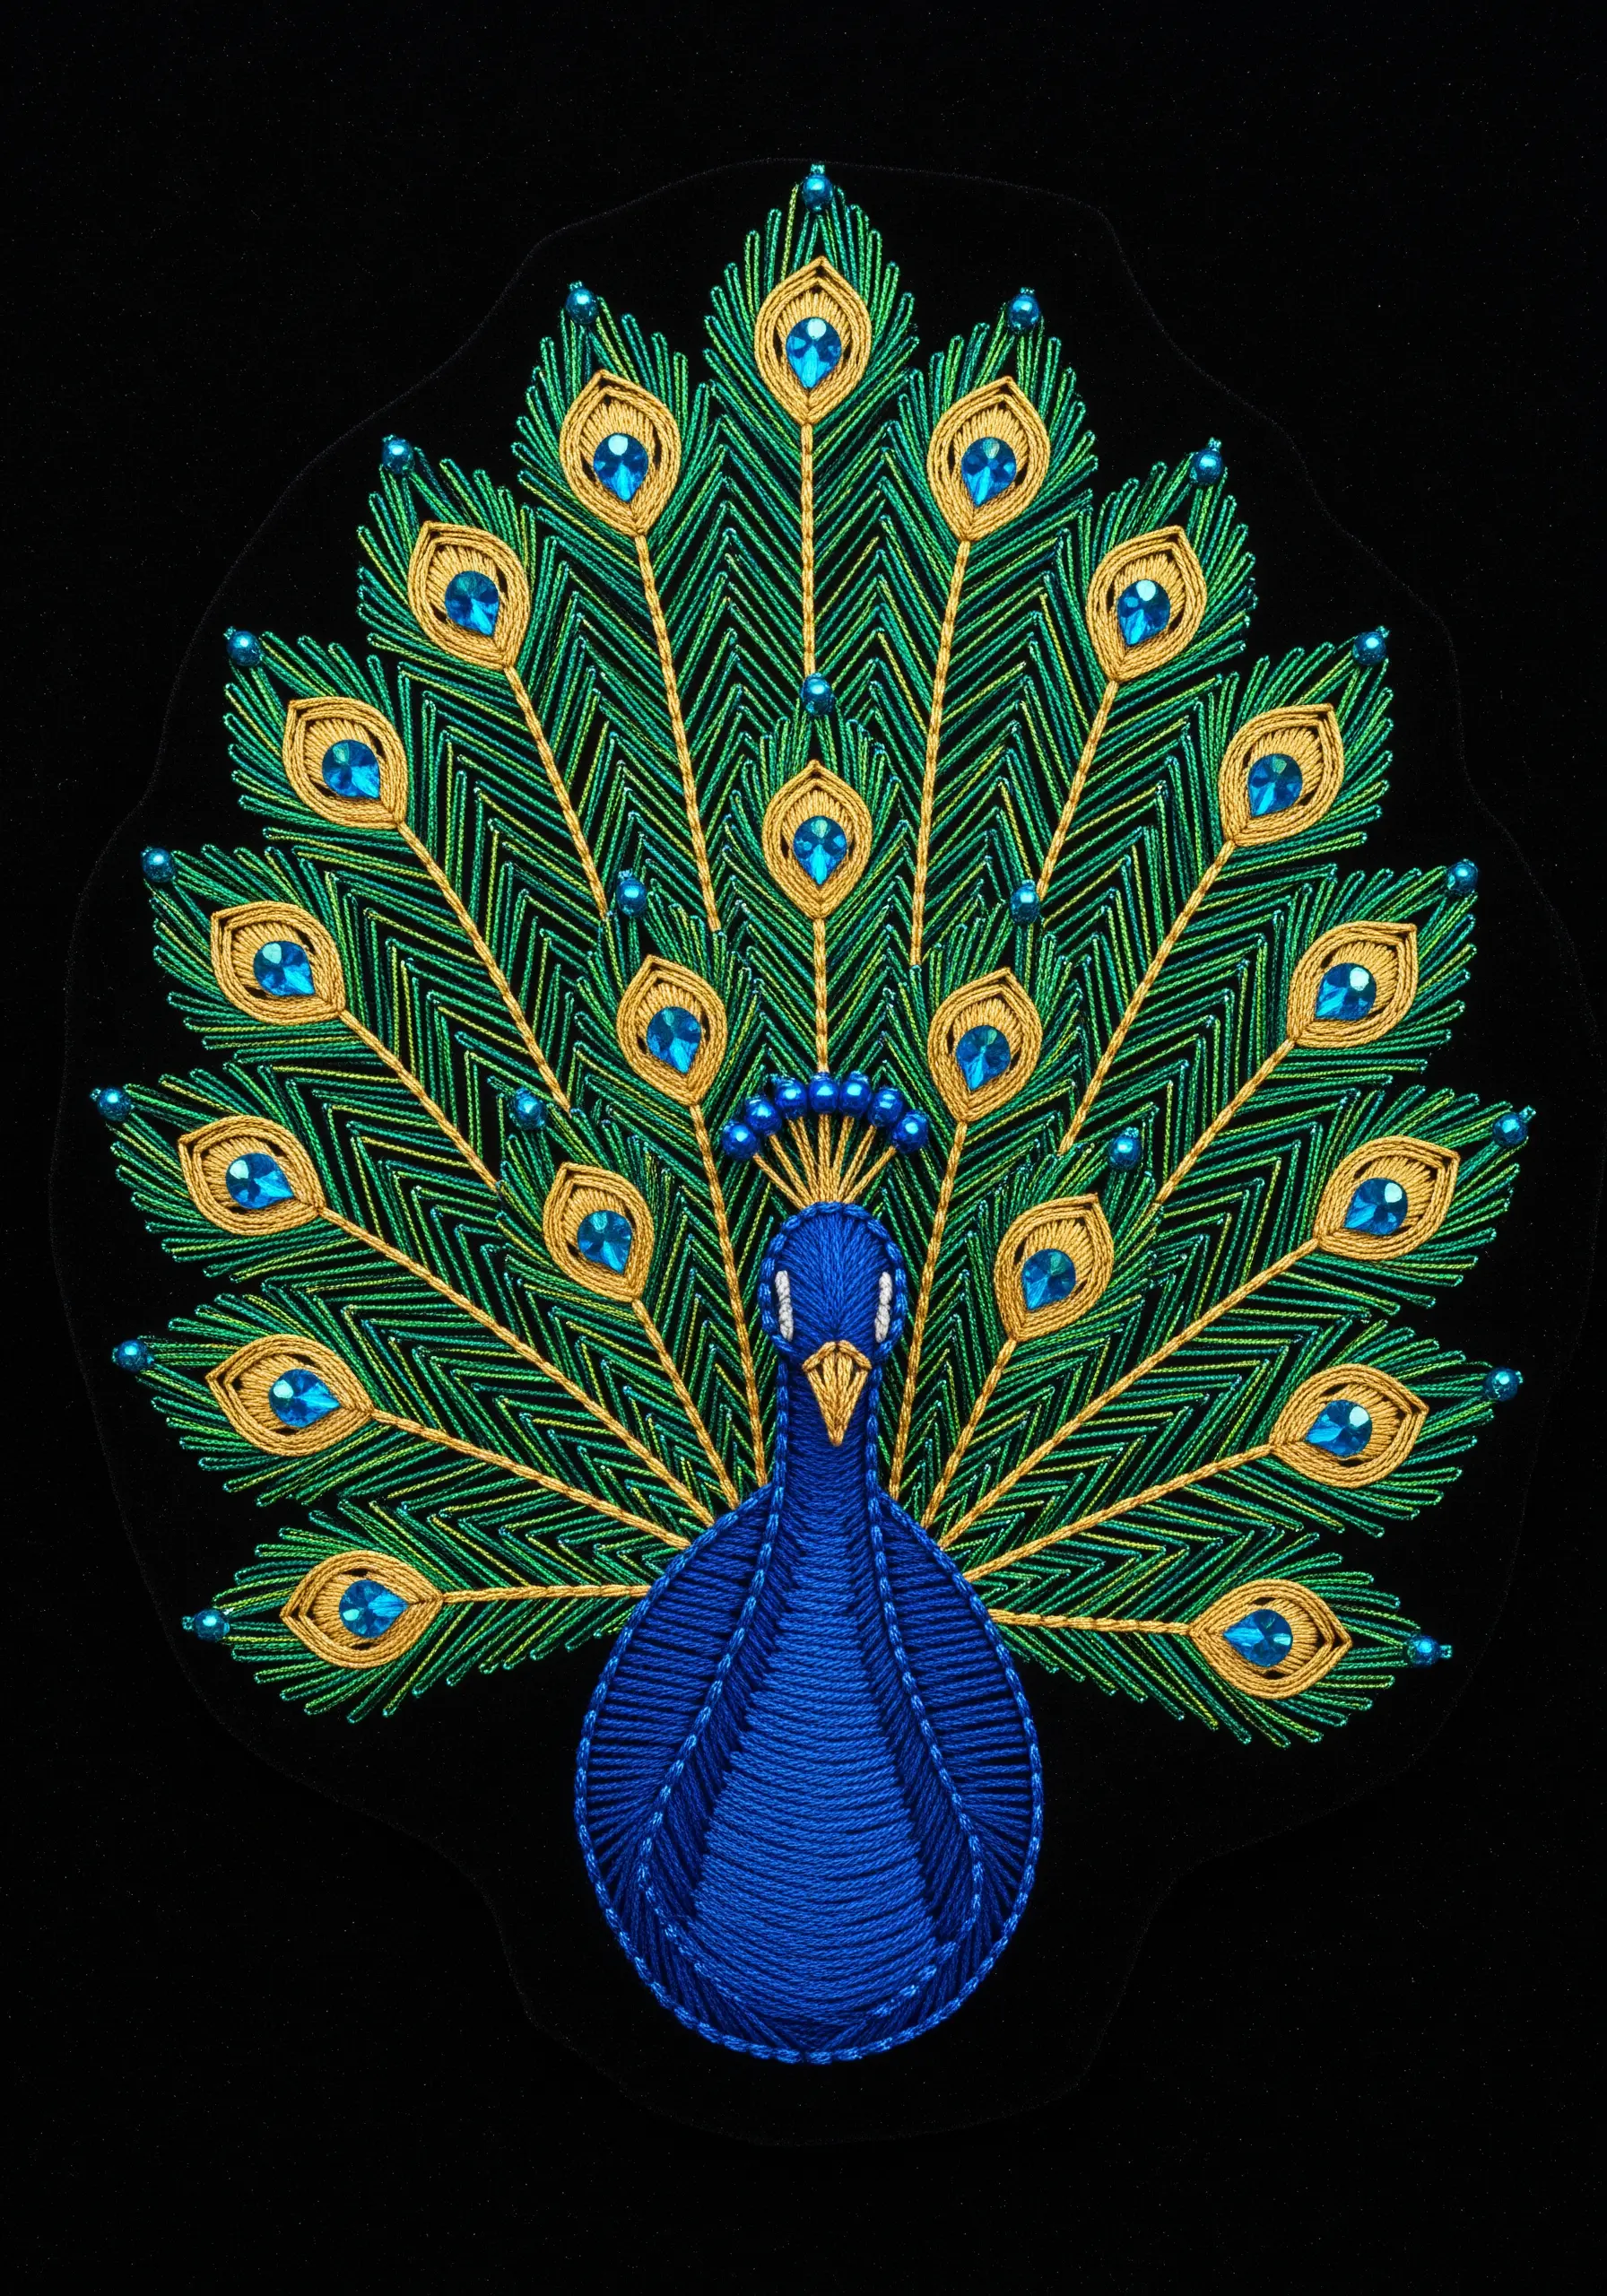
Elevate a precise satin stitch design by integrating beads or crystals at key points. Here, they serve as the iridescent centers of the peacock’s feathers.
First, complete all your threadwork. Then, go back and securely attach the beads with a matching or invisible thread, sinking them slightly into the stitches for a seamless finish.
The body is stitched with horizontal satin stitches, while the feathers use long, radiating stitches. This change in direction creates a clear distinction between textures.
Using a metallic gold thread to outline each feather segment adds a touch of luxury and defines the intricate pattern against the vibrant greens and blues.
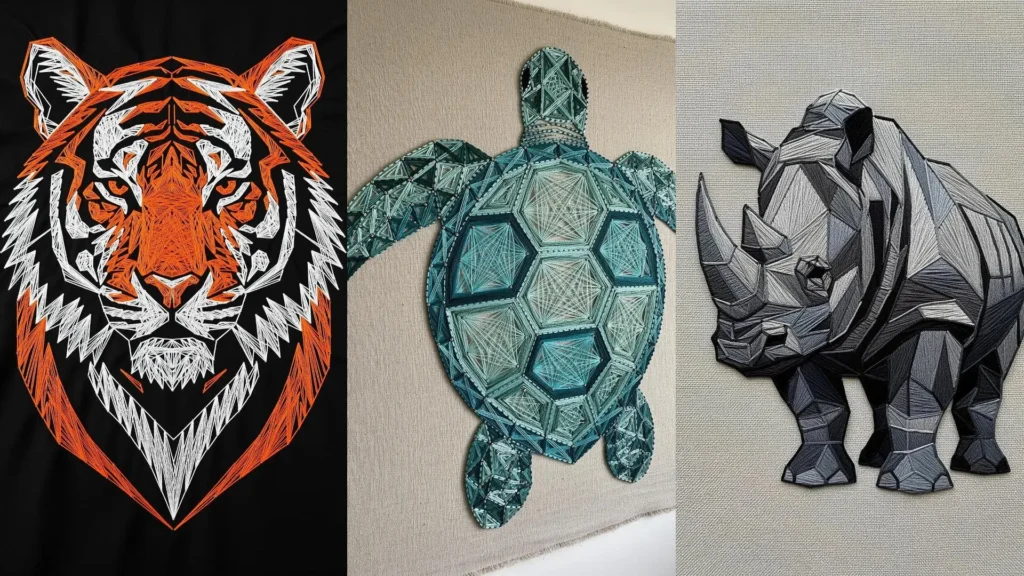
6. Geometric Tessellations for a Sea Turtle Shell
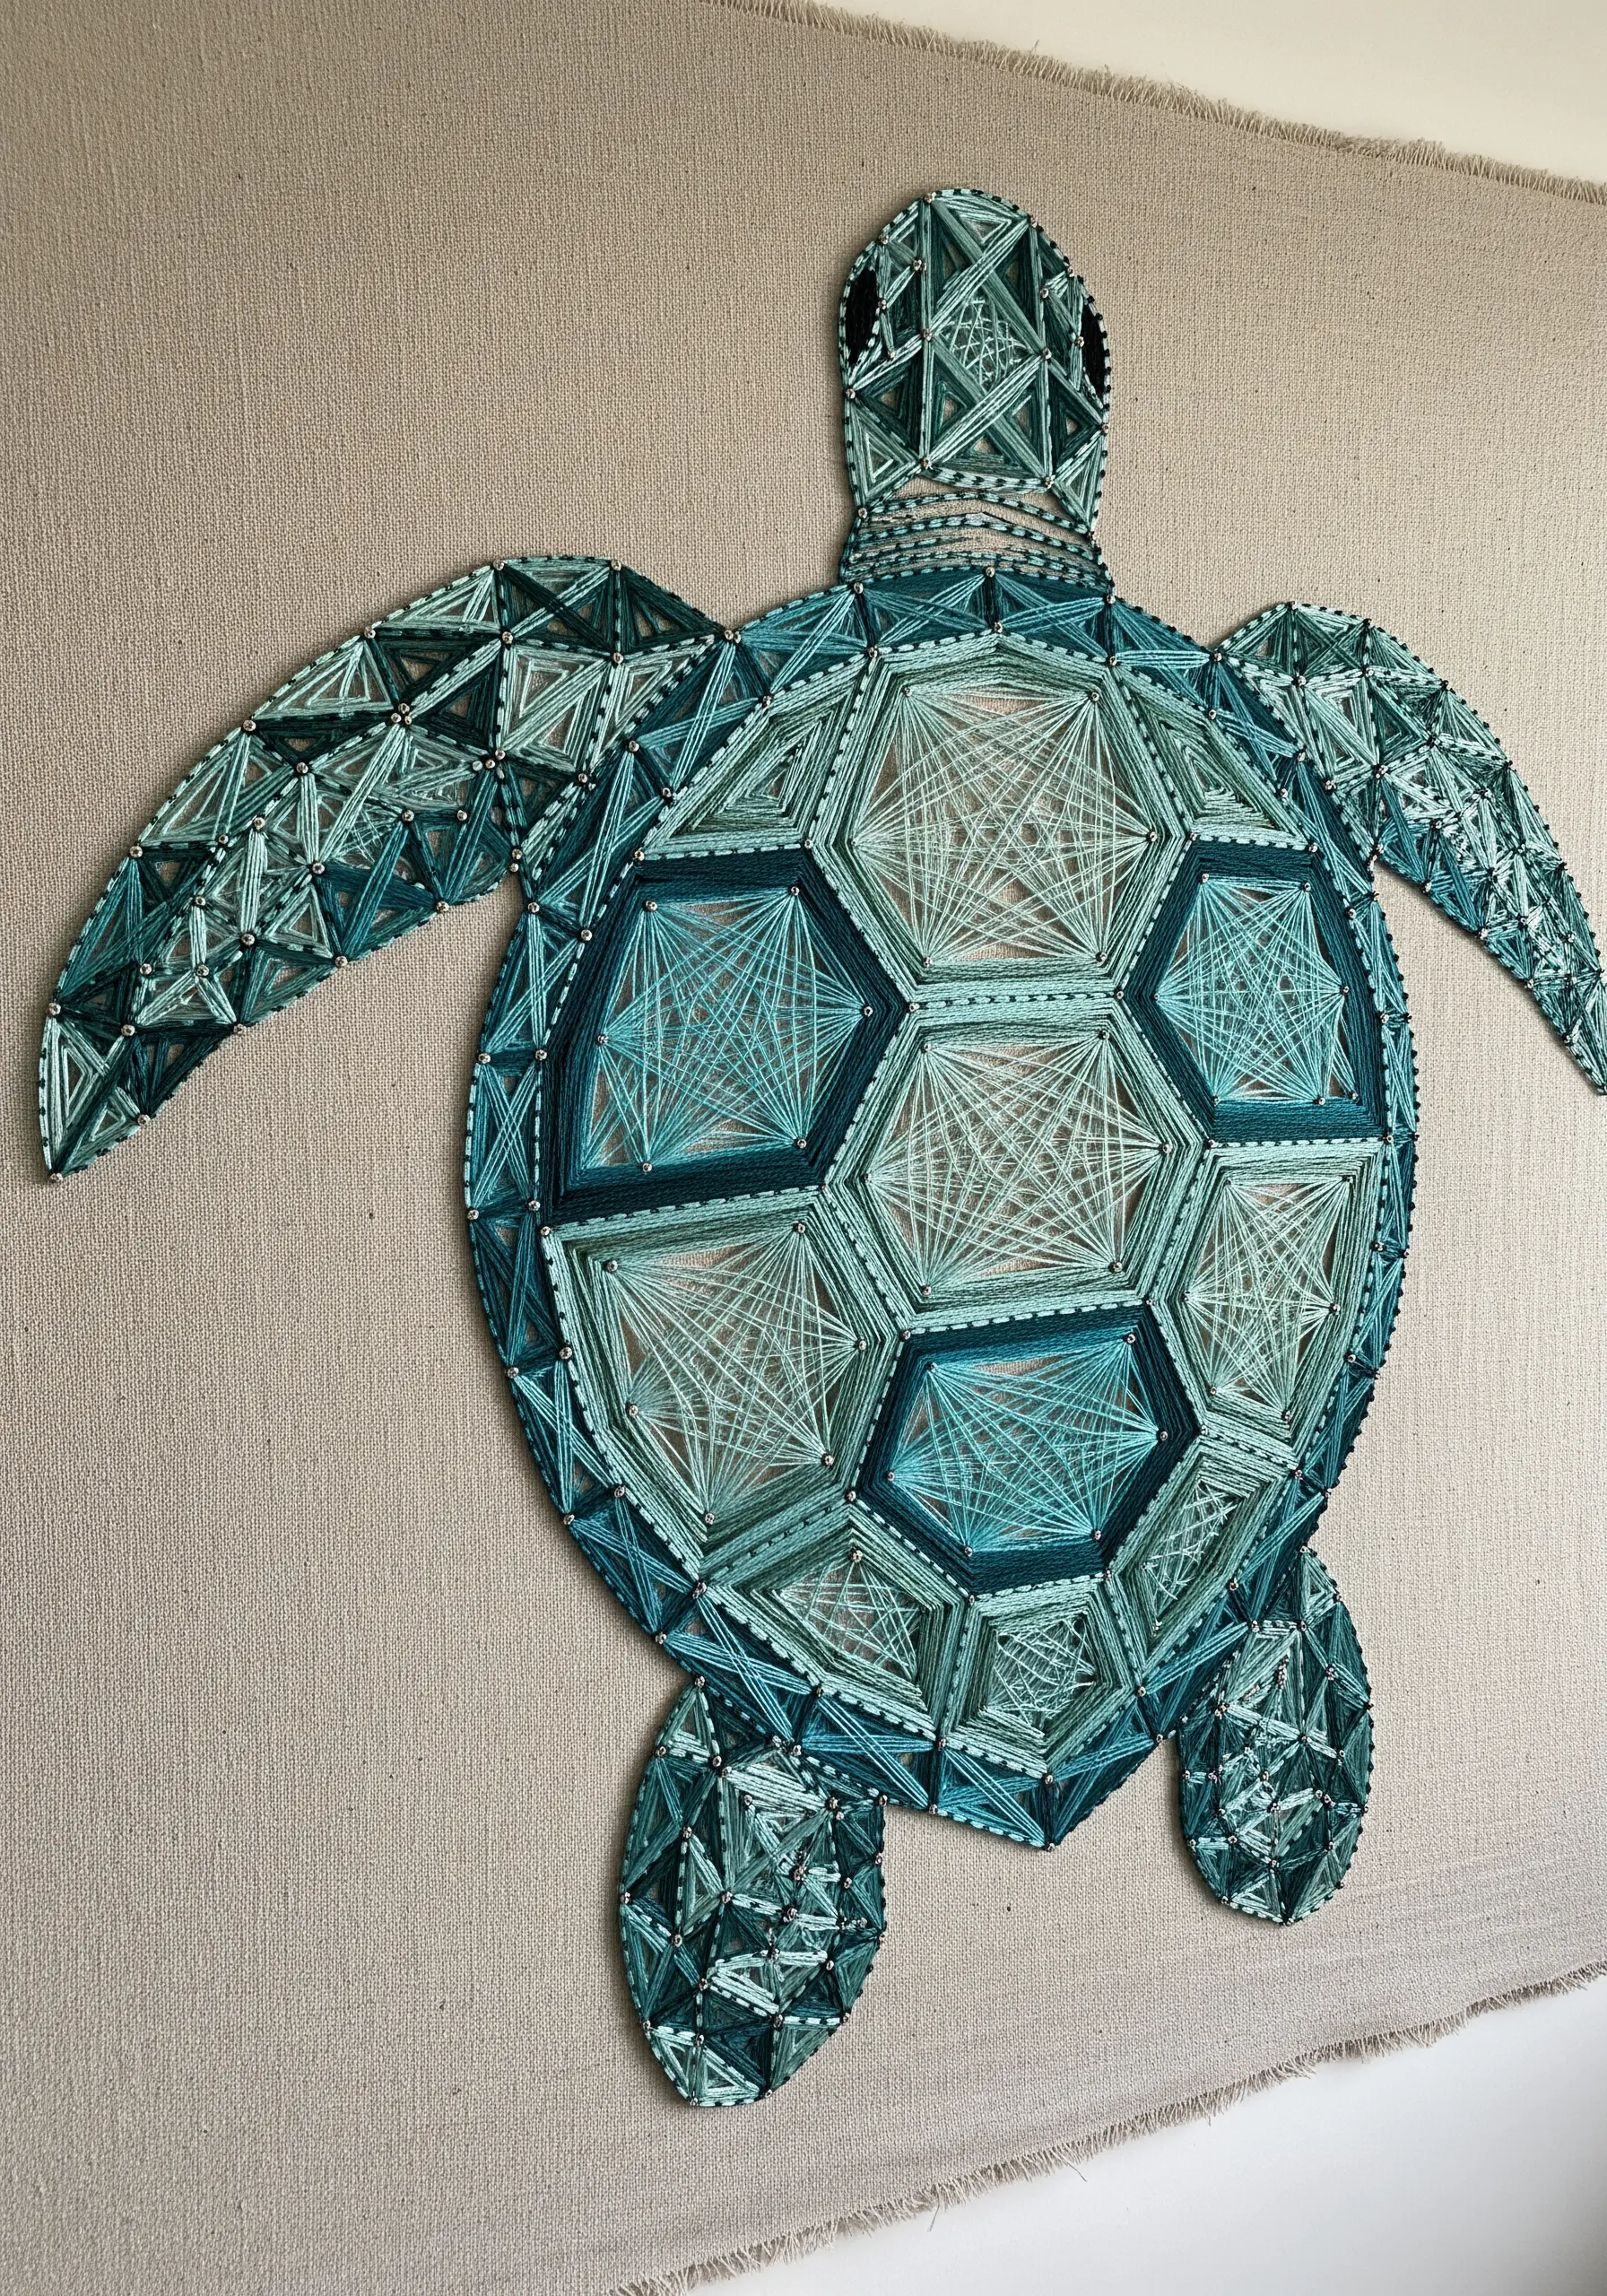
Recreate the turtle’s iconic shell by breaking it down into a series of interlocking geometric shapes—hexagons and triangles.
Use a different shade of teal or green for each segment’s outline to create definition. Then, fill the interior with a lighter, contrasting color to produce a stained-glass effect.
For the fill, layer your threads from multiple angles. This creates a web-like texture that is more visually interesting than a simple parallel fill.
Stitch on a neutral, textured fabric like linen or burlap; it provides a natural, earthy backdrop that makes the aquatic colors feel more vibrant.
7. Capturing Motion With Directional Lines
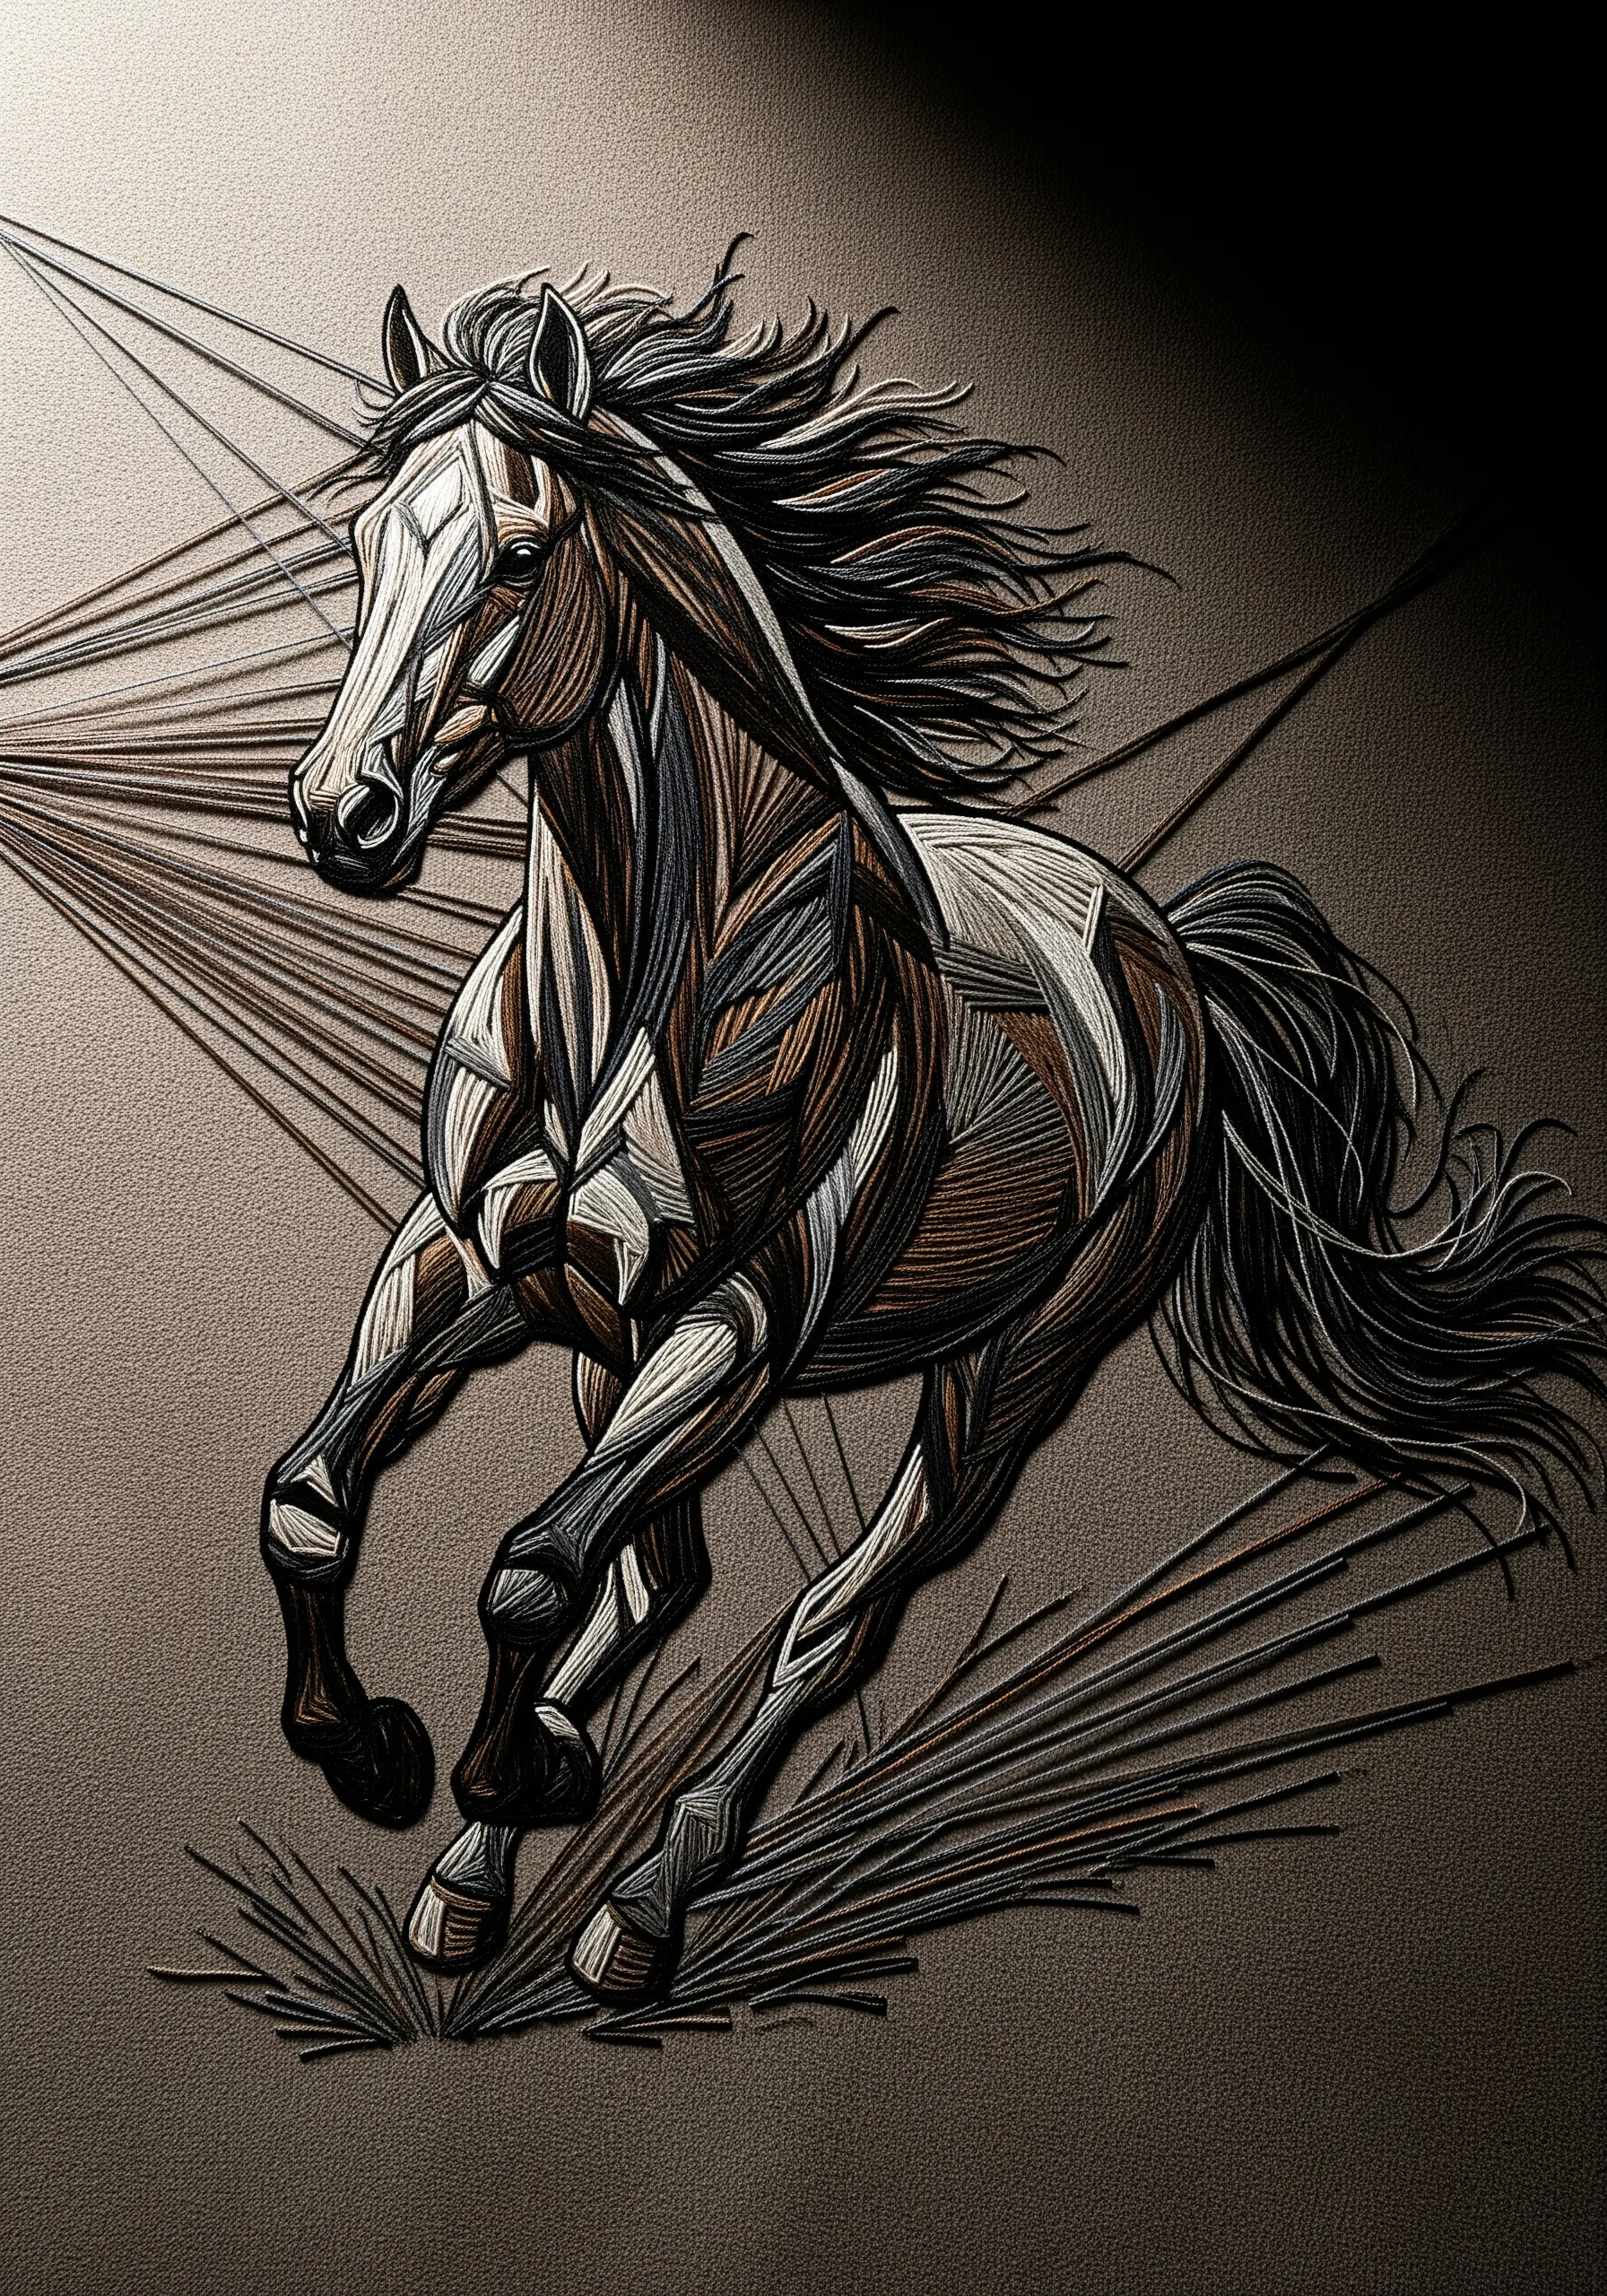
Suggest dynamic movement by aligning your primary stitch direction with the animal’s motion—in this case, forward and slightly upward.
Break the horse’s body into muscle groups, treating each as a separate geometric panel. Fill each panel with stitches that follow the contour of that muscle.
Incorporate a few strands of off-white or light gray thread to represent highlights, placing them on the upper curves of the back, neck, and face.
The background’s explosive, radiating lines enhance the sense of speed. Keep them sparse so they frame the subject rather than competing with it. This technique is perfect for capturing abstract thread waves & swirls.
8. Building Feather Textures With Small Shapes

To avoid a flat appearance, build the owl’s plumage from dozens of small, individual feather shapes rather than one large block of color.
Define each feather group with a dark brown or black outline stitch first. This acts as a container for your fill stitches and keeps the pattern crisp.
Fill each shape with just two or three shades of thread—a dark, a medium, and a highlight—to create depth without overcomplicating the design.
For the eyes, use a bold, high-contrast color like yellow. Fill the shape with dense satin stitch and add a single white French knot as a catchlight to bring them to life.
9. Minimalist Silhouette With an Open Fill
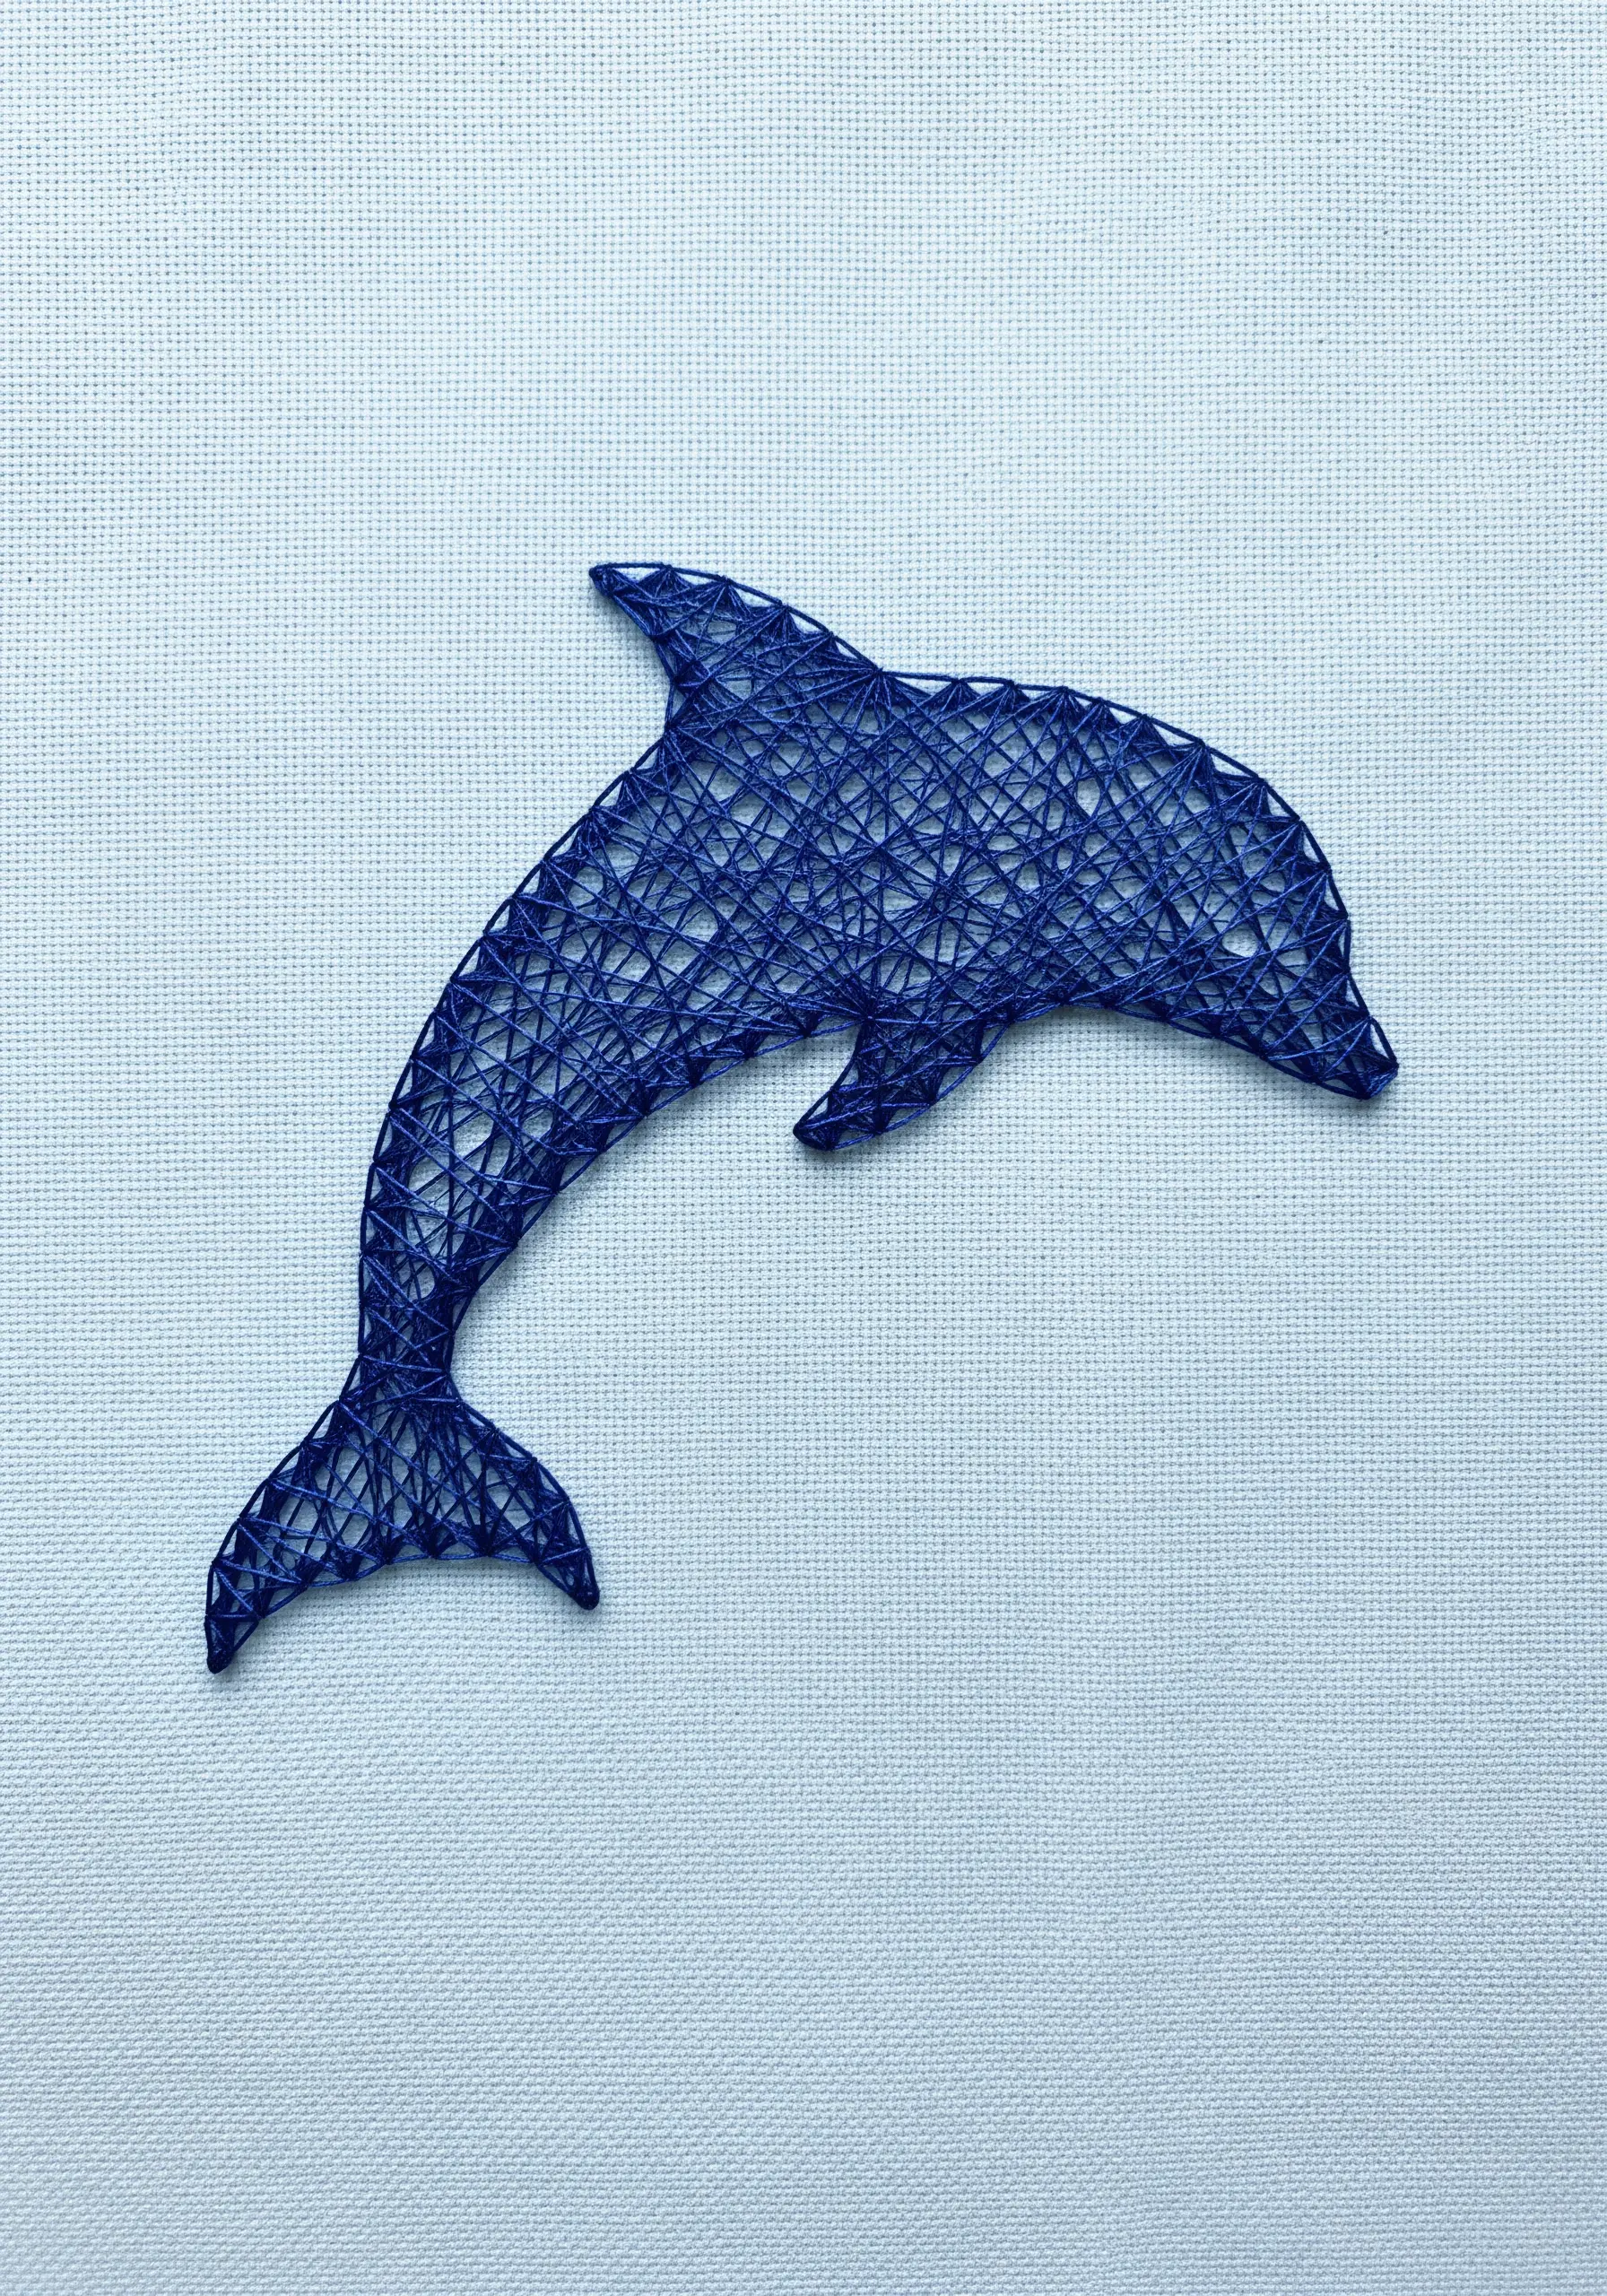
Create a clean, modern silhouette by focusing on the outline and using a sparse, almost random fill.
First, establish a crisp outline using backstitch. Place your anchor stitches for the fill just inside this line to maintain a sharp edge.
Use a single color of thread for a strong graphic statement. A bold royal blue on a light, airy fabric like Aida cloth creates a beautiful contrast.
Keep the fill light and open, allowing the background fabric to show through. This creates a delicate, web-like effect that feels both simple and sophisticated. It’s a great approach for minimalist embroidery ideas.
10. Sculpted Fur With Turkey Stitch

To achieve this highly textured, plush fur, combine long straight stitches with sections of turkey stitch (or Ghiordes knot).
Map out the areas where you want the deepest texture, such as the ruff around the bear’s face and shoulders. Fill these with rows of turkey stitch loops.
Once all the loops are in place, trim them carefully with sharp embroidery scissors to create a dense, velvety pile.
Contrast the soft, trimmed sections with flat, satin-stitched areas like the nose and paws. This juxtaposition of textures adds realism and visual interest. It’s a key step in learning creative ways to stitch natural textures.
11. Dynamic Wings With Extended Stitches
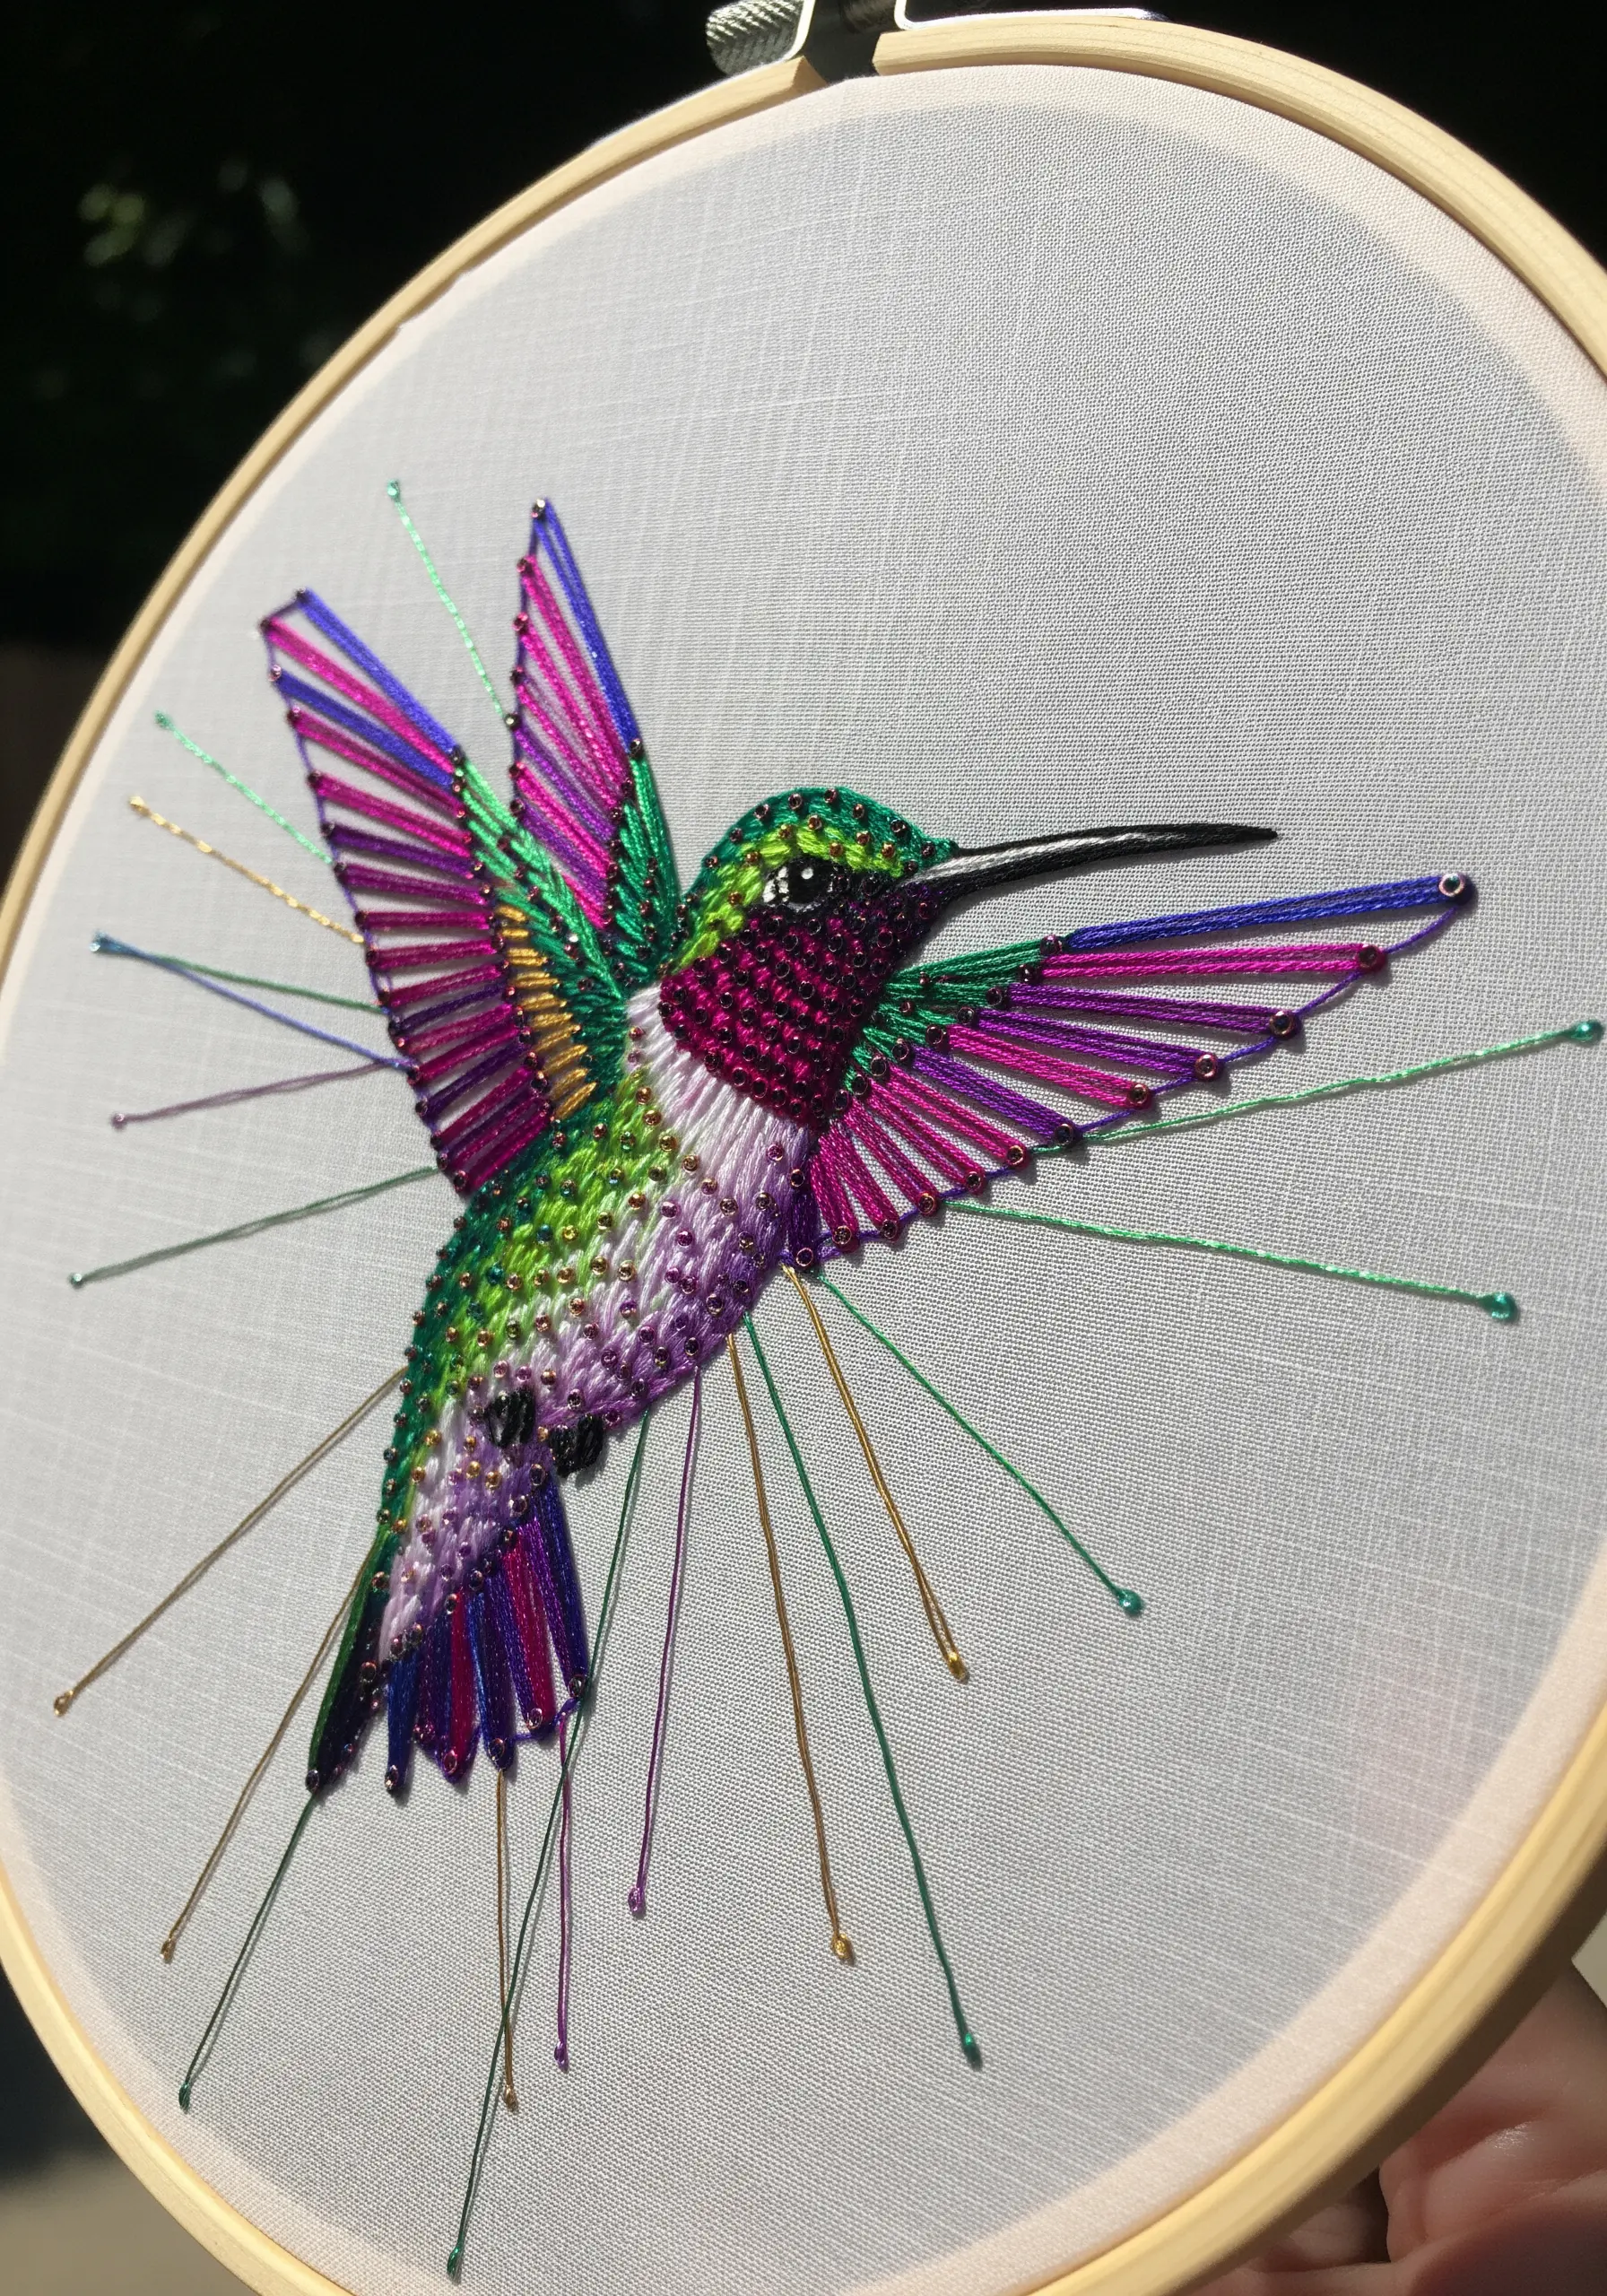
Give your hummingbird a sense of vibrant motion by extending some of your wing stitches beyond the natural outline of the body.
Use variegated or iridescent threads for the wings and body to capture the bird’s shimmering, color-shifting quality with minimal effort.
Anchor these extended stitches with a tiny knot or a small bead at the end to ensure they stay taut and add a decorative touch.
For the body, use a combination of short satin stitches and French knots to build up a dense, jewel-like texture that contrasts with the long, smooth wing feathers.
12. Faceted Portrait With Color Blocking
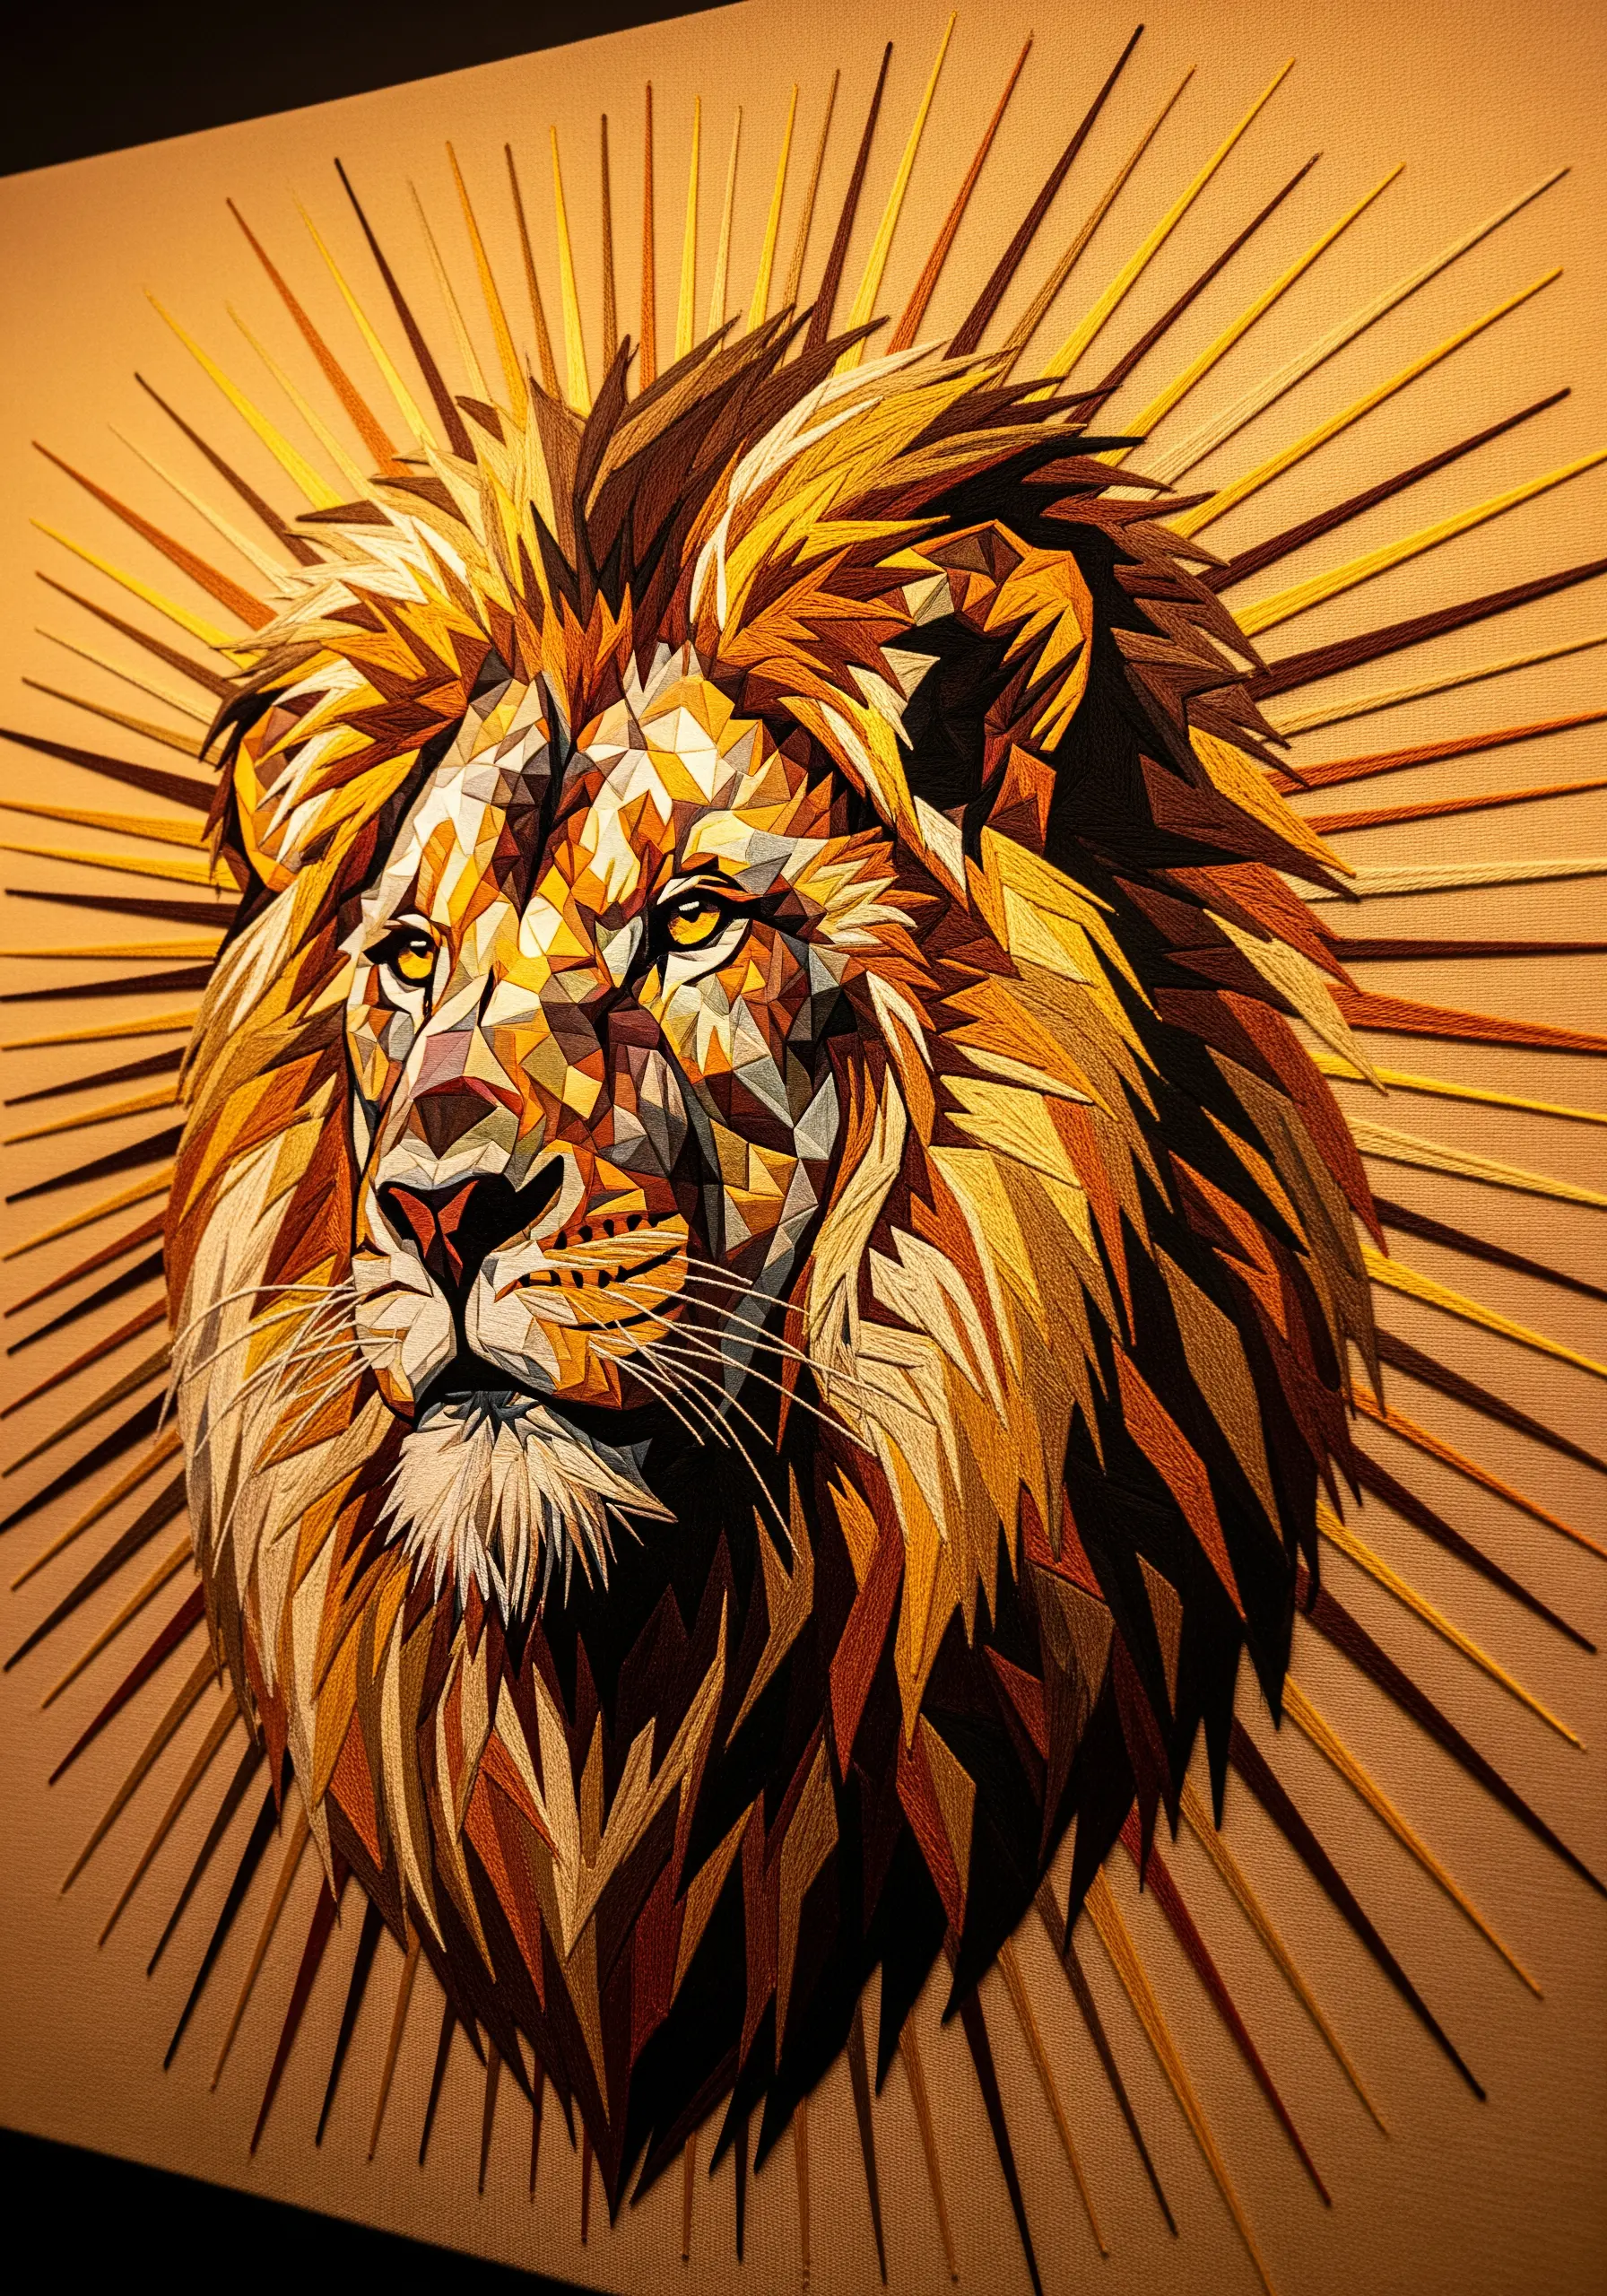
Create a powerful, low-poly style portrait by dividing the subject into distinct geometric planes, each filled with a solid block of color.
Use a limited palette of warm tones—golds, oranges, and deep browns—to maintain harmony while still creating strong definition between the shapes.
Fill each facet with long straight stitches, ensuring all stitches within a single shape run in the same direction. This keeps the look clean and graphic.
The radiant sunburst background adds a majestic quality. Use shades that are slightly lighter or darker than the main palette to create a subtle frame. This approach turns any motif into framed embroidery patterns that look like they belong in a gallery.
13. Subtle Texture on a Monochrome Swan
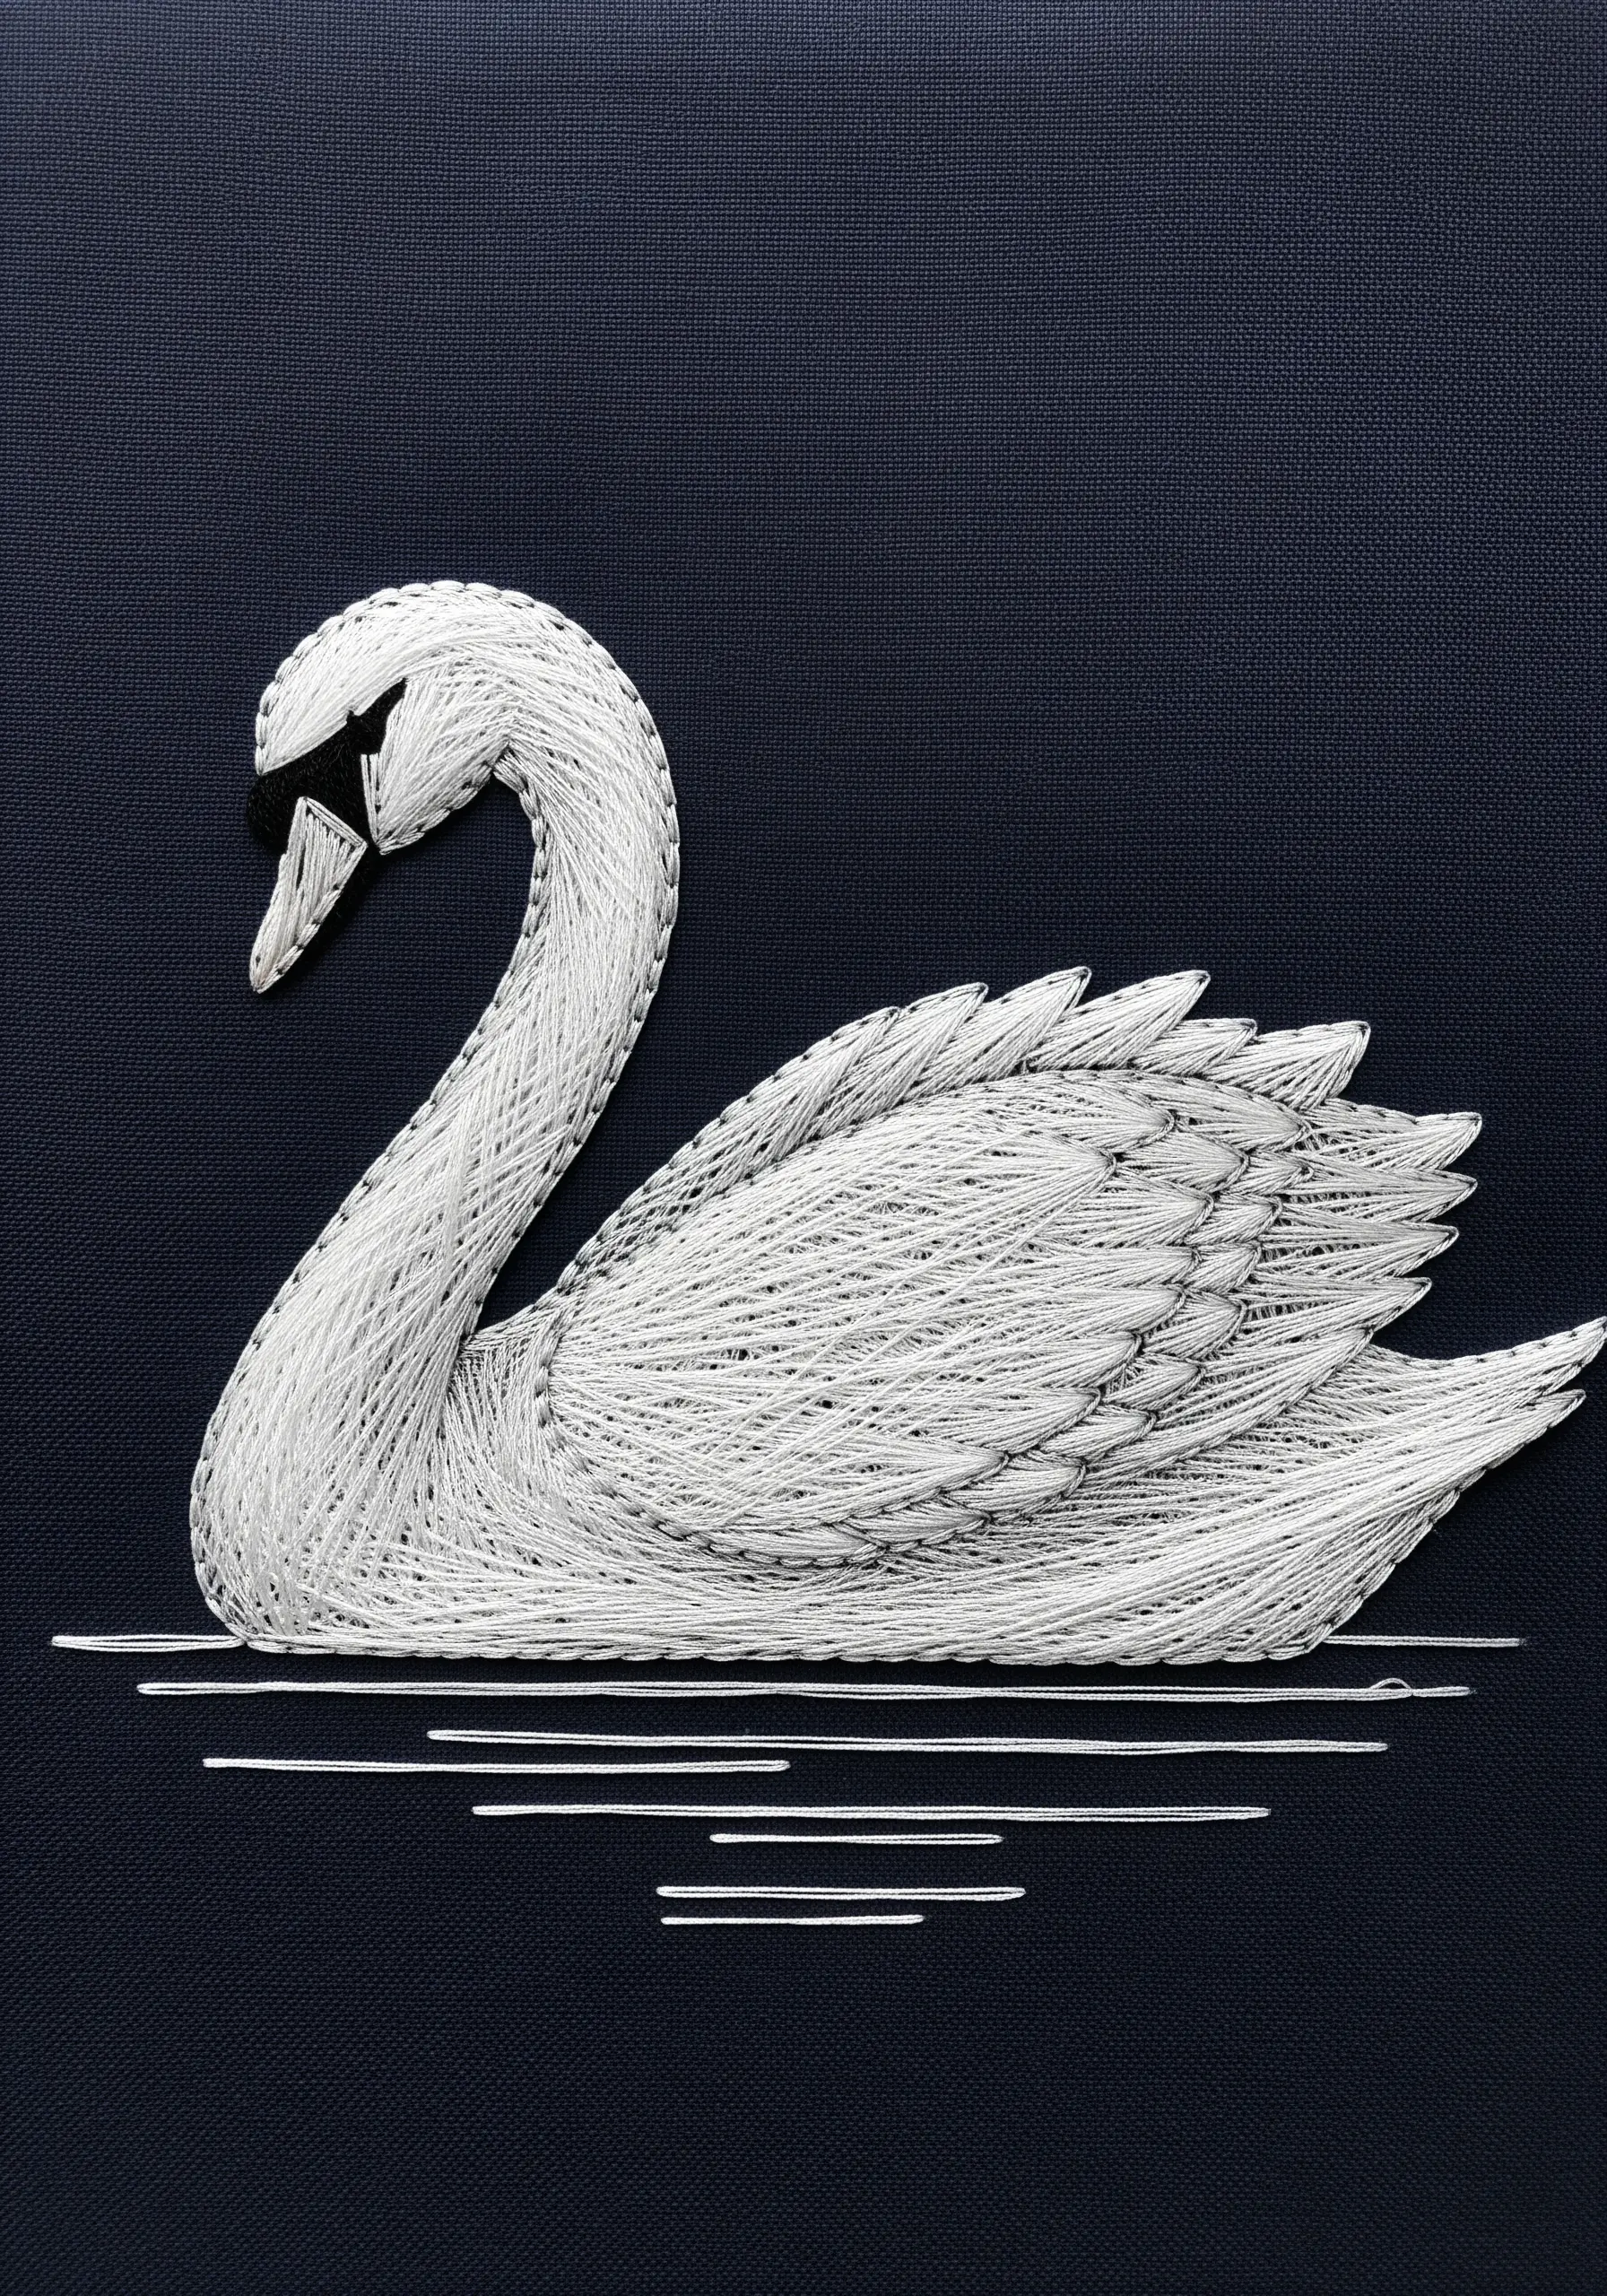
Create visual interest in a single-color design by varying your stitch direction and density.
Use tightly packed, horizontal straight stitches for the smooth neck and body. For the wings, switch to shorter, angled stitches layered over one another to suggest individual feathers.
Introduce a second, slightly darker thread (like a light gray with the white) for subtle outlining and shadow details, particularly under the wing.
A few simple, horizontal stitches at the base are all you need to suggest water, grounding the elegant figure without distracting from it. This is a hallmark of monochrome embroidery ideas that feel complete.
14. High-Contrast Graphic Intensity
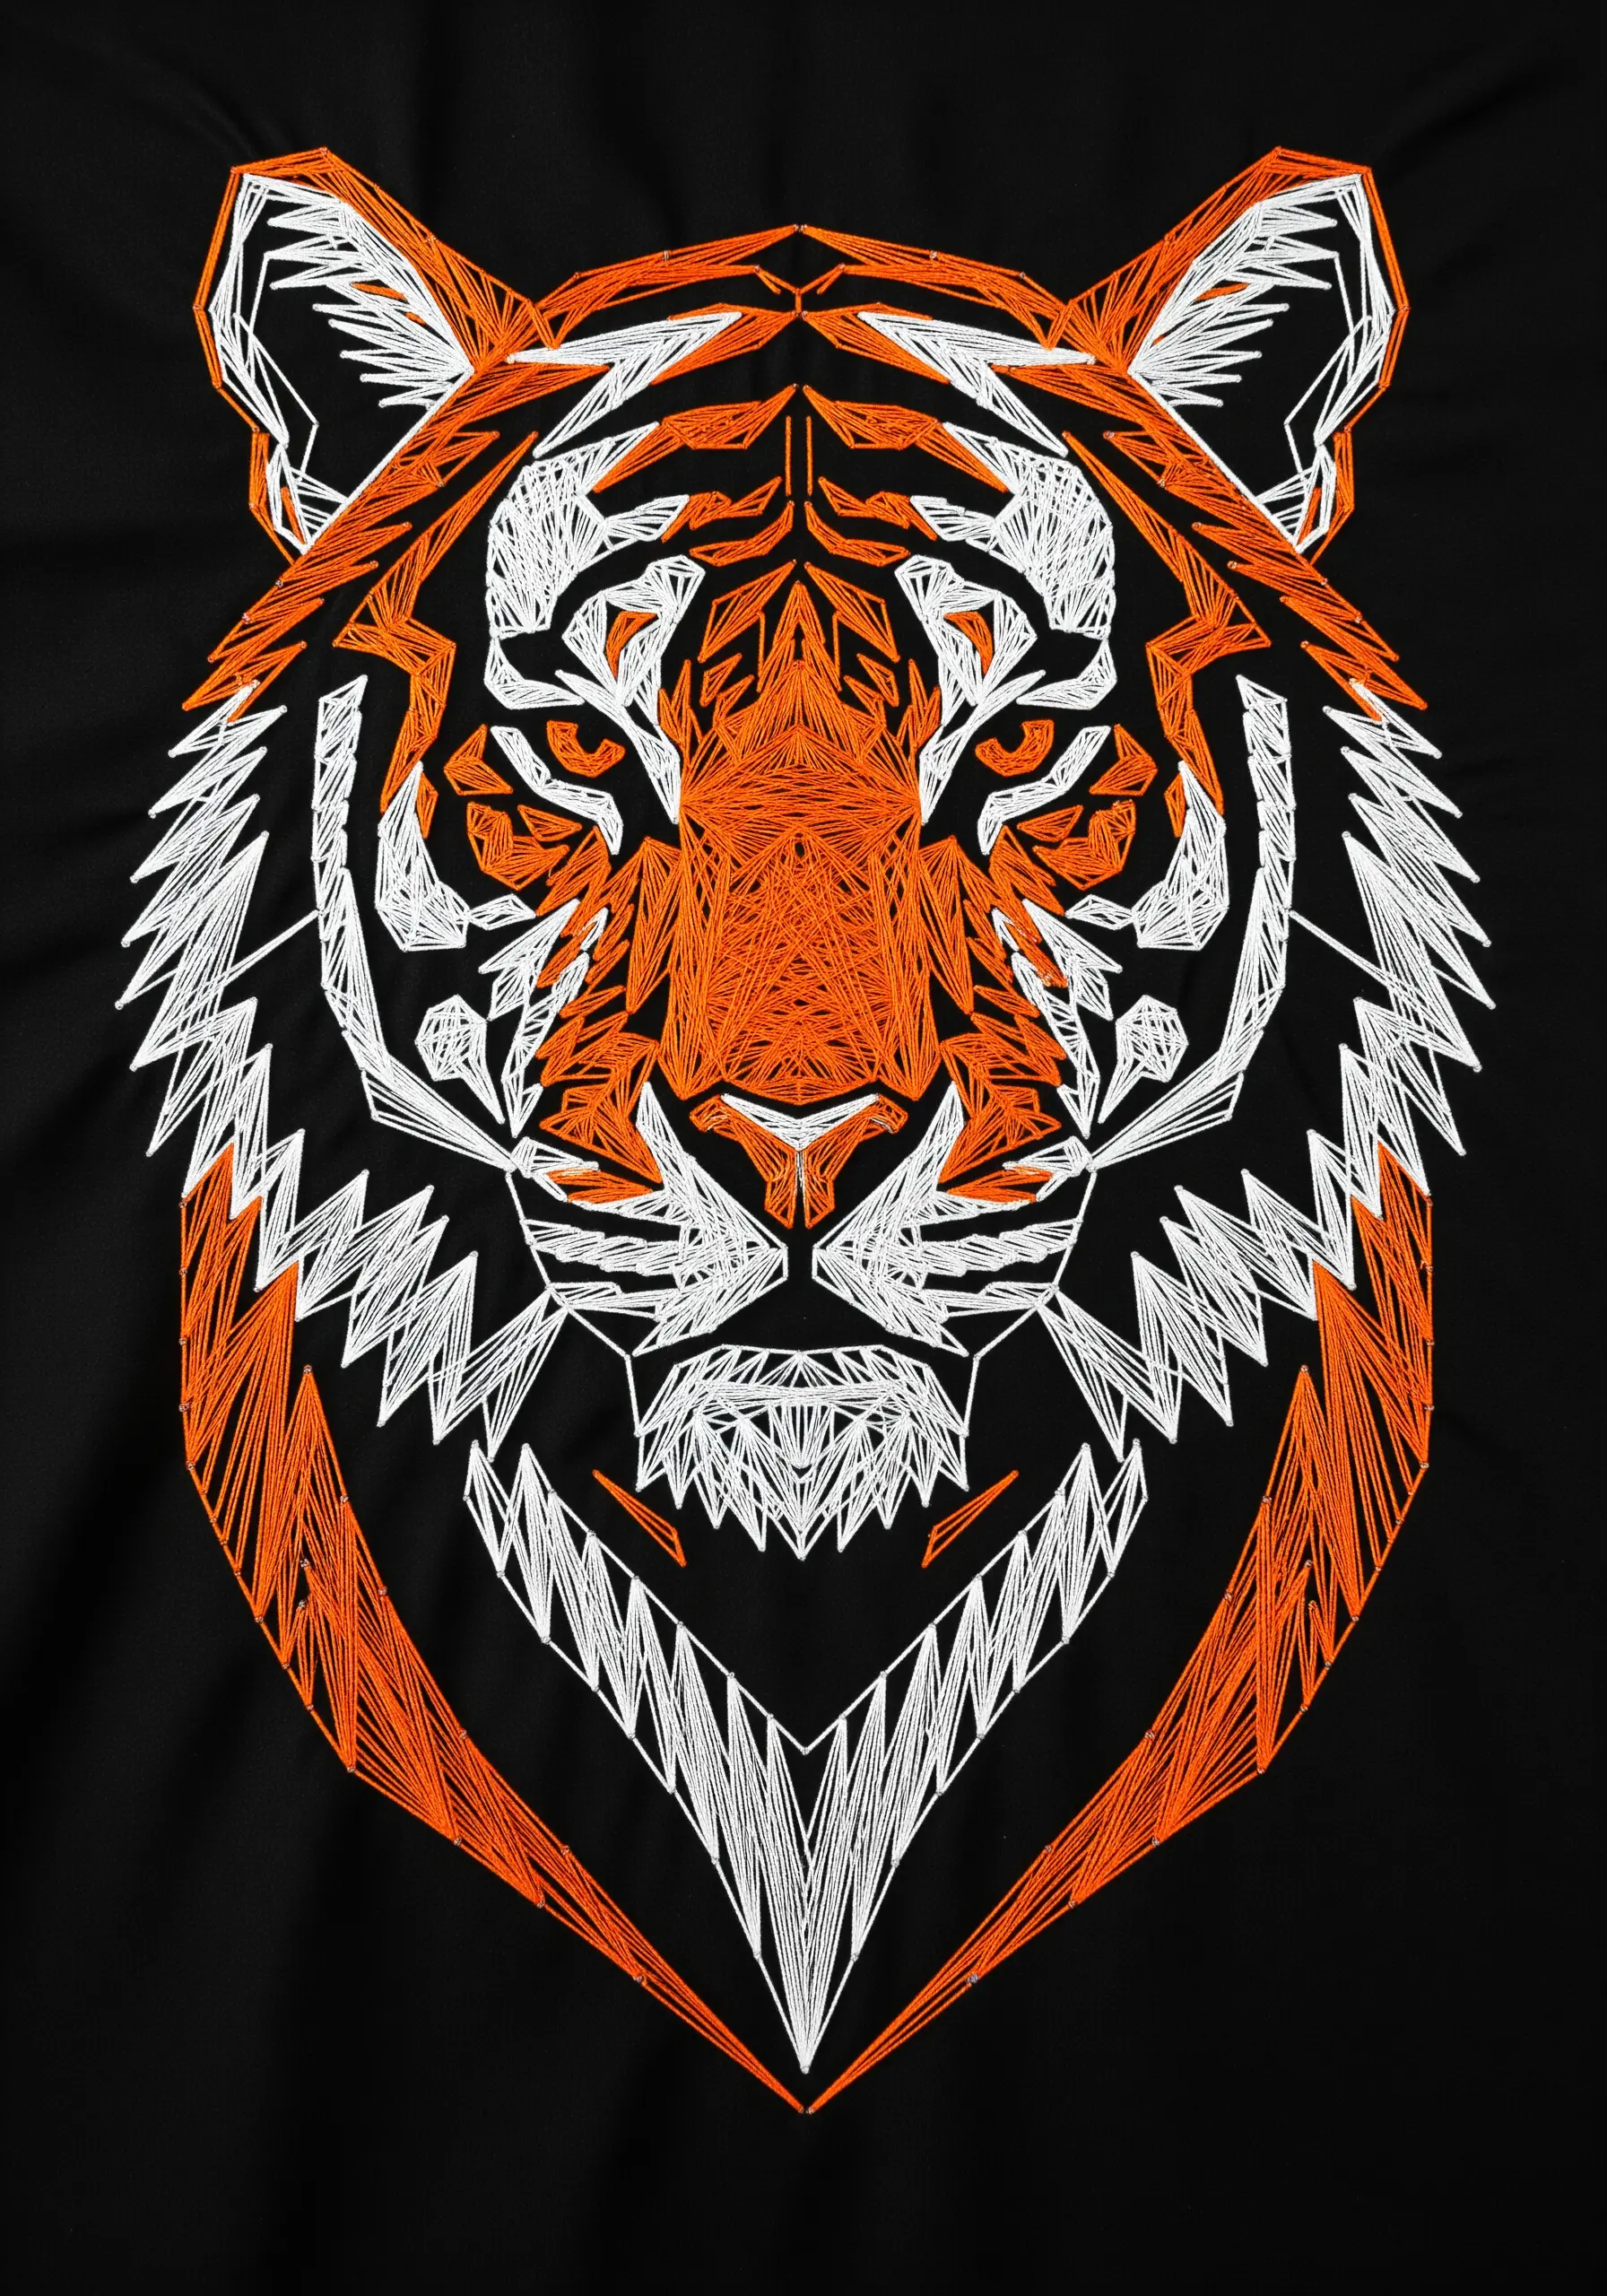
Achieve a bold, graphic look by using only two high-contrast colors, like bright orange and stark white, on a pure black background.
Let the negative space do the work. The unstitched black fabric is just as important as the threads in defining the tiger’s stripes and features.
Use zig-zagging or erratic fill patterns to create a feeling of raw energy and aggression, especially around the jowls and cheeks.
Keep the outlines sharp and angular. This enhances the geometric style and gives the portrait a modern, almost digital aesthetic.
15. Blended Blues for Aquatic Depth
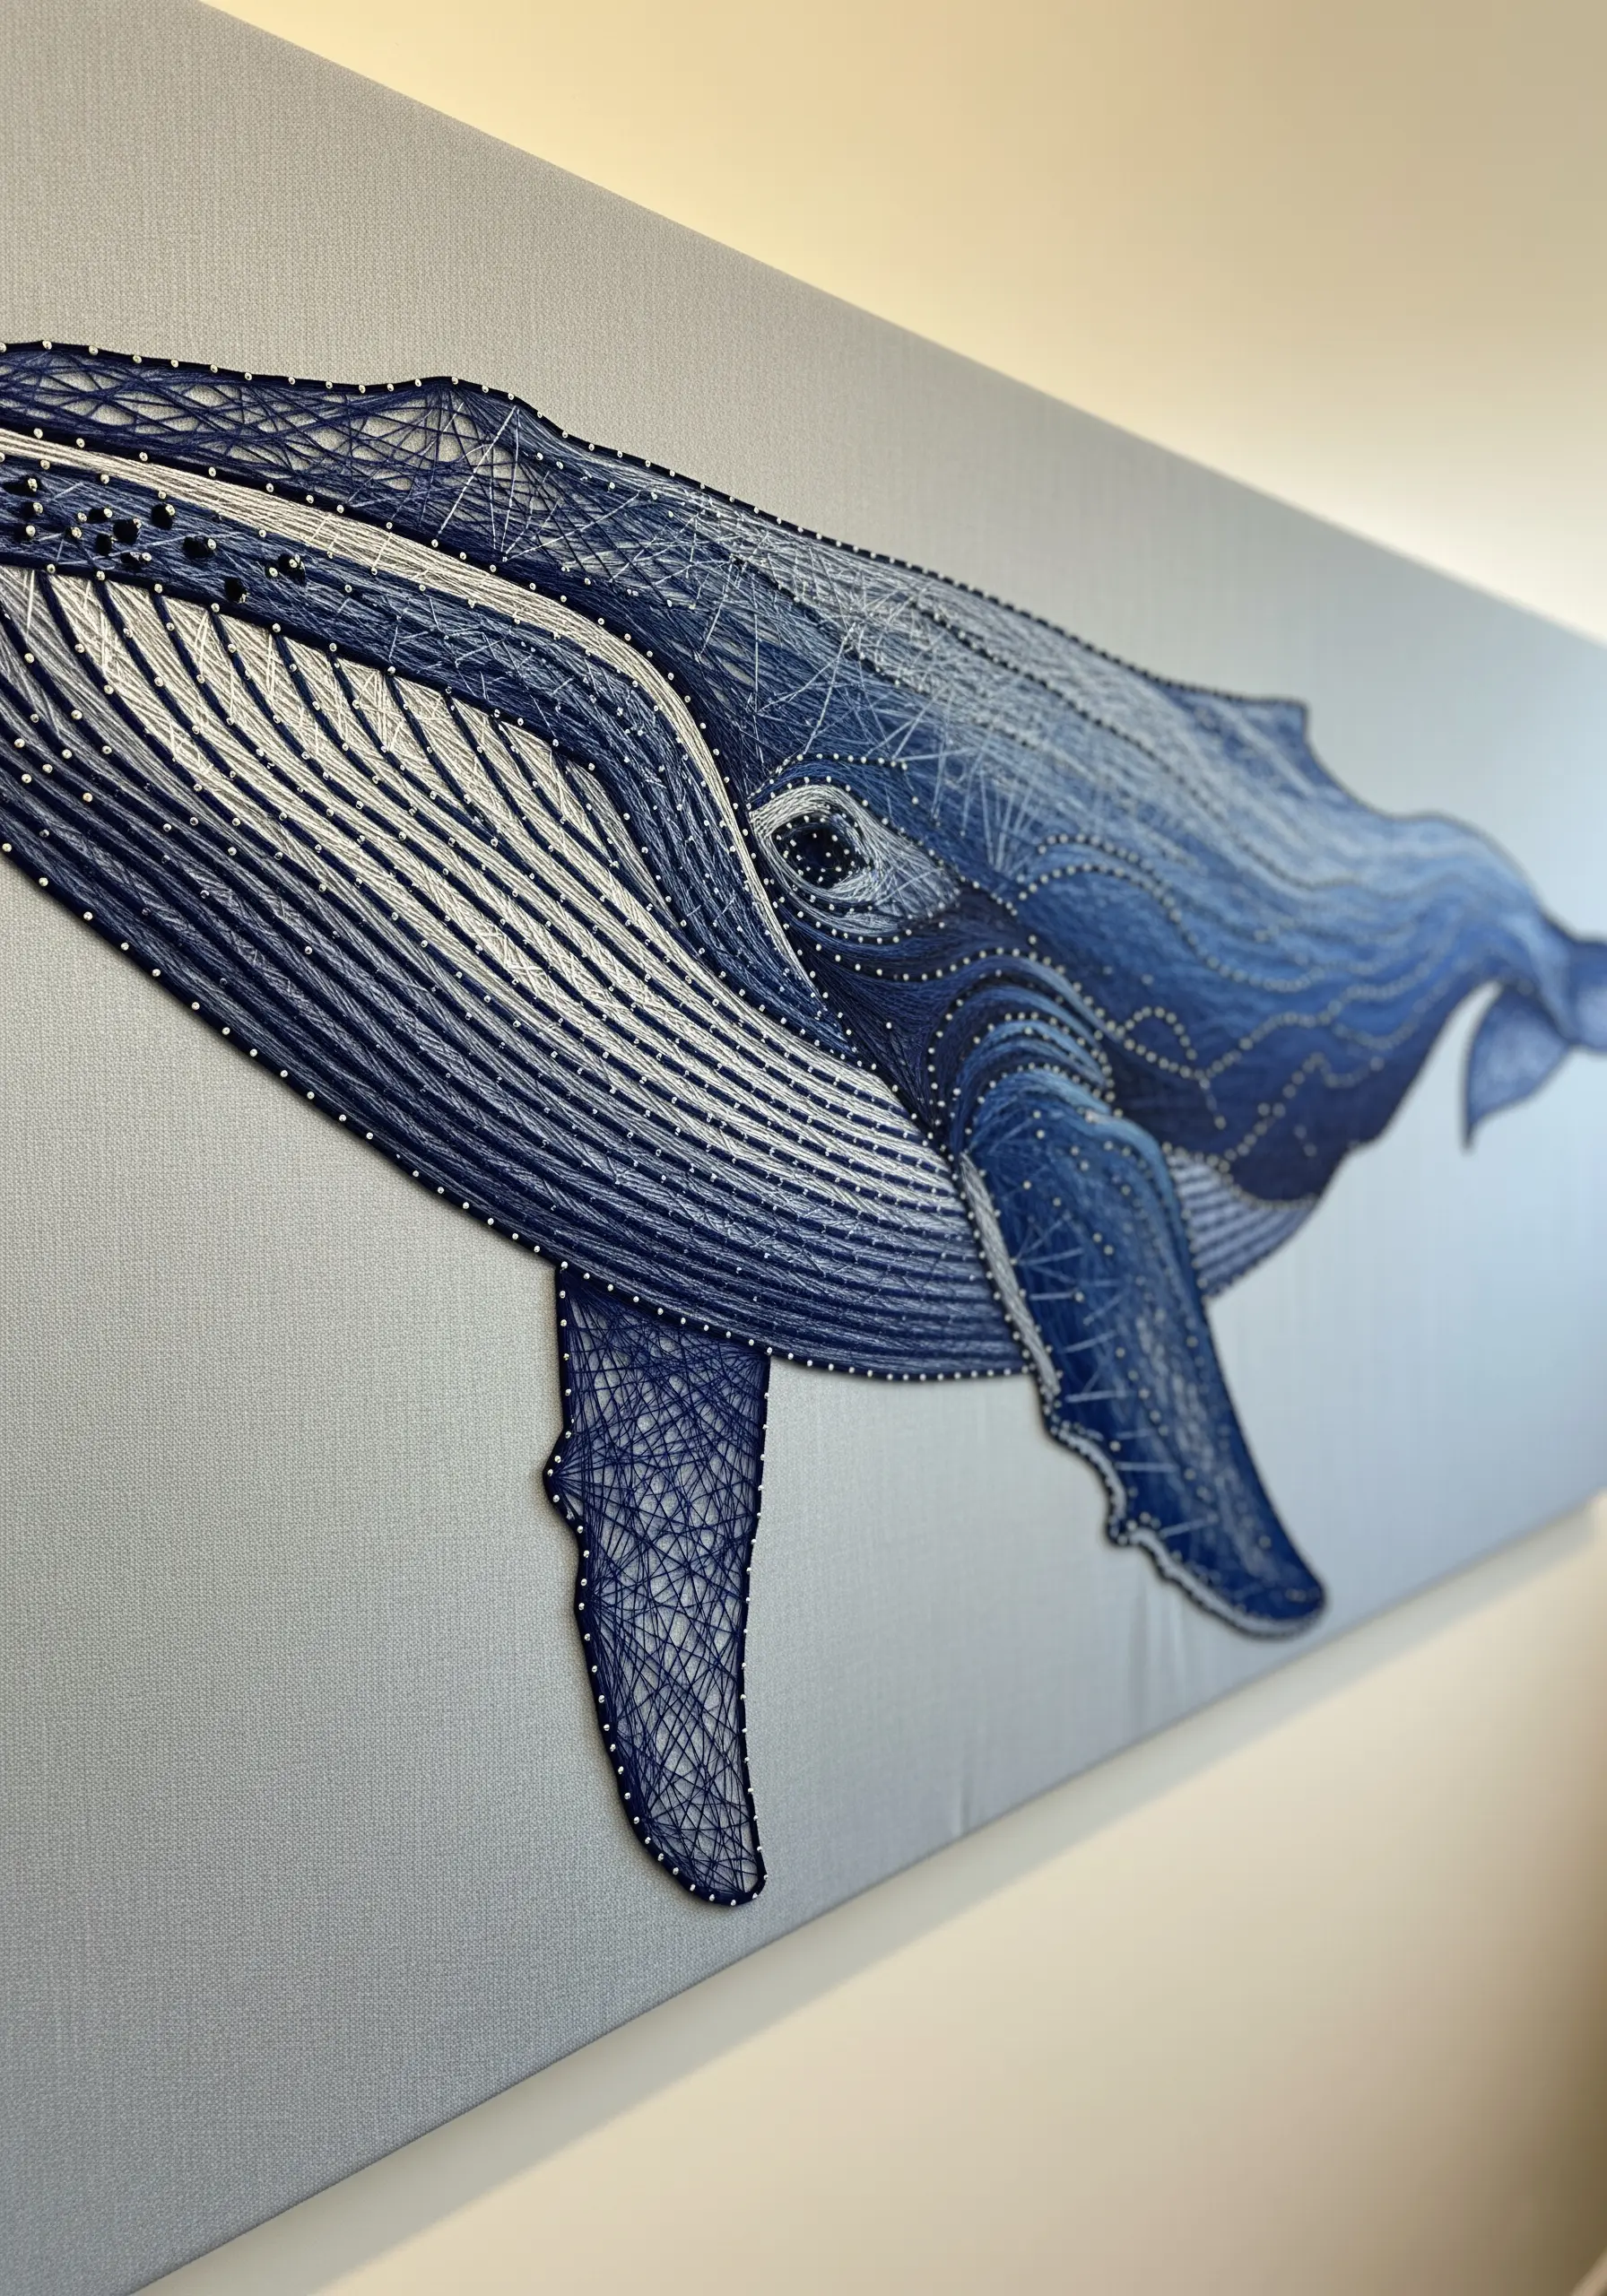
Suggest the immense scale and depth of a whale by blending multiple shades of blue and white thread across its form.
Use lighter threads along the top of the back and darker shades for the underbelly to create a natural sense of light and shadow.
For the pleated throat grooves, alternate between dark and light threads in long, parallel vertical stitches. This creates a convincing illusion of texture and form.
Incorporate a few strands of silver metallic thread throughout the design to mimic the way light filters through water and reflects off the whale’s skin.
16. Simple Forms With Playful Outlines
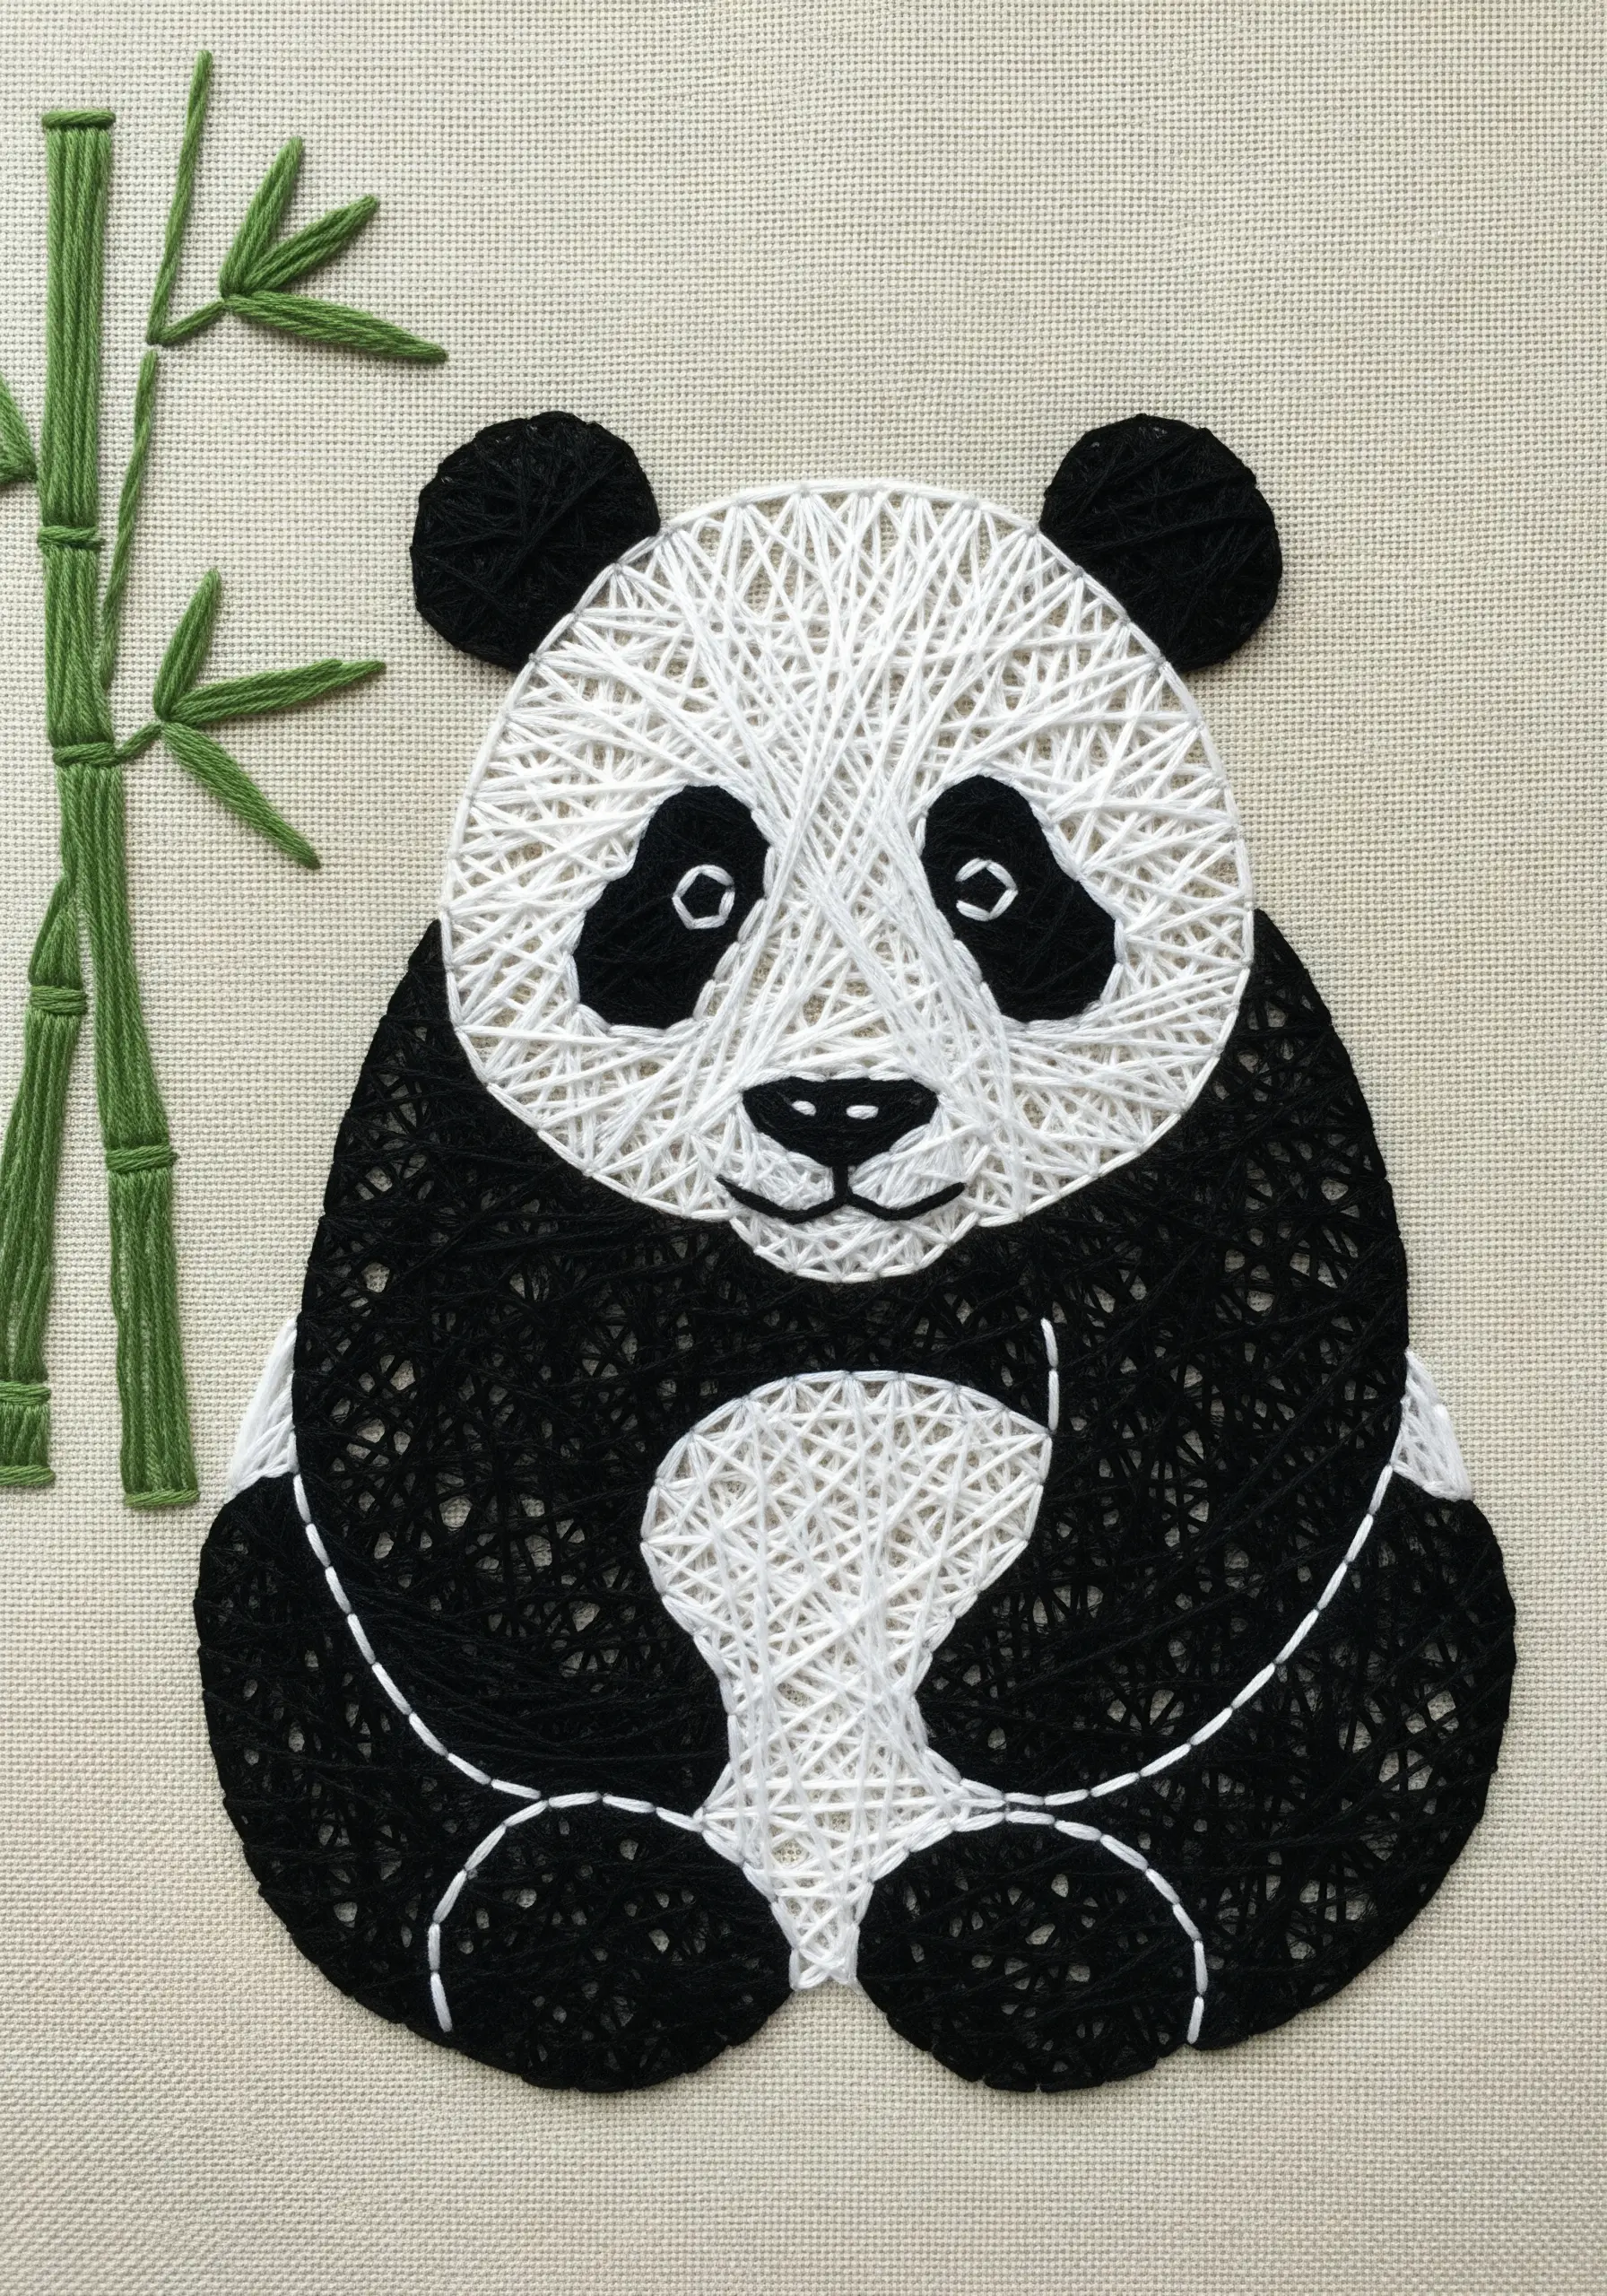
For a charming, stylized look, simplify the animal’s form into basic shapes and define them with a clear, contrasting outline.
Fill the main body sections with a dense, web-like pattern of straight stitches, allowing the black outlines to contain the chaotic energy.
For the bamboo, use a simple satin stitch or couching to create clean, straight stalks that contrast with the panda’s rounded form.
This style works best on a neutral, plain-weave fabric that doesn’t compete with the simple, bold graphic. It is a fantastic starting point for jungle animal embroidery patterns kids love.
17. Flamingo With Beaded Anchor Points

Instead of hiding your anchor points, make them a decorative element by using small, metallic seed beads.
First, stitch the beads onto your fabric following the outline of your geometric pattern. Then, wrap your embroidery floss around them just as you would with pins in traditional string art.
Use an analogous color scheme—pinks, reds, and oranges—to create a harmonious and vibrant gradient effect across the flamingo’s body.
A bright, solid-colored background fabric, like this turquoise cotton, makes the warm tones of the flamingo pop and creates a cheerful, tropical feel.
18. Tentacles With Couching and French Knots
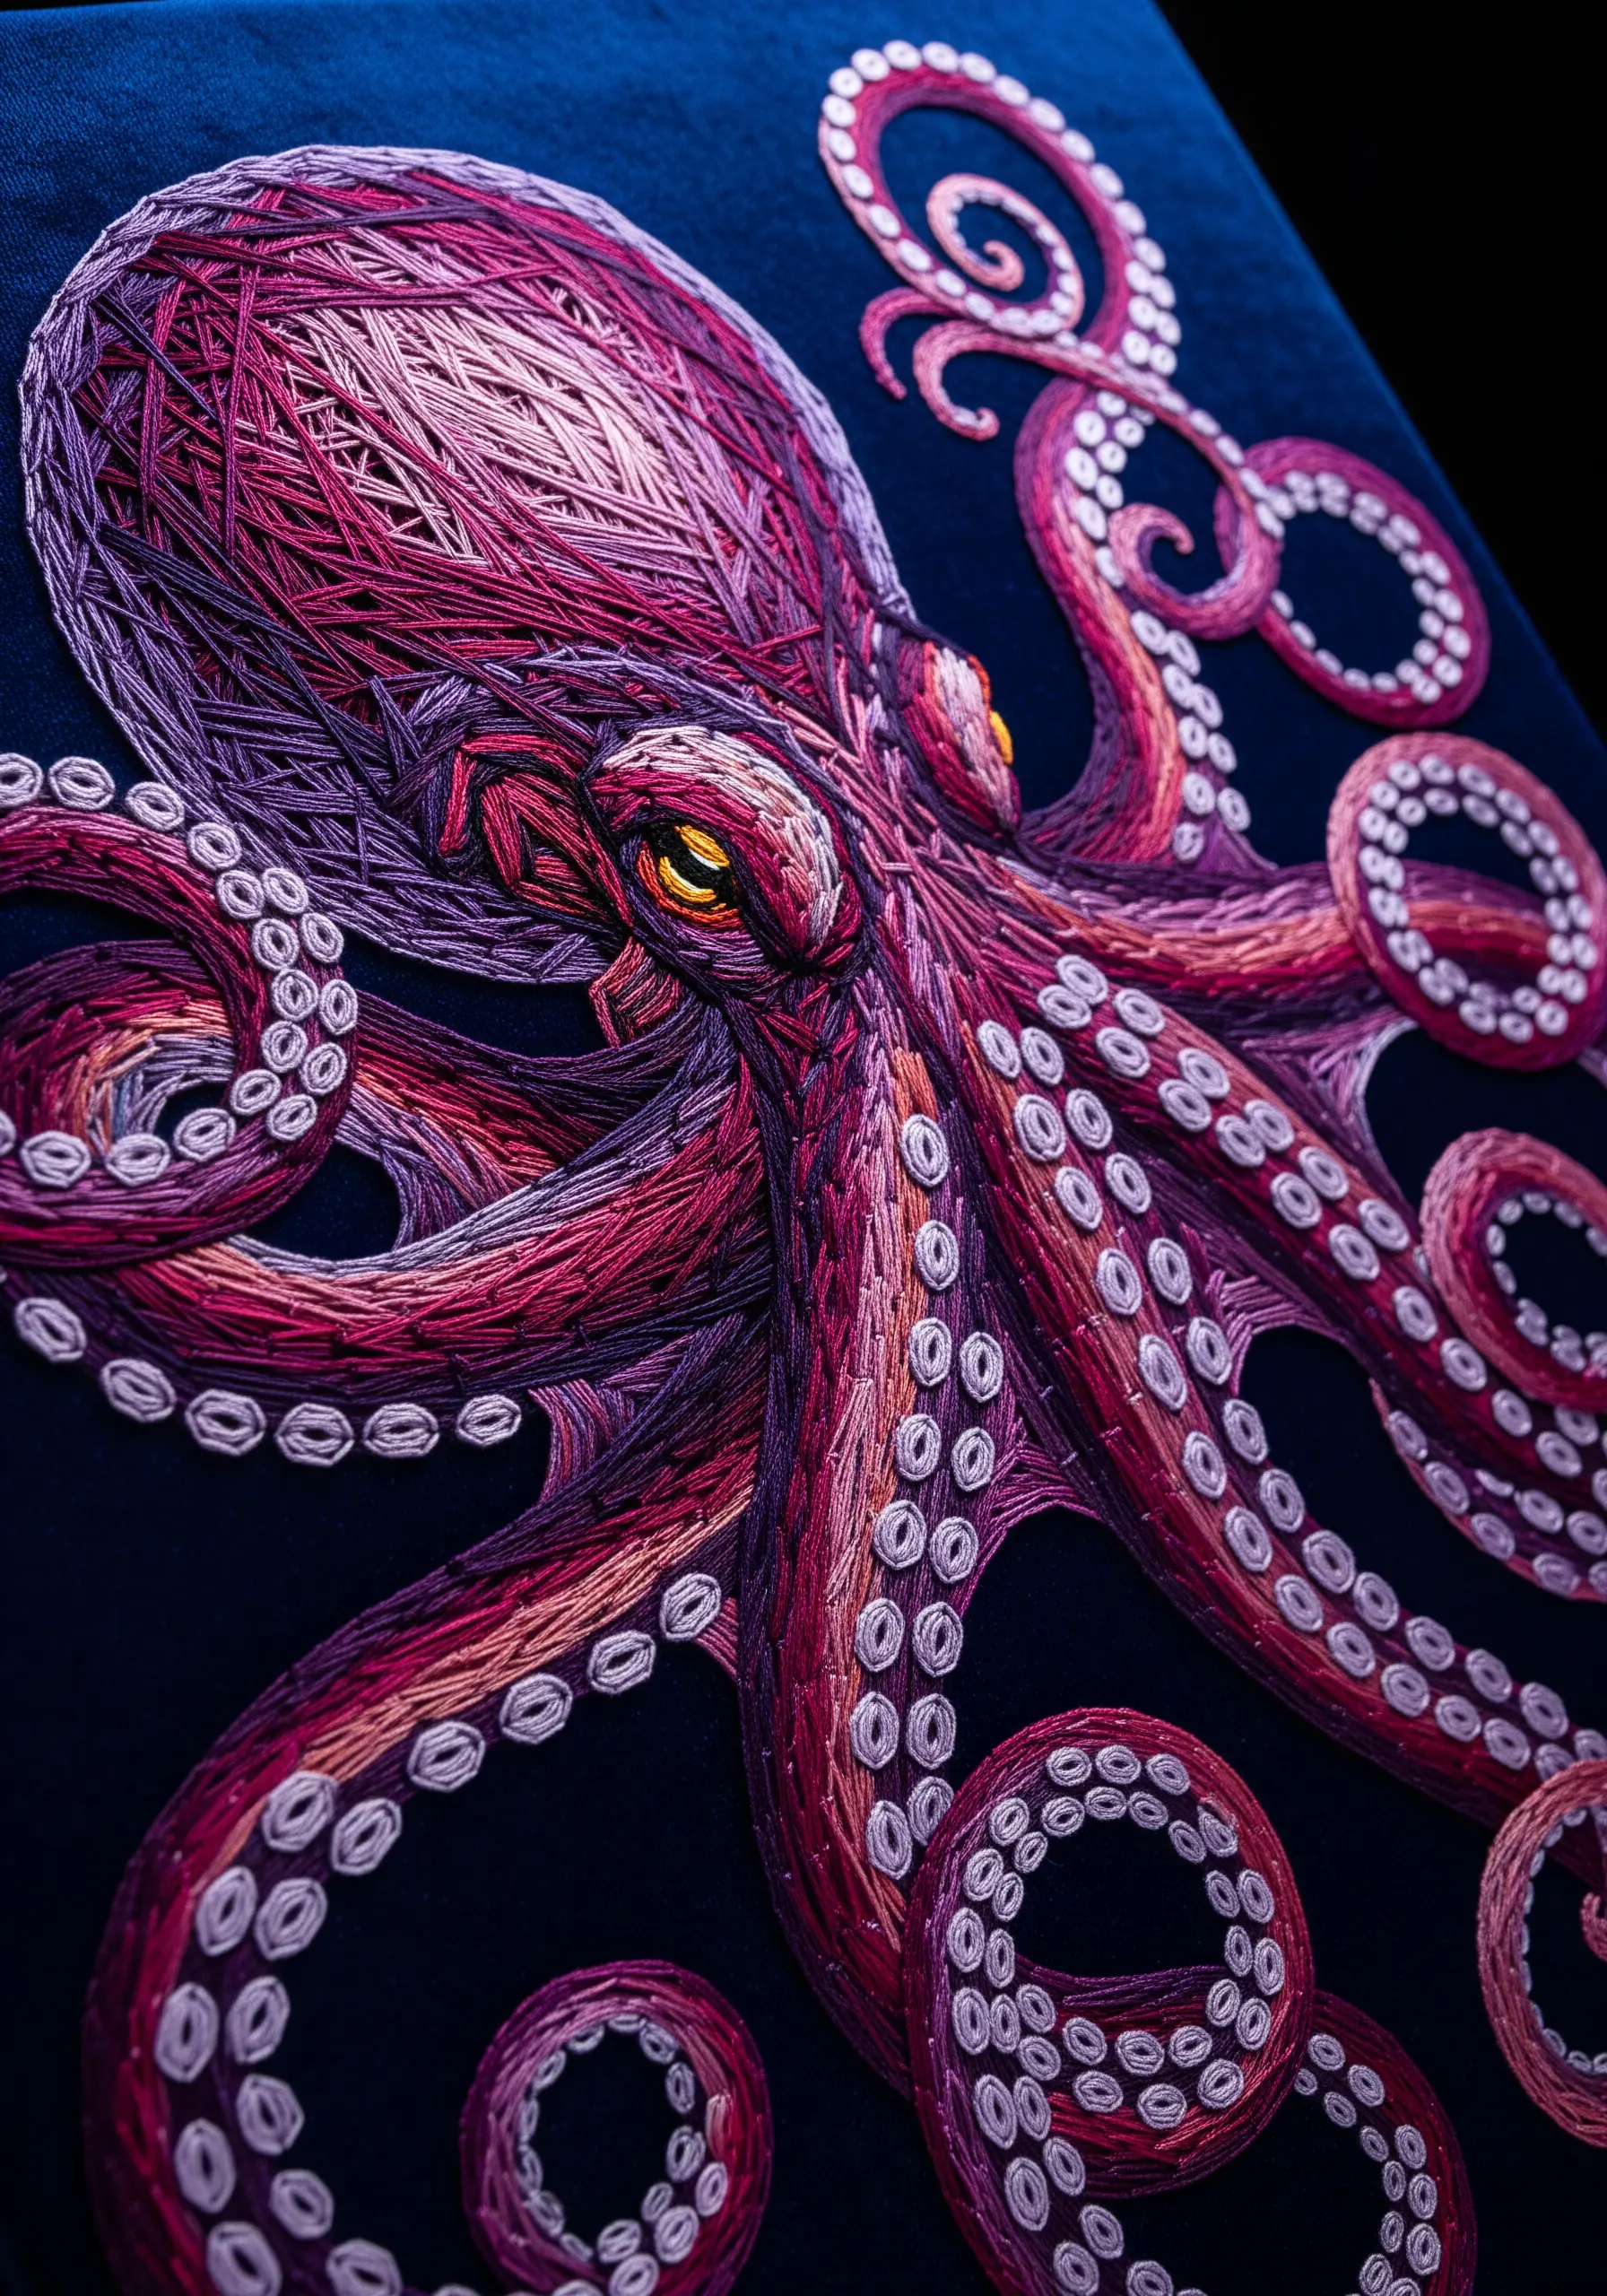
To create the octopus’s suckers, use couching to outline each circle, then fill the center with a contrasting French knot.
Work with a rich, jewel-toned palette of purples, magentas, and deep reds to give the creature an otherworldly, deep-sea luminescence.
Achieve the smooth, rounded head by layering your straight stitches in a radial pattern, working from a central point outwards.
Stitching on a dark, luxurious fabric like velvet enhances the deep-sea mood and makes the silky threads appear even more lustrous.
19. Radiant Energy With a Sunburst Background

Create a stunning focal point by framing your subject with a bold, sunburst background of radiating straight stitches.
Use a single color for the background that complements the subject—here, a vibrant yellow enhances the warm browns and golds of the giraffe.
Keep the background stitches perfectly straight and evenly spaced for a clean, graphic look. A ruler and fabric marker are your best friends for this step.
For the giraffe’s spots, use a darker brown thread and fill the shapes with dense, multi-directional stitches to make them stand out against the lighter, geometric fill of the body.
20. Symmetrical Wings With Variegated Thread
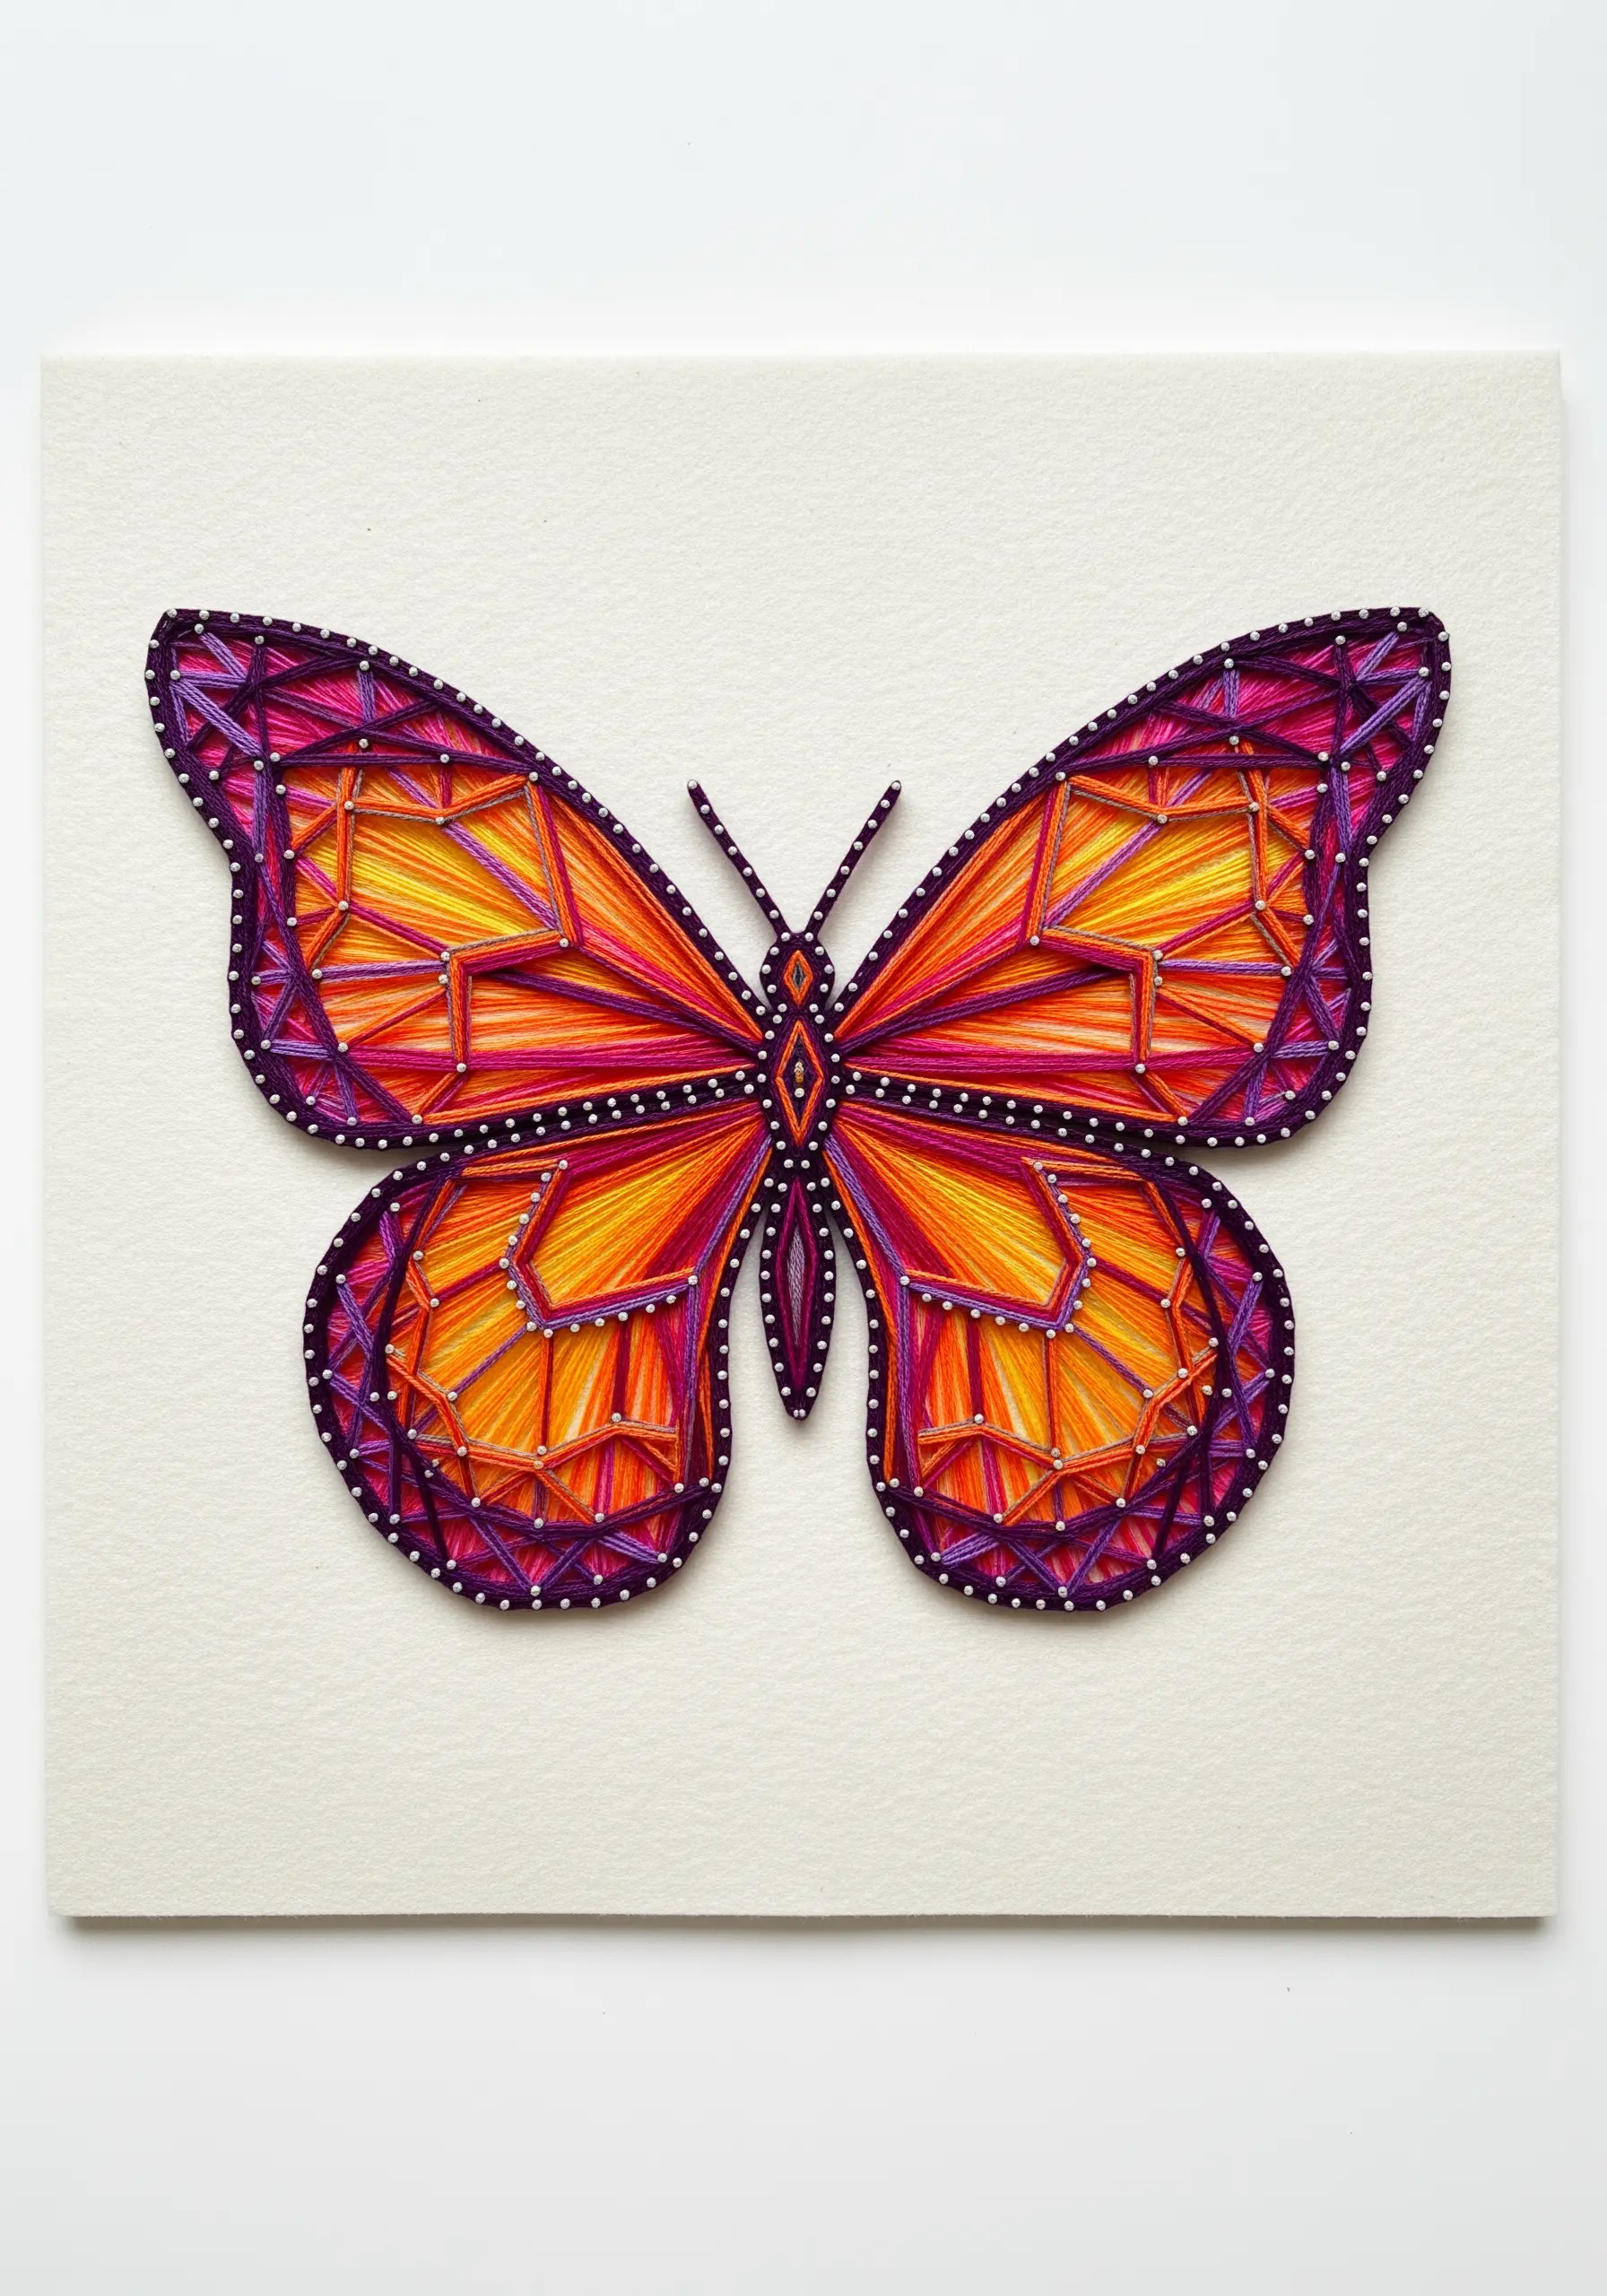
Achieve a beautiful, effortless color gradient in symmetrical designs by using a single skein of variegated thread.
The thread will naturally shift from one color to the next as you stitch, creating a balanced yet dynamic look across both wings of the butterfly.
Use tiny white or silver beads for your anchor points. This adds a delicate sparkle and helps to define the intricate segments within the wings.
A clean, off-white background ensures that the butterfly’s vibrant colors are the sole focus of the piece, making it a perfect example of minimalist neutral embroidery projects with a pop of color.
21. Layered Wings for Soaring Dimension
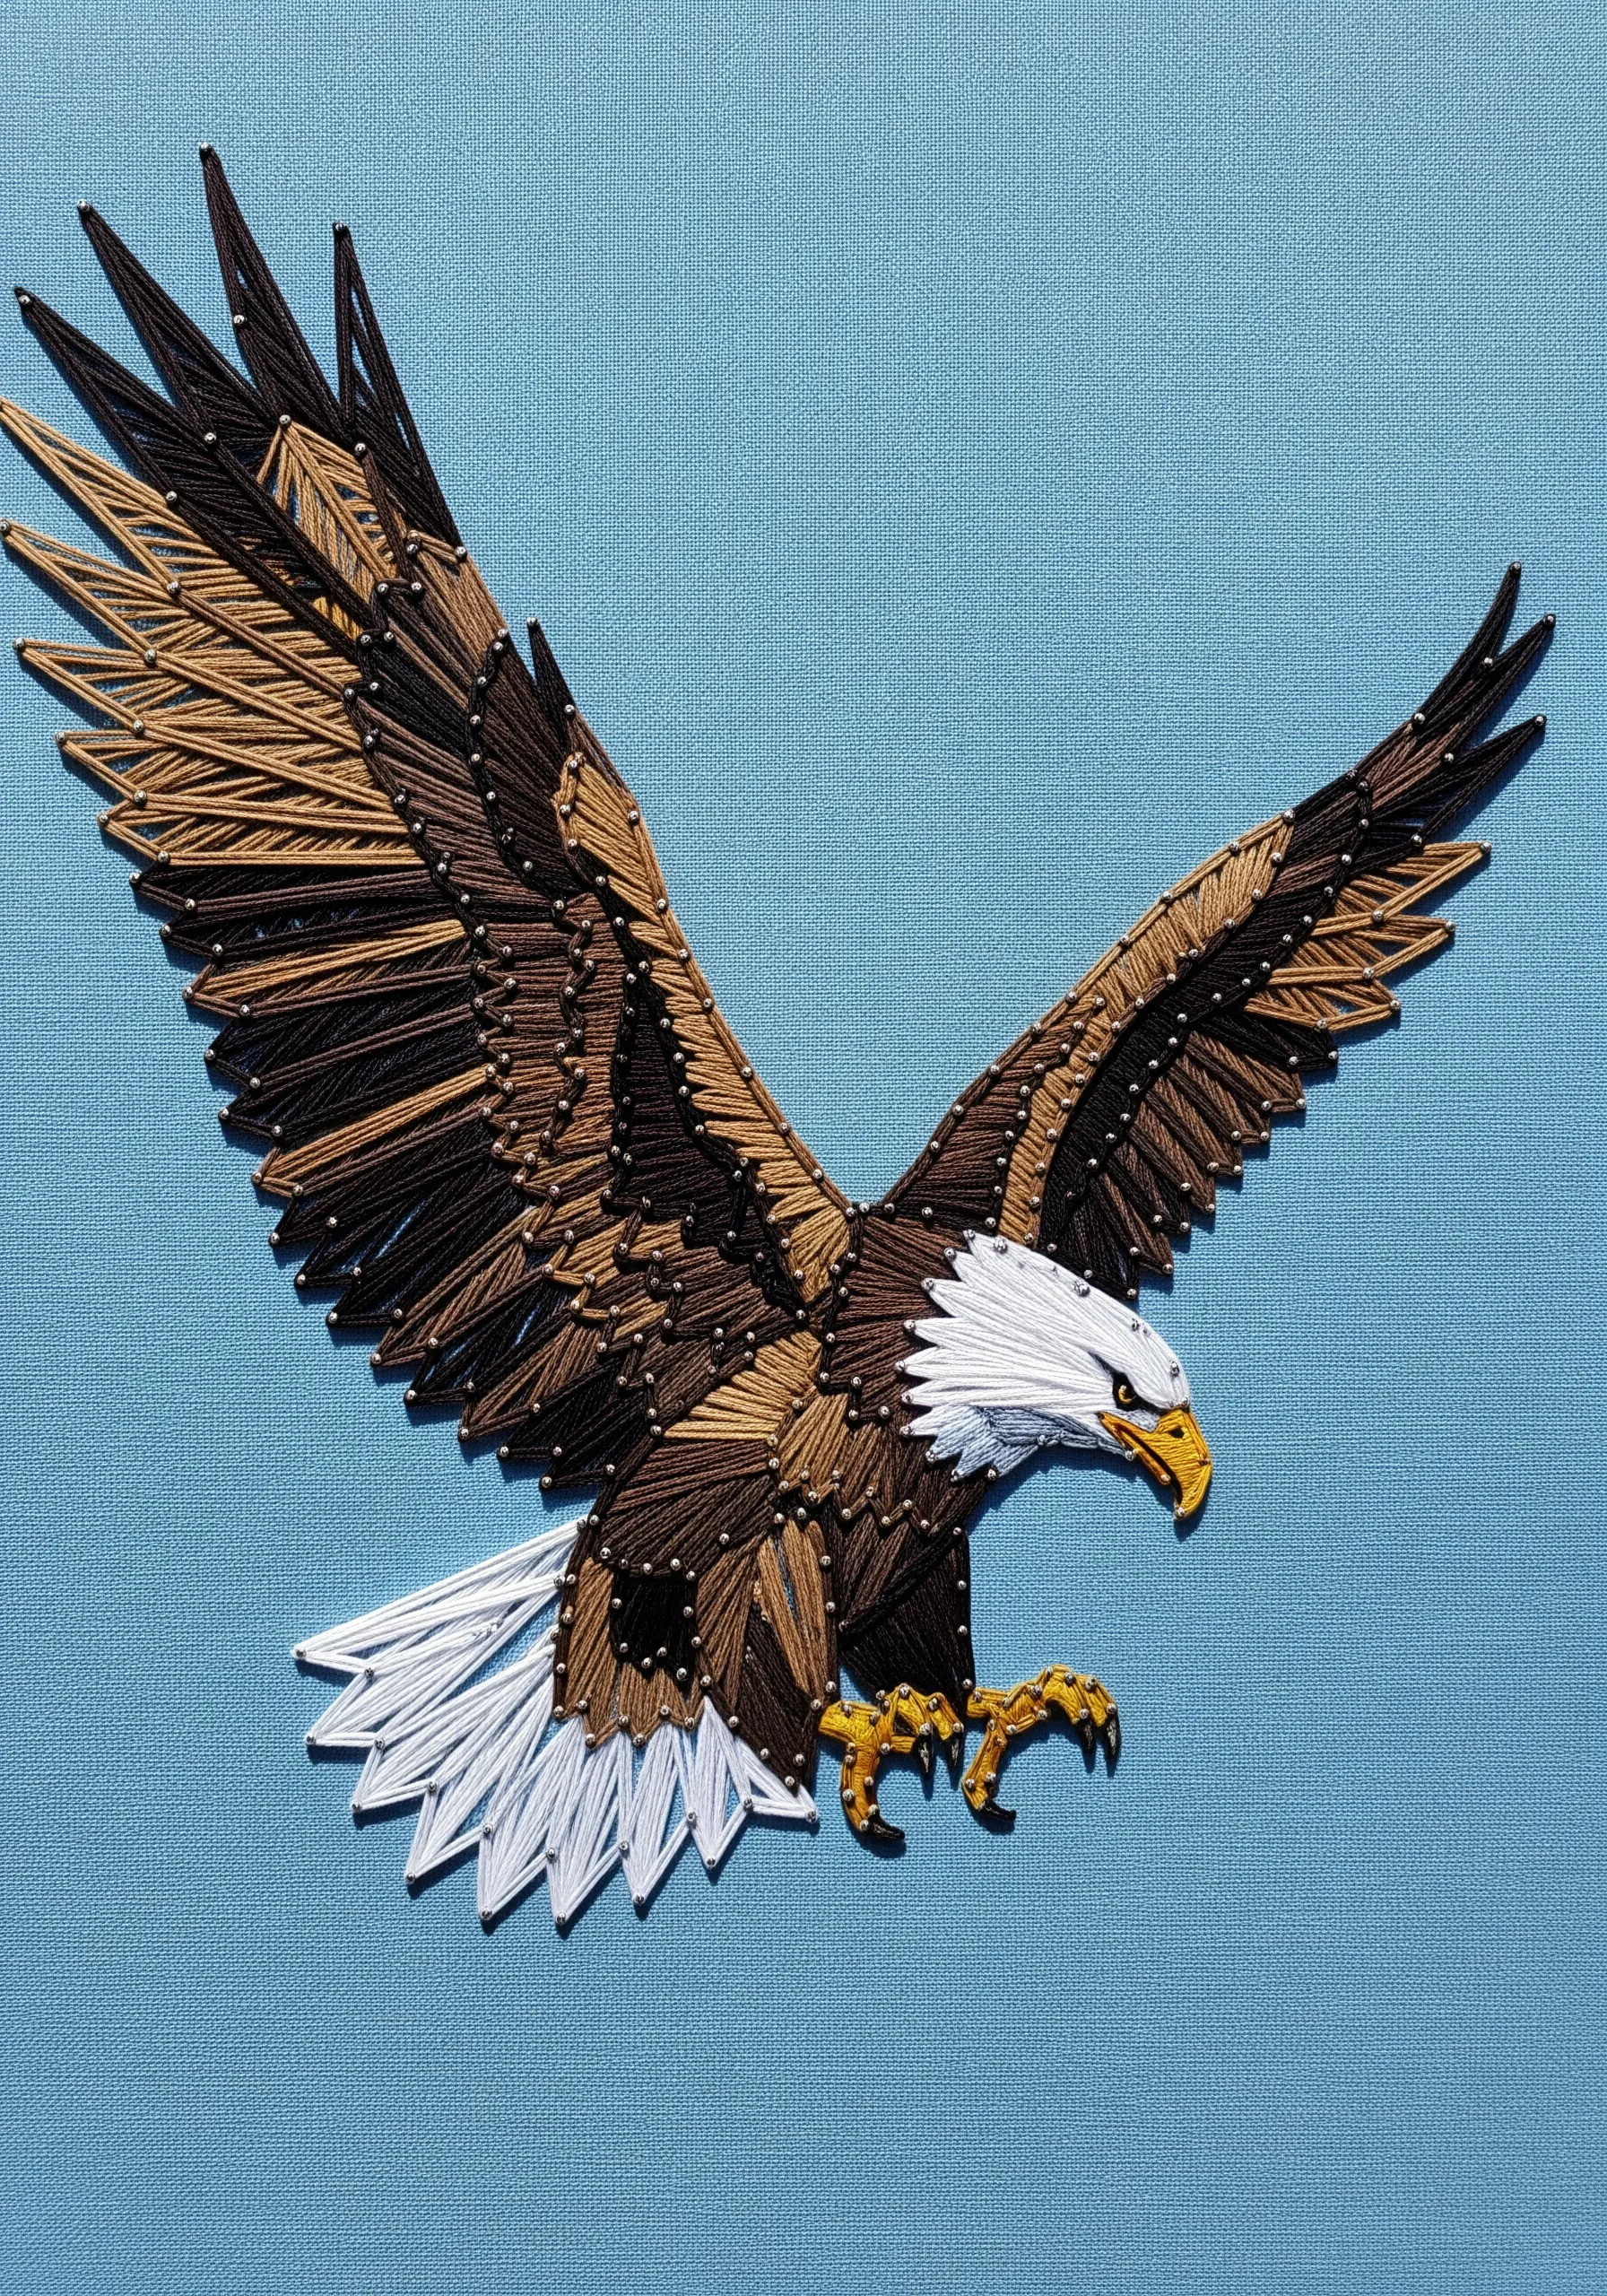
Create the illusion of layered feathers by stitching the eagle’s wings in distinct, overlapping sections.
Stitch the rearmost layer of feathers first, then work forward, slightly overlapping each new section on top of the previous one. This builds realistic depth.
Use a consistent stitch direction for each feather group to create a sleek, uniform appearance, mimicking the structure of a real wing.
A medium-blue background provides a classic sky backdrop that allows the earthy browns and crisp white of the eagle to stand out clearly.
22. Ethereal Tentacles With Wispy Threads
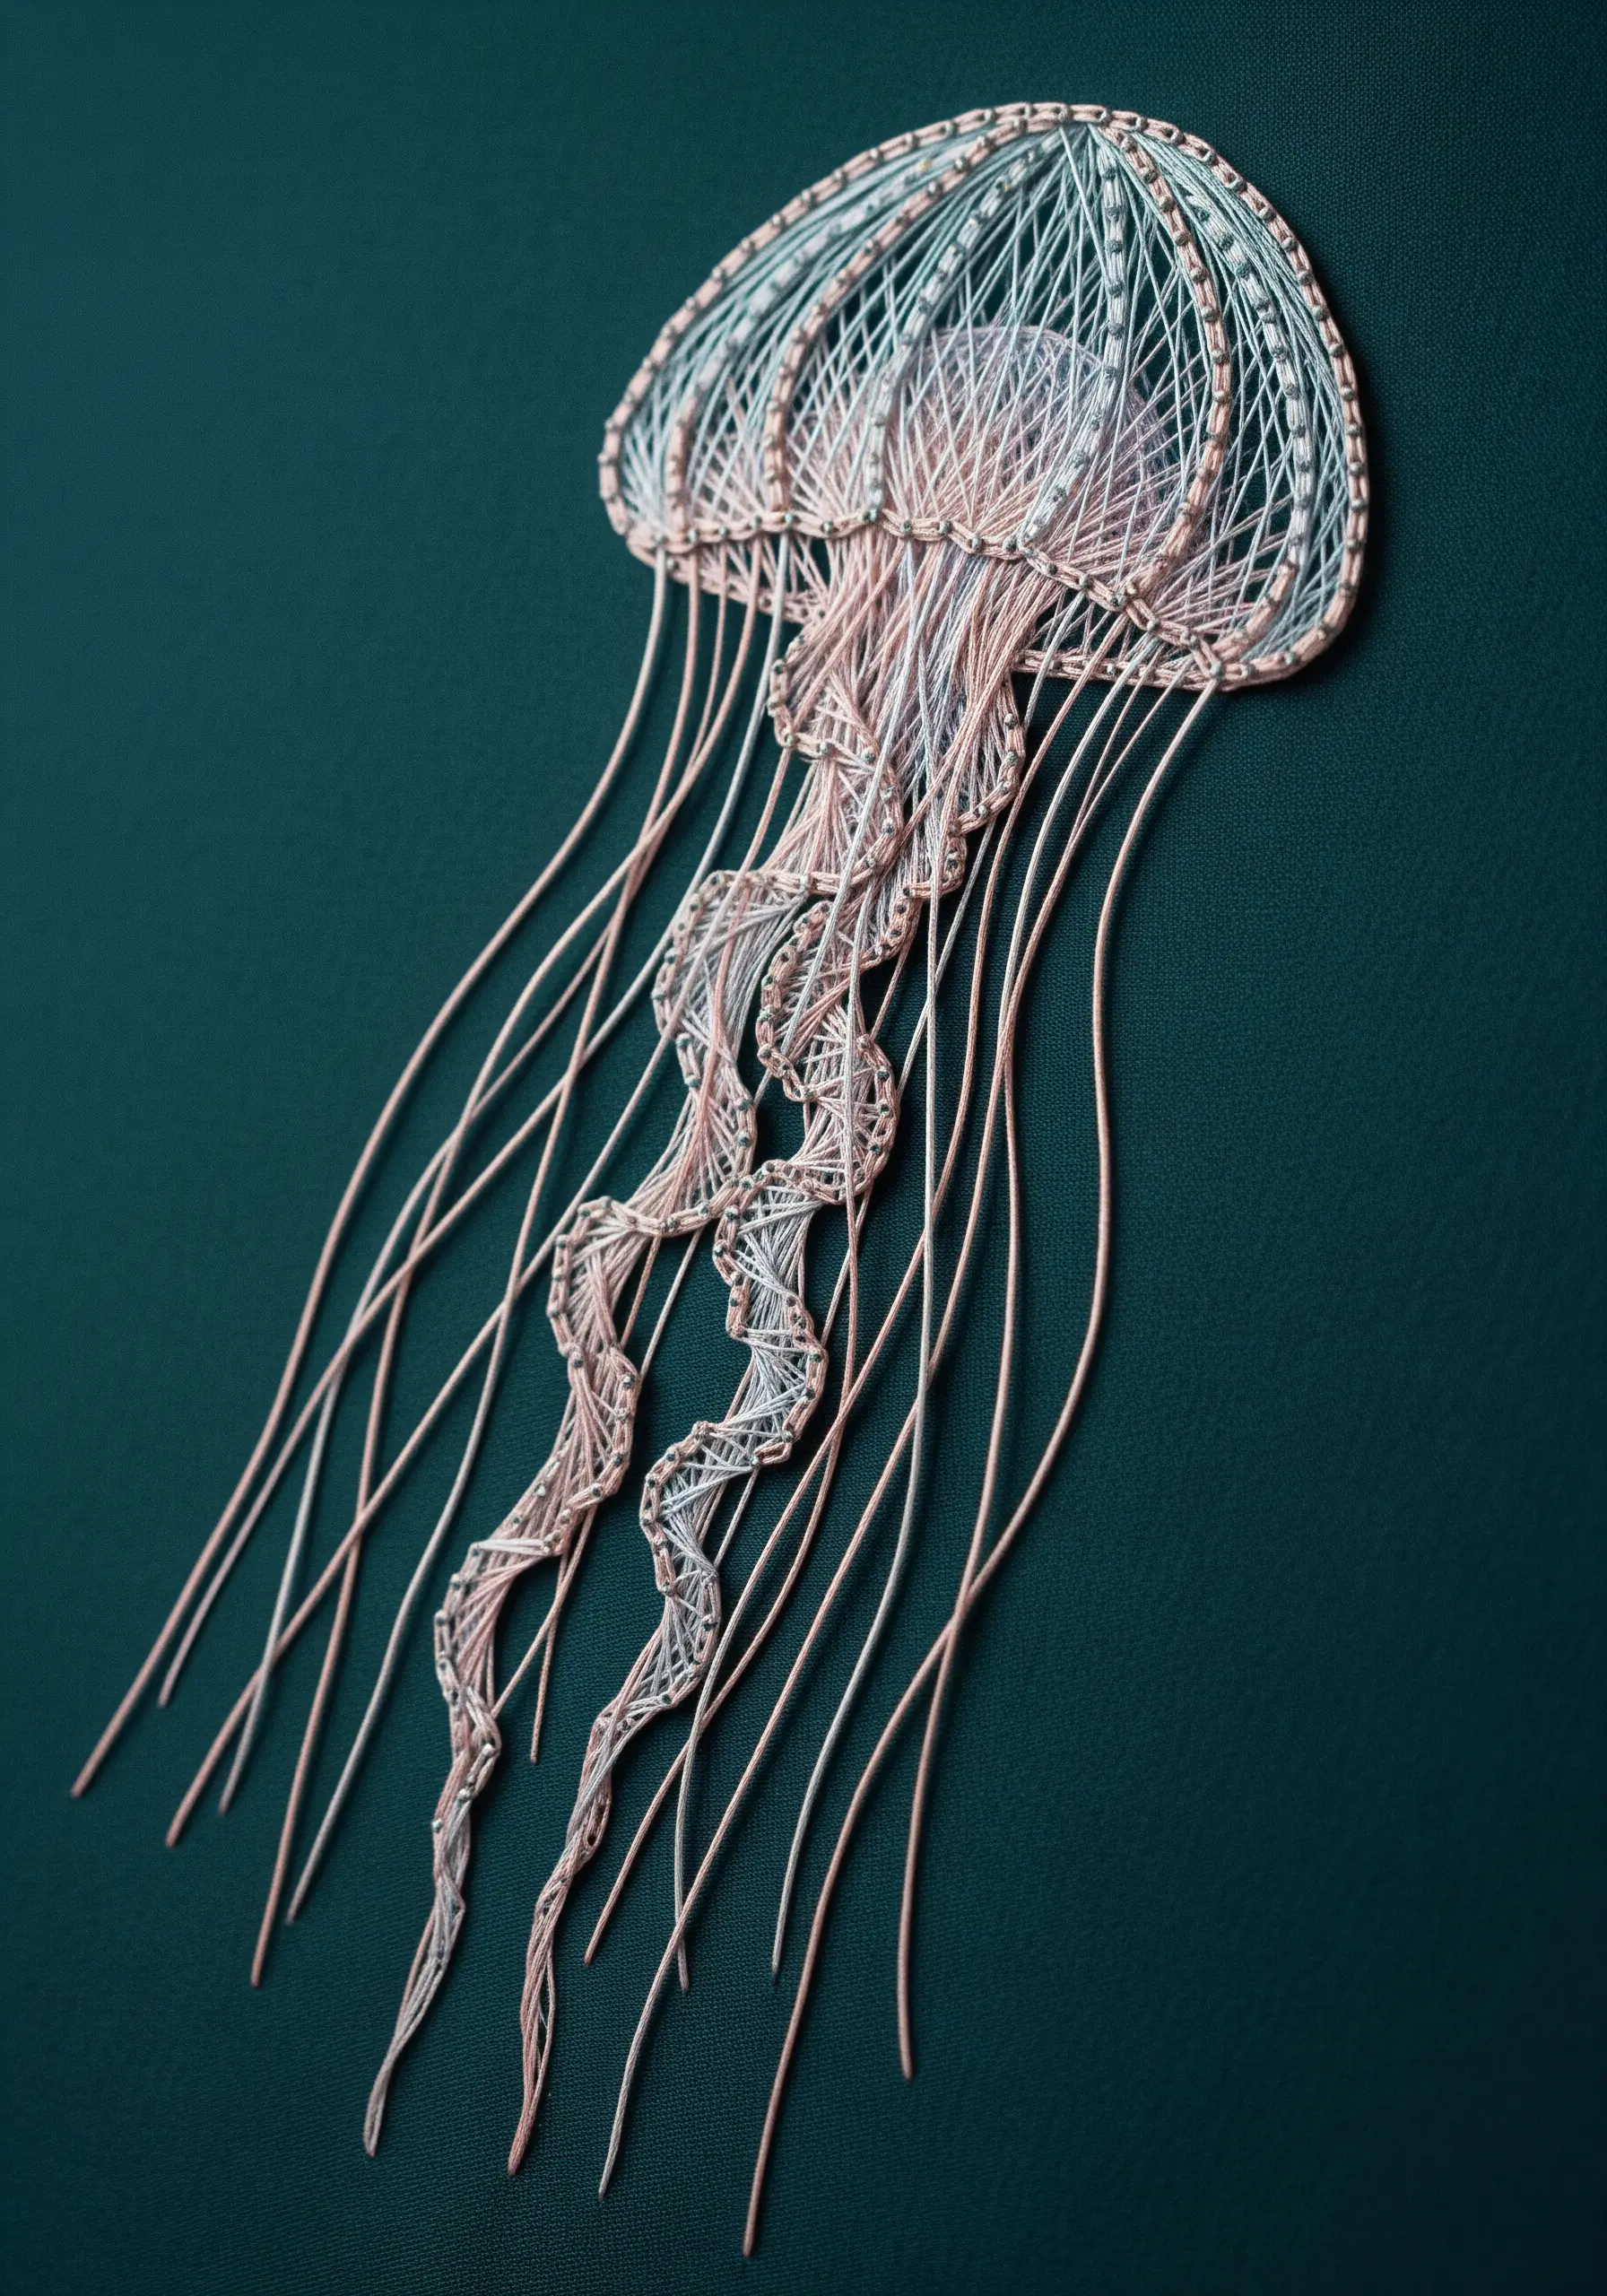
Capture the delicate, translucent quality of a jellyfish by using very fine, wispy threads like single-strand cotton or silk floss.
For the bell, create a dense, cross-hatched pattern to suggest a more solid form. Contrast this by using long, flowing, and sparsely placed stitches for the tentacles.
Allow the ends of your tentacle threads to hang loose and untrimmed. This enhances the ethereal, floating effect and adds a unique three-dimensional quality.
Choose a dark, moody background fabric in a deep teal or navy. This makes the pale pink and white threads seem to glow, as if bioluminescent. It’s a perfect technique for night garden embroidery ideas applied to sea life.
23. Armored Plates With Angular Shading
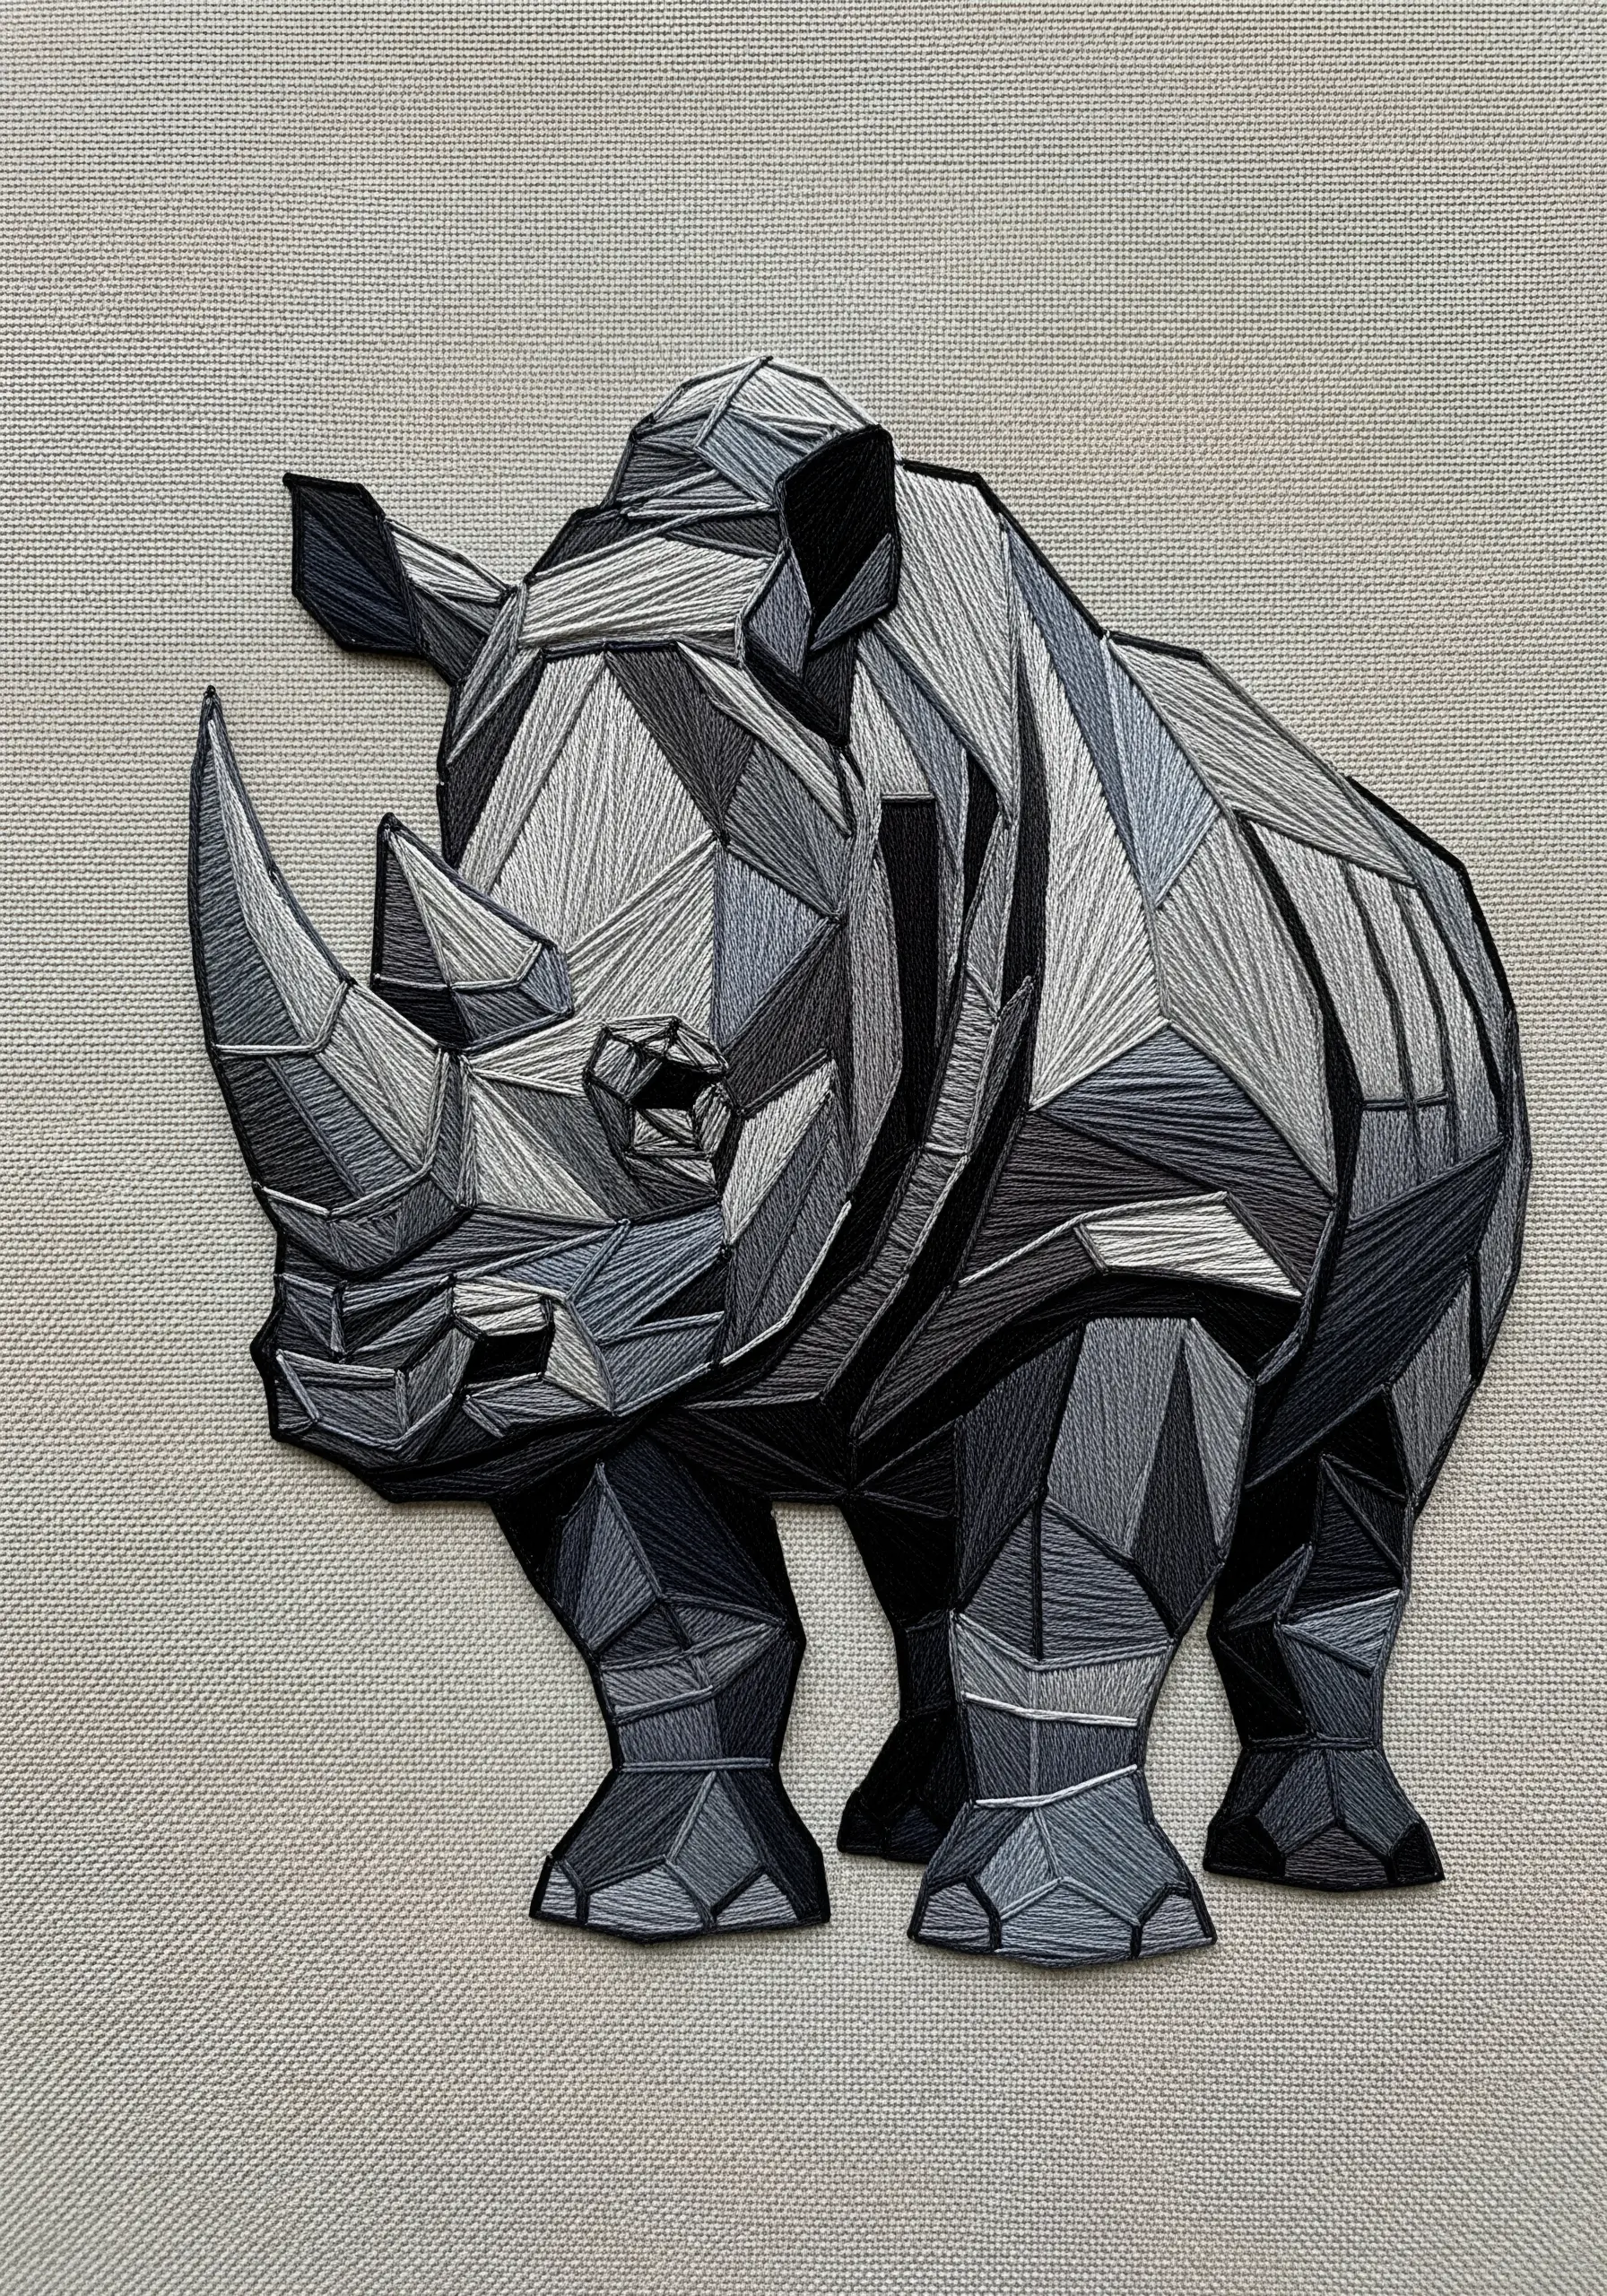
Replicate the tough, armored hide of a rhinoceros by breaking its body into sharp, angular, geometric planes.
Use a monochrome palette of grays, from light silver to deep charcoal, to create shading. Place the darkest shades in areas of shadow, like the underbelly, and the lightest on top surfaces.
Ensure the stitches within each geometric plate all run in the same direction. When adjacent plates have stitches running in different directions, it creates a powerful, faceted look.
A strong, dark outline stitch around the entire silhouette contains the design and gives it a solid, weighty presence. This is key for creating minimalist line-art animal designs with substance.
24. Expressing Speed With Abstract Lines
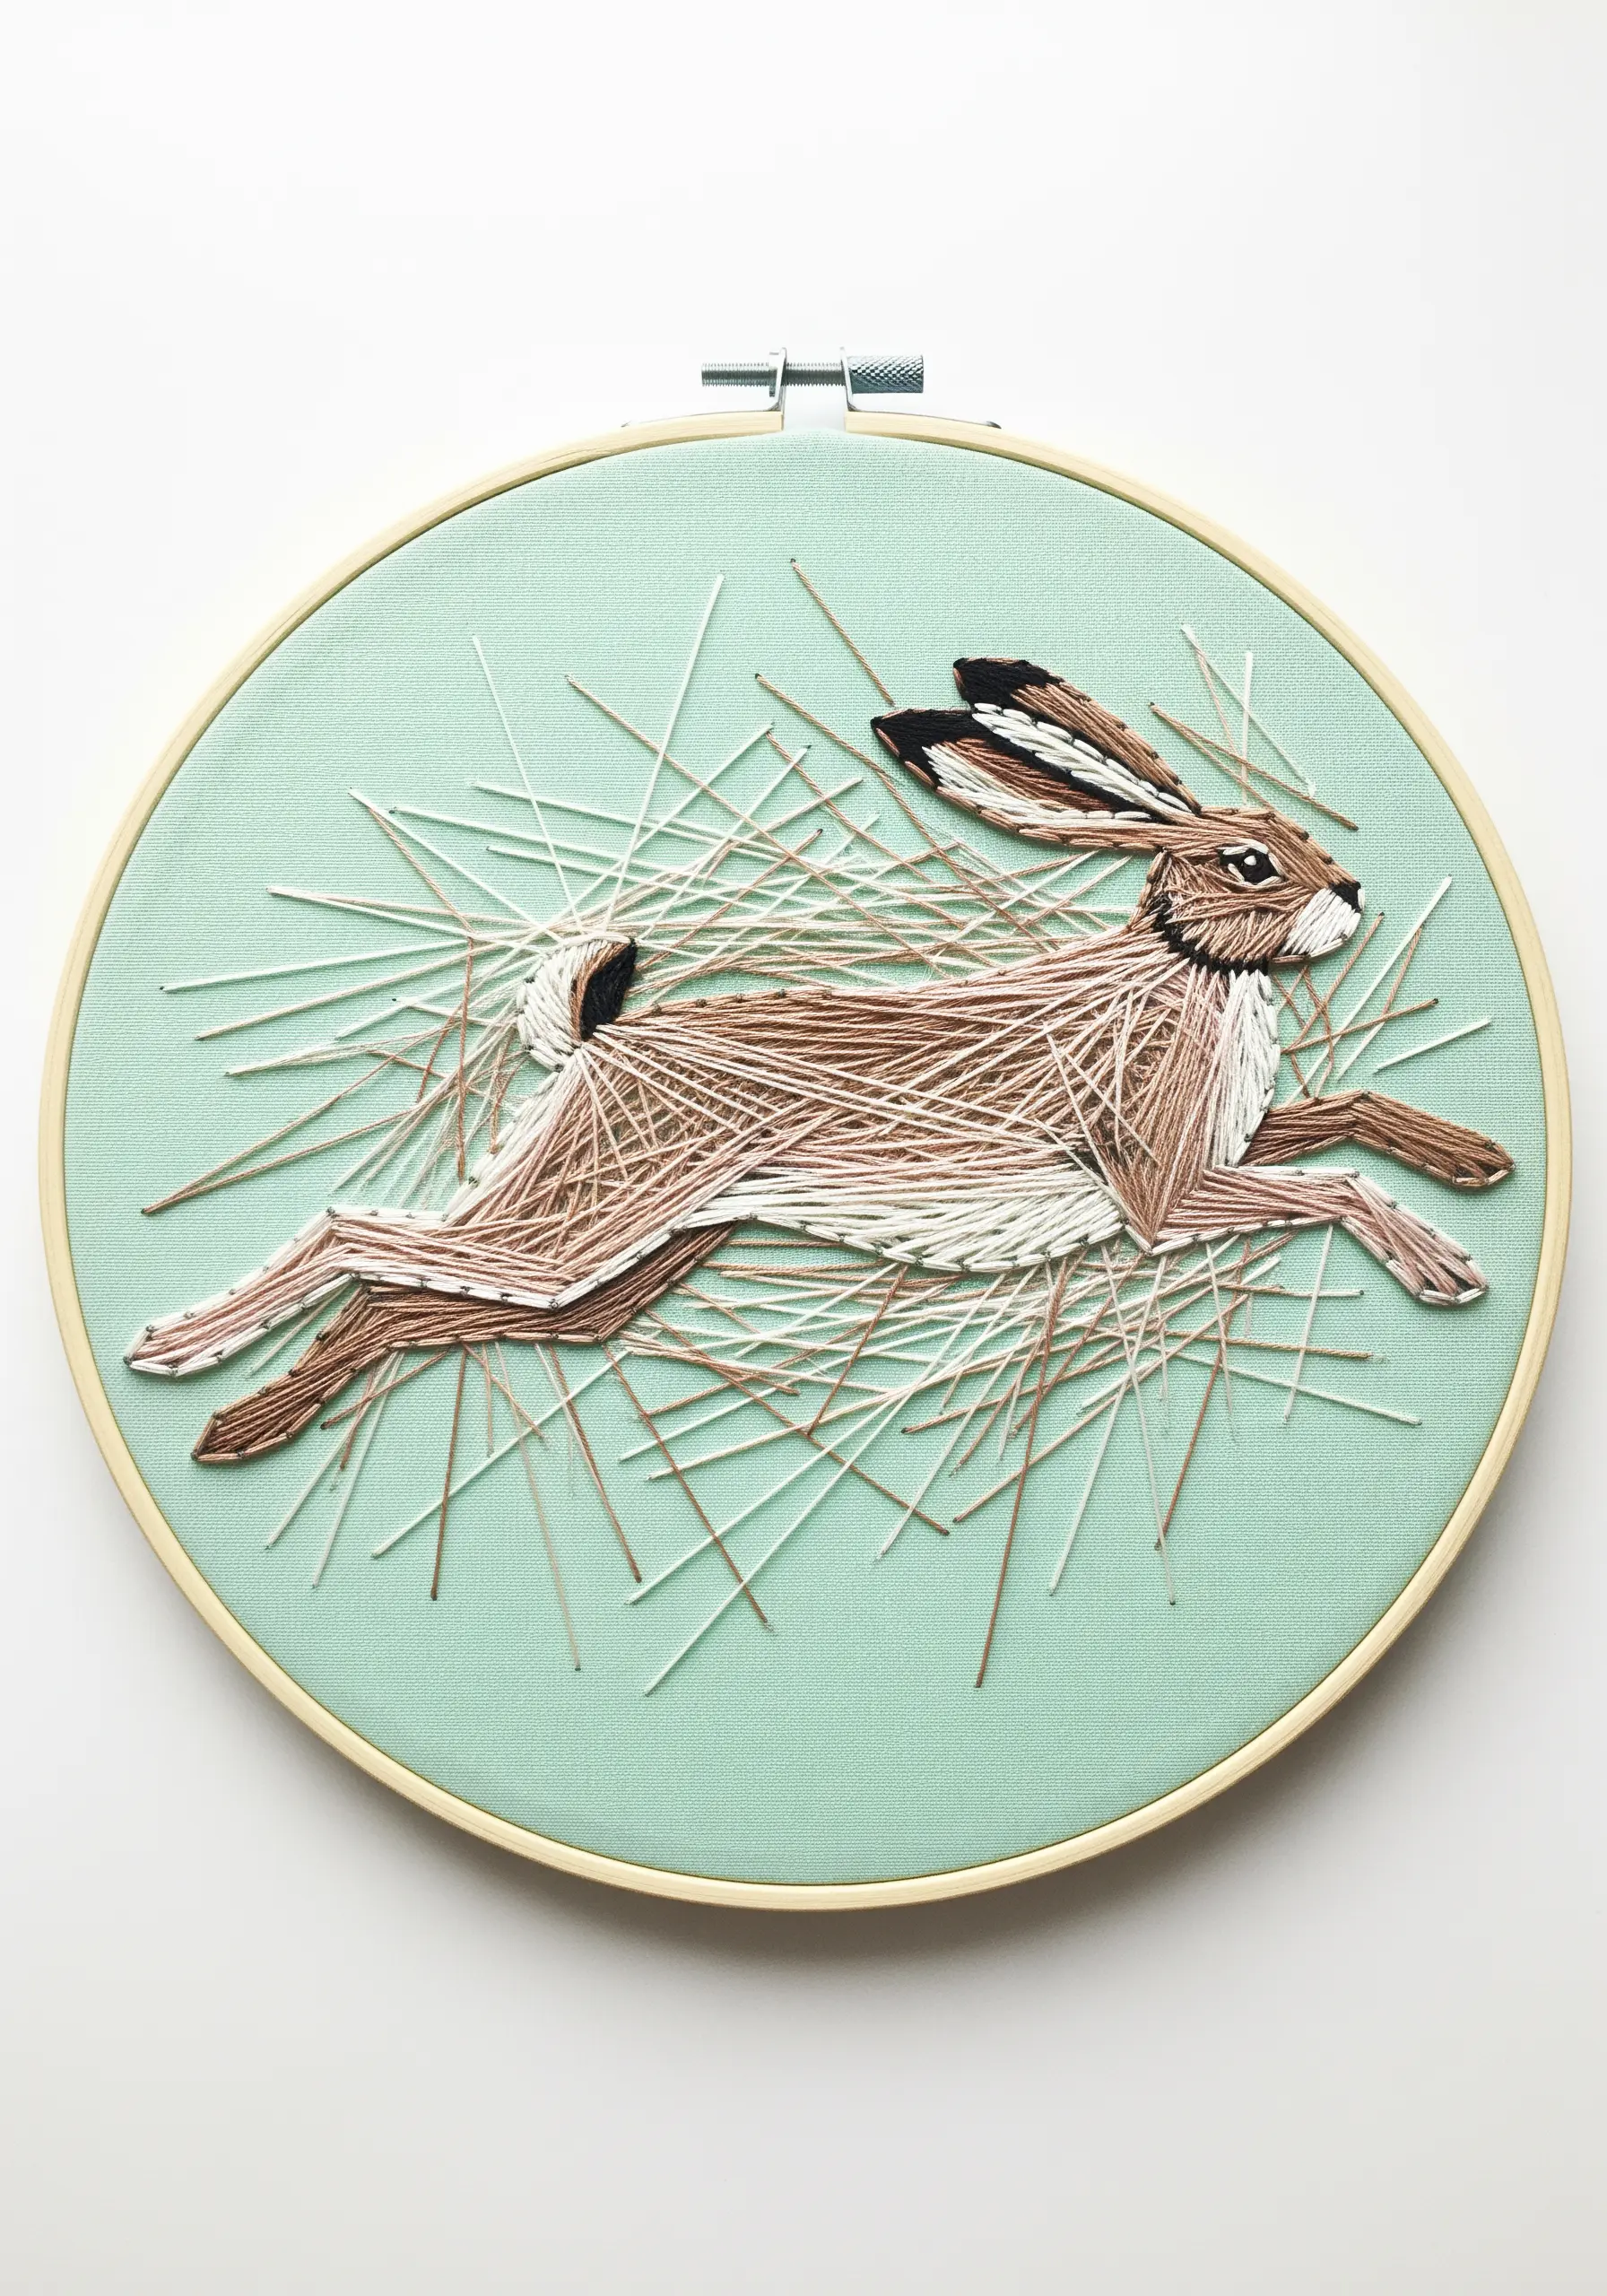
Convey a sense of rapid movement by surrounding your subject with a flurry of chaotic, intersecting straight stitches.
Keep the animal’s body relatively clean and defined so it stands out against the abstract background.
Extend the abstract lines far beyond the subject’s outline to create a sense of energy radiating outwards, as if the hare is kicking up grass and dust.
Use a mix of colors from the main subject and the background in your abstract lines. This seamlessly integrates the figure with its environment and enhances the feeling of motion.
25. Combining Textures for a Playful Koala
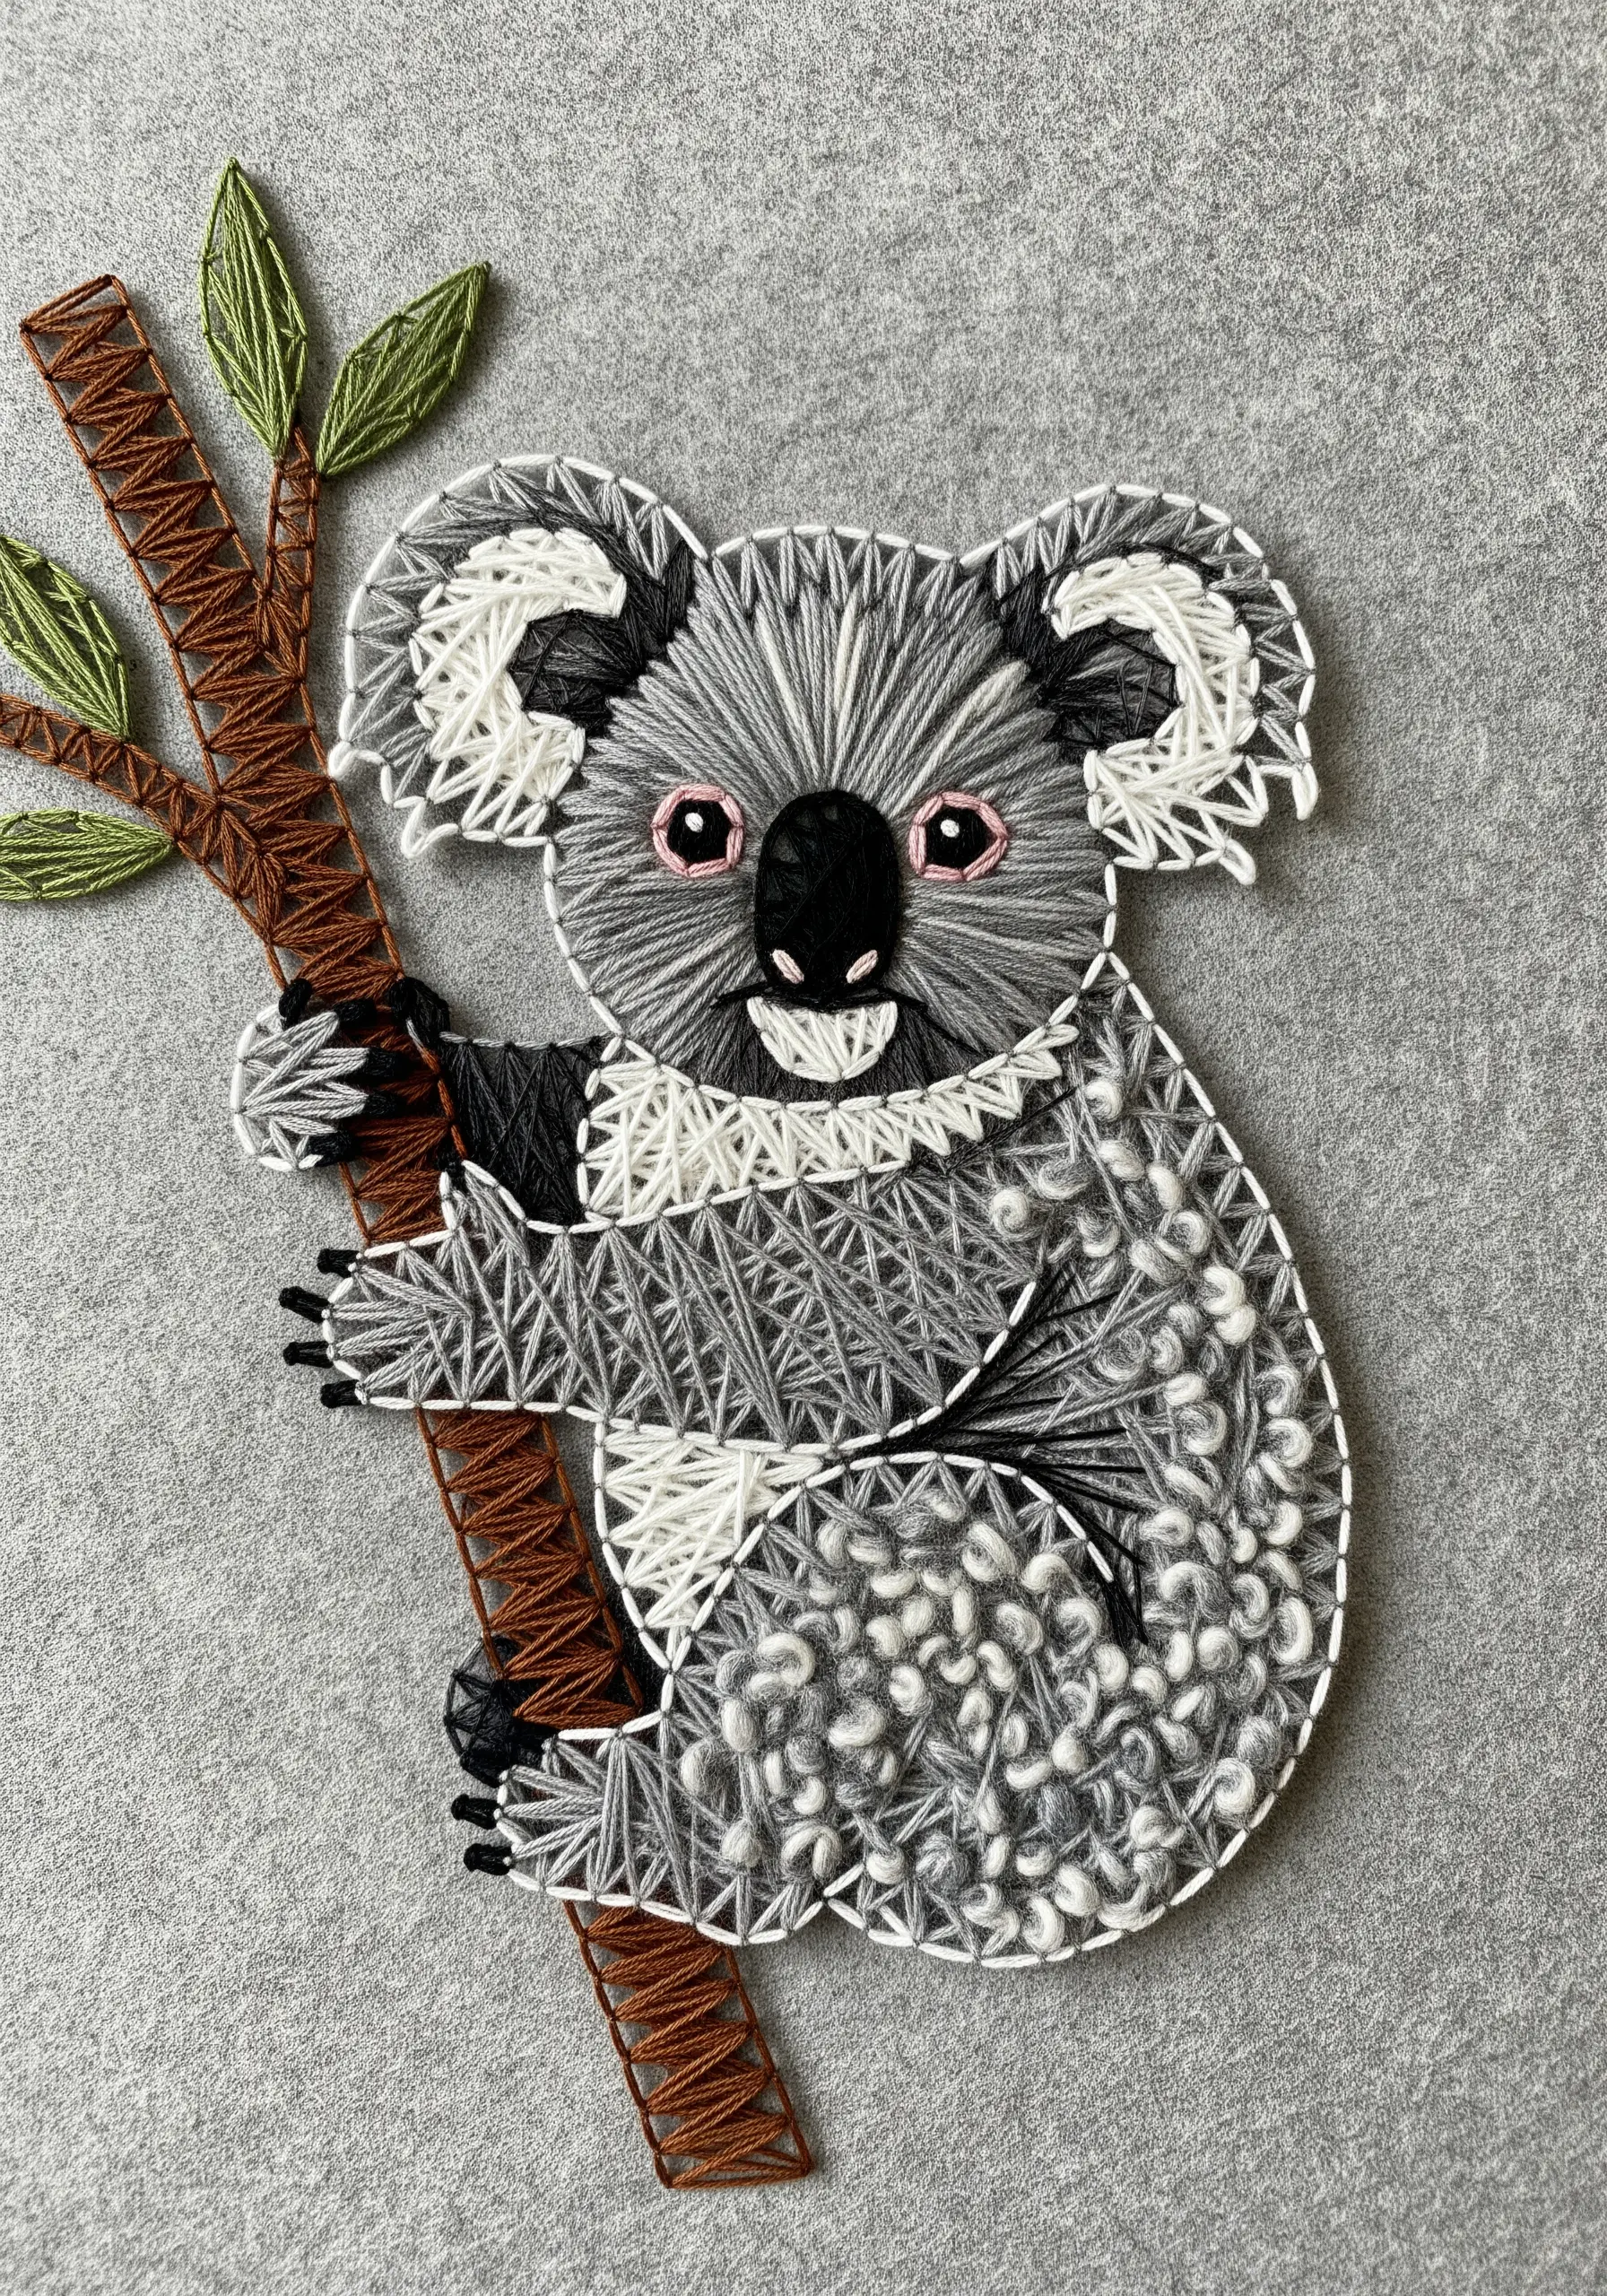
Create a tactile and visually engaging piece by combining different stitch textures within a single, simple subject.
For the fuzzy ears and belly, use a looping stitch like a detached chain or Boucle stitch to create a soft, fluffy appearance.
Contrast the soft areas with a classic, smooth string-art fill for the main body, using intersecting straight stitches.
For the tree branch, wrap thread tightly around a thicker yarn or cord before stitching it down (couching). This gives the branch a realistic, rounded dimension. Combining fibers is a great way to explore mixed-fiber embroidery ideas.


