

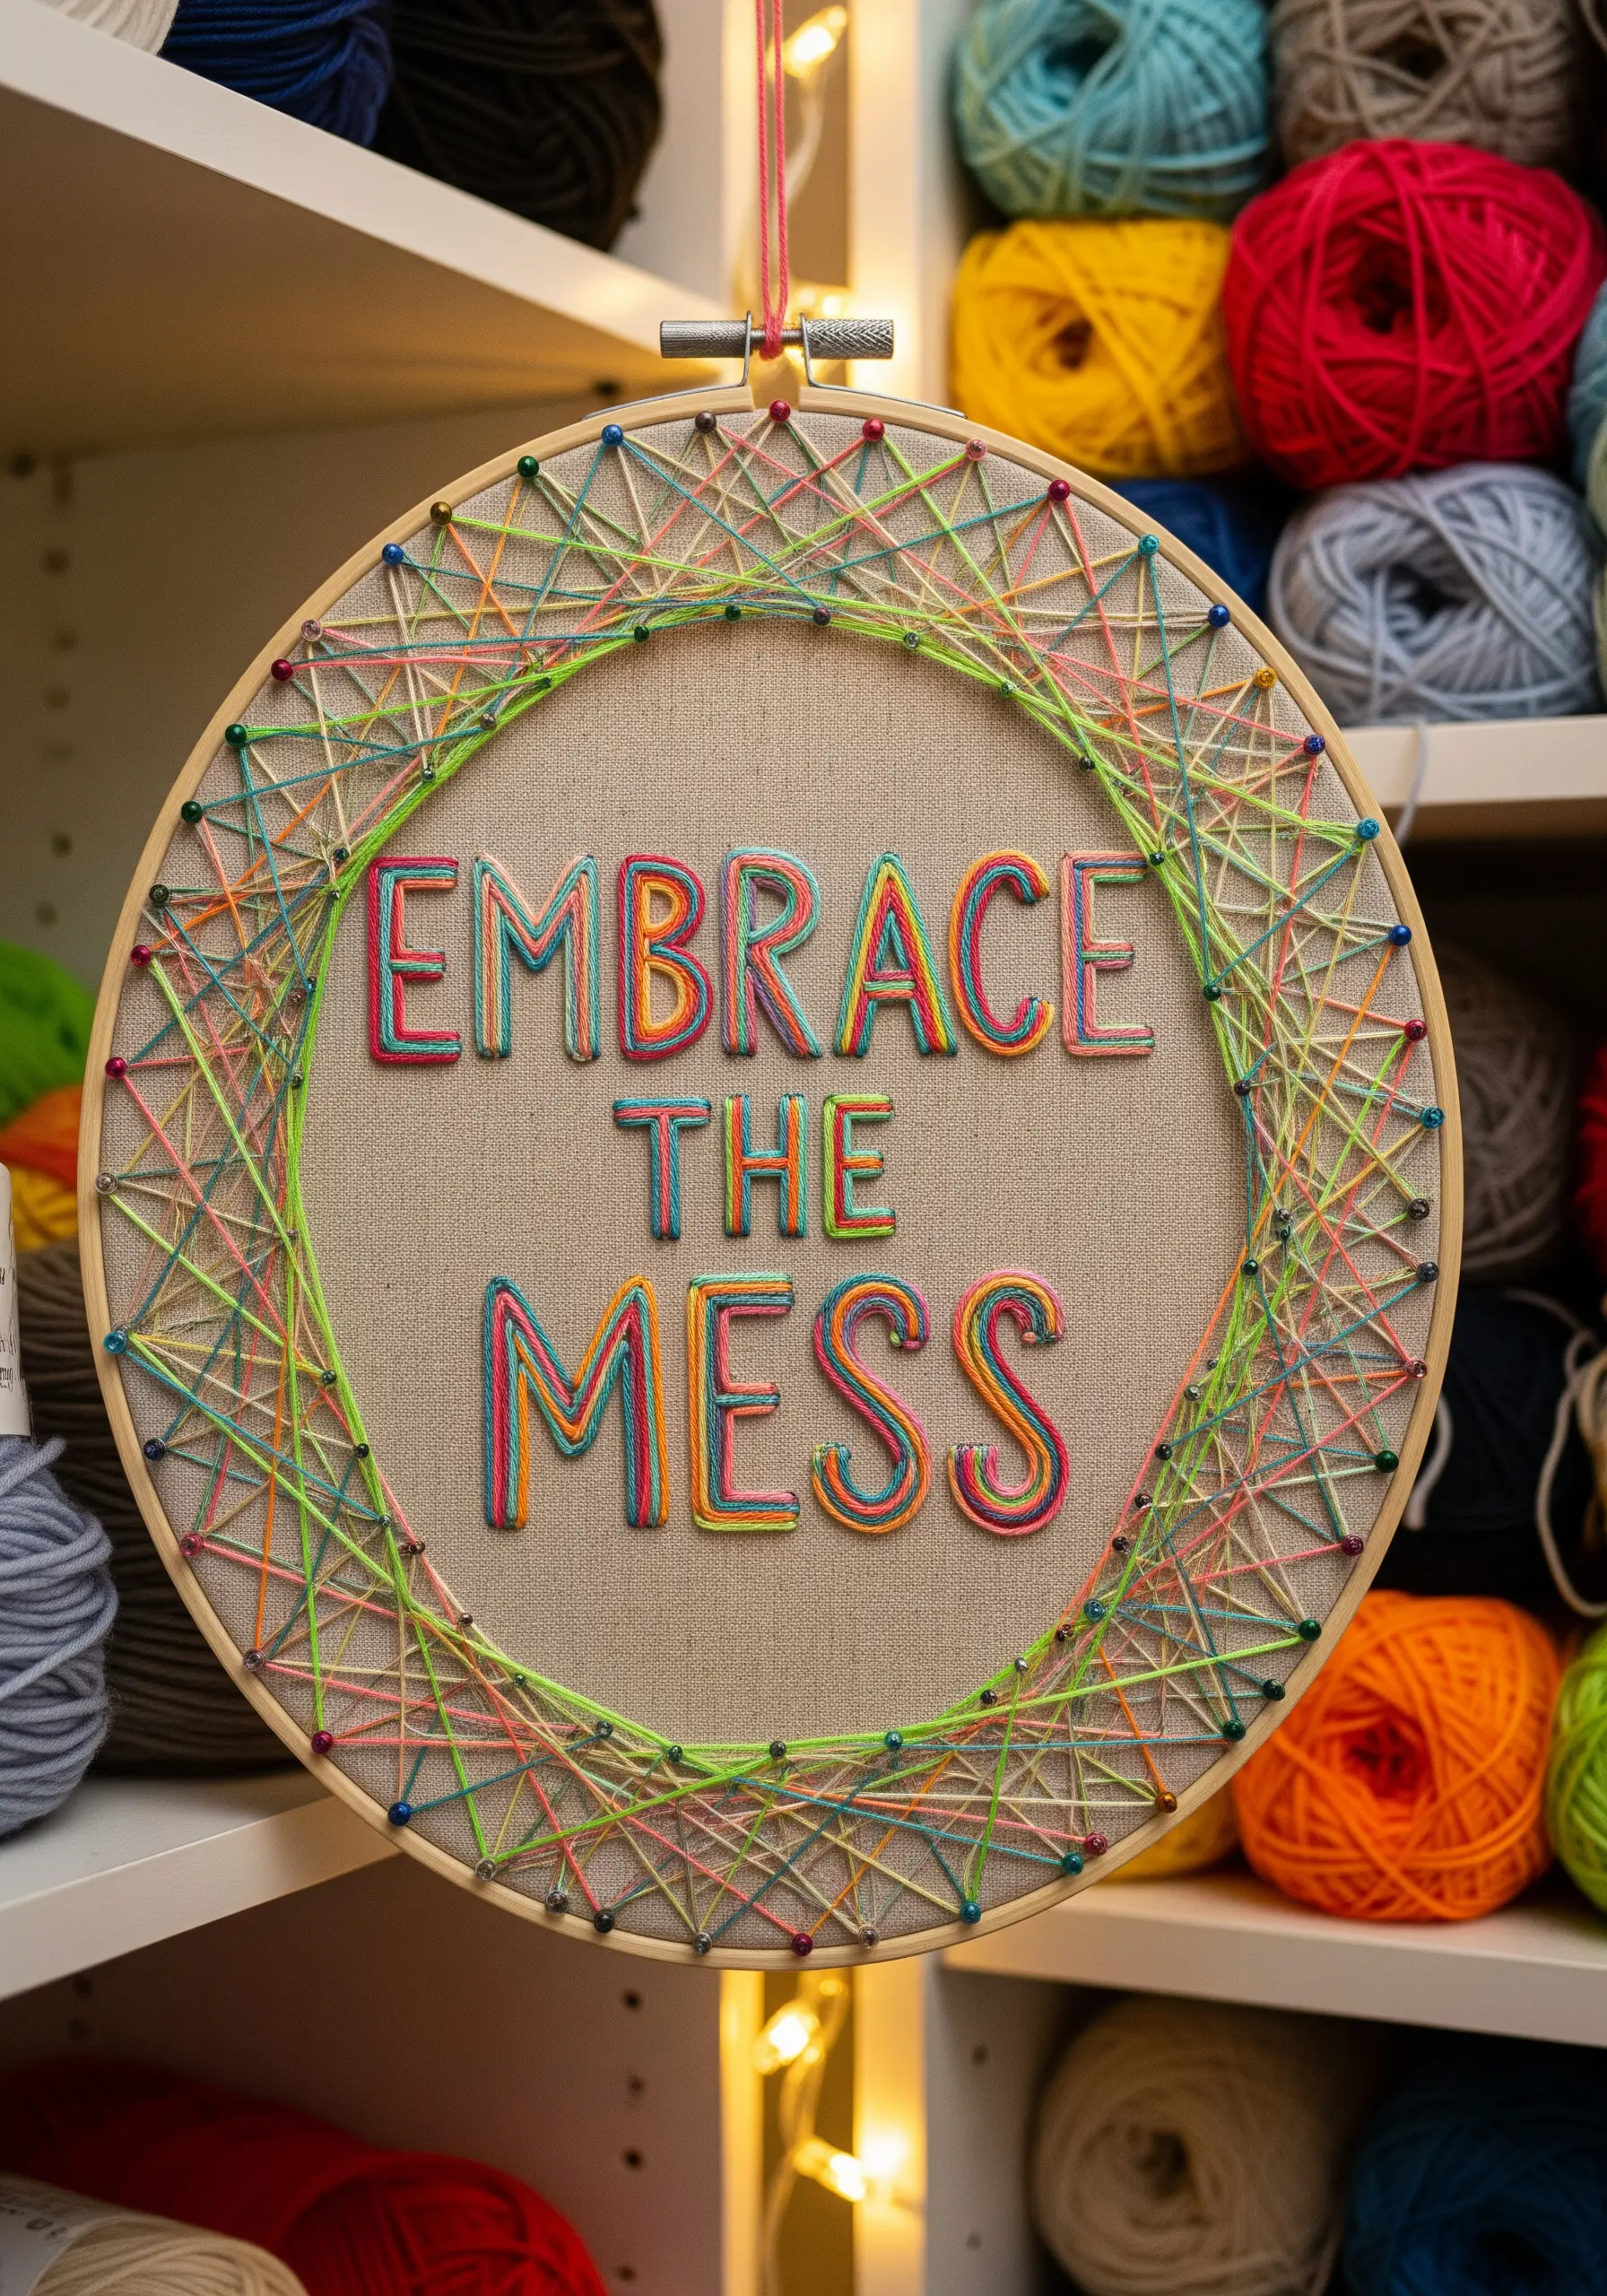
You can transform a simple quote from mere words into a piece of textured, architectural art. This isn’t about traditional embroidery in the strictest sense; it’s about borrowing from the bold, graphic world of string art to give your messages dimension, energy, and modern elegance.
Think of thread not just as a tool for filling space, but as a line you can pull taut to create tension, shadow, and form. By combining linear geometry with soft, stitched lettering, you create a dynamic contrast that feels both intentional and deeply personal.
In each of these ideas, you’ll find a technique to elevate your work. Whether it’s using metallic floss to catch the light, blending variegated threads for a painterly effect, or building entire landscapes with color theory, you have the power to stitch a message that truly resonates.
1. Create a Radiating Sunburst Effect with Thread
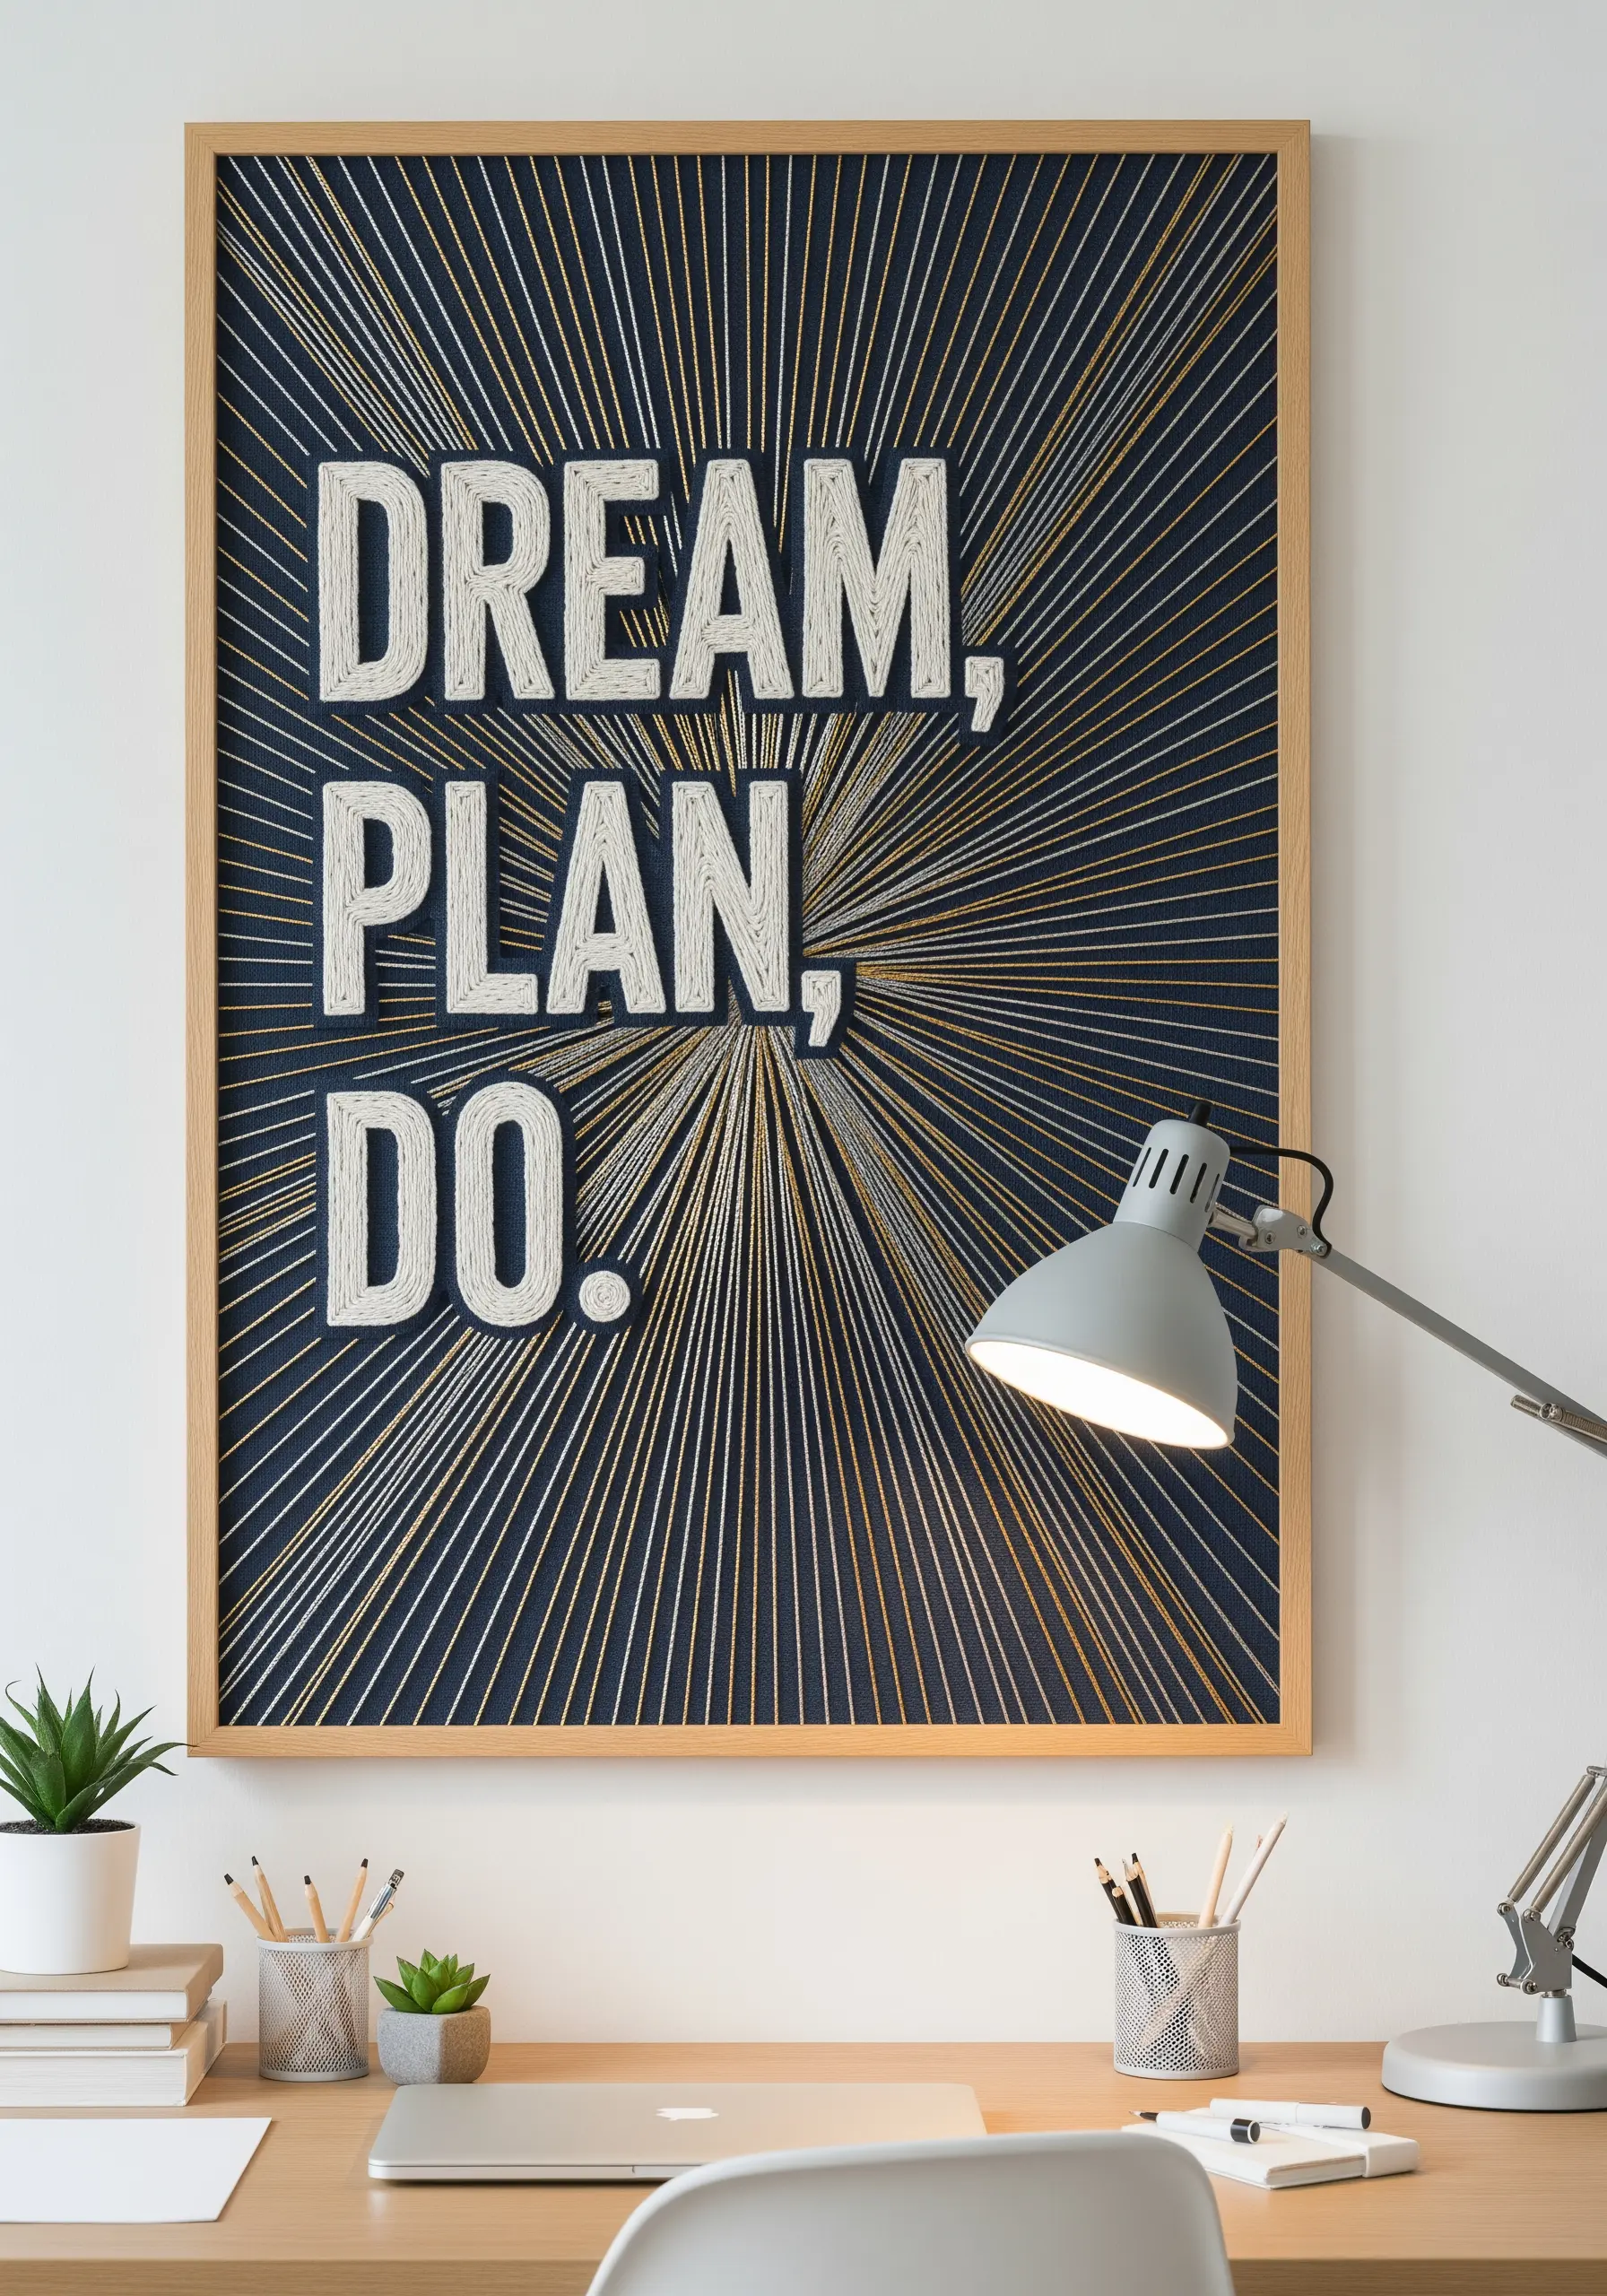
To achieve this dynamic starburst, use a high-sheen or metallic thread that will catch the light from every angle.
First, stitch your letters using a padded satin stitch to give them dimension, making them pop against the background.
Next, map out your anchor points around the frame and a central point behind the letters.
Pull each strand of metallic floss taut from the outer edge to the center—this tension is what creates those perfectly crisp, energetic lines.
The contrast between the soft, raised lettering and the sharp, radiant lines creates a powerful visual hierarchy.
2. Blend Variegated Floss for a Painterly Border

Let the thread do the work for you by choosing a variegated or space-dyed floss for the geometric border.
As you wind the thread, the colors will shift naturally, creating a beautiful, watercolor-like effect without needing to switch skeins.
For the central quote, use a whipped backstitch or stem stitch to create a smooth, cord-like line that stands out against the bright background fabric.
This is one of the most effective handmade embroidery touches to add effortless color and movement.
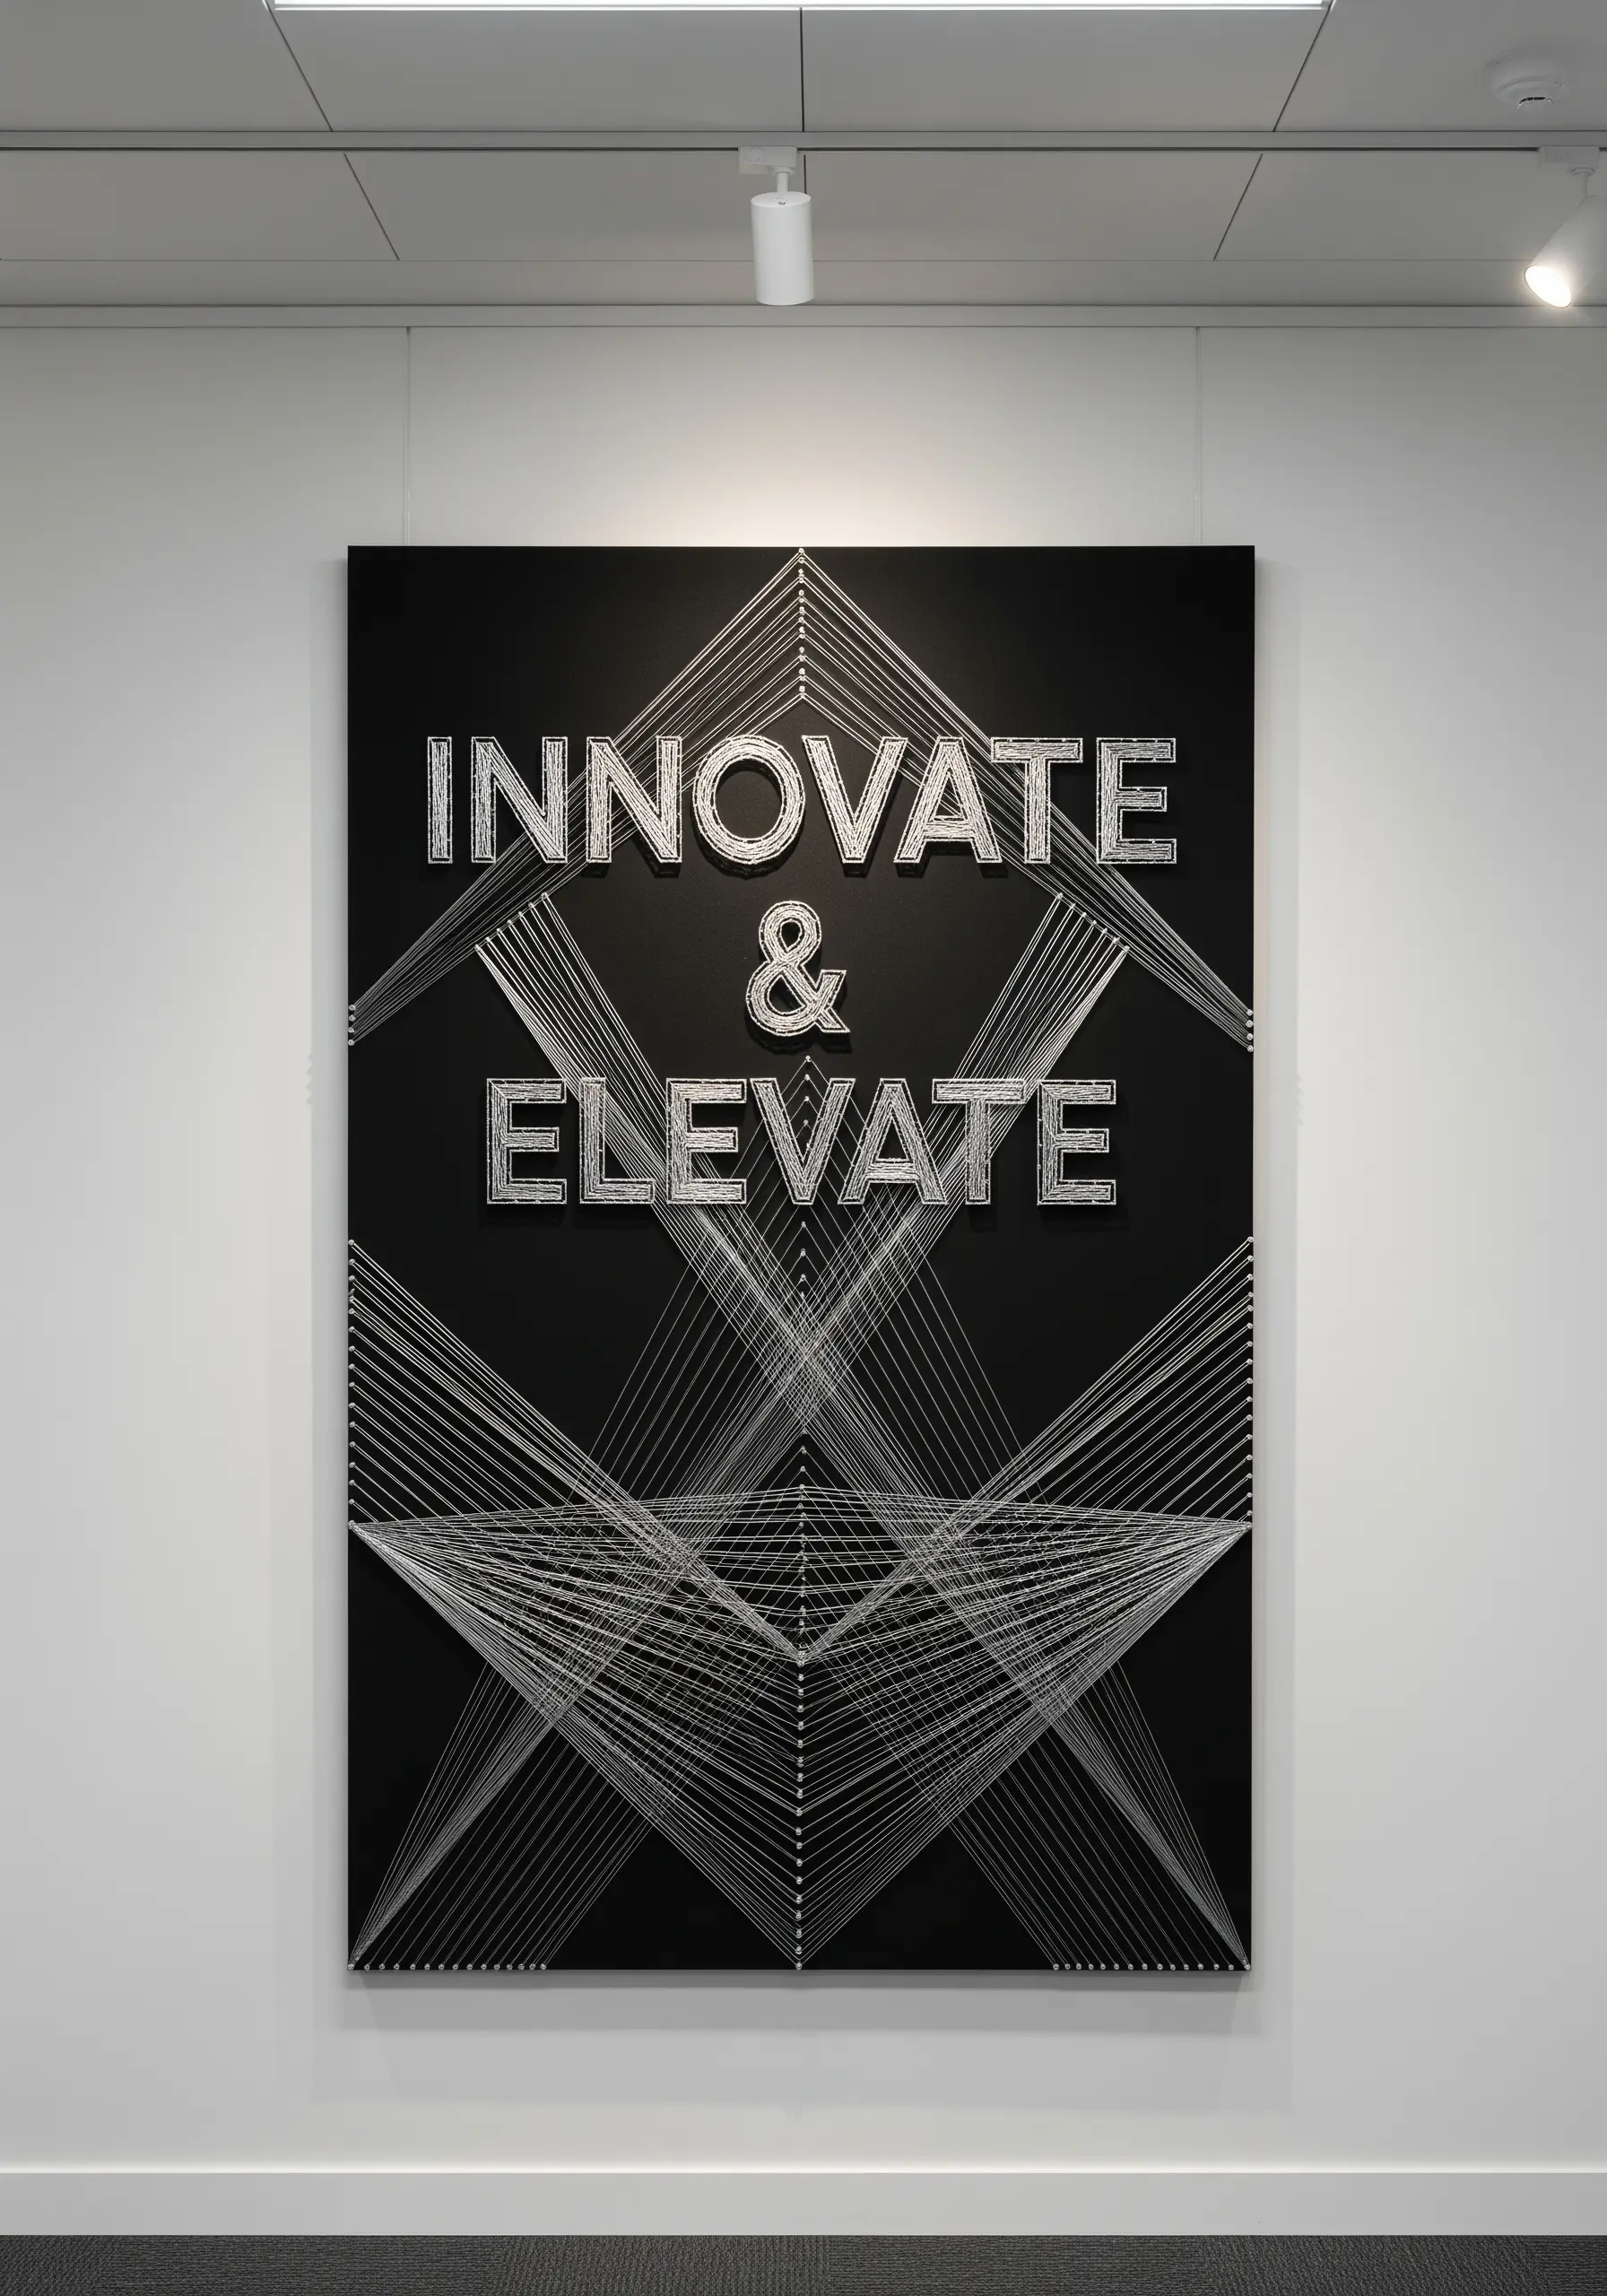
3. Map Out a Circuit Board Motif with Precision

This design celebrates precision, making it perfect for a modern office space.
Start by transferring a circuit board pattern onto a stiff, dark fabric or a fabric-covered foam board.
Use a fine but strong thread, like perle cotton No. 8, to ensure the lines remain crisp and don’t sag over time.
Introduce a second, high-contrast color to highlight specific pathways, guiding the viewer’s eye through the design.
For the lettering, consider iron-on felt letters for a perfectly clean, graphic finish that complements the technical aesthetic.
4. Layer Thread Colors to Build Mountain Landscapes

Create the illusion of atmospheric depth by layering different colors of thread to form mountain ranges.
Begin with the lightest color for the mountains in the far distance, and work your way forward, using progressively darker or warmer tones for the closer peaks.
Slightly overlap your thread colors where the mountains meet to create a softer, more natural transition.
The negative space around the quote is essential—choose a neutral linen or cotton canvas to provide a sense of calm and openness.
5. Frame Your Quote with an Organic, Woven Border

Move beyond rigid shapes by creating a free-form, organic border around your central message.
Plot two irregular, looping lines of anchor points, then weave two different thread textures—like a matte teal cotton and a shiny copper metallic—between them.
This layering of color and finish adds incredible depth and a rustic, handmade quality.
For the lettering, couching a very thick, soft yarn creates a bold statement that balances the intricate frame.
This technique is a beautiful example of retro string art patterns made modern.
6. Use Monochrome Lines for Architectural Depth
A simple black-and-white palette delivers immediate graphic impact and sophistication.
The key to this architectural style is creating sharp, intersecting planes of thread.
Use a fine, high-tensile thread and pull it very taut between your anchor points to maintain those razor-sharp edges.
By varying the density of the lines, you can create the illusion of shadow and three-dimensional form.
The clean, sans-serif font enhances the modern, structural feel of the piece, making these perfect stitched details that make plain walls pop.
7. Combine Playful Lettering with a Colorful Frame
Capture the spirit of creative chaos by using a rainbow variegated yarn for the ‘messy’ string art border.
The random color changes in the yarn will create a vibrant, energetic frame with zero effort.
For the letters, first outline them with a split stitch to create a defined edge.
Then, fill the outlined letters using a single strand of floss in a satin stitch for a clean, almost cartoonish effect that contrasts beautifully with the wild border.
8. Create Soft Gradients with Concentric Circles
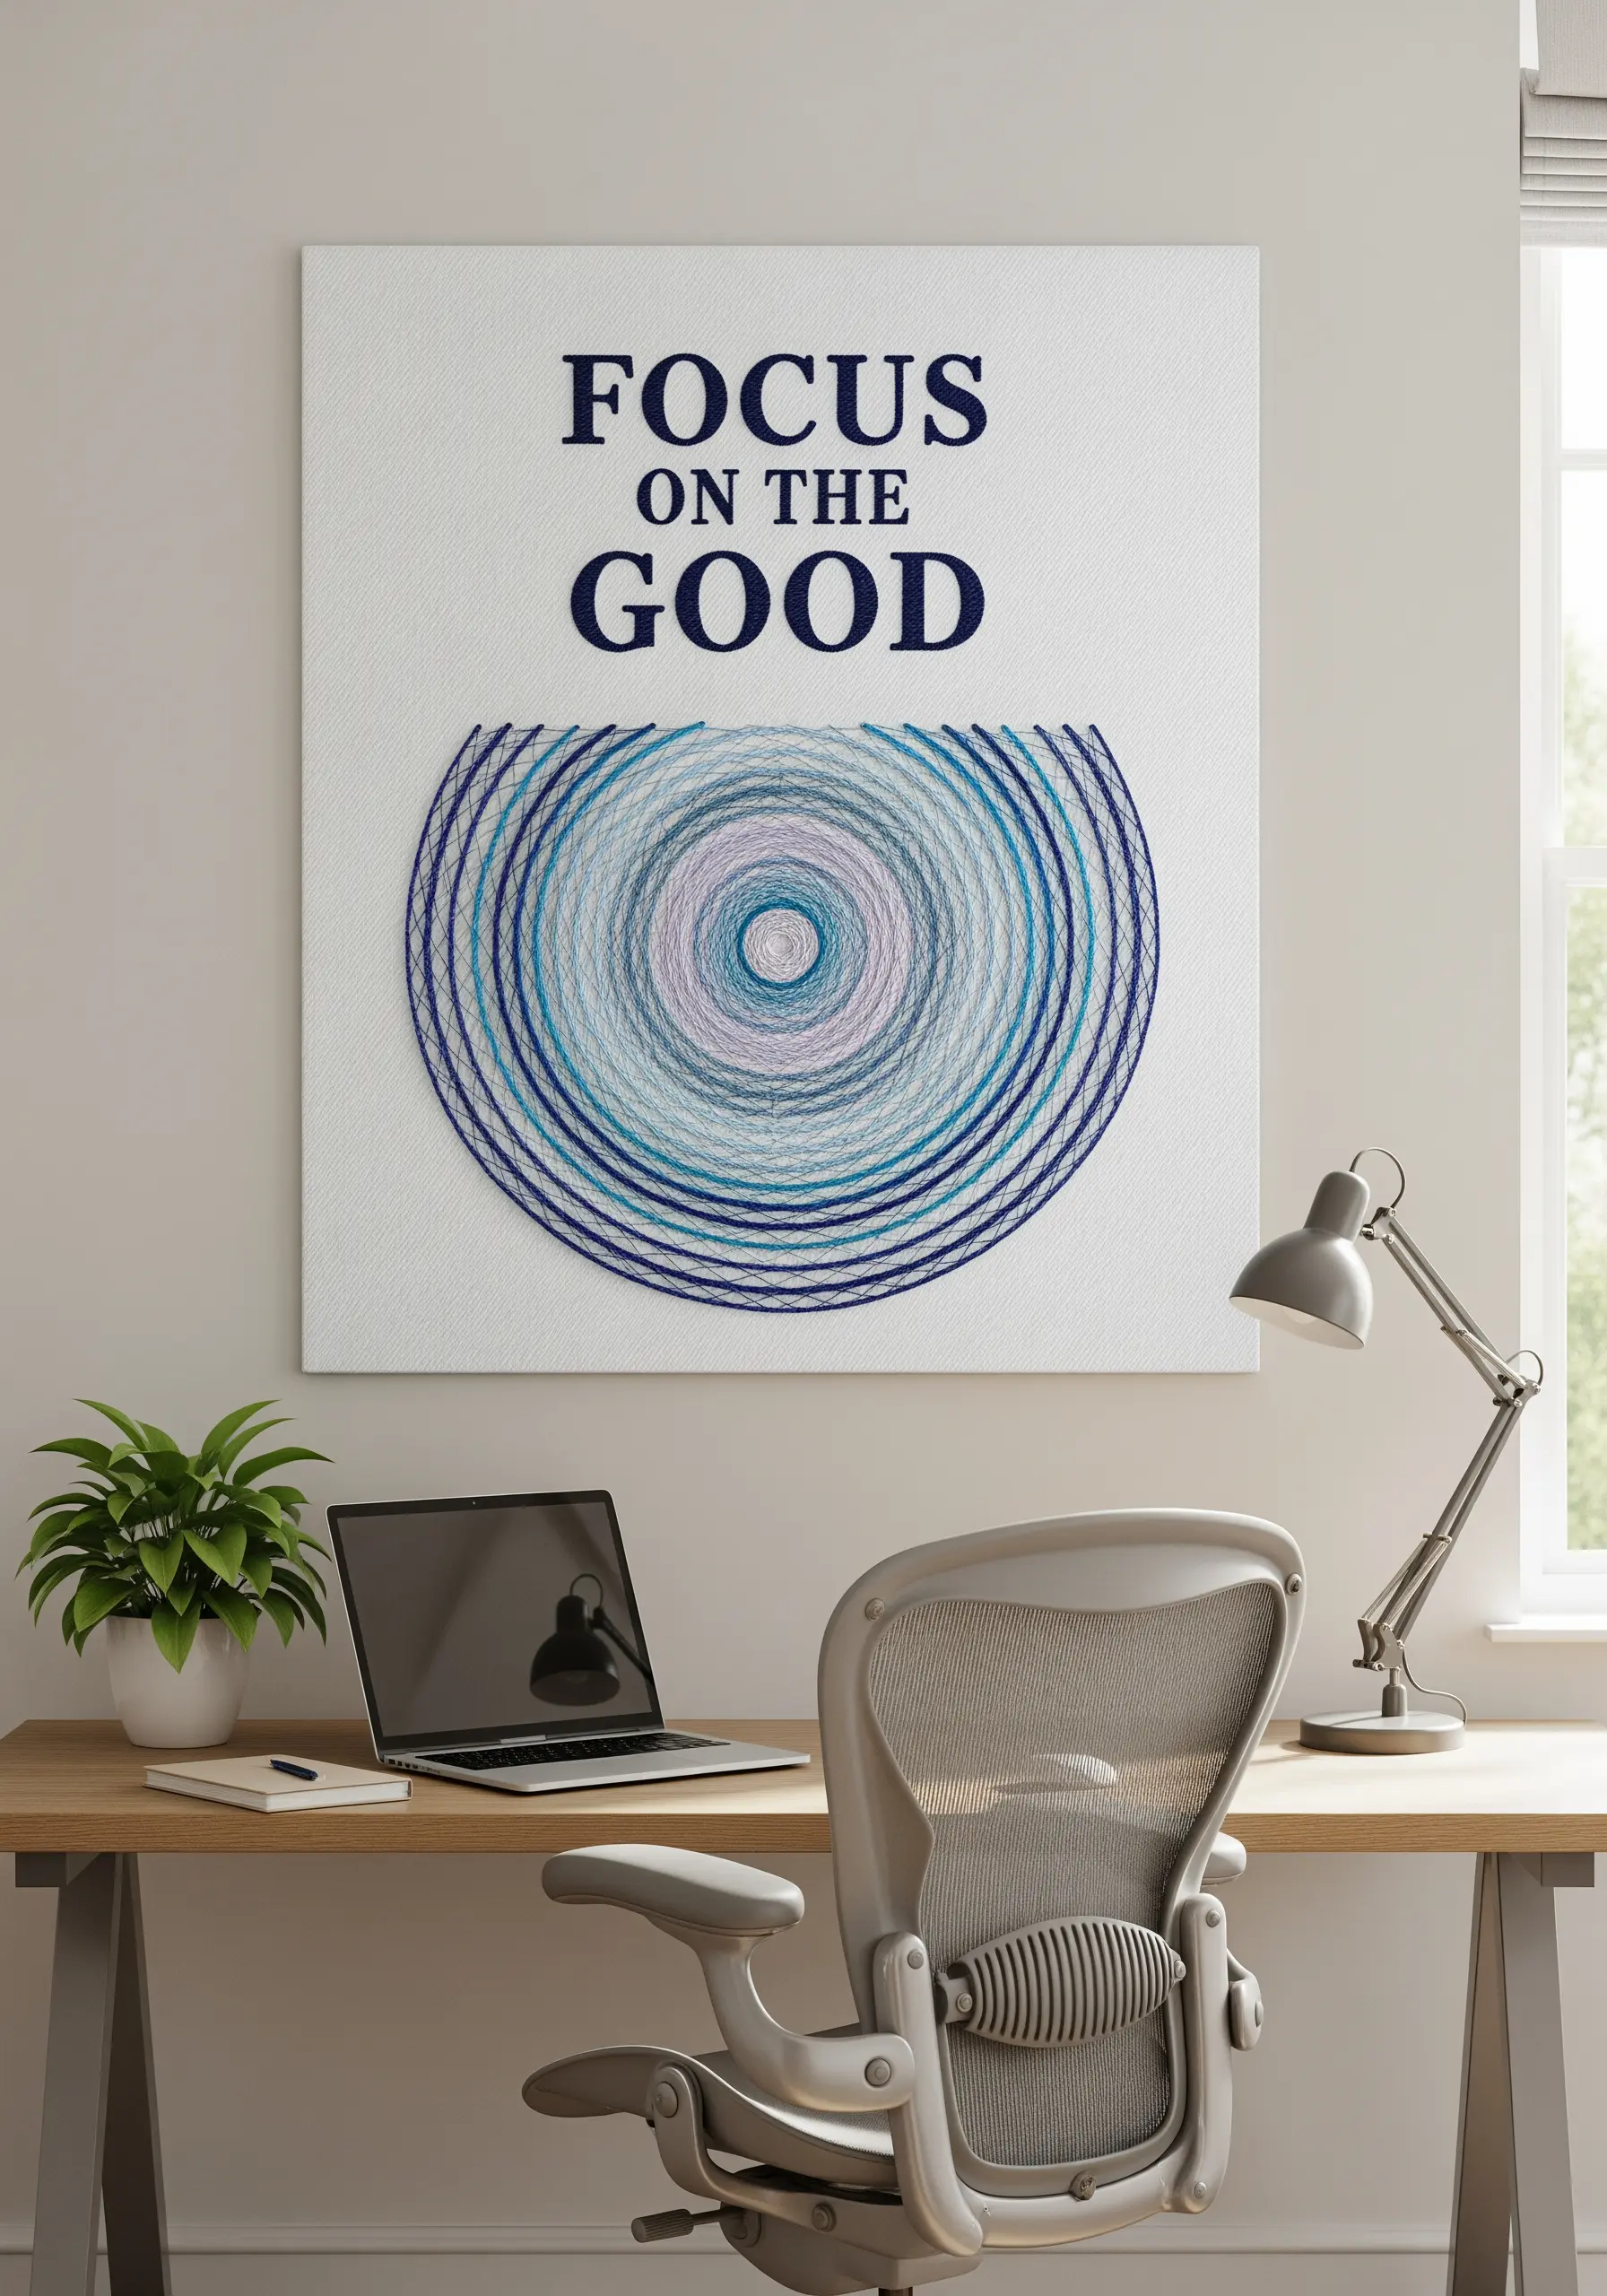
This meditative design is built by winding thread in concentric circles, which creates a soft, almost hypnotic visual effect.
Select three to four analogous shades—colors next to each other on the color wheel, like blue and lavender—for a subtle, harmonious gradient.
Slightly overlap the thread as you transition from one color to the next to ensure a smooth, seamless blend.
The simple, classic lettering at the top provides a quiet anchor, allowing the colored circle to be the main focus.
9. Emphasize a Central Idea with a Network Motif
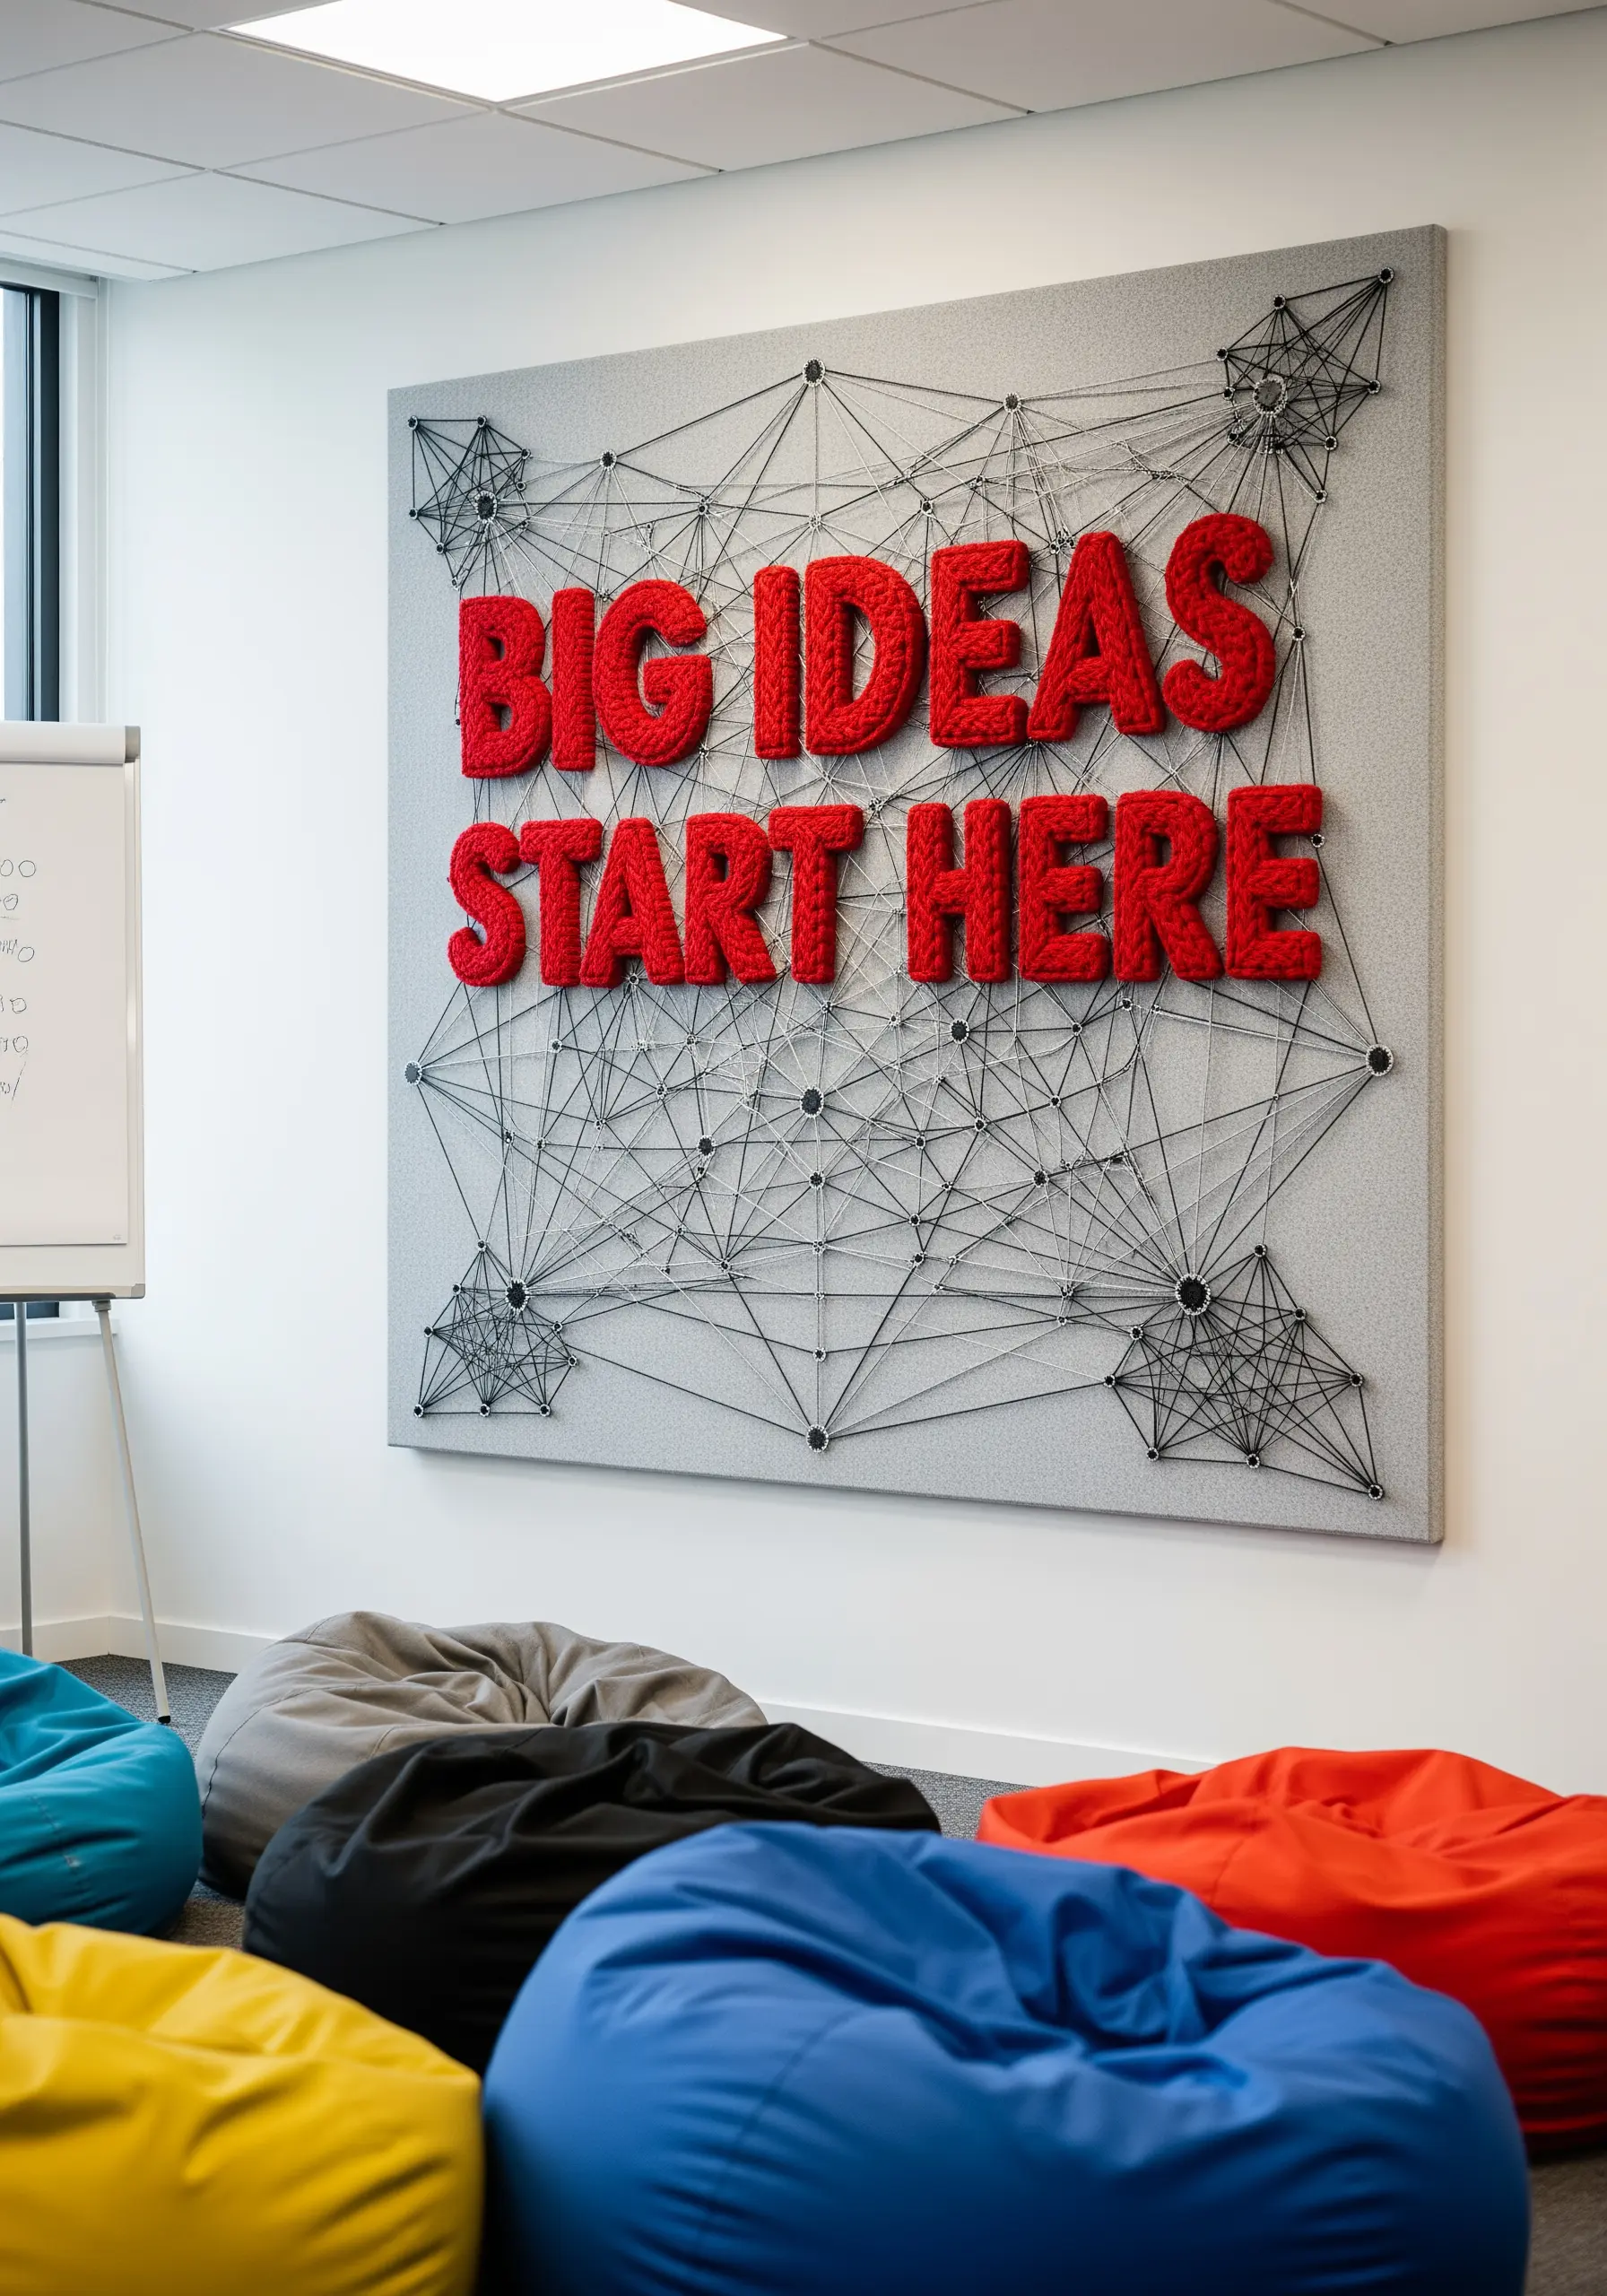
Make your message the undeniable hero of the piece by setting it against a subtle, textural background.
Create the background ‘network’ using a neutral gray thread to form interconnected geometric nodes.
Then, couch down a thick, highly textured yarn in a bold, primary color like red to form your letters.
This contrast in both color and texture ensures your quote commands attention immediately.
It’s one of the most effective high texture fabric collage embroidery projects for making a statement.
10. Combine String Art with Traditional Stitches

Elevate your design by blending the geometric precision of string art with the delicate freedom of hand embroidery.
Create the main dandelion head using the string art technique with fine white cotton floss for a light, airy look.
Then, use simple straight stitches and detached chain stitches to create the tiny seeds floating away, adding a sense of movement and narrative.
The combination of techniques on a rustic fabric like burlap creates a piece with immense charm and texture.
11. Master Negative Space with Minimalist Lines
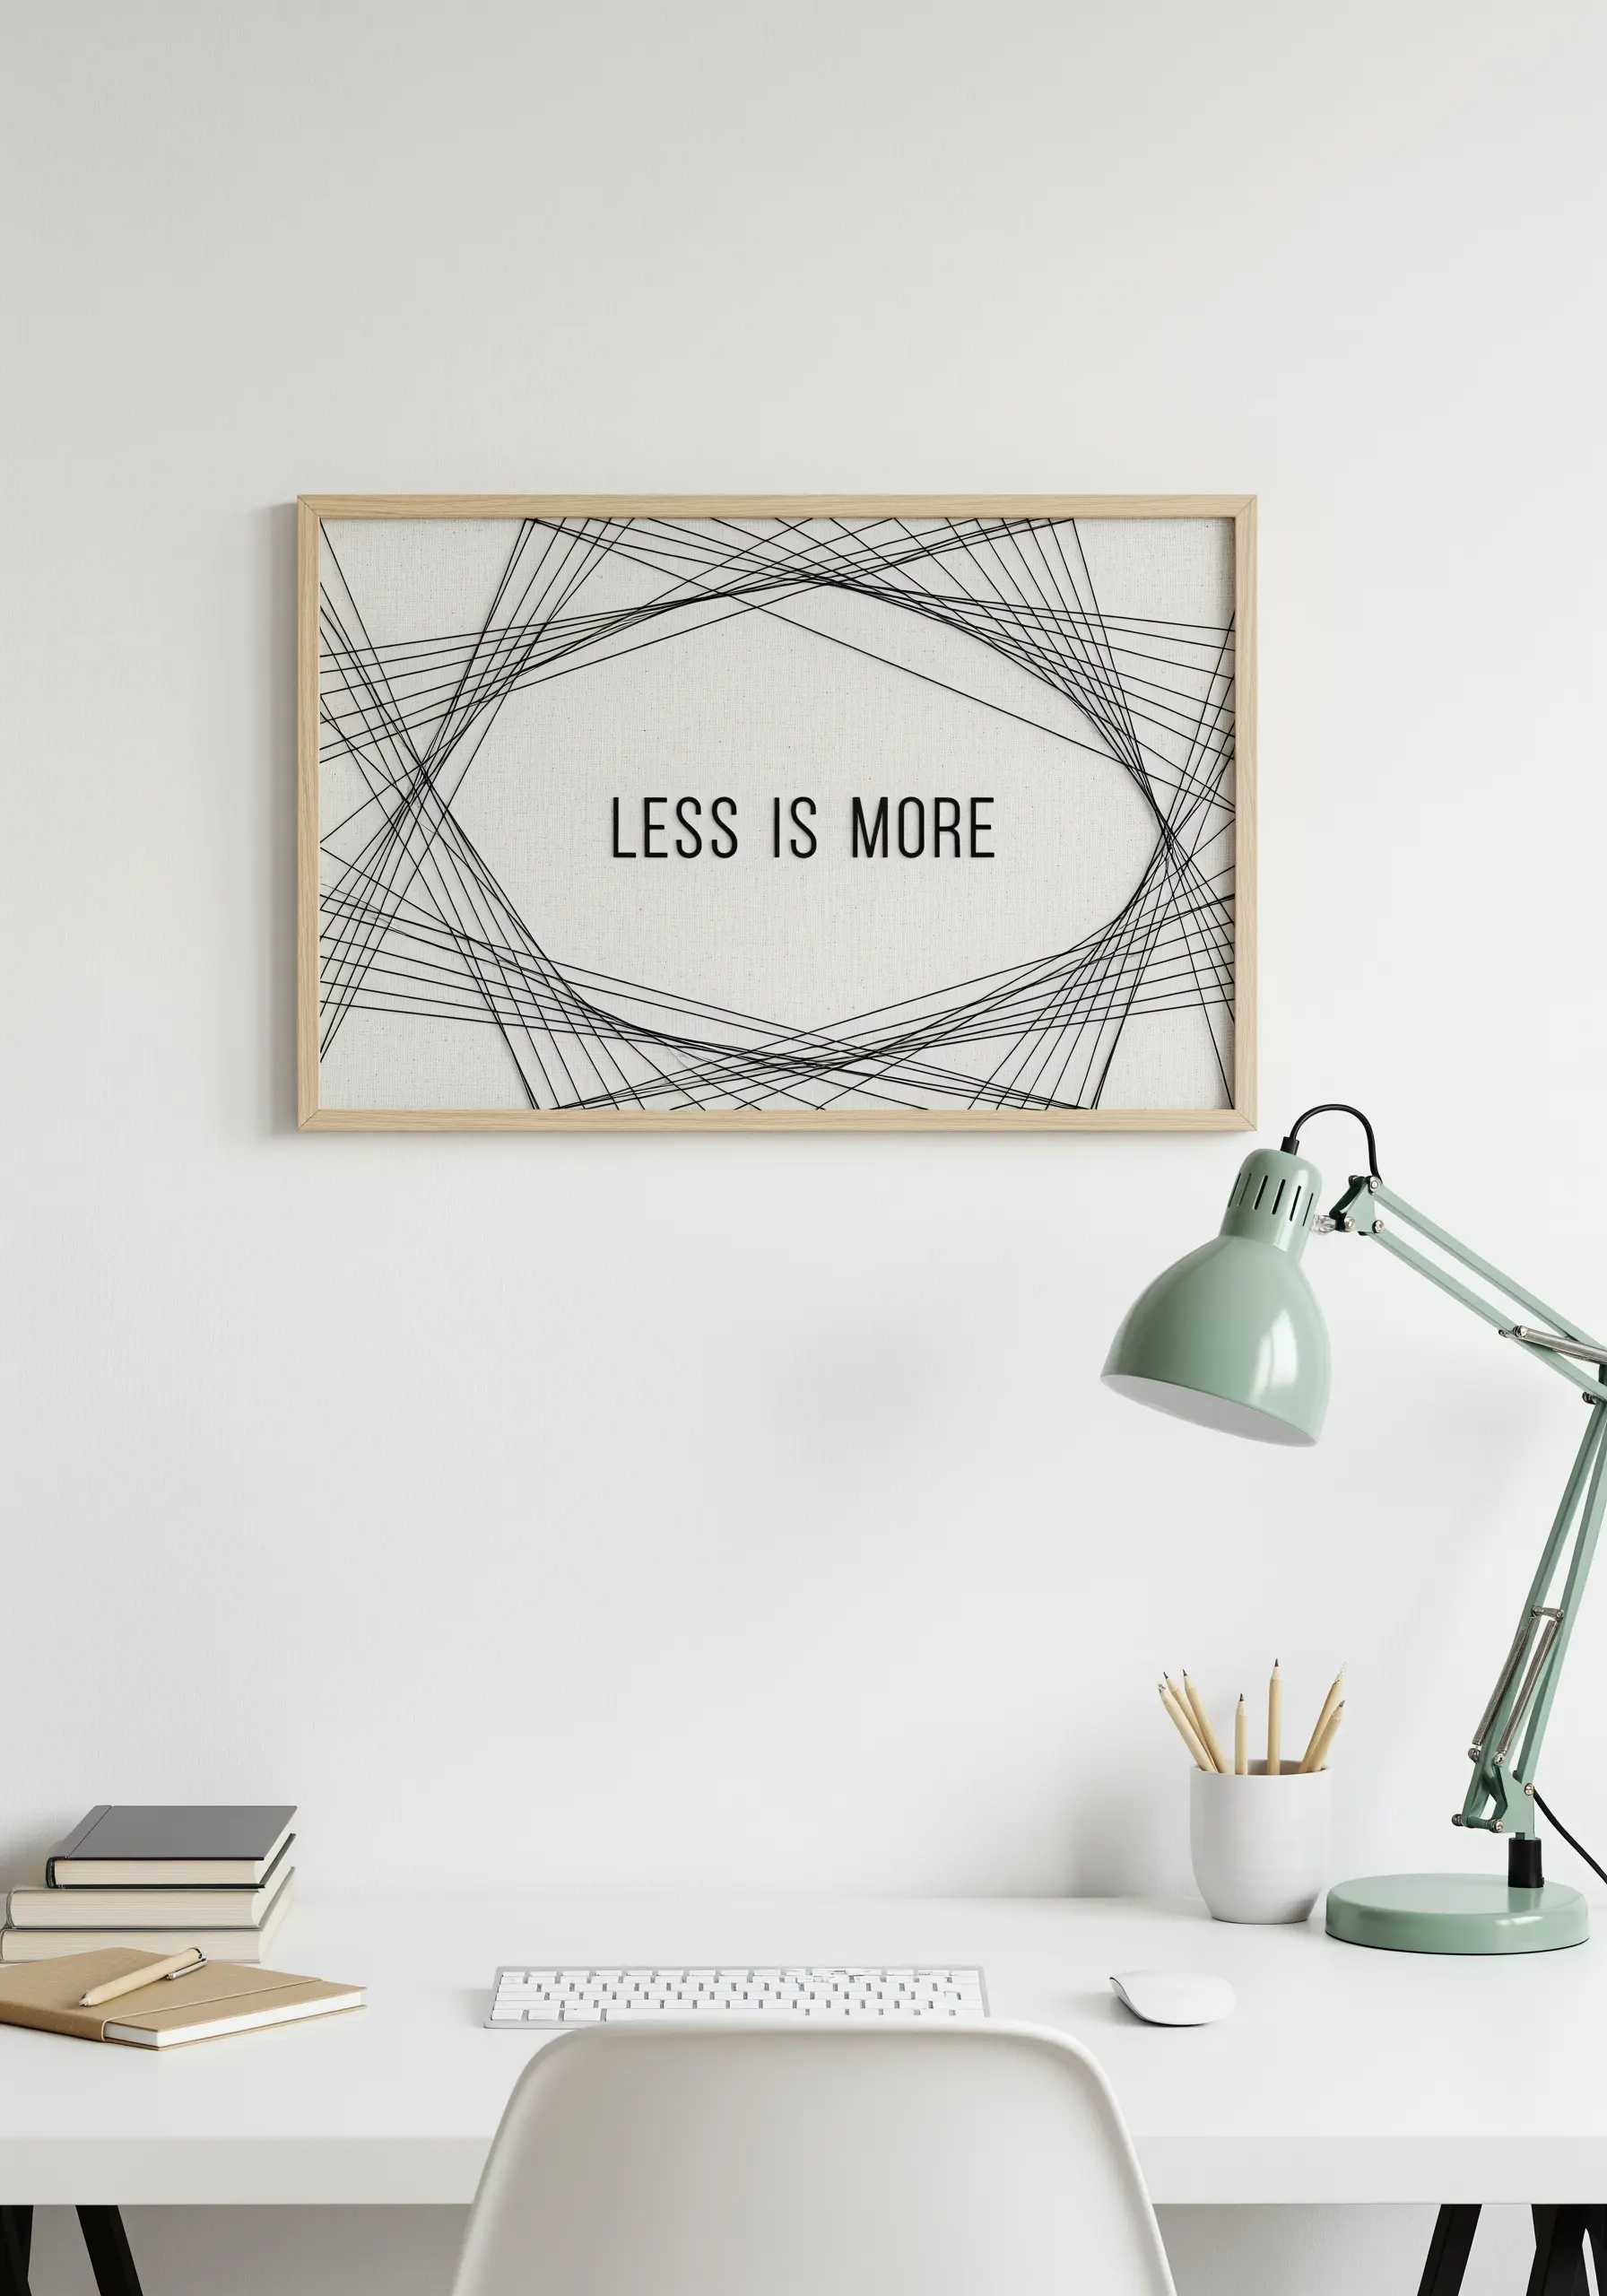
This piece demonstrates that the unstitched areas are just as important as the stitched ones.
Use a single, fine black thread on a light, neutral fabric like oatmeal linen for maximum contrast.
Create an abstract, asymmetrical shape with intersecting lines, focusing on the balance and flow of the composition.
The lettering should be equally restrained; a simple backstitch or even a printed font keeps the focus on the airy, linear form, making it a perfect example of botanical line art embroidery patterns‘ minimalist cousin.
12. Create Botanical Textures with Layered Stitches
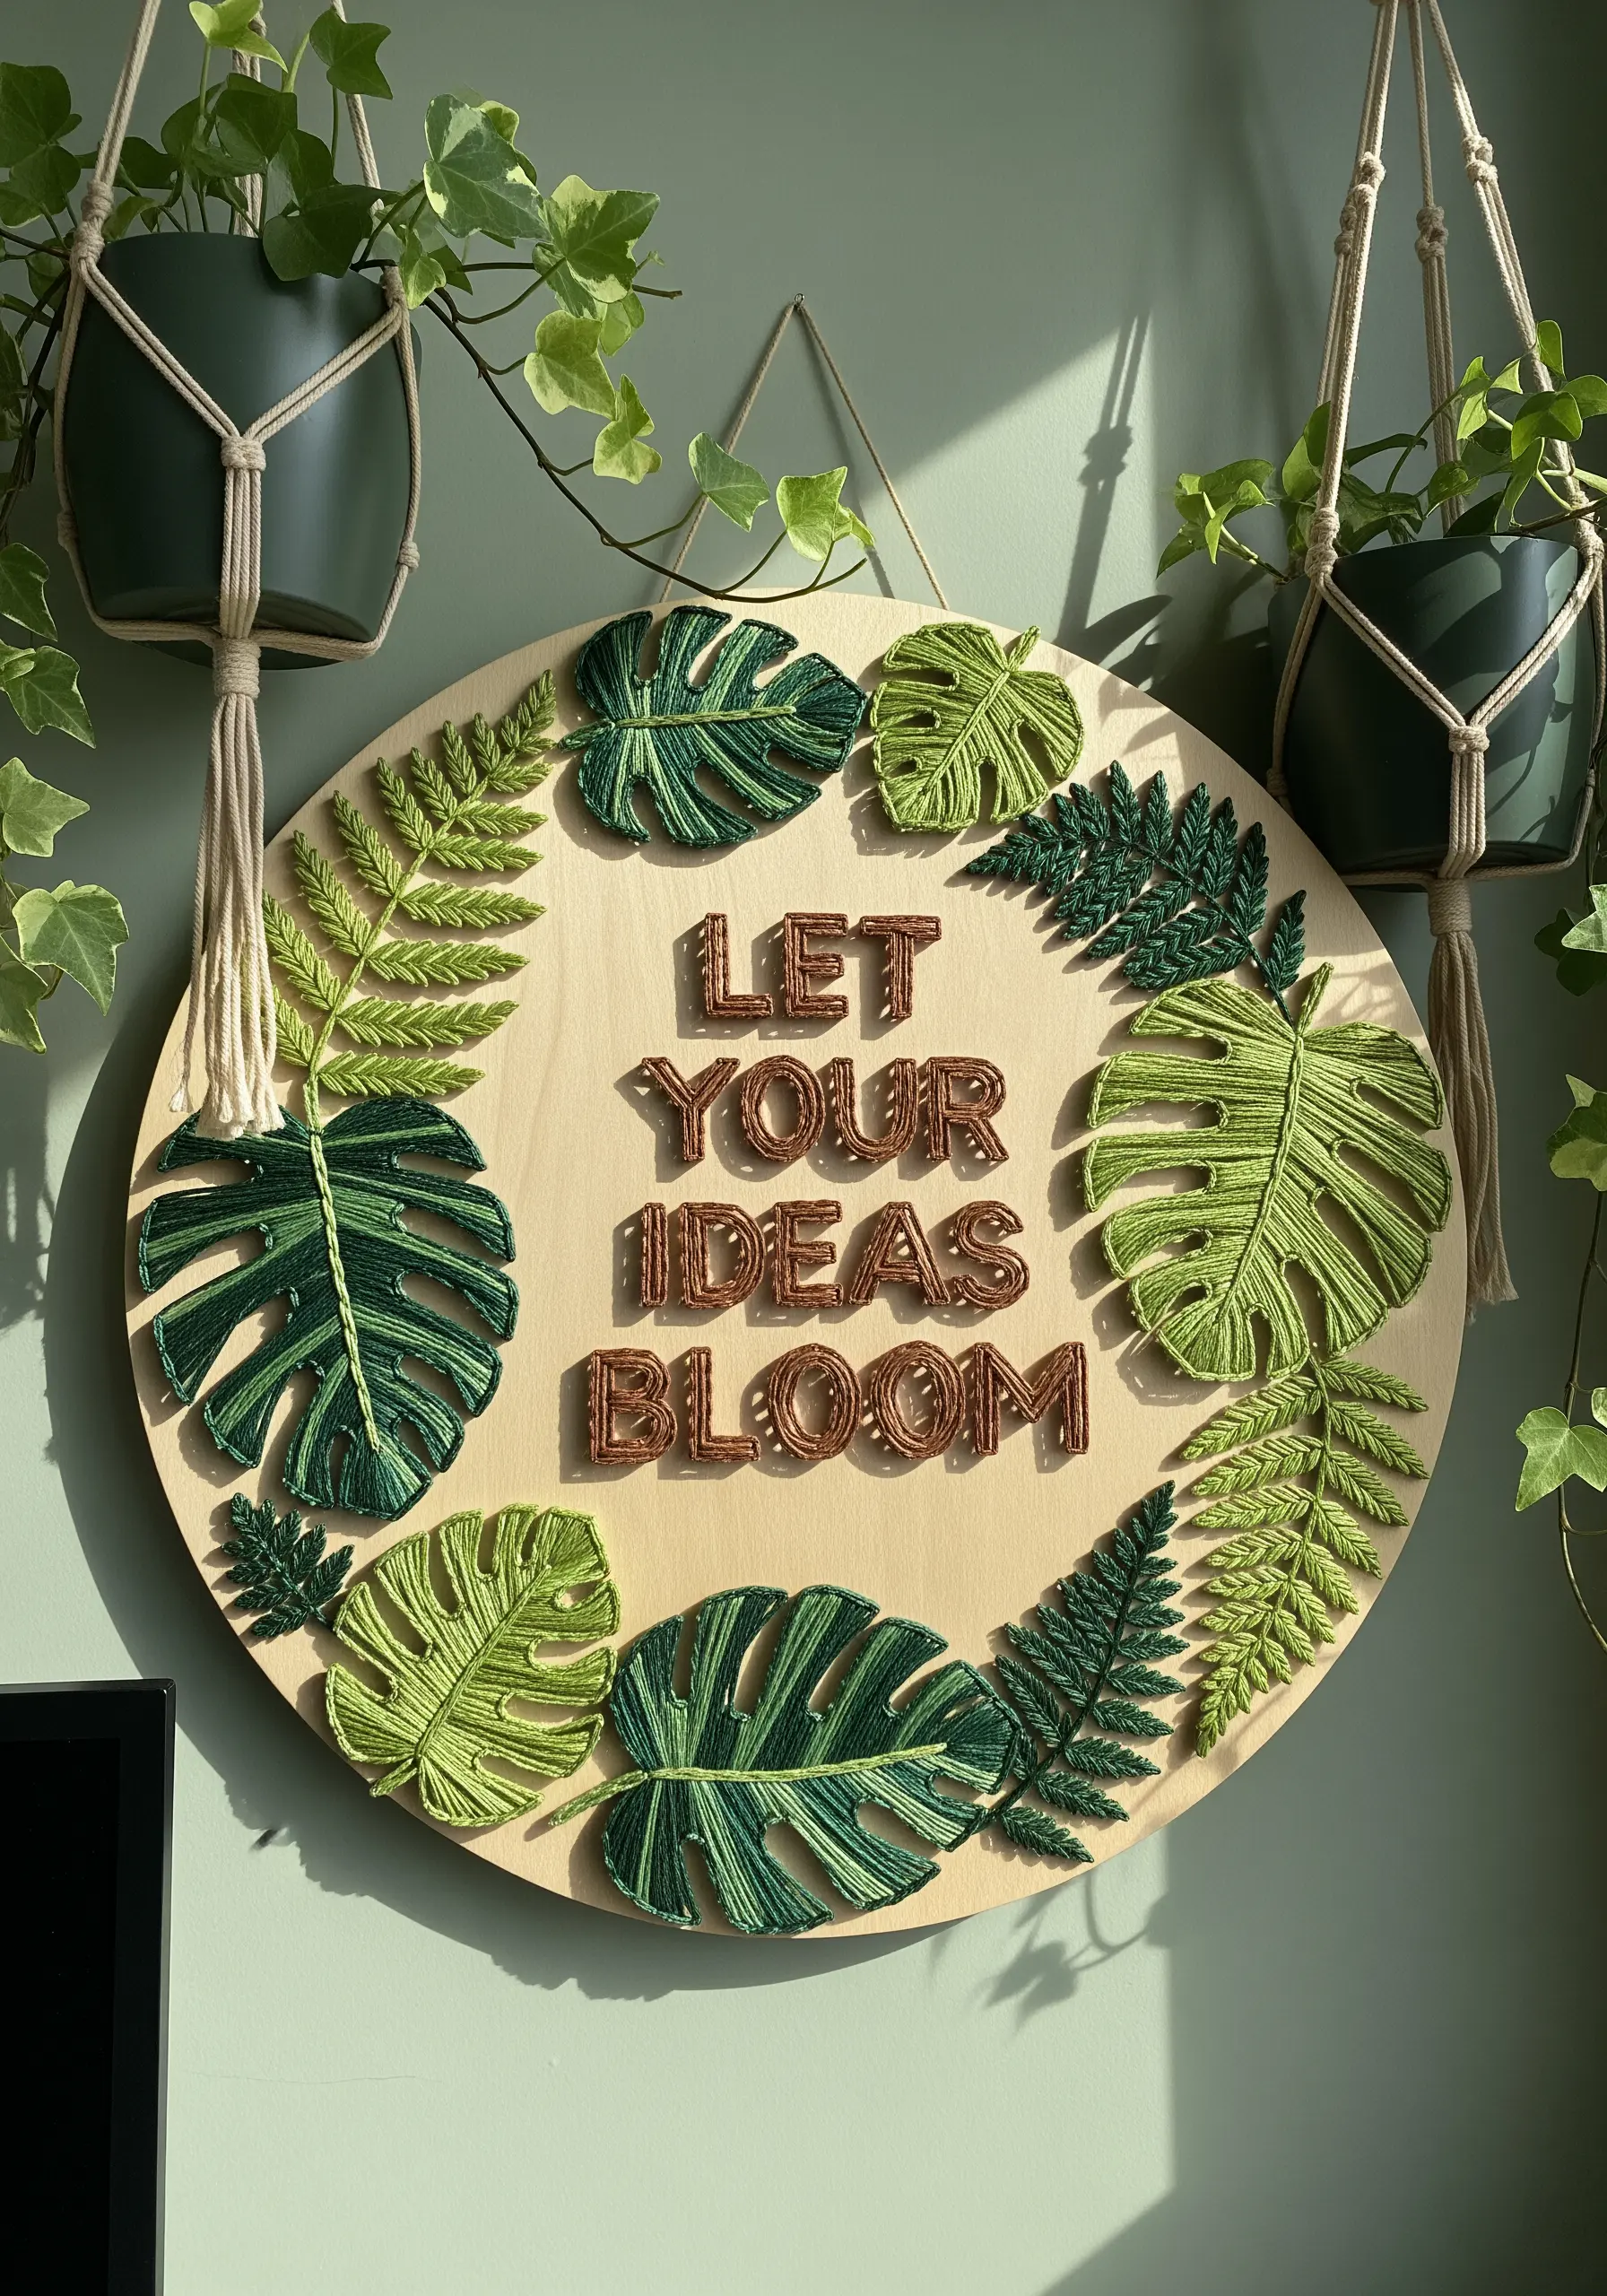
Instead of simply filling leaf shapes, focus on recreating their natural texture and form.
Use long-and-short stitches or a fishbone stitch to mimic the direction of veins in the monstera and fern leaves.
Layering several shades of green for each leaf—a darker shade near the stem and a lighter one at the tip—will add dimension and realism.
Working on a solid wood plaque provides a sturdy base and a natural backdrop that enhances the botanical theme.
13. Stitch Flowing Waves with Blended Colors

To create these serene, flowing waves, use long, straight stitches pulled taut between two parallel, undulating lines of anchor points.
The secret to the painterly effect is to use several analogous colors—like sea green, periwinkle, and pale pink—and switch between them randomly as you stitch.
This subtle, unplanned variation mimics the way light reflects on water, creating a sense of movement and calm.
The clean, centered lettering provides a point of stillness above the motion.
14. Use Metallic Thread for a Symbolic Motif

Give a single, symbolic object immense visual weight by stitching it entirely in metallic thread.
To avoid the frustration of working with metallics, use a thread conditioner like beeswax and work with shorter lengths of floss (no more than 12 inches).
A simple shape like this key becomes instantly precious and significant when rendered in gleaming gold.
Choose a deep, saturated background fabric, like this teal linen, to make the metallic thread truly shine.
These are the kinds of stunning framed embroidery pieces that tell a story.
15. Construct an Architectural Cityscape with Thread
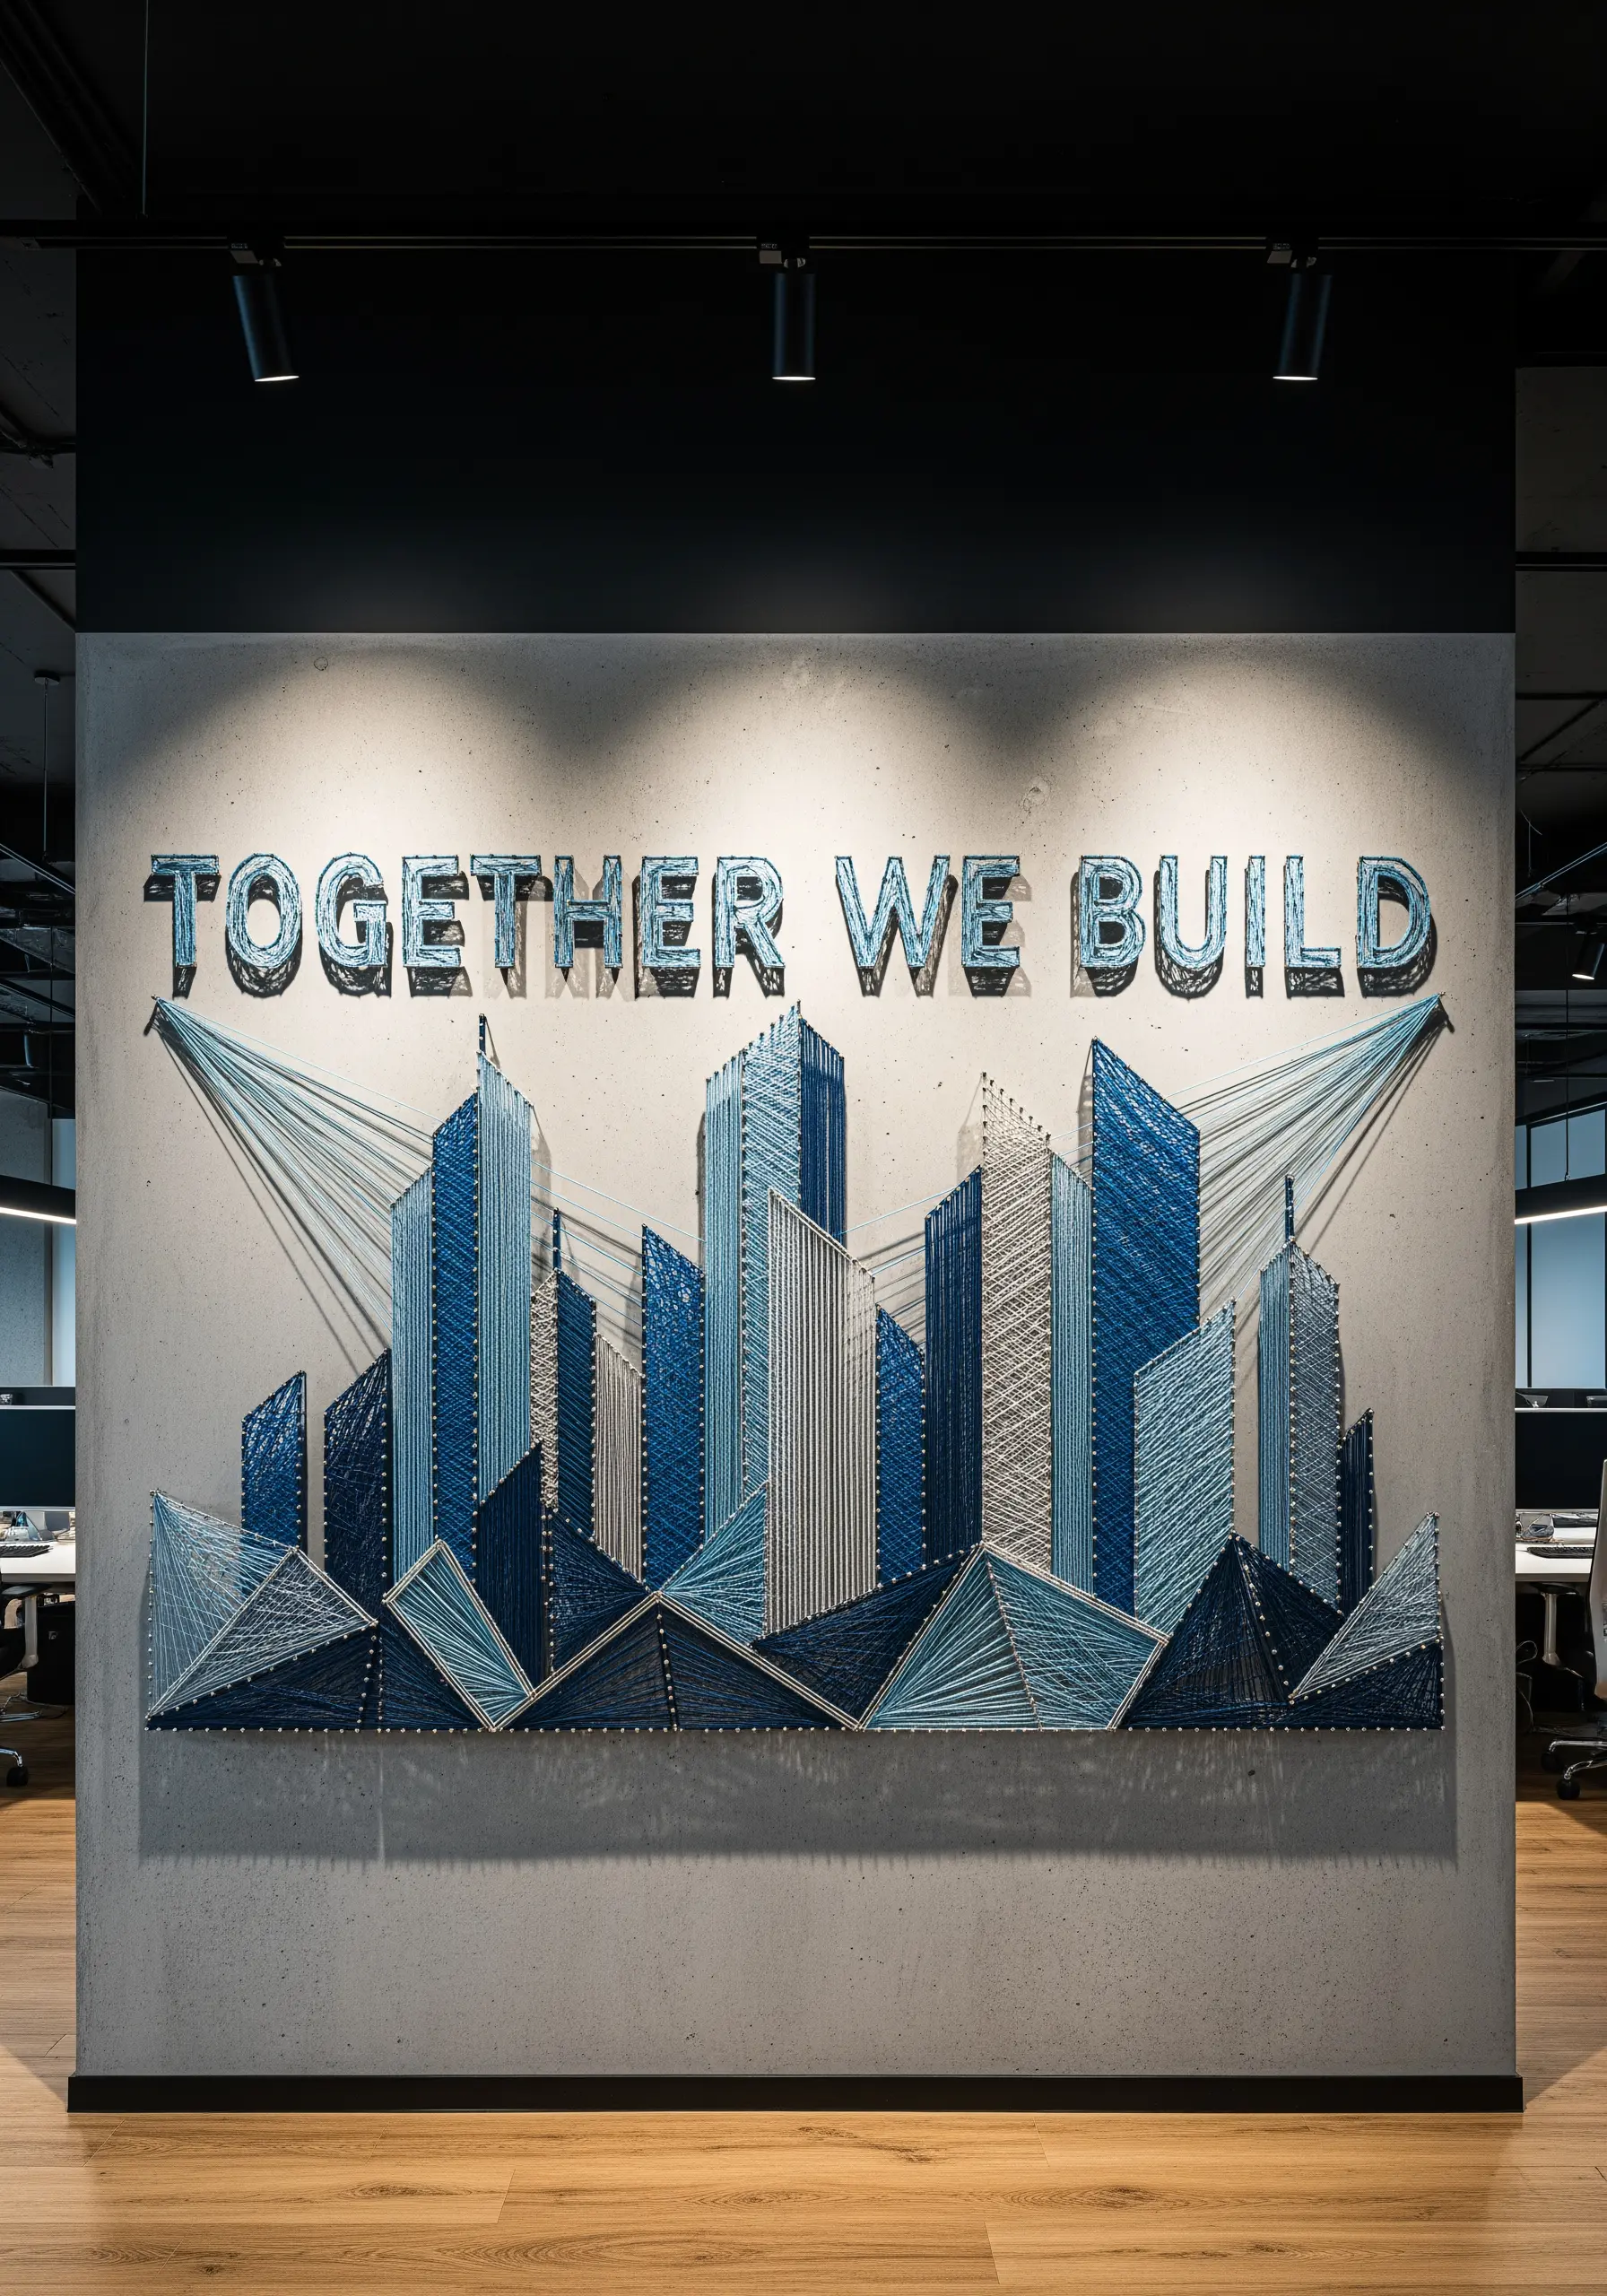
Build an entire cityscape using thread to create depth, shadow, and form.
Use a monochromatic color palette with various shades of blue to suggest buildings at different distances—lighter blues for further away, darker blues for the foreground.
Vary the density of your stitches: tightly packed threads create the look of a solid facade, while sparser lines can suggest glass or steel frames.
The dramatic lines connecting the letters to the city visually reinforce the powerful message of collaborative creation.
16. Combine Graphic Outlines with Textured Fills
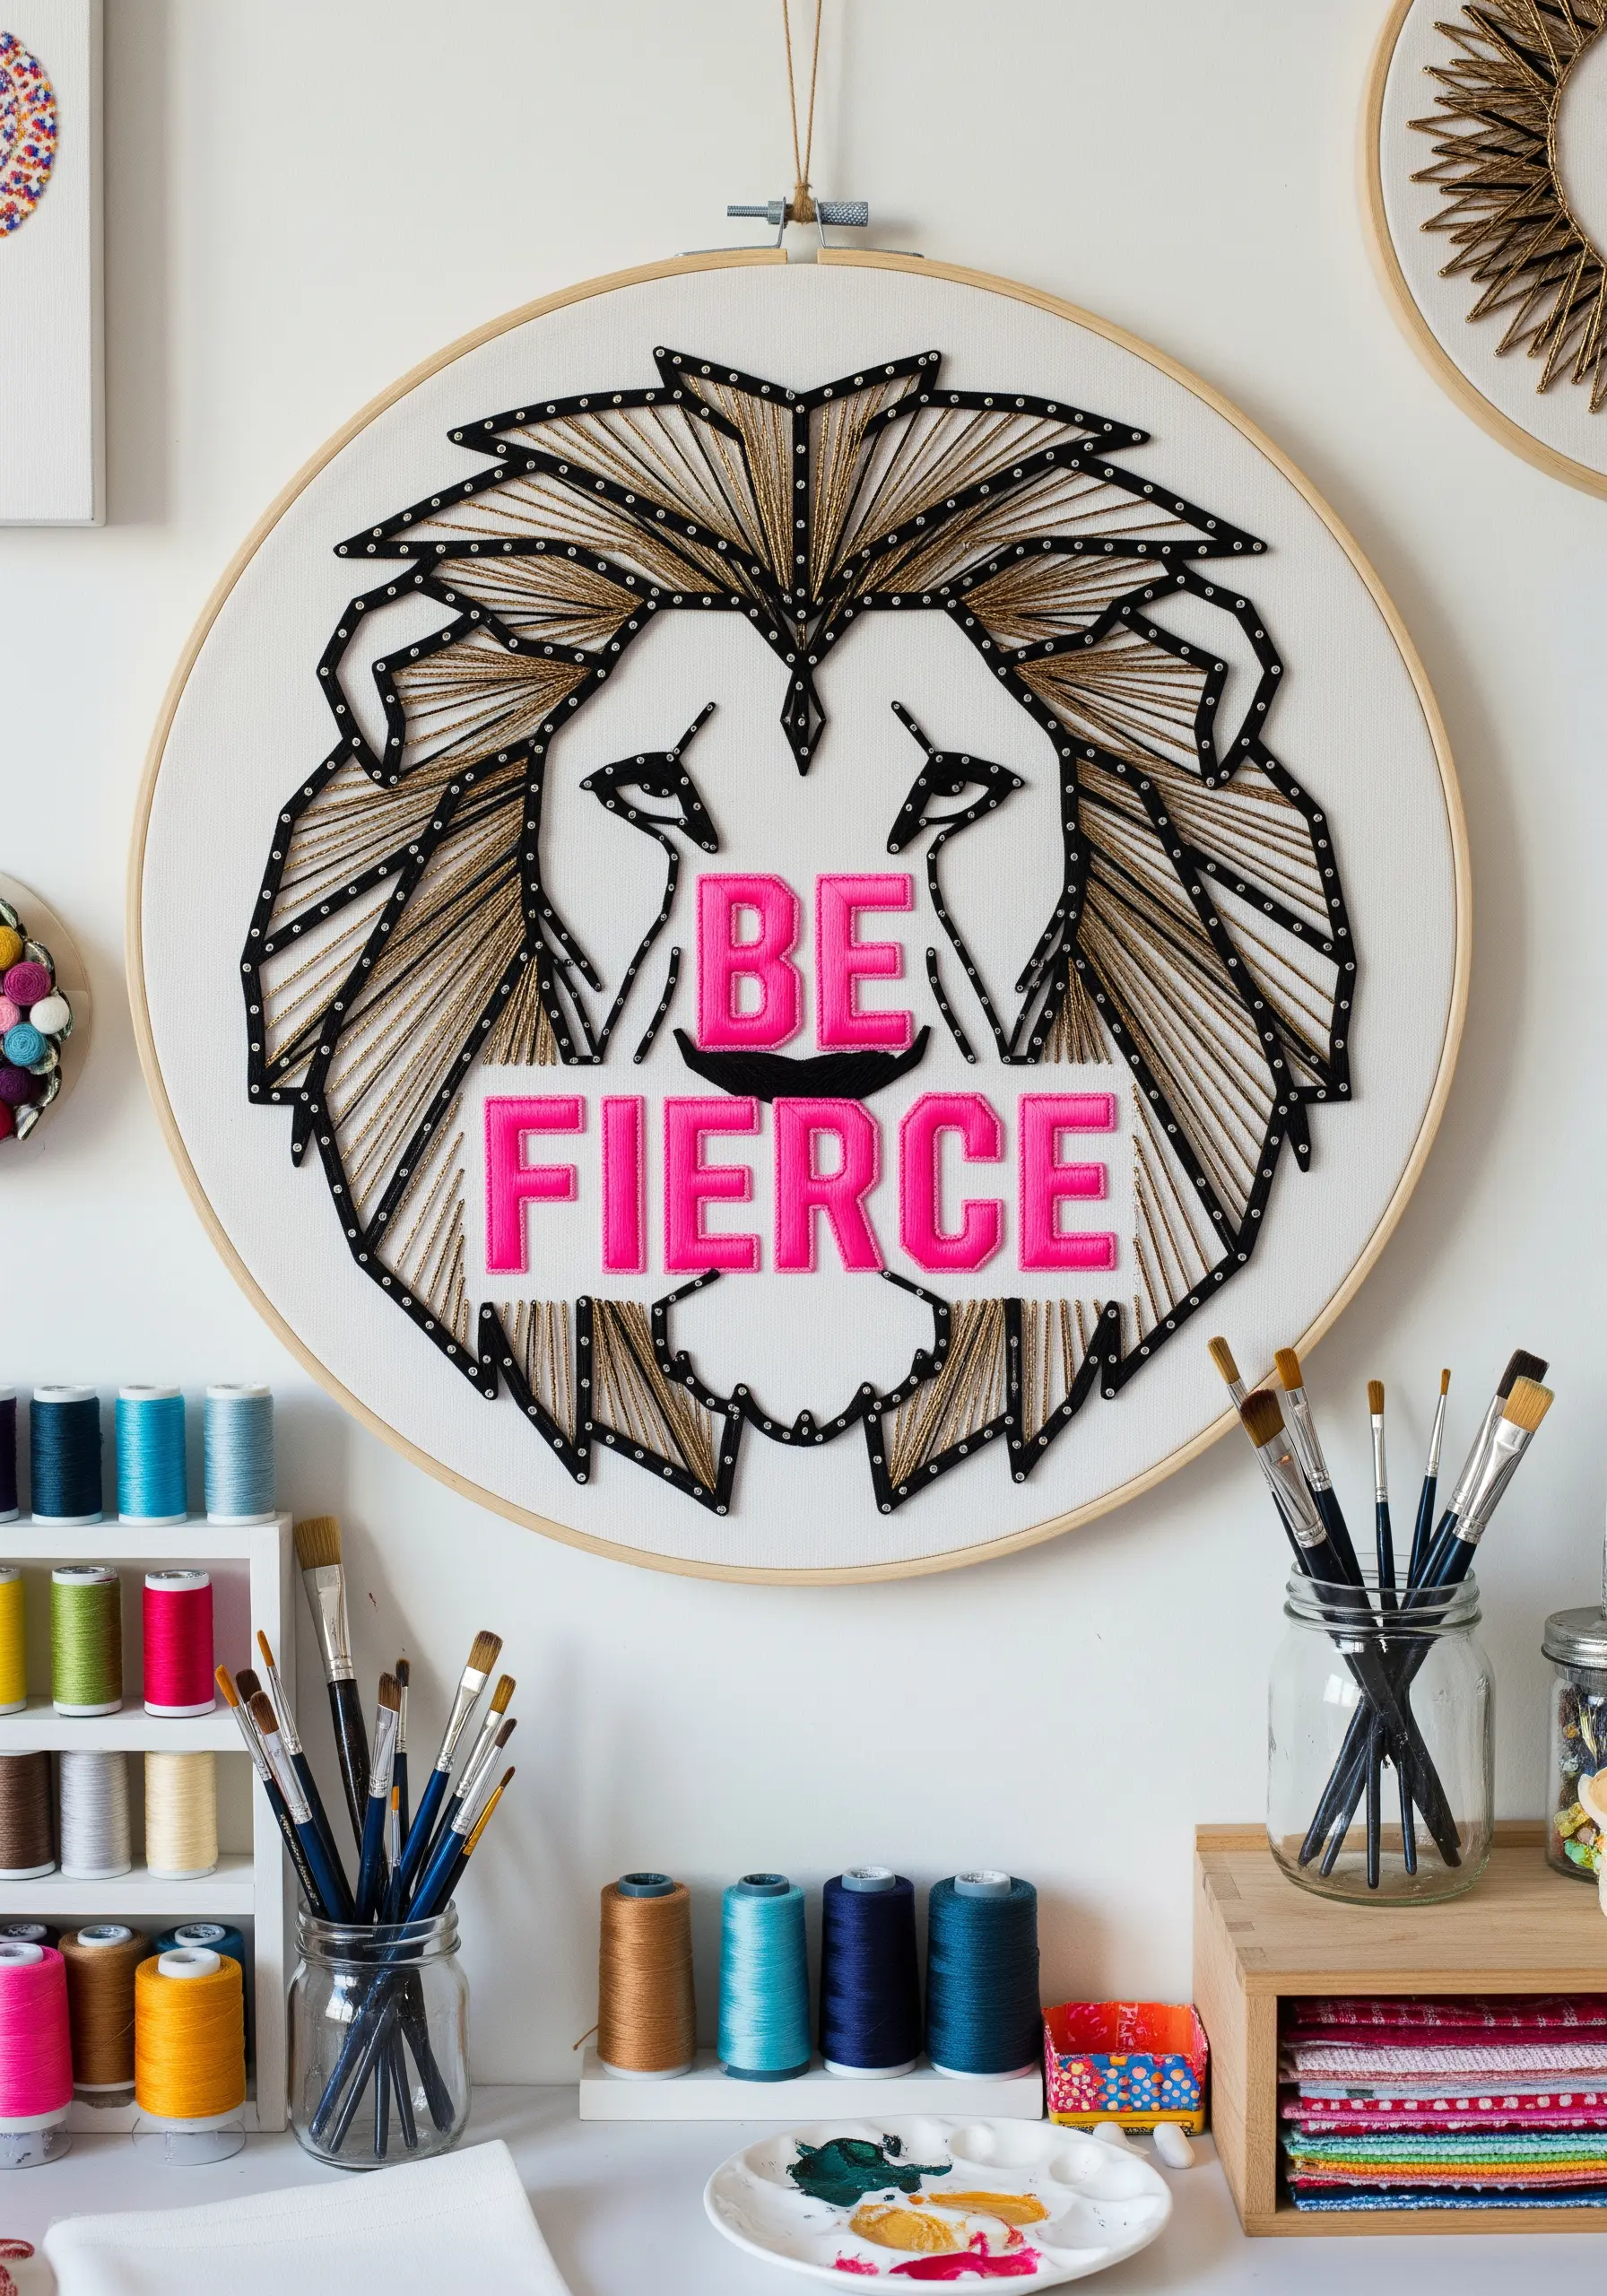
For a design with powerful graphic appeal, start with a bold, non-negotiable outline.
Couching down a thick black yarn is the perfect way to establish the strong, defining lines of the lion’s face.
Next, fill the interior sections with a neutral, textural string art fill—a beige or gold thread adds warmth without competing with the outline.
Finally, introduce a block of shocking pink for the quote, creating an electrifying focal point that is impossible to ignore.
17. Create a Radiant Ombré Sunset Effect

Achieve a flawless gradient effect by planning your color transitions before you start stitching.
Mentally (or lightly with a pencil) divide your shape into color zones—yellow at the top, orange in the middle, deep red at the bottom.
As you stitch from one zone to the next, slightly overlap the threads to create a soft, seamless blend where the colors meet.
This controlled technique results in a radiant glow that perfectly captures the feeling of a warm sunset.
18. Evoke a Neon Sign with Electric-Hued Thread

The key to a convincing neon effect is high contrast.
Place a bright, electric-hued thread—like this vibrant turquoise—against a deep, matte black background.
First, outline your letters clearly. Then, create a chaotic web of intersecting background lines using a finer, lighter-colored thread.
This background static makes the bold lettering appear to float and glow, just like a real neon sign.
Using a thread with a natural sheen, like a rayon or silk floss, will enhance the illusion of light.
19. Fill a Simple Shape with a Rainbow of Color

This technique is a joyful celebration of color and a perfect way to use up small scraps of embroidery floss.
Outline your primary shape—here, a question mark—with anchor points.
Then, simply fill the interior by winding different colors back and forth, embracing the randomness of the pattern.
For the accompanying text, choose one color from your rainbow mix and stitch it in a textured chain stitch. This provides a cohesive link without overwhelming the vibrant central motif.


