

If you’ve ever felt that your embroidery could be… more, you’re in the right place. Sometimes the path from a simple stitch to a finished piece of art feels unclear. You have the skills, but you’re looking for that shift in perspective—the small adjustment that makes a design feel intentional, polished, and uniquely yours.
This weekend, I want you to set aside the idea of just following a pattern. Instead, let’s focus on technique and texture. Think about how the direction of a stitch can change the way light hits the thread, how layering felt can build a landscape, or how combining chunky yarn with fine floss can create a stunning sculptural effect.
These ideas aren’t about complexity; they’re about intention. They are invitations to play with your materials, to see your threads and fabrics as more than just supplies, and to create something that feels deeply satisfying to both make and display. Let’s begin.
1. Layer Botanical Stitches for Lush Realism
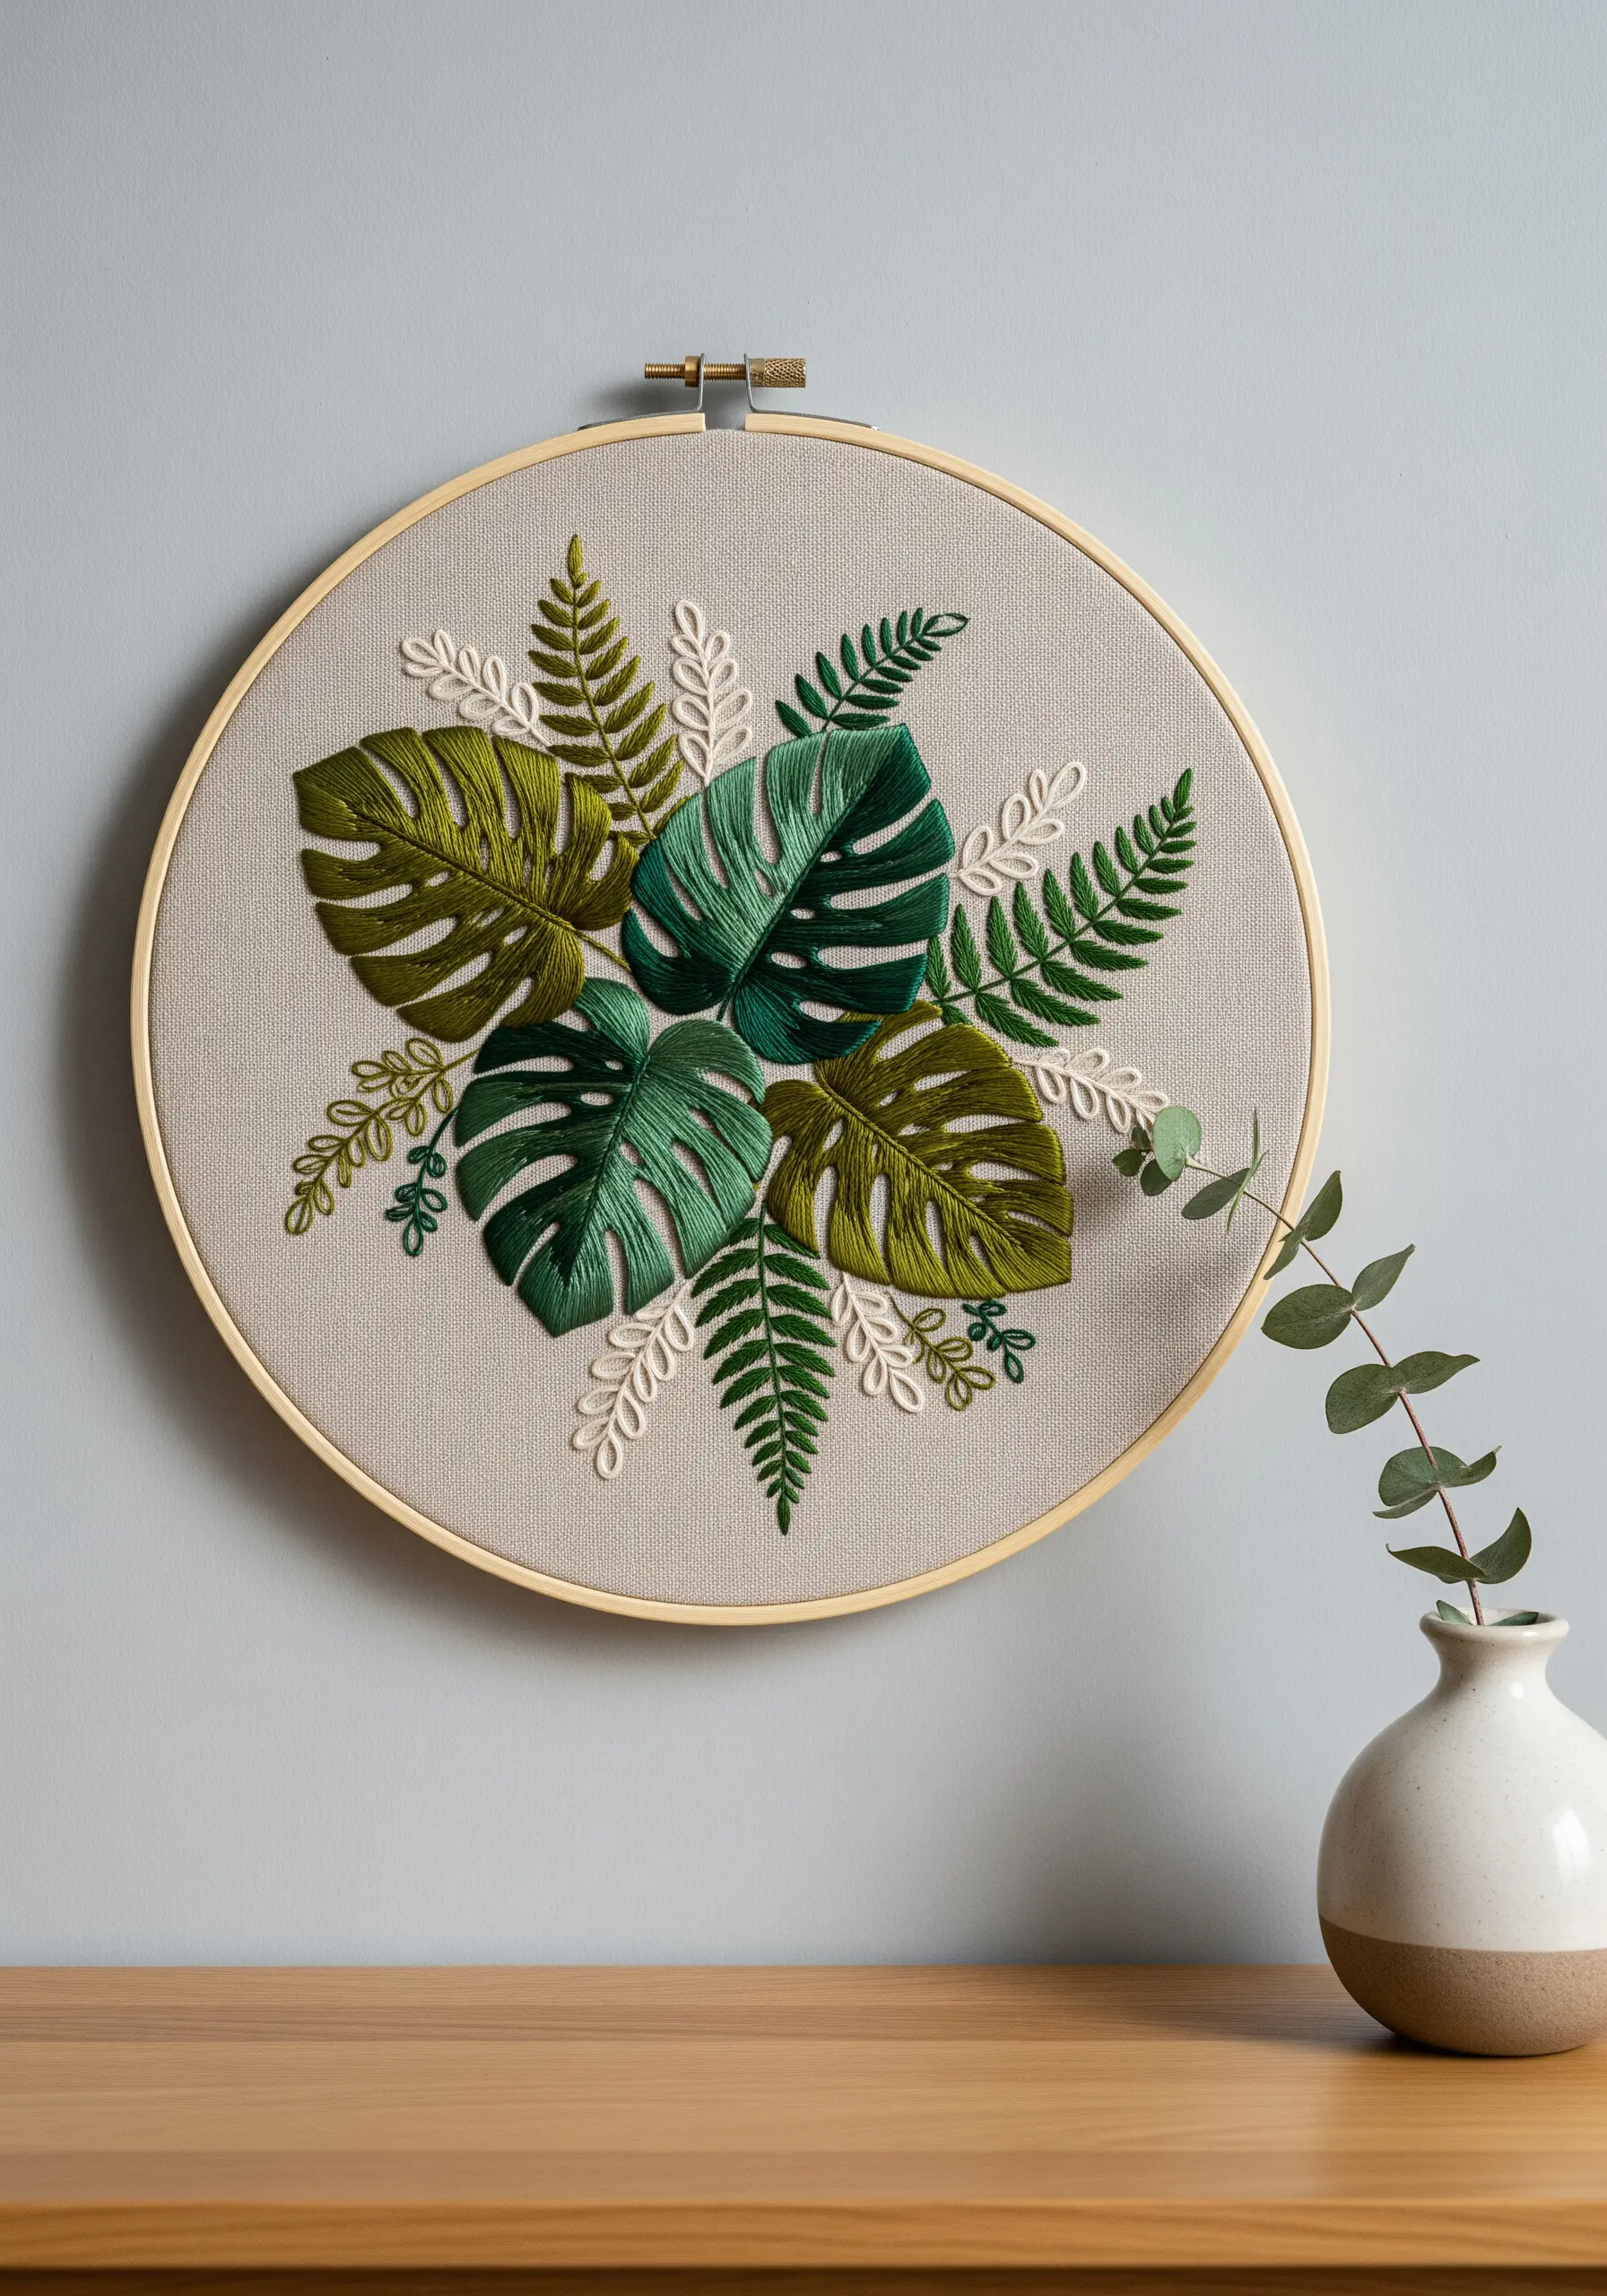
Create depth in your botanical pieces by layering different leaf shapes and stitch directions.
Use a fishbone stitch for the smaller ferns to give them a delicate, feathery texture that contrasts with the larger leaves.
For the main monstera leaves, fill them with satin stitch, but change the angle of your stitches on either side of the central vein to mimic how light reflects off a real leaf.
Finally, add simple backstitch outlines of leaves in a lighter, neutral color to fill negative space without overwhelming the composition—this makes the central motif feel fuller and more dynamic.
This technique of combining filled shapes with simple outlines creates a sophisticated visual hierarchy.
2. Create Graphic Shapes with Punch Needle Texture
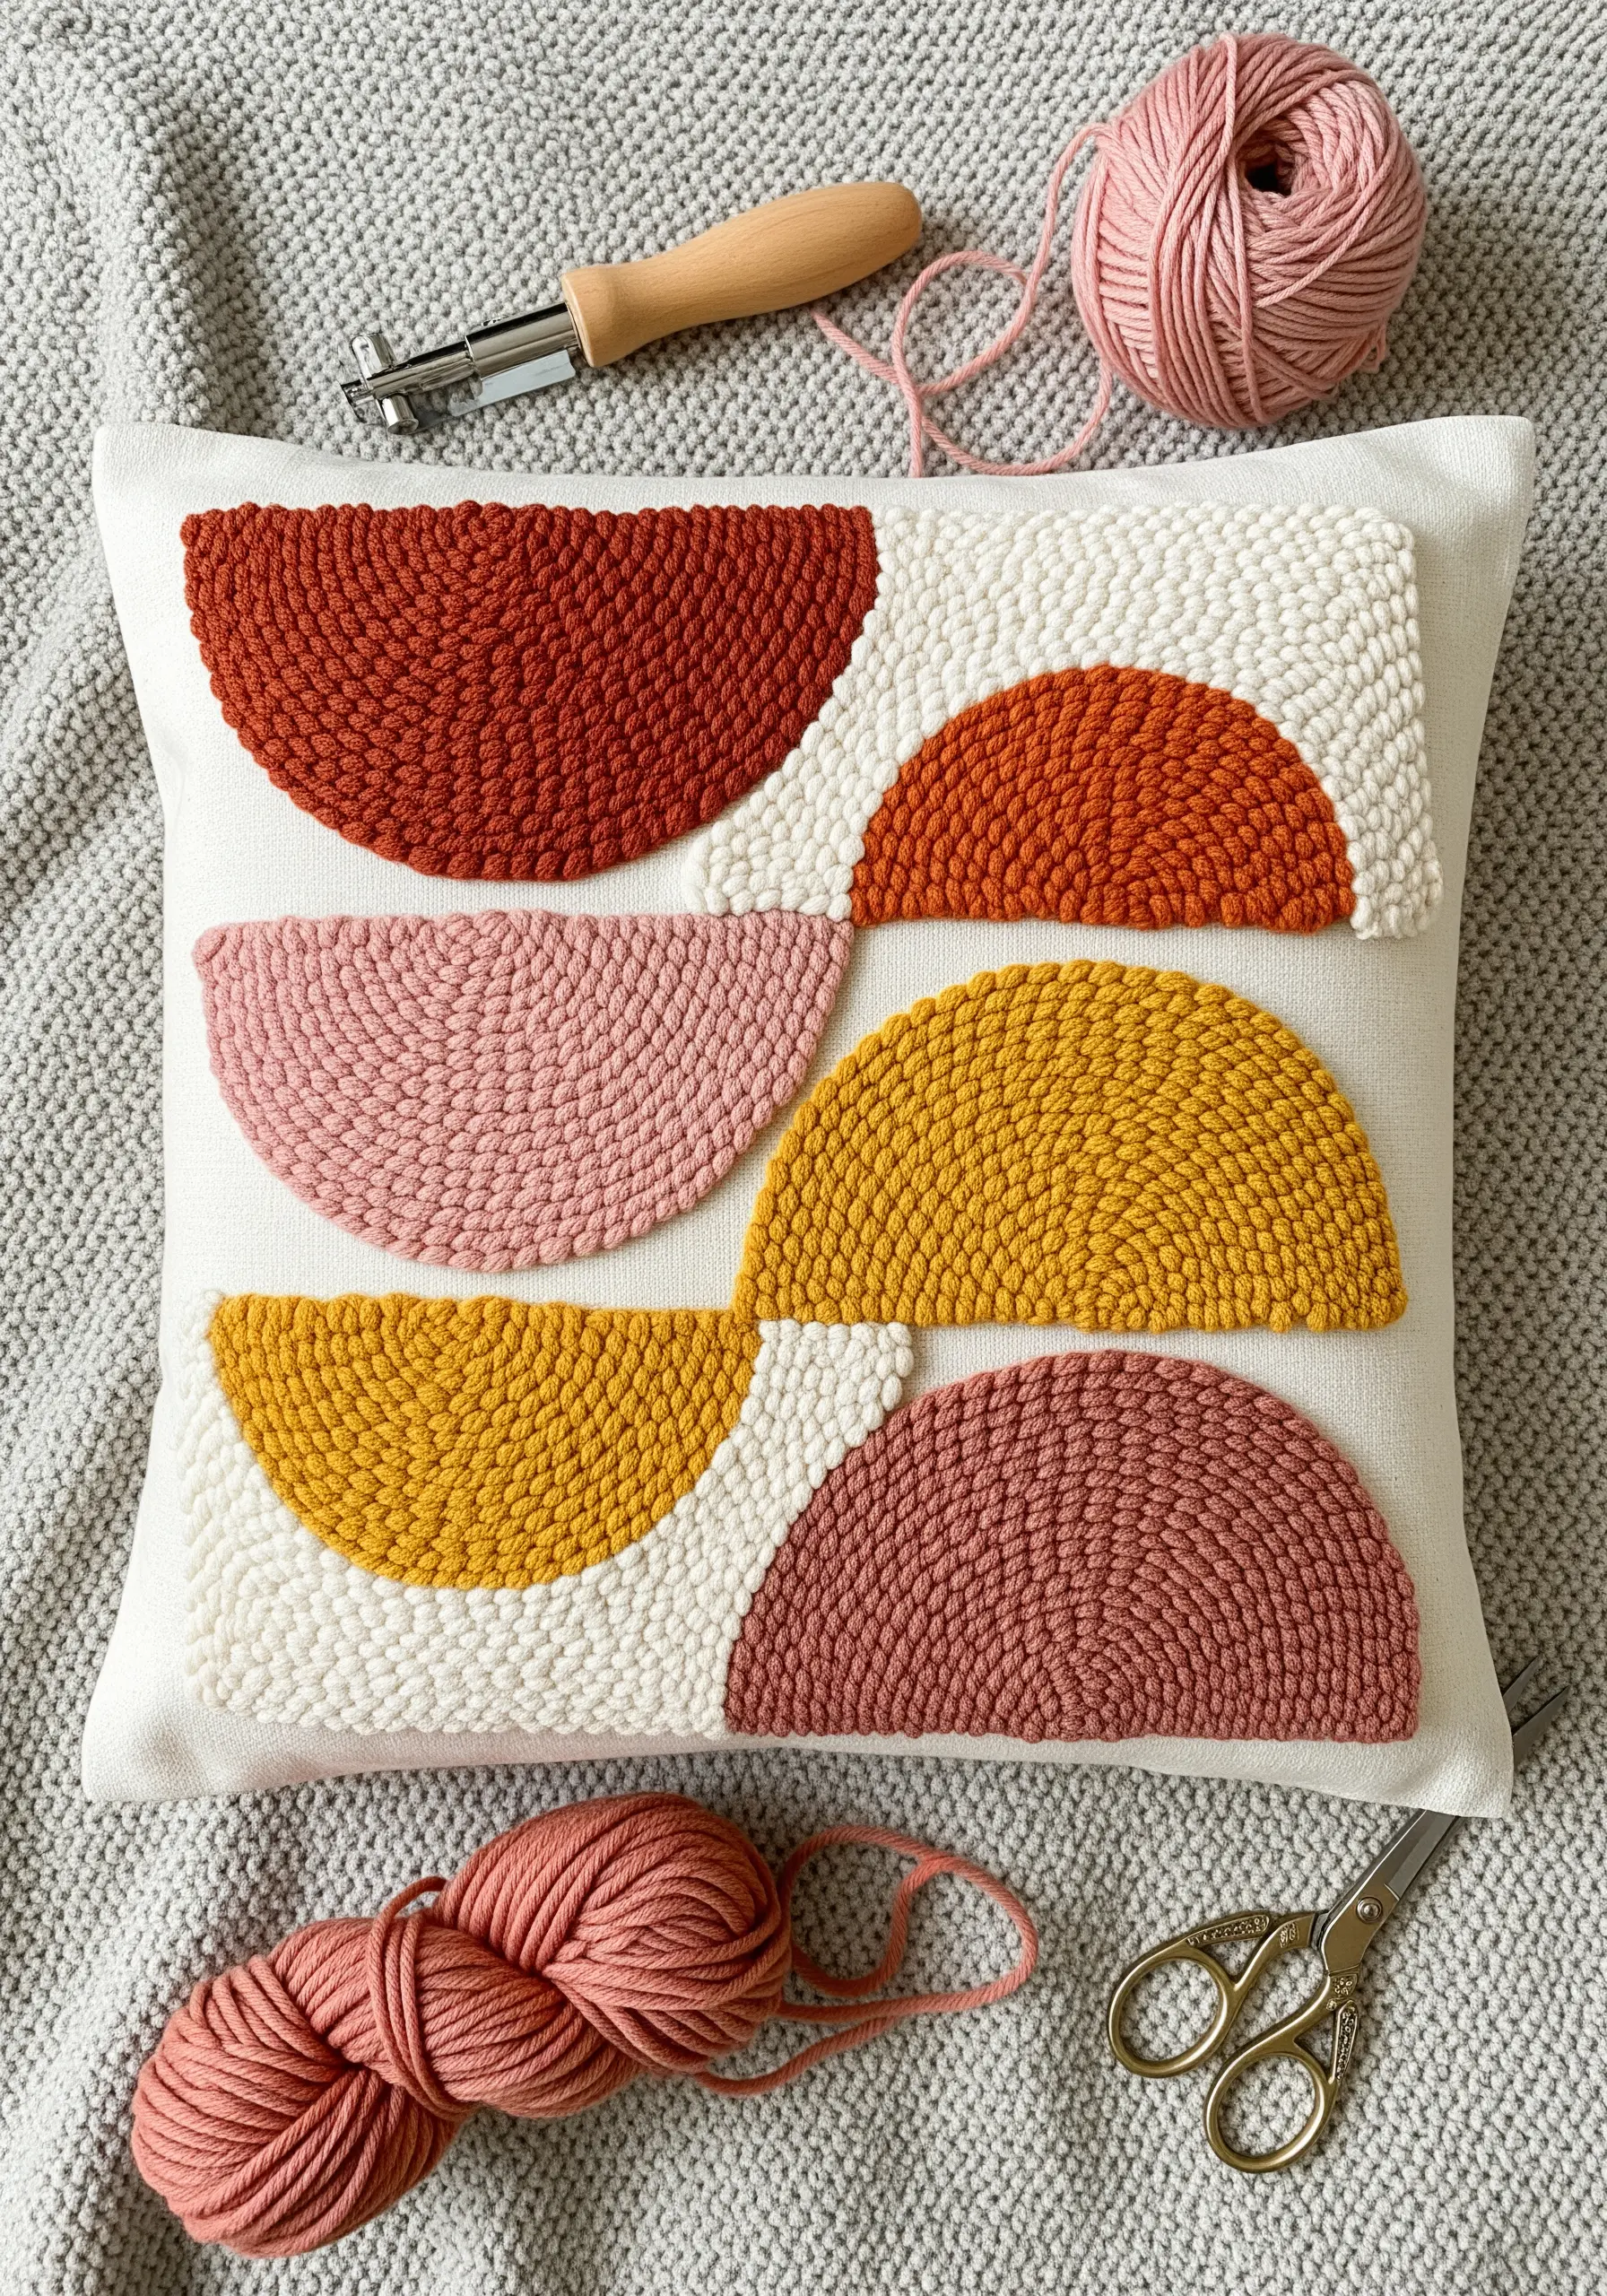
Use punch needle to explore bold color blocking and satisfying texture on functional items like pillowcases.
By keeping the loop height consistent, you create a uniform, plush surface that resembles a fine rug.
The magic is in the clean edges between colors—punch carefully along your drawn lines to ensure a crisp separation between each semi-circle.
This method turns simple geometric shapes into a highly tactile piece of art, where the texture itself becomes the main attraction.
Choose a durable fabric like cotton canvas or linen for your base to hold the tension of the dense yarn loops securely.
3. Blend Weaving Textures for a Sculptural Wall Hanging
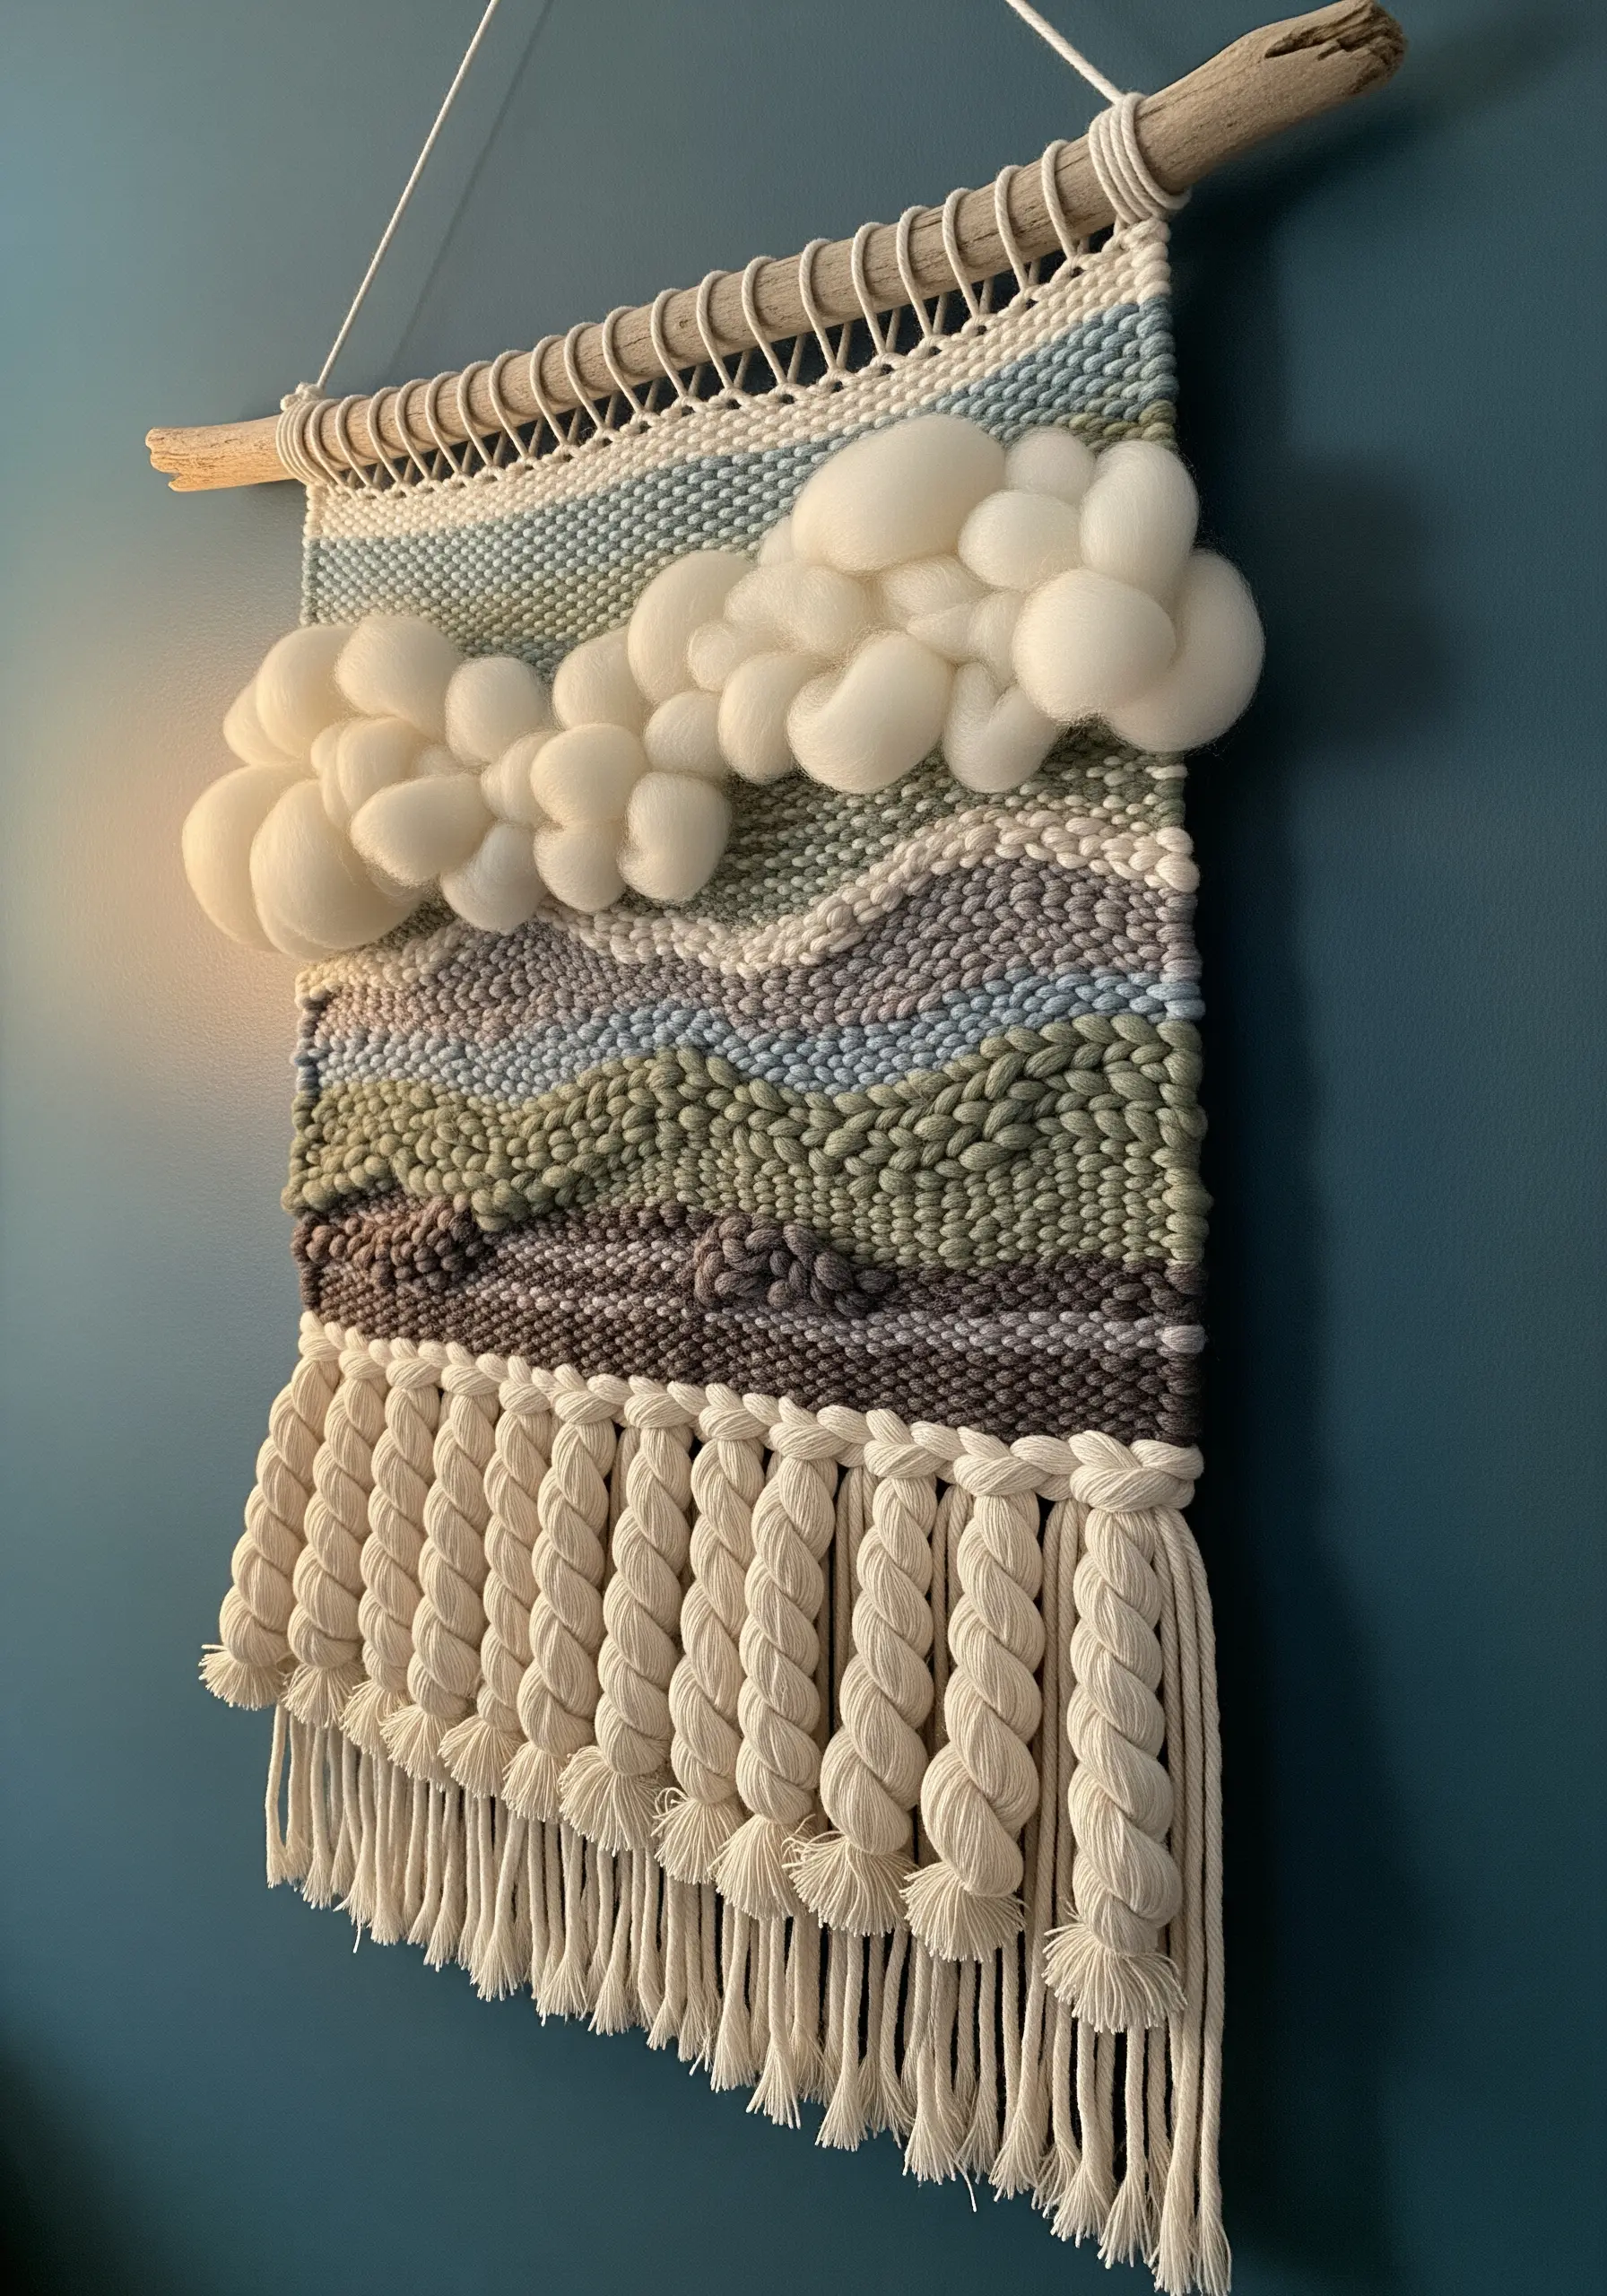
Move beyond flat weaving by incorporating high-texture fibers like thick wool roving and braided cord.
Create soft, cloud-like forms by weaving with unspun roving, gently pulling loops out to build volume and dimension.
Contrast these soft areas with sections of tightly woven tabby or twill weave using a thinner yarn for a balanced composition.
Finish with a fringe made of thick, braided cord to add weight and a dramatic, sculptural element to the bottom of your piece.
This combination of textures transforms a simple wall hanging into a mixed-fiber wall hanging that invites touch.
4. Layer Felt and Thread for a Minimalist Landscape
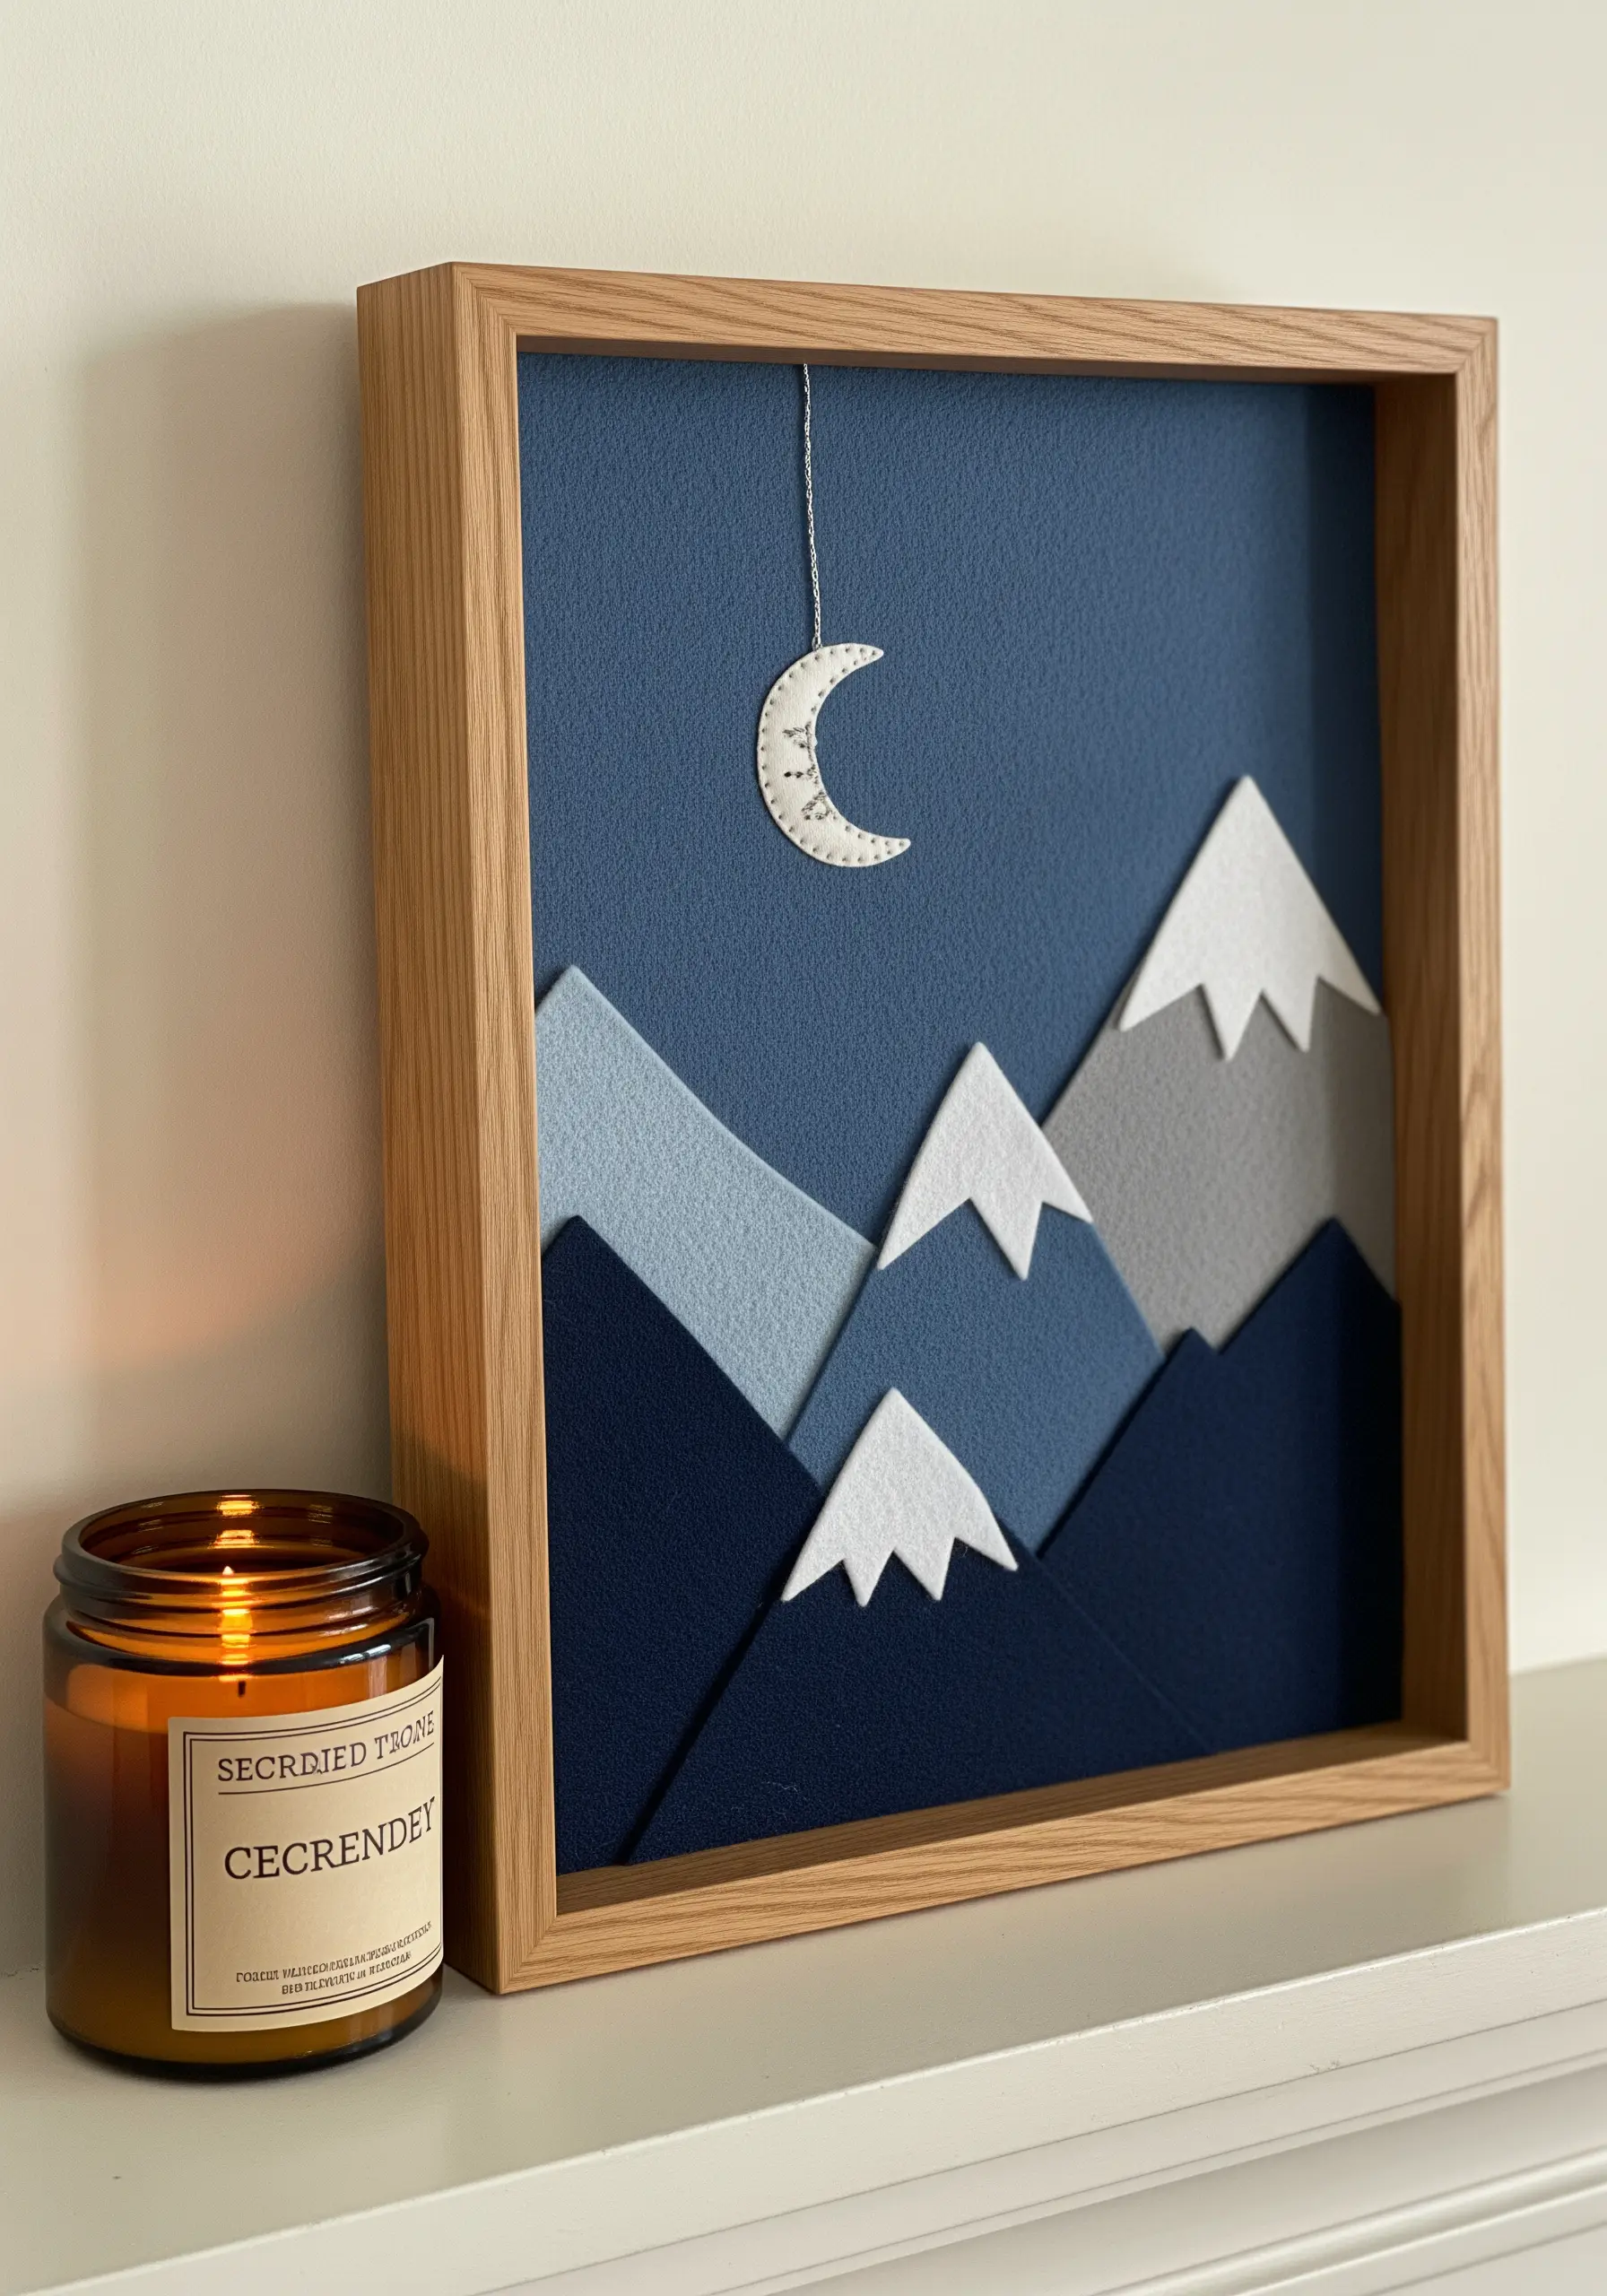
Construct a clean, graphic mountainscape by layering cut felt pieces inside a deep shadow box frame.
Choose felt in a cool, analogous color palette—like navy, slate, and powder blue—to create an illusion of atmospheric depth.
The sharp, cut edges of the felt provide a minimalist aesthetic that requires no complex stitching.
Introduce a single, delicate embroidered element, like the hanging crescent moon, to add a touch of handcrafted detail and textural contrast against the flat felt surfaces.
This project is perfect for exploring composition and color theory without needing advanced embroidery skills.
5. Build Lunar Texture with Directional Stitching
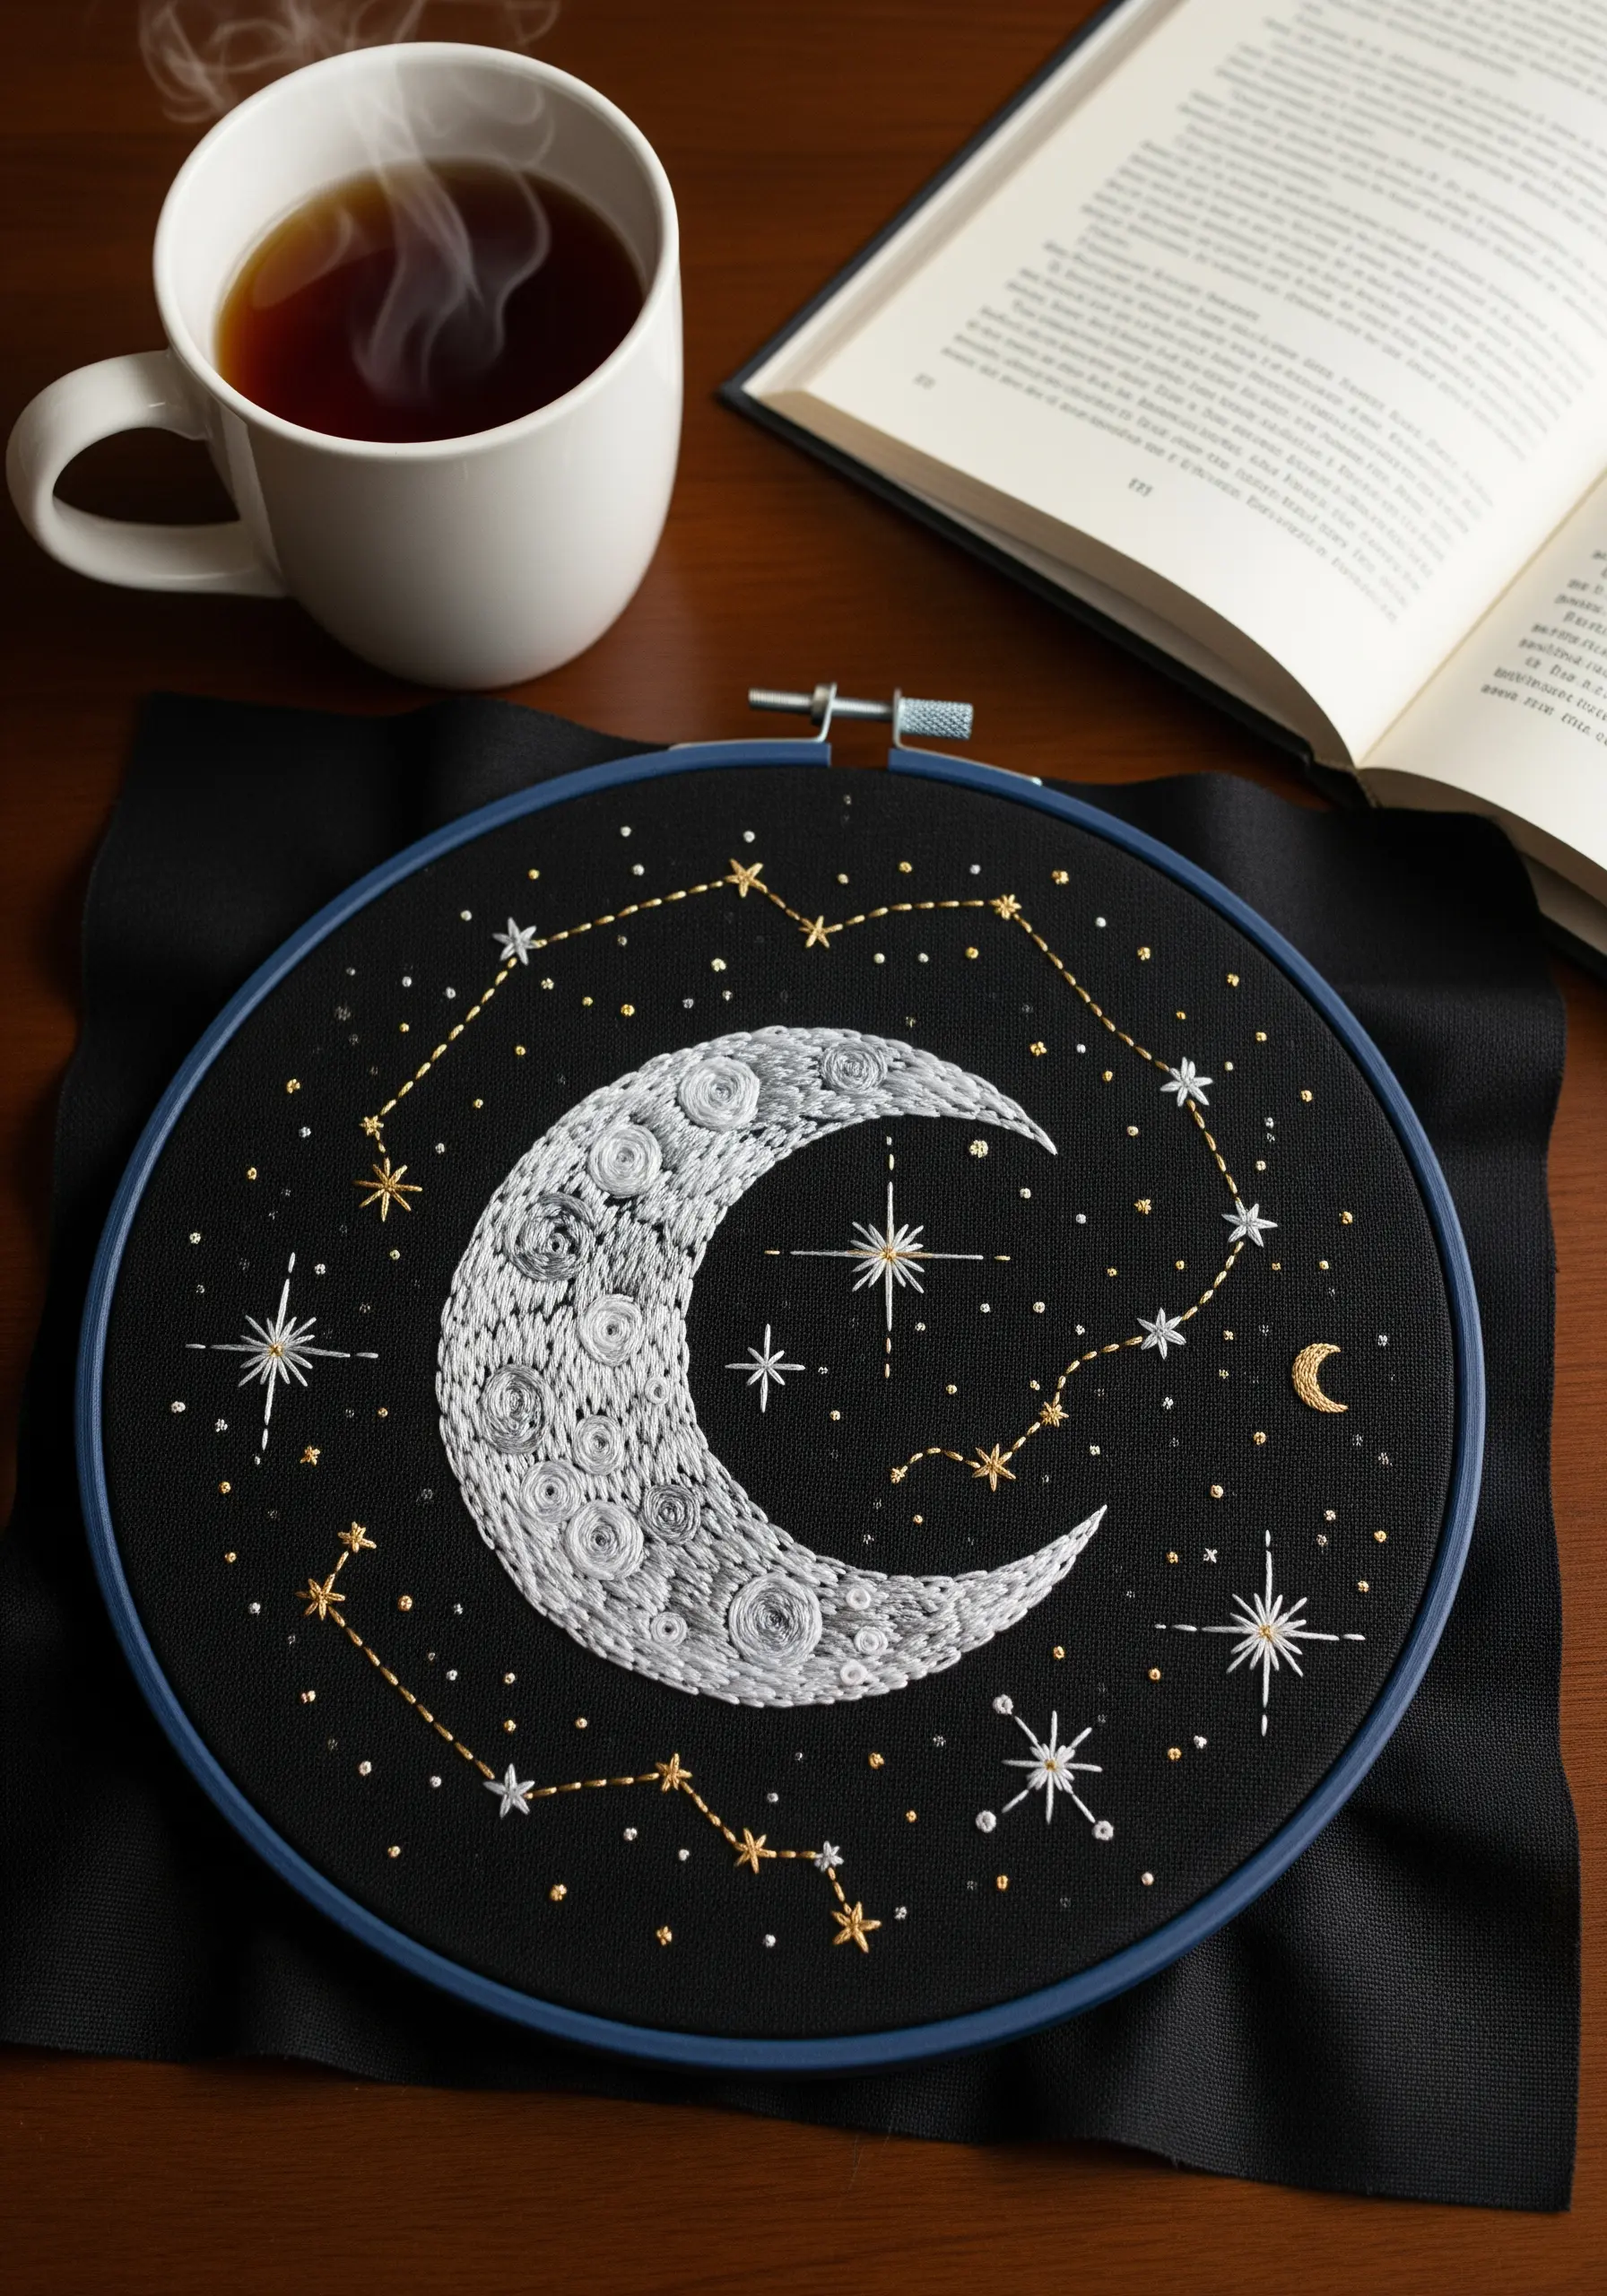
Give your embroidered moon a realistic, cratered surface by layering various stitches and thread weights.
Use a combination of short satin stitches, French knots, and seed stitches, placing them in swirling patterns to suggest shadows and highlights.
Incorporate a single strand of metallic silver or pearlescent white thread to catch the light and add a subtle shimmer.
For the surrounding stars and constellations, use a crisp backstitch with metallic gold thread to contrast against the textured moon and dark fabric.
Stitching on black fabric makes the white and metallic threads pop, creating a dramatic celestial scene.
6. Finish Your Embroidery as a Polished Wall Banner
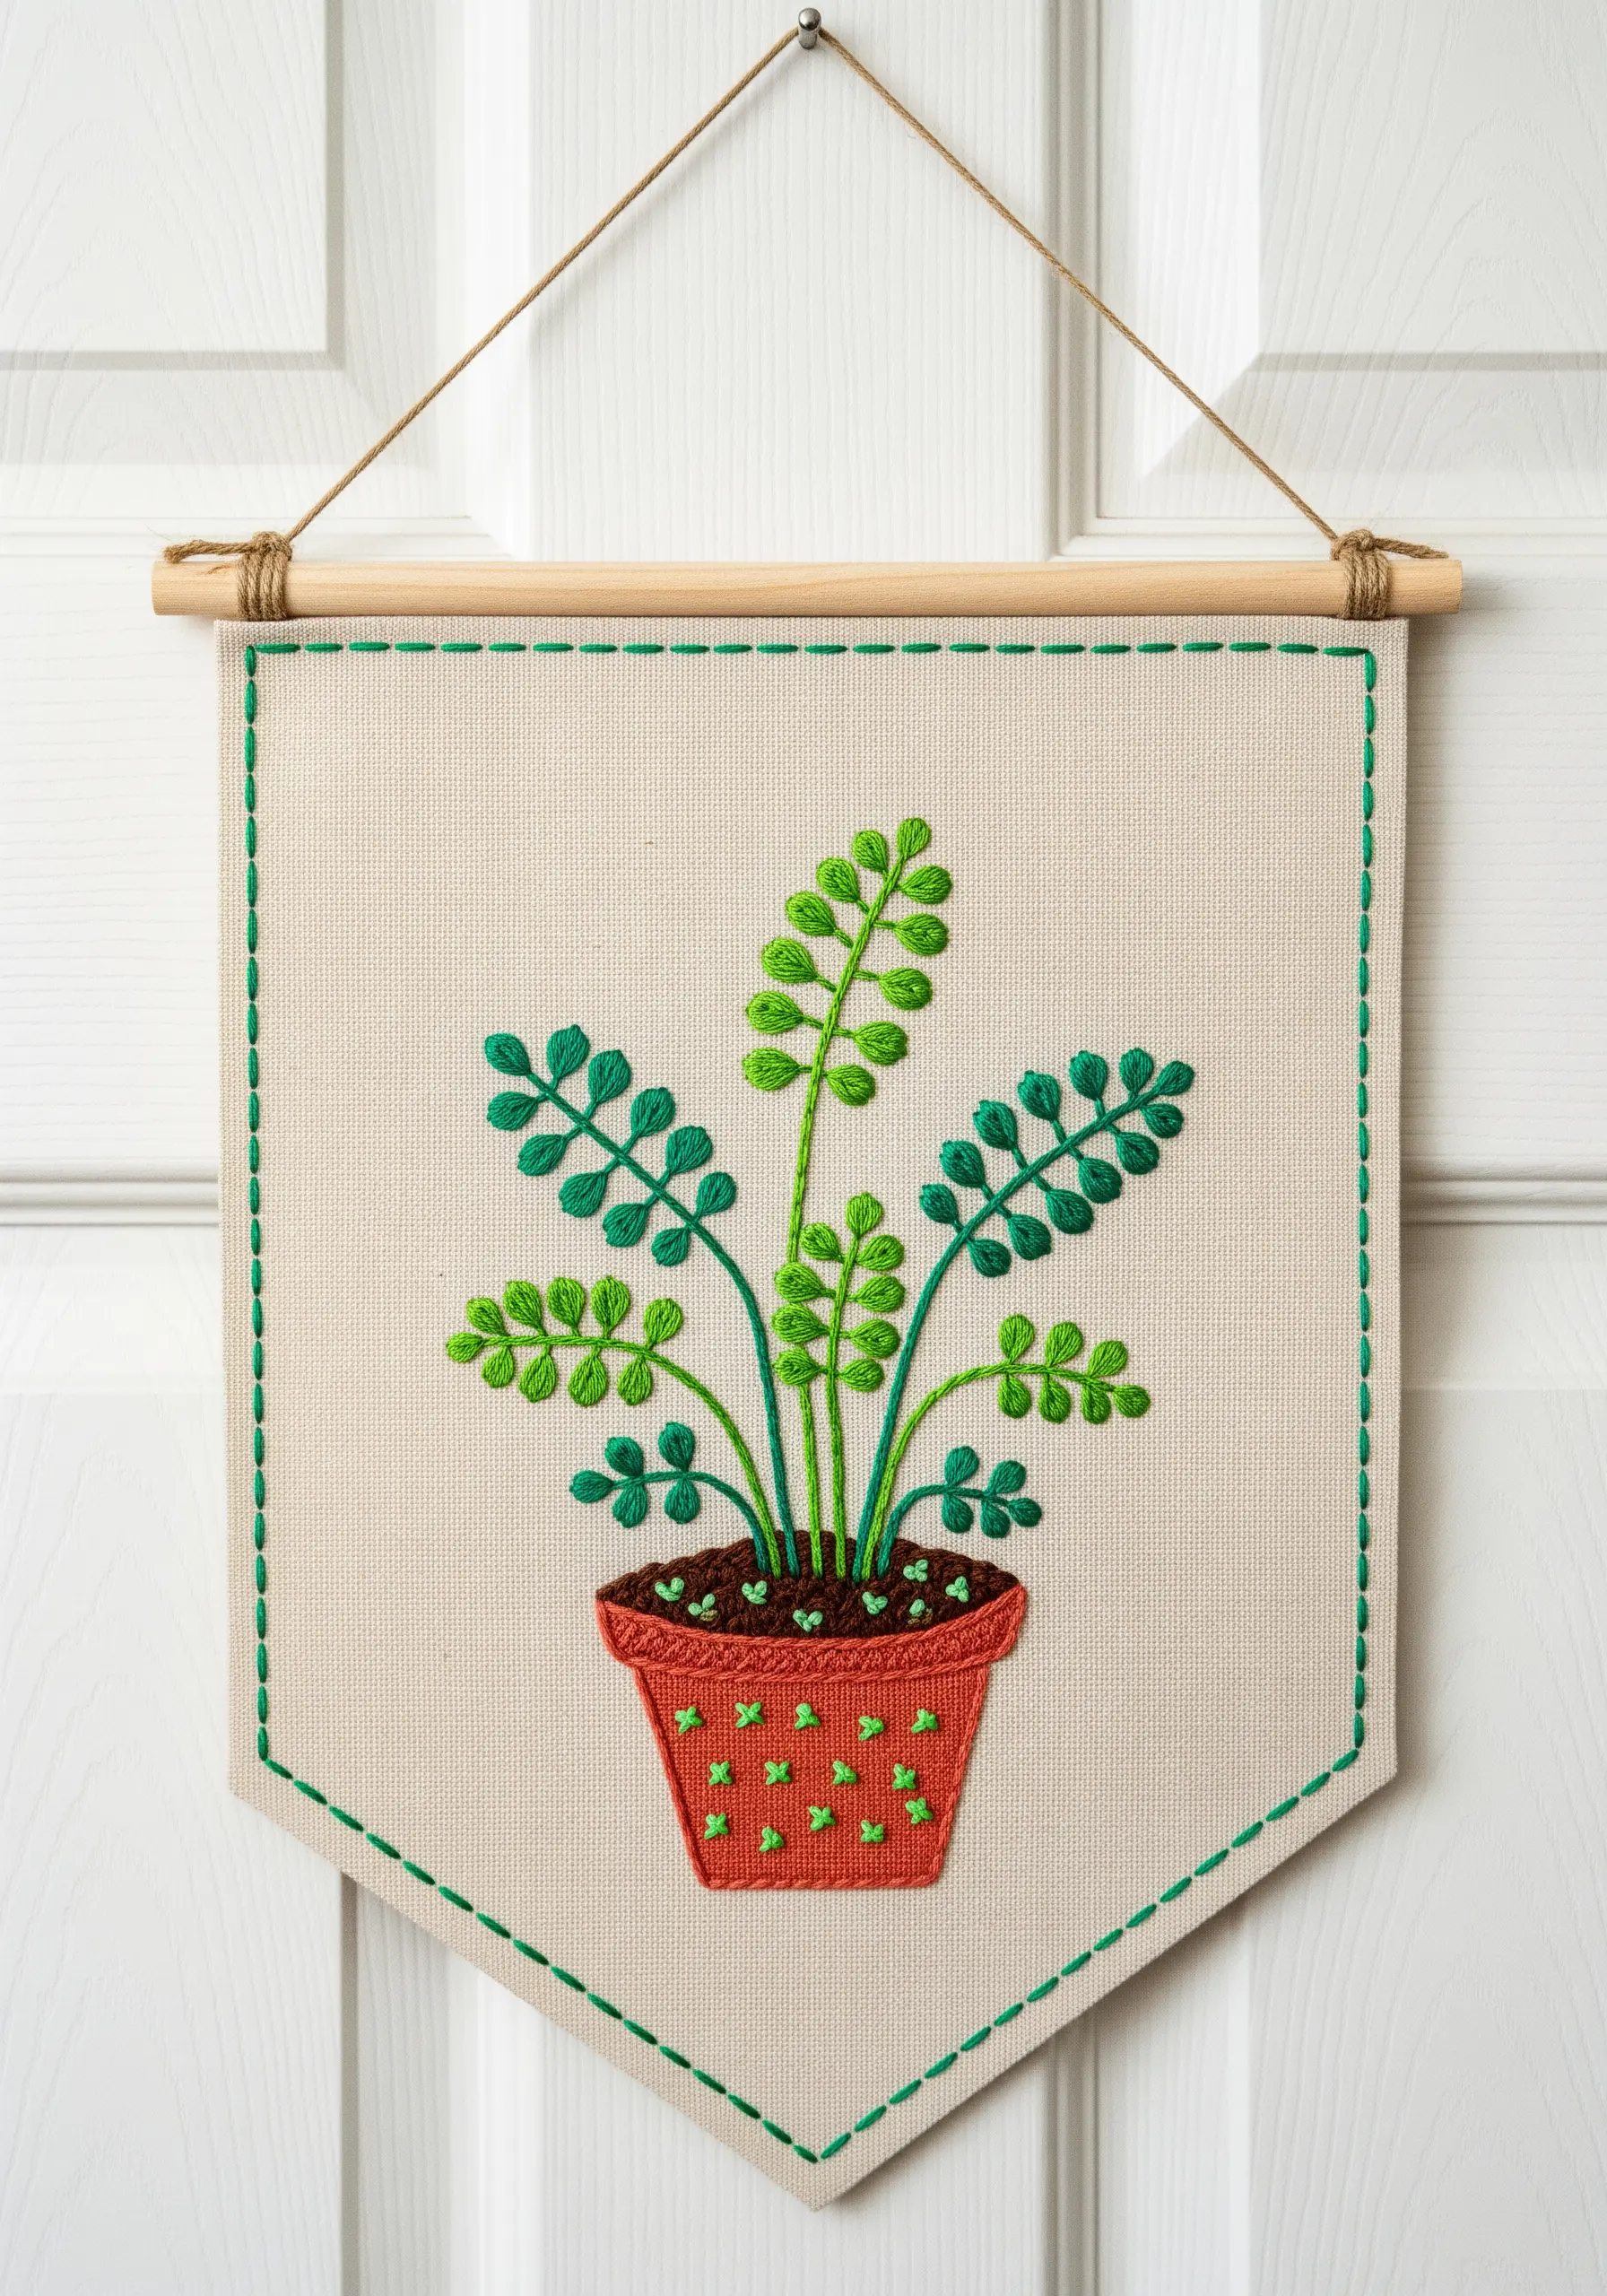
Transform a simple stitched piece into a finished wall hanging for a professional look.
Instead of leaving your work in a hoop, trim the fabric into a pennant shape and create a channel at the top for a wooden dowel.
Frame your central motif with a simple running stitch border using a contrasting color to define the edges and add a cohesive, decorative finish.
Use a single, bold stitch like the satin stitch for the leaves and pot to create a clean, graphic look that stands out from a distance.
This finishing method elevates your embroidery from a work-in-progress to intentional home decor.
7. Use Padded Satin Stitch for 3D Effects
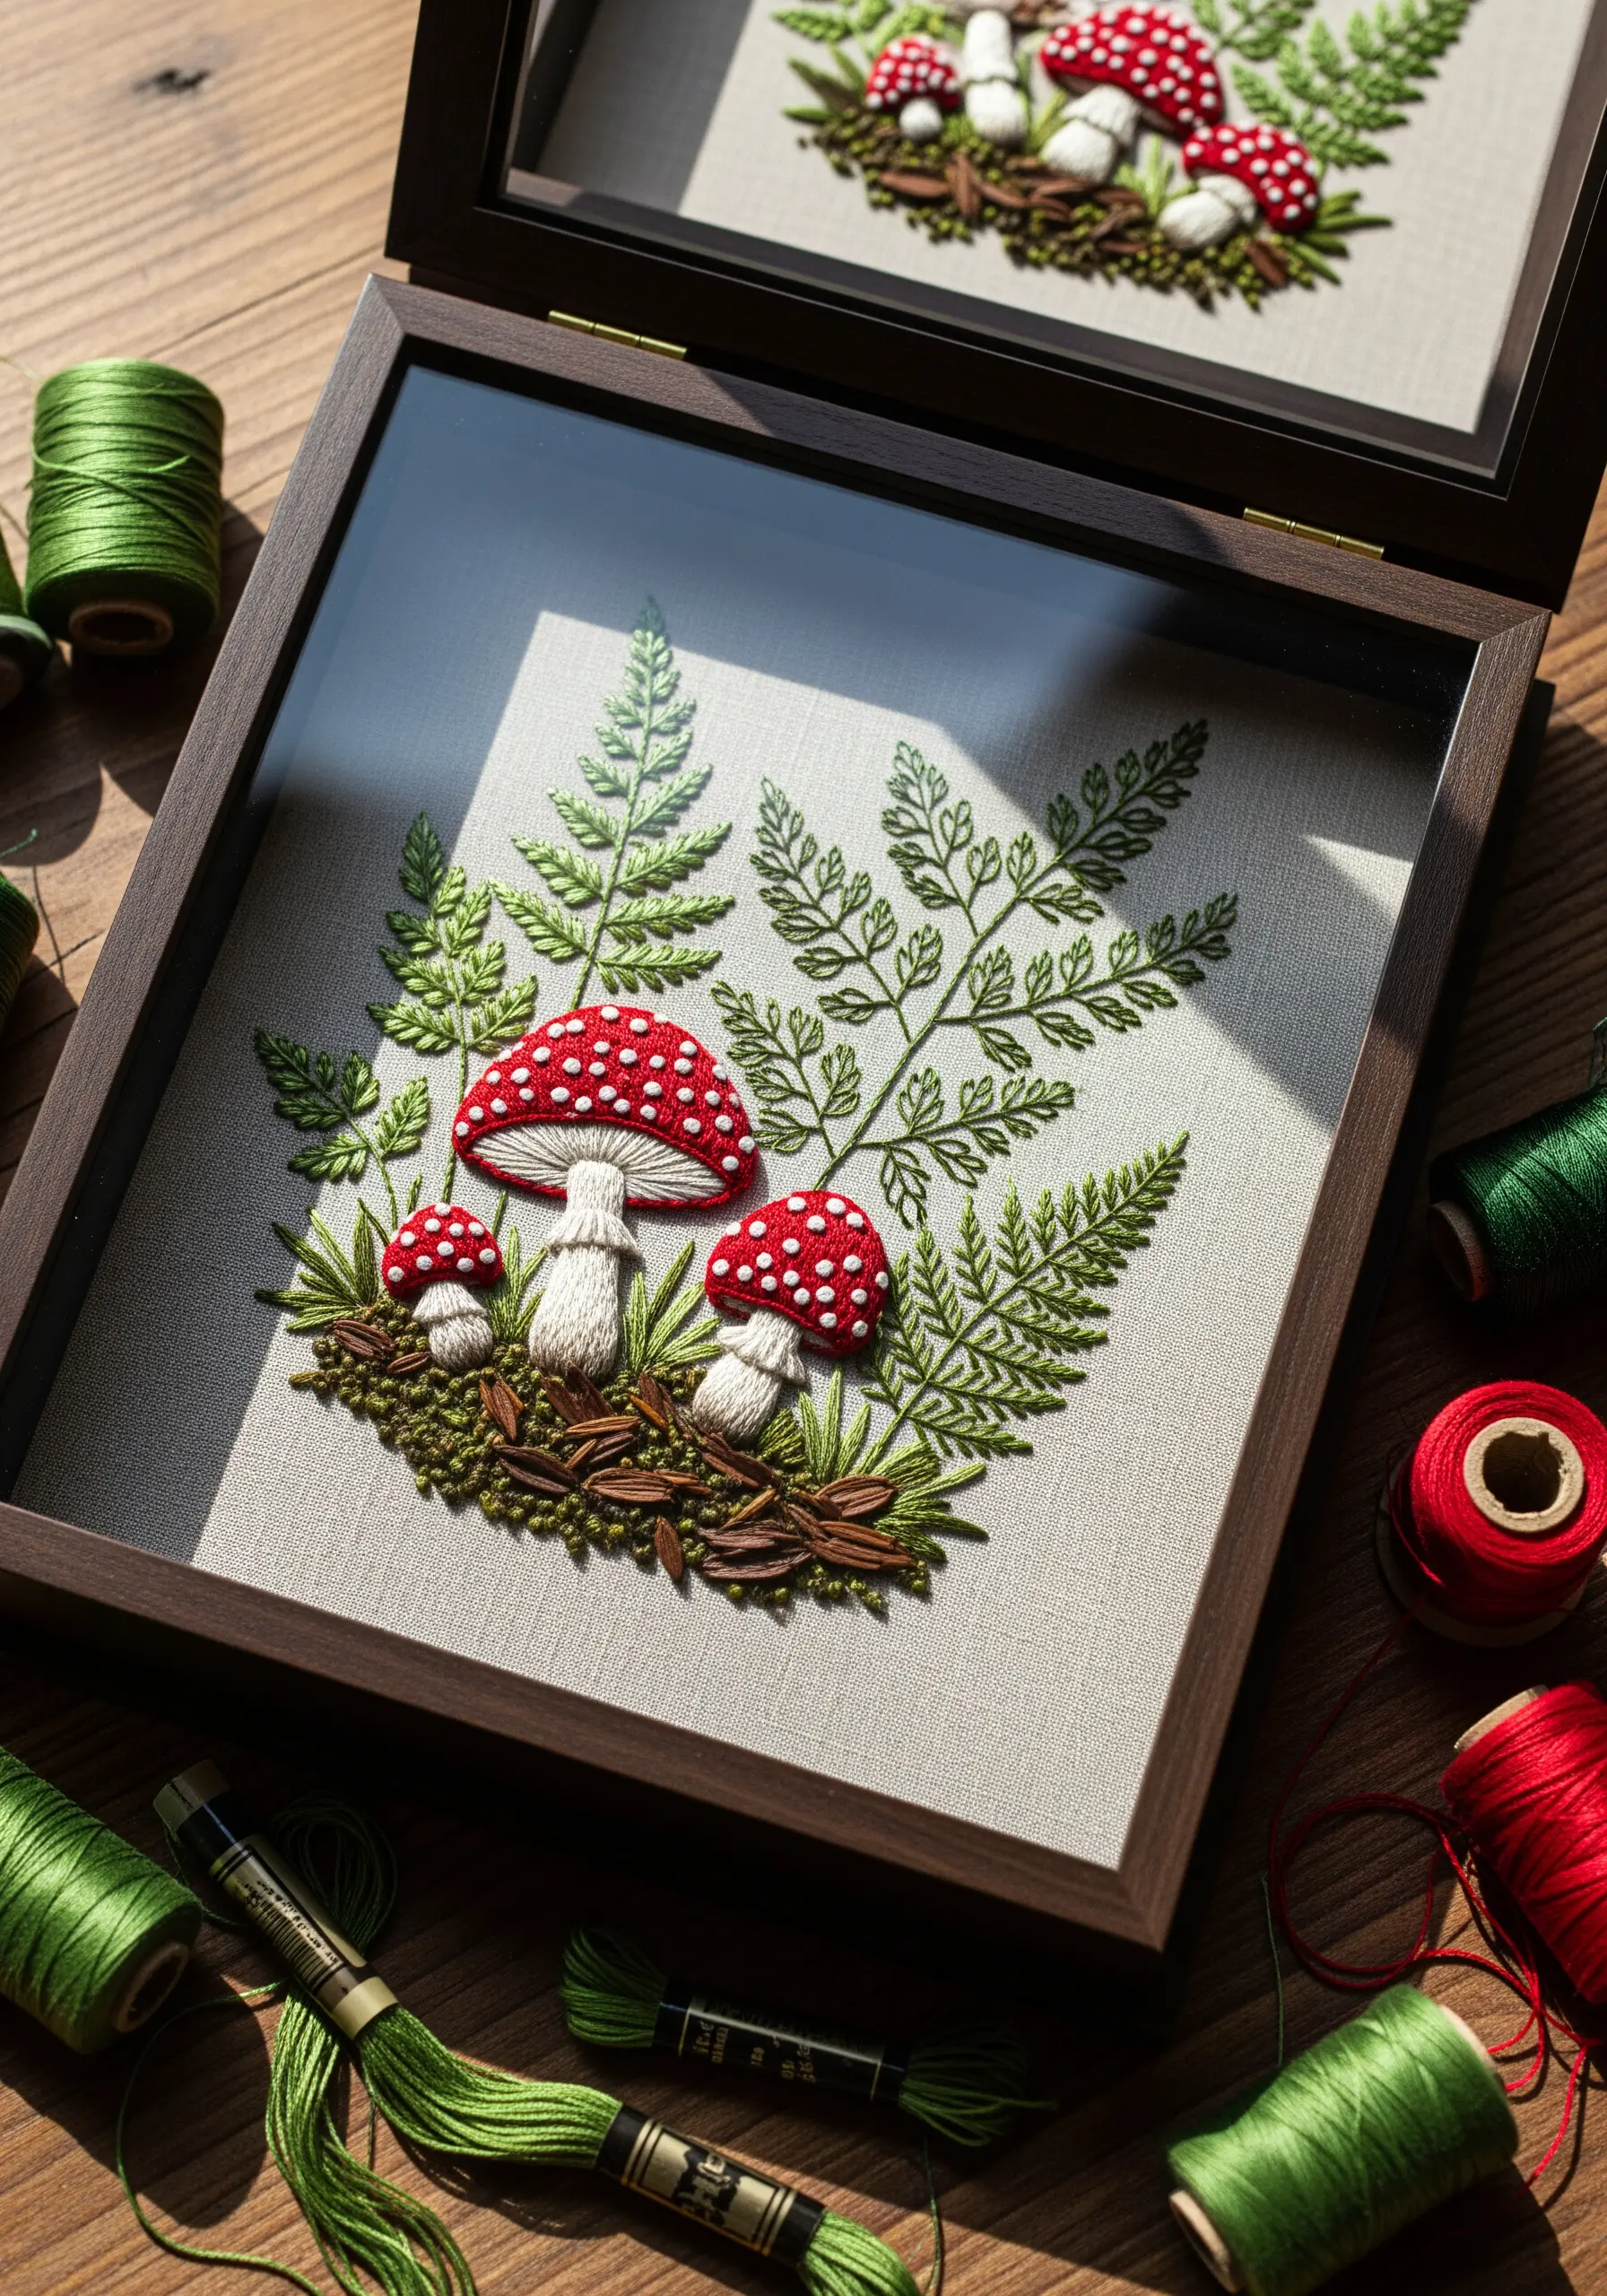
Make elements of your design physically pop off the fabric using a padded satin stitch.
To create the raised mushroom caps, first fill the shape with a base layer of small, underlying stitches (like seed stitches or even felt padding), then cover it completely with smooth satin stitches.
This underlayer pushes the top stitches upward, creating a rounded, three-dimensional effect that catches the light beautifully.
For the delicate ferns, use a light fern stitch to contrast with the bold, heavy mushrooms.
Displaying the final piece in a shadow box frame protects the raised elements and enhances the sense of depth.
8. Explore Geometric Gradients with String Art
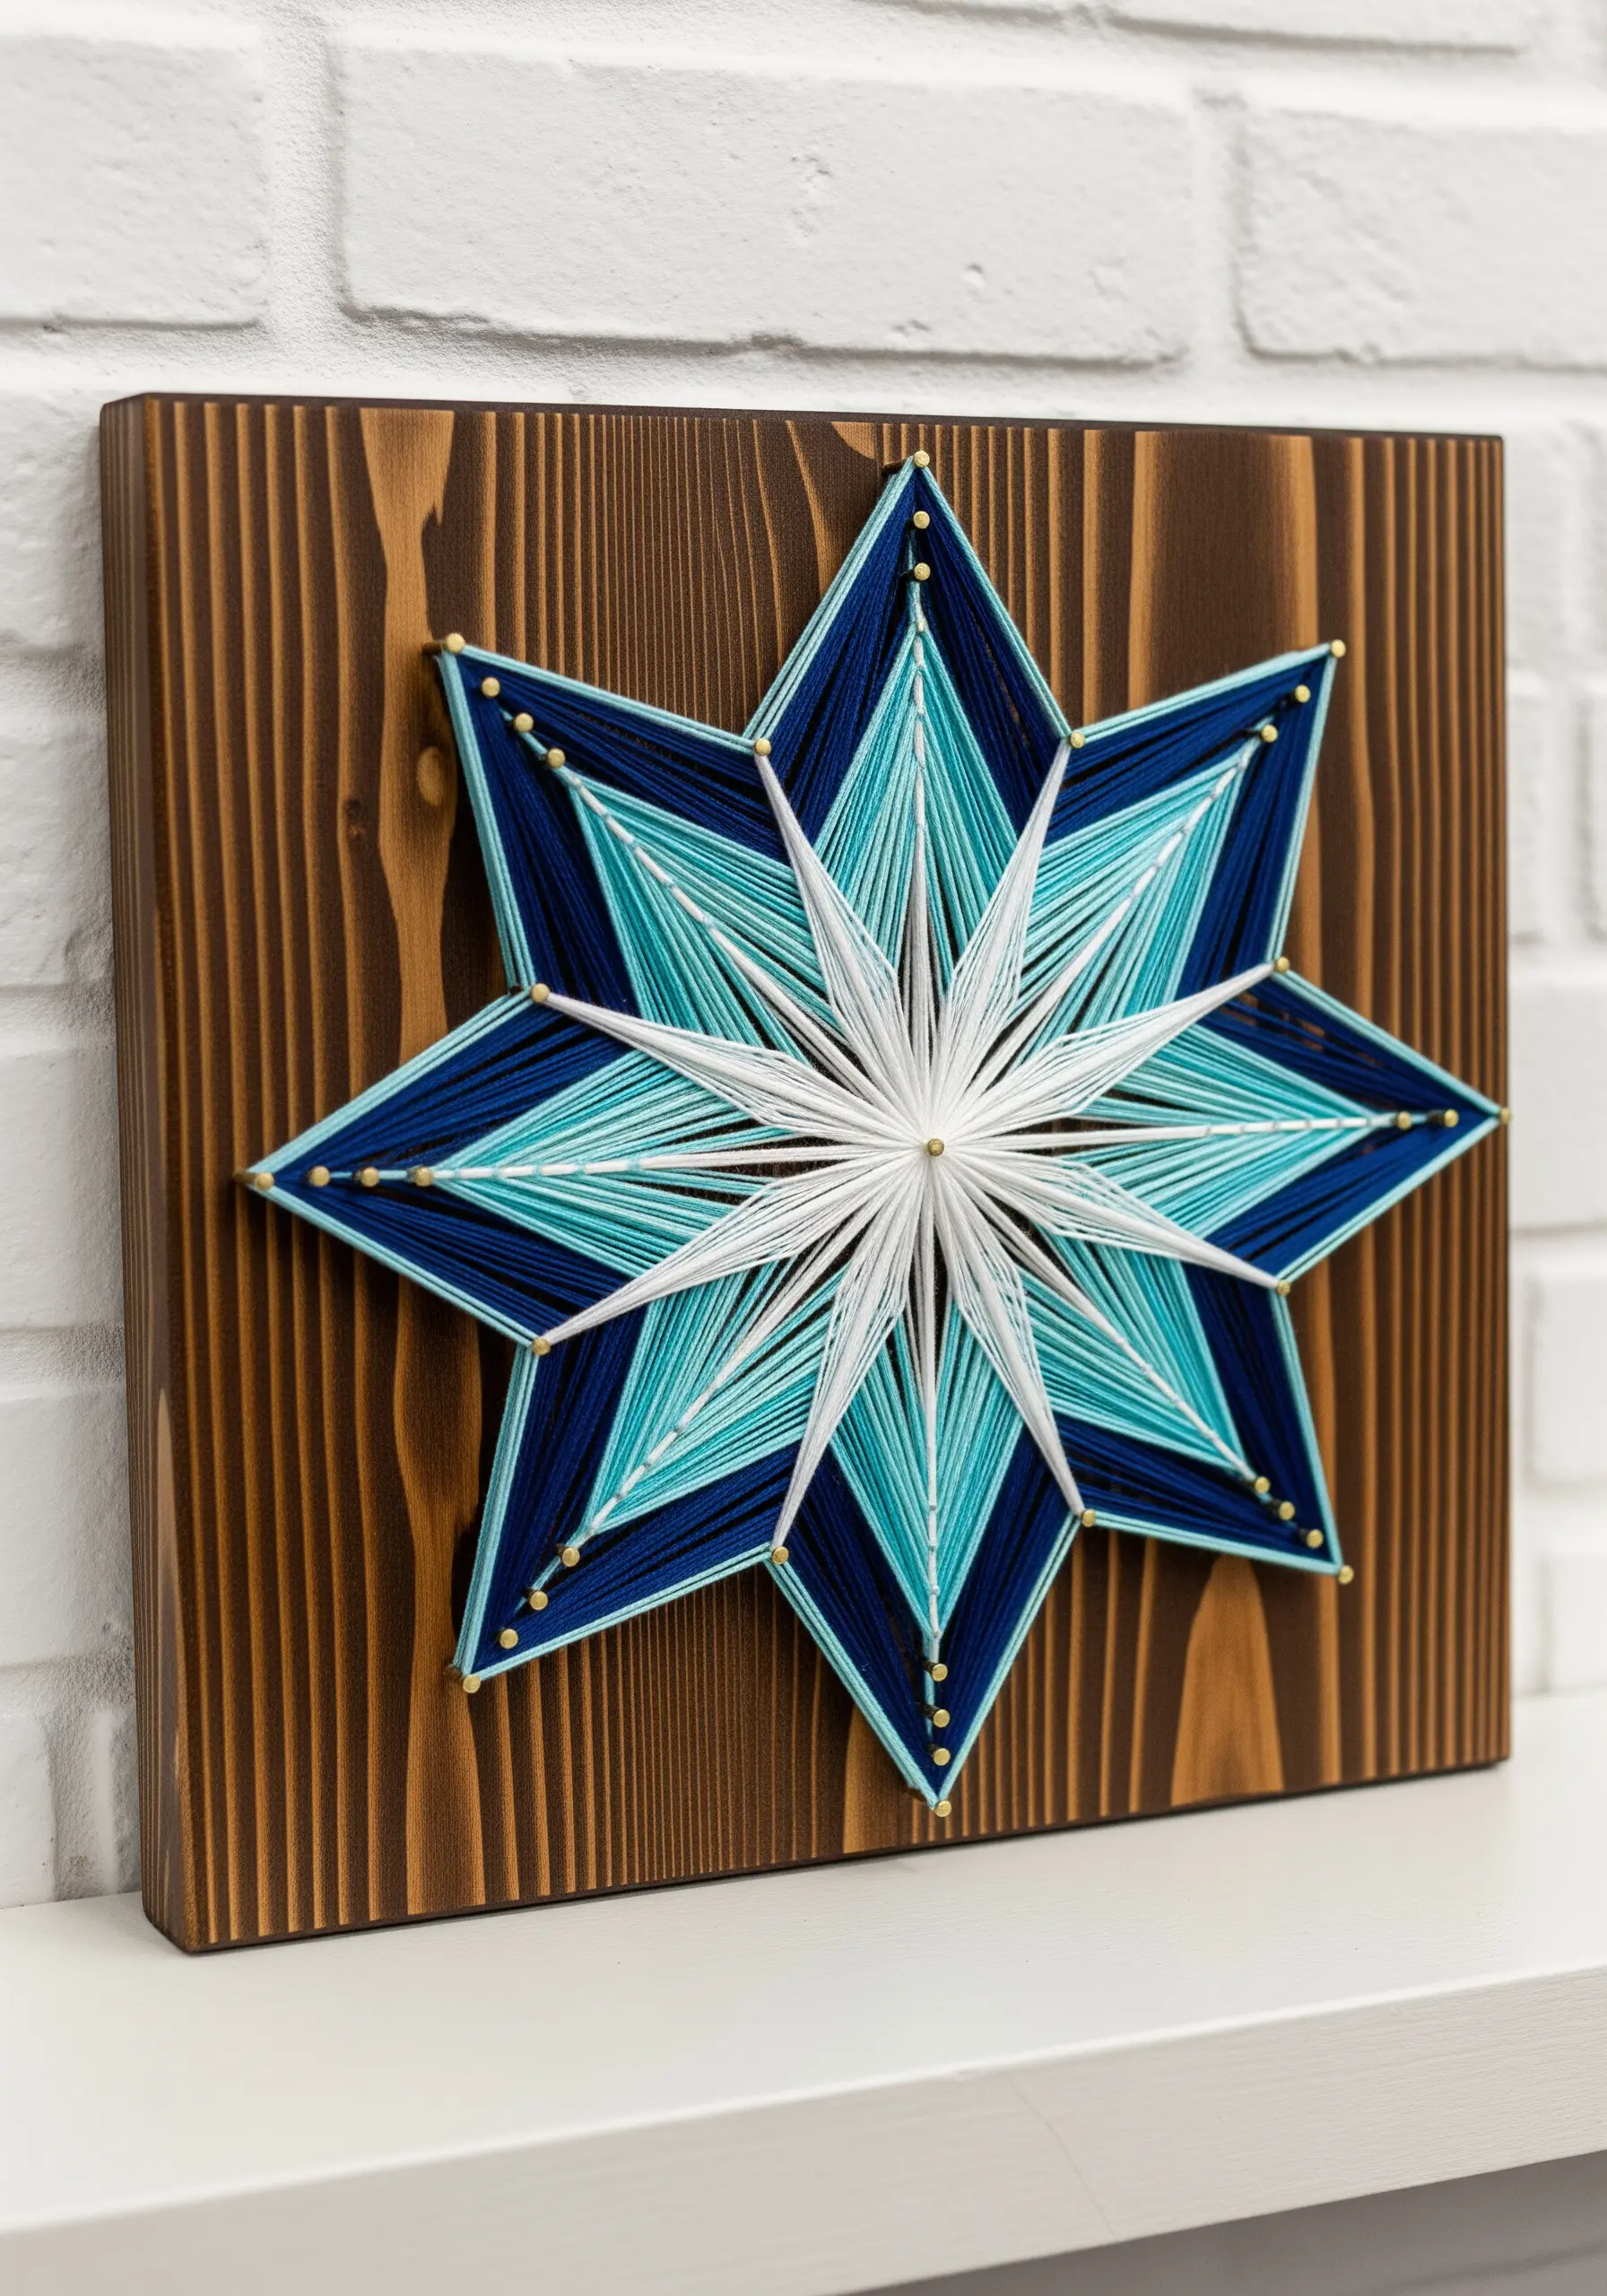
Create mesmerizing geometric patterns using string art, a technique that relies on tension and layering rather than knots.
Begin by hammering small nails into a wooden board to create your outline—a star, a mandala, or any symmetrical shape.
Wrap embroidery floss or fine string from one nail to another, creating overlapping straight lines that form curves and gradients.
The key to the gradient effect is layering different colors sequentially; start with your darkest color and work your way to the lightest, allowing the previous layers to show through.
This project is a perfect way to explore color theory and geometry in a meditative, rhythmic process.
9. Weave Abstract Landscapes with Punch Needle
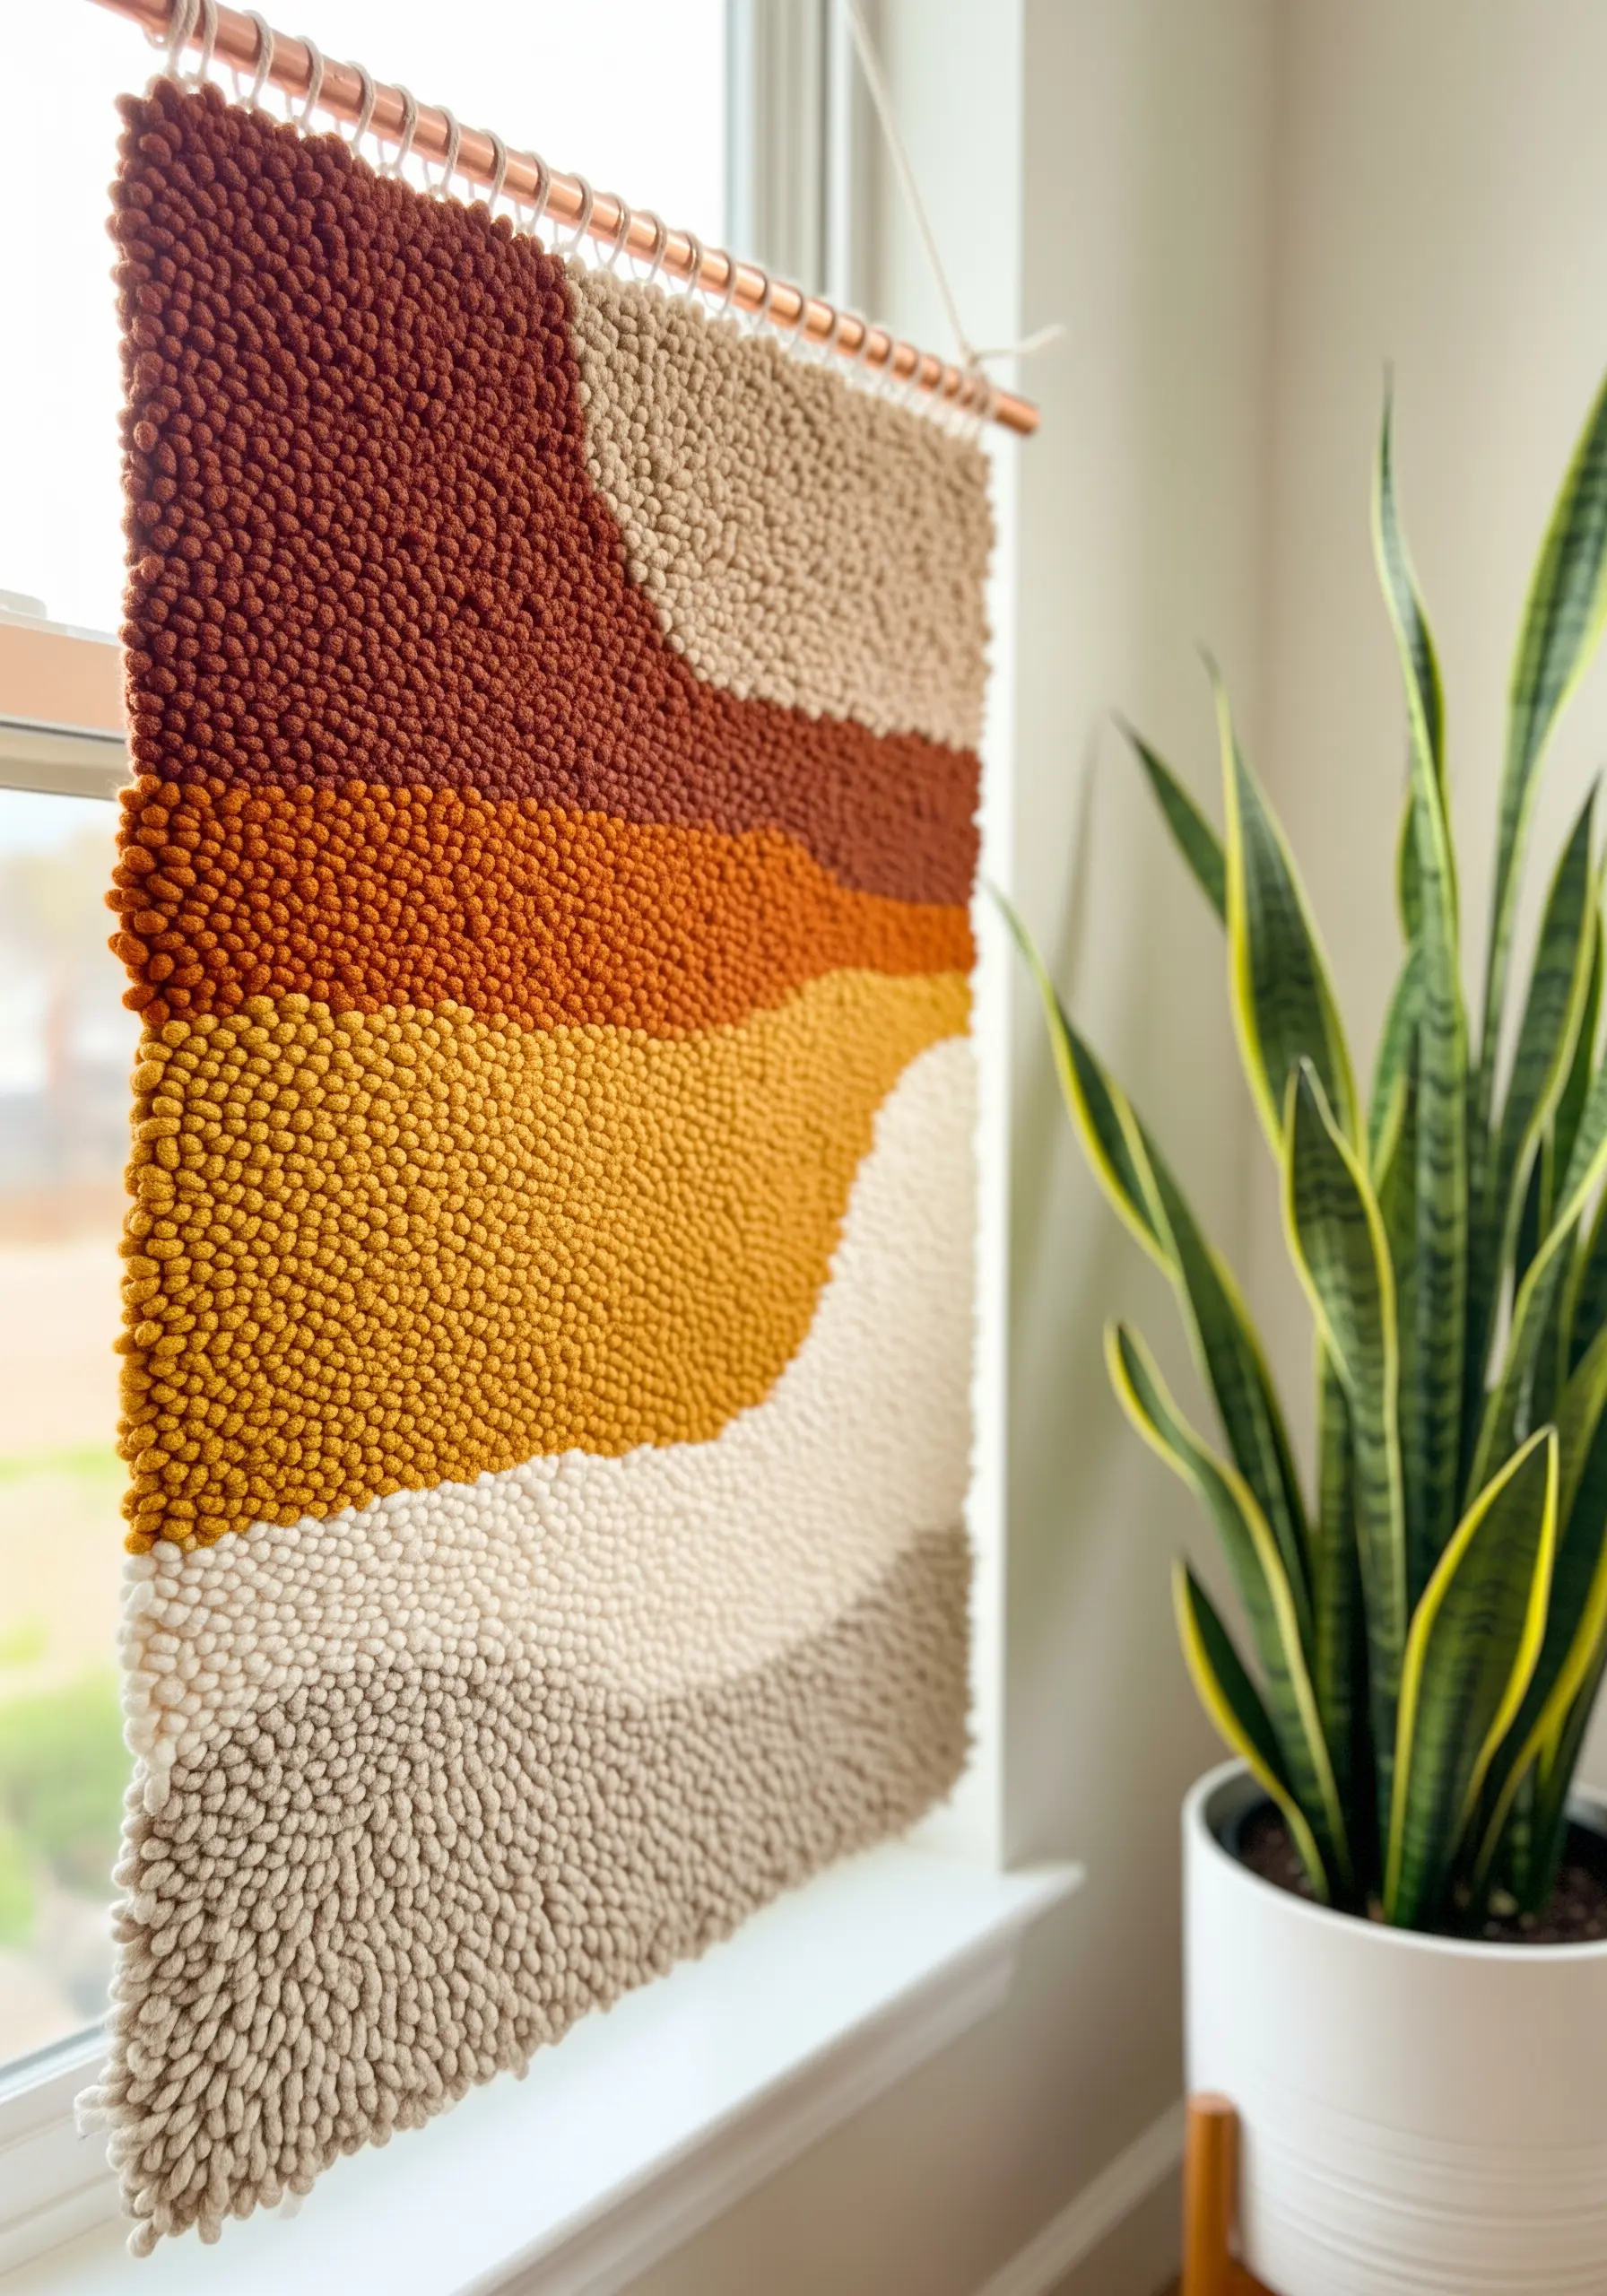
Use the punch needle technique to “paint” an abstract landscape with yarn, focusing on color and texture rather than precise detail.
Create organic, flowing shapes with earthy tones to evoke hills, deserts, or sunsets without needing to draw a literal scene.
The dense, uniform loops of the punch needle create a wonderfully tactile surface that emphasizes the blocky, abstract nature of the design.
This method is incredibly forgiving and allows you to easily fill large areas with color, making it an ideal weekend project for creating impactful earthy texture embroidery patterns.
Hang it from a simple copper or wooden dowel for a modern, minimalist finish.
10. Combine Delicate Botanicals with Precise Linework
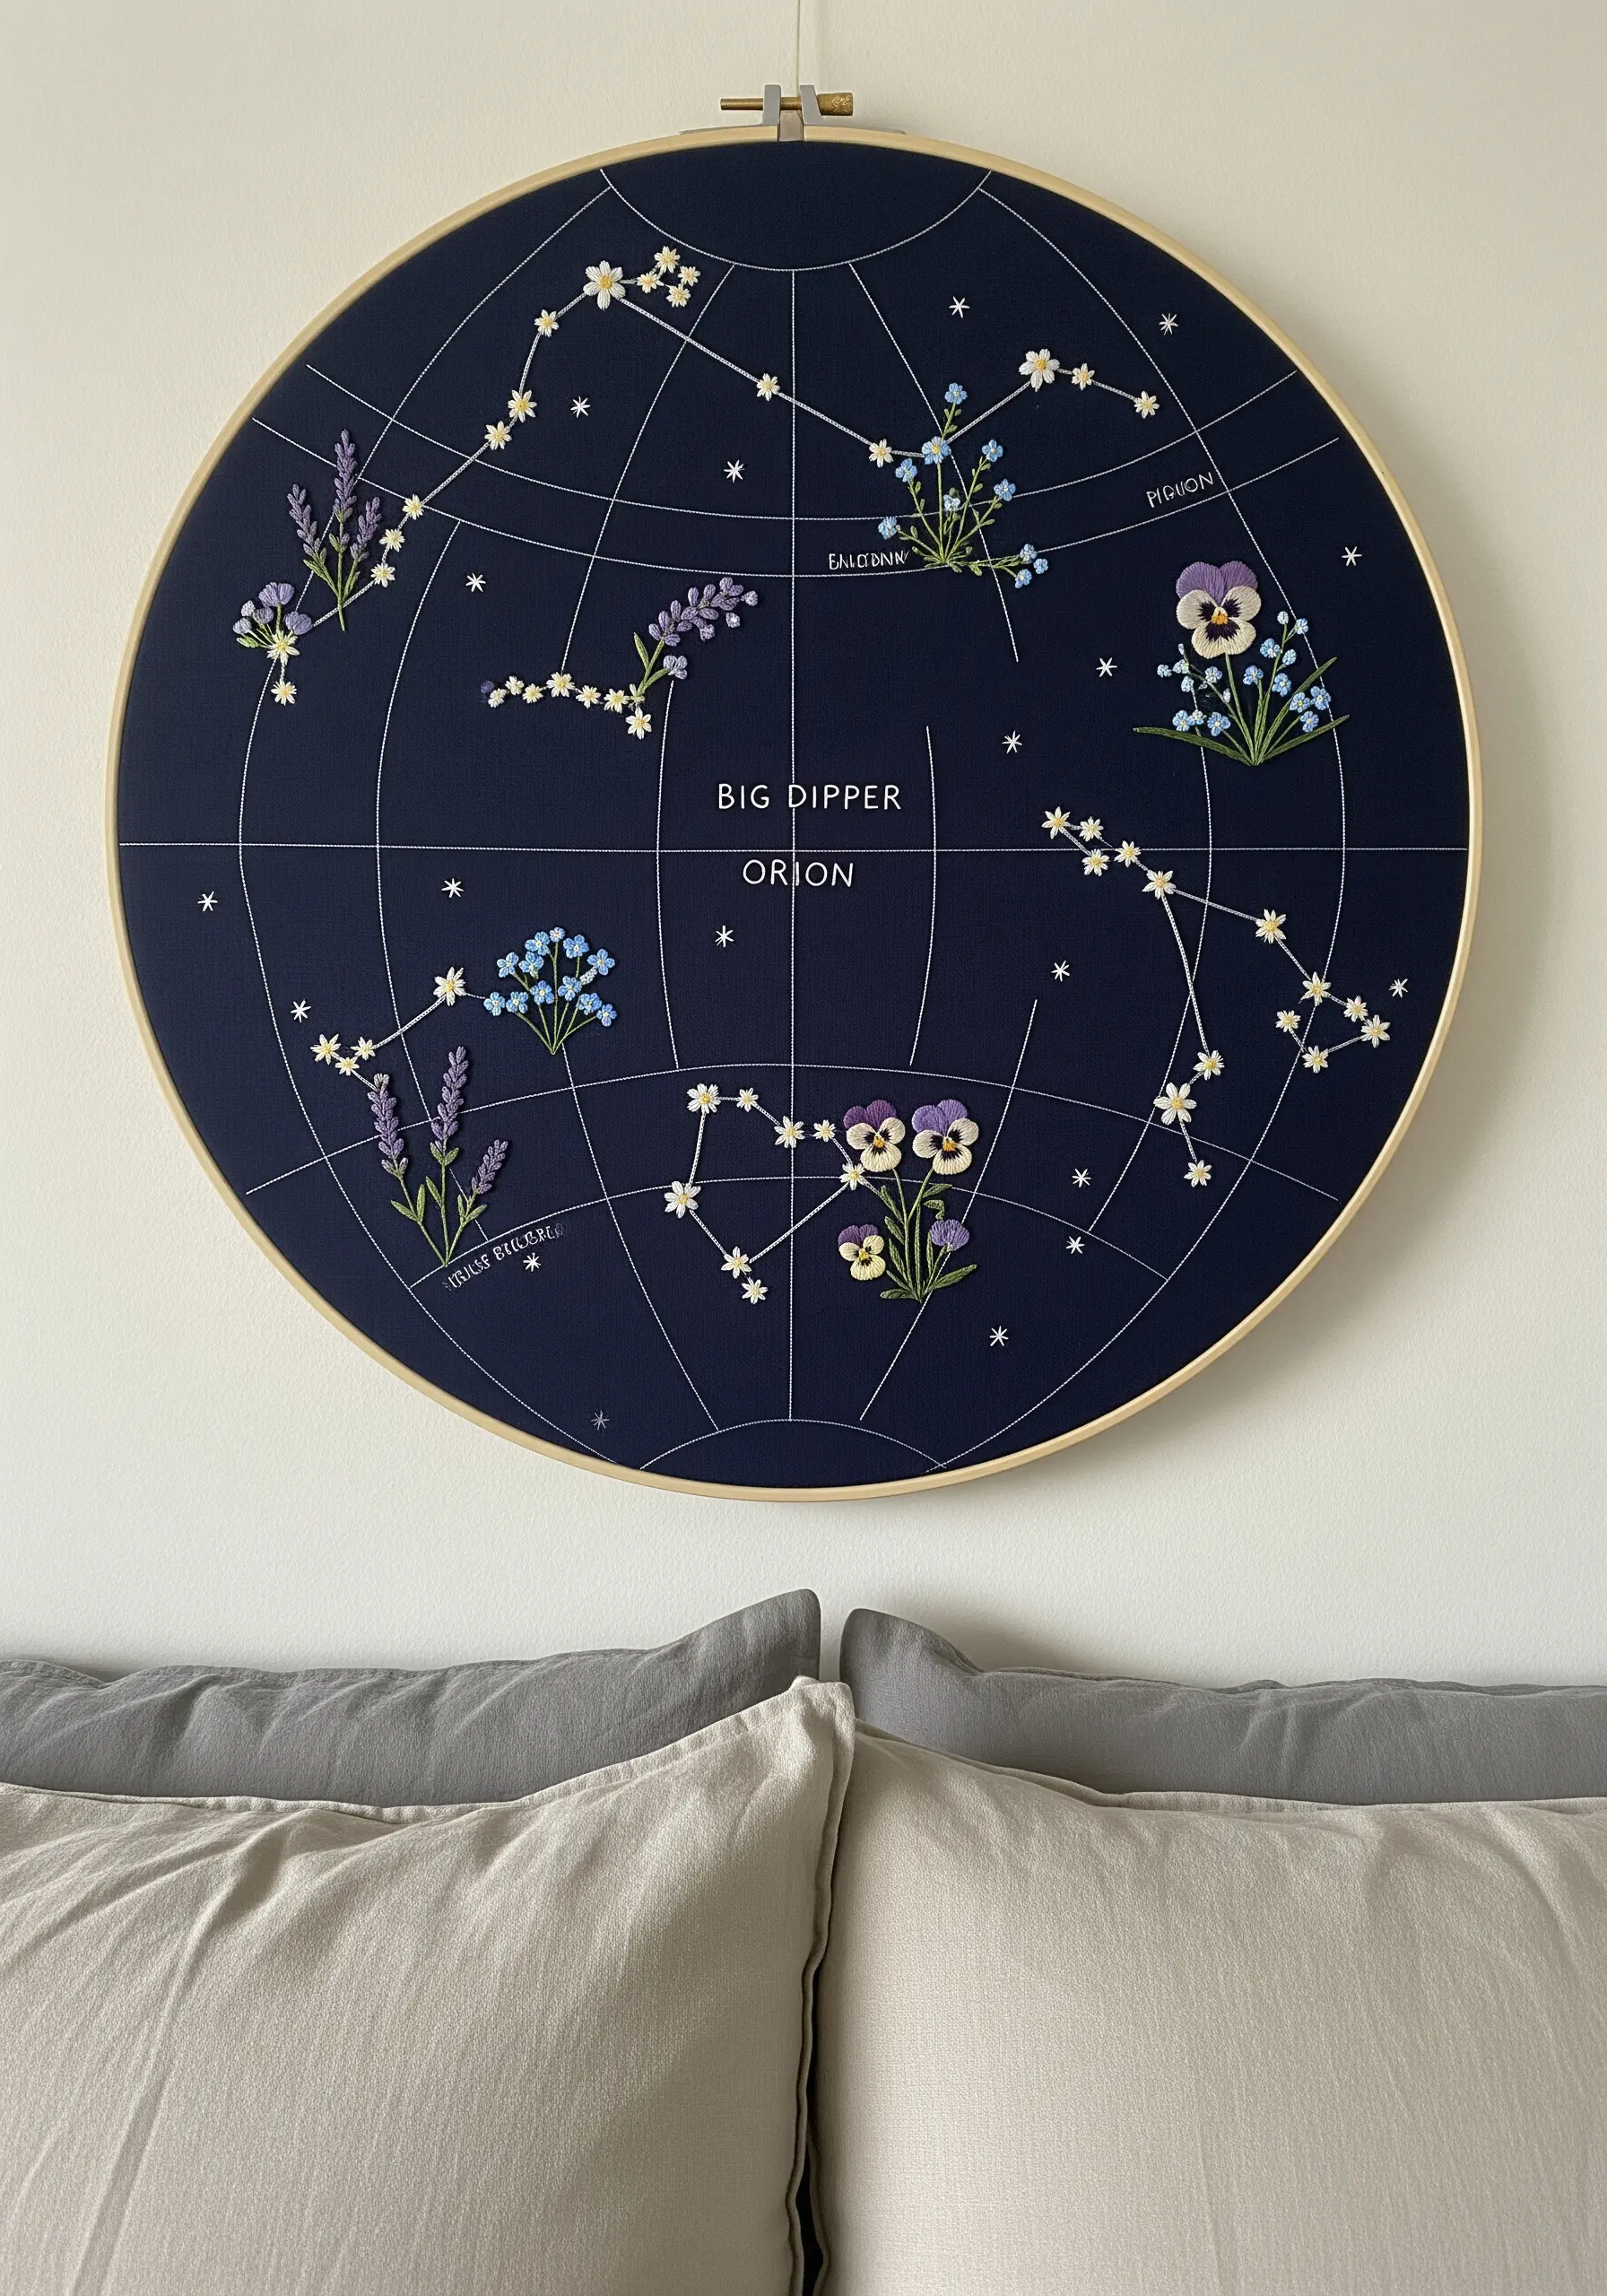
Elevate a simple line design by integrating finely stitched floral elements.
For the constellation map, use a single strand of white floss and a crisp backstitch to ensure the lines are clean and precise against the dark navy fabric.
Then, embellish key points on the map with clusters of tiny flowers, like lavender sprigs made with lazy daisy stitches or pansies created with small satin stitches.
This contrast between sharp, geometric lines and soft, organic botanicals creates a sophisticated and whimsical piece.
The dark background makes the delicate colors of the flowers and the bright white of the stars appear more vibrant.
11. Tell a Story with Fabric Collage and Appliqué
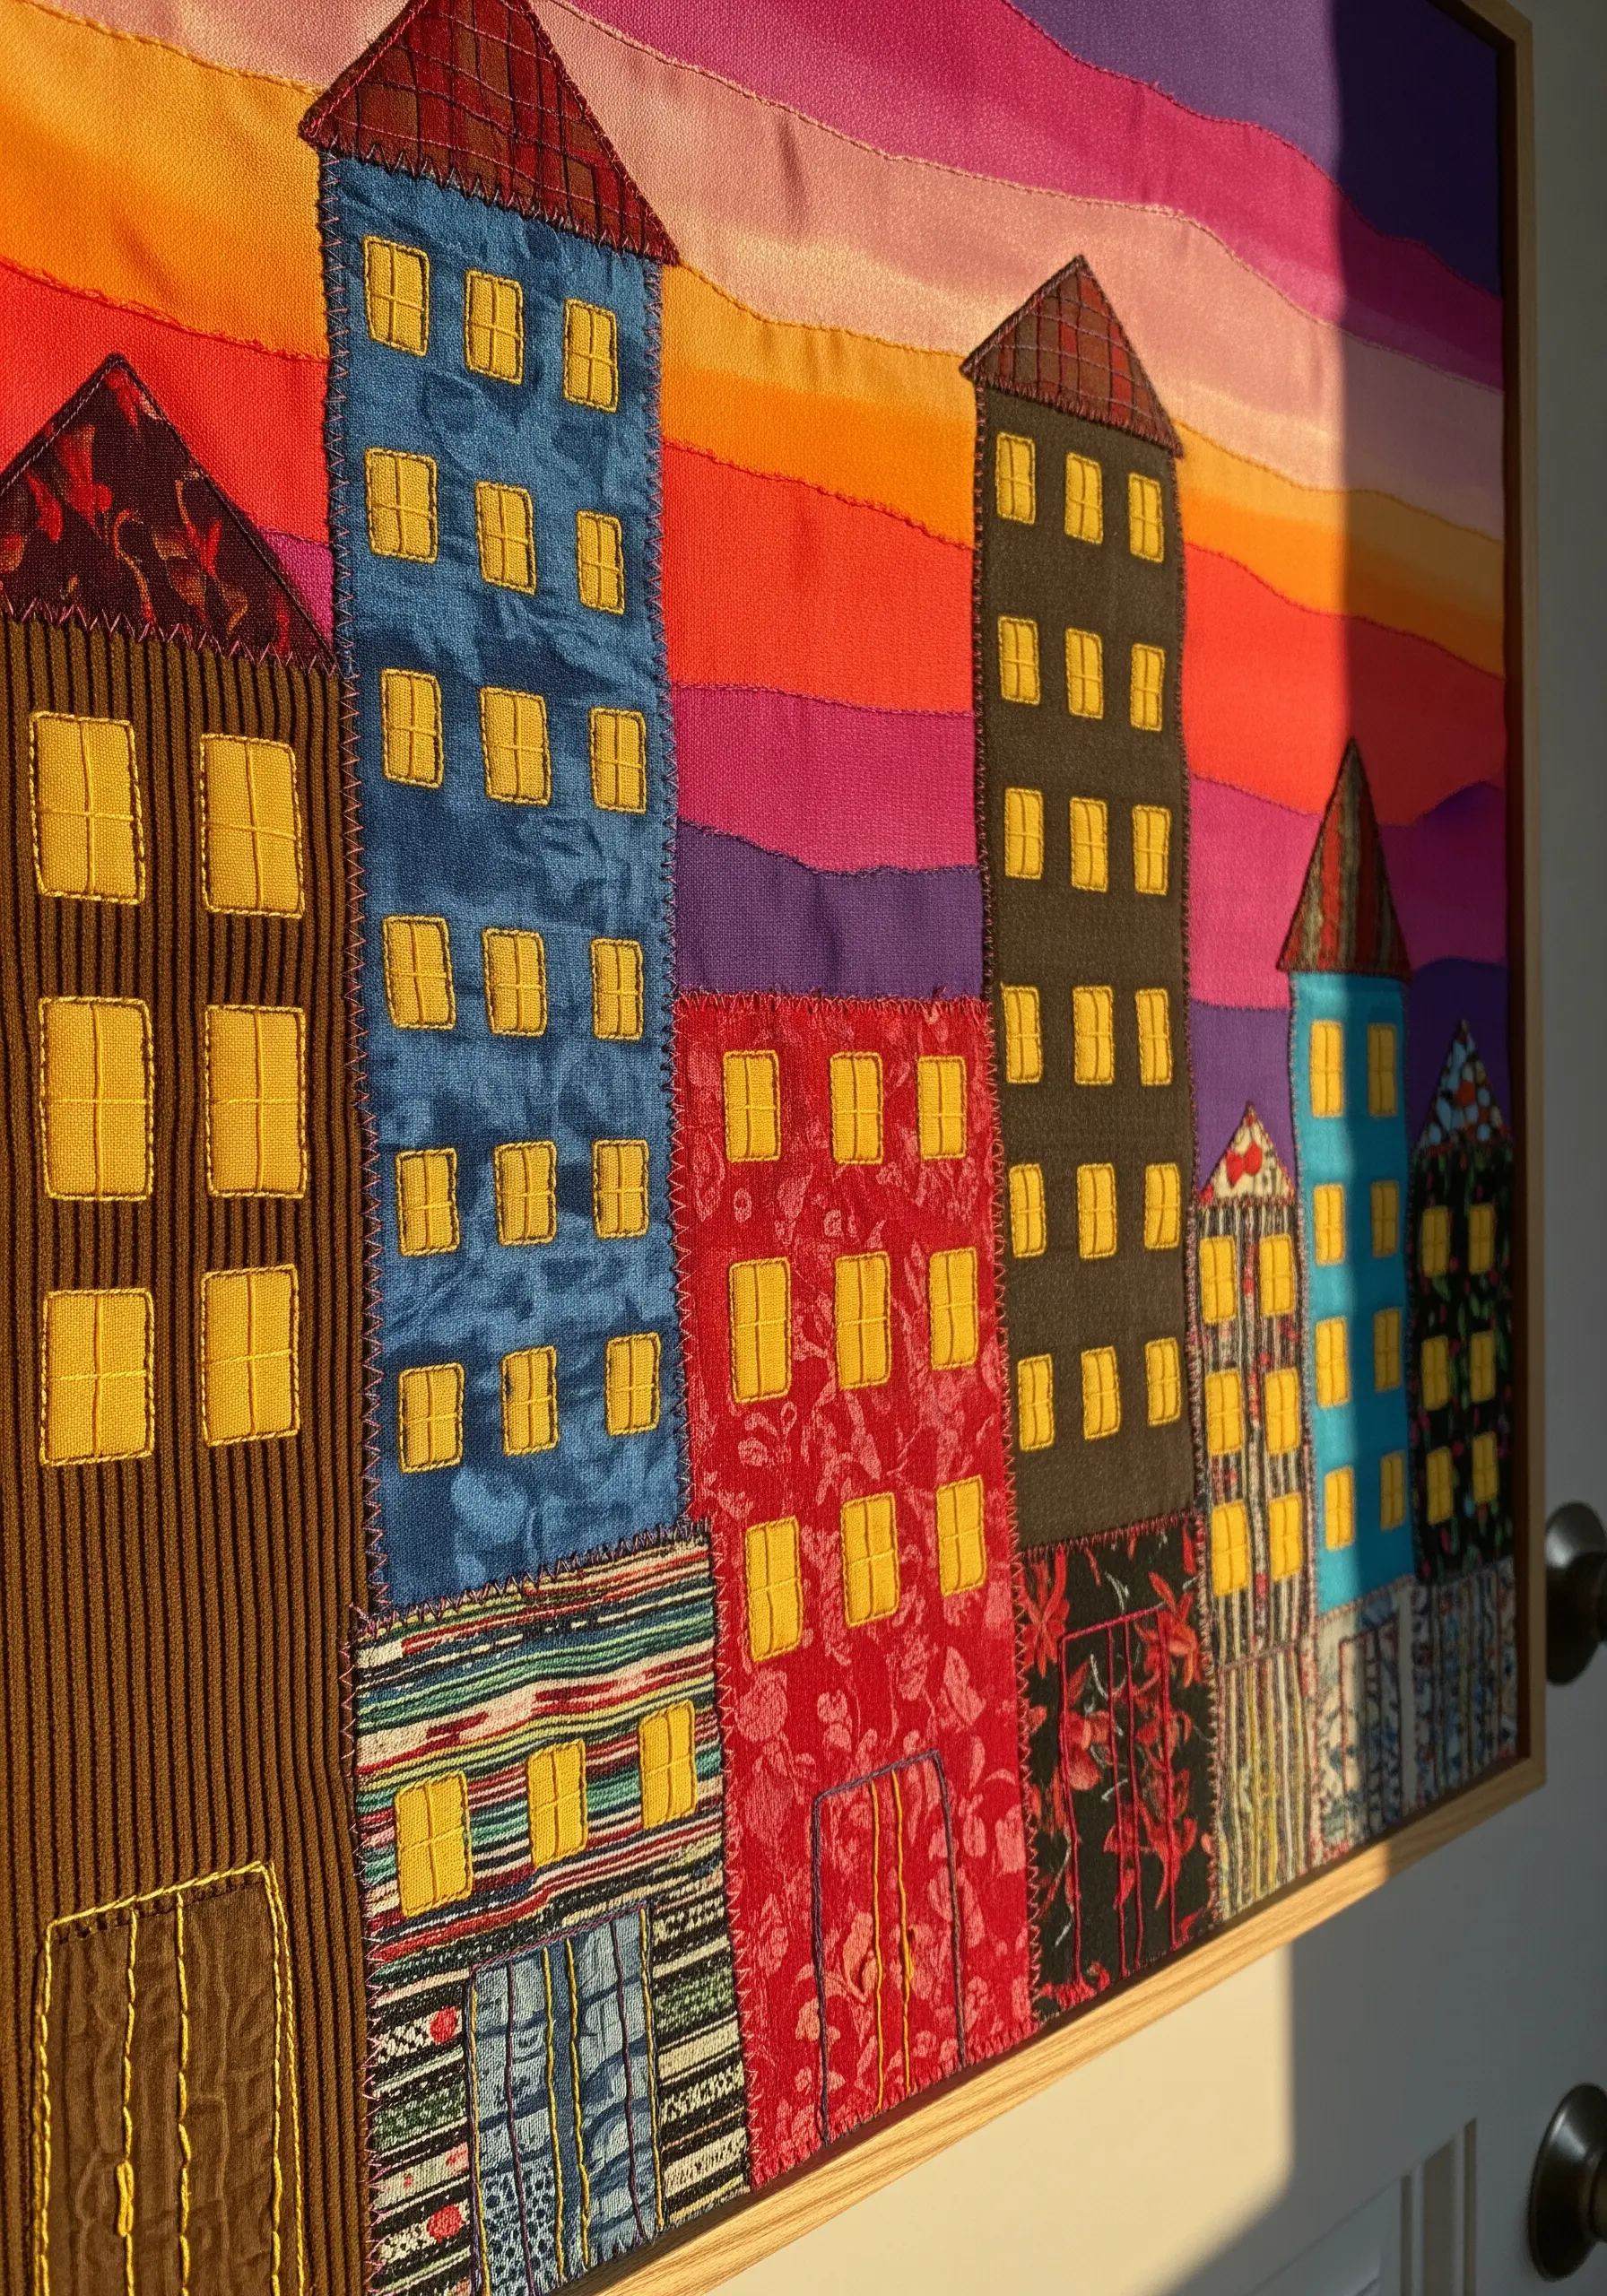
Build a vibrant cityscape by using fabric scraps as your color palette in a technique called appliqué.
Cut different textured and patterned fabrics to represent buildings, roofs, and windows, arranging them to create a dynamic skyline.
Secure each piece with a simple, visible running stitch or blanket stitch around the edges, which adds a charming, handcrafted feel.
This approach allows you to incorporate a wide range of materials—from corduroy to silk—turning your fabric stash into a storytelling tool.
The beauty of this project is in the imperfection and the rich texture created by the different textiles.
12. Sculpt a Miniature Garden with 3D Stitches
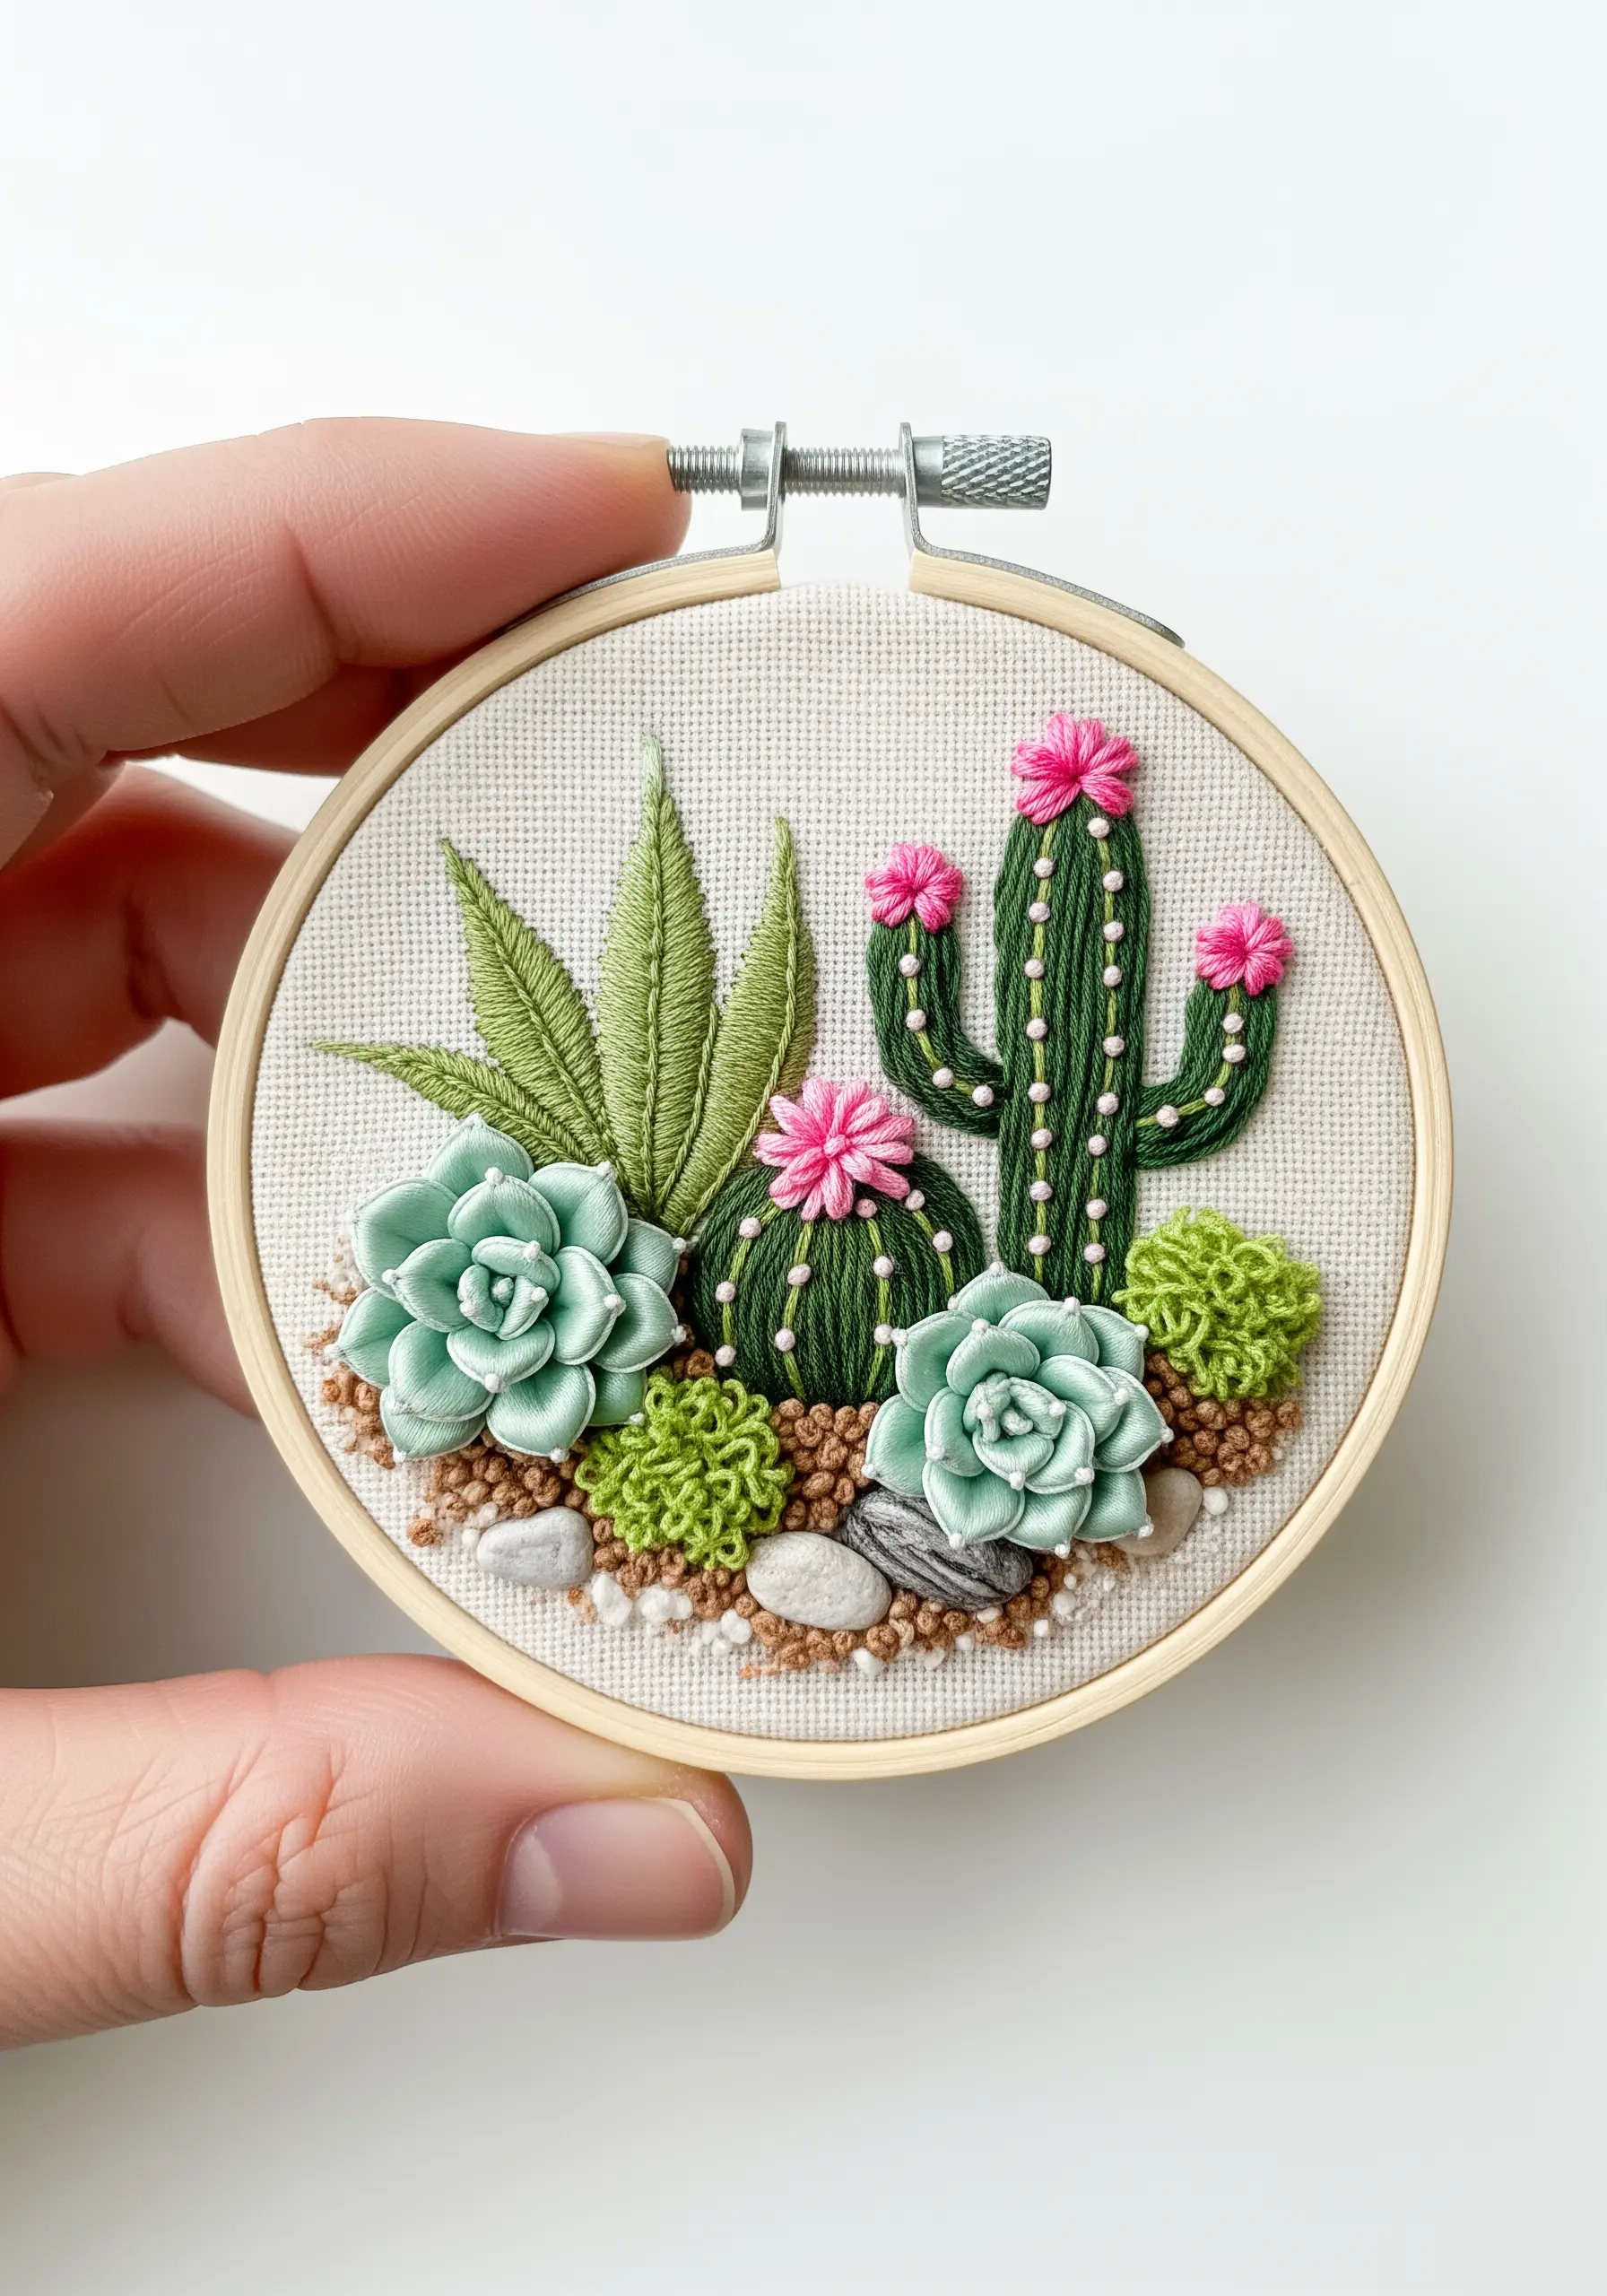
Create a stunningly realistic succulent garden by using sculptural, three-dimensional stitches.
Form the fleshy petals of echeveria succulents using the woven wheel stitch (also known as the wagon wheel rose stitch), pulling the thread taut to create neat, overlapping layers.
For the spiky cactus, use a padded satin stitch, and for the ground cover, use dense French knots in various shades of green and brown.
This project is all about building layers and textures to create a tiny embroidery detail that looks almost real.
A few strategically placed seed beads or tiny stones can add another layer of realism.
13. Fuse Macrame and Embroidery for a Statement Piece
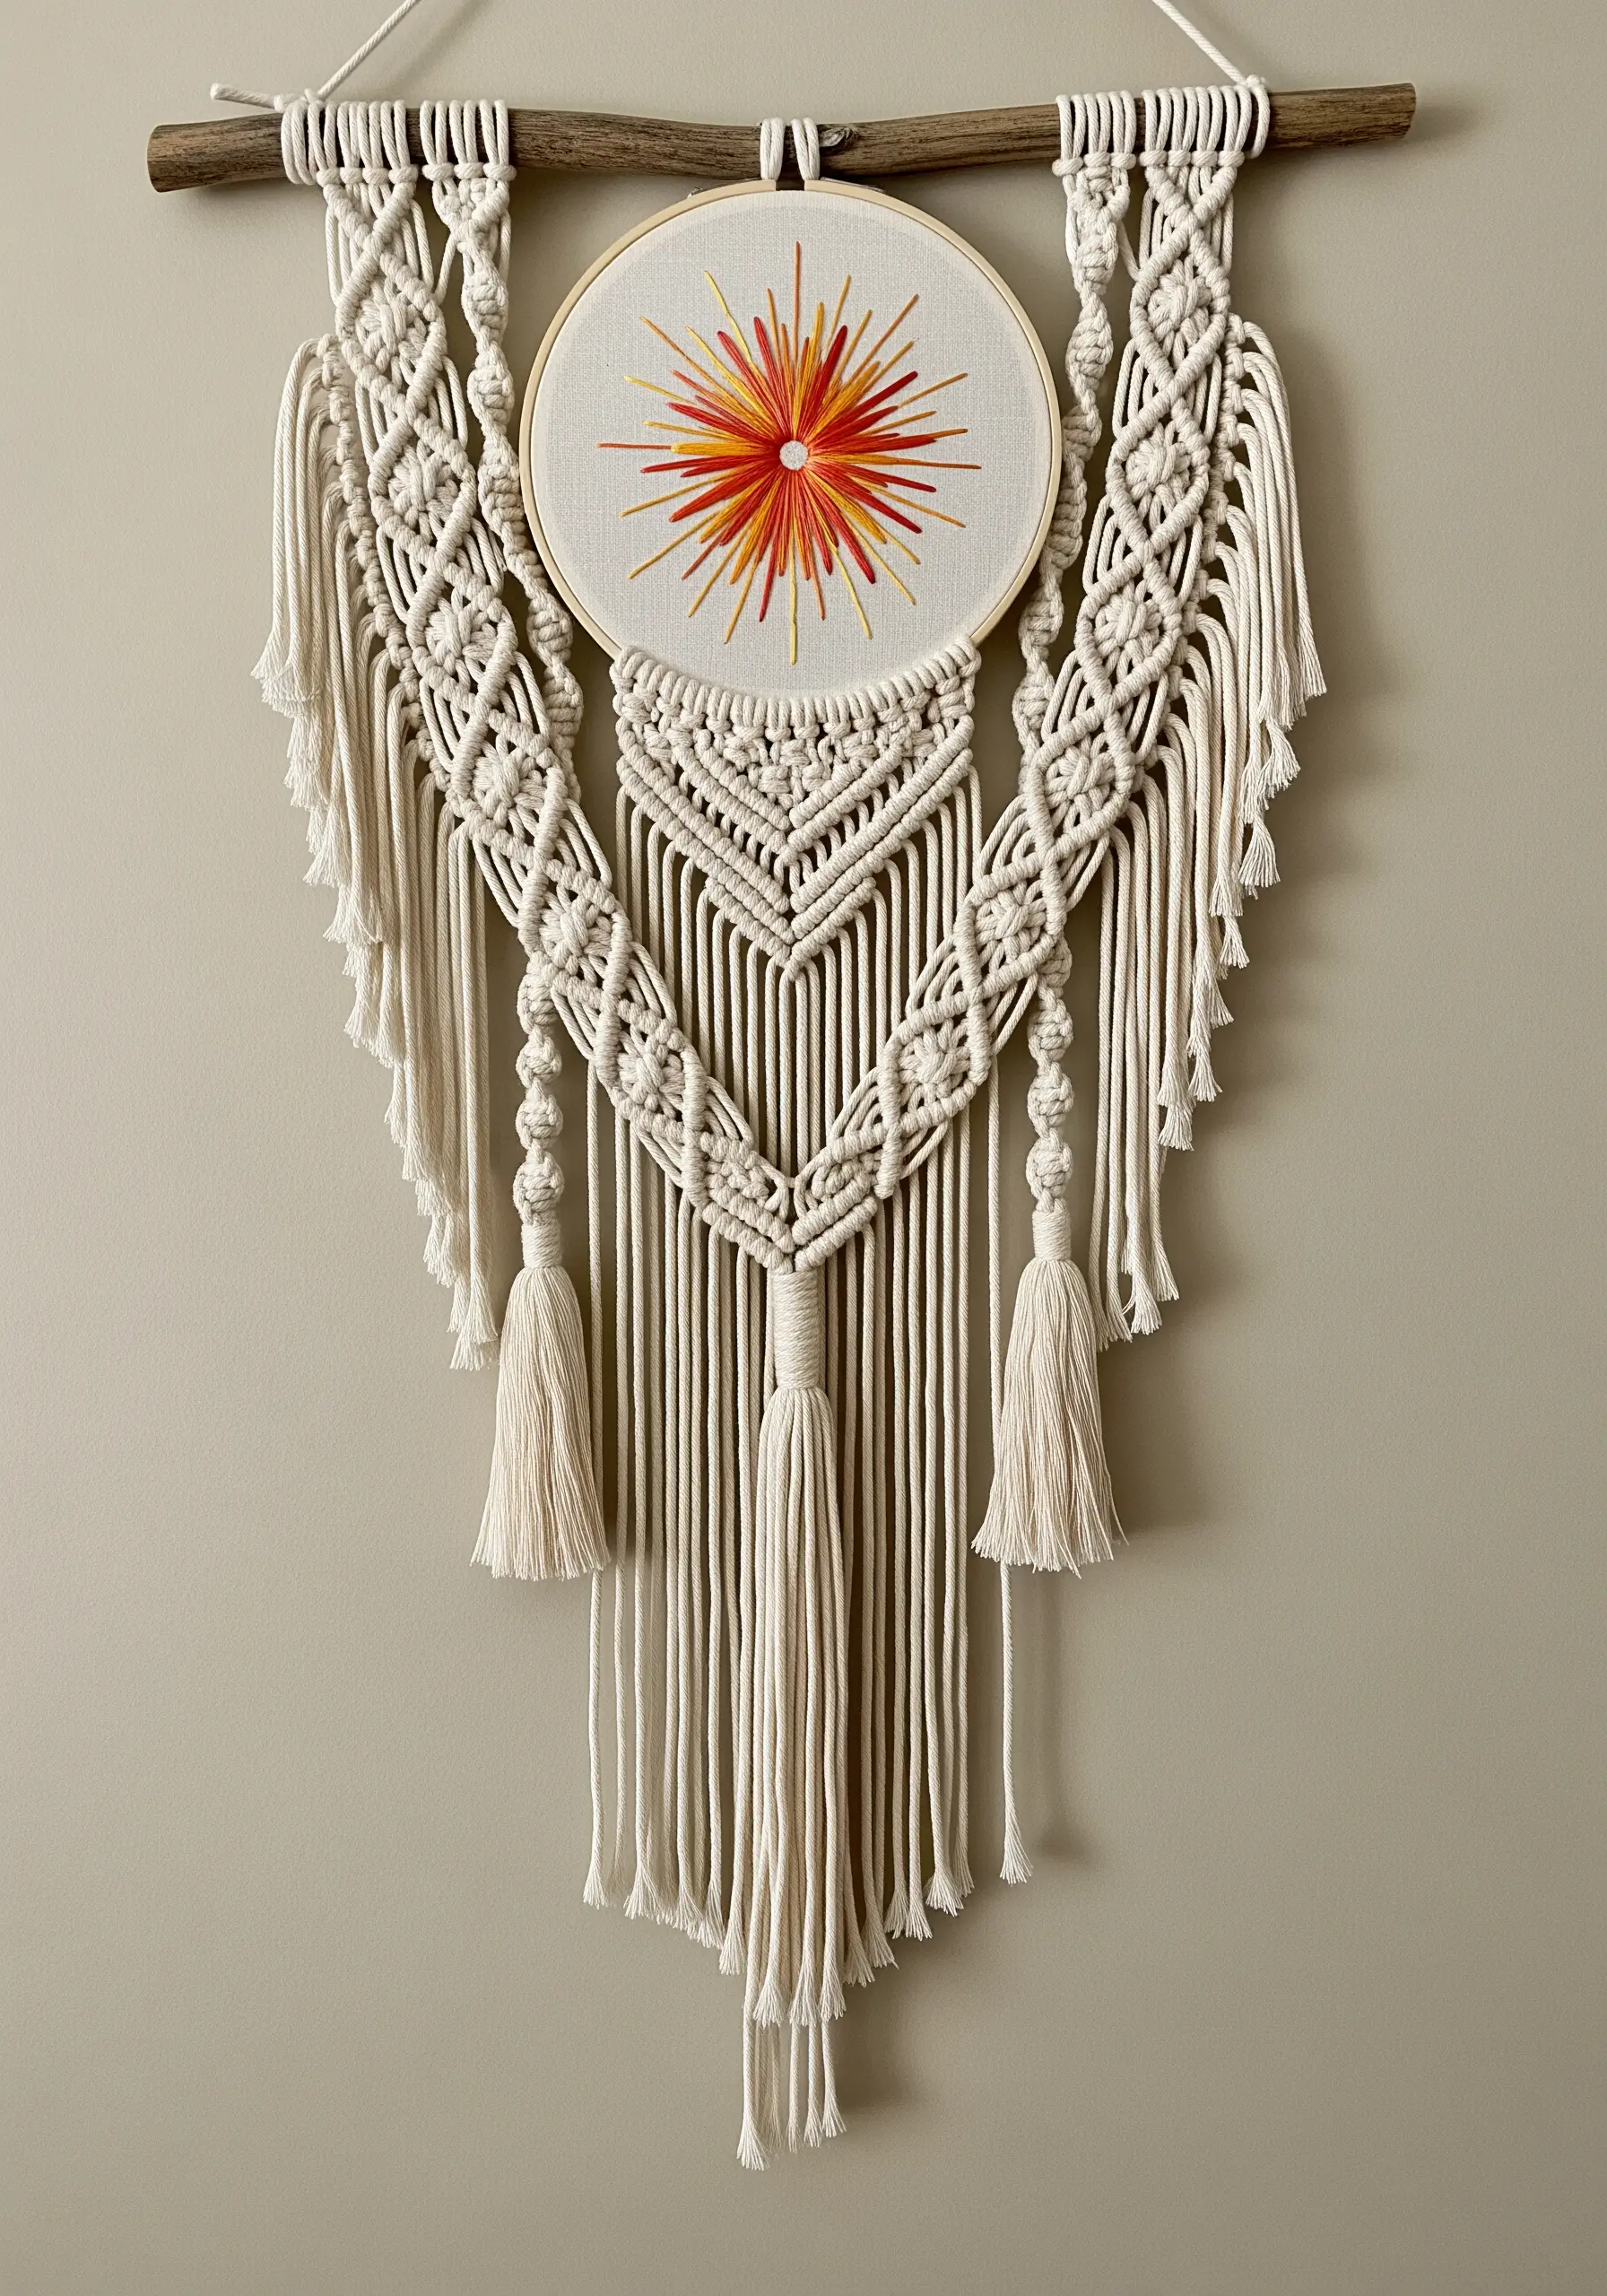
Combine two beloved fiber arts by setting a small embroidered hoop within a larger macrame wall hanging.
Create a simple, bold embroidered motif—like an abstract sunburst—using long straight stitches on a taut fabric hoop.
Then, build your macrame design around it, using knots like the square knot and double half hitch to create an intricate frame.
This juxtaposition of the colorful, delicate embroidery with the neutral, textural macrame creates a unique focal point that highlights the strengths of both crafts.
It’s a perfect way to add a surprising pop of color to a classic boho design.
14. Craft an Interactive Felt Wall Calendar
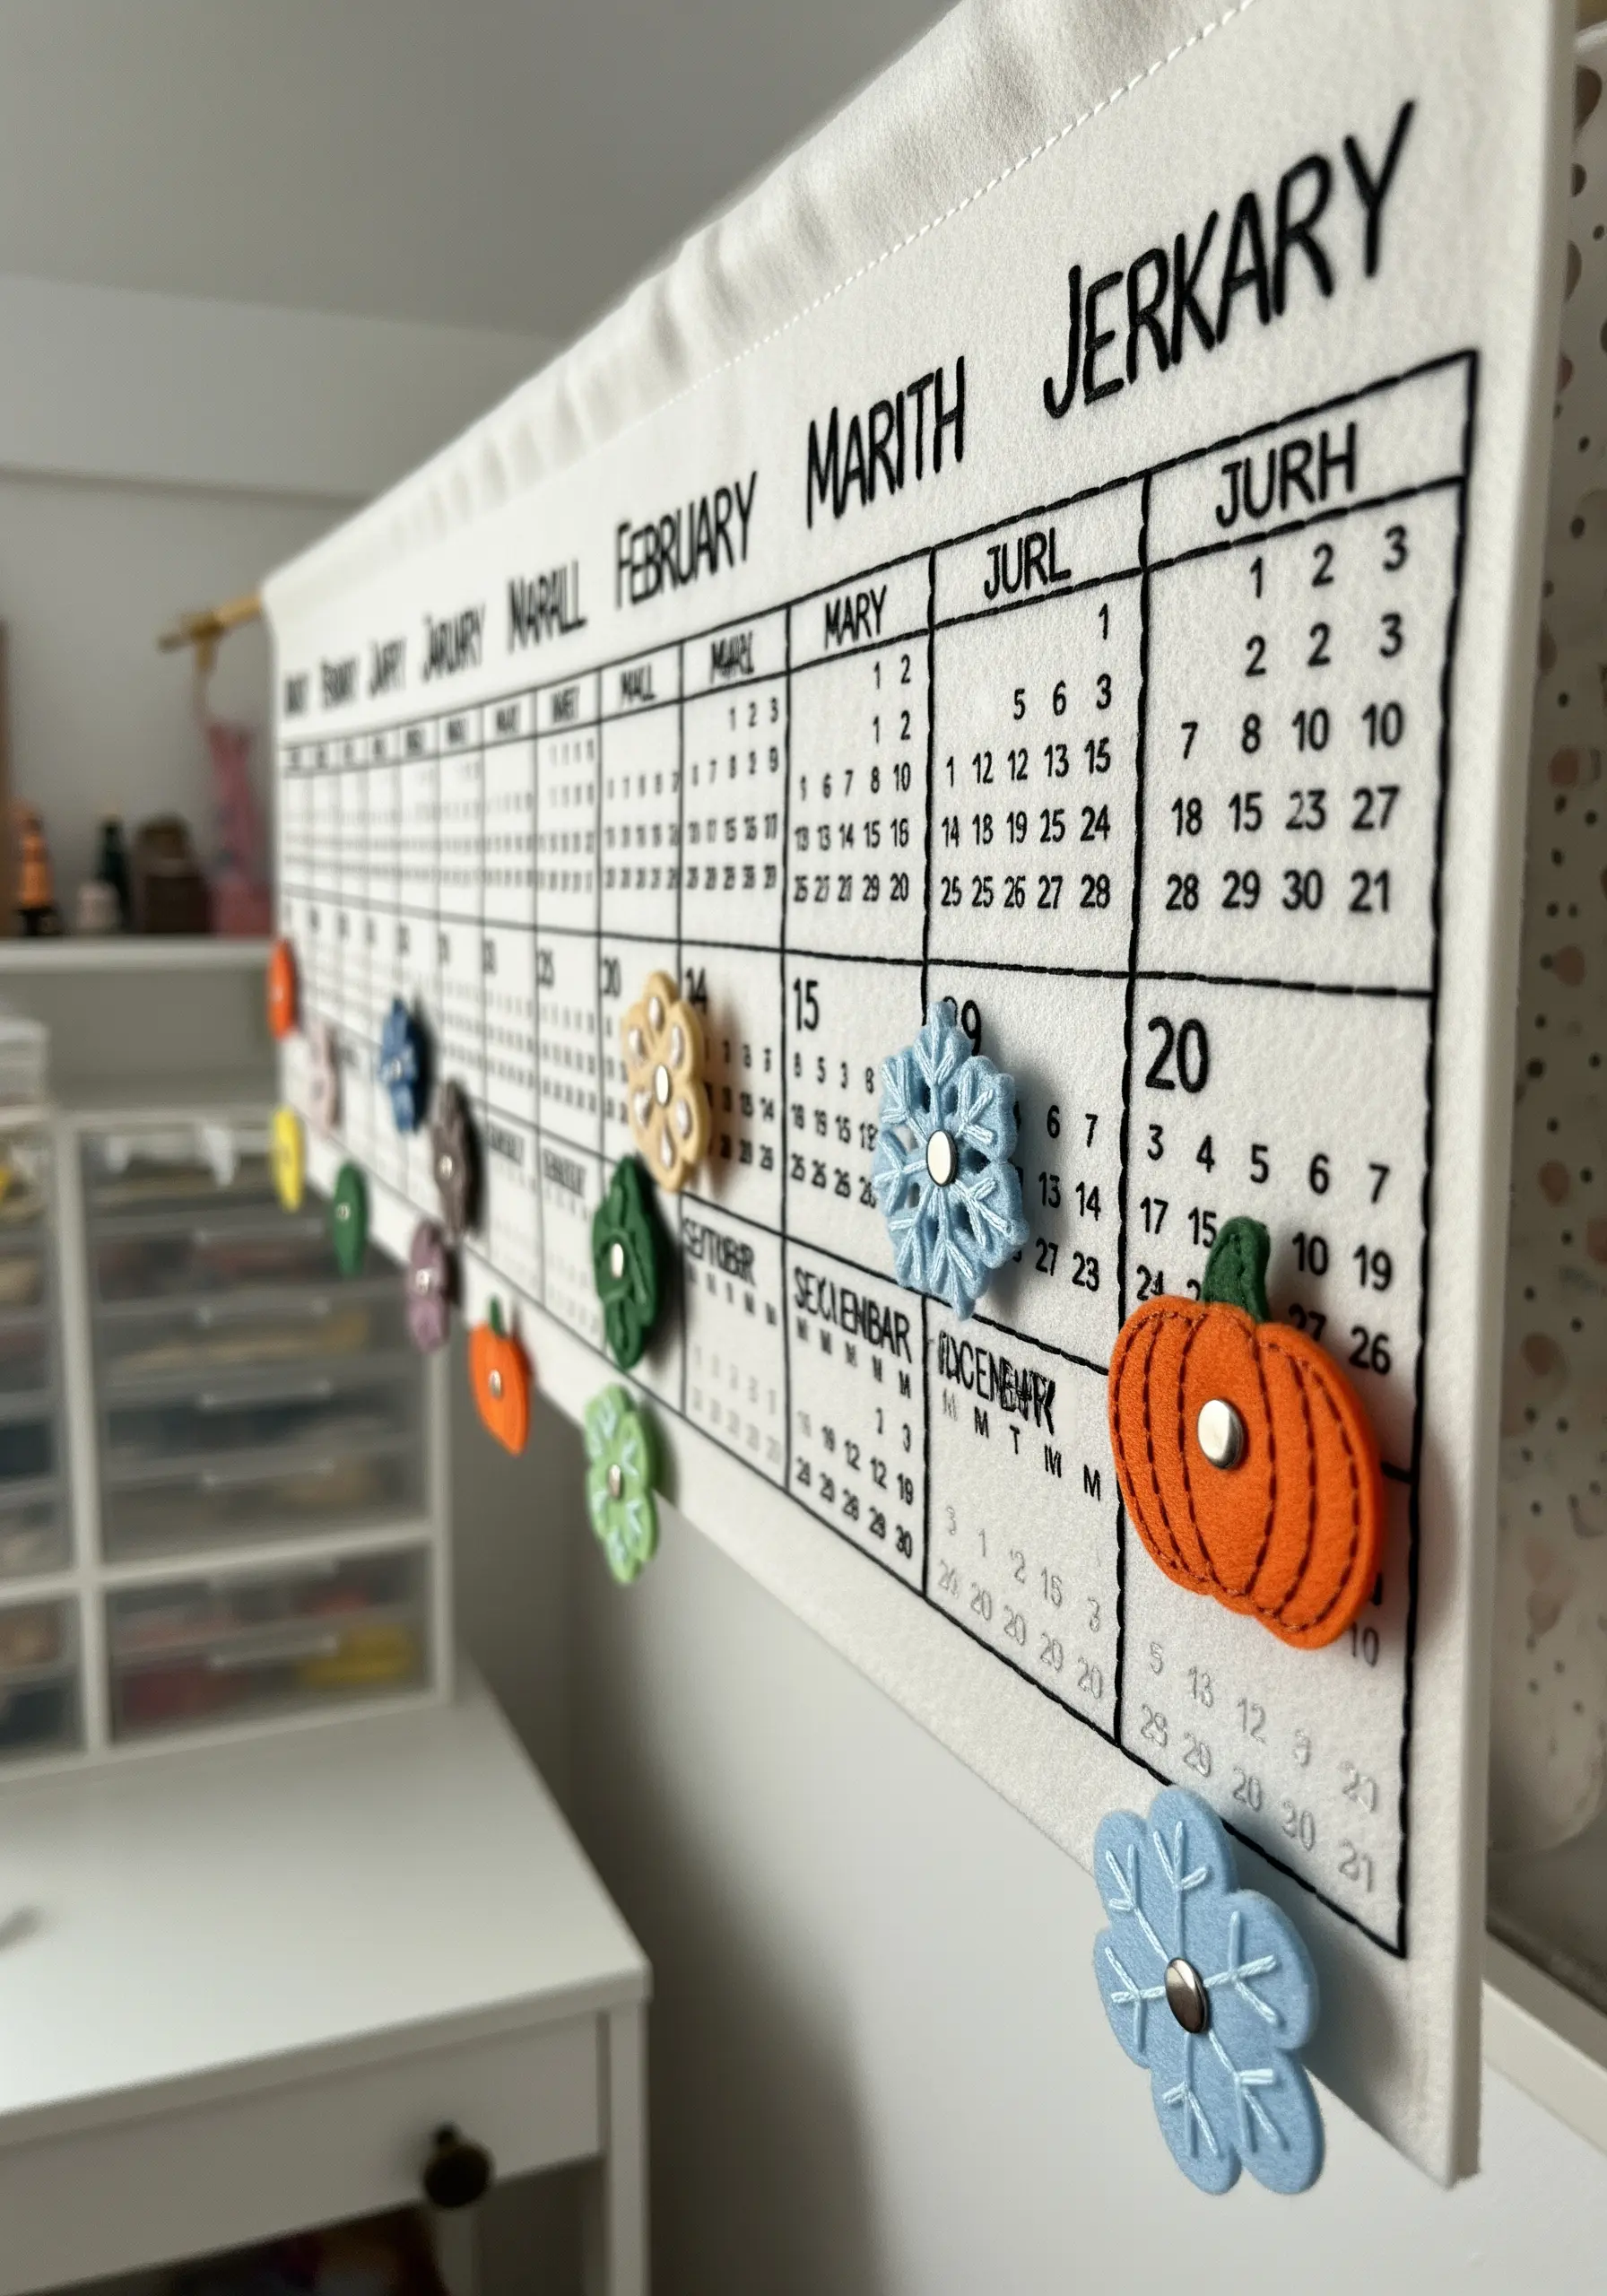
Design a reusable wall calendar using felt appliqué for a fun and functional weekend project.
Print the calendar grid and lettering onto the felt base using iron-on transfer paper for crisp, clean lines.
Create small, seasonal icons from different colors of felt—like pumpkins, snowflakes, and flowers—and add simple embroidered details with backstitch.
Attach a small piece of Velcro or a snap to the back of each icon and the corresponding spot on the calendar, allowing you to move and change them throughout the year.
This tactile project is a delightful way to mark the seasons and practice basic appliqué and embroidery skills.
15. Master Realism with Thread Painting

Capture the lifelike detail of a pet portrait using the thread painting technique.
This method involves using the long and short stitch with multiple shades of a single color to create smooth gradients that mimic the texture and direction of fur.
Work with a single strand of floss for the finest detail, especially around the eyes and nose, to achieve a realistic expression.
Always stitch in the natural direction of the animal’s fur growth—this is the key to creating movement and realism rather than a flat, colored-in shape.
It’s a patient process, but the stunningly realistic result is well worth the effort.
16. Construct a No-Sew Felt Floral Wreath
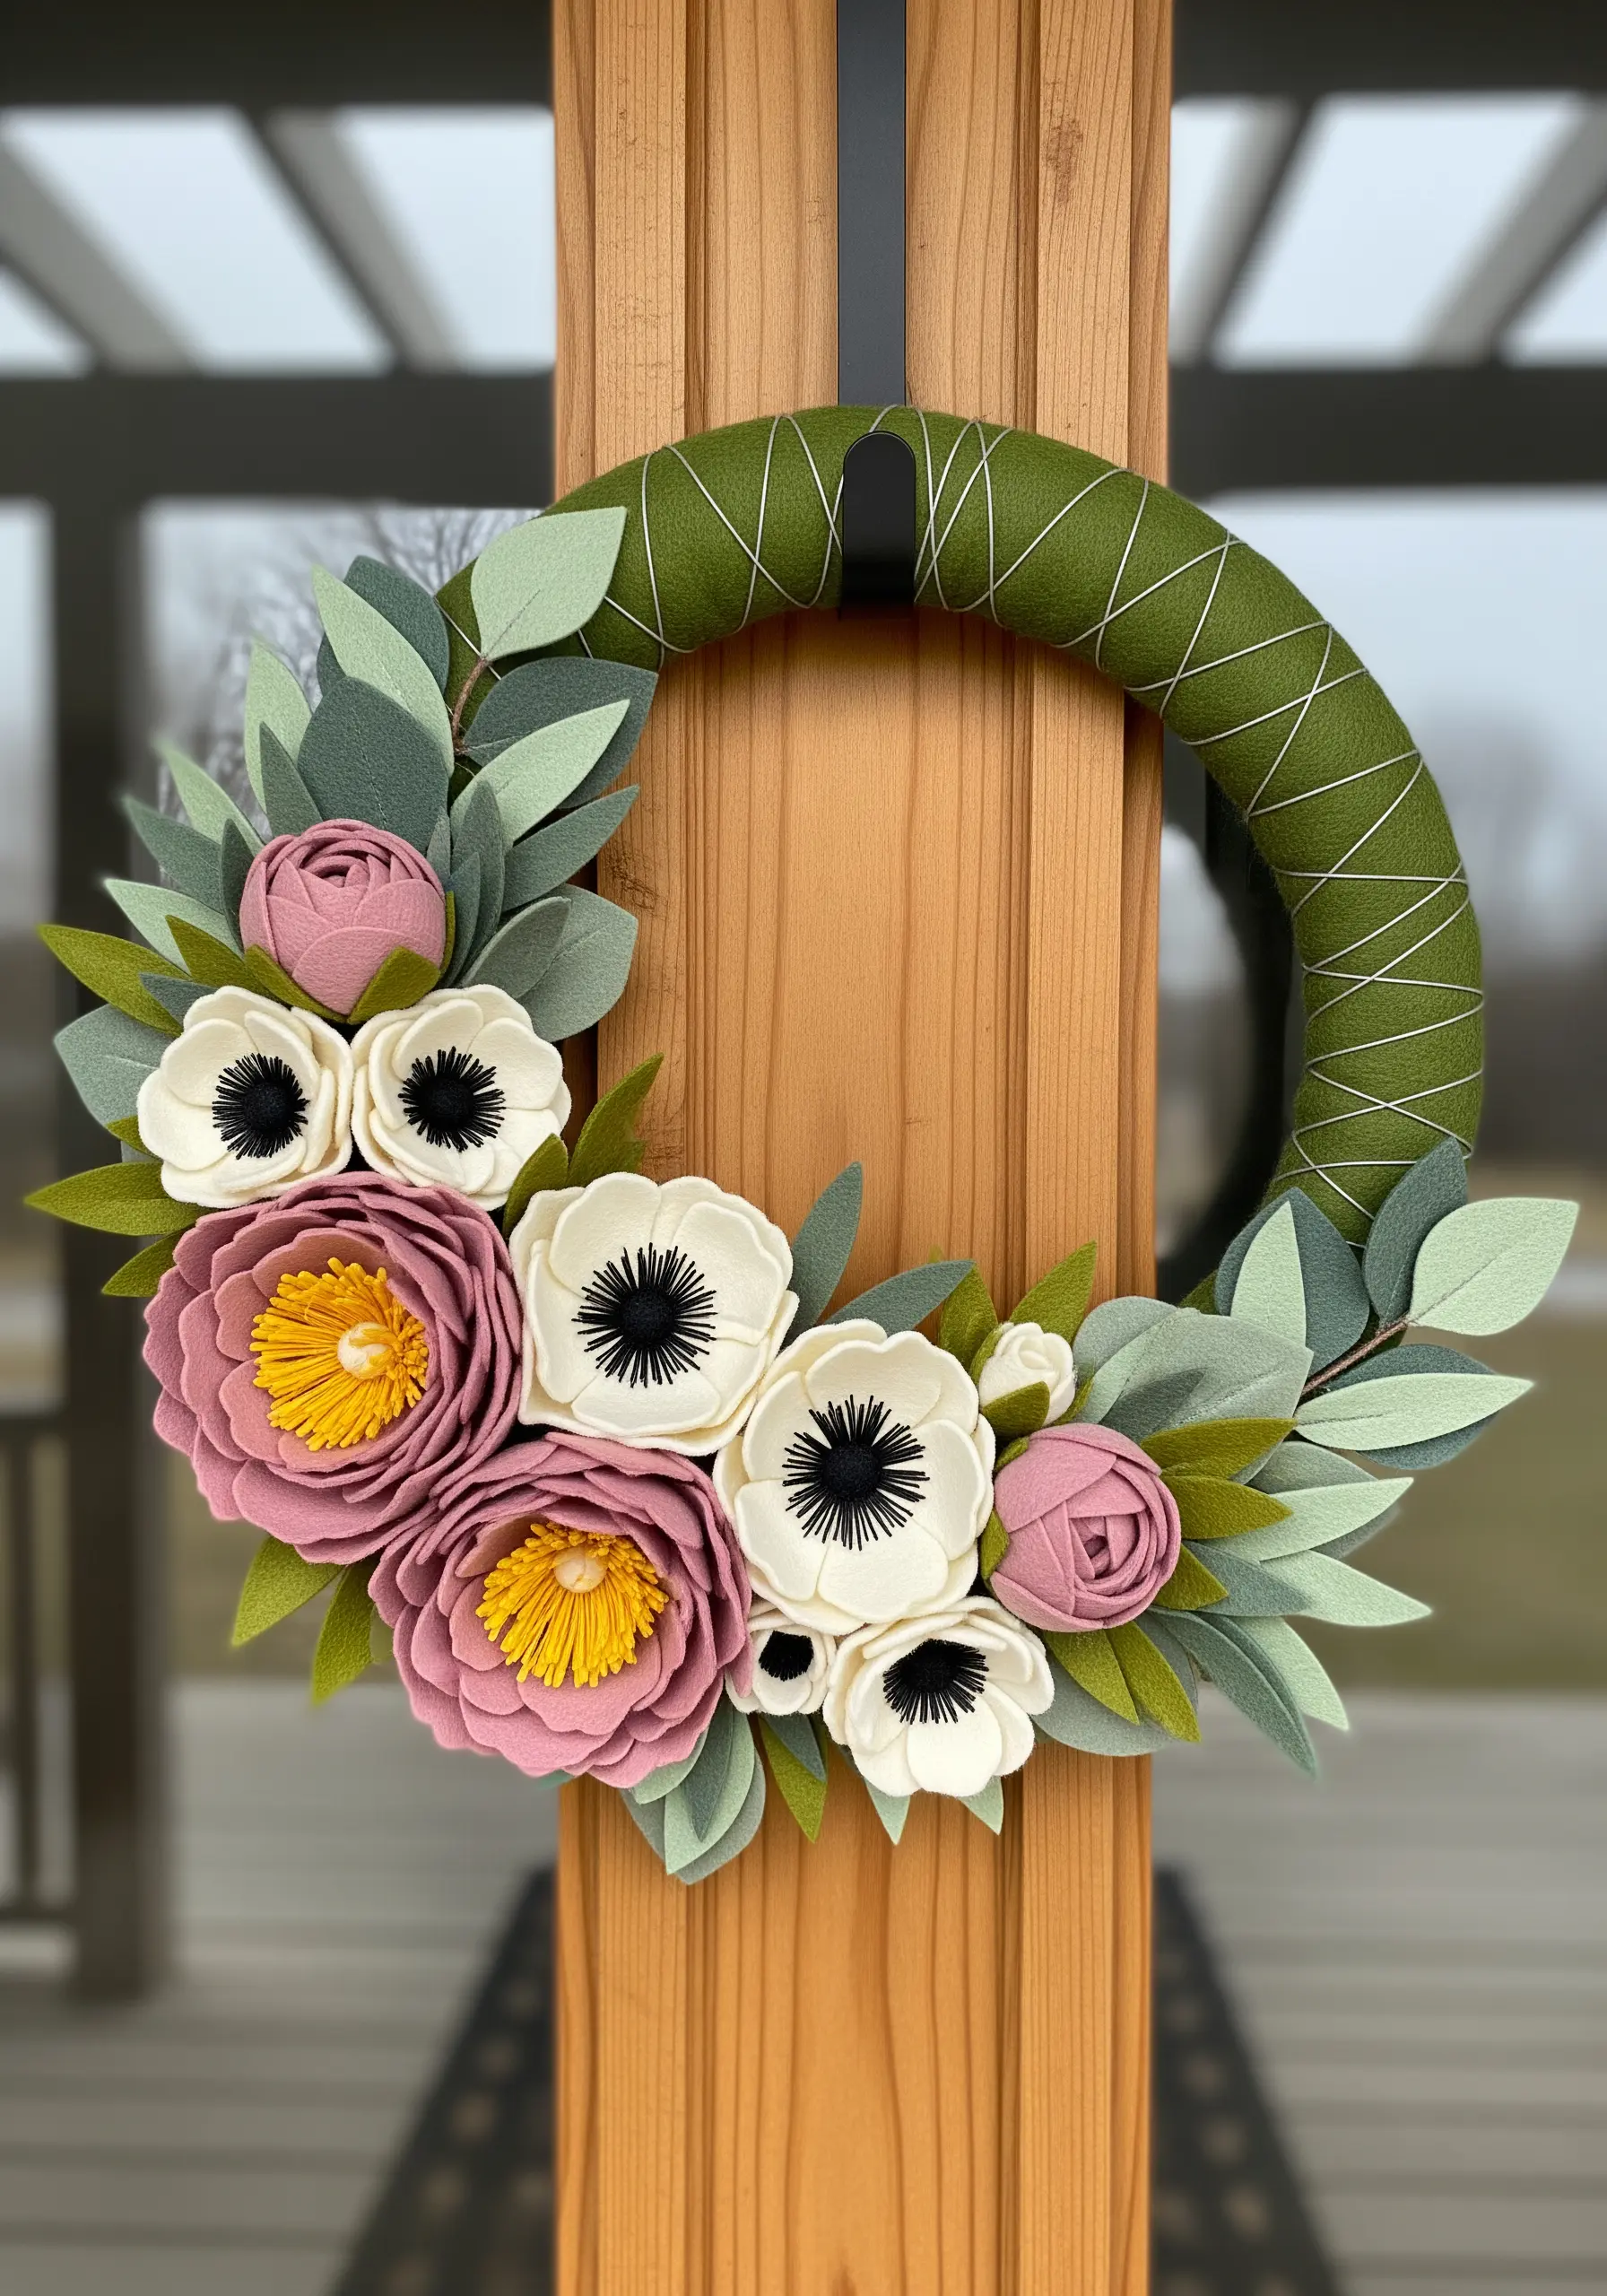
Assemble a beautiful, everlasting floral wreath using layered felt and a hot glue gun—no sewing required.
Cut petal and leaf shapes from various colors of craft felt; you can create complex flowers like roses and anemones by layering and curling individual petals.
For the flower centers, use contrasting colors or add texture with bundled yarn or felt balls.
Wrap a foam wreath form with ribbon or yarn for a neat base, then arrange and glue your finished felt flowers and leaves to create a lush, full composition.
This is a wonderfully fast and satisfying way to create dimensional decor.
17. Stitch Miniature Landscapes on Postcards
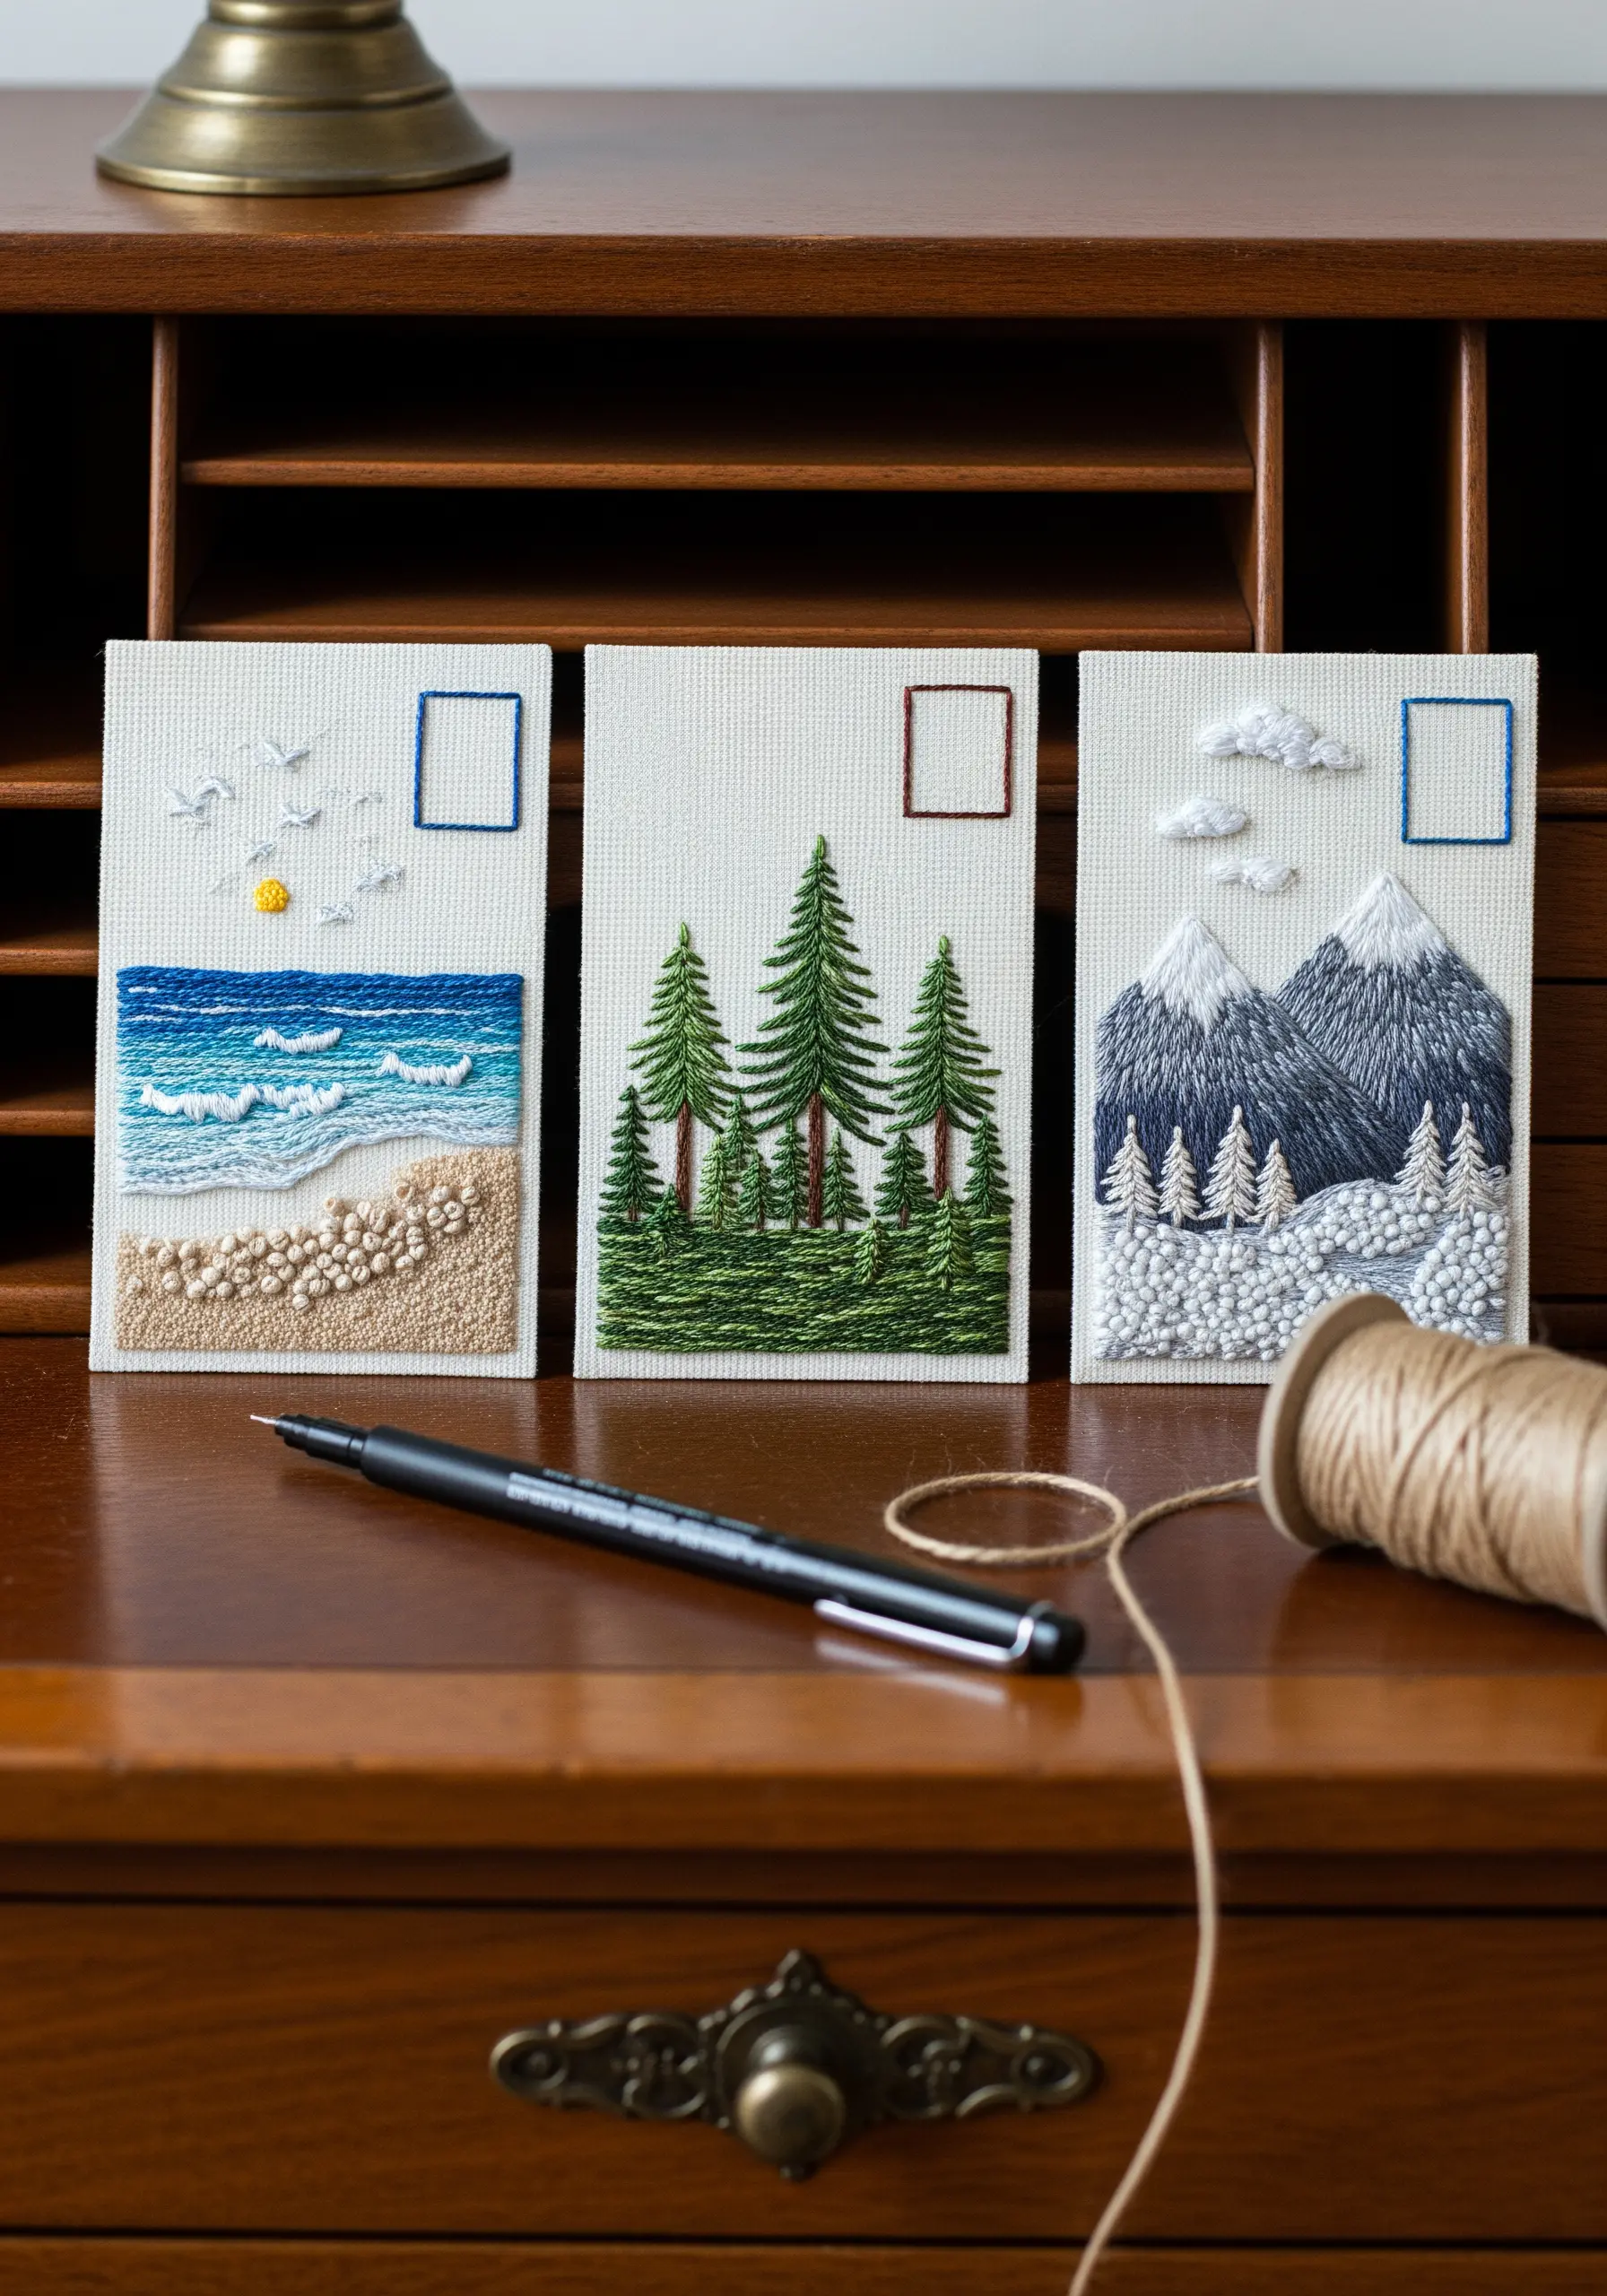
Create charming, postcard-sized vignettes by combining different textural stitches to represent landscapes.
Use dense French knots to create the texture of a sandy beach or snowy ground, and use layered satin stitch for smooth, rolling waves.
For elements like trees and clouds, a mix of straight stitches and fluffy bullion knots can add dimension and detail.
Working on a small scale, like on a piece of cardstock or heavyweight fabric, forces you to be intentional with every stitch, making it a great exercise in composition.
These mini embroidery patterns make perfect handmade gifts or gallery wall additions.
18. Weave a Sunset with Blended Colors and Textures
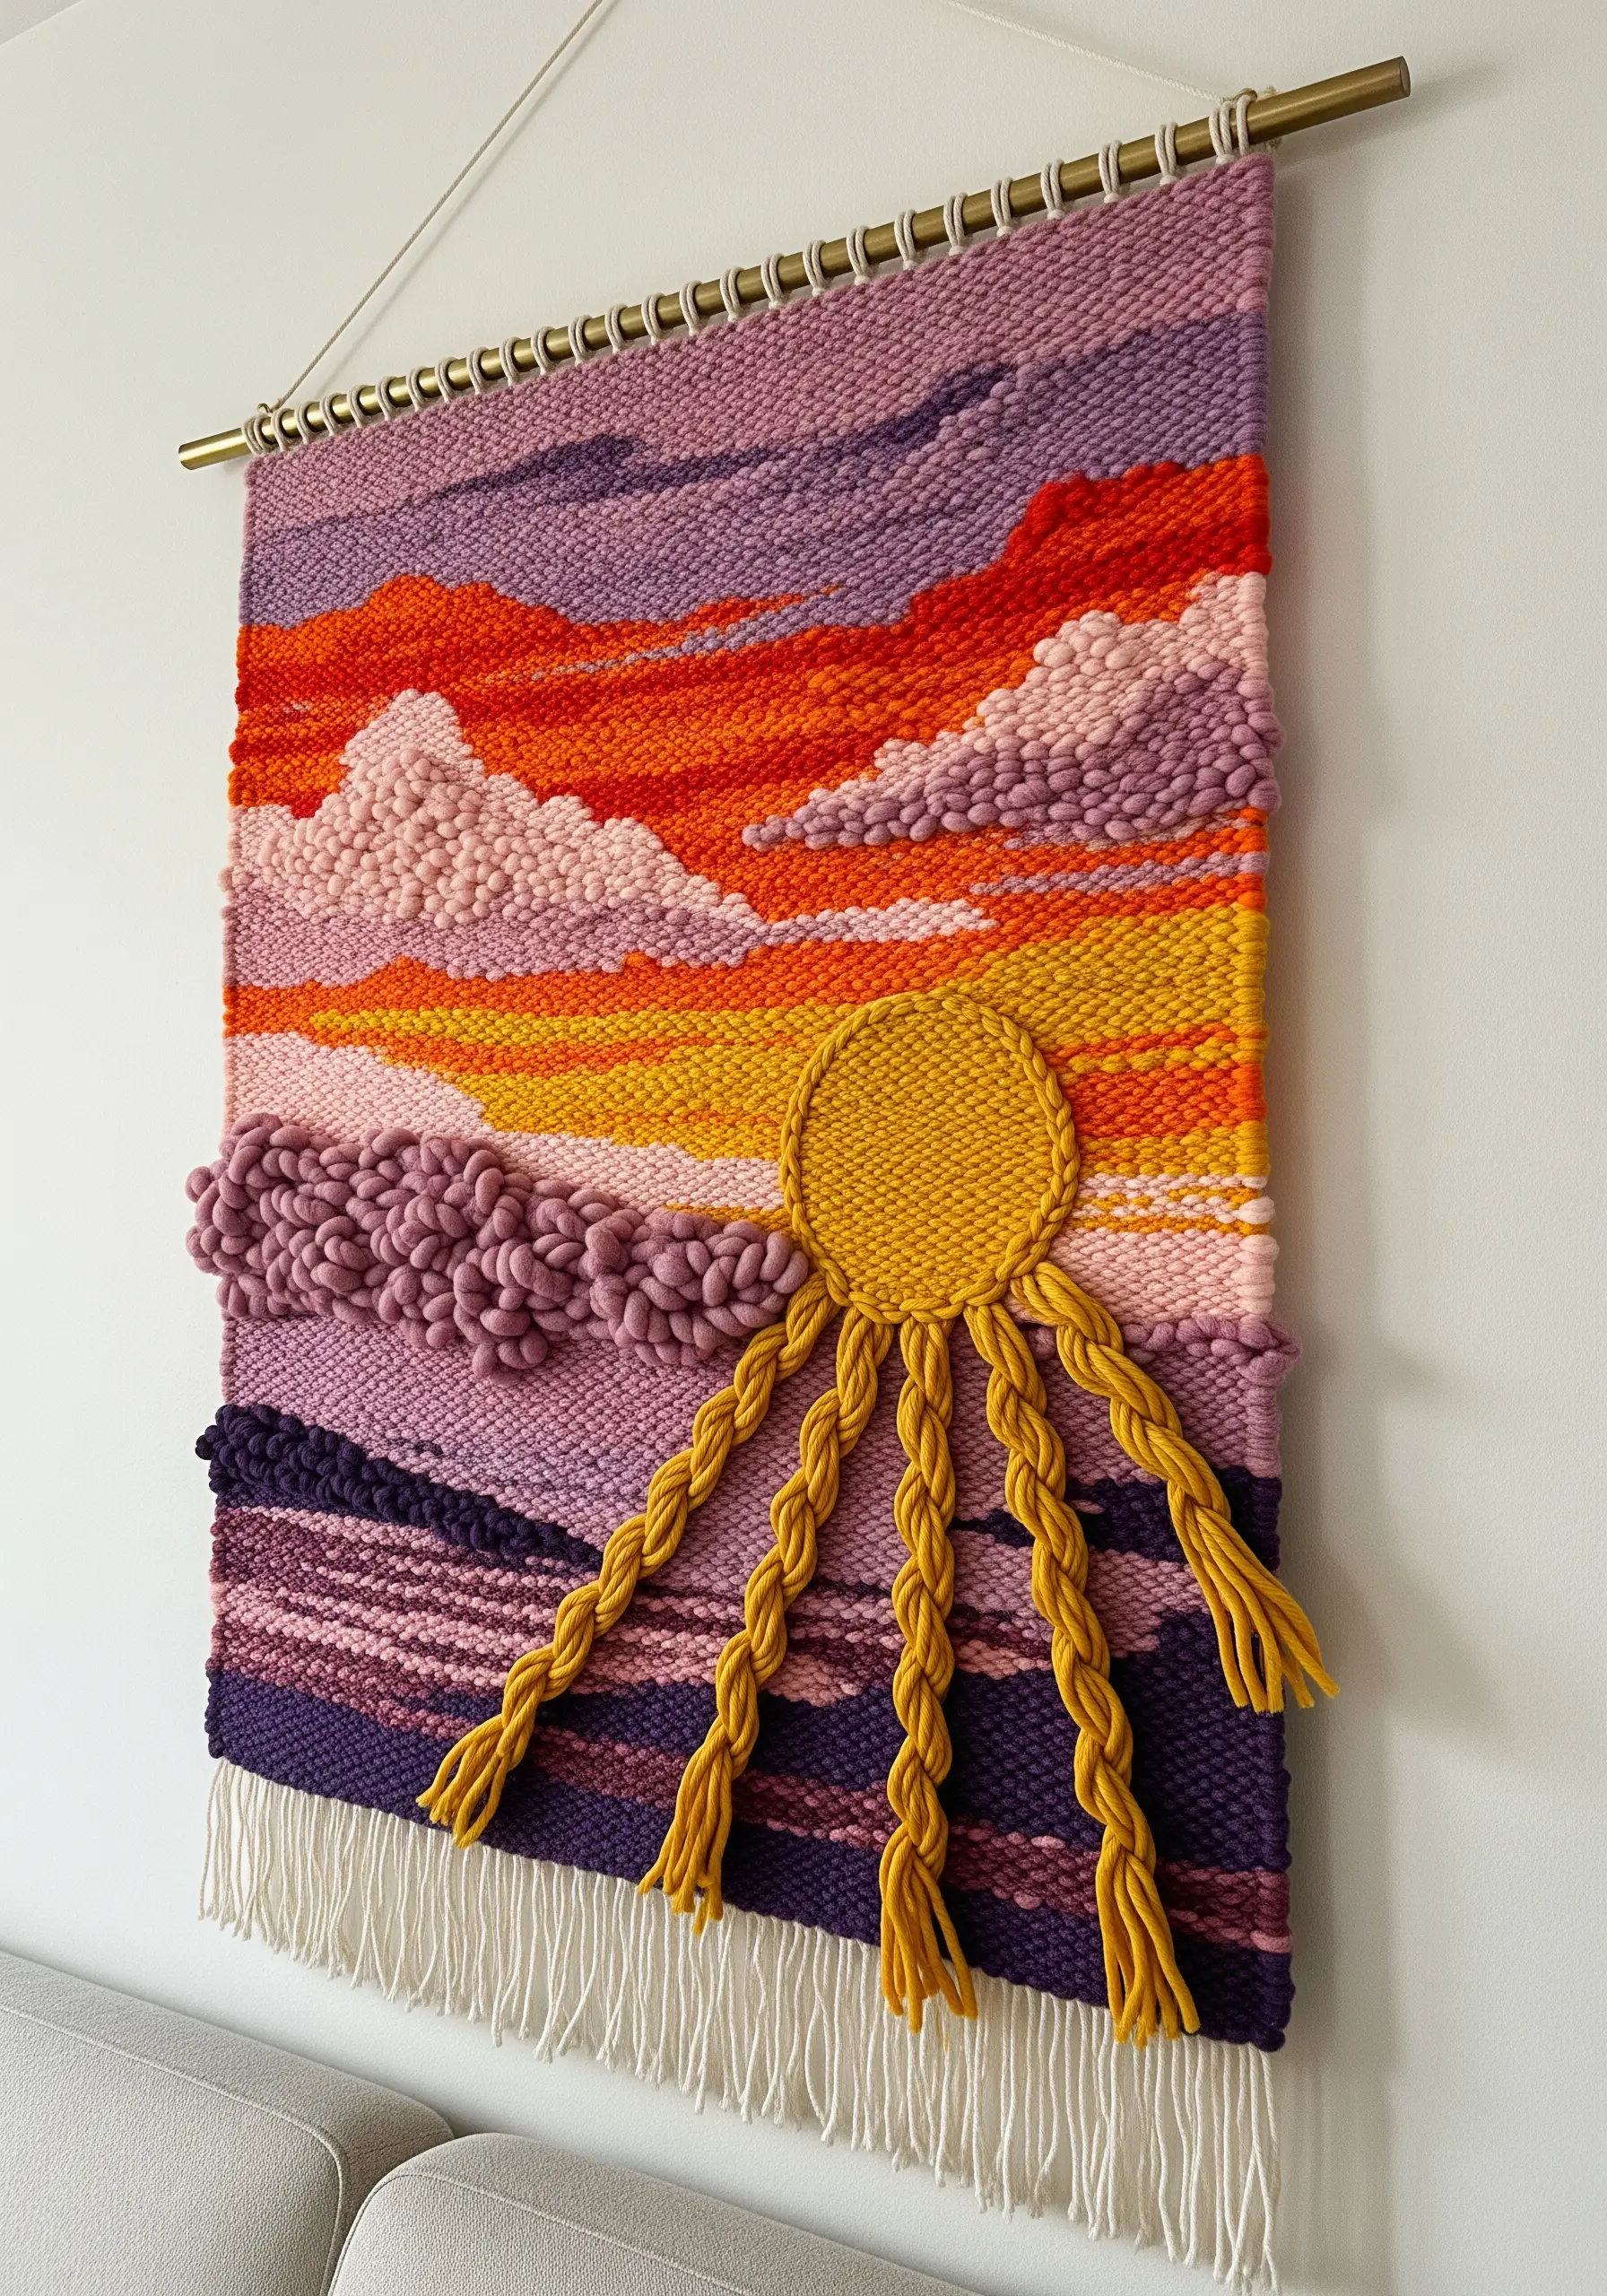
Capture the soft gradients of a sunset in a woven wall hanging by blending different colors of yarn within the same row.
Instead of hard color blocks, use tapestry weaving techniques to interlock different colored yarns, creating a soft, painterly transition from one hue to the next.
Introduce textural stitches like soumak weave or chunky roving to create cloud formations that stand out from the flat background.
The combination of smooth color gradients and raised textures brings the woven scene to life, transforming simple yarn into an atmospheric landscape.
19. Achieve Seamless Gradients with Variegated Thread
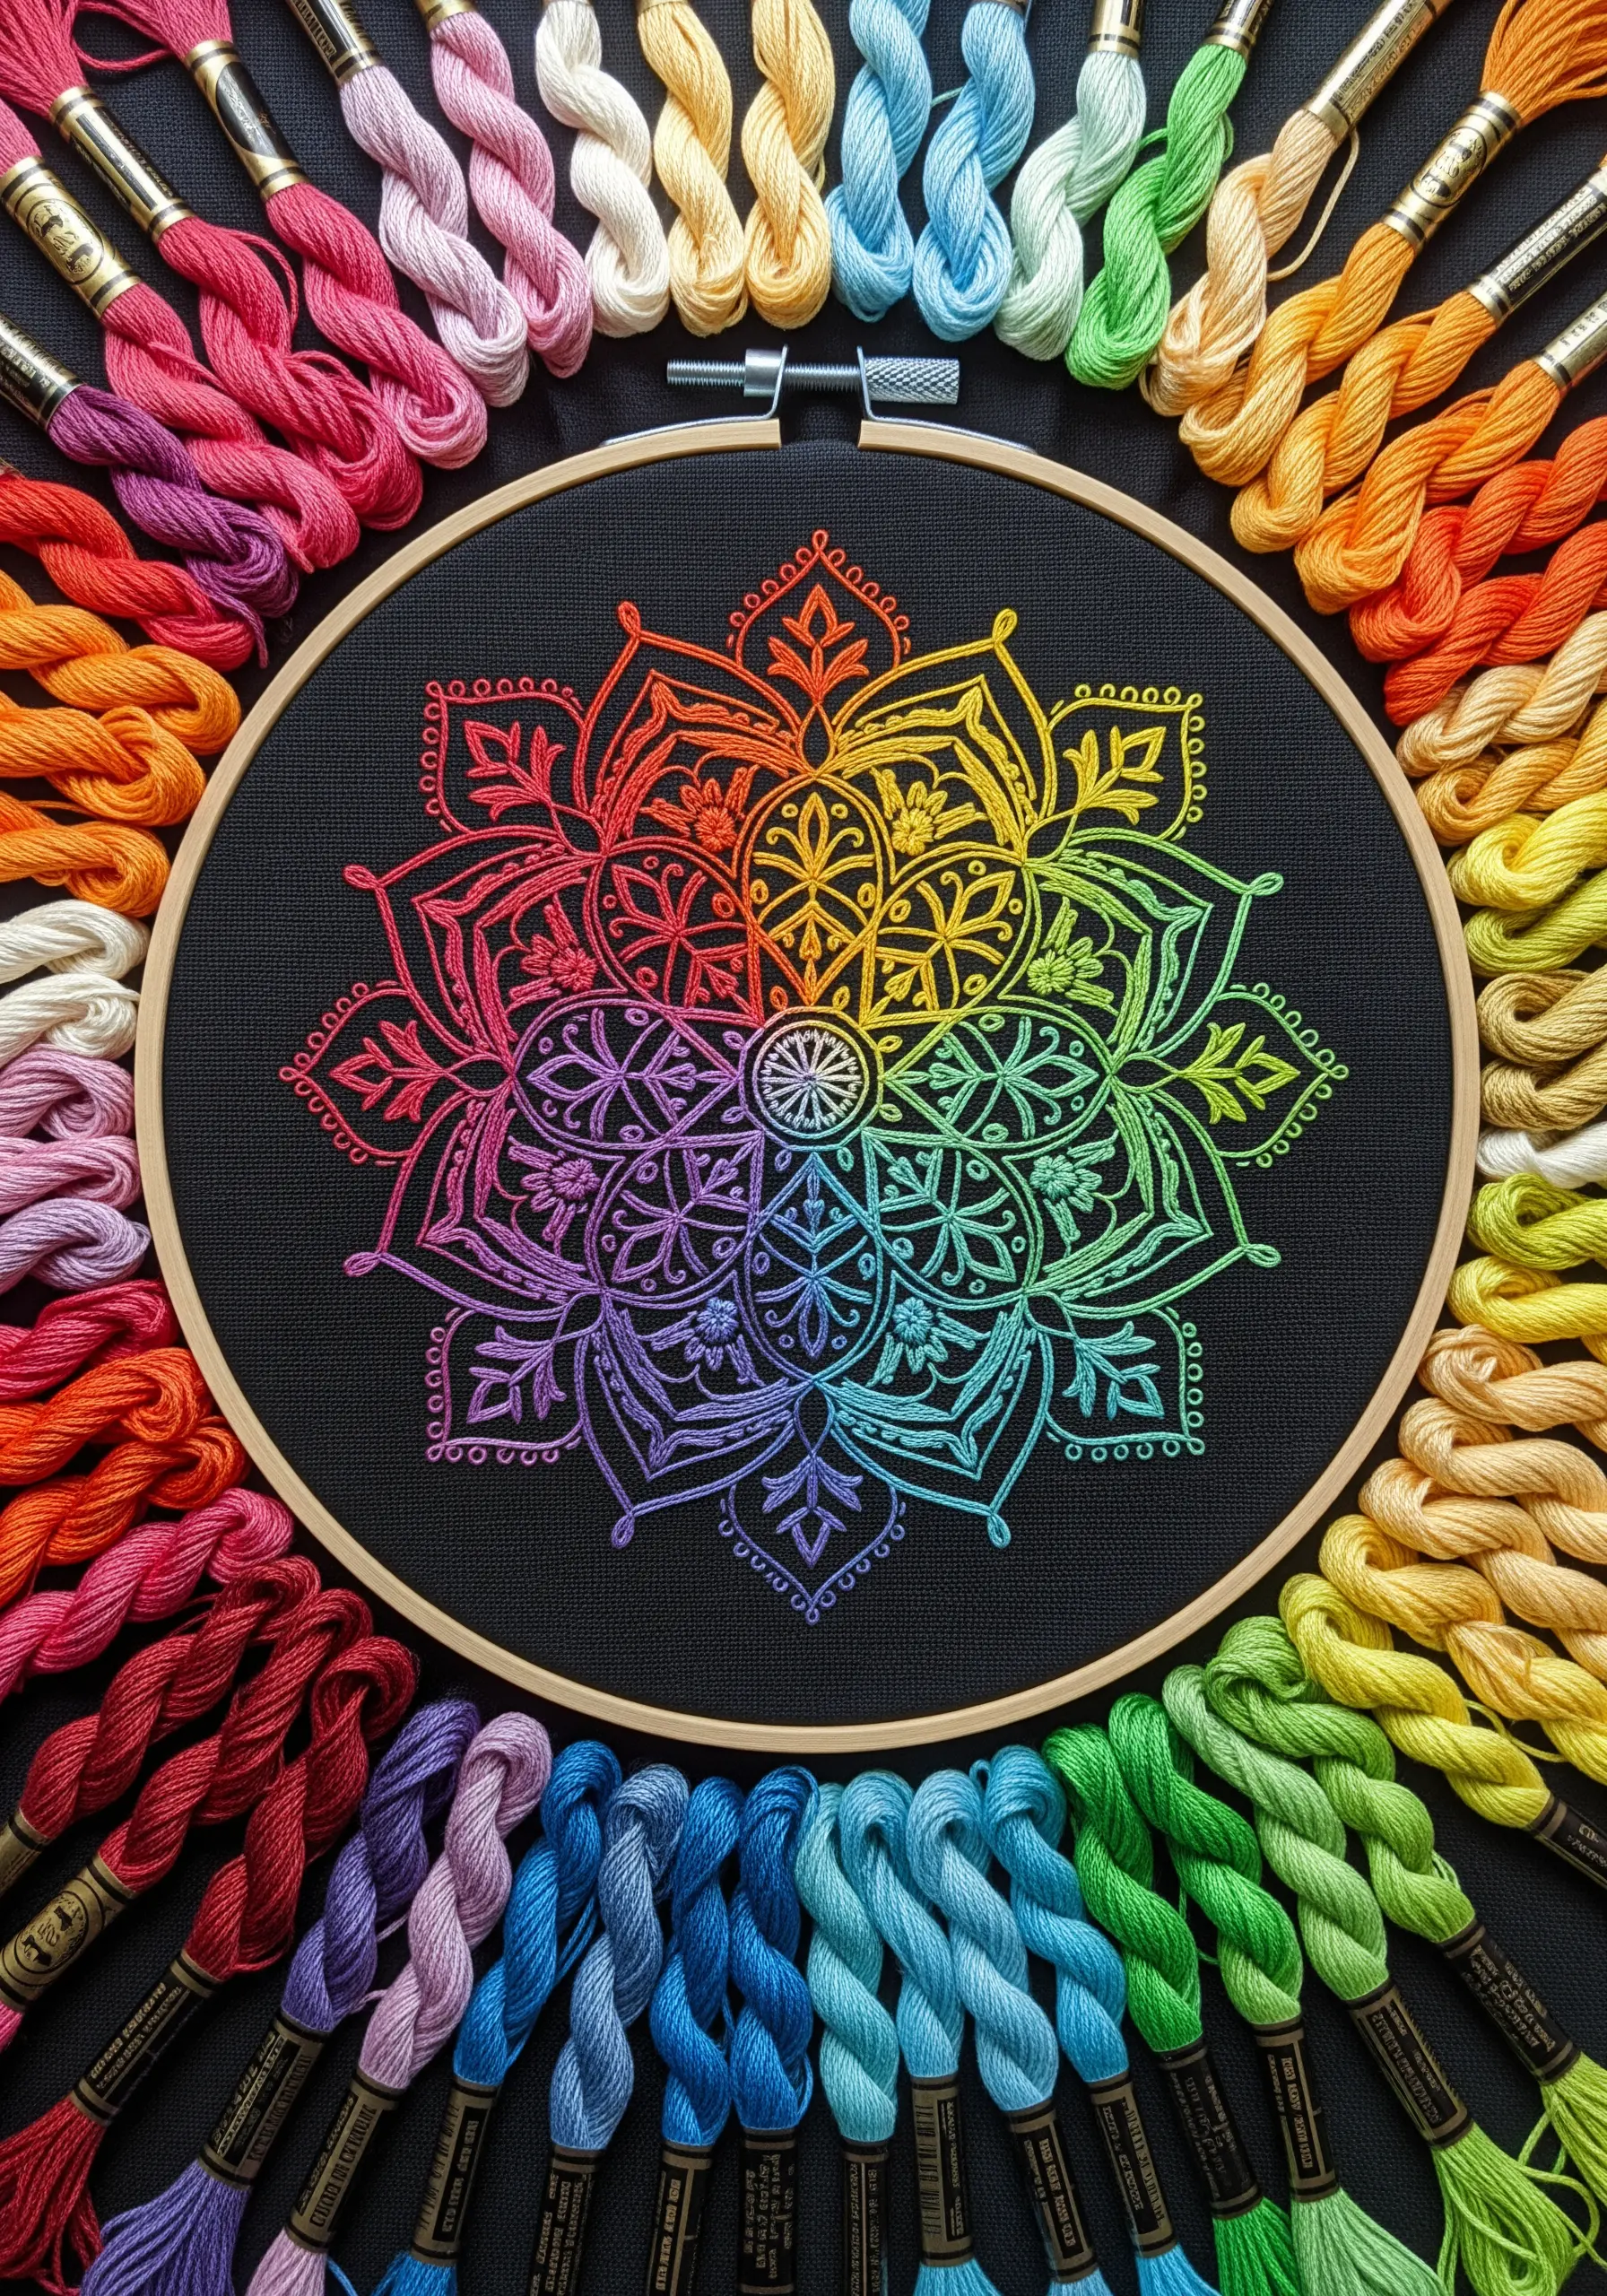
Let your thread do the color work for you by using variegated floss to stitch a complex design like a mandala.
Variegated thread is dyed with multiple colors along its length, so as you stitch, it creates a natural, flowing gradient without you ever having to change your needle.
Outline your design with a simple stitch like a backstitch or stem stitch, and watch the colors shift and blend automatically.
This technique is especially effective on a dark fabric, as it makes the vibrant, changing colors of the thread appear even more luminous and striking.
20. Create a Framed Vertical Garden with Felt
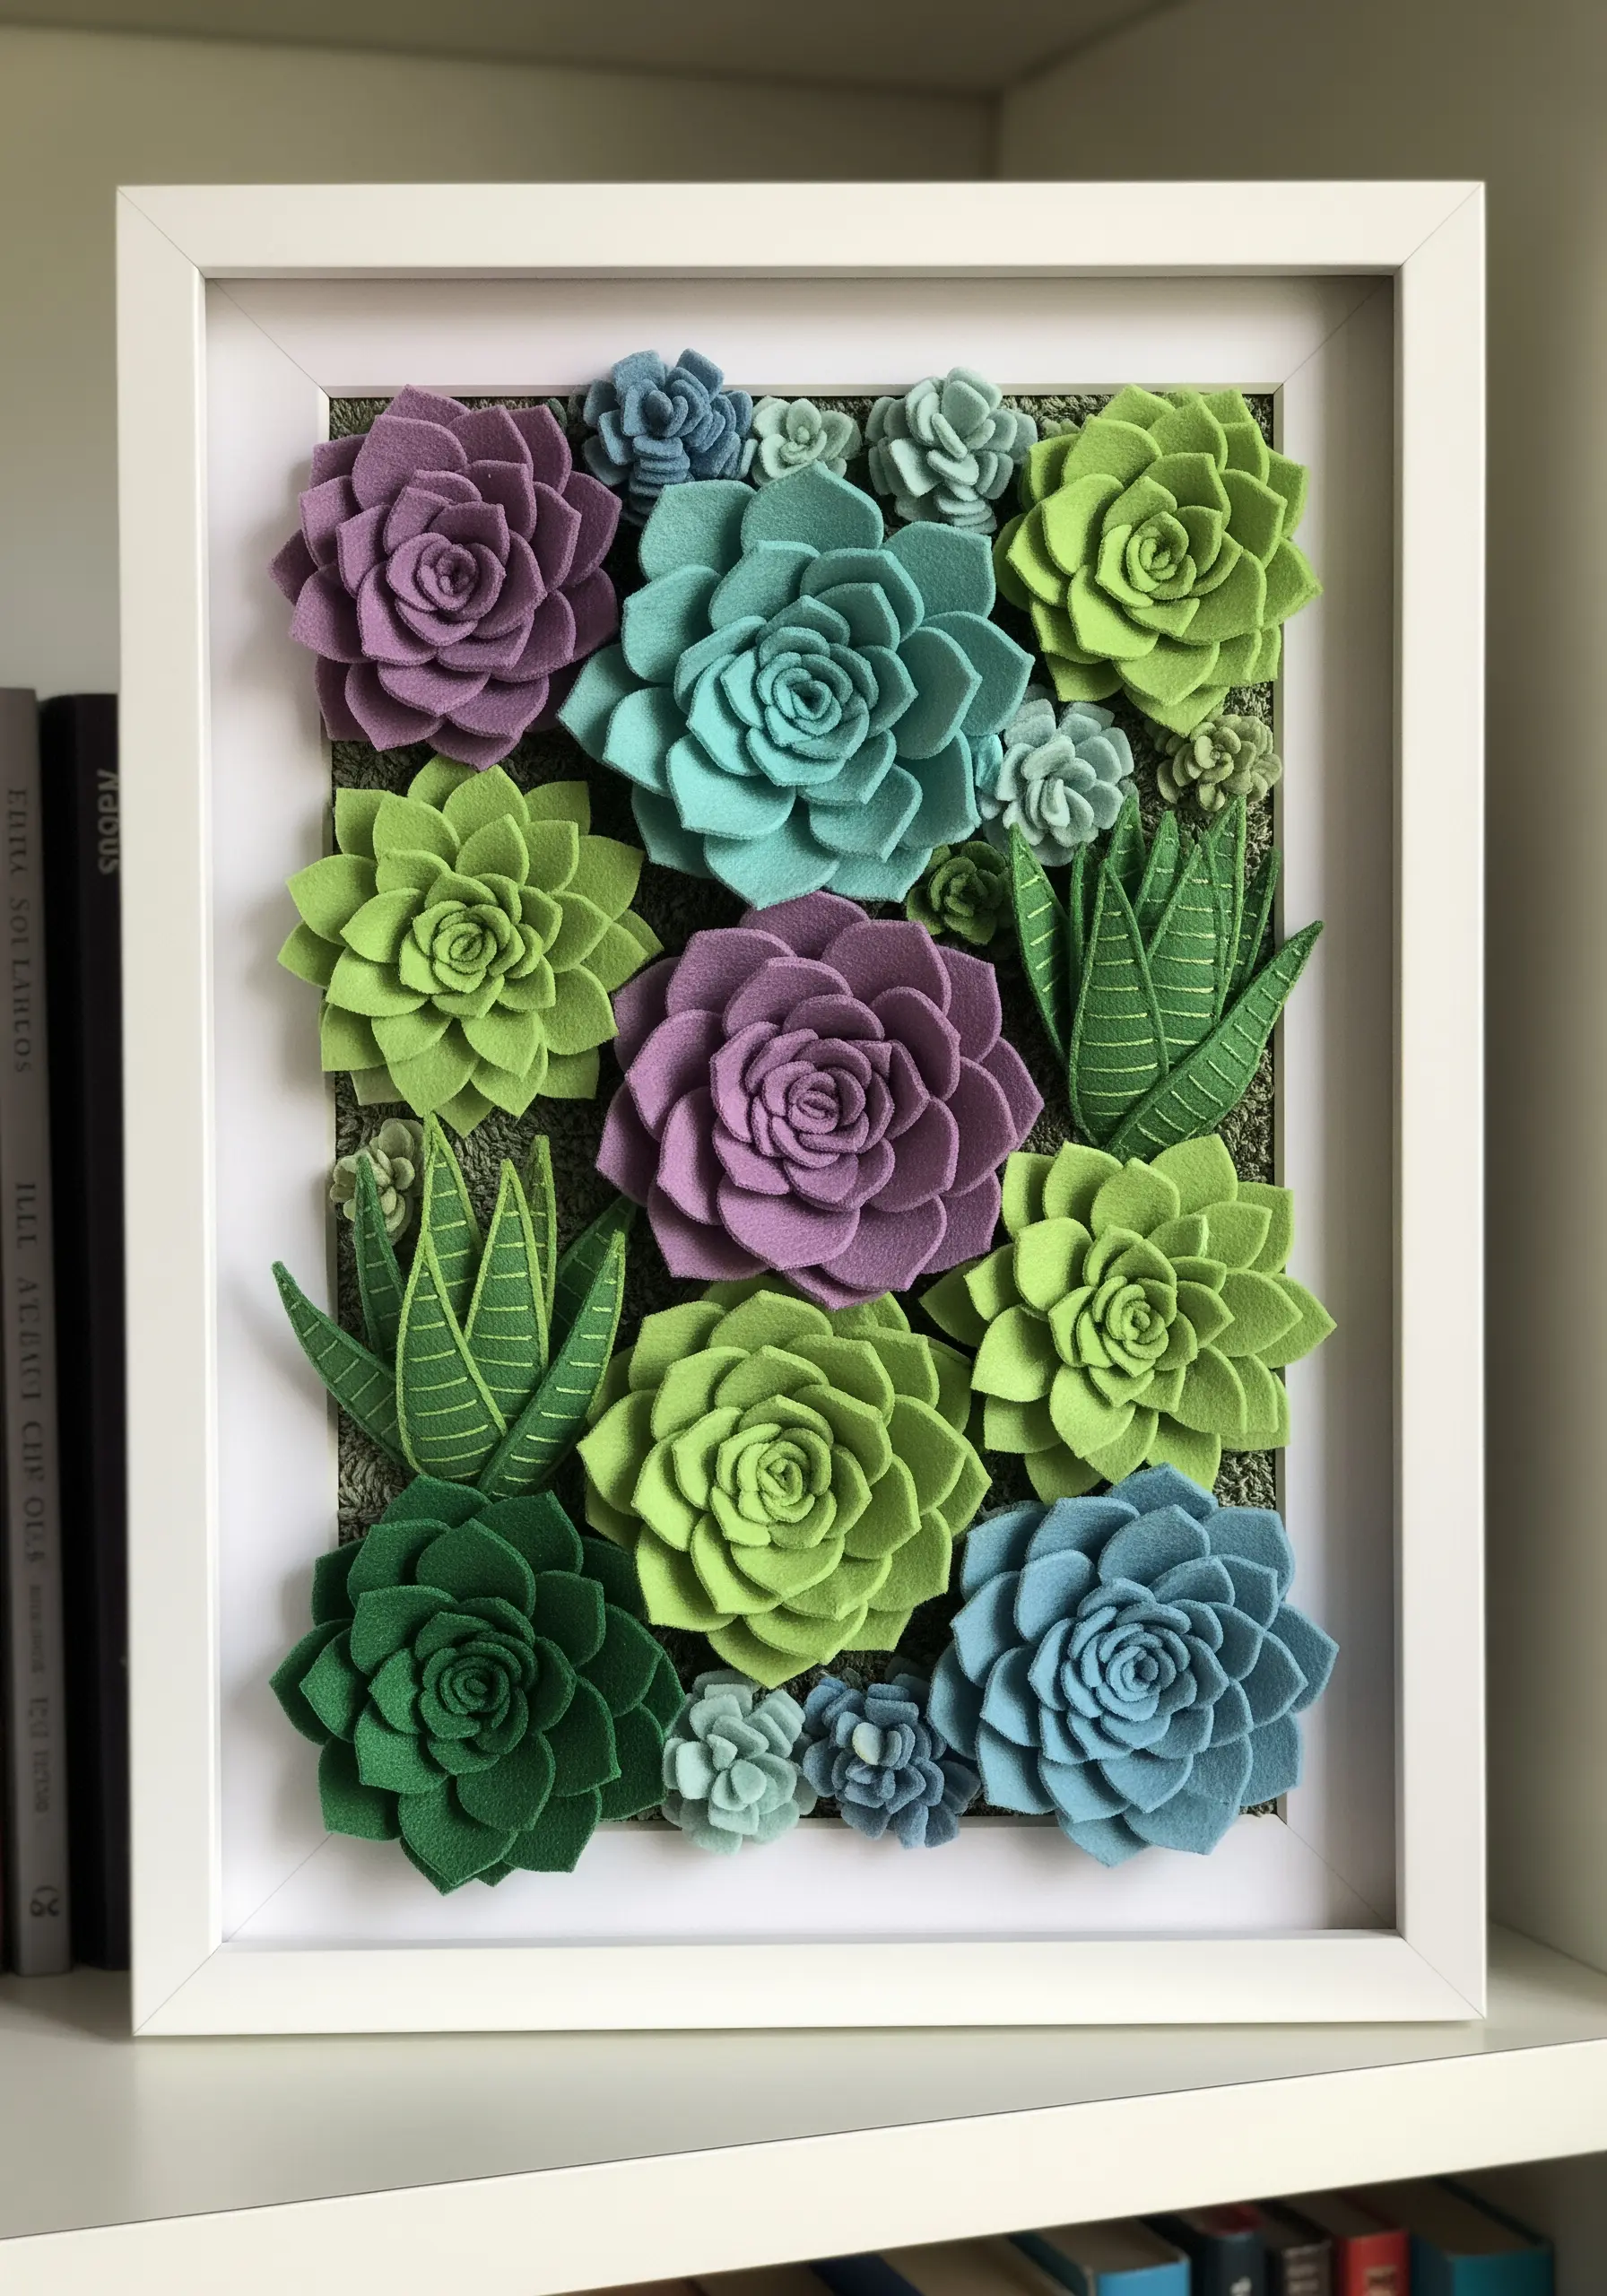
Design a maintenance-free succulent garden by arranging dimensional felt flowers in a shadow box.
Craft a variety of succulents—like echeverias, aloes, and sedums—by cutting and layering different shades of green, purple, and blue felt.
Arrange them tightly together on a moss-like felt background inside a deep frame to create the illusion of a lush, living wall.
The shadow box not only provides a clean, modern display but also protects the delicate felt shapes from dust and damage.
This is a perfect project for using up felt scraps and creating a piece of decor that brings nature indoors.
21. Map Your World with Textural French Knots
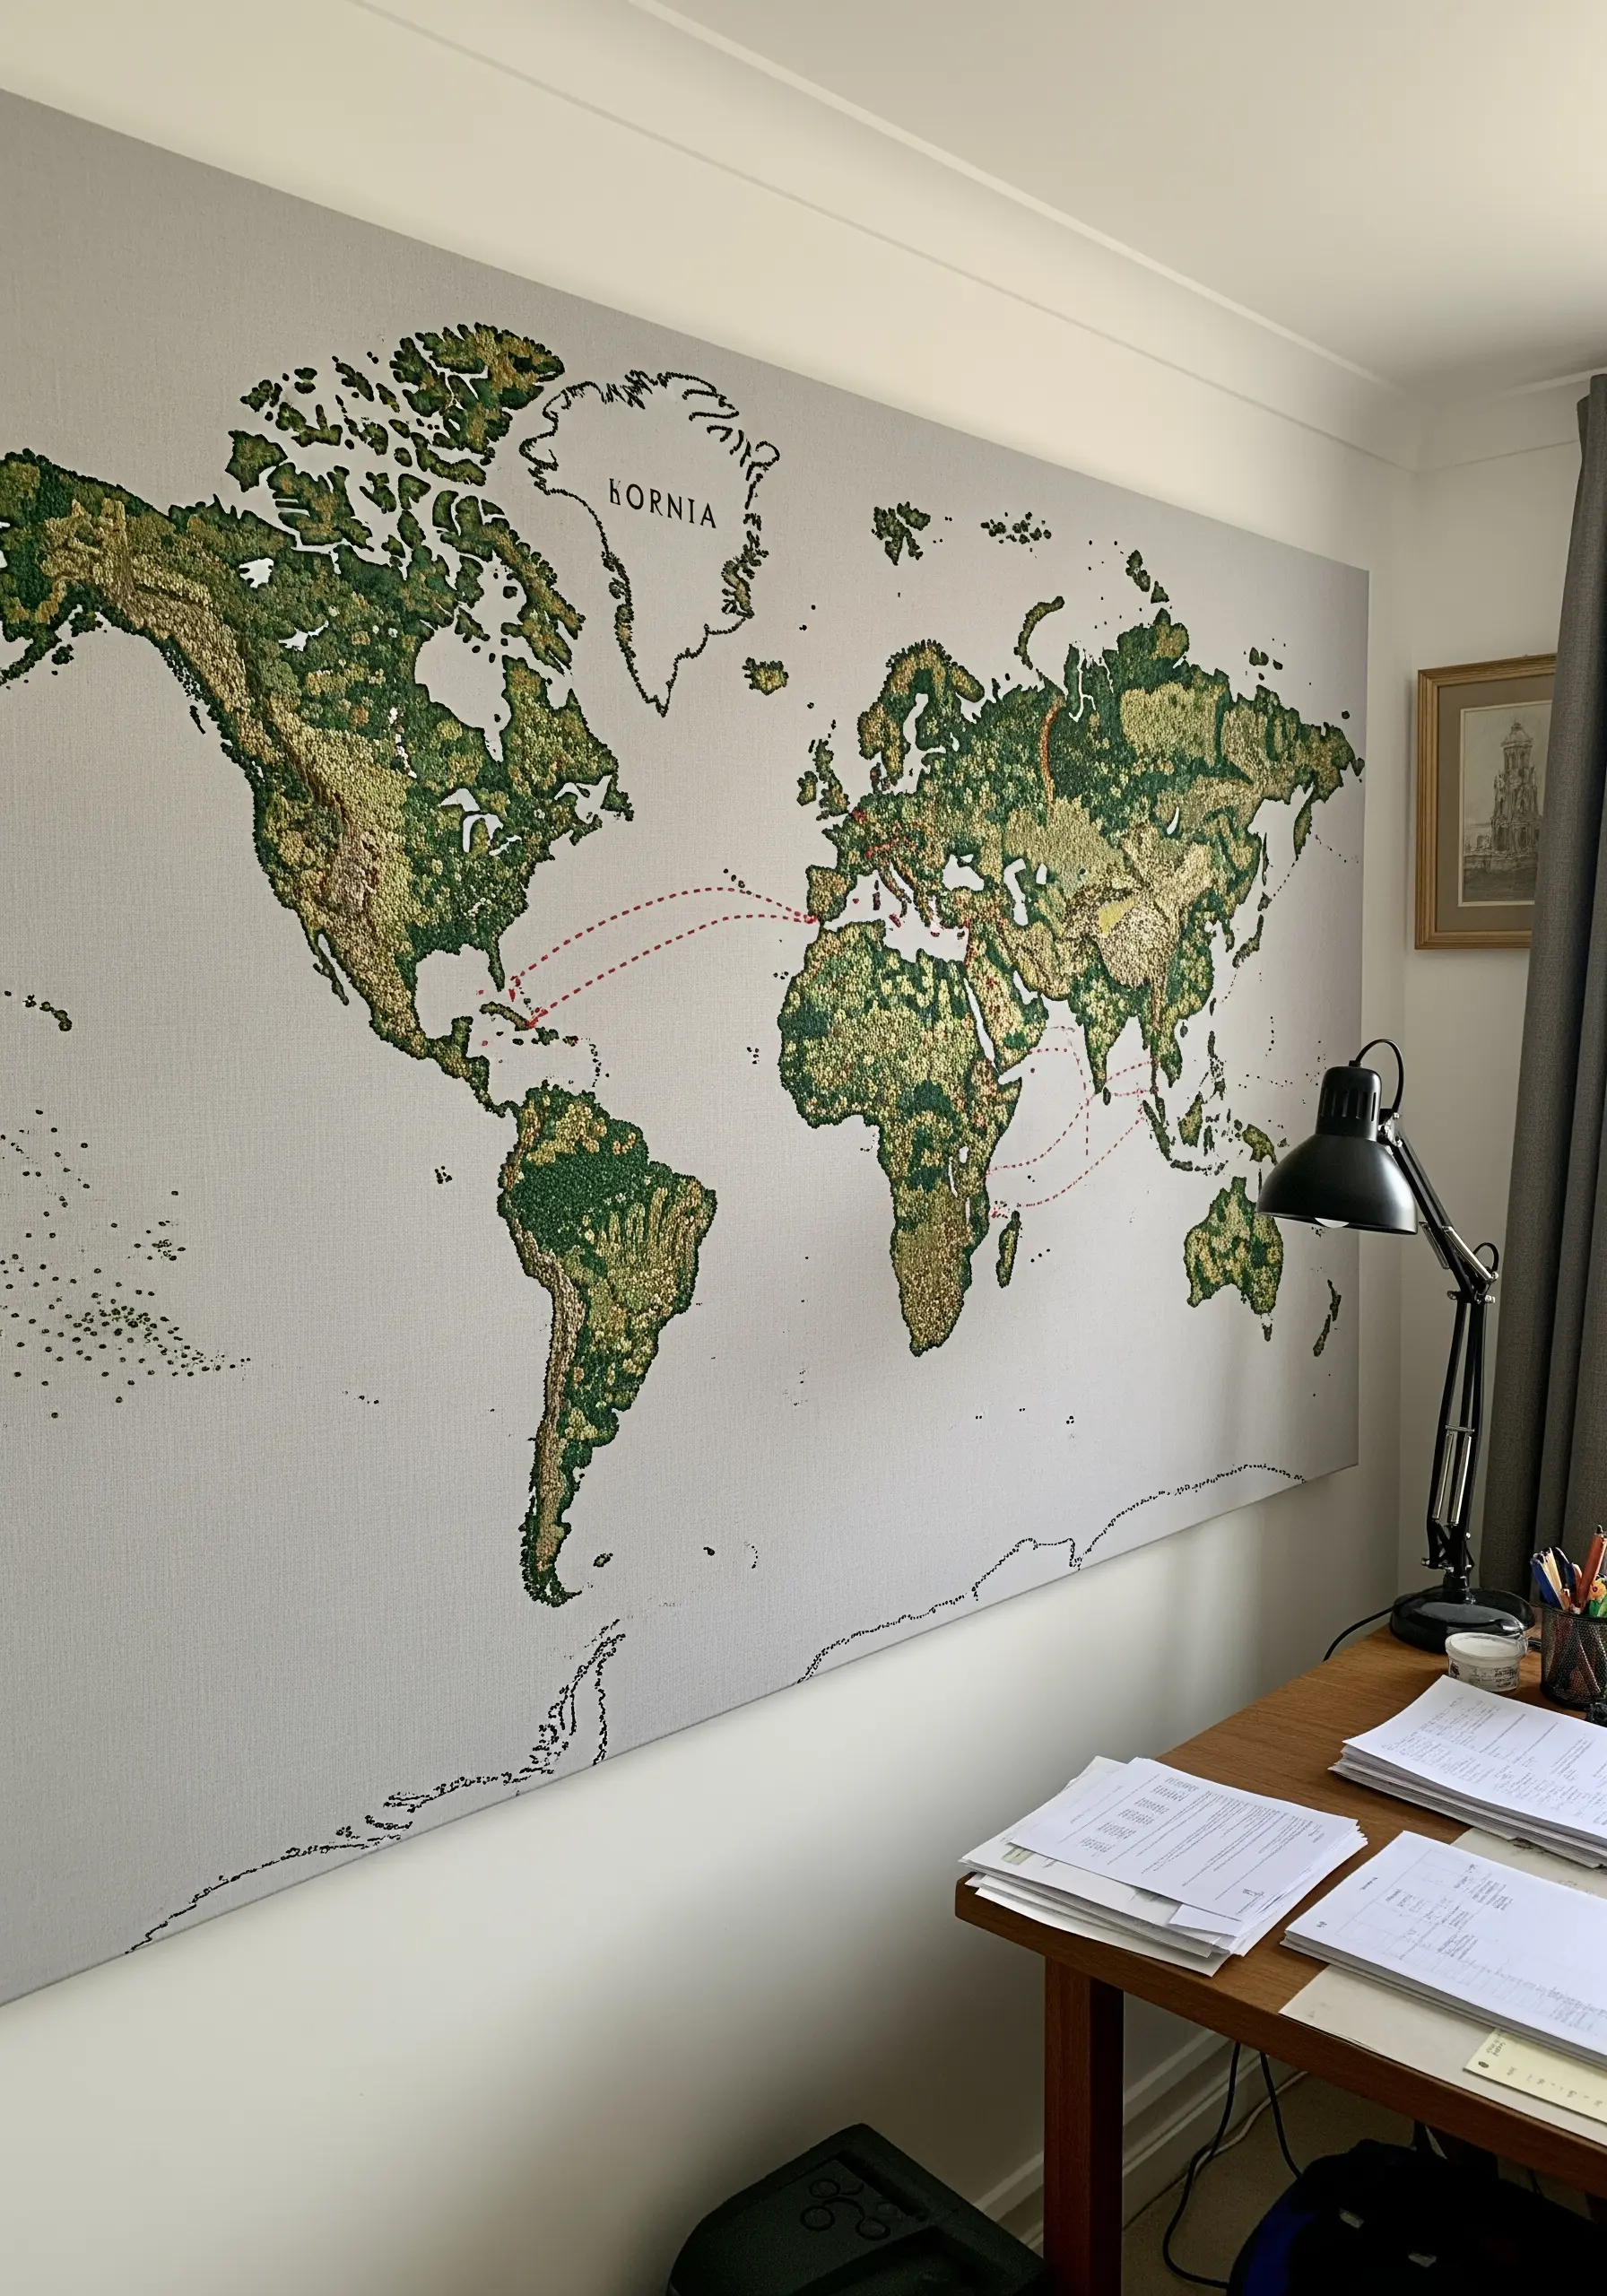
Tackle a large-scale project by creating a world map where the texture tells the story.
Fill in the landmasses with thousands of French knots using several shades of green and brown yarn to represent different terrains.
This pointillist-style approach creates a rich, tactile surface that is visually stunning from a distance and fascinating up close.
For a personal touch, use a single strand of red thread and a simple backstitch to mark your travels or connect meaningful places.
Stretching the finished canvas over a wooden frame gives it the presence of a true art installation.
22. Combine Appliqué and Quilting for a Cozy Scene
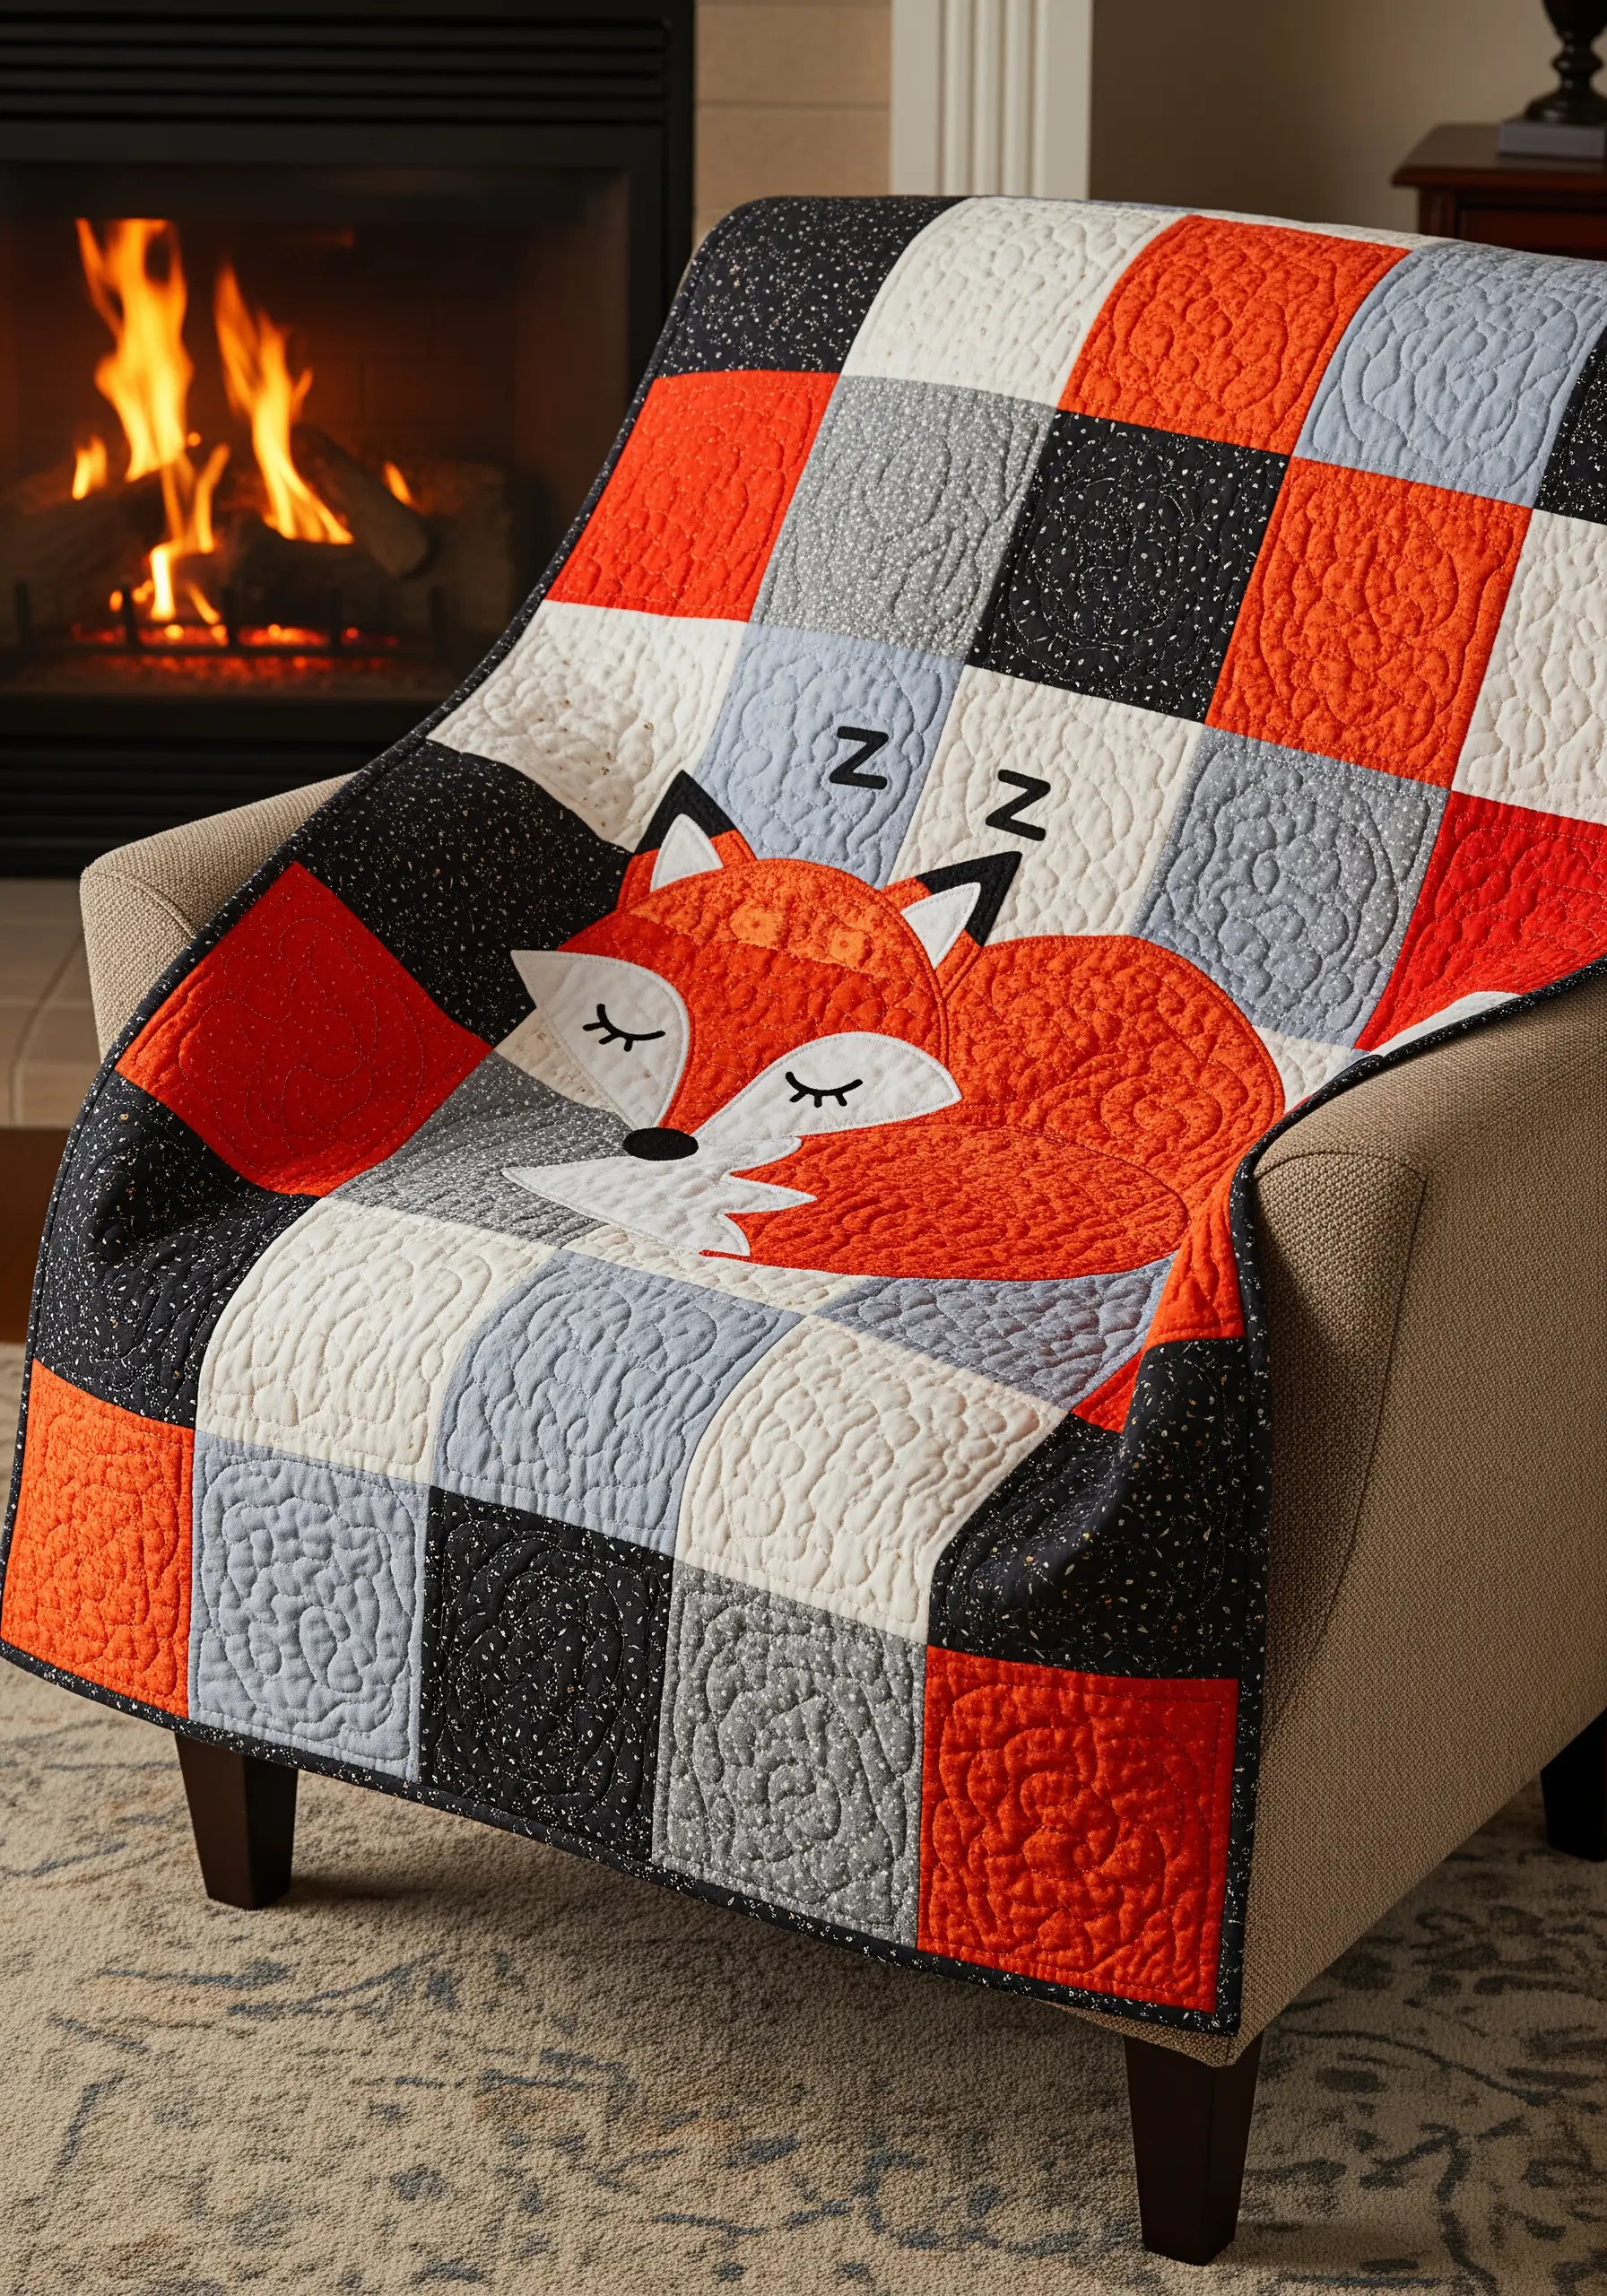
Create a charming and tactile quilt by combining simple patchwork with a central appliqué motif.
First, assemble your background from fabric squares in a cohesive color palette.
Then, cut your main design—like this sleeping fox—from contrasting fabric, and secure it to the quilt top using a neat blanket stitch or a machine satin stitch.
The final quilting stitches, sewn through all layers of the blanket, not only hold it together but also add a lovely, puffy texture that makes the appliqué design pop.
Embroider small details like the eyes and nose to bring your character to life.
23. Tell a Story with a Series of Mini Hoops
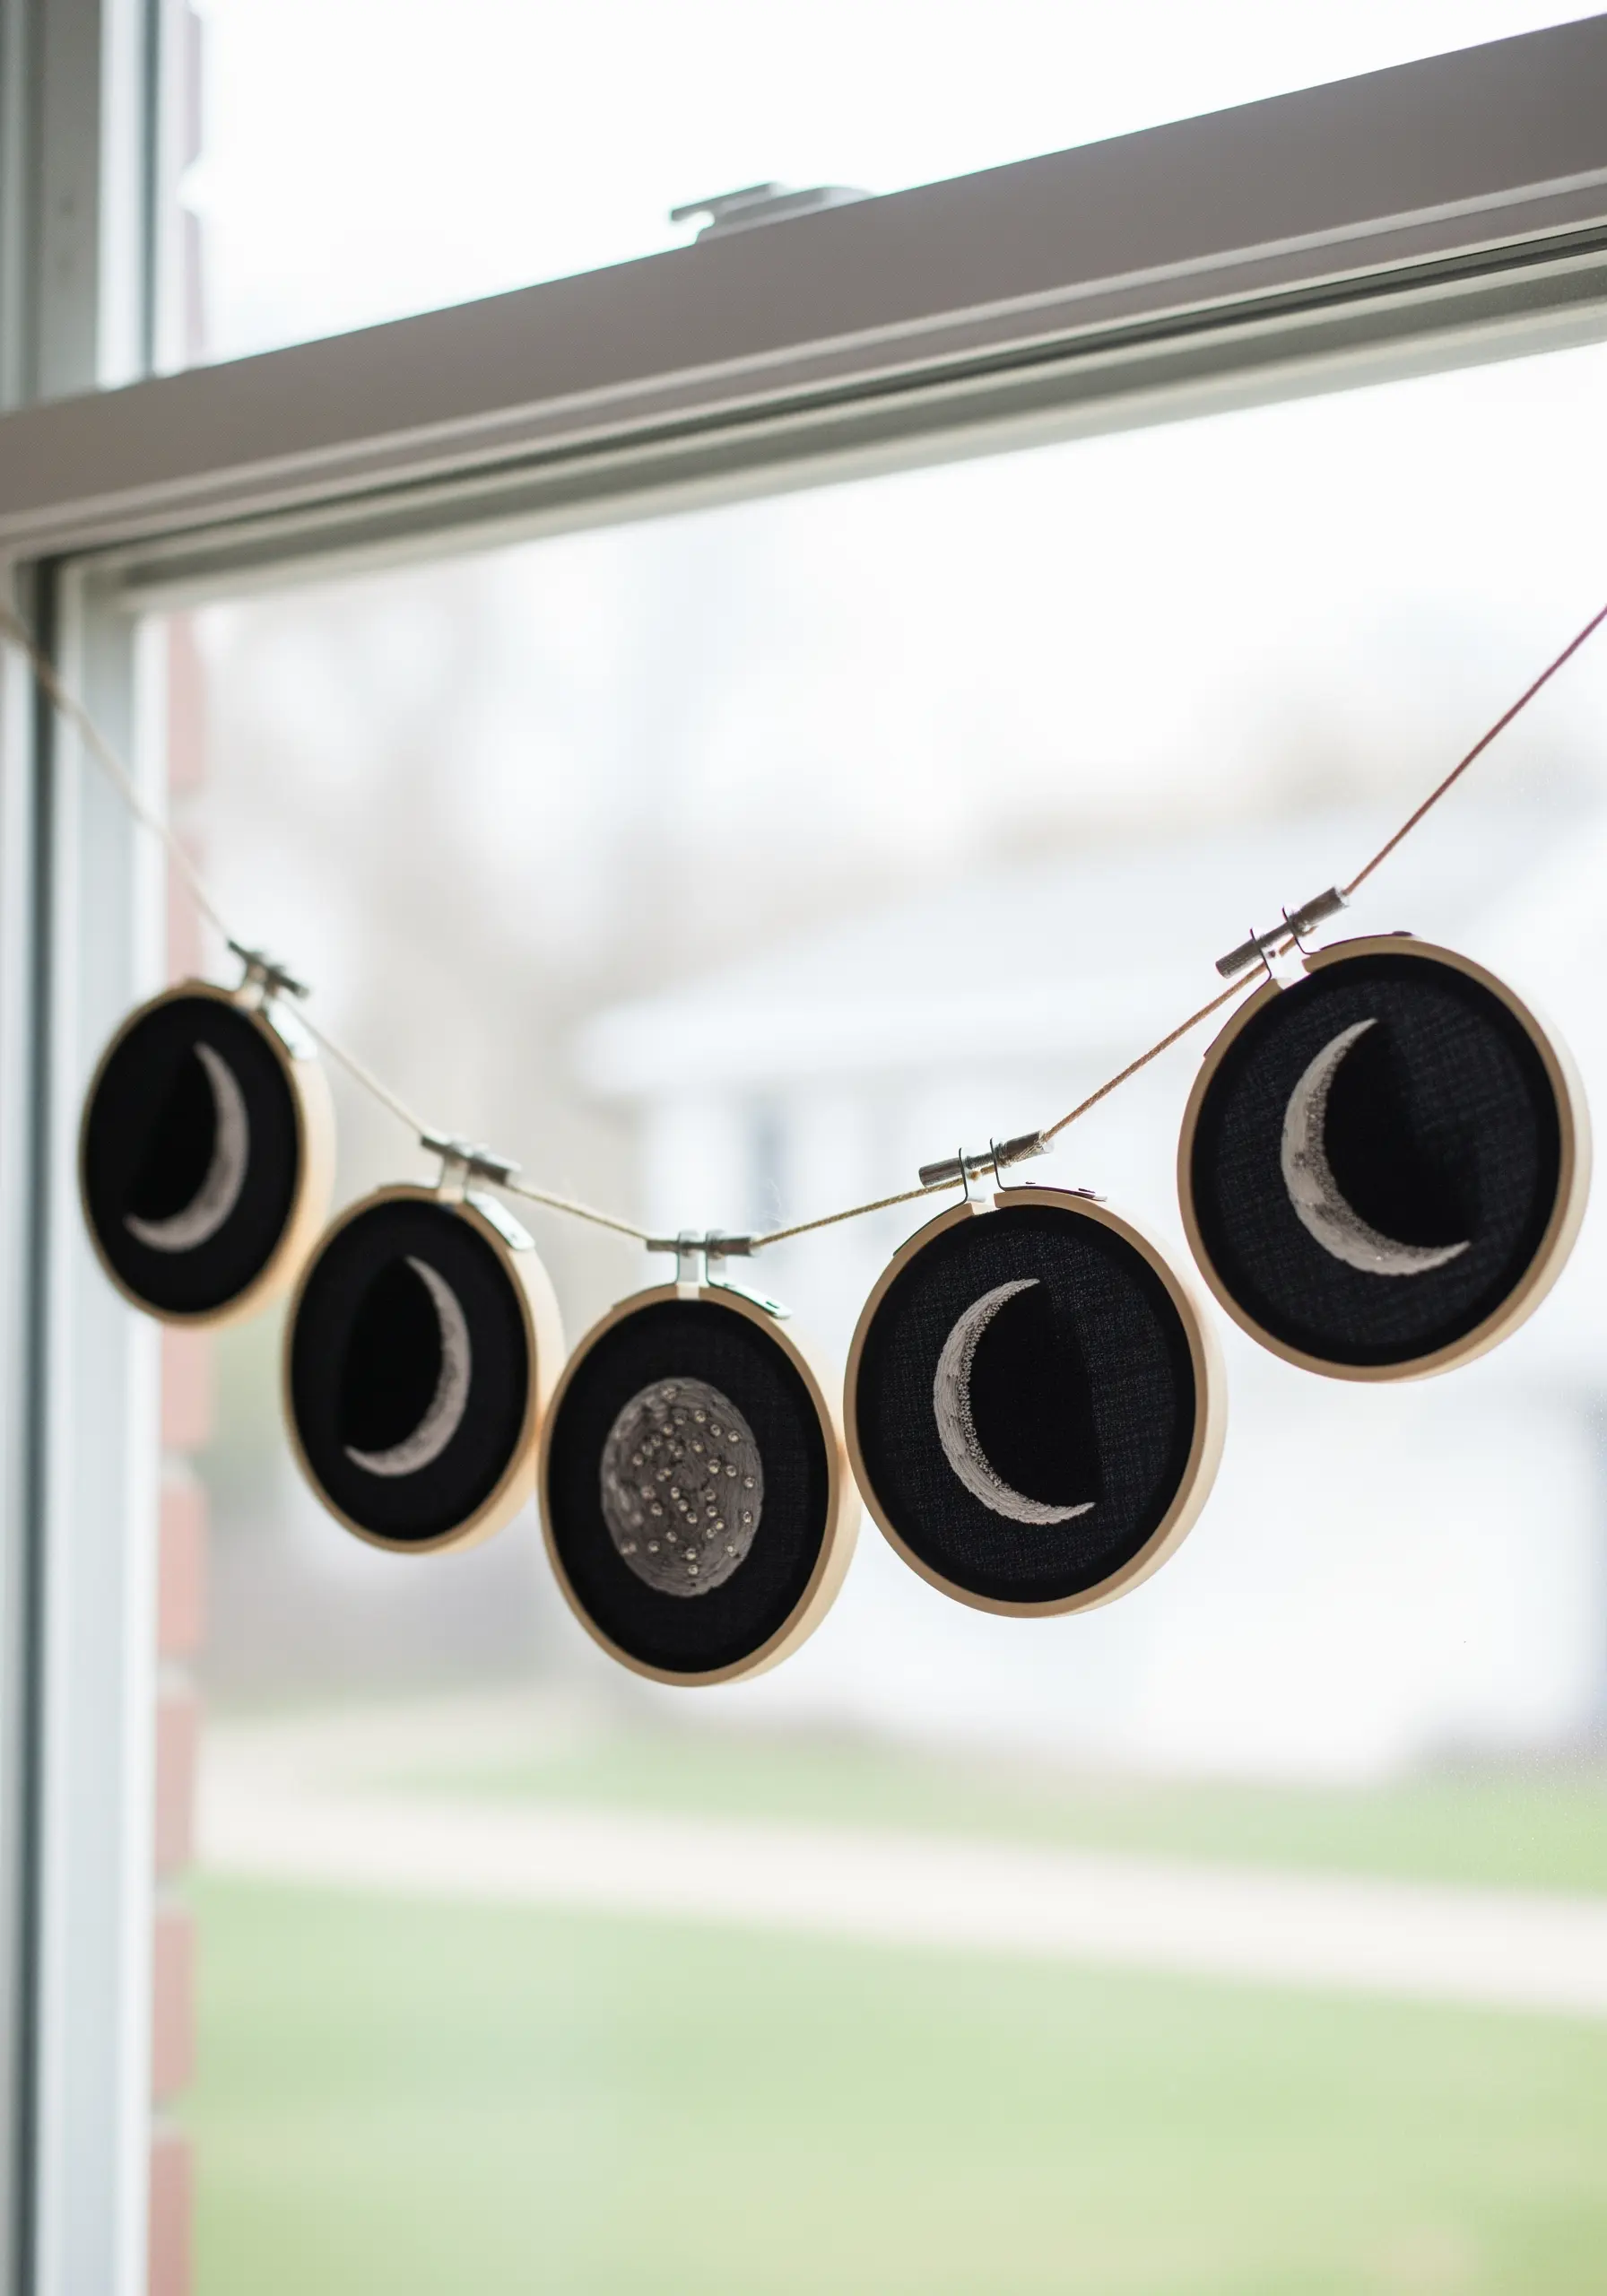
Create a dynamic wall display by stitching a series of related designs in small, identical hoops.
By embroidering the phases of the moon, each in its own hoop, you create a cohesive narrative that is more impactful than a single piece.
Use simple satin stitch and French knots, but focus on consistency in your fabric, hoop size, and thread color to tie the collection together.
String them together to create a garland or arrange them in a grid on a wall for a modern gallery effect.
This approach turns minimalist small hoop designs into a larger, more significant work of art.
24. Embellish Typography with Miniature Florals
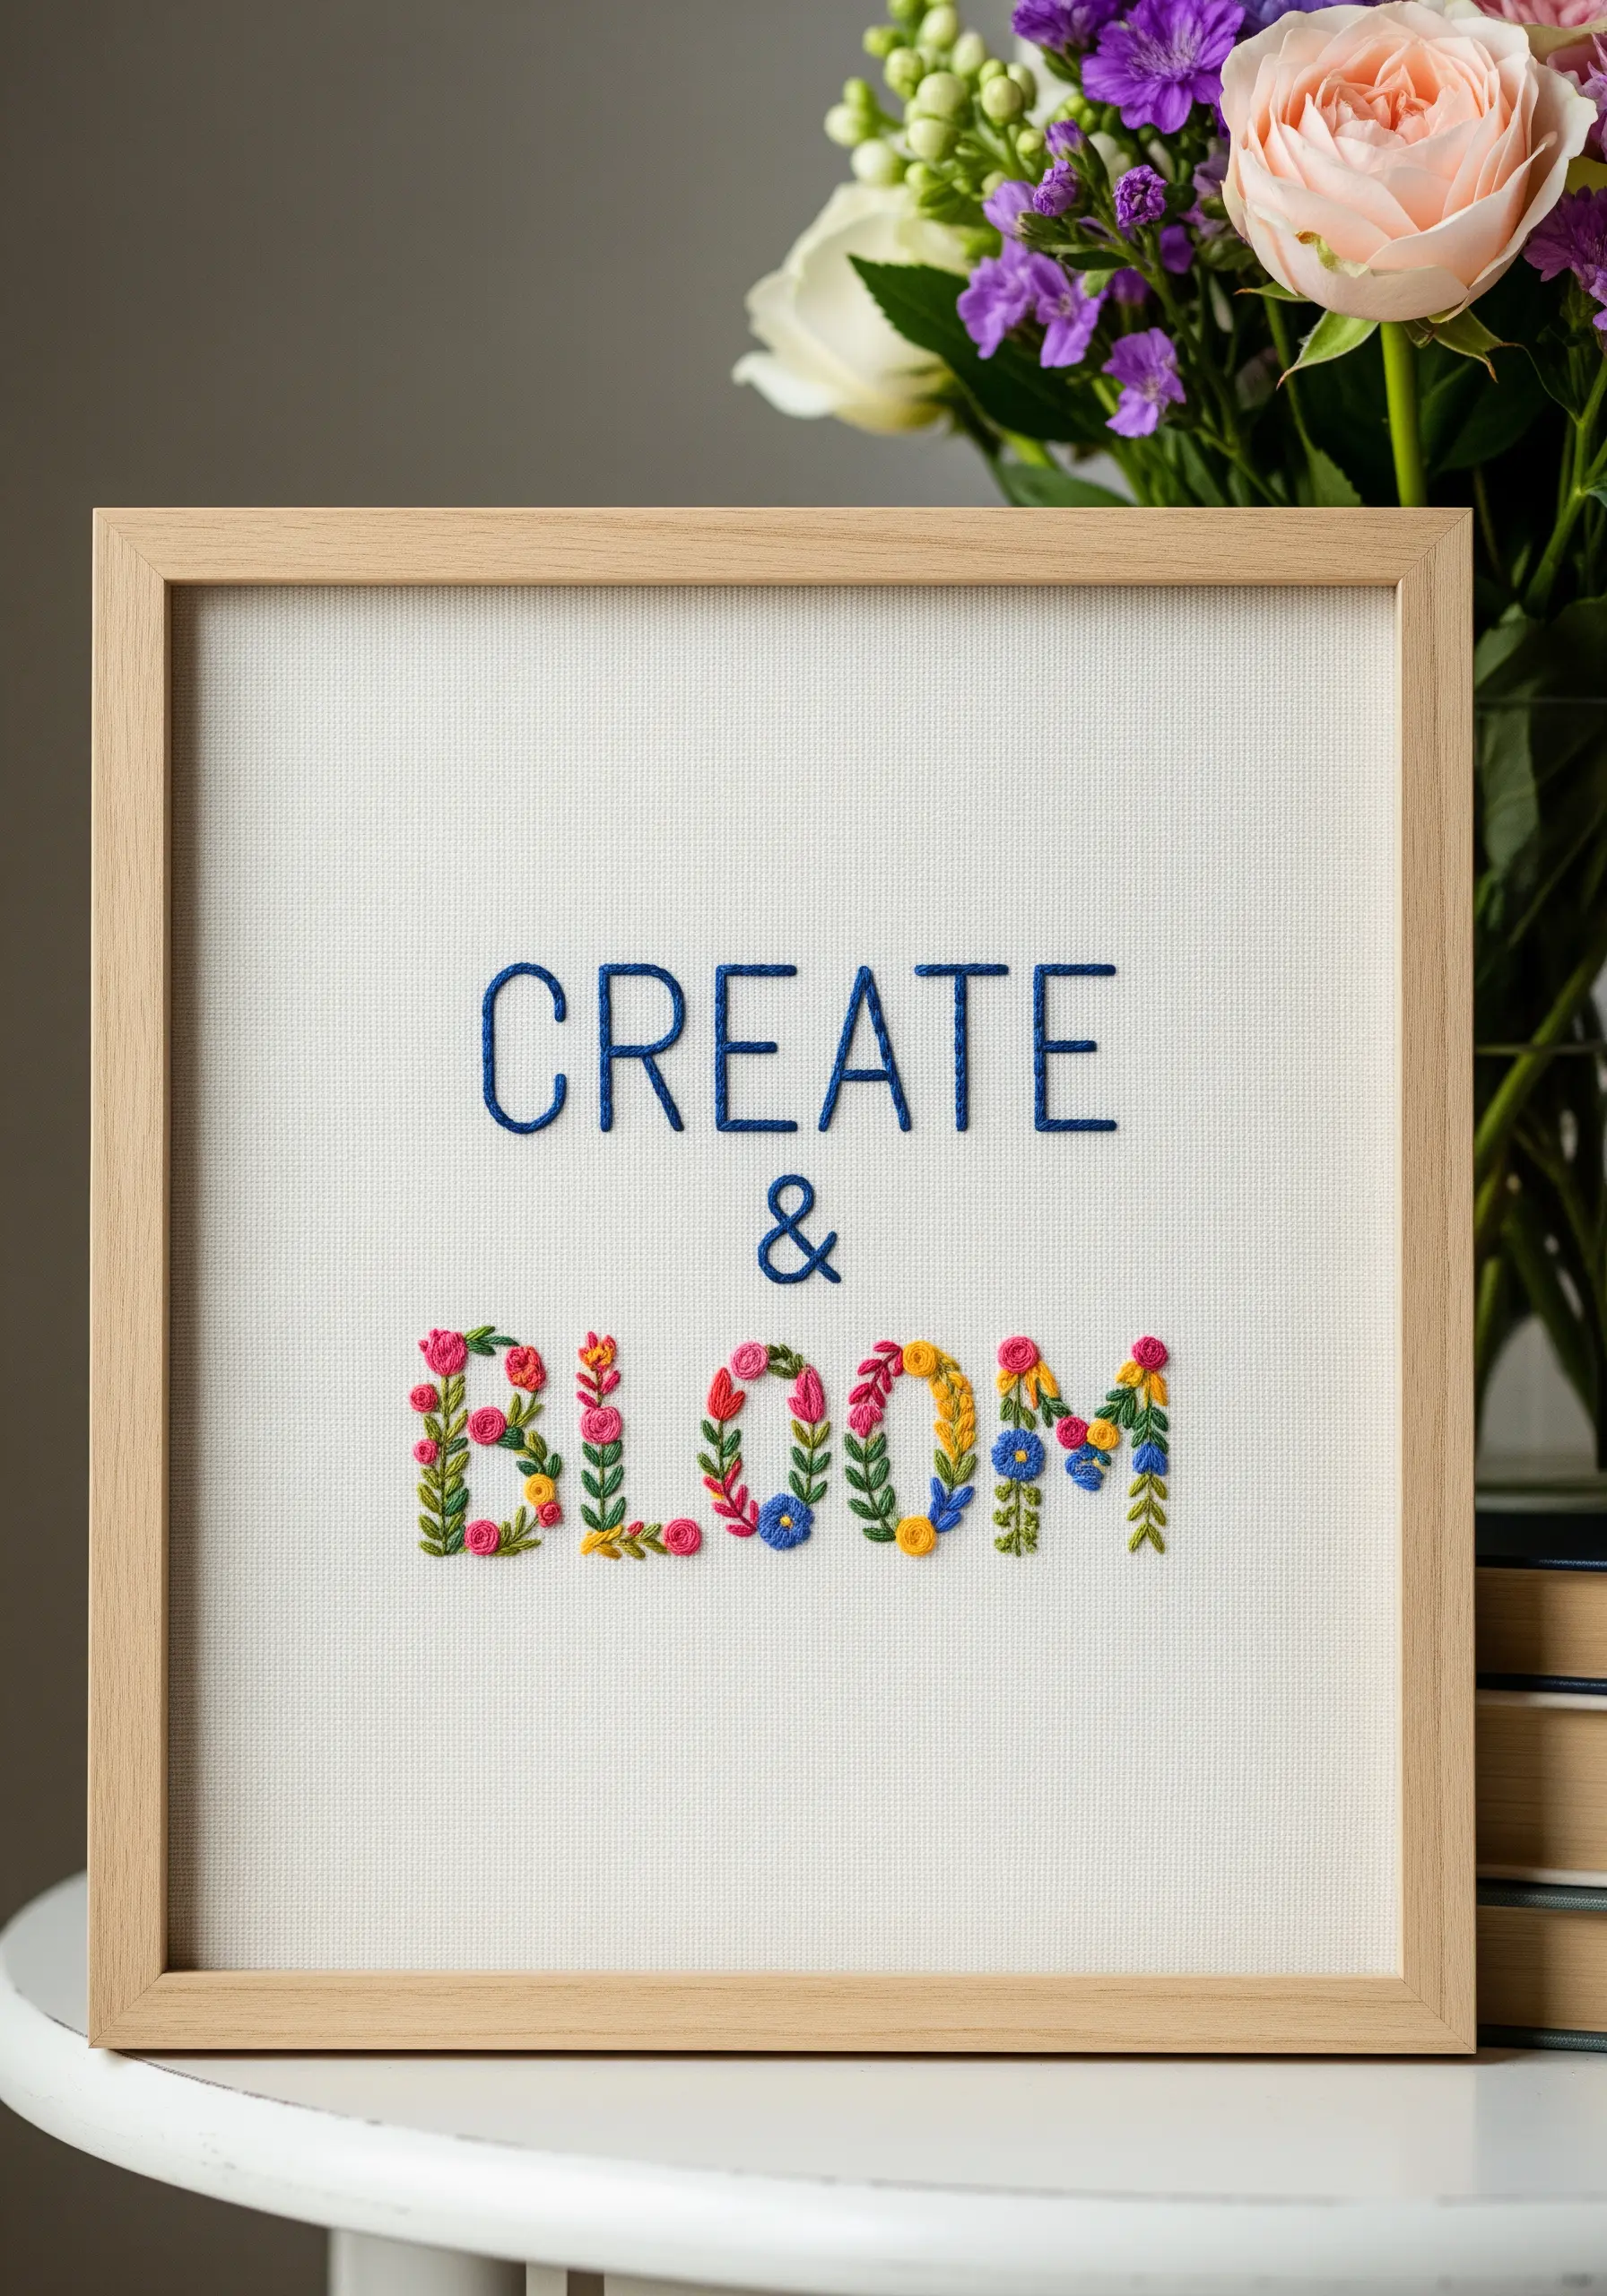
Transform simple text into a work of art by infusing the letters with intricate floral details.
First, outline your letters using a simple backstitch for clean, readable lines.
Then, treat the bolder letters as tiny gardens, filling them with a variety of miniature floral stitches: woven wheel roses, lazy daisy petals, and French knot buds.
Using a bright, varied color palette for the flowers makes the letters bloom and creates a joyful contrast with the plain text.
This technique allows you to merge the graphic appeal of typography with the organic beauty of botanical embroidery.
25. Add a Personal Touch to a Fabric Book Cover
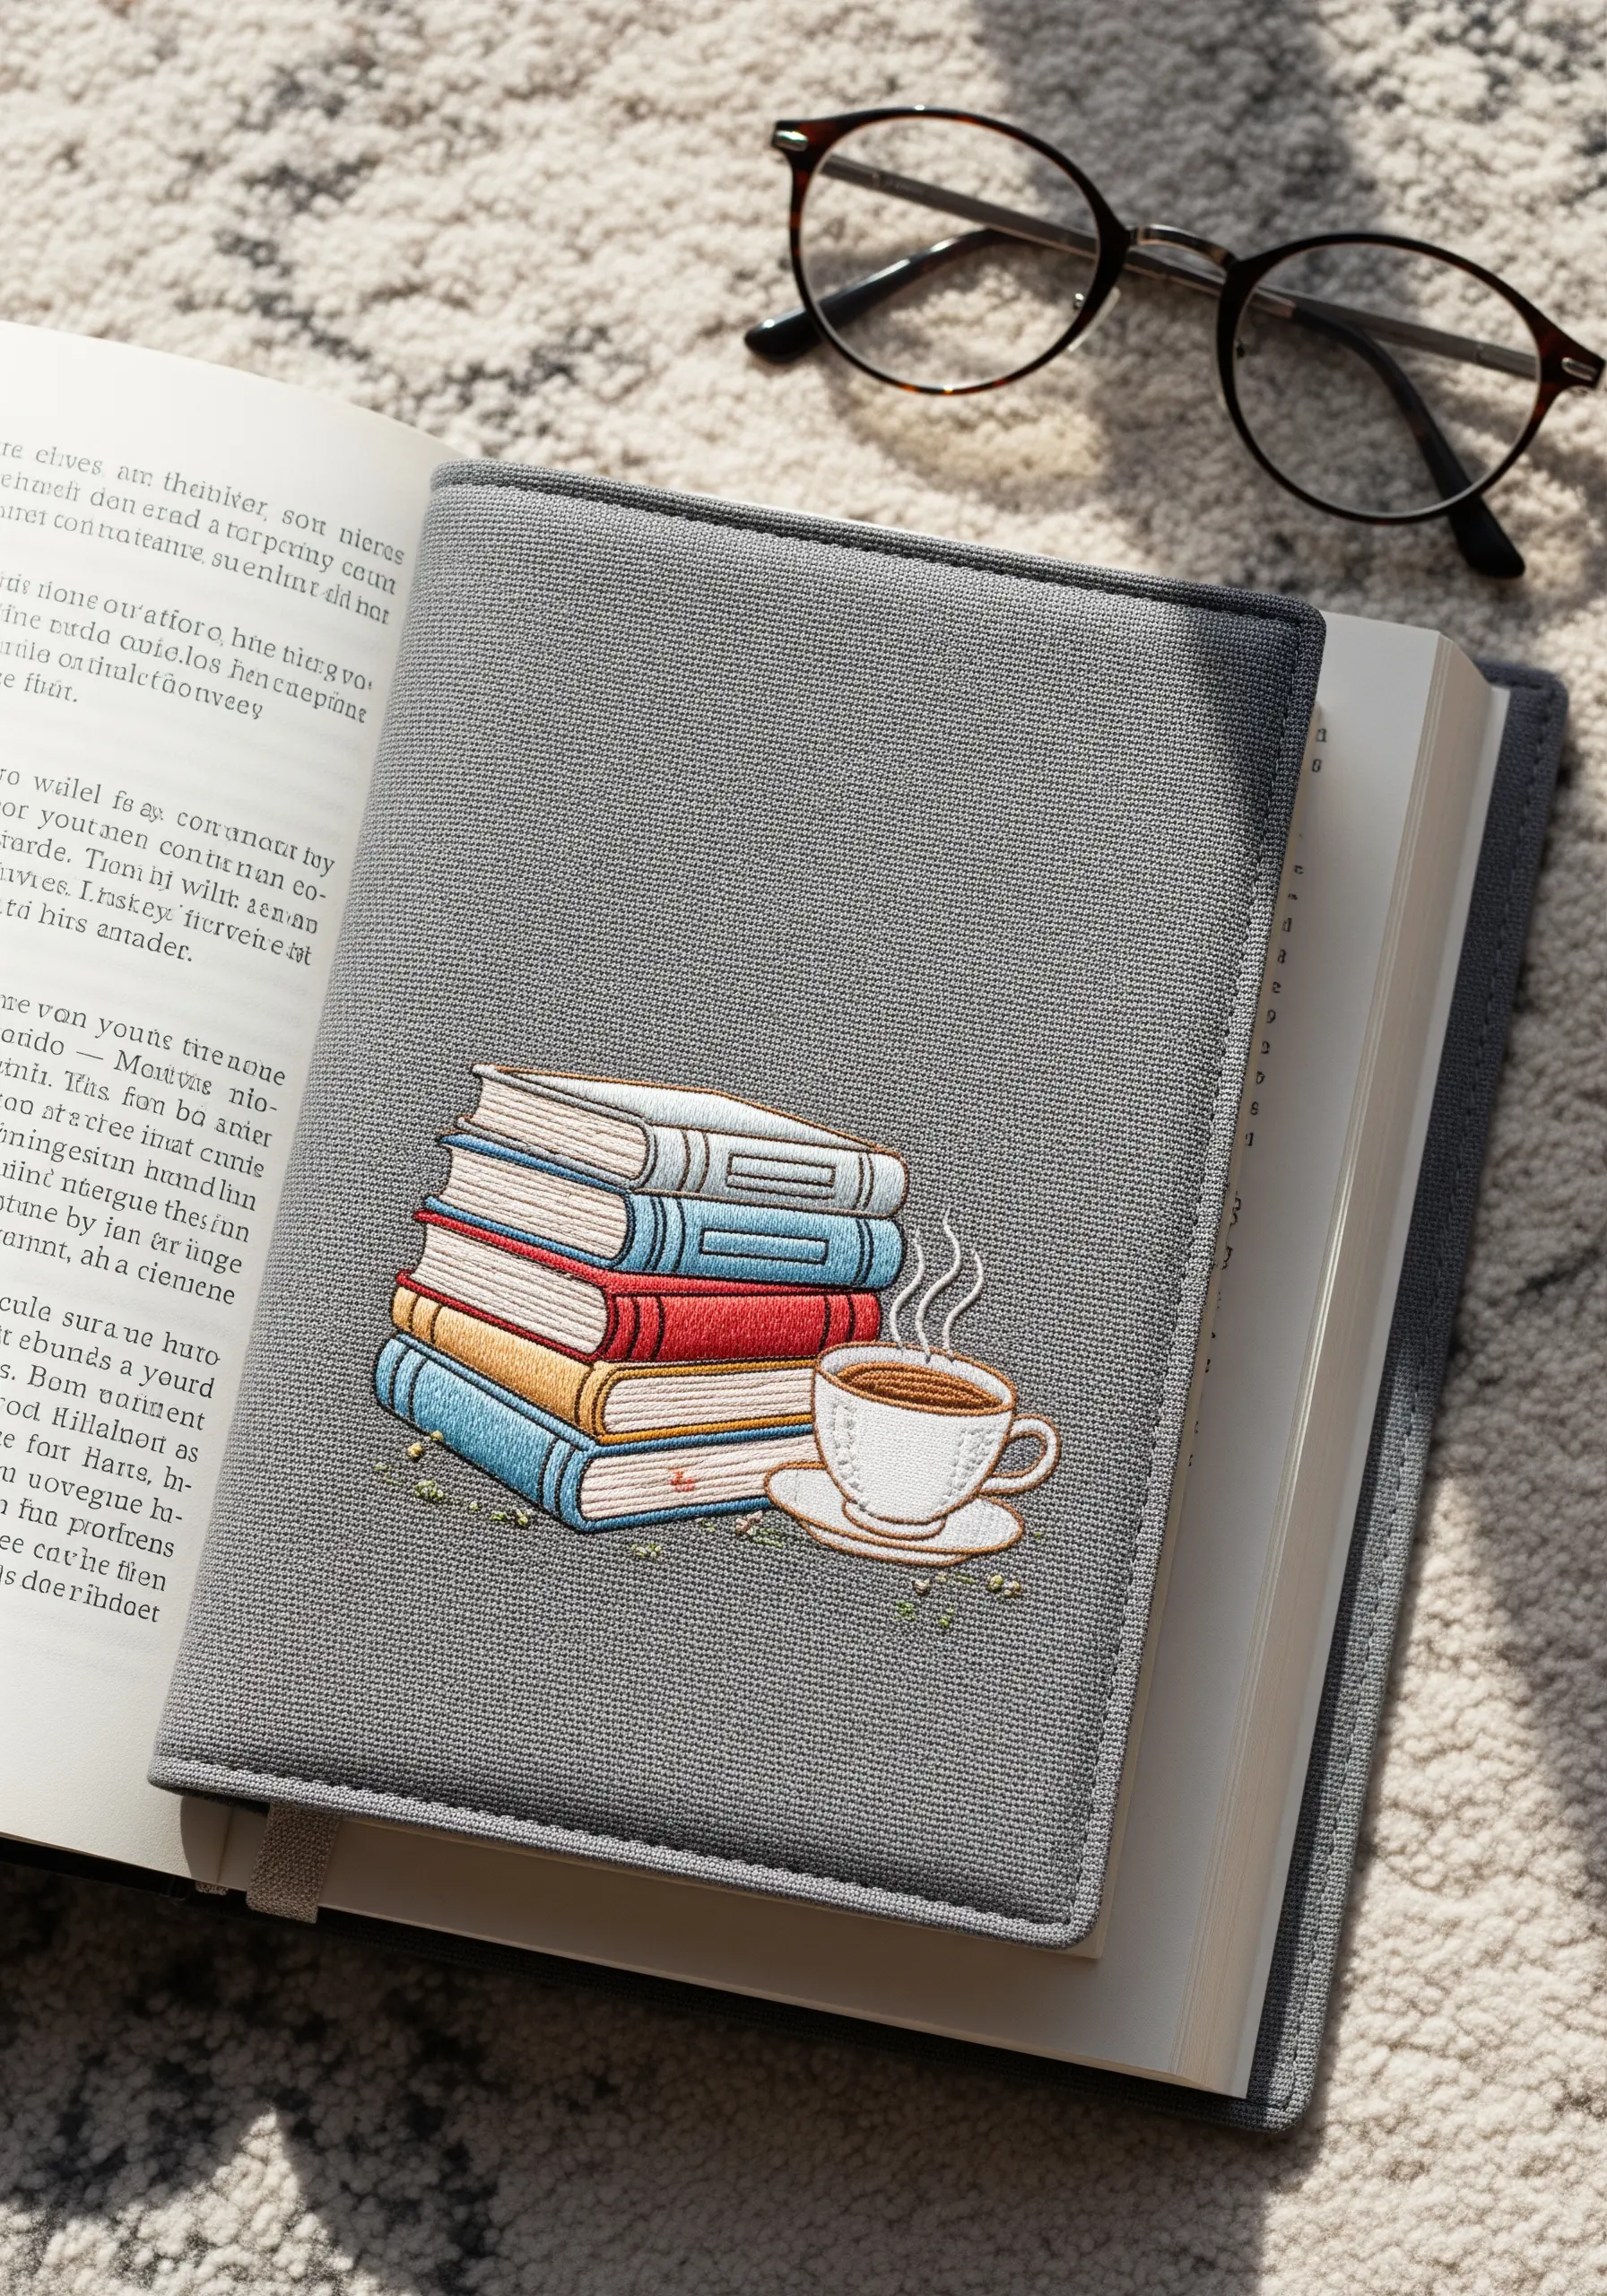
Elevate a simple handmade book cover with a clean, illustrative embroidery design.
To achieve that sharp, graphic novel look, use a two-strand backstitch or stem stitch for all the outlines.
Fill in the shapes with a smooth, directional satin stitch, ensuring your stitches all lie flat and parallel for a neat finish.
Choosing a limited, harmonious color palette keeps the design feeling sophisticated and calm.
This project not only protects your book but also turns an everyday object into a personal keepsake.
26. Frame Punch Needle Shapes as Minimalist Art
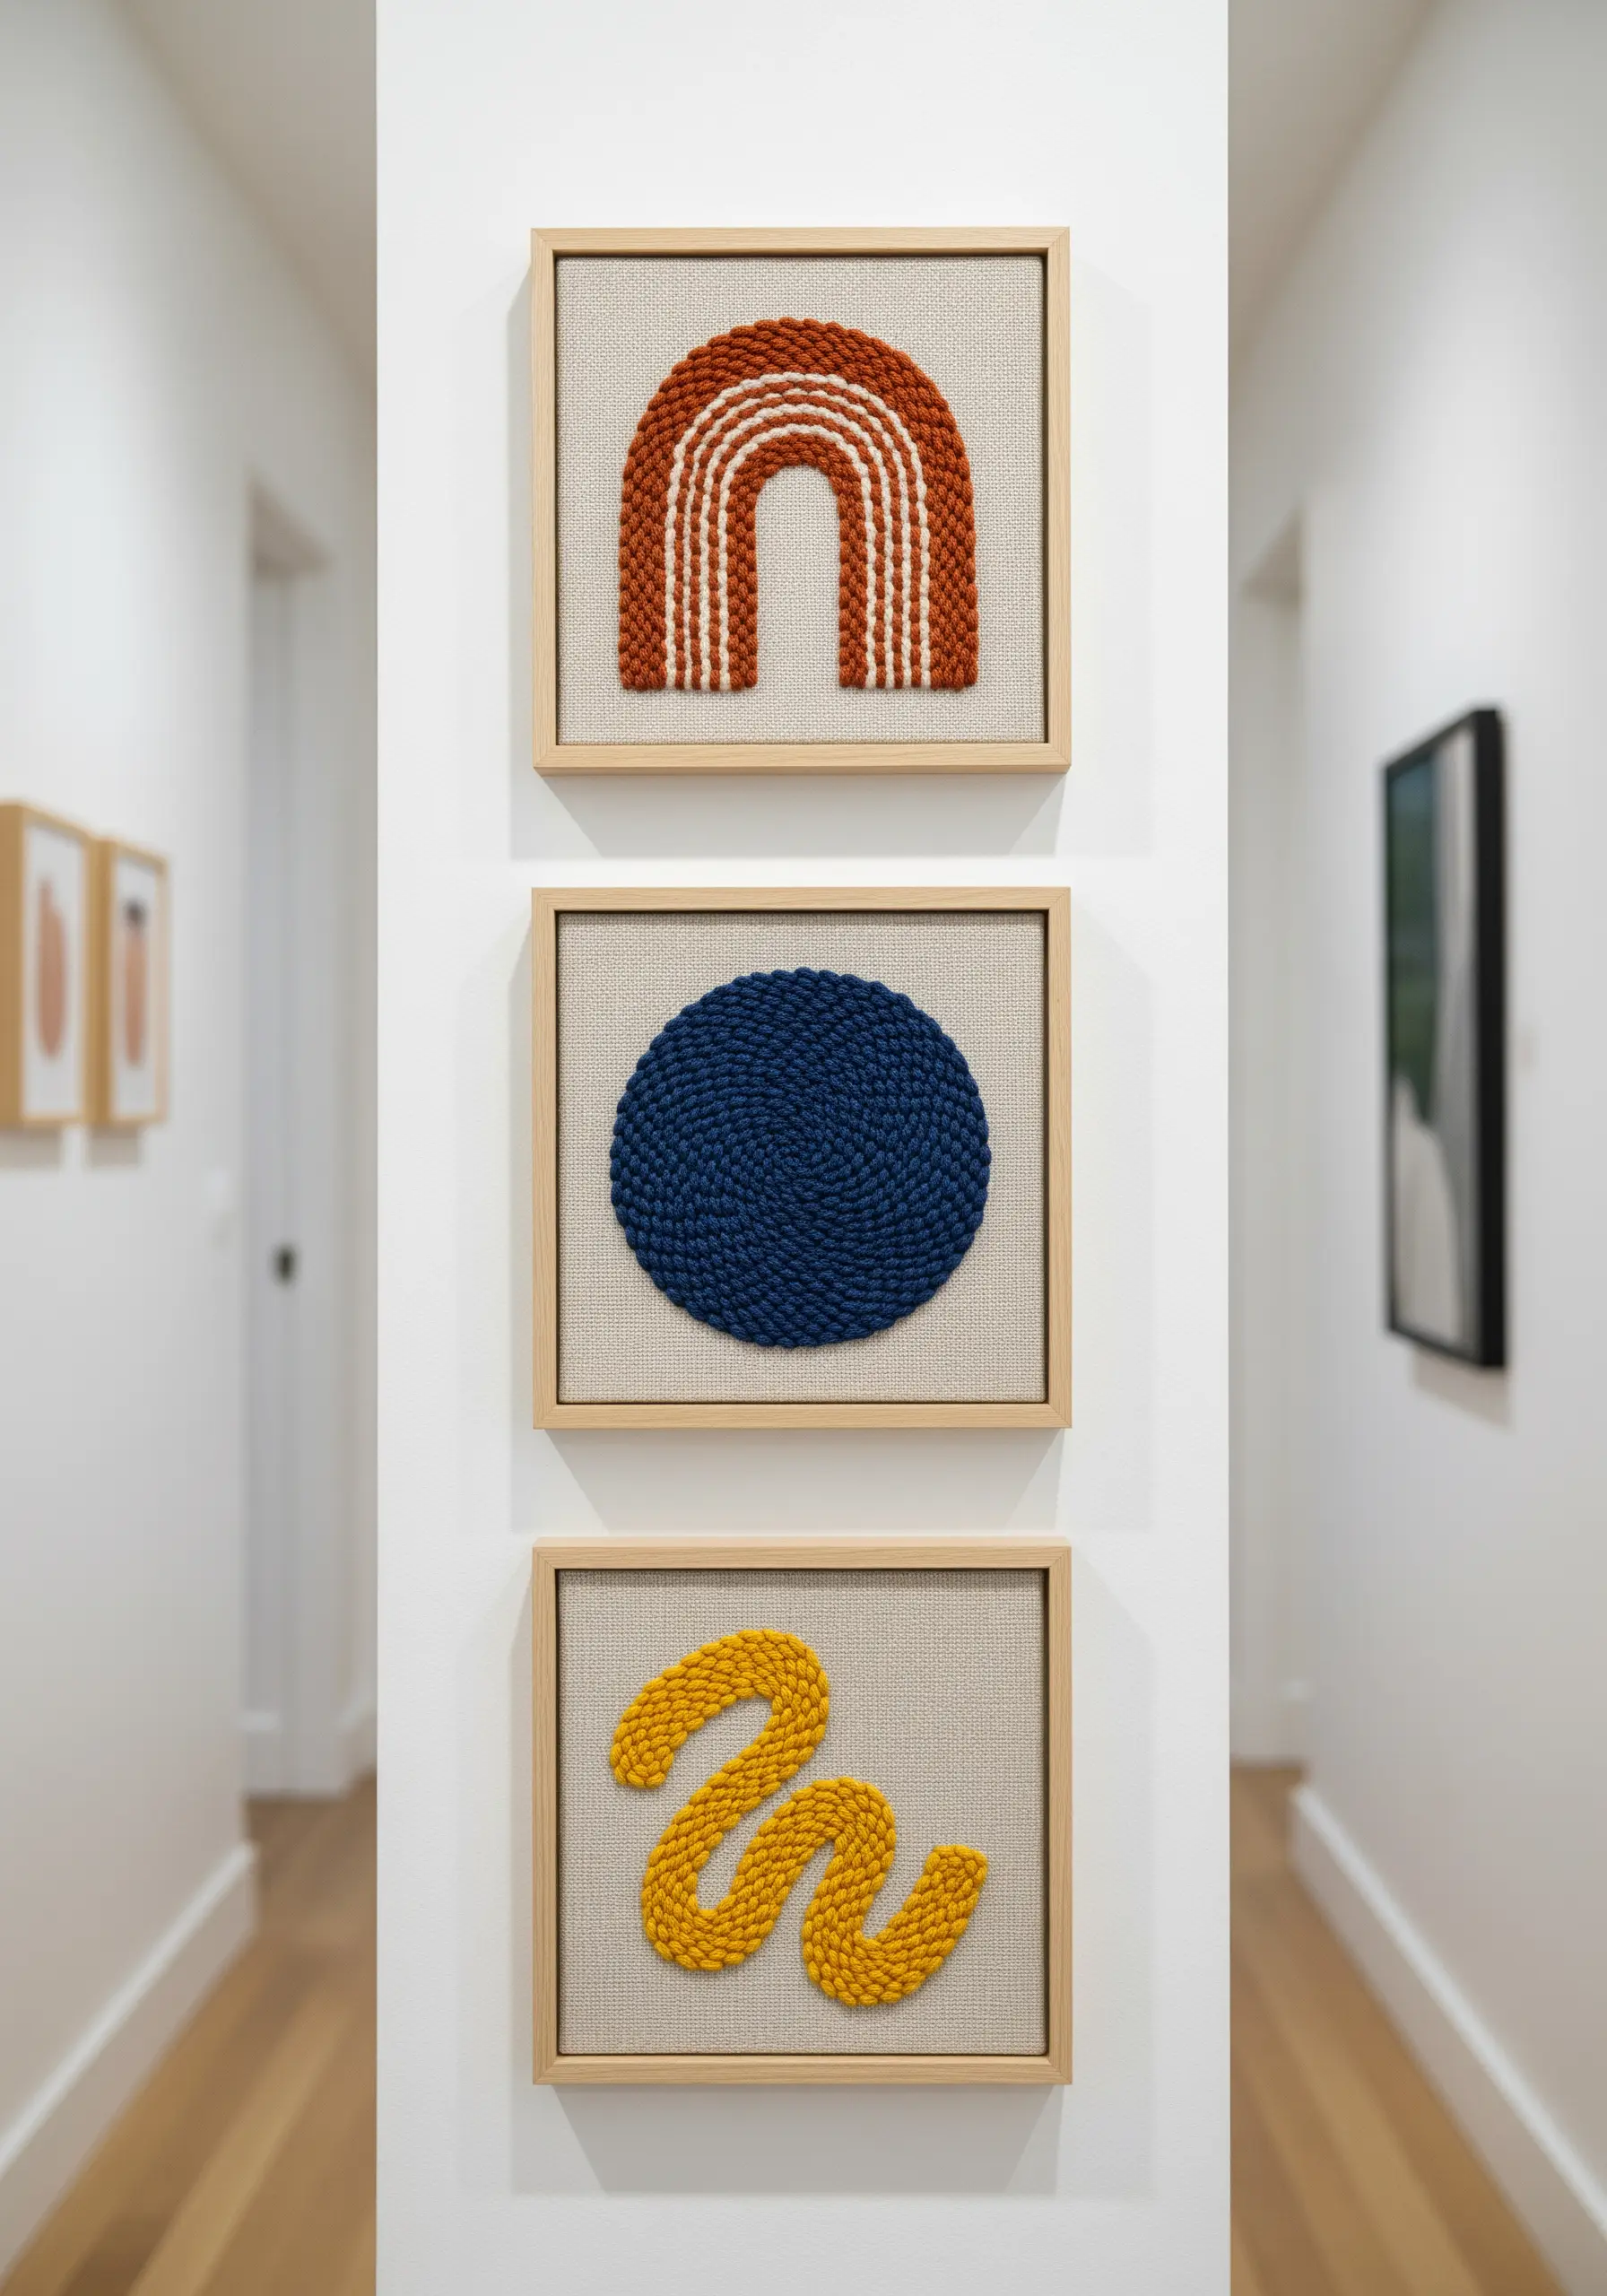
Explore punch needle not just for pillows but as a medium for minimalist wall art.
Create simple, bold geometric or abstract shapes on a neutral linen background.
The power of this style comes from the stark contrast between the highly textured, raised surface of the punch needle loops and the flat, plain weave of the fabric.
By framing each piece individually and hanging them as a triptych, you create a cohesive and modern gallery wall that feels intentional and high-end.
This approach celebrates the texture and color of the yarn itself.
27. Create Bold Line Art with the Couching Technique
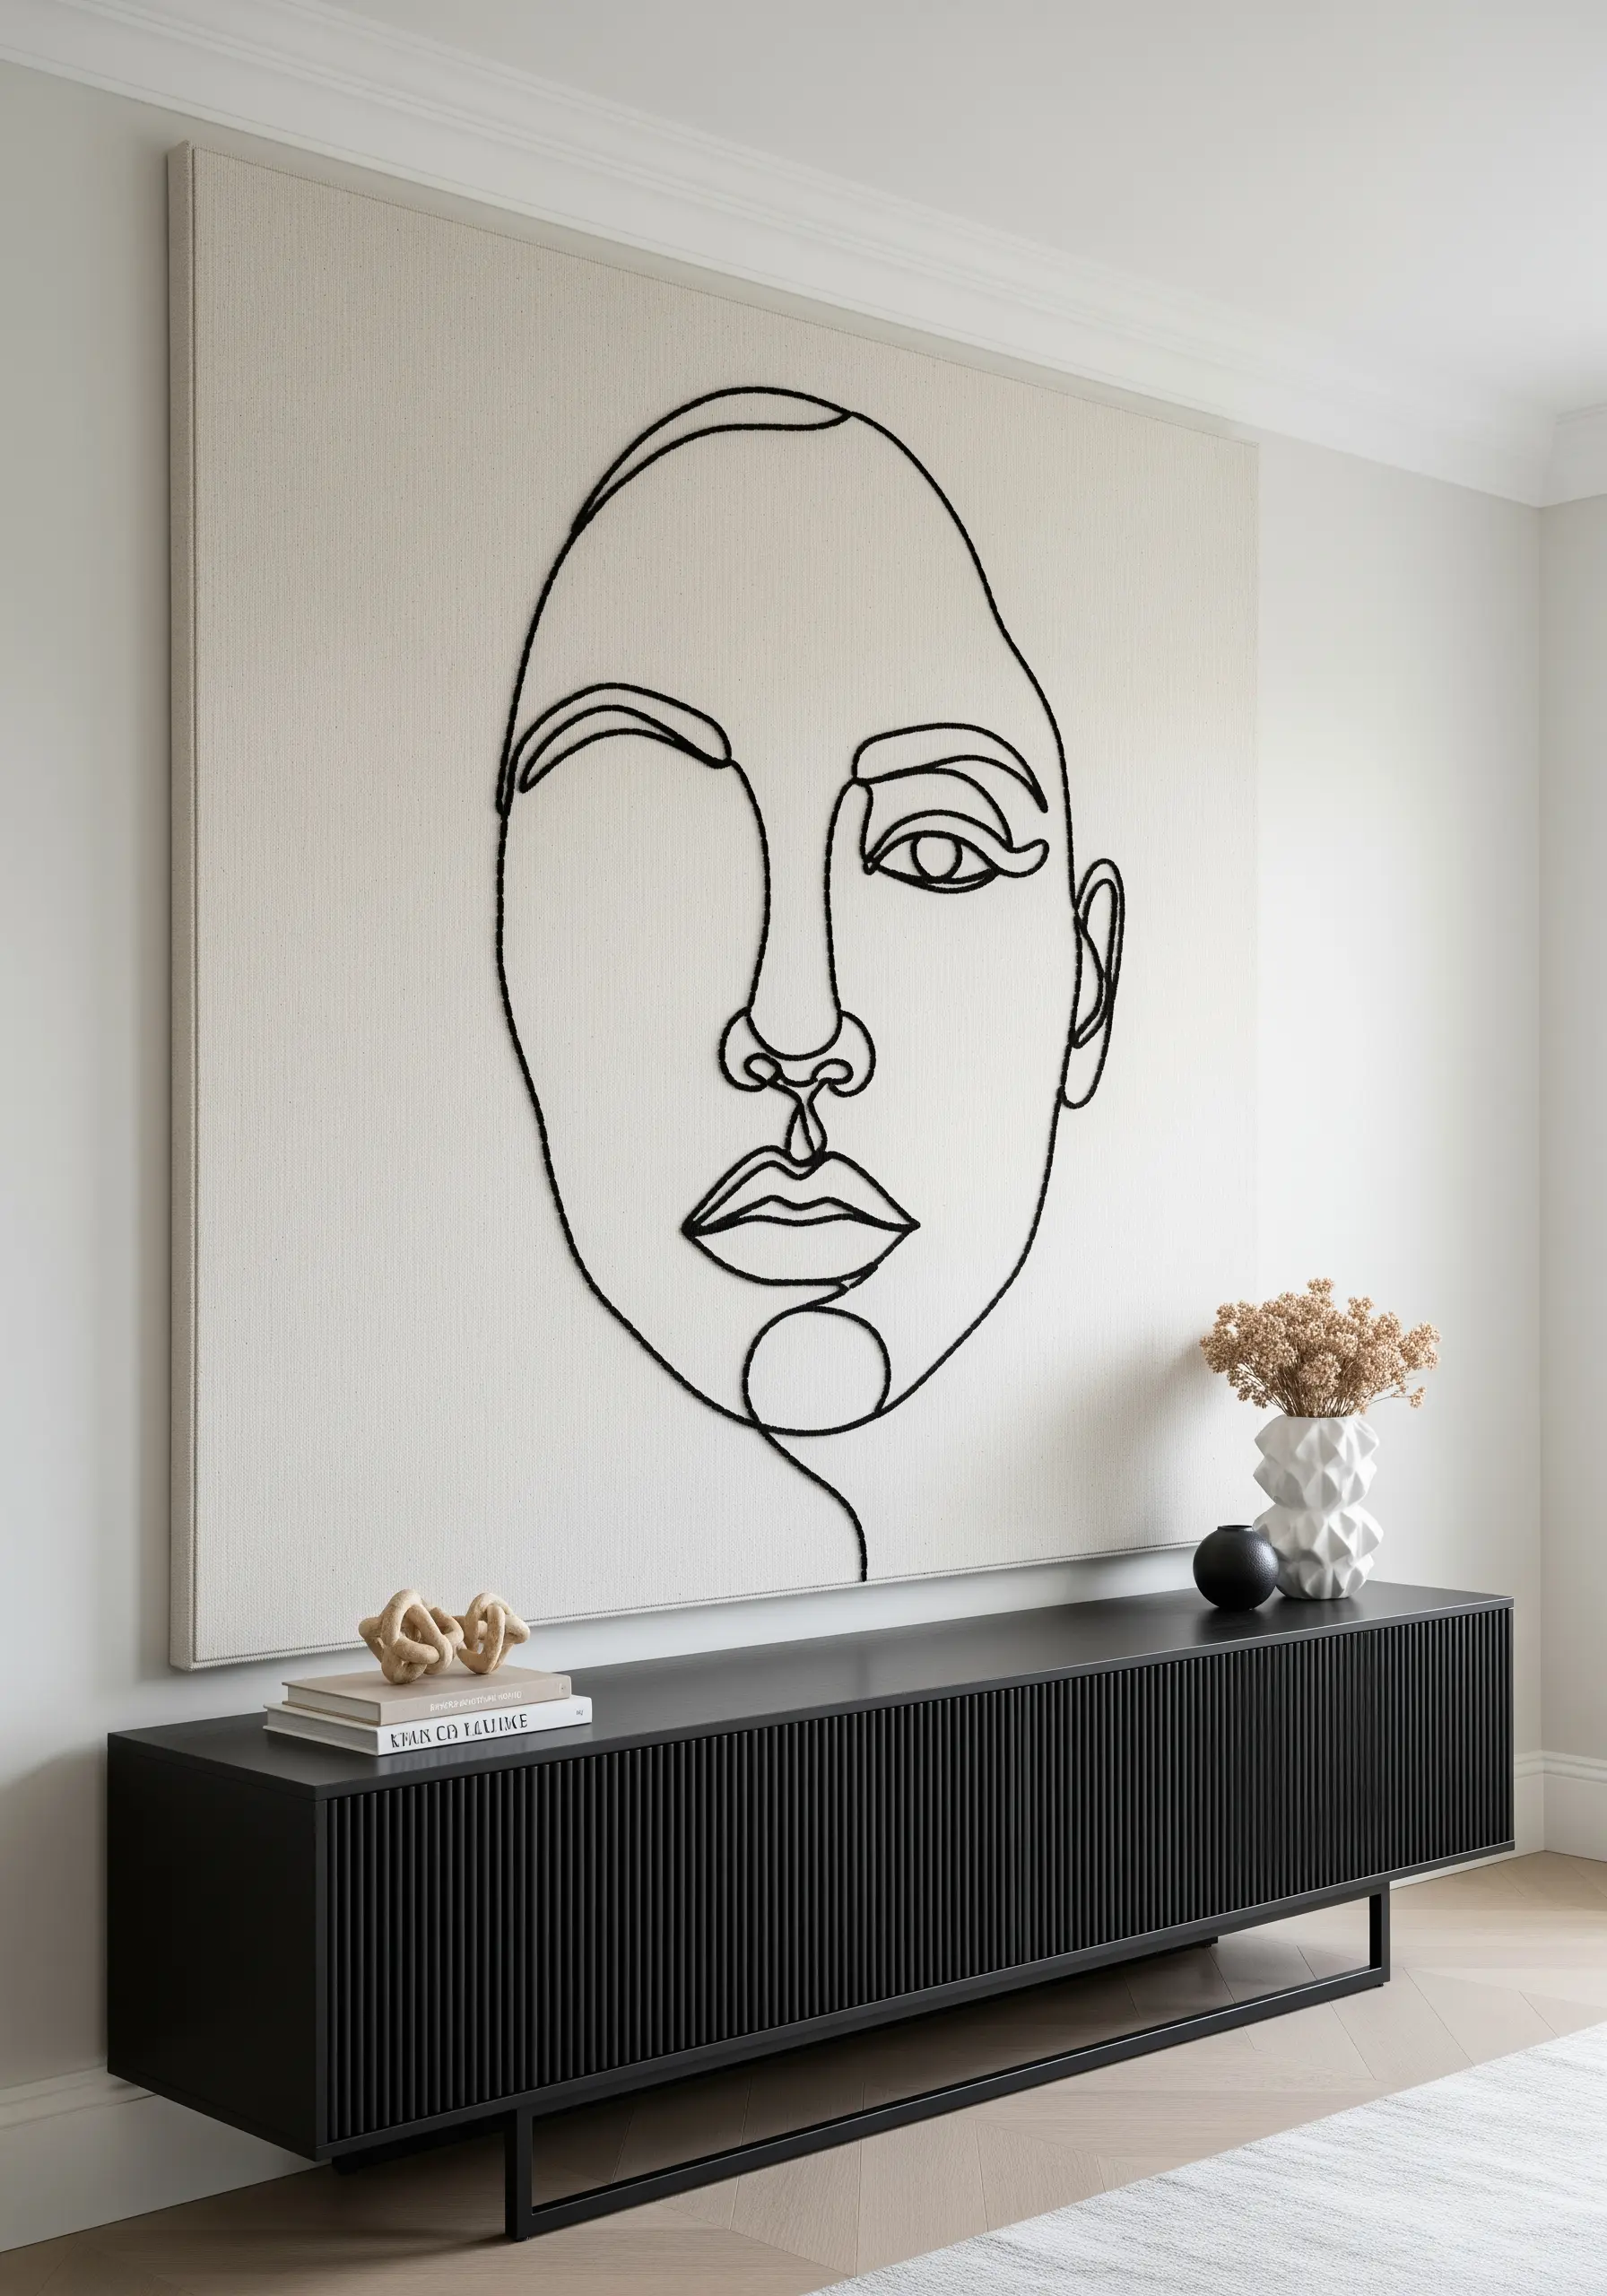
For large-scale pieces where a single line needs to make a big impact, use the couching technique.
Instead of trying to create a thick line with satin stitch, simply lay down a length of thick yarn or cord onto your fabric along your design line.
Then, use a second, thinner thread (in a matching or contrasting color) to tack the yarn down to the fabric with small, evenly spaced stitches.
This method allows you to create perfectly smooth, bold, and continuous lines that would be difficult to achieve otherwise, making it perfect for abstract face line embroidery designs.
28. Decorate Functional Items with Symmetrical Designs
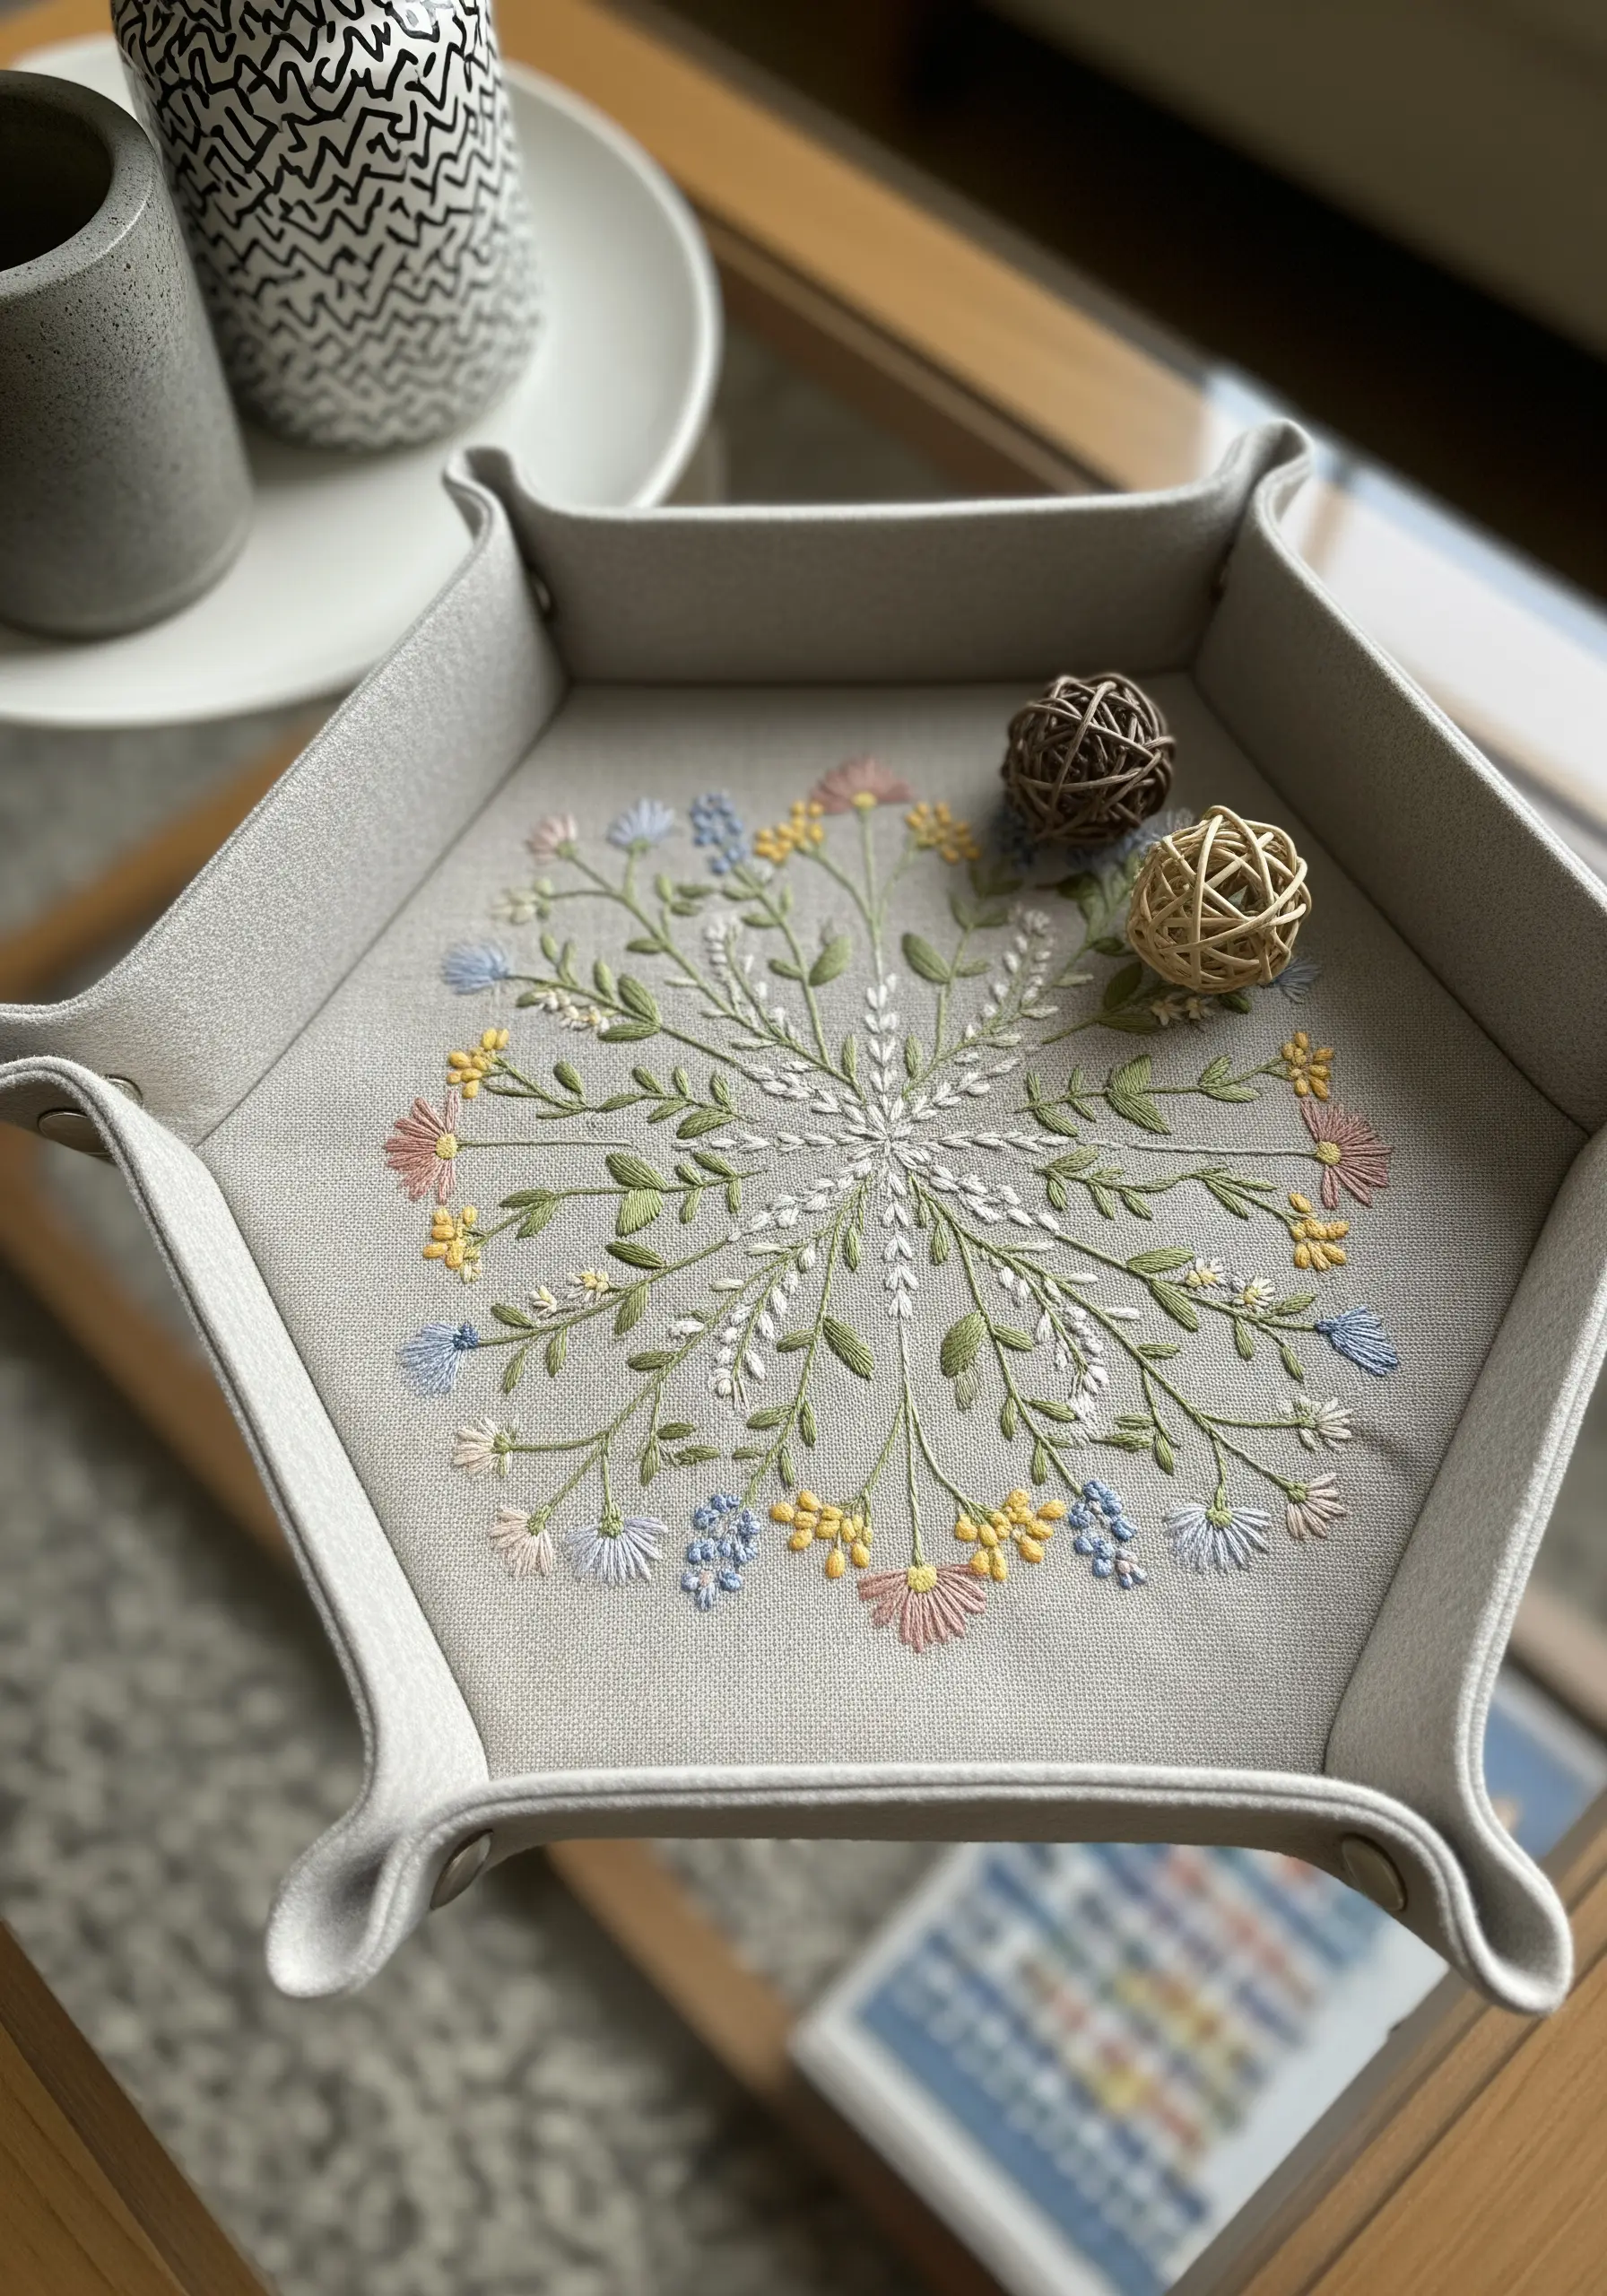
Add a touch of handmade elegance to everyday objects, like this valet tray, with a delicate embroidered mandala.
The key to a successful mandala is symmetry and balance.
Use a water-soluble marker to draw your guidelines first, ensuring your design is evenly spaced.
Combine simple stitches like stem stitch for the vines, lazy daisy stitches for the petals, and French knots for the flower centers.
A soft, muted color palette keeps the design sophisticated and ensures it enhances, rather than overwhelms, the object’s function.
29. Practice and Play with a Modern Stitch Sampler
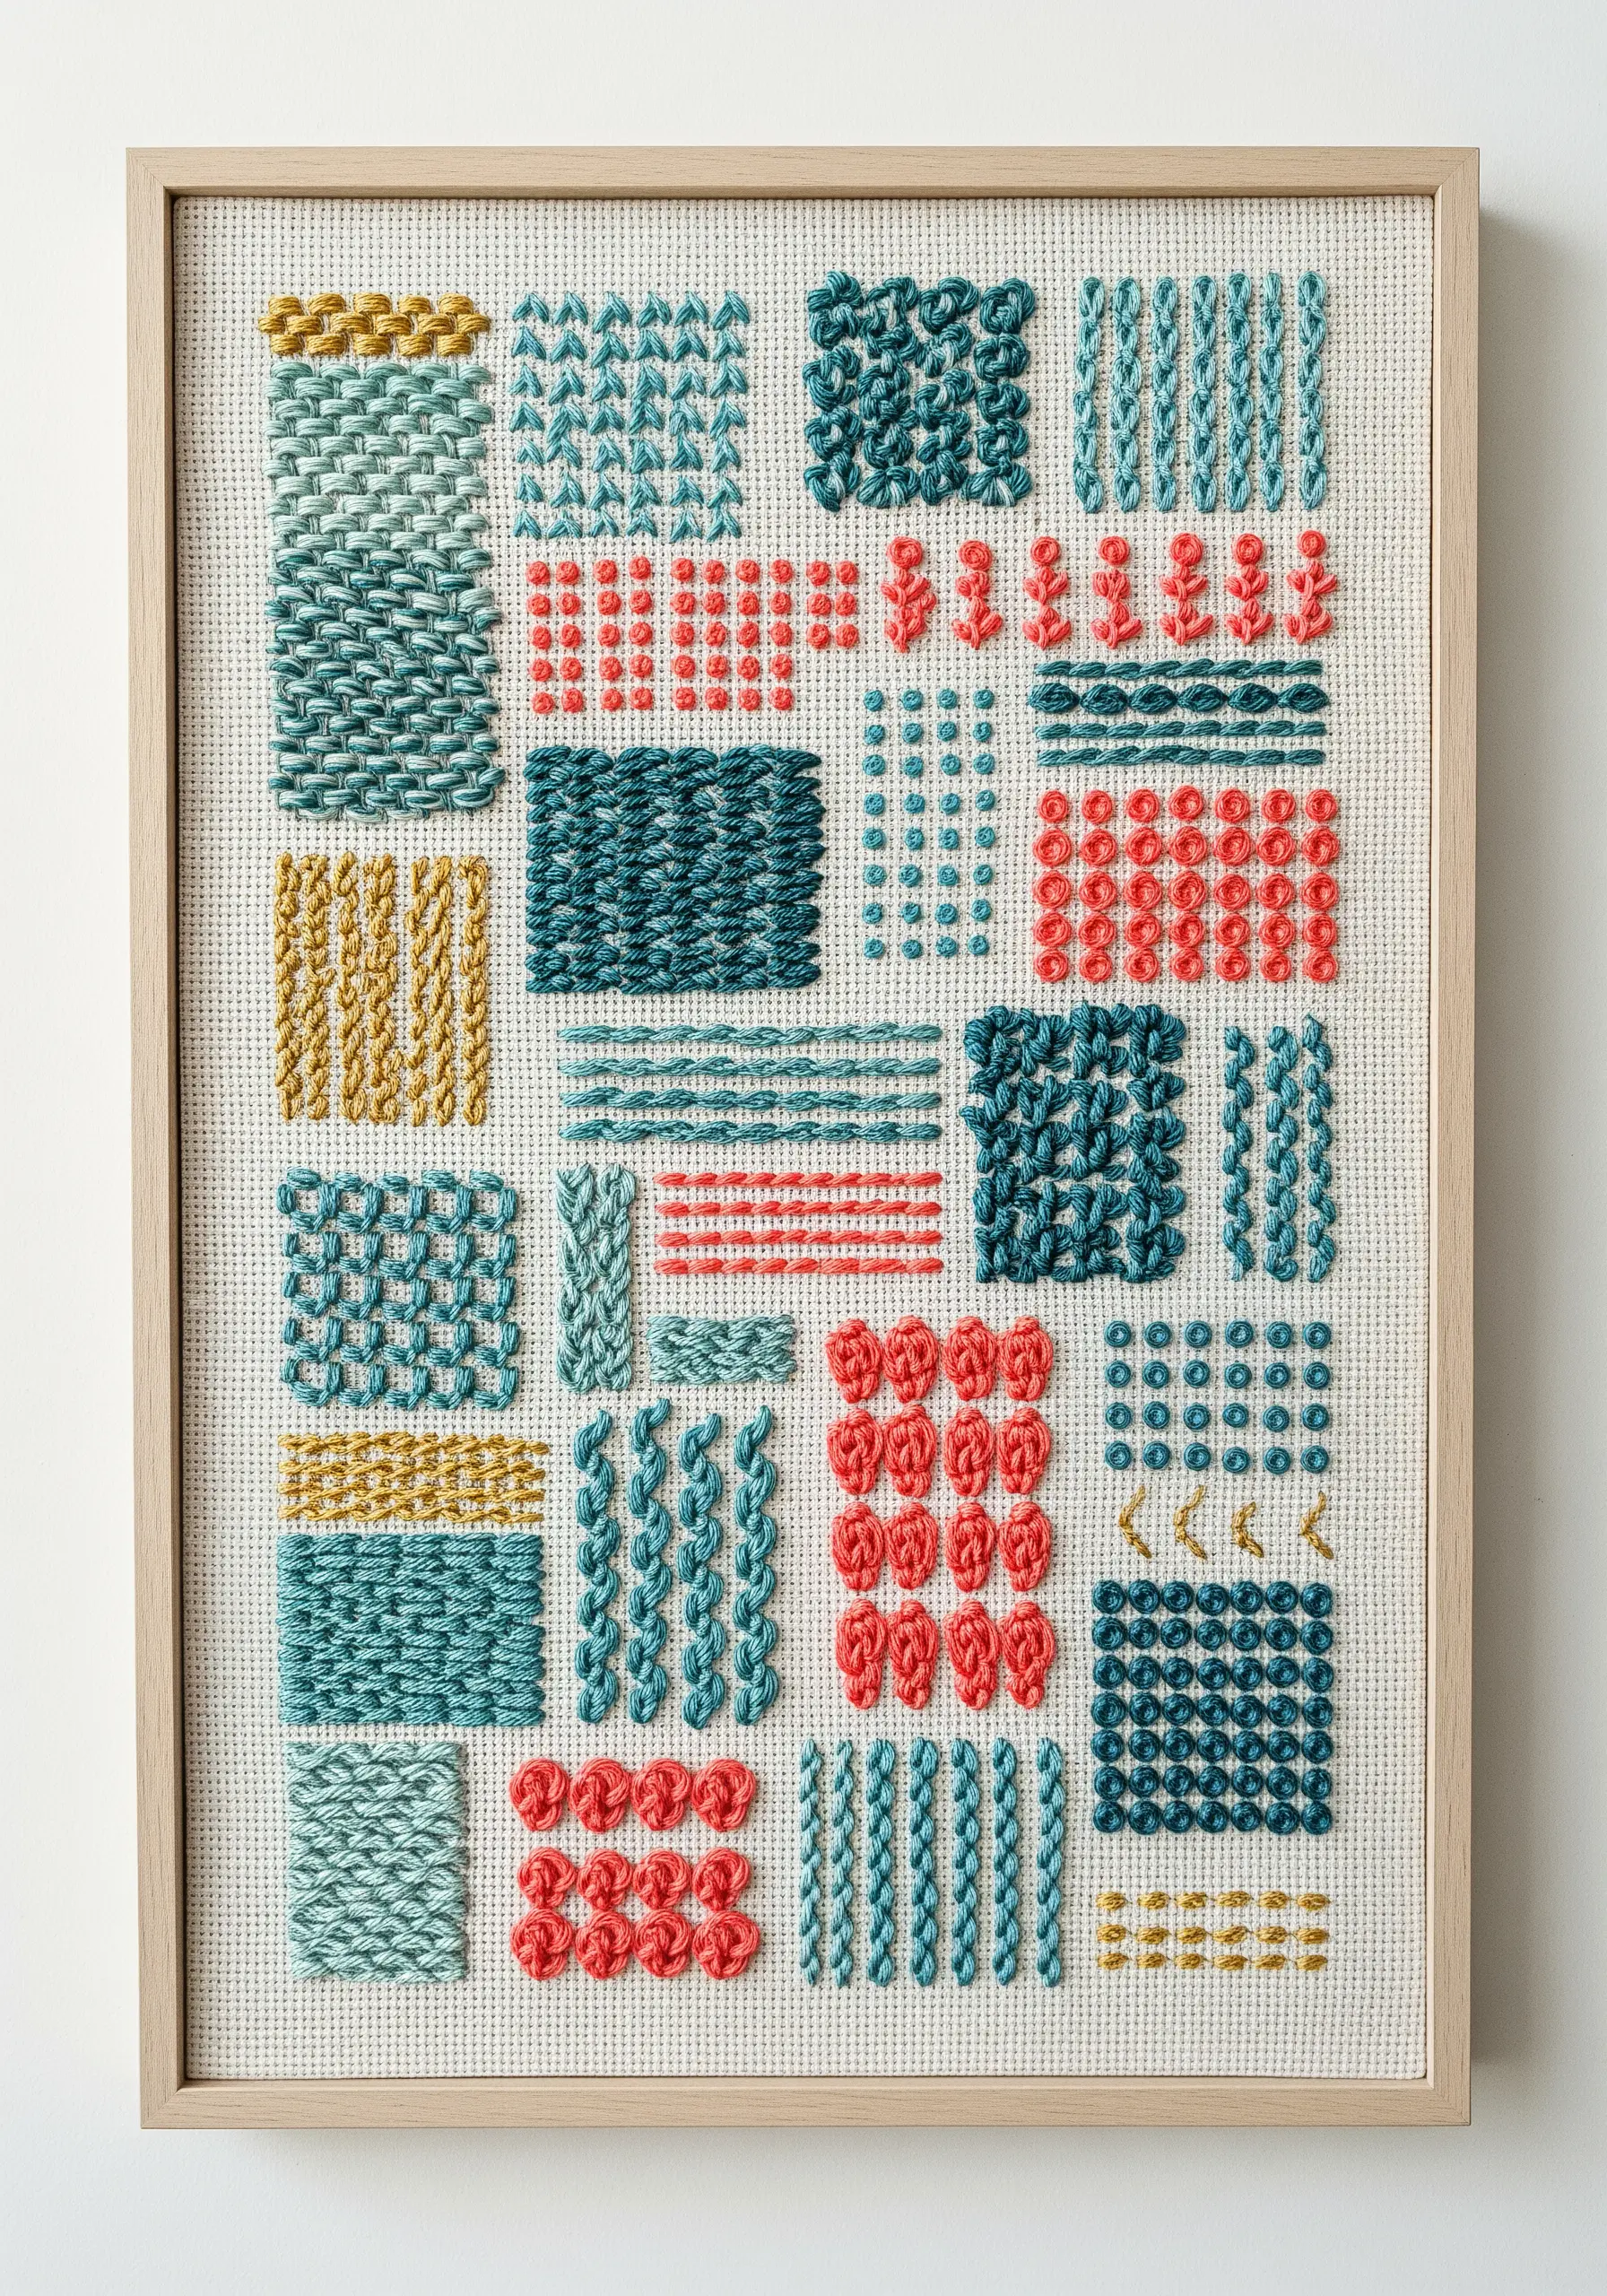
Move beyond traditional samplers by creating a modern, abstract composition of stitch textures.
Divide your fabric into a loose grid and fill each block with a different stitch or pattern—try rows of French knots, woven bars, chain stitch fillings, or grids of straight stitches.
This is not about creating a picture, but about exploring the textures and rhythms of different embroidery stitches.
Working within a limited color palette of two or three complementary colors gives the final piece a cohesive, contemporary feel.
It’s a meditative project that builds your skills while creating a unique piece of abstract thread embroidery.
30. Stage Your Embroidery for a 3D Diorama Effect
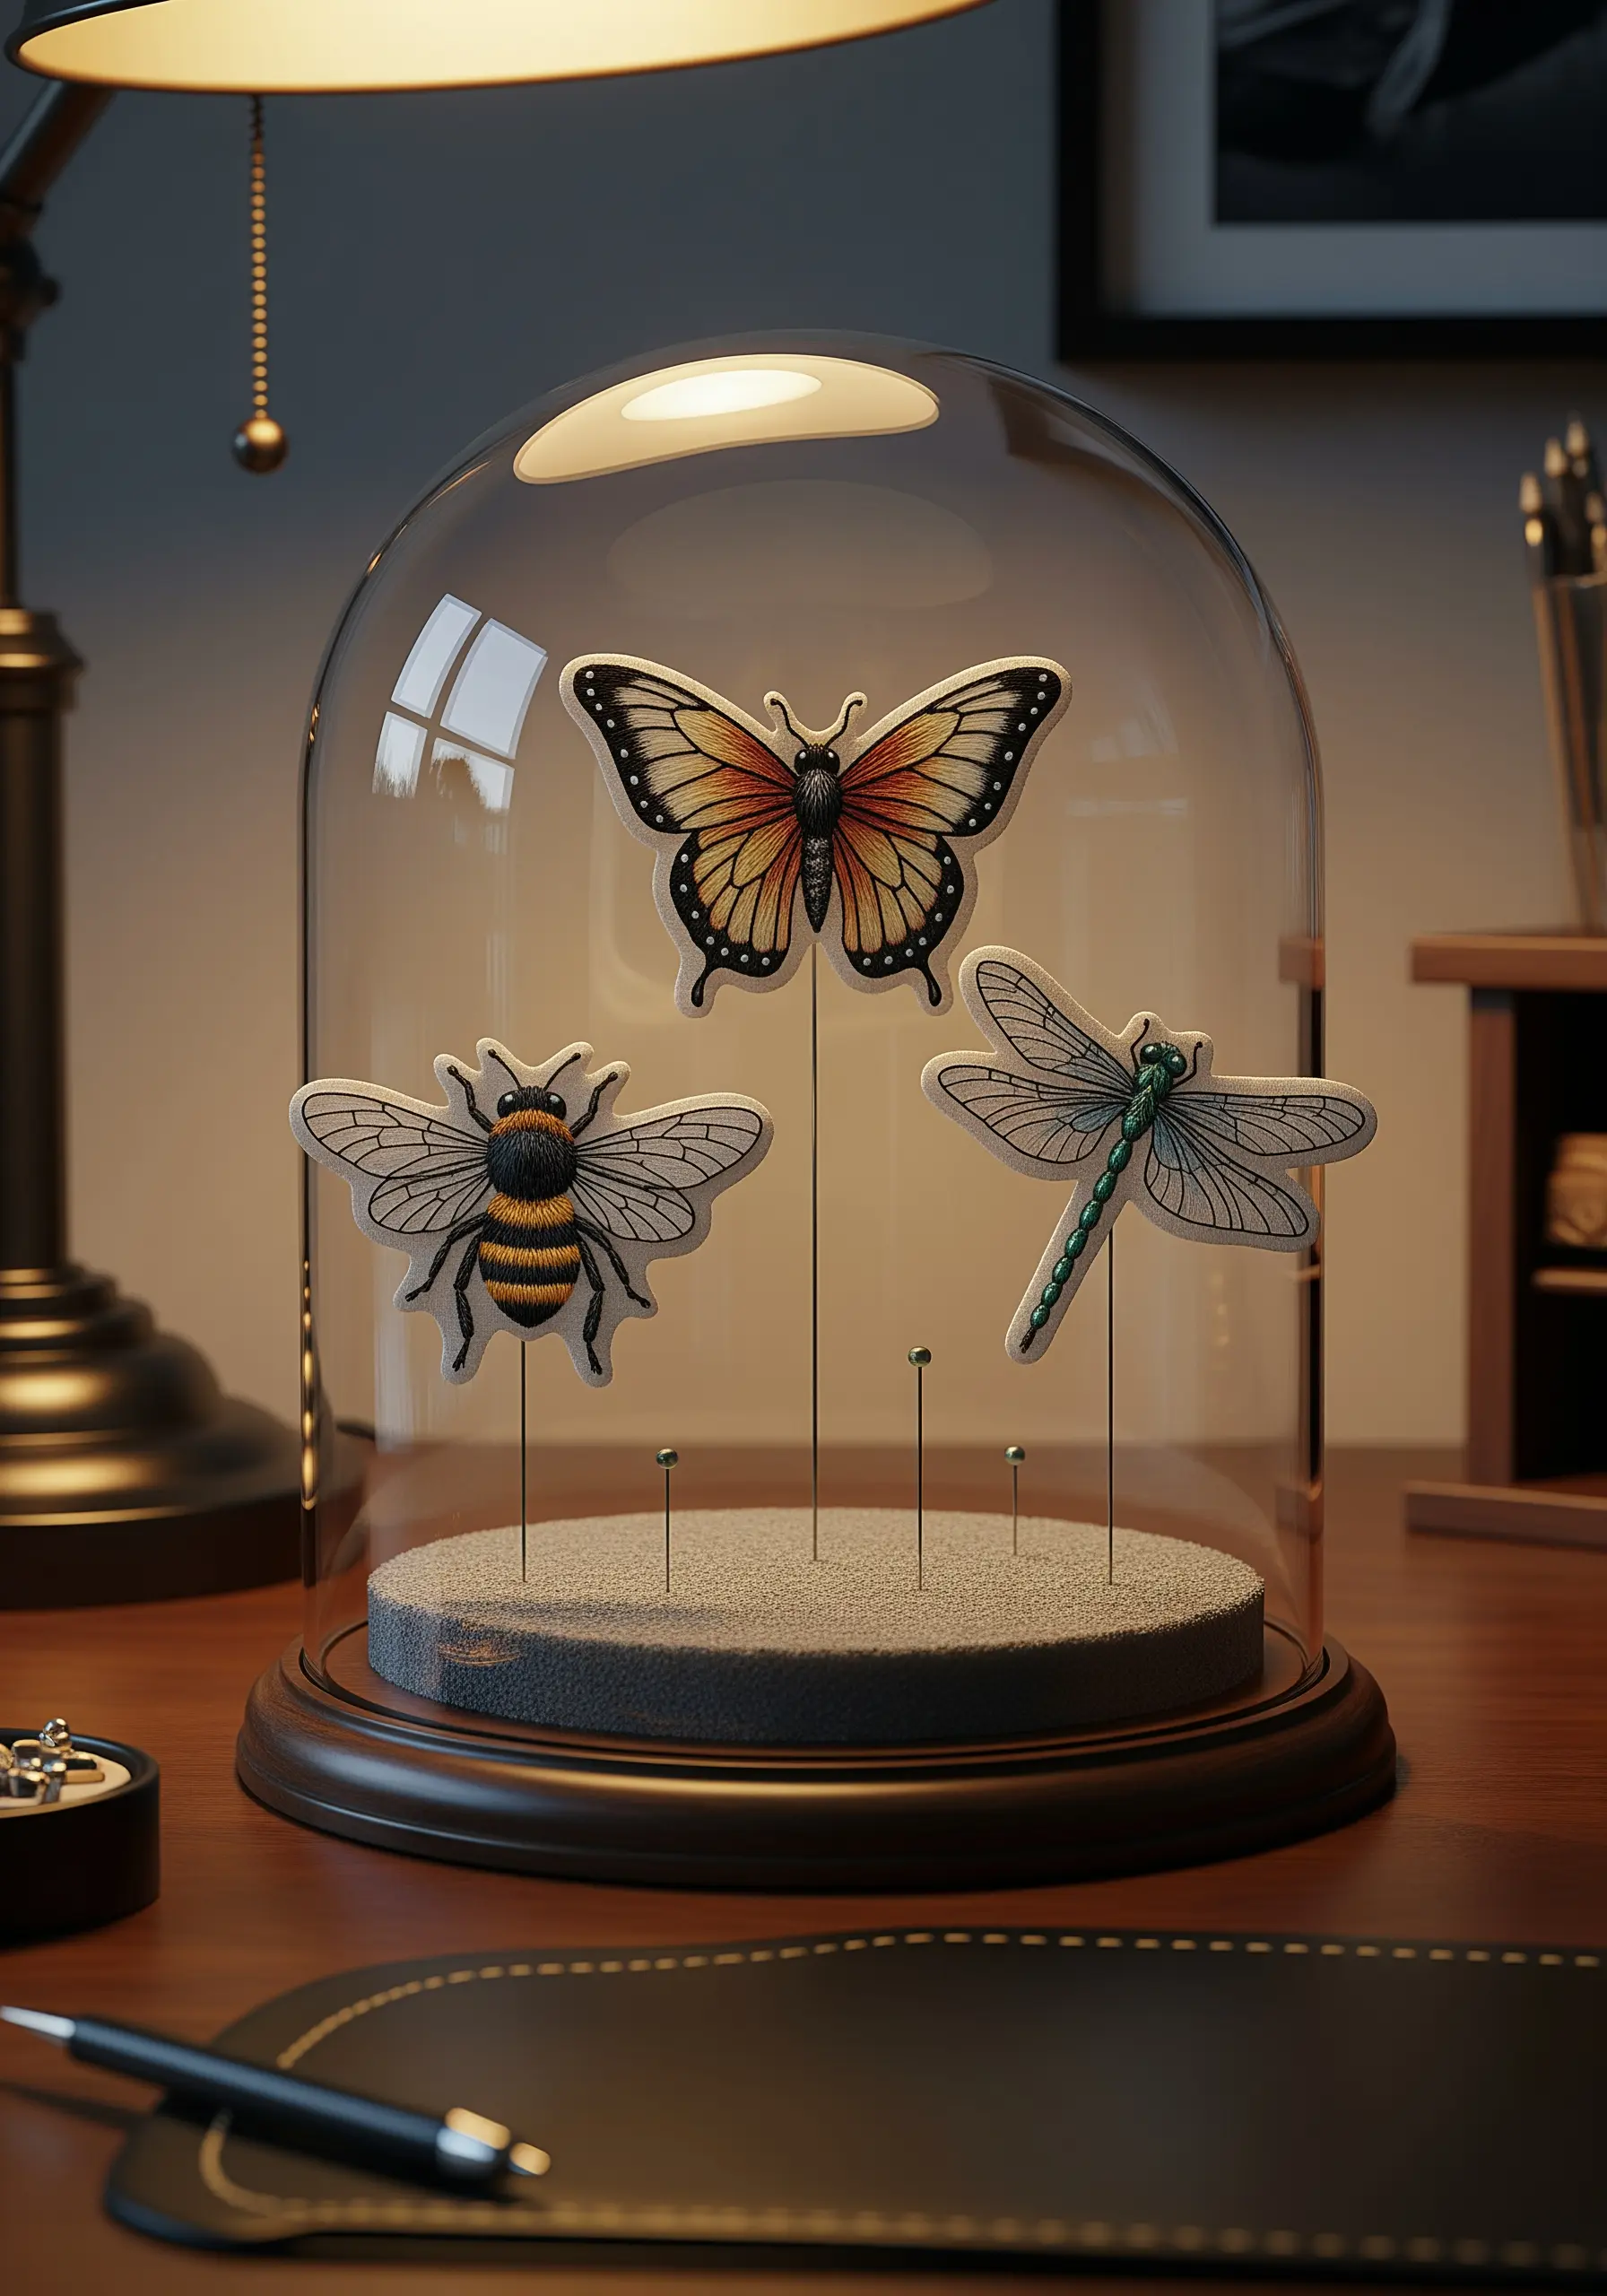
Create a stunning 3D display by taking your embroidery off the fabric and into a new dimension.
Stitch your motifs—like these insects—onto a stiff, non-fraying material like felt or reinforced fabric.
Carefully cut out each shape, leaving a tiny border.
Then, mount them on thin wires and arrange them inside a glass cloche or shadow box to create a miniature diorama, like a natural history museum display.
This innovative presentation transforms your stitches into small sculptures, giving them a magical, floating appearance.
31. Embroider a Lampshade for a Subtle, Luminous Effect
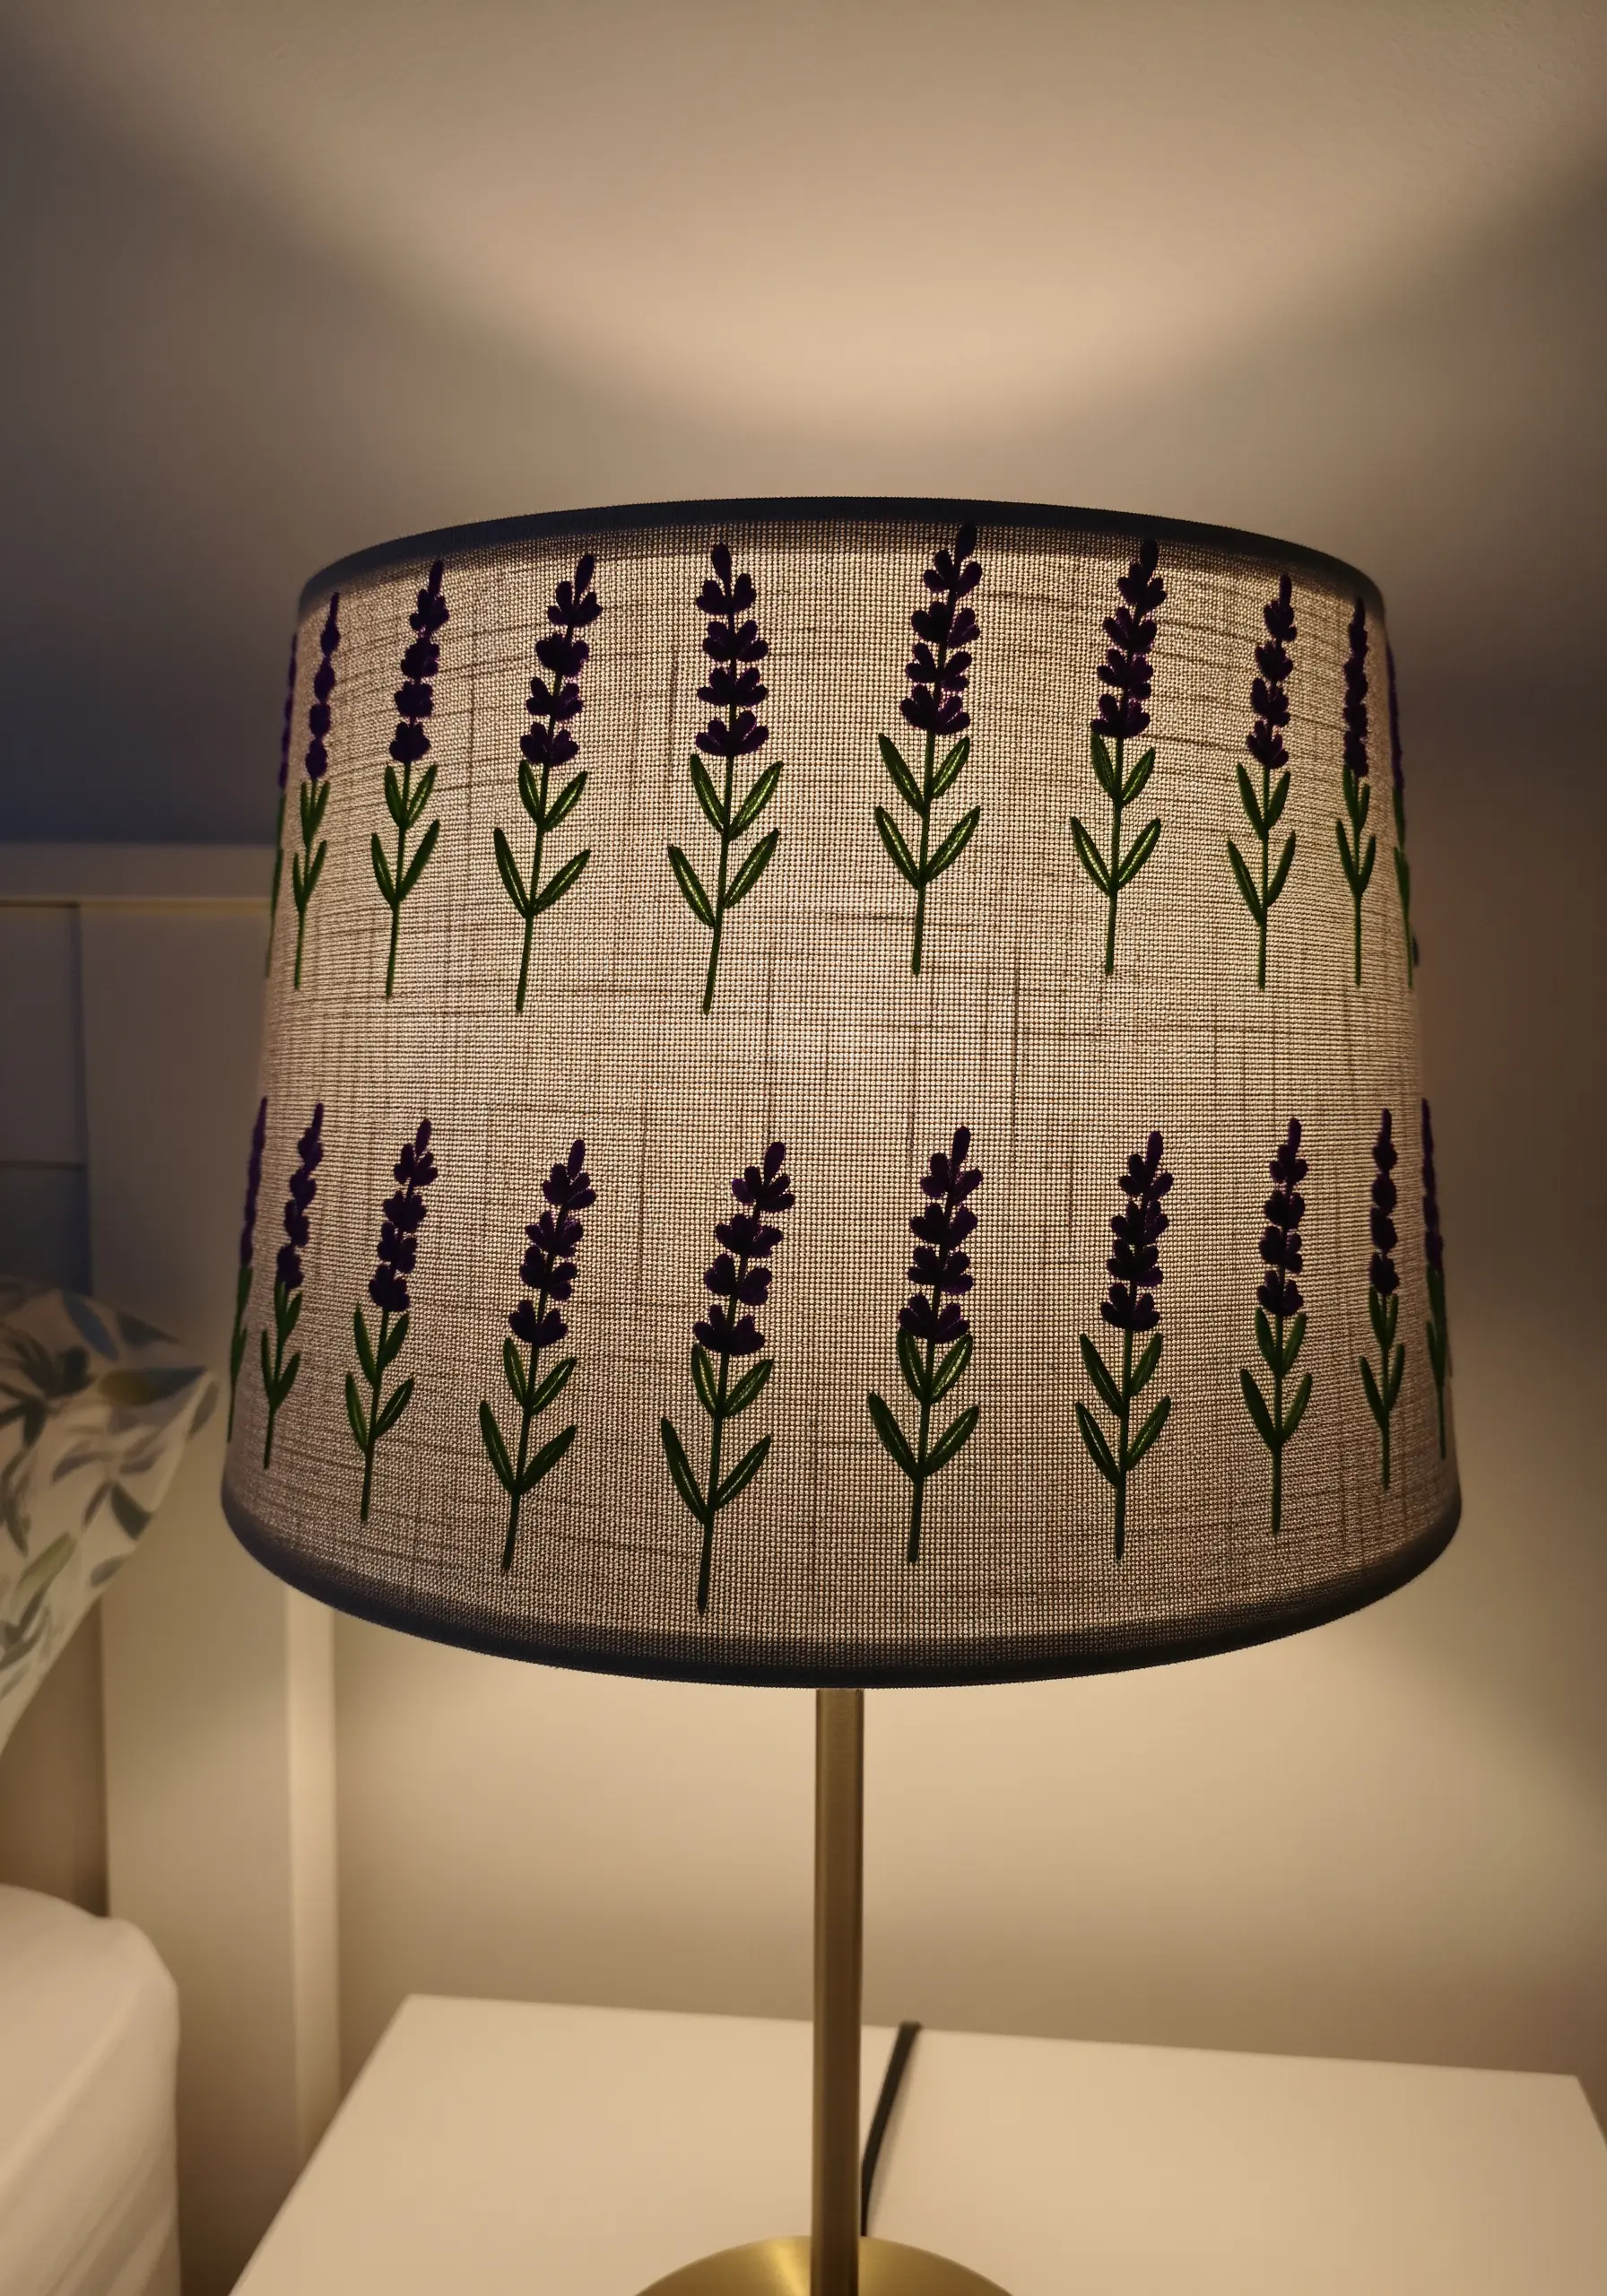
Add a custom touch to your home lighting by embroidering a simple, repeating pattern onto a fabric lampshade.
Choose a design that is graphic and easy to replicate, like these lavender sprigs.
Use basic stitches—stem stitch for the stalks and small satin stitches or French knots for the blossoms—that won’t pull or pucker the delicate lampshade material.
When the lamp is turned on, the light will shine through the fabric, beautifully illuminating your stitches from behind and creating a warm, ambient glow.
Ensure your stitches are neat on the inside as they may be visible when lit.
32. Add Delicate Botanical Details to Table Linens
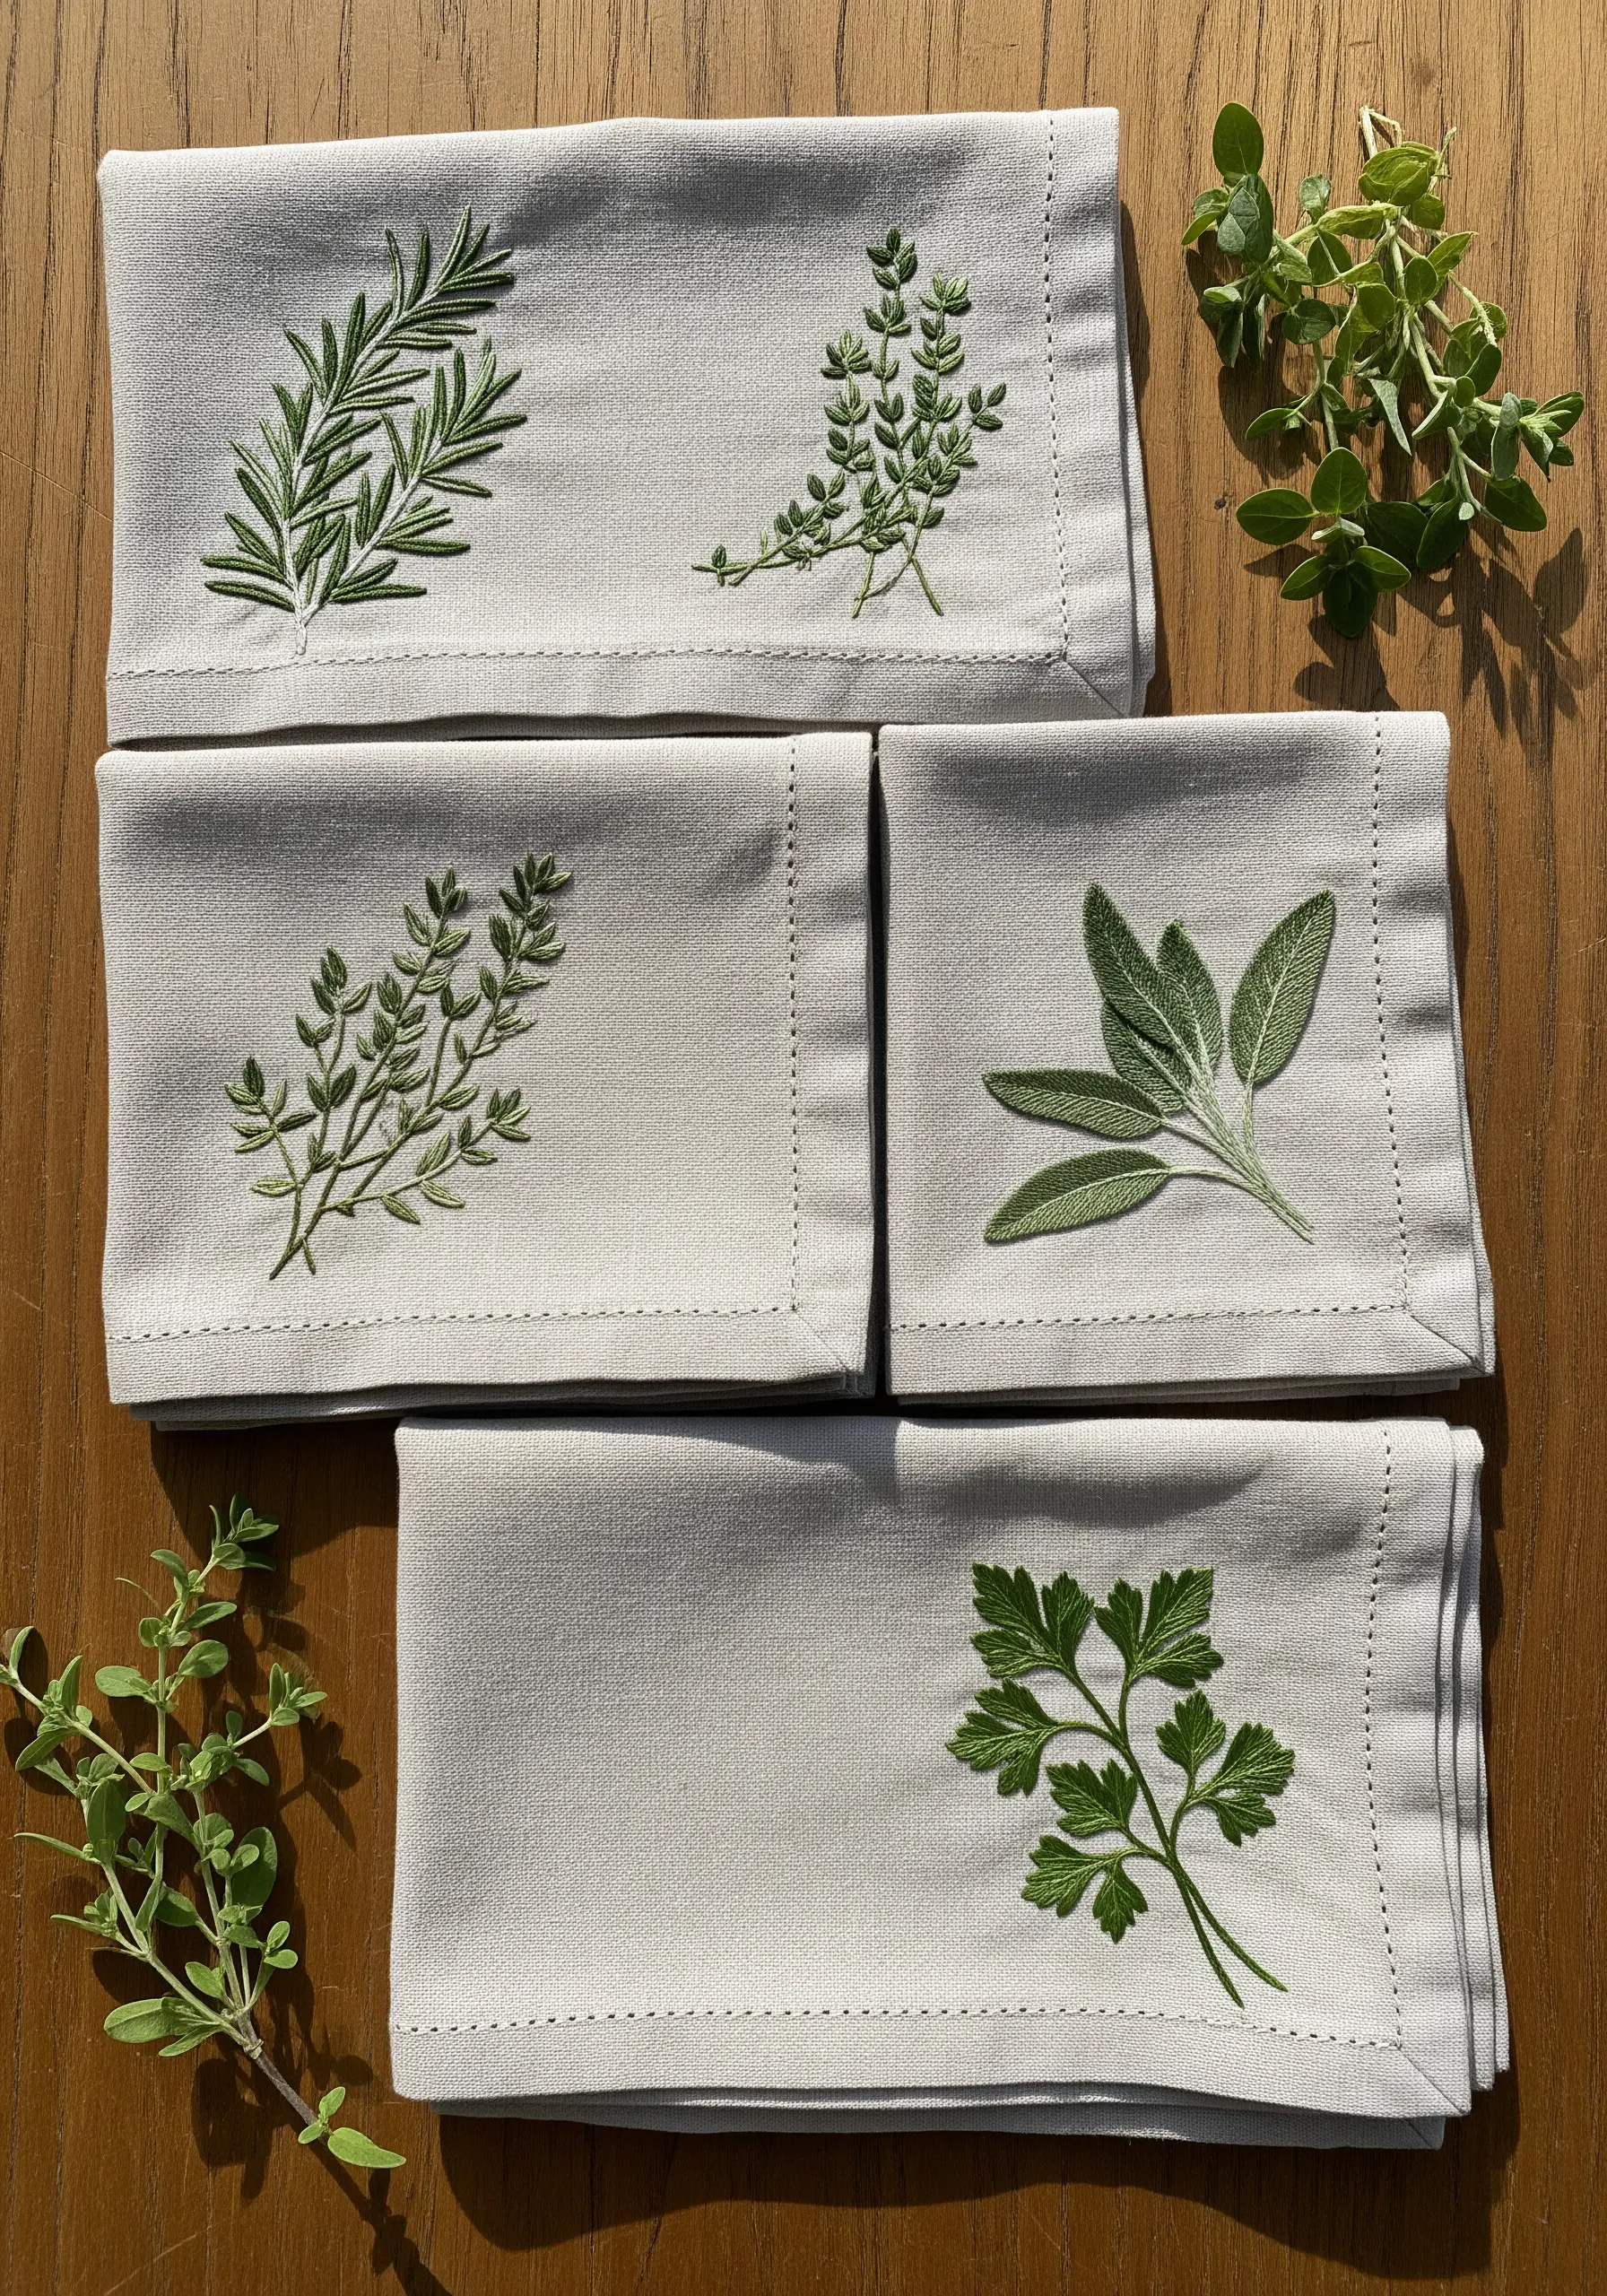
Elevate a set of simple cloth napkins with elegant, finely stitched herbal motifs.
To achieve a delicate, high-end look, use only one or two strands of embroidery floss.
Use a fishbone stitch for the leaves of the sage and parsley to create a realistic central vein and texture.
For the rosemary and thyme, a combination of tiny straight stitches and stem stitches will capture their fine, needle-like or clustered leaves.
Stitching these minimal fruit & botanical embroidery patterns on high-quality linen turns a functional item into a treasured heirloom.


