

There is a quiet magic in translating the textures of the earth into thread. It’s a way to hold the roughness of bark, the smoothness of a river stone, or the intricate pattern of moss in your hands, and reshape it stitch by stitch.
This isn’t about perfectly replicating nature, but about capturing its essence—the feeling of calm that washes over you in a quiet forest or a windswept field. The patterns that follow are invitations to slow down, to notice the small details, and to let your needle and thread become instruments of mindfulness.
Here, you will discover how to use simple stitches in new ways to create depth, dimension, and emotion. You’ll learn how a change in thread thickness or stitch density can transform a flat surface into a tactile landscape. Let this be your guide to a more intentional, textured, and deeply satisfying creative practice.
1. Sculptural Foliage with Layered Knots
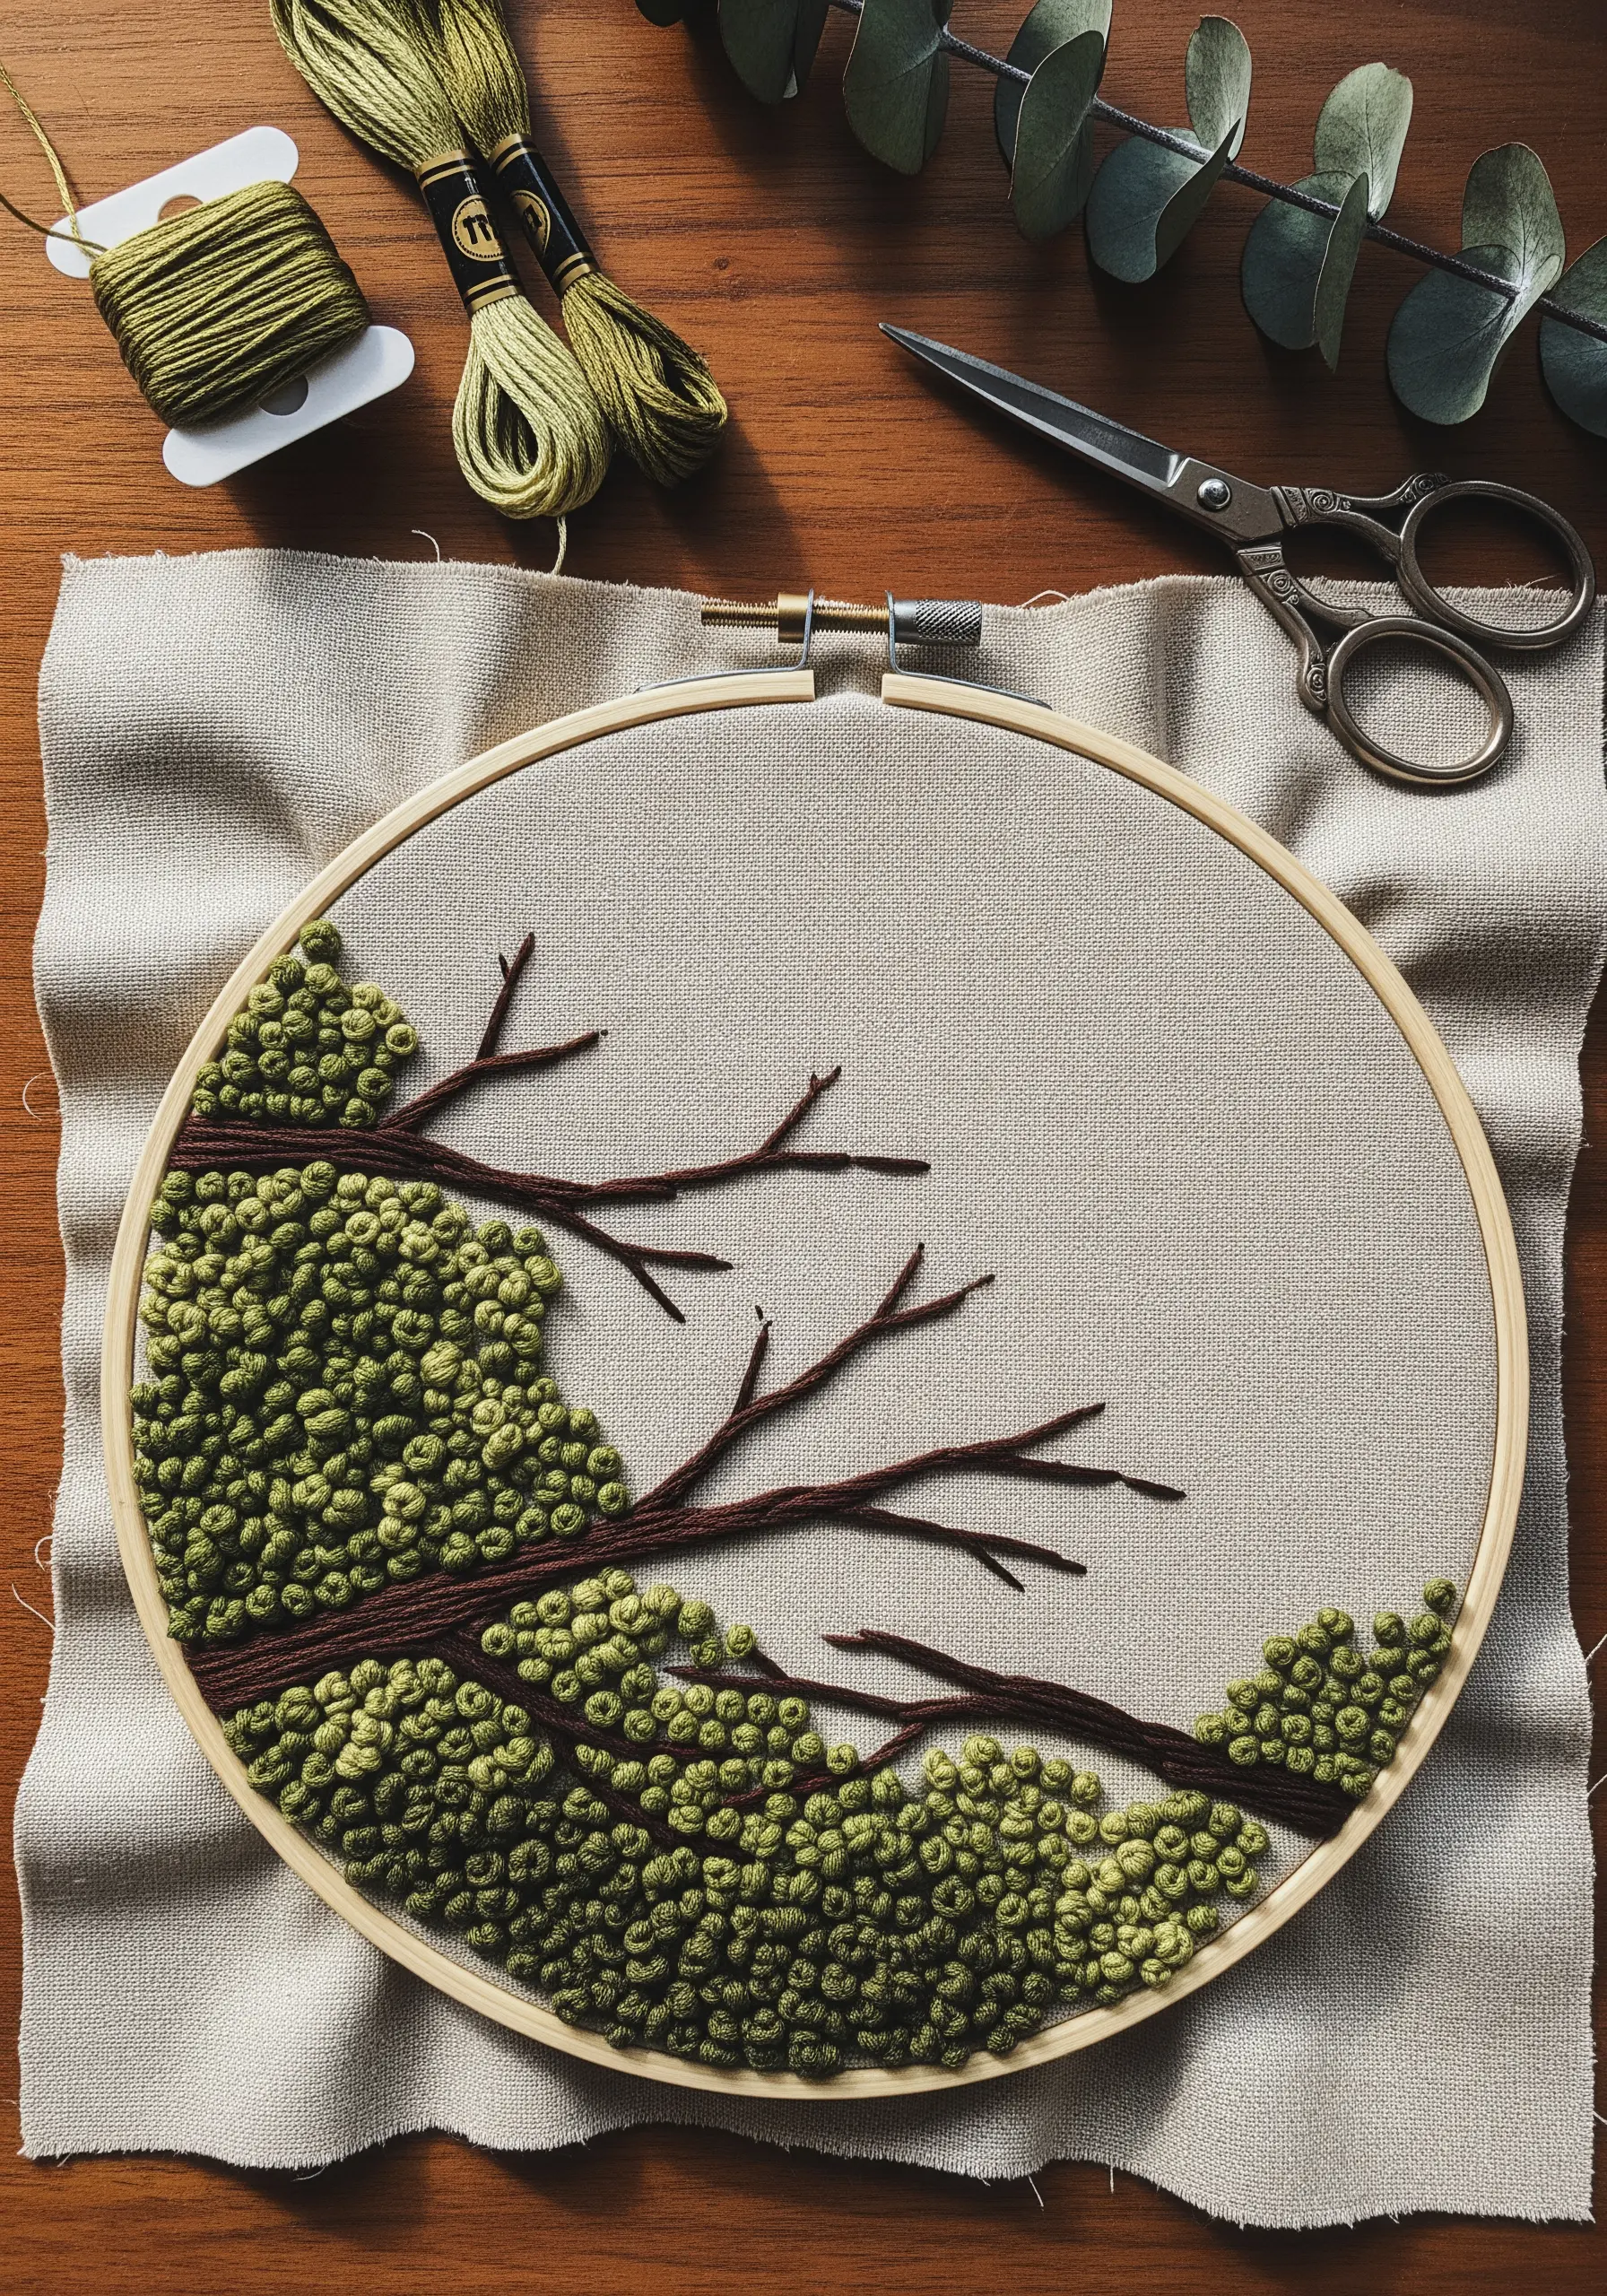
To create the dense, touchable texture of foliage, rely on the French knot.
Use at least three shades of green floss—a dark, a mid-tone, and a highlight—to give the clusters of leaves authentic depth.
Vary the number of wraps around your needle (one, two, or three) to alter the size of each knot, mimicking the organic irregularity of a real tree canopy.
For the branches, use a whipped backstitch with a dark brown thread to create a solid, raised line that grounds the lighter, airy knots.
2. Replicating Tree Bark with Couching

You can mimic the rugged texture of bark by couching various fibers onto your base fabric.
Lay down thick, textured yarns or even wool roving in vertical lines to form the main fissures, securing them with a thinner, matching thread.
Fill in the crevices with rows of stem stitch or seed stitch using variegated brown thread to create the illusion of cracked wood.
For a final touch of realism, add small clusters of French knots in mossy green and pale grey to suggest lichen growth, one of the best ways to capture nature’s textures in your next embroidery project.
3. Contour Stitching for Organic Stone Shapes
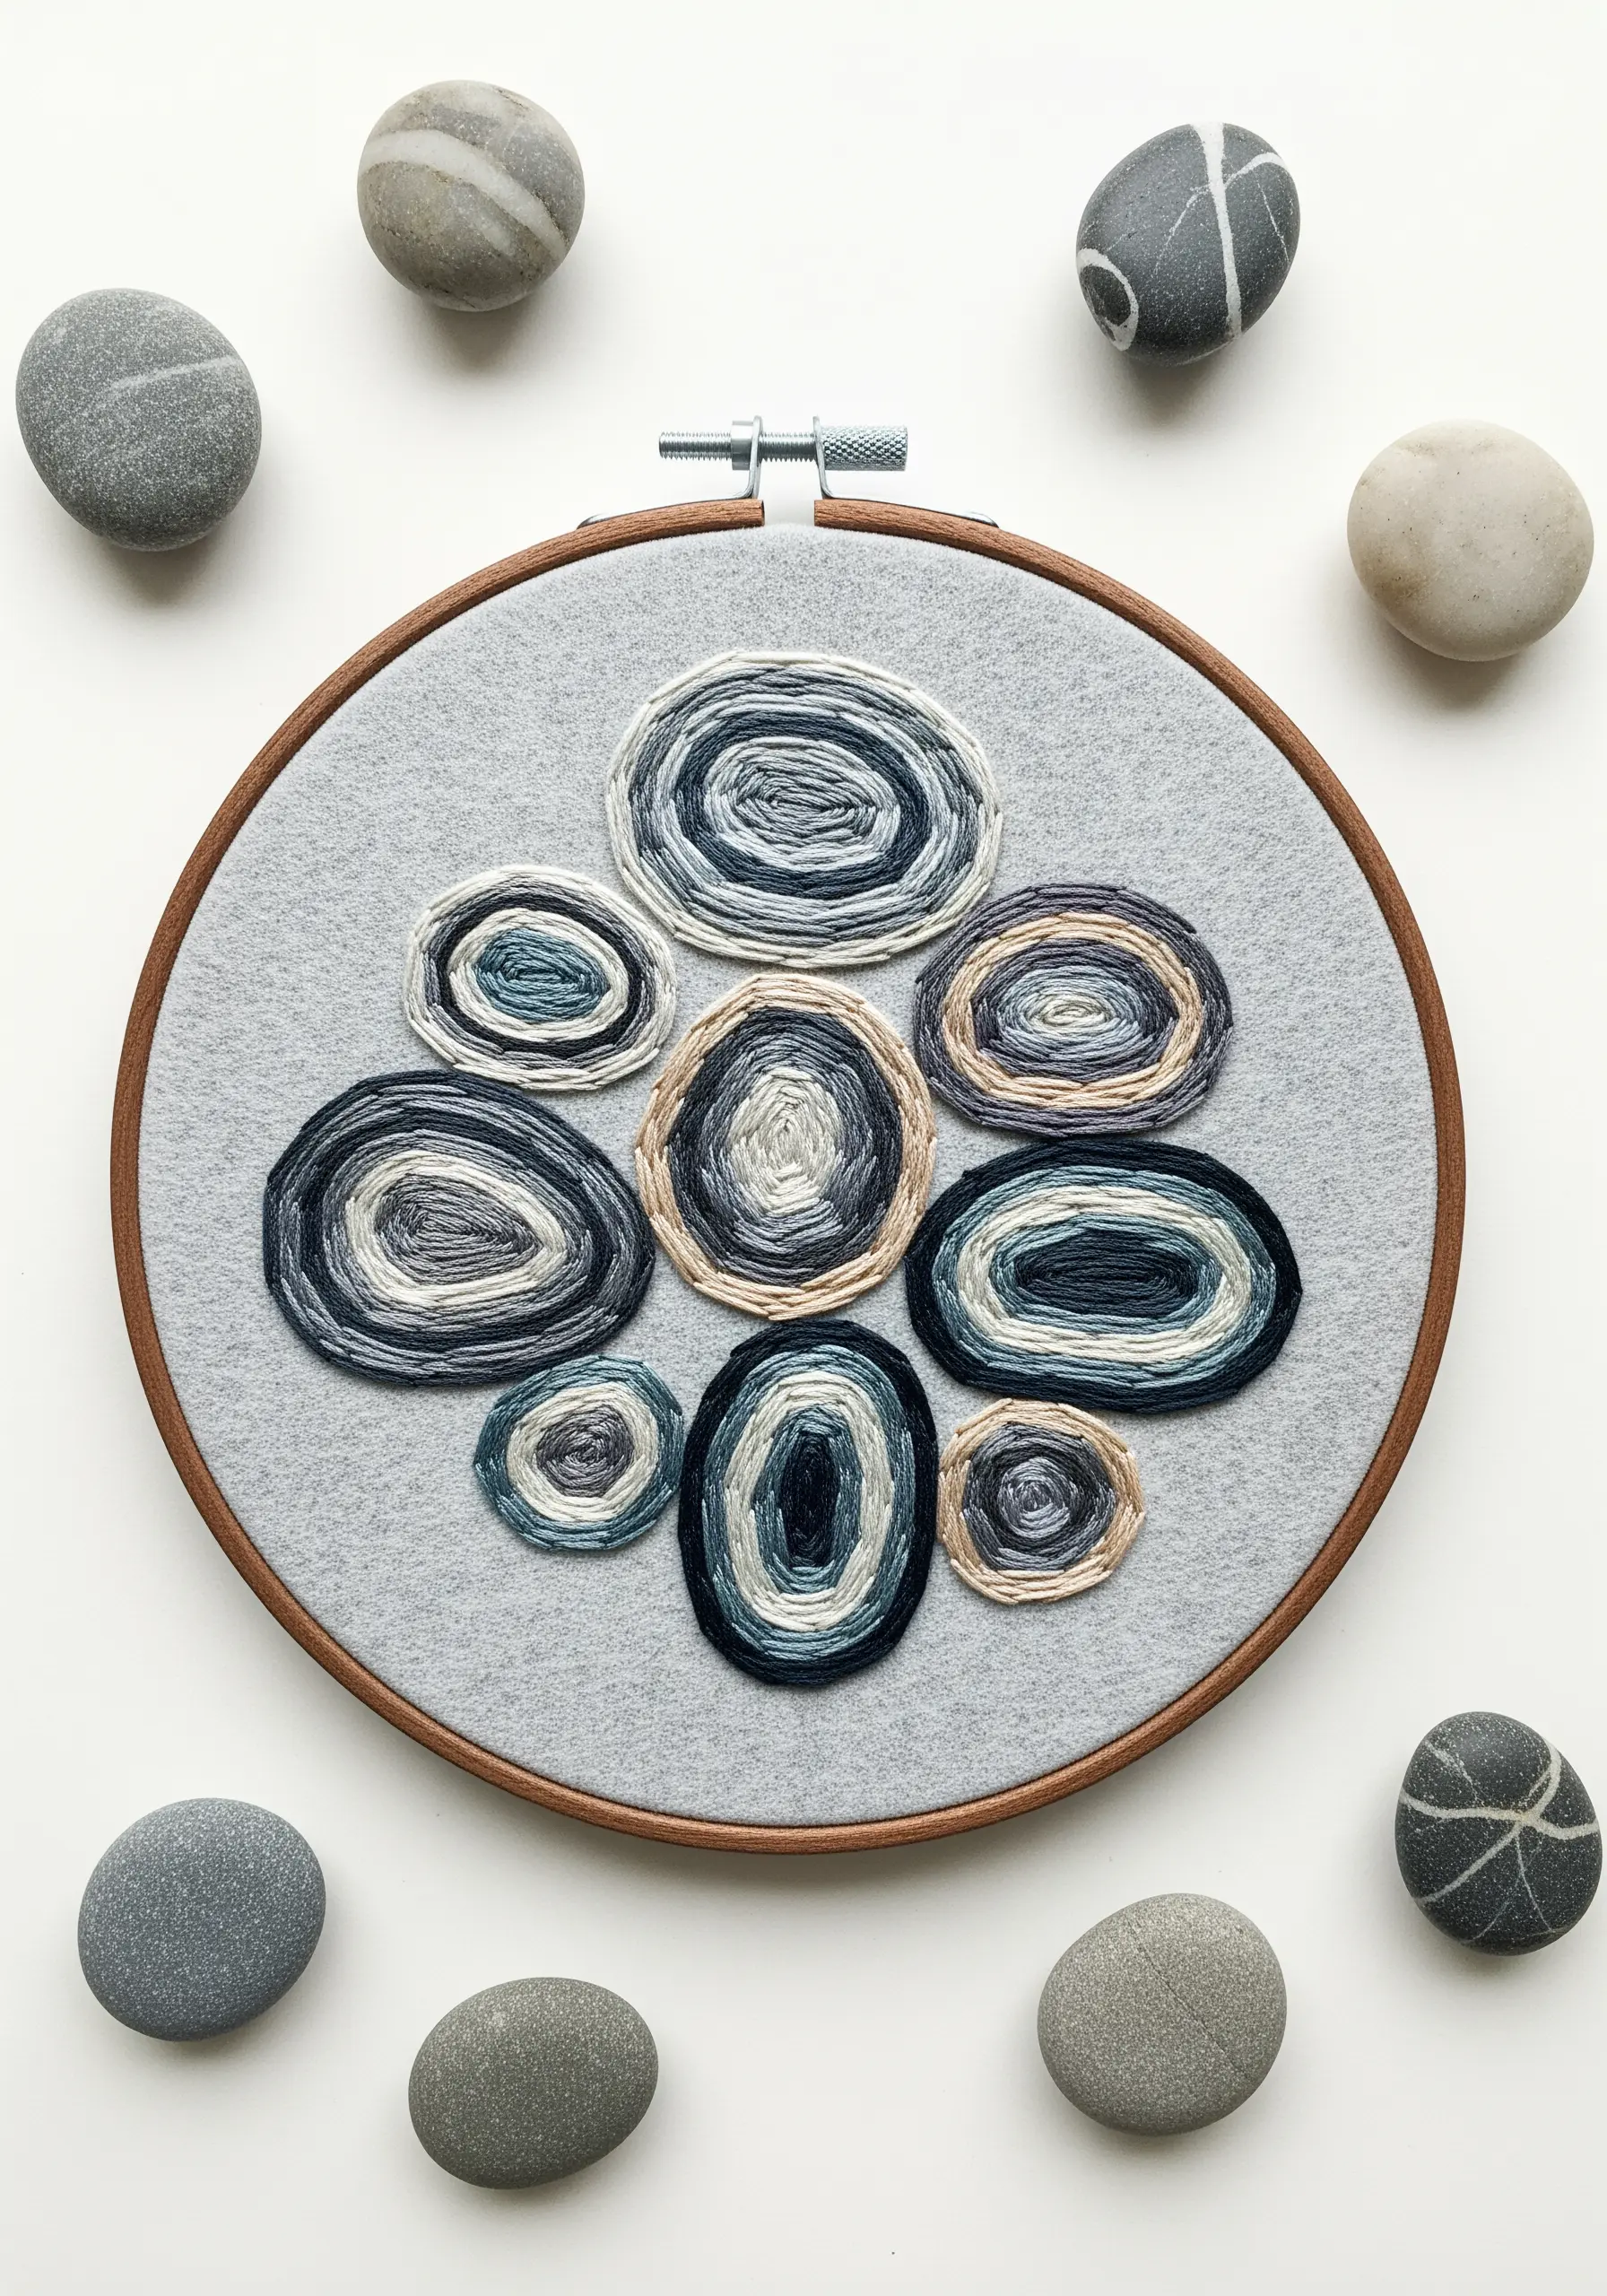
Create the serene, layered look of water-smoothed stones by stitching in concentric, organic outlines.
Use a simple backstitch or split stitch, but focus on the thread itself—a variegated floss will create subtle color shifts automatically, mimicking natural mineral deposits.
Alternatively, thread your needle with two or three single strands of different colors (like dusty blue, grey, and cream) to achieve a custom, blended effect.
Stitching on a soft felt fabric, as shown here, absorbs some of the thread’s sheen for a matte, earthy finish.
4. Carving Canyons with Topographical Stitching

Achieve this dramatic, layered effect by couching thick yarn or multiple strands of floss onto your fabric surface.
Plan your color gradient first, moving from light to dark to create a sense of depth, like geological strata.
Lay down your thick “primary” thread in a sweeping curve, then use a single, less visible strand to tack it down every quarter-inch.
Placing the stitched lines tightly against one another eliminates gaps and builds a solid, sculptural surface that feels both soft and monumental.
5. Capturing Cracked Earth with Varied Density

This design masterfully balances bold lines with delicate texture.
Create the primary cracks with a thick, dark outline using a stem stitch or whipped backstitch for definition.
Fill the sections with seed stitch, but here is the key: vary the density and direction of your stitches.
Tightly clustered stitches will appear darker and more textured, while sparsely placed stitches create a sense of light and fine-grained soil.
This subtle variation is what gives the piece its realistic, sun-baked appearance.
6. Graphic Botanicals with Satin Stitch Blocks

For a clean, modern take on botanical forms, focus on sharp, defined blocks of satin stitch.
To get those perfectly crisp edges, first outline each shape with a tiny split stitch using a single strand of matching thread.
This creates a raised border that your satin stitches can tuck up against, preventing them from pulling or looking uneven.
The contrast between the smooth fill and the dark, outlining backstitch gives these seed pods their graphic, illustrative quality, perfect for embroidered pillow covers that promote softness.
7. Unfurling Ferns with Knotted Textures

The coiled head of a young fern, or fiddlehead, is a perfect subject for tactile, knotted stitches.
Use tightly packed French or colonial knots in a vibrant lime green to capture that unique, bumpy texture of new growth.
Work the knots in a spiral pattern, starting from the center and moving outward, to enhance the unfurling effect.
Contrast this intricate texture with simple stem stitches for the stalk and delicate straight stitches for smaller fronds, allowing the fiddlehead to be the star.
8. Building Geodes with Mixed Textures
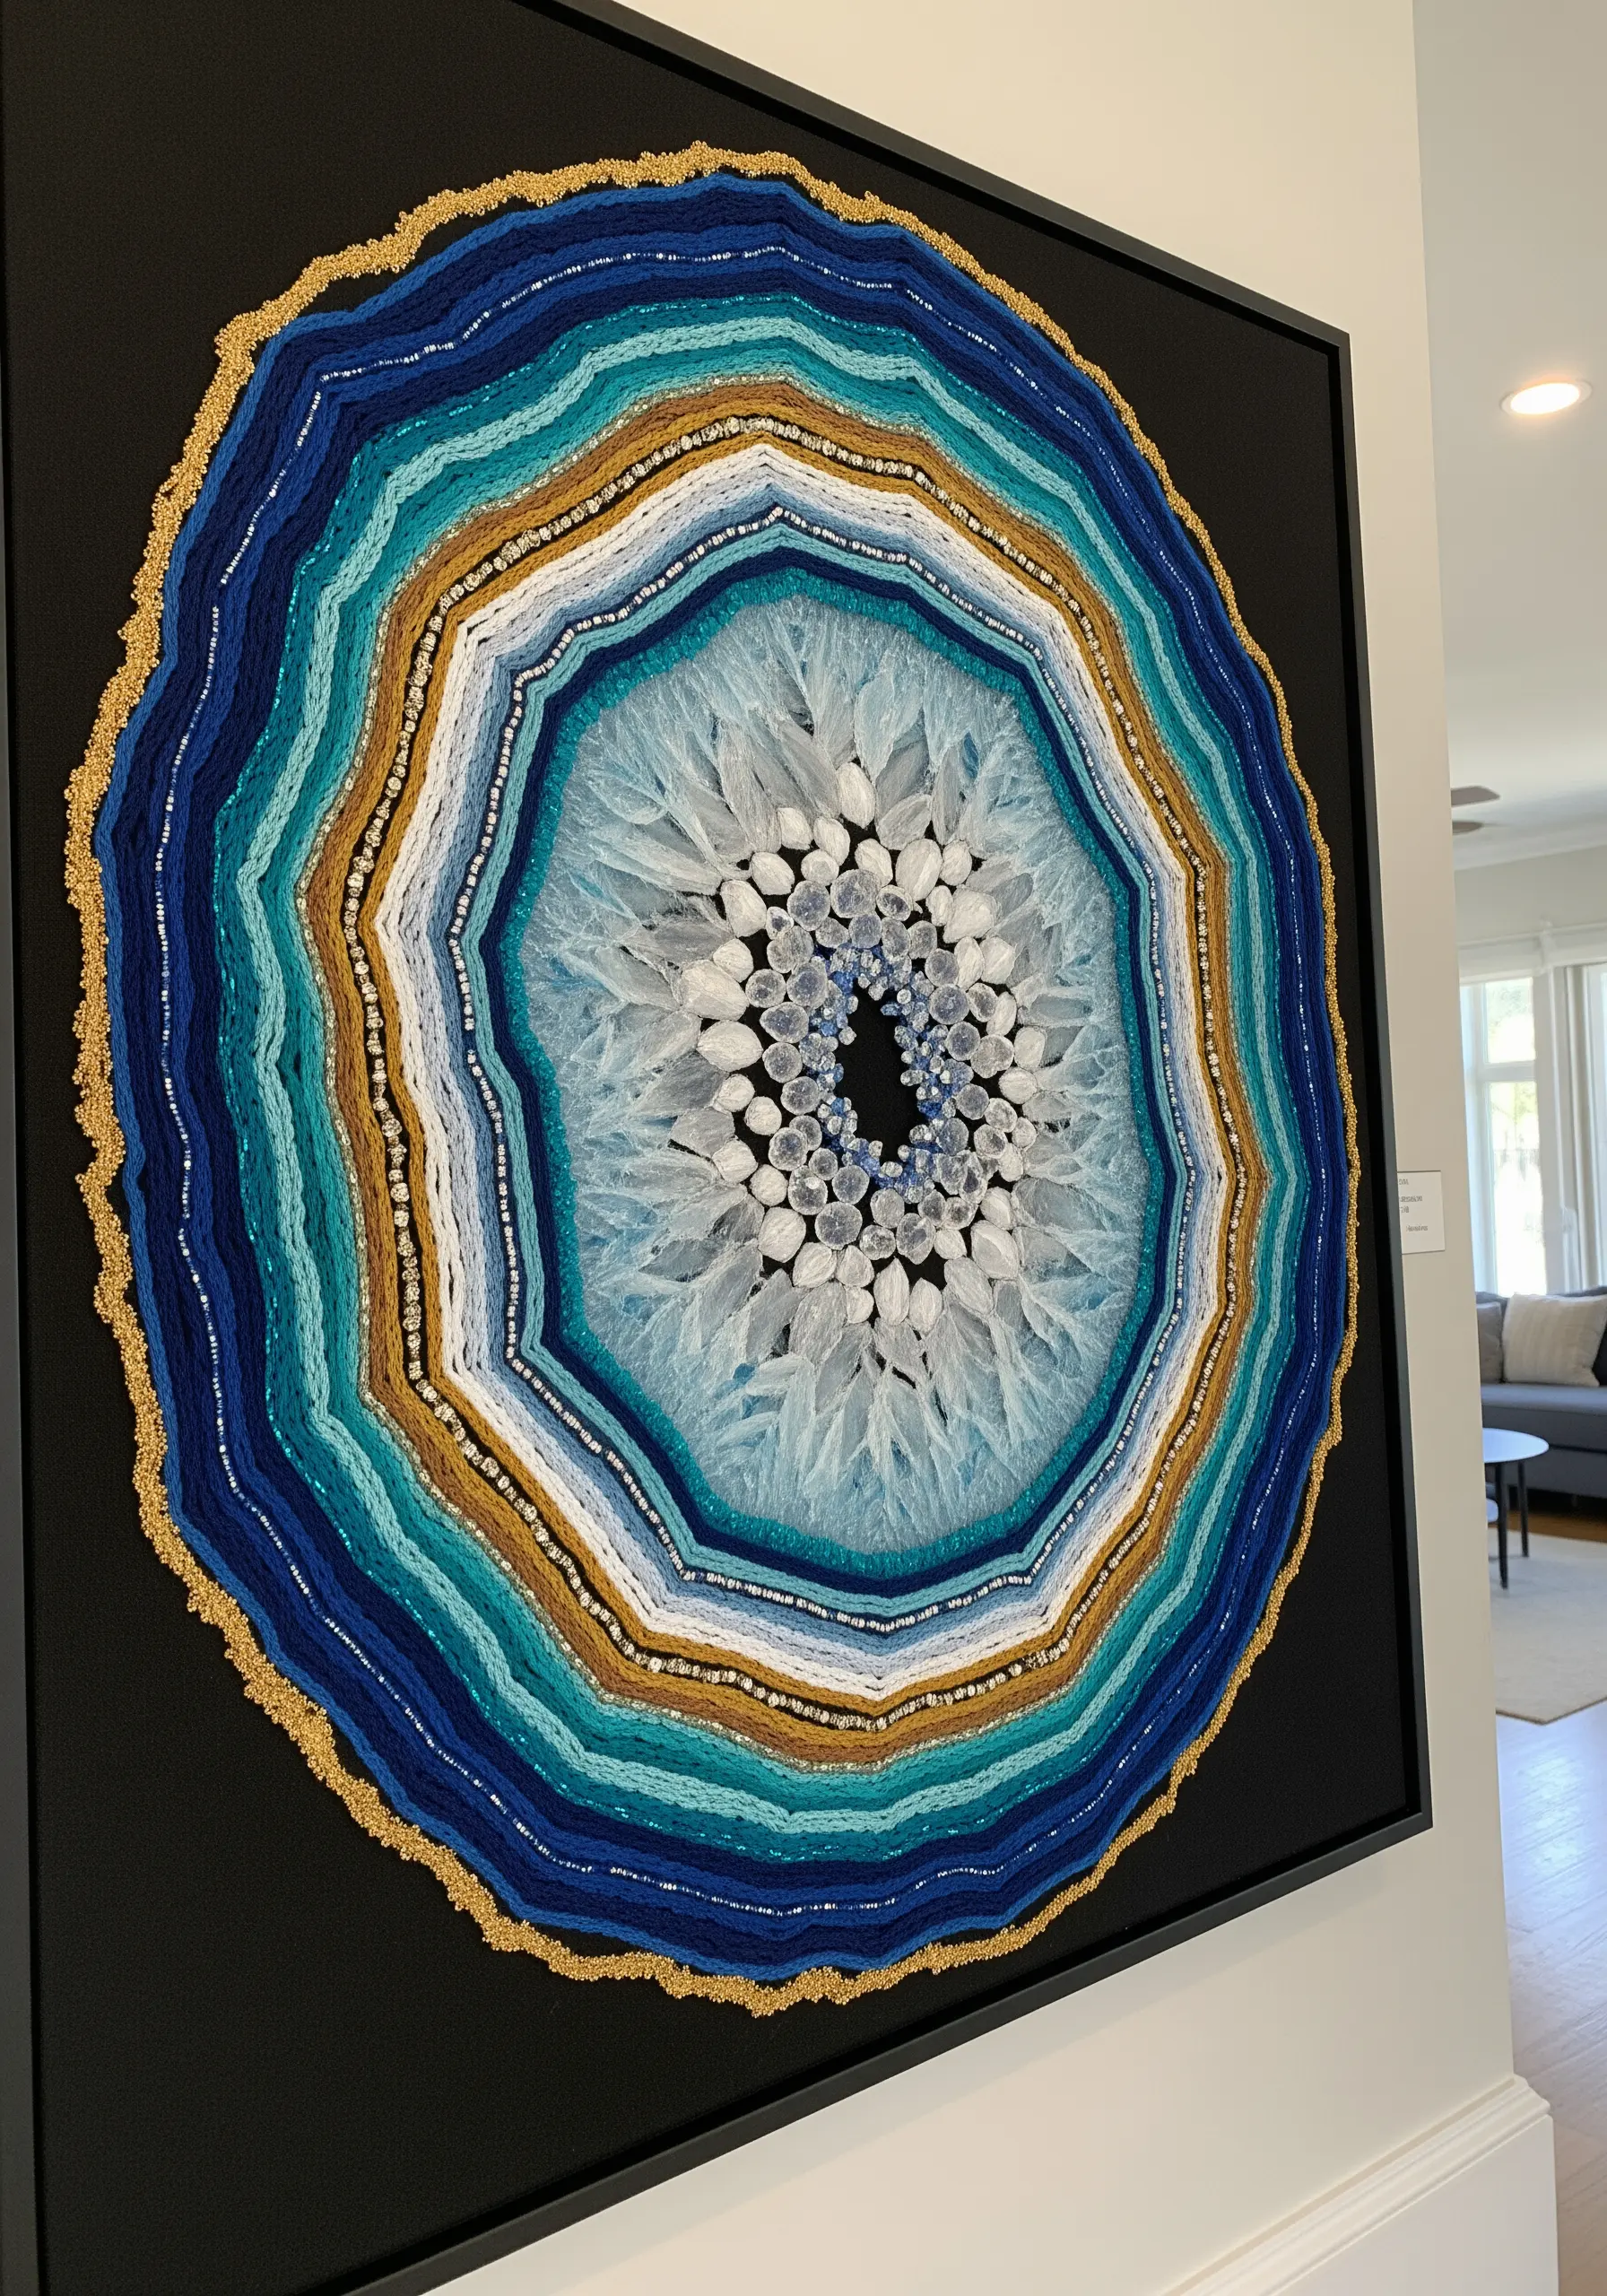
To create the stunning complexity of a geode, think in layers of texture, not just color.
Work from the outside in, starting with concentric rings of simple backstitch or chain stitch in earthy tones.
As you move toward the center, introduce more luxurious elements. Alternate rows of cotton floss with shimmering metallic thread, and then incorporate beaded stitches for a crystalline effect.
The final inner layer can be made with detached chain stitches or French knots to mimic the druzy crystal core.
9. Minimalist Ocean Waves with Running Stitch

This design proves that the simplest stitch can create the most dynamic effects.
Inspired by Japanese Sashiko, these waves are formed entirely with the humble running stitch.
The key to success is consistency: keep your stitch length and the spaces between them as even as possible for a clean, rhythmic pattern.
Using a thicker thread, like a cotton perle, on a dark, tightly woven fabric like linen or cotton twill creates a bold graphic contrast that makes the design pop.
10. Dimensional Mushrooms with Thread Painting
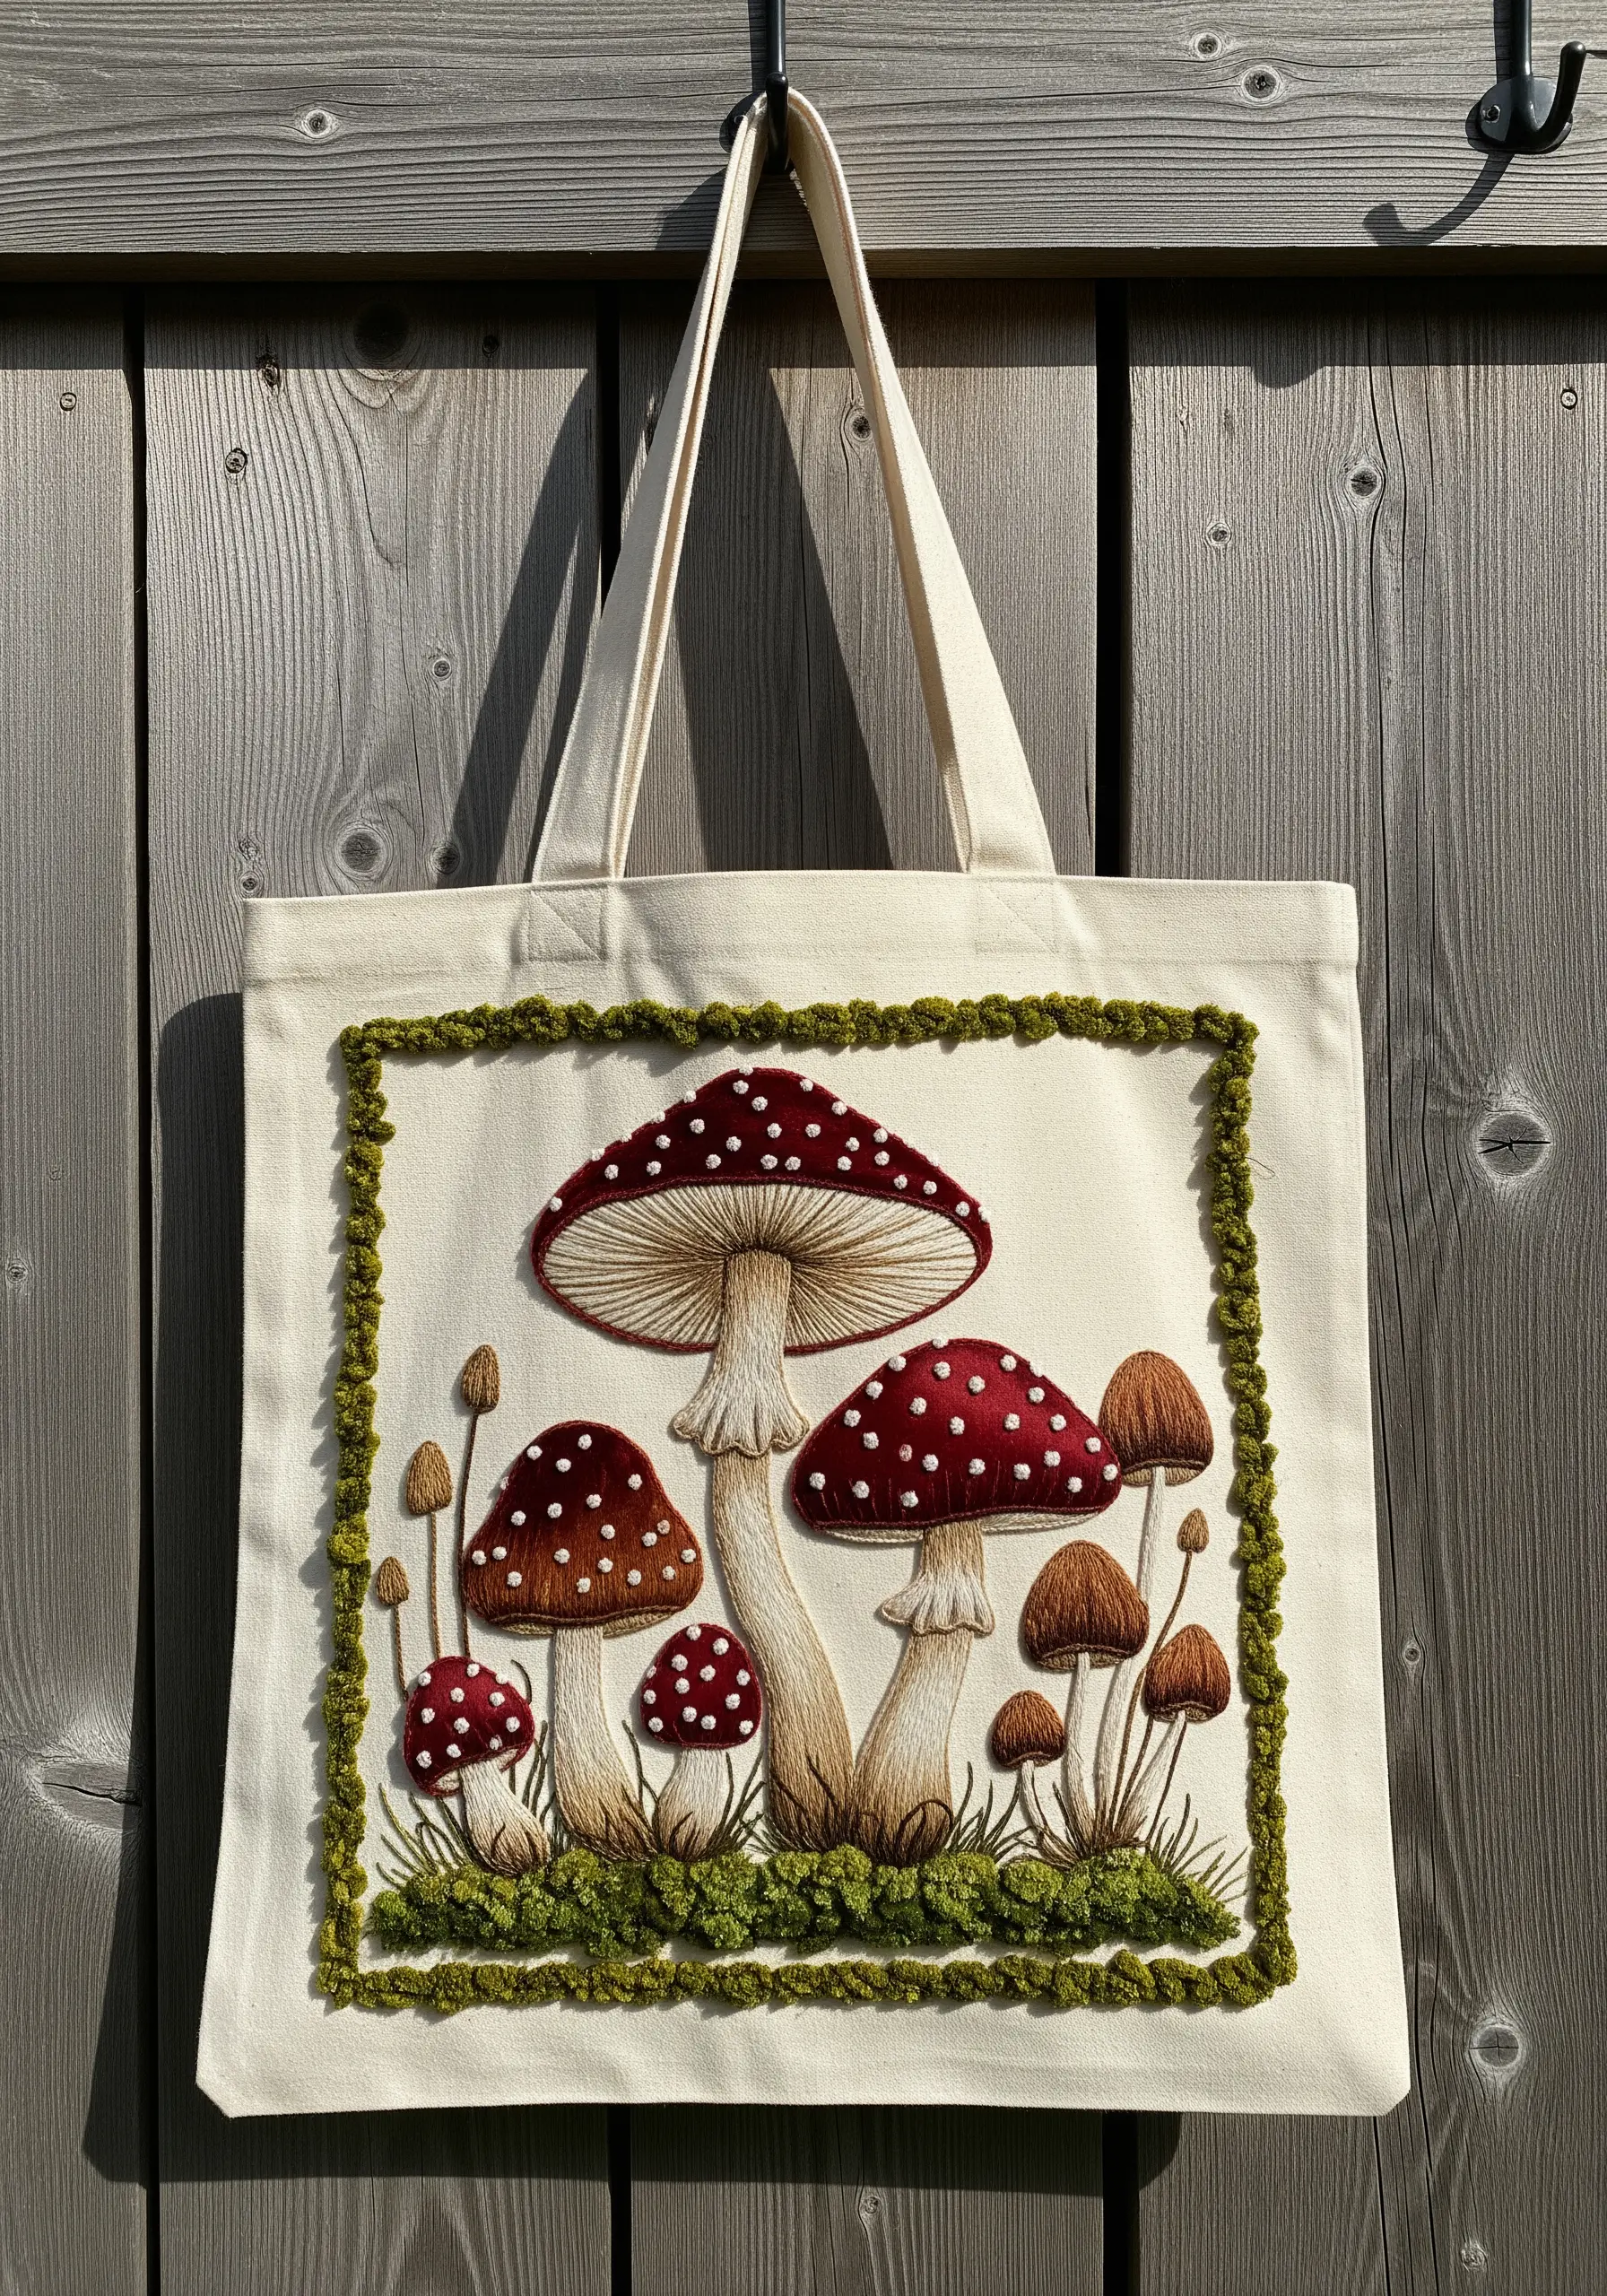
Give your mushrooms a realistic, rounded appearance using the long-and-short stitch, also known as thread painting.
To create the curved caps, angle your stitches to follow the contour of the shape, blending shades of red and white to create highlights and shadows.
The gills underneath are created with straight stitches radiating from the stem.
For the mossy border, use a turkey work stitch and trim the loops short for a dense, velvety texture that grounds the entire piece.
11. Abstract Lichen with Clustered Colonial Knots
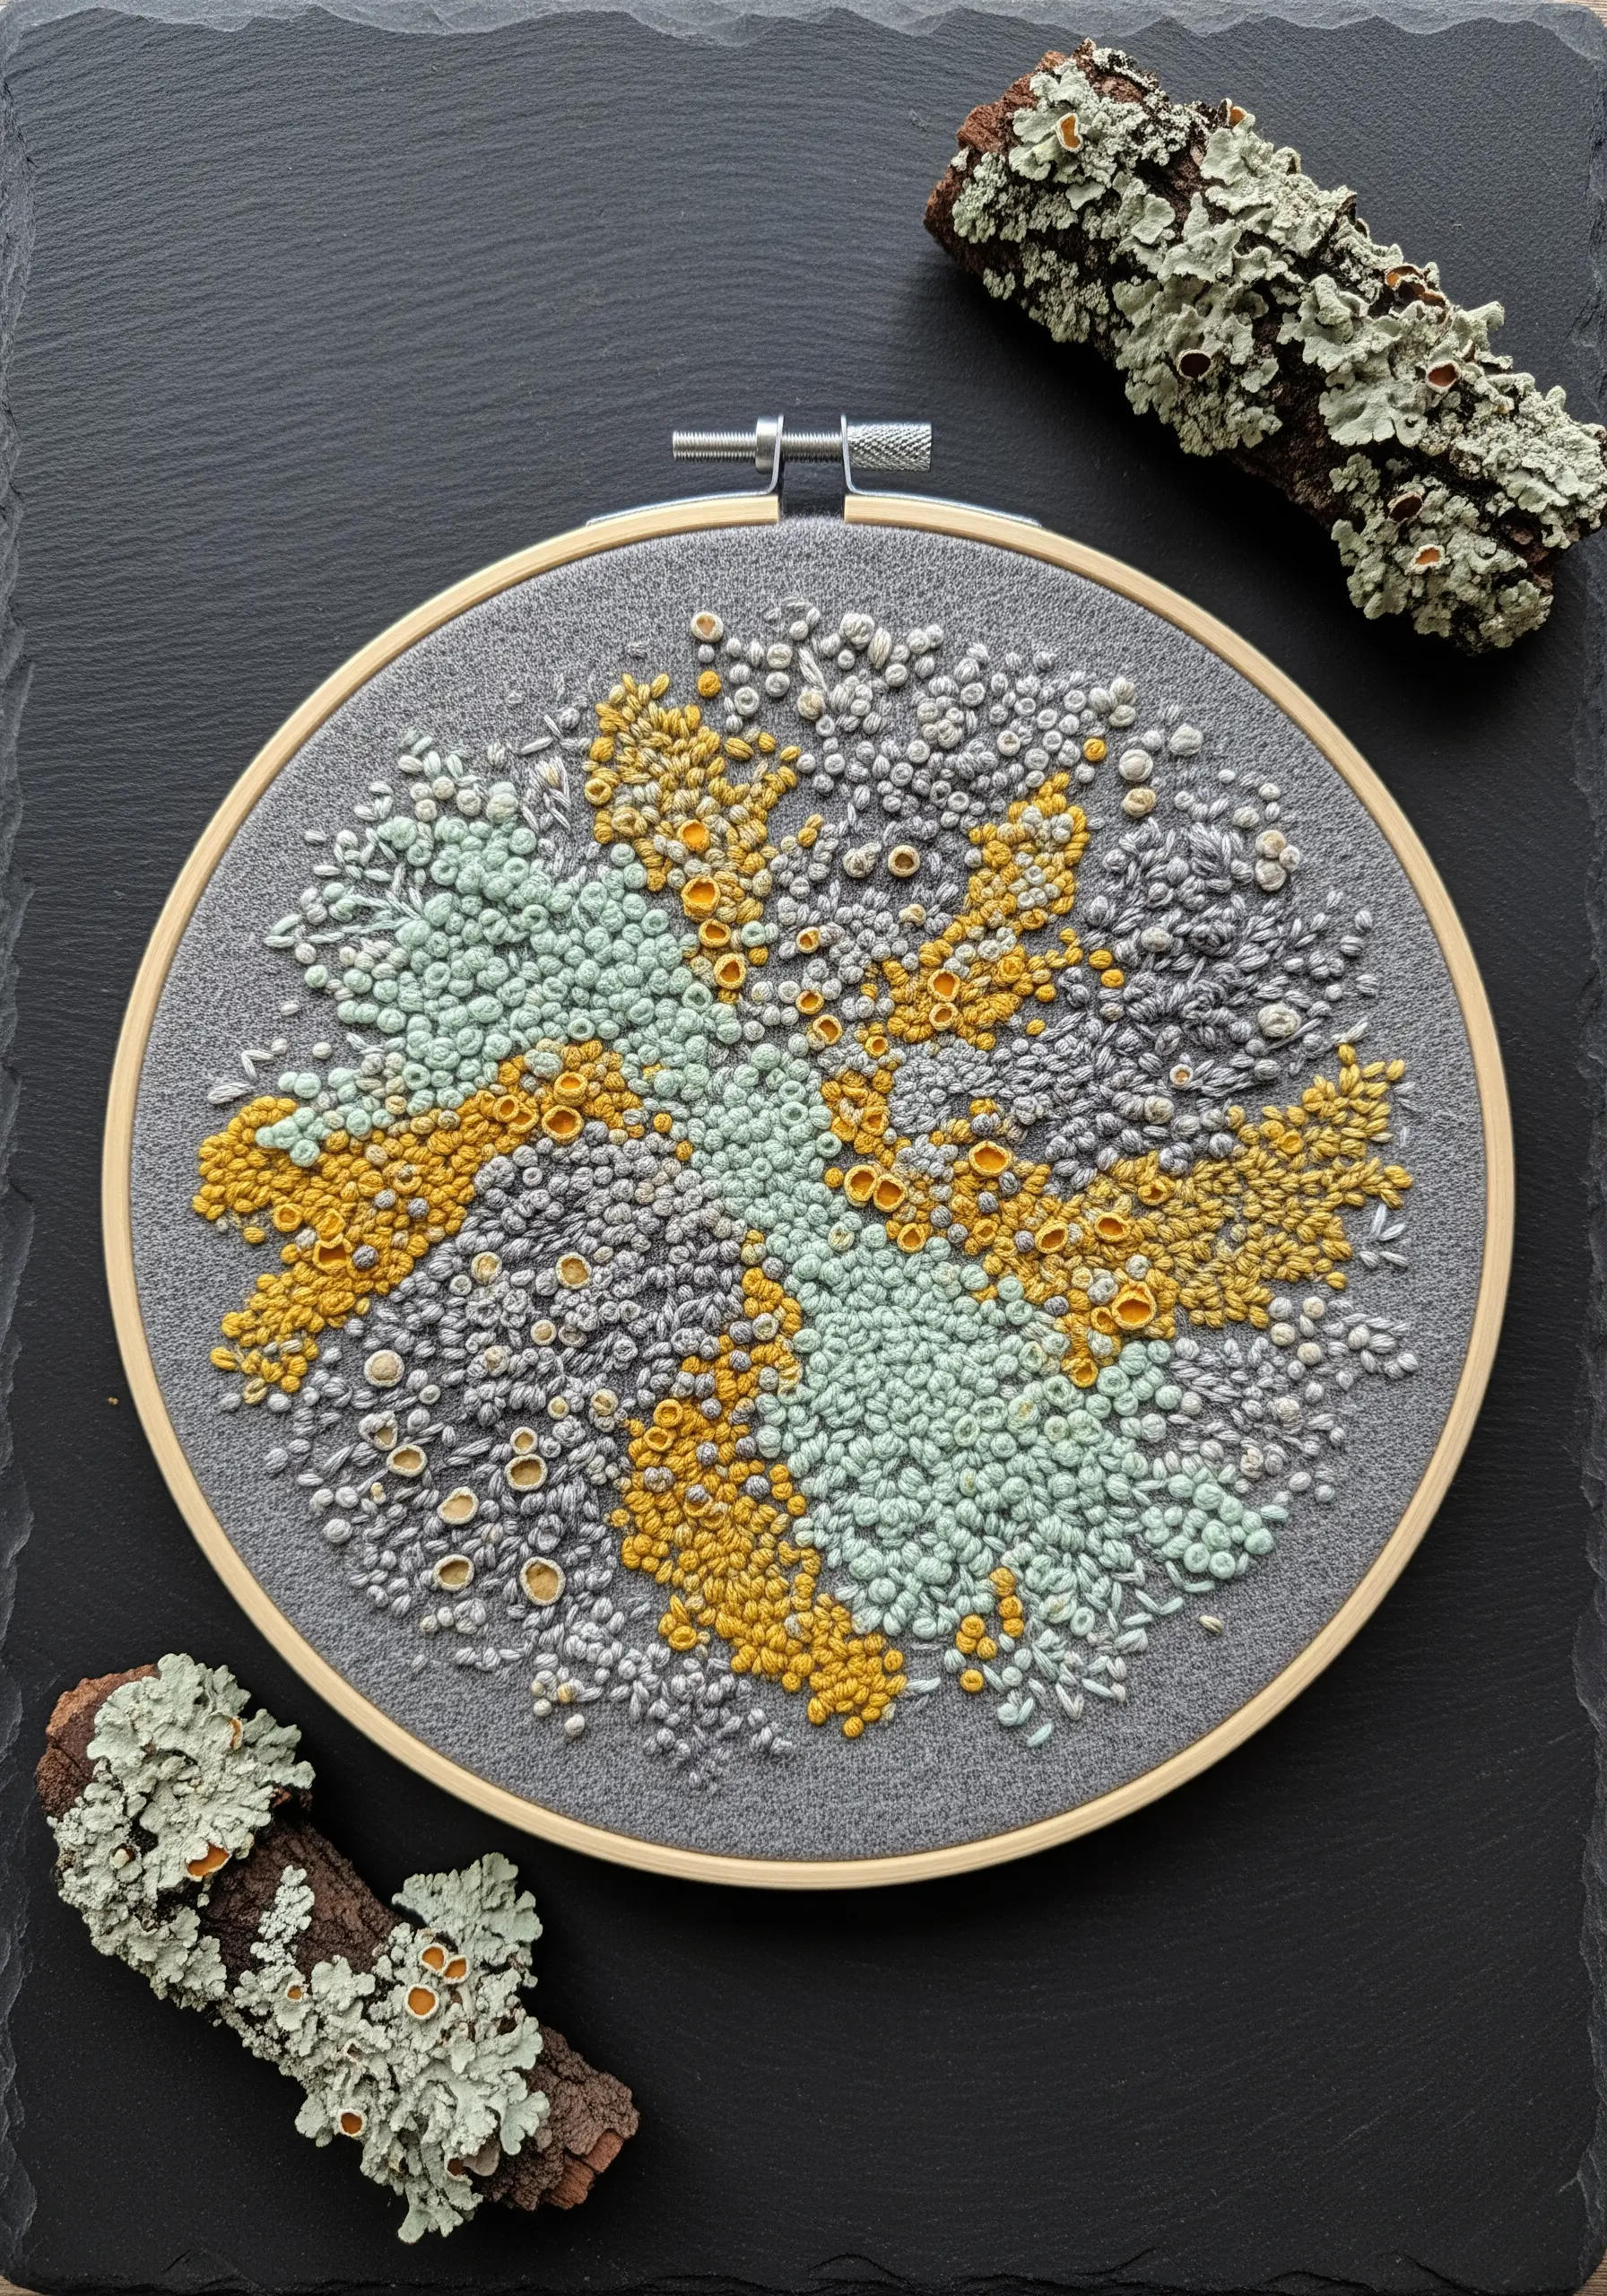
Mimic the organic, sprawling patterns of lichen with dense clusters of knotted stitches.
While French knots work, colonial knots are an excellent alternative here, as they create a slightly rounder, more robust nub of thread that stands up well to dense packing.
Use a palette of soft, earthy tones like grey, celadon, and ochre. For the tiny cupped details, stitch a single, detached chain stitch and place a tiny knot in its center.
This combination creates a fascinating, micro-landscape texture.
12. Birch Bark Texture with Appliqué and Stitch

Create a forest of birch trees quickly and effectively by combining fabric appliqué with simple embroidery.
Cut the tree trunks from white or off-white felt or linen and secure them to your background fabric.
Then, use black floss to add the characteristic details. Small, horizontal straight stitches and satin-stitched triangles are all you need to bring the bark to life.
This mixed-media approach adds immediate dimension and texture, making for stunning embroidered textile wall hangings.
13. Meditative Spirals with Whipped Stitches
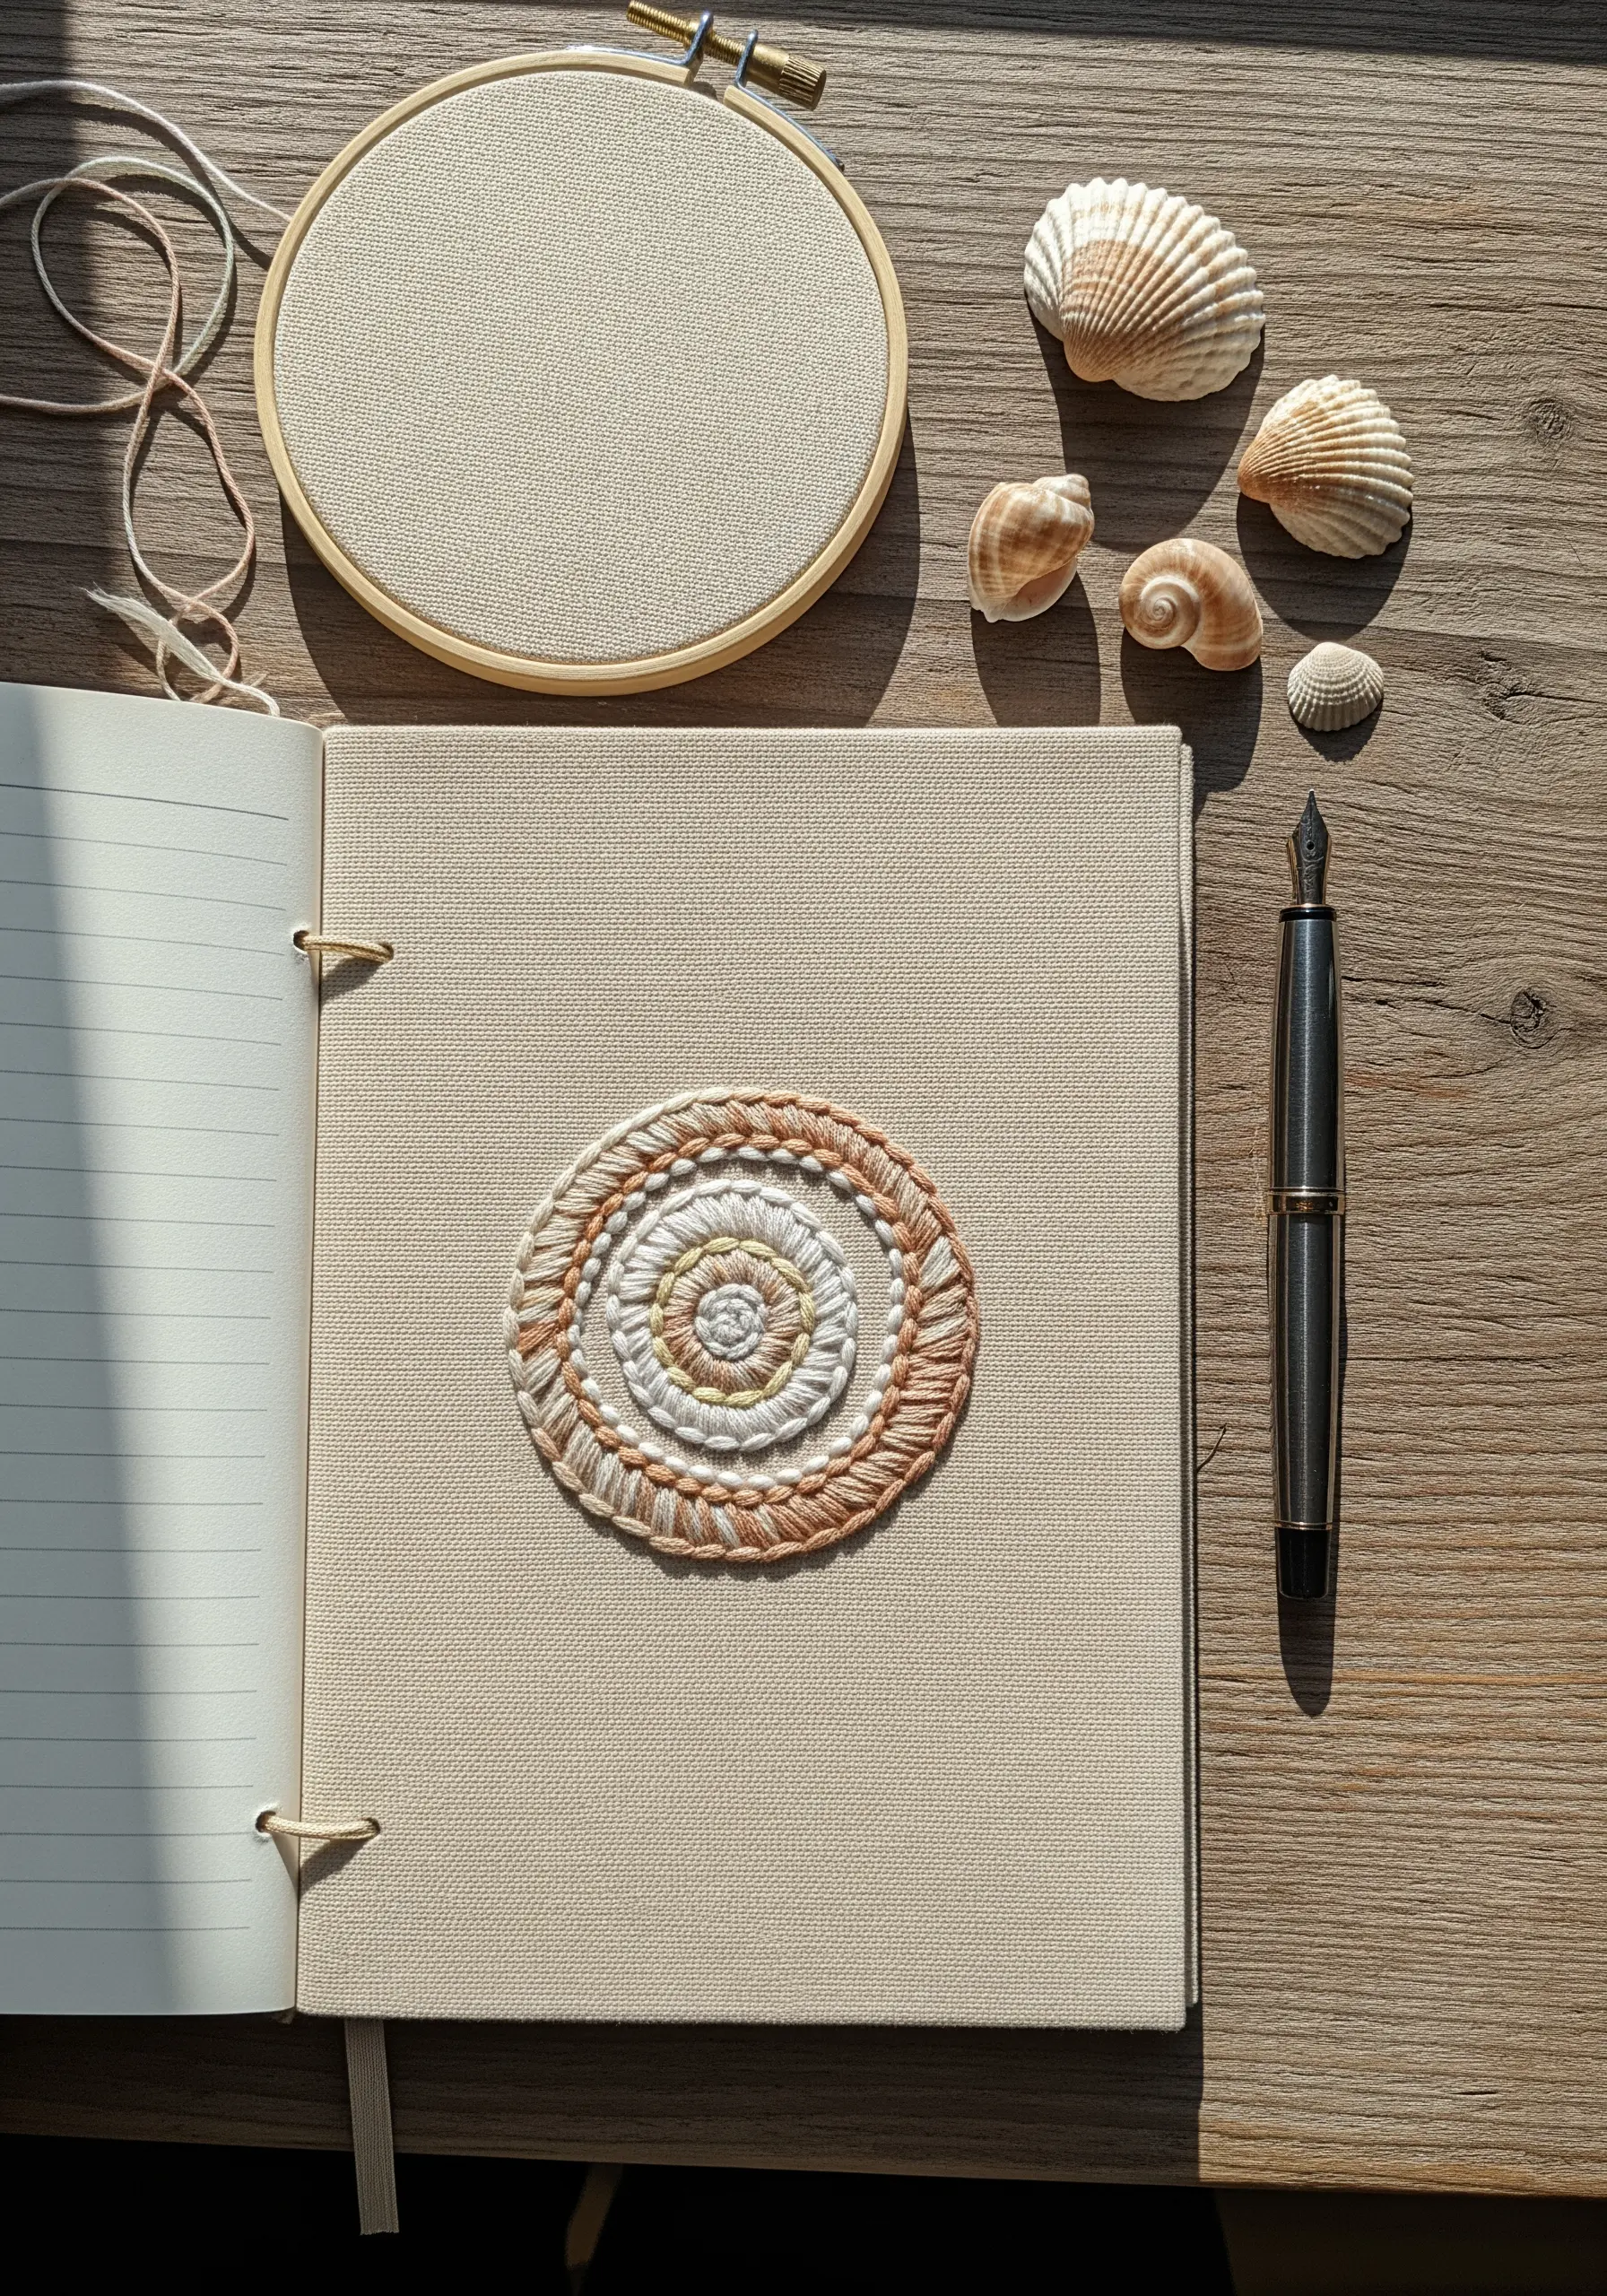
Elevate a simple stitched line into a tactile, rope-like spiral using a whipped stitch.
First, create a foundation of concentric circles using a basic backstitch. Then, take a second, possibly contrasting, thread and “whip” it around each backstitch without piercing the fabric.
This technique adds dimension and smoothness, transforming a flat design into a small, sculptural piece.
It’s a perfect way to add a focal point to a journal cover or a piece of clothing.
14. A Golden Wheat Field with Layered Stitches

To capture the depth of a field, you must think in layers.
Begin with the background sky, using a cloud fill or split stitch in a pale blue.
For the wheat, use several shades of gold, yellow, and tan. The stalks are simple straight stitches, while the grains are created with single, detached chain stitches or small satin stitches.
Vary the height and angle of the stalks, and overlap them to create a dense, rustling effect that guides the eye through the scene.
15. Geological Strata with a Stitch Sampler
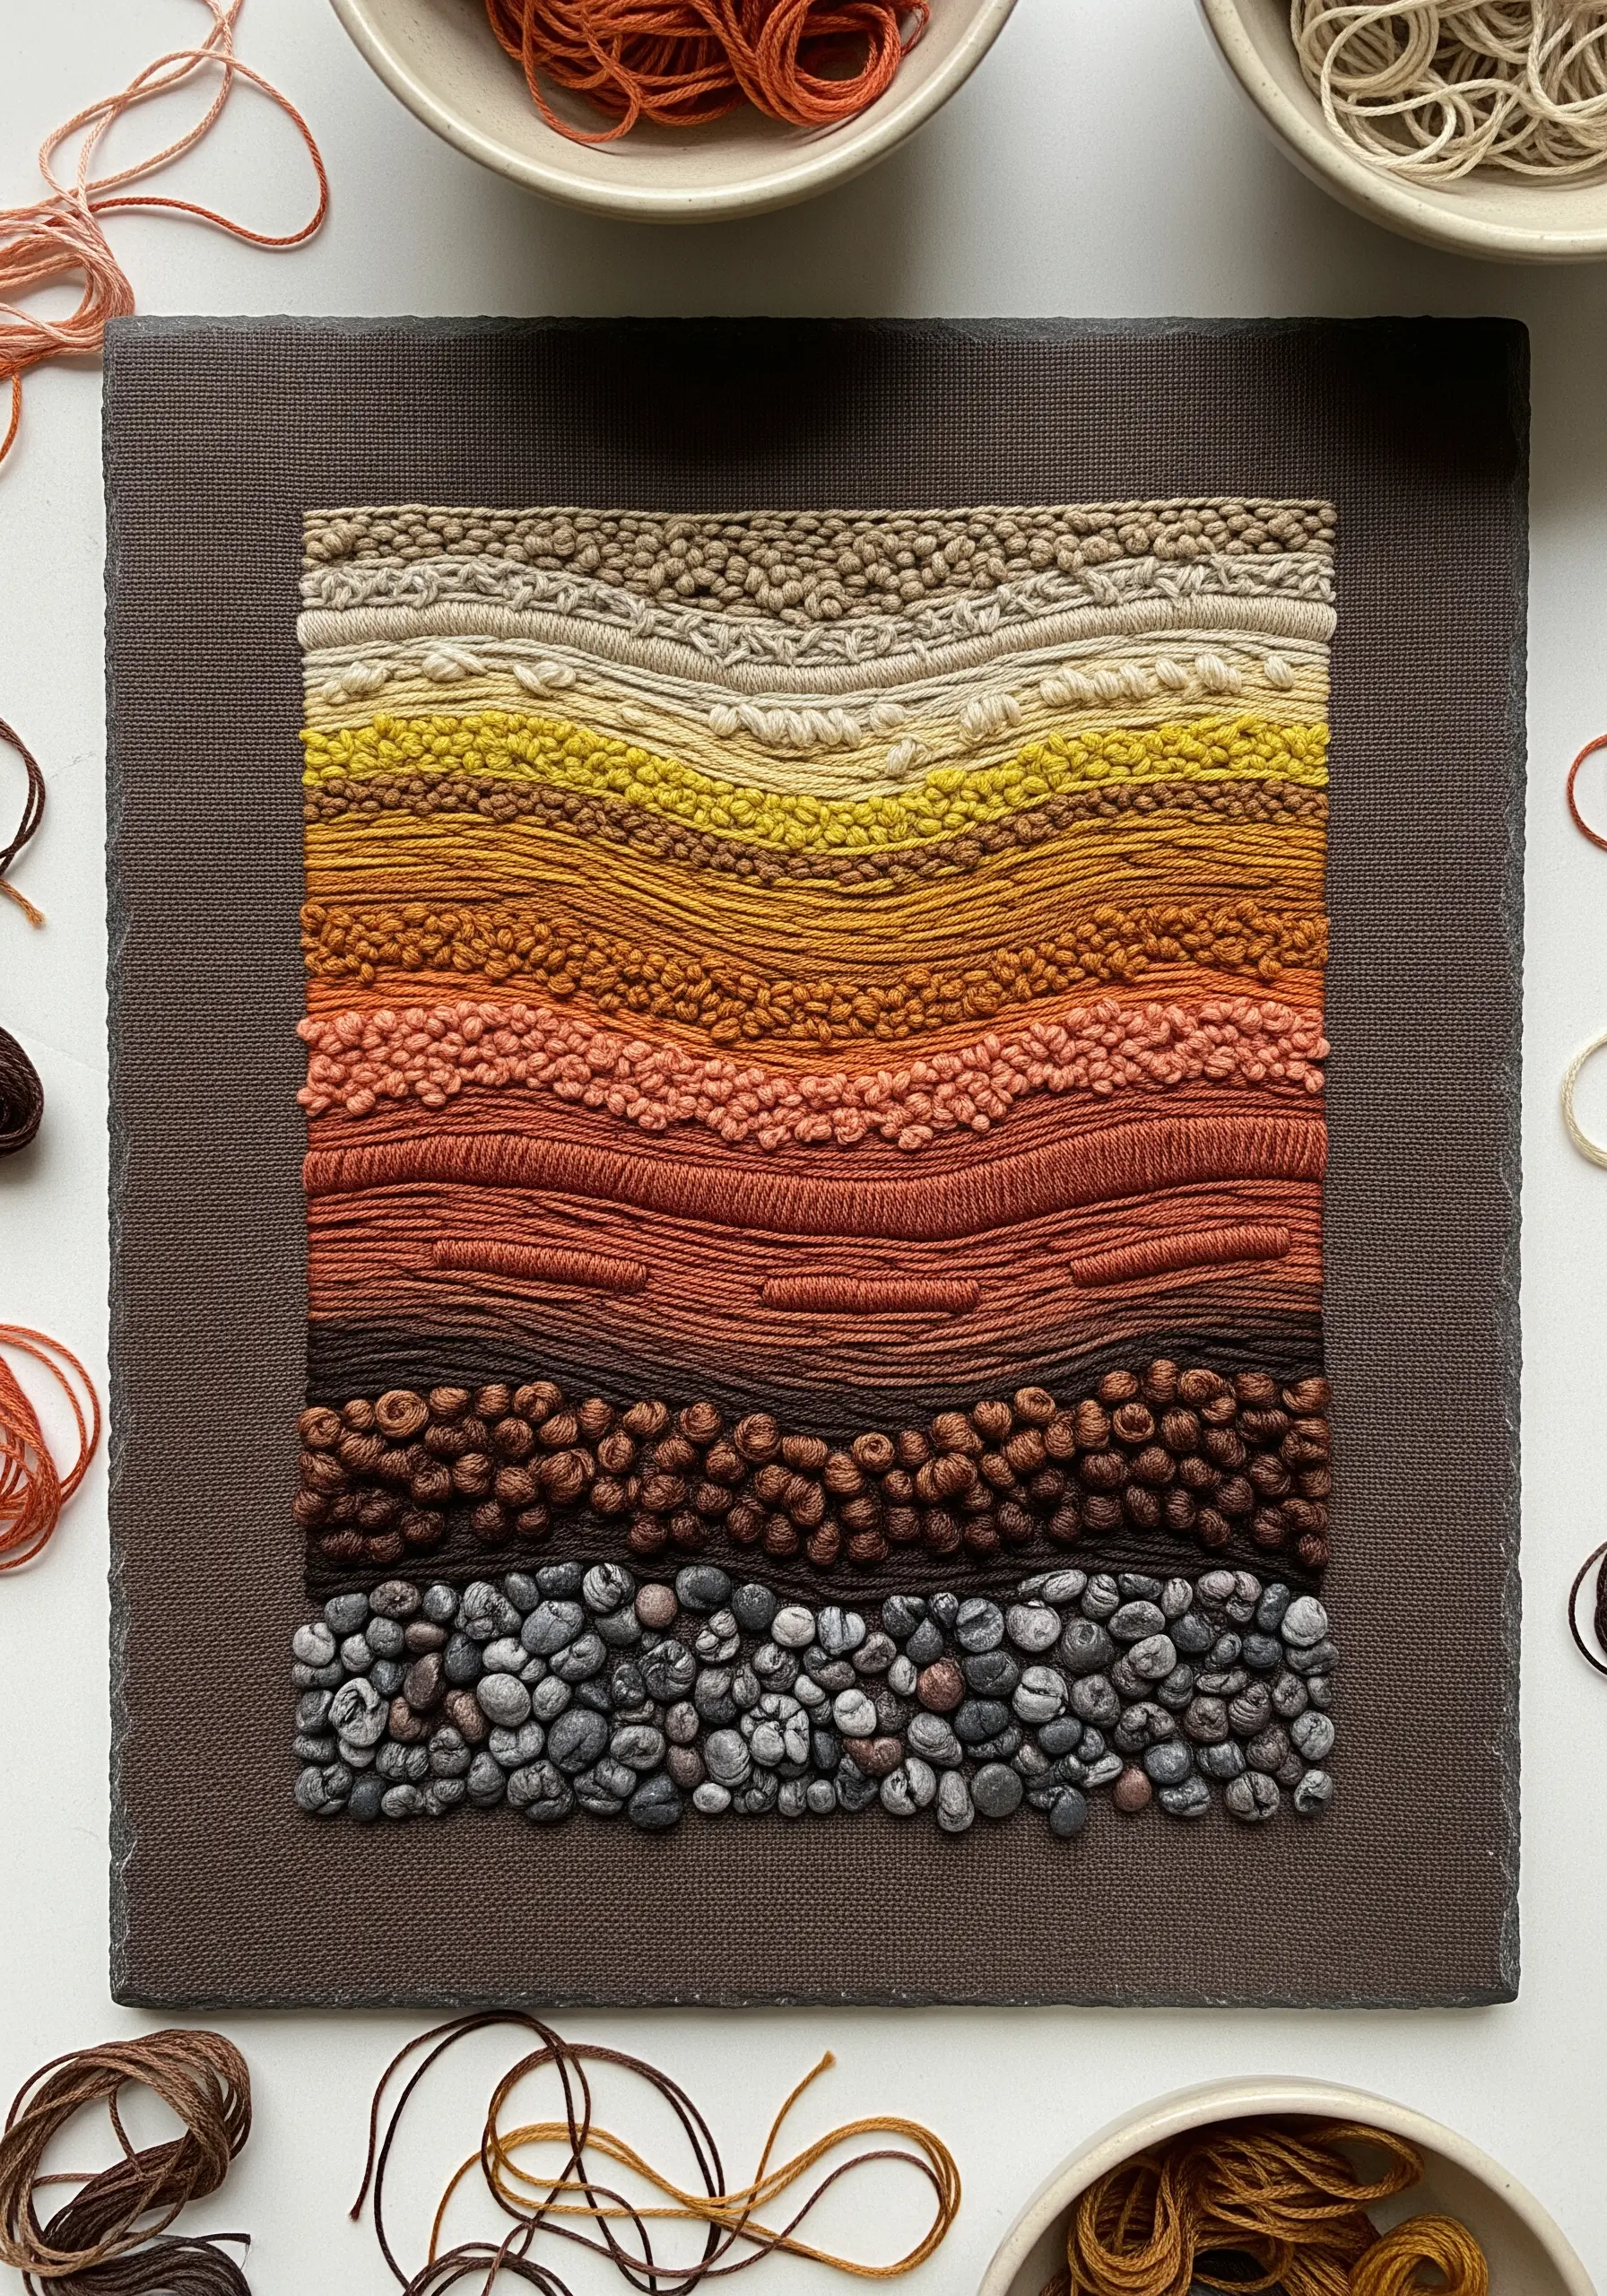
Explore the endless possibilities of texture by creating an abstract composition of layered stitches.
Divide your fabric into horizontal bands and assign a different stitch and color to each one, mimicking layers of earth.
Combine linear stitches like stem stitch and chain stitch with knotted stitches like French knots and bullion knots.
Couch down thick yarn for one layer and use tightly packed seed stitch for another. This project becomes a personal library of textures you can reference for future work.
16. Delicate Ginkgo Veins on Sheer Fabric
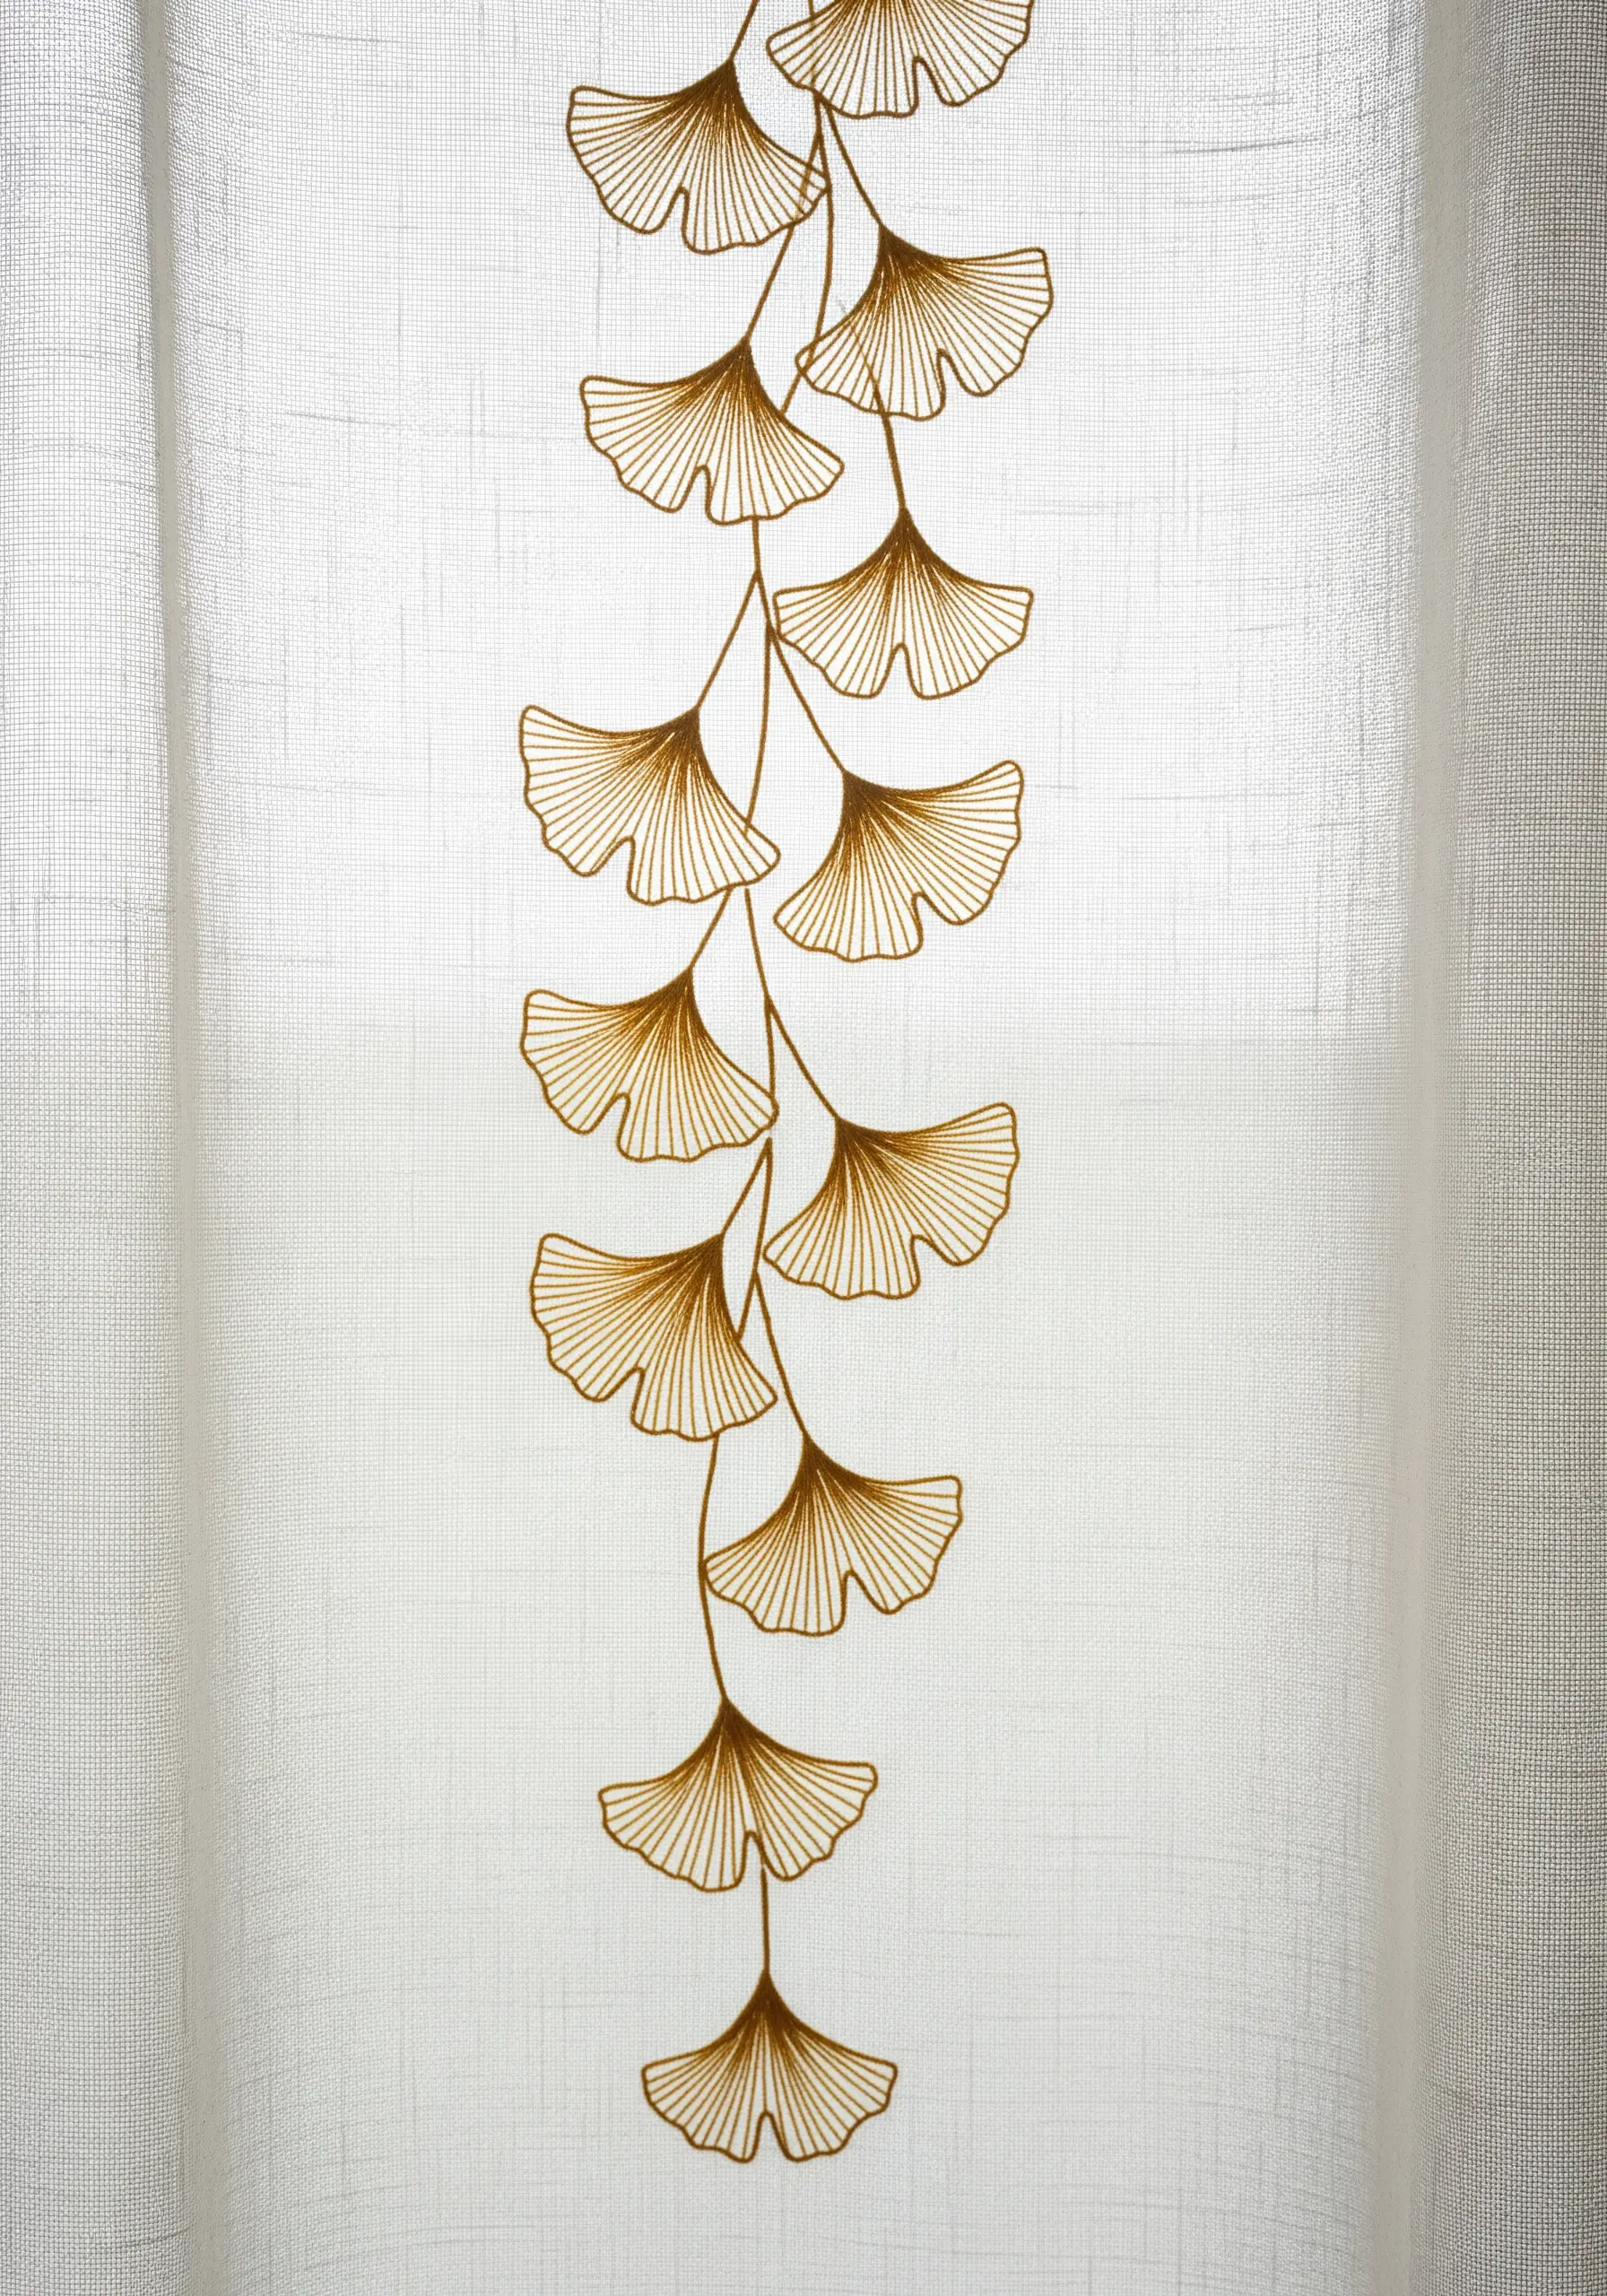
When embroidering on a delicate, sheer fabric like linen or organza, your technique must be equally light.
Use only a single strand of embroidery floss to maintain the fabric’s airy quality. A fine split stitch or stem stitch is perfect for tracing the elegant lines and veins of ginkgo leaves.
The beauty of this approach is how the light passes through the fabric, making the stitched lines appear to float. These are the kinds of subtle embroidery designs that add character without clutter.
17. Sculptural Cattails with Turkey Work

To achieve the plush, three-dimensional texture of cattails, the turkey work stitch is your best friend.
This technique involves creating loops of thread on the surface of the fabric, which you can then trim to your desired height.
For cattails, pack your stitches tightly and snip the loops very short to create a dense, velvety finish that begs to be touched.
Contrast this high-texture element with flat, clean satin stitches for the green leaves, making the brown heads pop even more.
18. Visible Mending with a Sashiko Grid

Turn a repair into a design statement with the Japanese art of visible mending.
This technique uses a simple running stitch in a grid formation to secure a patch, but the result is beautifully graphic and intentional.
Use a thick, strong thread, like sashiko thread or cotton perle, in a color that contrasts with your patch fabric.
Focus on the rhythm of your stitching rather than perfect precision; the handmade quality is part of its profound charm.
19. Sculpting a Coral Reef with Raised Stitches

You can build a vibrant, dimensional coral reef using a vocabulary of sculptural stitches.
The coiled, rosette-like forms are created with the woven wheel stitch—the more you wrap the thread, the fuller your rosette becomes.
For the taller, finger-like structures, use a raised stem stitch band or create individual fingers with the woven picot stitch.
The key is to cluster these different forms and colors tightly, just as they grow in nature, to create a rich, tactile ecosystem.
20. Minimalist Motifs for Meditative Stitching

Find a moment of calm by focusing on simple, zen-inspired forms.
Each of these designs relies on the purity of a single technique. Create a spiral with a whipped backstitch for a smooth, raised line. Form a flowing river with parallel rows of simple running stitch.
A cluster of French knots can represent moss, while concentric ovals of satin stitch mimic a worry stone.
This practice is less about the outcome and more about the quiet, repetitive motion of the needle, perfect for simple embroidery accents to refresh your coffee table this week.
21. Autumnal Blending on Denim
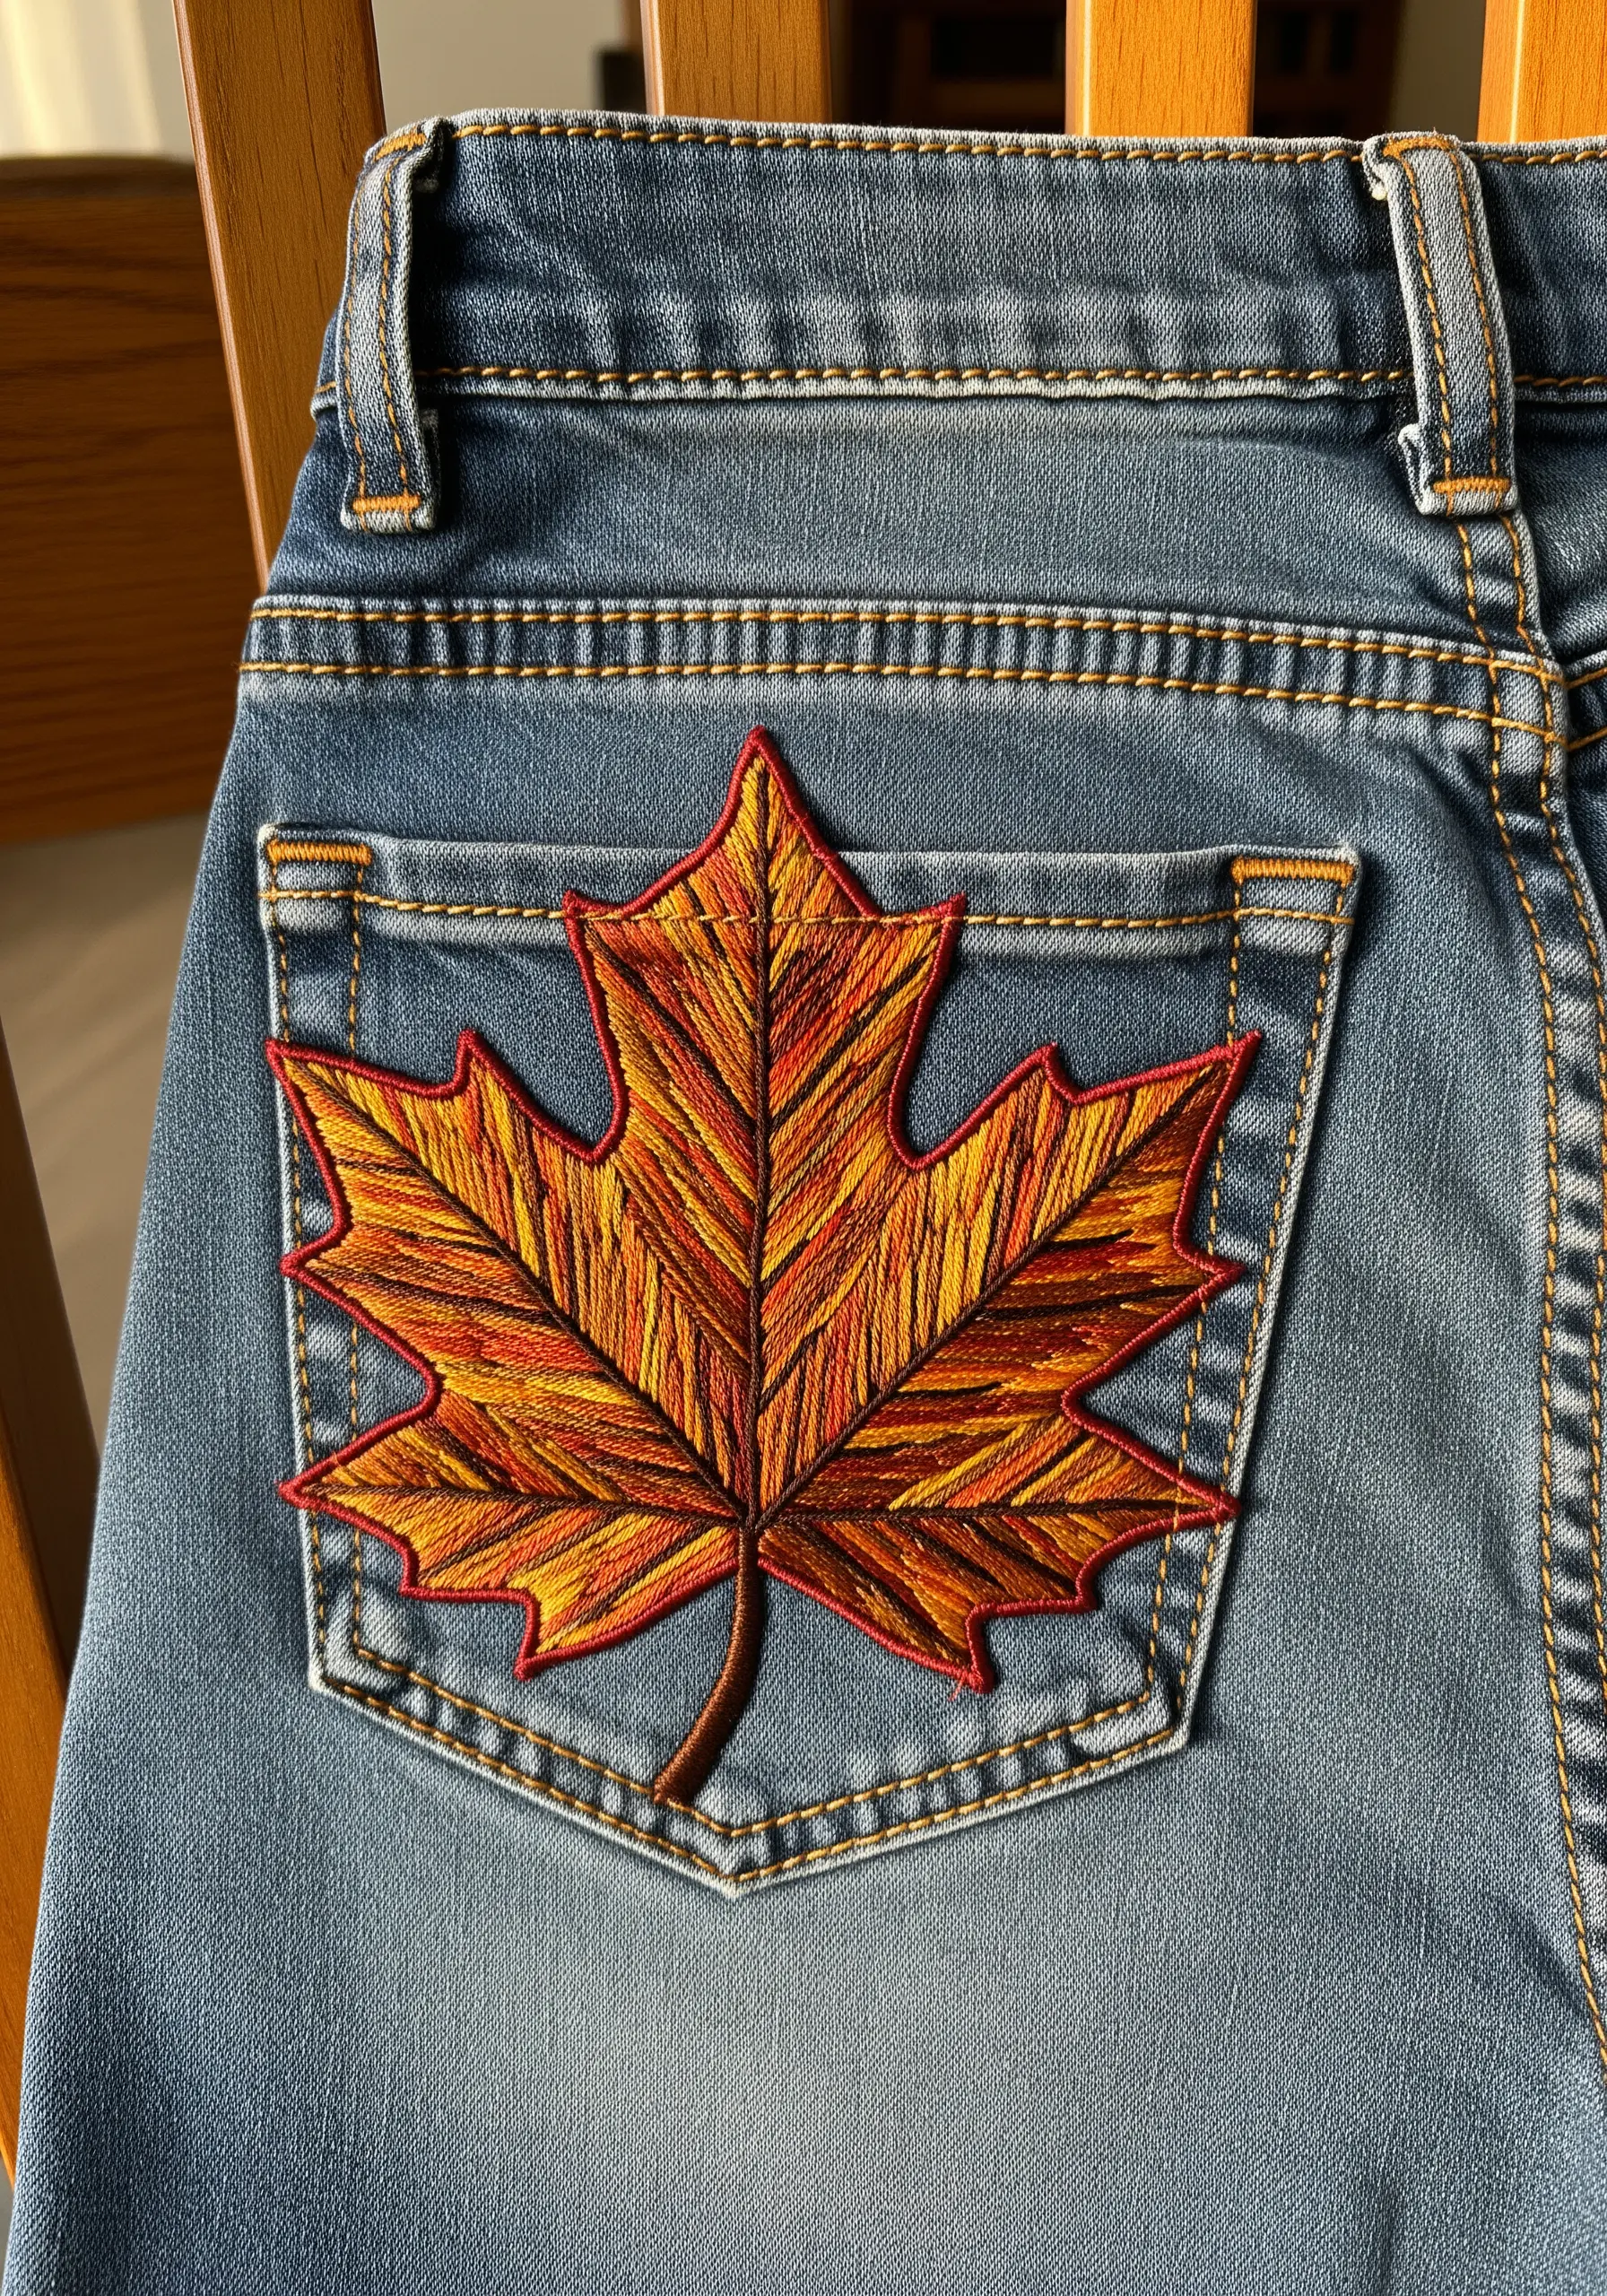
To capture the fiery gradient of an autumn leaf, you need to blend your colors seamlessly with the long-and-short stitch.
Start with one color at the edge of a section, then bring your next color up through the middle of the previous stitches to eliminate harsh lines.
Always angle your stitches to follow the natural direction of the leaf’s veins; this simple detail adds immense realism and a sense of movement.
Finish with a bold split stitch outline to contain the colors and give the patch a clean, polished edge.
22. Weaving a Nest with Found Fibers

A truly authentic bird’s nest requires more than just thread. This piece masterfully incorporates mixed fibers for unparalleled realism.
Create your base shape with long, overlapping straight stitches using variegated brown and tan floss.
Then, couch down other materials—thin yarns, raffia, twine, and even small, sterilized twigs or dried grasses—using a single, fine thread to secure them.
This layering of different materials is what gives the nest its chaotic yet structurally sound appearance.
23. Graphic Texture with Raised Chain Stitch
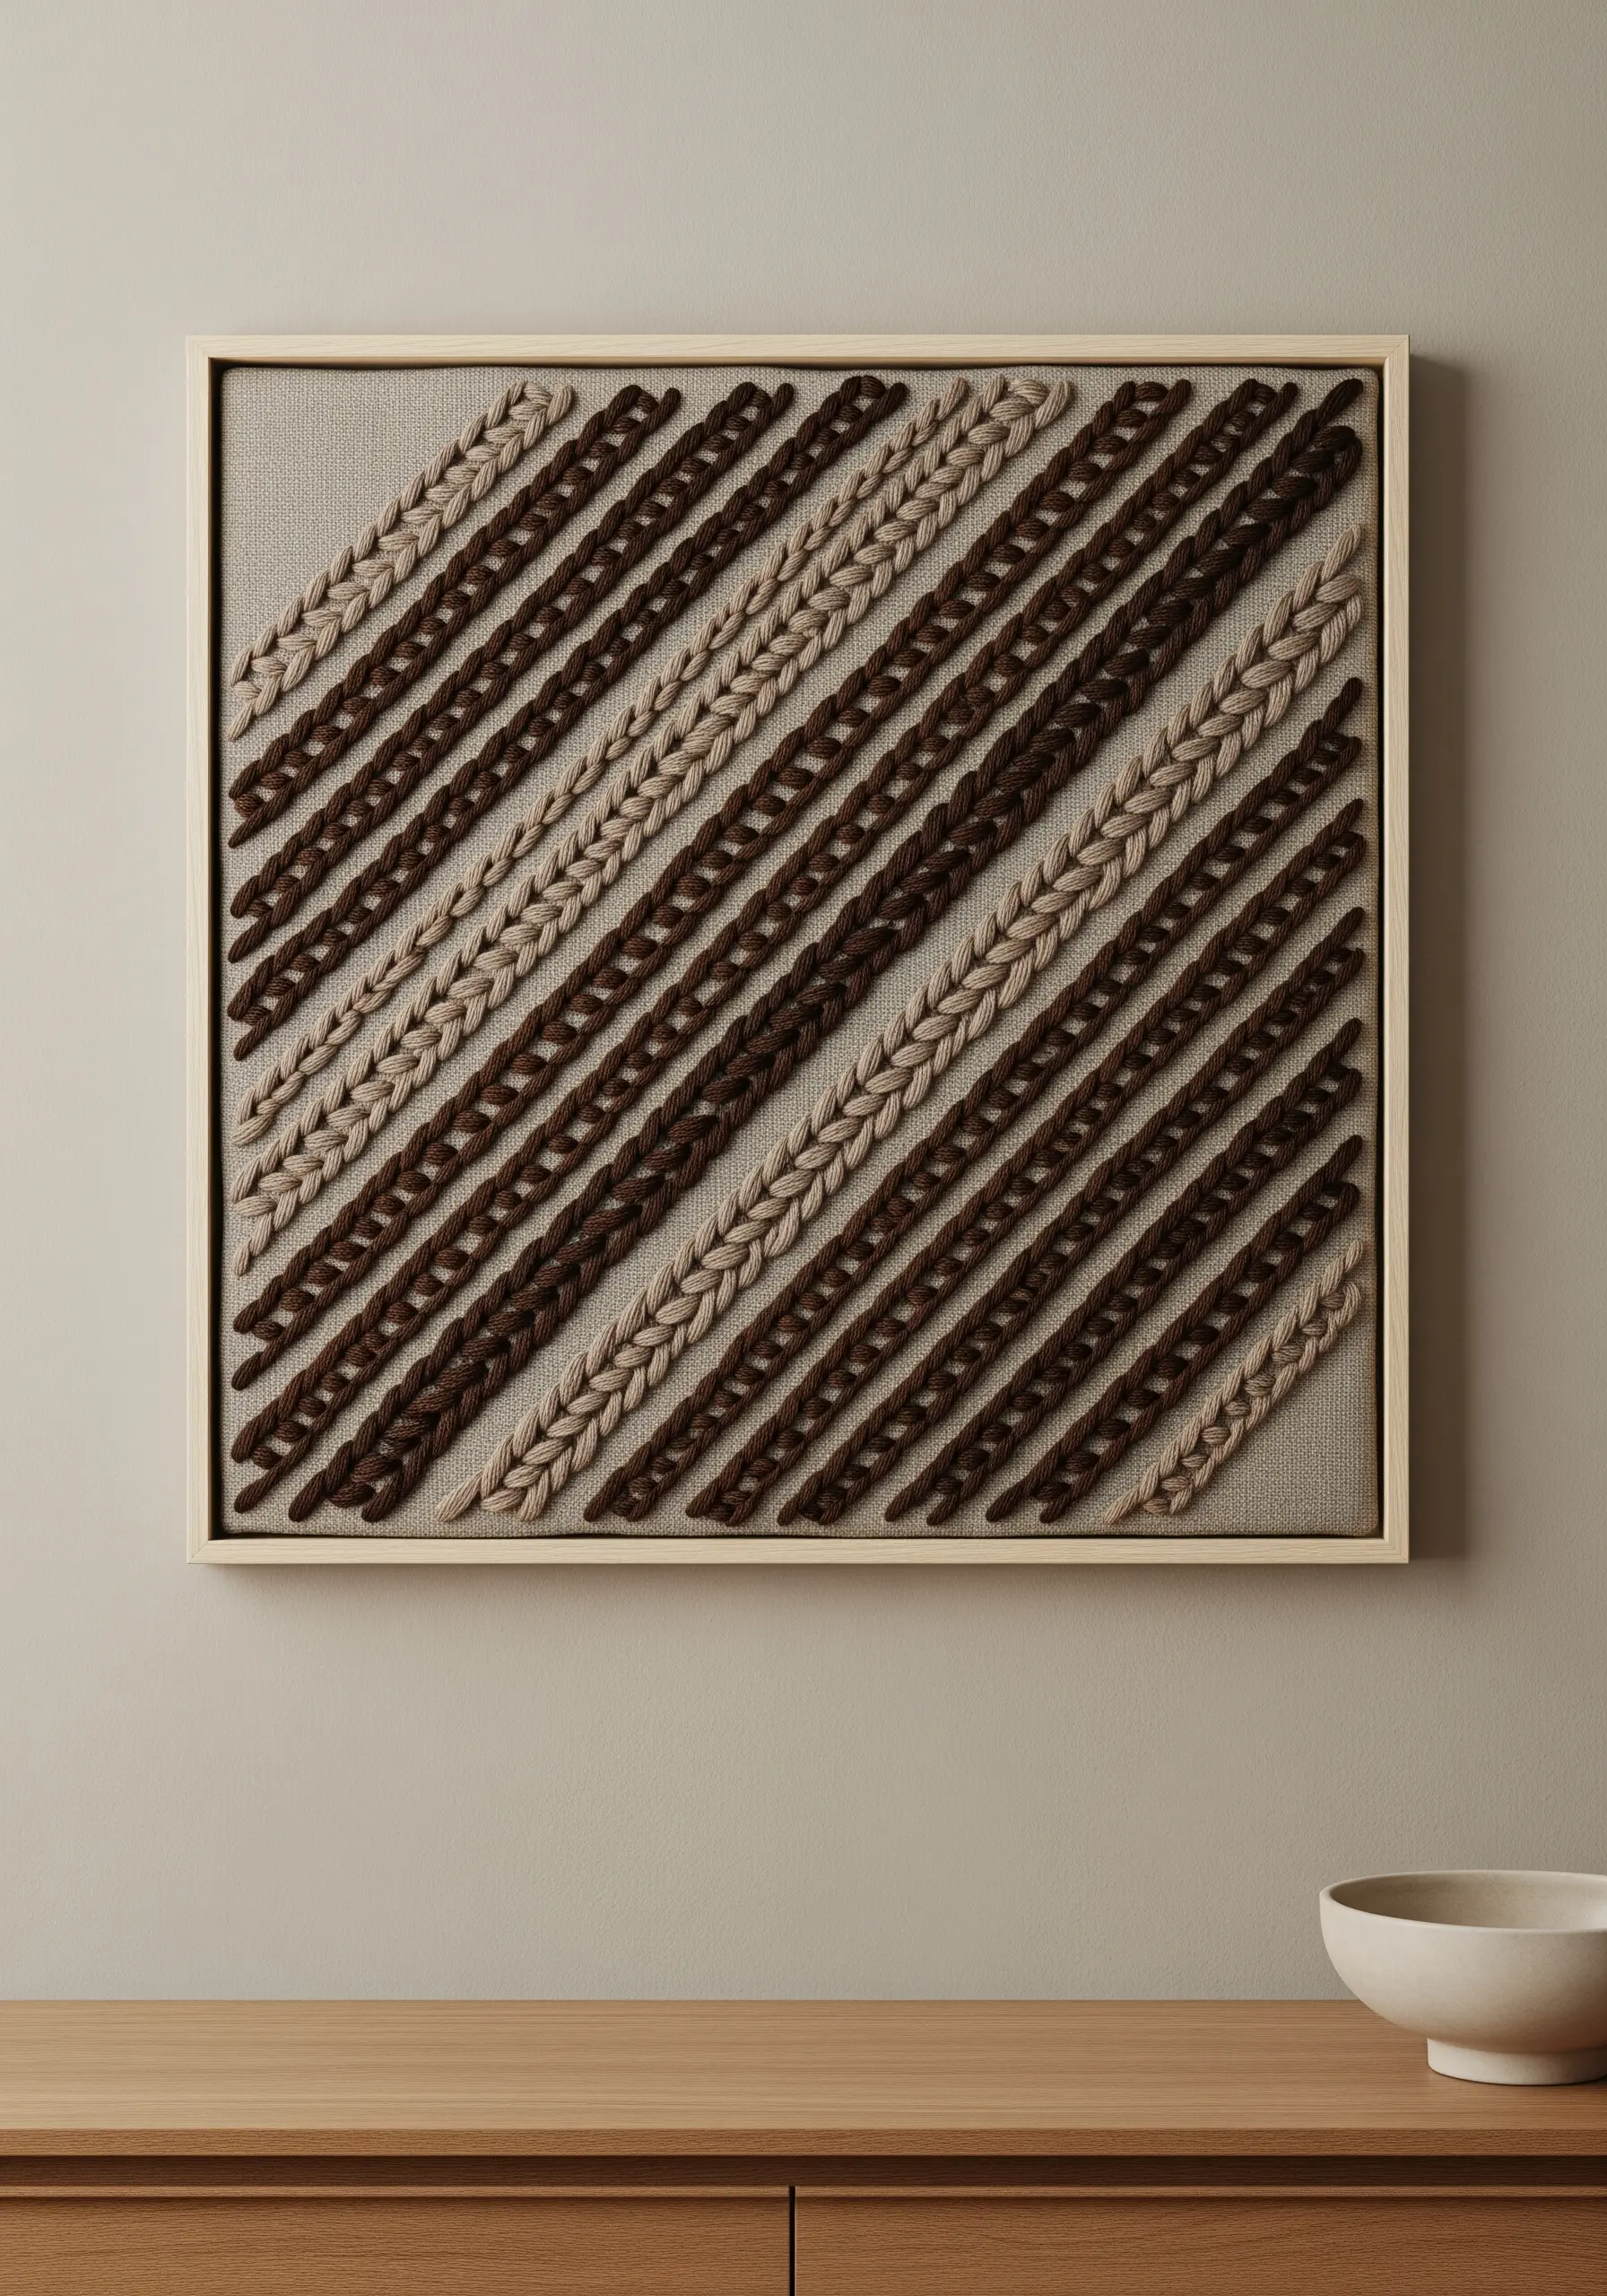
For a bold, modern, and highly textural design, the raised chain stitch is an ideal choice.
Unlike a standard chain stitch that lies flat, this variation creates a distinct, braid-like line that sits on top of the fabric.
Using a thicker thread, like a tapestry wool or multiple strands of floss, will enhance the three-dimensional effect.
Arrange the braided lines in a simple diagonal pattern and alternate two complementary colors for a result that is graphically striking and rhythmically pleasing.
24. Cosmic Pointillism with French Knots
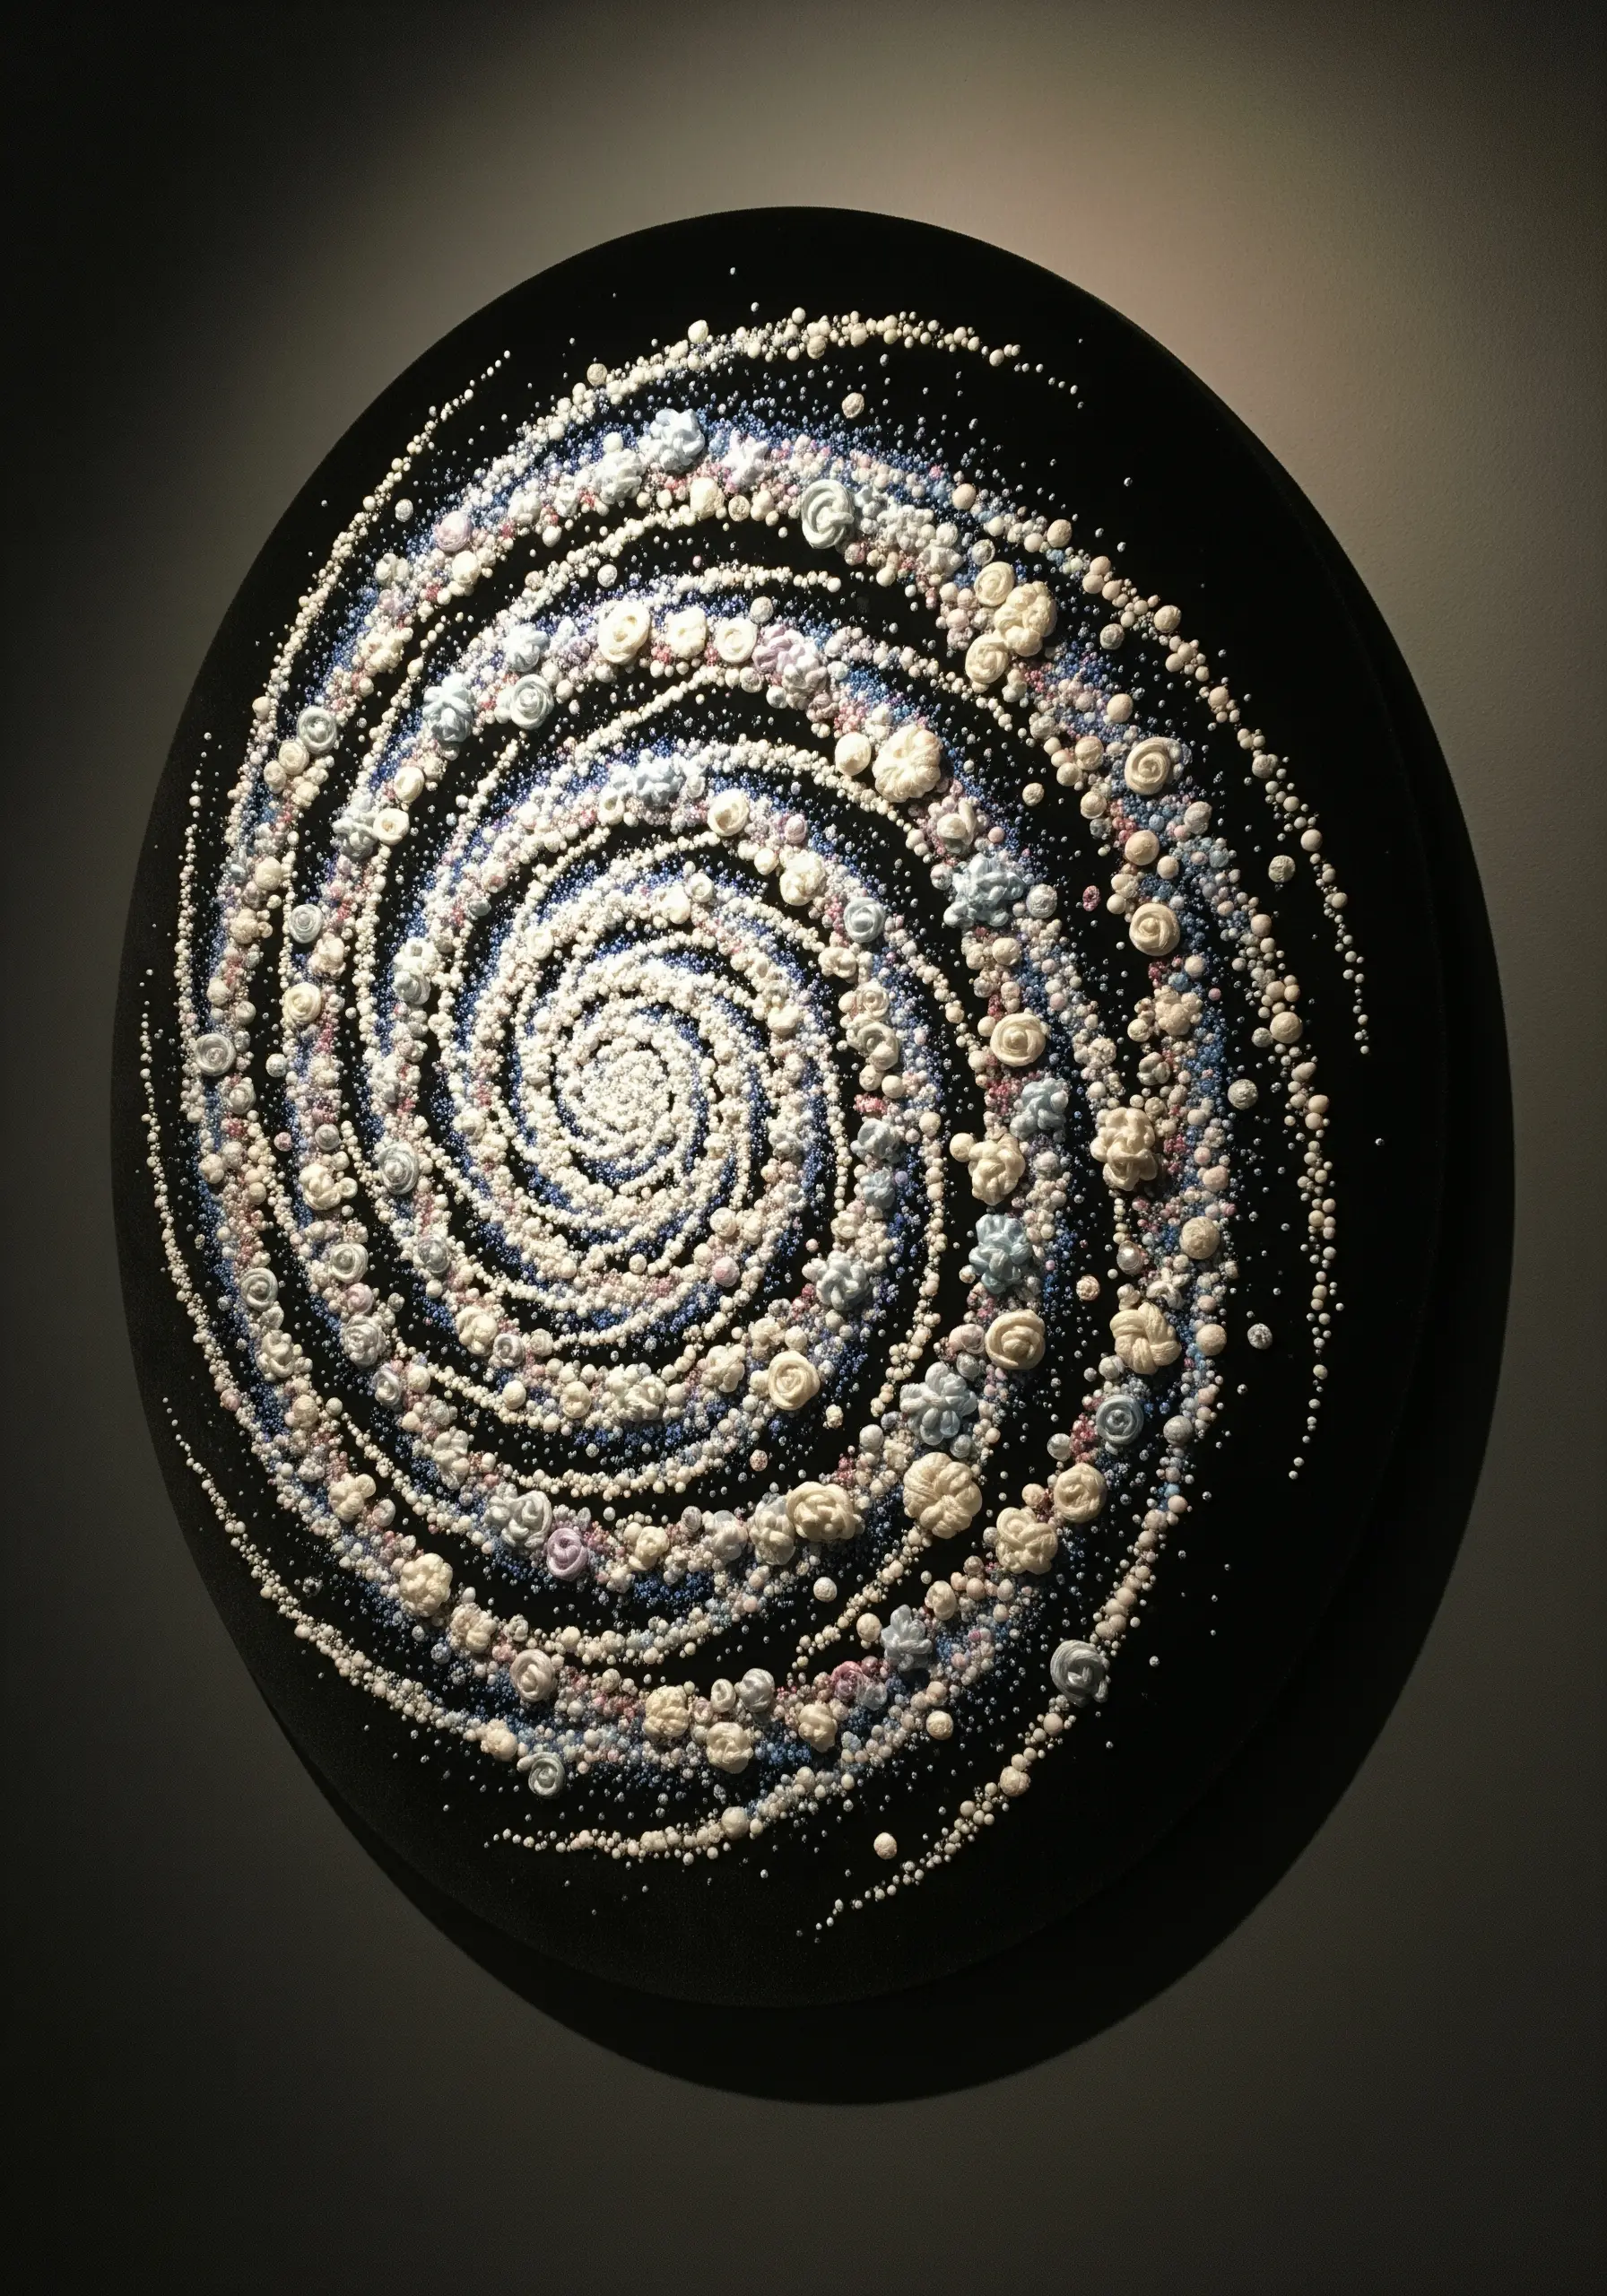
Create the swirling depths of a galaxy by using French knots as points of light.
This technique, akin to pointillism in painting, relies on placing thousands of tiny knots in strategic clusters of color.
Work on a dark, non-stretch fabric like black cotton drill for maximum contrast. Vary the size of your knots by using one, two, or three wraps, and by using different numbers of floss strands.
This variation creates the illusion of stars of different magnitudes, drawing the viewer into a cosmic spiral.
25. An Abstract Sampler of Textured Lines

Turn a simple composition into a rich textural study by exploring the expressive power of different line stitches.
Draw a series of flowing, parallel lines on your fabric, then stitch each one with a unique technique.
Try a classic chain stitch, a knotted Palestrina stitch, a smooth whipped running stitch, and an intricate Pekinese stitch.
By keeping the color palette simple and neutral, you allow the different textures themselves to become the focus of the artwork.
26. Layering a Wildflower Meadow

The secret to a lush, convincing meadow is to build it in layers, just as it grows in nature.
Start with the elements furthest away: the background grasses and stems, using simple straight stitches in various greens.
Next, add the mid-ground leaves and foliage, overlapping the background elements. Finally, stitch the foreground flowers—the stars of the show.
Use woven wheel stitches for dandelions, French knots for clover, and detached chain stitches for lavender. This layering technique creates a beautiful and realistic sense of depth.
27. Creating Illusions on Sheer Tulle

Stitching on a sheer fabric like tulle or organza allows you to create designs that appear to float in mid-air.
To make these gem-like teardrops, use a smooth satin stitch. The key is to blend colors within each shape to give it dimension and light.
Start with a dark shade at the top and gradually transition to a lighter shade at the bottom. Using a silk or metallic thread will enhance the shimmer.
Always use a temporary stabilizer behind the sheer fabric while stitching to prevent distortion, then carefully remove it afterward.
28. Framed Weaving for Ultimate Coziness
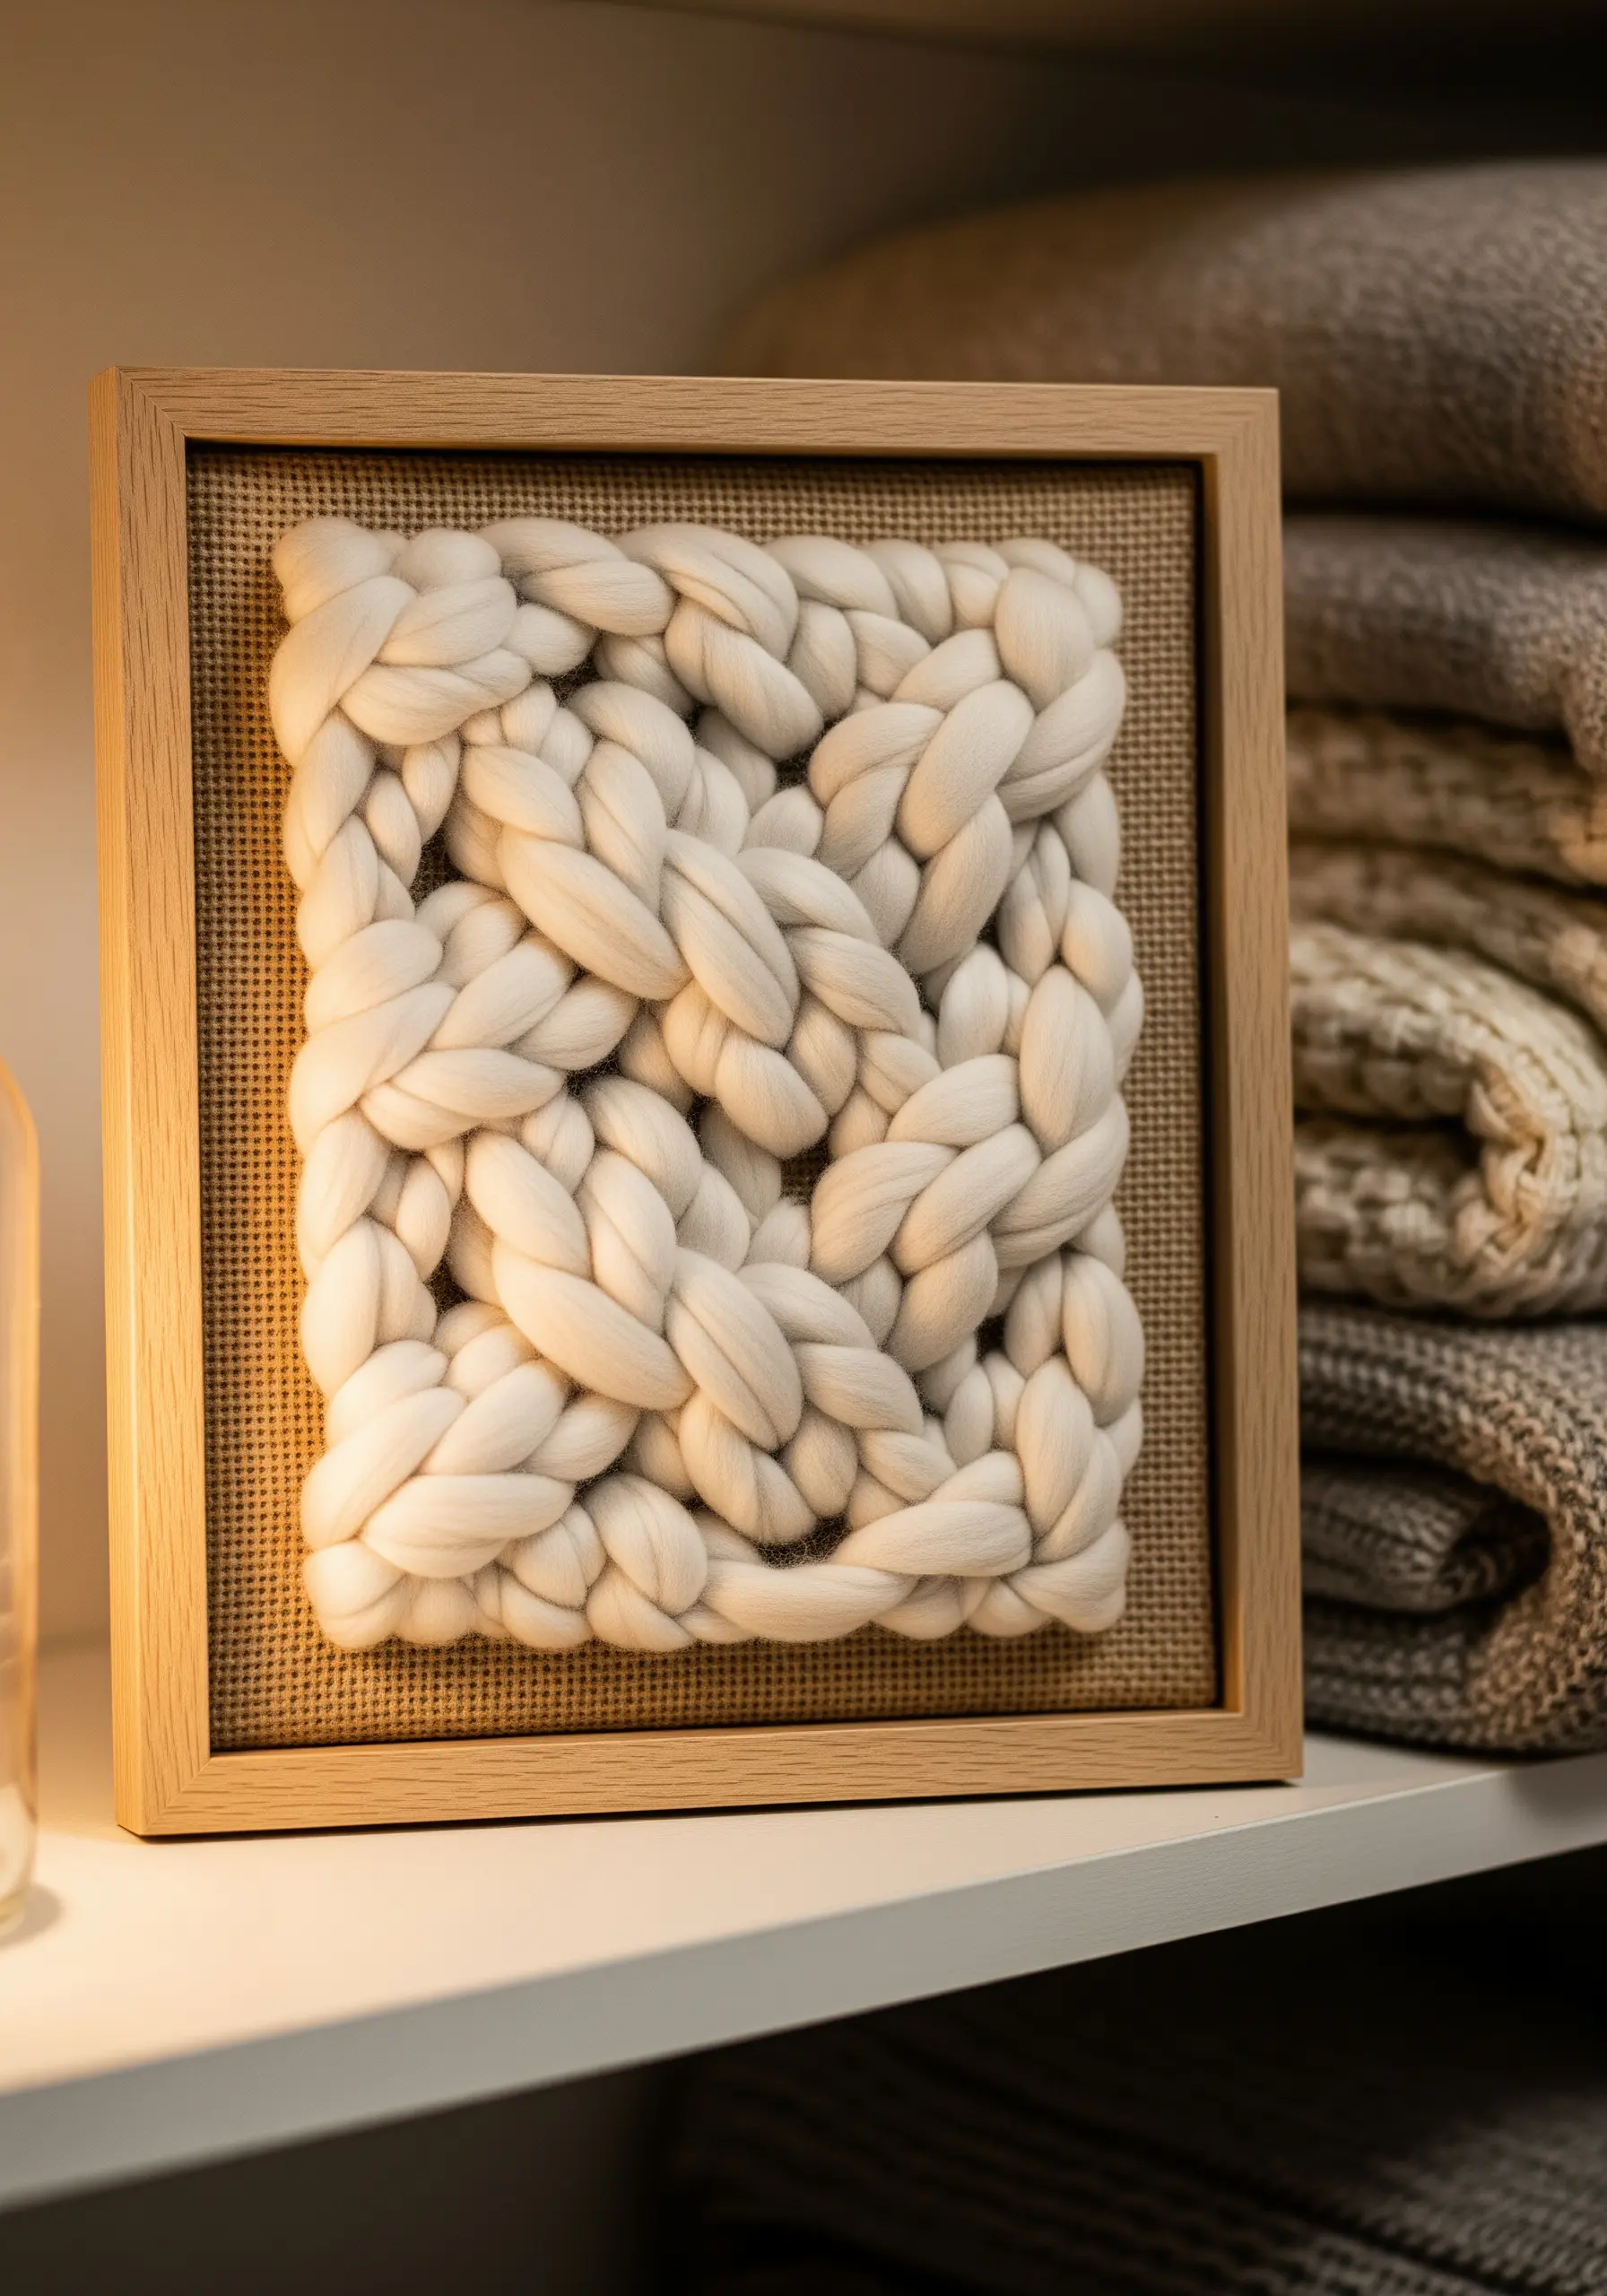
While not traditional embroidery, you can achieve a similar super-chunky, woven effect by incorporating thick fibers into your work.
Use an open-weave fabric like burlap as your base. Then, couch down strands of thick, unspun wool roving in an over-under pattern.
Alternatively, create extremely large, loose chain stitches with the roving to mimic a knitted texture.
This mixed-media approach pushes the boundaries of embroidery and results in gorgeous mixed fiber textures that everyone will admire.
29. A Monochrome Study of Natural Forms

You don’t need a full spectrum of color to create a piece with depth and impact.
This composition of stitched stones is a masterful exercise in using value—the relative lightness or darkness of a color.
By working with a monochrome palette of white, various greys, and black, you can focus entirely on shape and contour.
The contrast between the light and dark threads is what defines each form, proving that a limited palette can lead to a sophisticated and modern result.


