
Geometric patterns offer something unique: a beautiful intersection of structure and creativity. If you’ve ever felt your stitching was missing a sense of intention or polish, focusing on geometry is the answer. It’s not about rigid rules, but about using lines, shapes, and repetition to bring a quiet confidence and clarity to your work.
In these designs, you’ll discover how simple adjustments—a change in thread weight, a shift in stitch direction, or a thoughtful color choice—can transform a basic shape into a sophisticated piece of art. This is your chance to move beyond just filling in patterns and start making deliberate artistic choices that have a visible, tangible impact.
Let these ideas be your guide to creating embroidery that feels both modern and timeless. You have the skills already. Now, let’s refine them to create pieces that not only look beautiful on your wall but also reflect the care and precision you’ve put into every stitch.
1. Create Sculptural Depth with Padded Hexagons
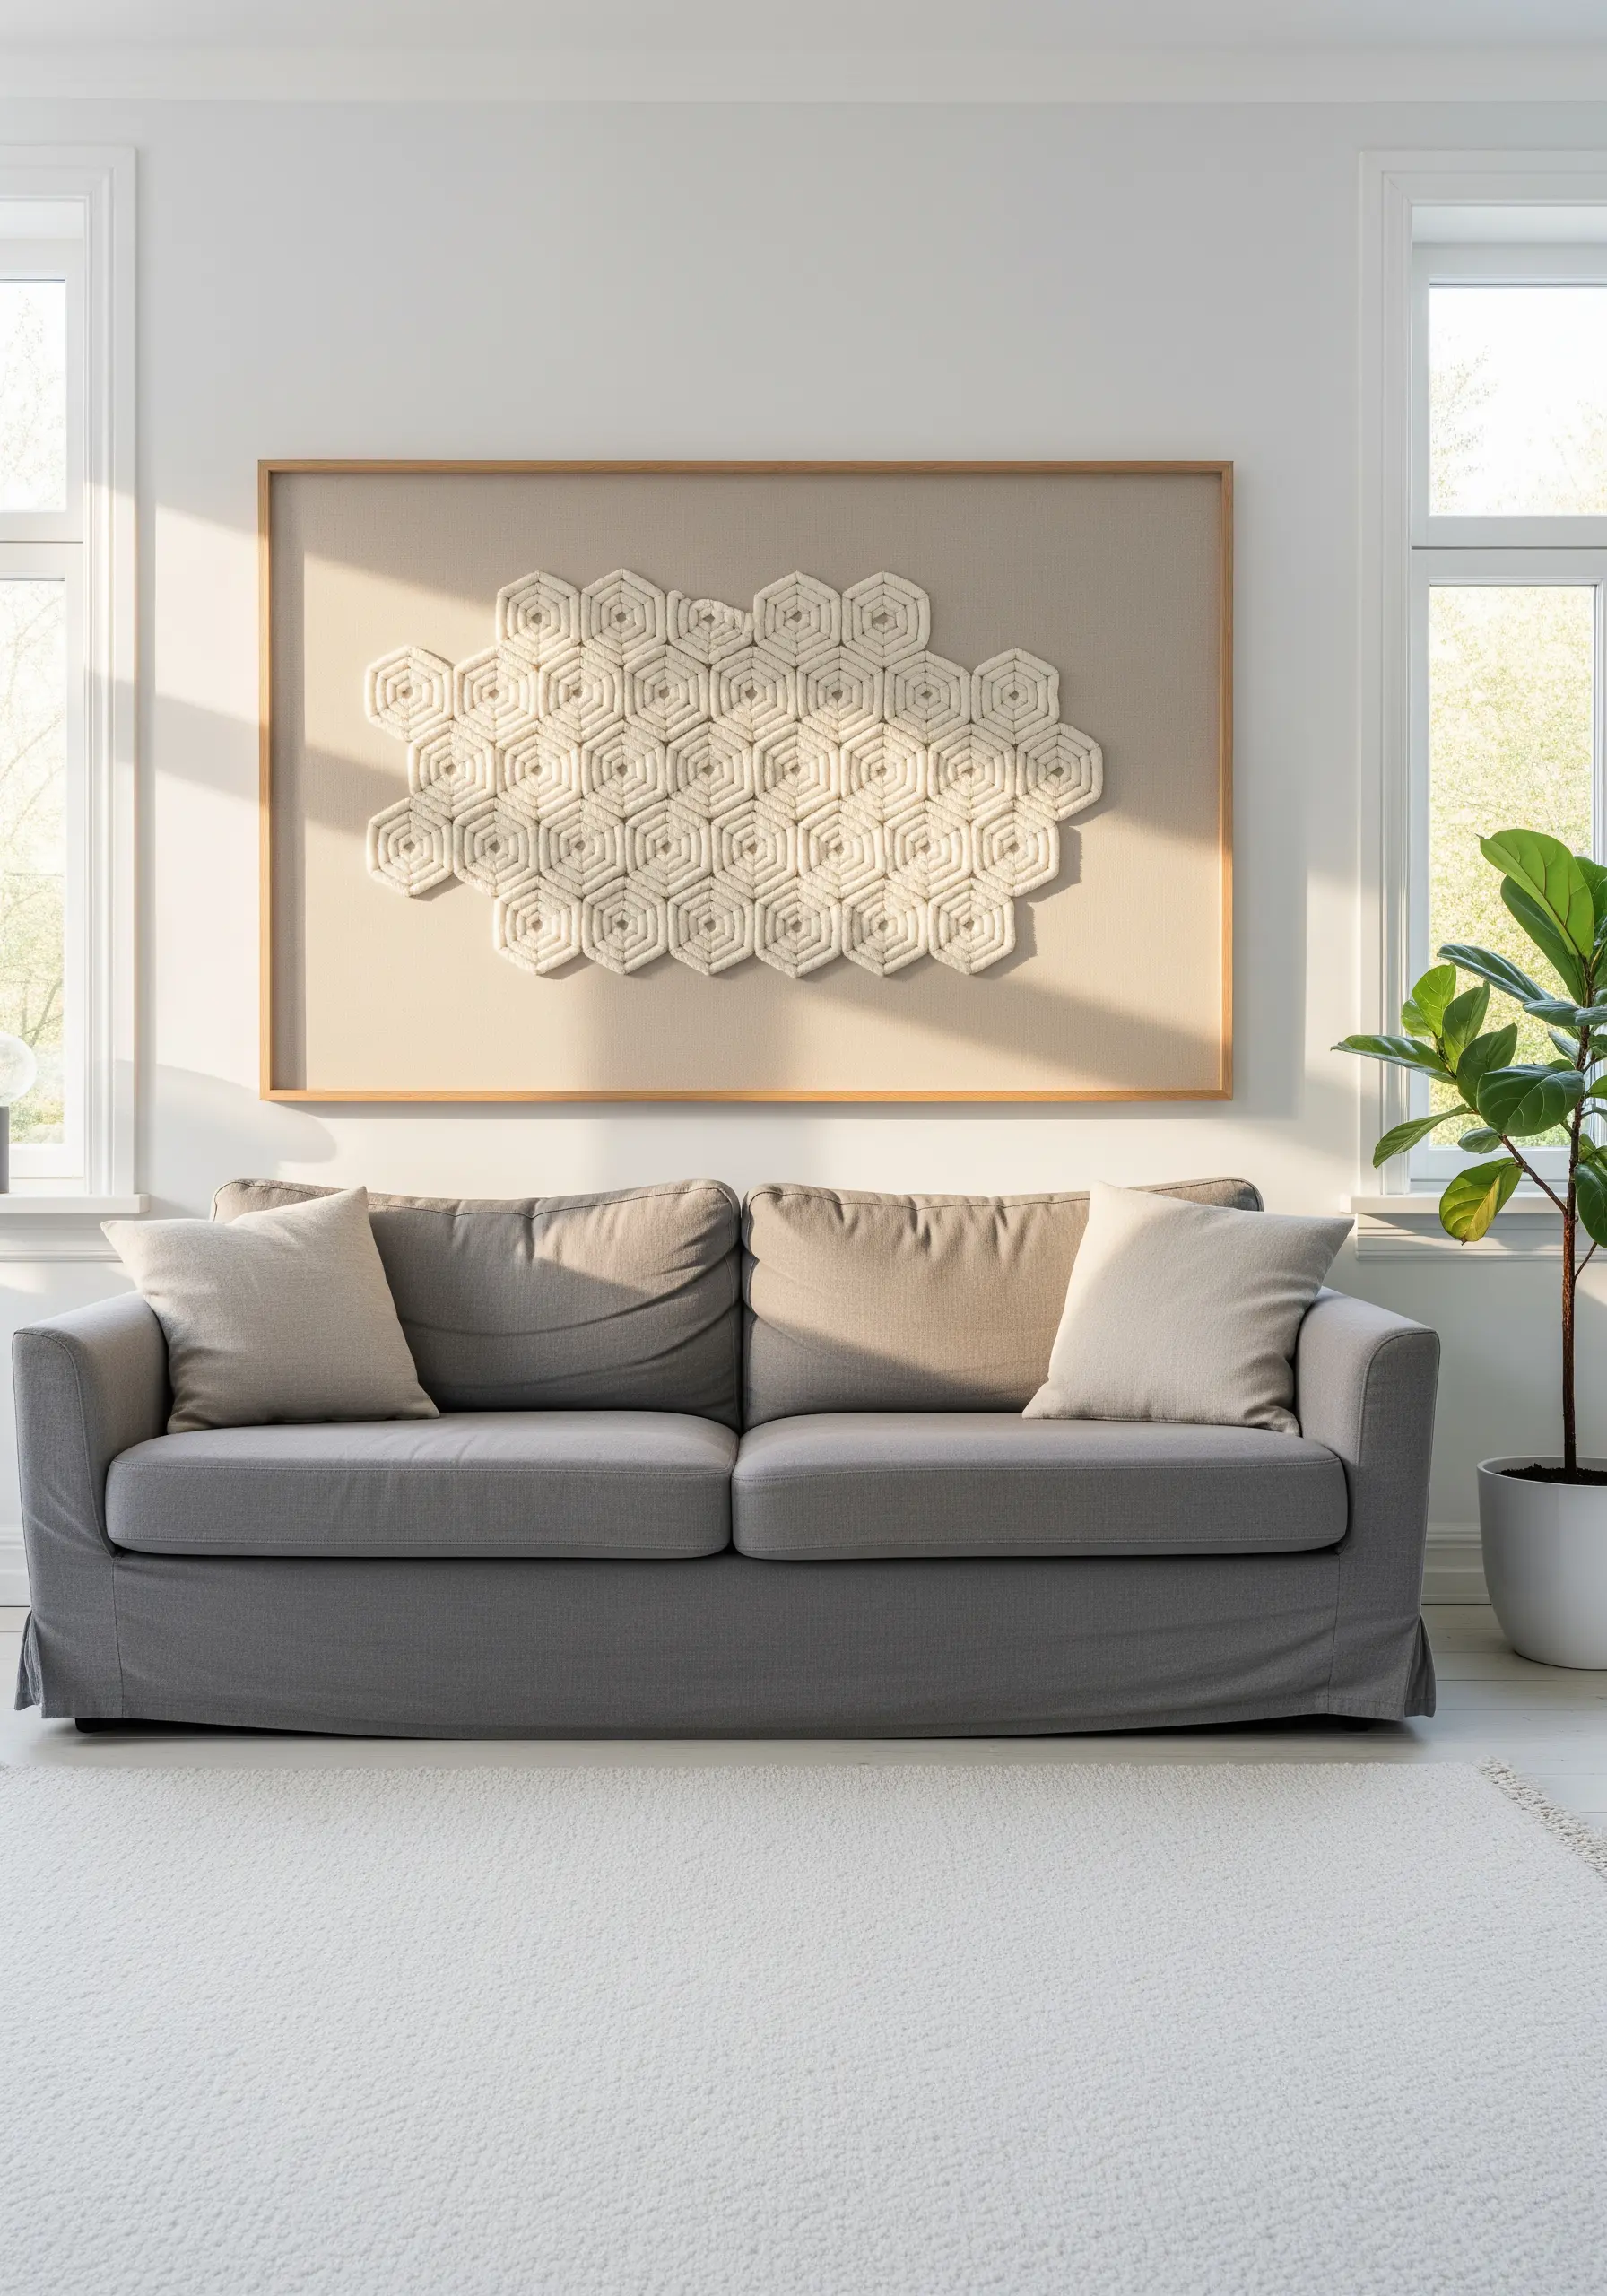
Transform a simple honeycomb pattern into a tactile statement piece by adding dimension.
First, stitch the hexagonal outlines using a basic backstitch for clean definition.
Instead of a flat fill, use padded satin stitch: fill each shape with small, underlying straight stitches, then cover them with smooth satin stitches aligned in the same direction.
For an even bolder effect, couch thick cotton cord or yarn onto the fabric, creating a highly raised, sculptural surface that plays beautifully with light and shadow.
This technique turns a flat geometric design into a sophisticated embroidered textile wall hanging that commands attention.
2. Master Light with Metallic Starbursts
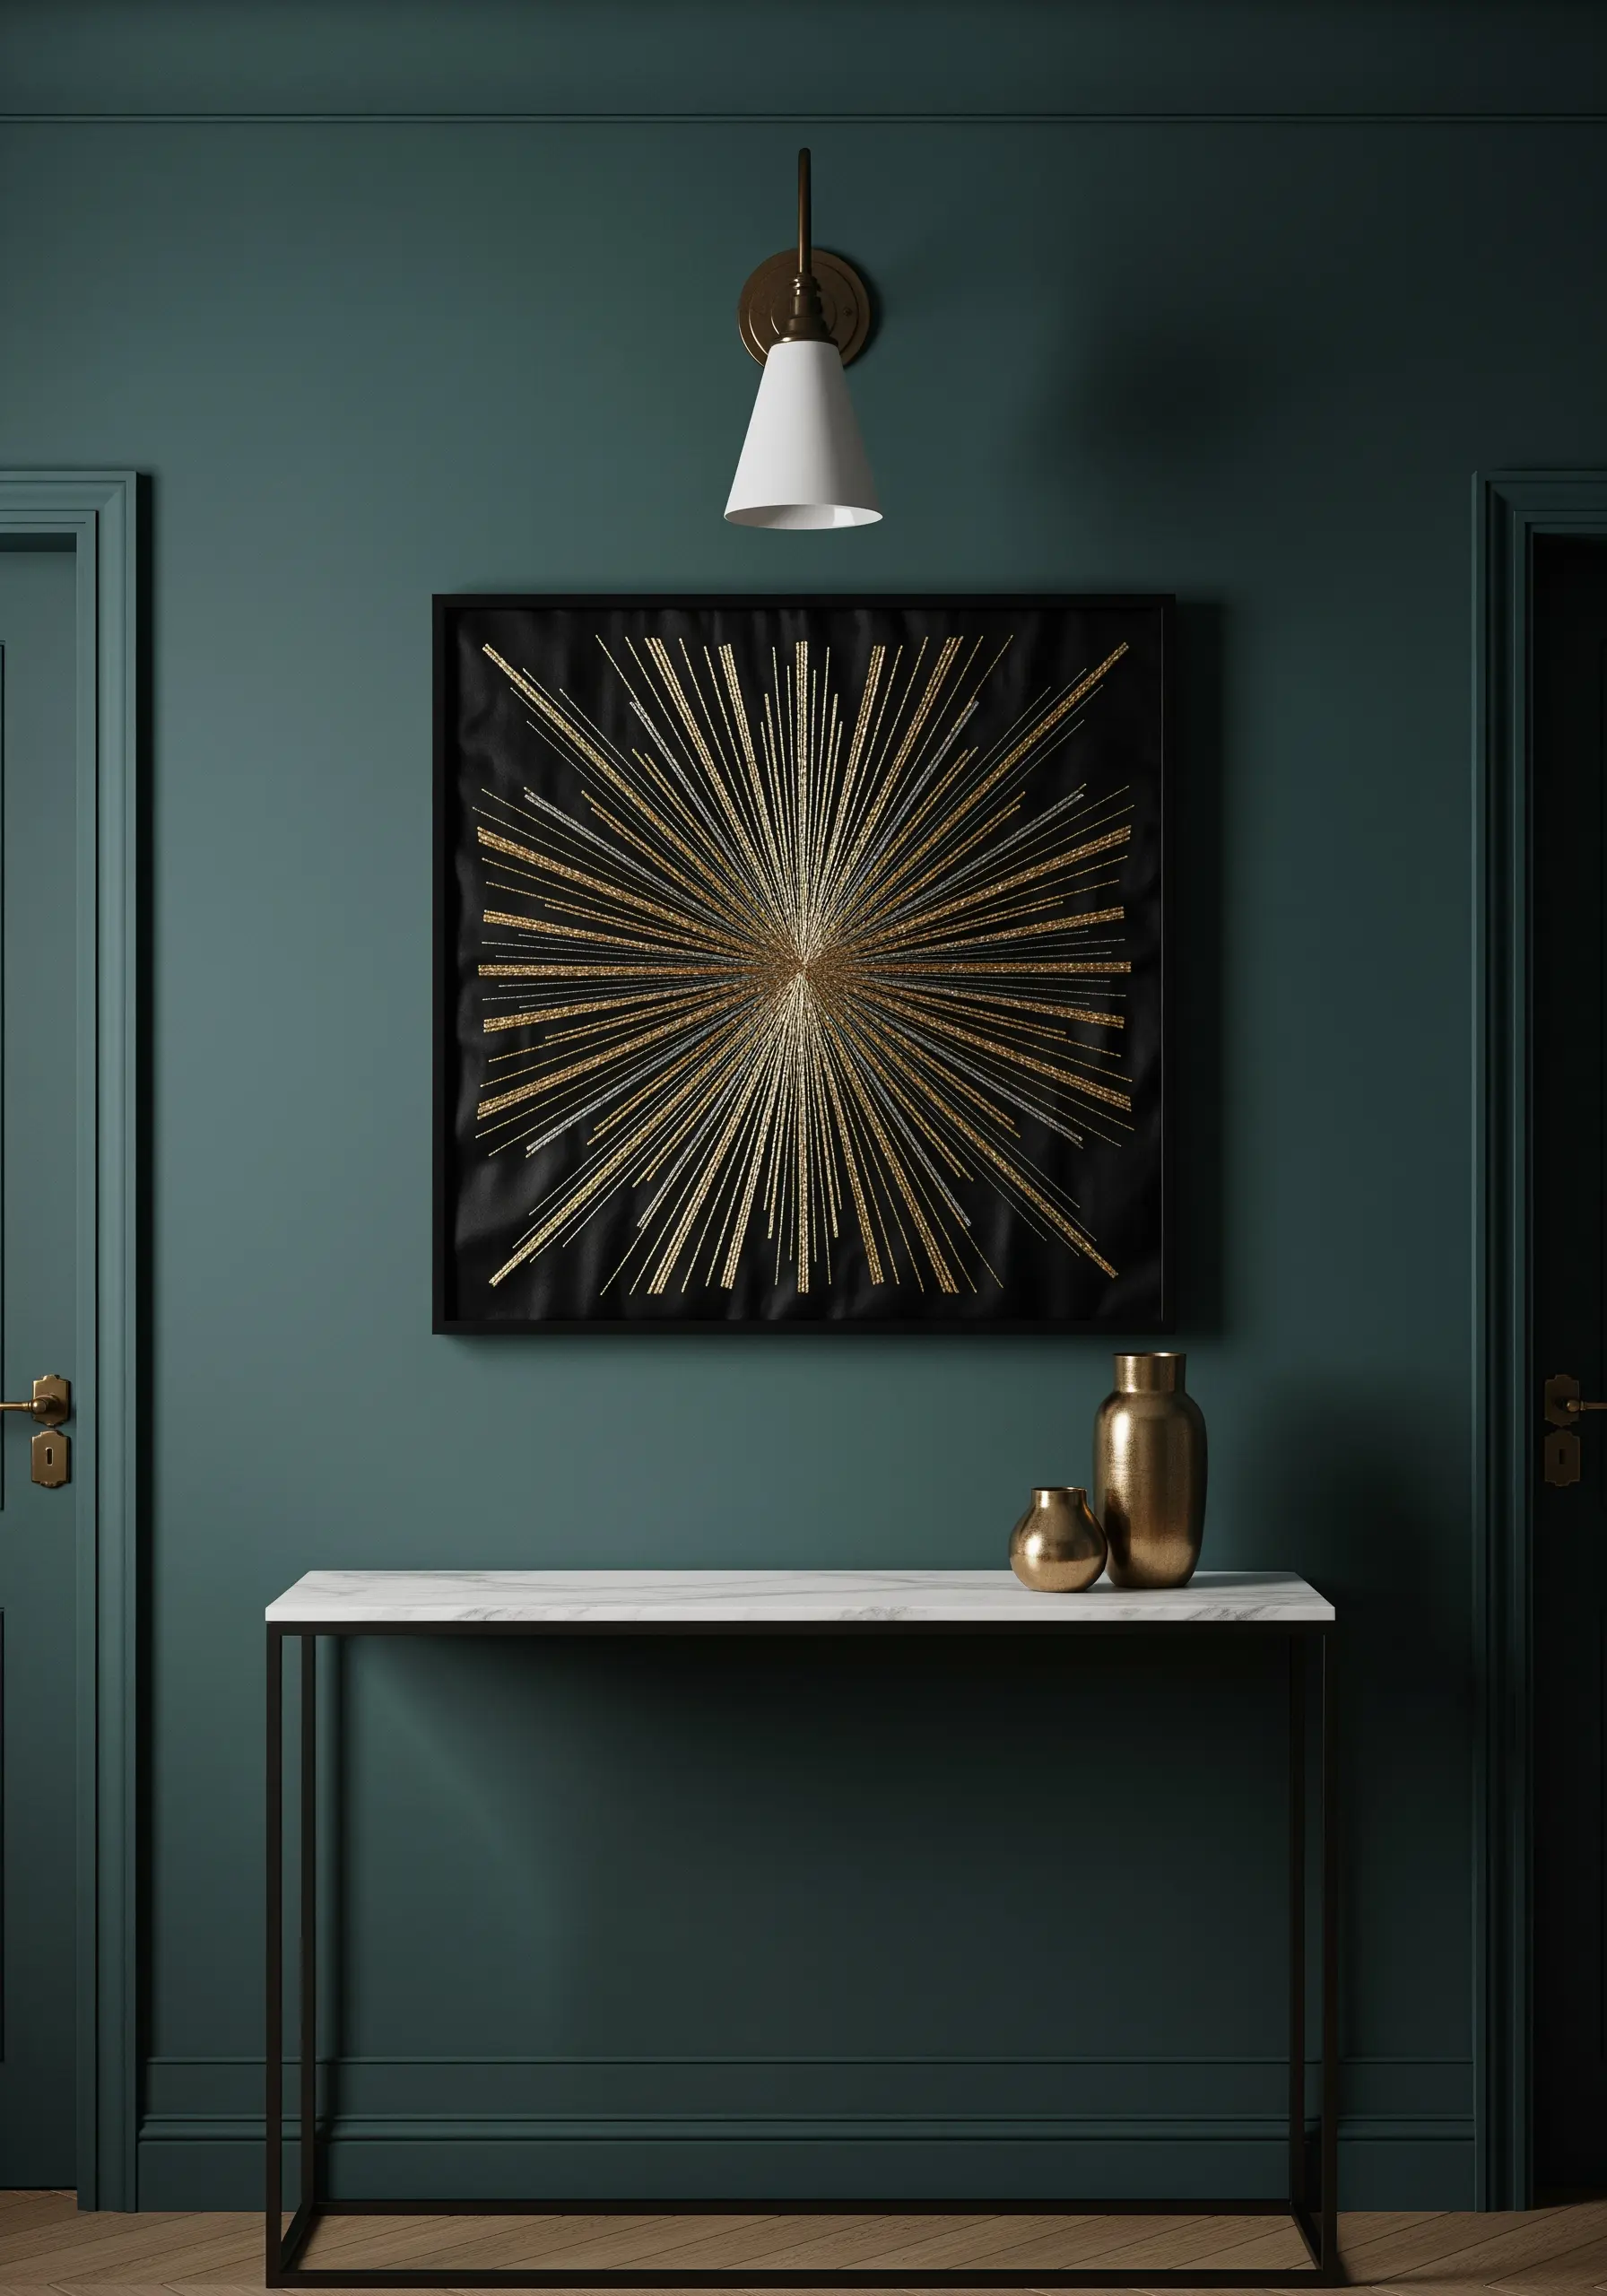
Capture the drama of a starburst by focusing on how different threads interact with light.
Choose a dark, luxurious fabric like black velvet or linen to create maximum contrast.
Use a combination of metallic and matte threads for the radiating lines.
Alternate between a high-sheen gold thread and a glittery blending filament to create varied textures that sparkle differently as the light changes.
Stitch each line with a single, taut straight stitch, ensuring you vary their lengths and thickness to achieve a dynamic, explosive effect.
This method transforms a simple geometric concept into glamorous, light-reflecting interior art.
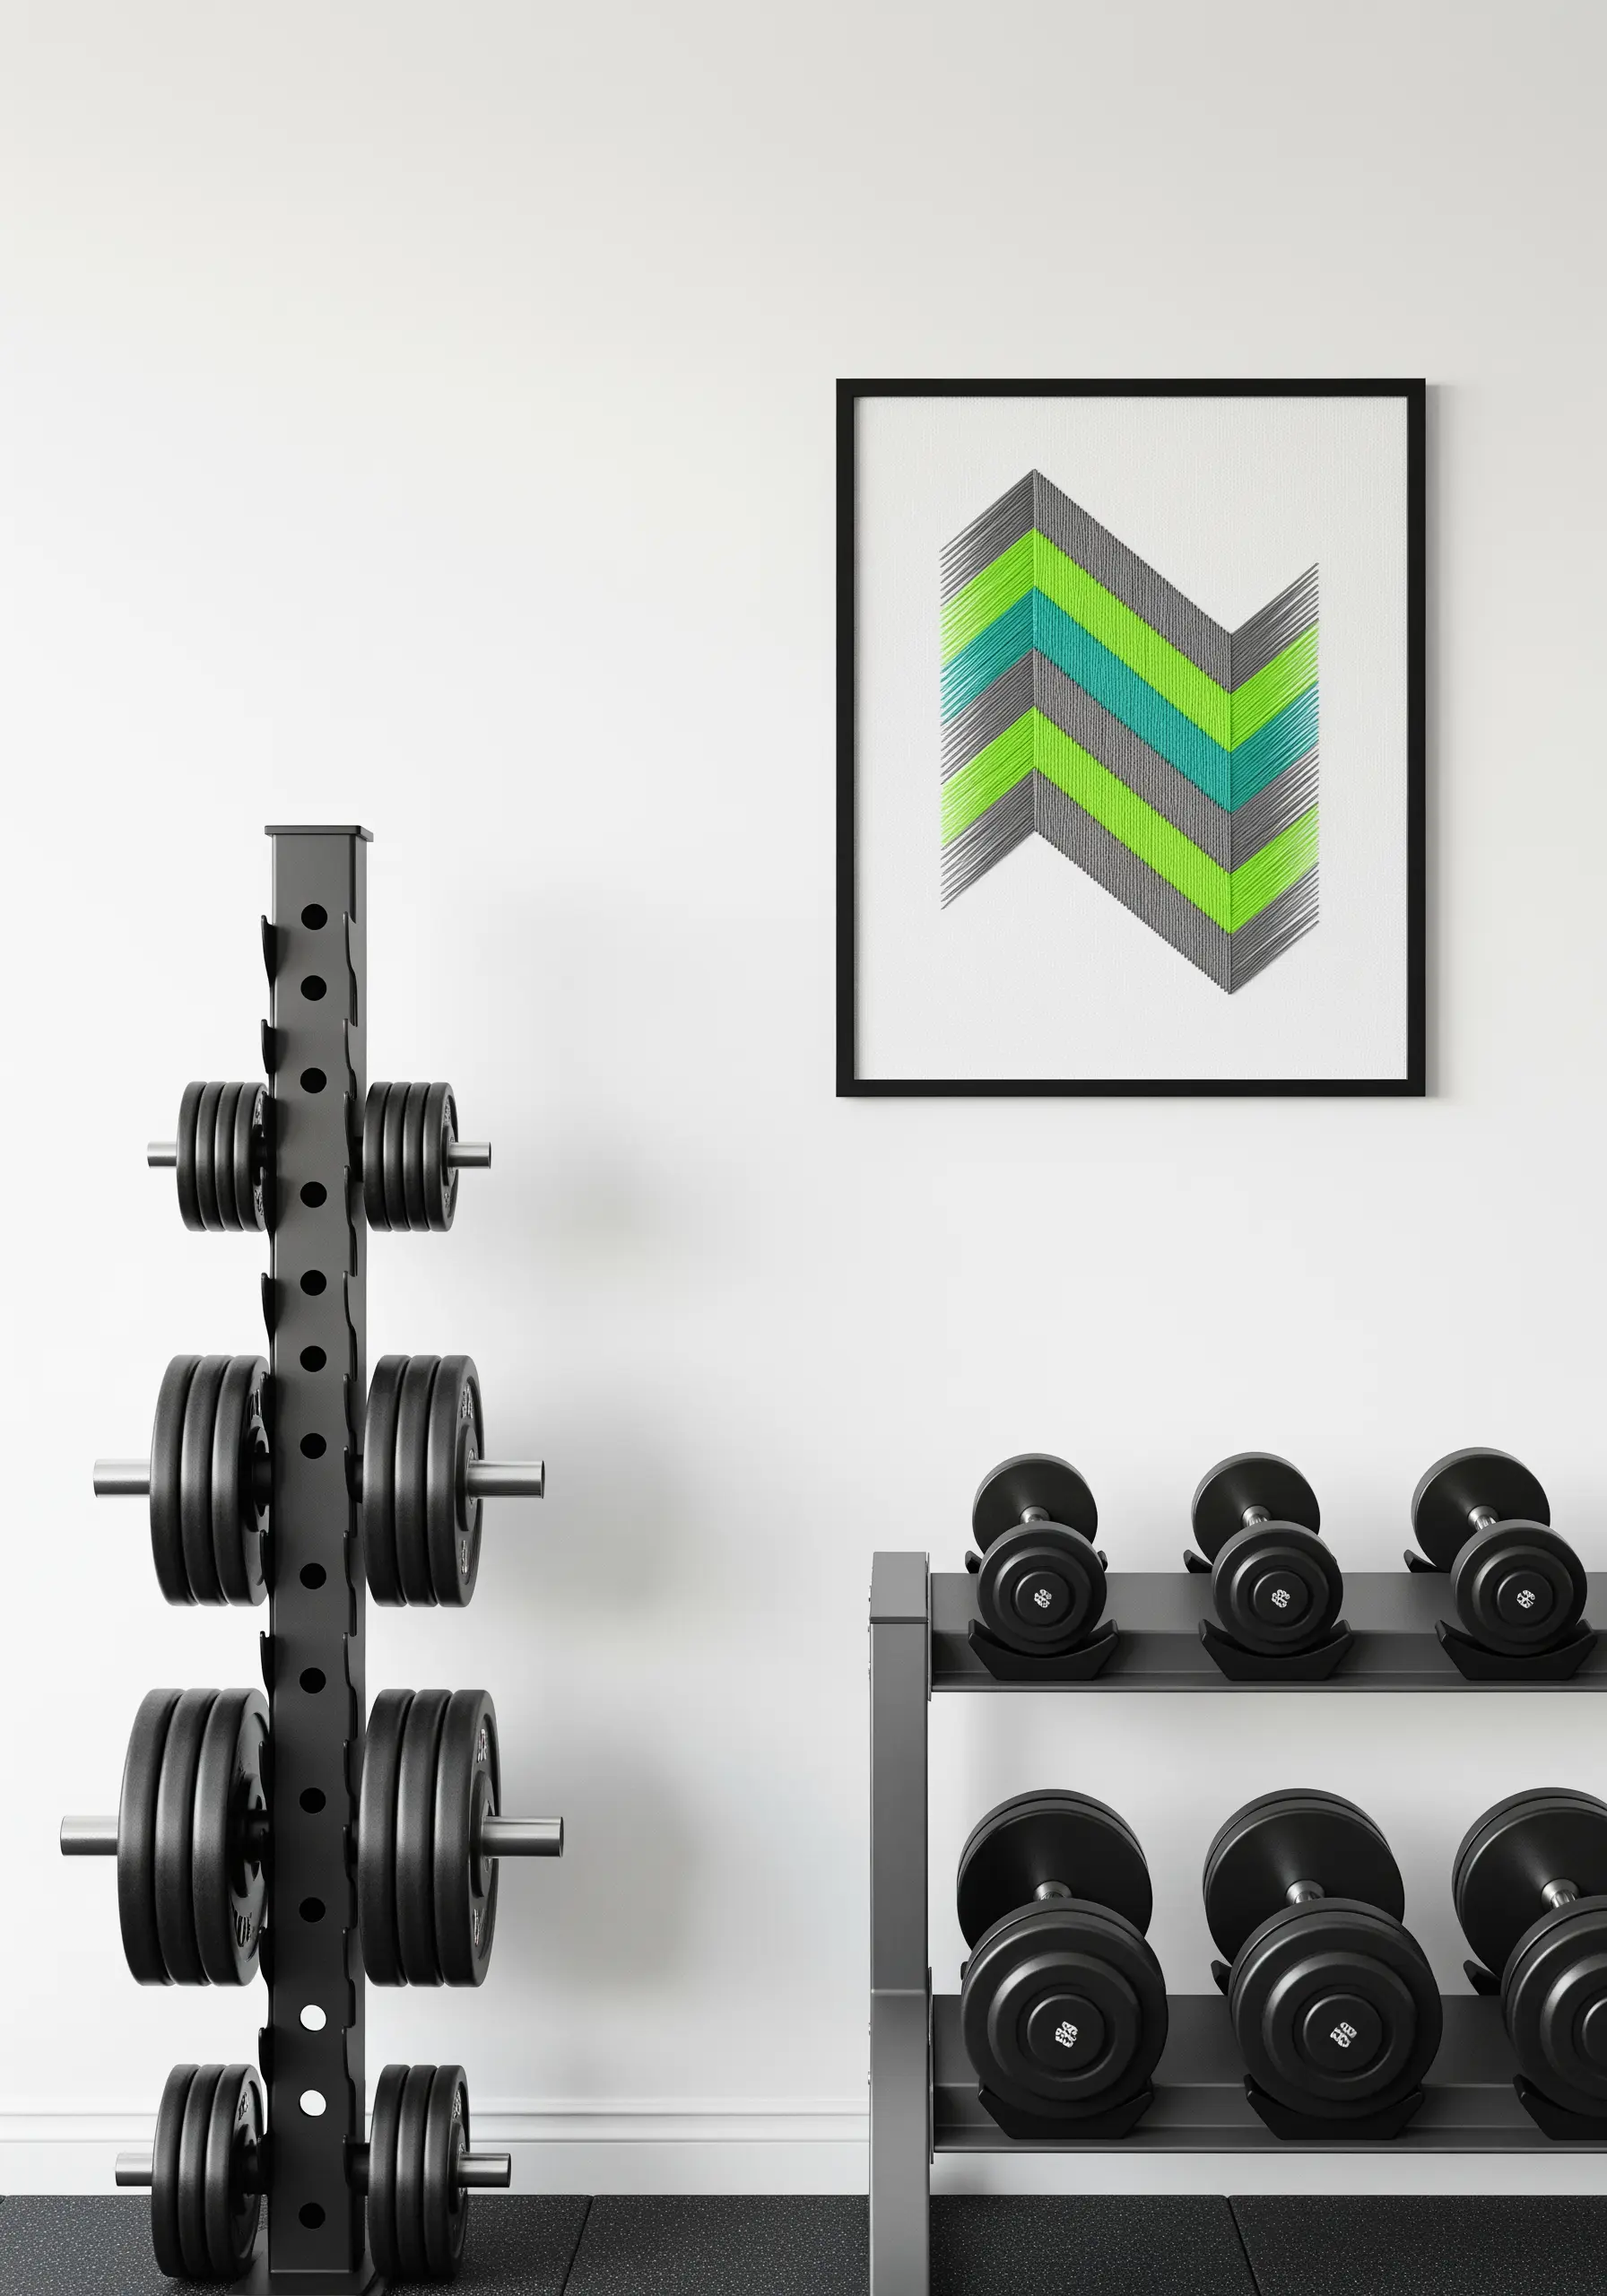
3. Balance Composition with Mid-Century Modern Forms
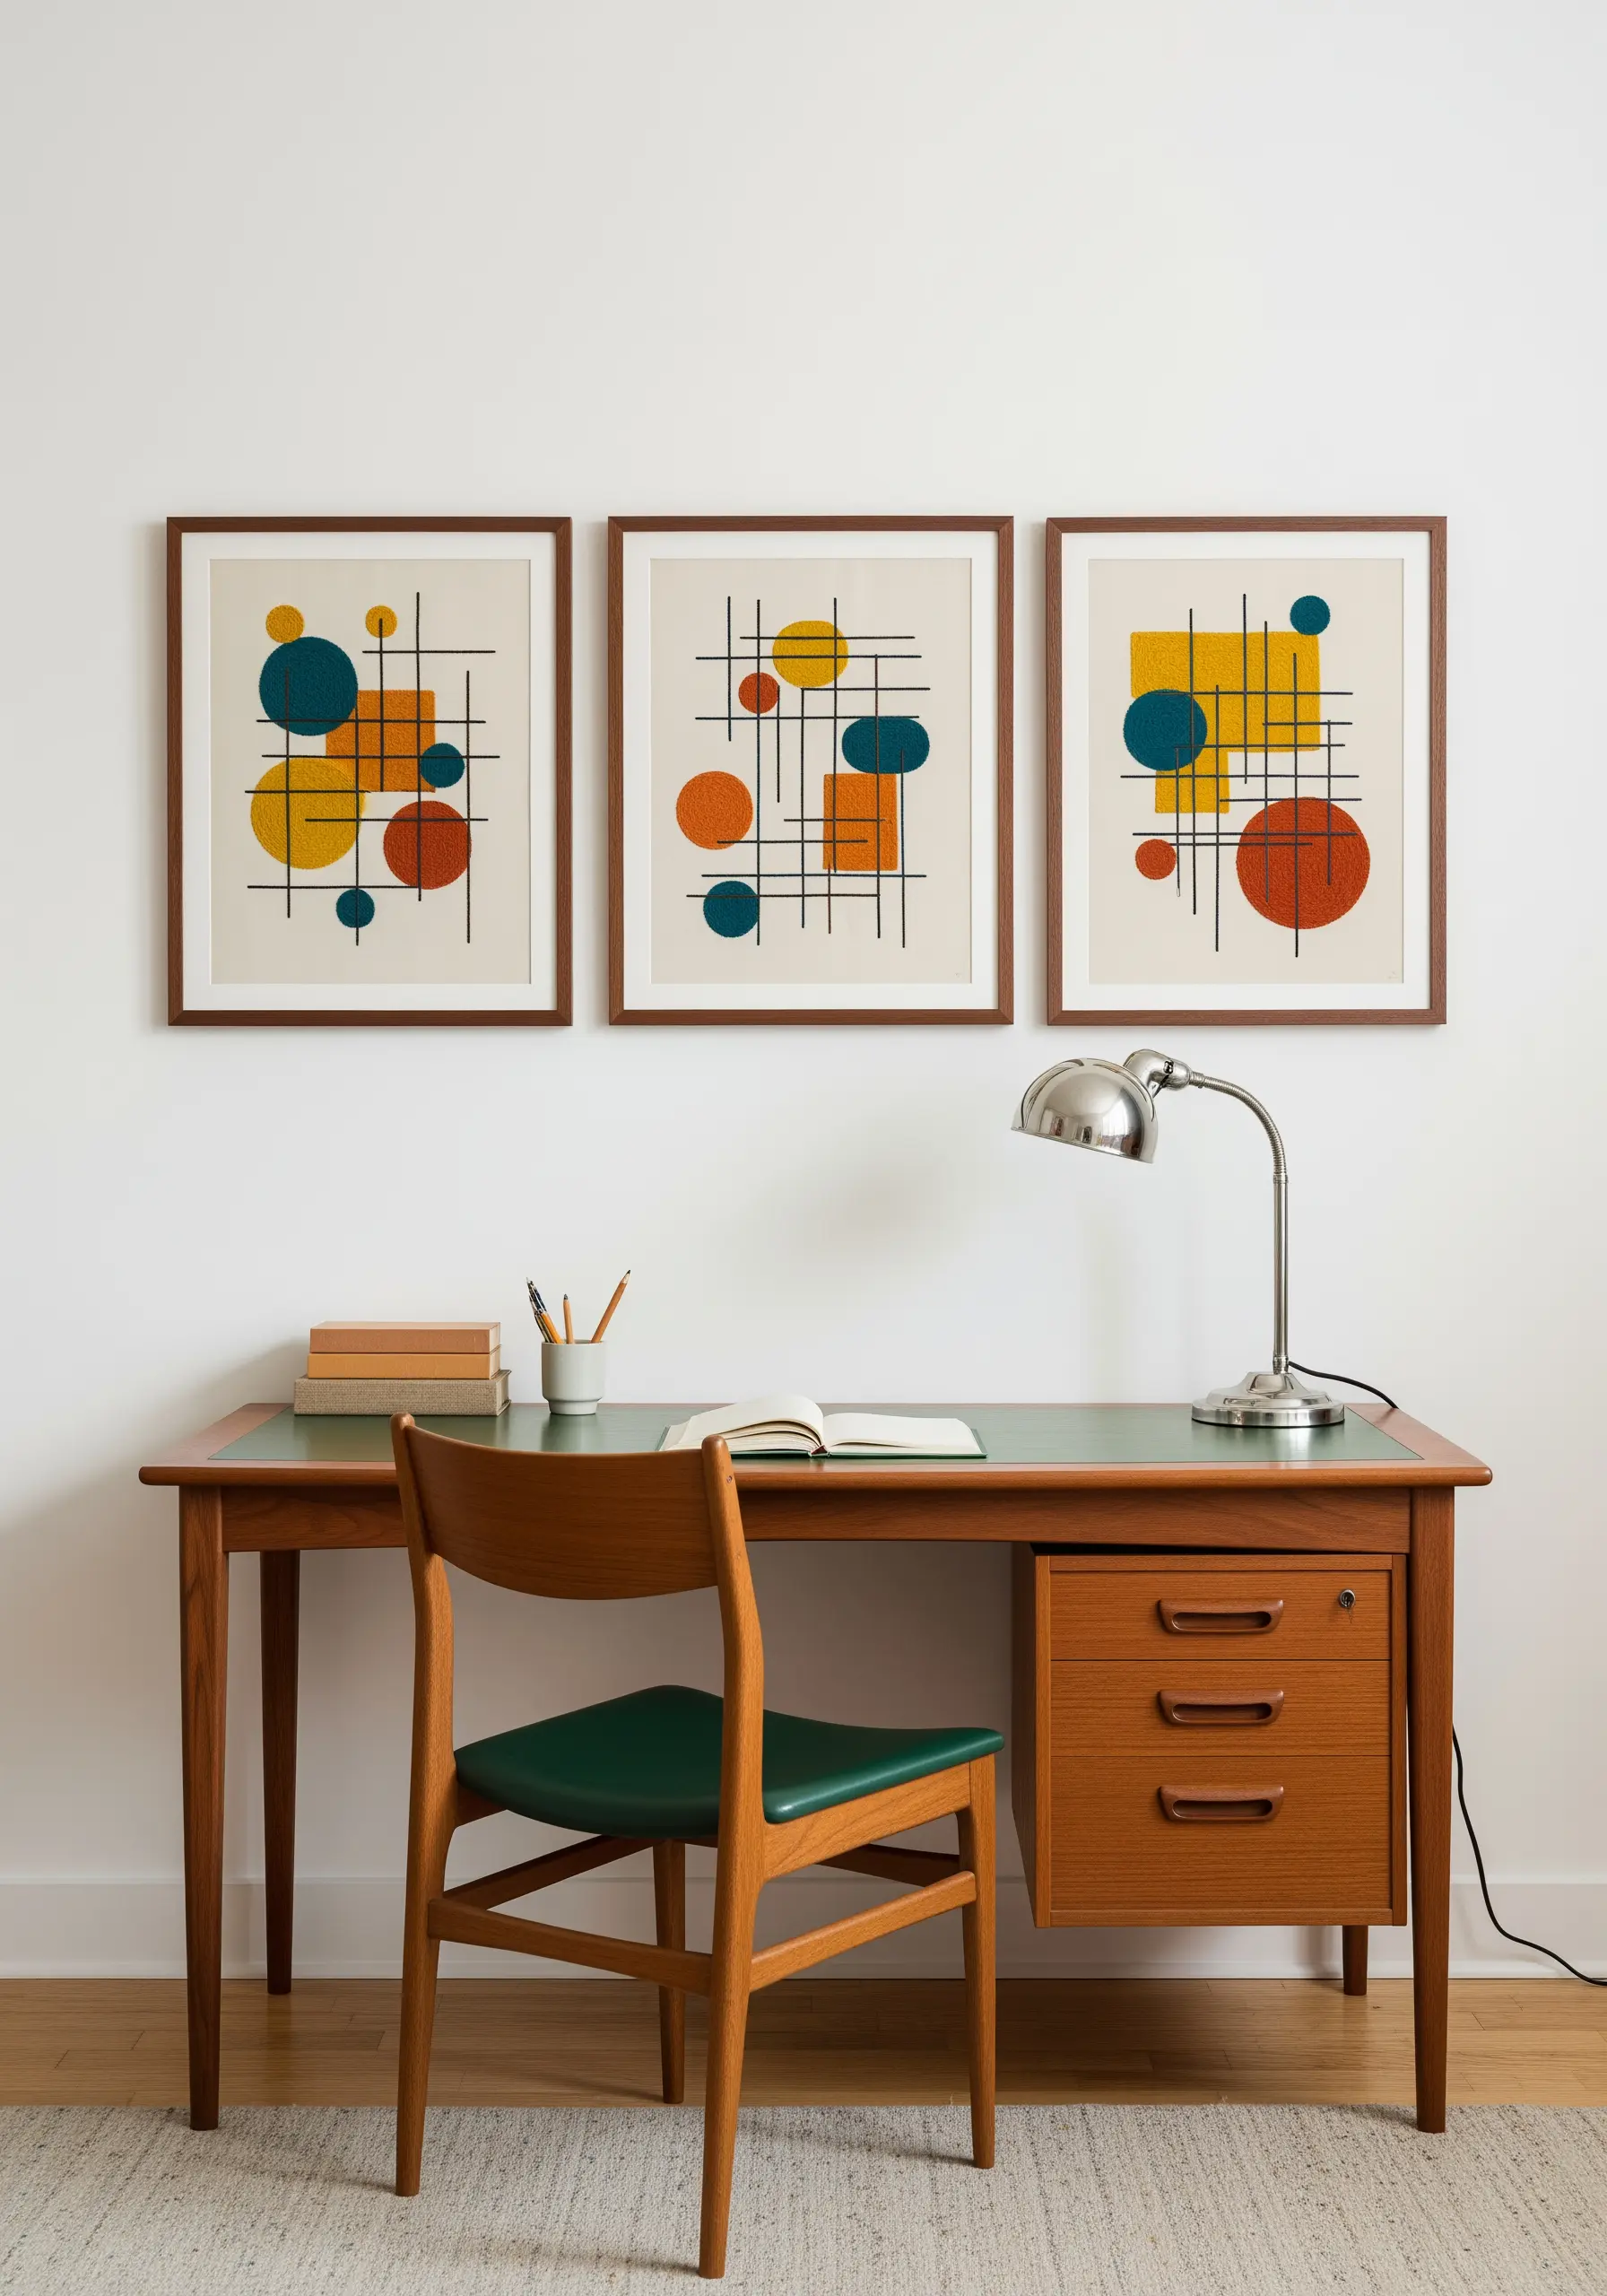
Achieve the clean, balanced aesthetic of mid-century modern design by treating your hoop like a graphic designer’s canvas.
Use a fine-tipped, heat-erasable pen to draw your grid and shapes directly onto the fabric, ensuring perfect placement.
Stitch the thin black lines using a two-strand backstitch for precision.
Fill the circles and squares with a perfectly smooth satin stitch, making sure every stitch lies flat and parallel.
The key is the color palette: choose two or three complementary colors (like teal and orange) and one neutral to create harmony without overwhelming the design.
4. Curate a Cohesive Geometric Gallery Wall
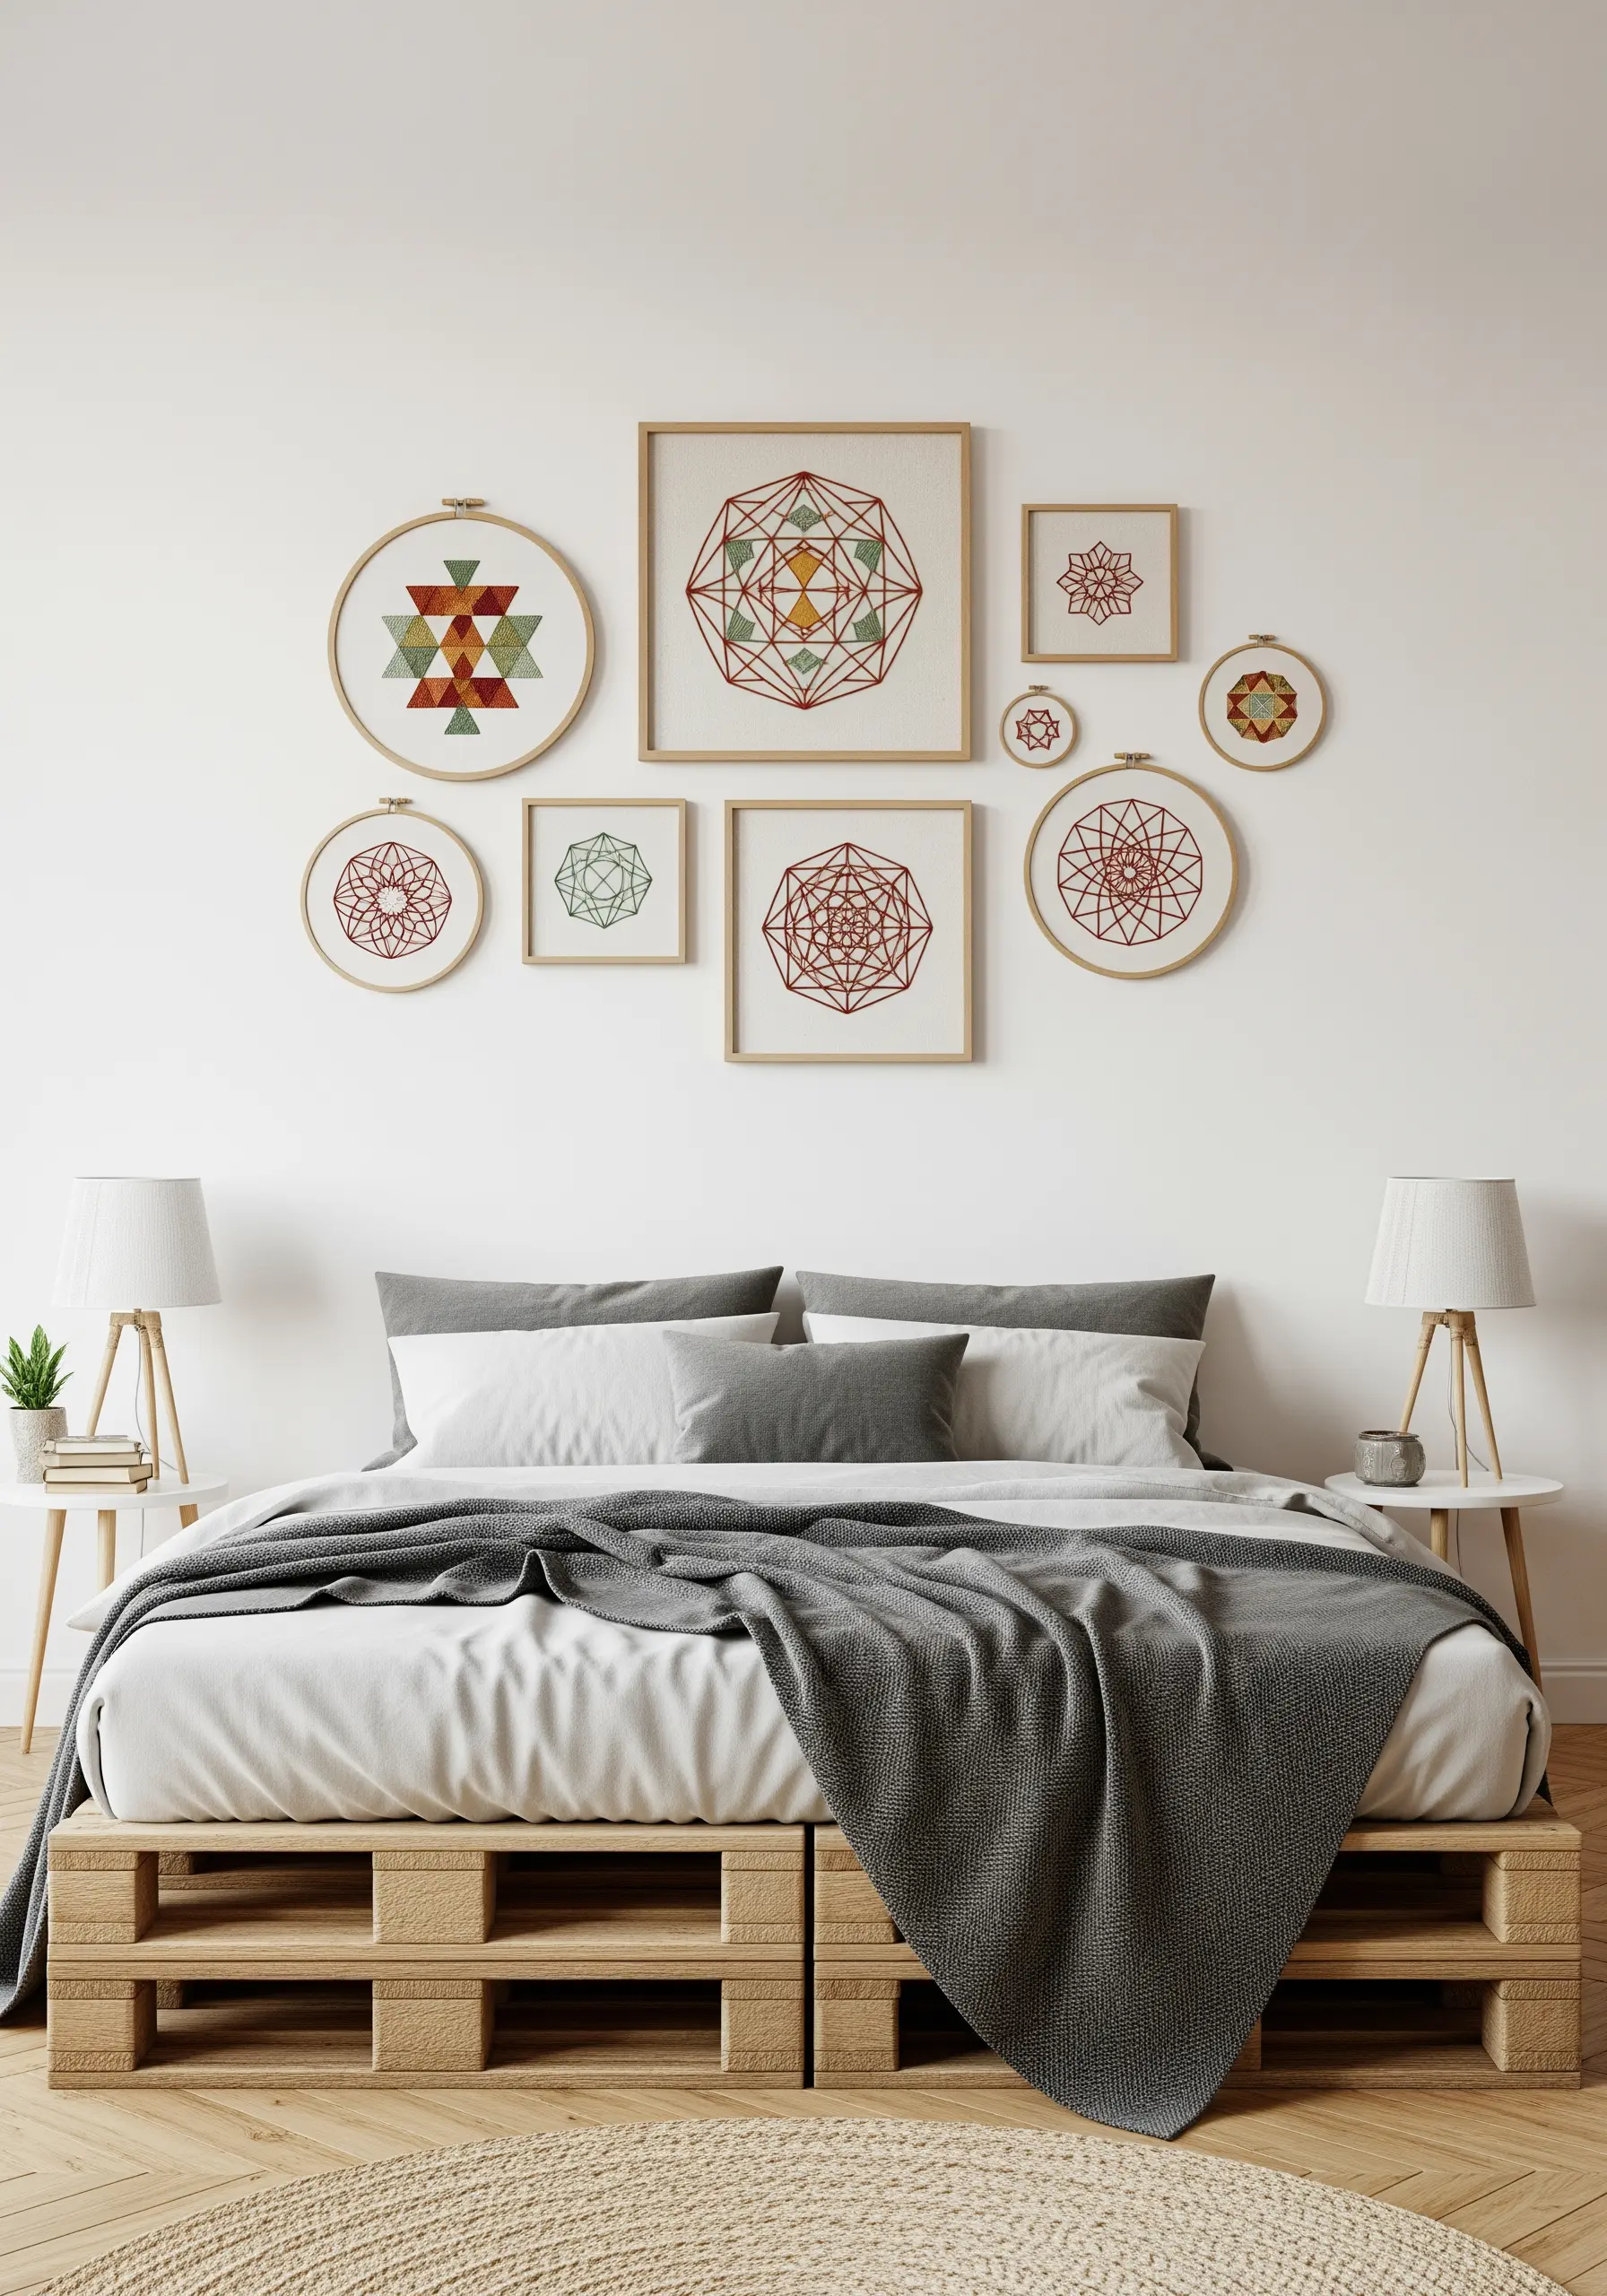
Design a stunning gallery wall by unifying different geometric patterns with a consistent theme and color story.
Select three to four core colors and use them across all your pieces, varying their dominance in each hoop.
Combine different geometric styles—like mandalas, chevrons, and simple triangles—to create visual interest.
Mix traditional framing with the raw look of embroidery hoops to add textural variety.
This approach ensures your collection feels intentional and curated, turning a simple bedroom wall into one of your favorite elegant framed embroidery artworks.
5. Embrace Simplicity with a Single Continuous Line
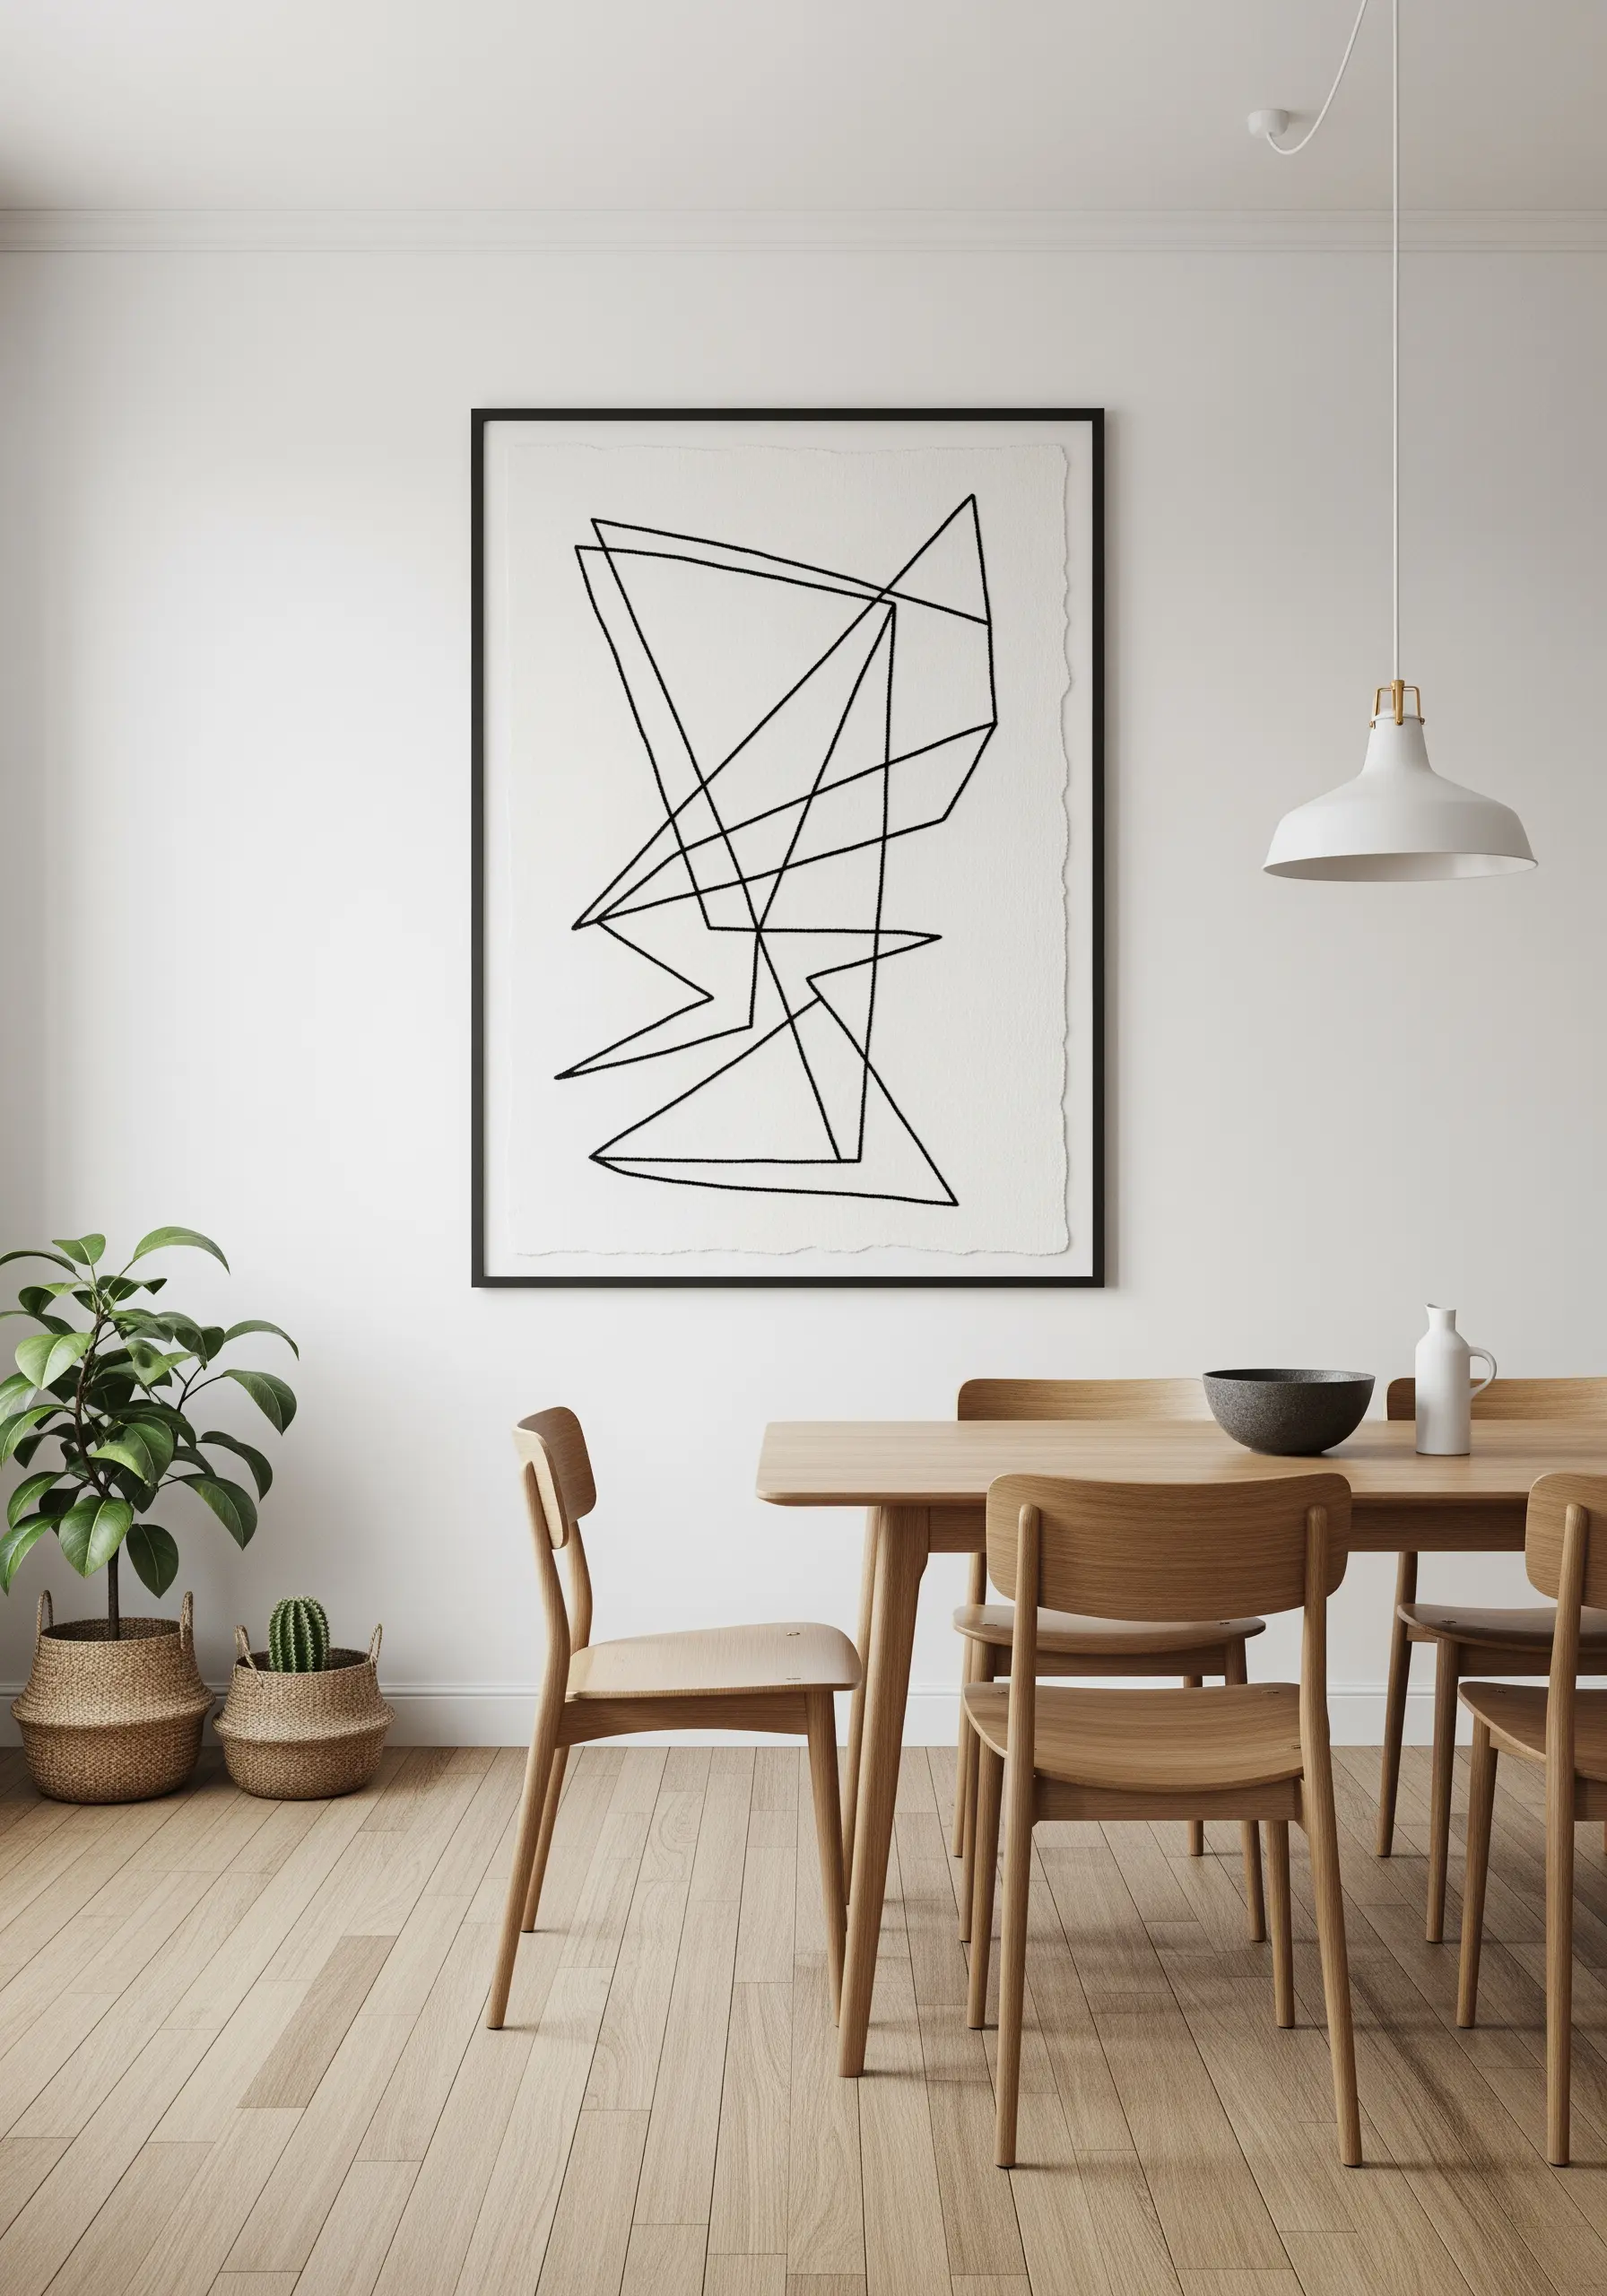
Create a powerful abstract piece by using a single, unbroken line to form your geometric composition.
To achieve a perfectly smooth and solid line, use a whipped backstitch or a stem stitch with high tension.
Use a heavier-weight thread, like a Pearl Cotton No. 8, to give the line presence and weight against the negative space of the fabric.
Mount the finished piece on acid-free paper with a deckled edge to add an extra layer of texture and artistry before framing.
This minimalist approach celebrates the purity of form, making it one of those abstract framed embroidery patterns that feels both modern and timeless.
6. Go Bold with Architectural Color Blocking
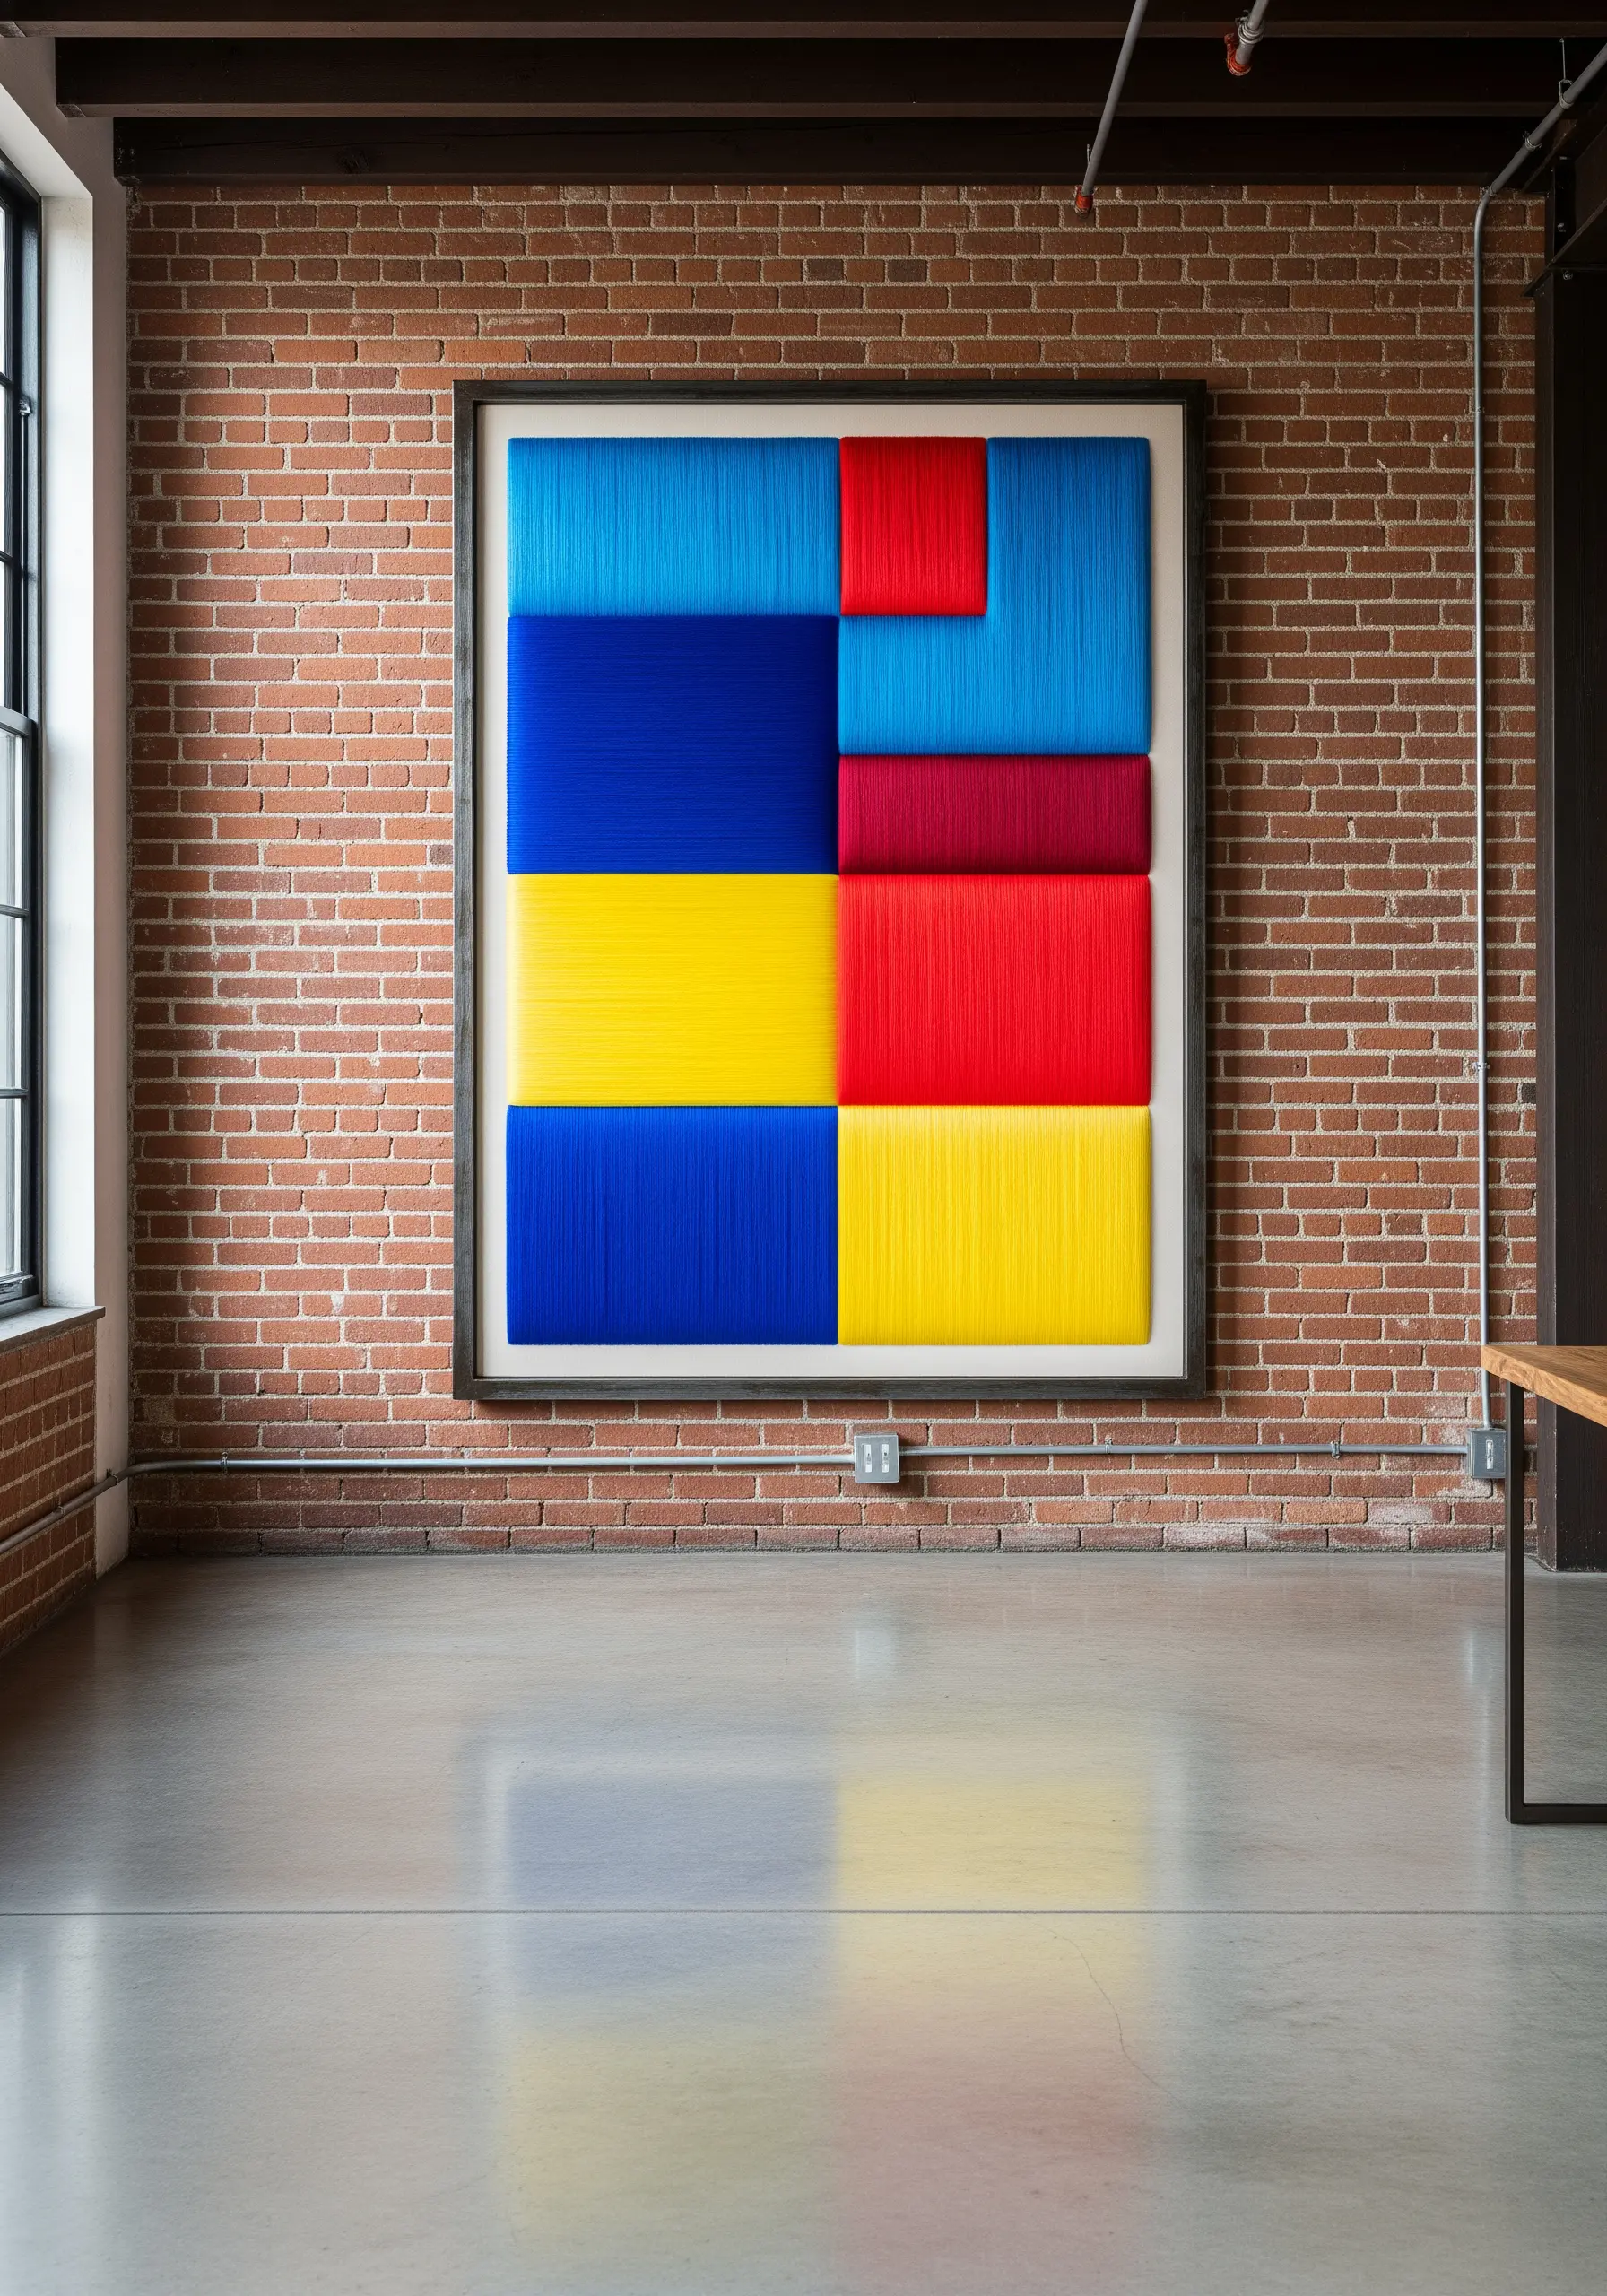
Make a high-impact statement by using thick yarn or roving to create large-scale color blocks.
Instead of stitching through the fabric, this technique involves wrapping the fibers tightly around a canvas or sturdy board.
Plan your geometric sections and wrap each one with your chosen color, ensuring the strands are perfectly parallel and densely packed.
The tension is crucial—too loose and it will look messy, too tight and the canvas may warp.
This method allows you to create large-scale embroidery tapestries with incredible texture and graphic power, perfect for an industrial or modern space.
7. Evoke Natural Textures within Geometric Shapes
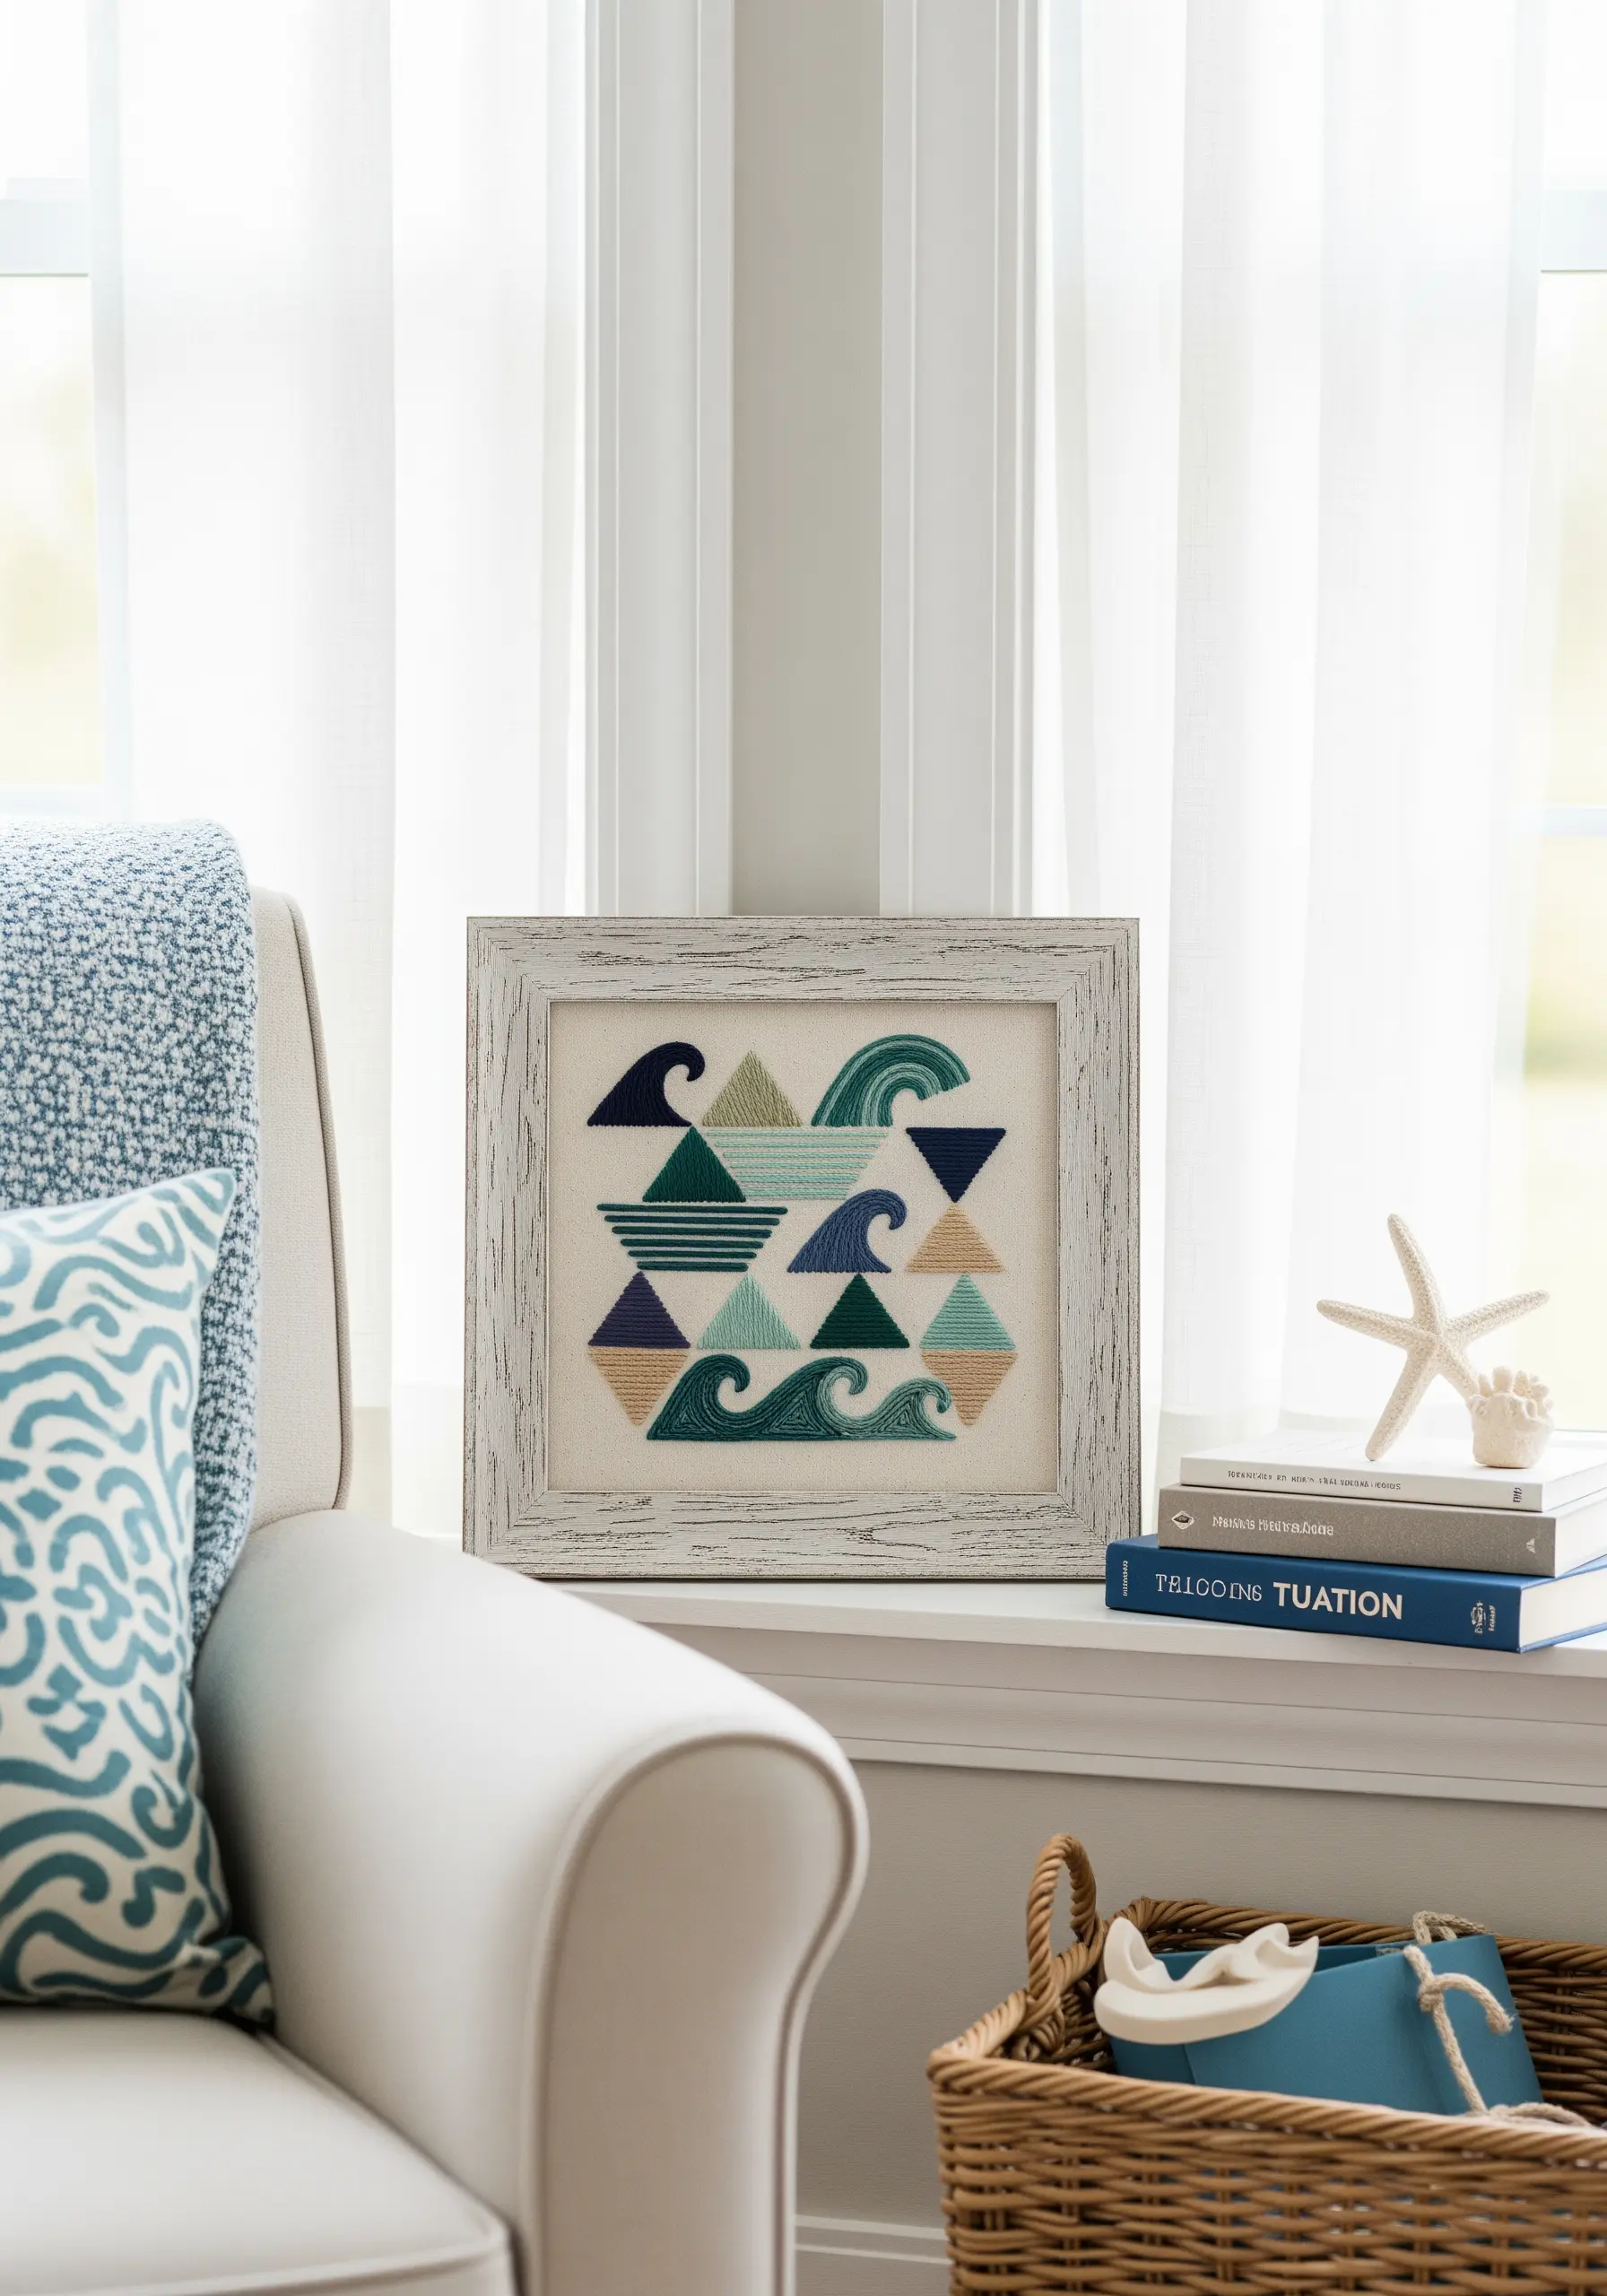
Use geometric constraints to interpret organic elements, like ocean waves, in a fresh, modern way.
Divide your composition into a grid of triangles.
Within each triangle, use varied stitches to represent different textures: tight satin stitches for smooth water, French knots for seafoam, and layered backstitches for rolling waves.
Stick to a limited, coastal-inspired color palette—shades of teal, navy, and sand—to unify the design.
This technique blends the structure of geometry with the fluidity of nature, making it a perfect coastal, ocean-inspired piece.
8. Achieve Precision with Symmetrical Folk Patterns
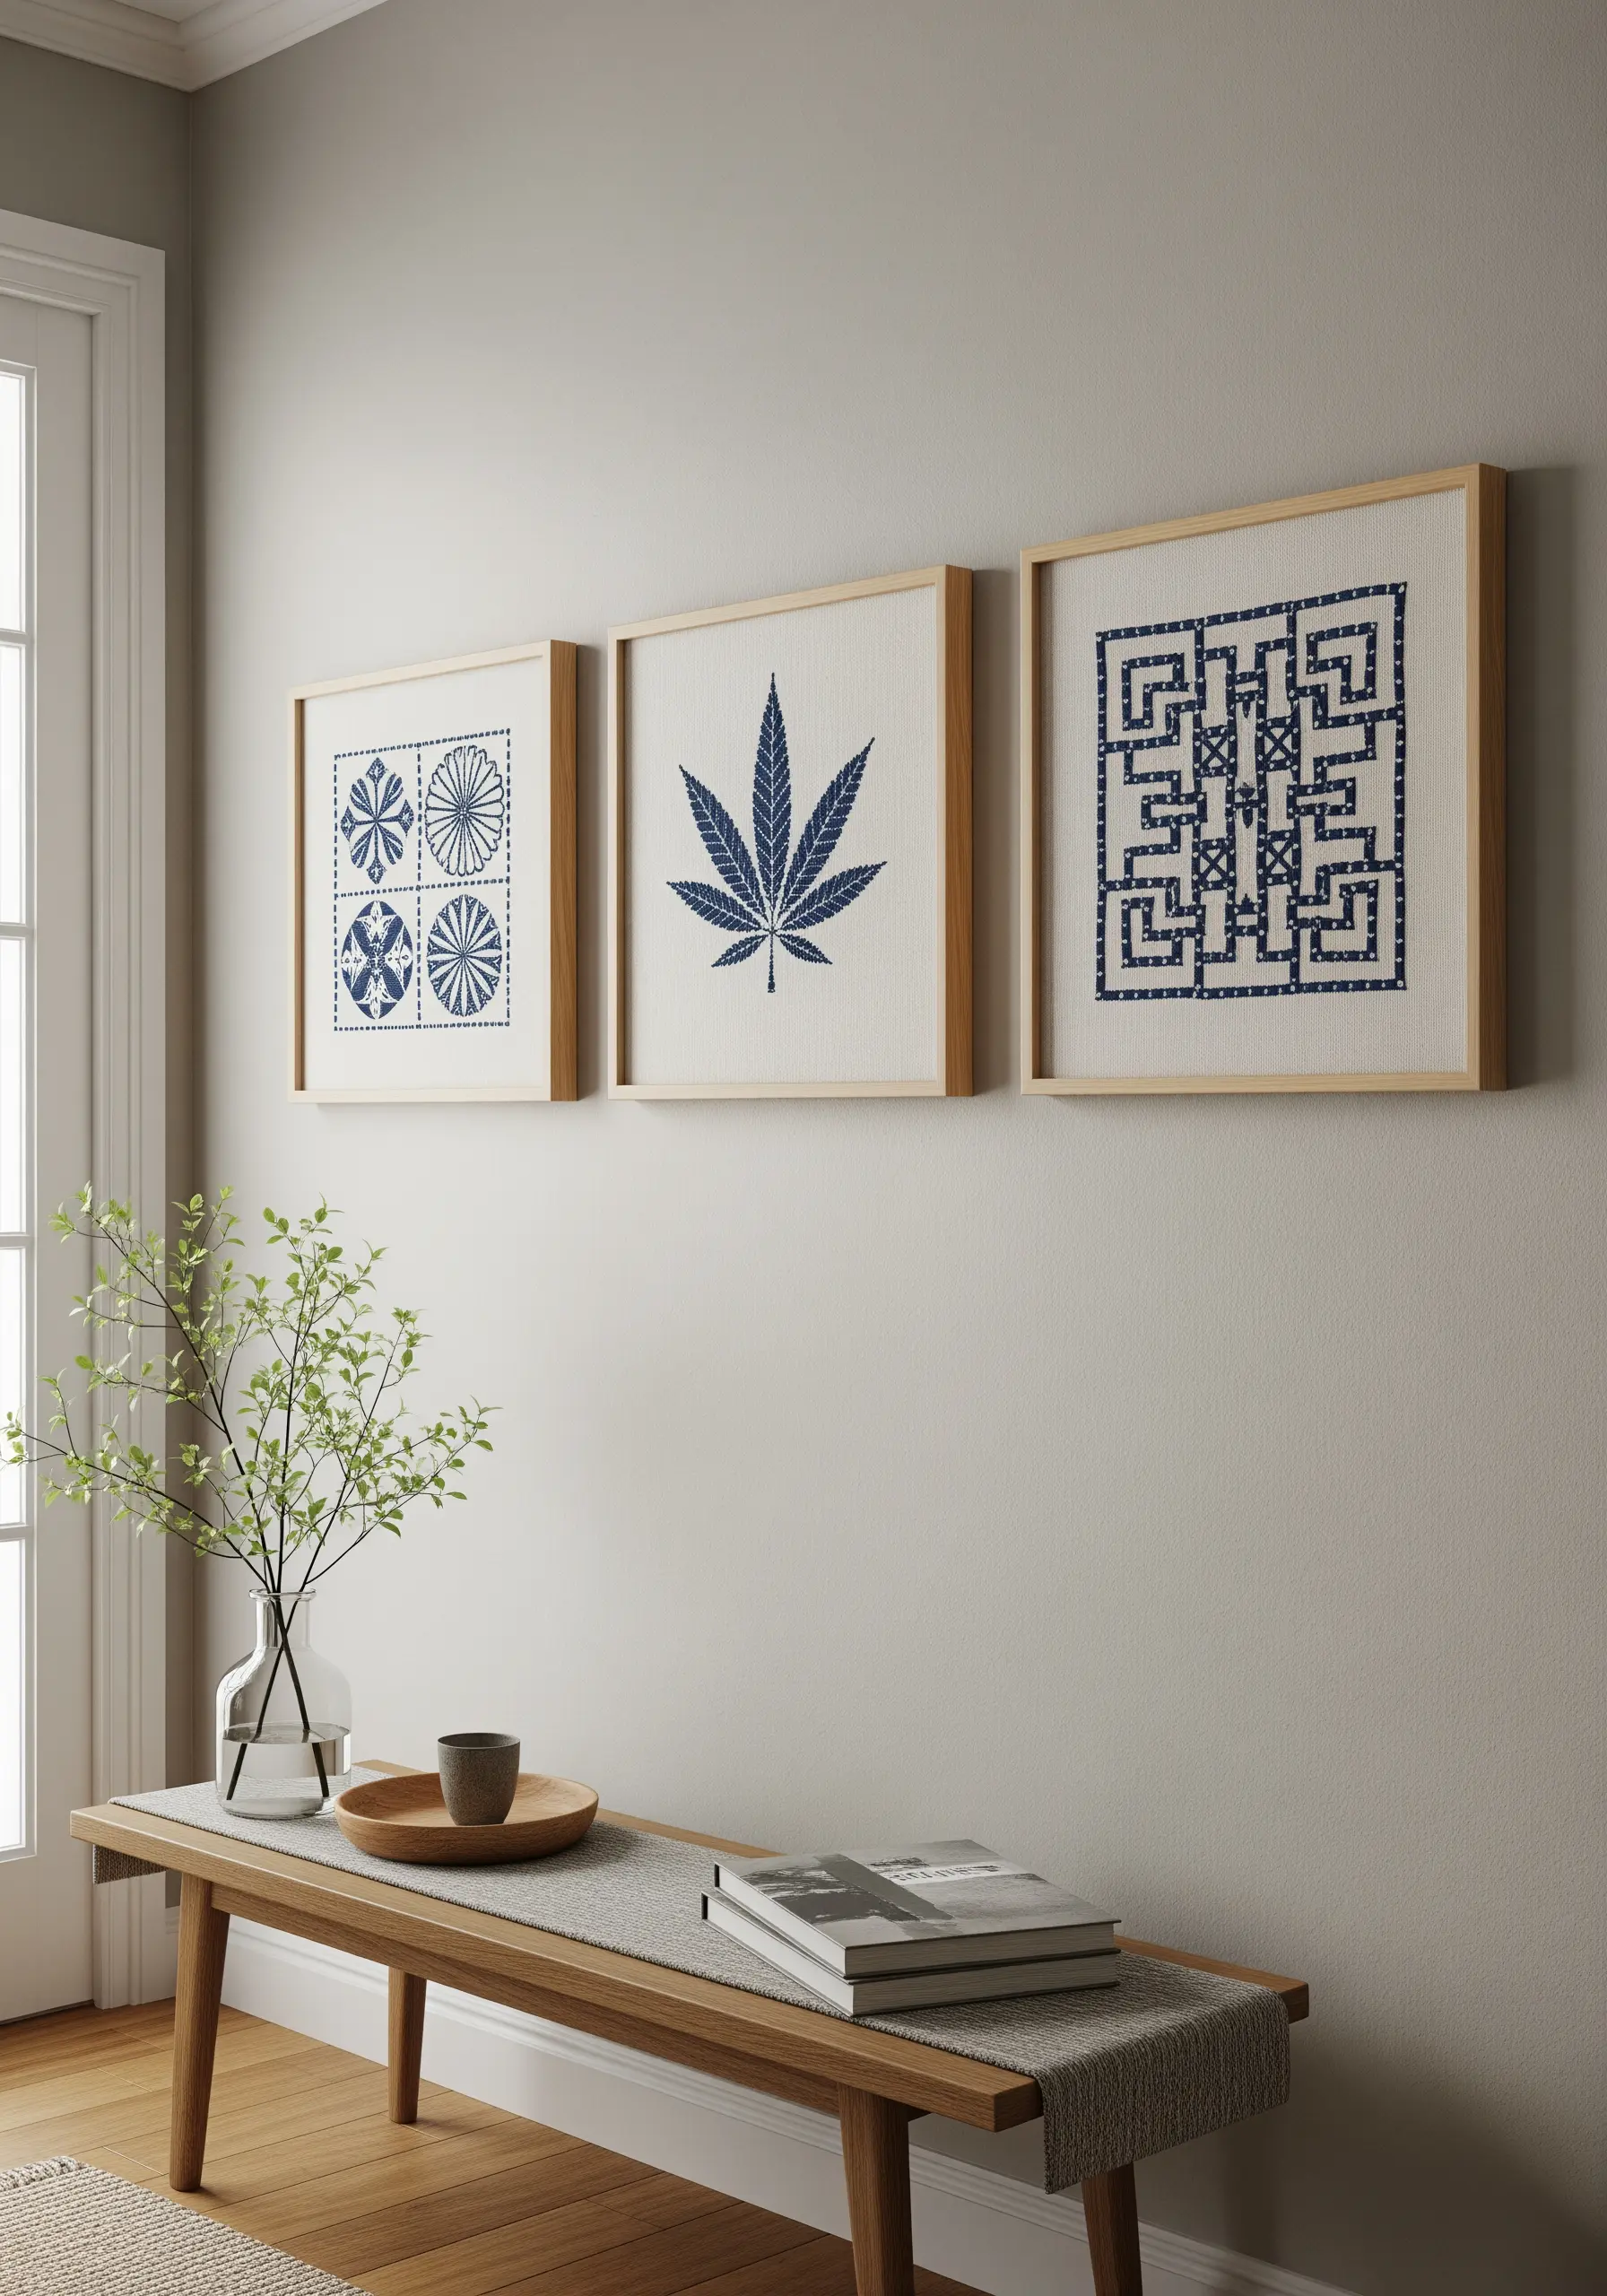
Create clean, crisp folk-art-inspired designs by working on an evenweave fabric like linen or Aida cloth.
This fabric’s grid structure allows you to execute perfectly symmetrical patterns using counted-thread techniques like blackwork or cross-stitch.
Use a single, high-contrast color, such as navy blue on natural linen, to give the design a classic, sophisticated feel.
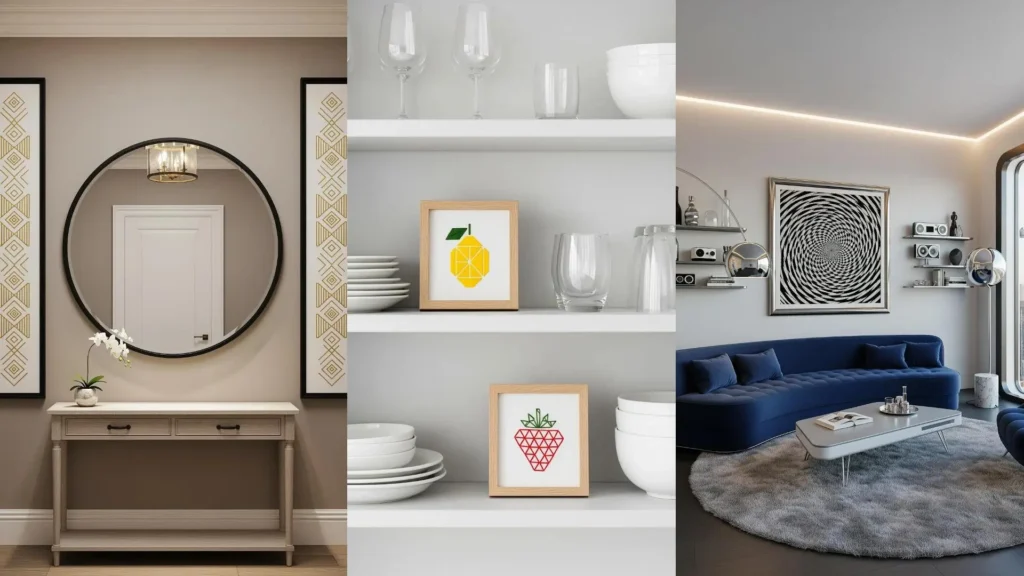
Grouping three related but distinct patterns together creates a visually satisfying triptych for a hallway or entryway.
These Scandinavian-style embroidery decor ideas add a touch of handmade elegance to any room.
9. Juxtapose Modern Stitches with Ornate Frames
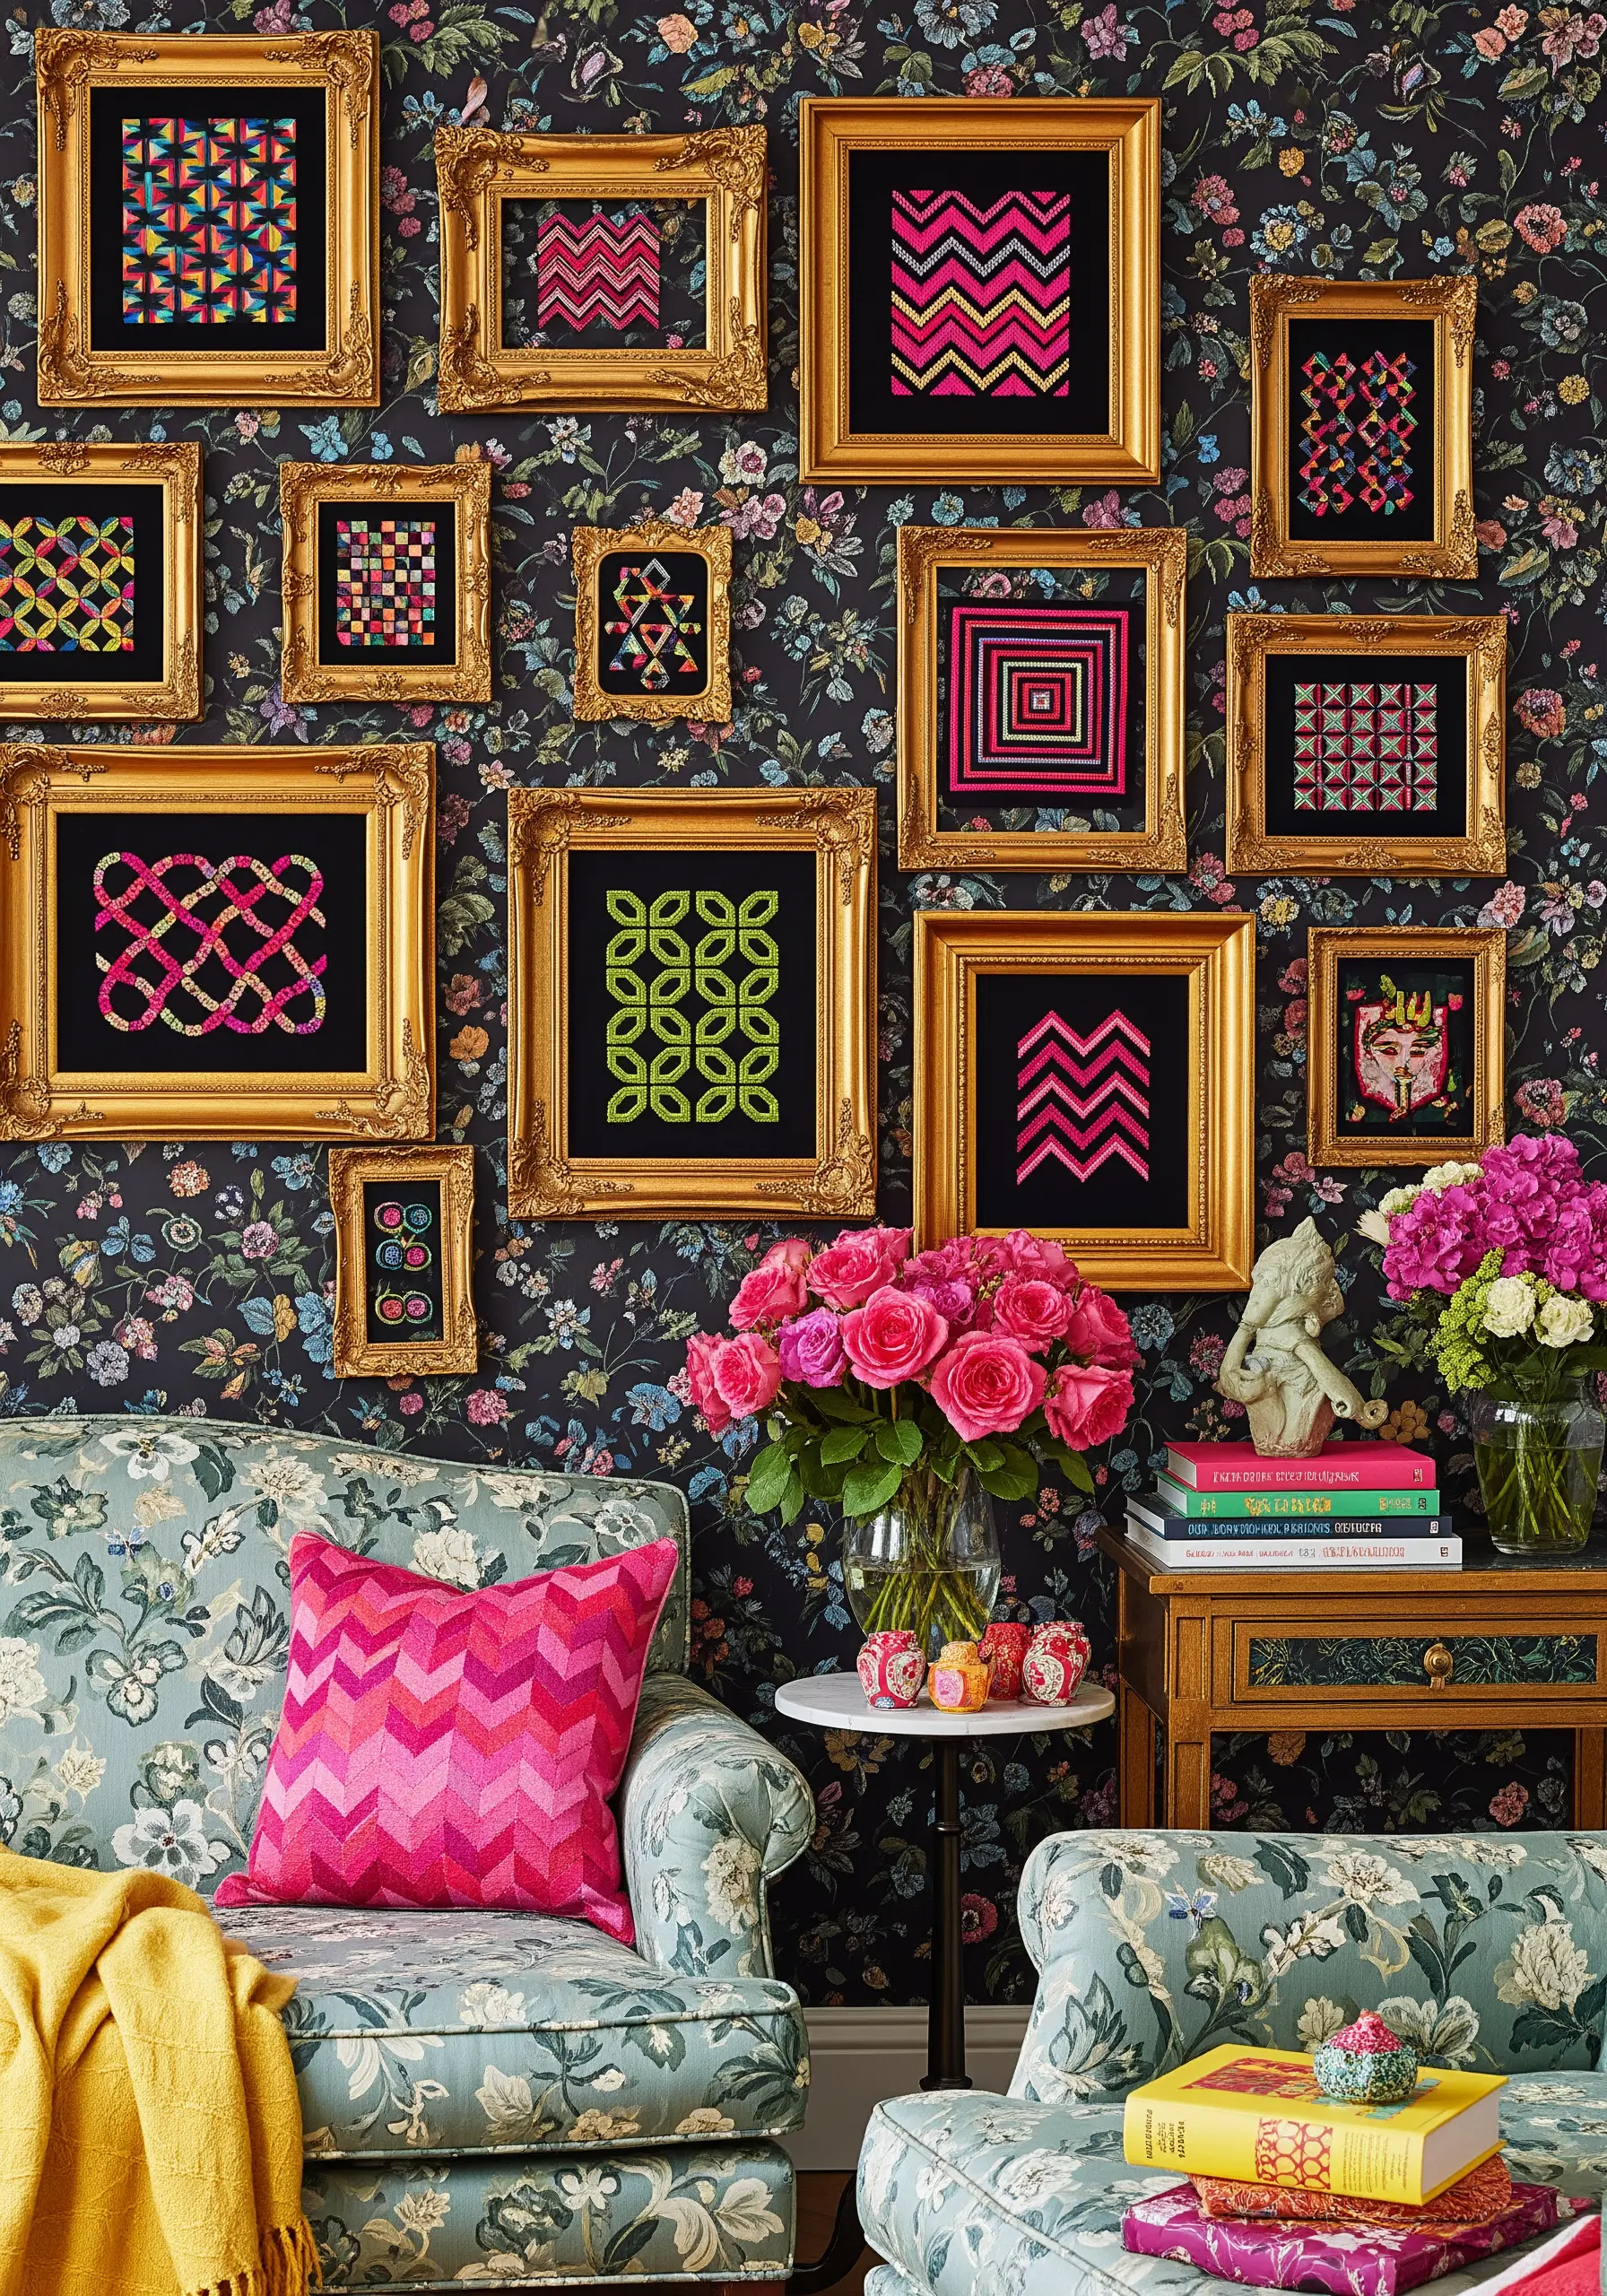
Create an exciting visual tension by pairing bright, modern geometric embroidery with traditional, ornate frames.
Use high-contrast, neon threads on a black fabric background to make your geometric patterns pop with electric energy.
Stitch simple, repeating motifs like chevrons, grids, and interlocking squares.
The true artistry comes from the framing: scour flea markets for vintage, gilded frames. The contrast between the intricate, classical frame and the clean, modern stitching is unexpected and utterly chic.
10. Simplify Organic Forms into Geometric Icons
Distill the essence of natural objects like fruits into clean, geometric representations.
Instead of curves, think in lines and angles.
Use a backstitch to outline a series of triangles and polygons that suggest the shape of a lemon or strawberry.
Keep the color palette minimal and true to the source—yellow and green for the lemon, red for the strawberry.
These minimal fruit and botanical embroidery patterns add a touch of stylized charm to kitchen shelves or a dining nook.
11. Create Hypnotic Motion with Concentric Lines
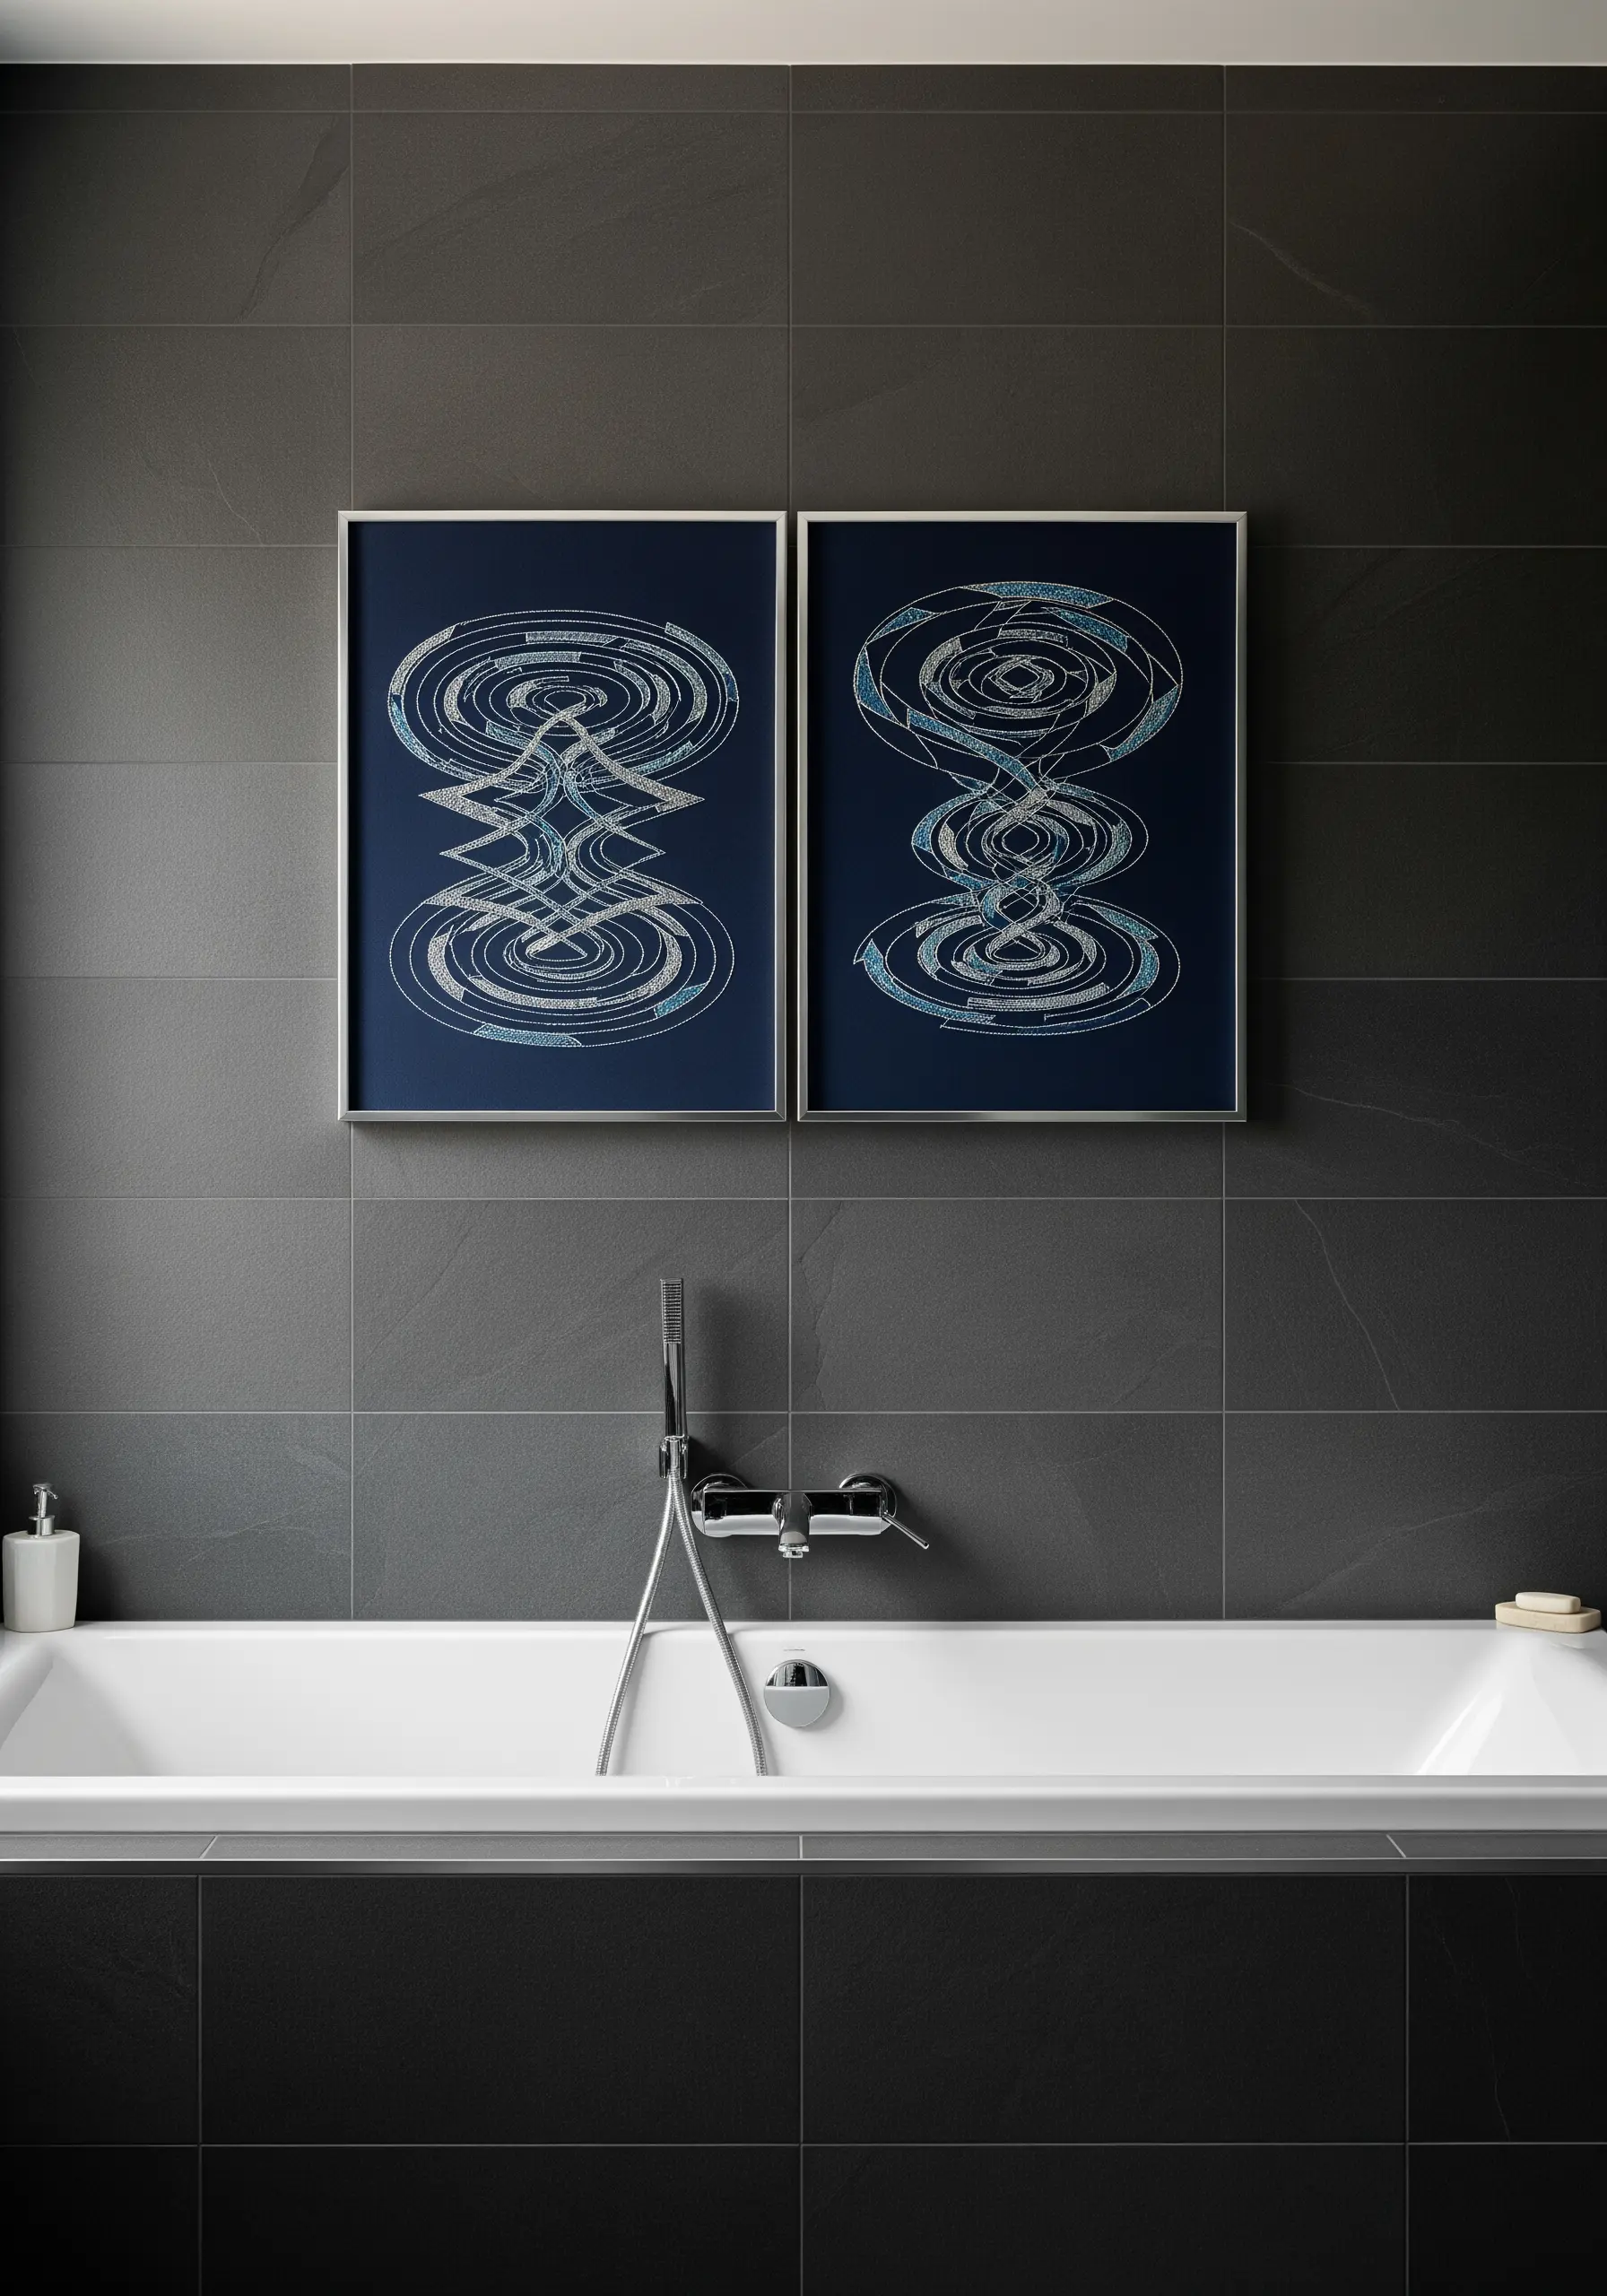
Design a piece that feels like it’s in motion by using carefully spaced concentric or symmetrical lines.
Use a single color of thread in multiple shades—from light to dark—to create a subtle gradient that enhances the illusion of depth.
Alternatively, use a variegated thread that changes color as you stitch, adding an element of unpredictability.
The key to success is precise stitch placement, so use a water-soluble transfer paper to get your pattern just right.
These abstract thread waves and swirls are perfect for a modern, minimalist space like a bathroom or office.
12. Stitch a Spectrum with Geometric Gradients
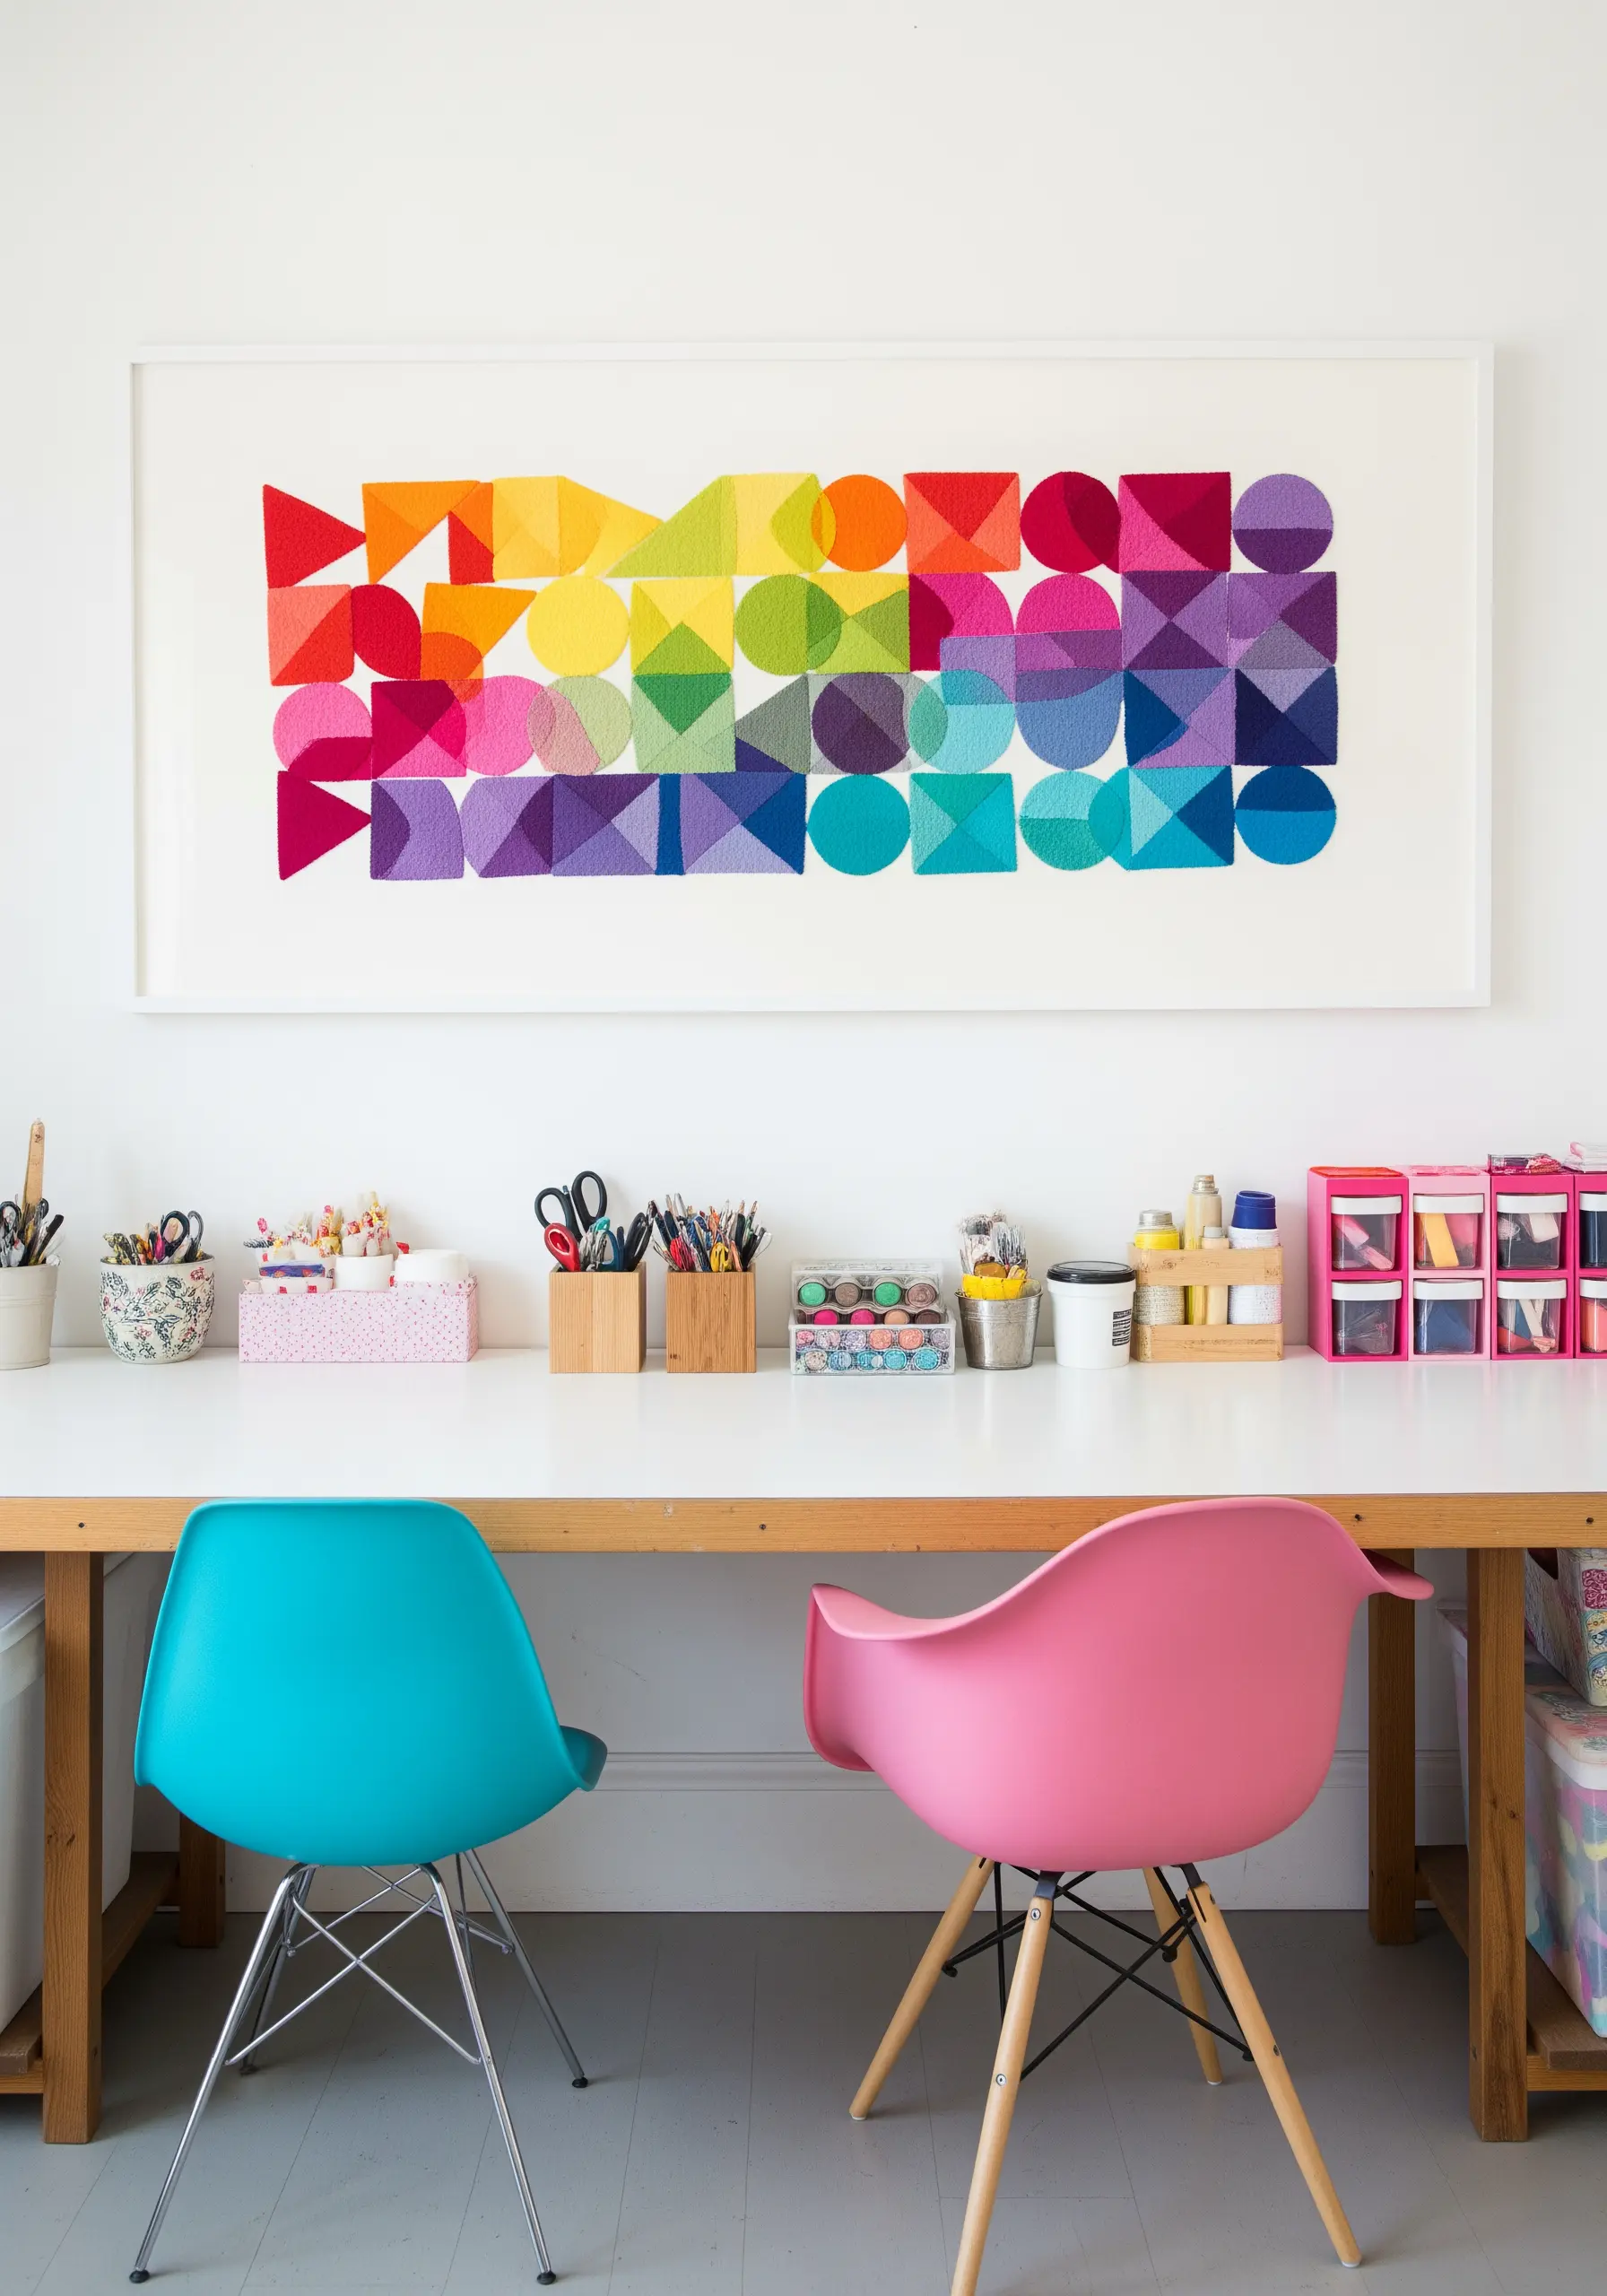
Explore the relationship between color and shape by creating a seamless rainbow gradient across a geometric pattern.
Use long-and-short stitch to fill each shape, allowing the colors to blend softly into one another.
To plan your gradient, arrange your floss colors in order beforehand. Use two strands of thread at a time—one of the old color and one of the new—for a few stitches to ensure a smooth transition.
This technique turns a simple grid of shapes into a vibrant piece of abstract art that looks almost painted.
13. Design Optical Illusions with Line Direction
Create the illusion of three-dimensional planes and movement using only straight lines.
The magic is in the direction of your stitches. Within each section of your design, keep your straight stitches perfectly parallel.
In the adjacent section, change the angle of your stitches—for example, from vertical to horizontal, or from a 45-degree angle to a -45-degree angle.
This shift in direction tricks the eye and creates a dynamic, almost pulsating effect, turning simple thread into modern geometric thread art.
14. Frame Botanicals with Geometric Borders
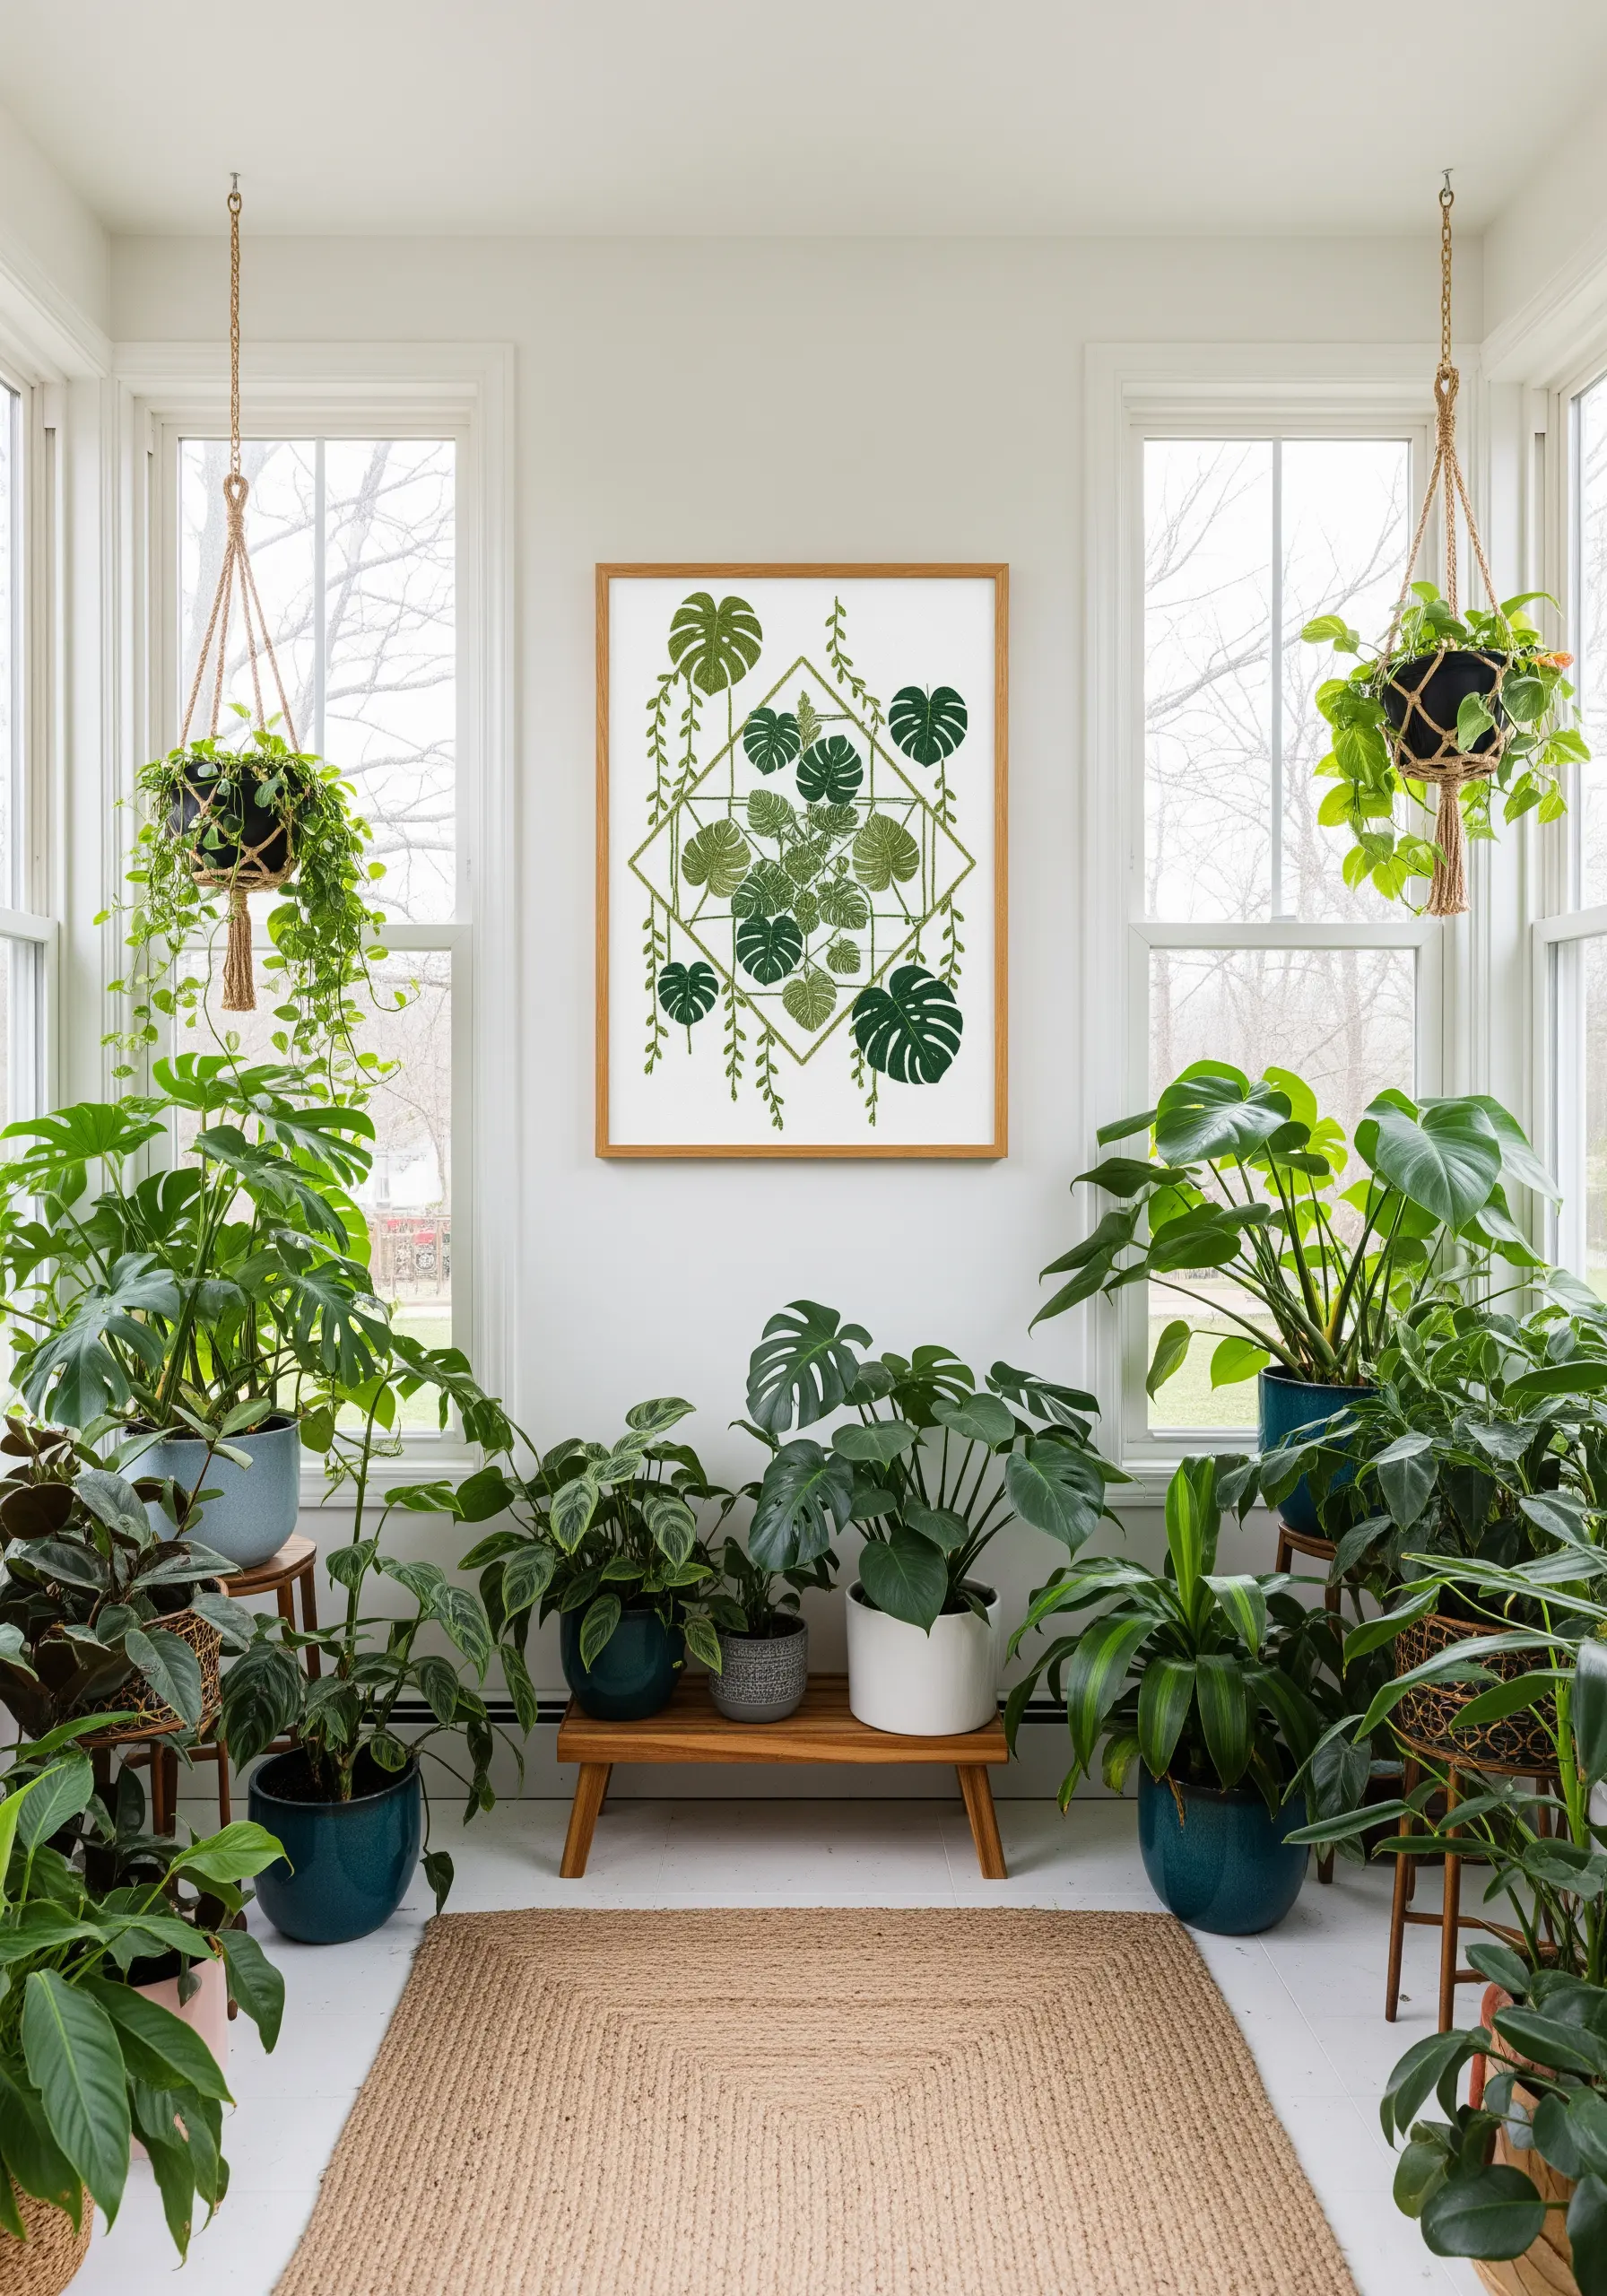
Create a striking composition by contrasting the organic shapes of leaves with the rigid structure of a geometric frame.
Use a clean satin stitch to fill in the Monstera leaves, varying the shade of green to add depth and realism.
For the central diamond and the delicate hanging vines, switch to a simple backstitch or stem stitch. This difference in stitch texture separates the elements visually.
This combination of styles results in a sophisticated piece of botanical textile art that feels both natural and orderly.
15. Achieve a Stained-Glass Effect with Thread
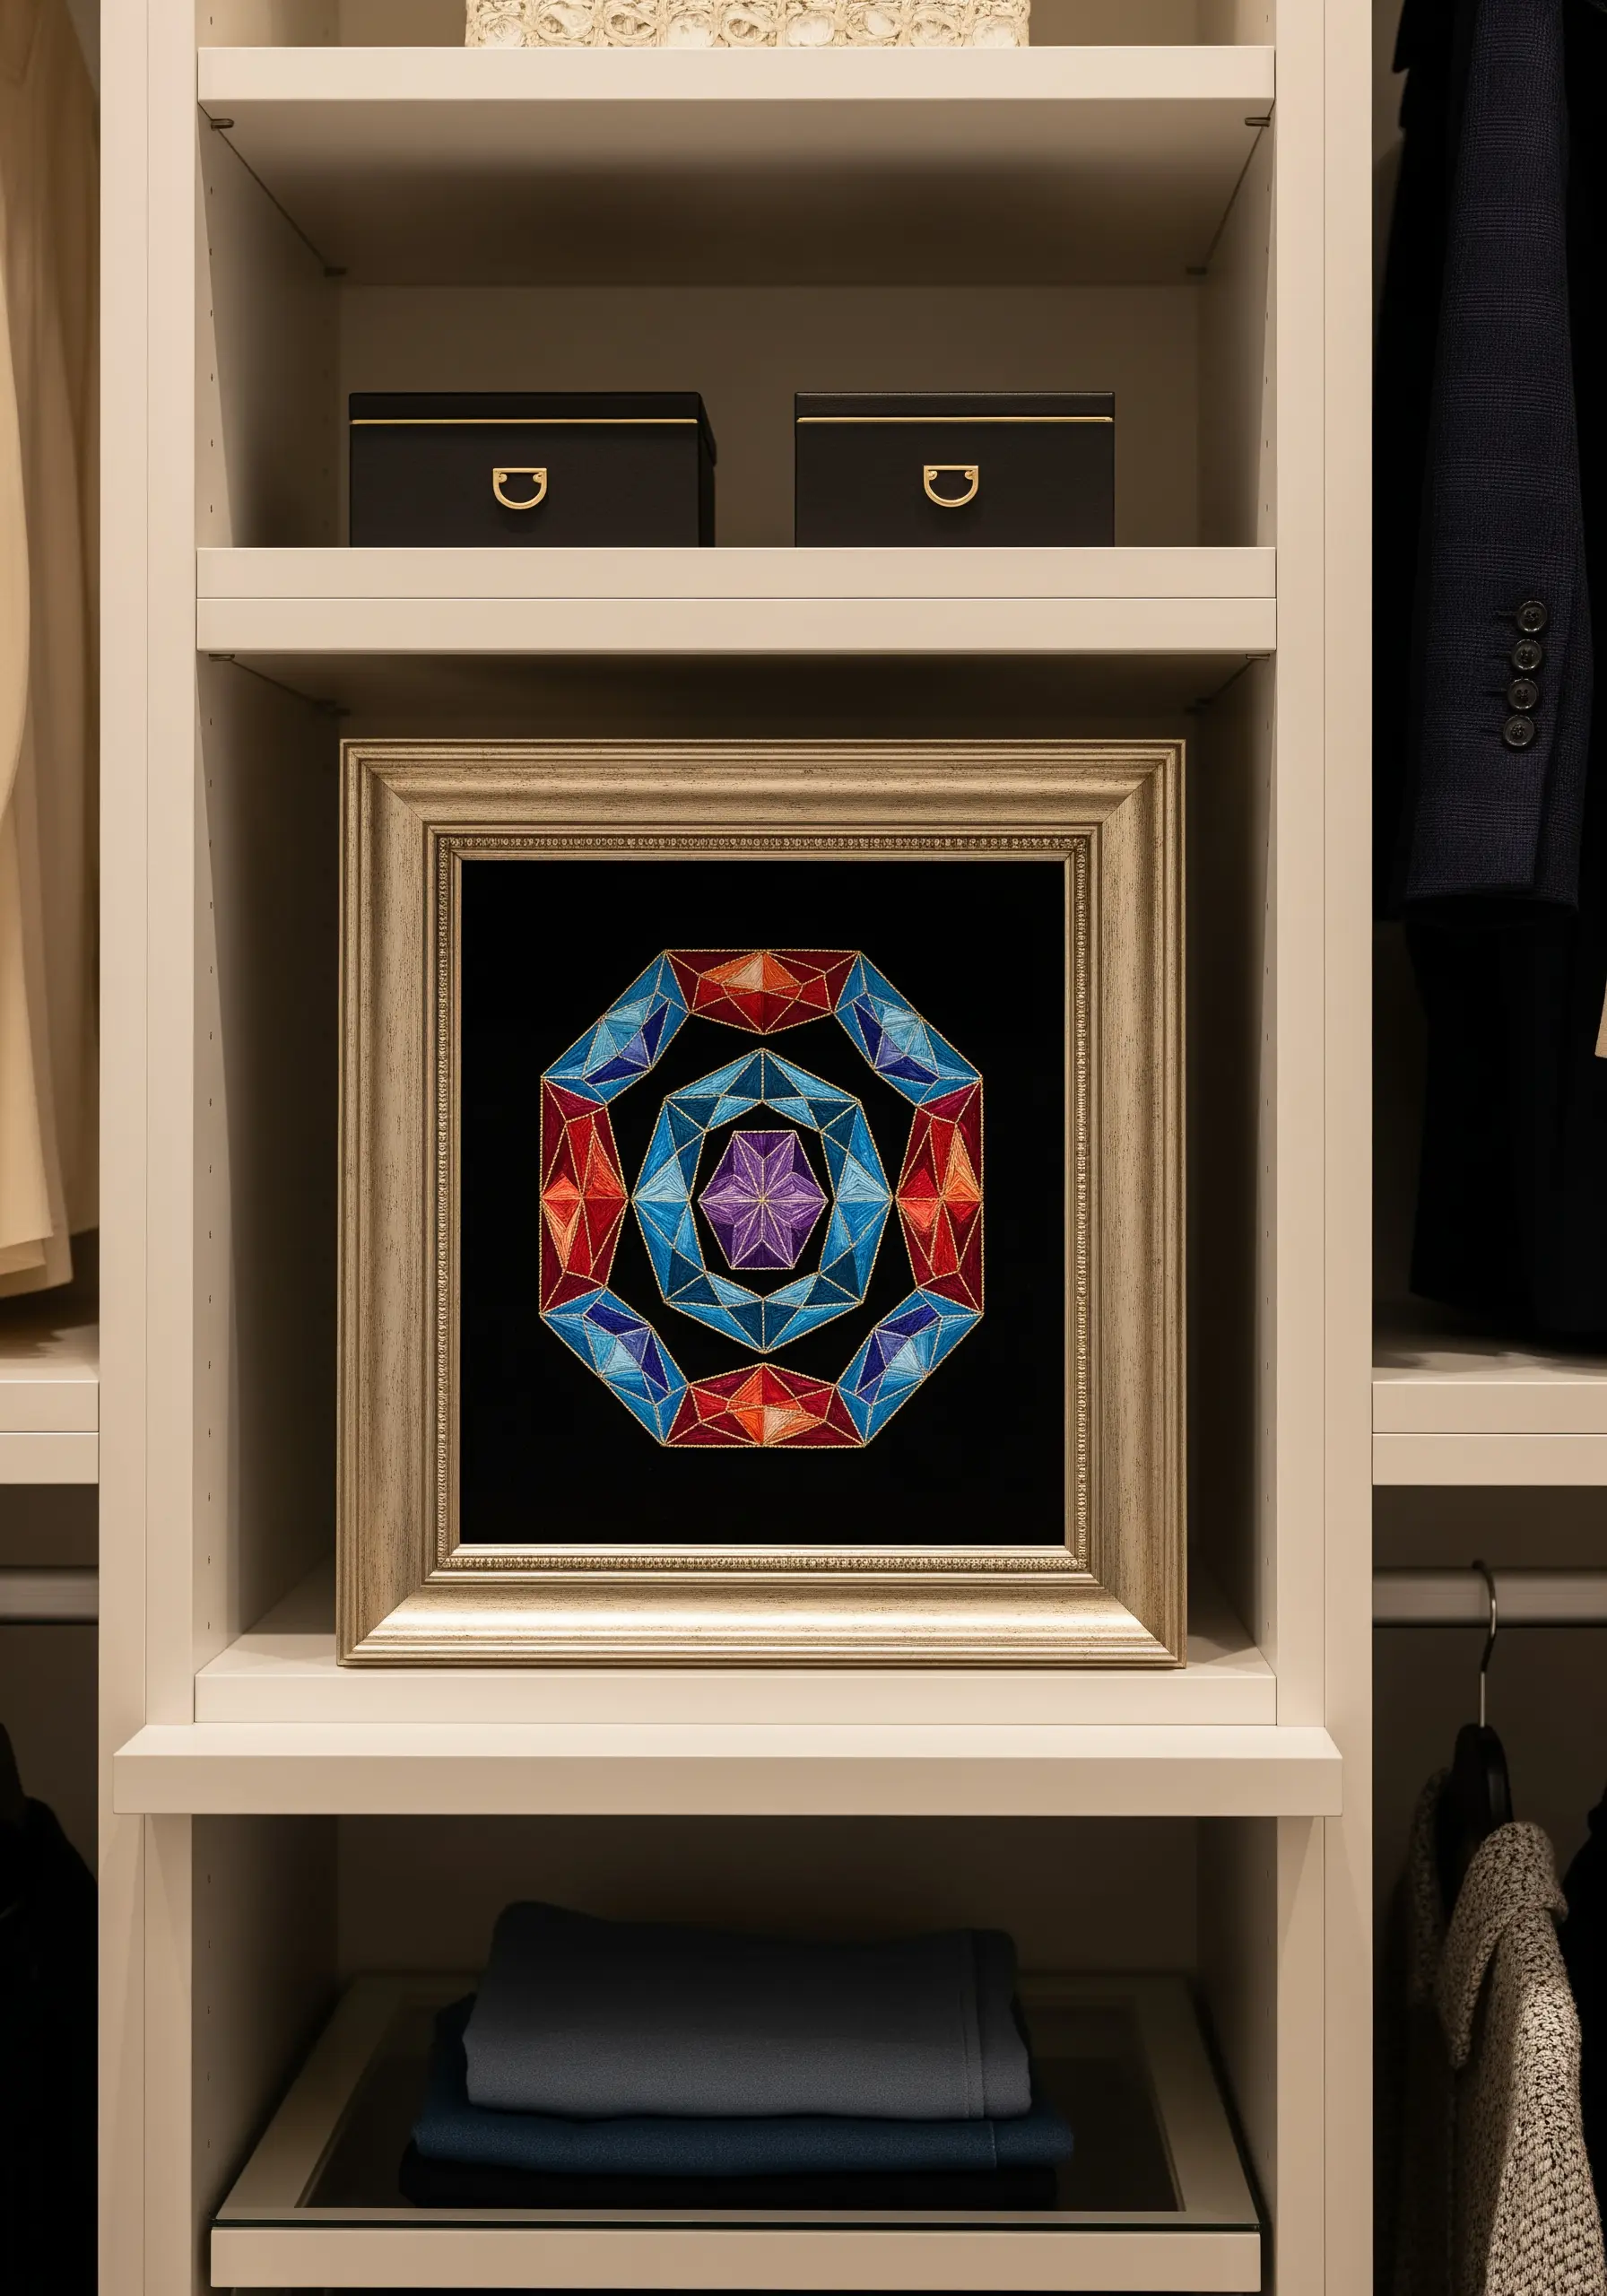
Mimic the vibrant luminosity of stained glass by outlining bold color blocks with a fine, dark thread.
Work on black fabric to make your colors appear even more saturated and jewel-like.
Fill each geometric facet with rich satin stitch, using silky rayon or satin floss for maximum sheen.
Finally, outline each colored section with a single strand of gold or black thread using a backstitch. This ‘leading’ is what defines the shapes and creates the classic stained-glass look.
16. Construct 3D Illusions with String Art Techniques
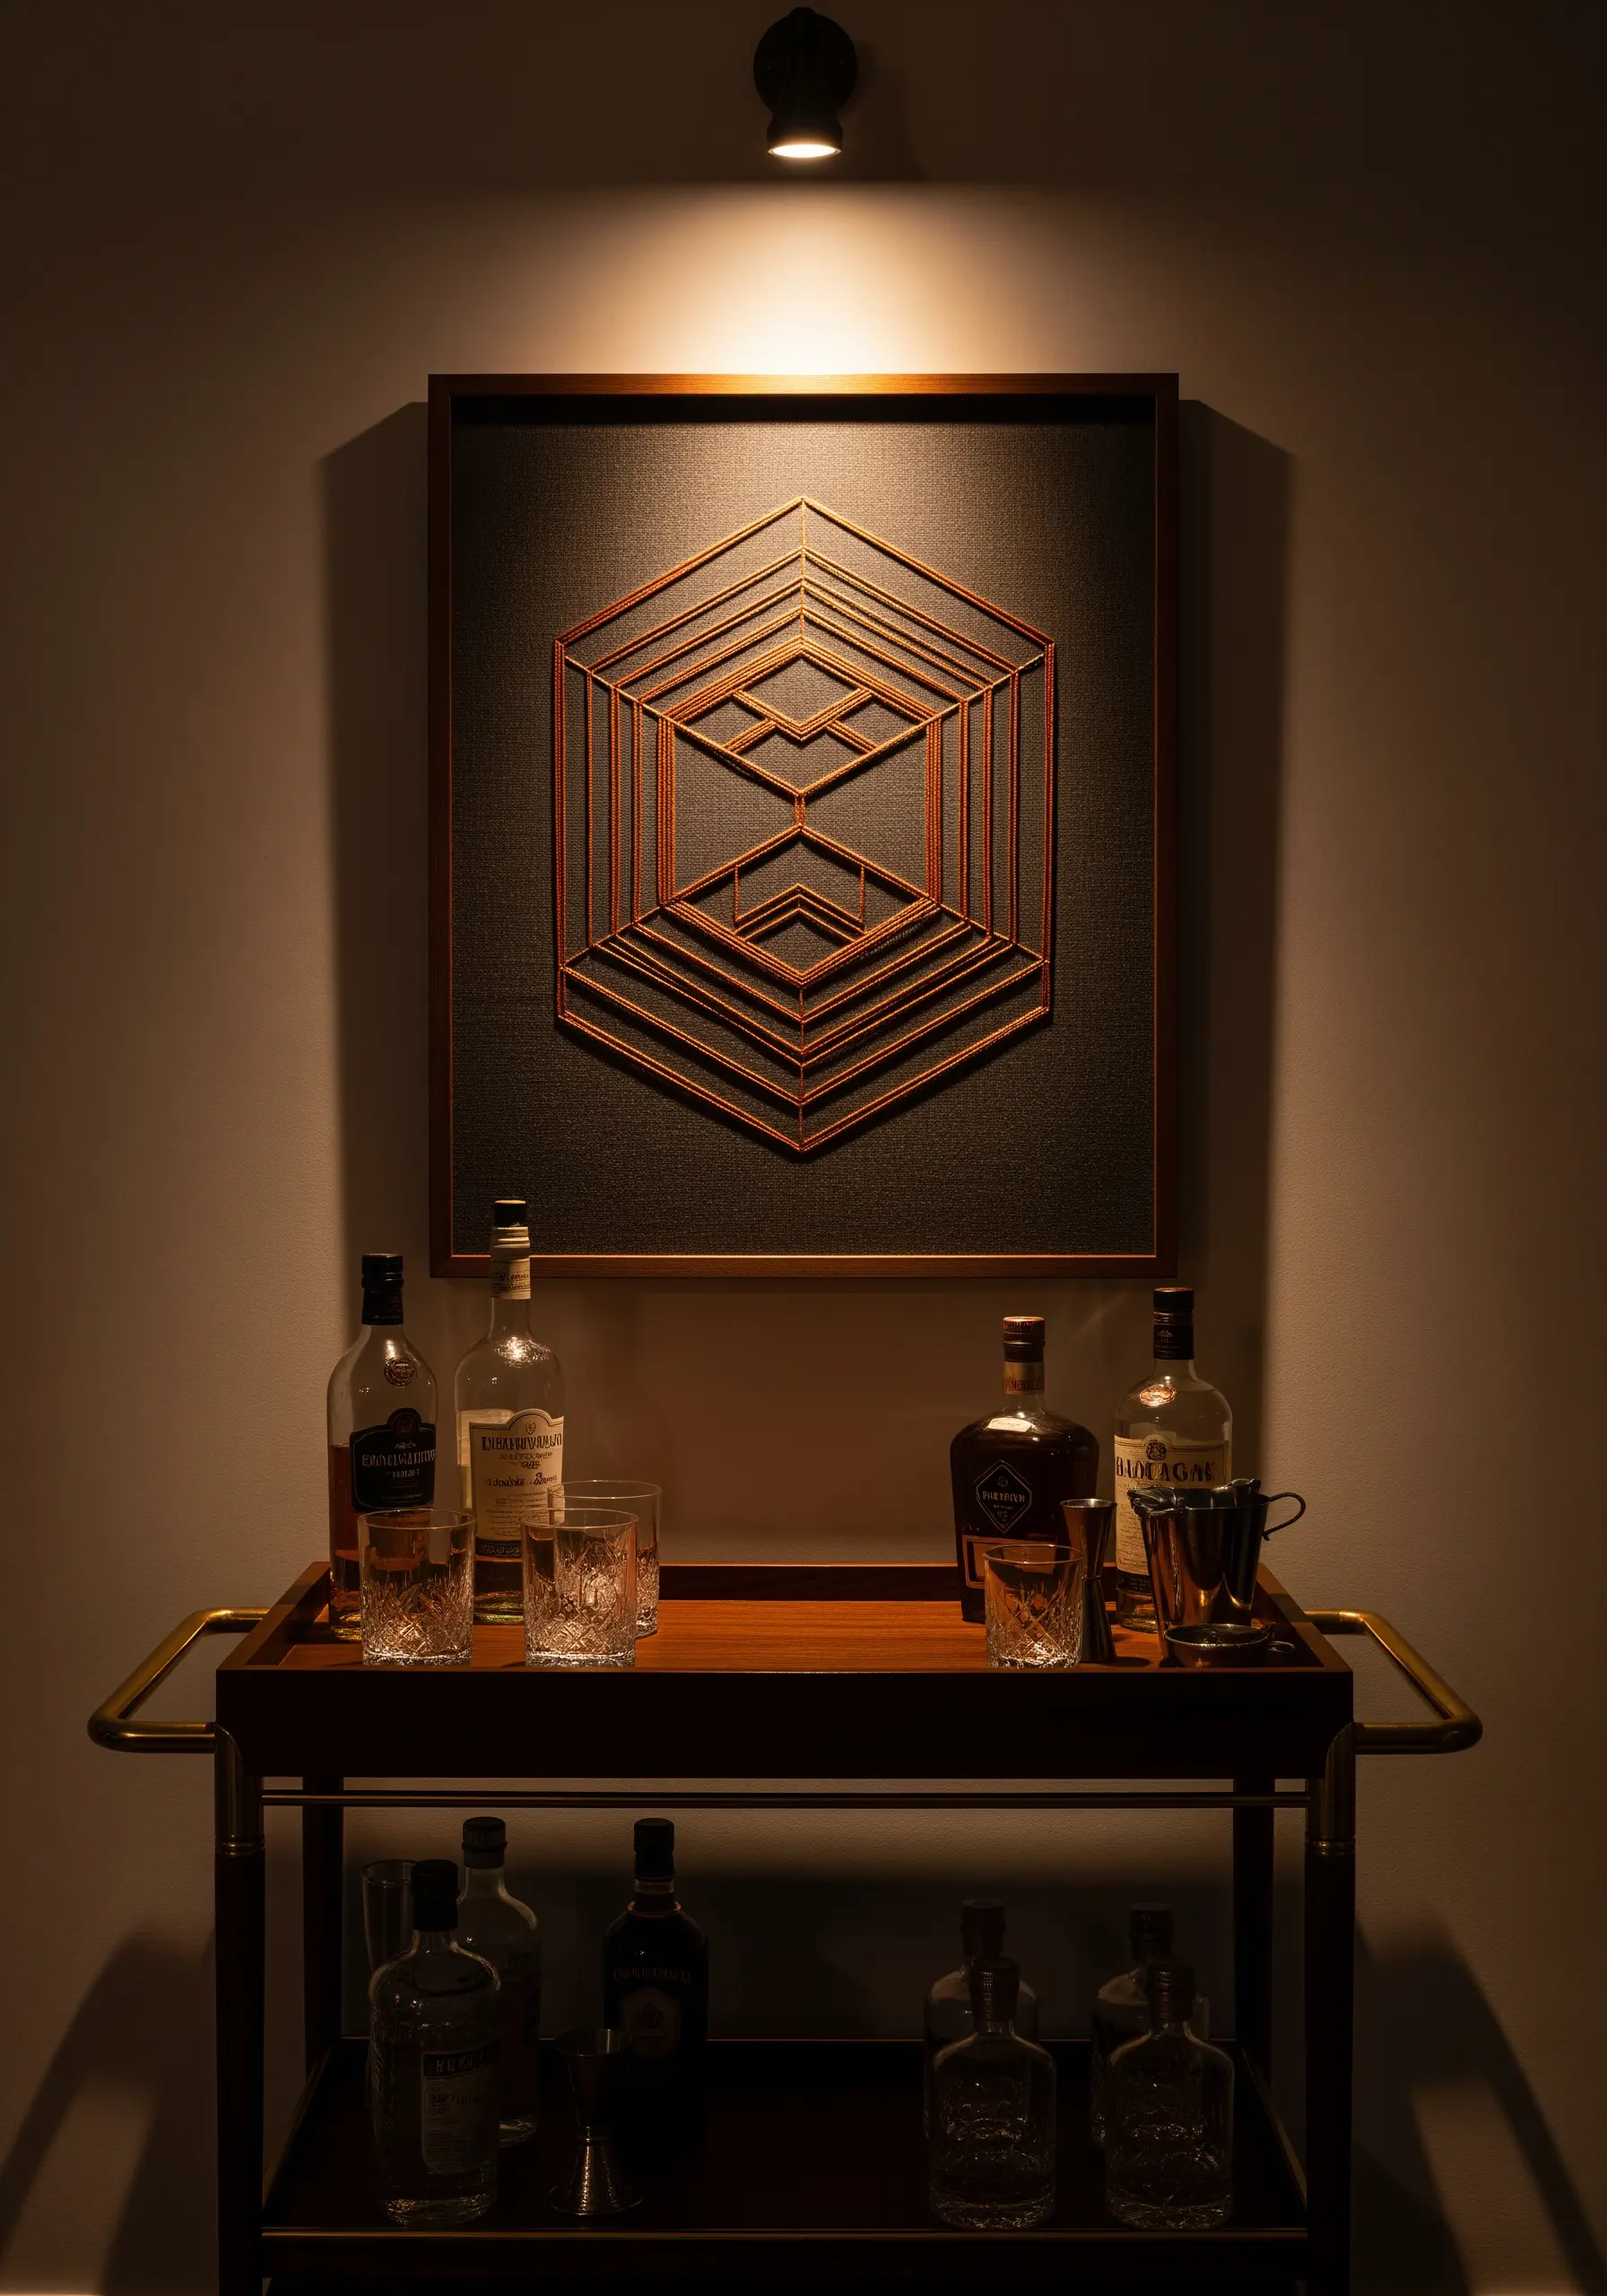
Move beyond the hoop and create a stunning three-dimensional piece using string art principles on a stretched canvas.
First, paint your canvas a dark, uniform color. Then, lightly hammer small nails or pins into the wooden frame at precise, measured intervals.
Instead of a needle, you’ll wrap thread or fine cord from one pin to another, layering the lines to build up your geometric form.
This technique creates incredible depth and shadow, turning simple lines into an architectural sculpture. It’s one of the most effective abstract thread embroidery ideas for a moody, sophisticated space.
17. Curate a Visual Library of Geometric Fills

Create a beautiful and practical reference piece by designing a sampler of geometric patterns and fill stitches.
Divide a large piece of fabric into a grid. In each square, practice a different blackwork or cross-stitch fill pattern.
Stitch the entire piece using a single color of thread, like black or navy, to keep the focus on the textures and patterns themselves.
This not only creates a stunning, intricate artwork but also serves as your personal stitch dictionary for all future monochrome black thread designs.
18. Create Visual Rhythm with a Repeating Series
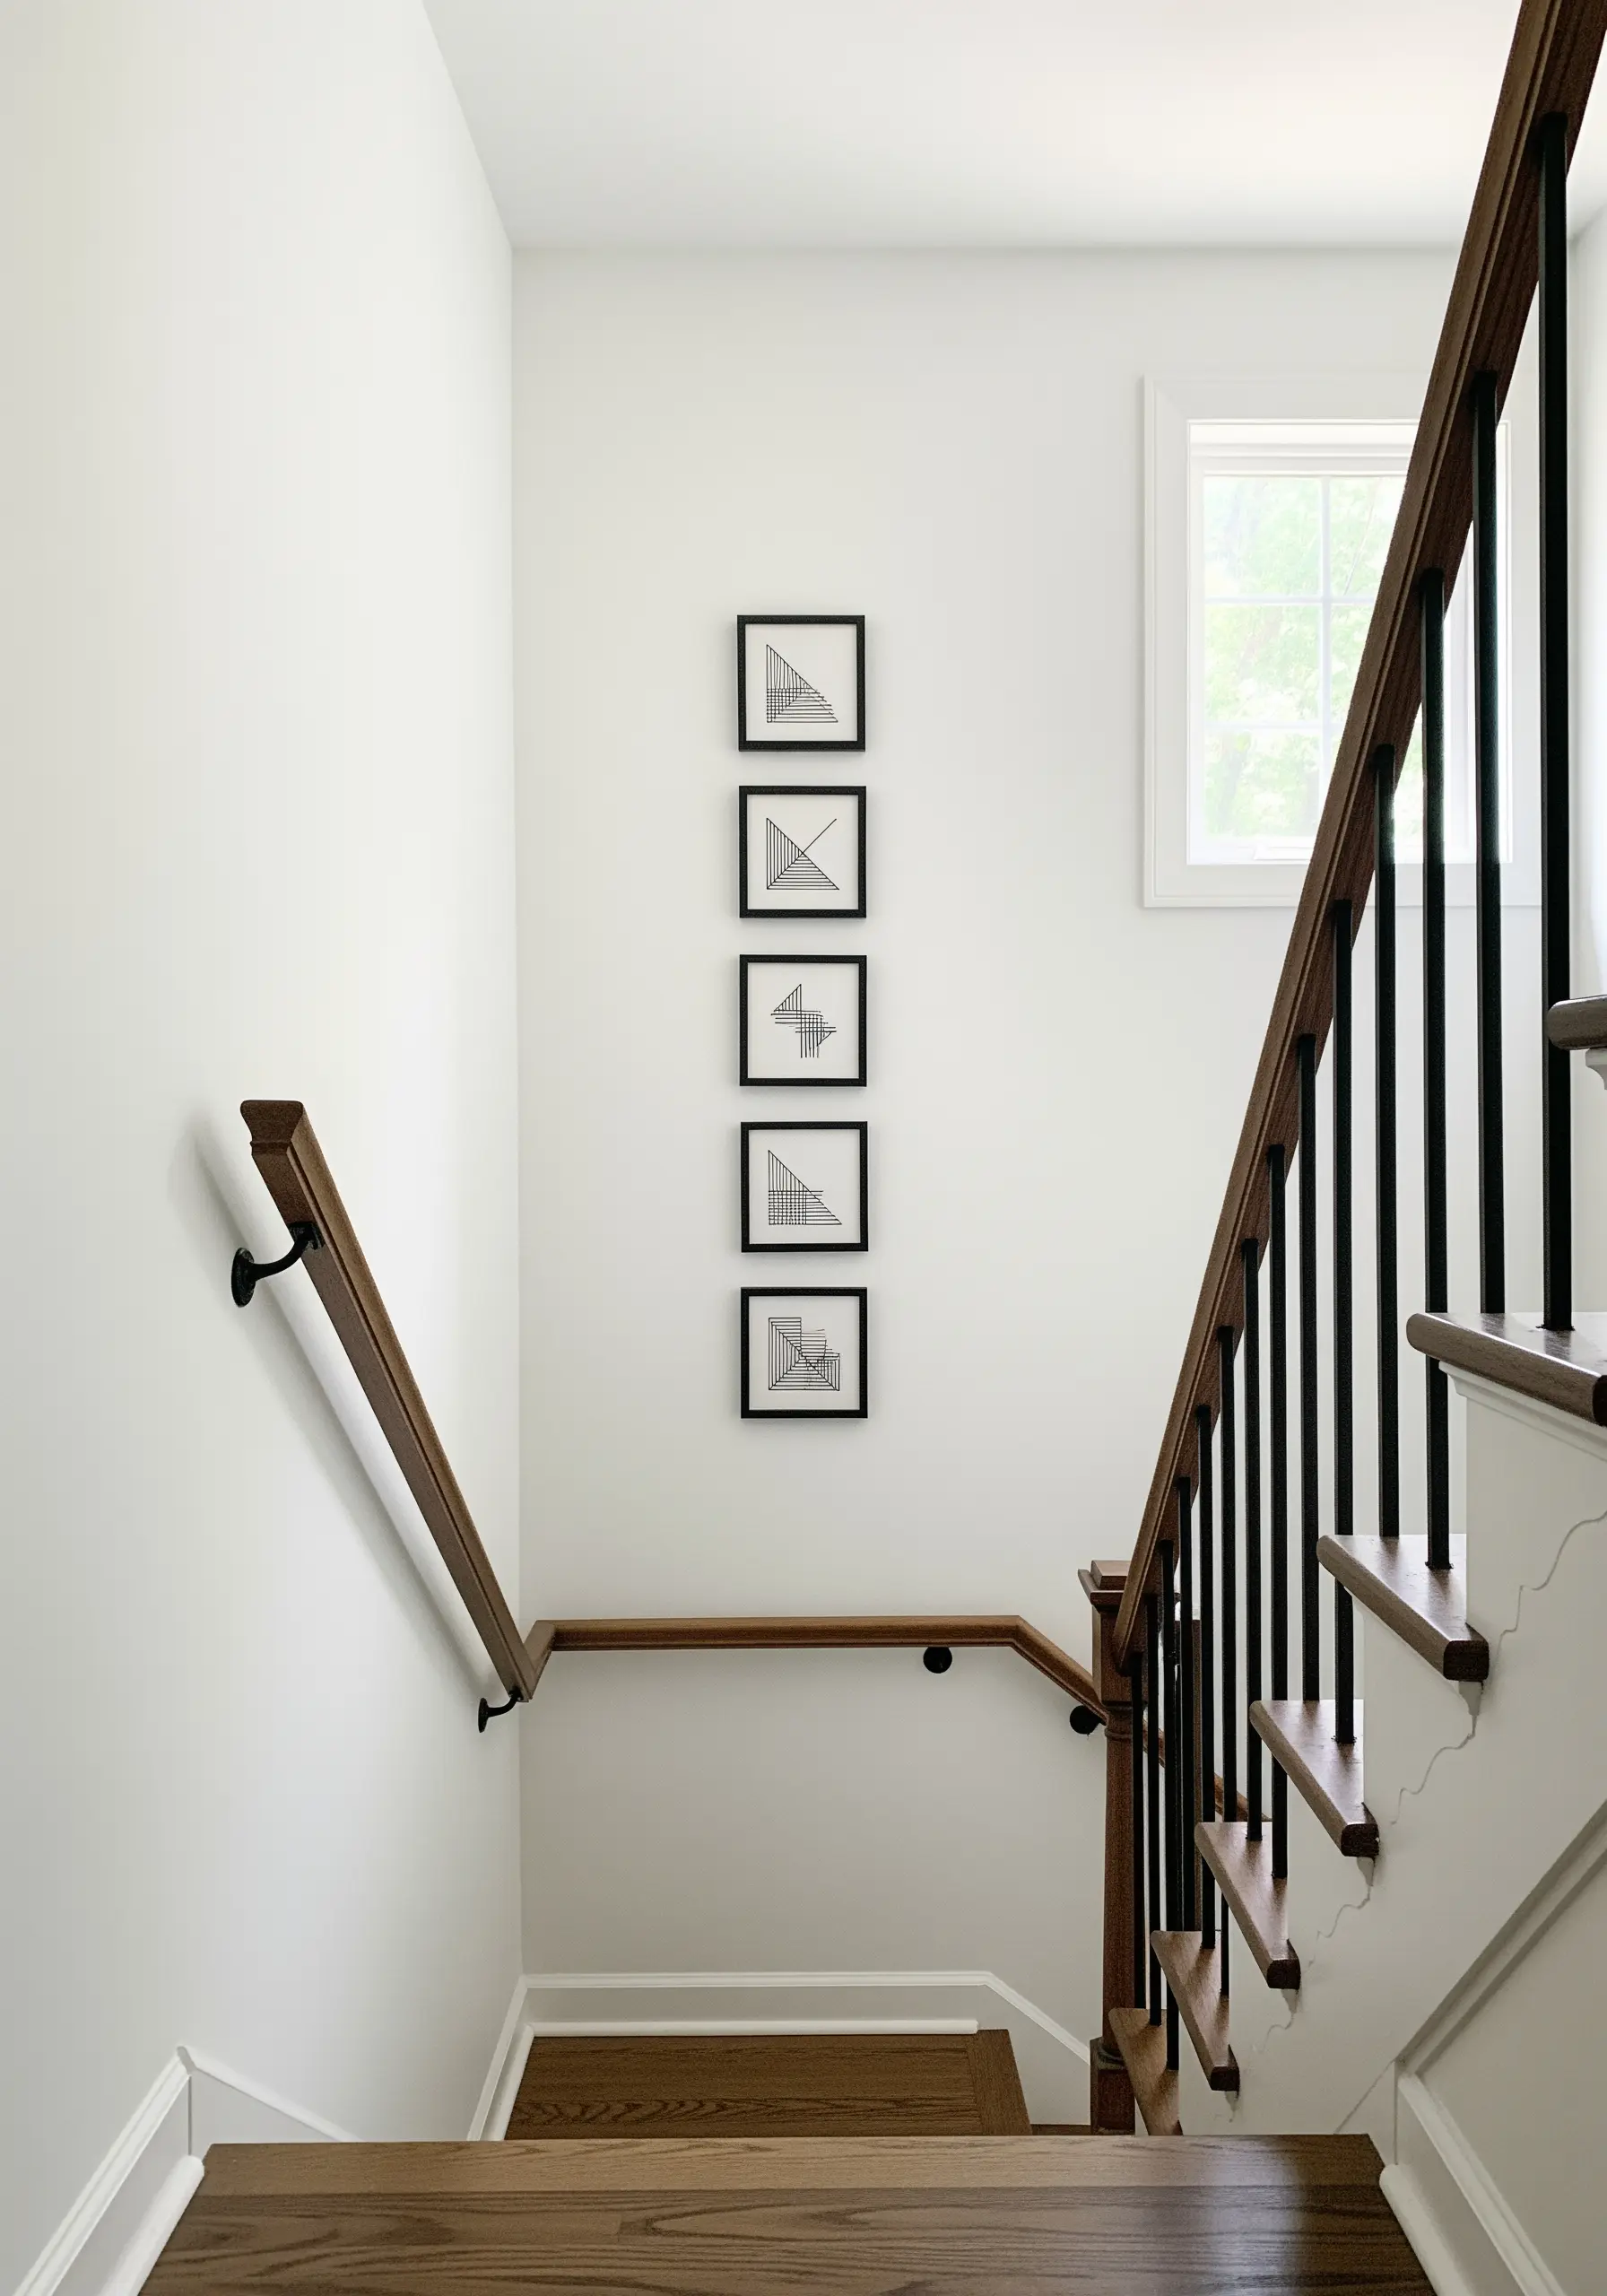
Amplify the impact of a small, simple design by stitching it in a series.
Choose a minimalist geometric pattern and stitch it multiple times on separate, identical pieces of fabric.
Frame each one in a simple, matching black frame. When hung in a vertical or horizontal line, the repetition creates a powerful sense of rhythm and intentionality.
This is an excellent way to fill a narrow space like a hallway or staircase, turning minimal DIY embroidery pieces into a cohesive art installation.
19. Visualize Sound with Embroidered Waveforms
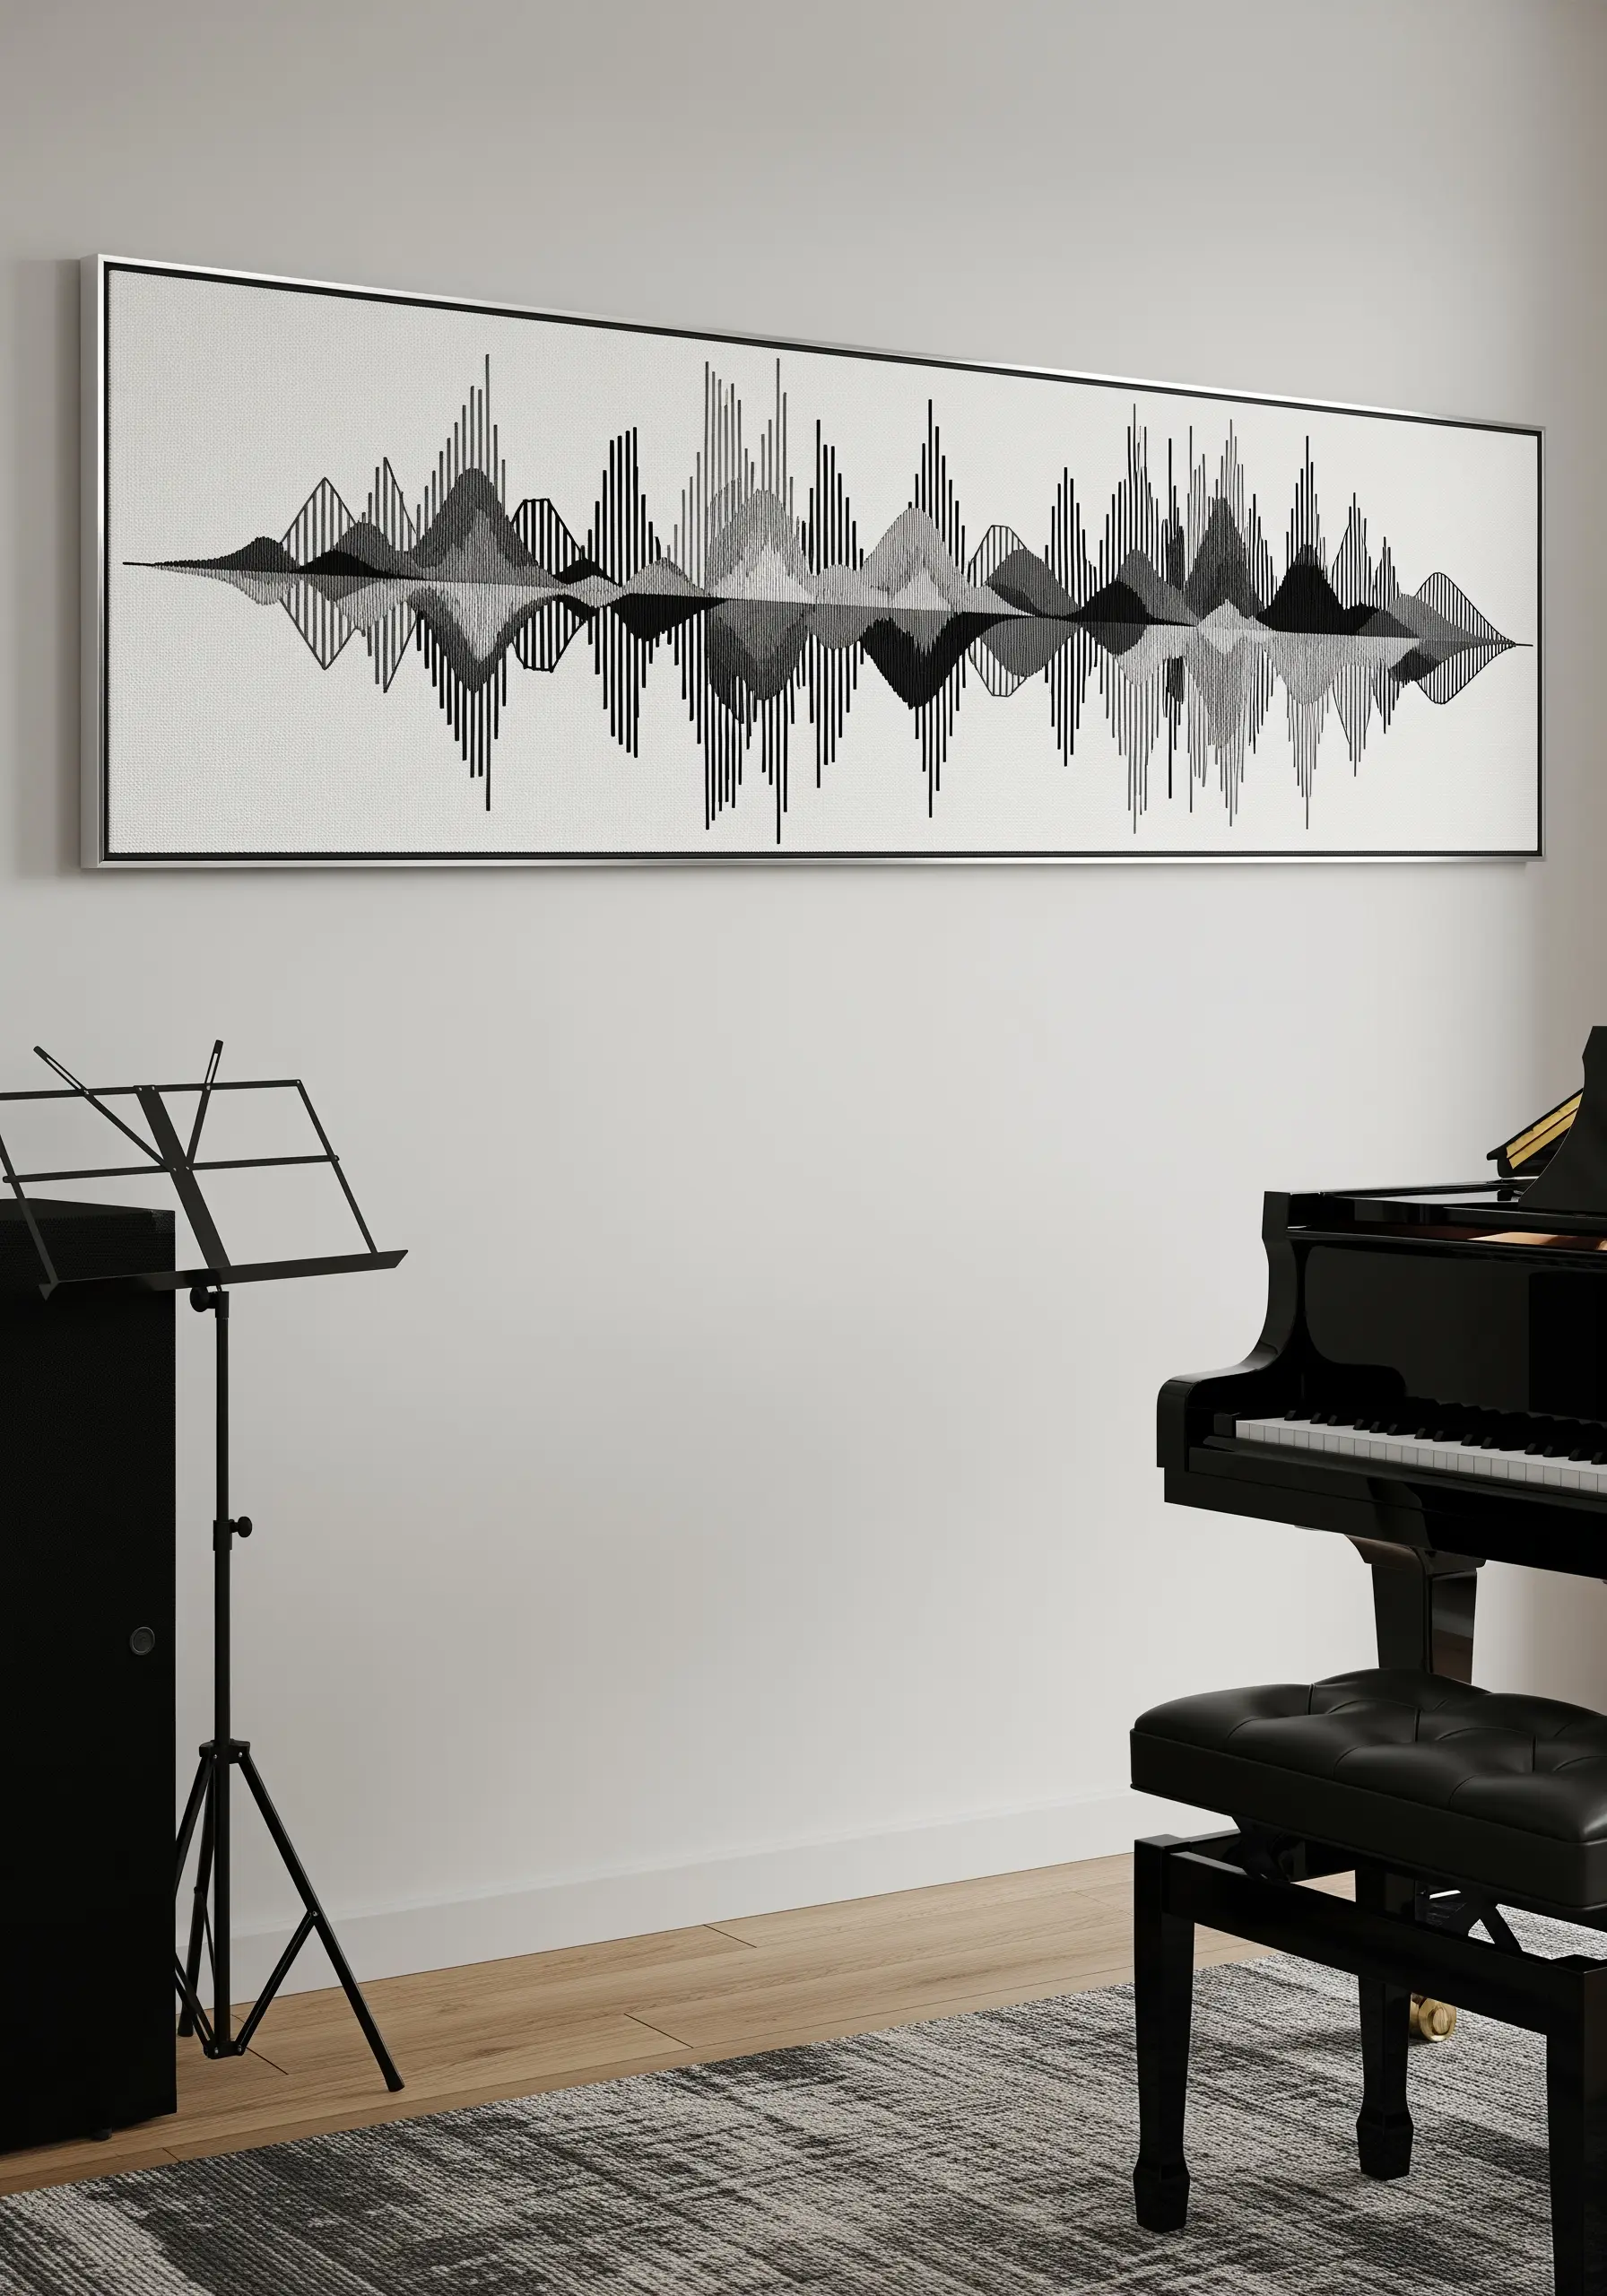
Translate a meaningful sound—like a favorite song clip, a baby’s heartbeat, or a loved one’s voice—into a deeply personal piece of art.
Use a free online tool to generate a visual waveform of your chosen audio clip.
Transfer this pattern onto your fabric. Then, using vertical satin stitches, fill in the waveform, varying the height of your stitches to match the visual data.
Using shades of one color, like grey and black, adds depth and dimension to the final piece, transforming sound into a tangible, abstract piece inspired by memories.
20. Weave Color and Texture for a Plaid Effect
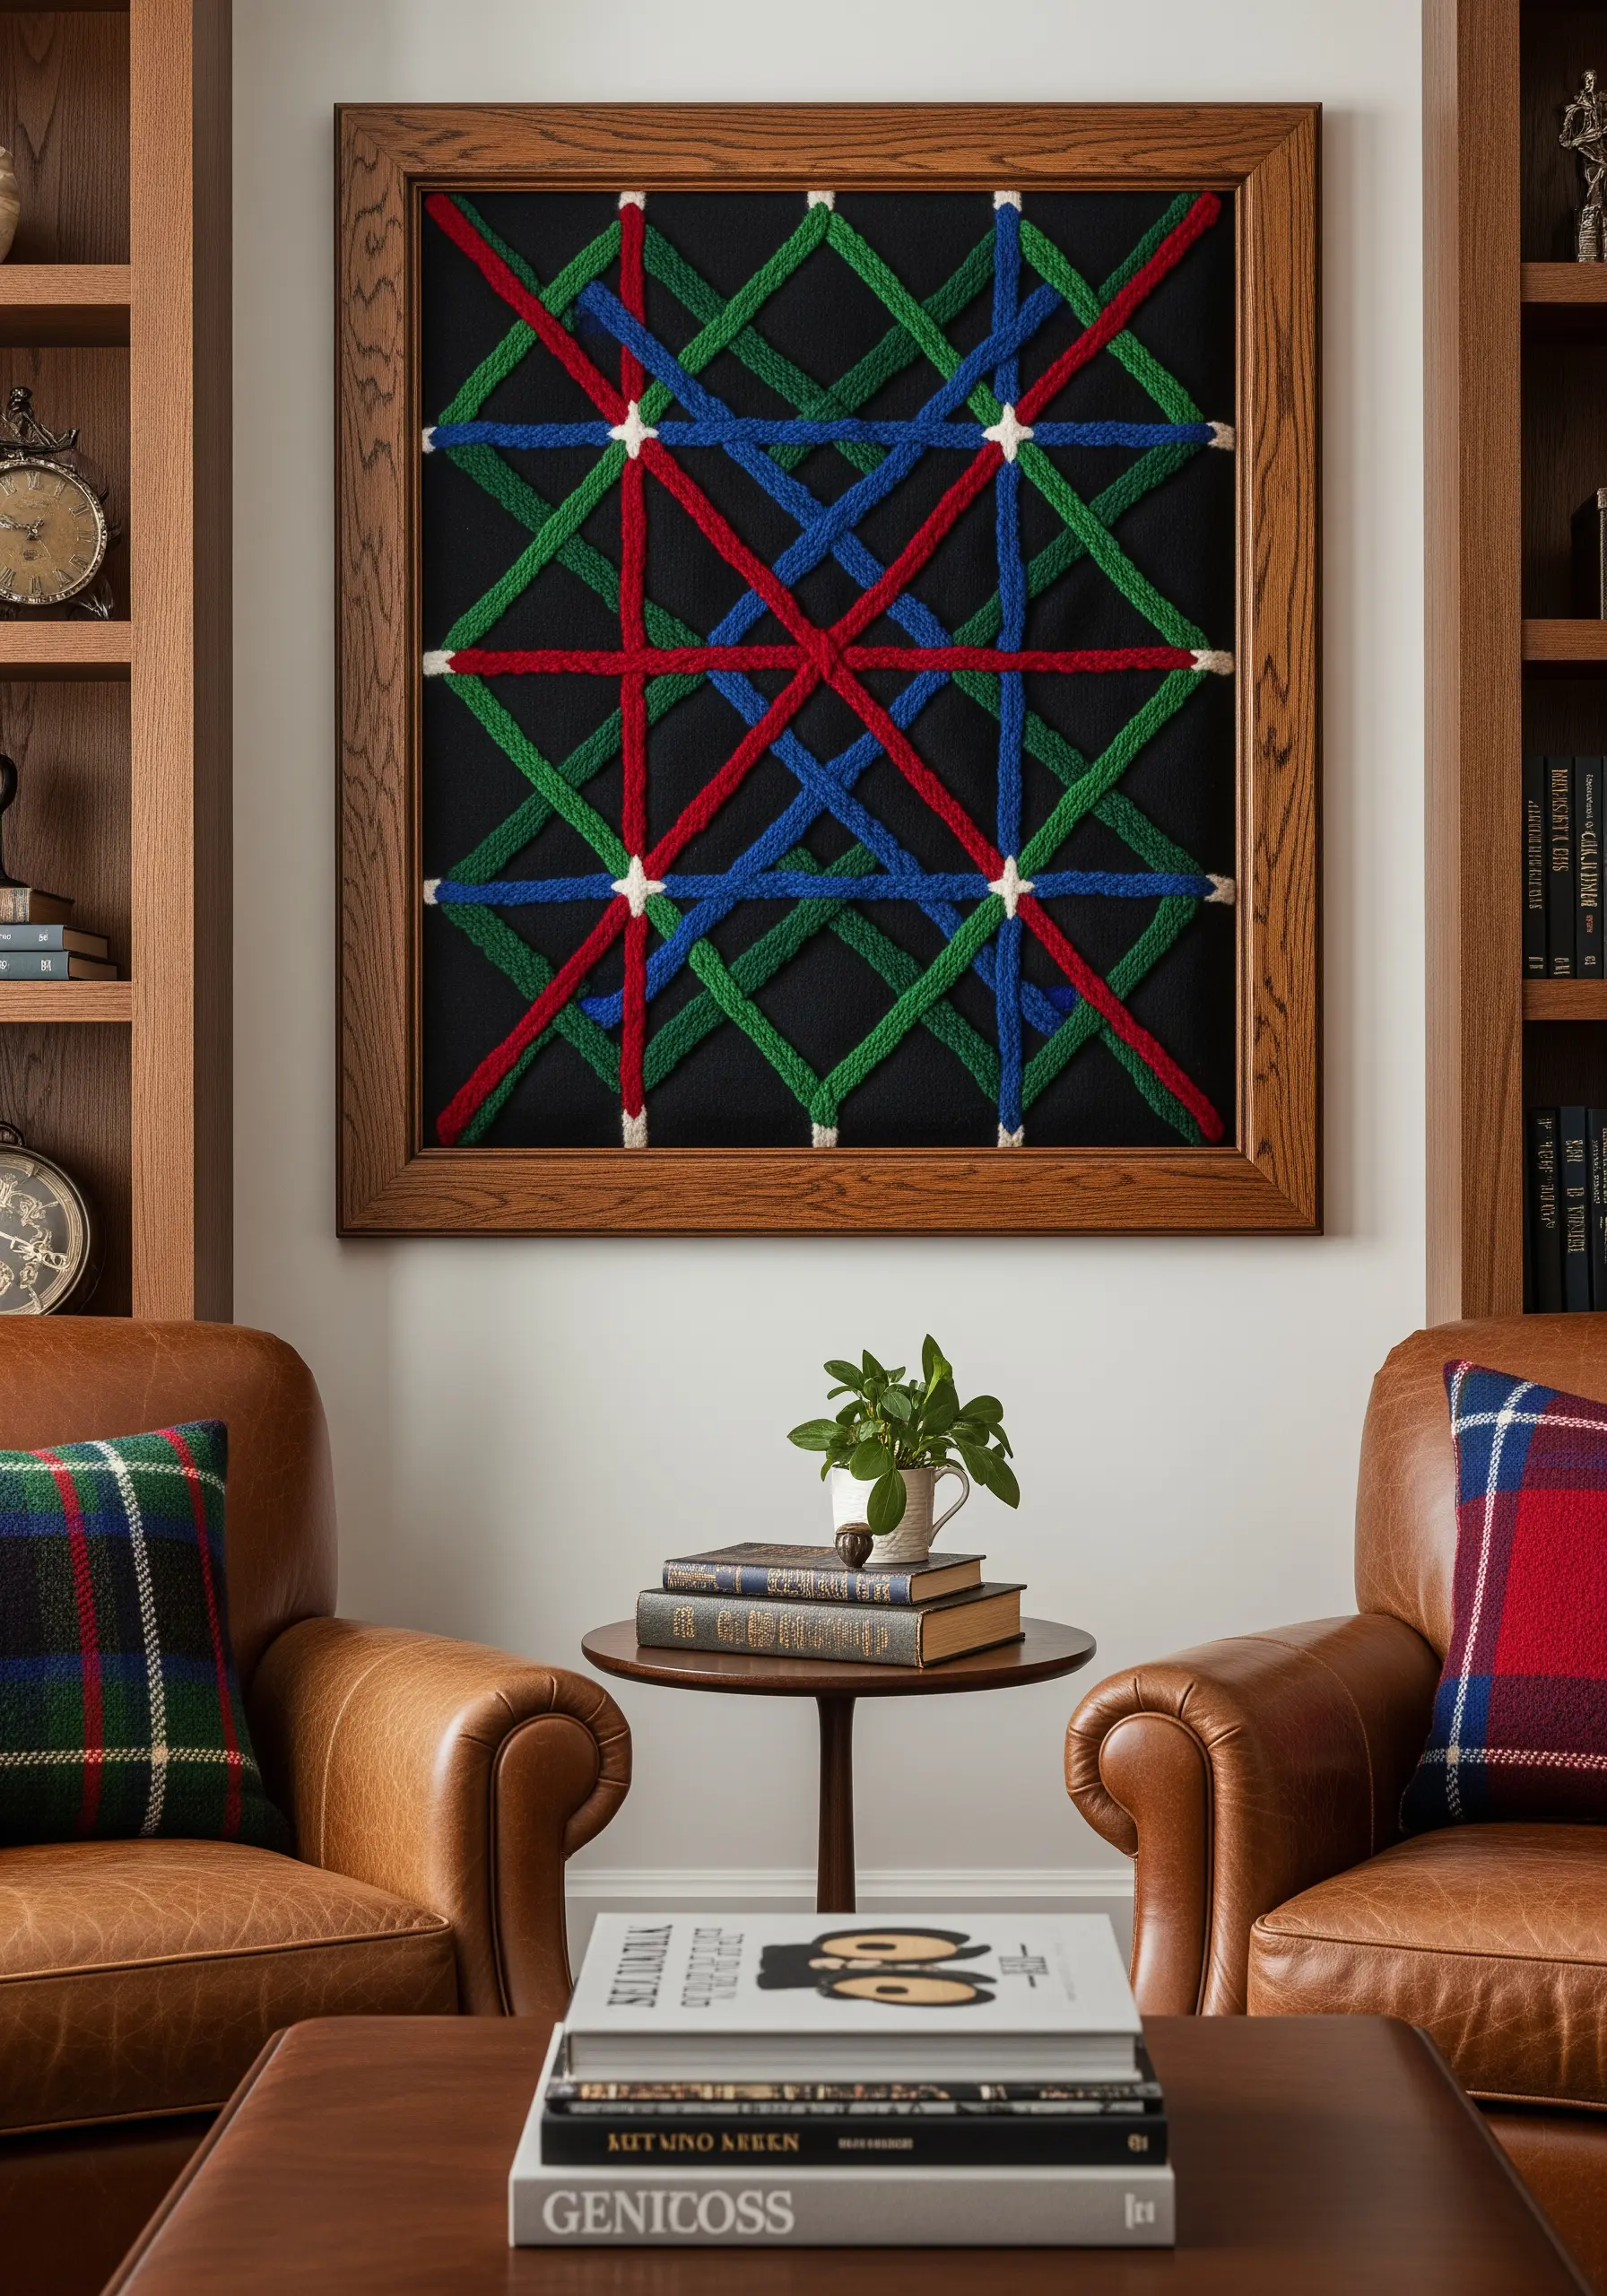
Create the rich, layered look of woven fabric using a simple embroidery technique.
First, lay down a series of long, parallel straight stitches in your primary colors—these are your ‘warp’ threads.
Then, using a blunt tapestry needle, weave a different colored thread over and under these warp stitches without piercing the fabric.
Pack the woven ‘weft’ threads tightly together to create a dense, textured surface.
This method builds gorgeous mixed-fiber textures with a classic, cozy feel perfect for a study or library.
21. Find Stillness in a Meditative Labyrinth
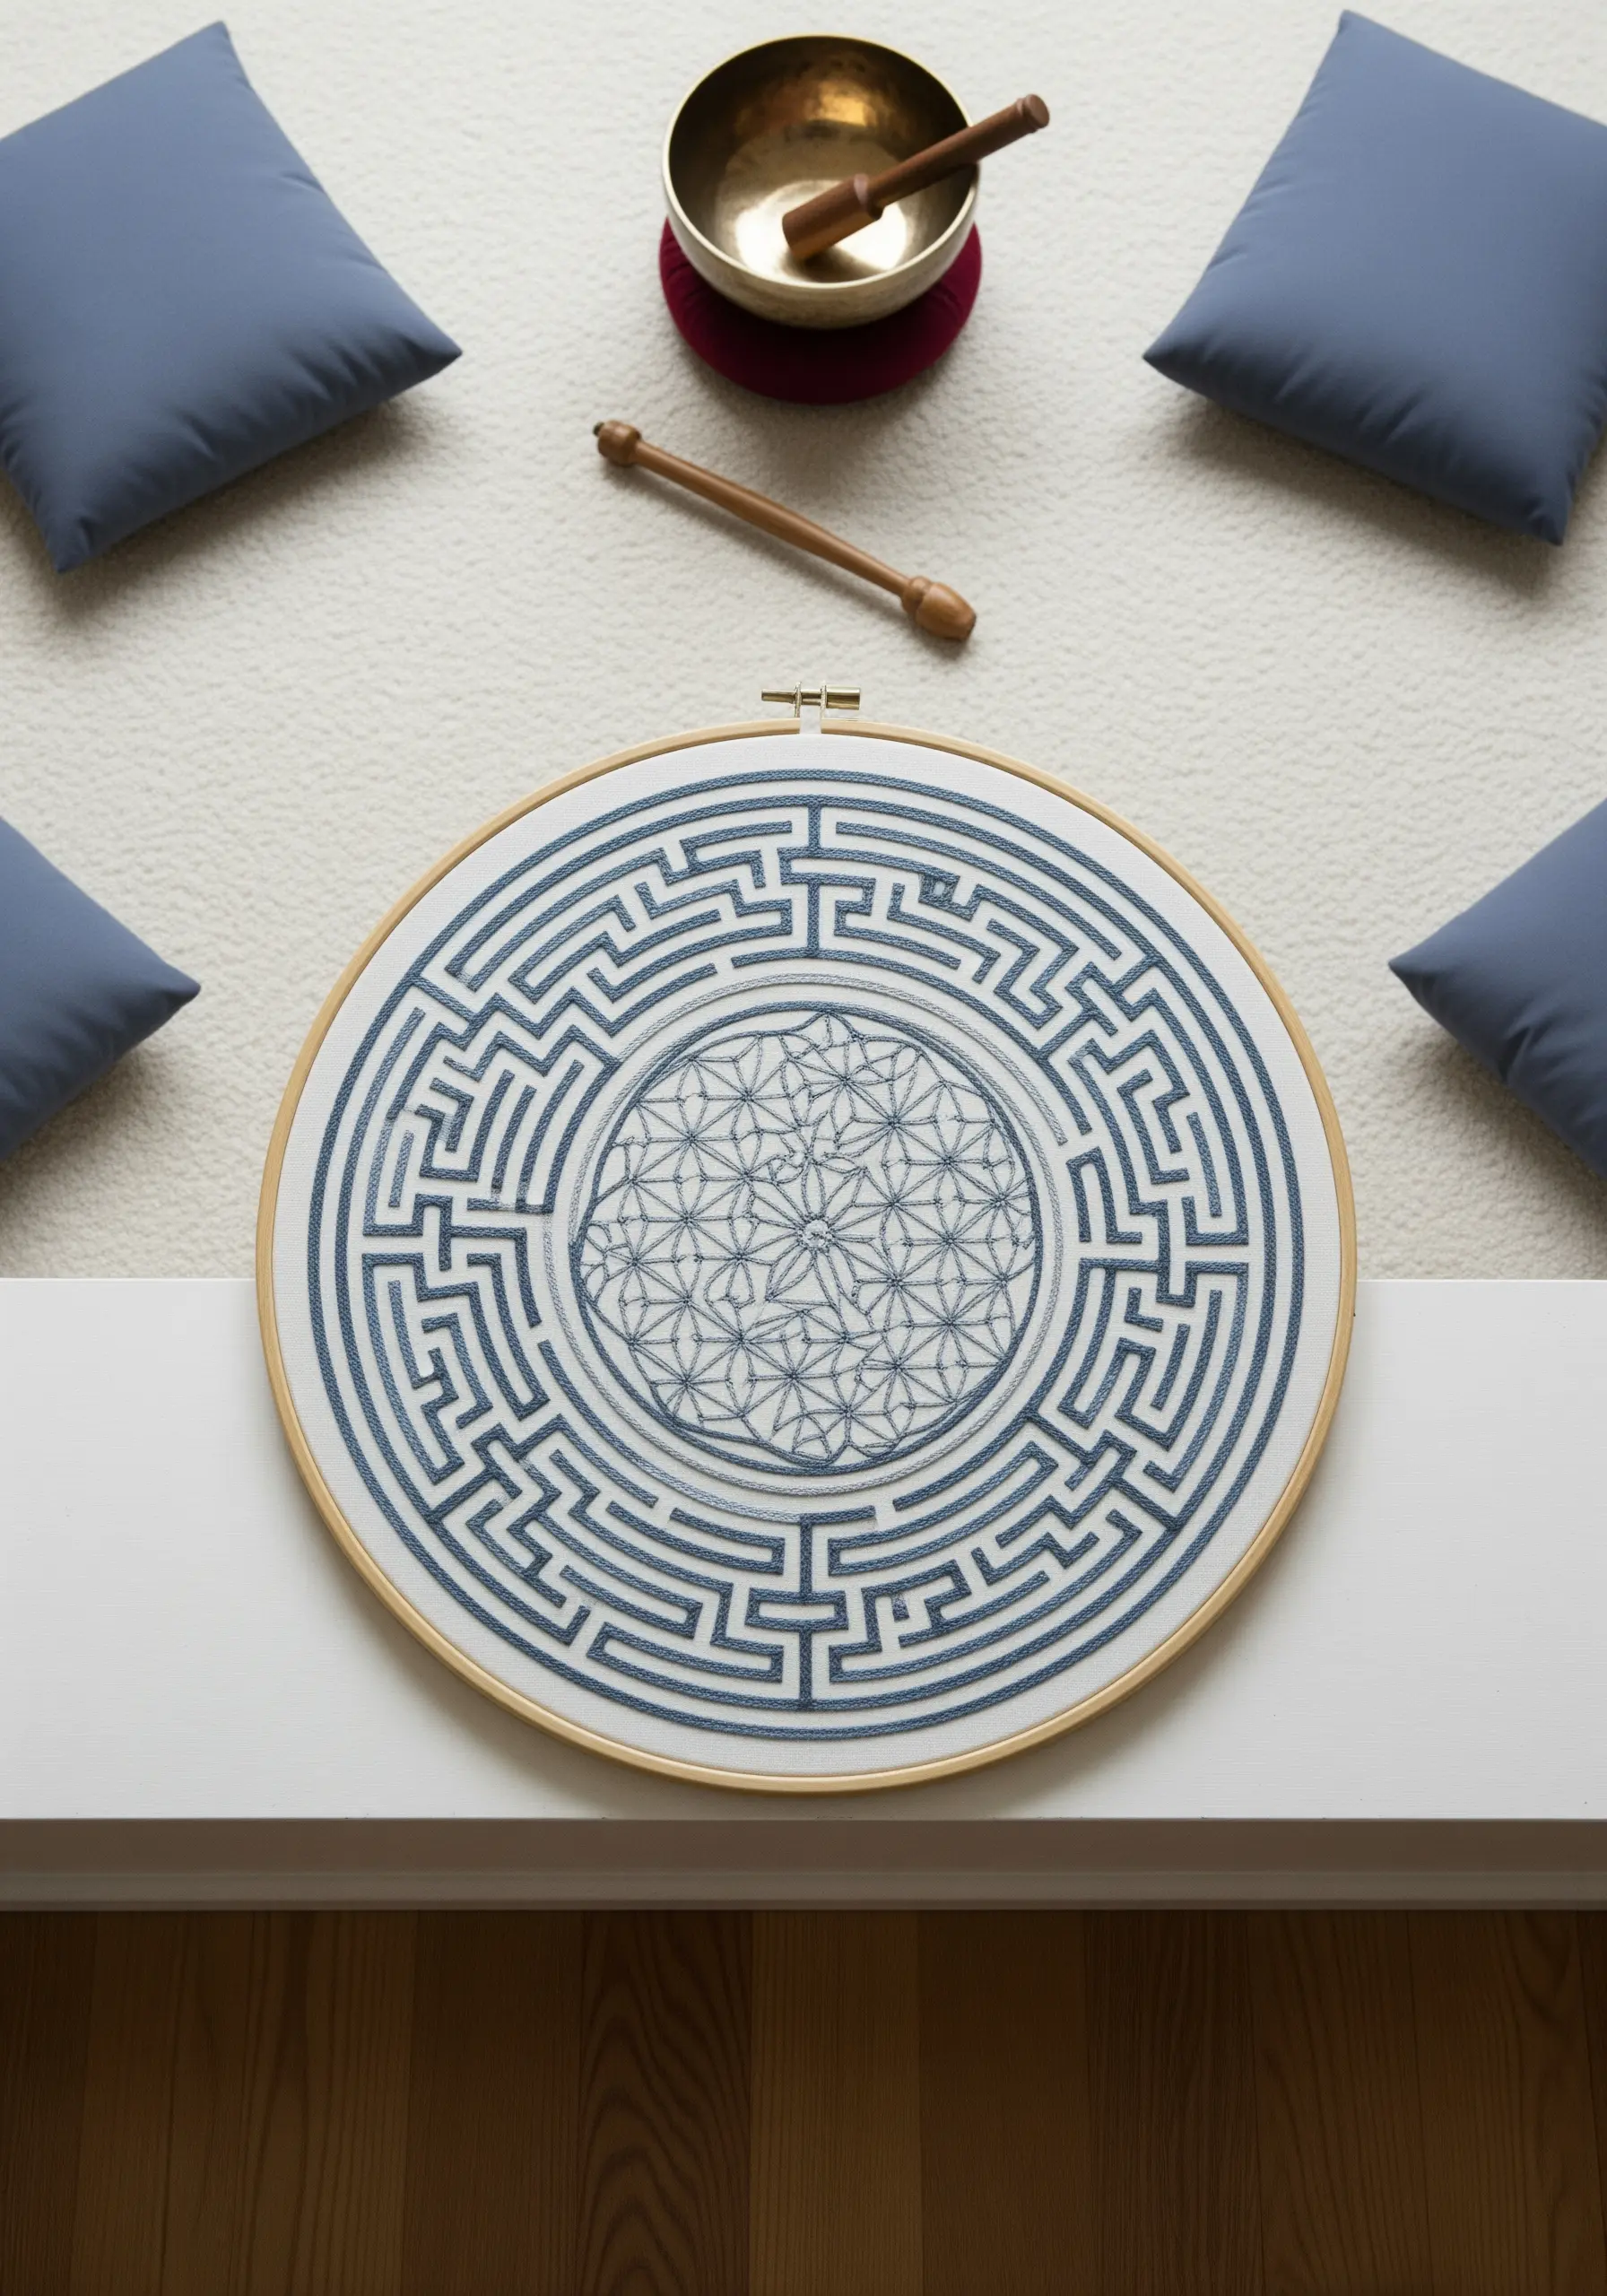
Use the rhythmic, repetitive motion of stitching to create a piece that inspires calm and focus.
A labyrinth pattern, with its single, winding path, is perfect for this purpose.
Choose a soothing color palette, like slate blue on an off-white linen, to enhance the serene feeling.
Use a simple, consistent stitch like the backstitch or stem stitch. The goal isn’t complex technique, but the mindful process of following the path with your needle and thread, making it a perfect project for a relaxing evening routine.
22. Command Attention with High-Contrast Optical Art
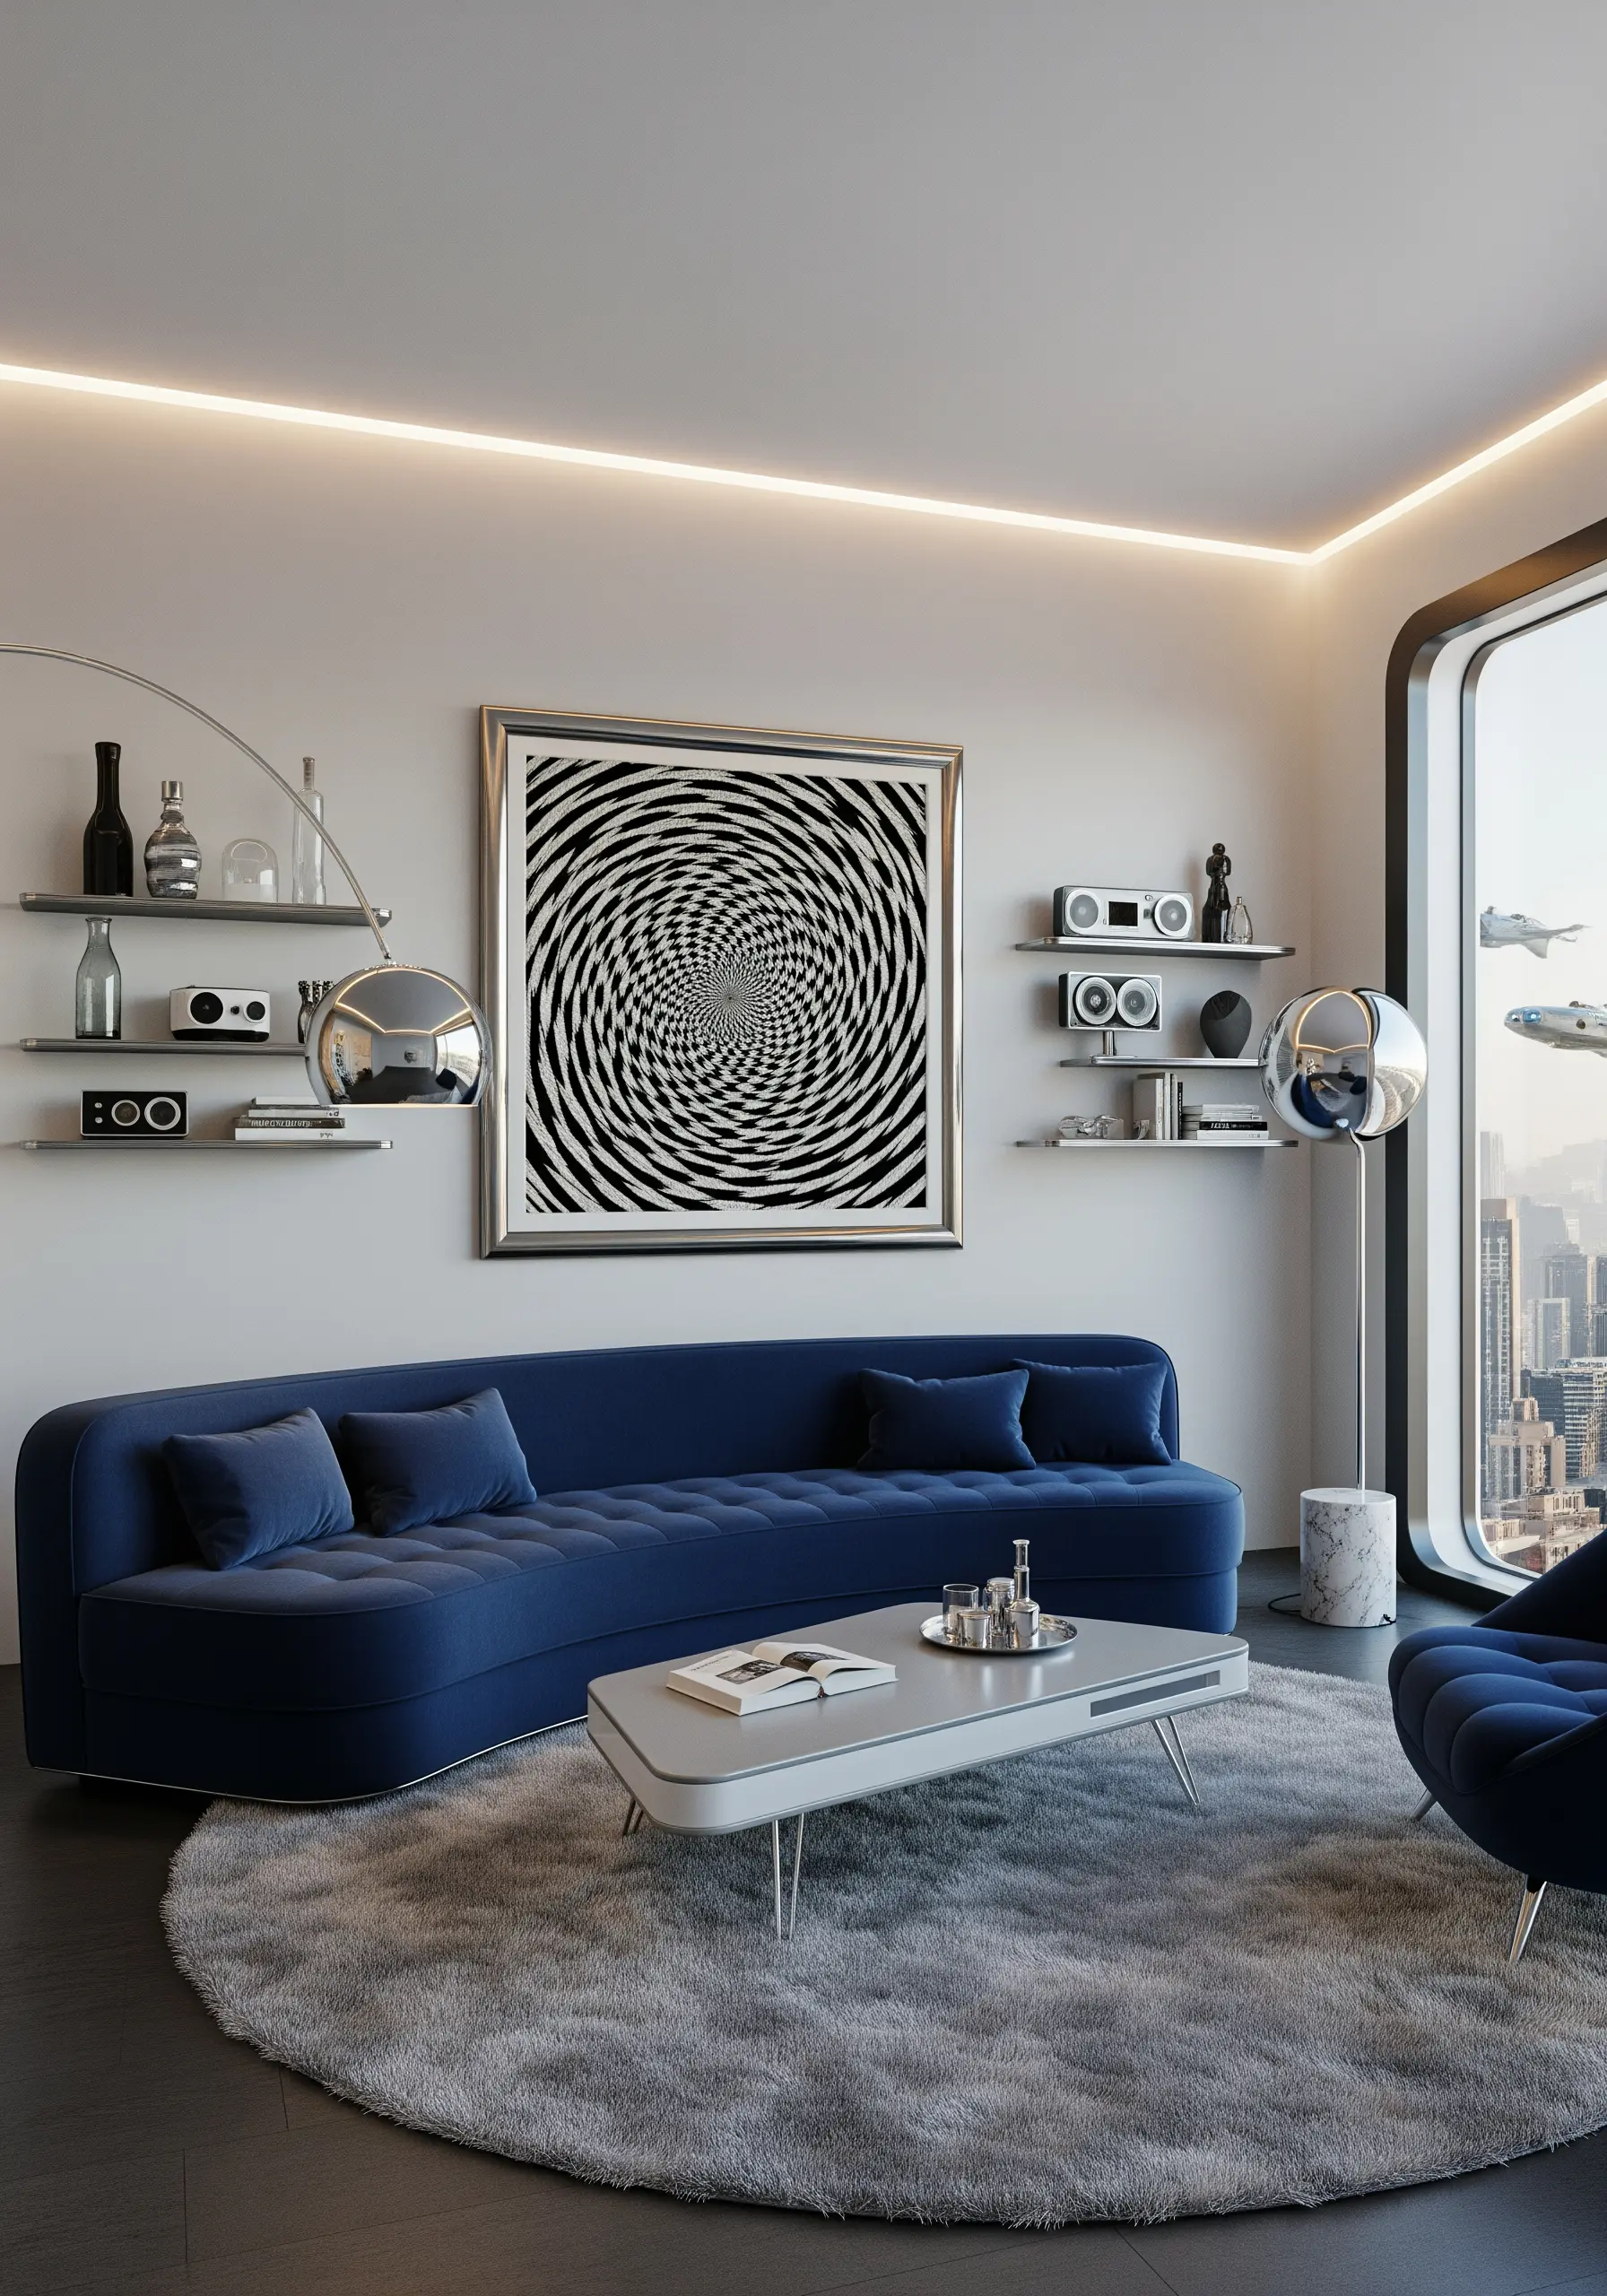
Create a mesmerizing focal point by leveraging the power of high-contrast optical illusions.
For a design like this swirling vortex, precision is everything. Use a pattern transfer method that won’t smudge, like a fine-tipped water-soluble marker.
Fill each segment with dense, perfectly executed satin stitch, ensuring the boundary between black and white is razor-sharp.
The stark contrast and curving lines will create a powerful sense of depth and motion that draws the viewer in, becoming a true example of abstract optical illusion stitches.
23. Channel Earthen Warmth with Terracotta Tones
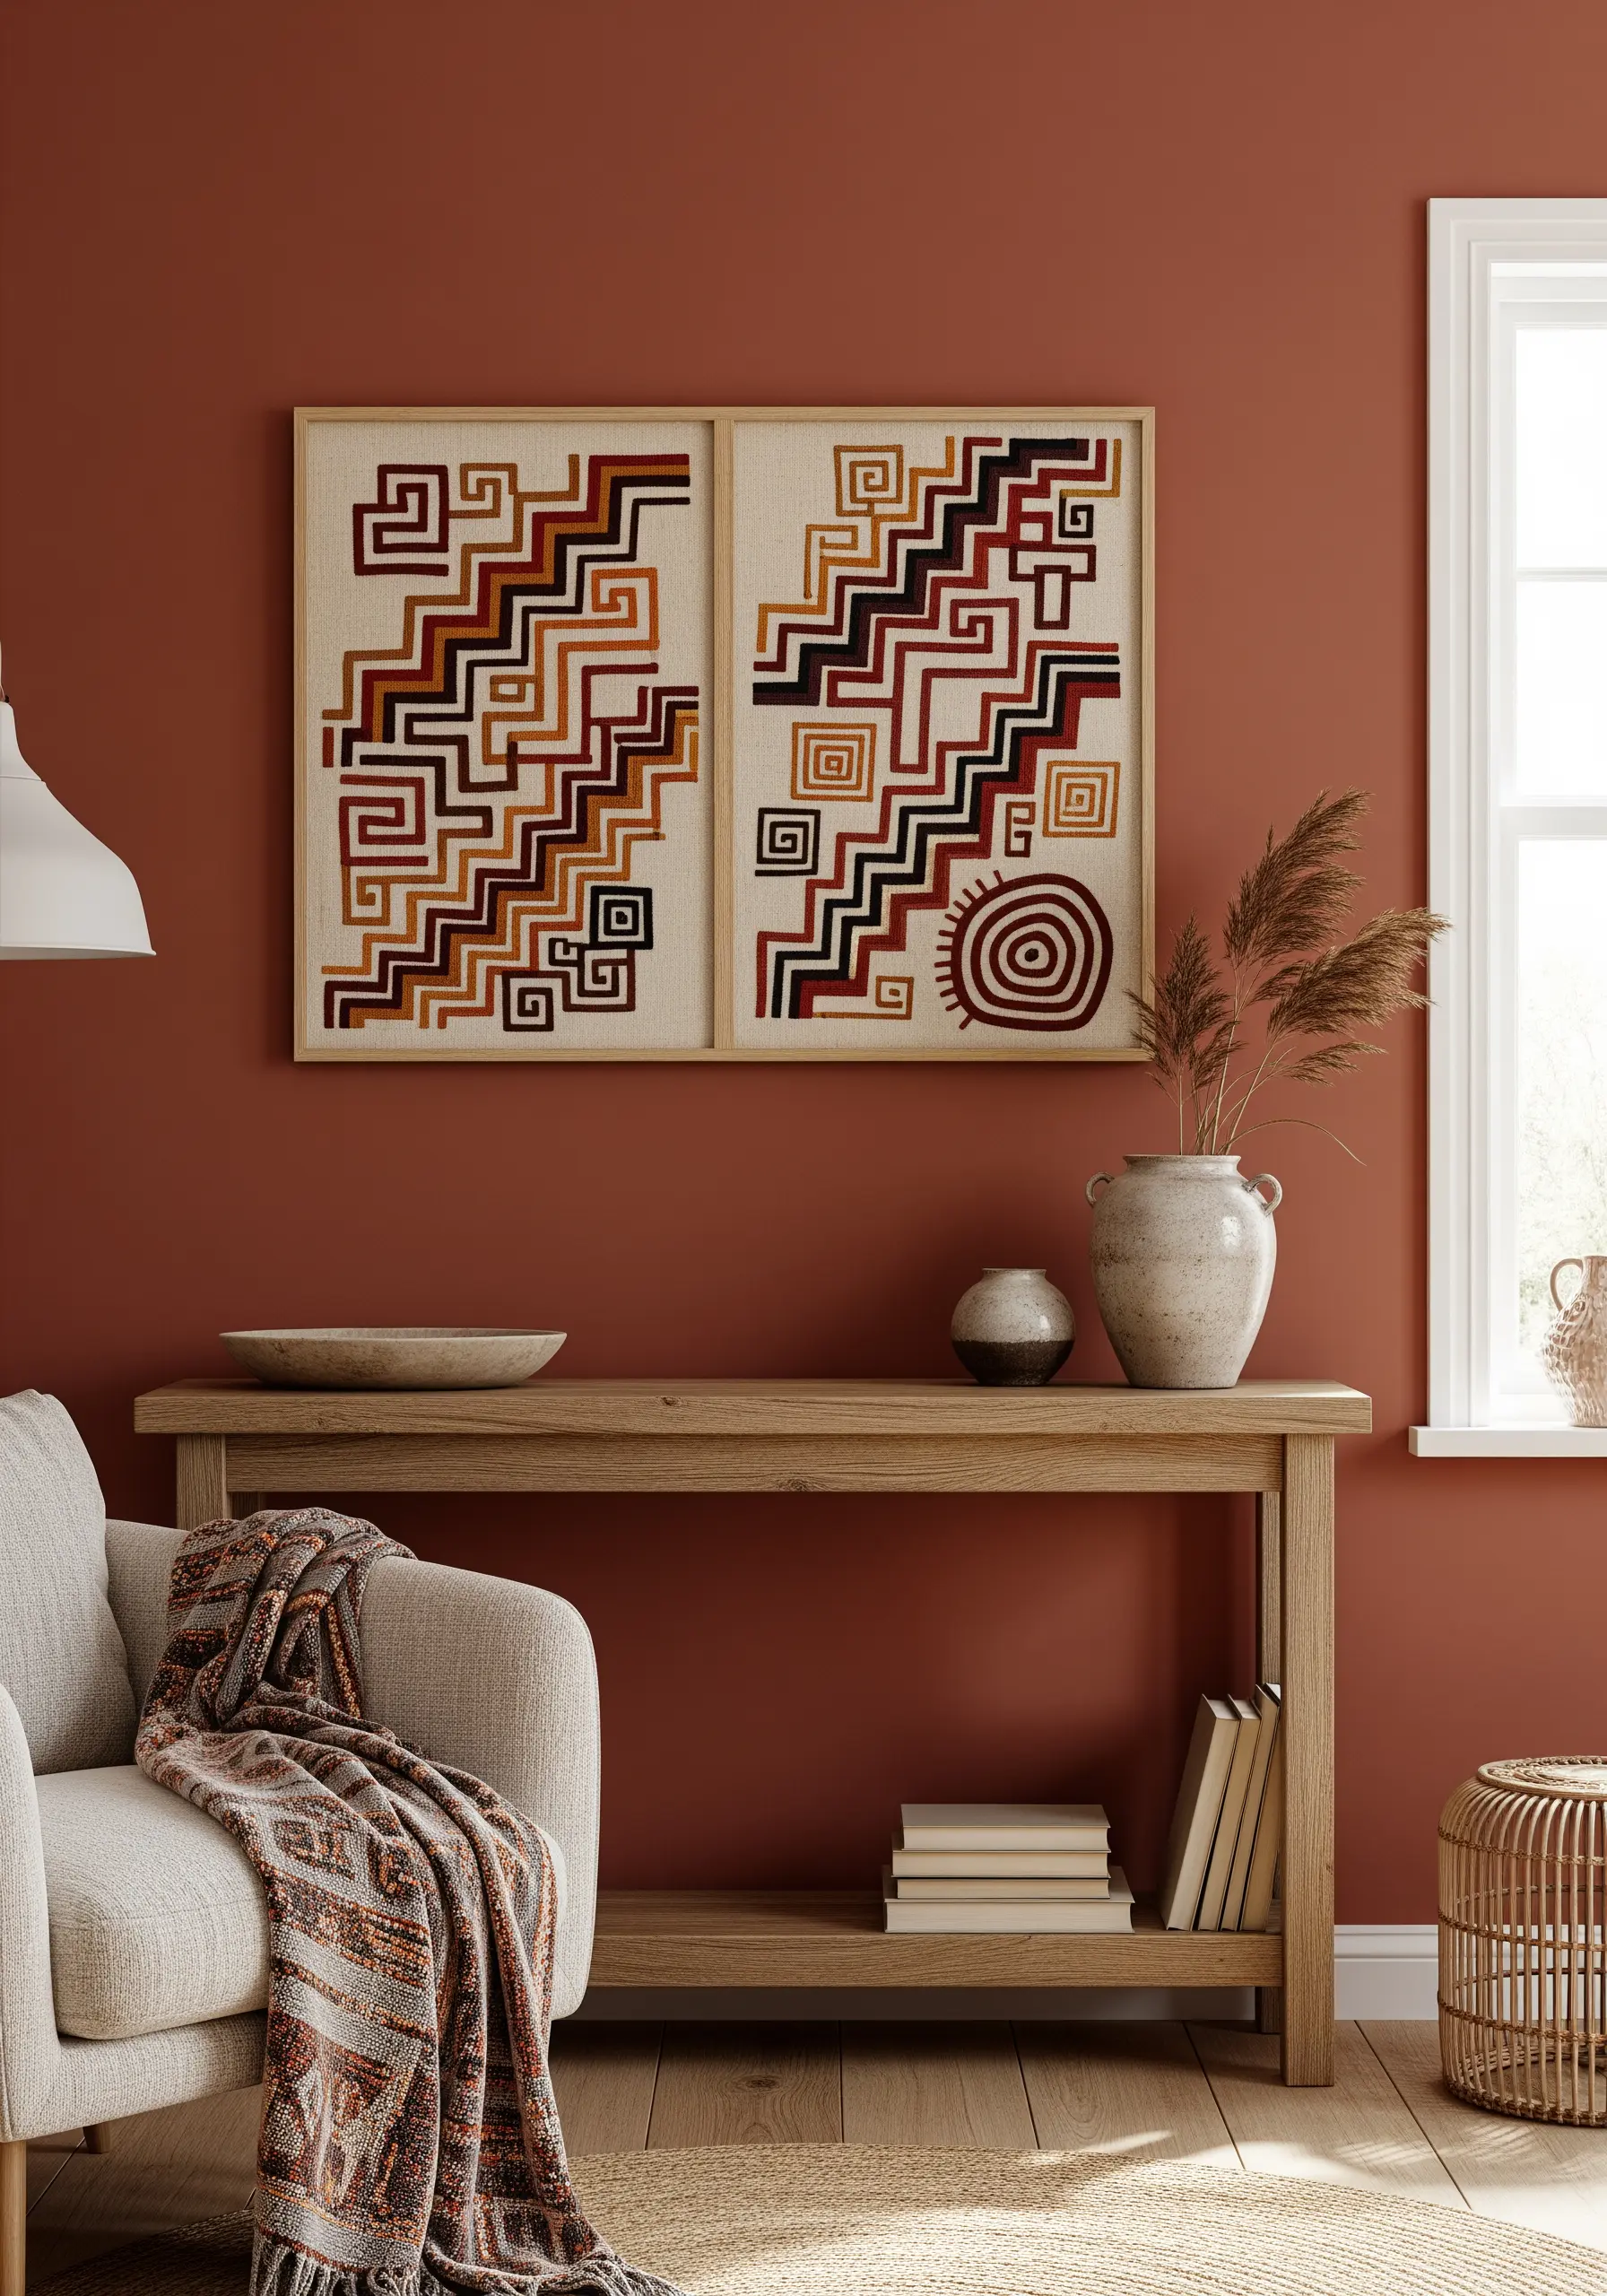
Infuse your space with warmth and character by using a color palette inspired by natural clays, rusts, and desert landscapes.
Choose patterns with strong, repeating lines, like the step-fret motifs found in ancient textiles.
Work on a neutral, textured fabric like unbleached linen or cotton canvas to let the earthy colors shine.
Combine shades of terracotta, ochre, brown, and black to create a design that feels grounded and timeless. These handmade earth-tone pieces bring a sense of history and calm to modern decor.
24. Imply Transparency with Overlapping Color
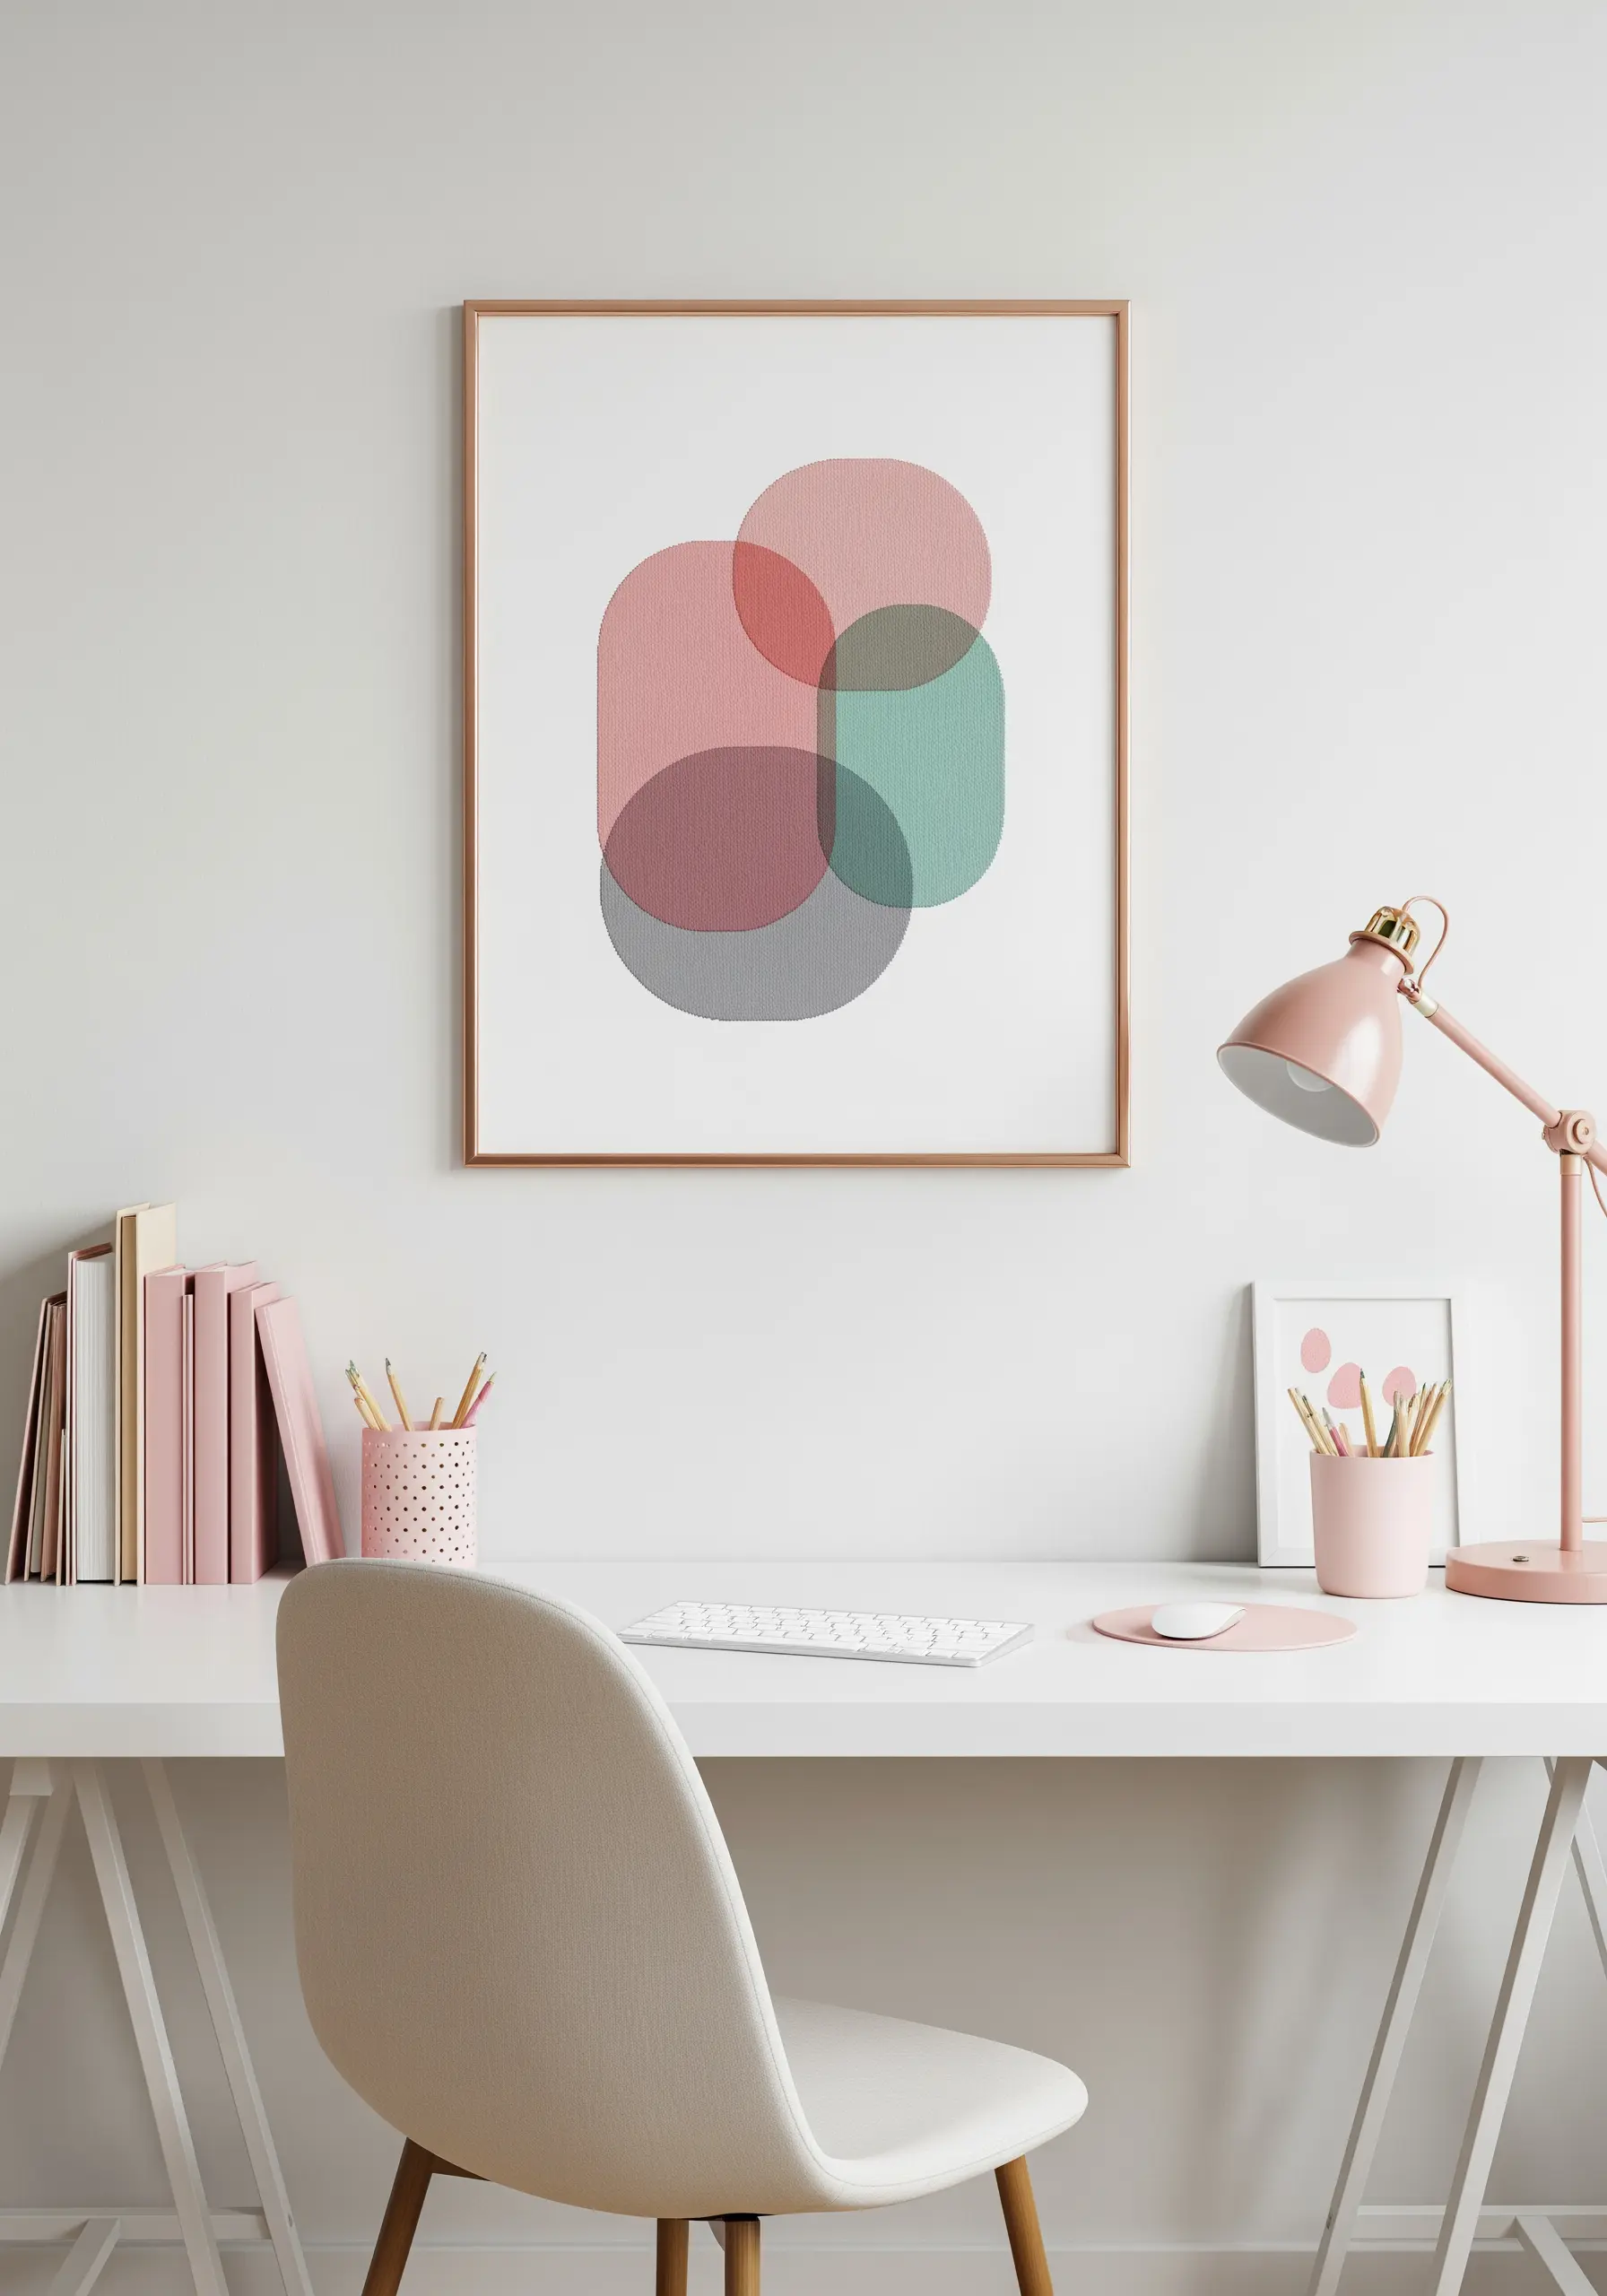
Create the illusion of translucent, overlapping shapes using a sparse fill stitch technique.
Where two shapes overlap, you will stitch with both colors simultaneously, or alternate stitches of each color.
Use a delicate fill, like a cross-hatch or seed stitch, rather than a solid satin stitch. This allows the background fabric to show through, enhancing the sense of transparency.
This subtle technique is ideal for soft, minimalist designs and adds a layer of visual complexity to soft pastel textile wall decor.
25. Add Elegance with Symmetrical Panels
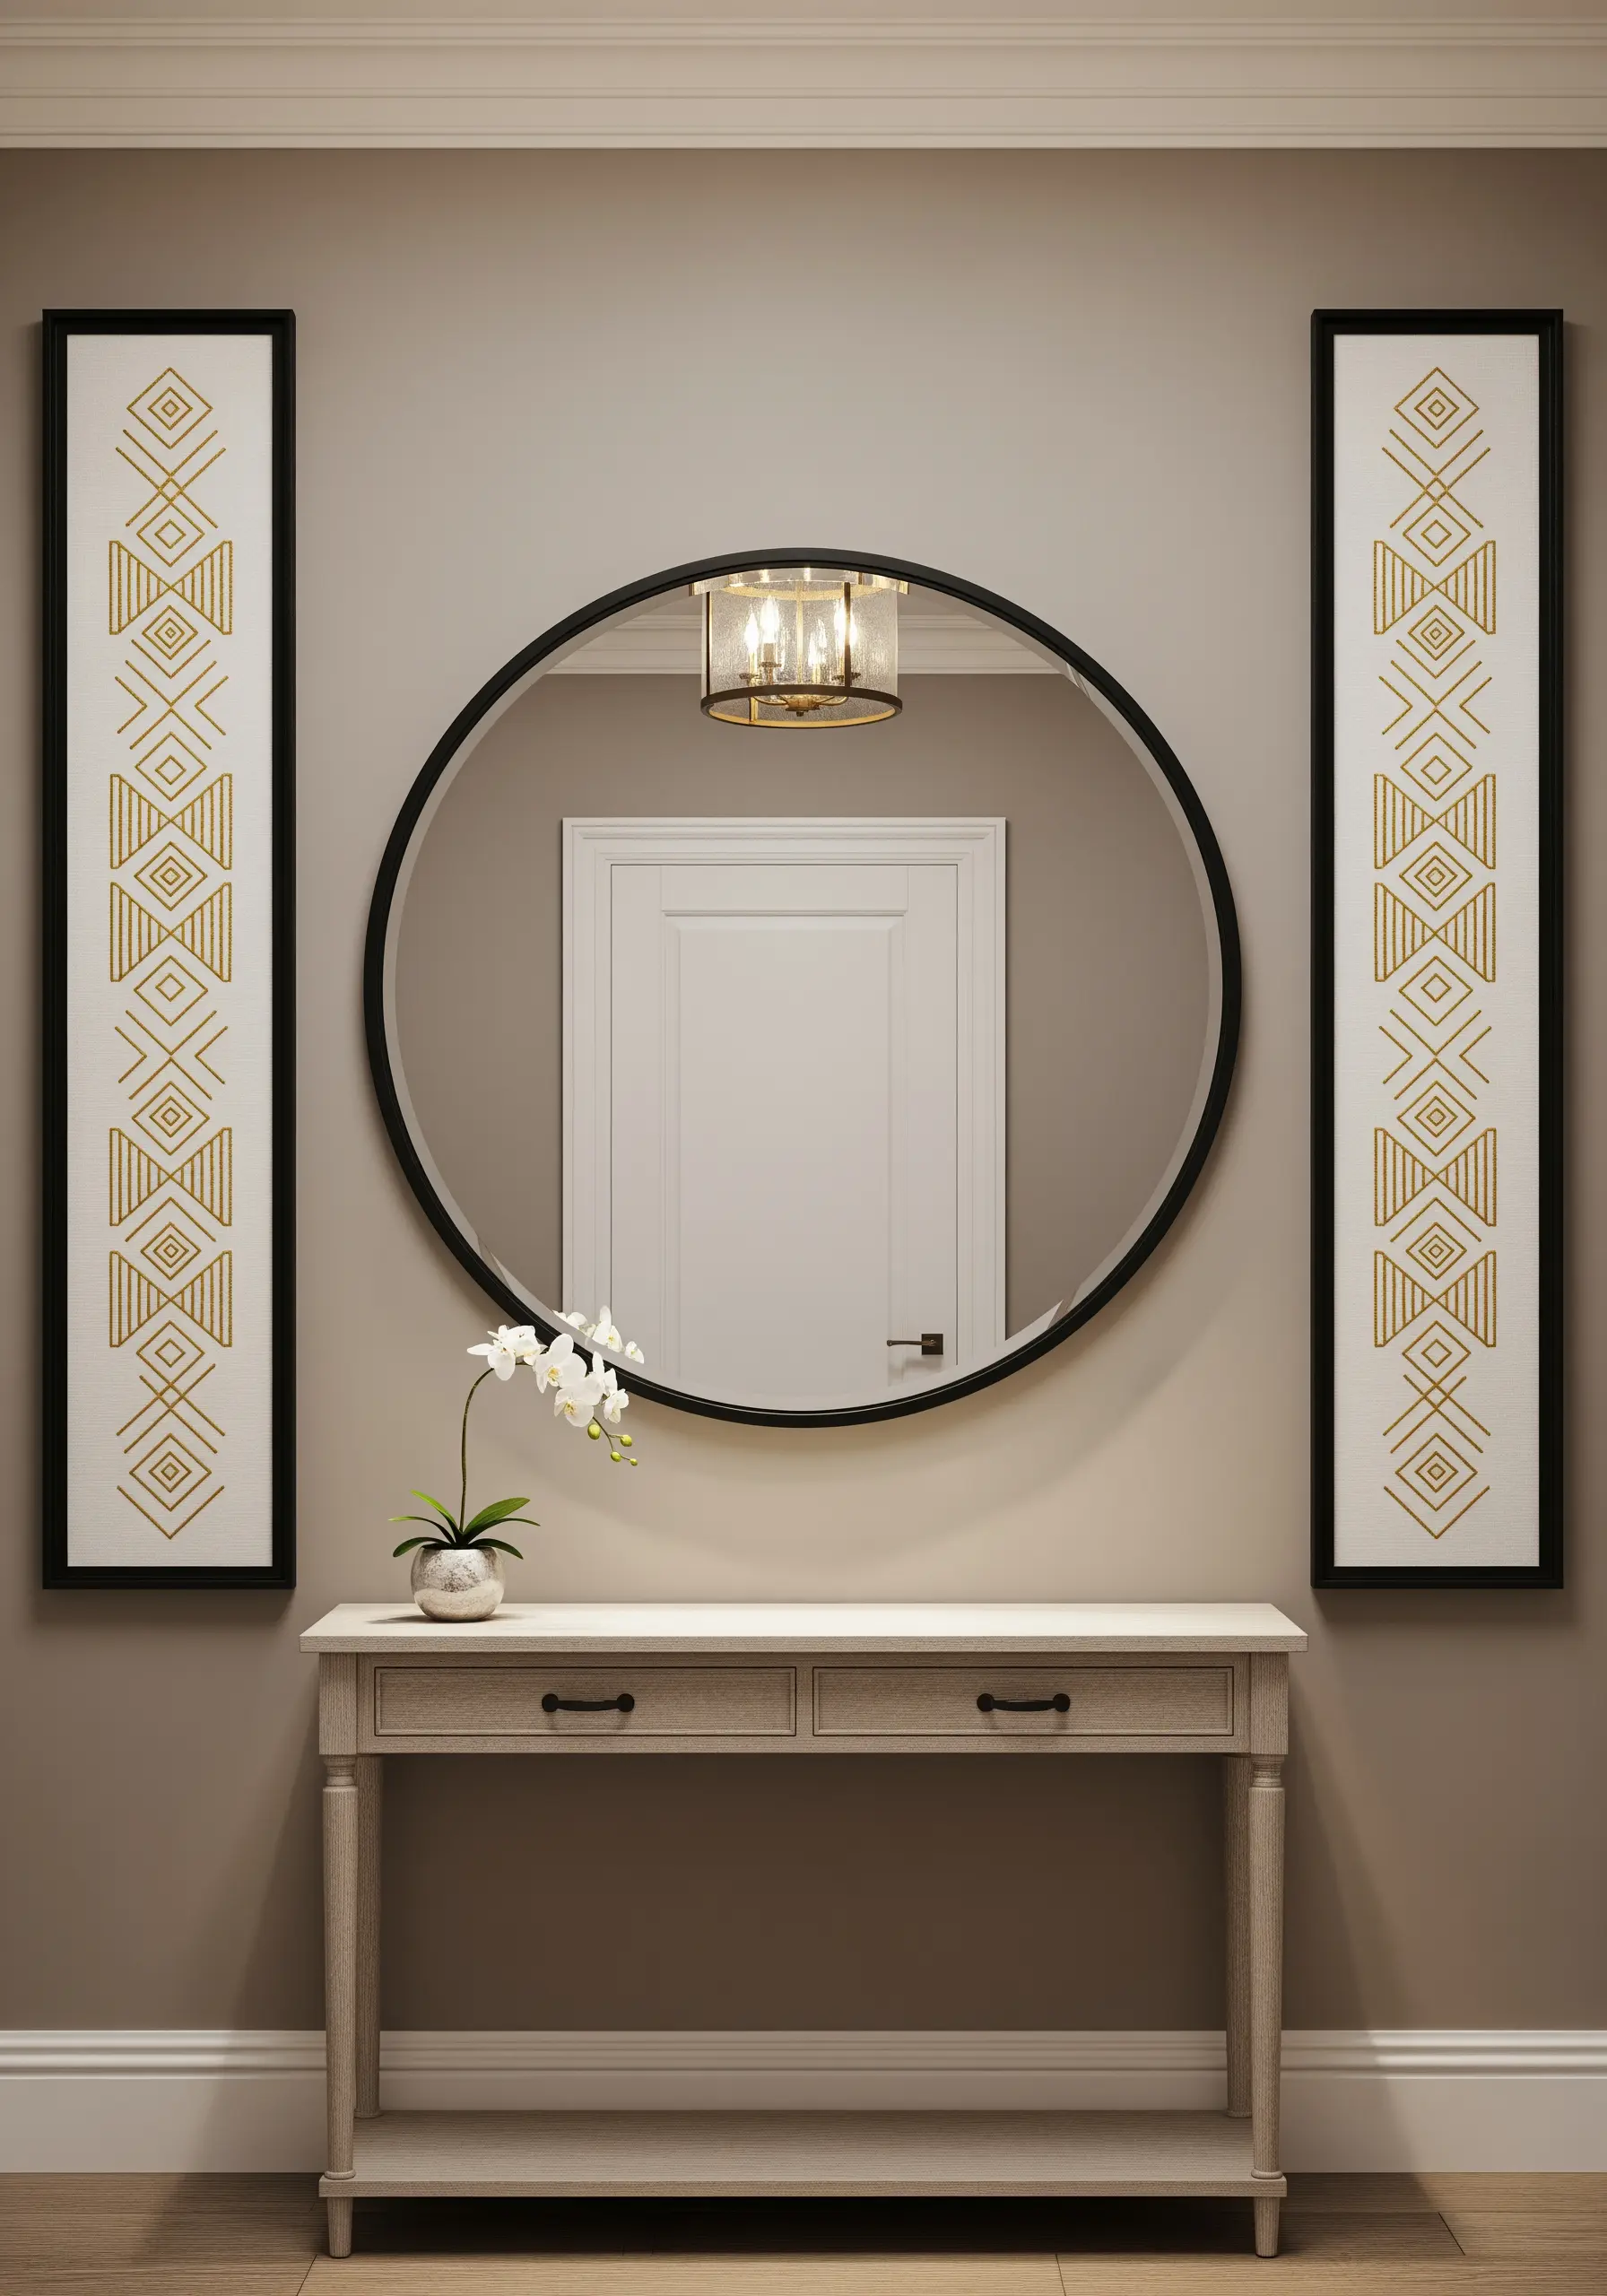
Frame a doorway, mirror, or console table with a pair of tall, narrow embroidered panels for a touch of refined symmetry.
Choose a repeating geometric pattern that has a vertical orientation.
For a look of quiet luxury, use a single color of metallic thread—like gold or champagne—on a neutral linen background.
The simplicity of the color palette allows the intricacy of the pattern and the subtle shimmer of the thread to become the focal point, creating elegant embroidery accents.
26. Design a Labyrinthine Focal Point
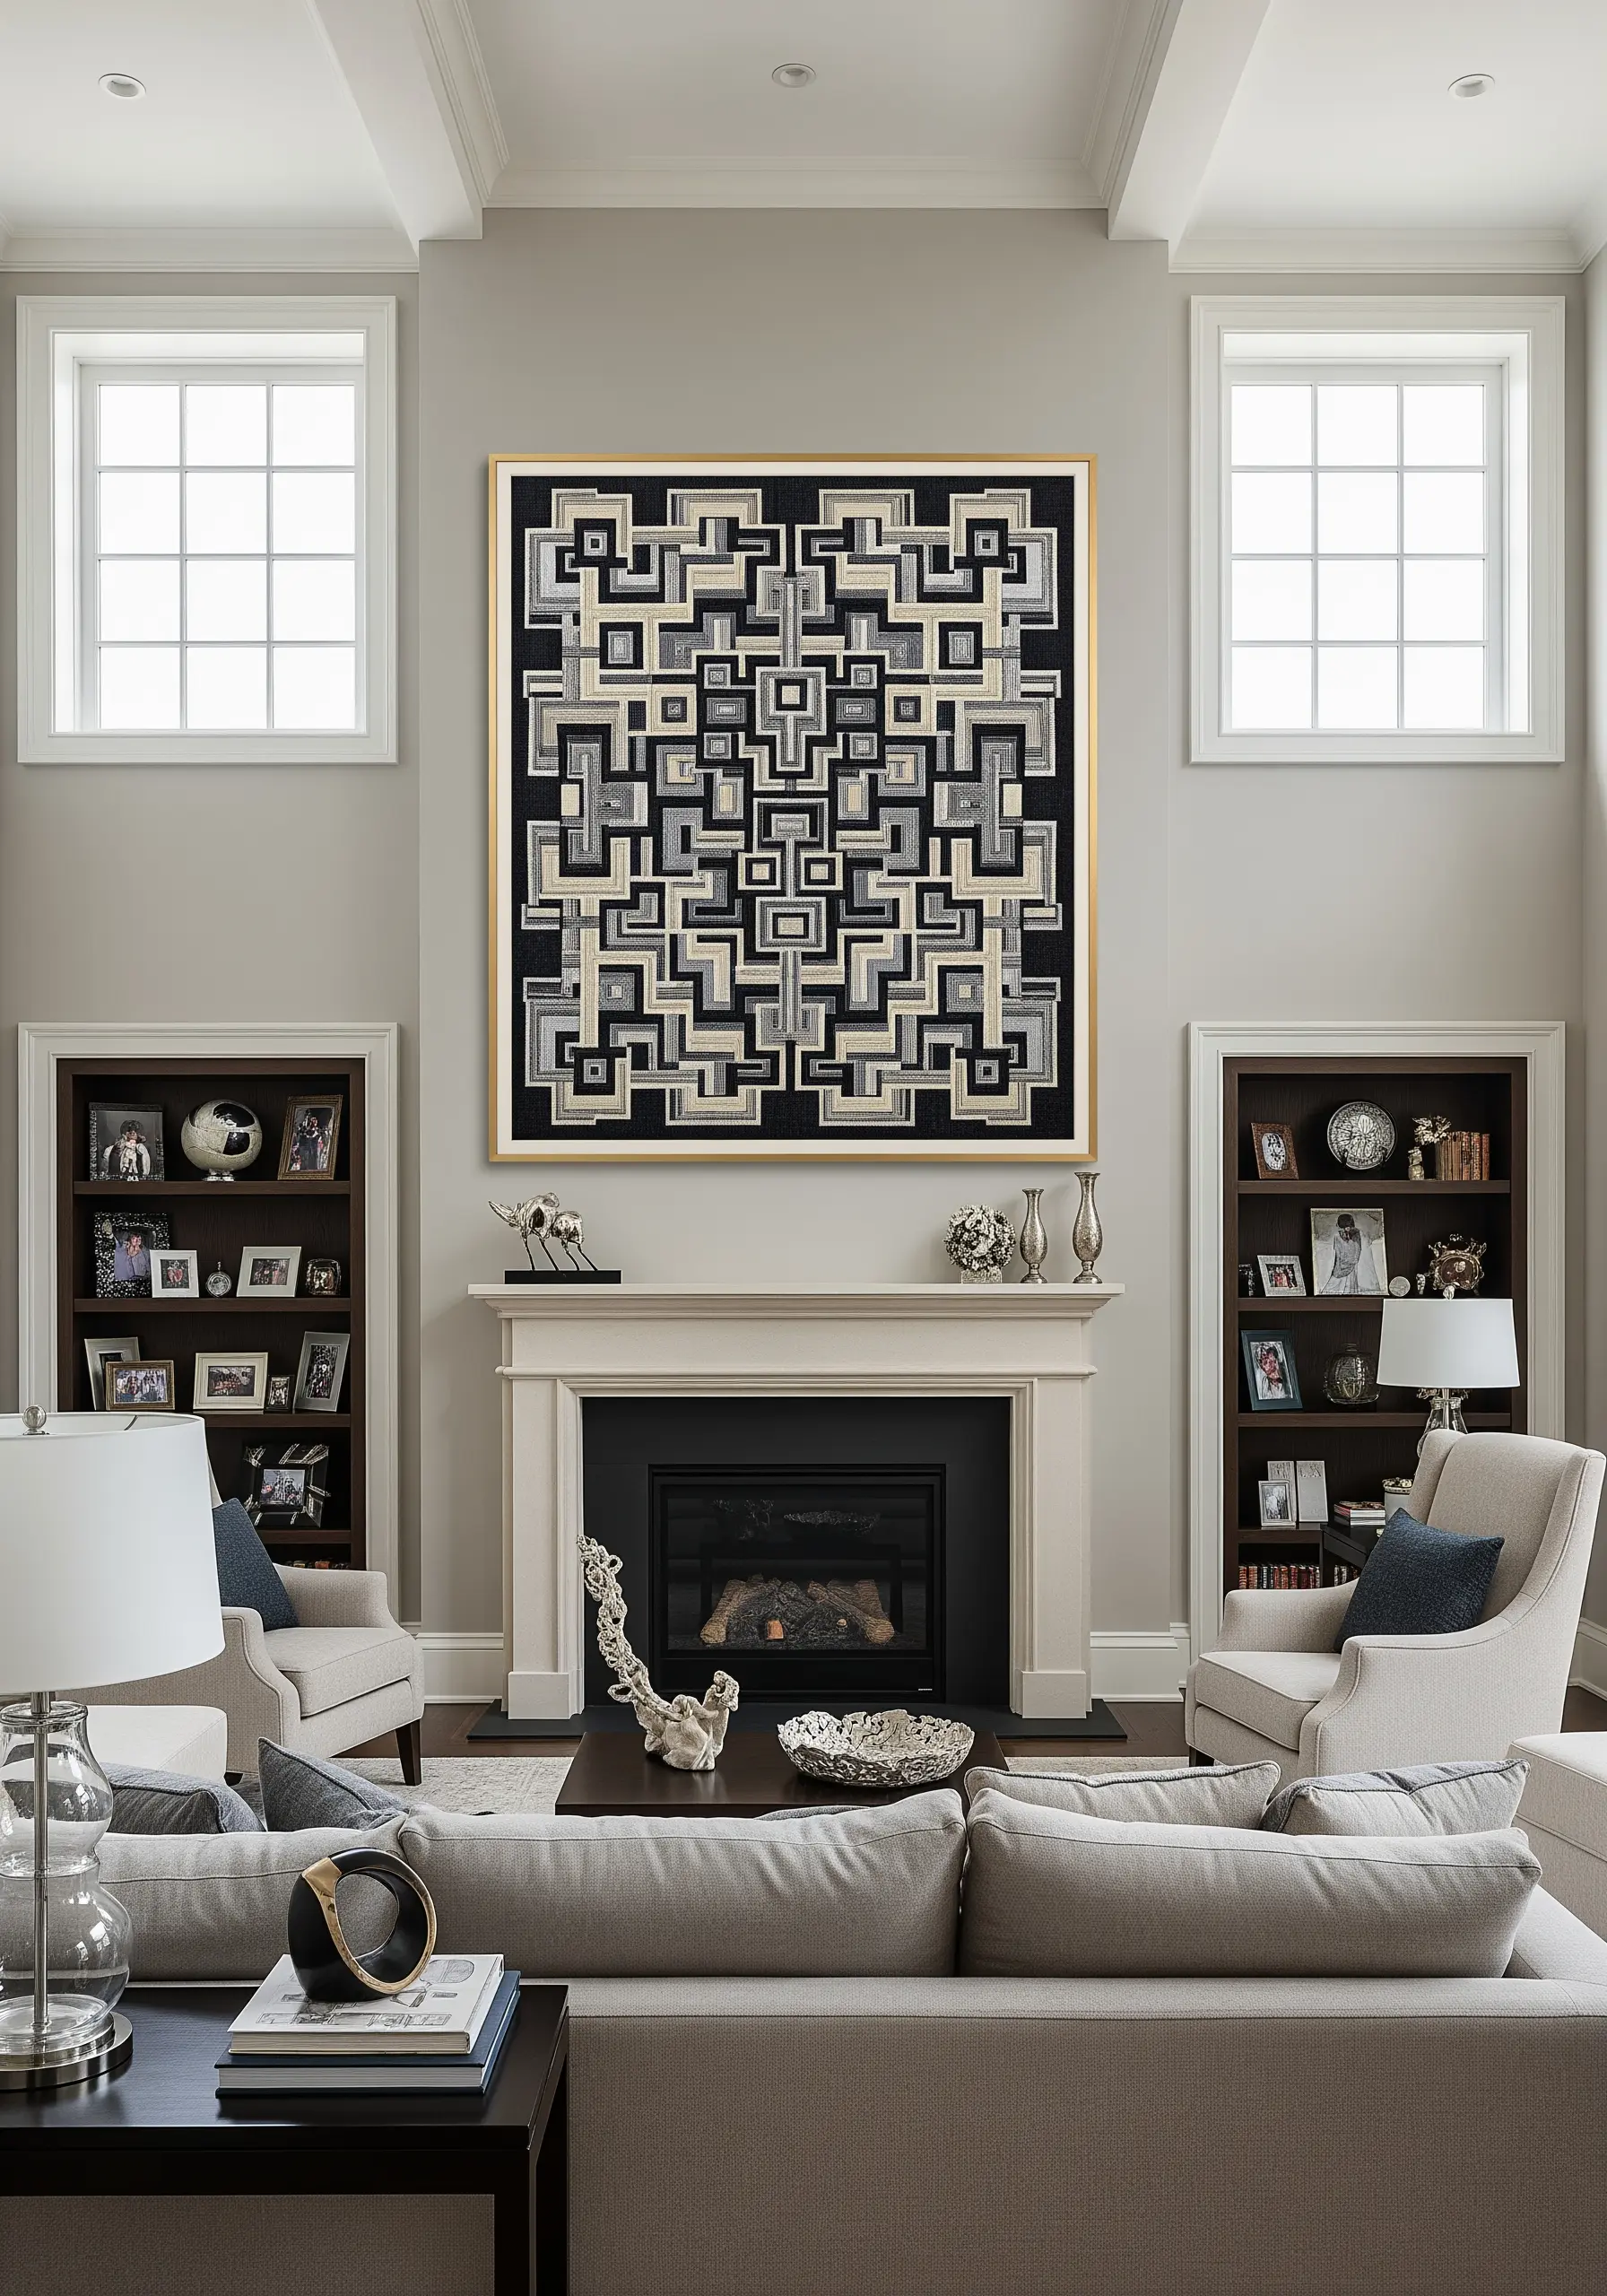
Take a complex geometric pattern and scale it up to create a dramatic, oversized piece of art that can anchor an entire room.
When working on a large scale, choose your thread wisely. A thicker thread, like Pearl Cotton No. 5 or even fine yarn, will help you fill the space more efficiently.
Use a neutral color palette—shades of black, grey, and cream—to keep the intricate design from feeling overwhelming.
This approach turns a simple stitch concept into a statement-making work of monochrome embroidery wall art.
27. Define Interwoven Lines with Padded Stitches
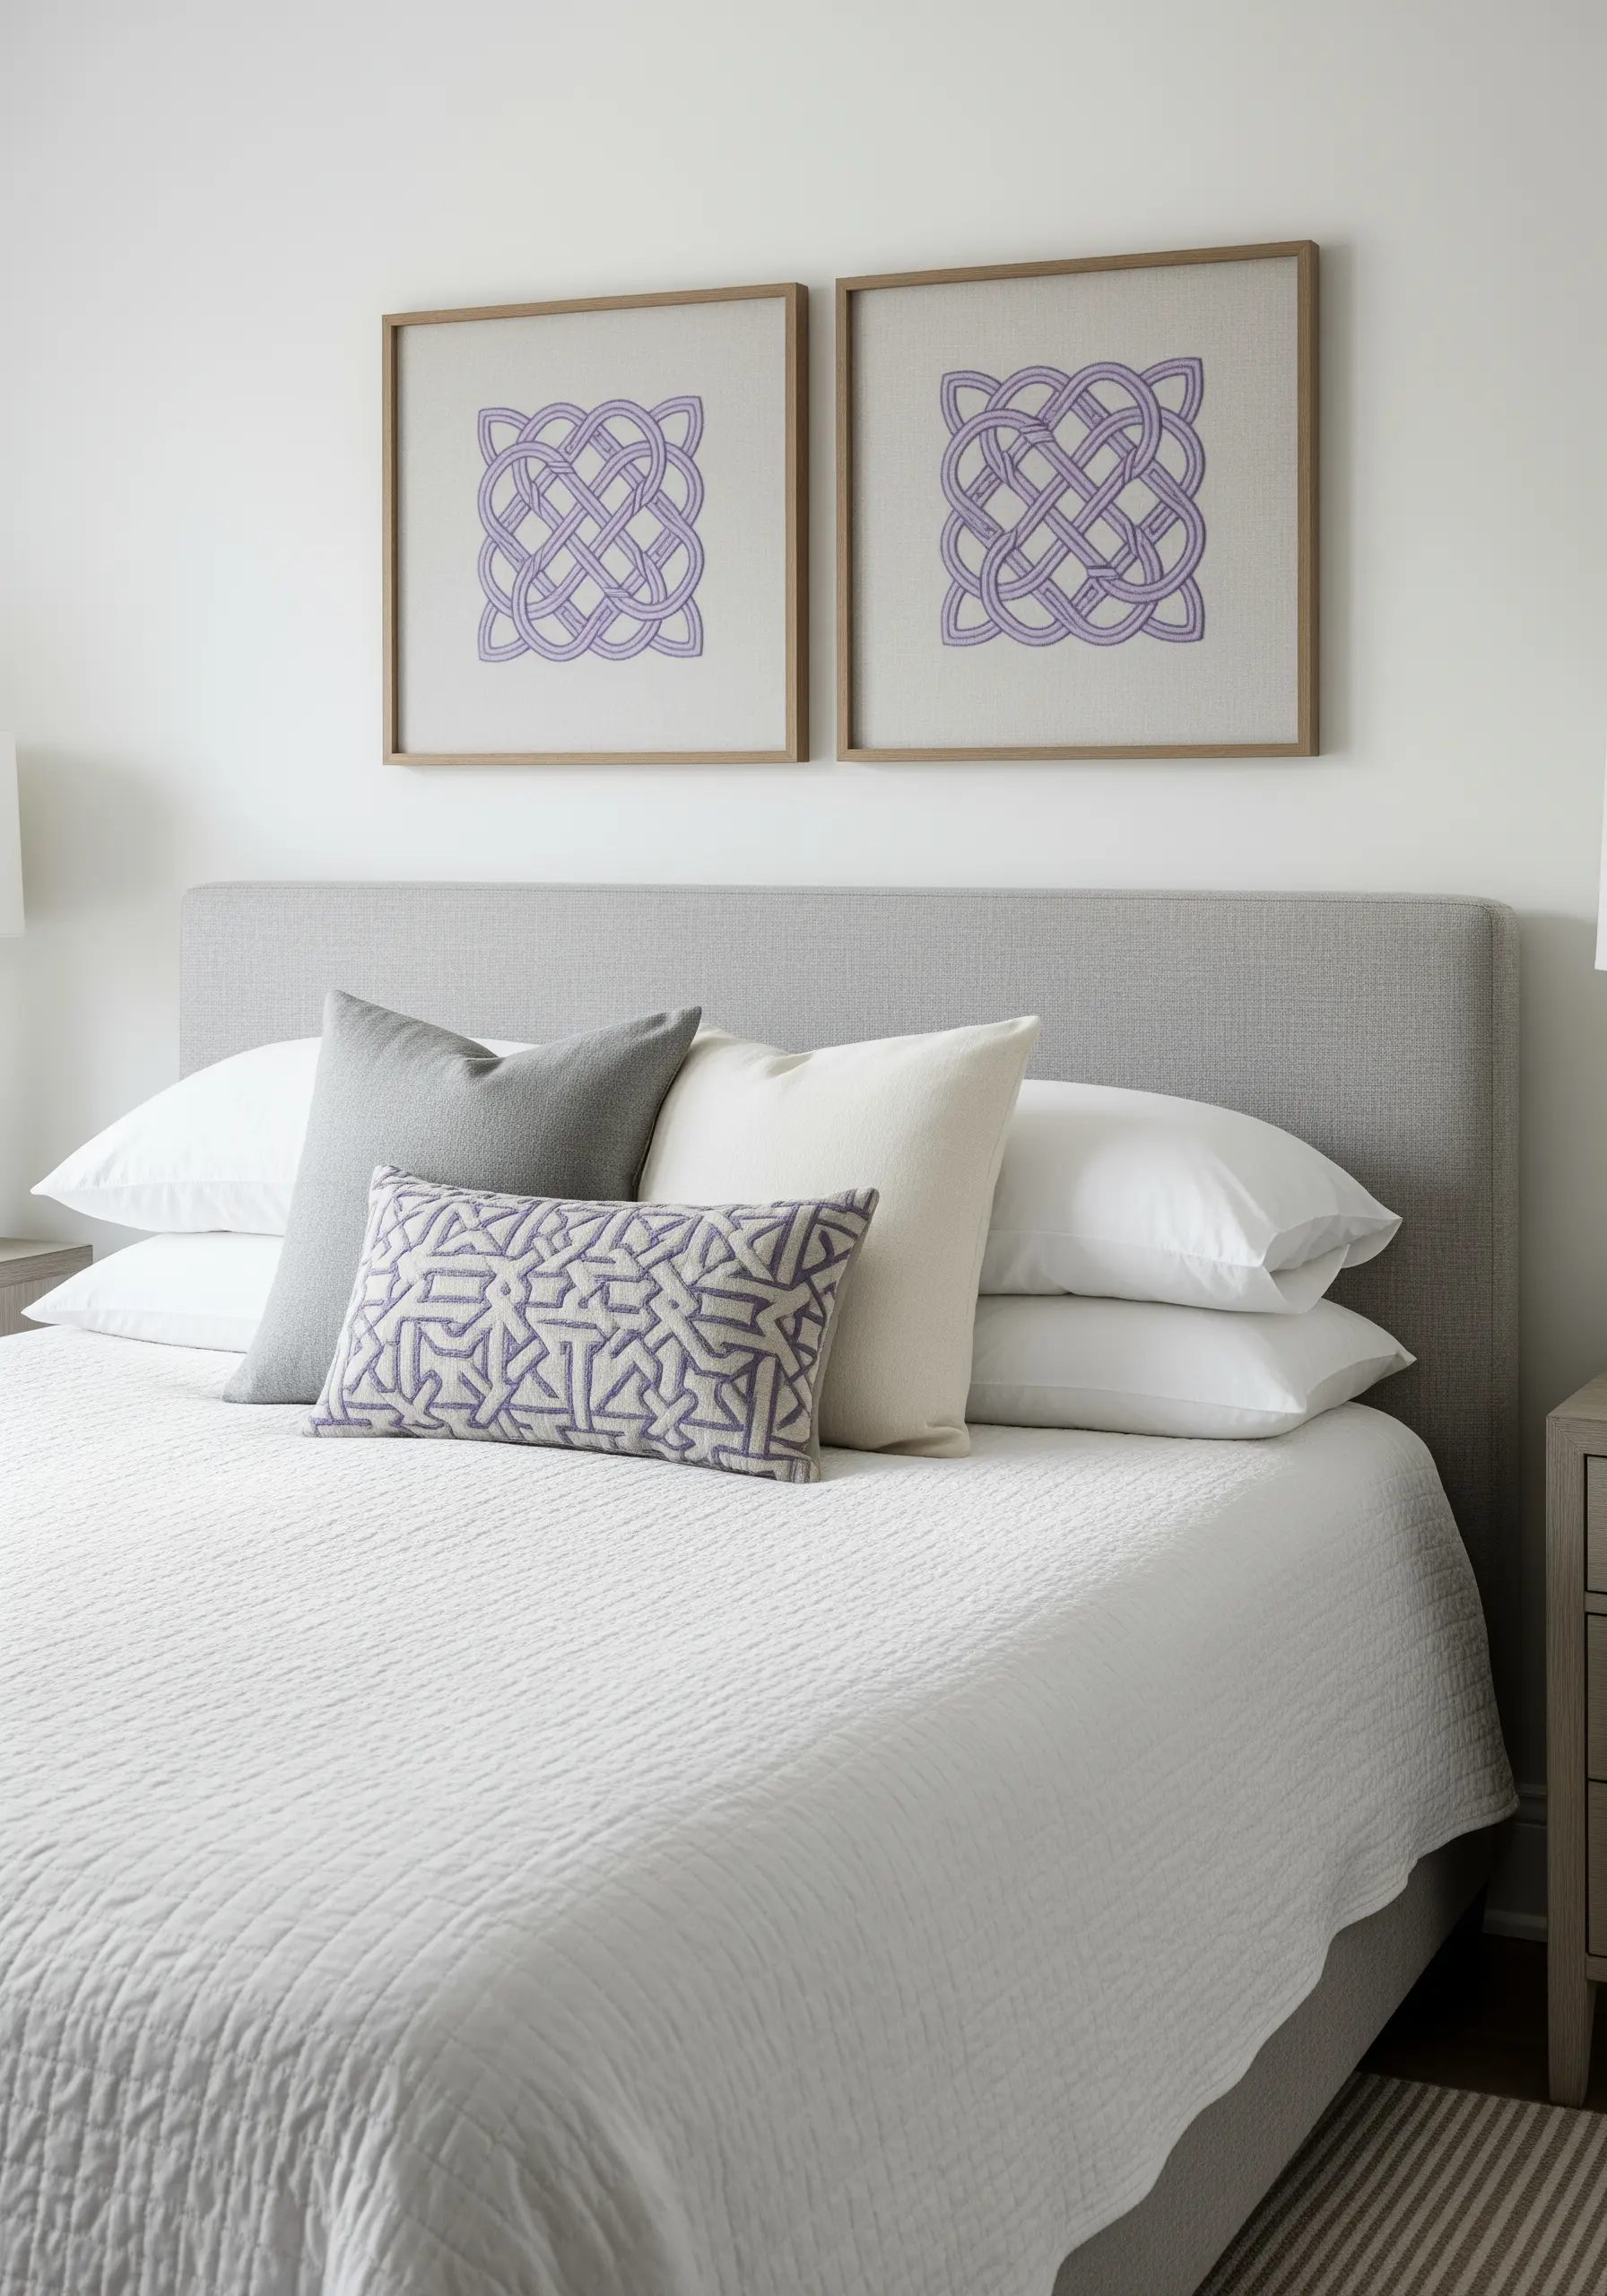
Give Celtic knots and other interwoven patterns a clean, dimensional look by emphasizing the ‘over-under’ effect.
First, stitch the complete outline of the entire knot. Then, use a padded satin stitch for only the segments that are supposed to be ‘on top’.
For the ‘under’ segments, use a simple, flat satin stitch.
This subtle difference in height makes the interwoven path clear and adds a sophisticated, sculptural quality to the design, making it a perfect accent for cozy, neutral decor.
28. Infuse Joy with a Playful, Coordinated Set
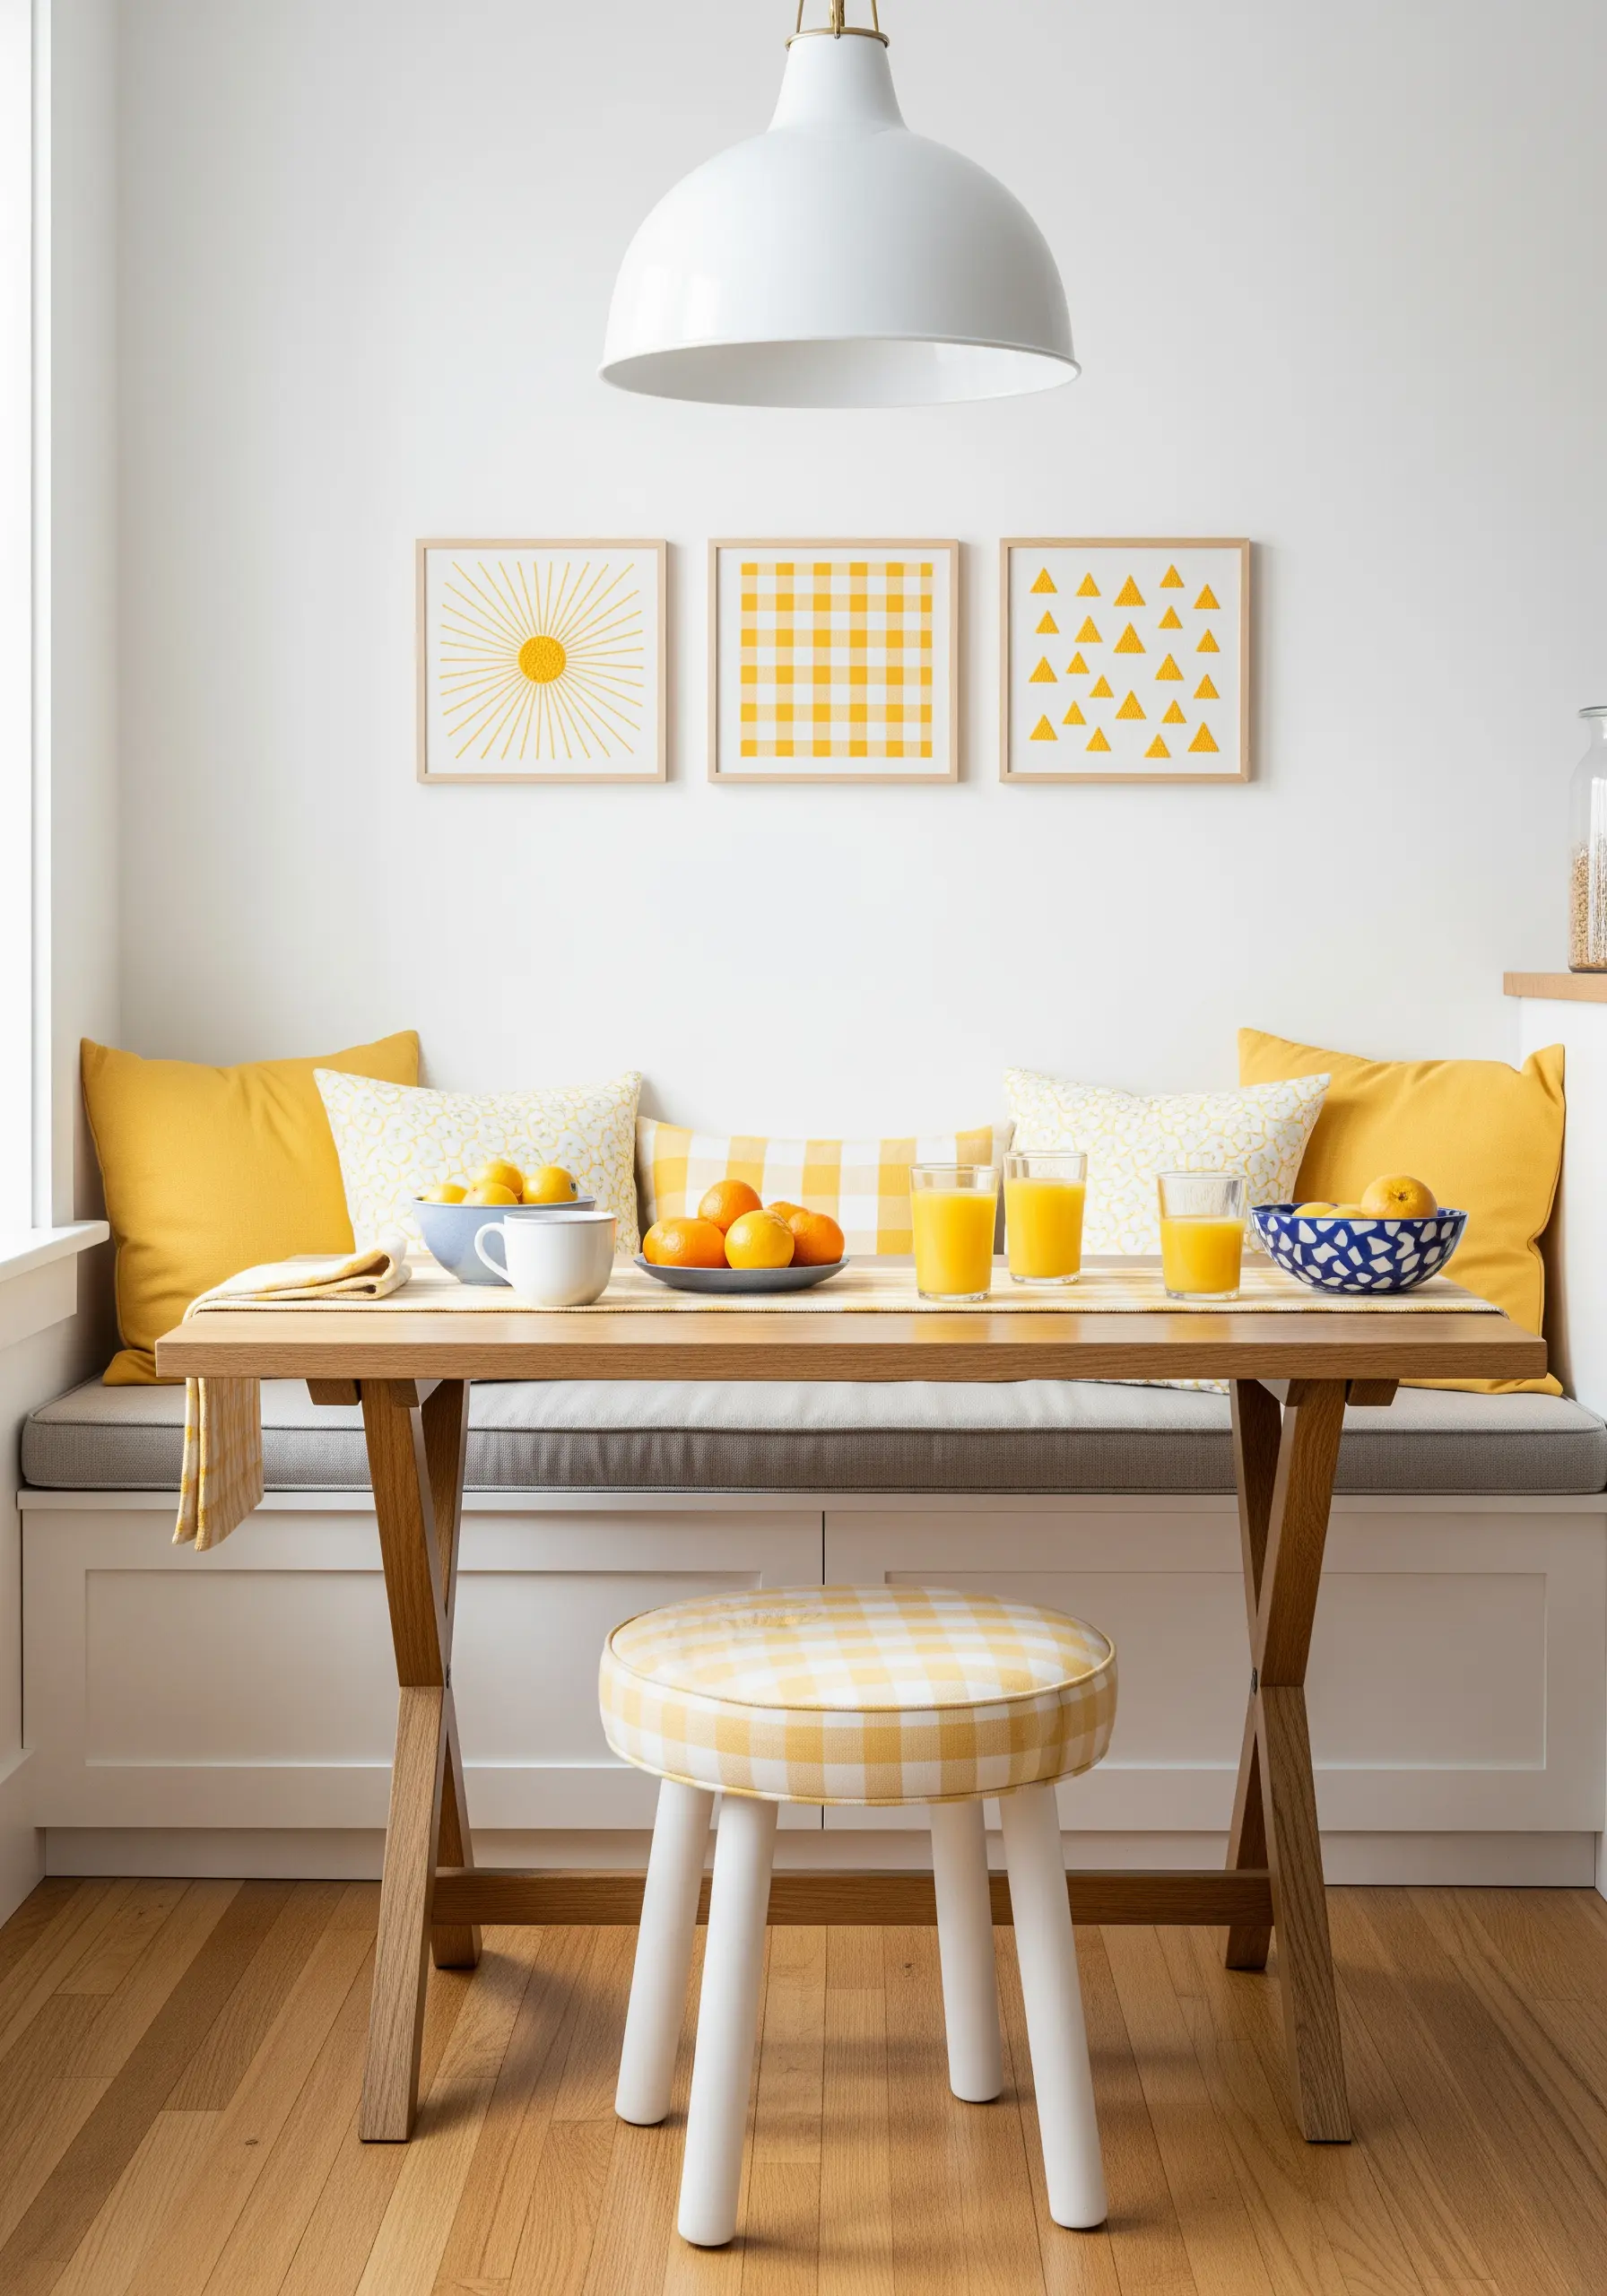
Brighten a breakfast nook or kitchen with a cheerful trio of simple geometric designs.
Unify the set by using a single, vibrant color palette—like sunny yellow and white—across all three pieces.
Choose simple, happy motifs: a sunburst made of straight stitches, a gingham pattern, and a field of tiny triangles.
Framing them identically and hanging them together creates a cohesive and uplifting display that feels both playful and polished, adding colorful embroidery hoops or frames to transform the space.
29. Craft an Intricate Frame with Micro-Geometrics
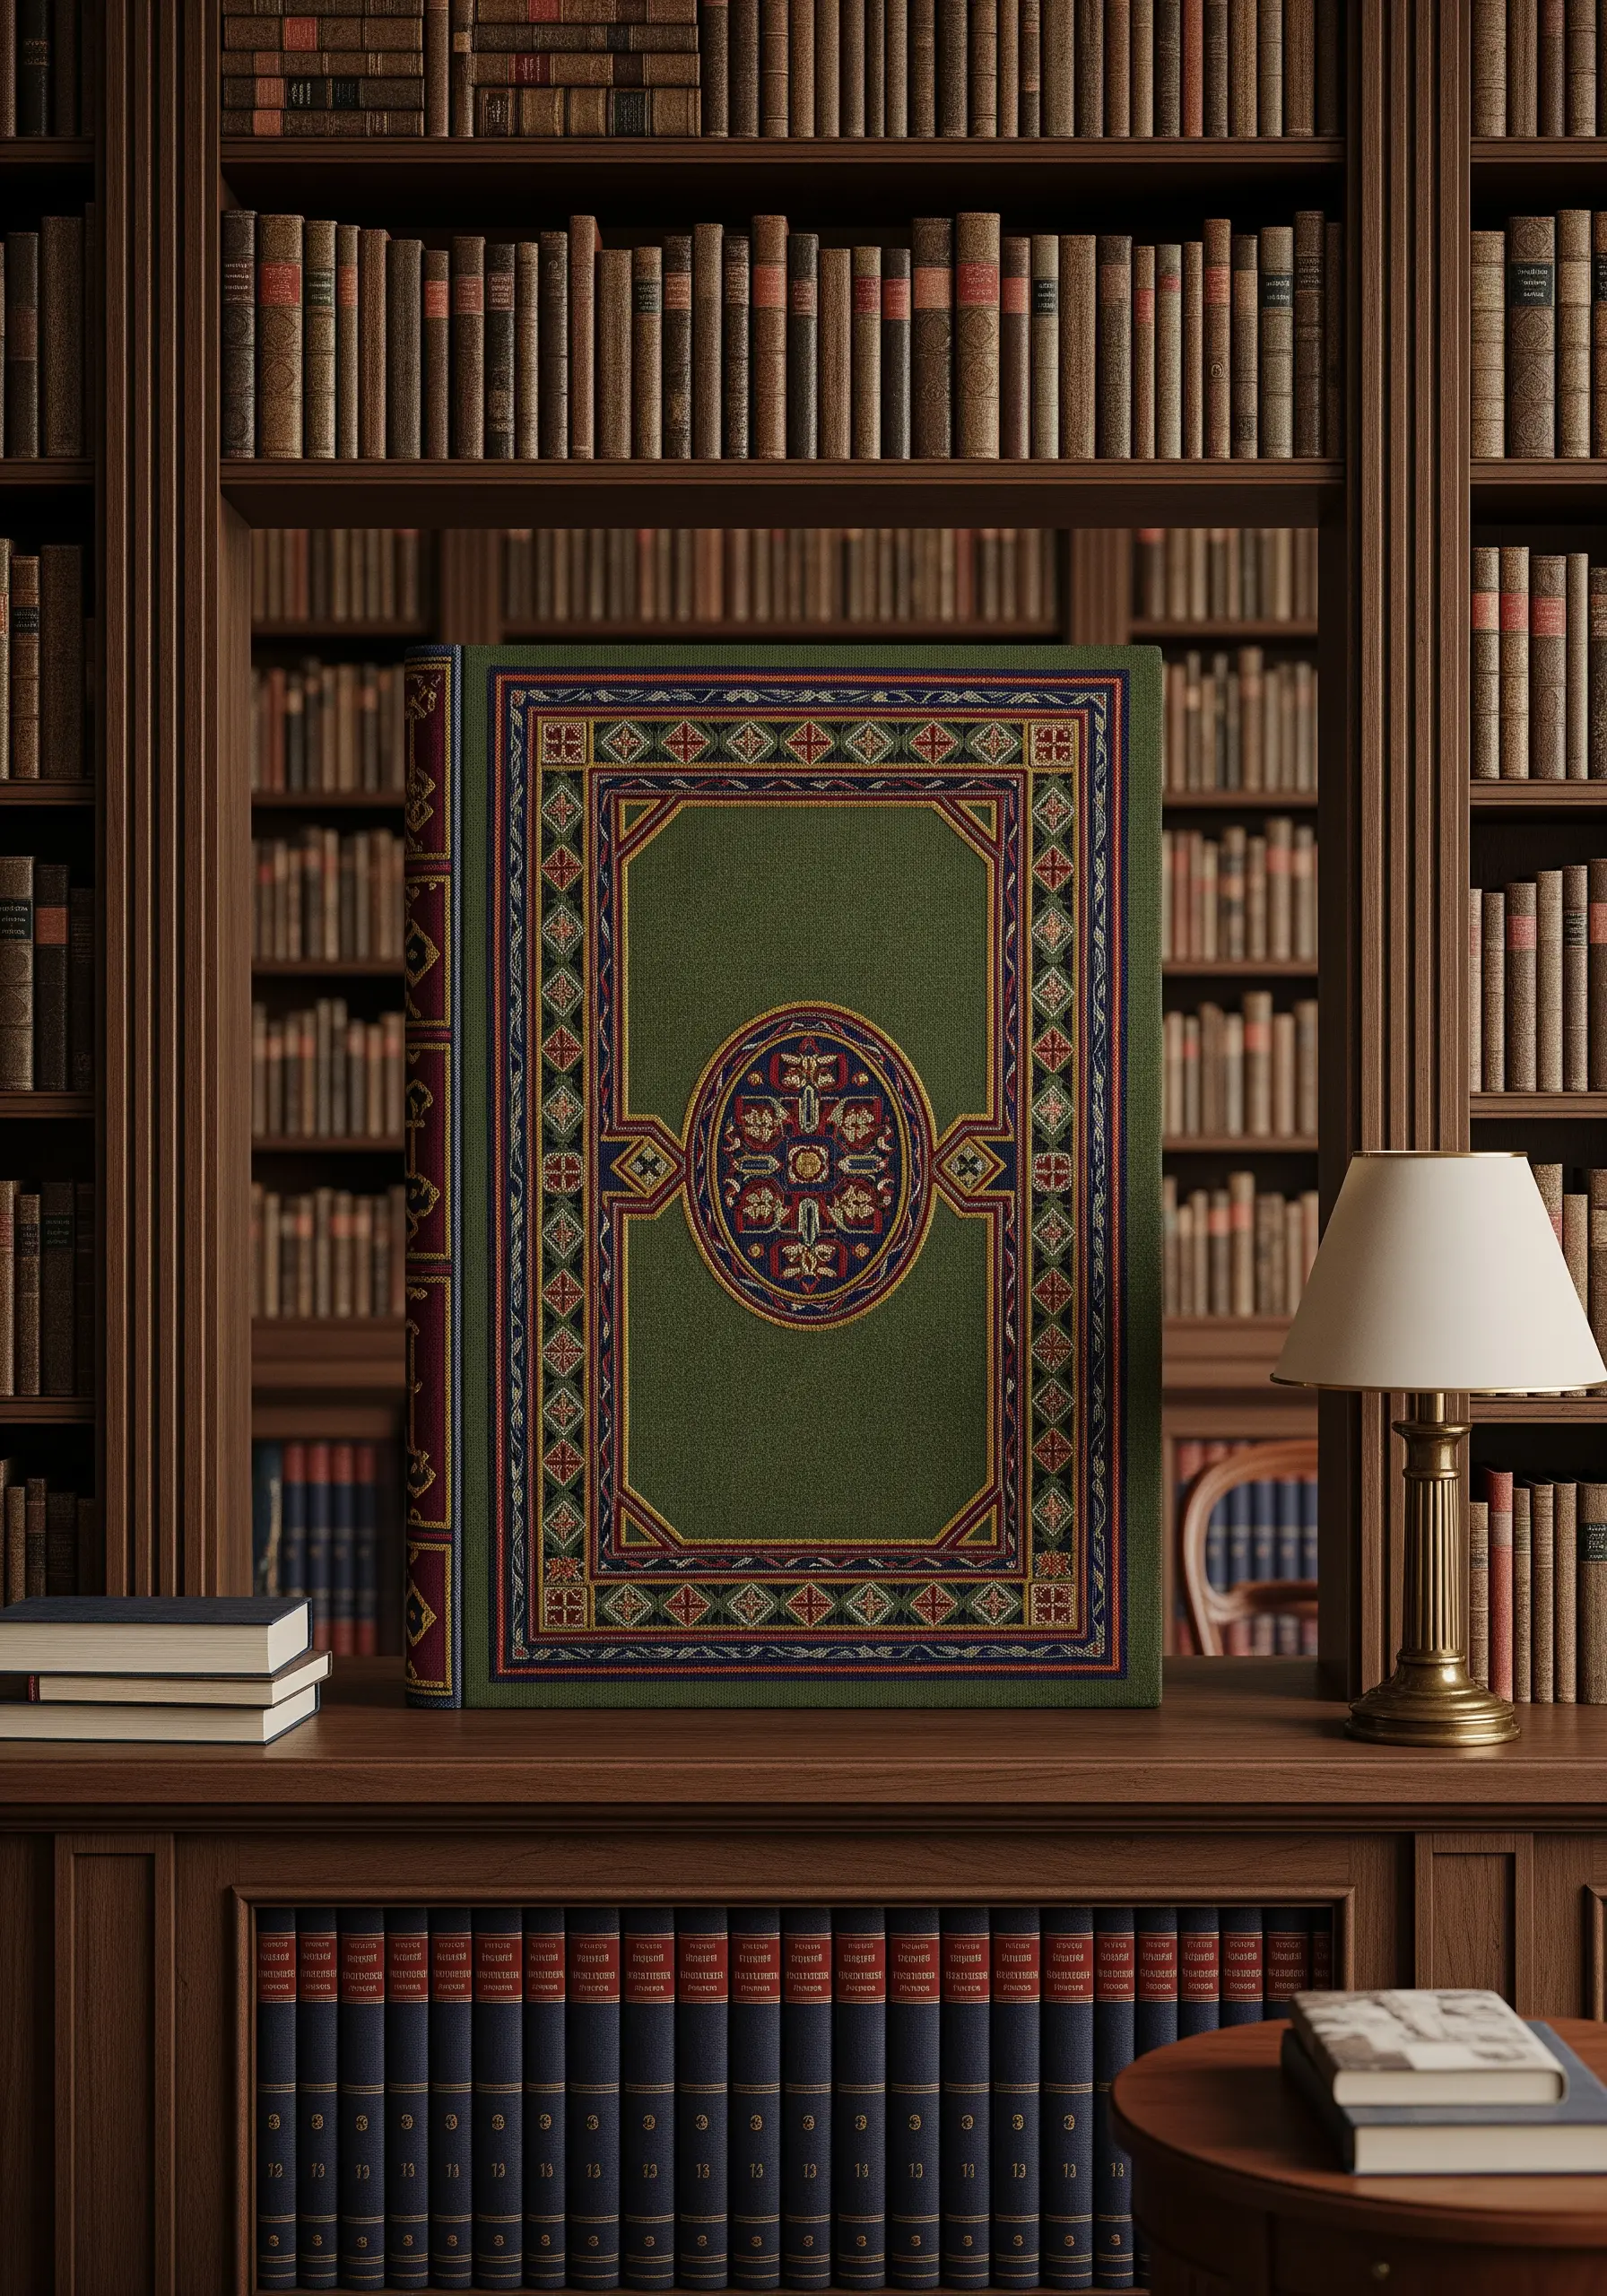
Elevate a central motif by surrounding it with a detailed border made of tiny, repeating geometric patterns.
Think of it as creating an embroidered frame within the frame.
Use a single strand of floss to stitch these micro-patterns, such as tiny diamonds, squares, or cross-stitches, for maximum precision.
This technique adds a sense of richness and history, reminiscent of antique tapestries or illuminated manuscripts. It’s a beautiful way to create framed embroidery patterns that look like they belong in a gallery.


