

Perhaps you’ve mastered the basic stitches, but now you find yourself wondering how to move your work from simply ‘handmade’ to ‘hand-crafted art.’ The answer isn’t in buying more supplies or learning impossibly complex techniques. It lies in intention—in understanding how a subtle shift in stitch direction, thread weight, or color composition can transform a simple line into a statement.
Abstract embroidery offers a unique freedom. It’s not about perfectly replicating an image; it’s about translating a feeling, a rhythm, or a balance of forms into thread. It allows you to focus purely on the tactile beauty of the materials themselves. Each of the pieces you’re about to see contains a core idea—a technique you can borrow and make your own, right now, to elevate your work.
Consider this a quiet conversation about possibility. Let these examples encourage you to see your needle and thread not just as tools for decoration, but as instruments for creating art that is modern, personal, and deeply satisfying. You have the skills. Now, let’s refine the vision.
1. Master Architectural Depth with Layered Satin Stitch

Create the illusion of overlapping forms by carefully planning your stitch direction.
For each colored shape, fill it entirely with a consistent satin stitch, ensuring your stitches lie flat and parallel.
Where one shape overlaps another, change the direction of your stitches—for example, from vertical to horizontal—to create a subtle, light-catching contrast that defines the edge without a harsh outline.
Use a matte cotton floss for this to achieve a flat, graphic look that emphasizes shape over sheen.
For the perfect circles, use a couching stitch with a thicker thread for the outline before filling the shape; this guarantees a crisp, unwavering circumference.
2. Evoke Topographical Maps with Contoured Stem Stitch

Capture the organic flow of contour lines by using a stem stitch or a whipped backstitch, which provides a smooth, rope-like finish.
Vary the weight of your lines by switching between two, three, and four strands of floss—this adds visual rhythm and depth to the composition.
When stitching curves, shorten your stitch length slightly to prevent sharp angles and maintain a graceful arc.
Arrange your pieces as a triptych to create a continuous visual narrative that draws the eye across the wall, turning simple lines into a sophisticated art installation.
3. Create an Energy Burst with Directional Straight Stitches

Achieve this explosive effect by working with long, directional straight stitches that radiate from a central point.
Don’t aim for uniform length; the variation is what creates the sense of dynamic movement.
Layer vibrant colors over one another, allowing some threads to partially obscure others to build depth.
Use a dark, high-contrast fabric like black linen or cotton twill to make the fluorescent and primary colors appear to glow.
Finally, add a few delicate, single-strand outlines in a contrasting color to give the chaotic energy a hint of structure.
4. Build Soft, Tactile Clouds with French Knots
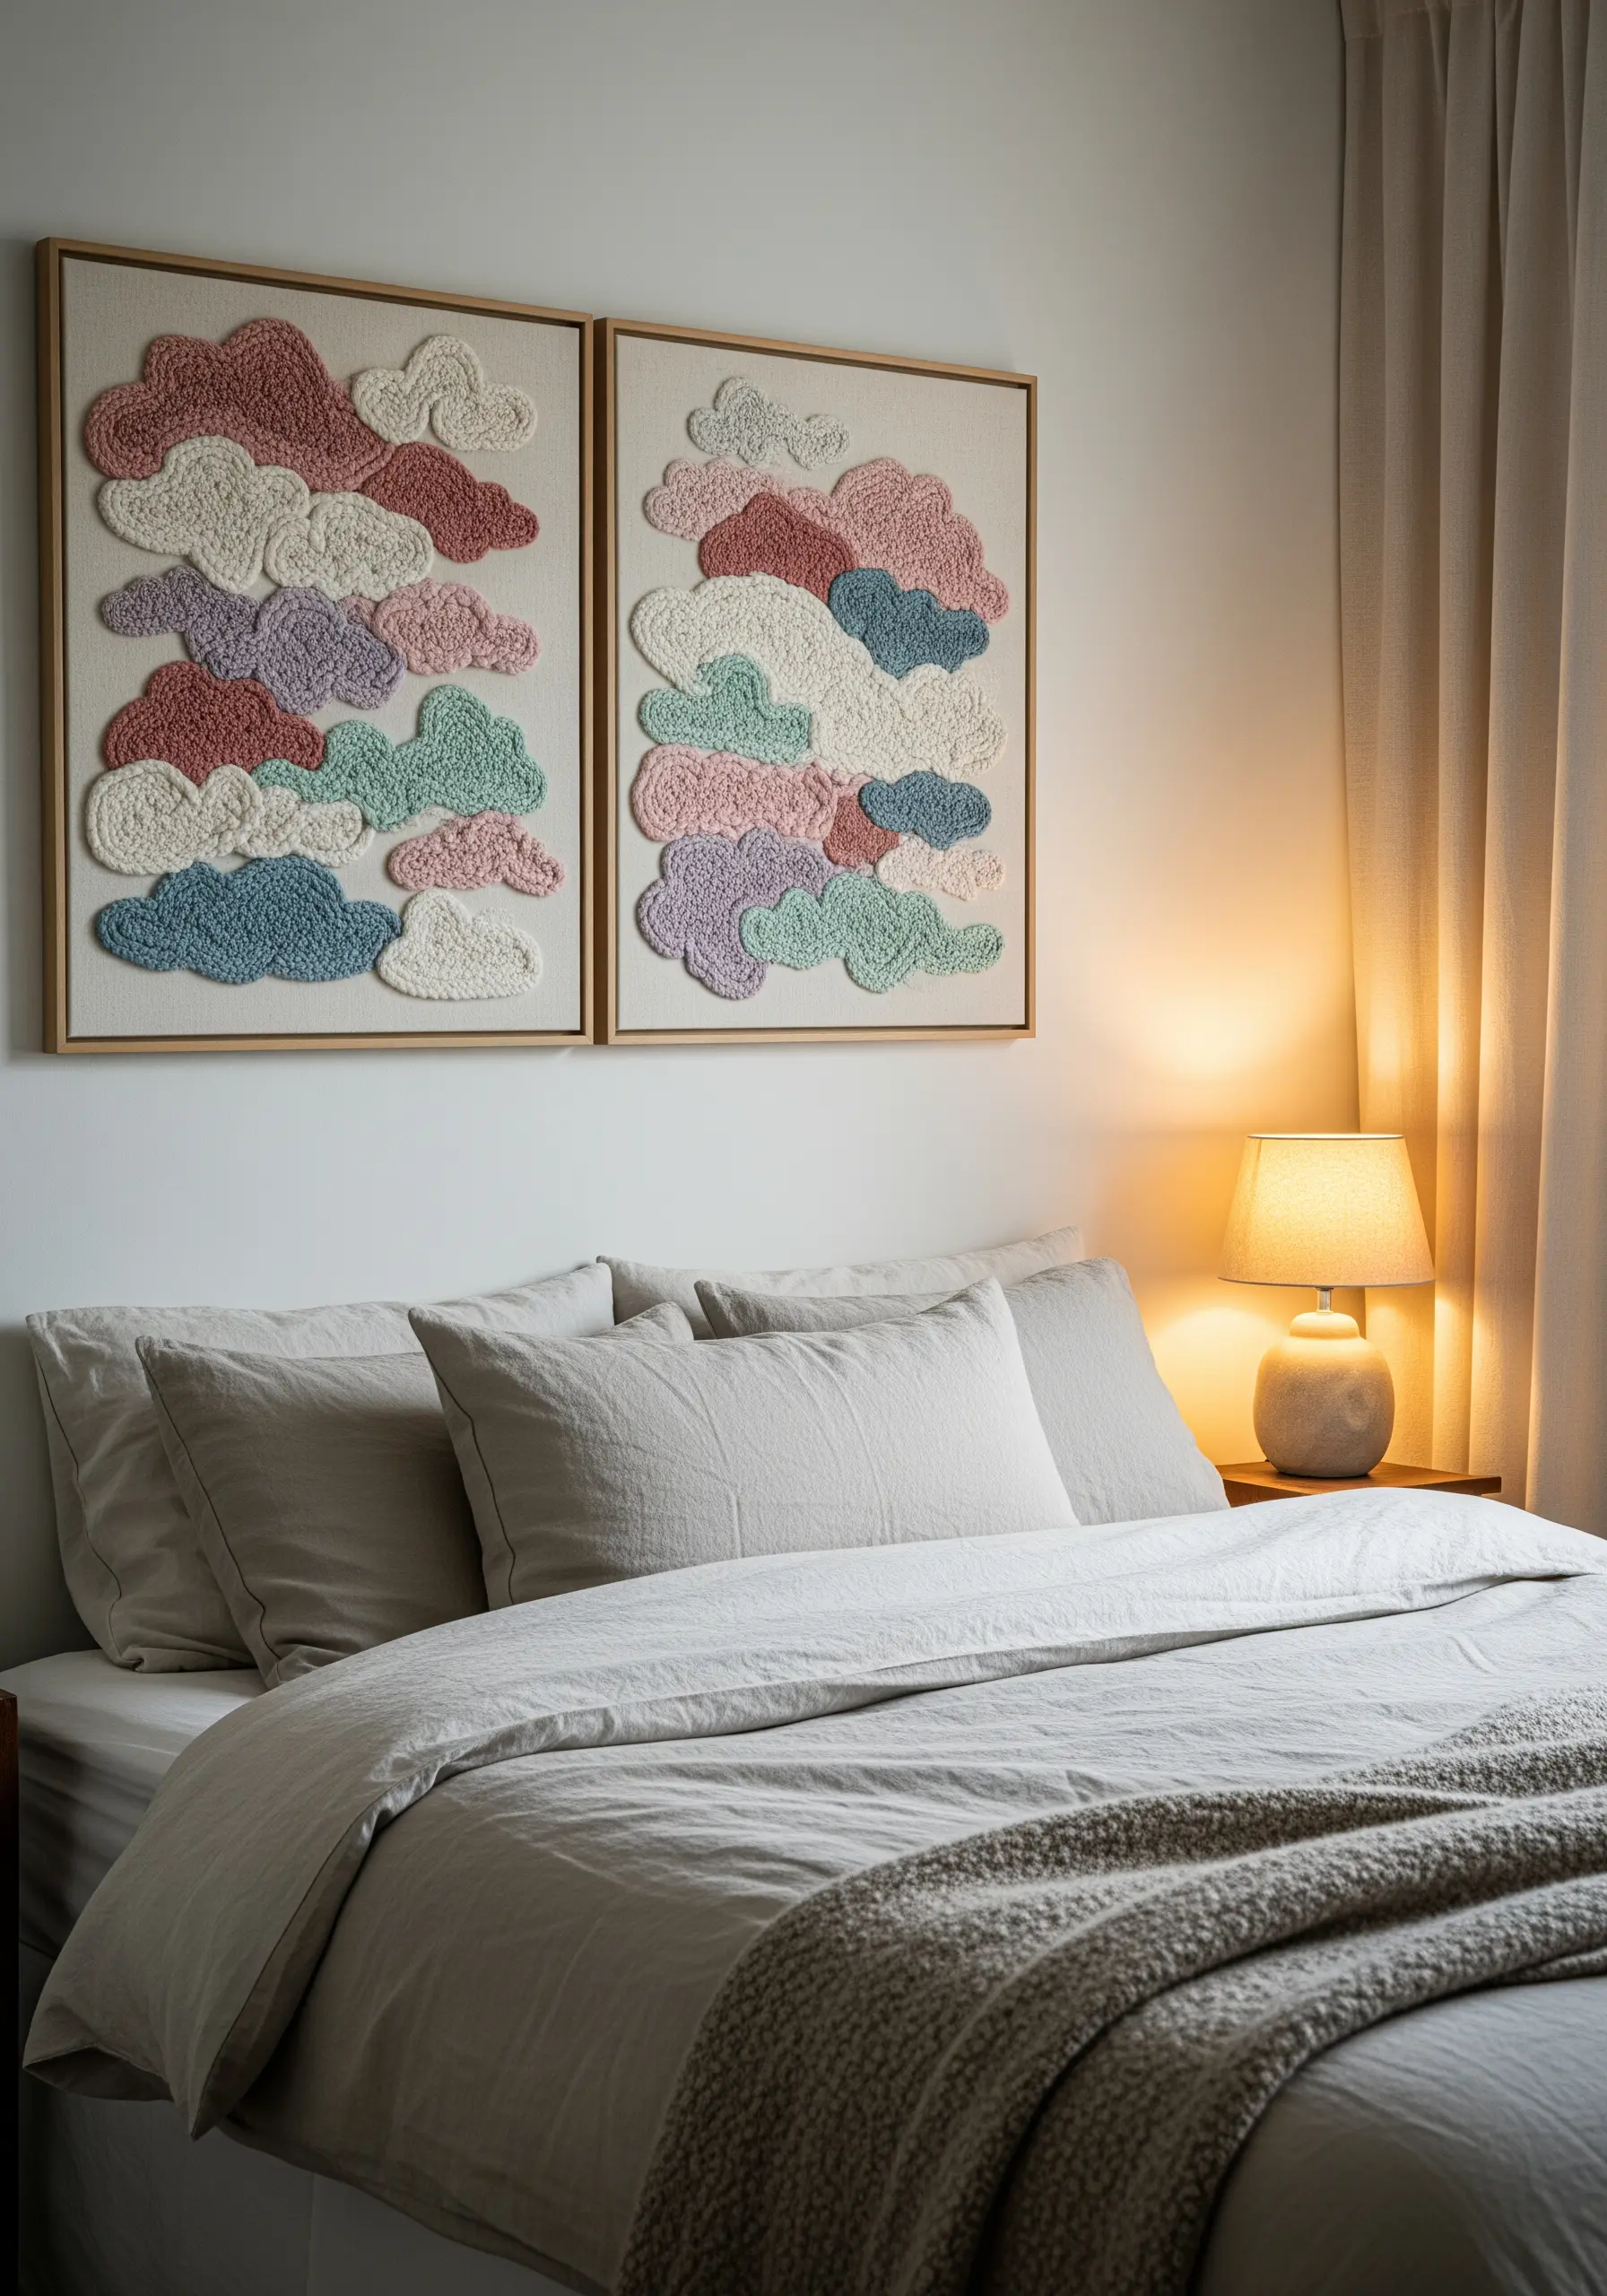
Move beyond flat fills and create a plush, three-dimensional surface using densely packed French knots.
To achieve a uniform, fluffy texture, use a thicker thread like pearl cotton or all six strands of embroidery floss, and wrap the needle two or three times for each knot.
Work in a diptych format for a larger statement piece that feels cohesive yet expansive.
A muted pastel palette enhances the soft, dreamy quality, making these perfect for a serene bedroom or nursery.
The slight irregularity in knot size is not a flaw—it’s what gives the piece its handmade, organic charm.
5. Achieve Graphic Impact with Laid Work

For perfectly straight, uniform vertical lines on a large scale, laid work is superior to satin stitch, as it prevents sagging and uses less thread.
Lay down long strands of a thick, smooth thread—like pearl cotton or even fine yarn—across the fabric surface from top to bottom.
Then, use a thinner, matching (or contrasting) thread to tack these long strands down at regular intervals with tiny, nearly invisible couching stitches.
Incorporating a metallic thread for some of the bars adds a reflective quality that breaks up the matte texture and catches the light beautifully.
6. Curate a Cohesive Hoop Art Gallery Wall

Turn a collection of abstract studies into intentional decor by uniting them with a consistent element, such as a limited color palette or a recurring geometric theme.
Experiment with different techniques in each hoop to create visual interest: a whipped backstitch for smooth spirals, dense seed stitch for a sandy texture, and precise satin stitch for graphic blocks.
This approach allows you to explore new stitches on a small scale.
Displaying your hoops alongside framed prints and photos integrates your textile art into your broader home decor, making it feel both personal and polished.
7. Channel Mid-Century Modern with Bold Crewel Work

Capture the iconic style of the 1950s and ’60s by using crewel wool instead of cotton floss.
The thicker wool creates bold, graphic lines with a soft, matte texture that is characteristic of the era.
Use a chain stitch or a split stitch to outline and fill your abstract shapes; these stitches work beautifully with wool and add their own subtle texture.
Stick to a classic mid-century palette of olive green, burnt orange, and deep teal on a neutral linen background to complete the authentic, retro aesthetic.
8. Construct a Tactile Collage with Mixed Fiber Art

Go beyond the hoop and create a large-scale wall hanging by combining multiple textile techniques.
Create individual abstract shapes using punch needle for looped texture, weaving for flat blocks of color, and chunky French knots for plush accents.
You can make these components separately and then appliqué them onto a large canvas or linen backing.
Leaving some threads to hang loose as fringe adds another layer of texture and movement, transforming the piece into a dynamic fiber art installation.
9. Define Space with a Minimalist Grid

Create a sophisticated, architectural design using only straight stitches on a high-contrast background.
To ensure your lines are perfectly straight and evenly spaced, use a water-soluble marker and a ruler to draw your grid before you begin stitching.
Using a slightly thicker thread, like a sashiko thread or pearl cotton, will give your lines more presence and a subtle, raised quality.
This minimalist approach proves that a powerful statement can be made with the simplest of stitches when composition and precision are prioritized.
10. Paint with Thread Using Color-Blocked Gradients

Emulate the look of a woven tapestry or a digital pixel gradient by filling small, rectangular blocks with satin stitch.
Plan your color transitions carefully, arranging shades from light to dark or creating a sunset-like blend across the canvas.
To keep your blocks neat, outline each rectangle with a single backstitch line before filling it in; this creates a crisp edge where colors meet.
Displaying two complementary gradient panels side-by-side enhances the visual story and makes for a powerful, modern diptych.
11. Weave a Cosmic Galaxy with Metallics and Seed Stitch

Create the illusion of a swirling galaxy by using a dark navy or black fabric as your canvas.
Use a fine, single strand of metallic thread in a sweeping backstitch to create the main spiral arms, giving the piece structure and light.
Fill the space between with thousands of tiny seed stitches and French knots in variegated blues, purples, and silver to represent distant stars and nebulae.
This dense layering of small stitches builds a rich, shimmering texture that draws the viewer in.
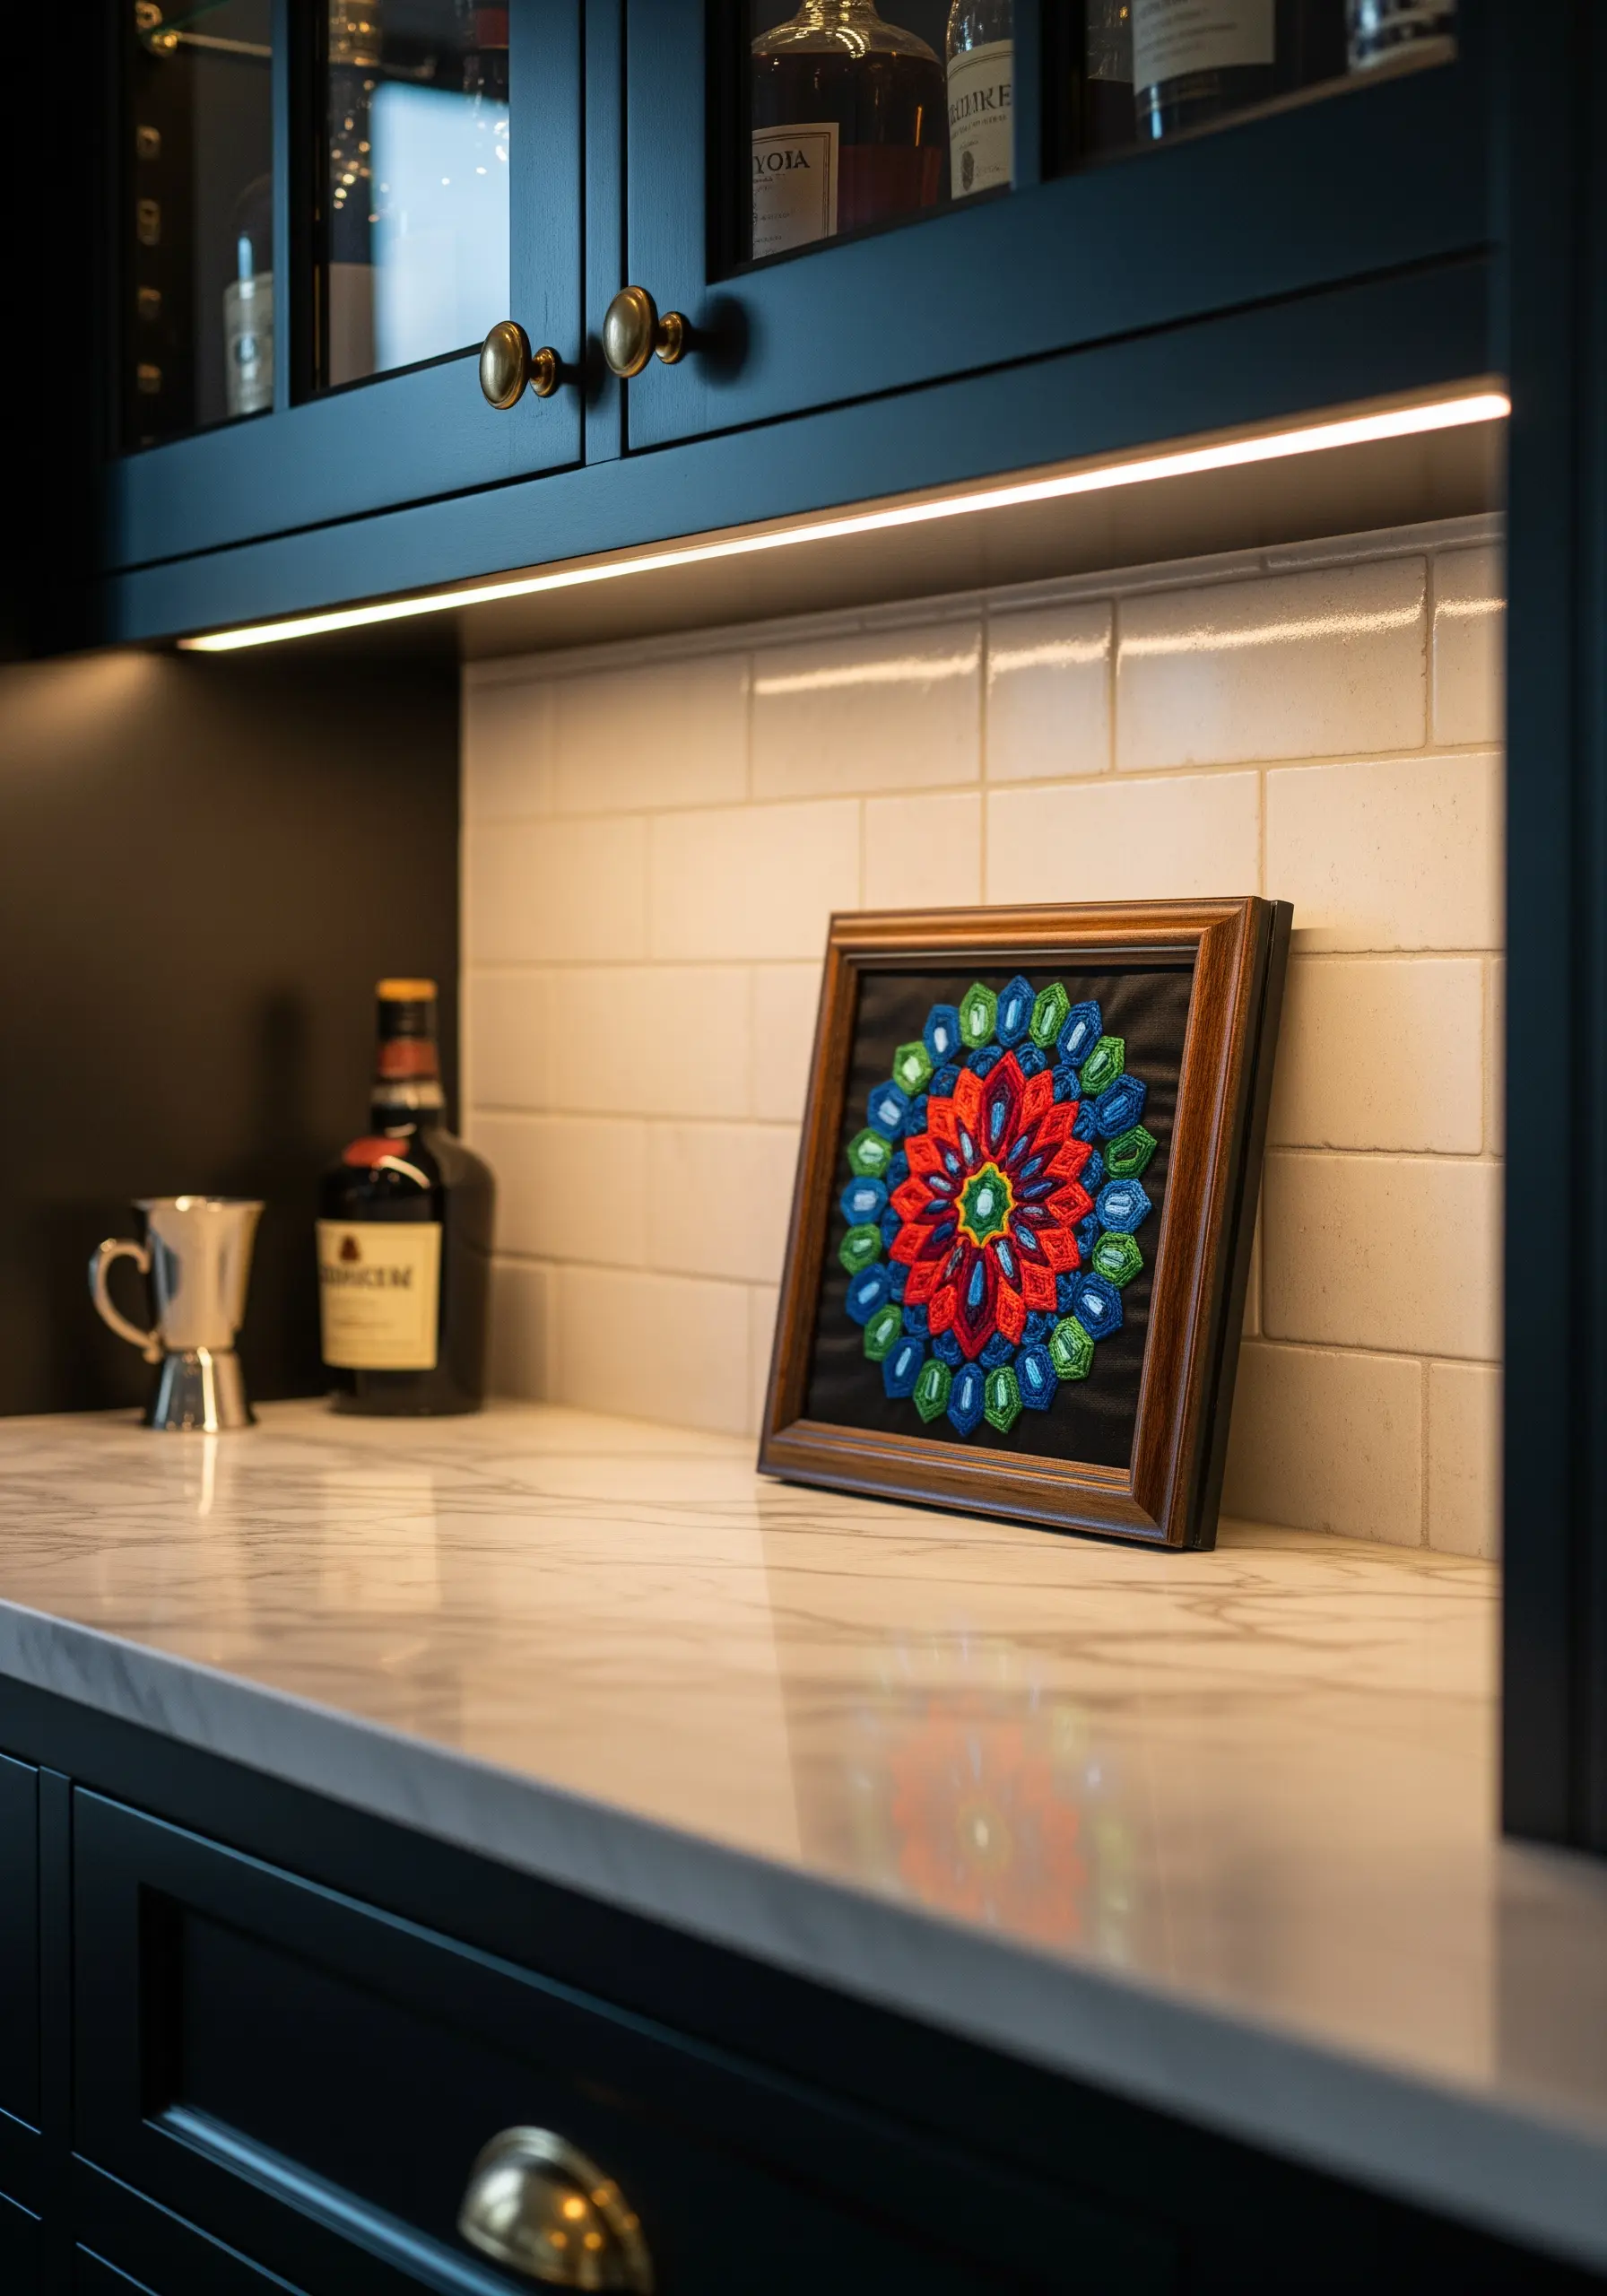
12. Mimic Natural Agate with Textured Concentric Rings

Recreate the mesmerizing layers of a geode by alternating different stitches and textures in concentric circles.
Use smooth satin stitch for glossy bands, French knots for crystalline clusters, and raised stem stitch for ridged layers.
Incorporating beads or metallic threads in the center adds a focal point and mimics the sparkling druzy found in real agate slices.
The beauty of this design lies in the varied tactile surfaces, so don’t be afraid to mix stitches and thread types within a single piece.
13. Design Serene Nursery Art with Graphic Shapes
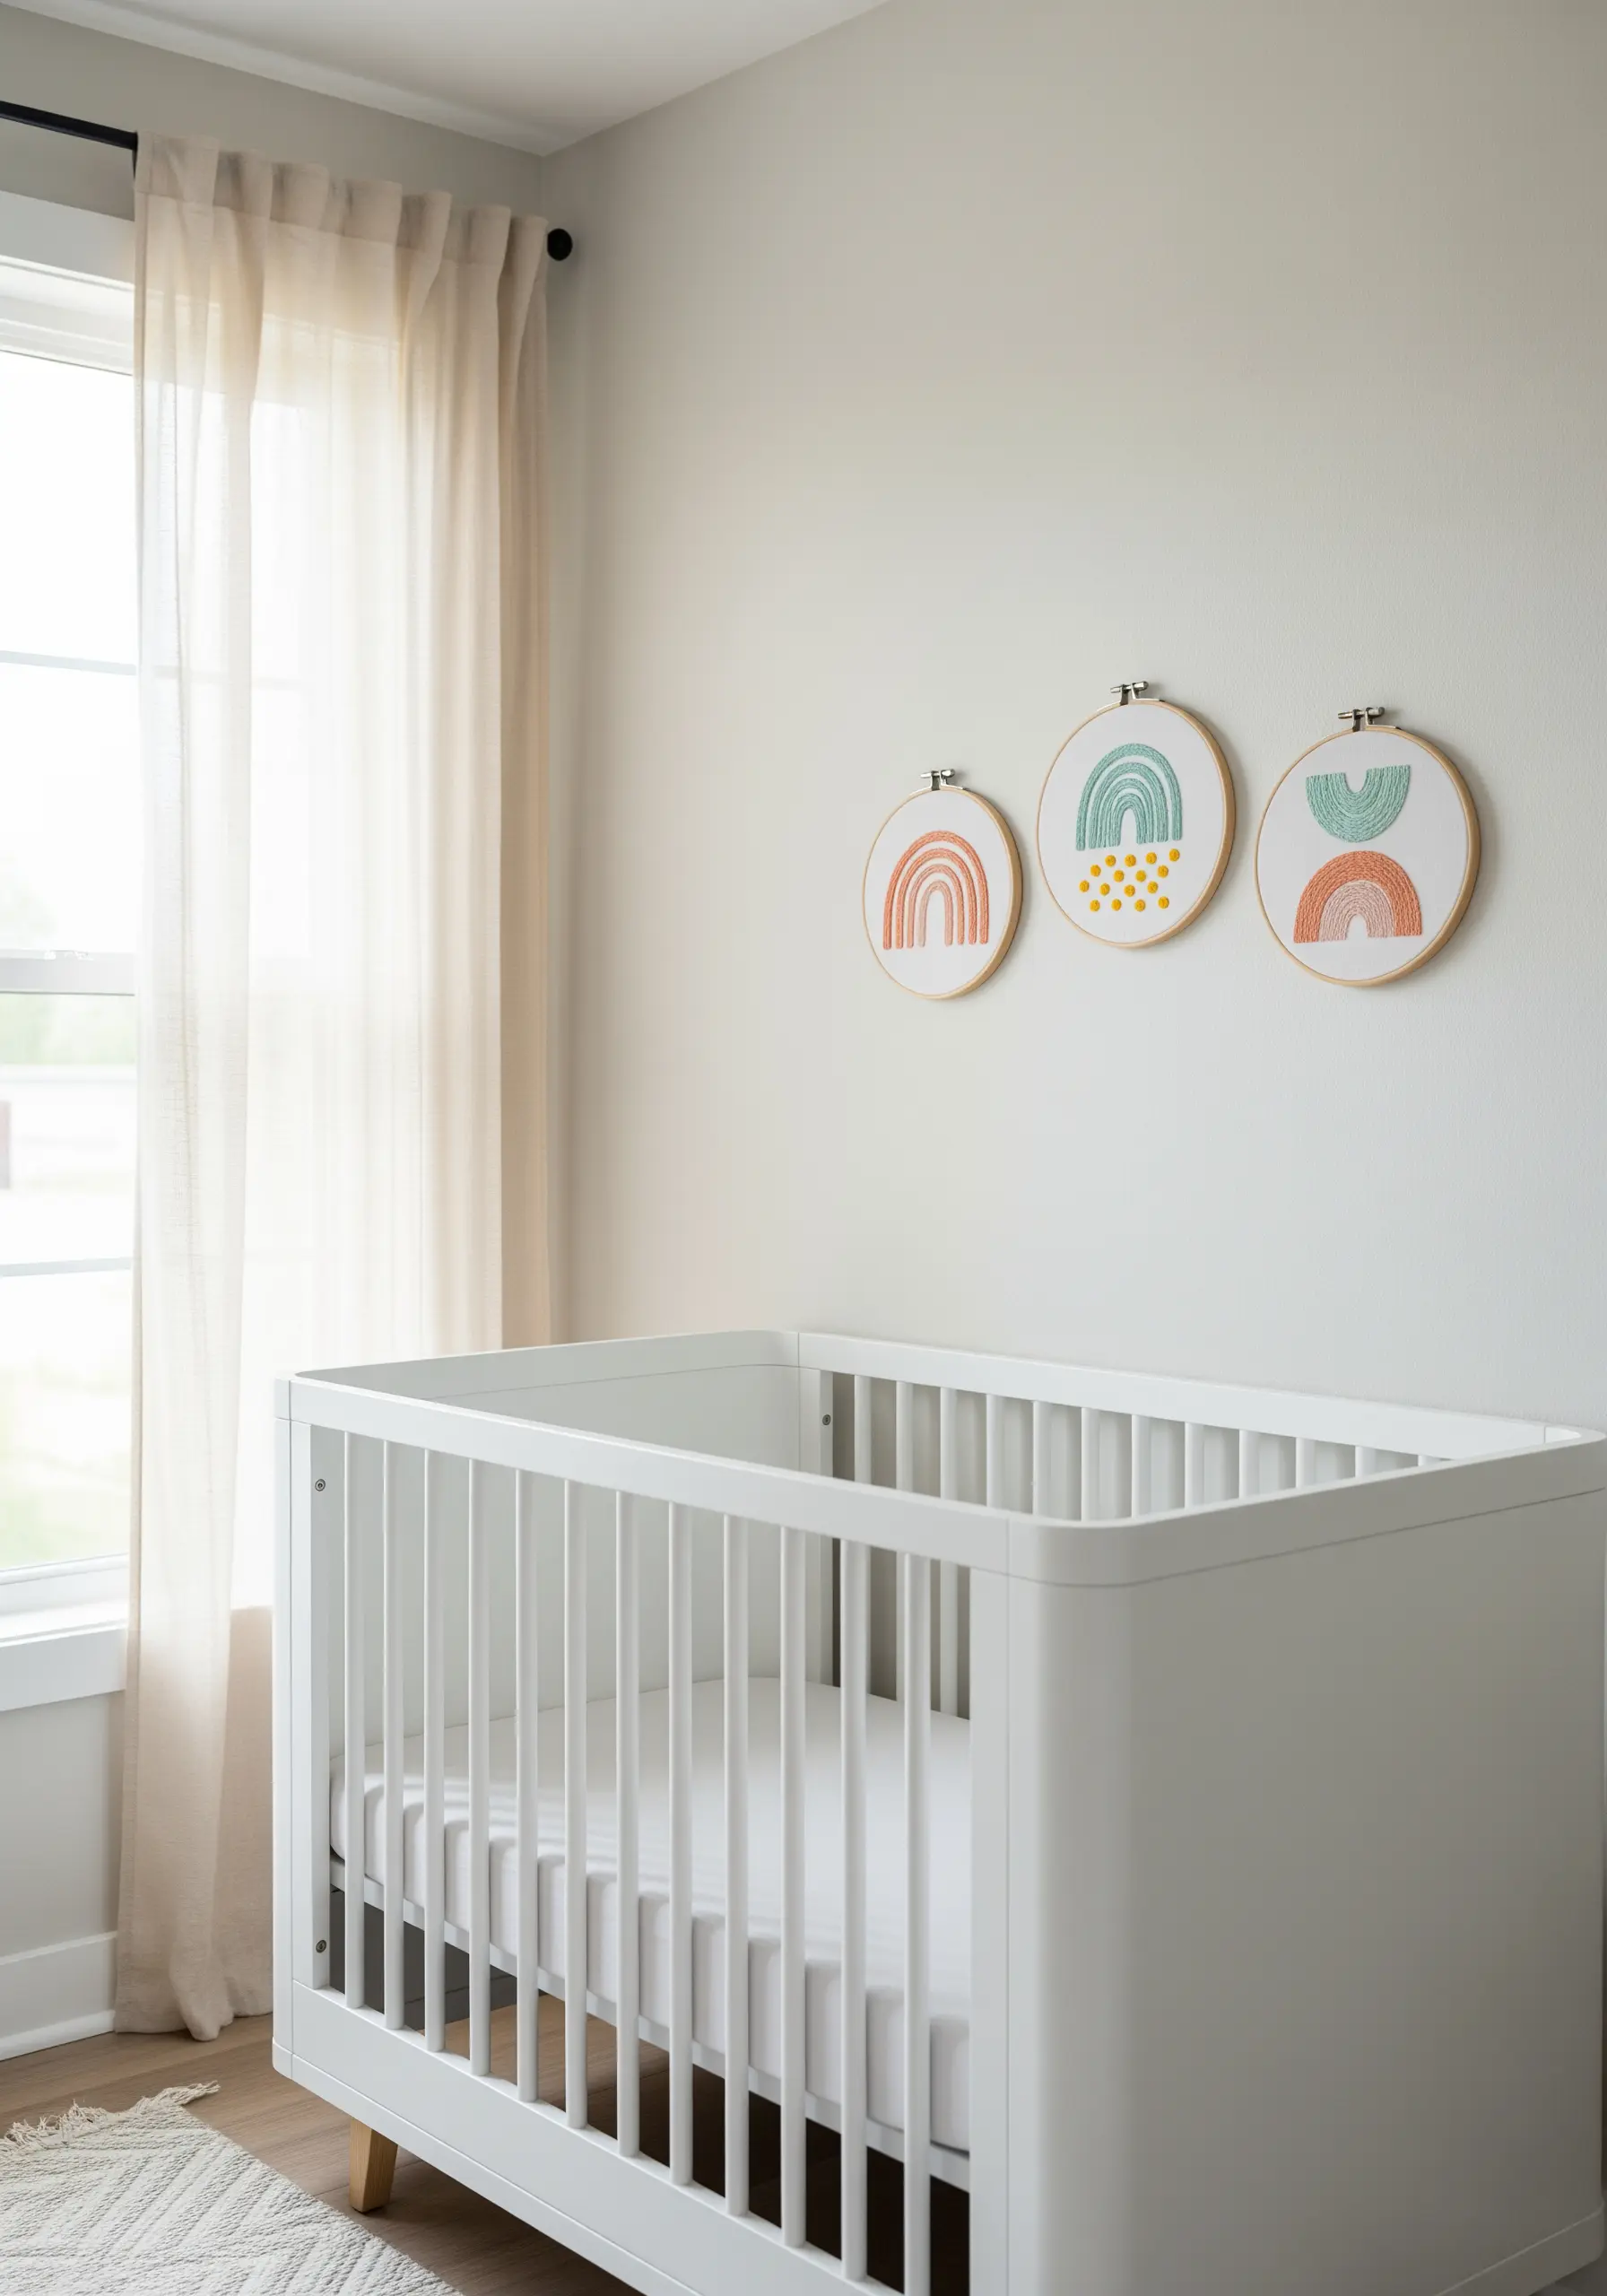
Create a calming atmosphere with simple, abstract forms stitched in a soft, coordinated color palette.
Use a basic satin stitch for filled areas and a clean backstitch for lines, keeping the designs graphic and easy to read.
These small hoop embroidery ideas are perfect for beginners and can be completed quickly.
Arranging them as a set of three provides a sense of rhythm and completeness, offering a gentle point of visual interest without overwhelming a peaceful nursery space.
14. Capture a Painterly Gesture with Bold Thread Strokes

Make a dramatic, large-scale statement by treating thick yarn like paint.
Use long, expressive straight stitches, laying them down in sweeping, overlapping motions to mimic the energy of a brushstroke.
To achieve this effect, you’ll need a large canvas and a sturdy frame to keep the fabric taut under the tension of the thick yarn.
The power of this piece comes from its scale and the high-contrast color palette, turning simple stitches into a commanding work of abstract expressionism.
15. Stitch Calm Waves with a Simple Whipped Backstitch

For clean, flowing lines that suggest gentle motion, a whipped backstitch is an excellent choice.
First, create a standard backstitch line, then weave a second thread through the stitches without piercing the fabric to create a smooth, raised cord.
Create a subtle ombré effect by using slightly different shades of green and blue for each consecutive line.
This minimalist piece is perfect for adding a touch of tranquility to a bathroom or a quiet corner of your home.
16. Embrace Chaos with Freeform Thread Splatters

Channel your inner Jackson Pollock by embracing spontaneous, energetic stitching.
Instead of following a pattern, work intuitively, using a mix of tangled straight stitches, loose French knots, and random loops in a riot of color.
To add another layer, try dipping the ends of some threads in acrylic paint and letting them drip down the canvas before or after stitching.
This mixed-media approach turns embroidery into a truly expressive and painterly medium.
17. Isolate Form with Minimalist Satin Stitch Shapes

Explore the relationship between color and form with these stark, minimalist compositions.
Fill each geometric shape with a perfectly smooth satin stitch, ensuring every thread lies flat against the fabric.
The key to this style is precision—use a sharp needle and maintain even tension to achieve the crisp edges and block-like finish.
By placing these simple forms in the center of a large, empty canvas, you amplify their graphic power and create a piece that feels both bold and contemplative.
18. Weave Texture into an Oversized Hoop

Transform a simple embroidery hoop into a substantial piece of wall art by working with chunky yarn and high-texture techniques.
Use a punch needle to create plush, looped sections and a large needle to weave thick roving through the fabric for a braided effect.
Dividing the circular space into geometric blocks creates a modern, abstract composition that balances different textures and neutral colors.
This oversized hoop wall display becomes an immediate focal point, adding warmth and tactile interest above a mantel or sofa.
19. Render an Abstract Seascape with Thread Painting

Capture the fluid energy of the ocean using the long-and-short stitch technique to blend colors seamlessly.
Work in horizontal bands, using a range of blues, teals, and sandy beiges to represent water and shore.
Create the illusion of light on the water’s surface by incorporating a few strands of off-white or light gray thread as highlights.
The key is to use single strands of floss and stagger your stitch lengths to create soft, painterly transitions, turning your fabric into a canvas of thread.
20. Chart a Celestial Map with Delicate Goldwork
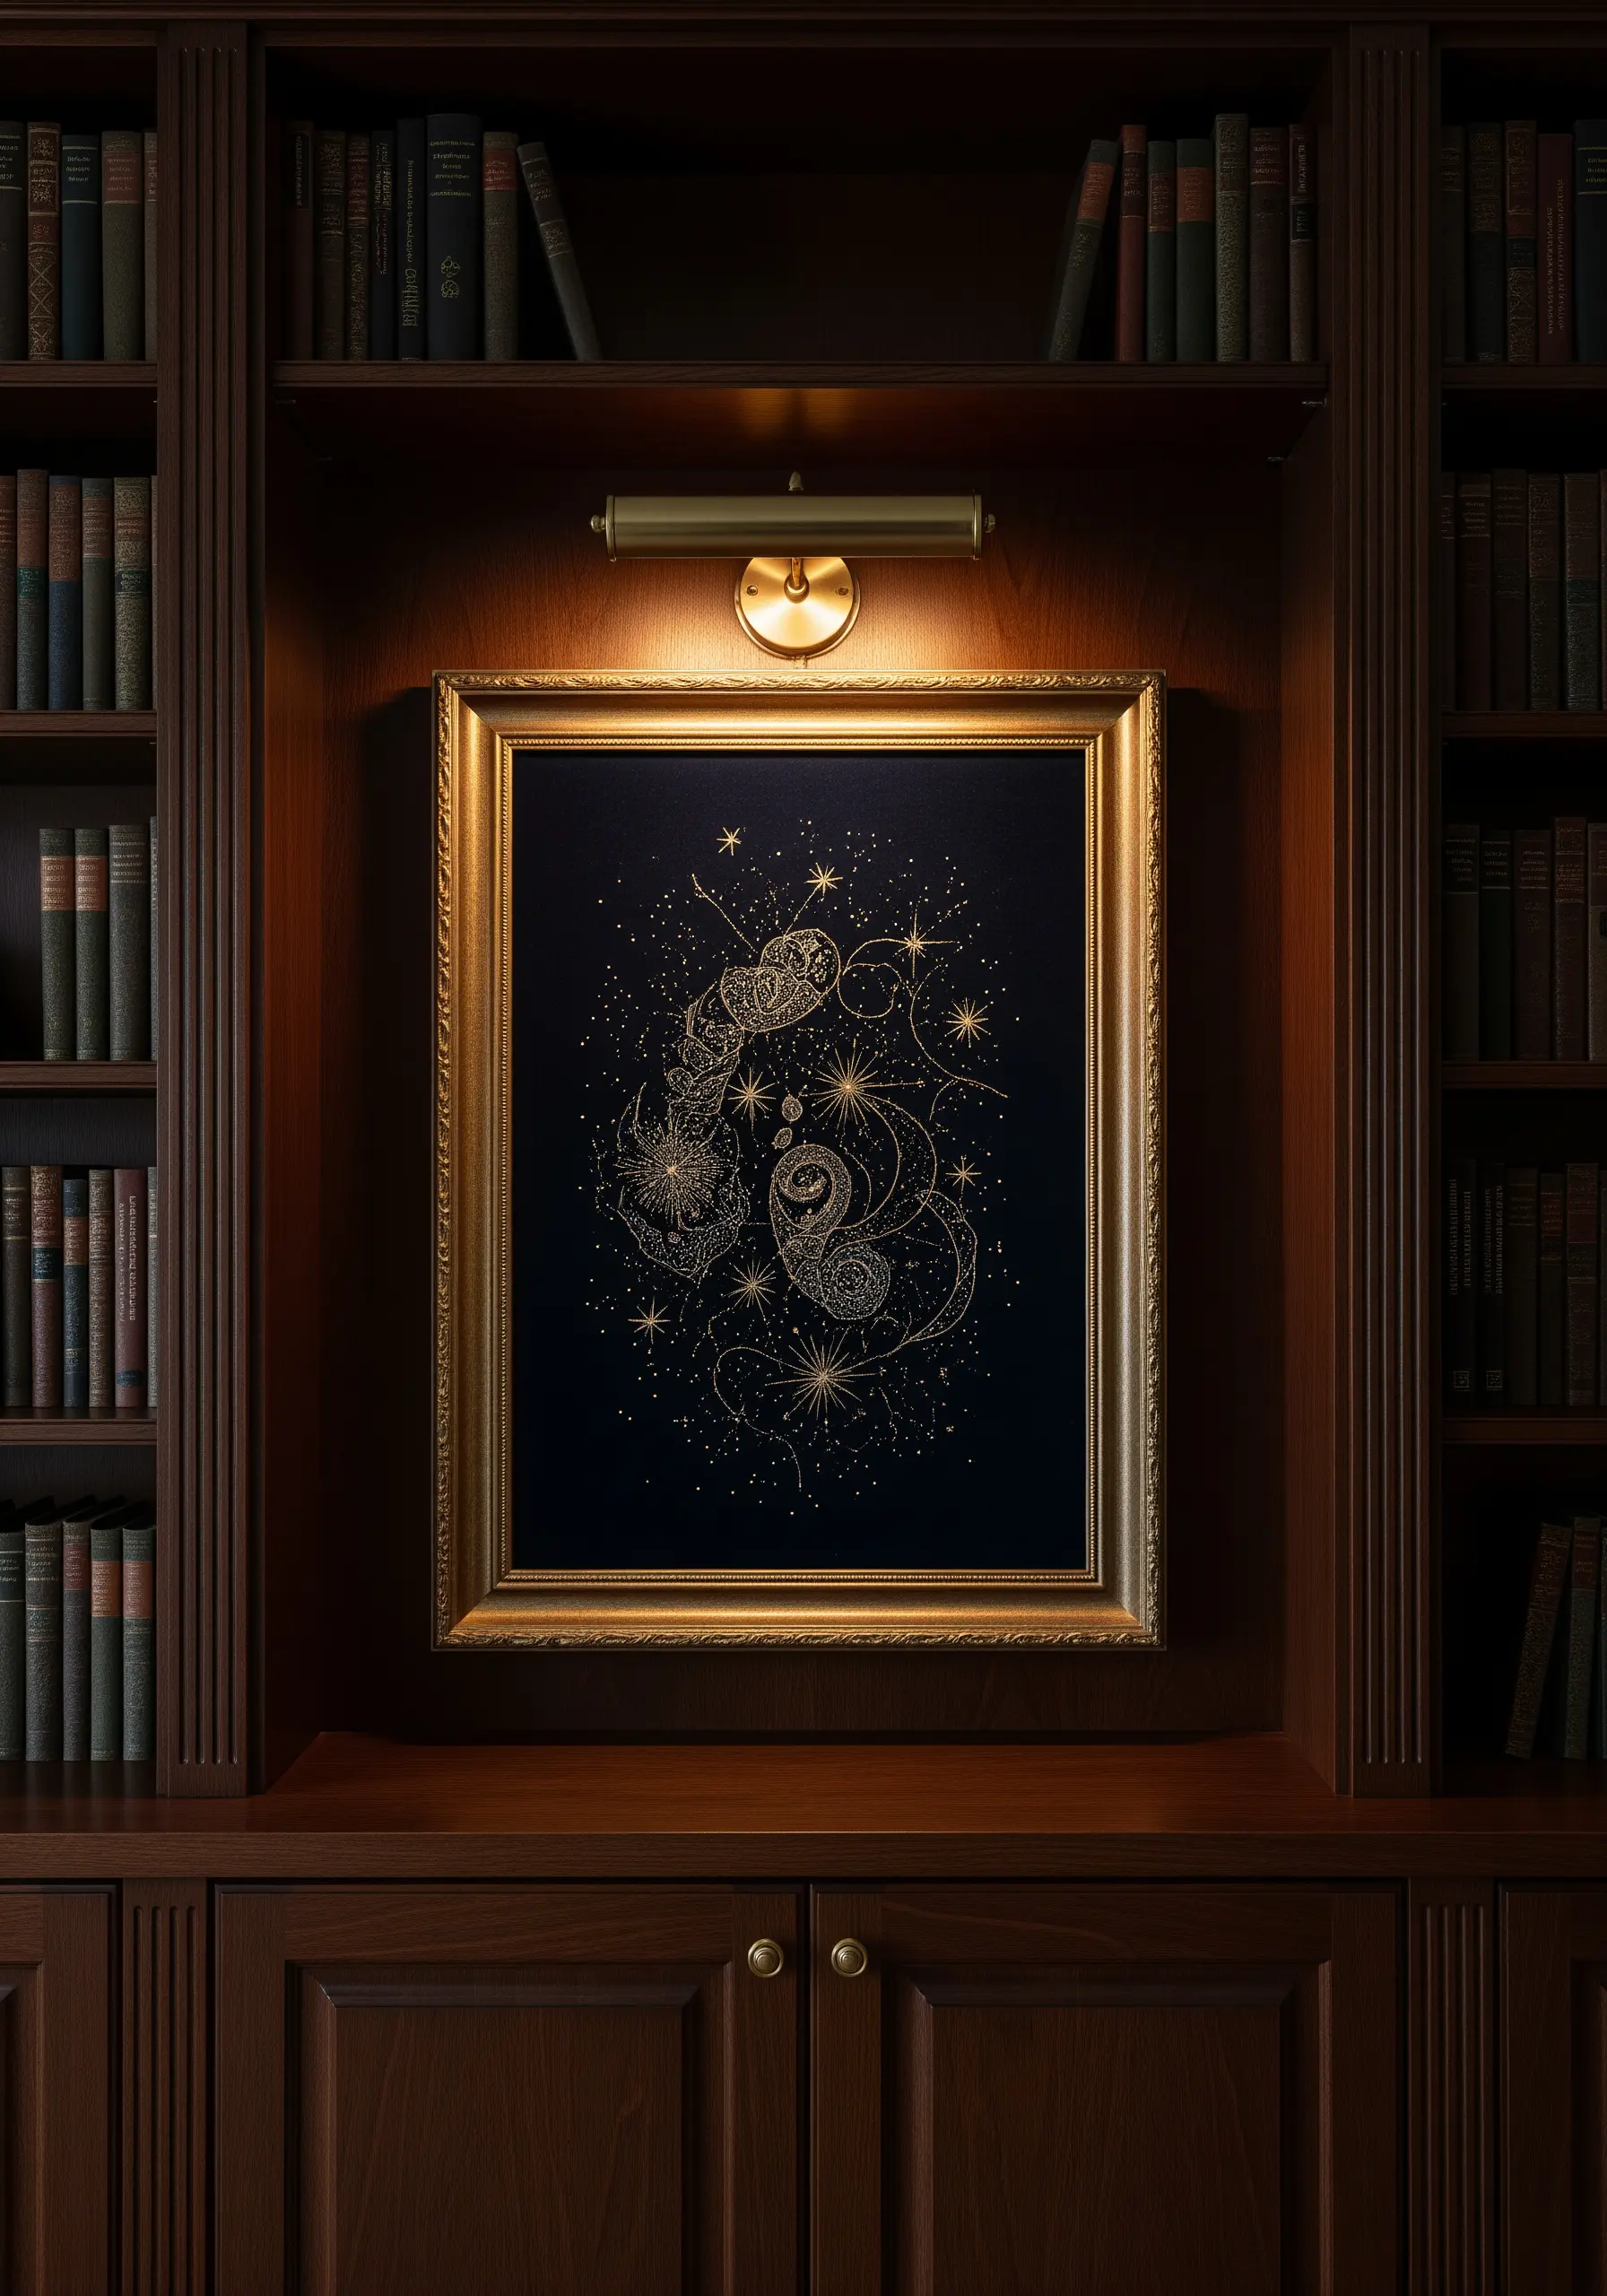
Elevate your embroidery with the timeless elegance of metallic thread on a dark, dramatic background.
Use a fine gold thread and tiny backstitches to create constellations and swirling paisley-like forms.
Scatter single, detached chain stitches or tiny seed stitches across the fabric to represent individual stars, varying their size and spacing for a natural, twinkling effect.
Working on black or deep navy velvet will enhance the luster of the metallic thread, creating a piece that feels both luxurious and magical.
21. Sculpt with Thread Using Padded Couching Techniques
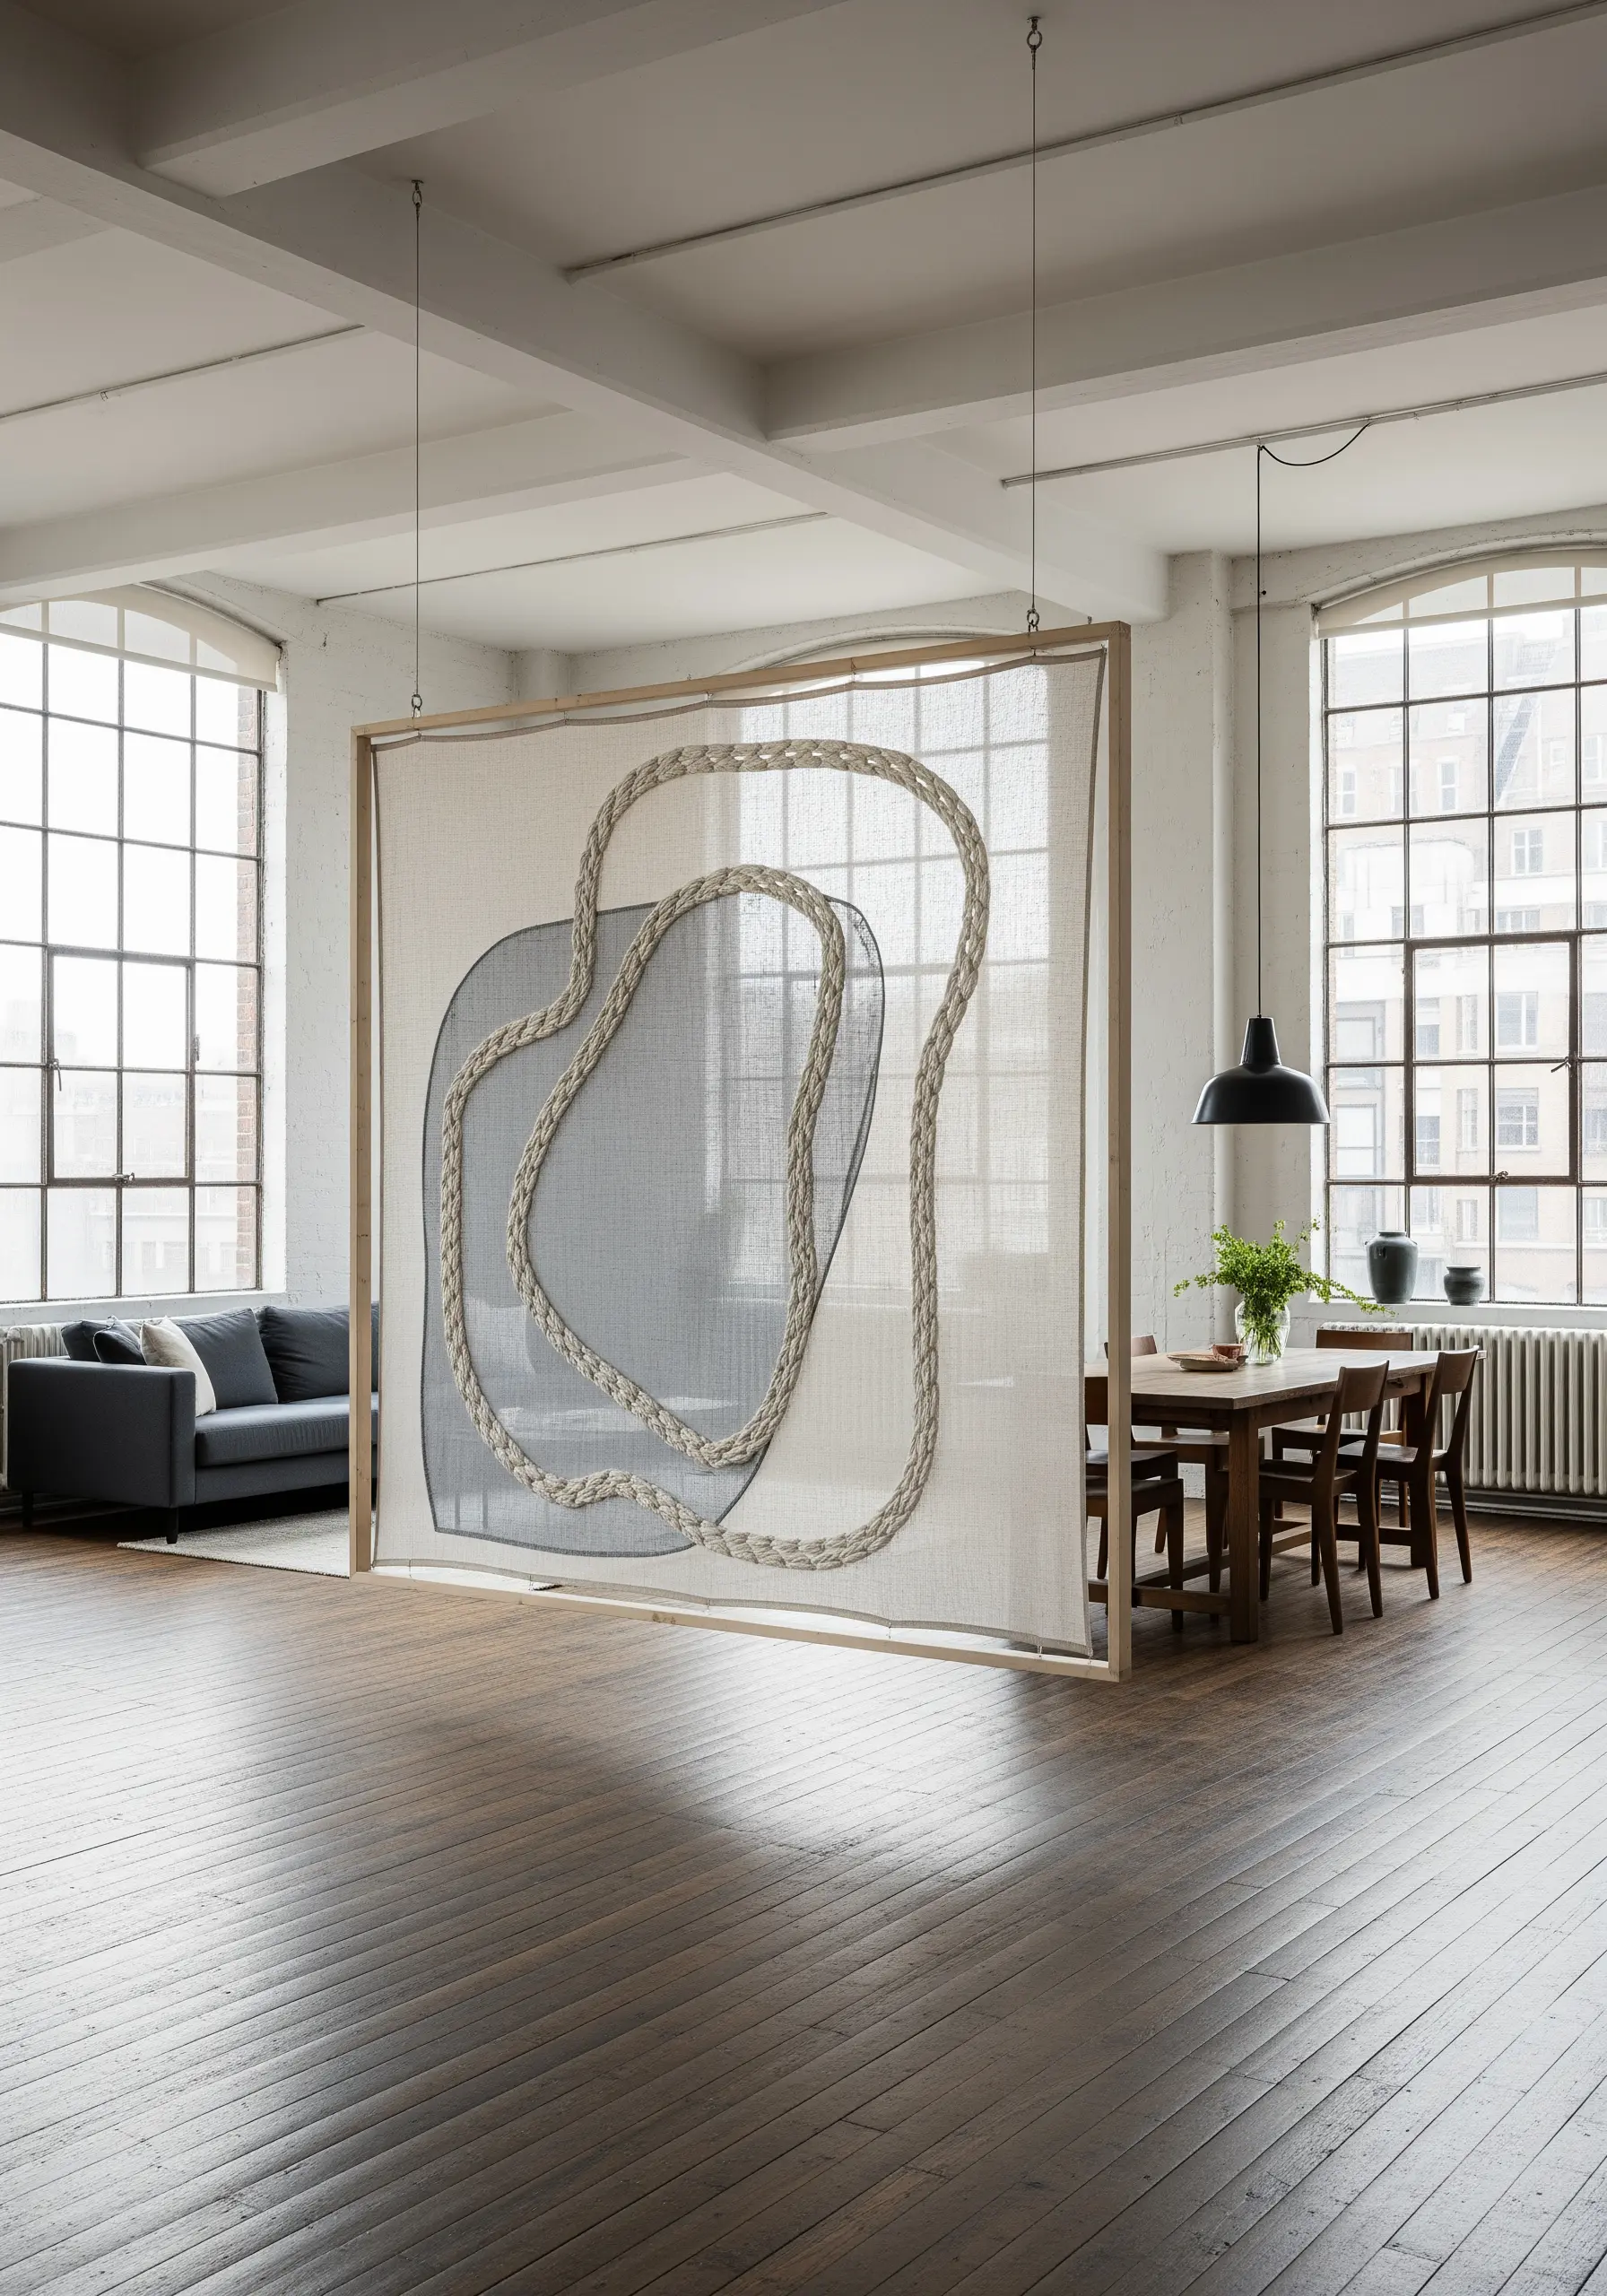
Create a stunning, three-dimensional form that appears to float on sheer fabric.
To achieve this, first create a thick, braided cord from multiple strands of yarn or rope.
Lay this cord onto a sheer organza or voile background, shaping it into your desired abstract outline.
Then, use a strong, fine thread (like a quilting thread) to couch the cord securely in place, passing your needle through the cord and the sheer fabric.
This technique transforms a simple line into a powerful, sculptural element.
22. Elevate a Single Line into a Minimalist Sculpture

Transform a simple embroidered line into a precious object by focusing on technique and presentation.
Create a raised, perfectly smooth curve using a padded satin stitch, where you first lay down a foundation of straight stitches and then cover them with satin stitches worked in the opposite direction.
Use a high-sheen rayon or silk thread for a lustrous finish that catches the light.
Displaying the small, focused work inside a clear acrylic block frame turns it from a simple stitch sample into a piece of modern art.
23. Create a Thread Waterfall for Dramatic Effect

Explore embroidery beyond the surface of the fabric by creating a hanging thread installation.
Securely anchor dense rows of thread at the top of your canvas, stitching them tightly in place.
Allow the rest of the thread to hang freely, creating a cascade of color and texture.
Use various shades of a single color family to create a gradient effect, and trim the ends at an angle or in a curve to complete the illusion of flowing water.
This technique adds movement and a surprising sculptural element to your wall art.
24. Stitch a Meditative Mandala with Whipped Backstitch

Achieve perfectly smooth, concentric circles by using a whipped backstitch.
First, stitch a circle using a basic backstitch, then take a second, blunt-tipped tapestry needle and weave your thread through the backstitches without piercing the fabric.
This technique creates a clean, raised line that is ideal for graphic and meditative patterns.
Using variegated thread or subtly shifting between neutral tones adds depth and visual interest, turning a simple geometric form into a hypnotic focal point for any room.
25. Combine Satin Stitch Fills with Delicate Metallic Outlines
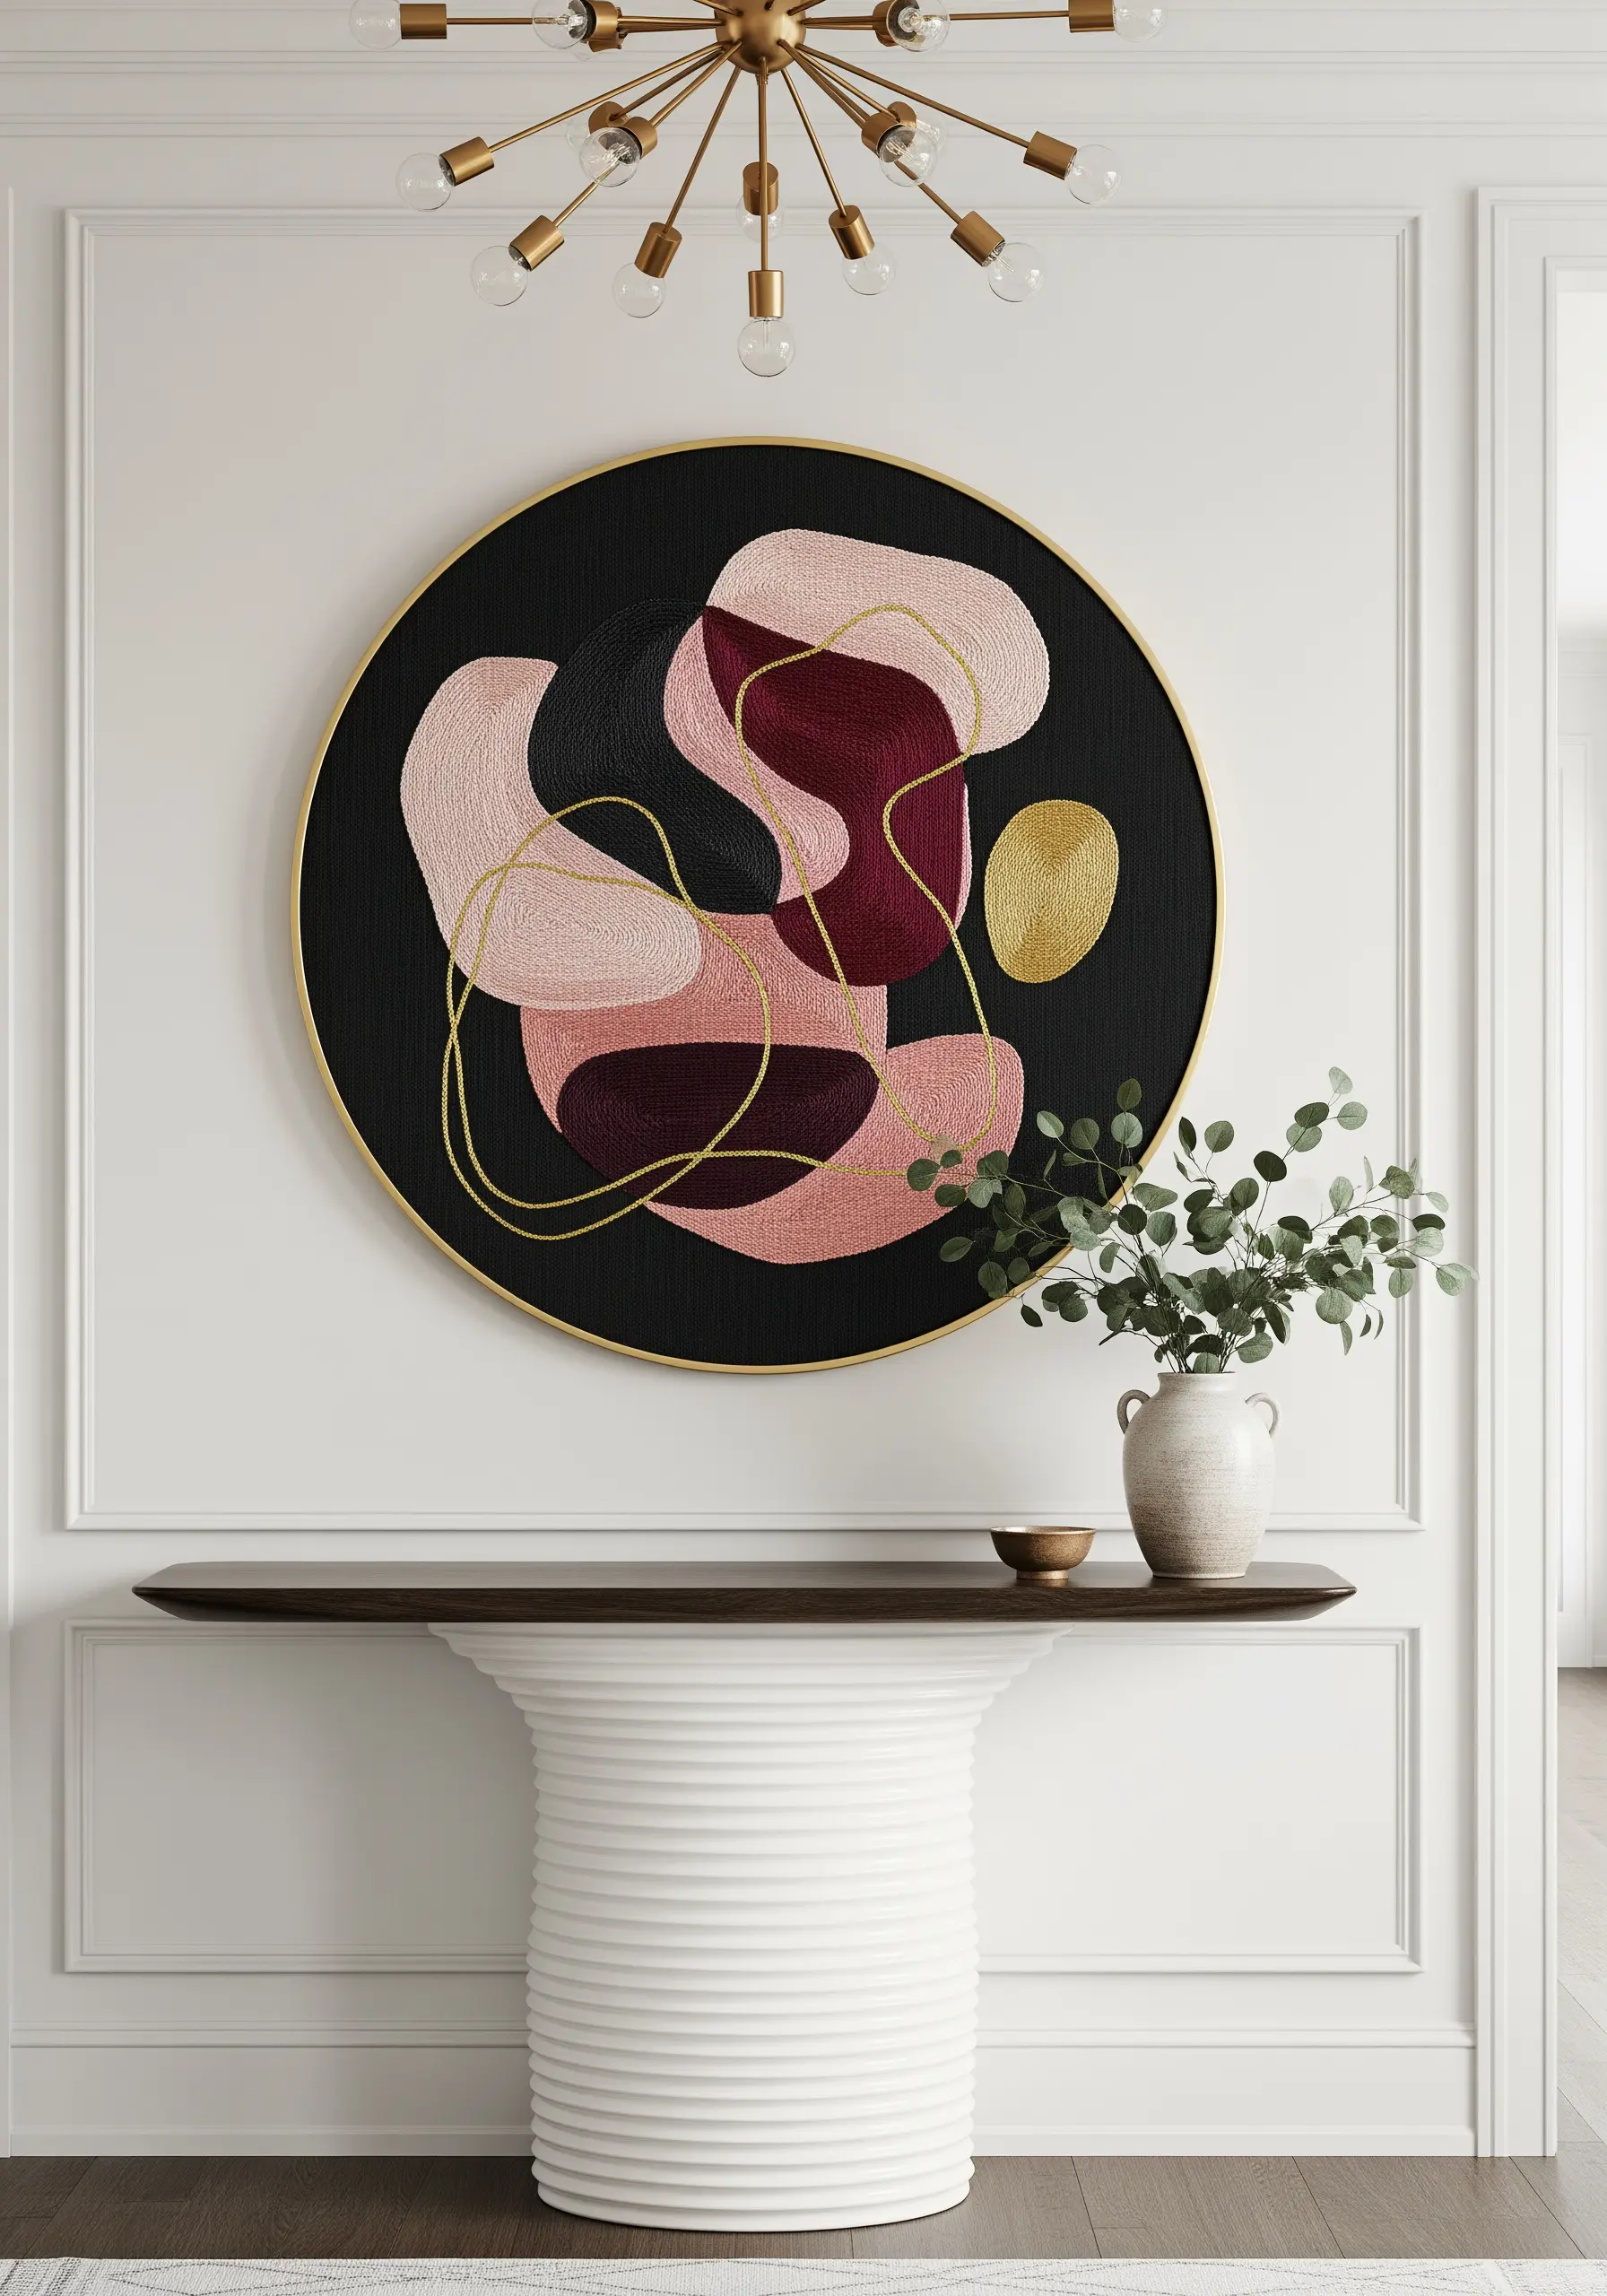
Give soft, organic shapes a touch of sophisticated structure by pairing matte fills with a hint of shine.
Fill your abstract, amoeba-like forms with a smooth, dense satin stitch using matte cotton floss in a harmonious color palette.
Then, use a single strand of fine metallic gold thread to add a delicate, wandering line that overlaps and defines the shapes.
Apply this metallic thread using a couching stitch for perfect curves, creating a design that feels both organic and elegantly refined.
26. Design Playful Shapes with Padded Appliqué

Create bold, three-dimensional shapes perfect for a child’s room or a playful modern space.
Cut your abstract forms from thick felt, then add a layer of batting underneath before attaching them to your background fabric.
Secure the shapes with a neat blanket stitch around the edge, which adds a charming, handmade detail.
You can then add further texture by filling parts of the felt shapes with straight stitches or French knots, combining appliqué and embroidery for a tactile result.
27. Achieve Vibrancy with Contrasting Outlines
Make your colors pop by framing each satin-stitched section with a bold, contrasting outline.
After filling a shape with a smooth satin stitch, use a contrasting color—like the black thread seen here—and a simple backstitch to trace its perimeter.
This technique, reminiscent of stained glass, cleans up any slightly uneven edges from your satin stitch and creates a crisp, graphic definition that makes the entire design more powerful and vibrant.
28. Convey Elegance with a Single, Unbroken Line
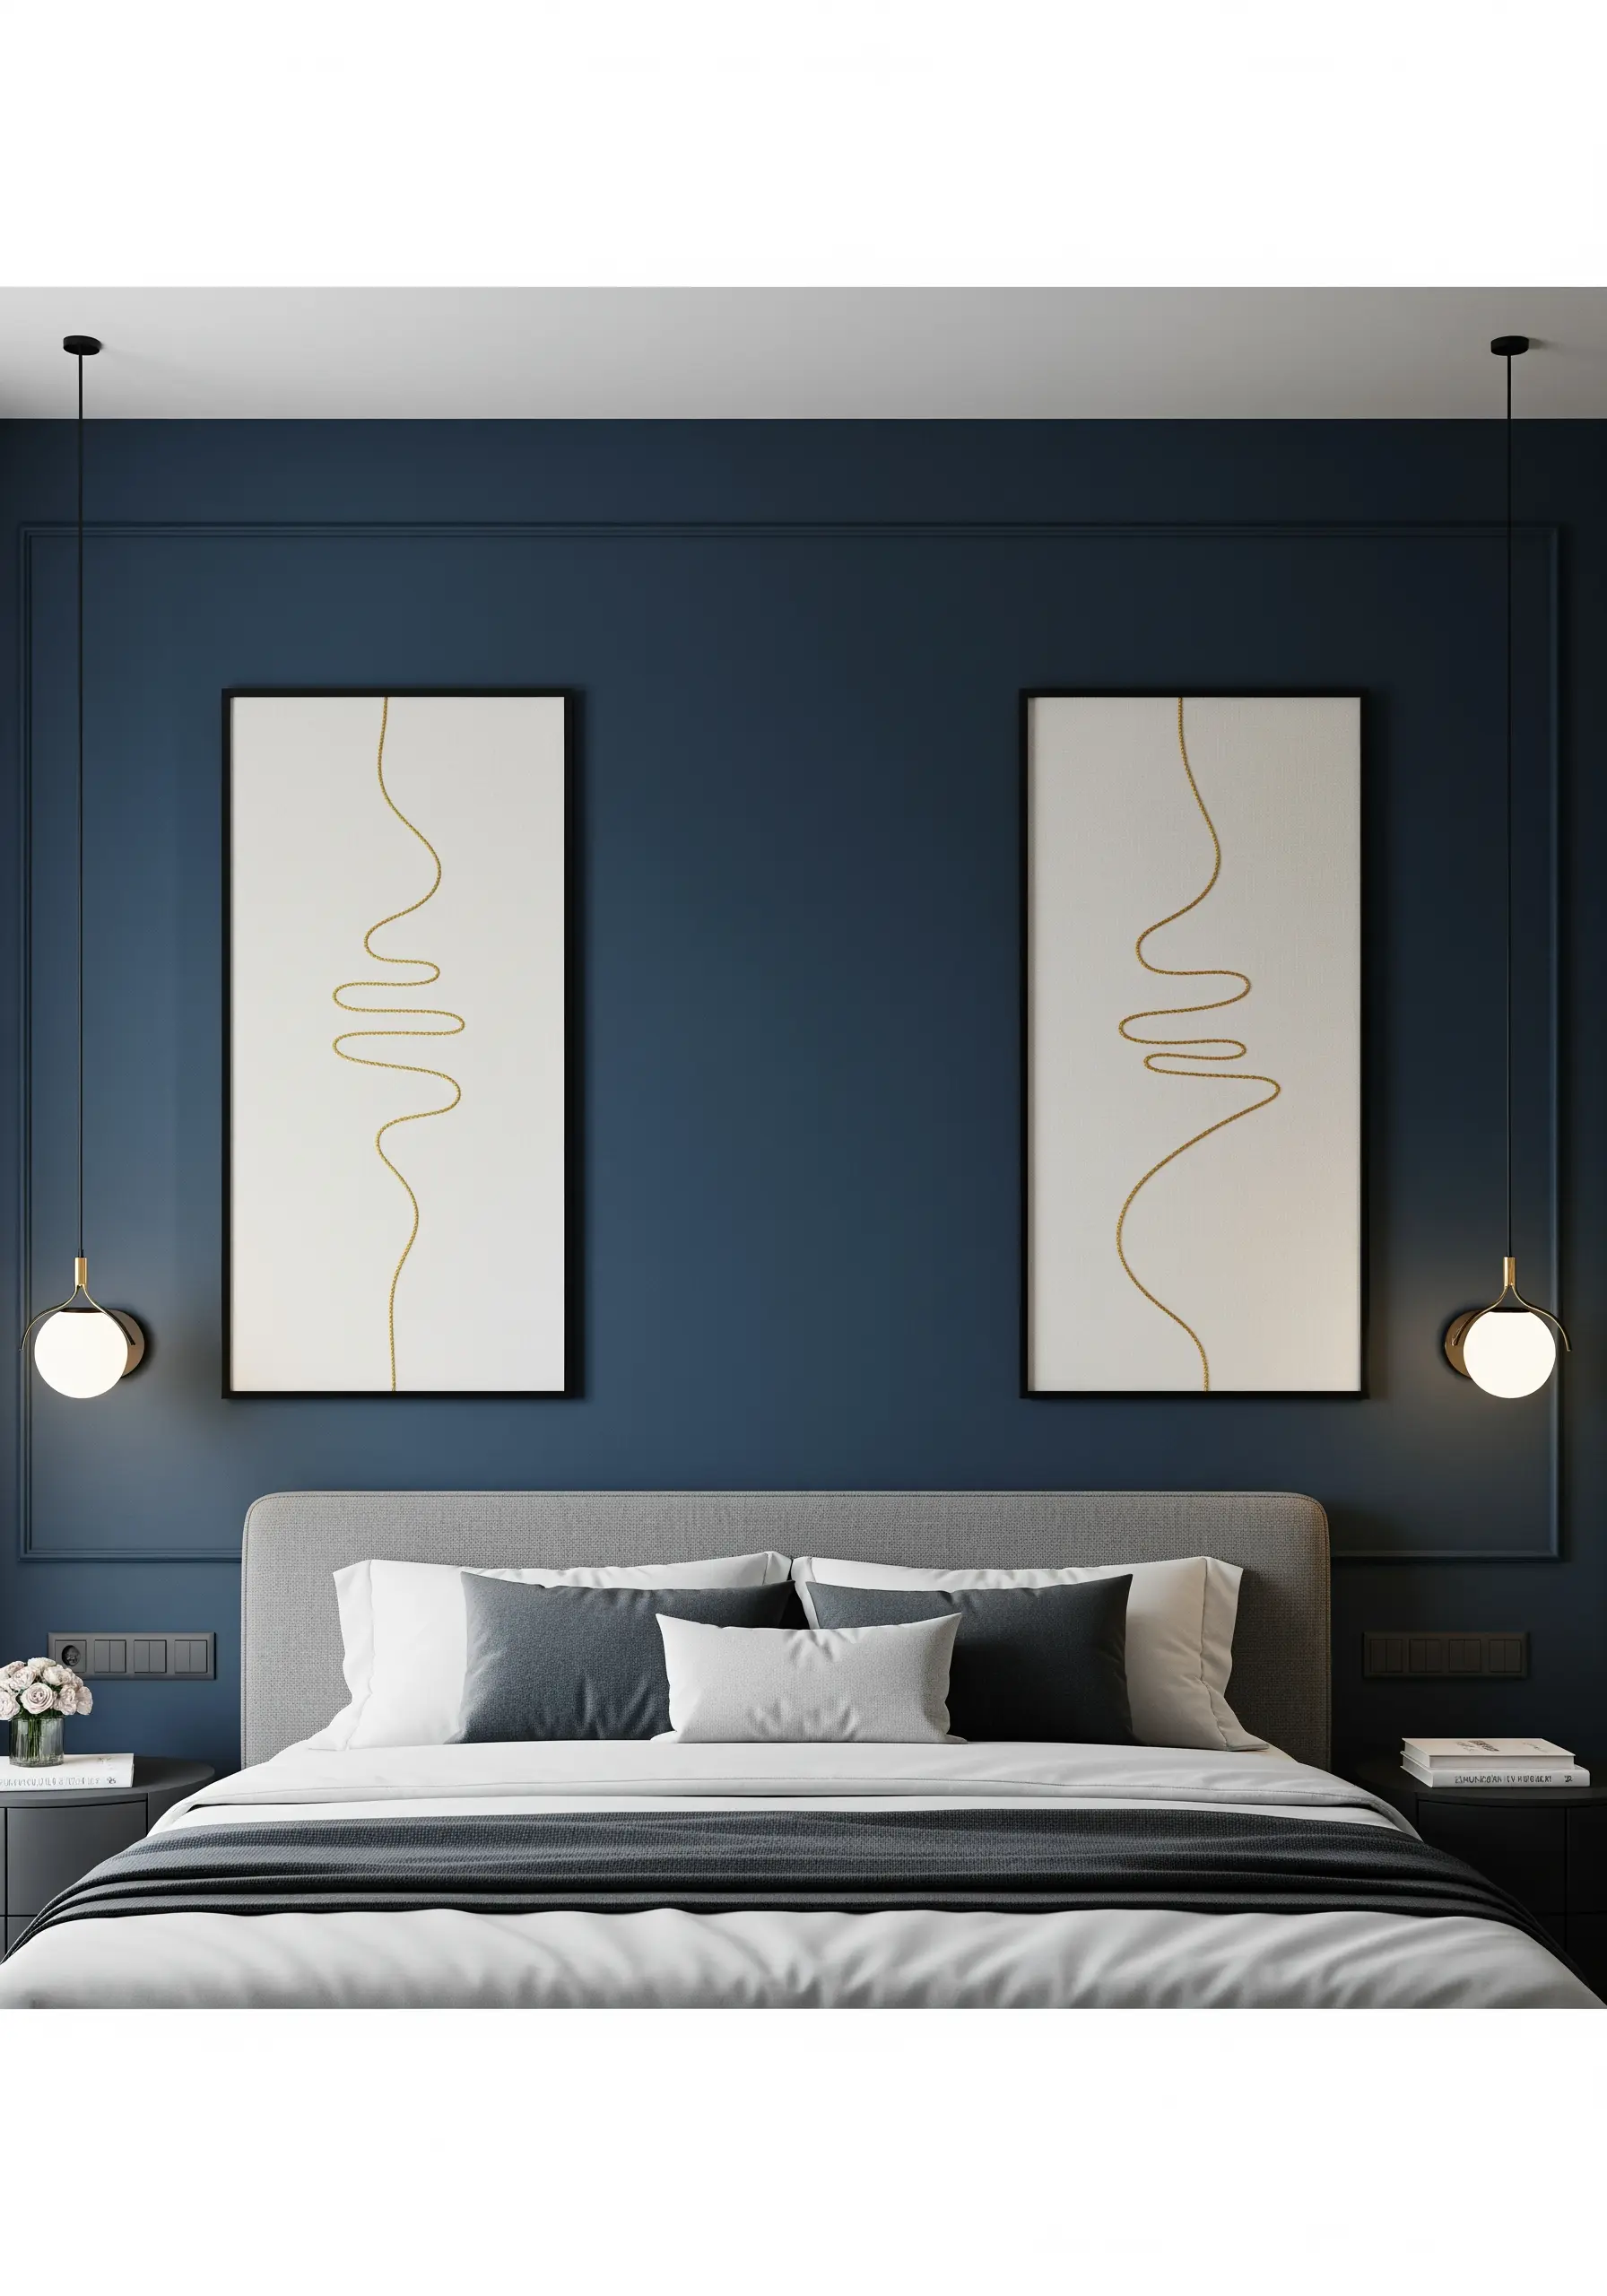
Explore the power of minimalism by creating a design from a single, continuous line.
To achieve this fluid, calligraphic look, use a slightly thicker thread, like pearl cotton, and secure it to the fabric using a couching stitch.
Lay down your main thread in the desired shape, then use a second, finer thread to tack it down with tiny, invisible stitches.
This method allows you to create perfectly smooth curves without the segmented look of other line stitches, resulting in a piece that is pure, simple, and elegant.
29. Create Illusions of Depth with Overlapping Lines

Build a complex, architectural pattern using only straight stitches.
Start by stitching a series of parallel lines in one direction. Then, add a second set of lines crossing over the first.
To create the illusion of transparency and depth, vary the weight of your thread.
Use a thicker thread (4-6 strands) for the bold, opaque lines and a finer thread (1-2 strands) for the lines that appear to be in the background. This simple trick adds sophisticated visual complexity to a minimalist design.
30. Make Your Mark with Expressive Monochrome Stitching

Treat your needle and thread like a pen and ink to create a powerful, gestural artwork.
Working entirely in black thread on a neutral background forces you to focus on texture and mark-making.
Combine a variety of stitches—long, jagged straight stitches for energy, dense clusters of French knots for texture, and loose, looping stitches for movement.
Don’t be afraid to be messy and intuitive; the goal is to capture a feeling or an energy, not to create a perfect, uniform surface.
This is abstract expressionism in thread.
31. Explore Pattern and Density with Seed Stitch Fills

Create subtle and sophisticated textures by varying the density of a simple seed stitch.
Fill one shape with tiny stitches placed very close together for a rich, textured surface. In another, space the stitches farther apart for a lighter, more airy feel.
This trio of framed embroidery patterns shows how the same basic stitch can produce vastly different effects, from gentle waves to scattered dots, simply by adjusting the spacing.
It’s a meditative technique that yields beautiful, organic results.
32. Craft Joyful Forms with Padded Satin Stitch

Give your abstract shapes a playful, 3D quality by using a padded satin stitch.
Before you begin your main stitching, create a foundation of small, underlying stitches within the shape you want to raise.
Then, work your final satin stitch over this padding, perpendicular to the foundation stitches. This simple step lifts the threads from the fabric surface, creating smooth, raised dots and shapes that have a delightful, tactile presence.
The bright, cheerful color palette enhances the joyful, bubbly effect.
33. Capture Fluid Motion with Dense Line Work

Create a sense of movement and vibration using meticulously placed parallel lines.
Use a fine, single strand of thread and a simple backstitch or stem stitch to create undulating, wavy forms.
The key to this powerful visual effect is density; by stitching the lines extremely close together, you create areas of shadow and light that give the flat surface a three-dimensional, kinetic quality.
Working in monochrome allows the focus to remain entirely on the texture and flow of the lines, resulting in a sophisticated and mesmerizing piece.


