
Have you ever looked at a piece of your own embroidery and felt that something was missing? You’ve chosen beautiful colors and your stitches are neat, but it doesn’t have that polished, intentional feel you admire in modern textile art.
The secret often isn’t in adding more, but in taking away. It’s about celebrating the quiet elegance of the unstitched fabric—the negative space. When you allow the cloth to breathe, your stitches gain power, your compositions feel balanced, and your work instantly looks more sophisticated and artful.
Think of the fabric not as a blank slate to be completely covered, but as a silent partner in your design. Ahead, you’ll discover how to use that partnership to your advantage, turning simple lines, textures, and shapes into chic, minimal statements that feel both personal and professional.
1. Directional Fill for Sculptural Contrast
Create a dense, tactile surface by filling a shape with stitches that all follow a single, flowing direction.
Instead of a standard satin stitch, use a long-and-short stitch or even a simple straight stitch, but ensure each one curves slightly to build a sense of movement.
Using a thicker thread, like a #5 pearl cotton, will accentuate the shadows between each stitch, adding sculptural depth.
The stark contrast between the heavily stitched area and the untouched fabric is what gives this piece its modern, graphic power.
2. Precision Line Art with Metallic Thread
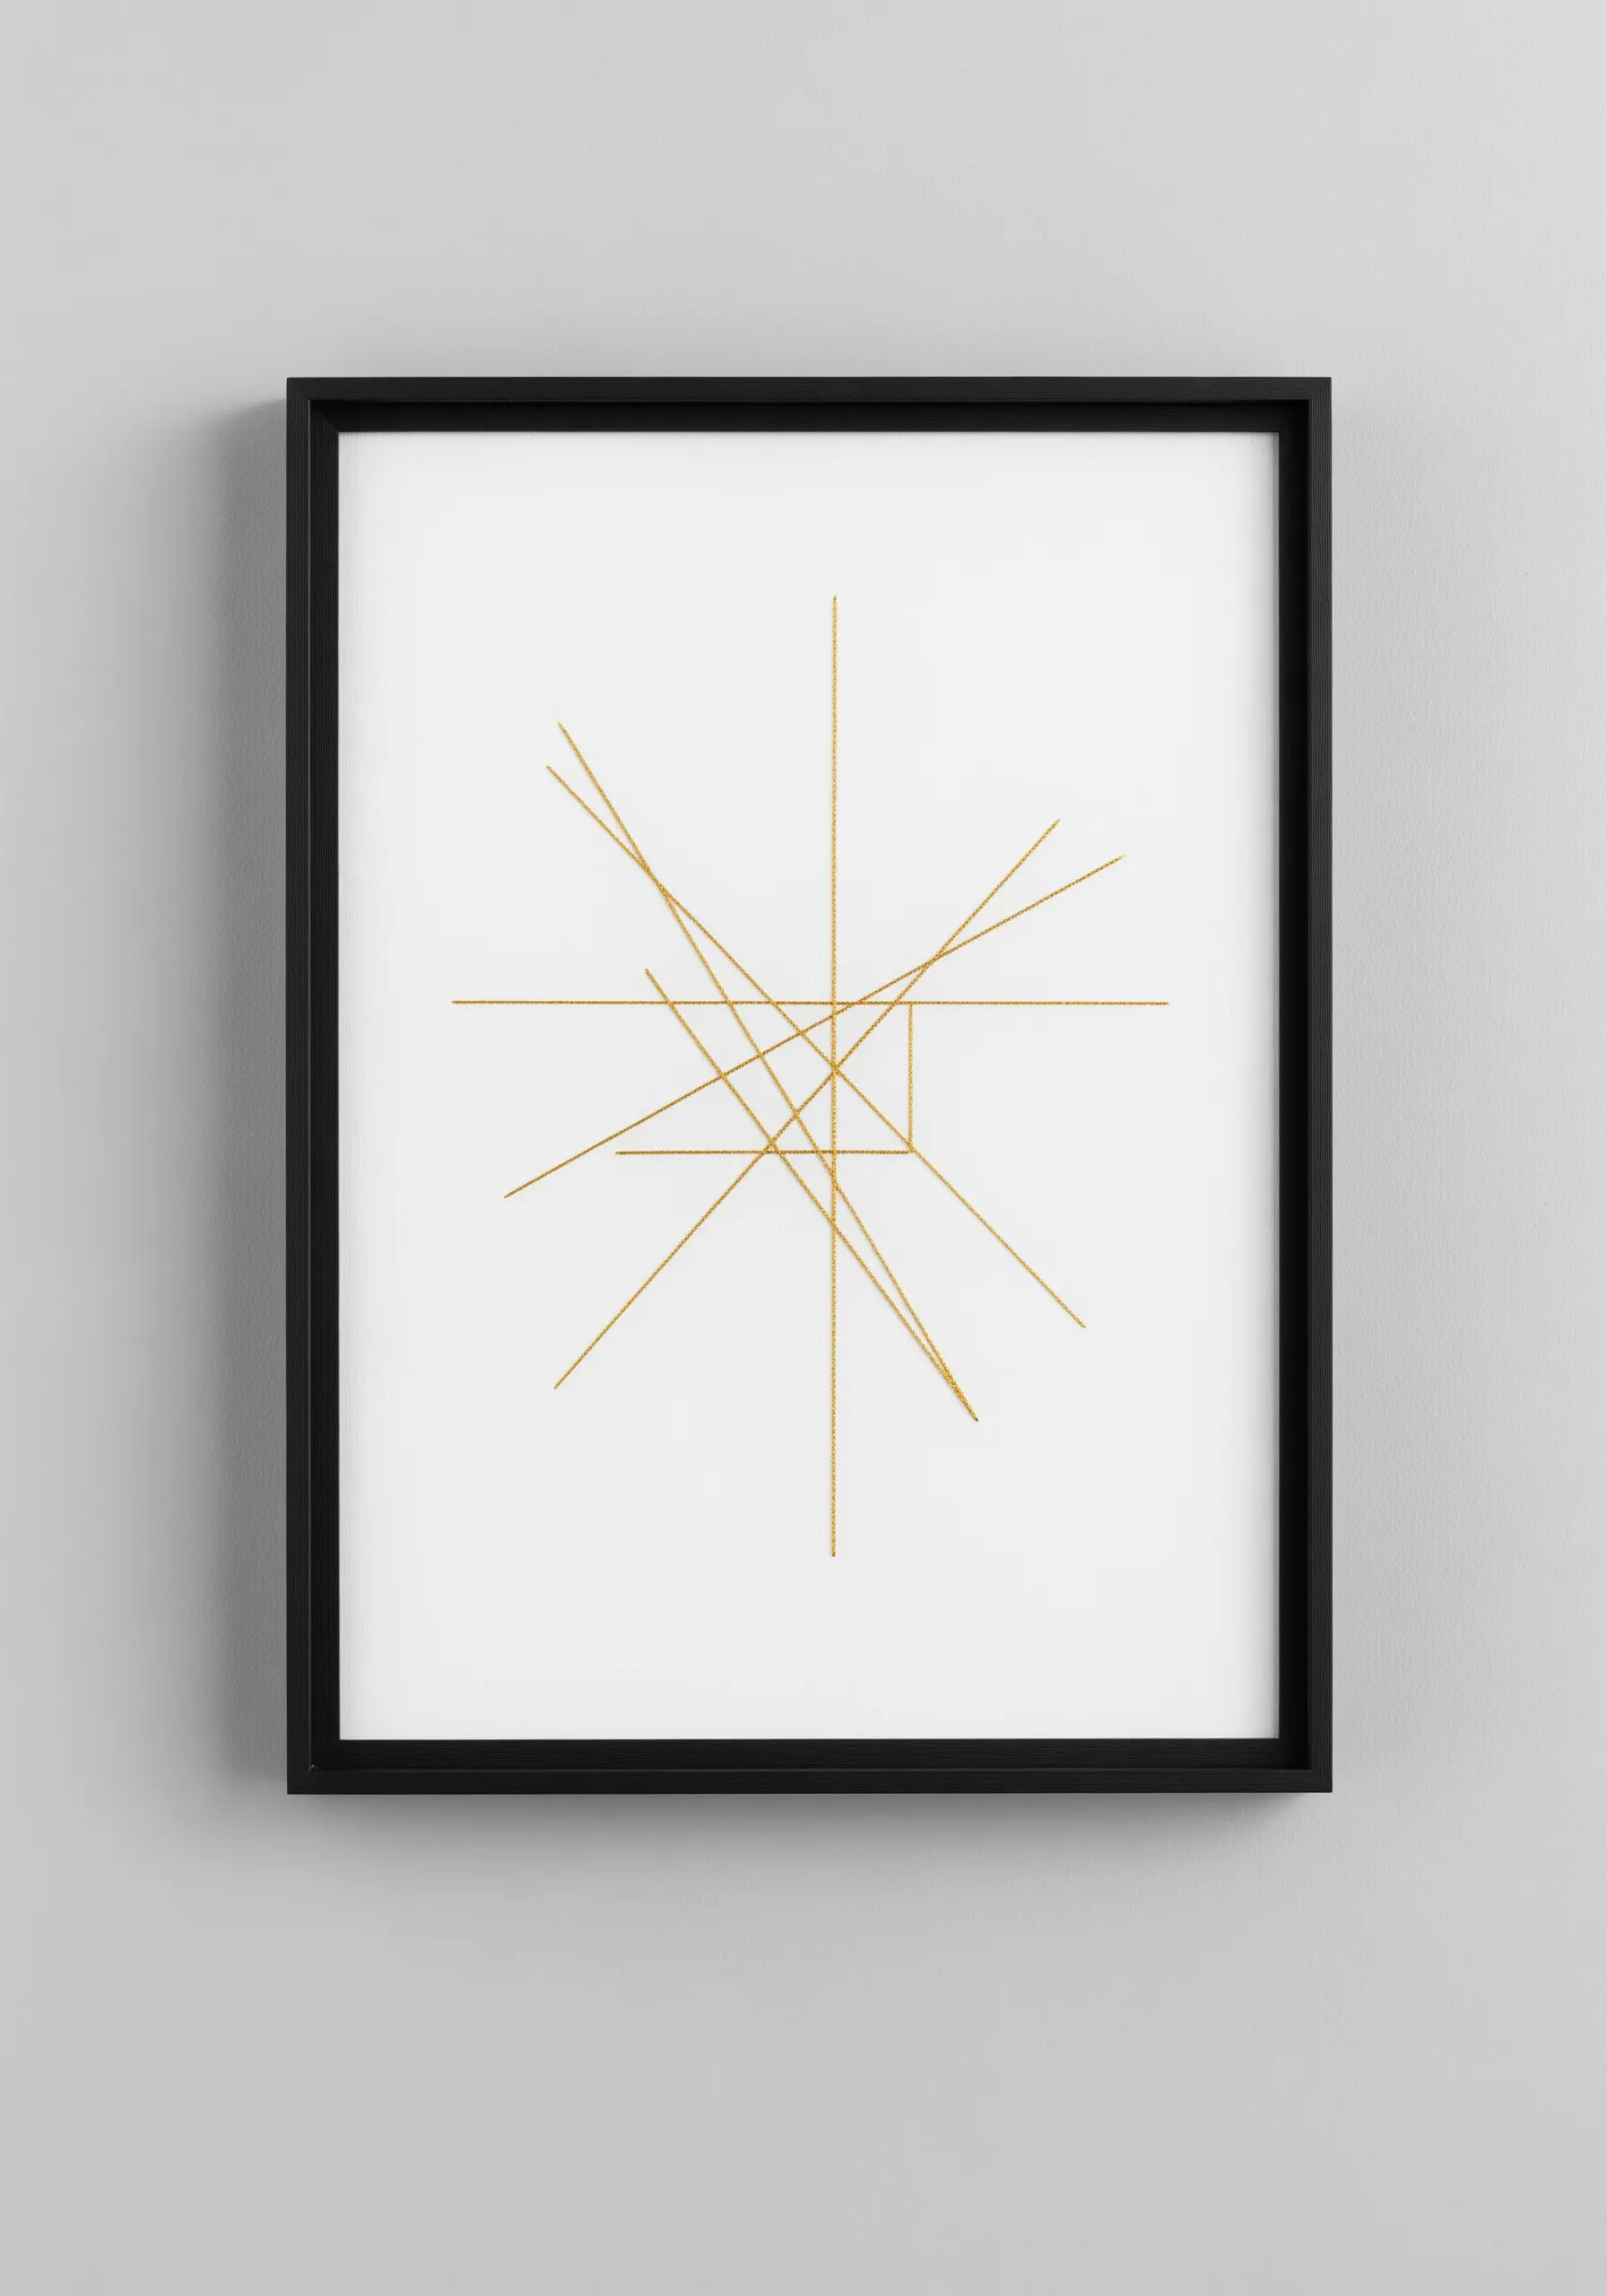
This technique is a masterclass in tension and placement, turning simple lines into a sophisticated statement.
Work on a stiff surface like cardstock or tightly woven, stabilized fabric to prevent puckering.
Use a single strand of a fine metallic thread for a crisp, architectural feel. The way it catches the light is essential to the design.
Map your anchor points meticulously with a pencil and ruler; the power of this design lies in its geometric precision, where the negative space is the true canvas.
3. Dimensional Shapes with Wrapped Stitches
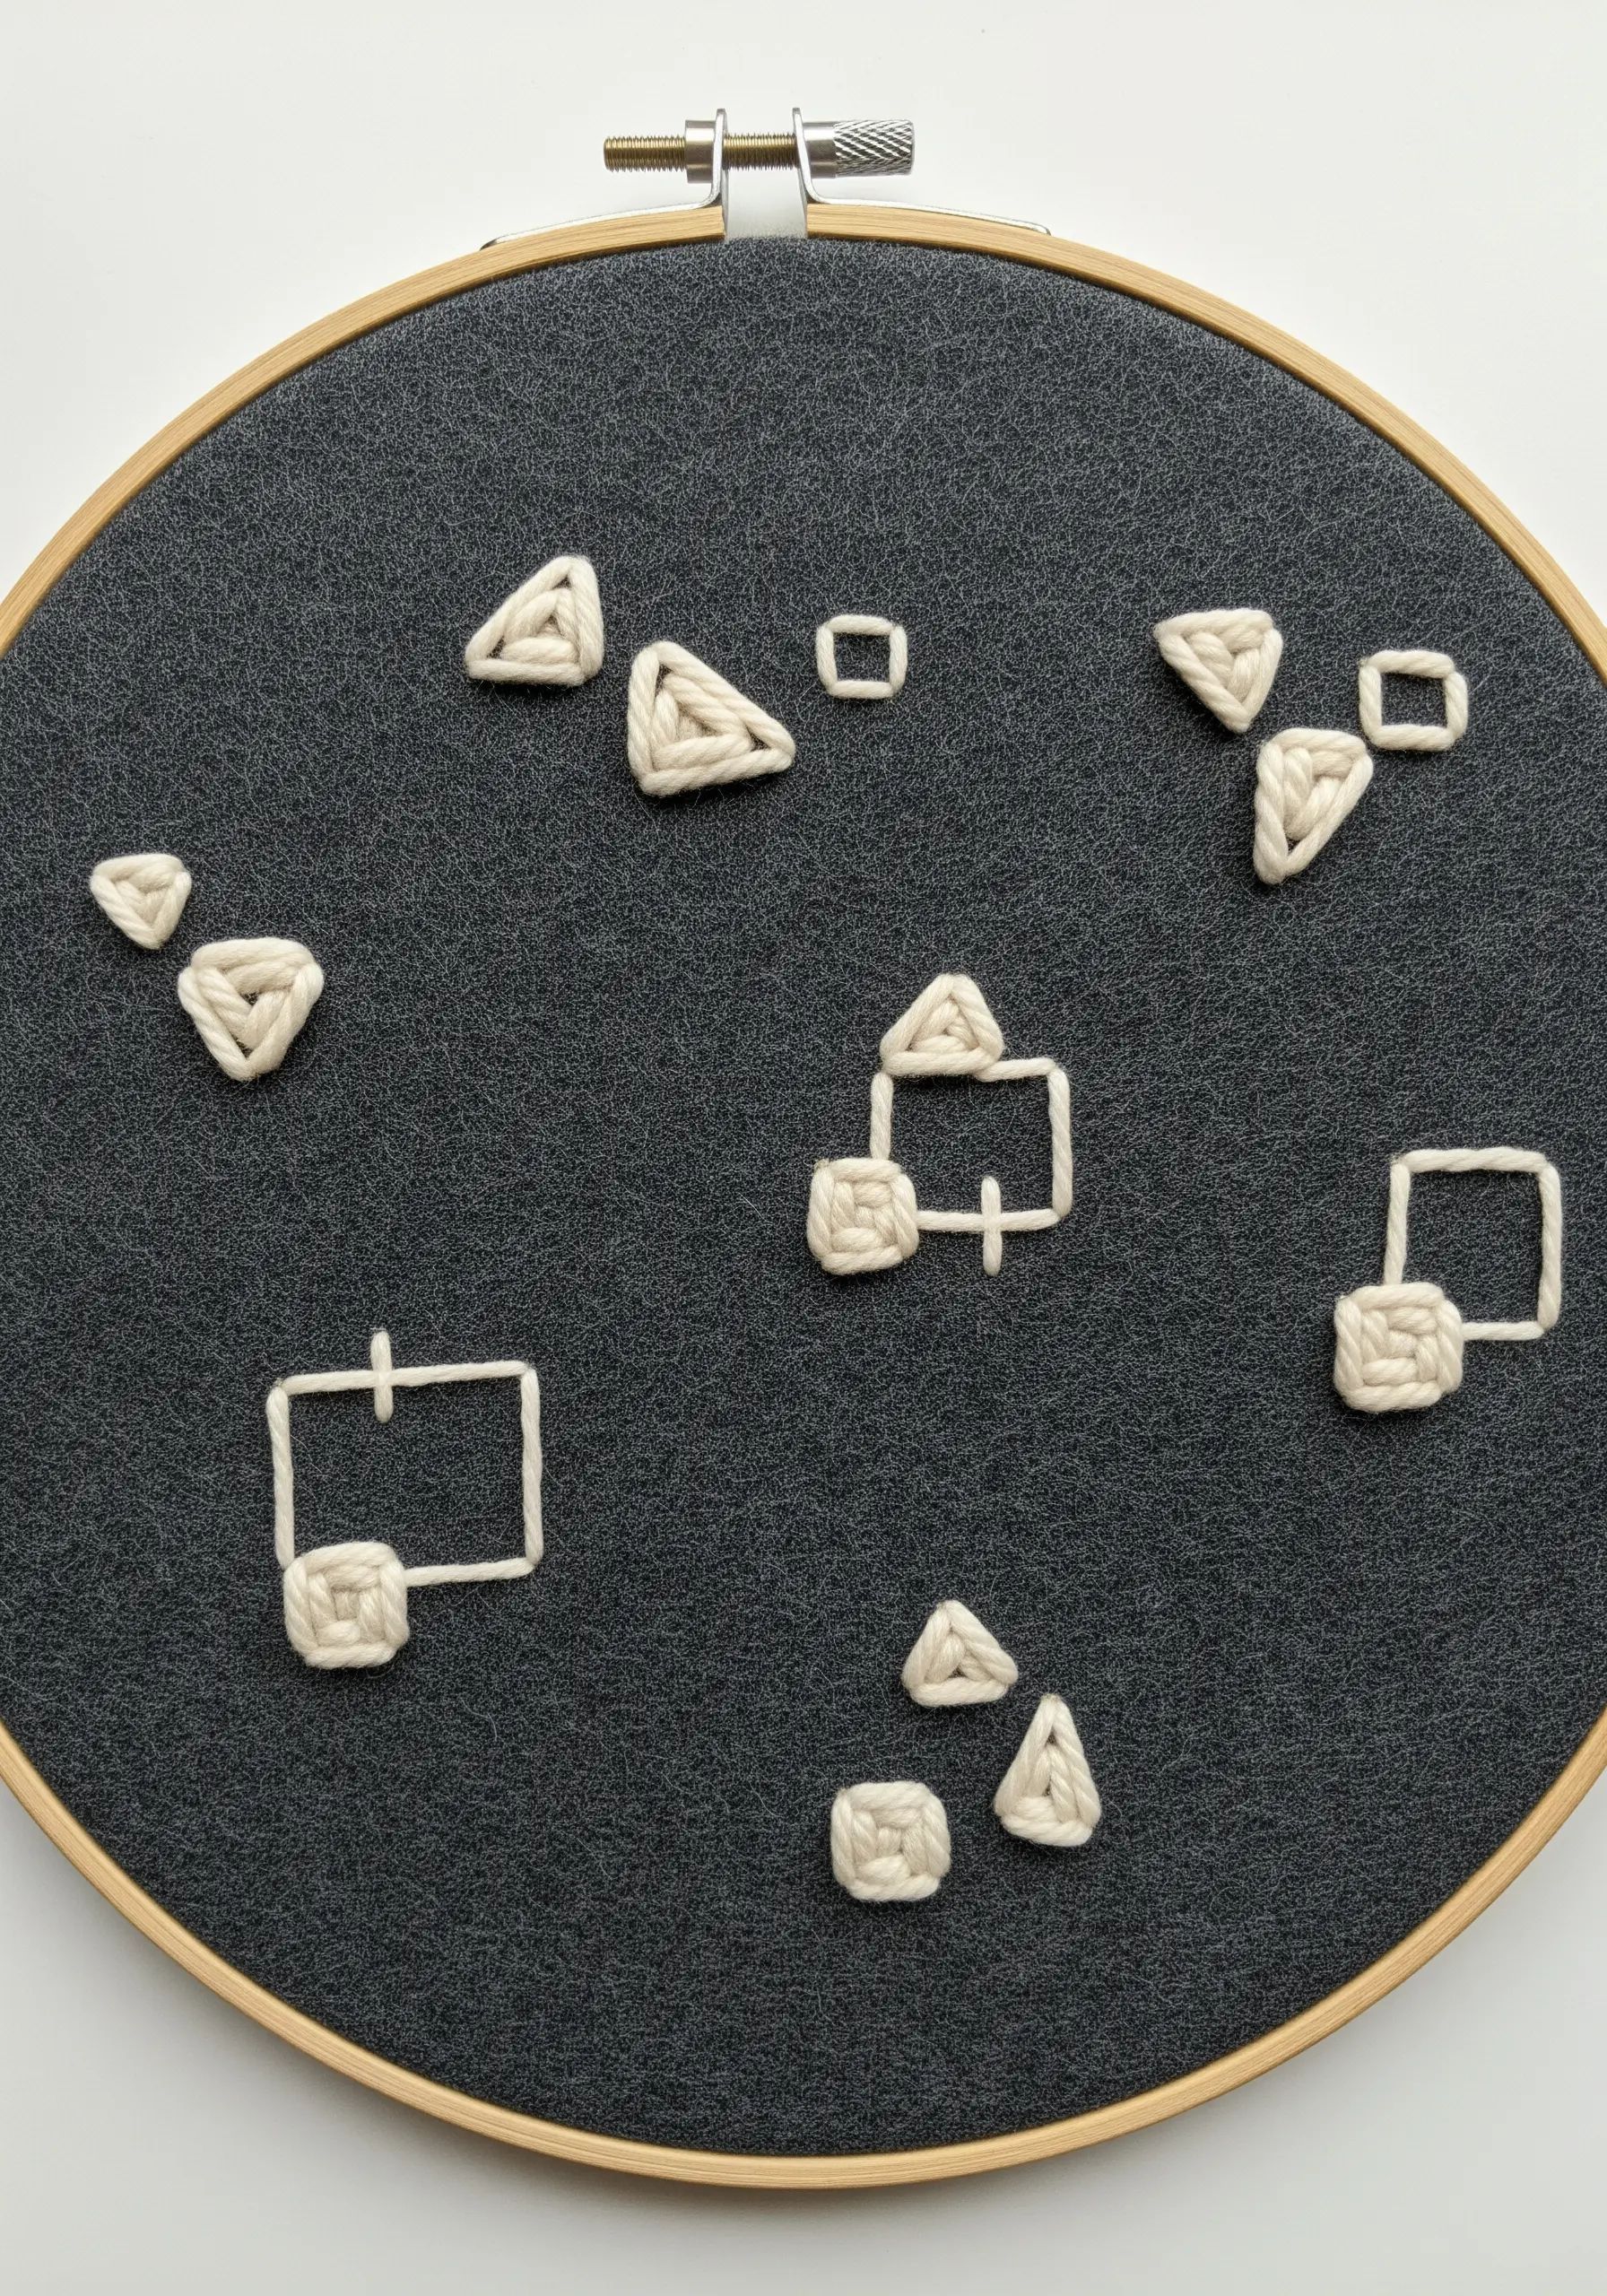
Build small, sculptural forms by using thick yarn or multiple strands of cotton floss on a non-stretch fabric like felt.
First, create an outline of your shape with a backstitch, then wrap your thread around the outline stitches—this is a variation of a whipped backstitch.
The key is to pull the wrapping thread tightly enough to create a rounded, 3D effect without distorting the fabric.
Arranging these small, textural elements in scattered clusters allows the negative space to feel active and intentional.
4. Cascading Threads for a Waterfall Effect
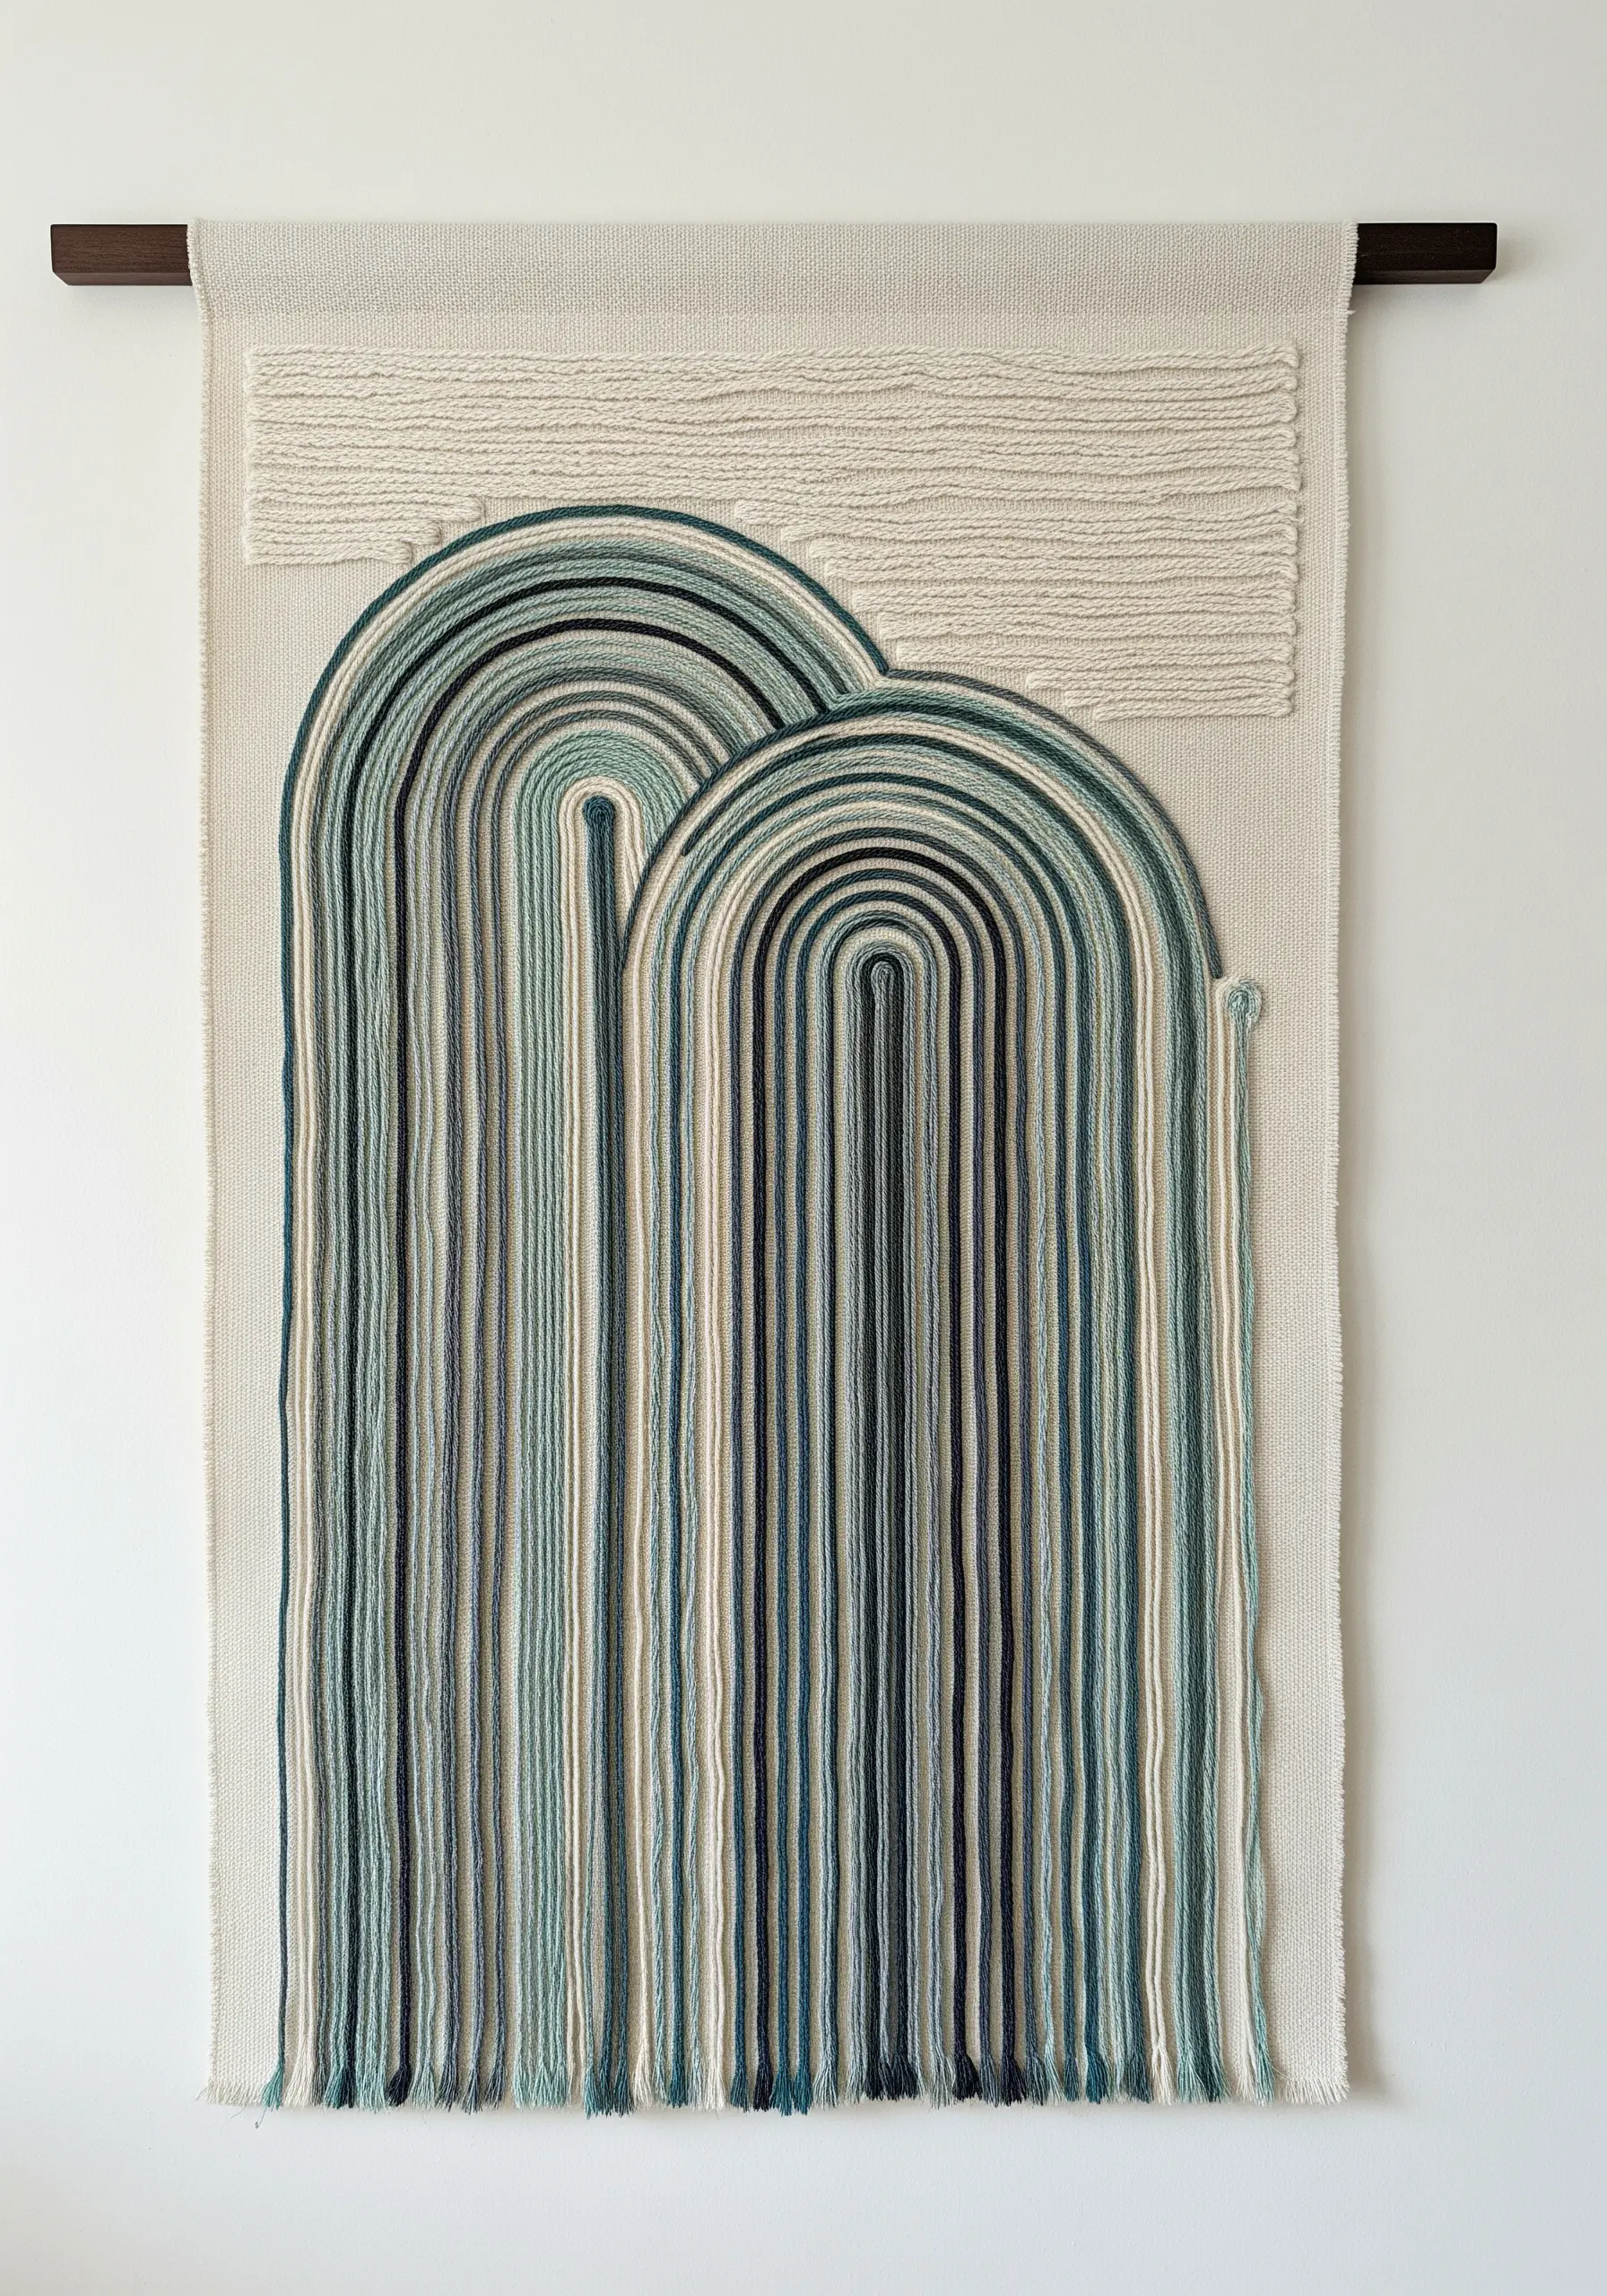
Combine couching with loose threads to create this stunning wall hanging that moves beyond the hoop.
Lay down your arch shapes using a thick cord or yarn, and tack it in place with a thinner, matching thread (couching).
Instead of trimming the ends, let them hang freely, creating a long, elegant fringe. The weight of the threads will ensure they fall straight.
Carefully planning your color gradient before you start is crucial for achieving this seamless, painterly flow.
5. Ethereal Motion with Floating Threads
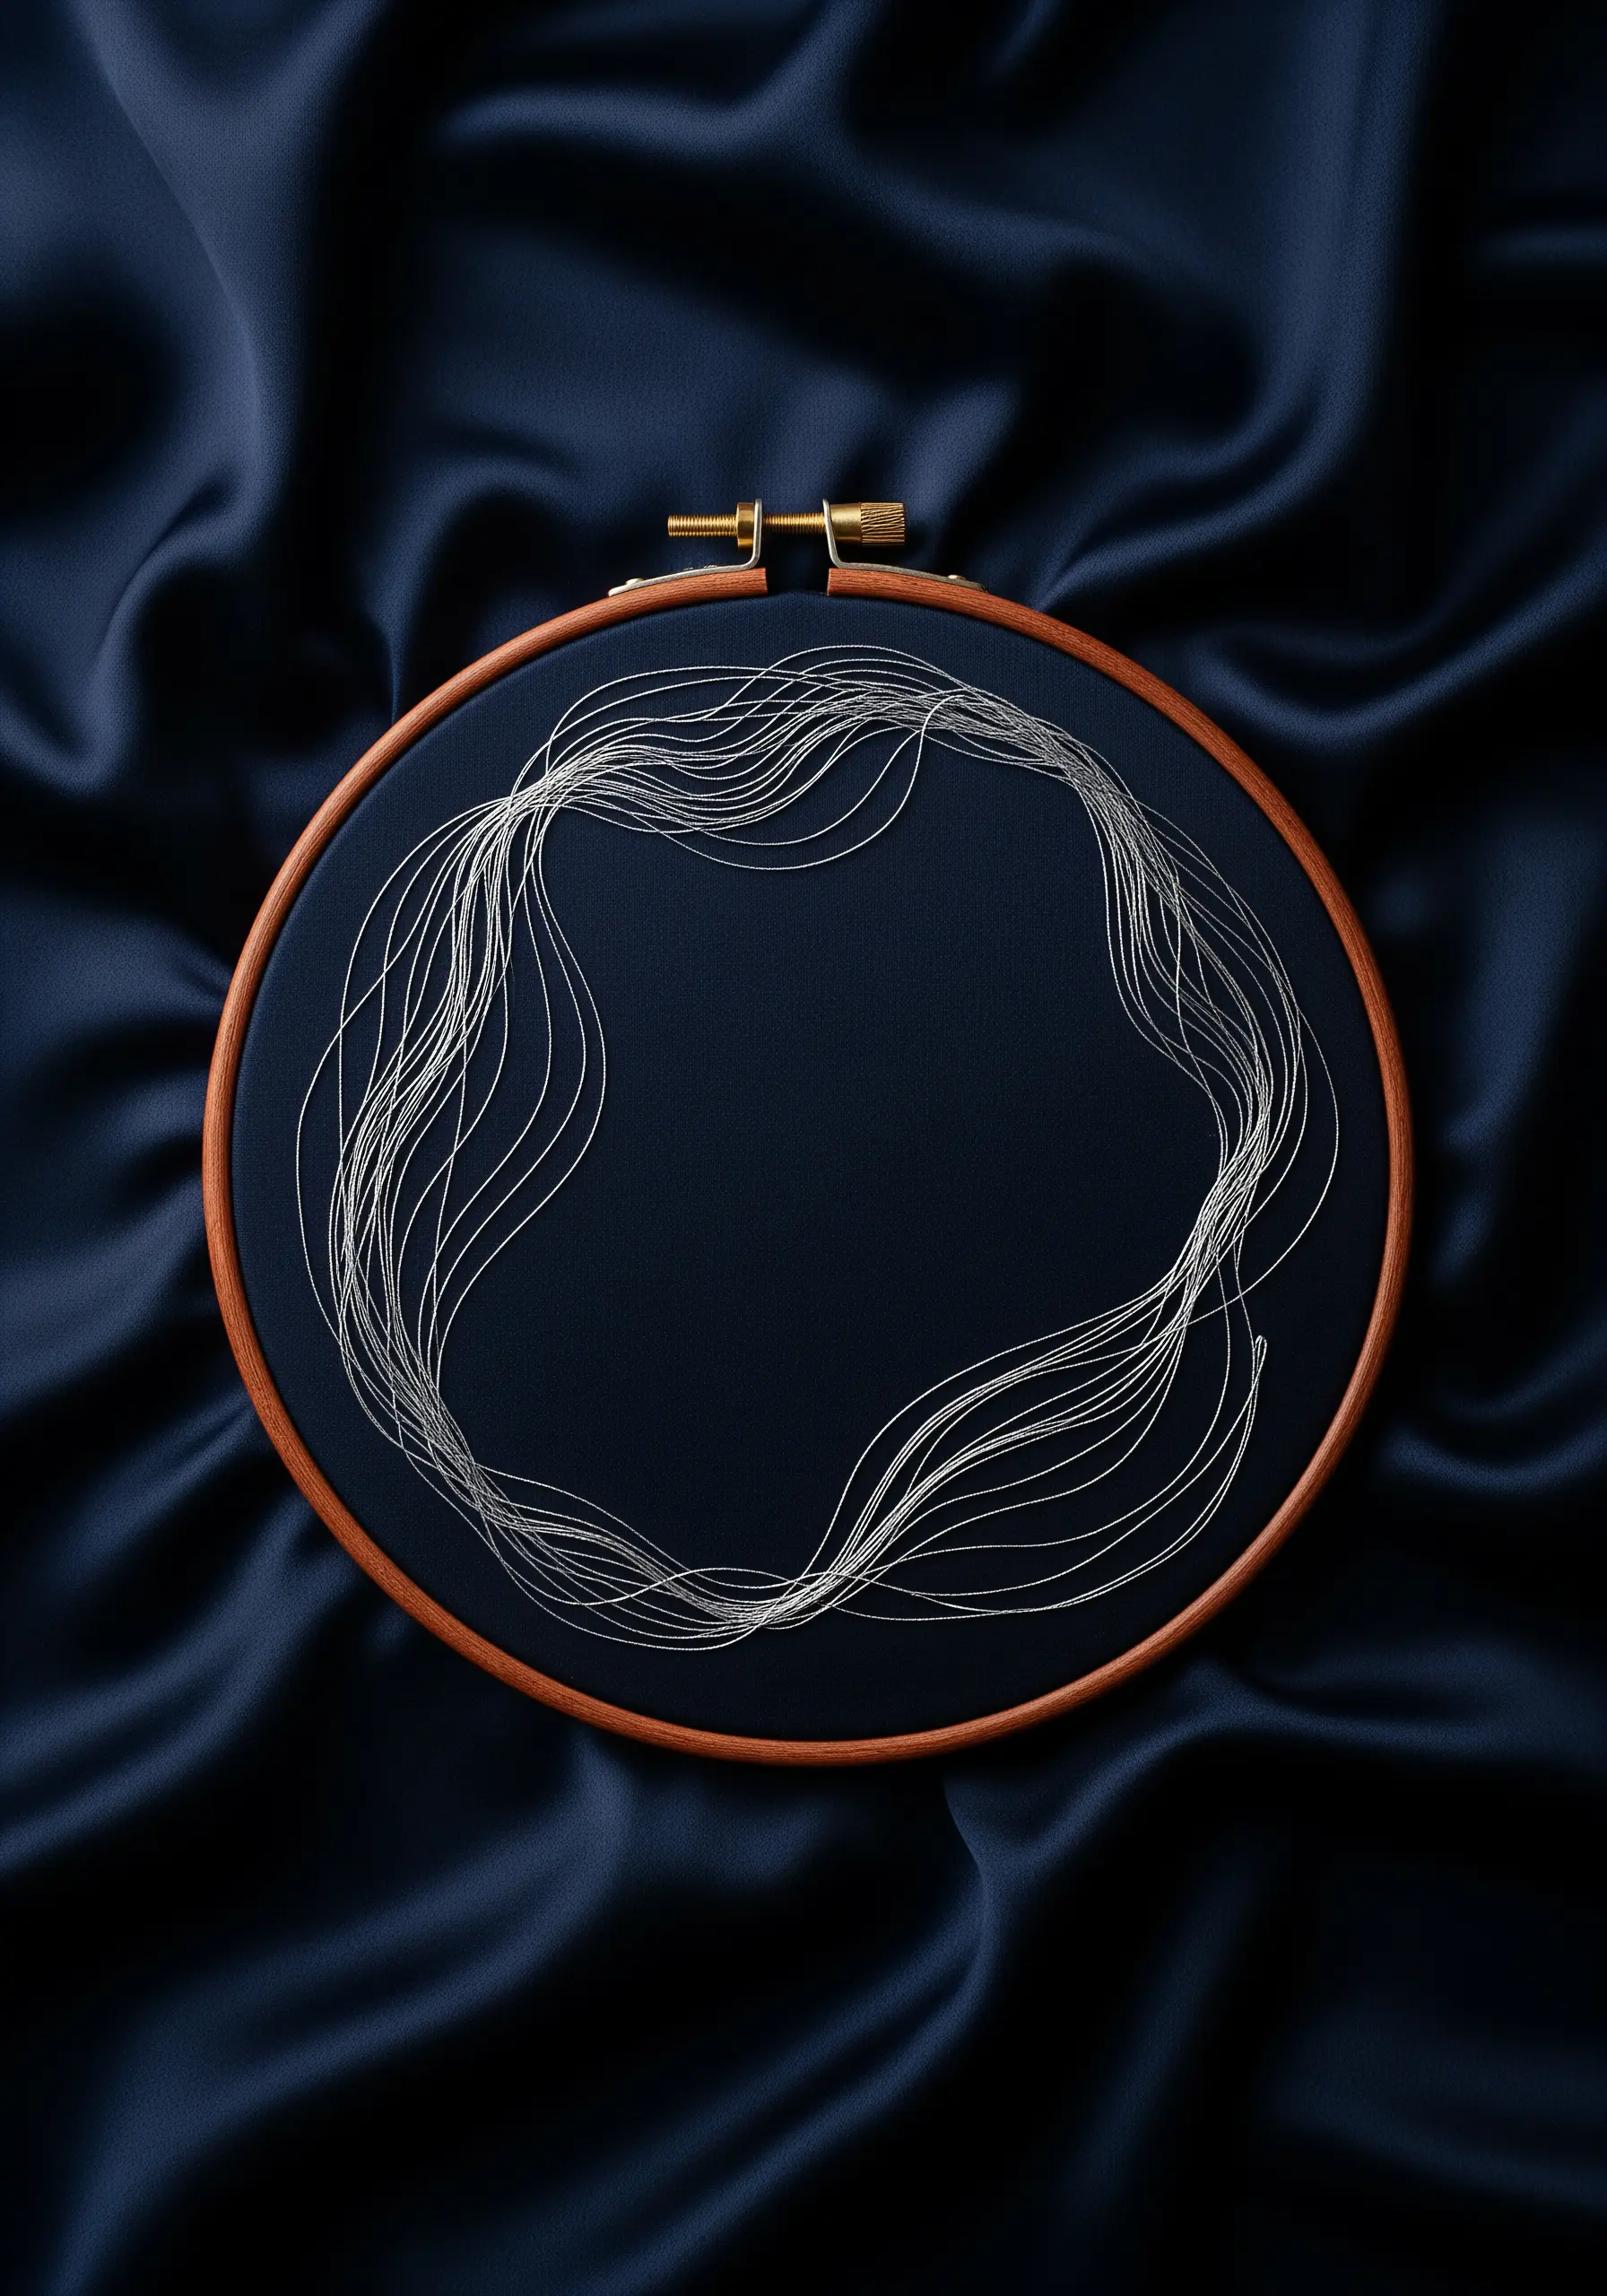
Create a design that feels weightless by using a very fine, lightweight thread, like a single strand of silk or rayon floss.
Instead of stitching a pattern directly onto the fabric, you only anchor the thread at a few points along the edge of your shape.
The thread is then allowed to drape and curve naturally across the surface, creating an organic, cloud-like form.
This works best on a fabric with a slight sheen, like satin, as it enhances the delicate, light-catching quality of the floating threads.
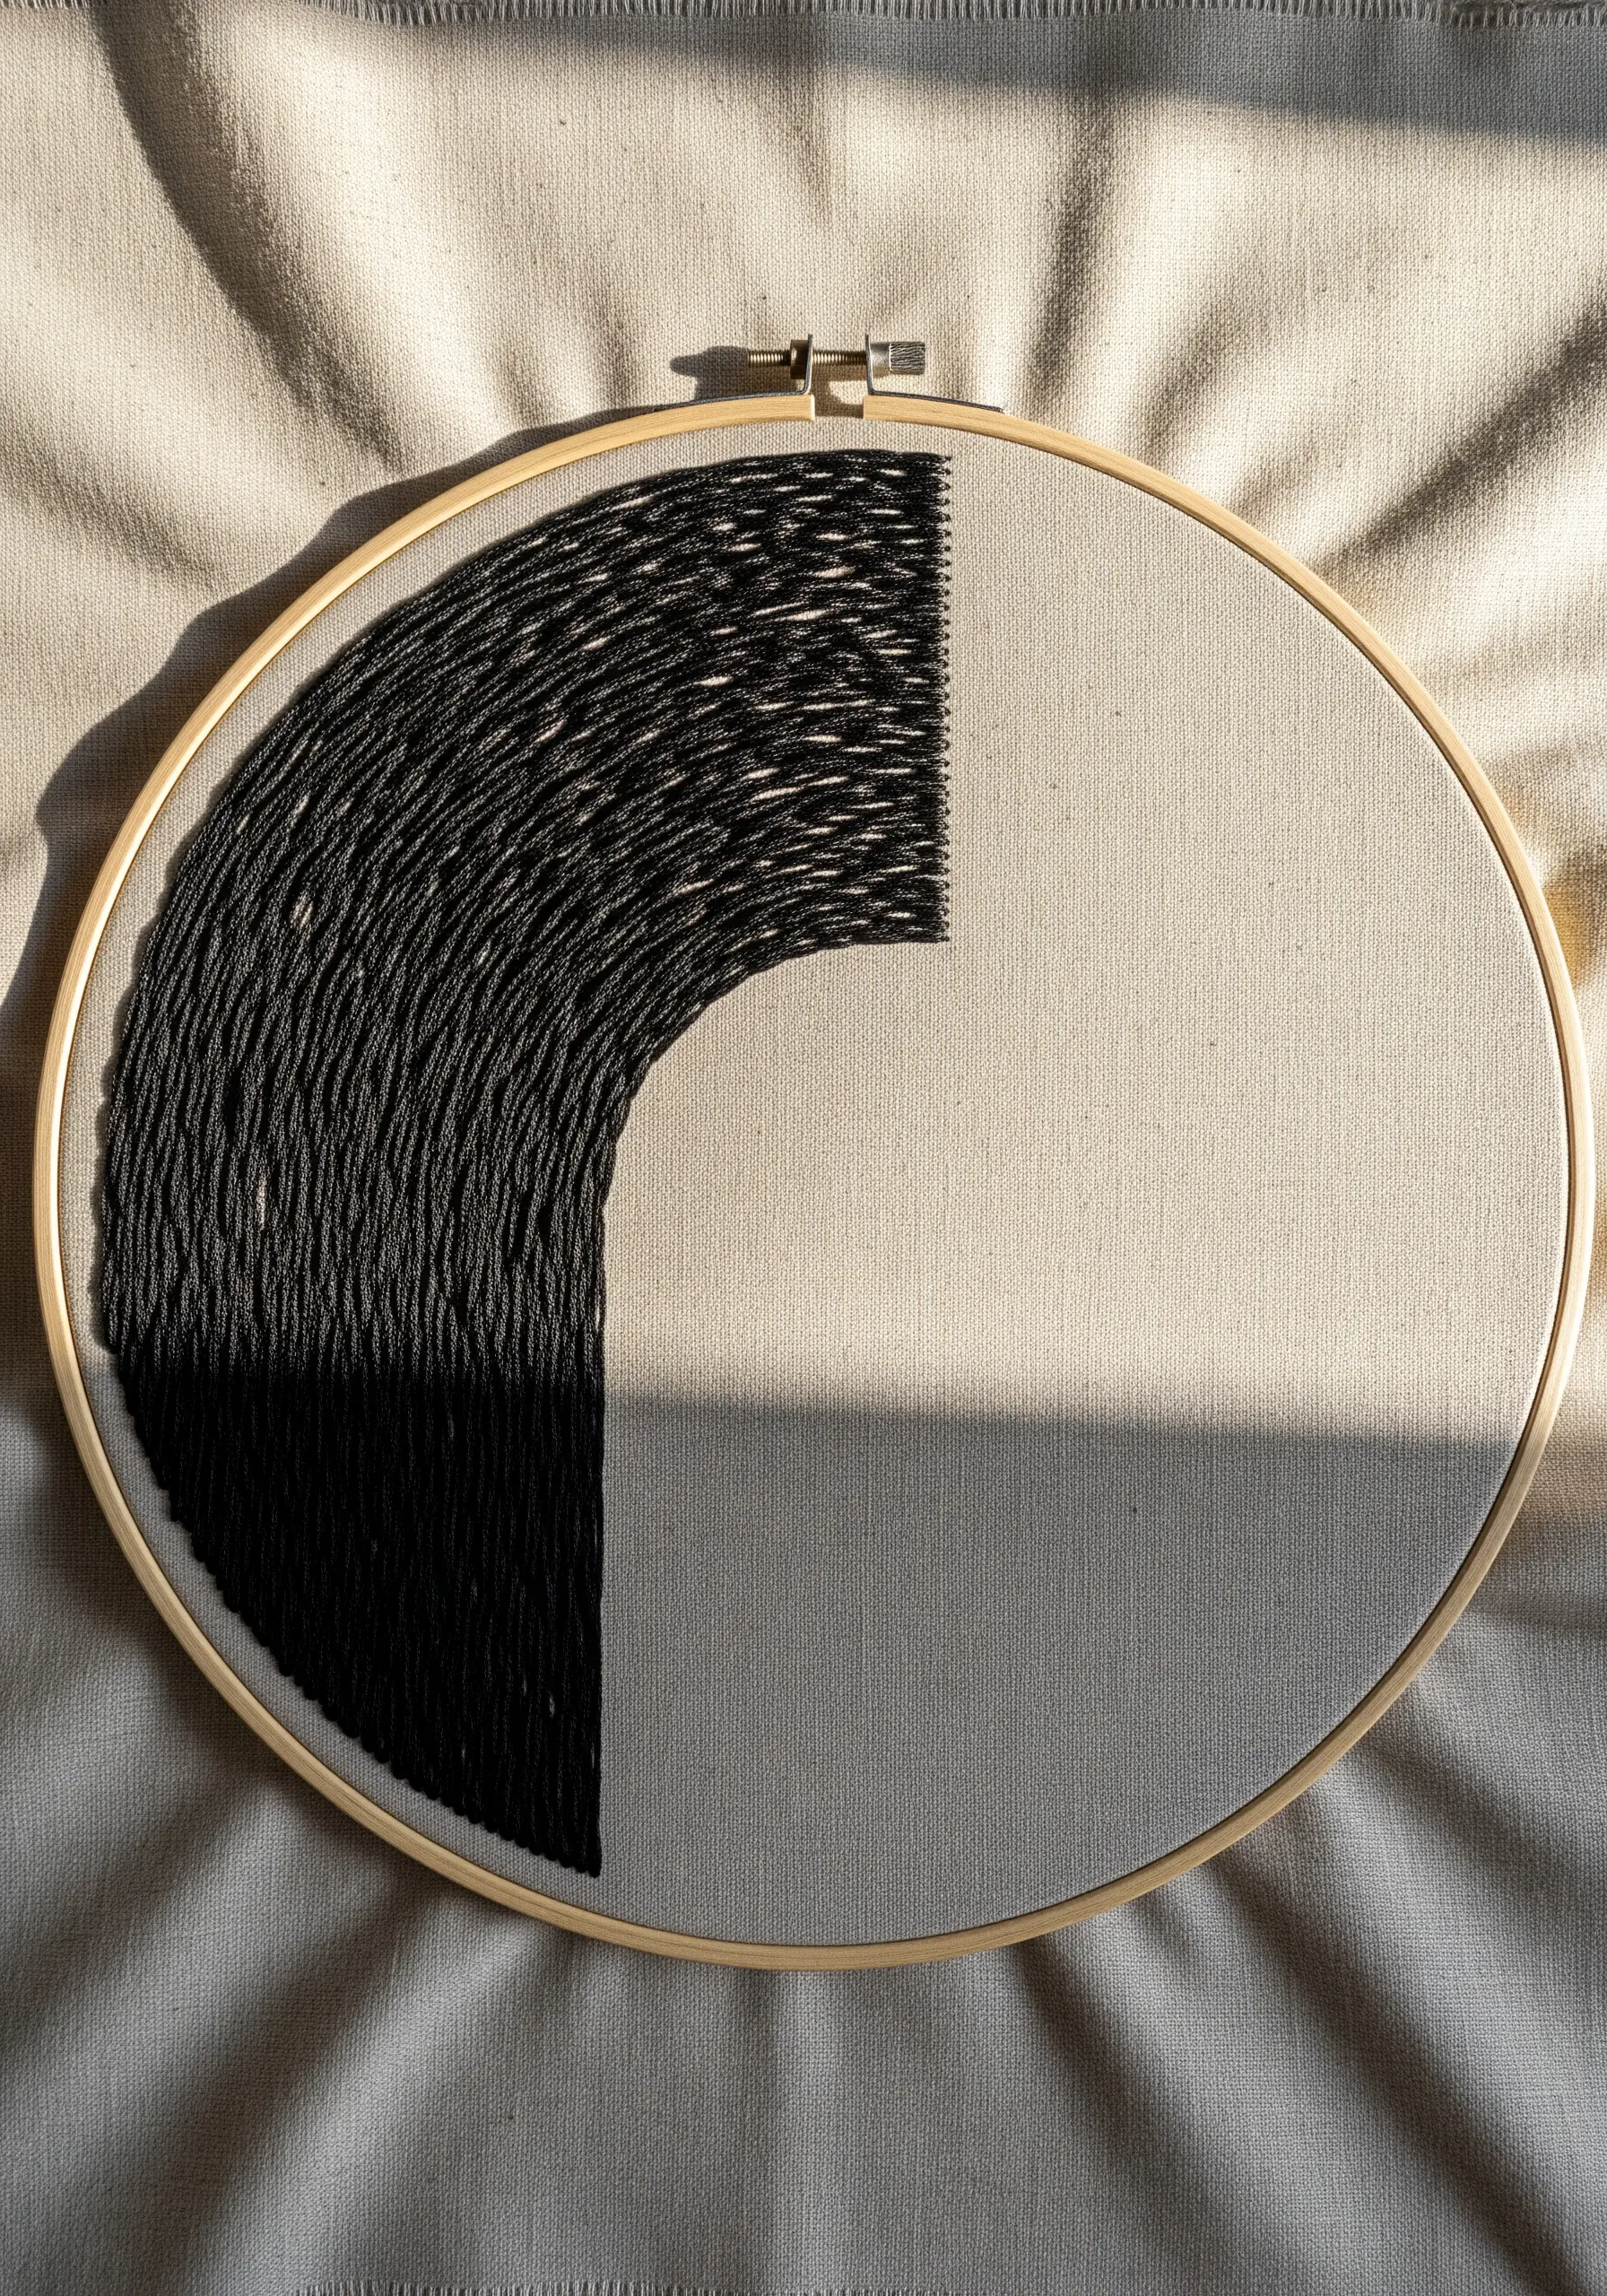
6. Graphic Arcs to Accentuate Form
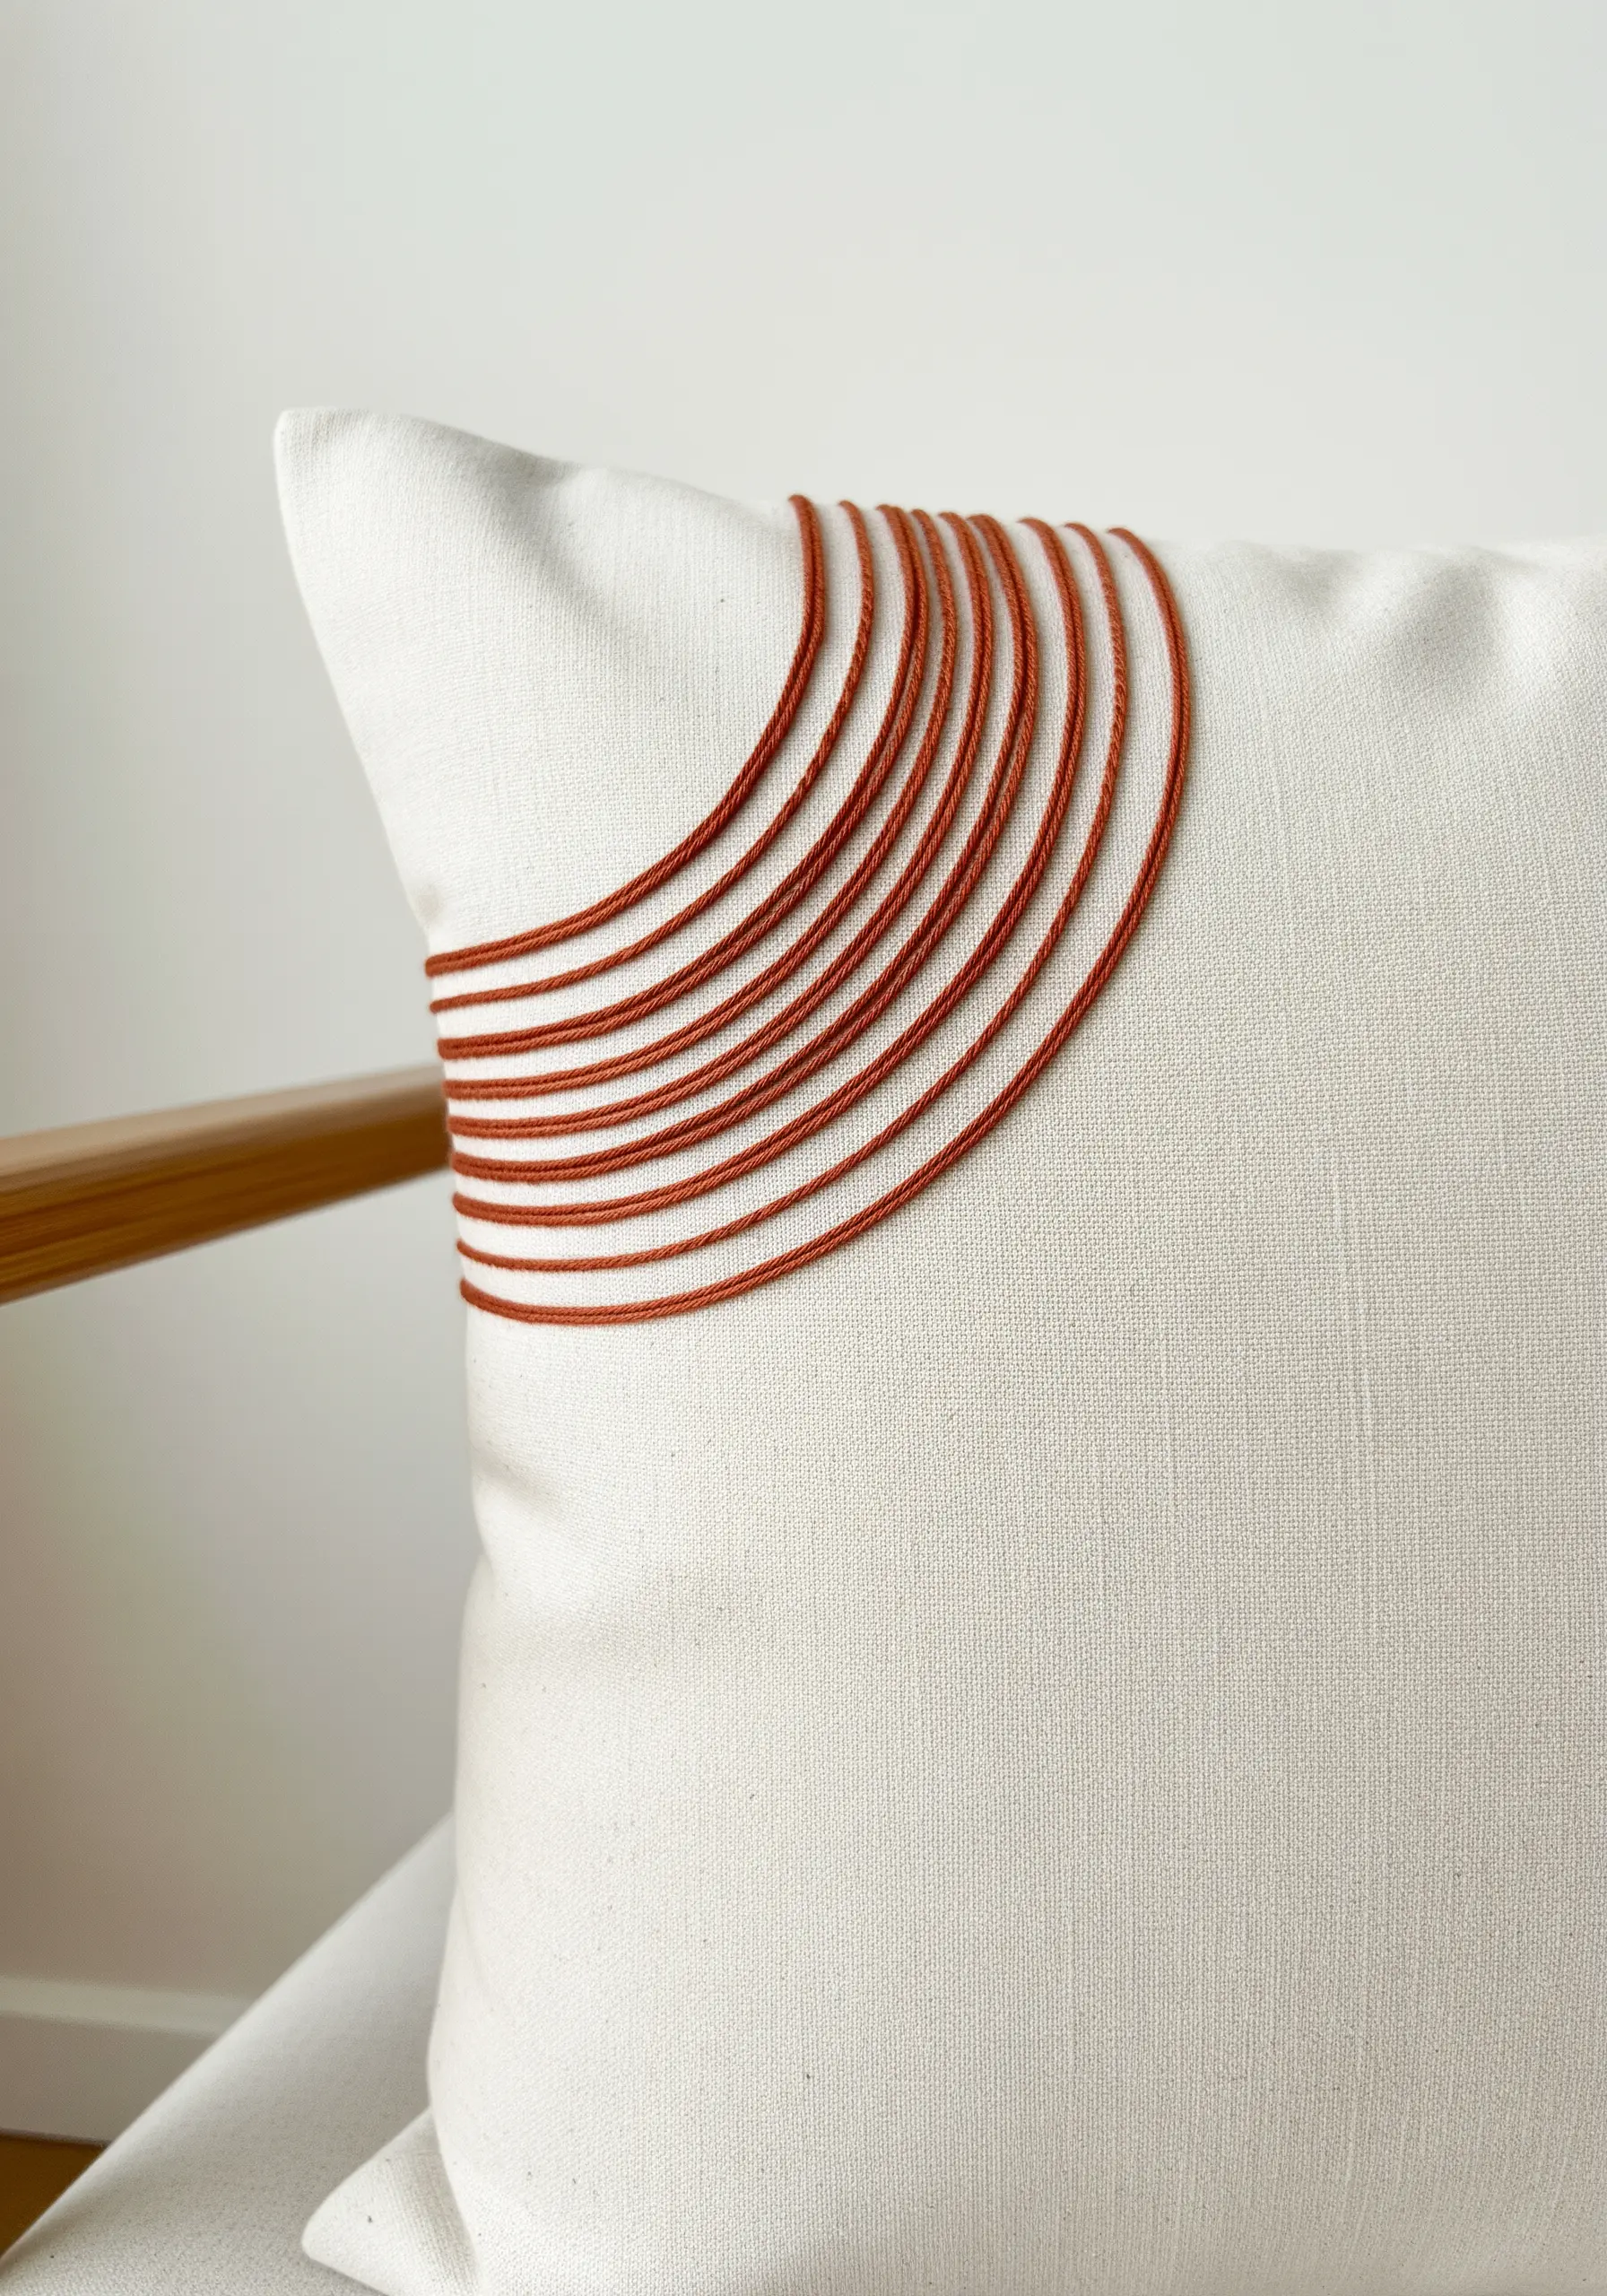
Transform a simple object, like a pillow cover, with clean, architectural lines.
Use a stem stitch or a whipped backstitch to achieve a perfectly smooth, rope-like line that has more presence than a simple backstitch.
A thicker thread, such as sashiko thread or #5 pearl cotton, provides the necessary weight and definition.
The key to a professional finish is maintaining consistent spacing between each arc. Use a compass and a disappearing ink pen to draw your guides first.
7. Define Shapes with Scribble Stitching
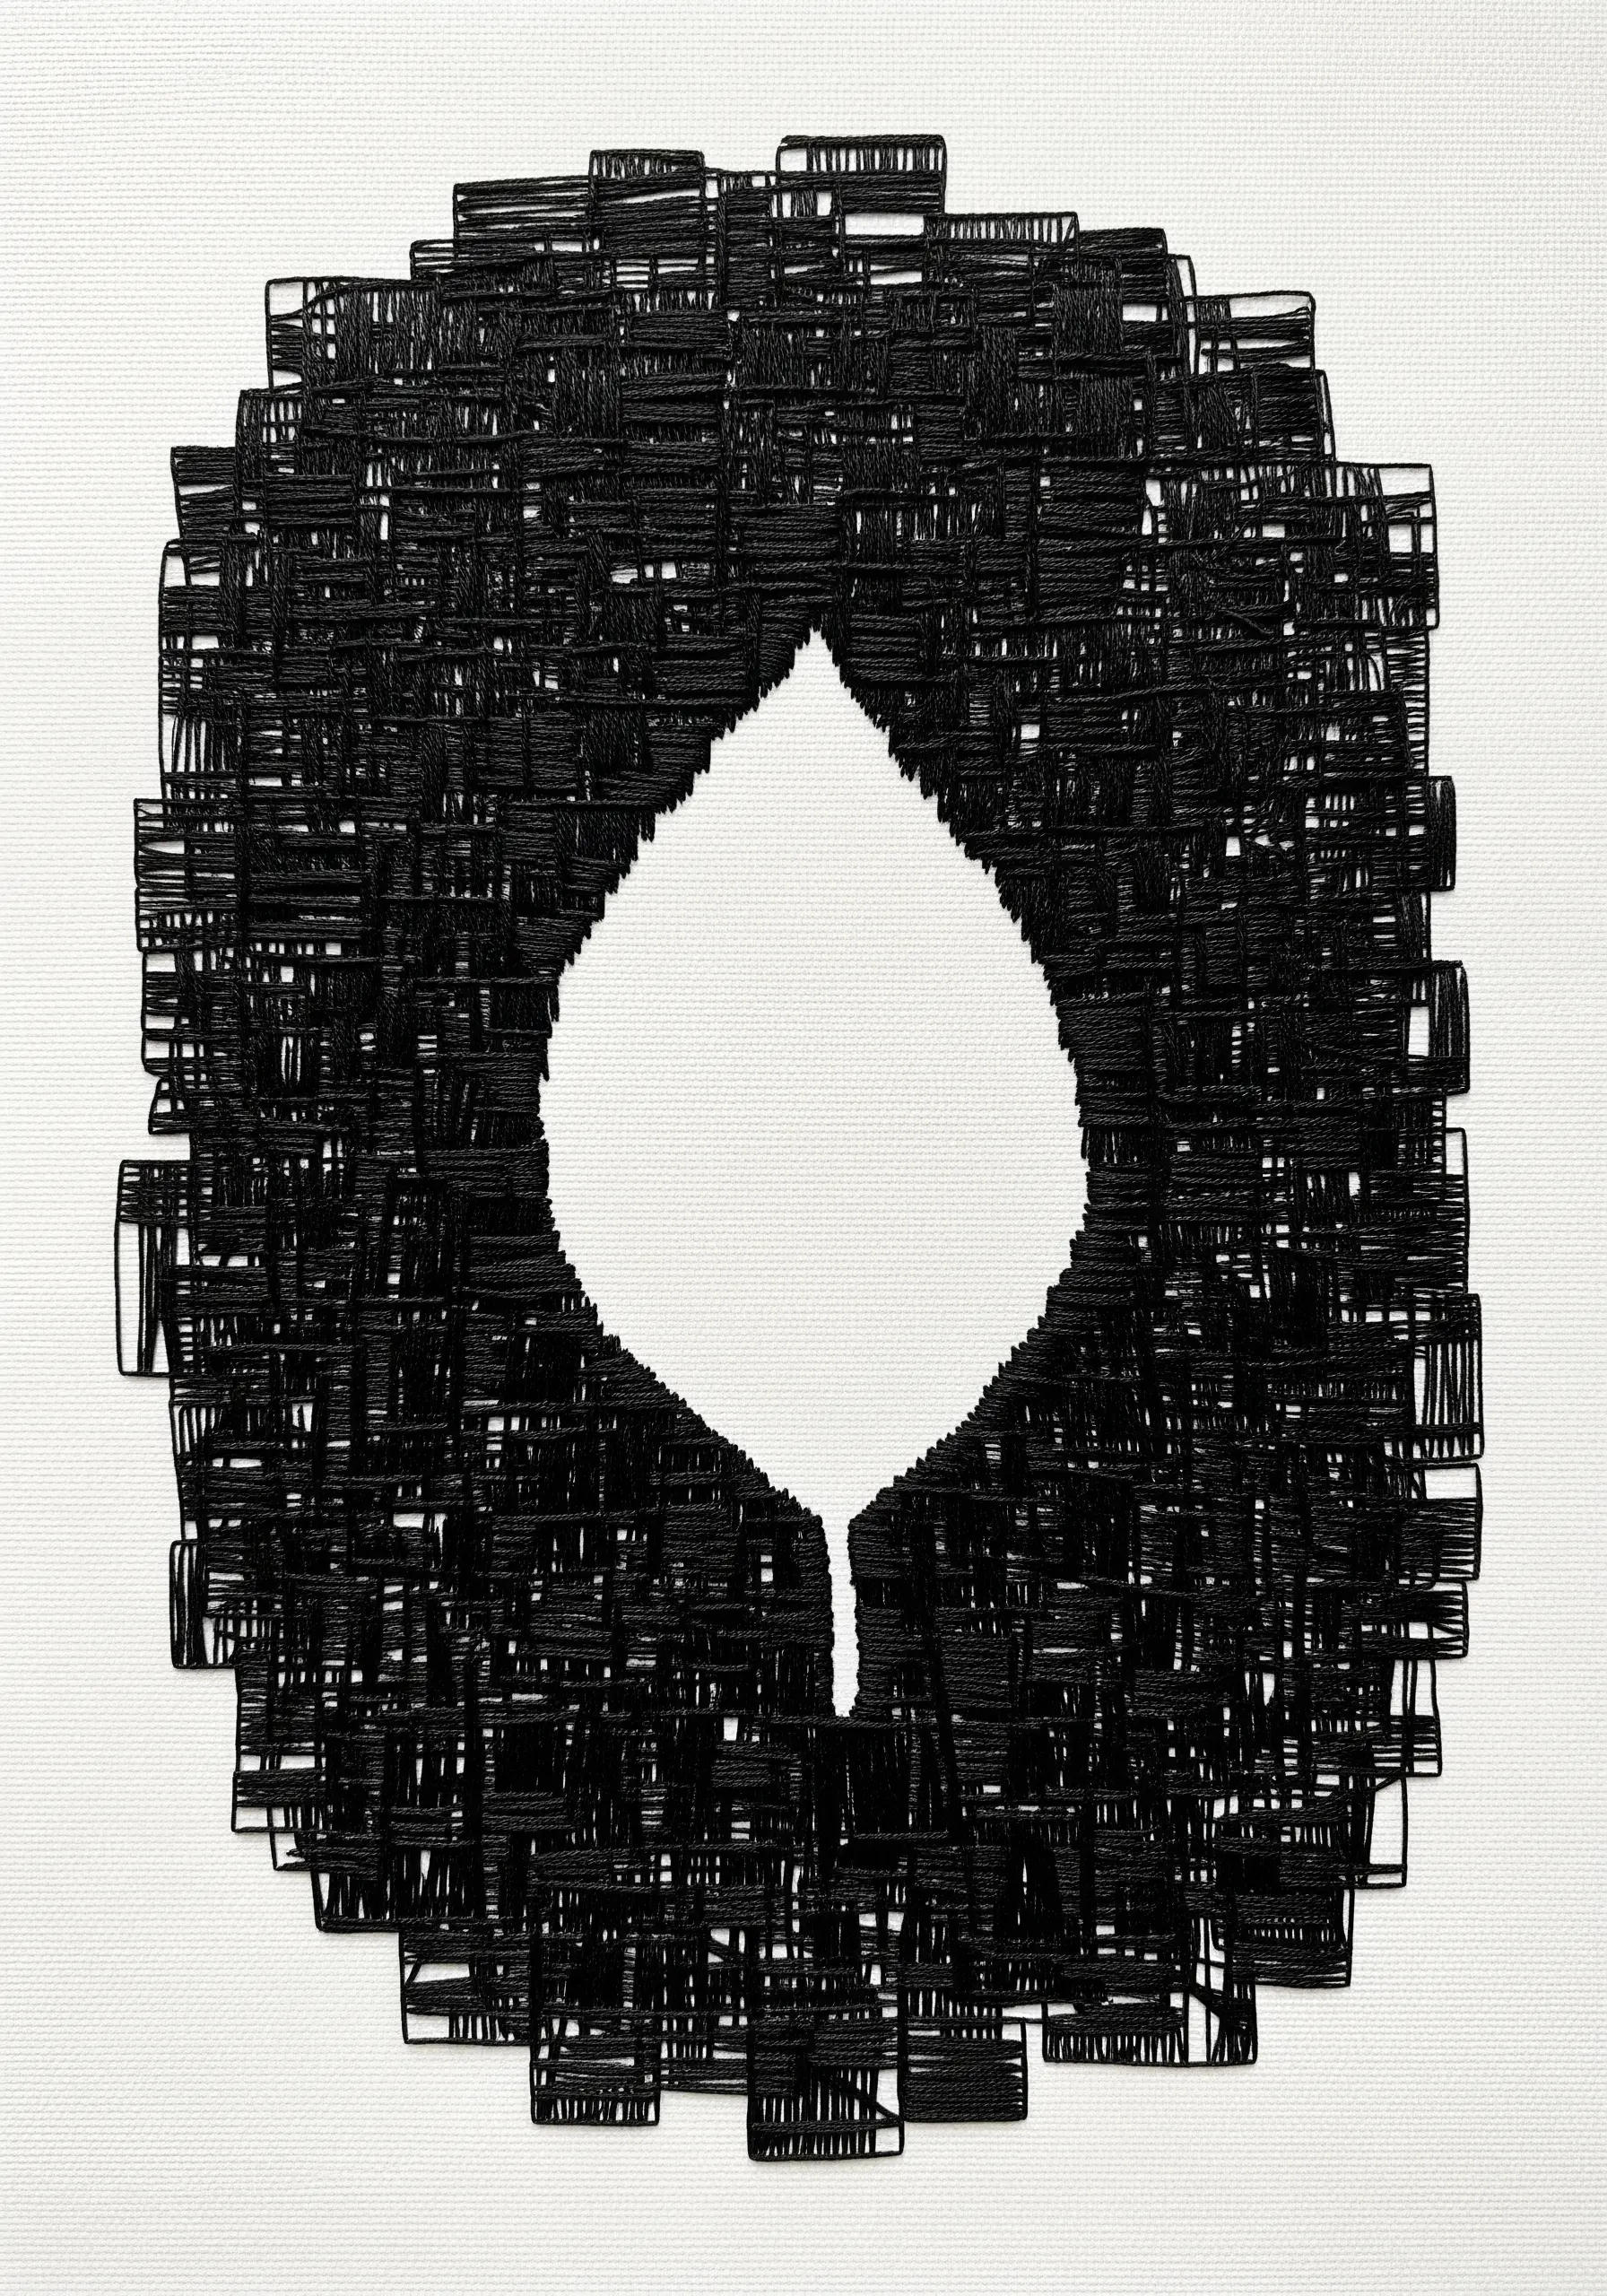
This technique uses texture to define the edges of your negative space.
Lightly trace the shape you want to remain empty—in this case, a leaf—onto your fabric.
Fill the entire surrounding area with dense, multi-directional straight stitches, creating a chaotic, “scribbled” texture.
Stitch right up to your traced line, and even slightly over it, to create a sharp, defined edge once the guide is removed.
The tension between the wild, stitched background and the calm, empty silhouette is what creates the visual impact.
8. Cascading Knots for an Organic Border
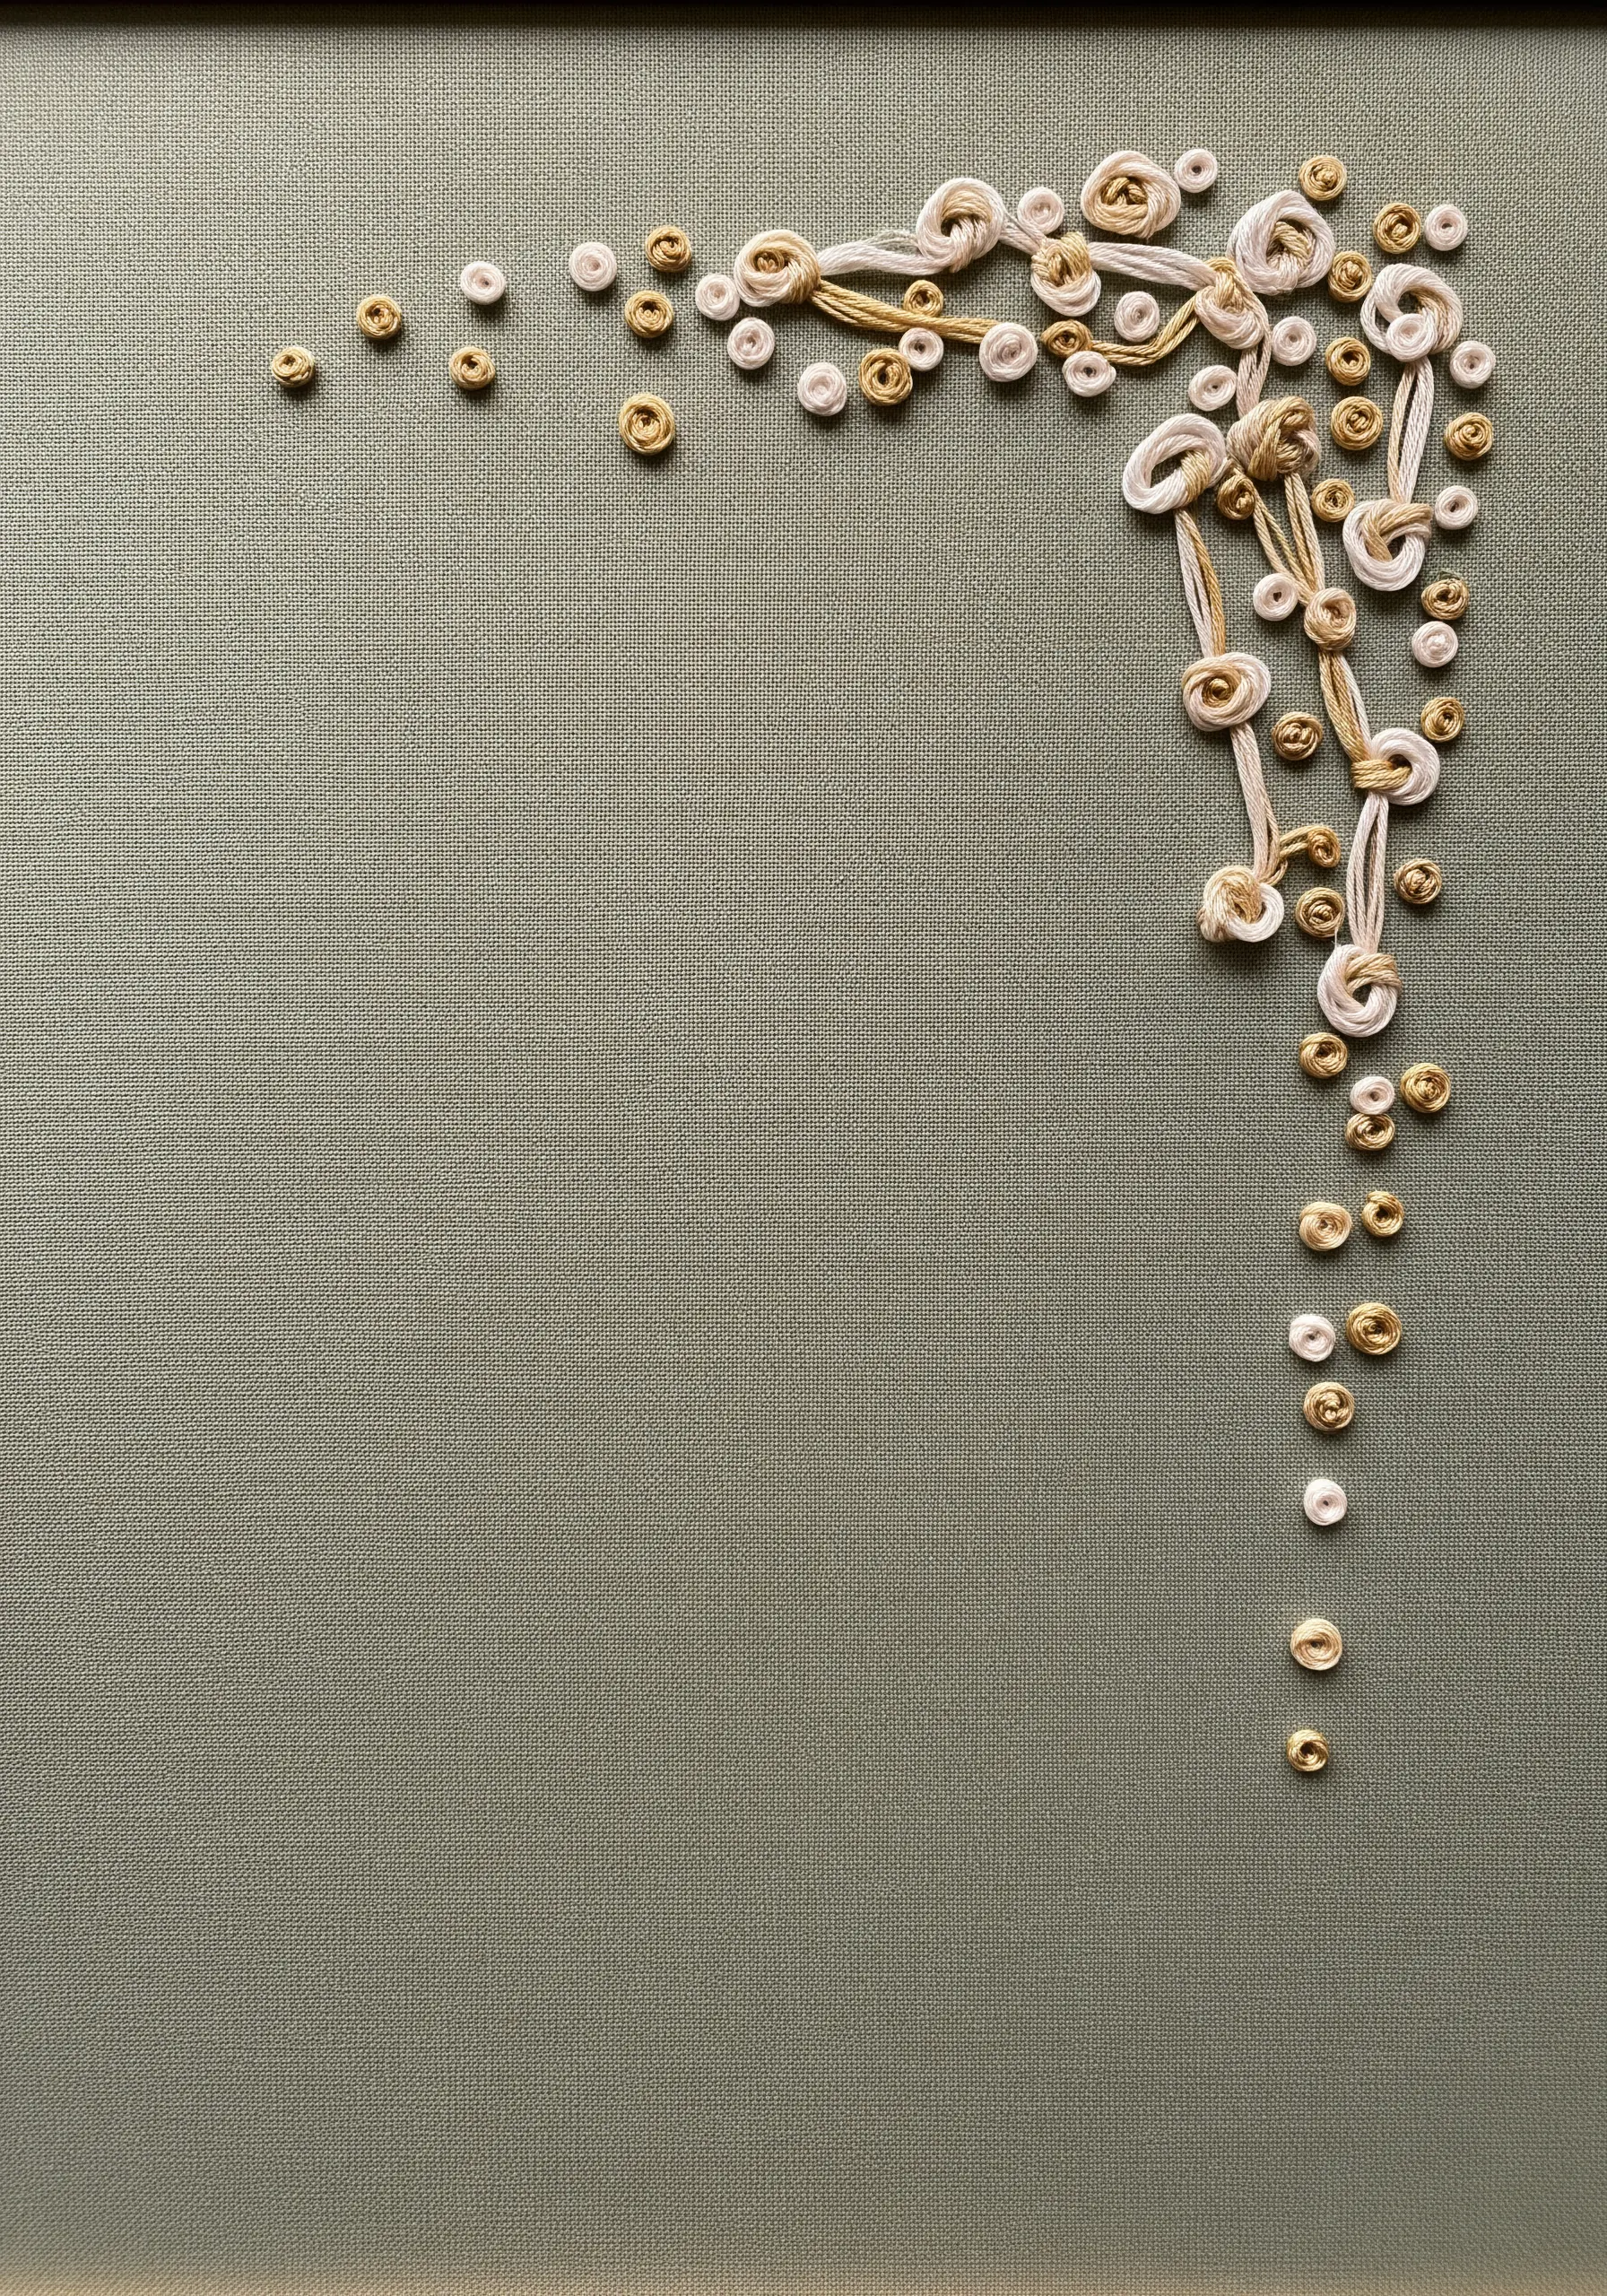
Create a beautiful, trailing effect by clustering textural stitches and letting them disperse gradually.
Combine French knots, colonial knots, and single-looped stitches of various sizes to build an organic, varied texture.
Start with a dense cluster in one corner, then slowly increase the spacing between stitches as you move away from the focal point.
Using a tonal color palette—like creams, beiges, and golds—keeps the focus on the texture rather than the color.
9. Floating Stitches on Sheer Fabric
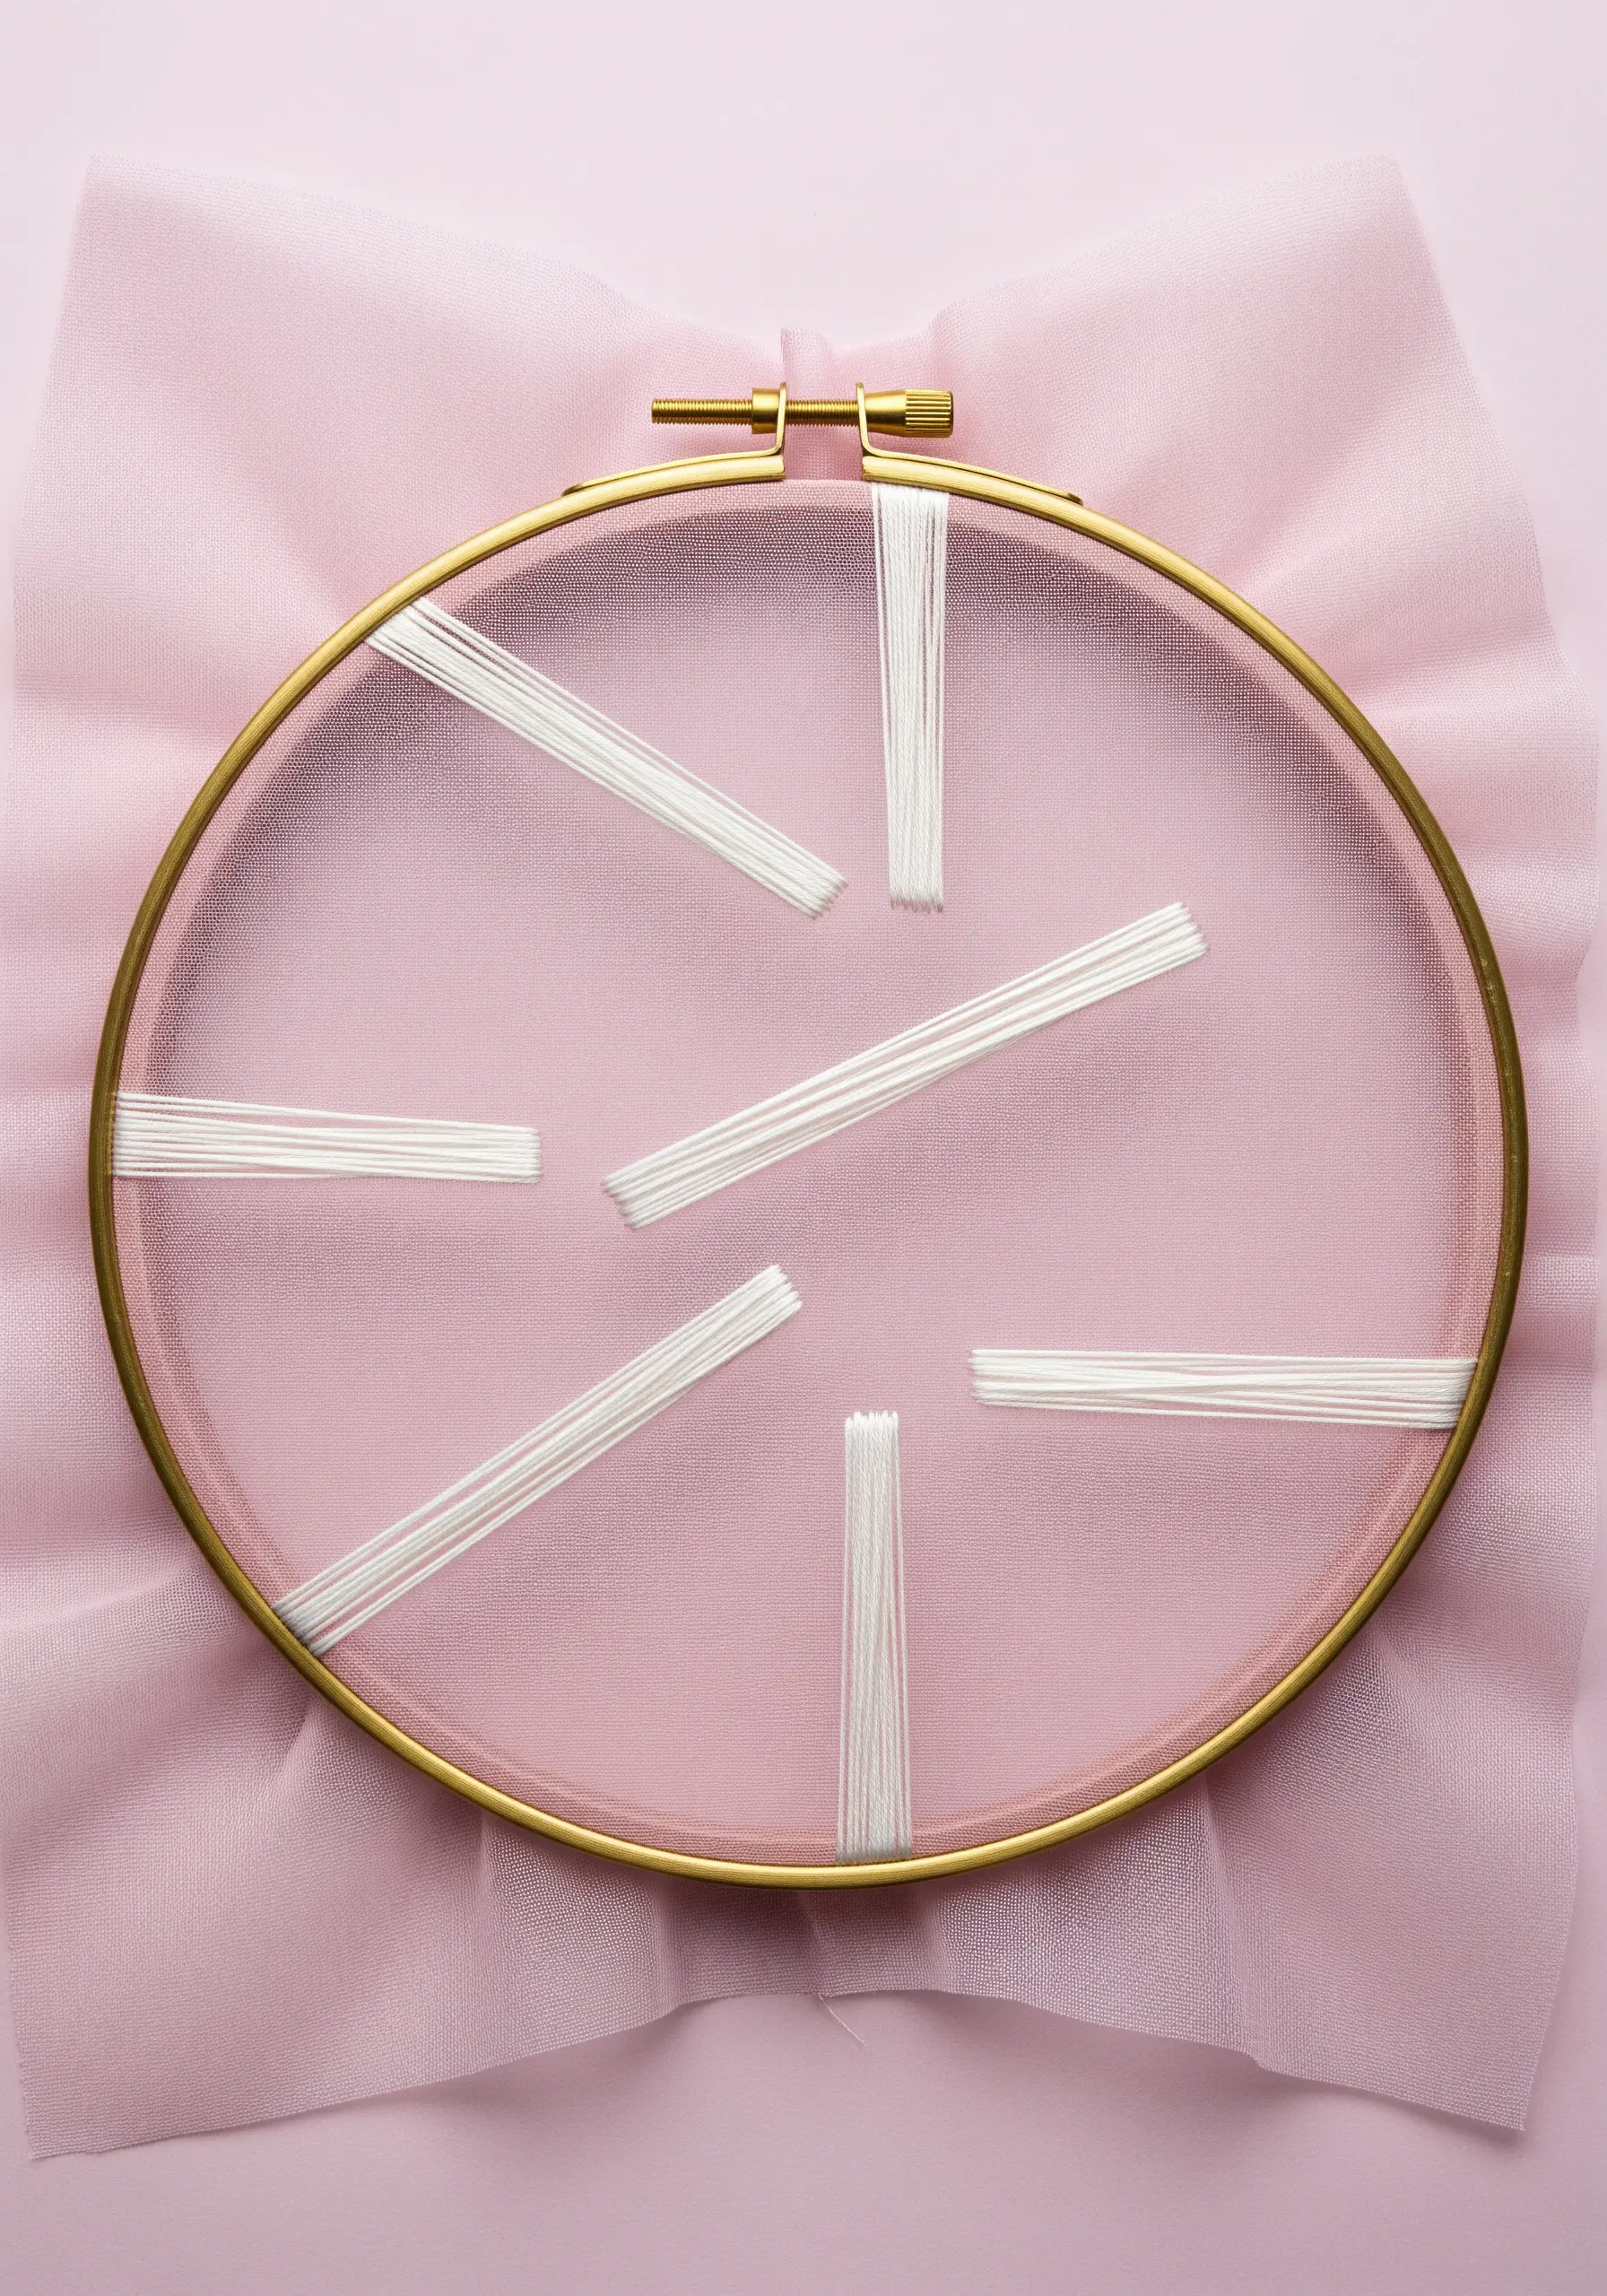
Working on a transparent fabric like organza or tulle allows you to create designs that appear suspended in mid-air.
To ensure your stitches don’t pull or tear the delicate fabric, always use a water-soluble stabilizer on top while you stitch.
Keep your stitches simple and graphic—like these bars of satin stitch—as the transparency of the background is the main feature.
The negative space isn’t just the area around your stitches; it’s the entire see-through plane, which adds a layer of depth to your work.
10. Command a Space with One Bold Line
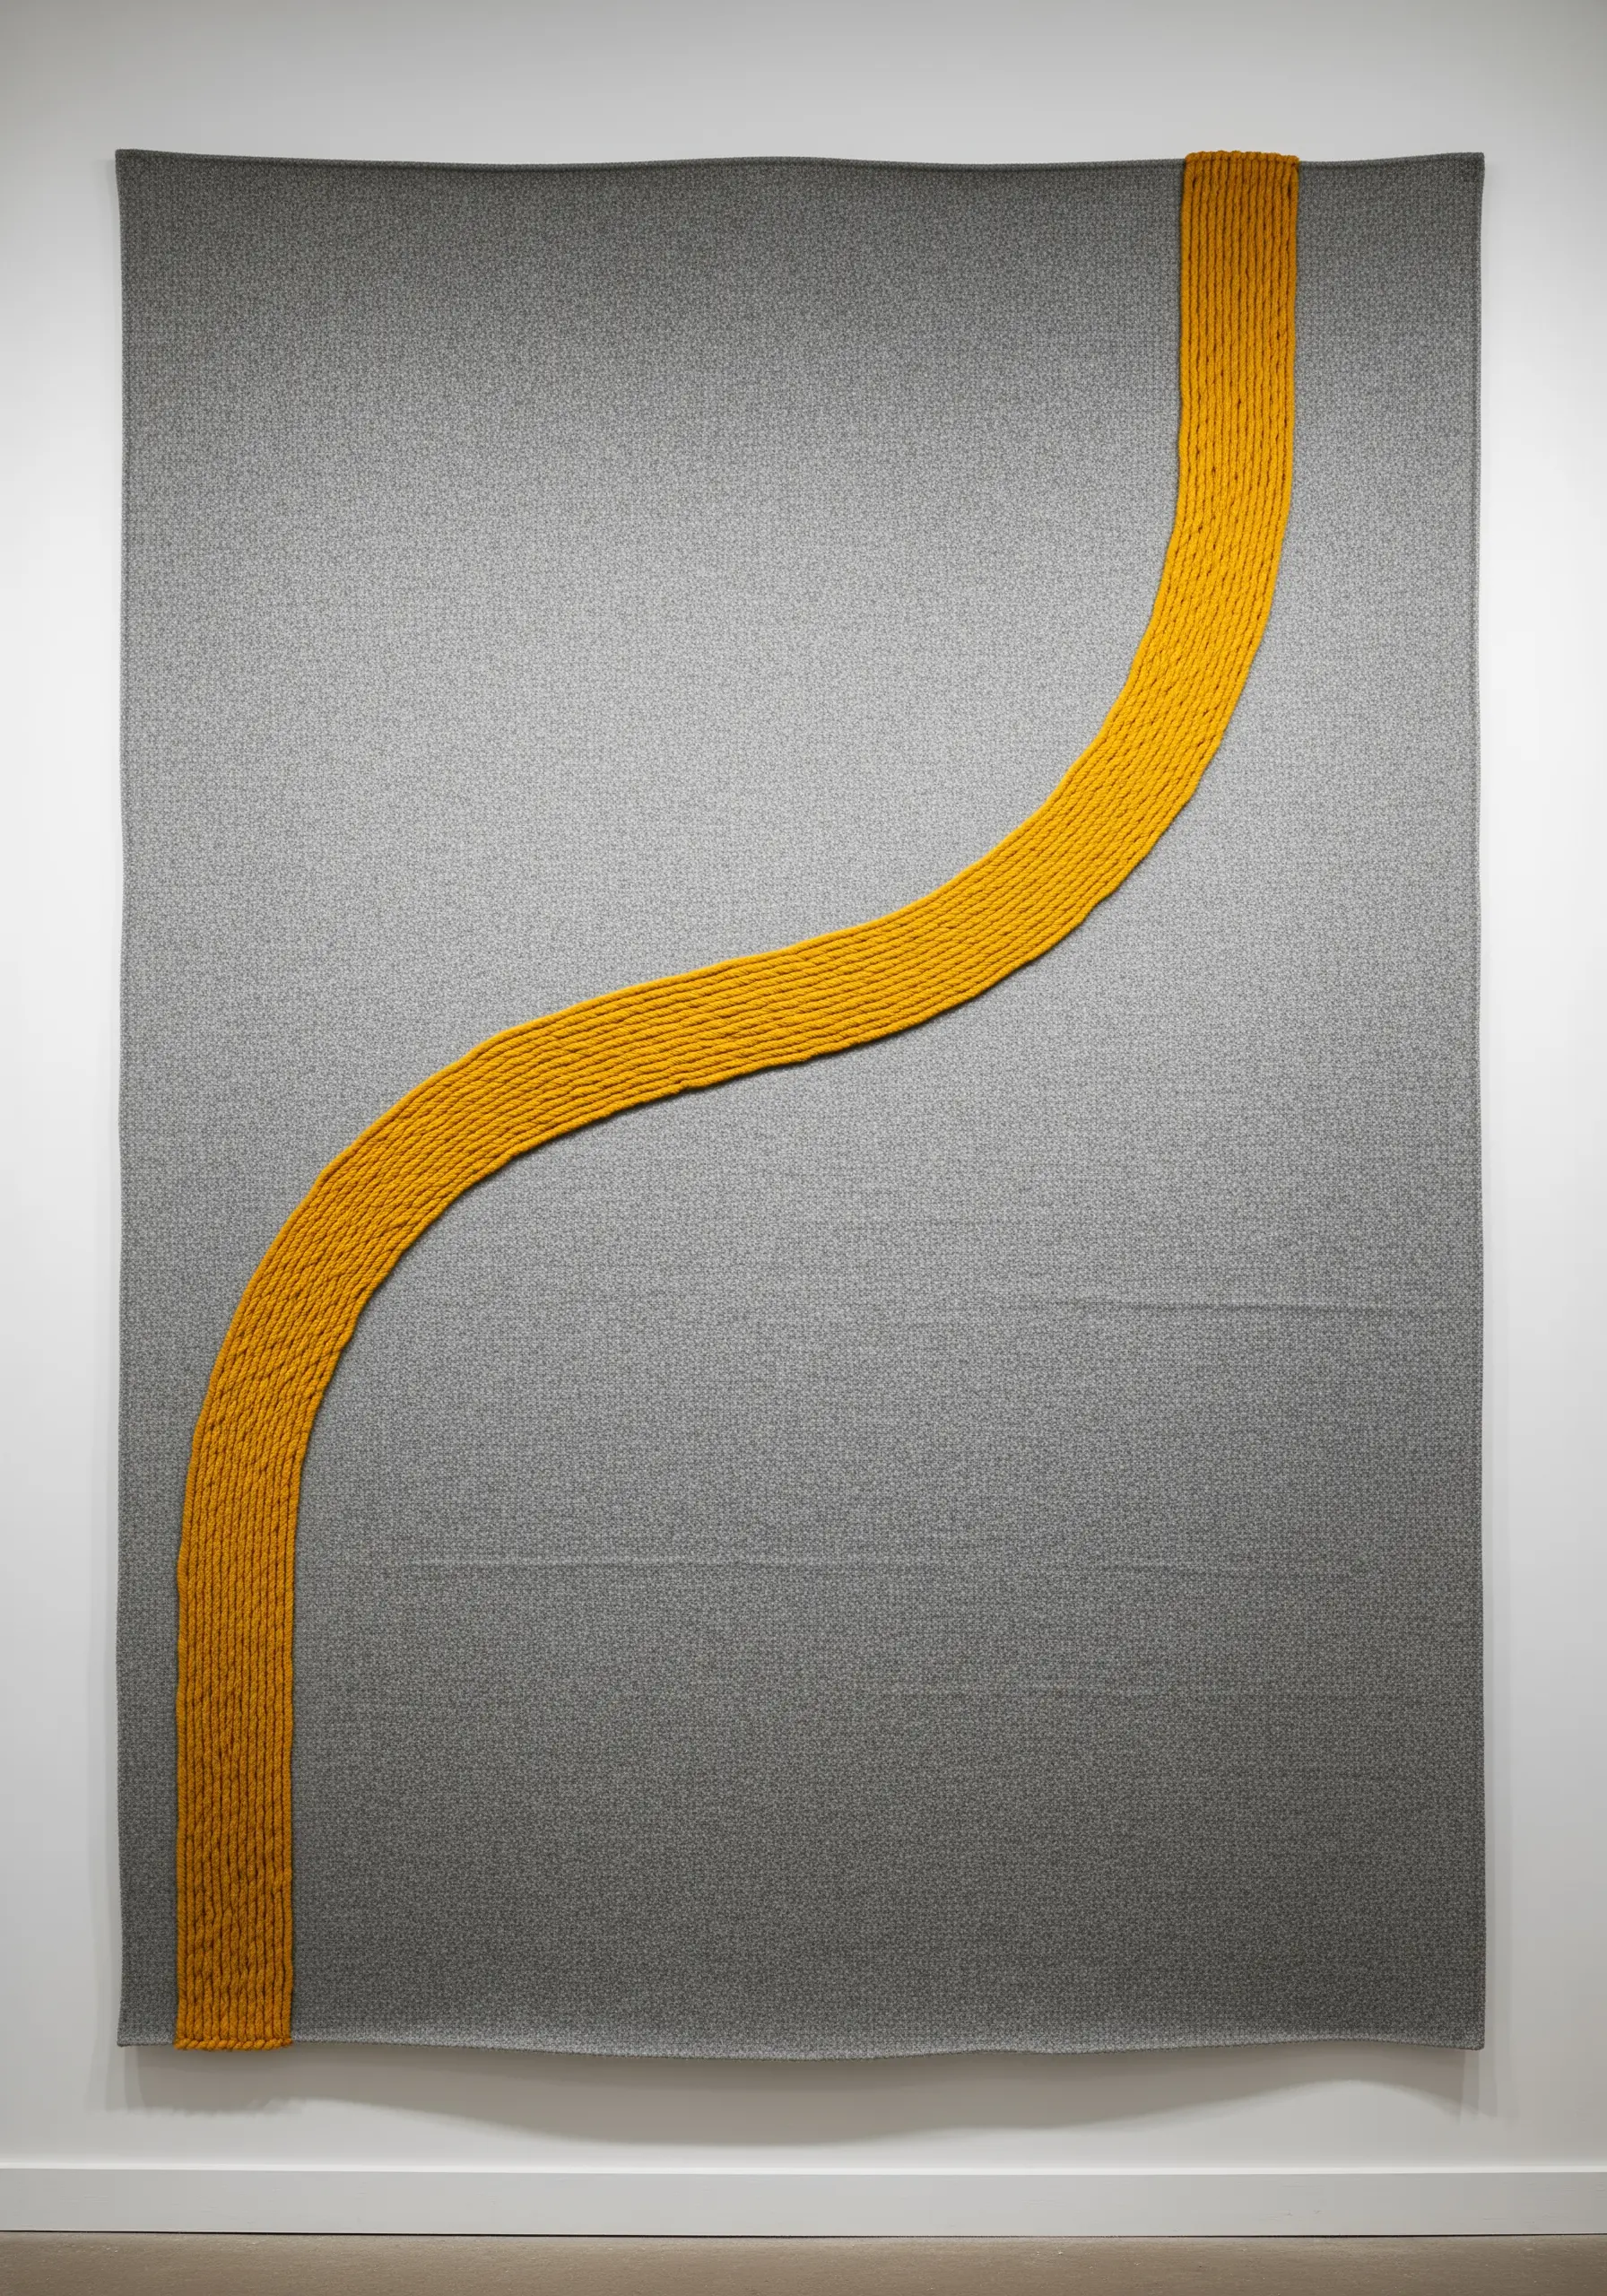
On a large-scale piece, a single, decisive gesture can have more impact than an intricate pattern.
To create this raised, highly textural line, use a thick yarn and either couch it down or use a padded satin stitch over a cord base.
The slight waviness of the line gives it an organic, dynamic quality that contrasts beautifully with the flat, woven background.
This is a powerful way to introduce a single pop of color into a neutral room, turning a simple wall into a focal point.
11. Labyrinthine Lines with Variegated Thread
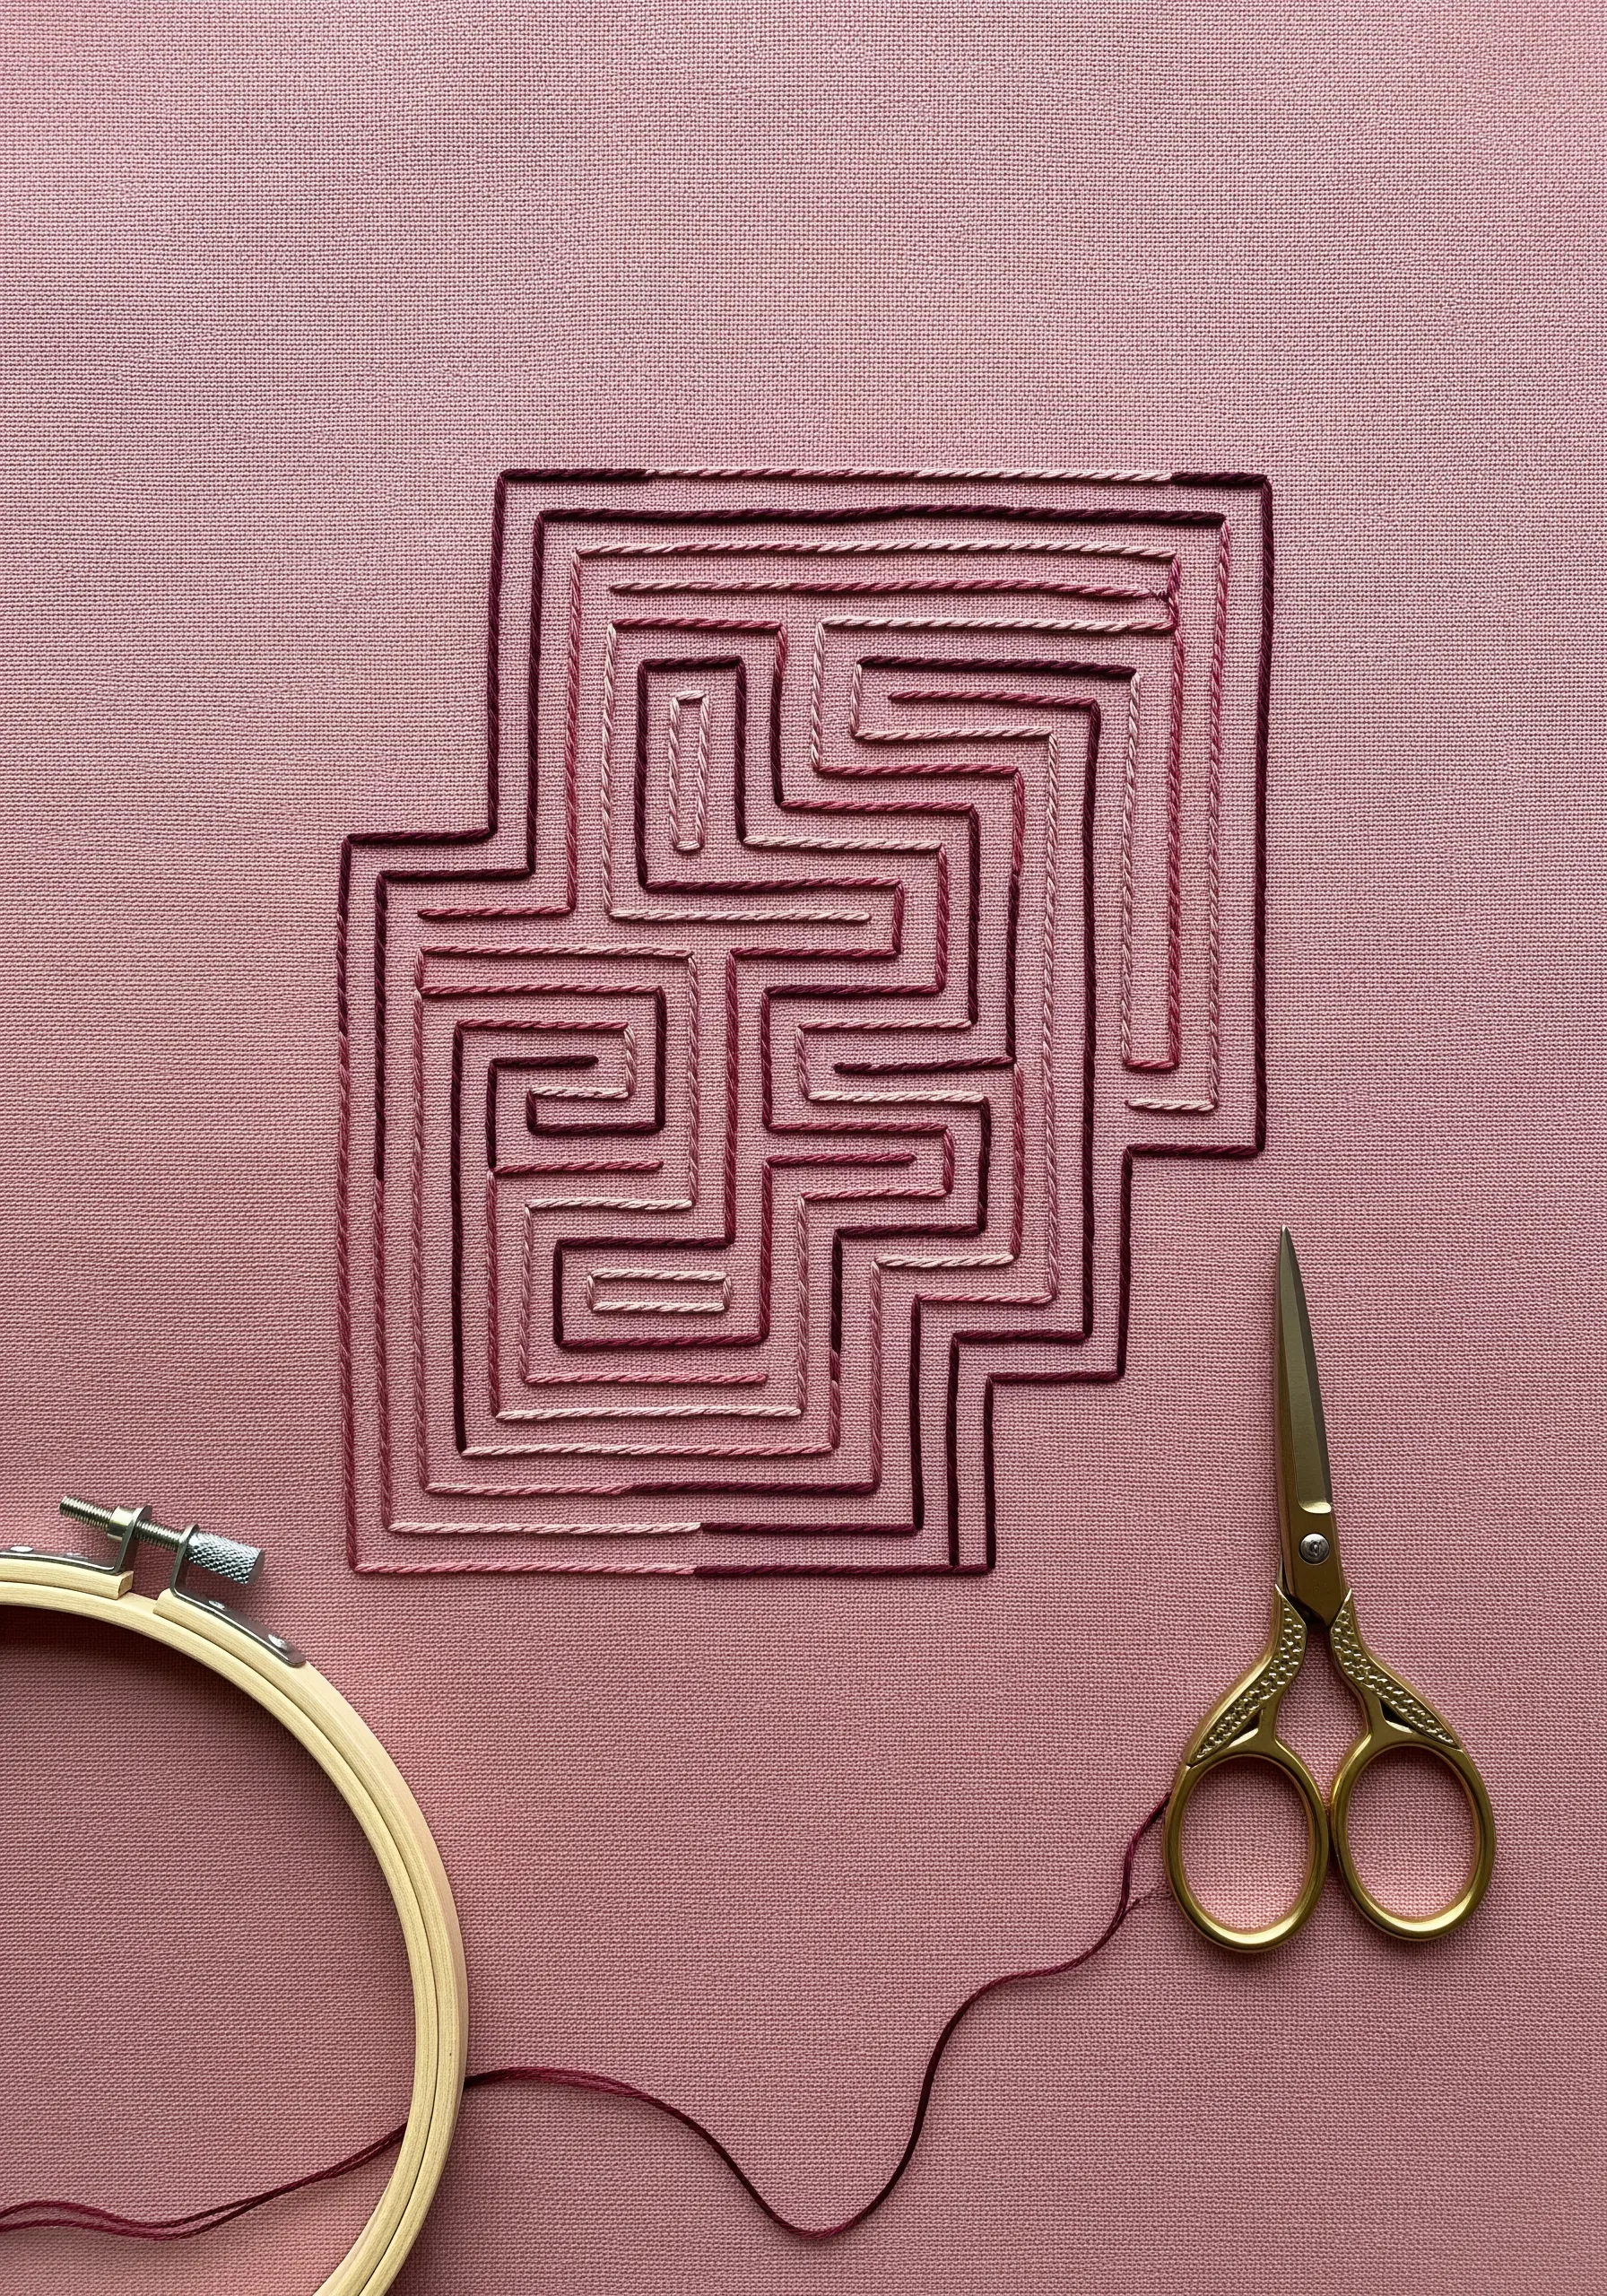
This design looks incredibly complex, but the secret lies in the thread choice, not the stitch.
Use a simple backstitch and a high-quality variegated thread. The thread’s gradual color shifts will create a beautiful, painterly effect automatically.
To ensure the color changes look intentional, try to complete entire sections of the maze before re-threading your needle.
The clean, unbroken lines of the geometric pattern provide the perfect structure to showcase the subtle color transitions.
12. Create Gradients with Stitch Density
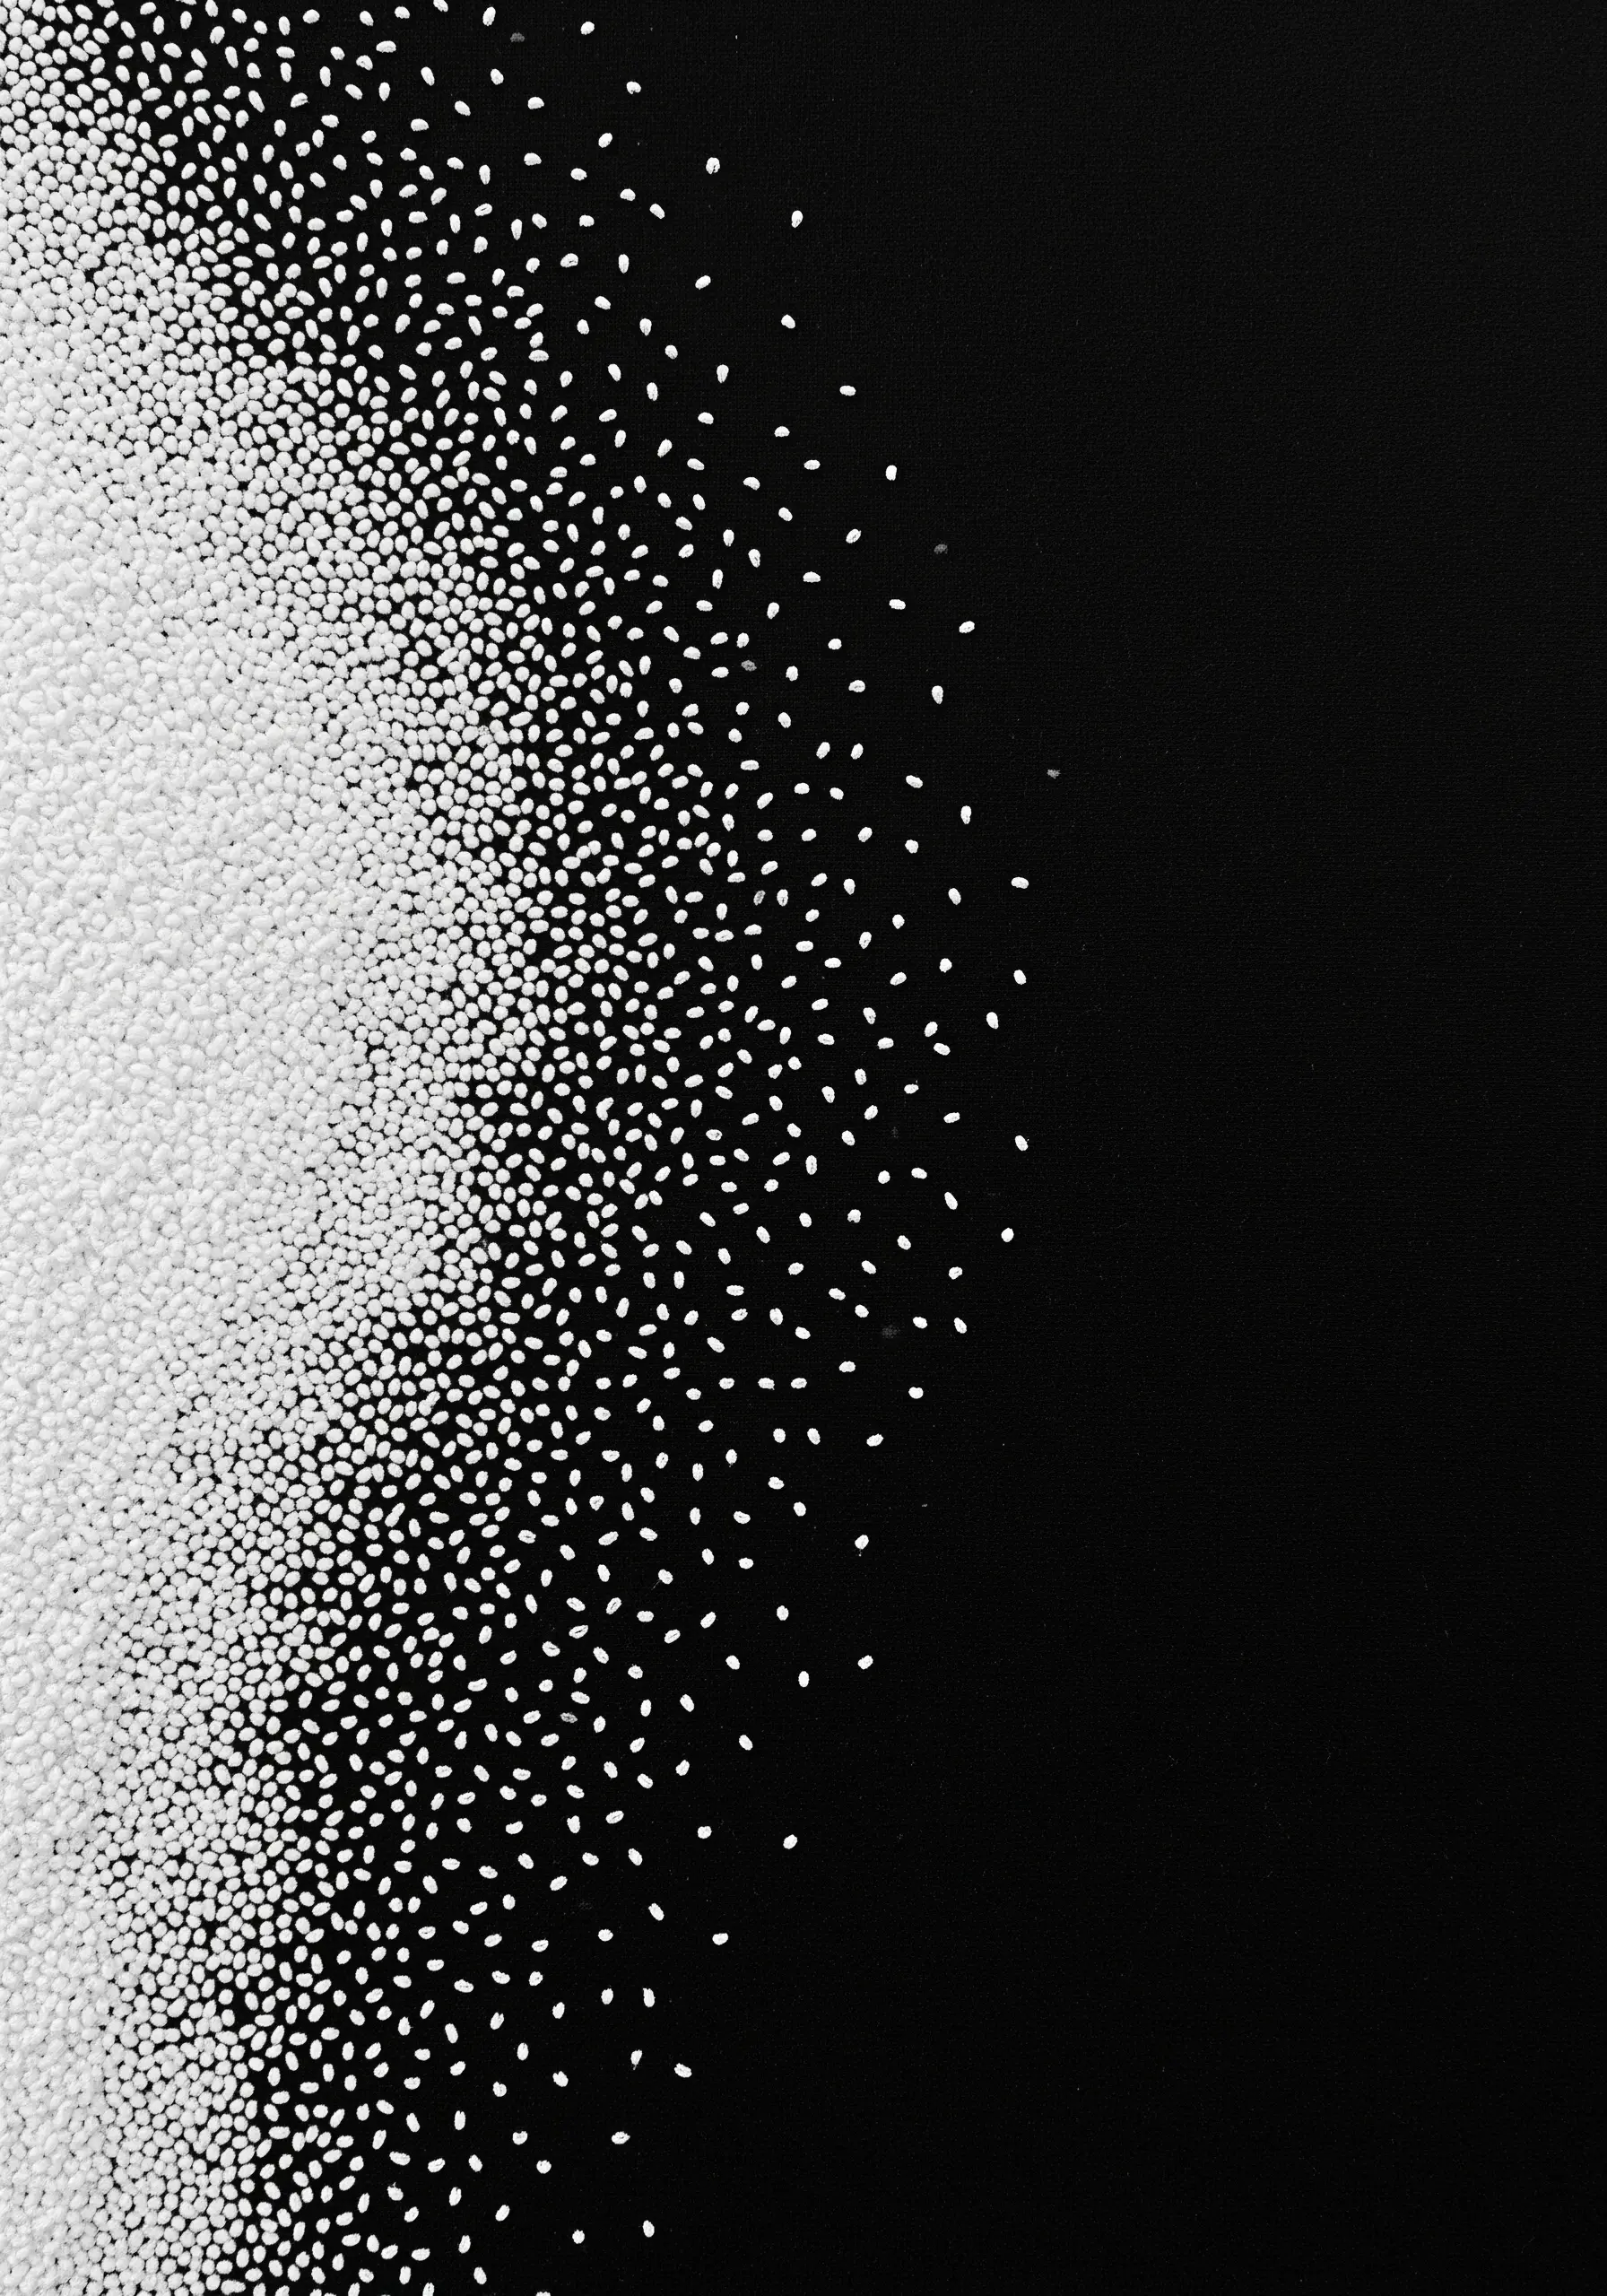
You can create a beautiful fading effect, known as pointillism, by controlling the spacing of your stitches.
This can be done with tiny seed stitches, French knots, or, as seen here, seed beads.
Start with a densely packed area where the stitches or beads touch, then gradually increase the space between them until they fade into the empty fabric.
This technique is stunning on high-contrast backgrounds, where the negative space feels infinite and dramatic.
13. Juxtapose Smooth Stitches and Rough Fabric
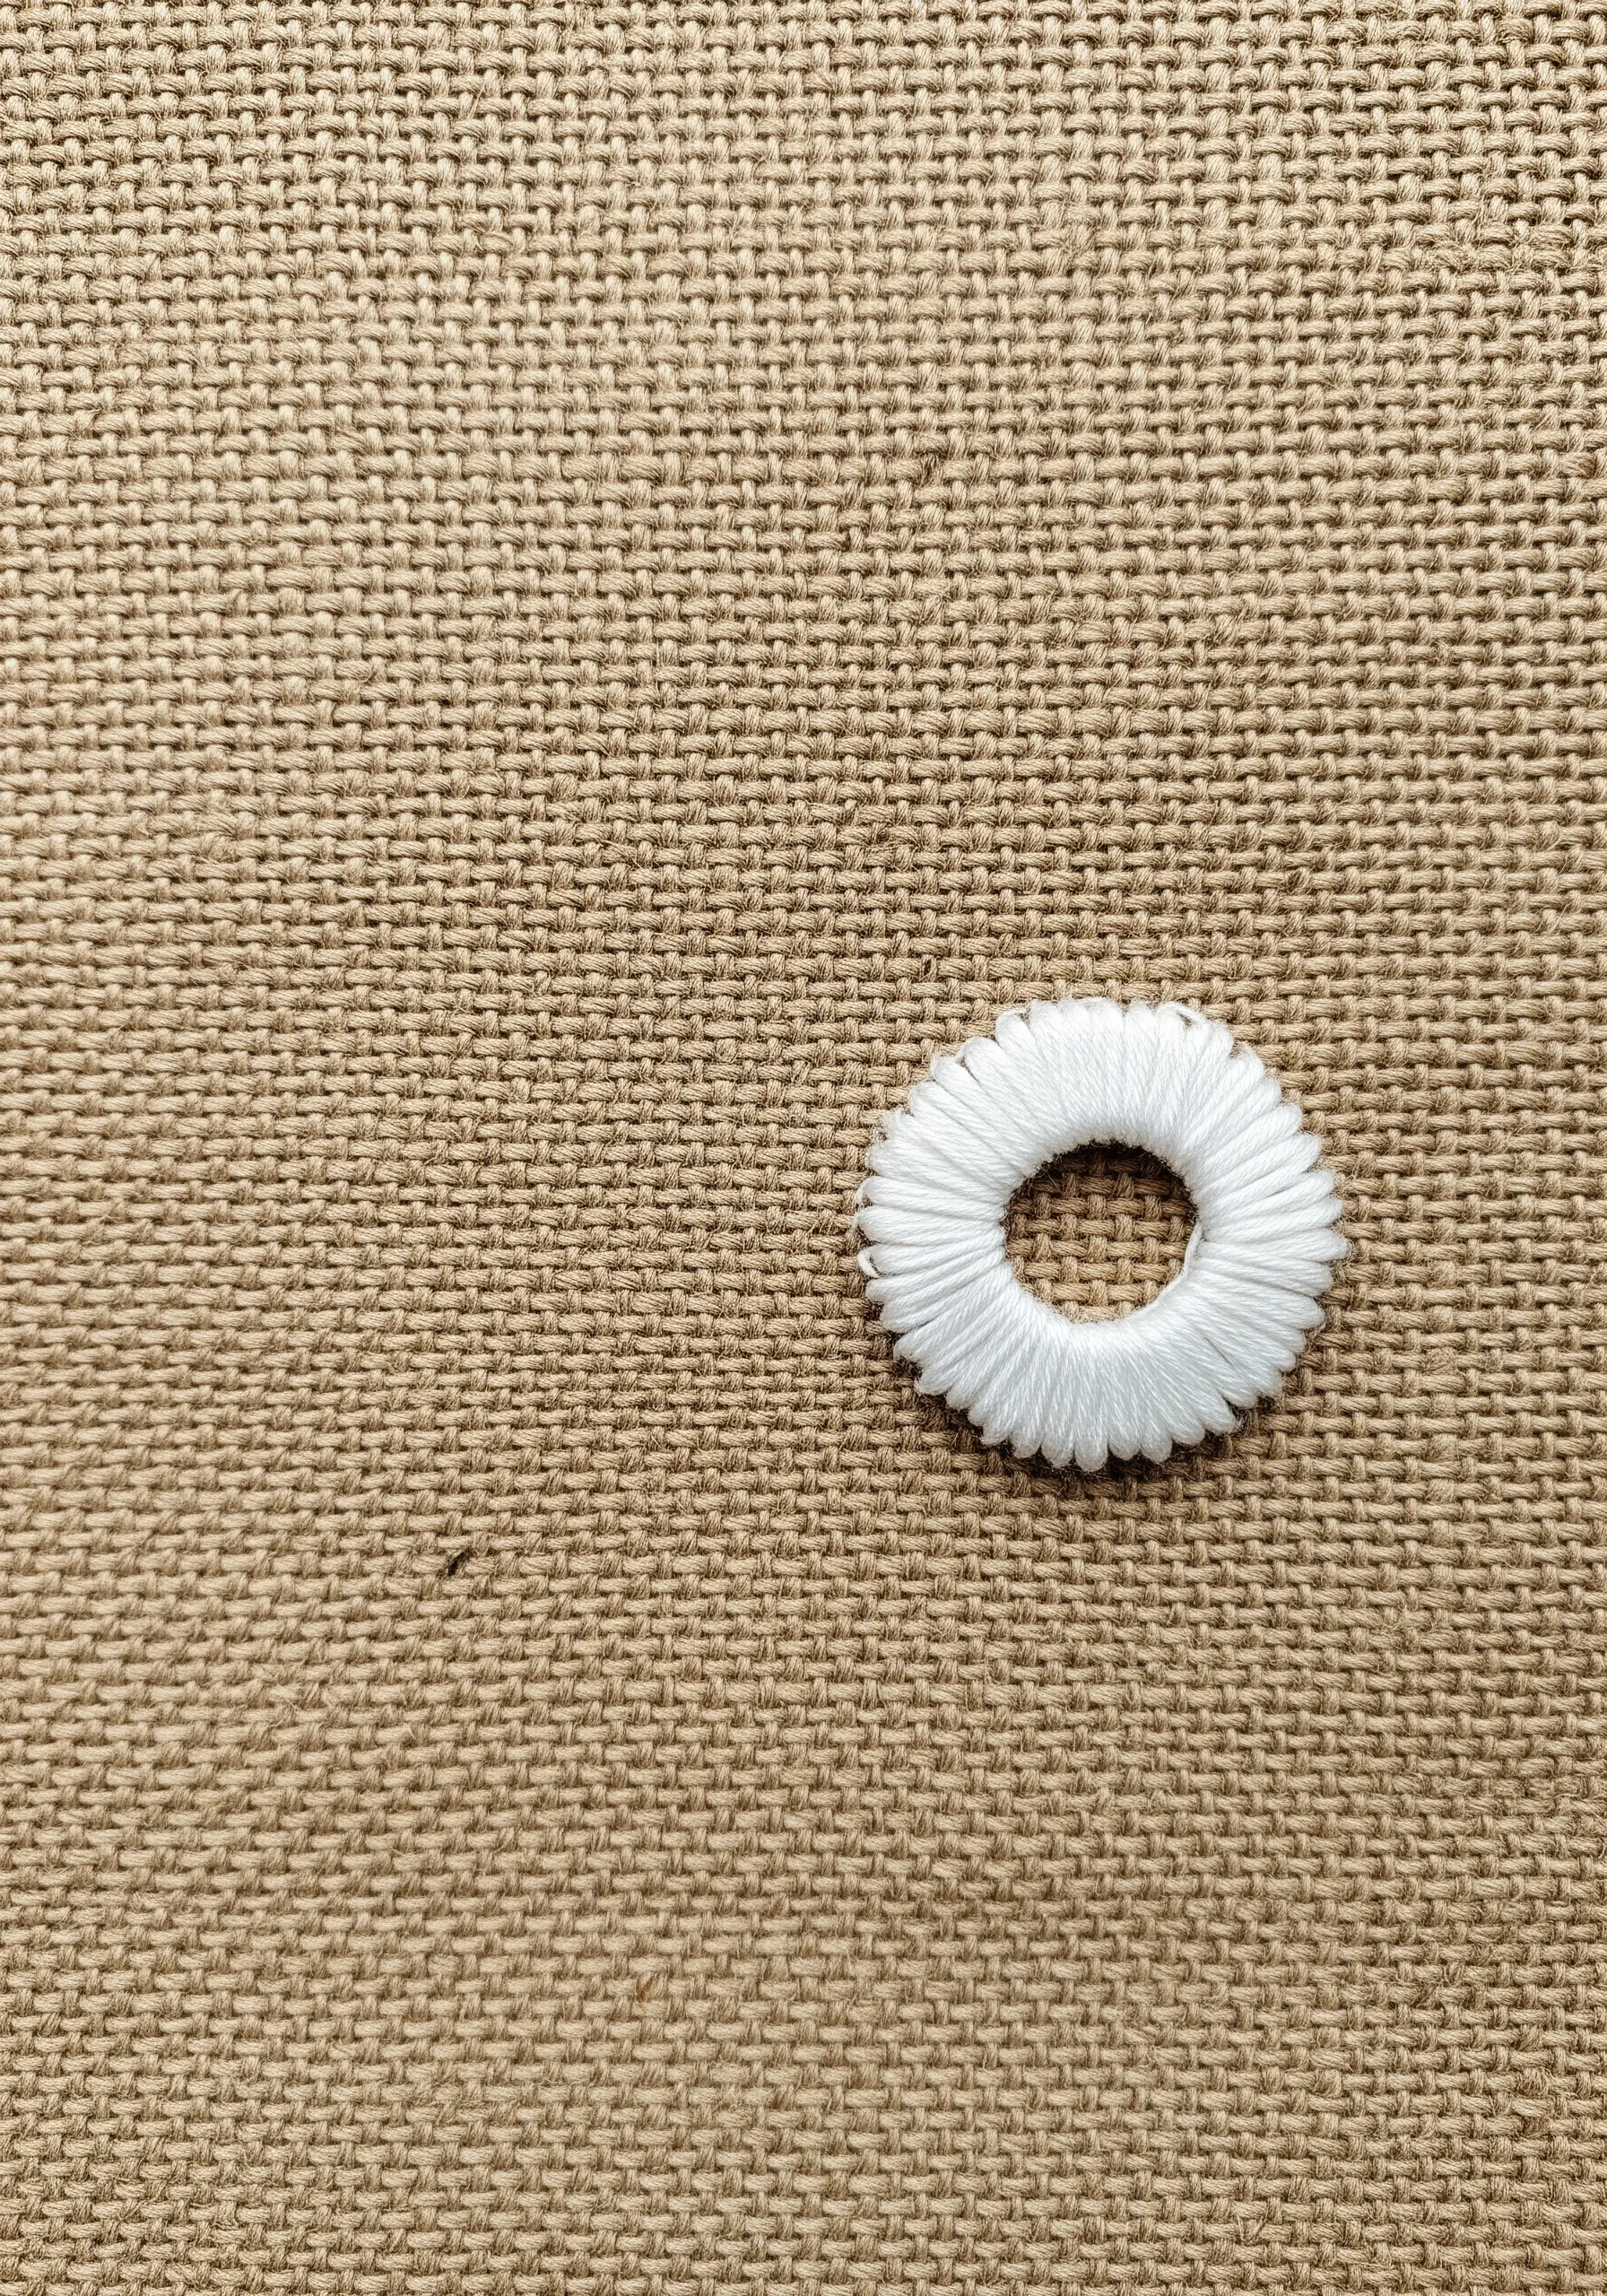
The elegance of this design comes from the powerful contrast in textures.
Choose a rustic, open-weave base fabric like burlap, hessian, or a coarse linen.
Then, select a smooth, lustrous thread—such as silk, rayon, or a satin floss—to create a perfect, luminous satin stitch.
The sleekness of the embroidery is amplified by the roughness of the background, making a simple circle feel like a precious object. This is a great way to explore nature’s textures in an abstract way.
14. The Power of a Minimalist Triptych
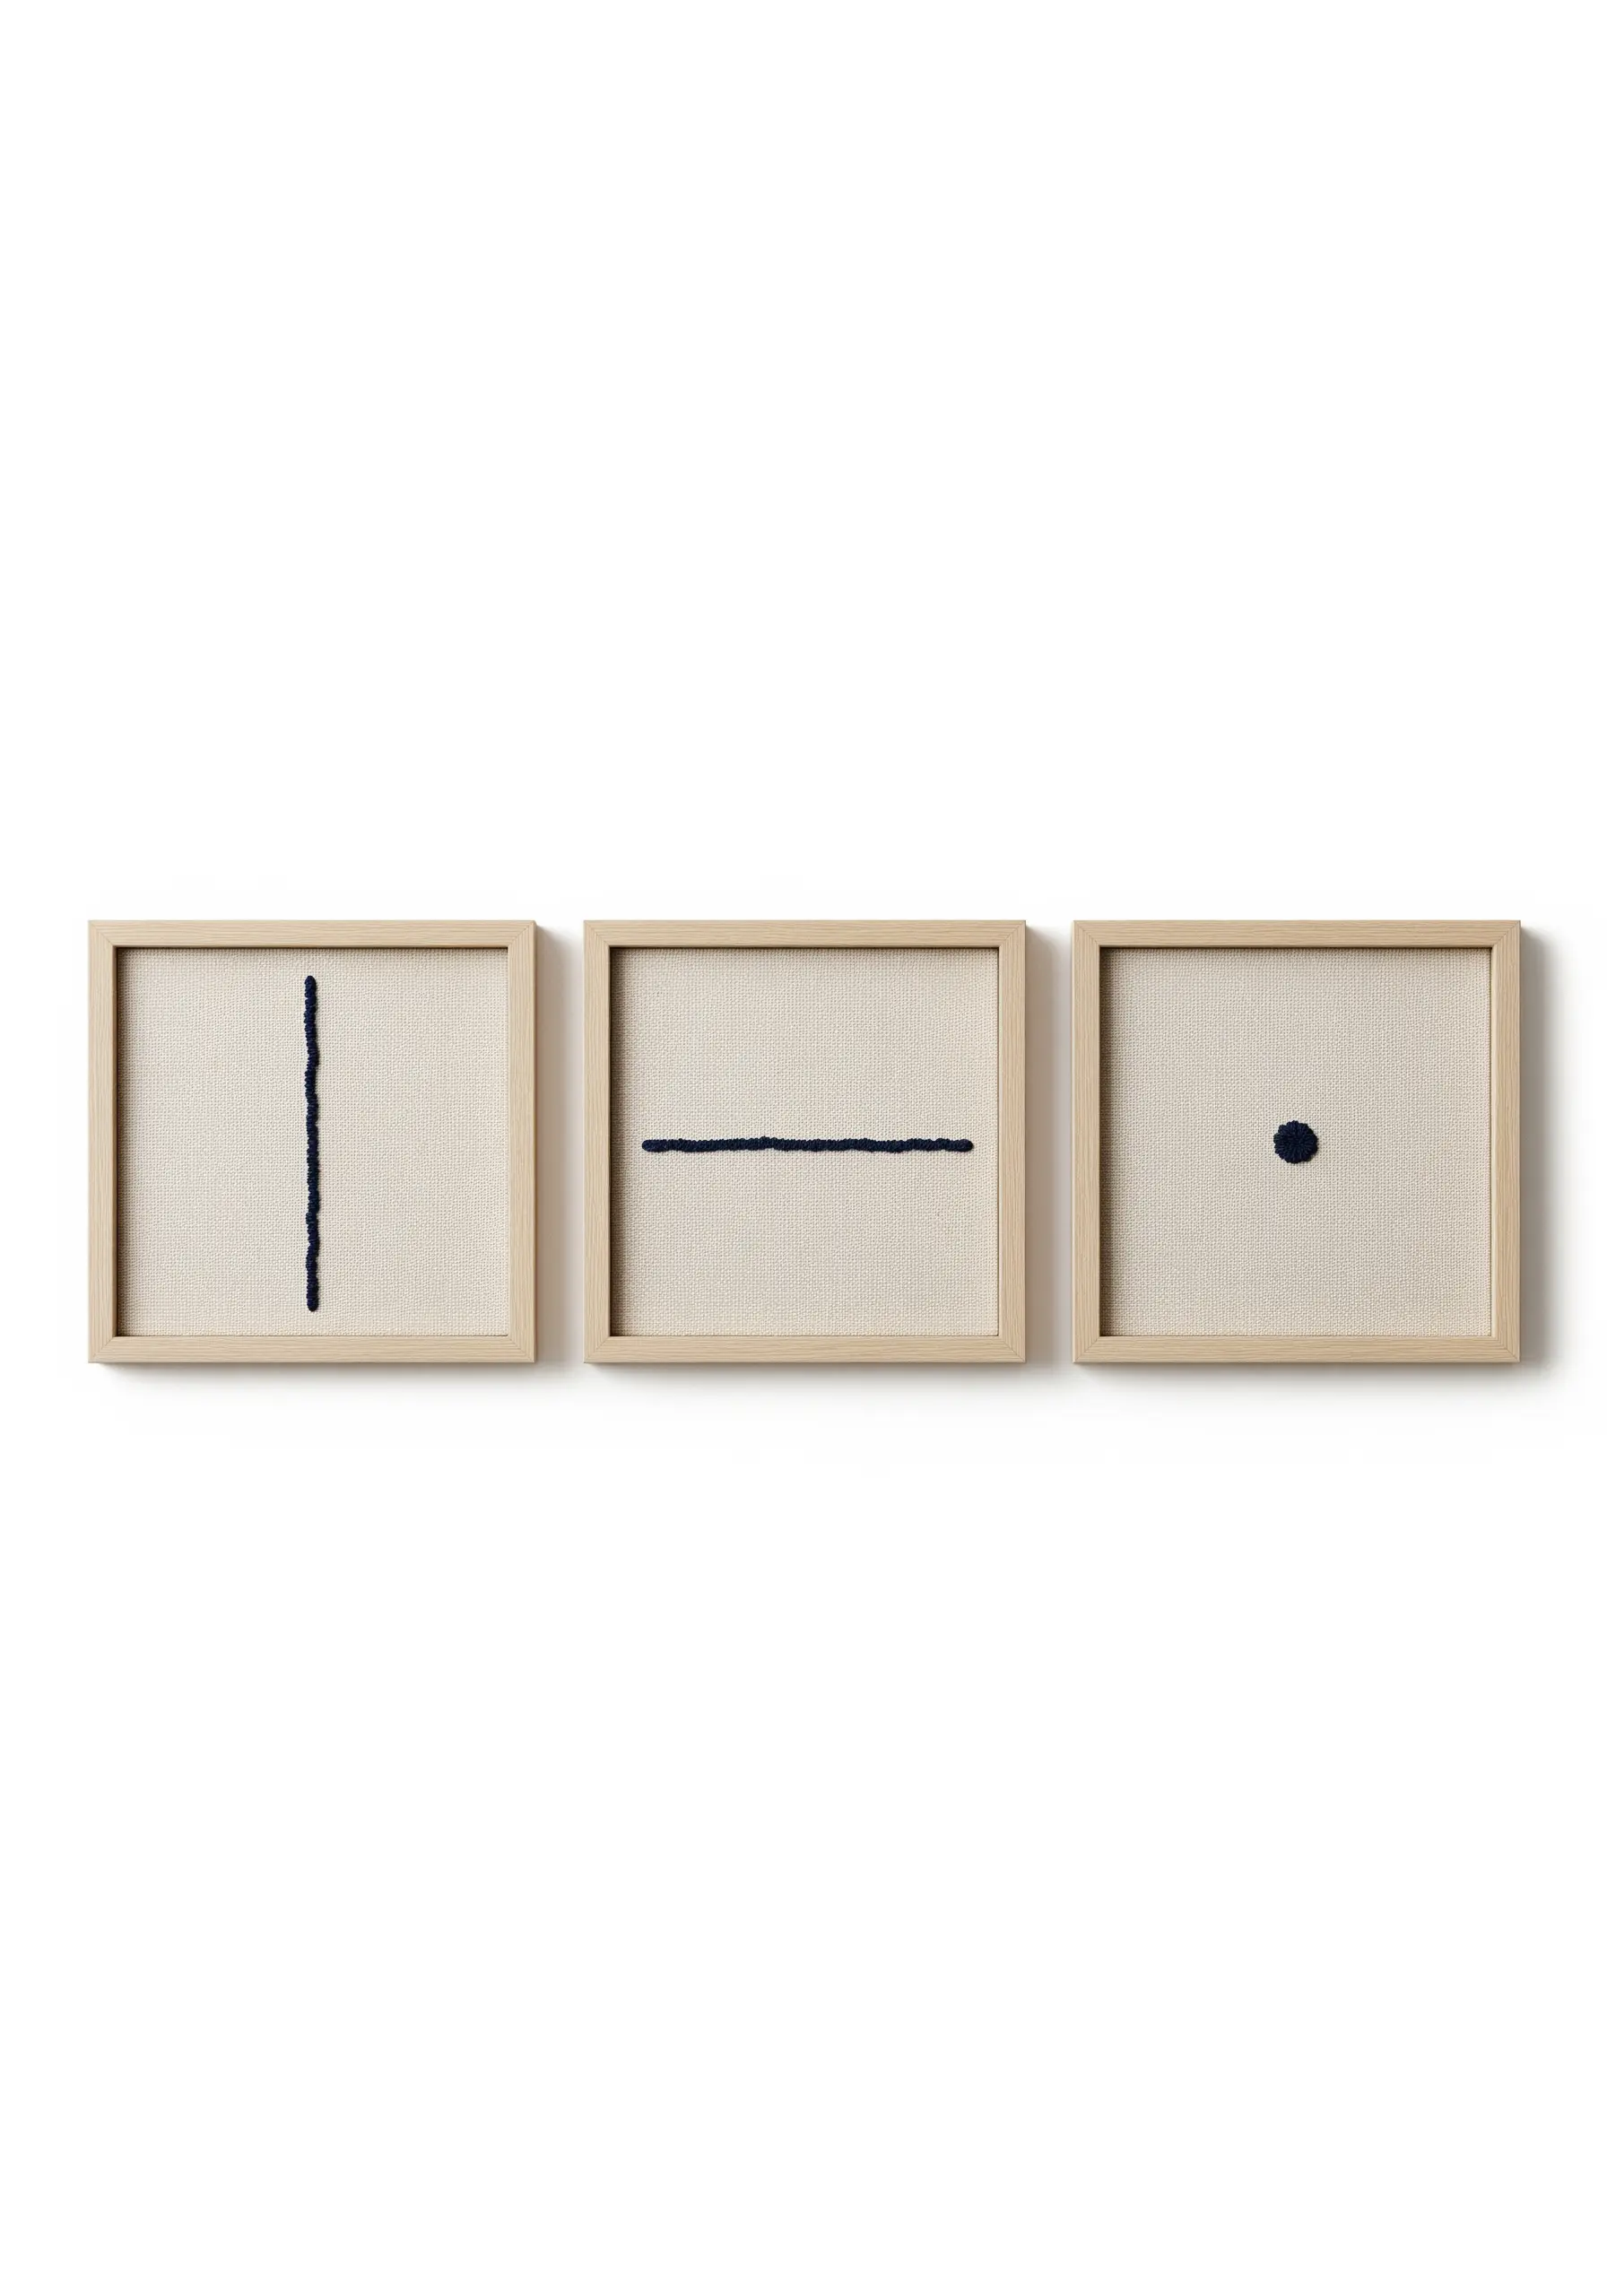
Amplify the impact of a minimal design by breaking it into a series of frames.
By isolating each element—a line, a dash, a dot—you give it significance and encourage the viewer to appreciate its simple form.
Use the exact same fabric, thread, and stitch for all three pieces to create a cohesive, intentional set.
The negative space in each frame is just as crucial as the embroidery, creating a rhythm and balance across the entire triptych.
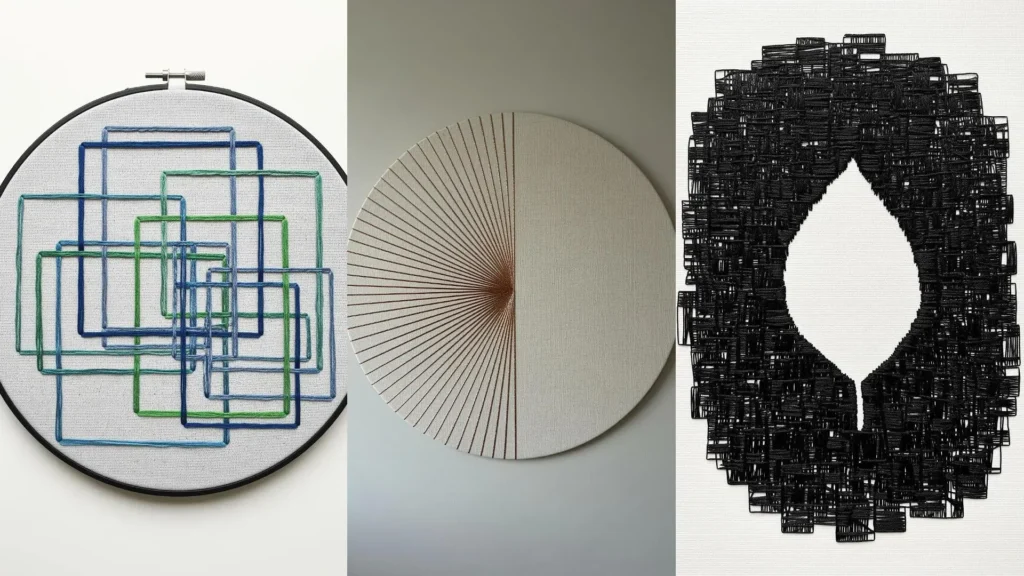
15. Create Layered Transparency with Outlines
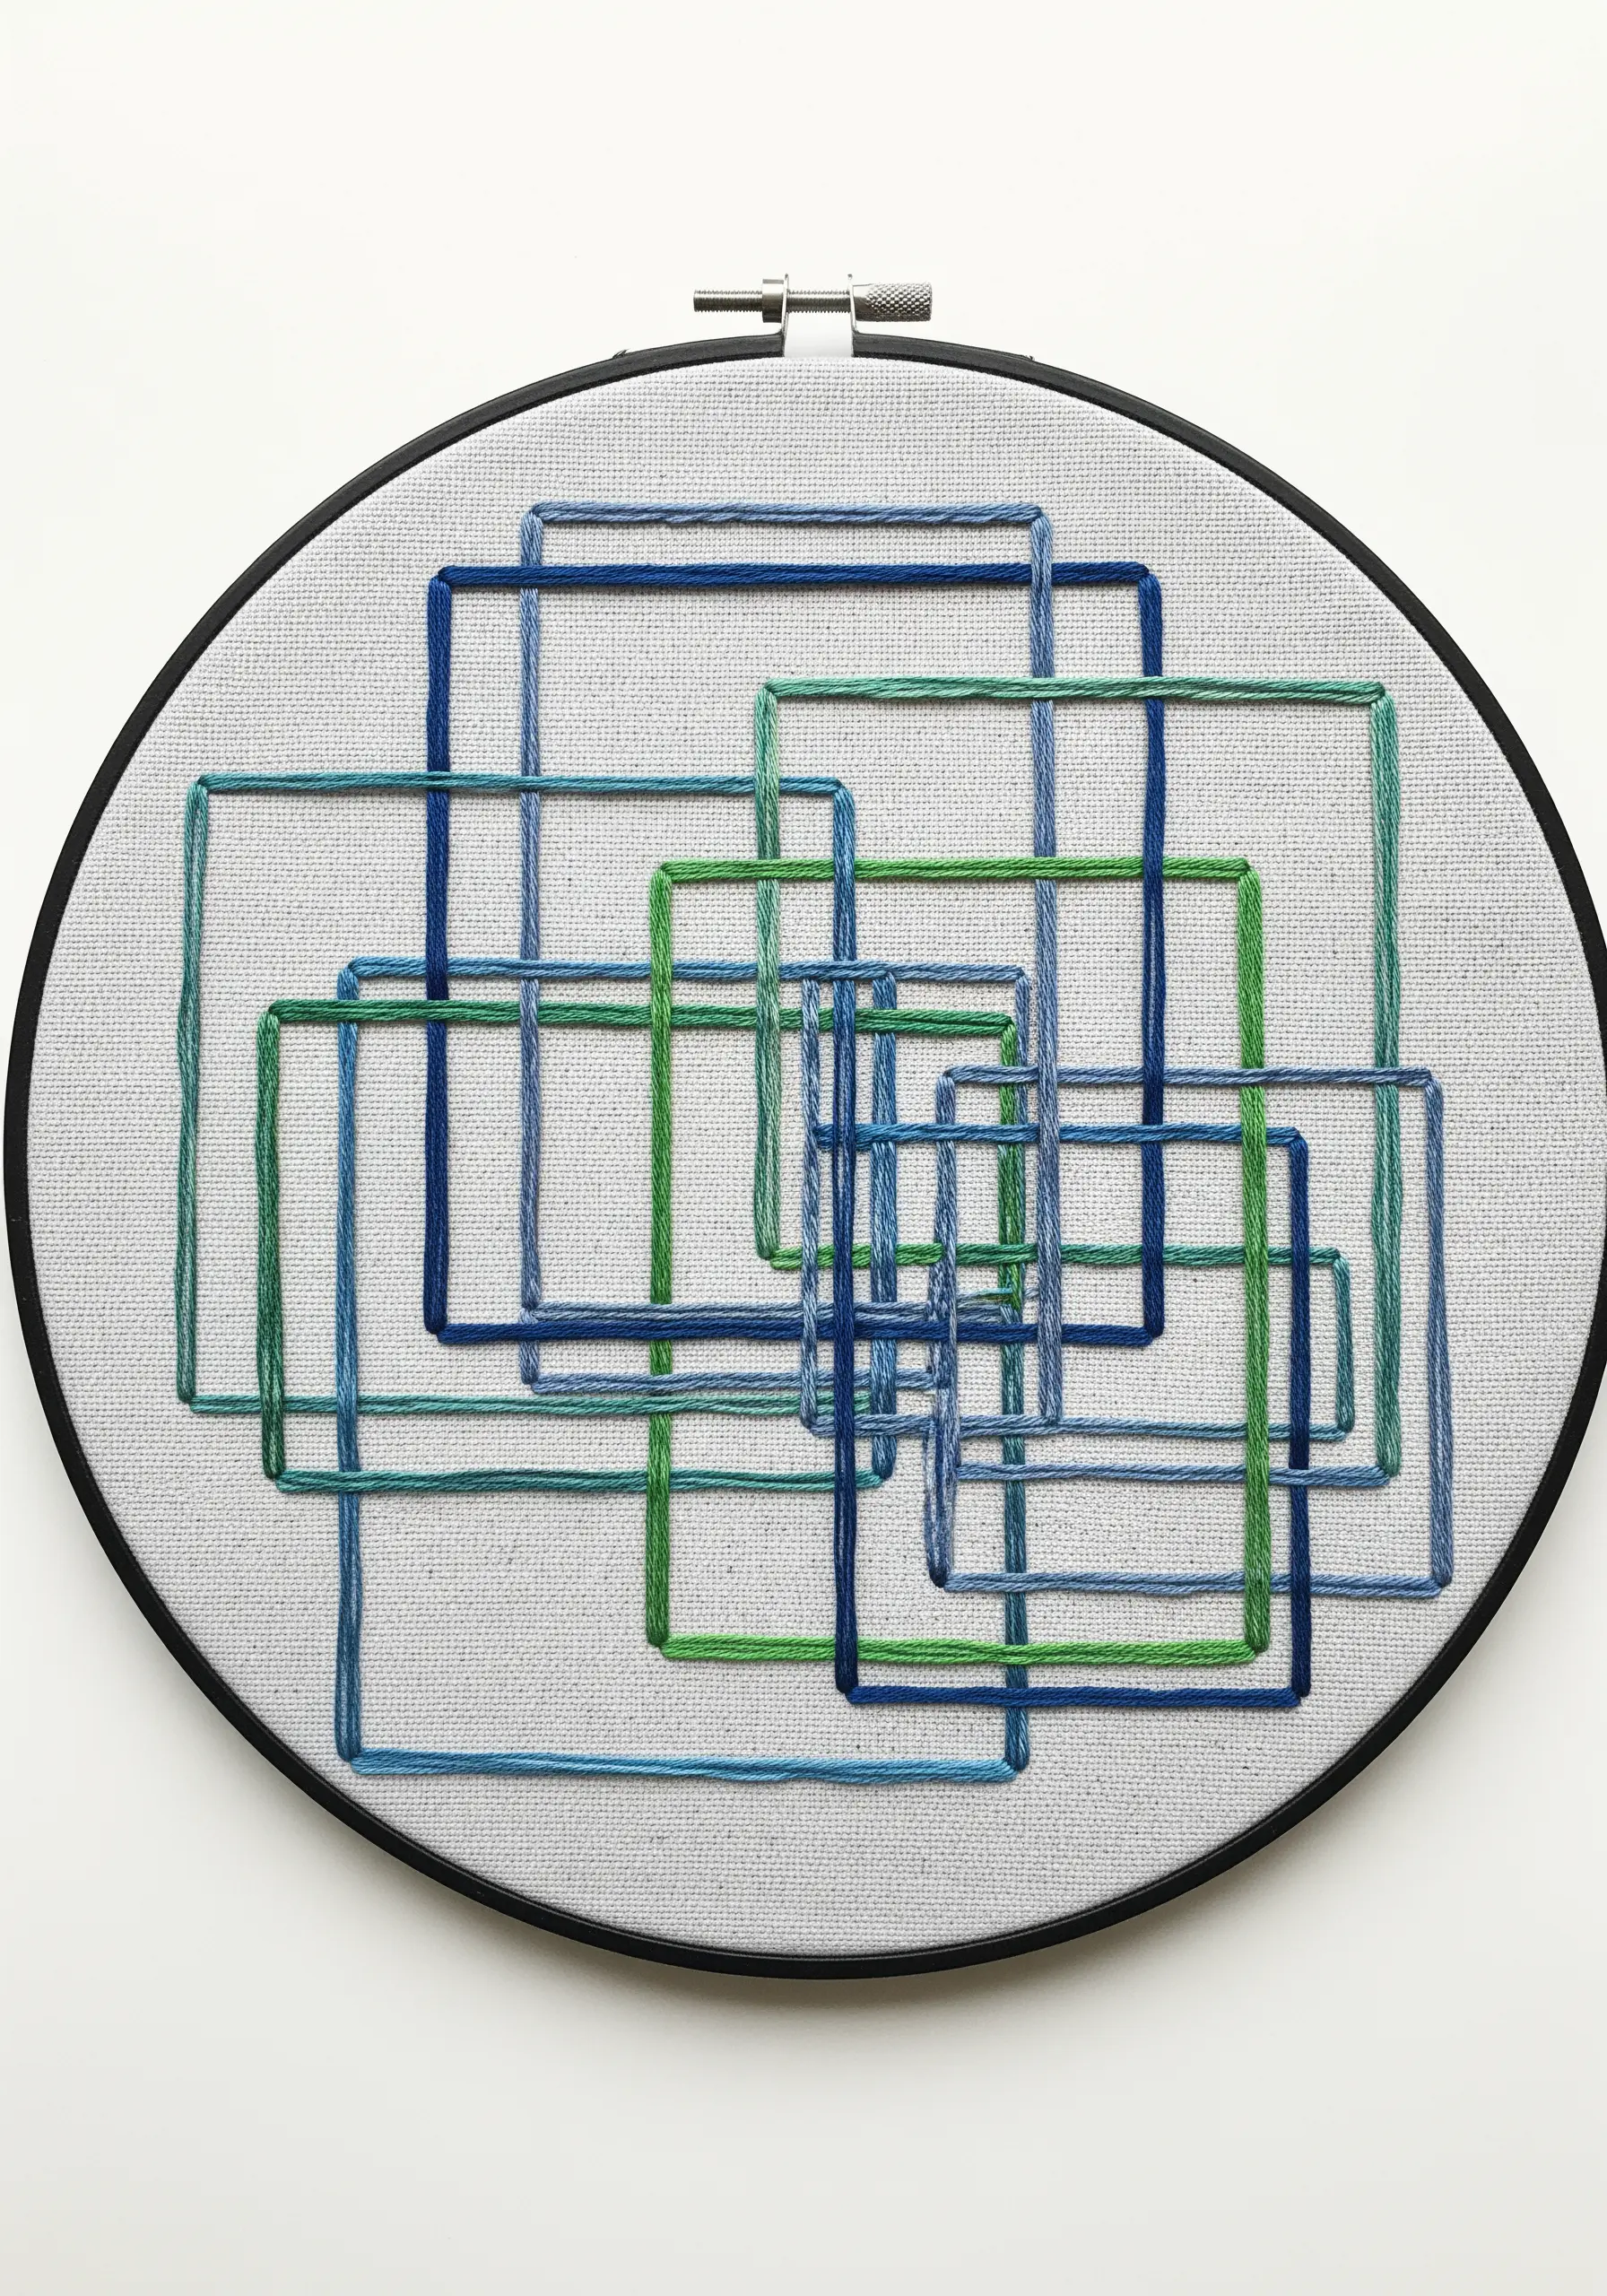
You can create the illusion of depth and transparency without any shading—just by using overlapping outlines.
Stick to a simple backstitch or split stitch for clean, crisp lines.
Choose an analogous color palette (colors that are next to each other on the color wheel, like blues and greens) to enhance the sense that you’re looking through colored panes of glass.
The negative space inside the rectangles becomes part of the layered composition, changing color where the shapes intersect.
16. Sculptural Appliqué for High-Impact Texture
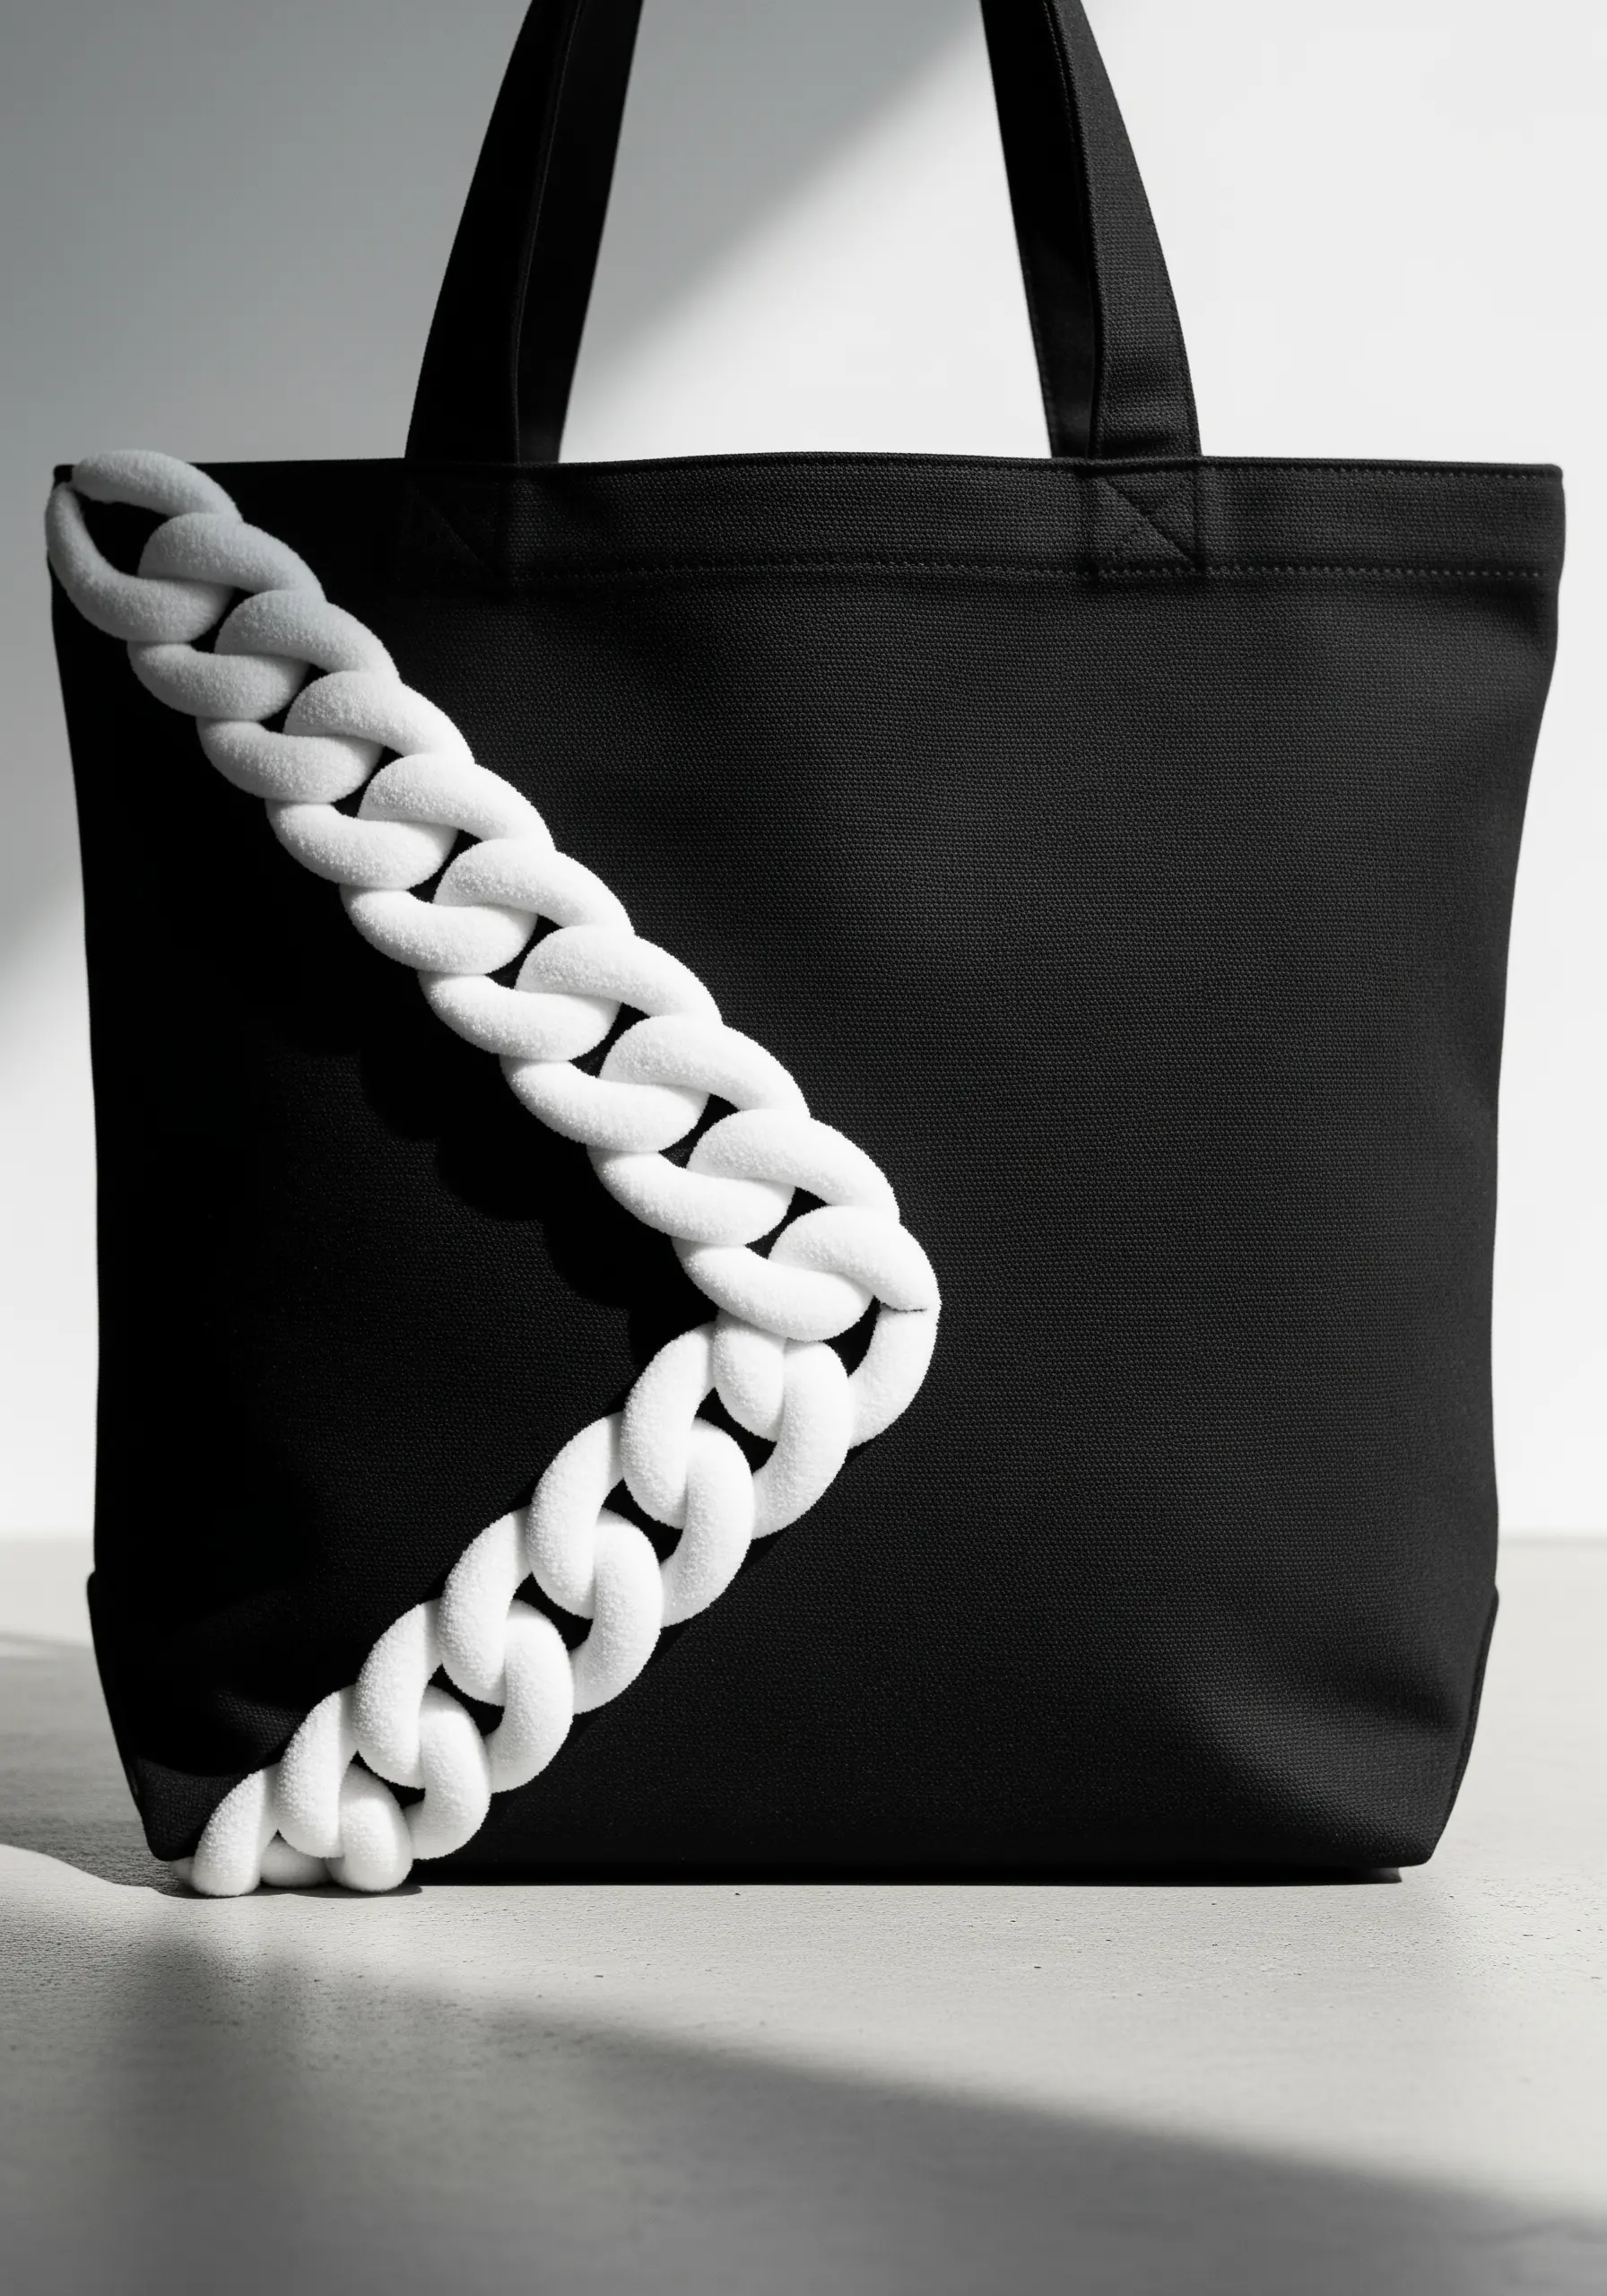
Take your embellishment into the third dimension by adding a soft, sculptural element.
This oversized chain is made from padded fabric tubes, linked together and then securely hand-stitched onto the bag.
The extreme contrast between the matte black canvas and the plush, white chain creates a bold, fashion-forward statement.
This technique is perfect for transforming plain tote bags or jacket backs into wearable art.
17. Balance Dense Fills with Delicate Lines
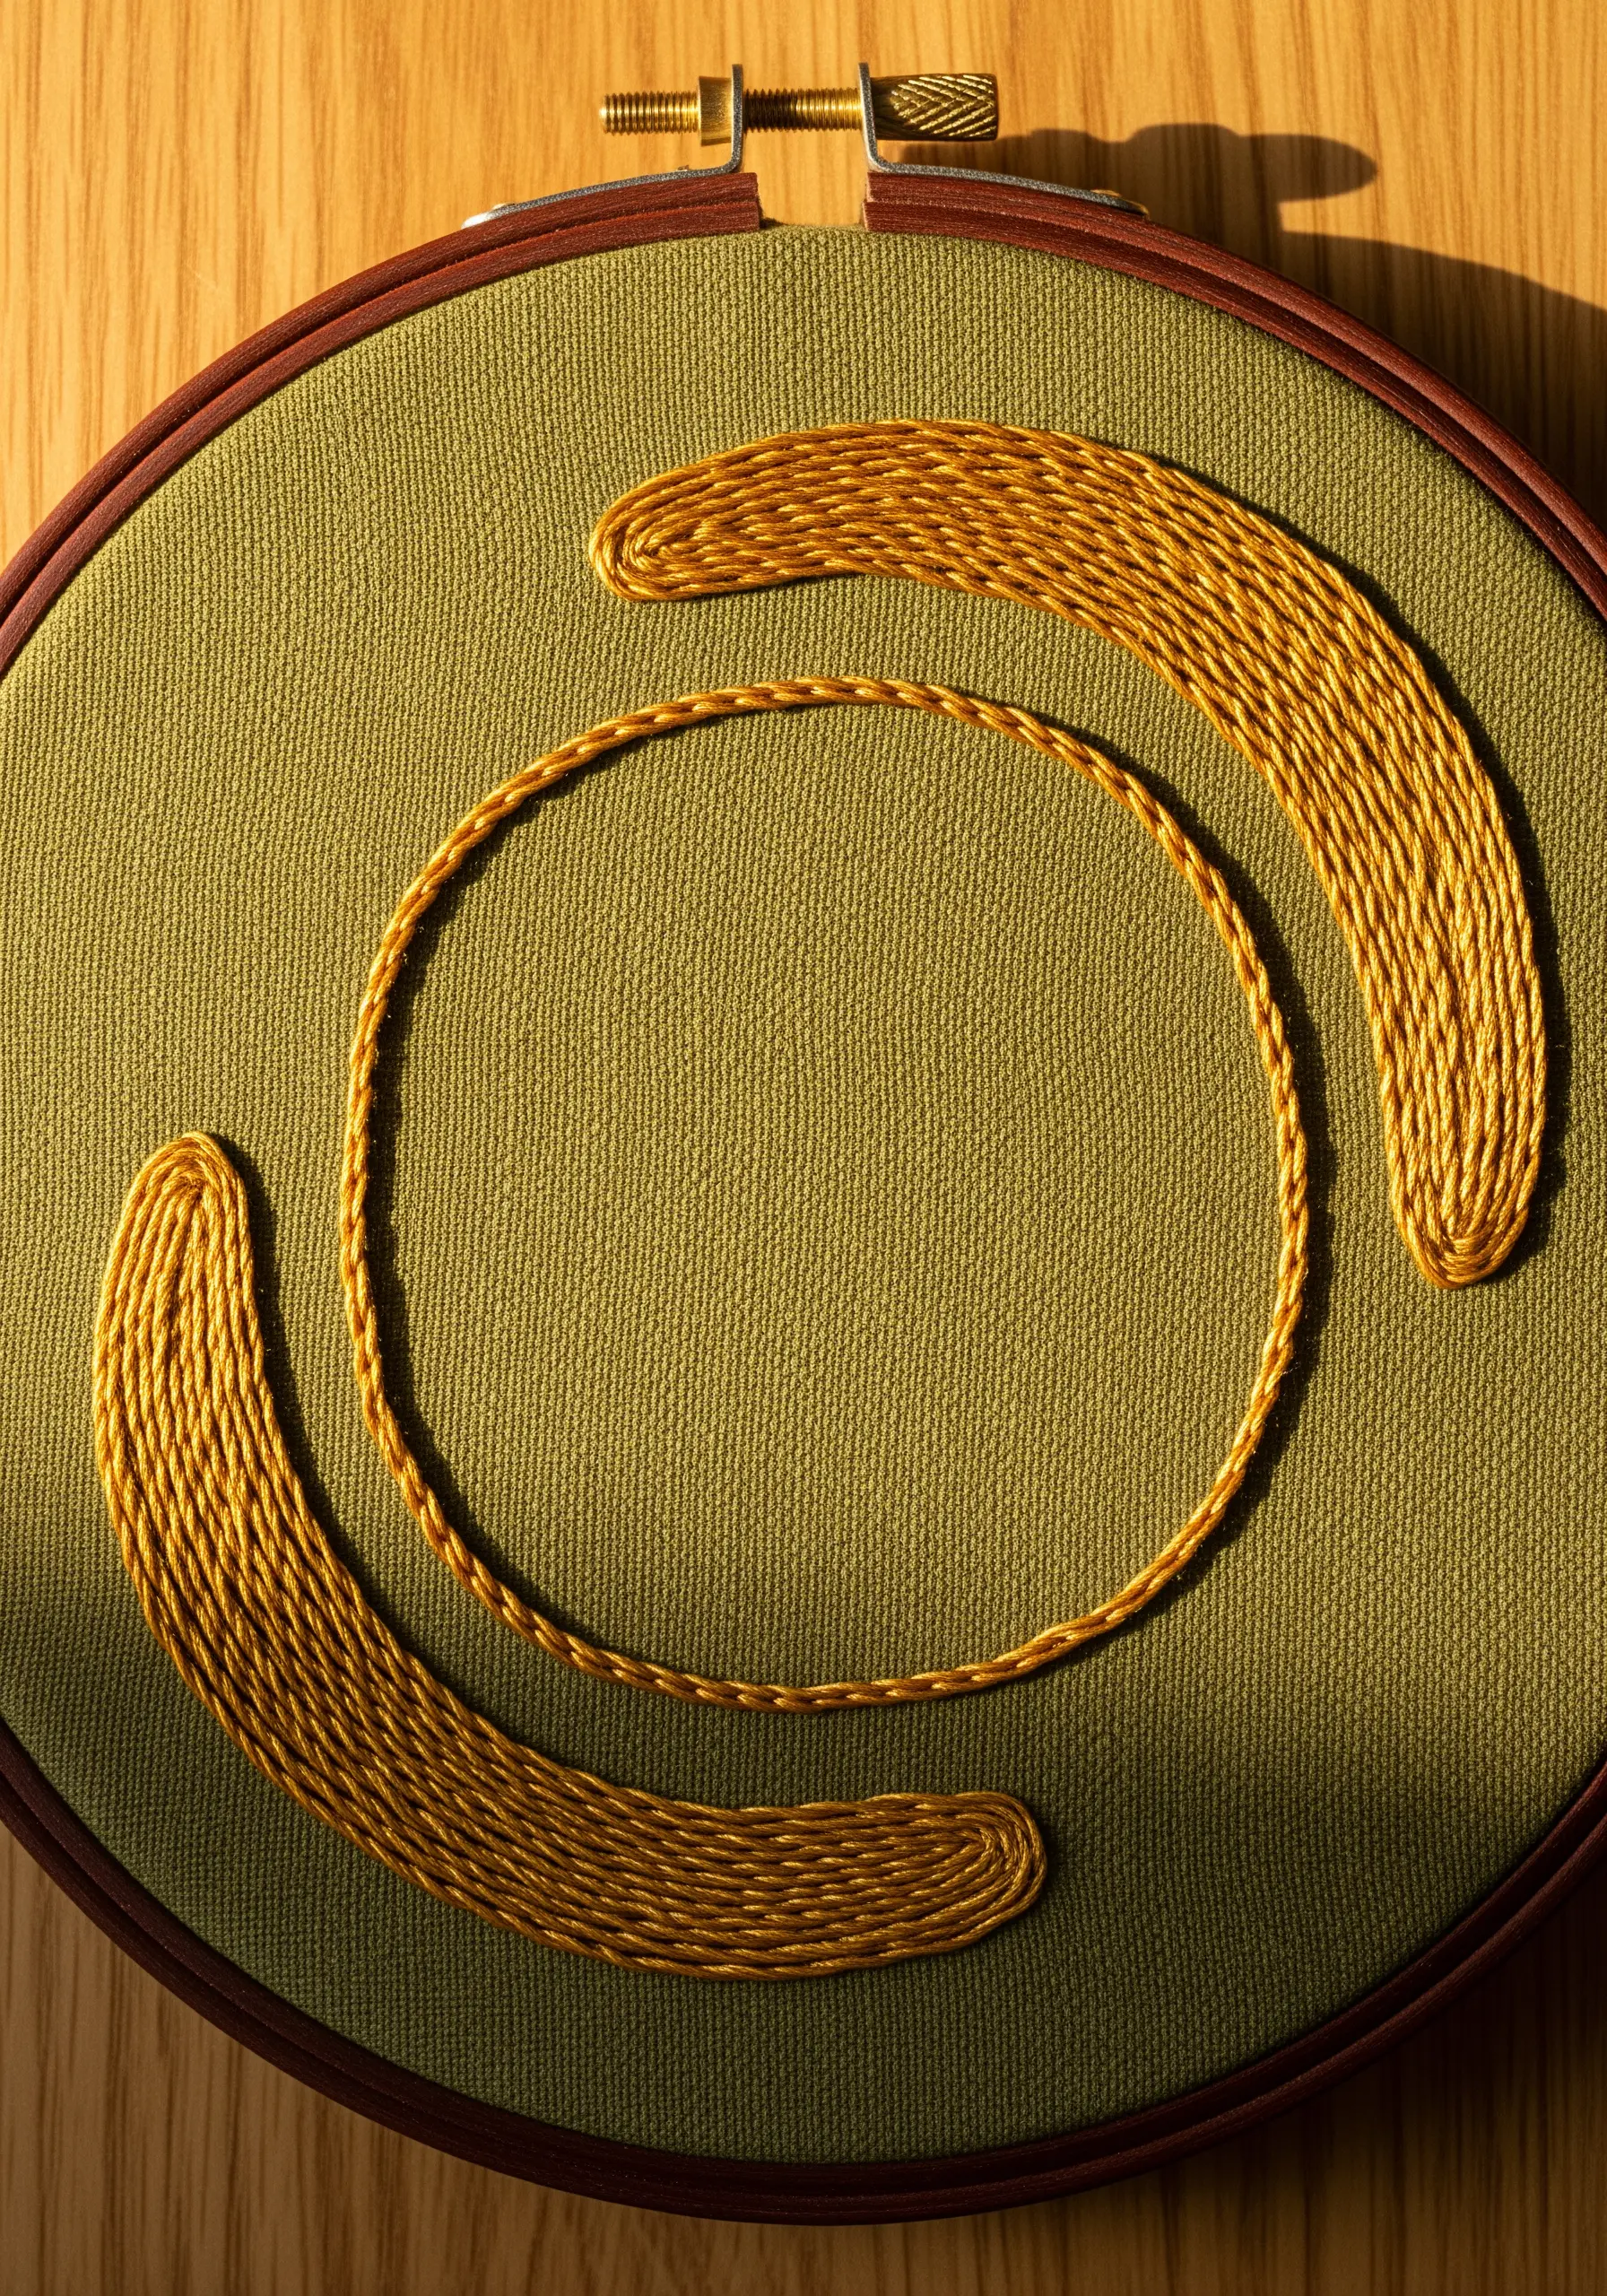
A successful composition often relies on balancing visual weight.
Here, the two crescent shapes are filled with a dense, light-catching satin stitch, giving them presence and solidity.
This density is perfectly counterbalanced by the delicate, airy circle, stitched with just a single strand of thread.
This interplay between heavy and light, filled and empty, is what makes the design feel harmonious and complete.
18. An Uneven Horizon with Straight Stitches
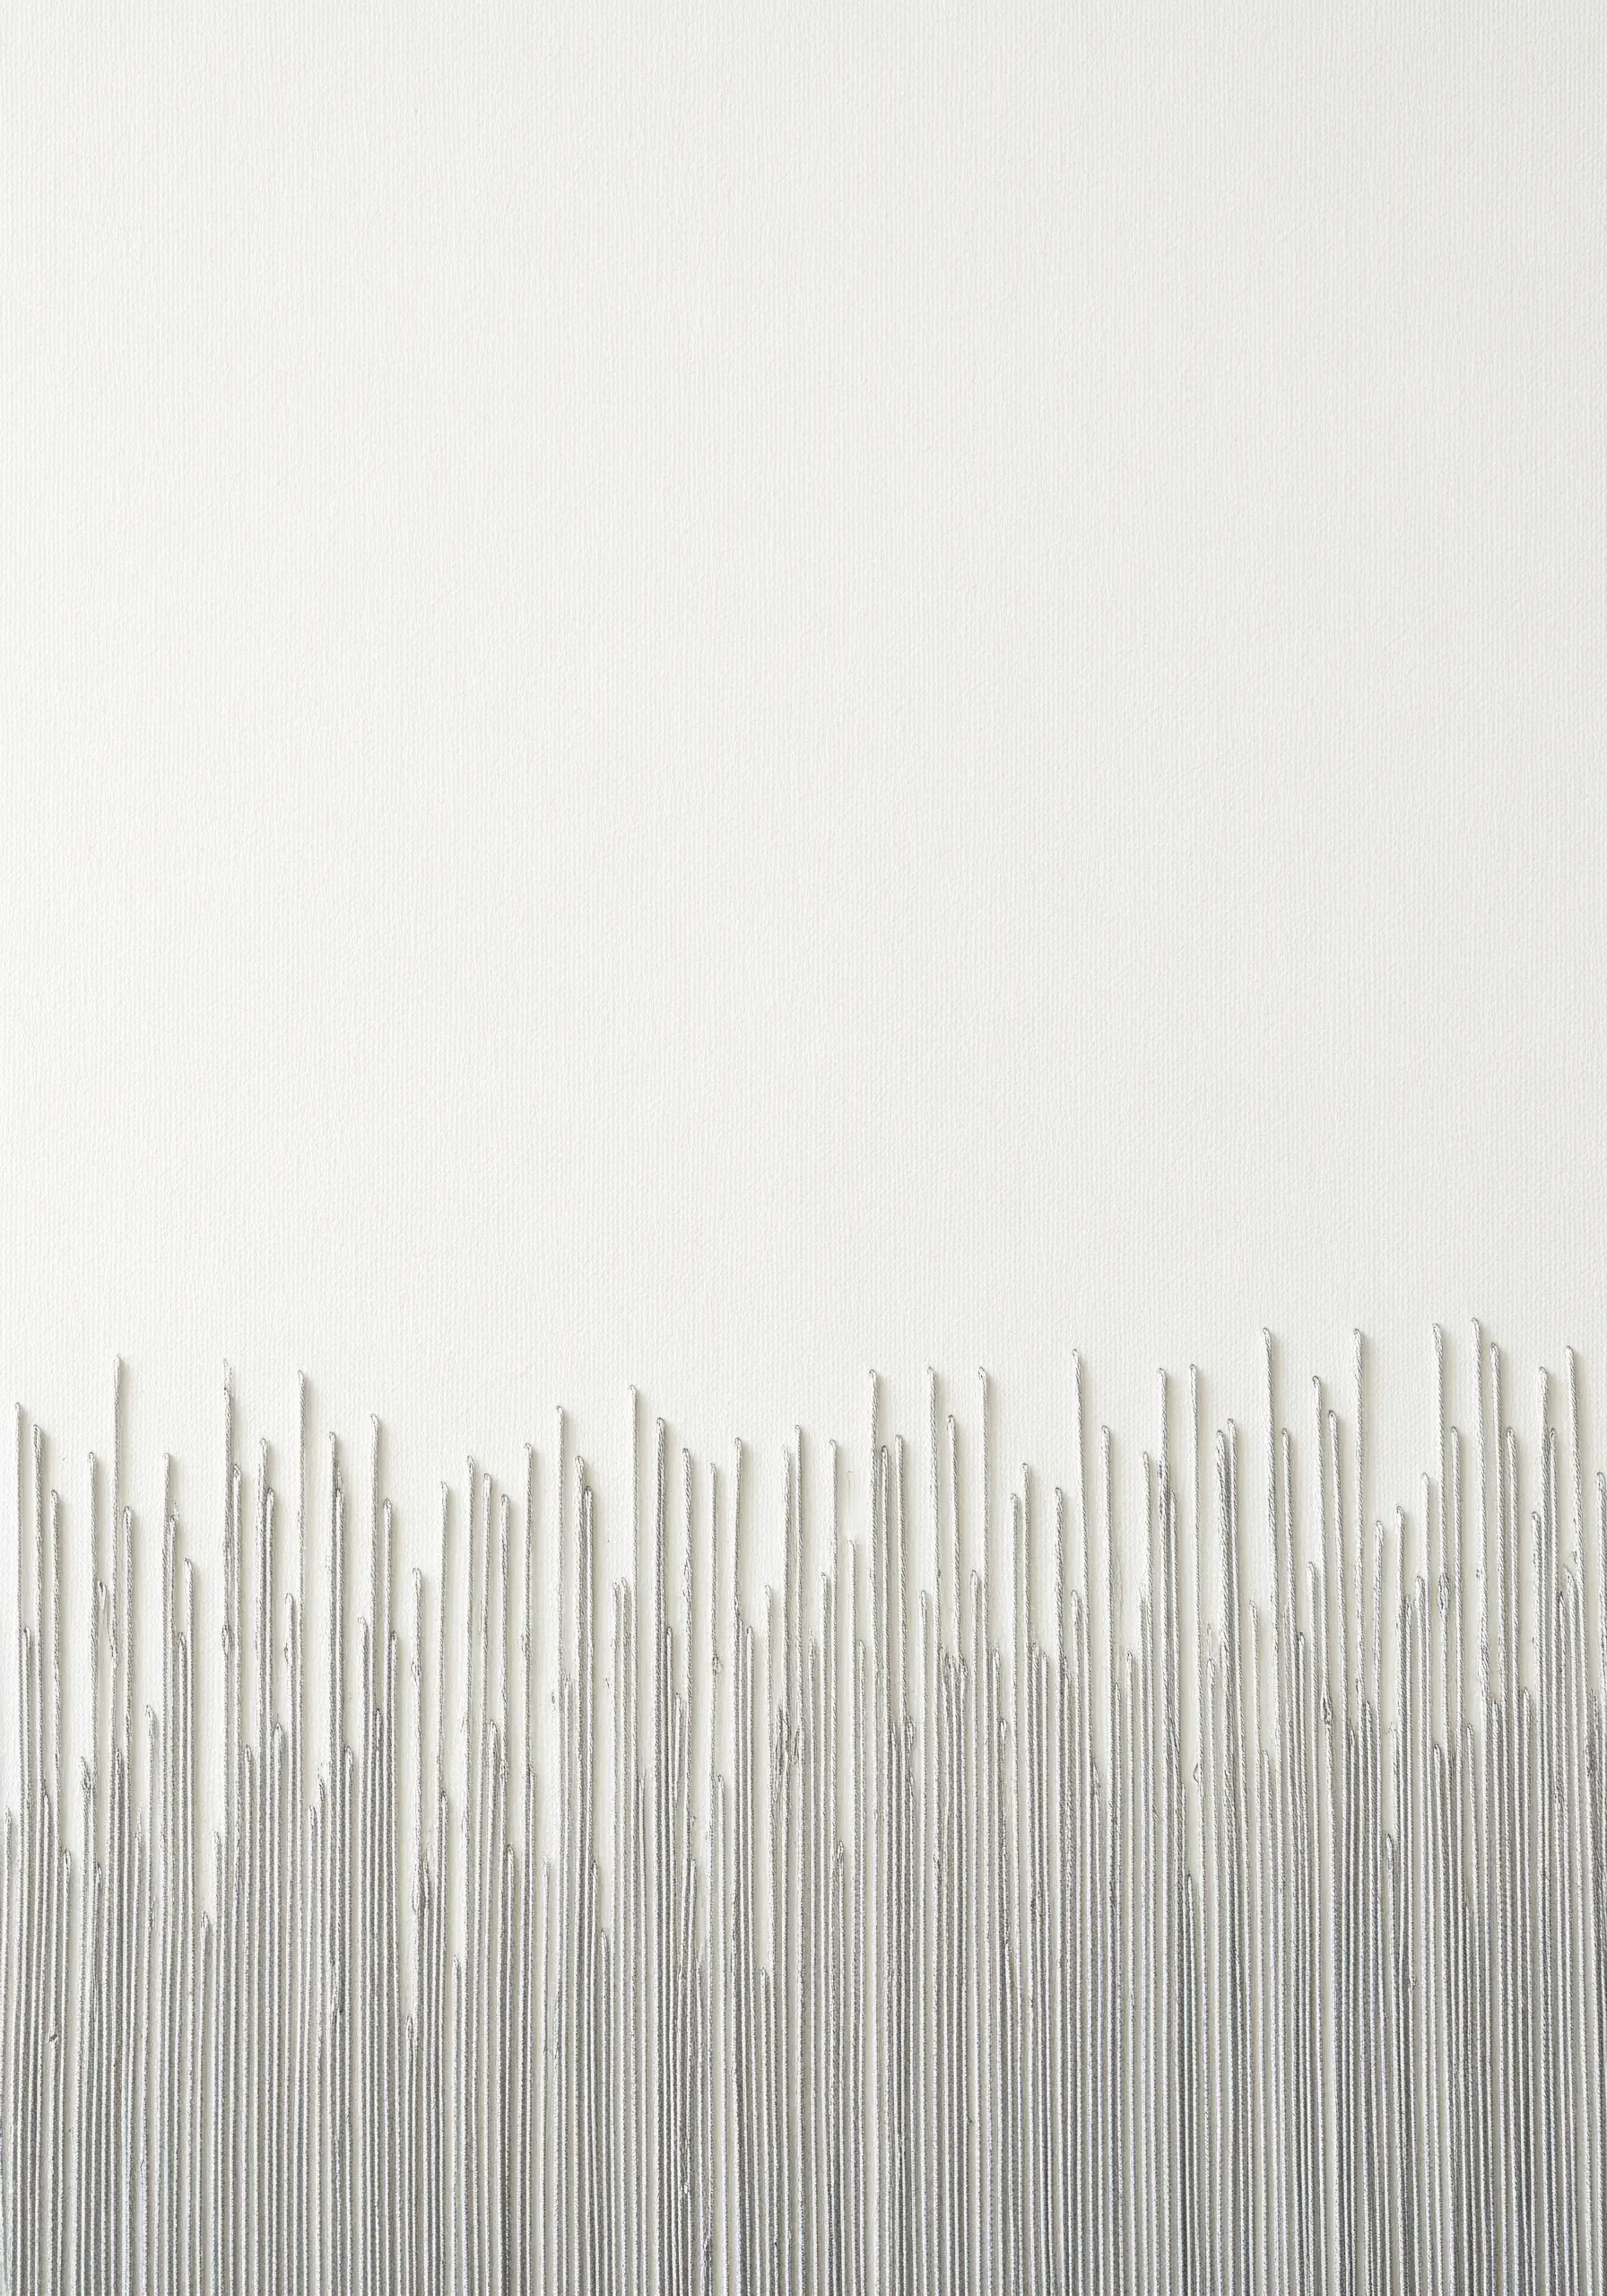
Evoke the feeling of grass, reeds, or rain with nothing more than simple straight stitches.
The key to making this look natural and not mechanical is to intentionally vary the height of each stitch.
Use a medium-weight thread that gives the lines some substance, and place them close together to create a dense, textural field.
The clean line of negative space at the top provides a calming contrast to the textured embroidery below, making it feel like a minimalist landscape.
19. Isolate Intricate Stitches for Maximum Impact

When you master a beautiful, complex knot—like a Chinese button knot or an elaborate bullion—let it be the star of the show.
Don’t crowd these intricate elements with other stitches or busy patterns.
Instead, place just two or three in a vast expanse of negative space. This isolation forces the viewer to lean in and appreciate the craftsmanship.
A high-contrast background, like this deep black, further enhances the knot’s sculptural form.
20. Radiating Lines for a Sunburst Effect
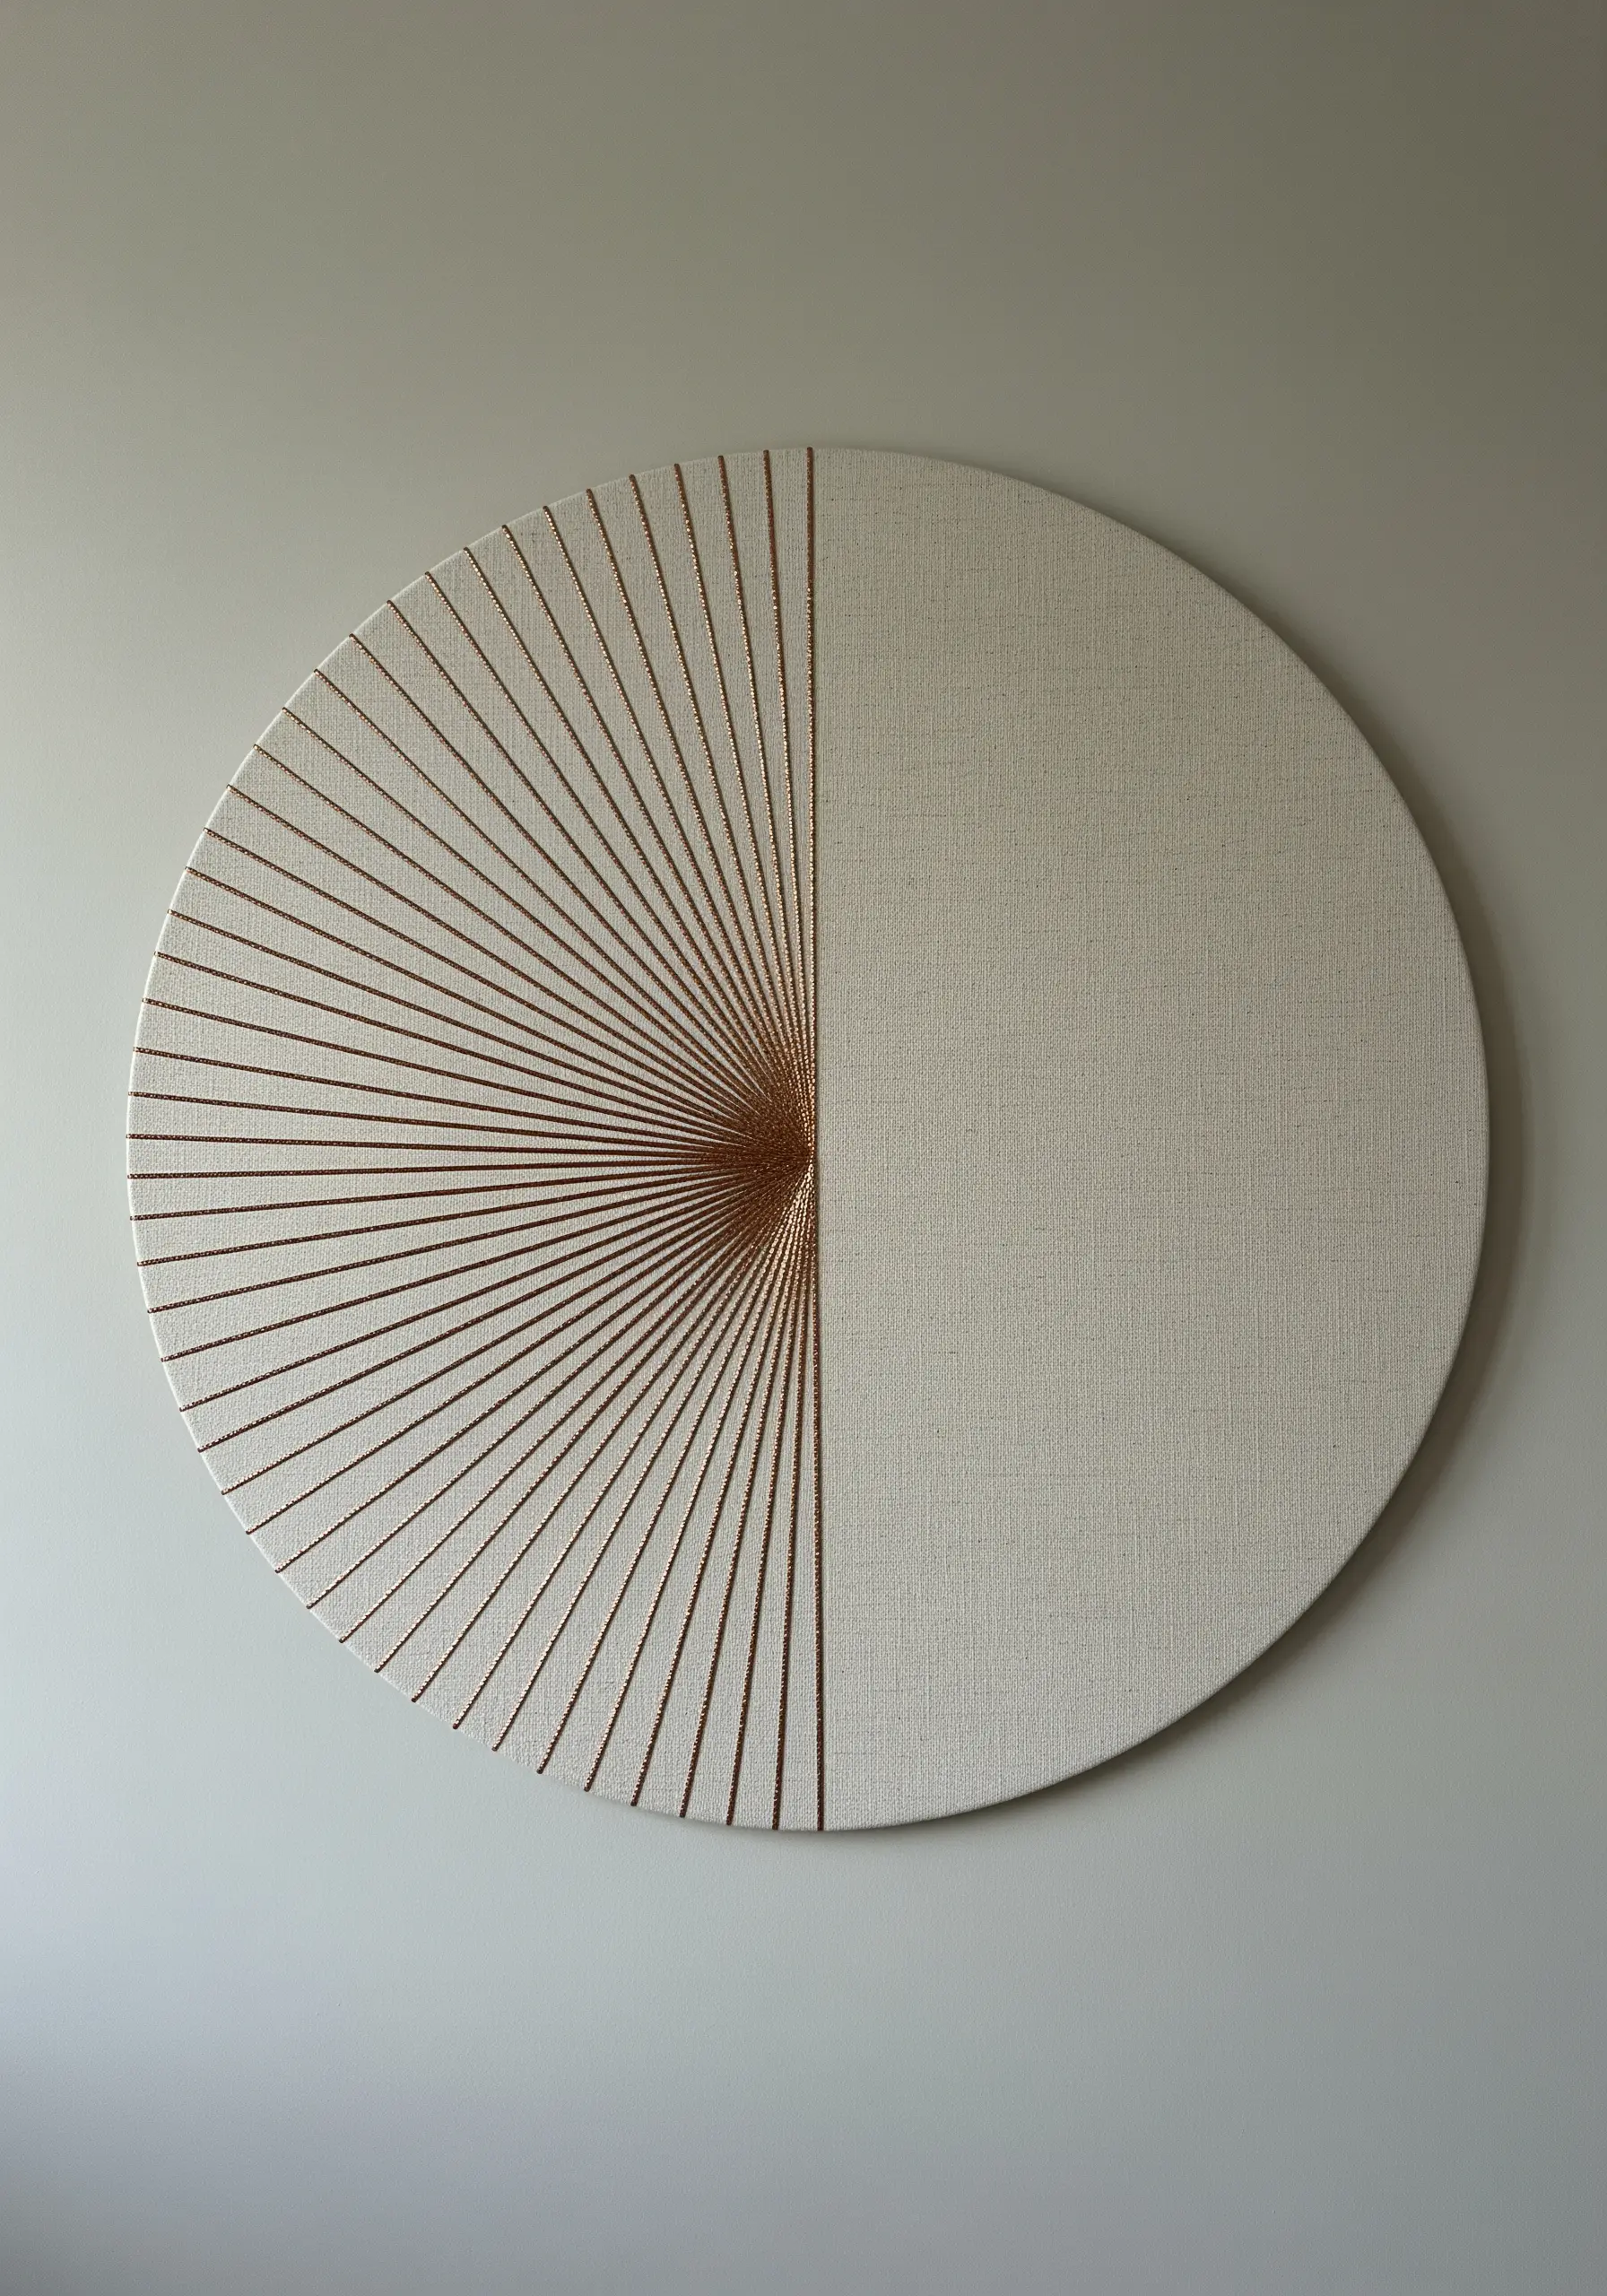
This is a perfect example of how string art principles can be used to create stunning abstract thread embroidery.
Start by marking a central anchor point and evenly spaced points around the edge of your canvas or hoop.
Use a single, continuous thread or individual straight stitches to connect the outer points to the center.
The negative space between the lines becomes an active part of the design, creating a powerful sense of light and energy radiating from the core.
21. Build a Textured Mosaic with Woven Wheels
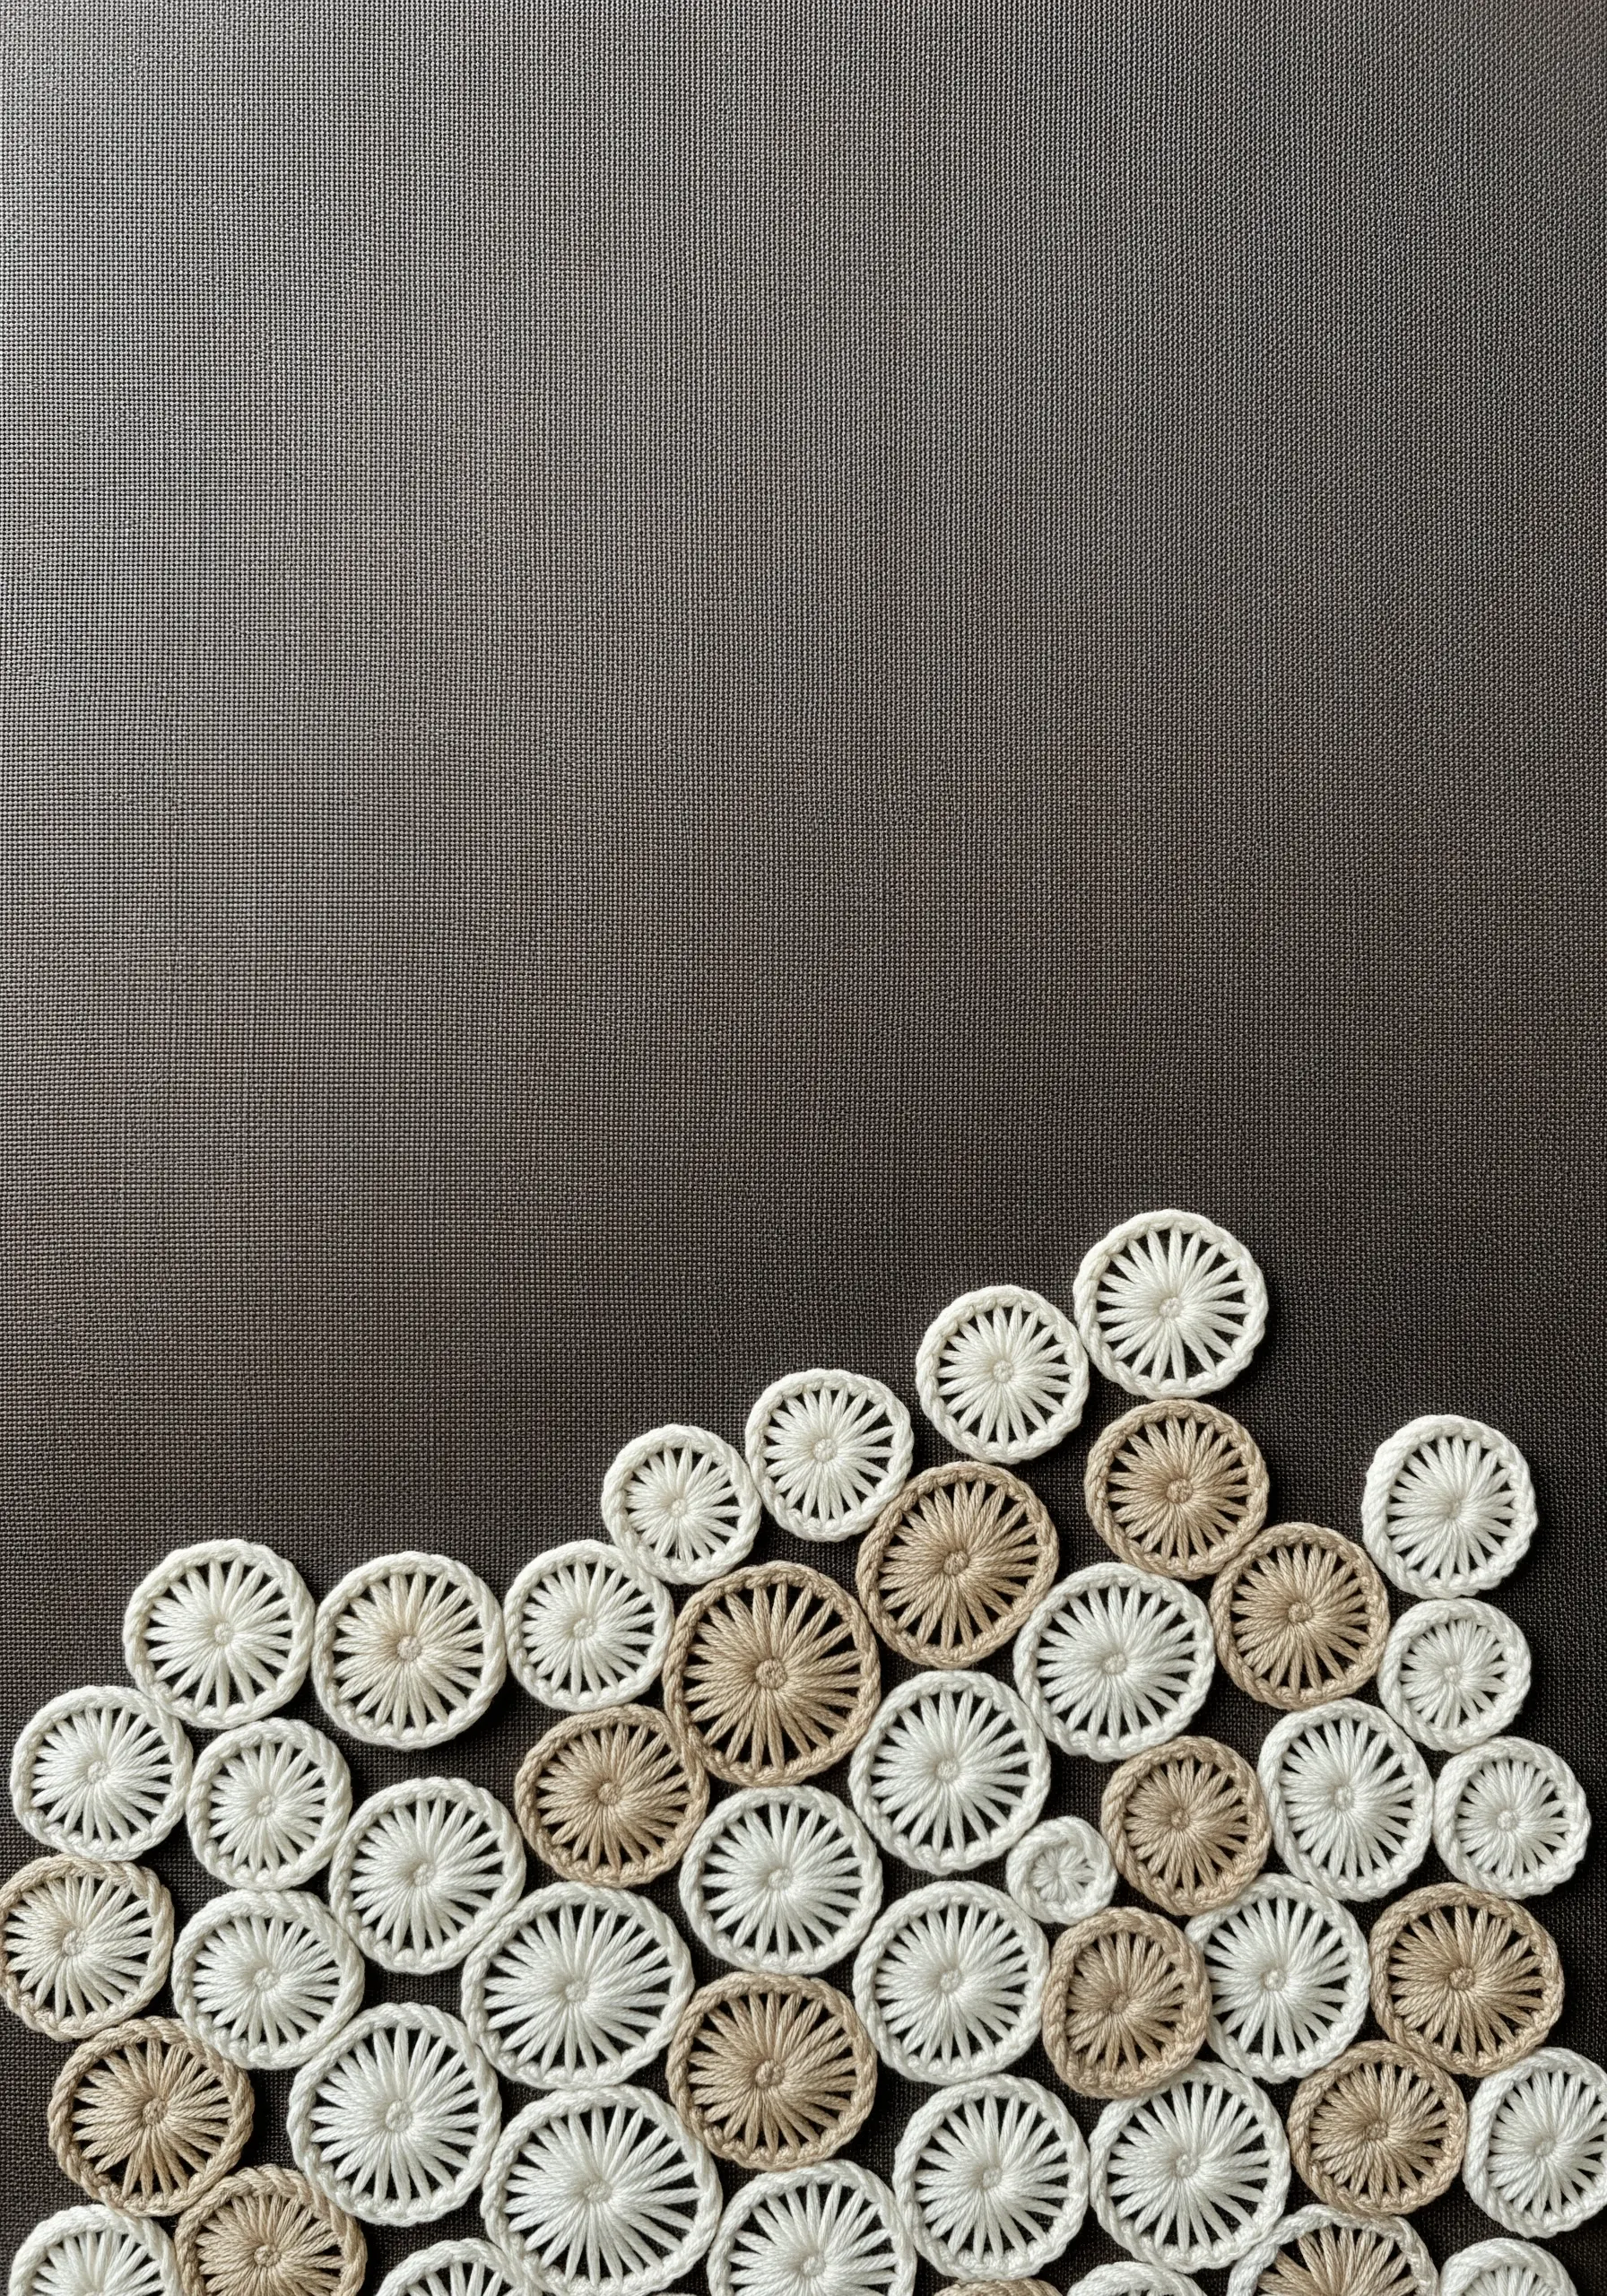
The woven wheel stitch is inherently dimensional, making it perfect for creating rich, tactile surfaces.
Instead of stitching them in isolation, cluster them together so their edges touch and slightly overlap, like pebbles on a beach.
Varying the size of the wheels and using a mix of thread types—like matte cotton alongside rustic jute—adds another layer of visual and textural interest.
This approach transforms a simple stitch into a complex, satisfying composition.
22. Outline Appliqué on a Patterned Background

Let a beautiful fabric be the hero of your design. This technique uses negative space in a clever way—by creating it *inside* your motif.
Cut your shape from a solid-colored fabric and appliqué it onto a patterned background.
Then, use a clean, substantial outline stitch like a chain stitch or a whipped backstitch to frame the shape.
The eye is drawn to the contrast between the calm solid color and the busy pattern it contains.
23. Expressive Freedom with Tangled Threads
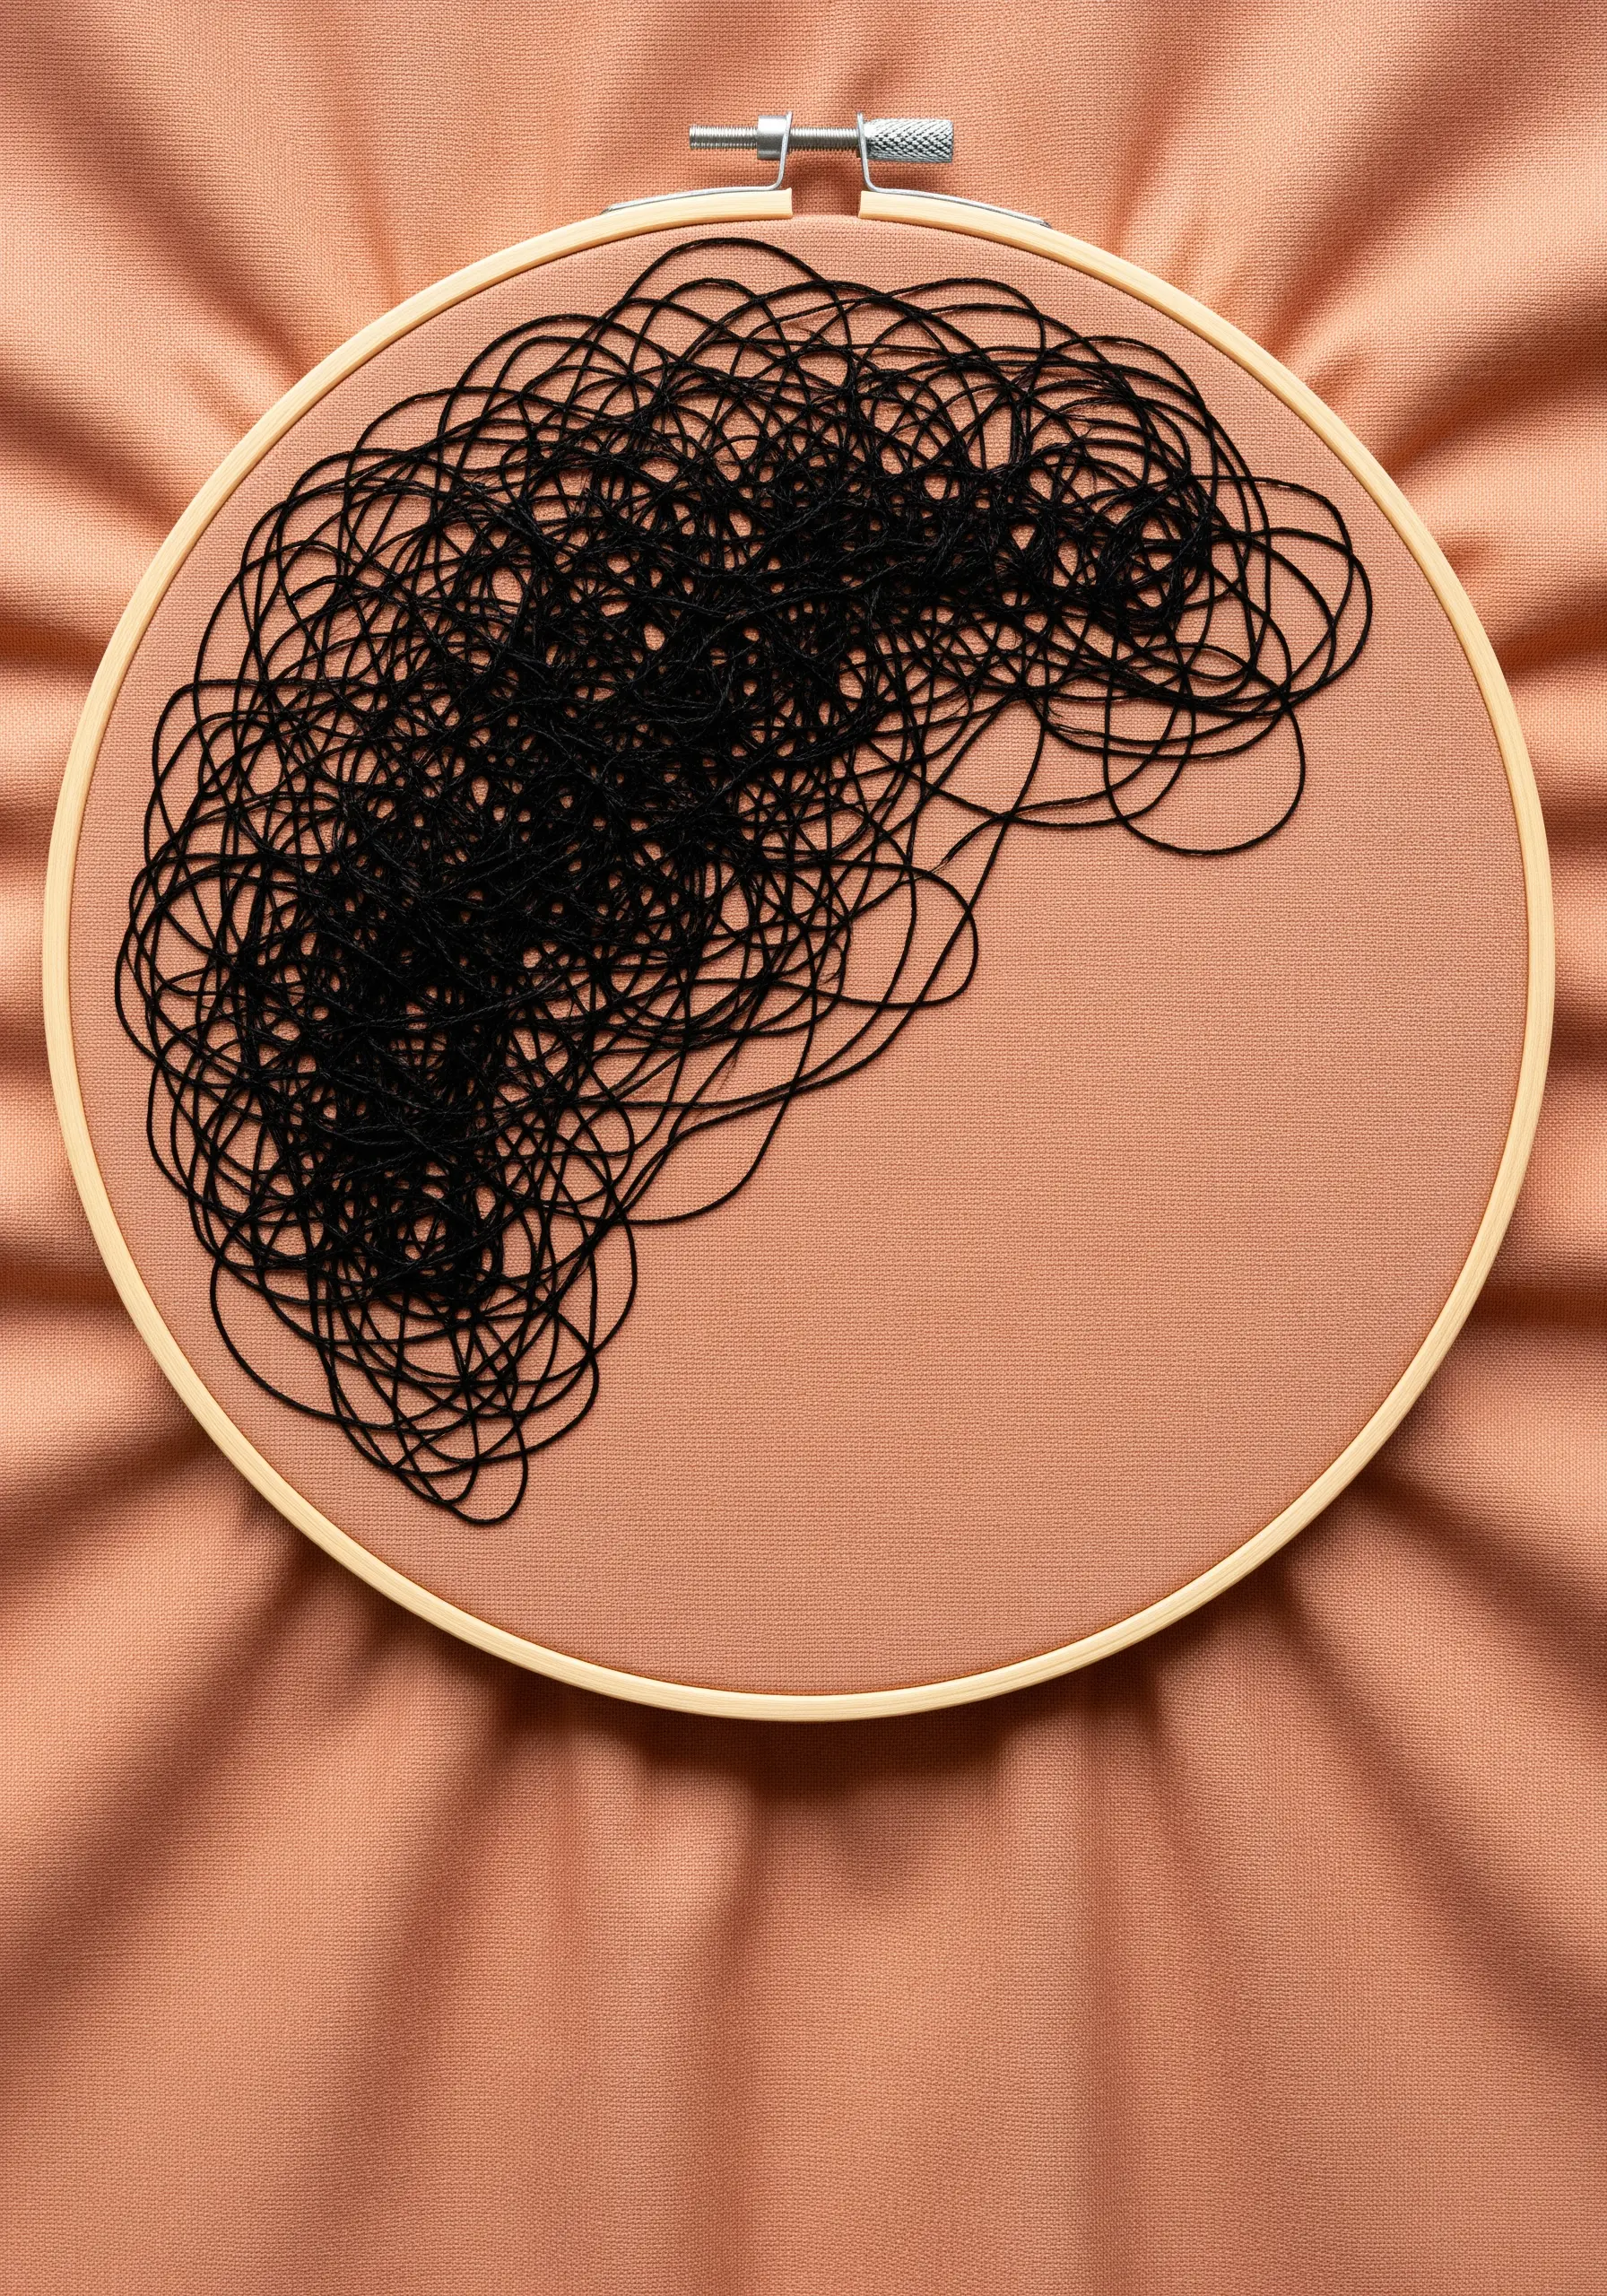
Embrace improvisation with this free-form stitching technique that feels both chaotic and controlled.
Don’t draw a guide. Instead, let your needle wander, creating random loops and long stitches that cross over each other.
Build up the density slowly until an organic, brain-like shape begins to form.
The raw, kinetic energy of the stitched mass creates a powerful contrast with the untouched fabric, making for a truly expressive piece of abstract hoop art.
24. Minimalist Running Stitch on Textured Denim
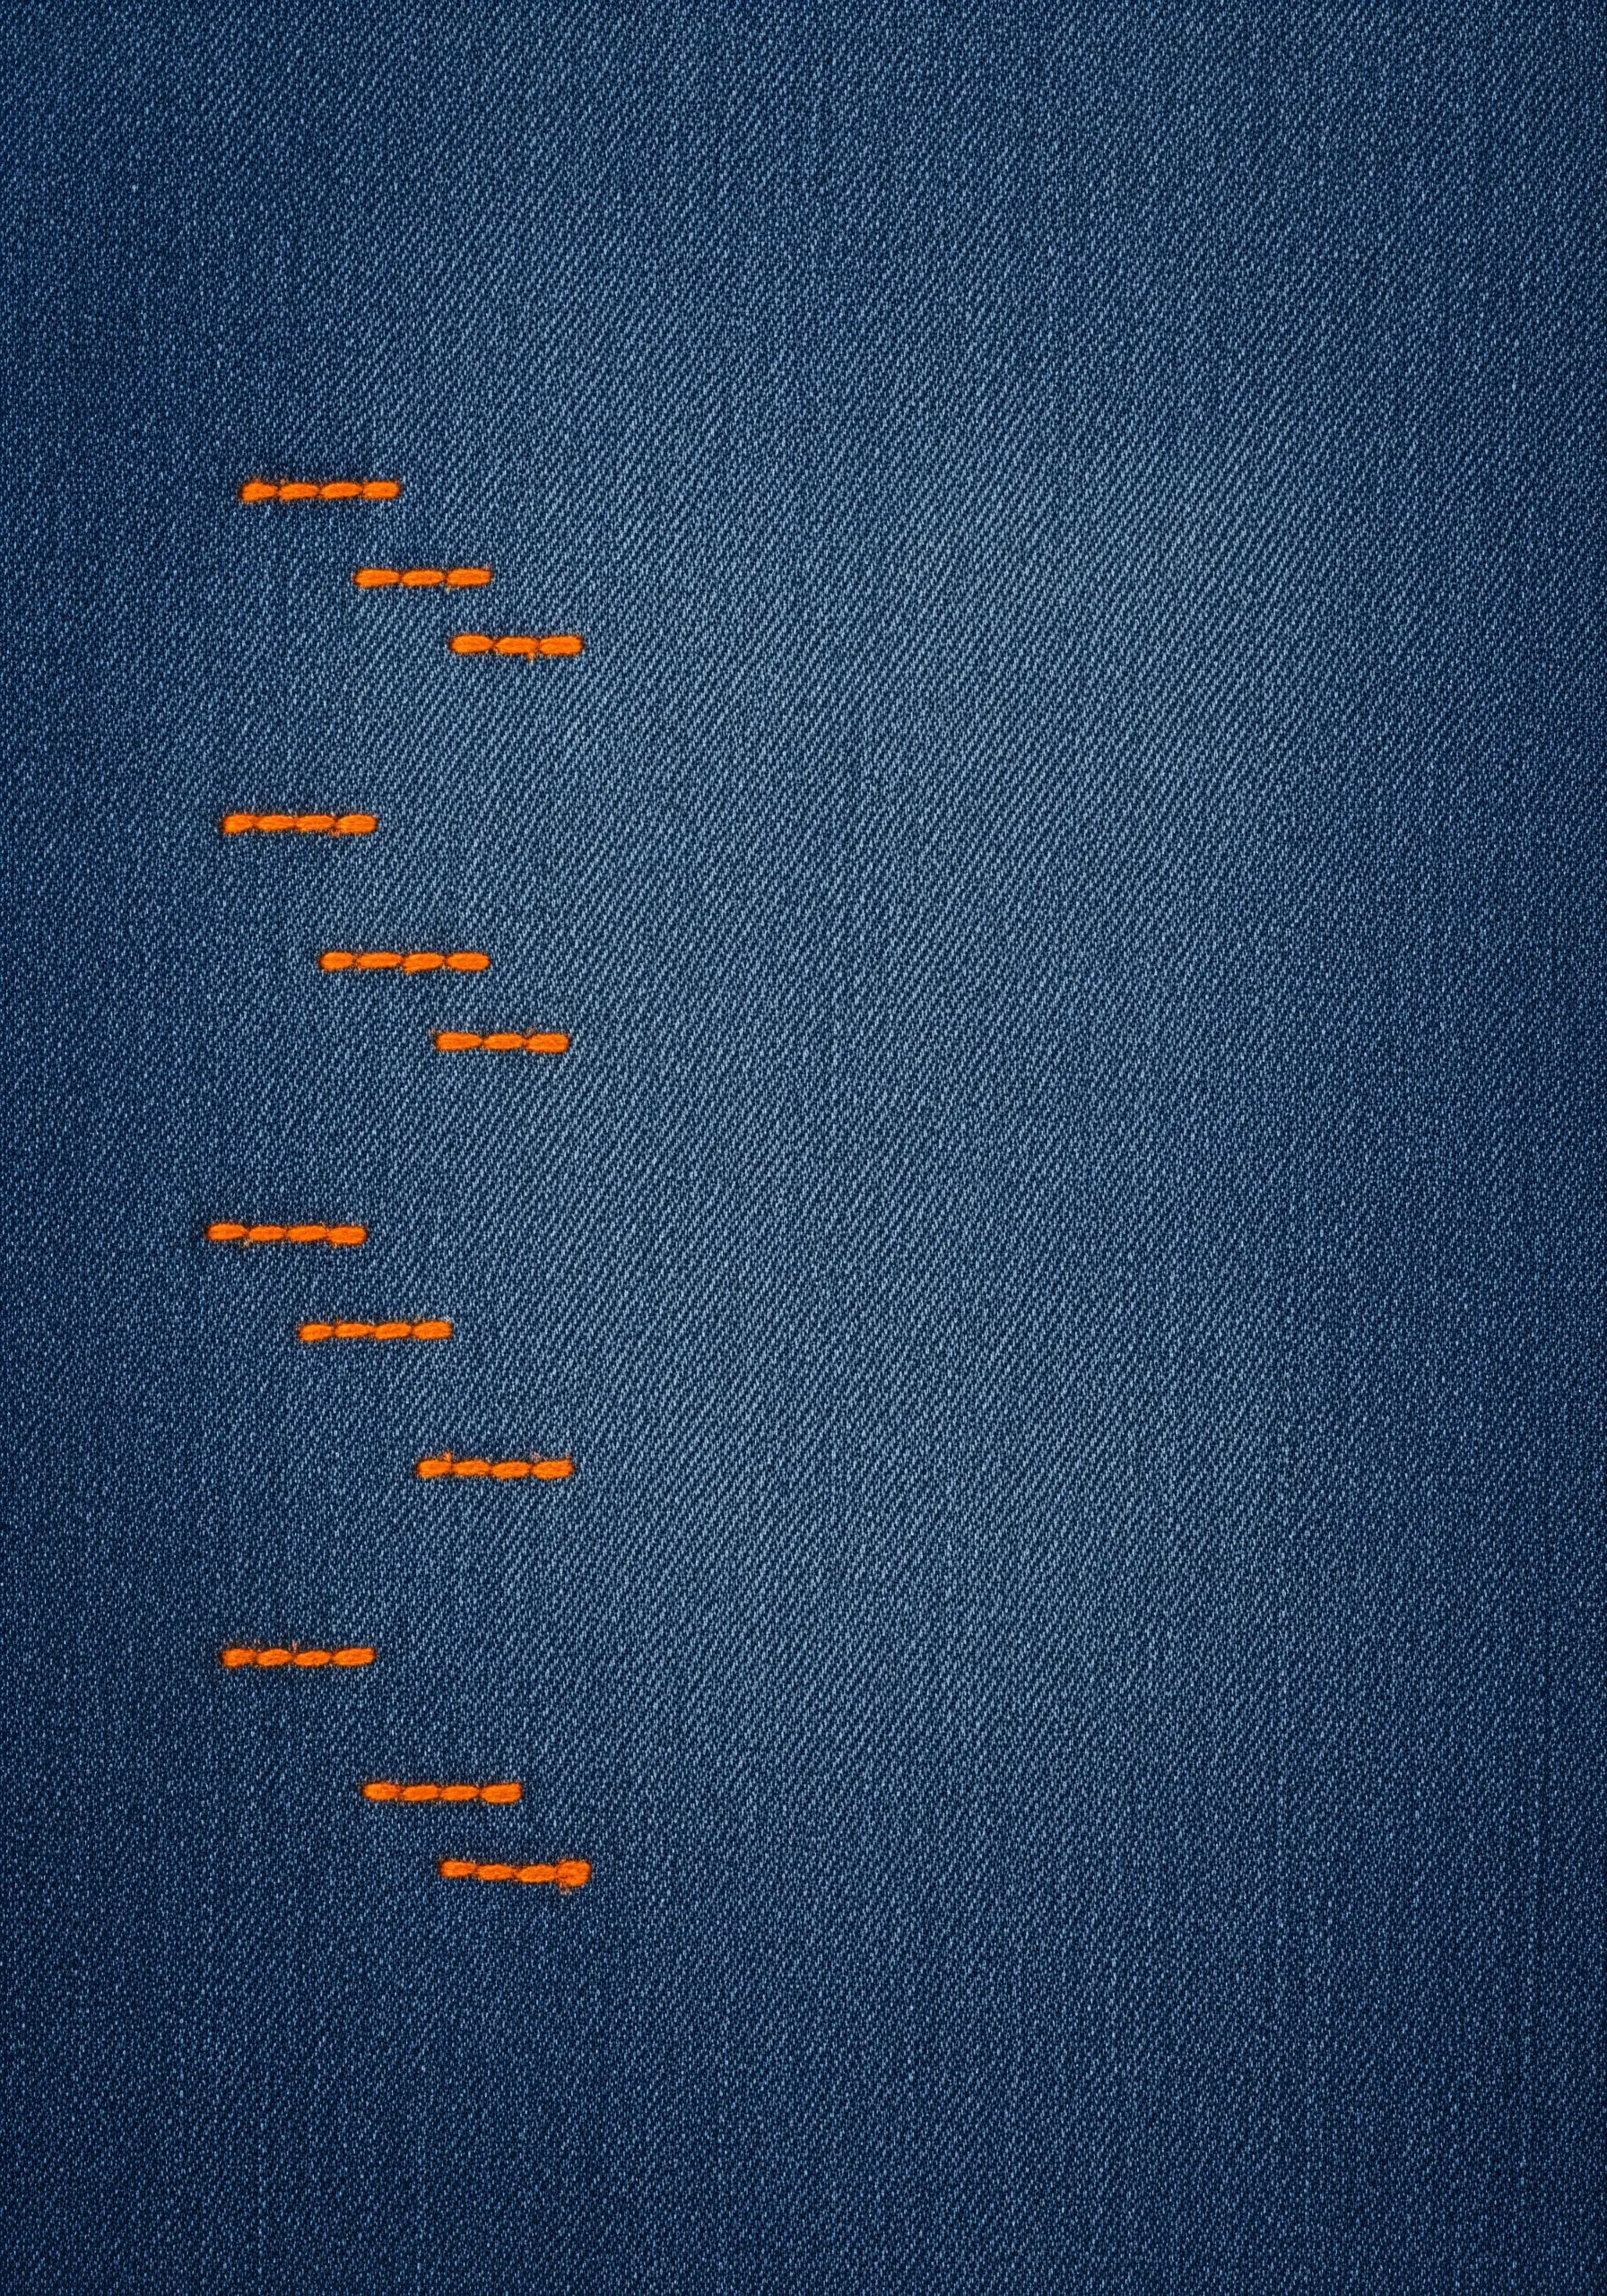
You don’t need complicated stitches to make a chic statement, especially on a fabric with its own character like denim.
A simple running stitch, carefully executed, provides a clean, graphic accent.
Use a high-contrast color and a slightly thicker thread (like a #8 pearl cotton) to ensure the stitches are visible against the twill weave.
The beauty of this is its simplicity; it’s a subtle nod to traditional mending stitches, reimagined as a modern design element.
25. Capture Fluid Motion with Beaded Contours
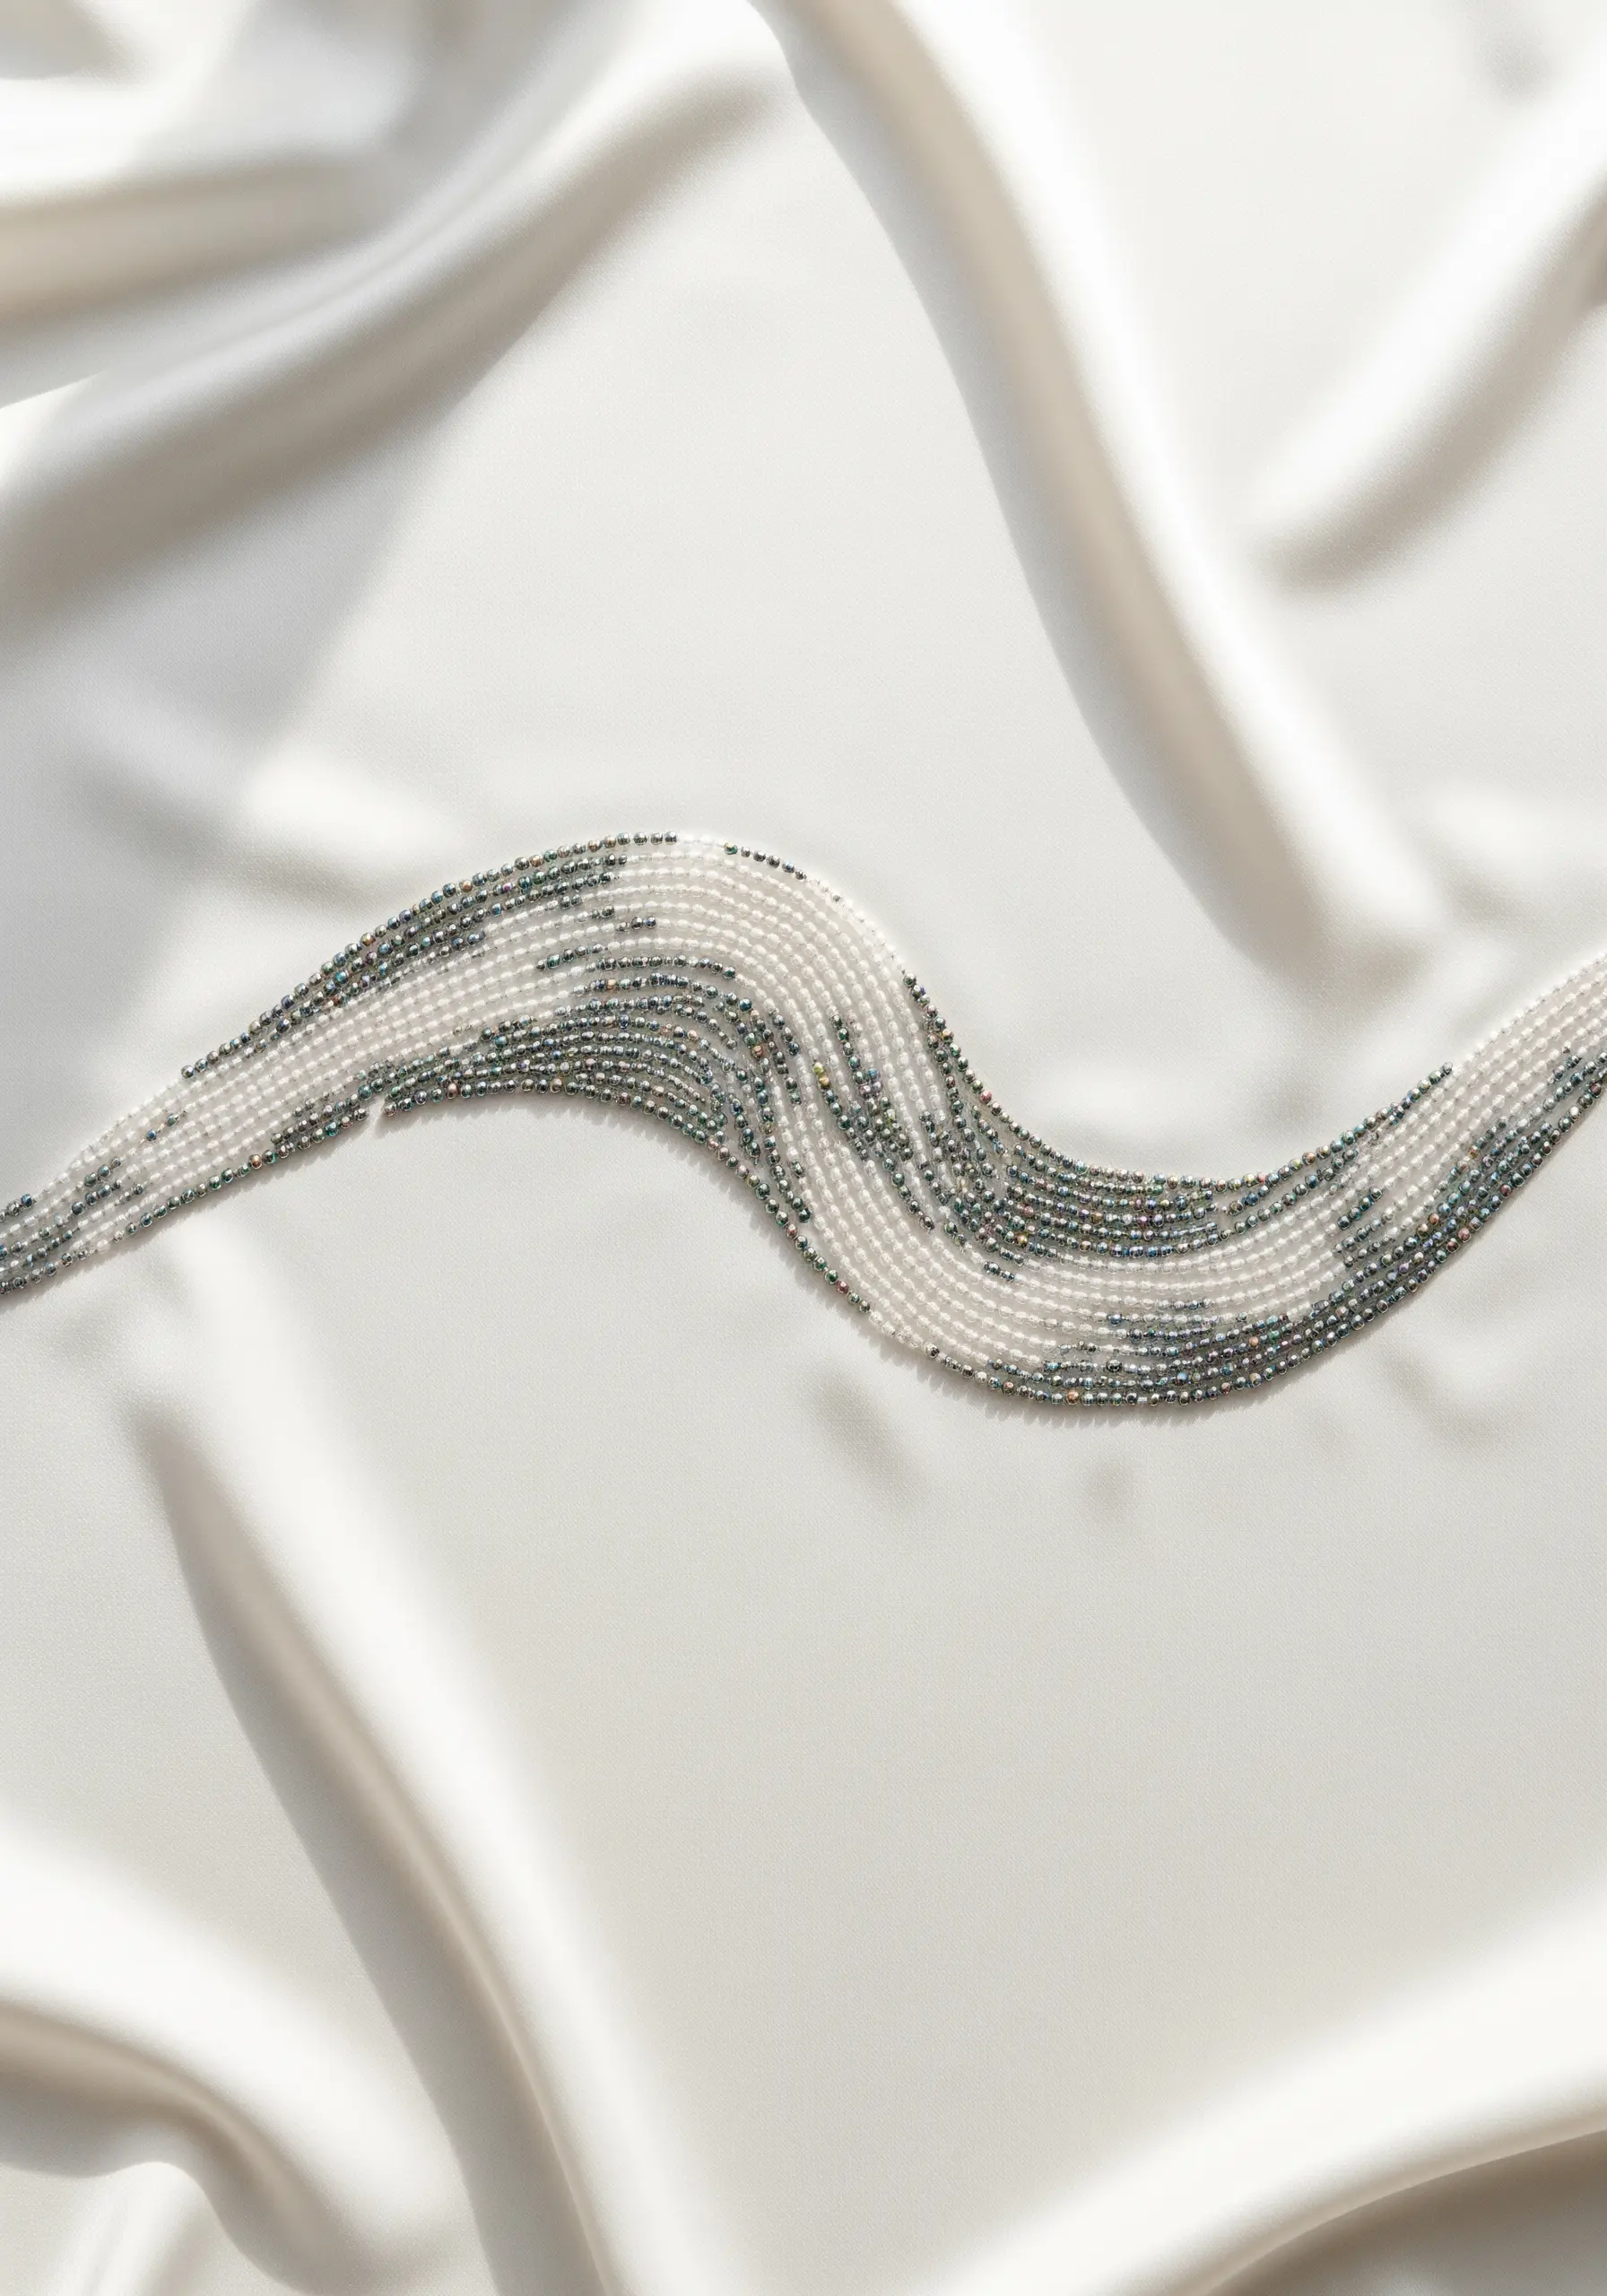
Use beads to create a design that shimmers and flows across the fabric.
Stitch dense, flowing lines of beads that follow a gentle curve to evoke the movement of water or smoke.
For a sophisticated effect, use a mix of beads in a similar color family but with different finishes—matte, metallic, and iridescent—to create subtle shifts in light and texture.
The smooth, luxurious background of silk or satin enhances the glittering quality of the beadwork.
26. High-Texture Lines with Twisted Cord
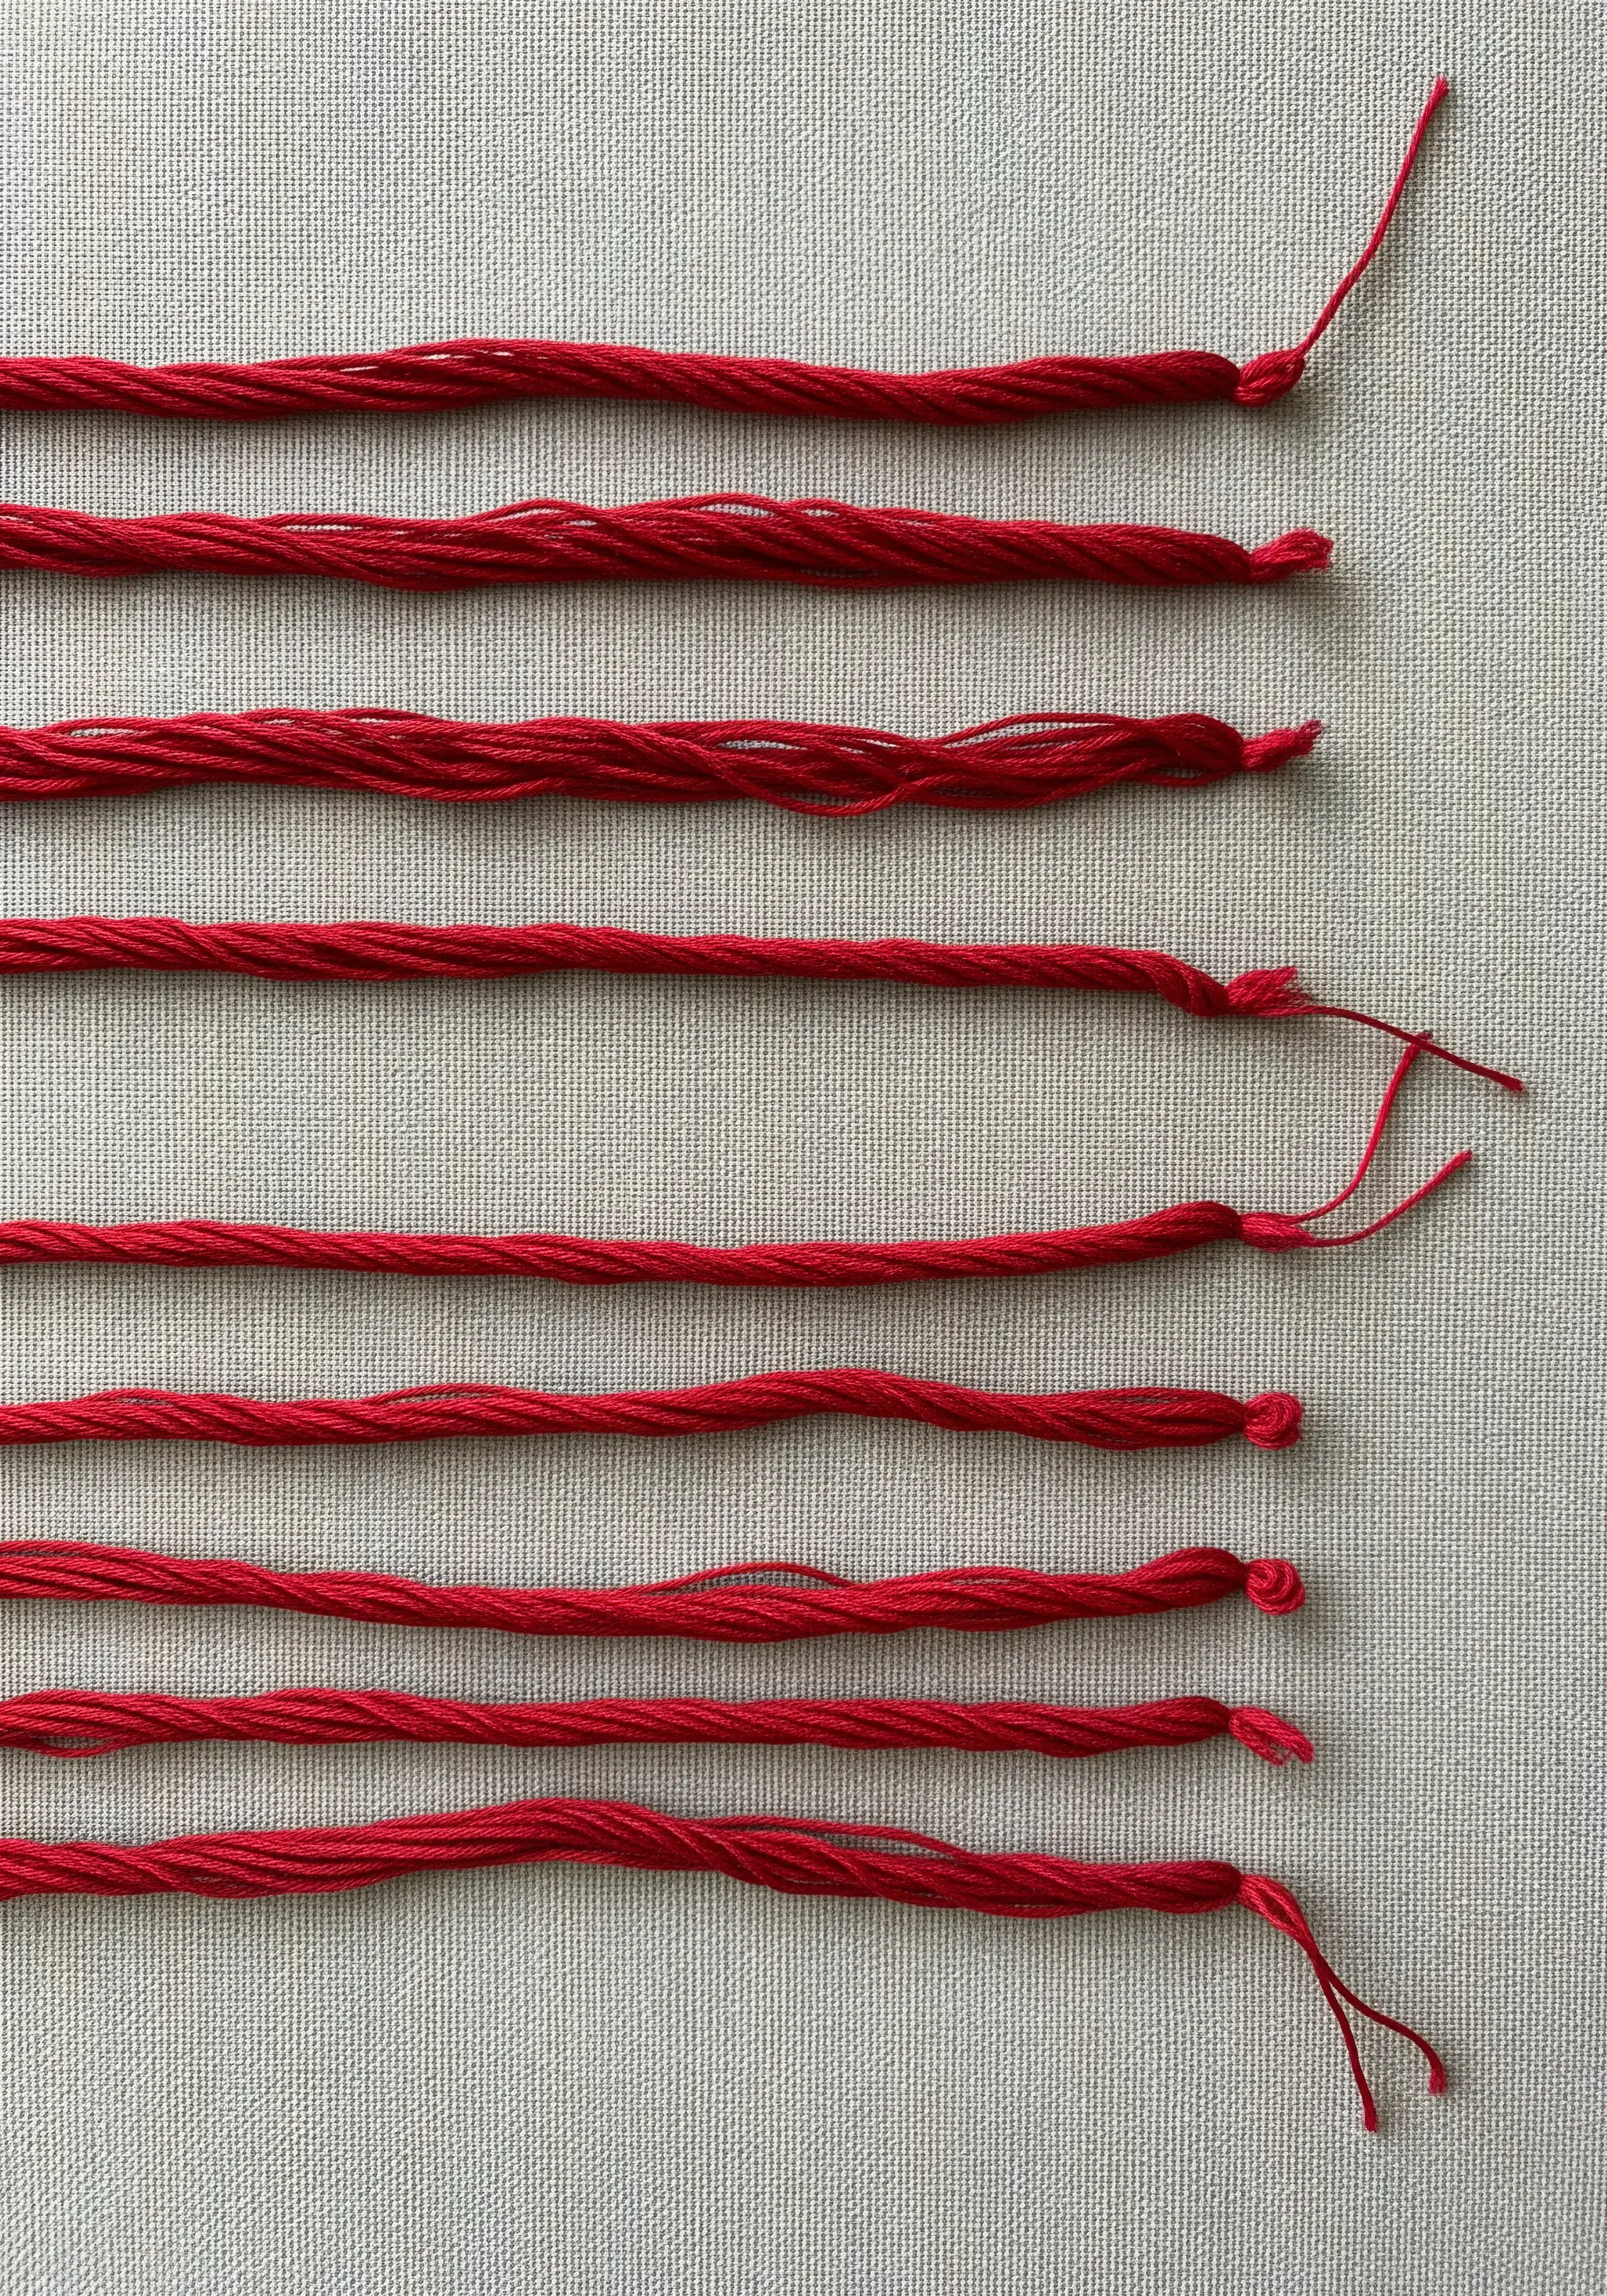
Create lines that have instant dimension and shadow by making your own thread.
Twist multiple strands of embroidery floss together very tightly to form a small cord, or use a pre-made decorative rope.
Then, use a couching stitch—tacking the cord down with a thinner, discreet thread—to secure it to the fabric.
The negative space around these bold, sculptural lines allows their rich texture to become the undisputed focal point of the piece.
27. Architectural Depth with String Art Stitches
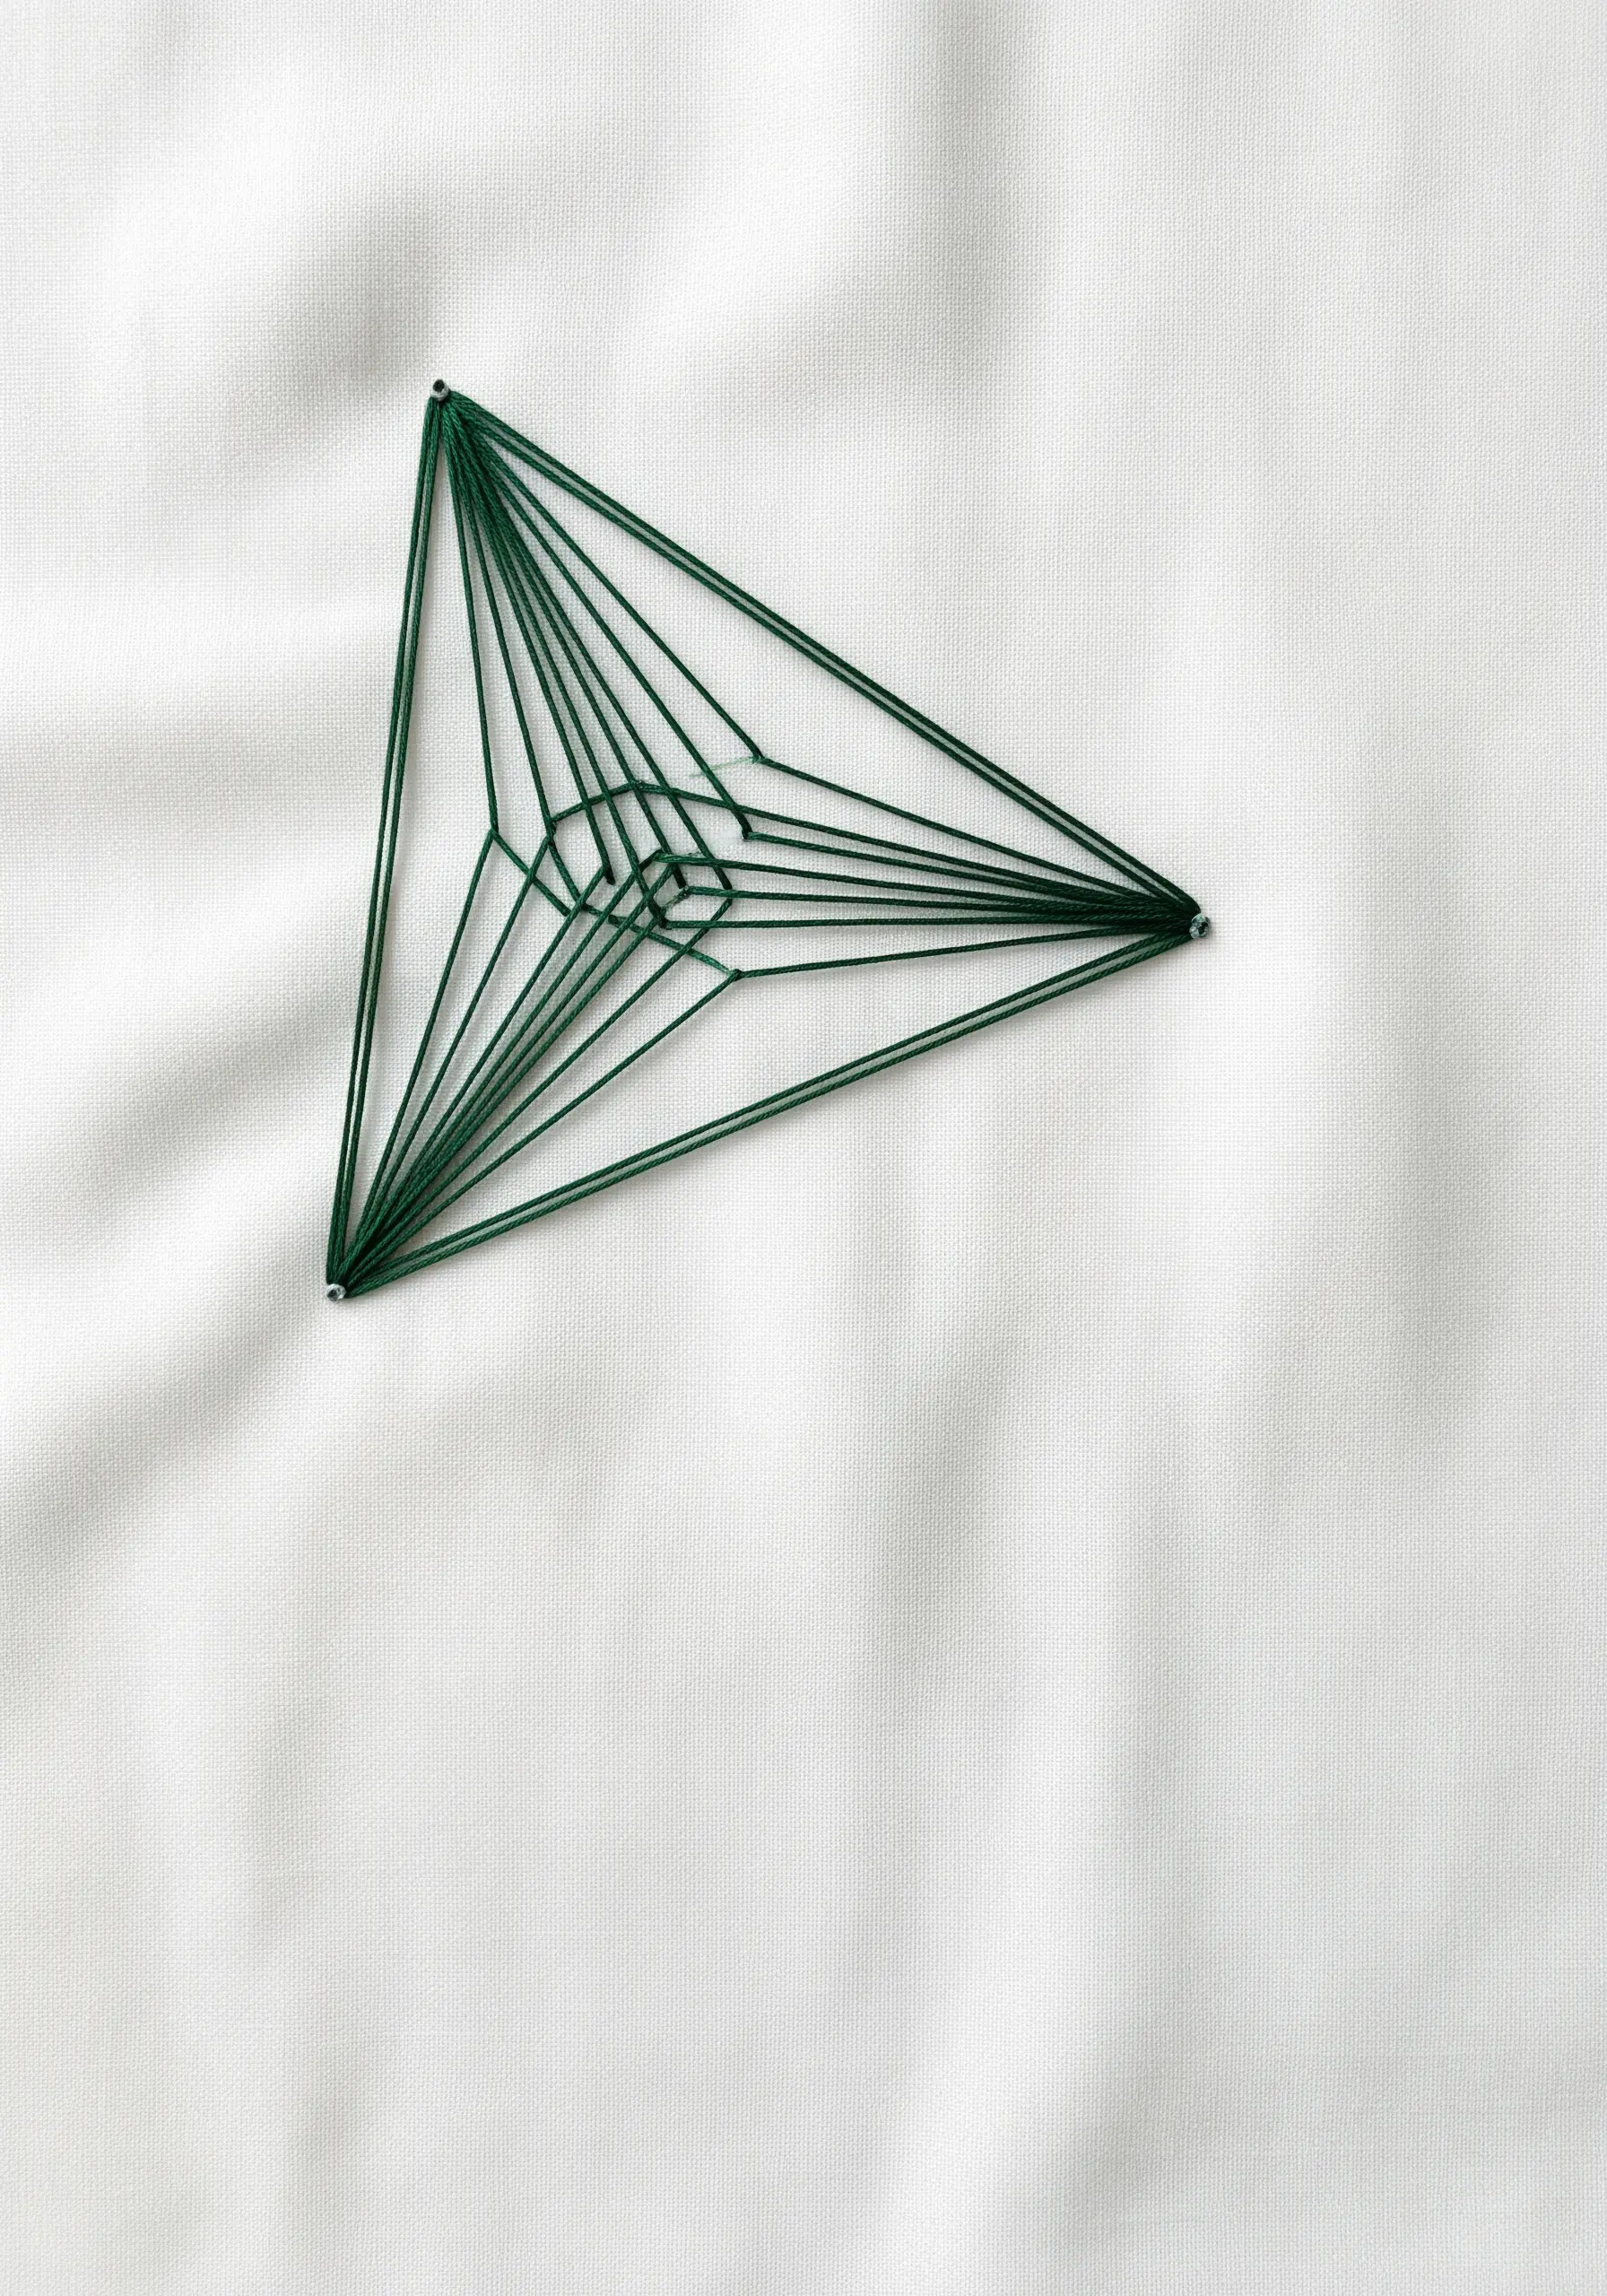
This technique, borrowed from string art, builds incredible geometric patterns using only straight lines.
Place anchor stitches (or pins, if working on a board) at the vertices of your shape.
Then, wrap or stitch your thread back and forth between these points in a methodical sequence.
The overlapping threads create curves and complex inner shapes, turning a simple triangle into a mesmerizing optical design.
28. Dynamic Energy with Stitch Bursts
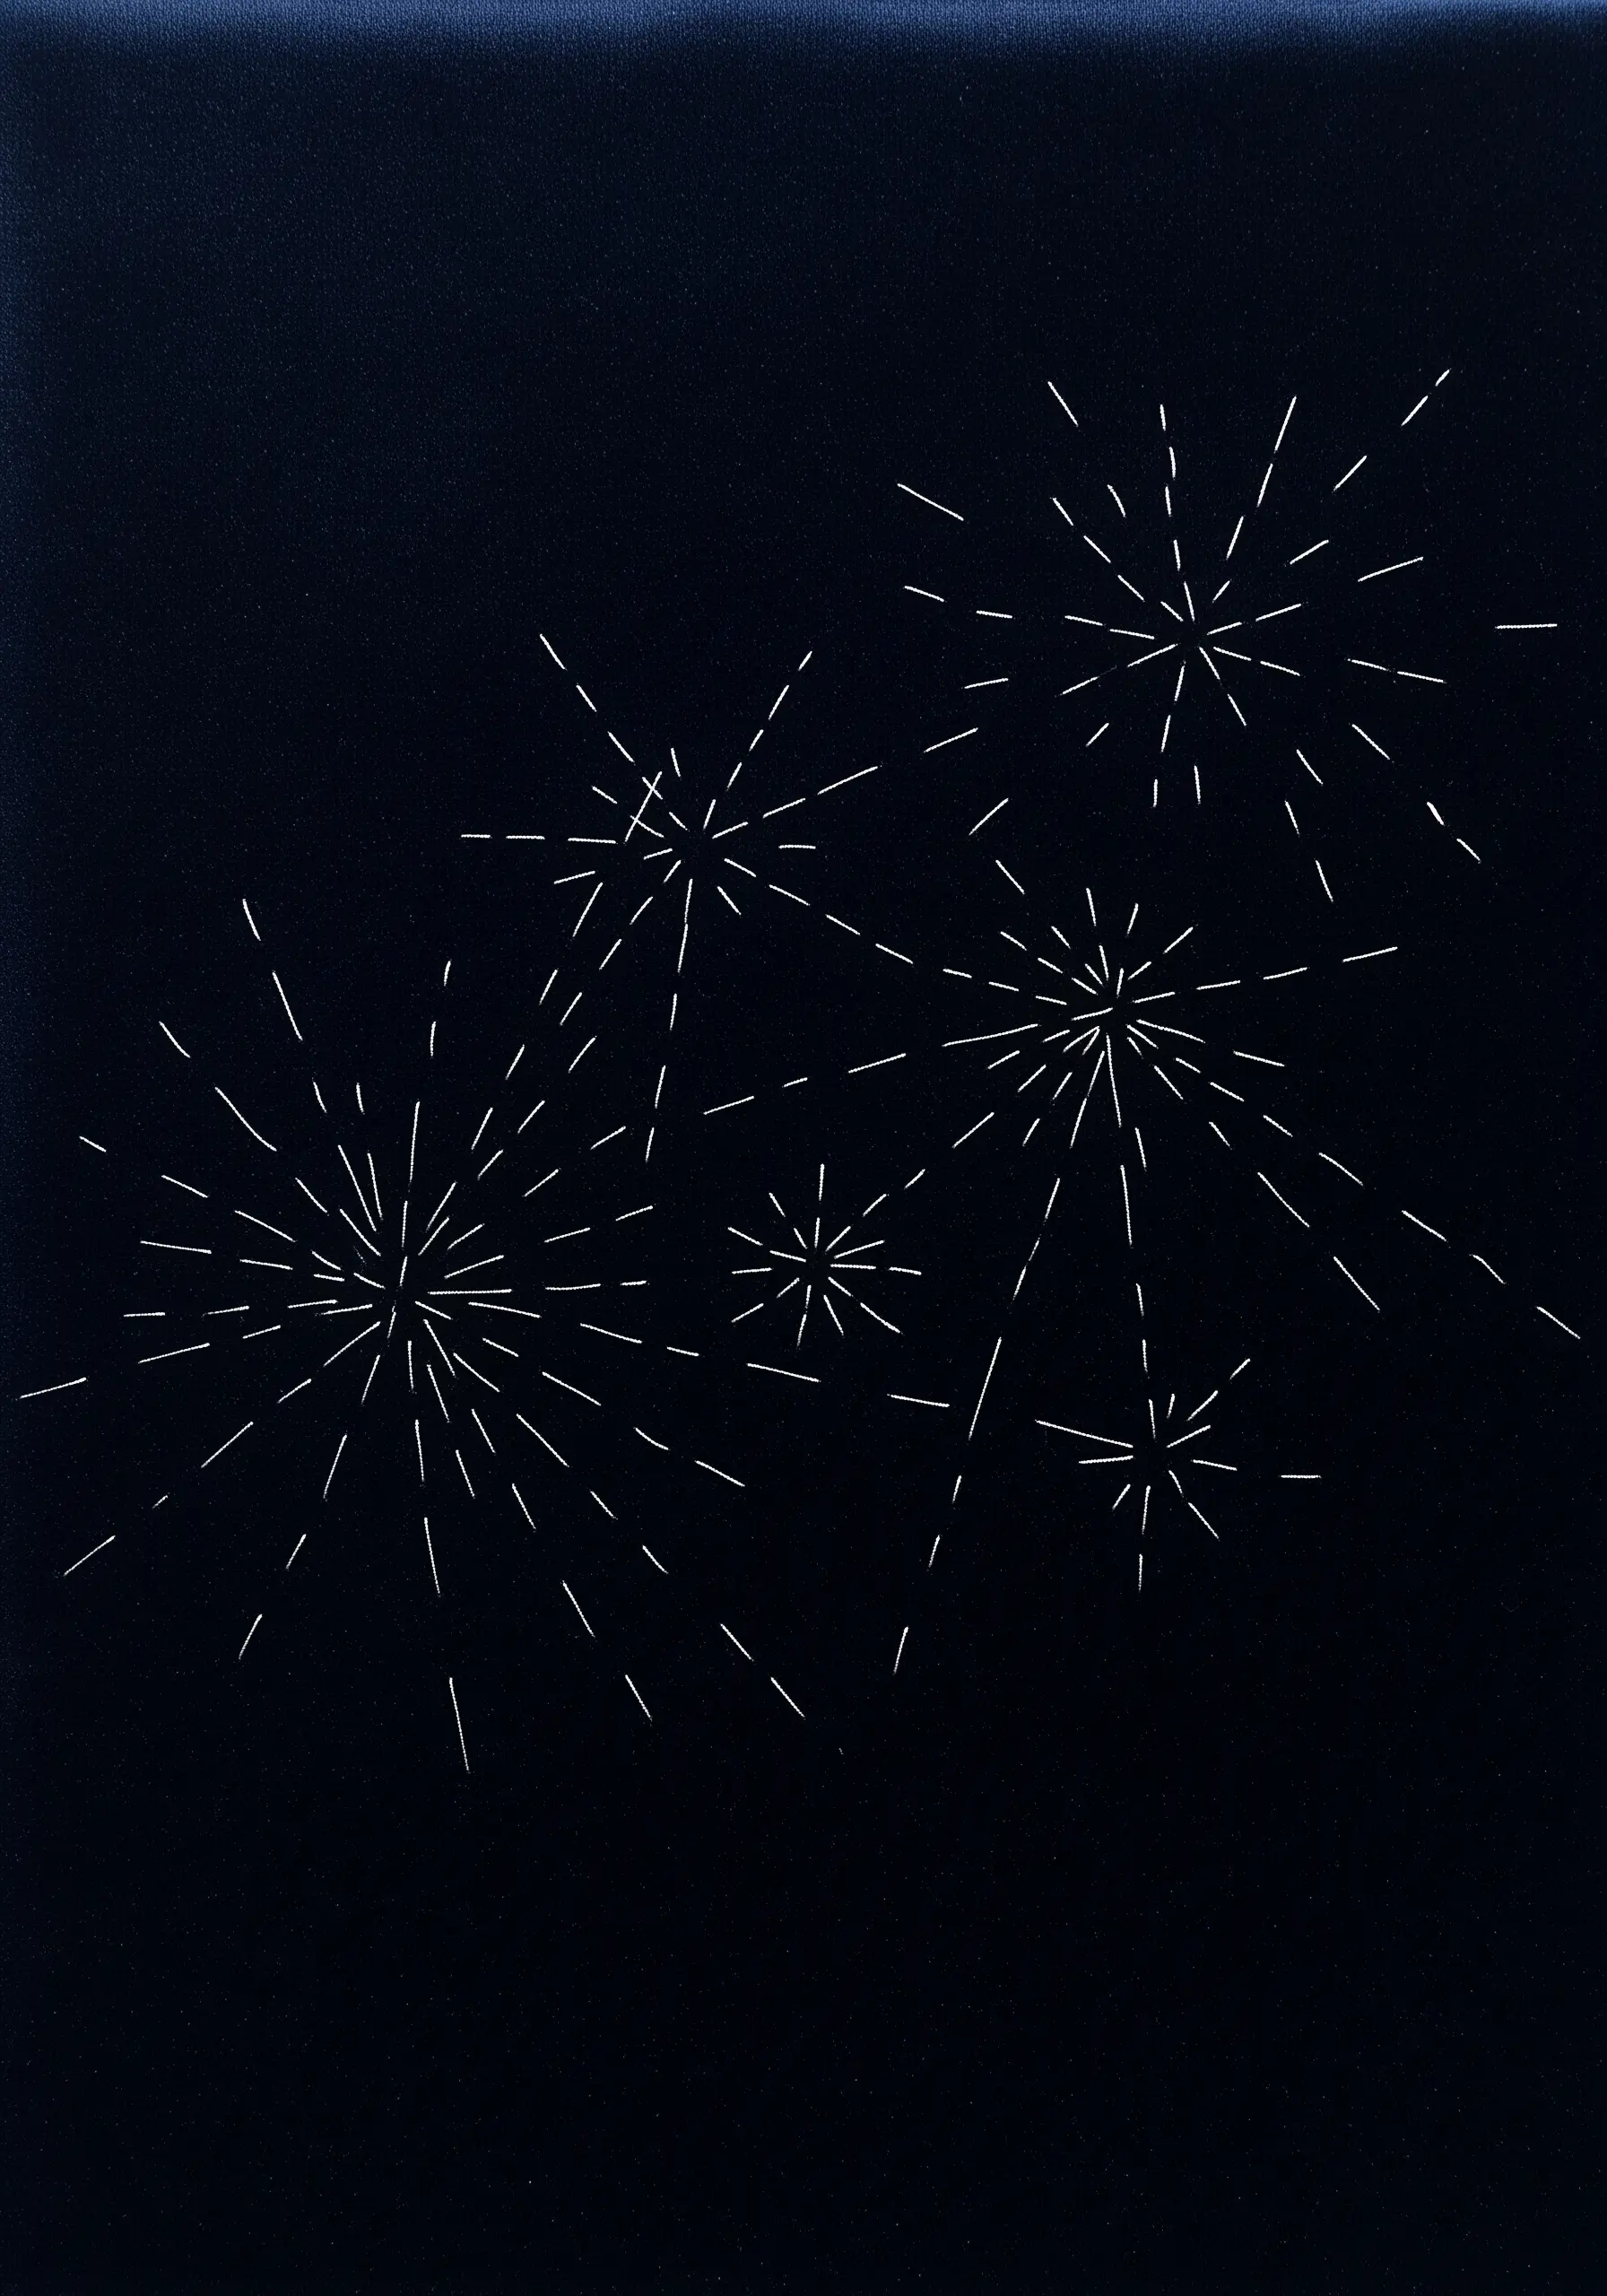
Capture the explosive energy of fireworks or the twinkle of stars with this simple yet effective technique.
From a central point, create a series of straight stitches that radiate outwards.
The key to making them feel alive is to vary the length of the stitches—some short, some long. This slight irregularity creates a sense of movement.
Stitching in a high-contrast color, like white on black, makes the design pop with graphic intensity.
29. Connecting Shapes with Interrupted Lines
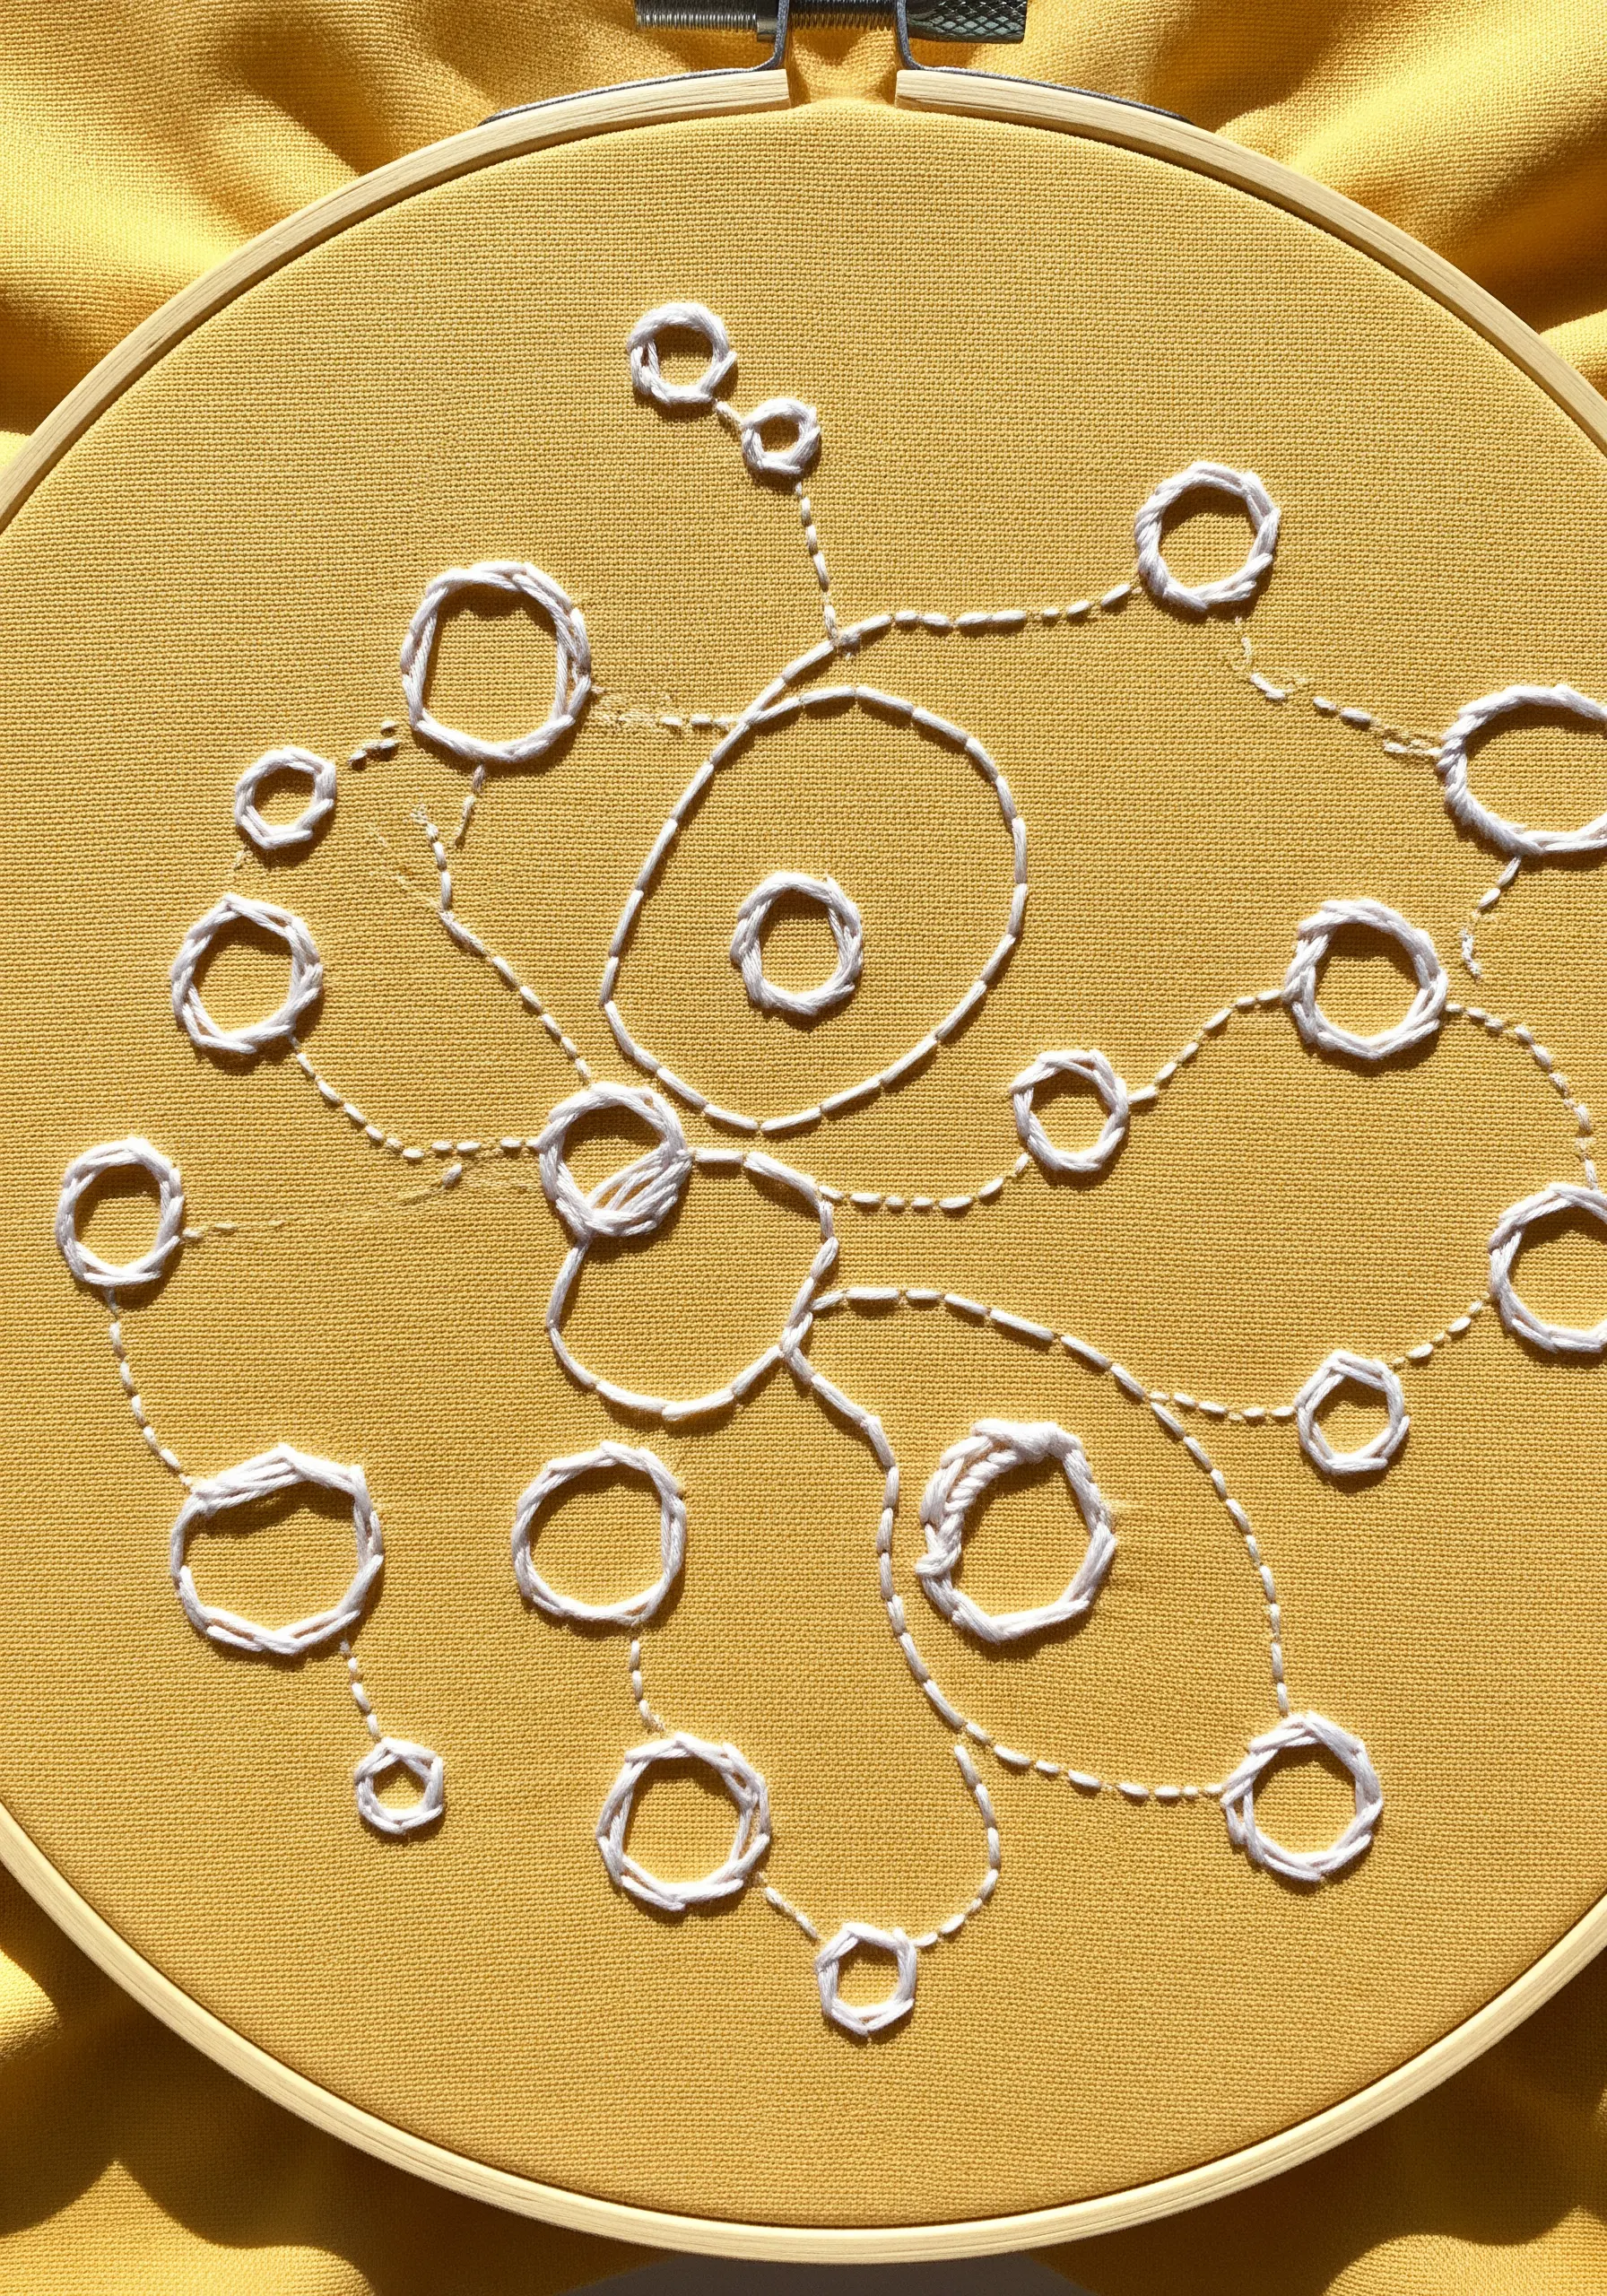
Create a design that feels like a playful map or a molecular structure by linking solid shapes with delicate, broken lines.
Use a smooth, solid stitch like a whipped backstitch or satin stitch for your main circular motifs.
Then, connect them with a simple running stitch. The gaps in the running stitch create a light, airy feel and guide the eye across the composition without making it feel cluttered.
This balance of solid and dashed elements results in a dynamic and engaging design.


