
You have the thread, the fabric, and the desire to create something beautiful. But perhaps you feel your work is missing that final touch of polish—the kind that transforms a simple project into a piece of personal art. It’s not about complexity or time; it’s about intention.
Think of your needle not just as a tool, but as a pen. Consider your thread not just as color, but as texture and light. In less than an hour, you can practice one deliberate technique that will elevate everything you stitch from now on.
These ideas are designed to be your quick, quiet moments of creative focus. They are small adjustments—a change in stitch direction, a mix of thread weights, a thoughtful use of negative space—that deliver an immediate and satisfying improvement. Let’s begin.
1. Mastering Lavender with French Knots and Stem Stitch
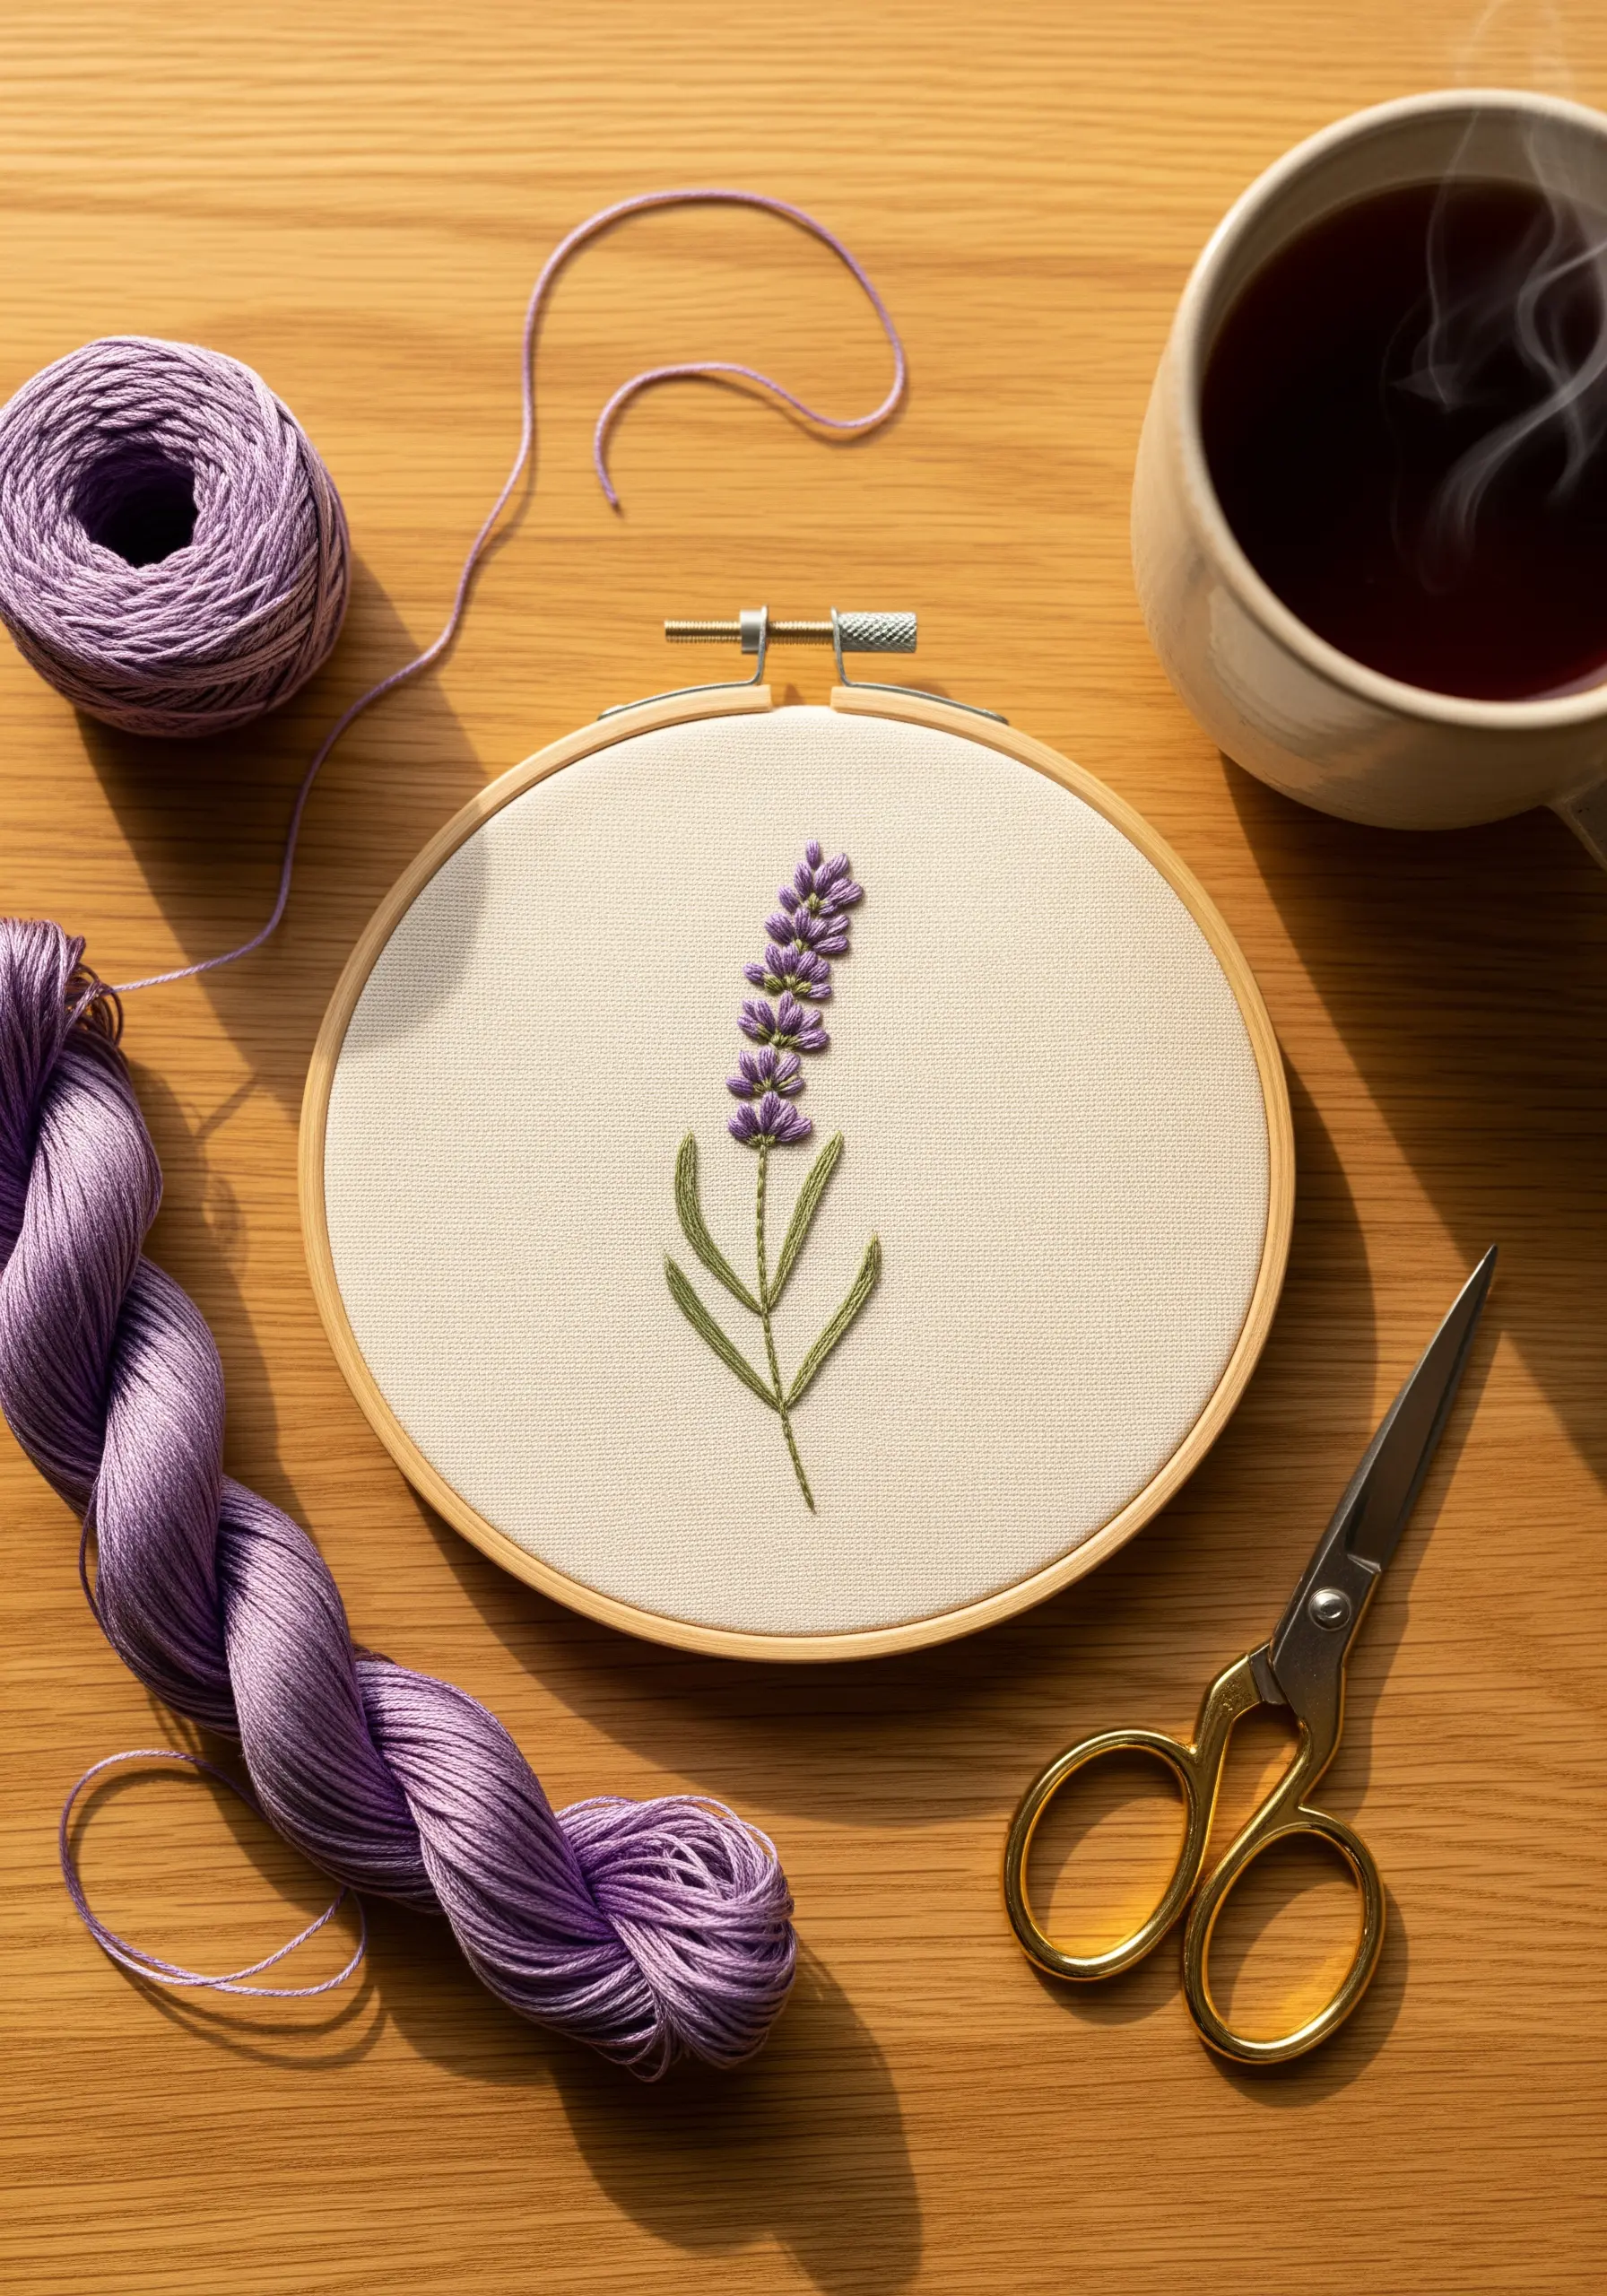
Create realistic texture by using French knots for the lavender buds, varying the number of wraps around your needle to create different sizes.
This mimics the natural, clustered appearance of a lavender flower.
For the stalk, use a single strand of floss with a stem stitch to keep it looking delicate and fine.
A few detached chain stitches (lazy daisies) are perfect for the slender leaves, adding just enough shape without bulk.
Using two or three shades of purple will give the buds dimensional color, making them look far more lifelike.
2. Geometric Stitching on Felt for Modern Coasters
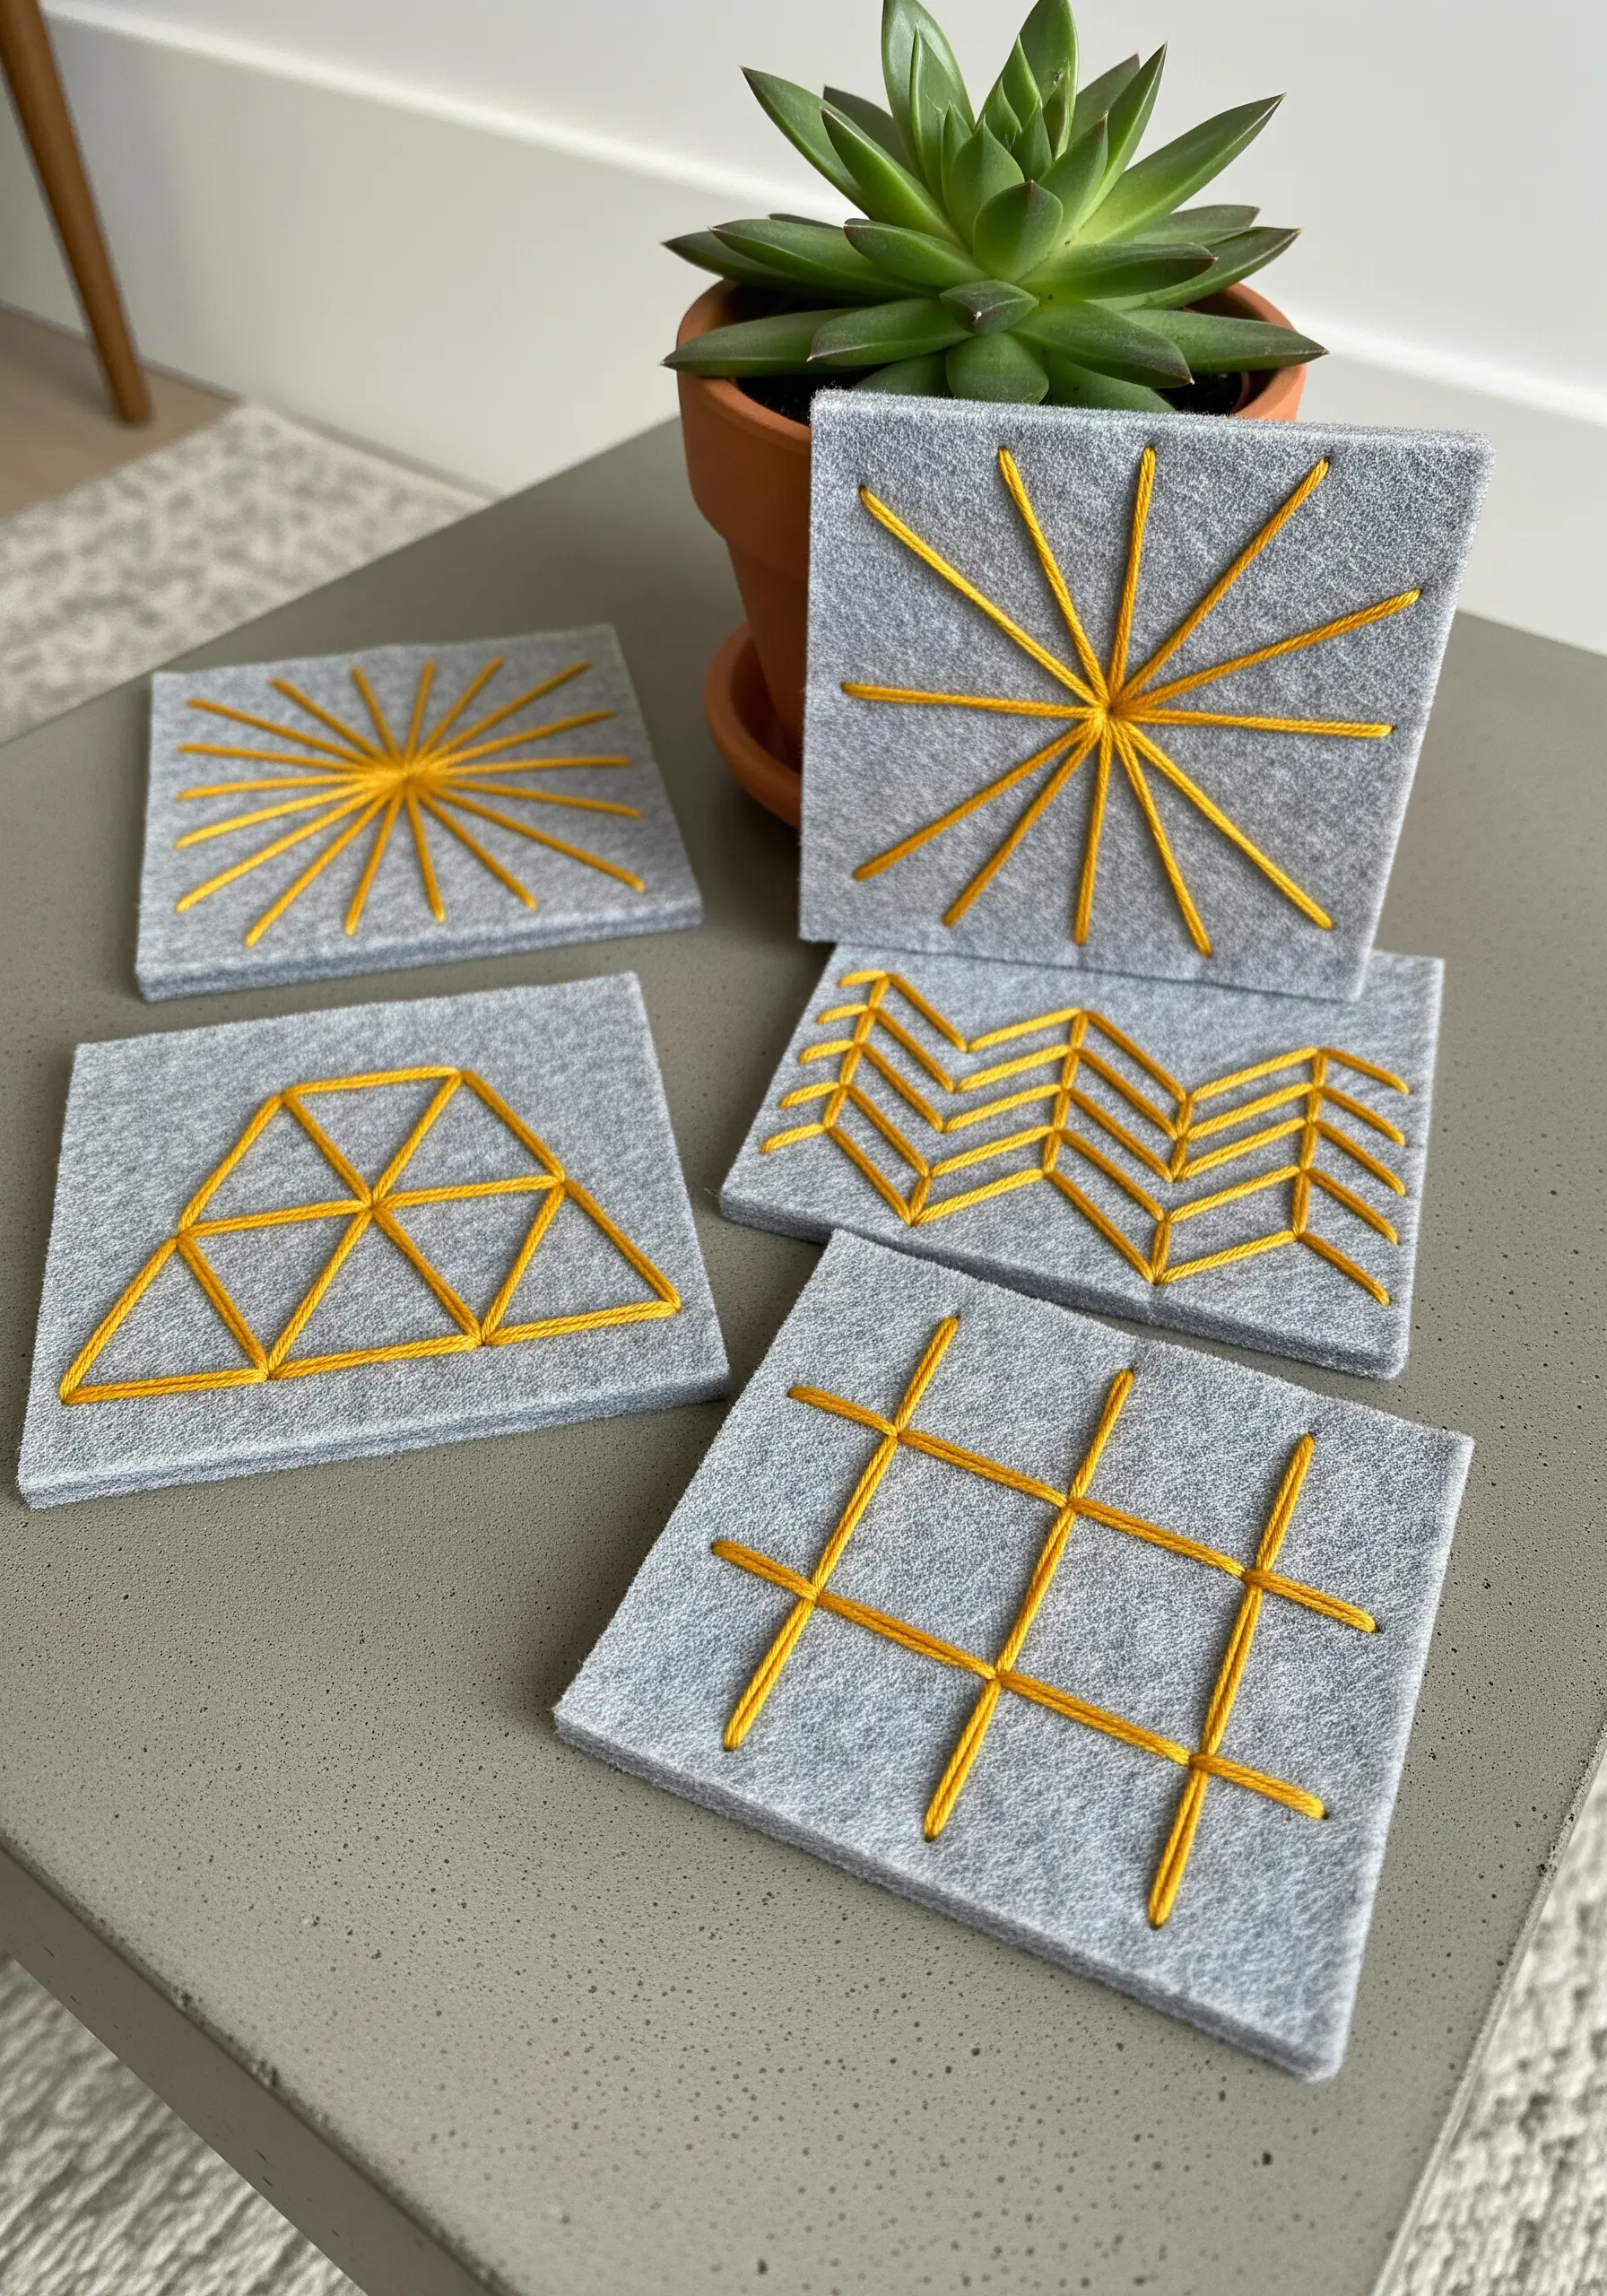
Felt is an ideal surface for a quick project because it doesn’t fray and provides a stable, non-slip base for your stitches.
Use a thicker thread, like pearl cotton No. 5 or all six strands of embroidery floss, to make your lines bold and graphic.
Simple stitches like backstitch or running stitch are all you need to create compelling geometric patterns.
Focus on maintaining consistent stitch length and even tension to ensure your lines are sharp and your shapes are symmetrical.
This transforms simple felt squares into unique handmade gifts.
3. Celestial Art with Beaded Constellations
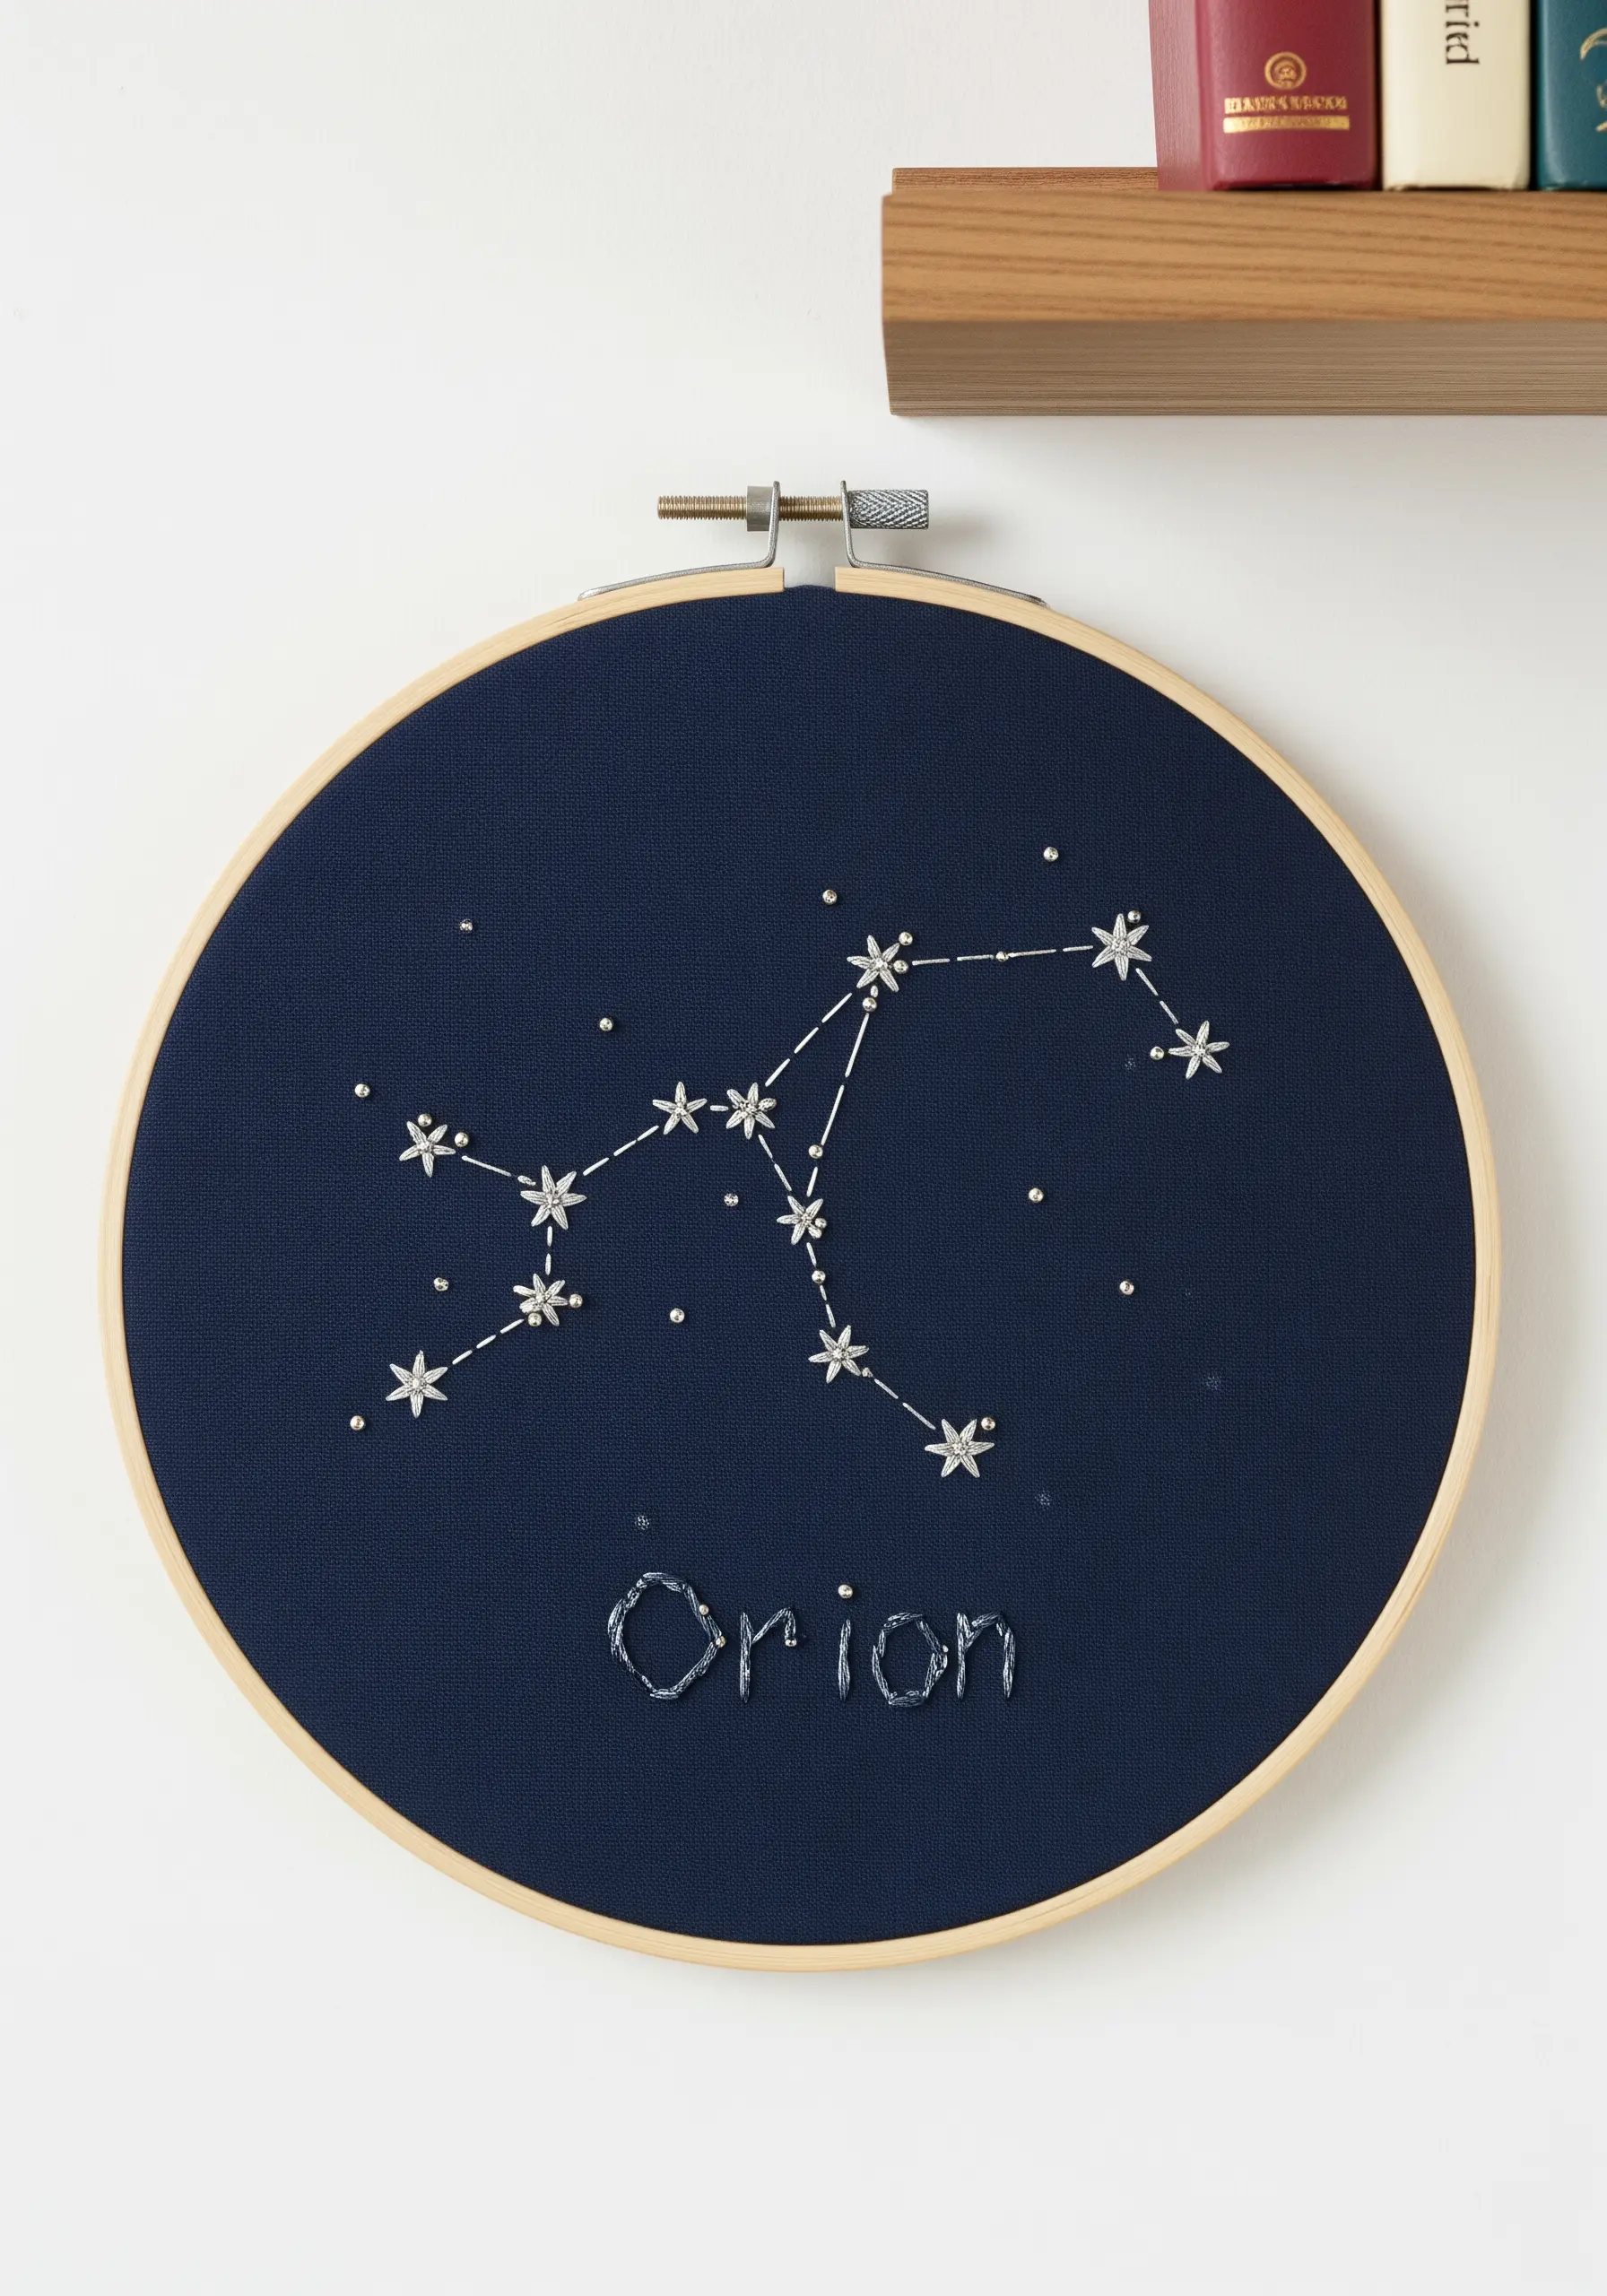
Elevate a simple backstitched line by incorporating tiny seed beads to represent the stars.
This adds a subtle, light-catching sparkle that makes the design feel magical, especially on dark navy or black fabric.
Use a single strand of thread that matches your fabric for the connecting lines; this makes the beaded stars the true focal point.
A beading needle is slightly thinner and more flexible, making it easier to pass through the tiny holes in the beads.
Let your stitches map the night sky and bring a cosmic touch to your wall.
4. The Art of the Elegant Monogram
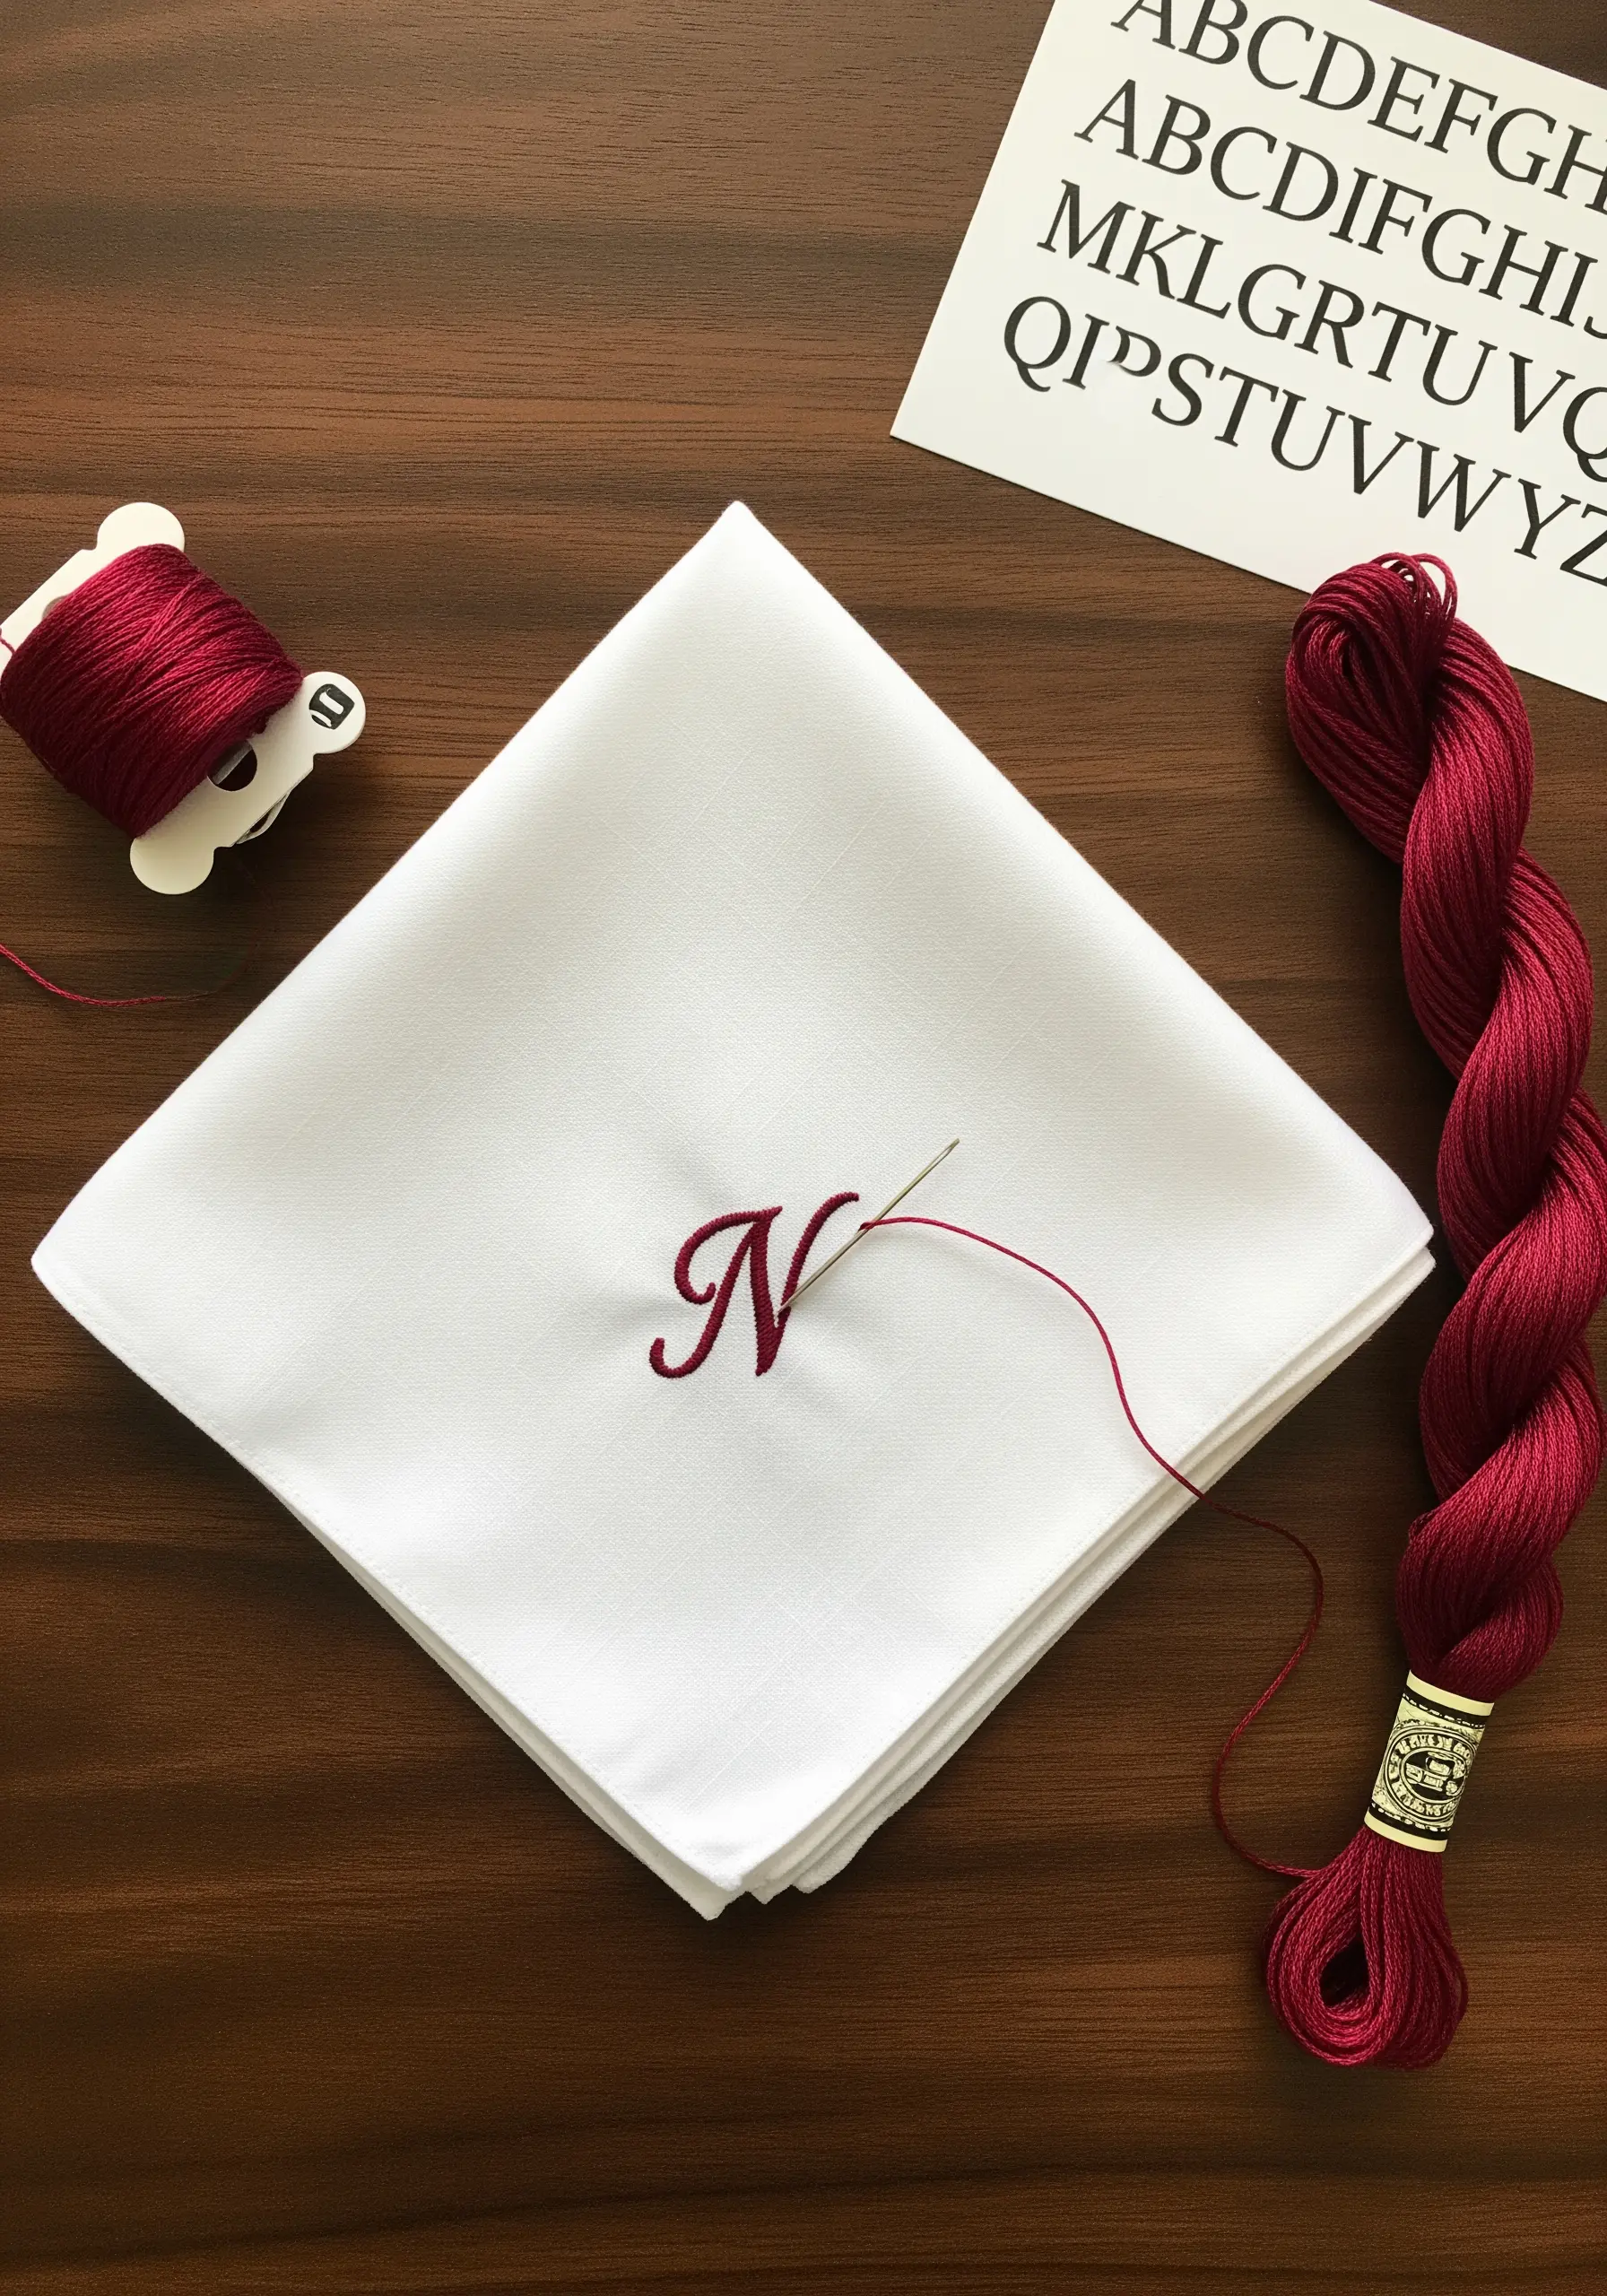
A beautiful satin stitch is the key to a classic, raised monogram, but the secret to perfection lies in the preparation.
First, outline your letter with a split stitch using two strands of floss.
This creates a subtle, raised boundary that acts as a perfect guide for your satin stitches, ensuring crisp edges and a smooth, padded finish.
Stitch on a high-quality, tightly woven fabric like linen or cotton batiste to prevent puckering and showcase the thread’s sheen.
The result is a timeless monogram that feels both personal and luxurious.
5. Minimalist Florals with Single-Thread Backstitch
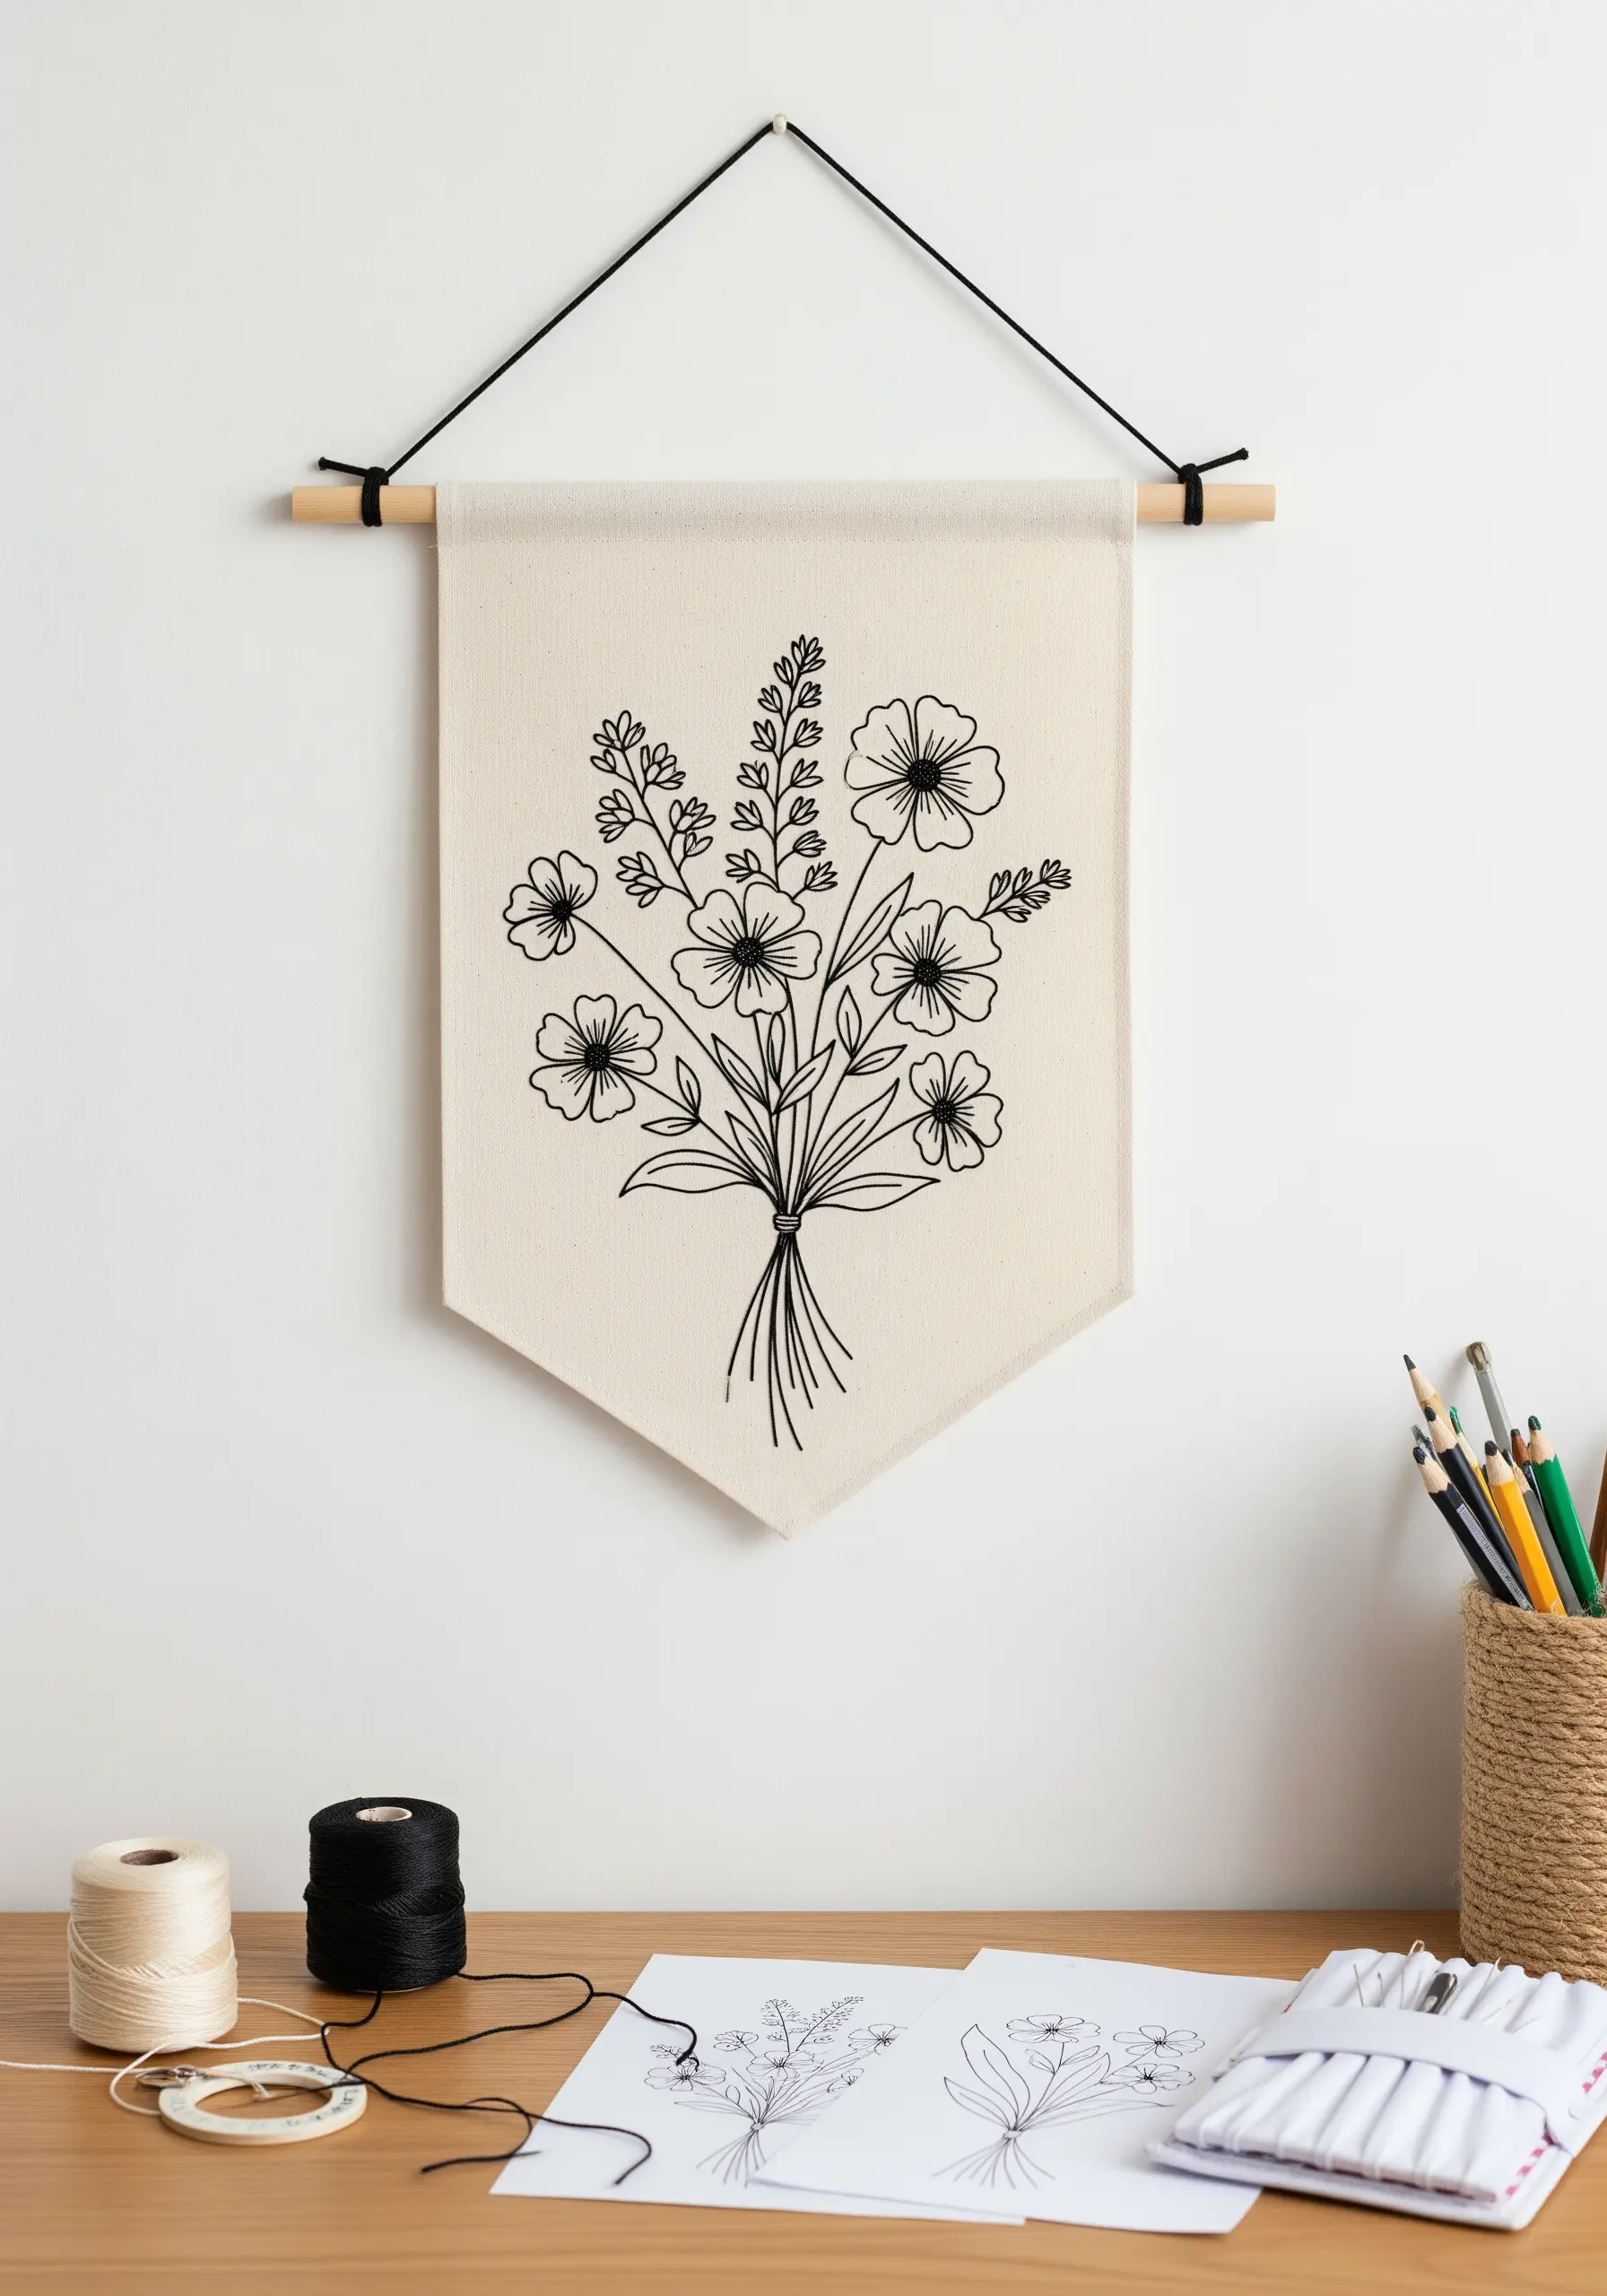
To achieve the delicate, effortless look of a line drawing, use only a single strand of black embroidery floss.
This technique is all about precision; treat your needle like a fine-tipped pen and focus on keeping your backstitches small and consistent in length, especially around curves.
This ensures your lines flow gracefully without appearing jagged or broken.
Stitching on a neutral, medium-weight canvas provides the perfect gallery-like backdrop for your minimalist artwork, giving it a modern, graphic look.
6. Abstract Texture with Scattered Seed Stitches
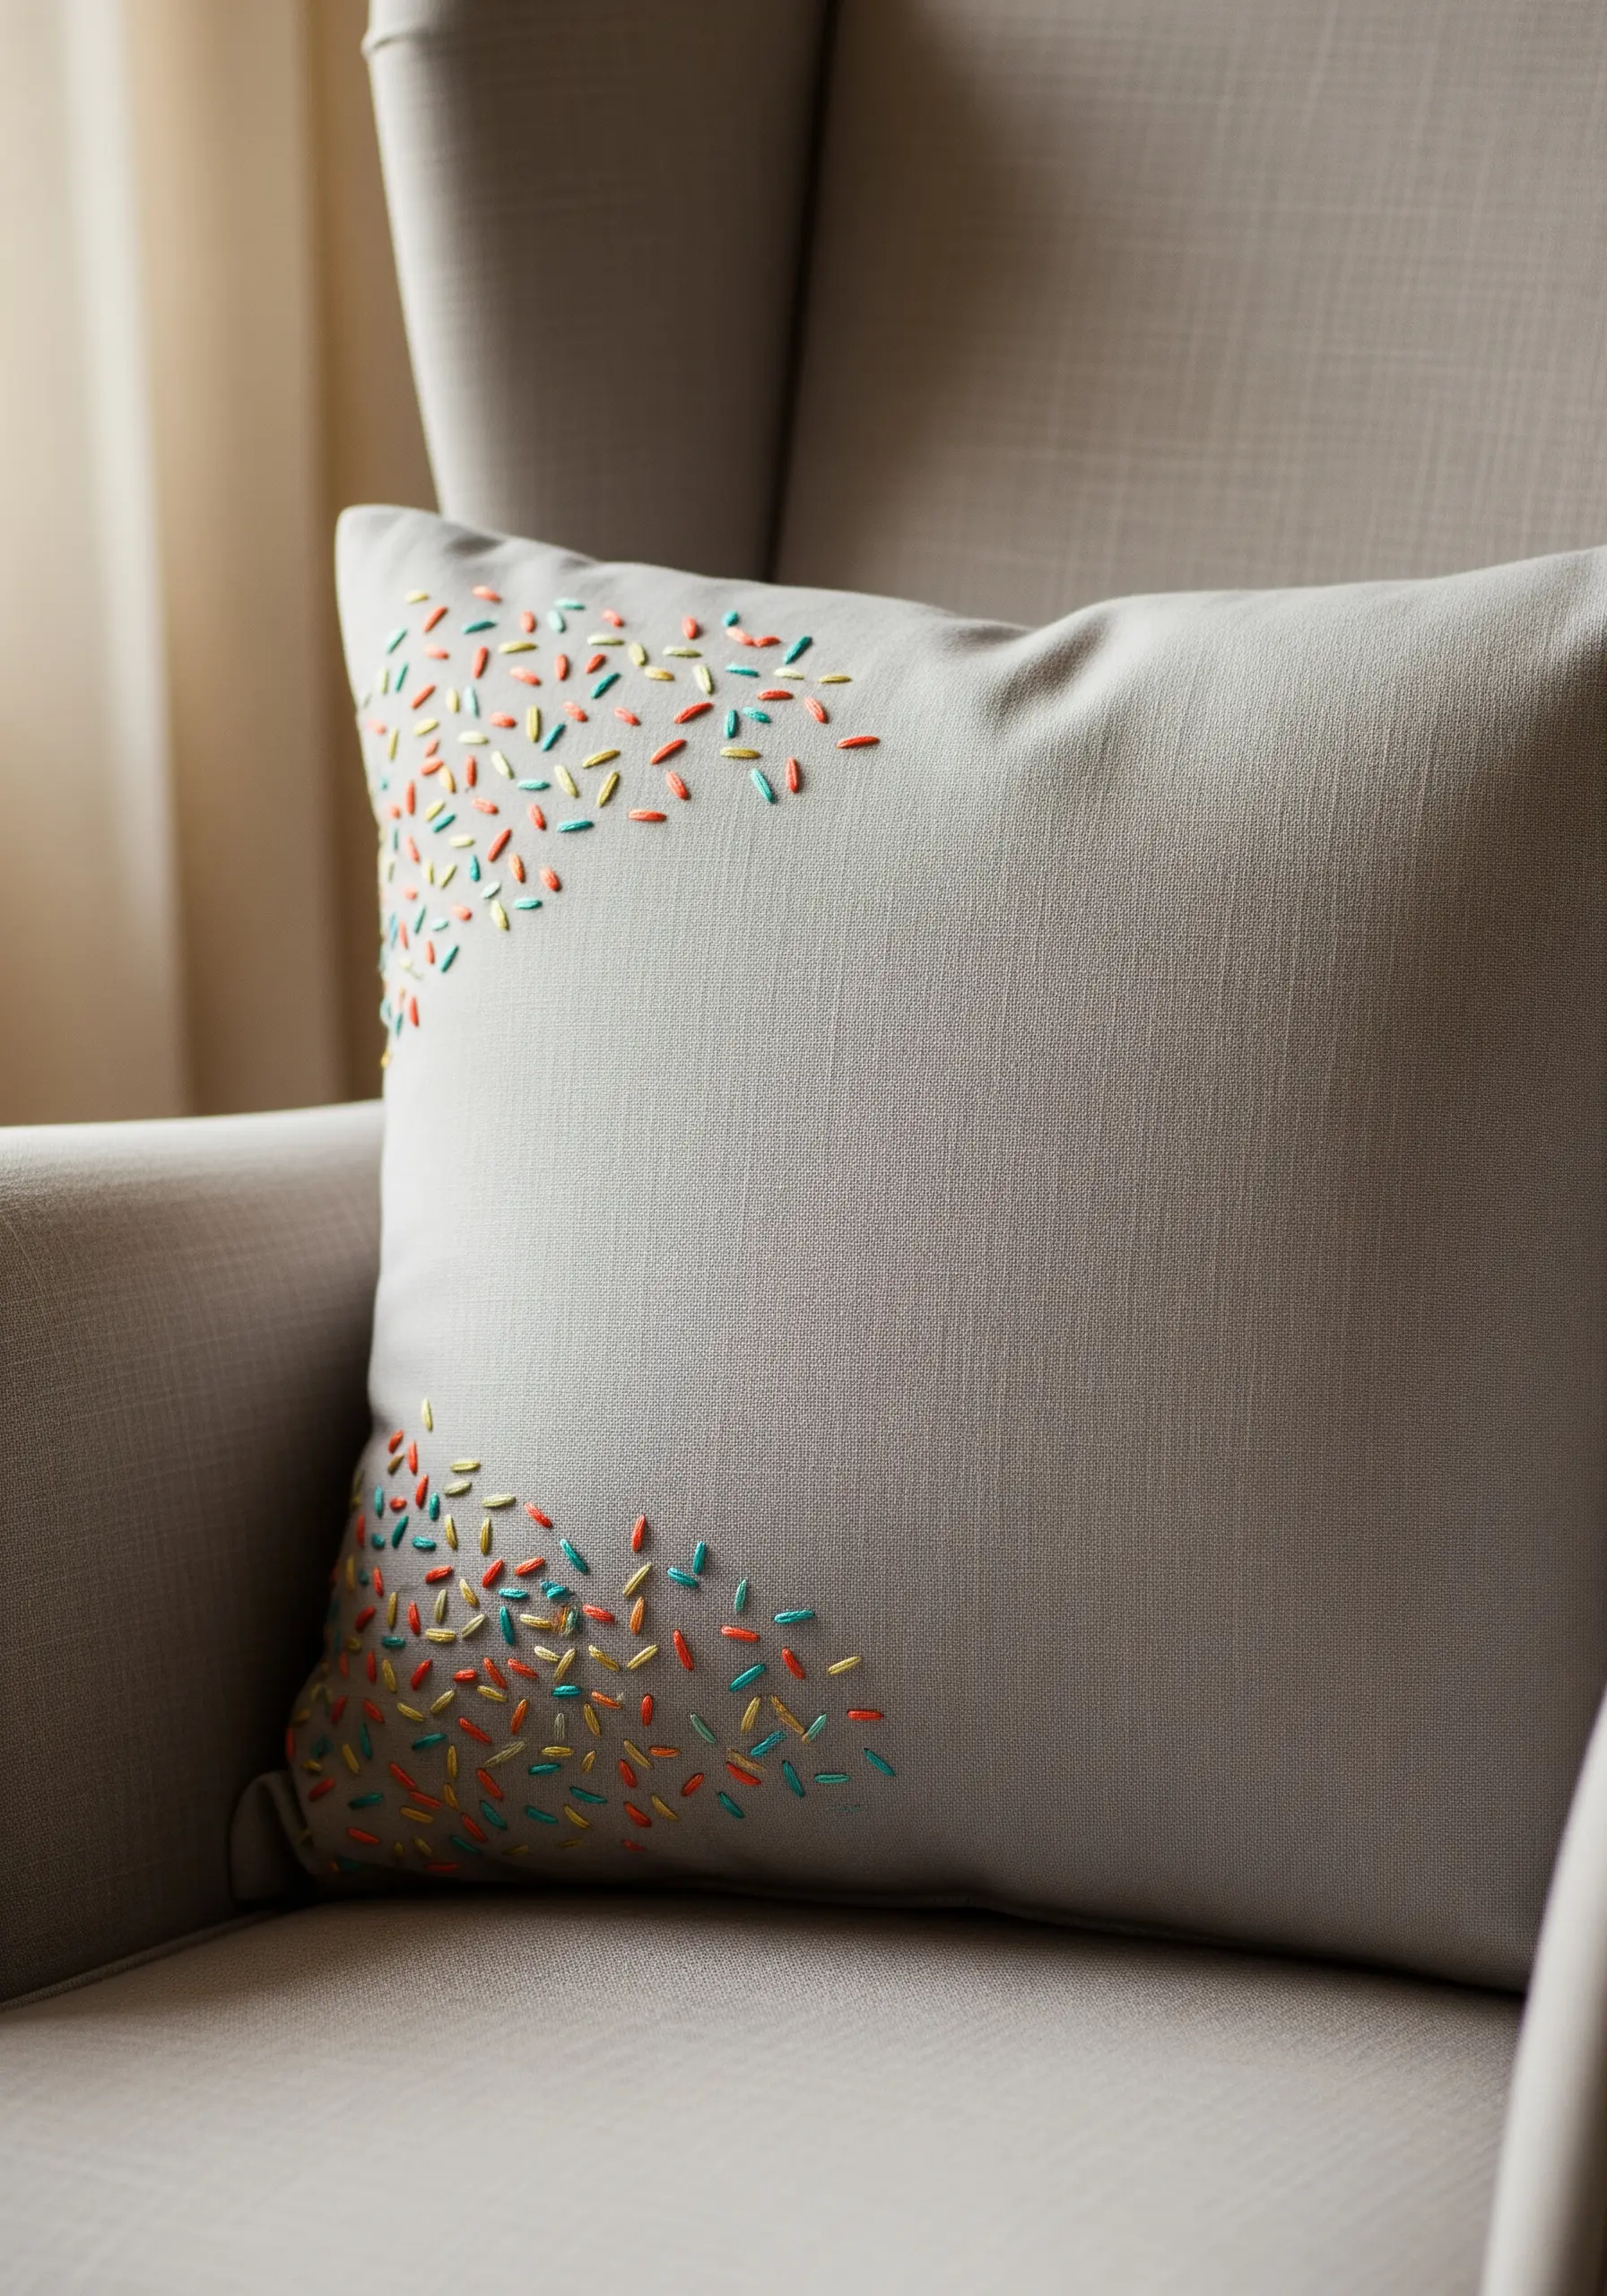
Create a playful, modern confetti effect using one of the simplest stitches: the seed stitch.
These are small, straight stitches worked in random directions to fill an area with color and texture.
Vary the length and angle of each stitch to enhance the spontaneous, organic feel.
For a dynamic composition, cluster the stitches more densely in one area and let them scatter outwards, creating a sense of movement.
This is a fast and effective way to add a pop of color and texture to a plain pillowcase.
7. Botanical Bookmark with Fishbone Stitch
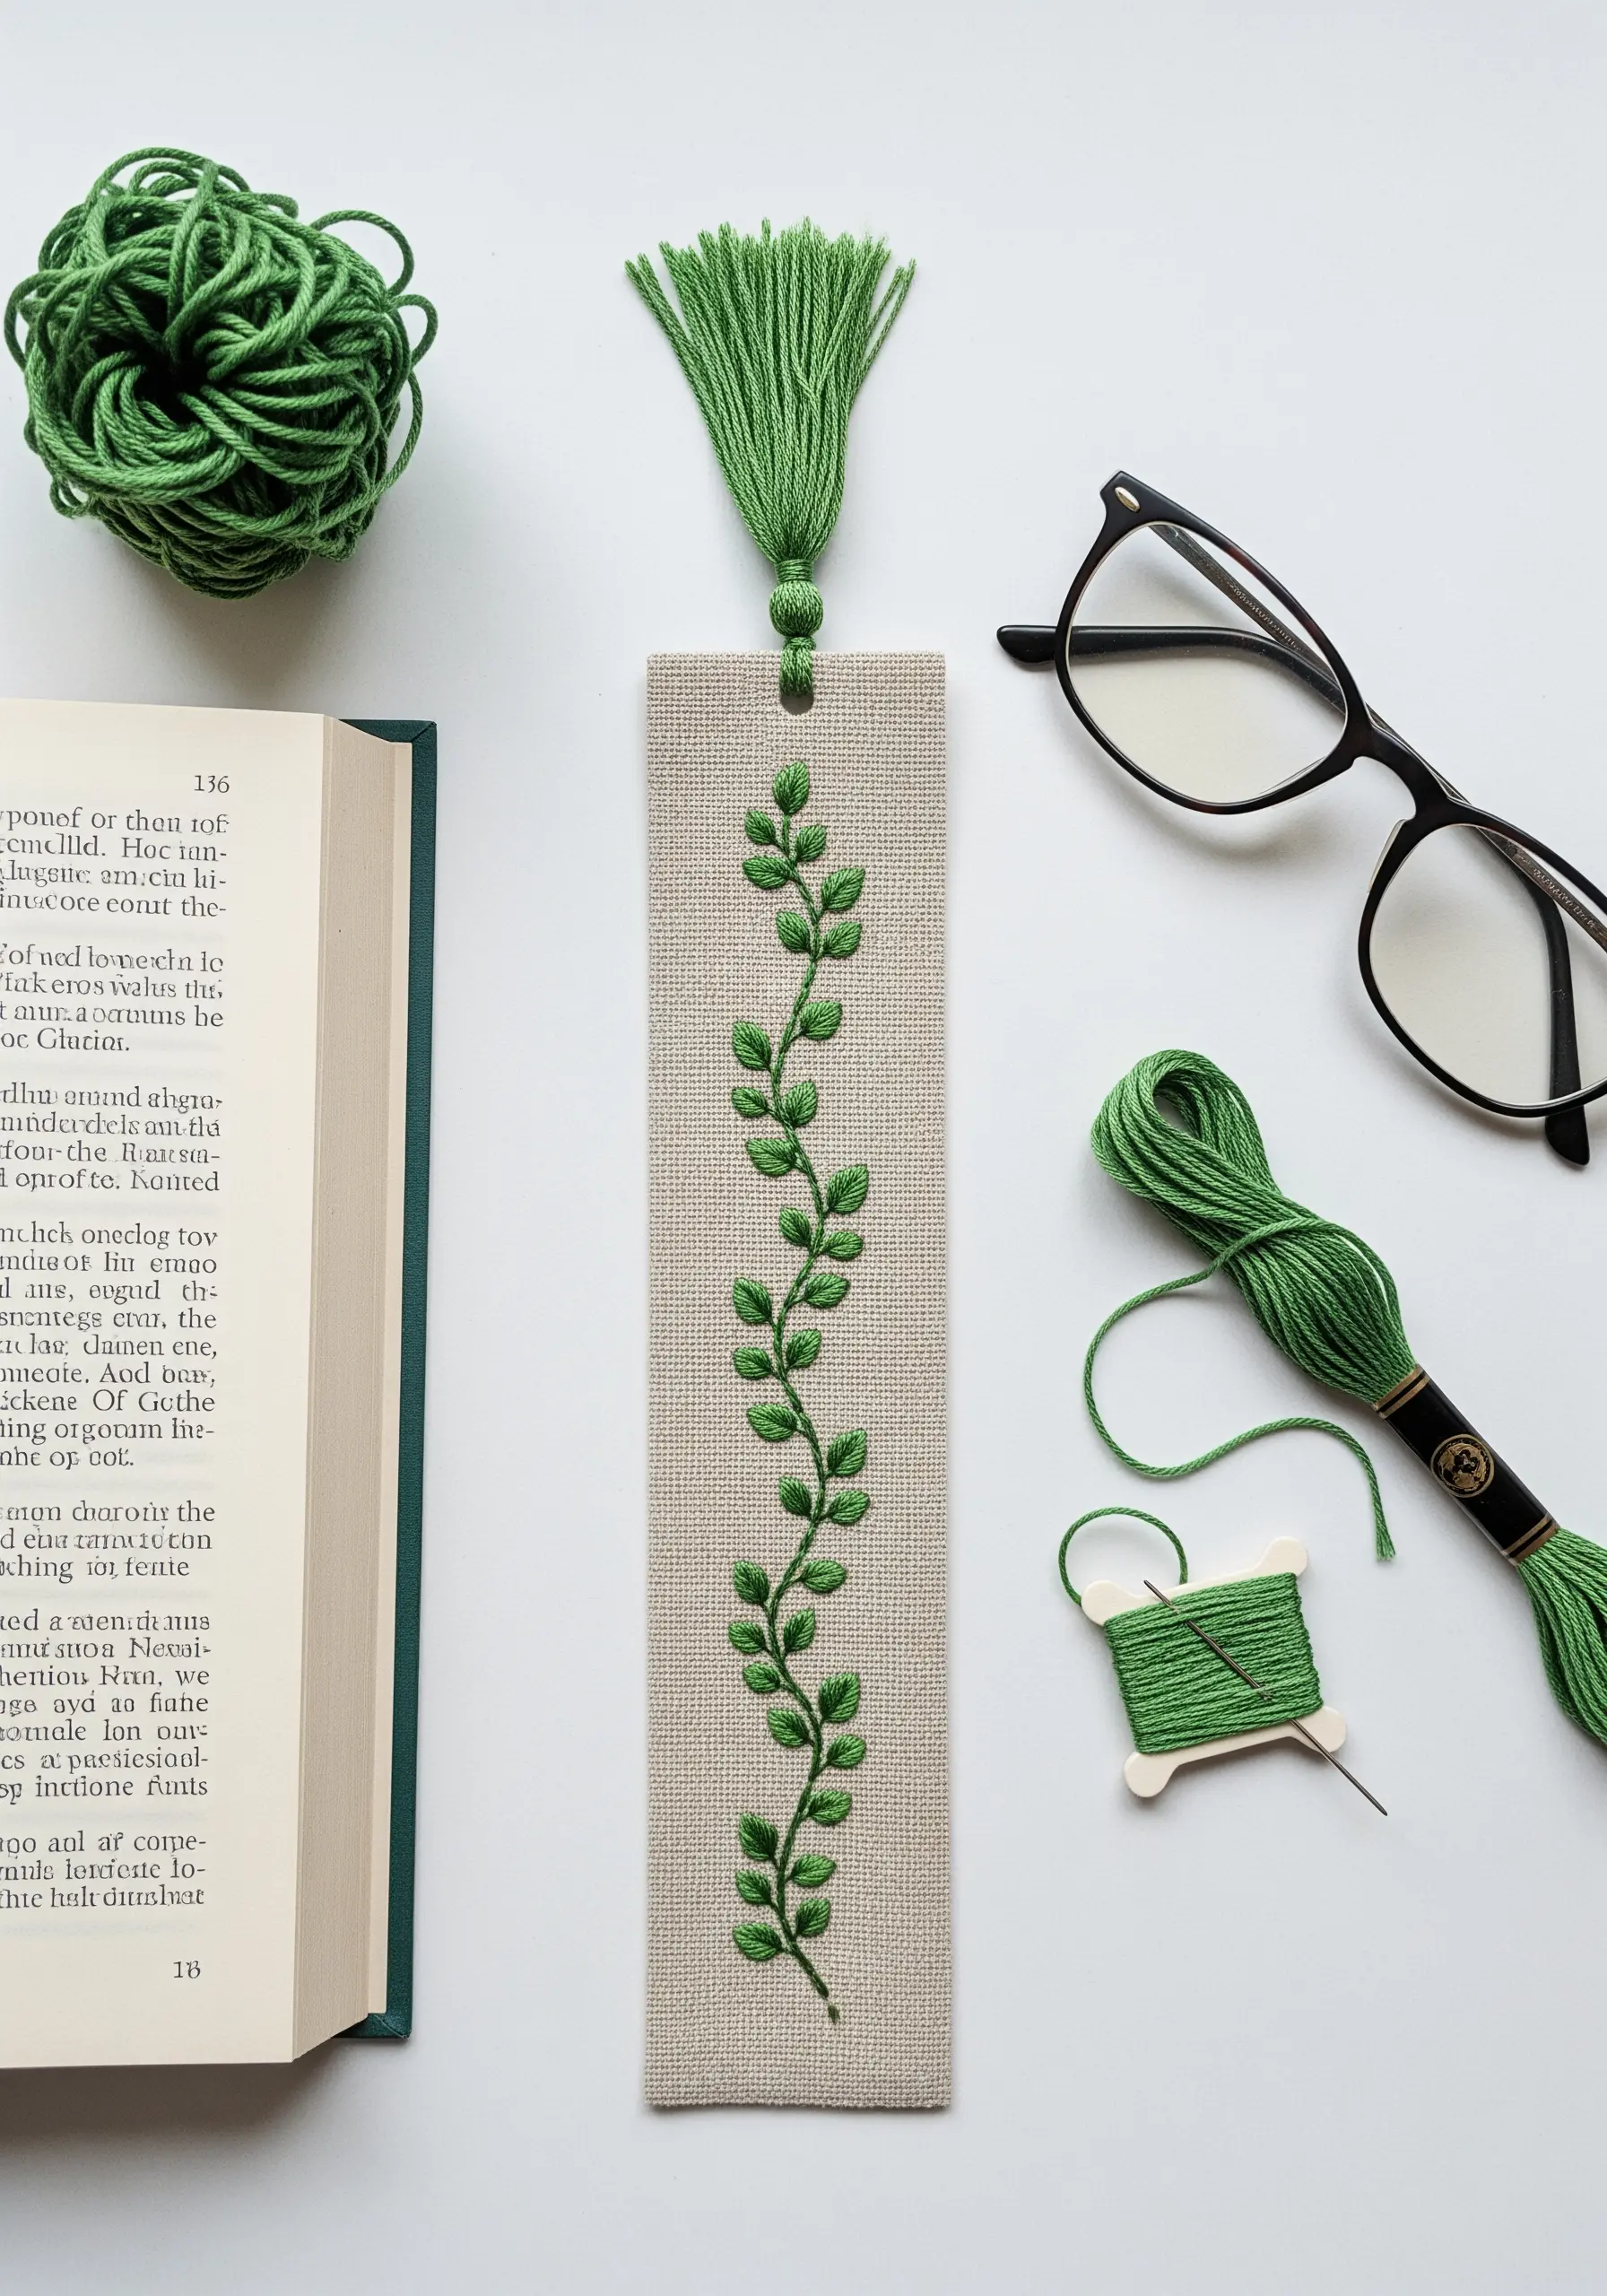
The fishbone stitch is your best choice for creating realistic leaves with a defined central vein, and it’s much faster than satin stitch.
Use three strands of floss to give the leaves a lush, substantial feel that stands out on the linen background.
Connect your leaves with a simple stem stitch to create a graceful, flowing vine.
Finishing the bookmark with a handmade tassel from the same thread ties the whole piece together, turning it into a treasured keepsake.
8. Adding a Tiny Motif to a Fabric Journal
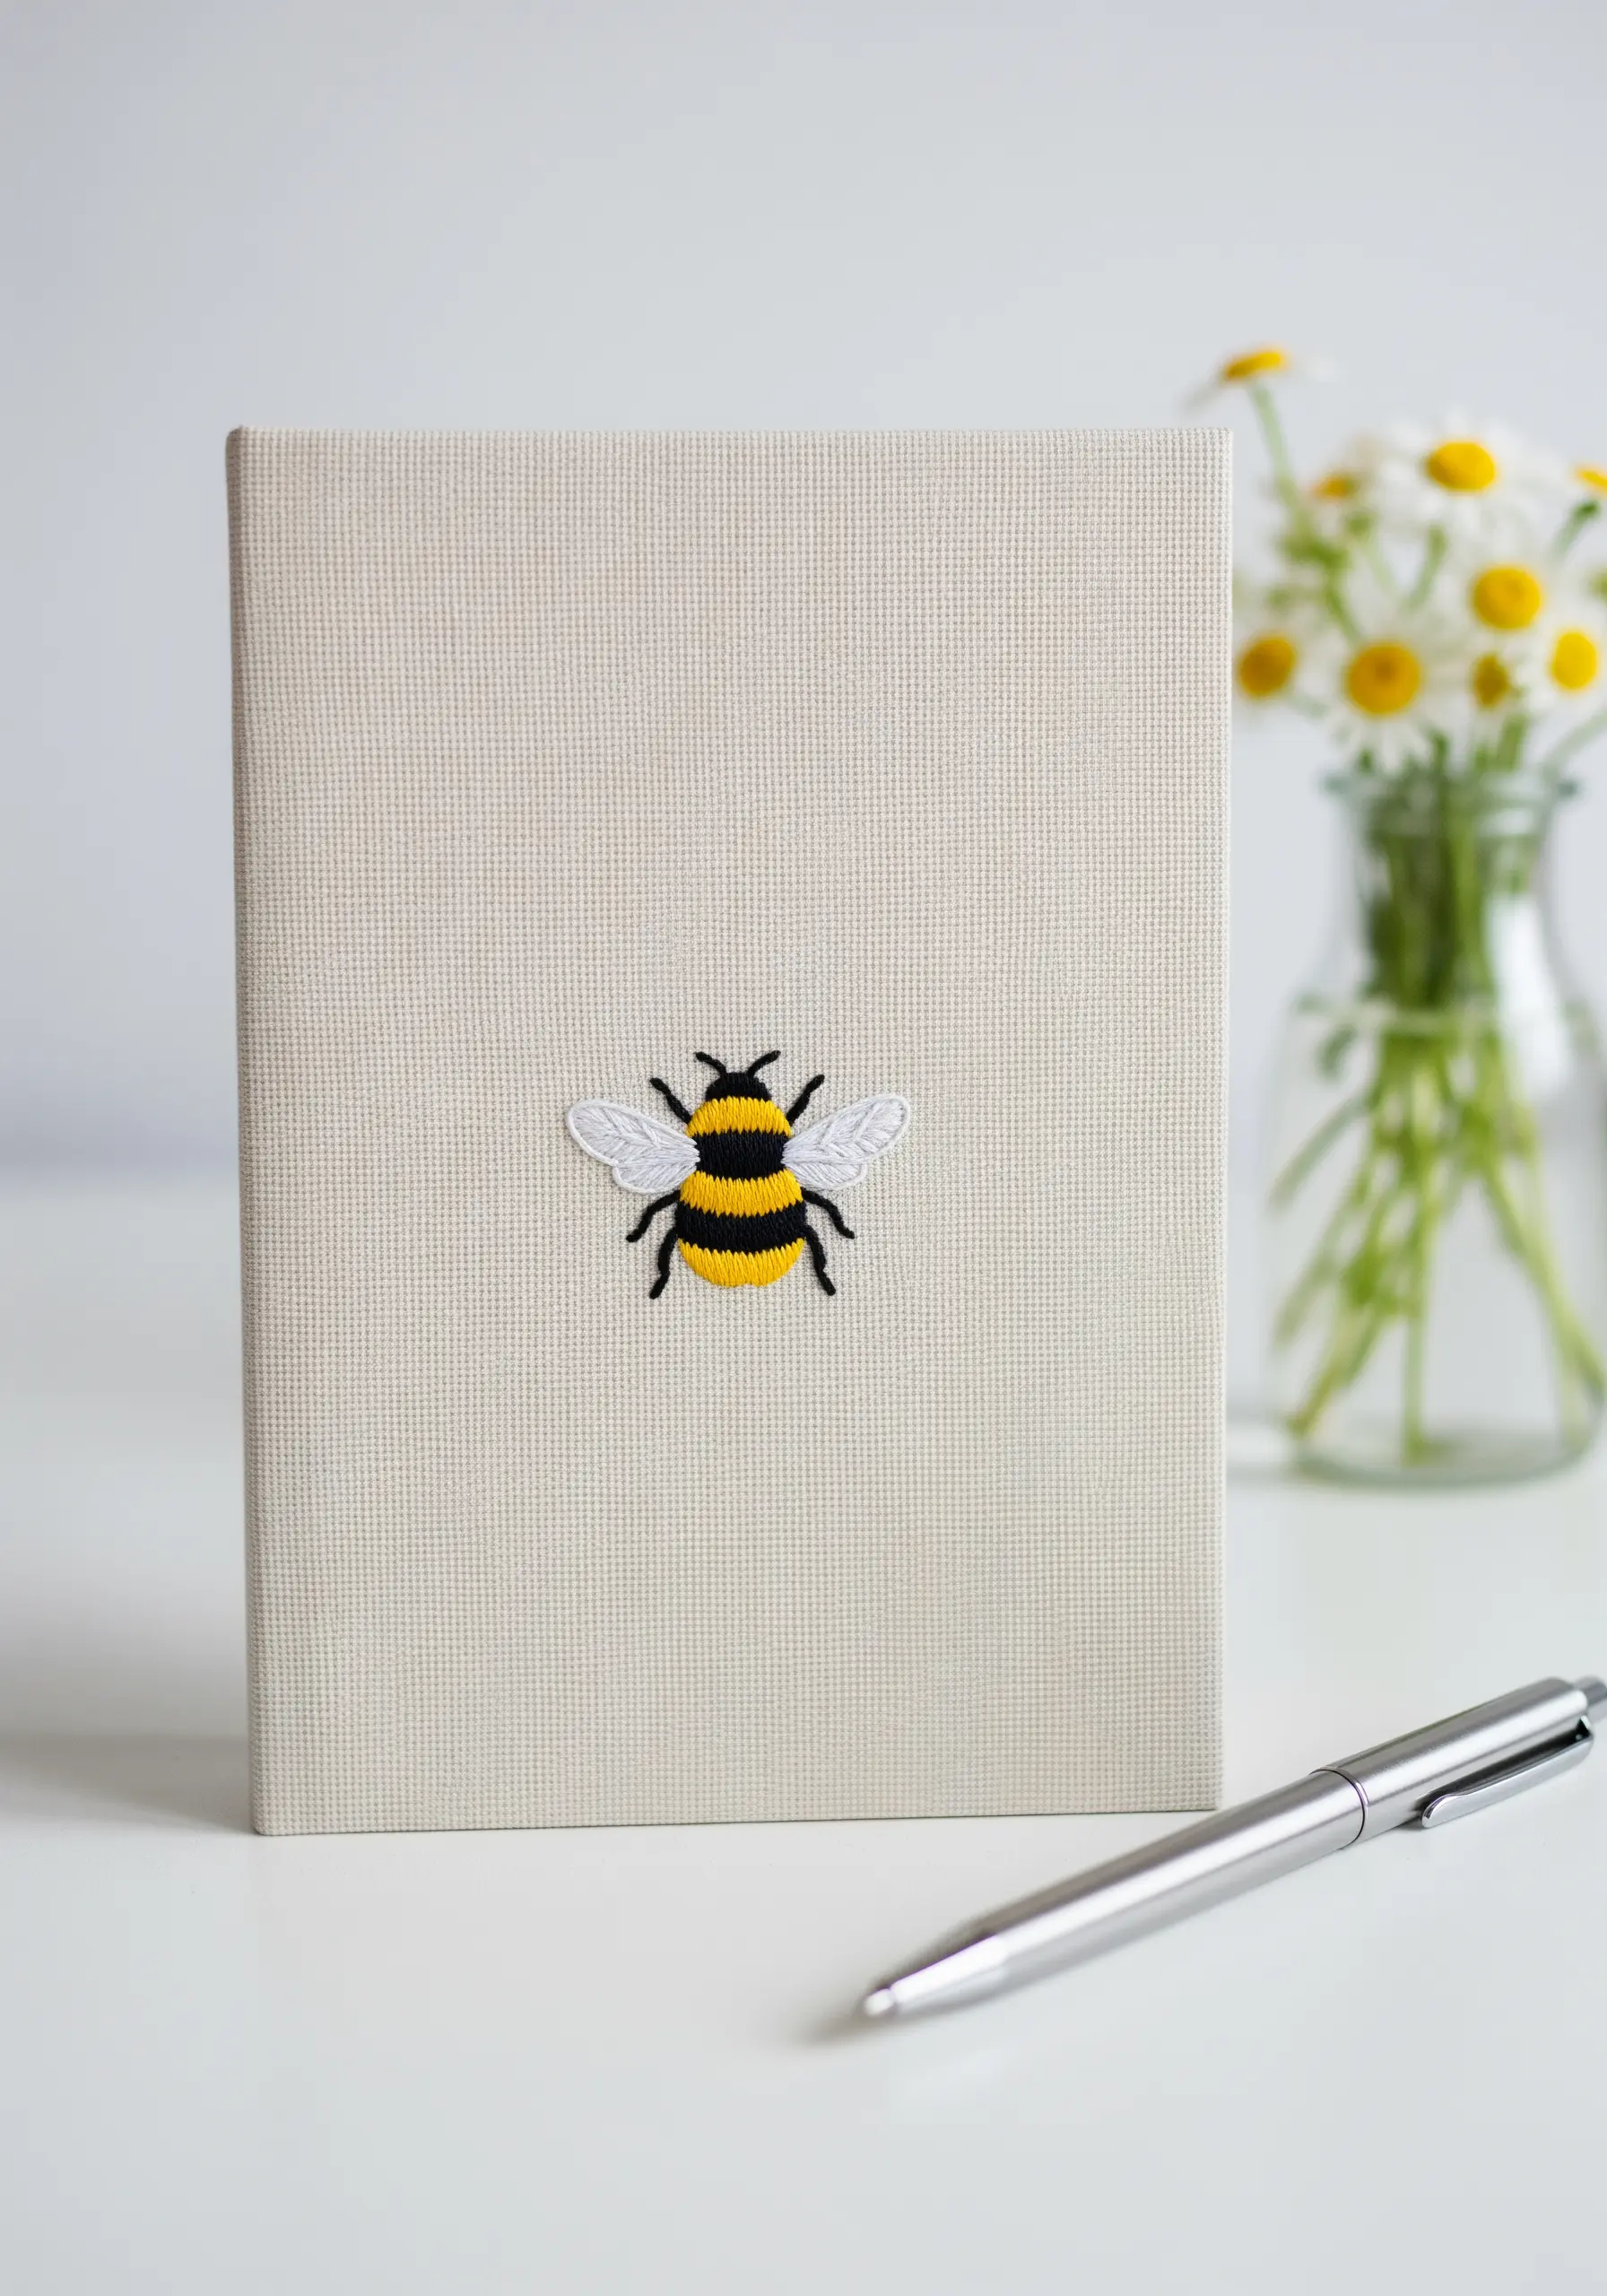
A single, meticulously stitched motif can instantly personalize an everyday object like a journal.
For a tiny design like this bee, use just one or two strands of floss to capture the fine details.
Satin stitch creates the bold stripes, while a single detached chain stitch on each side forms the delicate, translucent wings.
Transfer your design with a fine-tipped, water-soluble pen to ensure your guidelines are precise and disappear completely.
9. A Simple Plant Pot Wrap with Repeated Motifs
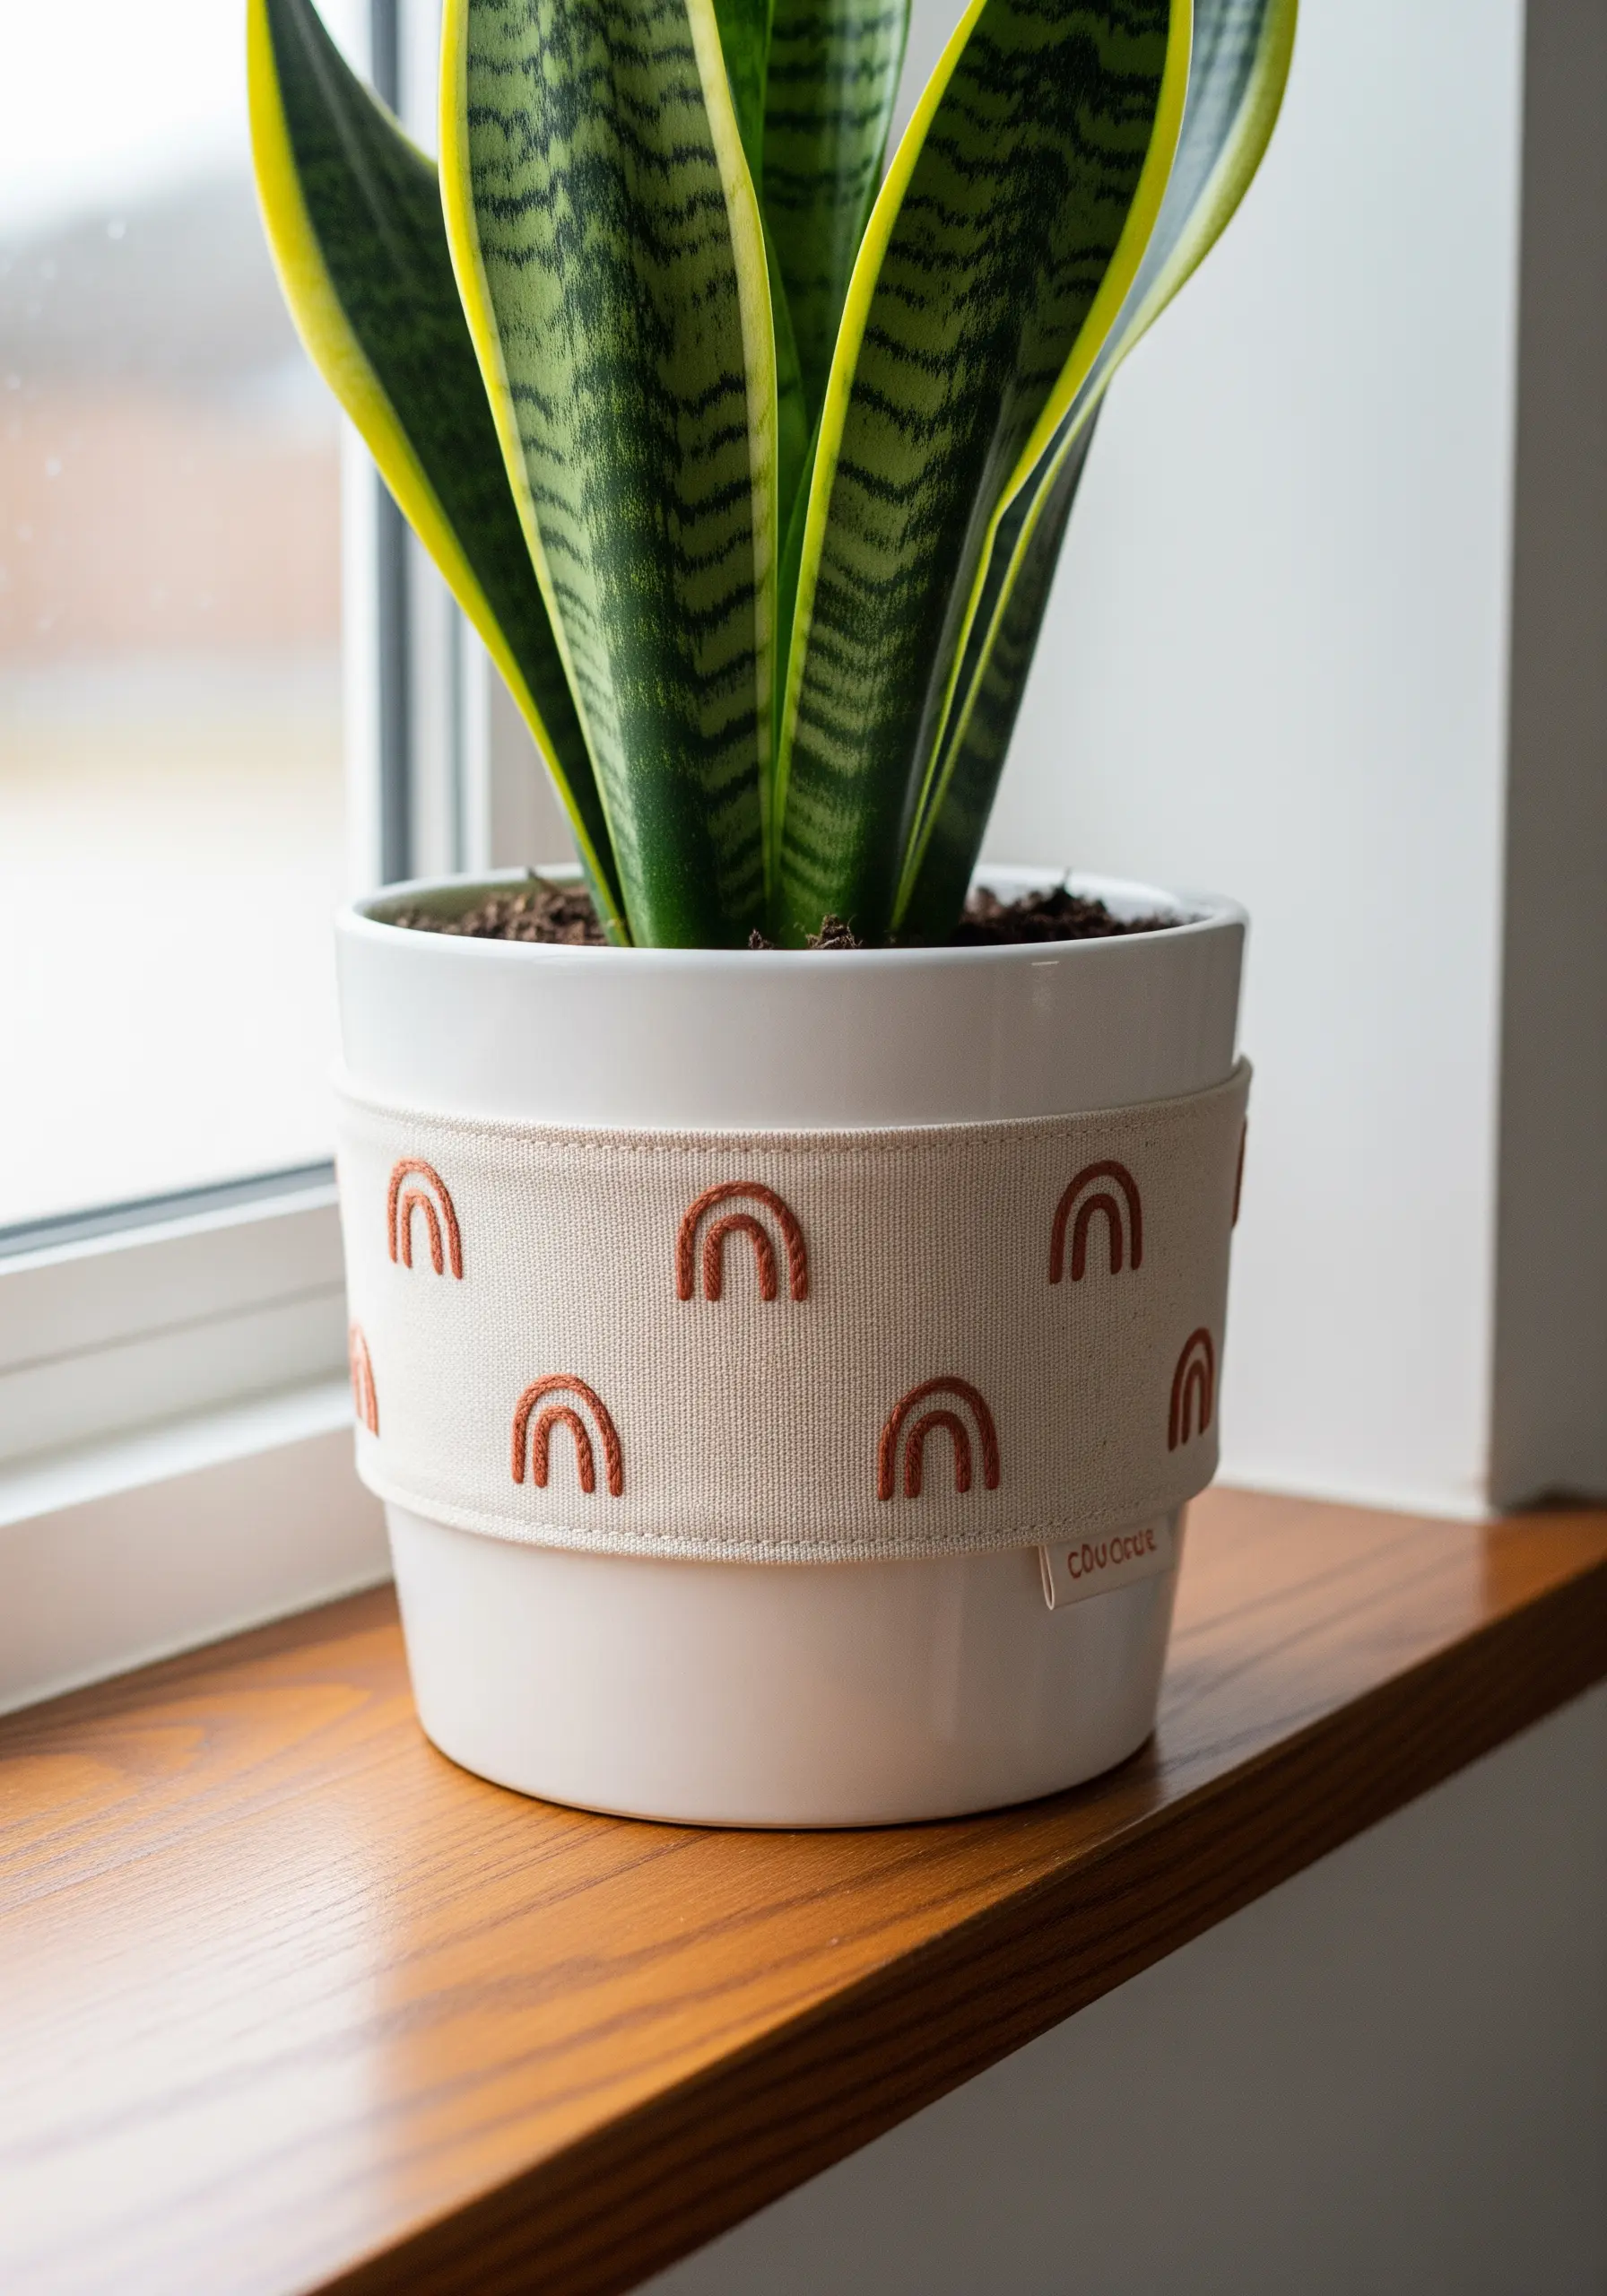
Elevate a standard planter with a custom-fit fabric wrap.
The power of this design lies in its rhythmic repetition. Use a simple backstitch or stem stitch to create the minimalist rainbow arches.
To ensure a clean, professional look, create a small cardboard template of your shape to trace onto the fabric, guaranteeing even spacing and size.
The earthy, terracotta-toned thread on natural canvas adds a touch of handmade warmth that complements the greenery it holds.
10. Rustic Wheat Sheaves for Scented Sachets
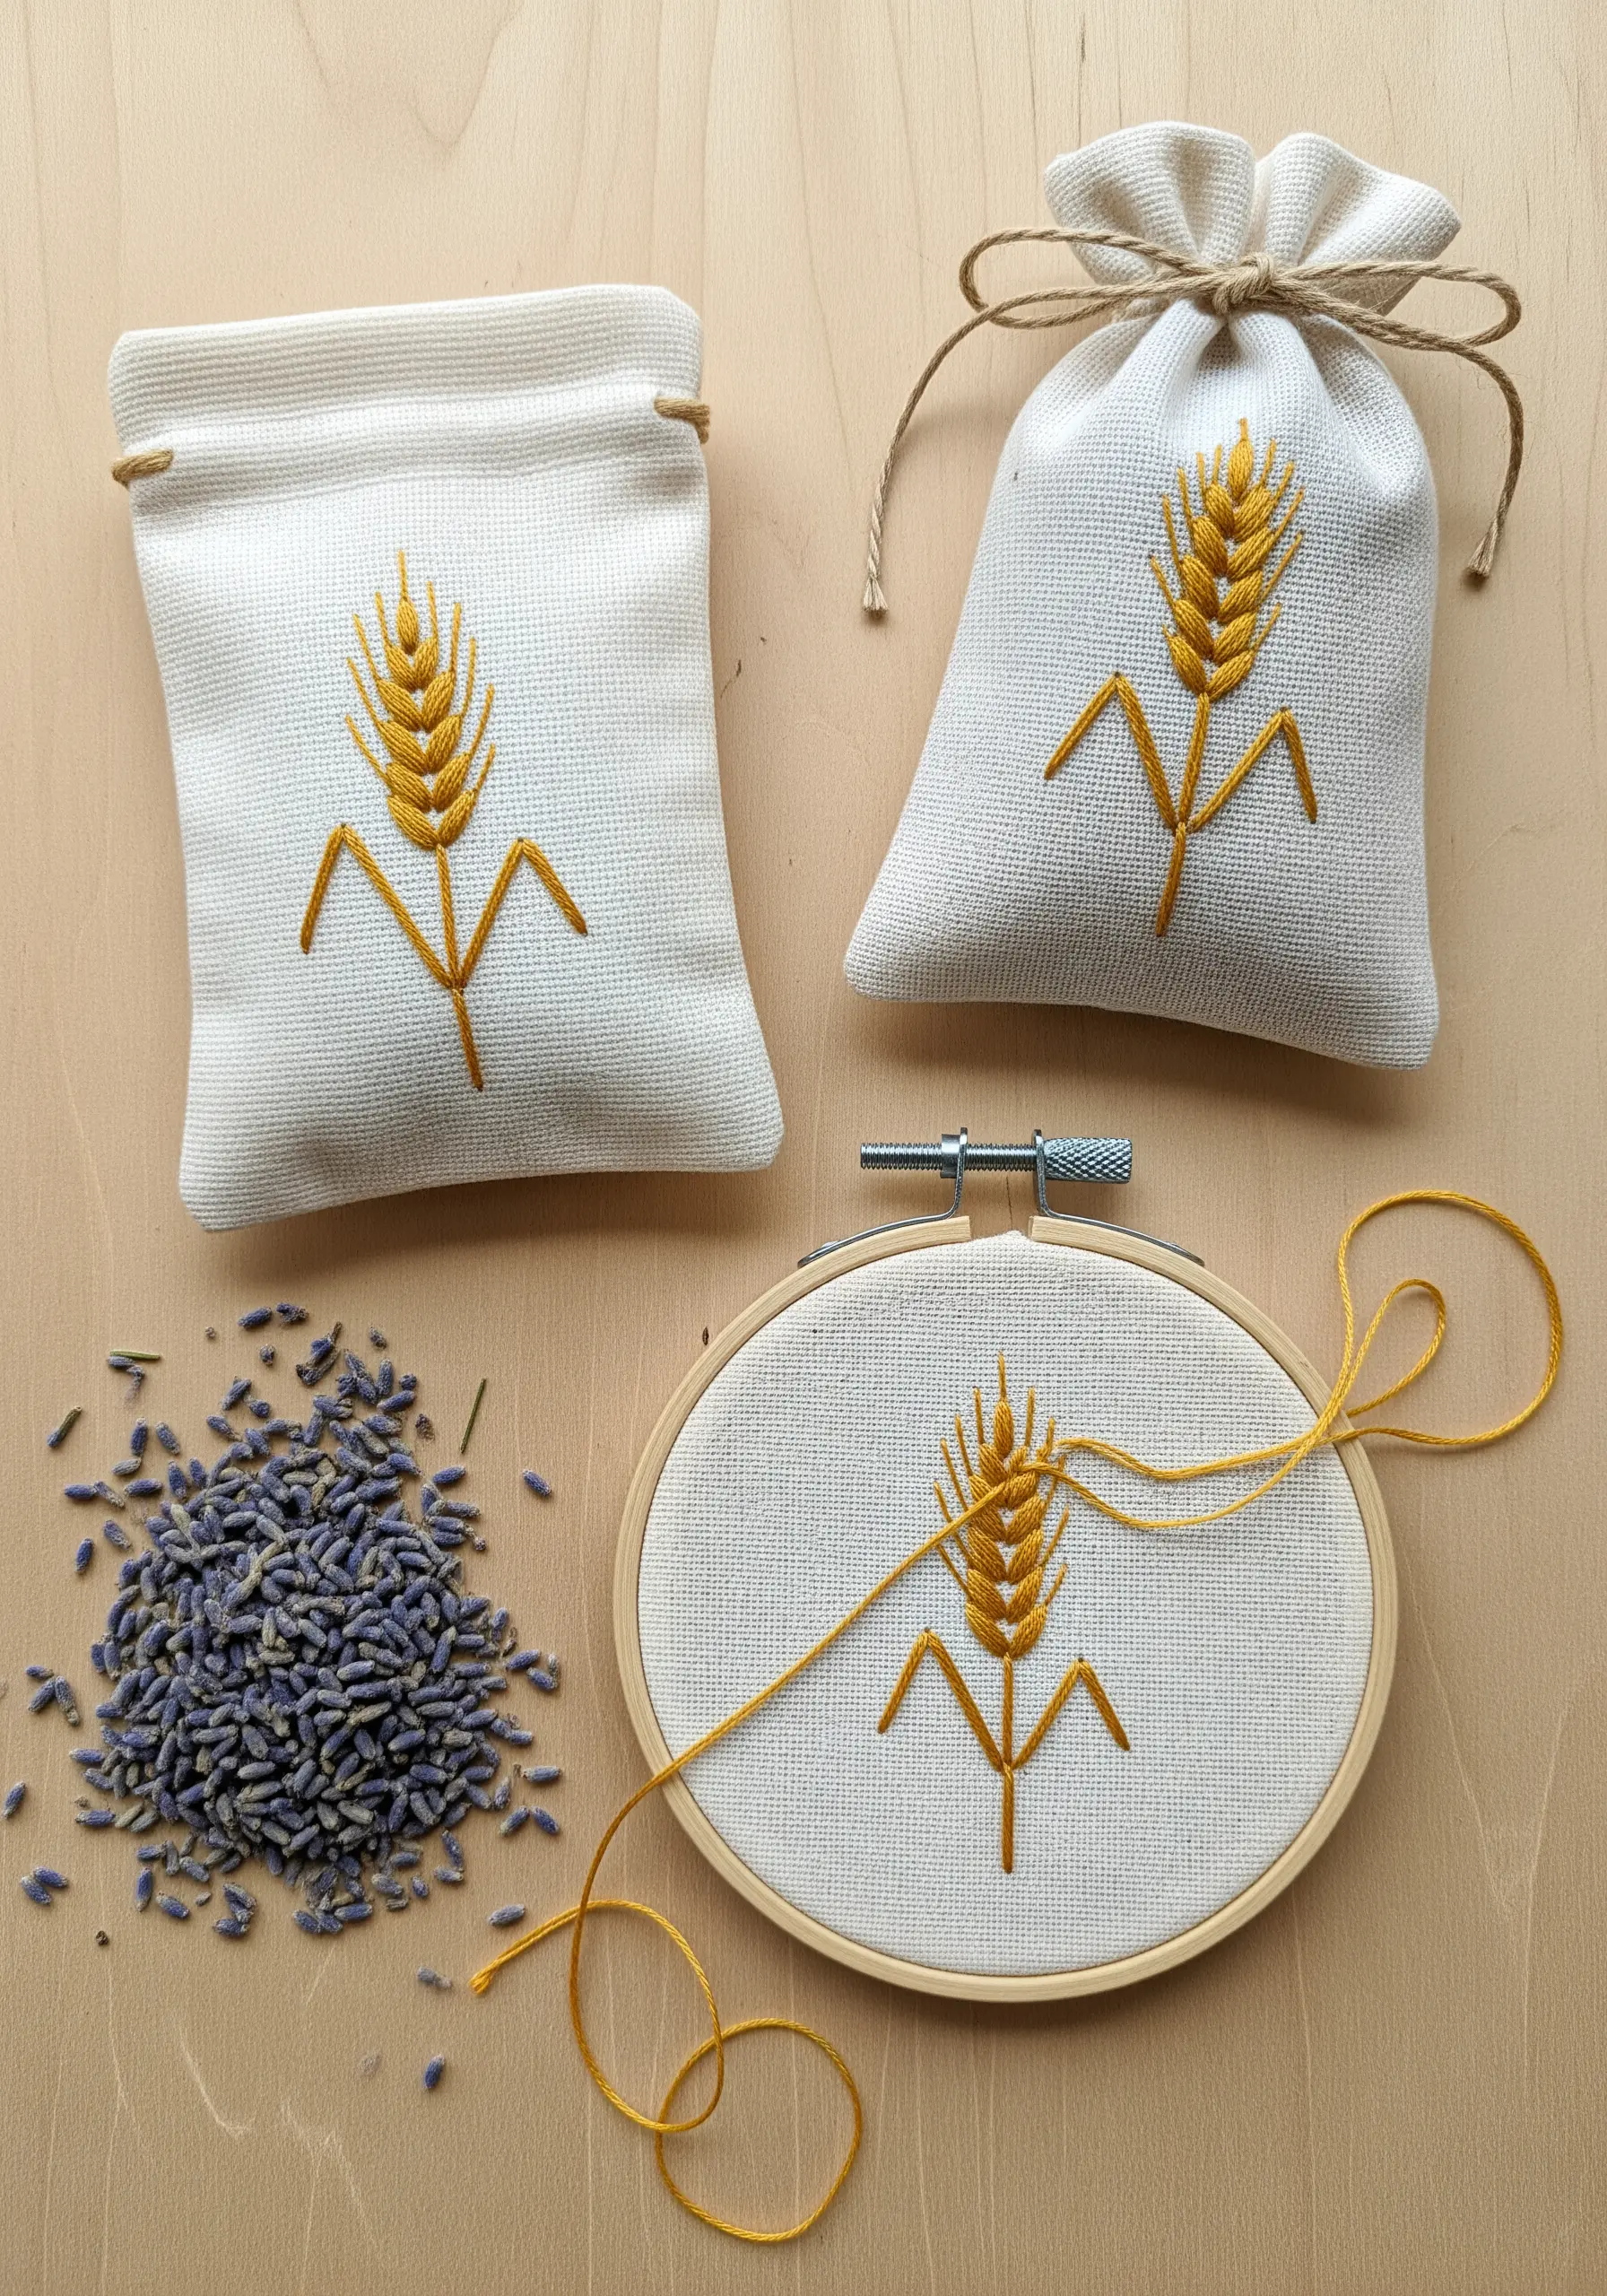
Capture a harvest-inspired feel by combining just two types of stitches for a stylized wheat sheaf.
Use a satin stitch to create the plump, full grains, ensuring your stitches lie close together for a smooth finish.
Then, add delicate awns and the main stalk using simple straight stitches.
The contrast between the full satin stitch and the fine straight stitches adds visual interest.
This golden motif on natural linen creates a rustic, harvest-inspired aesthetic perfect for filling with dried lavender or herbs.
11. Elegant Napkin Rings with Olive Branch Motifs
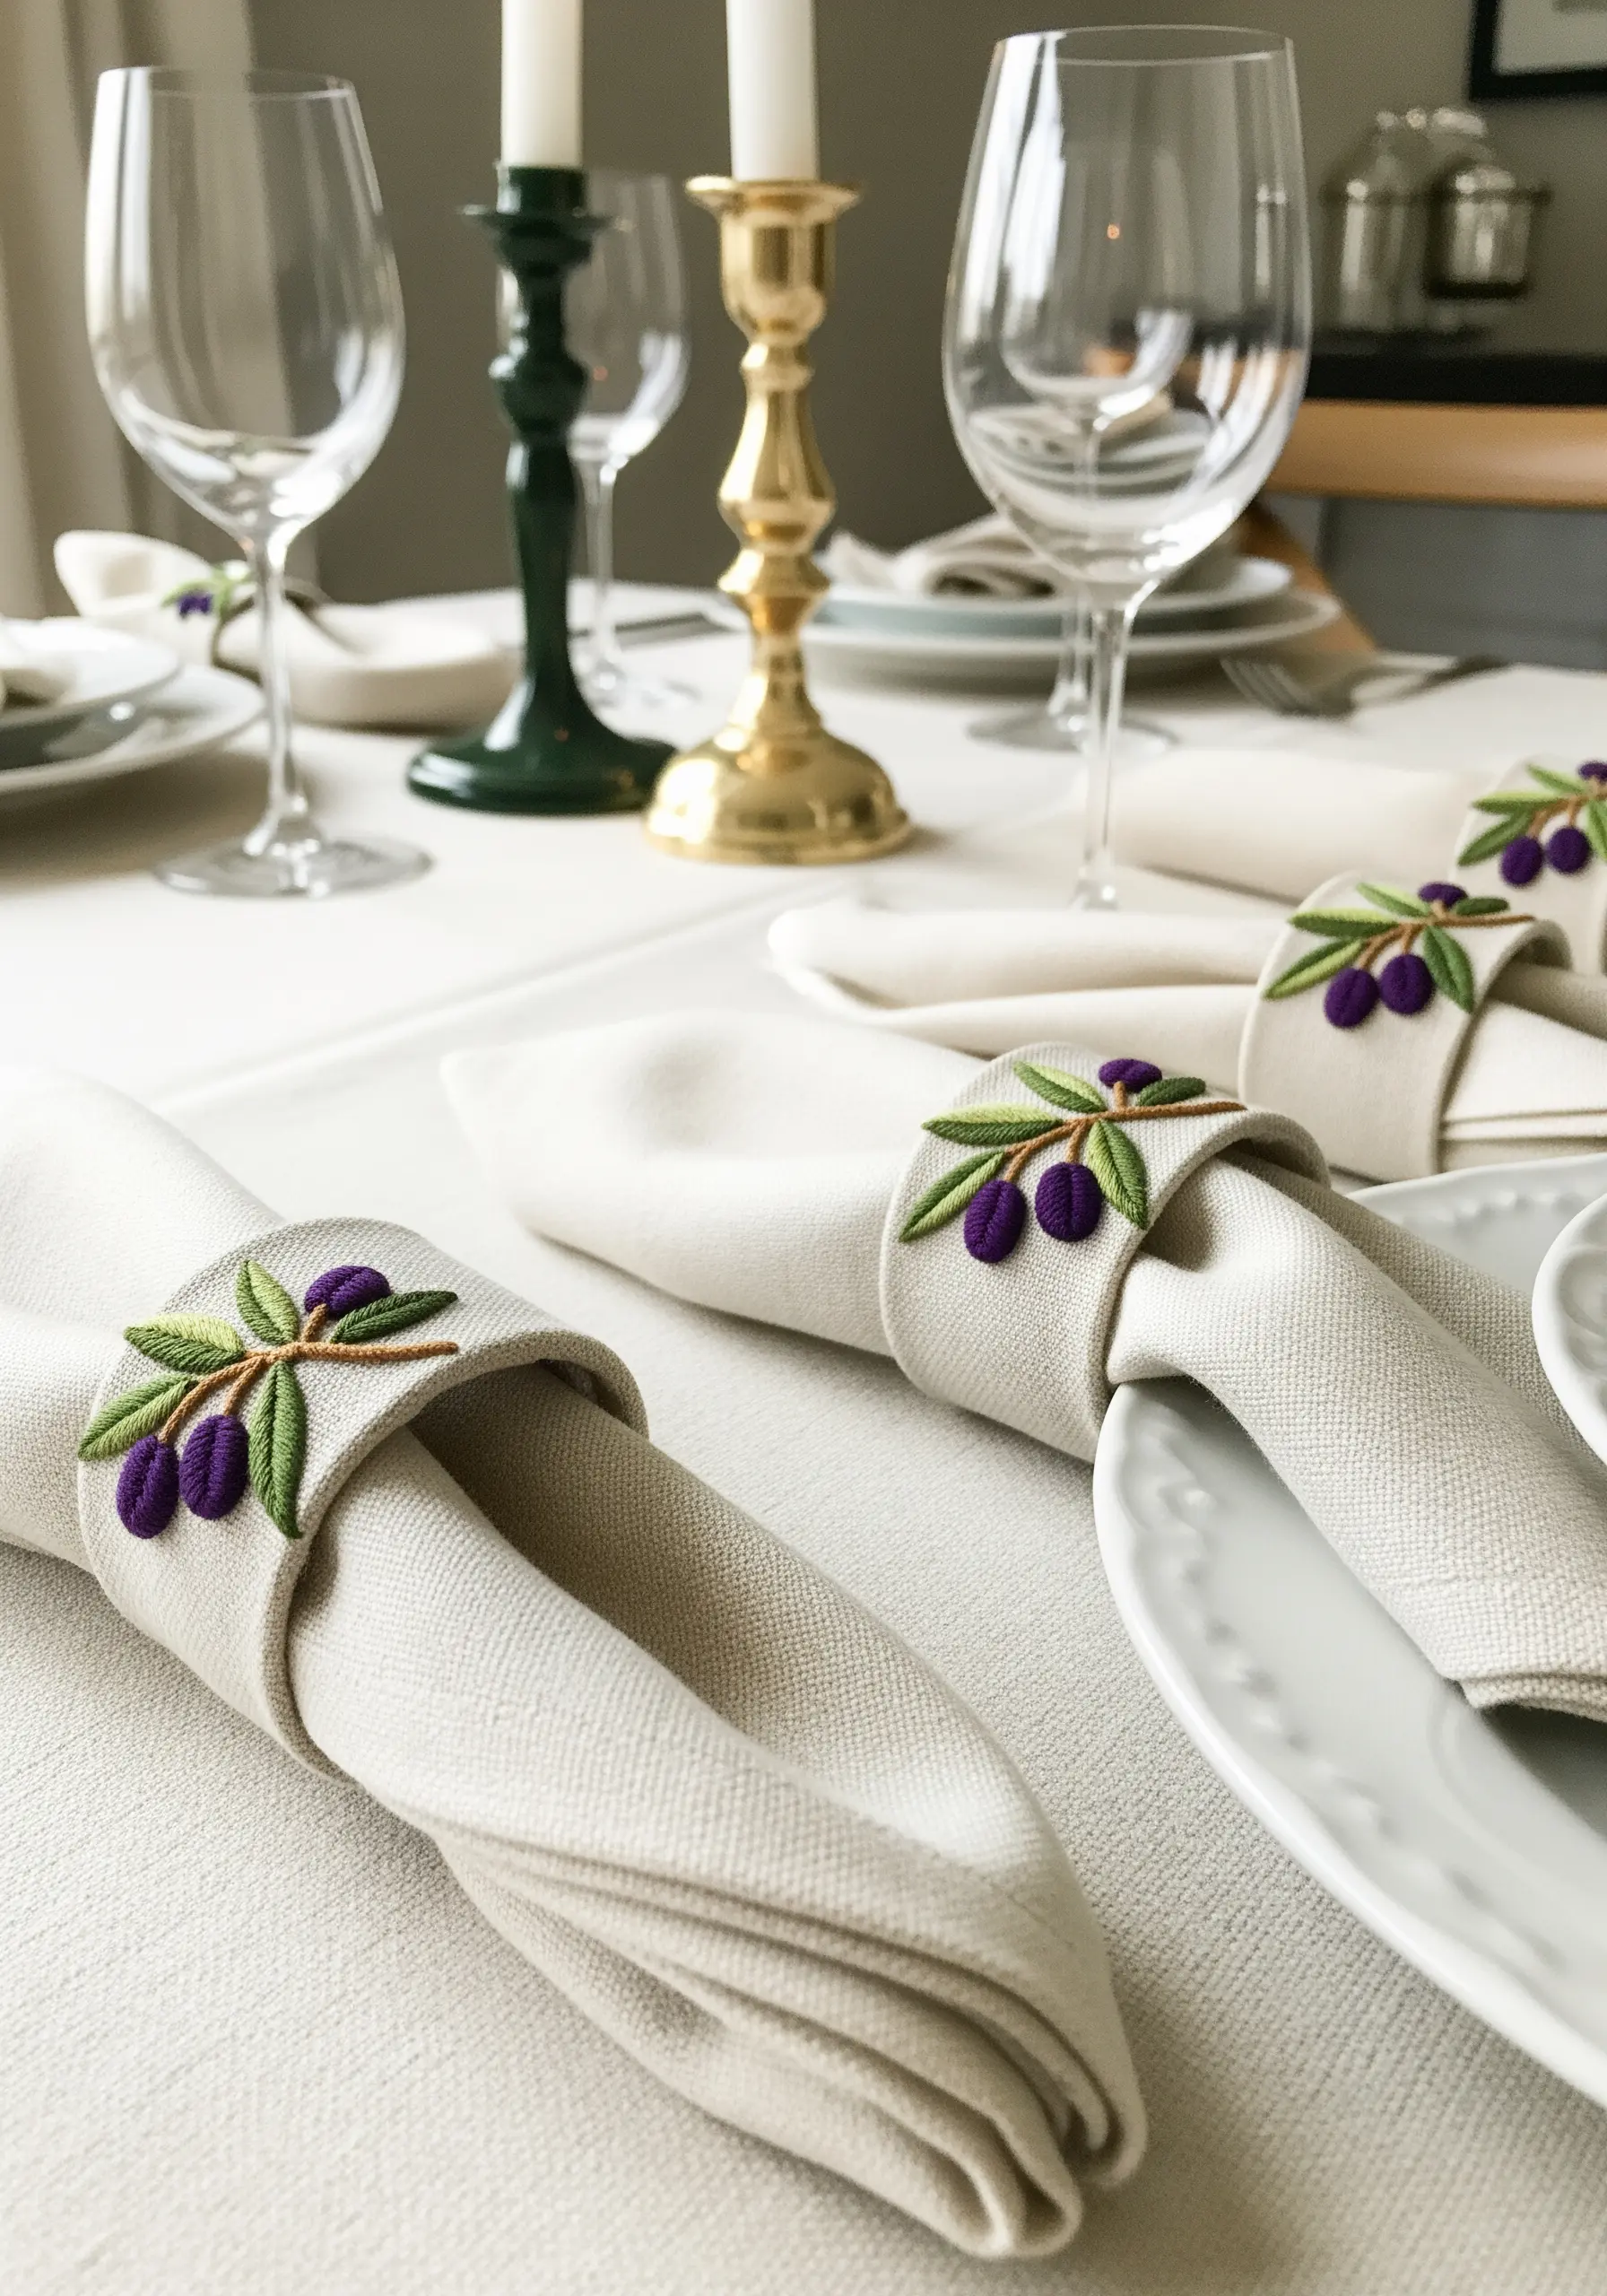
Transform your dining experience with beautifully detailed napkin rings.
To give the olives a plump, three-dimensional look, use a padded satin stitch: first, fill the shape with small underlying straight stitches, then cover it with your final satin stitch.
The fishbone stitch works perfectly for the leaves, creating that central vein with ease.
Stitch on a double layer of linen or a sturdy felt to ensure the rings hold their shape beautifully. This is how you elevate your tablescape.
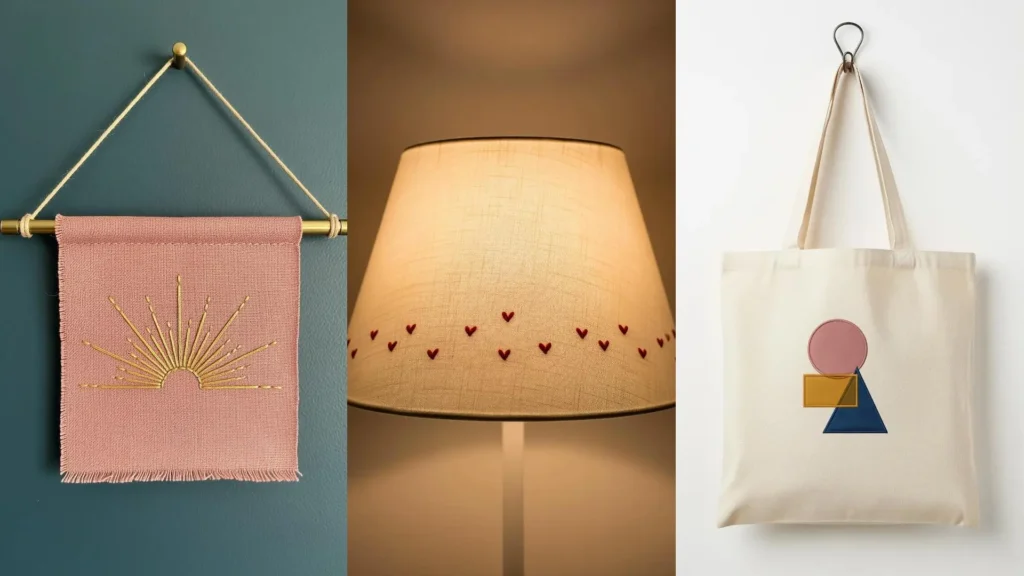
12. Radiant Sunburst Wall Art
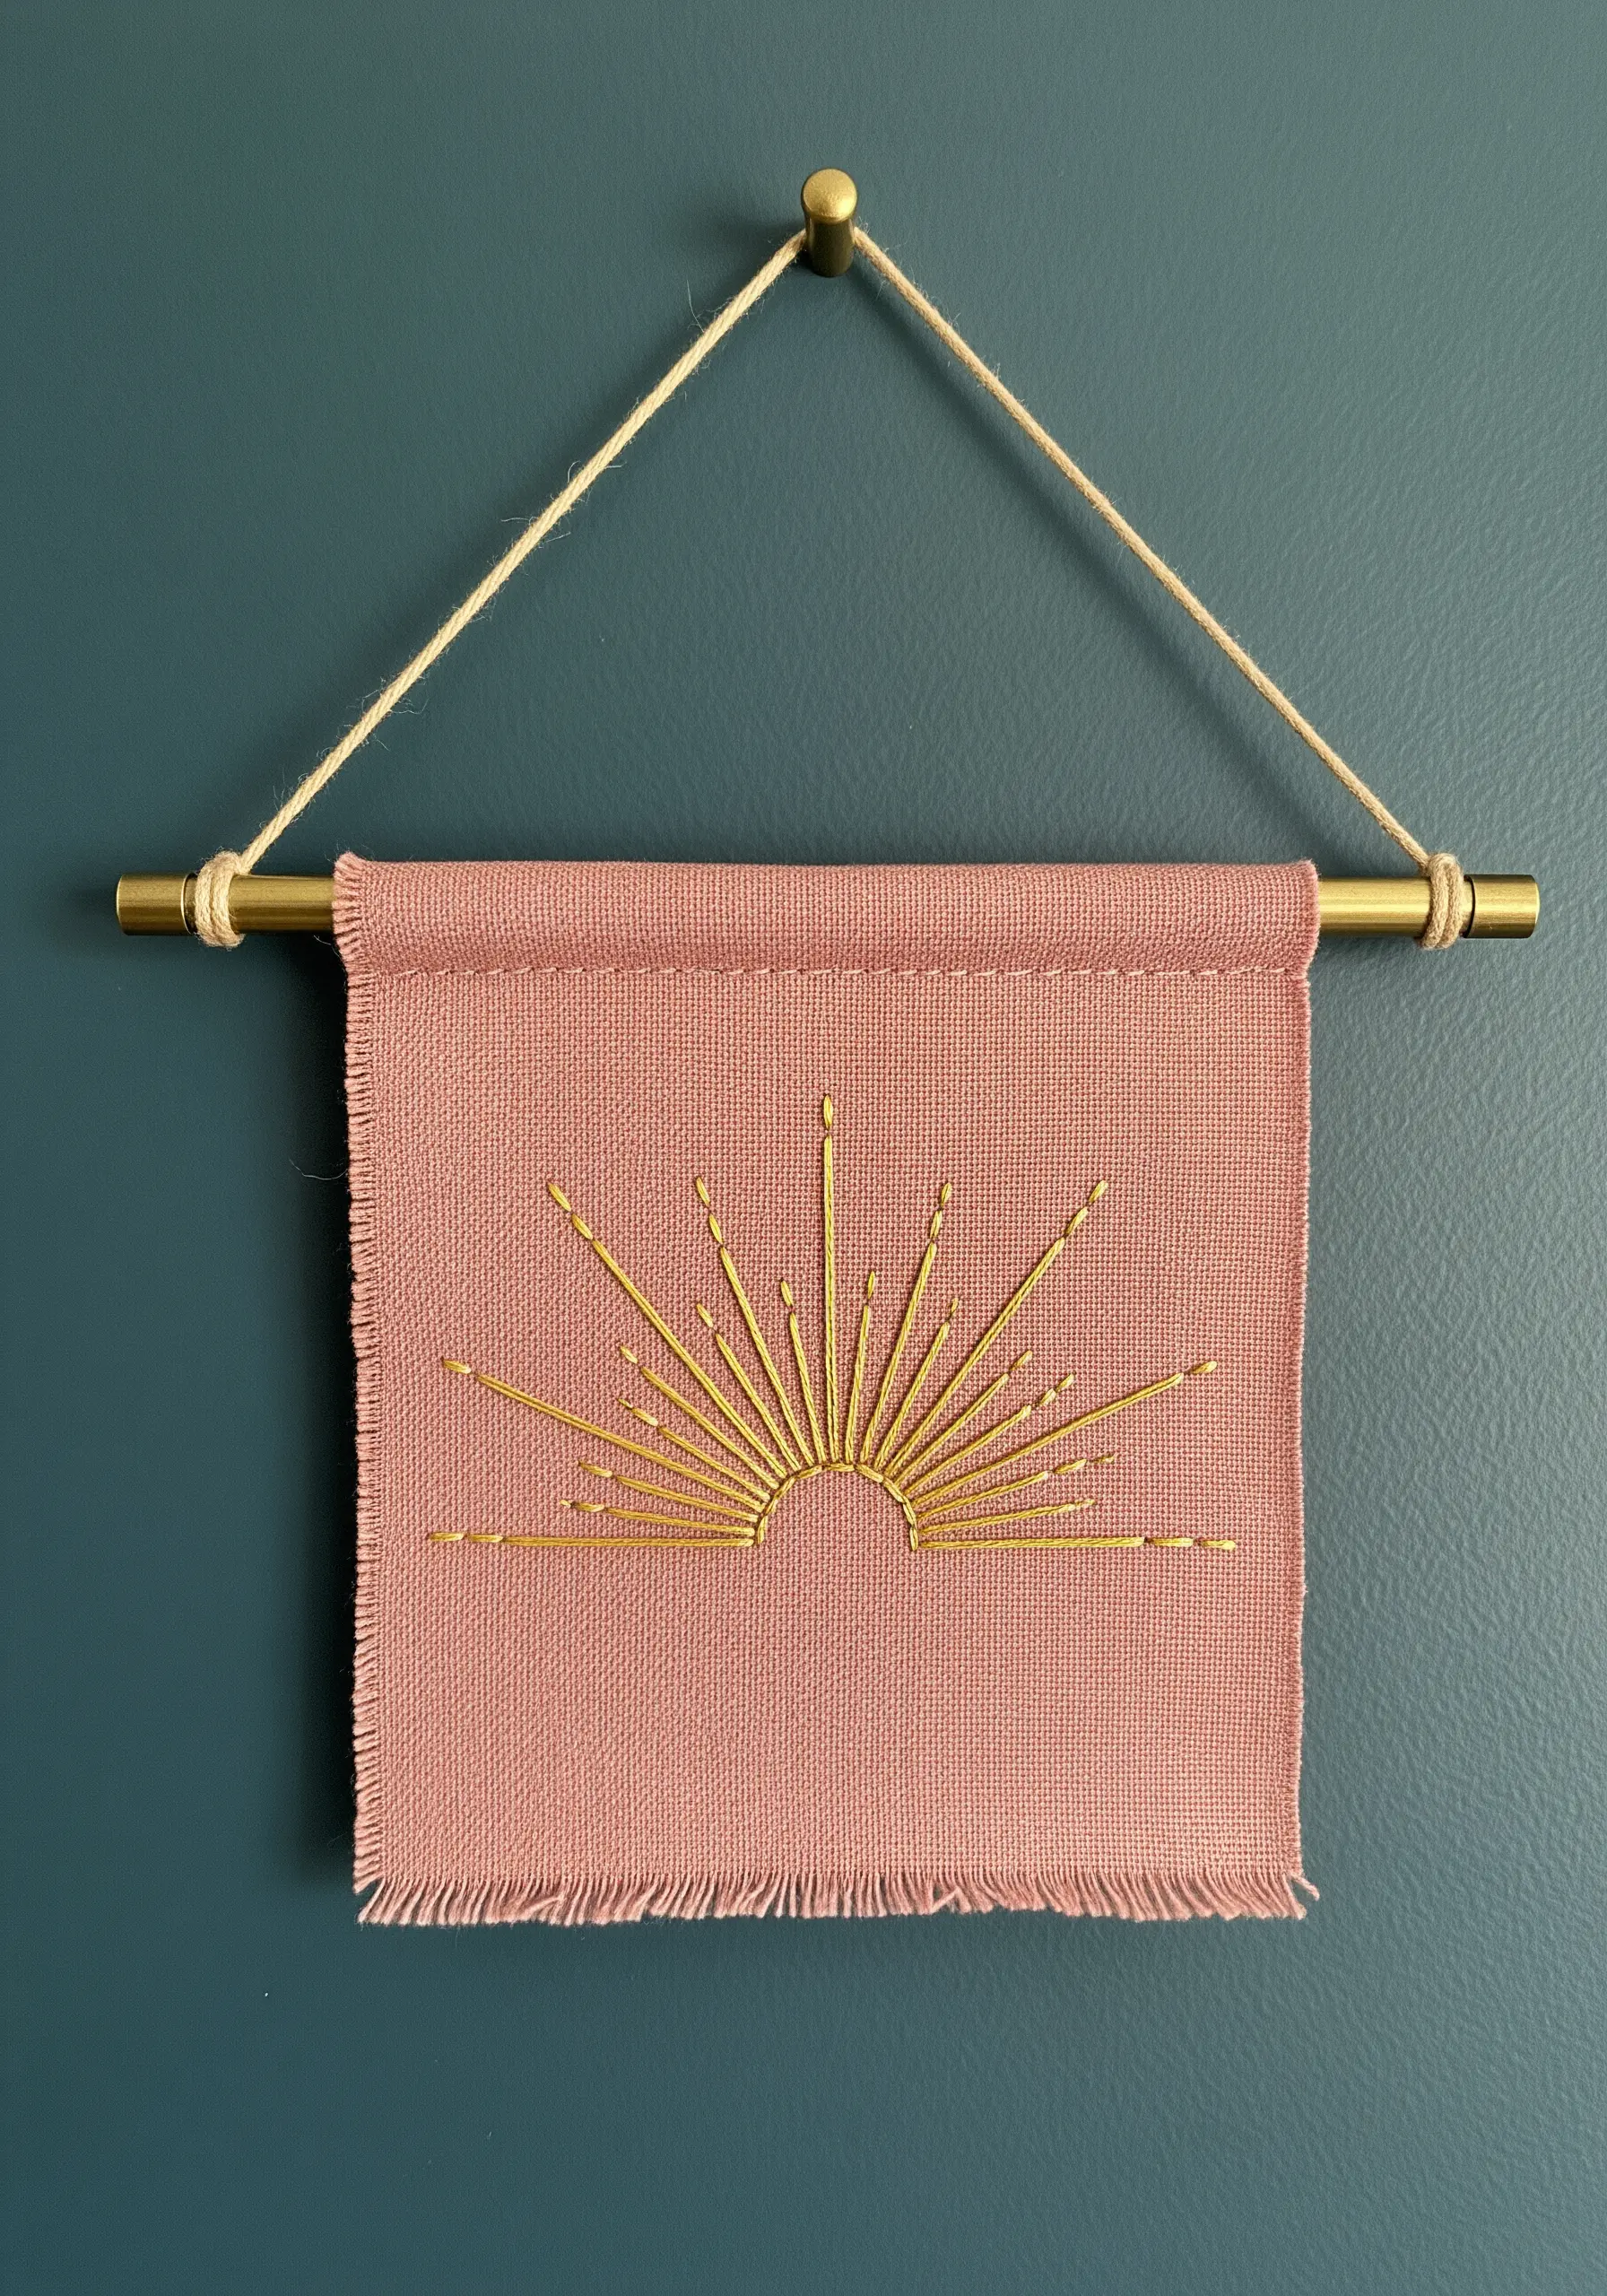
This design proves that a single stitch type—the straight stitch—can create incredible impact.
The key is contrast: use a high-sheen metallic thread against a matte, deeply colored linen to make the sunburst radiate light.
Vary the length of your stitches, making some rays long and others short, to create a dynamic, shimmering effect.
Leaving the bottom edge of the fabric frayed adds a soft, organic texture that balances the sharp lines of the stitching, resulting in striking modern wall art.
13. Dynamic Wave Border with Simple Stitches
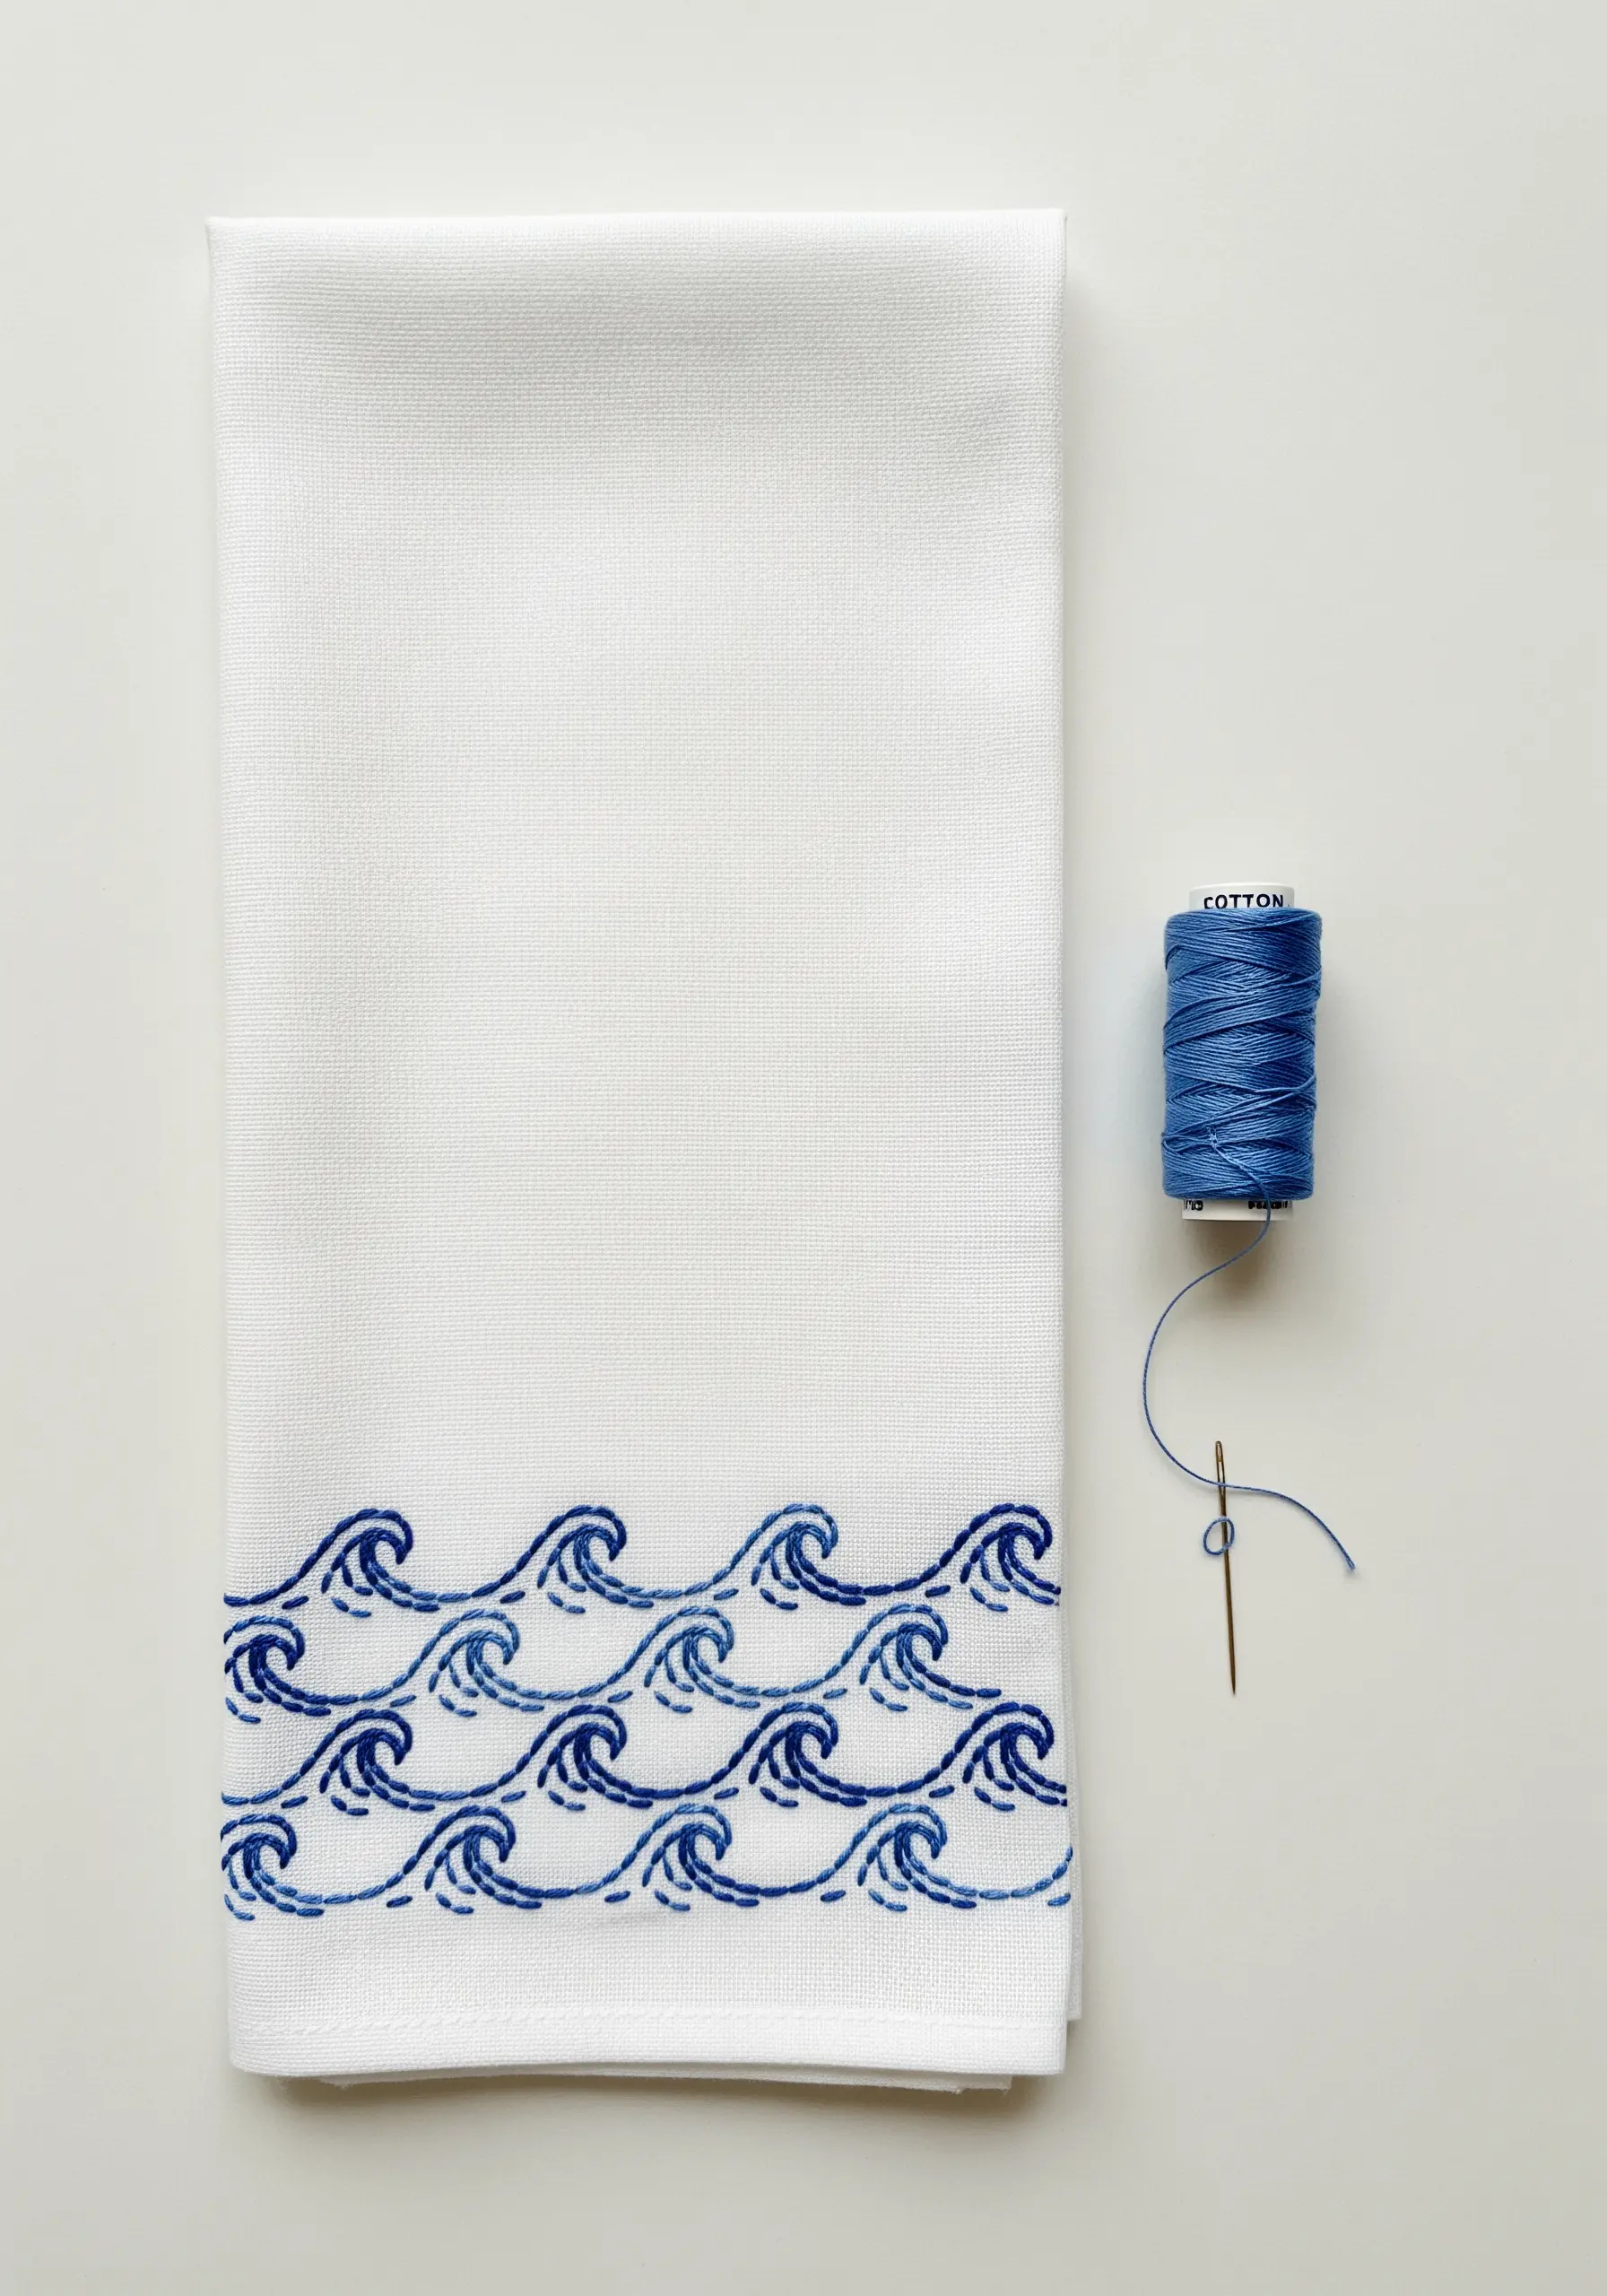
You can create this sophisticated, Japanese-inspired wave pattern by combining two of the most basic stitches.
Use a solid backstitch for the main outlines of the waves to give them strong definition.
Then, use a dashed running stitch for the interior lines to create the impression of seafoam and movement.
Using two shades of blue—a darker one for the outlines and a lighter one for the details—enhances the sense of depth and is the perfect way to embellish a simple kitchen towel.
14. A Subtle Glow-Up for a Plain Lampshade
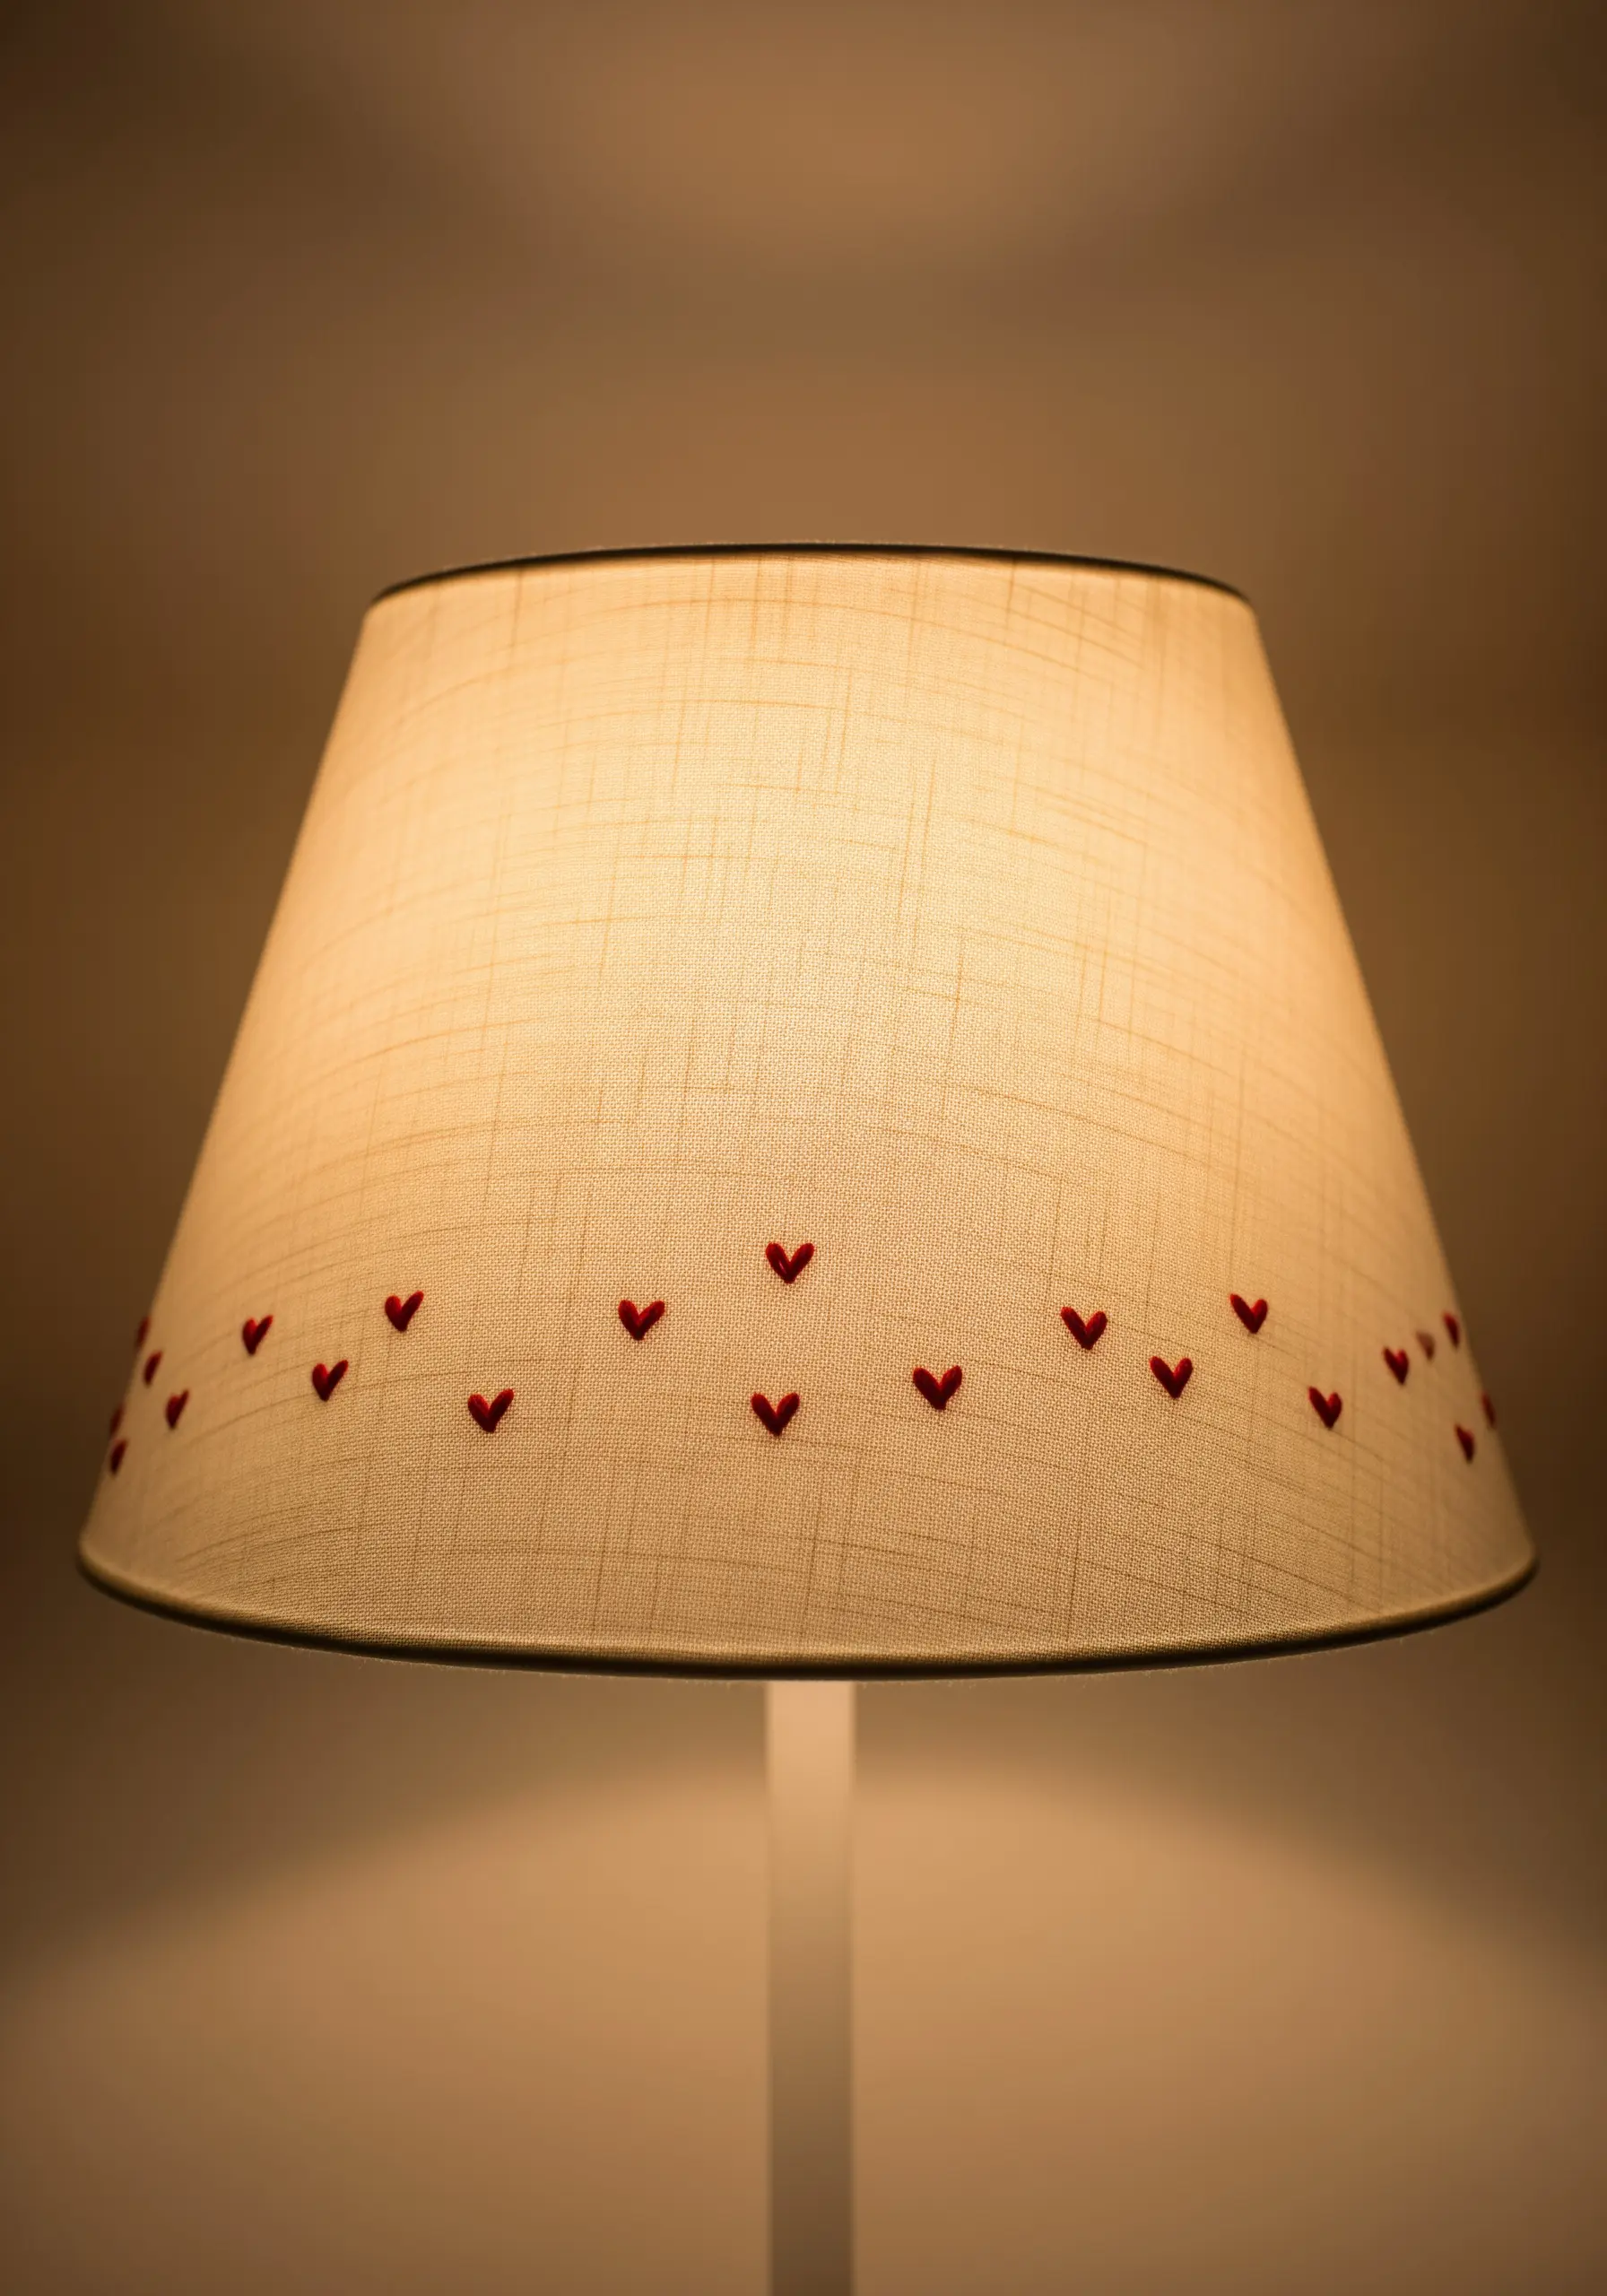
Embroidering on a taut lampshade requires a gentle approach. Skip the hoop, as it can dent or damage the material.
Use tiny satin stitches to create a simple, repeating motif like these hearts.
Mark your pattern very lightly with a removable fabric marker or chalk pencil.
When the lamp is off, the detail is subtle; when it’s on, the light filters through the threads, creating a beautiful silhouette and a warm, handmade feel.
15. Welcoming Entryway Art with Couching Stitch
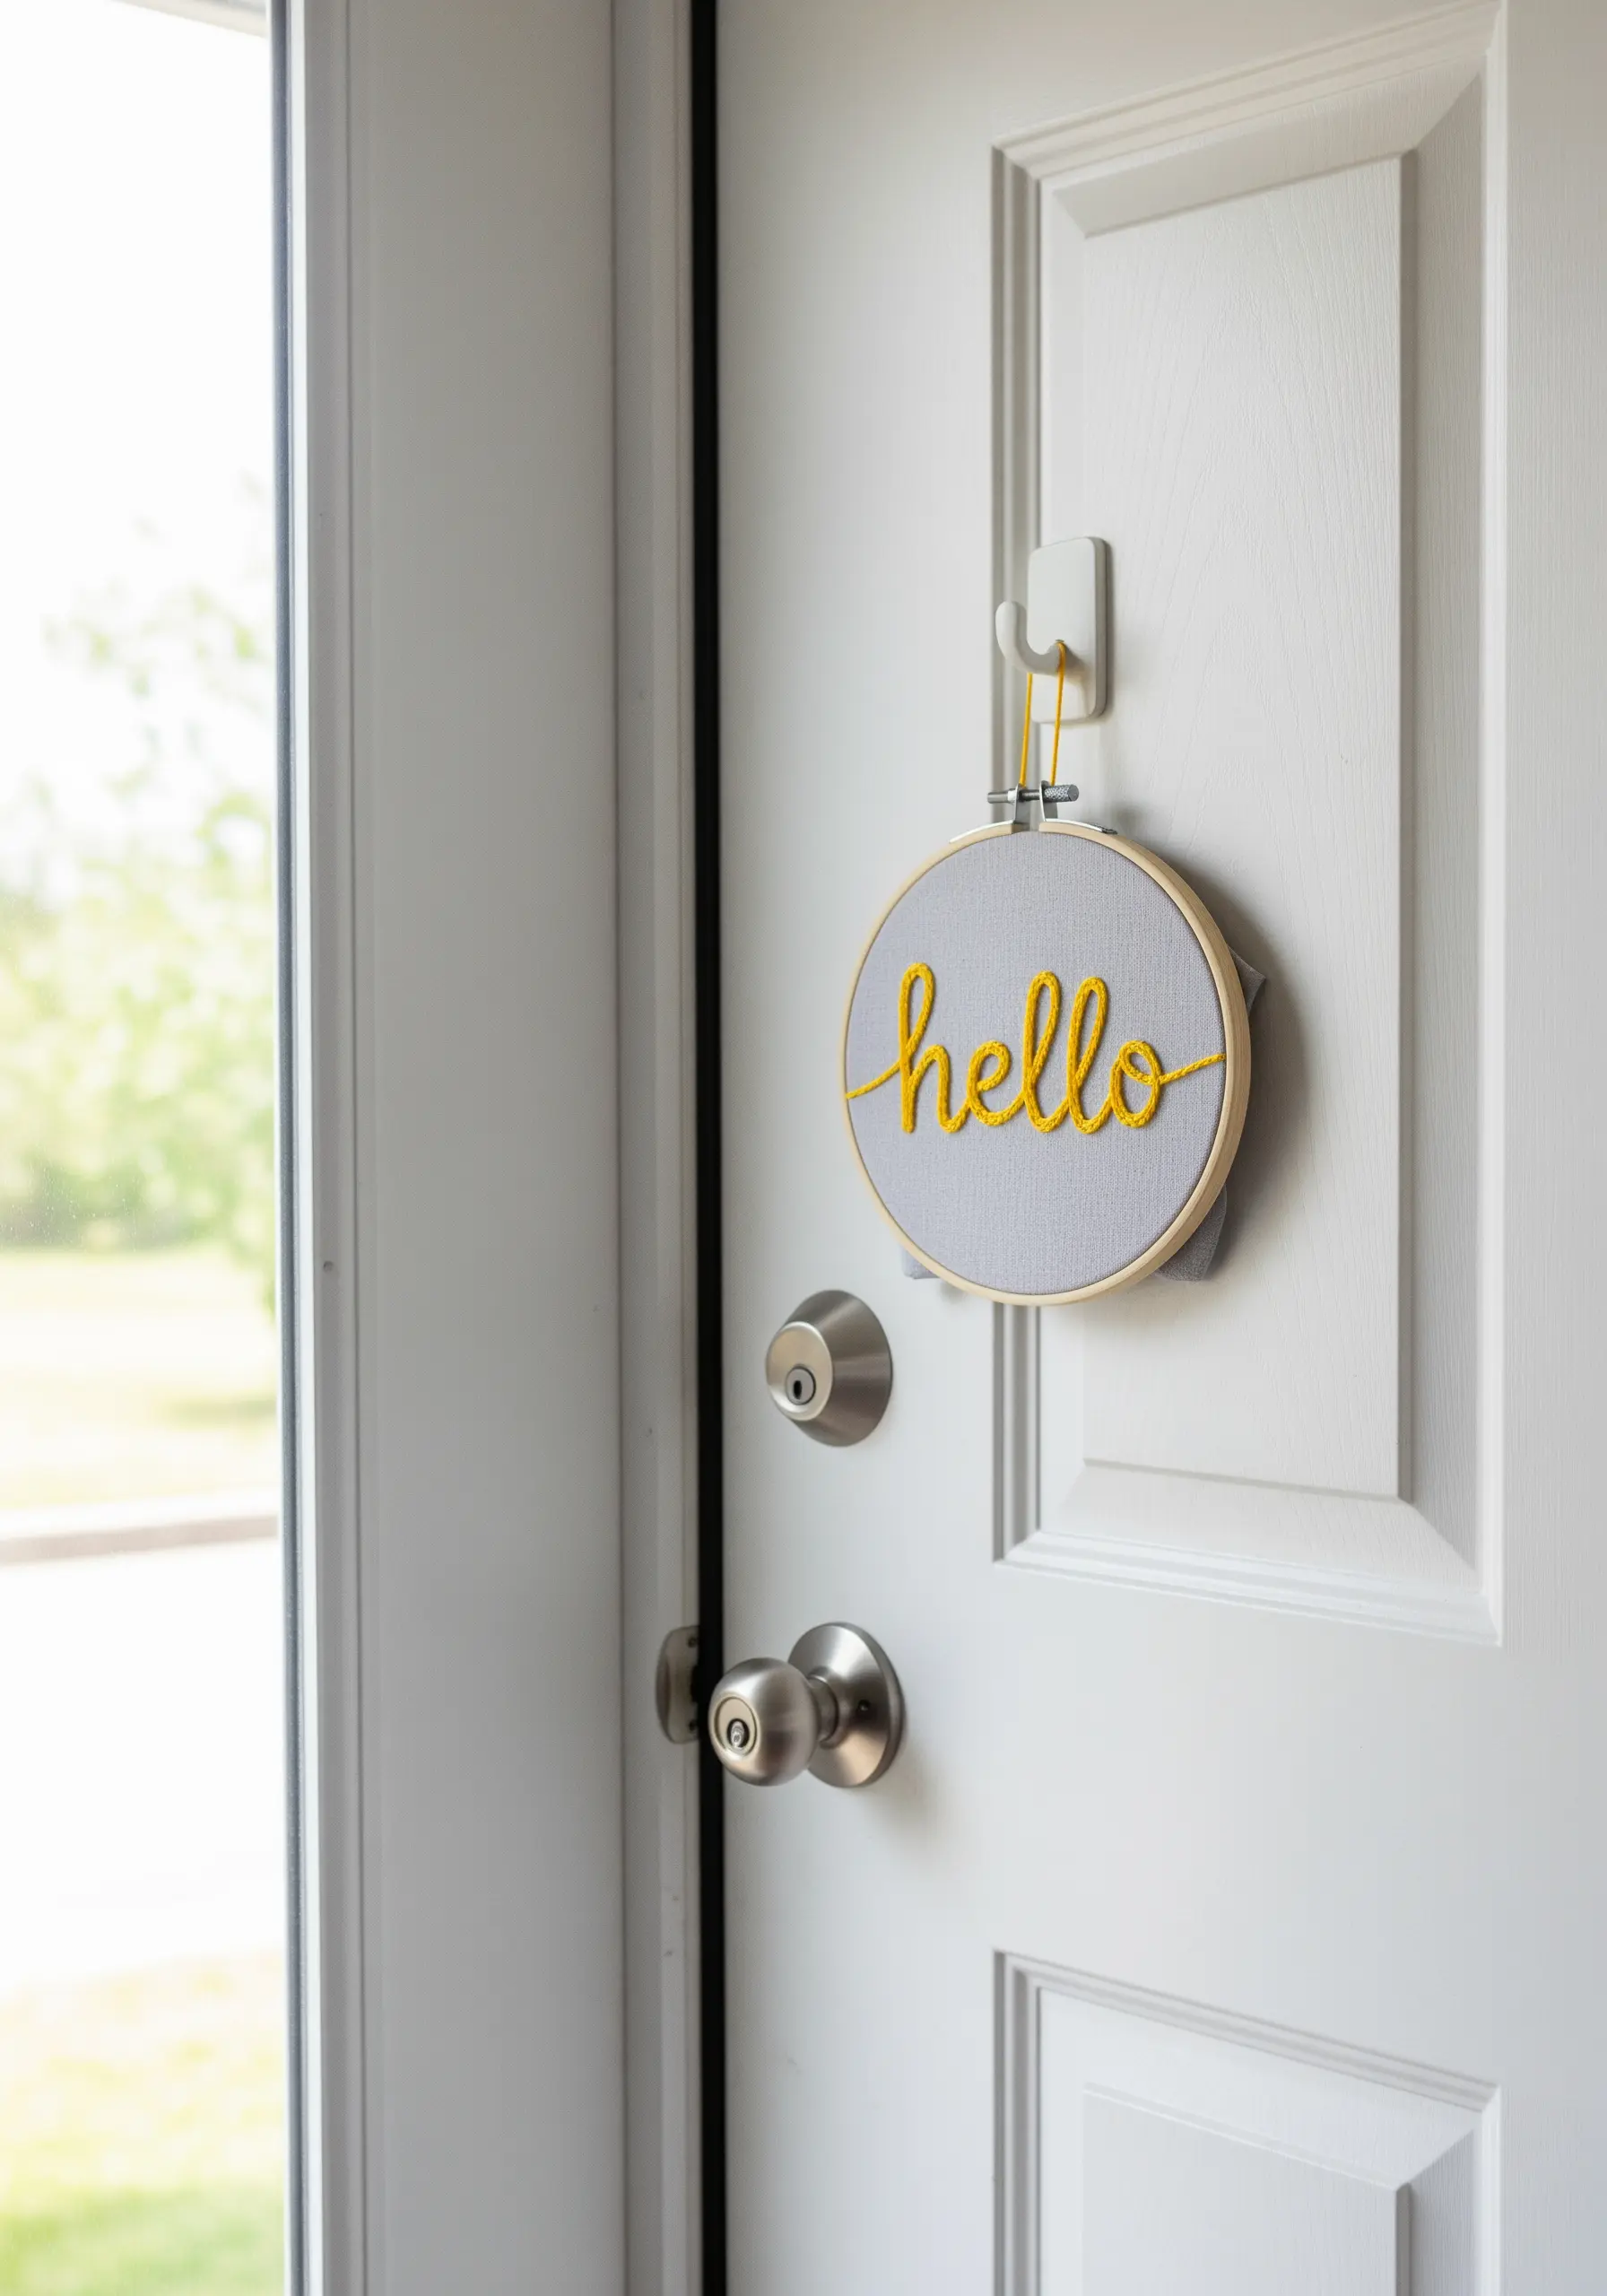
For bold, clean, and continuous lettering, the couching technique is far faster and easier than a satin stitch.
Lay down a thick foundation thread—like pearl cotton or yarn—along your desired path.
Then, use a single strand of regular floss in a matching or contrasting color to tack the foundation thread down with small, evenly spaced perpendicular stitches.
This creates a perfectly uniform, raised line ideal for cursive text and welcoming entryway art.
16. Embroidered Greeting Card with a Window Frame
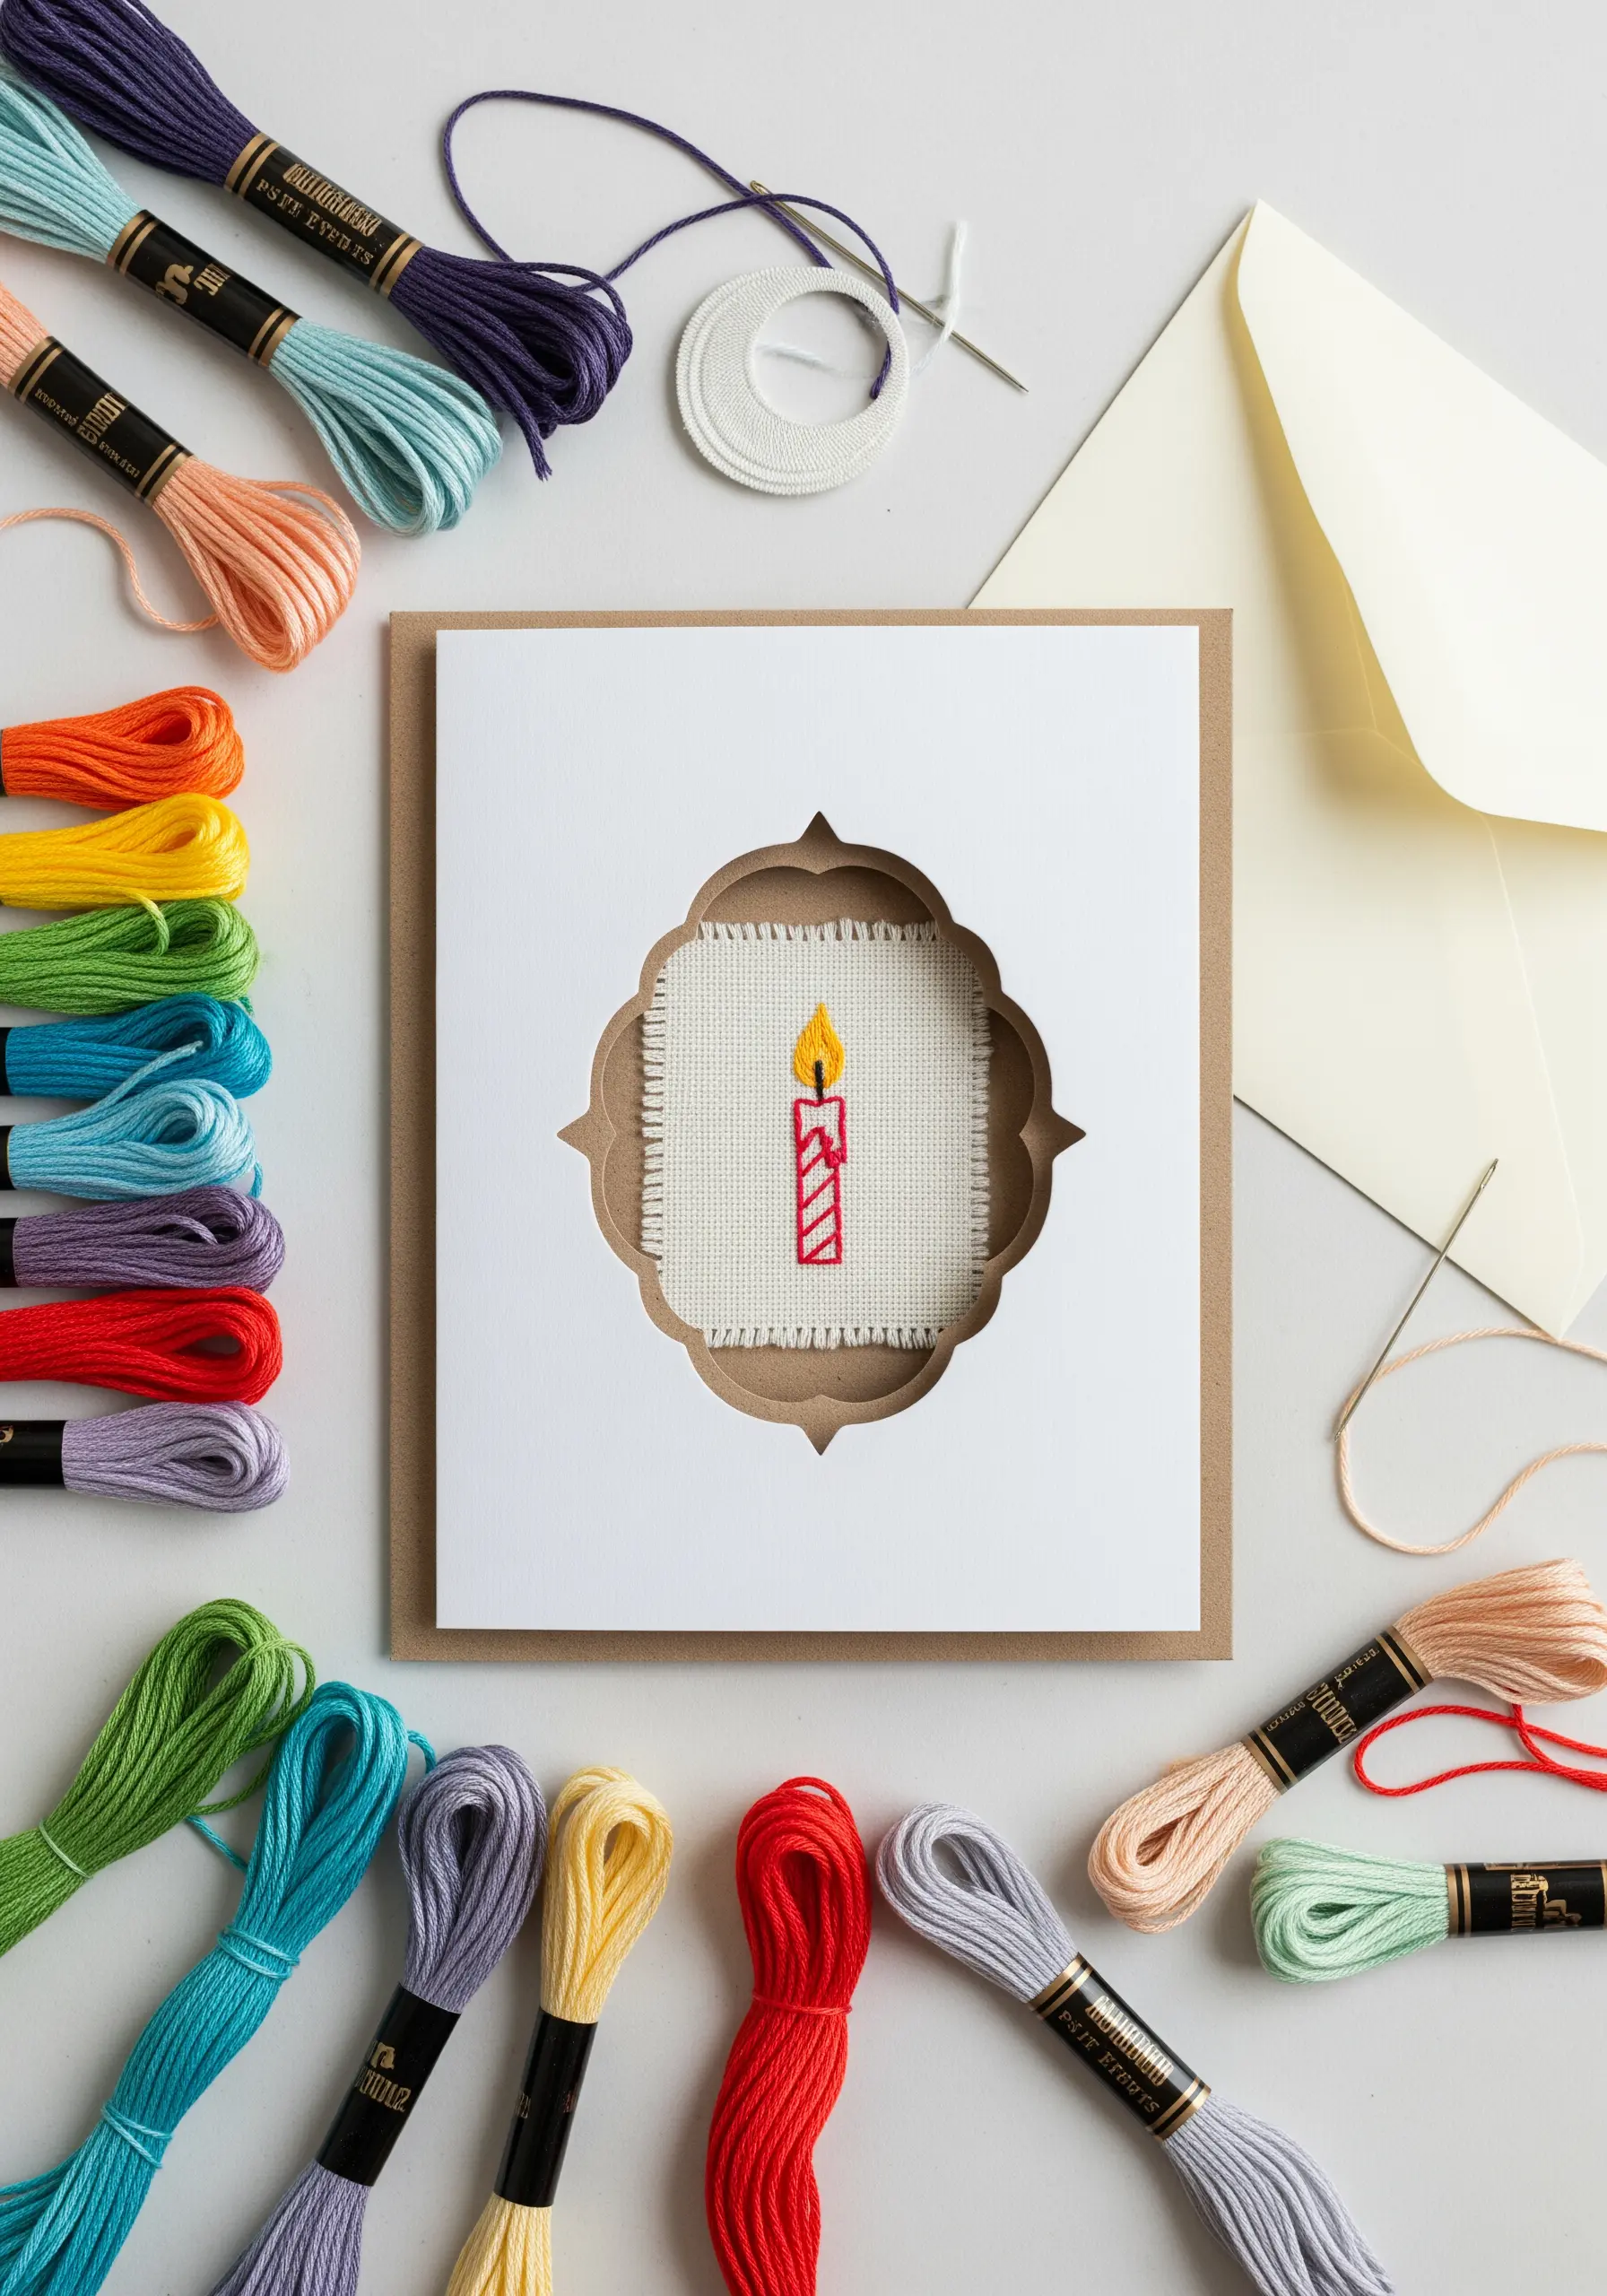
Give your embroidered cards a highly professional finish with this simple mounting technique.
Stitch your design on a separate piece of fabric, like Aida or evenweave, which provides a stable grid for even stitches.
Then, use a craft knife to cut a shaped window out of the front of a blank card.
Secure your stitched piece behind the window with double-sided tape. This perfectly frames your work and neatly hides the reverse side of your stitching, creating a beautiful handmade keepsake.
17. Simple Collar Accents with Starburst Stitches
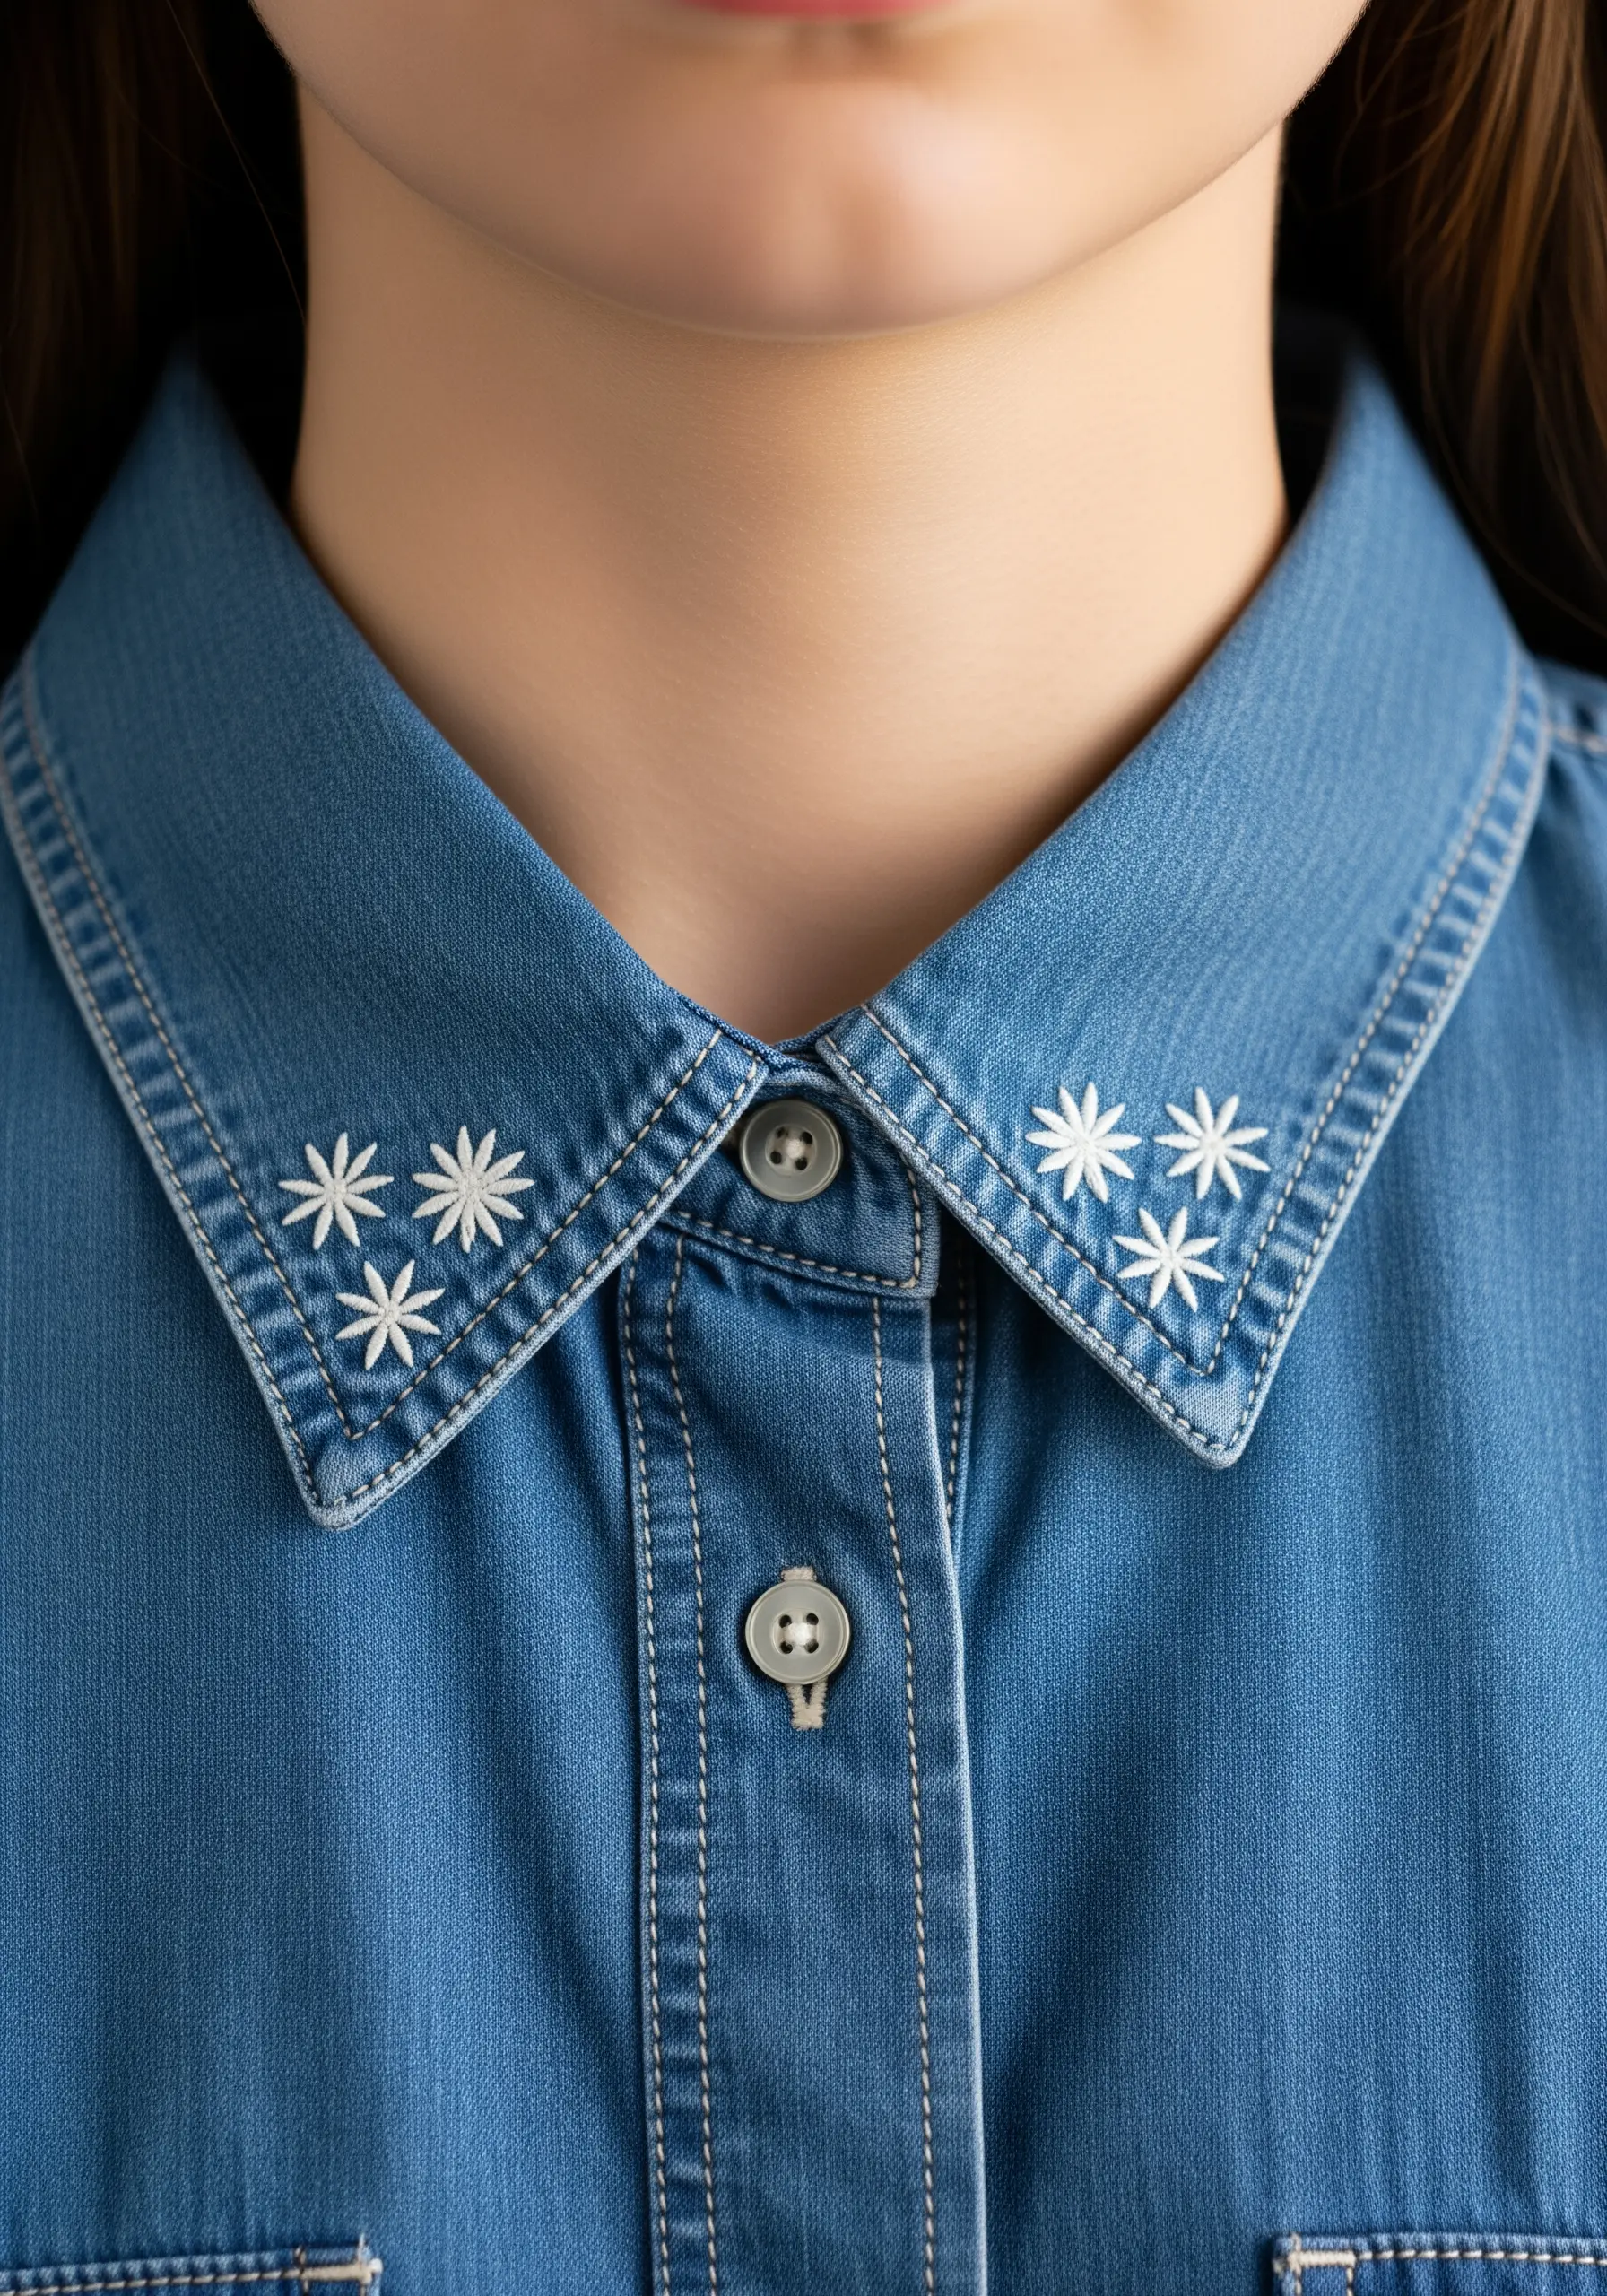
Revitalize a plain denim shirt in minutes with a few strategically placed stitches.
Use a bright white or contrasting thread to stitch small starbursts or lazy daisy flowers onto the collar points.
Each starburst is simply a series of straight stitches radiating from a central point.
You don’t need a hoop for such a small, sturdy area. It’s a quick and subtle way to add a personal touch to your wardrobe.
18. Hand-Stitched Herb Markers
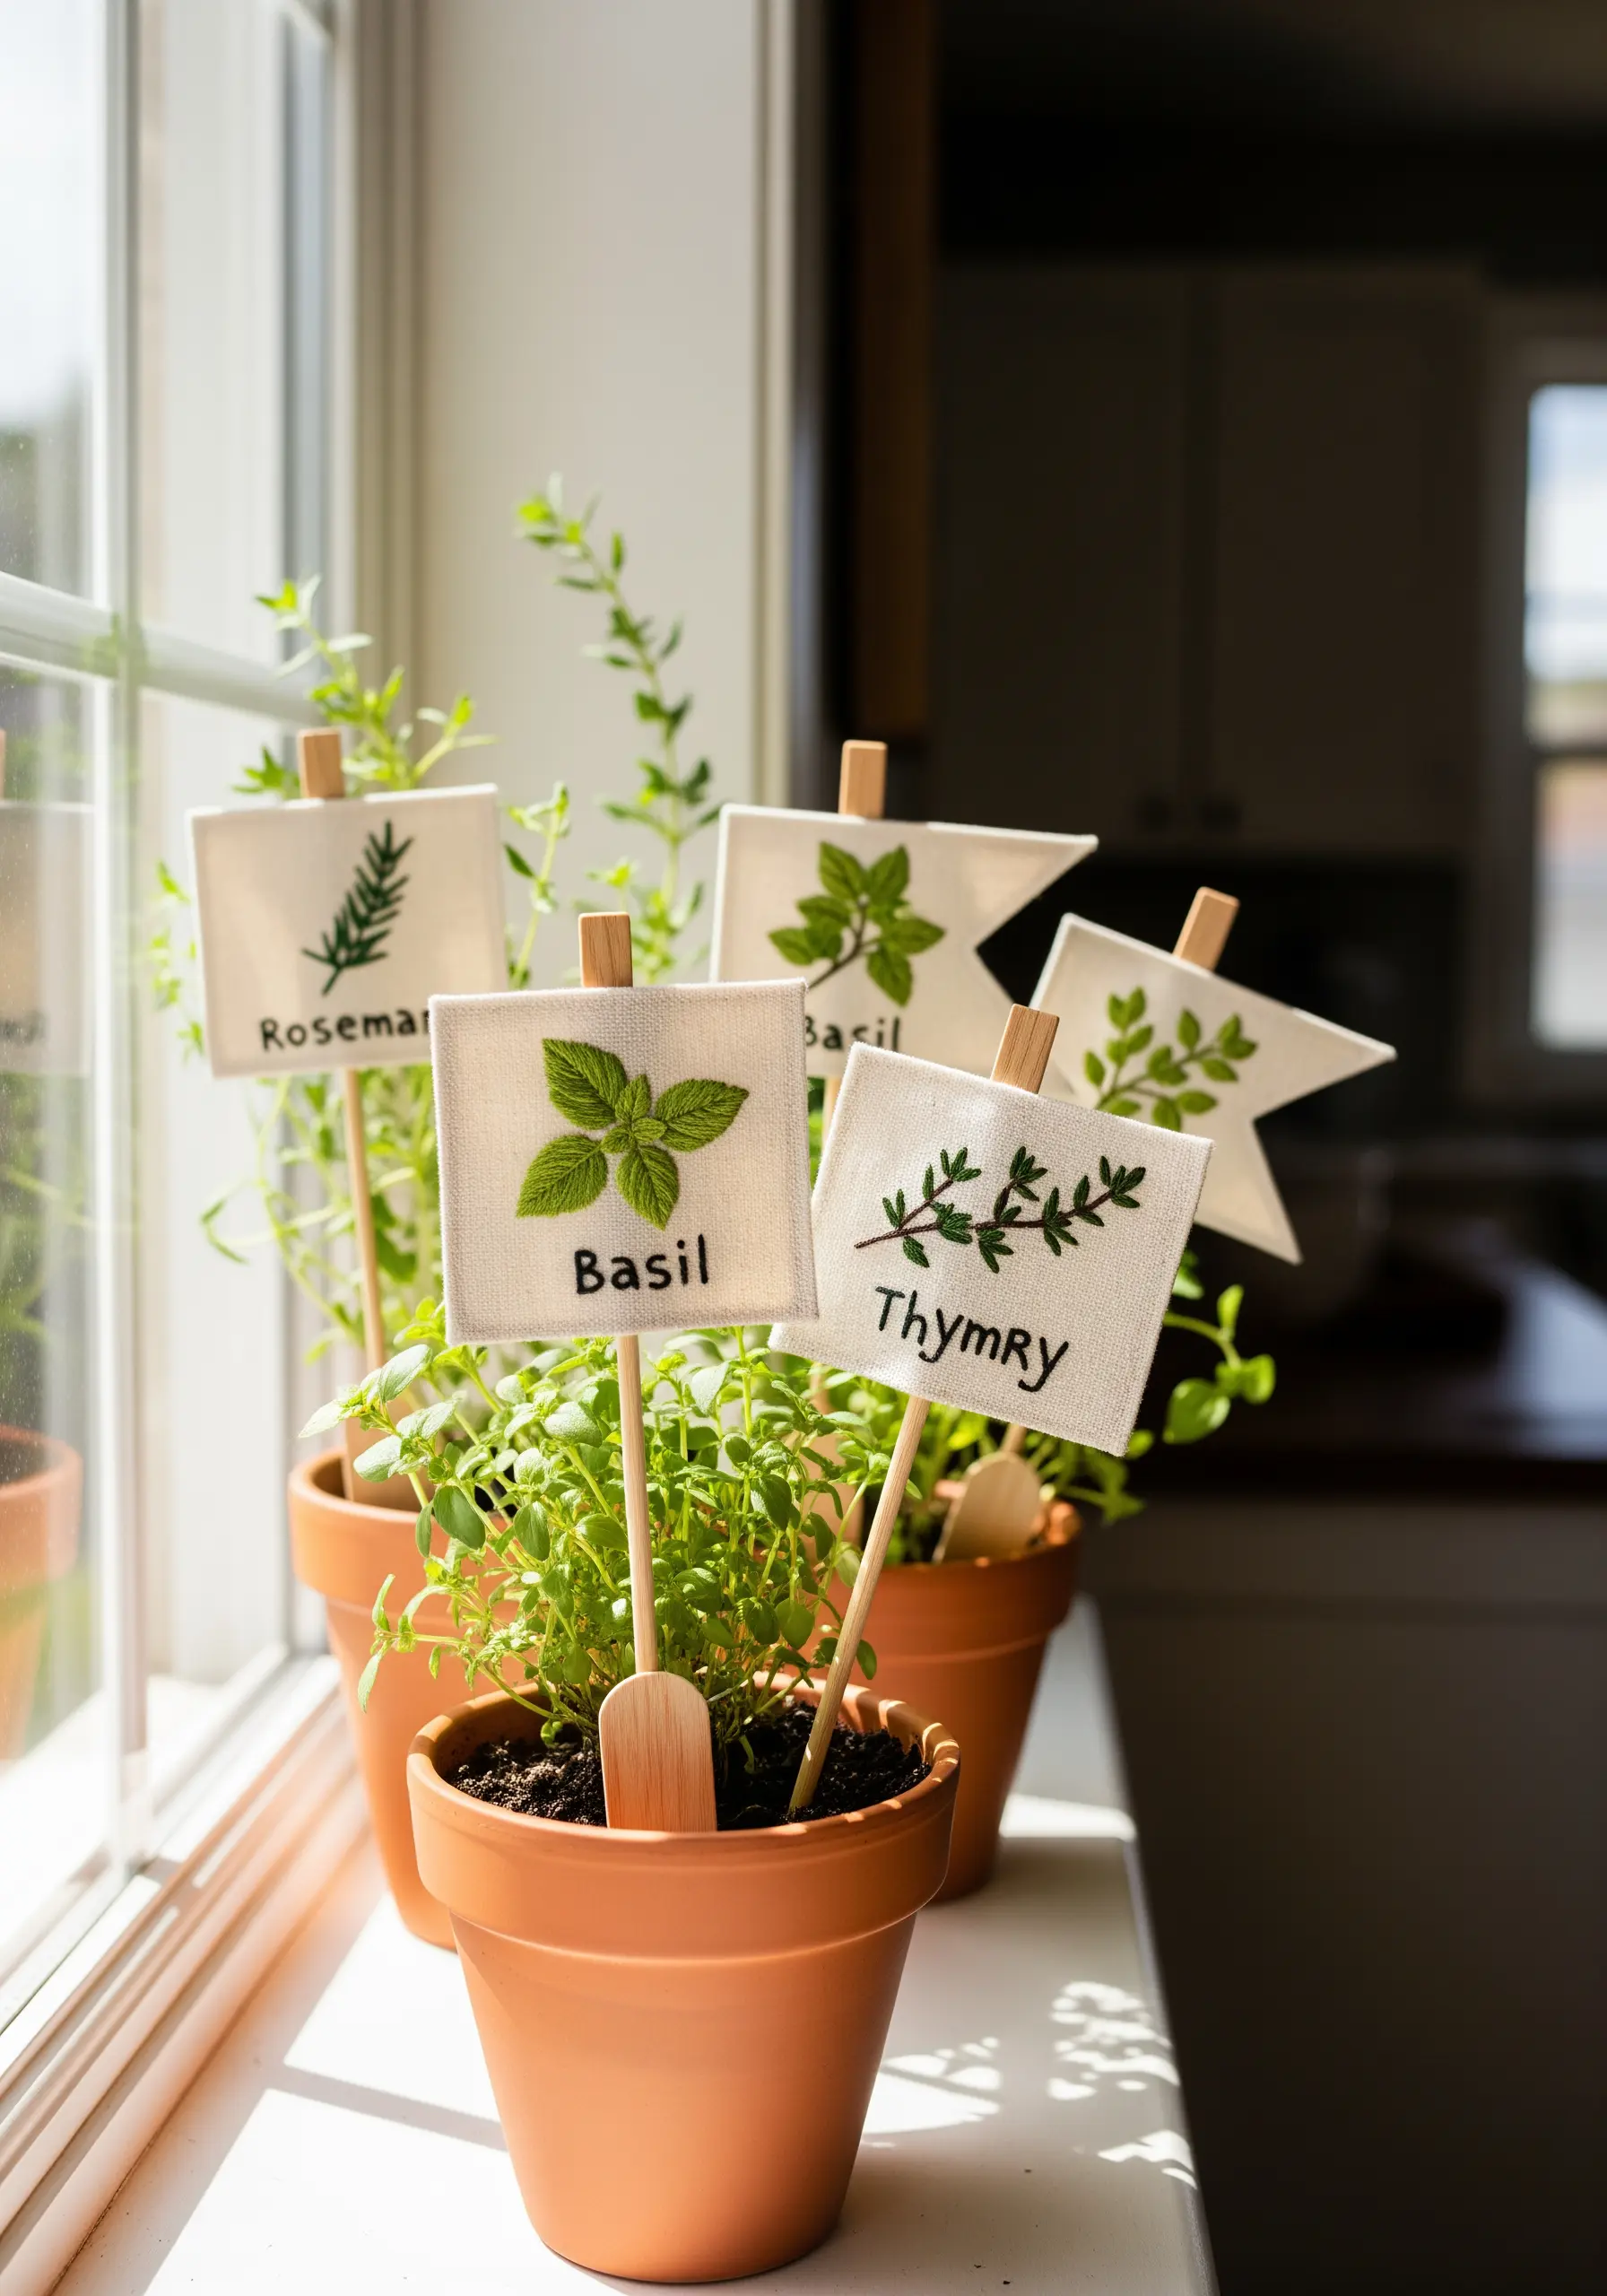
Create charming and functional markers for your indoor garden by stitching on small squares of heavy canvas.
Use a simple backstitch for legible text and add a small botanical illustration with a few leaf or straight stitches.
To make the markers durable, you can seal the back with a bit of fabric glue before attaching them to wooden stakes.
These charming and functional herb markers bridge the gap between your love for crafting and gardening.
19. Abstract Texture with Yarn and Beads
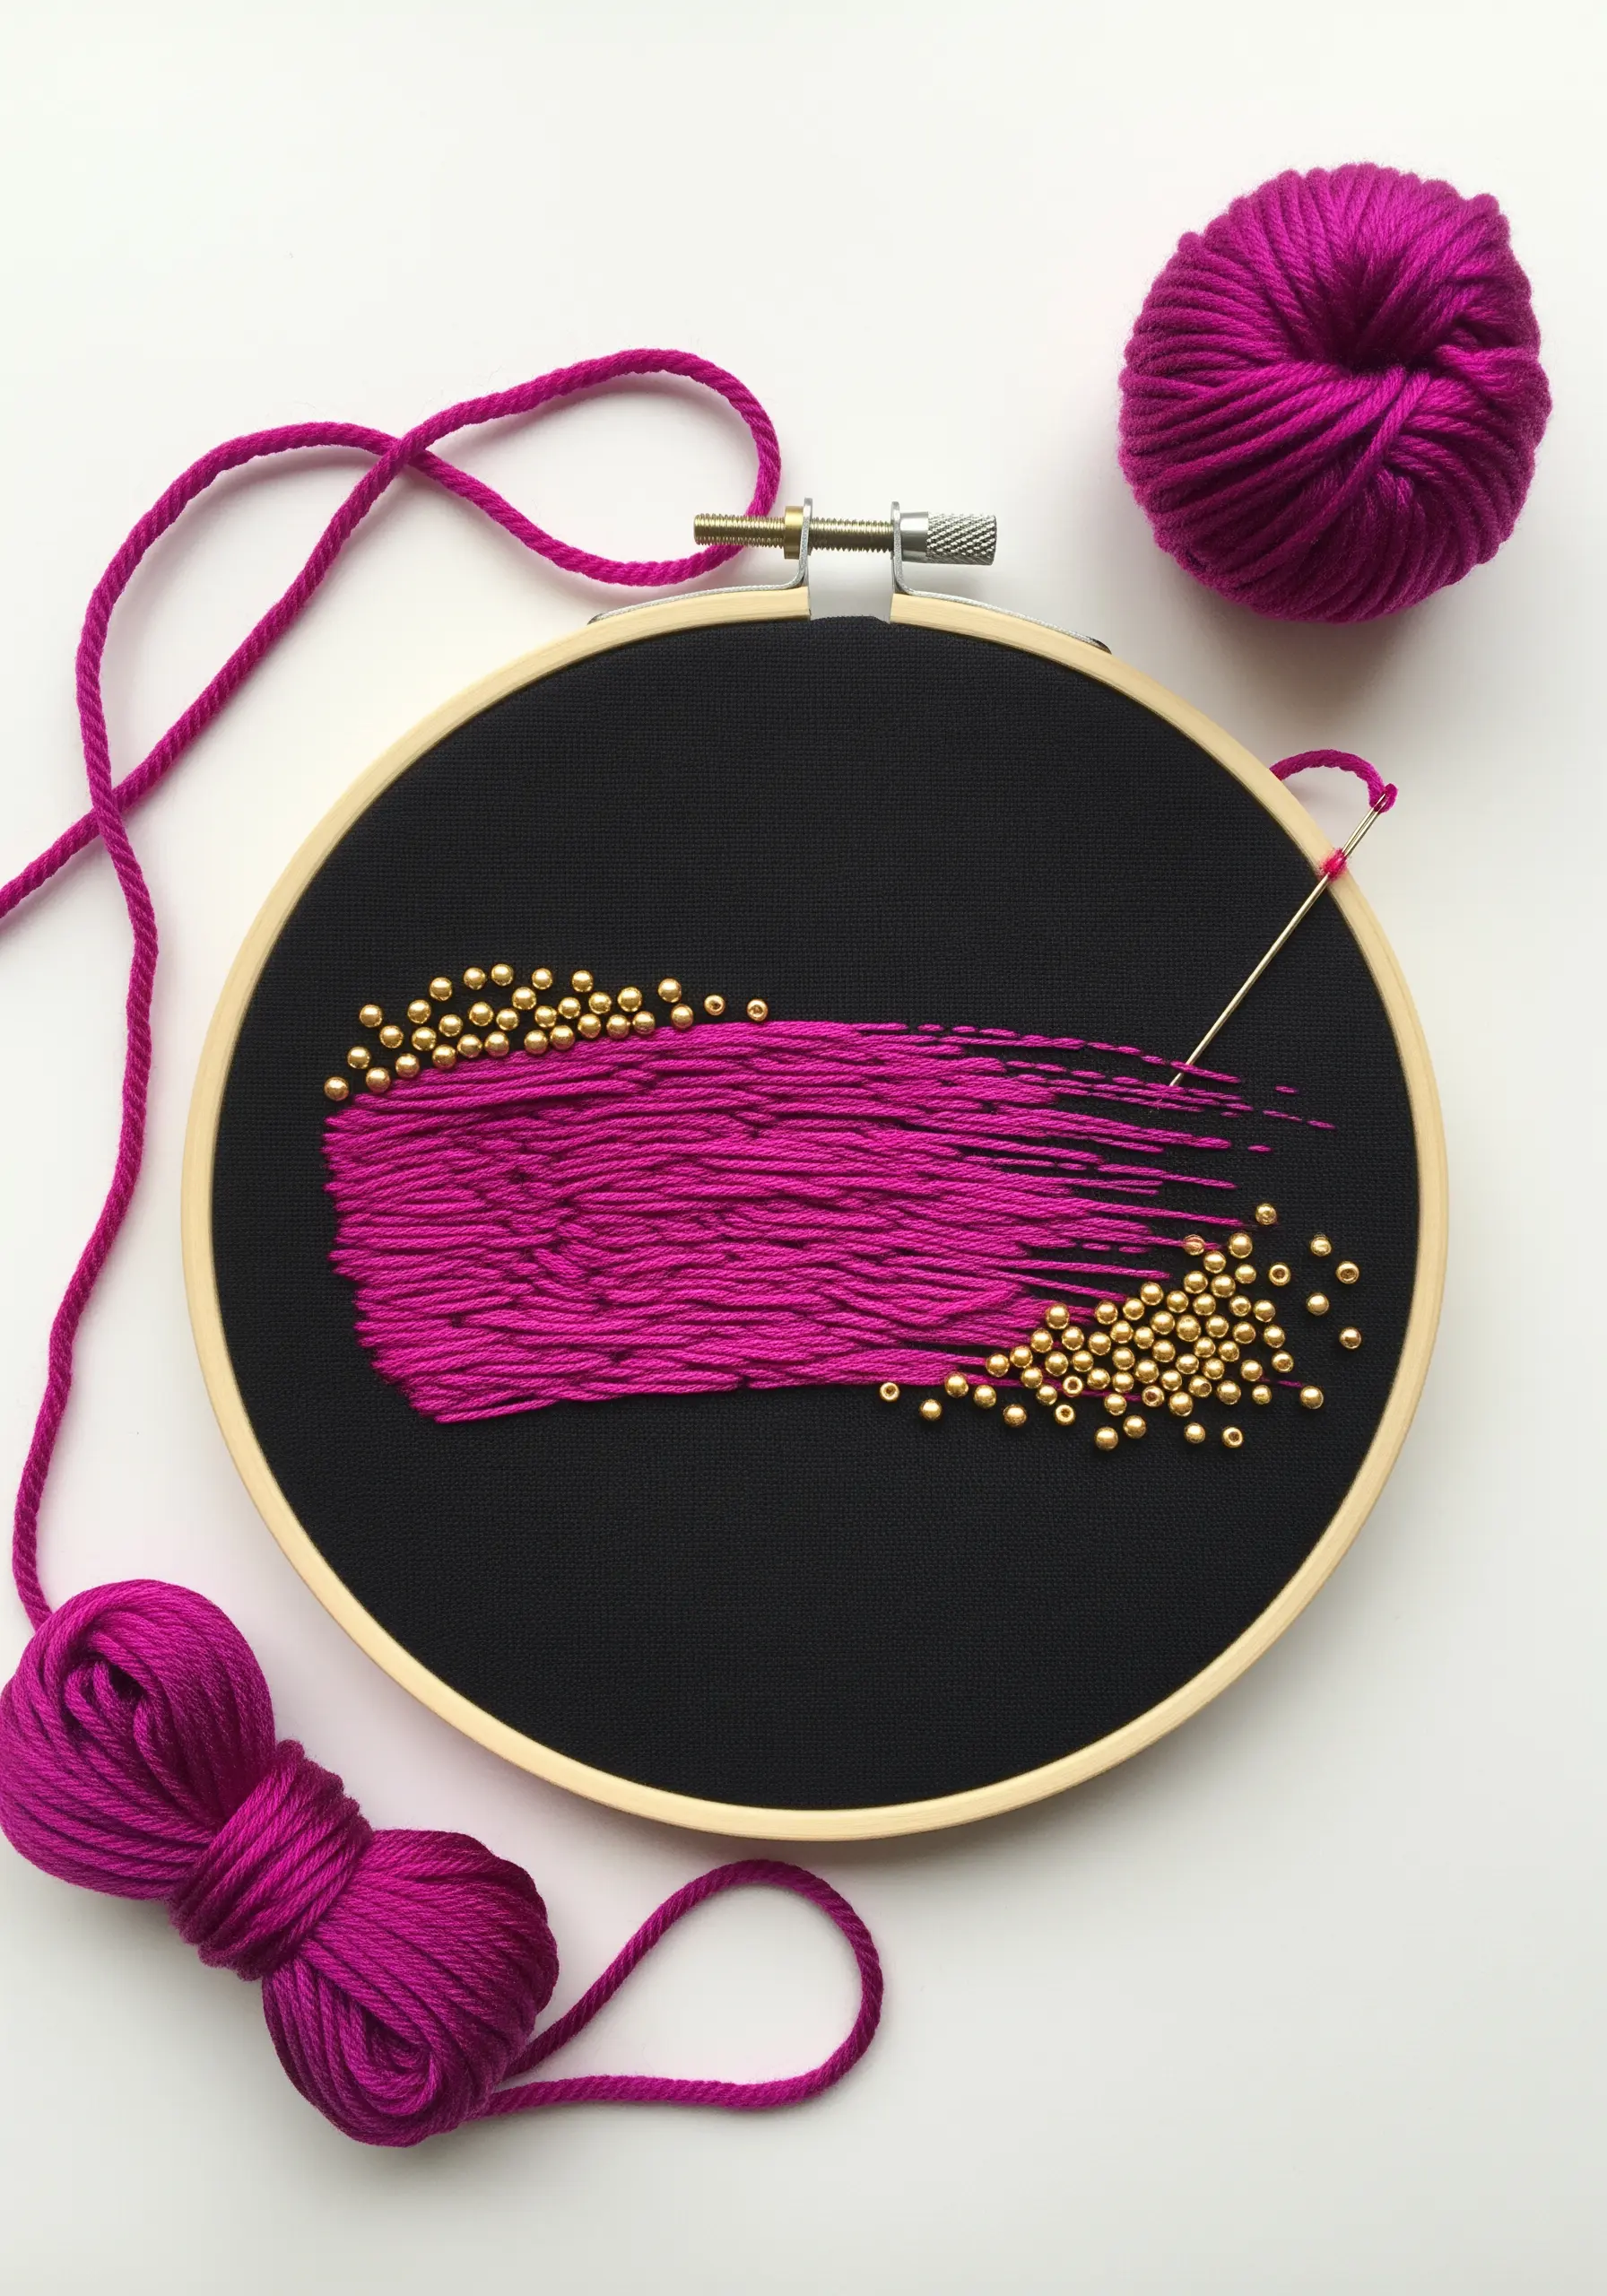
Explore dimension by moving beyond standard floss and incorporating thicker fibers like yarn.
Use long satin stitches to lay down a bold, textured block of color. The thick yarn fills the space quickly and creates a soft, tactile surface.
Then, add a scatter of metallic beads along the edges.
The contrast between the matte, soft yarn and the hard, reflective beads creates a compelling mixed-media effect, especially against dark fabric.
20. Interlocking Border for Bath Linens
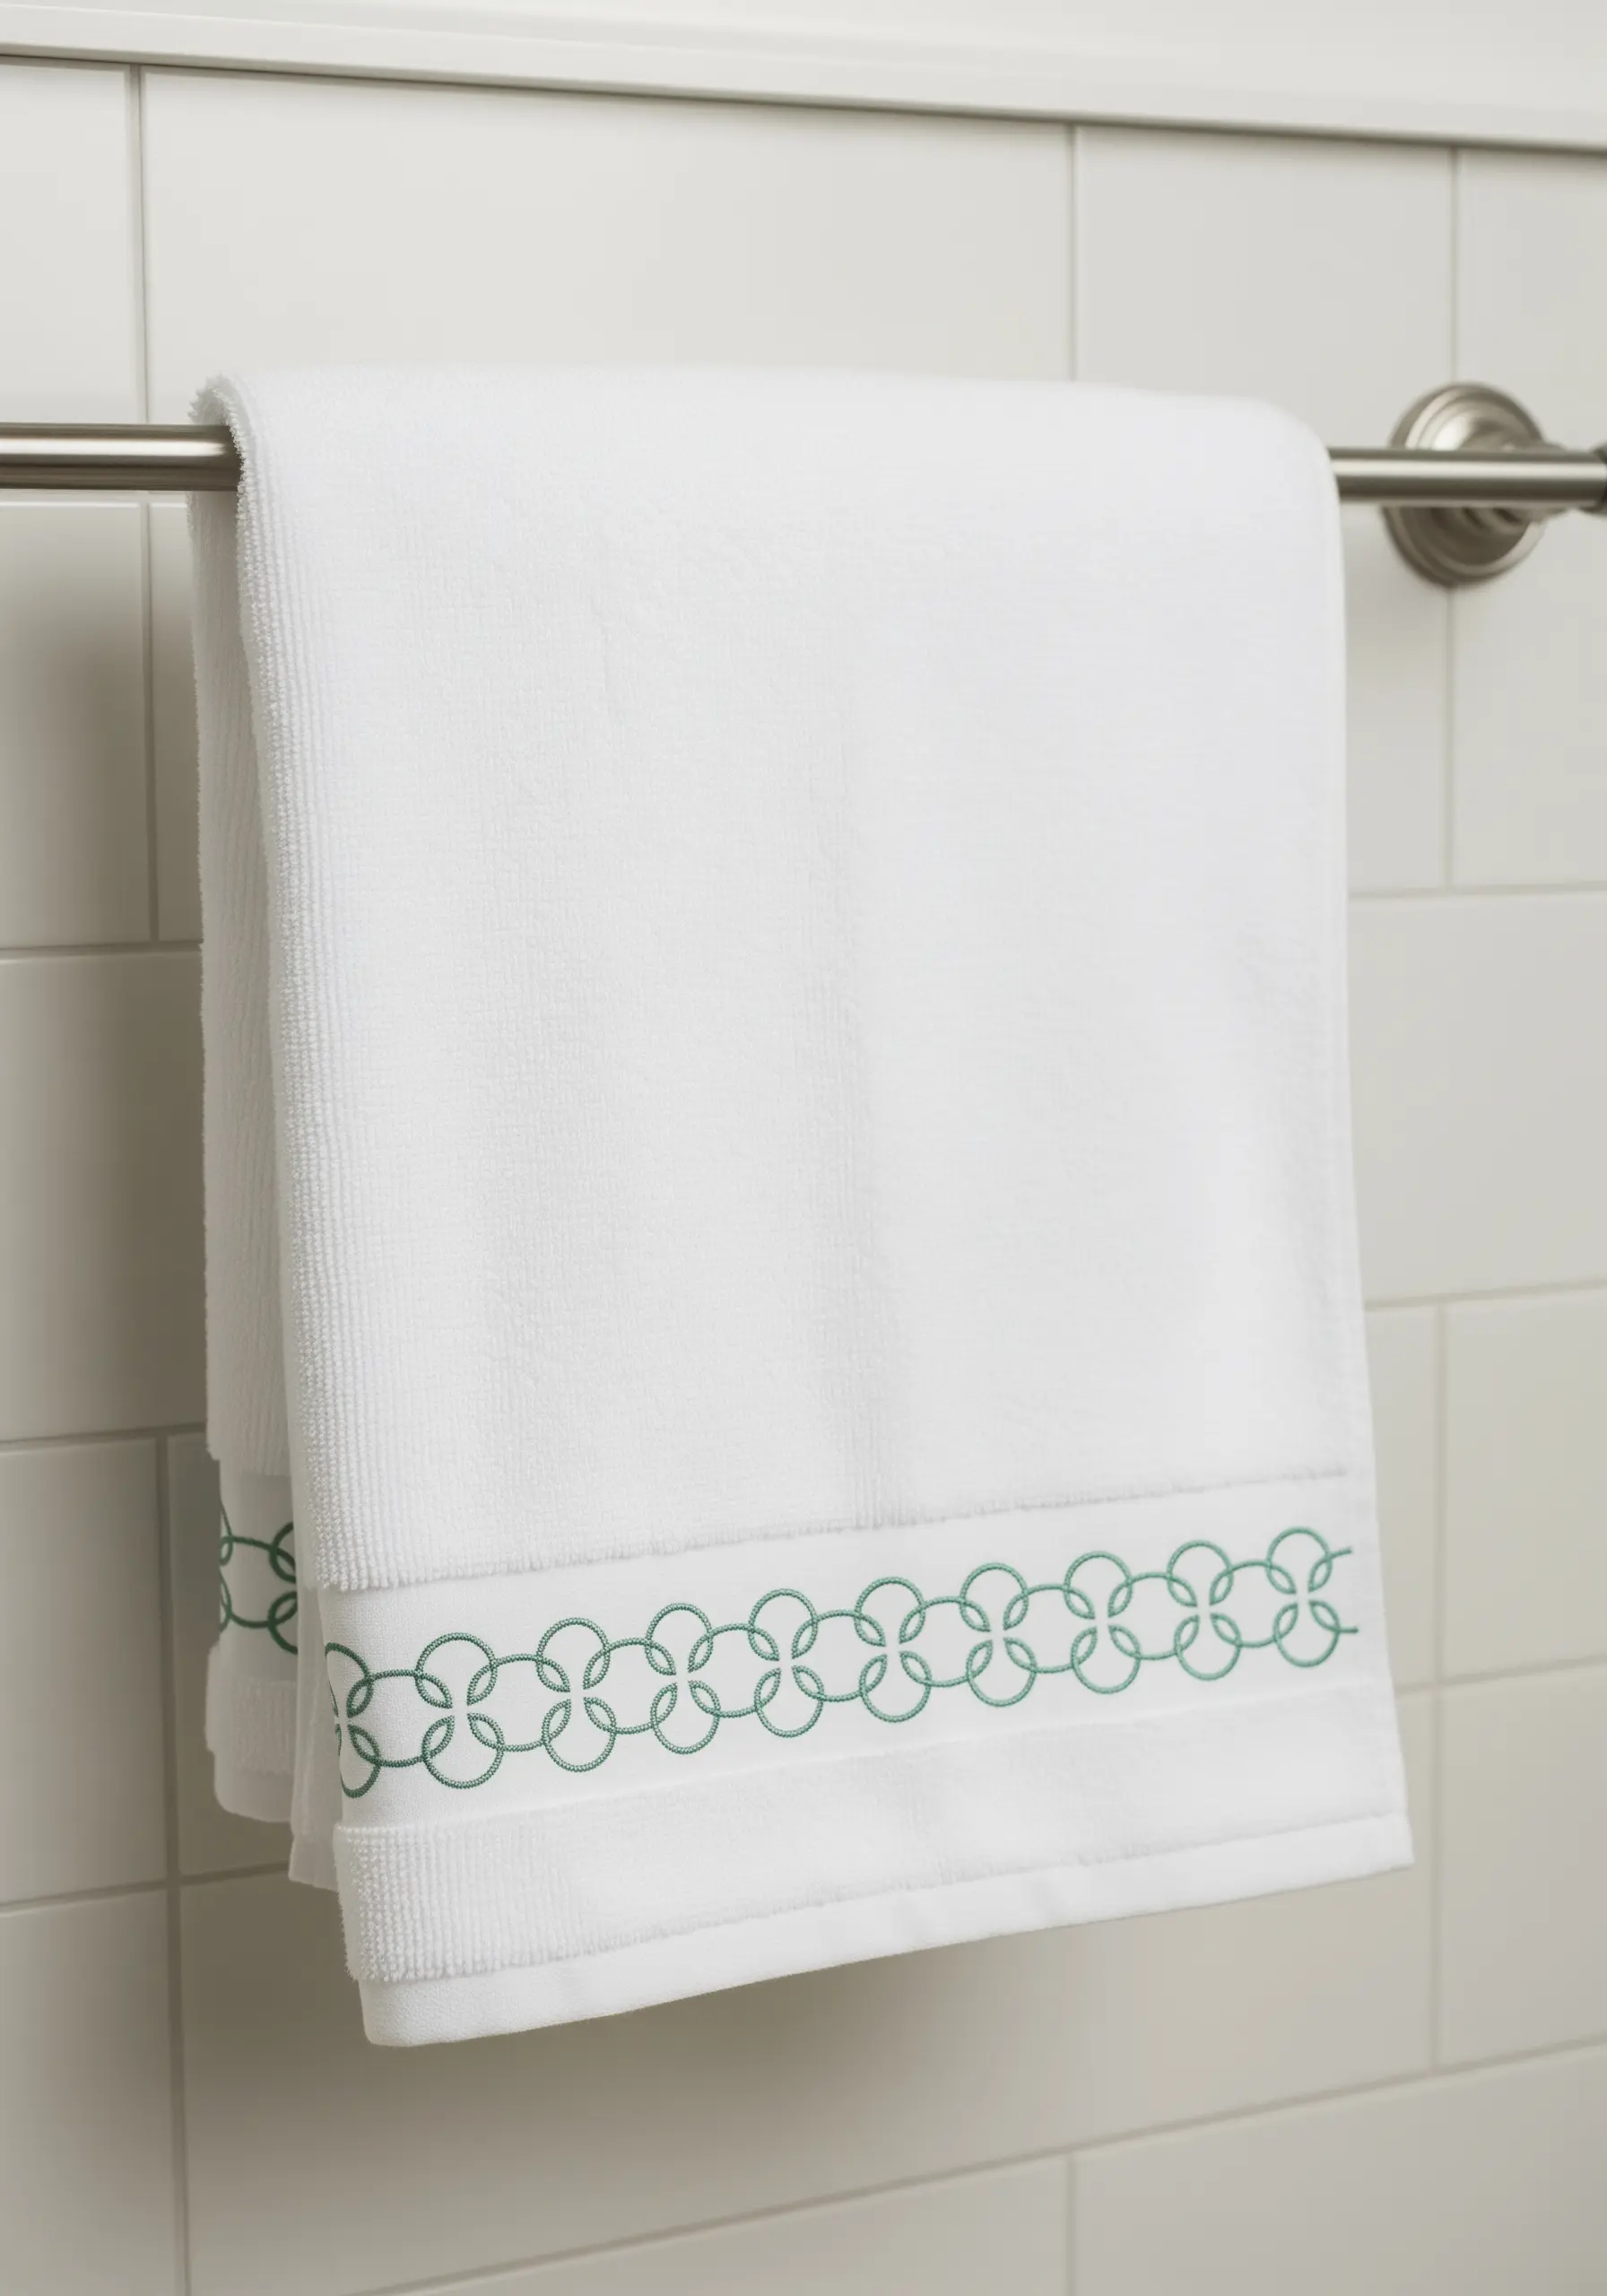
Recreate this clean, modern pattern using a simple backstitch or stem stitch.
The absolute key to a professional result is a flawless transfer. Use a water-soluble stabilizer paper with the pattern printed on it.
Simply stick it to your towel, stitch directly through it, and then wash it away, leaving only your perfect, evenly spaced stitches.
This method guarantees a high-end, boutique feel for any standard bath linens.
21. Embellishing Silk with Celestial Motifs

When stitching on a delicate, slippery fabric like silk, your tool choice is crucial.
Use a very fine, sharp needle (a size 10 milliner’s needle is excellent) and just one or two strands of floss to prevent puckering or snagging the fabric.
Simple starbursts made of straight stitches and a crescent moon in a gentle satin stitch add a touch of celestial magic without compromising the material’s luxurious feel.
Do not use a hoop, as it can leave a permanent mark on the silk.
22. The Elegance of Single-Line Embroidery
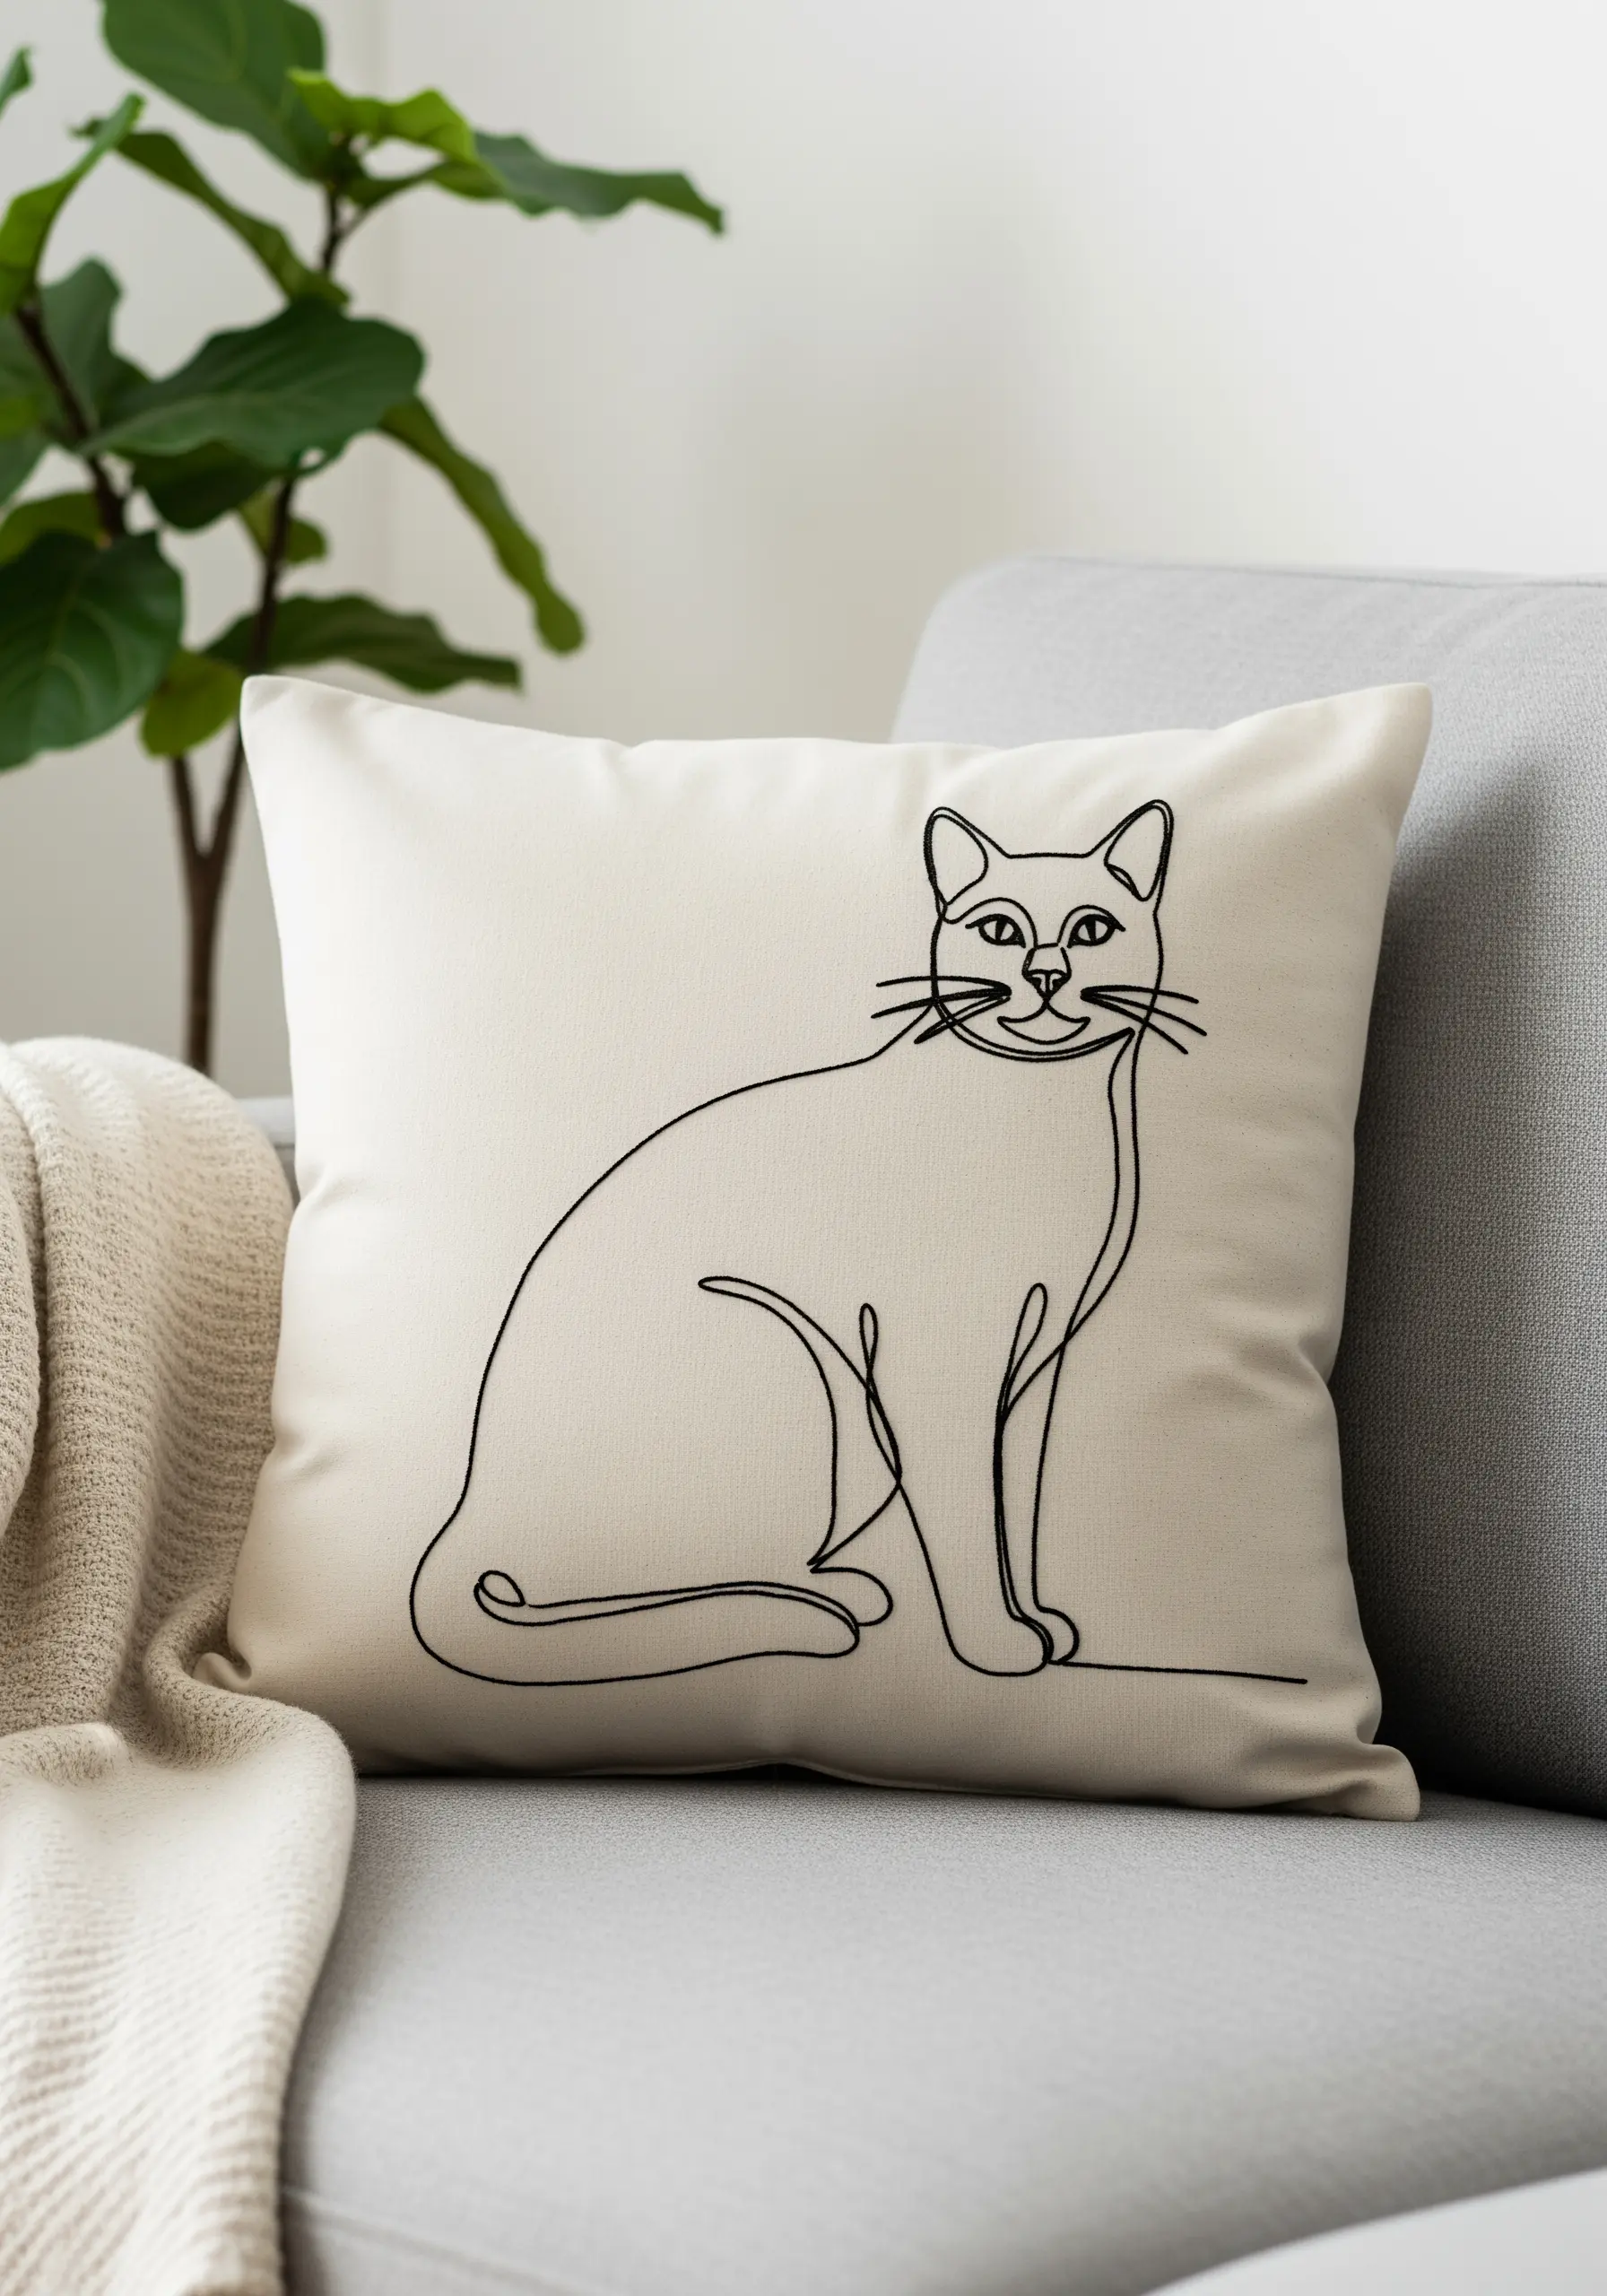
To replicate the fluid feel of continuous line art, choose a stitch that creates a smooth, solid line.
The stem stitch is a perfect choice, as each stitch overlaps slightly, masking the individual punctures of the needle.
A whipped backstitch also works beautifully for an even more uniform, cord-like appearance.
Use a high-contrast thread, like black on a light neutral, to ensure the elegant simplicity of the form is the star of the piece.
23. Organized Pantry with Embroidered Labels
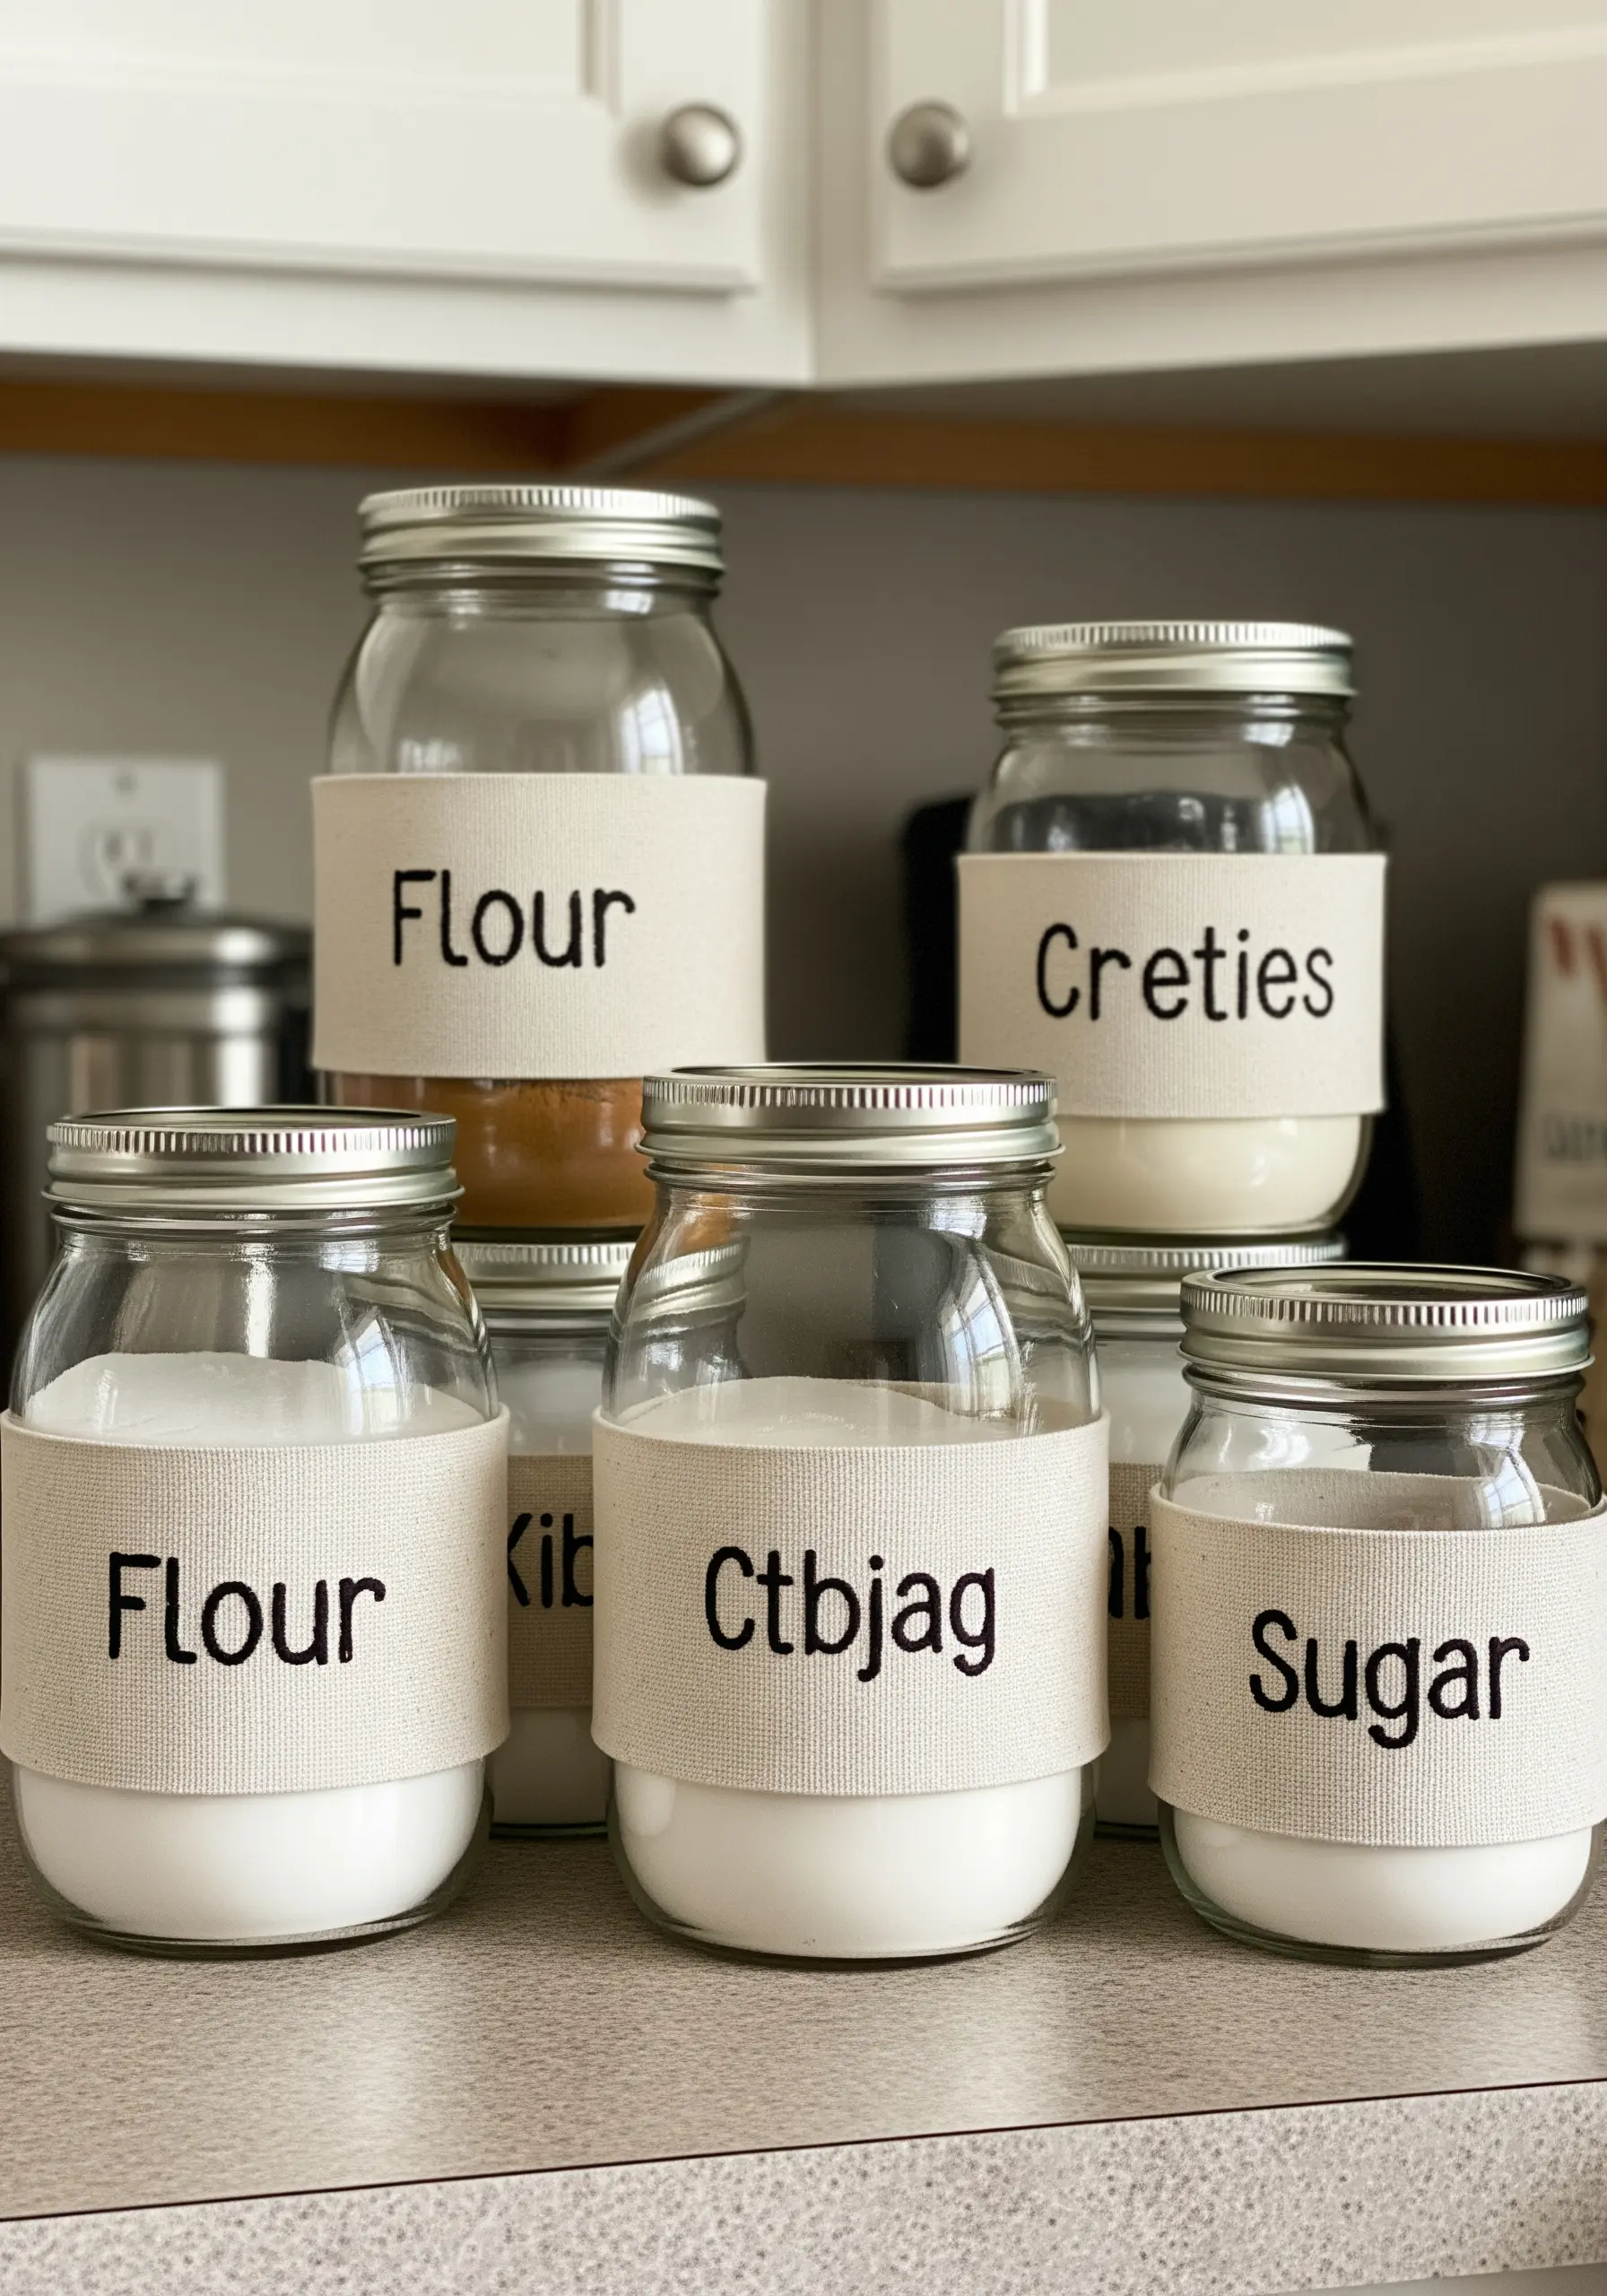
Create chic, reusable pantry labels by stitching onto durable strips of canvas or linen.
For absolutely perfect lettering every time, use a printable, water-soluble stabilizer.
You can print your chosen font directly onto the stabilizer, stick it to your fabric, and stitch over the lines with a simple backstitch.
When you’re done, the stabilizer dissolves in water, leaving crisp, clean text without any trace of your guidelines.
24. Capturing Whimsy with Dandelion Stitches
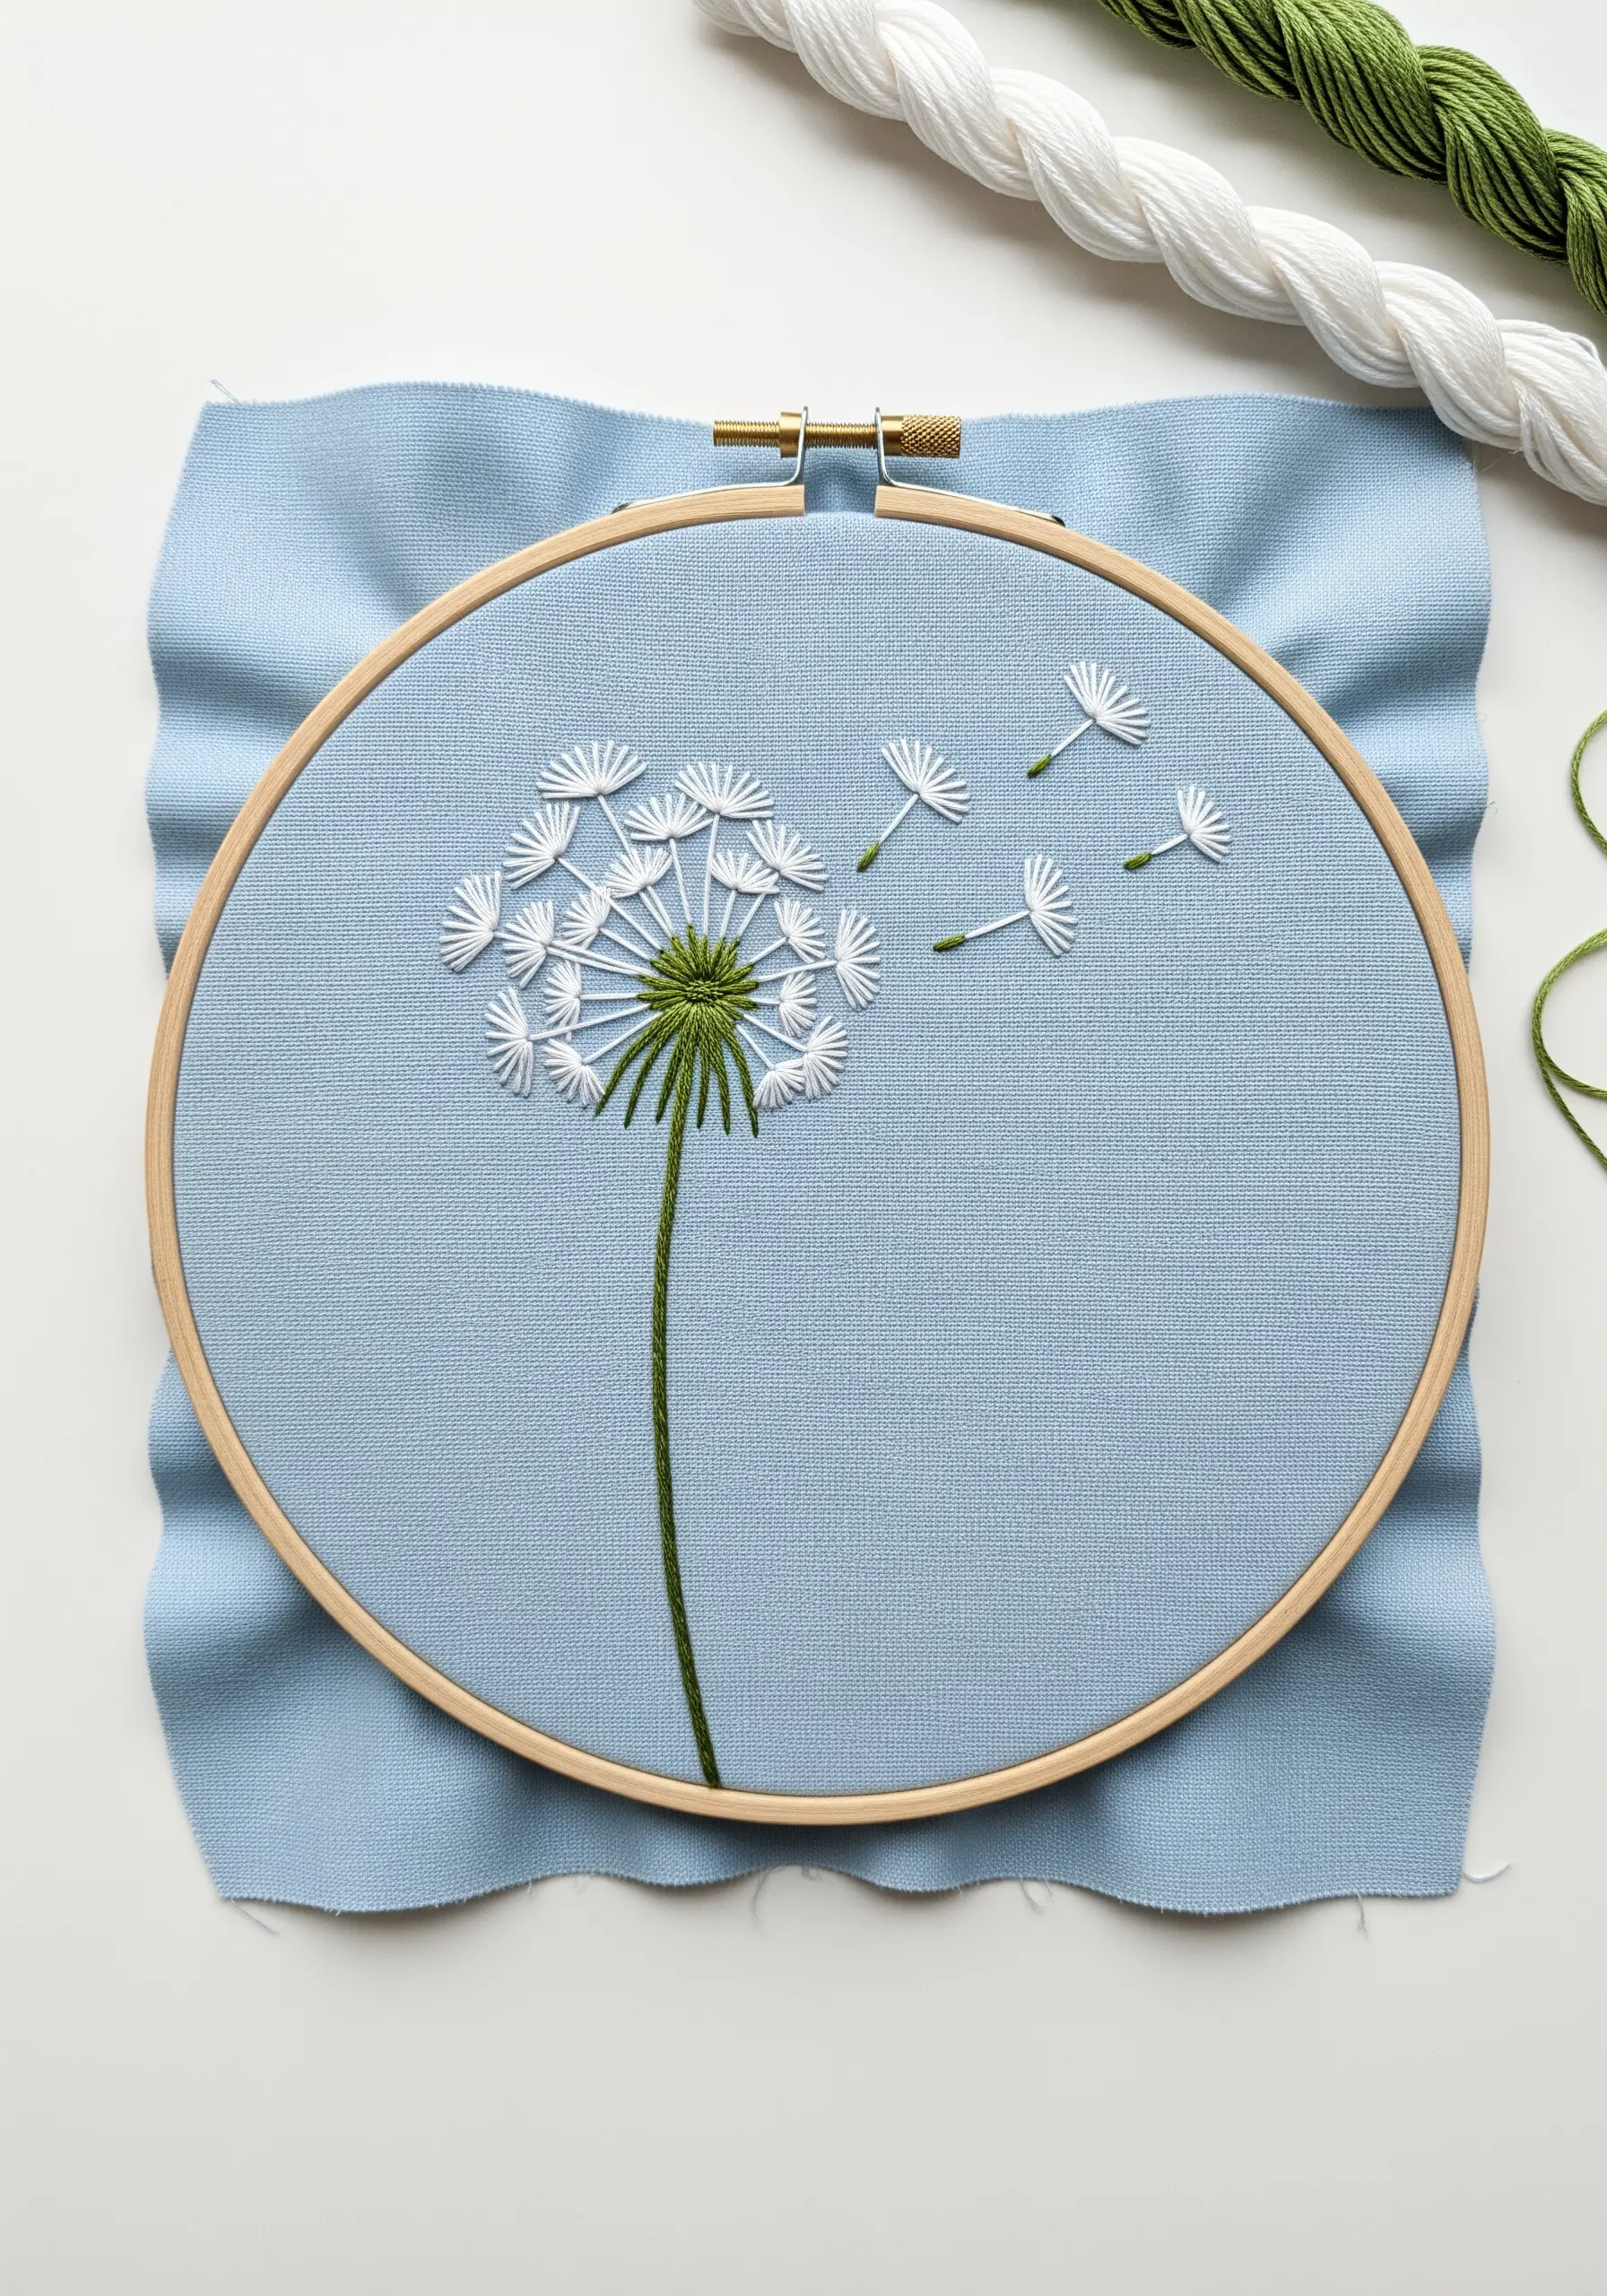
This design is a masterclass in how different stitches can evoke different textures and feelings.
Use straight stitches for the main seed head, radiating from a central point to create the fluffy pappus.
For the seeds that are blowing away, a single detached chain stitch (lazy daisy) for the parachute and a straight stitch for the stem perfectly captures their delicate structure.
This combination creates a beautiful sense of lightness and movement.
25. Color-Blocked Shapes on a Tote Bag
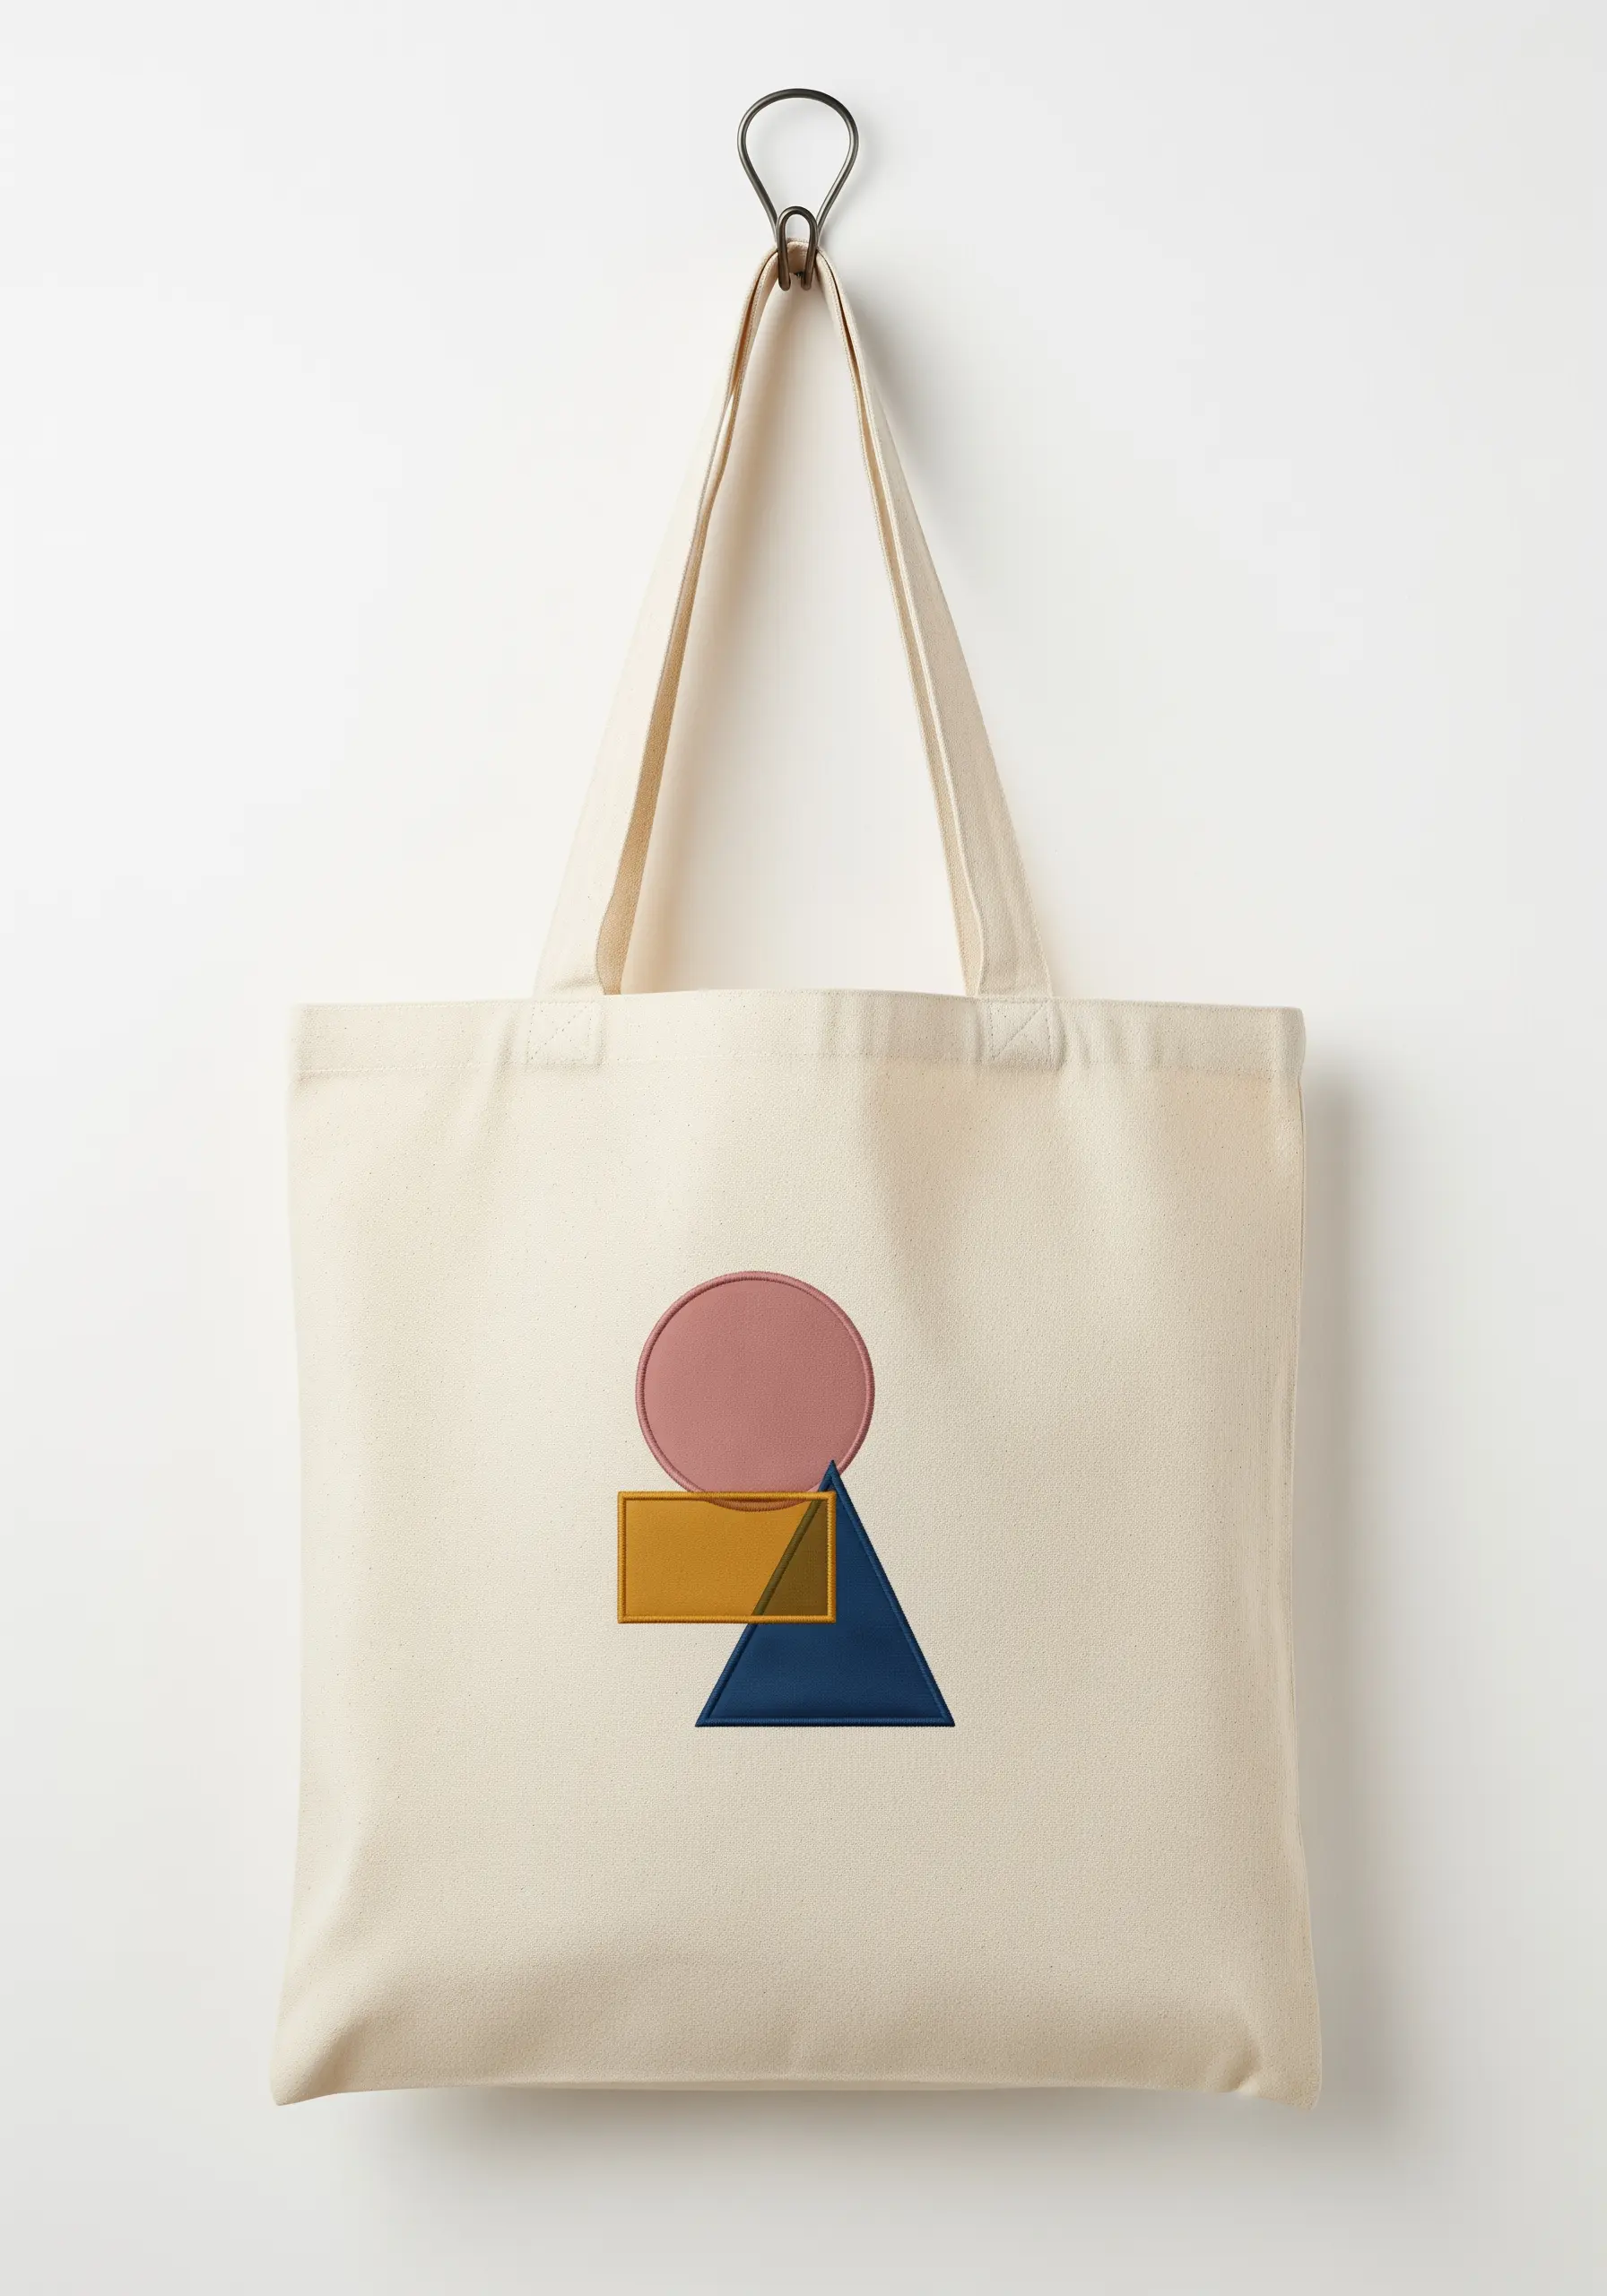
Make a bold statement on a plain tote with modern, color-blocked shapes.
The secret to perfectly neat satin-stitched shapes is to first outline them with a split stitch or backstitch.
This creates a slightly raised border that acts as a container for your satin stitches, preventing them from bleeding outside the lines and giving each shape a crisp, clean edge.
This simple preparatory step makes a world of difference in the final finish.
26. A Trio of Minimalist Botanical Studies
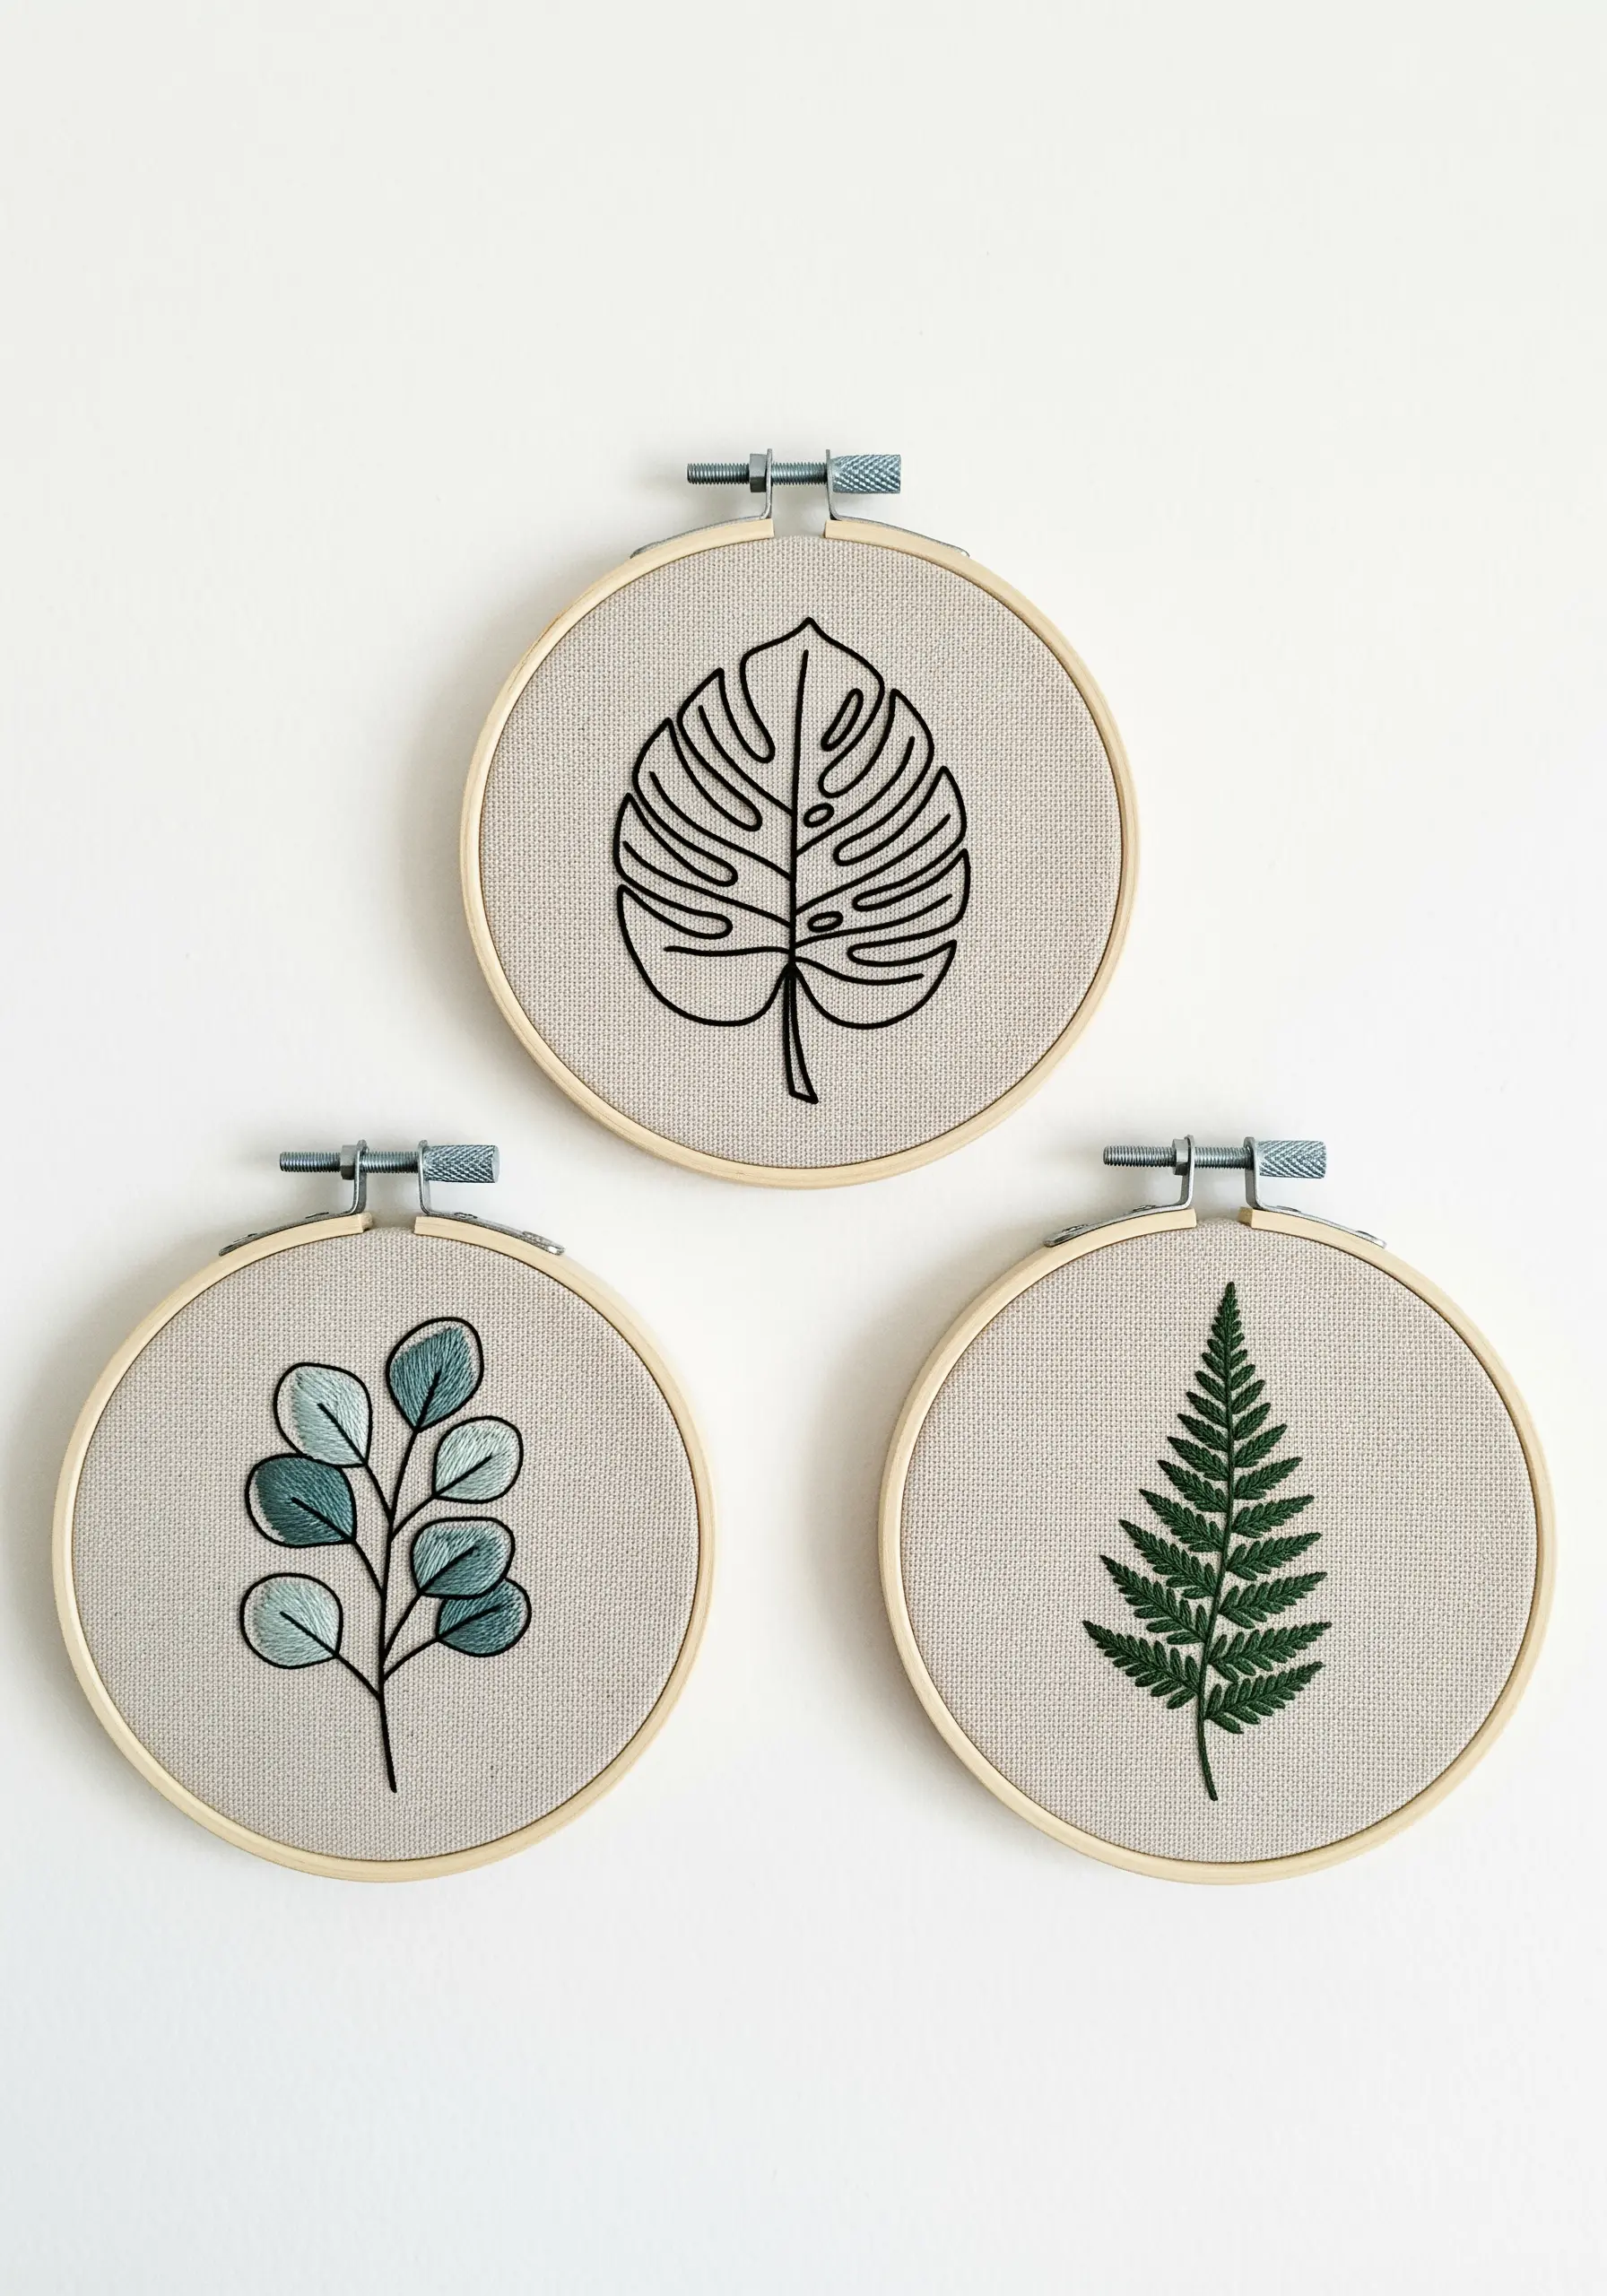
Create an instant, cohesive gallery wall by stitching related motifs in identical small hoops.
For these leaf designs, combine a bold backstitch for the outlines and stems with a directional satin stitch for the fill.
By angling your satin stitches to follow the natural growth of the leaf, you create a sense of realism and movement.
Using a limited color palette across the set—in this case, greens and black—ties the individual pieces together into a single, elegant statement.


