
Often, we think of embroidery as color and line. But what if we thought of it as texture and touch? That shift in perspective is where your work can truly begin to breathe, to feel less like a flat drawing and more like a living, tactile sculpture.
You don’t need a hundred different stitches or a rainbow of threads to create something profound. Sometimes, the most impactful pieces come from exploring just one or two techniques deeply—the plush density of a French knot, the smooth curve of a couched cord, the raised surface of a padded appliqué.
In this collection, I want you to look beyond the image and see the technique. Notice how a simple change in thread weight or stitch direction can completely alter the mood of a piece. These ideas are not just patterns to be copied; they are invitations to experiment with texture and to find your own unique voice in the language of fiber.
1. Build Immersive Depth with Layered Knots
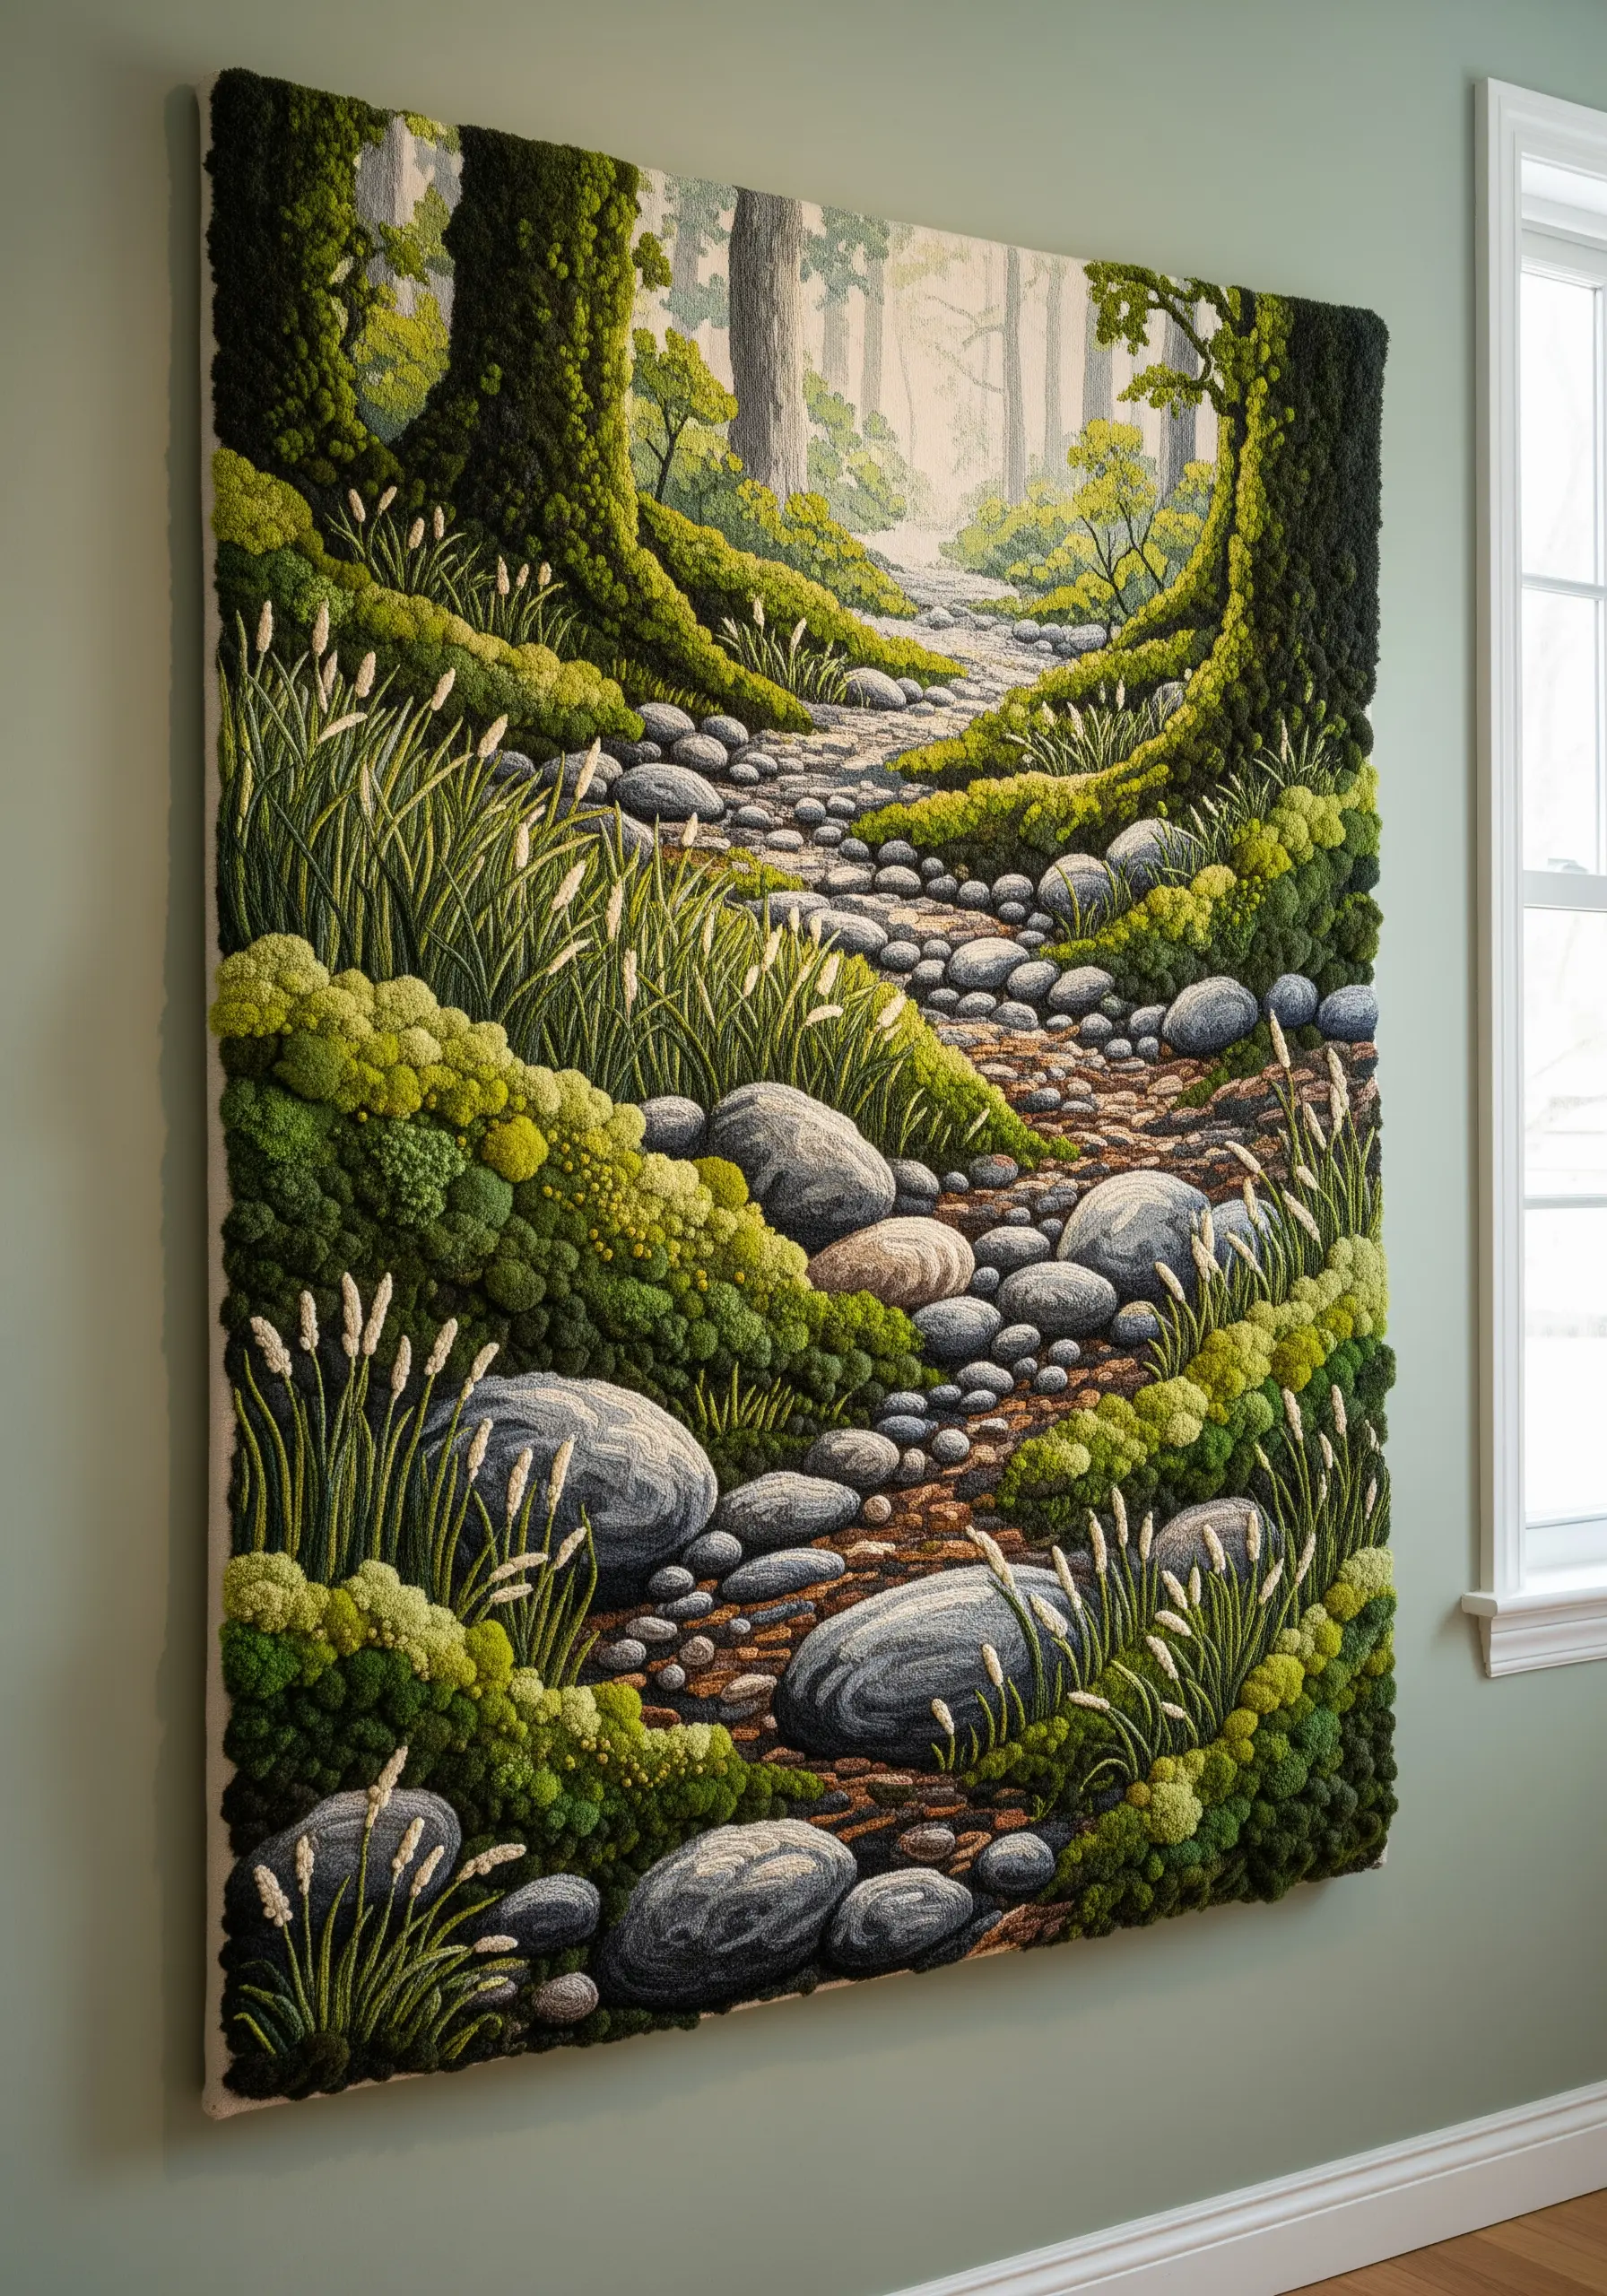
Create a sense of walking into your scene by building texture in layers, starting with the background and moving forward.
Use a combination of French knots, colonial knots, and turkey work (ghiordes knot) with varying thread counts—six strands for dense moss in the foreground, and two or three for softer textures further back.
This technique creates true physical depth, encouraging the eye to travel through the landscape you’ve stitched.
For the distant trees, switch to a soft long-and-short stitch blend to create atmospheric perspective, making the foreground textures pop even more.
2. Guide the Eye with Couched River Stones
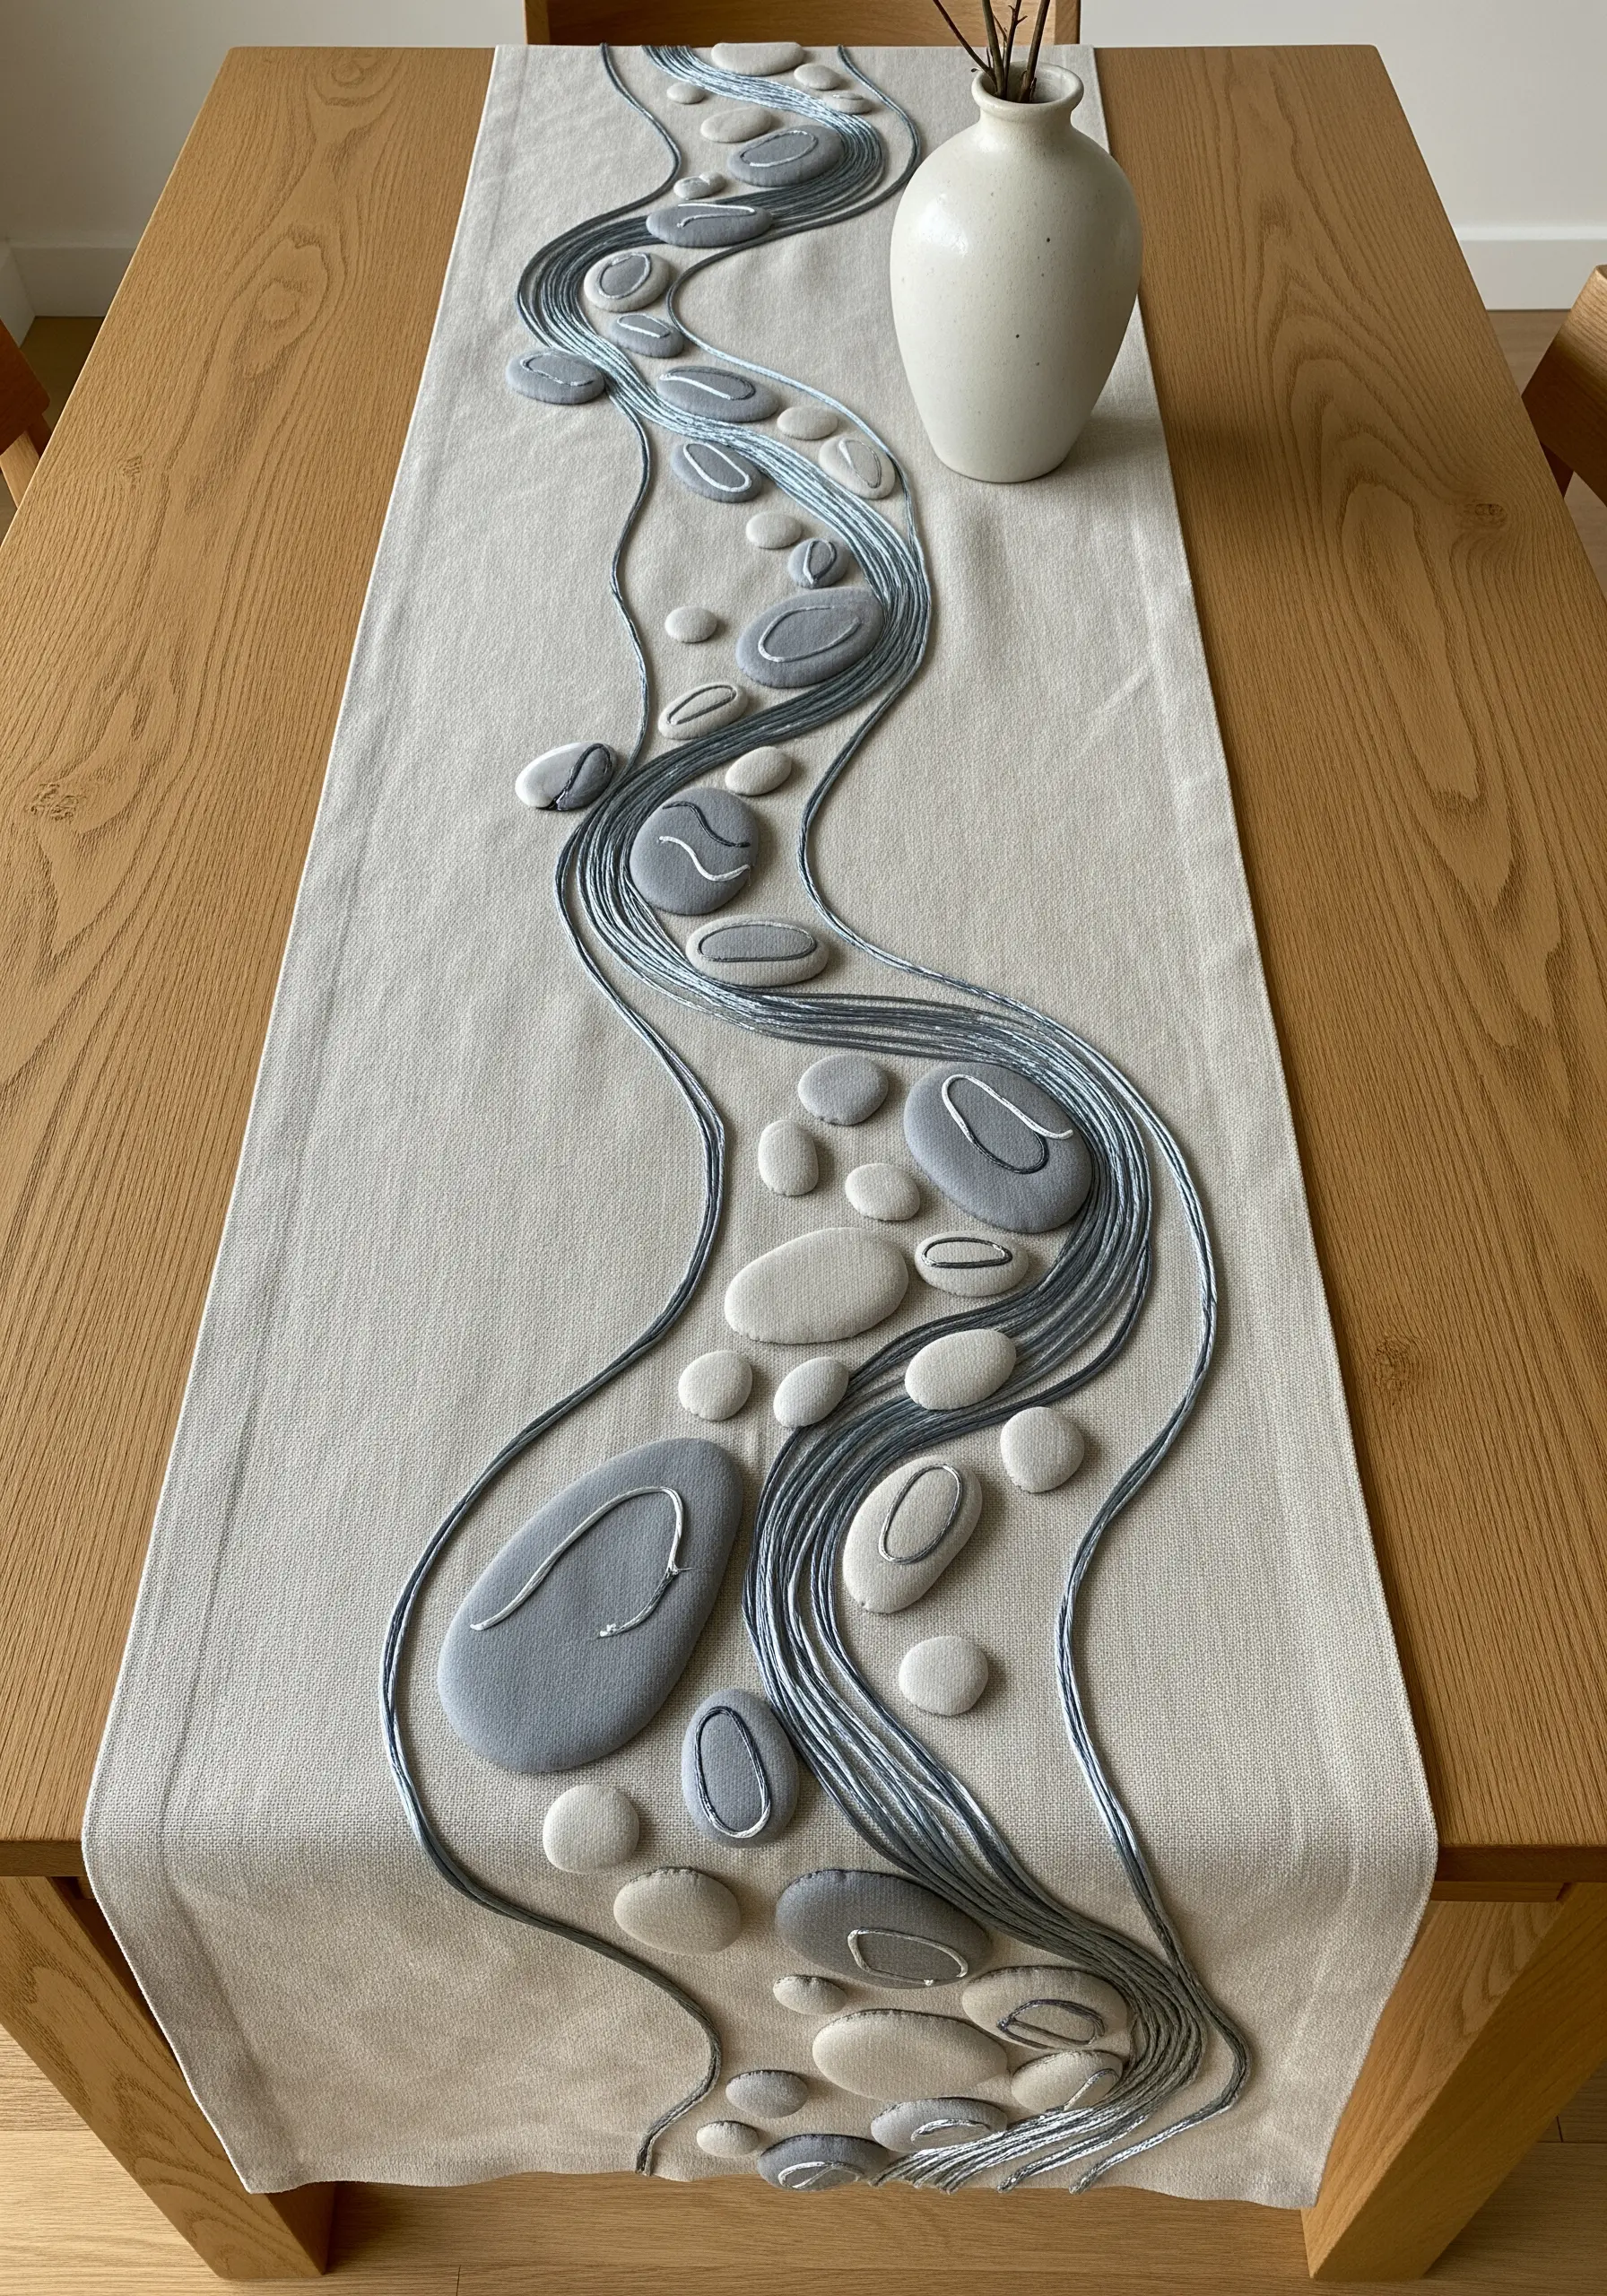
Transform a simple table runner by combining appliqué with the elegant art of couching.
First, cut smooth, organic pebble shapes from wool felt in shades of grey and cream and stitch them down using a hidden whip stitch.
Then, lay down multiple strands of a contrasting thread (like a silvery grey) to simulate the flow of water, tacking them into place with small, perpendicular stitches.
This method allows you to create bold, graphic lines and shapes that would be impossible with traditional stitching alone, resulting in a clean, modern aesthetic.
3. Recreate Birch Bark with Linear Textures
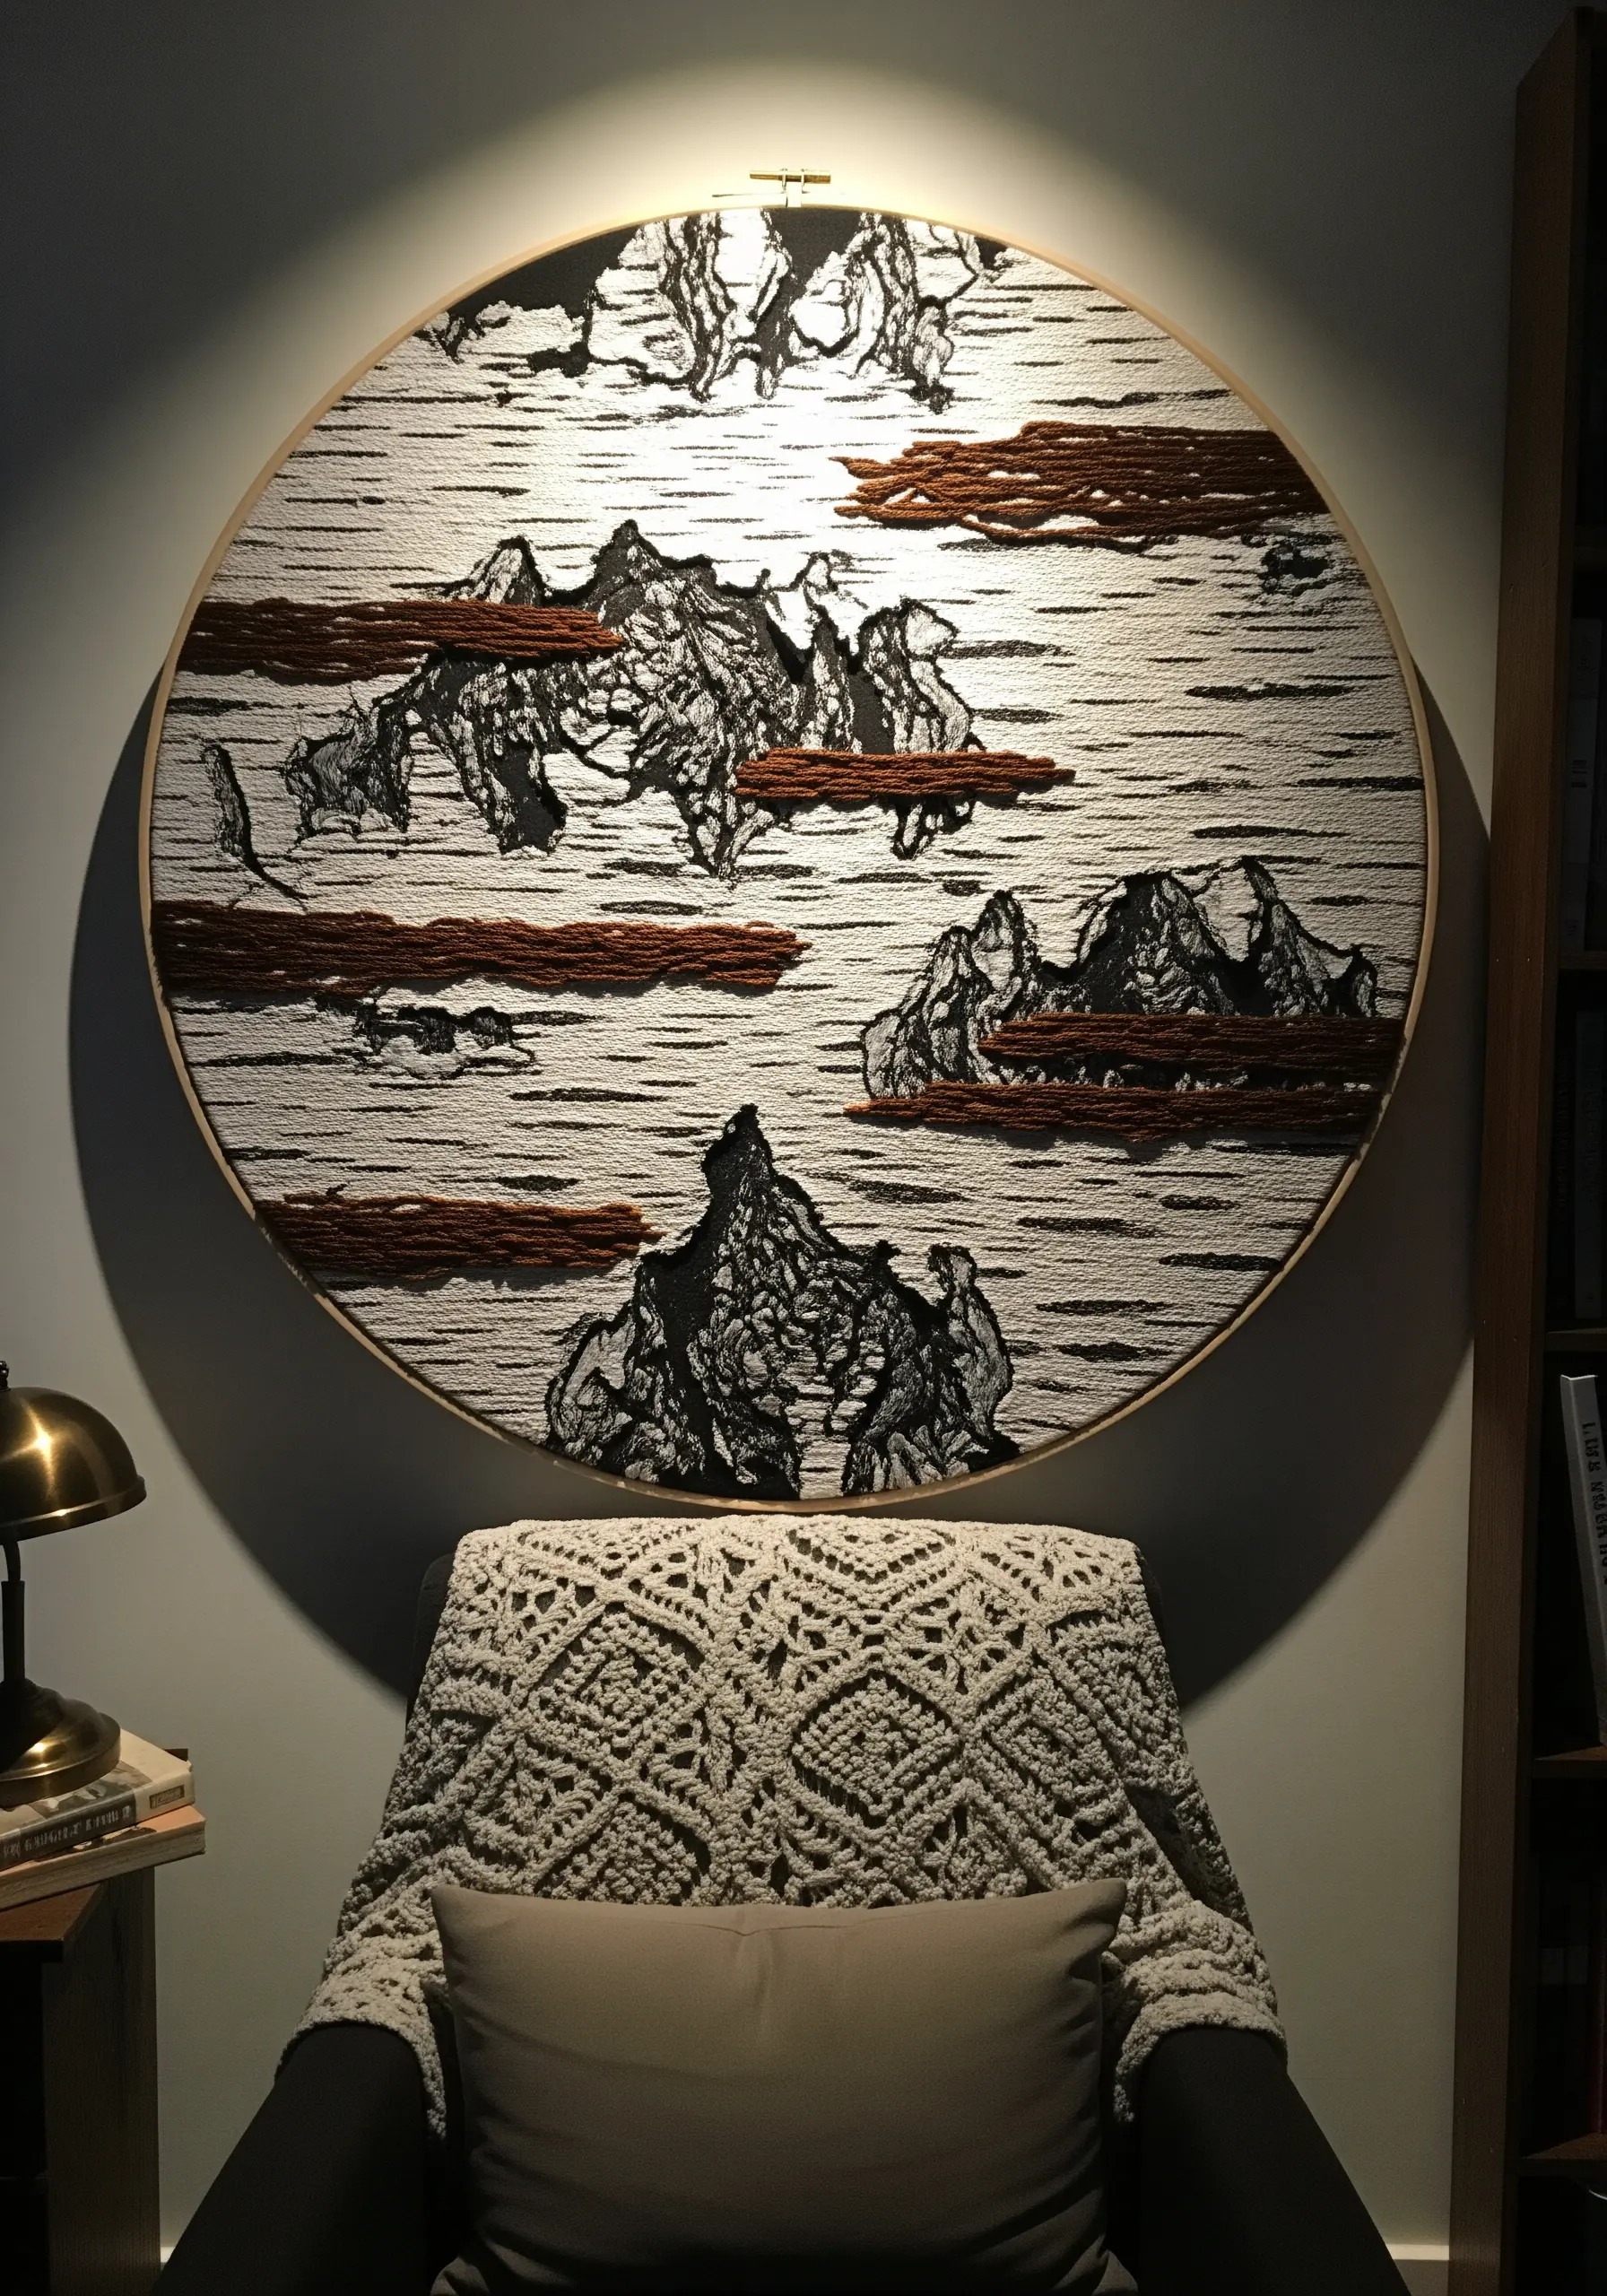
Evoke the delicate texture of birch bark by filling your background with dense, horizontal seed stitches using an off-white or cream thread.
Keep the stitches slightly irregular in length and placement to mimic natural imperfections.
For the darker, peeling sections, introduce bold, abstract shapes using free-form satin stitch or by couching down thick, textured yarn.
This contrast between the delicate background and the bold foreground elements creates a dynamic composition that feels both organic and abstract.
4. Stitch Realistic Lichen with Clustered French Knots
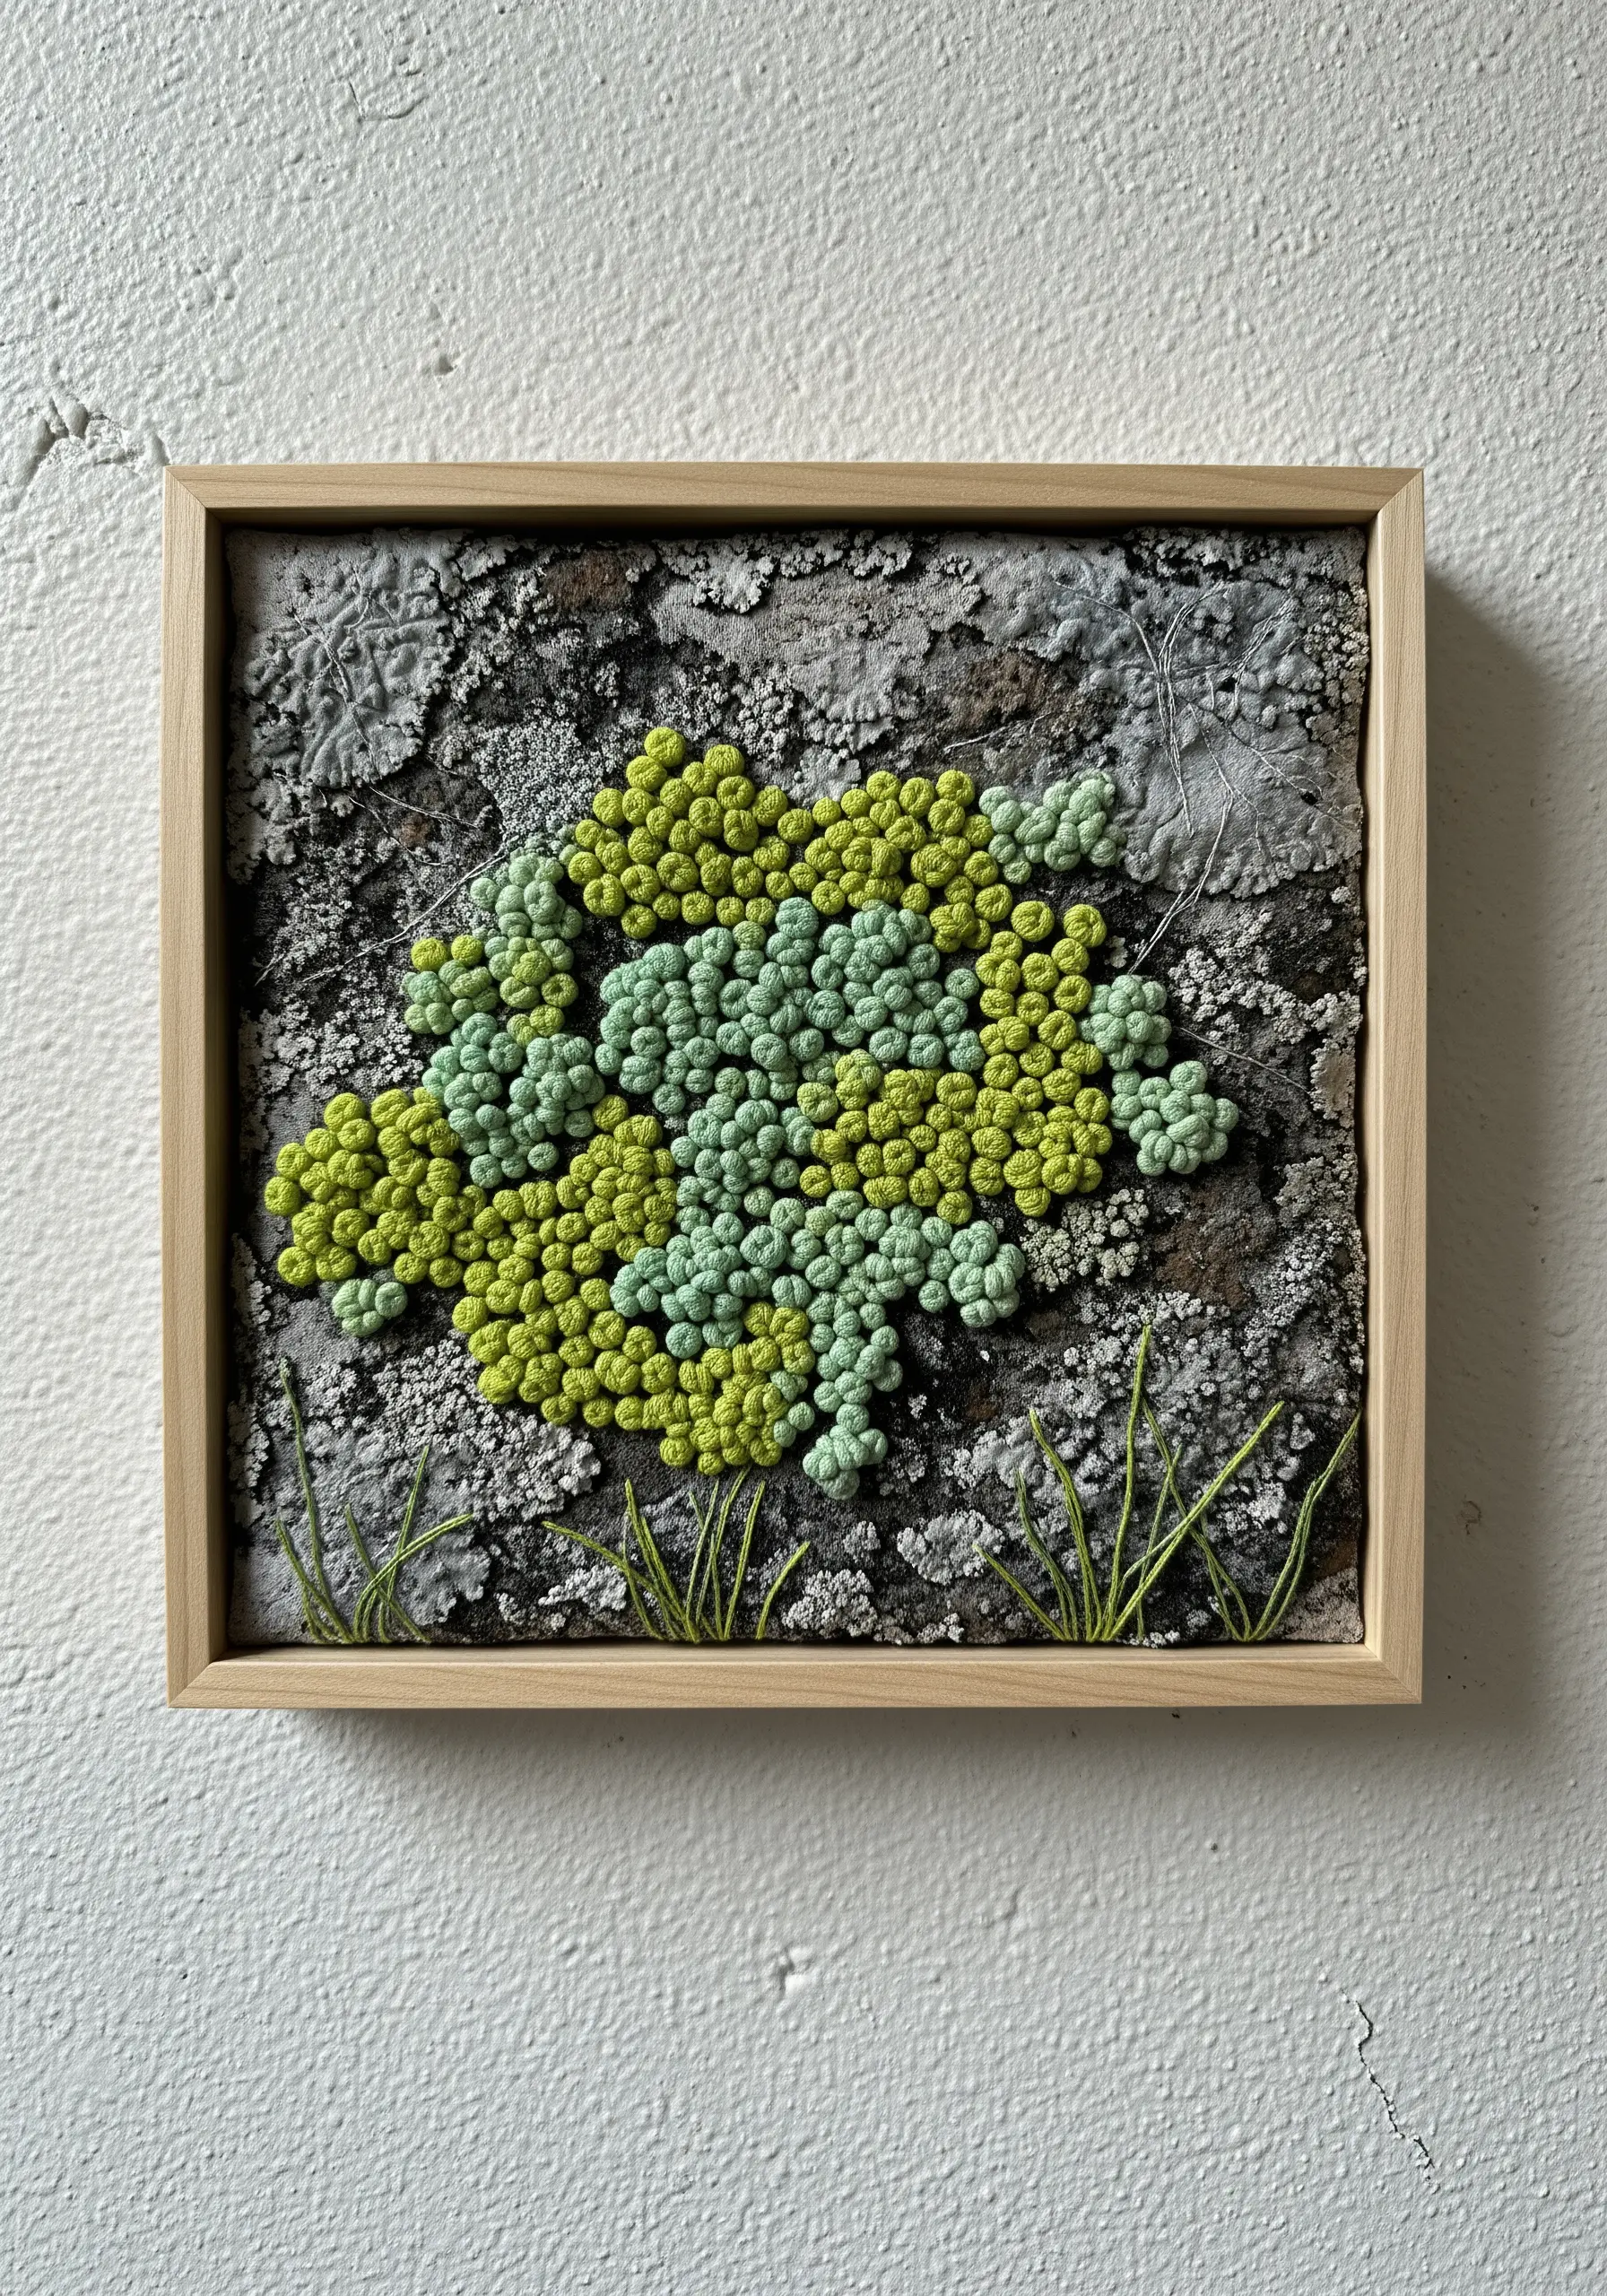
Capture the puffy, clustered texture of lichen by grouping French knots of varying sizes and colors.
Use a full six strands of floss and wrap the needle two or three times for plump, high-profile knots.
Create a natural gradient by blending two or three shades of green and chartreuse, placing them tightly together to form organic mounds.
For an even more realistic effect, mount your finished embroidery on a piece of slate or a textured, painted canvas to mimic its natural environment.
5. Carve Sculptural Lines with Thick Cord Couching
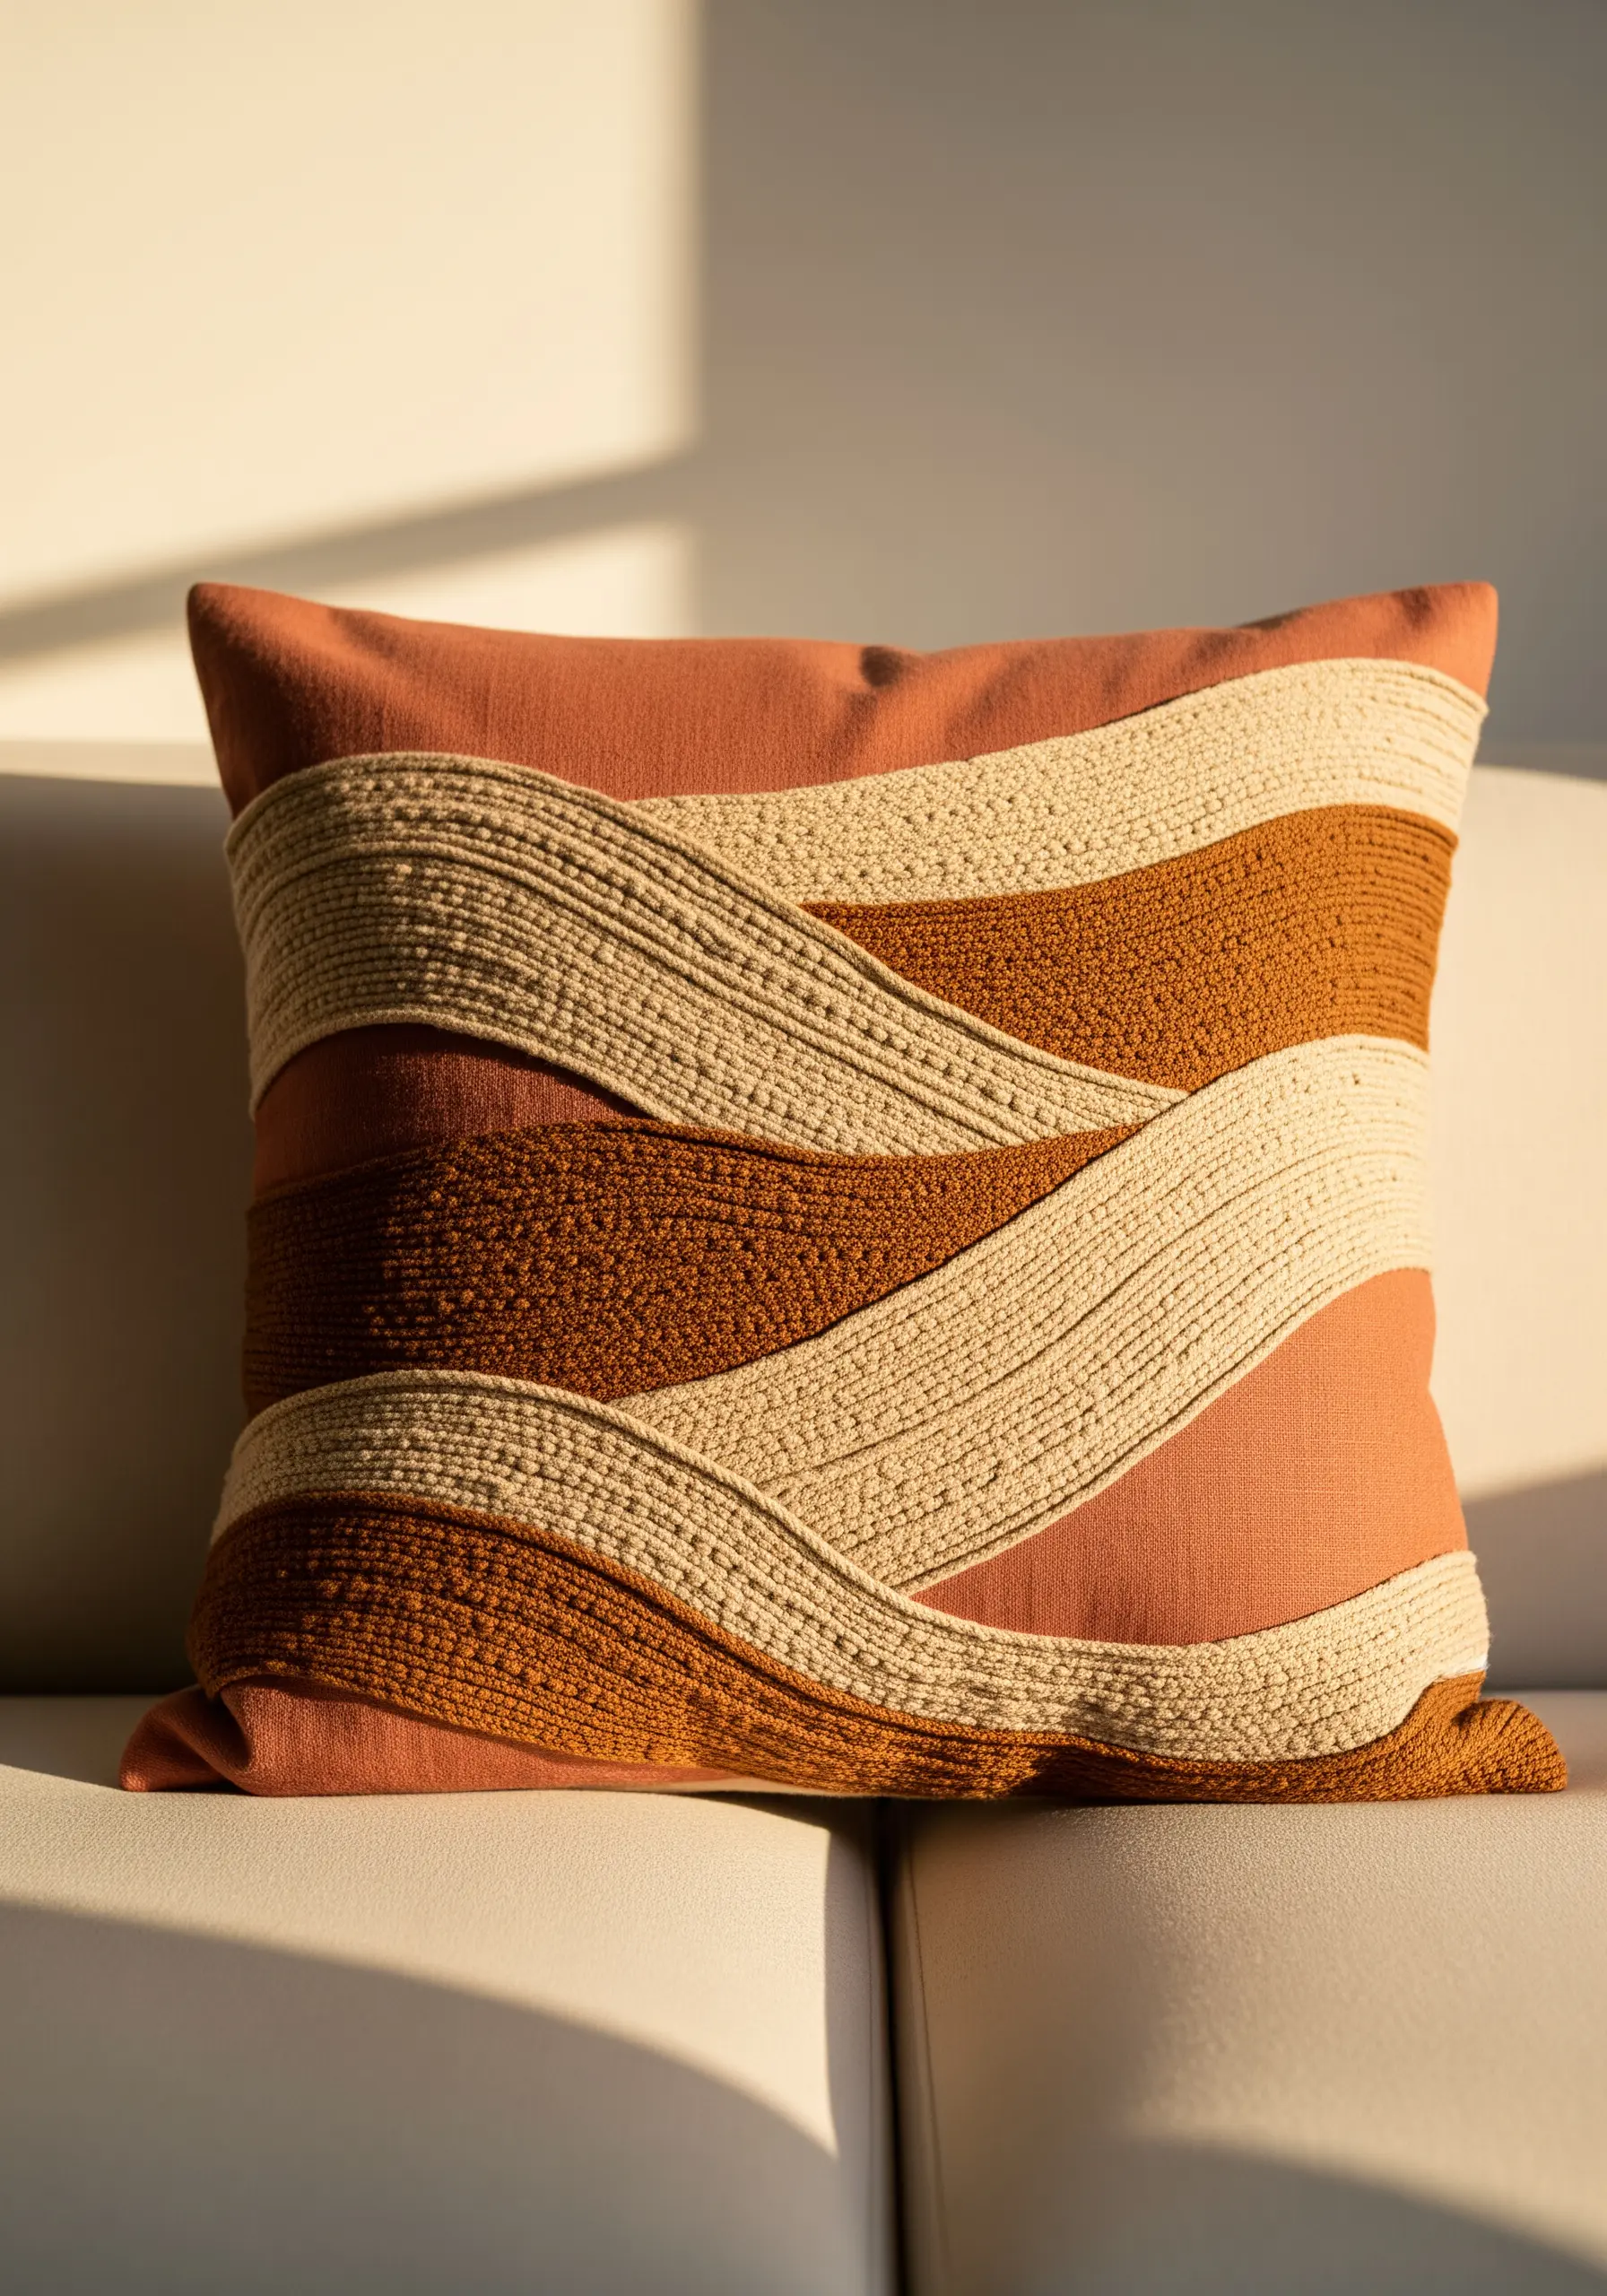
Add bold, graphic texture to pillows and upholstery by couching thick cotton cord or soft yarn onto the fabric surface.
Draw your wavy design directly onto the pillow cover, then lay the cord along the lines, securing it every half-inch with a small tacking stitch in a matching thread color.
To create the filled sections, stitch rows of cord side-by-side, ensuring they are packed tightly for a seamless, raised effect.
This technique offers a fast, high-impact way to introduce raised, sculptural effects to home décor projects.
6. Mimic Agate Slices with Concentric Satin Stitch
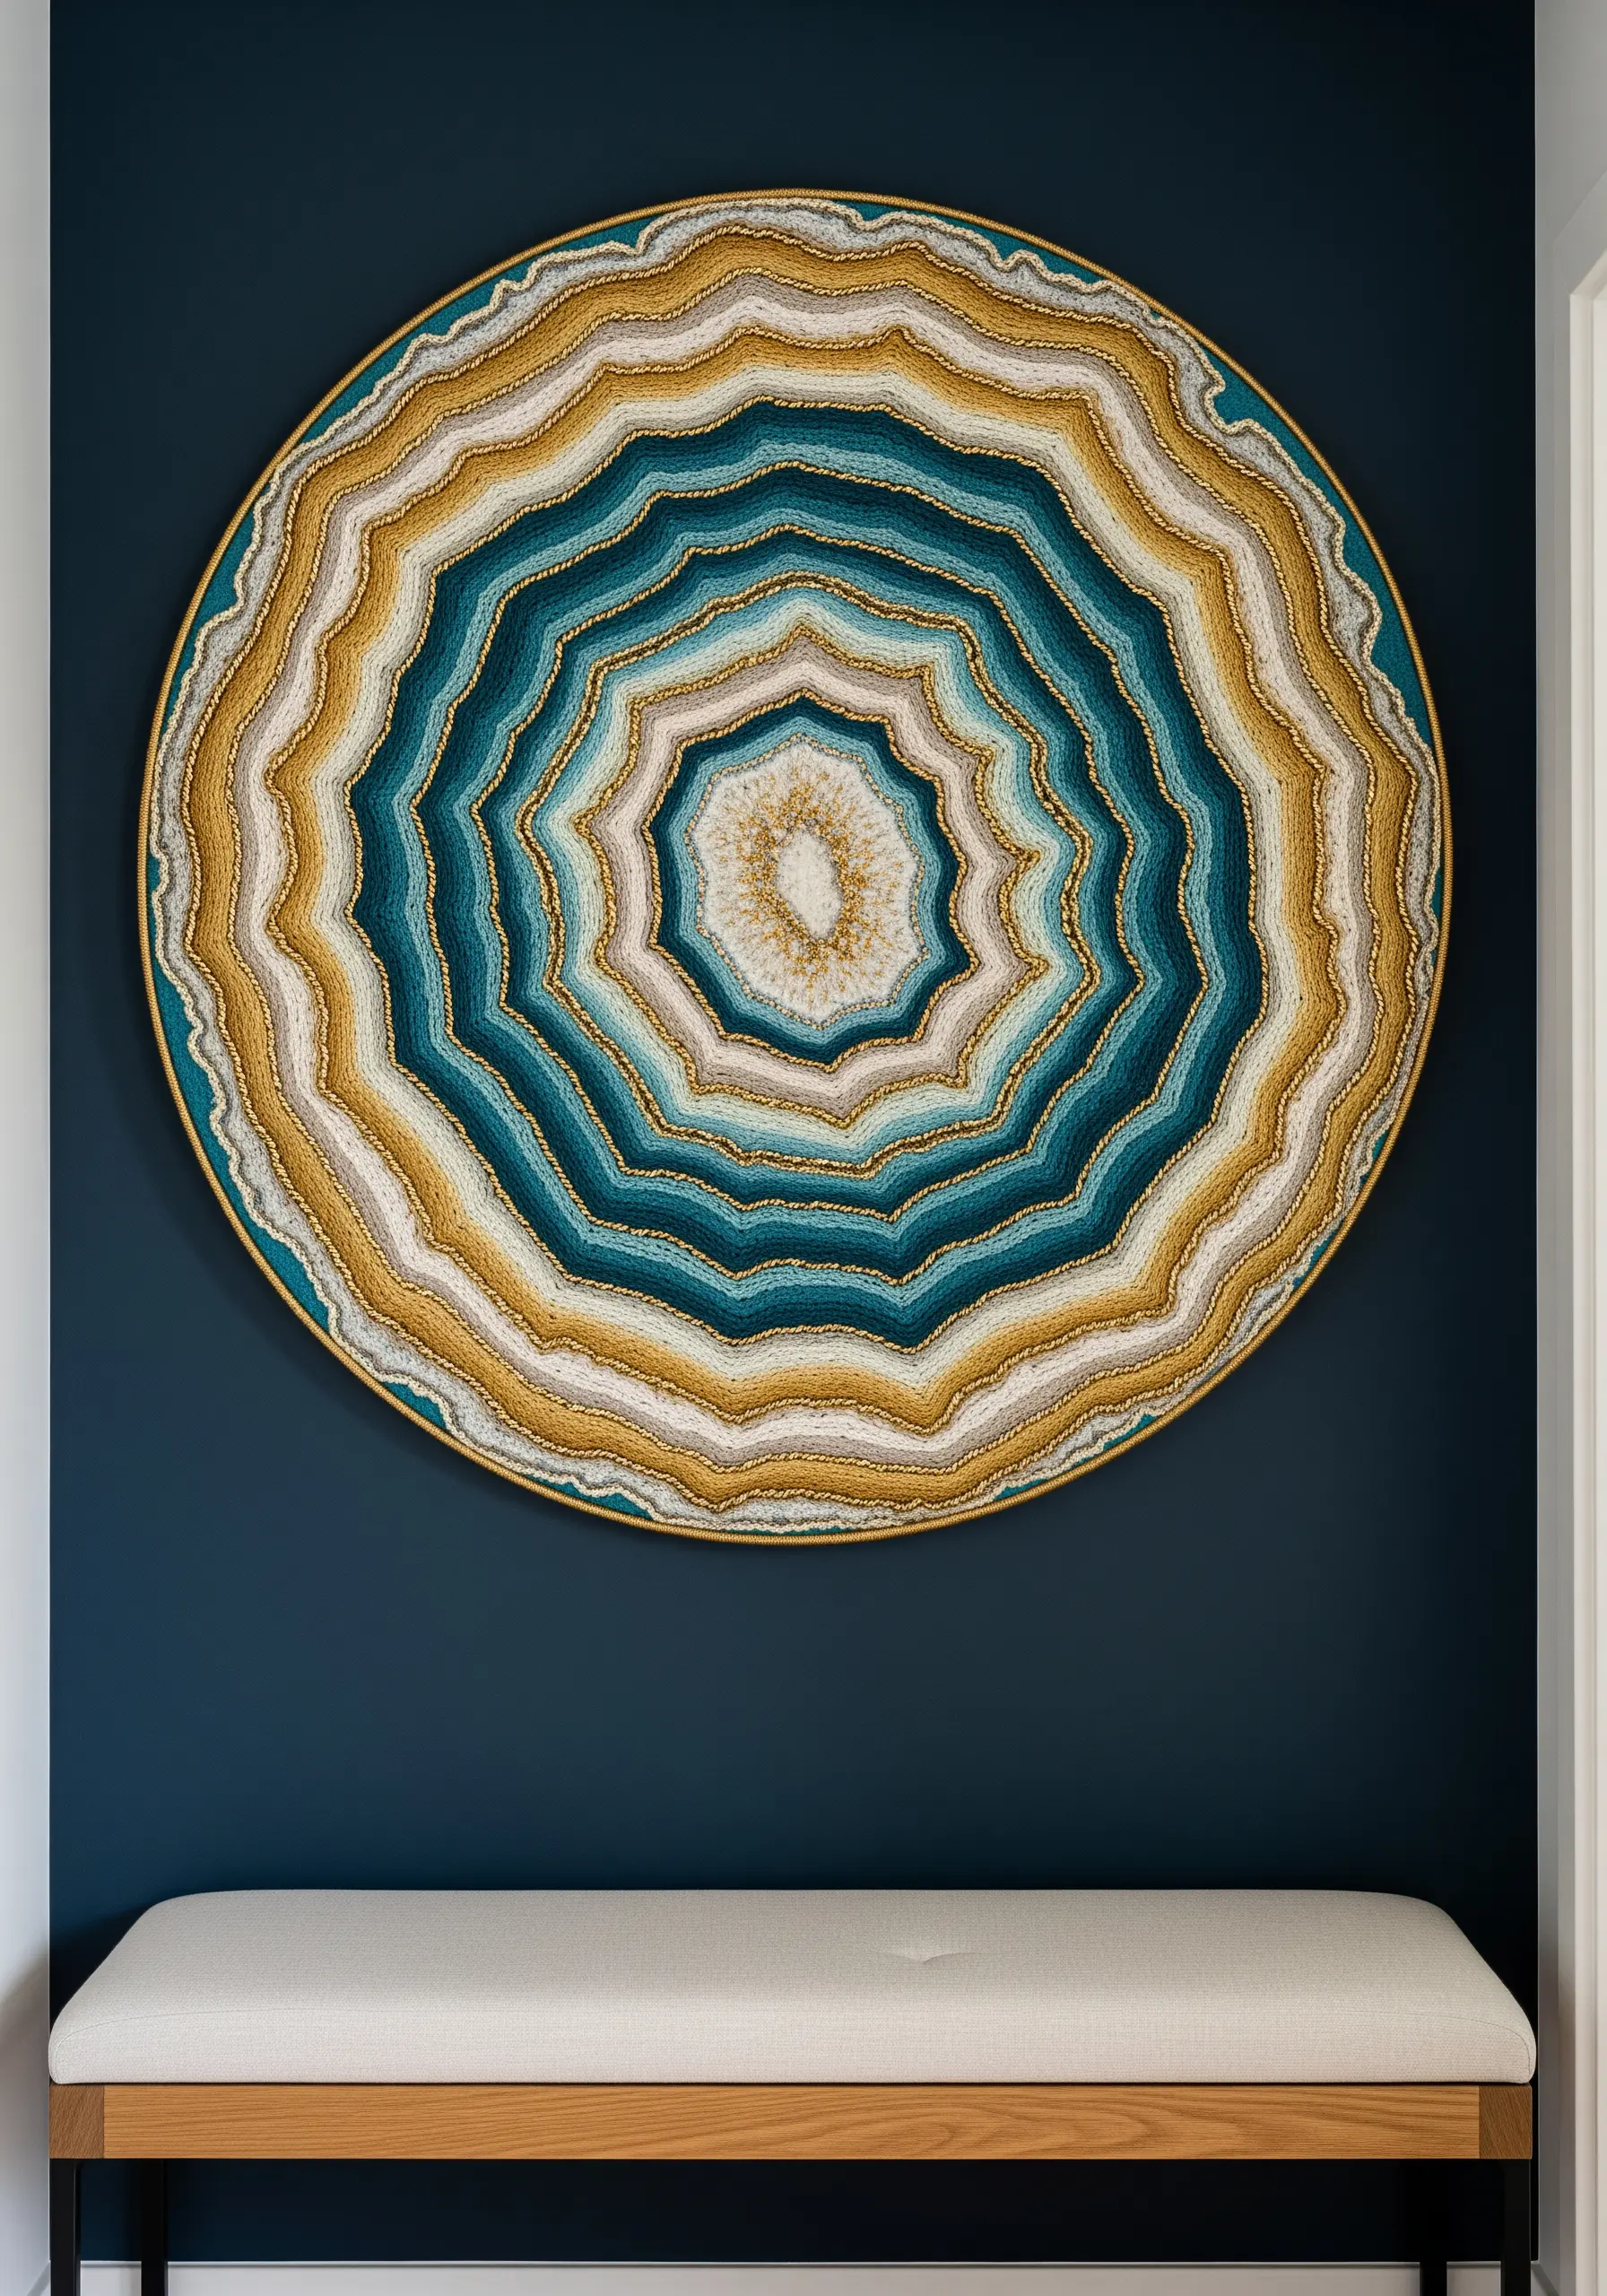
Recreate the mesmerizing layers of an agate stone with bands of concentric satin stitch or long-and-short stitch.
Work from the center out, changing your thread color every few rows to build the distinct rings.
To achieve that crystalline sparkle, introduce a single strand of metallic gold or silver thread between some of the color bands.
This acts as a highlight, catching the light and adding a touch of luxury to the organic pattern, turning your wall into a focal point.
7. Weave a Landscape with Textural Blocking
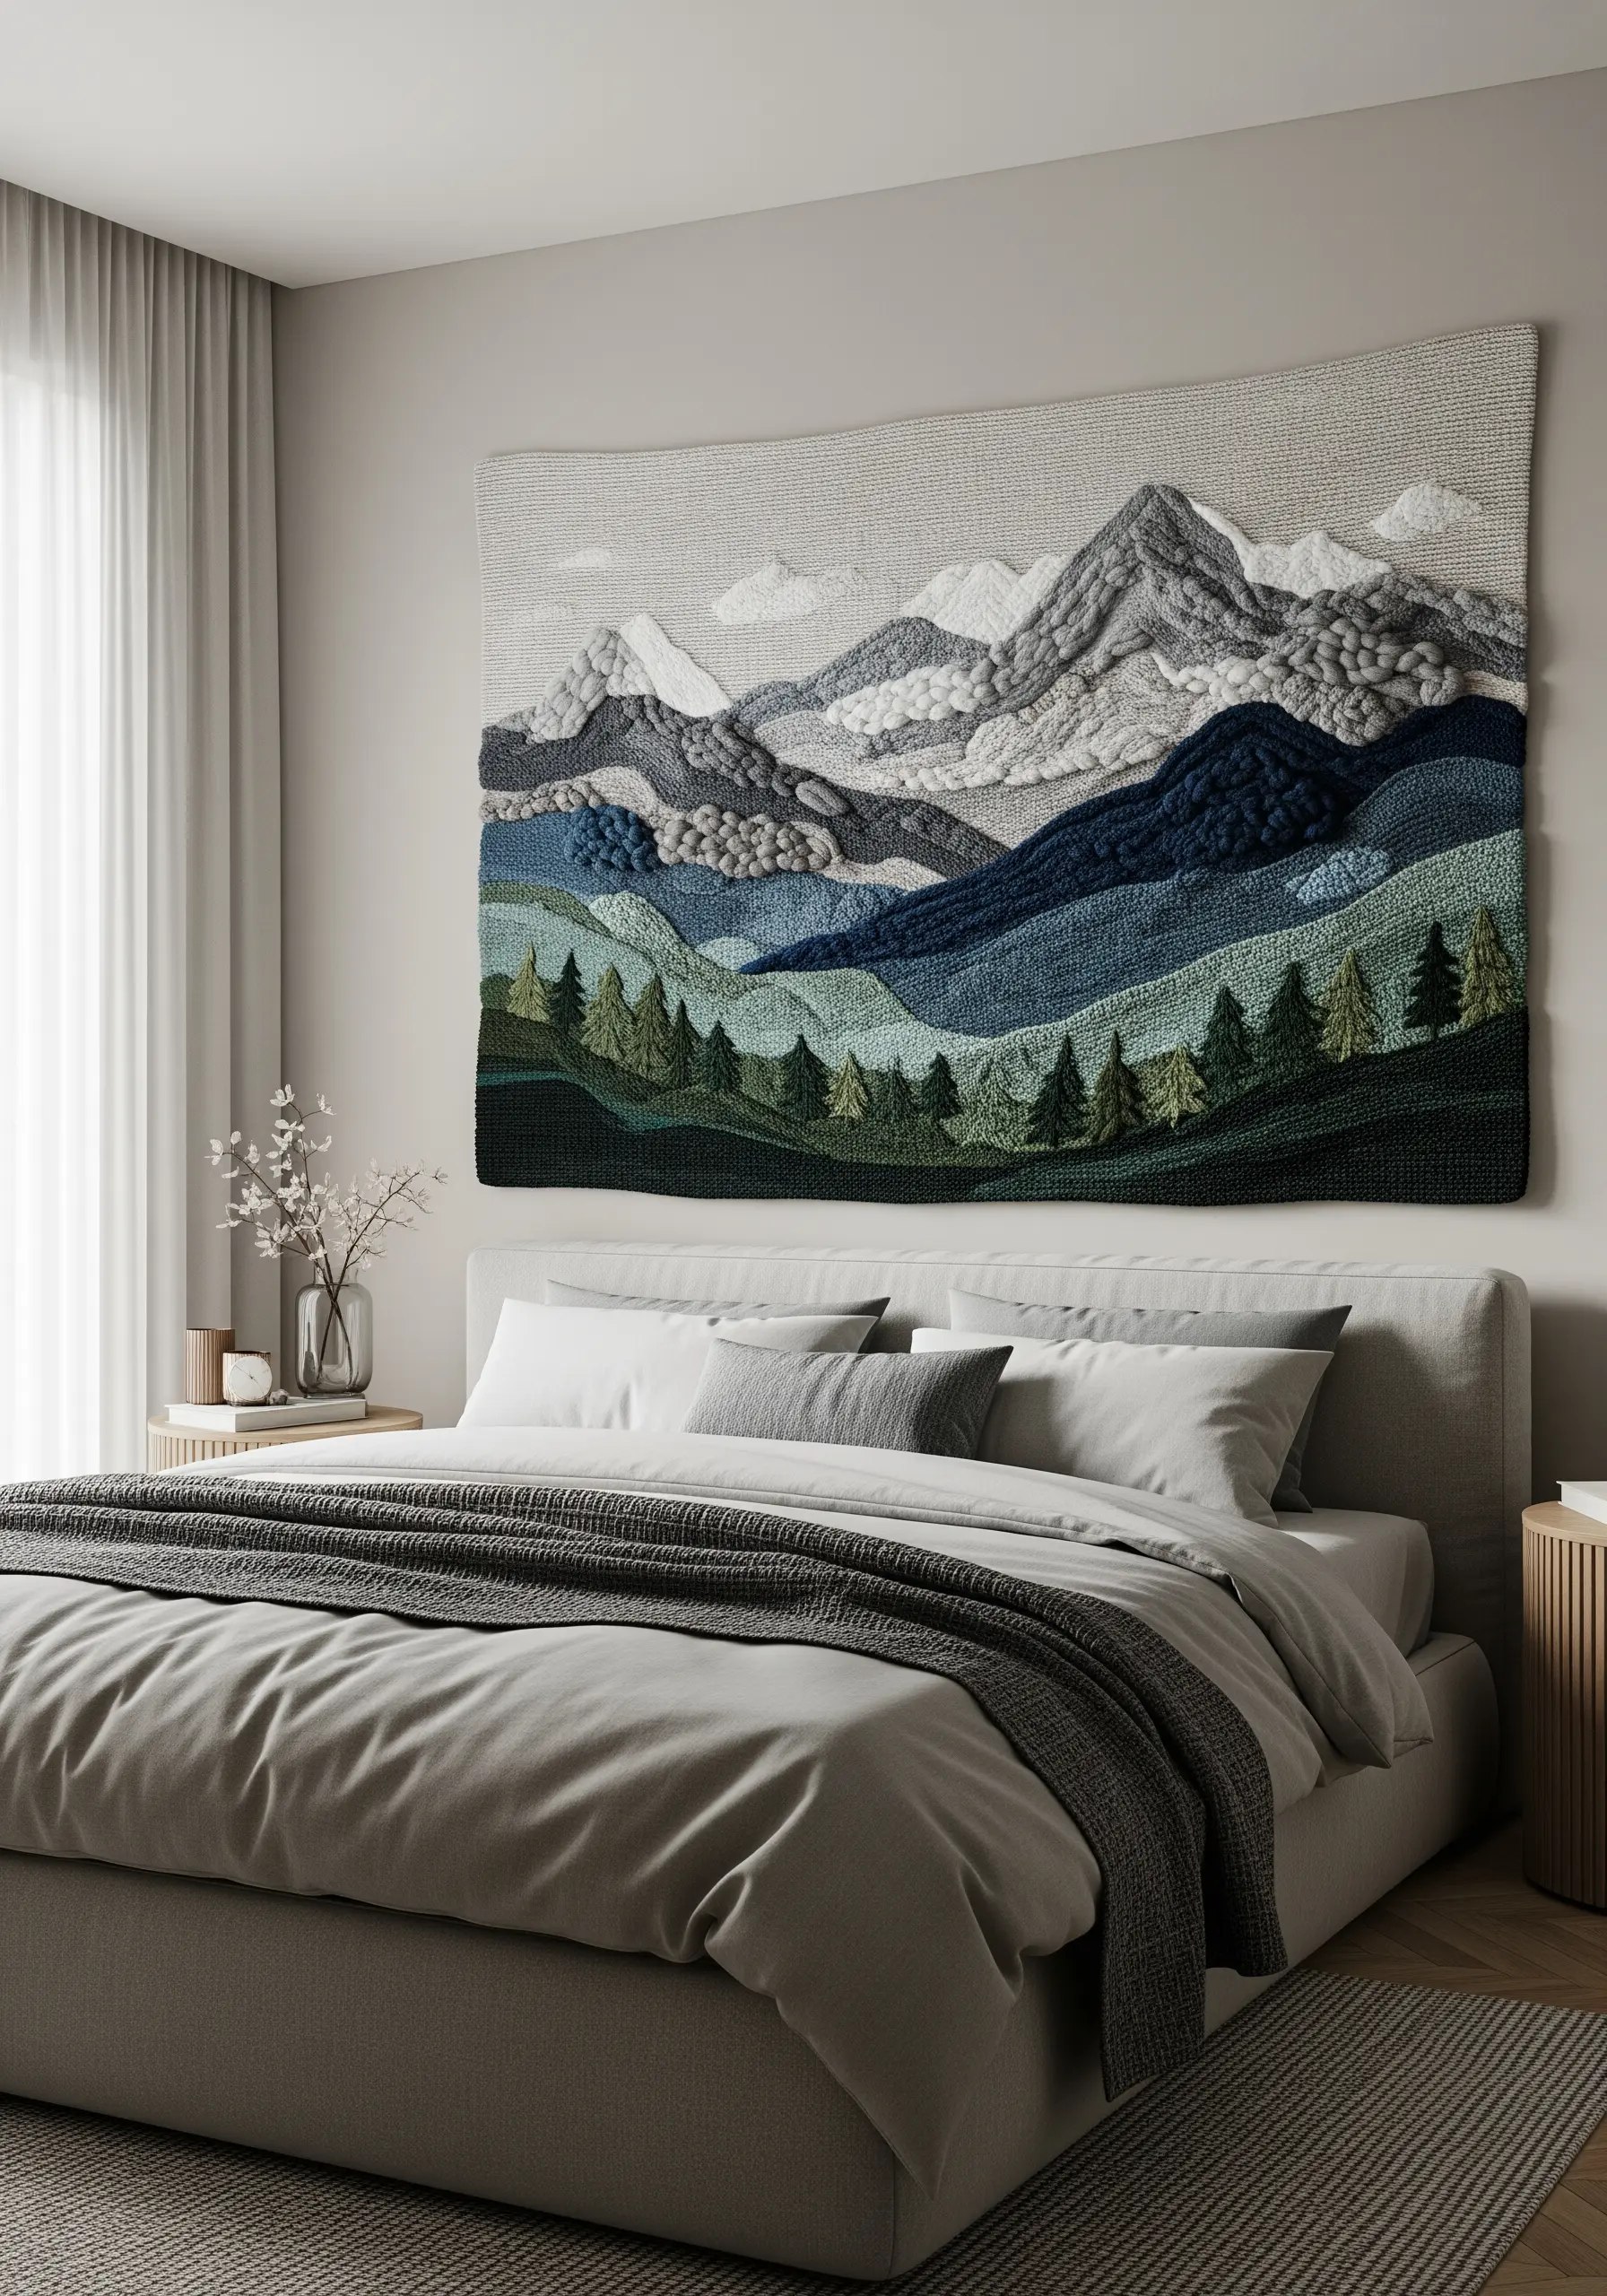
Design a mountain landscape by assigning a different stitch to each geographical feature, a technique I call textural blocking.
Use dense French knots for the rolling foothills, vertical satin stitch for distant rain, and raised turkey work for the forested areas.
This approach transforms the piece from a flat image into a tactile map, where each texture tells a part of the story.
Keep the color palette harmonious to ensure the various textures work together as a cohesive whole, perfect for large-scale embroidery projects.
8. Sculpt an Underwater World with 3D Stitches

Bring a coral reef to life using a vibrant collection of dimensional stitches.
Create brain coral with tightly packed bullion knots, and craft delicate sea fans using the woven picot stitch.
For branching corals, couch down colorful, chunky yarn or use a padded satin stitch over a felt base to give it lift.
This project is a perfect way to practice advanced stitches in a playful, organic composition where slight imperfections only add to the charm.
9. Elevate Simple Motifs with Stumpwork
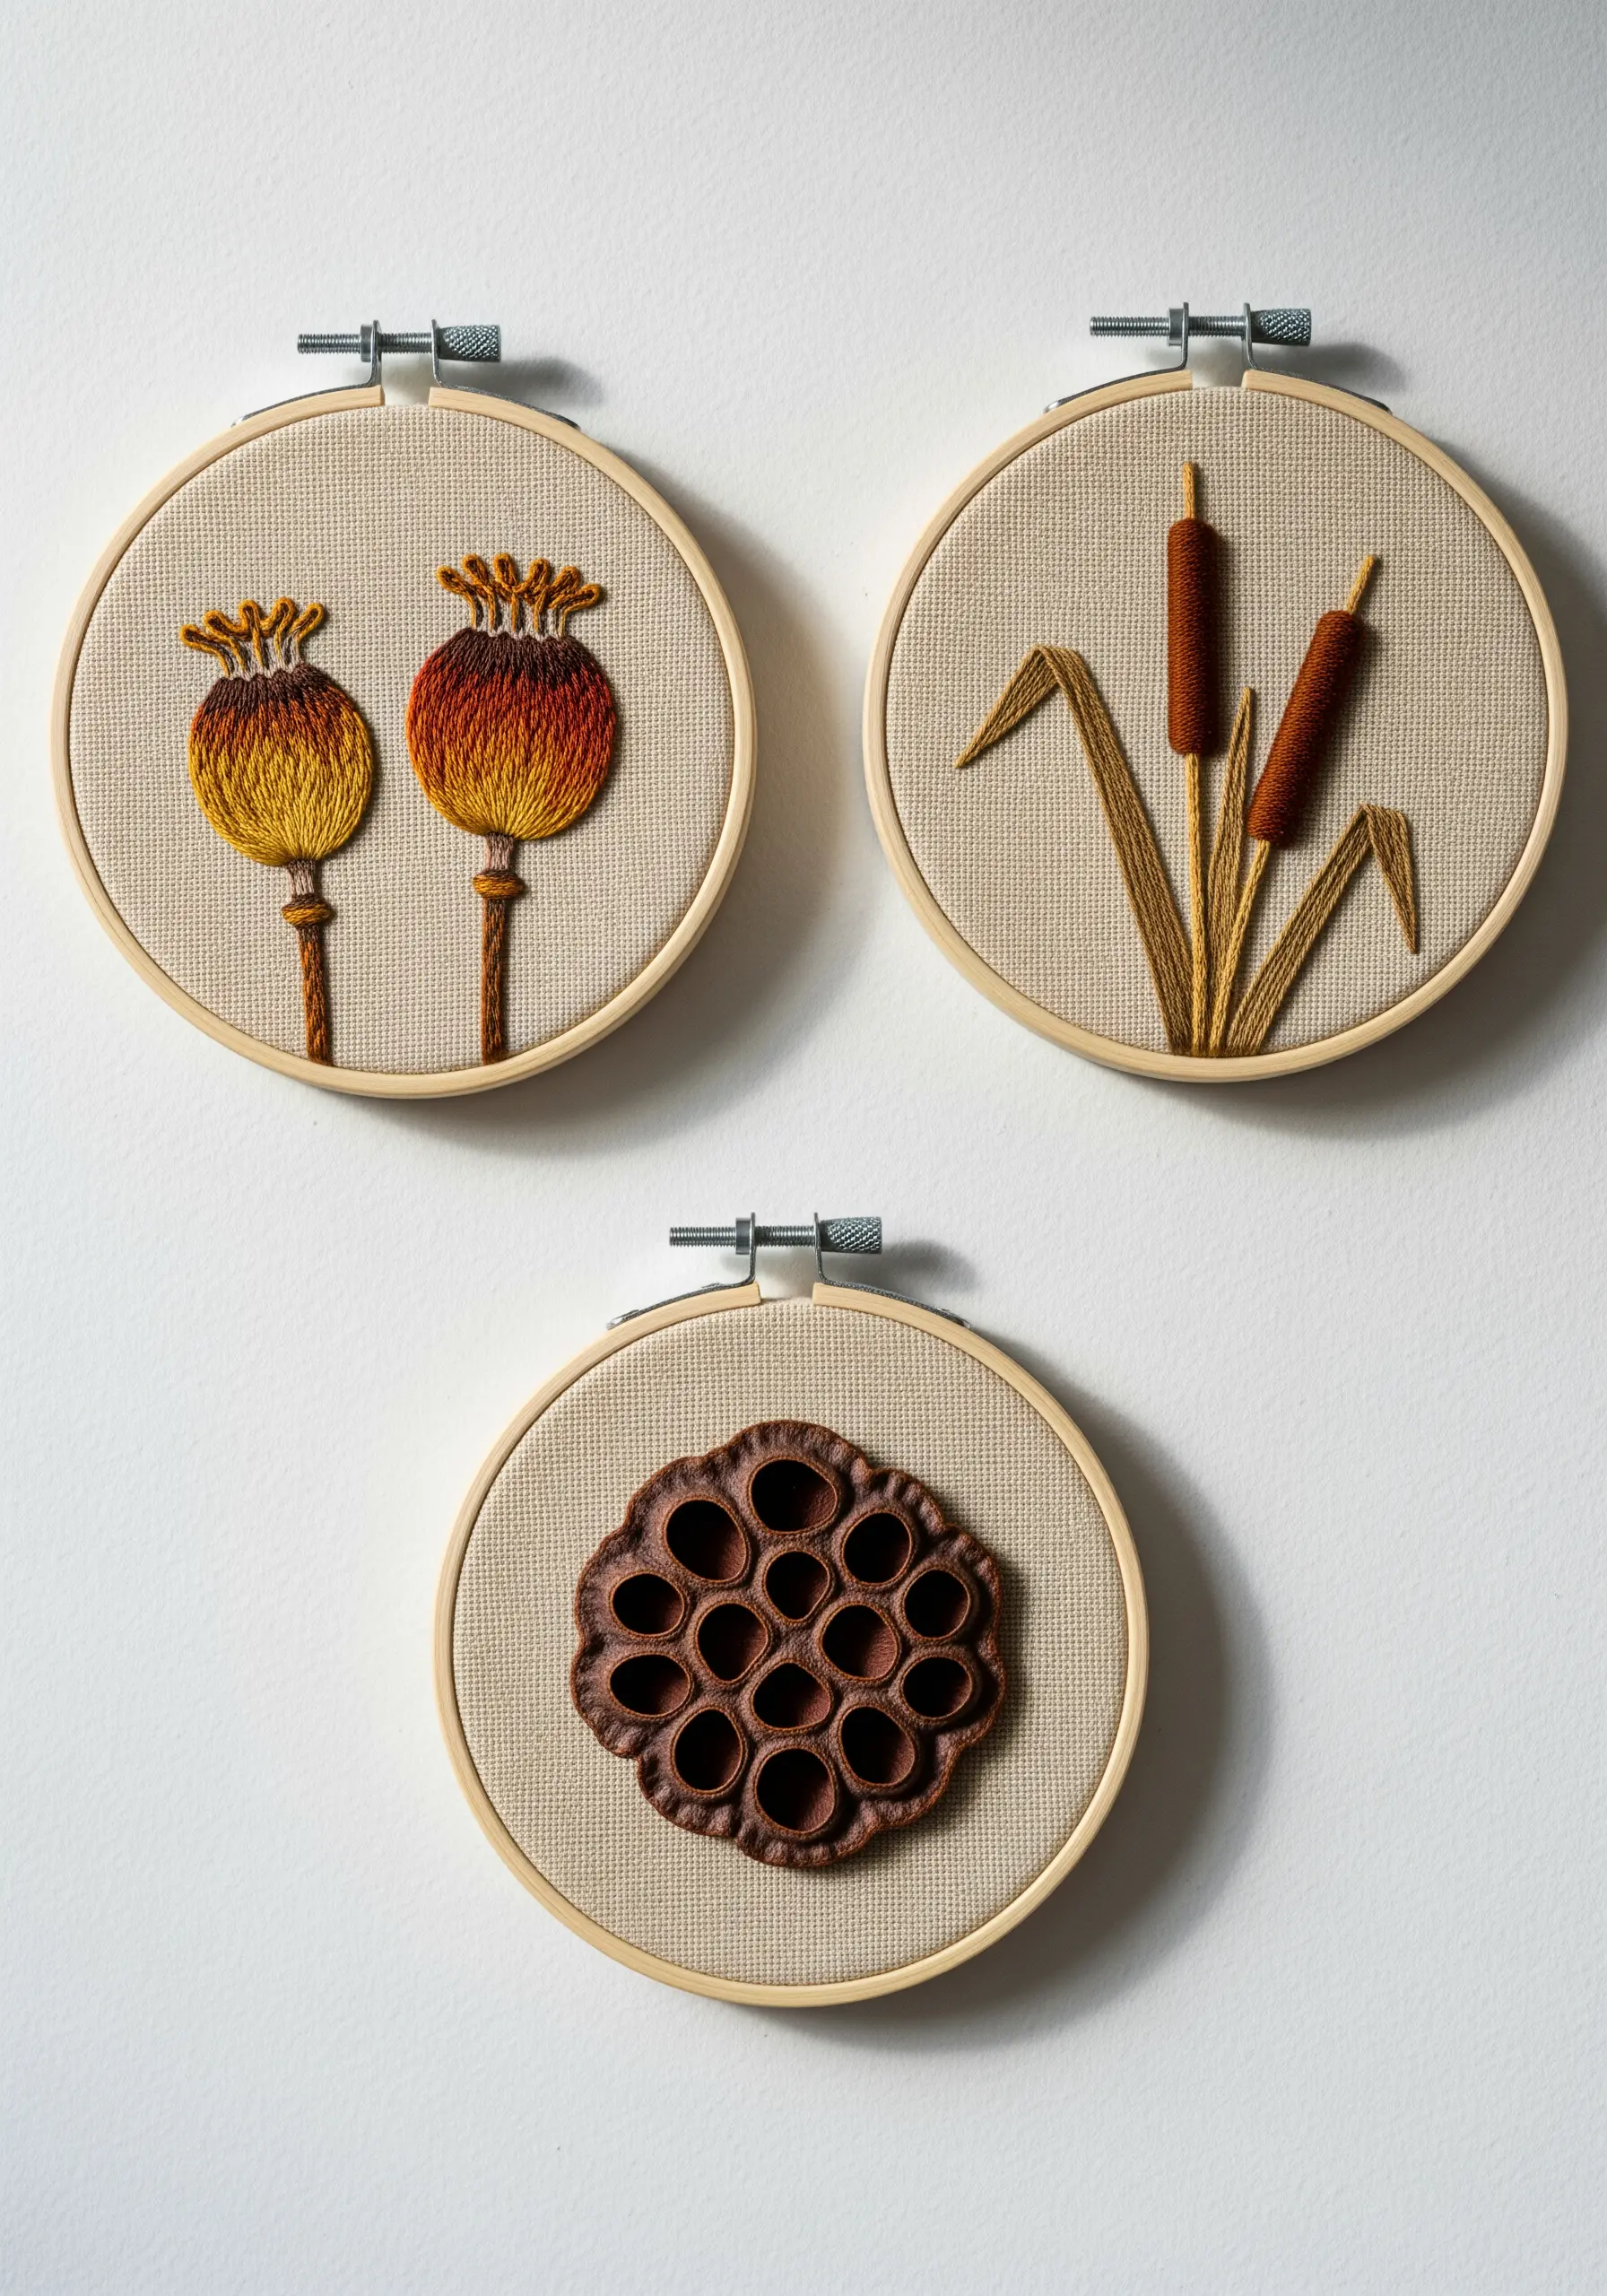
Give a simple botanical study a dramatic lift with stumpwork techniques.
For the lotus seed pod, create a separate embroidered piece on a scrap of fabric, incorporating padded satin stitch and beads for the seeds.
Cut it out carefully, leaving a small border, and then stitch it onto your main fabric for an immediate 3D effect.
This isolates the complex texture, allowing it to stand out against the flatter poppy pods and cattails, creating a sophisticated triptych.
10. Create Geometric Dimension with Braided Couching
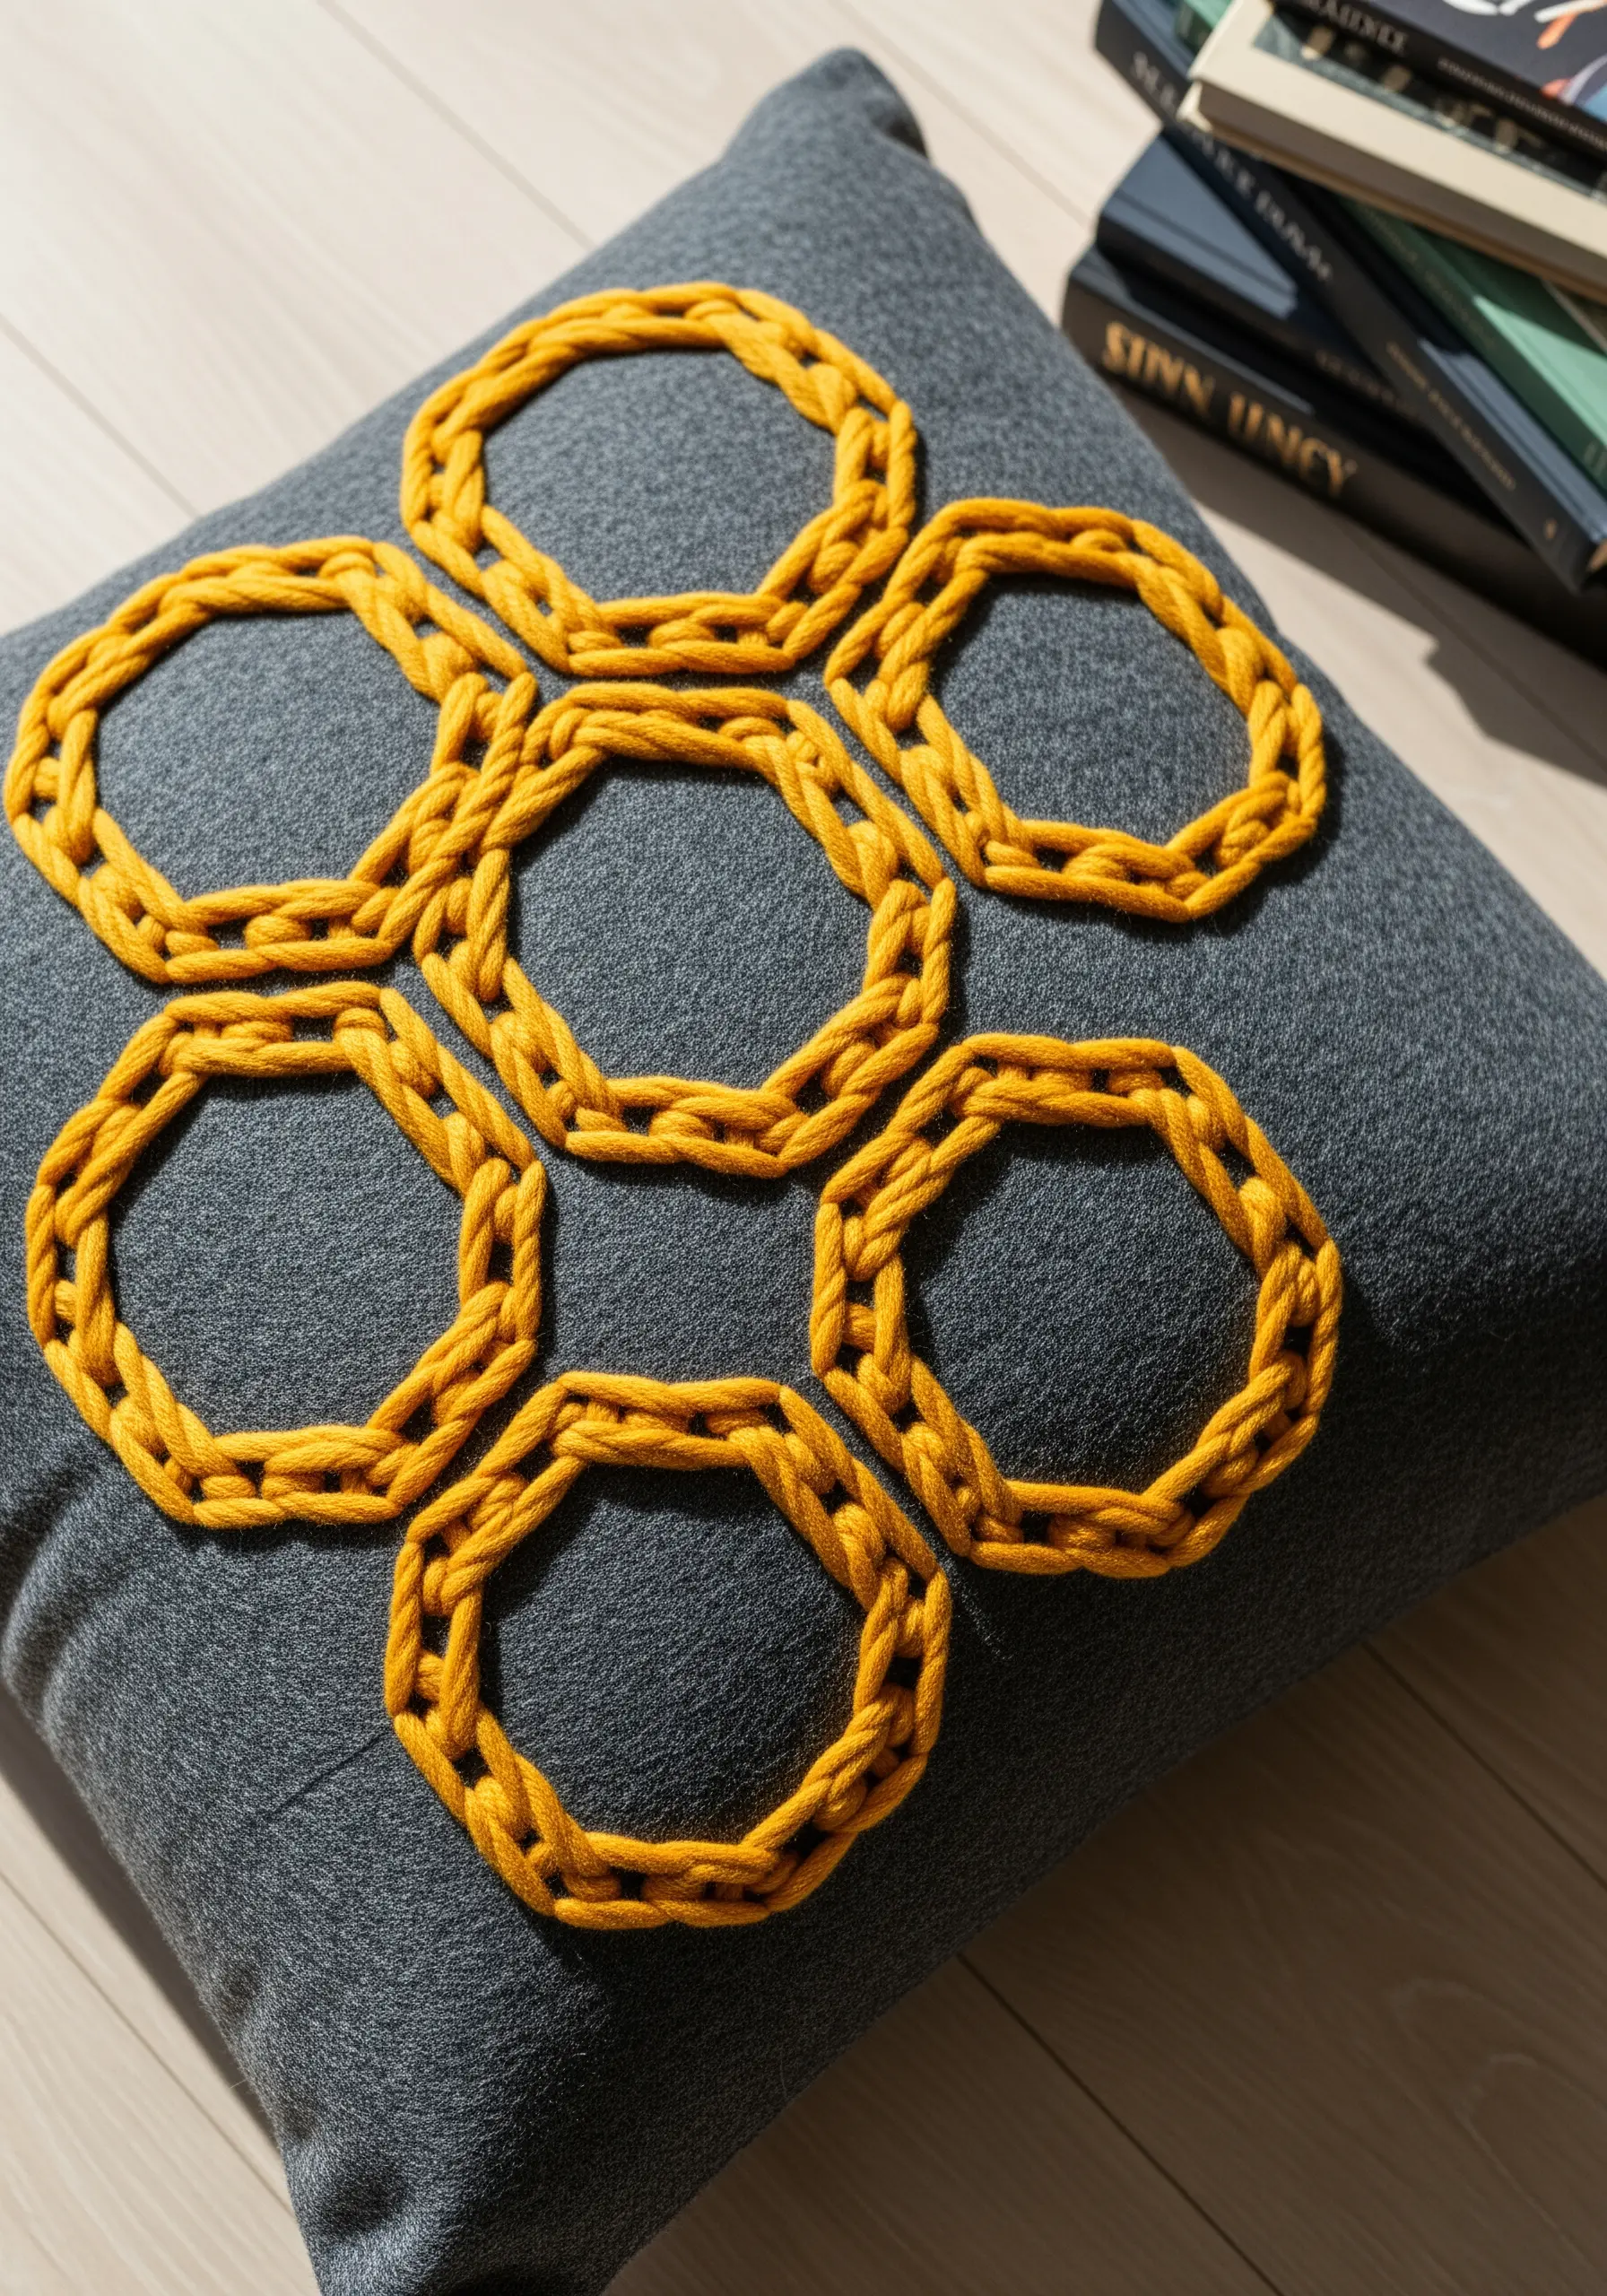
Add a modern, graphic touch to a plain cushion by couching down pre-braided yarn.
Braid three strands of thick yarn together to create a flat, textured cord.
Draw your hexagonal pattern onto the fabric, then carefully stitch the braid along the lines using a matching, less visible thread.
This technique creates a bold, clean outline with built-in texture, offering more visual interest than a simple line of stitching.
11. Articulate Texture with Negative Space
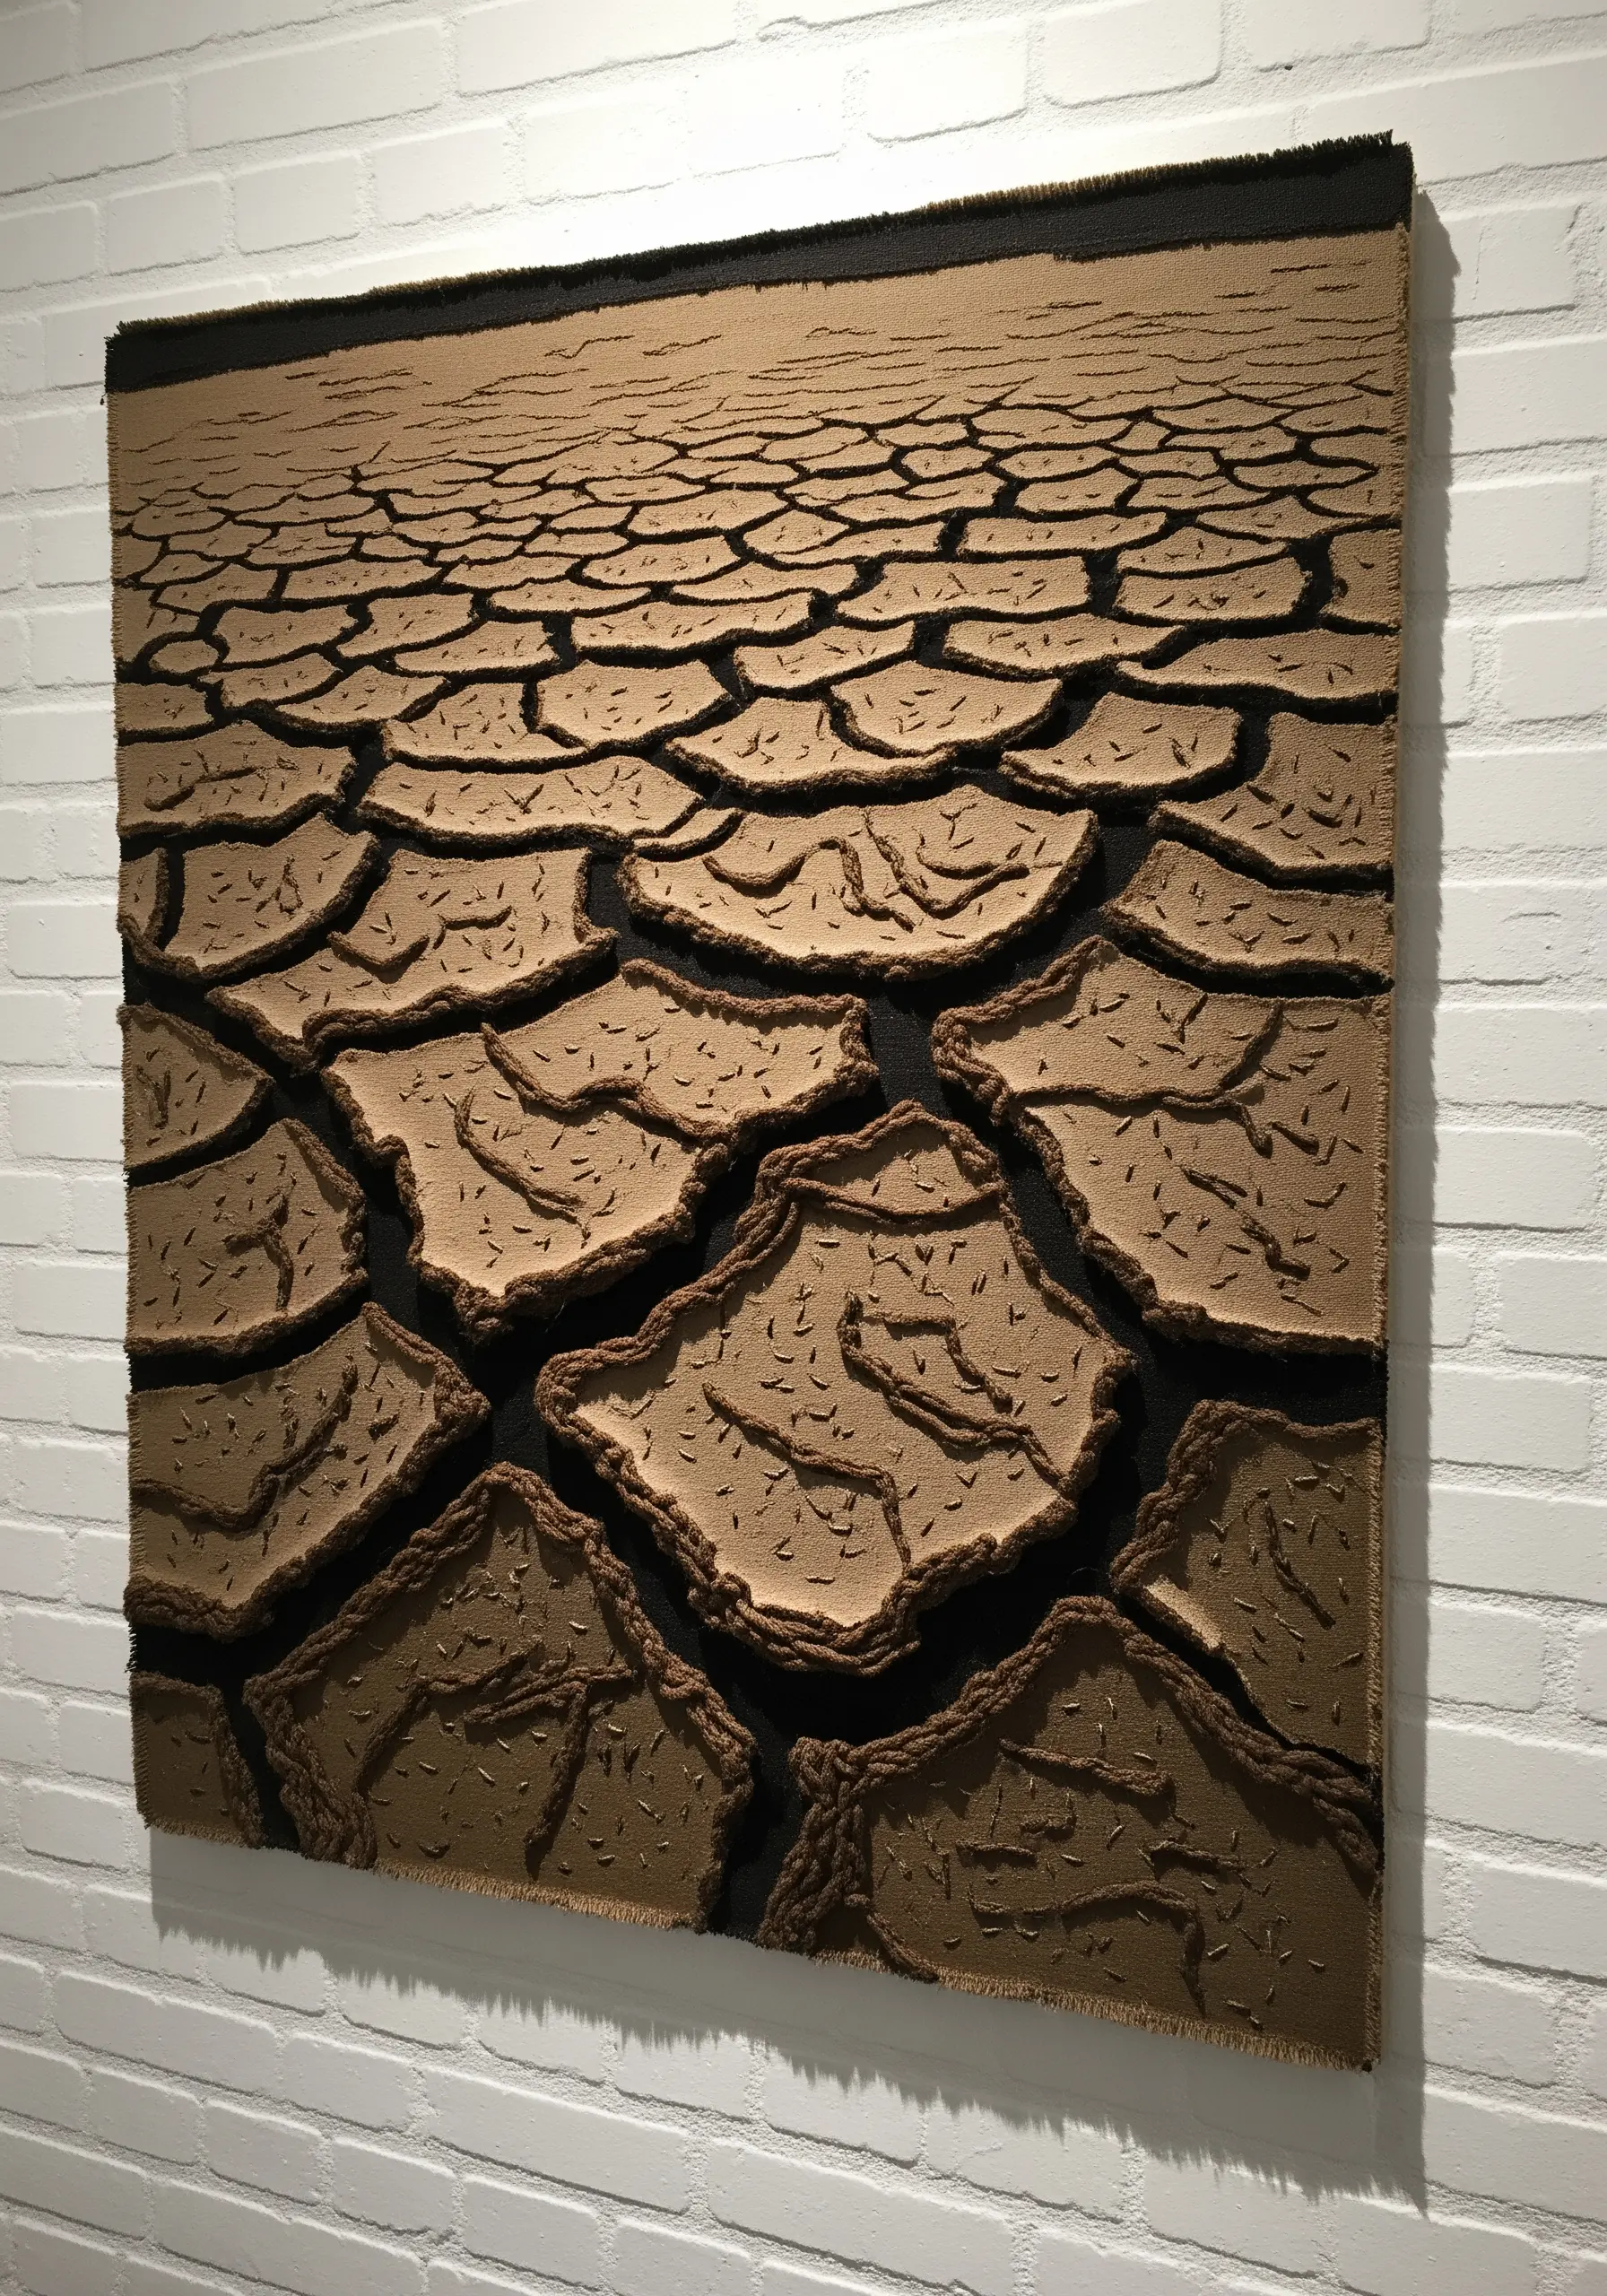
Recreate the compelling pattern of cracked earth by focusing on the space between the shapes.
Use a dark, contrasting fabric as your base. Appliqué lighter, organic shapes on top, leaving channels of the dark fabric visible as the ‘cracks’.
Fill the appliquéd shapes with dense, chaotic seed stitch or French knots to mimic the texture of dry soil.
This design is a powerful exercise in using negative space as a key compositional element.
12. Capture Ephemeral Frost with a Delicate Fern Stitch
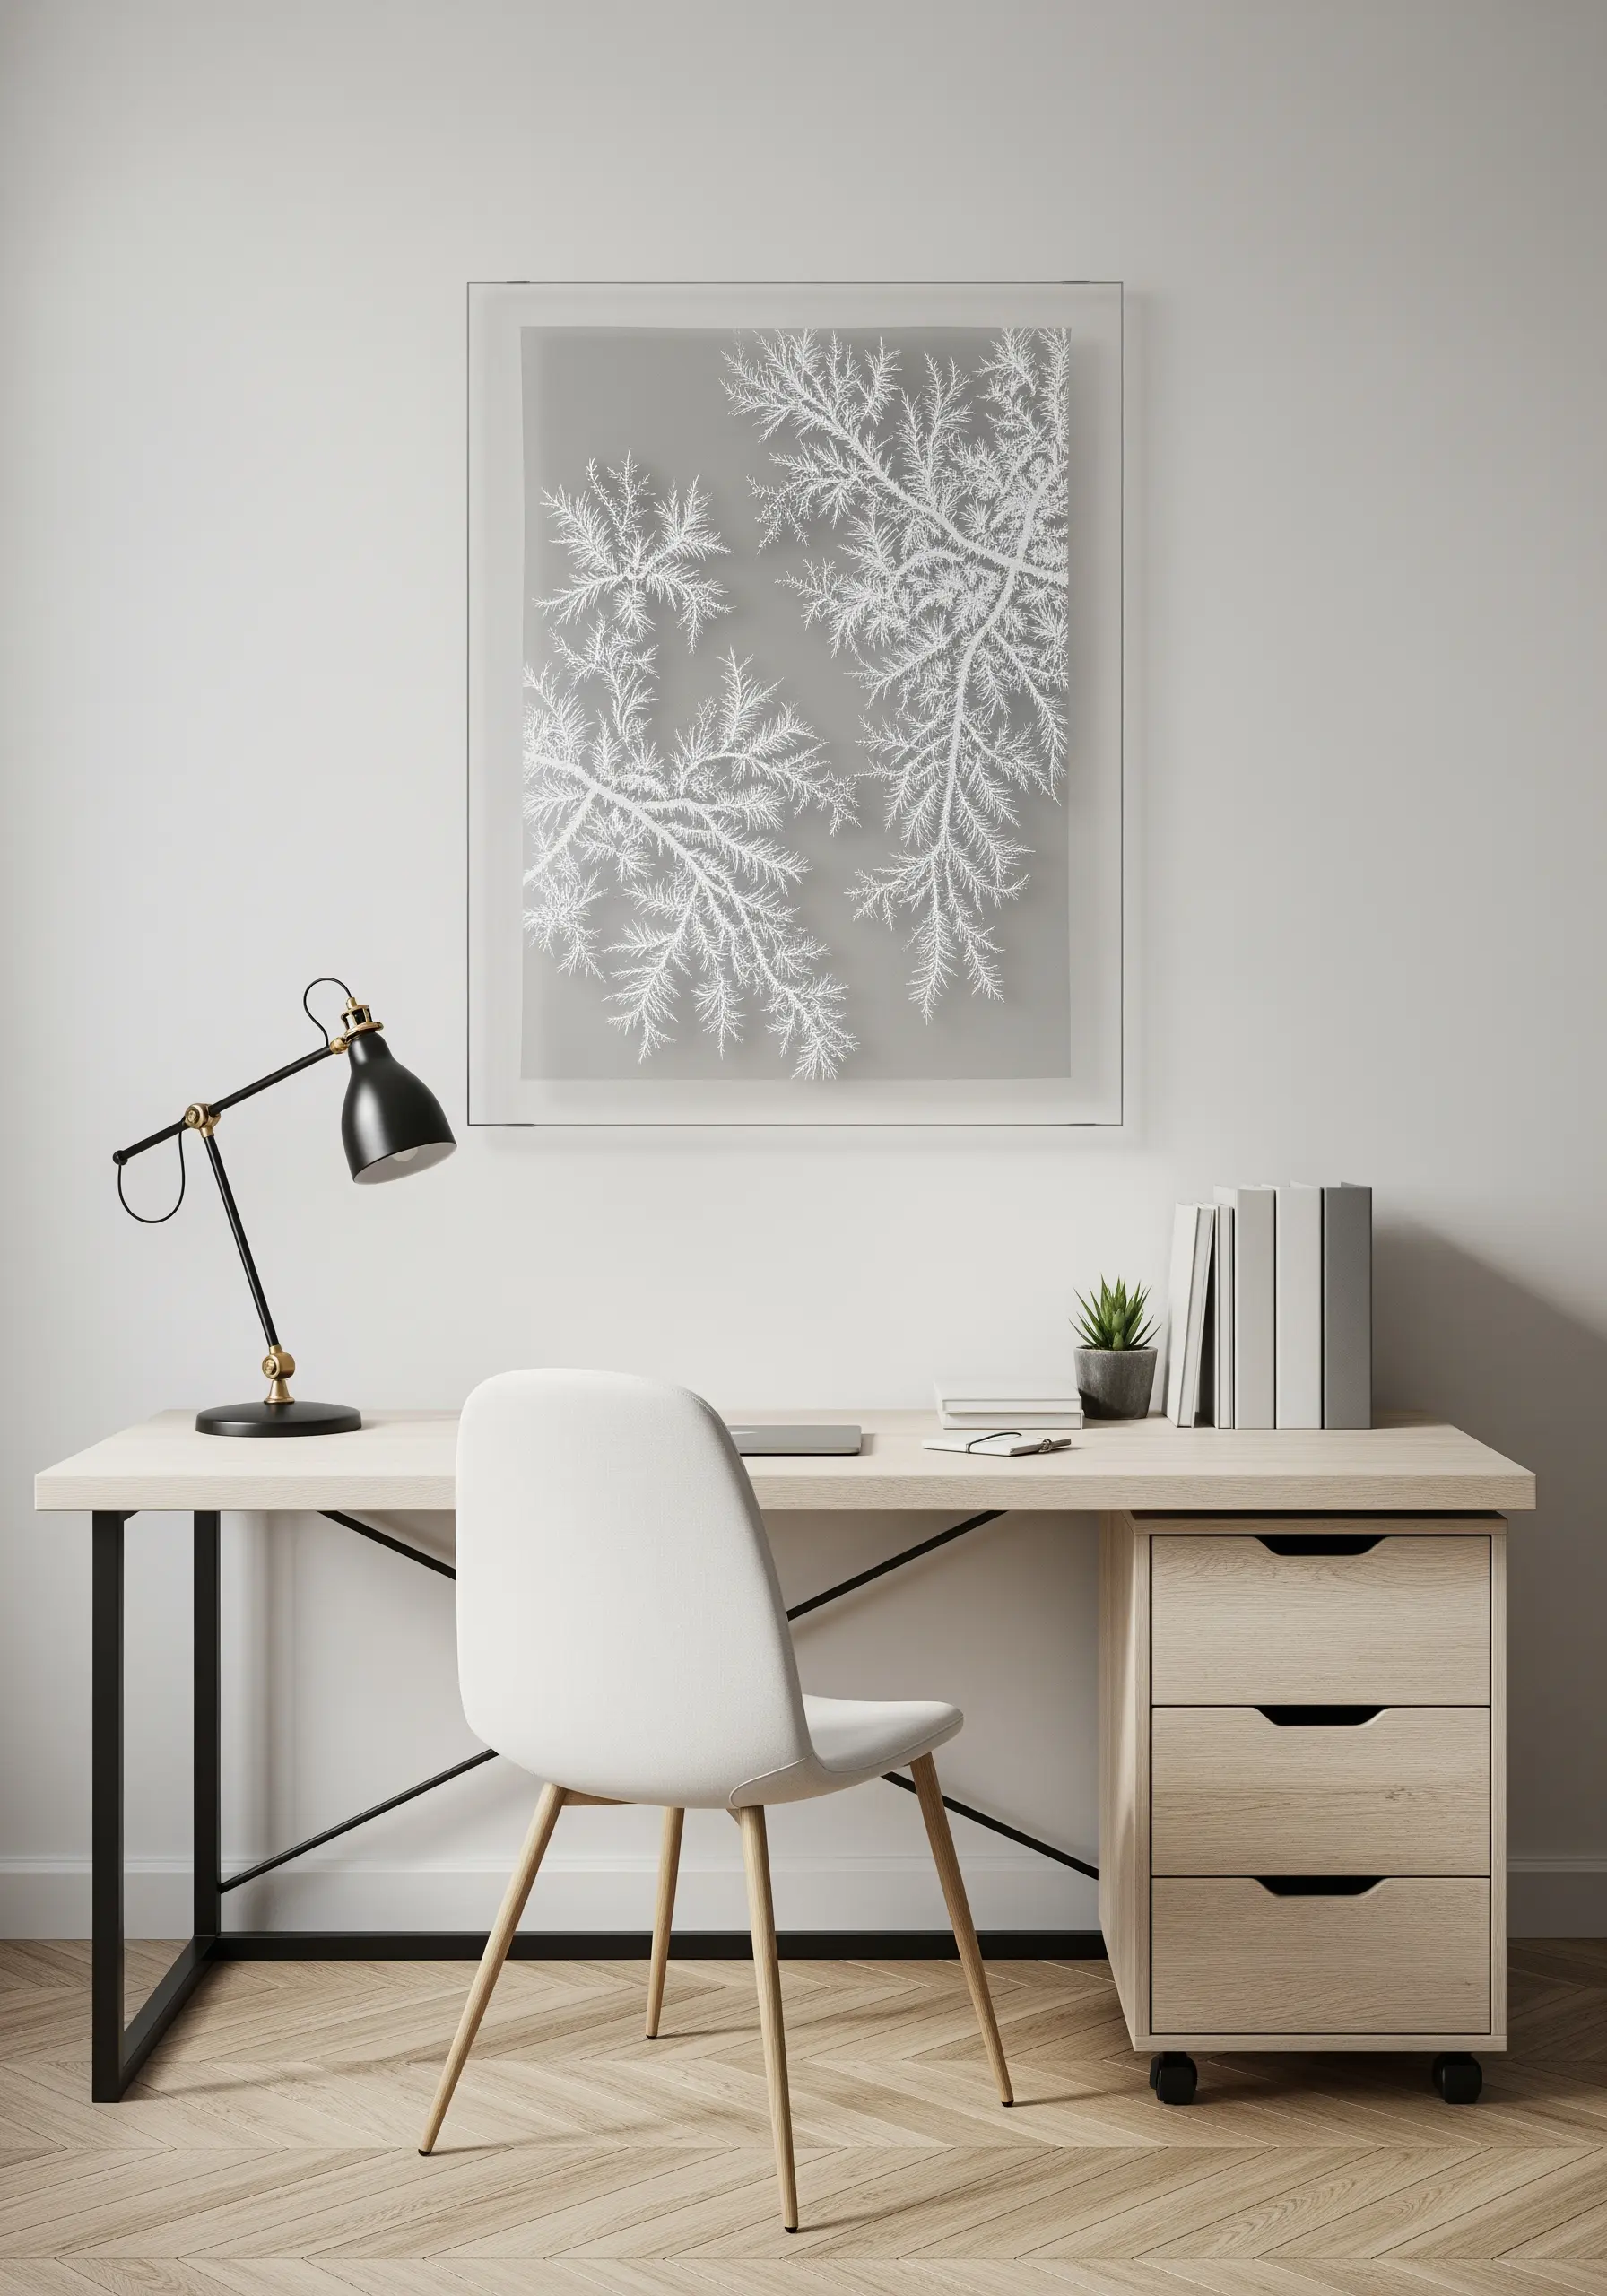
Embroider the crystalline structure of frost or snowflakes using a single strand of white thread on a grey or transparent background.
The fern stitch is perfect for this, as it naturally branches out and mimics the fractal patterns of ice crystals.
Stitch onto a layer of organza or fine linen and frame it in a floating glass frame to enhance the sense of delicacy and light.
This minimalist approach turns a simple stitch into a sophisticated piece of art.
13. Compose a Tactile Mandala with Mixed Fibers
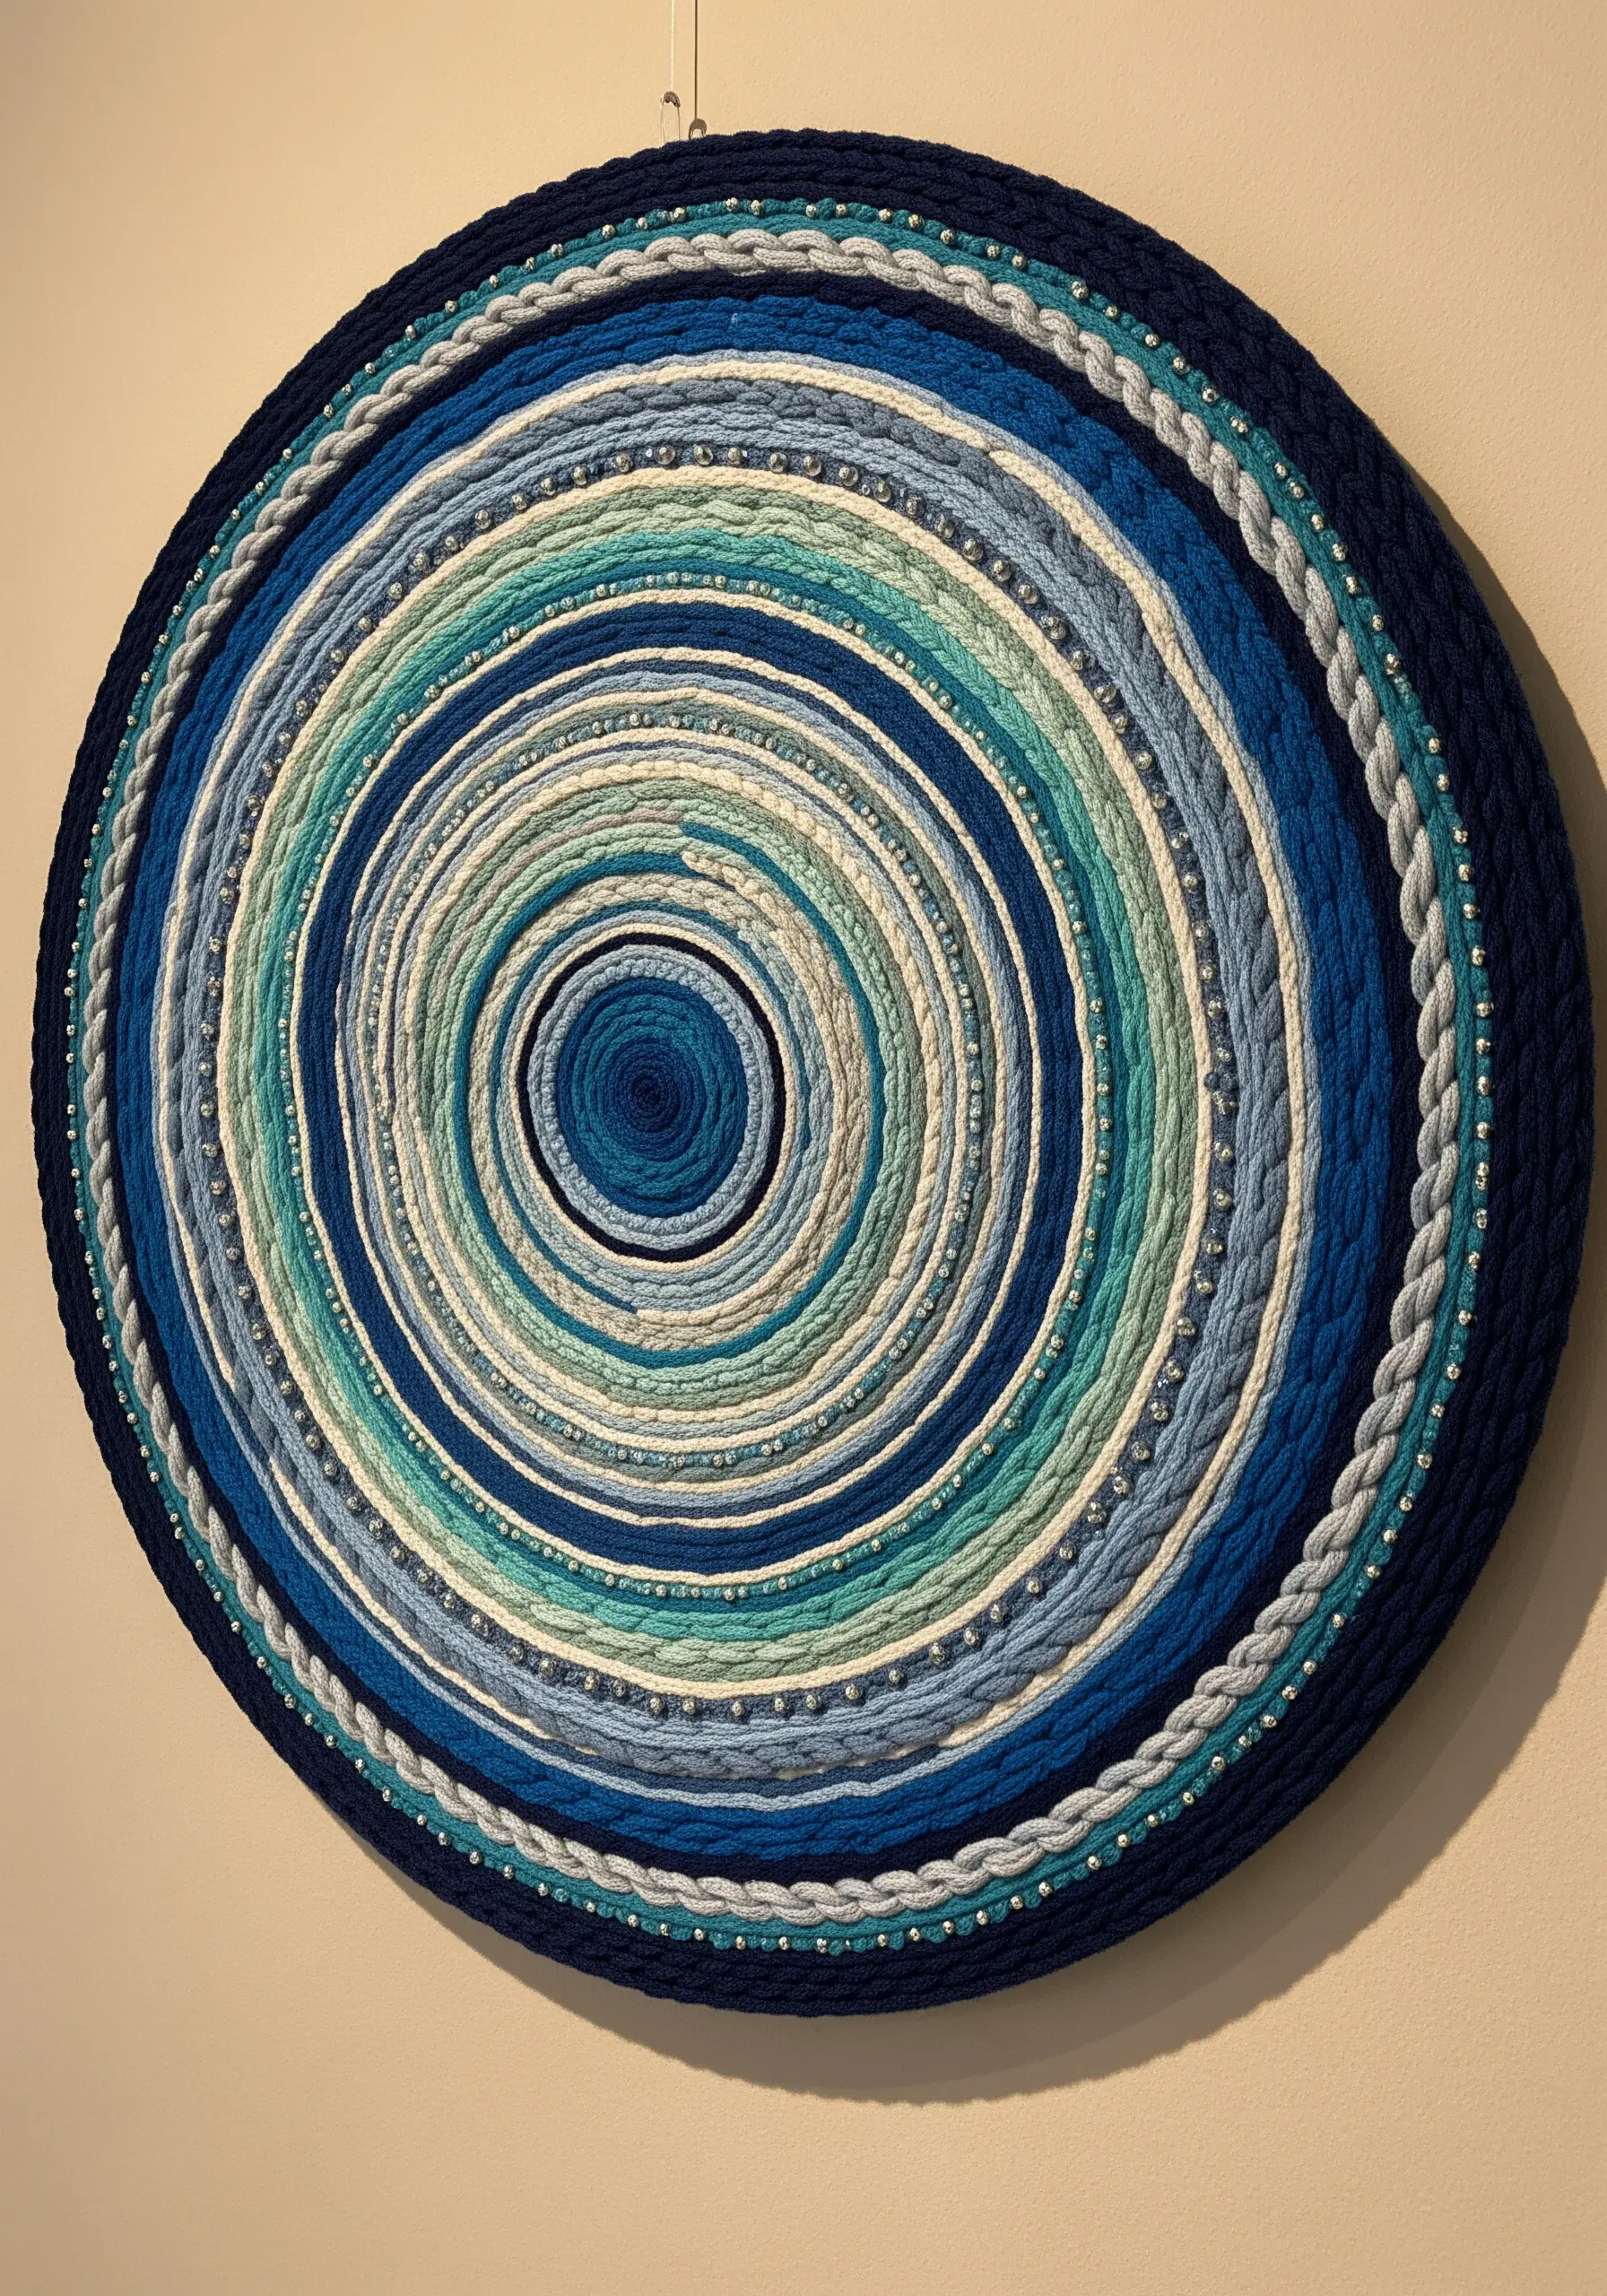
Build a stunning circular tapestry by couching down a variety of fibers in concentric rings.
Combine chunky wool yarn, smooth cotton rope, braided cords, and even lines of delicate beads to create a symphony of textures.
Arrange your materials on a stretched canvas or fabric-covered board, securing them with a strong, matching thread.
The beauty of this piece comes from the interplay of different sheens, thicknesses, and surfaces, creating gorgeous mixed-fiber textures that invite touch.
14. Achieve Iridescence with Thread Painting
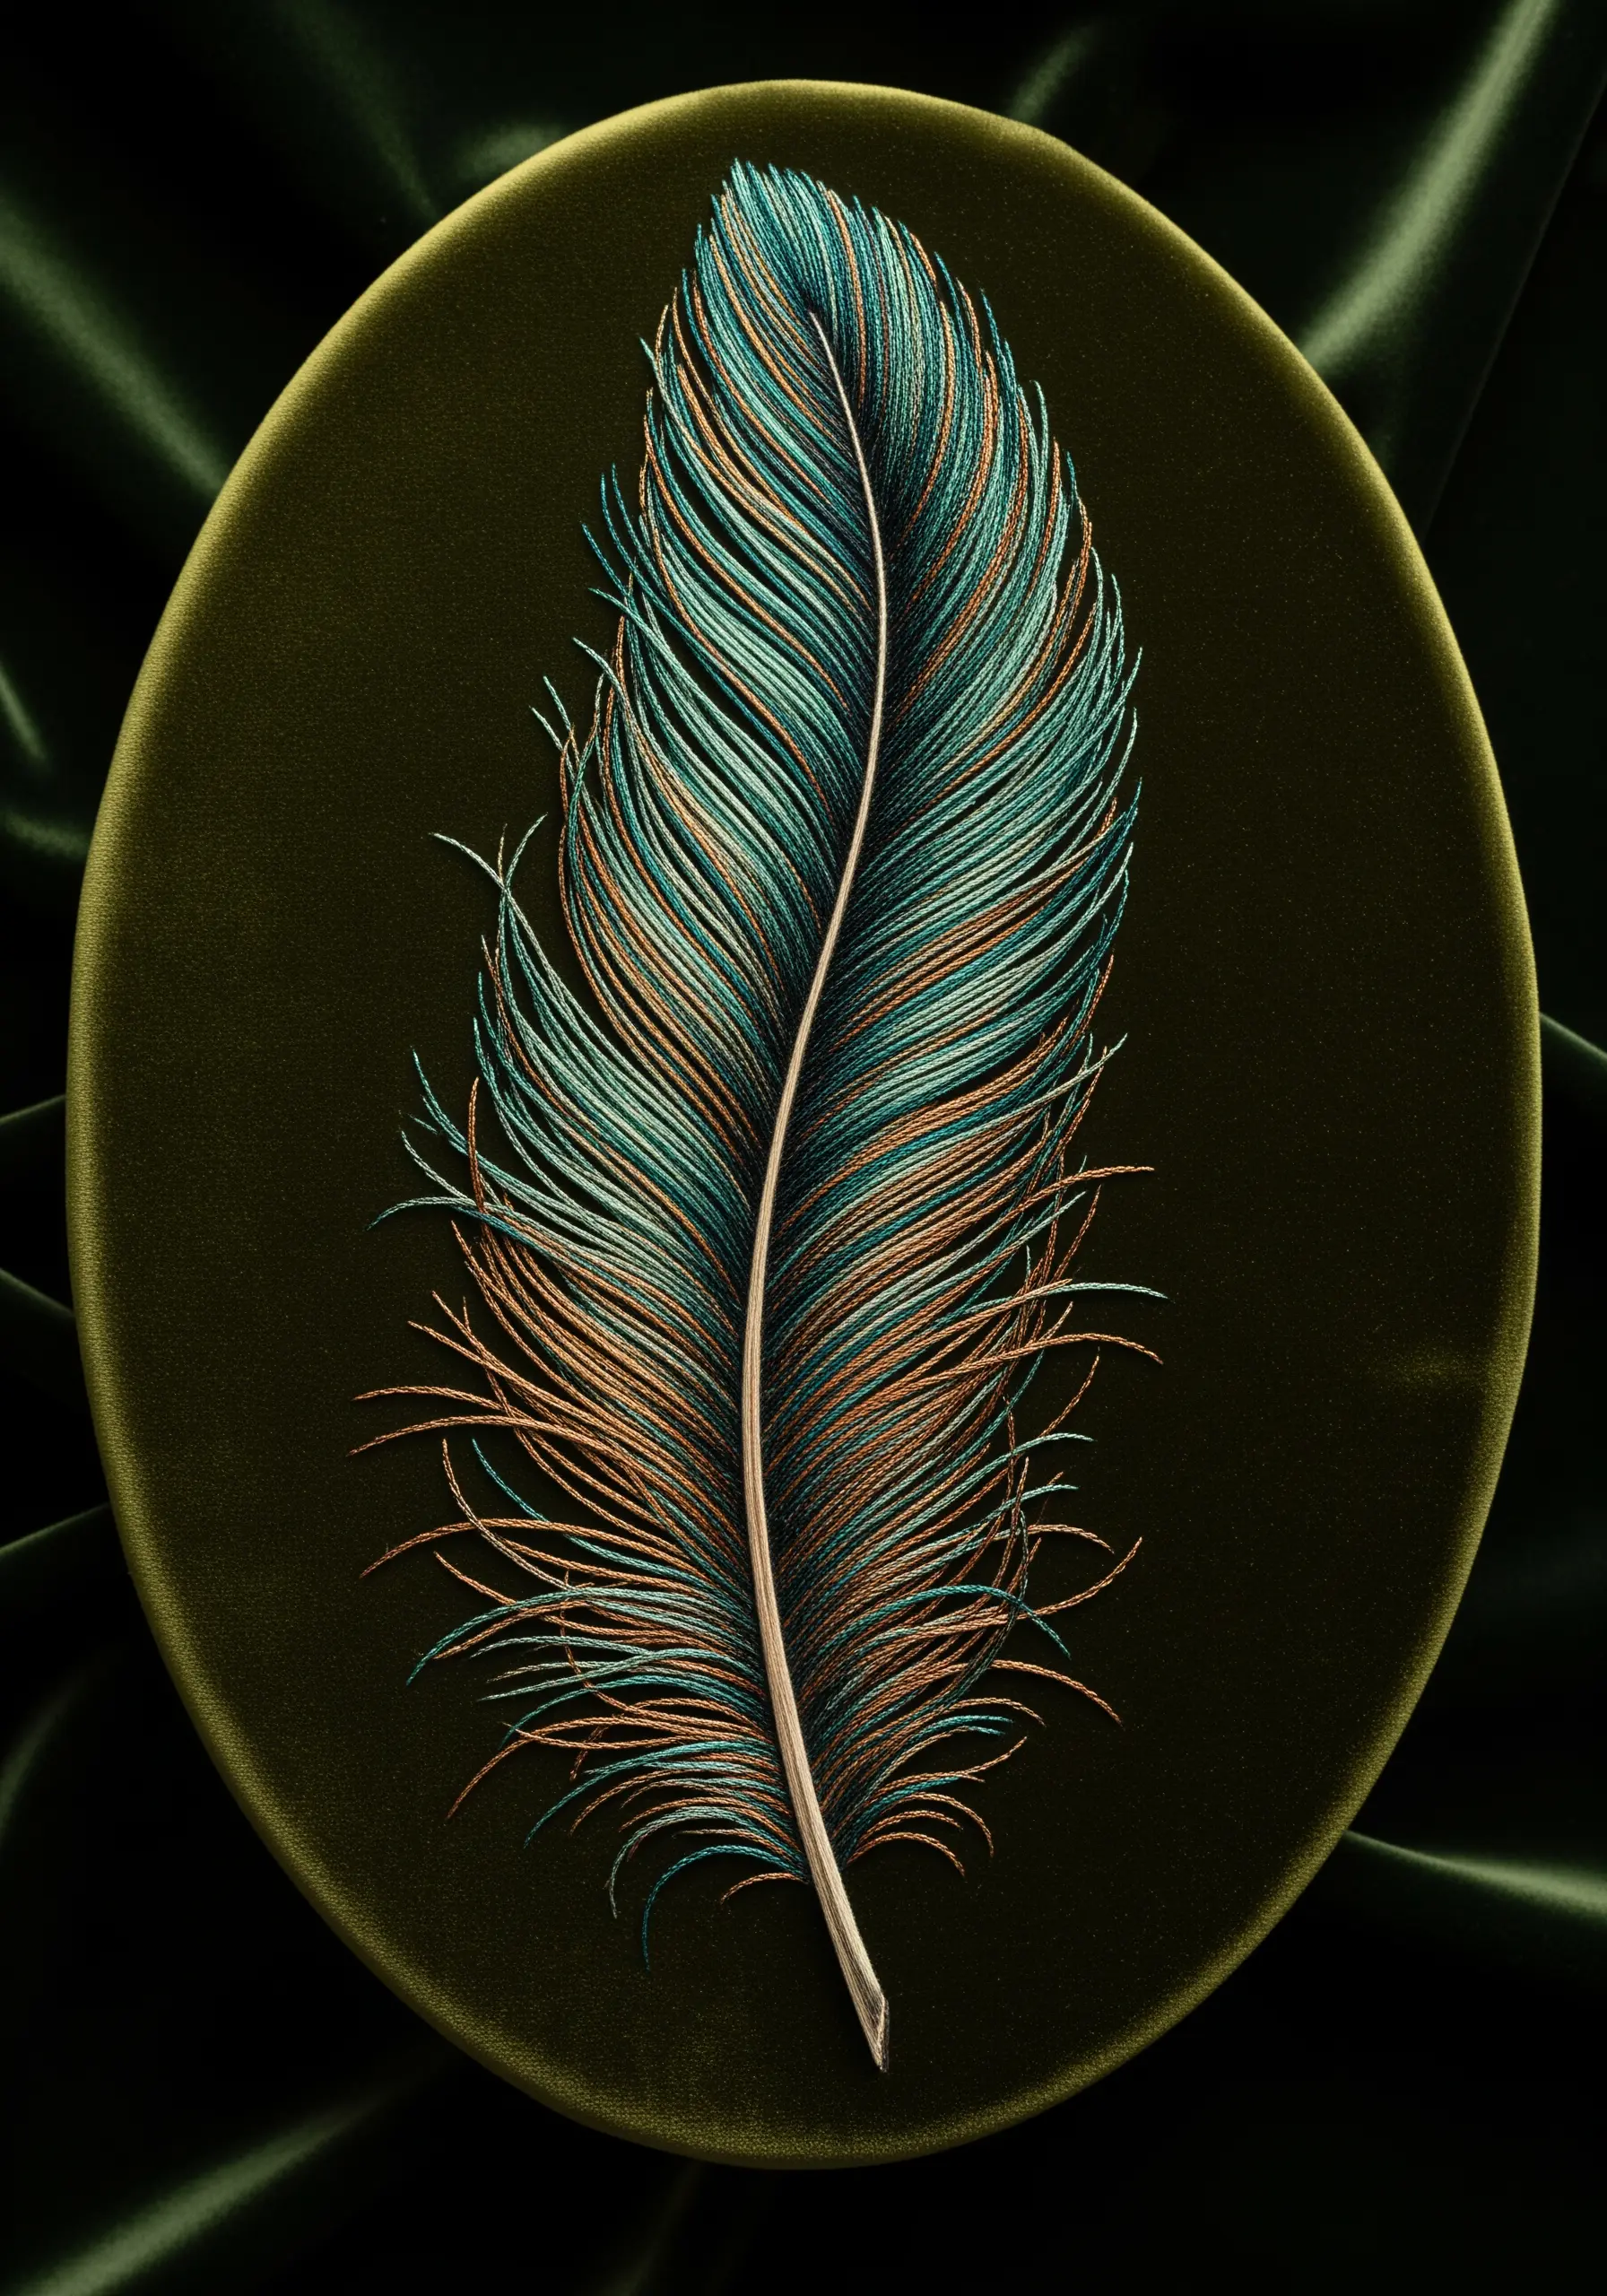
To capture the shimmering quality of a feather, use the long-and-short stitch technique known as thread painting.
Work with a single strand of floss at a time, laying your stitches in the direction of the feather’s barbs.
Blend two or three colors within the same needle (e.g., one strand of teal and one of copper) to create a subtle, iridescent effect that changes with the light.
Stitching on a rich fabric like velvet absorbs light around the motif, making your glossy threads appear even more luminous.
15. Sculpt Succulents with Padded Satin Stitch
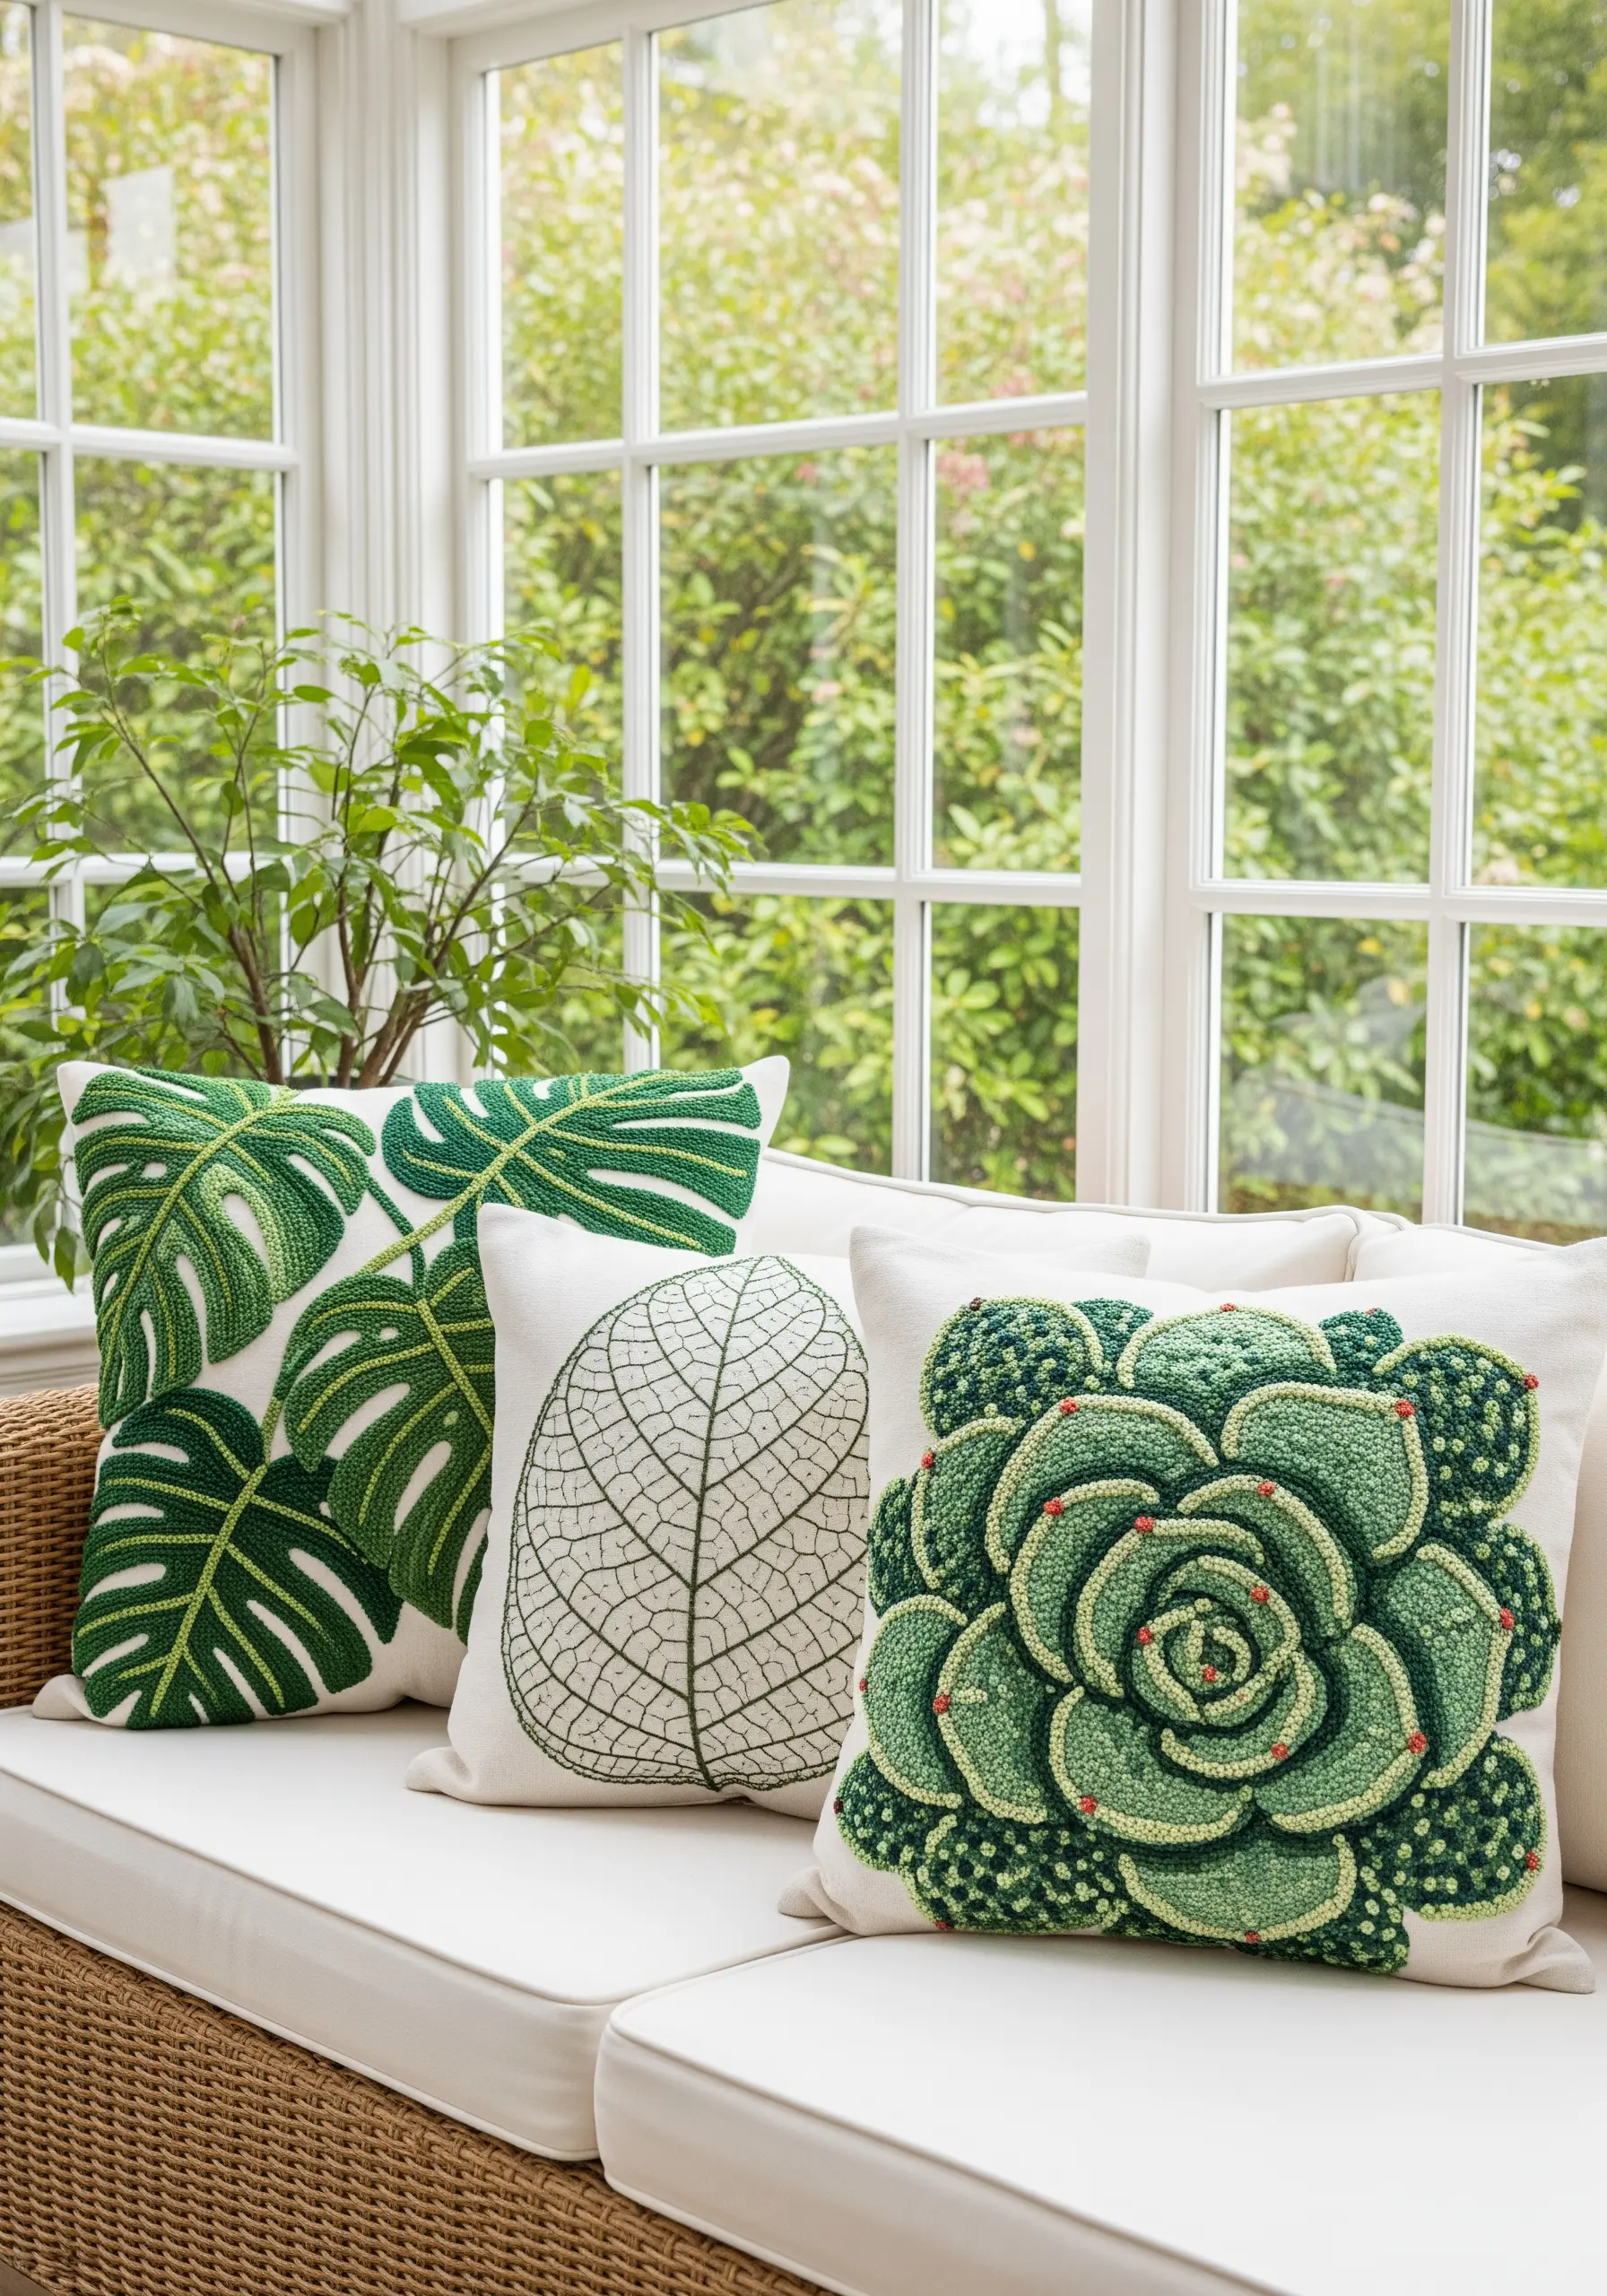
Give your botanical embroidery a lifelike, 3D form using padded satin stitch.
For the succulent, first stitch a base layer of felt cut to the shape of each petal directly onto your fabric.
Then, cover the felt padding completely with smooth satin stitches, working from the outer edge of the petal inward.
This simple padding technique physically raises the stitches from the surface, creating touchable, realistic plant forms that look stunning on pillows and wall art.
16. Plant a Wildflower Meadow with French Knots
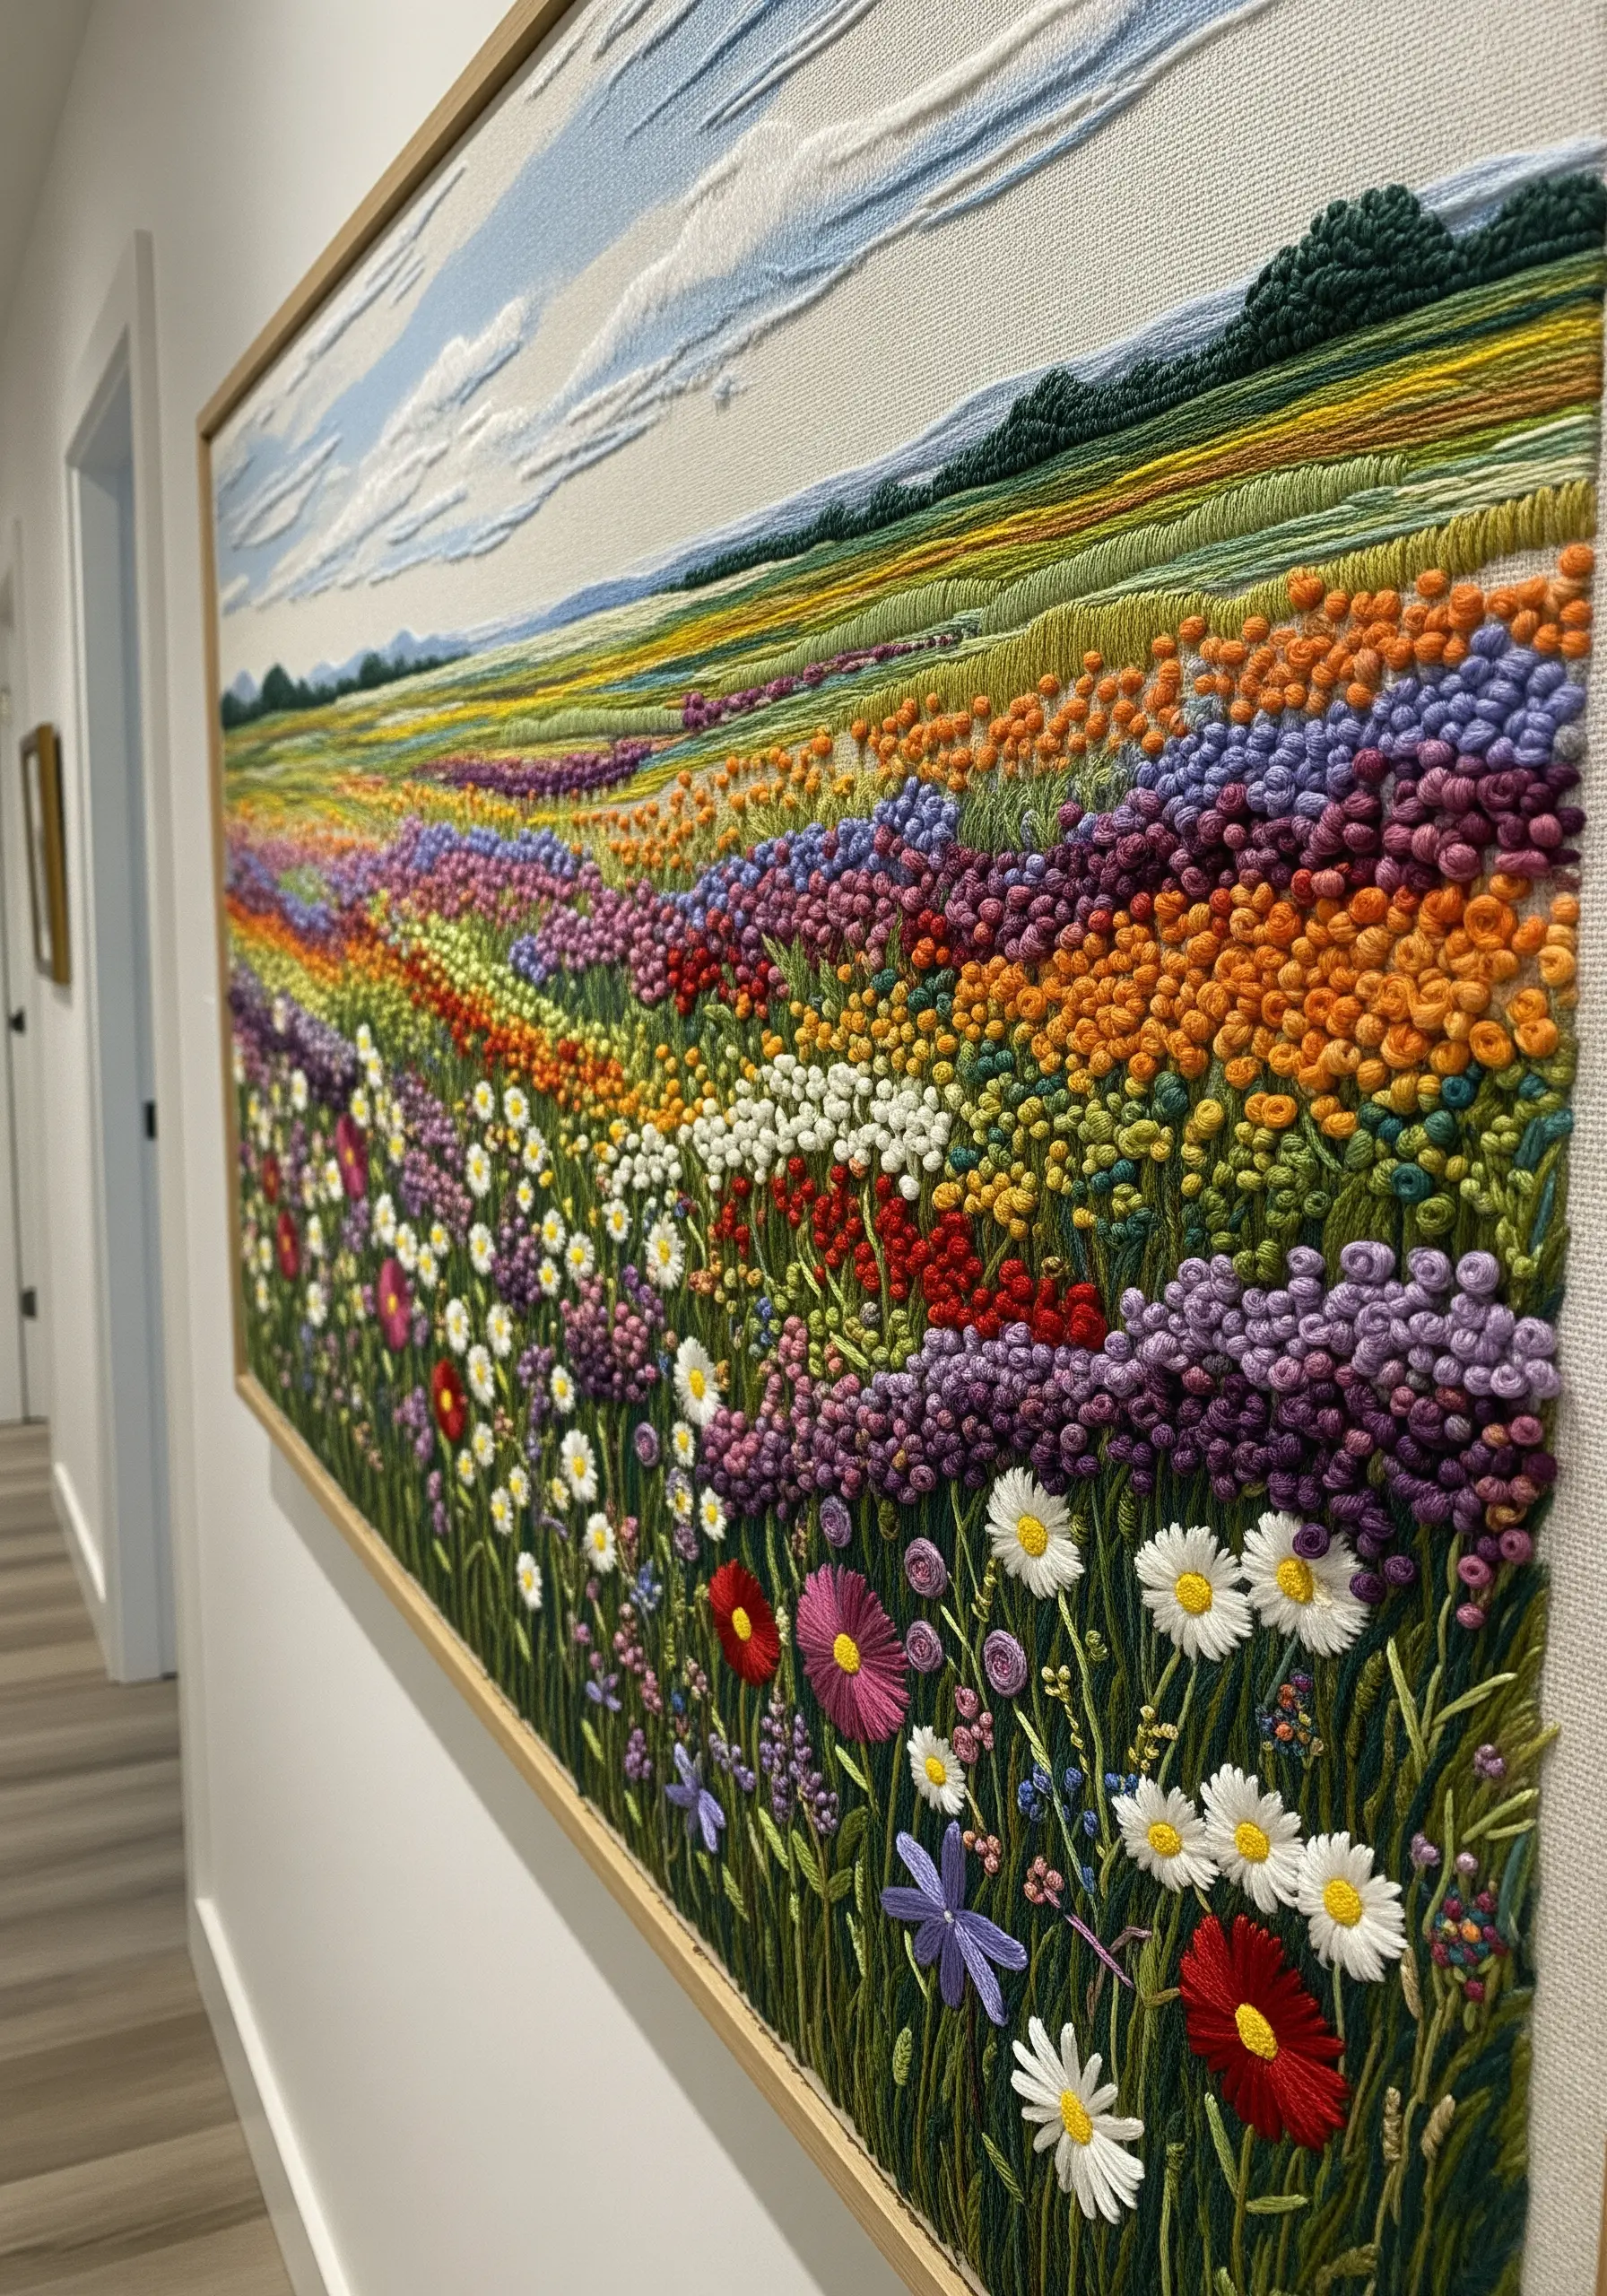
Create the illusion of a vast, vibrant flower field using thousands of French and colonial knots.
Use a full six strands of floss for flowers in the foreground to make them large and plush, then drop to two or three strands for smaller, tighter knots in the distance to create perspective.
Group colors together in organic drifts rather than scattering them randomly for a more natural look.
Intersperse the knots with simple lazy daisy and straight stitches for daisies and varied foliage, adding another layer of texture.
17. Add Soft Dimension with Padded Appliqué
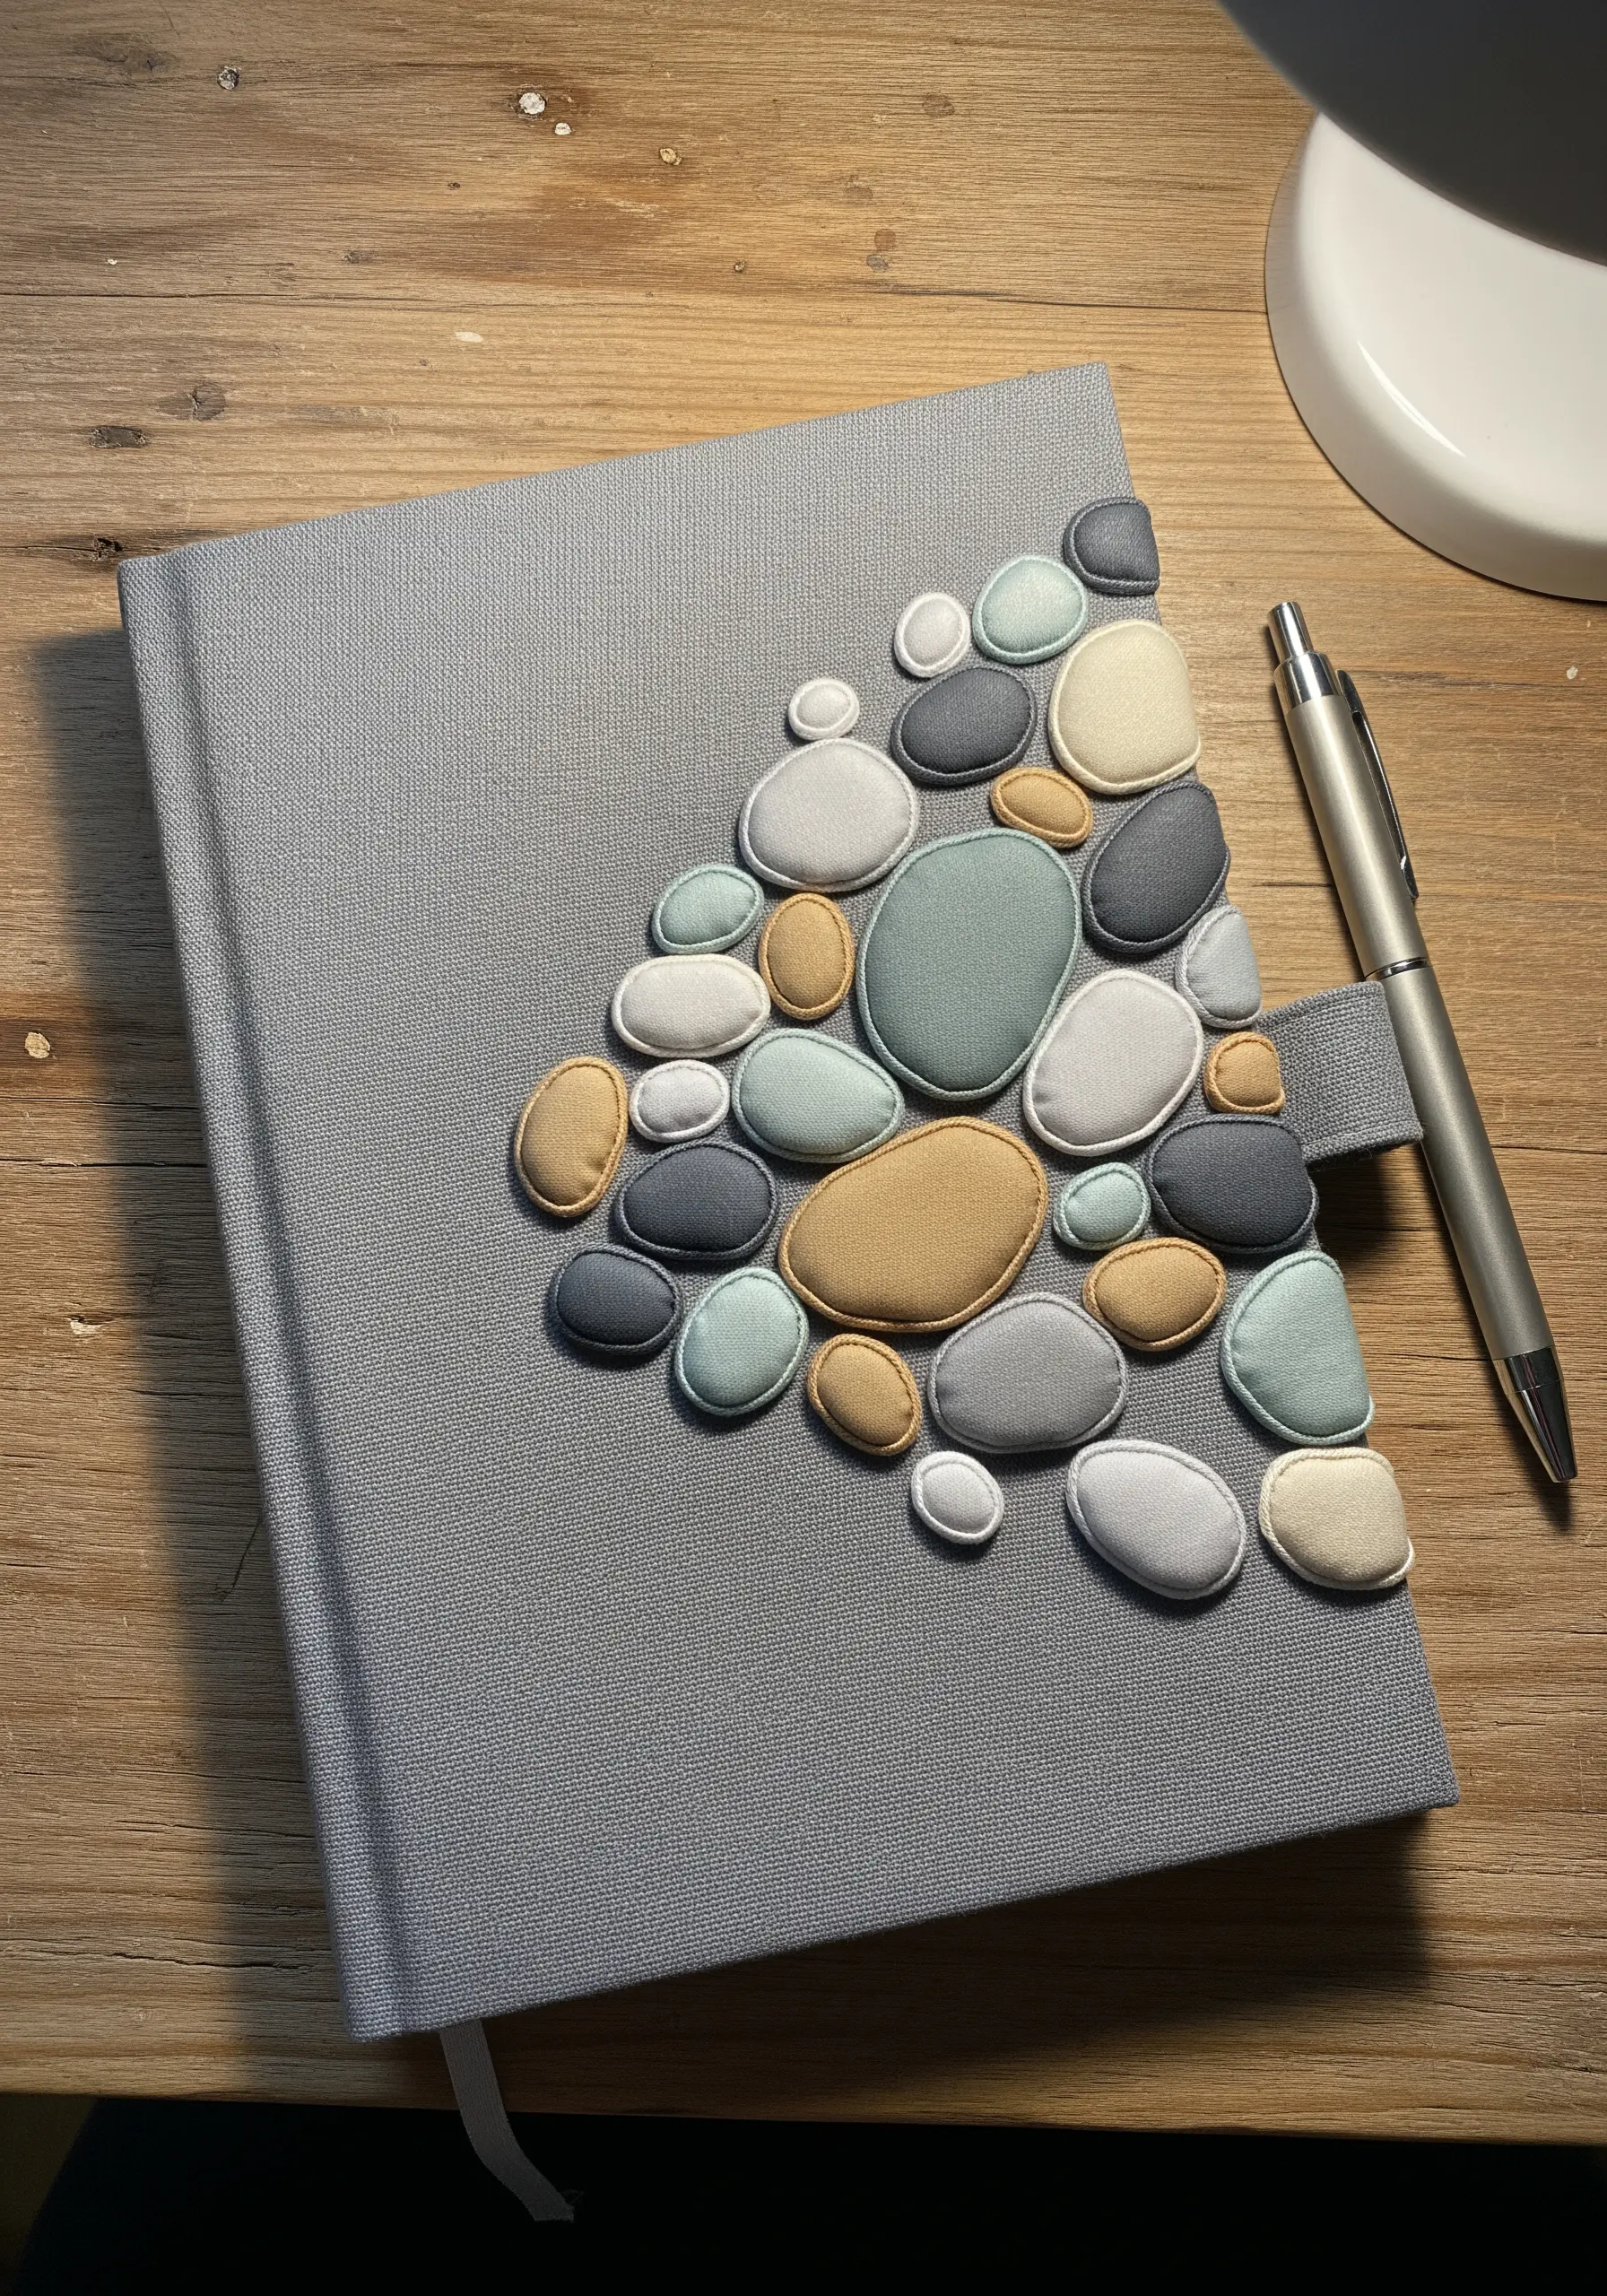
Elevate a simple journal cover with soft, touchable appliqué pebbles.
Cut your pebble shapes from various neutral-toned fabrics like cotton, linen, or felt. For each pebble, cut a slightly smaller piece of thin batting.
Place the batting on the back of the fabric shape, fold the edges of the fabric around it, and press.
Arrange the padded shapes on your journal and secure them with a tiny, neat whip stitch around the edge for a clean, three-dimensional effect.
18. Weave Warmth with Textural Yarn Blocks
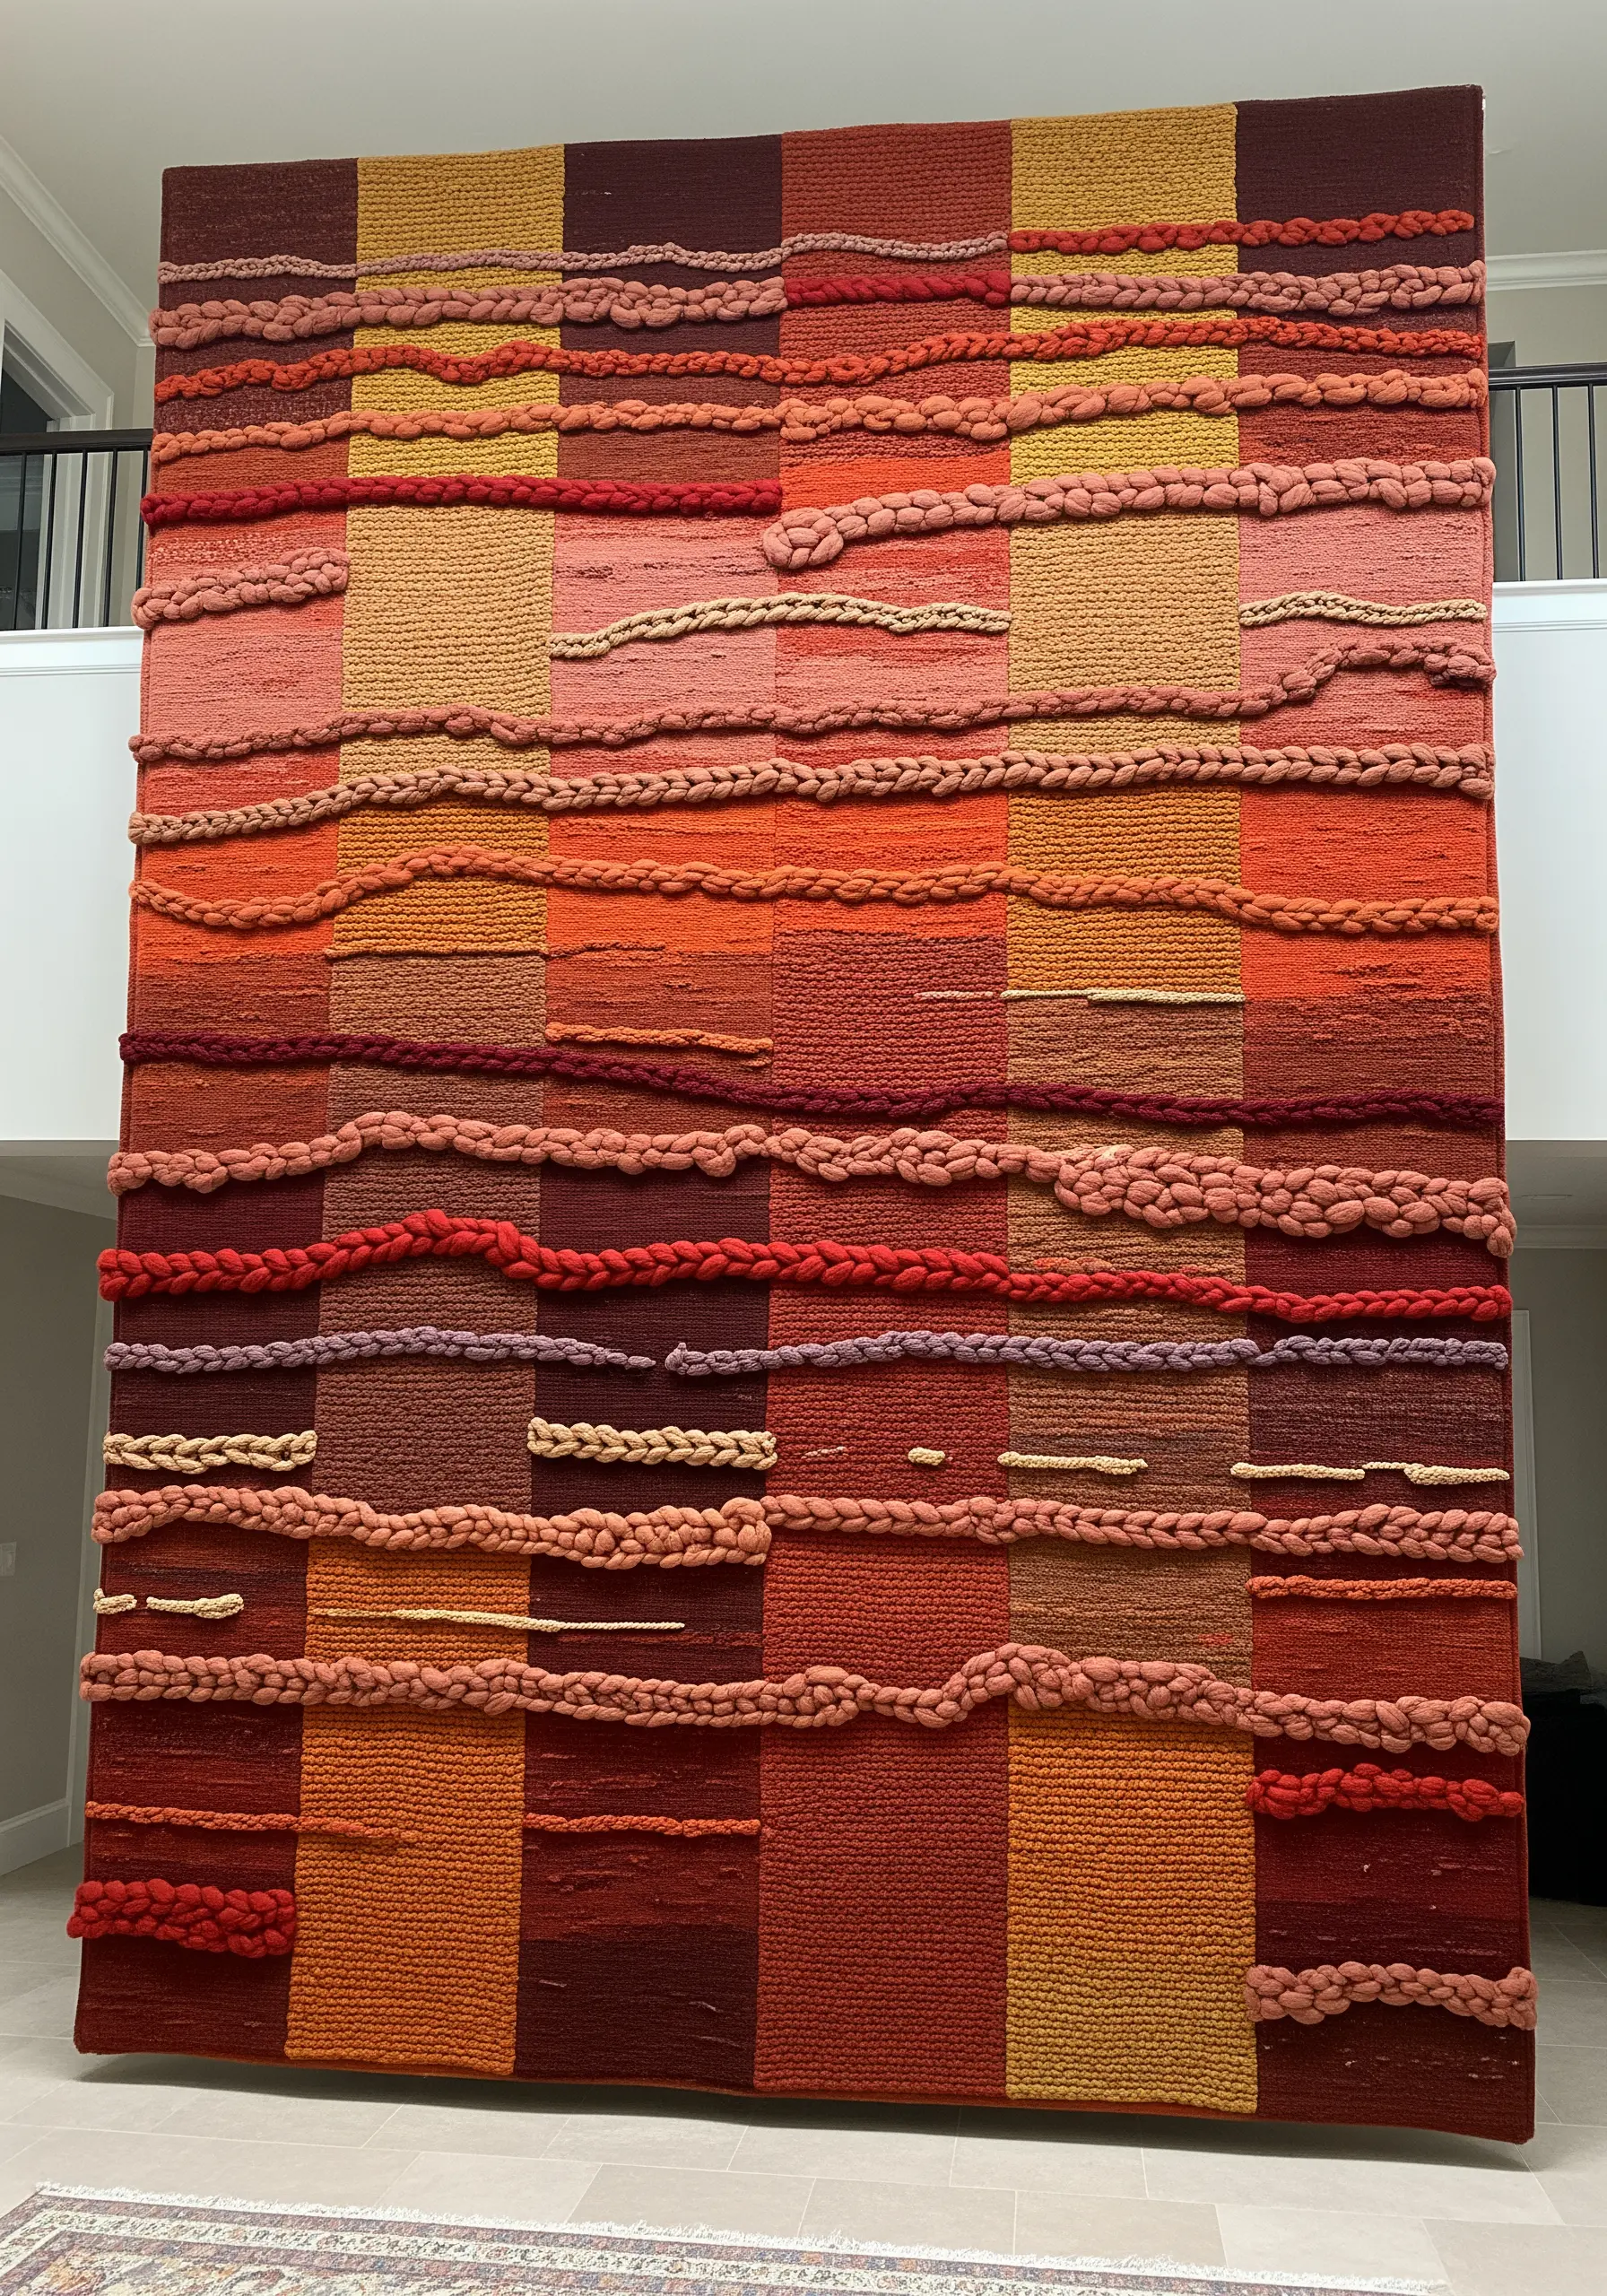
Create a stunning, large-scale wall hanging by focusing on texture over intricate pattern.
Divide your canvas into a simple grid. Fill each block with a single color but vary the texture by using different yarn types and stitches—chunky braided yarn, smooth satin stitch, or looped bullion knots.
The horizontal lines of thick, couched yarn break up the grid and add a layer of sculptural relief.
This approach transforms a simple color-blocked design into a rich, tactile masterpiece.
19. Replicate Tree Bark with Vertical Stitches
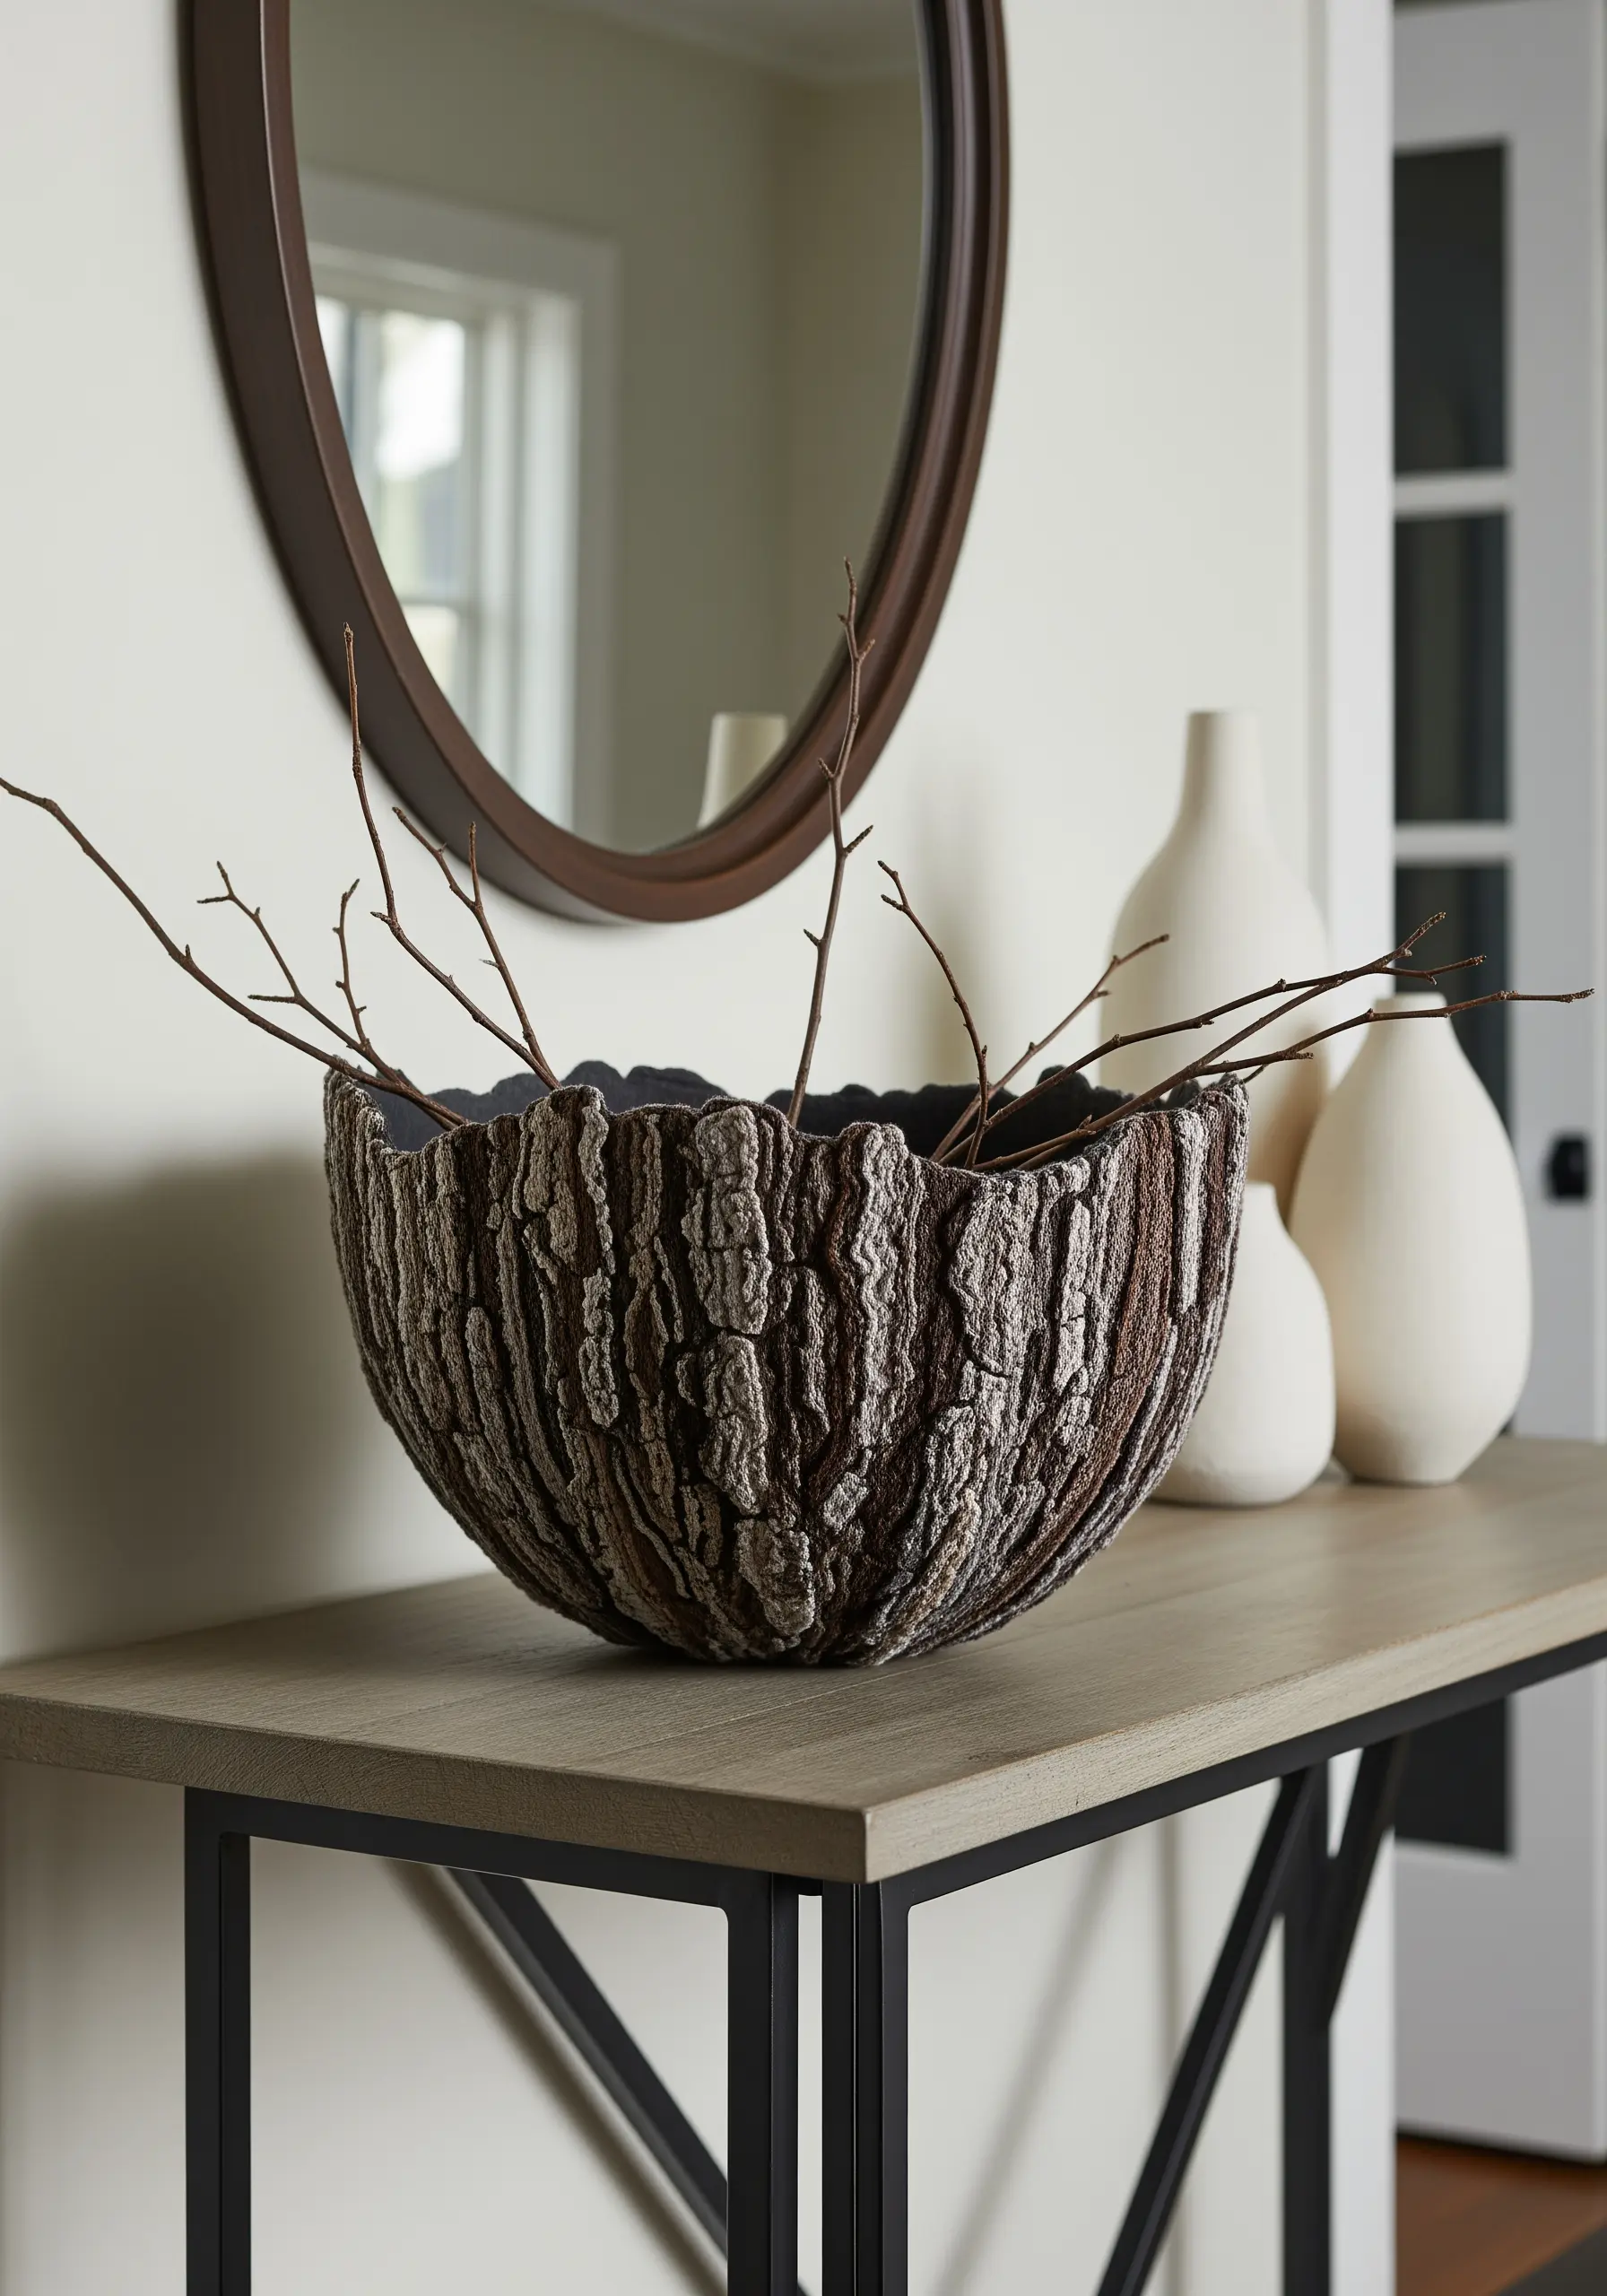
Craft a vessel that looks like it was carved from a tree by using dense, directional stitching.
Work over a pre-existing bowl or a mold with a sturdy, non-stretch fabric.
Using a mix of variegated brown, grey, and black threads, fill the entire surface with slightly irregular vertical straight stitches and seed stitches.
The varied thread colors and dense texture perfectly mimic the rough, fissured surface of bark, creating a truly unique decorative object.
20. Celebrate Simplicity with Rope and Negative Space
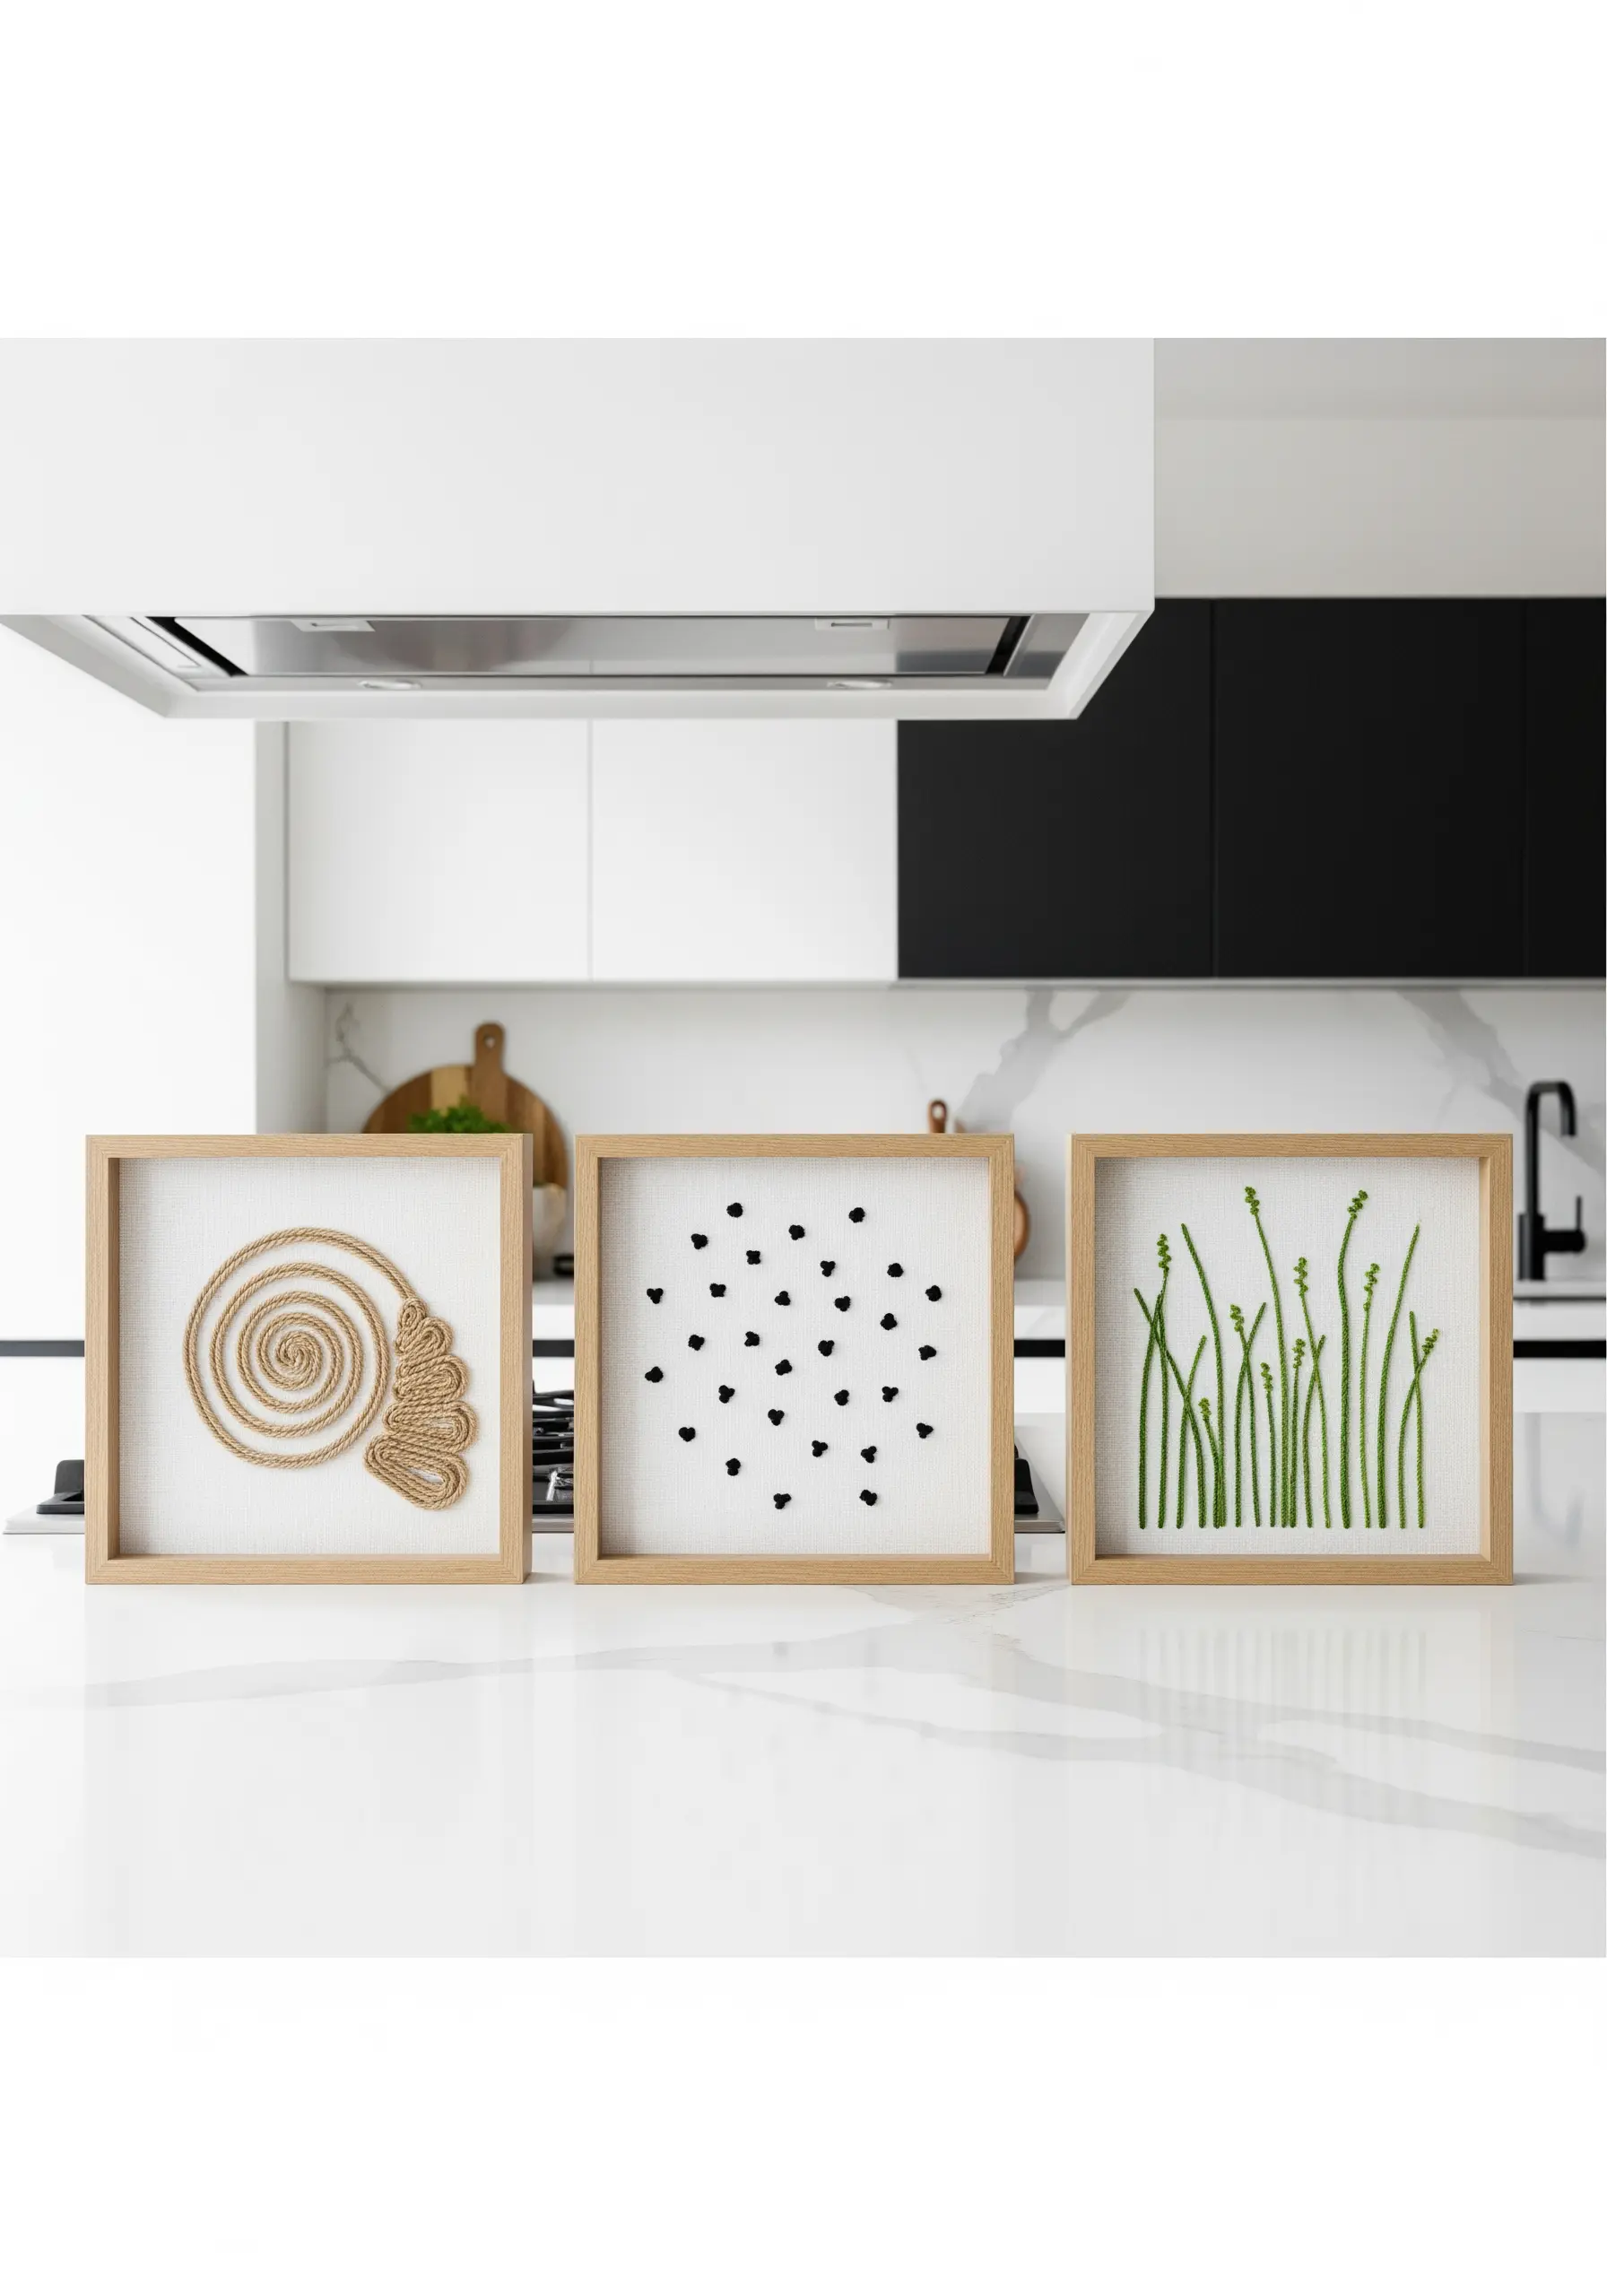
Make a powerful statement with minimal materials by focusing on form and line.
Choose a single, textural material like jute rope or thick cotton cord.
On a clean, neutral fabric like linen or cotton canvas, arrange the rope into a simple, organic shape—a spiral, a blade of grass, or a random assortment of dots.
Couch it down neatly, and let the surrounding empty space amplify the beauty of the texture. This is a core principle of minimalist embroidery projects.
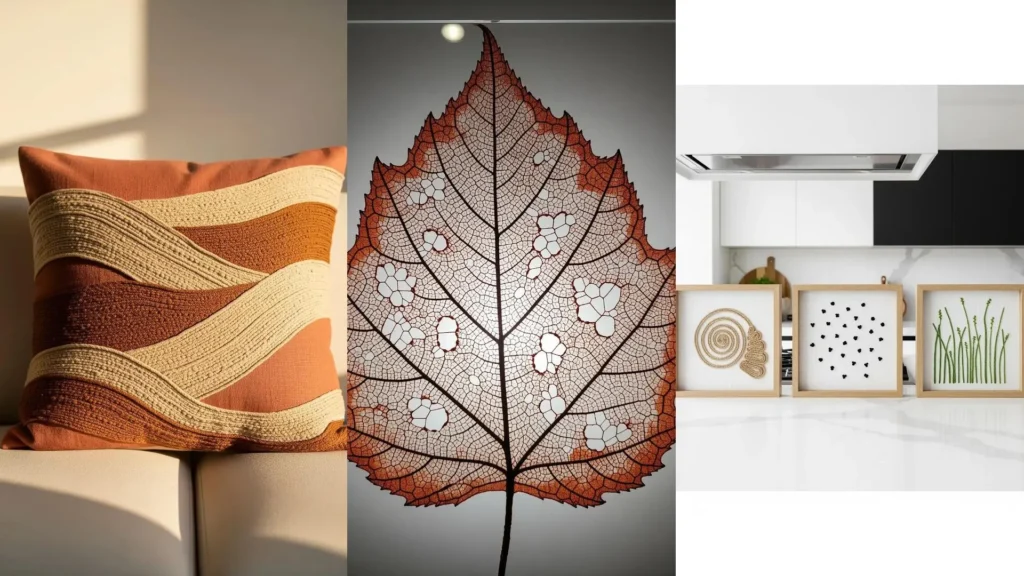
21. Trace Nature’s Blueprint with Outline Stitches
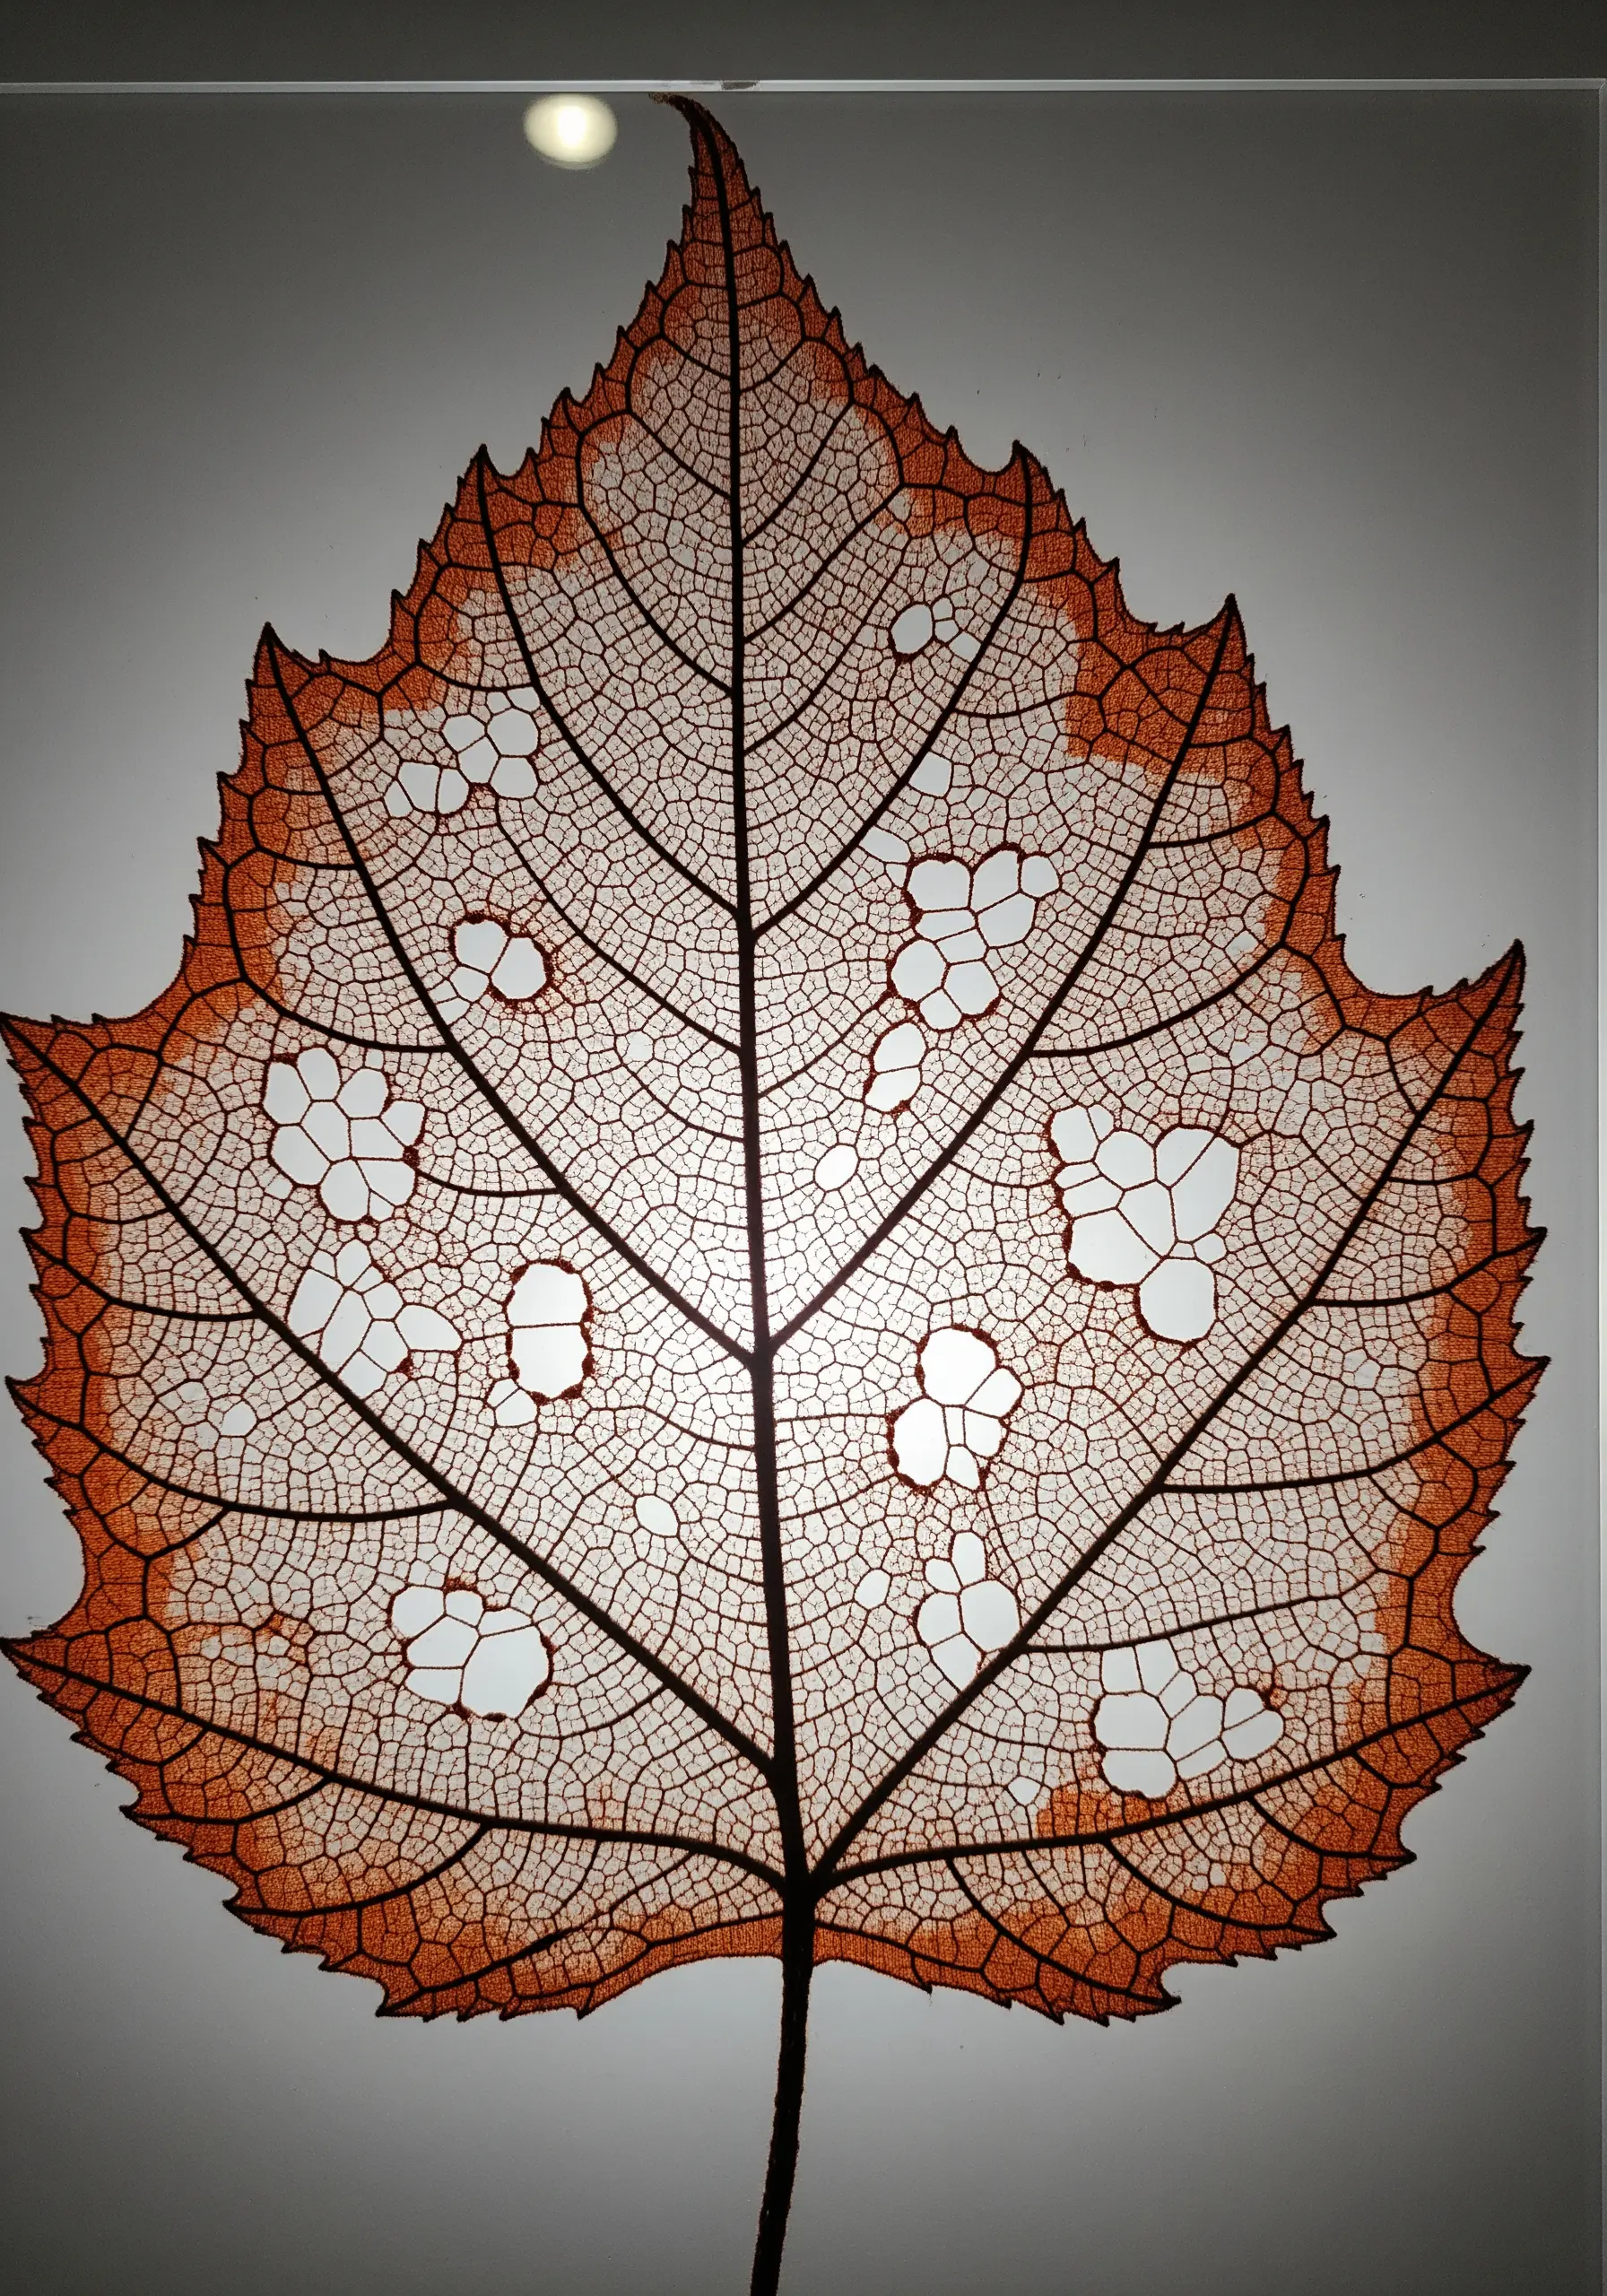
Use a real leaf skeleton as your pattern to create a beautifully intricate and accurate design.
Place the skeleton on a light box or sunny window with your fabric over it, and carefully trace the delicate veins with a water-soluble pen.
Using a single strand of thread in a contrasting color, stitch over your lines with a fine backstitch or stem stitch.
The resulting piece is a perfect marriage of natural design and handmade artistry, ideal for creating authentic shapes in your embroidery.
22. Create a Textural Mosaic with Darning Stitch
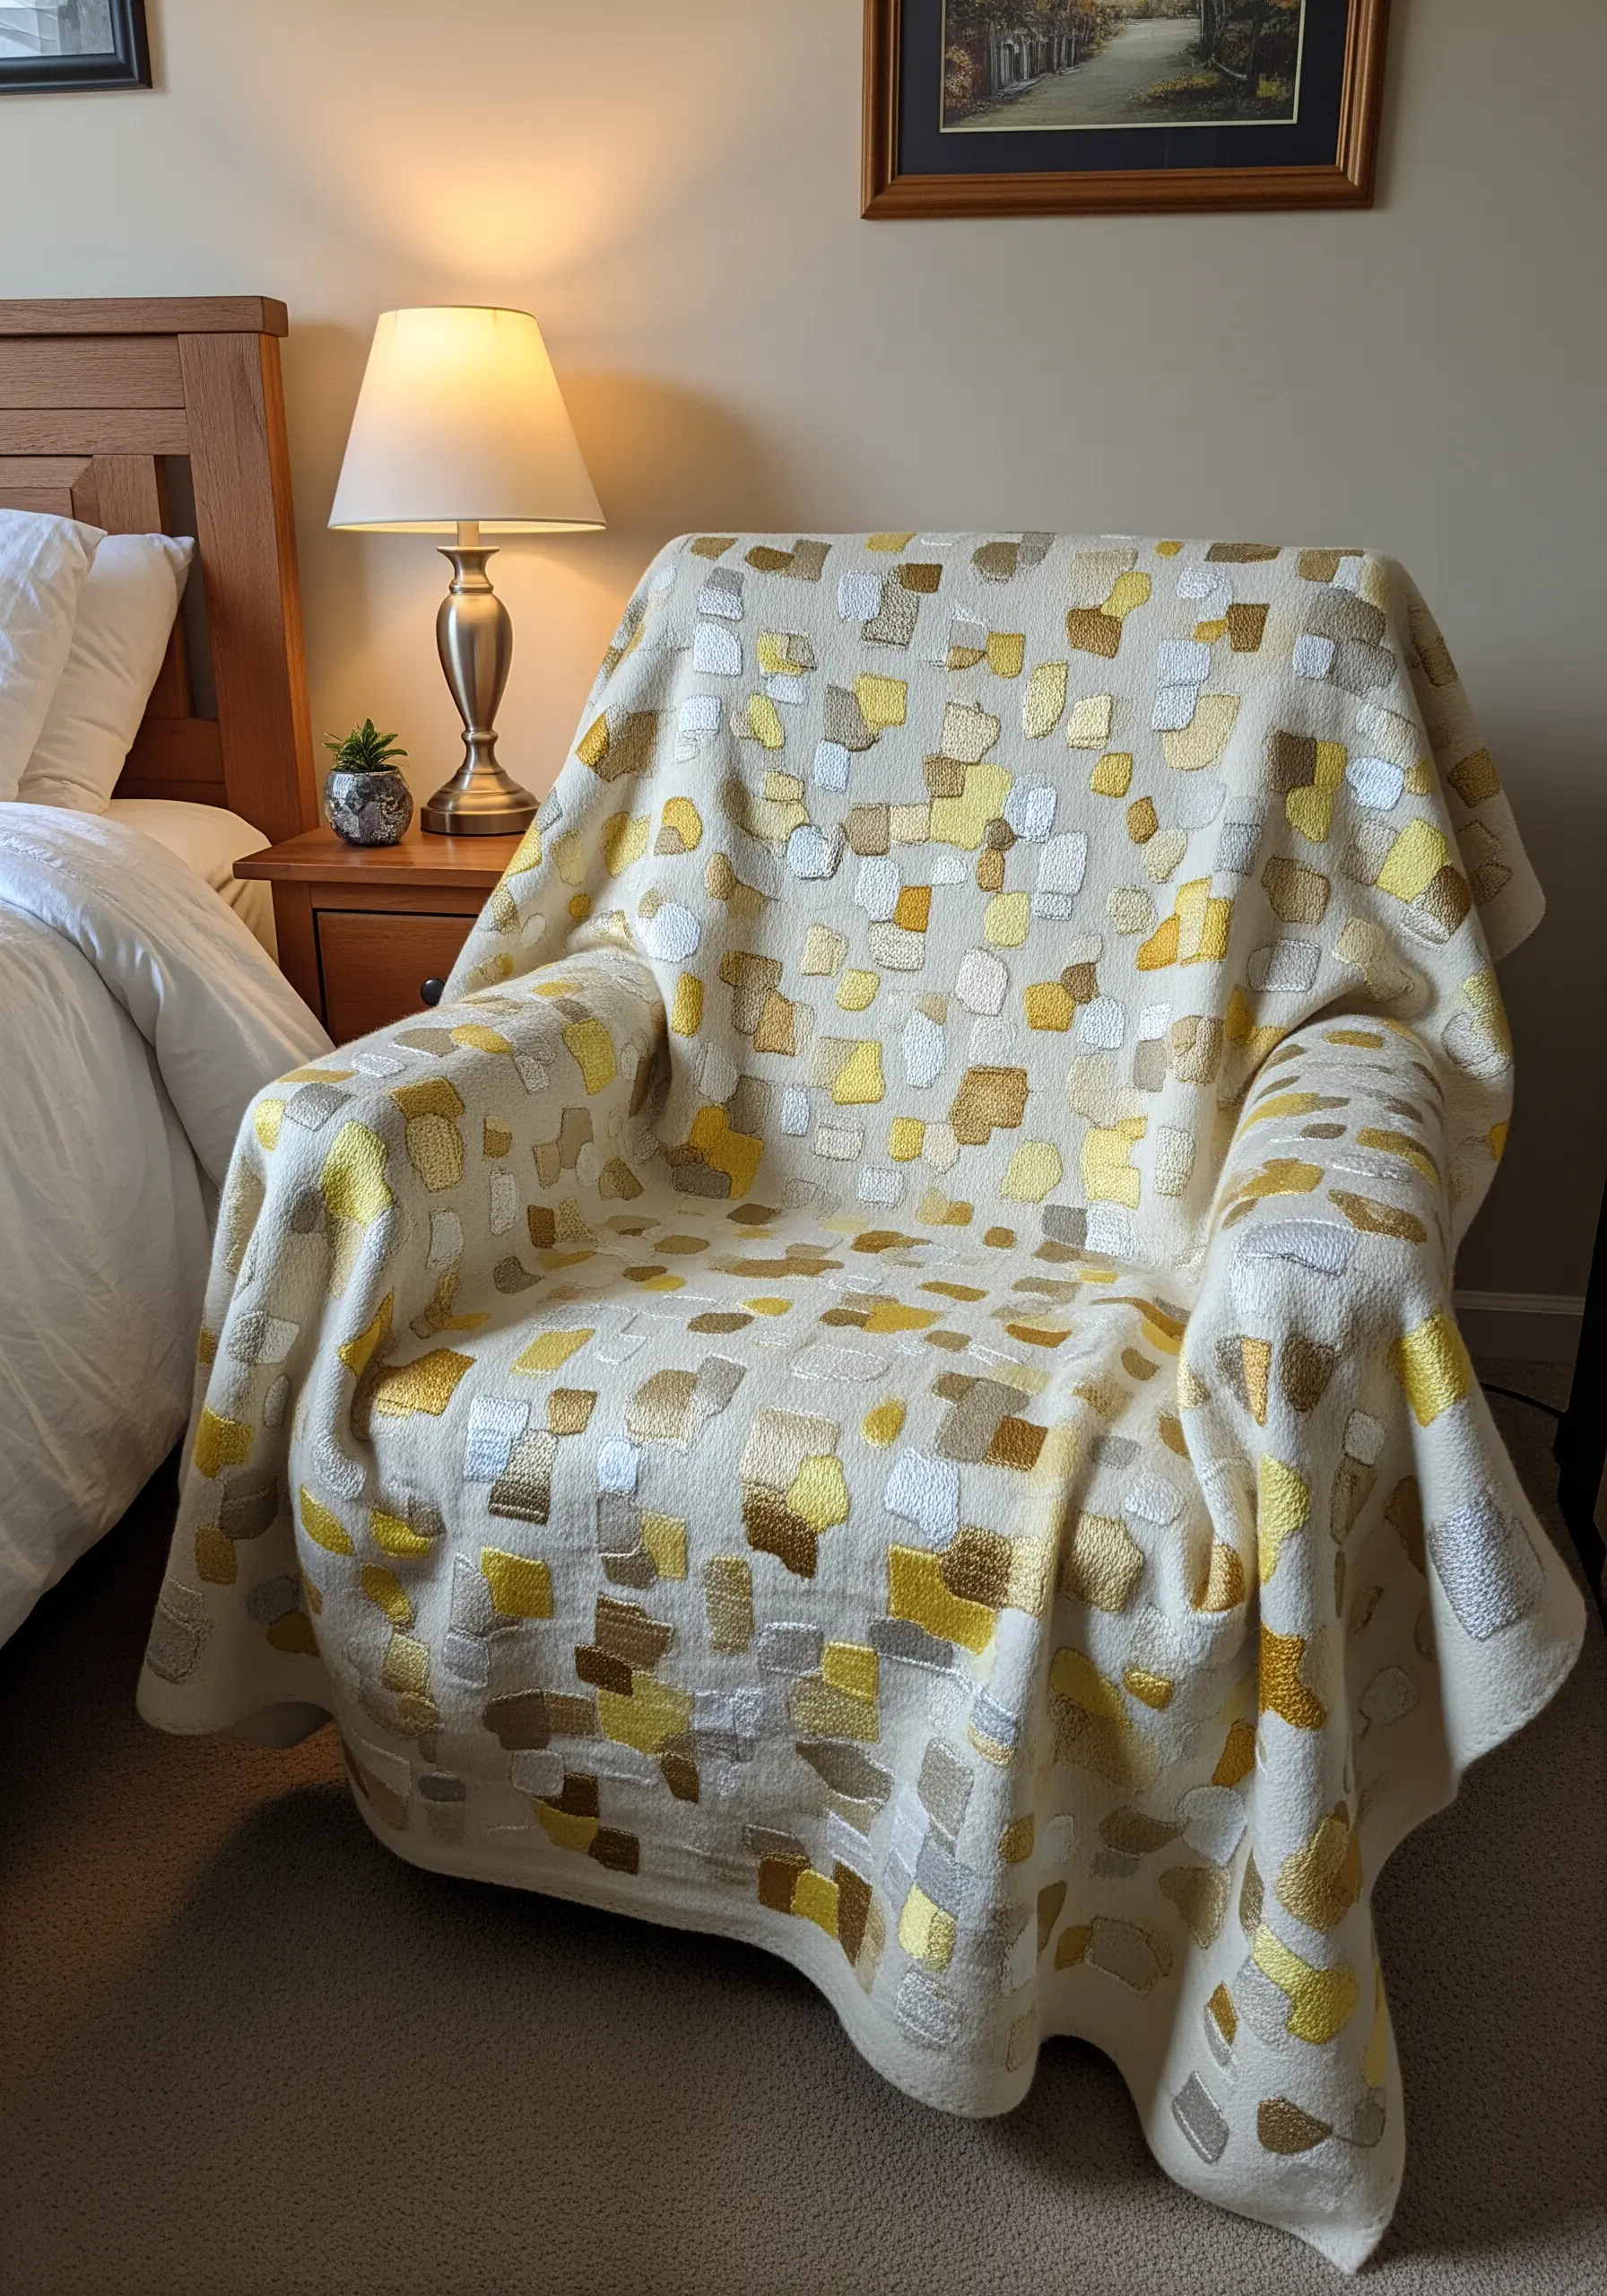
Embellish a cozy throw blanket with abstract patches of texture.
Instead of using appliqué, fill in organic, rounded-square shapes with a darning stitch or dense satin stitch, varying the direction of your stitches in each shape.
Use a palette of analogous colors (like shades of yellow, cream, and gold) to maintain a cohesive look while allowing the textural variations to shine.
This method adds warmth and visual interest without adding bulk, creating a sophisticated, modern textile.
23. Craft a Fiber Waterfall with Mixed-Media
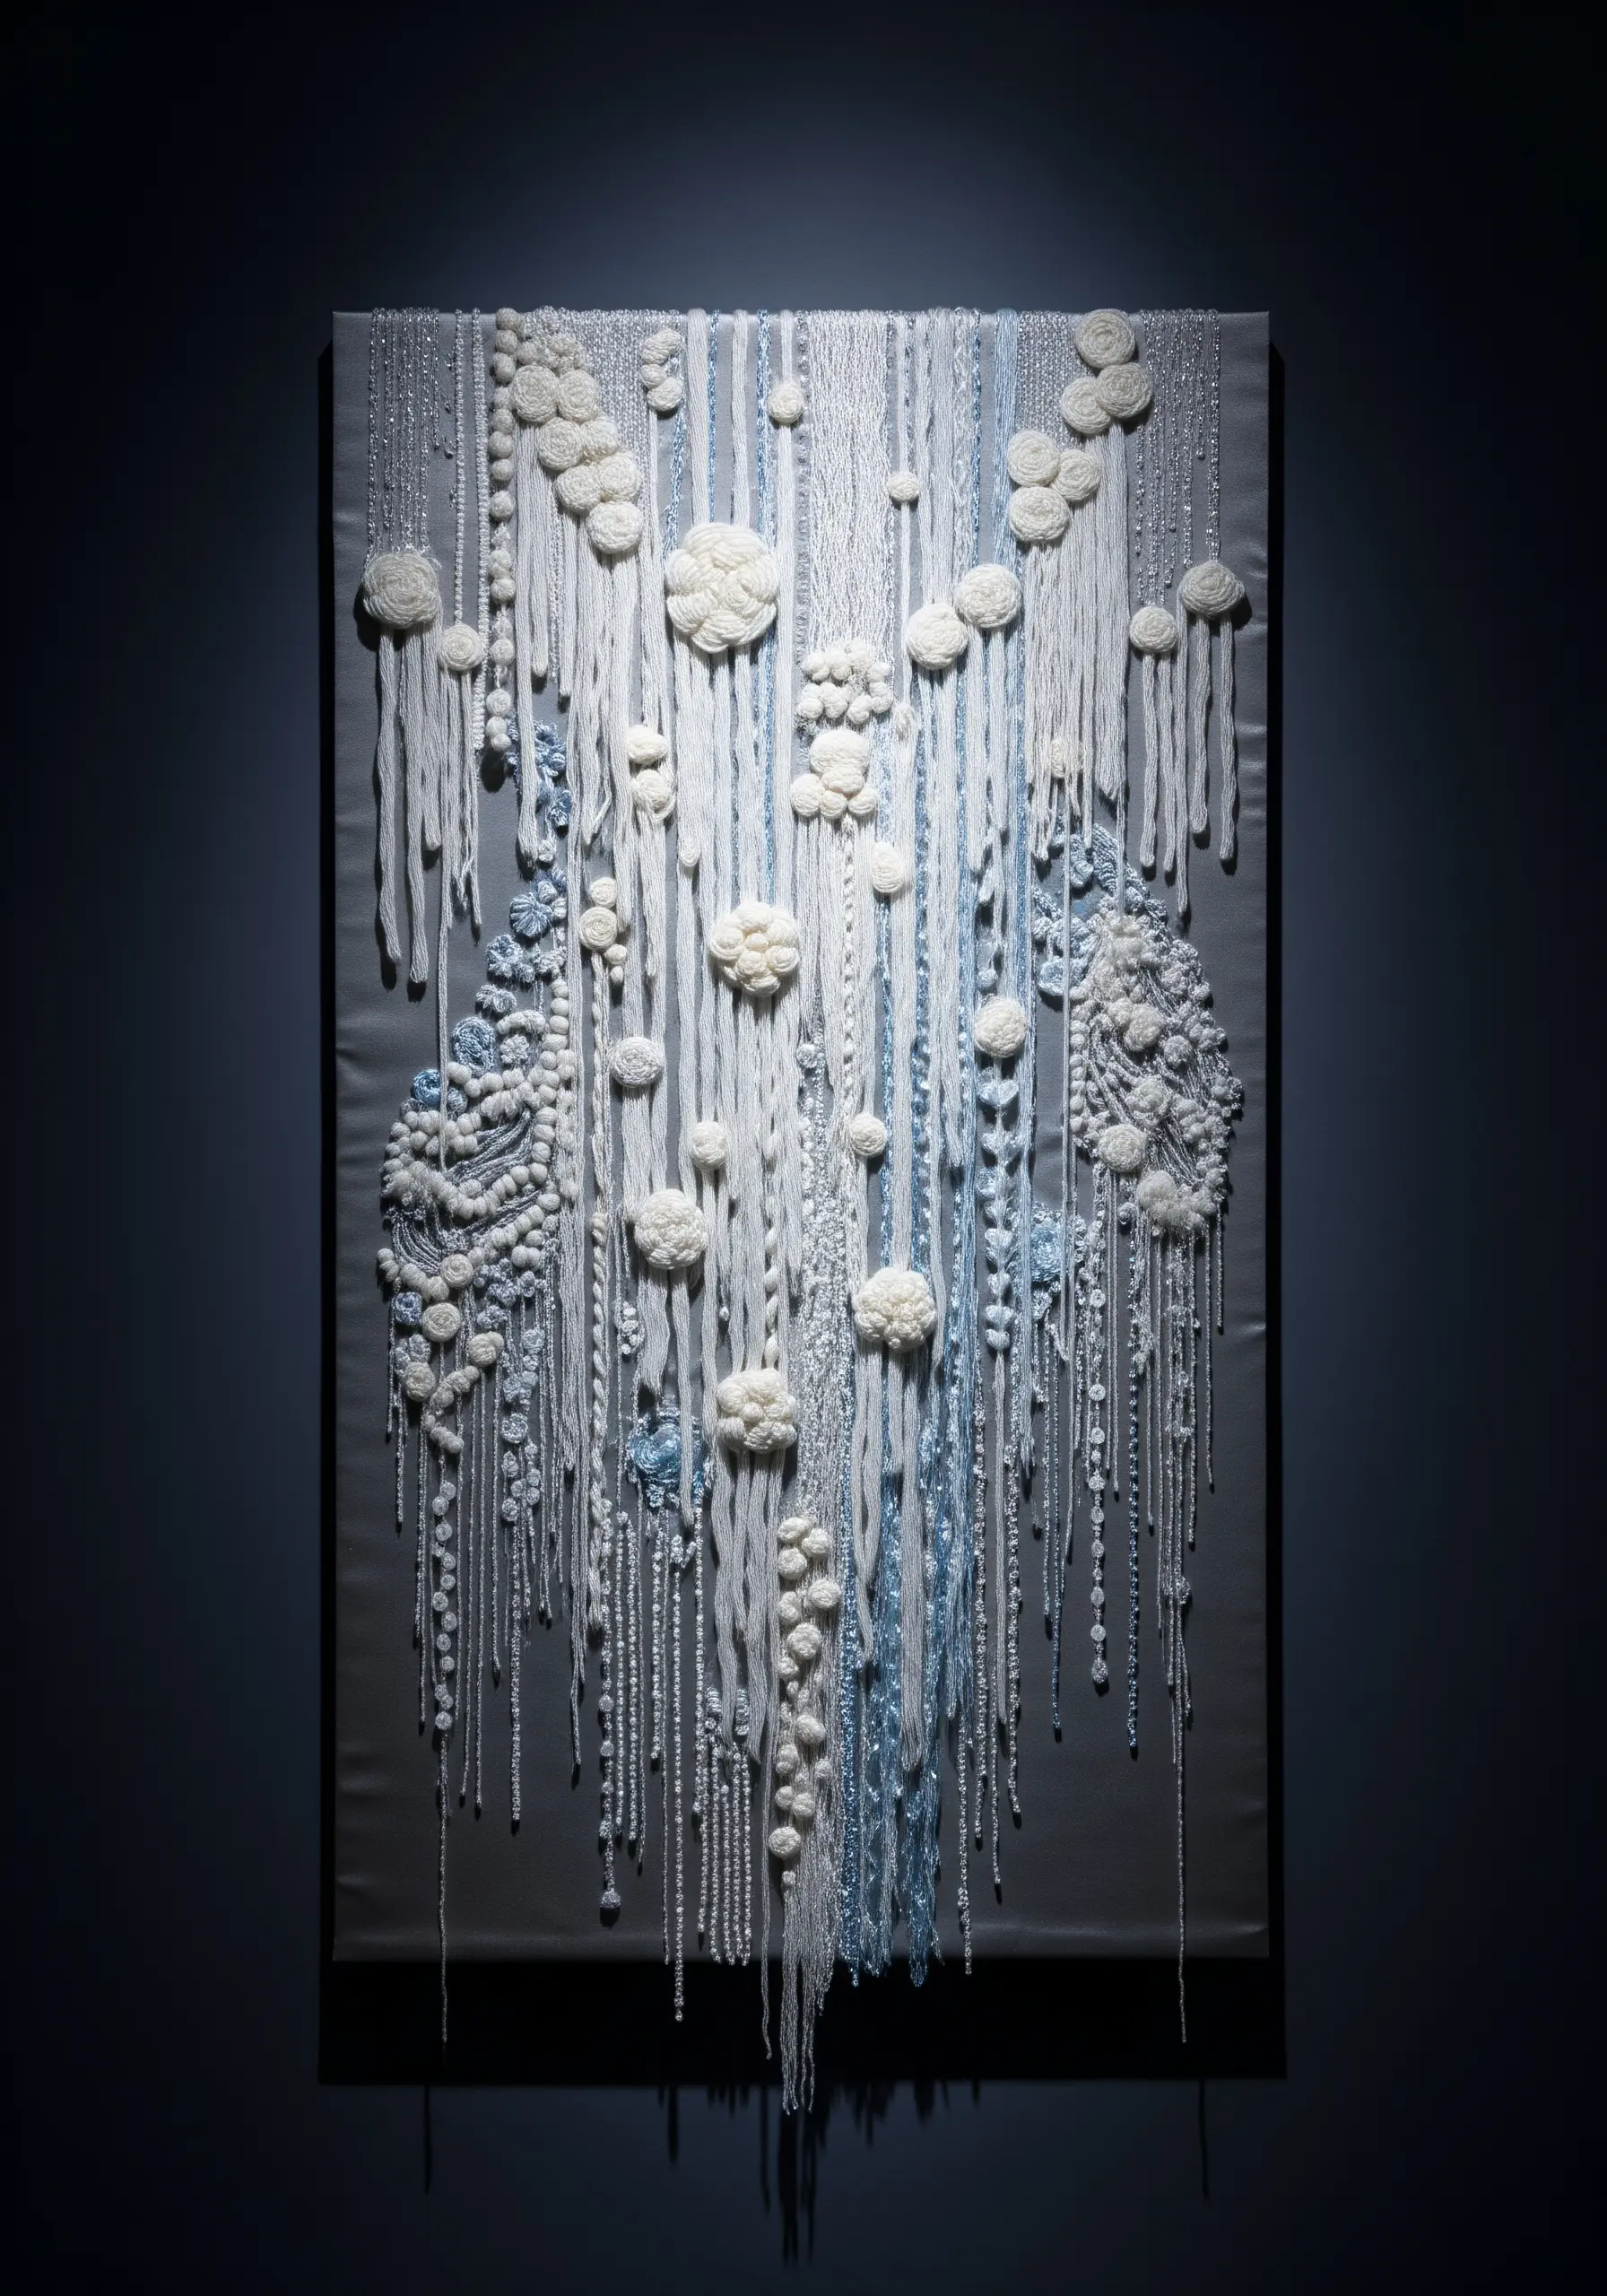
Create a dramatic wall hanging that drips with texture by combining multiple fiber art techniques.
Start with a fabric-wrapped canvas. Attach cascading lengths of various yarns and threads, letting them hang freely.
Incorporate clusters of French knots, woven sections (using a needle as a small loom), and dimensional pom-poms made from turkey work.
This free-form, layered approach results in extraordinary fiber art that feels both organic and intentional.
24. Illustrate Growth with Spiral Chain Stitch
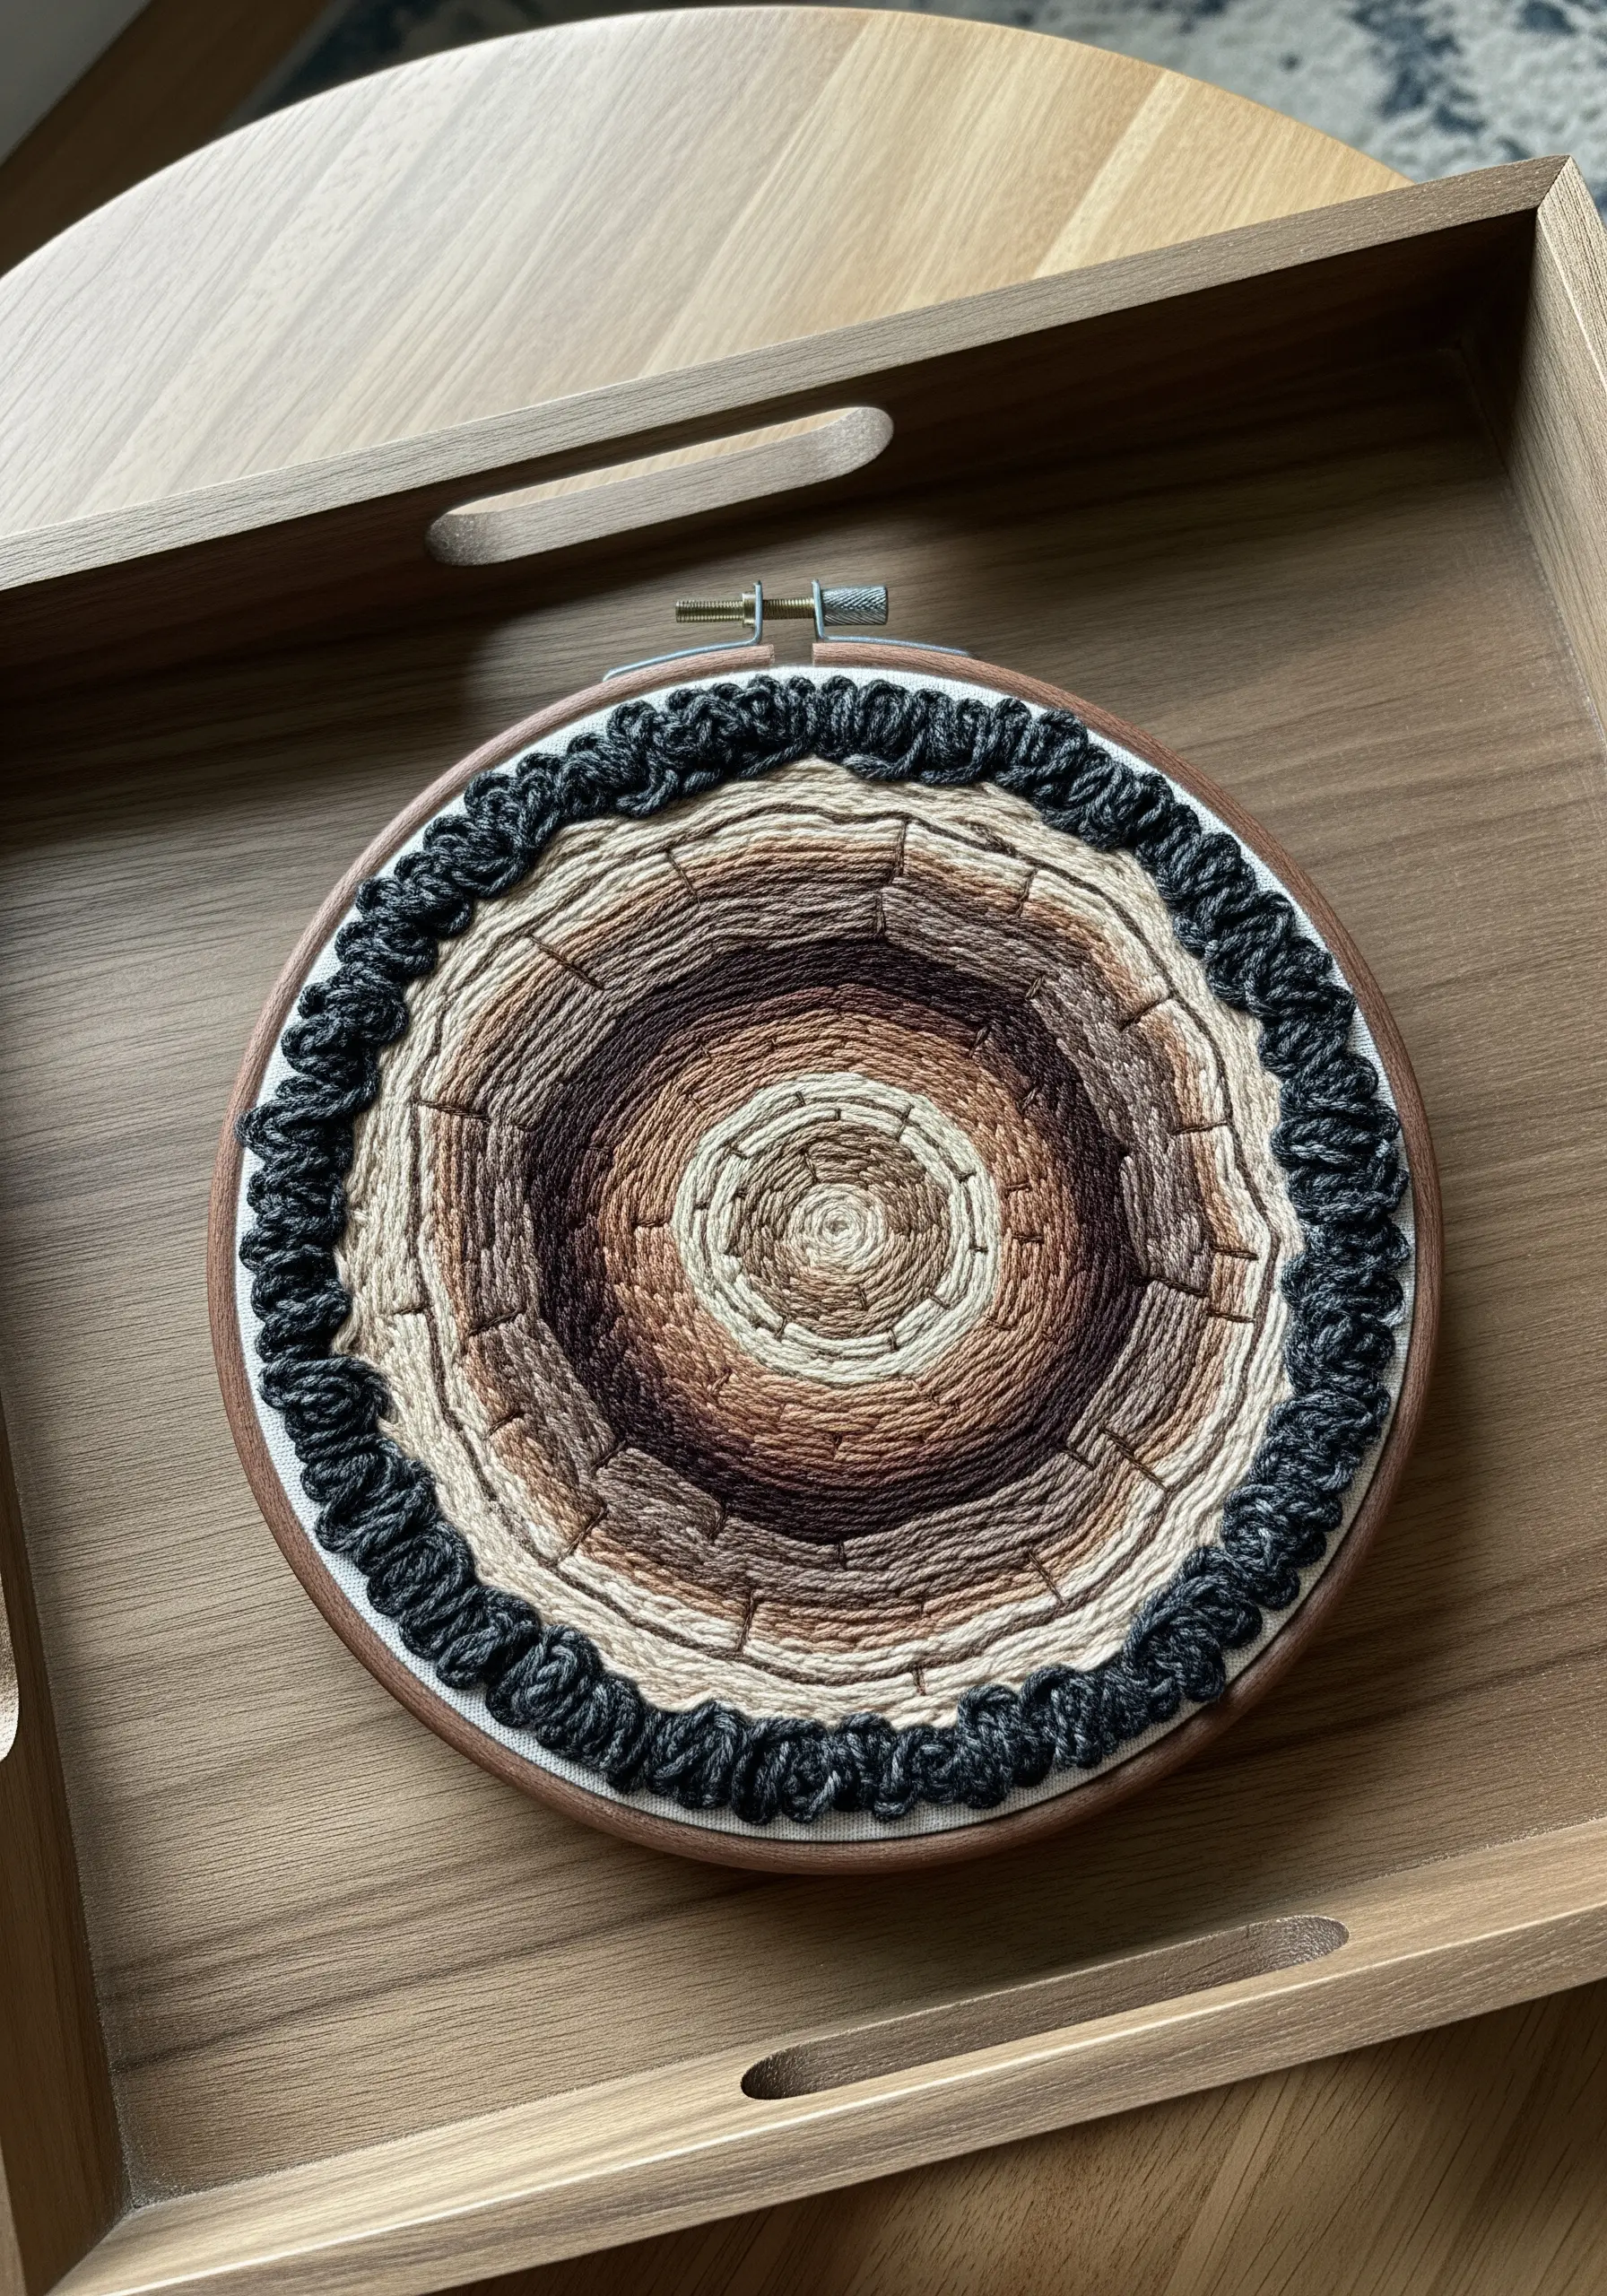
Capture the organic pattern of a tree’s growth rings with a simple spiral of chain stitch or stem stitch.
Start in the center and work your way out, occasionally varying your stitch length to create imperfect, natural-looking rings.
Use a variegated thread, or switch colors every few rounds, moving from light to dark to mimic the aging of the wood.
Frame the design with a border of bulky French knots or a couched, dark yarn to represent the rough bark, adding a final layer of contrasting texture.


