

Your journal is more than just paper; it’s a space for your thoughts, dreams, and plans. So why not make the cover a reflection of the care you put inside? It doesn’t require a grand, complex project—often, the most beautiful statements are made with a few, well-chosen stitches.
This collection of ideas is about elevating your embroidery through small, intentional details. It’s about understanding how changing one stitch, adjusting your thread count, or adding a touch of texture can transform a simple motif into a small work of art.
Here, you’ll find techniques that are both achievable and deeply satisfying. Let these ideas inspire you to pick up your needle and thread, and turn your journal into a quiet, personal masterpiece, one stitch at a time.
1. Render Lavender with Woven Texture

Create realistic lavender buds by using a woven wheel stitch instead of simple knots.
First, make a small star of five straight stitches for your base.
Then, weave your thread over and under these spokes without piercing the fabric, building up a raised, circular bud.
For the stem, use a whipped backstitch to create a smooth, cord-like line that contrasts beautifully with the textured blossoms.
This combination of textures adds dimension and a tactile quality that satin stitch alone cannot achieve.
2. Create a Luminous Padded Moon

Give your crescent moon a gentle, three-dimensional lift by using a padded satin stitch.
Begin by filling the moon shape with a base layer of small, horizontal seed stitches.
Then, cover this padding with your final vertical satin stitches, using an off-white or pale silver thread.
This technique physically raises the embroidery from the surface, allowing it to catch the light and appear fuller against a dark fabric.
For the stars, use a single strand of metallic gold thread to make tiny, sharp star stitches that sparkle without overpowering the moon.
3. Blend Soft Gradients in Foliage

Achieve the soft, realistic tones of eucalyptus leaves with the long-and-short stitch.
Instead of filling each leaf with a solid color, use two or three similar shades of green and grey-green.
Work with just one or two strands of floss to ensure the colors blend seamlessly, creating a painterly effect.
Direct your stitches to follow the natural curve of the leaf, radiating from the central vein.
This method offers more realism than satin stitch and turns a simple botanical motif into a refined piece of art.
4. Incorporate Sheer Fabric for Delicate Wings

Add an unexpected, ethereal touch to an embroidered bee by using sheer organza for the wings.
First, stitch the bee’s body using a dense satin stitch for the yellow stripes and black for the head and lines.
Cut two small wing shapes from organza fabric, leaving a tiny margin.
Secure them to the journal cover with a few tiny, discreet backstitches along the base, allowing the wings to remain slightly free.
This mixed-media approach creates a delicate, translucent effect that thread alone cannot replicate, adding a touch of whimsy and sophistication.
5. Add Depth with Variegated Thread Outlines
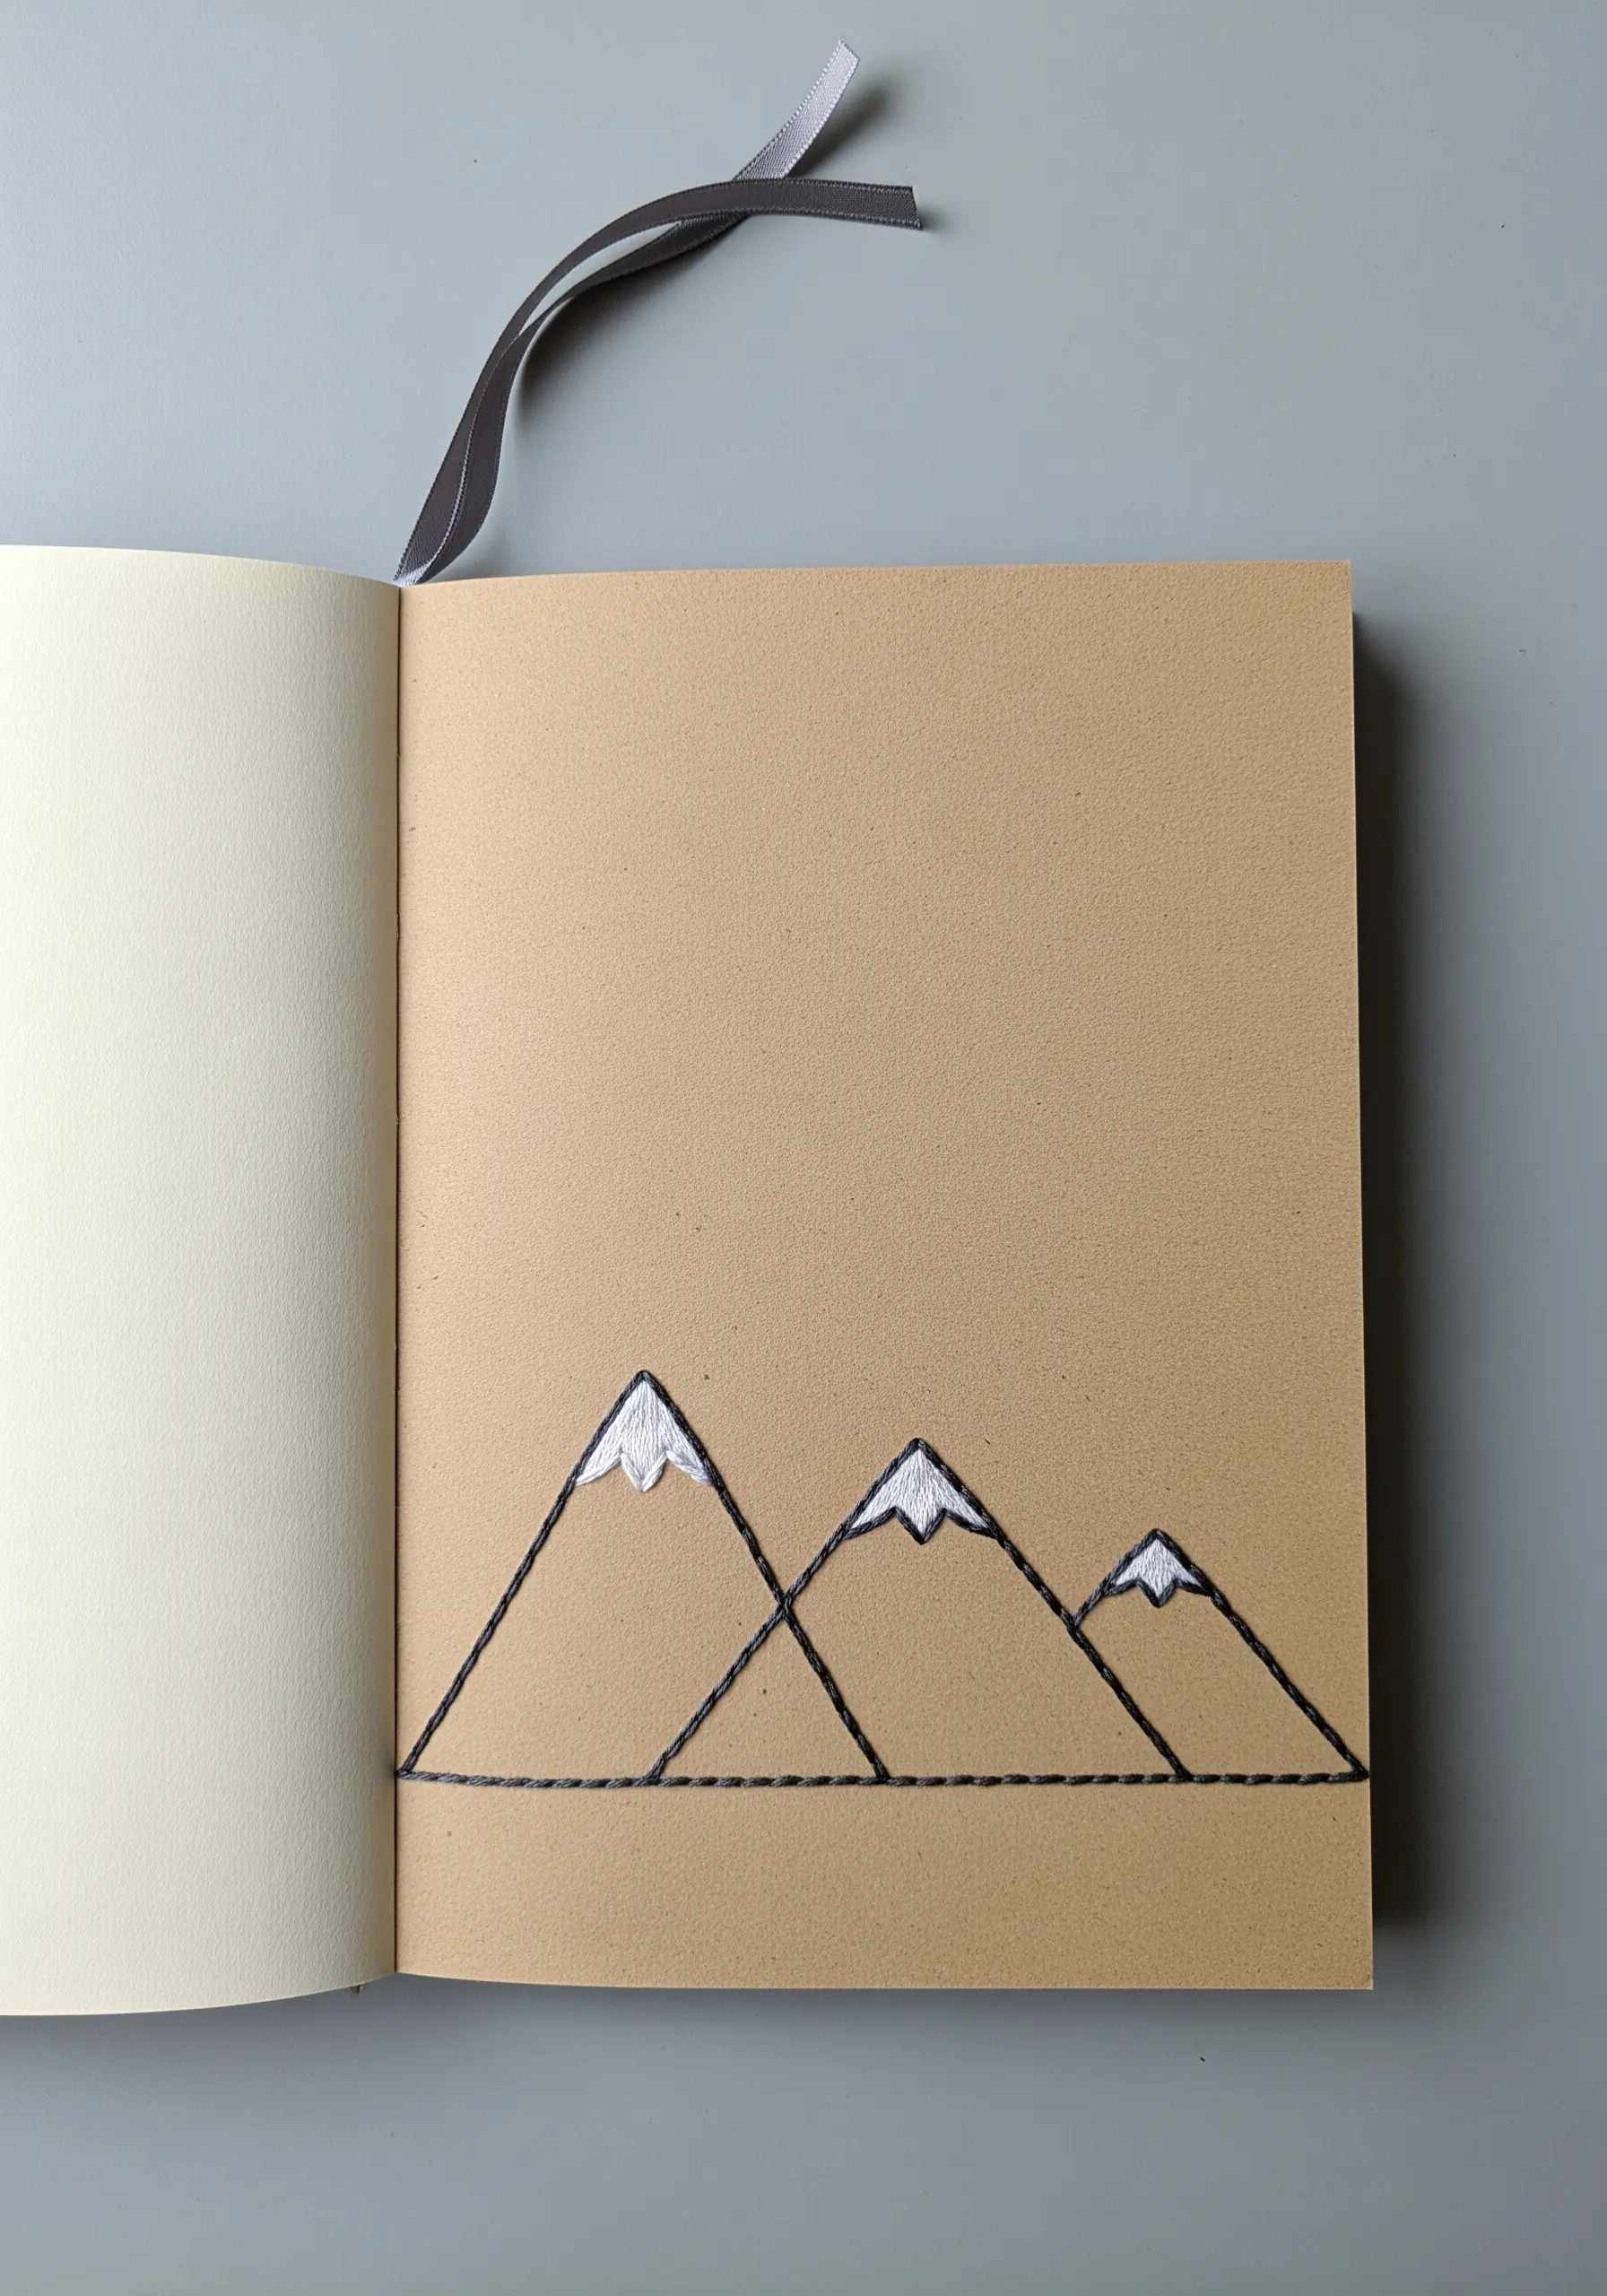
Elevate a simple mountain range outline by using a variegated thread in shades of black and grey.
This single choice introduces subtle color shifts that mimic shadow and light, adding depth without requiring any complex shading techniques.
Use a clean backstitch or stem stitch for the outlines to maintain sharp, geometric lines.
For the snow caps, fill the small peaks with dense, white satin stitches, creating a crisp contrast against the darker thread.
This design proves that thoughtful material selection is as powerful as intricate stitching.
6. Master the Elegance of a Single, Flowing Line

For delicate line art, like this steaming cup, focus on creating a perfectly smooth and continuous line.
Use a whipped backstitch or a stem stitch, ensuring each stitch is the same length.
This consistency is key to a professional finish, preventing any jagged or uneven areas.
Choose a thread color that offers high contrast with your journal cover to make the simple design stand out.
This minimalist approach is all about precision and control, turning a basic outline into a statement of quiet elegance.
7. Define Monograms with a Rope-Like Chain Stitch

Give a simple initial a bold, textural presence by using the chain stitch for your outline.
This stitch creates a beautiful, braided effect that looks far more intricate than it is to execute.
Use three or four strands of floss to add weight and dimension, making the letter feel substantial and raised.
The key to a clean curve is to keep your stitches small and consistent as you navigate the turns of the letter.
This transforms a standard monogram into a tactile, personalized emblem.
8. Build Dimensional Florals with Layered Stitches

Create a lush, three-dimensional floral corner using a combination of layered stitches.
For the flat petals of the forget-me-nots, use a detached chain stitch (lazy daisy) with just four or five stitches per flower.
Introduce texture by adding tightly packed French knots for the flower centers and for the round, unopened buds.
Use a fishbone stitch for the leaves to create a central vein and add a touch of realism.
Layering these different textures is what gives the composition its depth and charm.
9. Create a Fern with a Raised Fishbone Stitch

Capture the delicate structure of a fern frond using a meticulously executed fishbone stitch.
This stitch is perfect for creating the central spine and angled leaflets all in one fluid motion.
To achieve a raised, almost embossed effect, pull each stitch taut and keep them packed tightly together.
Use a single, cohesive color to emphasize the texture and form of the fern rather than color variation.
The result is a strikingly detailed and tactile design that celebrates the beauty of a single stitch style.
10. Capture Delicacy with Detached Chain Stitches

Embody the airy, delicate nature of a dandelion head using detached chain stitches.
Each tiny floret is created with just a few lazy daisy stitches radiating from a central point.
Keep the stitches loose to enhance the feeling of lightness and movement.
For the stem, a simple, thin backstitch is all you need to ground the motif without adding bulk.
This minimalist embroidery project proves that negative space and a light touch can be incredibly expressive.
11. Design a Modern Color Palette with Satin Stitch
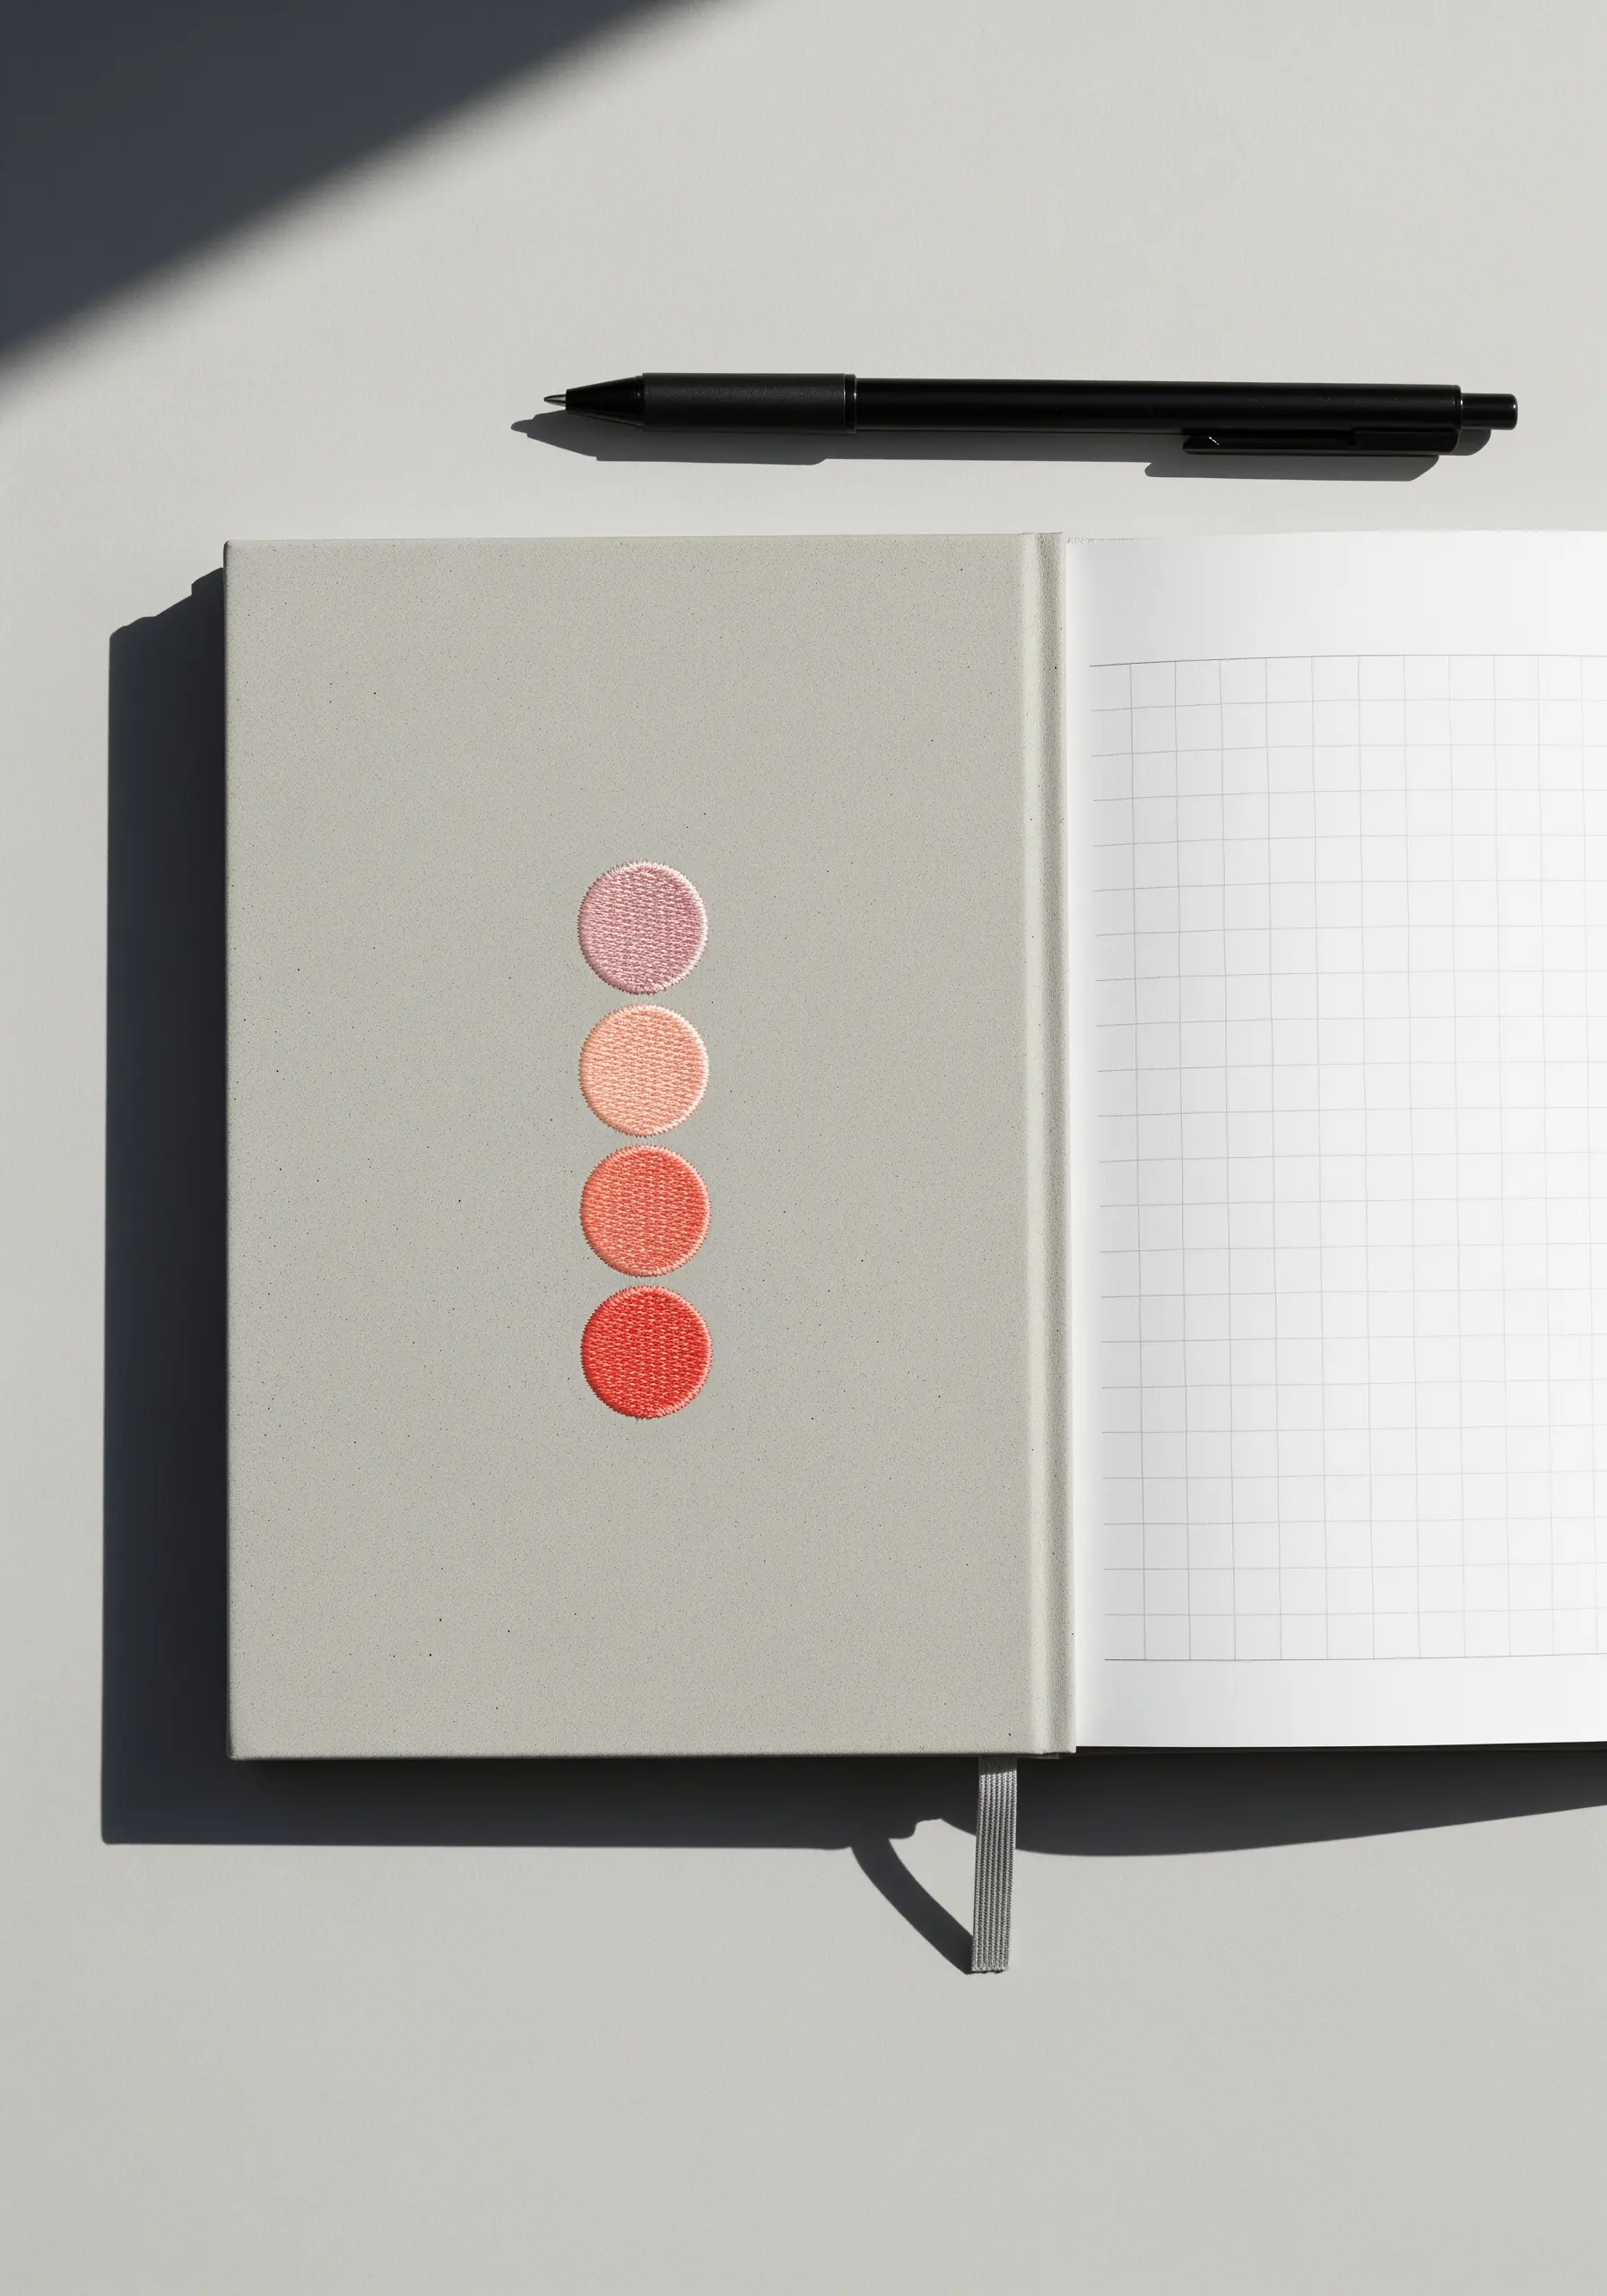
Transform simple satin-stitched circles into a modern, graphic design element.
Choose an analogous color palette—shades that sit next to each other on the color wheel—for a harmonious and sophisticated look.
Before you begin your satin stitch, outline each circle with a tiny split stitch.
This creates a raised edge that makes it much easier to keep your satin stitches neat and contained, resulting in perfectly crisp circles.
This technique is a perfect exercise in color theory and stitch precision.
12. Stitch a Whimsical Path with Whipped Backstitch

Create a playful, dotted flight path for a paper plane by using a whipped backstitch for the curved line.
First, create a series of spaced-out backstitches along your desired path.
Then, whip the thread around each stitch without going through the fabric to create the smooth, looping effect.
This technique adds a touch of movement and whimsy that a simple running stitch lacks.
For the plane itself, a clean backstitch outline keeps the design crisp and graphic.
13. Combine Metallic and Matte Threads for Contrast

Create a dynamic atomic symbol by pairing a high-shine metallic thread with a soft, matte cotton floss.
Use a couching stitch for the metallic orbits: lay the metallic thread on the surface and tack it down with tiny stitches of a matching, thinner thread.
This prevents the delicate metallic thread from fraying and gives you perfect control over the curves.
Fill the central circle with a dense, matte satin stitch in a contrasting color, which makes the metallic thread appear even more luminous.
14. Let Form Shine with a Monochromatic Sun

Emphasize the graphic beauty of a sun motif by stitching it in a single, bold color.
This monochromatic approach forces the eye to focus on the texture and form created by the stitches themselves.
Use a satin stitch for the central circle and simple straight stitches for the rays.
To ensure your rays are perfectly spaced, lightly draw guidelines with a water-soluble pen before you begin.
This design is a testament to the power of clean lines and negative space.
15. Achieve Crisp Lettering with Backstitch

For clean and readable small-scale lettering, the backstitch is your most reliable choice.
Use just two or three strands of floss to keep the lines sharp and avoid bulkiness, especially in a serif font.
The key to perfect lettering is stitch consistency; make every stitch the same length.
For curves, shorten your stitch length slightly to prevent the line from looking jagged or angular.
This disciplined approach results in text that looks polished and intentional.
16. Add Dimension with French Knot Details
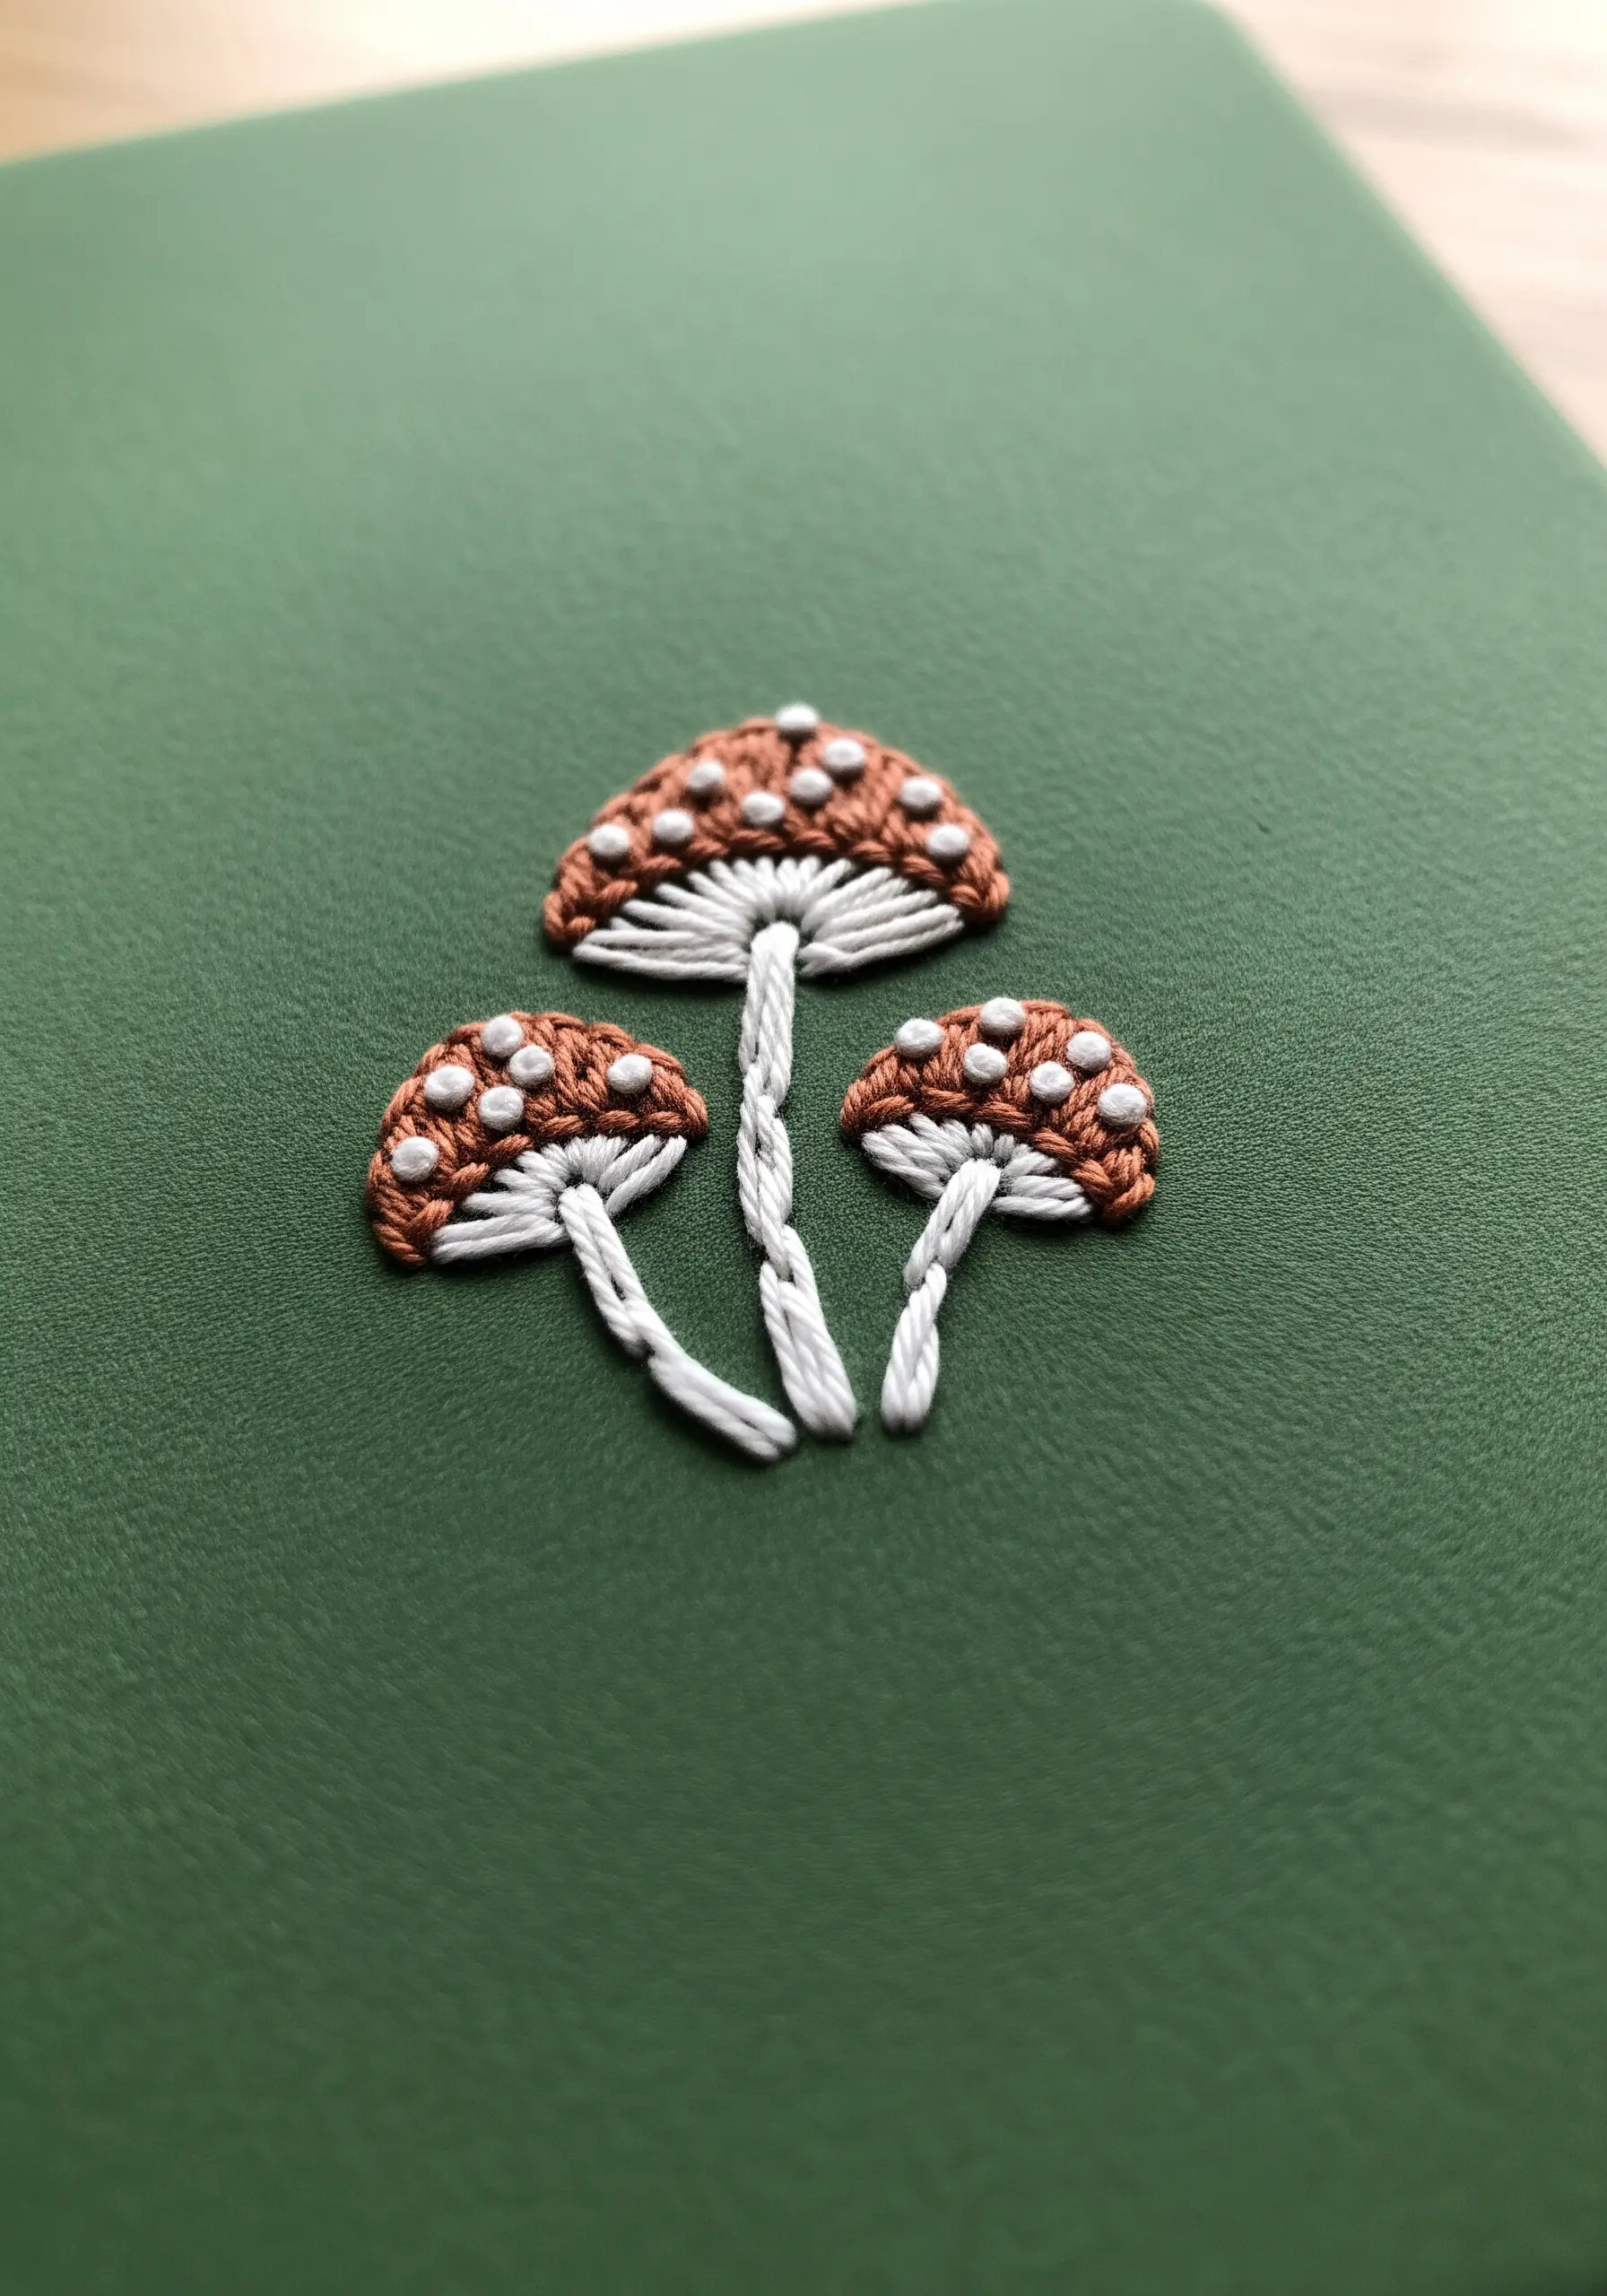
Give your embroidered mushrooms a realistic, woodsy texture by adding French knots on top of the satin-stitched caps.
First, fill the caps with a foundation of smooth satin stitch in a rich brown.
Then, scatter tiny white French knots across the surface, varying their placement for a natural look.
This layering technique creates a tangible texture and depth that makes the simple motif come alive.
Use a twisted stem stitch for the stalks to add to the organic feel.
17. Create Uniform Texture with French Knots
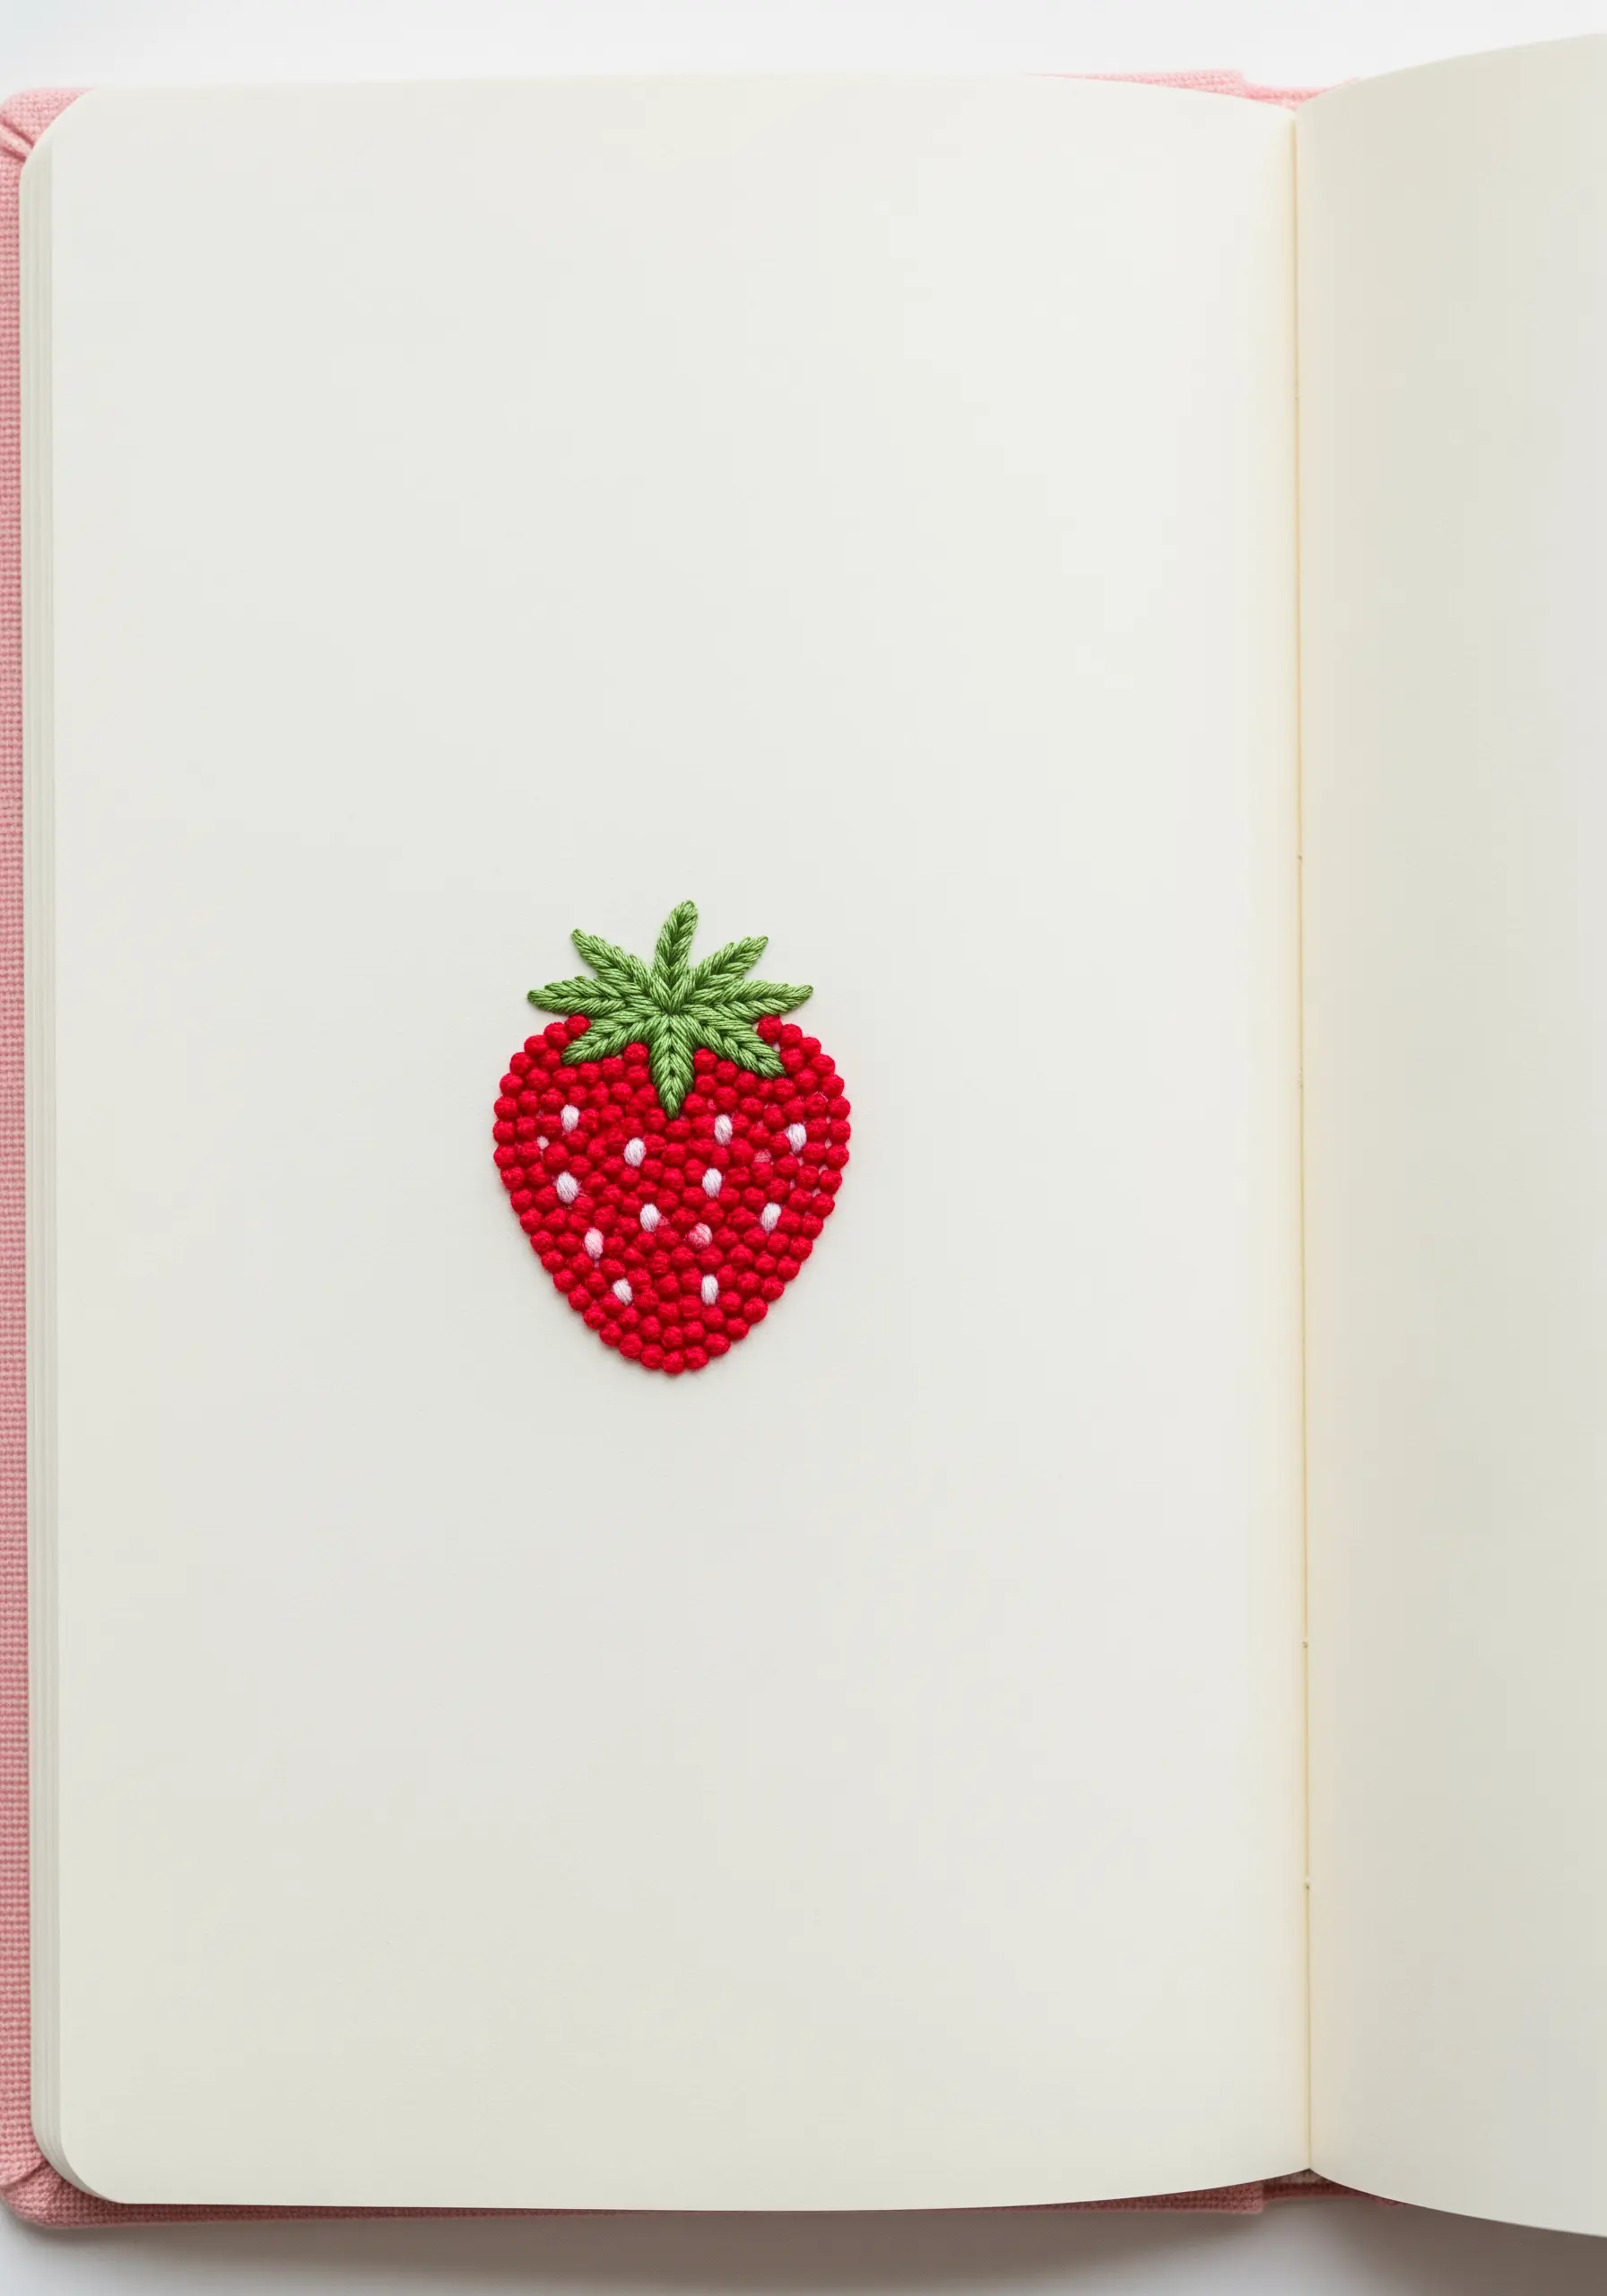
Fill a shape completely with French knots for a wonderfully dense and tactile effect, perfect for this small strawberry.
To keep the texture even, wrap the thread around your needle the same number of times for each knot (once or twice is ideal).
Place the knots closely together, staggering them slightly as you would with bricks, to ensure full coverage without gaps.
This technique transforms a simple fruit shape into a captivating, pointillist-style piece of textile art.
18. Turn an Outline into a Feature

Make a simple outline the star of the show by choosing an interesting stitch and thread.
Instead of a plain backstitch, use a heavy chain stitch or a whipped backstitch for this key motif.
Using a variegated brown thread adds subtle color variation, giving the impression of aged metal without any complex shading.
This approach elevates a basic shape into a thoughtful design, proving that an outline can be just as impactful as a fully filled piece.
19. Map Out Constellations with Star Stitches
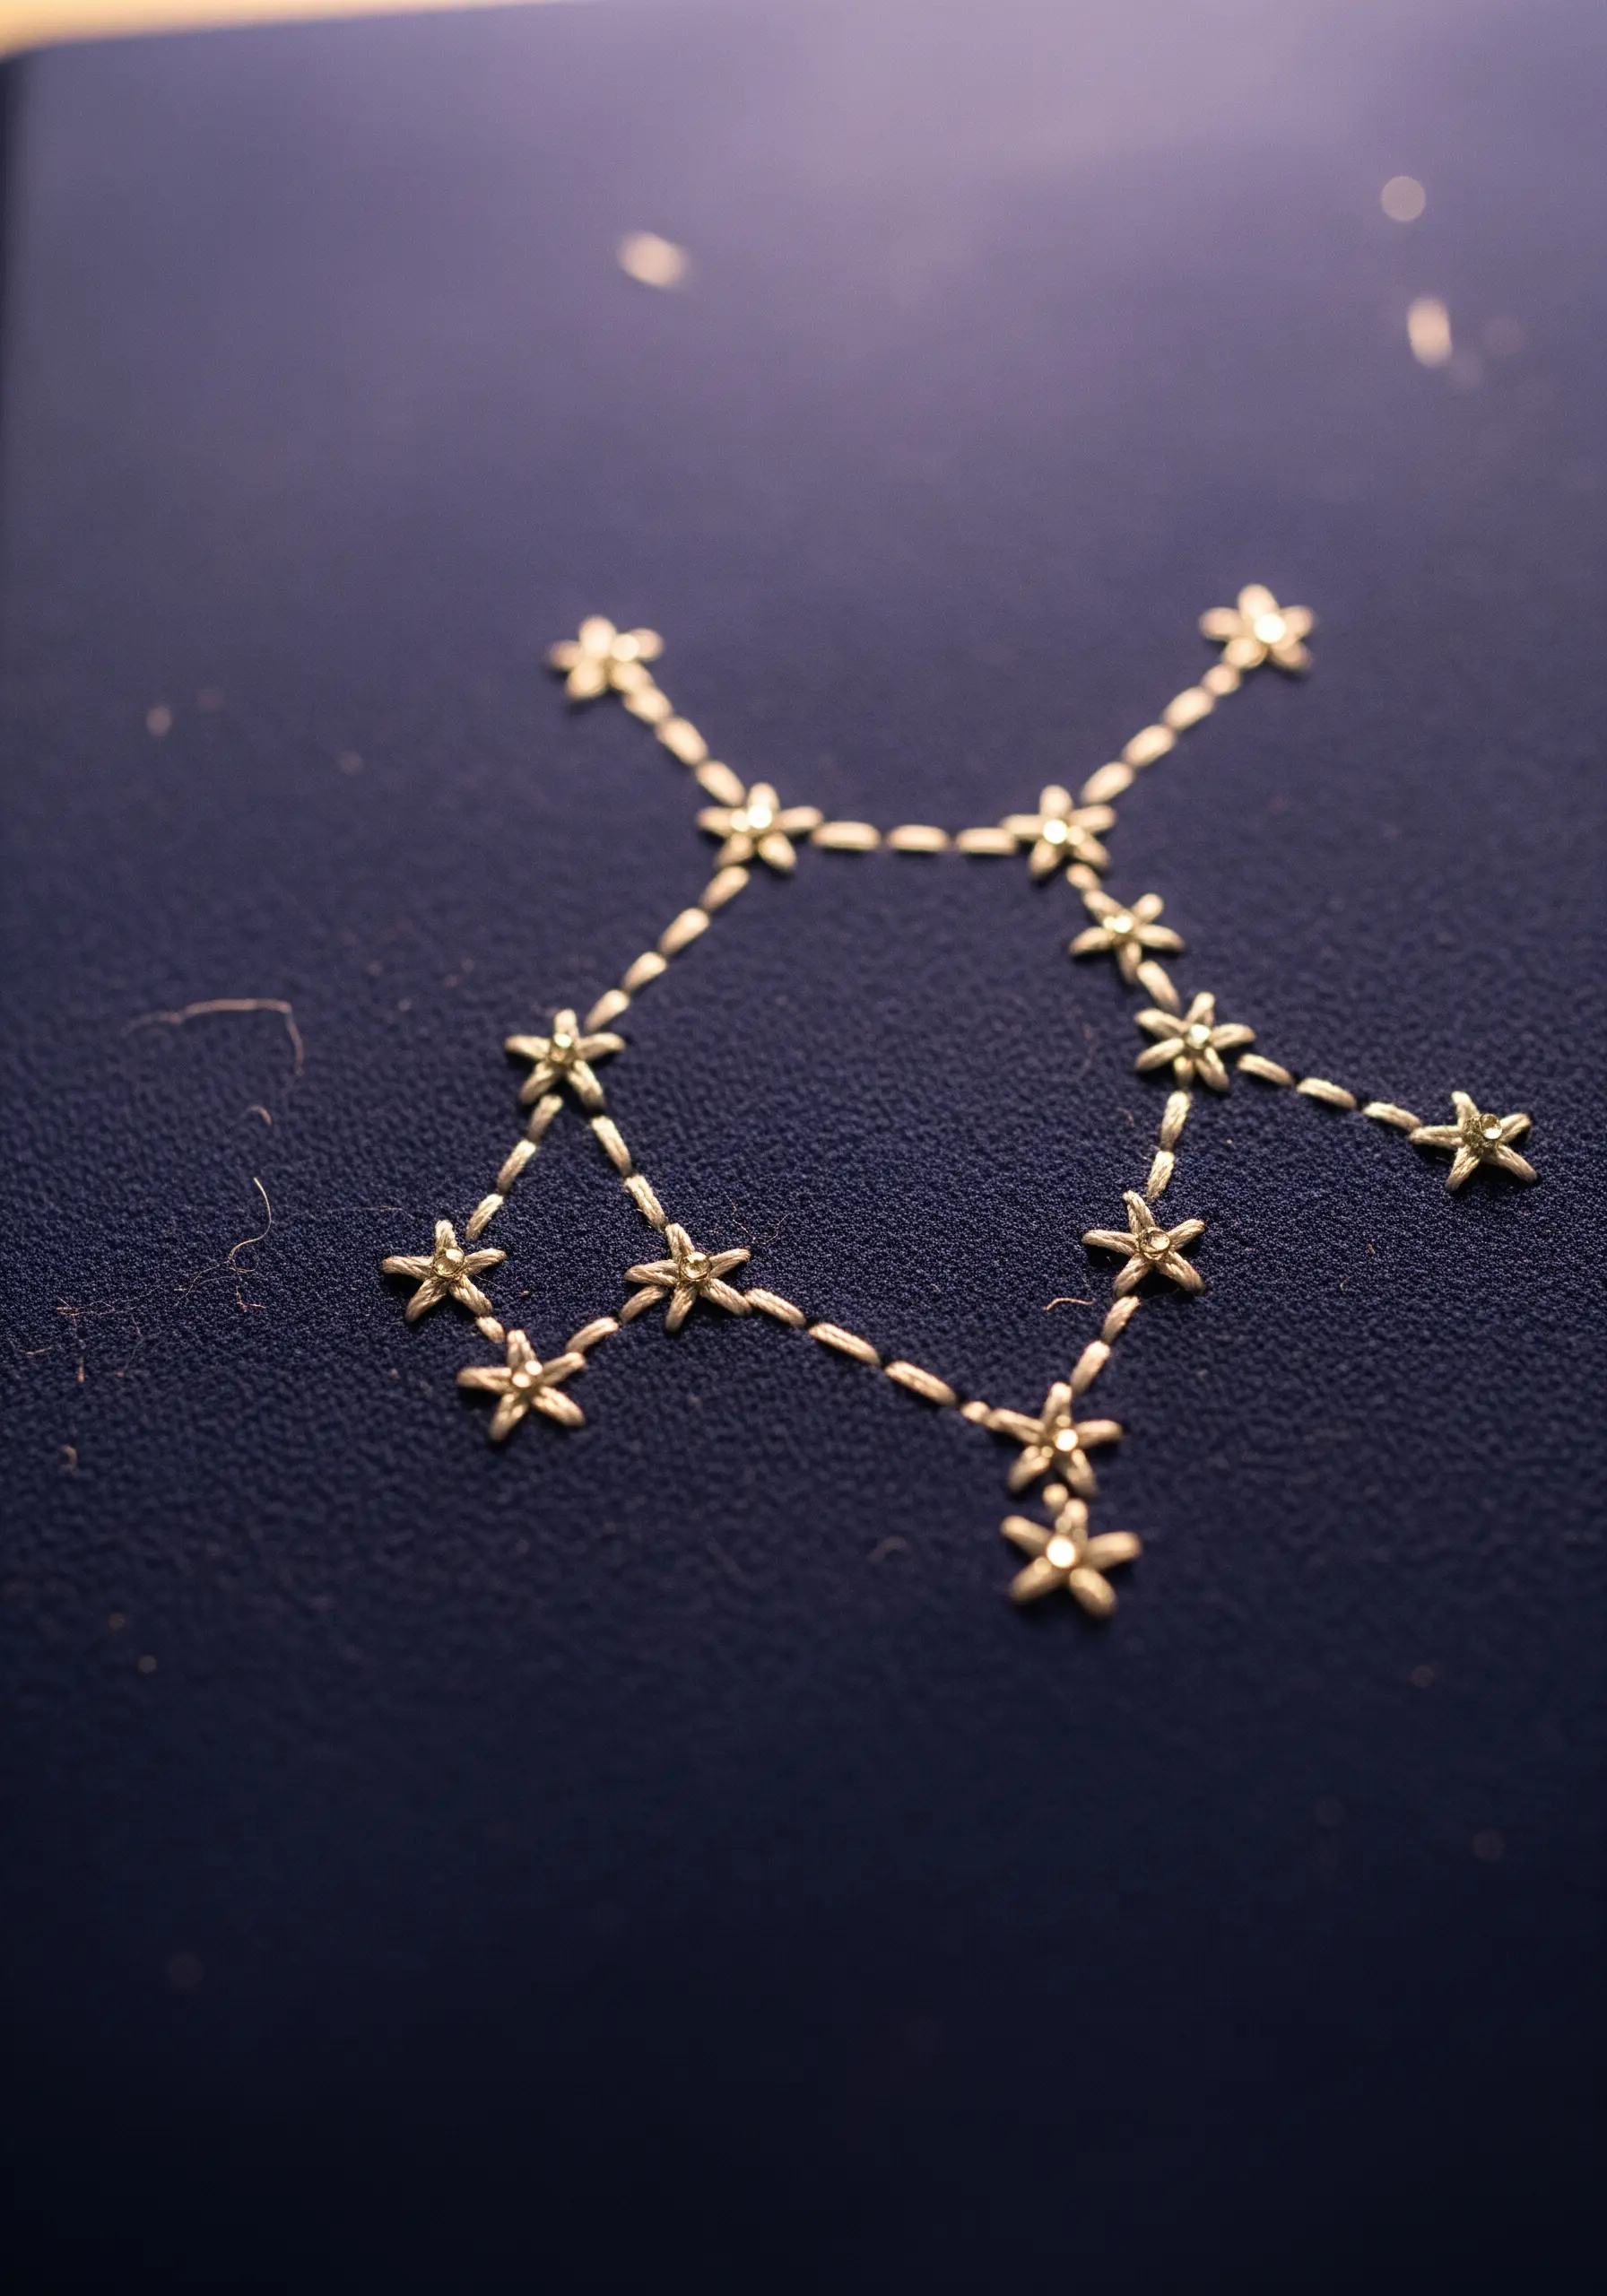
Create a delicate constellation by connecting a series of perfectly formed star stitches.
Each star is made of several small, straight stitches overlapping in the center. Use a light-colored or metallic thread to stand out against a dark blue or black background.
Connect them with a simple, spaced-out running stitch to represent the constellation’s form without adding heavy lines.
This technique results in a design that feels both precise and ethereal, perfect for a stargazing journal.
20. Mimic Baby’s Breath with Clustered French Knots

Recreate the airy texture of baby’s breath by clustering dense French knots at the ends of delicate stems.
Use a bright white, six-strand floss for the knots to make them plump and noticeable against the colored background.
For the stems, use just one or two strands of green floss and a simple stem stitch to keep them looking thin and wispy.
This contrast in thread weight is crucial; it ensures the blossoms appear full while the stems remain delicate, accurately capturing the flower’s essence.
21. Define Succulent Leaves with Outlines
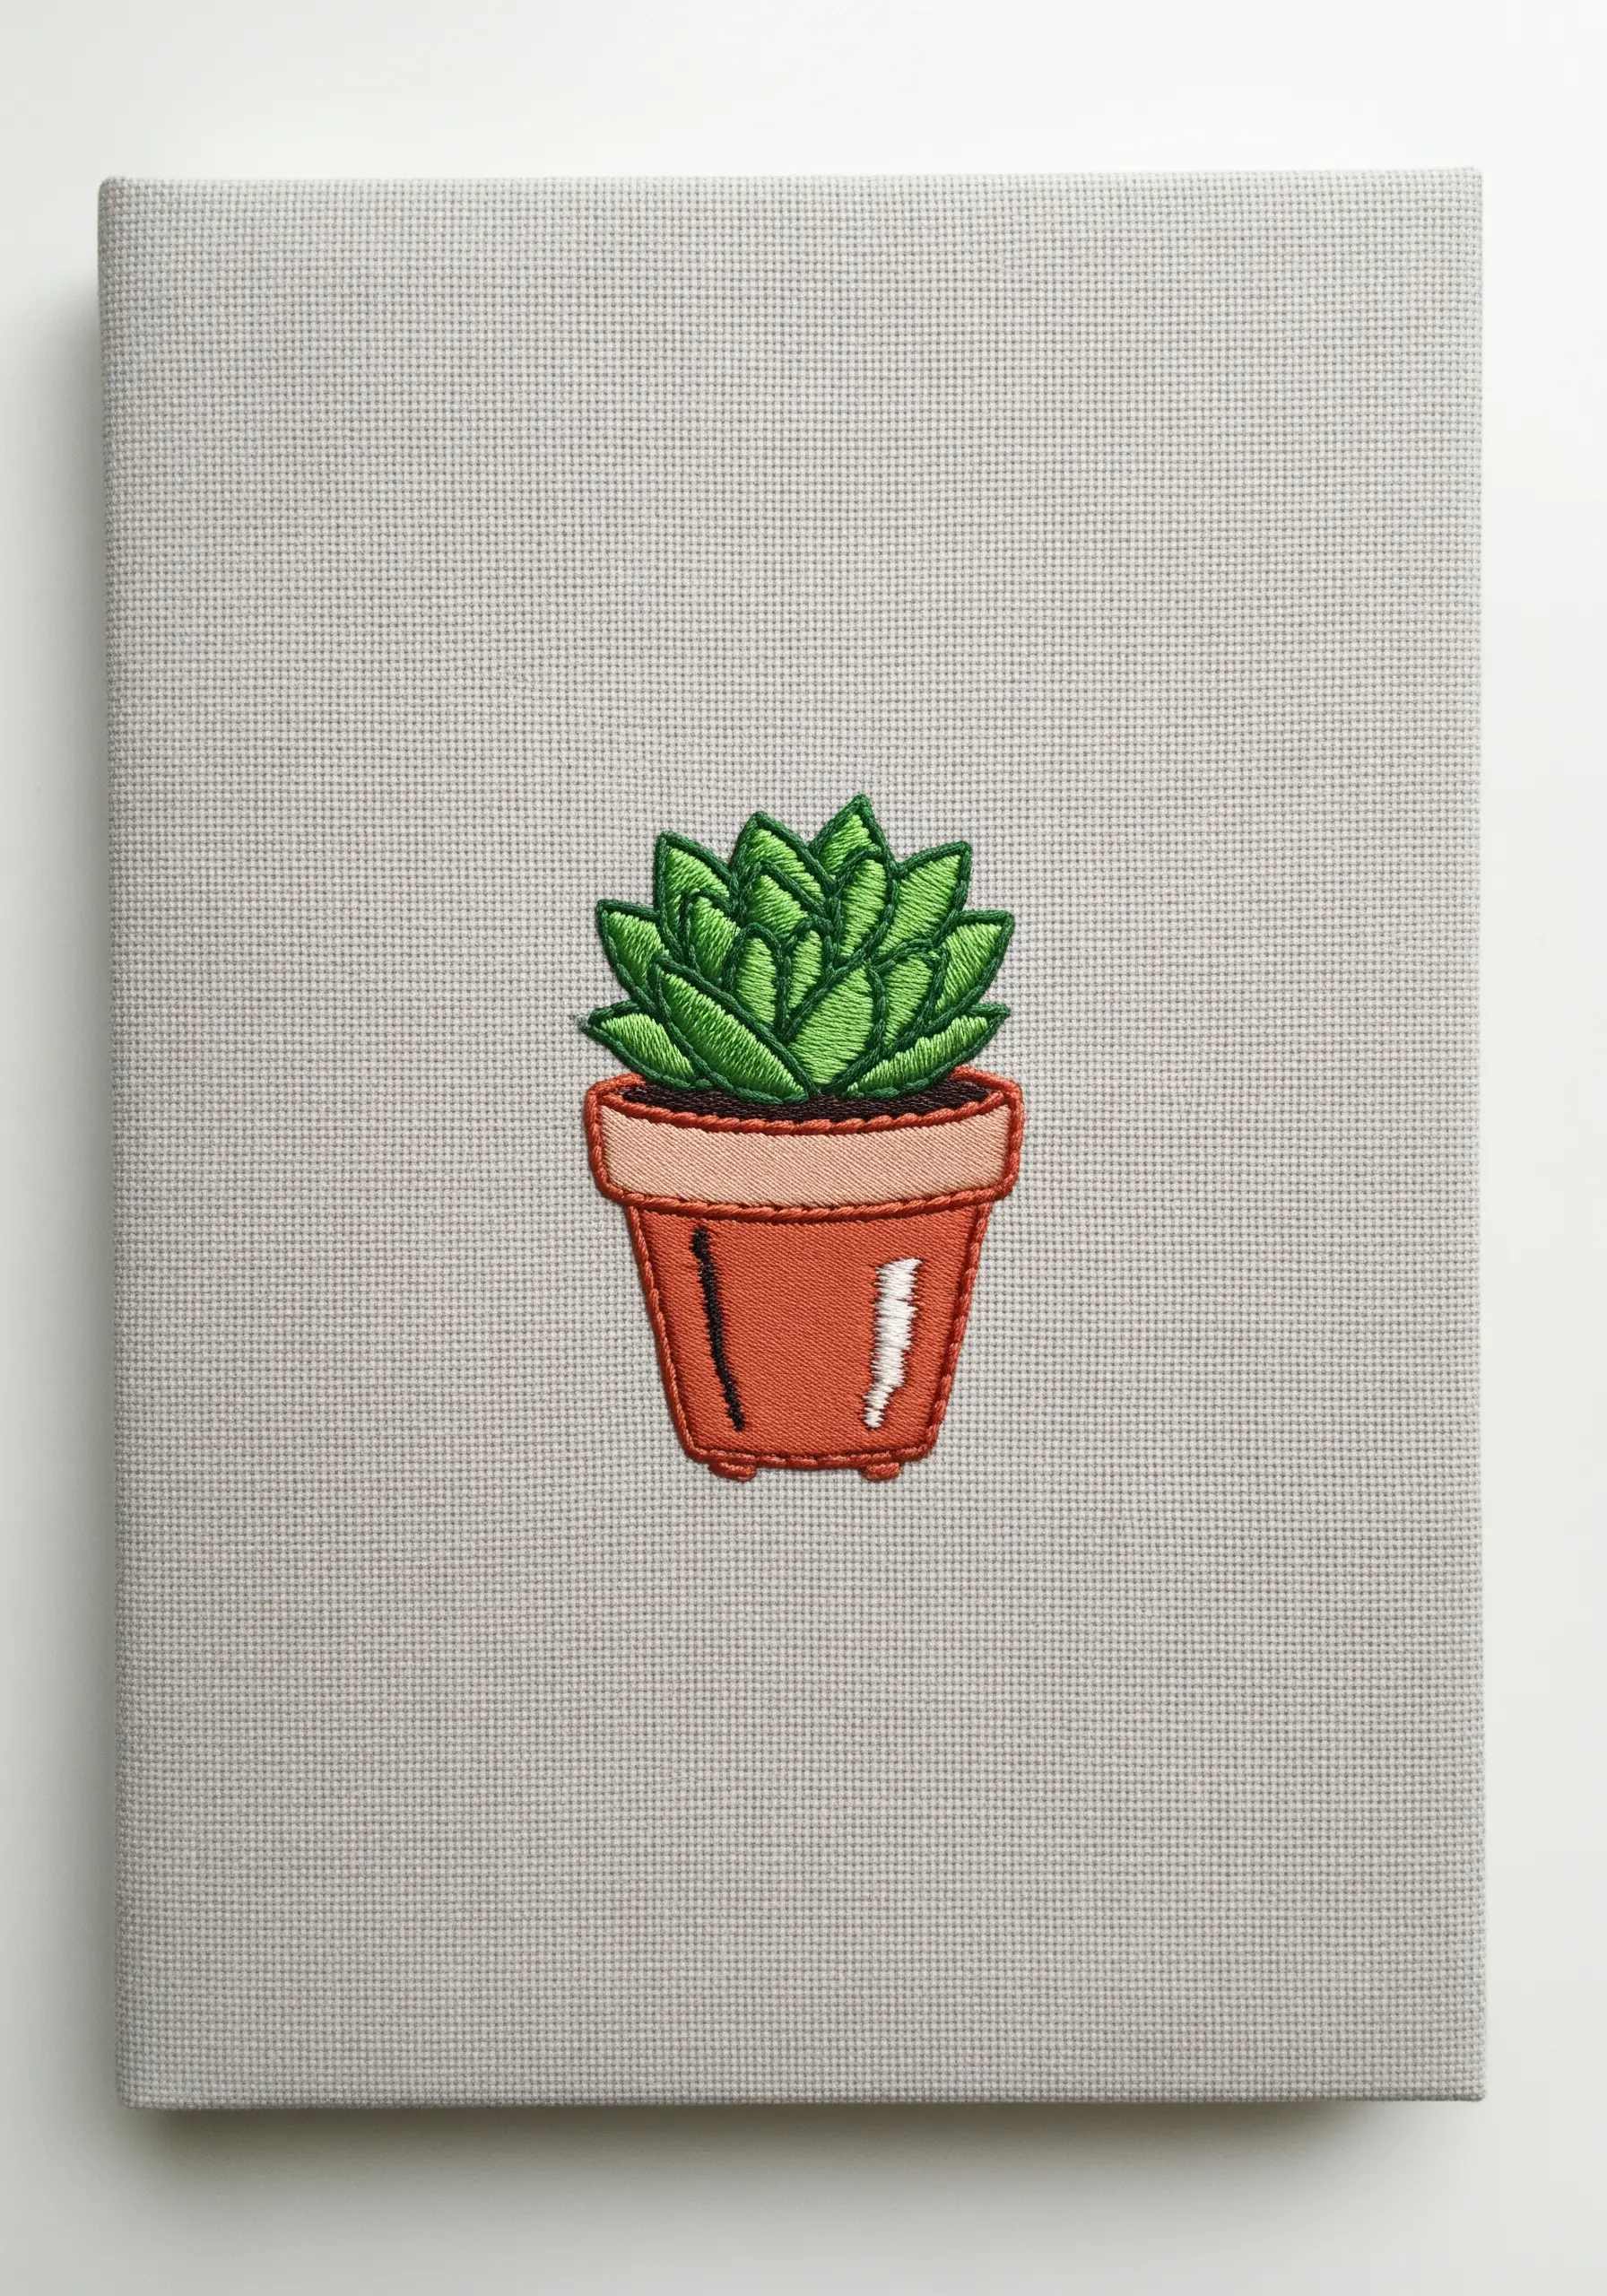
Make the leaves of a small succulent pop by outlining each shape after you’ve filled it.
First, fill each leaf with a directional satin stitch, angling your stitches towards the center of the plant.
Then, use a single strand of a slightly darker green thread to outline each leaf with a clean backstitch.
This simple step adds sharp definition and a clean, graphic quality, preventing the individual leaves from blending into one another.
Add a single white stitch as a highlight to create a sense of light and dimension.
22. Use Stitch Direction to Create Flow
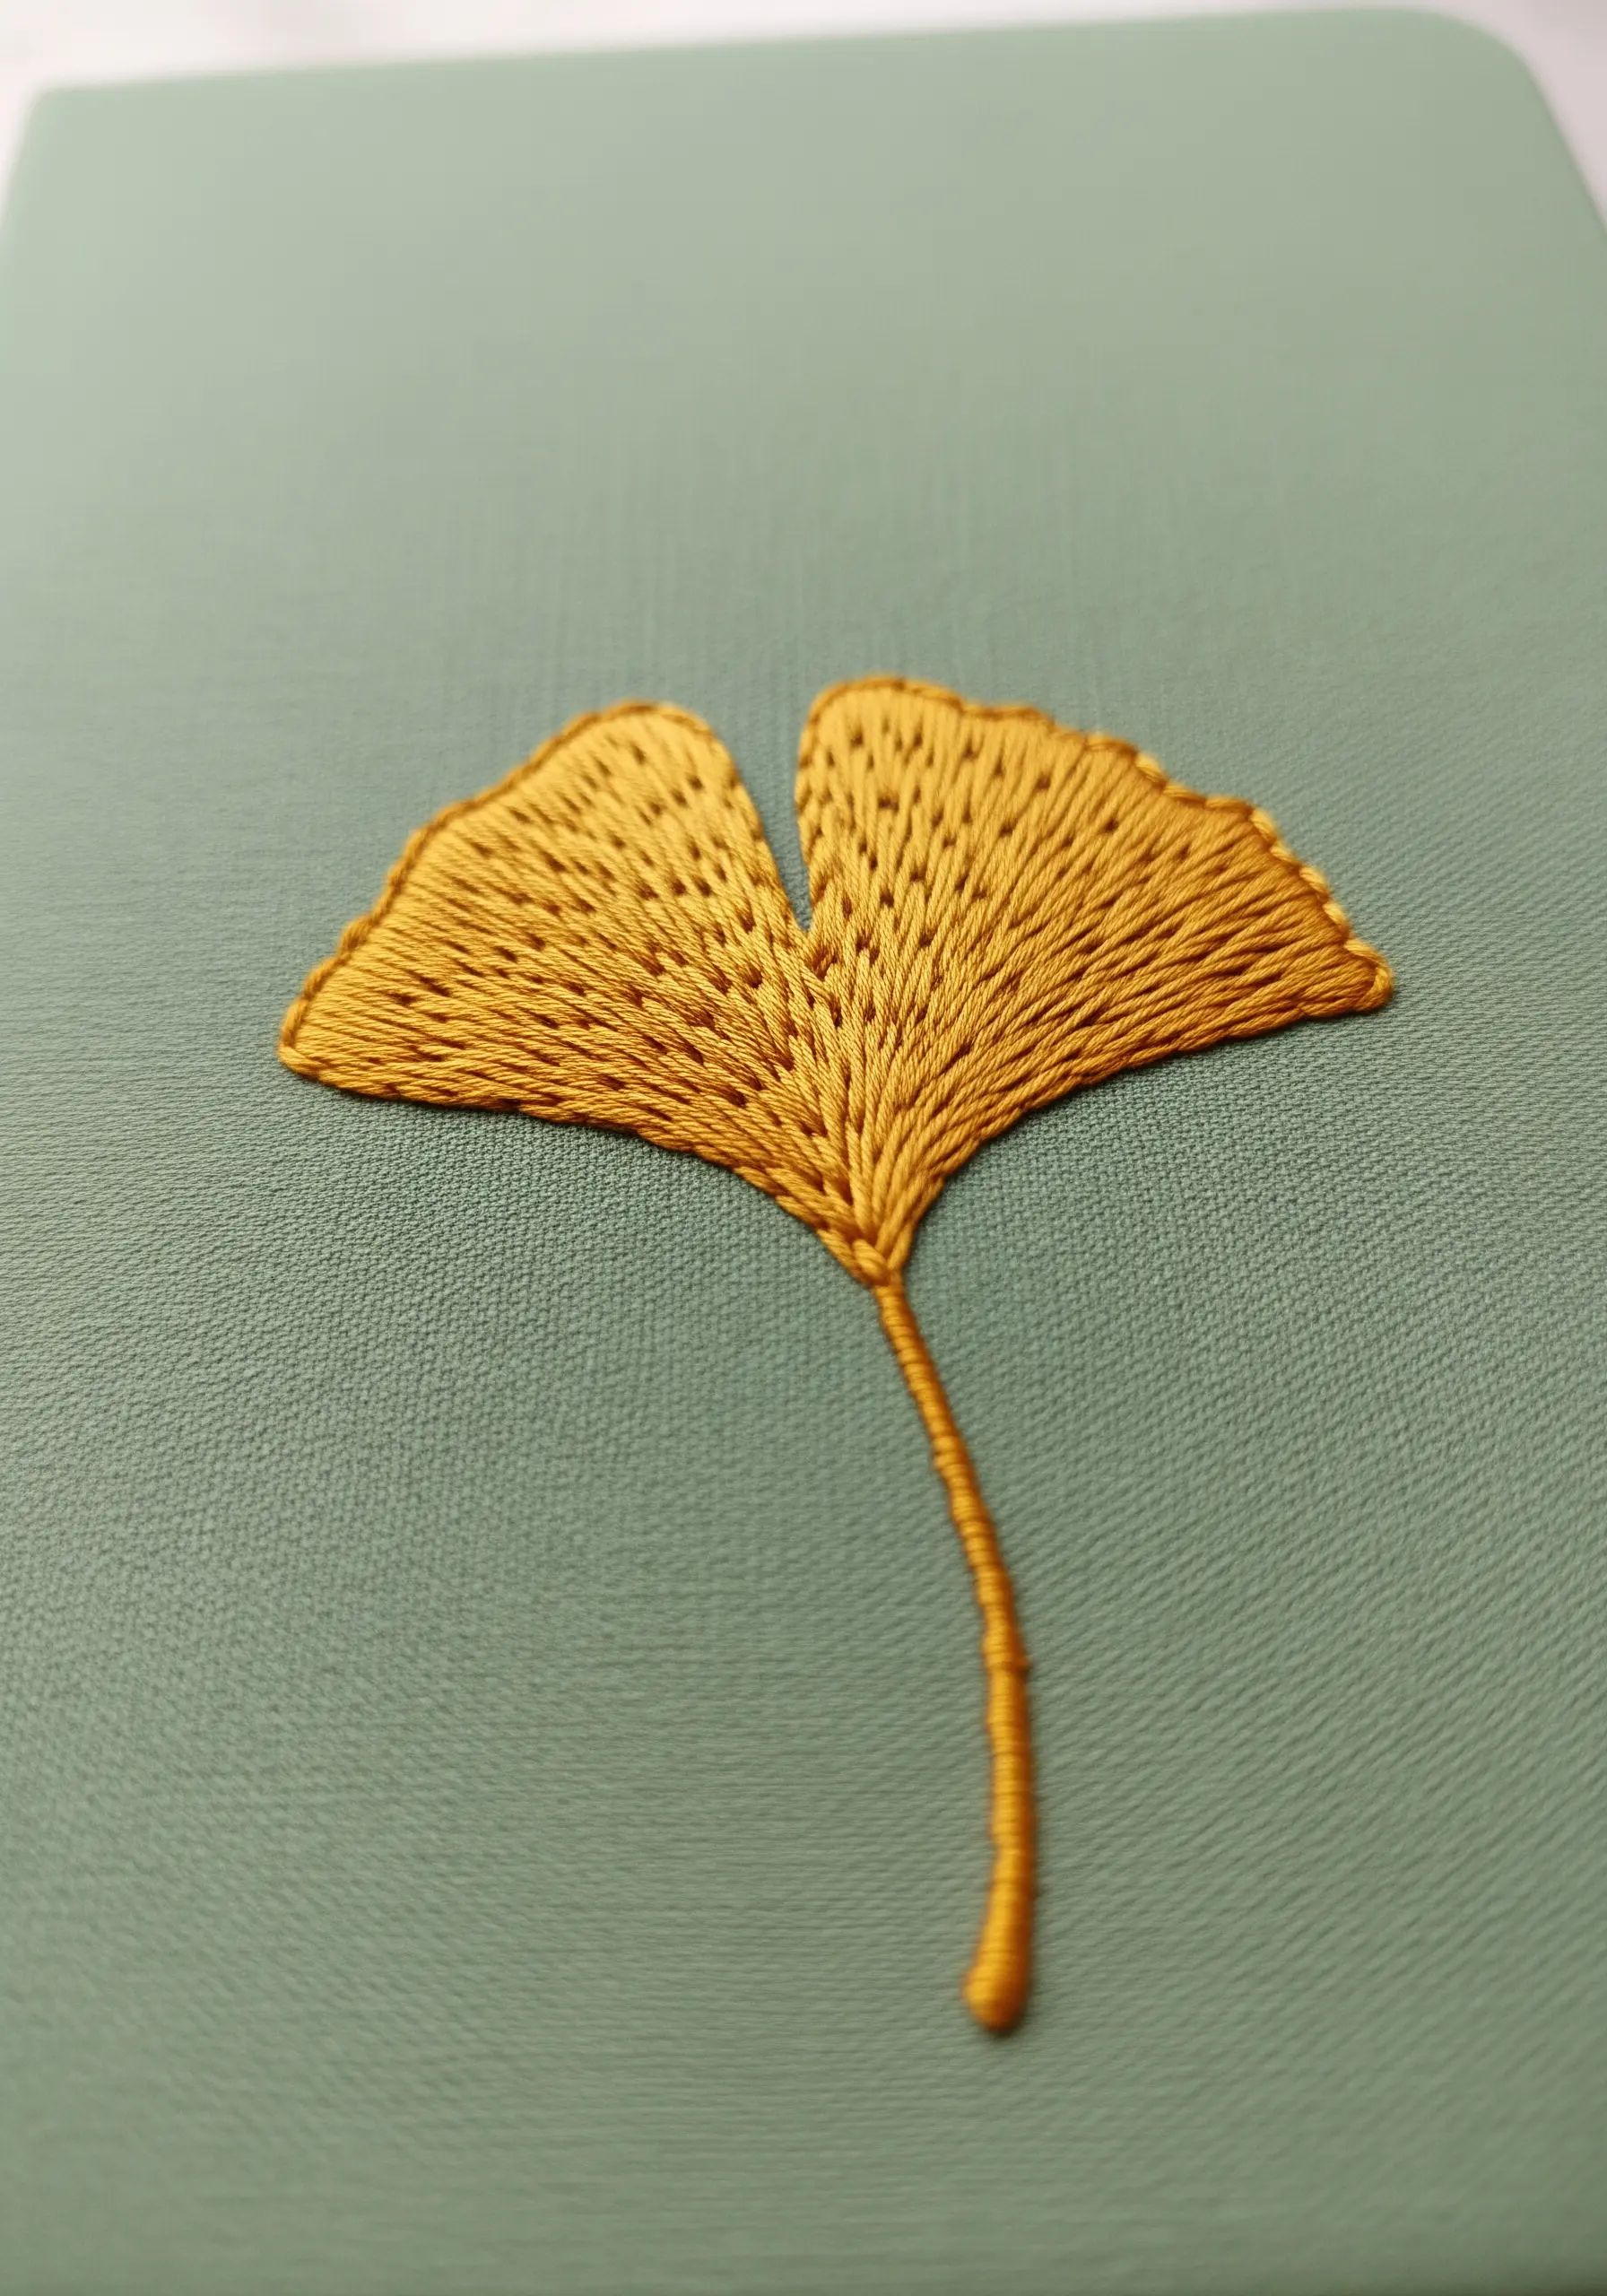
Capture the fan-like shape of a ginkgo leaf by paying close attention to the direction of your stitches.
Instead of stitching straight across, angle your satin stitches so they radiate outwards from the base of the leaf.
This mimics the leaf’s natural vein structure and creates a beautiful sense of flow and movement.
Use a split stitch to create a subtle central divide, stitching each half separately to reinforce the shape.
This directional approach turns a flat shape into a dynamic, organic form.
23. Create a Pop of Detail with a Tiny Motif

Add a meaningful detail to your journal with a tiny, impeccably stitched motif placed in a corner.
This small book icon uses a padded satin stitch to give it a raised, patch-like appearance.
The white thread for the pages is stitched first, followed by the cover outline, which neatly encases the stitches.
Using a single, bright red French knot for the heart creates a focal point and adds a touch of vibrant color.
This is a perfect way to add personality without covering the entire journal.
24. Add Sheen and Highlights with Satin Stitch
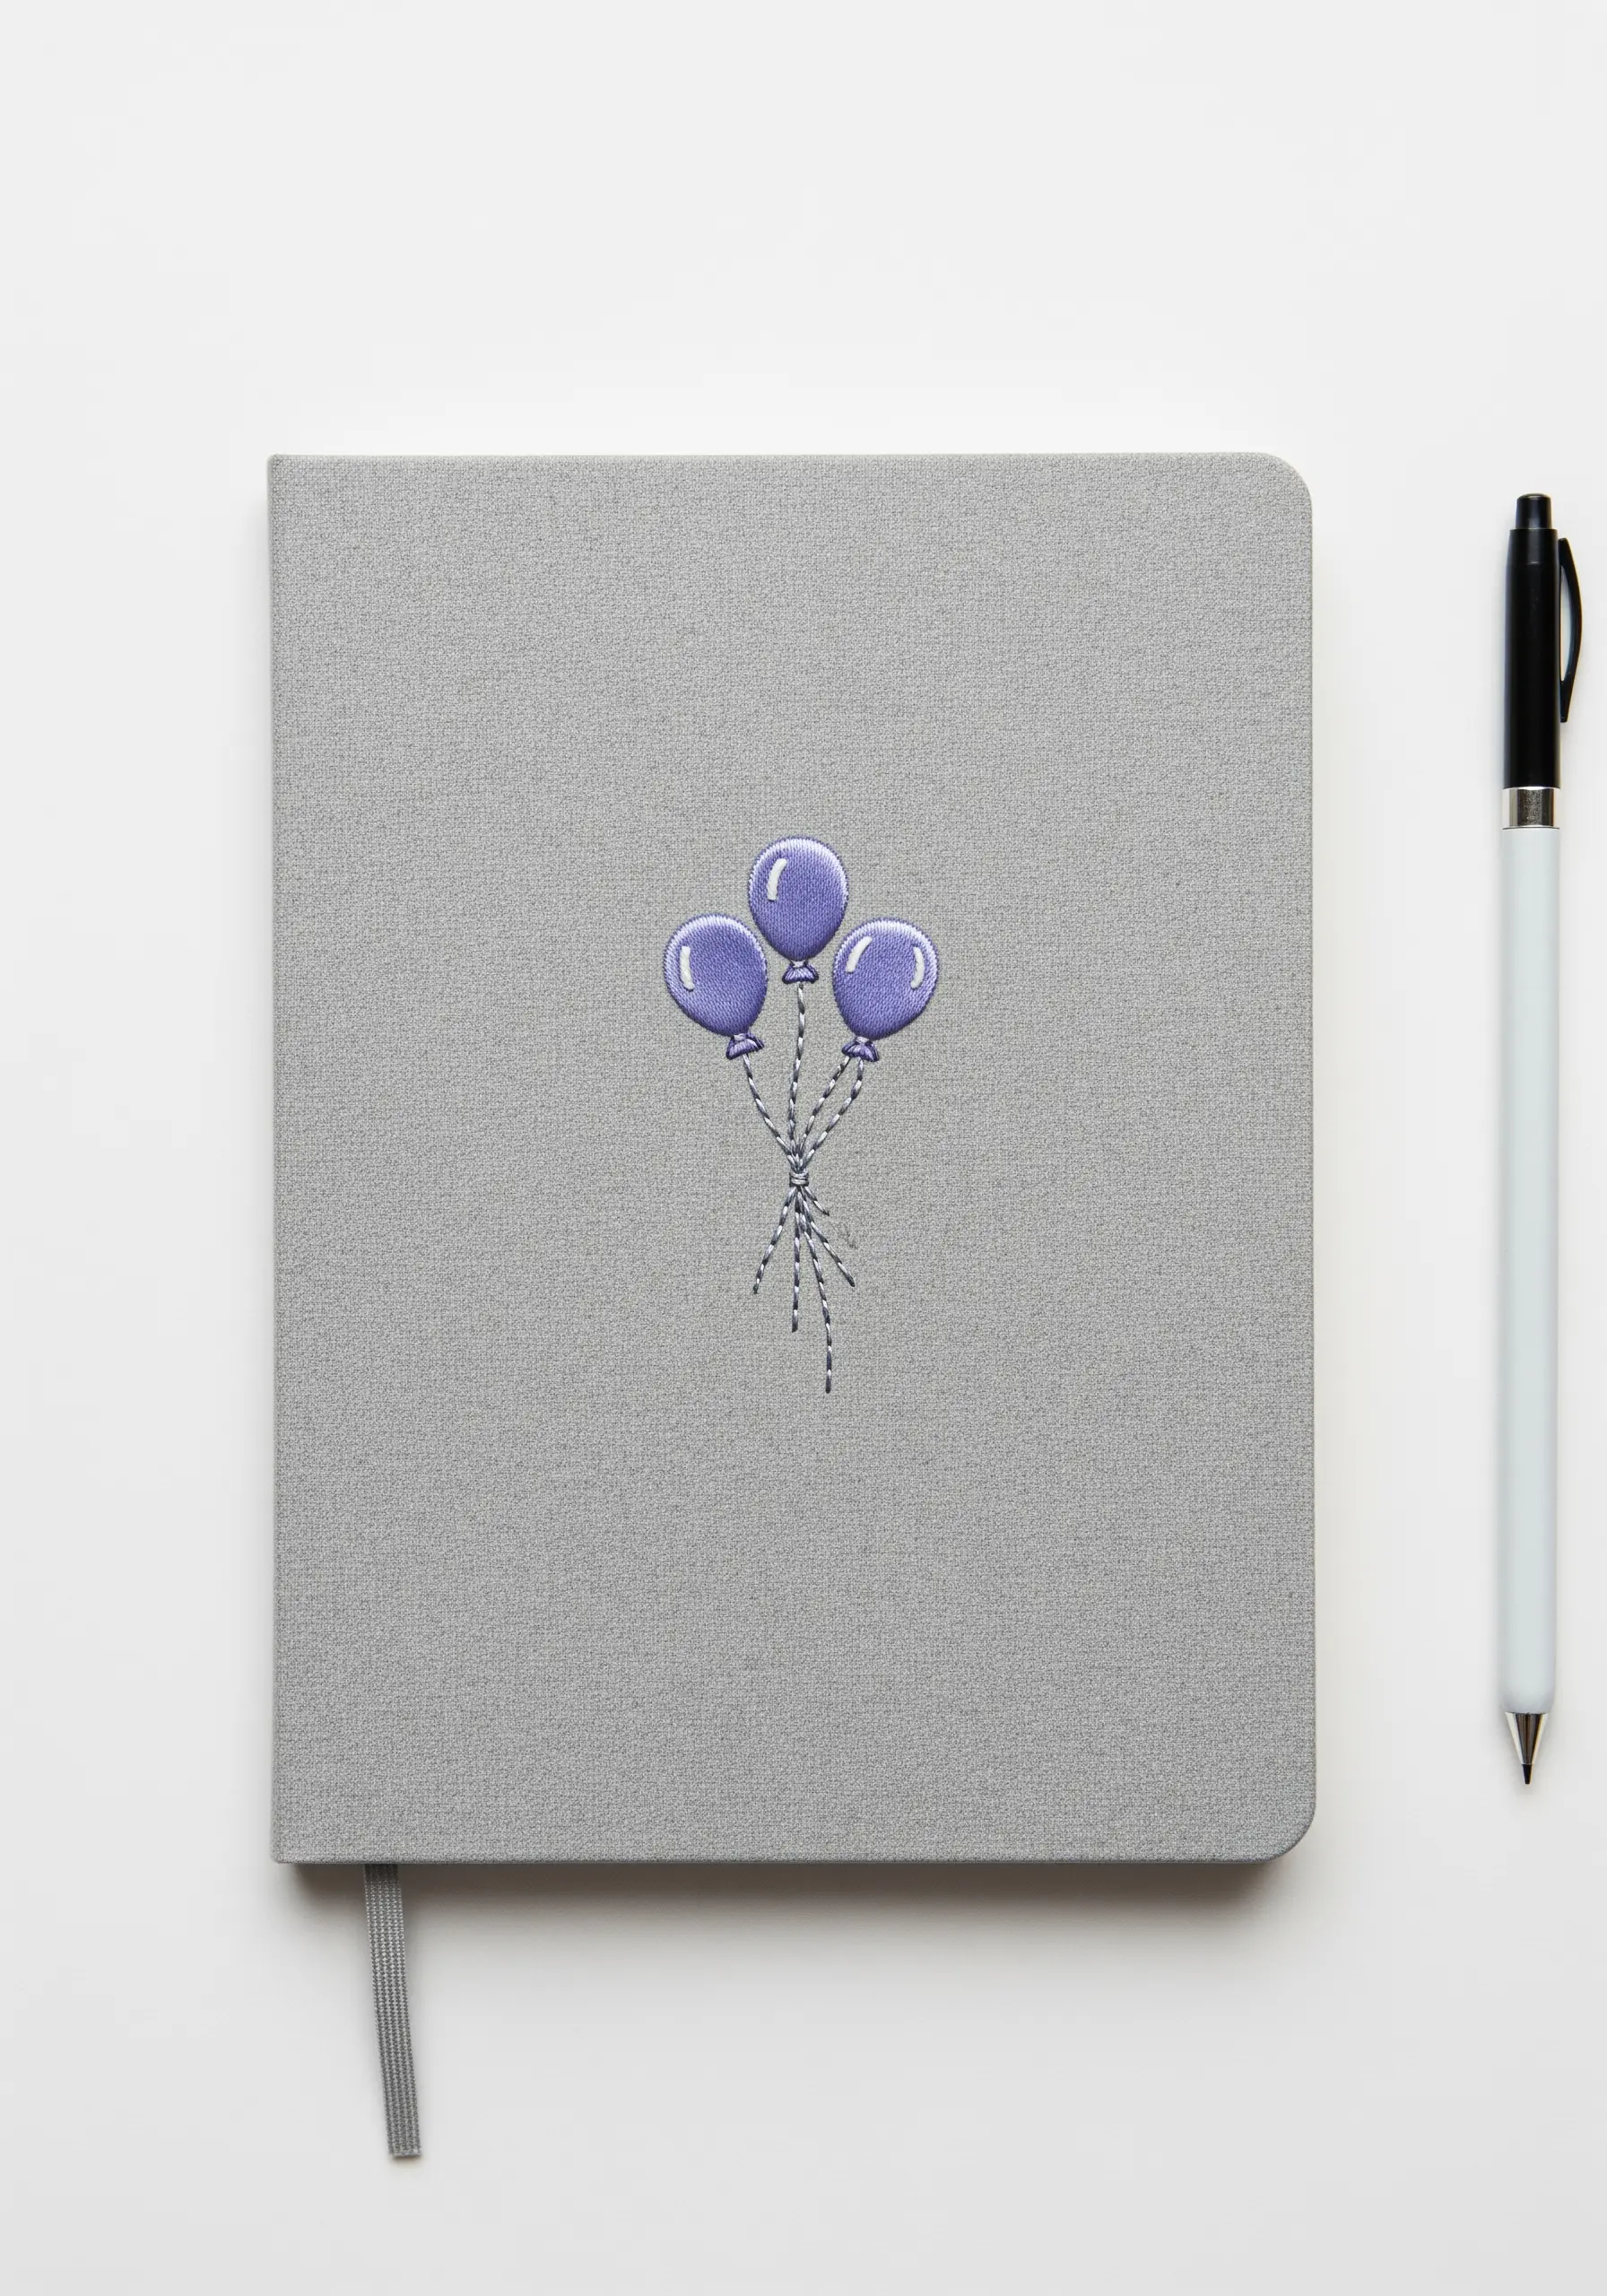
Give simple balloon shapes a glossy, three-dimensional look by strategically placing a highlight.
Fill each balloon with a smooth, vertical satin stitch using a single color.
Then, using a slightly lighter shade or a white thread, add a small, curved satin stitch highlight on one side.
This simple addition tricks the eye into seeing a rounded, shiny surface.
The technique instantly elevates a flat design, giving it depth and a playful, polished finish.
25. Imply Form with a Minimalist Outline
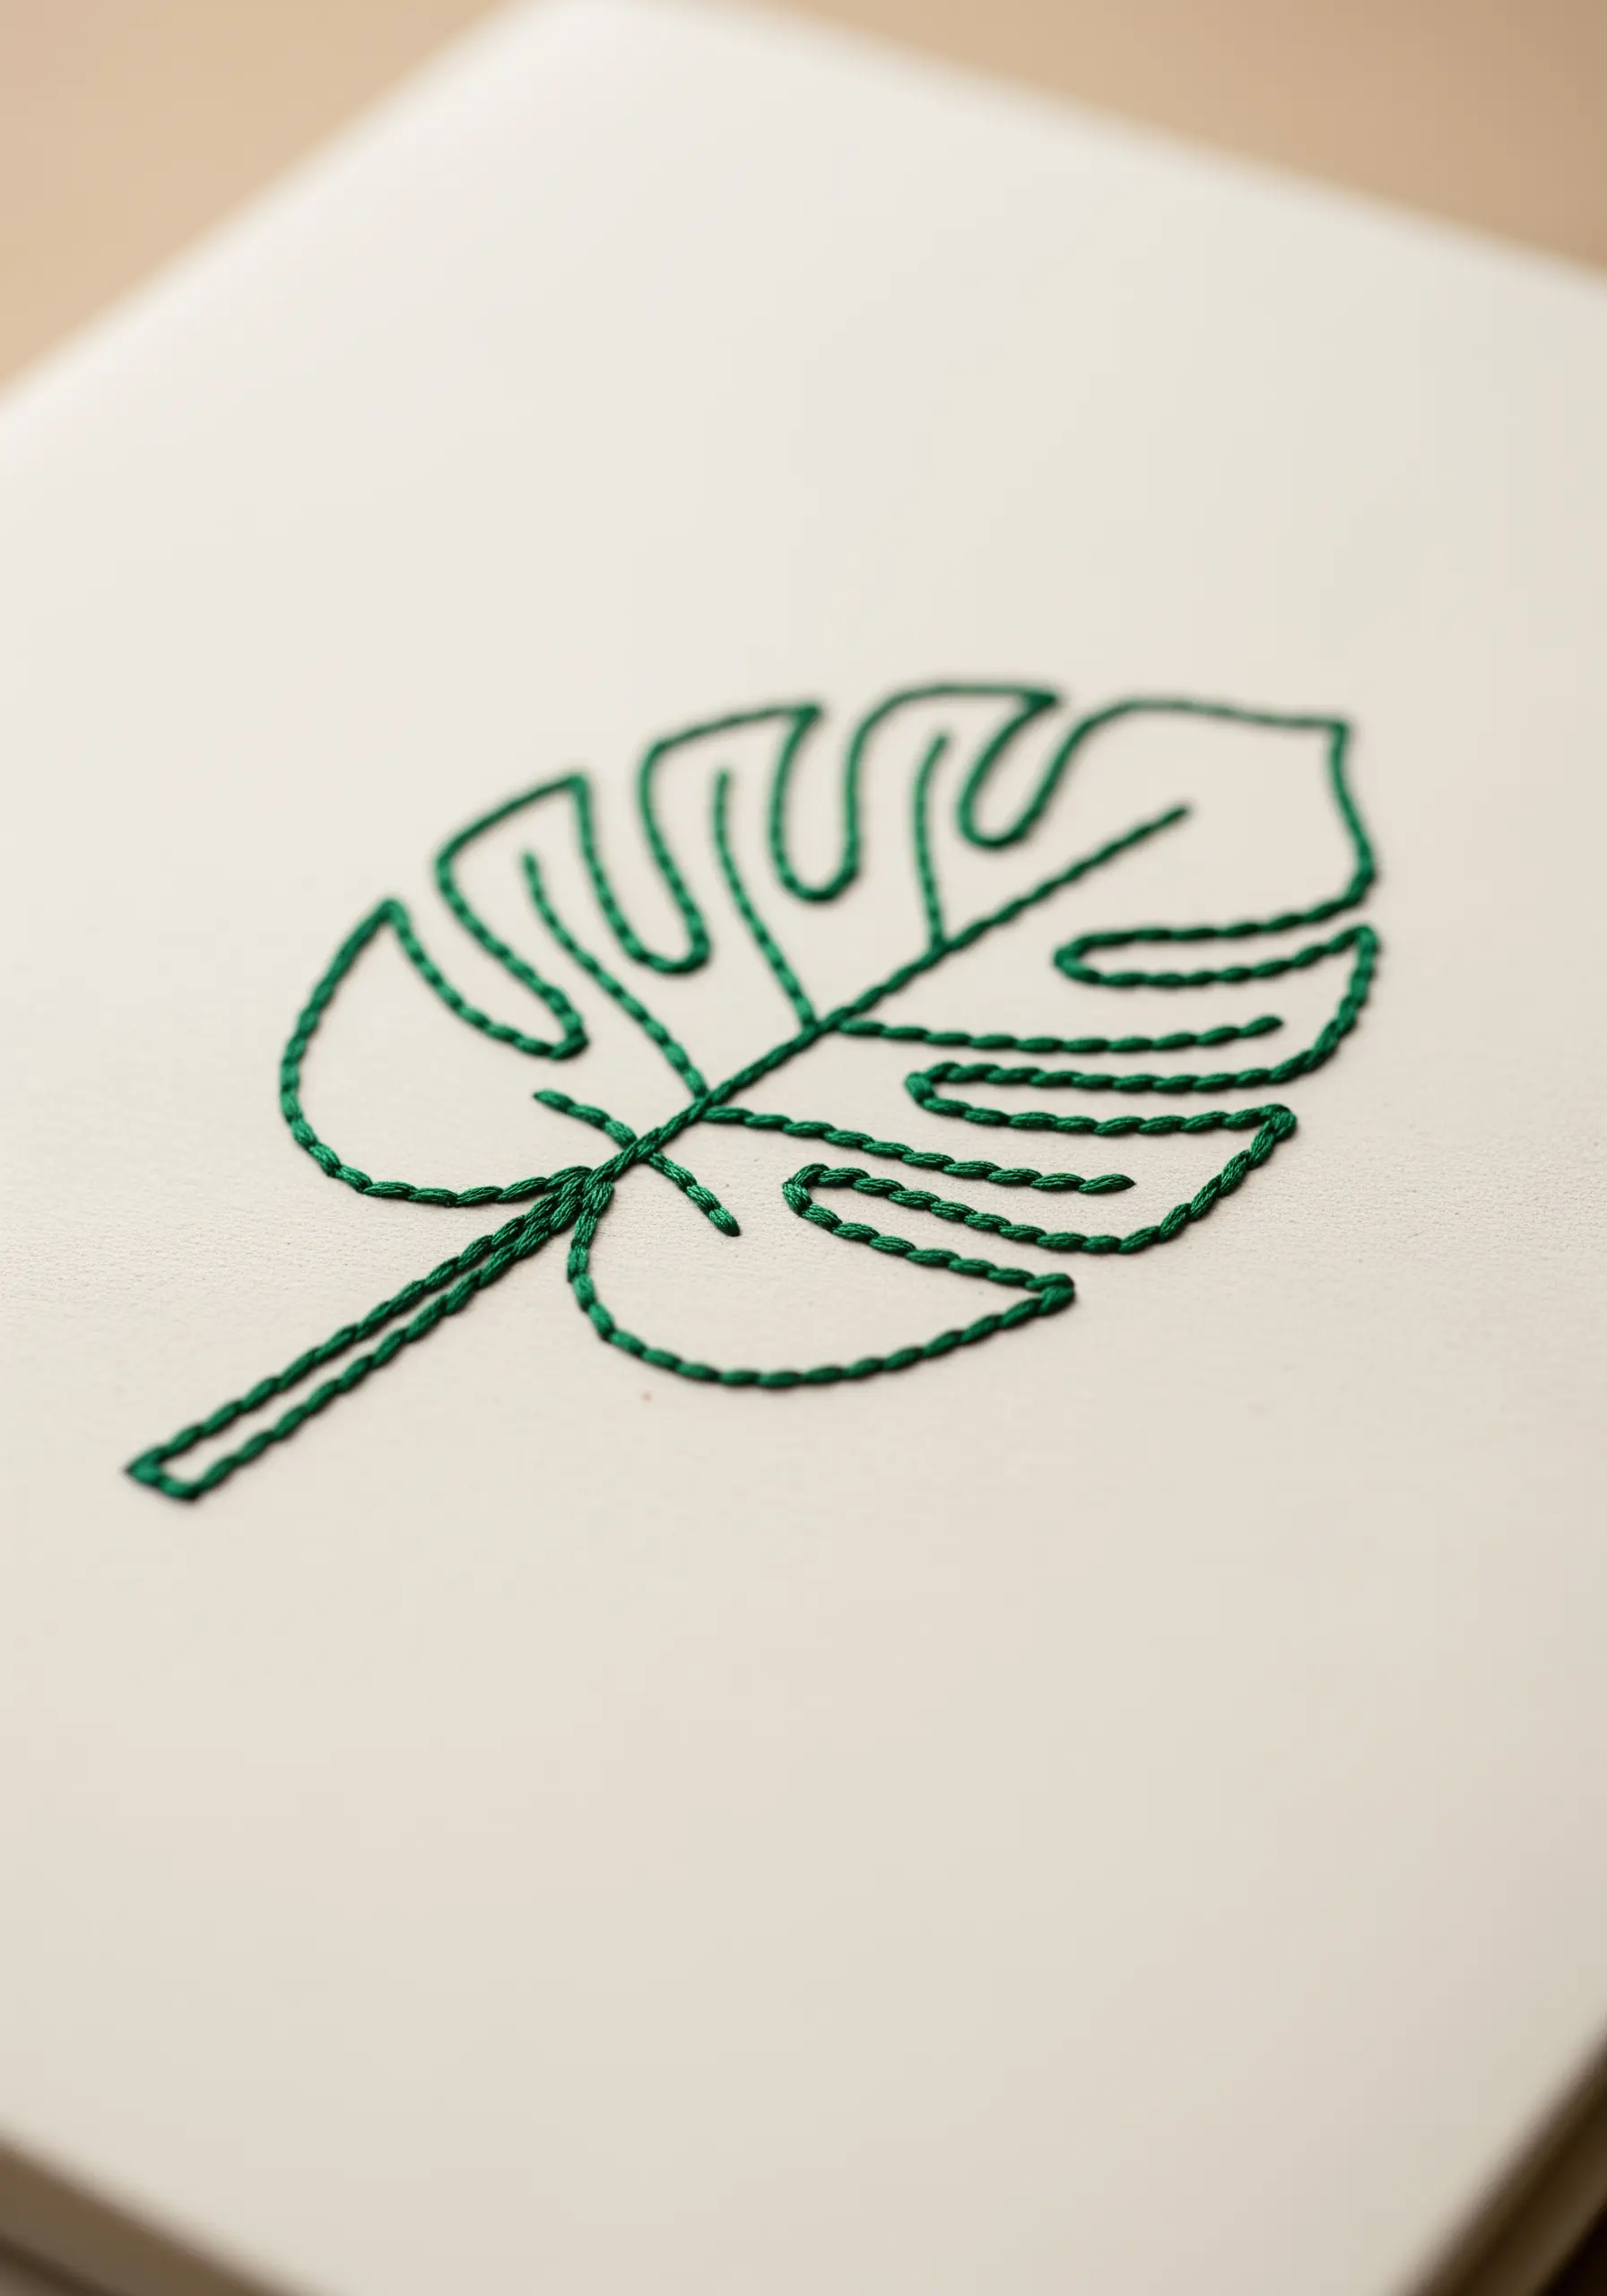
Capture the essence of a monstera leaf using only a well-placed outline stitch.
This minimalist line art approach relies on the chain stitch to provide a line with enough weight and texture to stand on its own.
The key is to accurately trace the leaf’s iconic fenestrations (the holes), as this is what makes the shape instantly recognizable.
By leaving the inside empty, you create a light, airy design that is both modern and elegant, highlighting the beauty of the leaf’s silhouette.
26. Build a Textured Rainbow Arch

Create a rainbow with incredible texture by assigning a different stitch to each colored arch.
Use a combination of stitches like the chain stitch, French knots, satin stitch, and stem stitch.
This variety not only makes the stitching process more engaging but also results in a rich, tactile surface that invites touch.
Keep the color palette slightly muted or earthy for a more modern, sophisticated take on the classic rainbow motif.
The final piece feels like a sampler of your favorite textural stitches.
27. Opt for a Clean, Graphic Outline

Create a crisp, logo-like design by focusing on a flawless outline.
For these gardening tools, a whipped backstitch in a single, contrasting color provides a smooth, solid line that looks clean and modern.
This technique is perfect for simple icons or symbols where clarity and readability are important.
Choosing a book cloth with a visible weave, like canvas or linen, adds a subtle texture that complements the simplicity of the stitching.
It’s a refined way to signal the theme of your journal.
28. Define Segments with Negative Space
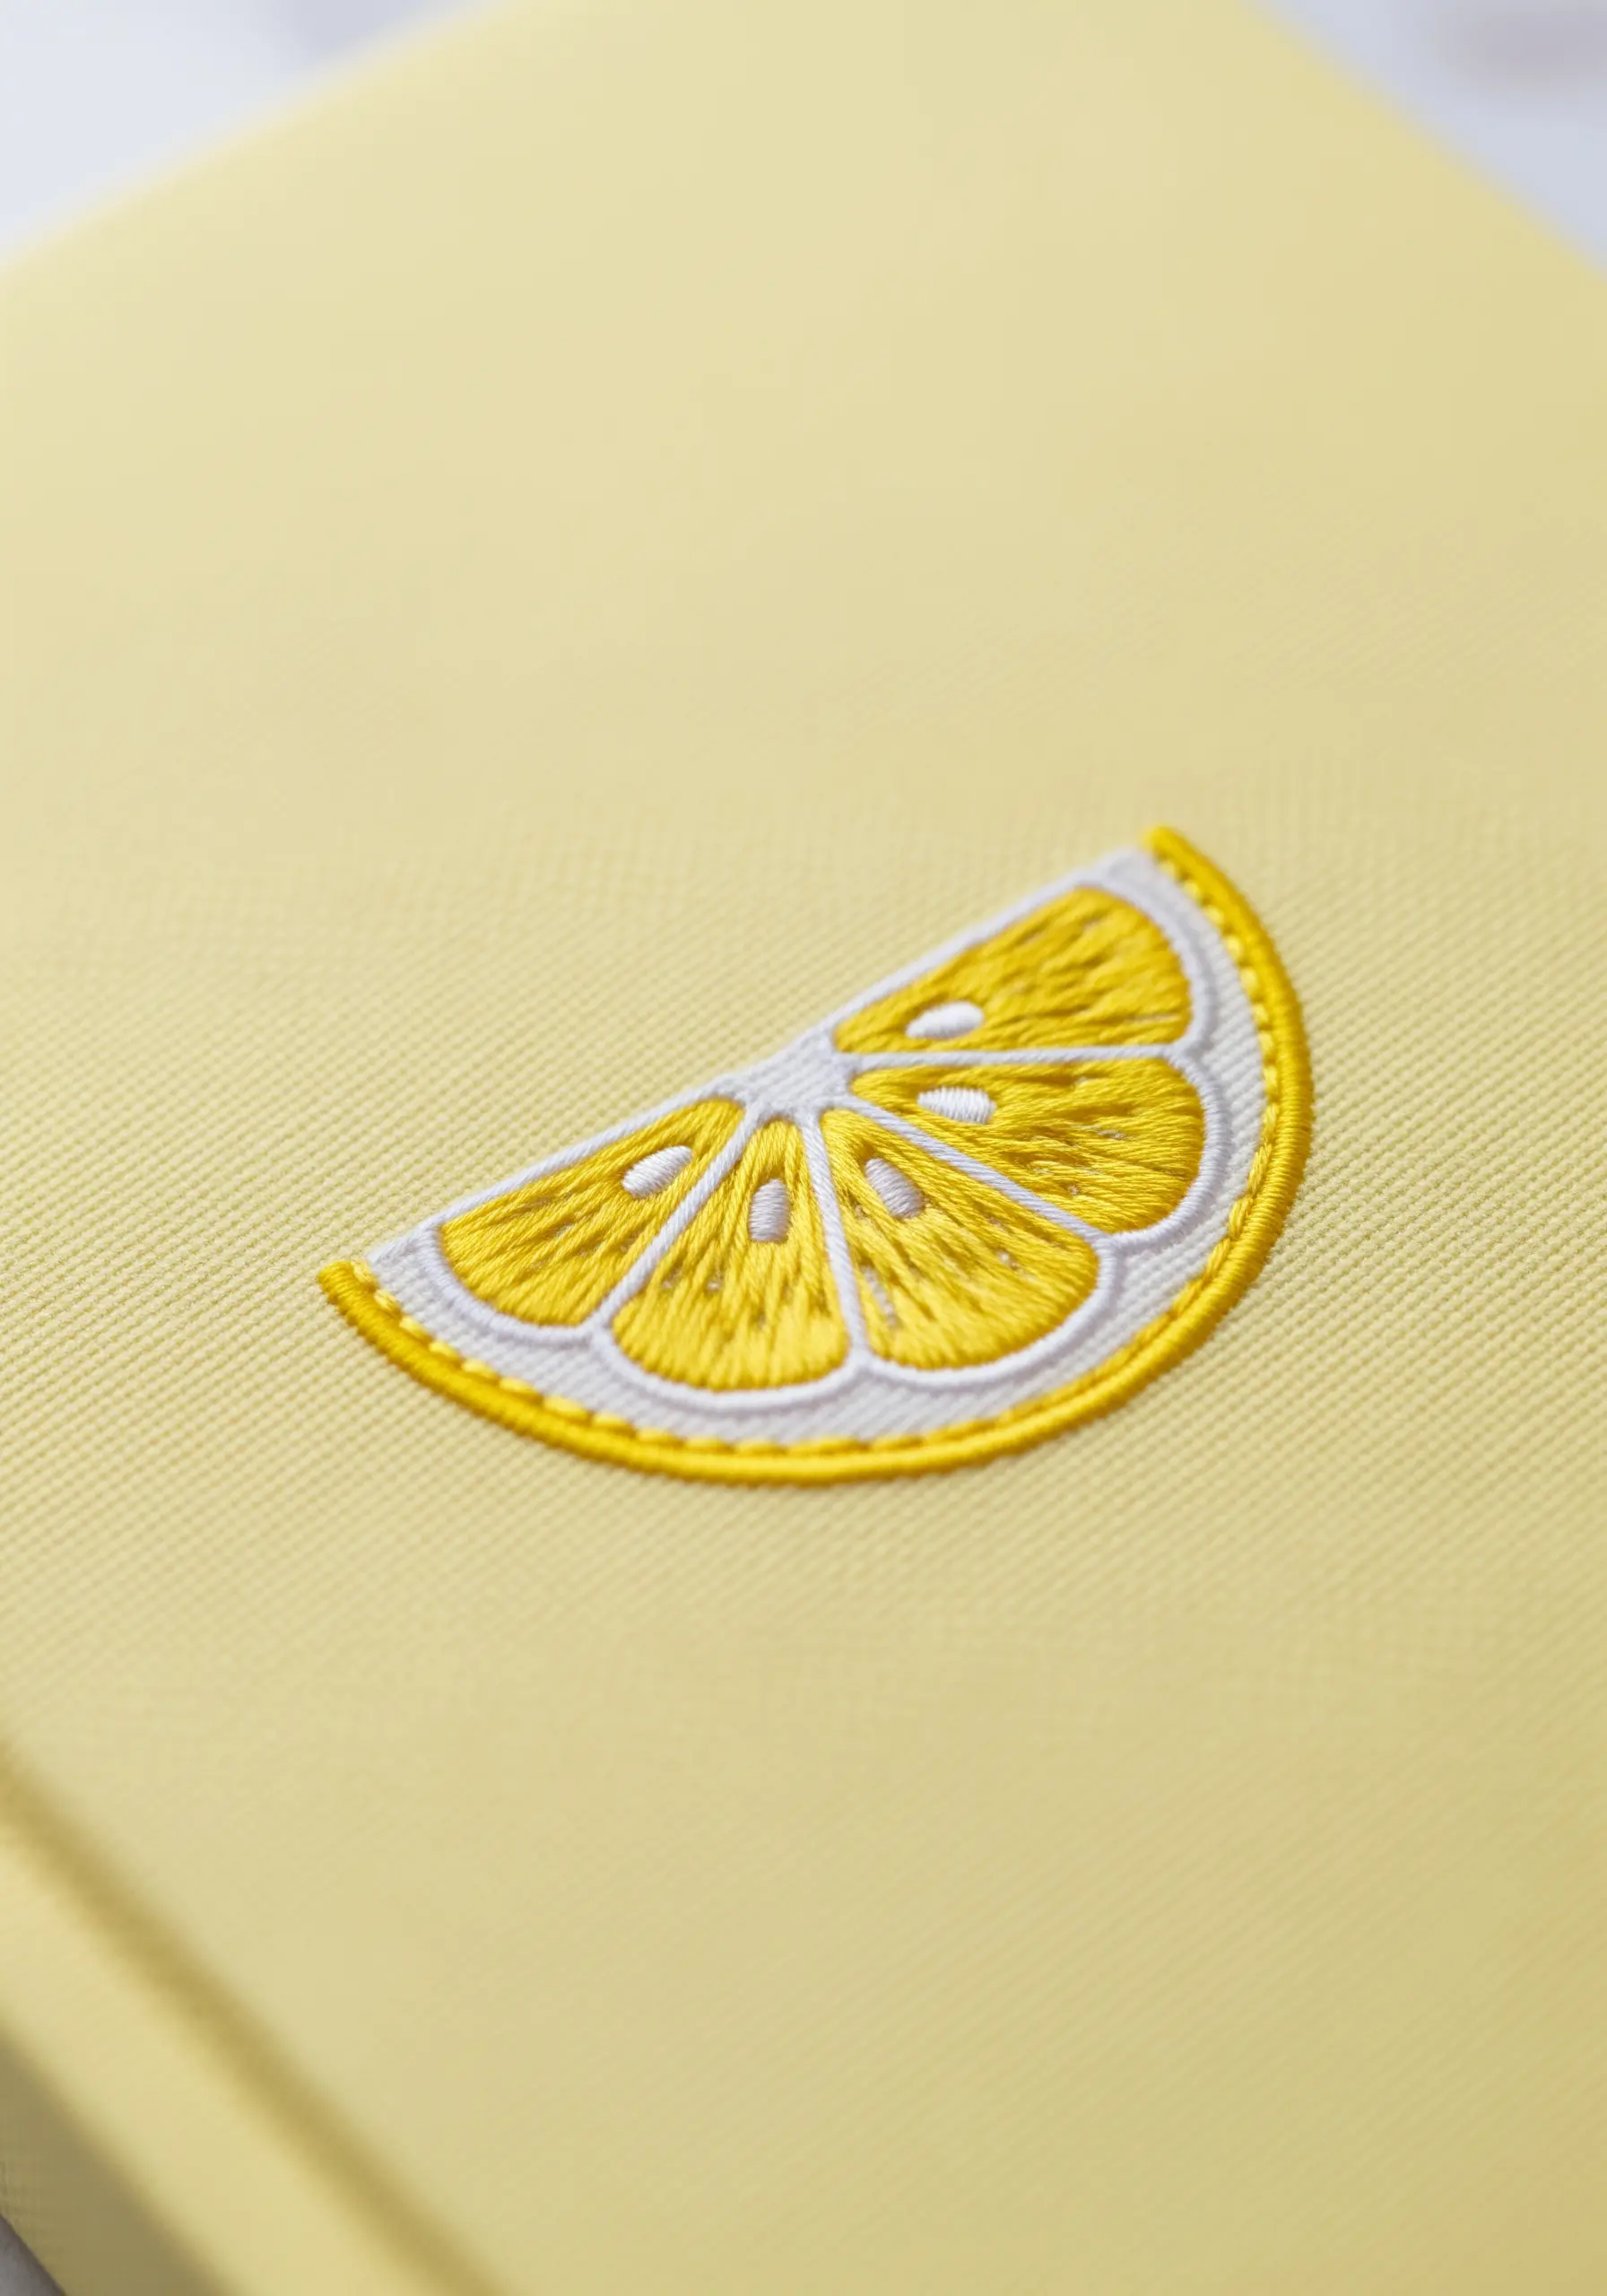
Make the segments of this lemon slice look crisp and juicy by using negative space.
Instead of stitching one solid shape, embroider each yellow pulp section separately with satin stitch, radiating the stitches from the center.
Leave a tiny, unstitched line between each segment to represent the pith.
This small gap provides instant definition and makes the fruit look more realistic.
Outline the entire slice with a clean backstitch to finish the design with a sharp edge.
29. Create Fluffy Clouds with French Knots

Stitch a dreamy, fluffy cloud by filling the entire shape with tightly packed white French knots.
To create a bumpy, cumulus texture, vary the size of your knots slightly by wrapping the thread once for some and twice for others.
Use a full six strands of white cotton floss to make the knots plump and substantial.
This technique creates a wonderful, tactile 3D effect that perfectly captures the soft, pillowy nature of a cloud against a clear blue sky.


