

Sometimes, the most profound statement is made with the quietest voice. In embroidery, this means moving beyond complex patterns and focusing on the elegance of a single, intentional stitch.
This is where your work transforms from a craft into an art form. It’s not about filling every inch of fabric, but about making every thread count. It’s about understanding that a simple line can hold more movement than a dense floral, and that negative space can be your most powerful tool.
Here, you’ll find not just designs, but techniques and ideas to help you refine your eye and your hand. Let these small studies guide you toward creating work that is not just beautiful, but deeply considered and personal—all in the palm of your hand.
1. The Poetics of a Single Line
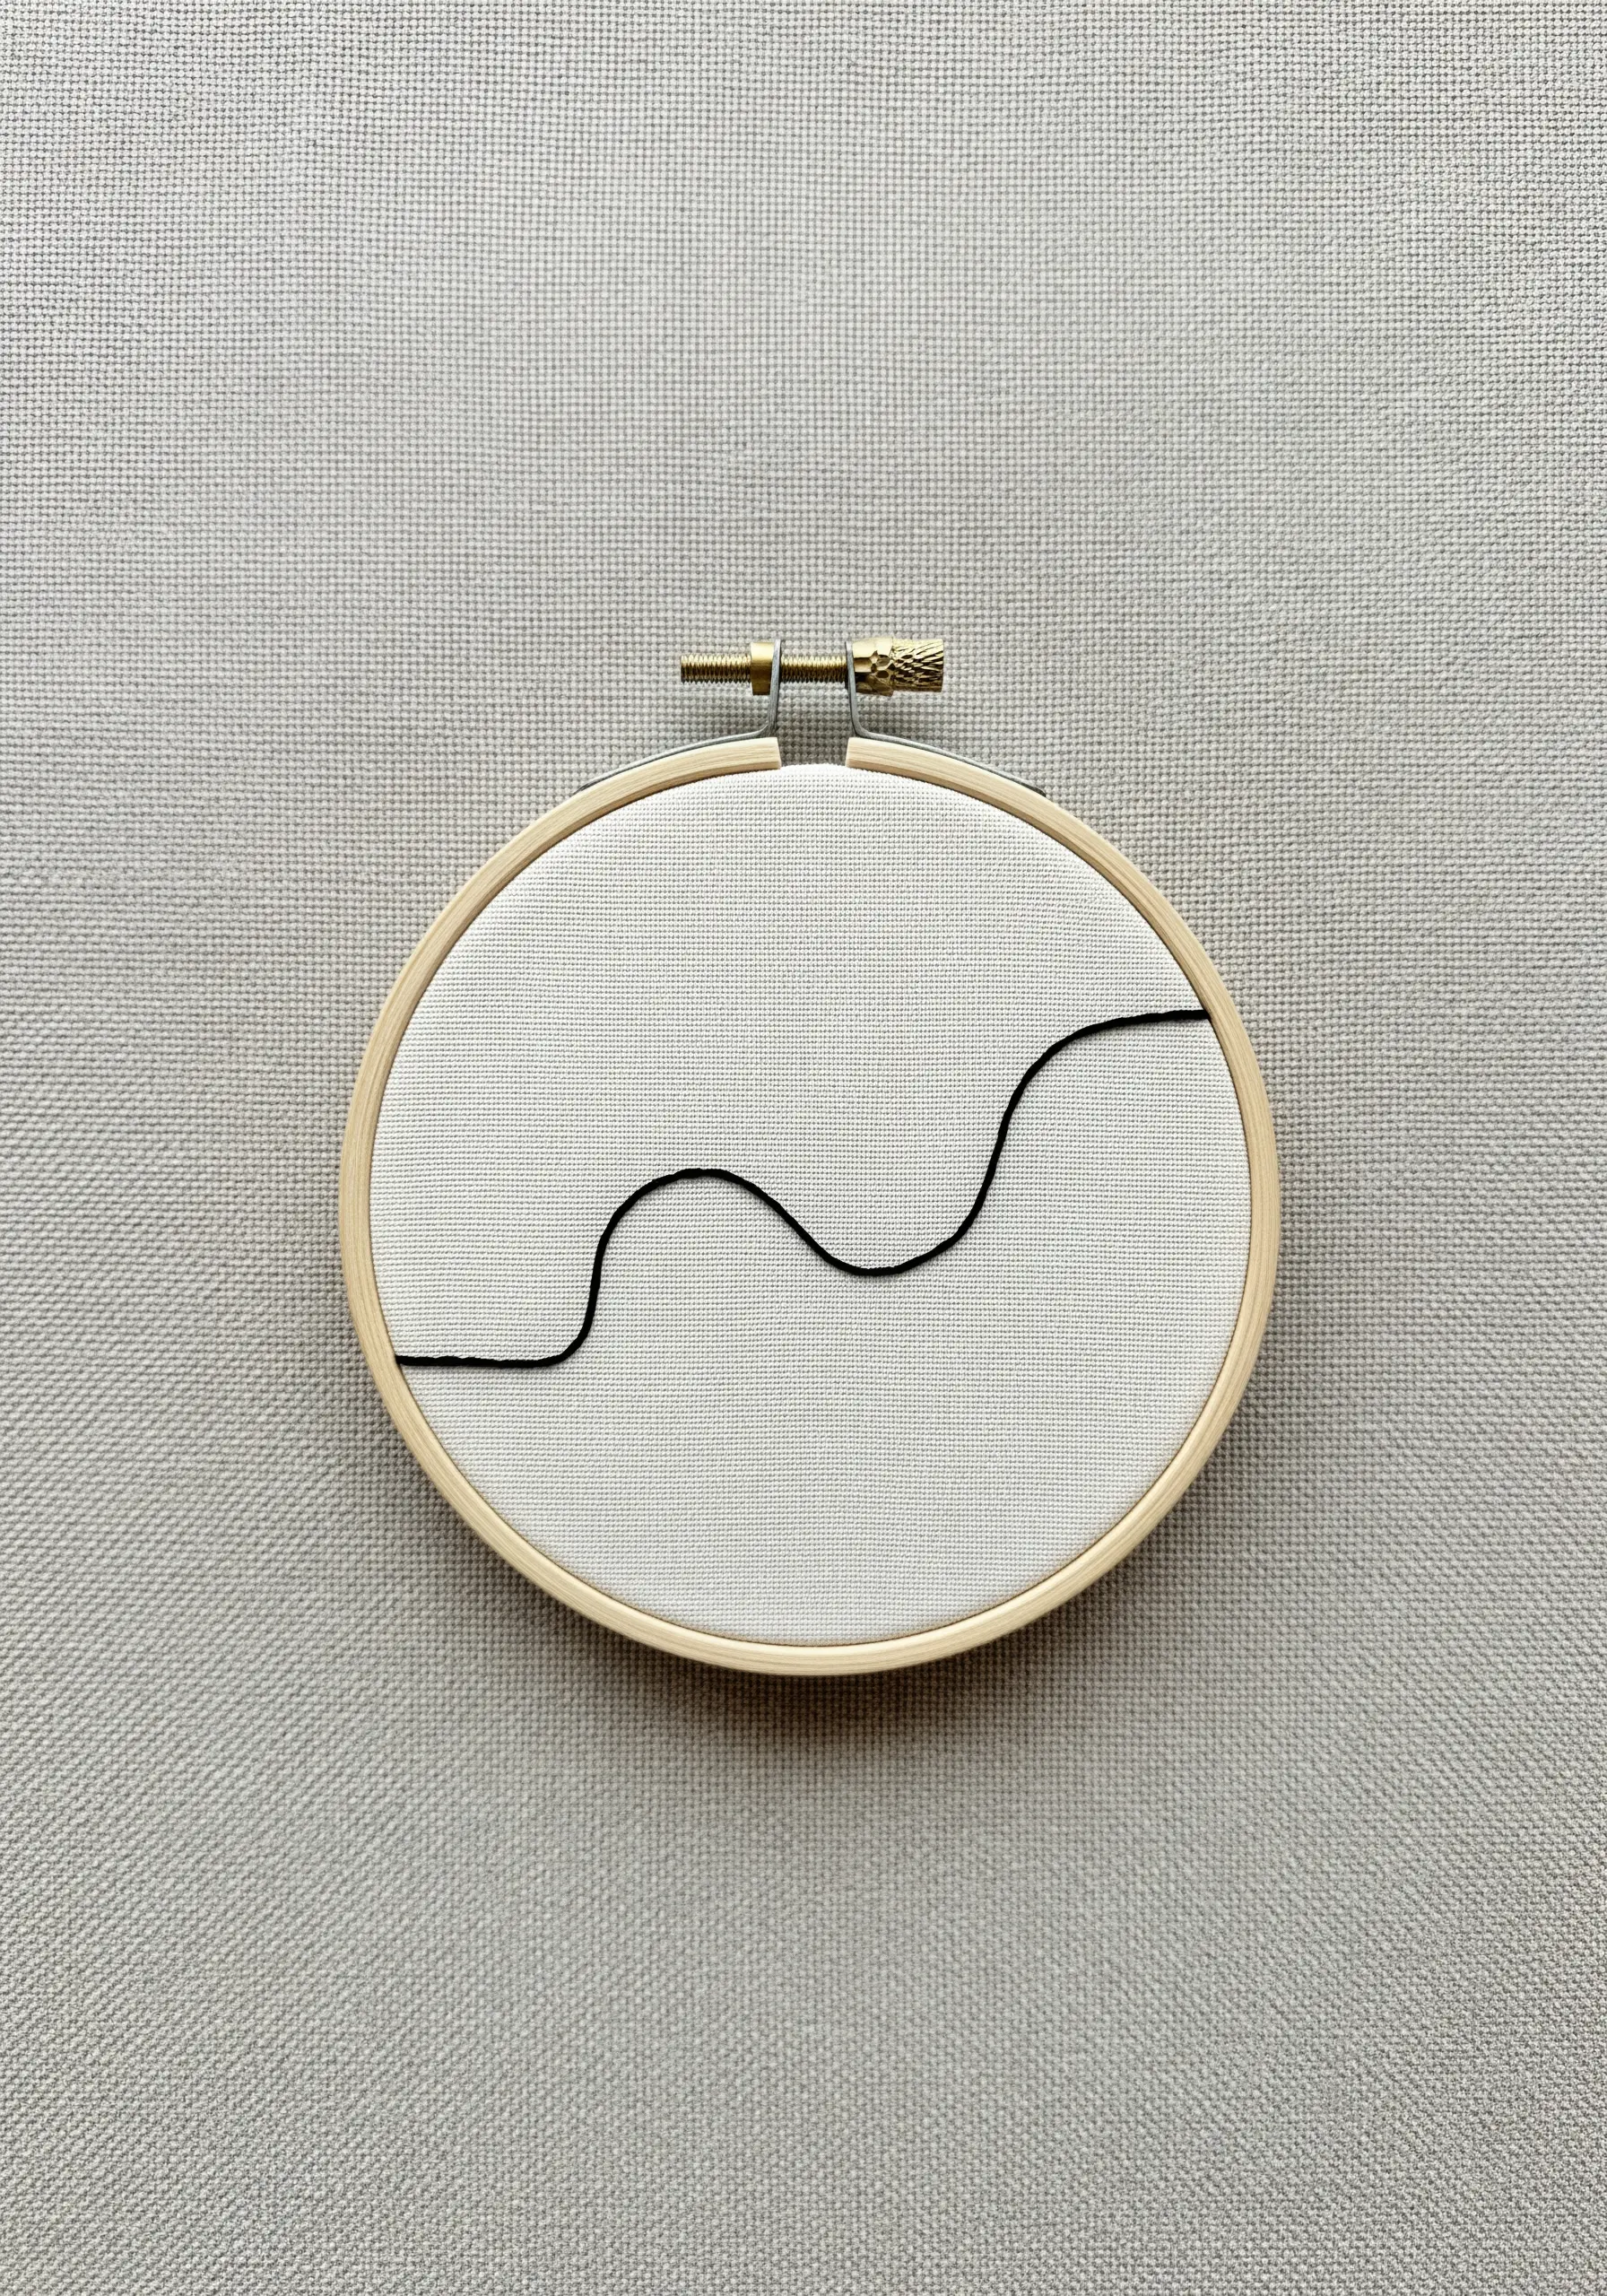
Embrace the power of a single, expressive line to create movement and focus.
Instead of a standard backstitch, use a couching stitch for a perfectly smooth, uninterrupted curve.
To do this, lay down your main (thicker) thread along the desired path and use a second, finer thread to tack it down with tiny, evenly spaced stitches.
This technique prevents the jagged edges that can occur with tight curves, resulting in a line that feels drawn rather than stitched, turning simple thread into a piece of minimalist embroidery wall art.
2. Interlocking Forms with Chain Stitch
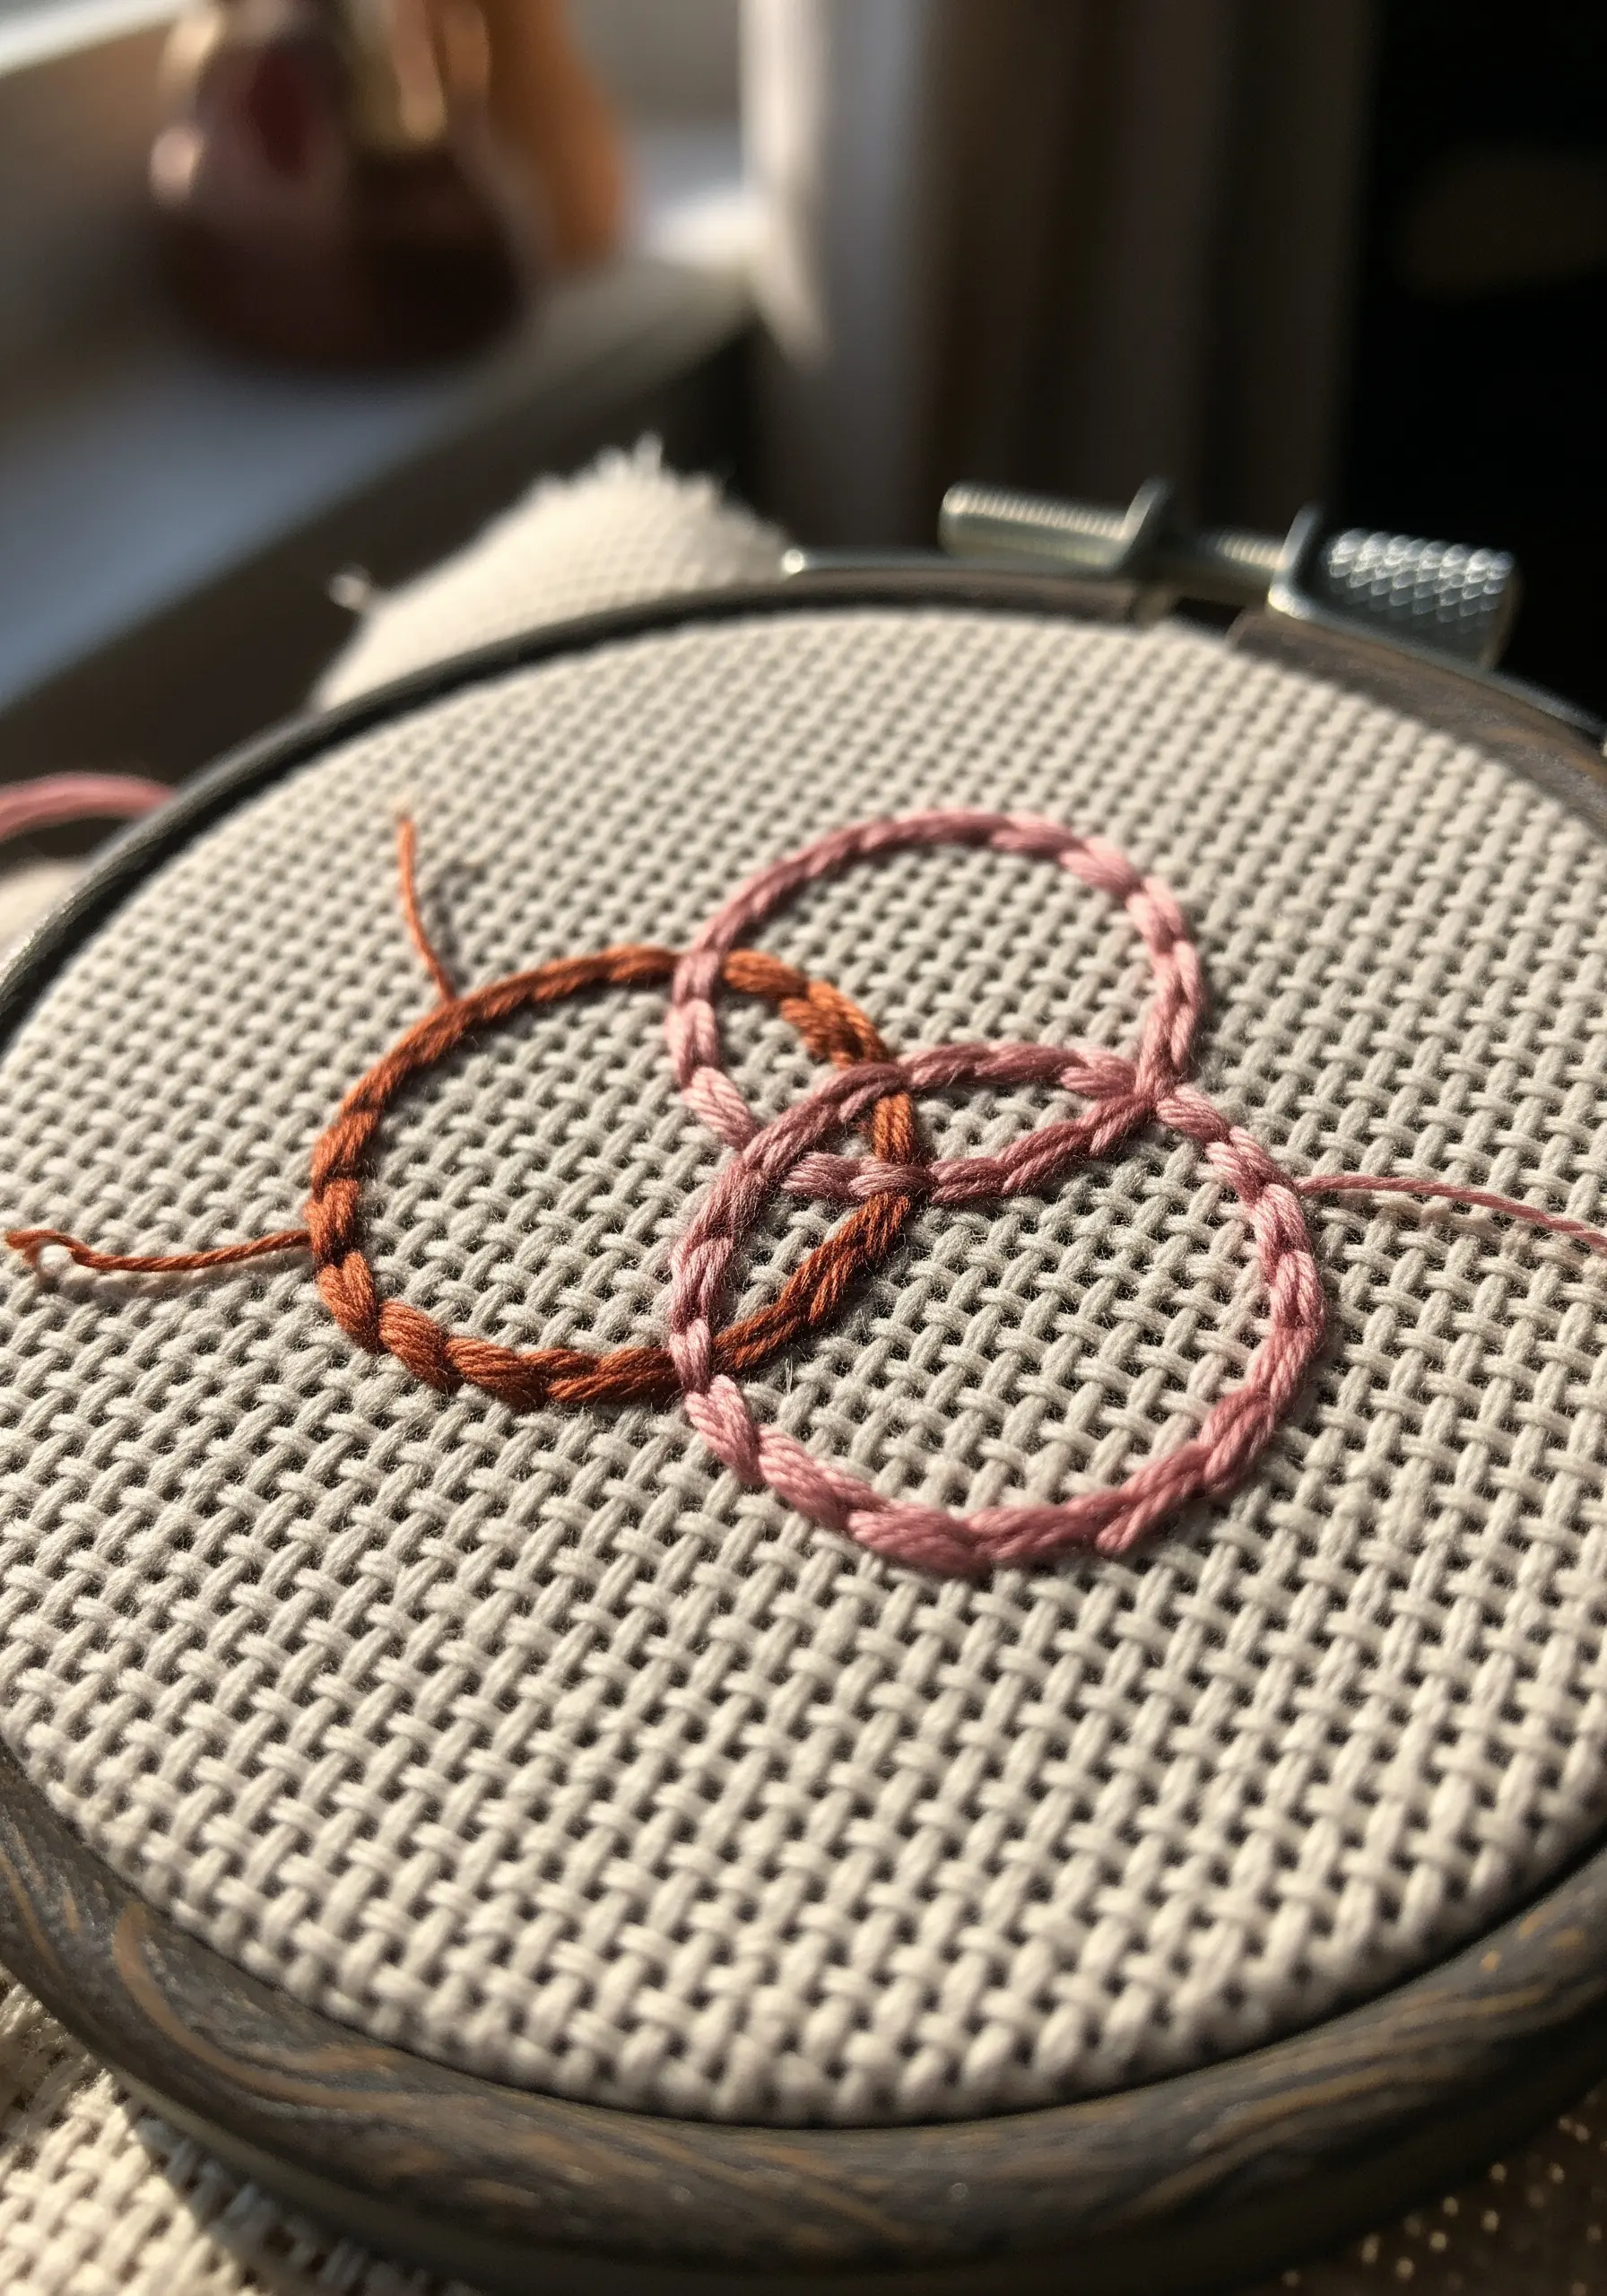
Create interlocking shapes that feel both modern and meaningful using a simple chain stitch.
This stitch provides a beautiful, rope-like texture that gives substance to simple outlines, making them feel more dimensional than a flat backstitch.
For a subtle, organic color shift, choose a variegated floss; the thread does the blending for you, adding depth without changing colors.
This design works beautifully for representing connection, and the finished pieces make thoughtful gifts.
3. Architectural Lines in a Landscape
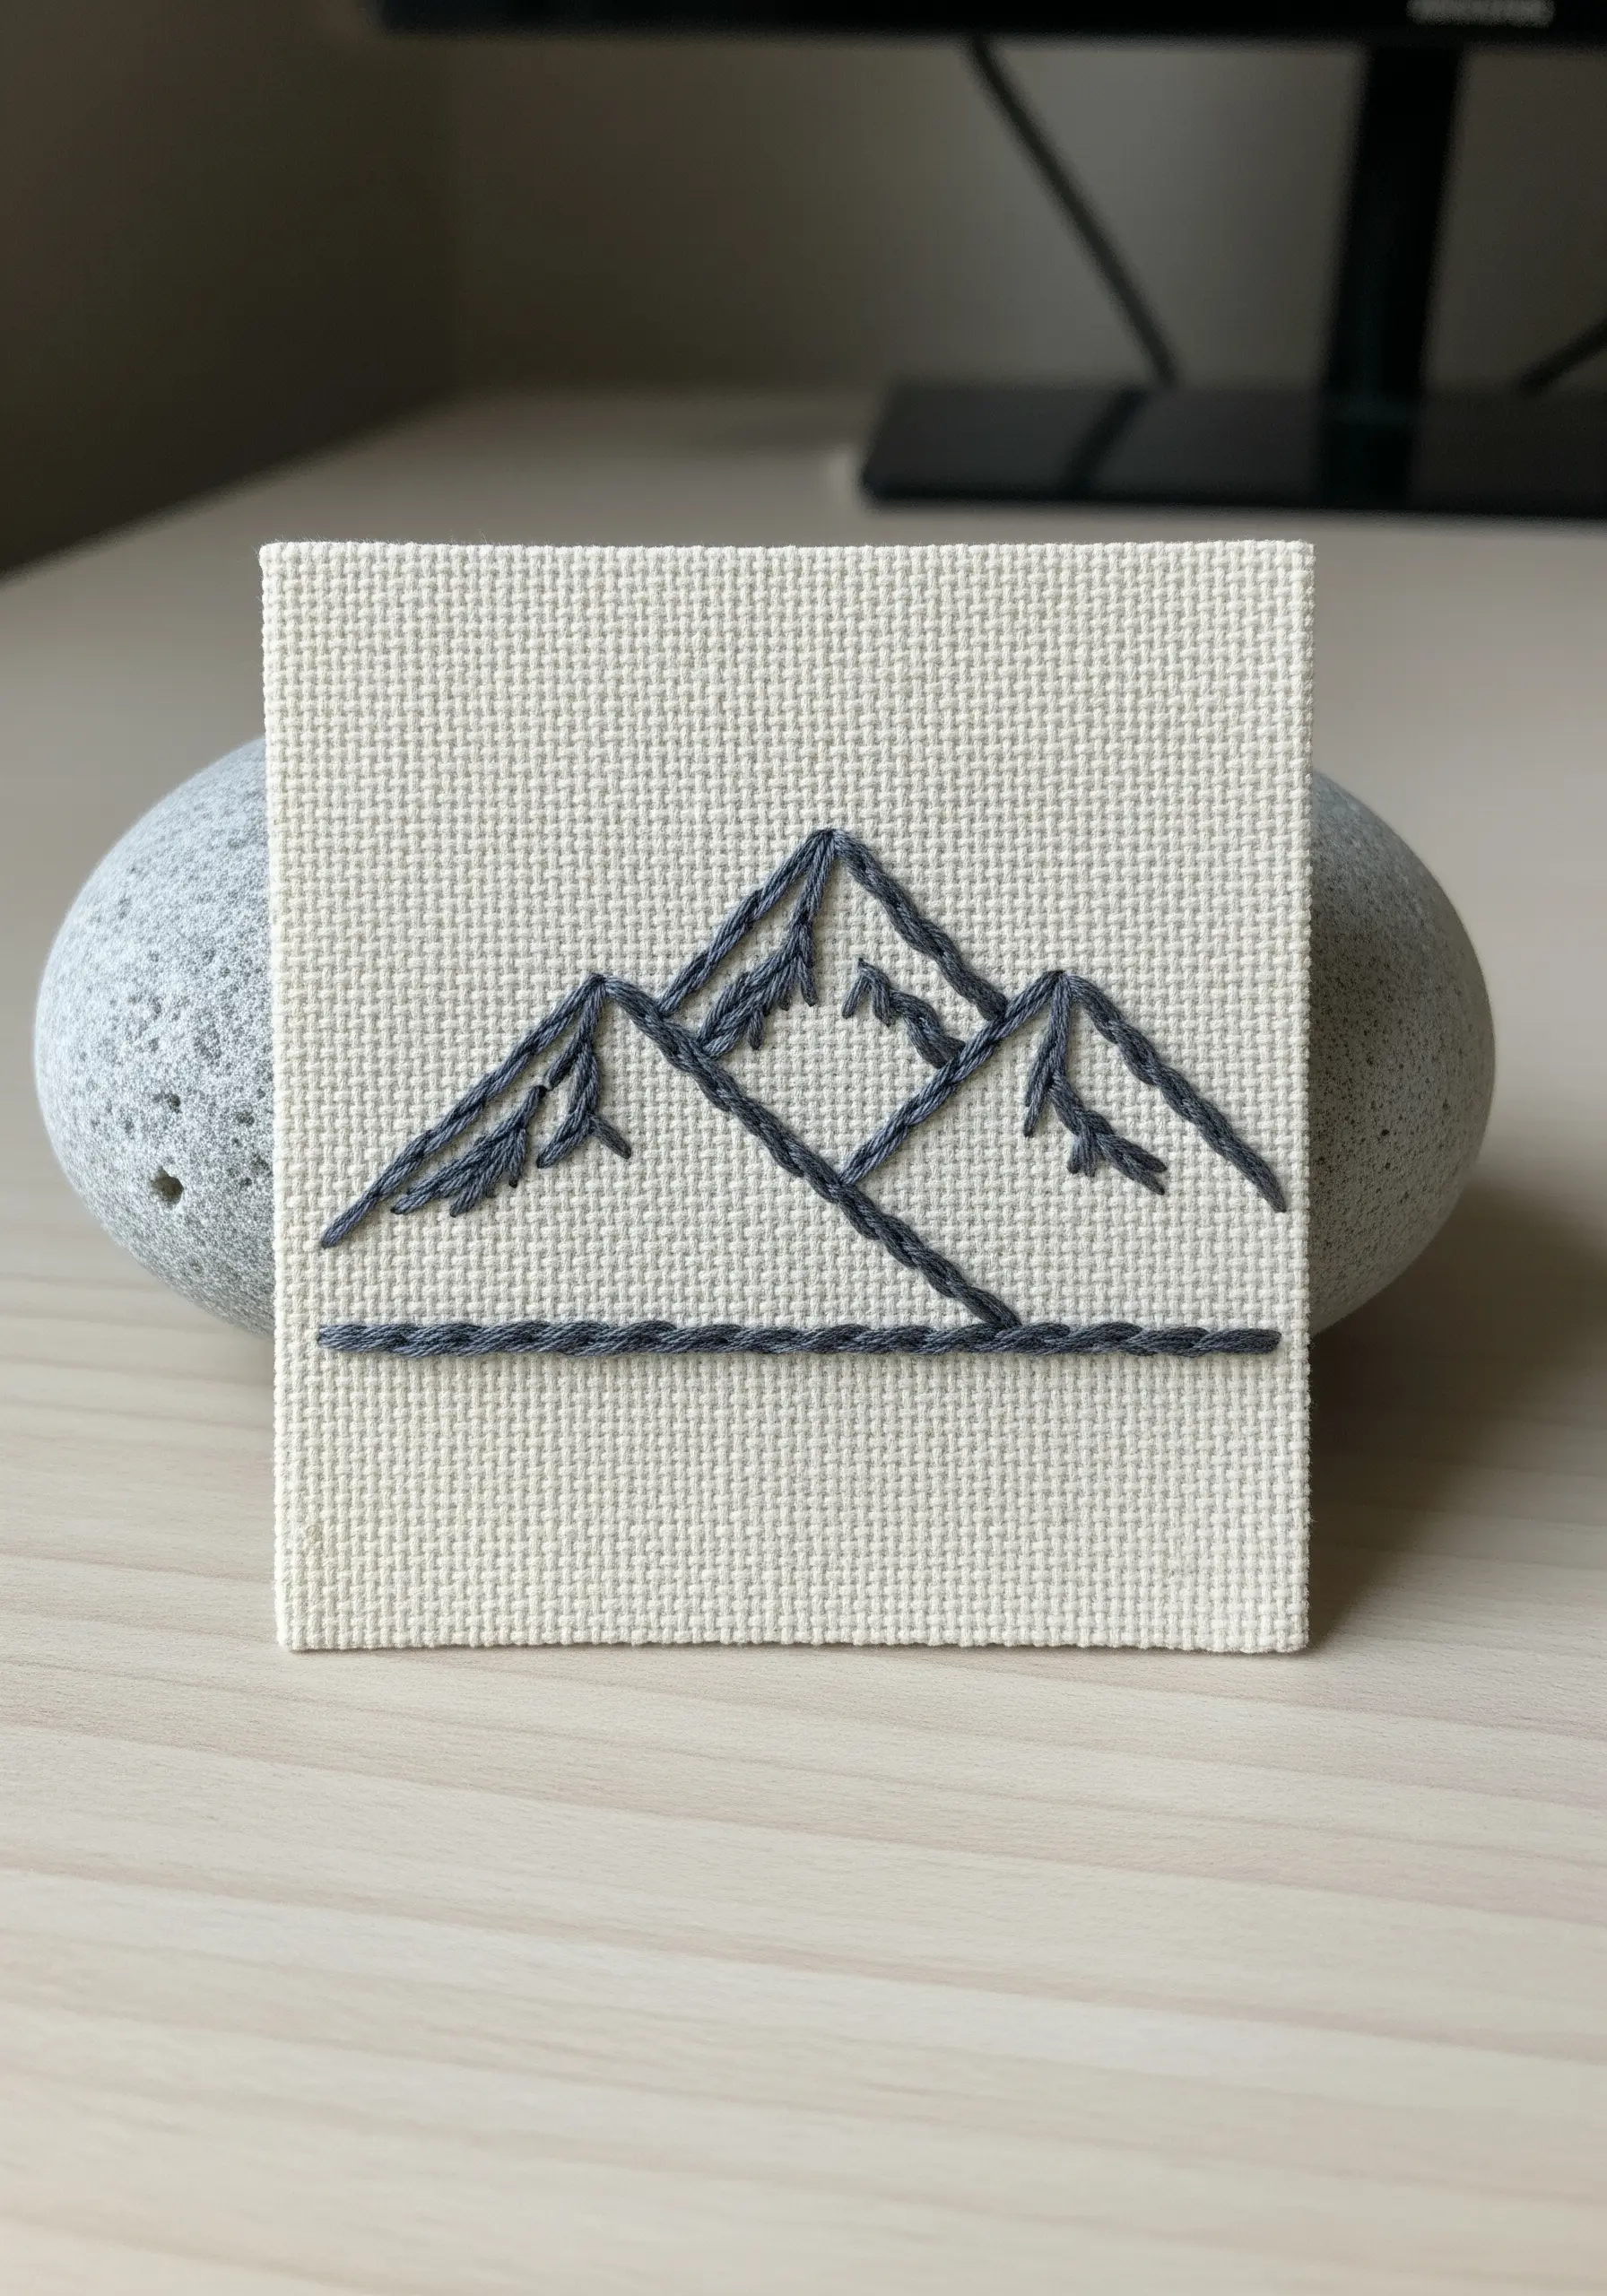
Capture the essence of a mountain range with clean, architectural lines.
Use a crisp backstitch for the main outlines, focusing on sharp angles and precise meeting points.
To add subtle detail, fill the peaks with a few intentionally placed satin stitches, suggesting snow without overworking the design.
Stitching on Aida cloth, as shown here, provides a natural grid that helps keep your lines perfectly straight and your composition balanced in any travel-inspired piece.
4. Integrating Beads for Textural Contrast
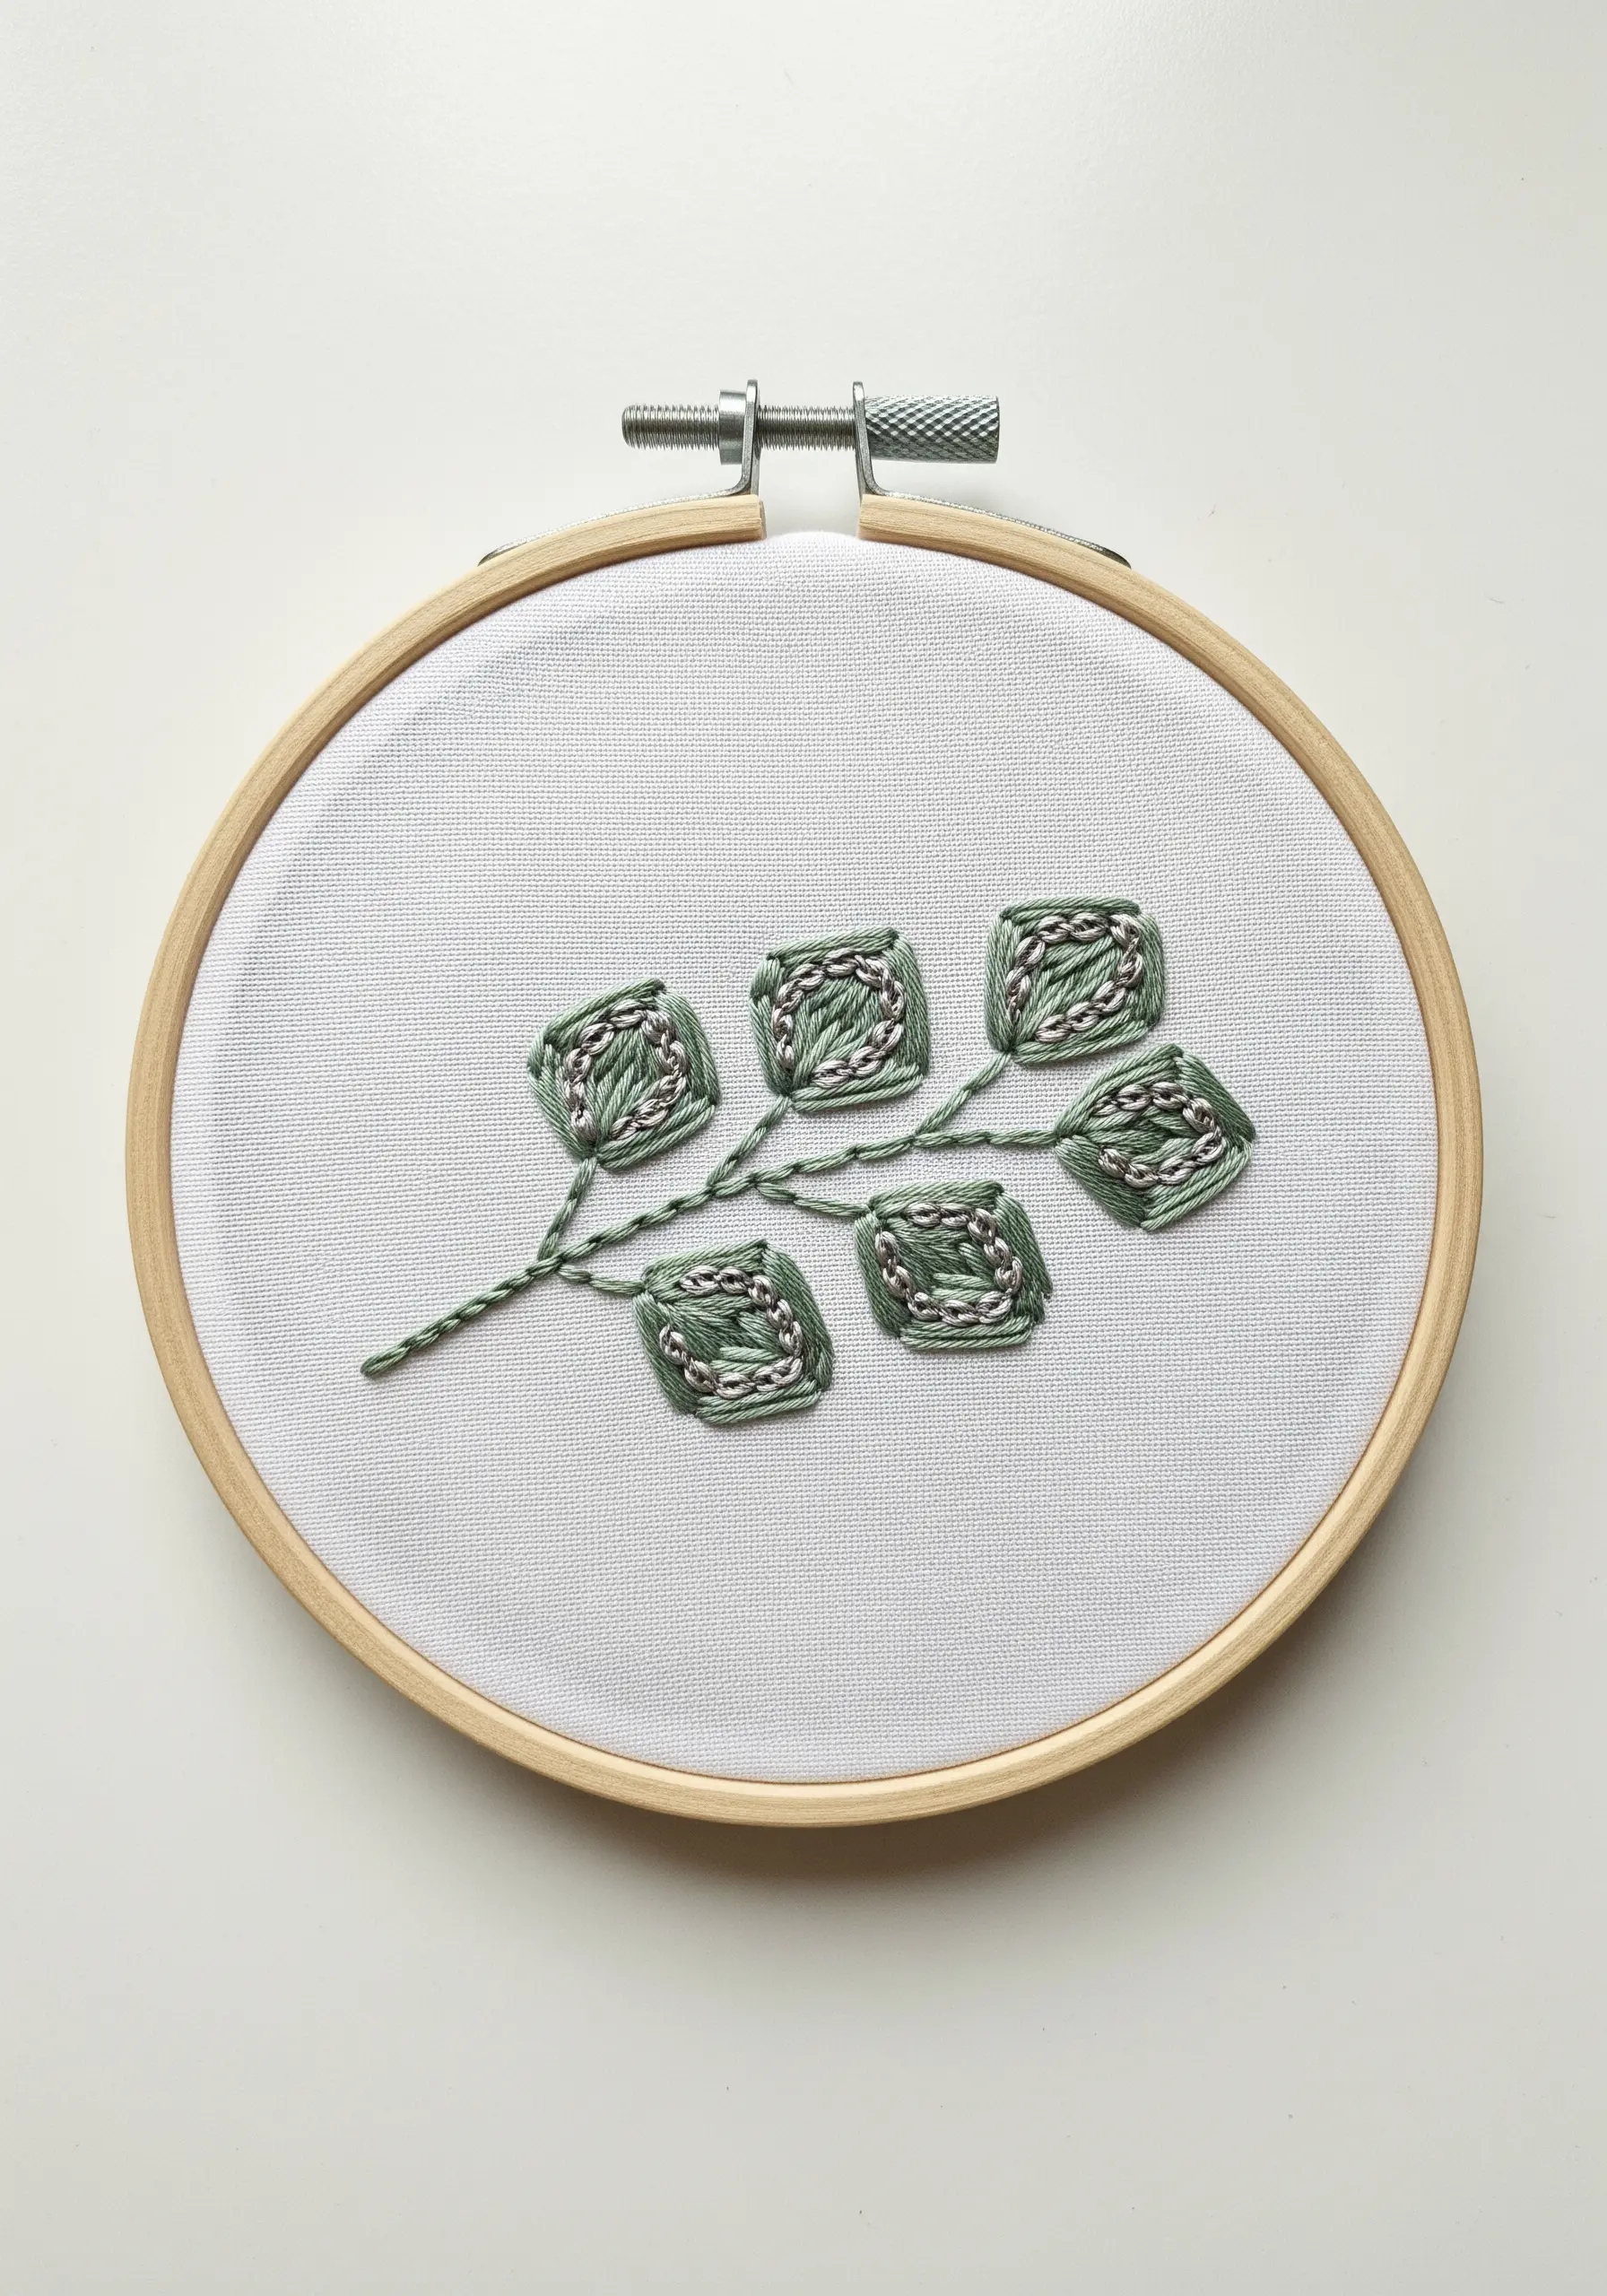
Elevate a simple botanical motif by introducing an unexpected material: glass seed beads.
Outline your leaf shapes with a stem stitch, then fill the interior with beads instead of thread for a surprising textural shift.
This combination of soft floss and hard, reflective beads catches the light differently, adding a layer of sophistication.
The technique introduces unexpected textures that make the piece more dynamic and tactile.
5. Stitching the Stars with Intention
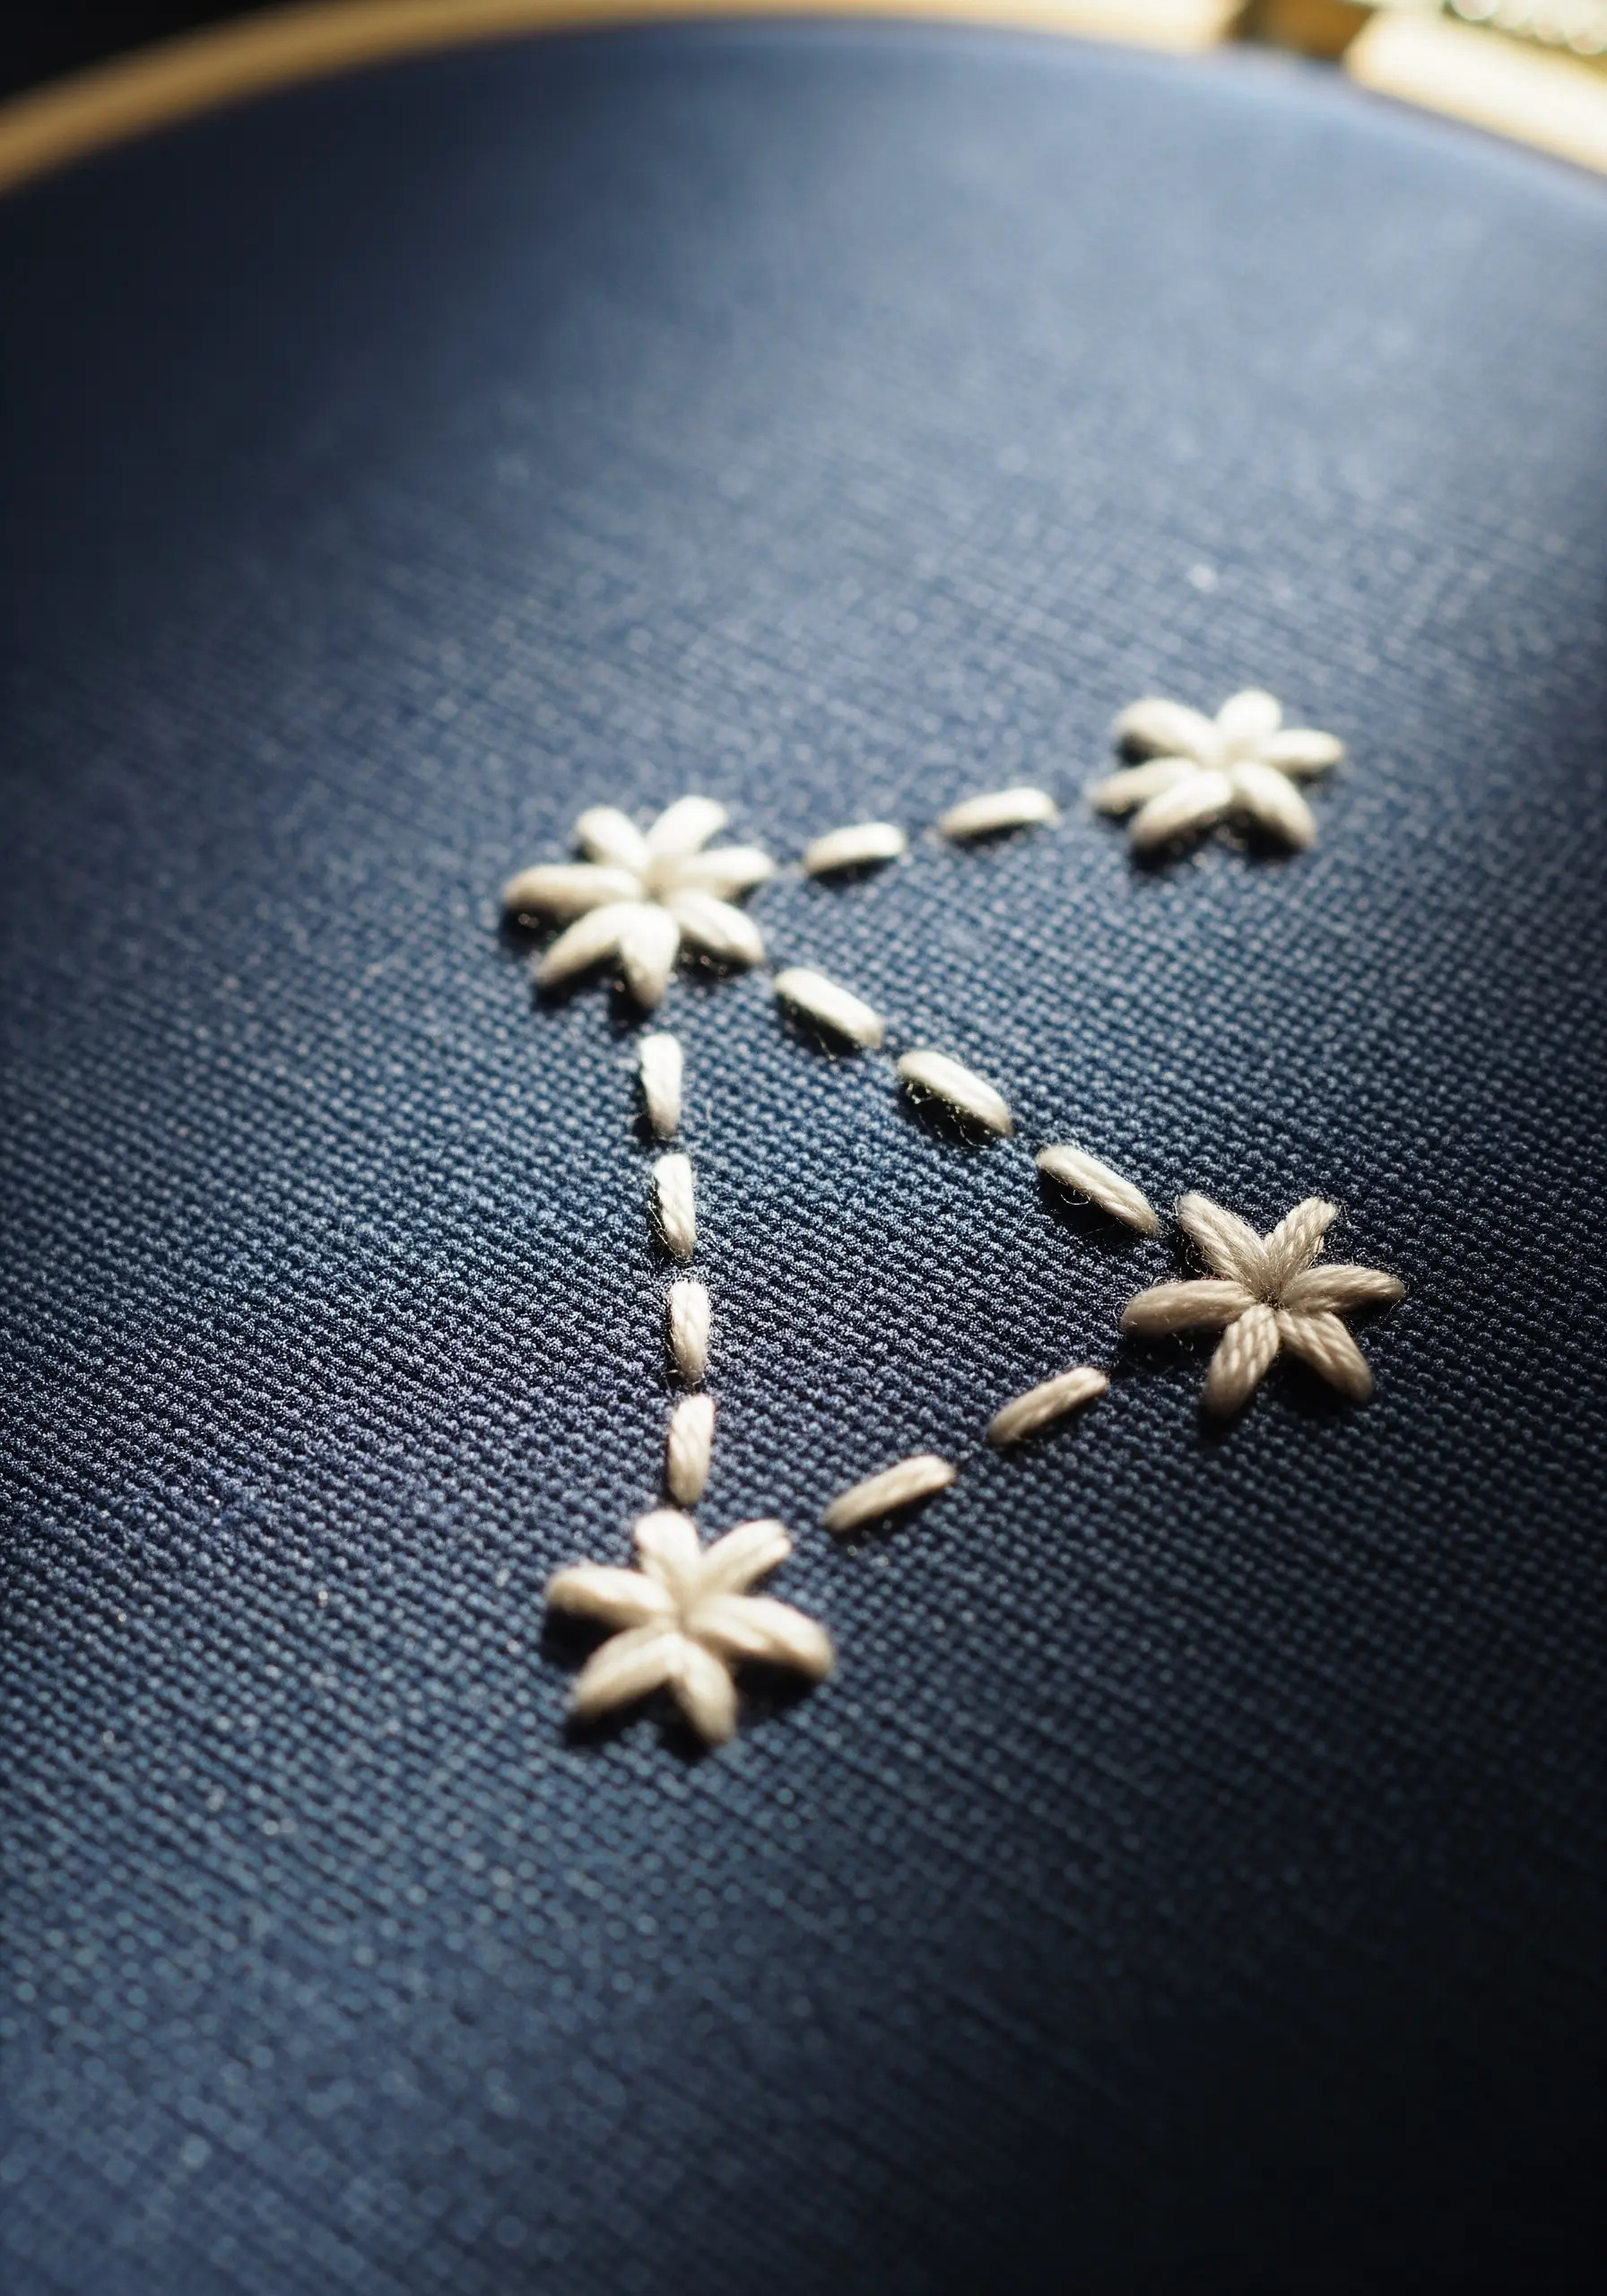
Create delicate constellations by combining two simple stitches for maximum effect.
Use a detached chain stitch or a five-spoke star stitch for the celestial bodies, pulling the thread just enough to create a soft, plump shape.
Connect them with a simple running stitch, using a single strand of floss to keep the lines faint and ethereal.
Stitching with white or metallic thread on dark navy fabric enhances the contrast, making your minimal sky & moon designs truly glow.
6. Illustrative Lines with Variegated Thread
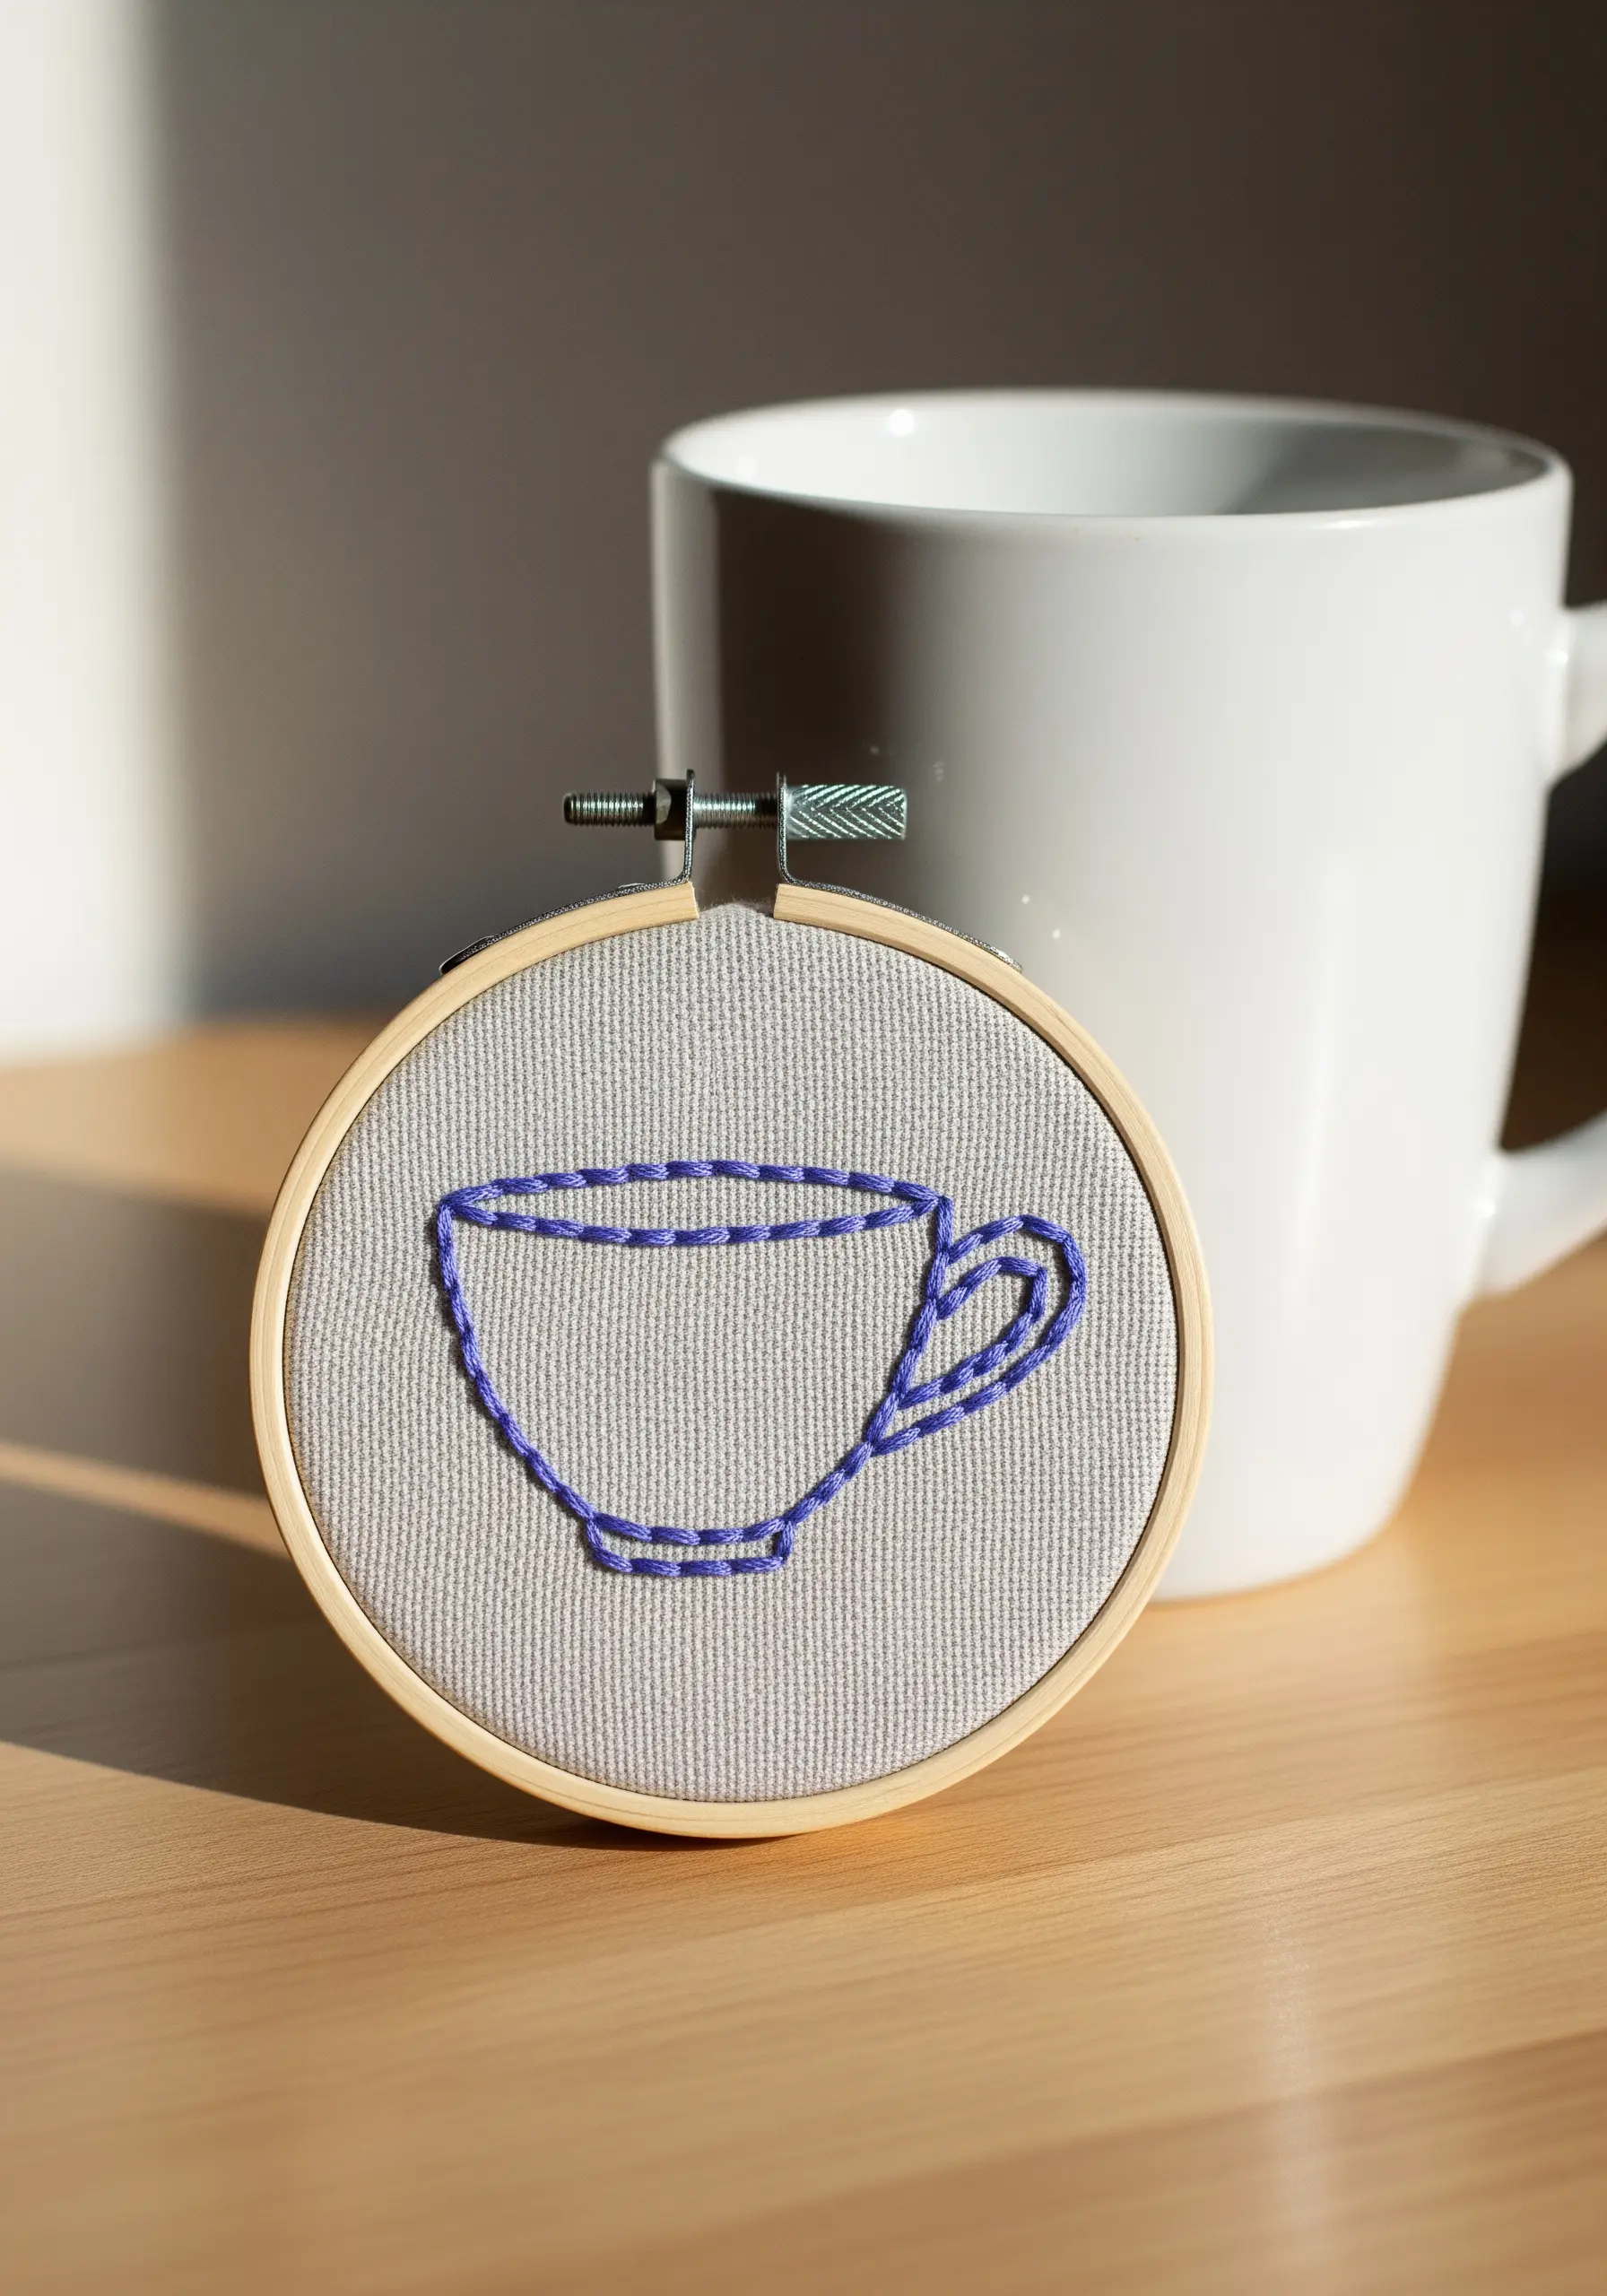
Give a simple outline the illusion of light and shadow using a single variegated thread.
Use a whipped backstitch for a smooth, raised line that mimics a pen stroke.
The variegated floss introduces subtle color shifts automatically, suggesting highlights and shadows without any complex shading techniques.
This method is perfect for transforming everyday objects into charming, illustrative art.
7. The Precision of Geometric Repetition
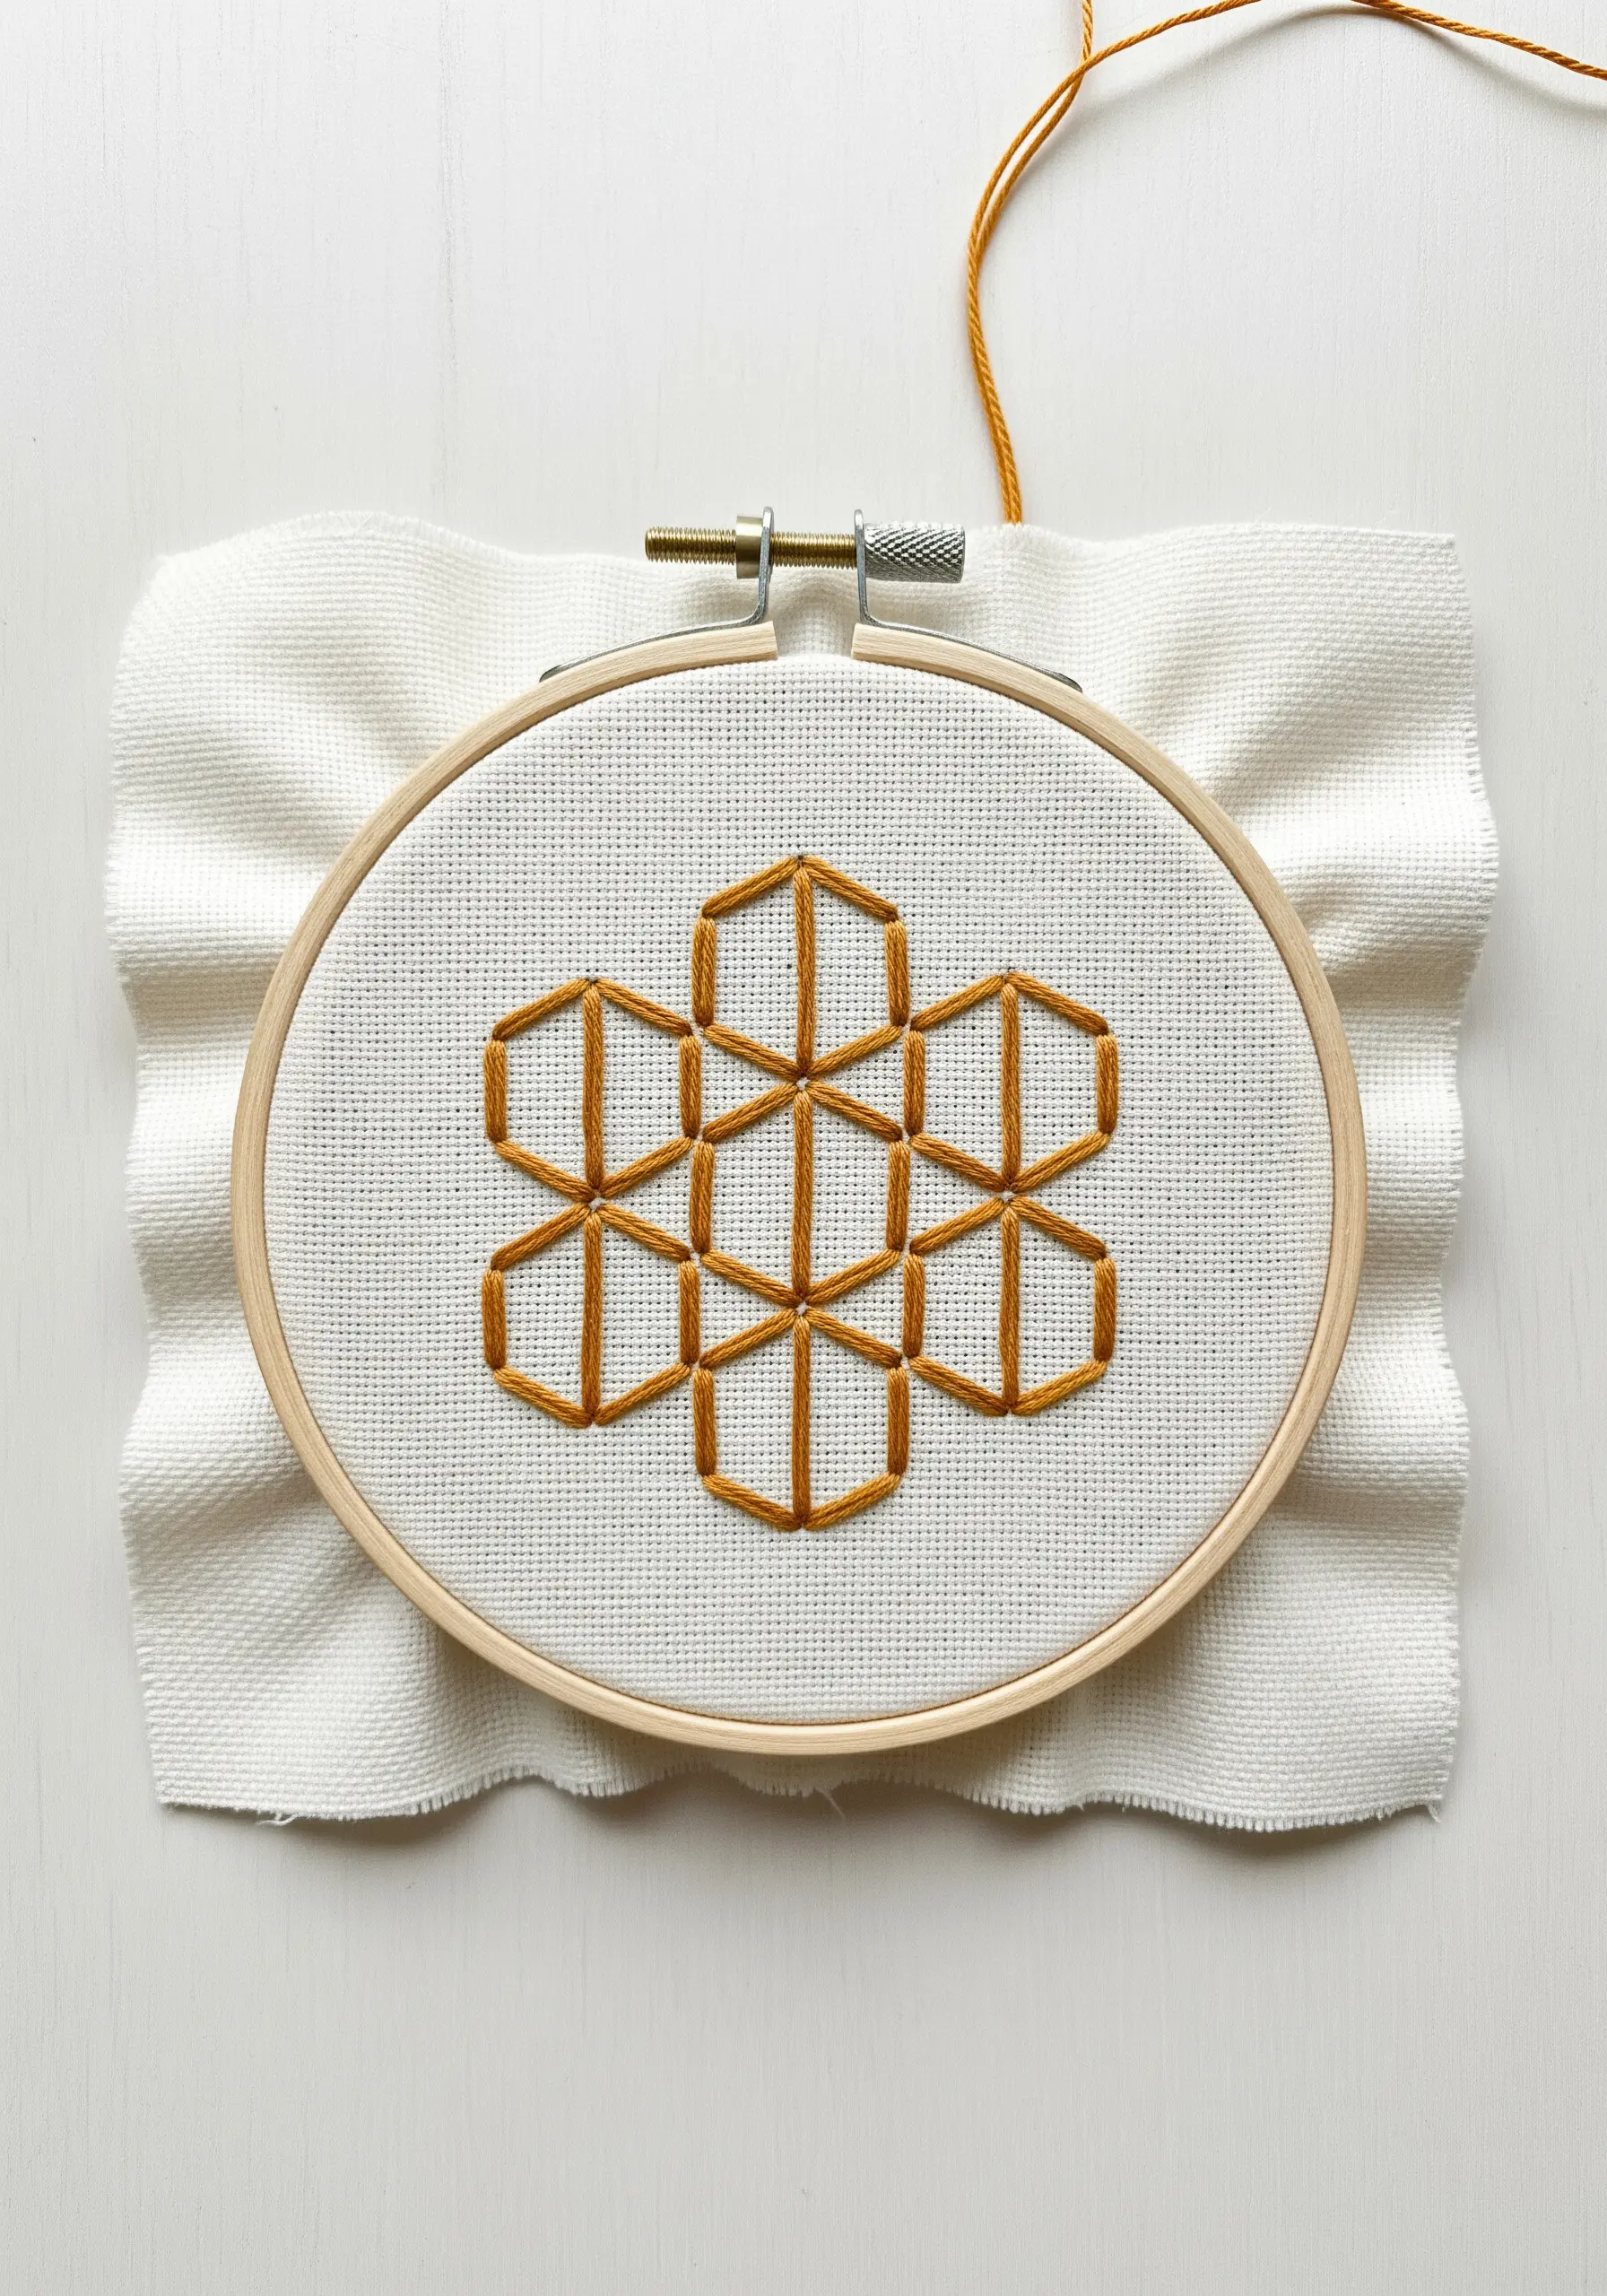
Build a complex-looking pattern from the simplest of stitches: the straight stitch.
The key to a successful geometric design is precision in length and angle, so working on an evenweave fabric like Aida is highly recommended.
Use a single, bold color to emphasize the pattern’s structure and the beauty of its clean lines.
This meditative process of building a larger shape from small, repeating geometric patterns is incredibly rewarding.
8. Perfecting the Satin Stitch Fill

Achieve a flawlessly smooth satin stitch by focusing on two key elements: outlines and tension.
Before filling the shape, define its boundary with a split stitch. This creates a slightly raised edge that your satin stitches can tuck into, resulting in a much cleaner border.
Keep your stitches parallel and apply even, consistent tension—not too tight, not too loose—to prevent puckering and gaps.
This attention to detail transforms a basic fill into a professional, polished element in your calming DIY embroidery projects.
9. Capturing Movement with Directional Stitches
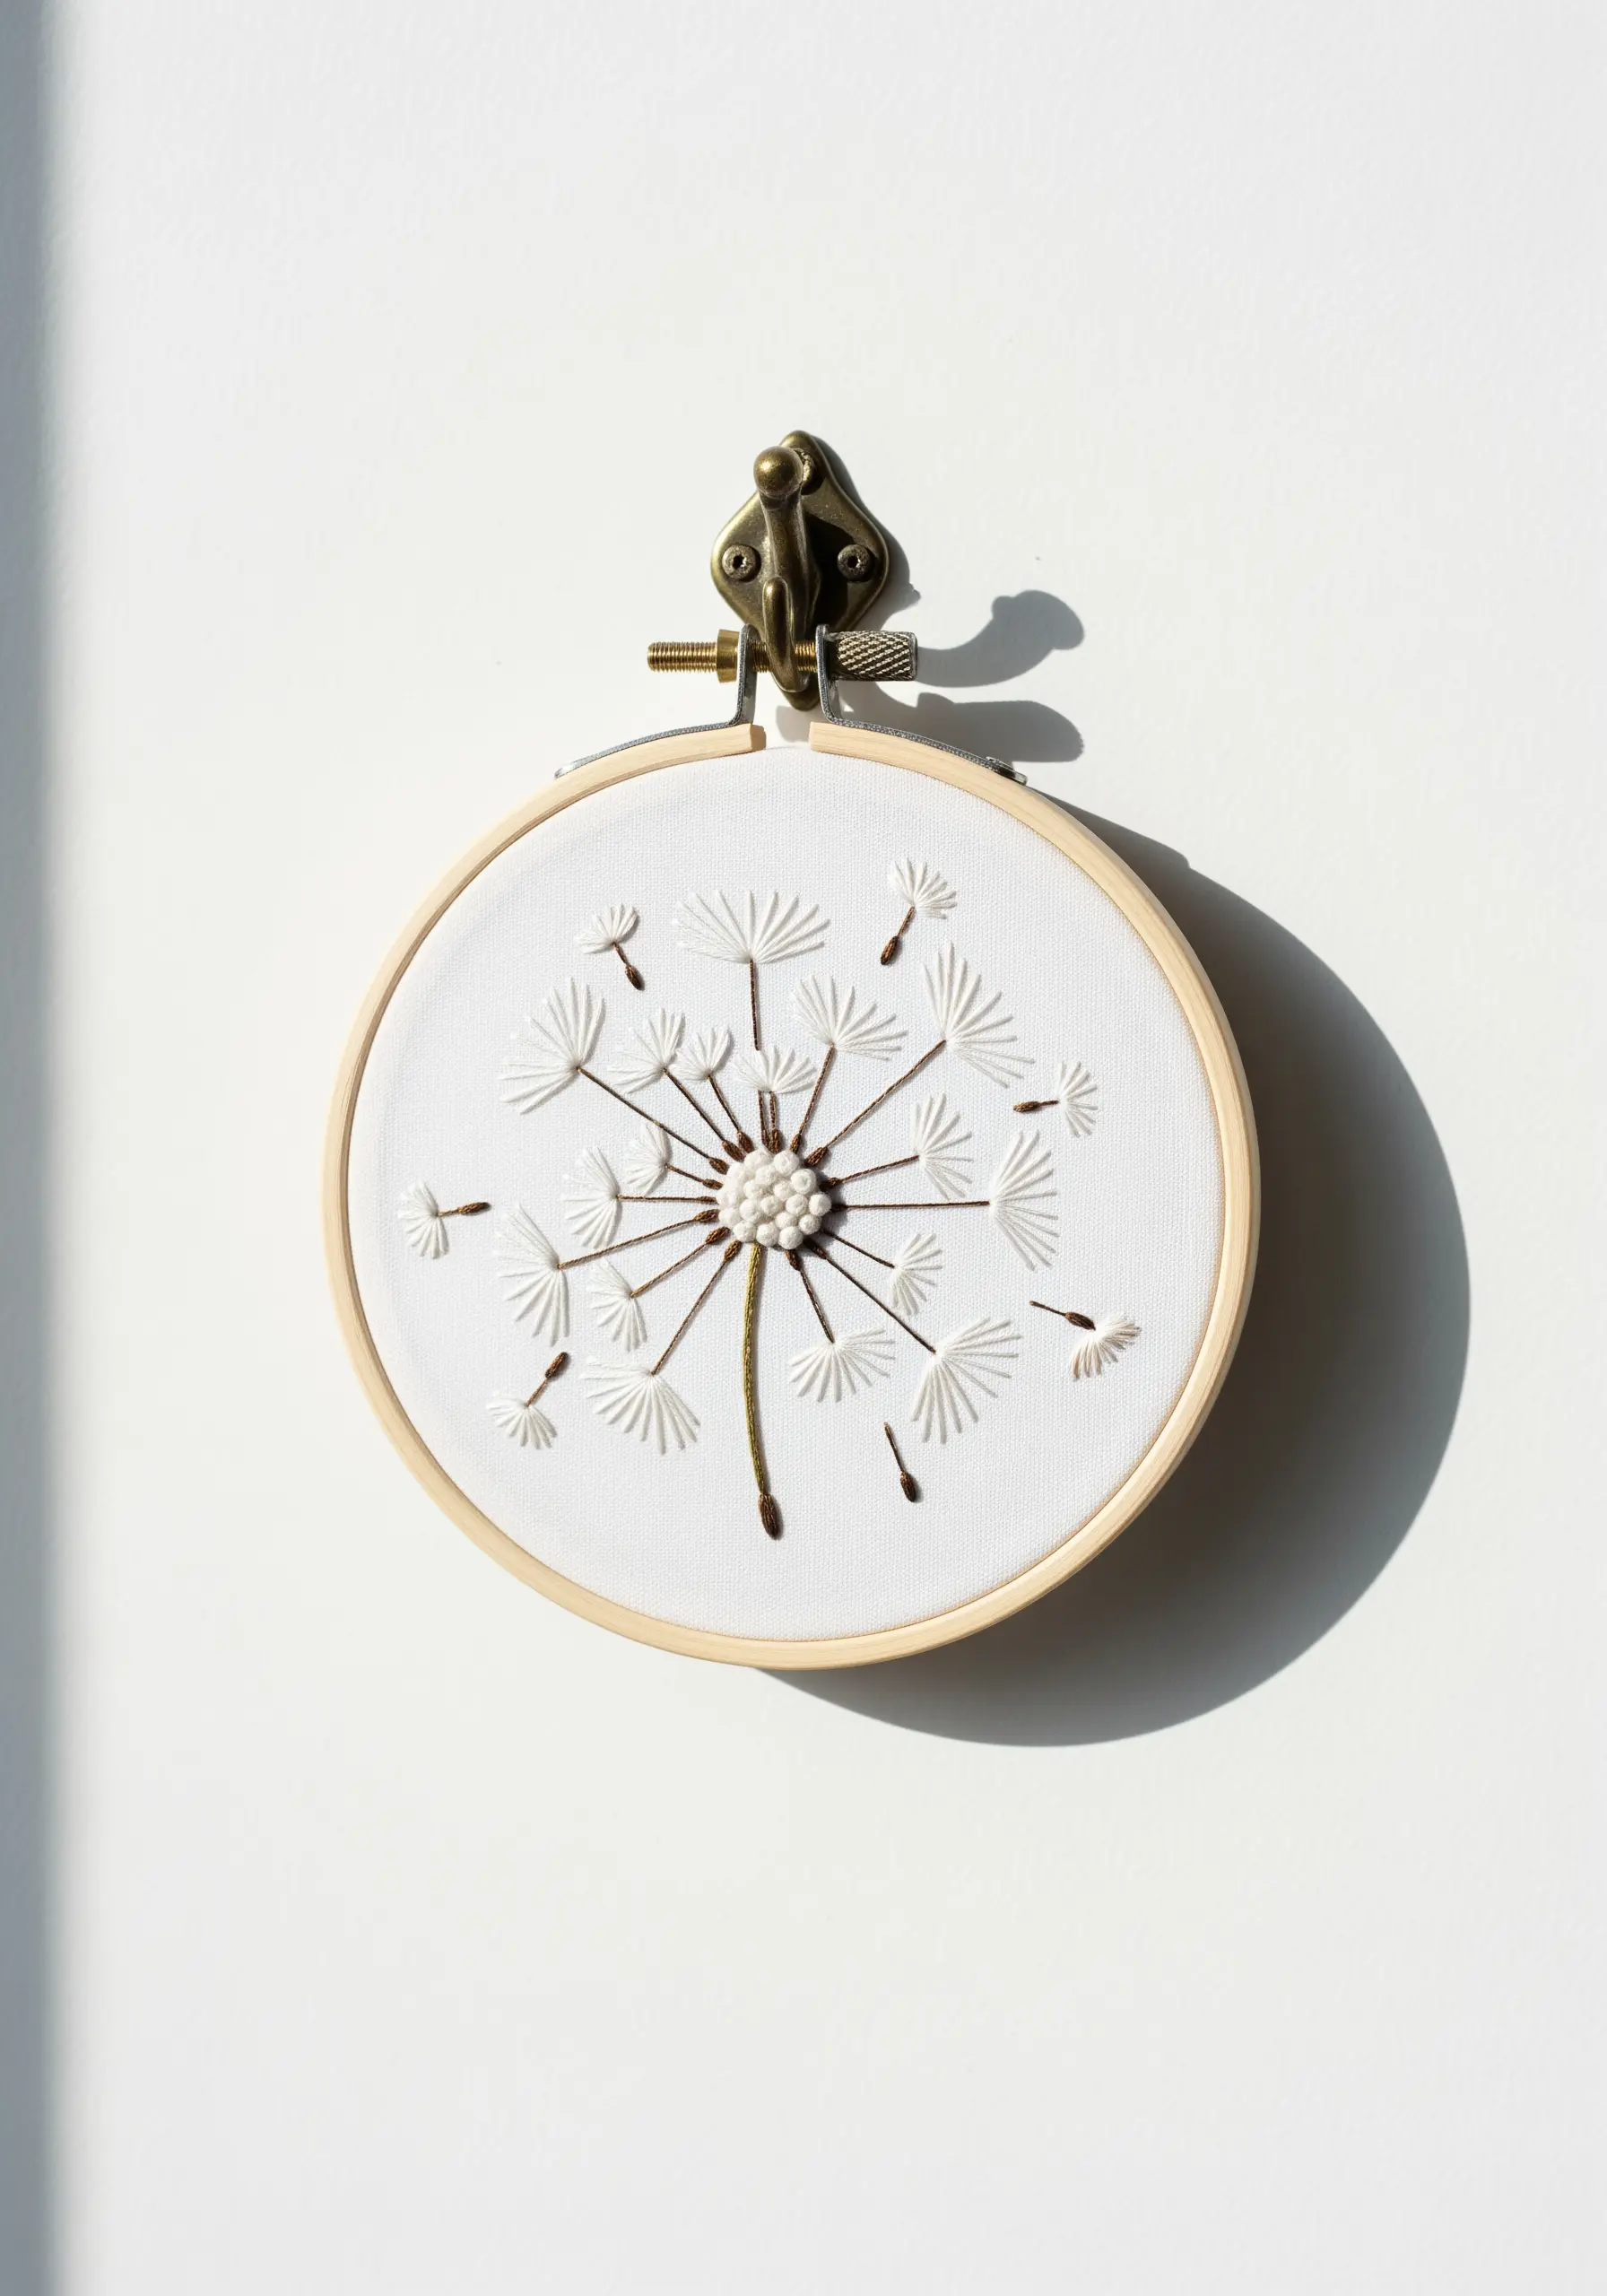
Create a sense of lightness and motion in botanical designs by varying your stitch direction and length.
For a dandelion, use French knots for the dense core and radiating straight stitches for the flying seeds.
Vary the length and angle of each straight stitch to mimic how seeds catch the wind, making the design feel dynamic rather than static.
This approach allows you to capture the subtle textures of nature in a clean, monochrome palette.
10. Graphic Storytelling with Backstitch
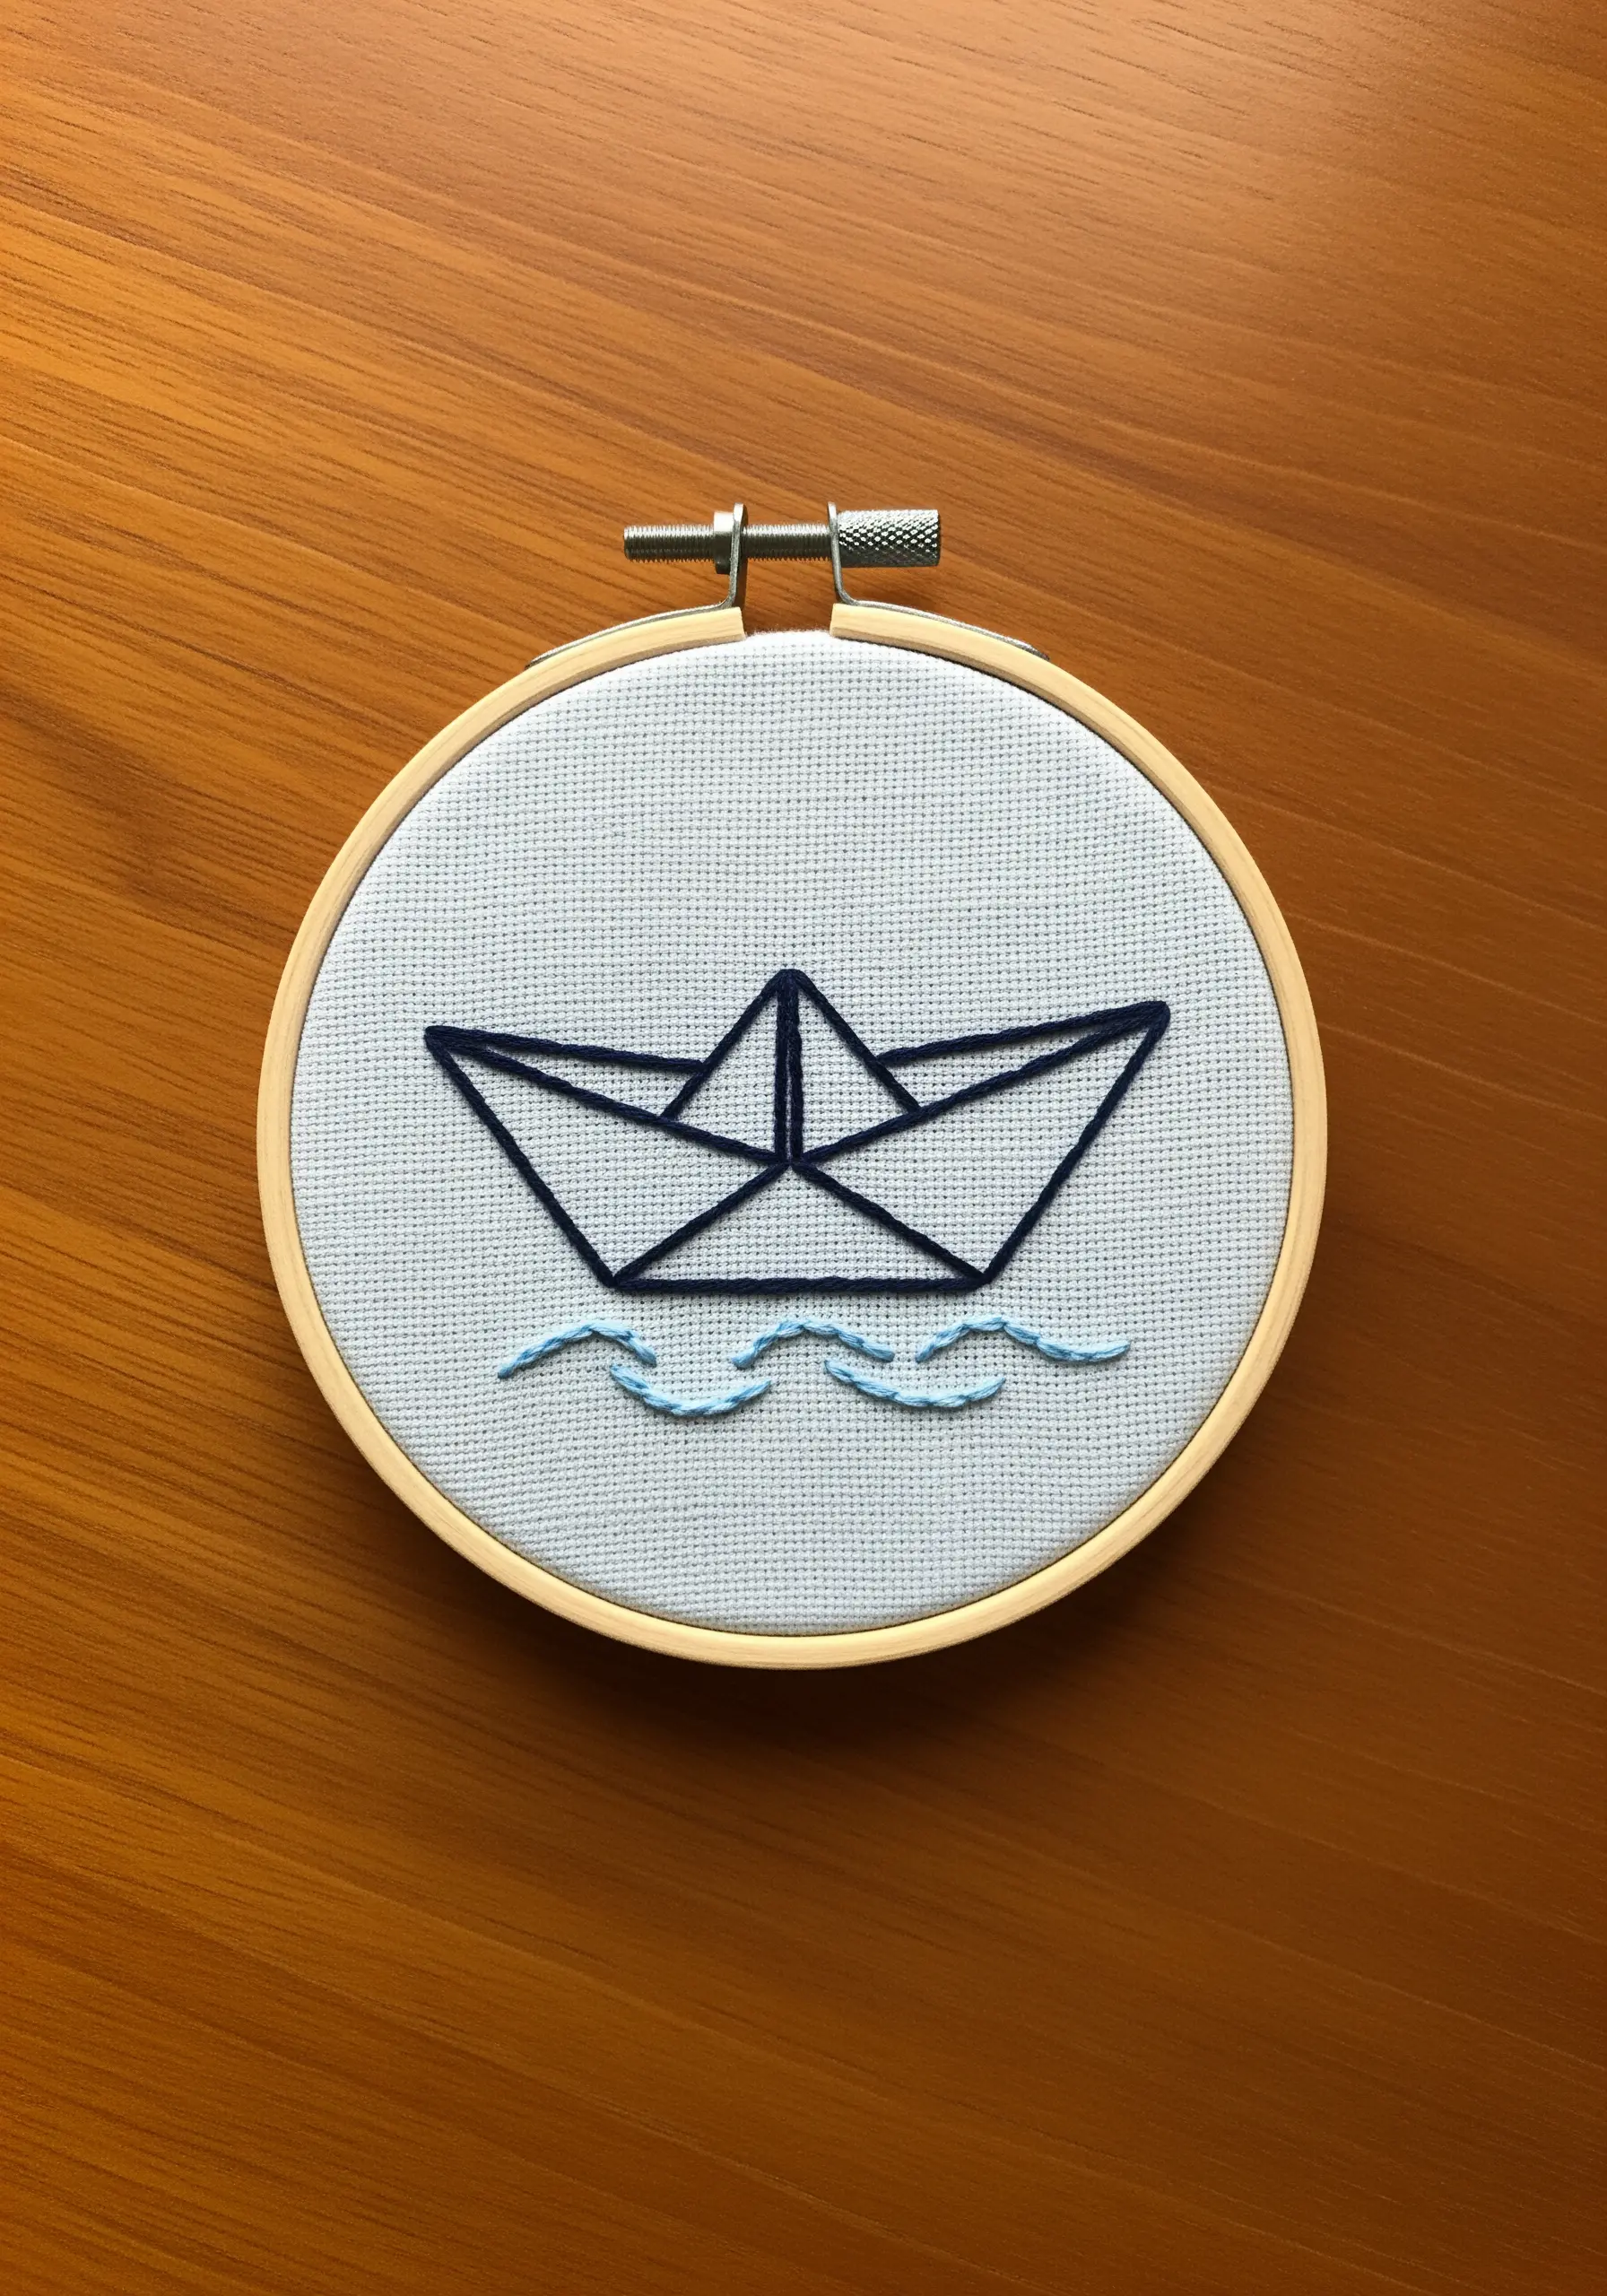
Tell a small story with the clean, illustrative quality of a simple backstitch.
This design relies on the clarity of its lines, so focus on consistent stitch length and sharp corners to maintain the geometric feel of the folded paper boat.
Introduce a second and third color minimally—just a few wavy lines are enough to suggest water and add context.
The result is a motif that feels both nostalgic, playful & happy, perfect for customizing children’s items or creating a simple piece of art.
11. Creating Leaf Veins with Fishbone Stitch

To give leaves a realistic, veined appearance, the fishbone stitch is your most powerful tool.
This stitch creates a central spine and angled sides simultaneously, perfectly mimicking the natural structure of a leaf.
For a multi-leaf design like this, slightly overlap each element to build depth and create a lush, layered effect.
Keeping the entire design in a single color family maintains a sophisticated, modern aesthetic for your hand-embroidery leaf patterns.
12. Embroidering on Unconventional Surfaces

Take your embroidery beyond the hoop by stitching on small fabric tags for gifts or decor.
Use a sturdy, evenweave fabric scrap and stitch a simple, radiant sunburst with straight stitches.
A metallic thread adds a touch of luxury and festivity, instantly elevating your gift wrapping.
Finish the tag with a metal eyelet for a polished look, proving how small details can make holiday gifts look elegant and personal.
13. The Impact of Color on Felt
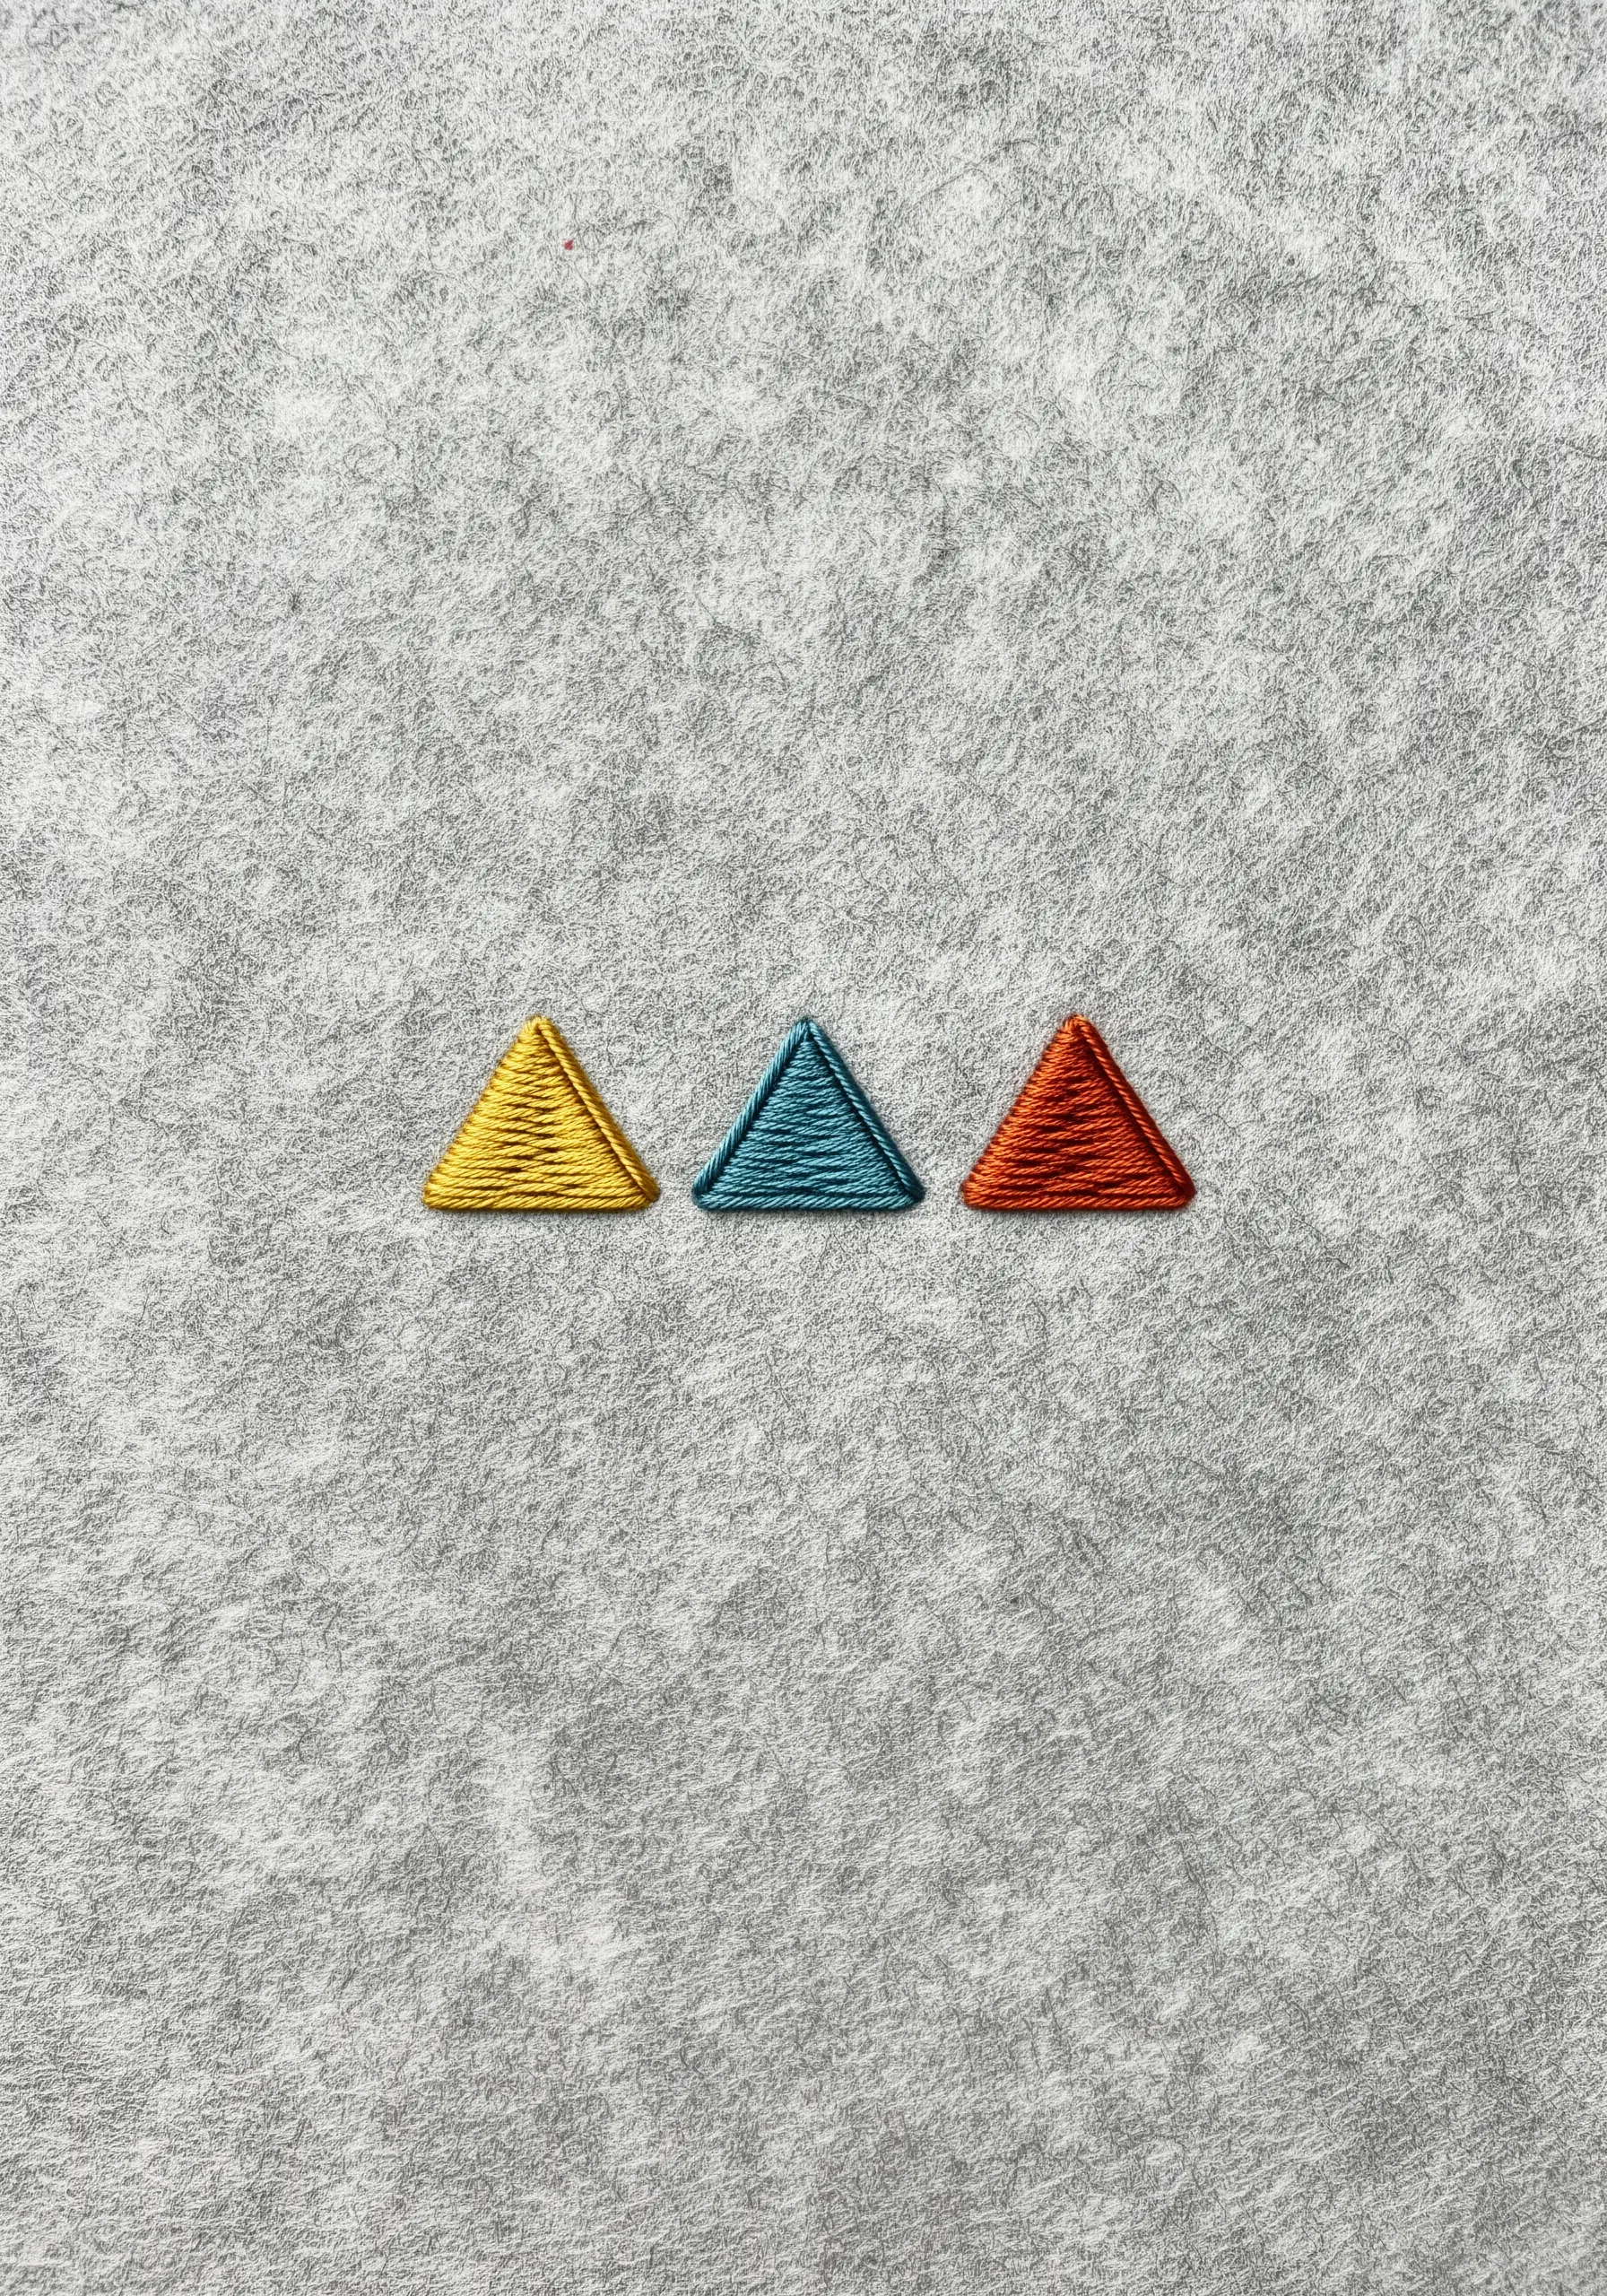
Explore the relationship between thread, texture, and color by stitching directly onto felt.
Felt’s stable, non-woven surface is perfect for achieving dense, smooth satin stitches without the risk of fabric puckering.
Choose a color palette of three complementary or contrasting shades to create a balanced, graphic composition.
The soft, matte texture of the felt makes the sheen of the floss stand out, creating tiny accents that can make plain walls pop when framed.
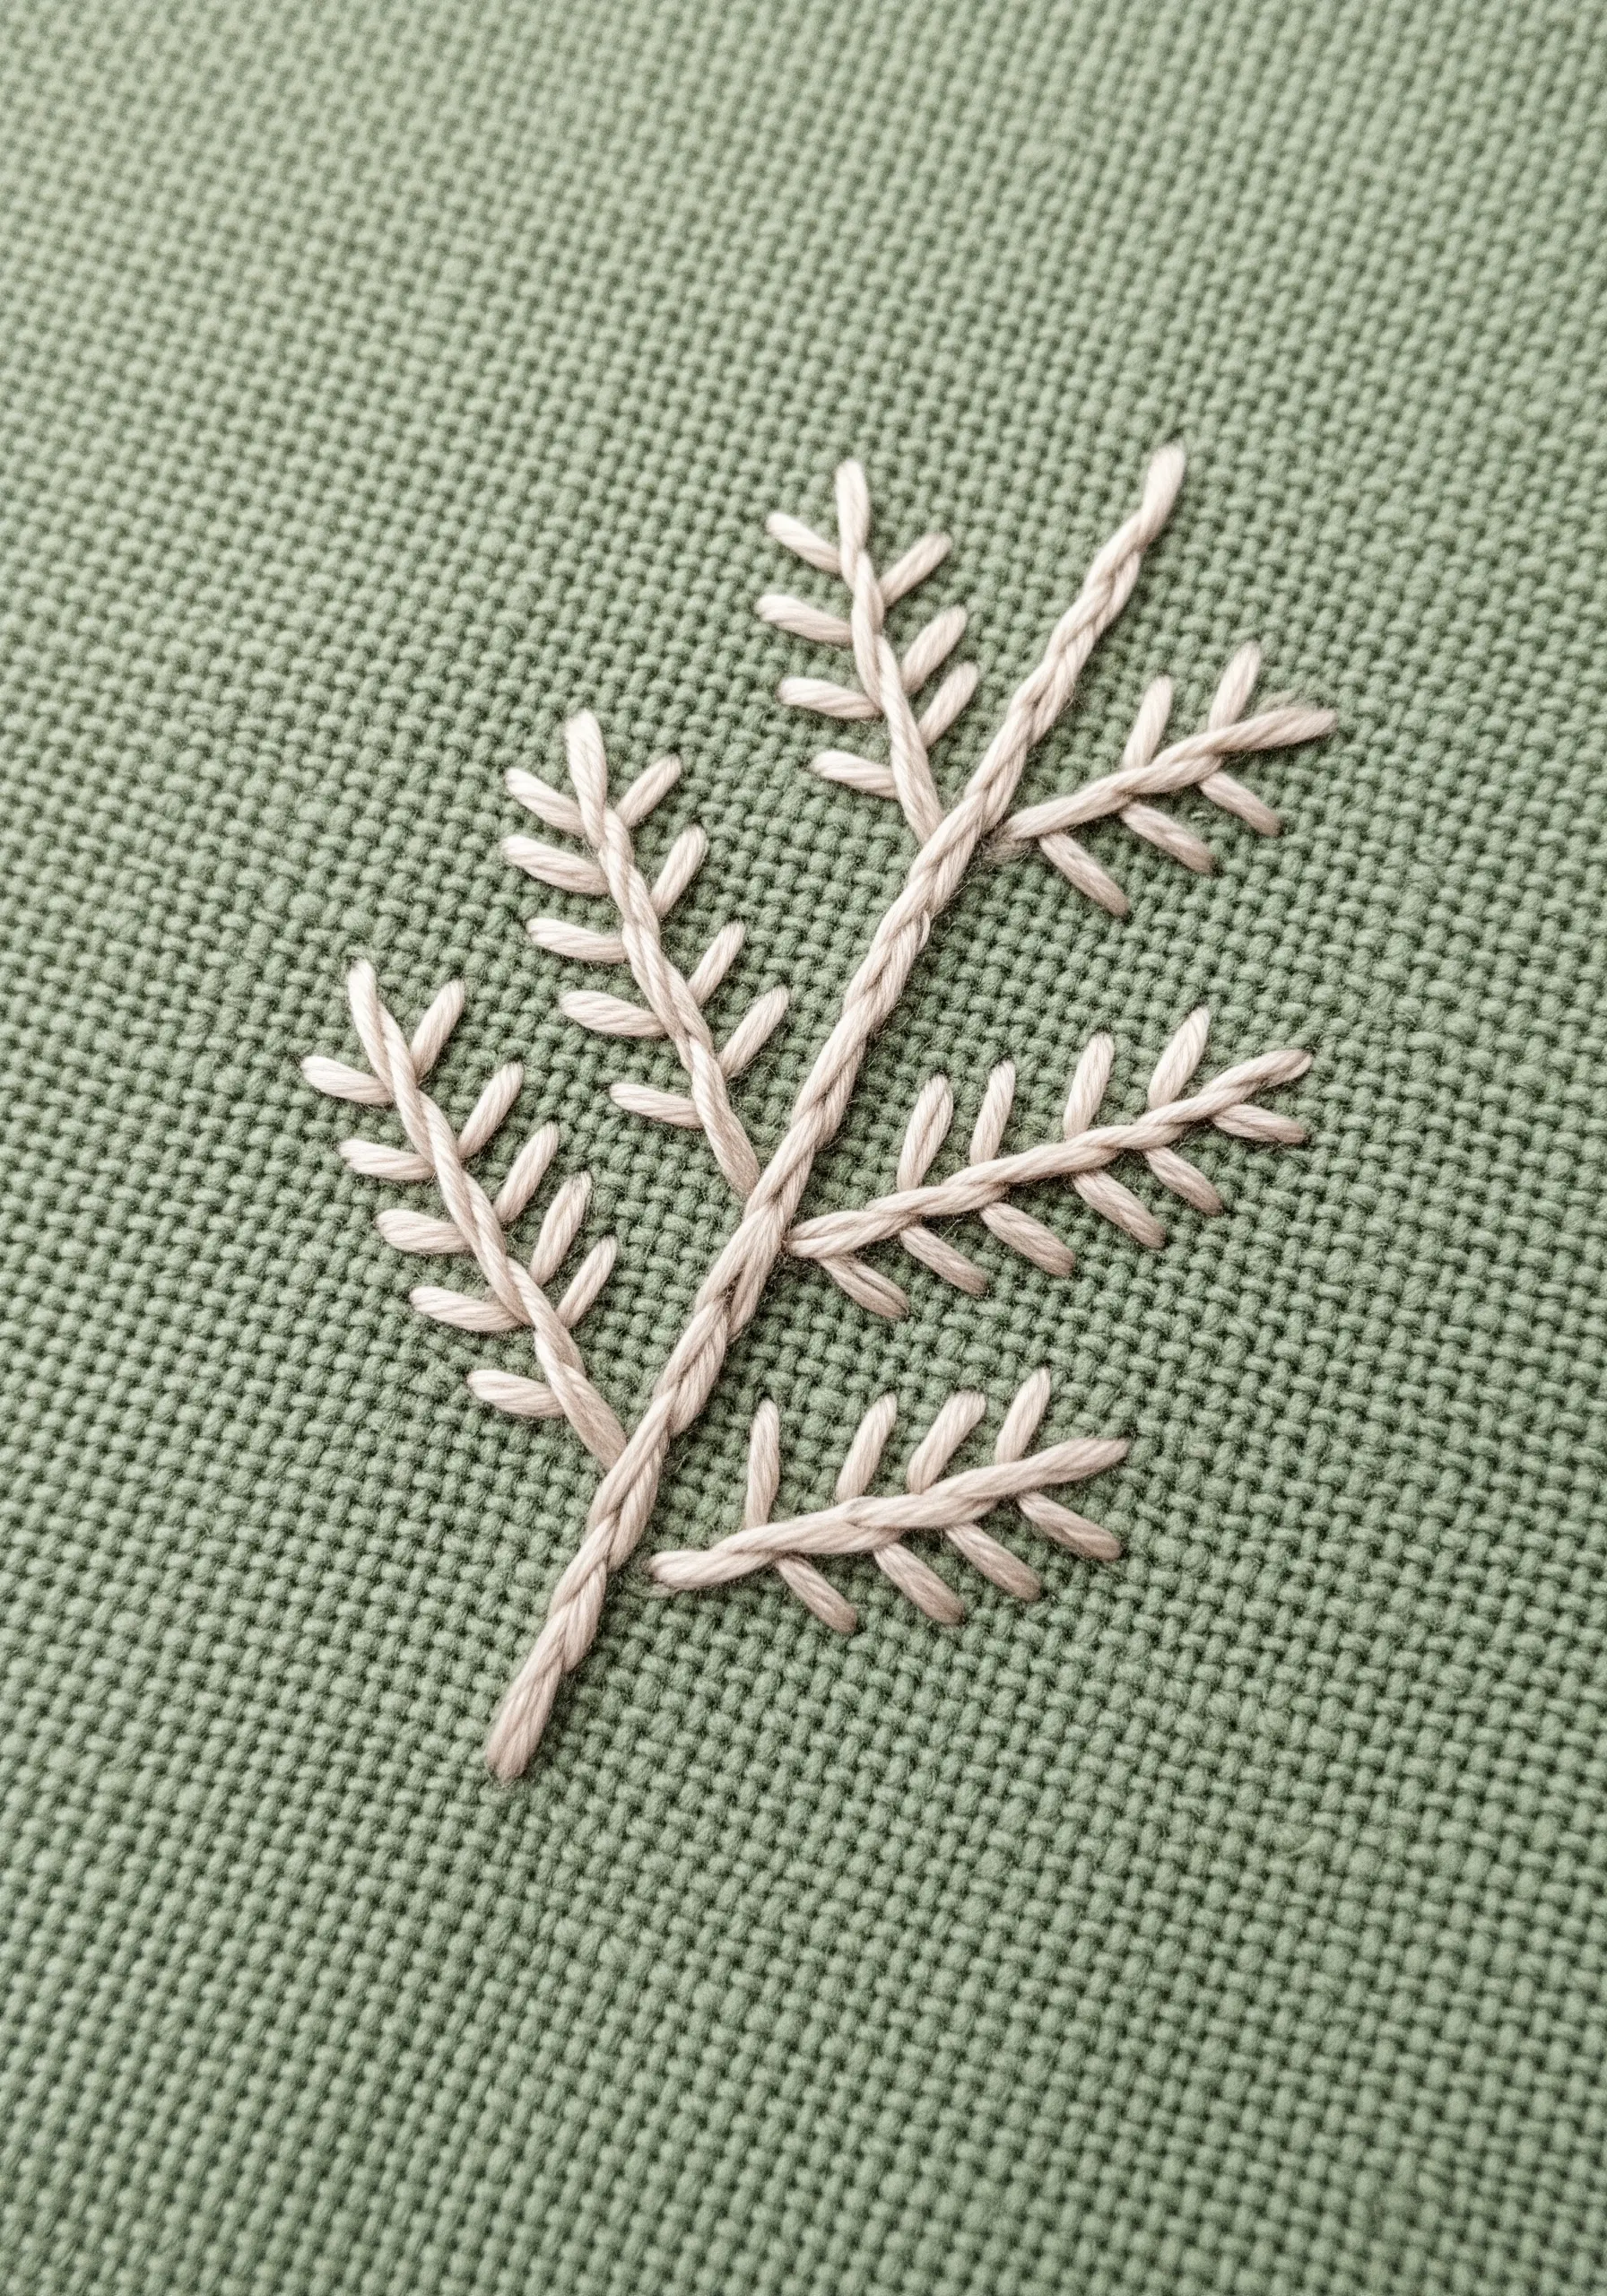
14. The Airy Quality of Open Fill Stitches
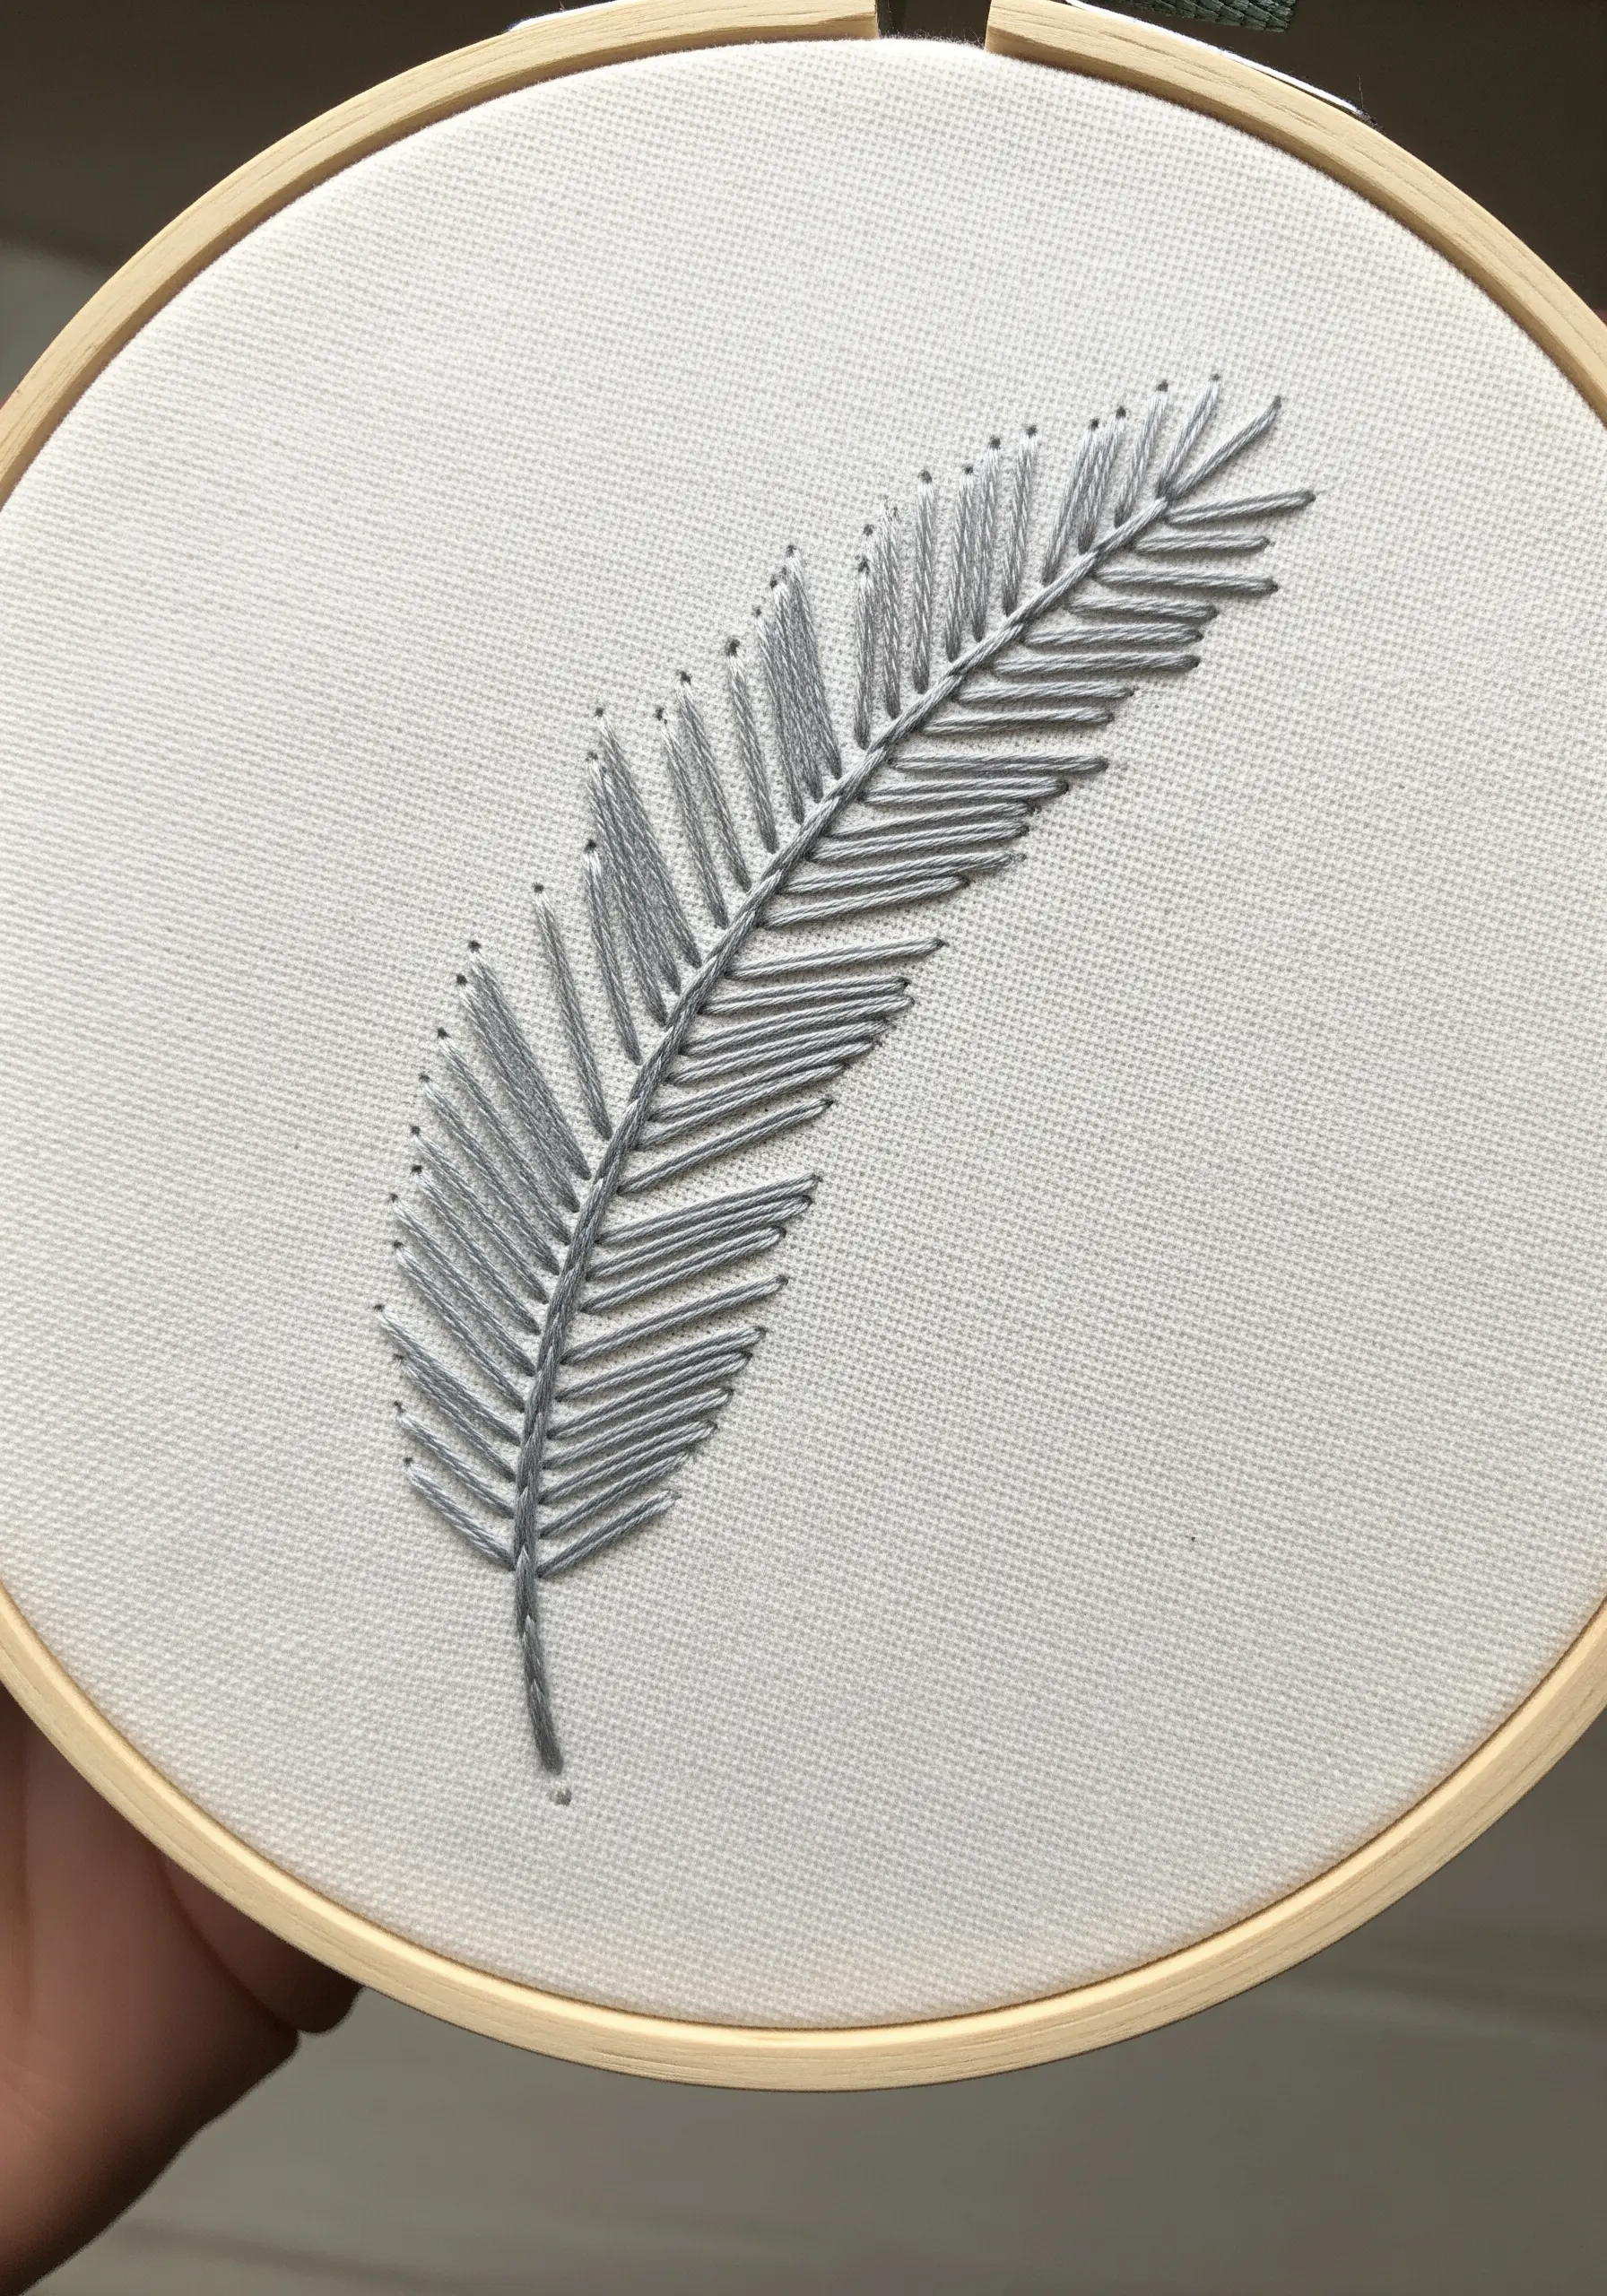
Suggest a shape rather than filling it completely for a delicate, minimalist aesthetic.
Create a feather using a stem stitch for the central shaft and evenly spaced straight stitches for the barbs.
The negative space between the stitches is just as important as the thread itself, contributing to the design’s light and airy feel.
This technique is a beautiful example of how nature-inspired embroidery can be both simple and incredibly elegant.
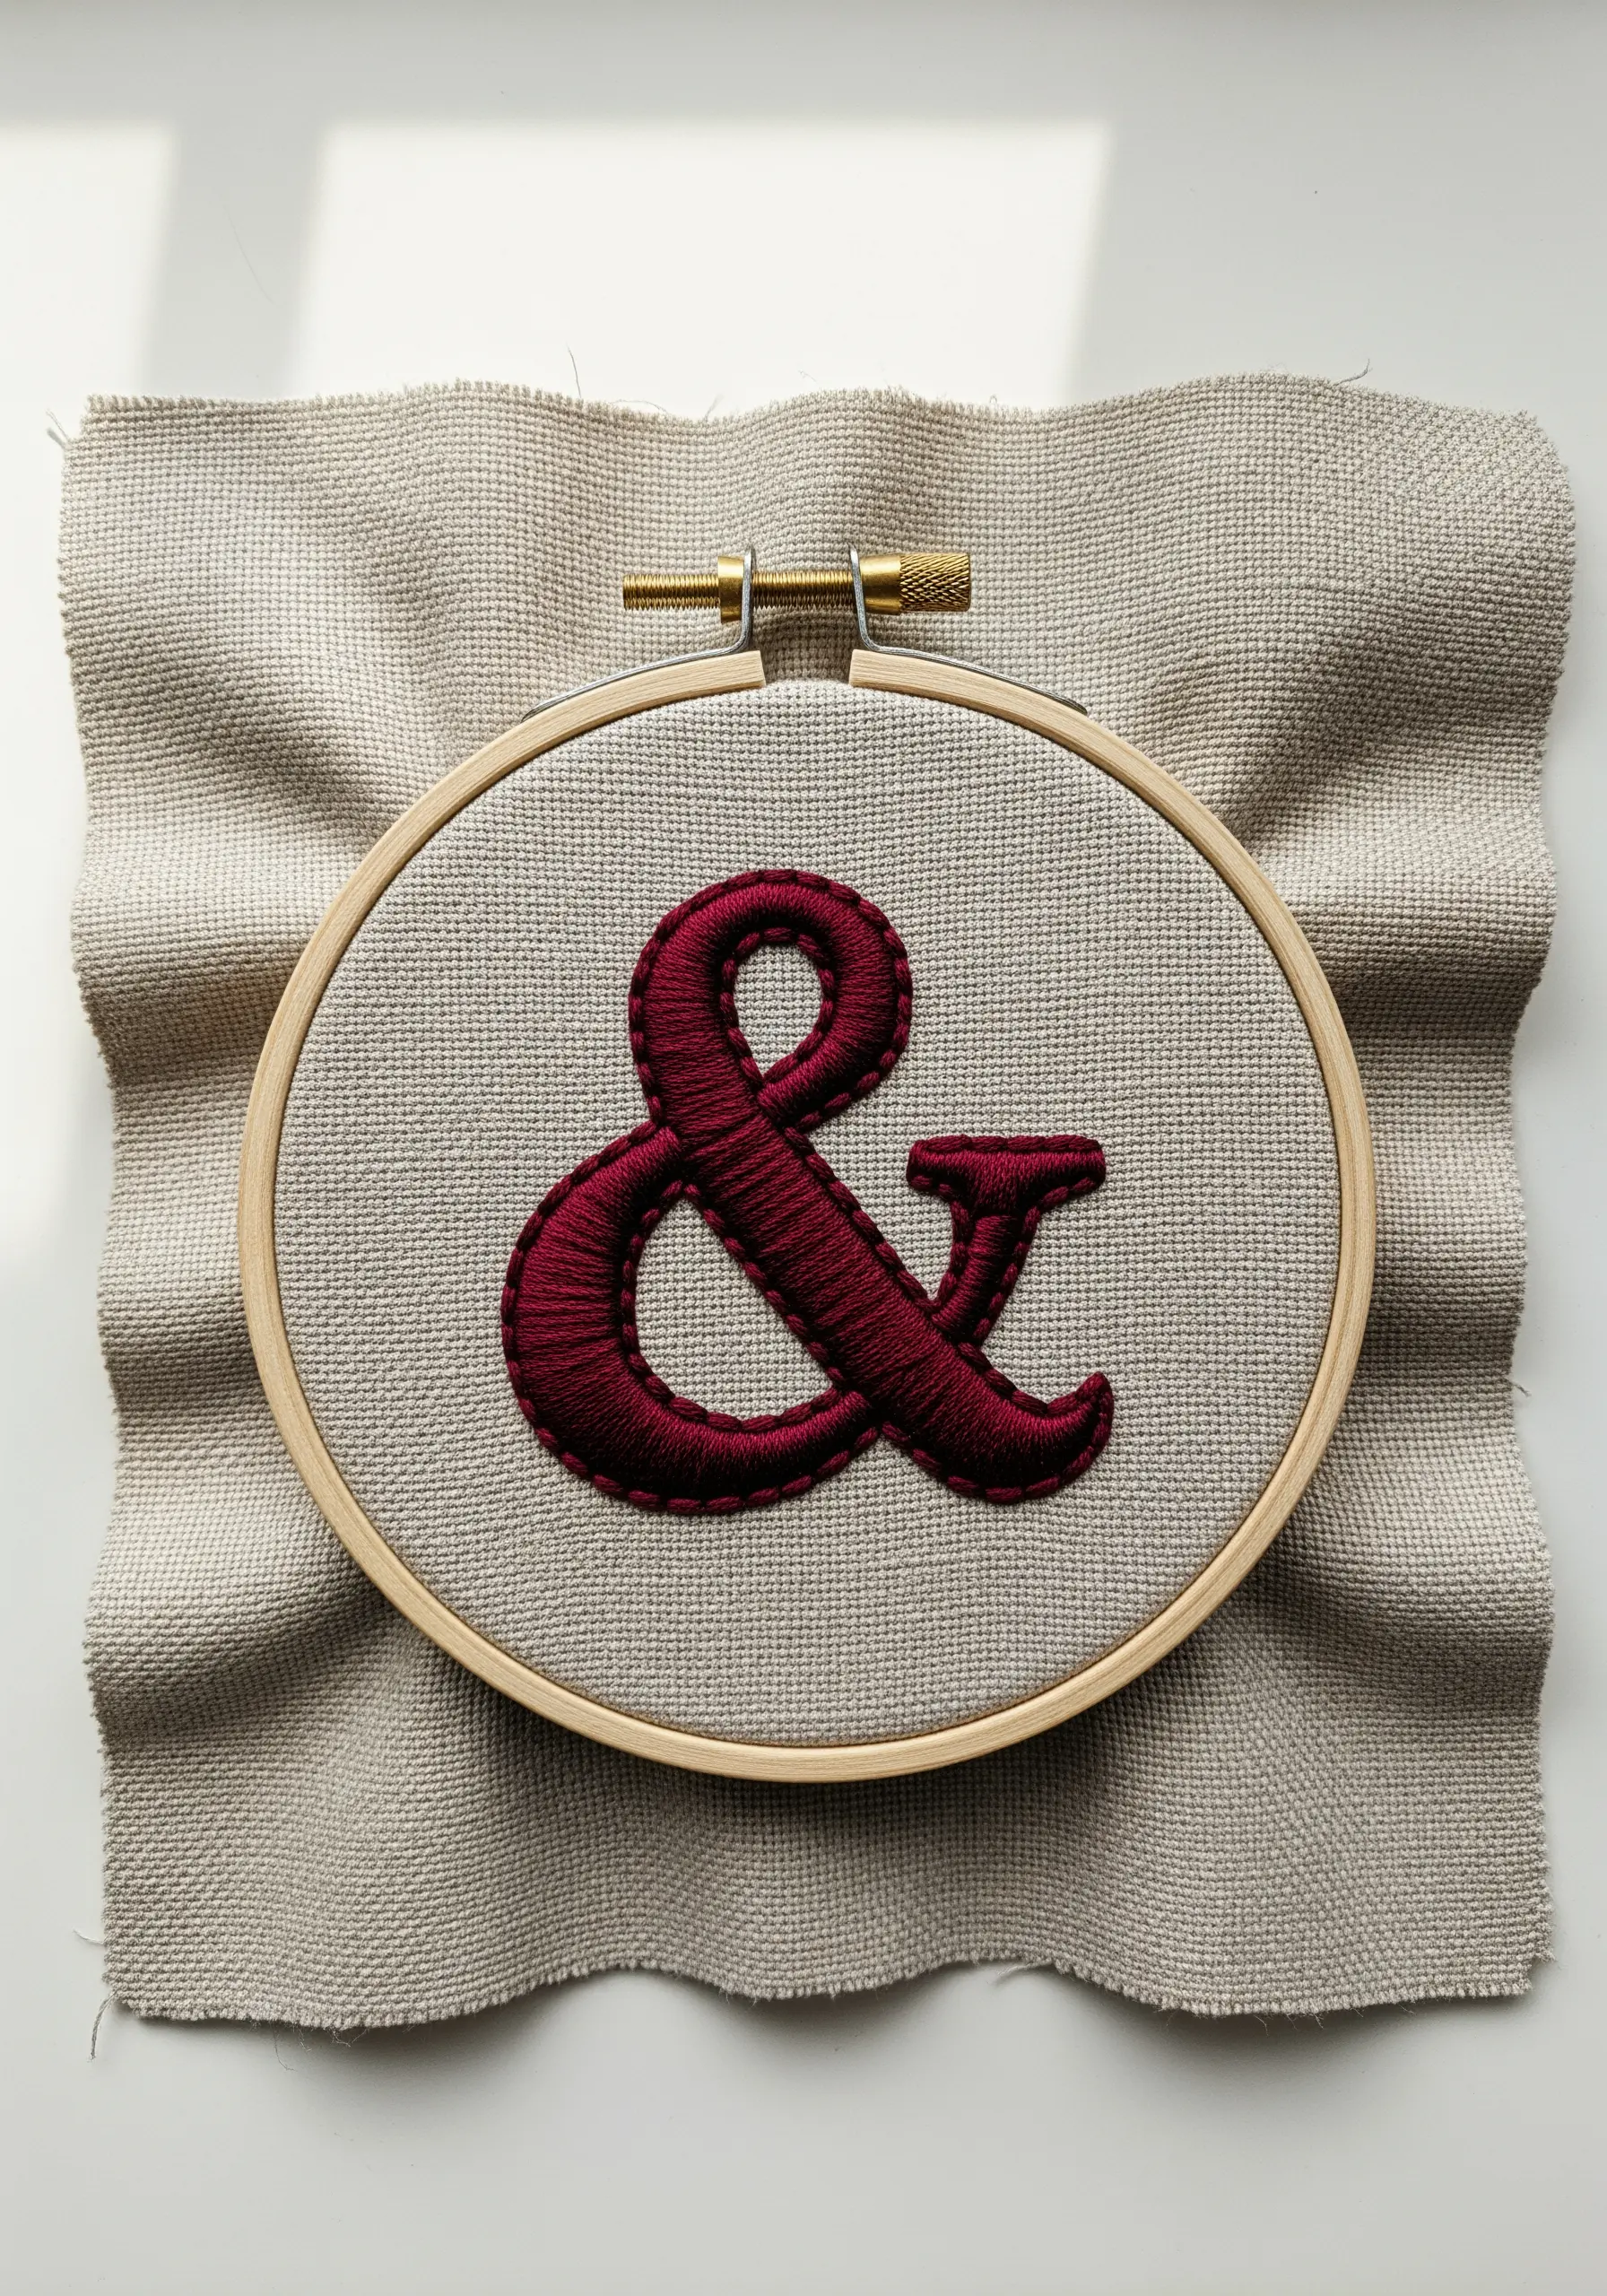
15. Bold Monograms with Heavy Chain Stitch
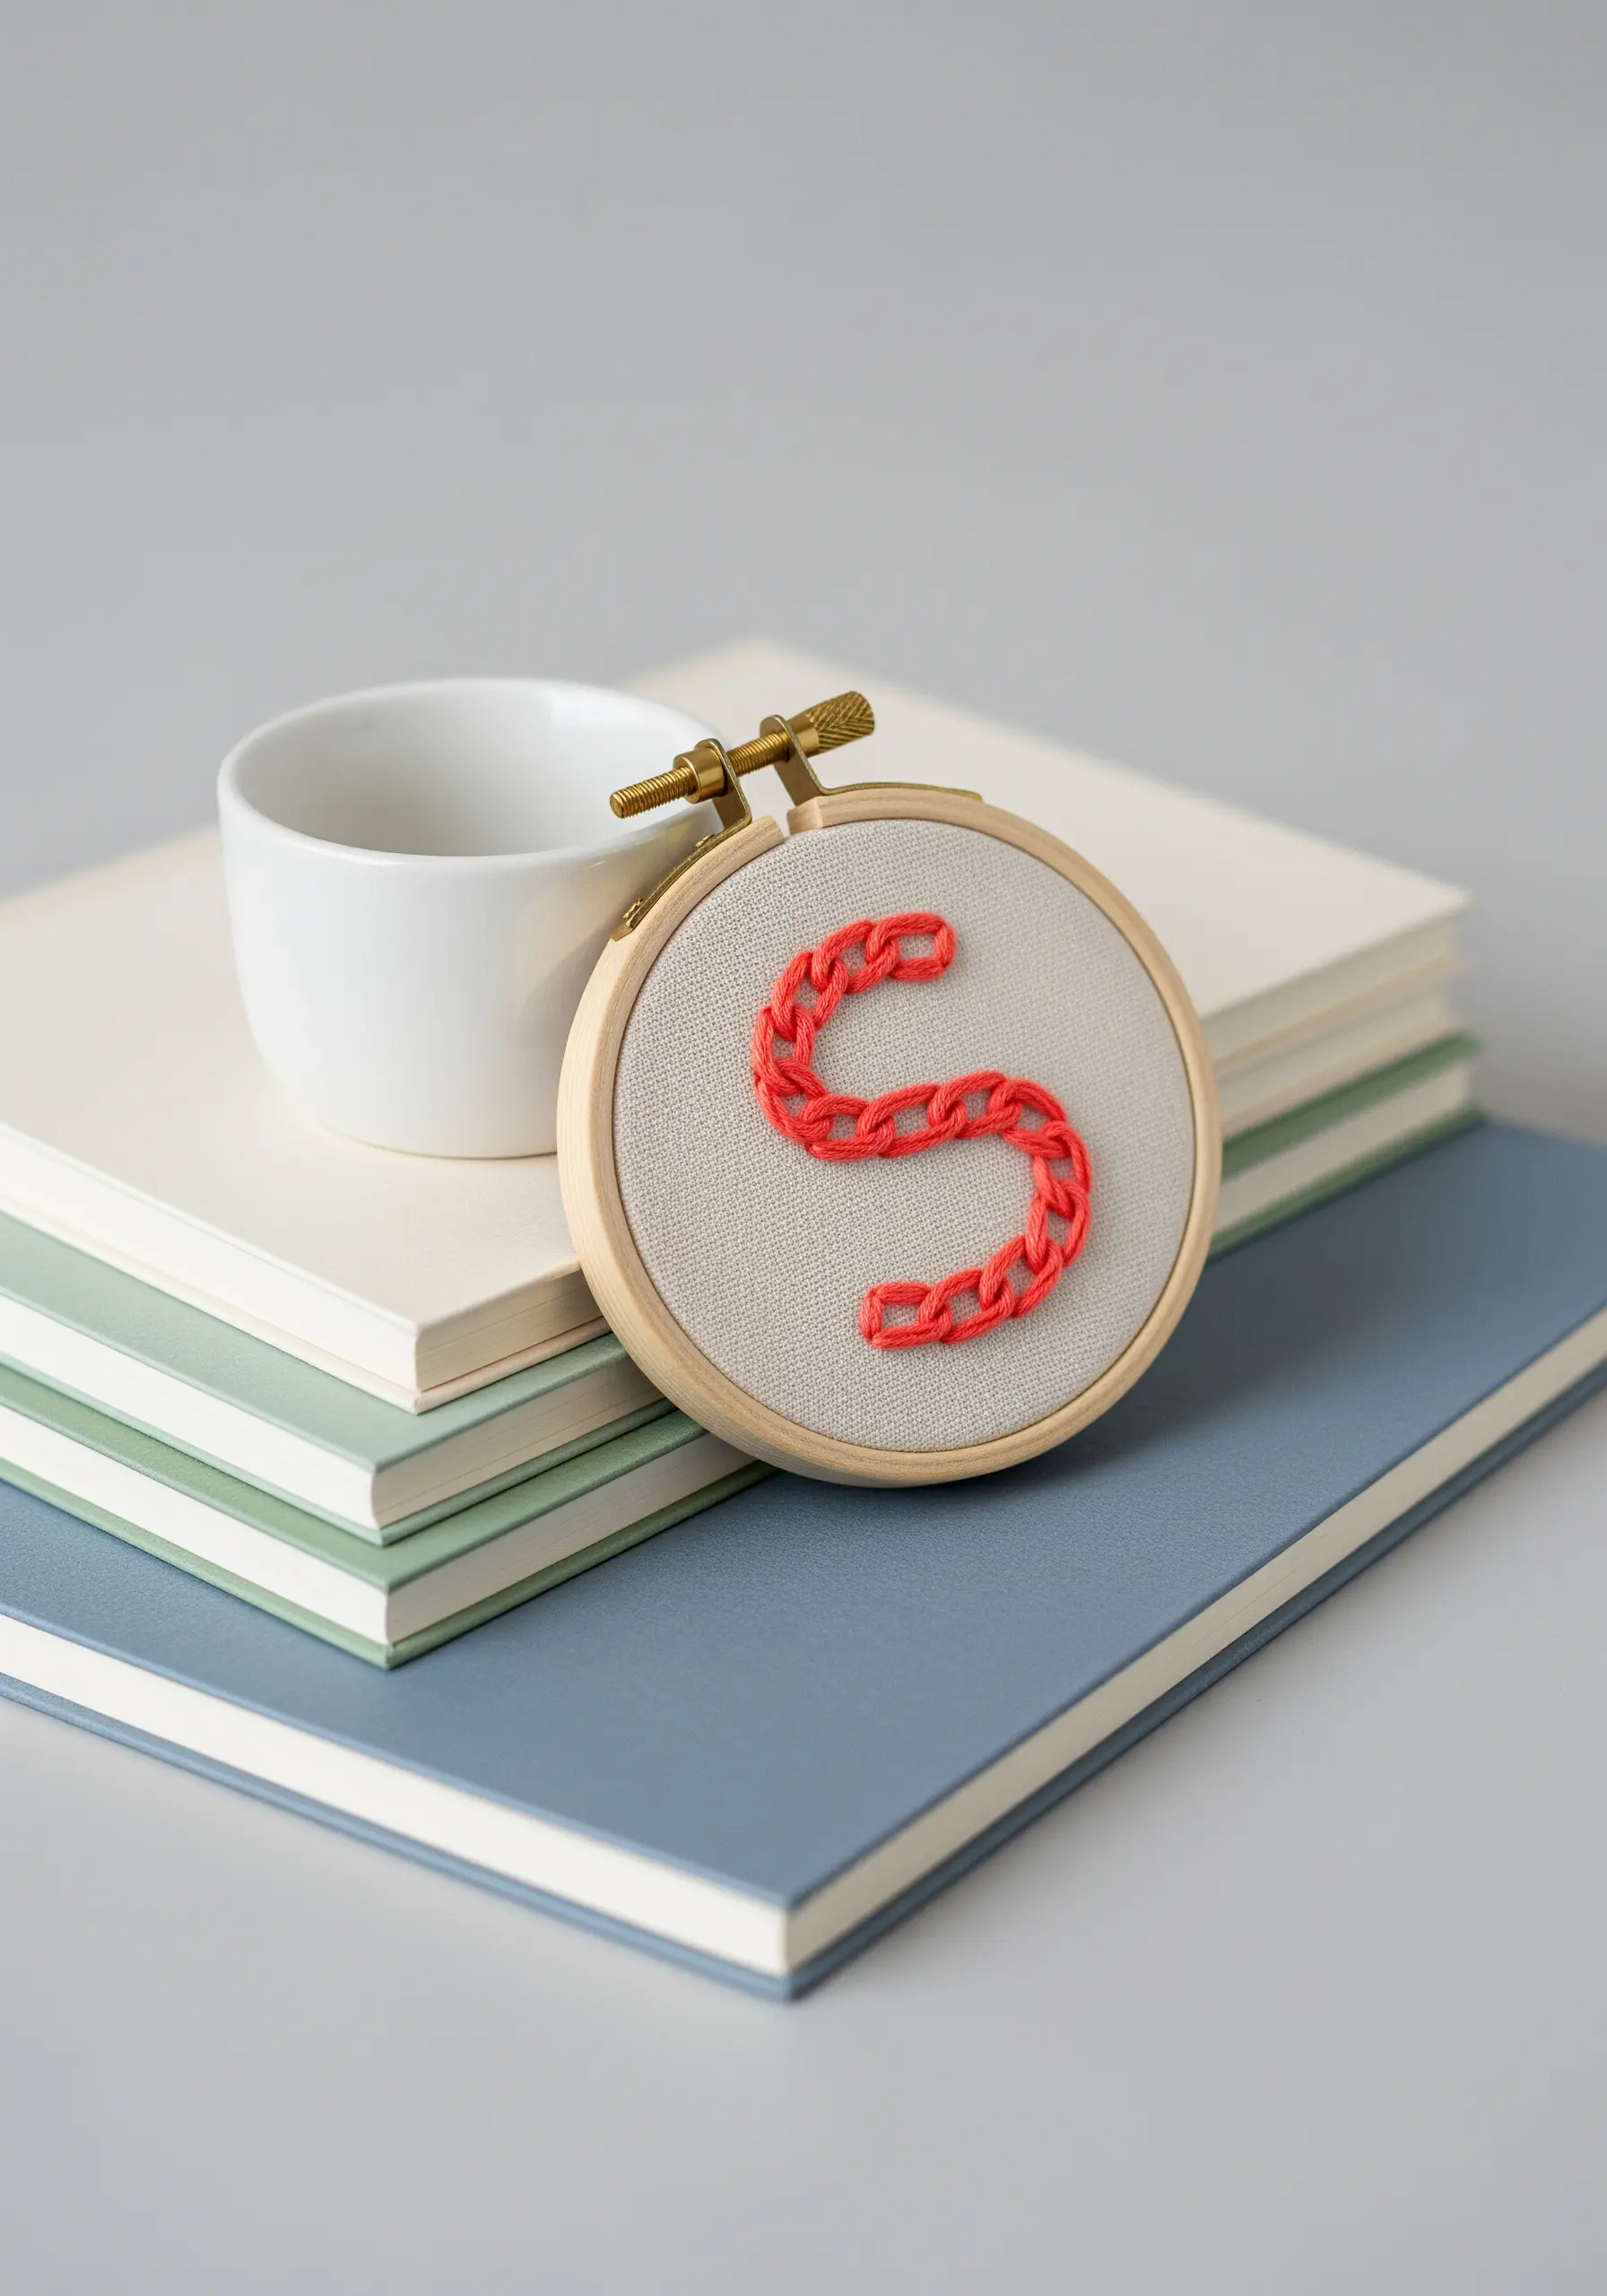
When you want a bold line with built-in texture, the heavy chain stitch is the perfect choice.
Unlike a standard chain stitch, this variation creates a braided, more substantial line that stands out, especially for monograms or lettering.
Use all six strands of your embroidery floss to maximize its thickness and visual weight.
Pair a vibrant color with a neutral linen background for a high-contrast design that fits perfectly in mini monogram embroidery frames.
16. Micro-Embroidery for Apparel

Add a tiny, personal detail to clothing with a micro-motif that’s smaller than a dime.
Use a tight satin stitch for the planet and a delicate backstitch for the ring, using just two or three strands of floss for clean definition.
When stitching on knits or stretchy fabrics, be sure to use a stabilizer on the back to prevent puckering and distortion.
These tiny details are what make your clothes look custom-made and unique.
17. Creating Texture with Scattered Knots

Build an abstract, textural field by scattering small, dimensional stitches across your fabric.
Use French knots or colonial knots in varying sizes by changing the number of thread strands or wraps around the needle.
Incorporate several shades of a single color family—like blues and grays—to create a sense of depth and movement, reminiscent of raindrops or pebbles.
Distribute the knots in a loose, organic oval to give the composition a soft, contained boundary and beautiful ombre effects.
18. Designing and Applying a Frayed-Edge Patch
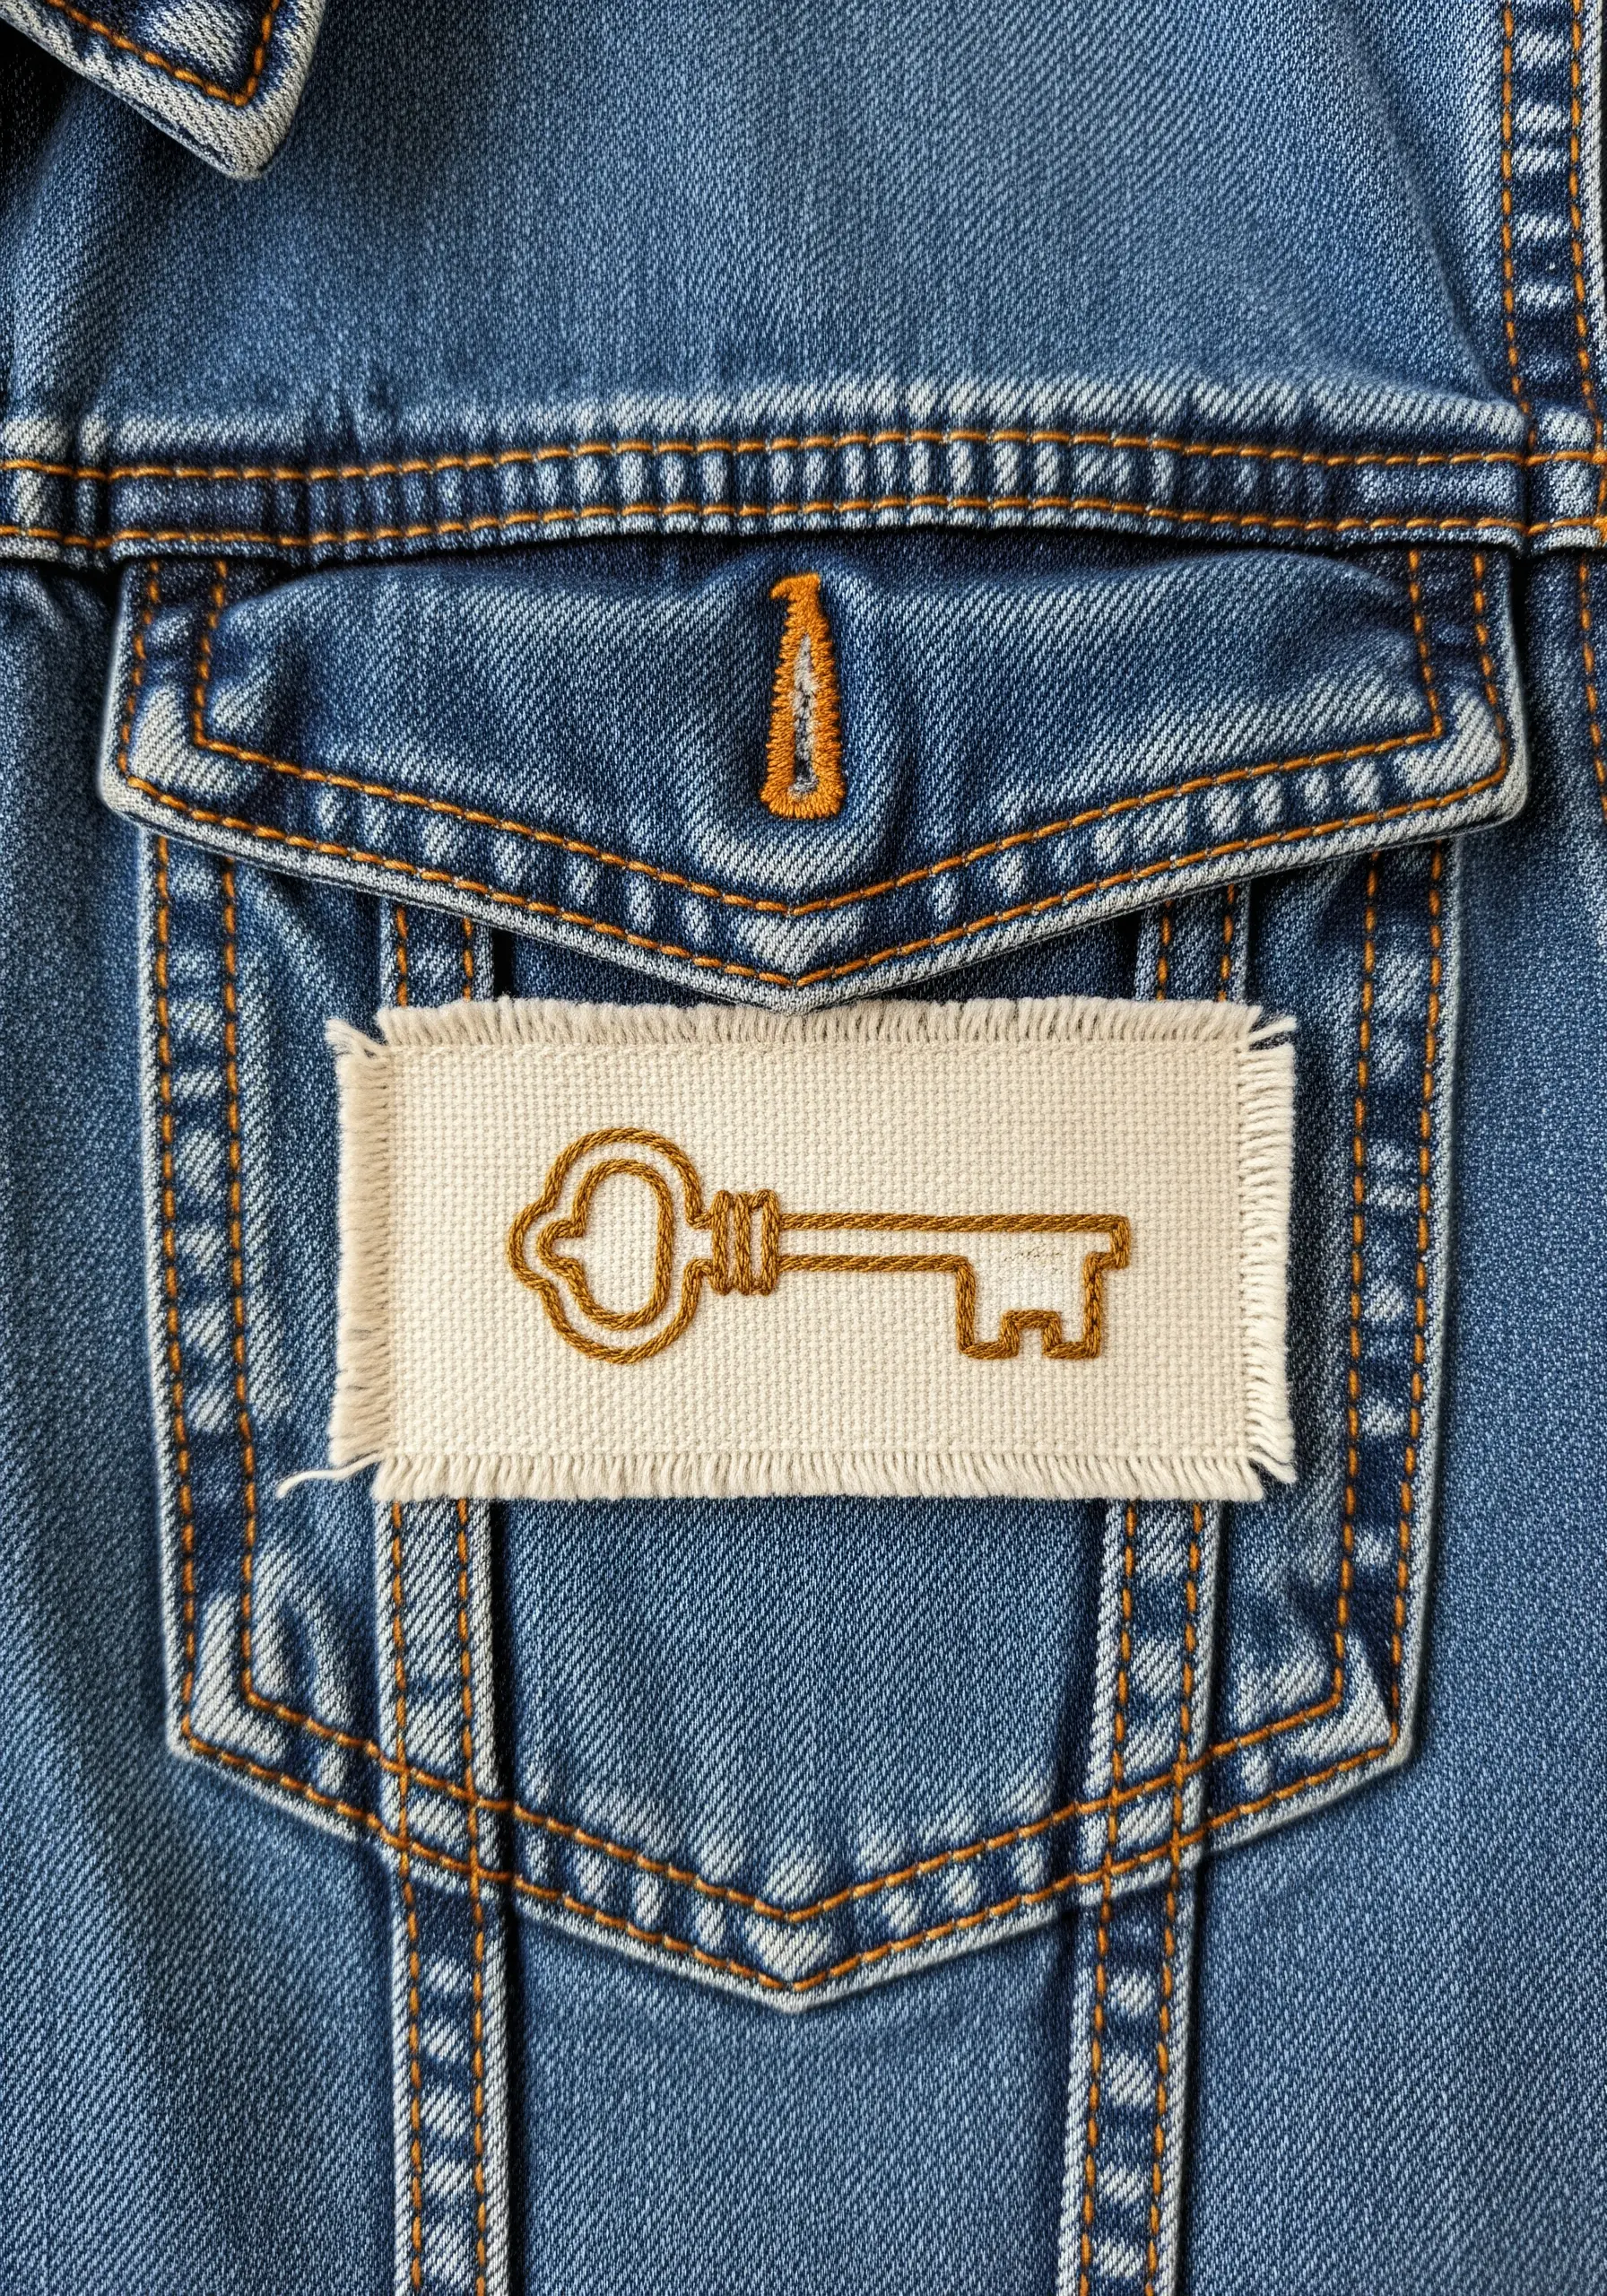
Create a custom patch for a jacket or bag that feels both polished and handmade.
Stitch your design—a simple stem stitch outline works perfectly—onto a rectangle of canvas or linen, leaving ample margin.
Once stitched, gently pull away the threads along the edges to create a soft, frayed border.
Attach the patch with a simple running stitch in a matching thread to customize backpacks, journals, and fabric covers with a personal touch.
19. The Sculptural Effect of Padded Satin Stitch
Give your satin stitch a raised, three-dimensional quality with padding.
First, fill the interior of your shape with a base layer of stitches—small straight stitches or a grid of running stitches will work.
Then, cover this foundation with your final satin stitches, working in the opposite direction. The underlying thread will lift the surface, creating a beautiful, embossed effect.
This technique is perfect for monograms and symbols, making them powerful focal points that make your walls come alive.
20. Elegant Botanicals with Whipped Backstitch
For fine botanical illustrations, combine a few simple stitches for a clean, elegant result.
Use a whipped backstitch for the central stem; this creates a solid, smooth line with a slight twist that mimics a natural stalk.
Add leaflets with detached chain stitches or simple straight stitches, keeping them uniform in size and angle for a balanced, symmetrical look.
This minimalist approach is perfect for creating refined botanical line art embroidery patterns.
21. The Fine Art of Single-Strand Outlines
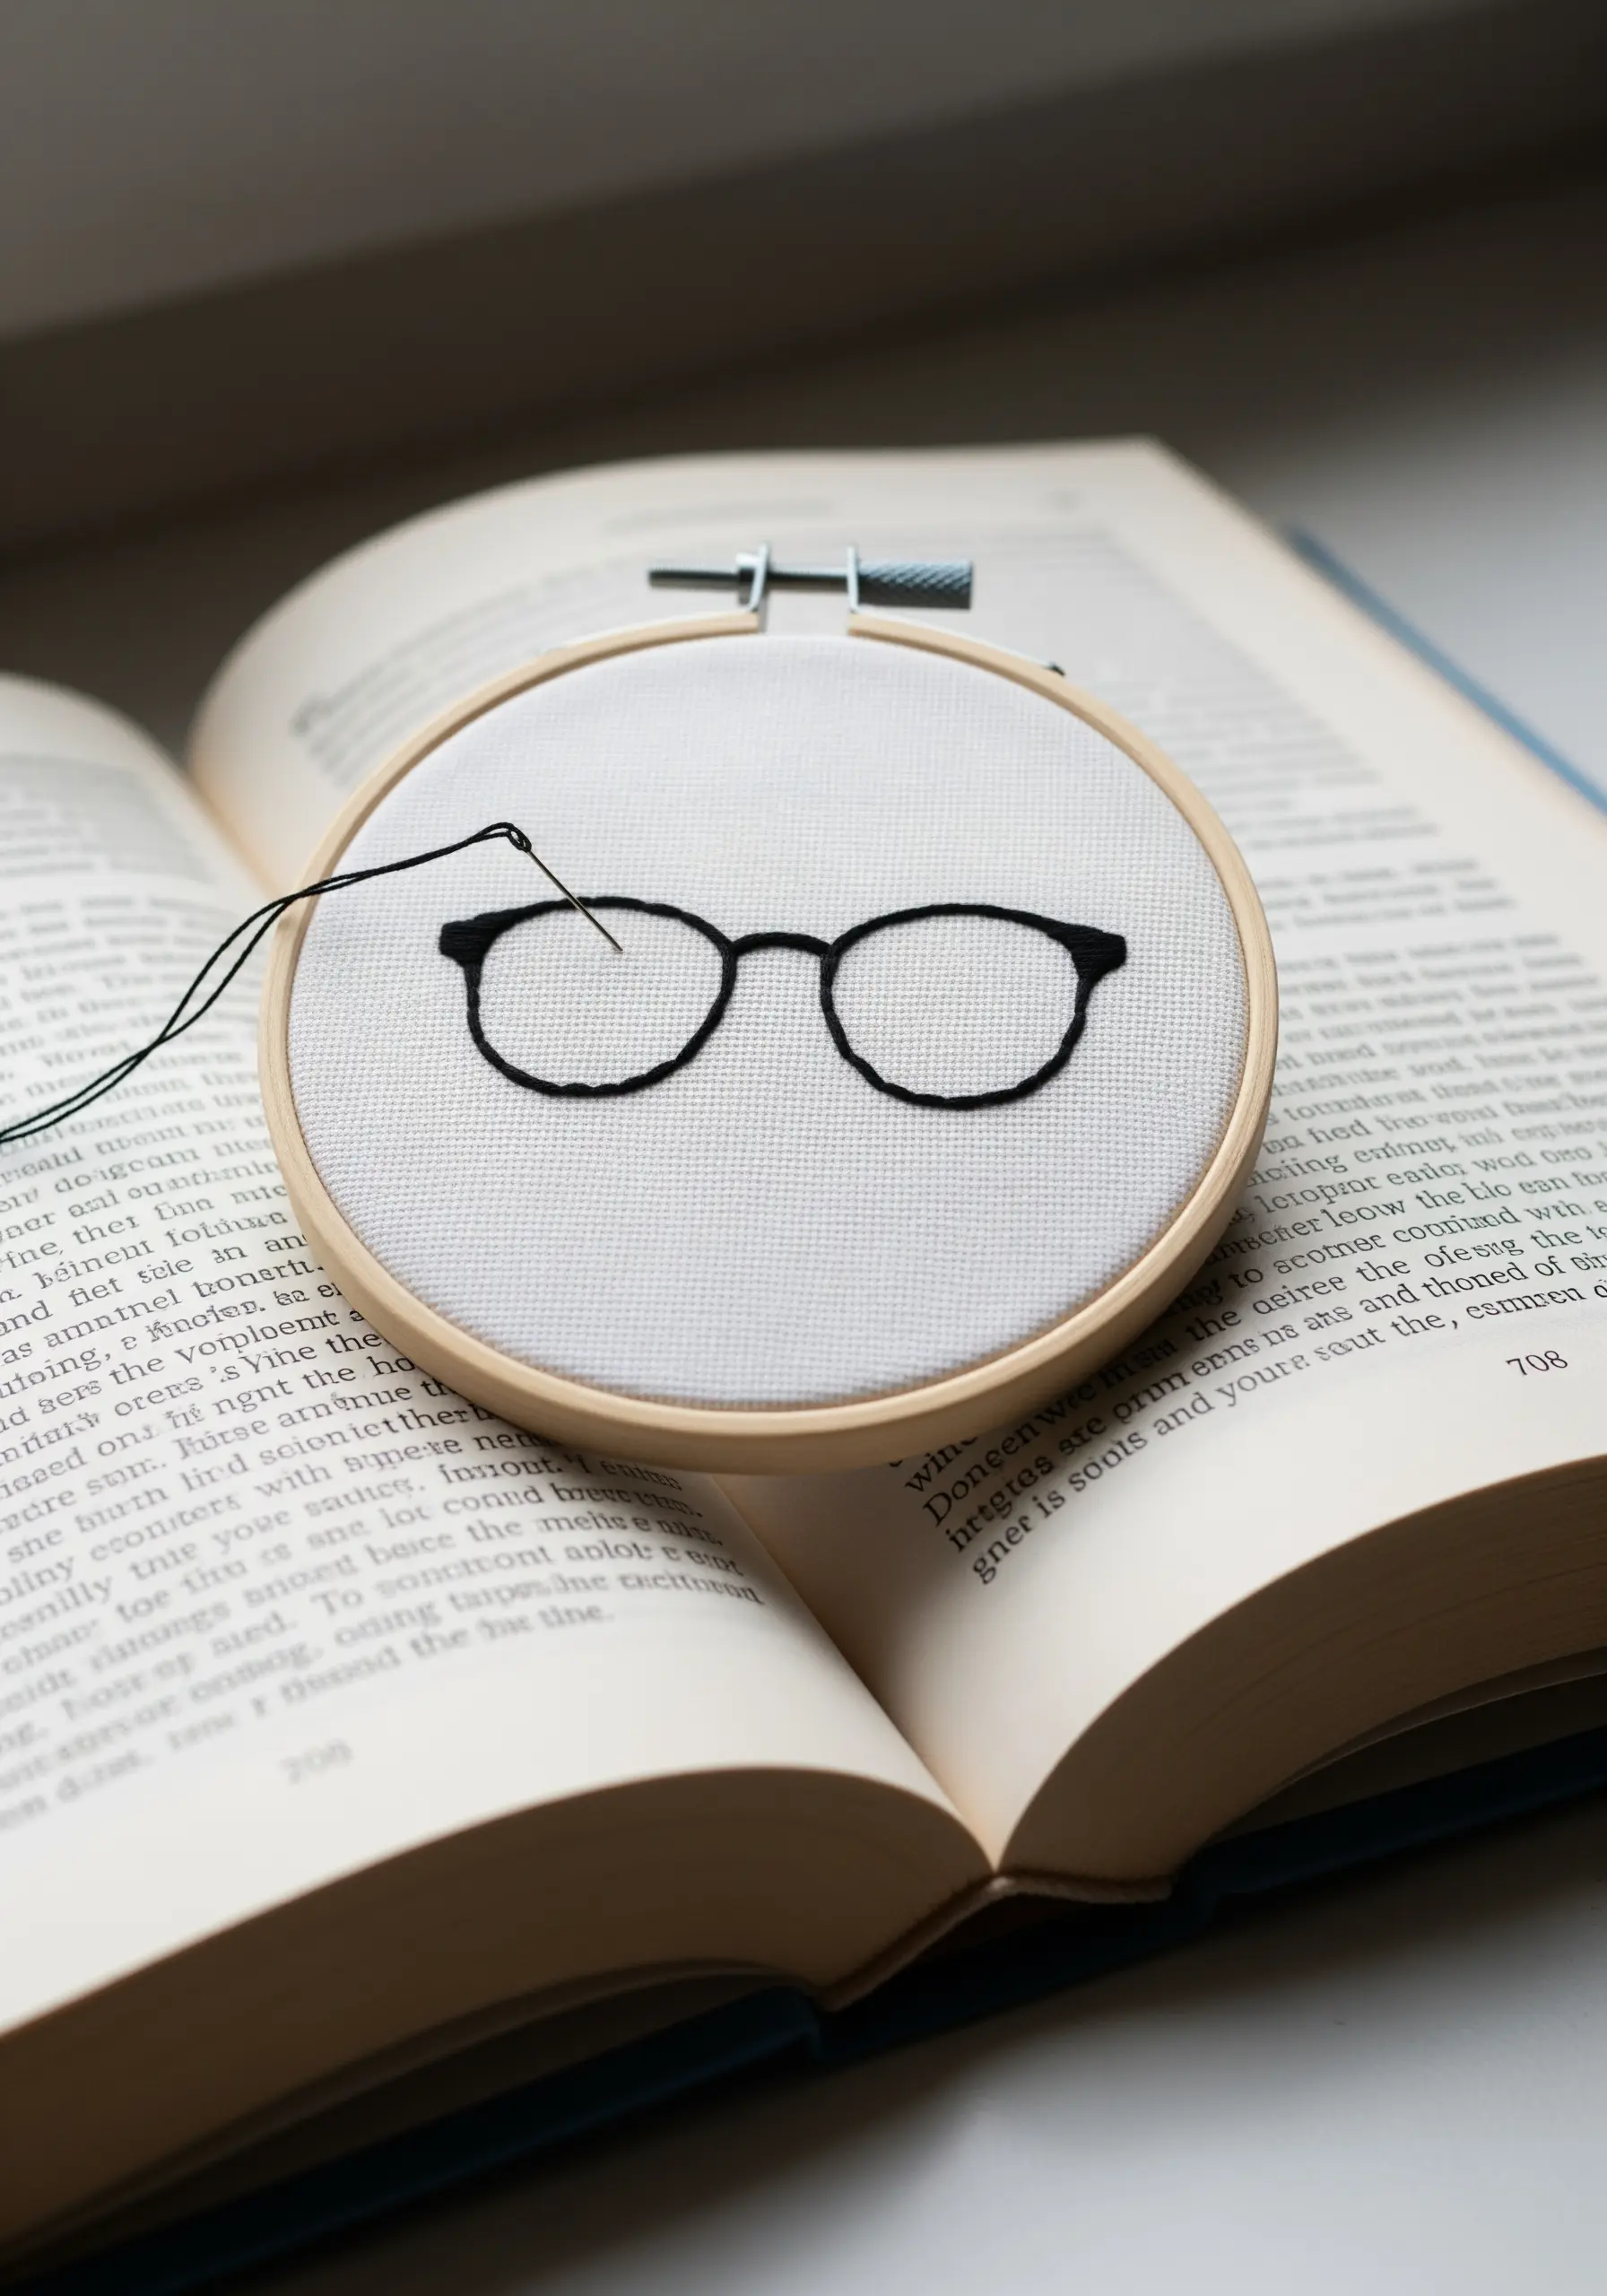
Capture the delicate feel of a line drawing by using only a single strand of embroidery floss.
Use a tiny backstitch, keeping your stitches small and even to create smooth curves for shapes like these glasses.
Working with one strand allows for a level of precision that is impossible with thicker thread, making your work feel more like an illustration than a textile piece.
This technique is ideal when you want to create gallery-style hoop art with a subtle, sophisticated touch.
22. Building 3D Illusions with Color Blocking

Create the illusion of three-dimensional cubes using nothing more than satin stitch and a smart color strategy.
For each cube, assign three shades of a color—light, medium, and dark—to represent the top, front, and side faces.
Stitch each panel with satin stitch, ensuring the stitch direction is consistent for each corresponding face across the entire pattern (e.g., all tops are stitched vertically).
This geometric precision is a beautiful way to transform bare walls without over-decorating.
23. Weaving Thread for a Braided Texture
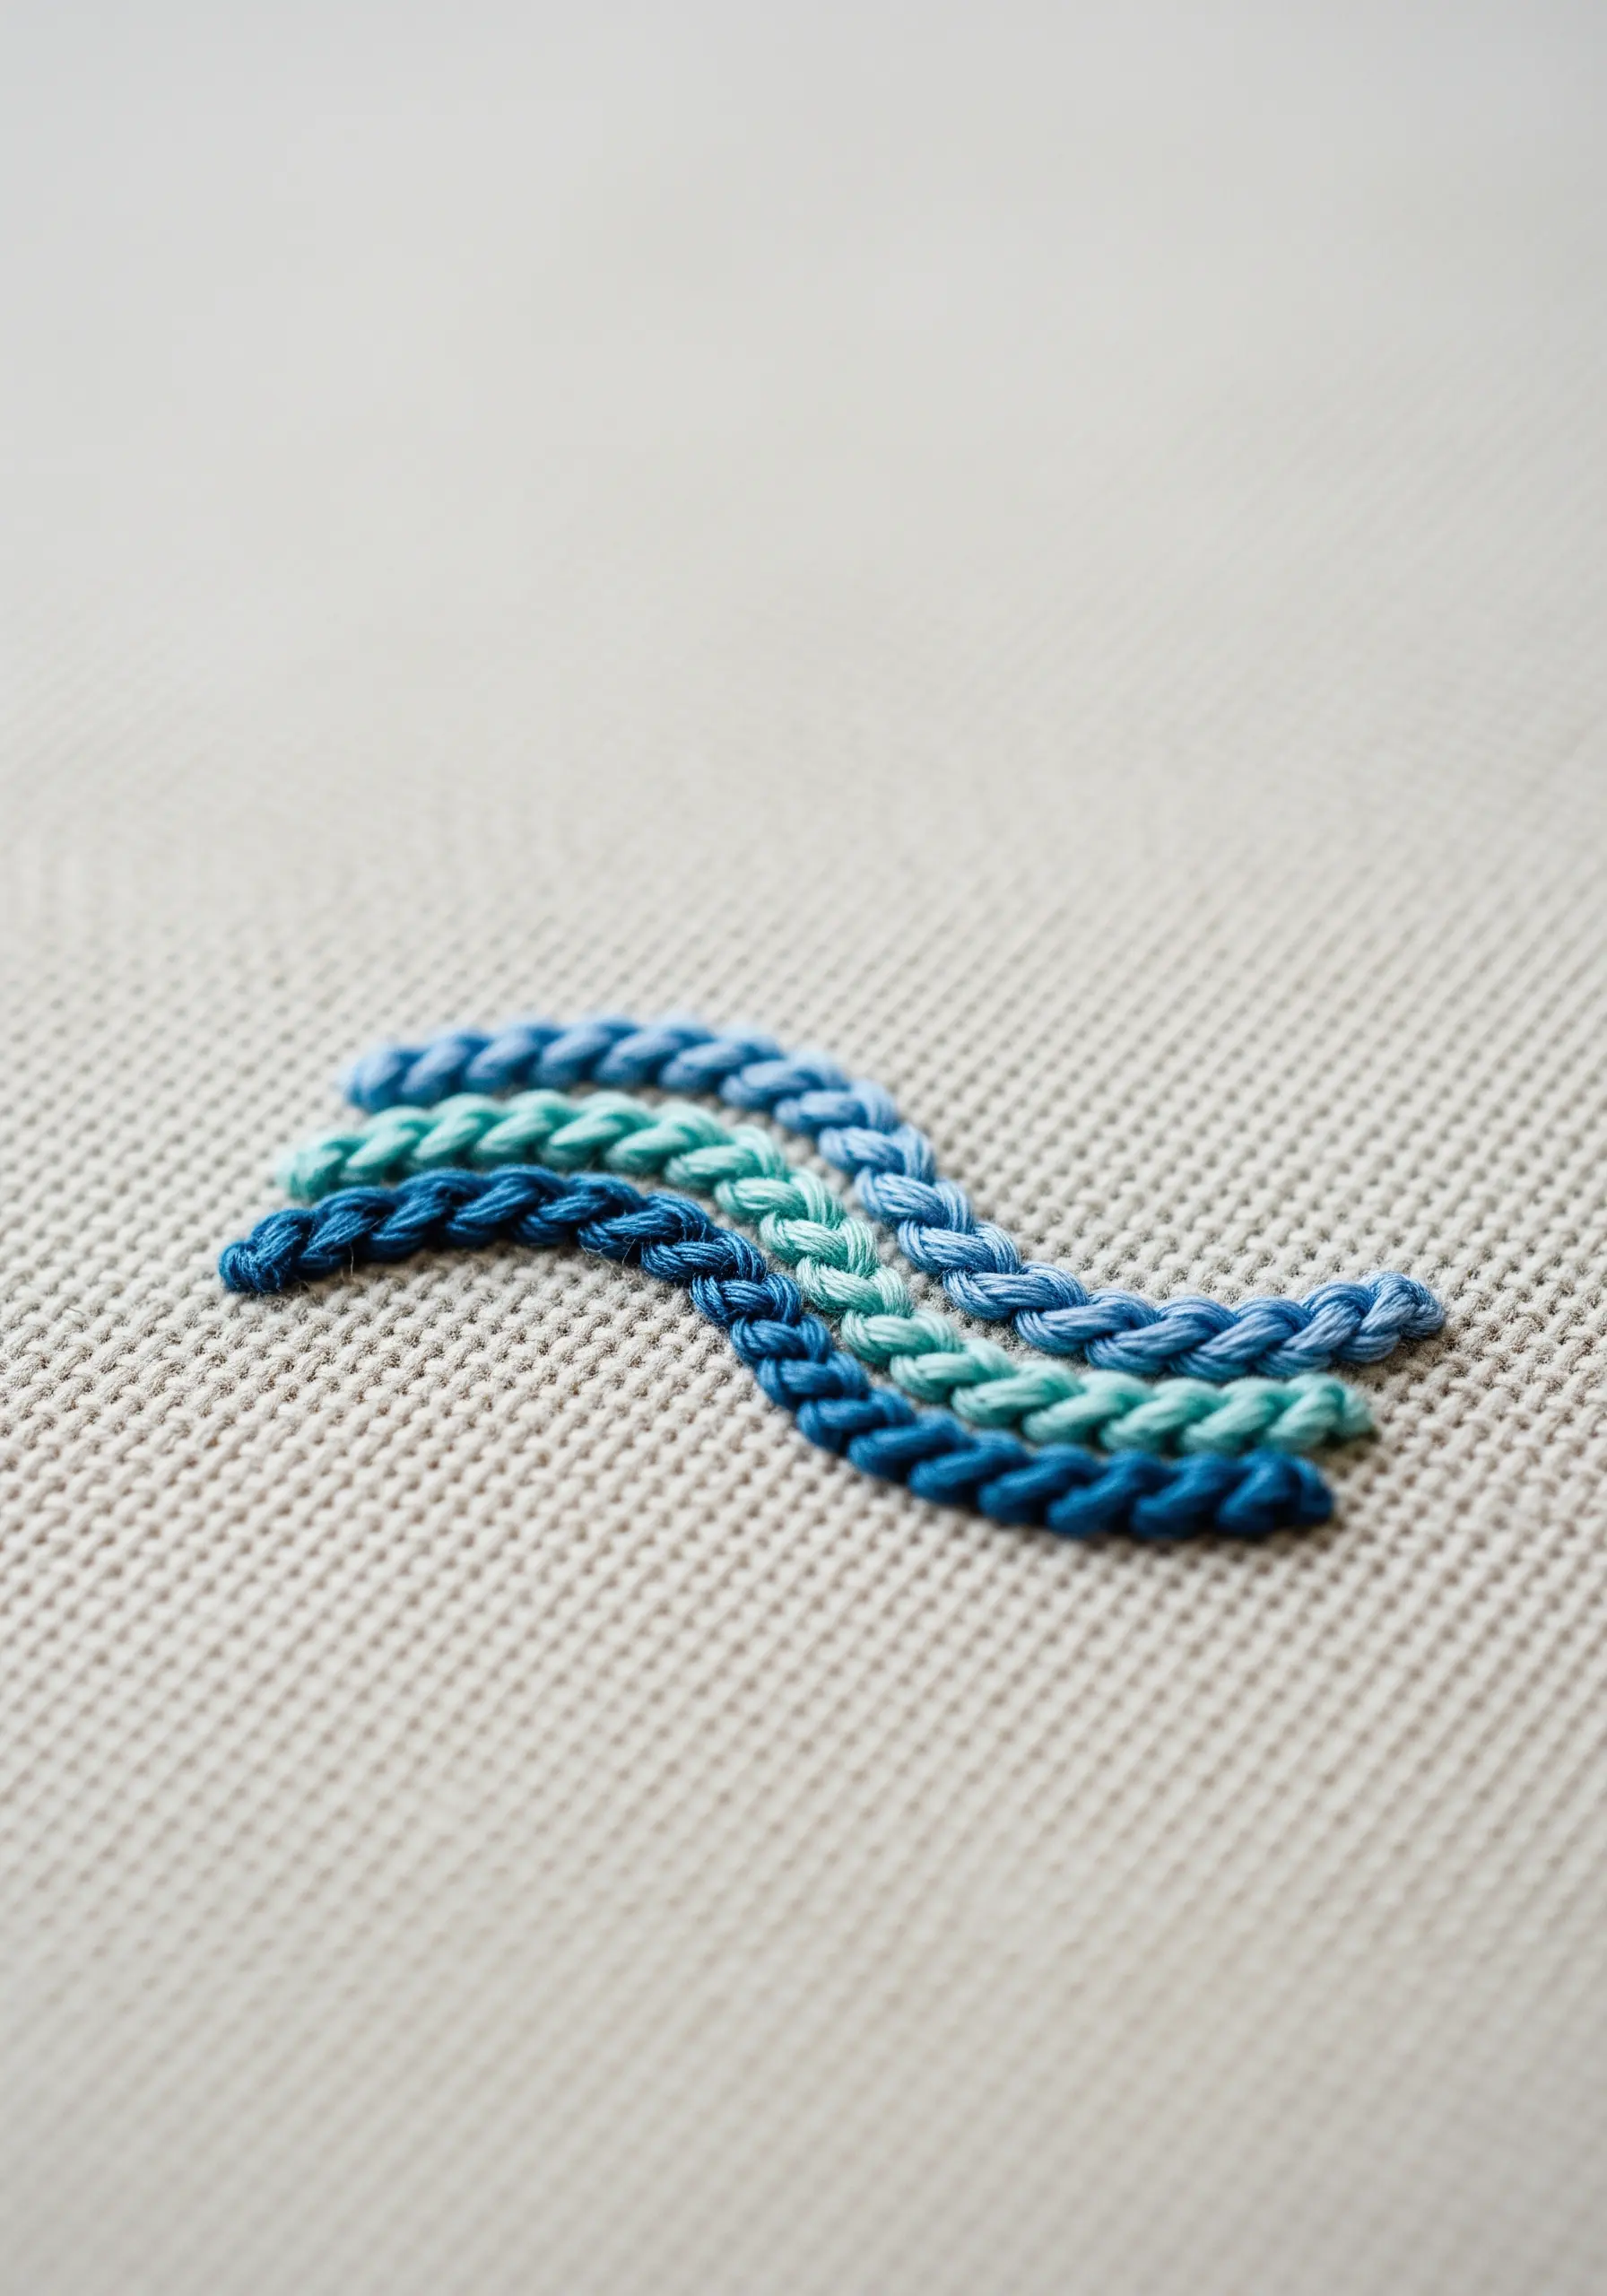
Move beyond simple stitches and explore weaving techniques for incredible texture.
This braided effect is created with a raised stem stitch band or a similar woven stitch where threads are passed over and under foundation stitches without piercing the fabric.
By using several shades of blue and weaving them together, you can create a gorgeous ombré effect that mimics the flow of water.
It’s a perfect technique for cozy mixed-fiber projects where texture is the main focus.
24. Minimalist Grids as Abstract Art
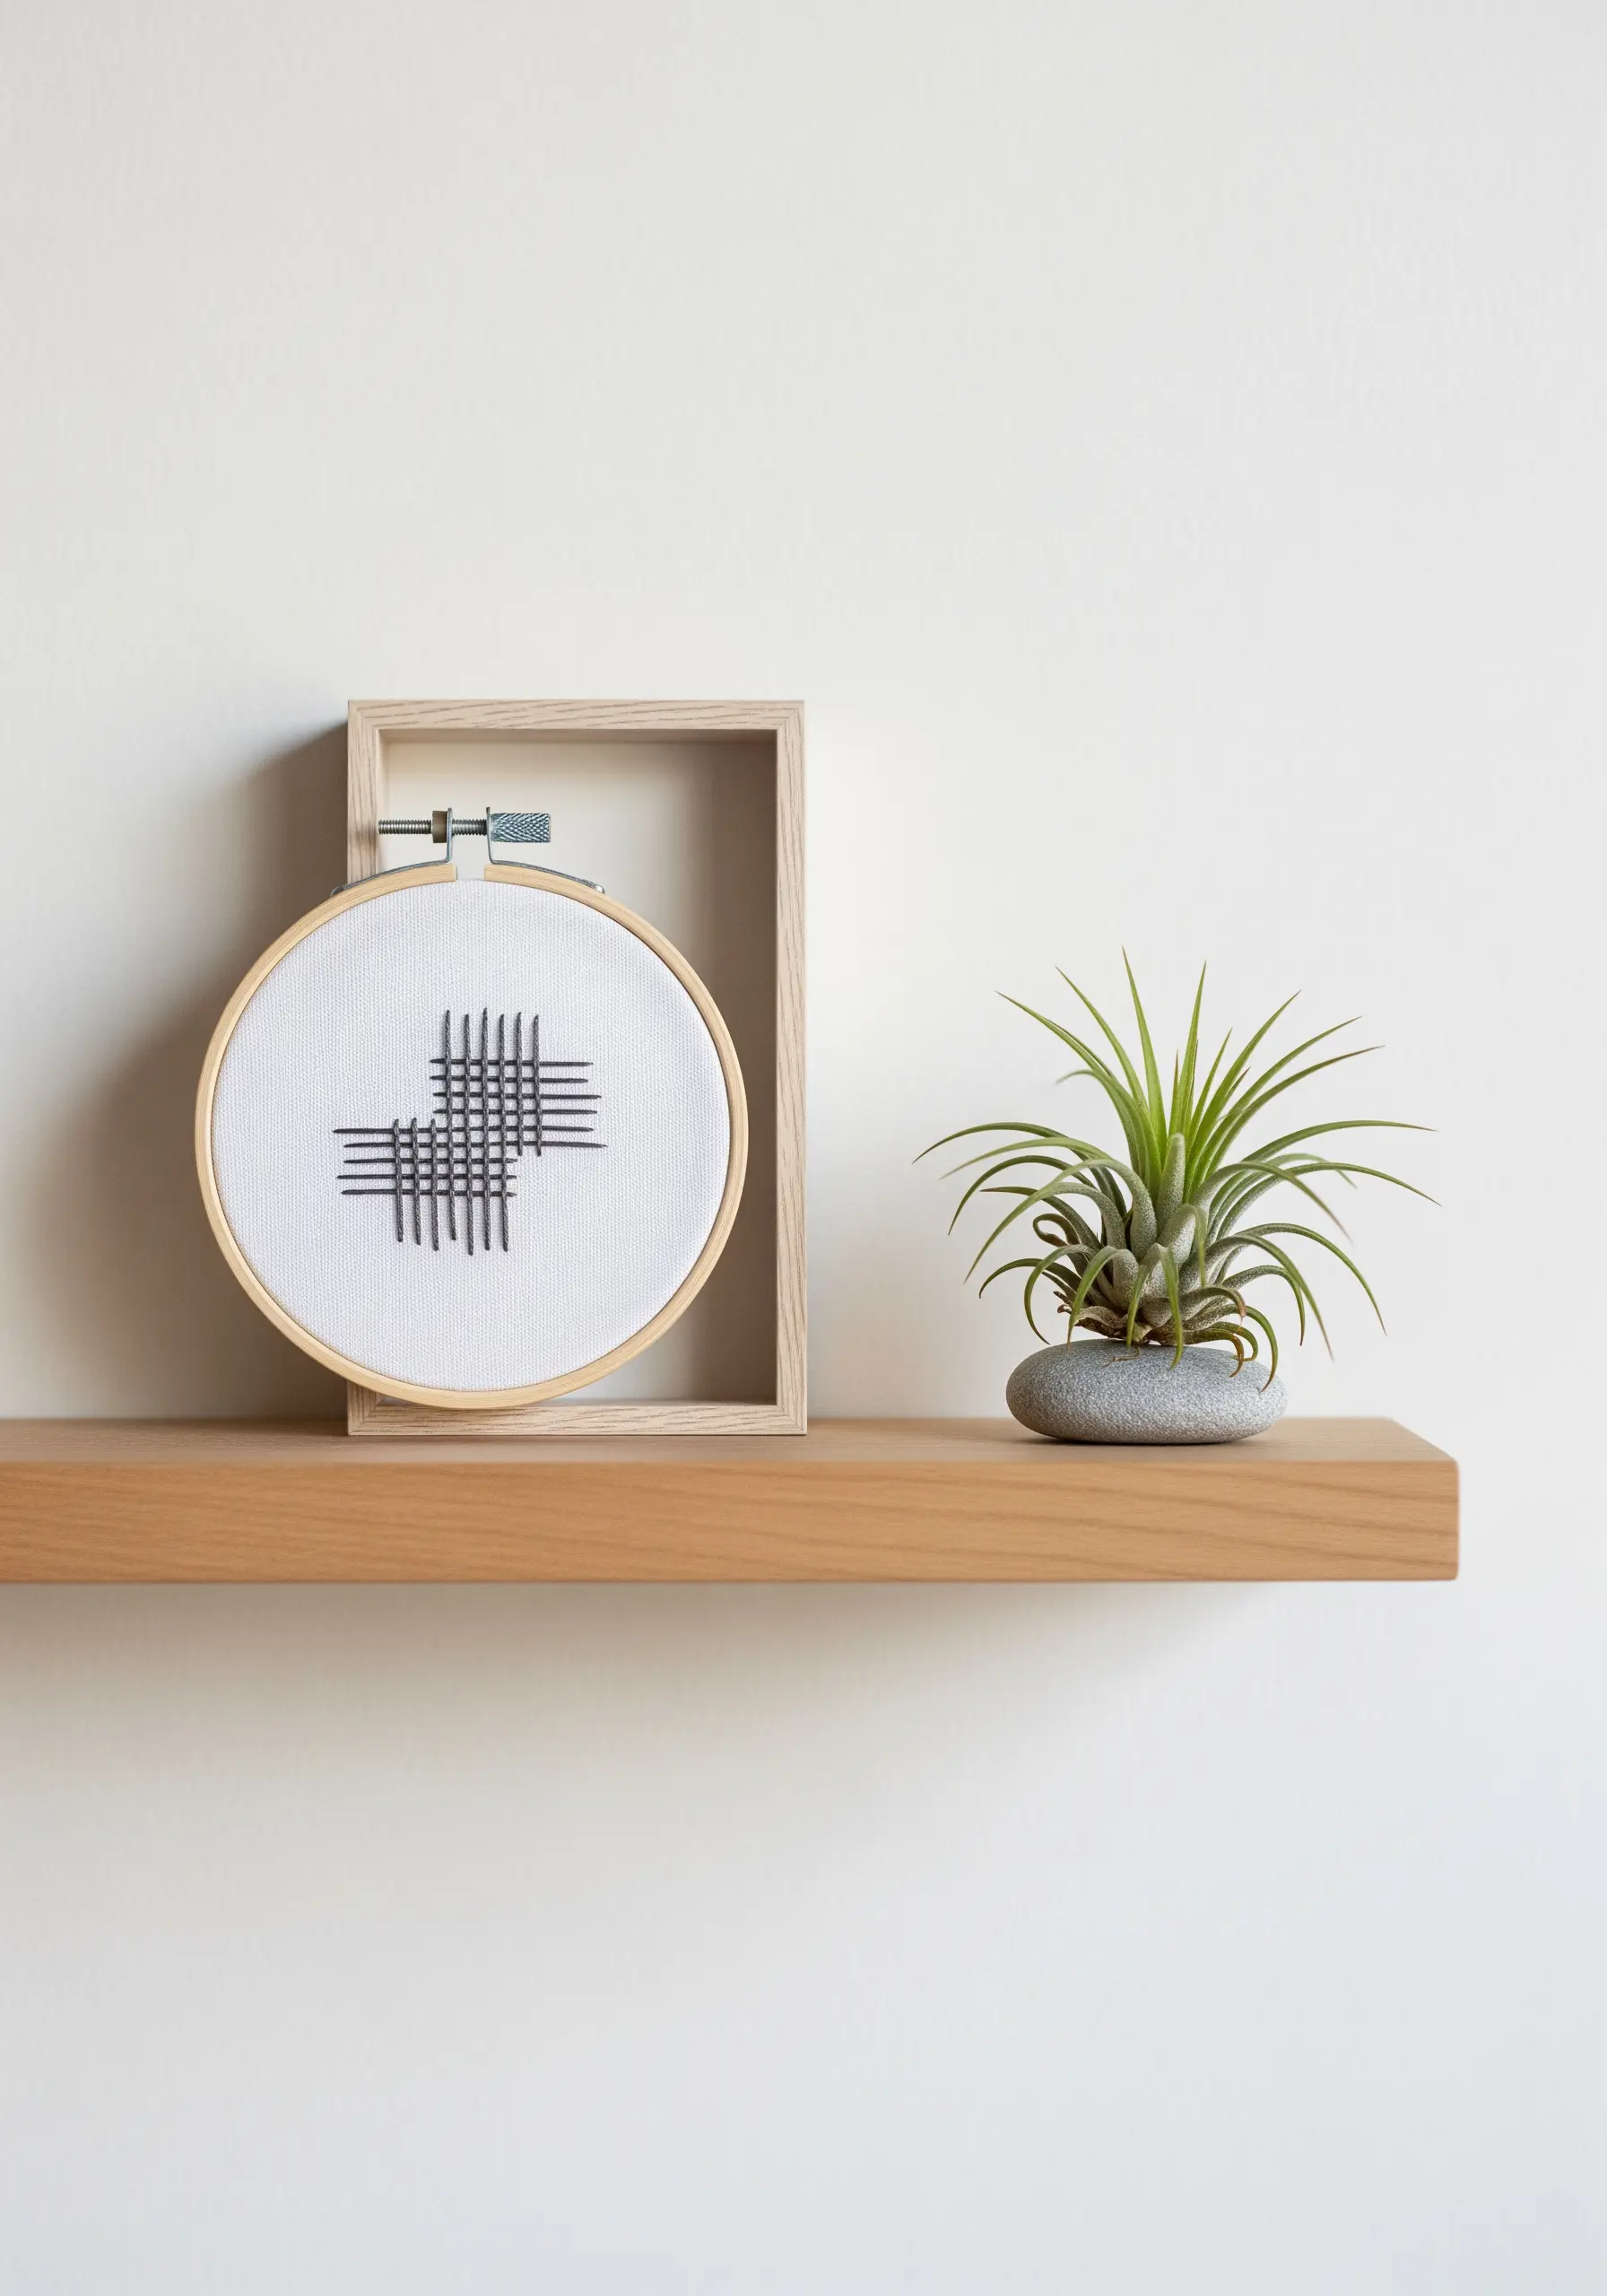
Explore abstraction by creating a design from intersecting straight stitches.
The beauty of this piece lies in its perfect imperfection—the lines are straight but the overall shape is organic.
Maintain consistent tension to prevent the fabric from puckering where the lines overlap.
Displaying your hoop within a second, larger frame, as shown, adds another layer of geometric interest and elevates simple stitches into framed embroidery ideas worthy of a gallery wall.
25. Sculptural Knots as a Focal Point
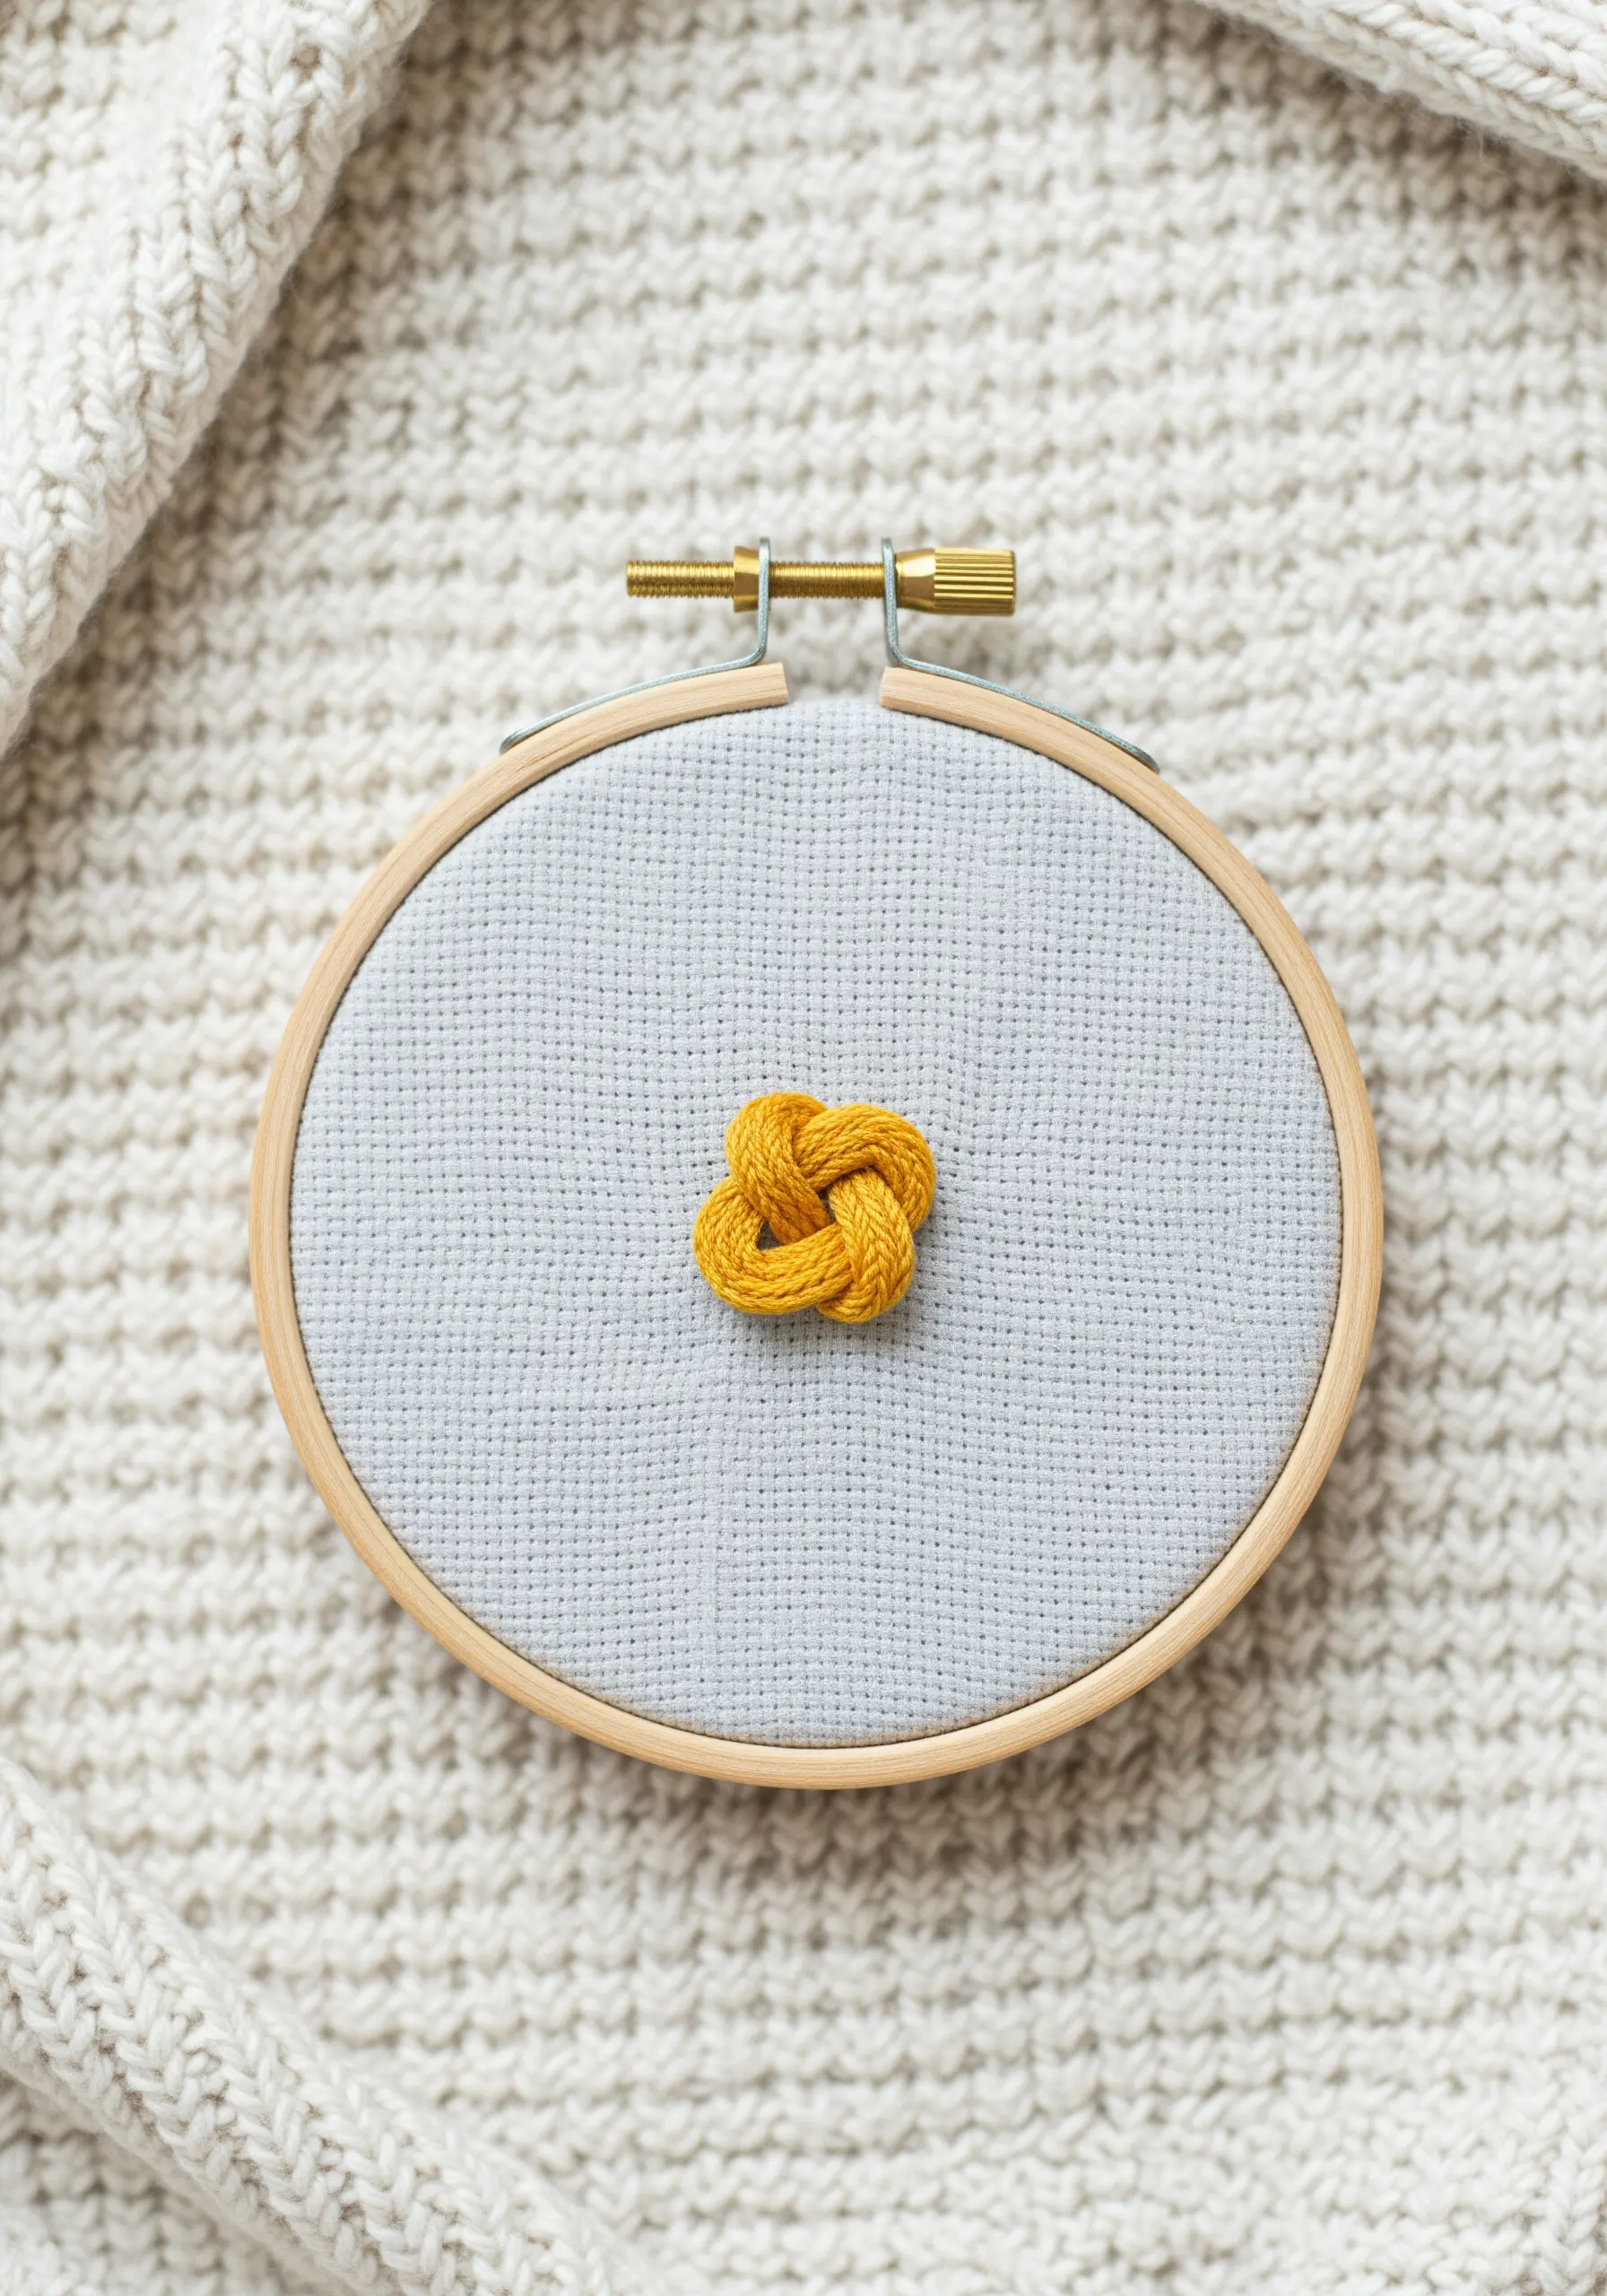
Make a single, intricate knot the star of your piece for a high-impact, textural design.
This is a variation of a Turk’s Head knot or a woven buttonhole wheel, where thread is looped and woven to create a dimensional, sculptural element.
Use a thicker thread, like pearl cotton or multiple strands of floss, to give the knot substance and definition.
This technique is a fantastic entry point into high-texture fabric collage embroidery projects where the thread itself becomes a 3D object.


