
You don’t need fabric to create beautiful embroidery. In fact, one of the most expressive and accessible surfaces is already in your home: paper. It’s a medium that invites you to rethink the rules, blending the familiar comfort of thread with the crisp, graphic nature of a new canvas.
Working with paper opens up a world of texture, structure, and dimension that fabric alone can’t offer. You can paint it, cut it, layer it, and collage it, creating rich, multi-dimensional artworks where your stitches become the final, defining touch. This isn’t just about punching holes and pulling thread; it’s about making each stitch a deliberate mark, a line of texture against a smooth plane.
Forget the fear of making a mistake. Paper is forgiving, affordable, and endlessly versatile. These techniques are designed to give you the confidence to experiment, whether you’re crafting a simple greeting card or an intricate, gallery-worthy piece. Let’s explore how the humble sheet of paper can become your most exciting embroidery project yet.
1. Layer Watercolor Washes Under Botanical Stitches
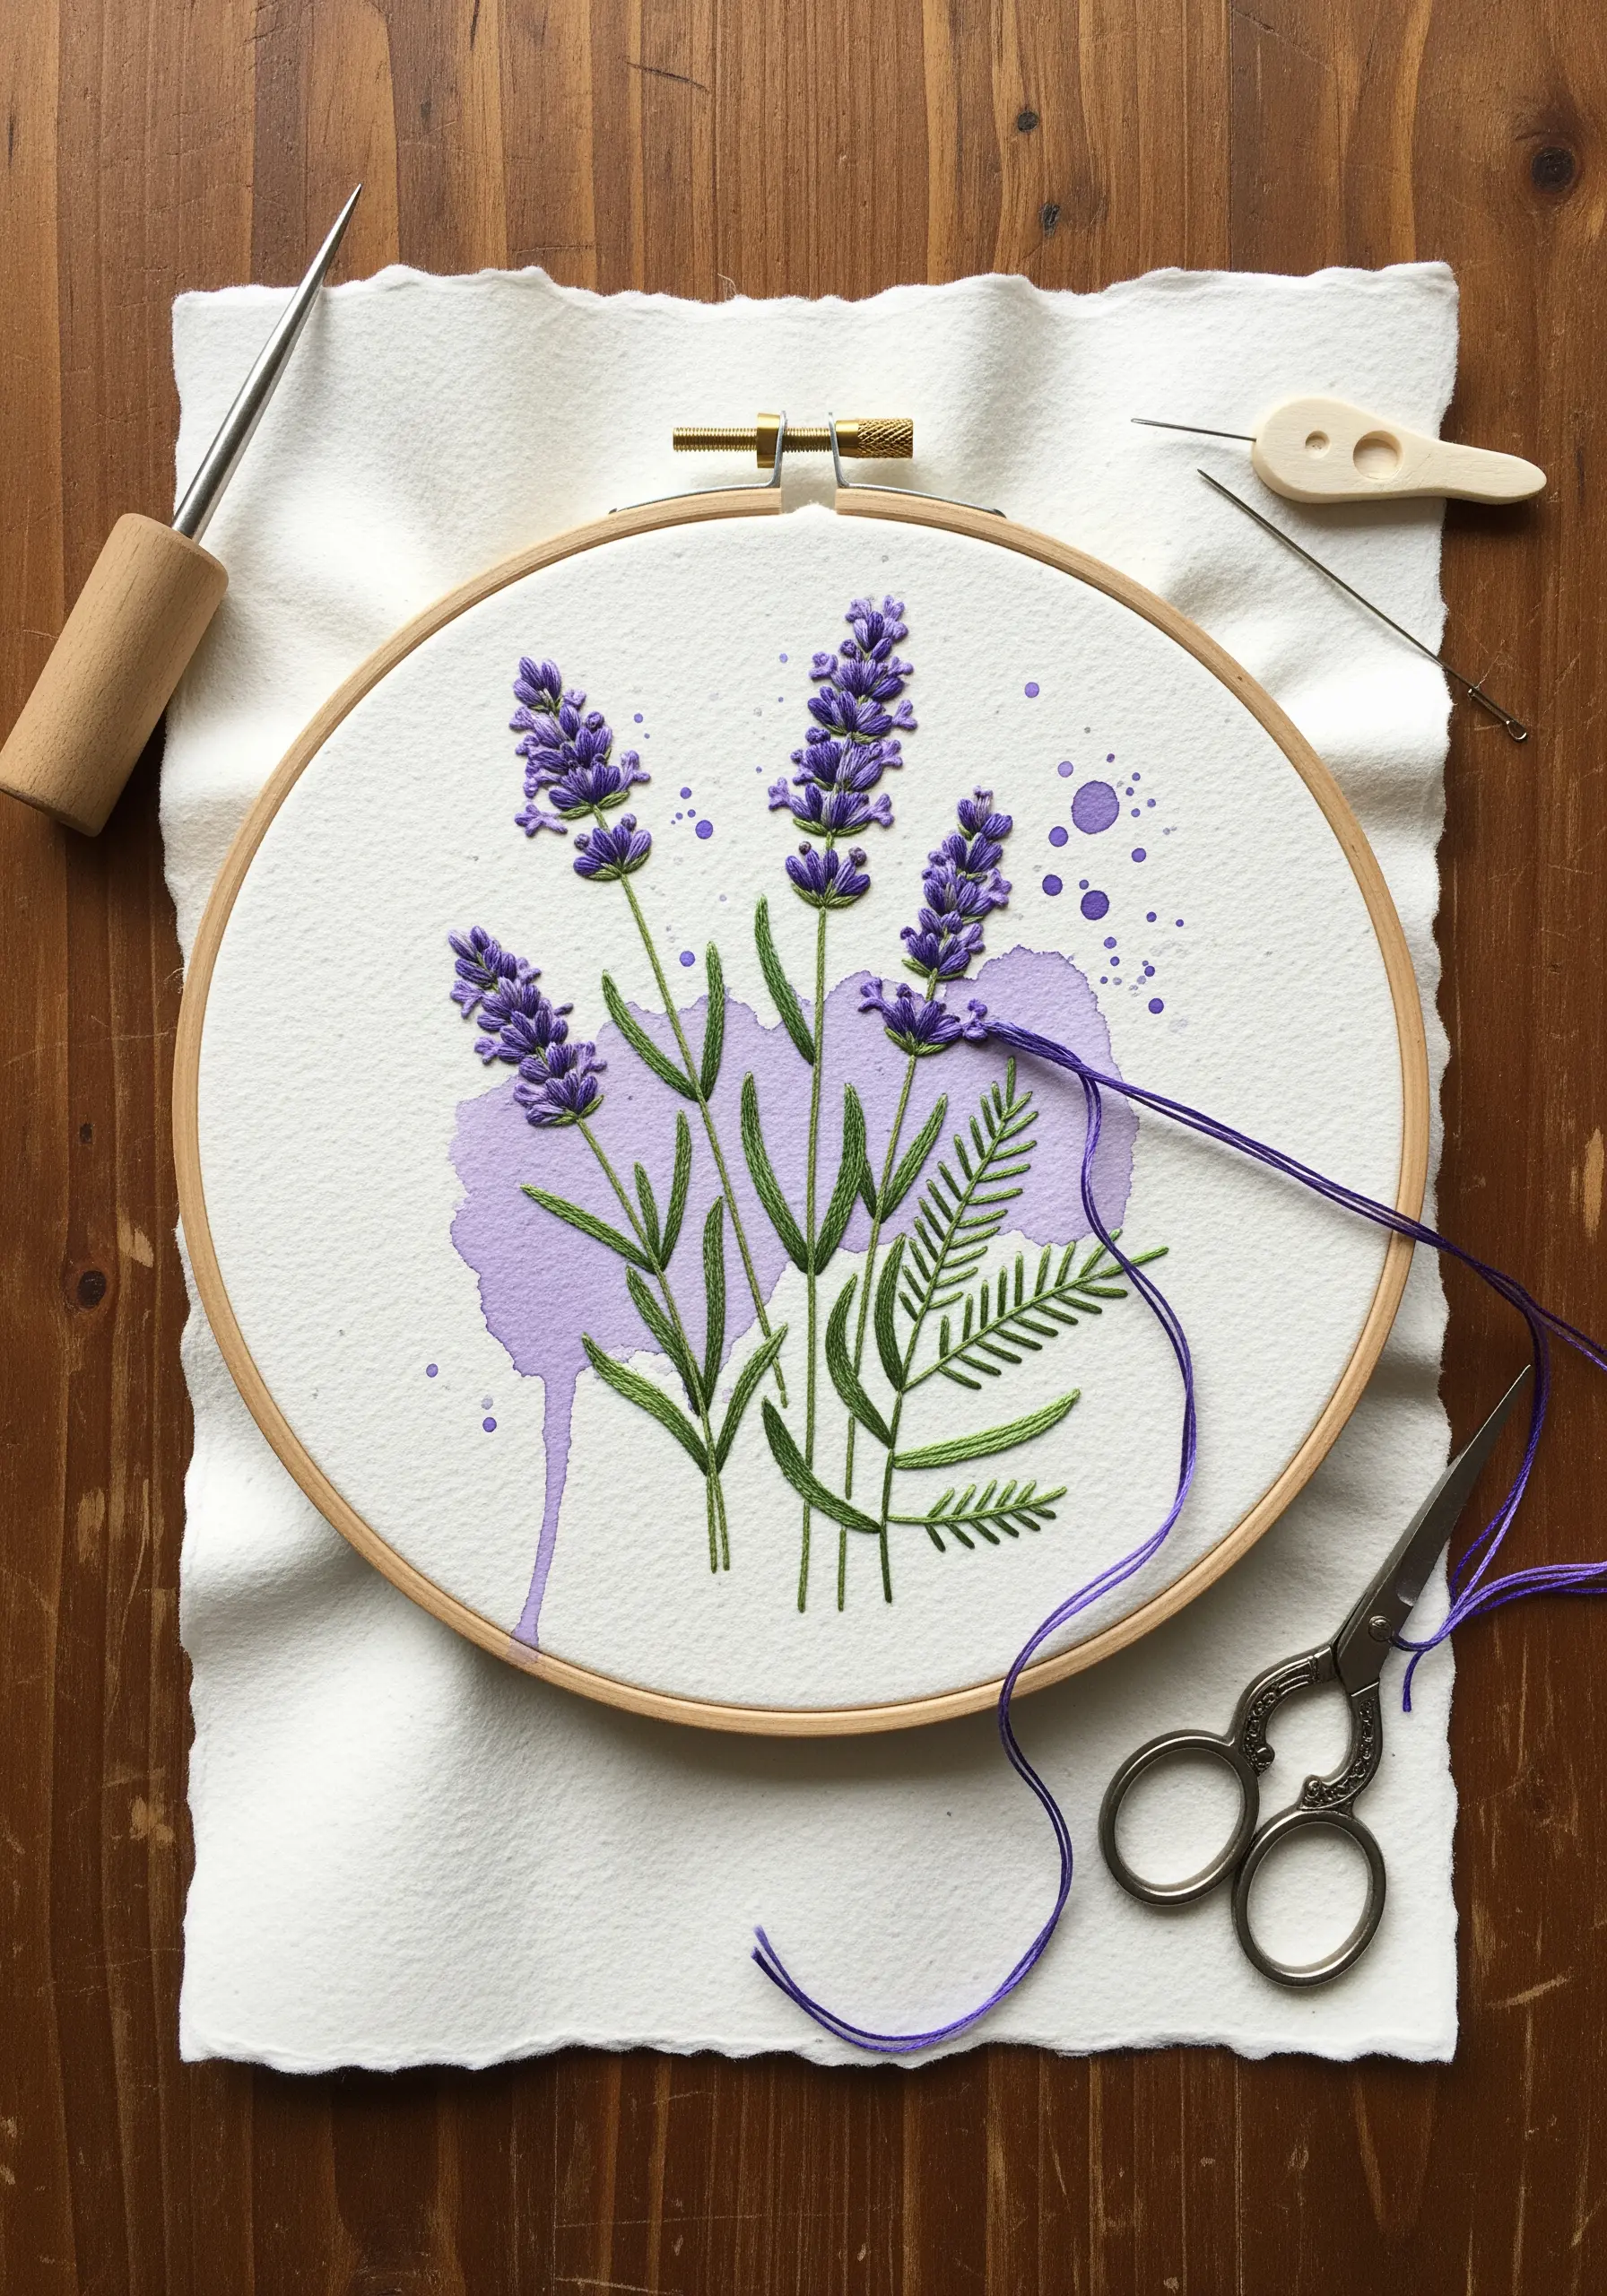
Begin by applying a soft watercolor wash to heavy-gauge, cold-press watercolor paper before you start stitching.
This technique creates an atmospheric background that complements your thread work without overwhelming it.
Allow the paper to dry completely, then pre-pierce your stitch holes with a fine awl or a spare needle to prevent tearing.
The paint adds a layer of visual softness that your stitches can interact with, making your delicate lavender stitches feel more integrated and painterly.
2. Stitch Constellations Over a Painted Galaxy
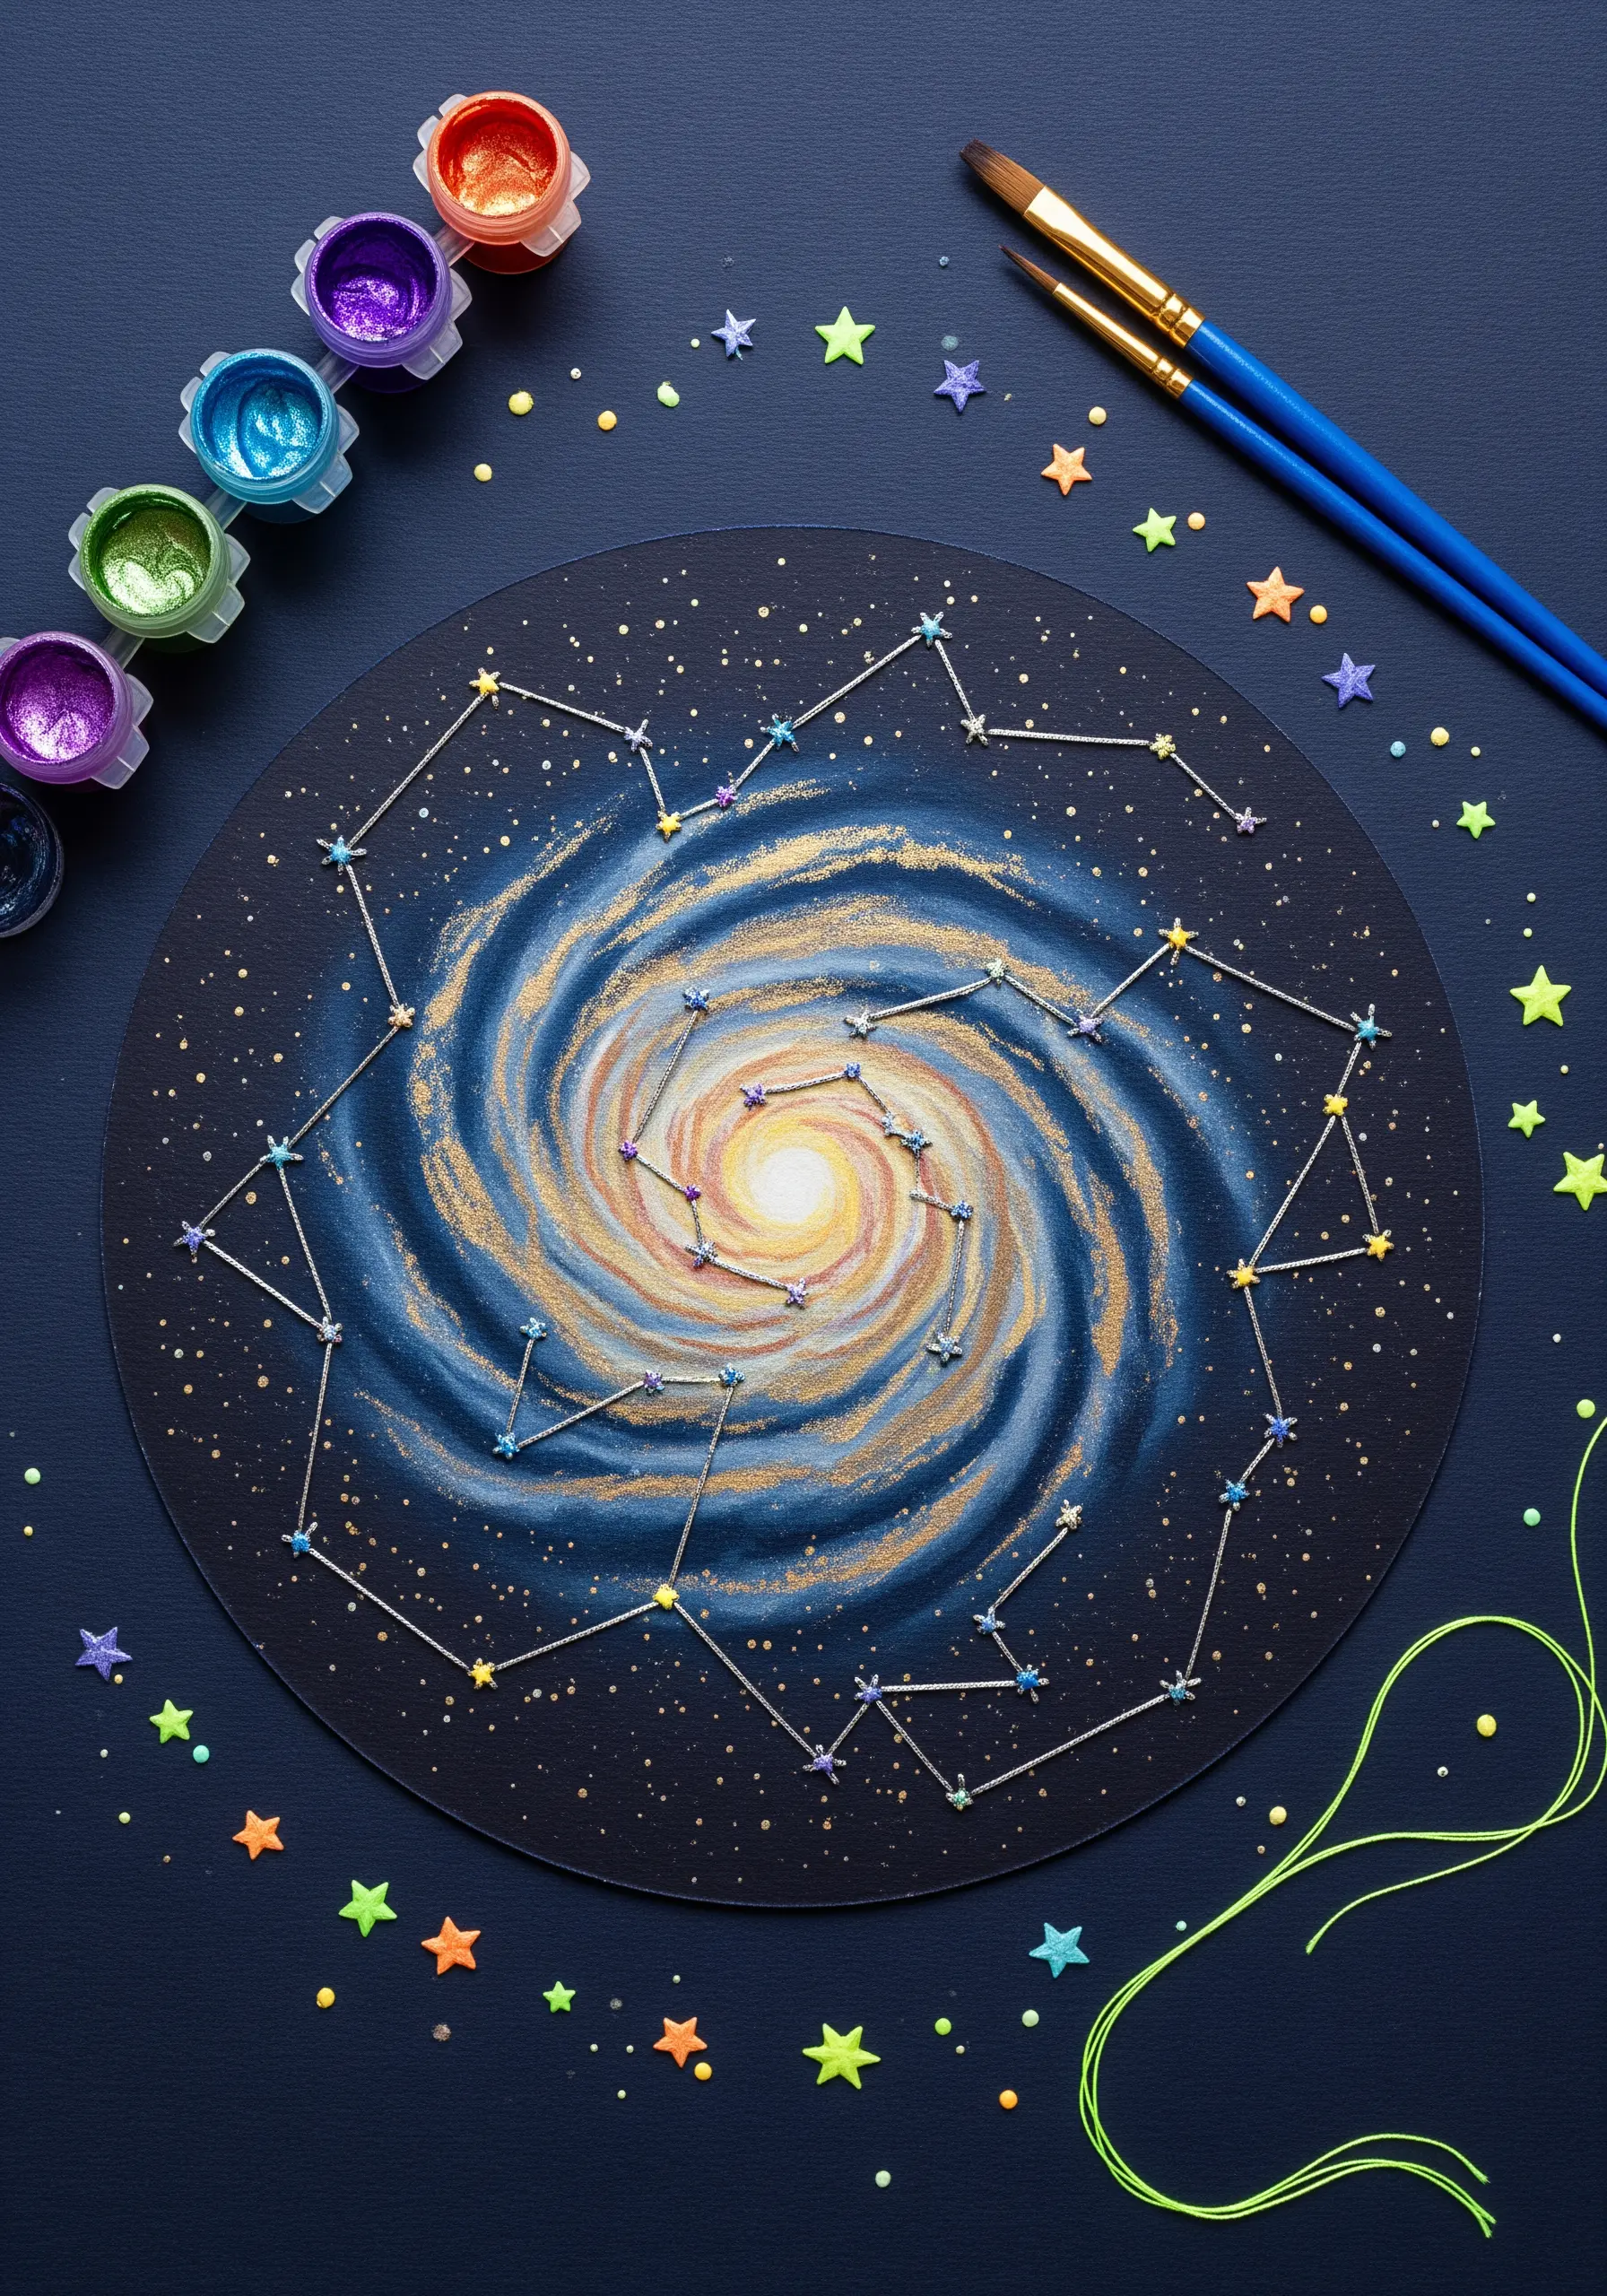
Create a celestial masterpiece by first painting a swirling galaxy on dark, heavy cardstock using acrylics with metallic and pearlescent finishes.
Once dry, use a light-colored pencil to map out your constellations, then pierce the star points before connecting them with a vibrant thread like neon or metallic floss.
This method transforms simple backstitching into glowing star paths, giving the piece a sense of cosmic depth and wonder.
Adding tiny sequin stars or beads enhances the three-dimensional effect, making your artwork truly shine.
3. Construct a Woven Grid with Layered Paper
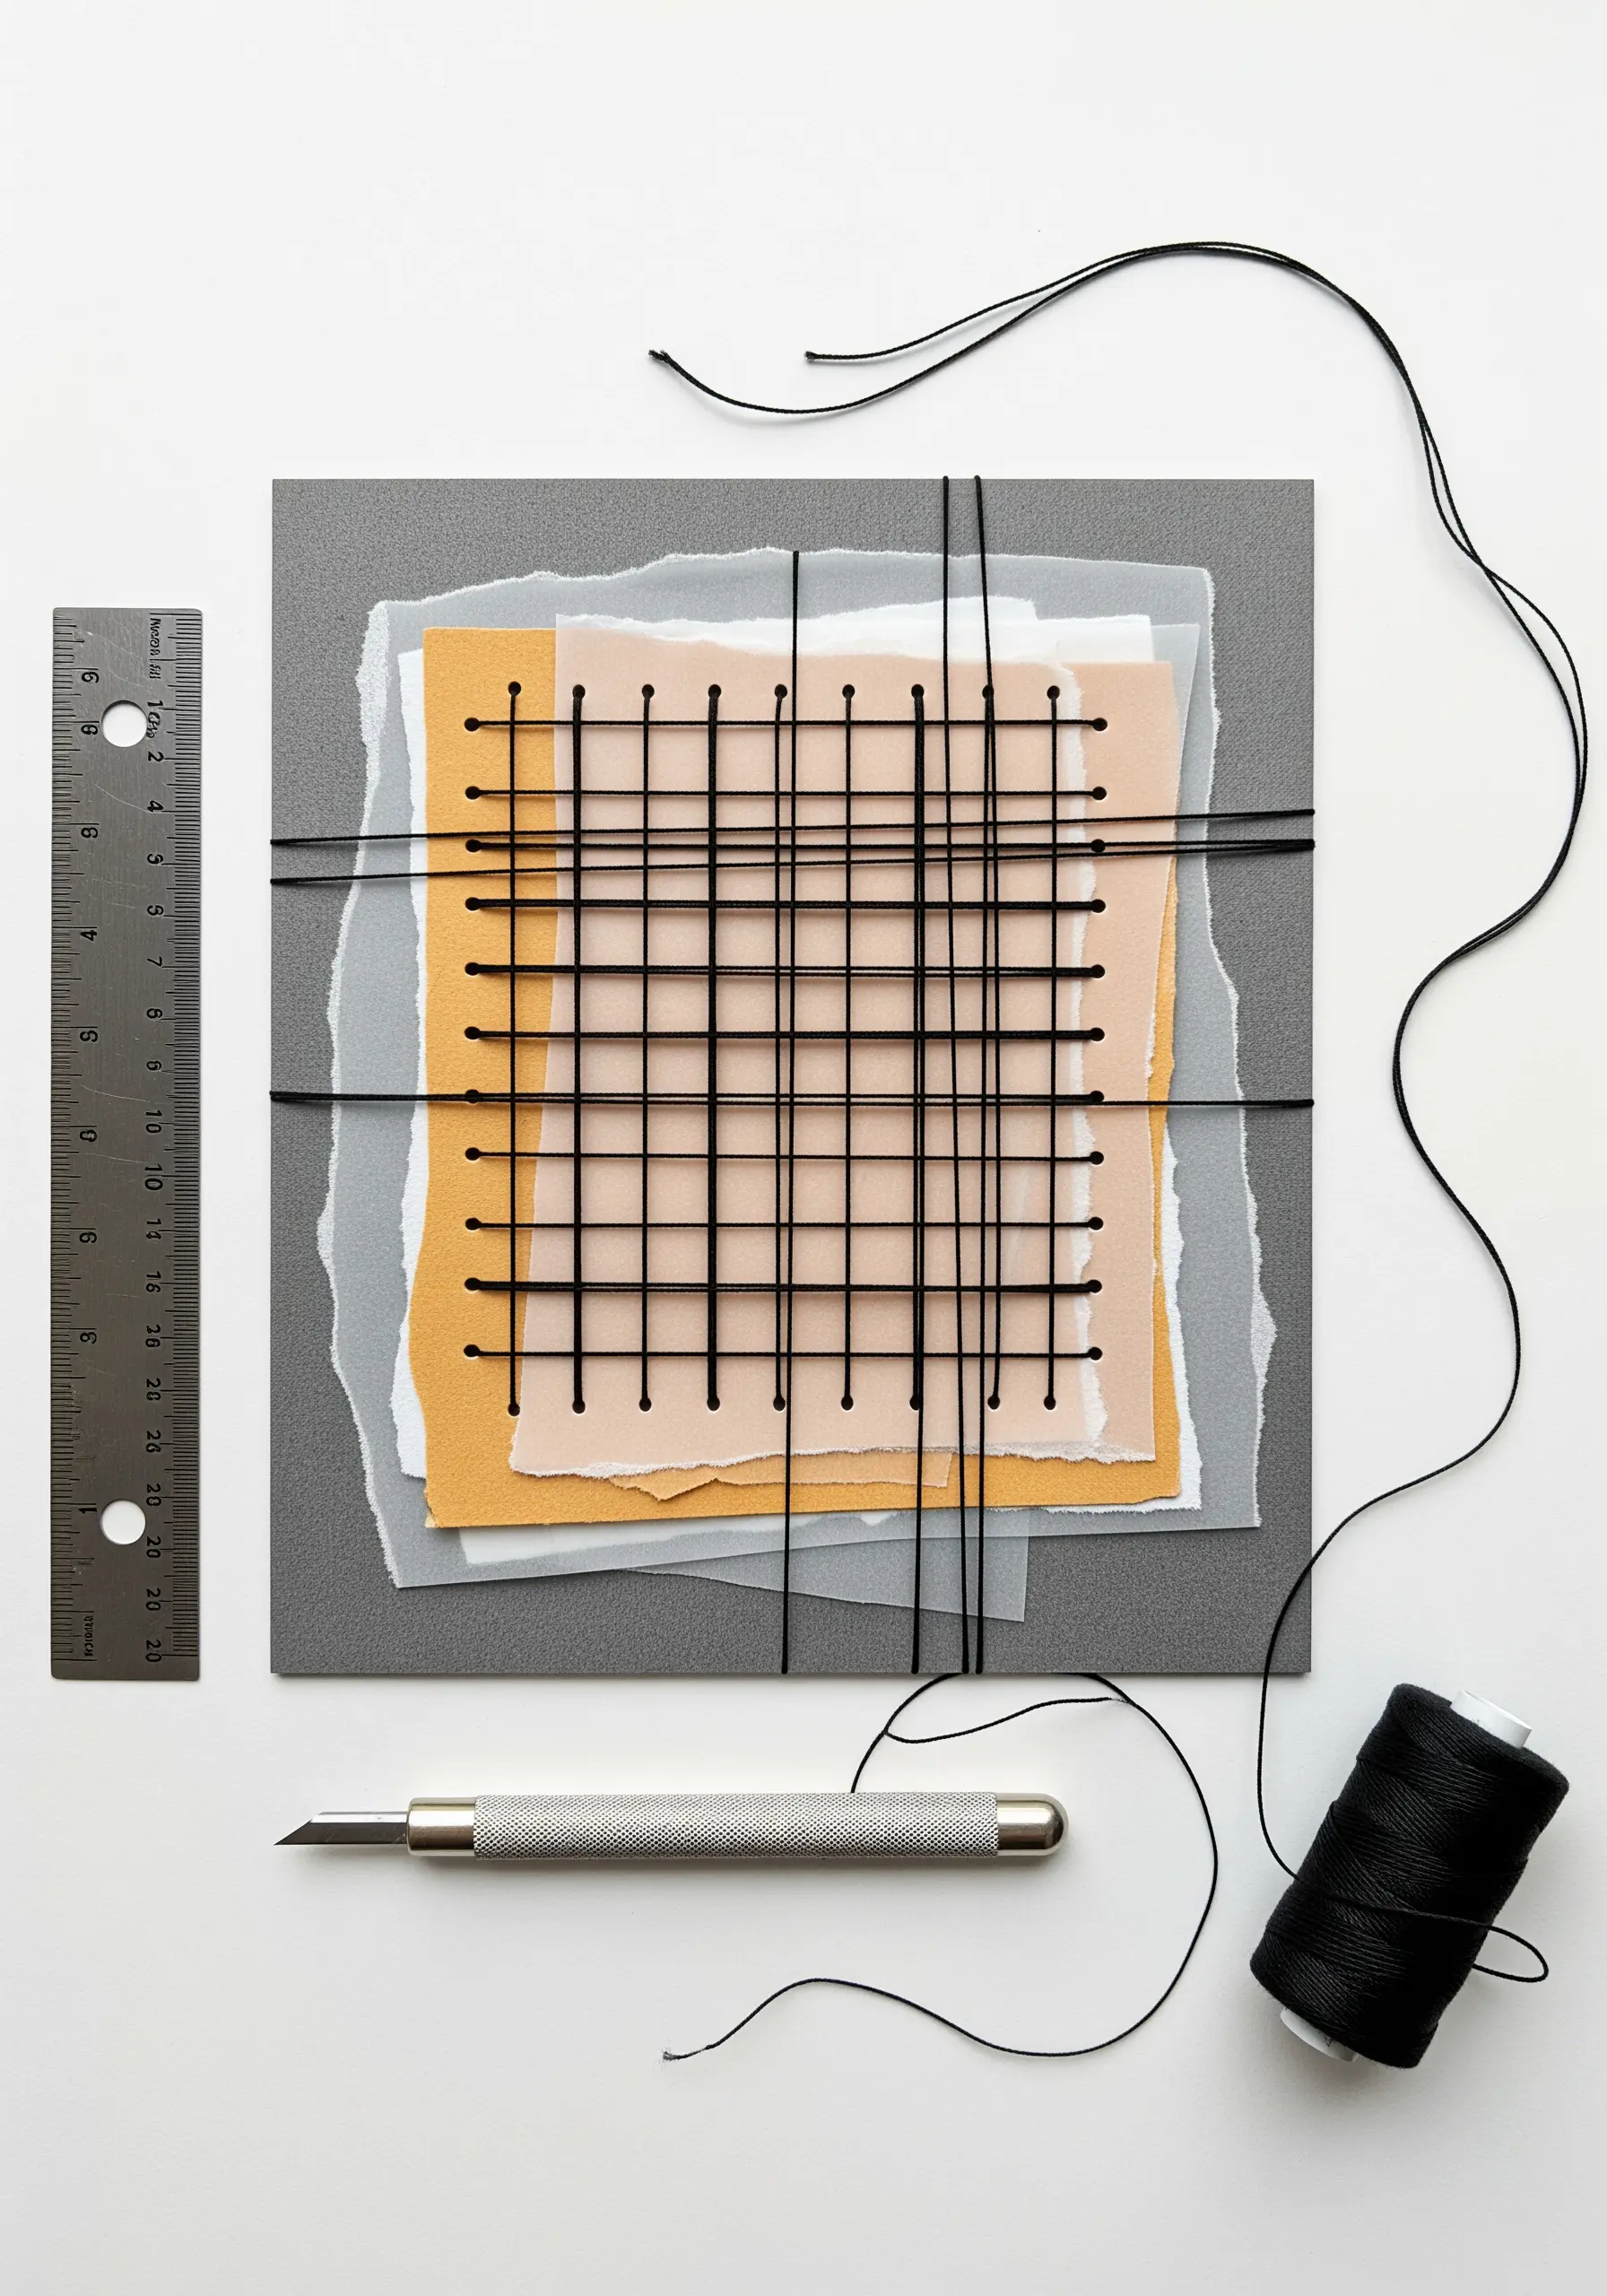
Use paper as a miniature loom by layering vellum, kraft paper, and cardstock to create a textured base.
Carefully measure and pierce holes along two opposite edges of your top paper layer before you assemble the collage.
Thread a strong, smooth cord or floss through the holes, pulling it taut to create a warp, then weave a contrasting thread for the weft.
This architectural approach introduces structure and tension, turning simple lines into a sophisticated, graphic statement piece.
4. Build 3D Clouds with Stuffed Stitches
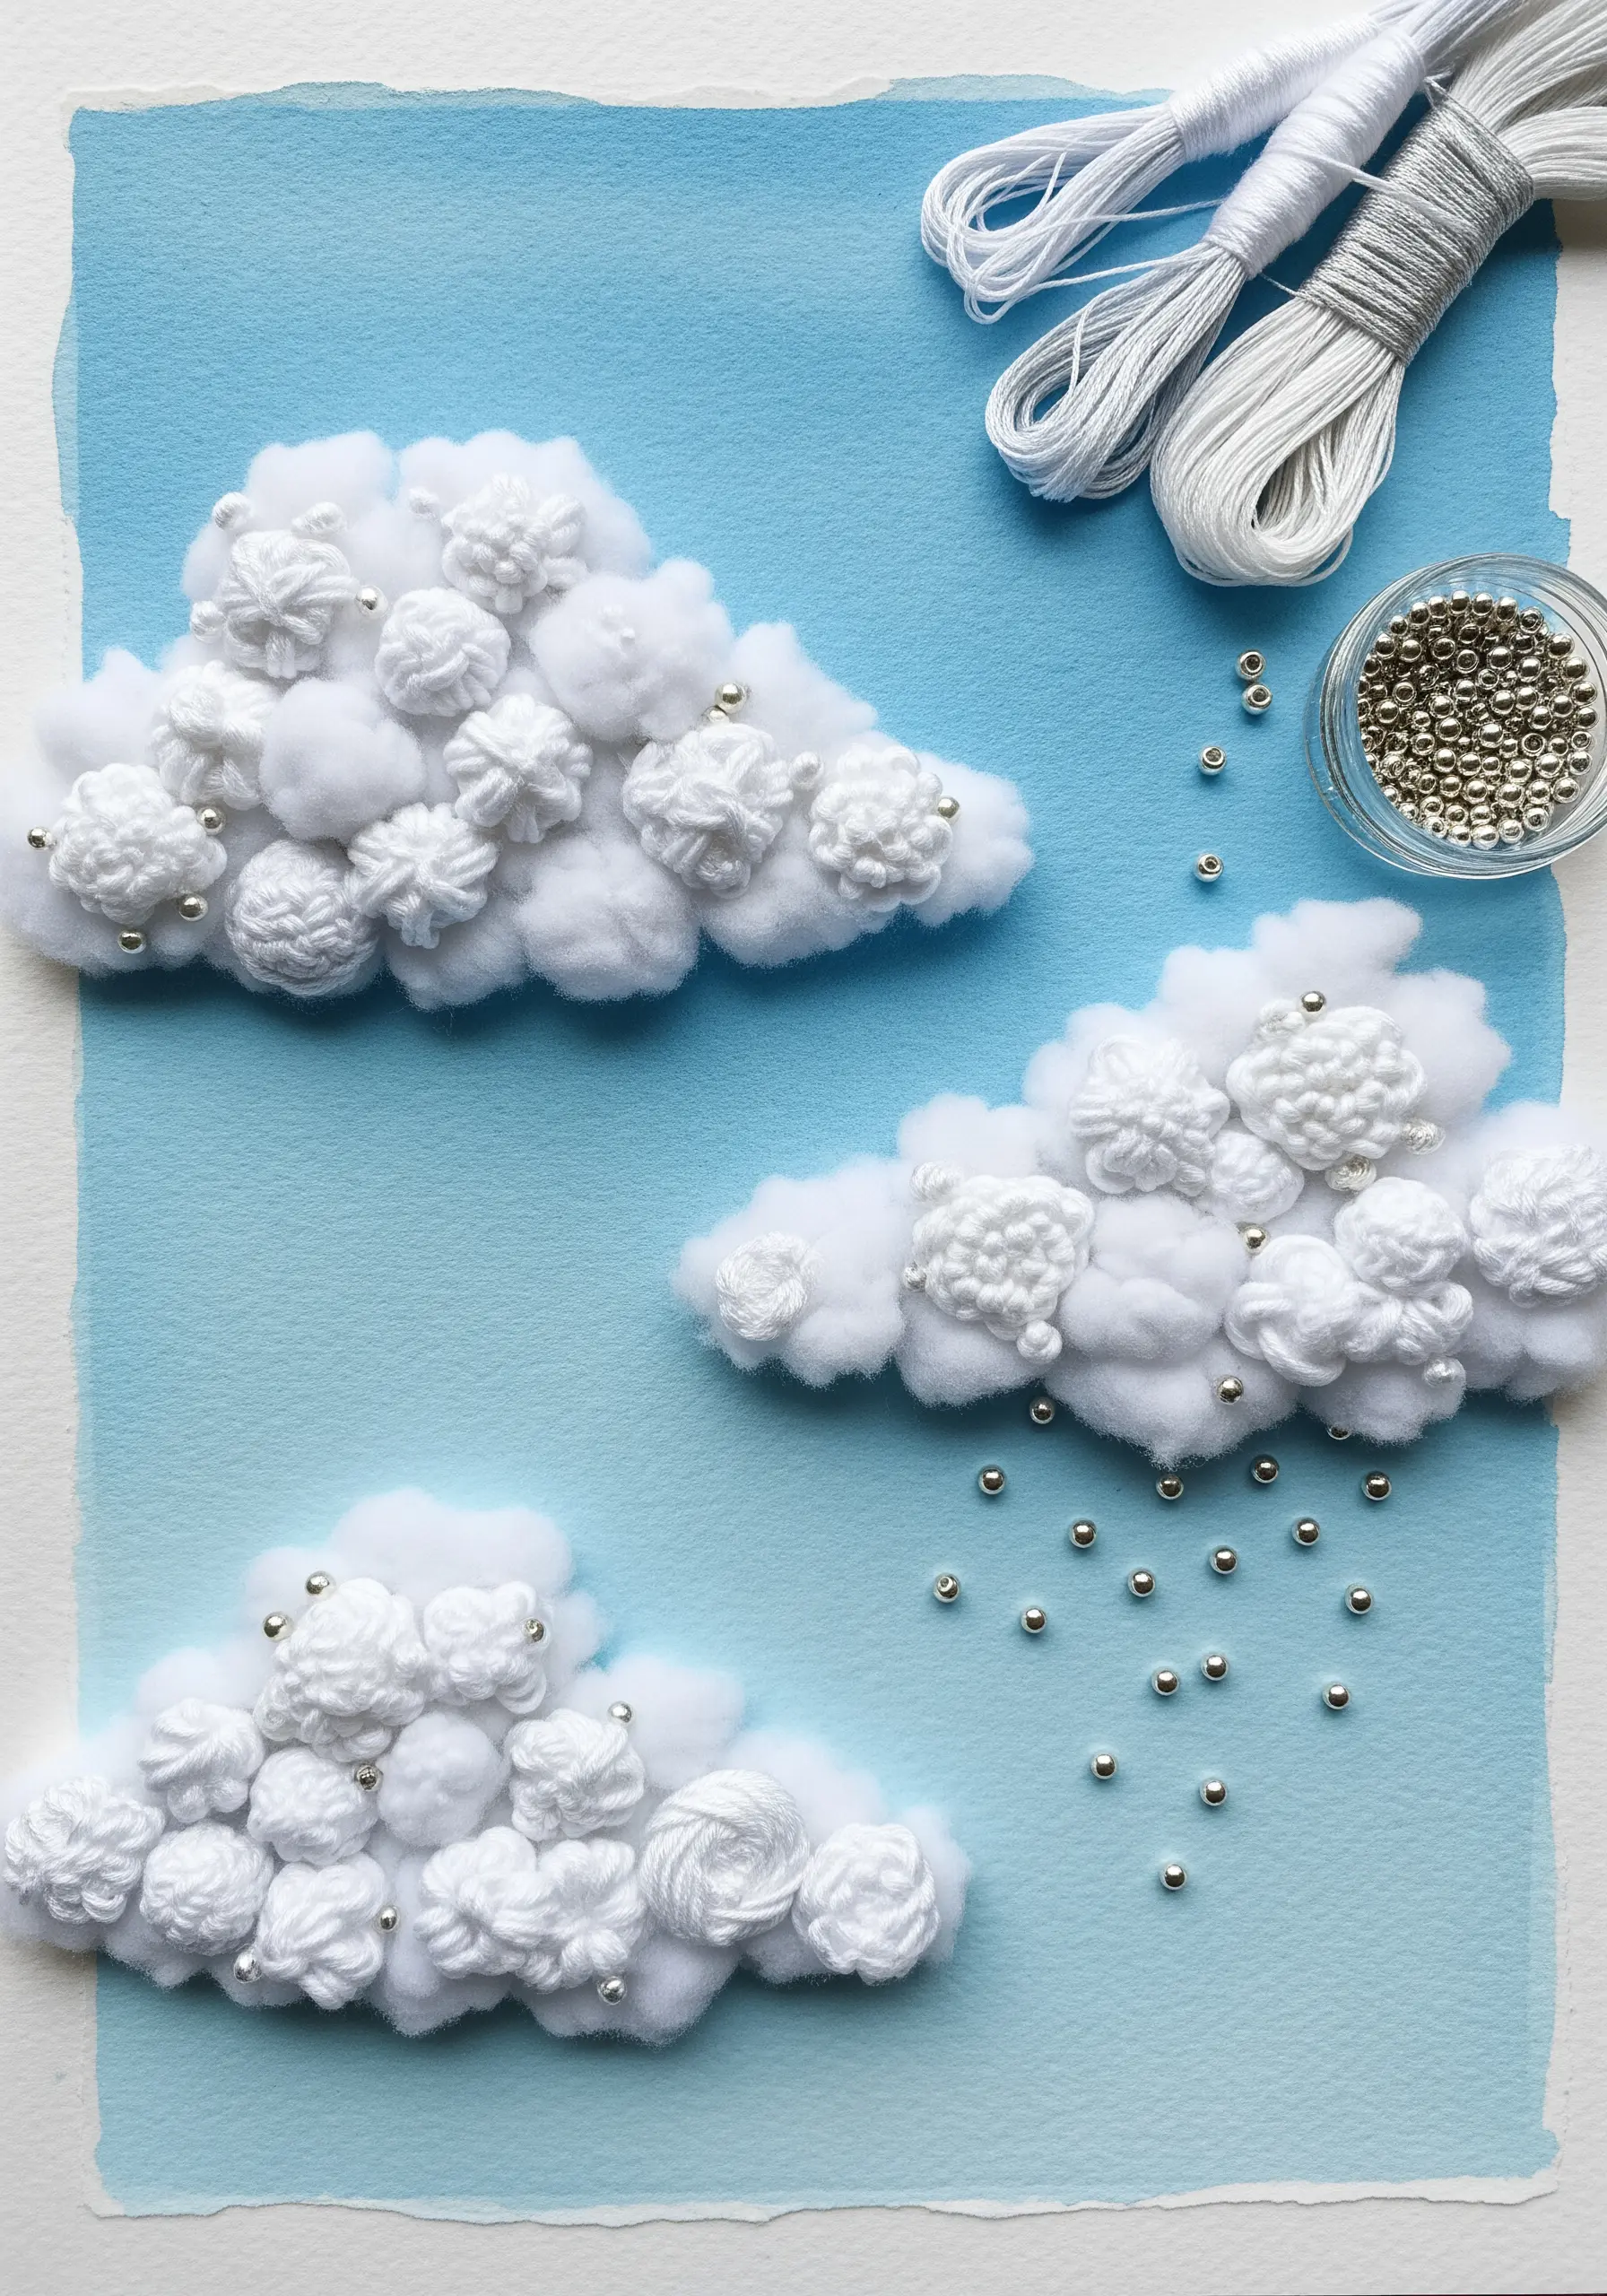
Create pillowy, dimensional clouds by anchoring cotton batting or felt shapes onto your paper with a few discreet stitches.
Conceal the batting by covering it with a dense layer of French knots, woven wheel stitches, and colonial knots in white and pale gray thread.
This technique adds a highly tactile, sculptural quality that makes the clouds appear to float off the page.
Intersperse tiny silver beads to mimic raindrops, adding a delicate sparkle that contrasts beautifully with the soft, matte texture of the thread.
5. Bind a Paper Collage with a Decorative Spine Stitch
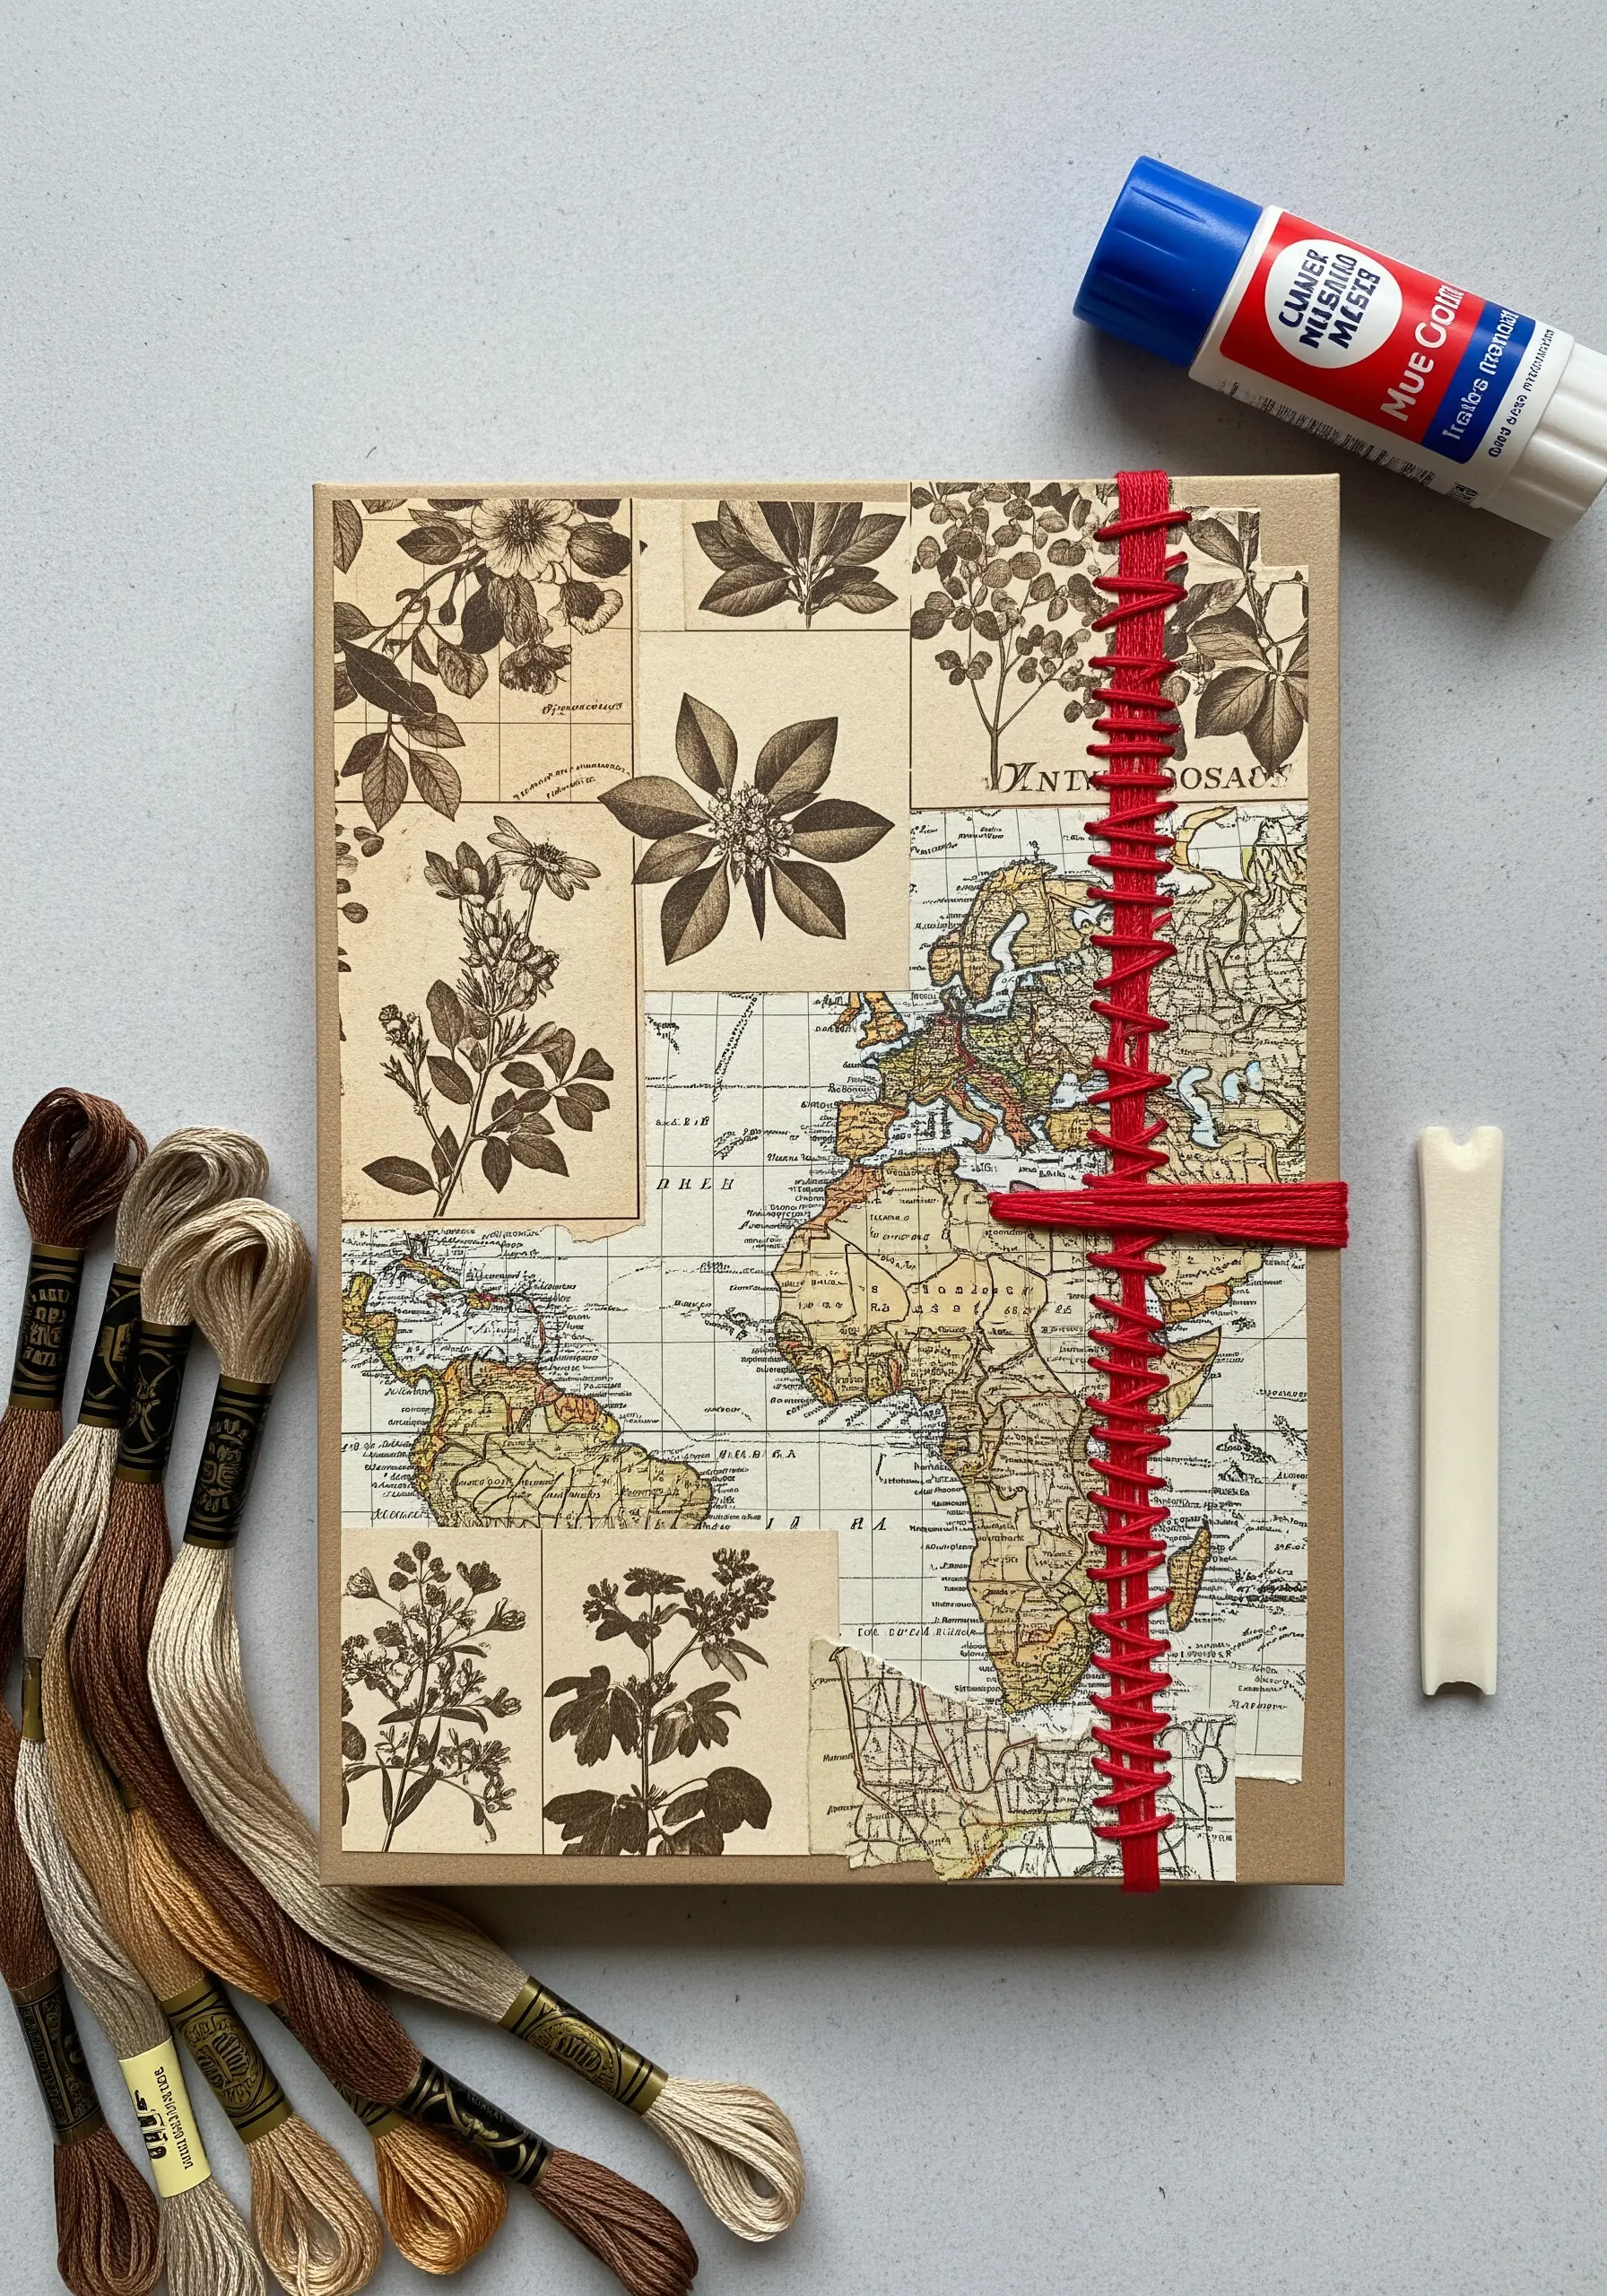
Elevate a simple collage by incorporating a bookbinding stitch, such as a Coptic or French link stitch, as a central design element.
Assemble your vintage maps, botanical prints, and cardstock, then clamp them firmly together before piercing a line of holes for your spine.
Use a waxed linen thread for durability and a smooth pull through the paper layers.
The stitch acts as both a functional binding and a striking decorative detail, adding a handmade, historical feel to your artwork.
6. Accentuate Watercolor Art with Precise Stitched Outlines
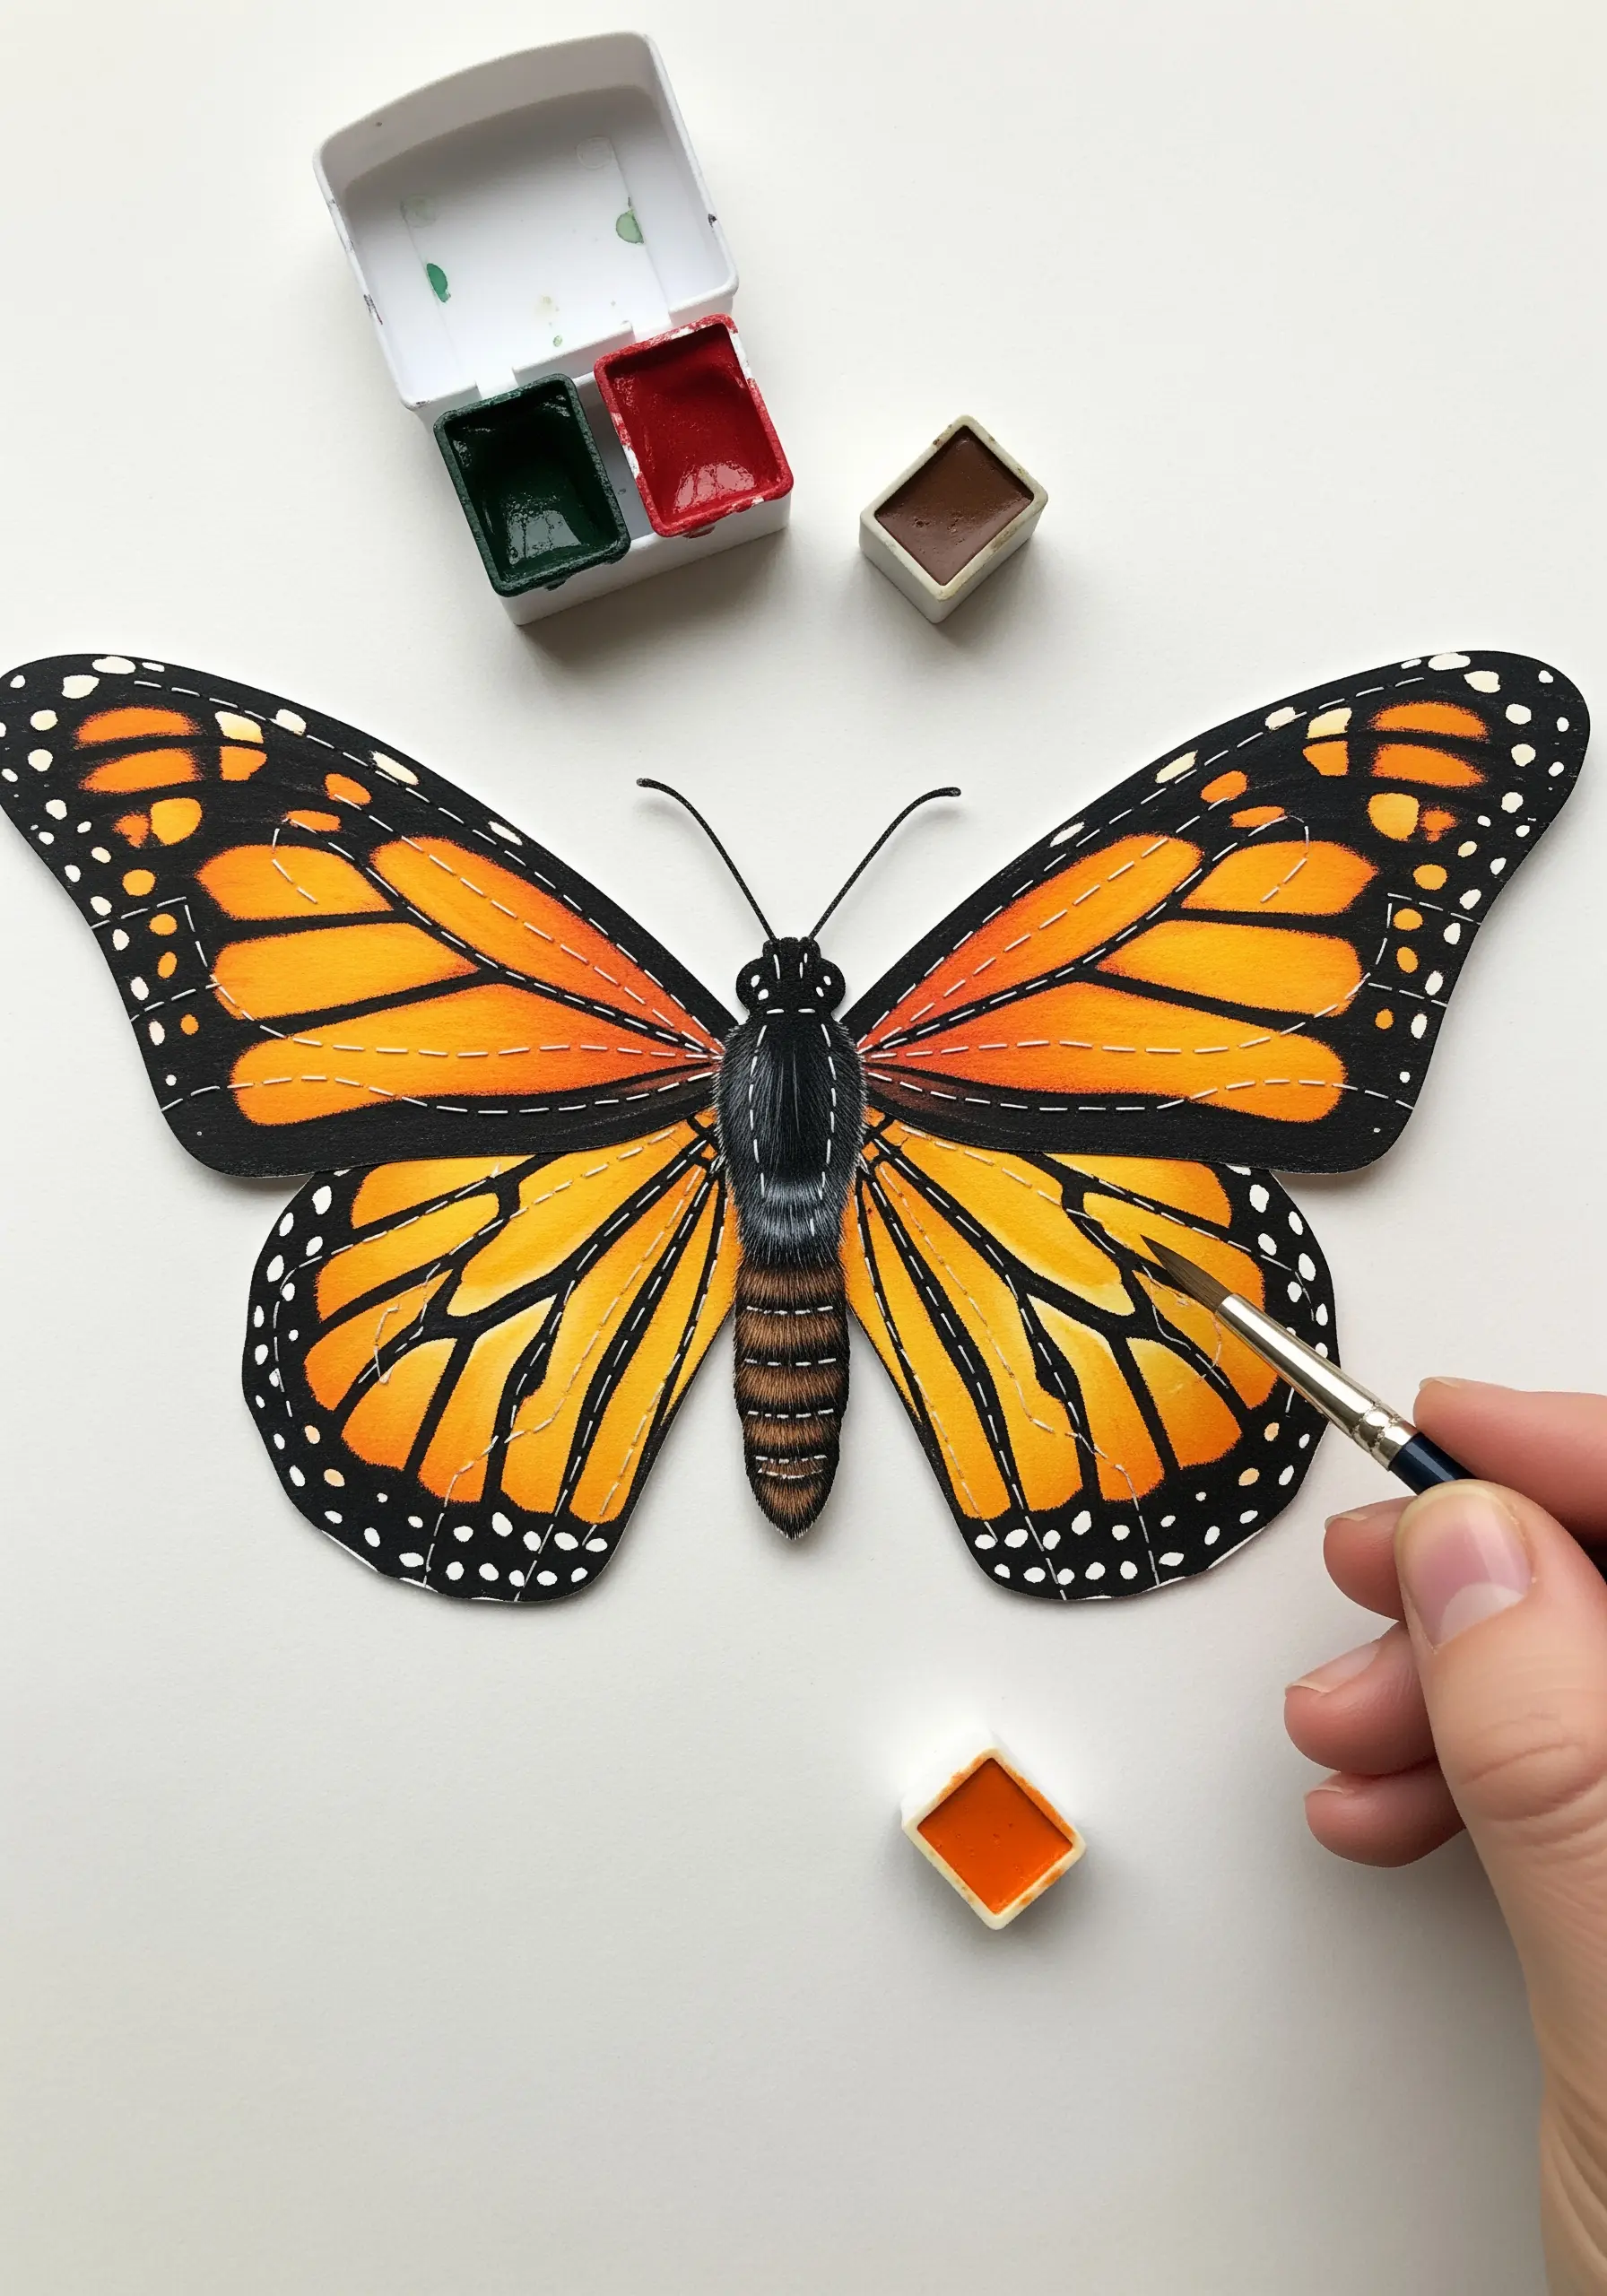
First, paint your subject, like a monarch butterfly, on sturdy watercolor paper, focusing on smooth color gradients and fine details.
After the paint is completely dry, use a simple backstitch or stem stitch with a single strand of black or white thread to outline the edges.
This adds crisp definition and a subtle textile texture that makes the painted colors appear more vibrant.
The thread doesn’t just outline; it adds a layer of dimension, transforming a flat painting into a dynamic mixed-media piece.
7. Weave Threads and Paper Strips Through a Slit Card

Create an impromptu loom by cutting uniform, parallel slits into a sheet of heavy cardstock, leaving the top and bottom edges intact.
Use these slits as your warp, weaving various threads, thin strips of decorative paper, or even fabric ribbons through them.
This method allows you to experiment with color and texture combinations quickly, creating a small tapestry without a traditional frame.
Displaying stitch samples alongside your weaving turns the piece into a beautiful reference guide for future projects.
8. Add Selective Texture to Line Drawings
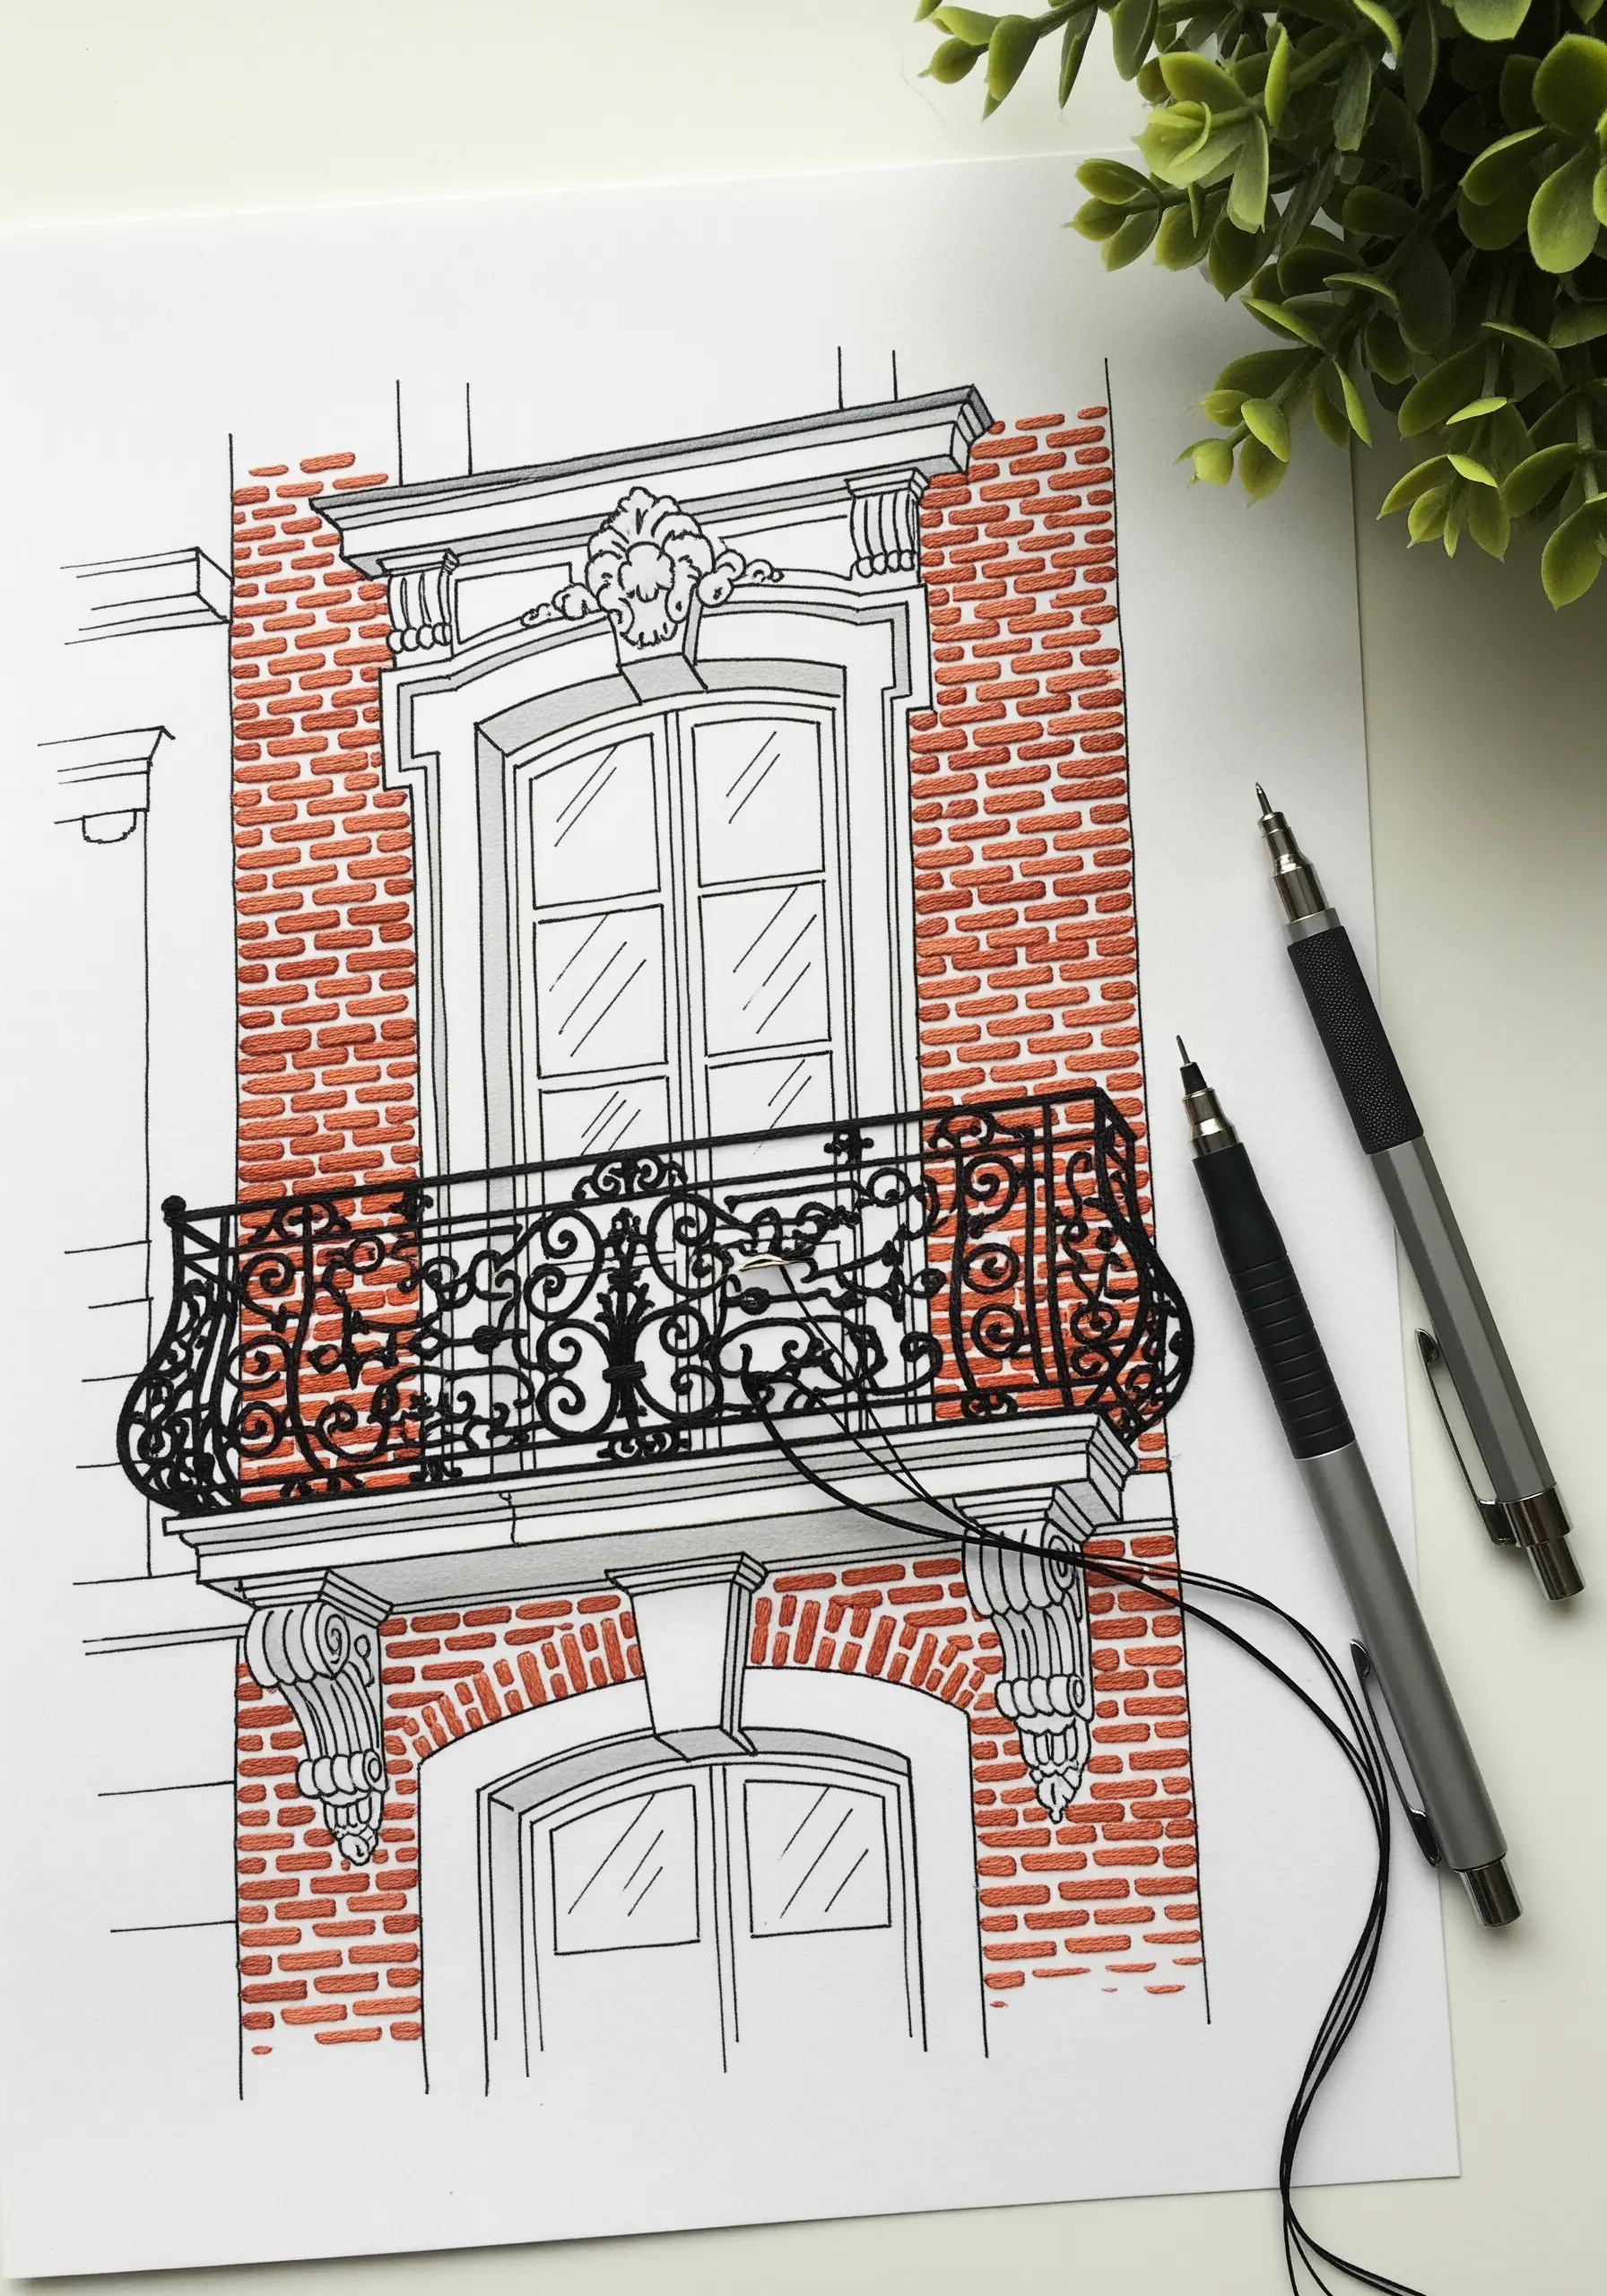
Instead of coloring an entire illustration, use thread to highlight specific architectural or natural textures.
In a drawing of a building, for example, use satin stitch or long-and-short stitch to fill in the brickwork, leaving other areas as simple line art.
This selective application draws the viewer’s eye and creates a powerful contrast between the flat ink lines and the dimensional, light-catching thread.
It’s a modern way to blend illustration and embroidery, where each medium enhances the other’s strengths.
9. Explore Monochrome Stitch Samplers on Handmade Paper
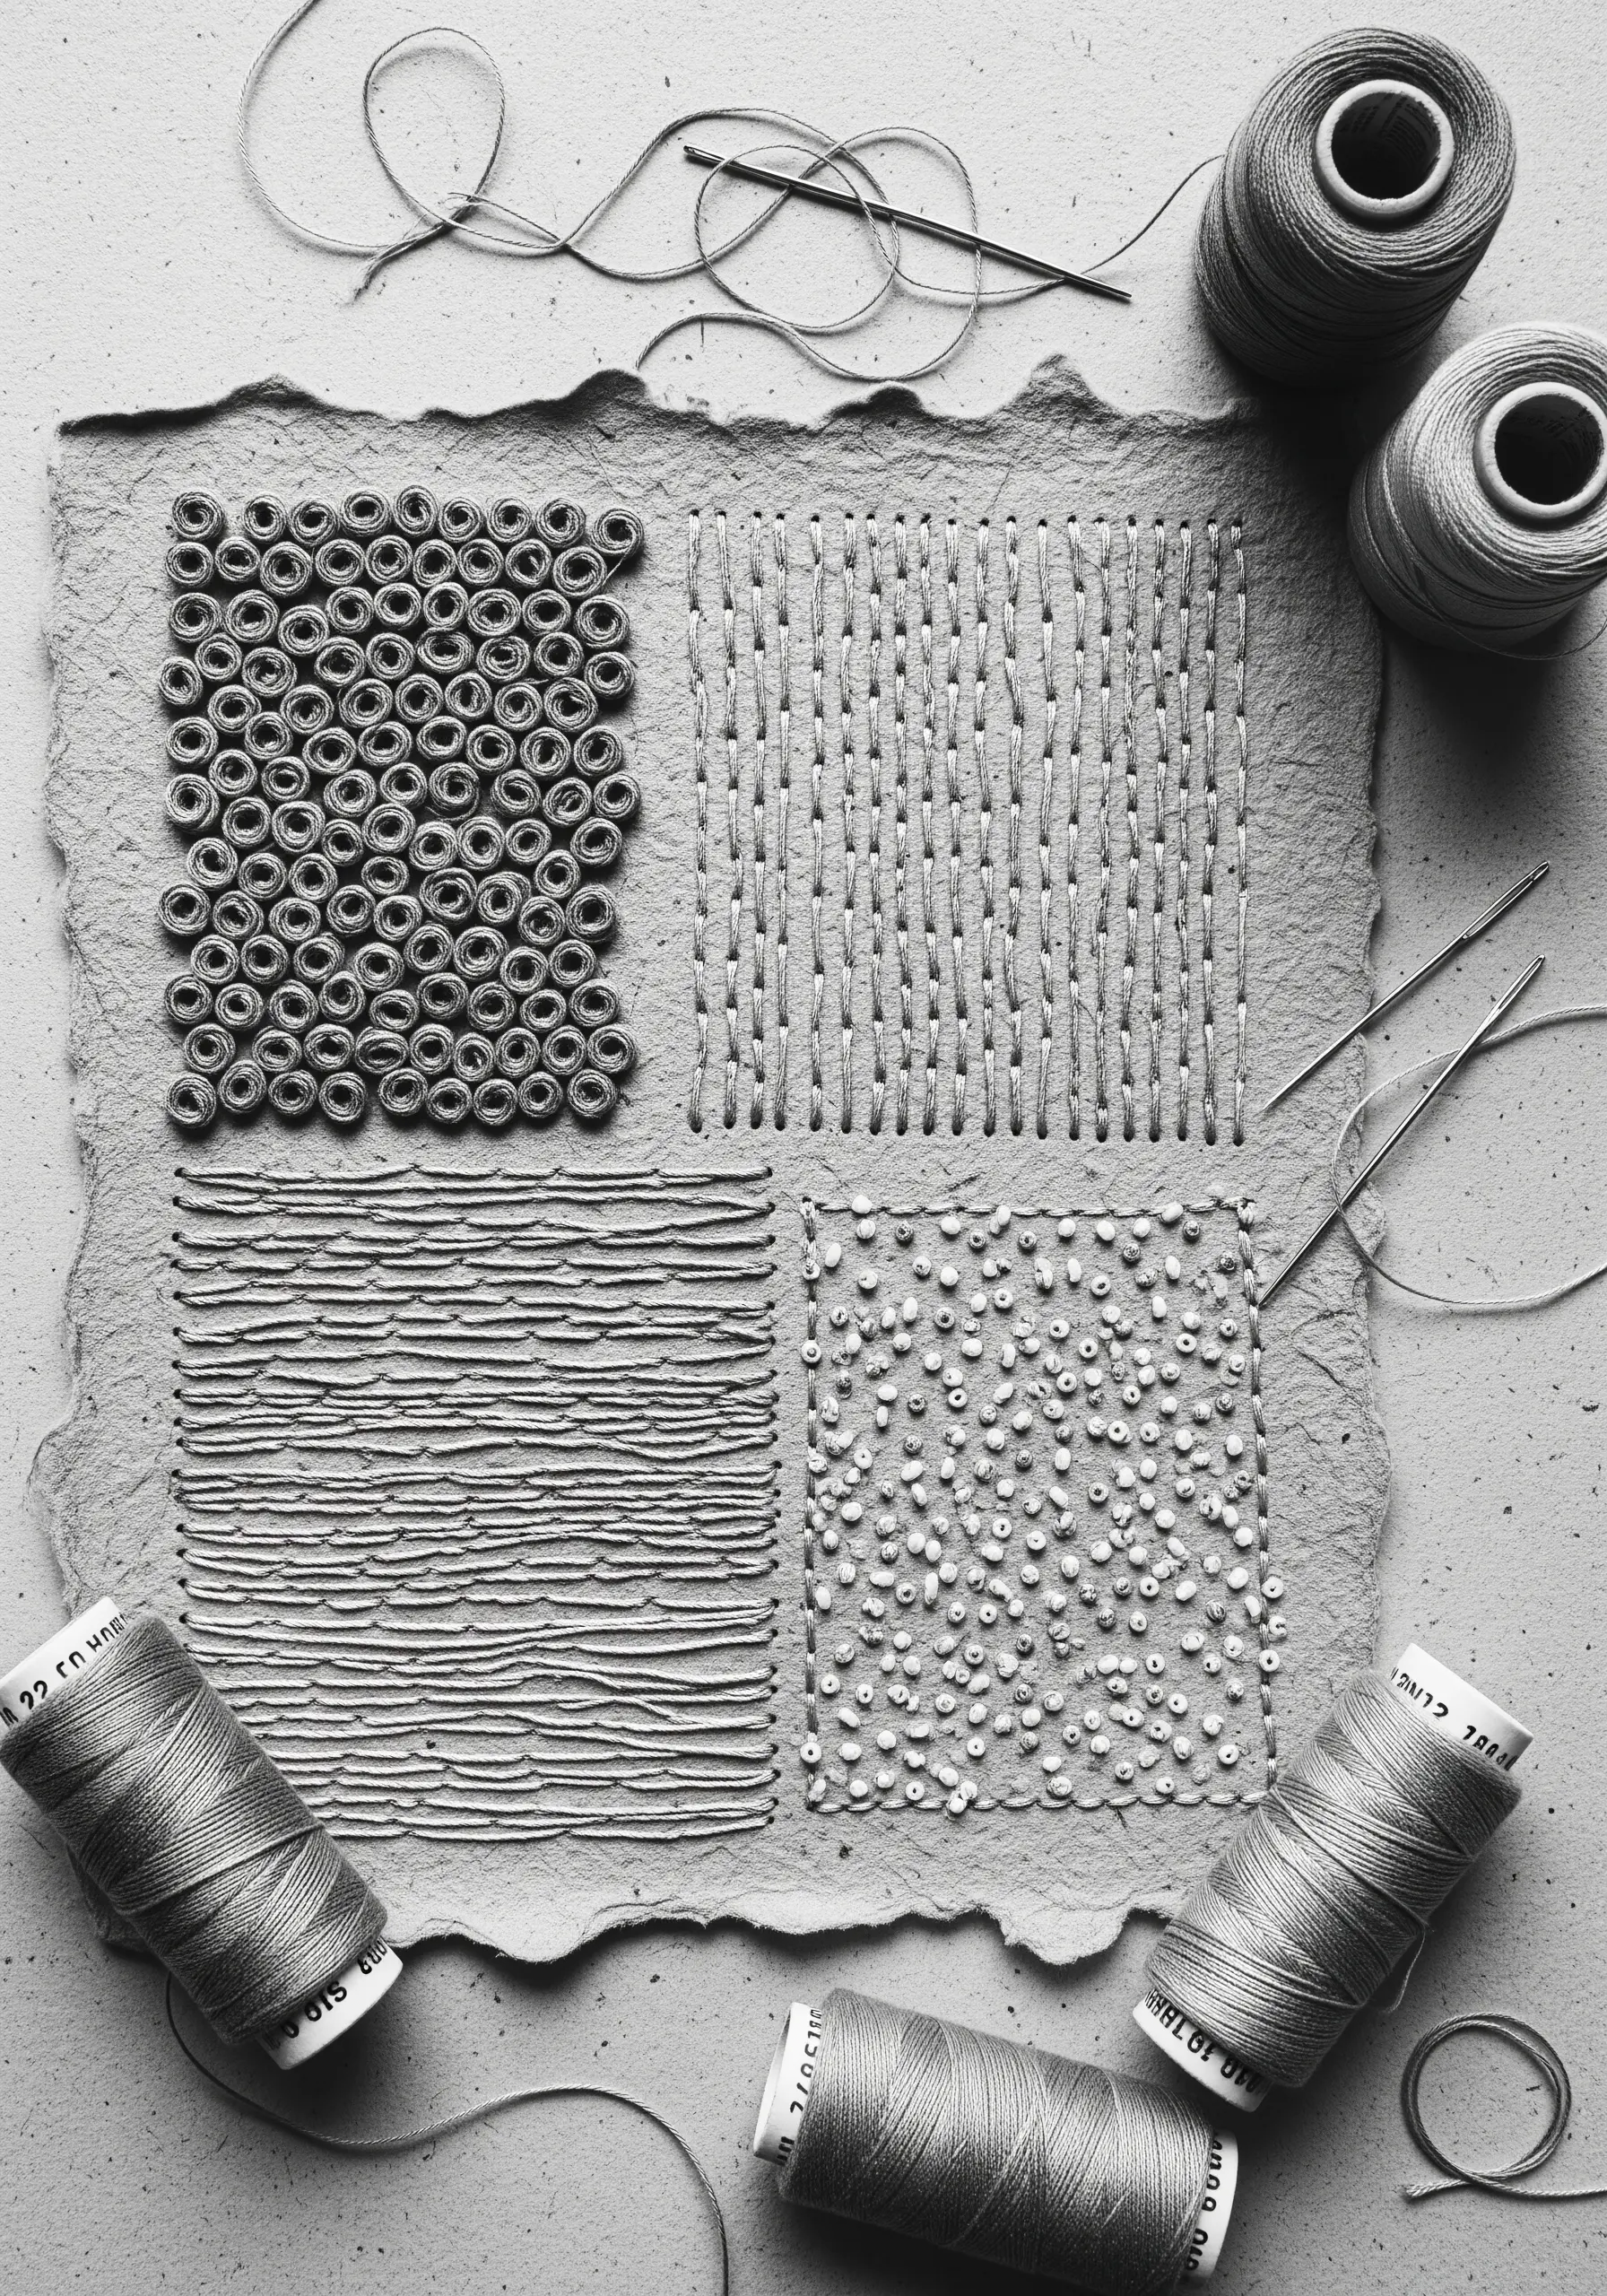
Challenge yourself by working with a single color on a beautifully textured surface like handmade cotton rag paper.
Divide your paper into quadrants and fill each one with a different textural stitch—such as coiled French knots, straight running stitches, or seed stitches.
The lack of color variation forces you to focus entirely on texture, light, and shadow, revealing the unique character of each stitch.
This exercise sharpens your skills and results in a piece of abstract texture-play that is both subtle and complex.
10. Craft Elegant Greeting Cards with Minimal Stitches
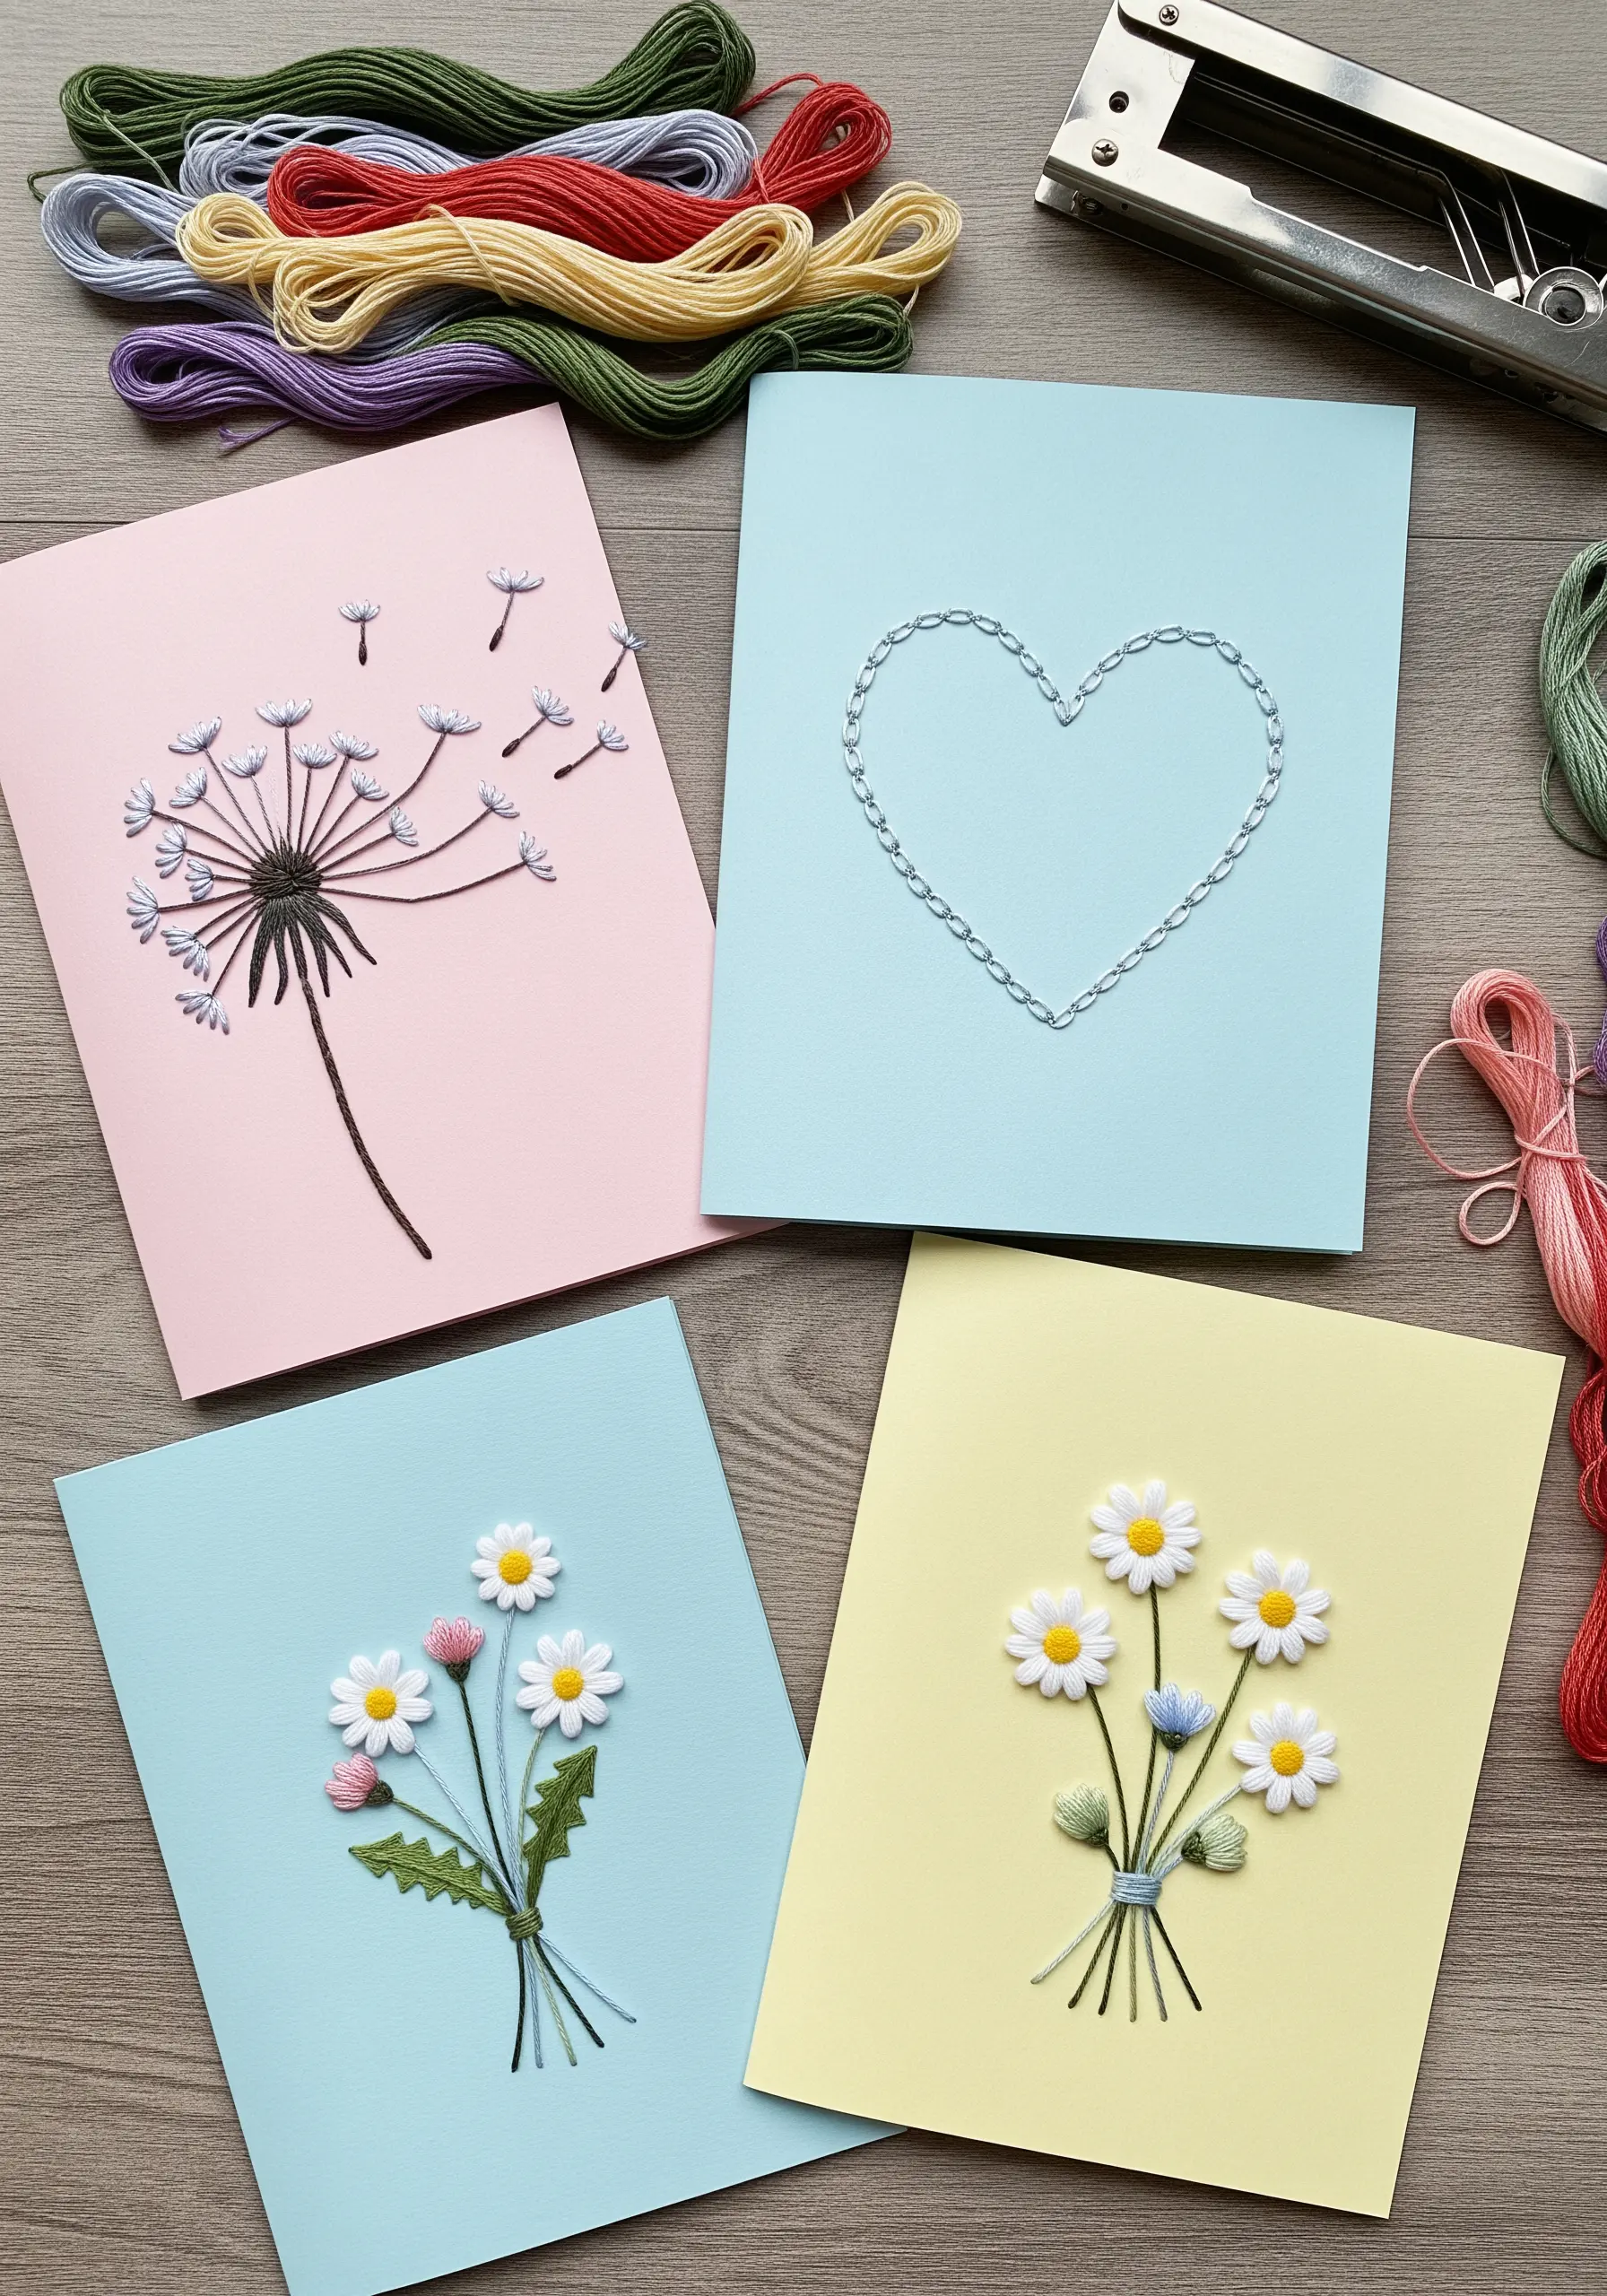
Transform simple cardstock into heartfelt keepsakes with just a few well-placed stitches.
Use a backstitch for clean outlines on hearts or a combination of detached chain stitches and French knots for delicate florals like dandelions.
Pre-piercing your holes is essential for a clean finish on cardstock, preventing buckling or tearing.
Adding small paper-cut elements, like daisy heads, creates a charming 3D effect that makes your DIY embroidered cards feel truly special.
11. Collage with Embroidered Fabric Appliqués

Stitch your motifs—like these toadstool mushrooms—on a piece of scrap fabric first, using detailed long-and-short stitches for shading.
Carefully cut out the embroidered shapes, leaving a tiny fabric border, and apply a fray-stop solution to the edges.
Arrange these appliqués on a dark paper background, using matte medium or fabric glue to secure them.
This method allows you to create highly detailed embroidery without repeatedly perforating your paper, resulting in a clean, layered composition with added elements like preserved moss for realism.
12. Couch Metallic Threads Over Impasto Paint
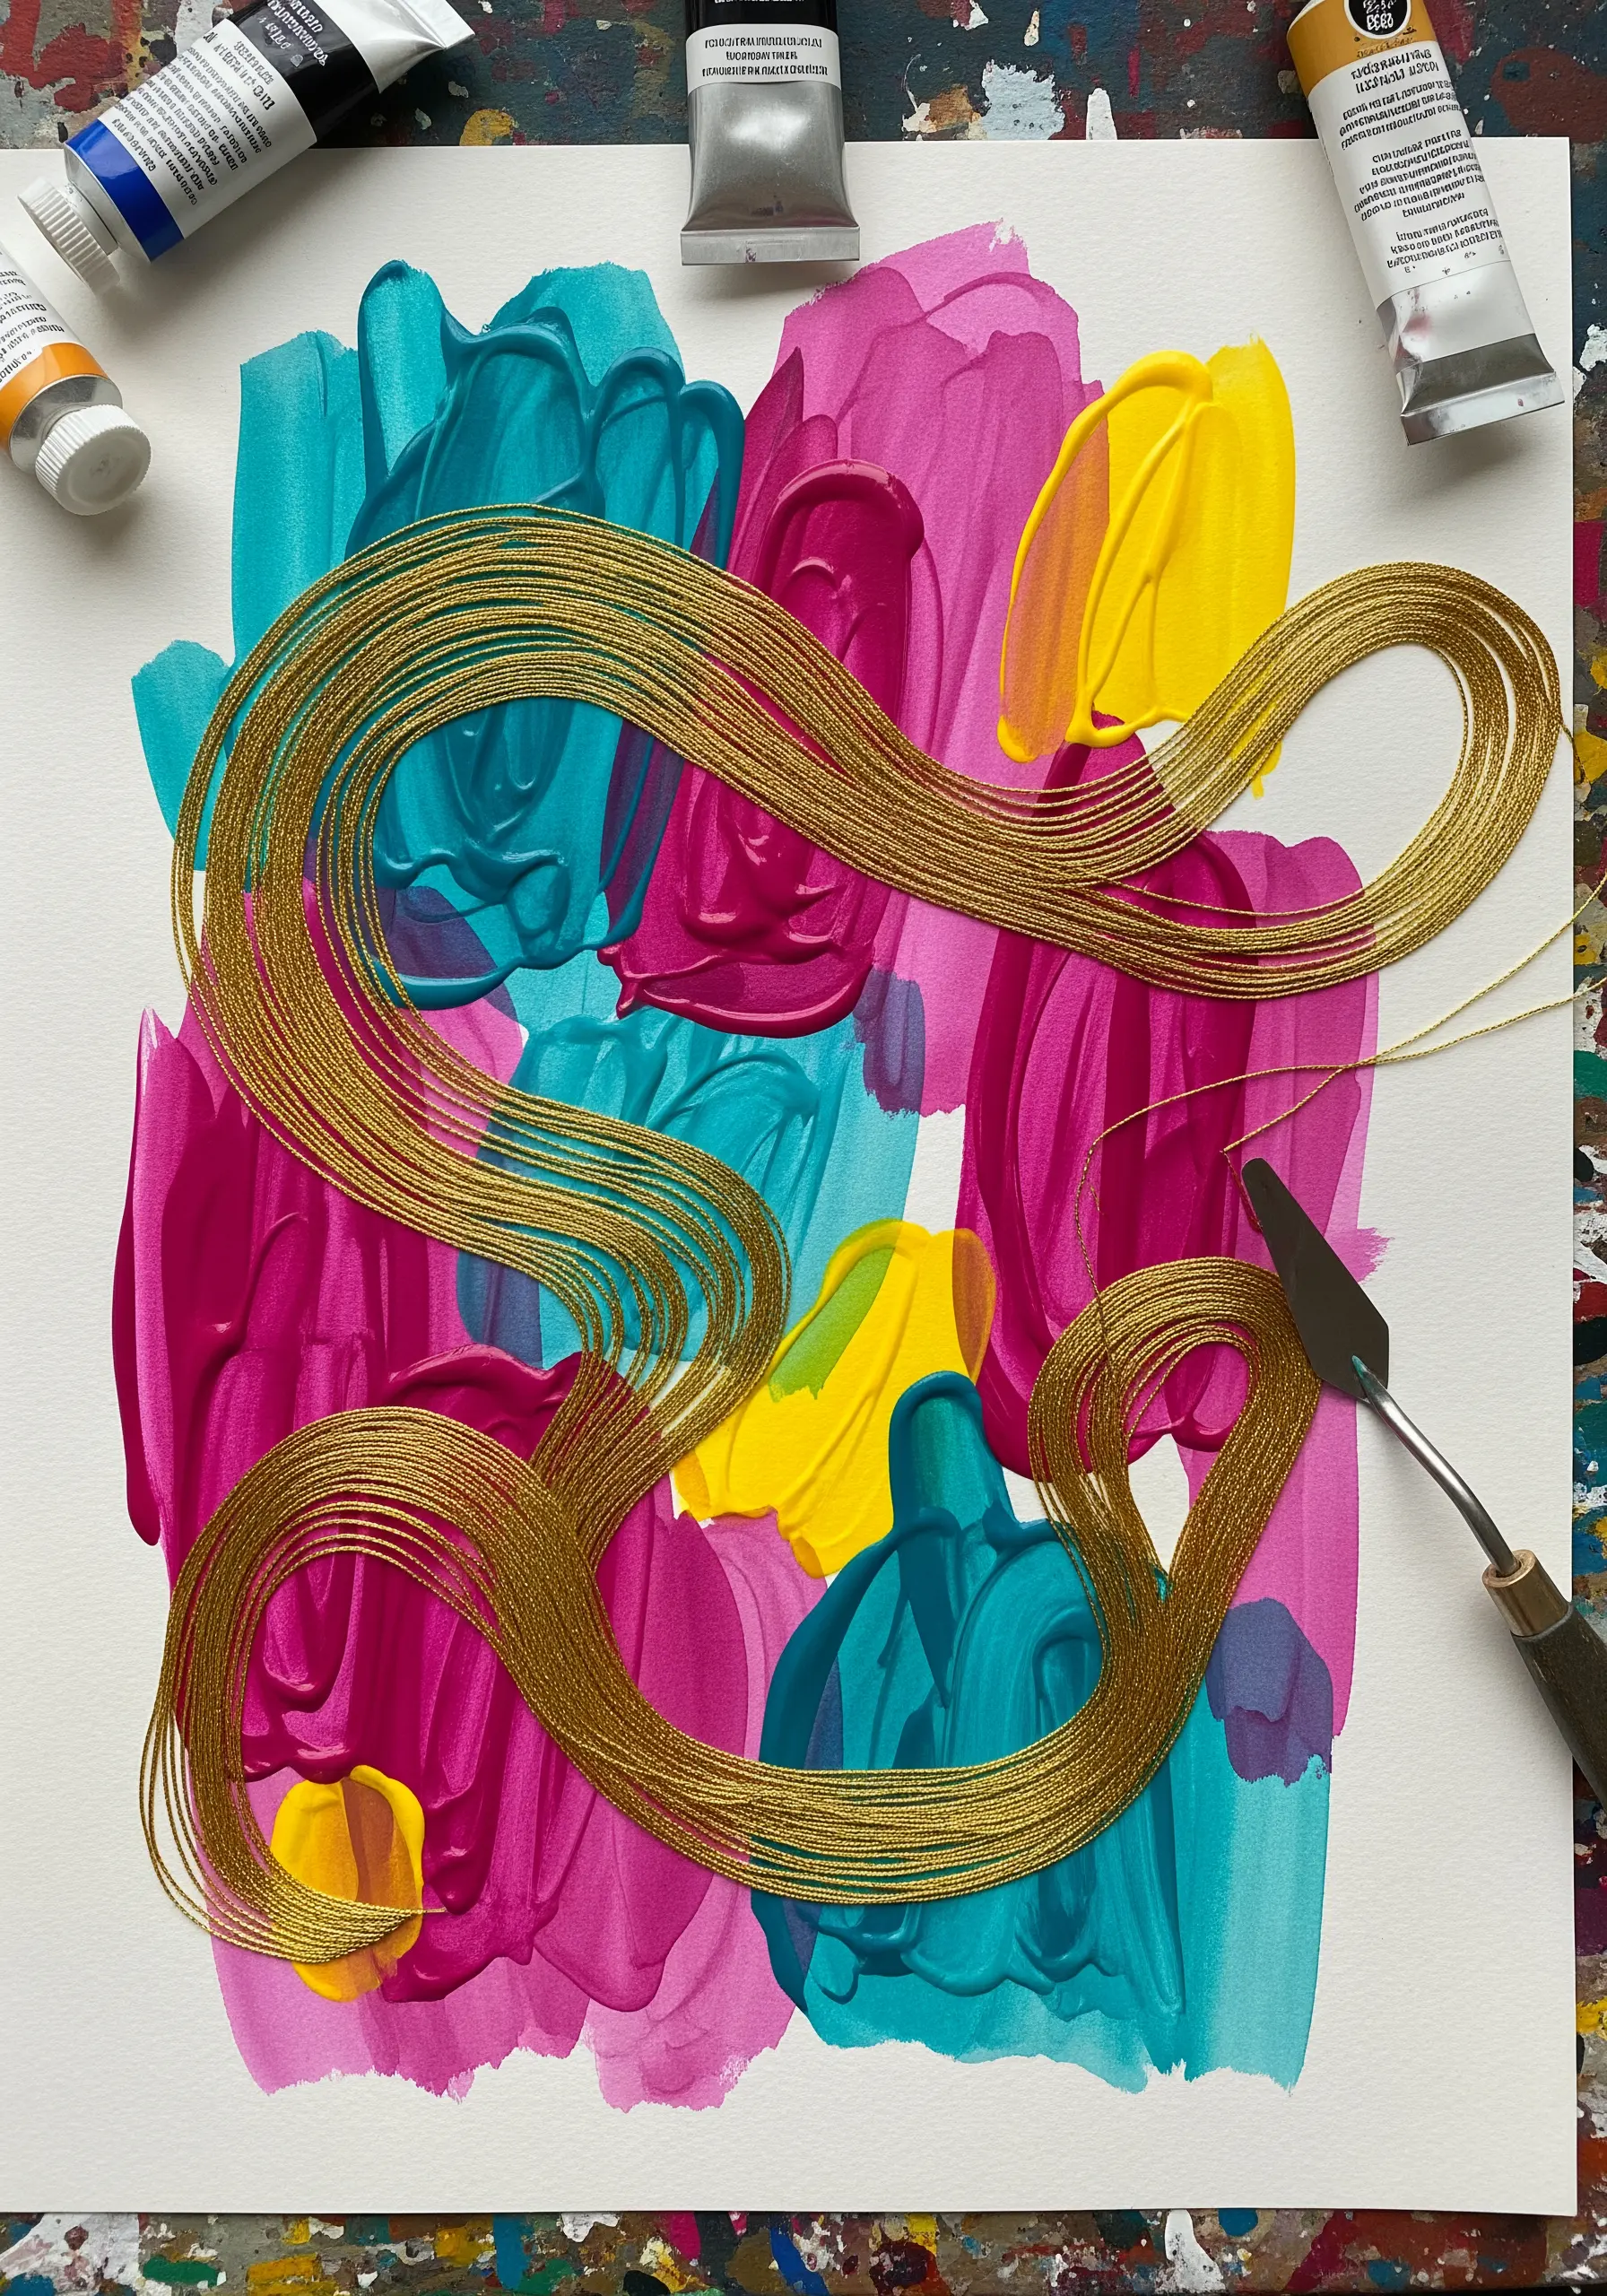
Create a dynamic, textured background by applying thick, expressive strokes of acrylic paint to your paper with a palette knife.
Once the paint is fully cured, lay down bundles of fine metallic thread in sweeping, organic curves over the surface.
Use a single, matching strand of thread to couch the metallic bundles in place with tiny, discreet stitches made directly into the paint and paper.
The contrast between the rough, matte paint and the smooth, reflective thread creates a stunning visual and tactile experience.
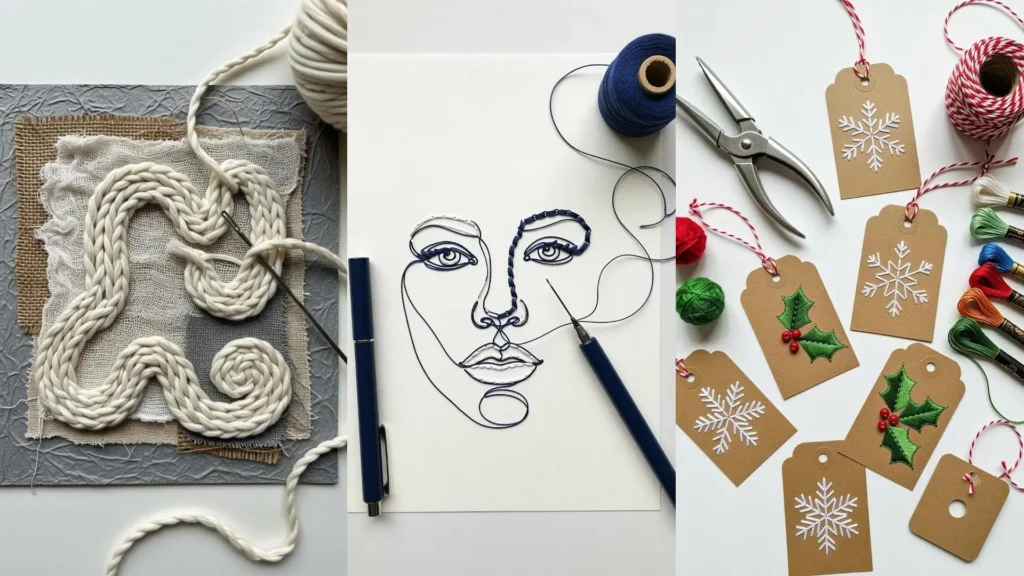
13. Trace Line Art with Stitched and Knotted Contours
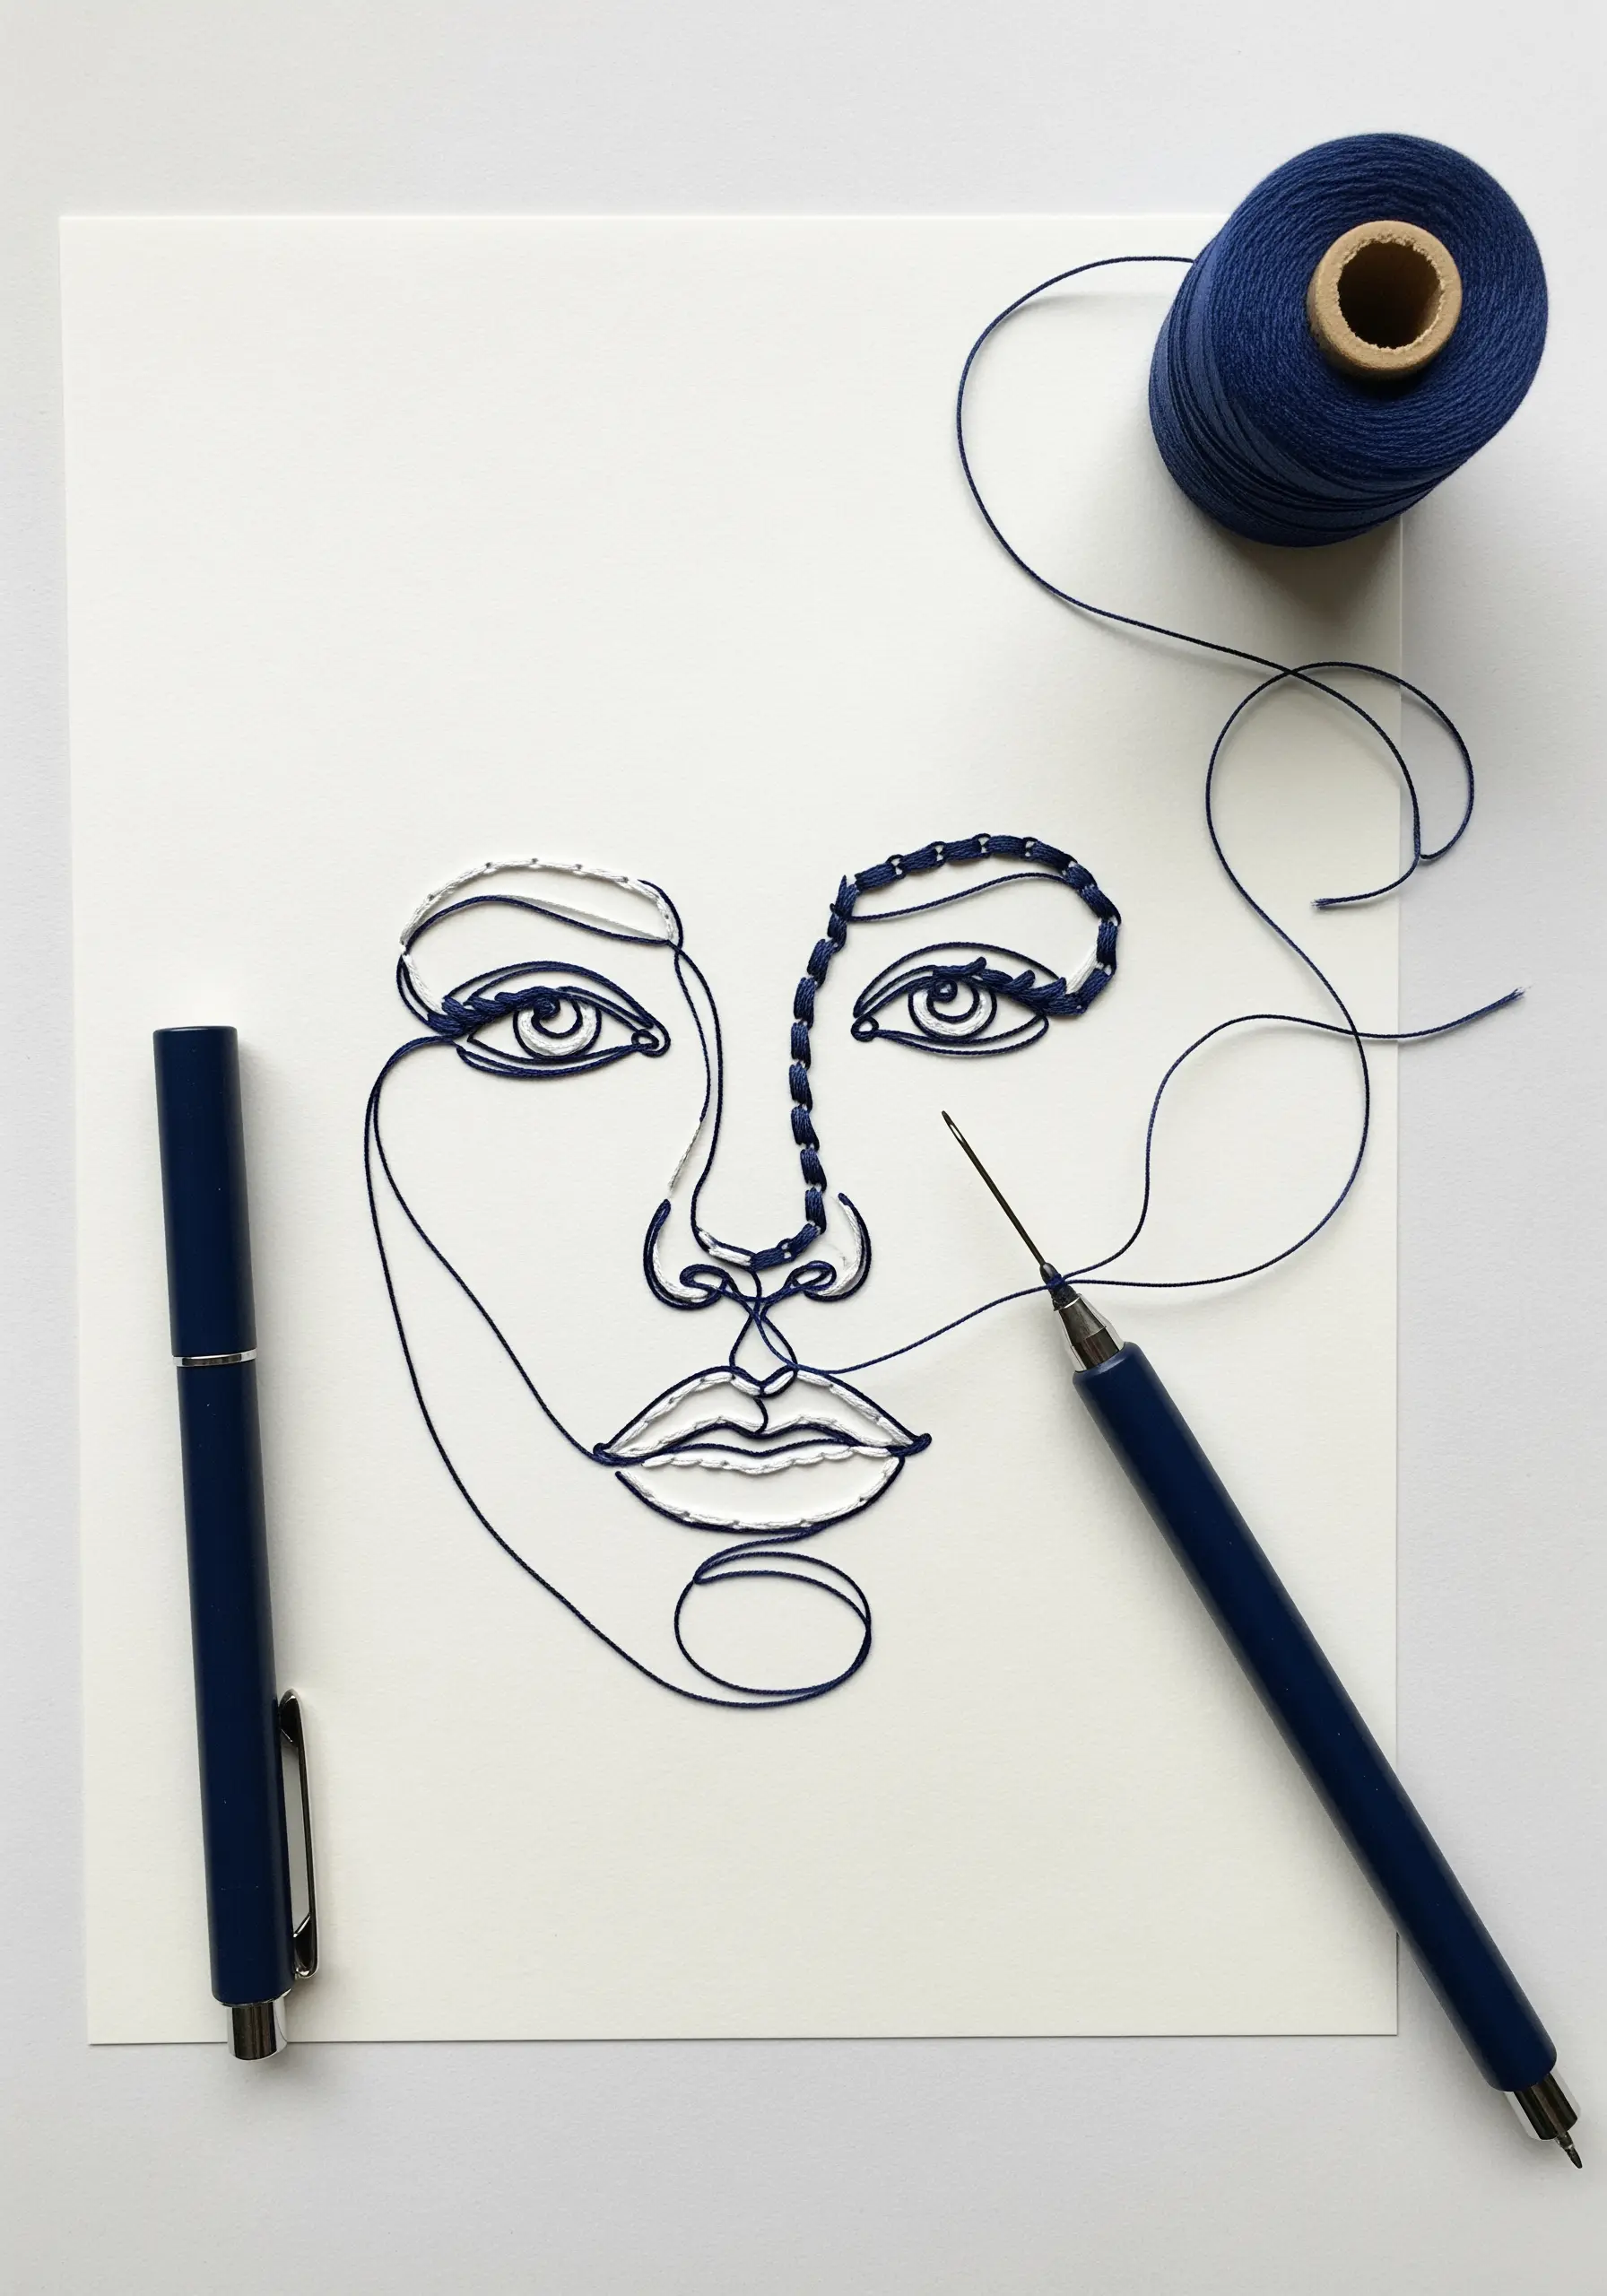
Elevate a simple line-art portrait by selectively tracing the lines with thread.
Use a fine pen to draw your design, then go over key features with couched thread for smooth, uninterrupted curves.
For areas needing more emphasis or texture, switch to a knotted stitch like a Pekinese stitch or a knotted chain stitch.
This technique allows you to play with line weight and texture, turning a flat drawing into an expressive abstract face line embroidery piece.
14. Integrate Paper Cutting with Stitched Details
Combine the precision of paper cutting with the soft texture of embroidery for a dramatic effect.
First, cut the main silhouette of your design from a sheet of paper, then cut intricate details like feathers or scales.
Layer this cutout over a contrasting background color and use long, straight stitches to add shading, color gradients, and fine lines.
The thread work, nestled within the paper cuts, adds a surprising layer of depth and craftsmanship that makes the entire piece feel alive.
15. Sculpt Sea Foam with Textured Stitches and Sequins
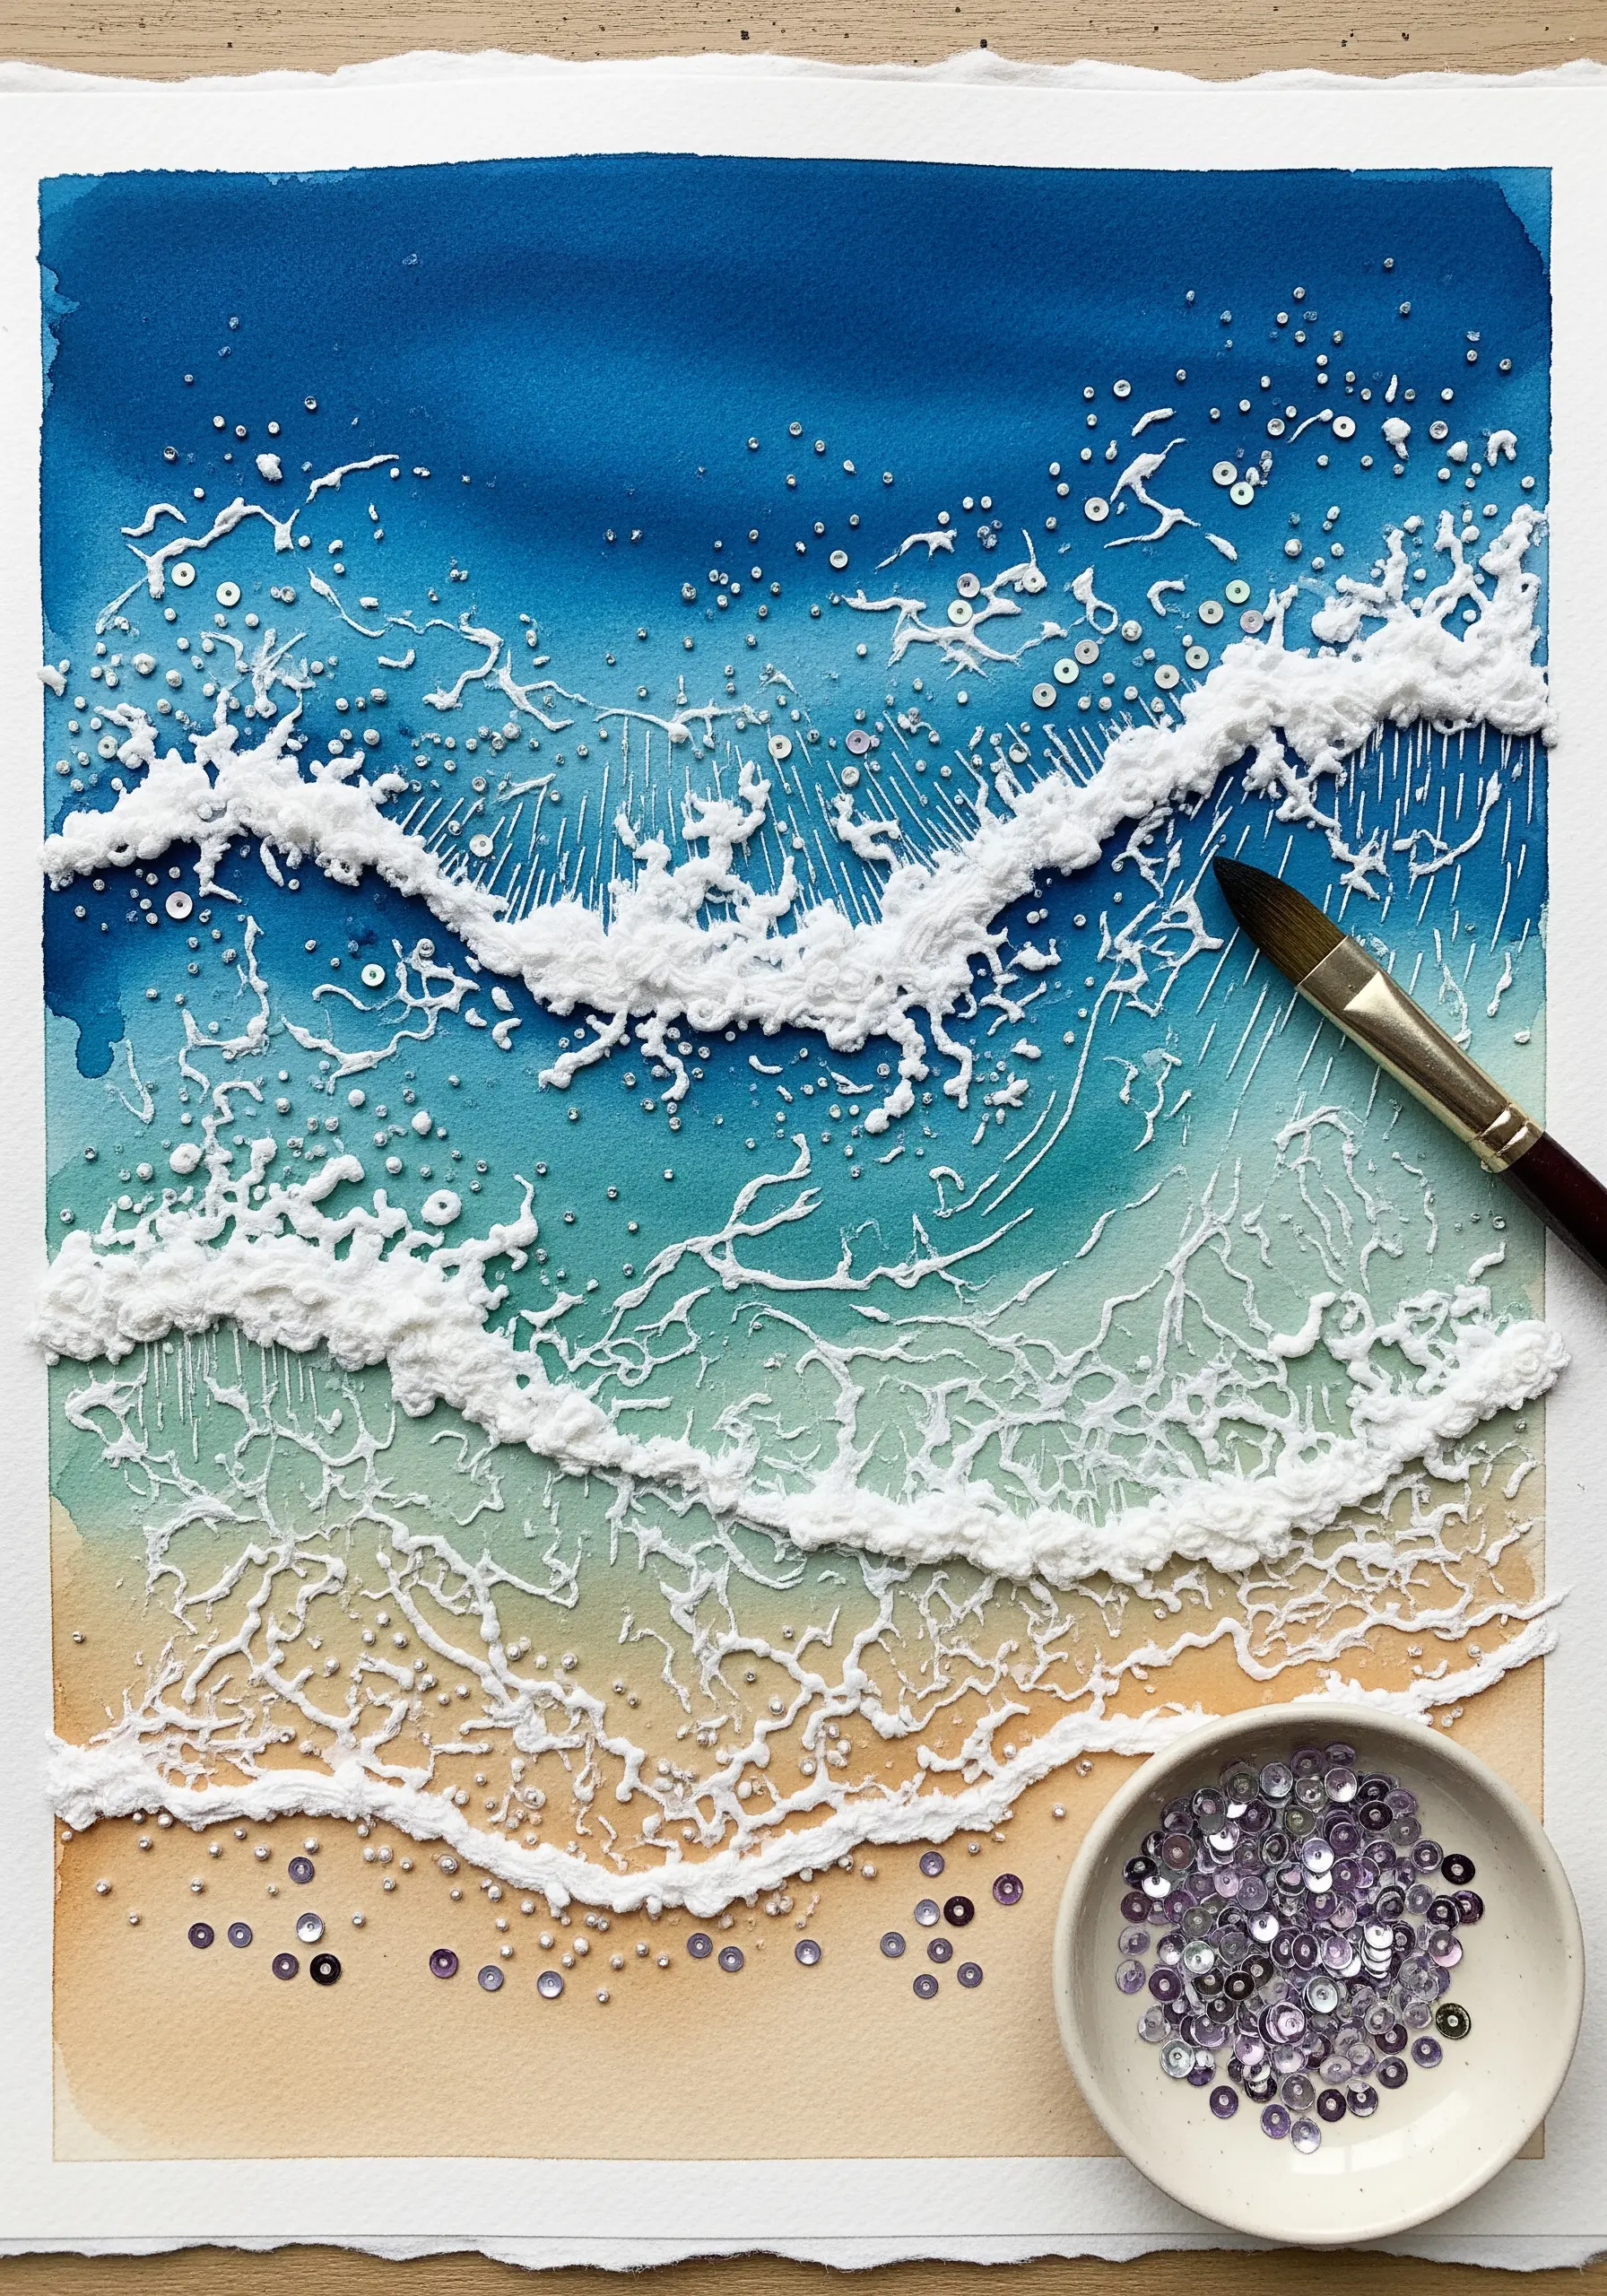
Capture the effervescent texture of ocean waves by building up layers of French knots and bullion knots on a watercolor-painted background.
Use pure white and off-white threads to create the frothy crests of the waves, varying the density of your knots to suggest movement.
Work into the wet-on-wet watercolor base after it has dried to mimic the soft blend of sea and sand.
Sprinkle iridescent sequins and tiny beads near the shoreline to catch the light, perfectly mimicking the glisten of wet sand and sea spray.
16. Embellish Kraft Paper Tags with Festive Motifs
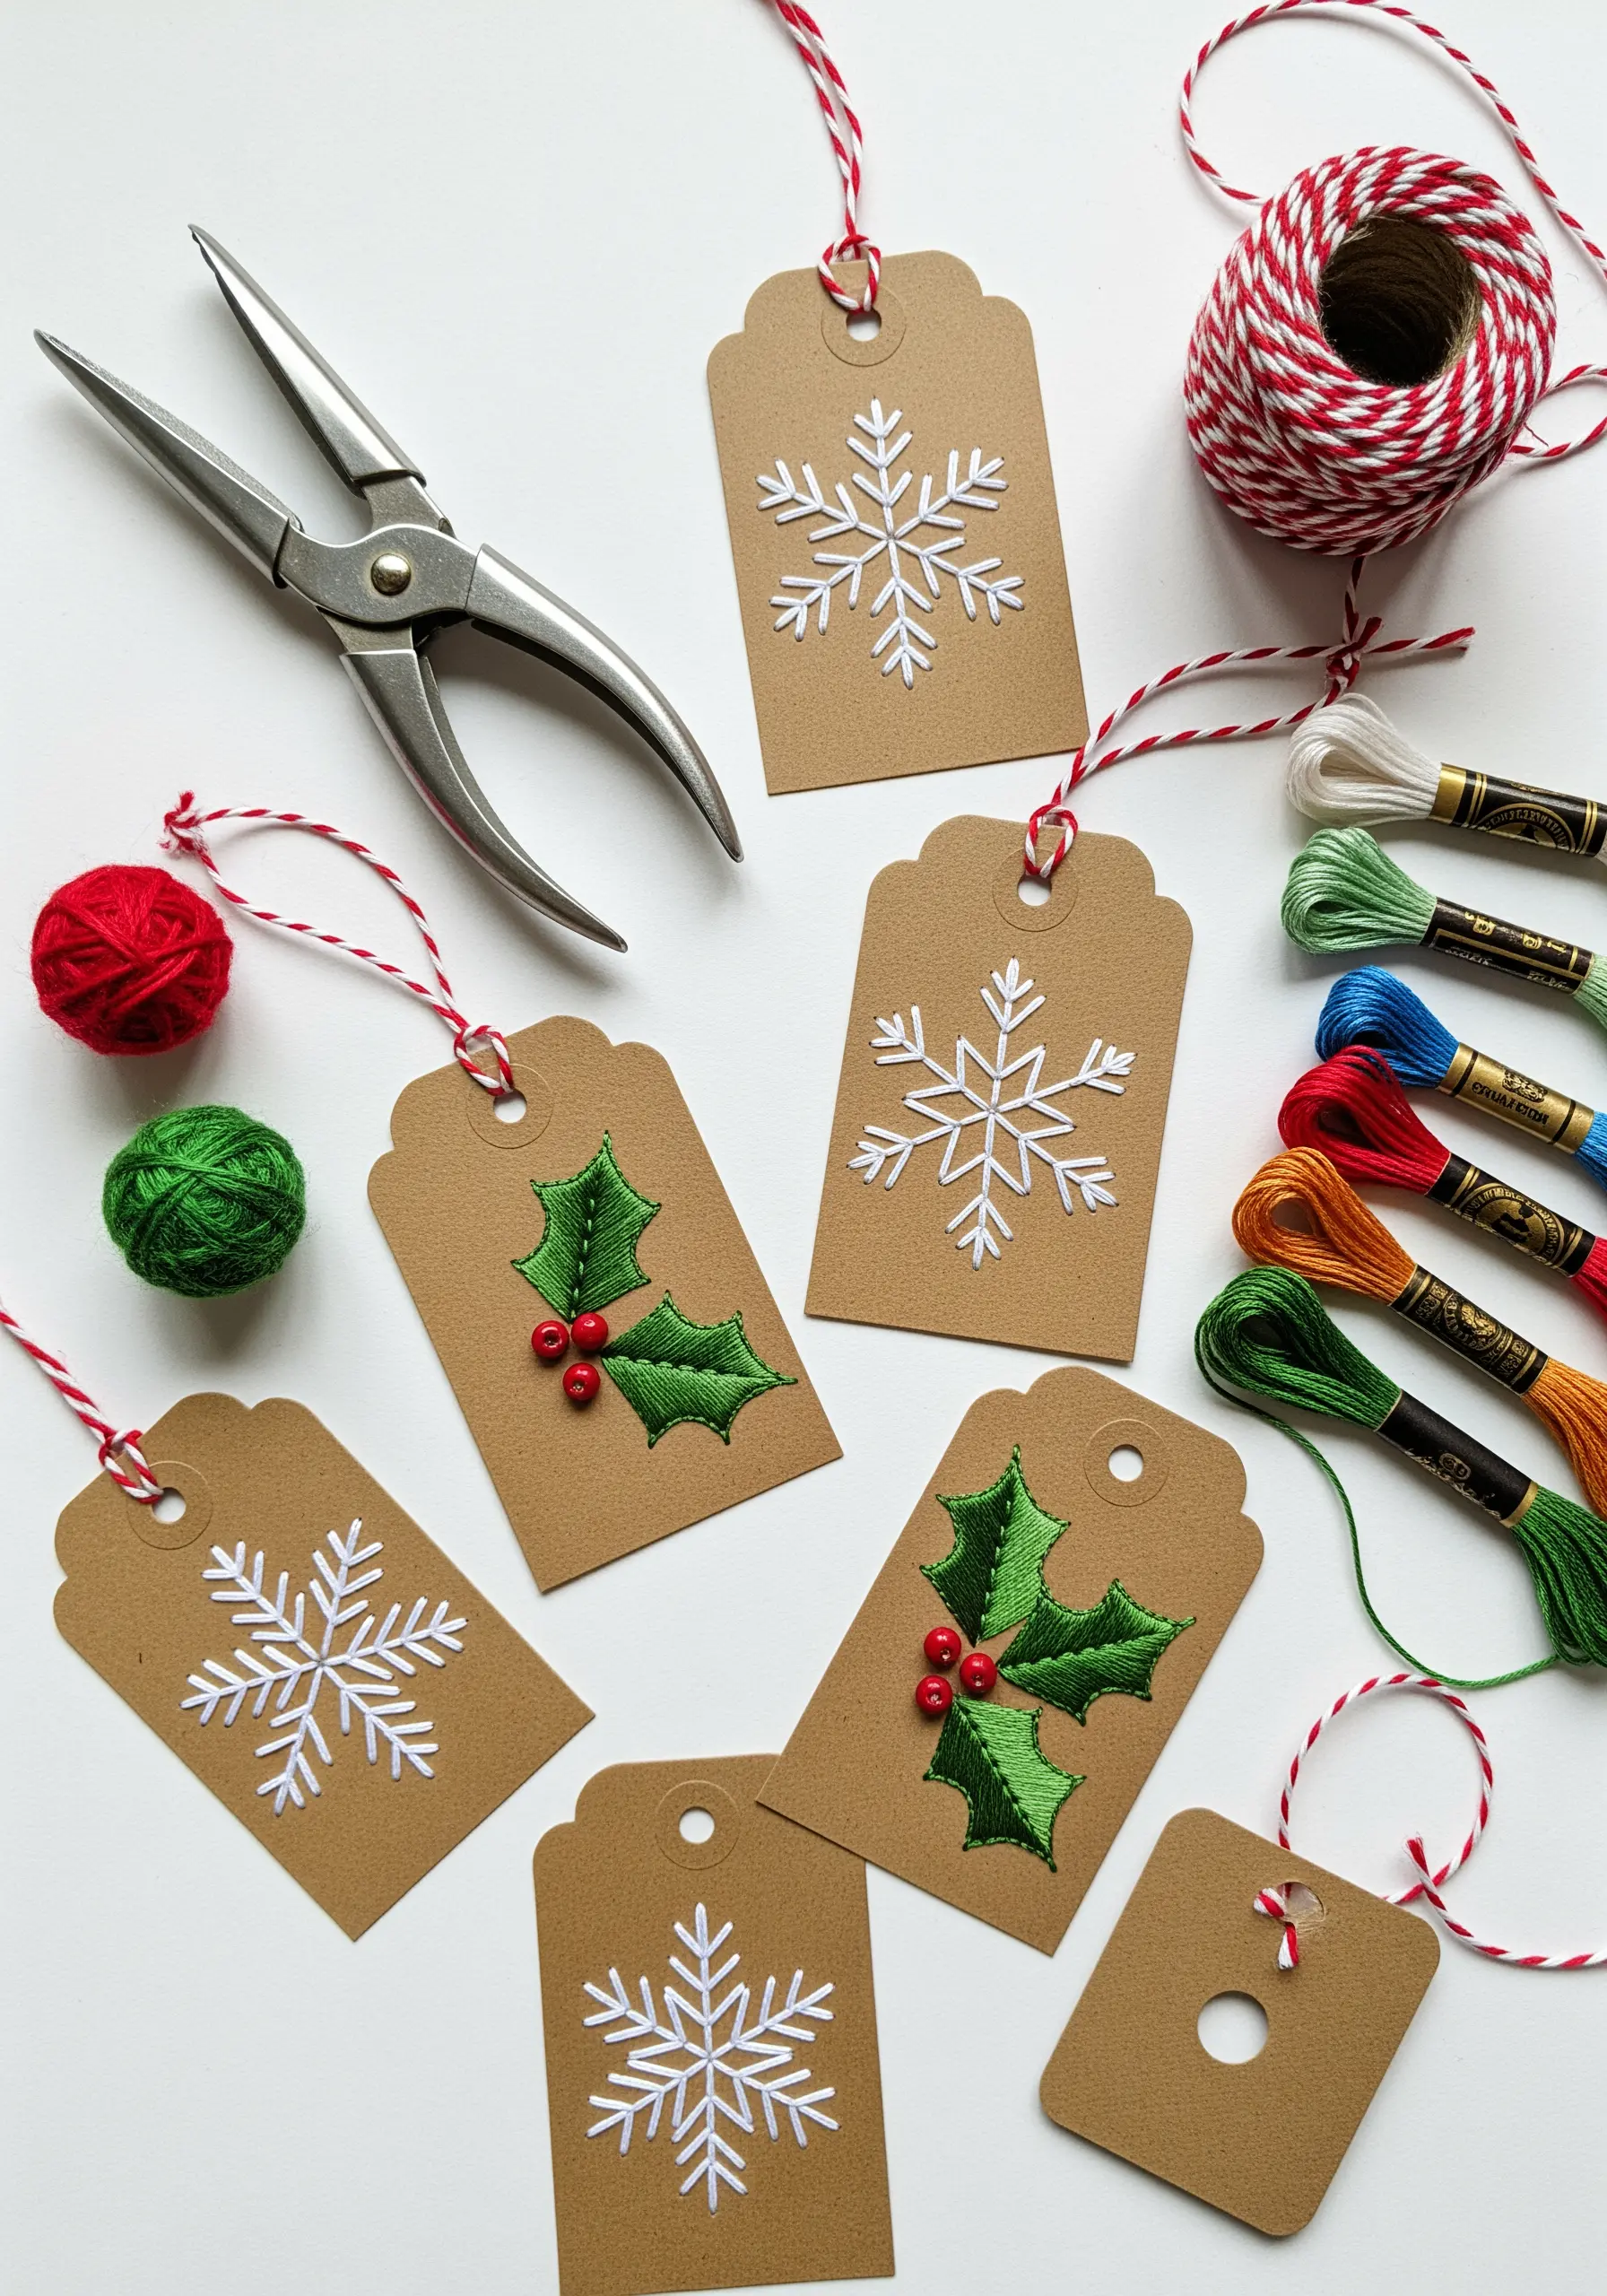
Give your gifts a personal touch by embroidering simple designs onto sturdy kraft paper tags.
Use satin stitch for bold holly leaves and straight stitches for delicate snowflakes, keeping your designs clean and graphic.
Pre-piercing the holes with your needle ensures your stitches are even and prevents the paper from tearing.
Adding tiny red beads for holly berries introduces a pop of color and a charming three-dimensional element, making these tags into treasured ornaments.
17. Create Whimsical Steam with Thread Curls
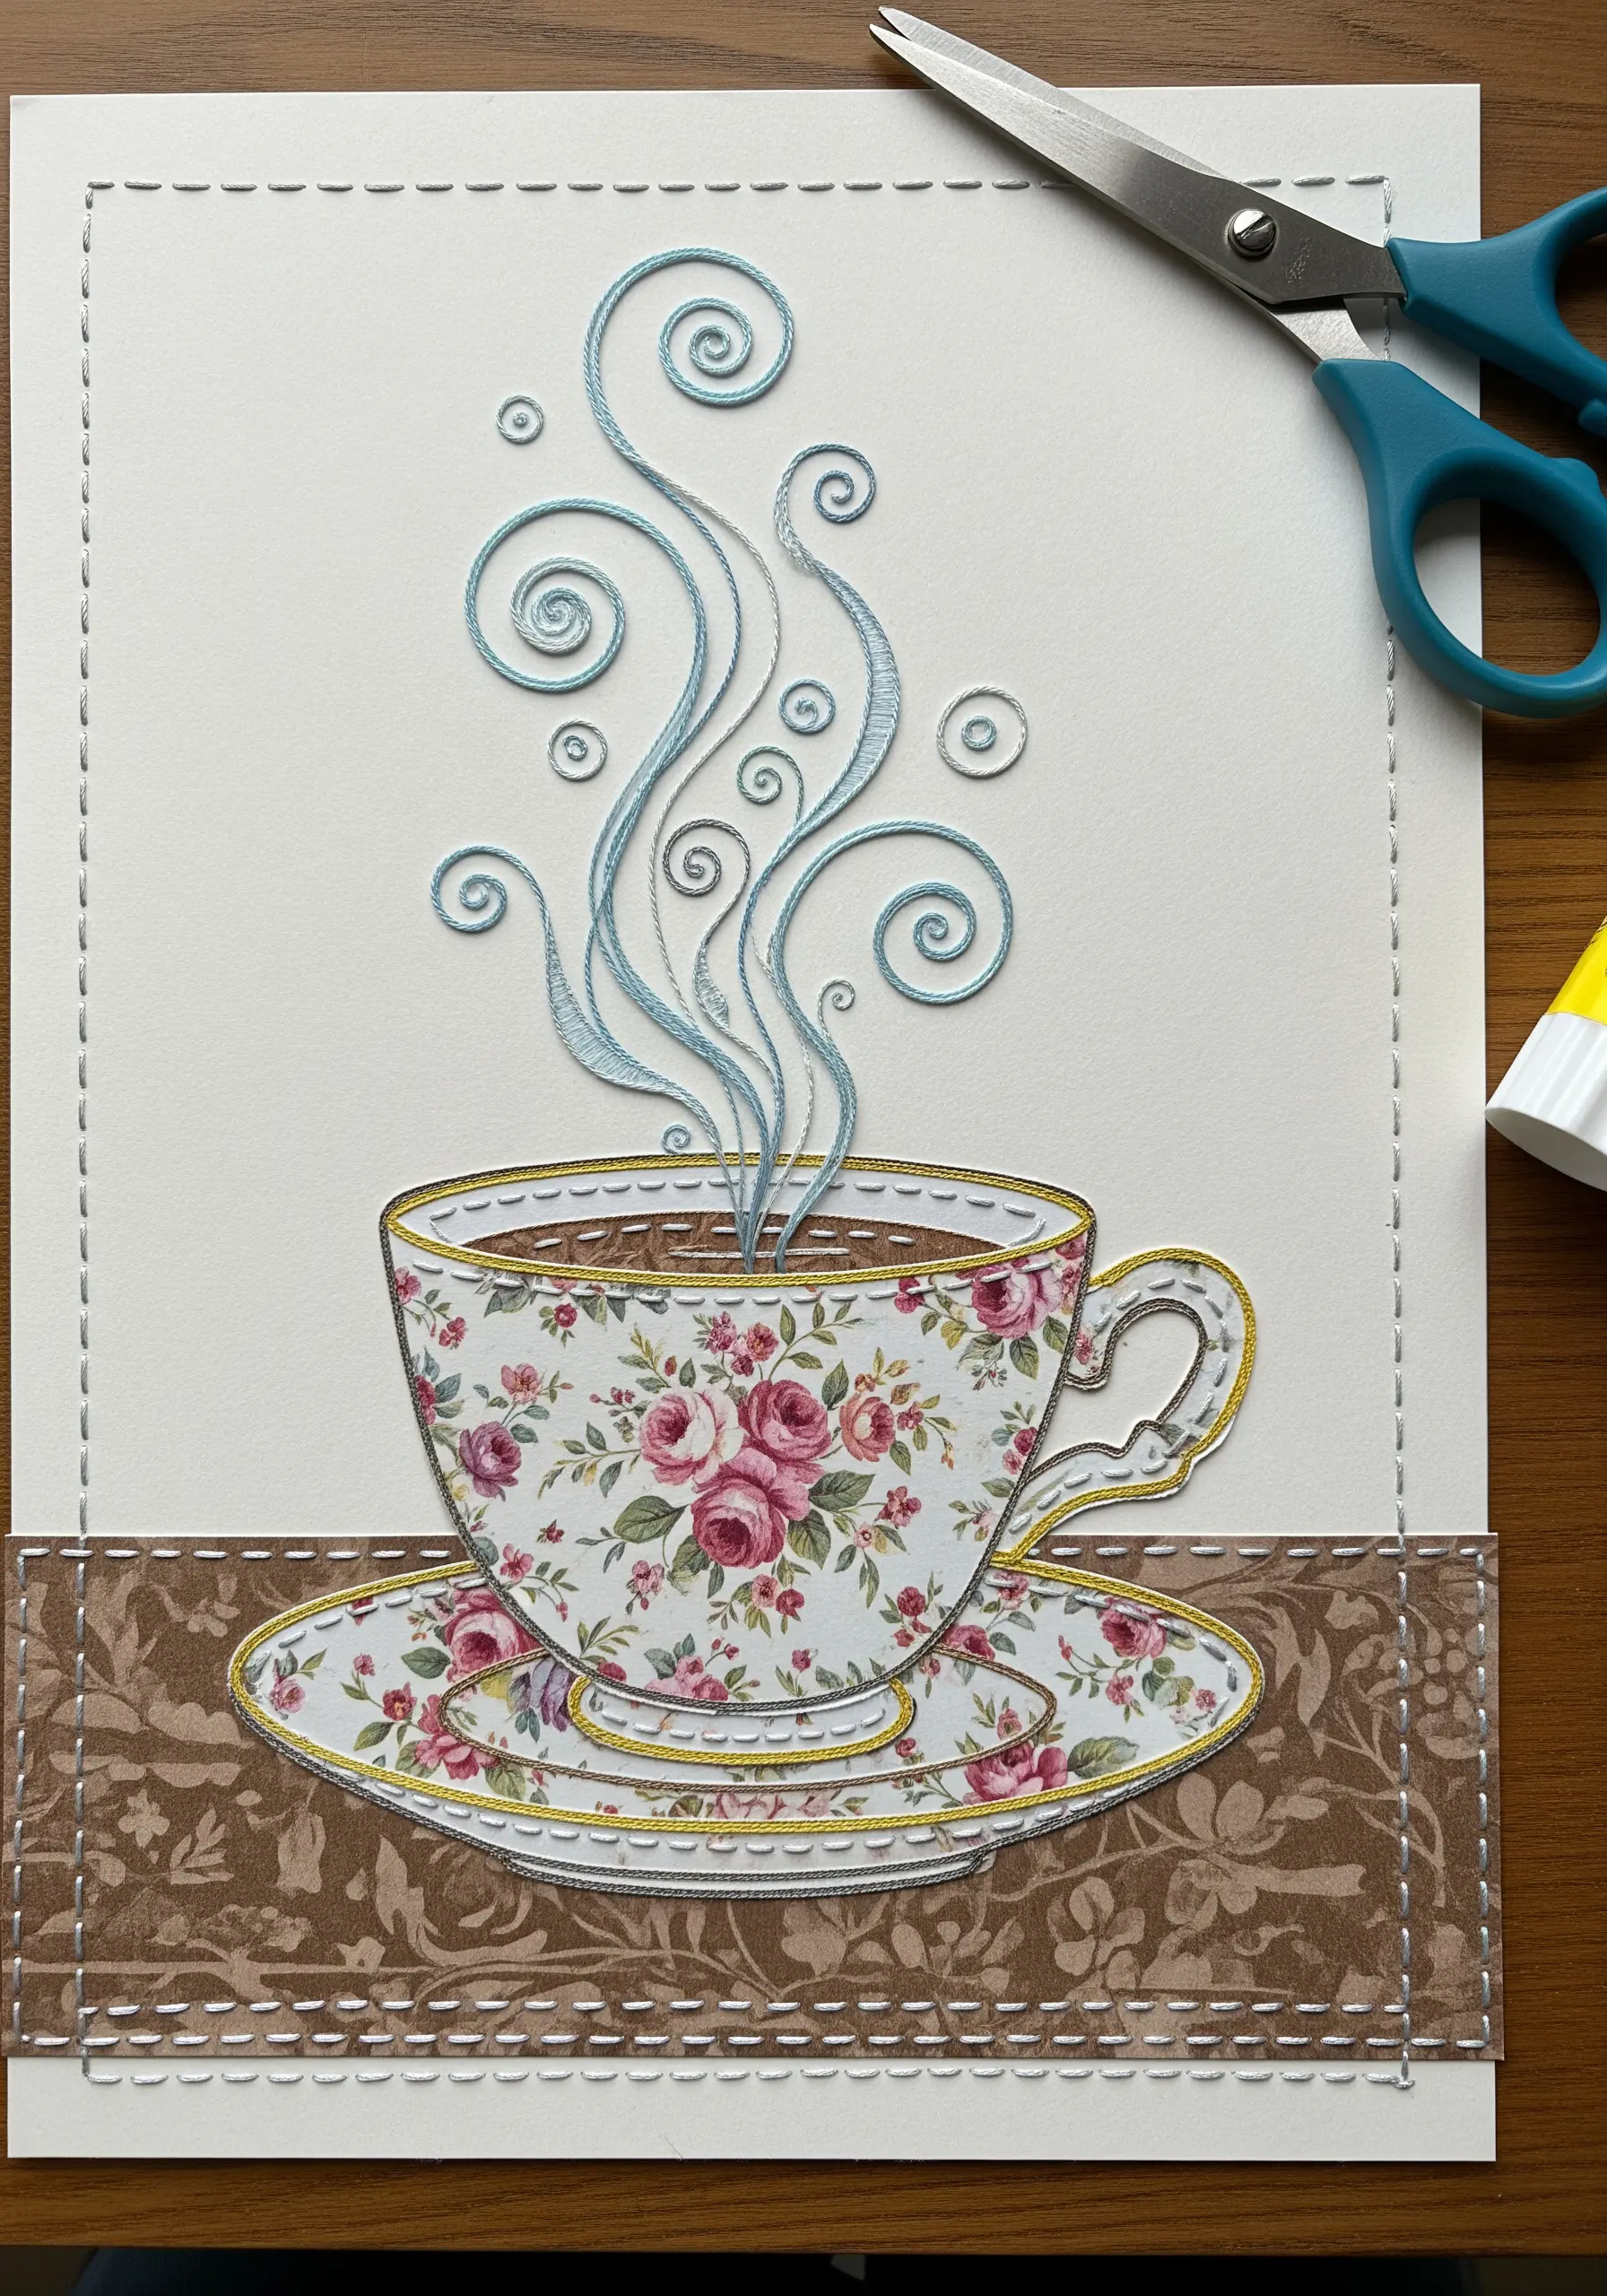
Combine paper collage and embroidery to create a cozy, layered scene.
Use patterned scrapbook paper for the main elements, like a teacup, and adhere it to a cardstock base.
To create the illusion of steam, draw light, swirling guidelines in pencil and then stitch over them using a fine, light-colored thread.
Couching a metallic or pearlescent thread into spirals creates delicate, shimmering steam that appears to rise right off the page.
18. Populate a Printed Image with Stitched Elements
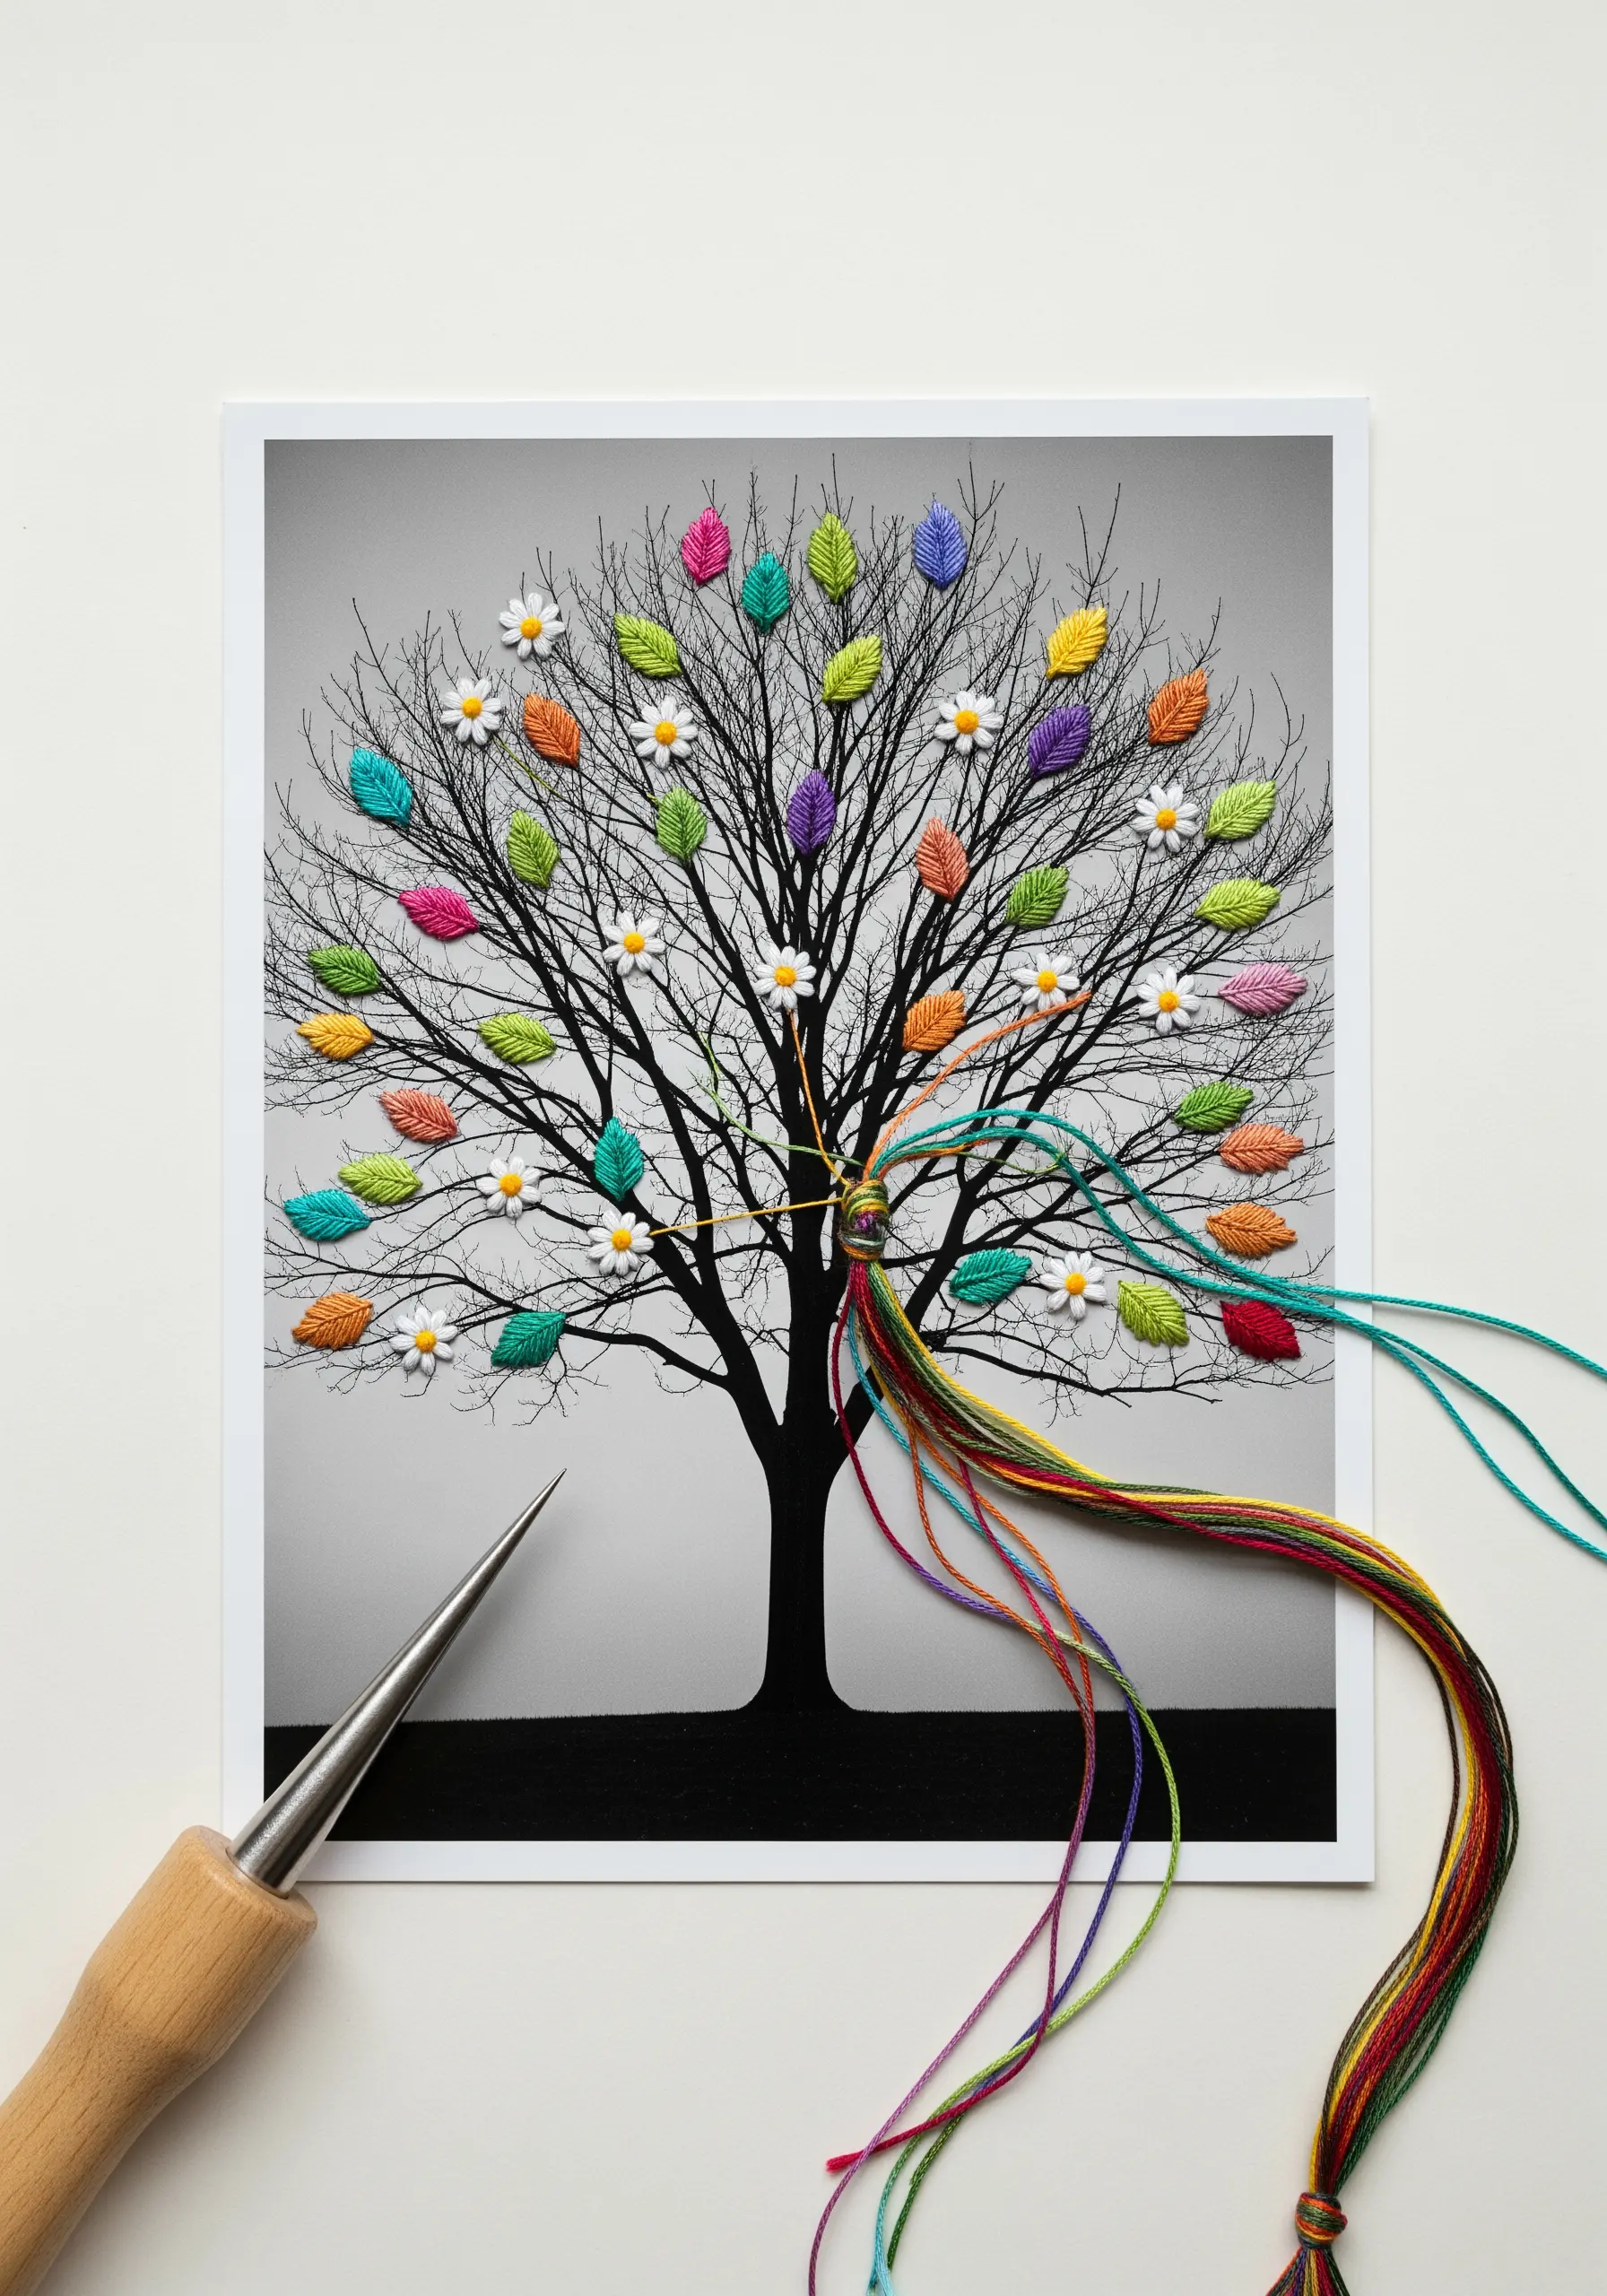
Start with a high-contrast black and white photograph or illustration, like this bare tree, printed on matte photo paper or heavy cardstock.
Bring the image to life by adding colorful embroidered elements, such as satin-stitched leaves or French knot blossoms.
This technique creates a surreal and beautiful juxtaposition between the flat, printed background and the vibrant, textured thread in the foreground.
Allowing the threads to hang loose adds a dynamic, interactive quality, inviting the viewer to engage with the piece.
19. Craft Padded Honeycomb Cells for a 3D Effect
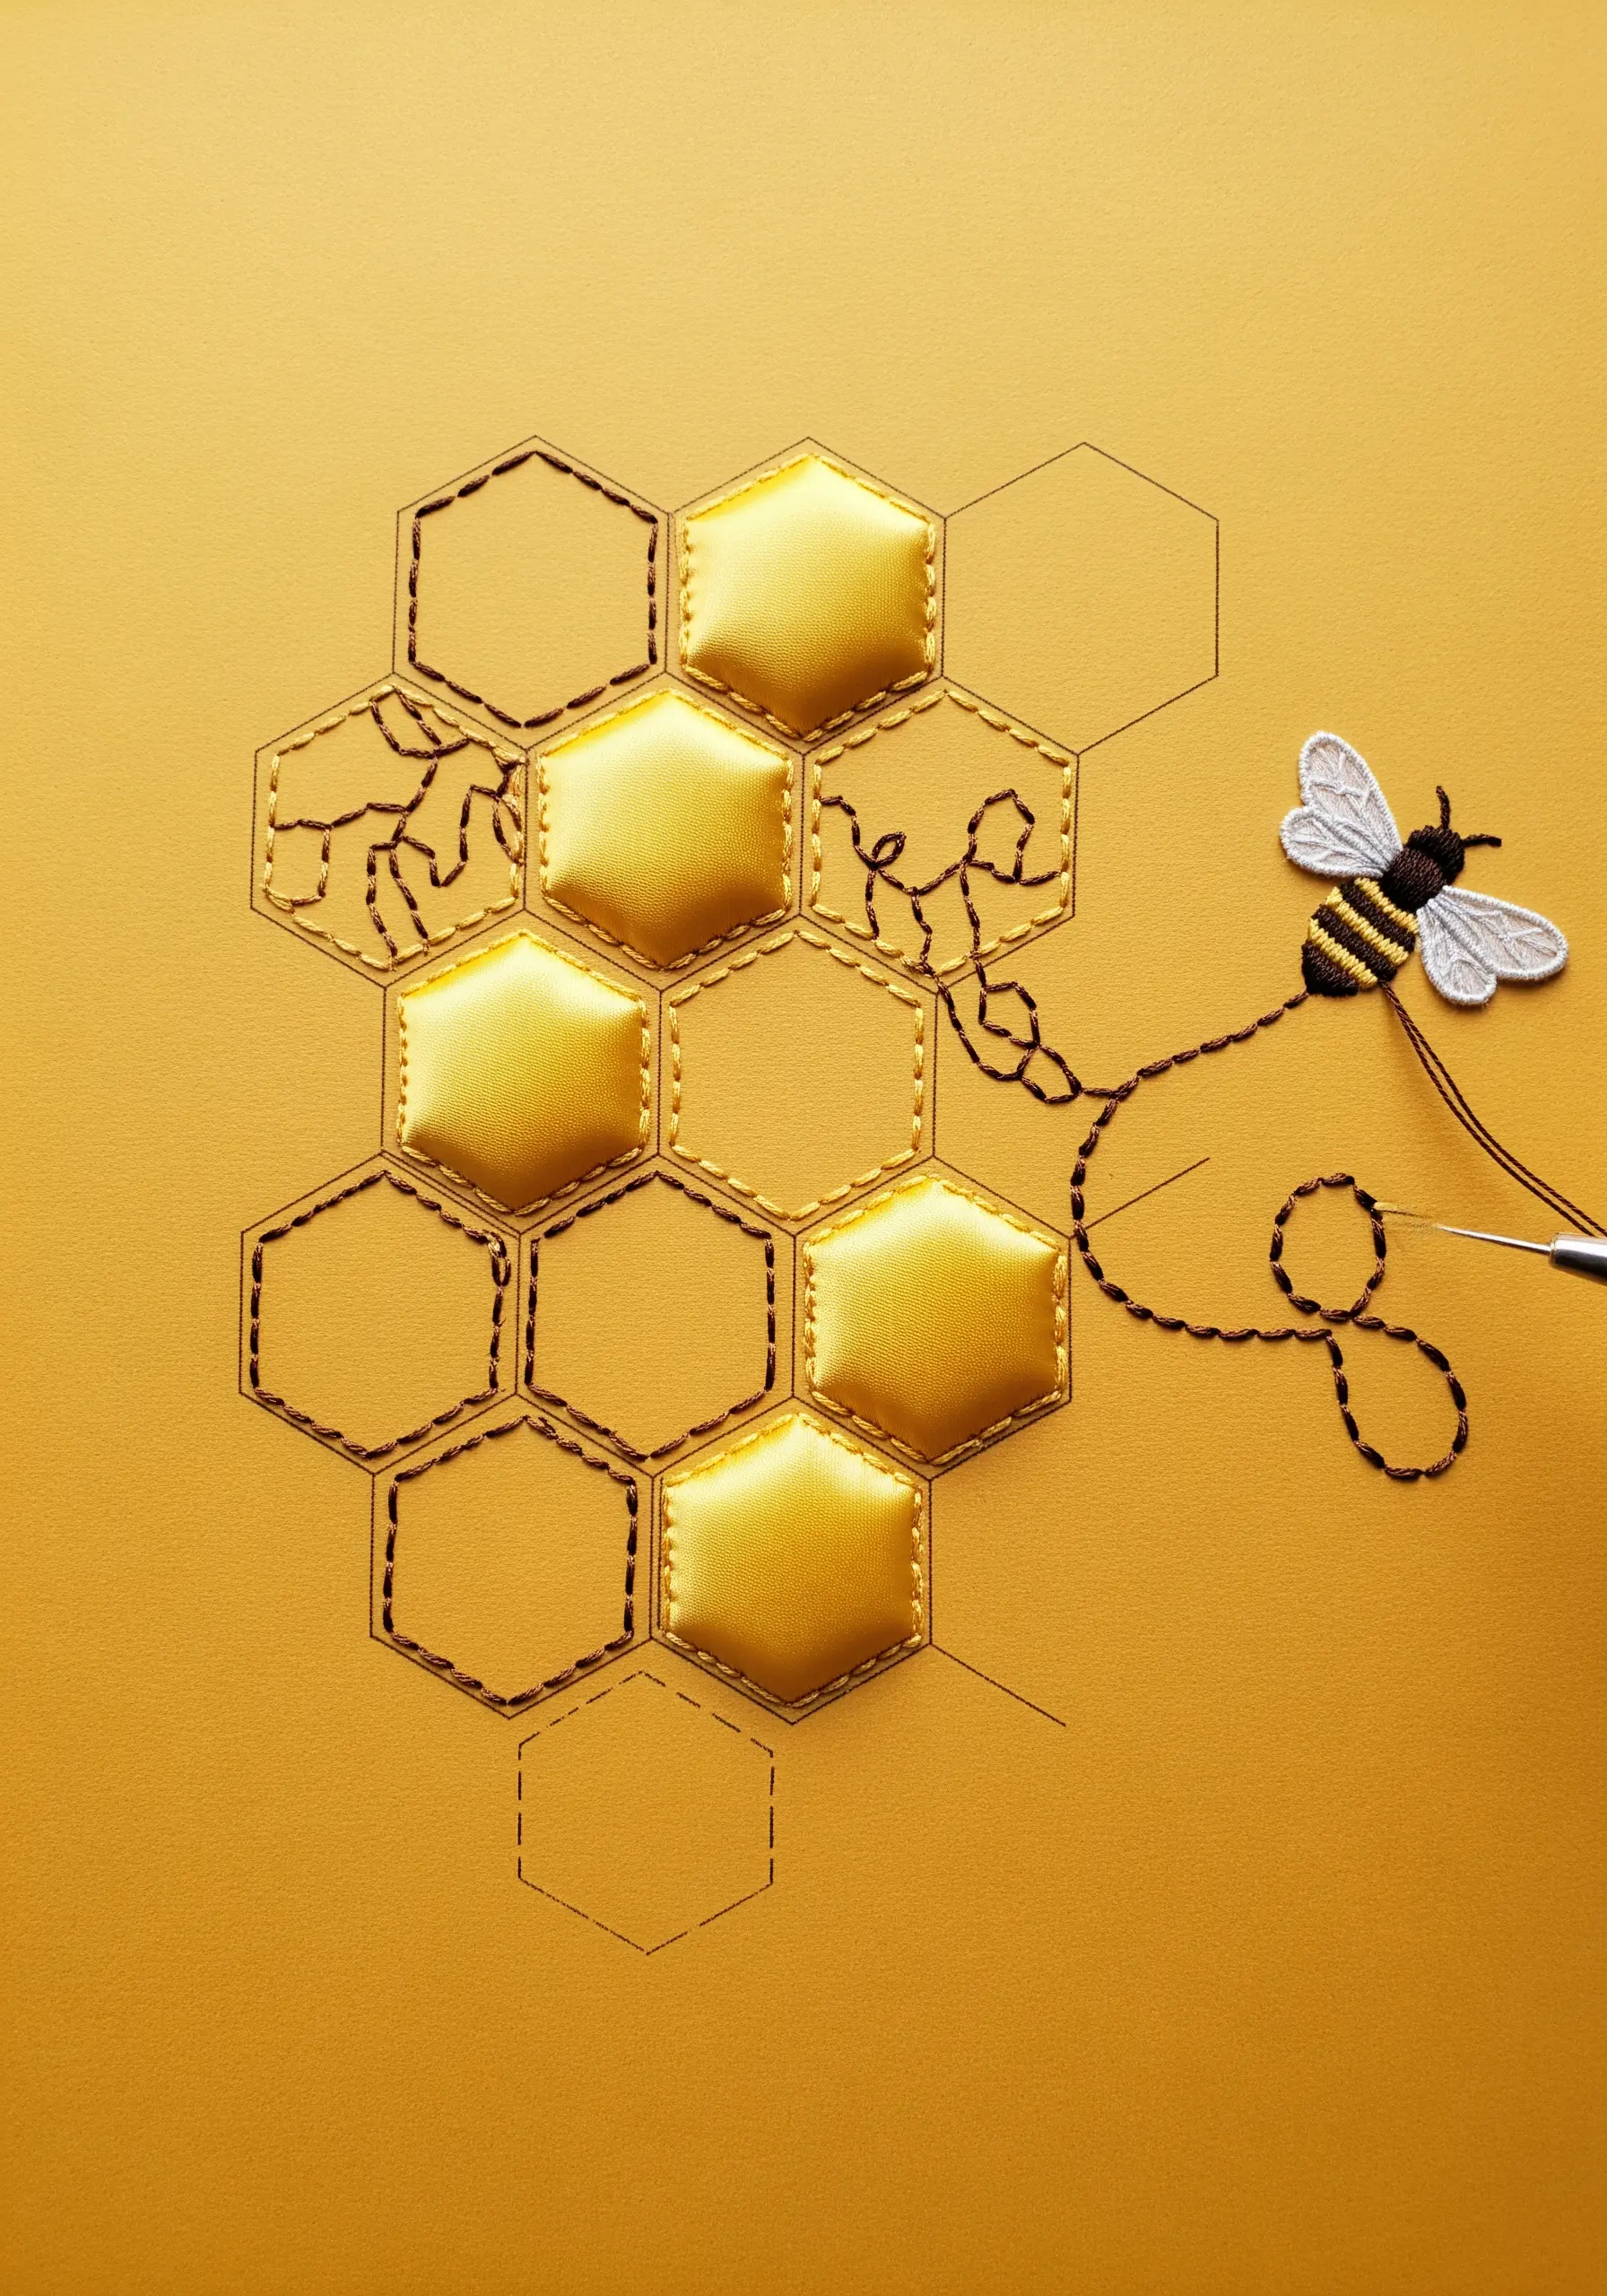
Add dimension to a geometric design by incorporating padded appliqué, also known as trapunto.
For select honeycomb cells, place a small piece of felt or batting under a layer of satin fabric, then stitch the outline through all layers onto your paper base.
The padding raises the surface, creating soft, puffy cells that contrast with the flat, stitched outlines of the rest of the honeycomb.
This gives your work a tactile quality that begs to be touched, enhancing the visual depth and realism of the design.
20. Visualize Sound by Stitching Waveforms
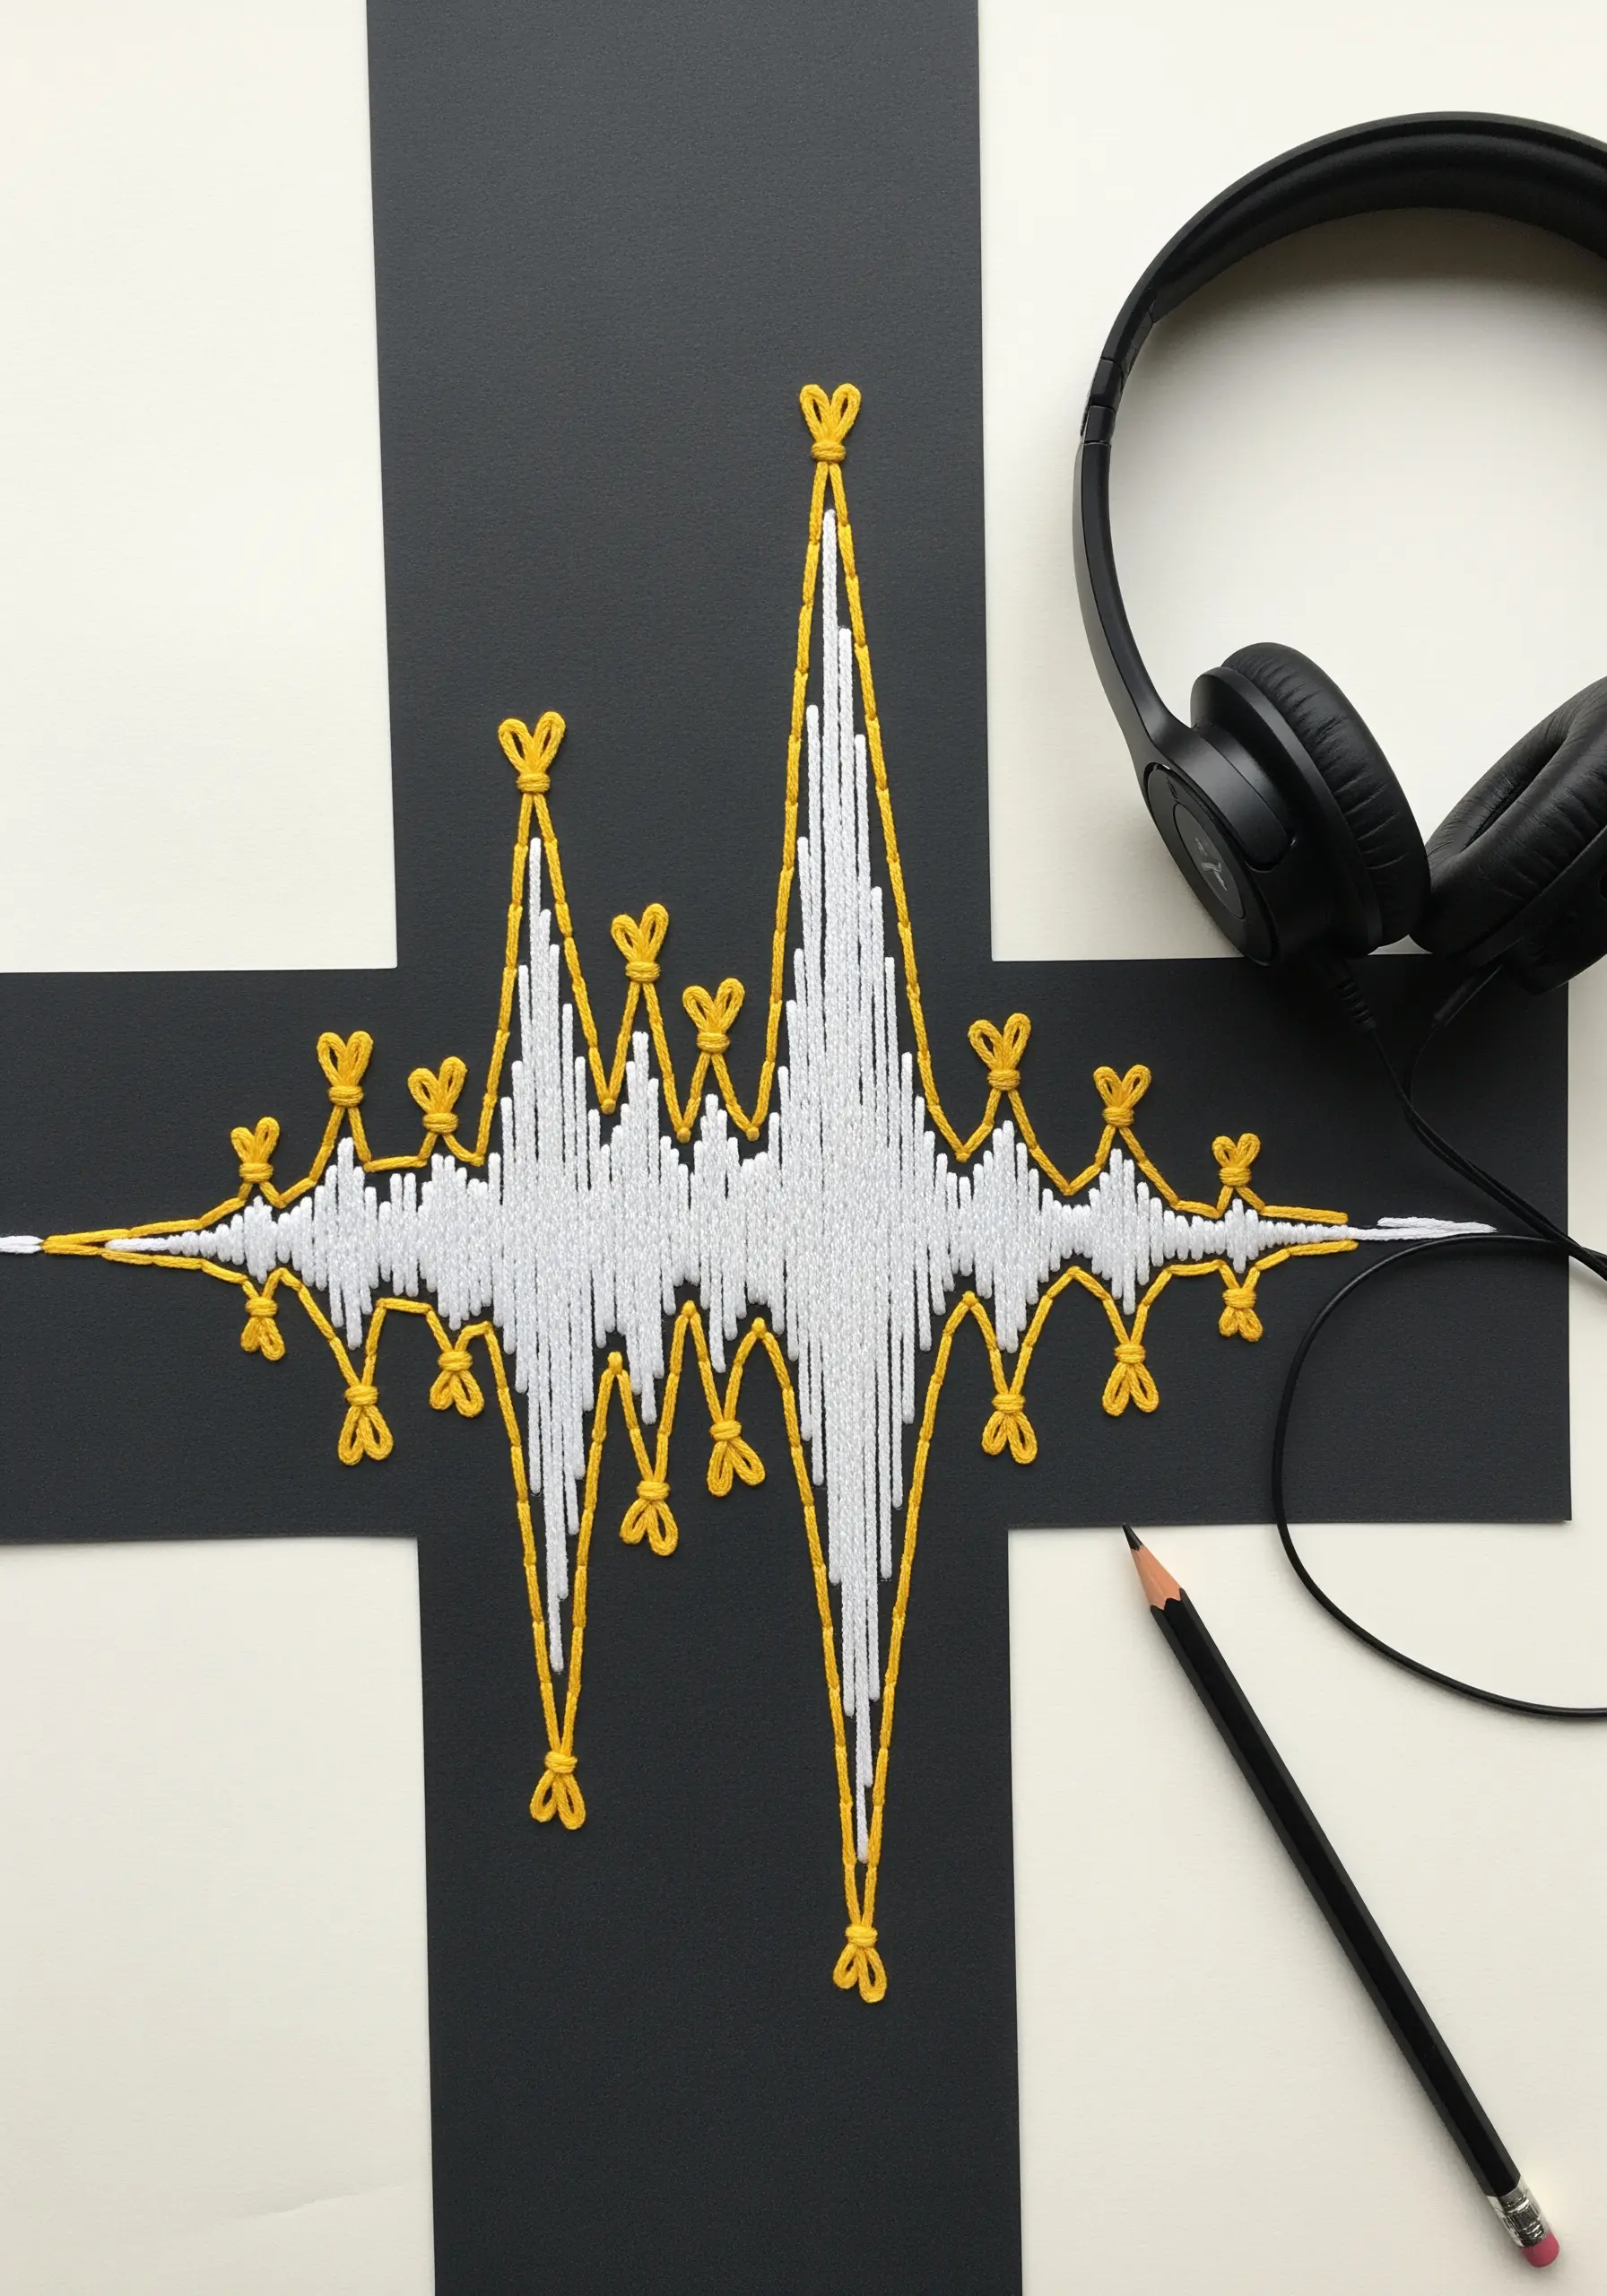
Turn audio into art by embroidering the visual representation of a sound wave.
Find an image of a waveform online or generate one from a personal audio clip, then transfer the outline to your paper.
Use a dense satin stitch for the main body of the wave and a contrasting outline stitch, like a backstitch or whipped backstitch, to define the edges.
This is a deeply personal way to literally stitch sound, immortalizing a favorite song, a voice, or a meaningful moment in thread.
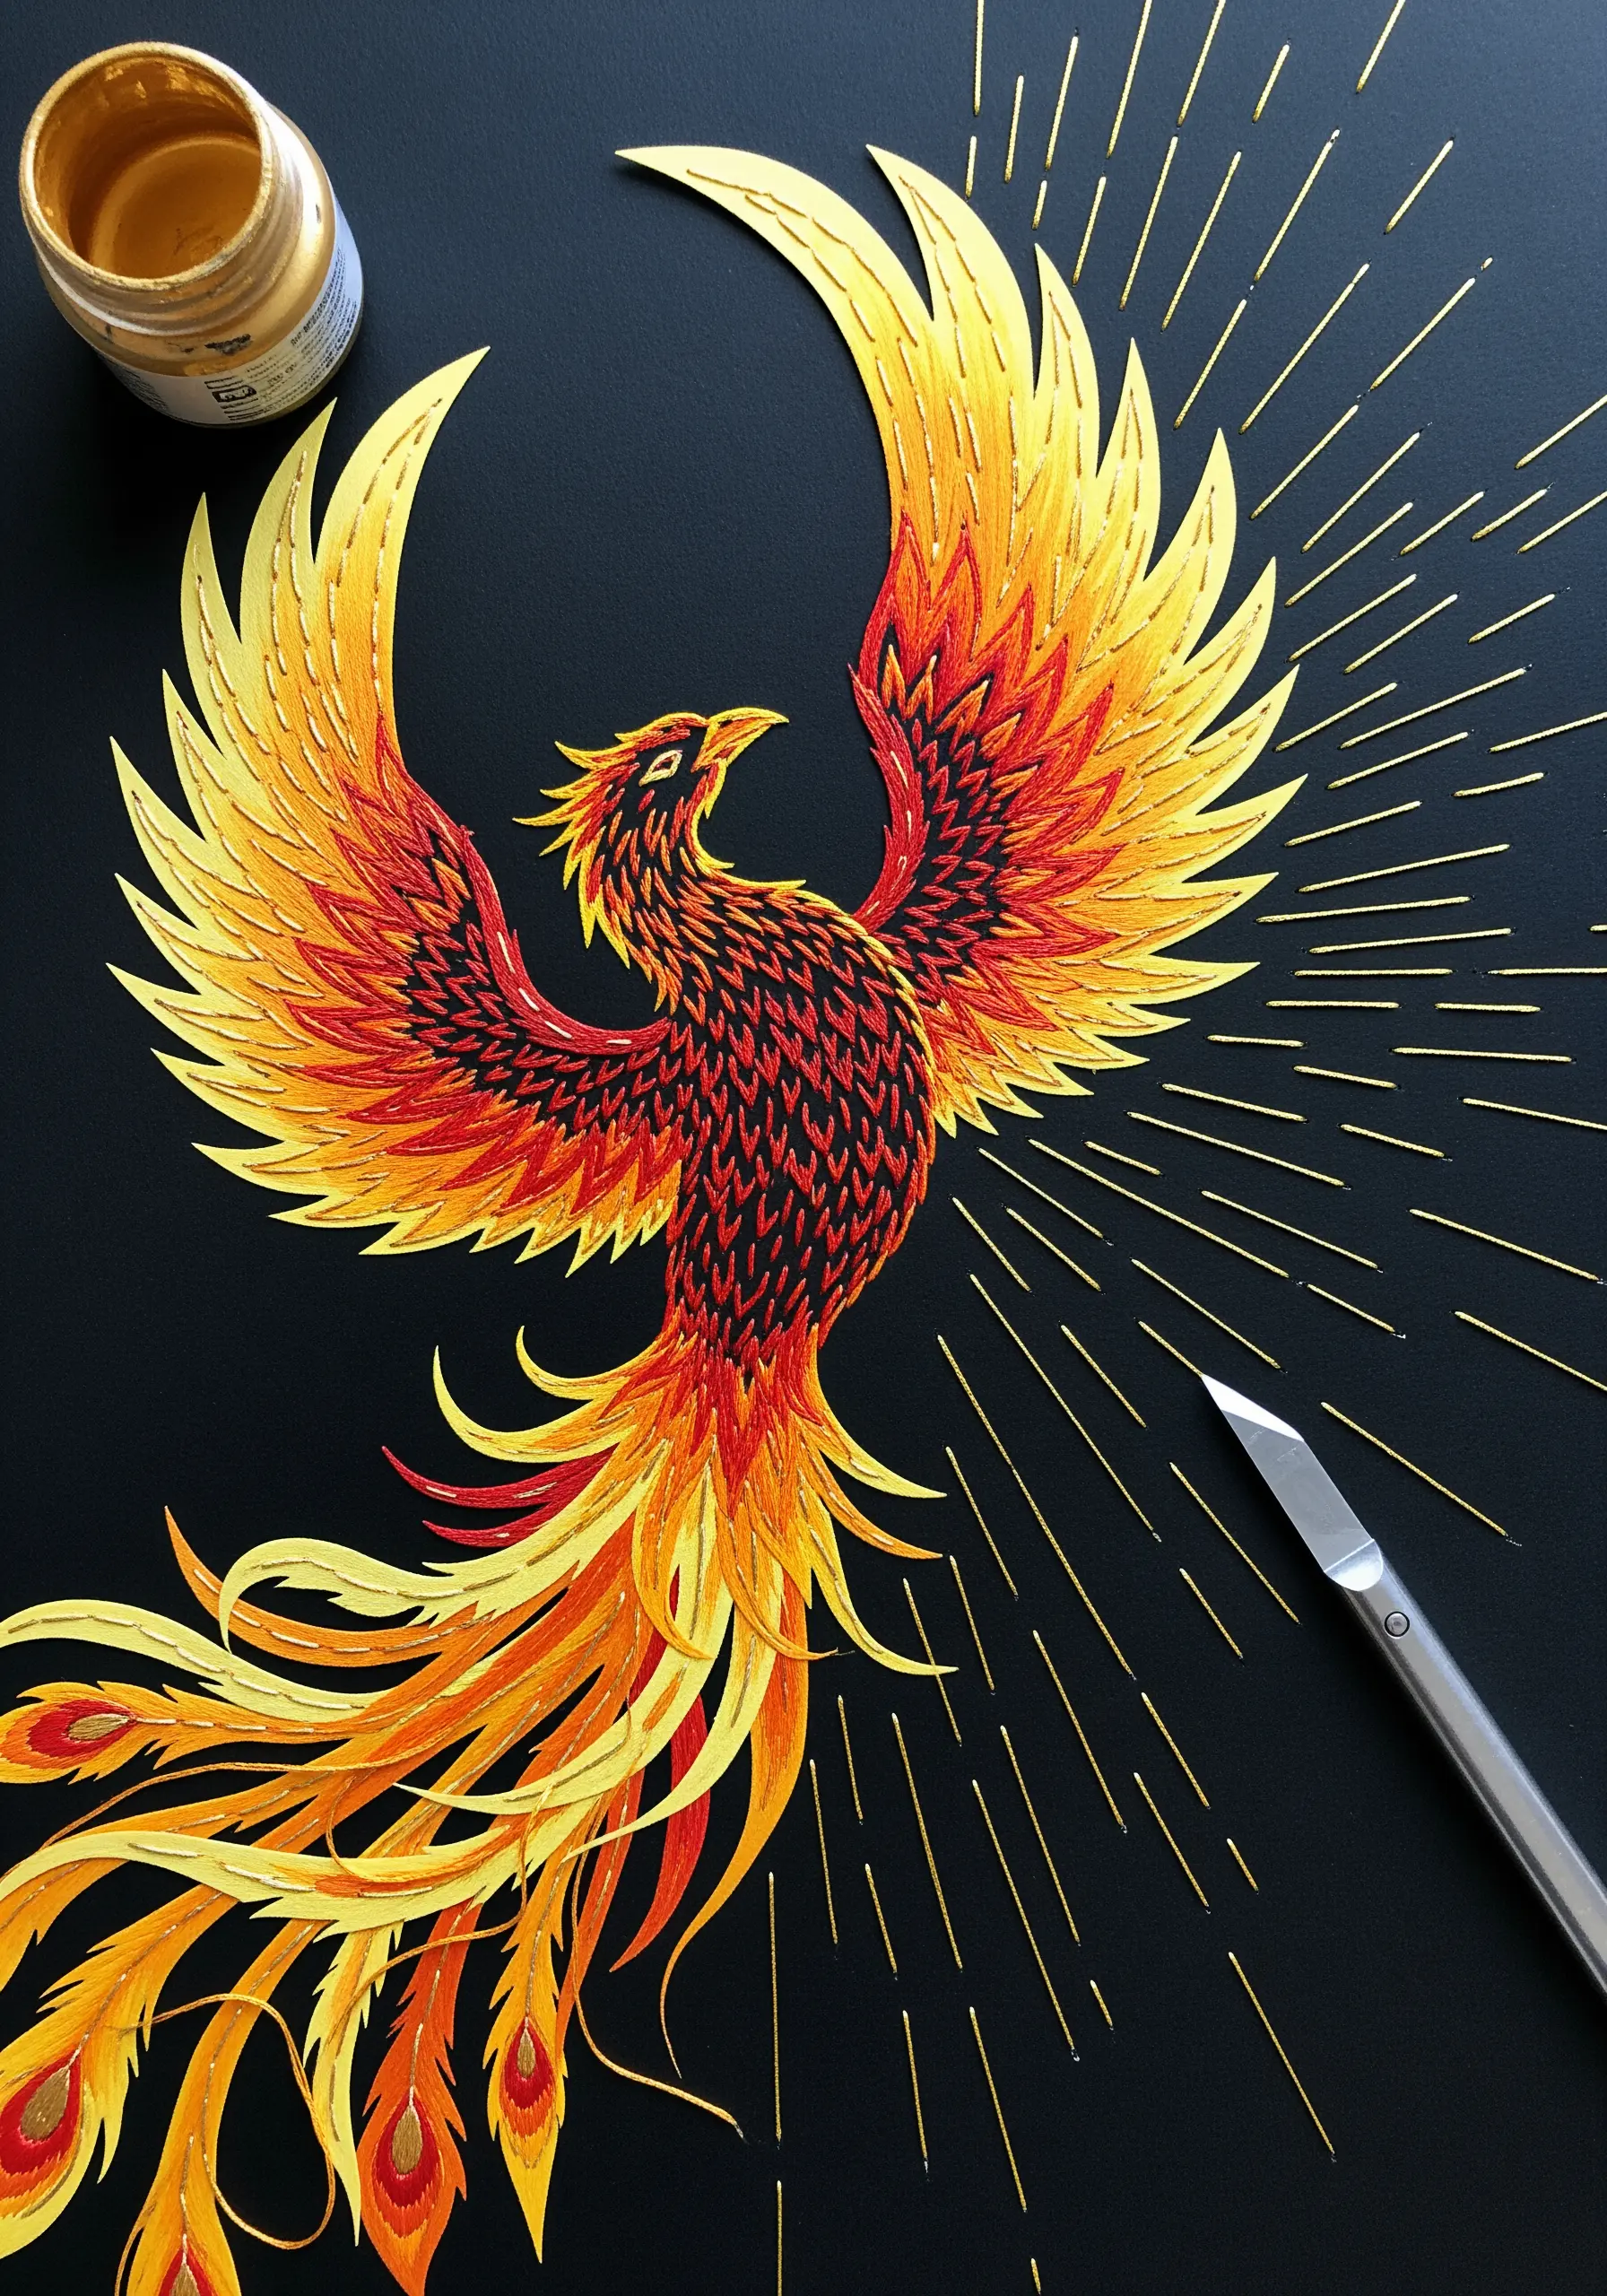
21. Combine Gold Leaf with Stitched Starbursts
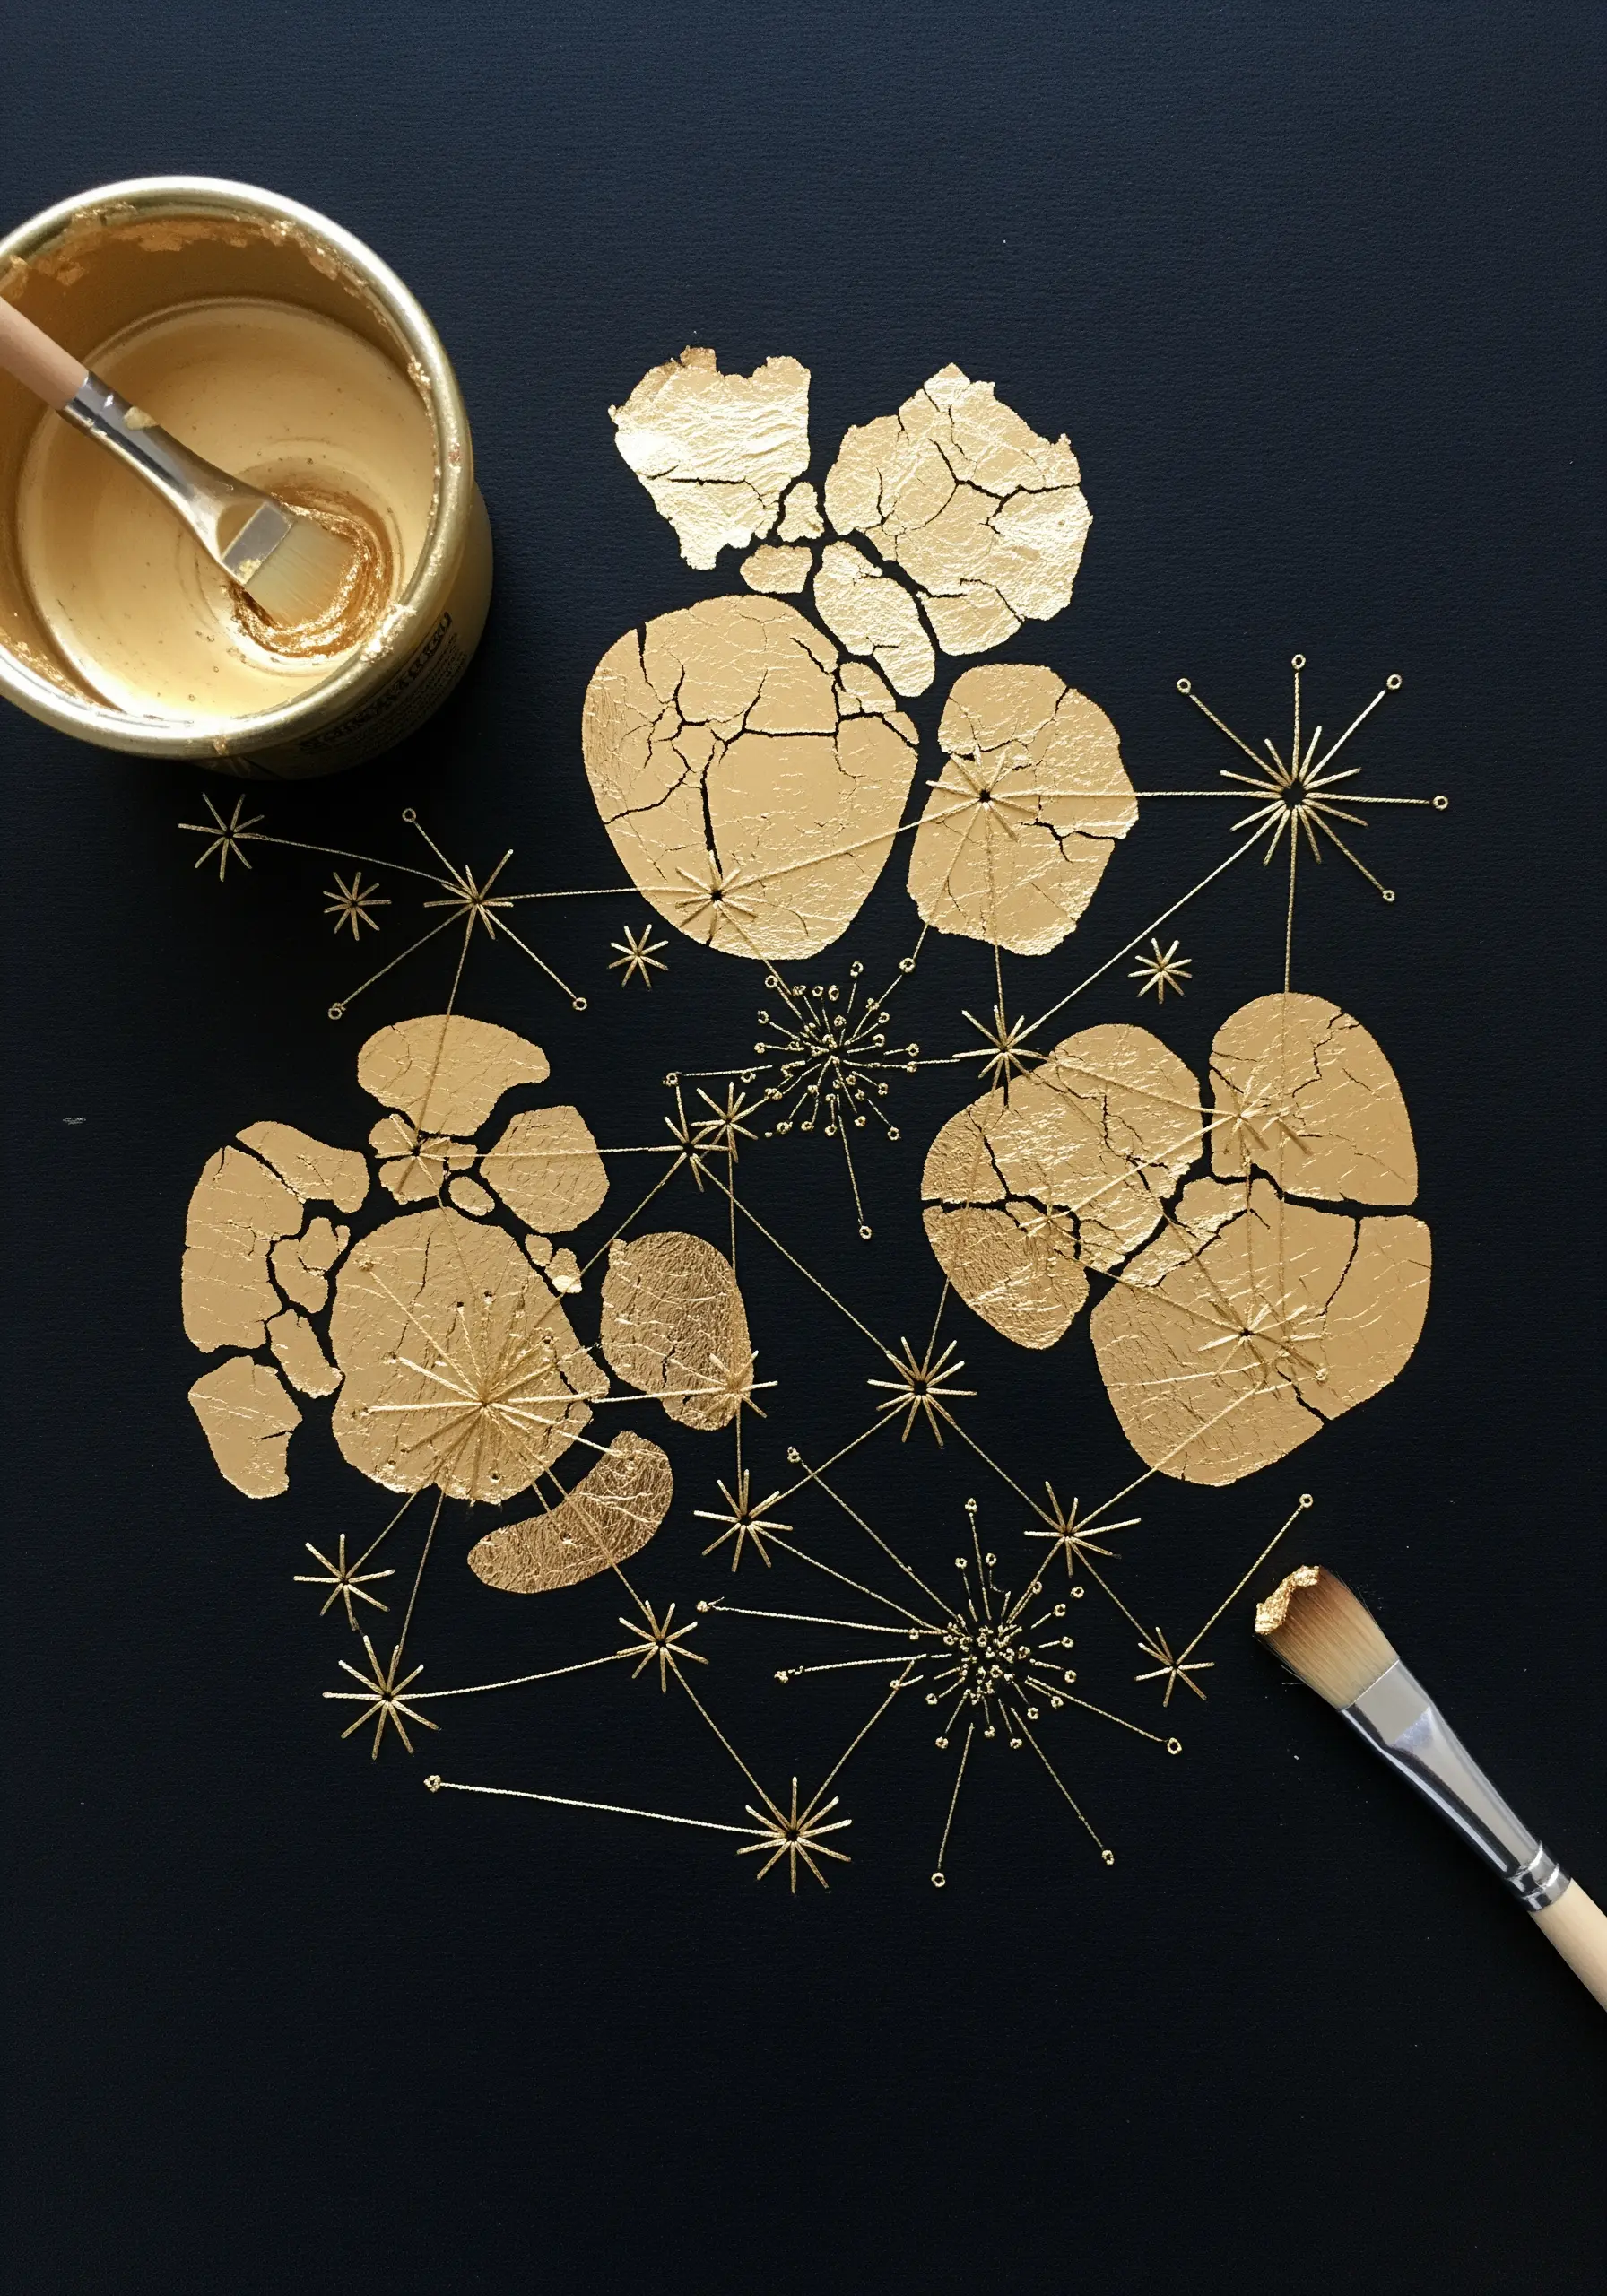
Apply gold leaf adhesive to your paper in organic shapes, then press on the foil and brush away the excess for a crackled, antique finish.
Once the leaf is set, use a fine, matching metallic thread to stitch delicate starbursts and radiating lines that appear to emanate from the gilded shapes.
This pairing of materials creates a celestial feel, where the unpredictable texture of the gold leaf is balanced by the precise geometry of your stitches.
The technique works best on a dark, matte paper, which makes the gold elements truly pop.
22. Frame Floating Florals on Translucent Paper
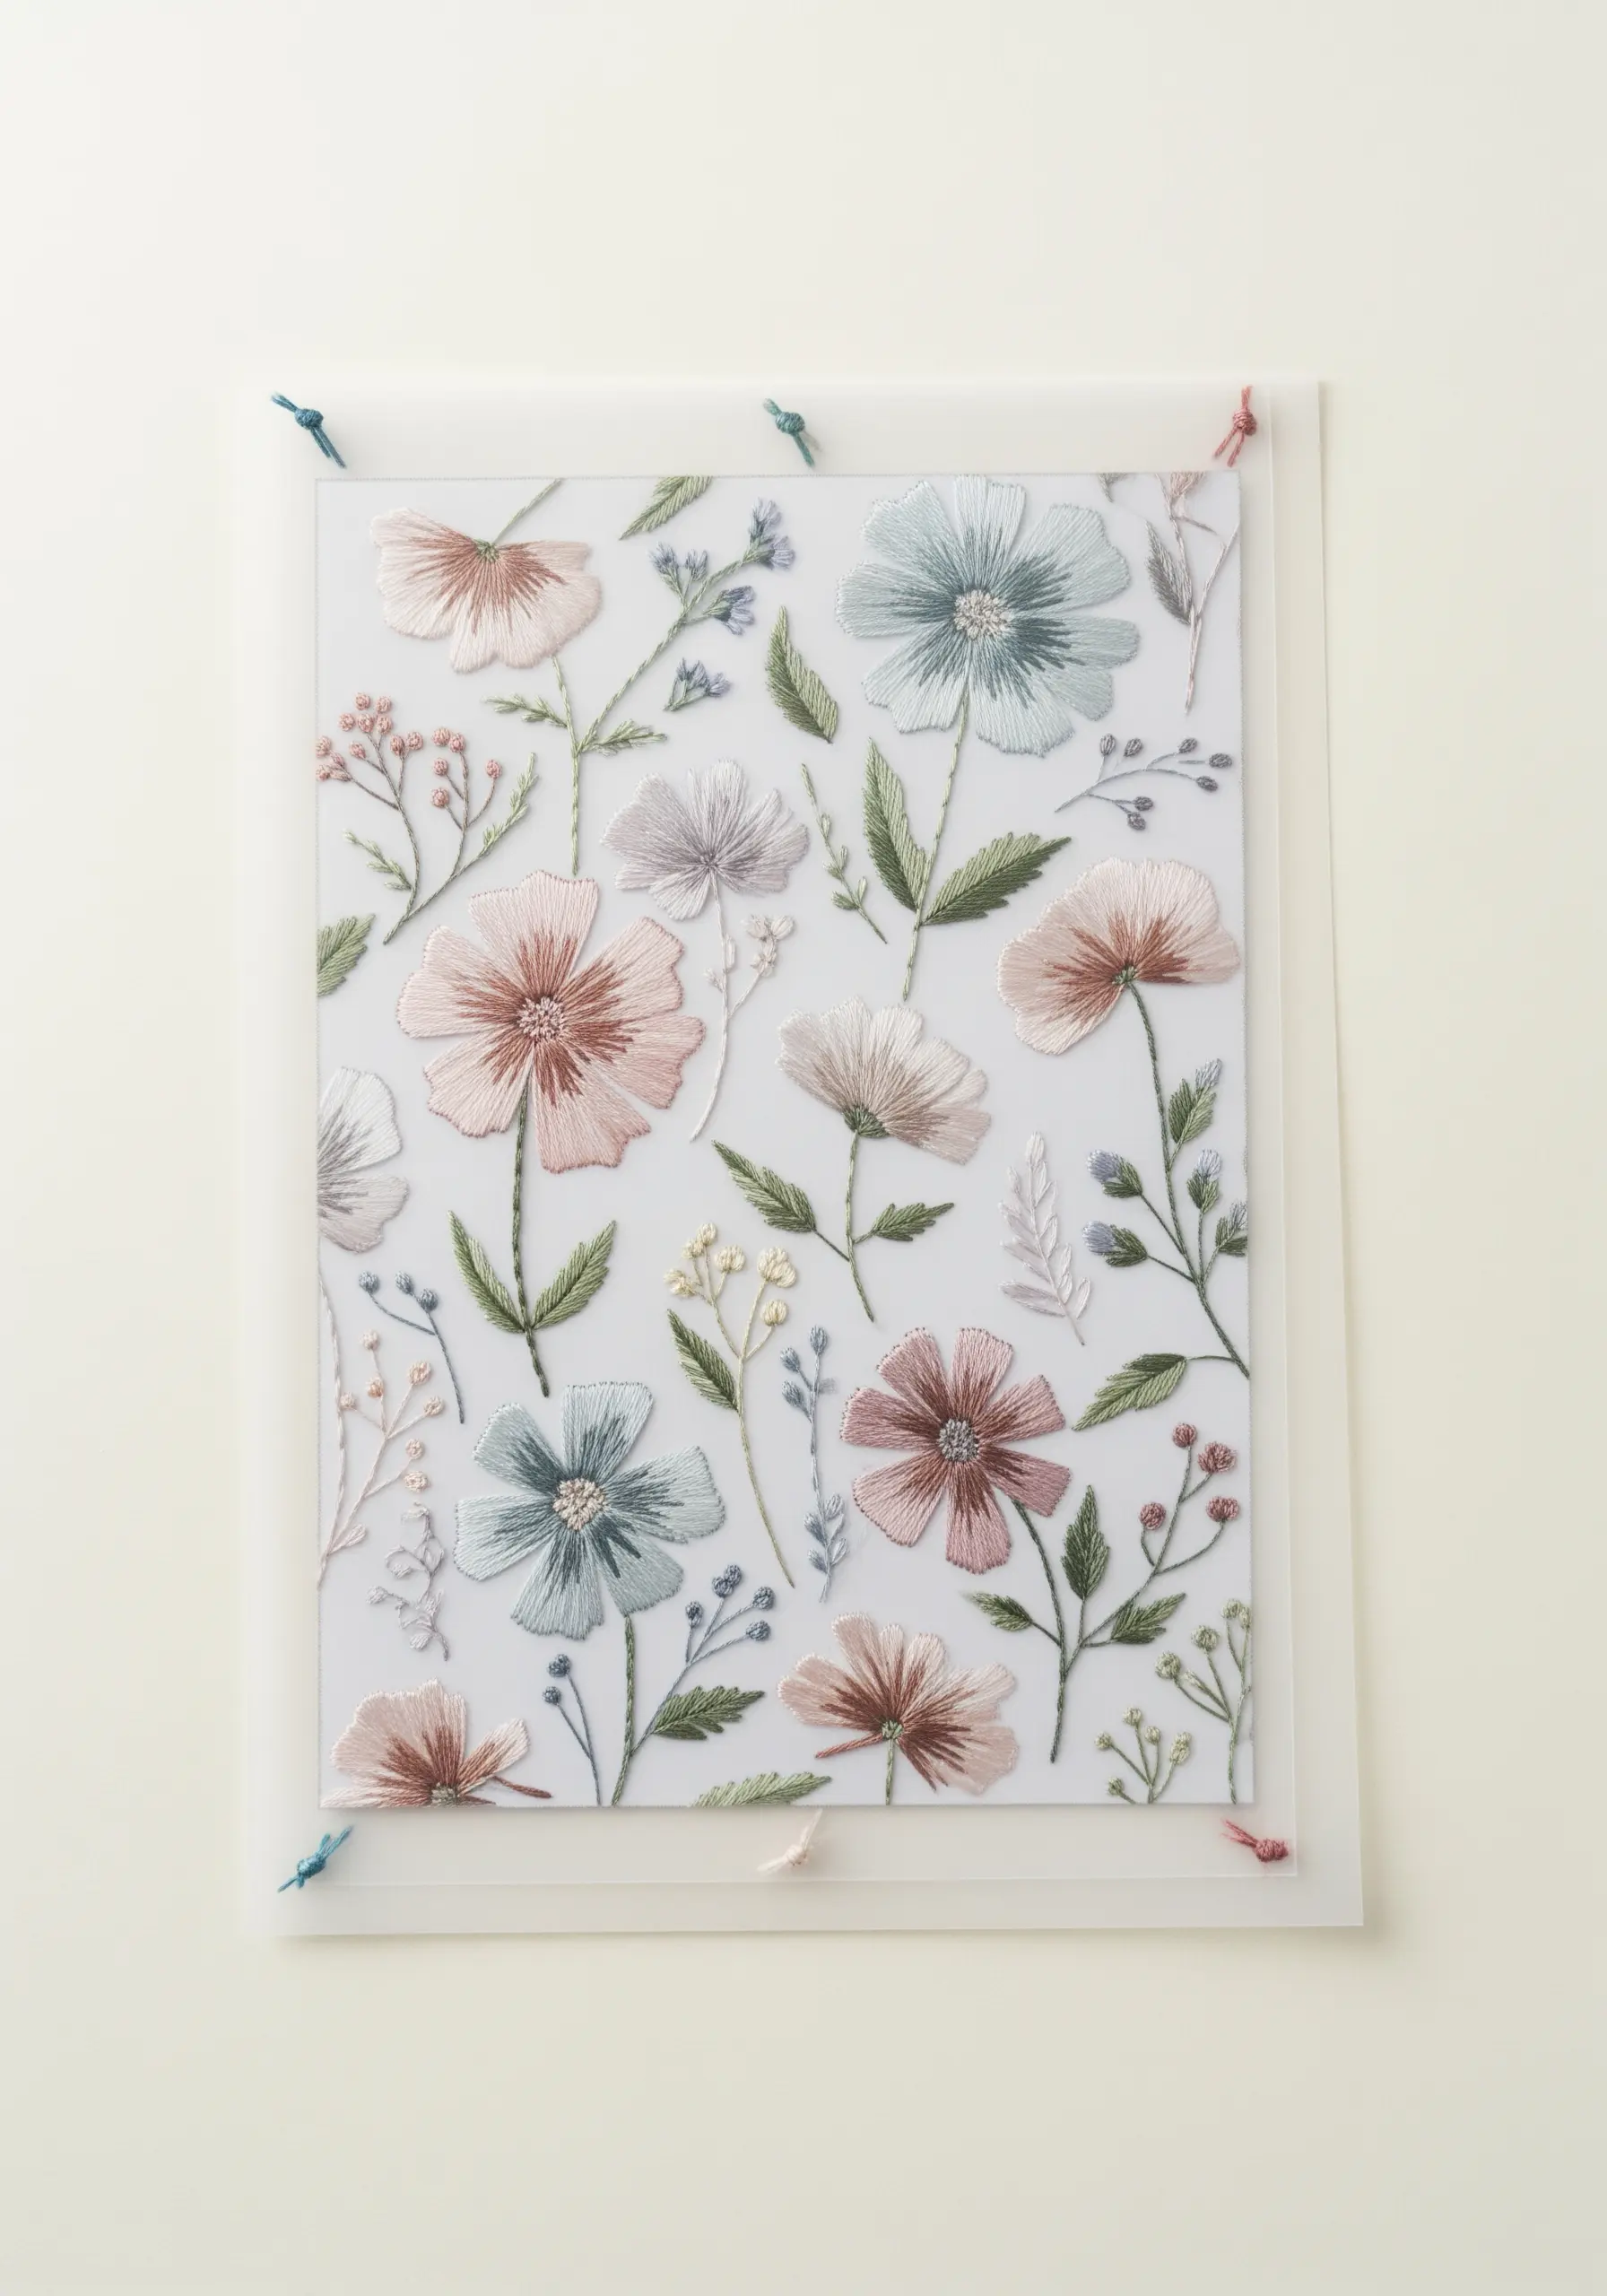
Stitch your botanical designs on a semi-transparent material like vellum or heavyweight tracing paper.
Use smaller needles and fewer strands of floss to minimize the size of the holes and maintain the paper’s integrity.
Mount the finished piece between two panes of glass or clear acrylic for a modern, floating effect.
This display method removes the background, allowing the delicate stitches and the soft translucency of the paper to become the focal point, creating elegant framed artworks.
23. Assemble a Garland from Stitched Paper Shapes
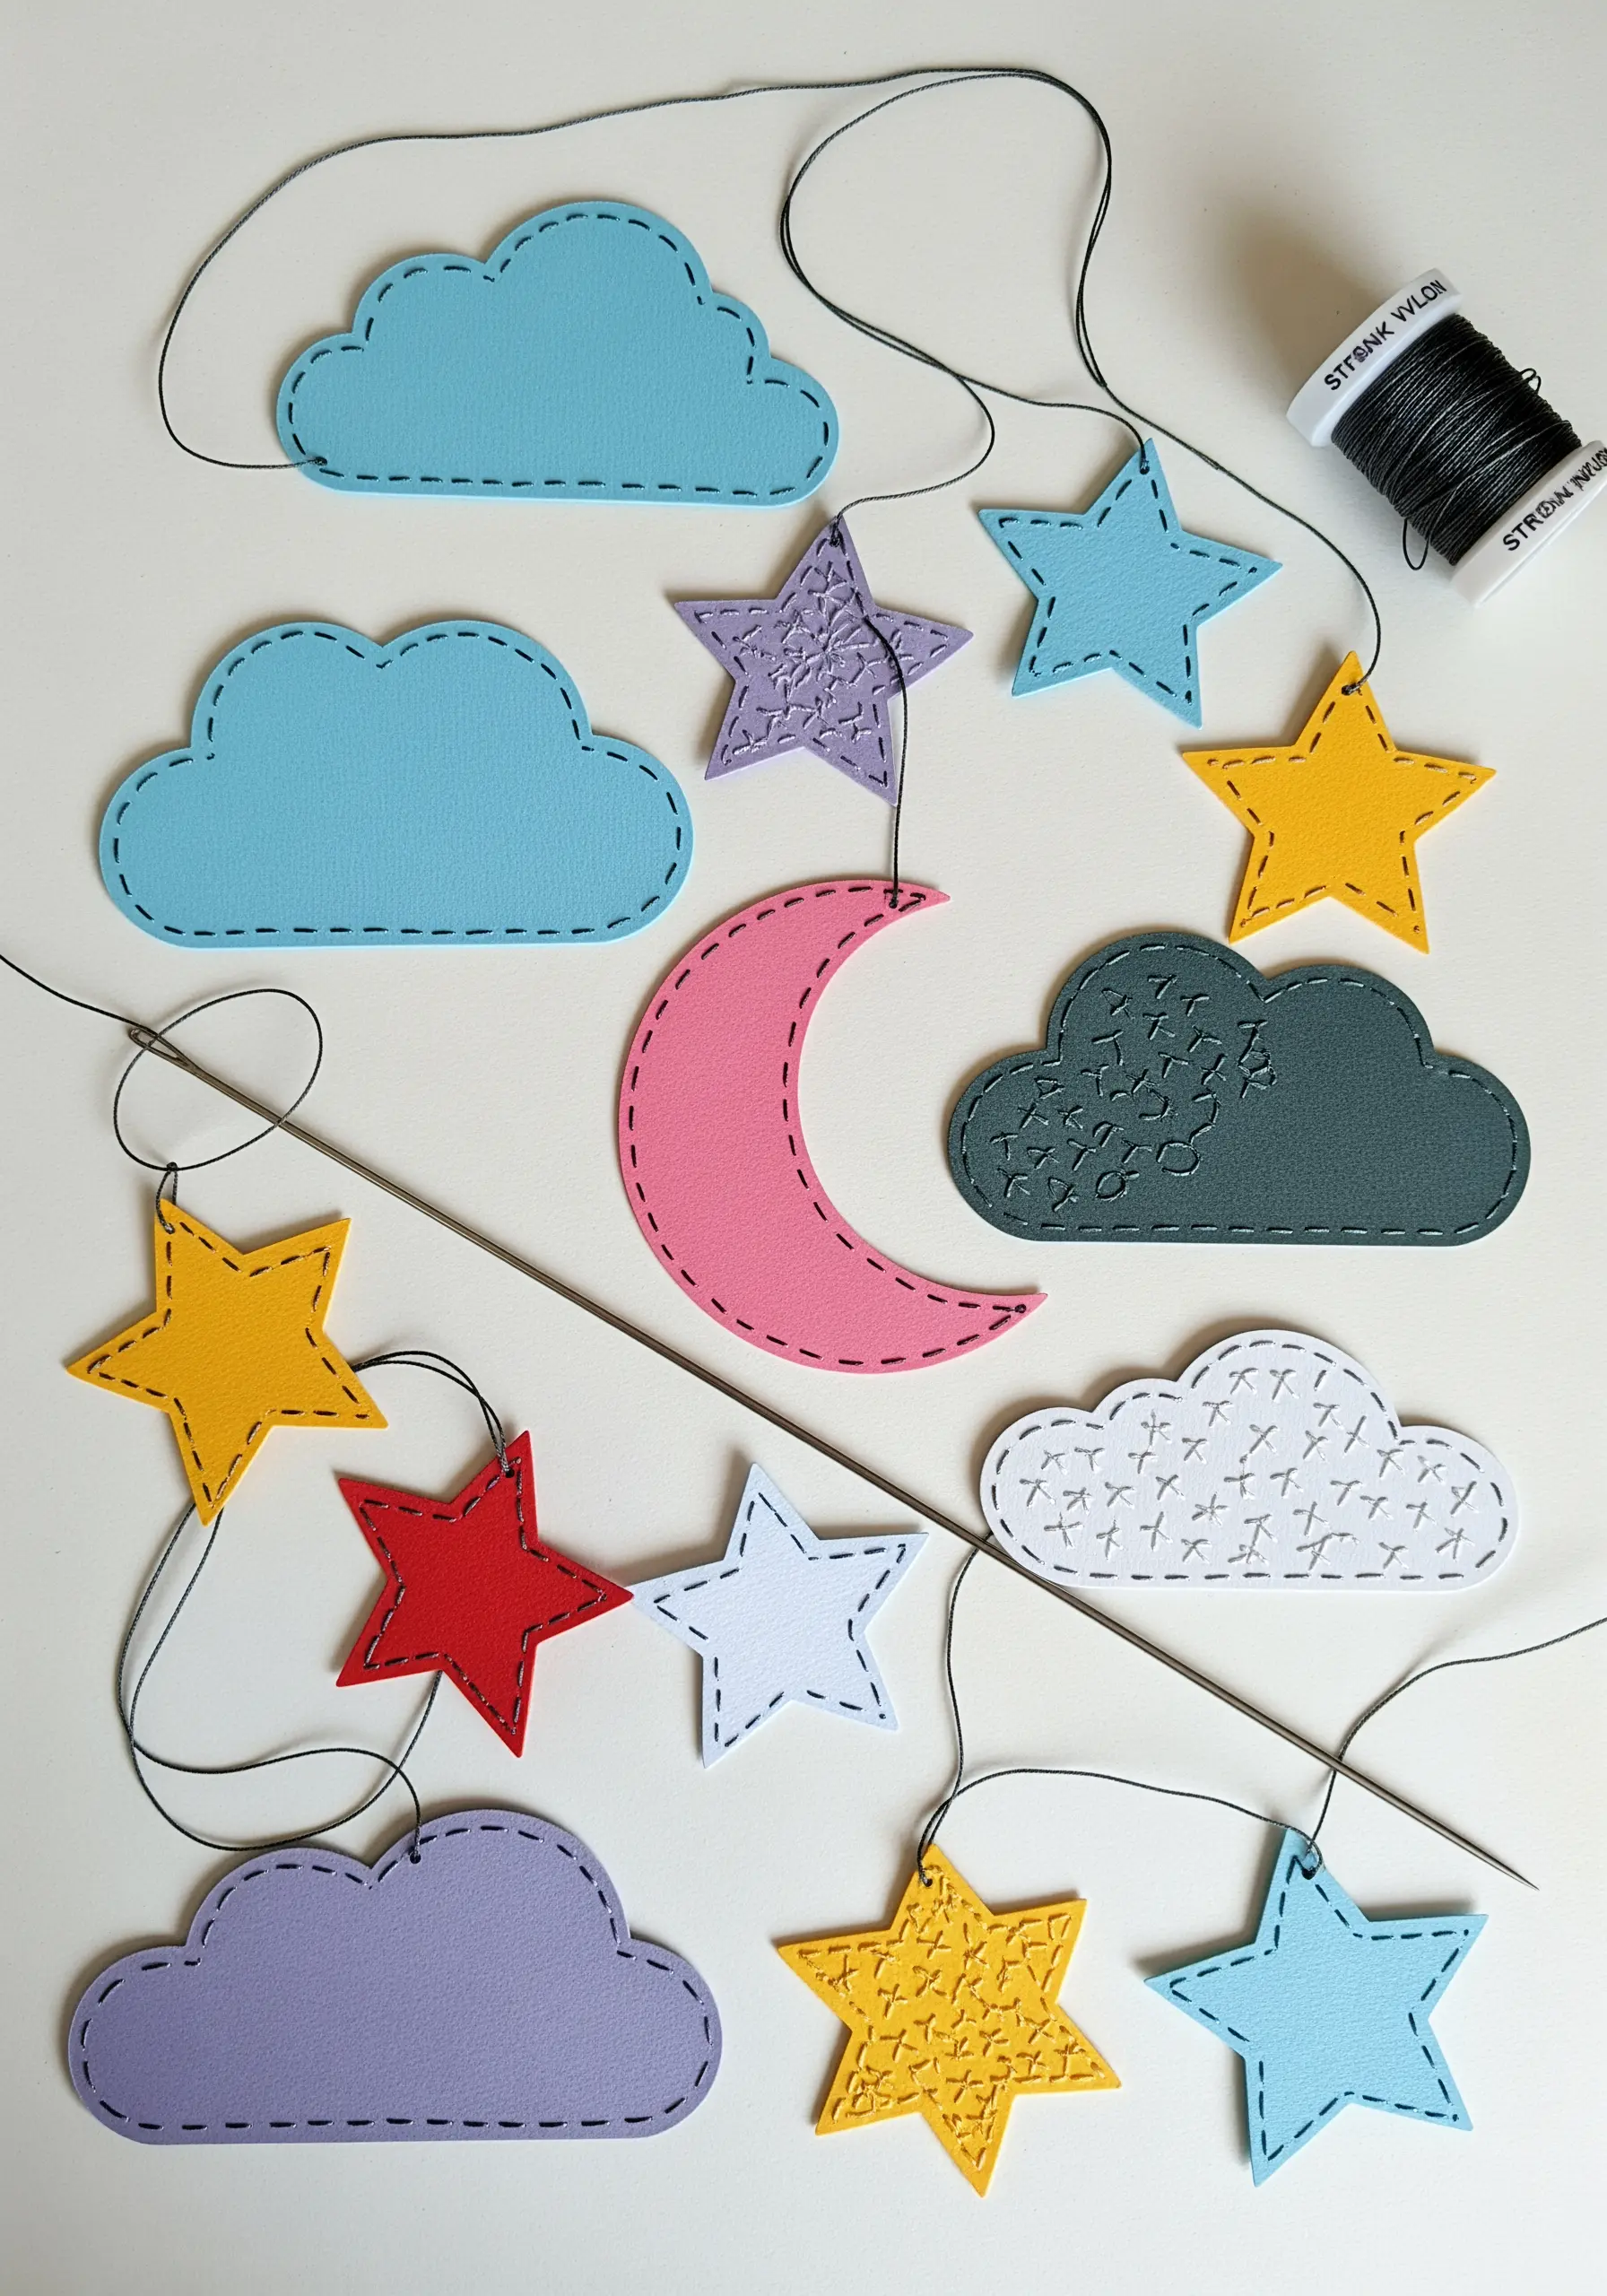
Create charming, handmade decorations by cutting shapes from colorful felt or sturdy cardstock.
Add personality to each shape with simple embroidery stitches—a running stitch border, seed stitch texture, or tiny cross-stitch patterns.
Use a single, long strand of strong thread to link all the pieces together, leaving even spacing between them.
This is a wonderful project for using up paper scraps and leftover thread, resulting in a whimsical garland perfect for nurseries, parties, or seasonal decor.
24. Create Bold Typography with Satin Stitch
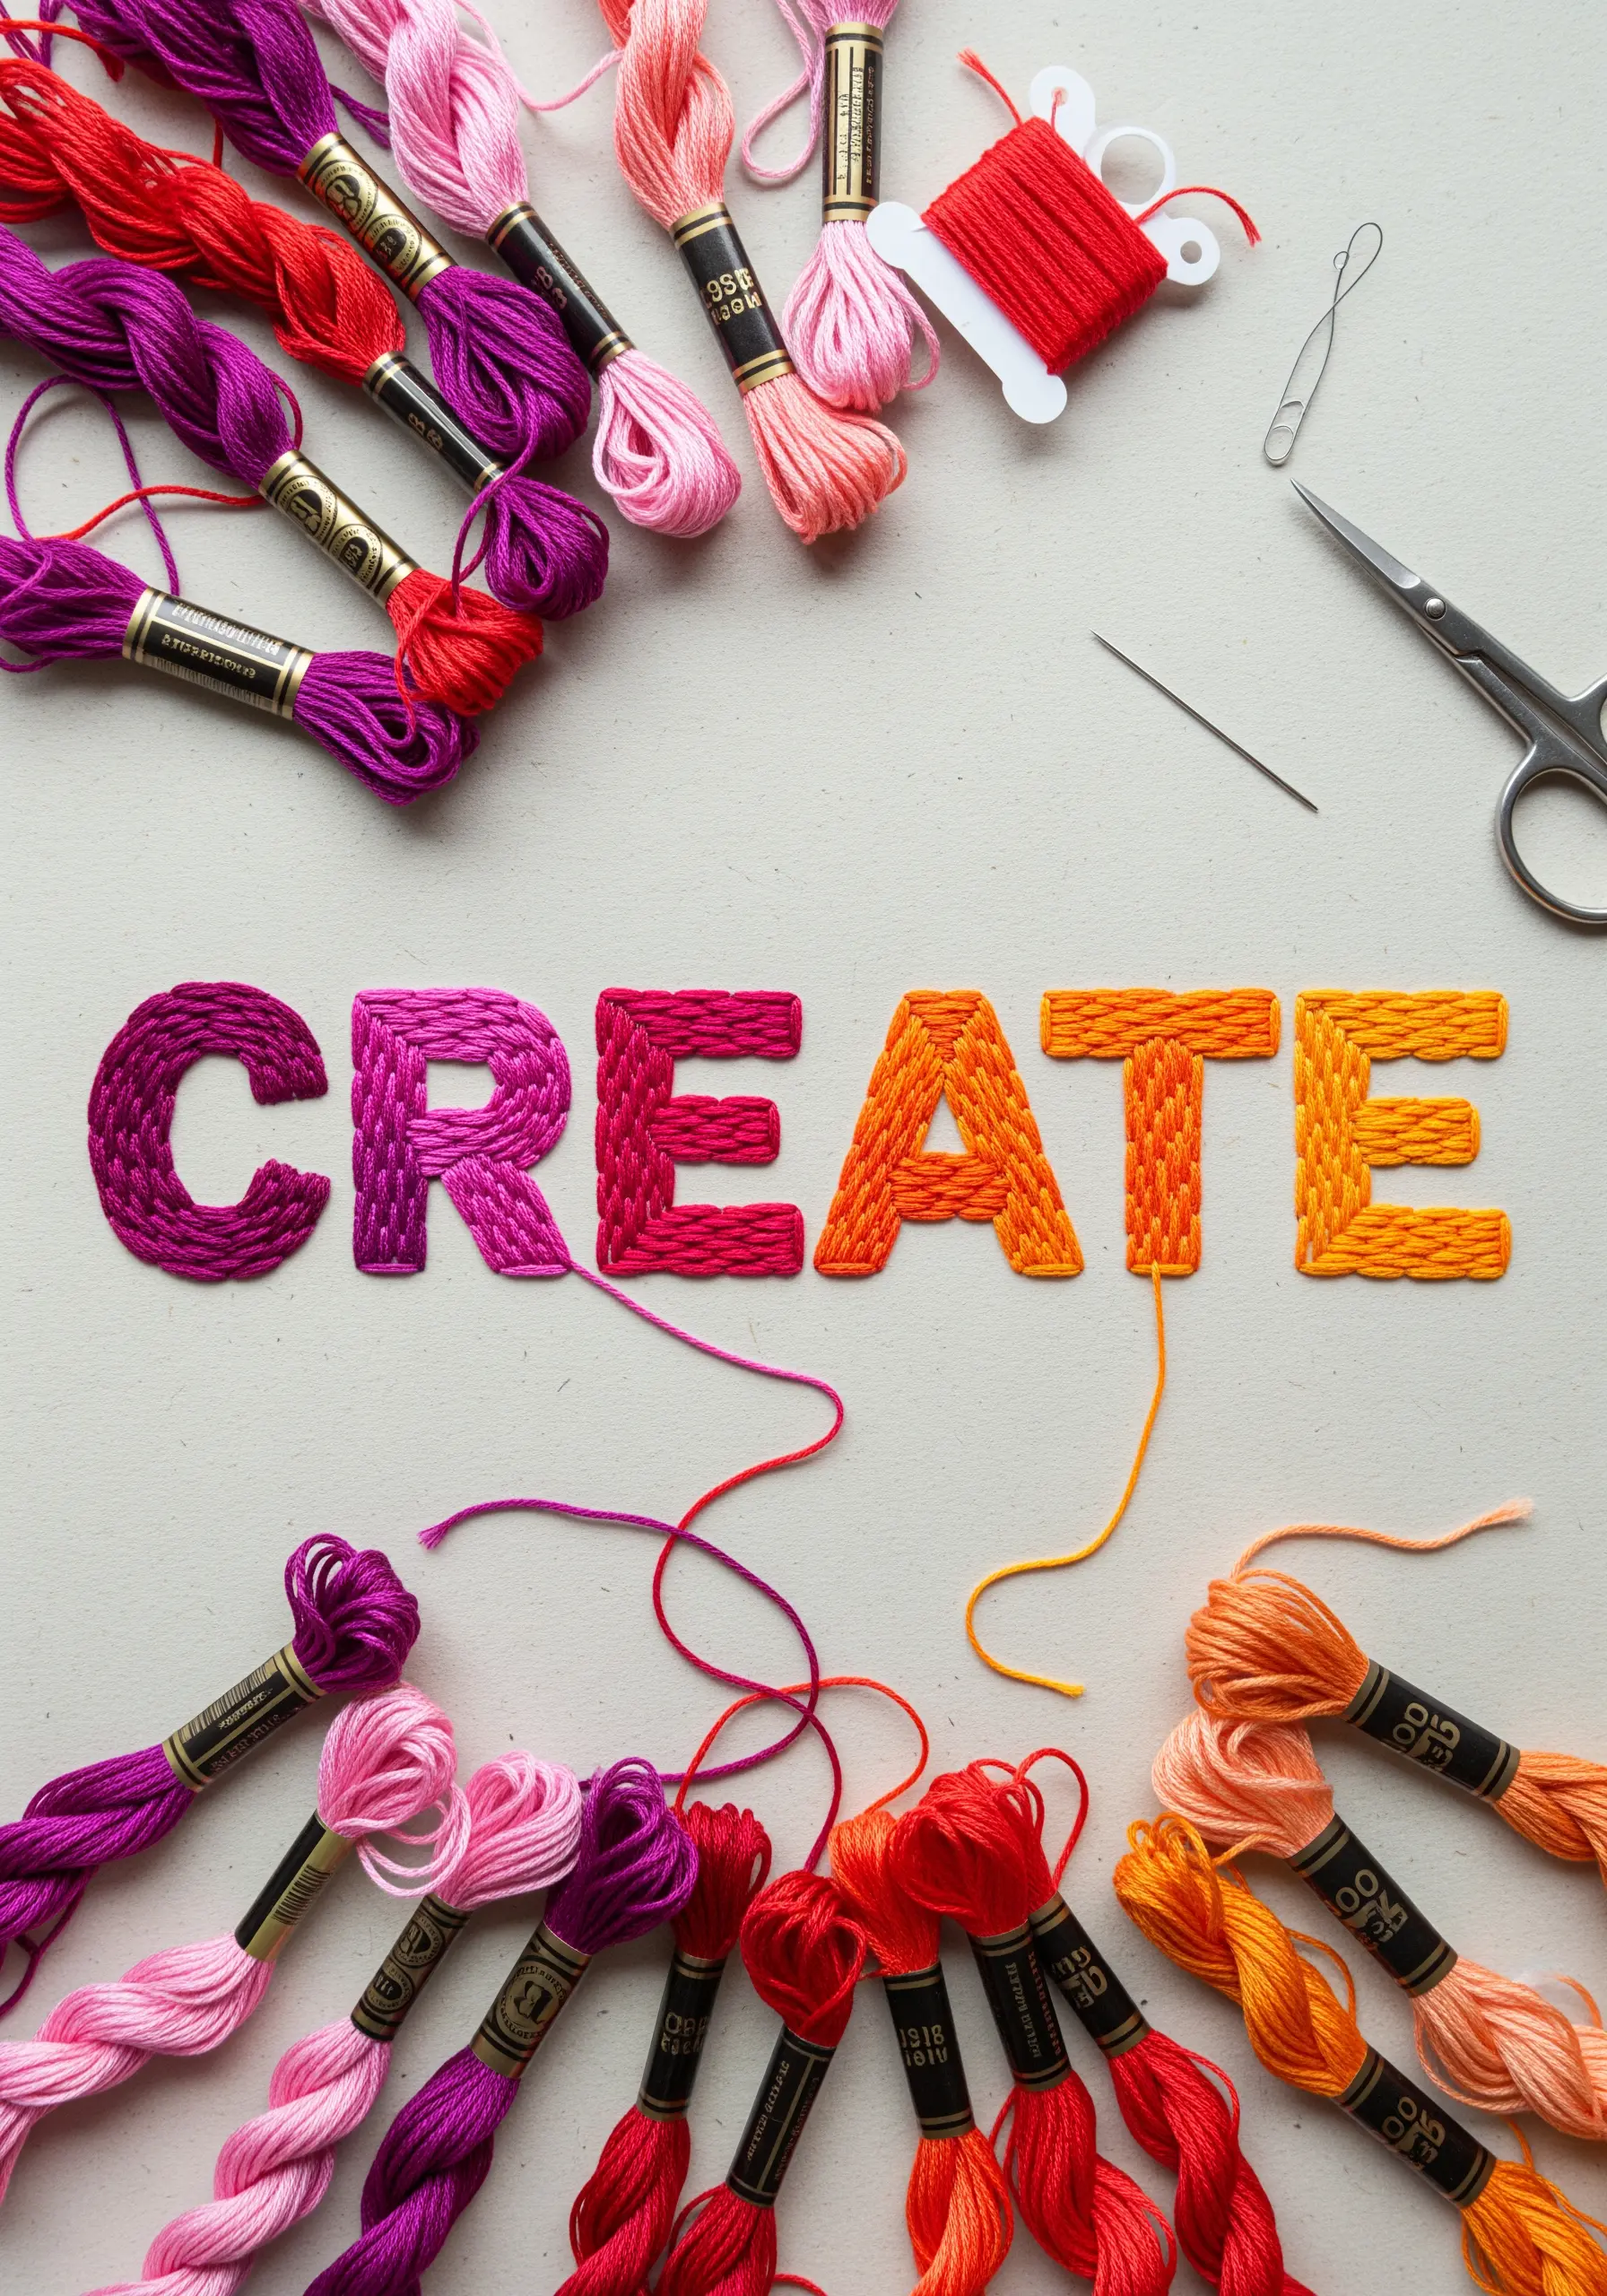
Use cardstock as a stable base for creating impactful embroidered lettering.
Draw your letters in a bold, block style, then fill them with a dense satin stitch, ensuring your stitches lay flat and parallel.
To achieve clean, sharp edges, outline the letters with a split stitch first; this creates a raised edge that your satin stitches can tuck up against.
Experiment with color gradients by switching thread colors midway through a letter for a dynamic, eye-catching effect.
25. Embellish Pressed Leaves with Couched Thread
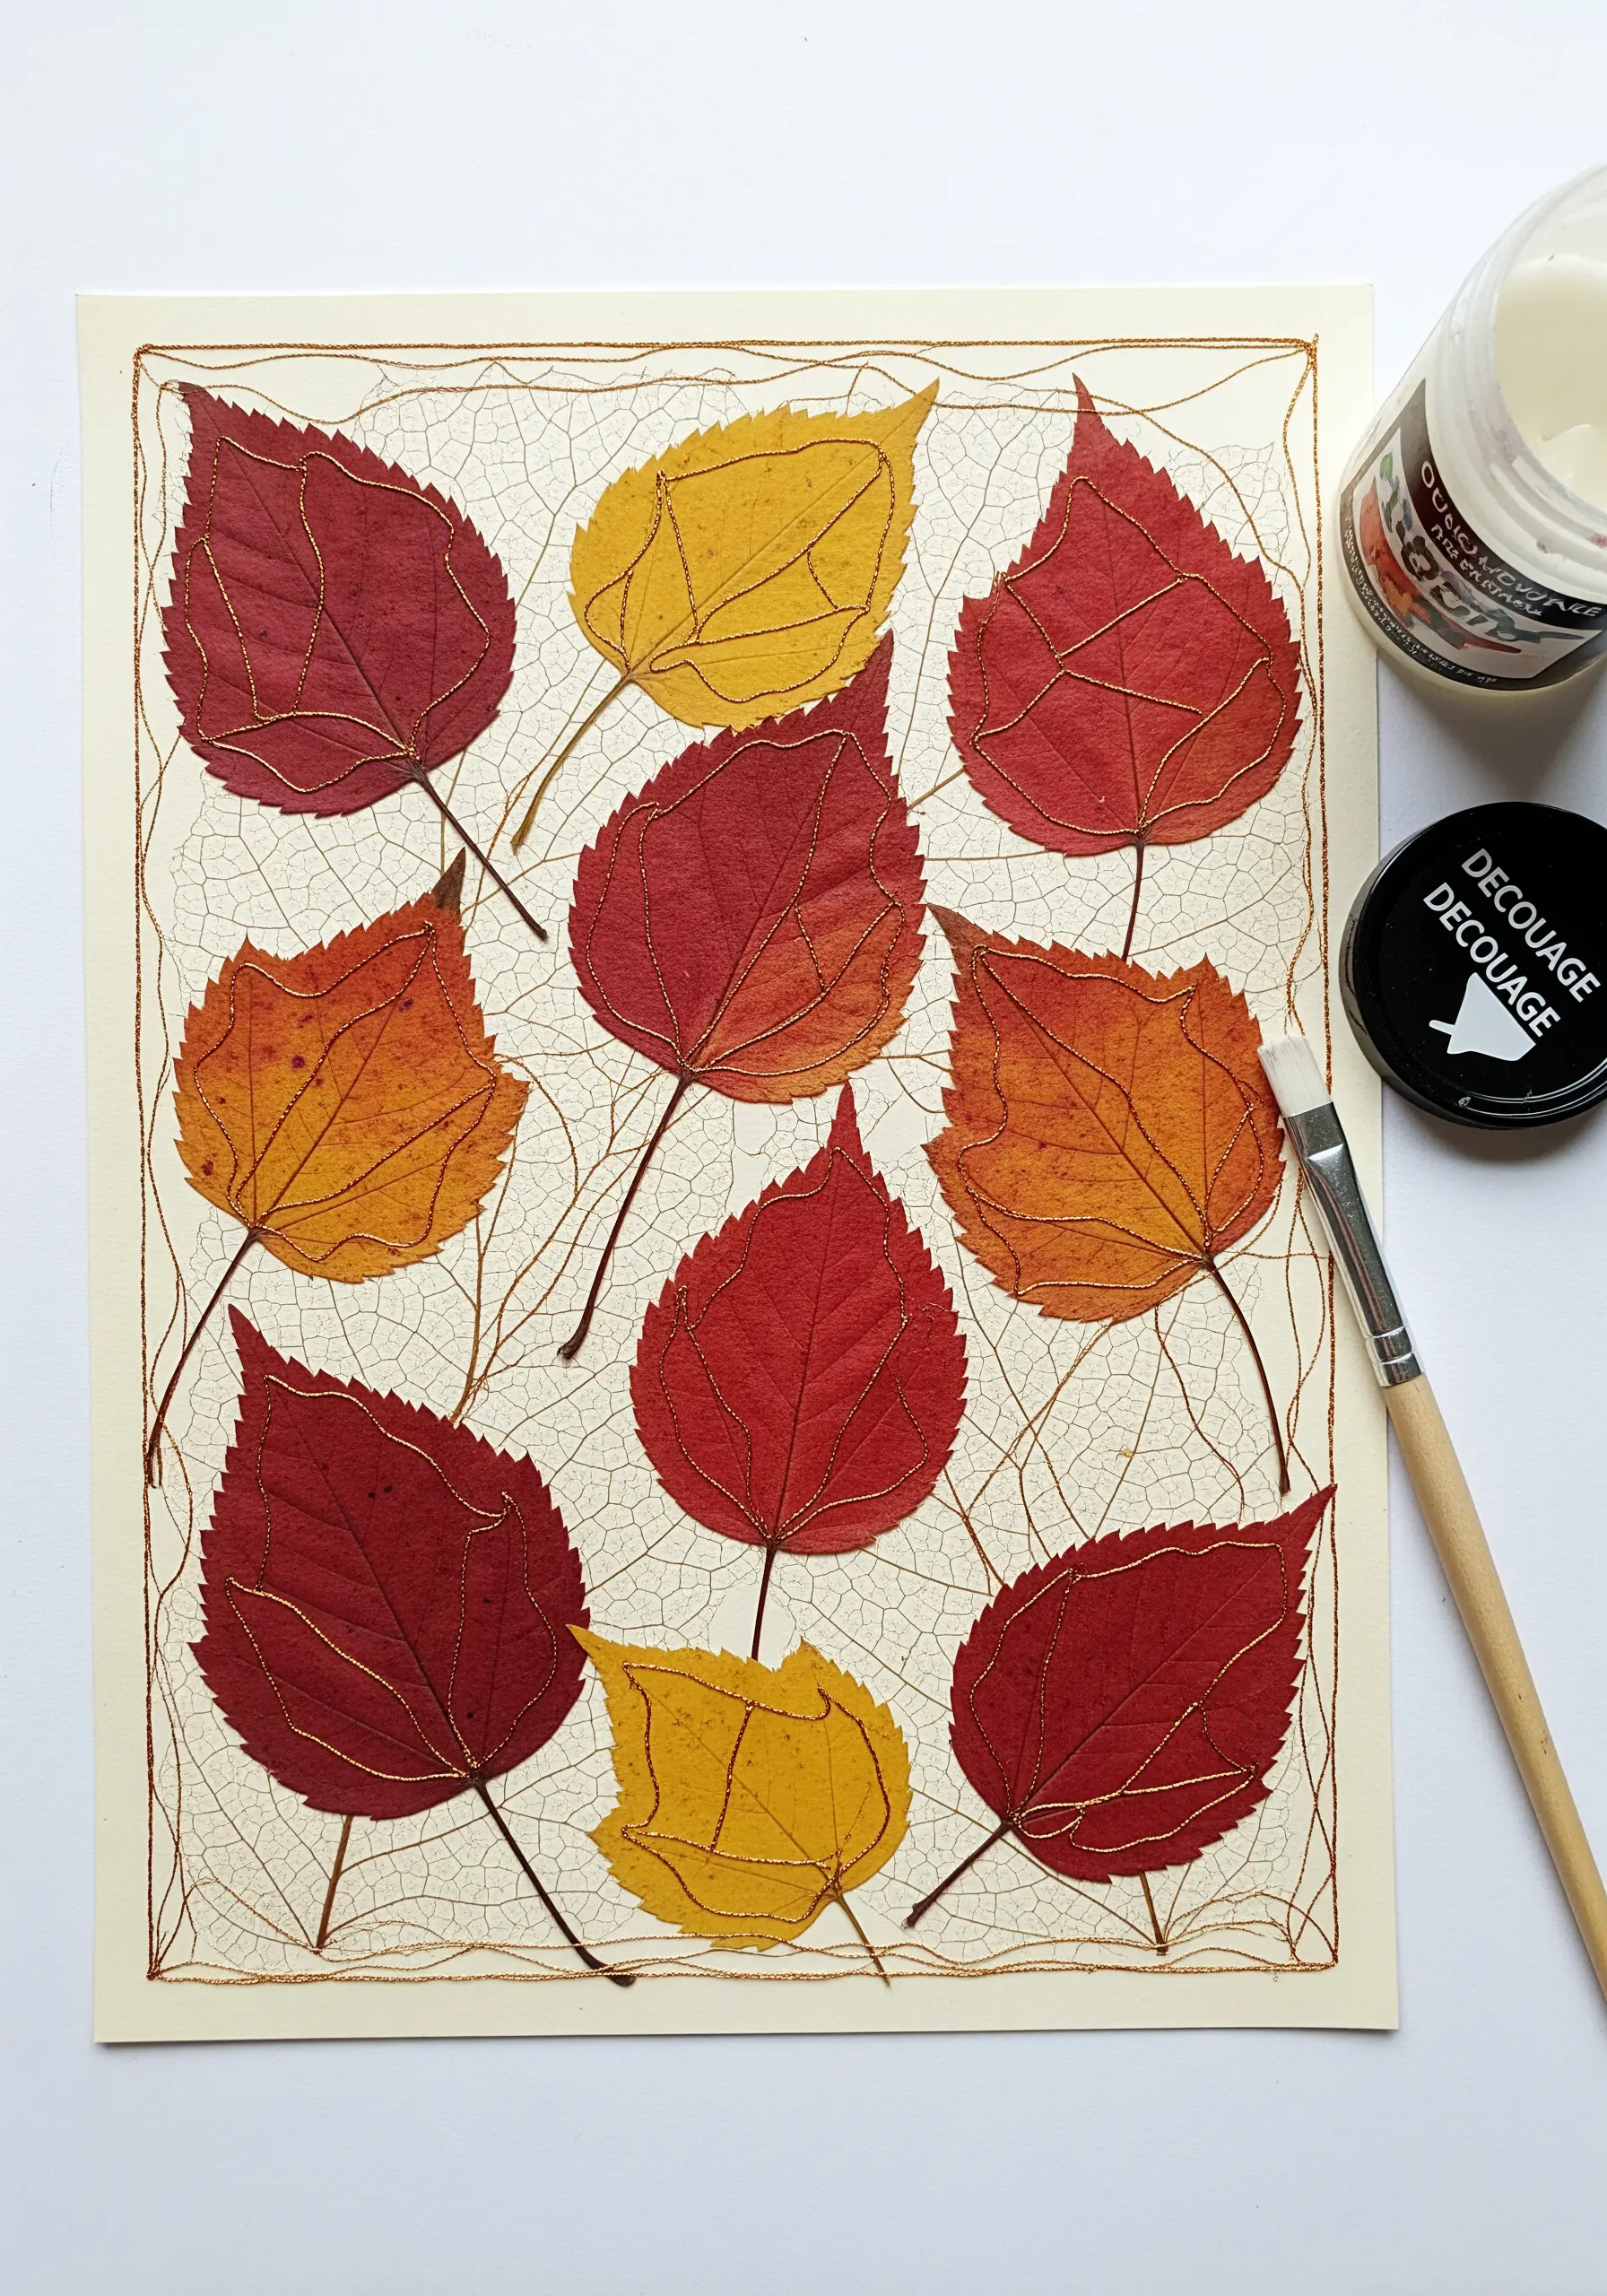
Preserve the beauty of autumn by decoupaging real, pressed skeleton leaves onto high-quality paper.
Once the glue is dry, use a fine metallic thread to trace the delicate veins of the leaves using a couching technique.
This method allows you to add a touch of gilded elegance without piercing the fragile leaf itself; your couching stitches go into the paper on either side of the vein.
The result is a stunning blend of natural and artistic elements, capturing a fleeting moment of seasonal beauty.
26. Explore Geometric String Art on Cardstock
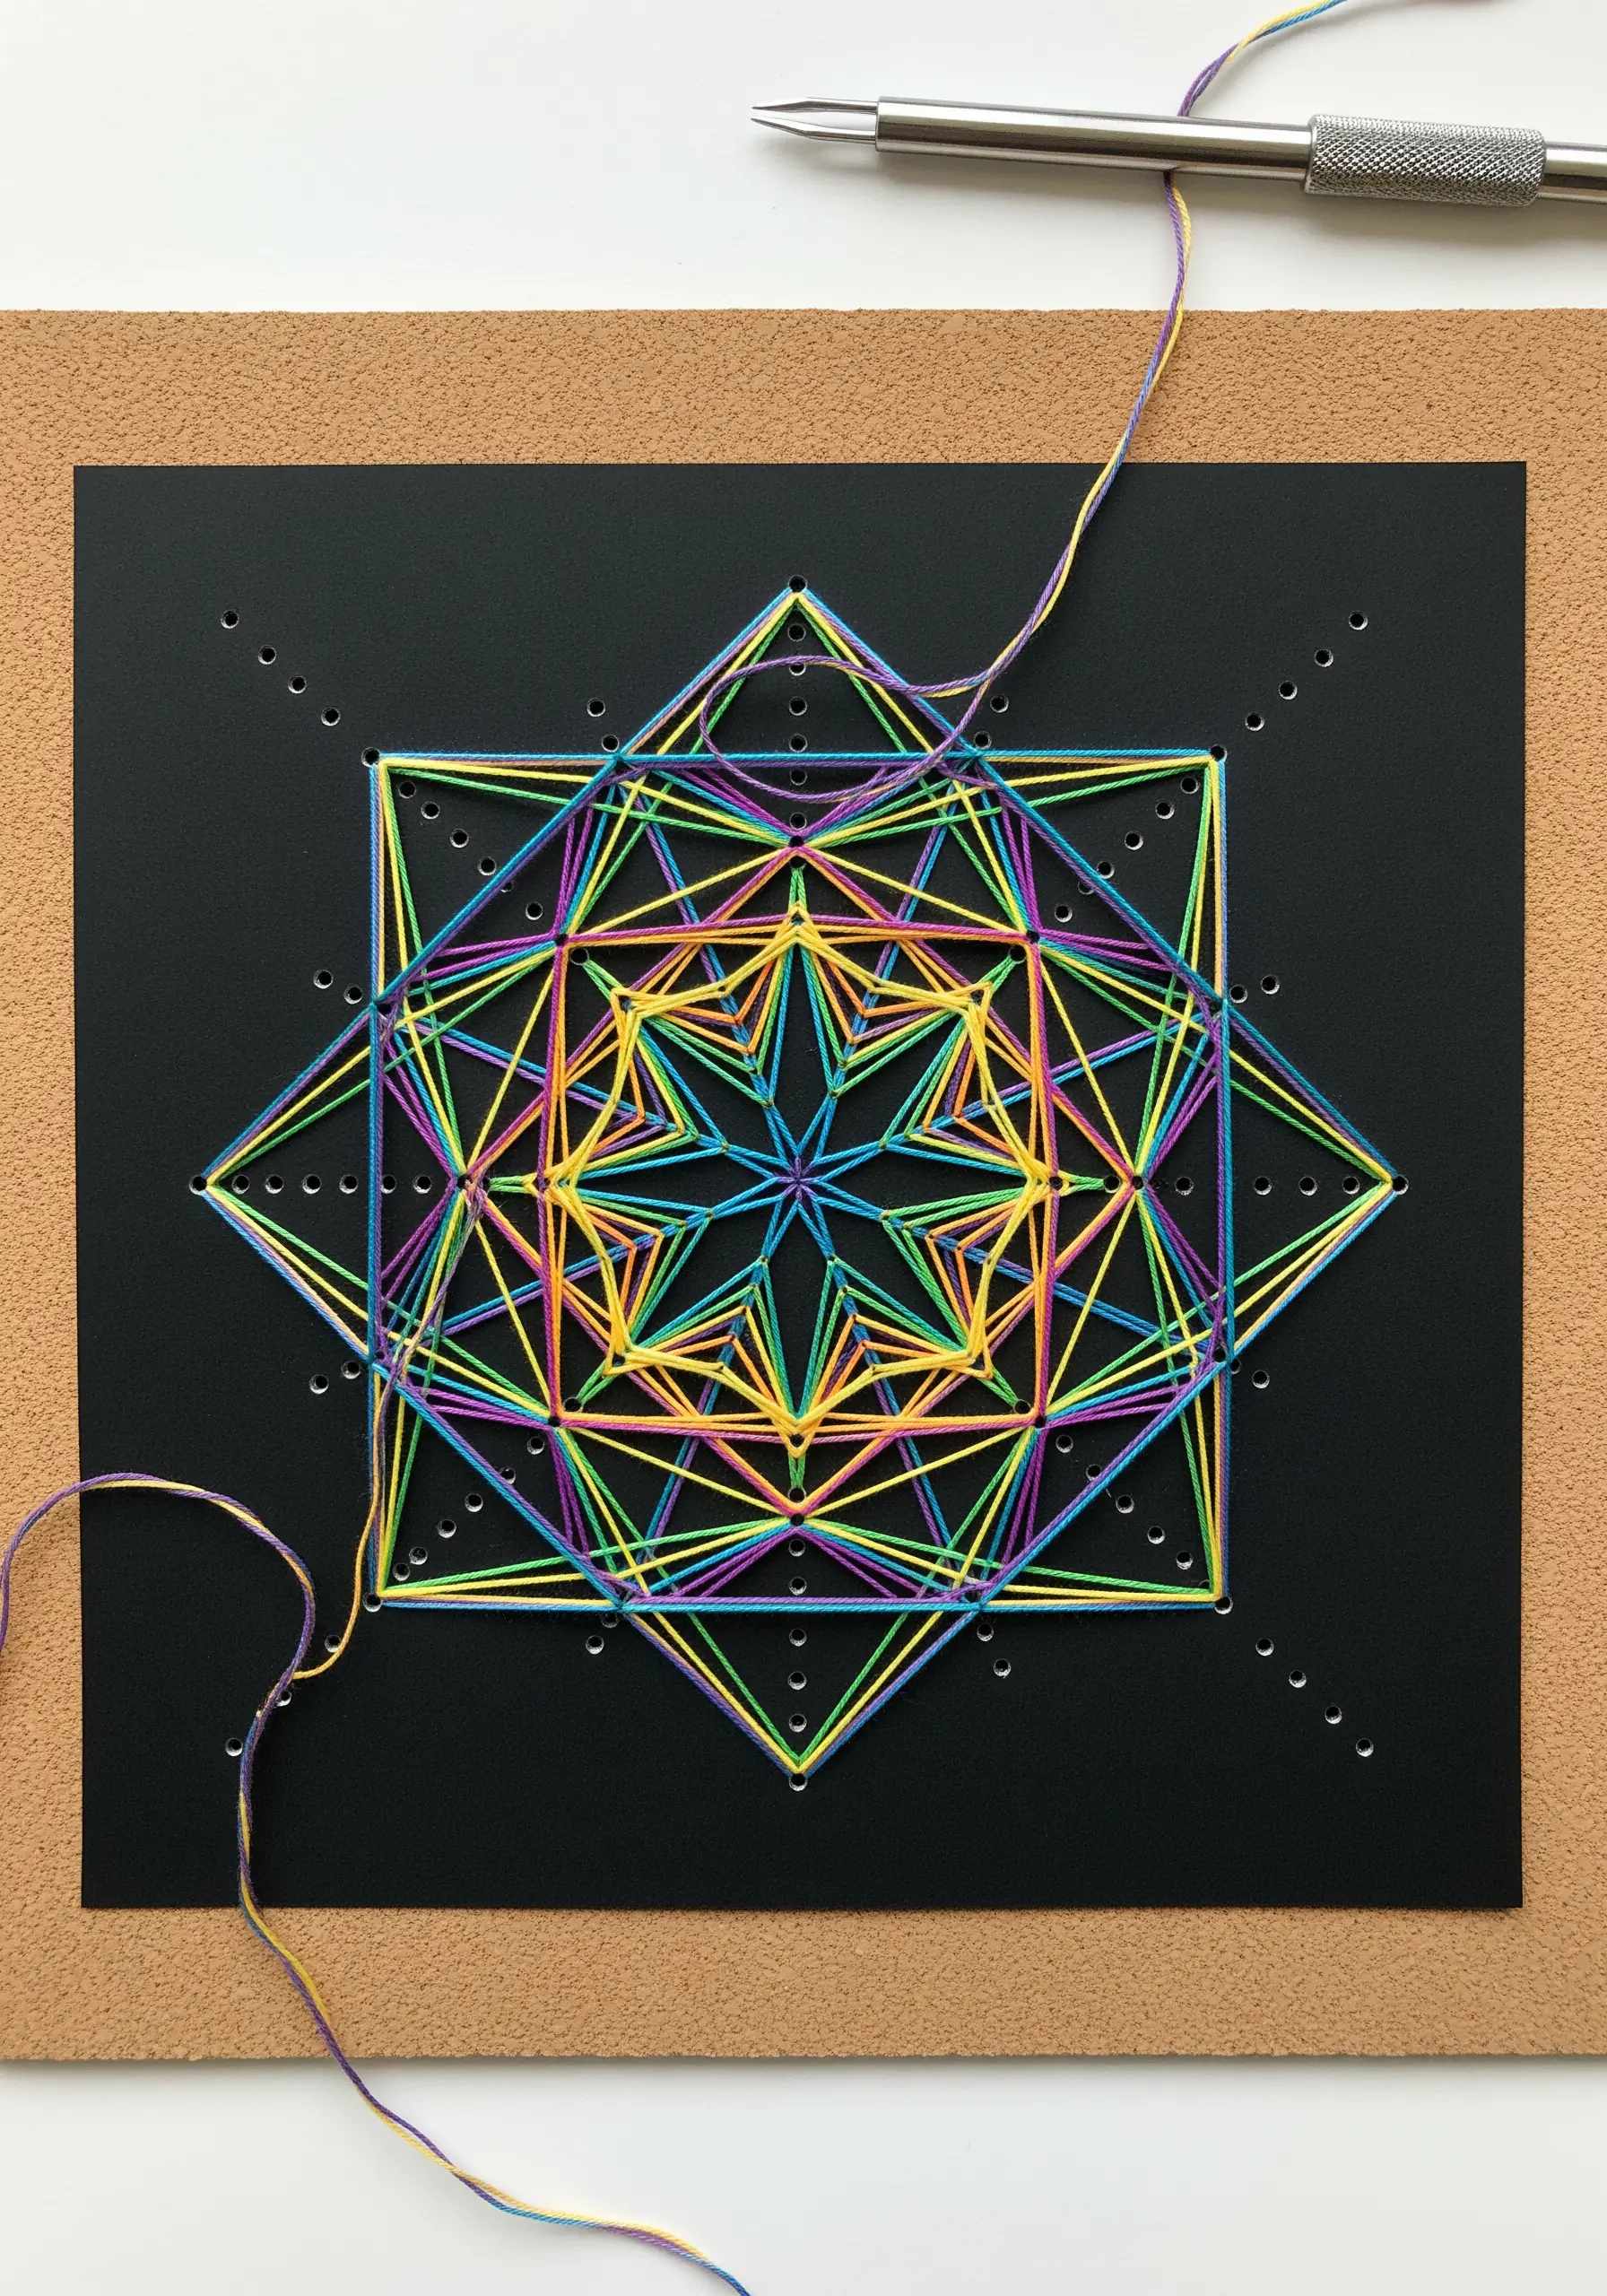
Mount a sheet of dark cardstock onto a cork board to provide support and make piercing easier.
Use a ruler and compass to mark out a geometric pattern, then pierce holes at regular intervals along your lines with an awl.
Wrap colorful embroidery floss or fine string from point to point, creating intricate layers of overlapping lines.
This technique, inspired by string art, allows you to build complex, mandala-like designs with beautiful mathematical precision.
27. Stitch a Textured Foreground Over a Painted Landscape
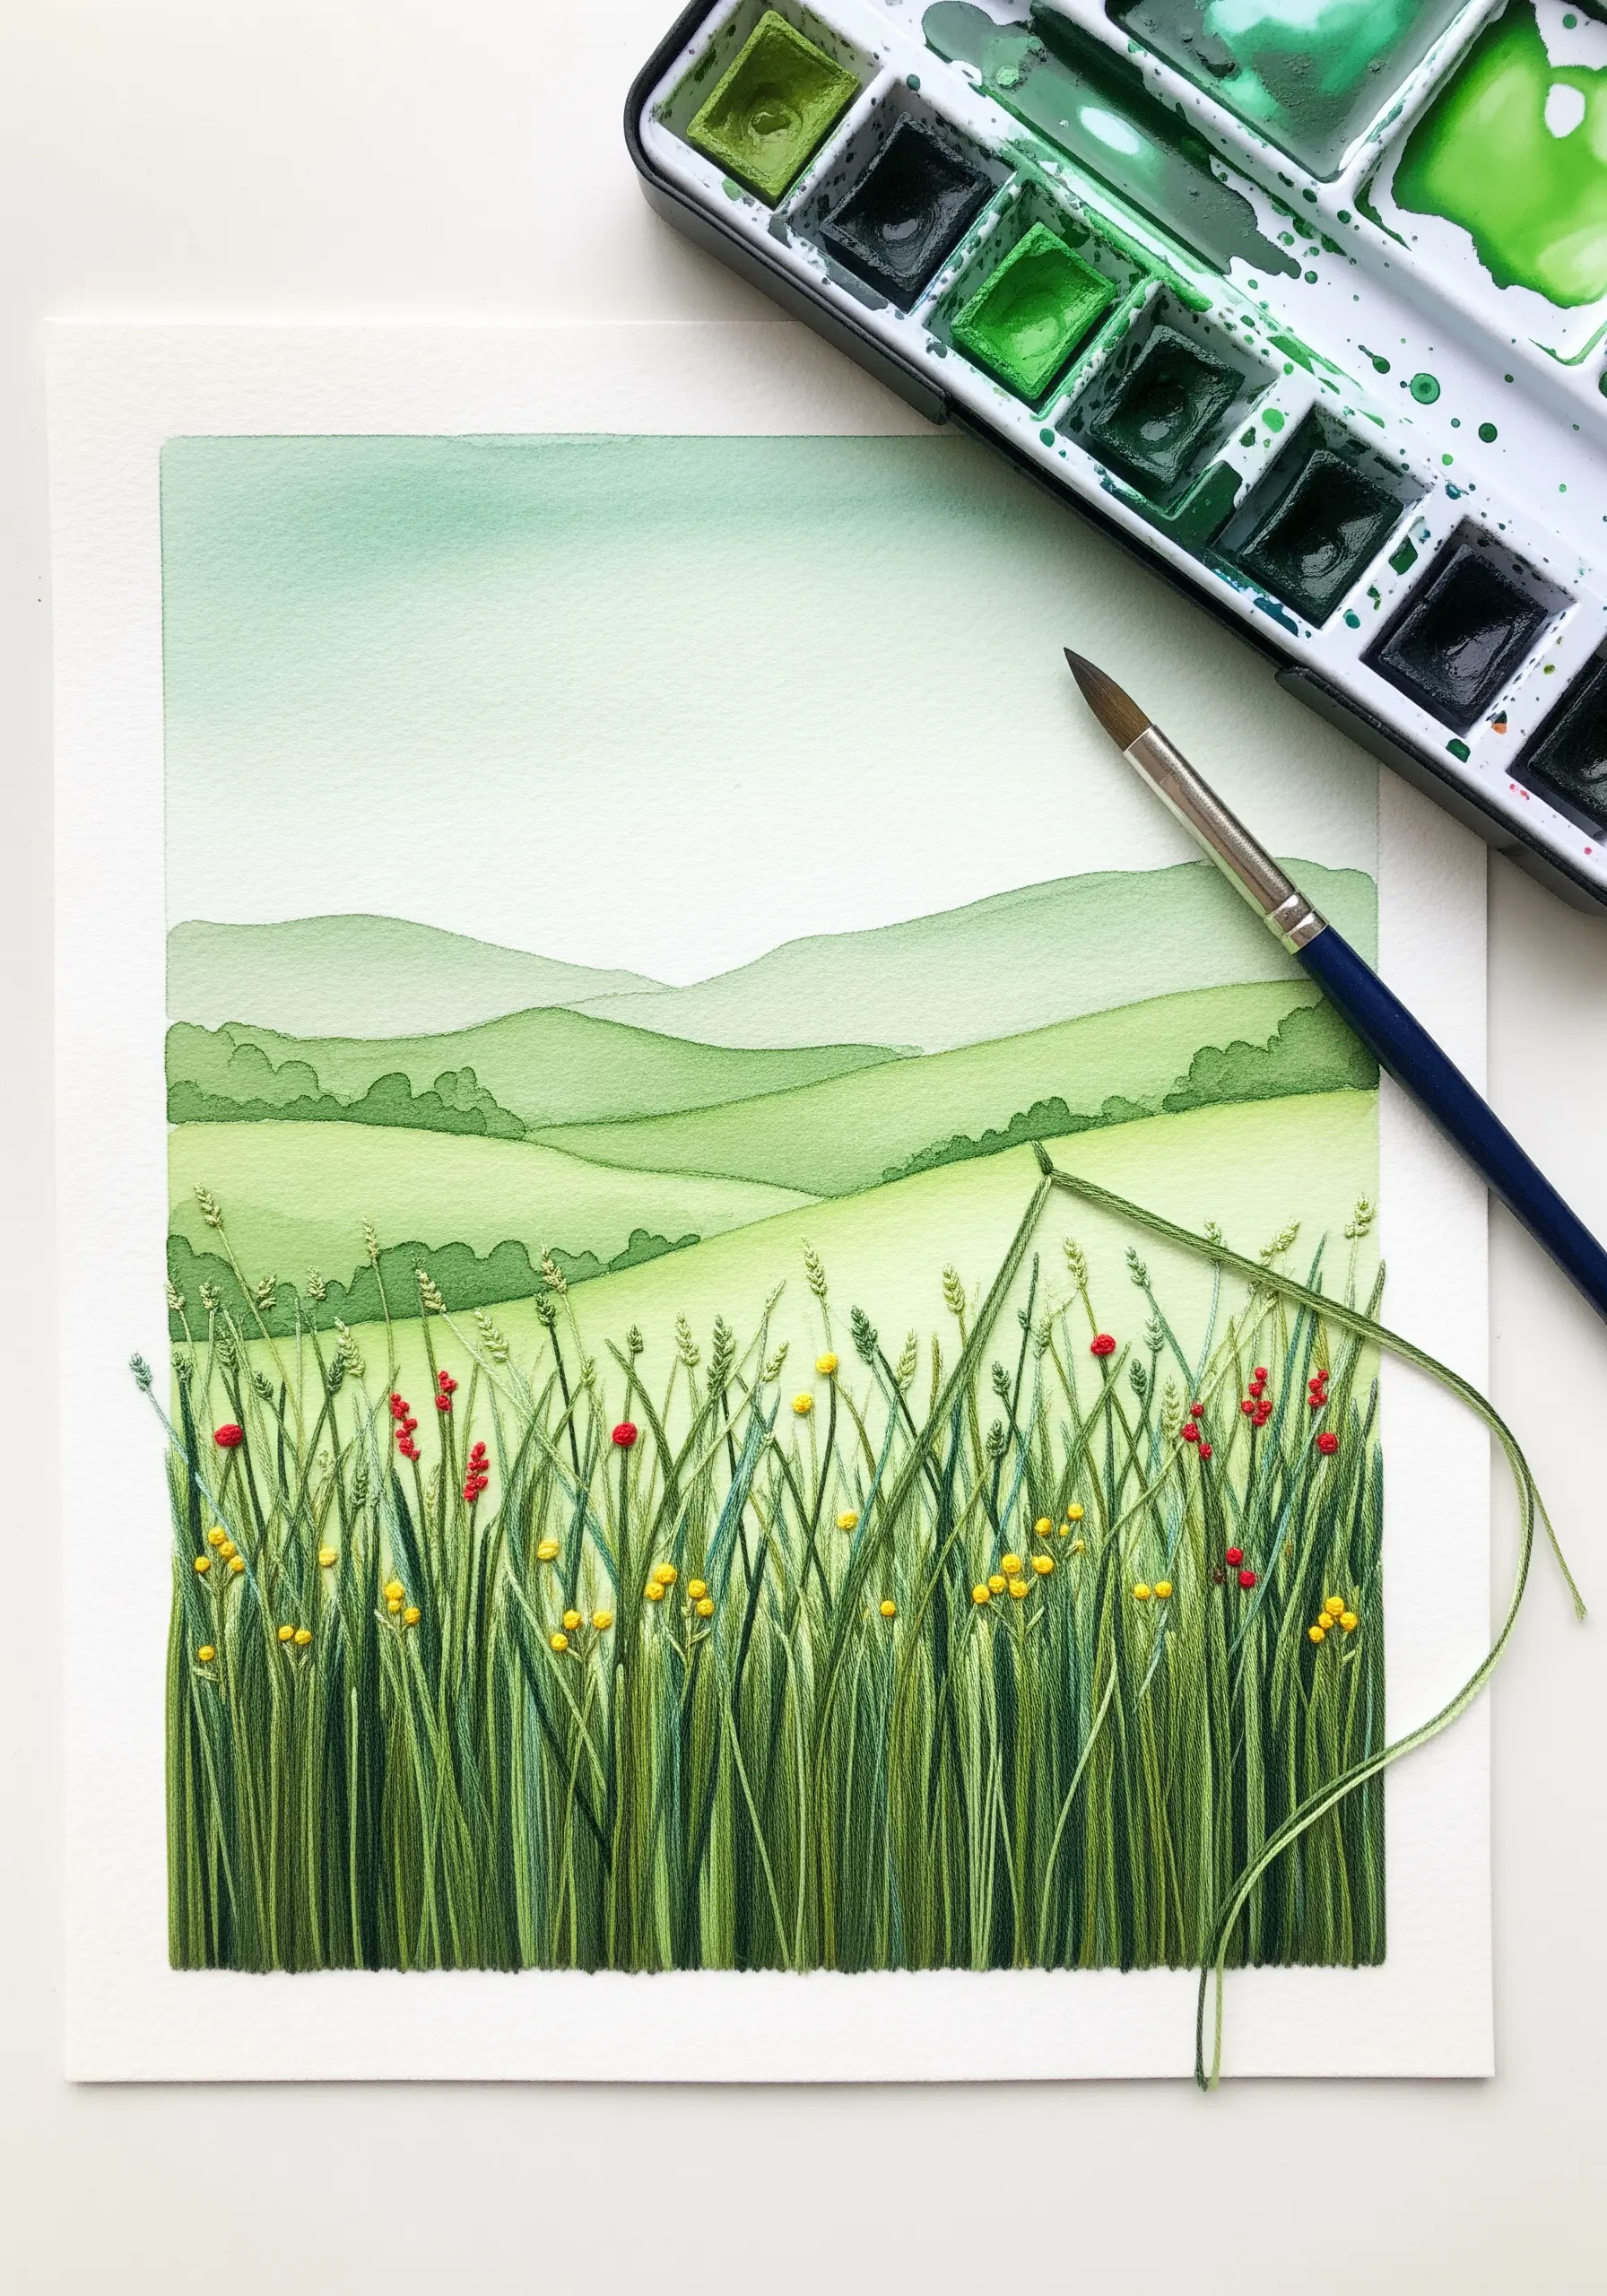
Create depth in your artwork by combining a soft, painted background with a sharply detailed, embroidered foreground.
Paint a simple, atmospheric landscape on watercolor paper, using fewer details for distant elements like hills and sky.
Once dry, use a dense array of straight stitches and French knots in the foreground to represent grasses and wildflowers.
This contrast in texture makes the foreground pop, drawing the viewer into the scene and creating a powerful illusion of distance and perspective.
28. Build a Layered Coral Reef Scene
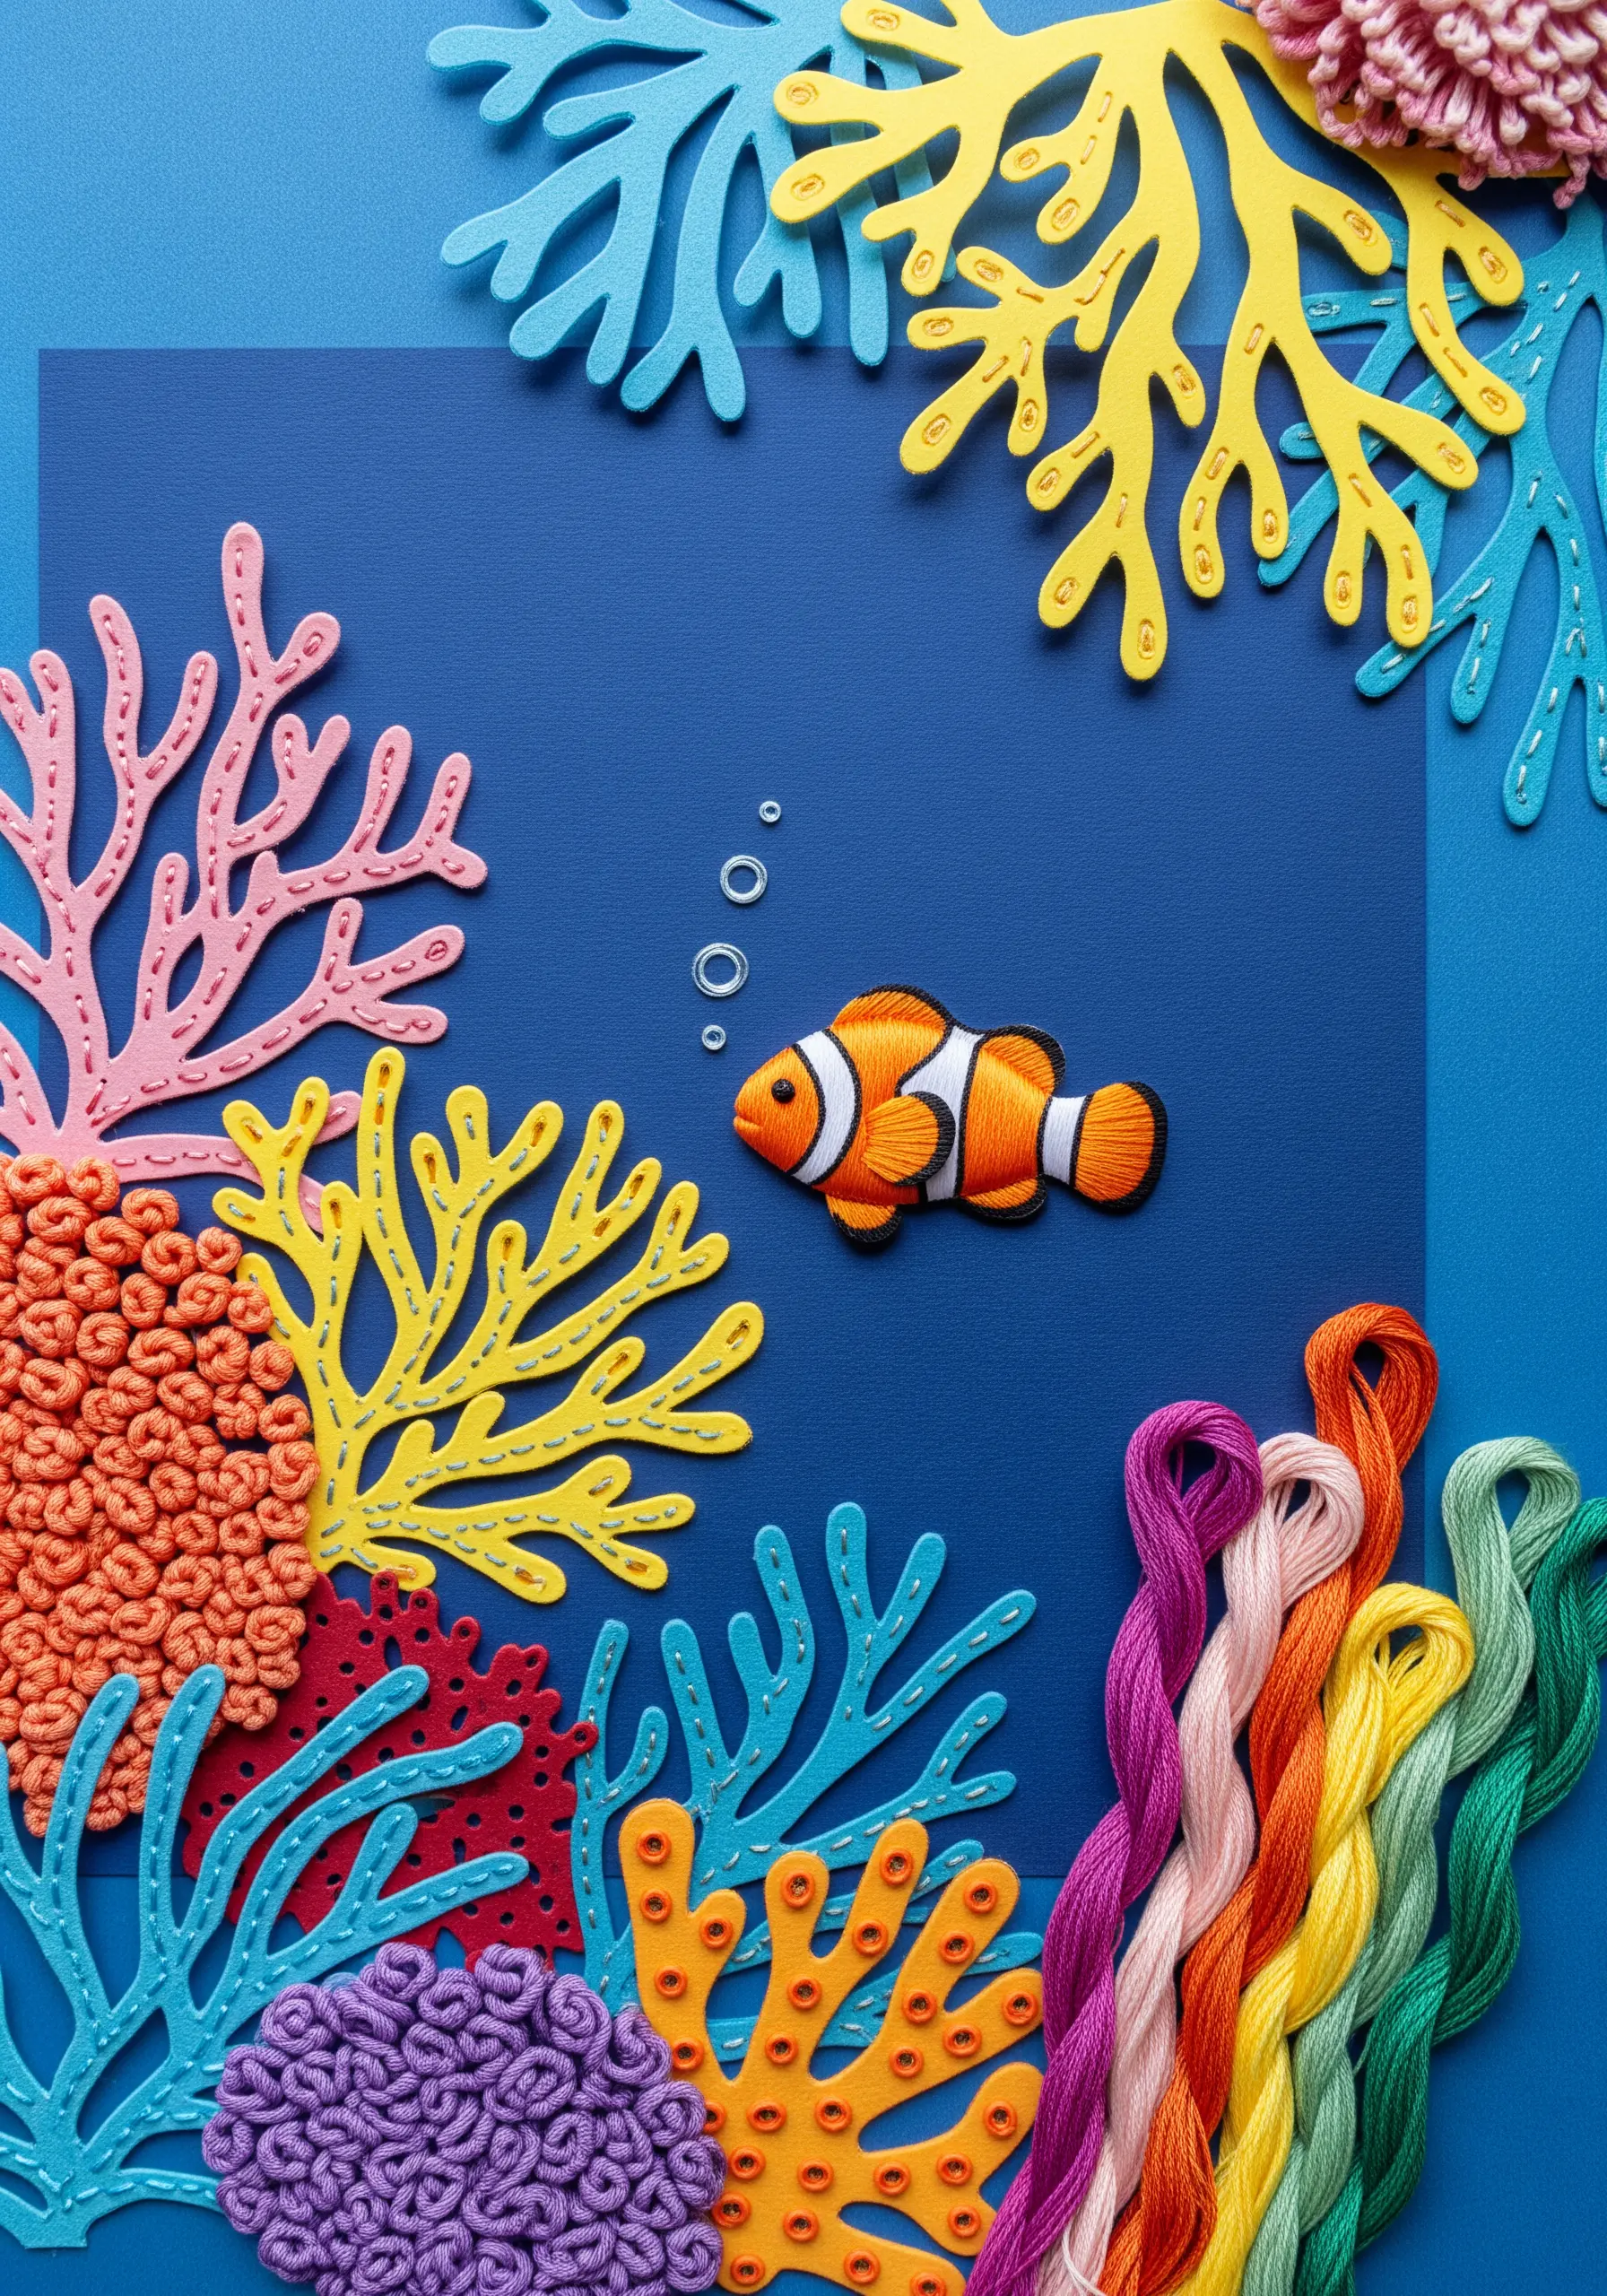
Create an underwater world by combining multiple mixed-media techniques in a single piece.
Embroider key elements like the clownfish and textured corals on fabric, then cut them out and apply them to a paper background.
Craft other coral shapes from colorful paper, adding stitched details for texture before gluing them down.
Layering these embroidered and paper-cut elements creates a vibrant, dimensional mixed-media collage that captures the lively complexity of a coral reef.
29. Craft a Delicate Bookmark with Stitches and Beads
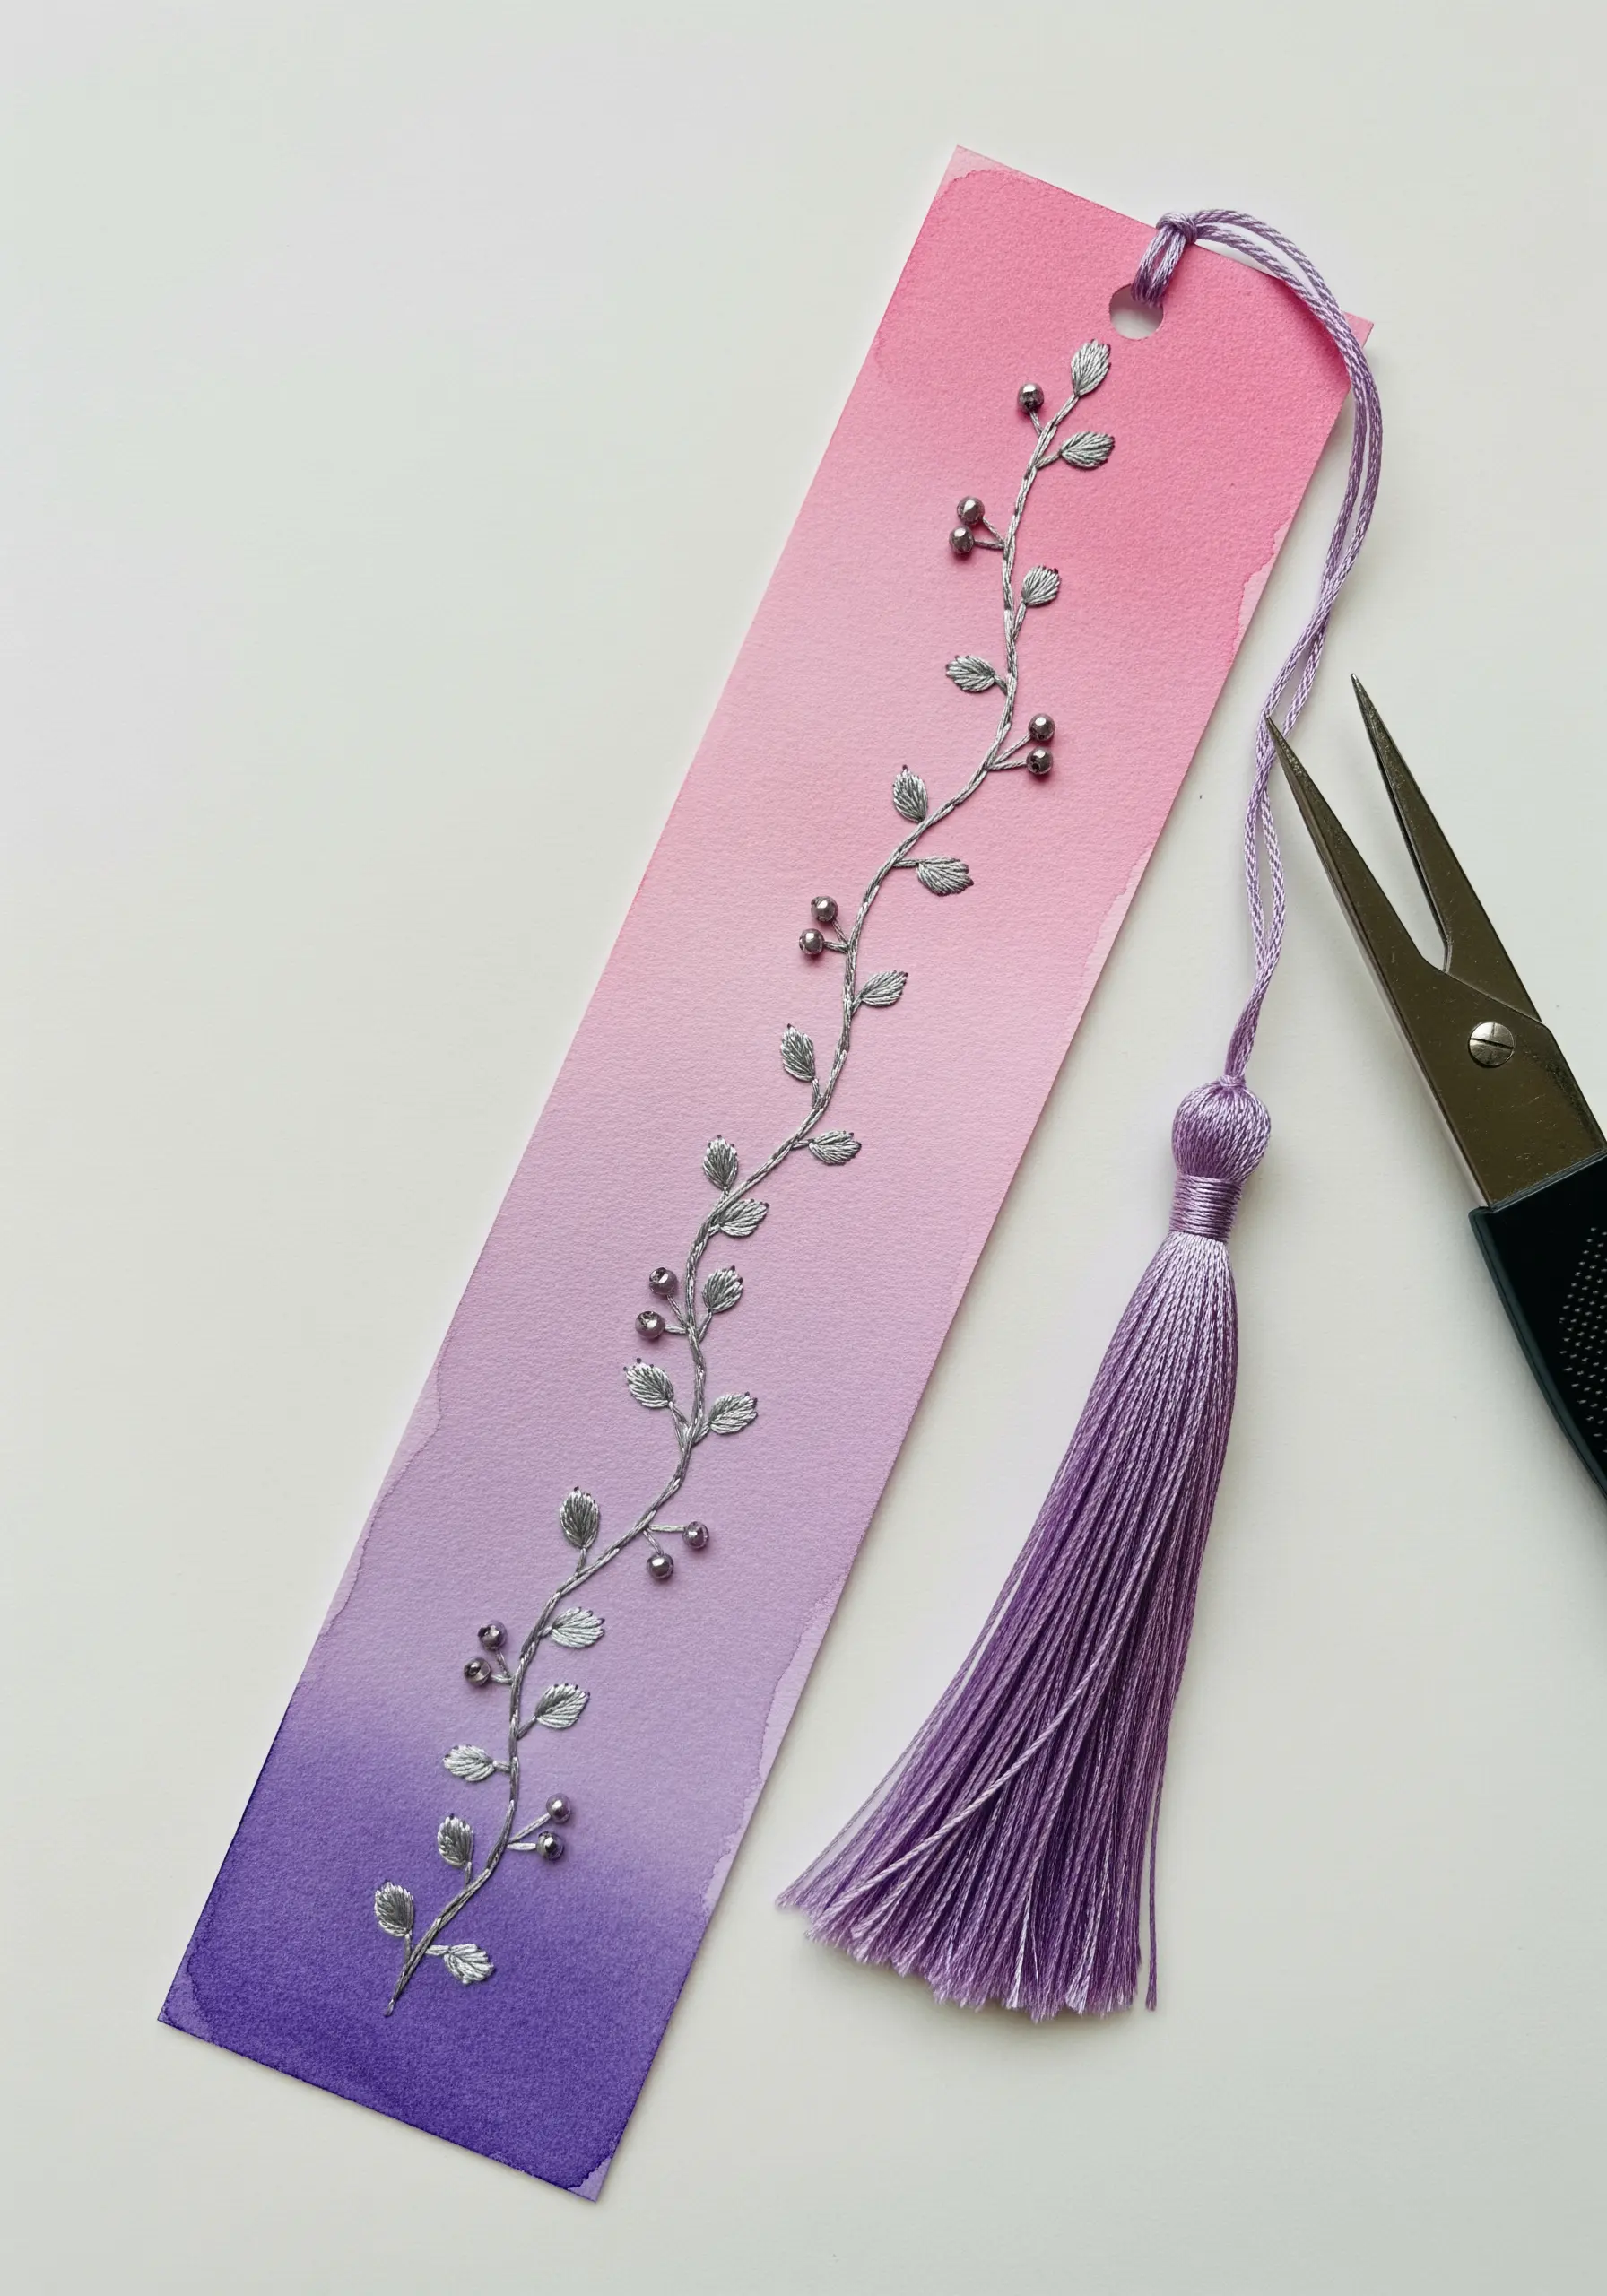
Design a beautiful and functional piece of art by embroidering on a sturdy cardstock bookmark.
Create an elegant background with a smooth watercolor gradient wash before you begin stitching.
Use a fine, silvery thread to stitch a delicate vine with a stem stitch, adding detached chain stitches for leaves.
Incorporate small beads or pearls as berries, which adds a touch of weight and a luxurious texture, transforming a simple bookmark into a cherished item.
30. Create a Radiant Burst with Strategic Negative Space
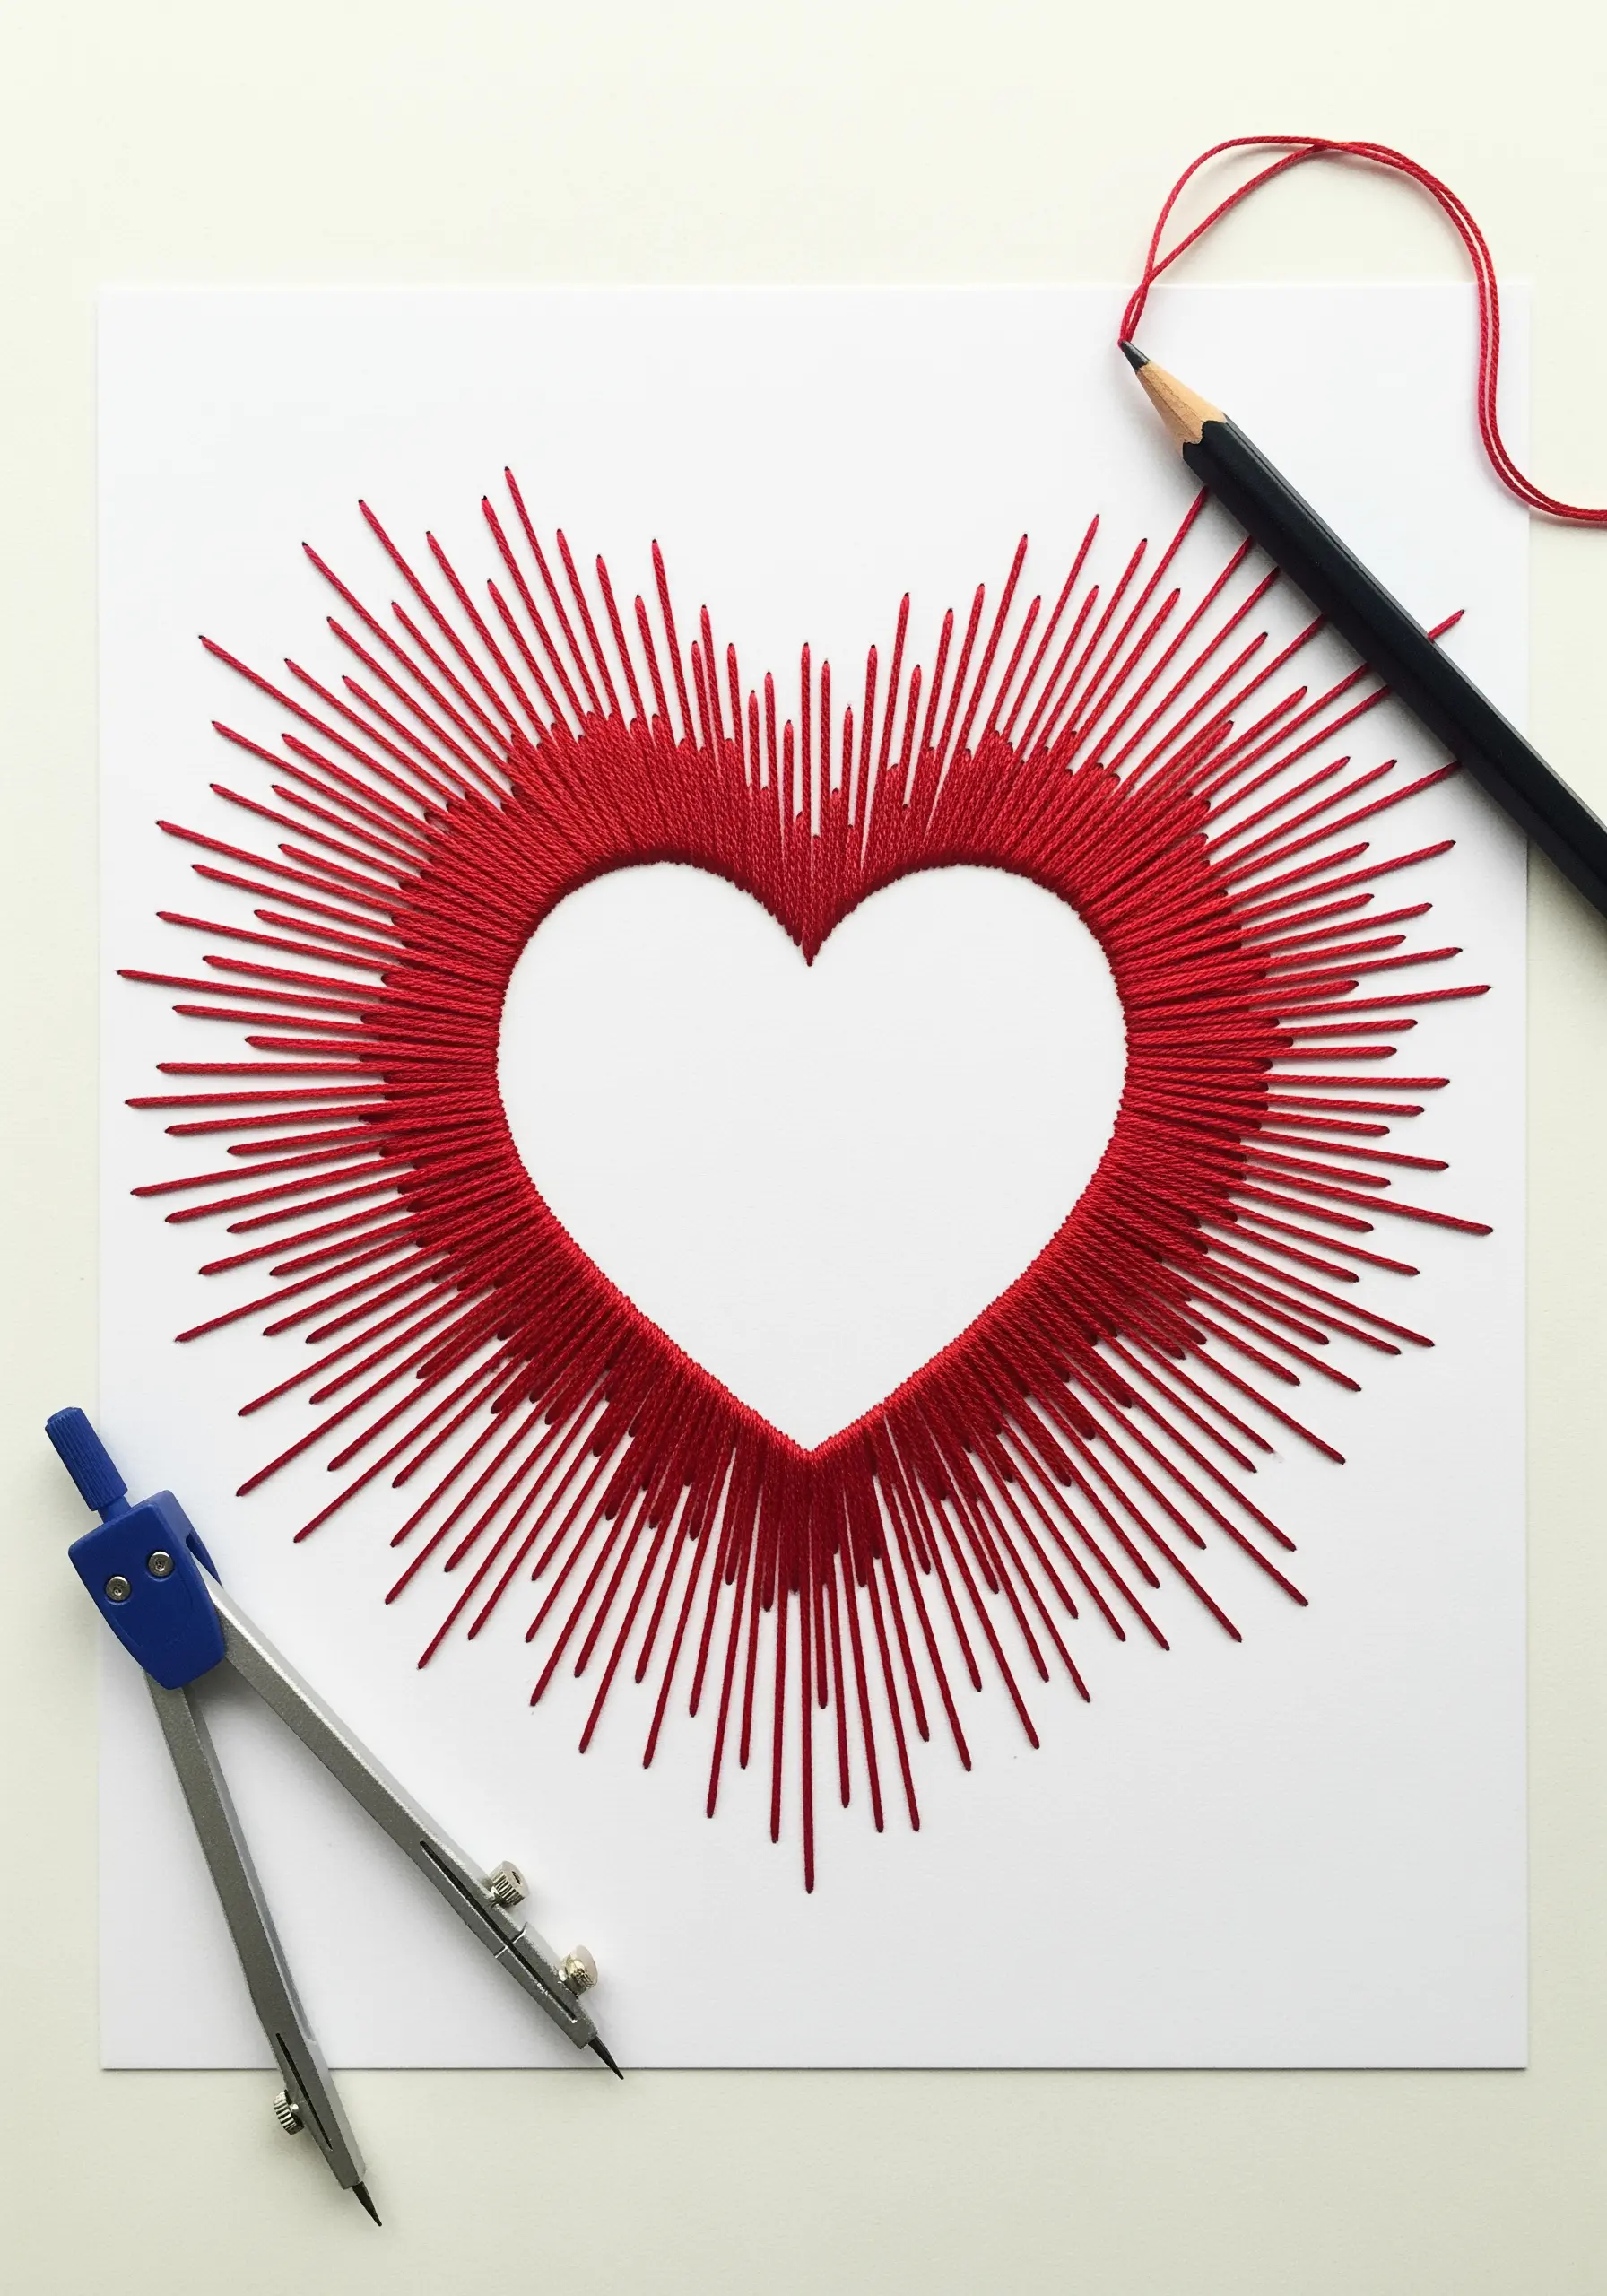
Use the paper itself as a central part of your design by leaving a shape unstitched.
Draw a simple heart or any other silhouette in the center of your cardstock.
Mark points along the outline of your shape and also along an outer boundary, then use straight stitches to connect the two, creating a burst effect.
This technique emphasizes the power of negative space and results in a dynamic, high-impact design using only the most basic stitch.
31. Couch Chunky Yarn for Sculptural Line Work
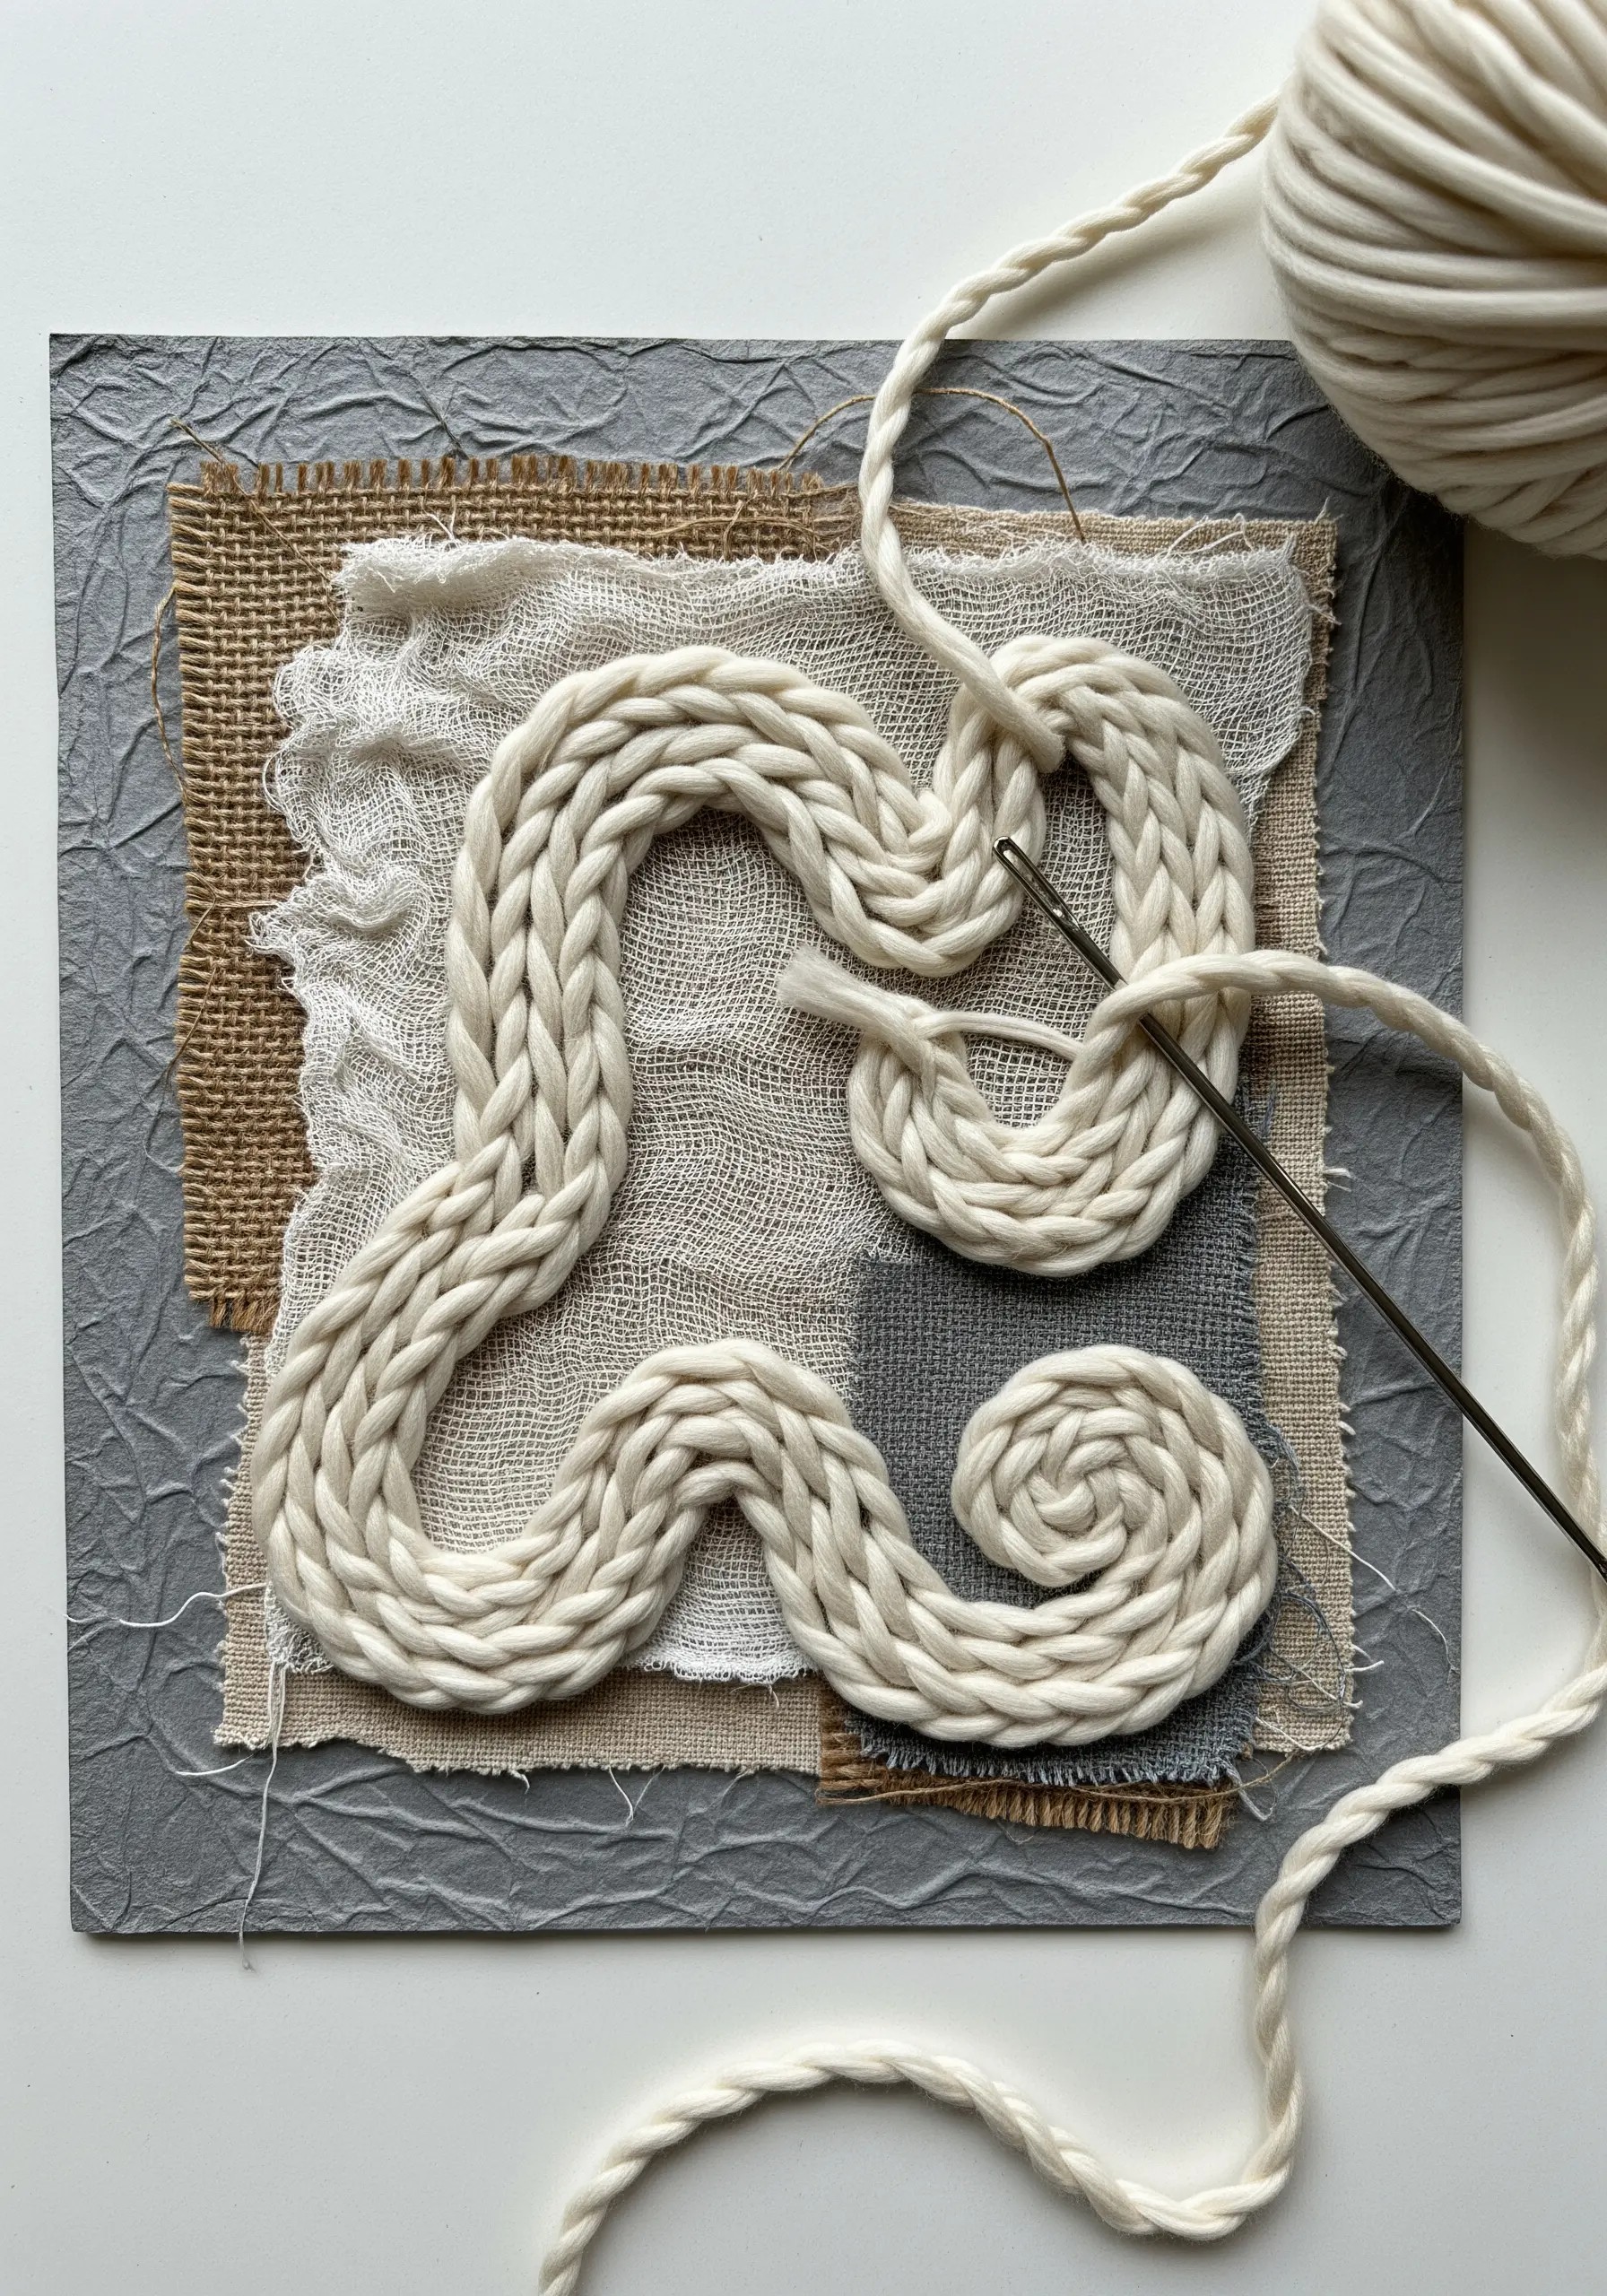
Move beyond fine floss and experiment with couching thick, textural yarns onto a layered paper and fabric base.
Arrange the yarn in bold, sweeping curves, then use a sturdy needle and a matching or contrasting thread to tack it down with small, evenly spaced stitches.
The sheer bulk of the yarn creates an immediate sculptural effect, adding a cozy, tactile dimension that contrasts beautifully with the flat paper background.
This is a fast and effective way to make a big impact with mixed-fiber techniques.
32. Embellish Patterned Paper with Expressive Stitches
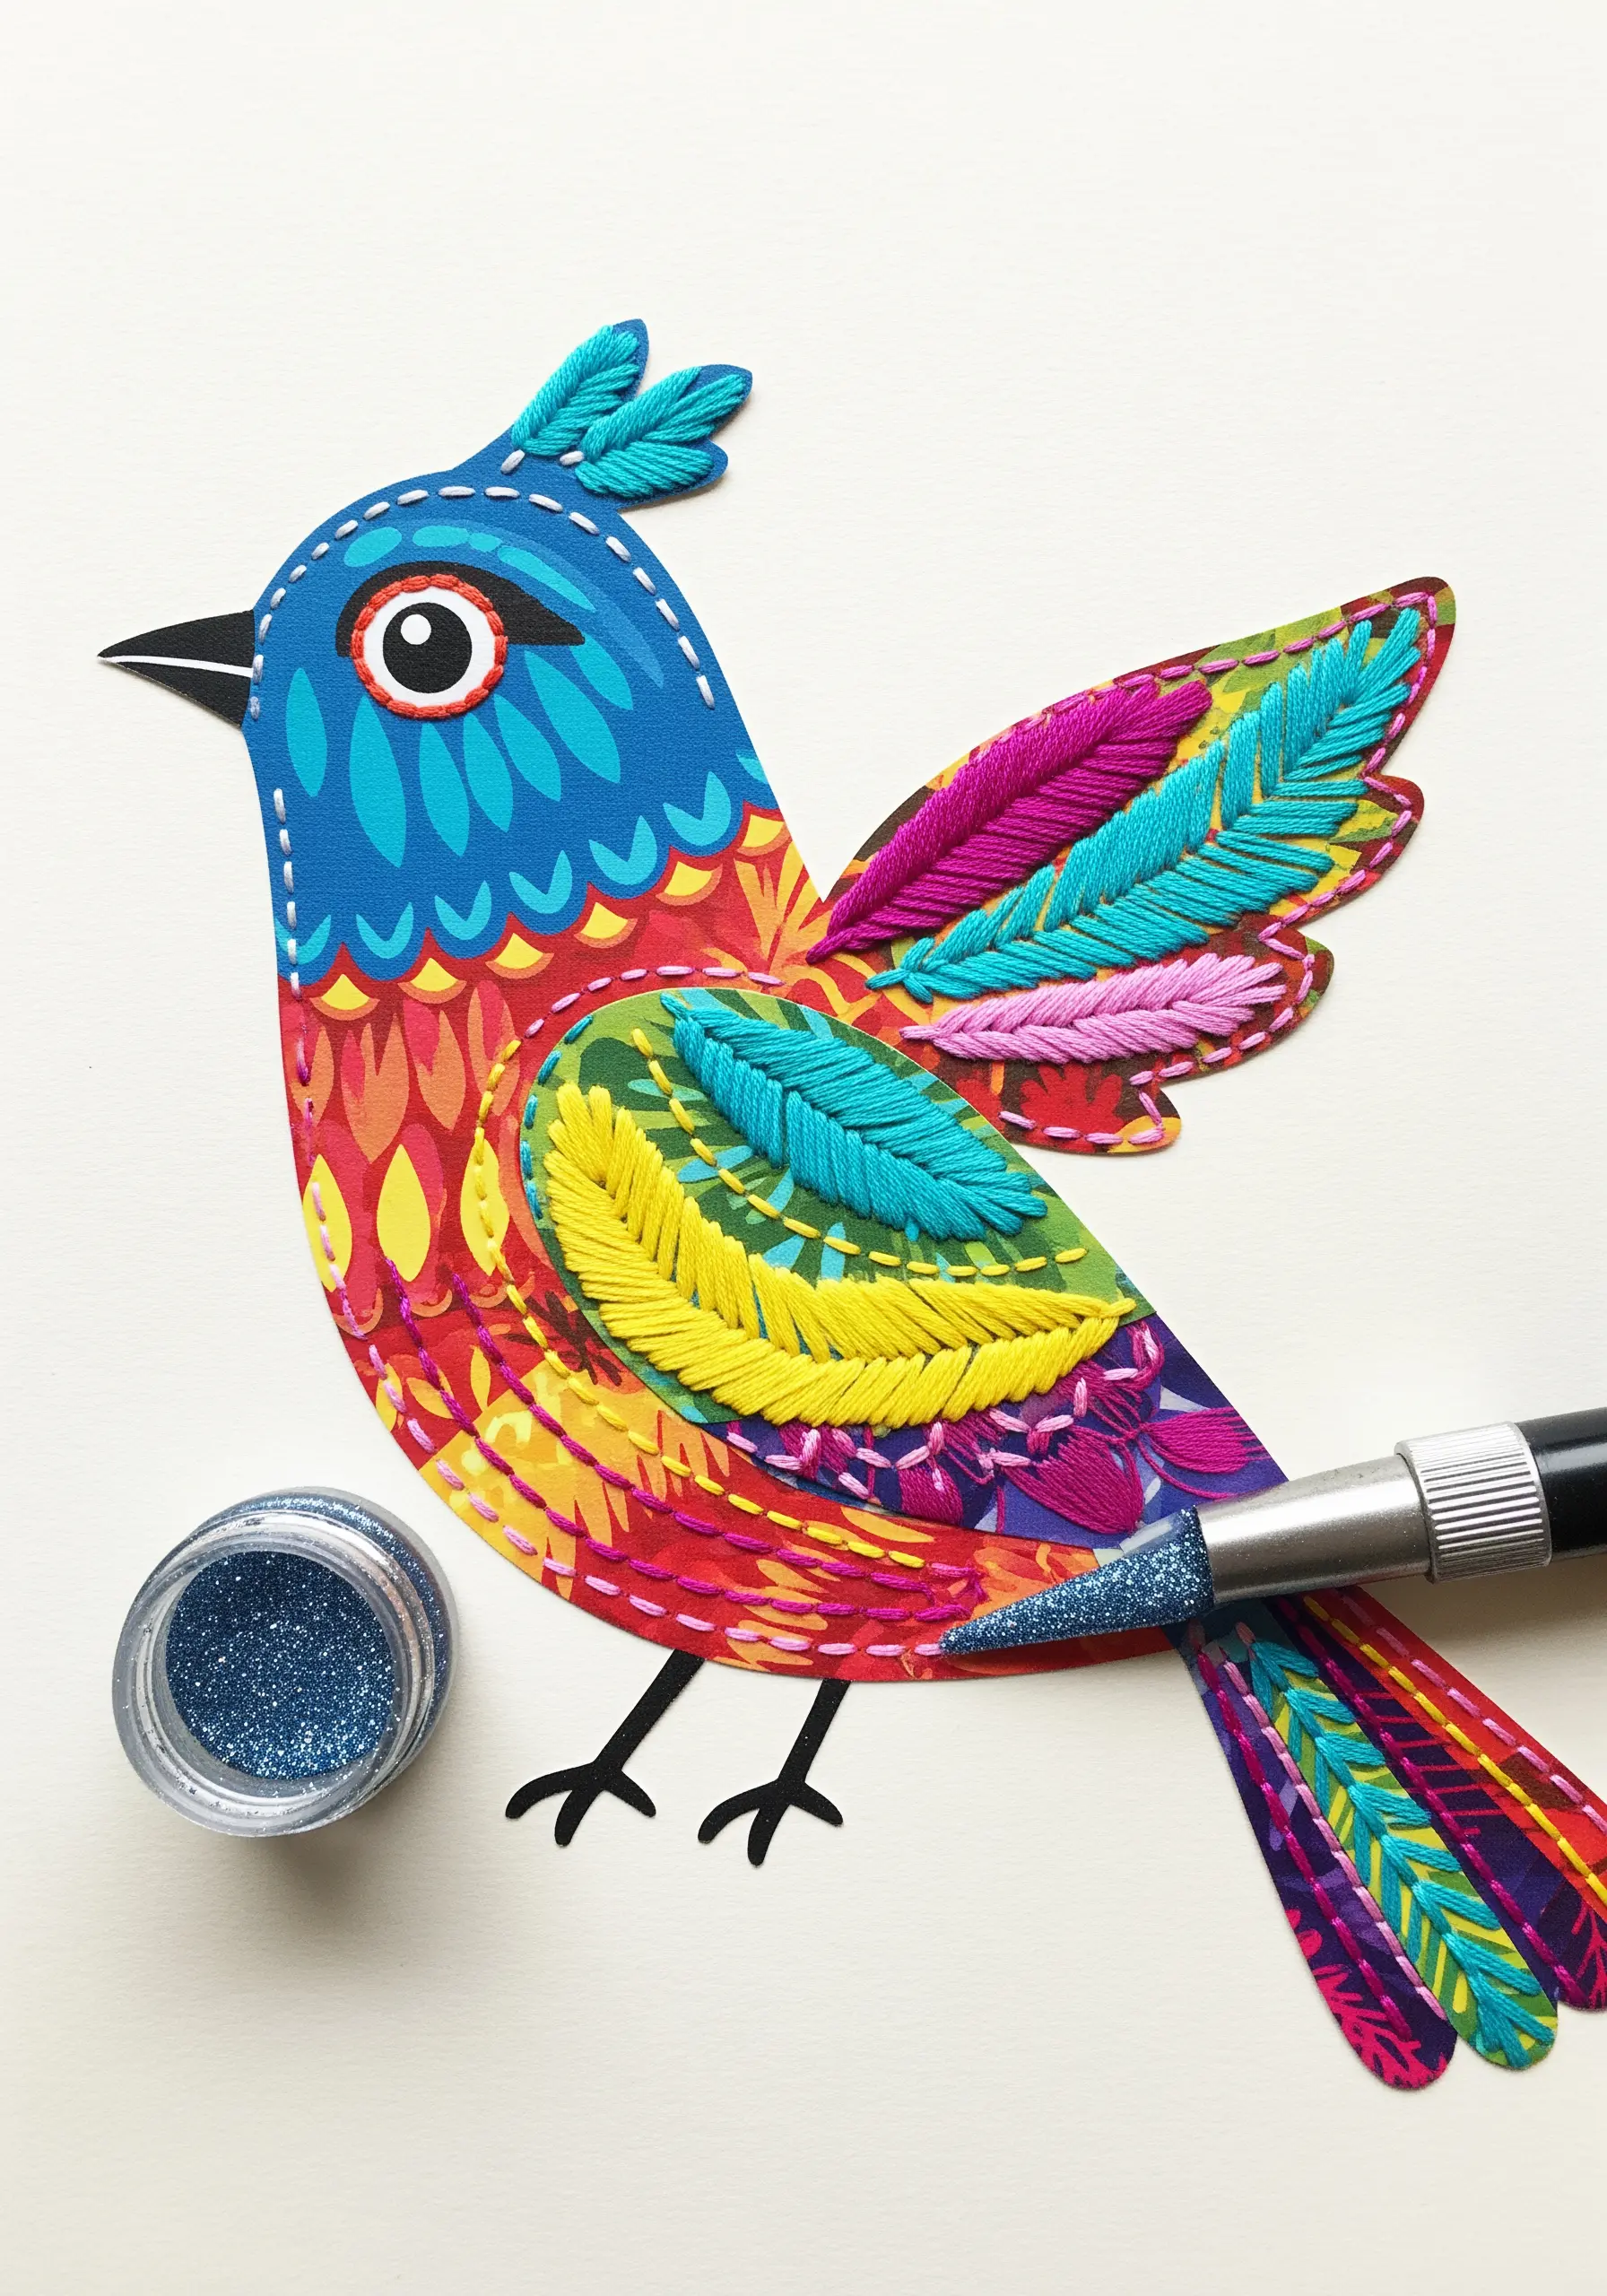
Start with a vibrant, patterned piece of paper as your base, cutting it into a desired shape like a bird.
Instead of filling the entire shape with thread, use selective embroidery to enhance the existing patterns and add texture.
Use satin stitch or fishbone stitch on the wings to create feathers, and simple running stitches for outlines.
This method allows you to create a colorful, dynamic piece quickly, as the patterned paper does much of the color work for you.
33. Construct 3D Flowers with Stitched Paper Petals
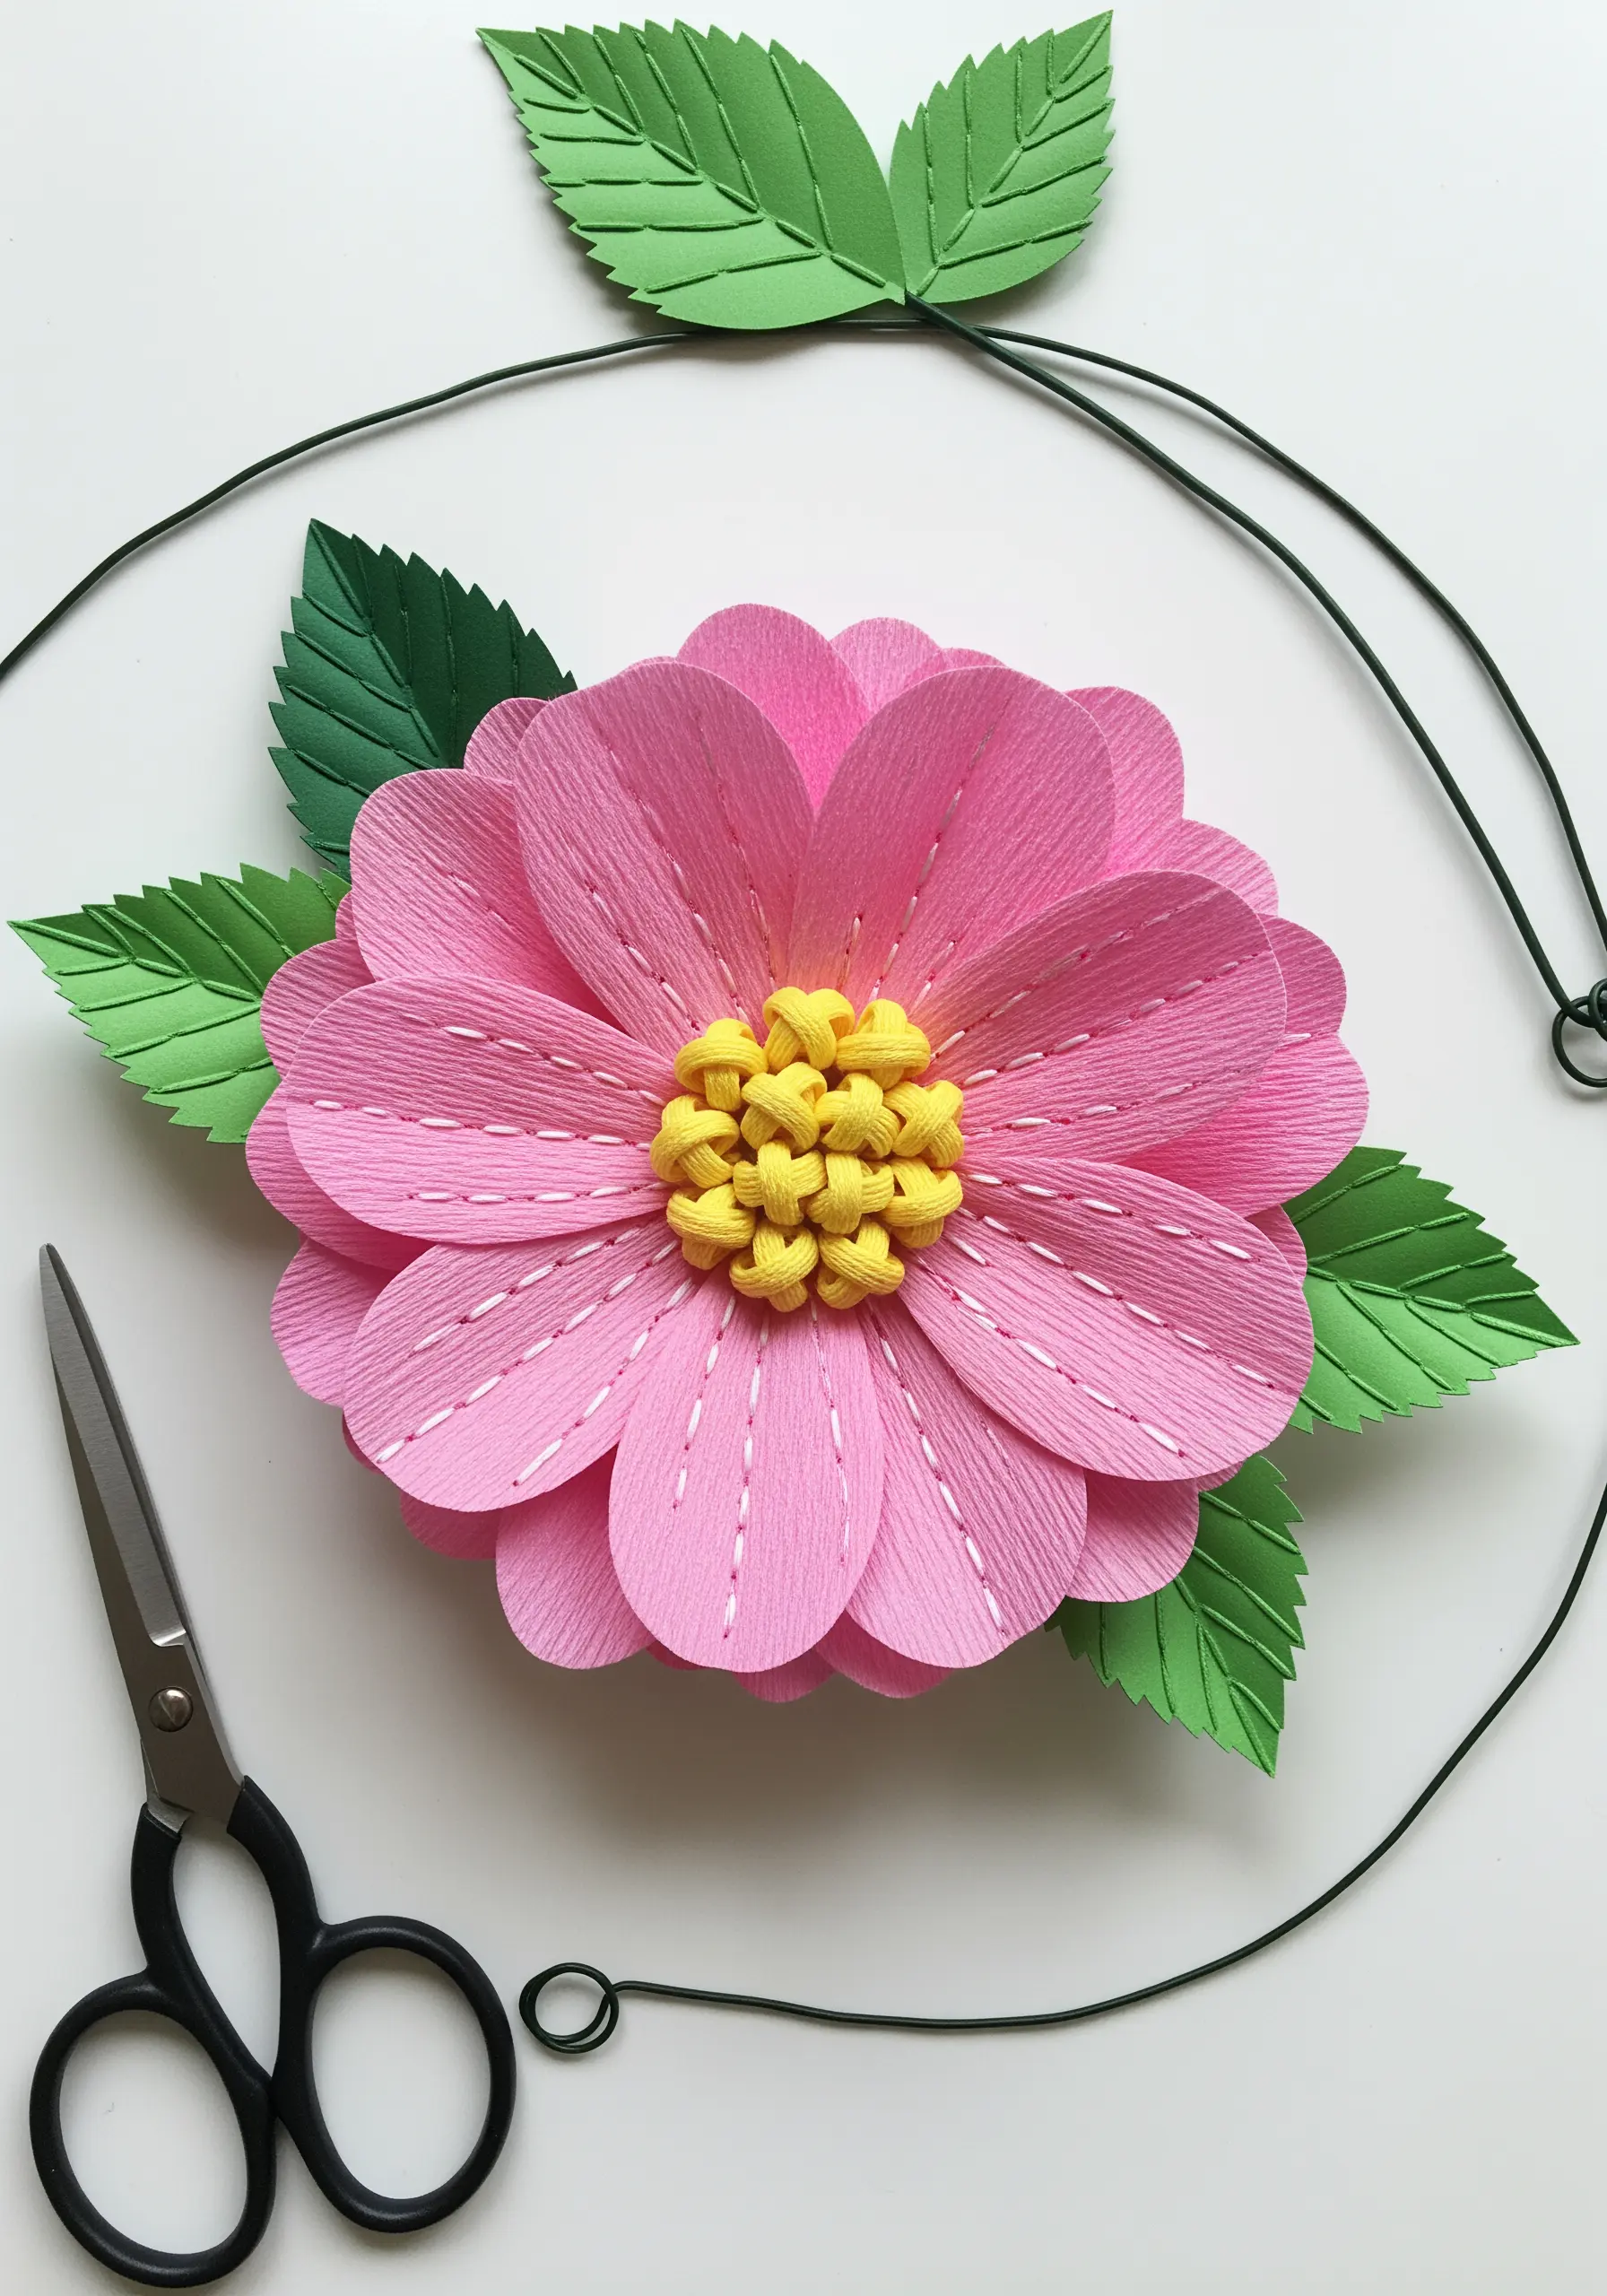
Add a subtle textile touch to paper craft by incorporating simple stitches before you assemble your final piece.
Cut out individual petals from textured crepe paper, then add a few lines of running stitch down the center of each one.
This not only adds a beautiful detail but also gives the petals a bit more structure and shape.
Layer the stitched petals and finish with a knotted center made from thread or yarn to create a stunning, dimensional flower that bridges the gap between paper art and embroidery.


Comments are closed.