
In a small space, every object carries weight. You’ve likely found that adding color can quickly feel like adding clutter, yet you crave the warmth and personality that only handmade items can bring. This is where the quiet power of neutral, textural embroidery comes in.
Instead of thinking about what colors to add, I want you to start thinking about what textures you can create. How can a line be raised? How can a surface feel woven? How can light and shadow play across a single color of thread to create a pattern?
Here, we’ll explore techniques that build depth, sophistication, and calm without adding a single bright hue. You’ll learn how to make your stitches feel as important as your color choices, transforming simple fabrics into pieces that are intentional, modern, and perfectly suited to a life that values both beauty and tranquility.
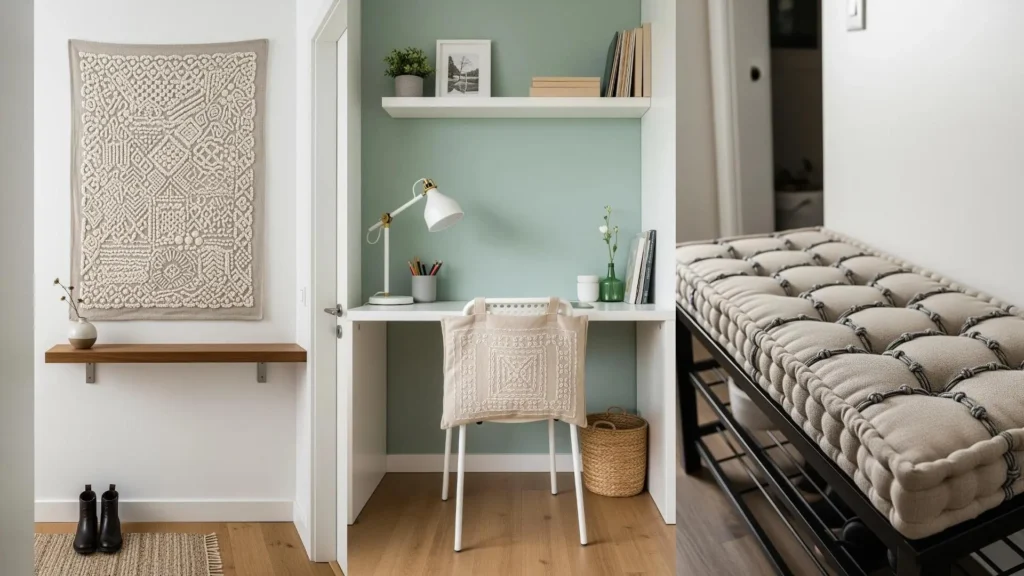
1. Add Sculptural Dimension with Couching
To create bold, raised lines without complex stitches, try couching.
Simply lay a thicker material, like cotton piping cord or bulky yarn, onto your fabric and use a standard six-strand floss in a matching color to tack it down with small, perpendicular stitches.
This technique adds immediate sculptural quality and is perfect for creating modern, graphic patterns on pillows and wall art.
The magic is in the texture, not the color, making it ideal for a serene, neutral palette.
2. Define Your Lines with a Heavier Thread
For clean, impactful outlines, switch from standard six-strand floss to a single strand of Perle cotton No. 8 or No. 5.
Its twisted ply gives it a beautiful, rope-like sheen that catches the light and defines the form with more authority.
Use a stem stitch or a whipped backstitch to create a perfectly smooth, uninterrupted line that gives your minimalist line art a professional, polished finish.
This is especially effective for graphic motifs like mountain ranges or architectural sketches.
3. Master Geometric Patterns with Precision
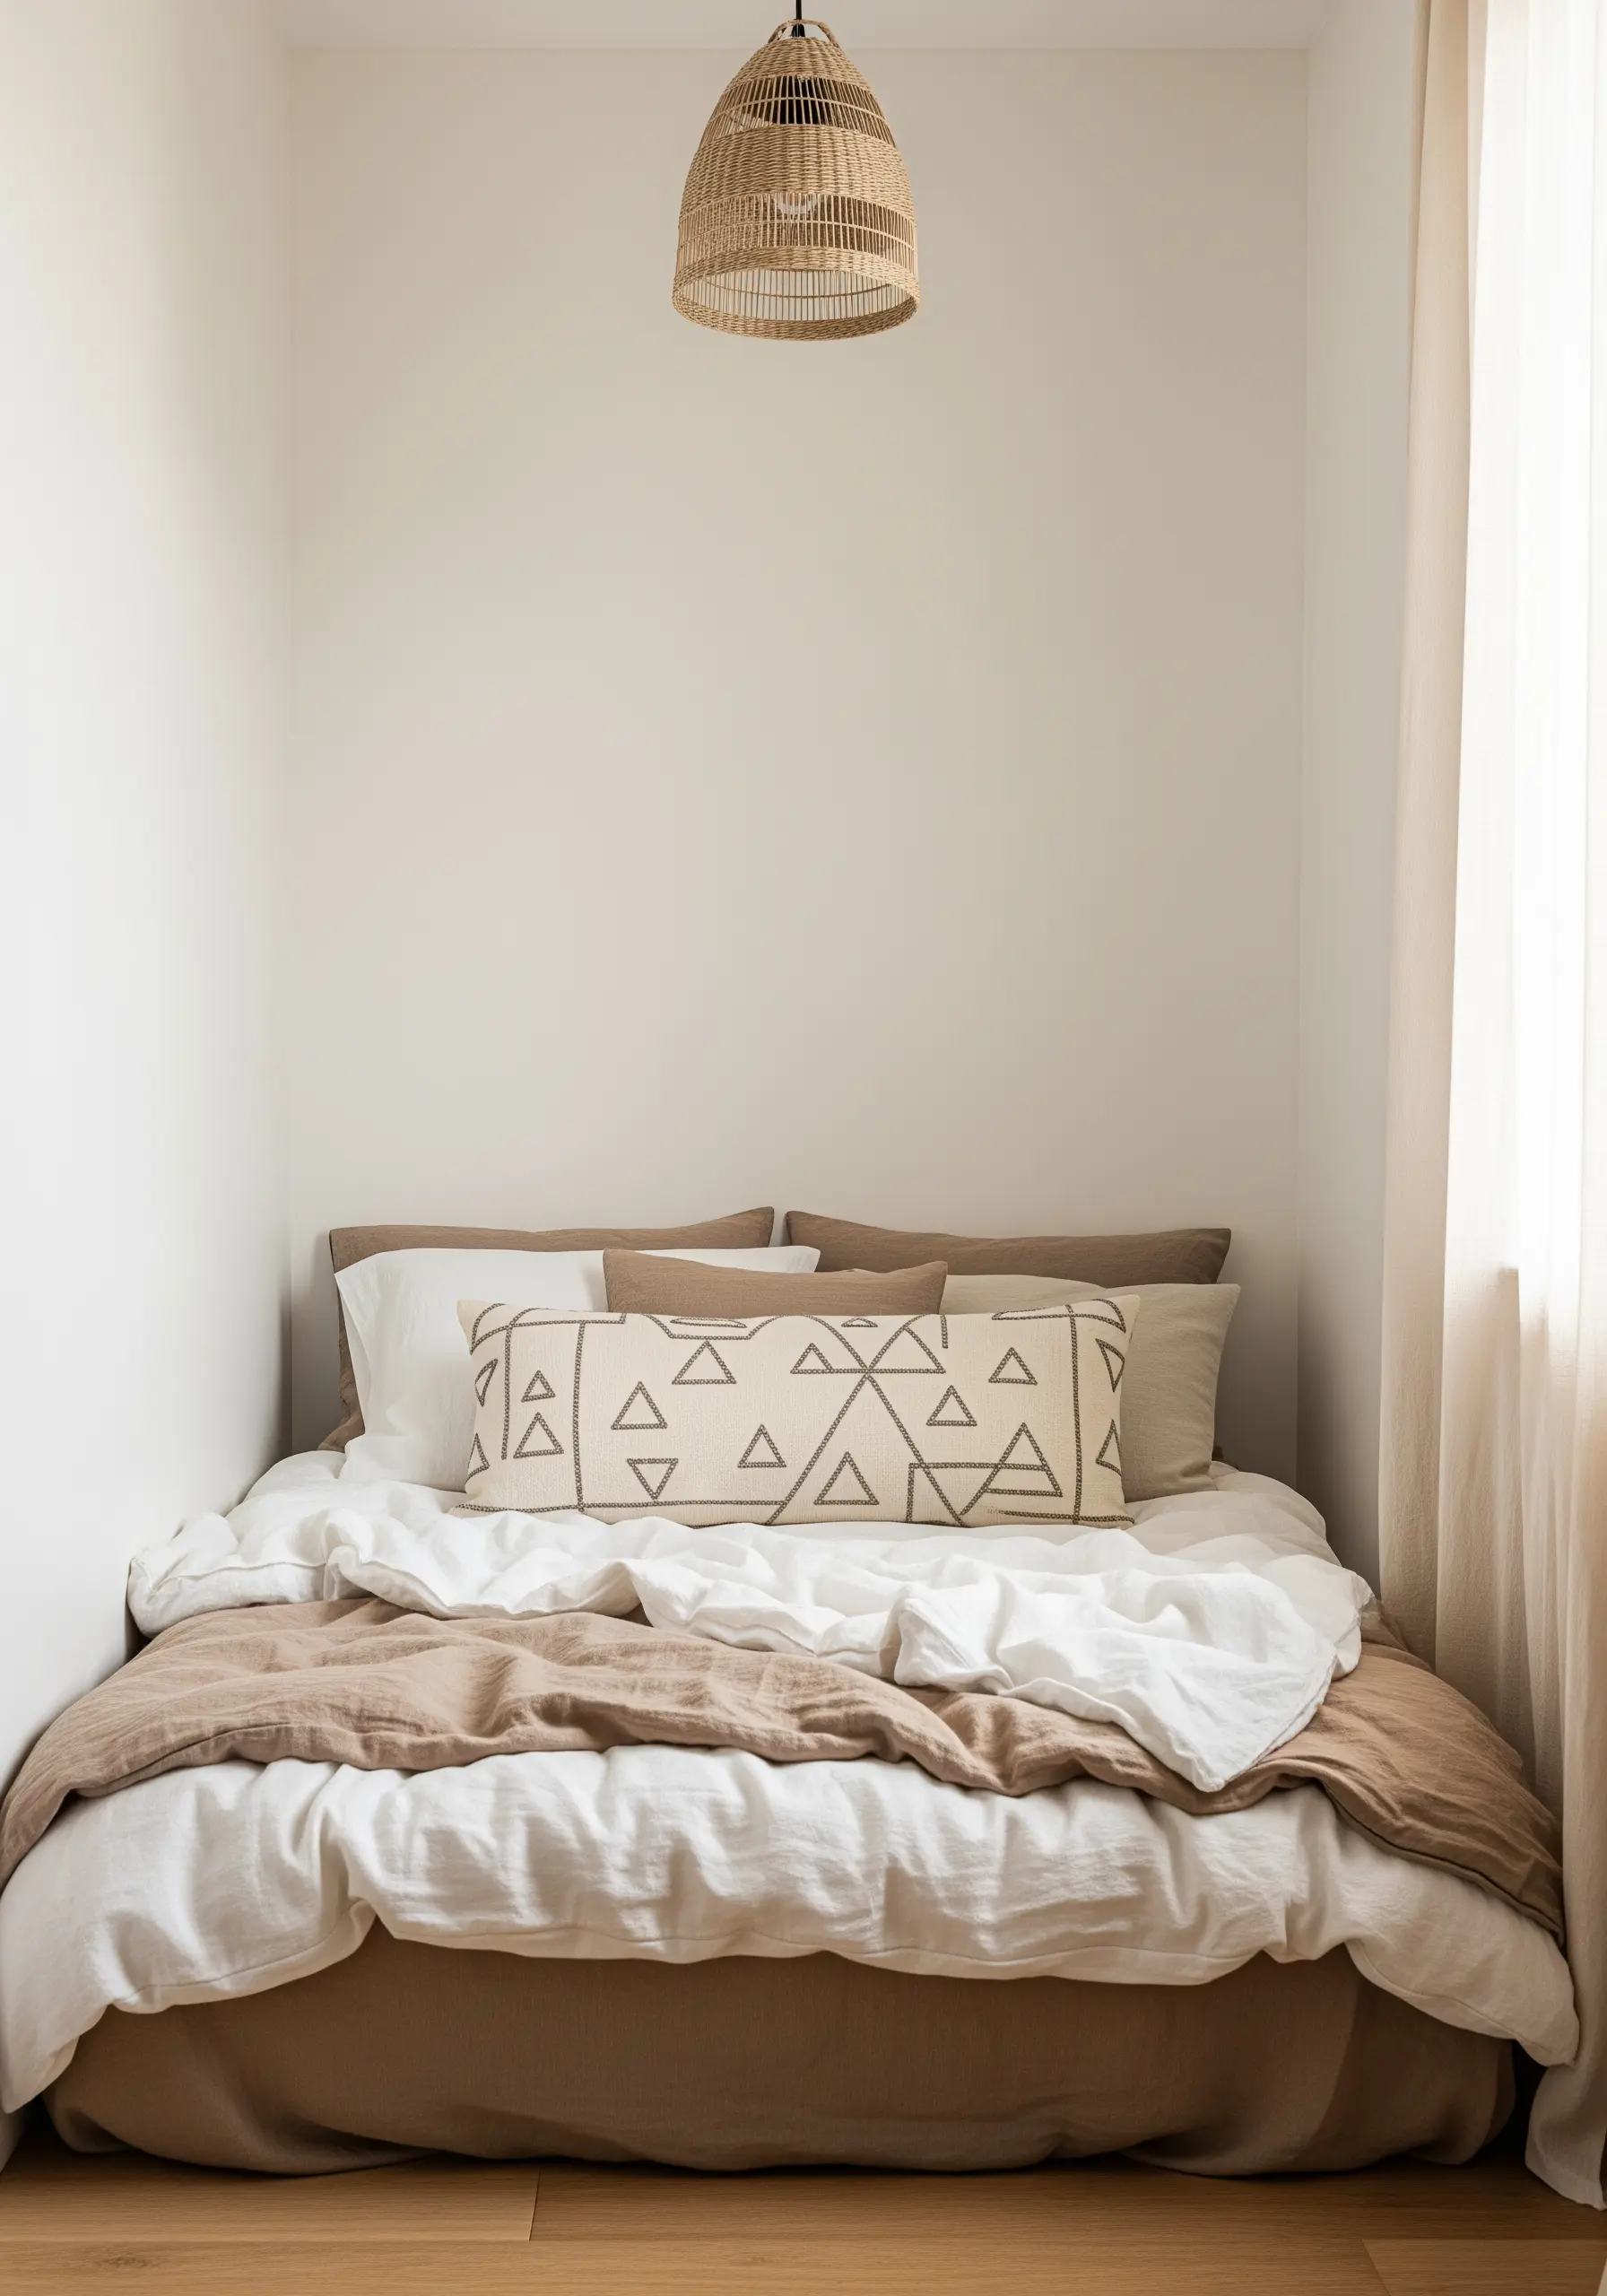
When stitching geometric designs, consistency is everything.
Use a water-soluble transfer pattern or a heat-erasable pen to ensure your lines are perfectly straight and your angles are sharp.
A simple running stitch or backstitch works beautifully, but the key is to keep your stitch length uniform throughout the entire piece.
Stitching with a thread just a few shades darker than your fabric creates a subtle, sophisticated pattern that adds structure without overwhelming the eye.
This simple adjustment can turn boring pillowcases into boutique home decor.
4. Create Large-Scale Texture with Punch Needle
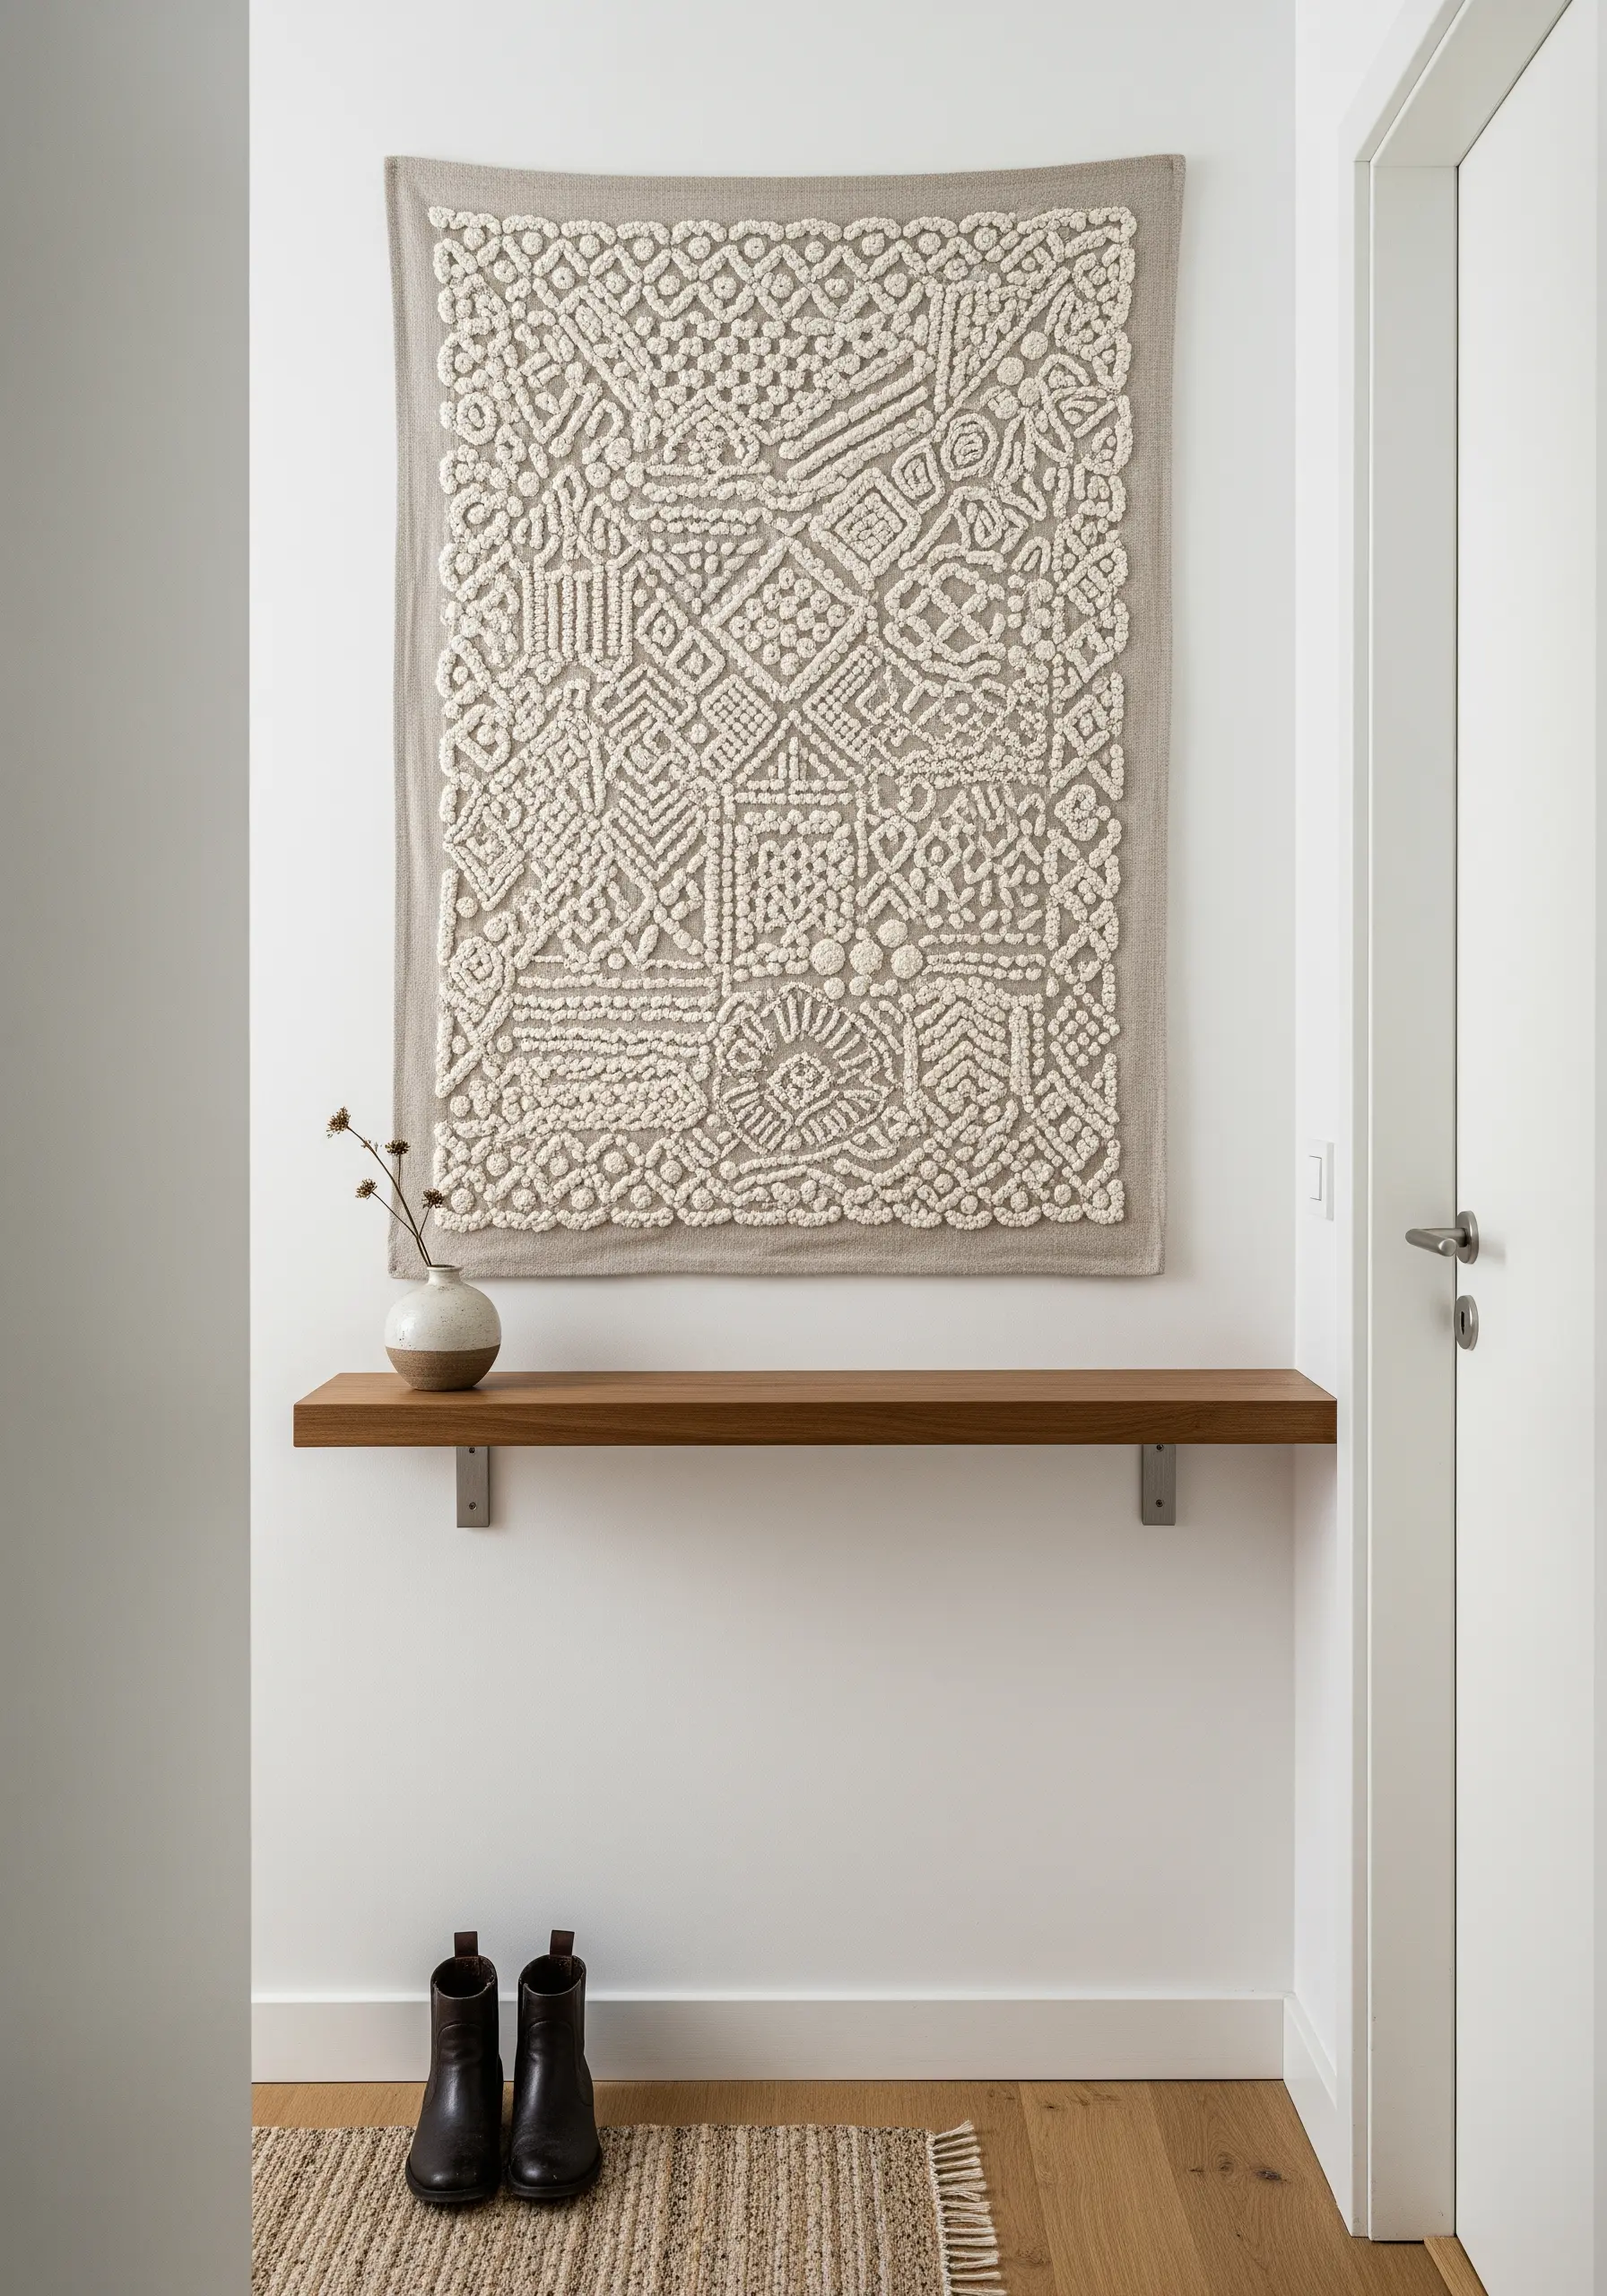
For a piece with major textural impact, punch needle is your fastest route to a lush, plush surface.
Instead of focusing on intricate details, let the density of yarn loops become the art itself.
Use a single color of chunky wool or cotton yarn on a monk’s cloth backing to create an abstract, tactile tapestry.
By varying the loop height—a simple adjustment on your tool—you can create subtle shadows and depth, adding another layer of interest to your monochrome design.
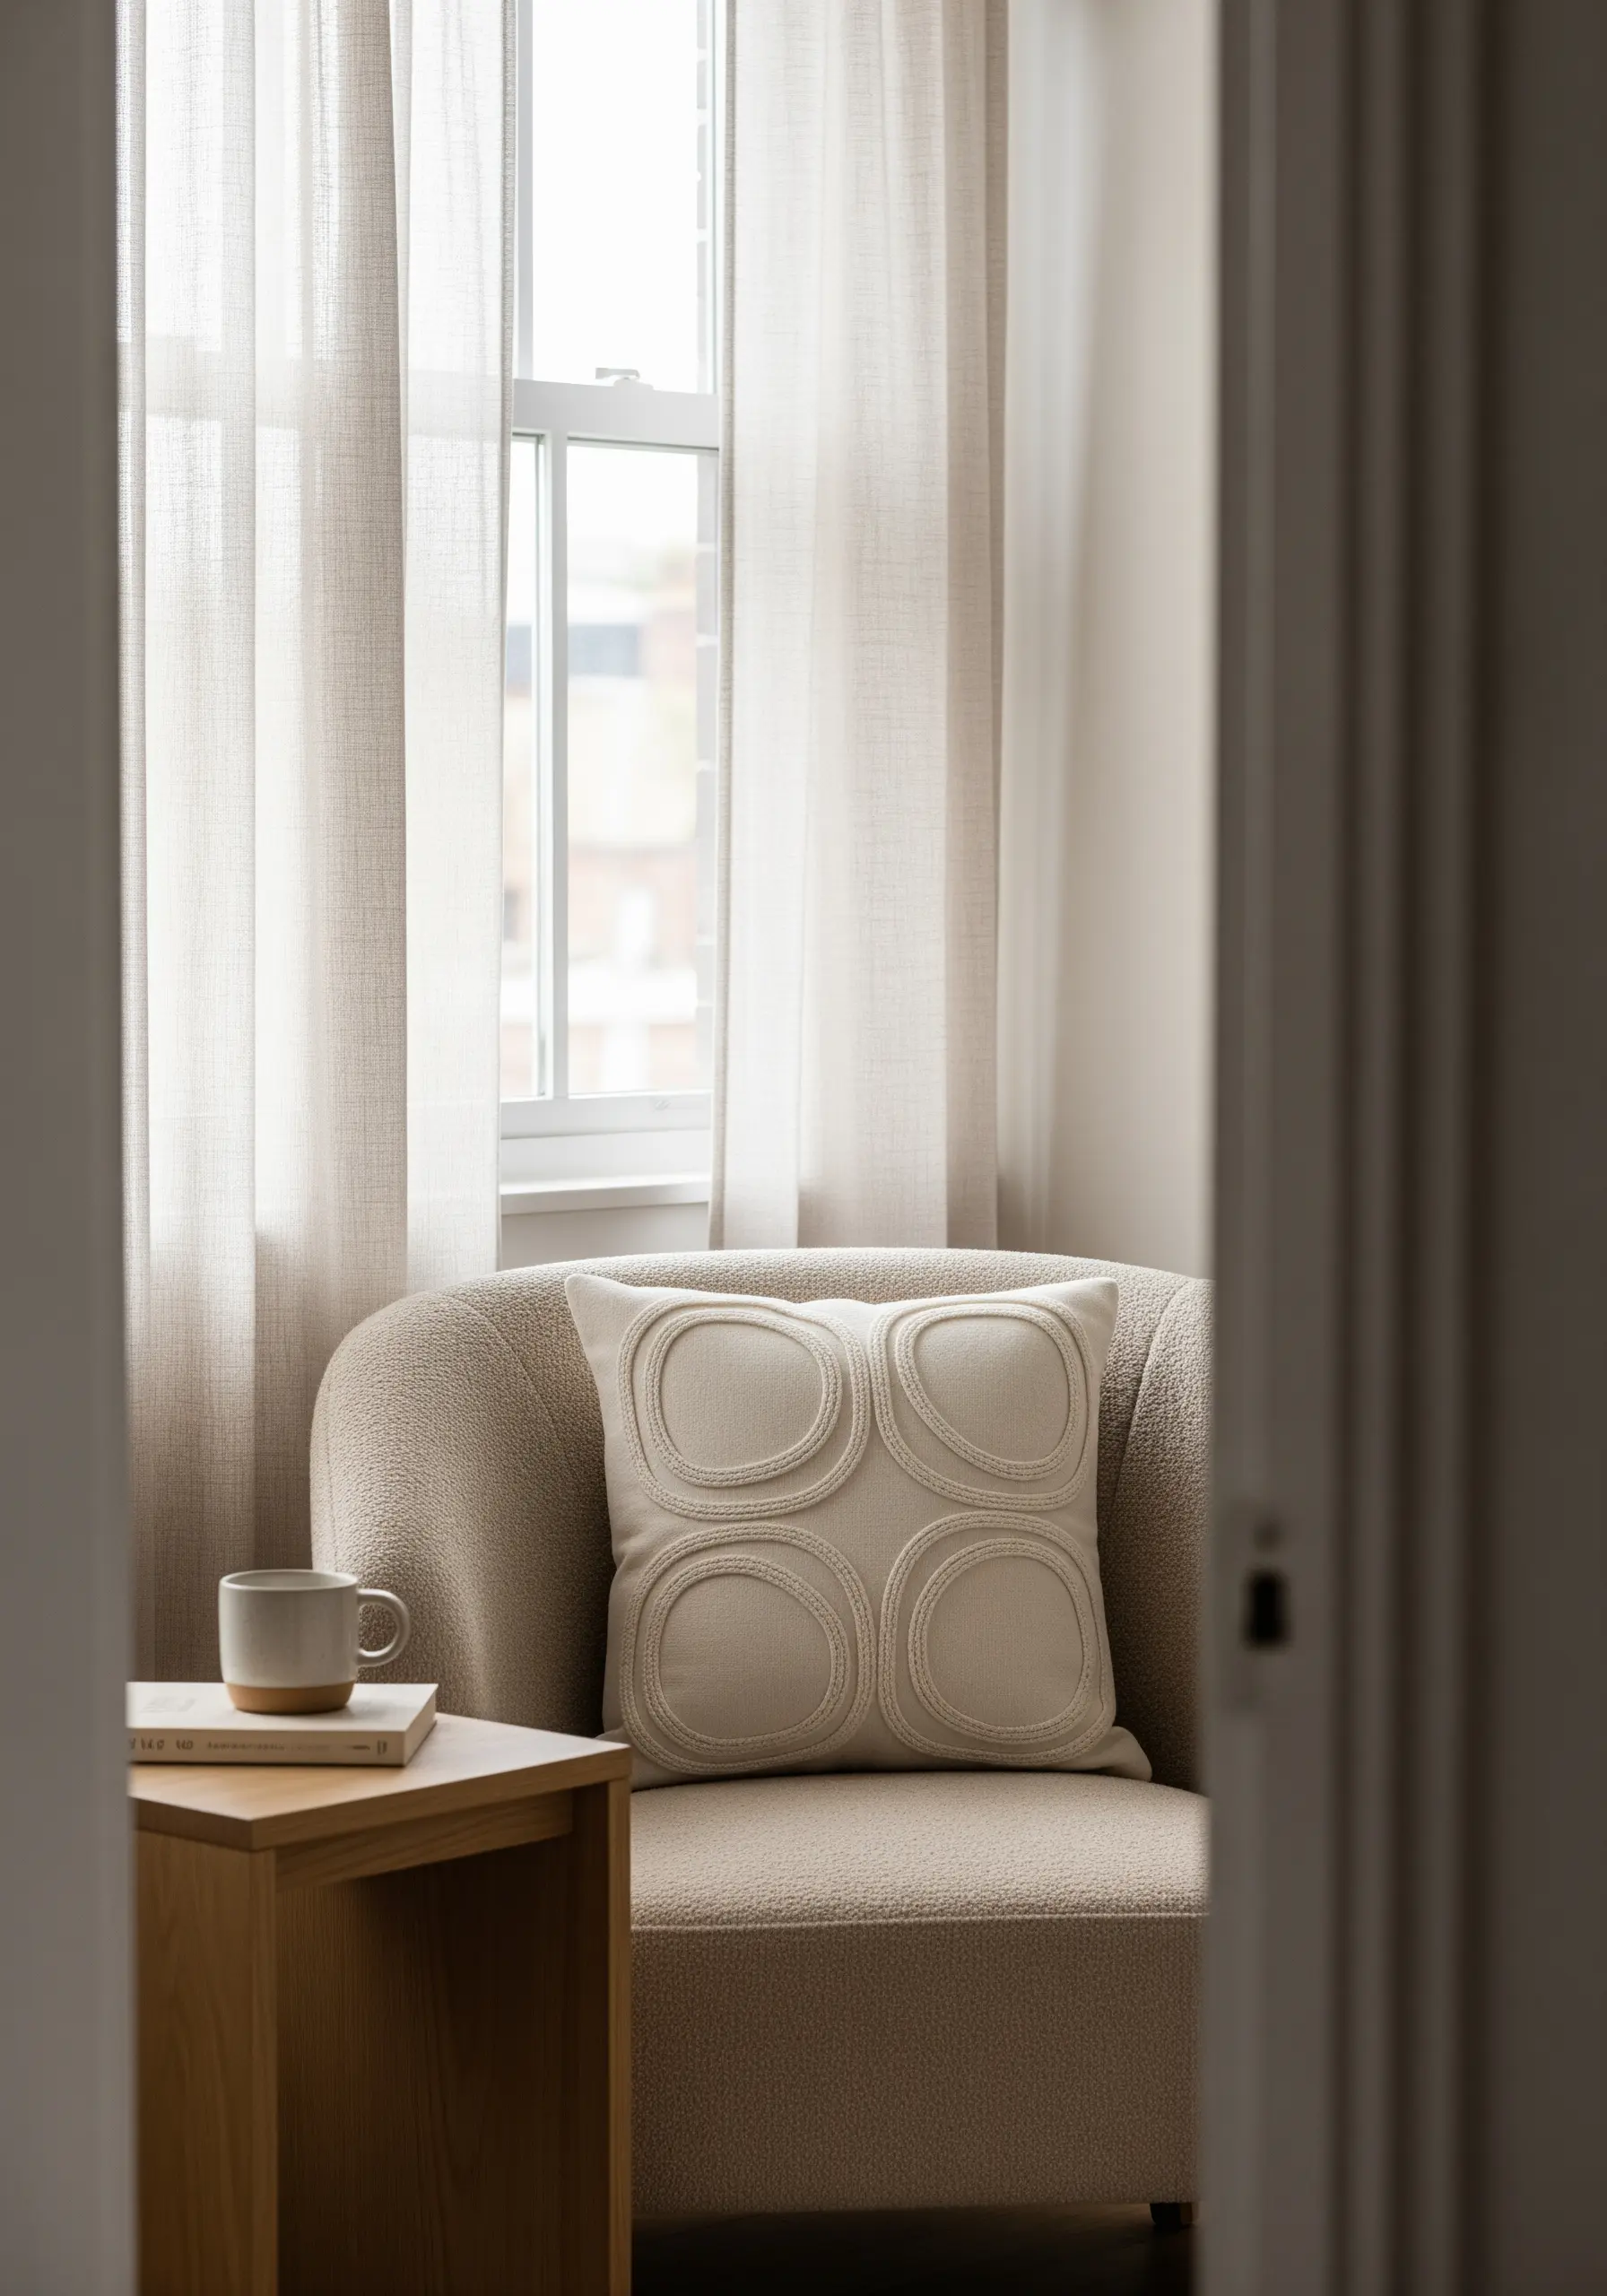
5. Use High-Contrast Thread on Muted Linen
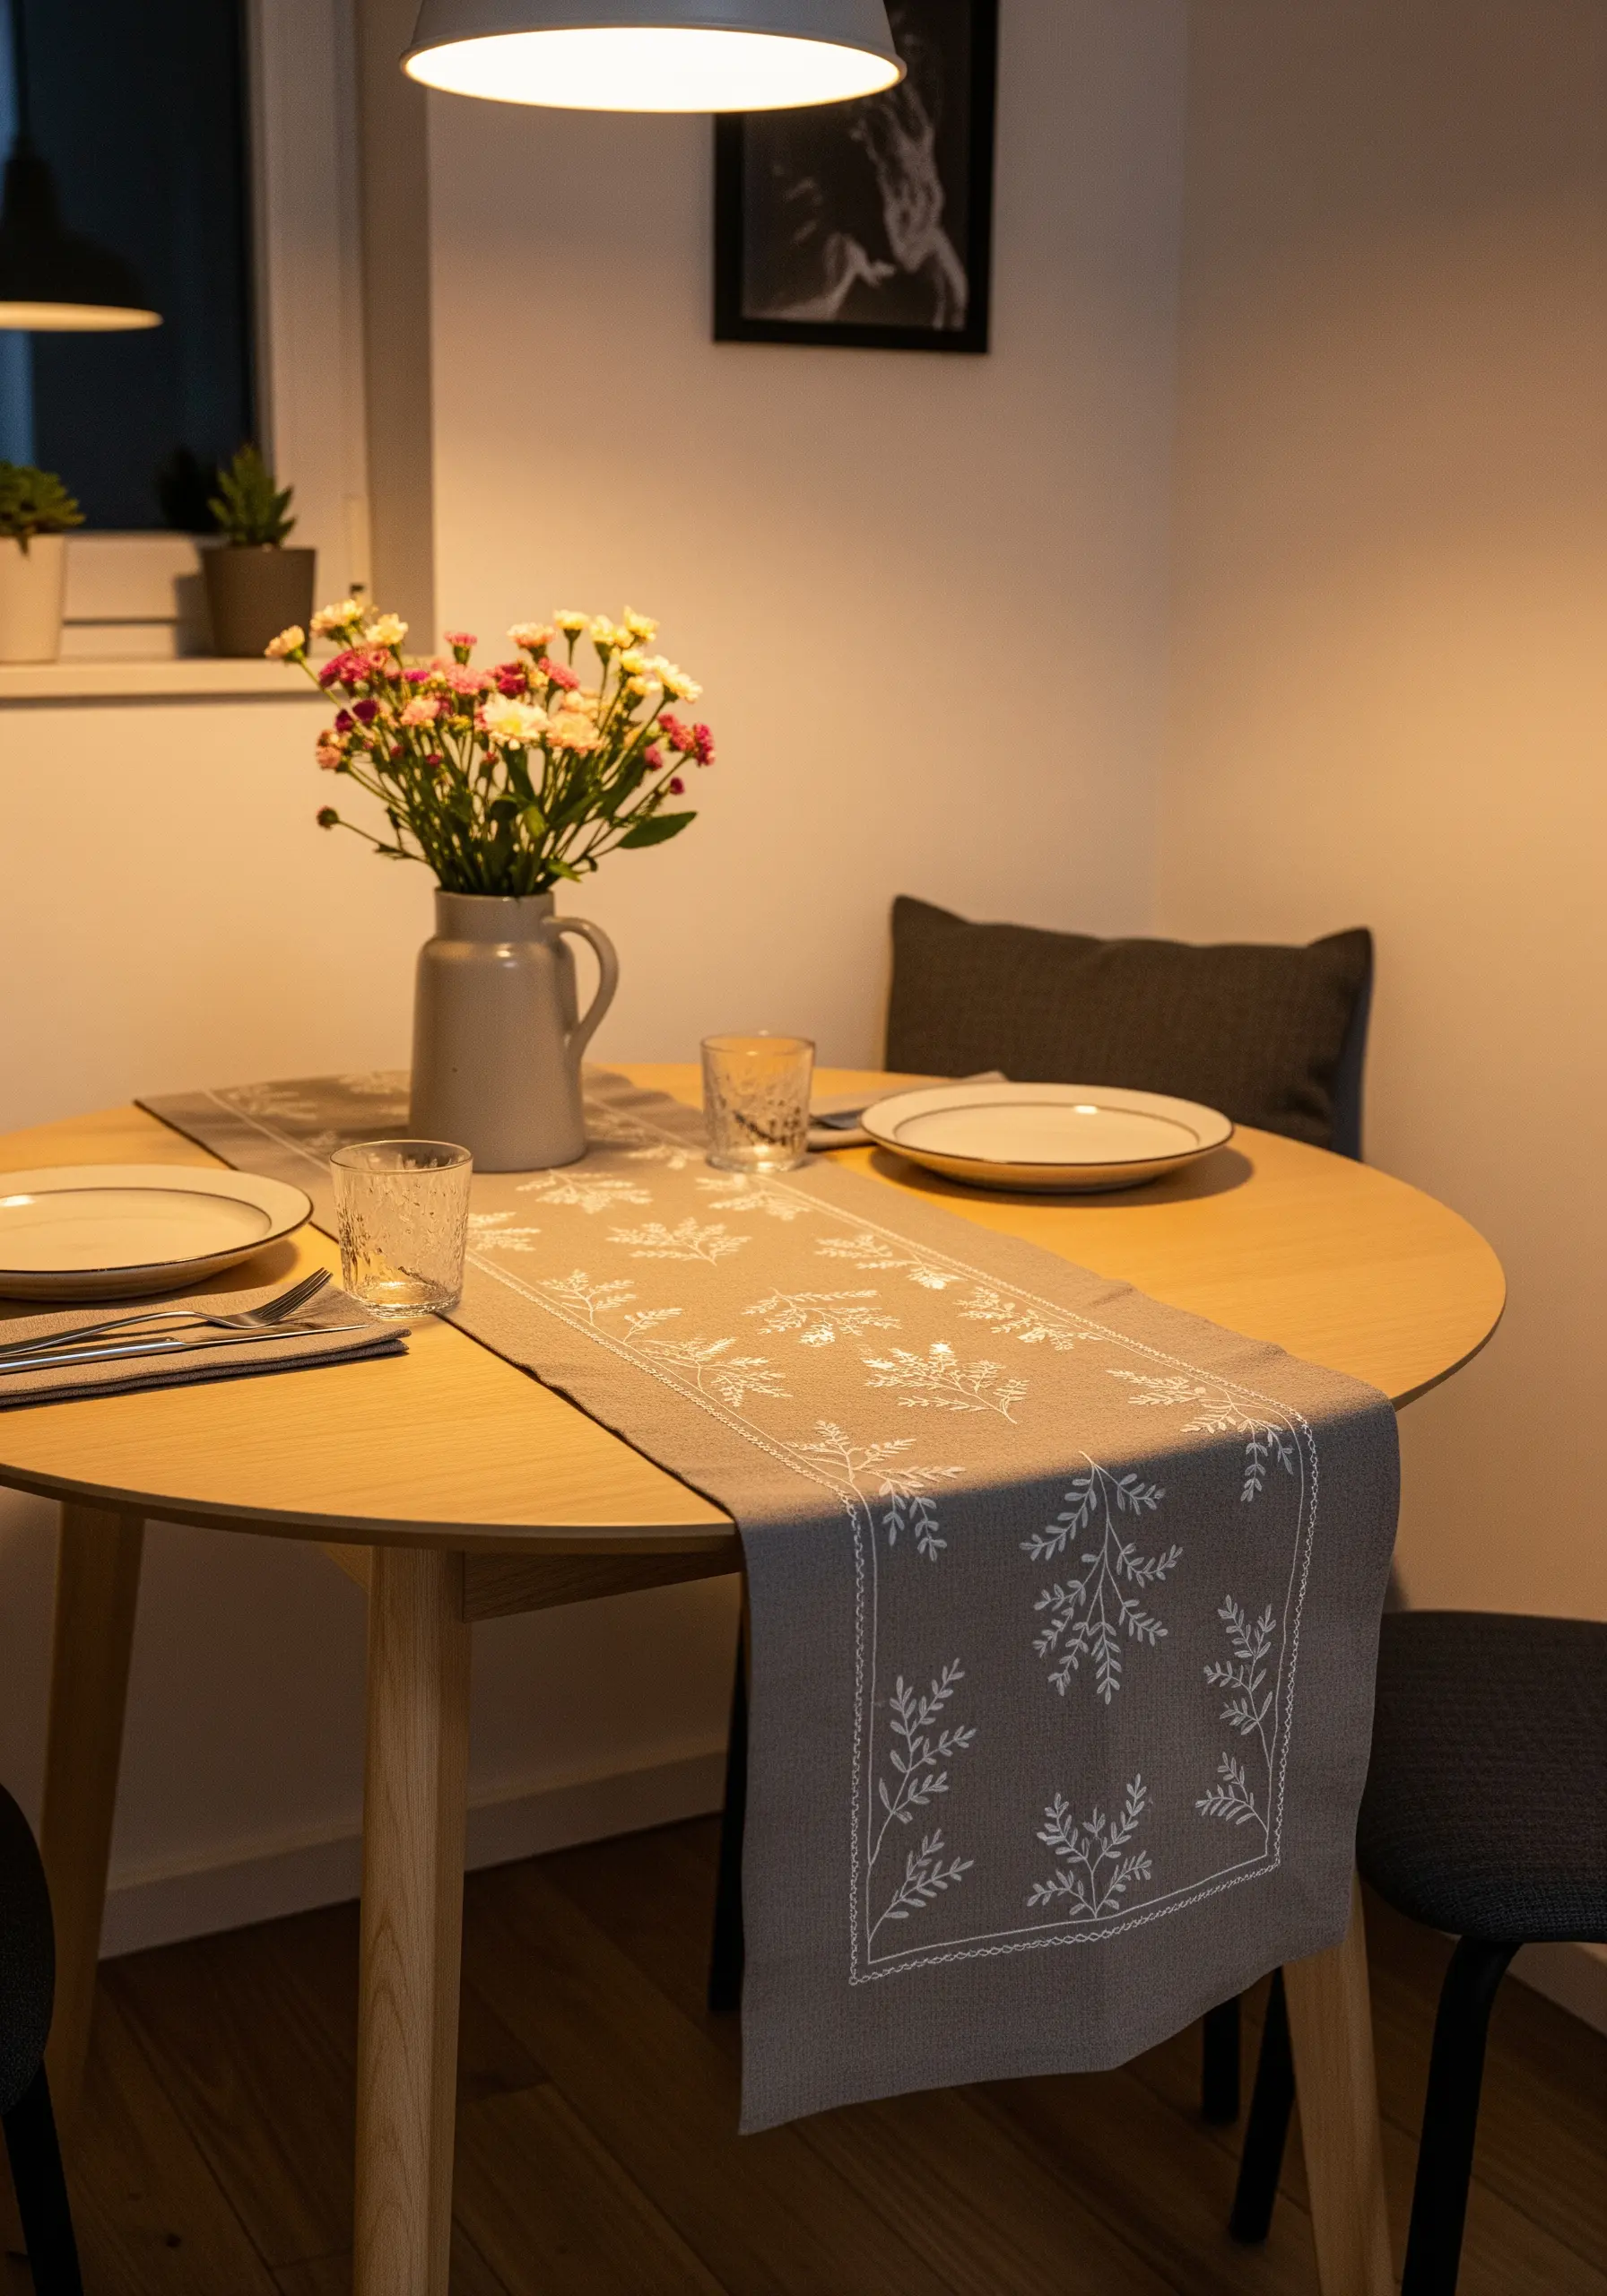
Make delicate botanical motifs stand out by stitching them in a crisp, bright white or deep charcoal on a mid-tone linen fabric.
The natural texture of the linen provides a soft, organic backdrop, allowing the clean lines of your stem stitches and lazy daisies to pop.
This contrast creates a look that is both fresh and timeless, turning a simple piece into one of those hand-stitched table runner embroidery designs that look expensive but are beginner-friendly.
Pay attention to negative space; a sparse, well-placed design often feels more elegant than a crowded one.
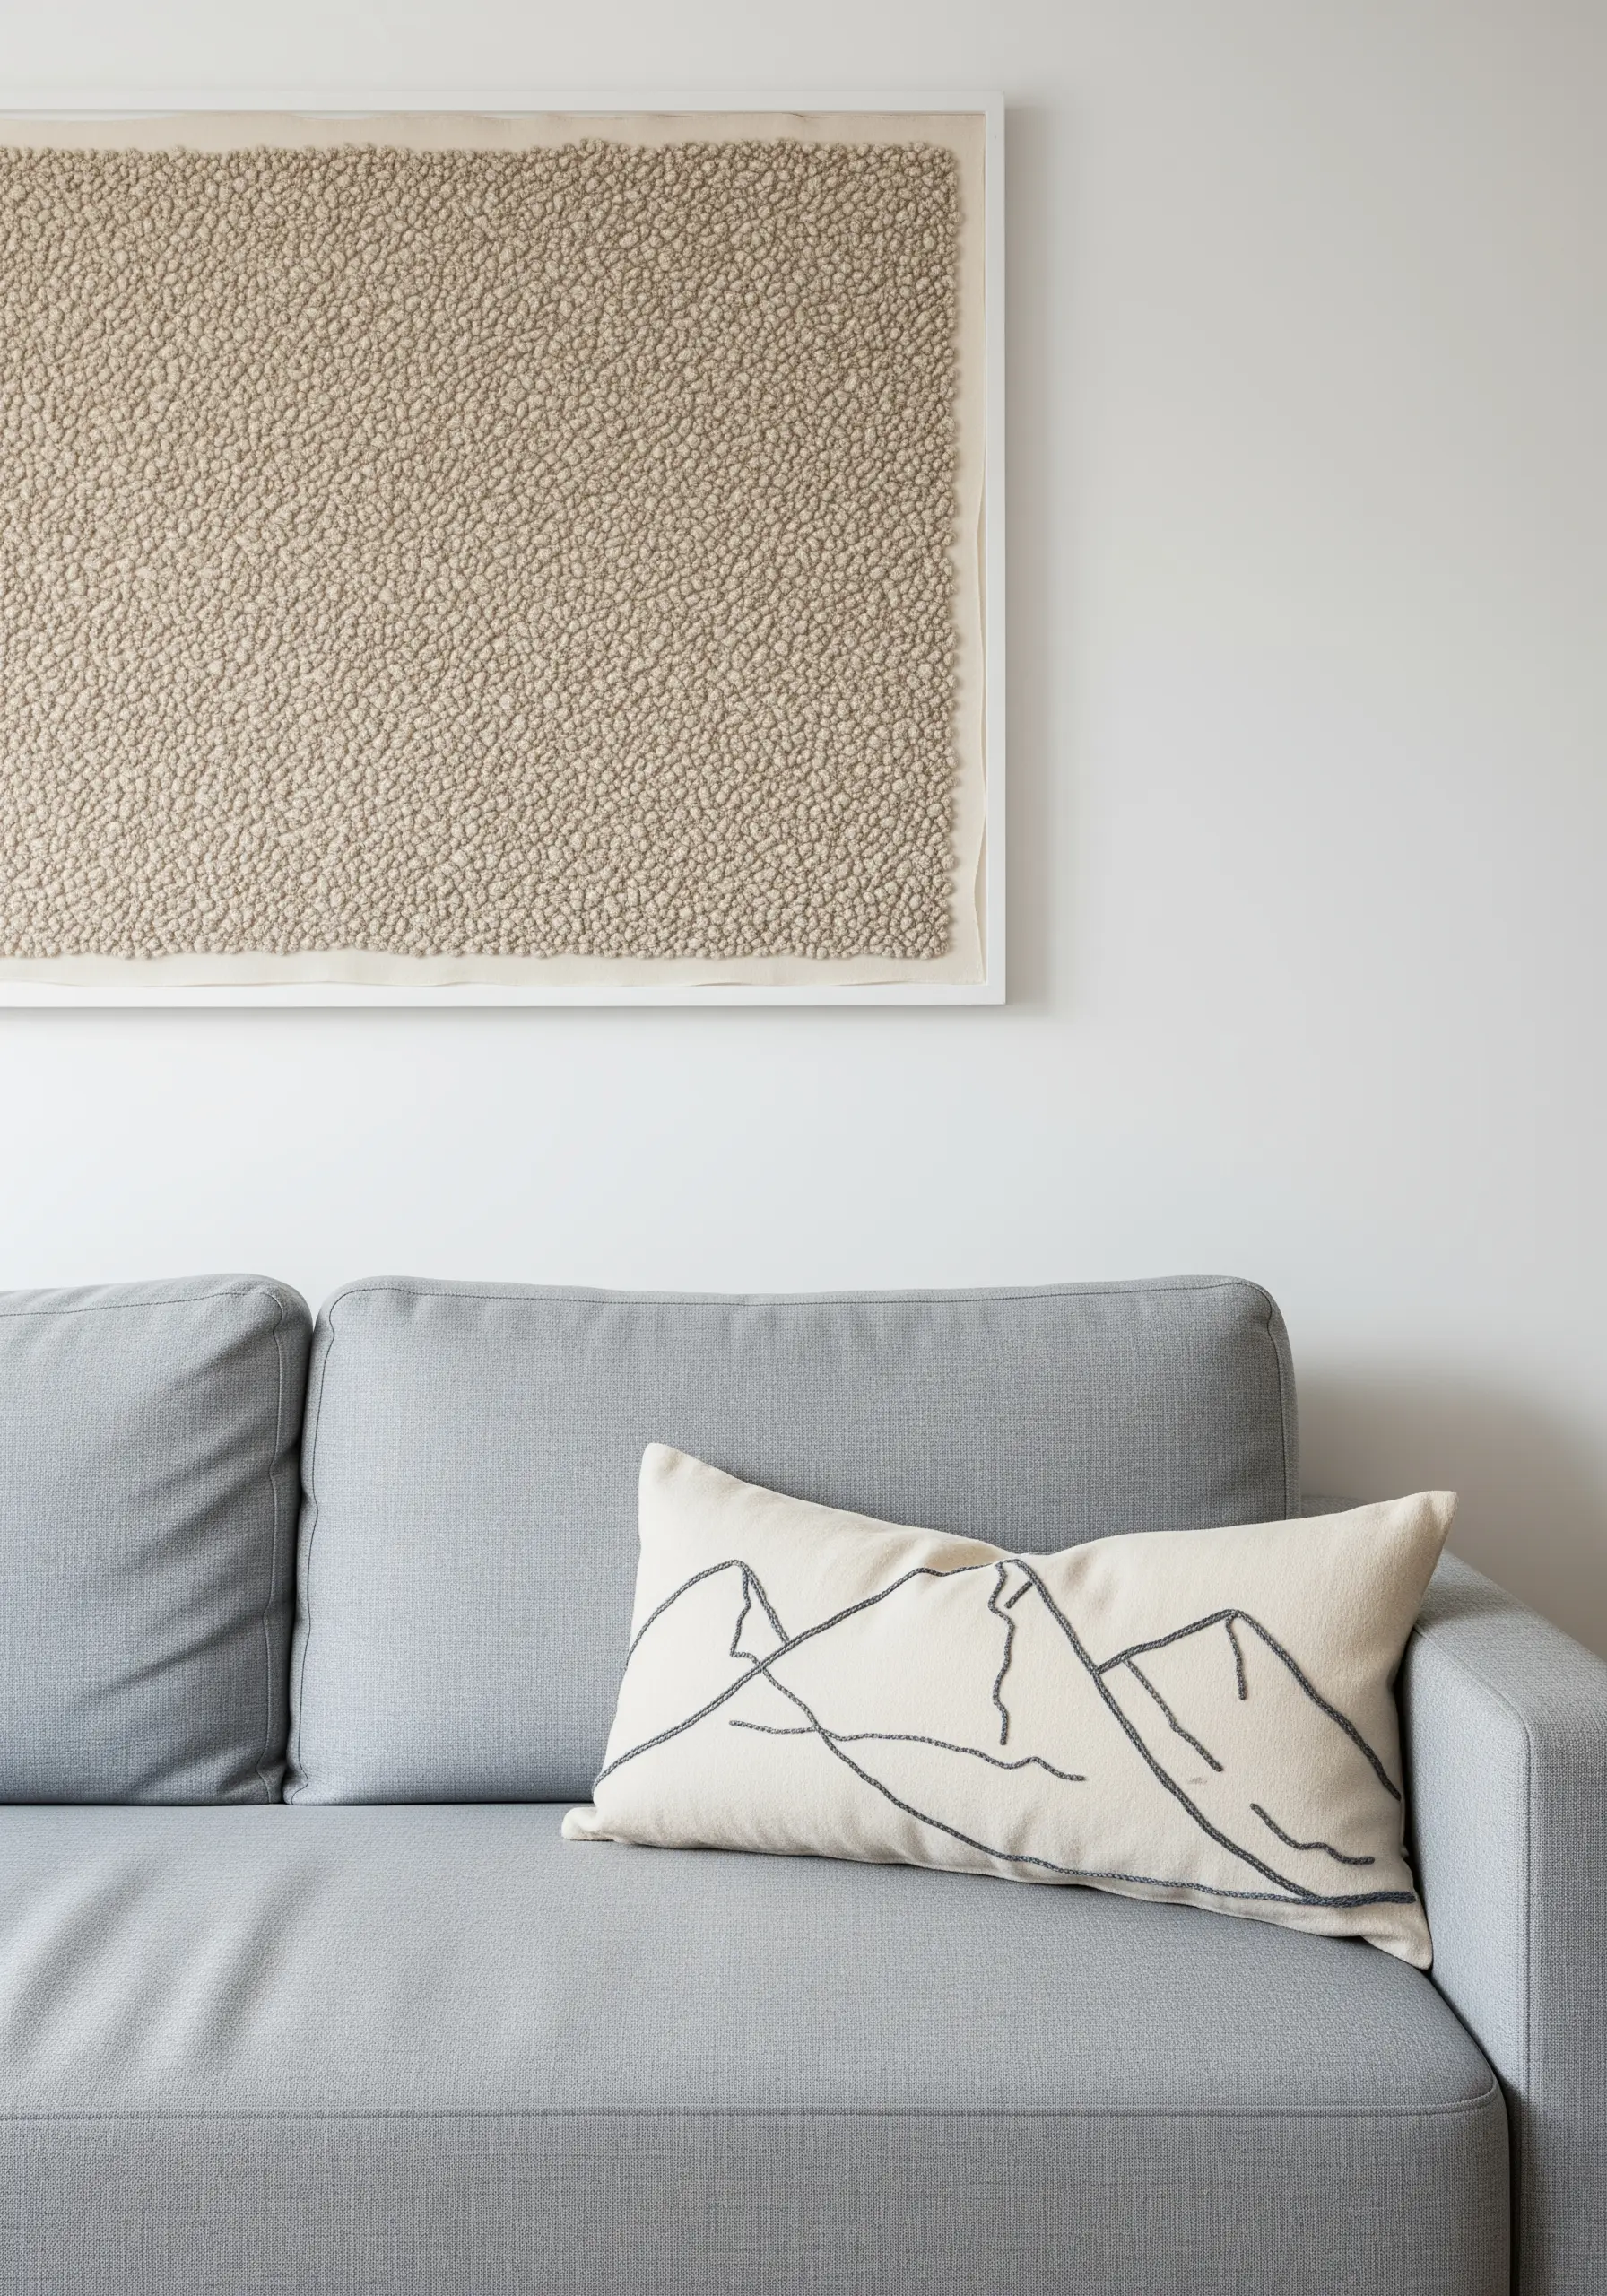
6. Build Visual Rhythm with Repetitive Stitches
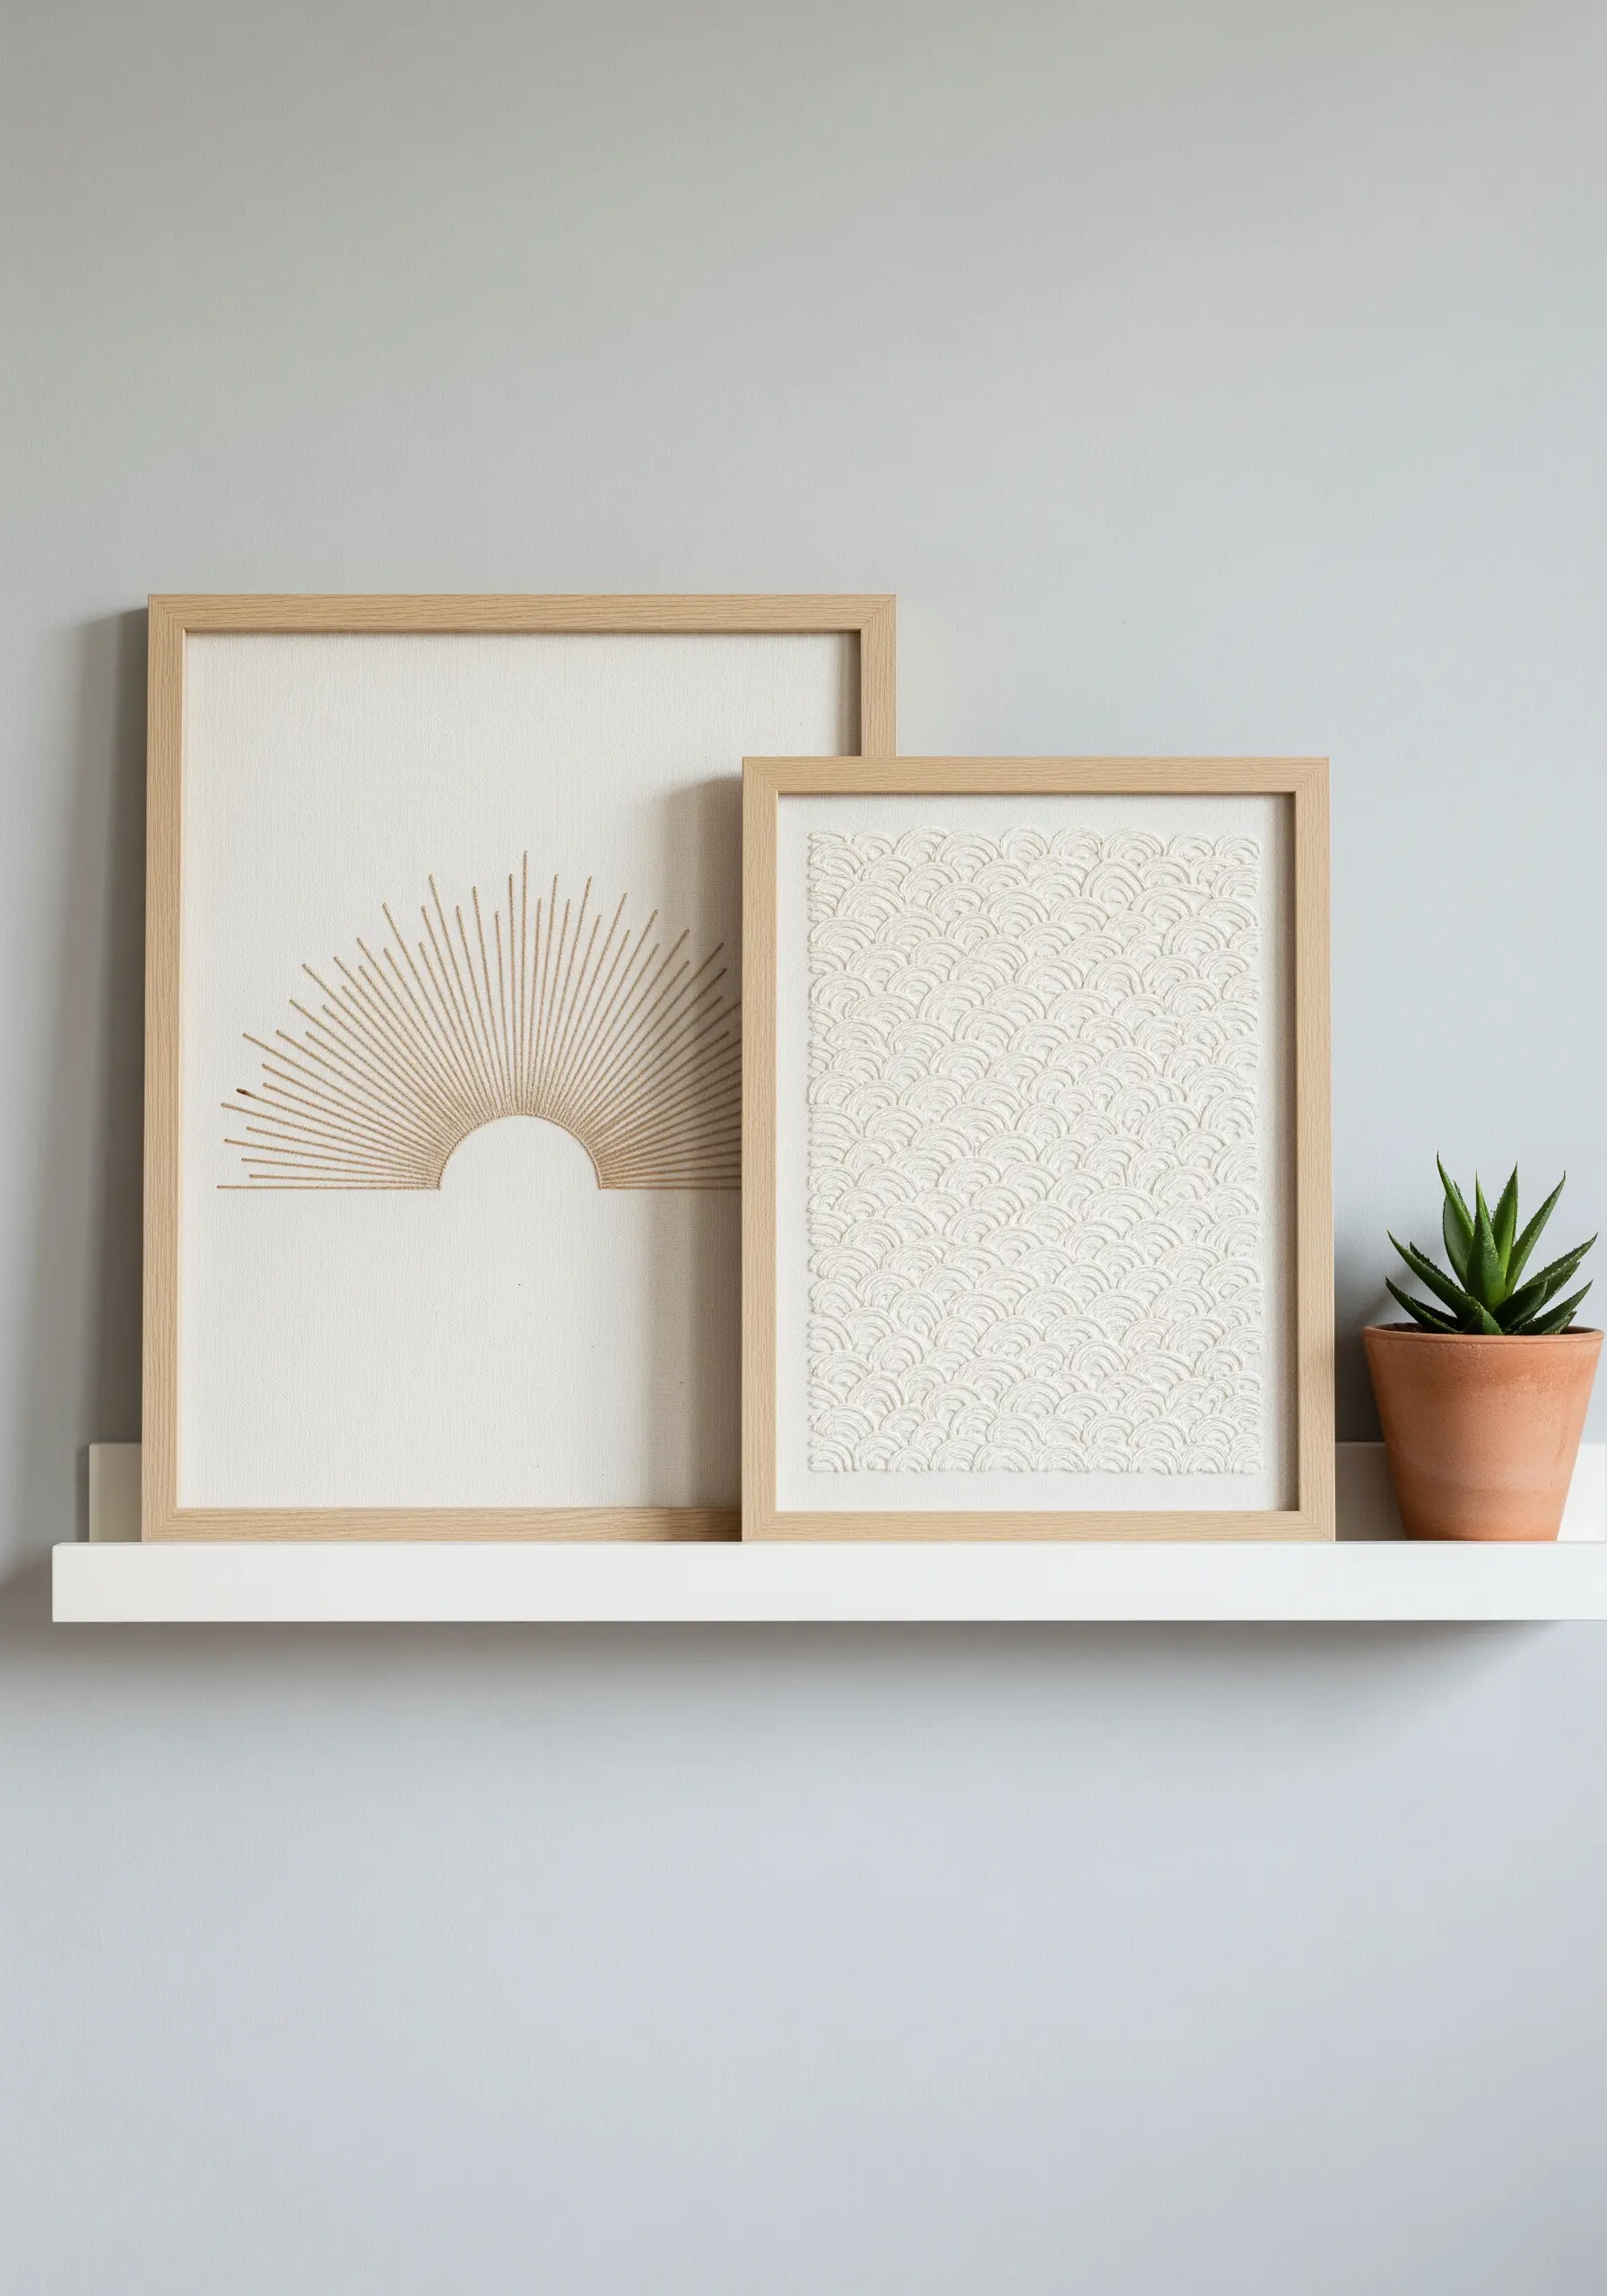
Transform a simple straight stitch or backstitch into sophisticated wall art through the power of repetition.
Create a sunburst with radiating straight stitches of varying lengths, or a wave pattern with rows of perfectly spaced backstitches.
When working tone-on-tone, the texture and the shadows cast by the thread become the design.
This technique relies on precision and consistency, turning the meditative act of stitching into a powerful visual statement and creating minimal embroidery wall designs that make your living room instantly cozy.
7. Stabilize Your Stitches on Knitted Textiles
Embroidering on a stretchy or heavily textured knit requires stabilization to prevent your stitches from sinking or warping the fabric.
Apply a layer of water-soluble or tear-away stabilizer to the surface before you begin stitching your monogram or design.
This creates a smooth, firm foundation that holds your stitches neatly on top of the knit structure.
Once you are finished, the stabilizer is removed, leaving behind a clean, professional-looking embellishment that feels perfectly integrated.
8. Choose Durable Stitches for Functional Decor
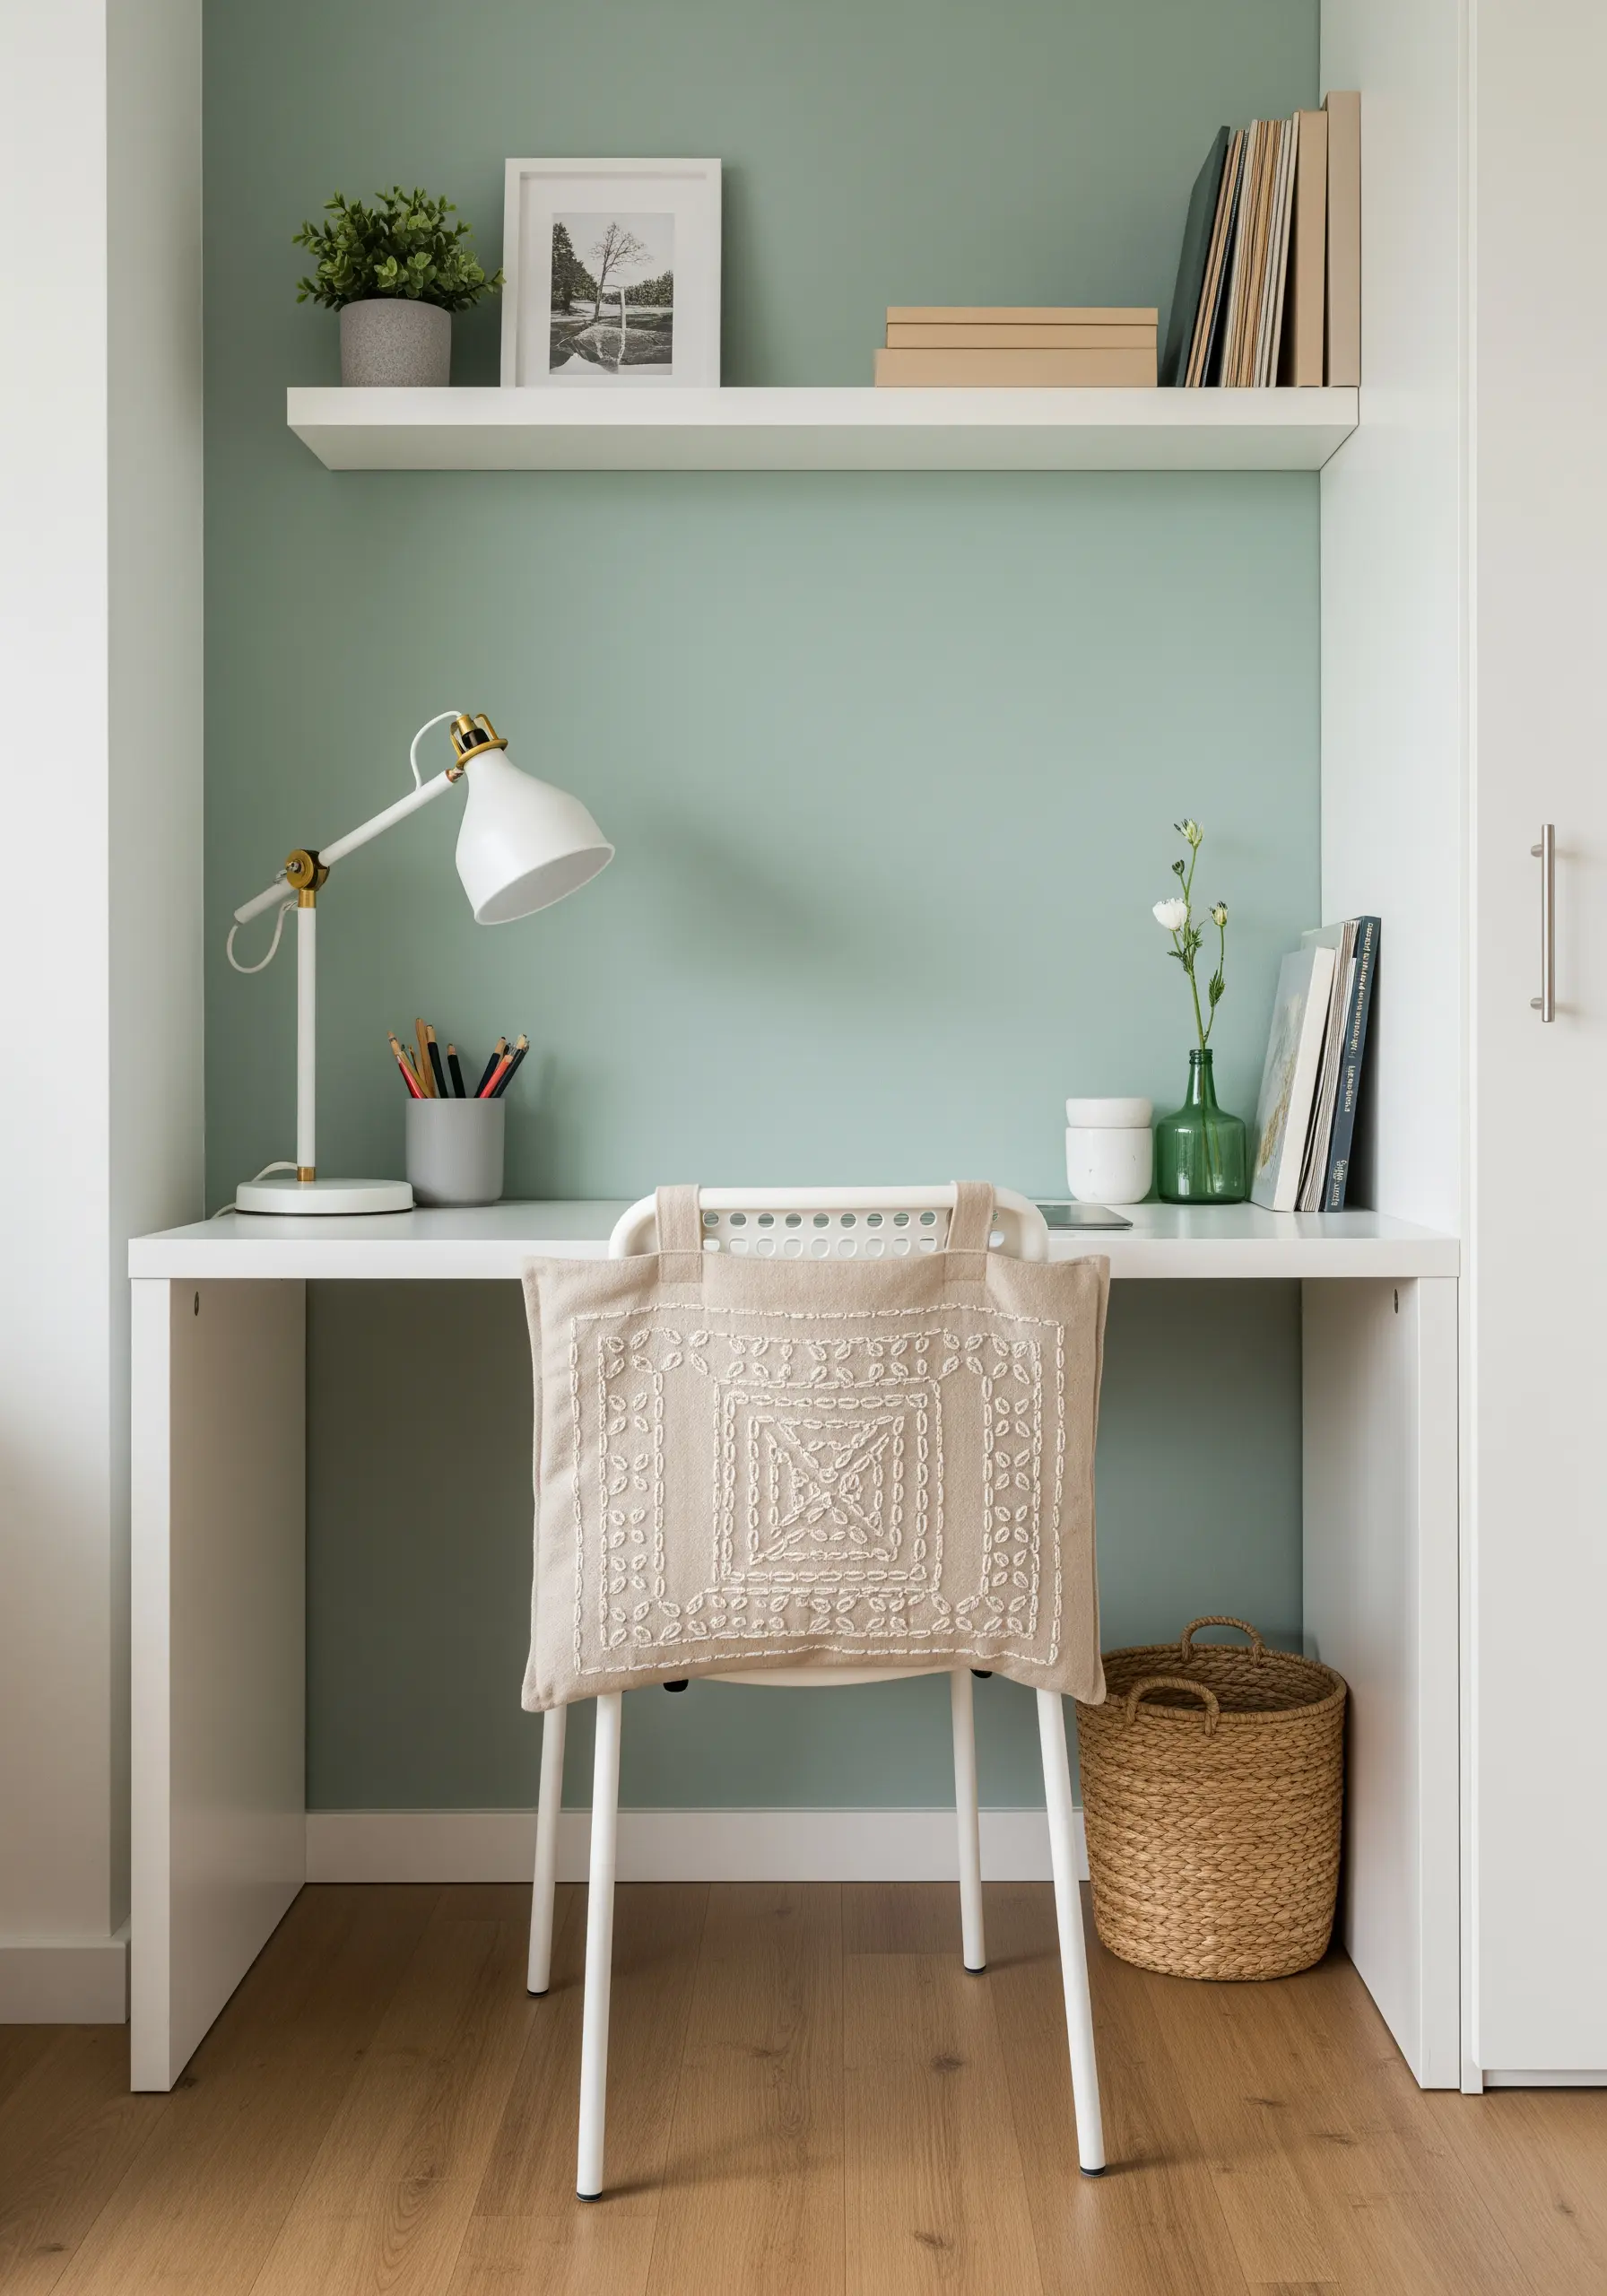
When embroidering pieces that will see daily use, like a chair cushion, durability is as important as aesthetics.
Opt for dense, robust stitches like a padded satin stitch or a tight chain stitch fill.
Using all six strands of cotton floss or a sturdy Perle cotton will ensure your work withstands friction and wear.
A tone-on-tone color scheme allows the rich texture of these durable stitches to be the main focus, creating handmade accents that look professional and last.
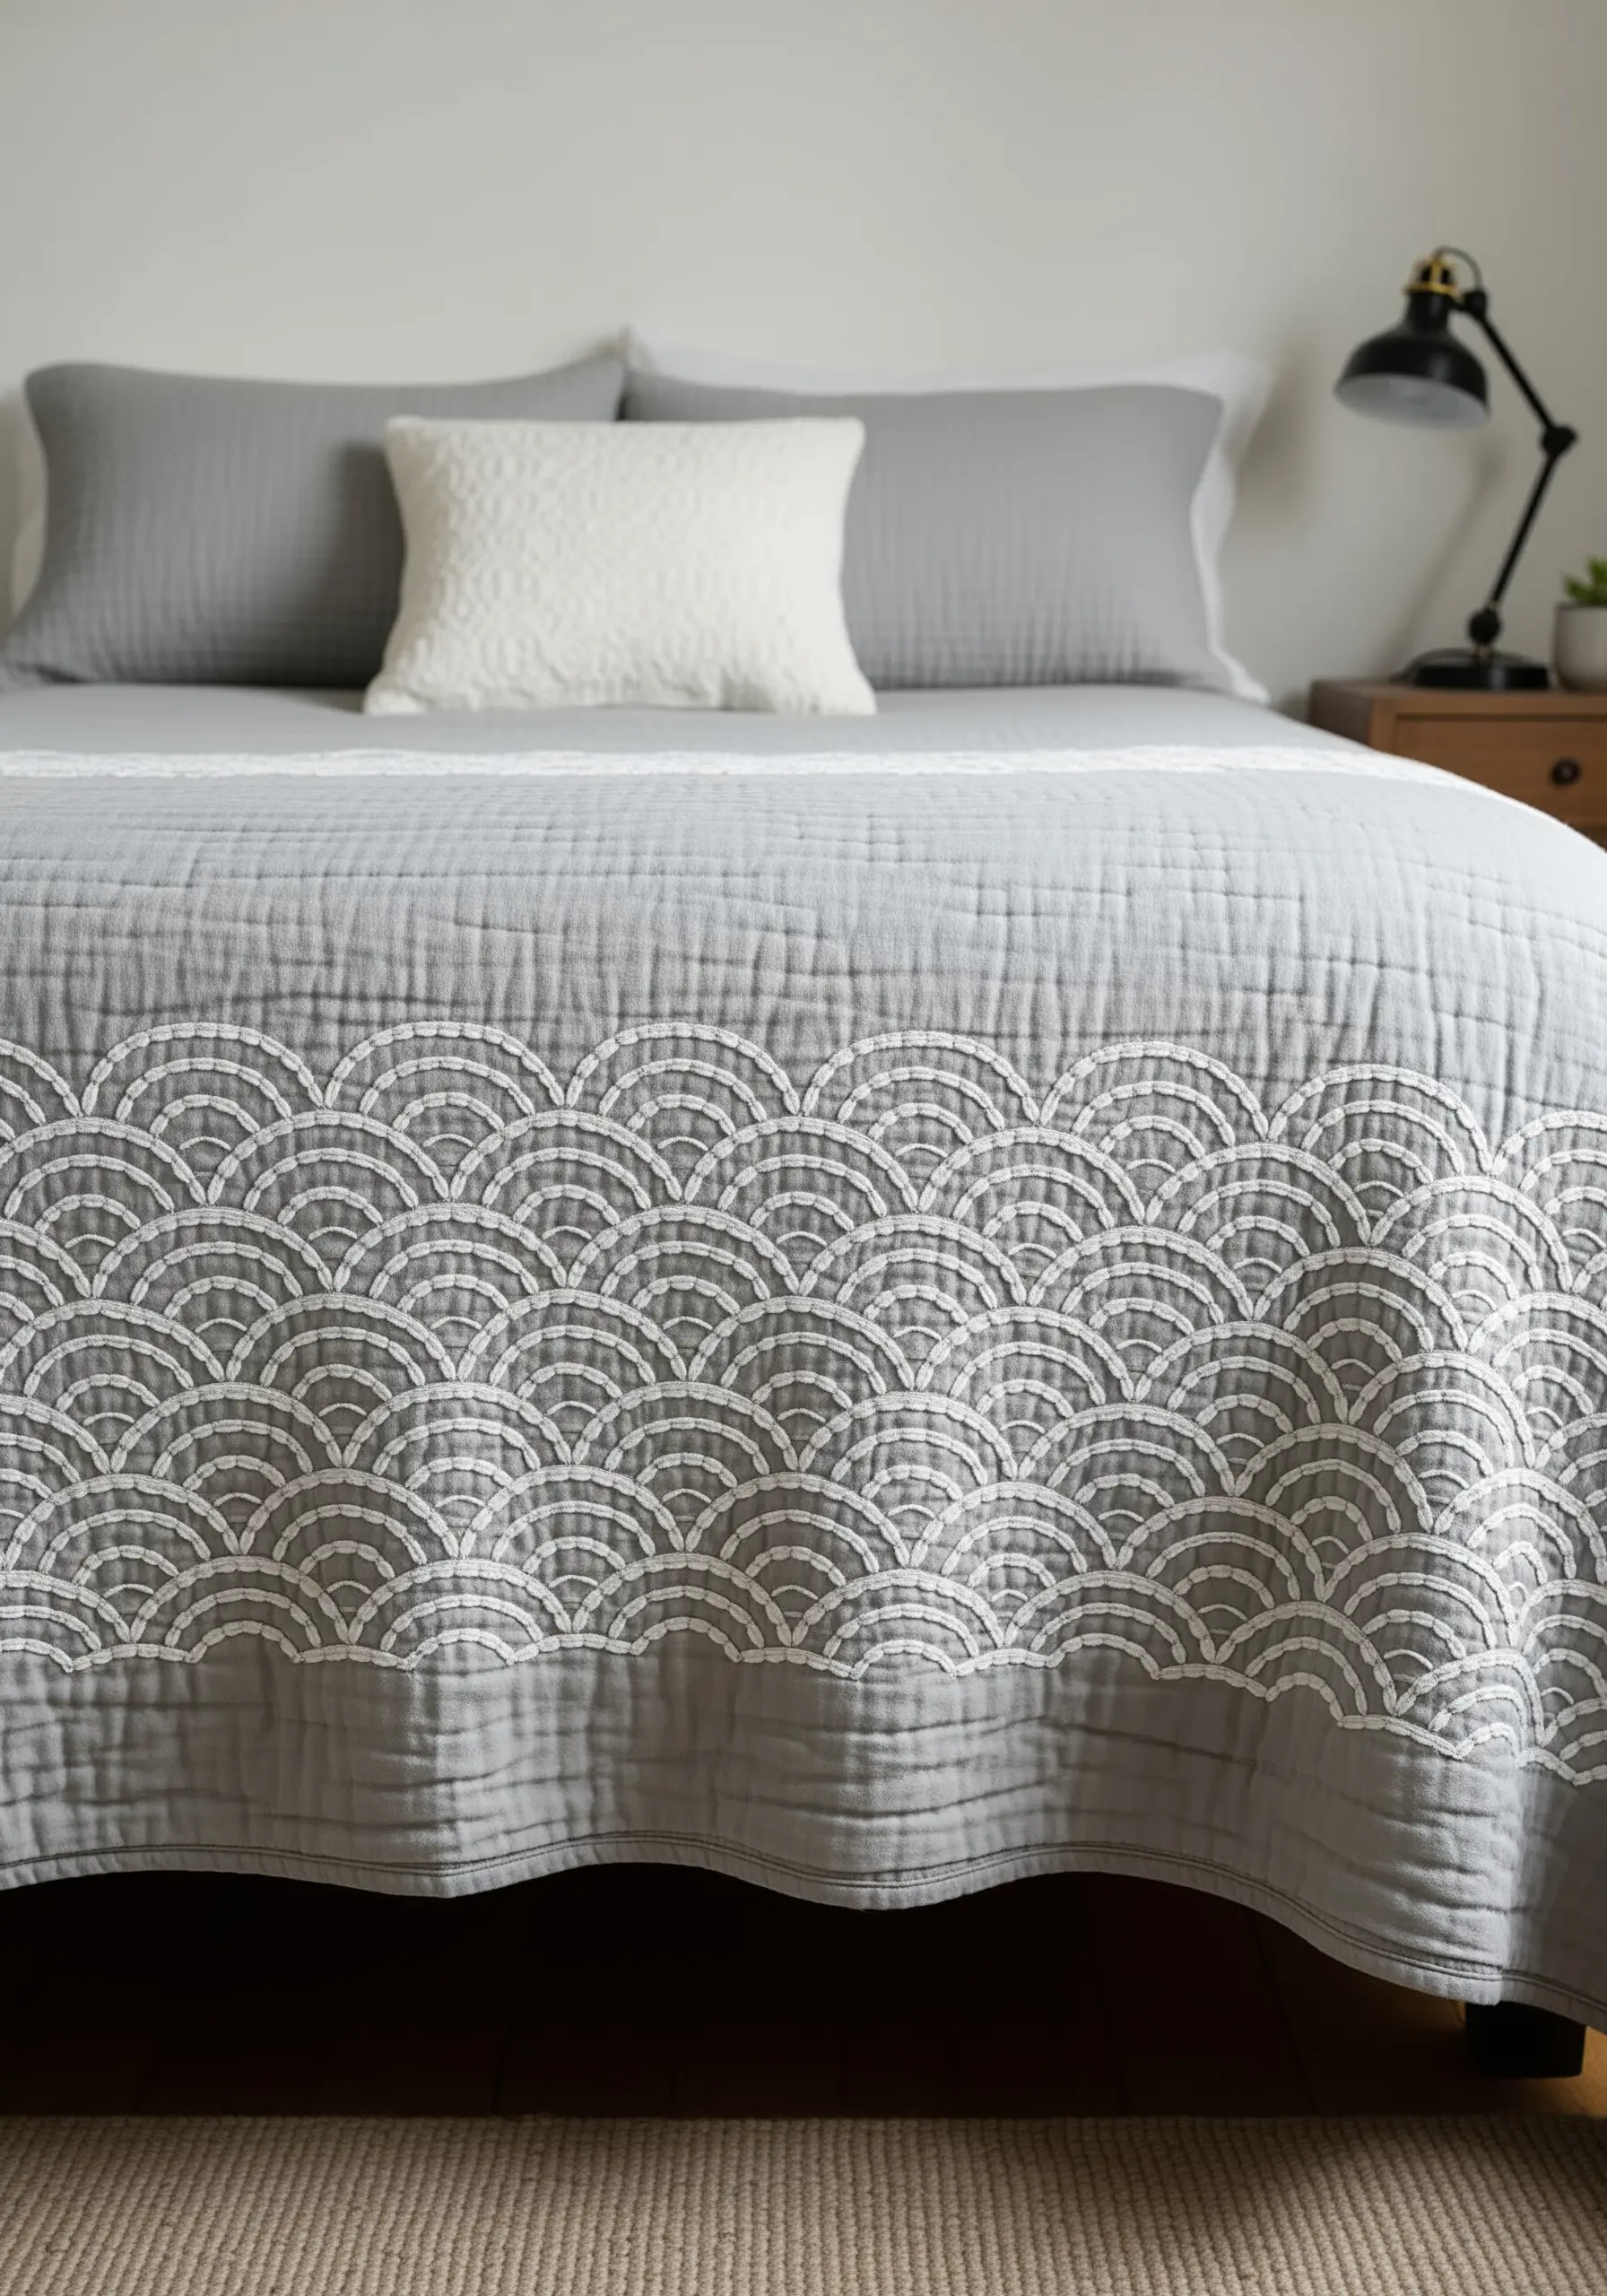
9. Elevate Bed Linens with a Delicate Border
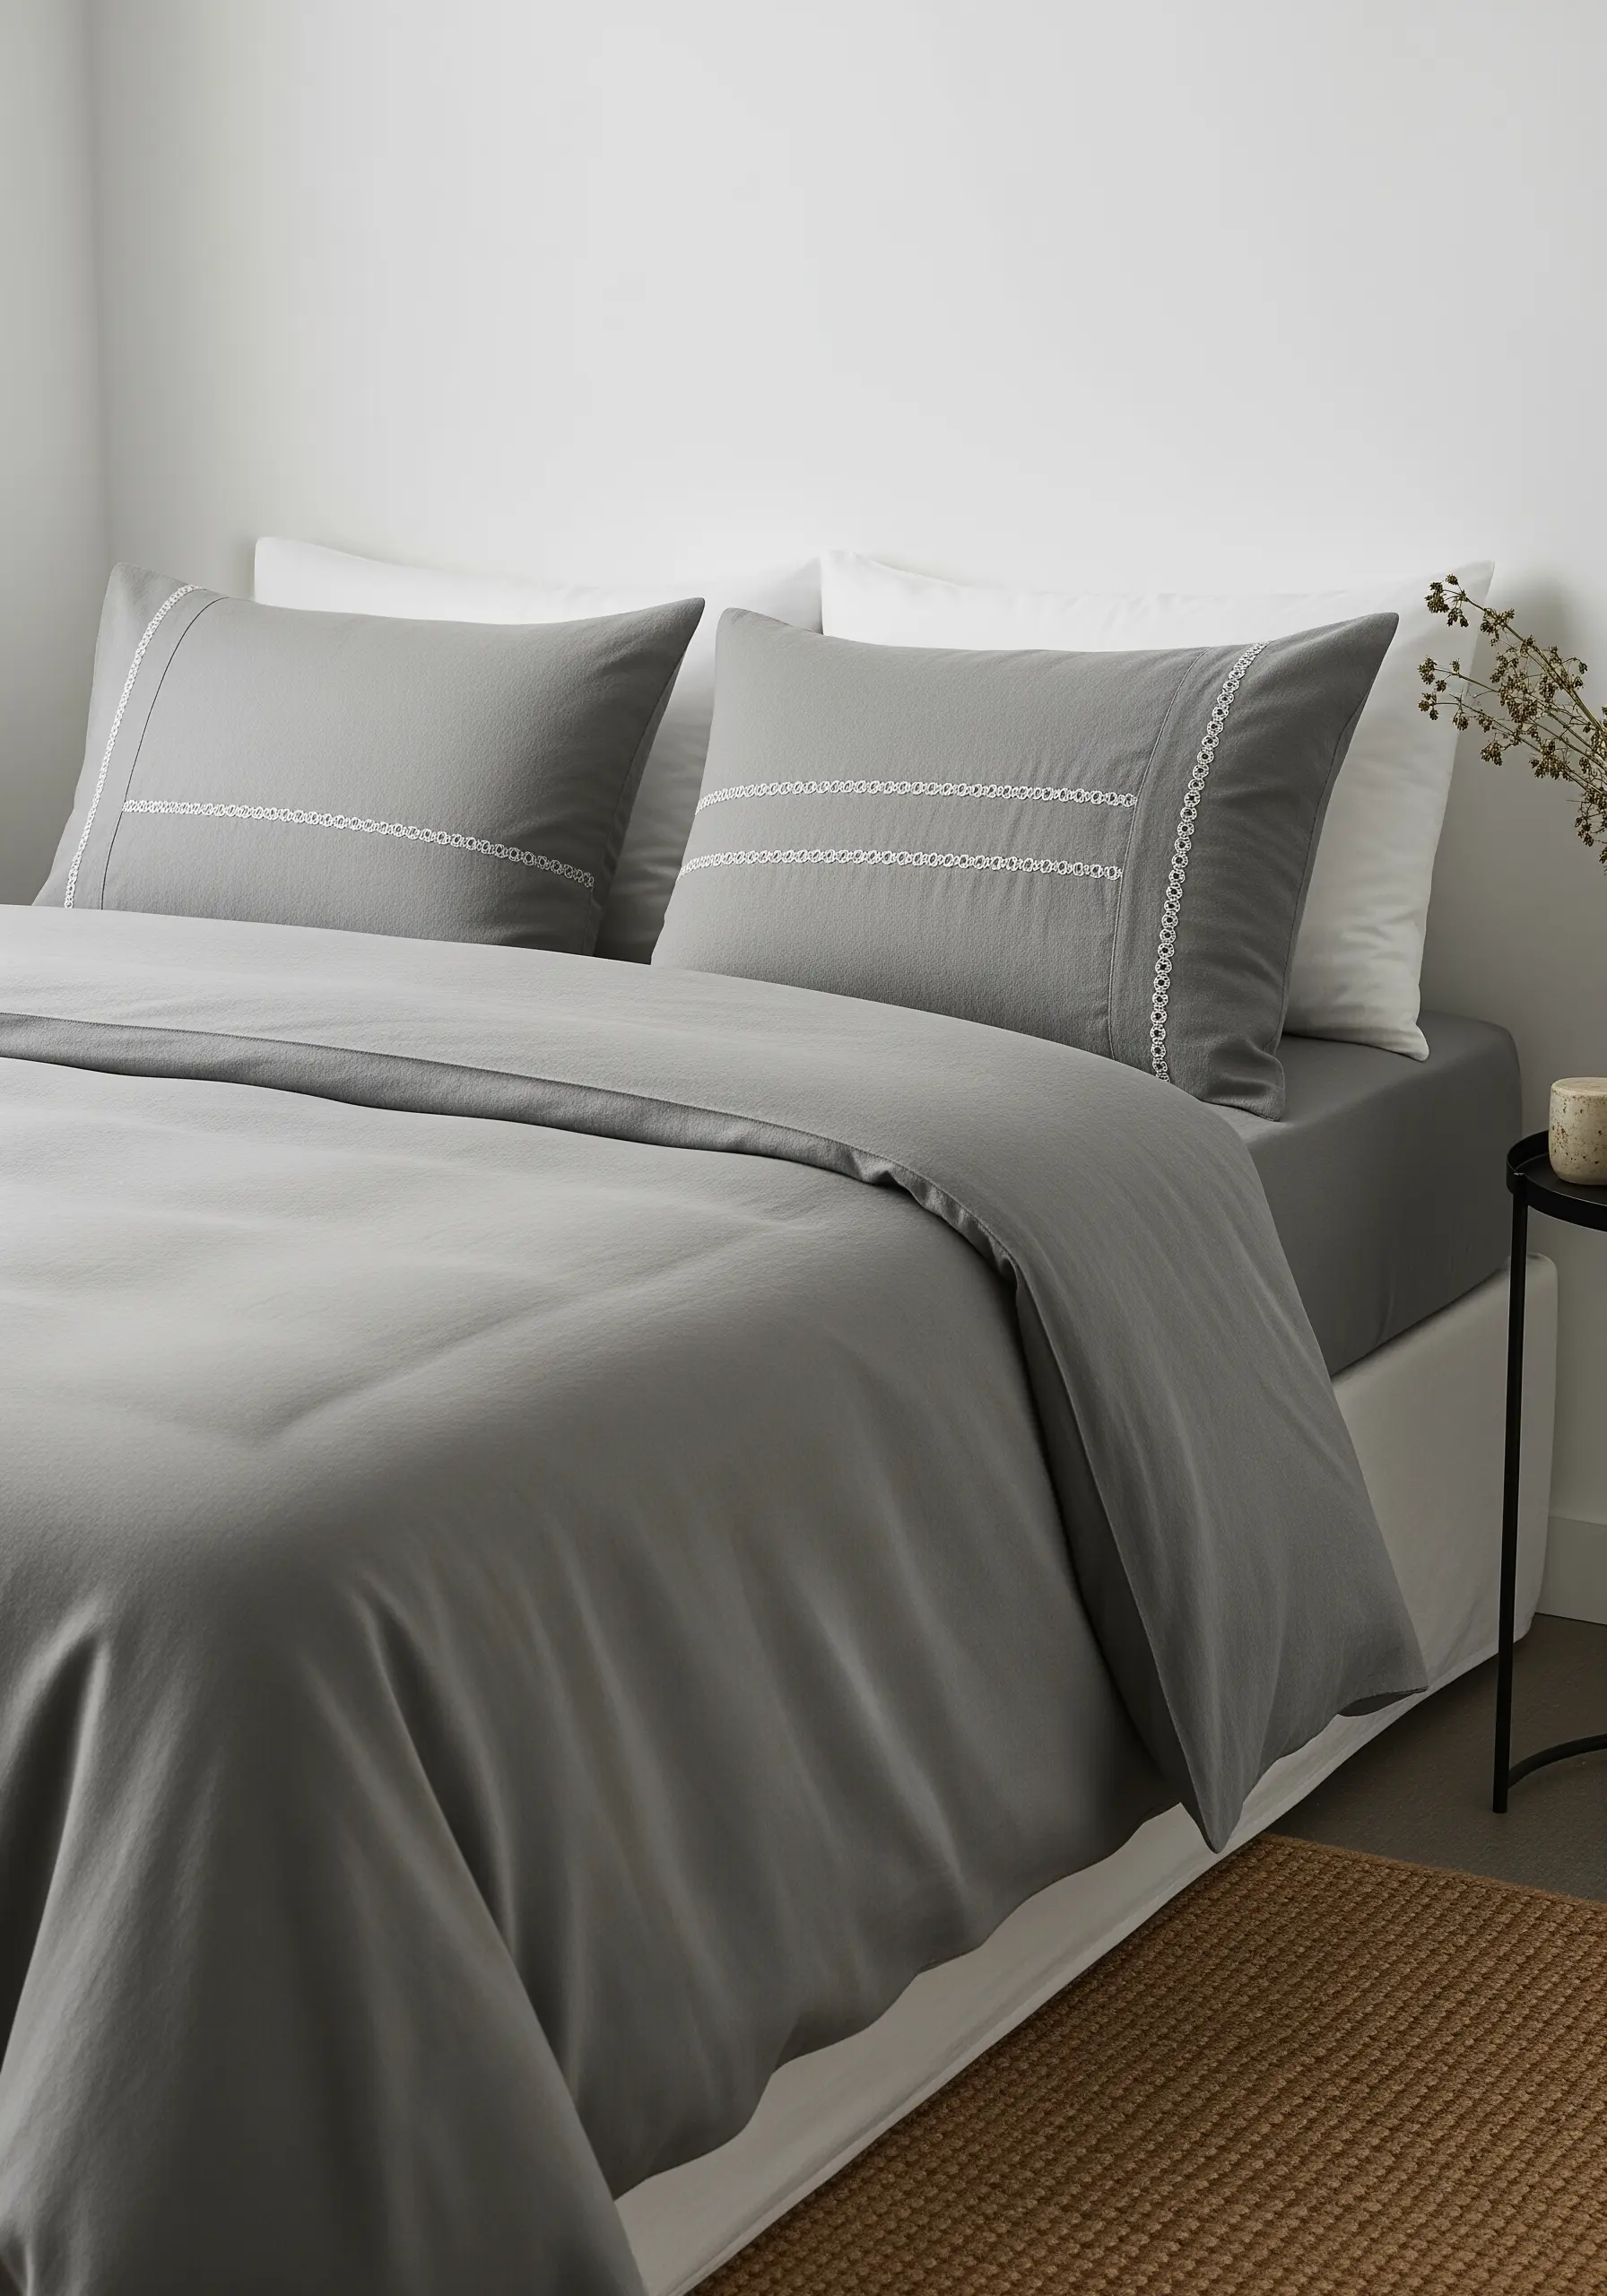
You can give standard bed linens a bespoke, high-end feel with a single, perfectly executed line of decorative stitching.
Instead of a complex pattern, try a simple row of feather stitch, pin stitch, or even tiny, evenly spaced seed stitches along the edge of a pillowcase.
Use a thread color that offers just a subtle contrast to the fabric, like white on grey or ivory on cream.
This minimal detail adds a touch of refinement and creates soft neutral embroidery borders that feel expensive and cozy.
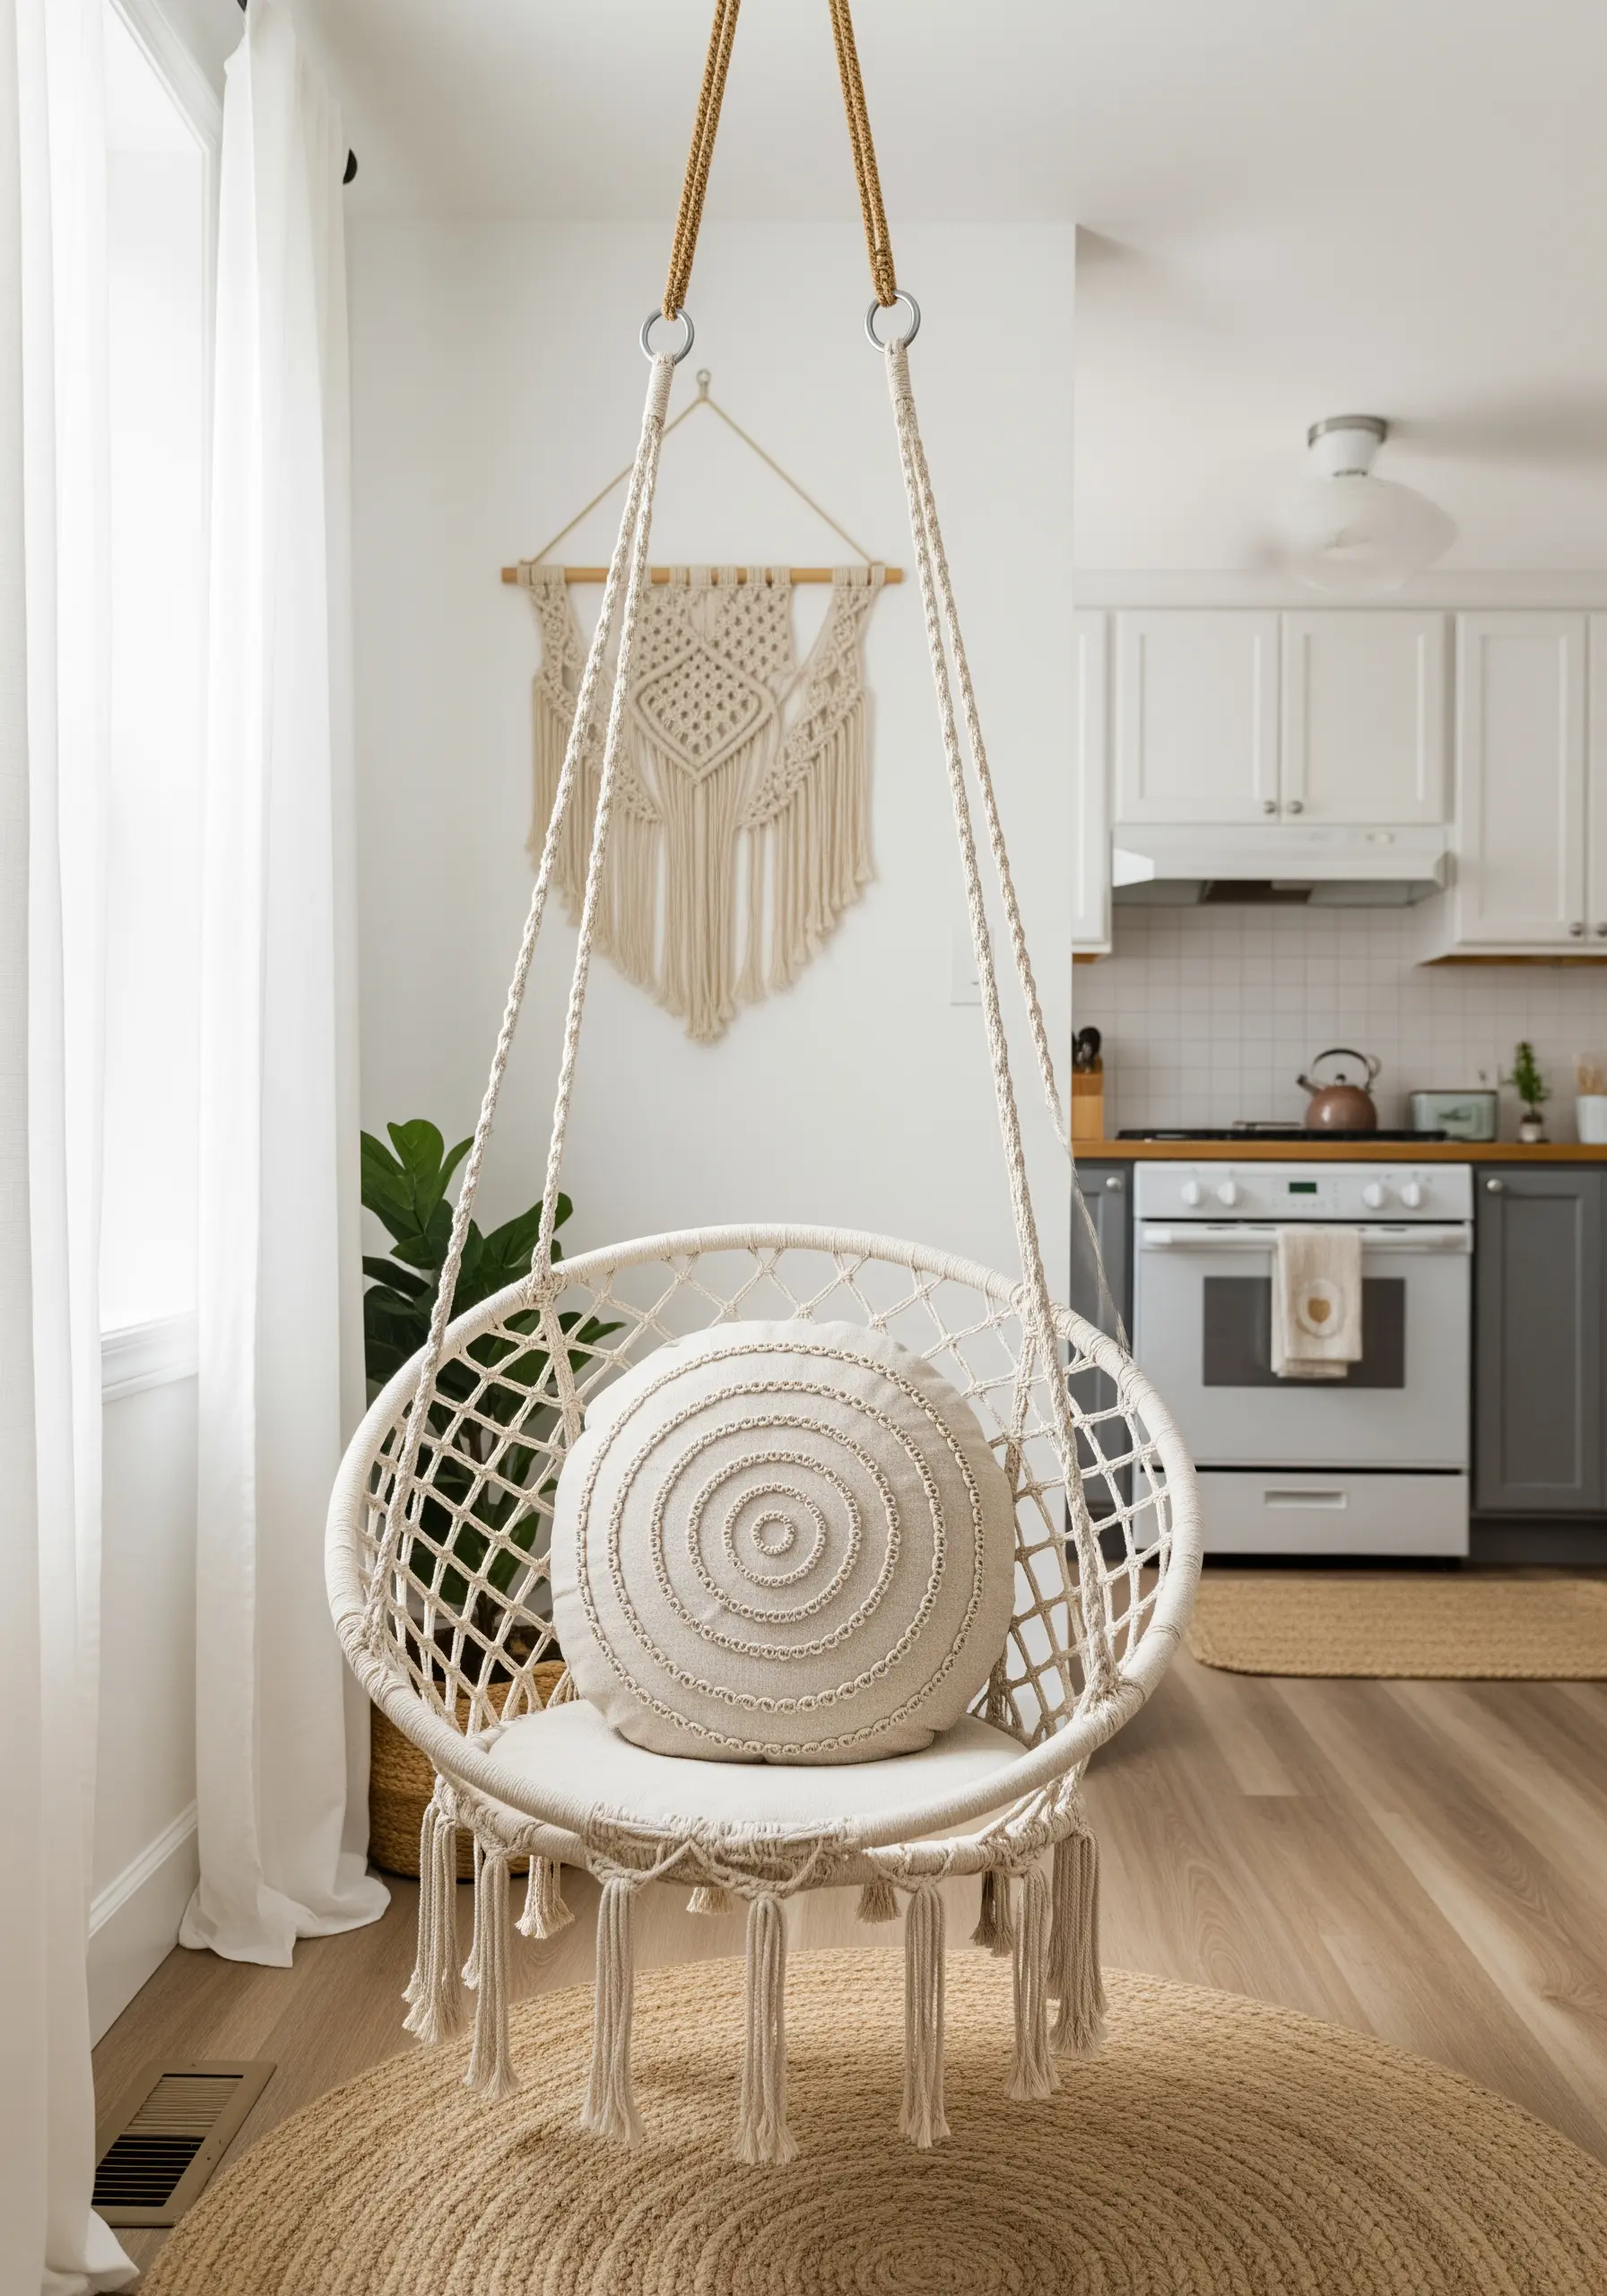
10. Anchor a Room with an Embroidered Curtain Border
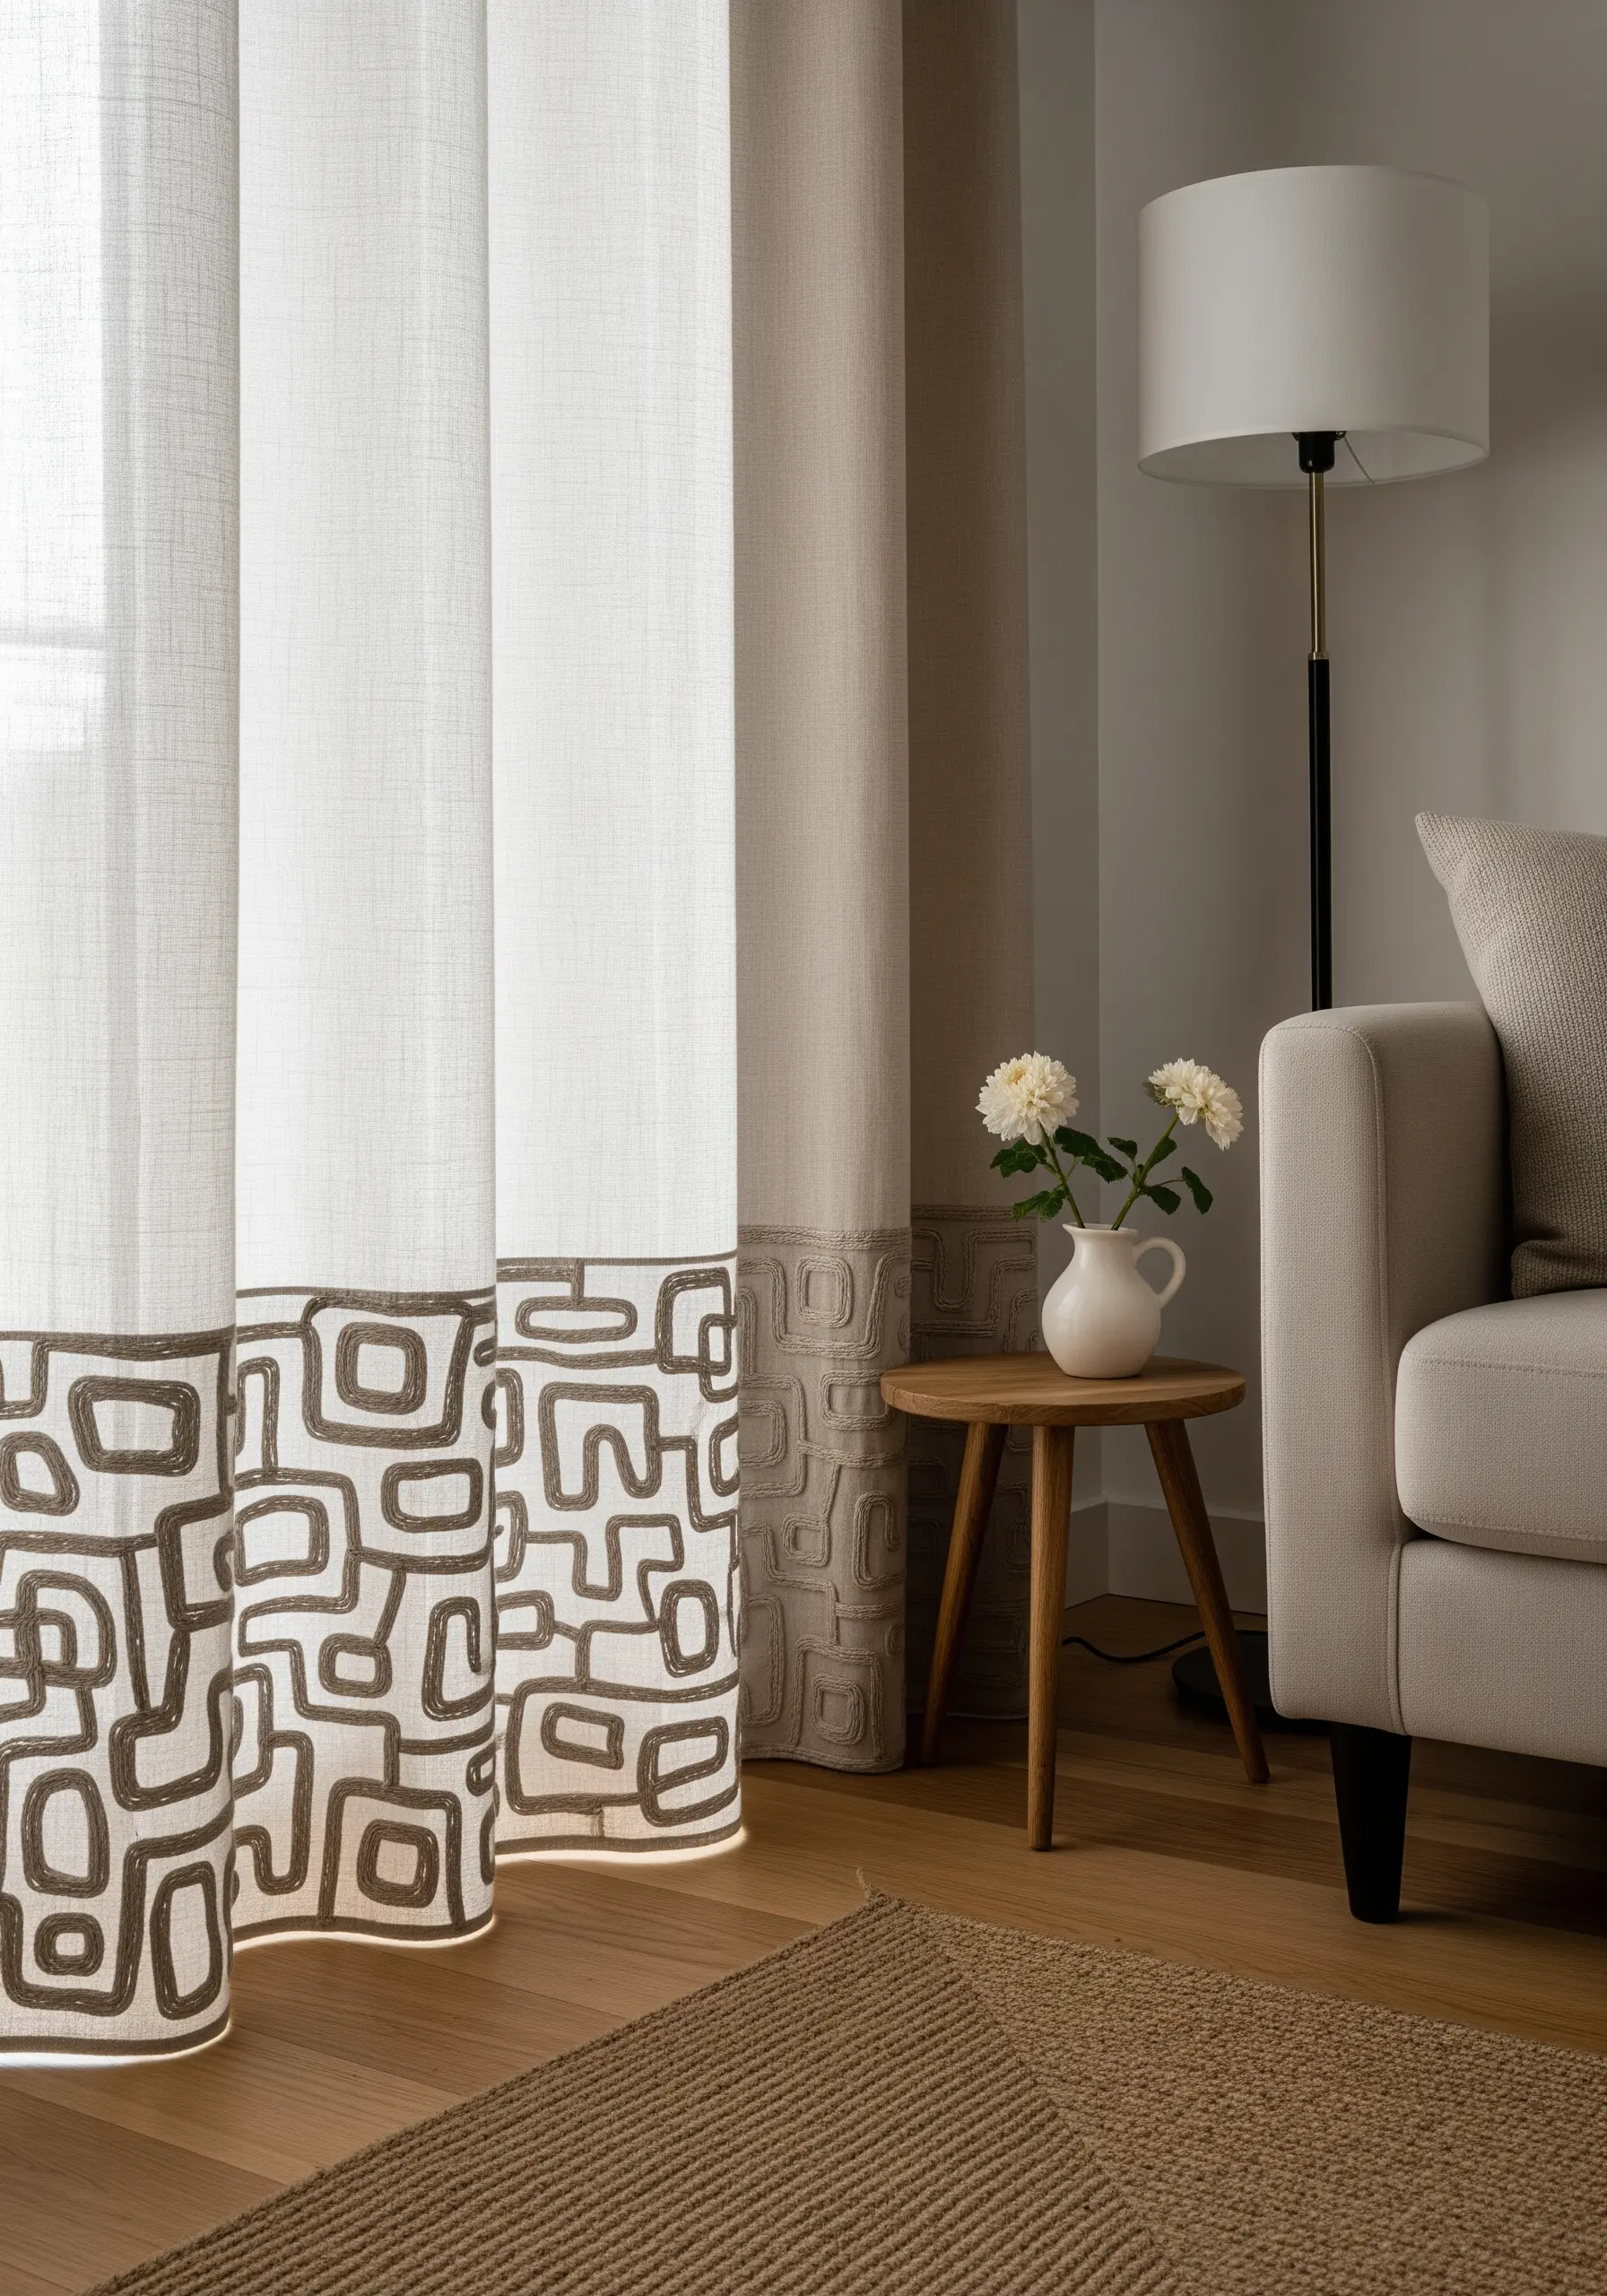
Add visual weight and a custom feel to lightweight curtains by embroidering a bold, graphic border along the bottom edge.
Use a thick yarn and a wide chain stitch or couching technique to create a substantial pattern that grounds the fabric.
Placing the design at the bottom draws the eye downward, making the room feel more anchored and intentional.
This is one of those elegant embroidery accents that instantly upgrade your home decor with a single project.
11. Weave a Narrative with Fine-Line Illustrations
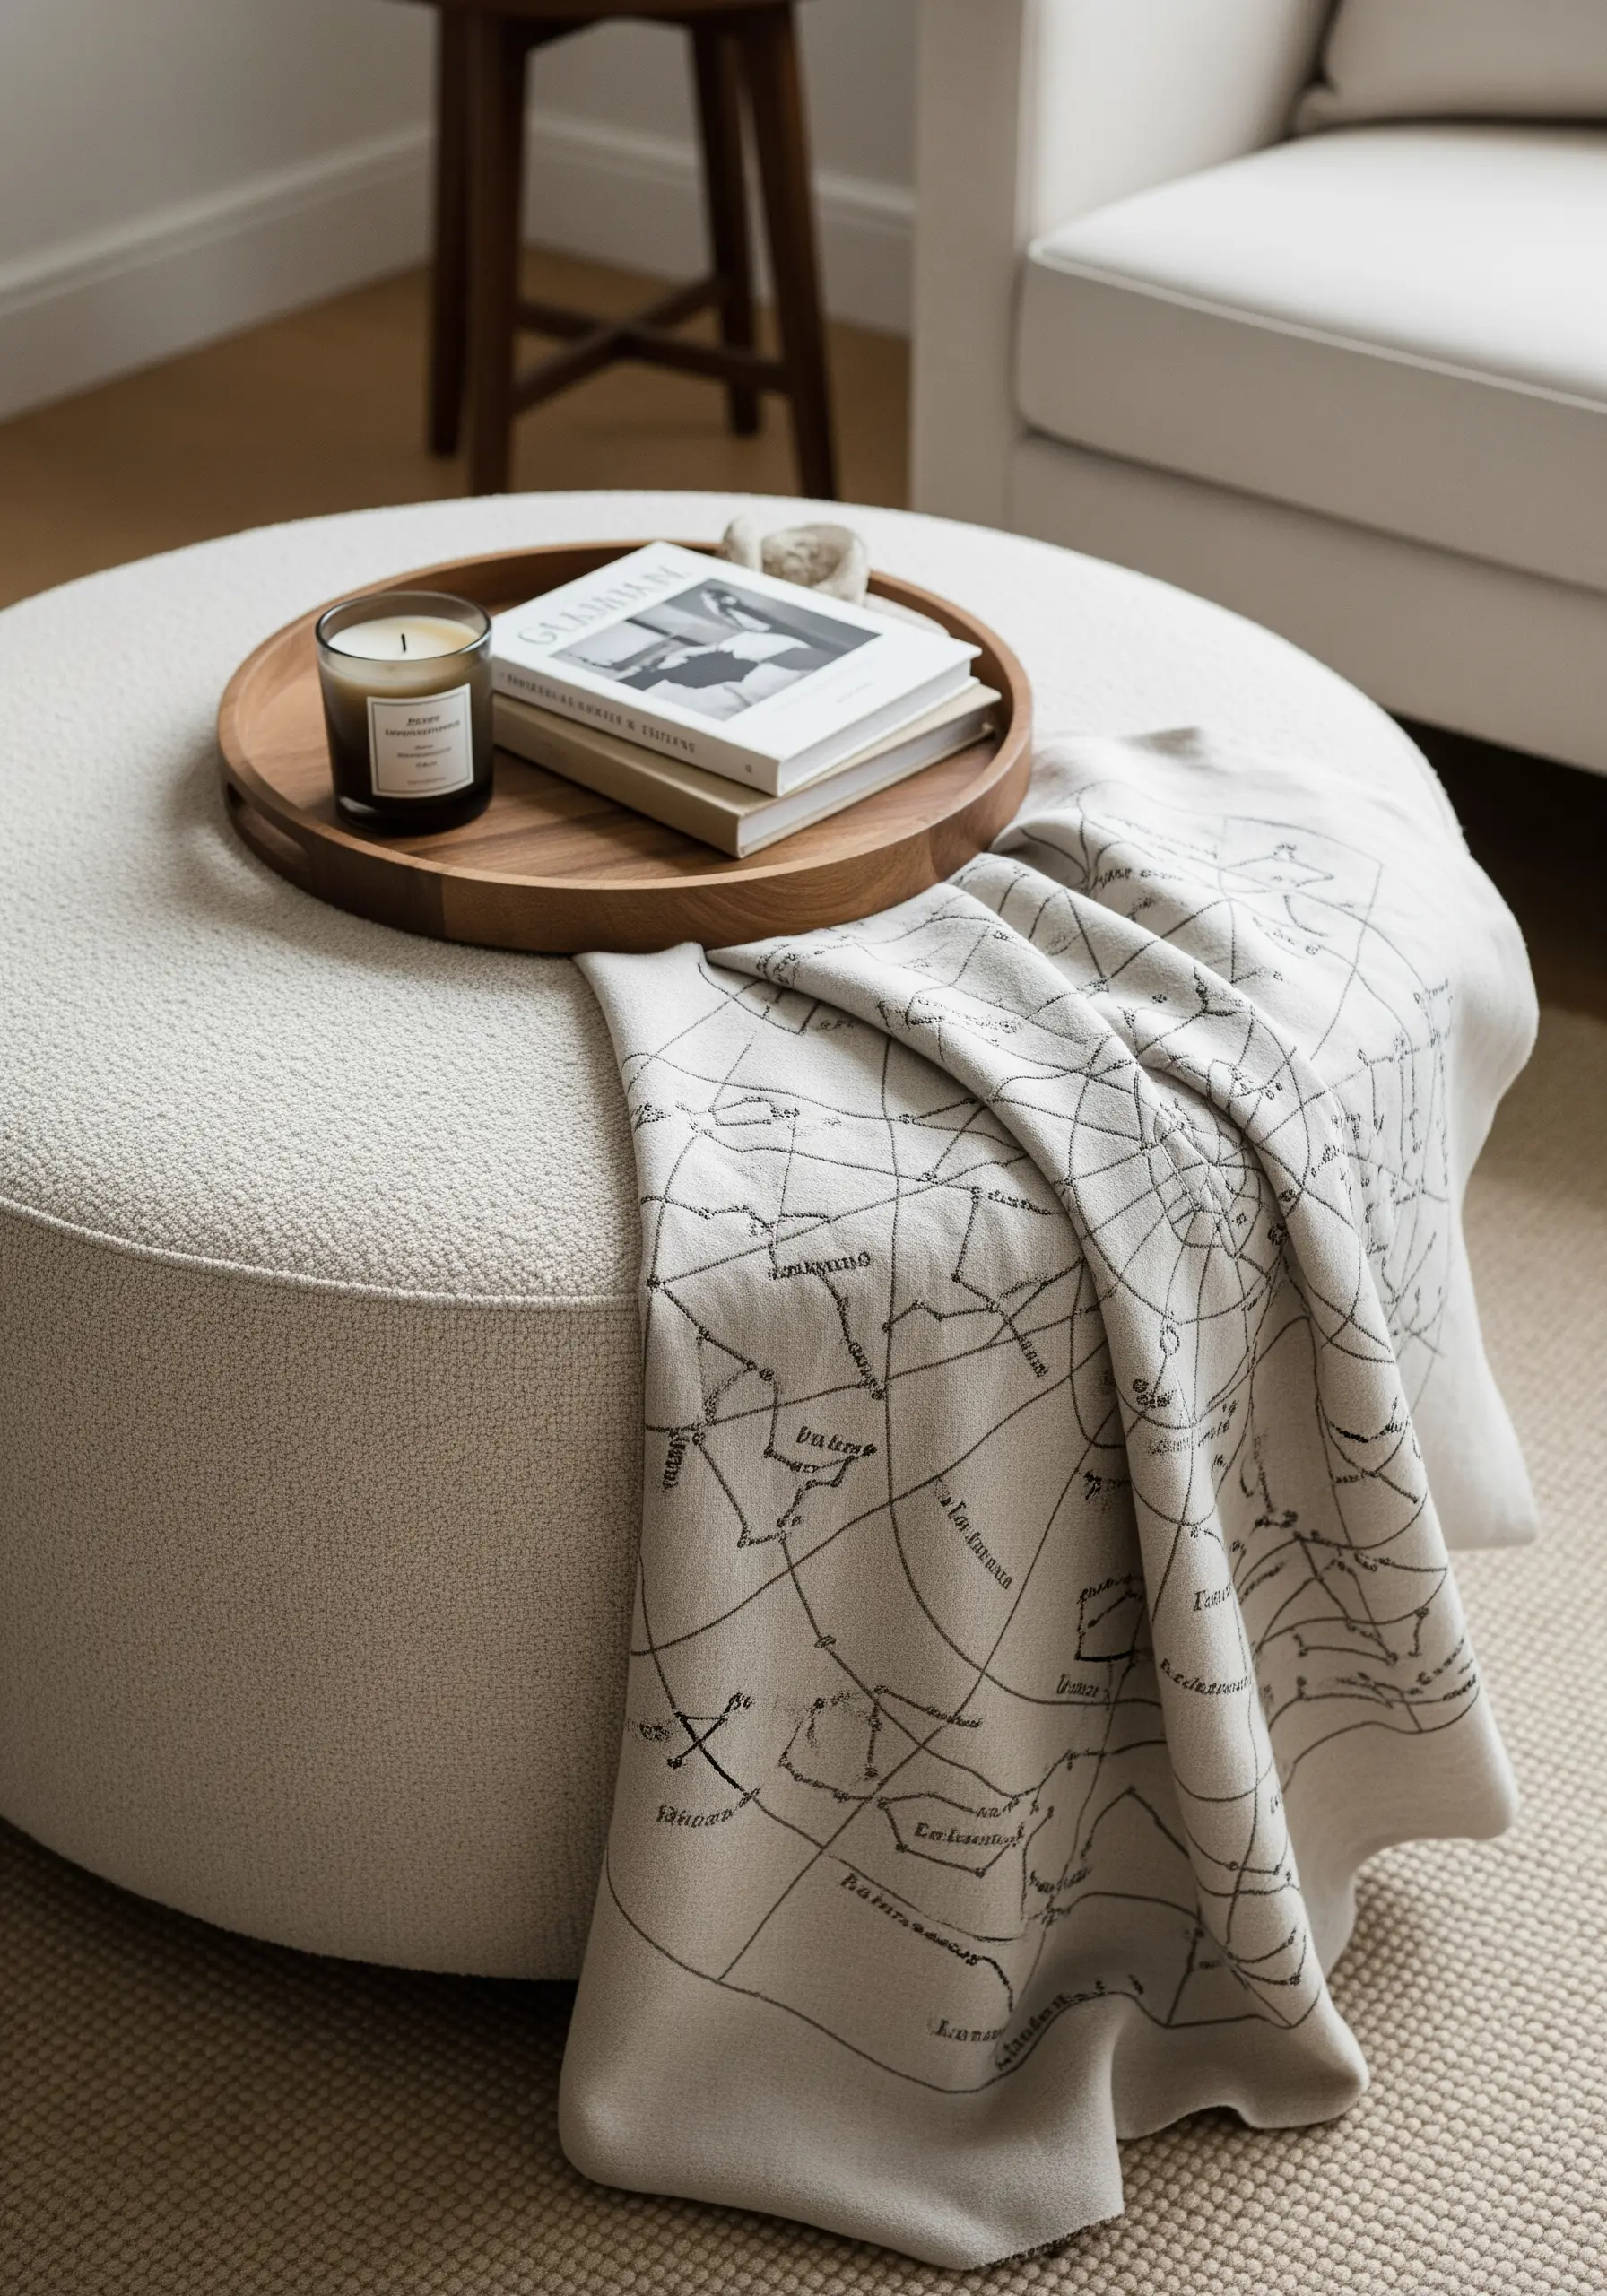
For intricate, illustrative designs like maps or architectural drawings, less is more.
Use just one or two strands of floss to achieve crisp, clean lines that allow the details to shine without becoming cluttered.
A simple backstitch is all you need.
This delicate approach turns a simple textile like a throw blanket into a piece of storytelling art, inviting viewers to look closer and discover the details woven within the threads.
12. Use Thread for Both Structure and Decoration
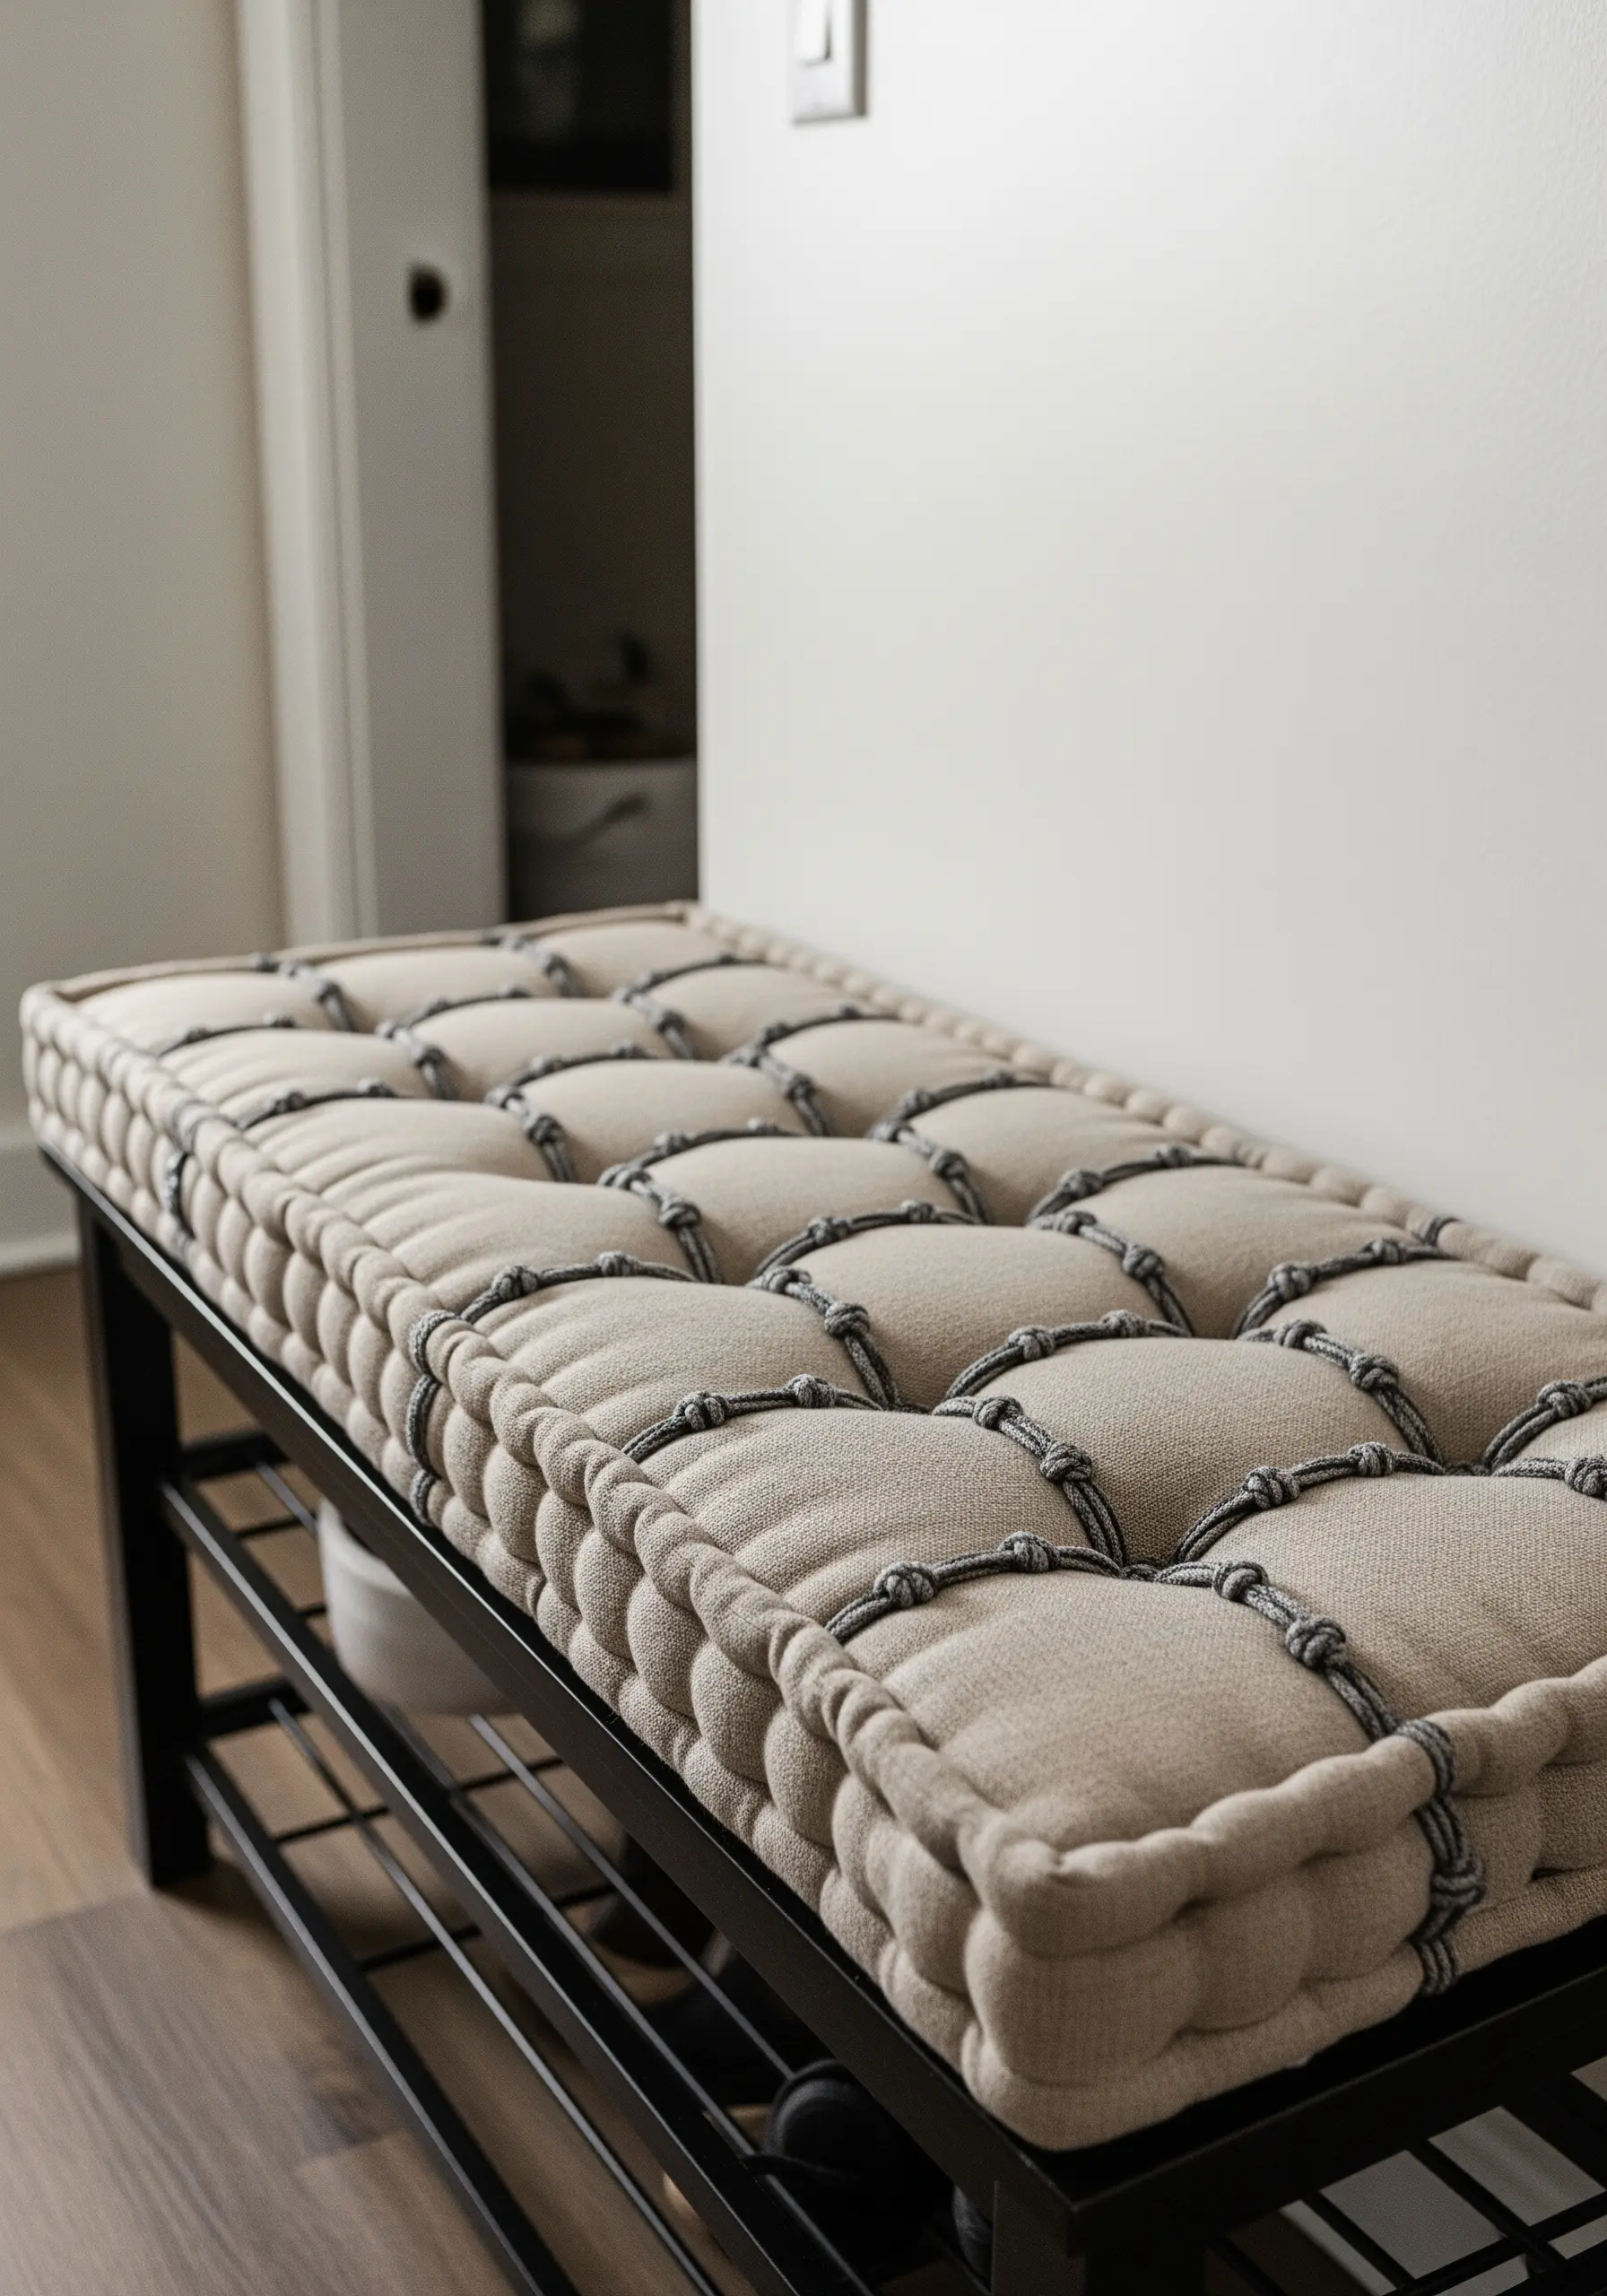
Embrace techniques where the thread serves a structural purpose as well as a decorative one, such as tufting.
Using a long upholstery needle and strong button thread, you can stitch through multiple layers of fabric and batting to create the classic tufted look on a bench cushion or headboard.
The knots or ties you use to secure the tufts become a key part of the visual pattern, creating a grid of soft texture that is both beautiful and functional.
13. Capture Nature’s Grace with a Single Outline

A single, elegant botanical silhouette can have more impact than a fully filled-in design.
To achieve a flawlessly smooth line for delicate shapes like a ginkgo leaf, use a whipped backstitch.
First, create a standard backstitch outline, then weave a second thread through the stitches without piercing the fabric. This eliminates the segmented look of a plain backstitch, resulting in a continuous, fluid line that looks incredibly refined.
14. Recreate Woven Textures with Filling Stitches

You don’t need a loom to achieve a woven effect.
Use embroidery techniques like the basket weave stitch or darning stitch to create areas of rich, woven-like texture on your pillows.
By laying your stitches in a specific grid or alternating pattern, you can mimic the look of different textile weaves.
Working tone-on-tone—stitching with a thread the same color as your fabric—puts the sole focus on this tactile dimension, creating beautifully subtle Scandinavian-inspired textures.
15. Add Clarity and Charm with Functional Stitches
Embroidery can be as practical as it is beautiful.
Add simple, single-line motifs and lettering to a wall organizer to create charming, functional labels.
A basic backstitch using three strands of floss in a dark, contrasting color is perfect for this.
The small, hand-stitched detail elevates a utilitarian object, making everyday organization a little more joyful and turning blank walls into useful, minimal art.
16. Define Edges with a Padded Satin Stitch
To make a graphic border truly pop, give it dimension with a padded satin stitch.
First, outline your shape with a split stitch, then fill the interior with small seed stitches.
Finally, cover the entire area with satin stitches laid perpendicular to the padding stitches underneath.
This raises the design slightly from the fabric surface, creating a subtle shadow line and a perfectly smooth, luxurious finish that promotes a feeling of softness and calm.
17. Create 3D Art with Chunky, Sculptural Fibers
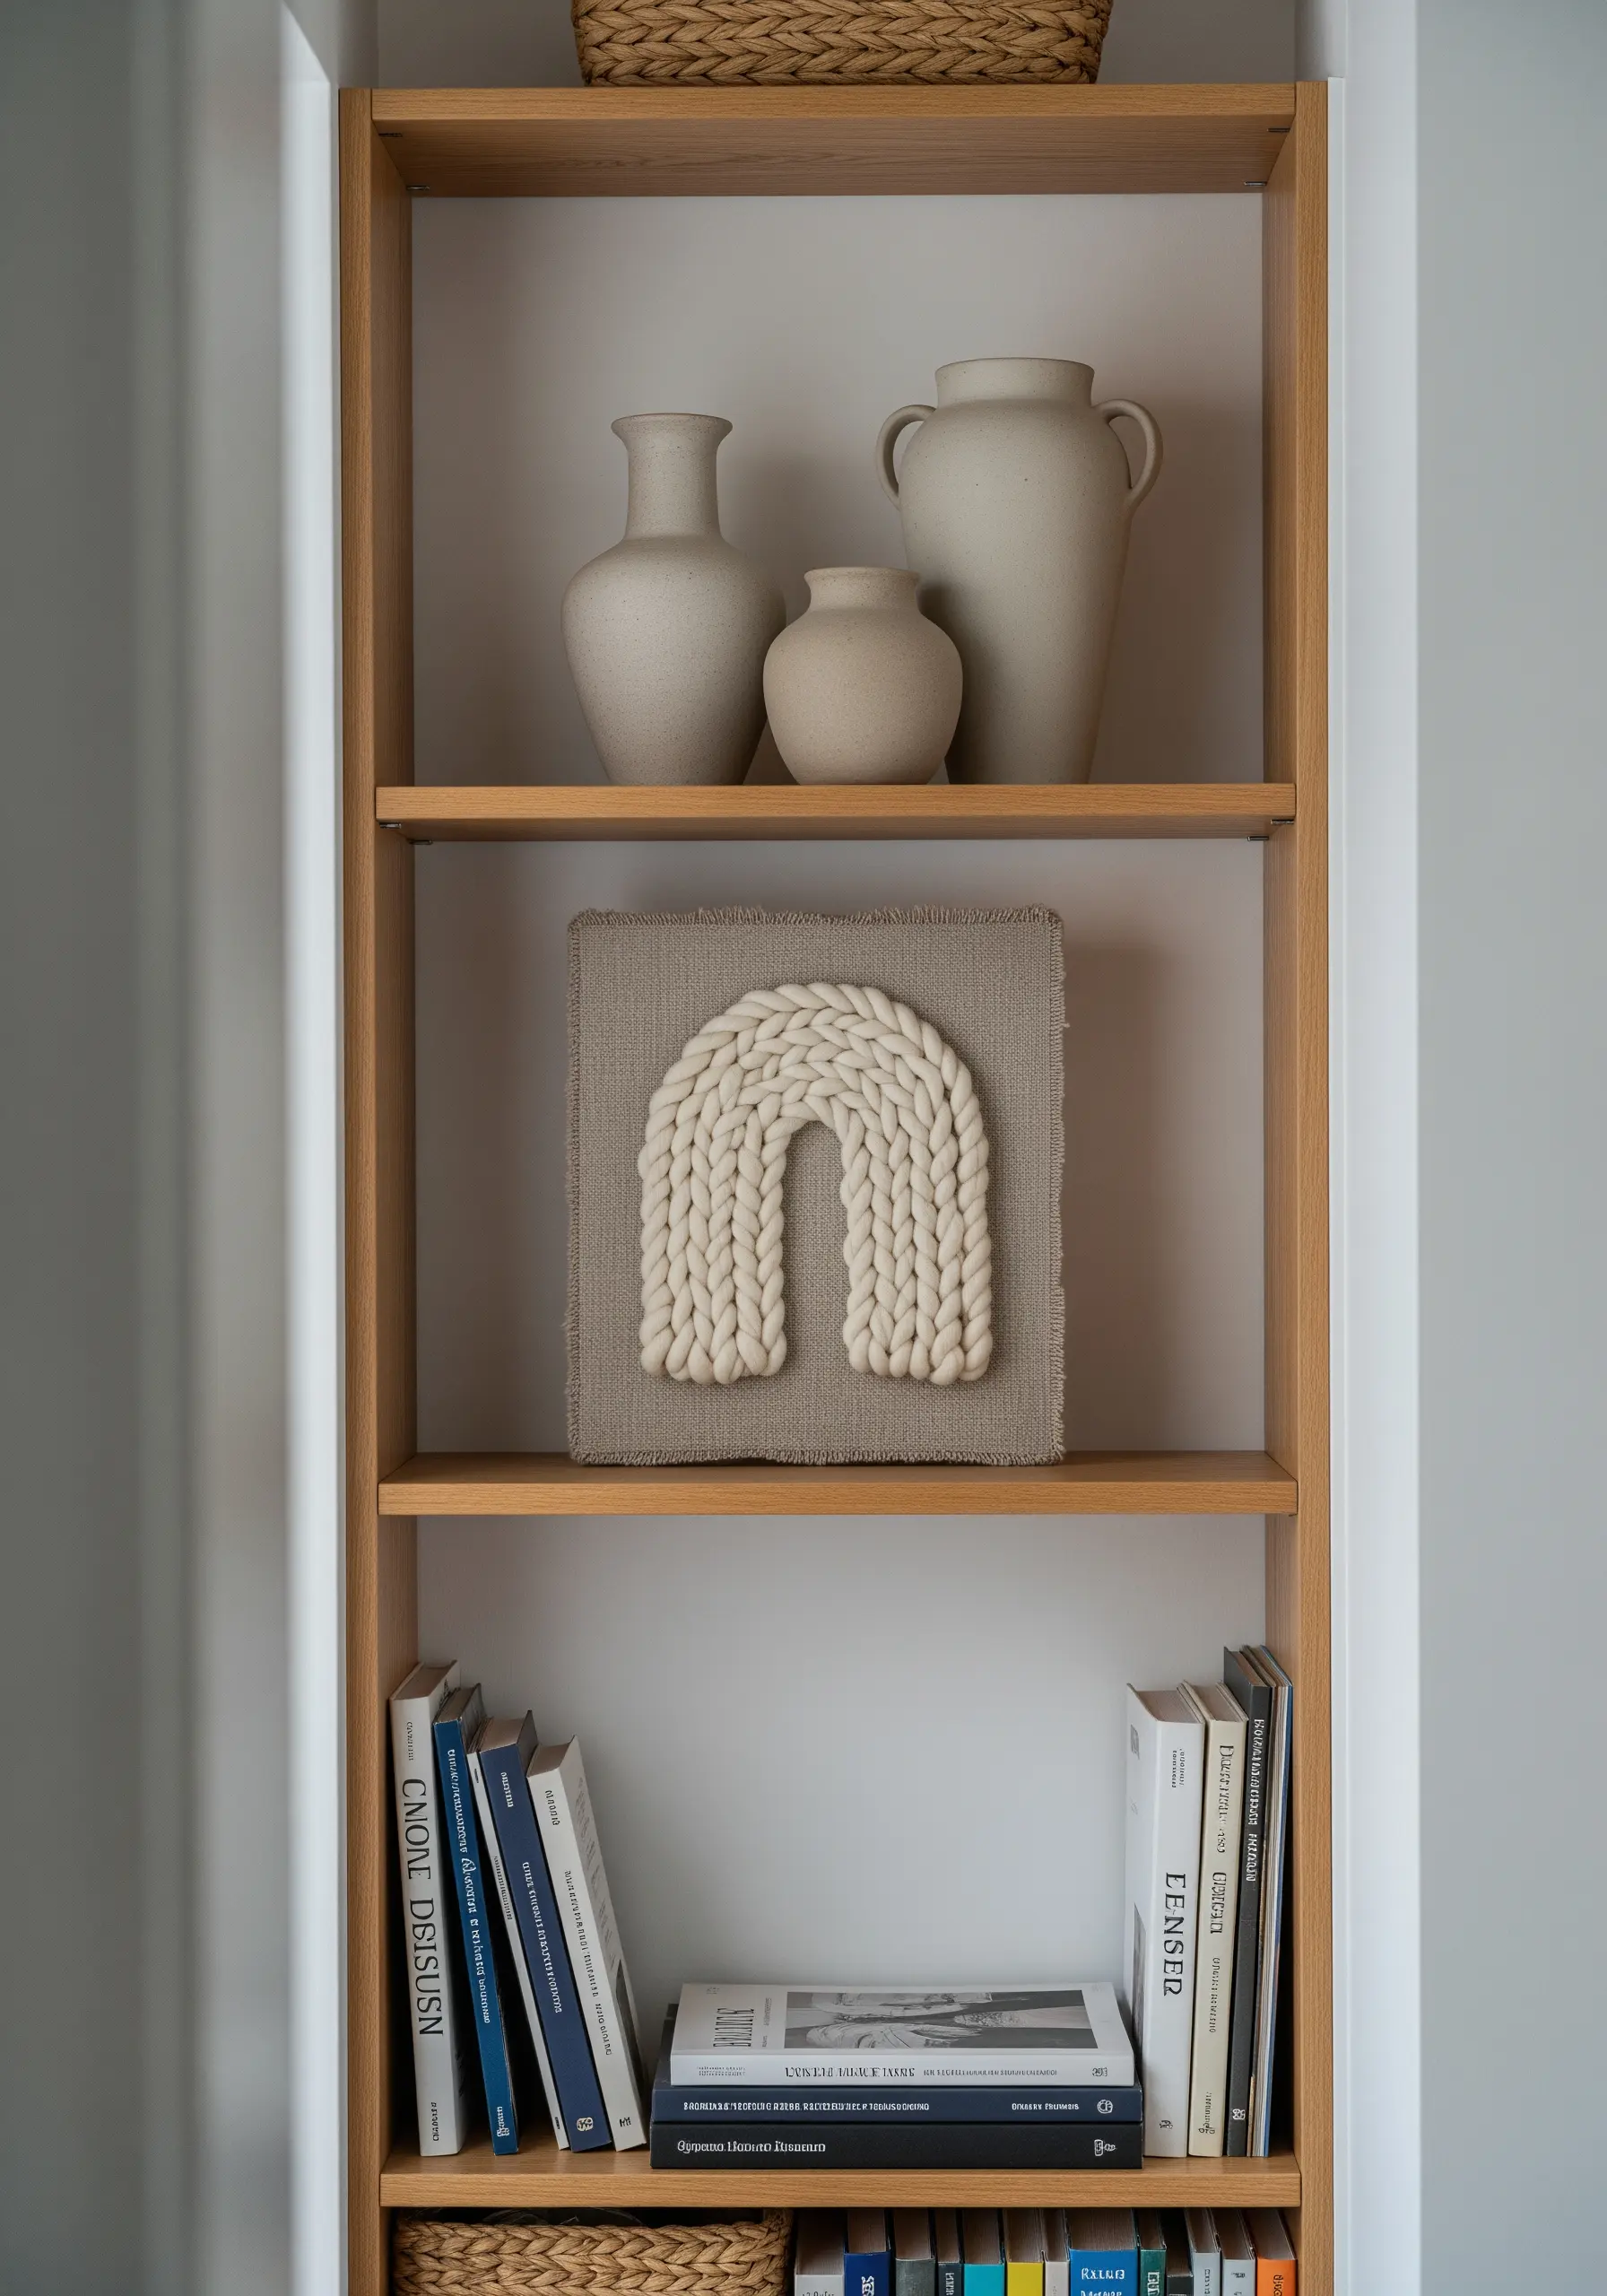
Move beyond embroidery floss and explore the textural possibilities of chunkier materials like macrame cord or thick wool roving.
Use the couching technique to attach these thick fibers to a sturdy fabric base, like linen or canvas.
This method allows you to create bold, three-dimensional shapes that blur the line between embroidery and sculpture.
These DIY yarn wall art pieces are perfect for making a big statement in a small space.
18. Design for High-Pile Fabrics Like Terrycloth
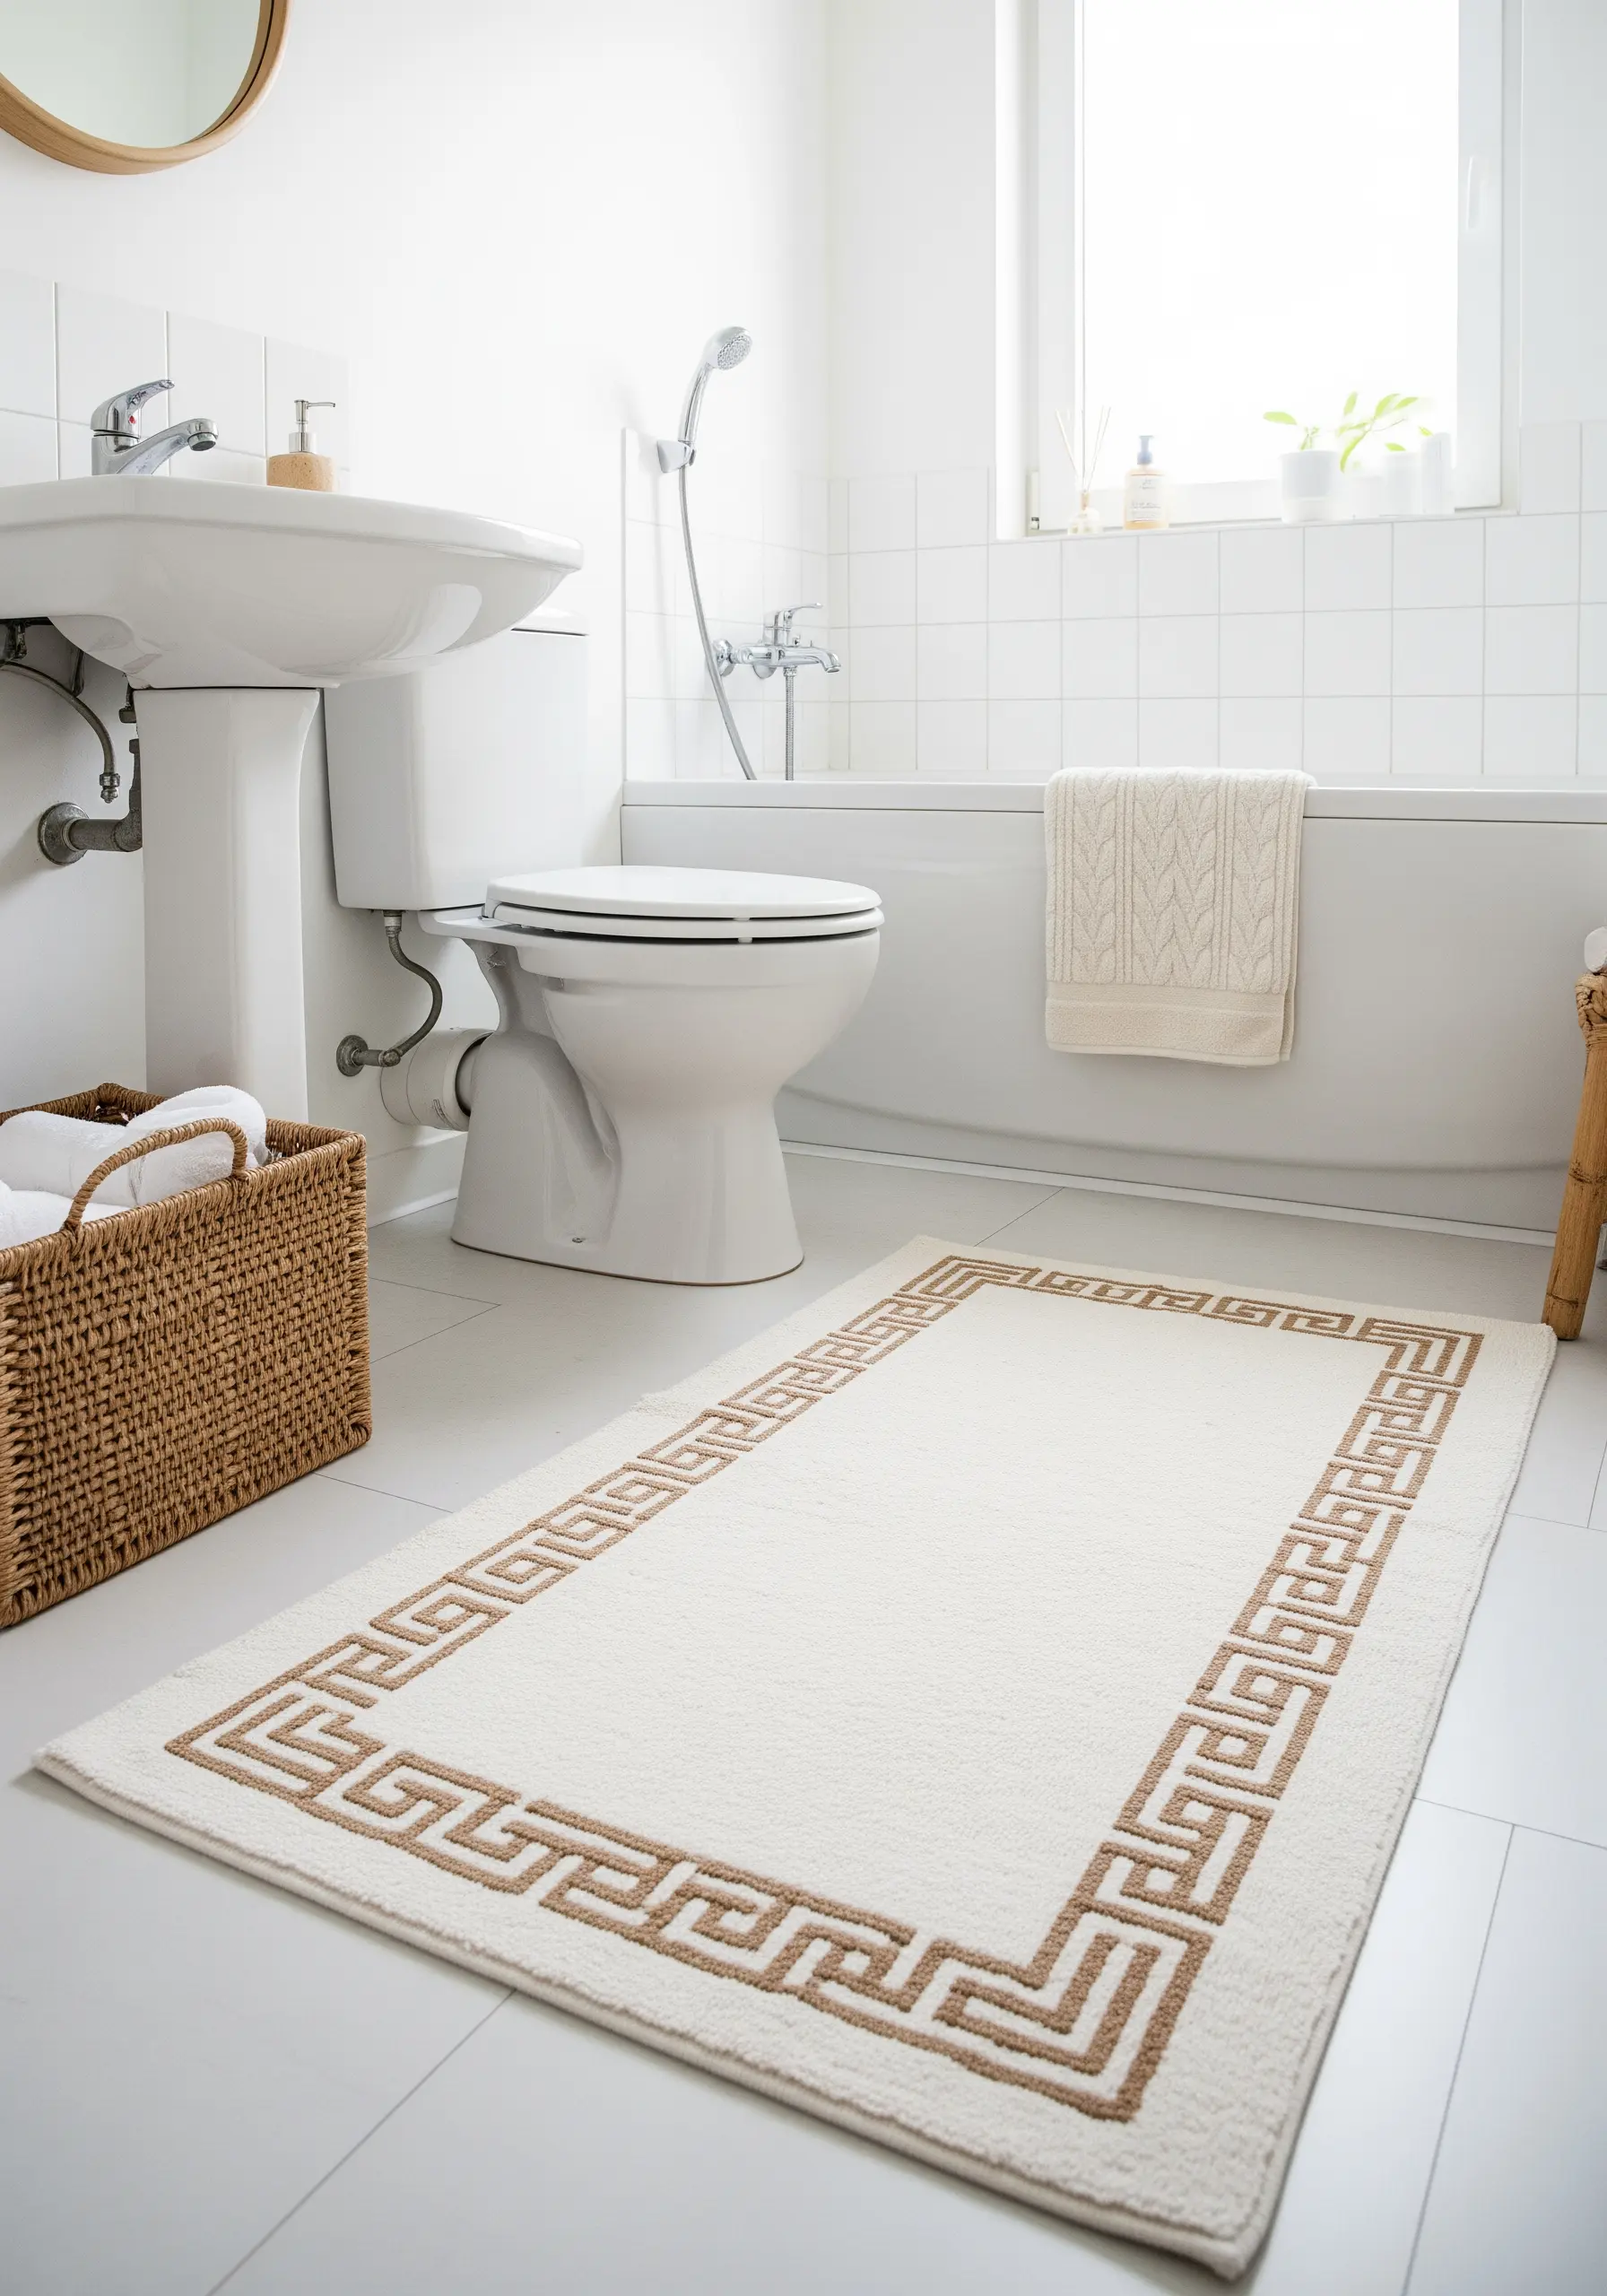
When adding a design to a plush surface like a bath mat or towel, your stitches need to sit on top of the fabric’s pile, not get lost within it.
Punch needle with a long loop setting is an excellent choice, as it creates a raised design that is even more plush than the background.
Alternatively, couching a thick, contrasting yarn onto the surface ensures your pattern remains crisp and visible, bringing spa-like vibes to your bathroom.
19. Embroider with Light on a Lampshade
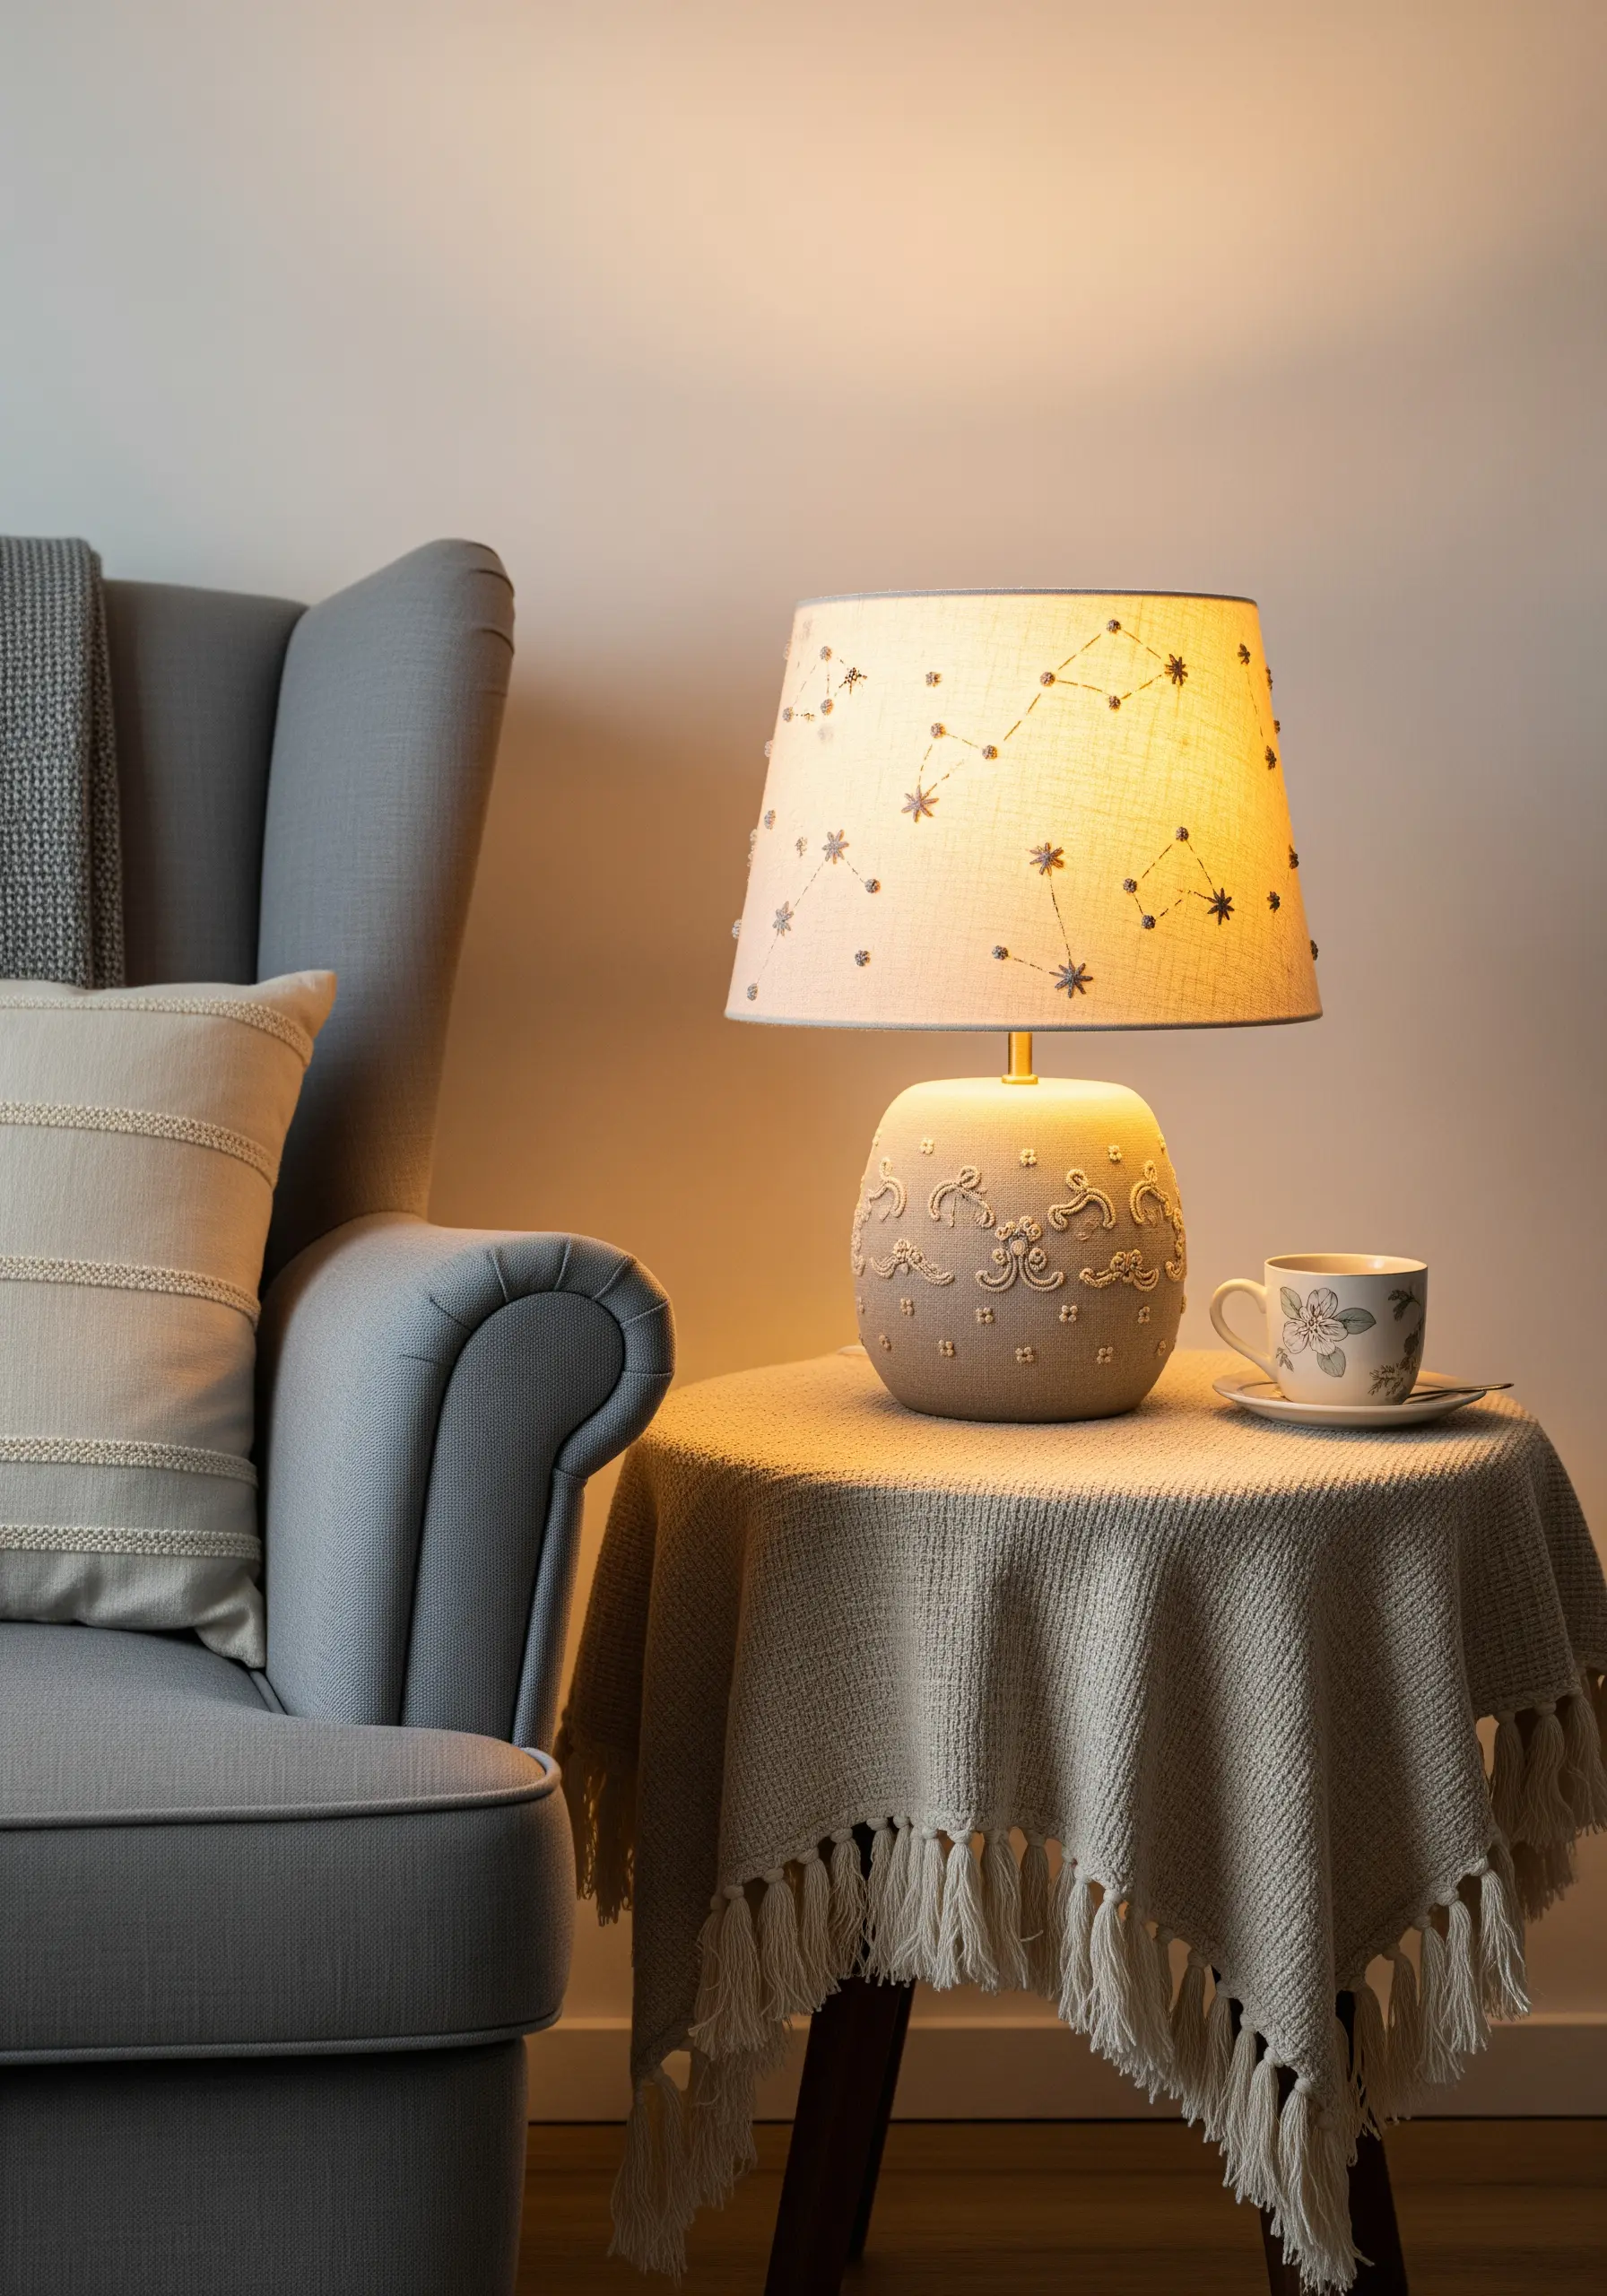
Think of a lampshade as a canvas for light itself.
When you embroider a design, the needle holes become part of the art.
Use simple backstitches and French knots to create a constellation pattern.
When you turn on the lamp, each puncture point will glow, transforming your stitching into a magical starry night.
Choose a light-colored thread so the design is also visible during the day, creating one of those tiny night sky designs that make a room feel special.
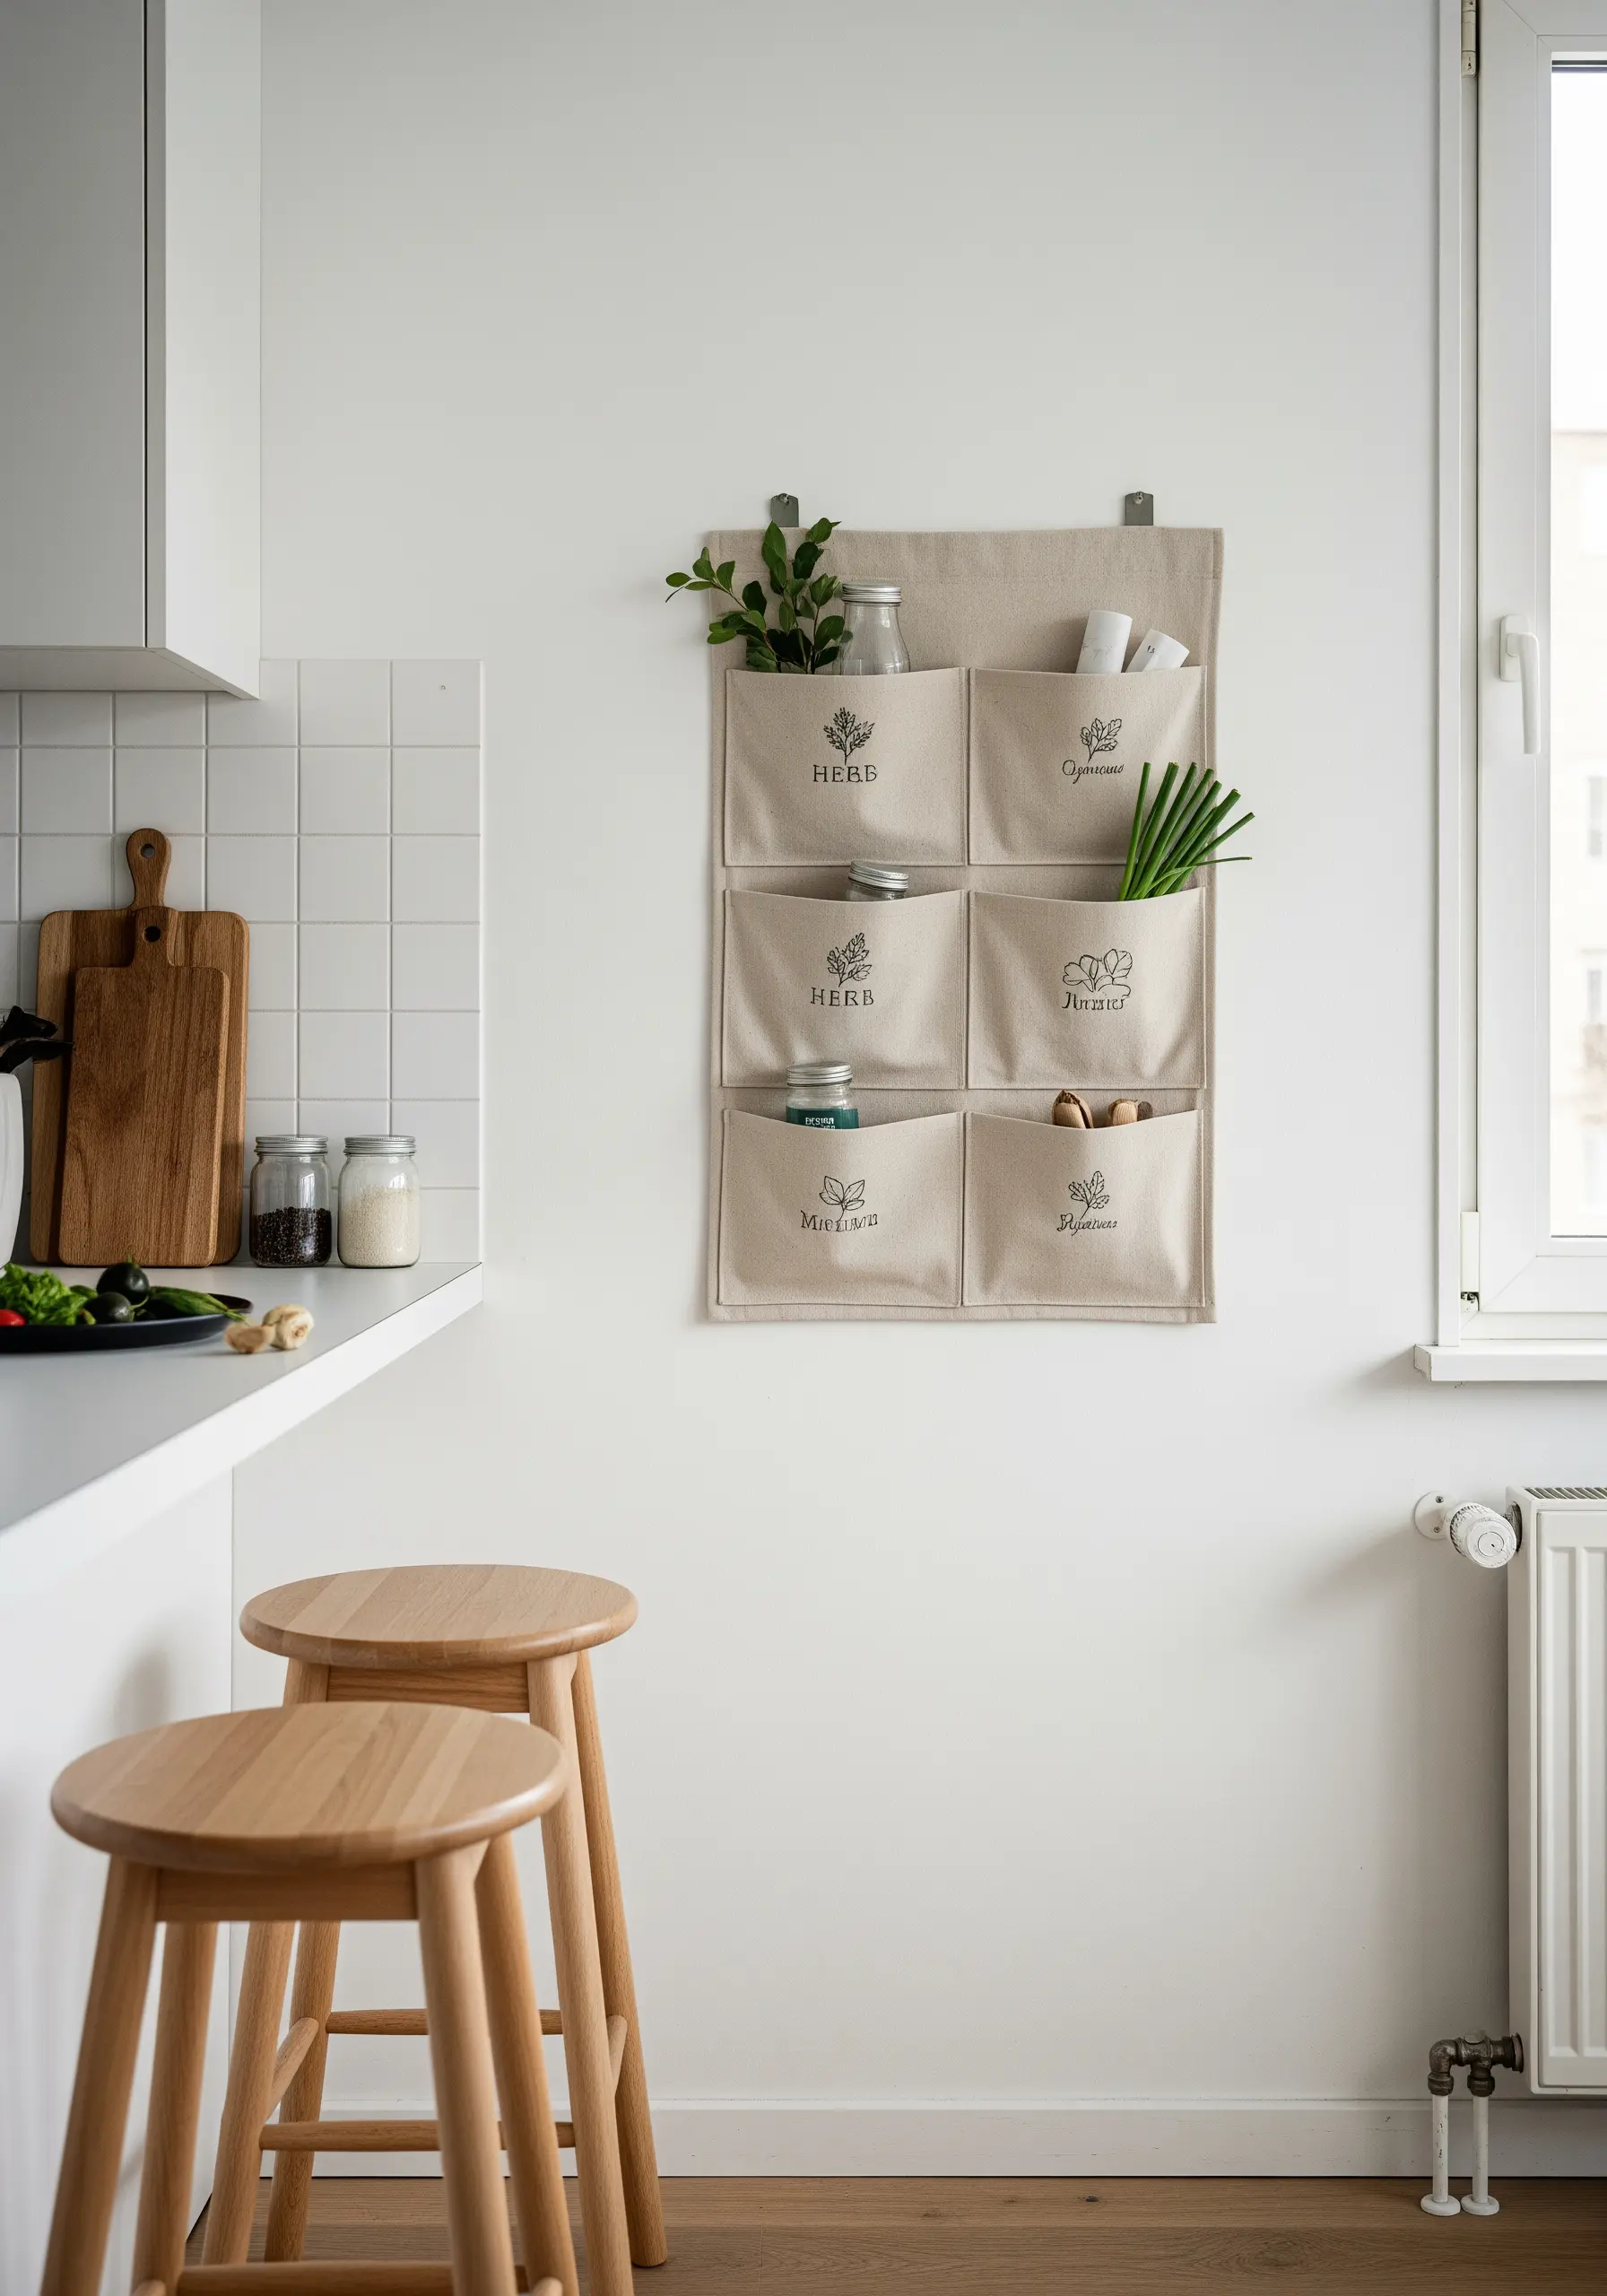
20. Elevate Storage with Textural Labels

Transform simple fabric storage boxes into a cohesive, stylish set with dimensional labels.
Couch a thick, wrapped cotton cord onto the front of each box to create minimalist shapes—a circle, a square, a triangle.
This not only adds a sophisticated, tactile element but can also serve as a modern, visual labeling system for your belongings.
It’s a perfect small DIY decor project that combines organization with artistry.
21. Add Subtle Pattern with Lines of Running Stitch
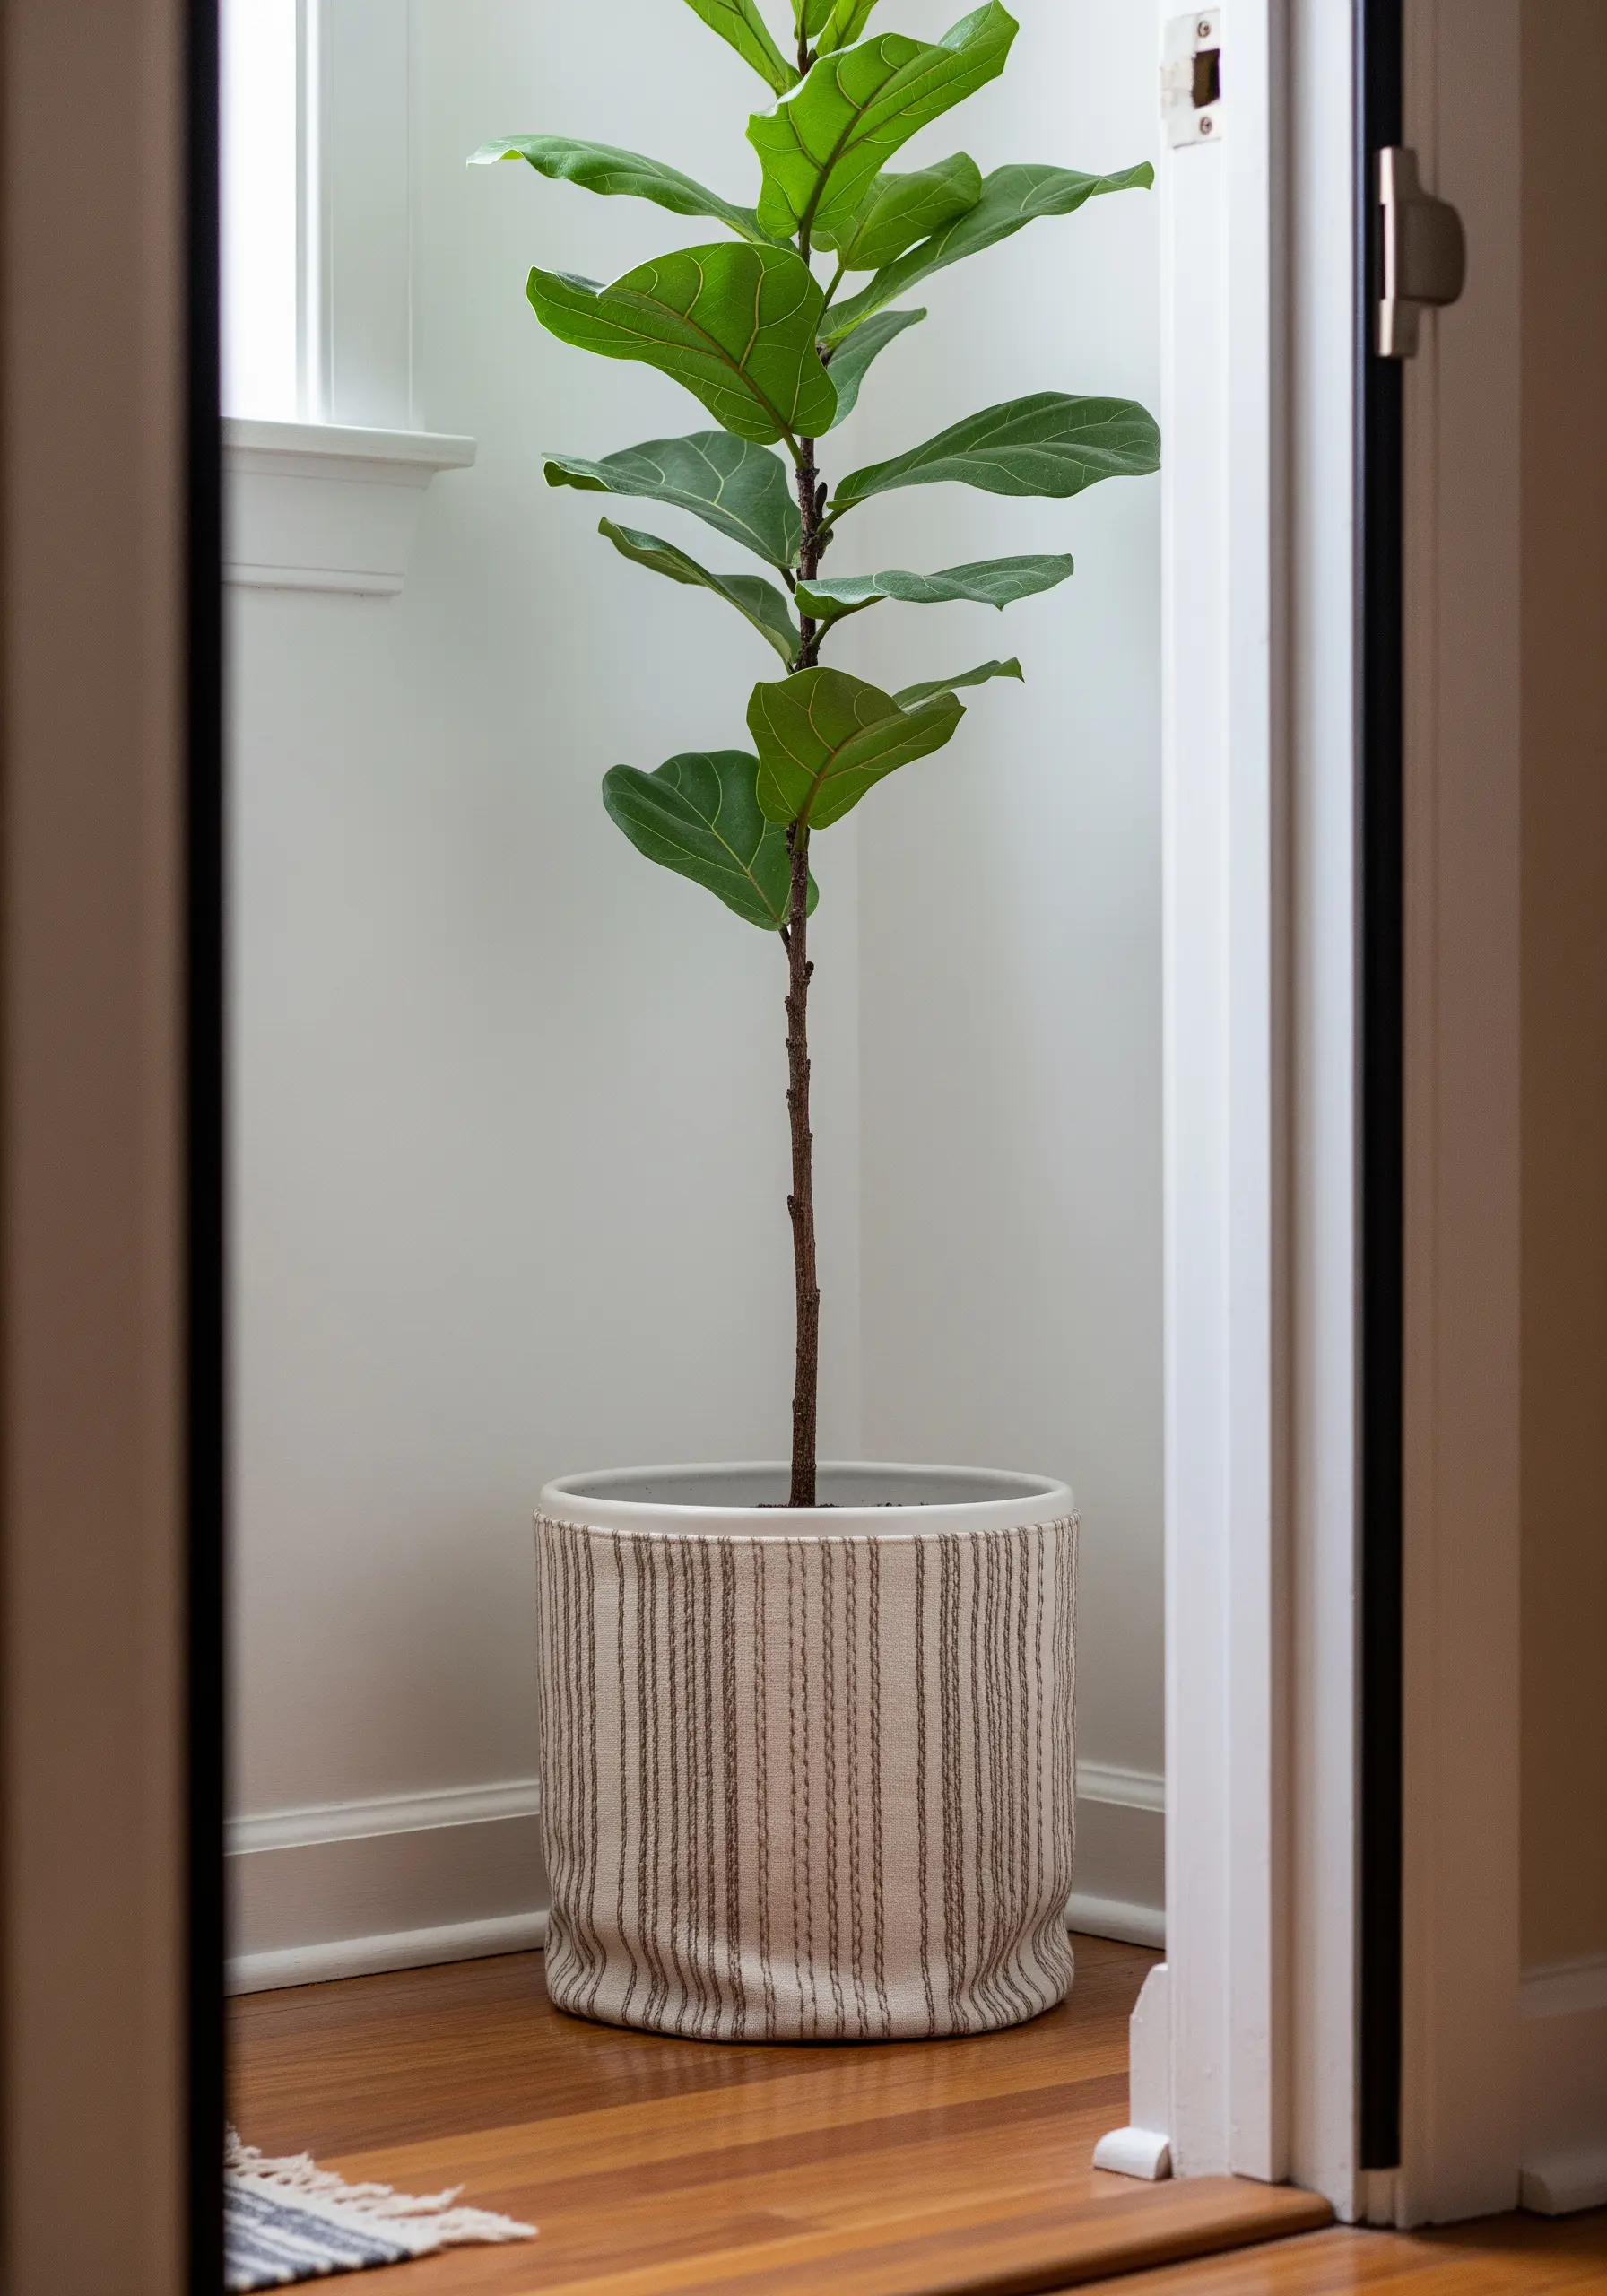
A simple running stitch, when repeated with intention, can create a beautifully subtle and modern pattern.
Decorate a plain fabric plant pot or storage basket with perfectly parallel vertical lines of running stitches.
By keeping the stitch and gap lengths consistent, you create a pleasing rhythm and texture.
Use a thread that is just one or two shades different from your fabric for an understated, hand-finished look that complements your beloved houseplants.
22. Create a Landscape with Layered Fabric Appliqué
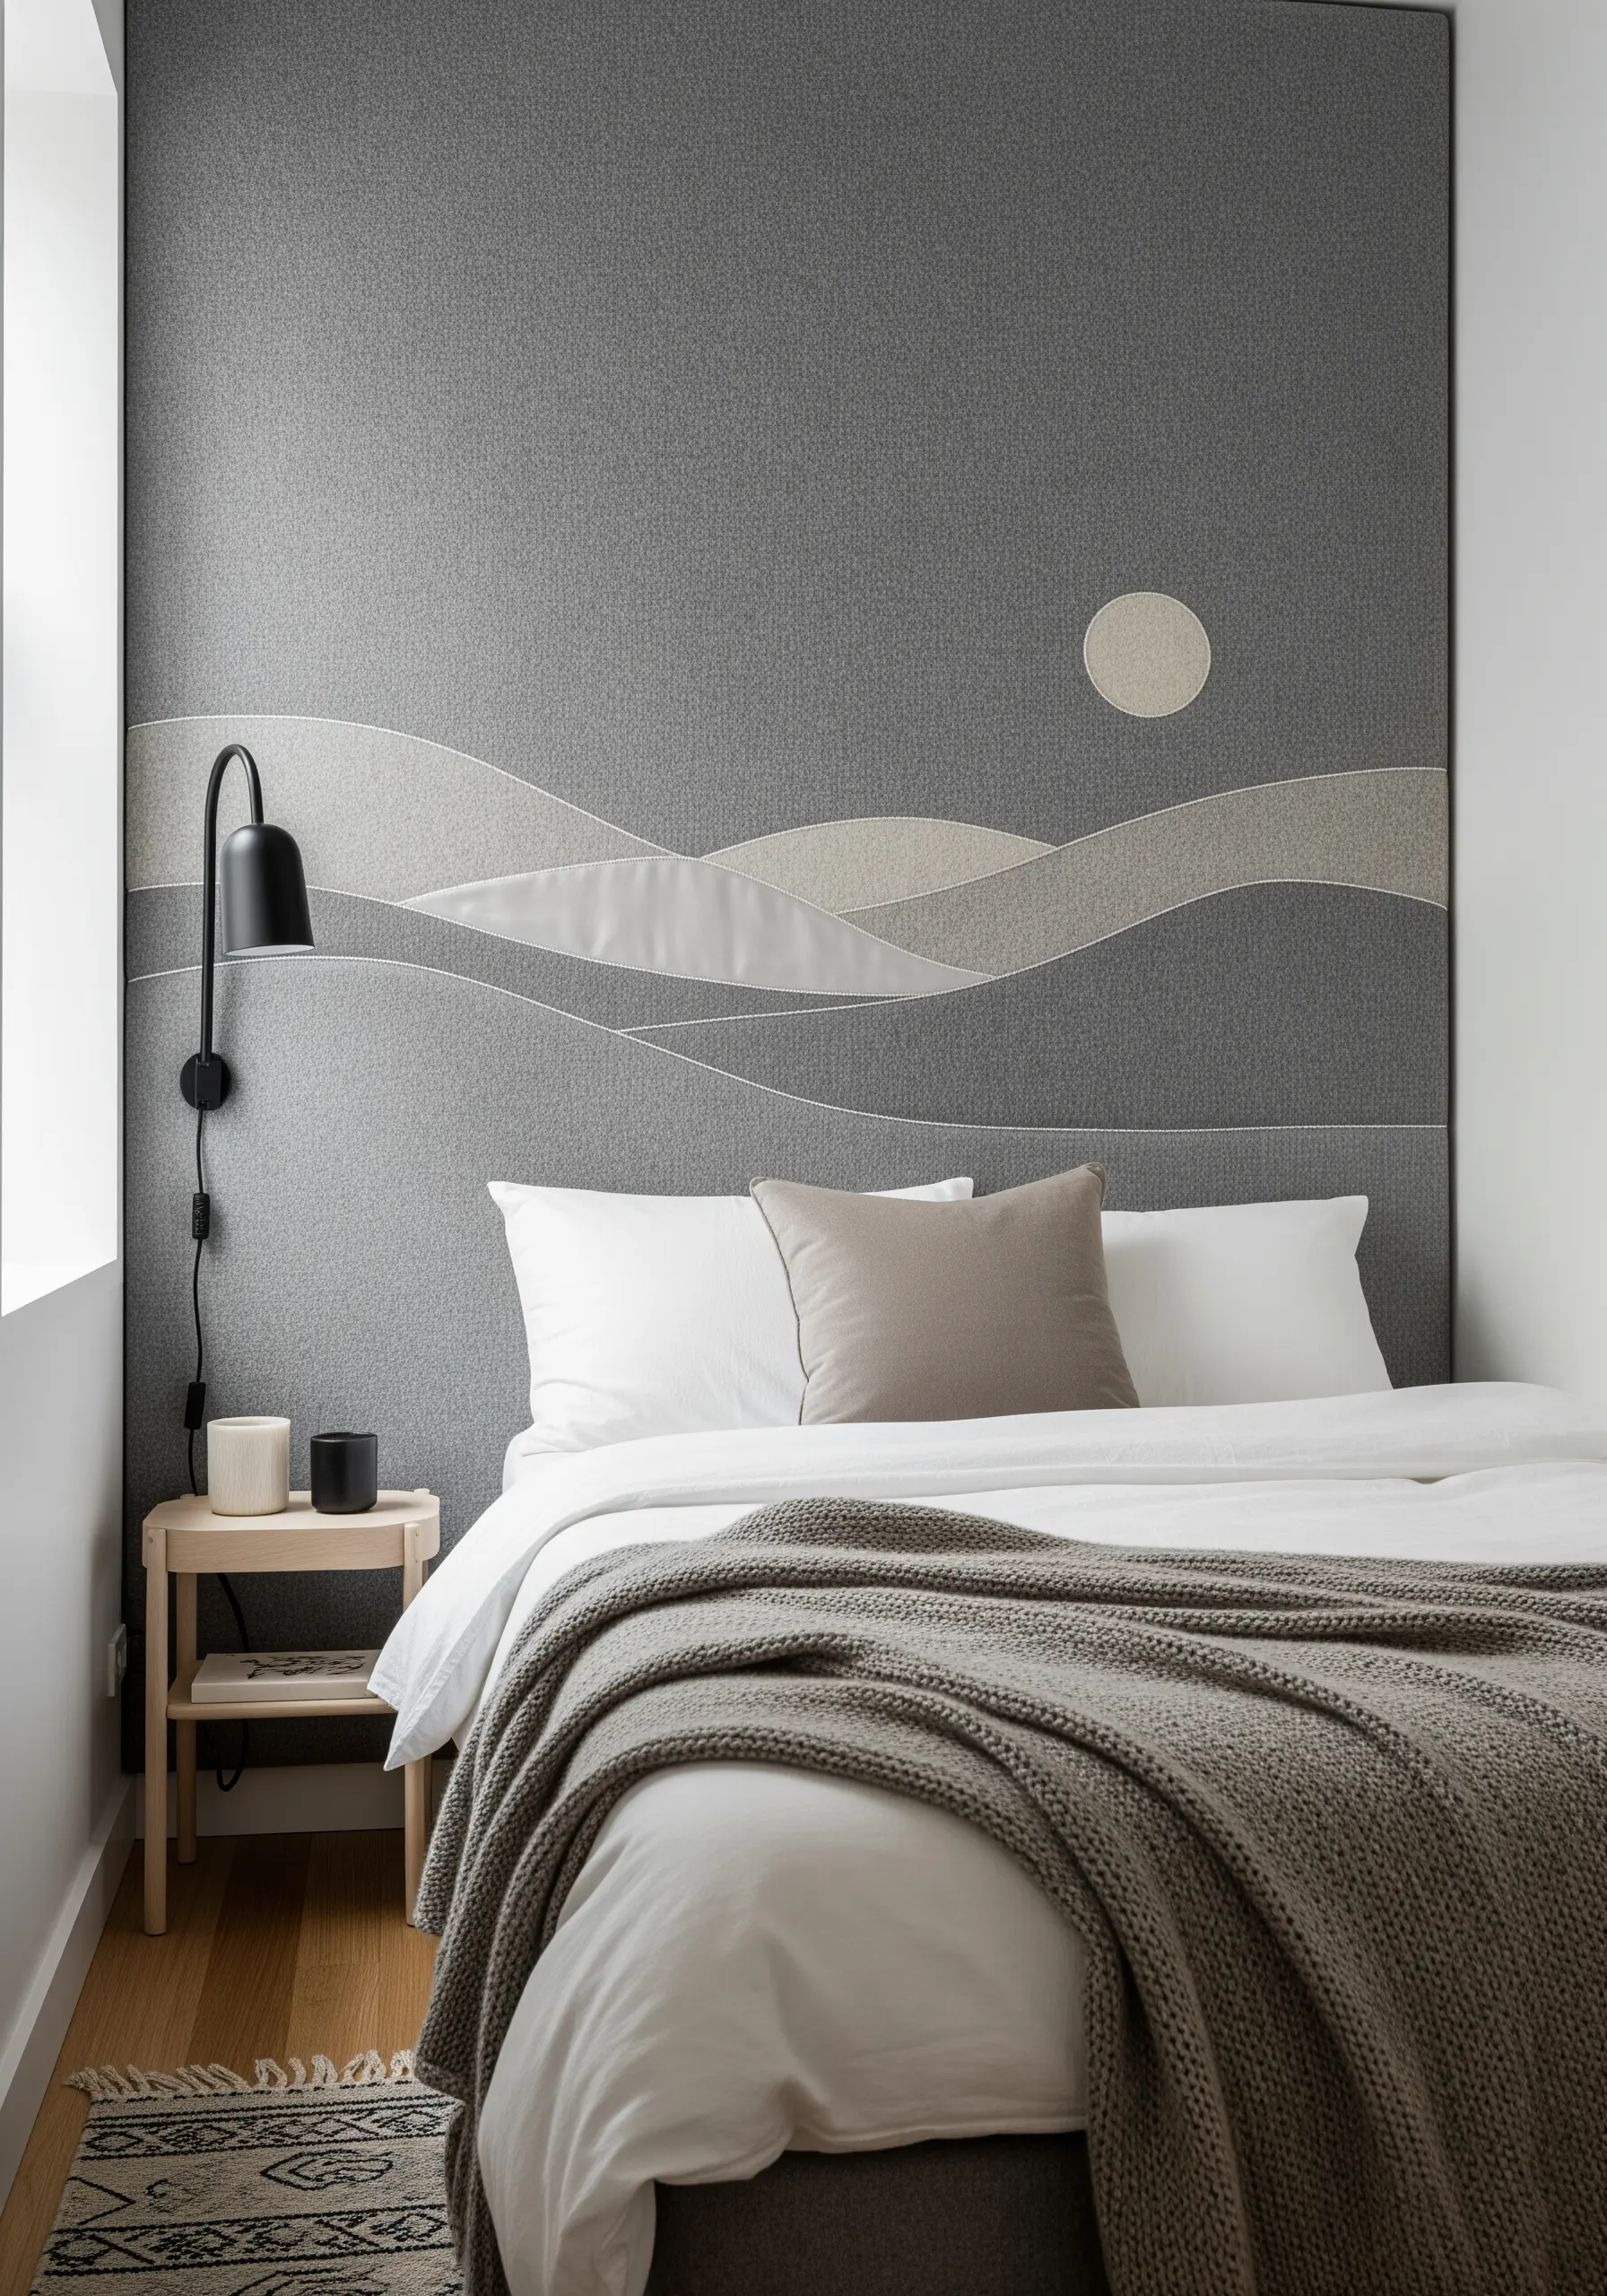
Instead of filling large areas with stitch, “paint” with fabric itself.
Create a minimal, abstract landscape on a headboard or wall hanging by layering different neutral-toned fabrics.
Cut your shapes—rolling hills, a sun, or clouds—and apply them to your base fabric using fusible webbing for clean, sharp edges.
You can then add a fine line of running stitch or backstitch around each shape to provide subtle definition, turning the piece into a stunning work of fabric collage embroidery.
23. Build Concentric Circles of Tactile Knots
Create a richly textured, dimensional surface by clustering knots together.
The colonial knot is a fantastic alternative to the French knot—it’s sturdier and creates a slightly rounder, tighter nub of thread.
Arrange them in a dense spiral on a round cushion, working from the center outwards.
The resulting texture is incredibly plush and inviting, proving how abstract texture play can make monochrome thread look multi-dimensional.
24. Compose Minimalist Art with Woven Panels
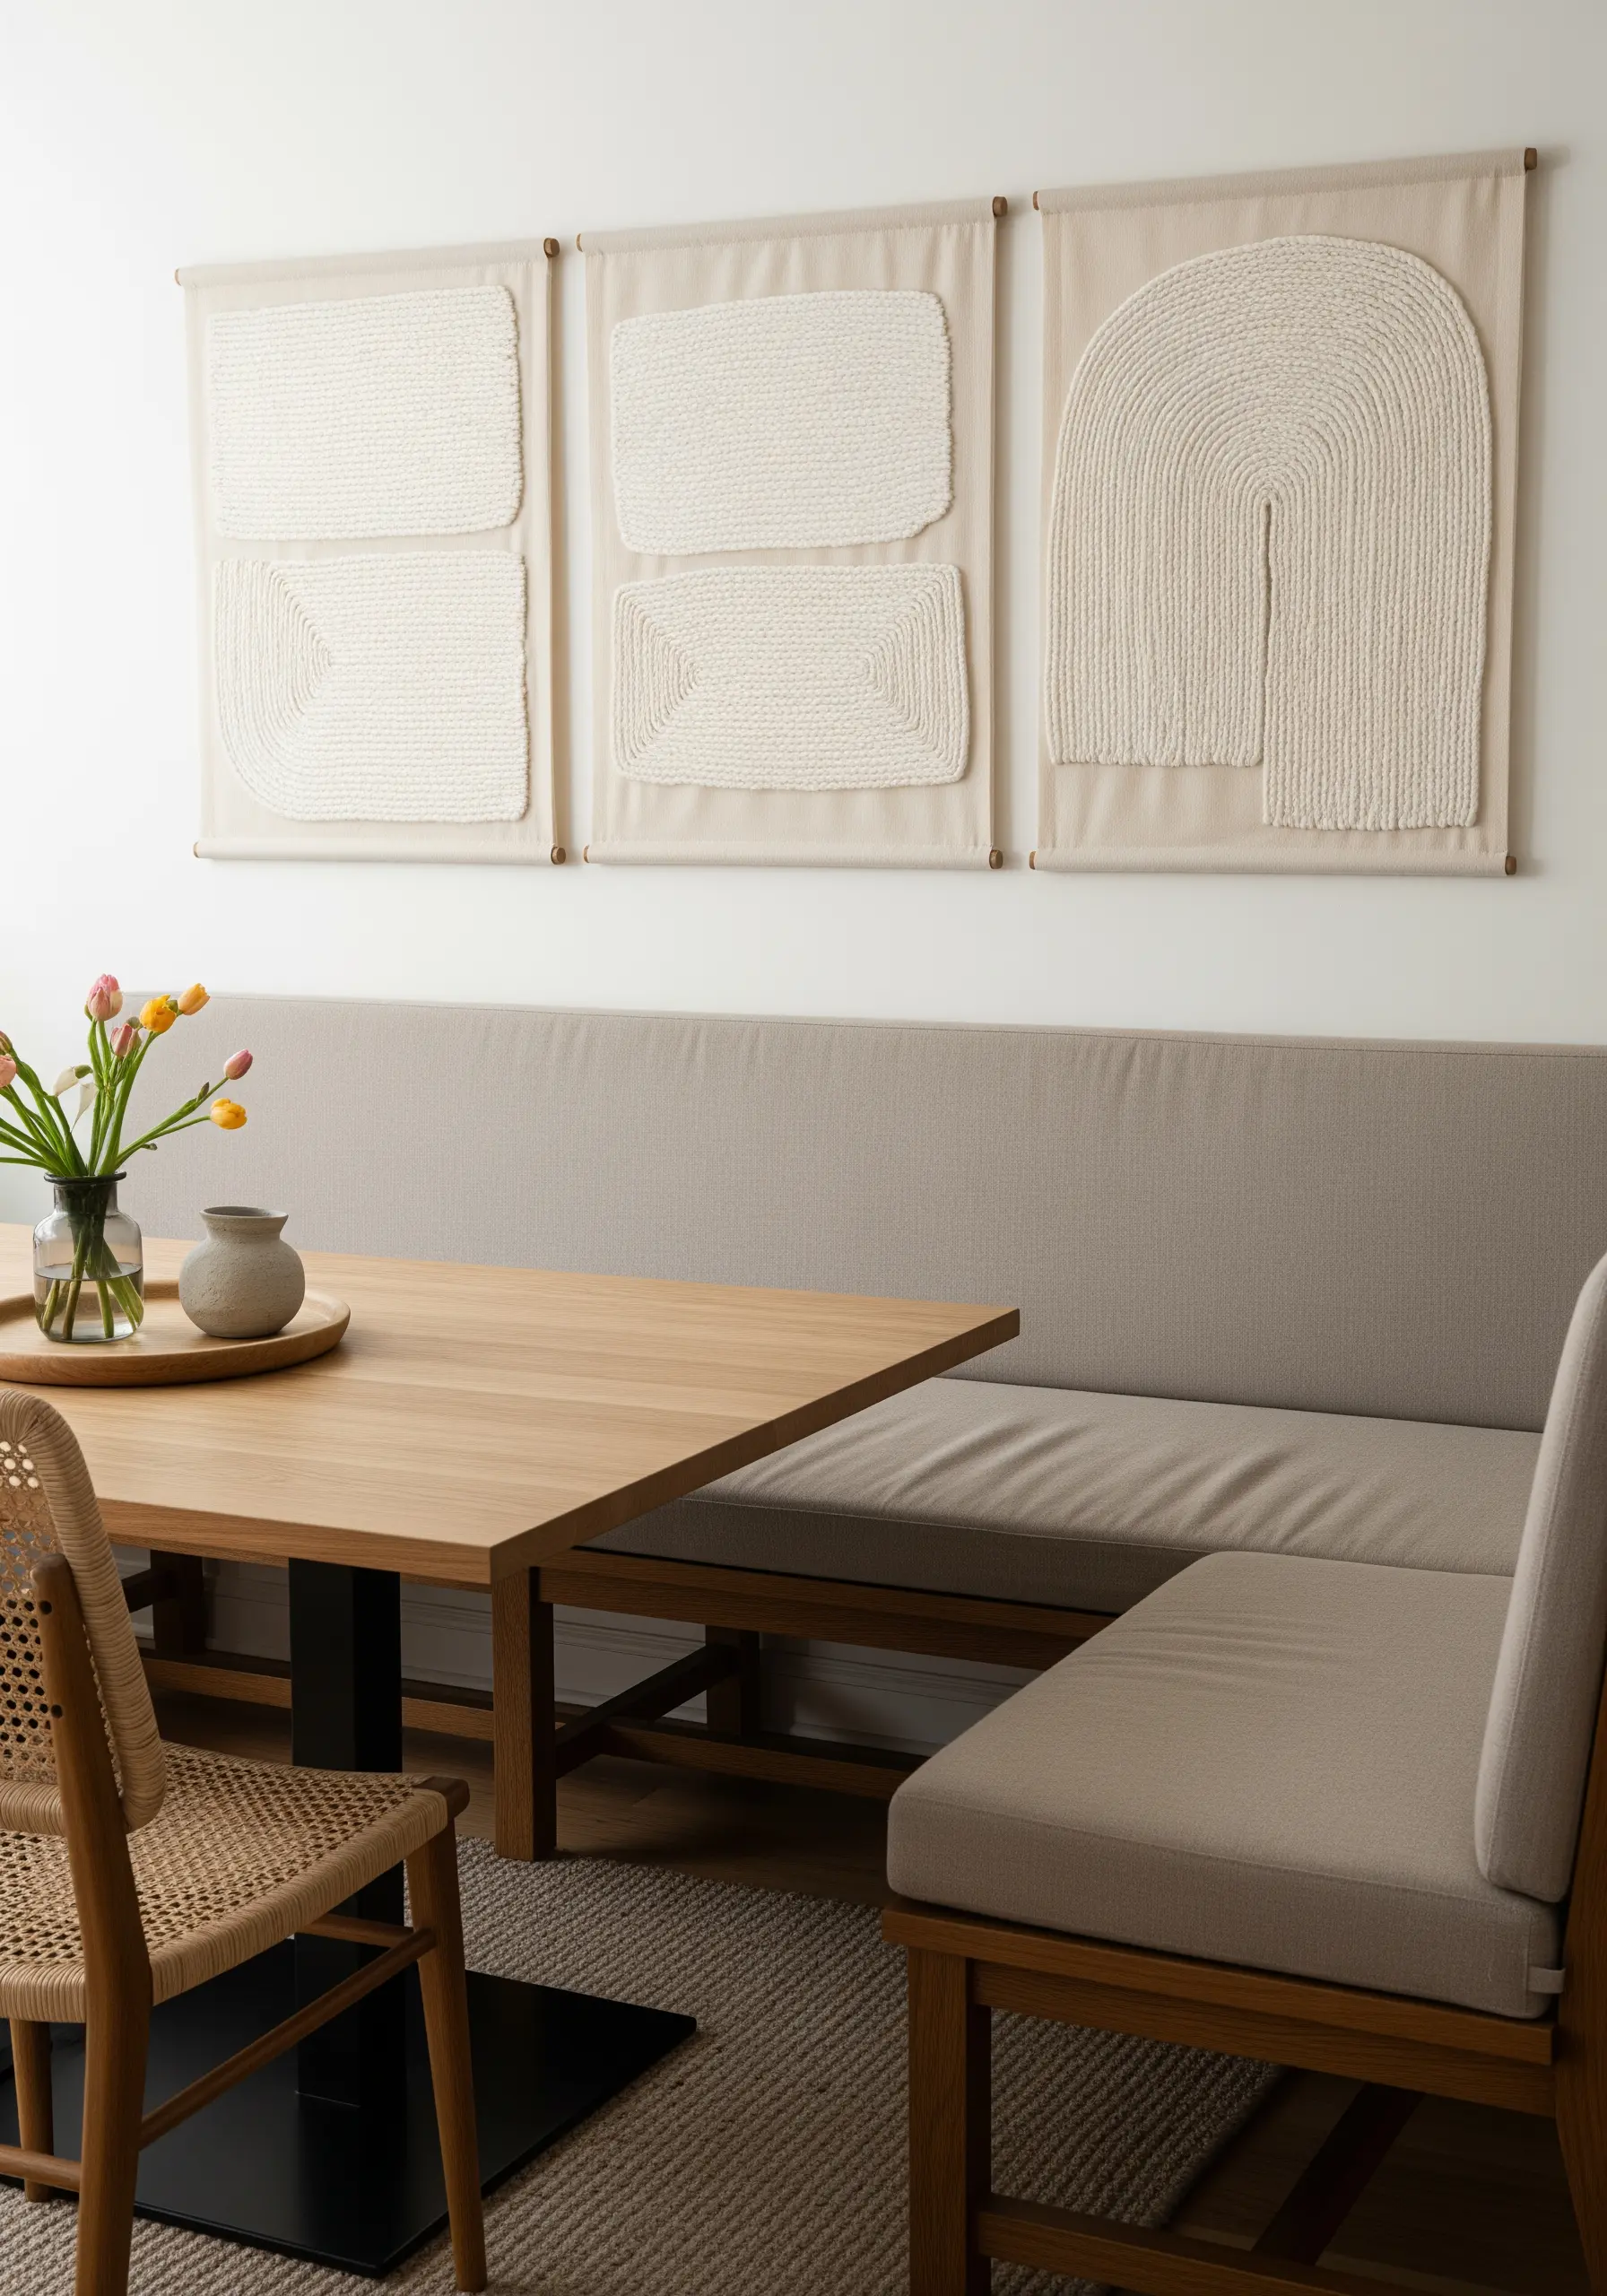
For a large, empty wall, consider creating a triptych of minimalist fiber art panels.
Stretch a neutral-colored base fabric, like linen, in three separate frames.
On each panel, create a simple, raised geometric shape using a flat punch needle stitch (the side without loops) or by weaving yarn directly onto the fabric.
The clean forms and woven texture create a calm, architectural feel, turning simple thread into a modern fiber art installation.
25. Give Soft Sculptures Personality with Minimal Stitches

When creating soft sculptures from felt, like a baby mobile, a few carefully placed stitches are all you need to bring them to life.
Felt is ideal because it doesn’t fray, allowing for clean edges.
After stuffing your shapes, use just two or three tiny backstitches in a contrasting color to create a sleepy eye or a gentle smile.
This minimalist approach to detail adds immense character and charm, perfect for creating cloud-soft nursery decor.


