

Have you ever finished an embroidery piece and felt that something was missing? You followed the pattern, used the right colors, but it doesn’t have that polished, intentional quality you admire in other artists’ work. It’s a quiet frustration, but a common one.
The secret to elevating your craft isn’t found in buying more expensive supplies or tackling impossibly complex designs. Instead, it lies in small, deliberate shifts in your technique—understanding how the direction of a stitch can create depth, how negative space can make a simple motif breathe, or how varying your thread weight can build subtle, captivating texture.
These ideas are designed to bridge that gap. They are not just patterns to copy, but principles to absorb. Each one offers a simple, achievable way to make your work look more refined, more artistic, and ultimately, more like you. It’s time to stitch with confidence and create work you are truly proud to display.
1. The Art of Negative Space in Botanical Embroidery
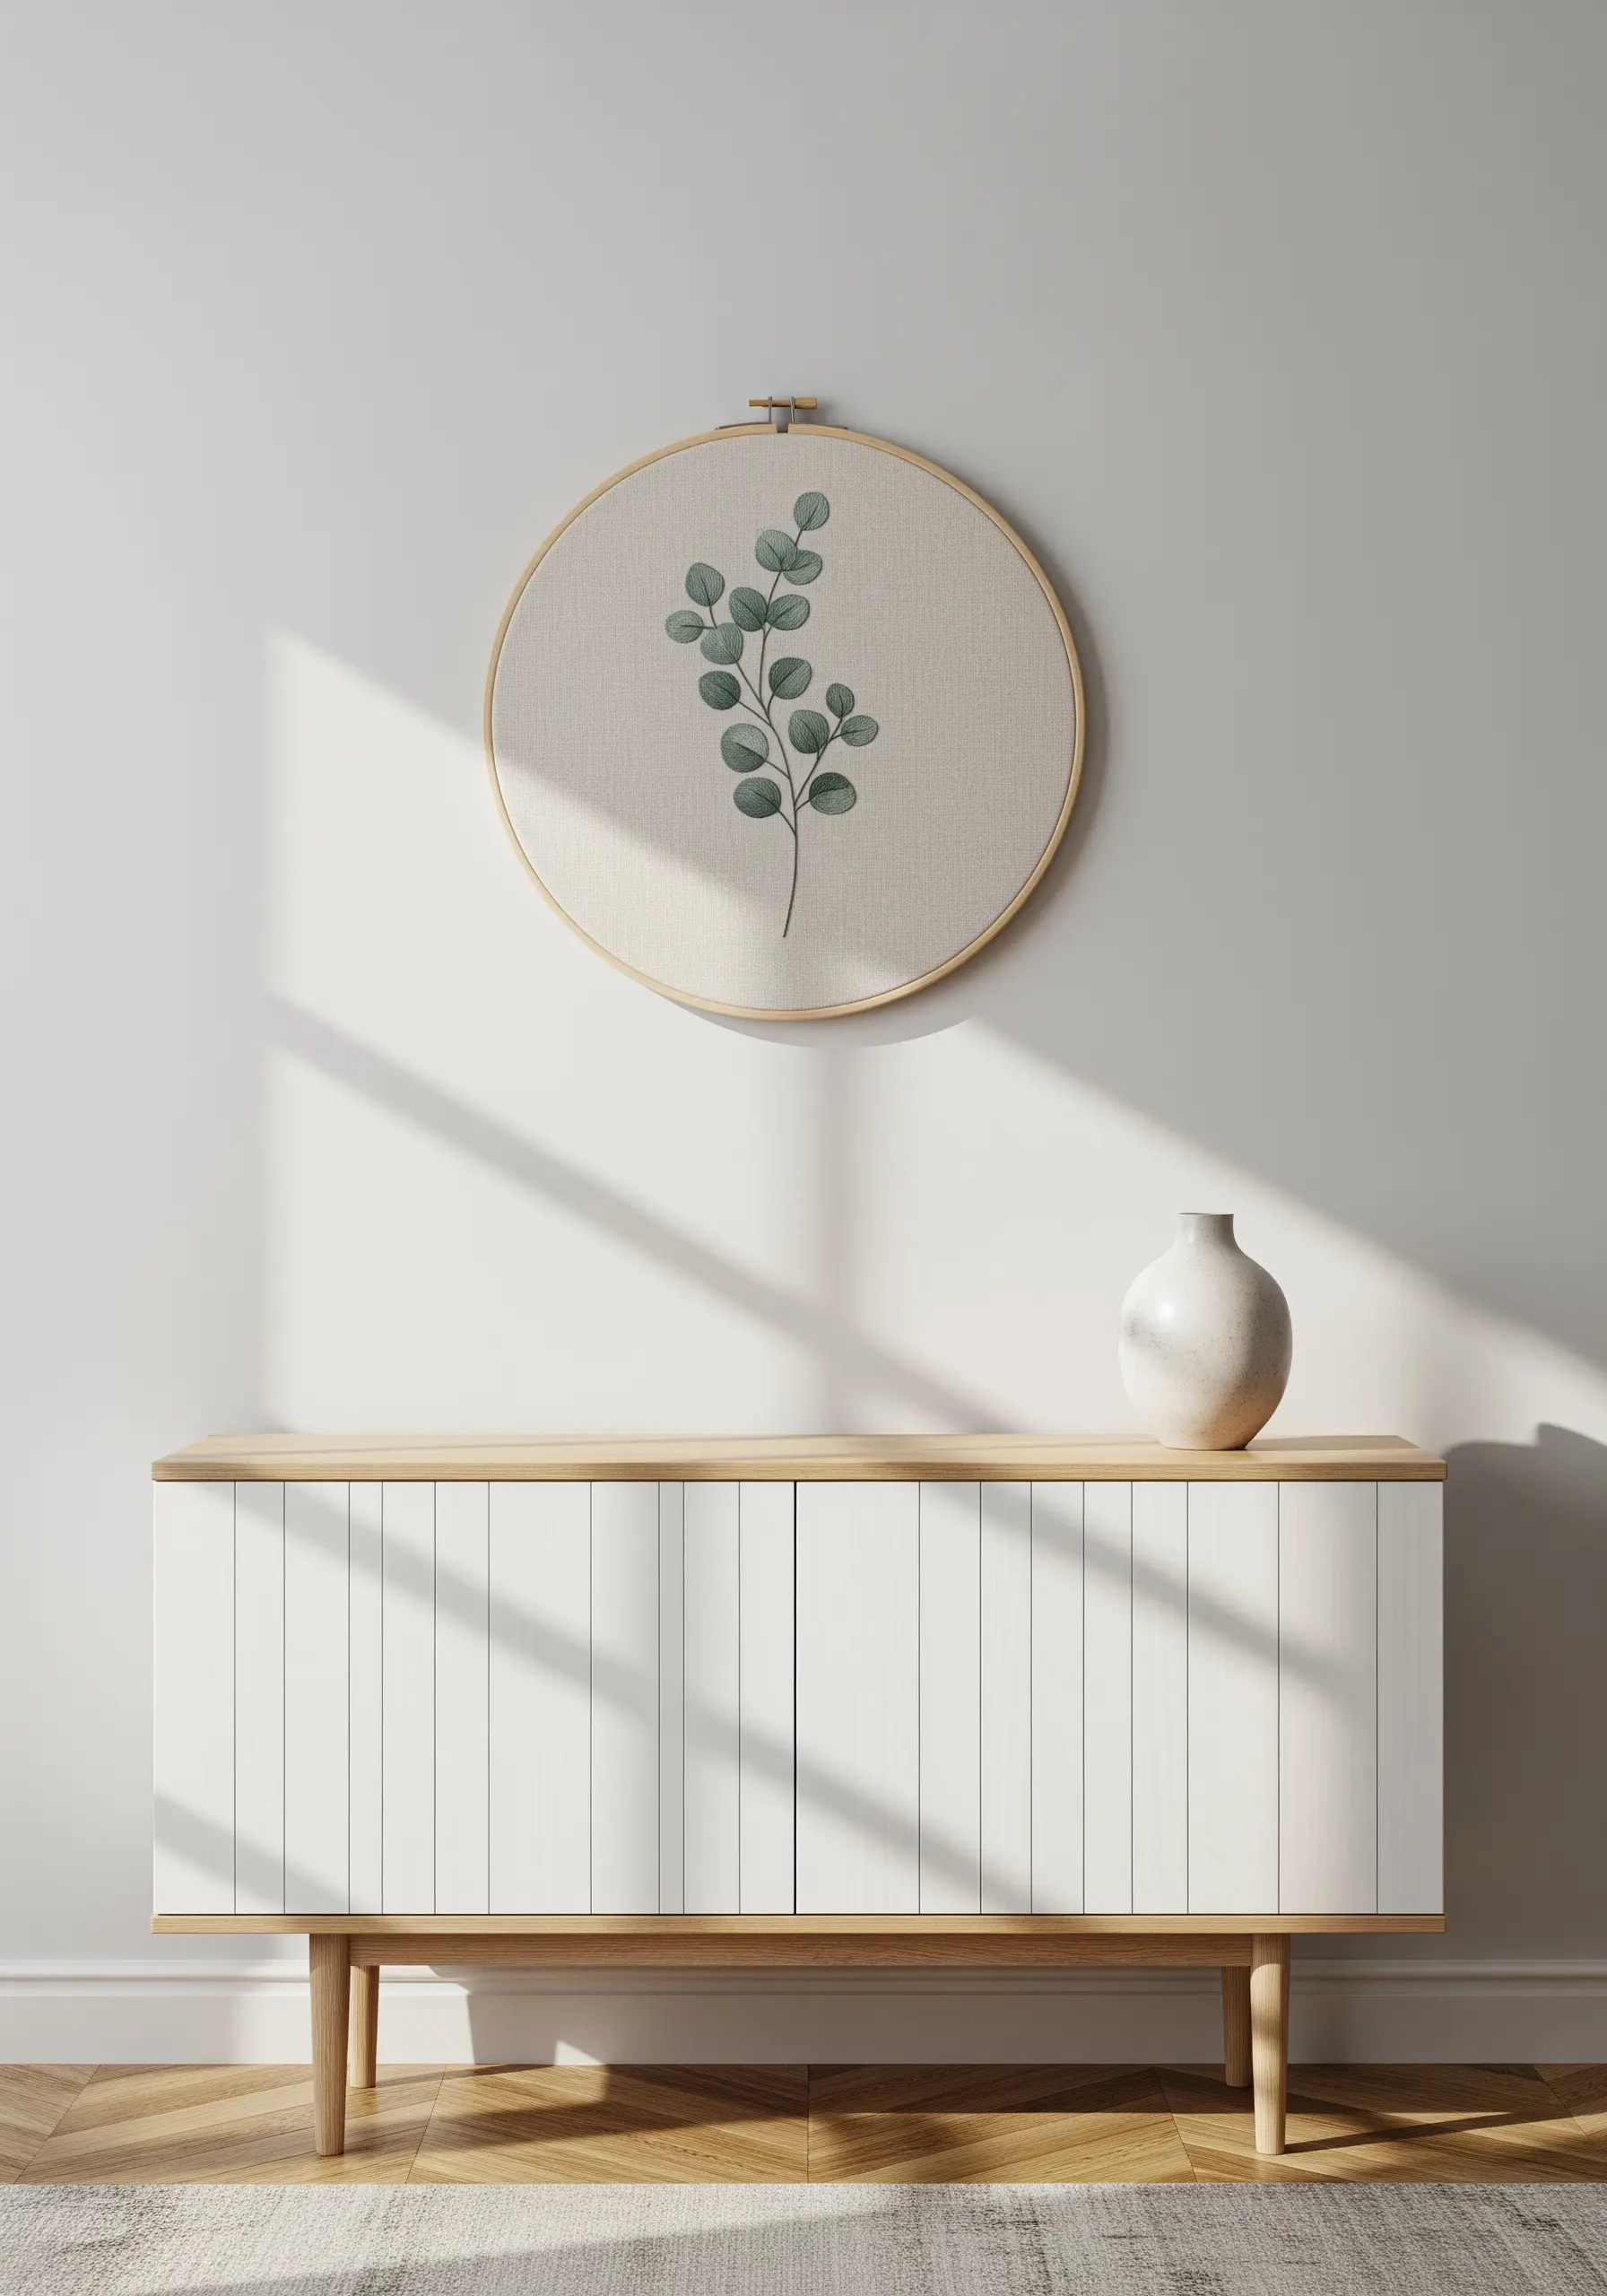
To achieve this serene, minimalist look, allow the texture of your linen fabric to become a central part of the design.
Use a single strand of floss for the delicate stems with a simple stem stitch, which creates a clean, flowing line.
For the leaves, switch to two strands and use a fishbone stitch—this technique builds in the central vein automatically, giving the leaves a natural shape and a hint of dimension.
The key is restraint; by stitching less, you create a more sophisticated and calming piece that feels both modern and timeless.
2. Create Luminous Radiance with Precision Straight Stitches

This high-impact design relies on precise execution, not complicated stitches.
Begin by lightly drawing pencil guidelines on your fabric with a ruler, radiating from a central point.
Use a single strand of a high-sheen or metallic thread, which will catch the light and create a beautiful shimmer.
By varying the lengths of your straight stitches and keeping the tension perfectly even, you can create a dynamic starburst that looks incredibly intricate and expensive.
3. Curated Pairs: Harmonizing Simple Kitchen Motifs
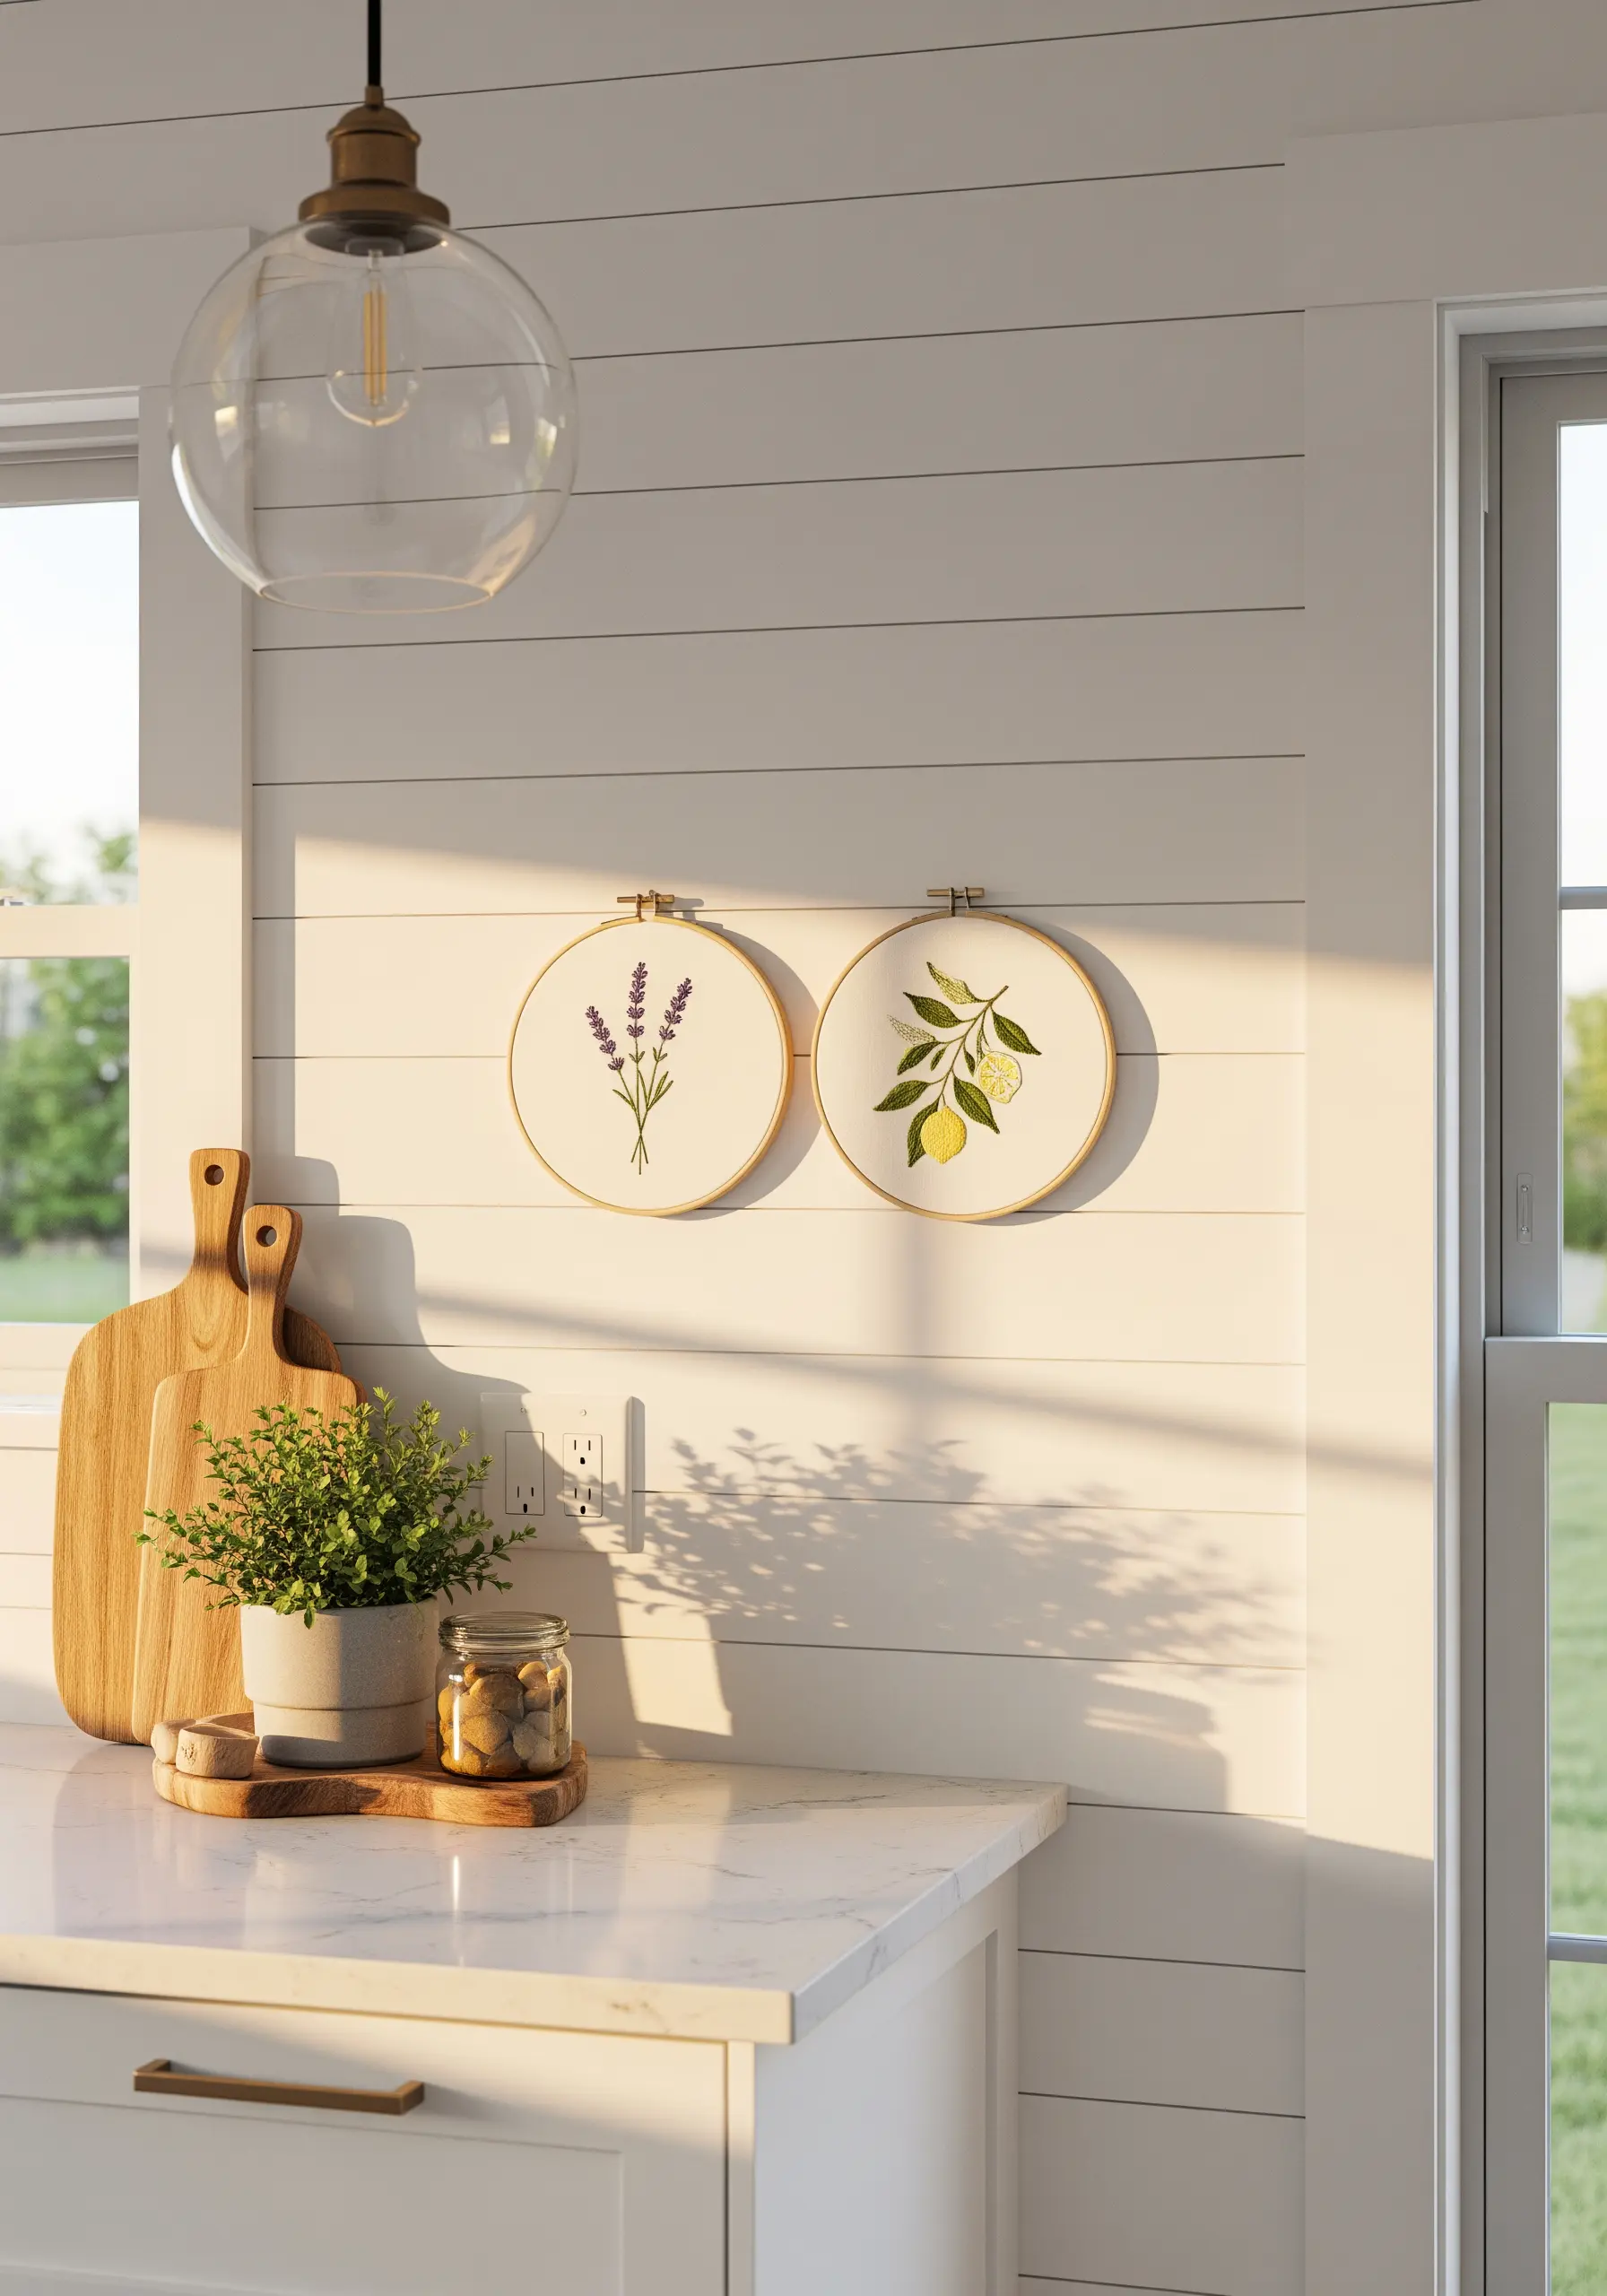
Elevate simple subjects by stitching them as a coordinated pair or trio.
For consistency, use the same size hoop and the same type of neutral linen fabric for each piece.
To give the lemon a plump, three-dimensional feel, use a padded satin stitch—simply add a layer of foundation stitches before covering it with your final, smooth layer.
For the lavender, detached chain stitches (lazy daisies) create perfect little buds, adding a delicate texture that contrasts beautifully.
4. Mastering Bold Color-Blocking with Satin Stitch
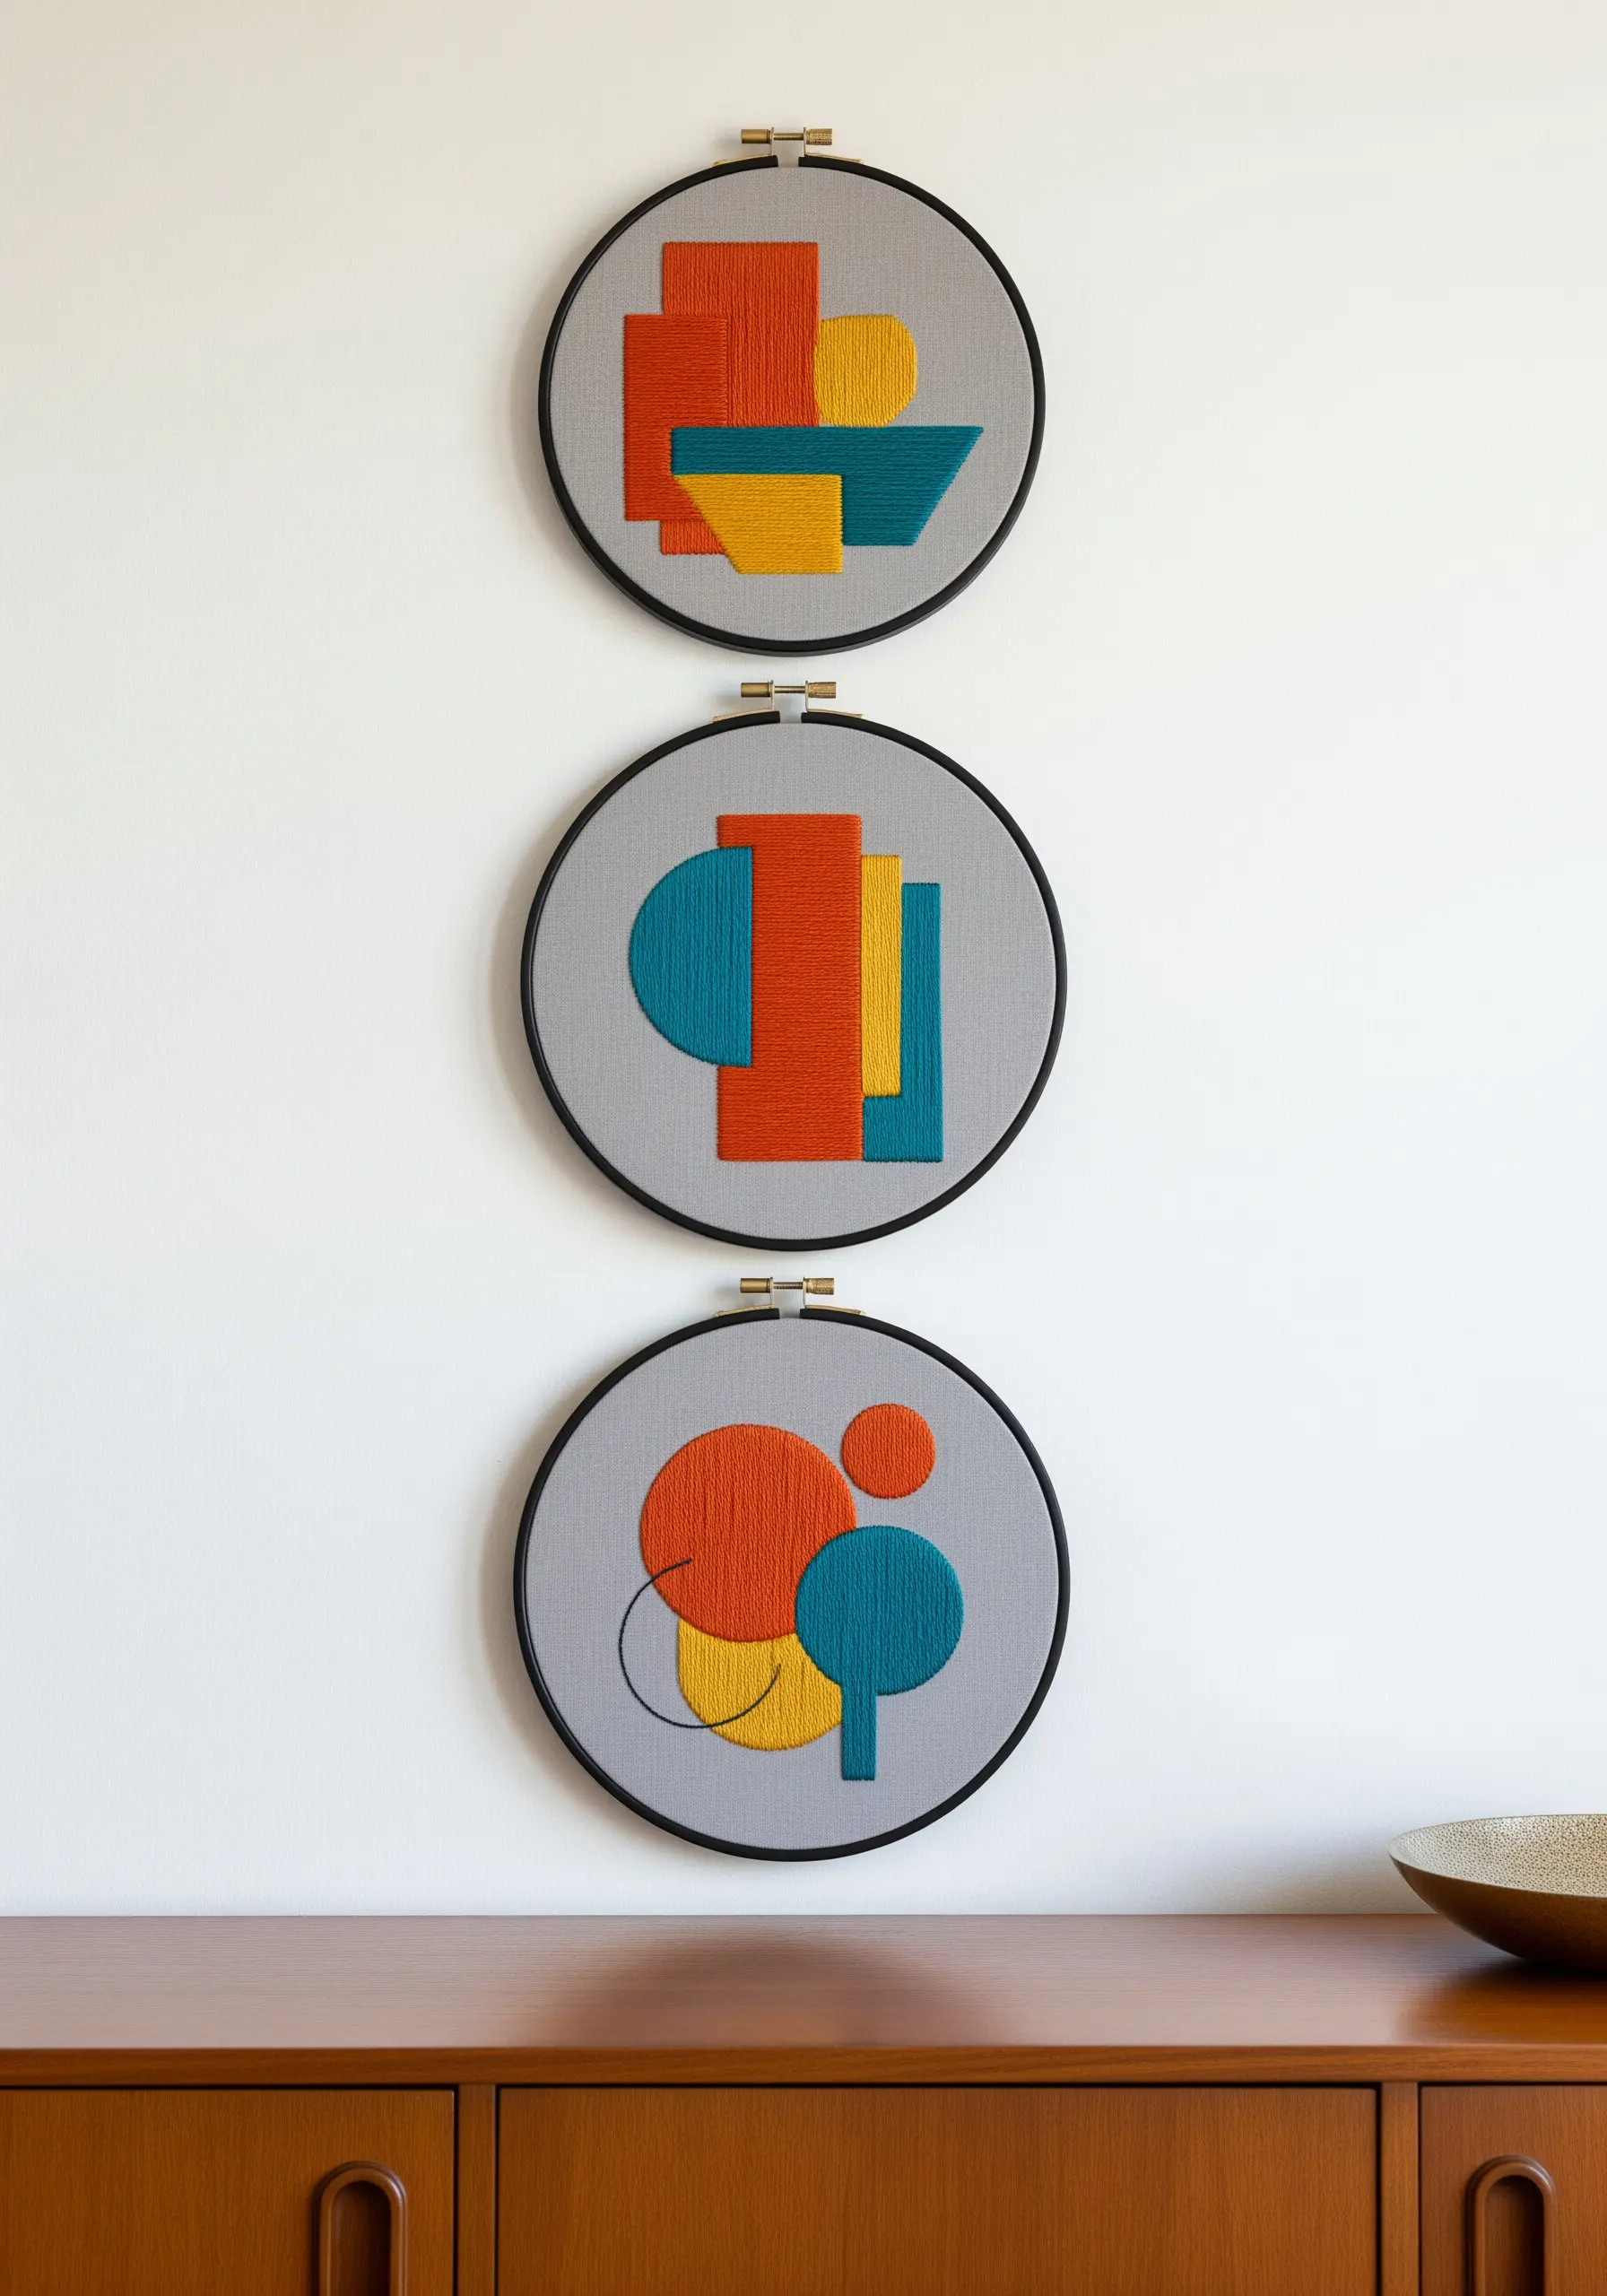
To achieve those perfectly crisp edges on your geometric shapes, first outline each section with a split stitch.
This simple step creates a raised border that acts as a guide, allowing you to nestle your satin stitches neatly against it for a sharp, clean line.
Use all six strands of your cotton floss to get that satisfyingly dense, opaque block of color.
Painting the hoop black adds a final graphic touch, transforming your stitching into a piece of modern art. It’s a striking way to create color-blocking embroidery patterns.
5. The Elegance of a Single, Unbroken Line
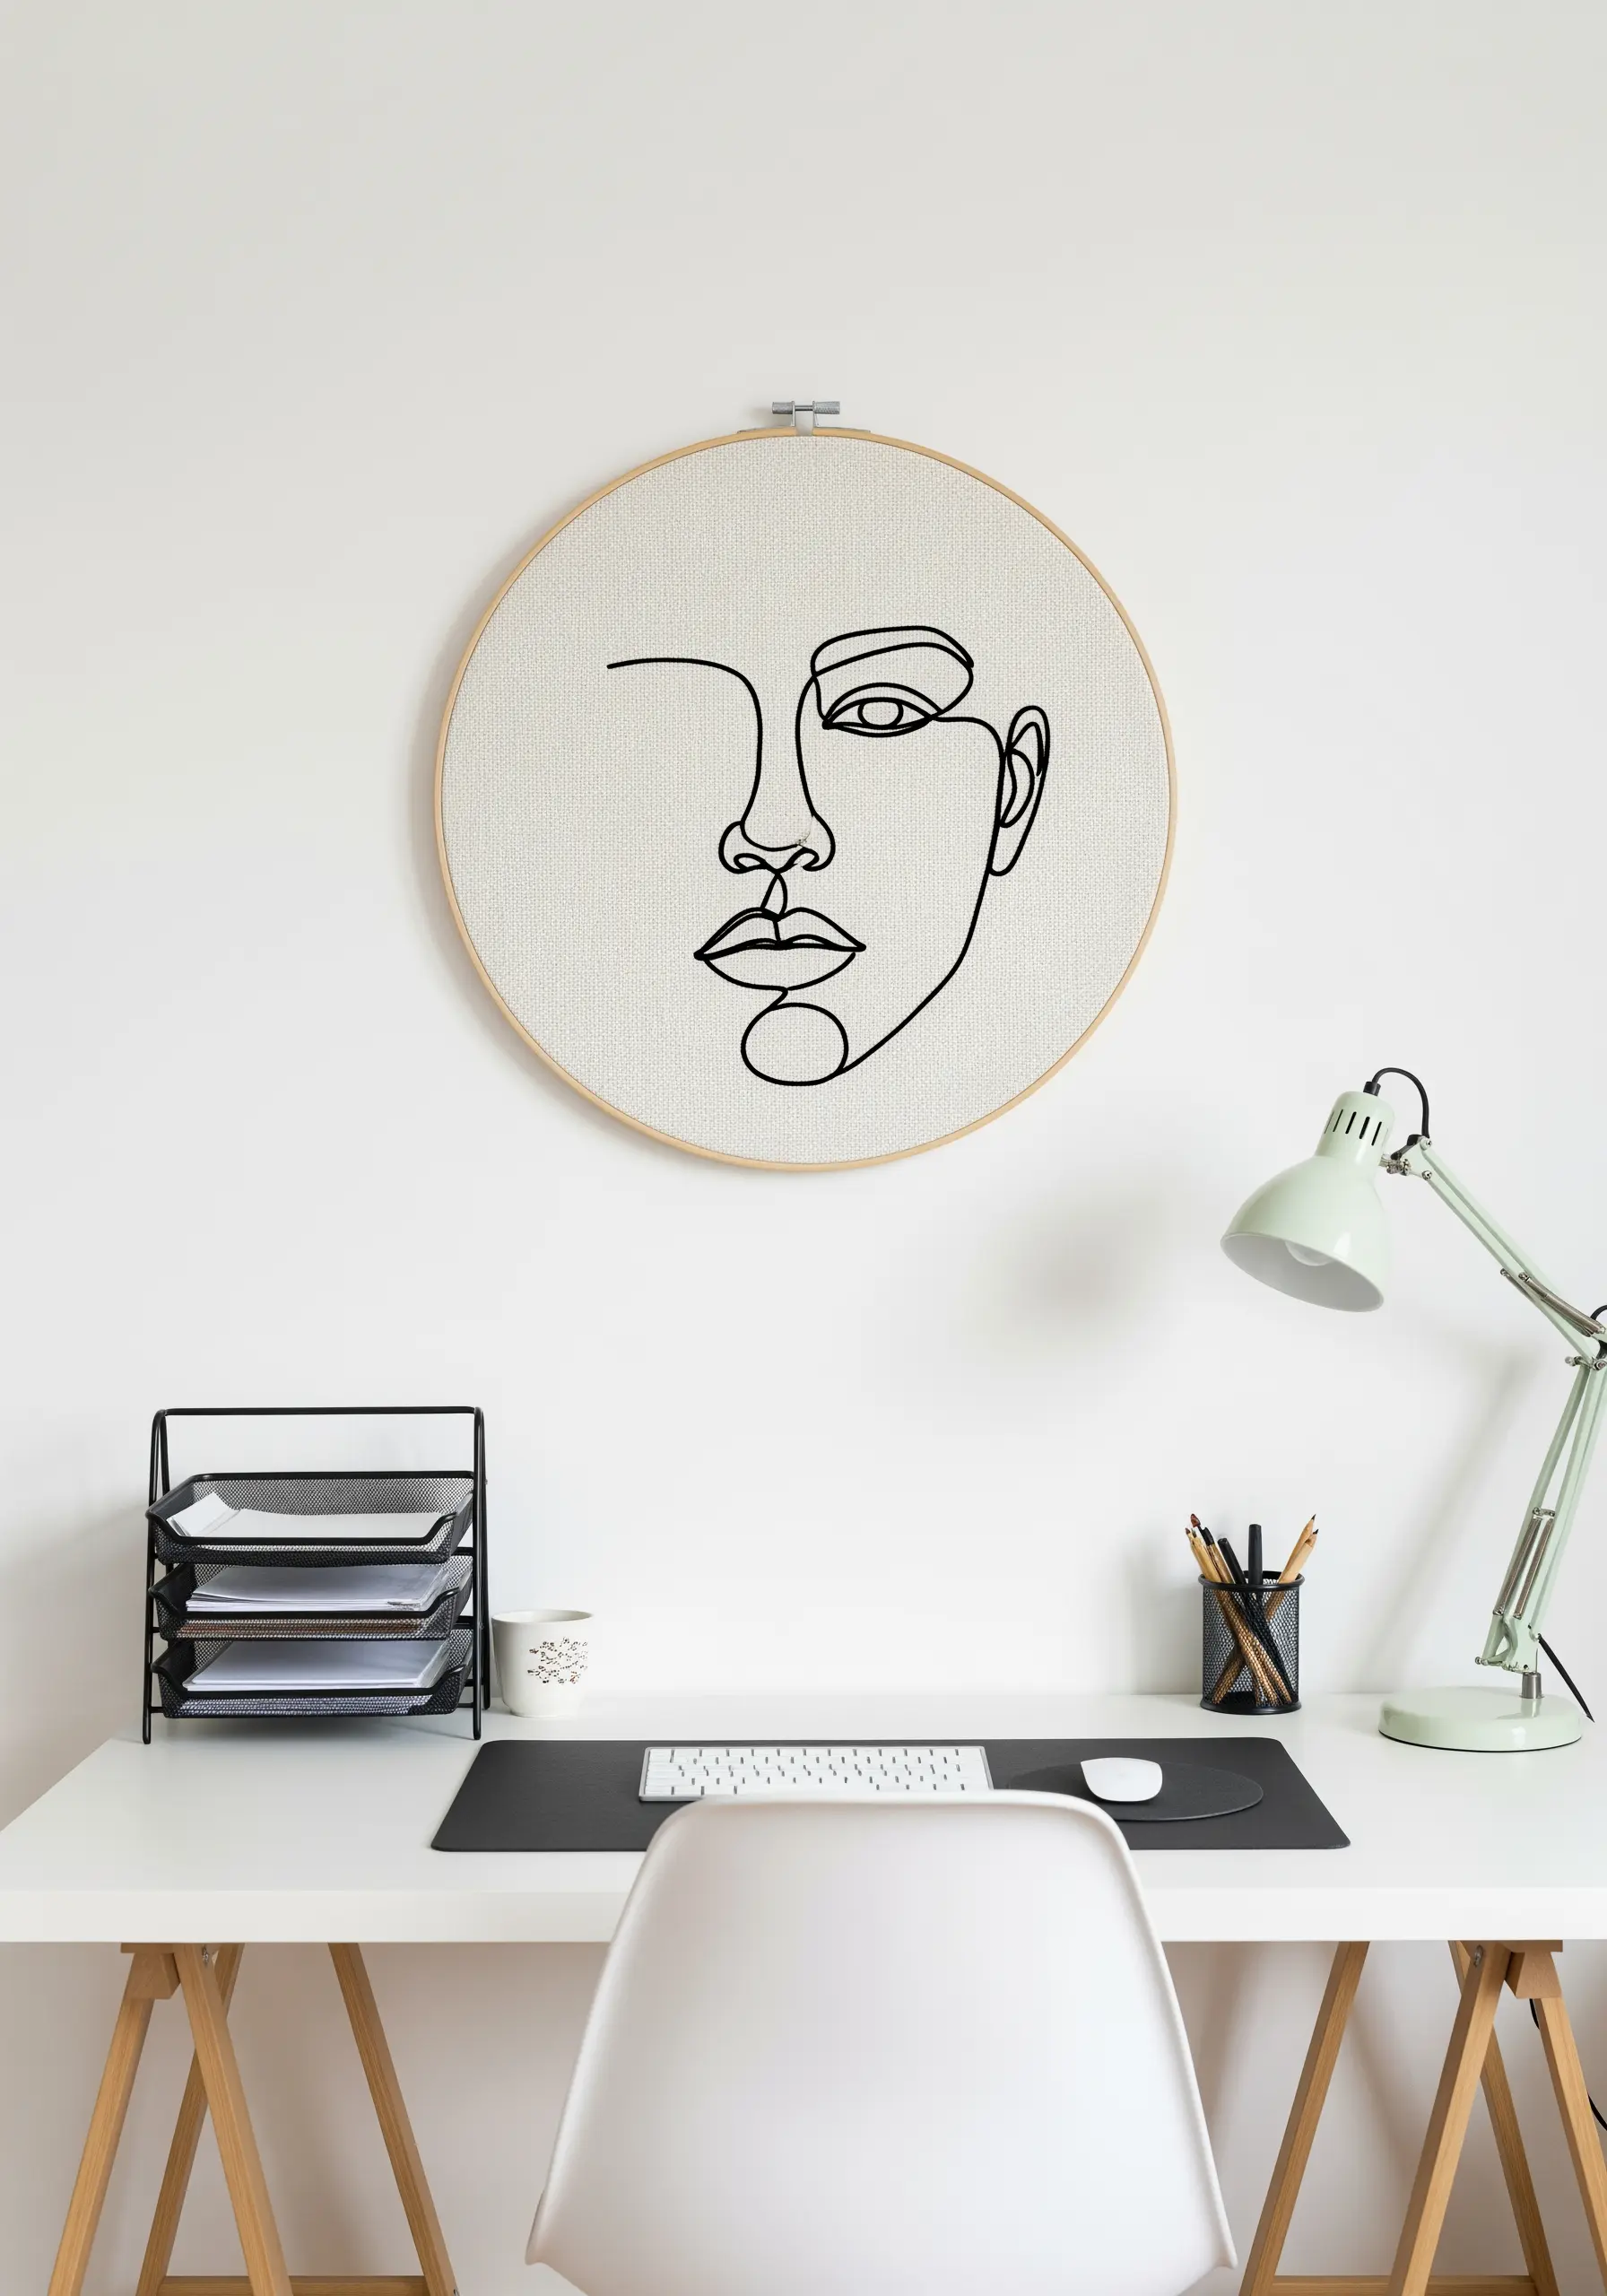
The secret to fluid, ink-like line art is choosing the right stitch.
Instead of a standard backstitch, which can look segmented on curves, use a whipped backstitch or a stem stitch.
Both techniques smooth over the individual stitches, creating the illusion of a single, continuous line.
Use three strands of black floss to give the line a confident weight that stands out against the fabric, turning a simple drawing into one of many powerful minimal portrait line embroidery projects.
6. Thread Painting on Velvet for Dramatic Depth

Stitching on velvet adds instant luxury, but the fabric requires a bit of care—always use a stabilizer on the back to prevent puckering and provide support.
To create this realistic monstera leaf, use a long-and-short stitch to blend three or four analogous shades of green thread.
Start with your darkest shade along the veins and work your way out to the lightest highlights.
The deep pile of the velvet absorbs light, which makes the silkiness of the thread stand out for a stunning textural and visual contrast.
7. Capturing Movement with Layered Running Stitches

This design proves that the simplest stitch can create the most dynamic effects.
Achieve this sense of movement by layering rows of running stitches in different shades of blue, teal, and seafoam green.
Create depth by varying the number of strands you use—a single strand for distant, light waves, and up to three strands for the darker, closer ones.
Allow your lines to be slightly imperfect and wavy; this enhances the organic, flowing energy of the water, making for one of the most serene coastal vibe embroidery projects.
8. Soft Fills and Gentle Outlines for Nursery Art
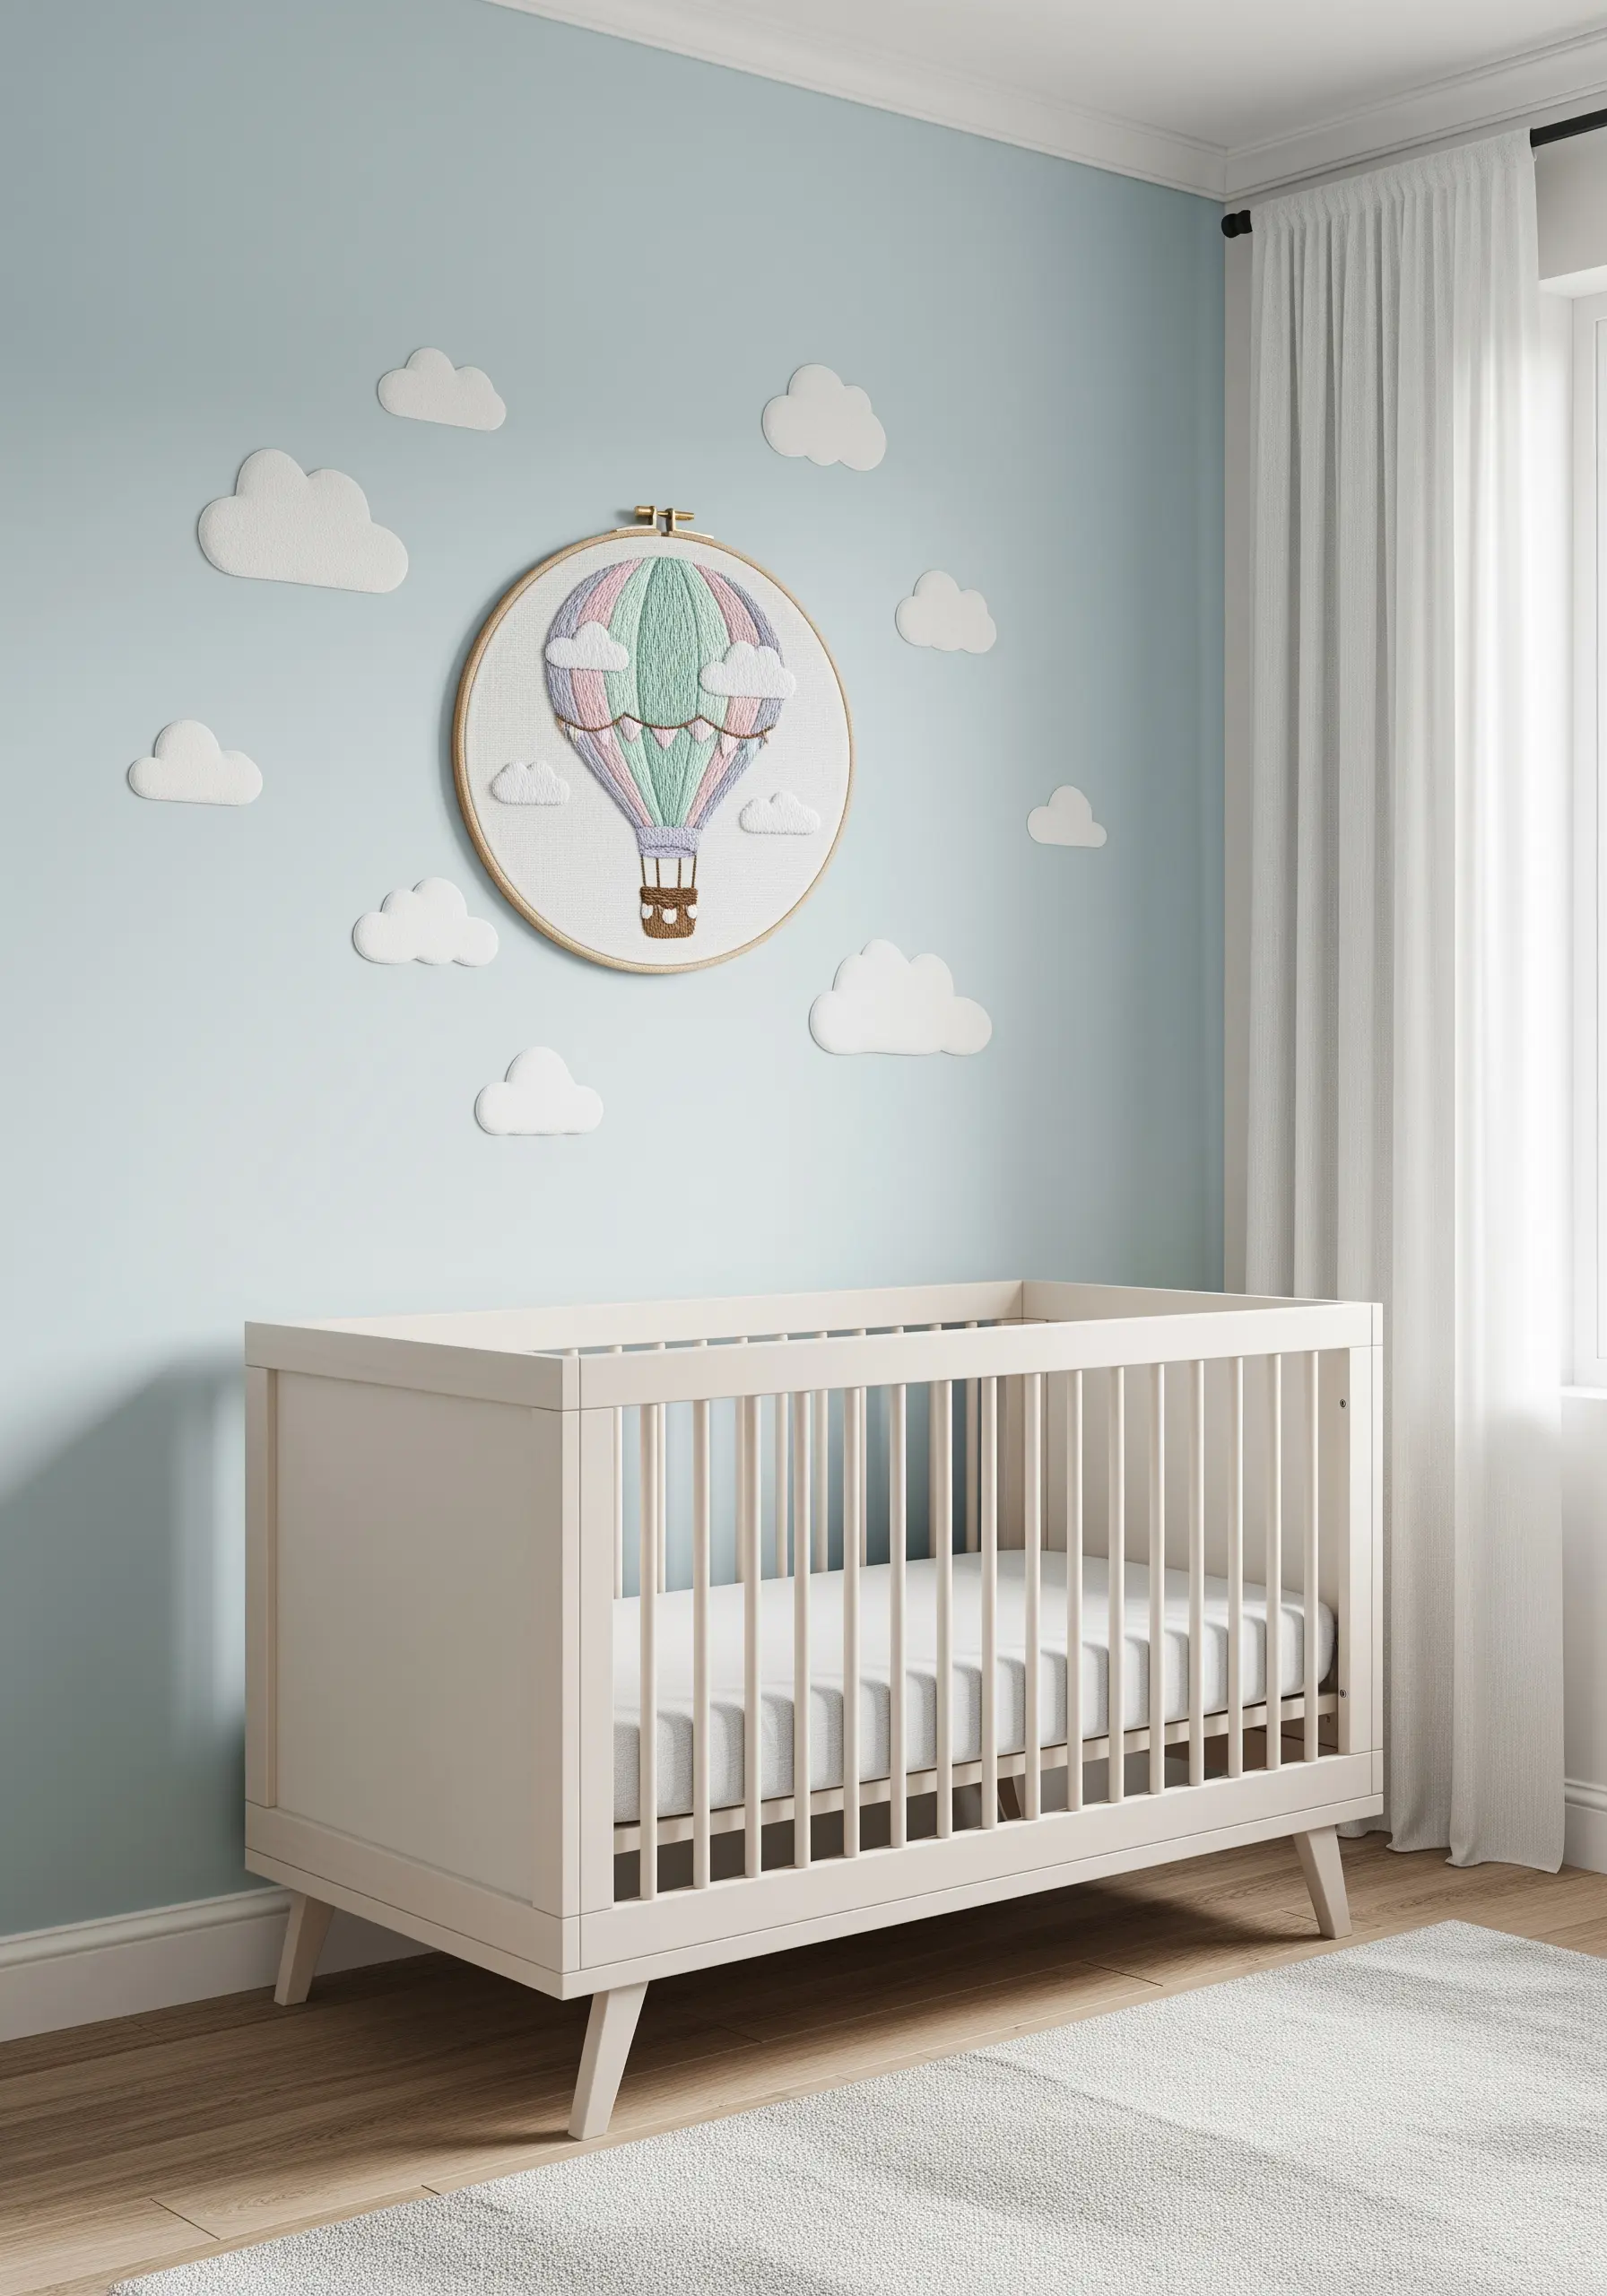
For nursery decor, a soft, gentle texture is often more pleasing than a dense, heavy fill.
Instead of using a satin stitch for the colored panels of the hot air balloon, try a spaced-out seed stitch or a light darning stitch.
This technique adds color and texture without feeling heavy or stiff, creating a delicate, storybook quality.
Pair this with a simple backstitch outline in a slightly darker shade to define the shape without overpowering it. This gentle approach is also perfect for dreamy baby clothing embroidery ideas.
9. Achieving Flawless Cursive with the Stem Stitch
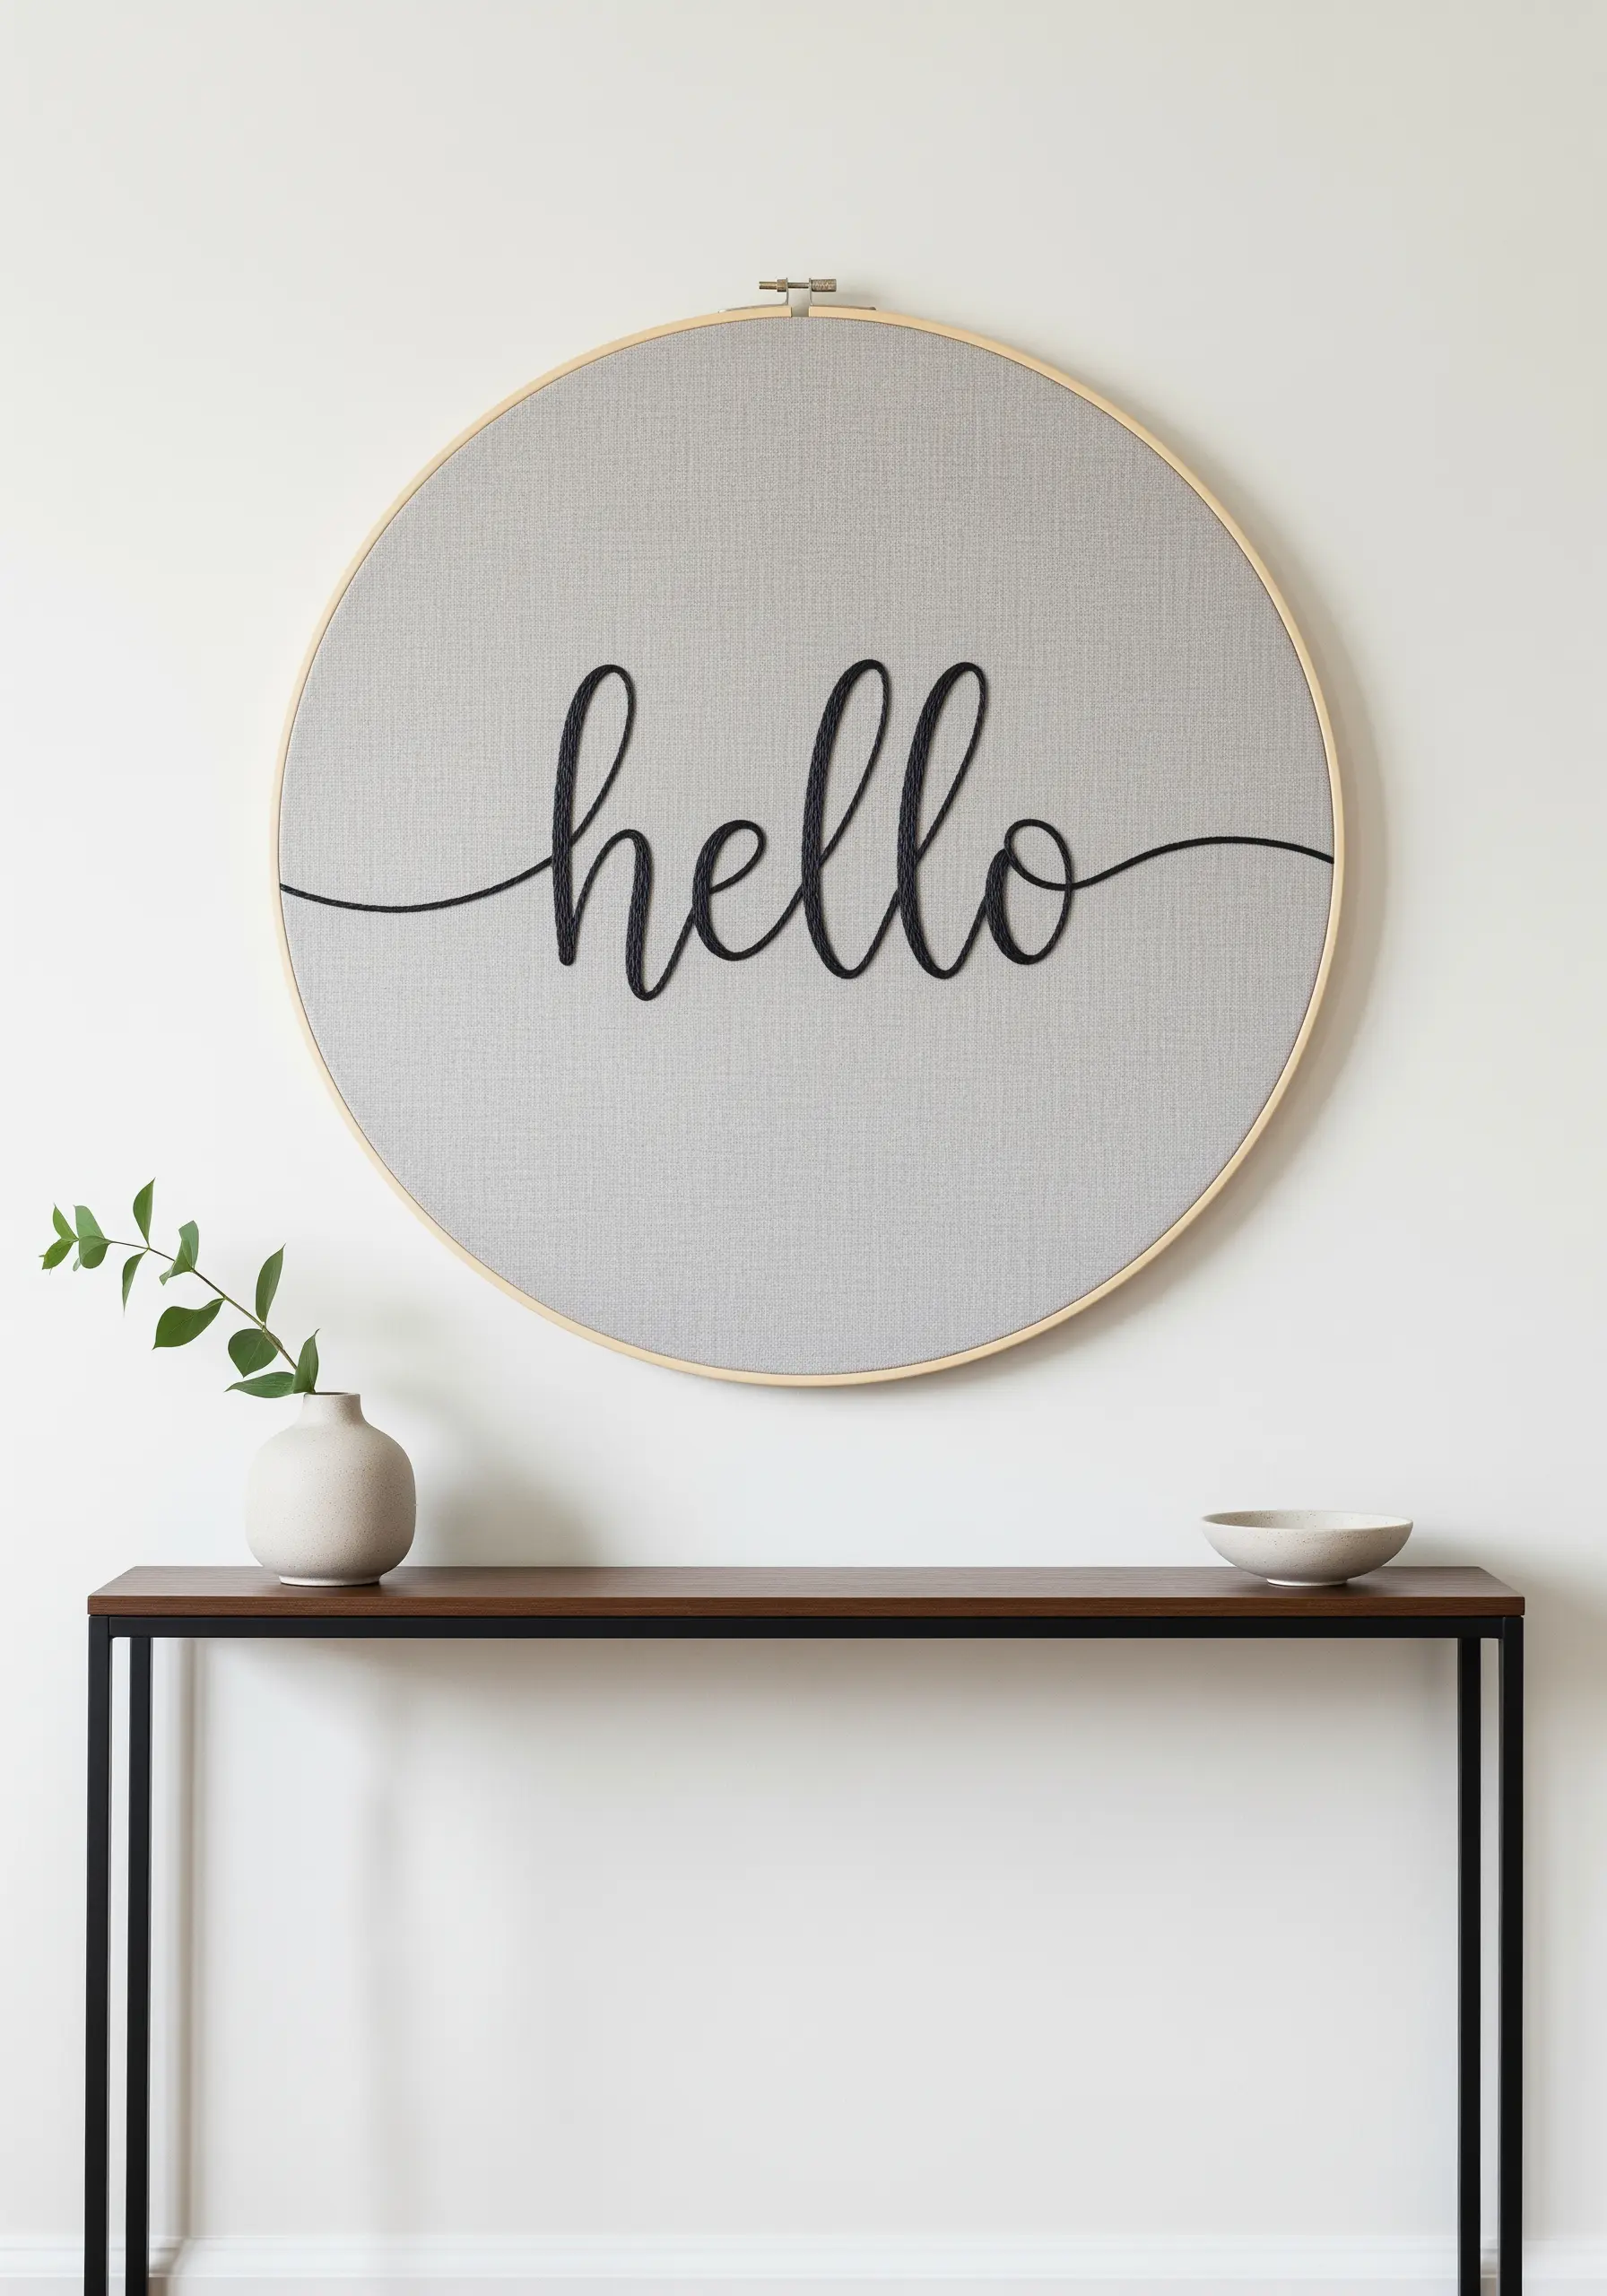
The stem stitch is the ideal choice for embroidering elegant, flowing script, as it naturally handles curves much more smoothly than a backstitch.
To create the thick-and-thin effect of modern calligraphy, simply double the stitch line on the downstrokes of the letters.
Just add a second row of stem stitches directly beside the first, which instantly adds weight and dimension.
This simple trick elevates basic lettering into sophisticated, professional-looking typography.
10. Star-Charting with French Knots and Straight Stitches

You can create a stunningly accurate and beautiful constellation map with just two simple stitches.
Use a single strand of white or metallic thread to create the delicate connecting lines with tiny straight stitches.
For the stars, use French knots and vary their size to indicate brightness: wrap the thread around the needle once for small, distant stars, and two or three times for the larger, more prominent ones.
This variation in knot size is what gives the piece its incredible depth and celestial magic.
11. Charming Kitchen Vignettes with Texture-Matched Stitches
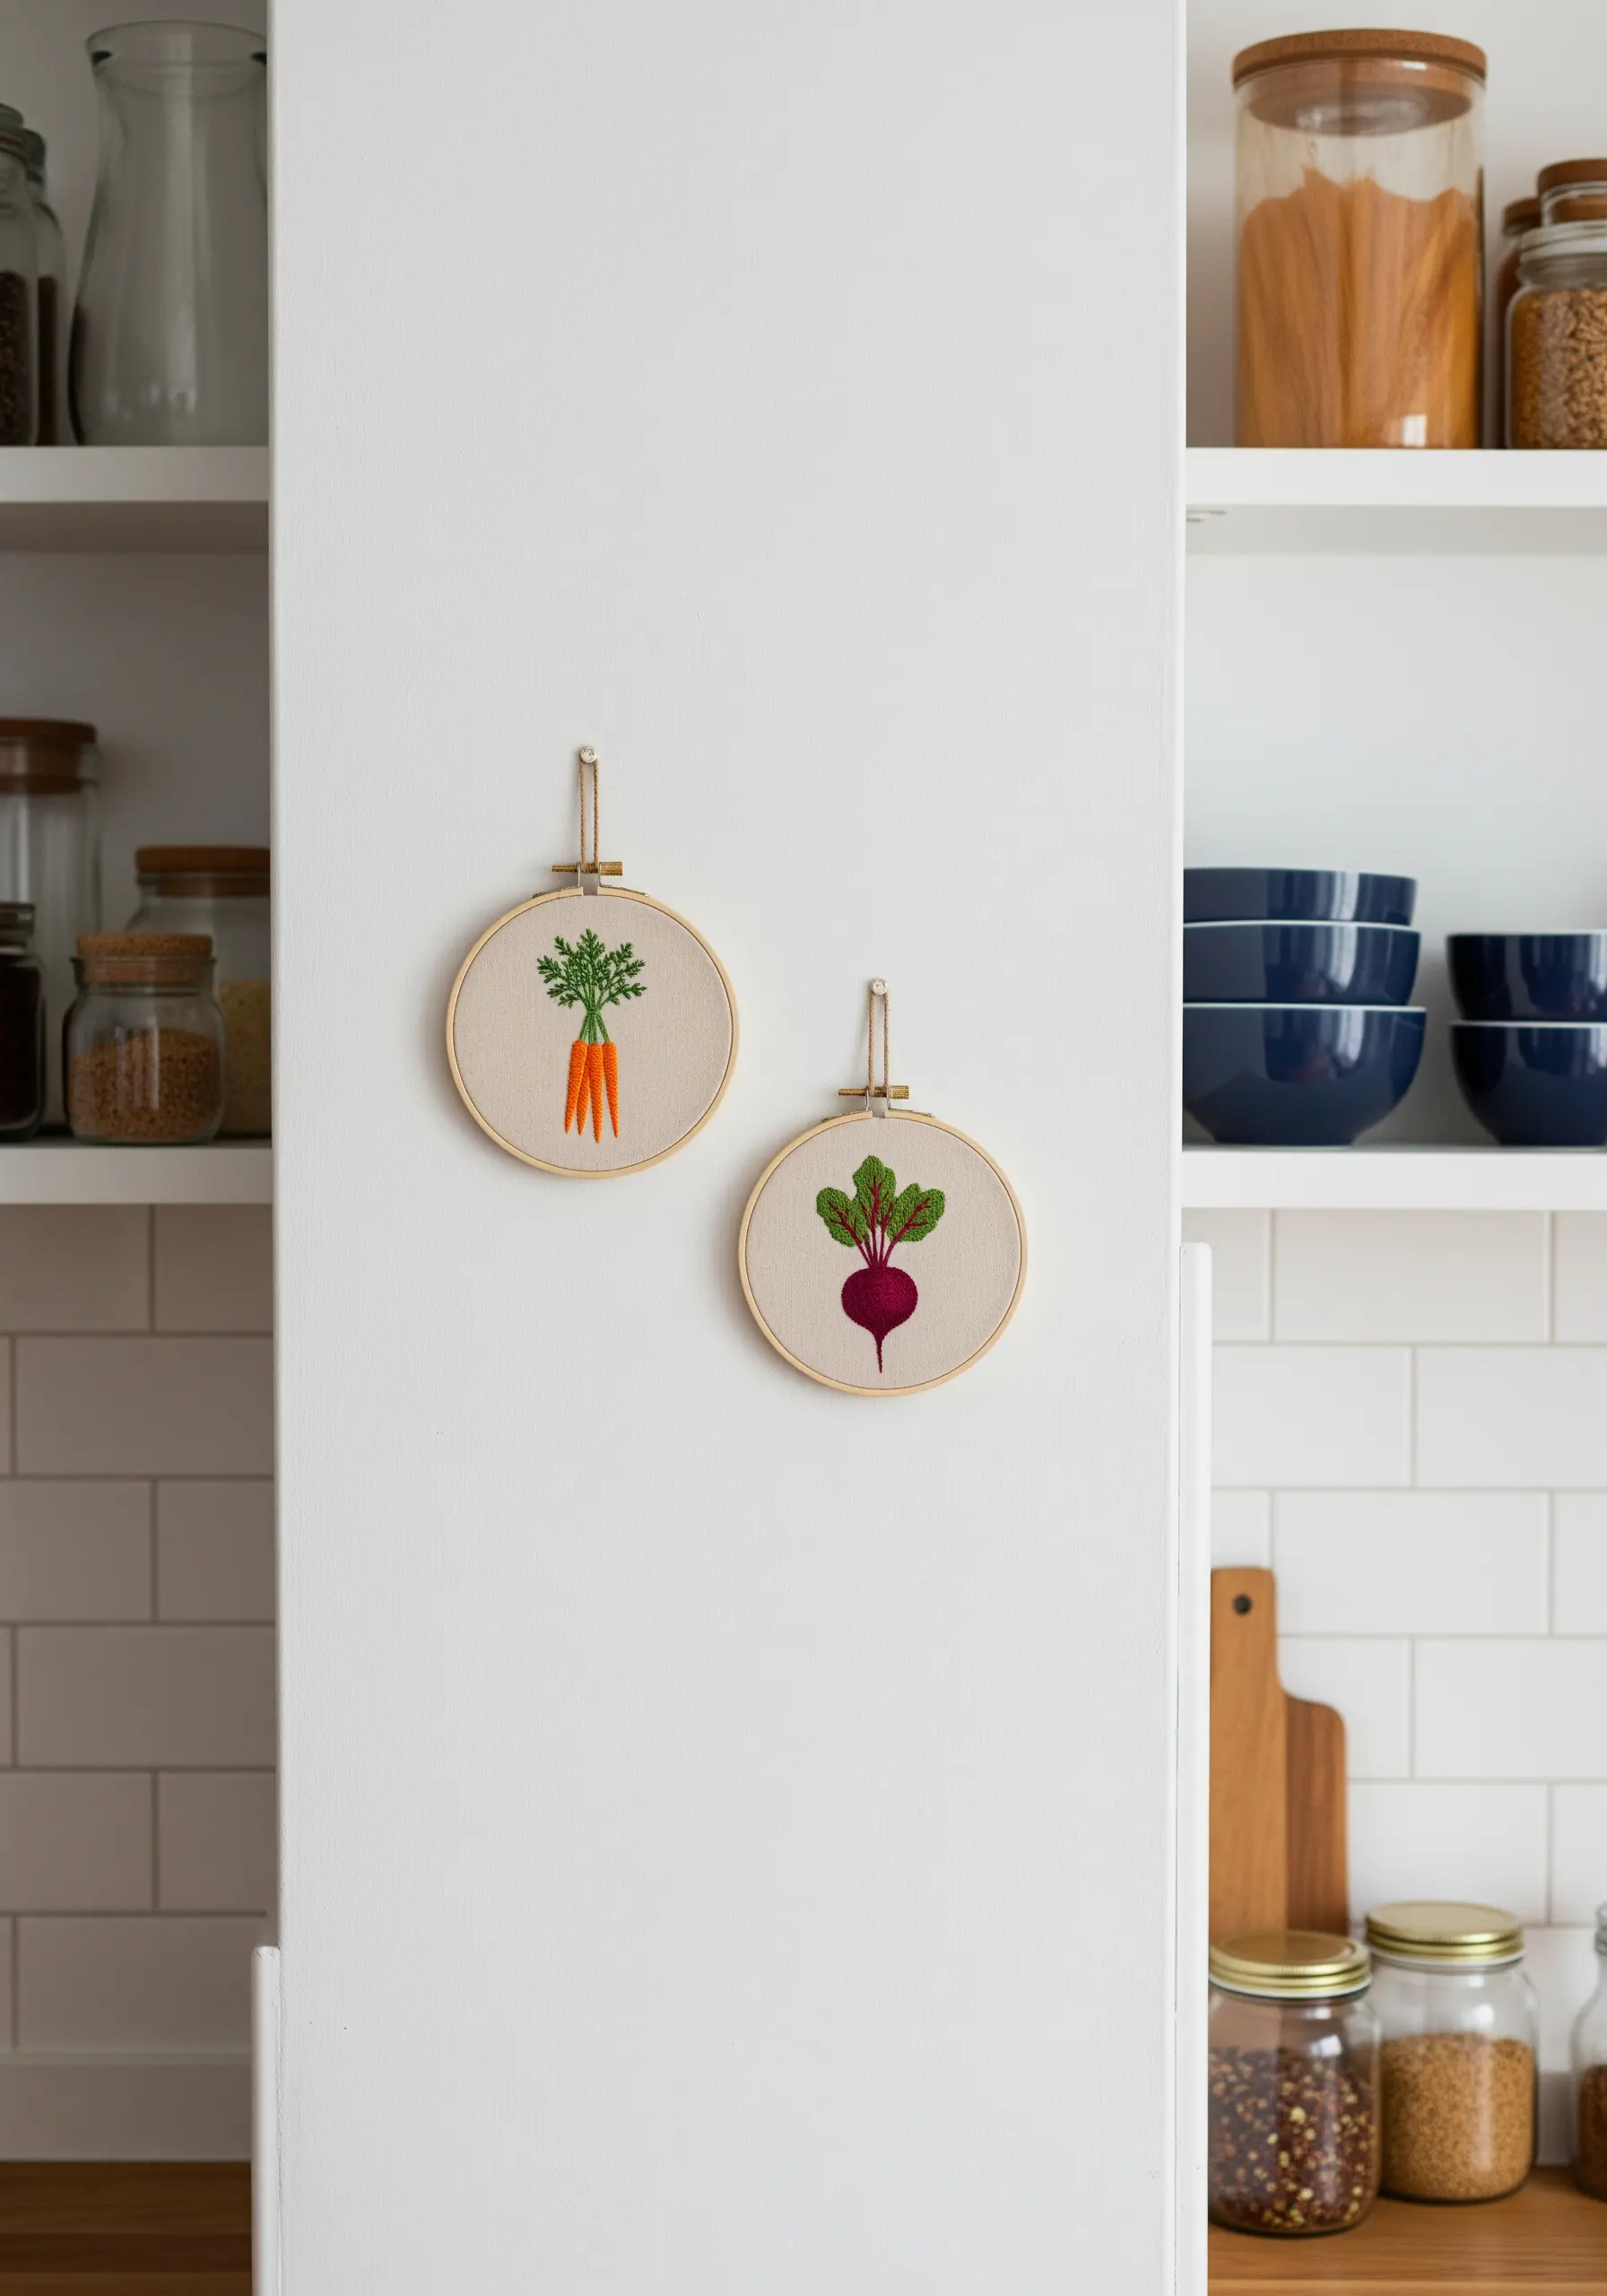
The key to making simple food motifs instantly recognizable is choosing stitches that mimic their natural textures.
For the carrot tops, use loose and airy lazy daisy stitches to replicate their delicate, frond-like appearance.
For the beet greens, a fishbone stitch naturally creates the central vein and angled growth of the leaf in one step.
These thoughtful stitch choices turn simple shapes into charming minimal fruit botanical embroidery patterns that feel elevated and smart.
12. Art Deco Glamour with Thread-Wrapped Straight Stitches
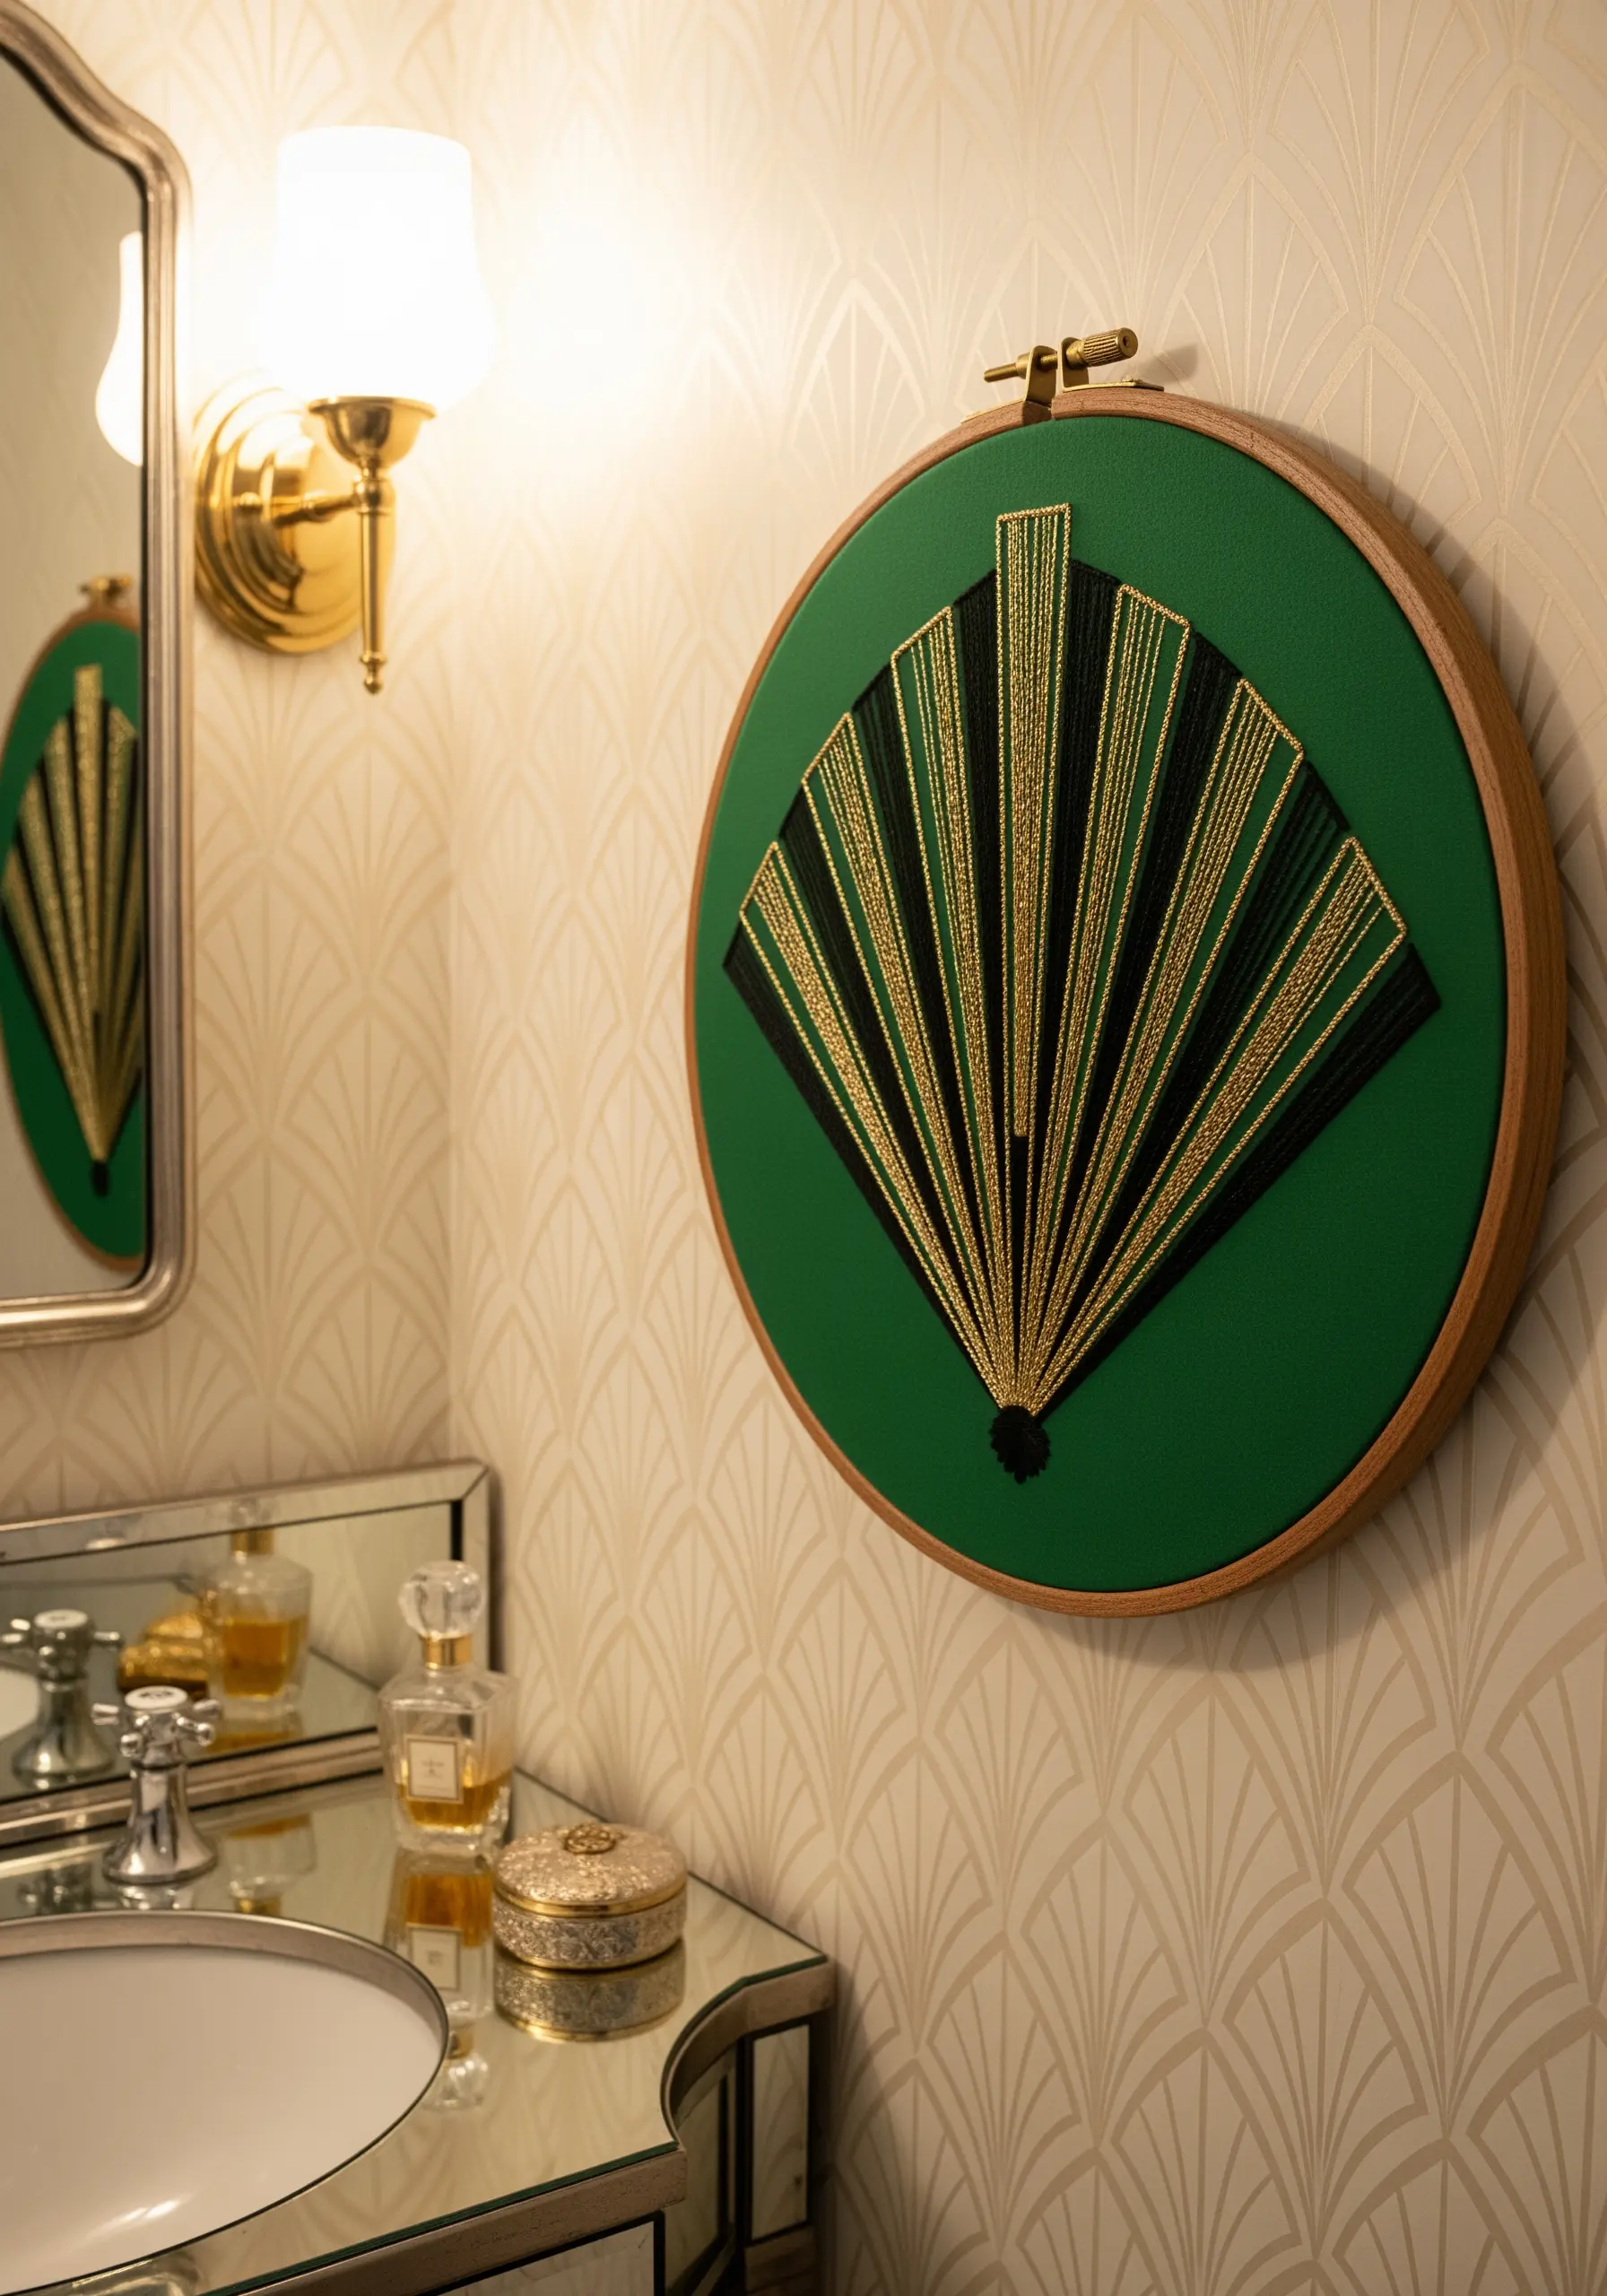
This design brilliantly combines embroidery and string art principles for a look of pure opulence.
First, create the radiating fan shape with long, taut straight stitches in a dark color like black.
Then, take a single strand of metallic gold thread on a new needle and carefully wrap it around the black anchor threads at measured intervals.
This technique creates a sharp, geometric pattern that is incredibly glamorous and looks far more complex than it is to execute.
13. Creating a Sense of Movement with Detached Stitches

To make your embroidered dandelions look as if they’re actually being carried by the wind, the trick is in the spacing and thread weight.
Stitch the seeds closest to the dandelion head with two strands of floss for clarity.
For the seeds floating further away, switch to a single strand of floss. This subtle shift in weight creates an illusion of distance and movement.
Using a combination of straight stitches and detached chain stitches adds to the delicate, airy effect.
14. Building a Lush Floral Crescent with Textured Stitches
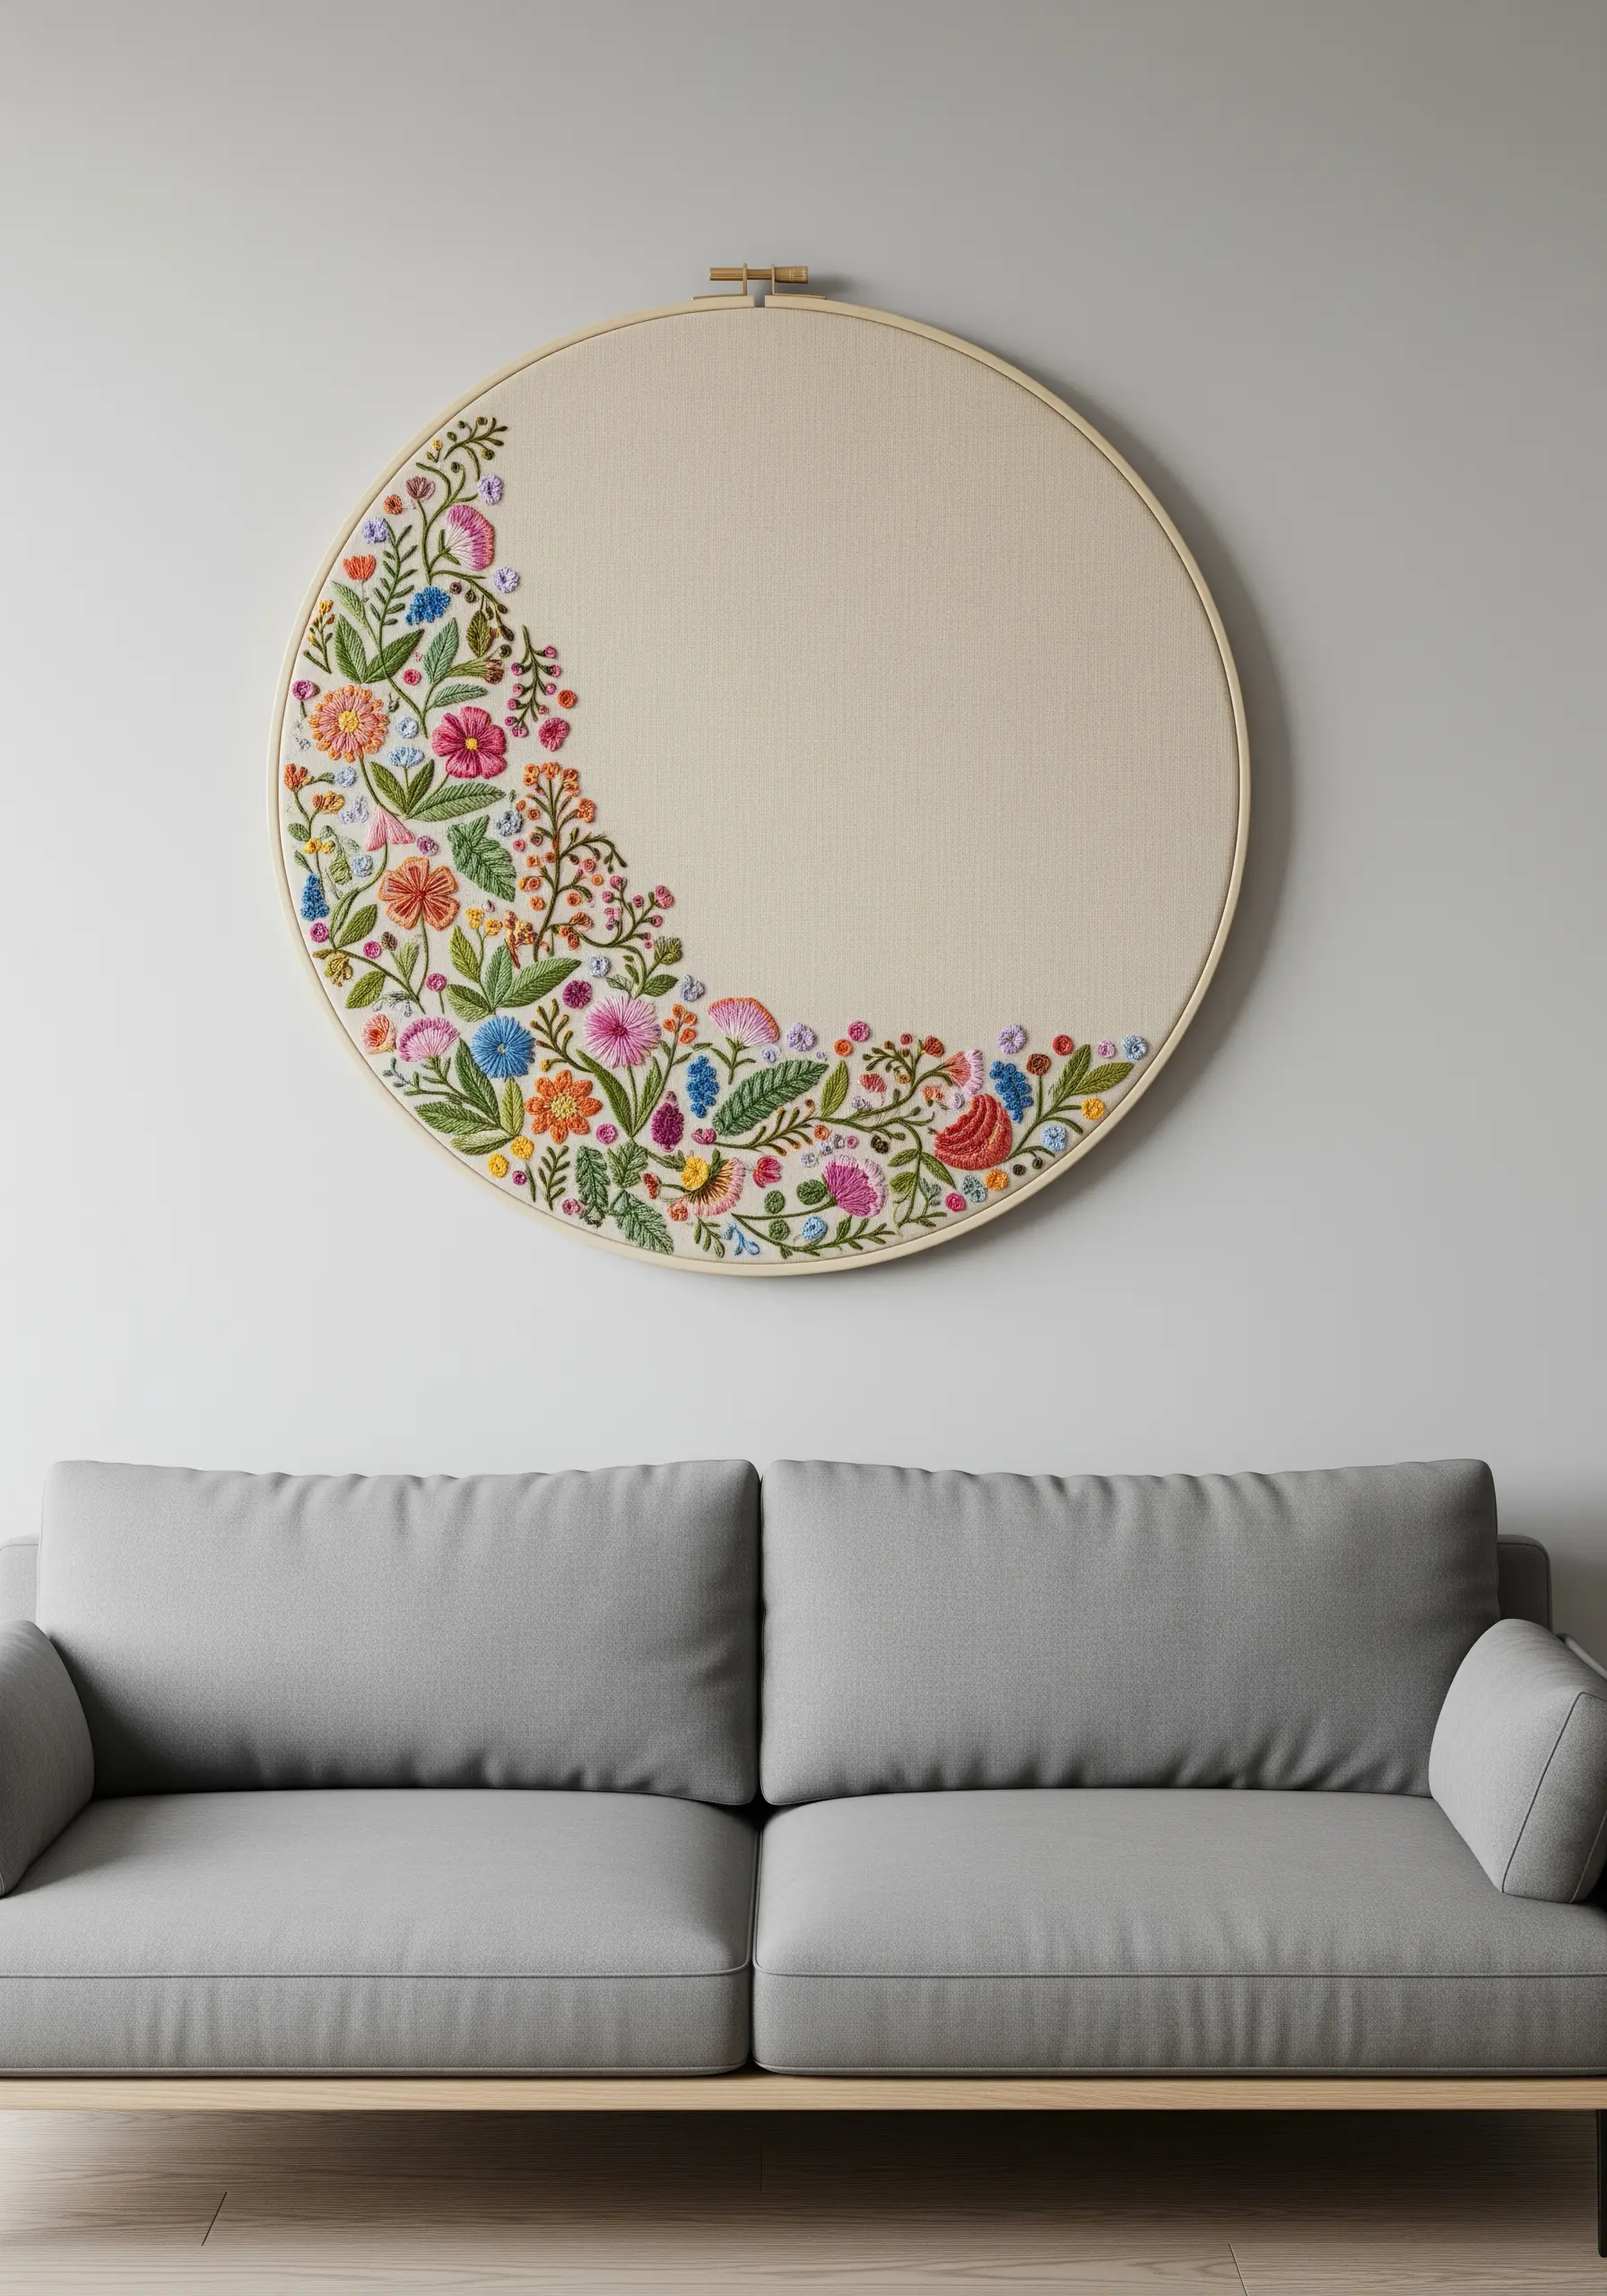
A rich, abundant floral design feels so luxurious because of its variety in texture and dimension.
Combine stitches that have different heights: bulky, raised woven wheel roses, tight clusters of French knots for filler flowers, and flatter fishbone or satin stitches for leaves.
Allow the different elements to overlap slightly, which eliminates any gaps and enhances the sense of lush, organic growth. This is the core principle behind beautiful hand-stitched flower wreath hoop ideas.
15. Bold Folk Art Style with Solid Satin Stitch Fills

The power of folk art lies in its bold shapes and clean, solid colors.
To ensure your satin stitch fills are perfectly smooth and flat, especially over larger areas, lay down a foundation of split stitches or long-and-short stitches first.
This underlayer prevents the top threads from sinking into the fabric weave, resulting in a flawless, almost-painted finish.
This technique draws from a rich history of traditional Indian embroidery wall art ideas, where smooth fills are paramount.
16. Layered Landscapes with Directional Satin Stitch
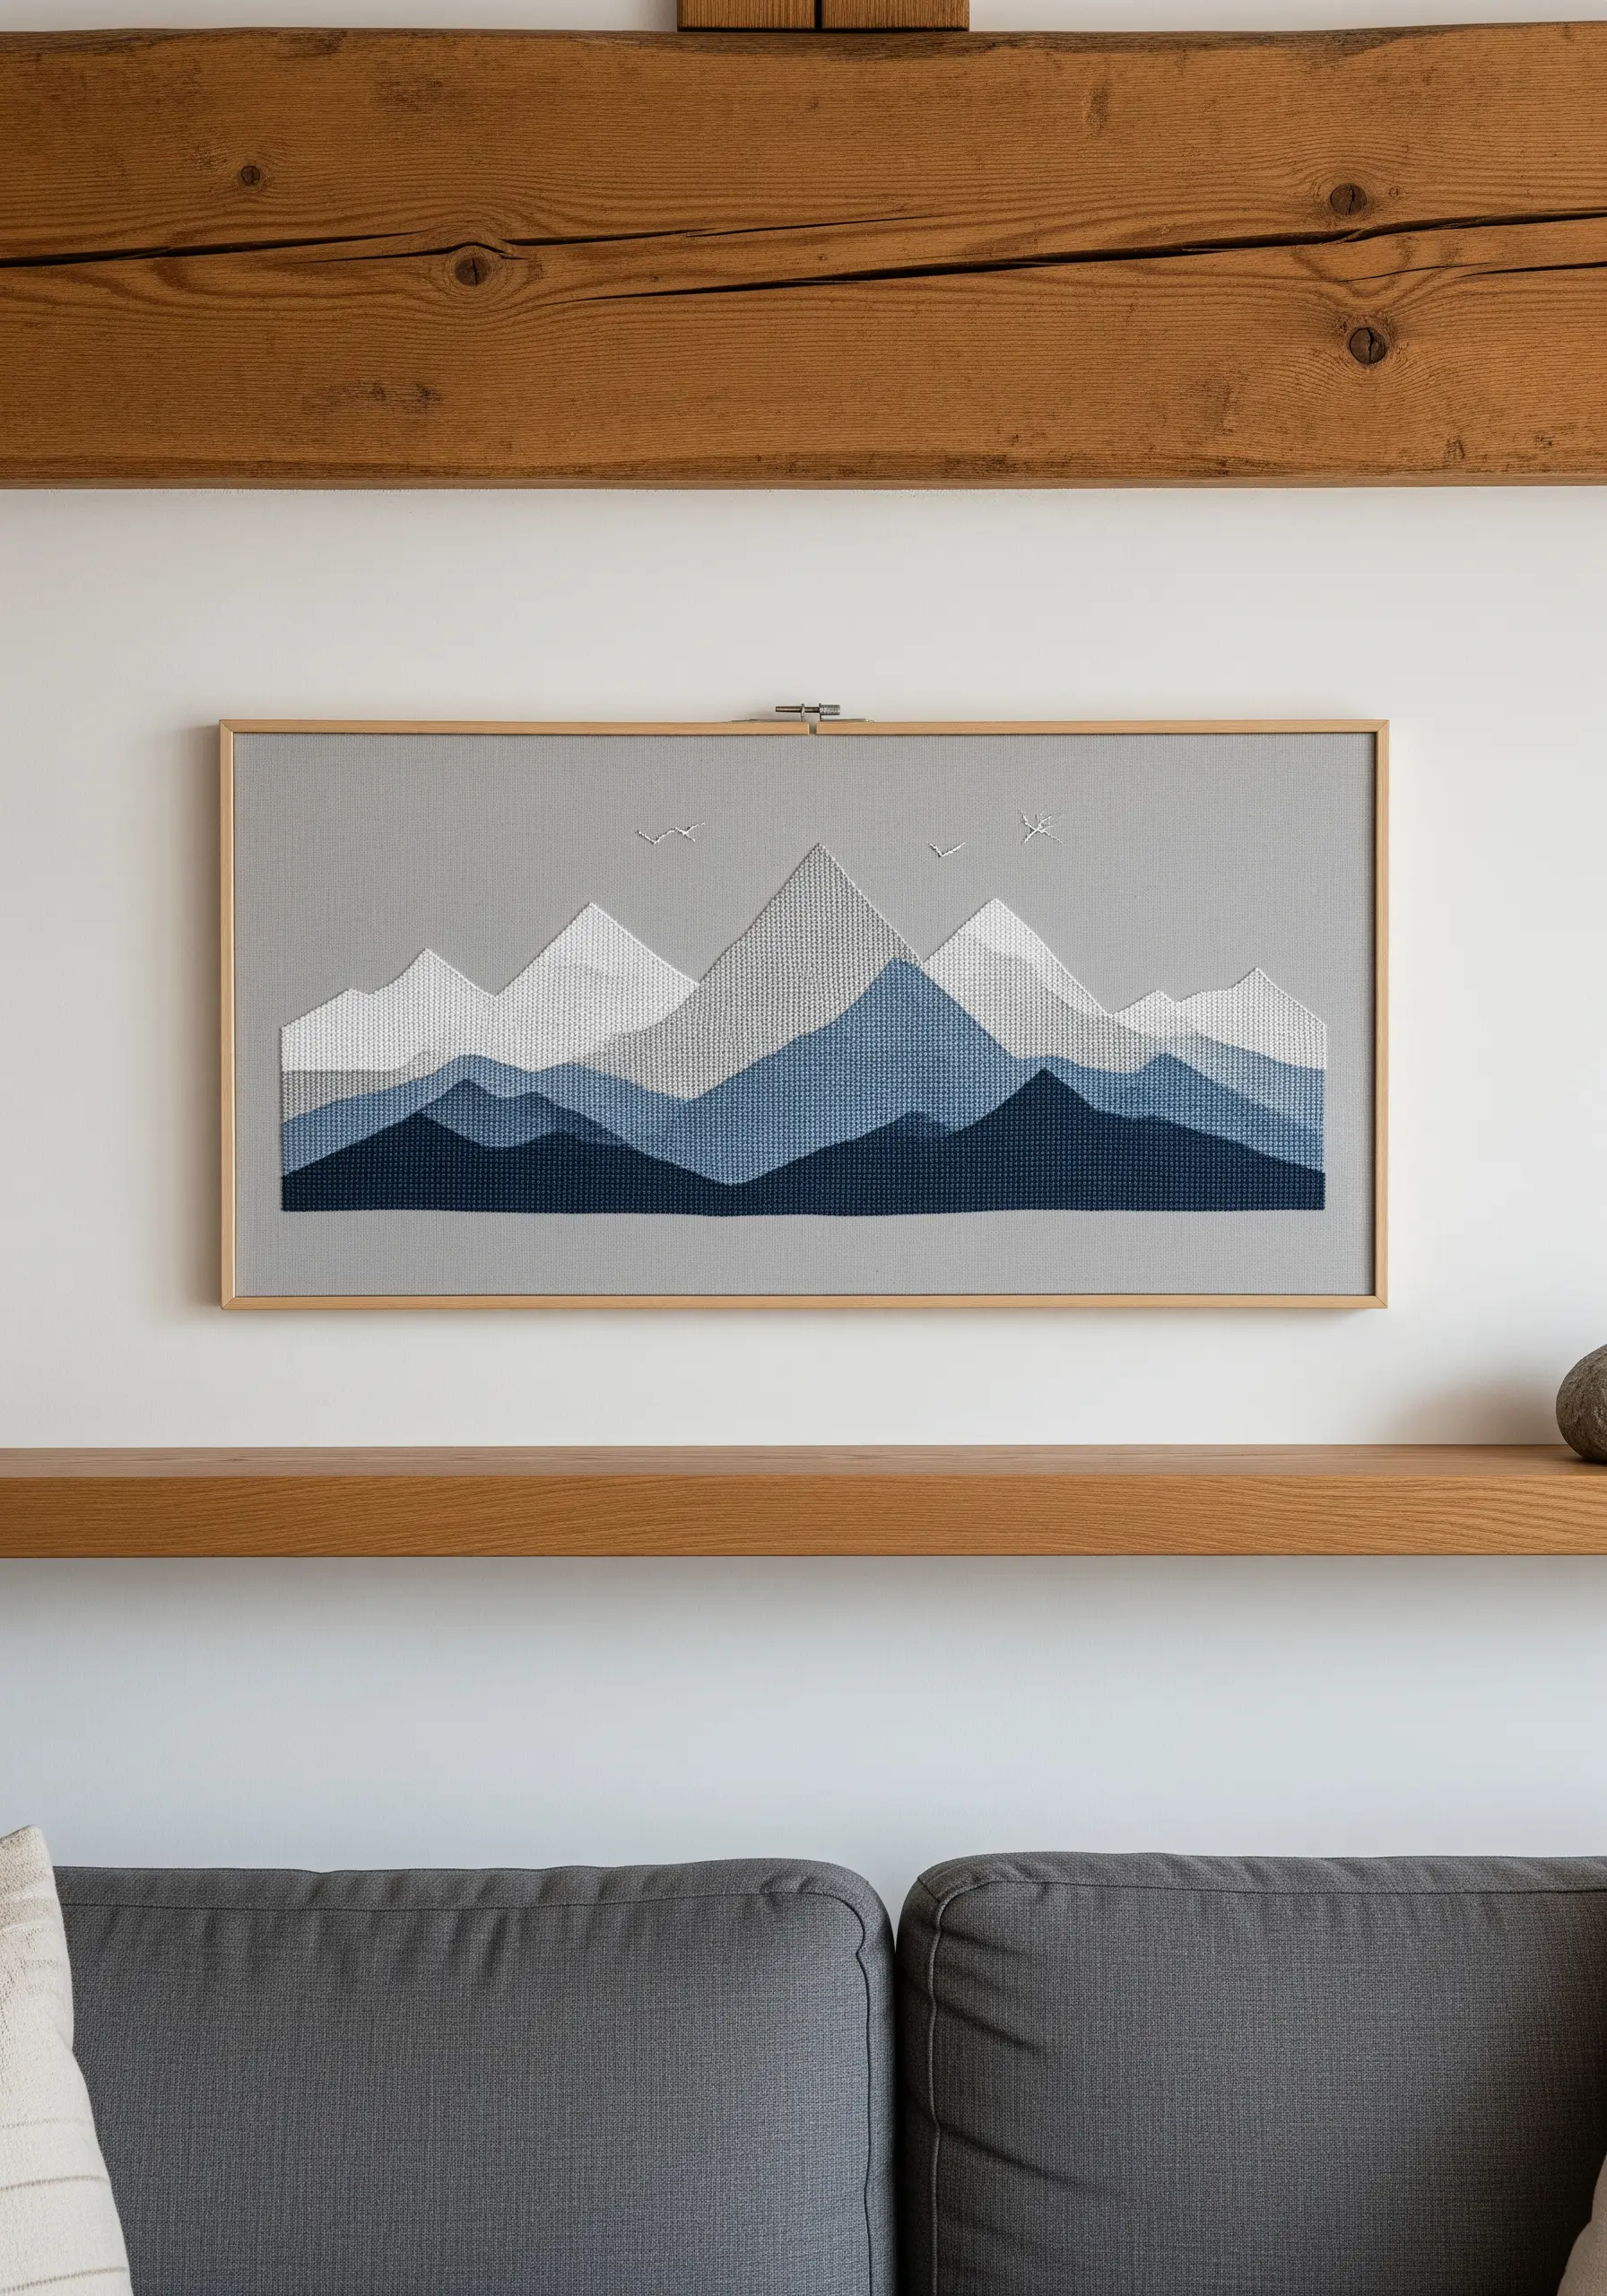
You can create a powerful illusion of atmospheric perspective using one simple trick: changing the direction of your satin stitches.
For the darkest, closest mountain range, fill it with vertical satin stitches.
For the next range back, angle your stitches slightly, and continue to change the angle for each subsequent layer.
This subtle shift tricks the eye into seeing depth, transforming a flat design into a dynamic landscape.
17. Delicate Blackwork Botanicals with Backstitch
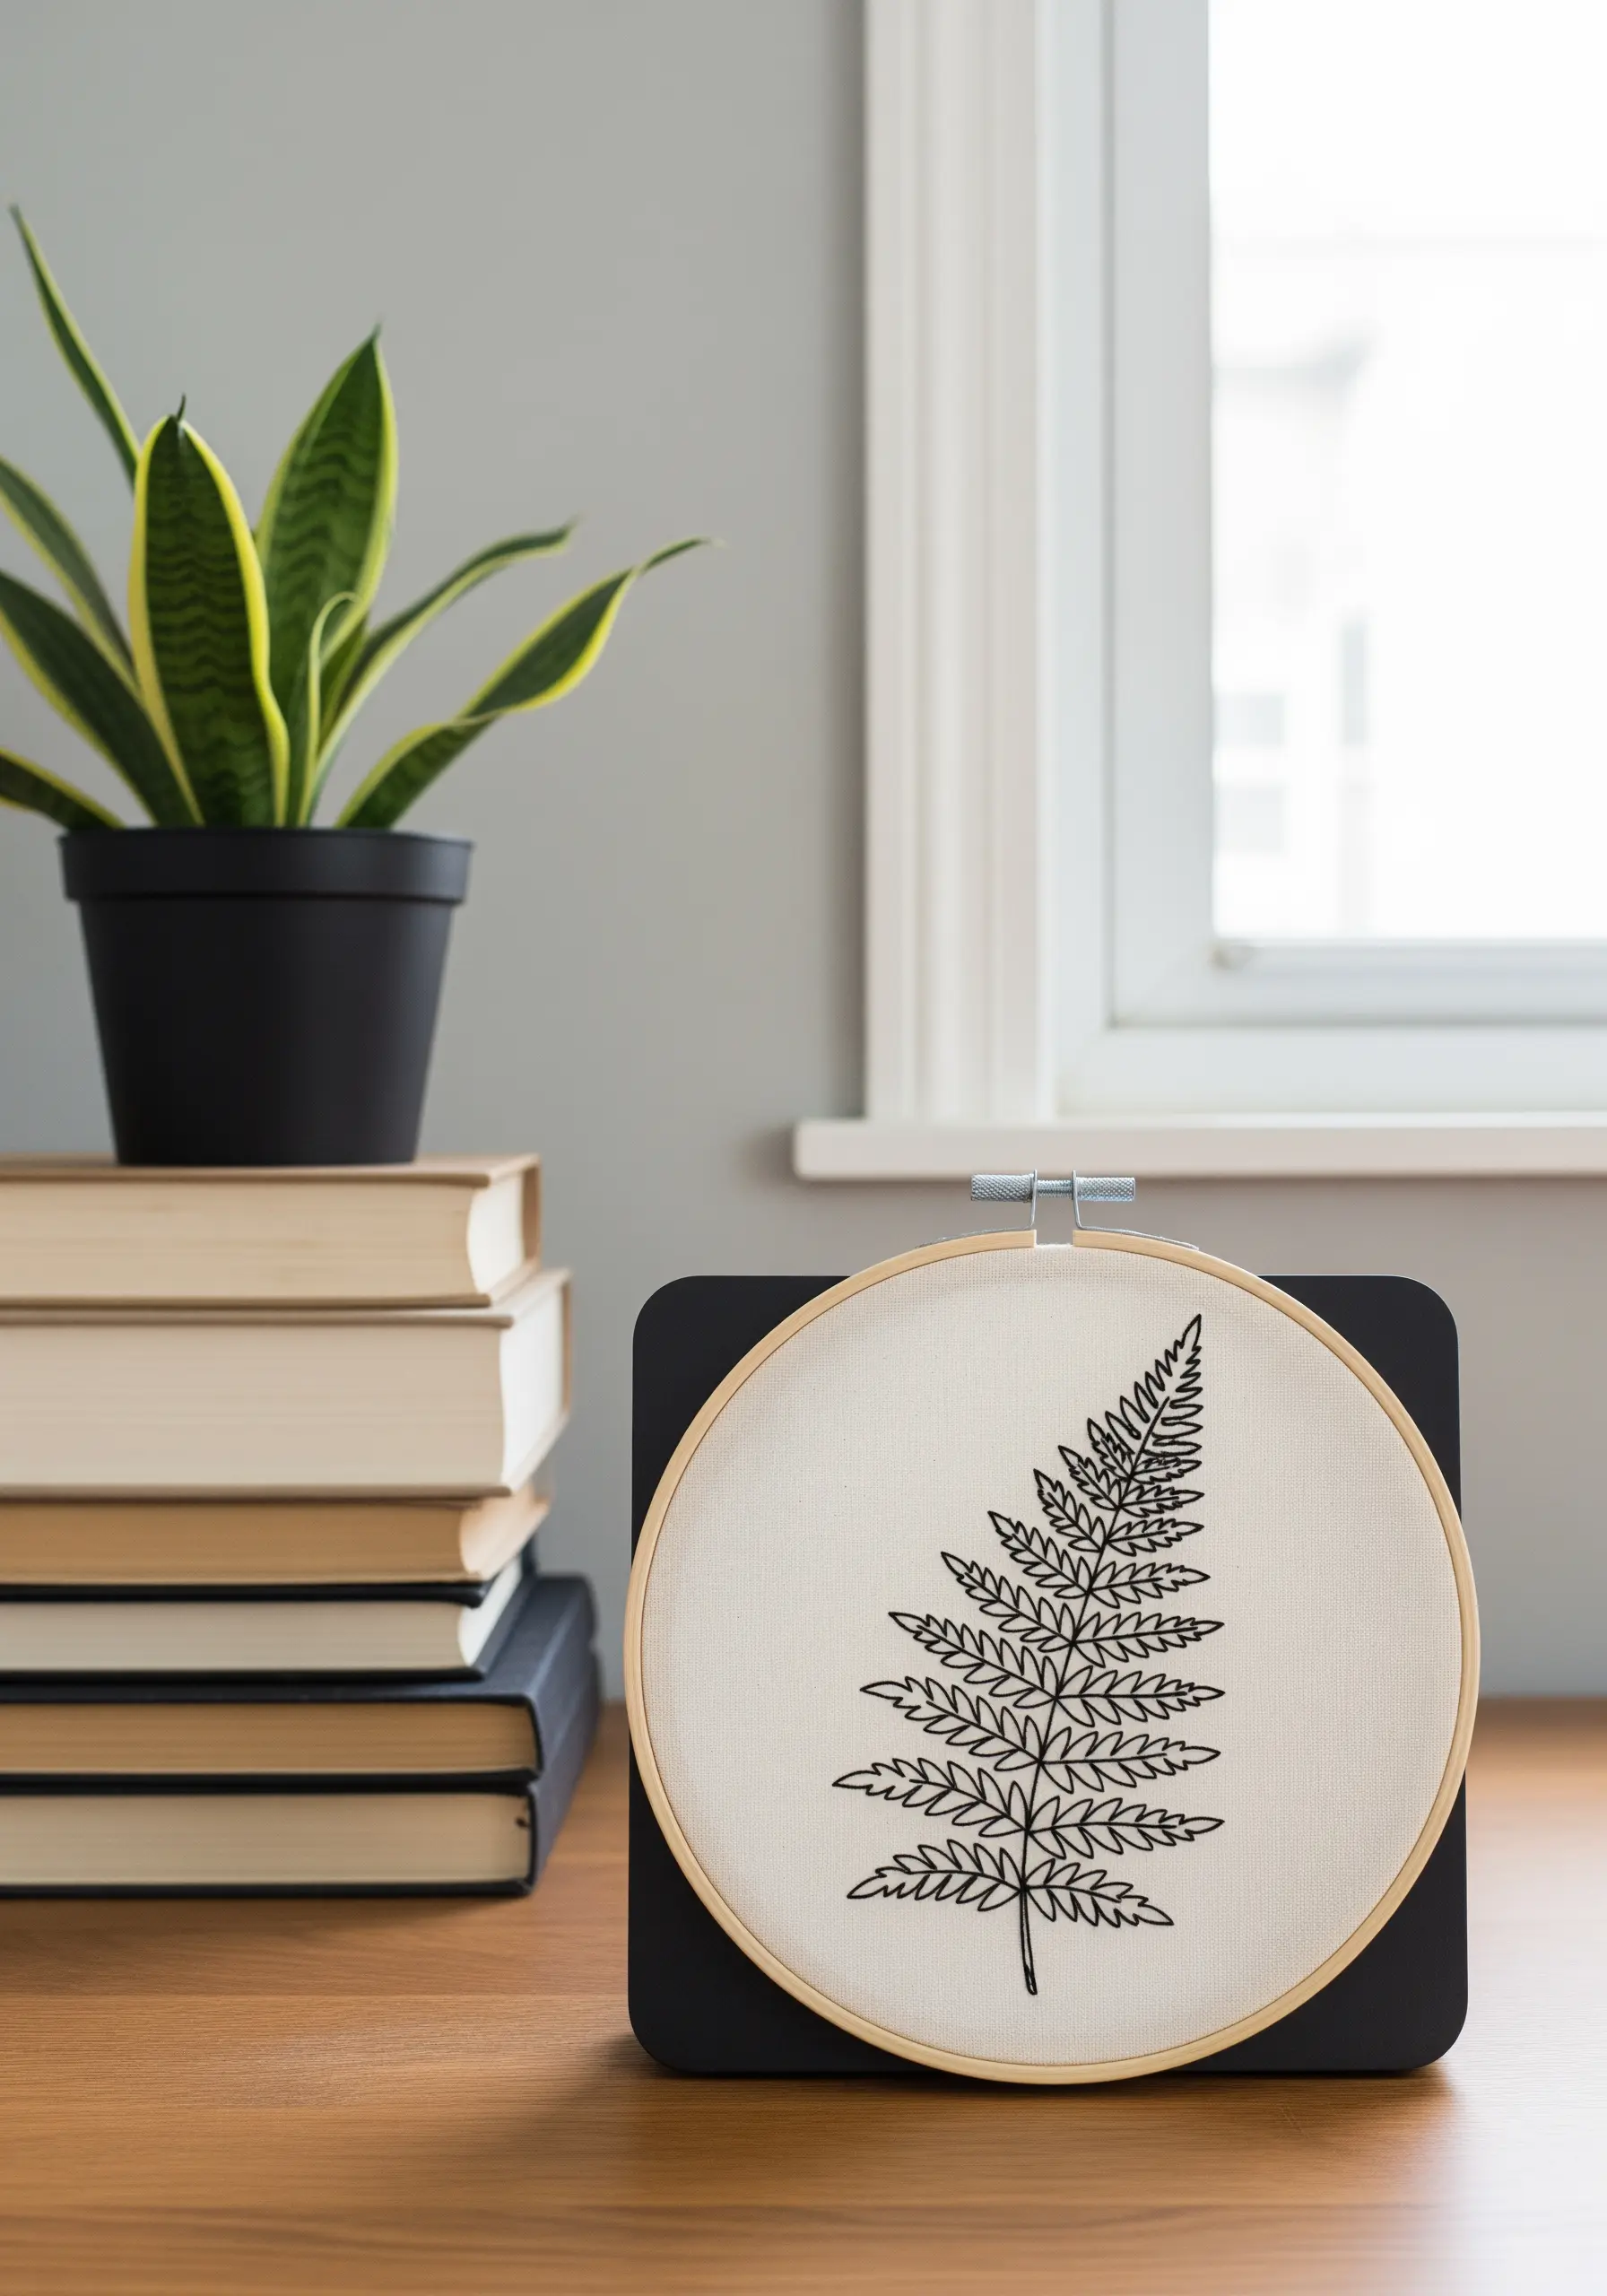
This intricate, lace-like fern proves that you can achieve incredible detail with the most basic stitch.
The key to successful blackwork is precision. Use only a single strand of black cotton floss and focus on keeping your backstitches consistently small and even.
It is this uniformity that creates the clean, illustrative quality.
Mounting the finished hoop against a solid black background creates a modern, floating effect that makes the delicate stitching pop.
18. Creating a Cohesive Gallery with a Wildflower Set
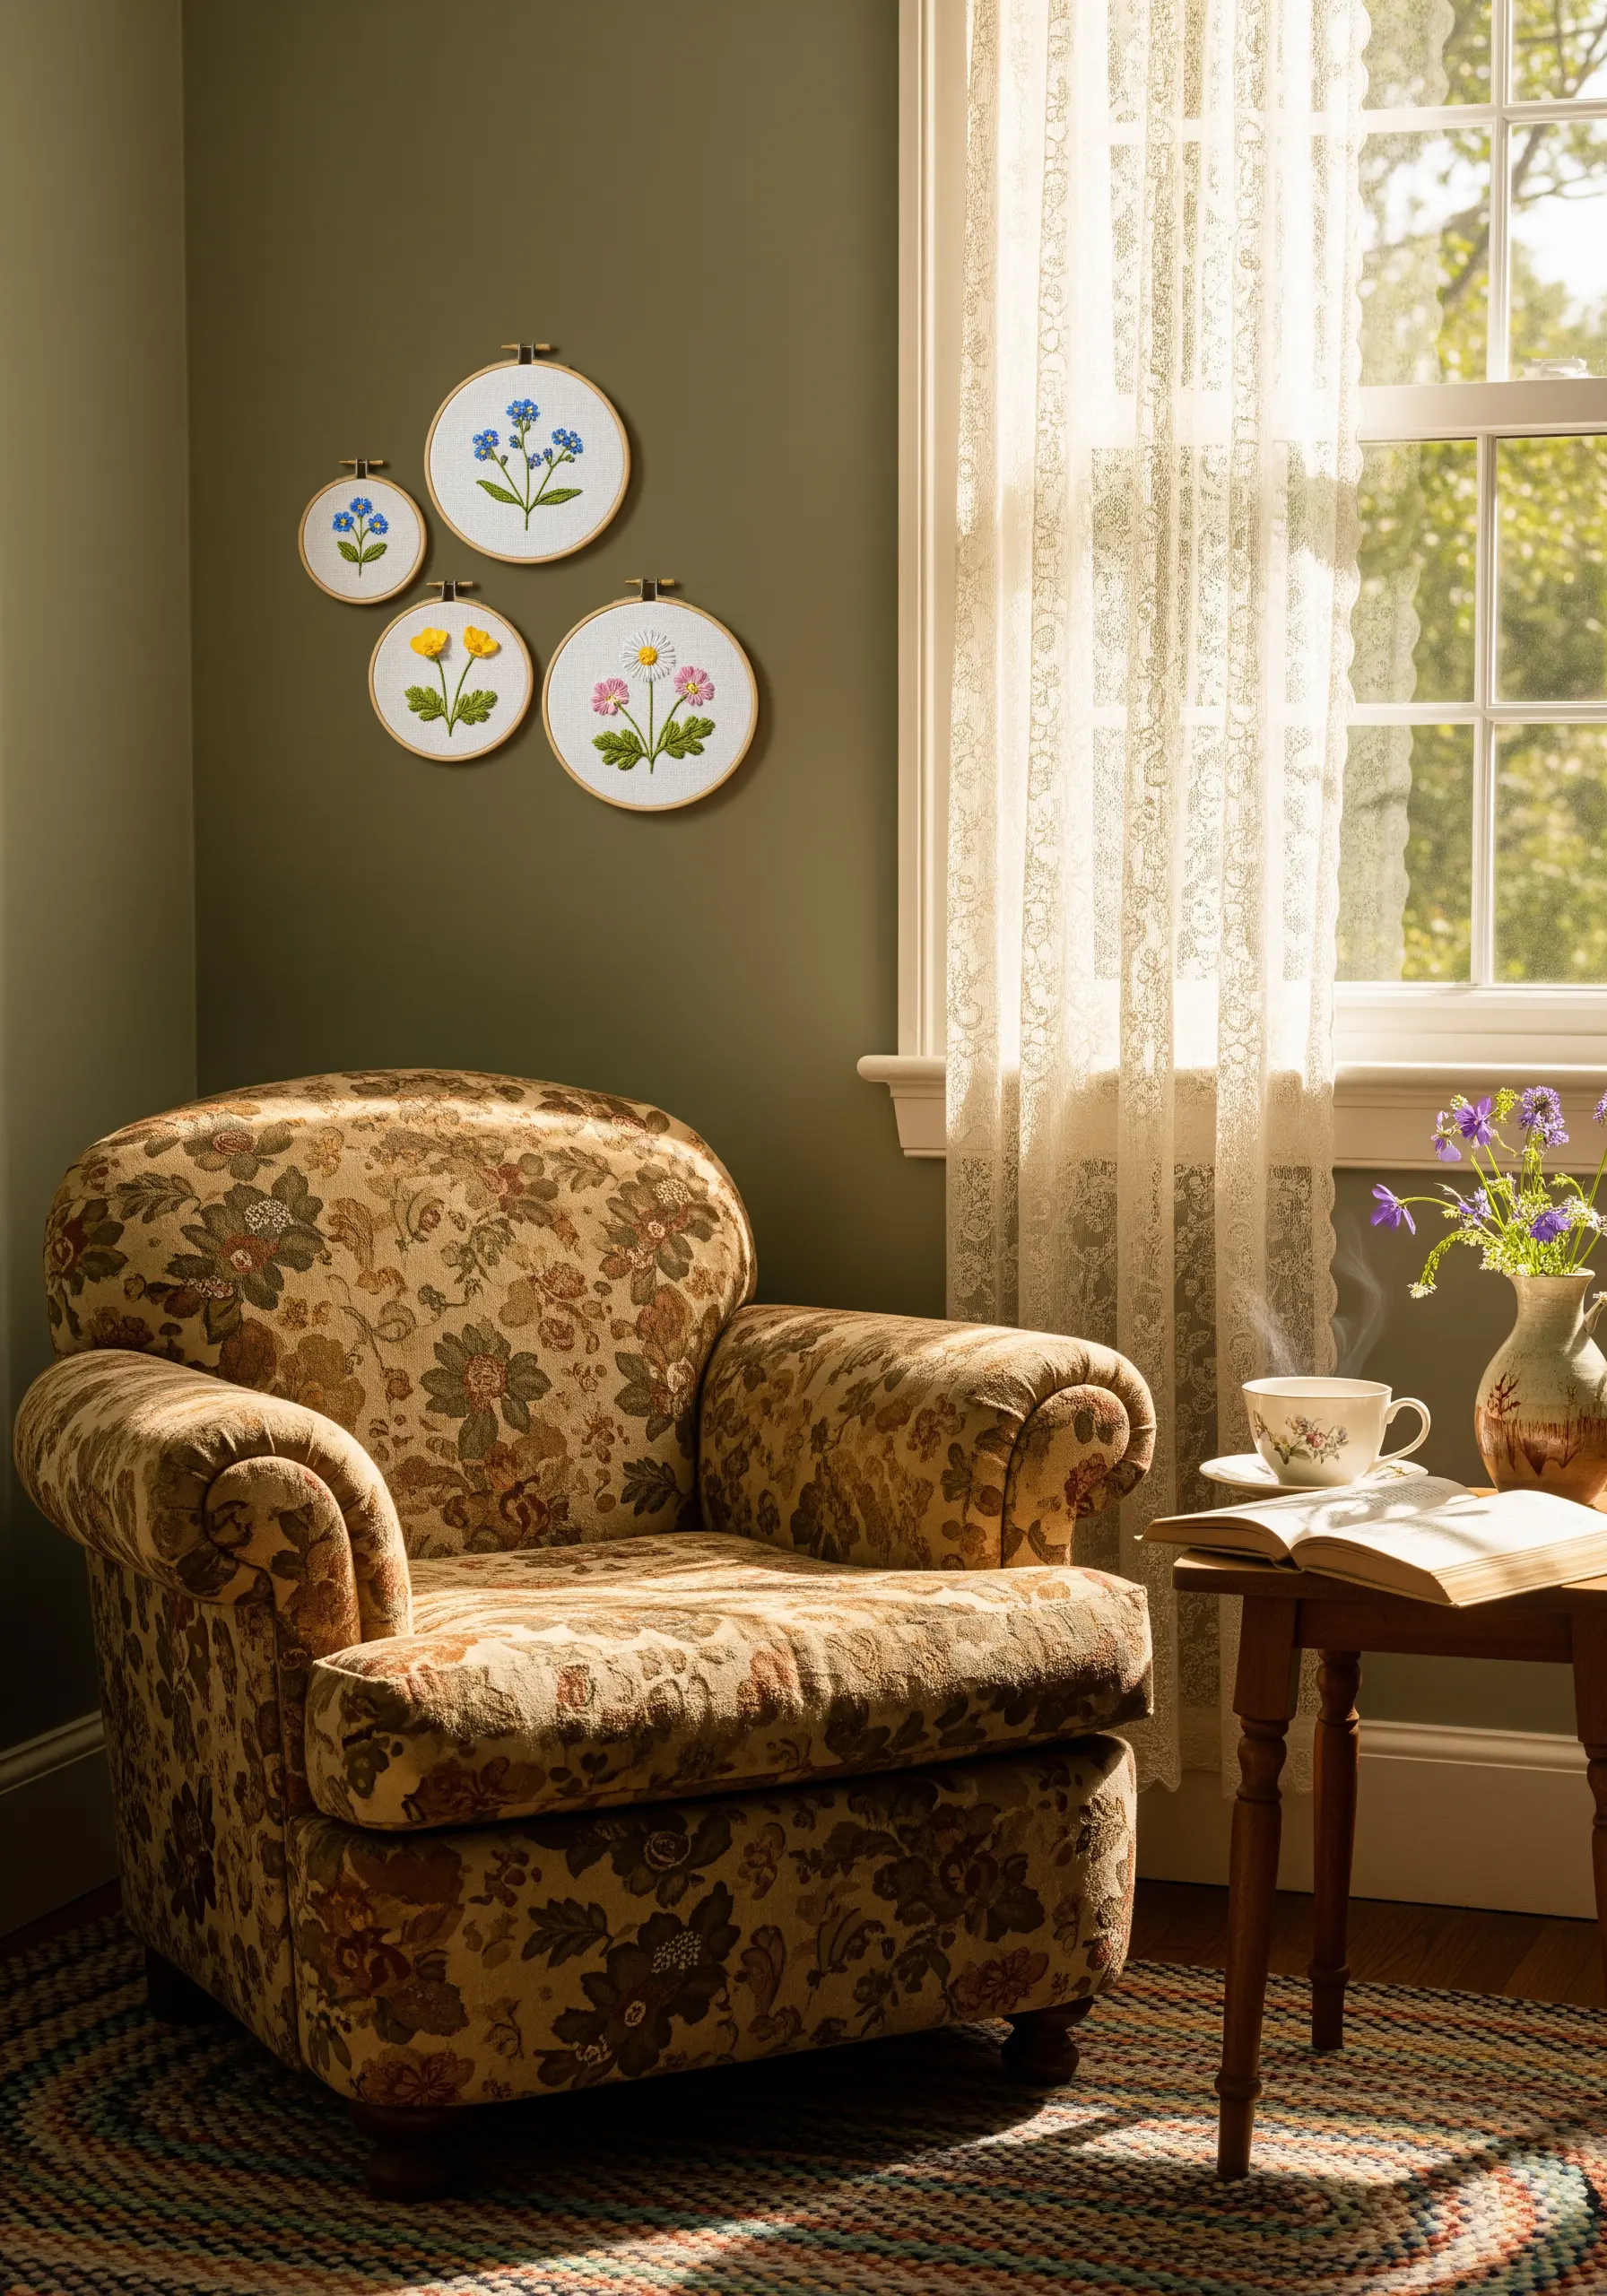
When displaying multiple small hoops, creating a sense of cohesion is what makes them look like an intentional collection rather than a random assortment.
Choose one or two unifying elements, such as the same background fabric and a consistent shade of green for all the stems and leaves.
This framework gives you the freedom to be playful with different flower colors and stitch types, knowing the final grouping will look harmonious. Grouping mini embroidery projects this way creates a beautiful focal point.
19. Modern Boho Aesthetics with Graphic Fills
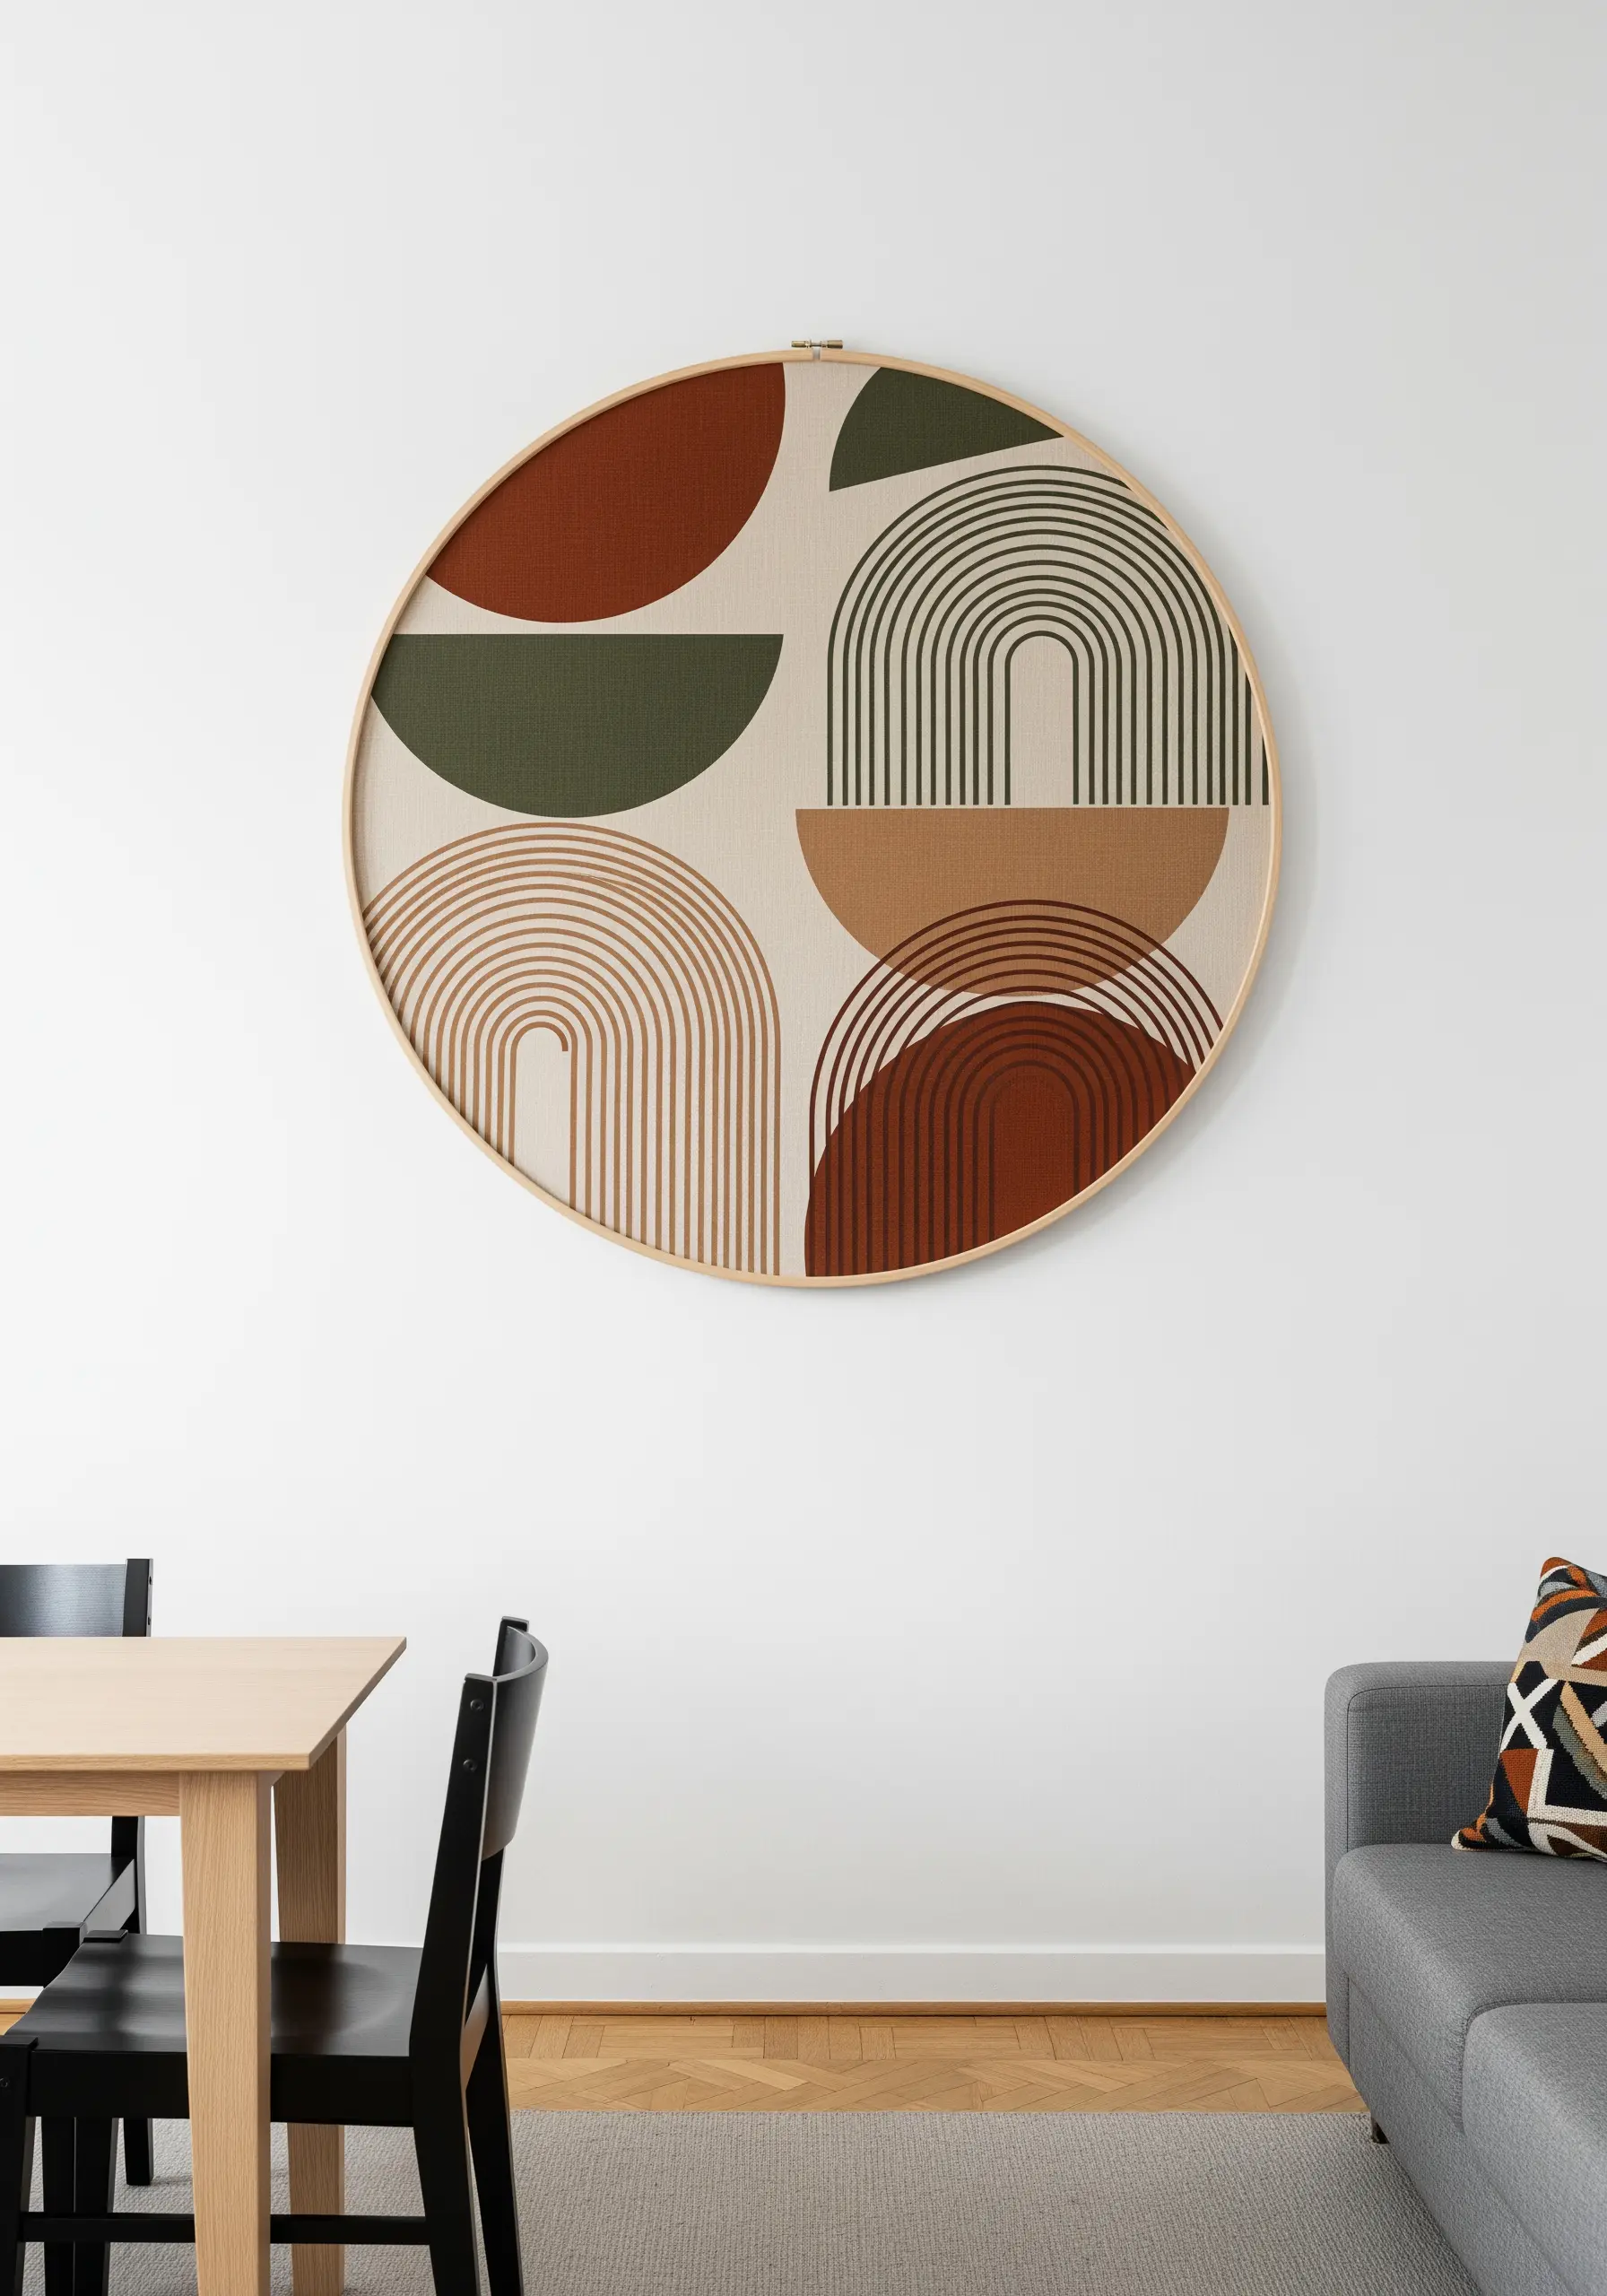
To achieve this clean, contemporary boho look, focus on the contrast between flat color and textured lines.
Fill the large, solid shapes with a dense, perfectly smooth satin stitch, ensuring all your stitches lie in the same direction for a uniform, almost screen-printed effect.
For the thin rainbow arches, use a three-strand stem stitch. This creates a rounded, rope-like line that provides a beautiful textural contrast to the flat-filled shapes, defining these popular boho-inspired wall hoop embroidery ideas.
20. Capturing Autumnal Gradients with Thread Painting

The magic of this autumn leaf is in the soft, seamless transition from one color to the next.
Using a single strand of floss and the long-and-short stitch, don’t be afraid to bring your stitches from one color section deep into the next.
This intermingling of red, orange, and yellow stitches is what creates a painterly gradient instead of distinct color blocks.
Finish with a sharp split stitch outline in a dark brown to define the leaf’s edge and make the warm colors appear even more vibrant.
21. An Elegant Monogram with Layered Botanicals
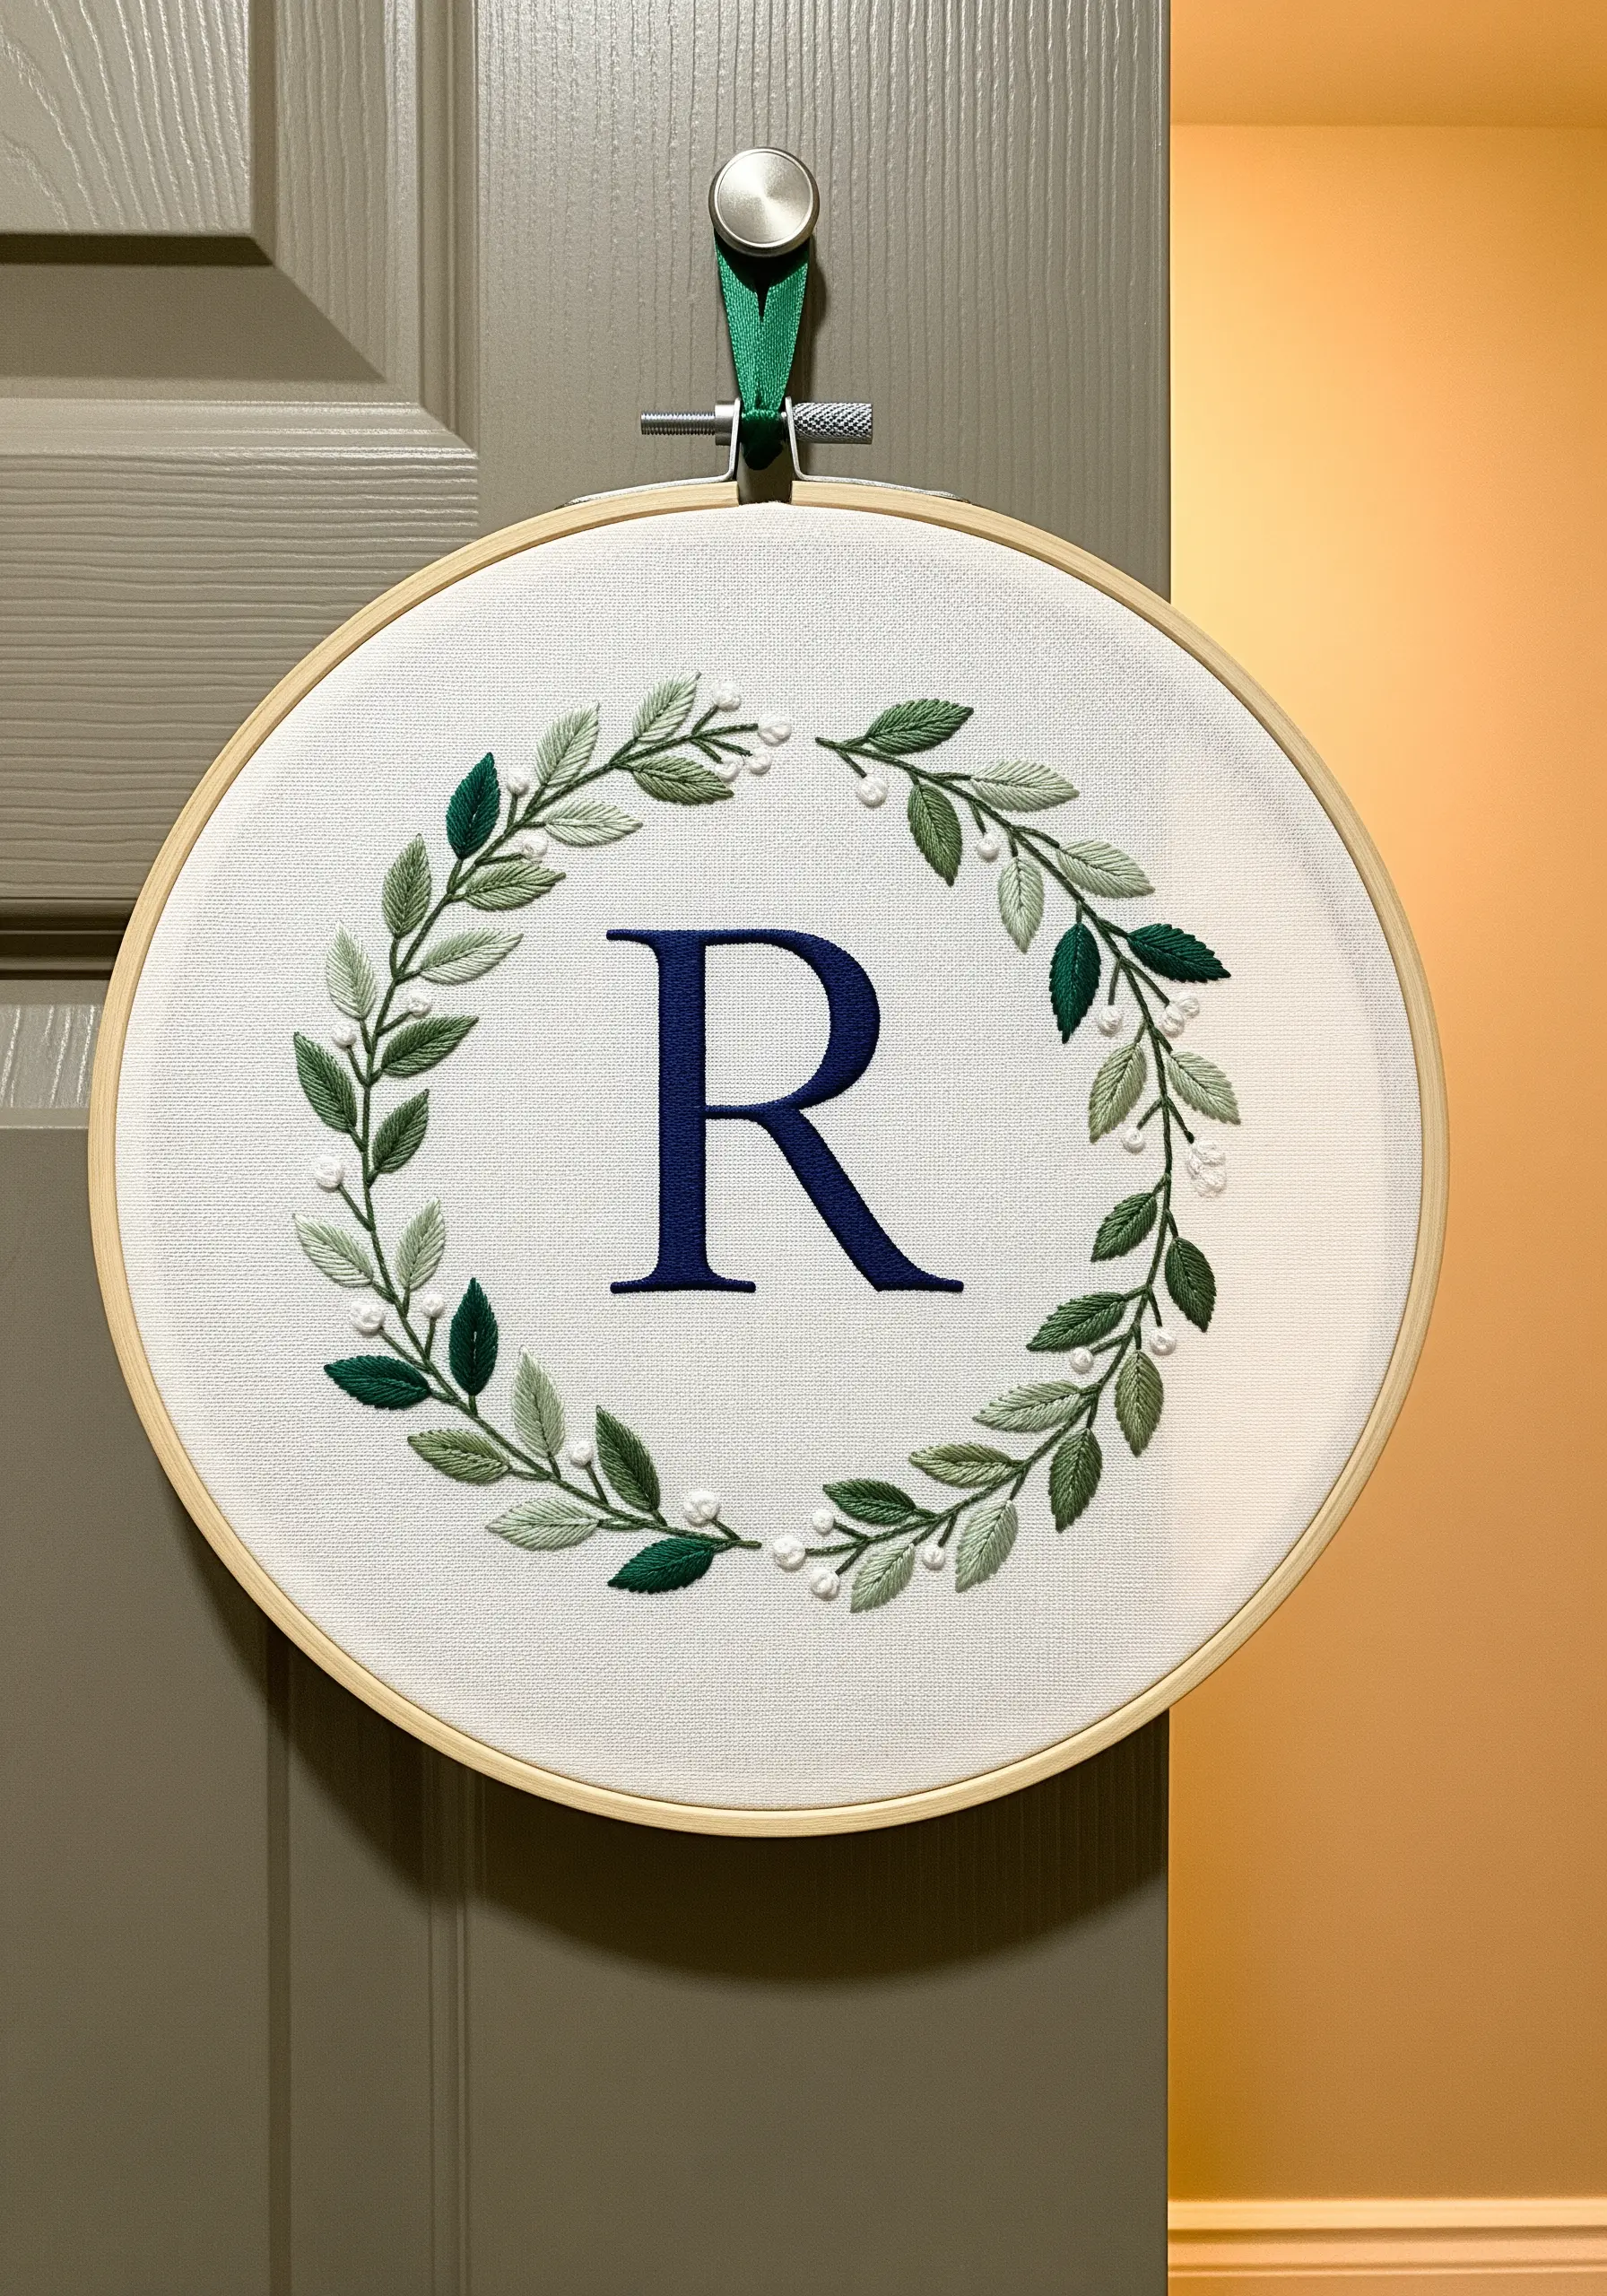
Create a truly personal and sophisticated piece by pairing a bold monogram with delicate, layered greenery.
Stitch the letter using a padded satin stitch to give it presence and dimension.
Then, frame it with a delicate wreath using fishbone stitch for the leaves—use two or three shades of green to add depth.
A few scattered French knots in off-white act as tiny berries, adding a final touch of texture and refinement to these perfect personalized name monogram wall embroidery gifts.
22. Modern Sashiko with Deconstructed Framing
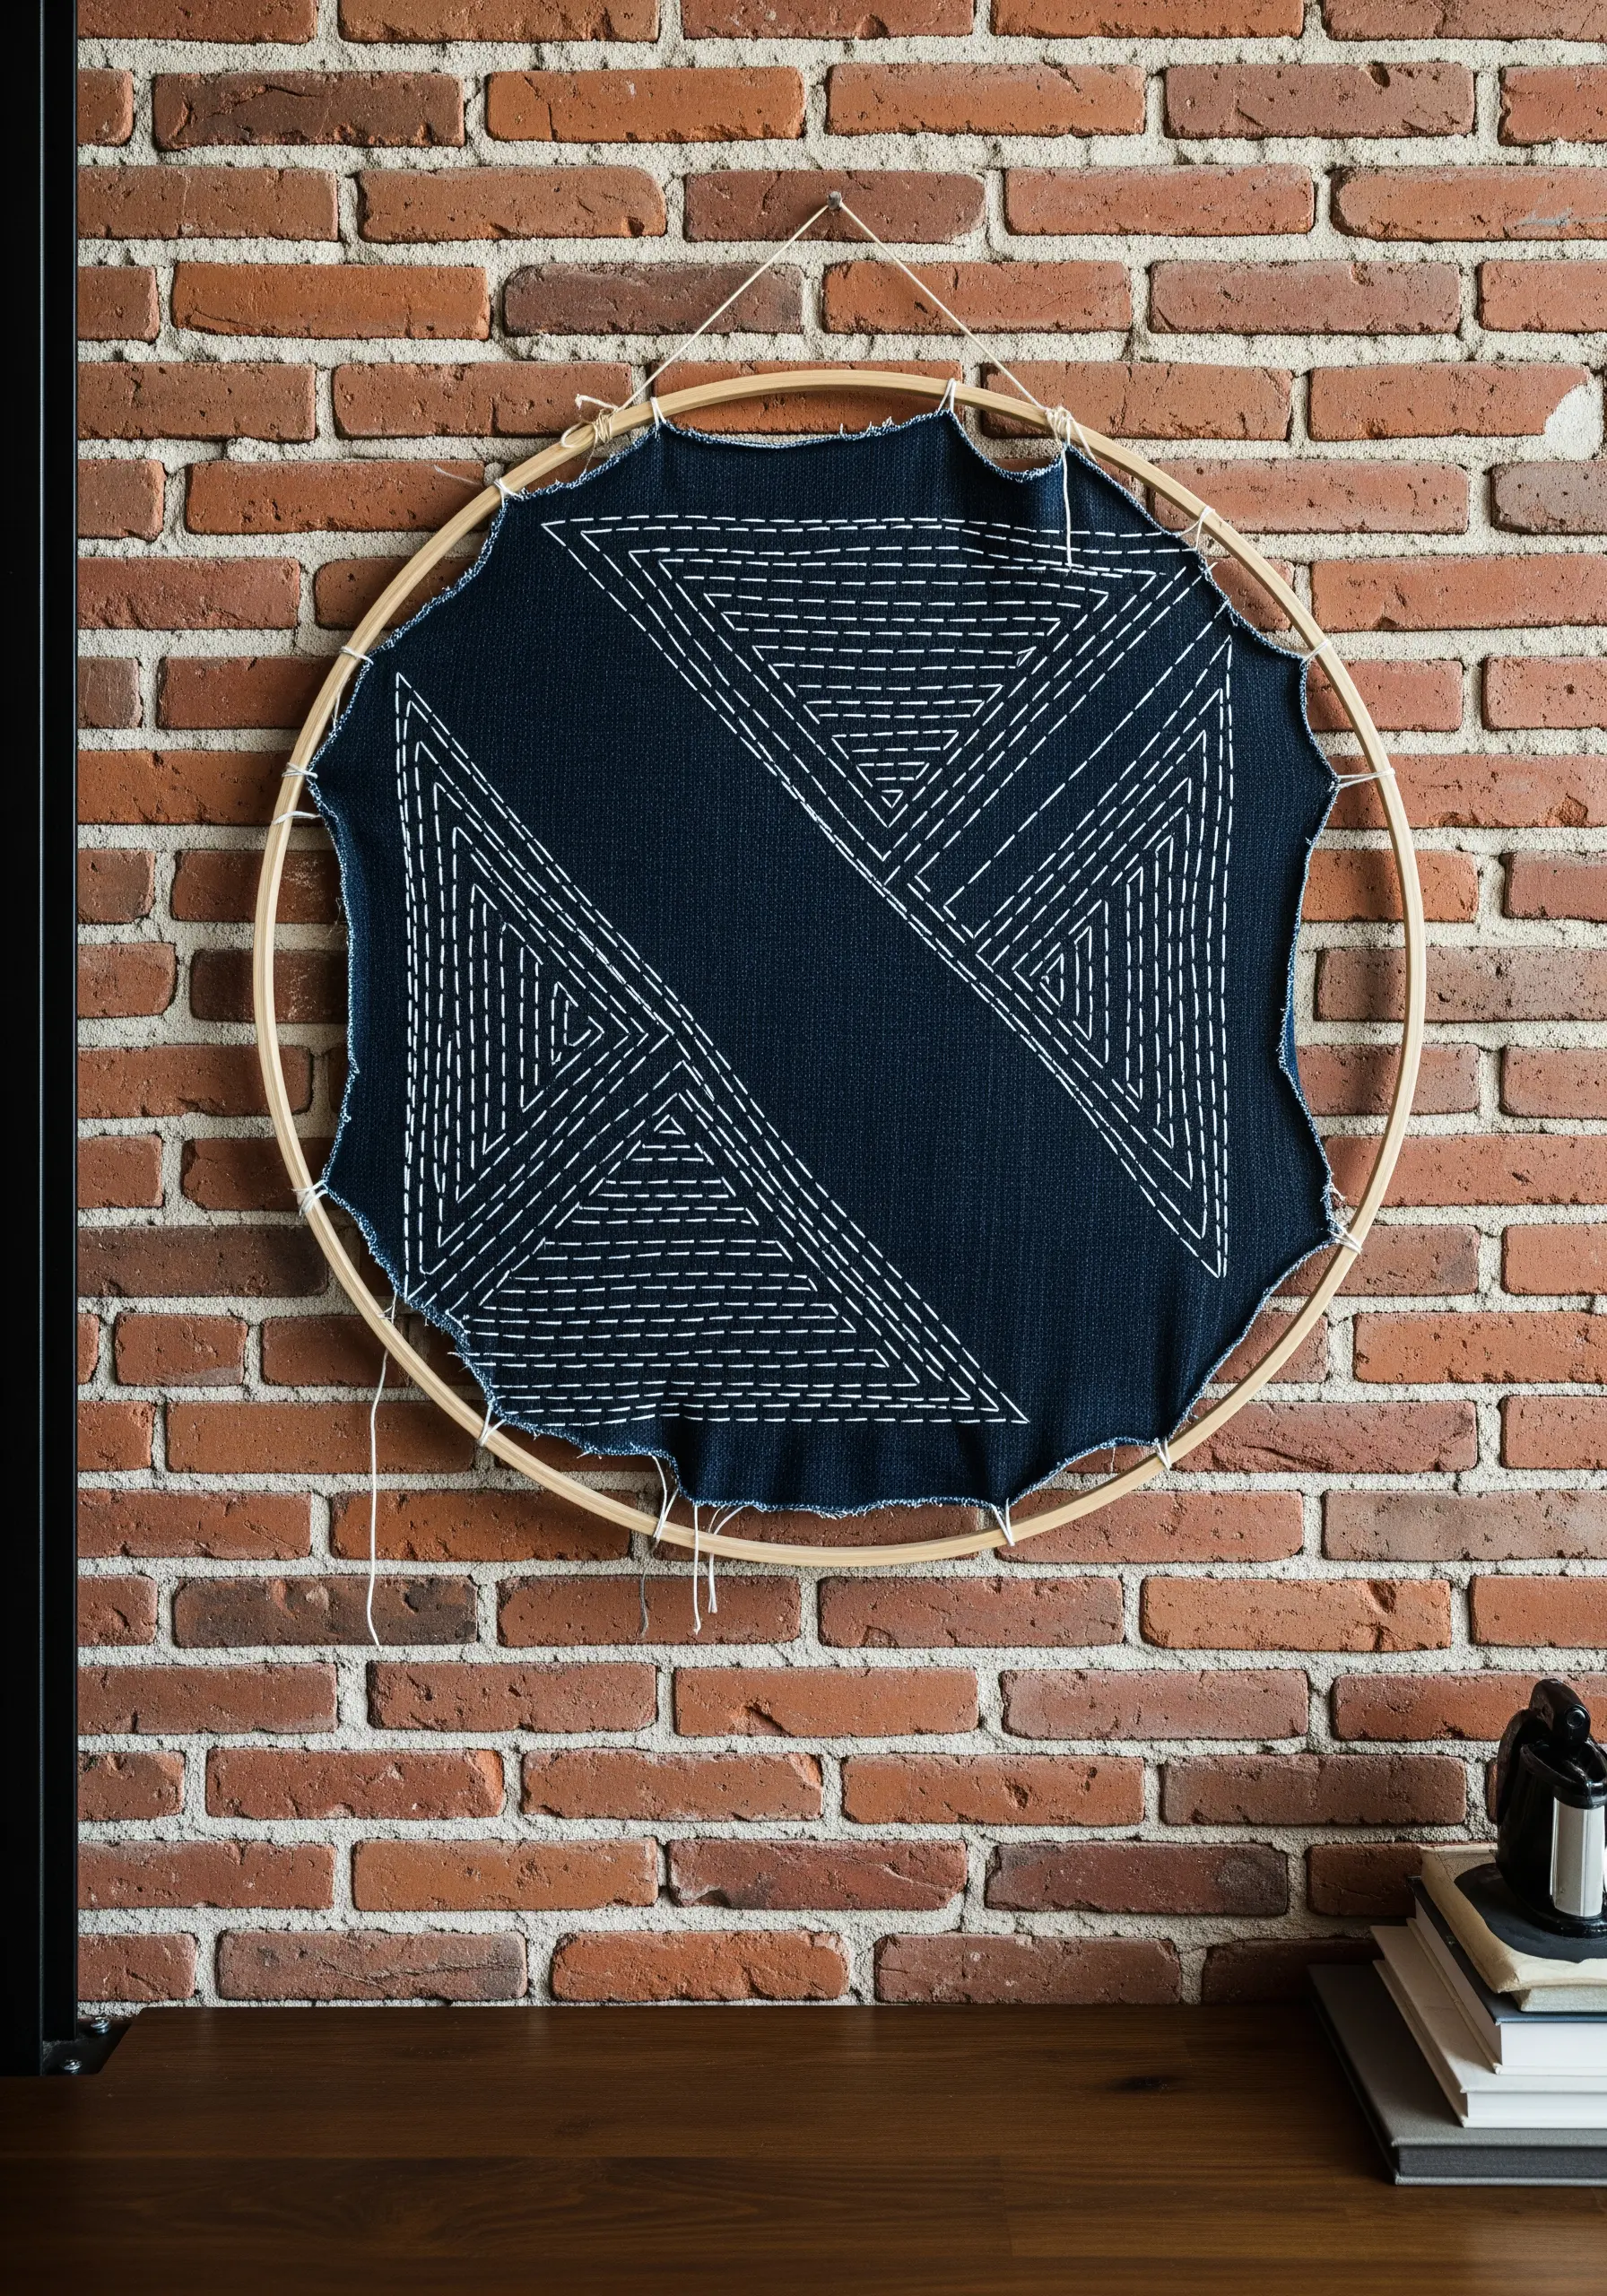
This design uses the simple, meditative running stitch of traditional Japanese Sashiko to create a powerful geometric pattern.
To give this ancient technique a contemporary edge, break the rules of finishing. Instead of neatly trimming the fabric, allow the raw, frayed edges to extend beyond the hoop.
This deconstructed approach feels modern and artistic, celebrating the texture of the fabric itself. Use a thick pearl cotton thread so your stitches have a bold, graphic quality.
23. Adding Subtle Sparkle with Beaded Accents
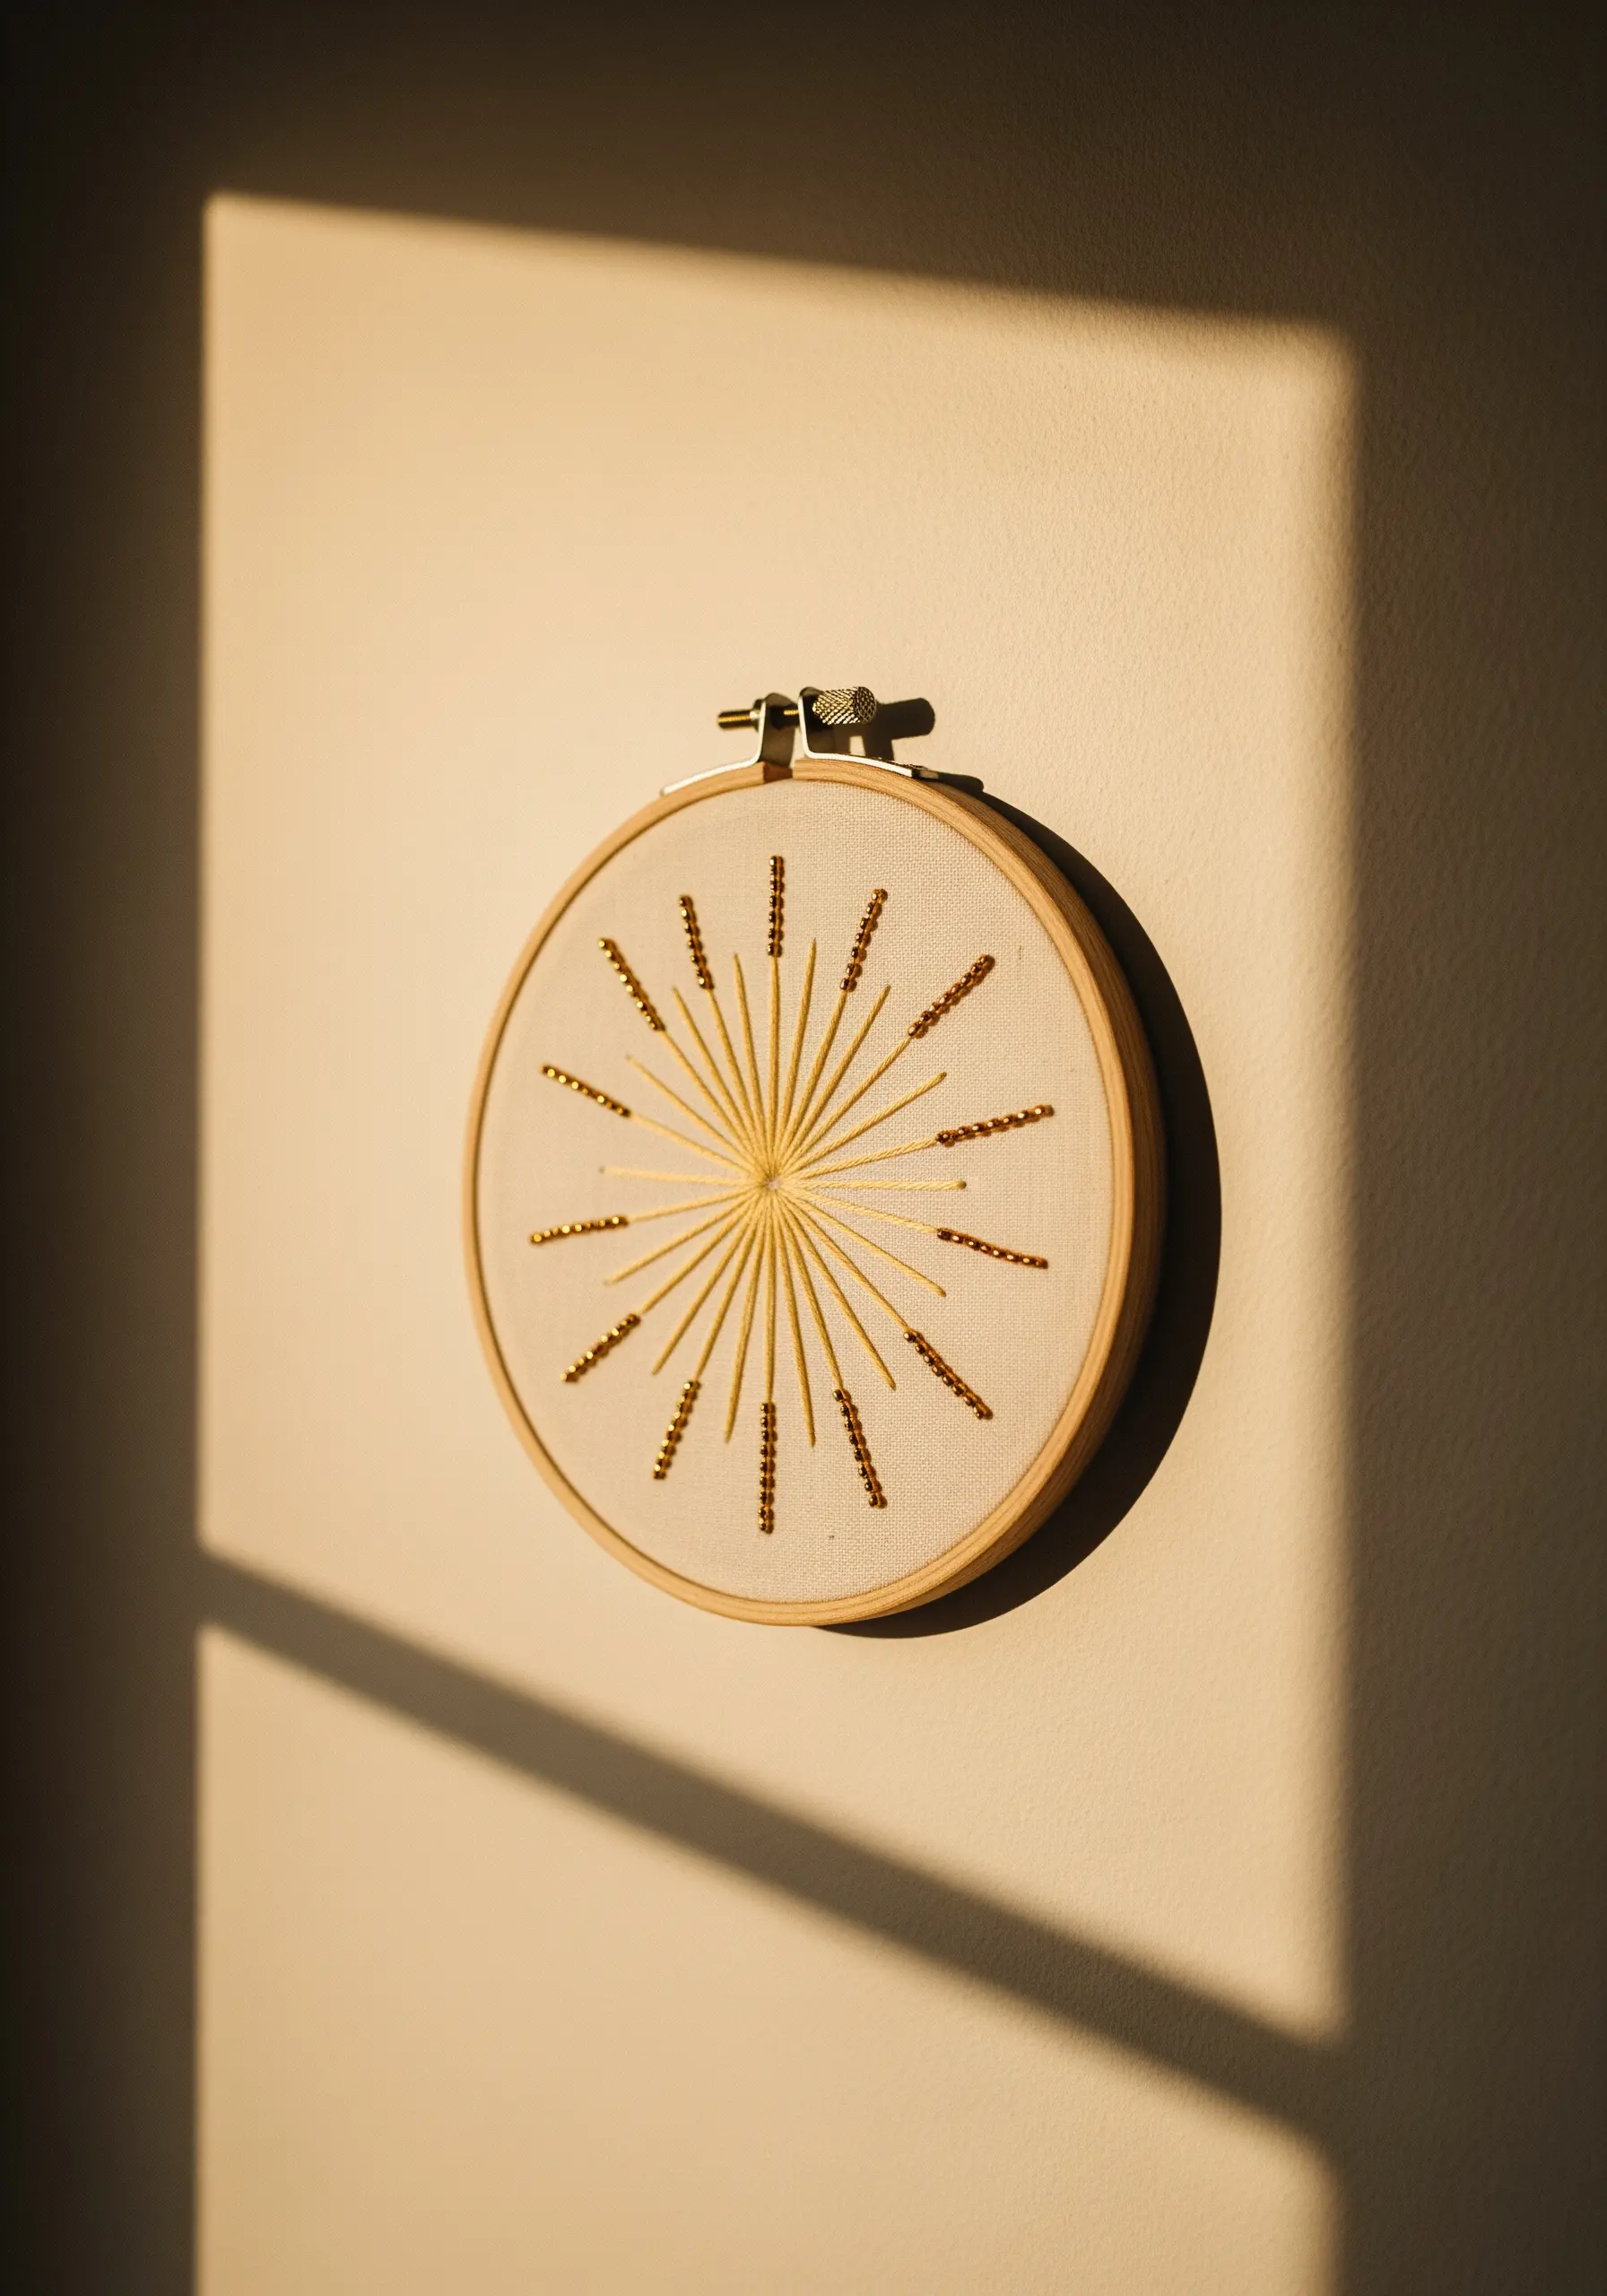
You can instantly elevate a minimalist design with the smallest touch of embellishment.
After embroidering this simple starburst with straight stitches, go back with a single strand of matching thread and attach one tiny seed bead to the tip of each ray.
This subtle detail catches the light in a way that thread alone cannot, adding a hint of texture and a touch of luxury without cluttering the design. It’s a wonderful upgrade for any minimalist small hoop designs.
24. Creating Soft Dimension with Appliqué and Outline Stitch
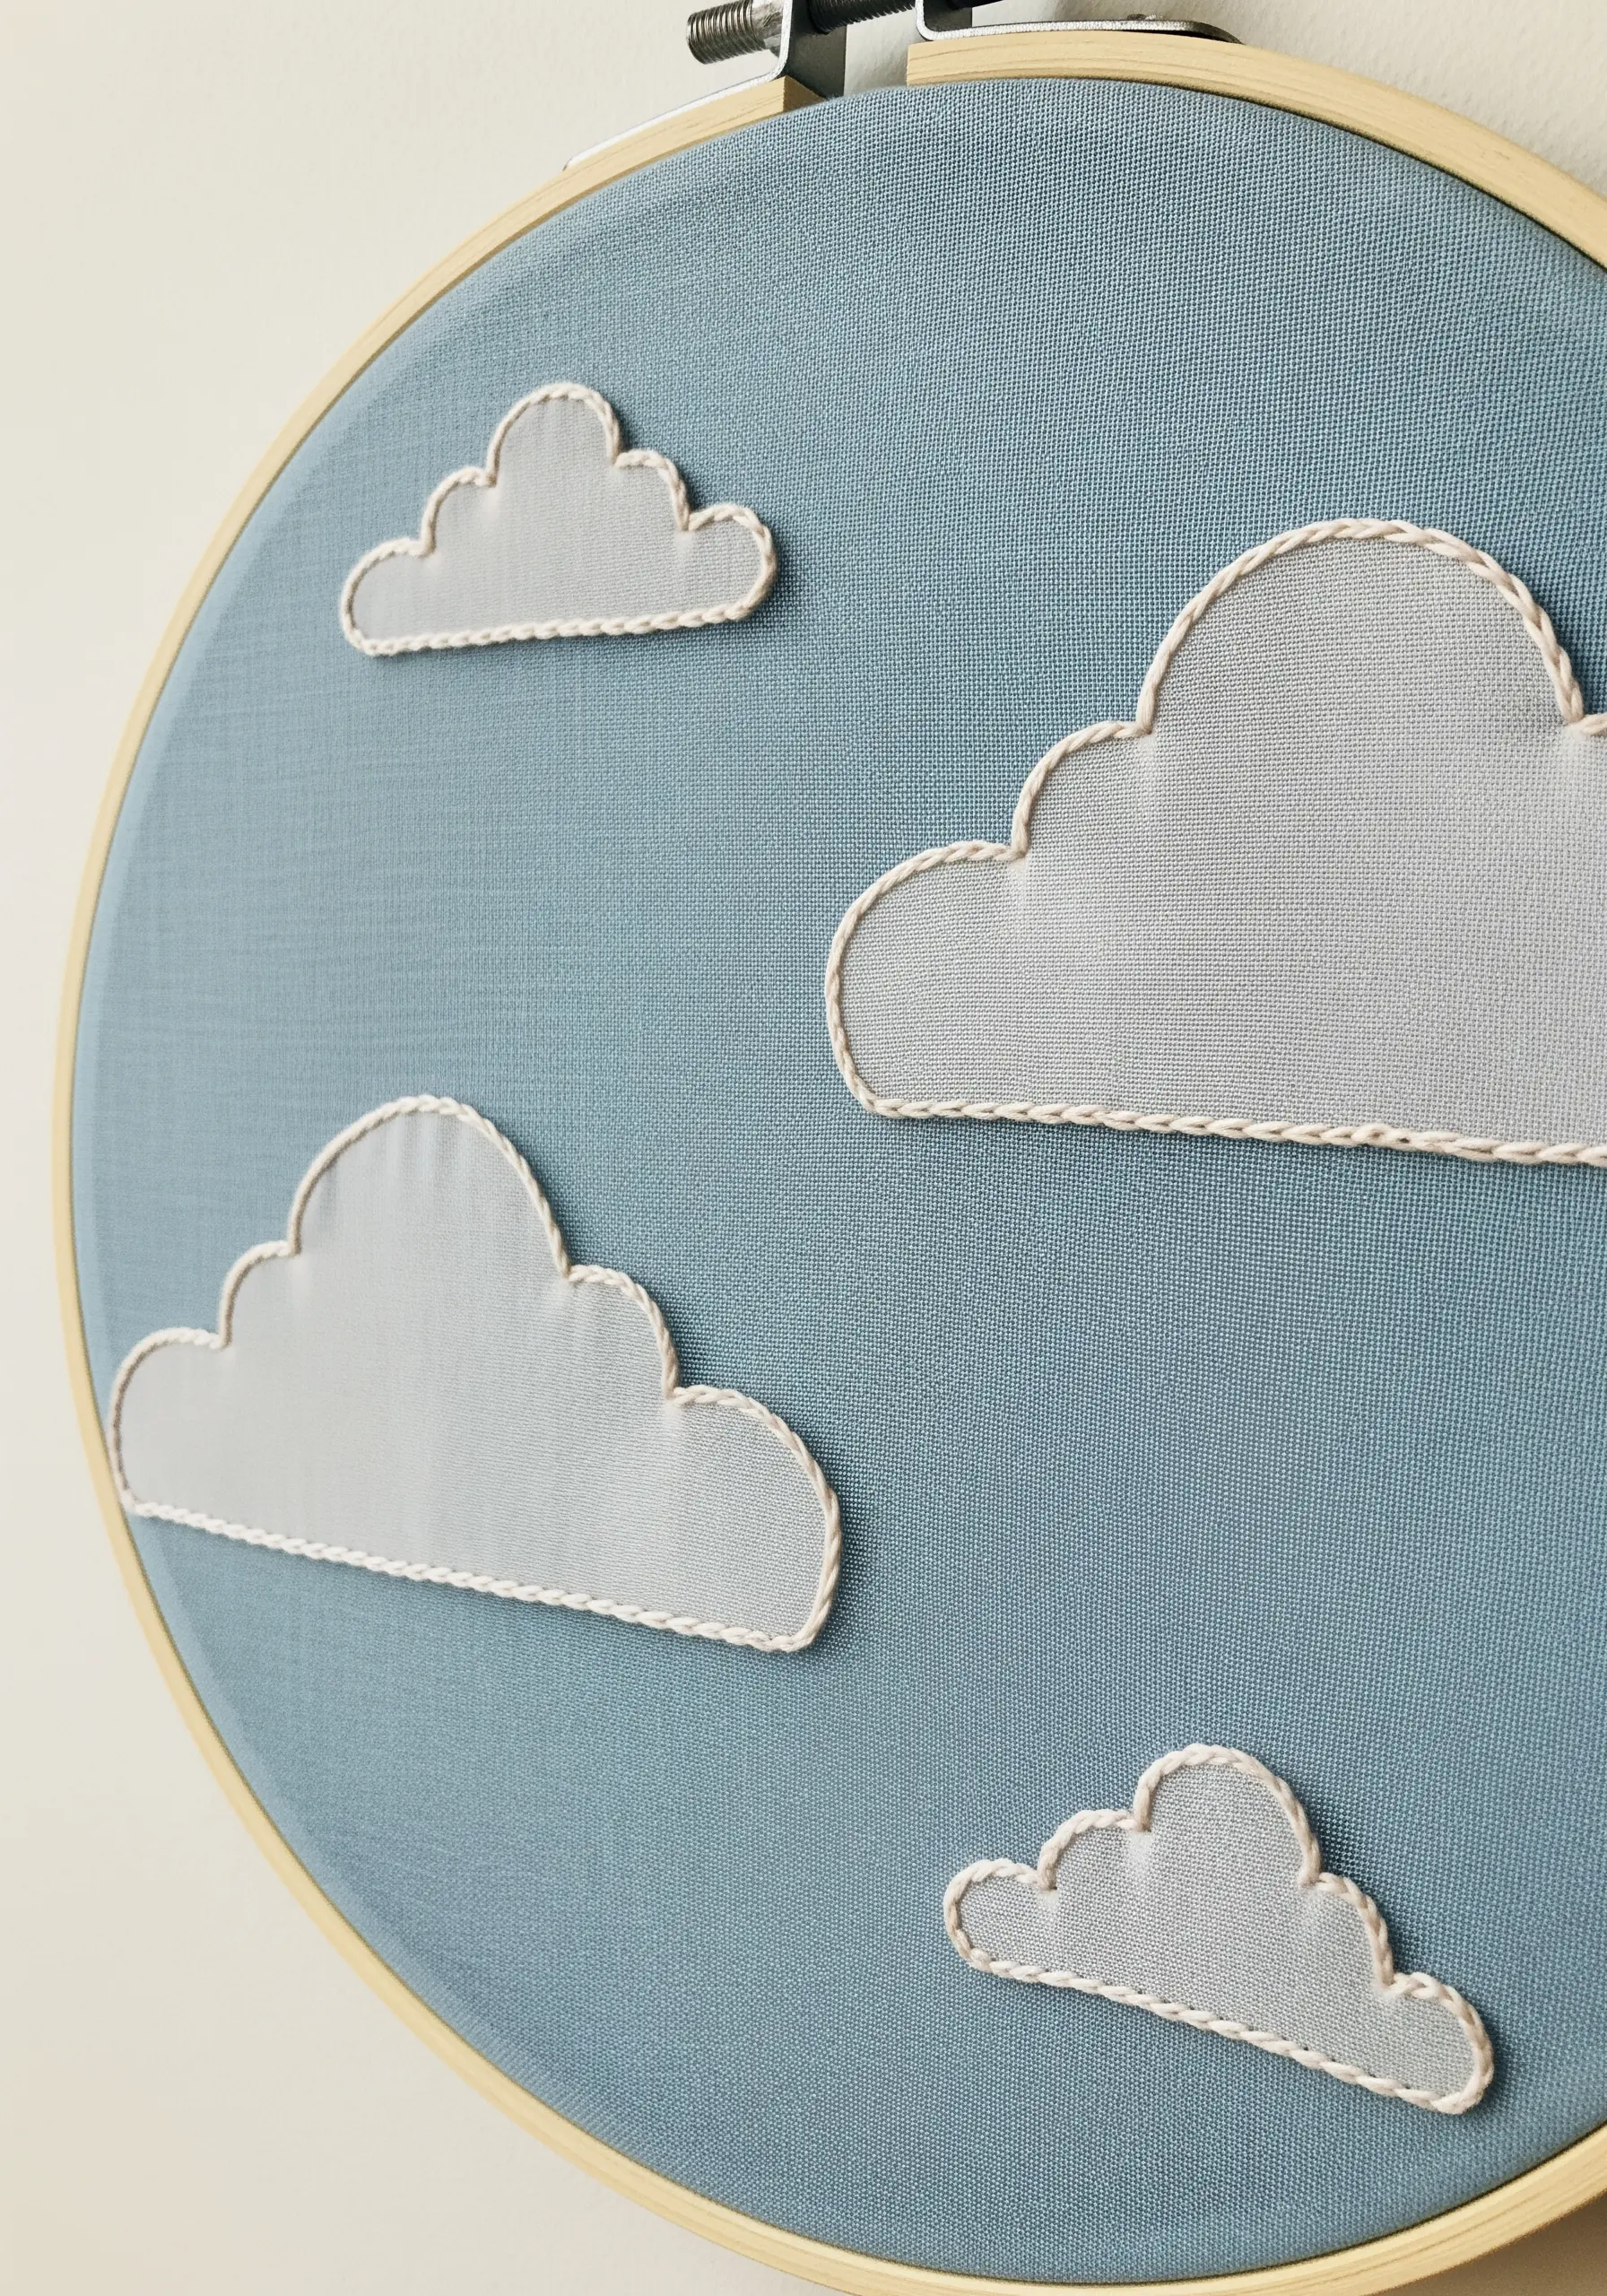
For a dreamy, three-dimensional look without complex stitches, try this simple appliqué technique.
Cut your cloud shapes from a piece of lightweight, slightly sheer fabric like cotton voile or organza.
Use a glue stick to temporarily place them on your background fabric, then secure them with a neat backstitch or split stitch around the edge.
The slight transparency of the appliqué fabric creates a soft, layered effect that is both subtle and beautiful.
25. Textured Rainbows with the Raised Chain Stitch

Instead of filling your rainbow arches with time-consuming satin stitch, try a raised chain stitch band.
This stitch creates a beautiful, dense braid that stands up from the surface of the fabric, giving your rainbow a wonderful, tactile quality.
It’s significantly faster to work than satin stitch and provides a cozy, yarn-like texture that makes the simple motif feel special and substantial.
26. A Desert Trio with Simple Texture Variations
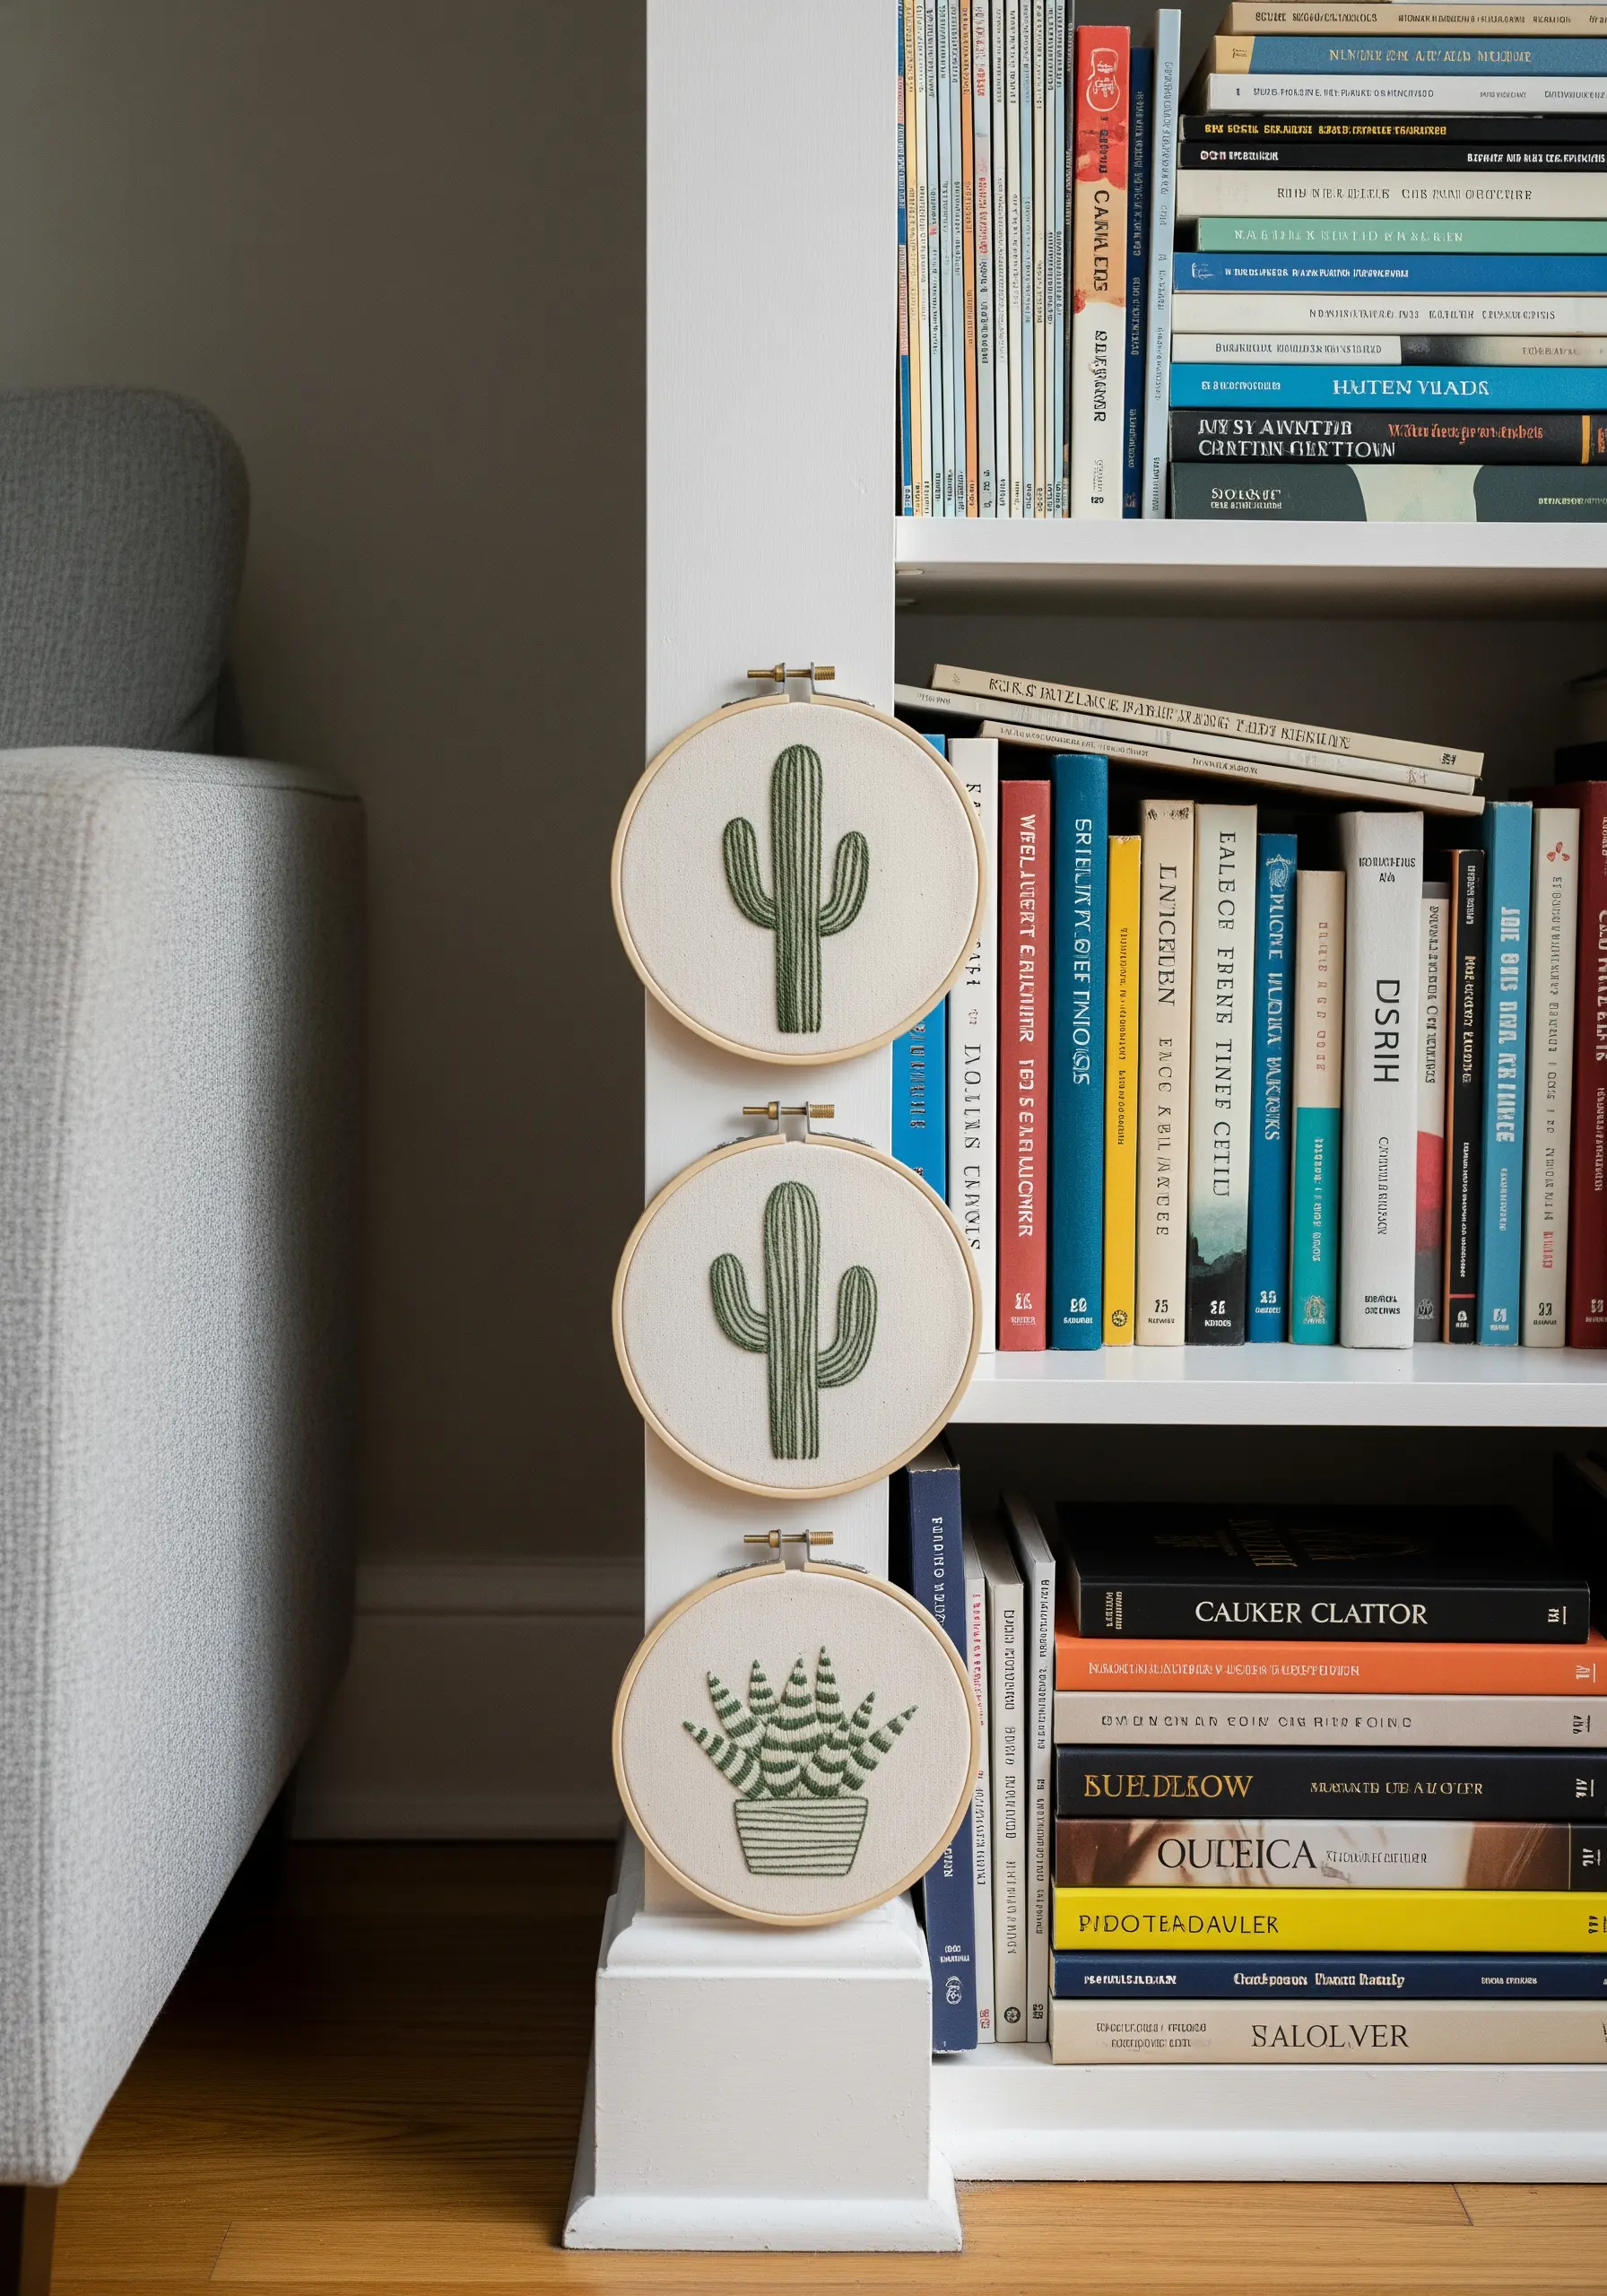
When stitching a collection of similar objects, like these cacti, you can create visual interest by varying the texture of your fill stitches.
For one, use smooth, vertical satin stitches. For another, use a brick stitch to create a more patterned fill. For the succulent, use detached chain stitches or single straight stitches that radiate from the center.
Even when using the same color, these textural differences give each plant its own distinct personality and make the collection of houseplant embroidery motifs more engaging.
27. Cascading Ginkgo Leaves with Metallic Threads

To capture the elegant, fan-like shape of ginkgo leaves, use a detached chain stitch for the outer curve and fill the interior with radiating straight stitches.
When working with metallic floss, which can be prone to tangling and fraying, always use a shorter length of thread than you normally would—about 12-15 inches is ideal.
Stitching against a dark, high-contrast fabric like this charcoal gray canvas makes the metallic thread appear incredibly luminous, creating a truly luxurious finish.


