

Your space should tell your story. And what better way to do that than with art you’ve made with your own hands? It’s not about creating something perfect; it’s about infusing your home with personality, texture, and a sense of calm that only the slow, meditative process of textile art can bring.
Think of each stitch, knot, or weave as a quiet decision. It’s a choice of color, a commitment to a texture, a moment of focus. You don’t need a grand studio or expensive materials to make something meaningful. Often, the most impactful pieces come from mastering a simple technique and applying it with intention.
In this collection, you’ll find ideas that move beyond the basics. We’ll explore how to build dimension, play with materials, and turn functional items into works of art. Let this be your guide to creating pieces that not only look beautiful on your walls but also feel deeply, authentically you.
1. Introduce Gradient Color with Dip-Dyeing

Transform a standard macrame wall hanging by dip-dyeing the ends of your cotton cord before you even begin knotting.
This method creates an organic, flowing color gradient that feels more integrated than painting the piece after it’s finished.
Use a high-quality fiber-reactive dye for cotton, mixing several shades in separate containers to create a seamless transition from light to dark.
The natural absorbency of the cotton rope will do the work, giving your finished piece an effortless, painterly quality that elevates the entire design.
2. Curate a Cohesive Botanical Gallery Wall
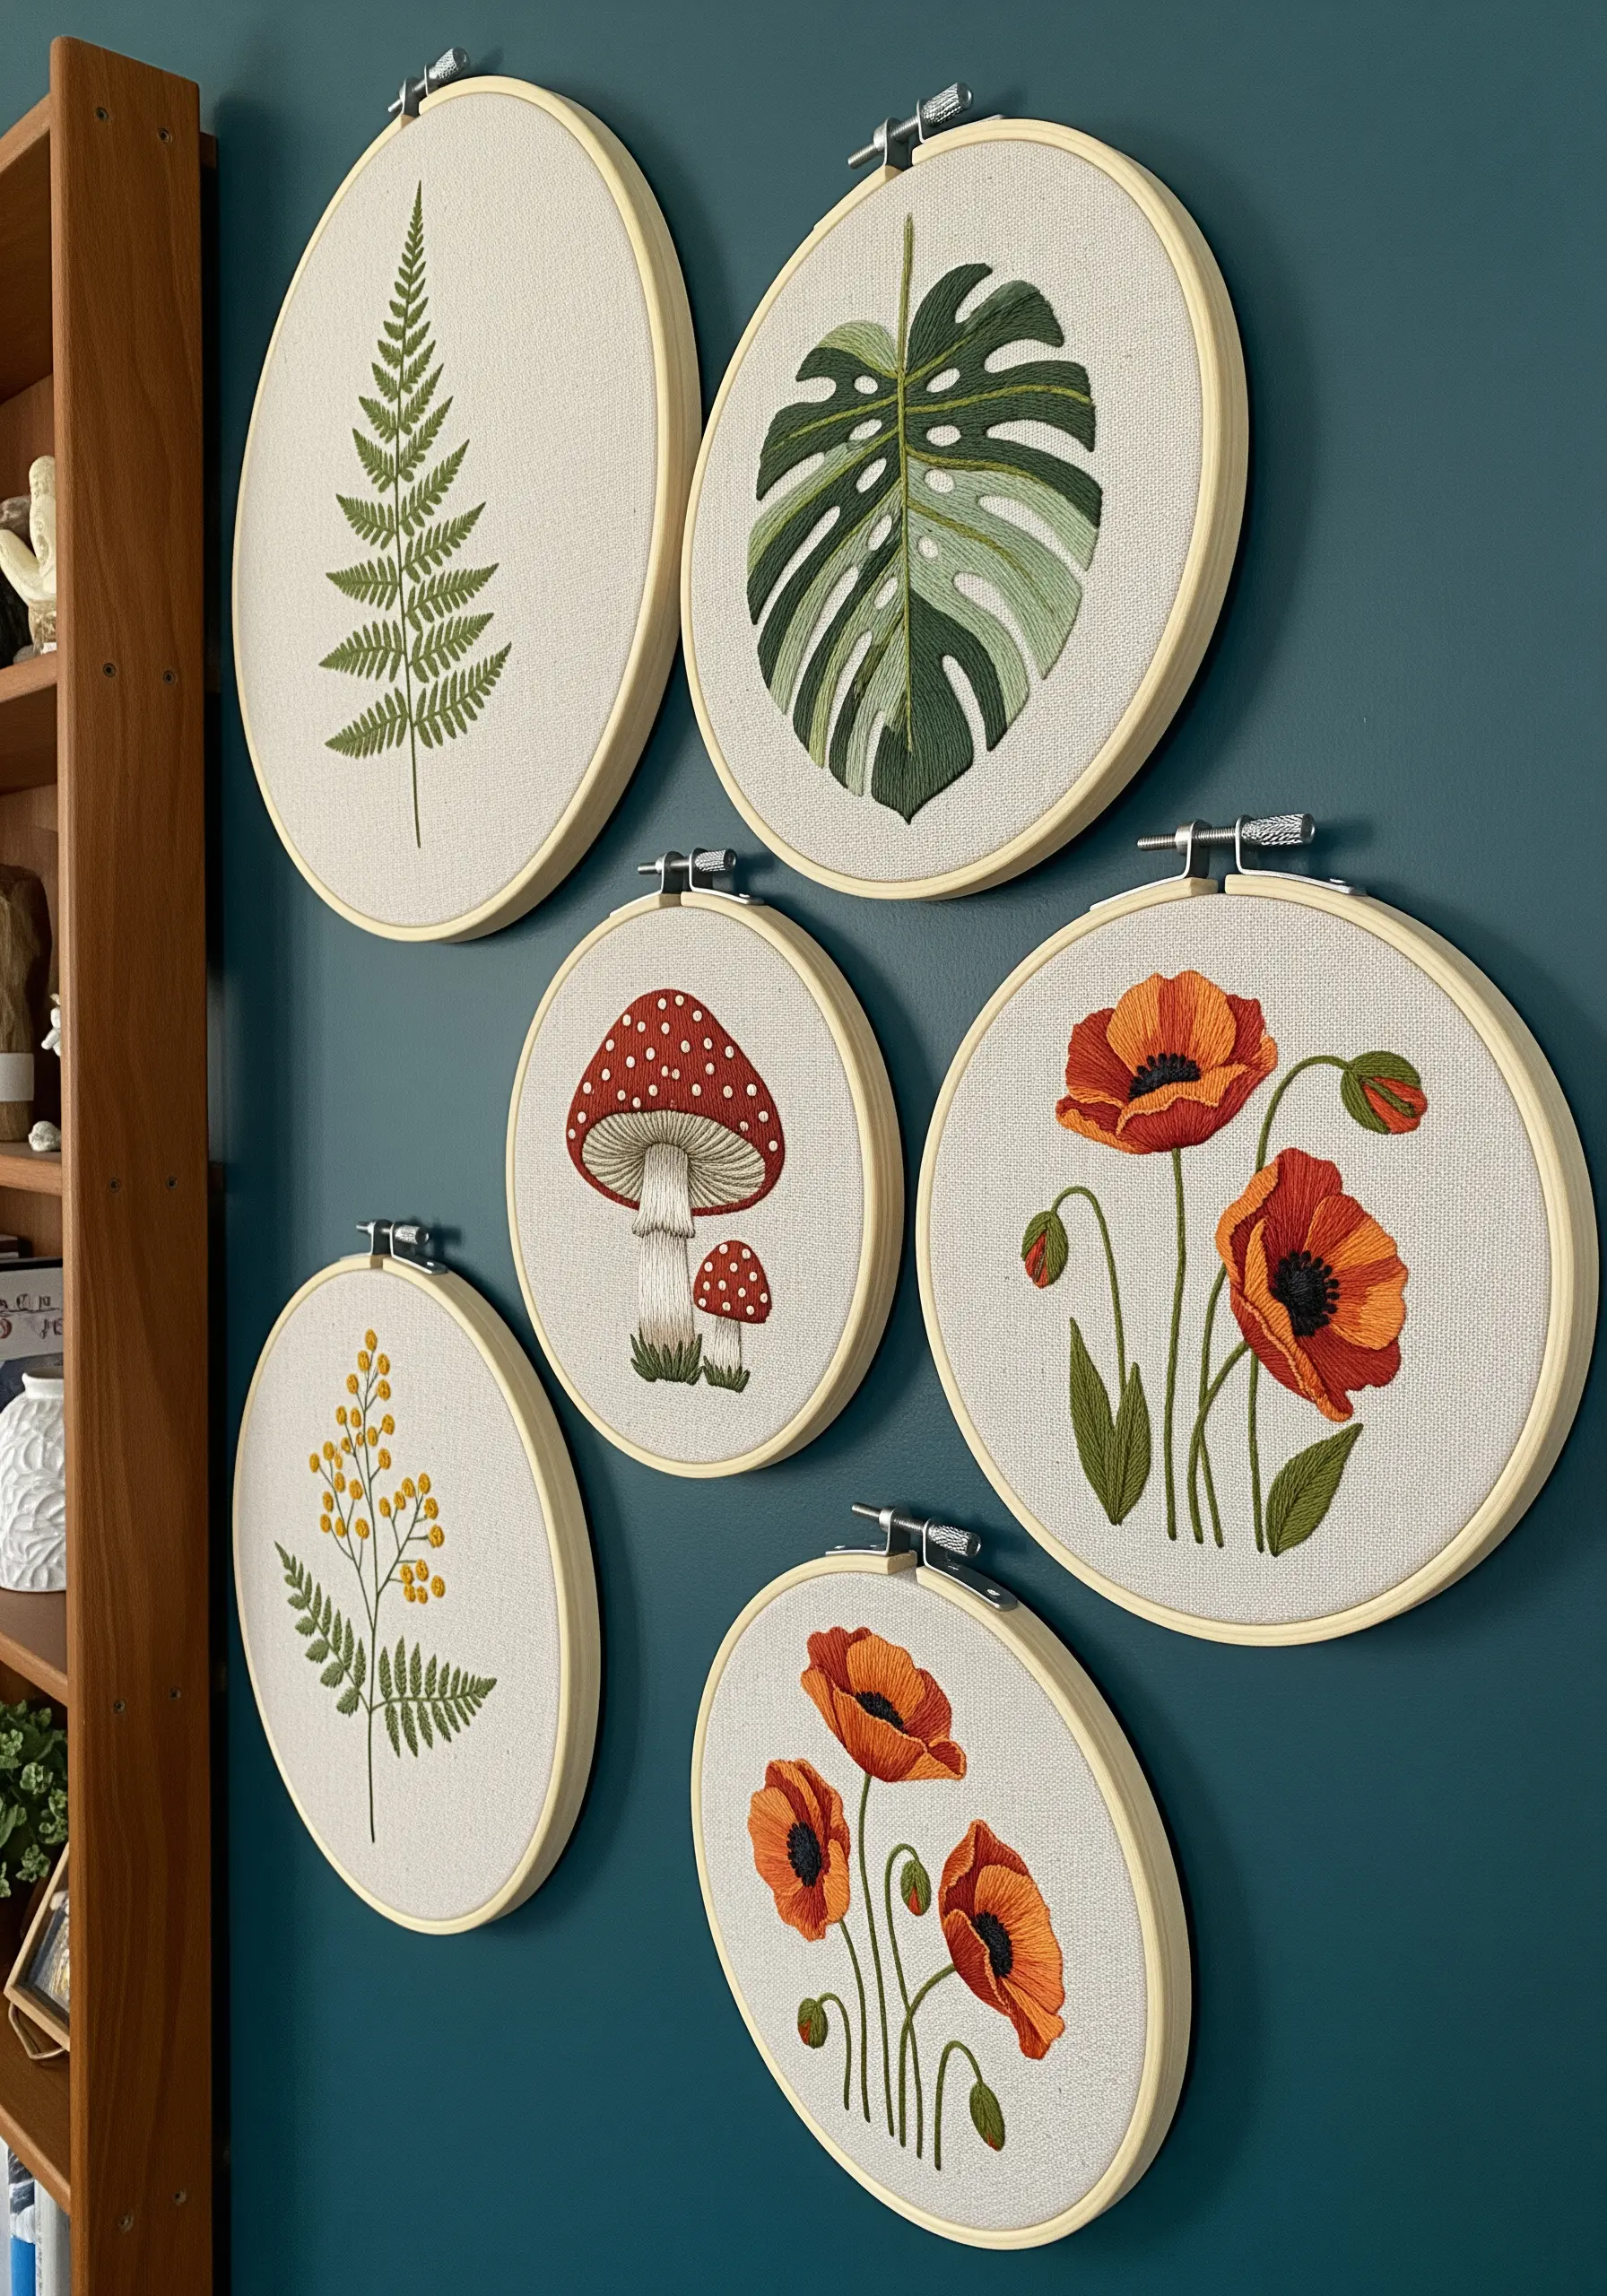
To make a collection of hoops feel like a unified gallery, choose a single fabric color and a consistent hoop style as your foundation.
Vary the scale and composition of your motifs—a single detailed leaf, a cluster of flowers, a full sprig—to create visual interest.
For realism in foliage, use a single strand of thread and the long-and-short stitch to blend shades of green, mimicking how light hits a real leaf.
This technique turns simple nature-themed wall hoop projects into a sophisticated, curated collection.
3. Master Clean Shapes with Punch Needle

The key to crisp, graphic shapes in punch needle is managing your loop height and yarn tension consistently.
Use a punch needle with adjustable height settings, selecting a shorter loop for the background and a slightly taller one for the foreground shapes to create subtle dimension.
Outline your shapes first, then fill them in, working from the outside toward the center.
This method ensures your yarn packs tightly, preventing colors from bleeding into one another and keeping your geometric forms sharp and intentional.
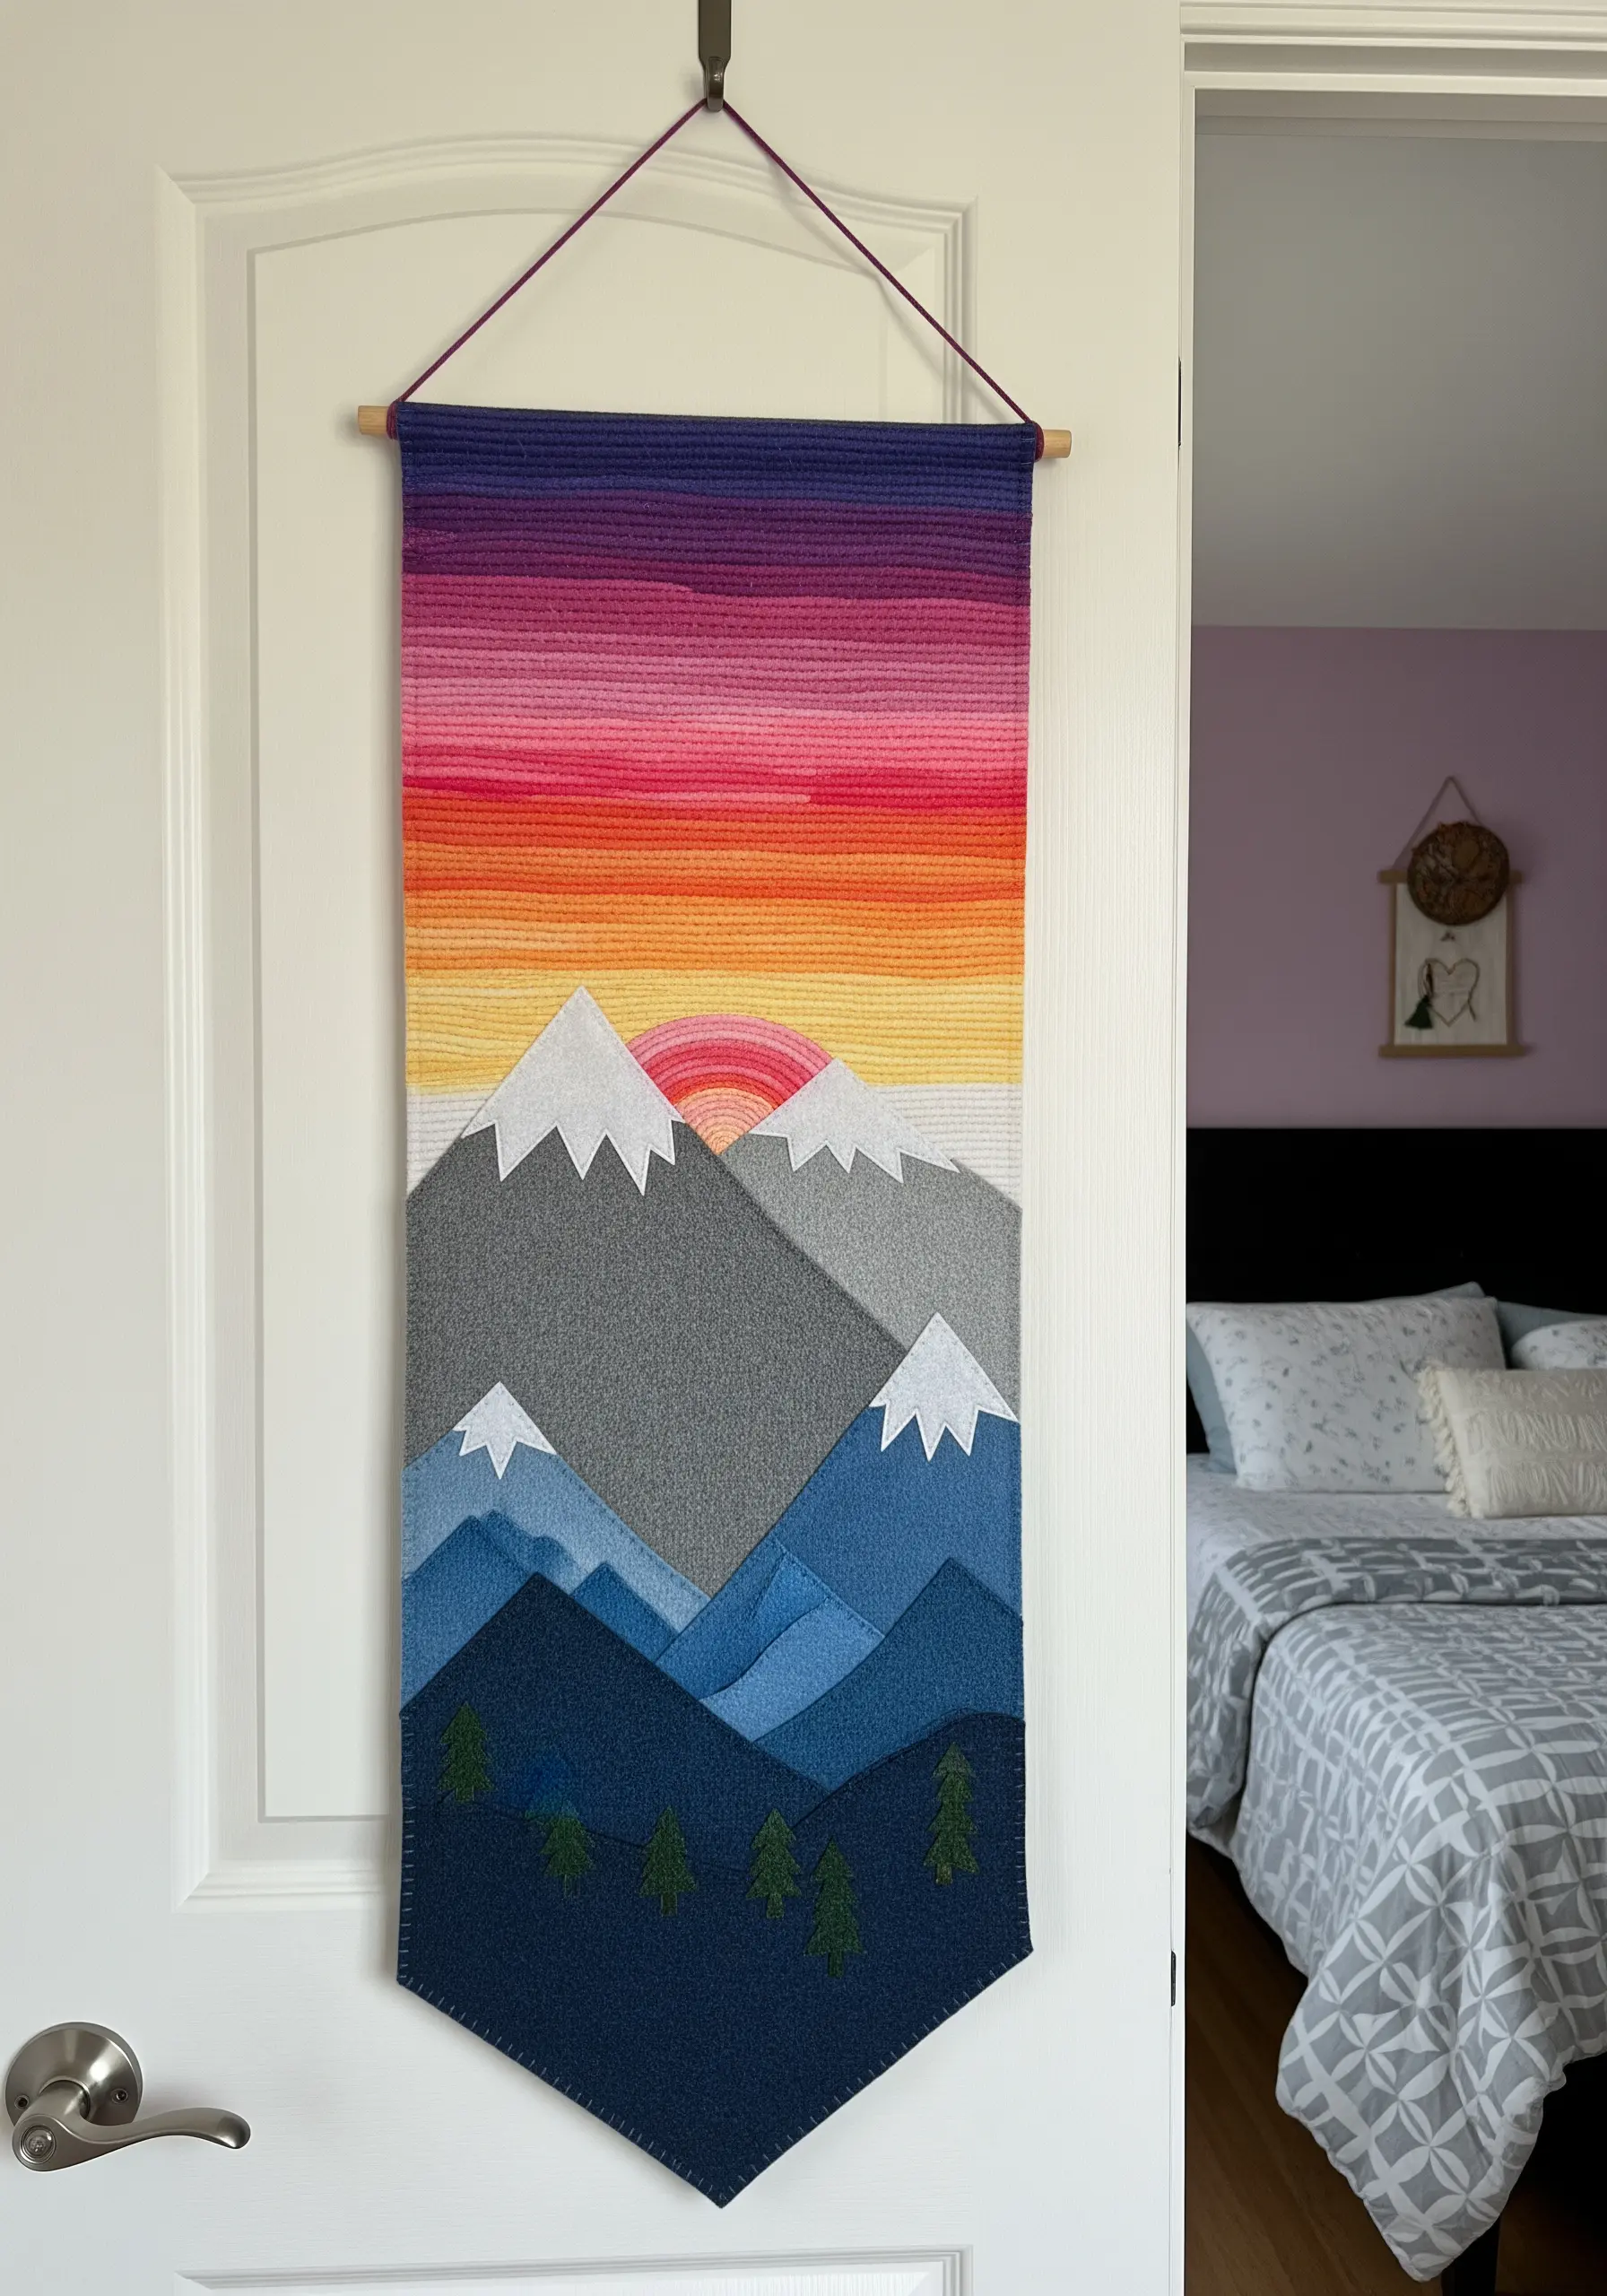
4. Weave Landscapes with Textural Yarn

Create a woven wall hanging that feels like a landscape by combining different yarn weights and textures.
Use chunky, thick roving wool for soft, cloud-like sections and a thinner, tightly spun yarn for more defined areas.
Incorporate soumak stitch—a technique where the weft yarn wraps around the warp threads—to create raised, braid-like lines that suggest rolling hills or waves.
This interplay of textures turns an abstract weaving into an evocative, touchable piece of art for your bedroom or living space.
5. Embroider a Lampshade for Luminous Art
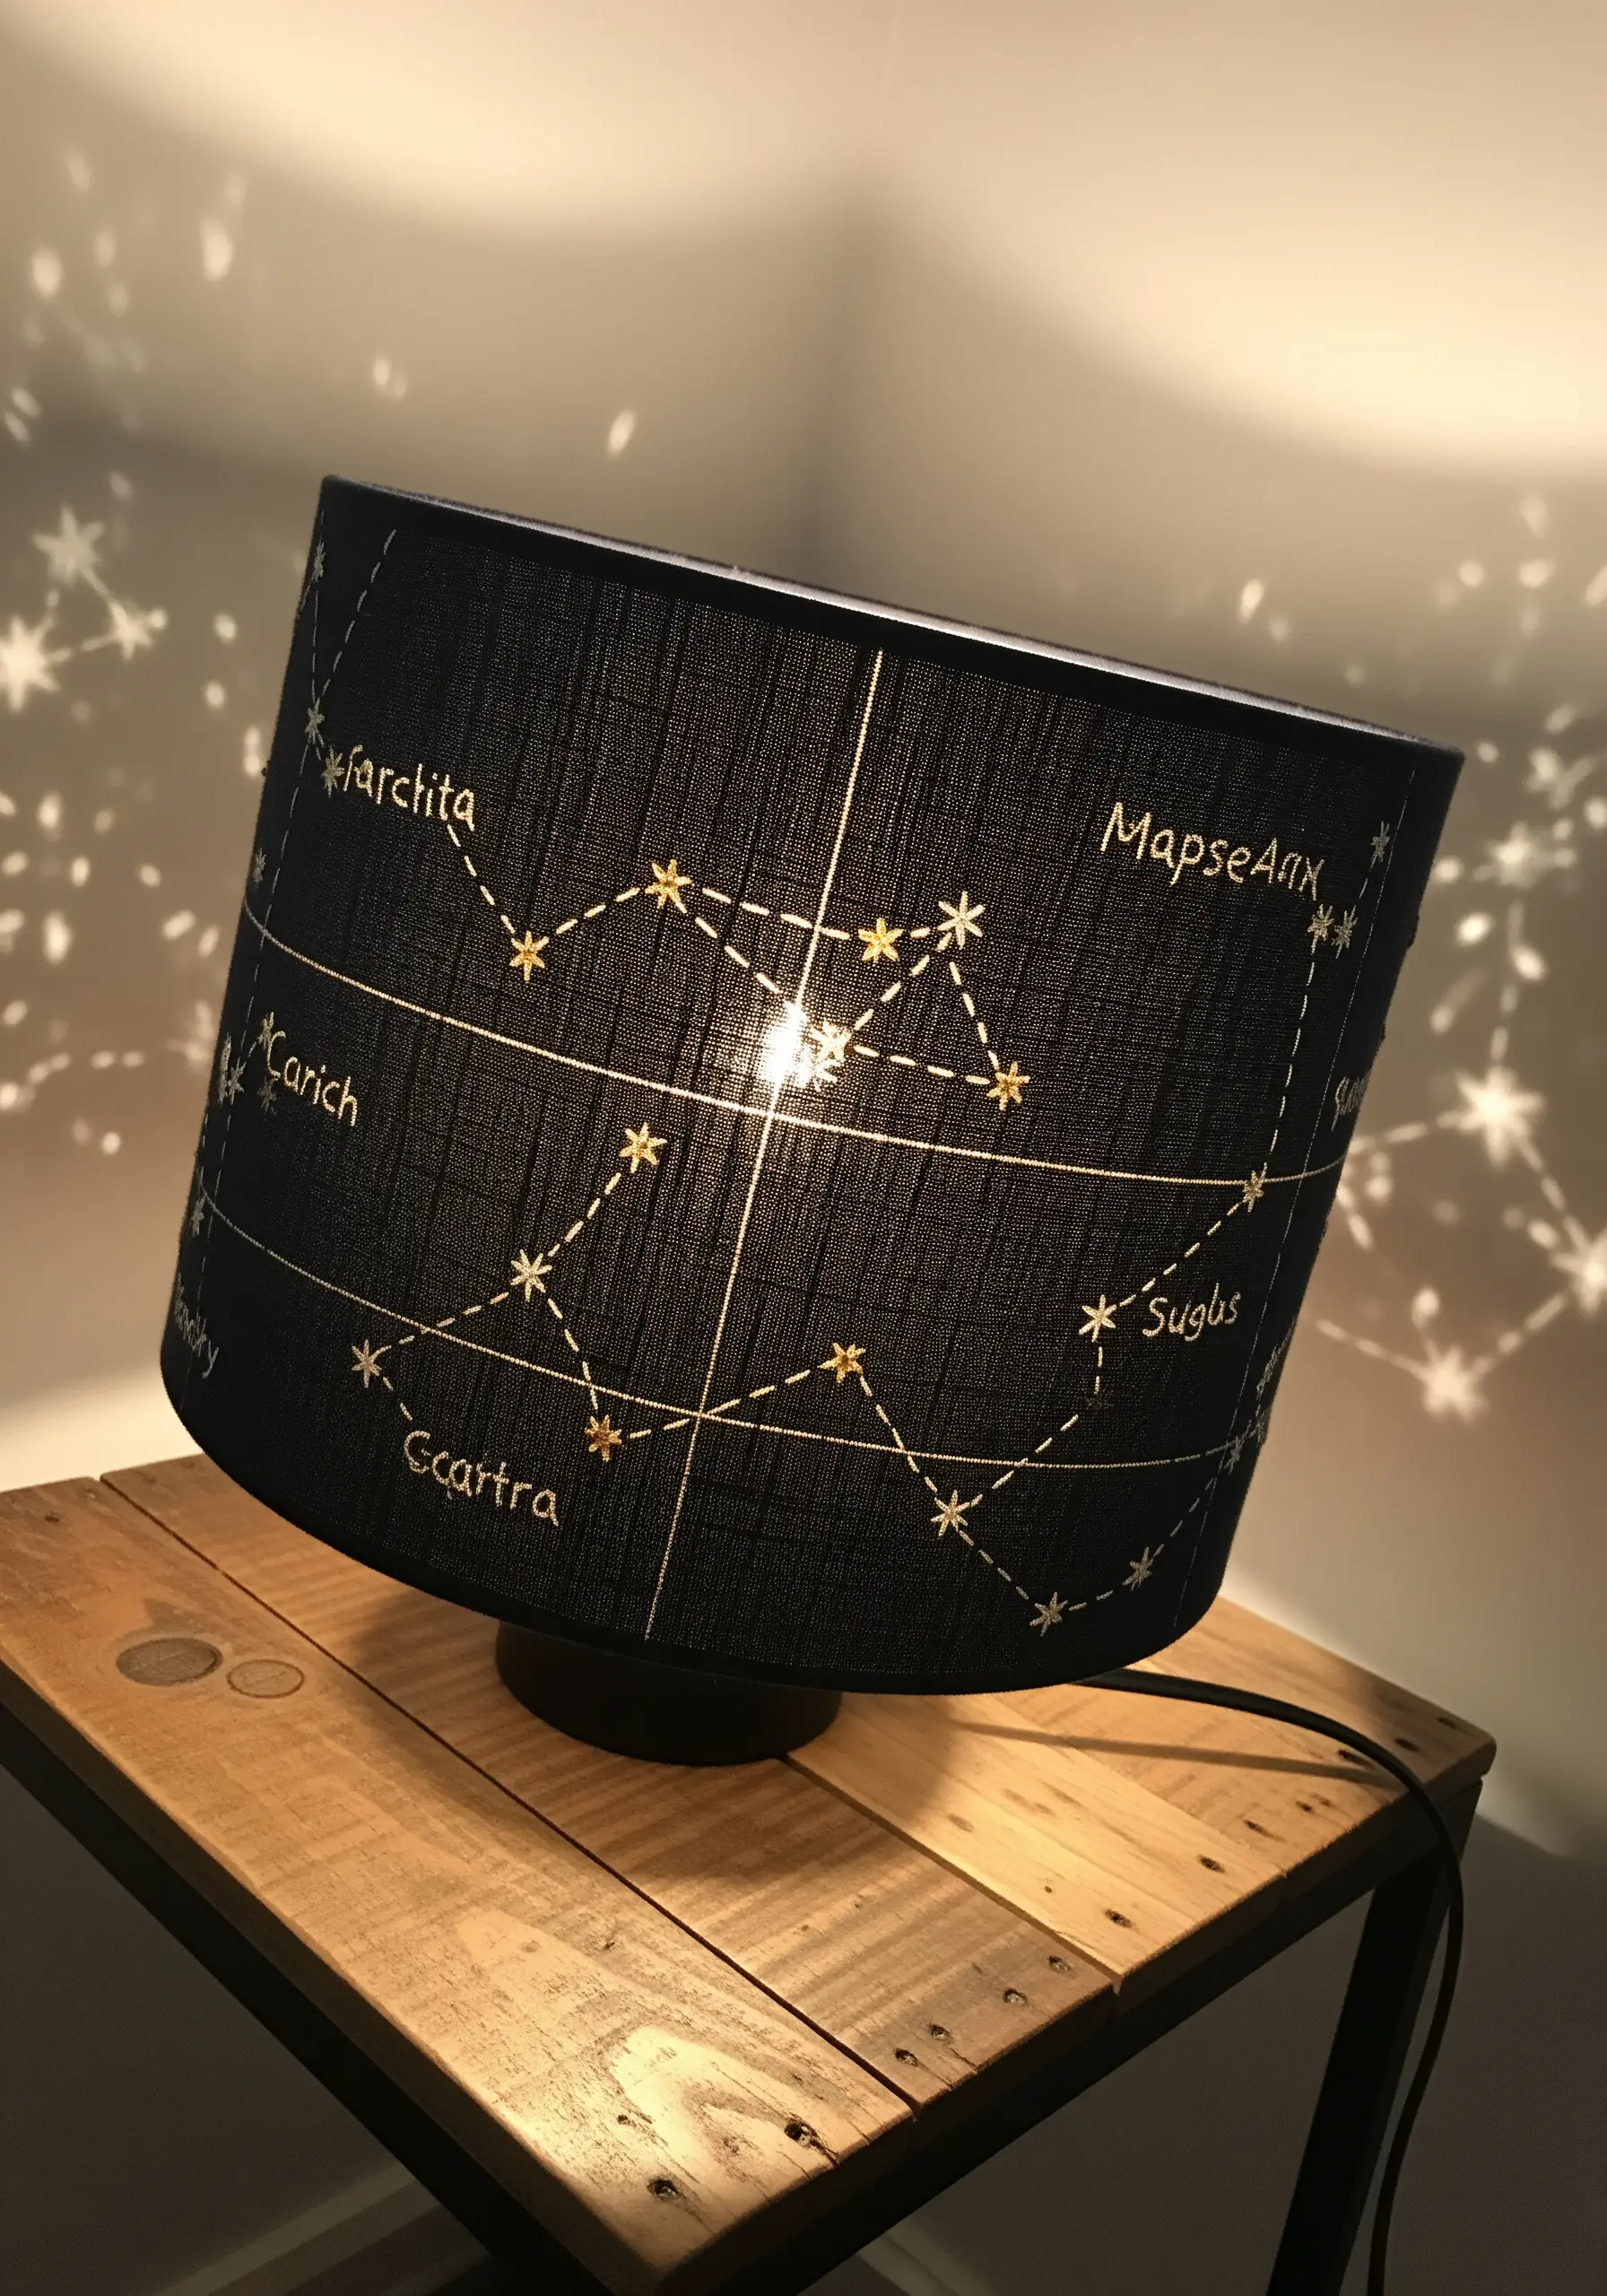
Stitching on a lampshade transforms it from a simple utility item into a piece of interactive art.
Choose a tightly woven, dark fabric shade that won’t easily fray. Use a single strand of light-colored or metallic thread for your design.
Stitch simple constellations using a combination of straight stitches for the lines and French knots or star stitches for the stars.
When the lamp is turned on, the light will shine through the perforations, projecting your stitched patterns onto the surrounding walls and creating a magical atmosphere.
6. Balance Lettering and Botanicals on a Banner
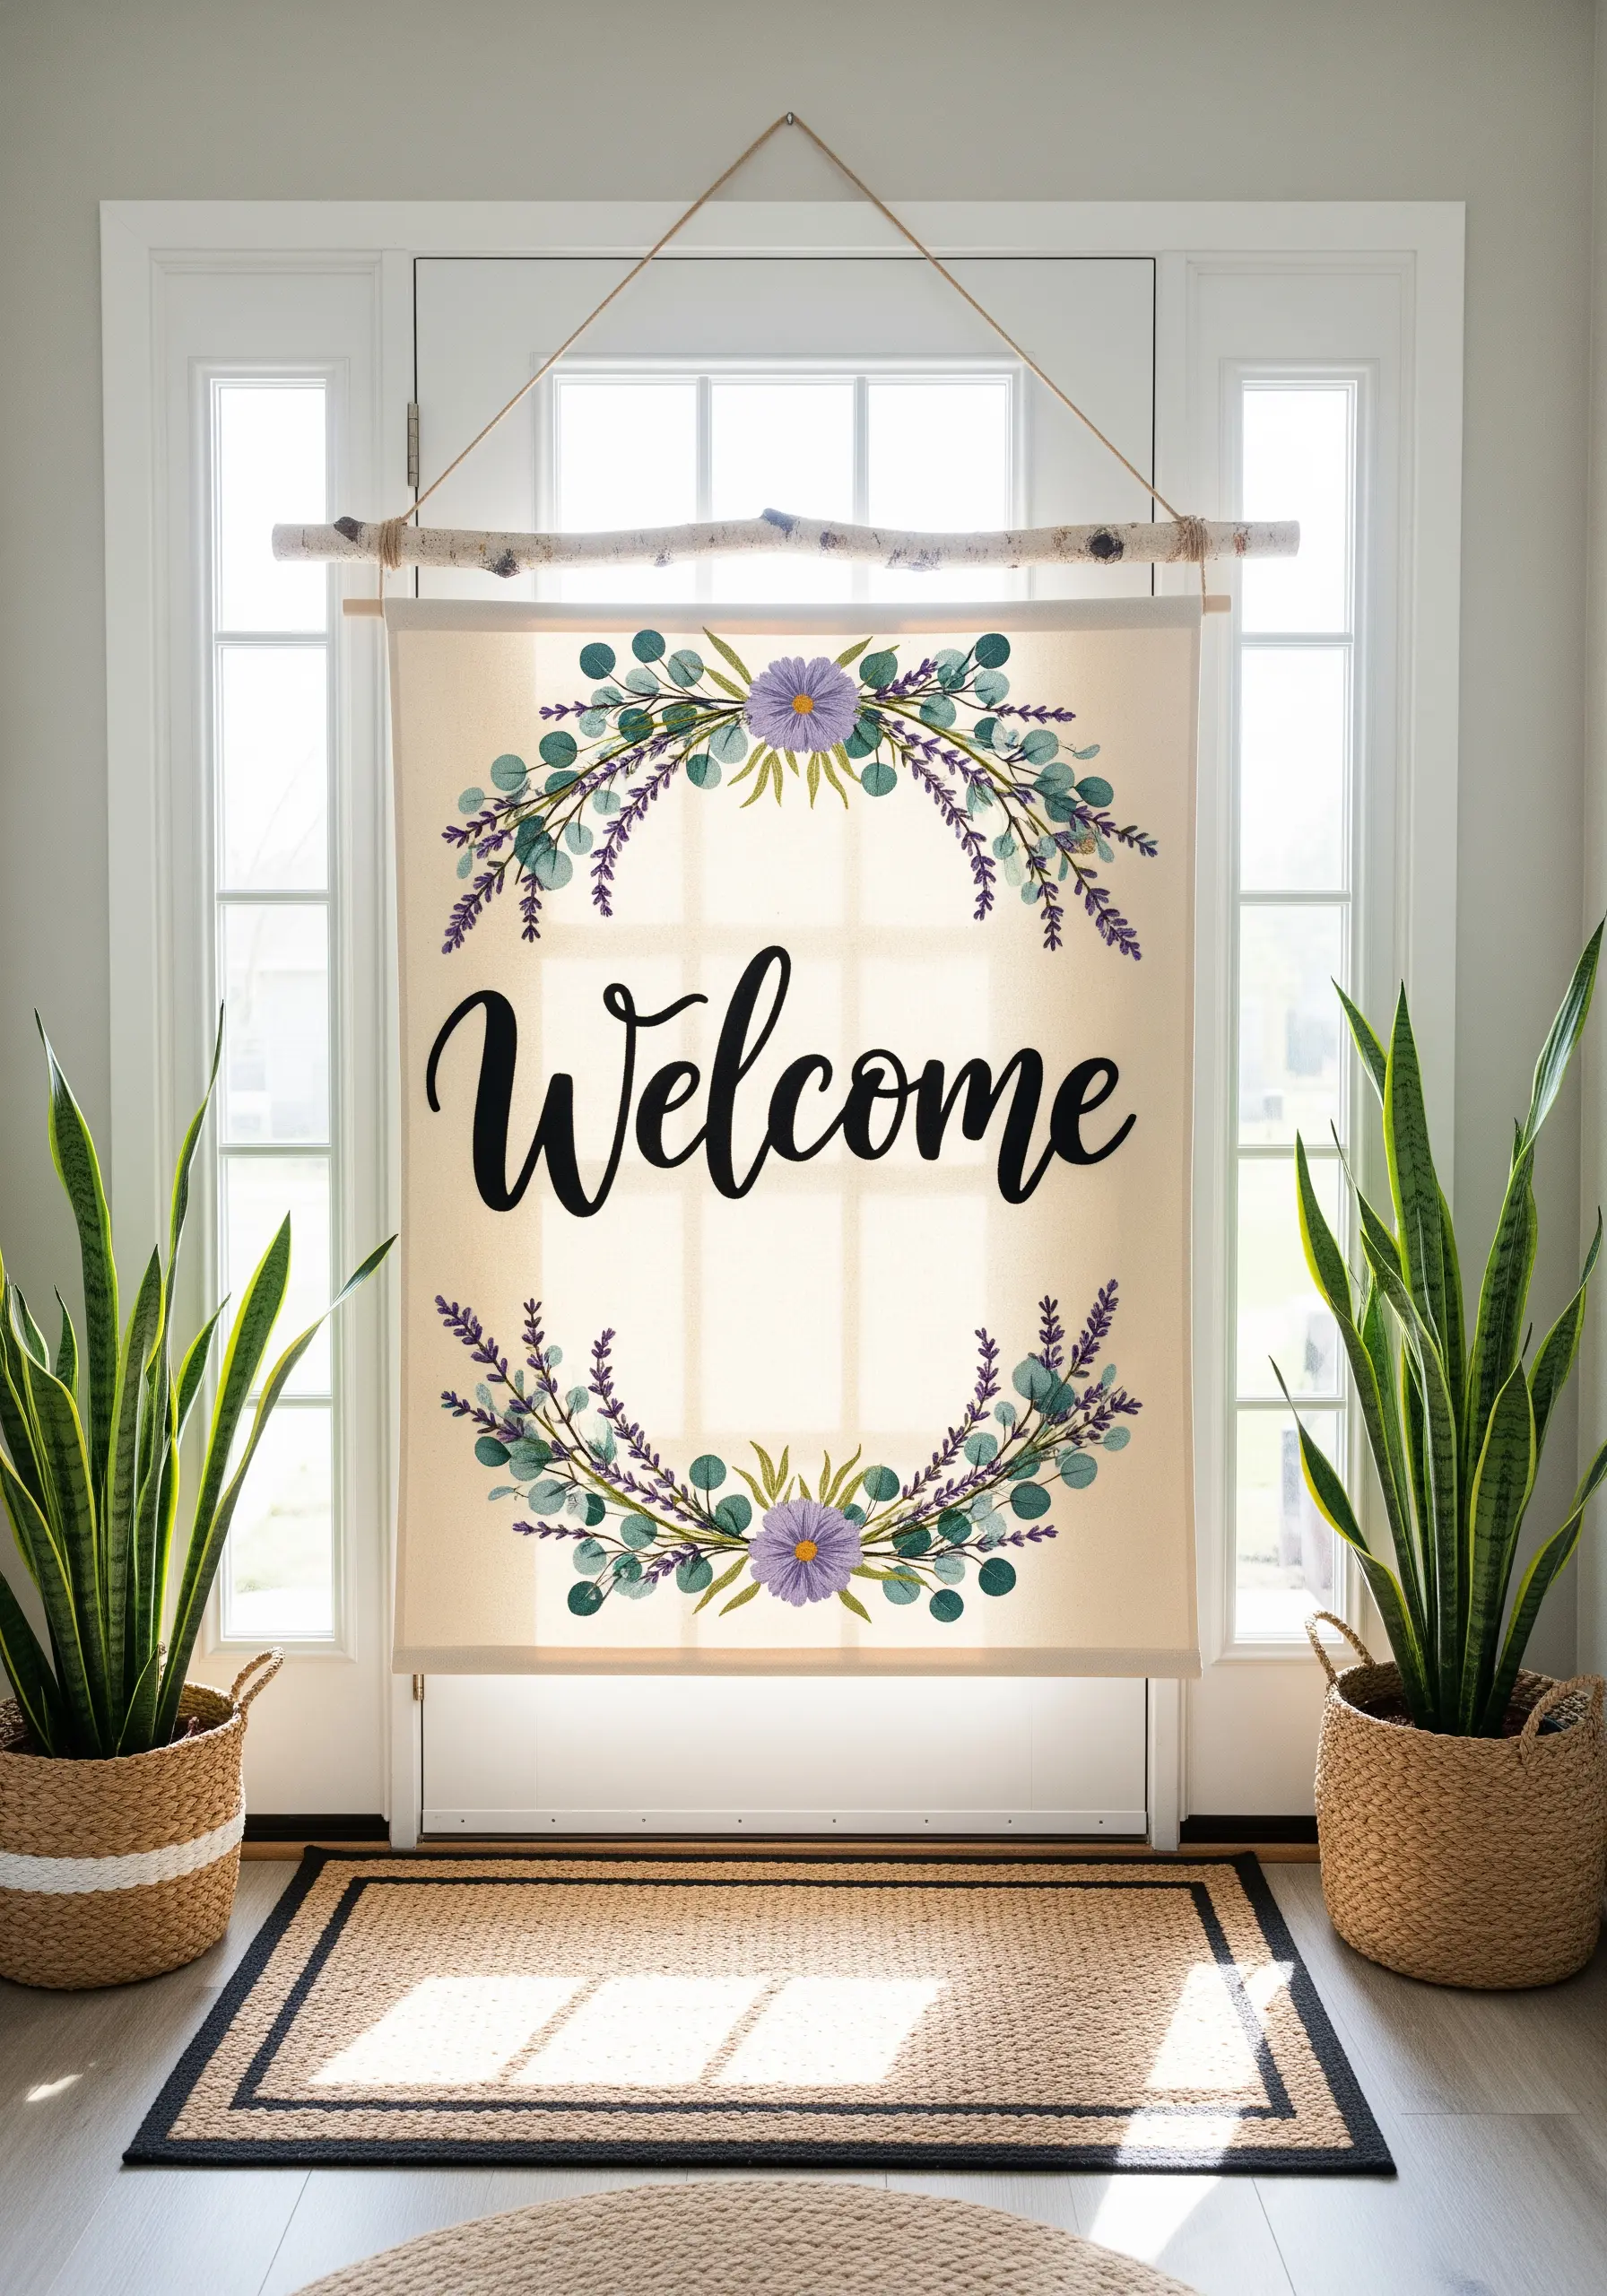
To create a welcoming entryway banner, ensure your lettering is the clear focal point.
Stitch the letters first using a bold, filled stitch like satin stitch or a dense chain stitch to give them visual weight.
For the surrounding botanical wreath, switch to more delicate stitches like lazy daisies for petals and stem stitch for vines.
Using fewer strands of thread for the foliage ensures it frames the text beautifully without competing with it for attention.
7. Create Abstract Art with Layered Textiles
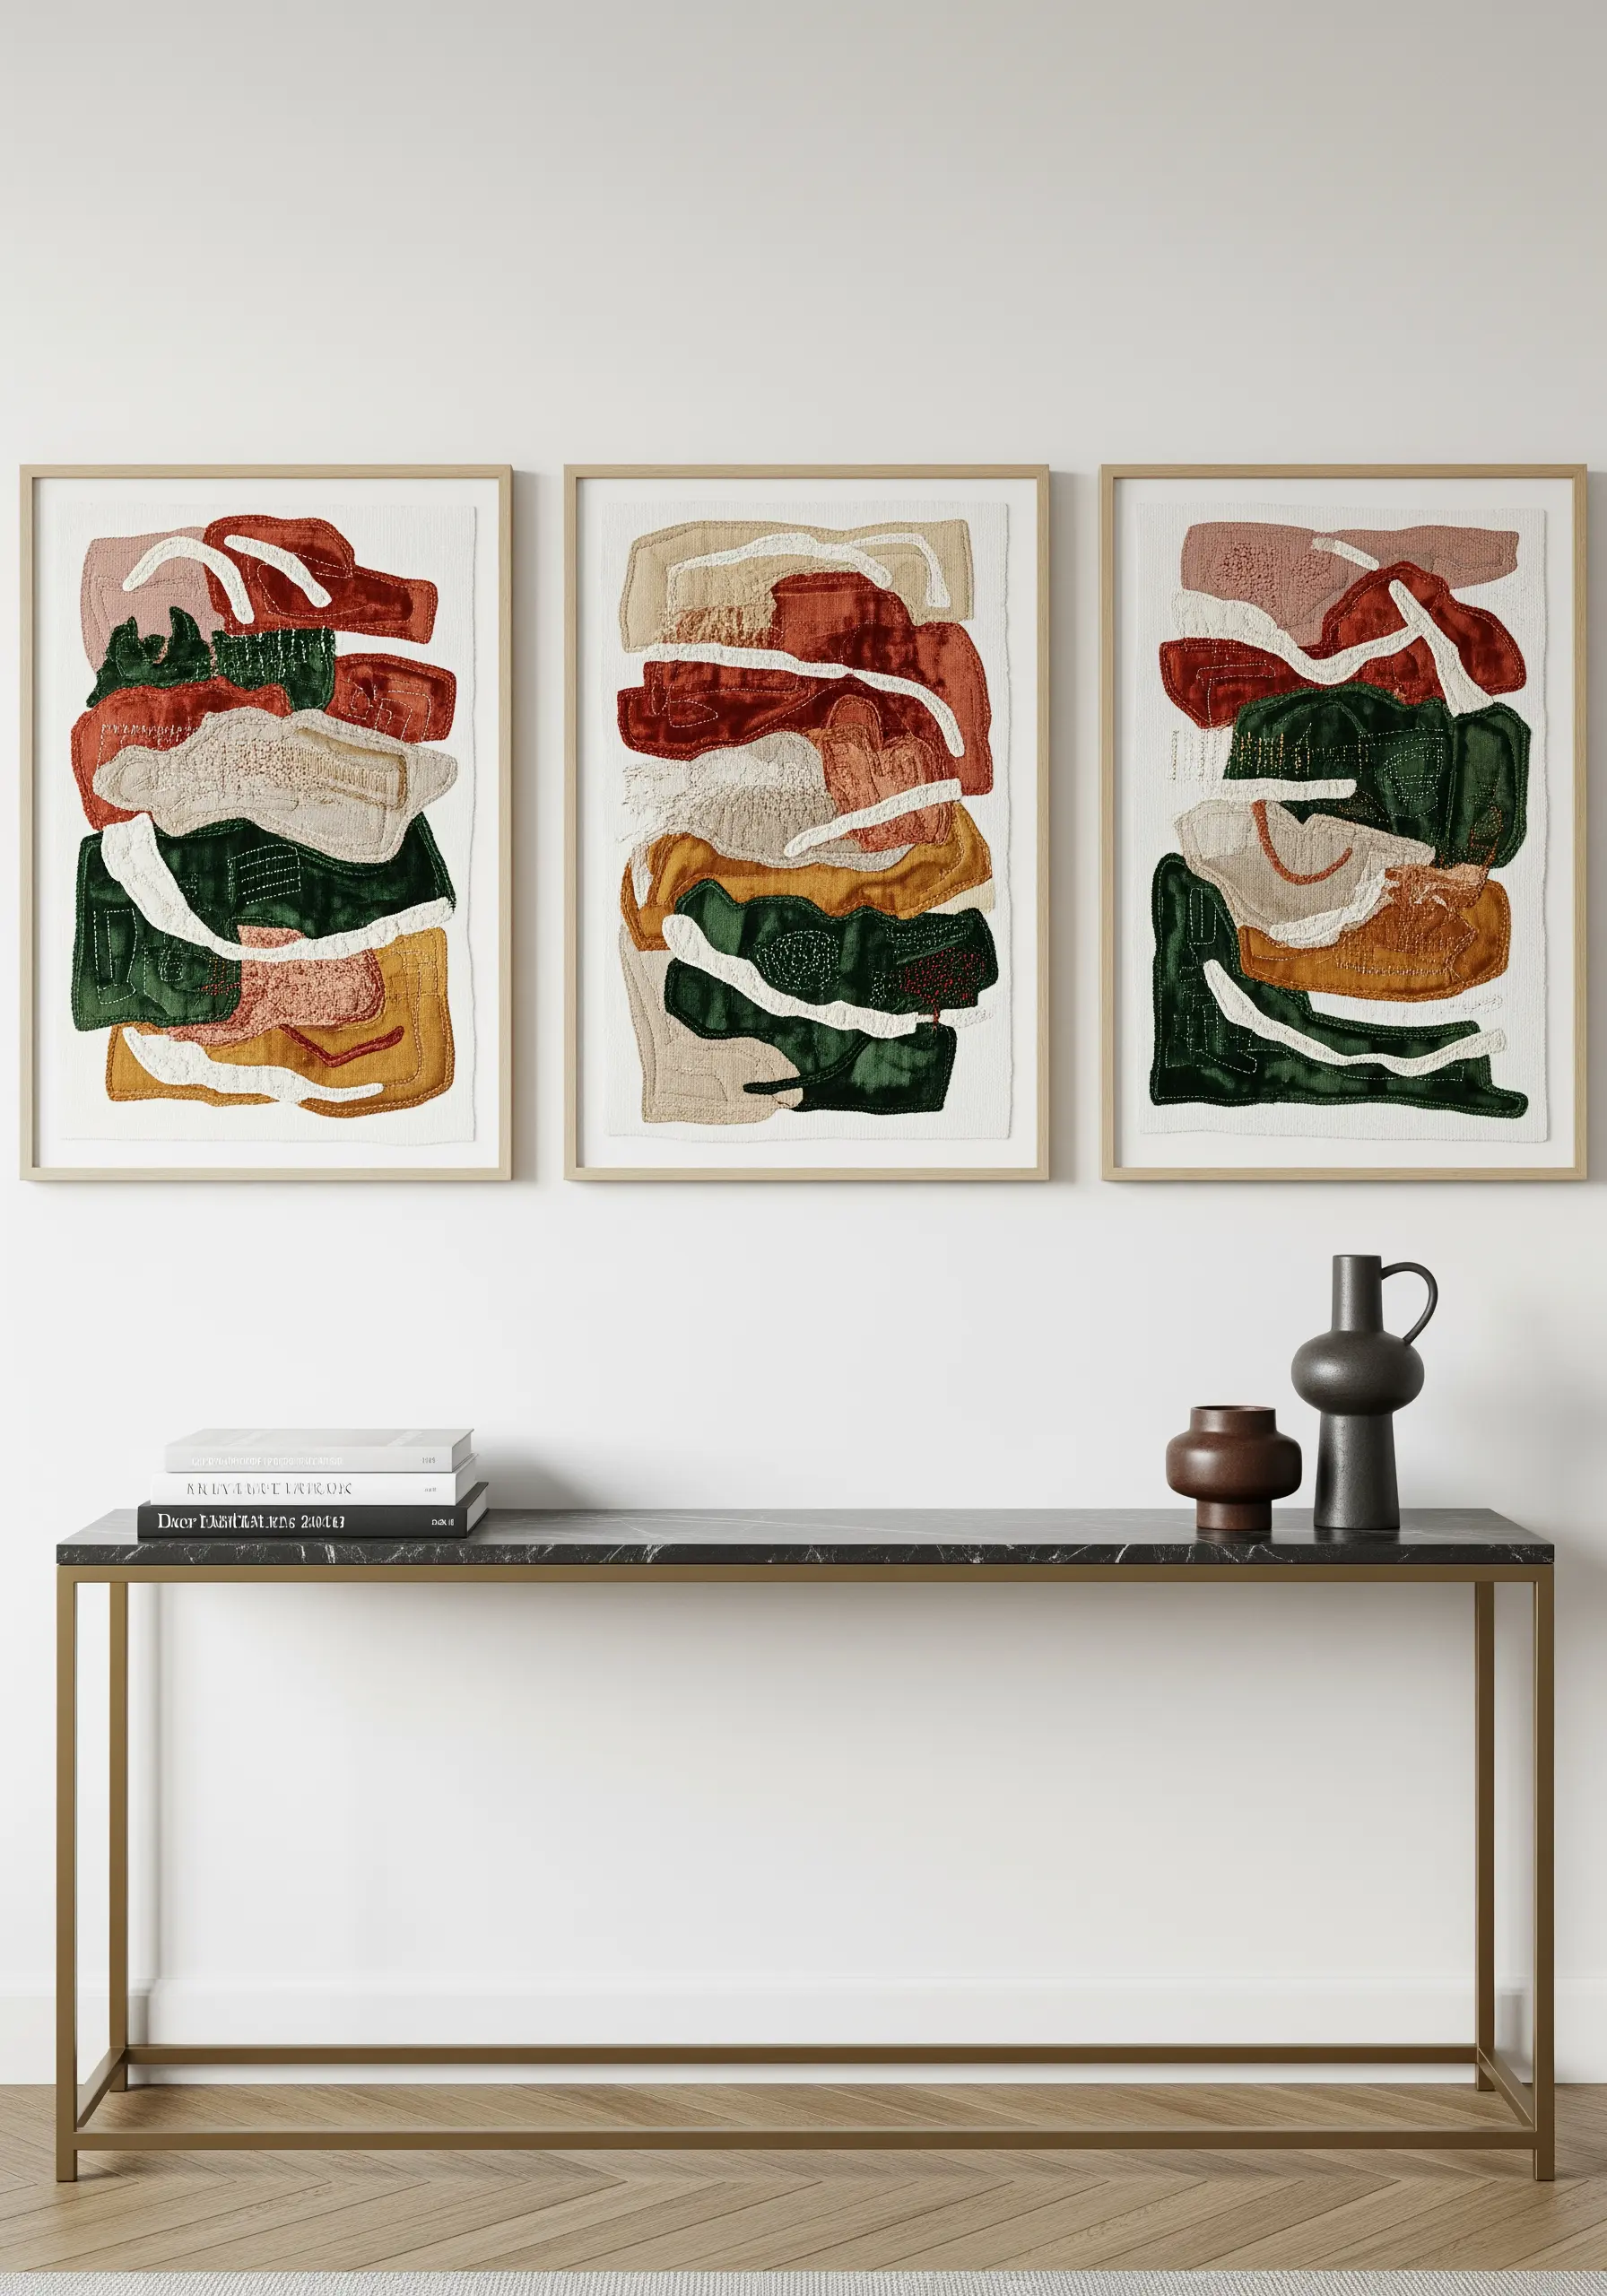
Build complex, abstract compositions by layering fabric appliqué with dense embroidery.
Start by cutting organic shapes from different textured fabrics—like velvet, linen, and cotton—and affixing them to your base fabric.
Then, use blocks of satin stitch and seed stitch to add another layer of texture, partially covering some fabric pieces and connecting others.
This modern texture-layering embroidery technique results in a rich, sculptural piece that invites closer inspection.
8. Frame a Mirror with Punch Needle Color Blocking

Turn a plain mirror into a vibrant statement piece by creating a custom frame with punch needle.
Build a simple wooden frame base larger than your mirror, stretch your monk’s cloth over it, and draw your color-blocked design.
Work in sections, punching each color block with a consistent loop height for a plush, uniform finish.
This technique is a fantastic way to introduce a bold pop of color and handmade texture into a hallway or bathroom.
9. Weave Subtle Patterns into a Table Runner

Elevate a simple woven table runner by introducing small, repeating geometric patterns.
Instead of weaving with a single weft color from edge to edge, use multiple shuttles with different colored yarns.
Weave small sections of color according to a planned chart—a technique known as inlay or tapestry weaving—to create diamonds, stripes, or chevrons.
These subtle, integrated motifs add a layer of sophisticated detail that makes the runner feel bespoke and thoughtfully designed.
10. Design Functional and Elegant Plant Hangers
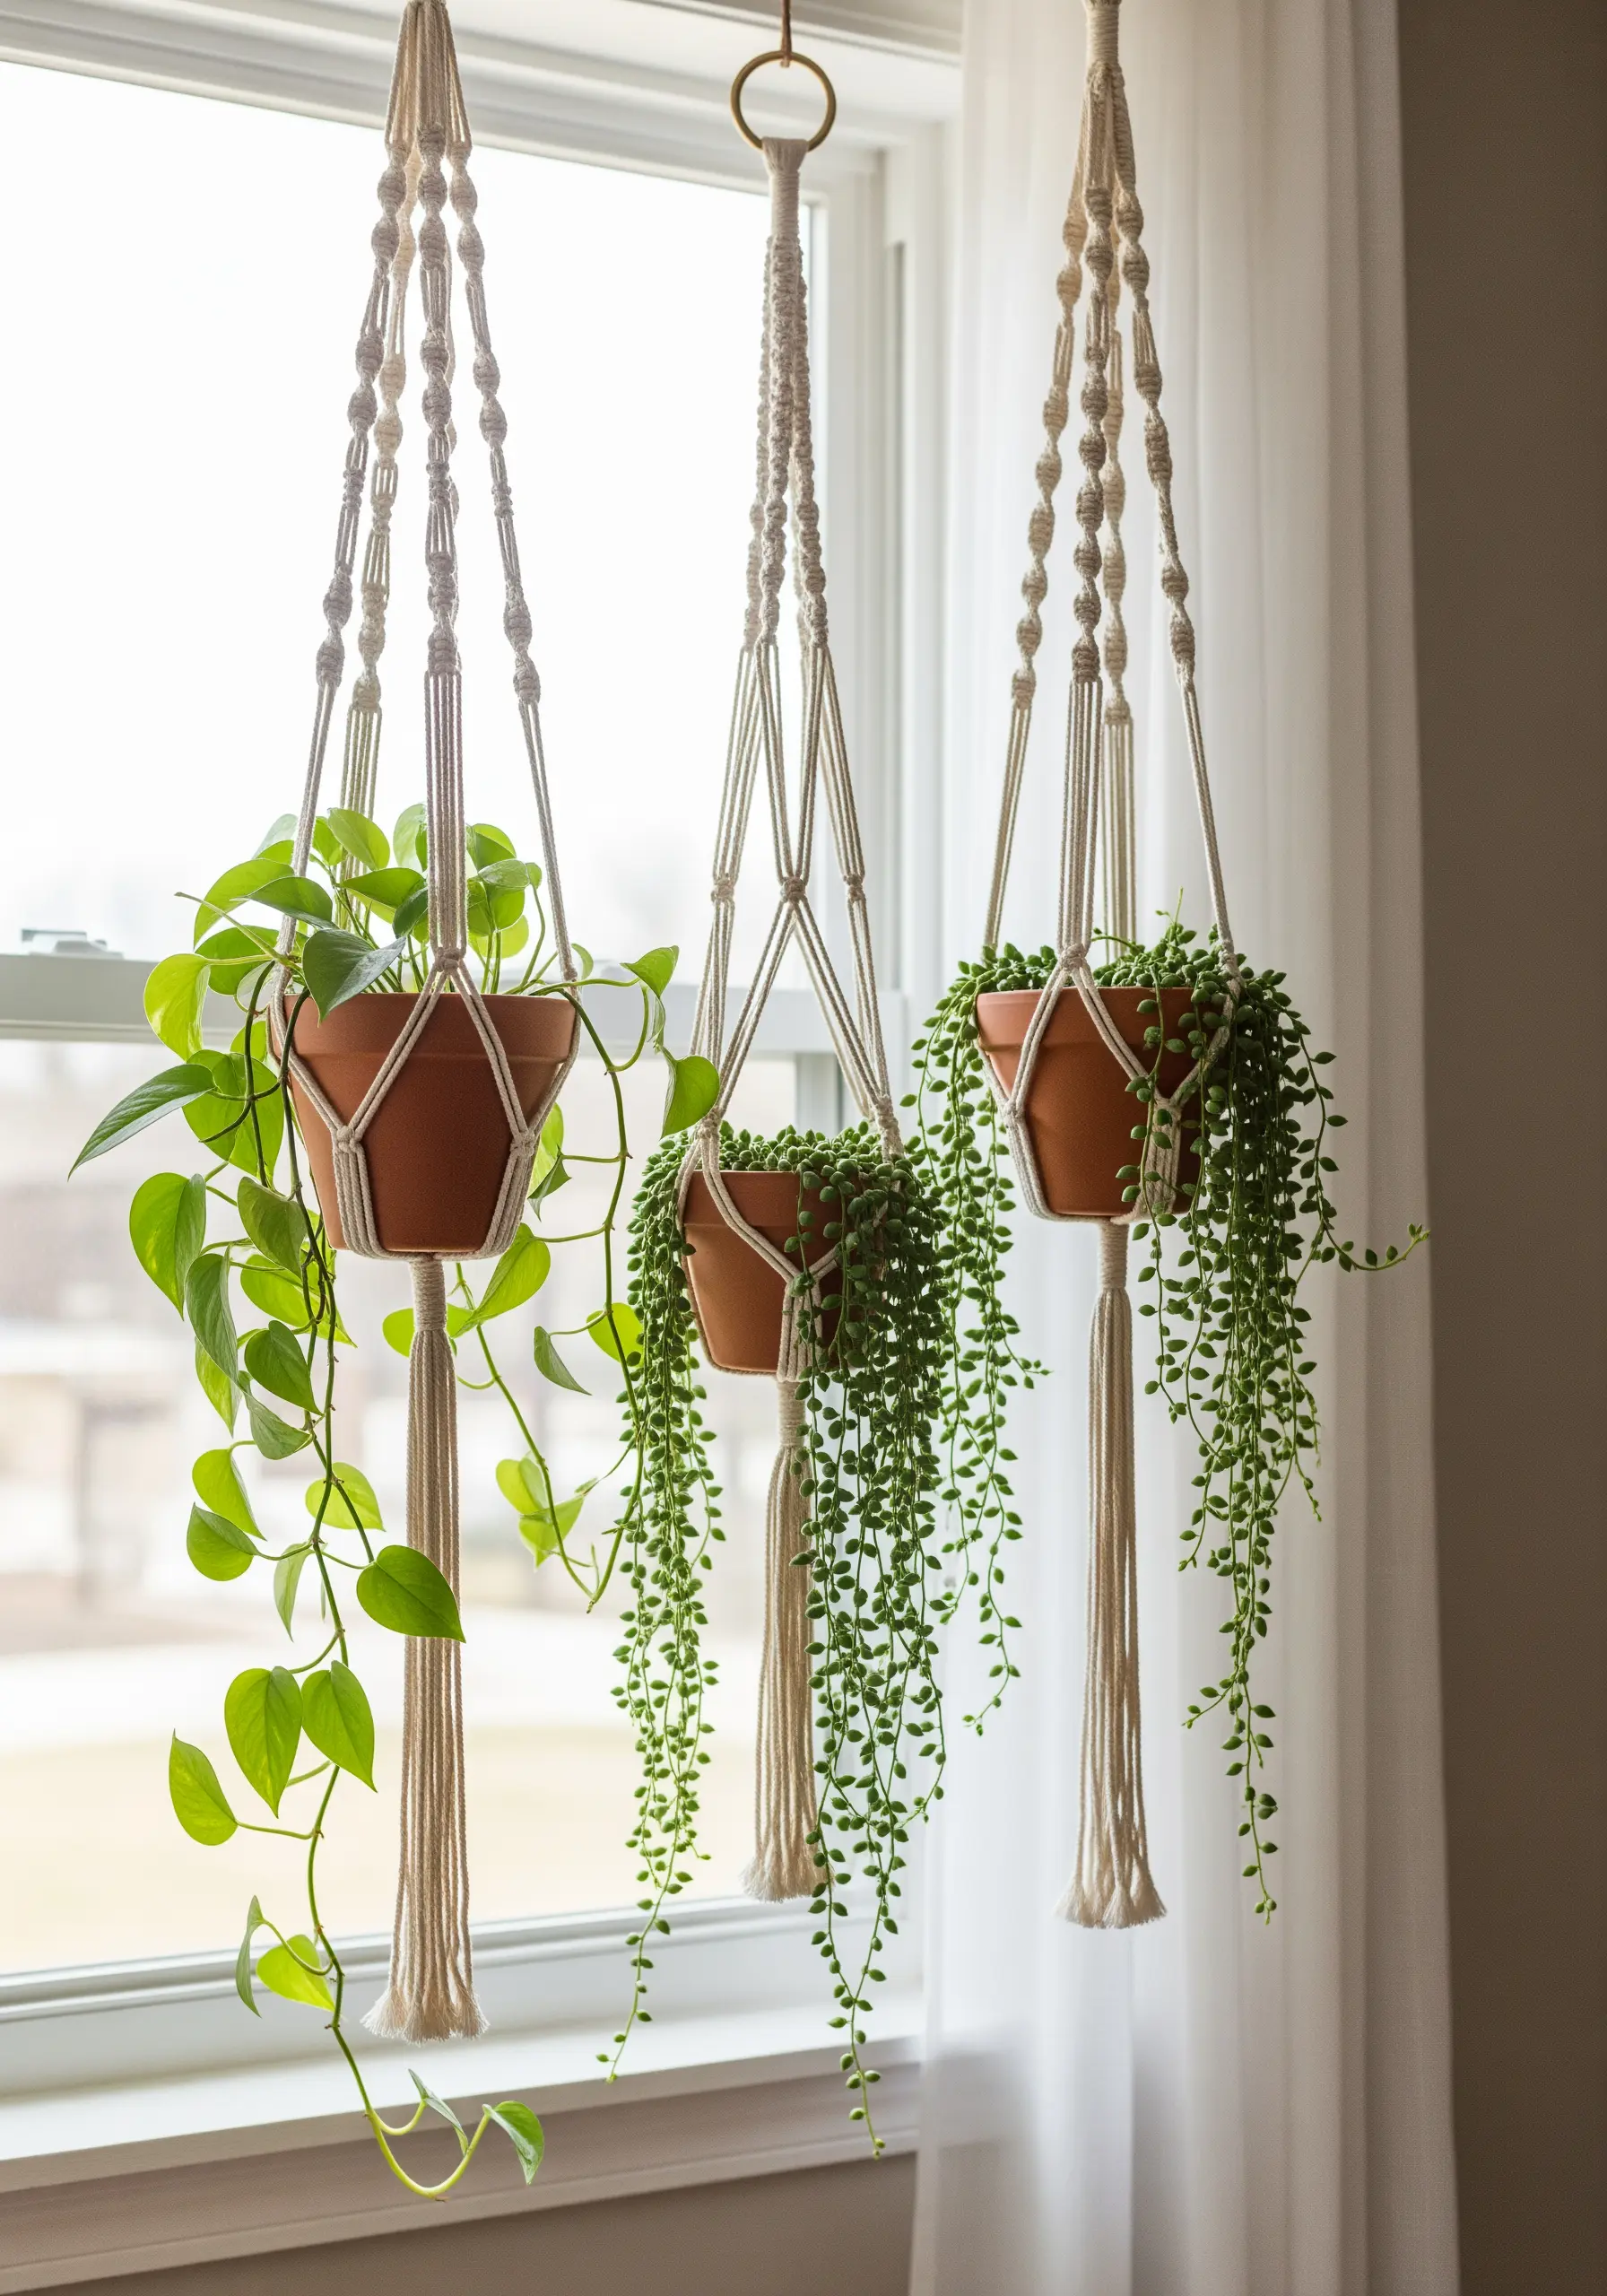
The beauty of a macrame plant hanger lies in the balance between decorative knots and structural integrity.
Use a series of square knots to create the main basket that holds the pot; this knot is flat and strong, providing excellent support.
For the long, trailing arms, switch to a half-knot spiral (also called a spiral stitch). This creates a beautiful, twisting visual element that adds elegance without compromising strength.
Mixing these two basic knots gives your hanger both stability and decorative flair.
11. Compose a Modern Quilted Wall Hanging
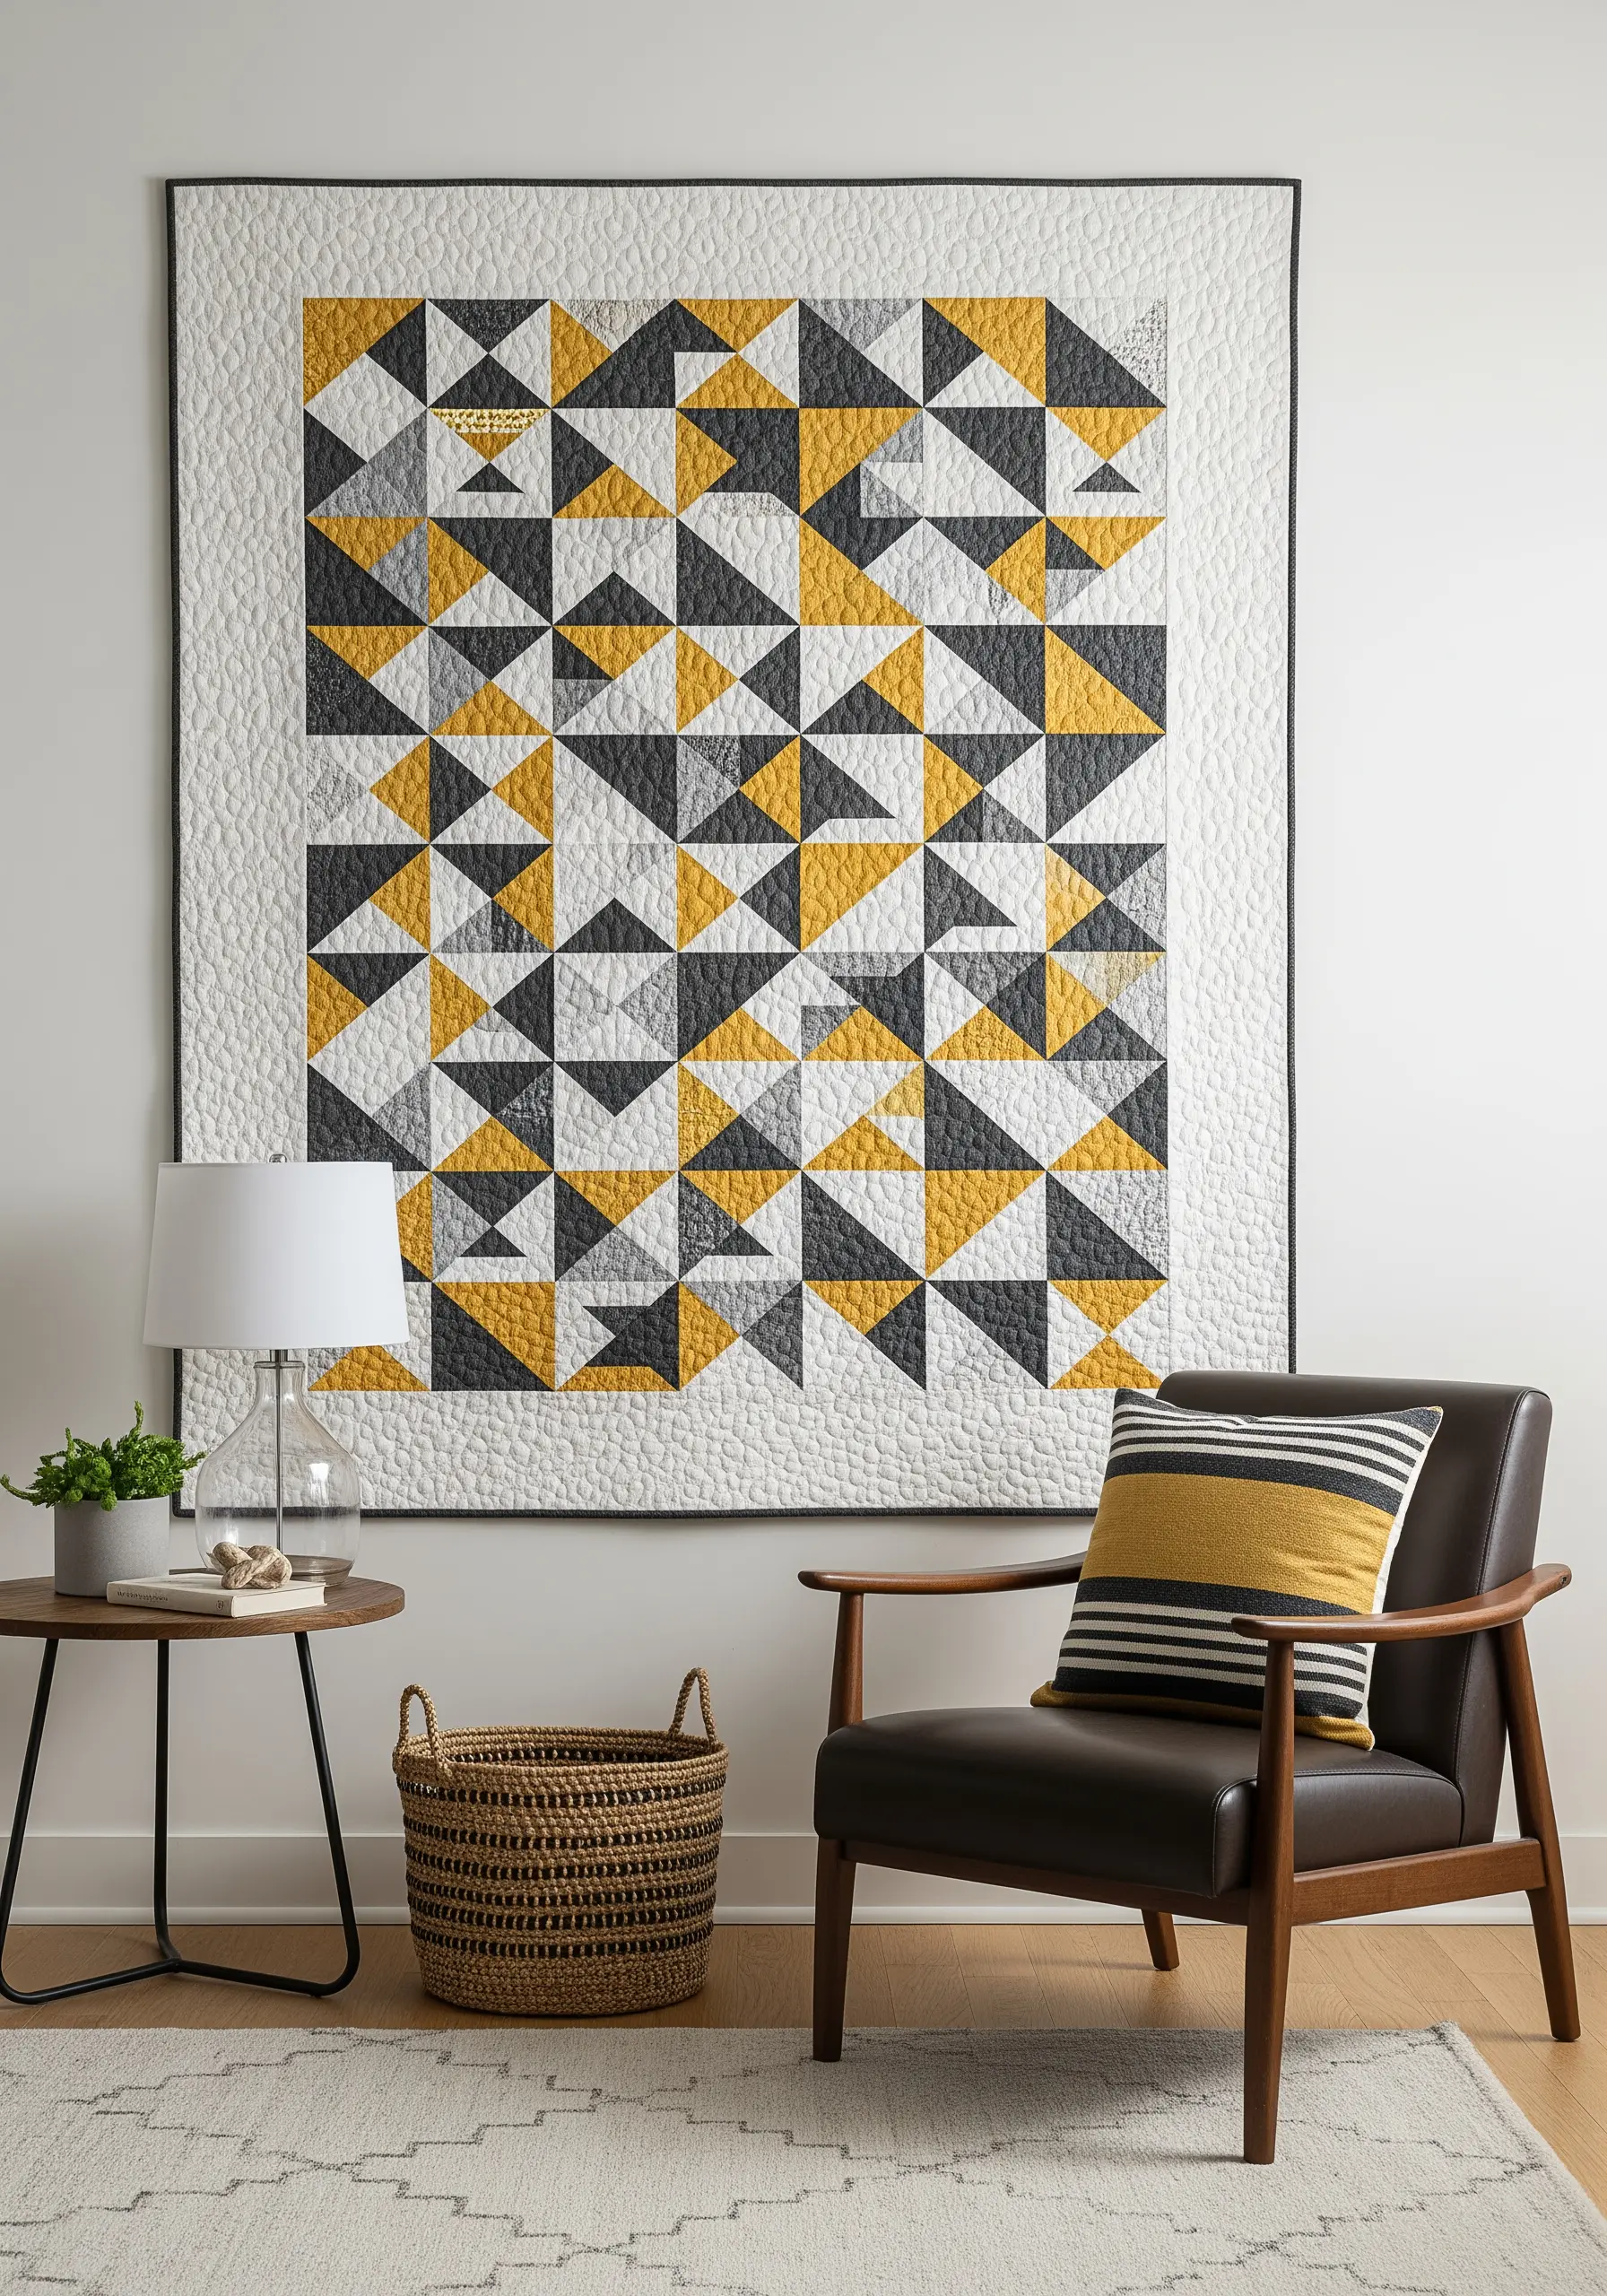
Think of quilting as assembling a large-scale textile mosaic.
To create a modern, graphic design, focus on a simple shape, like the half-square triangle, and a limited color palette of three to four colors.
Arrange your fabric blocks on a design wall or the floor to play with composition, rotating the triangles to create chevrons, diamonds, or flying geese patterns.
The repetition of a simple geometric unit, when combined with a strong color story, results in a powerful and dynamic piece of wall art.
12. Build a 3D Woodland Scene with Stumpwork
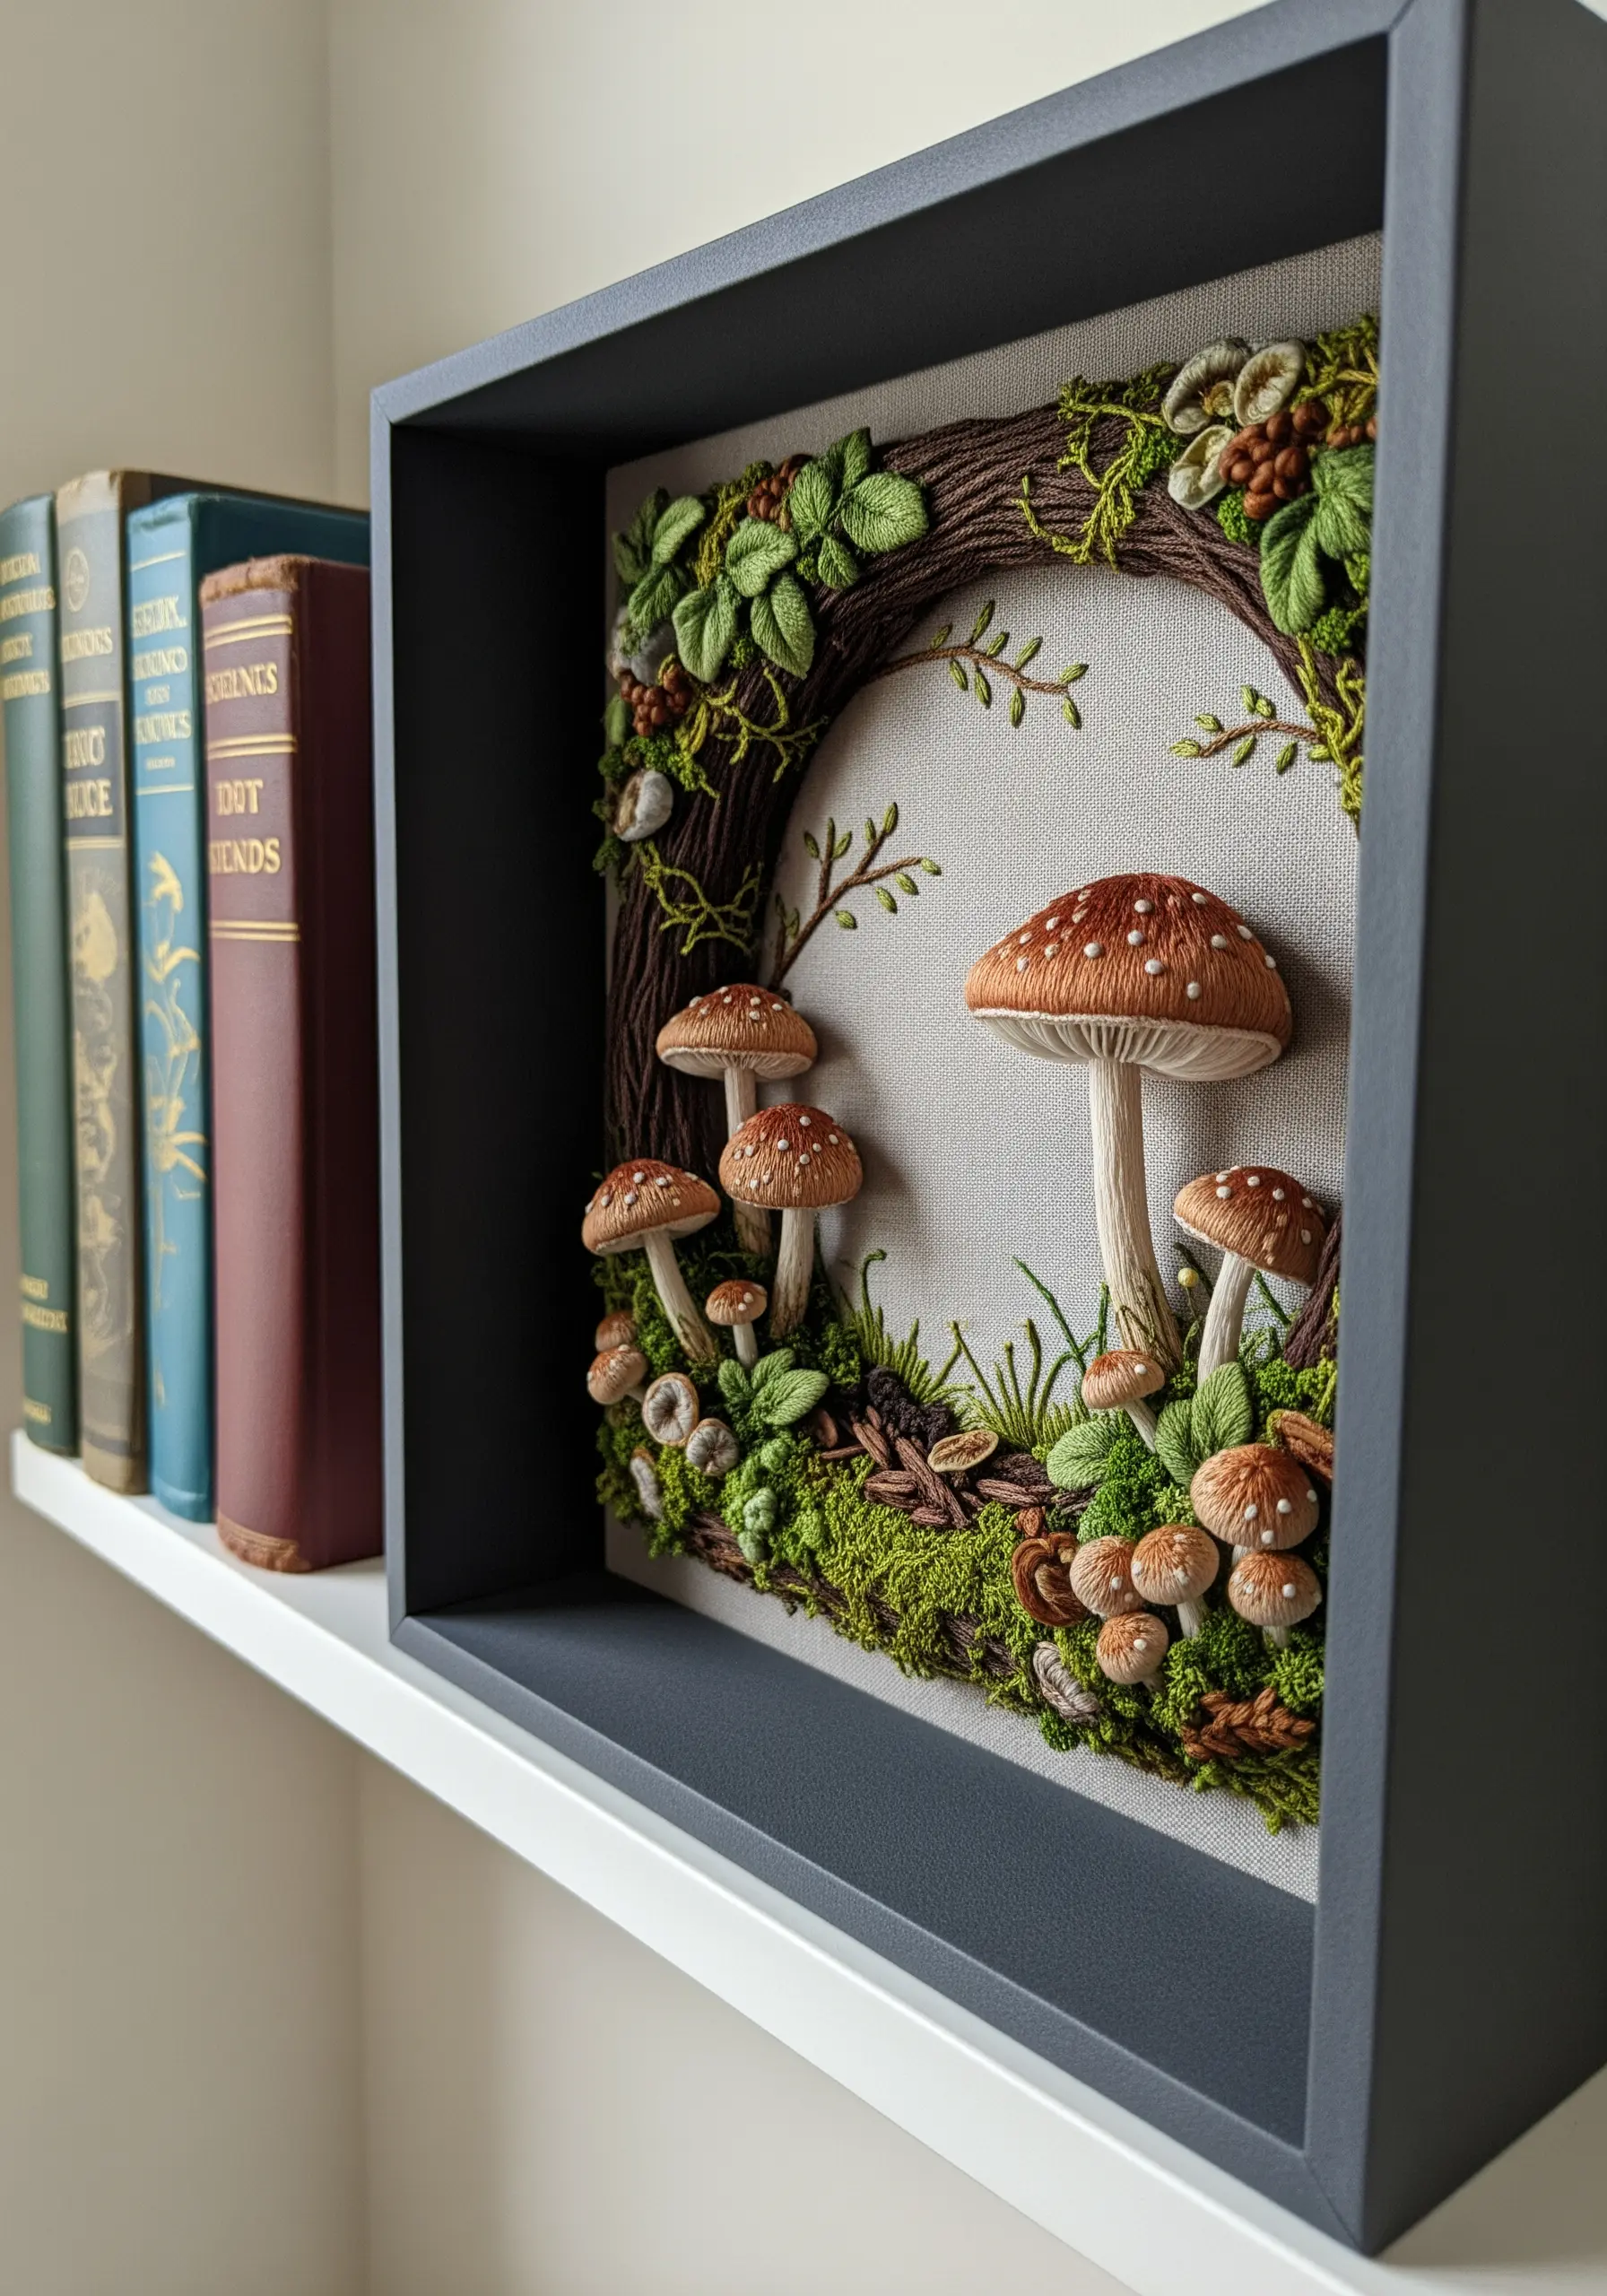
Bring your embroidery into the third dimension by using stumpwork techniques to create a shadow box scene.
To make the raised mushroom caps, stitch a padded satin stitch over a small felt cutout. For the delicate gills underneath, use detached buttonhole stitches worked over a wire frame, which allows you to shape them.
Create a mossy texture on the forest floor with turkey work, leaving the loops uncut for a dense, springy feel.
Framing the final piece in a deep shadow box protects the delicate elements and enhances the sense of depth.
13. Capture Personality in Faceless Portraits
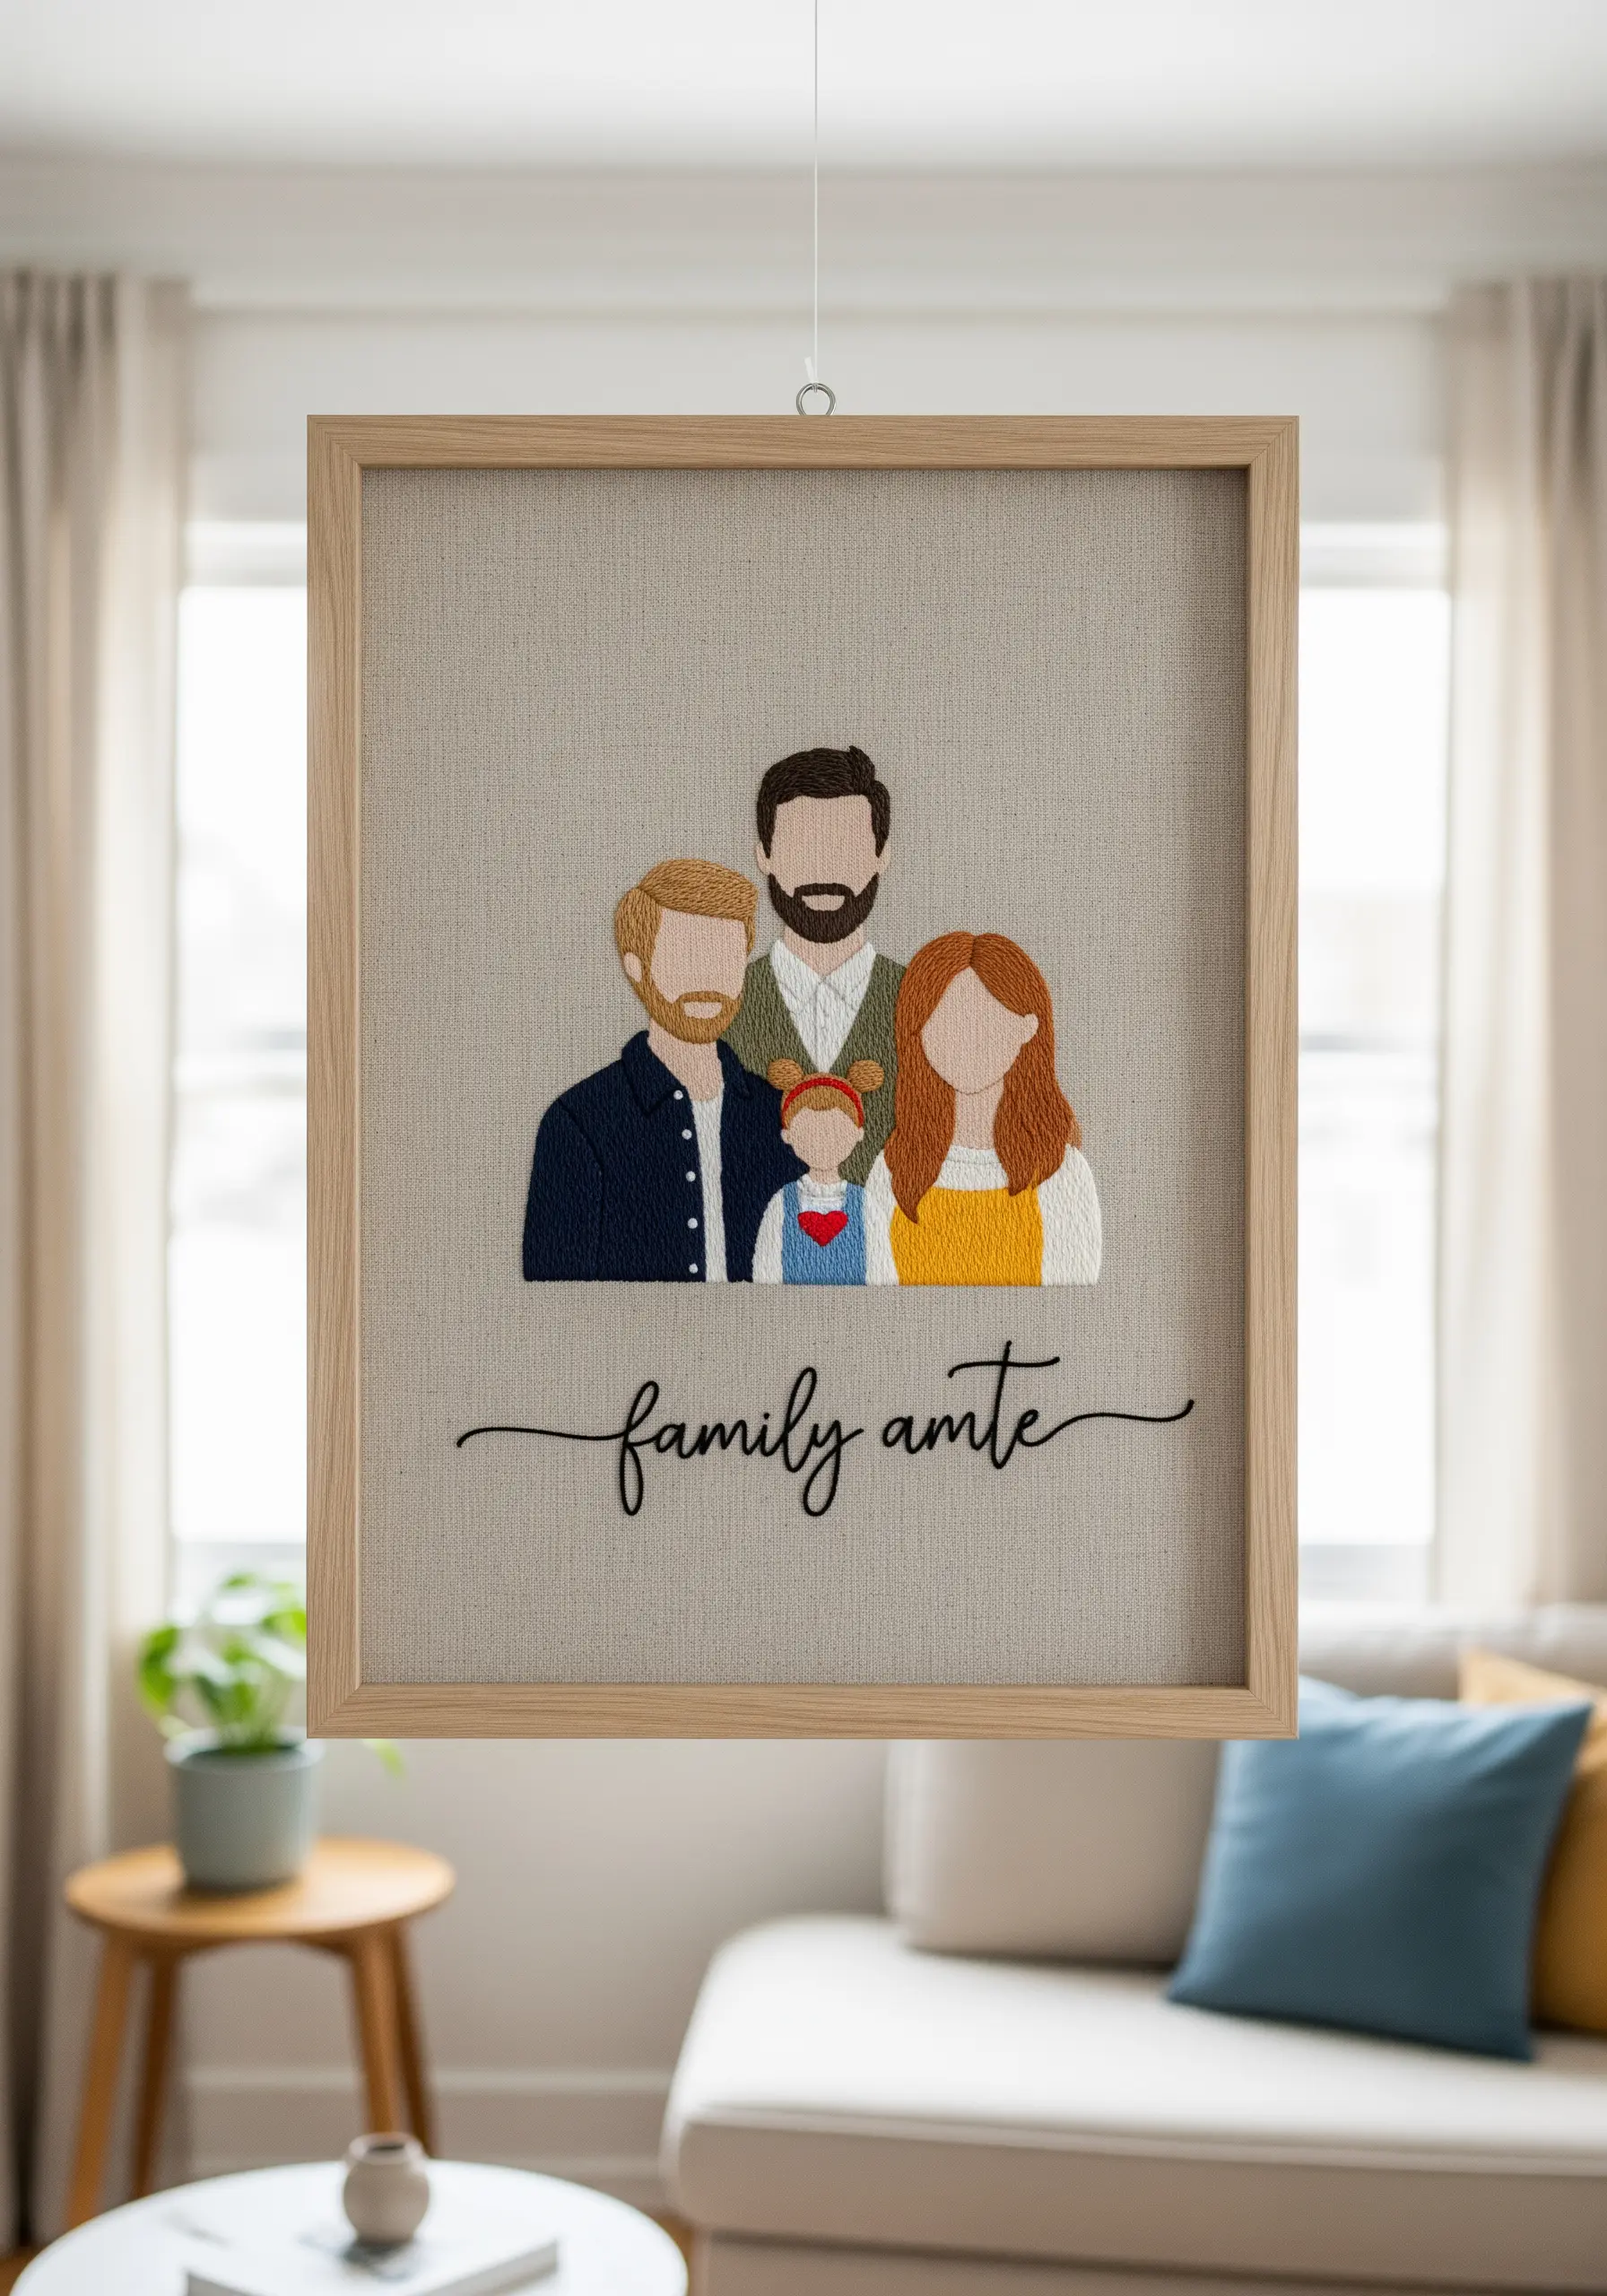
You can create deeply personal portraits without stitching a single facial feature.
Focus on capturing the essence of each person through their hair color, hairstyle, and clothing choices. Use long-and-short stitch to blend hair colors naturally, and directional satin stitch to mimic the drape of fabric.
The absence of facial details allows the viewer to project their own emotions onto the piece, making it a surprisingly intimate and modern form of portraiture.
14. Paint a Sunset with Thread Wrapping
To achieve a smooth, painterly gradient for a large-scale sunset, try thread wrapping instead of traditional stitching.
Cut a piece of cardboard or mat board to the shape of your sky. Working with multiple strands of embroidery floss at once, tightly wrap the thread around the board, taping the ends on the back.
Gradually introduce new colors by holding them alongside your current ones, then dropping the old ones. This creates a seamless blend that would be difficult to achieve with stitches, perfectly capturing the soft transitions of a sunset.
15. Replicate Fur Texture with Thread Painting
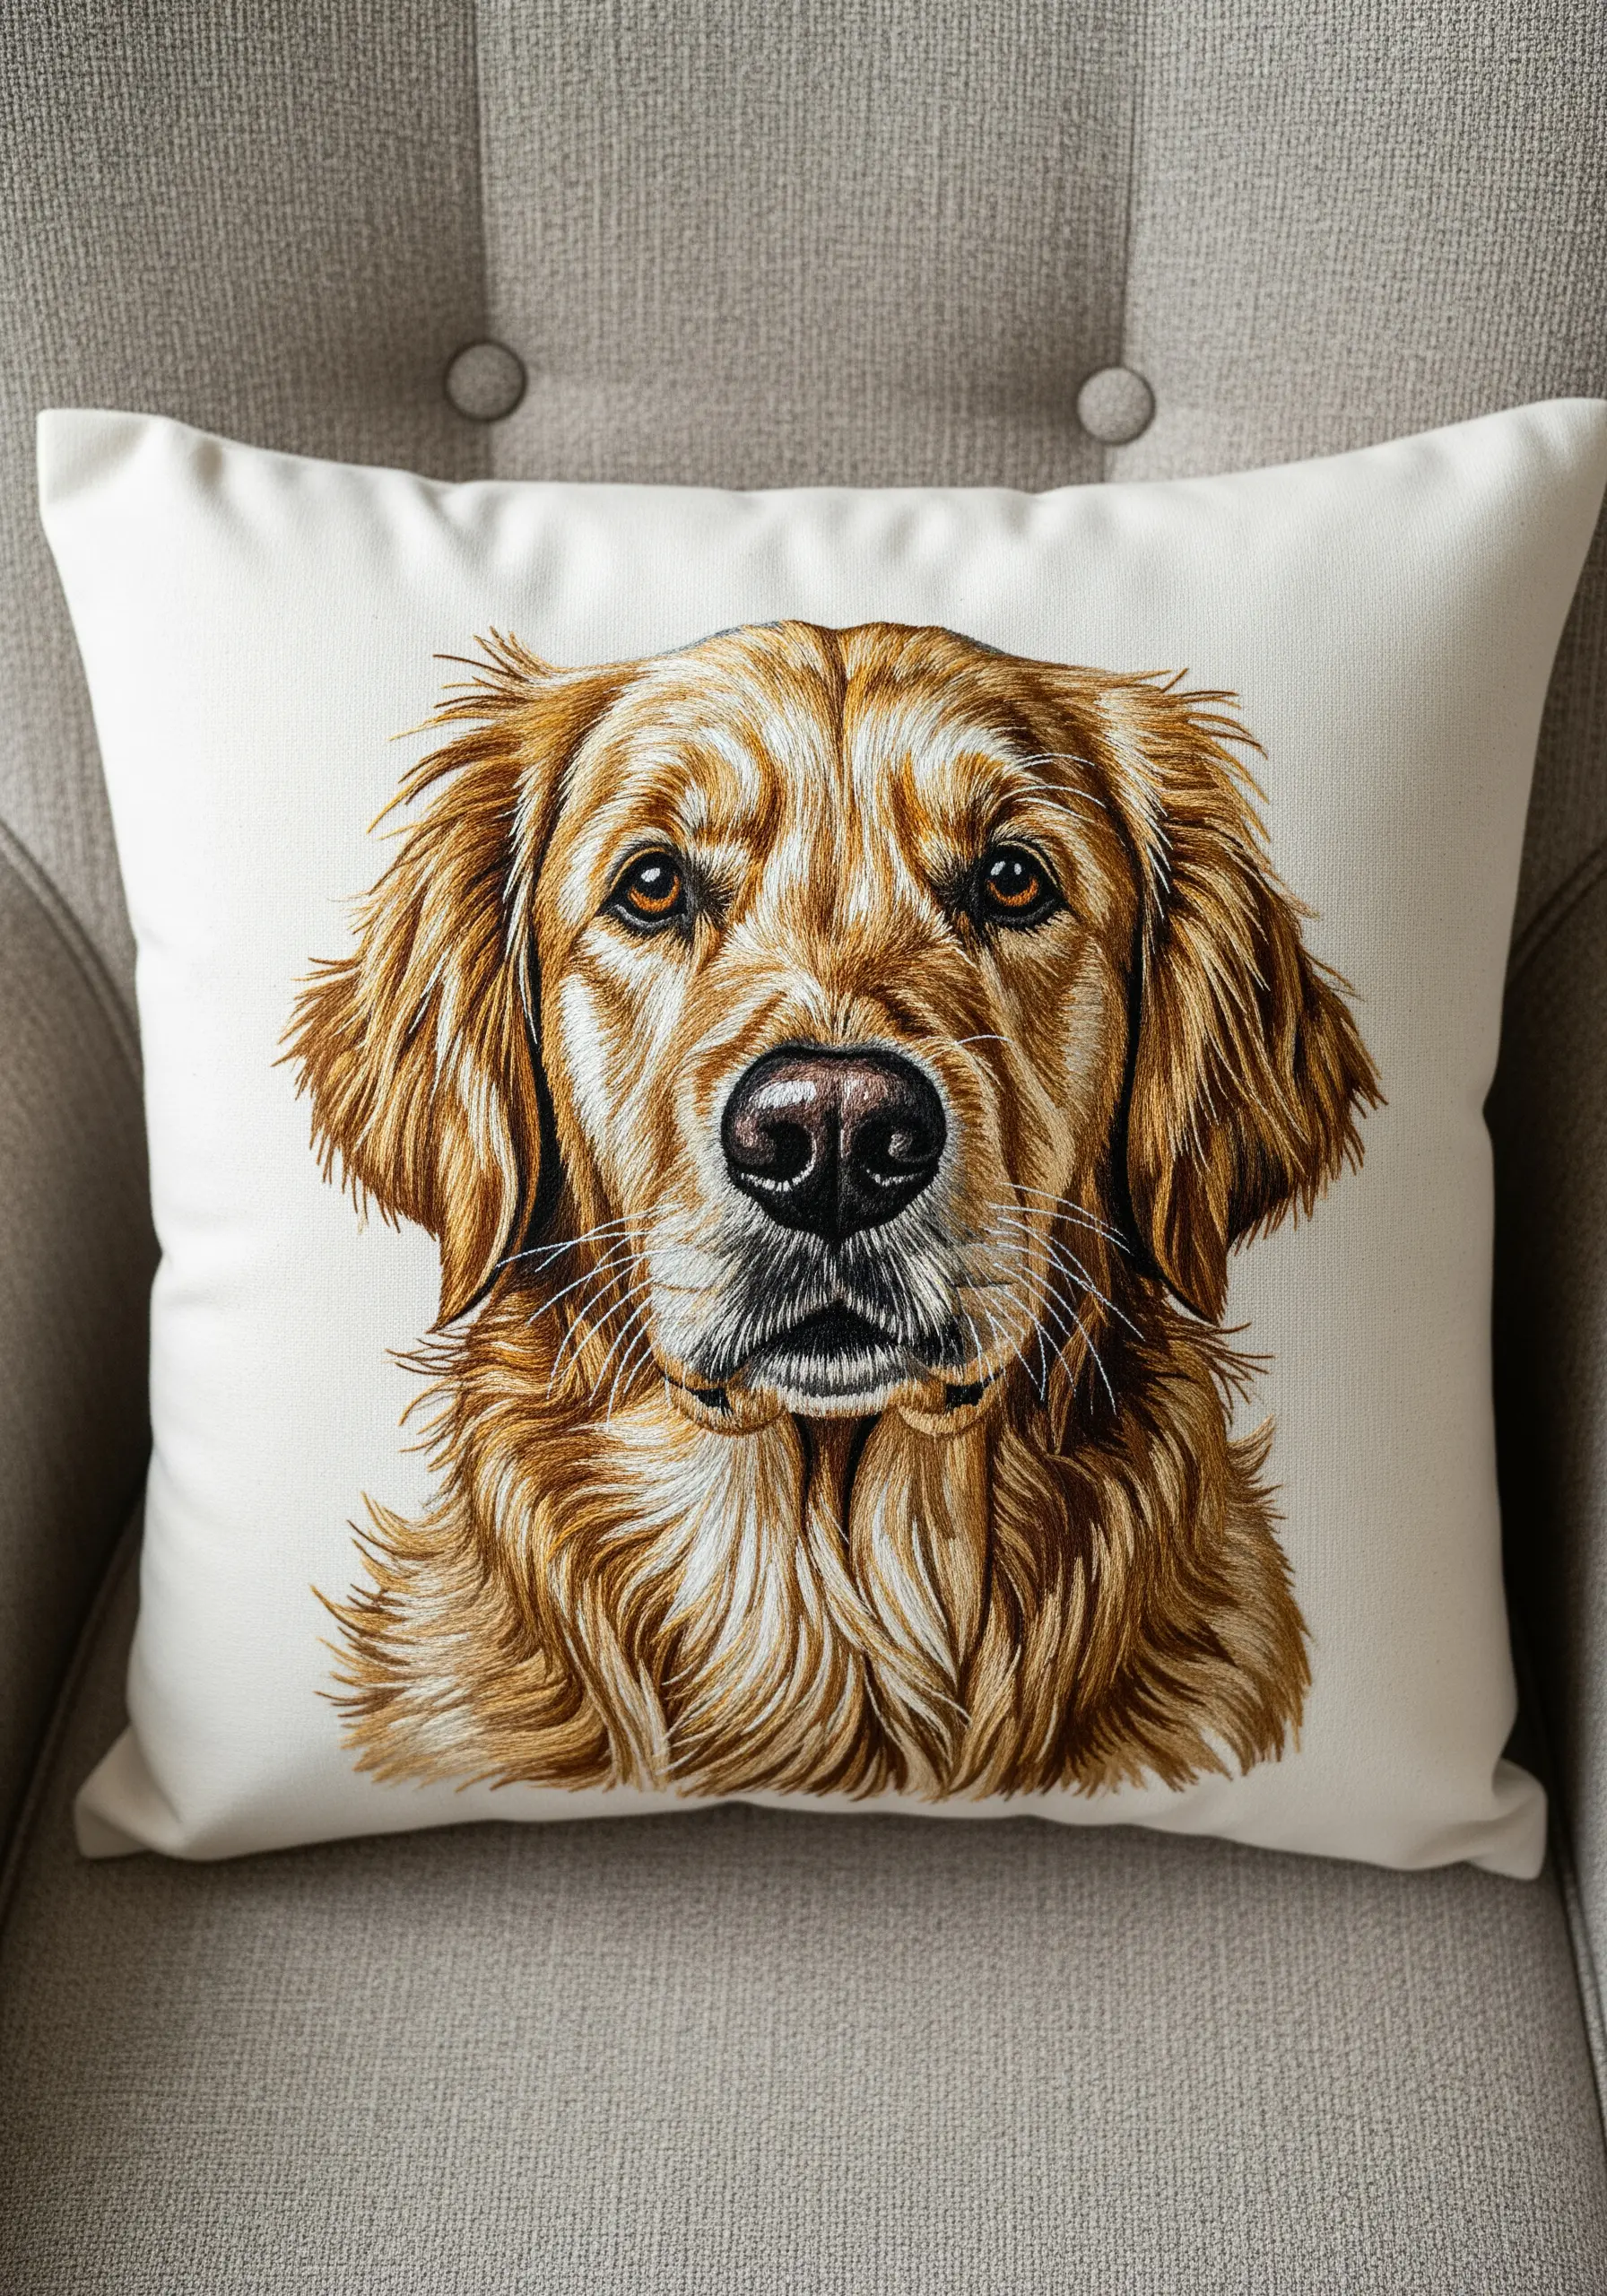
The key to a realistic embroidered pet portrait is stitching in the natural direction of fur growth.
Map out the main sections of the face and body, noting which way the fur lies. Use single strands of floss and the long-and-short stitch, angling your stitches to follow these directional lines.
Layering shades from dark to light adds depth and highlights, but it’s the careful direction of each stitch that ultimately creates the illusion of soft, touchable fur.
16. Design a Large-Scale Shibori Triptych

To create a dramatic, large-scale textile installation, plan your design across three separate panels.
Before dyeing, fold your large piece of fabric into thirds, then create your Shibori patterns by binding, folding, or clamping it.
This ensures that when you unfold the fabric and cut it into three panels, the pattern flows continuously from one piece to the next.
Framing them as a triptych transforms a simple textile craft into a commanding piece of contemporary art.
17. Embroider on Sheer Fabric for an Ethereal Effect
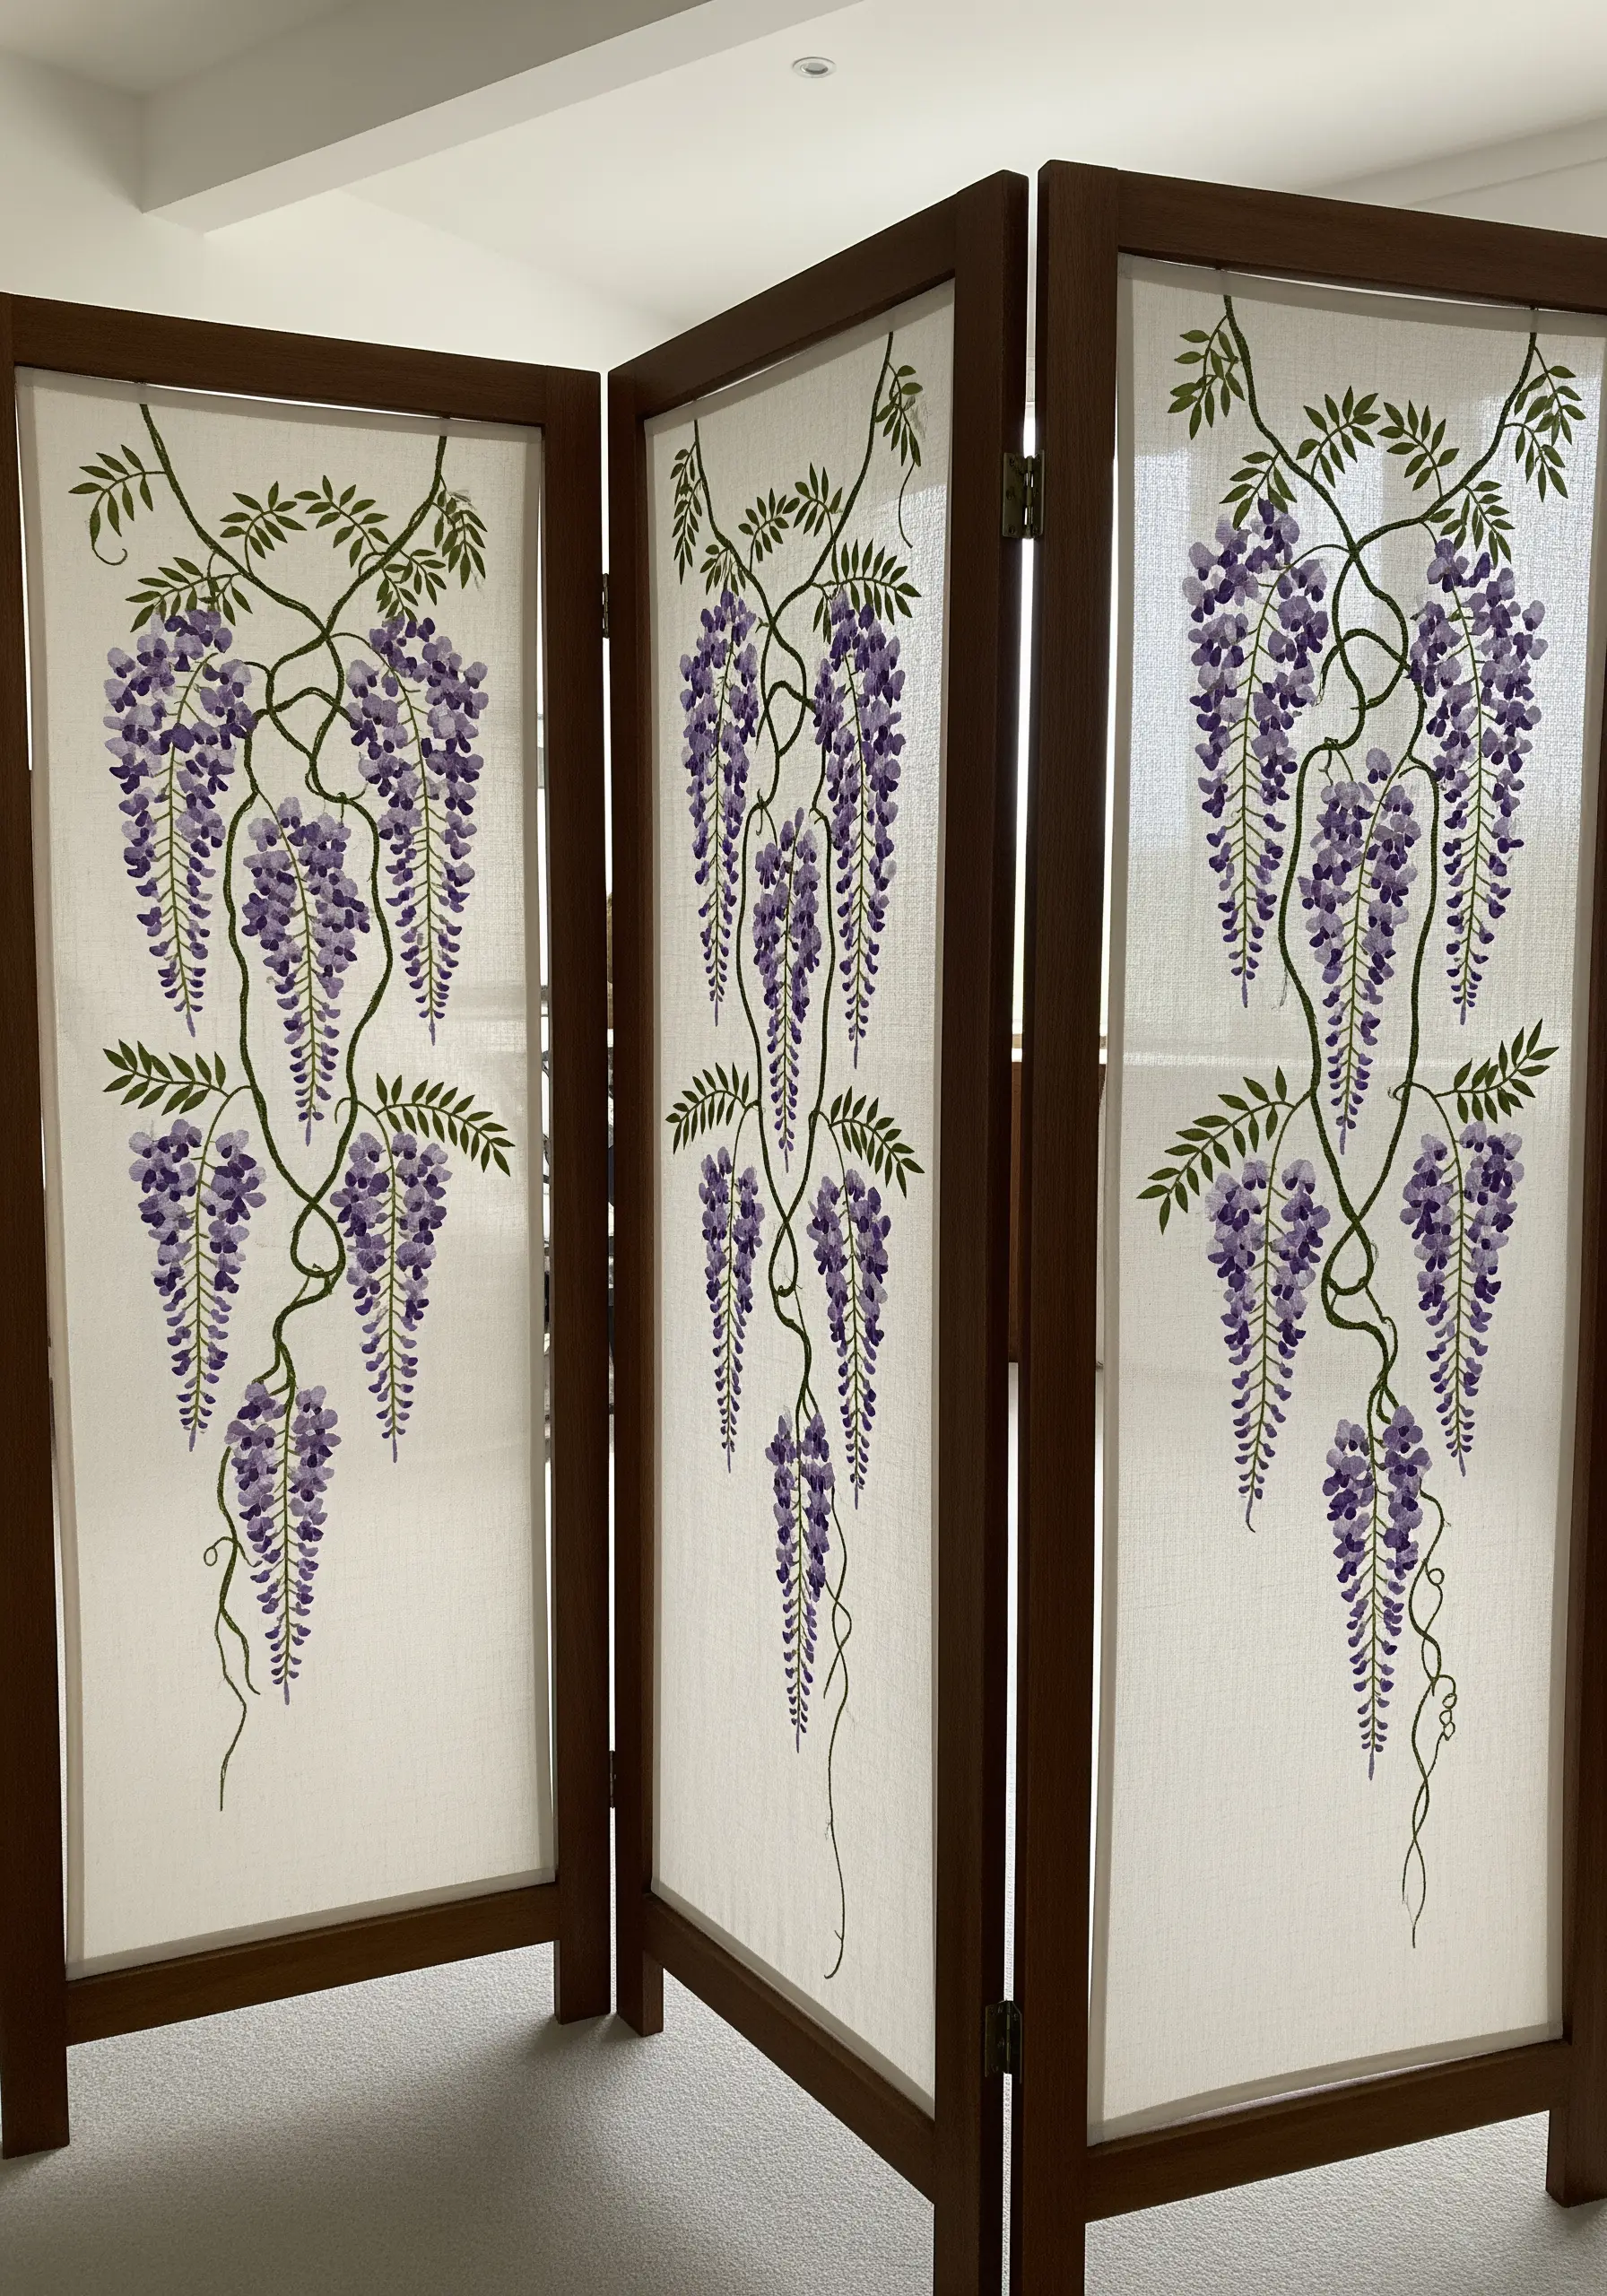
Create a light, floating design by stitching on a sheer or semi-sheer fabric like organza or linen voile for a room divider.
Always use a temporary stabilizer on the back while stitching to prevent puckering and support the delicate fabric. Once you’re done, the stabilizer can be washed or torn away.
Choose stitches that look beautiful from both the front and back, like stem stitch and detached chain stitch, as both sides of your work may be visible.
This approach gives your embroidery an elegant, almost weightless appearance.
18. Give Typography a Three-Dimensional Feel
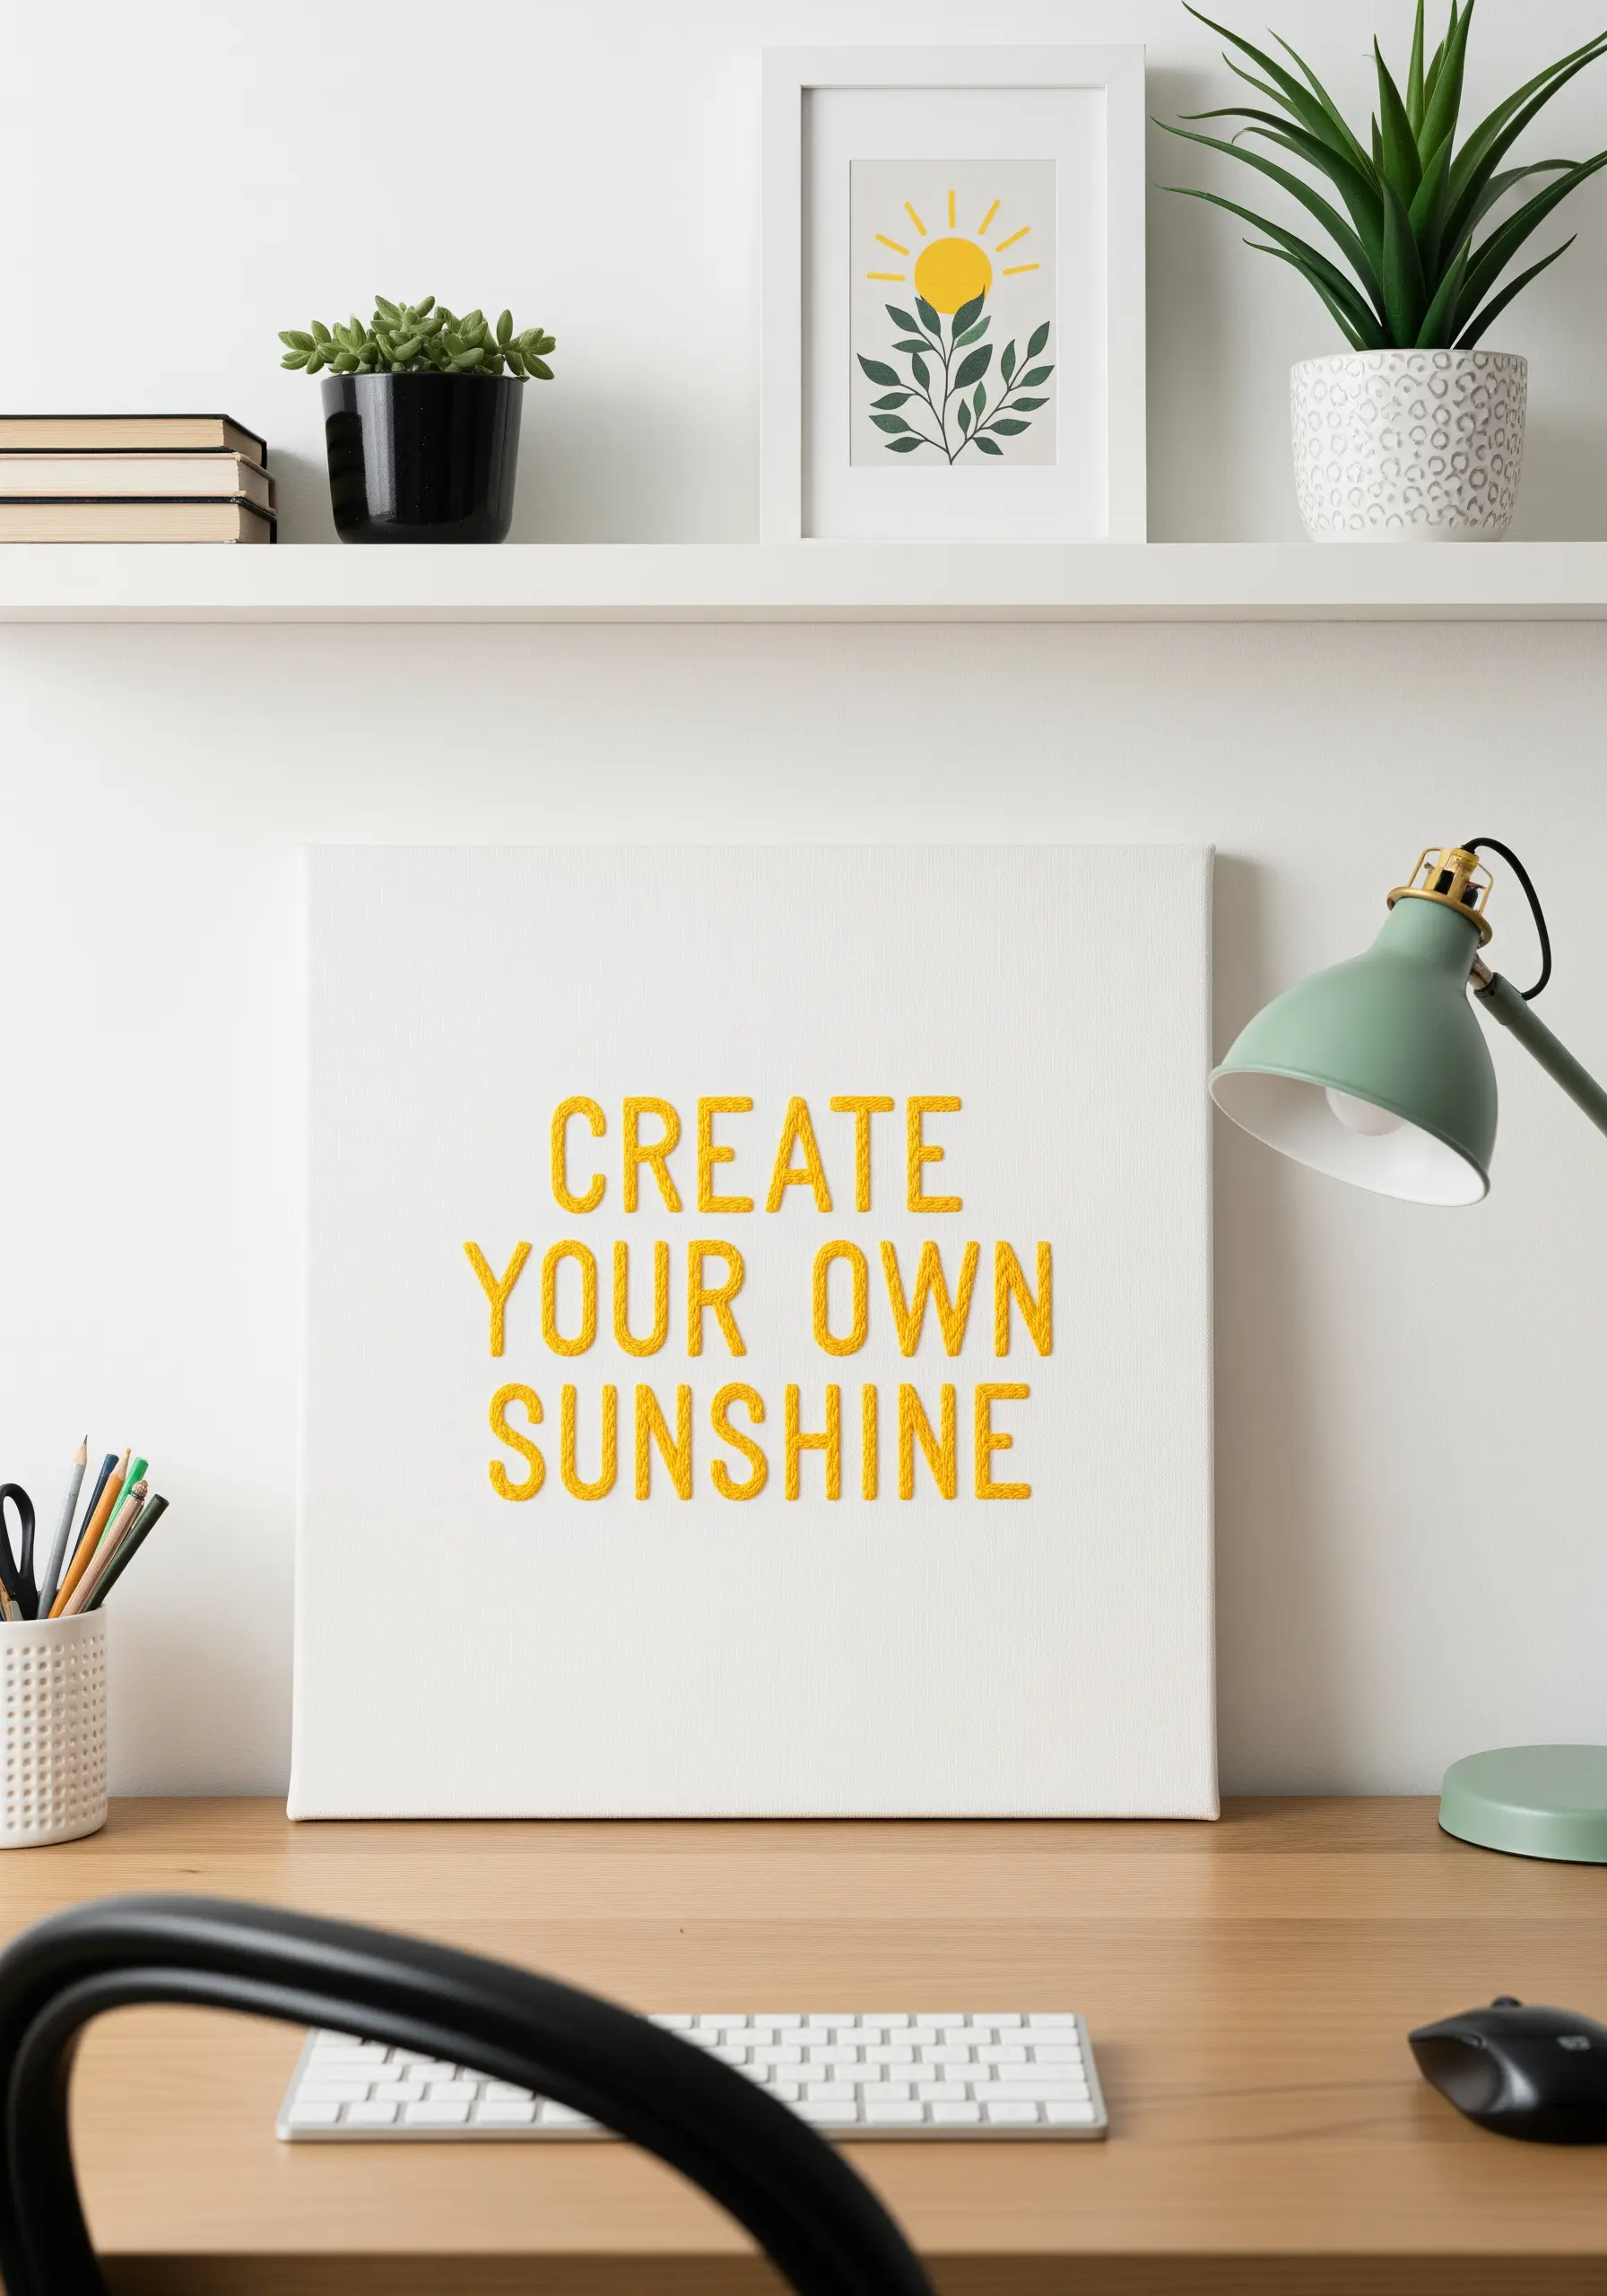
Make your embroidered quotes stand off the canvas by choosing a stitch that builds texture.
Instead of a simple backstitch, use a four-strand chain stitch to fill your letters. This stitch creates a raised, braided line that has significant visual weight and tactility.
For an even bolder effect, couch a thick piece of yarn onto the canvas, using a thinner, matching thread to tack it down.
This technique turns simple words into a sculptural statement piece for your desk or shelf.
19. Craft a Soft and Serene Nursery Mobile

For a handmade nursery mobile, focus on soft textures and clean finishing.
Cut your cloud, moon, and star shapes from high-quality wool felt. Use a blanket stitch around the edges to join the front and back pieces together as you stuff them lightly with poly-fil.
This stitch provides a secure and decorative edge that looks neat and professional.
Add dreamy details like sleepy eyes with a few simple backstitches, keeping the overall aesthetic calm and gentle.
20. Create Miniature Landscapes with Cross-Stitch
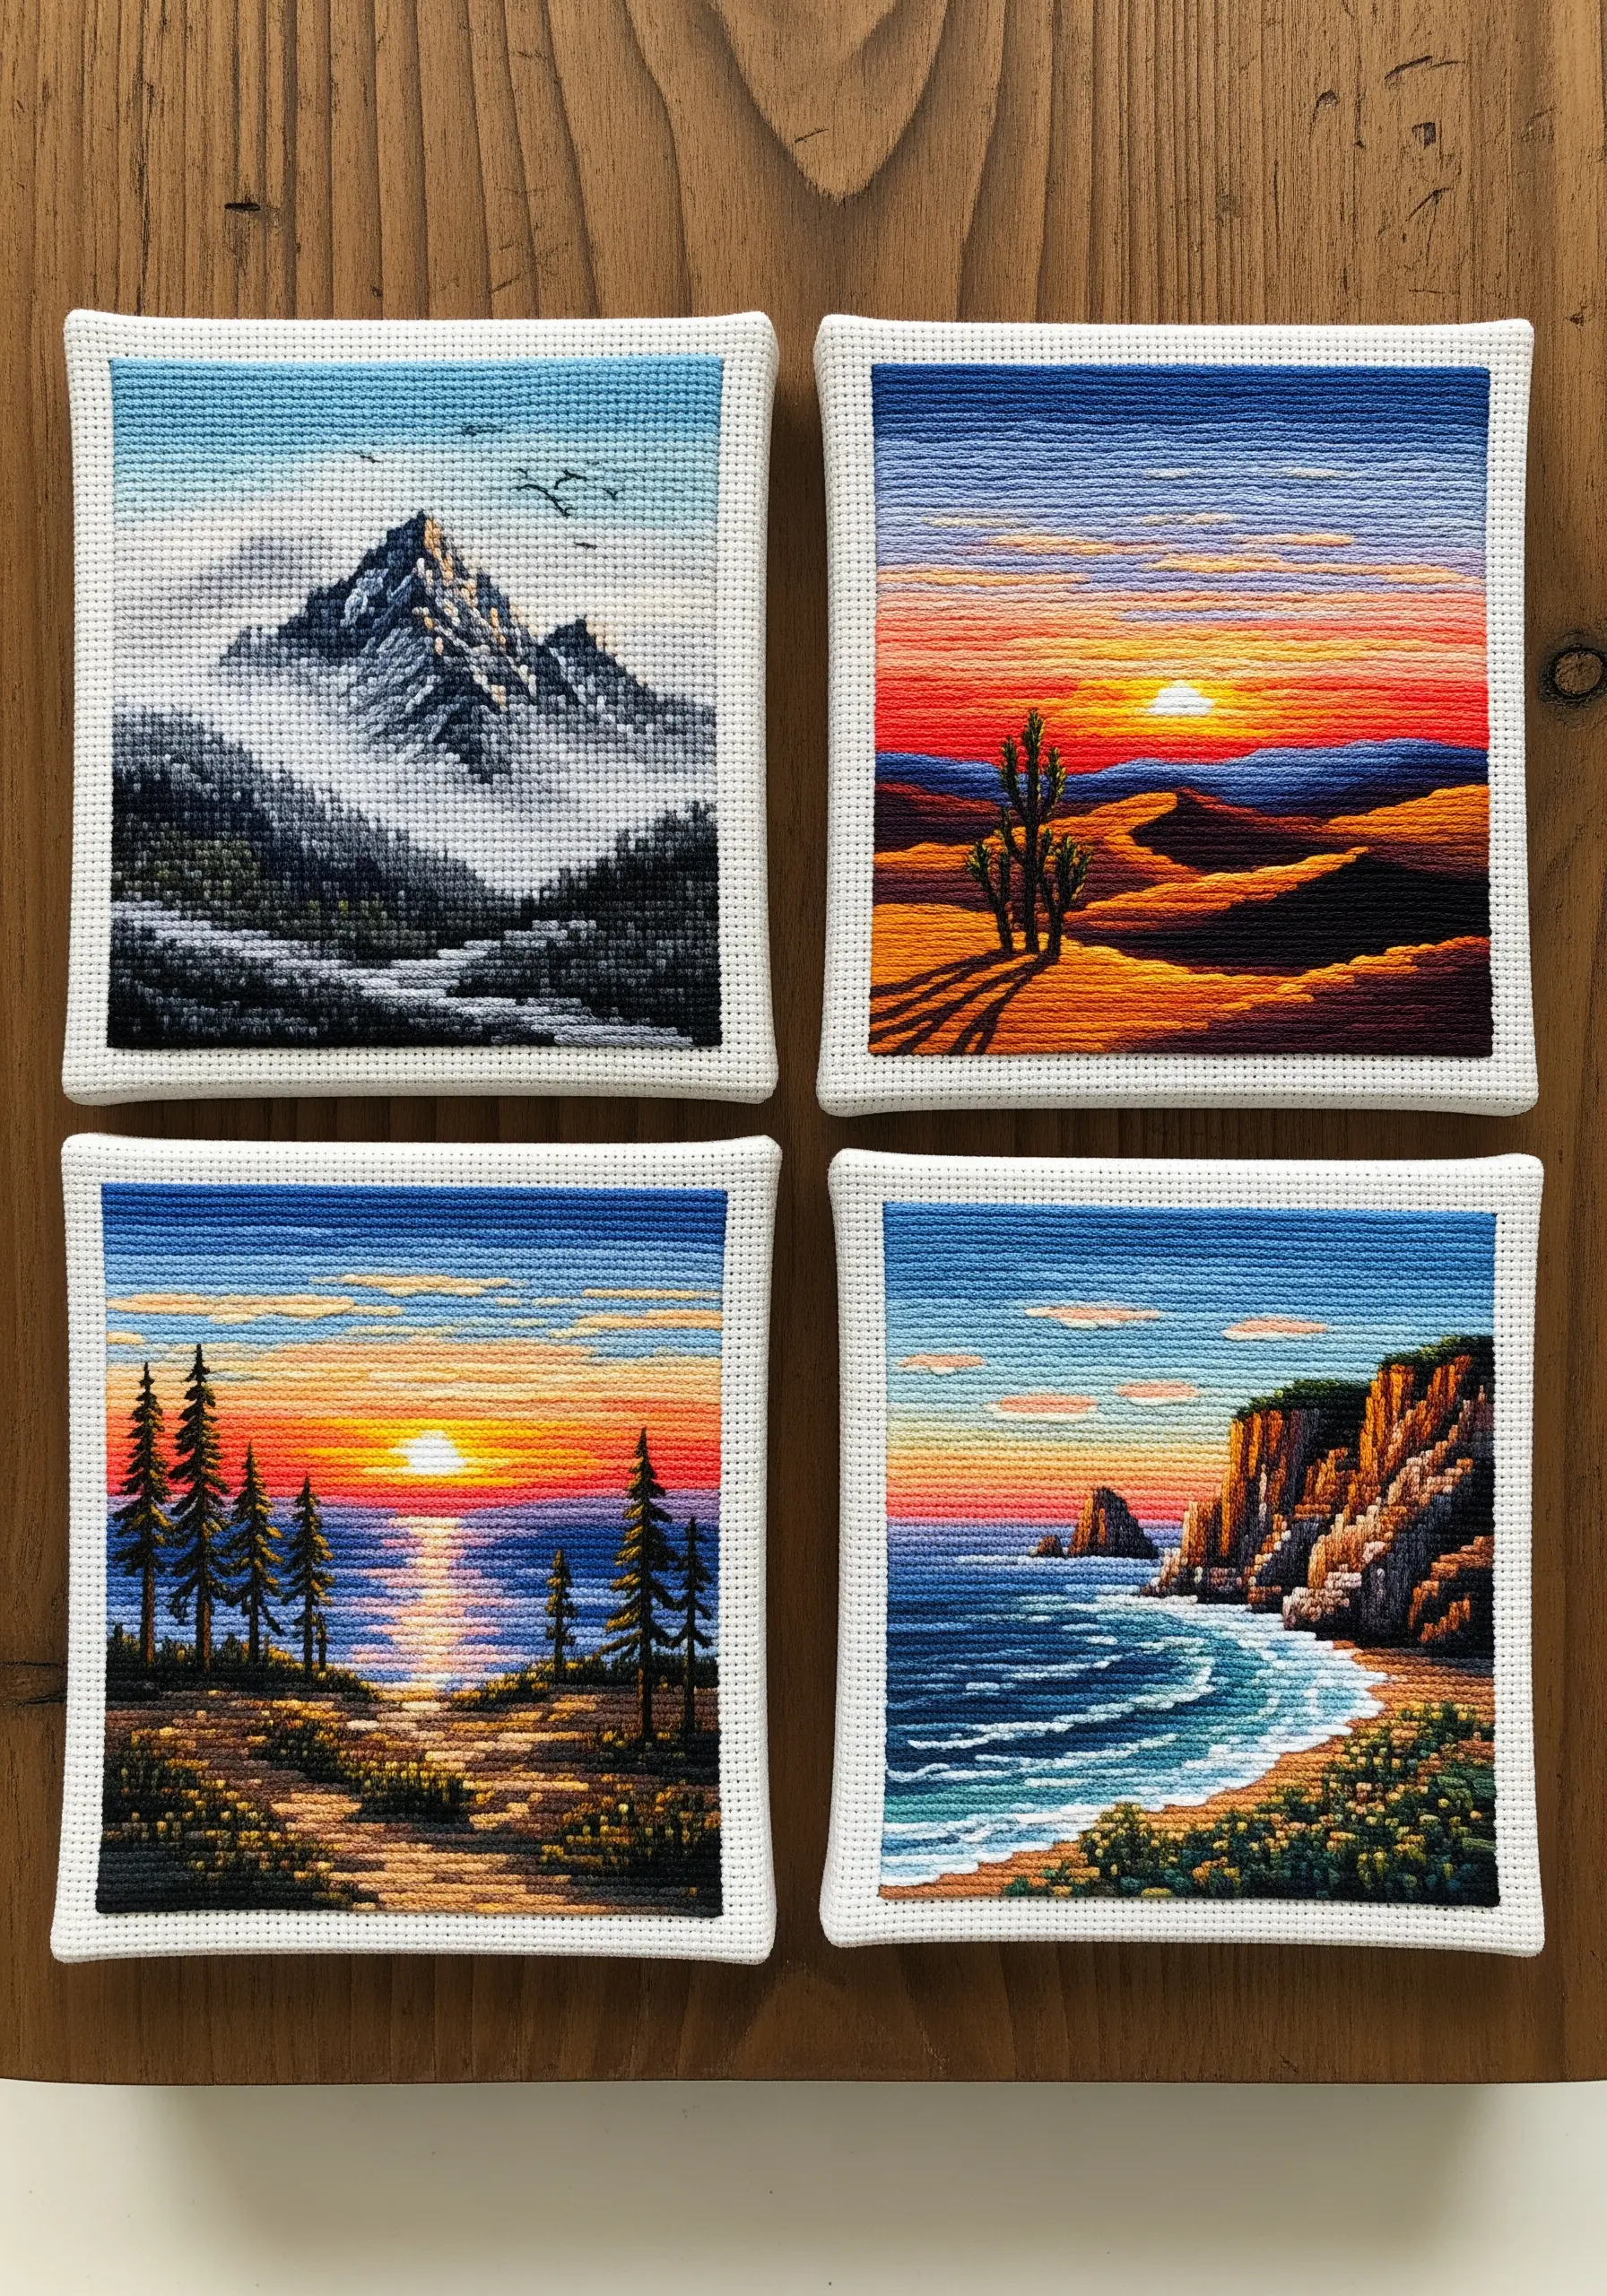
Cross-stitch is uniquely suited for creating detailed, pixel-like landscapes on a small scale.
Work on a high-count Aida cloth (16 or 18-count) to allow for finer detail in a compact space.
To create atmospheric depth, like distant mountains or a hazy sky, use a technique called ‘blending’ where you stitch with one strand of two different colors in your needle at the same time.
This creates a soft, heathered effect that adds incredible realism to your miniature scenes.
21. Construct a Storage Basket with Coiled Rope
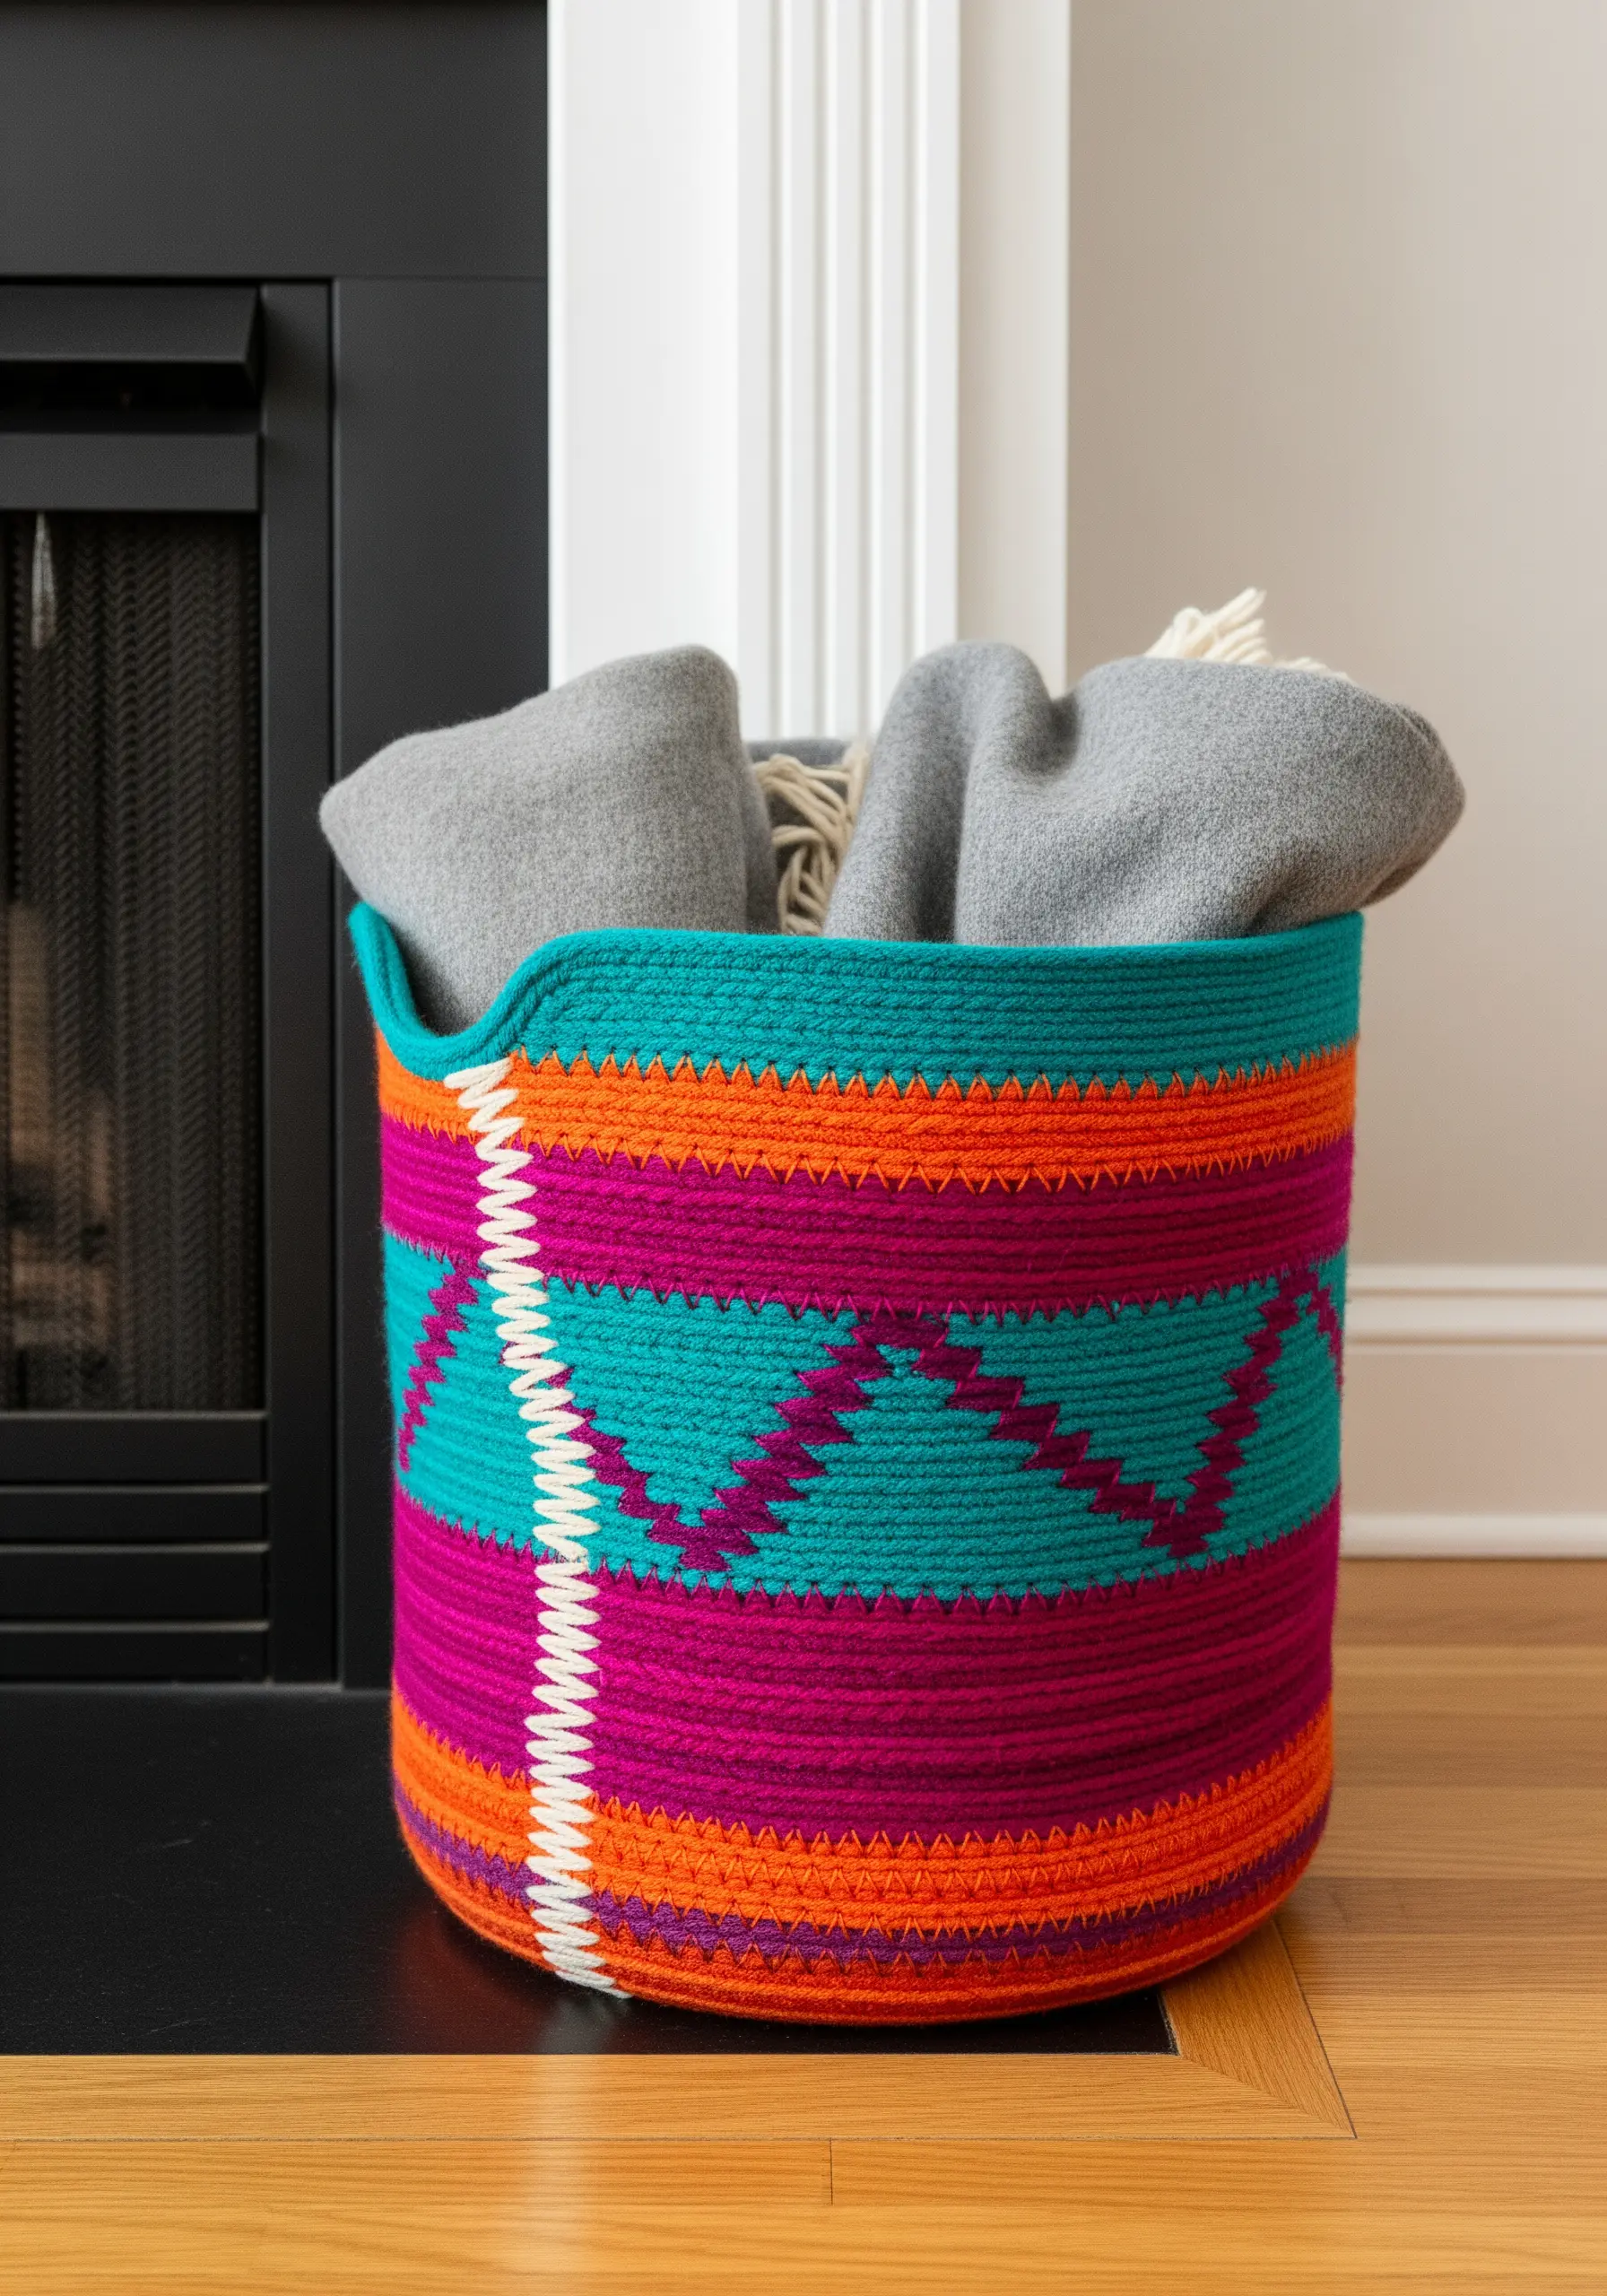
Create a sturdy and stylish basket by coiling cotton rope and wrapping it with colorful yarn.
To build the structure, hold a thick cotton rope in a spiral and use a tapestry needle to wrap it tightly with your chosen yarn, stitching into the previous coil to secure it.
You can create geometric patterns by simply switching your wrapping yarn color at planned intervals.
This technique allows you to build a functional storage piece that doubles as a vibrant, textural decor element.
22. Paint with Beads for a Textured Mandala
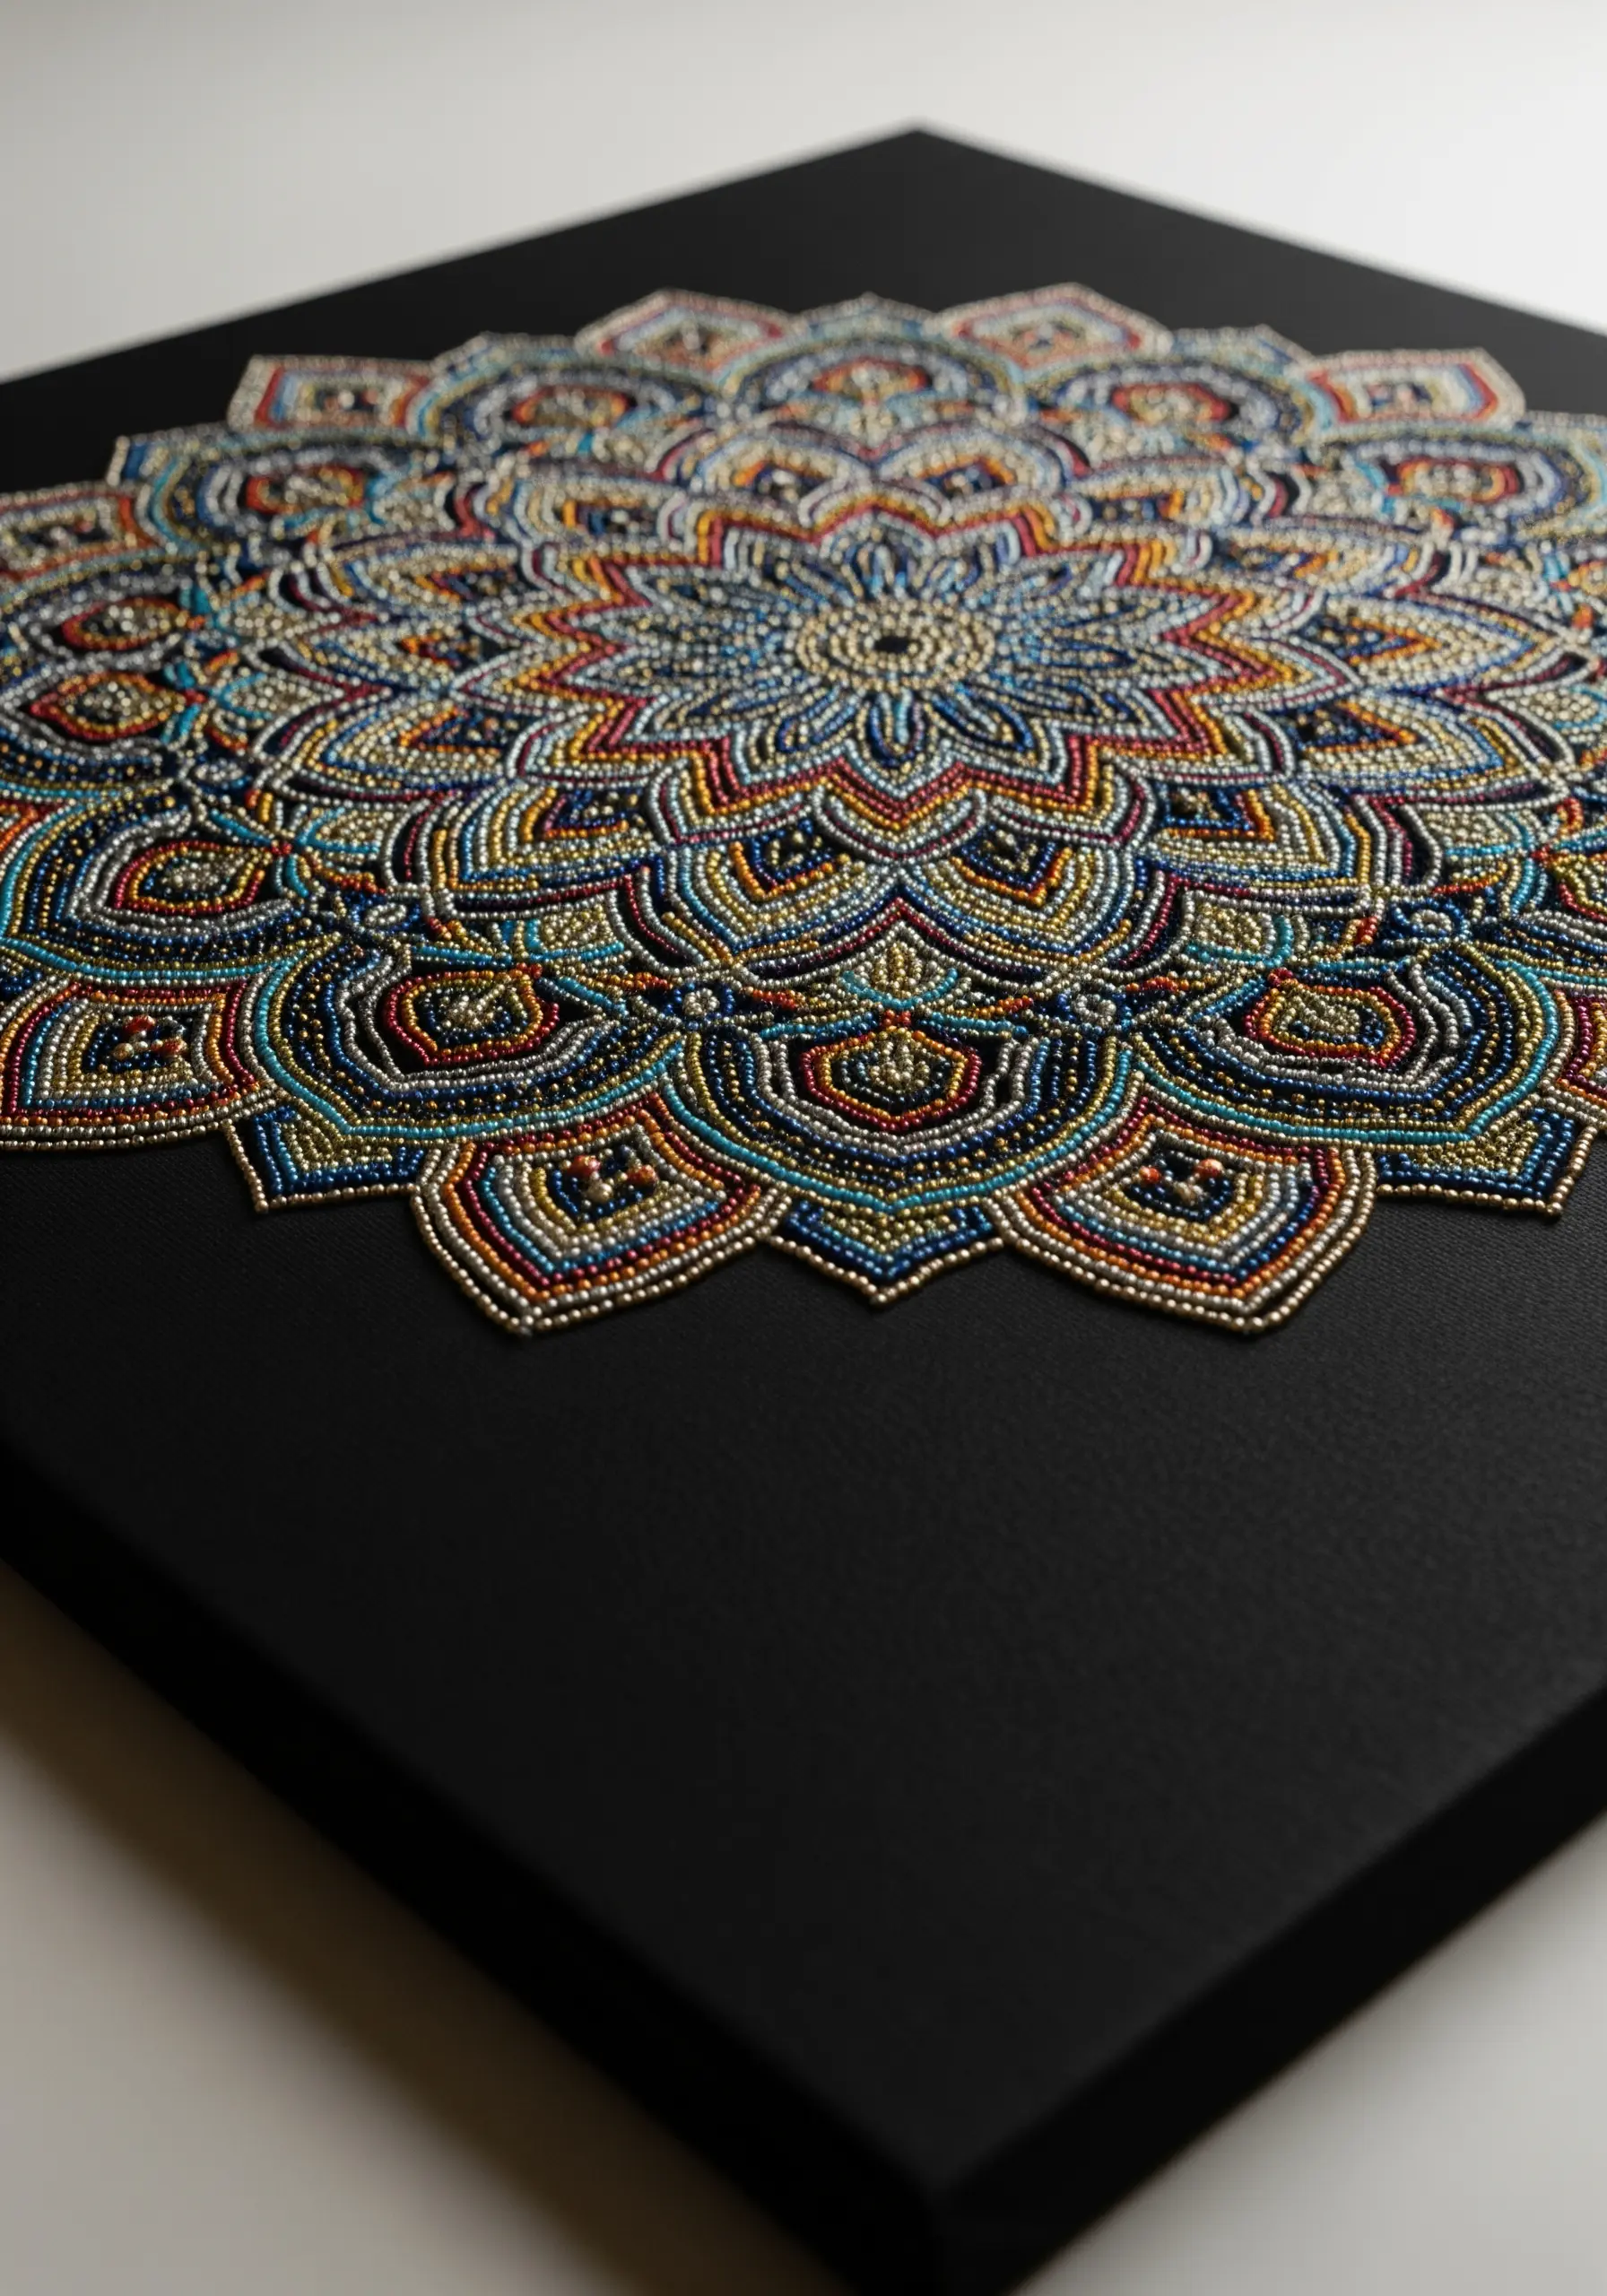
Achieve unparalleled detail and texture by creating a mandala using beads instead of thread.
Draw your design onto a stretched canvas, then apply beads using a strong adhesive and a beading tool for precision.
To create clean lines and patterns, sort your seed beads by color and finish (matte, metallic, iridescent) before you begin.
The play of light on the different bead surfaces will give your artwork a shimmering, dynamic quality that changes throughout the day.
23. Create an Interactive, Embroidered Travel Map
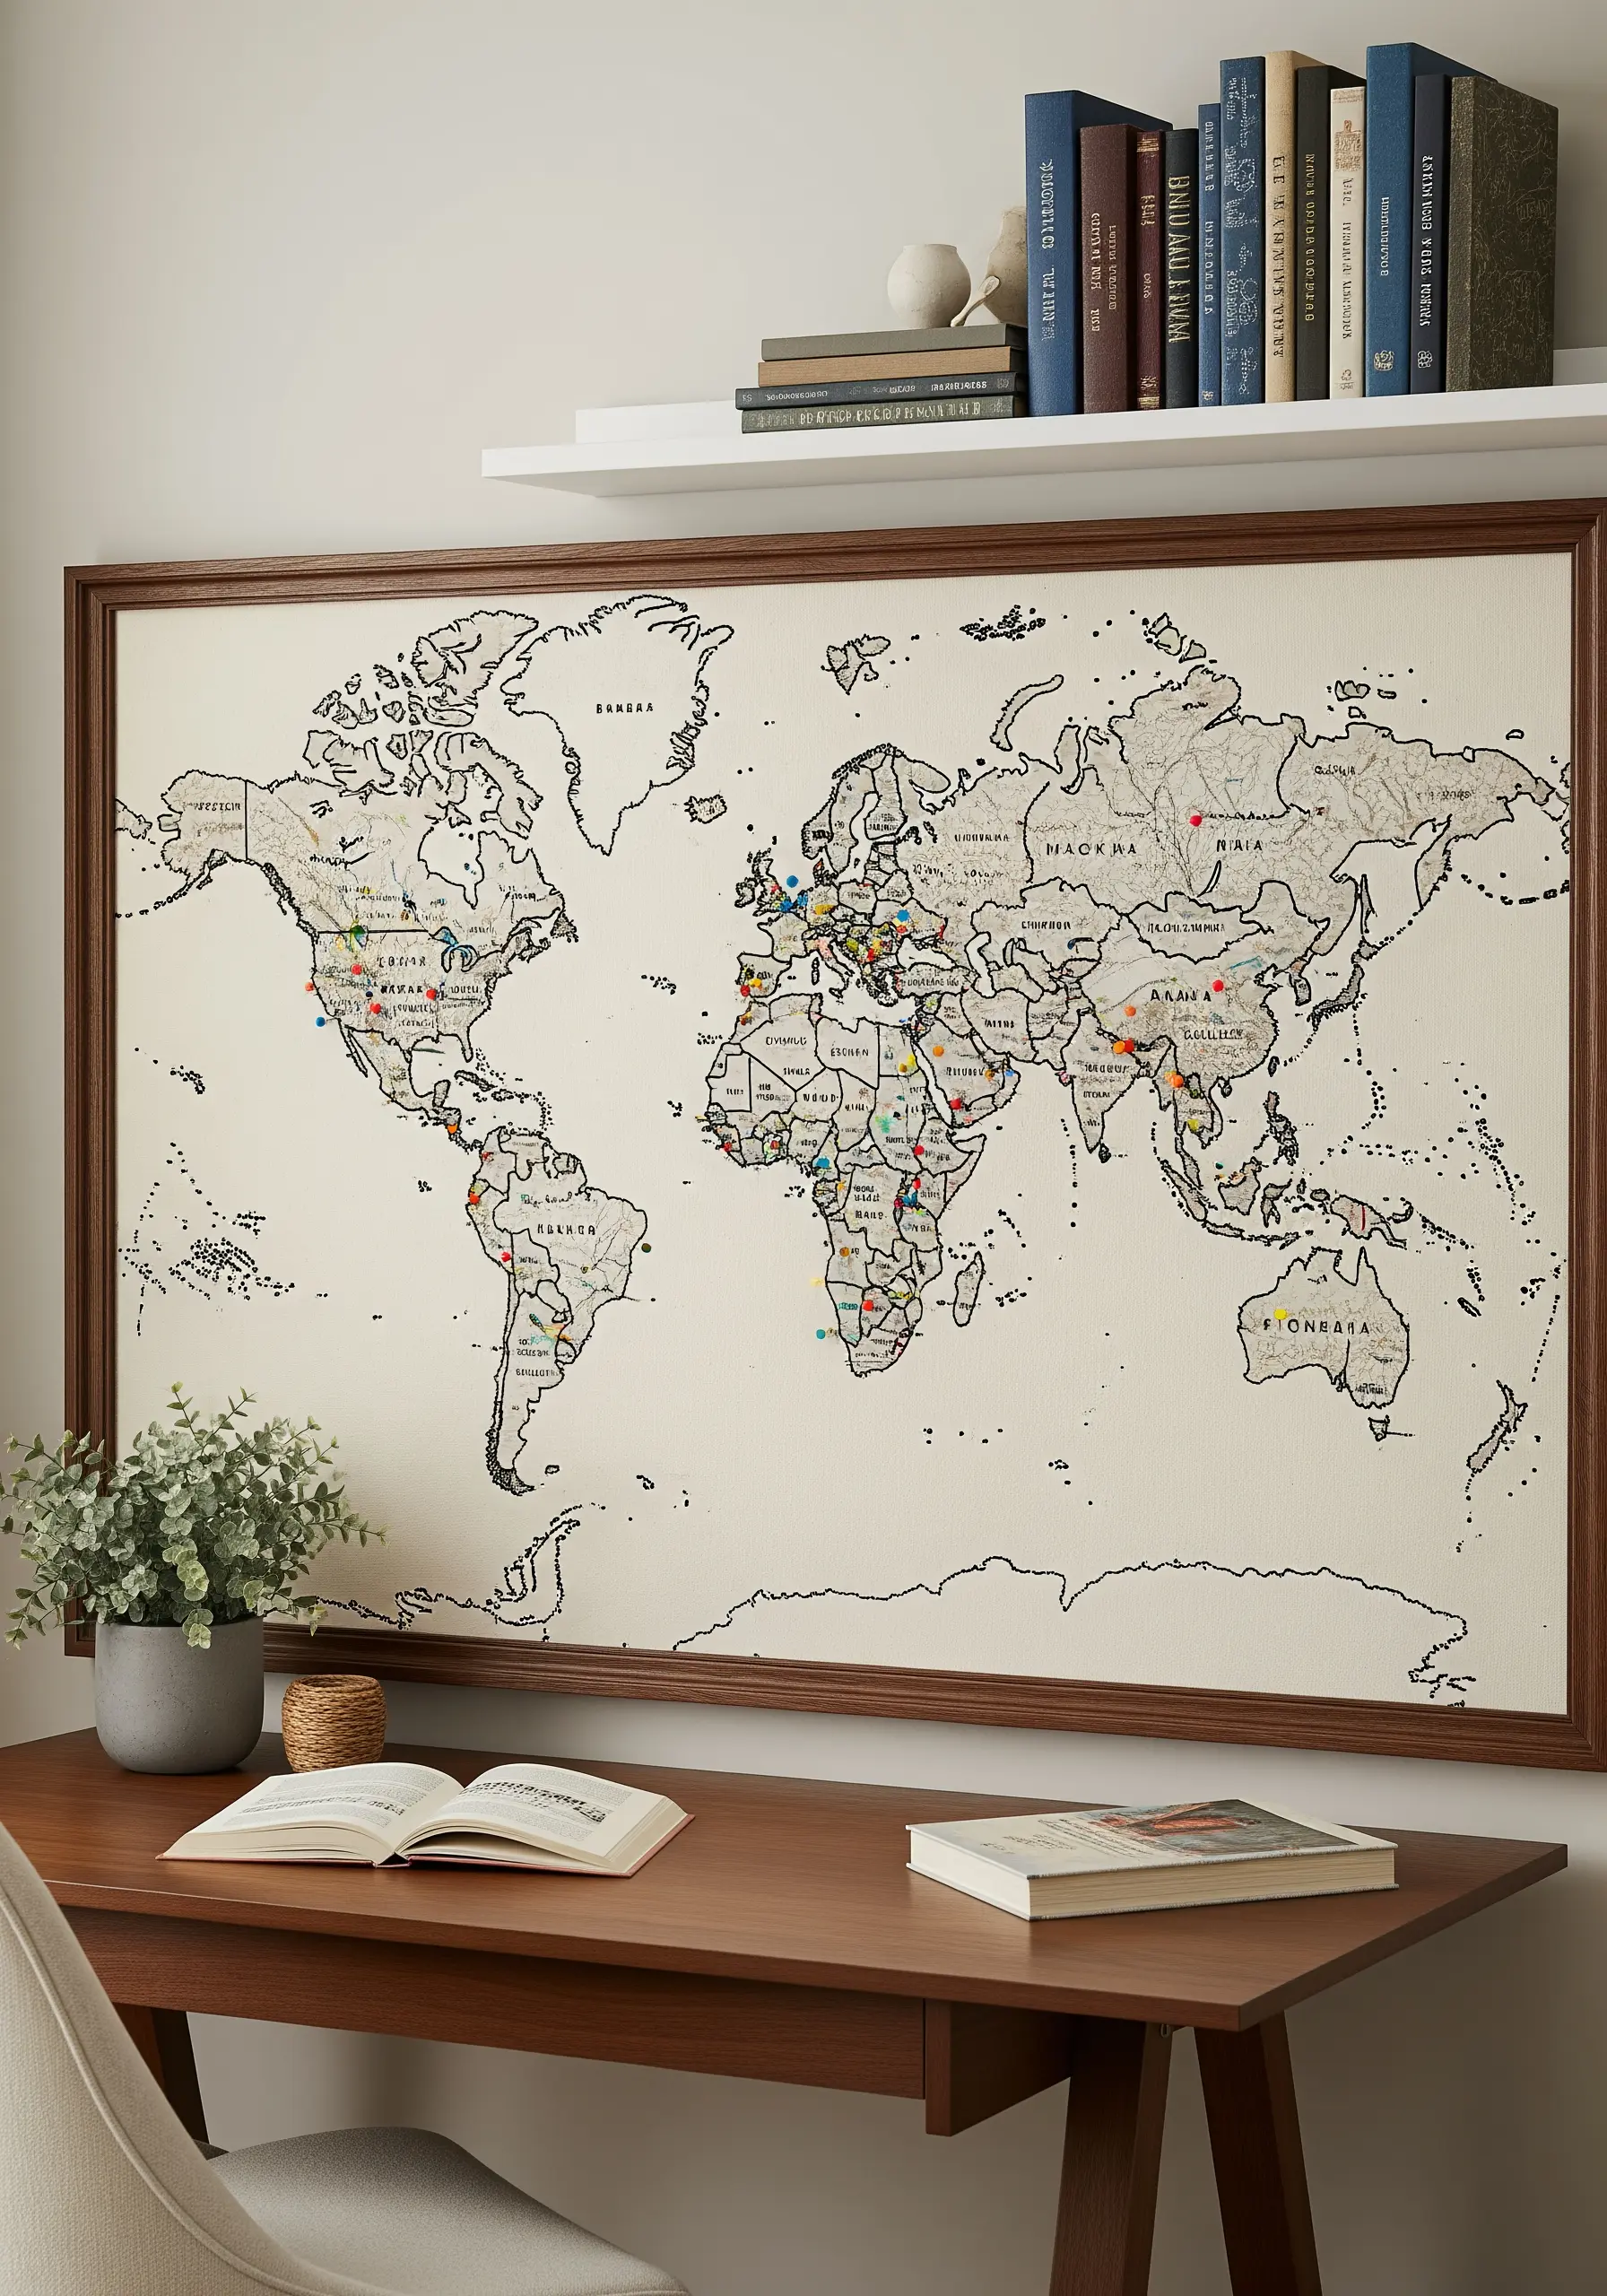
Turn a world map into a living record of your adventures.
Start by embroidering the continents onto a large piece of canvas using a simple backstitch for the outlines.
Stretch and mount the finished canvas onto a corkboard or foam core backing before framing it.
This allows you to use colorful pins to mark places you’ve been or dream of visiting, creating an interactive art piece that tells your personal story.
24. Explore Form with Sculptural Soft Textiles
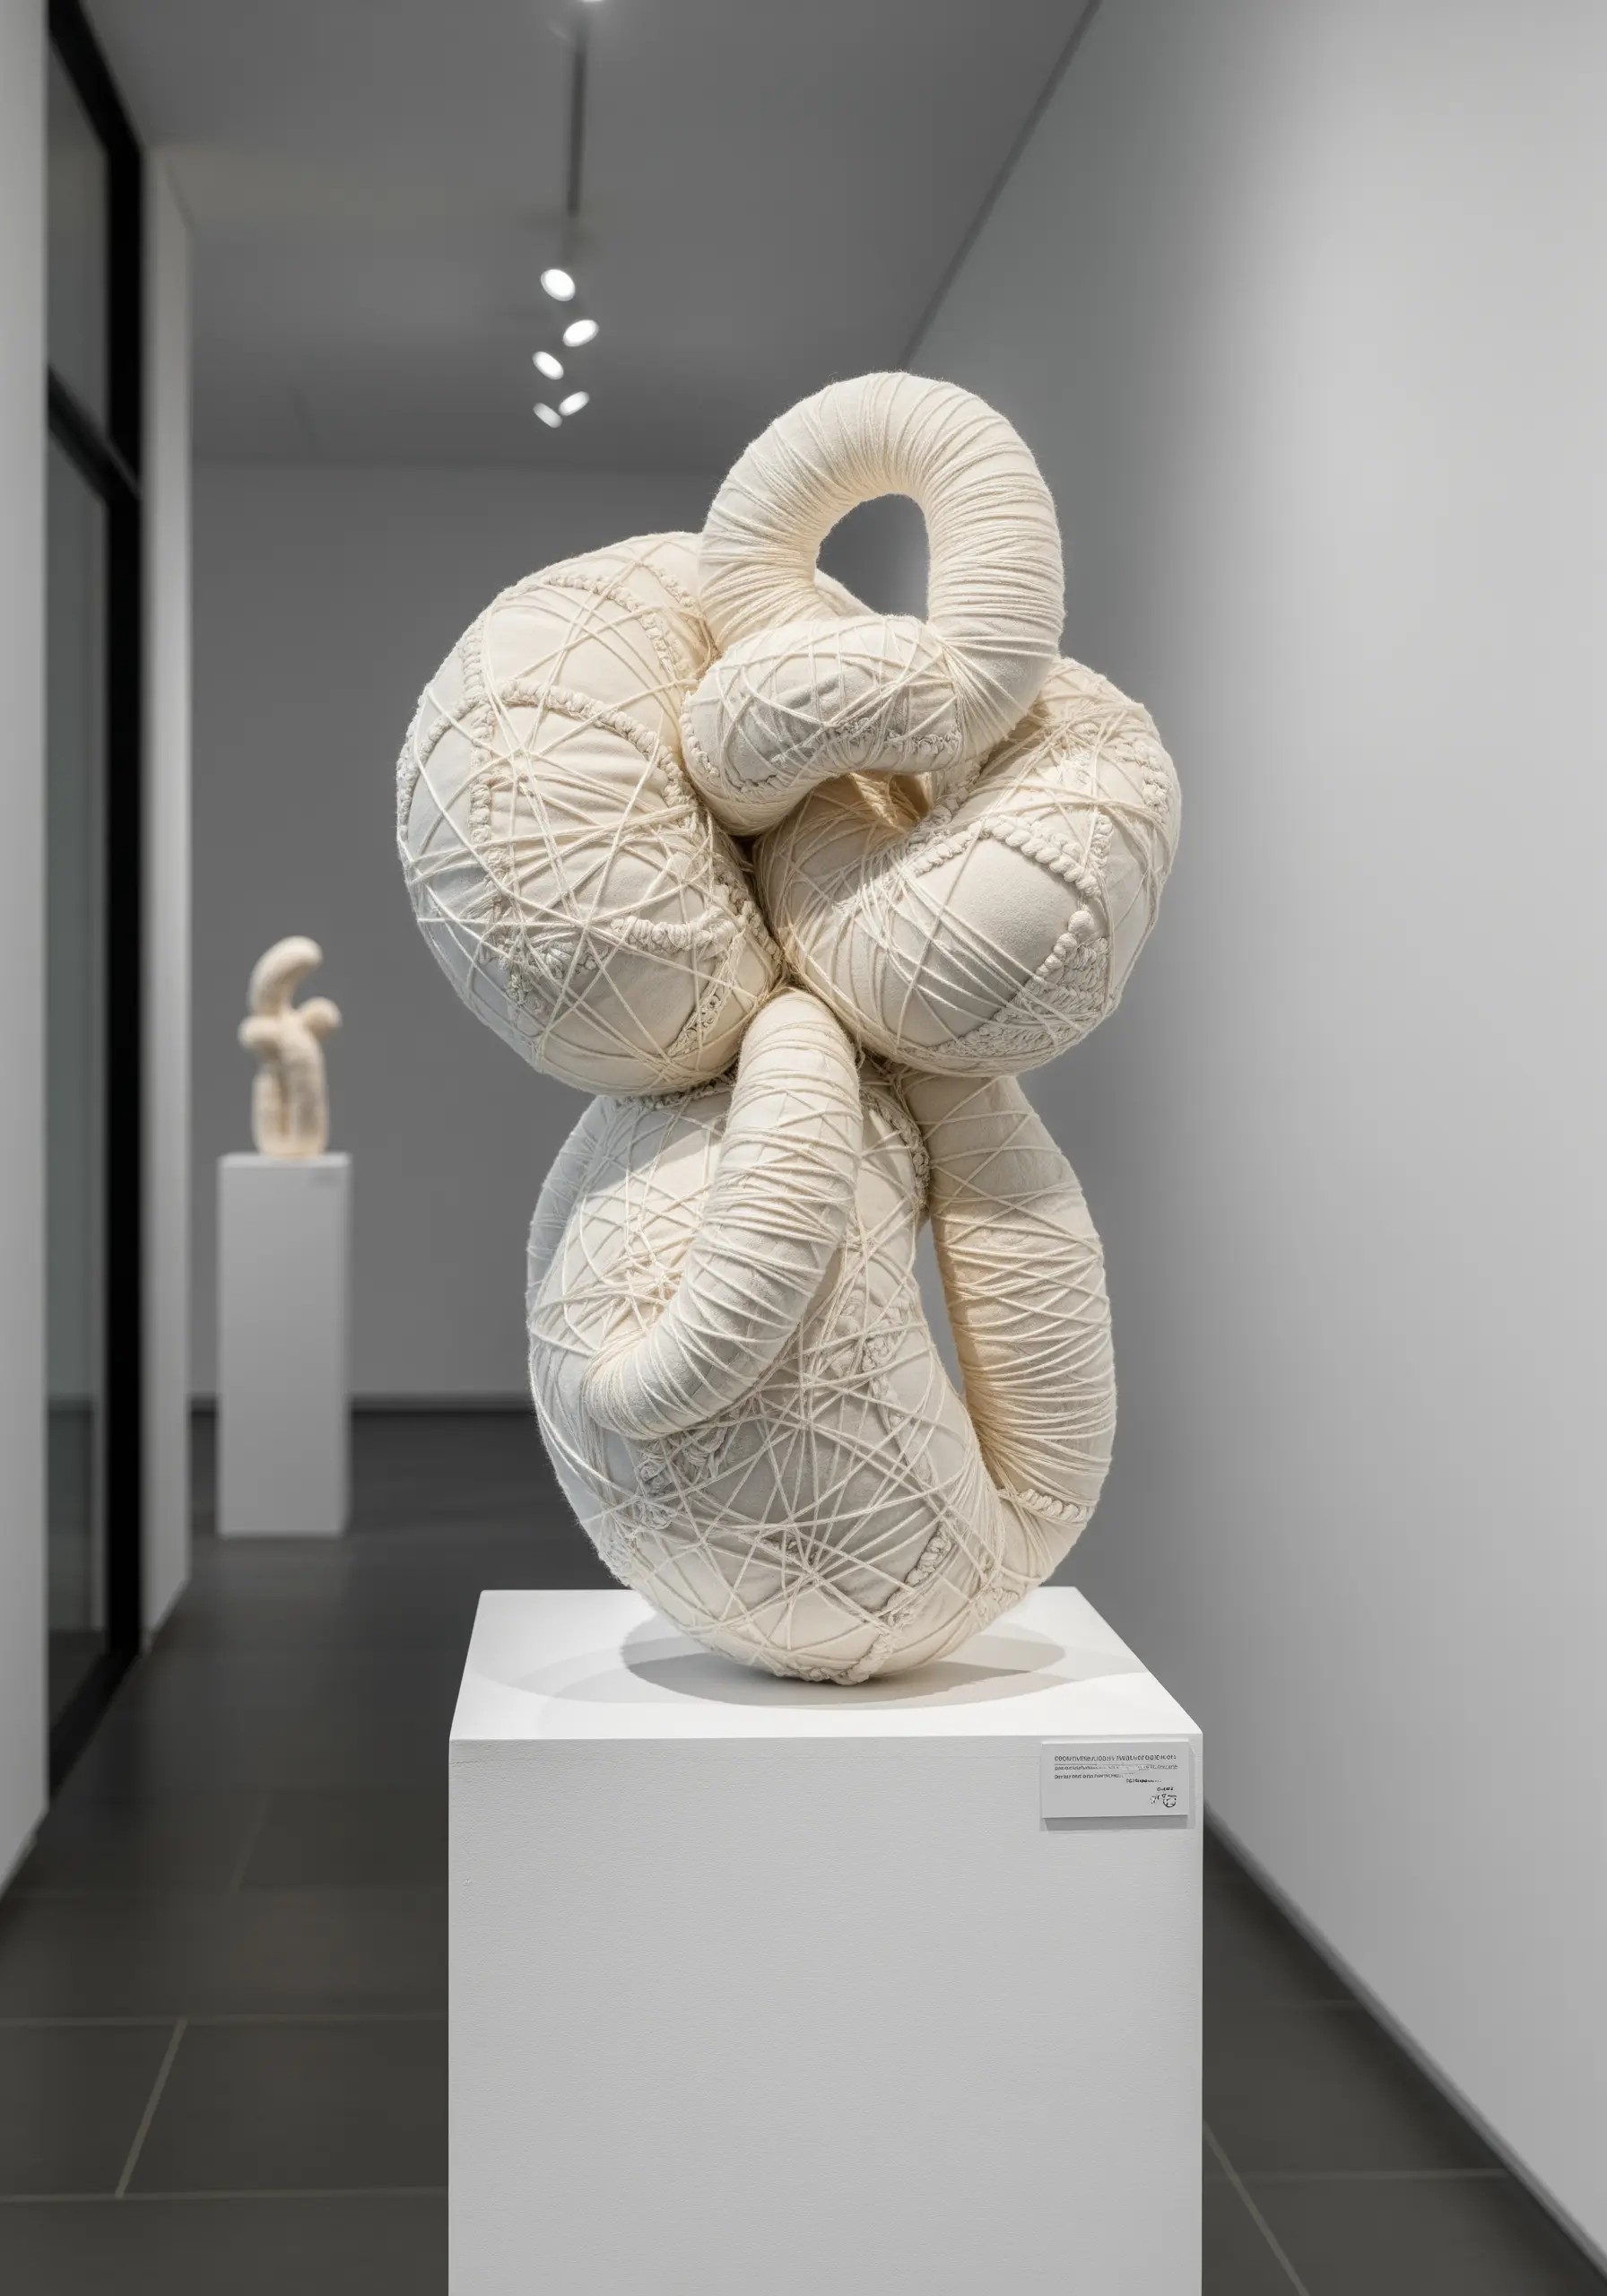
Move beyond the flat surface by creating three-dimensional soft sculptures.
Begin by sewing long tubes of fabric, stuffing them firmly with batting to create modular, organic shapes.
Then, bend, twist, and knot these forms together, securing them with hidden stitches.
You can add surface detail by wrapping sections tightly with thread or cord, creating tension and new textures. This process transforms simple fabric into a complex, biomorphic art piece.
25. Illustrate with Fabric Collage and Thread

Use fabric collage as your underpainting and thread as your ink to create stunning, graphic portraits.
Cut and layer pieces of patterned and colored fabric to block in the main areas of light and shadow. Use a temporary fabric adhesive to hold them in place.
Then, using free-motion machine embroidery or a simple hand backstitch with thick black thread, draw the defining lines of the portrait.
The thread unifies the disparate fabric pieces, turning a collage into a cohesive and powerful illustration.
26. Design a Statement Macrame Headboard

A large-scale macrame piece can serve as a stunning, textural headboard that softens a bedroom.
For a project of this size, choose a thicker cotton cord (5mm or 6mm) to give the piece visual weight and make the knotwork more impactful.
Plan your design around a central medallion, like a series of concentric diamonds made with clove hitch knots, and build outwards symmetrically.
This creates a clear focal point and ensures the final piece feels balanced and intentional behind the bed.
27. Construct an Heirloom Perpetual Calendar
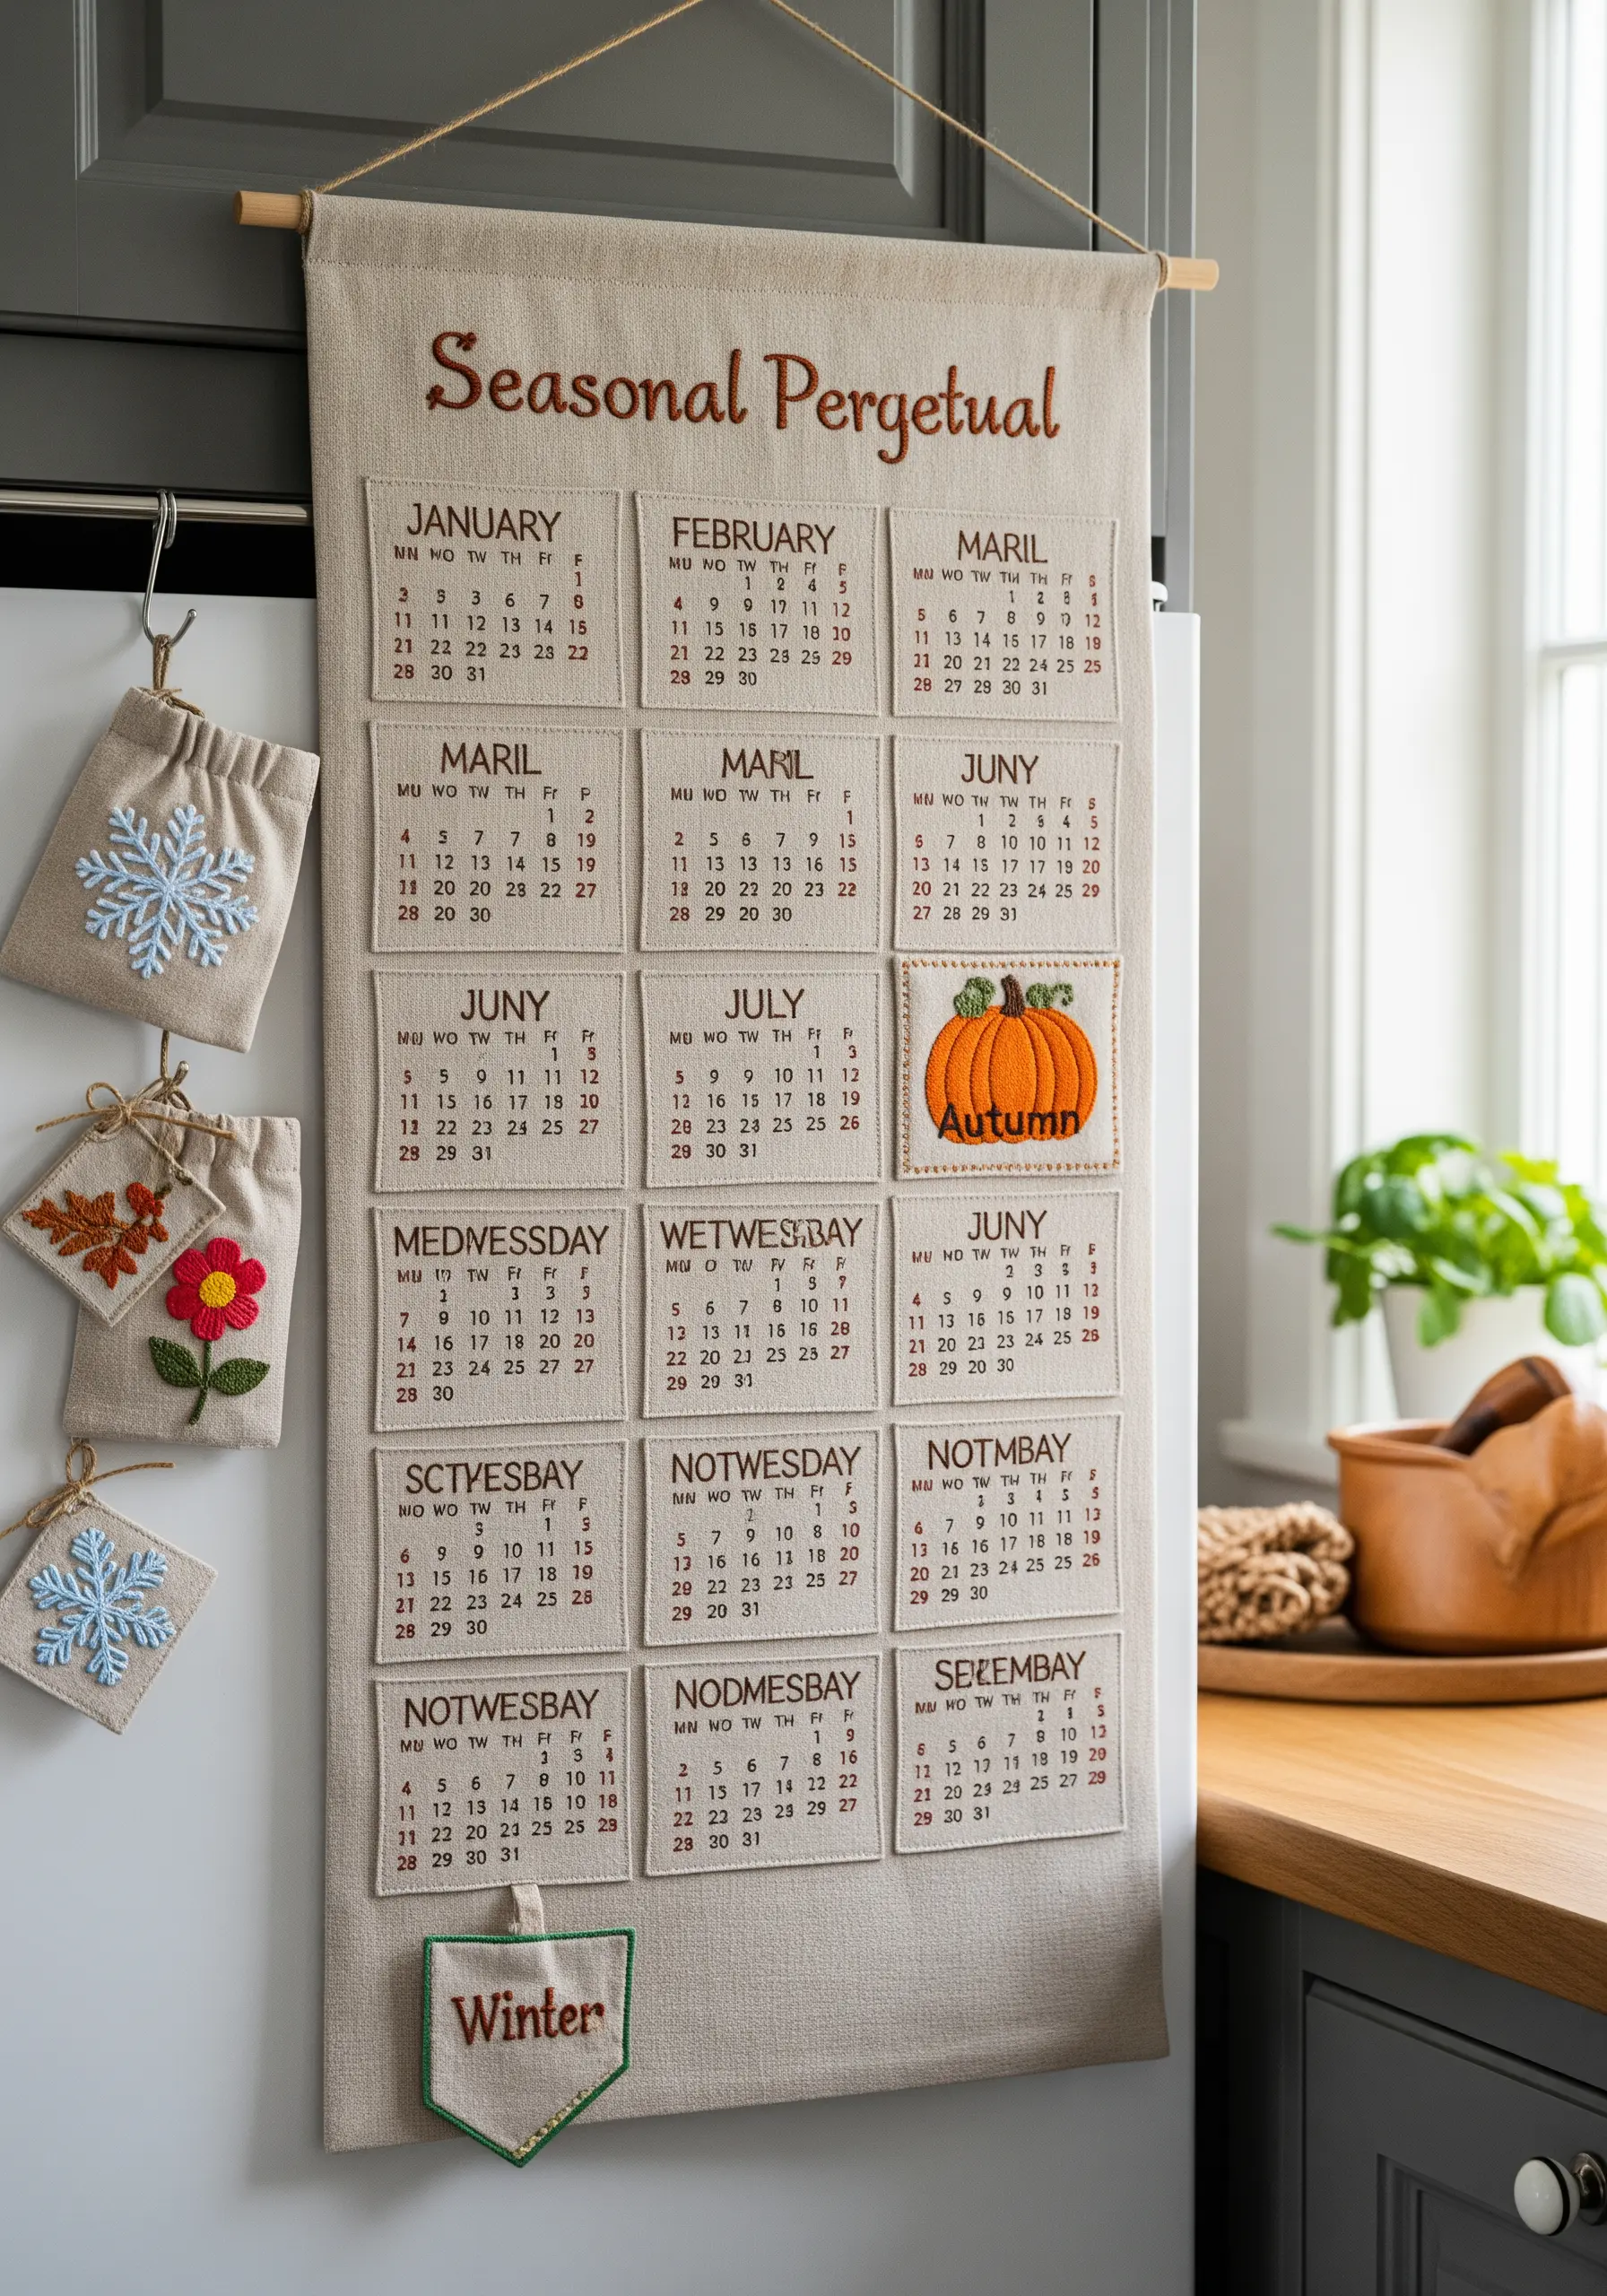
Create a functional piece of art that can be used year after year.
Construct the main banner from heavy linen. For the interchangeable date and month patches, use felt or fabric backed with a stiff interfacing to ensure they hold their shape.
Embroider the numbers and names, then attach a small piece of Velcro to the back of each patch and its corresponding spot on the banner.
This modular design makes it an interactive and enduring piece of home decor.
28. Transform Furniture with Upholstery Embroidery

Elevate a simple piece of furniture by embroidering directly onto the upholstery fabric before it’s assembled.
Choose a durable, medium-weight fabric like cotton canvas or a linen blend that can handle dense stitching.
Use bold, vibrant threads and fill stitches like satin stitch or French knots to create a dense, all-over pattern that is both visually stunning and robust enough to withstand daily use.
This is a commitment, but it turns a simple chair into a one-of-a-kind work of art.
29. Add Delicate Stitches to Pressed Botanicals
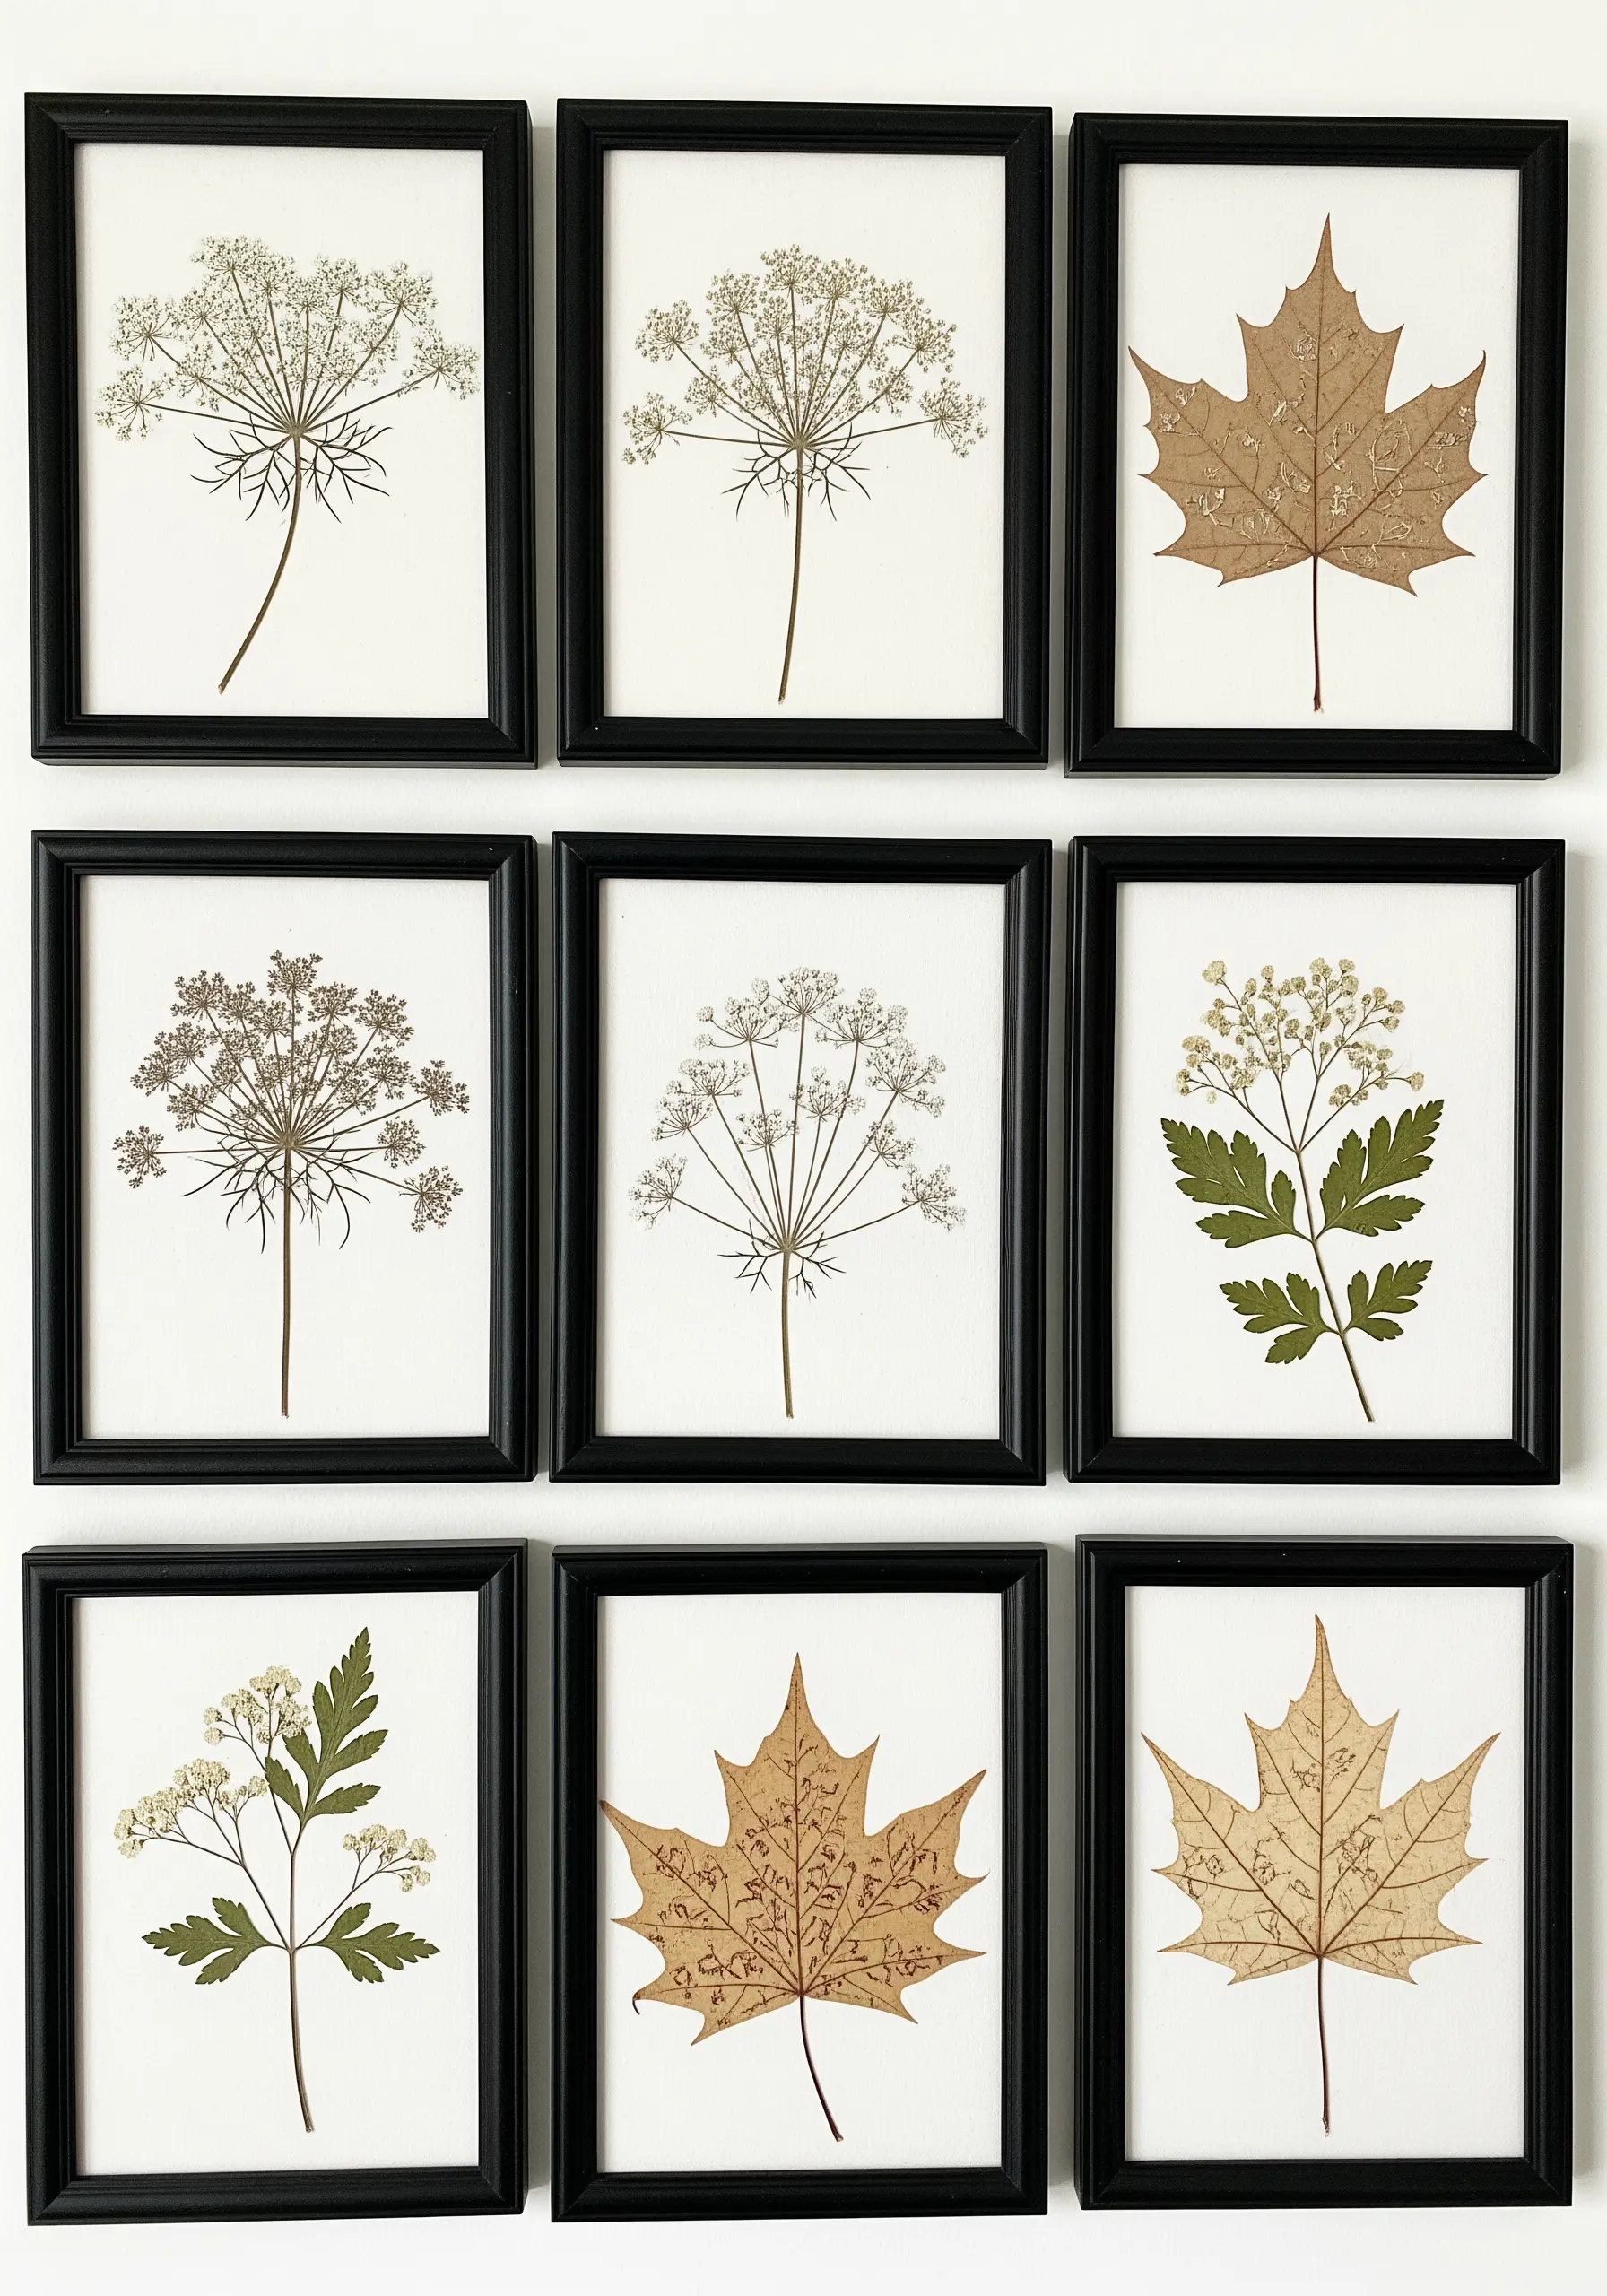
Combine the beauty of nature with the delicacy of embroidery by stitching directly onto pressed leaves and flowers.
Carefully press your botanicals until they are completely dry and flat. Mount them onto sturdy watercolor paper using a tiny dot of acid-free glue.
Using a very fine needle and a single strand of thread, add subtle details—trace a vein, outline a petal, or add a geometric pattern.
This technique requires a gentle touch, but results in a breathtakingly delicate piece of mixed-media art.
30. Sculpt a Coral Reef with Fiber and Beads
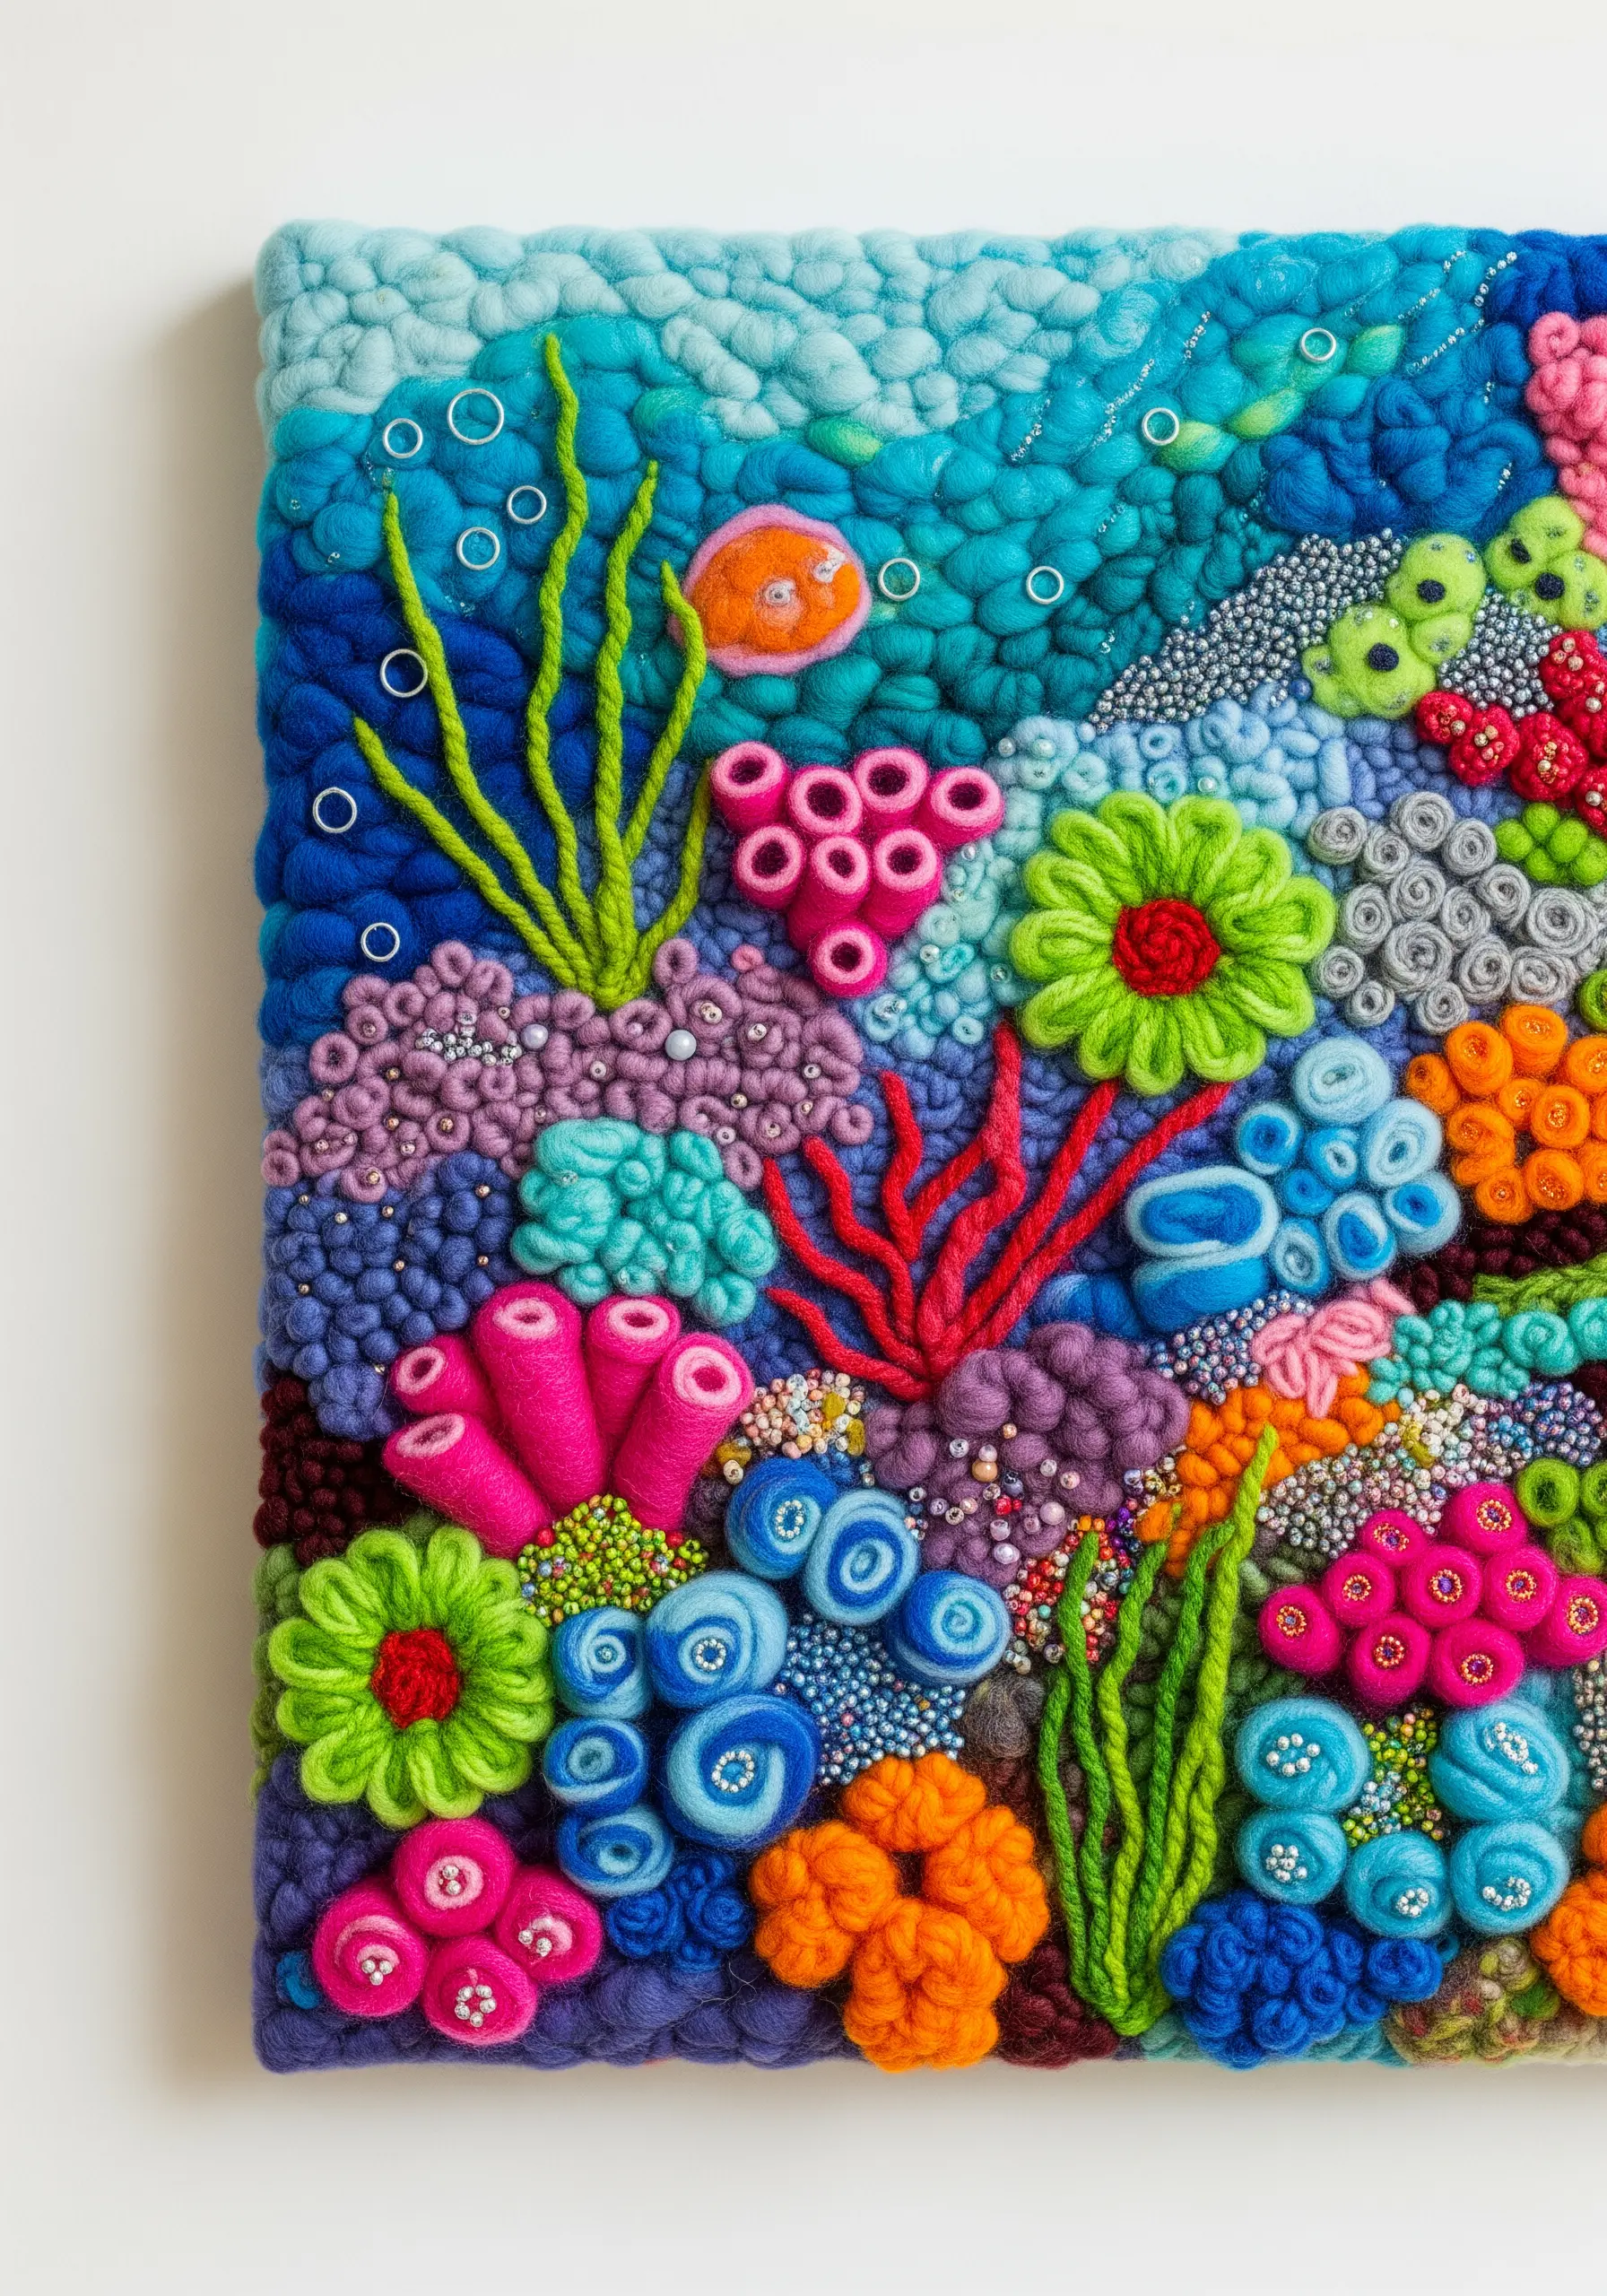
Create a vibrant, tactile underwater world by combining multiple fiber art techniques.
Use punch needle with chunky yarn for the soft, rounded coral shapes, and turkey work loops for anemone-like textures. Form tall, branching corals using wrapped wire or cast-on stitches.
Finally, scatter tiny seed beads and French knots throughout the piece to mimic the effervescence of air bubbles and the intricate details of a thriving reef.
This maximalist approach to texture creates an immersive and joyful piece of art.


