
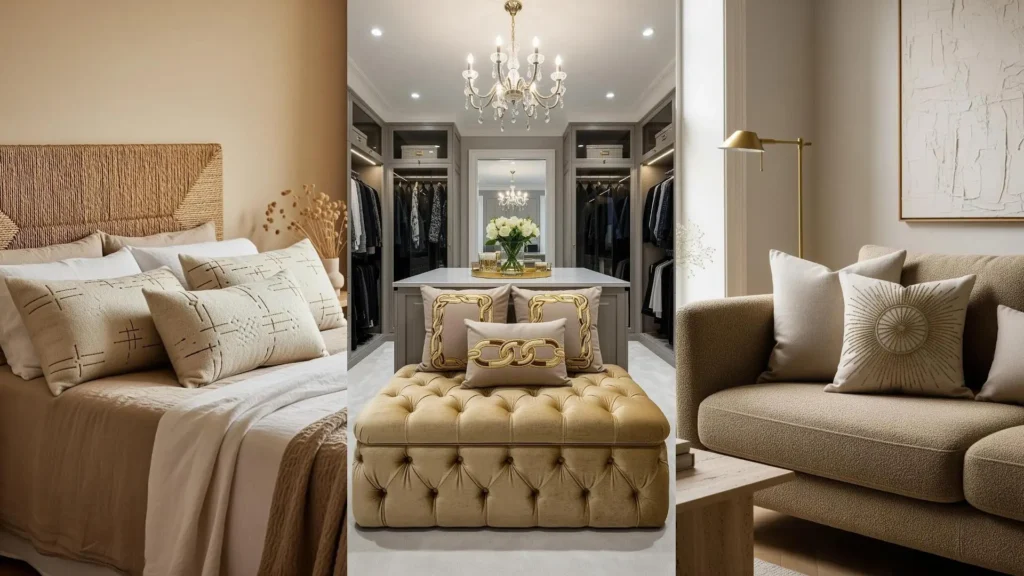
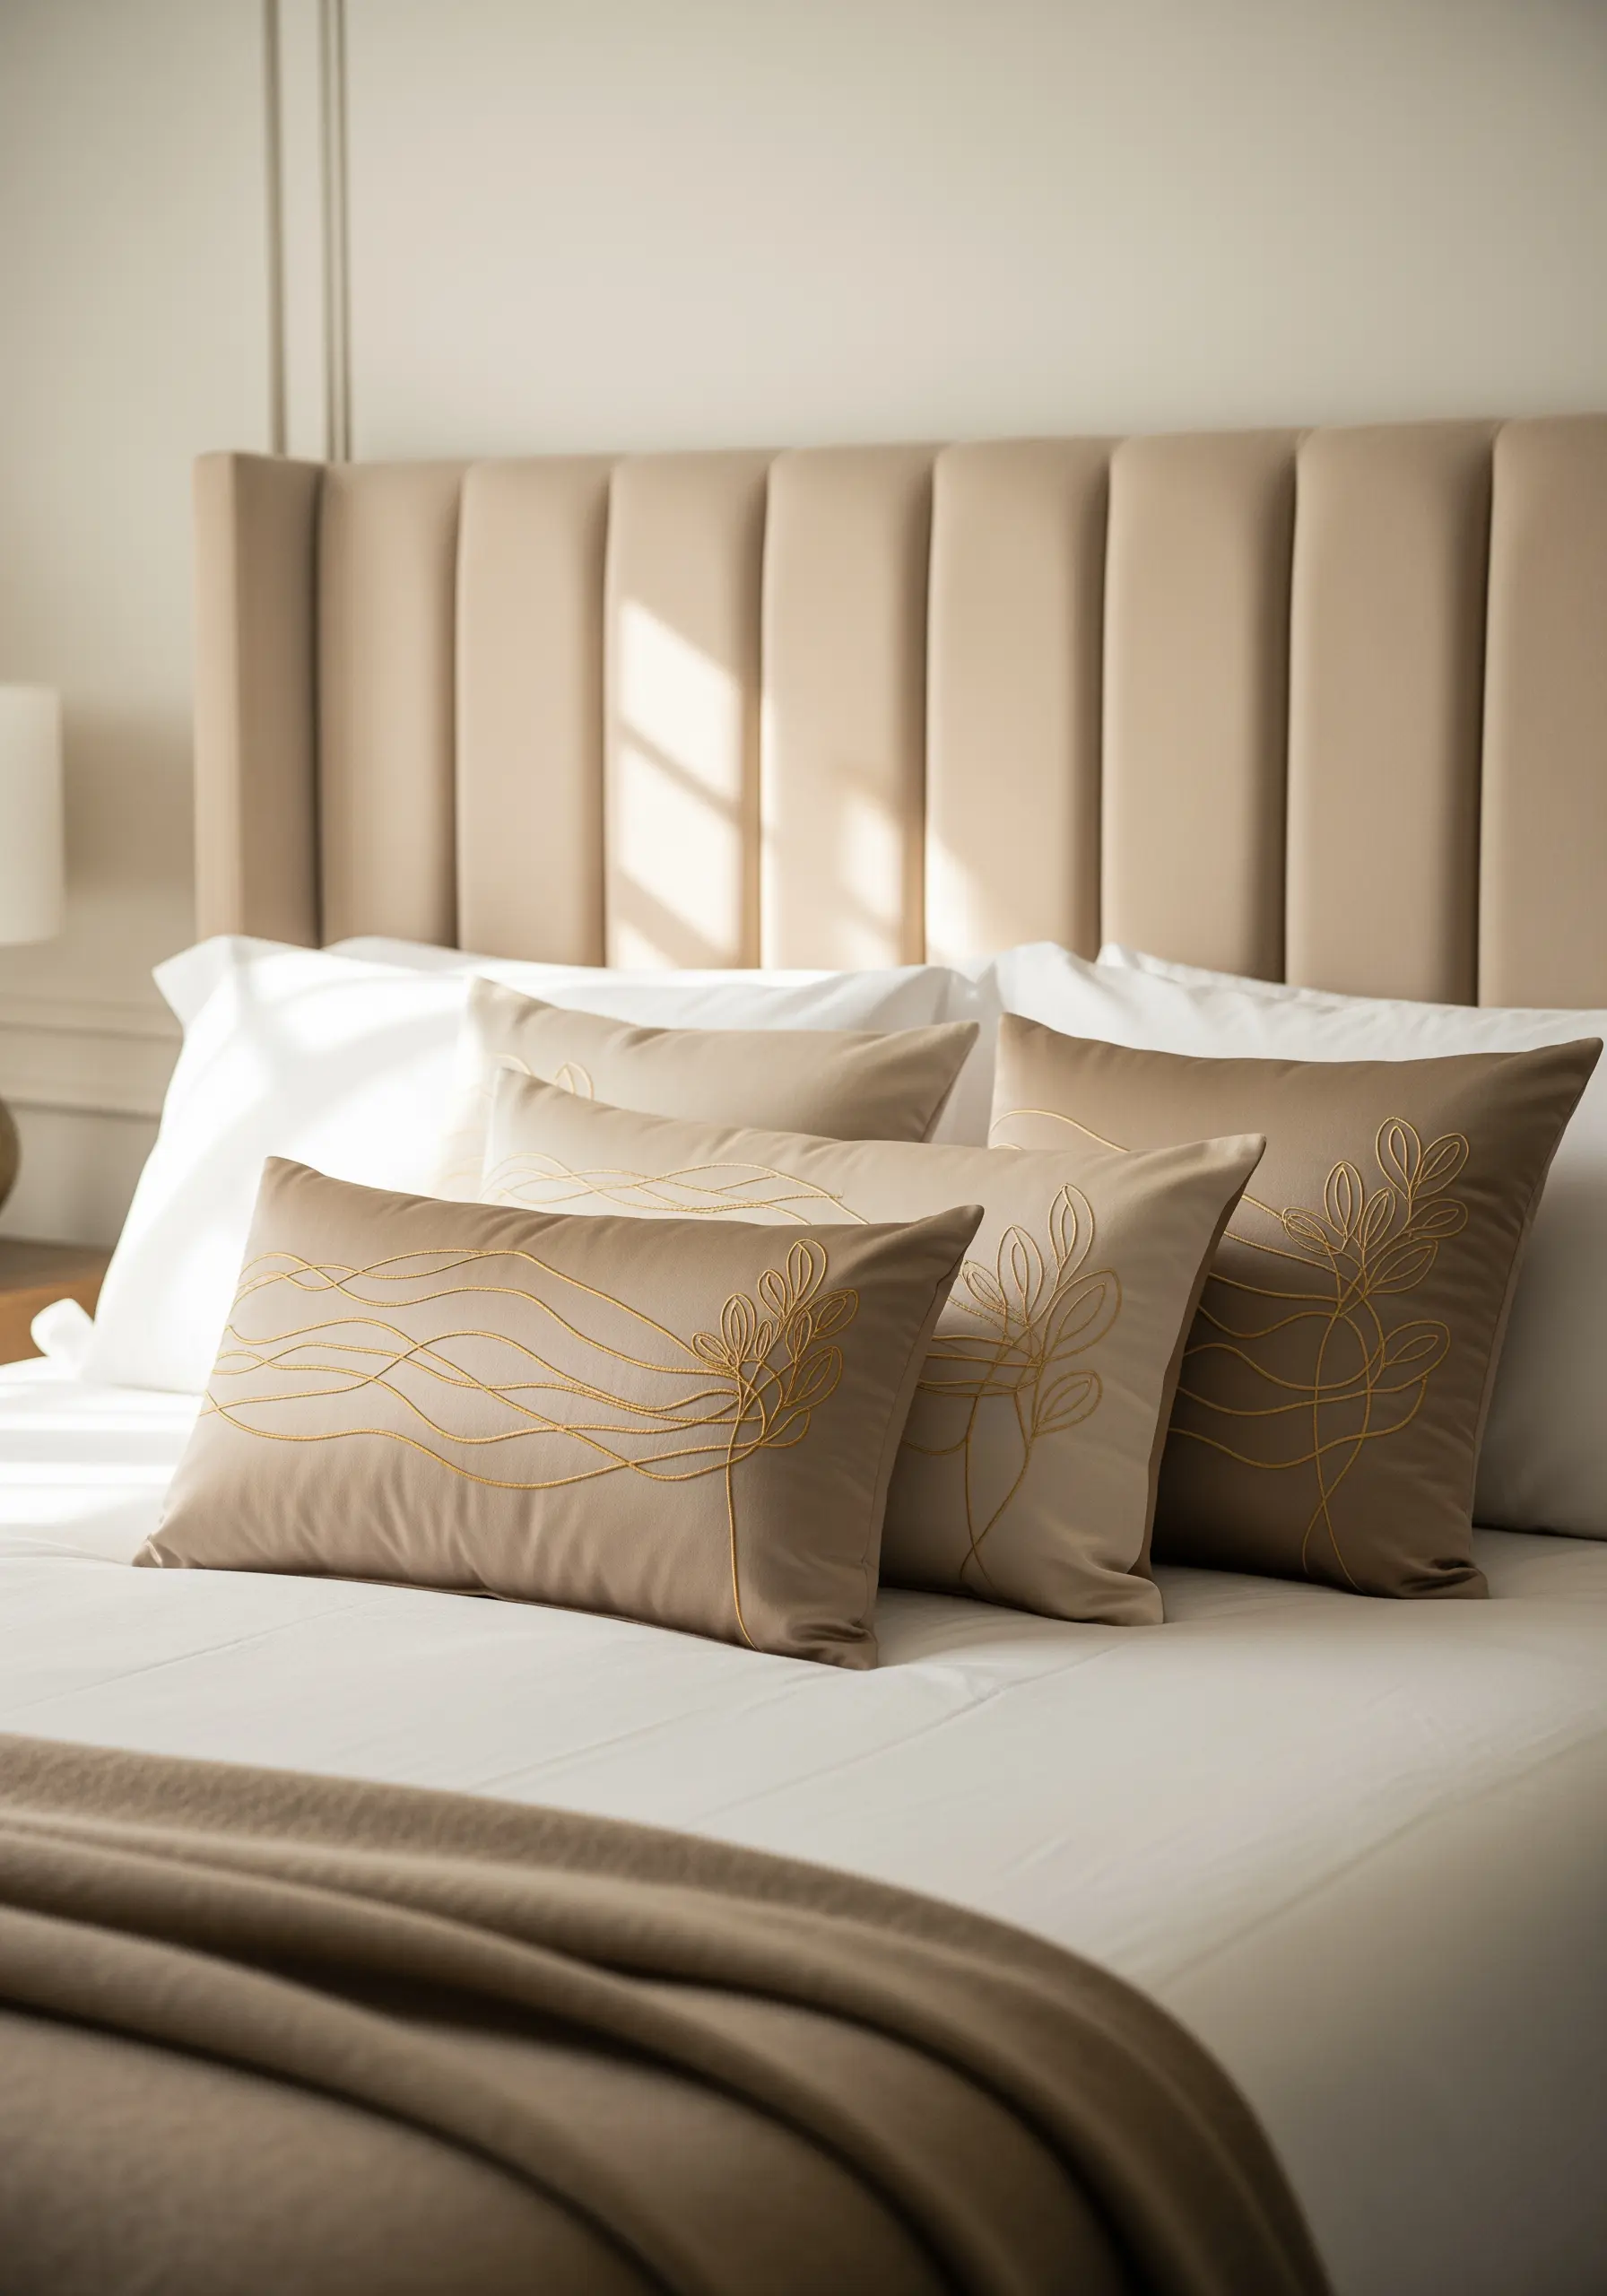
Perhaps you’ve noticed that the most luxurious interiors don’t shout; they whisper. The same is true for embroidery. Shifting your work from simply decorative to truly refined is not about complexity, but intention. It’s in the quiet harmony of beige and gold, the thoughtful choice of a stitch, and the subtle play of texture against fabric.
In this collection, I want to show you how to achieve that quiet luxury. We’ll move beyond basic patterns and focus on the techniques that create depth, sophistication, and a sense of calm. You’ll see how a simple change—from a flat stitch to a padded one, or from a single line to a couched cord—can transform an entire piece.
This isn’t about chasing trends. It’s about building a language of stitches that feels both personal and timeless. Let these ideas give you the confidence to stitch not just a pattern, but an atmosphere—one of understated elegance that makes your home feel truly curated by you.
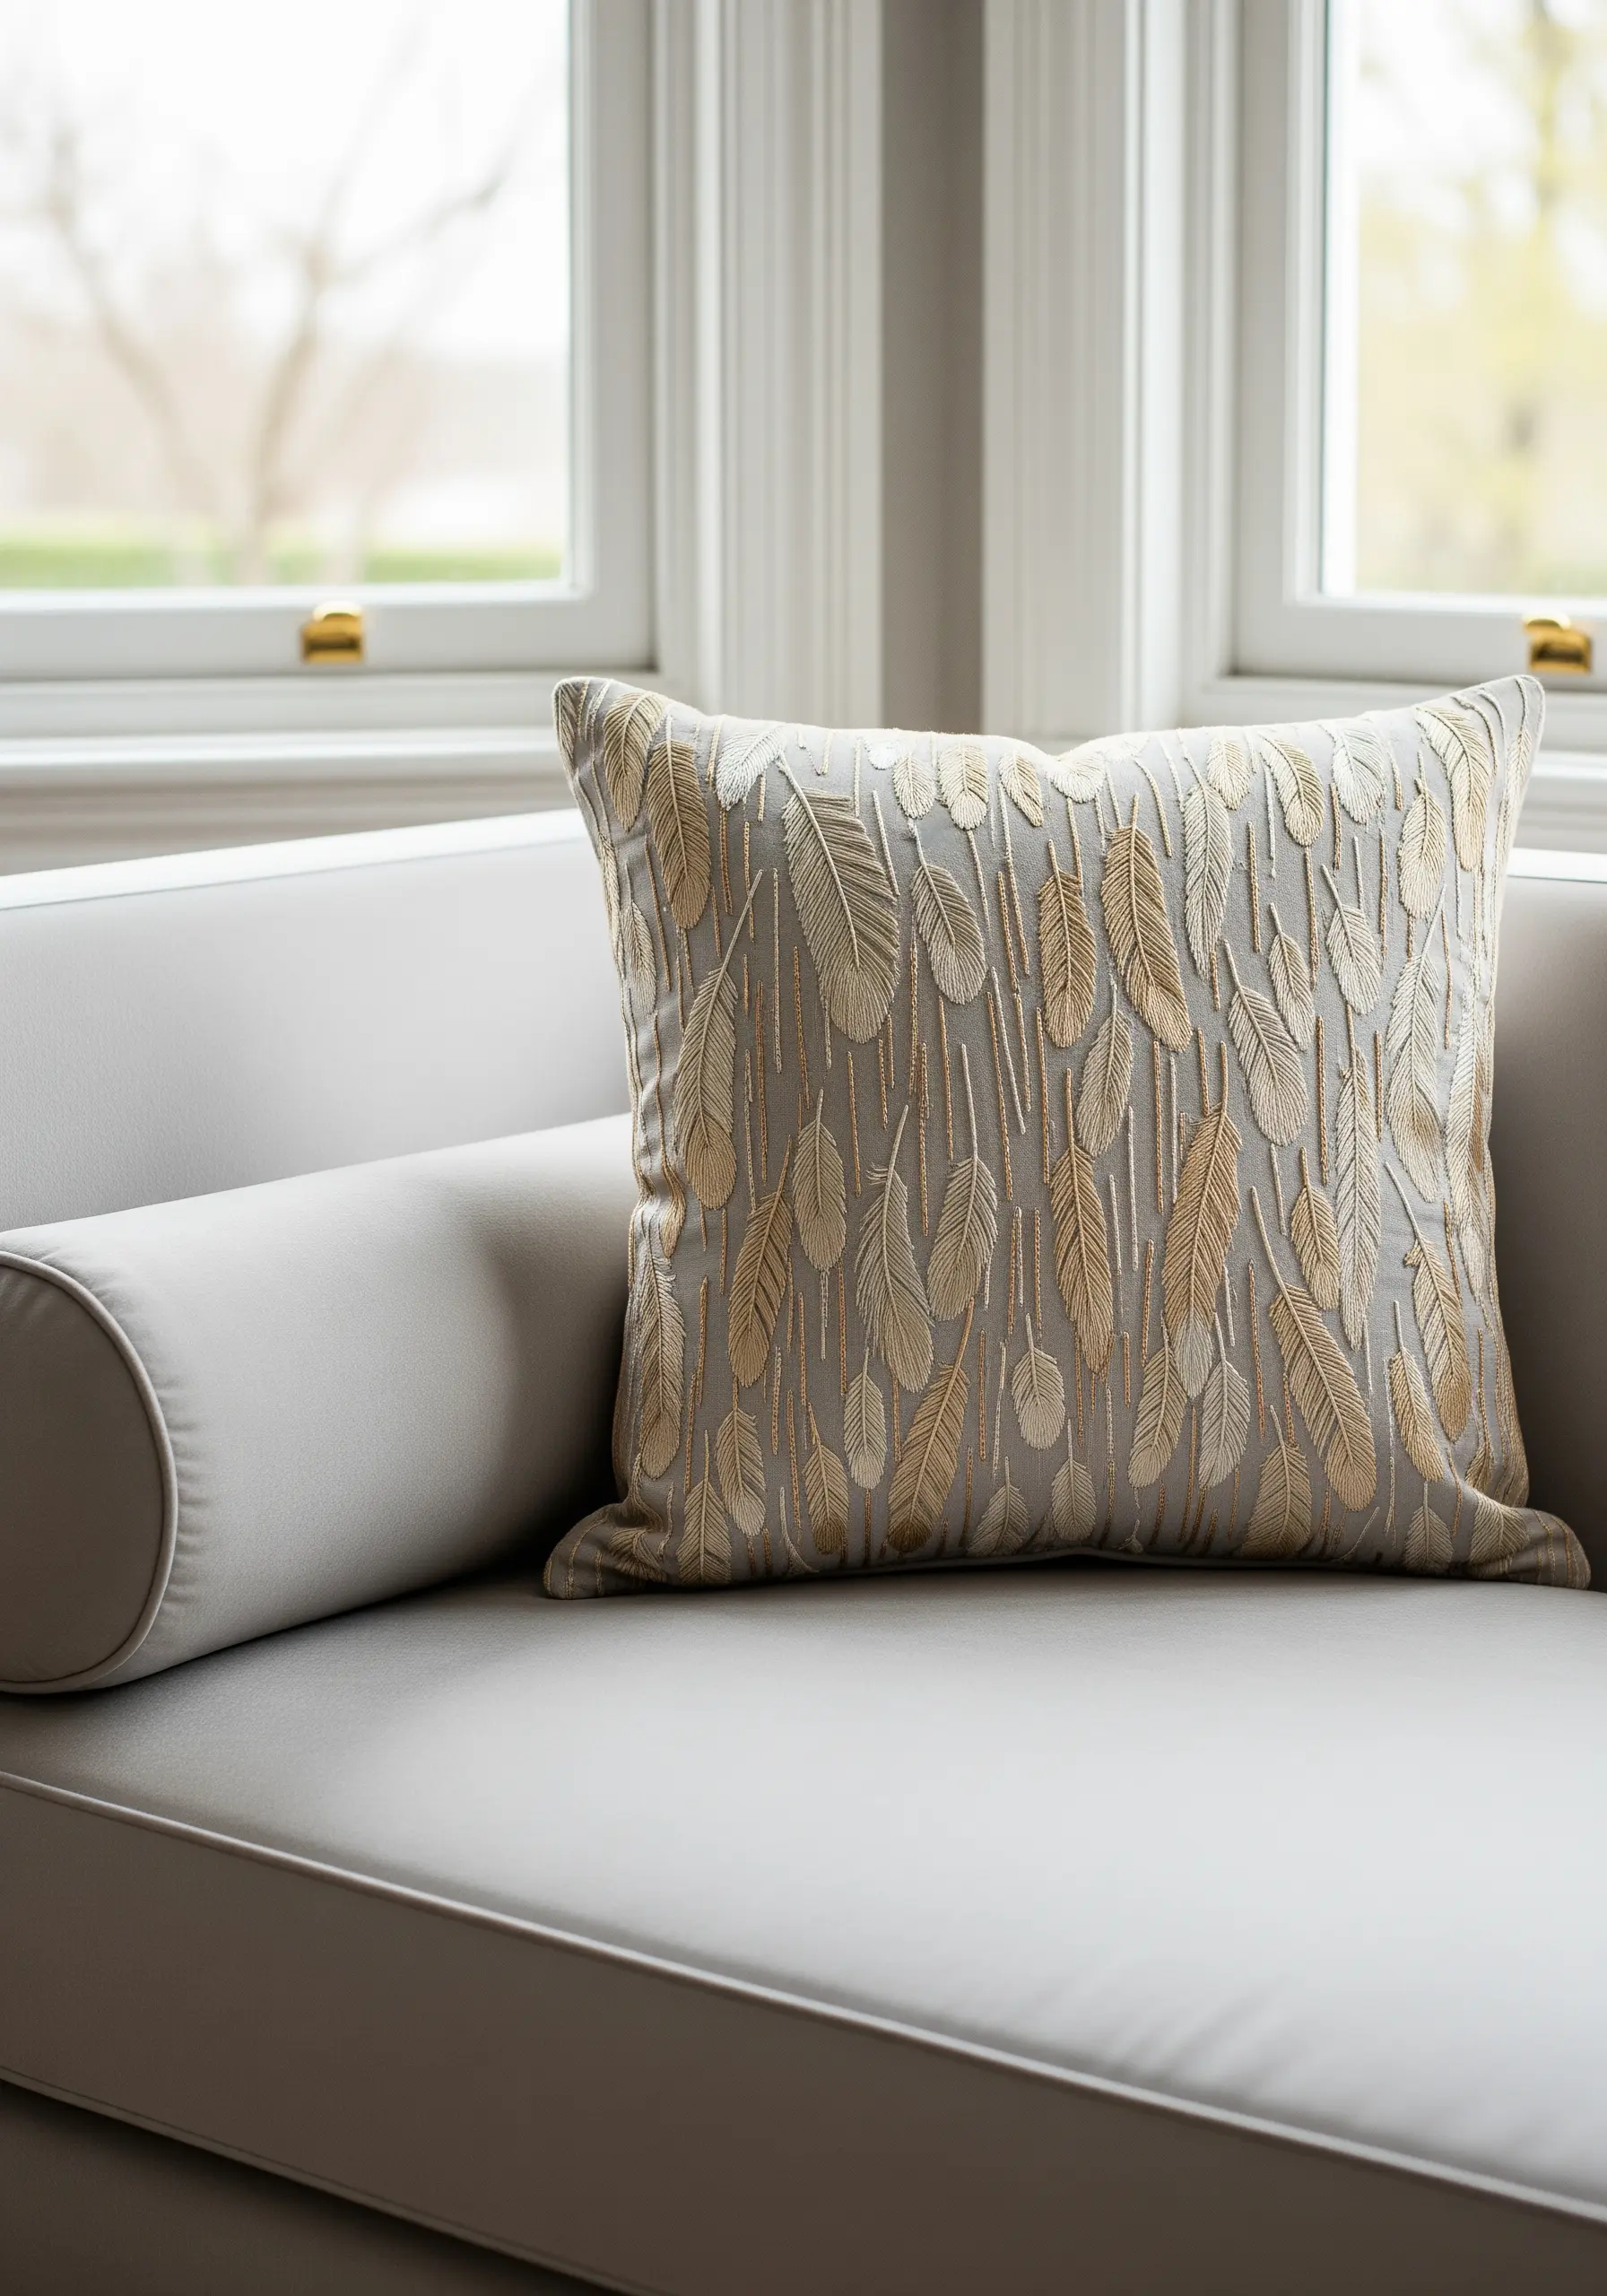
1. The Luminous Sunburst: Mastering Radiating Stitches
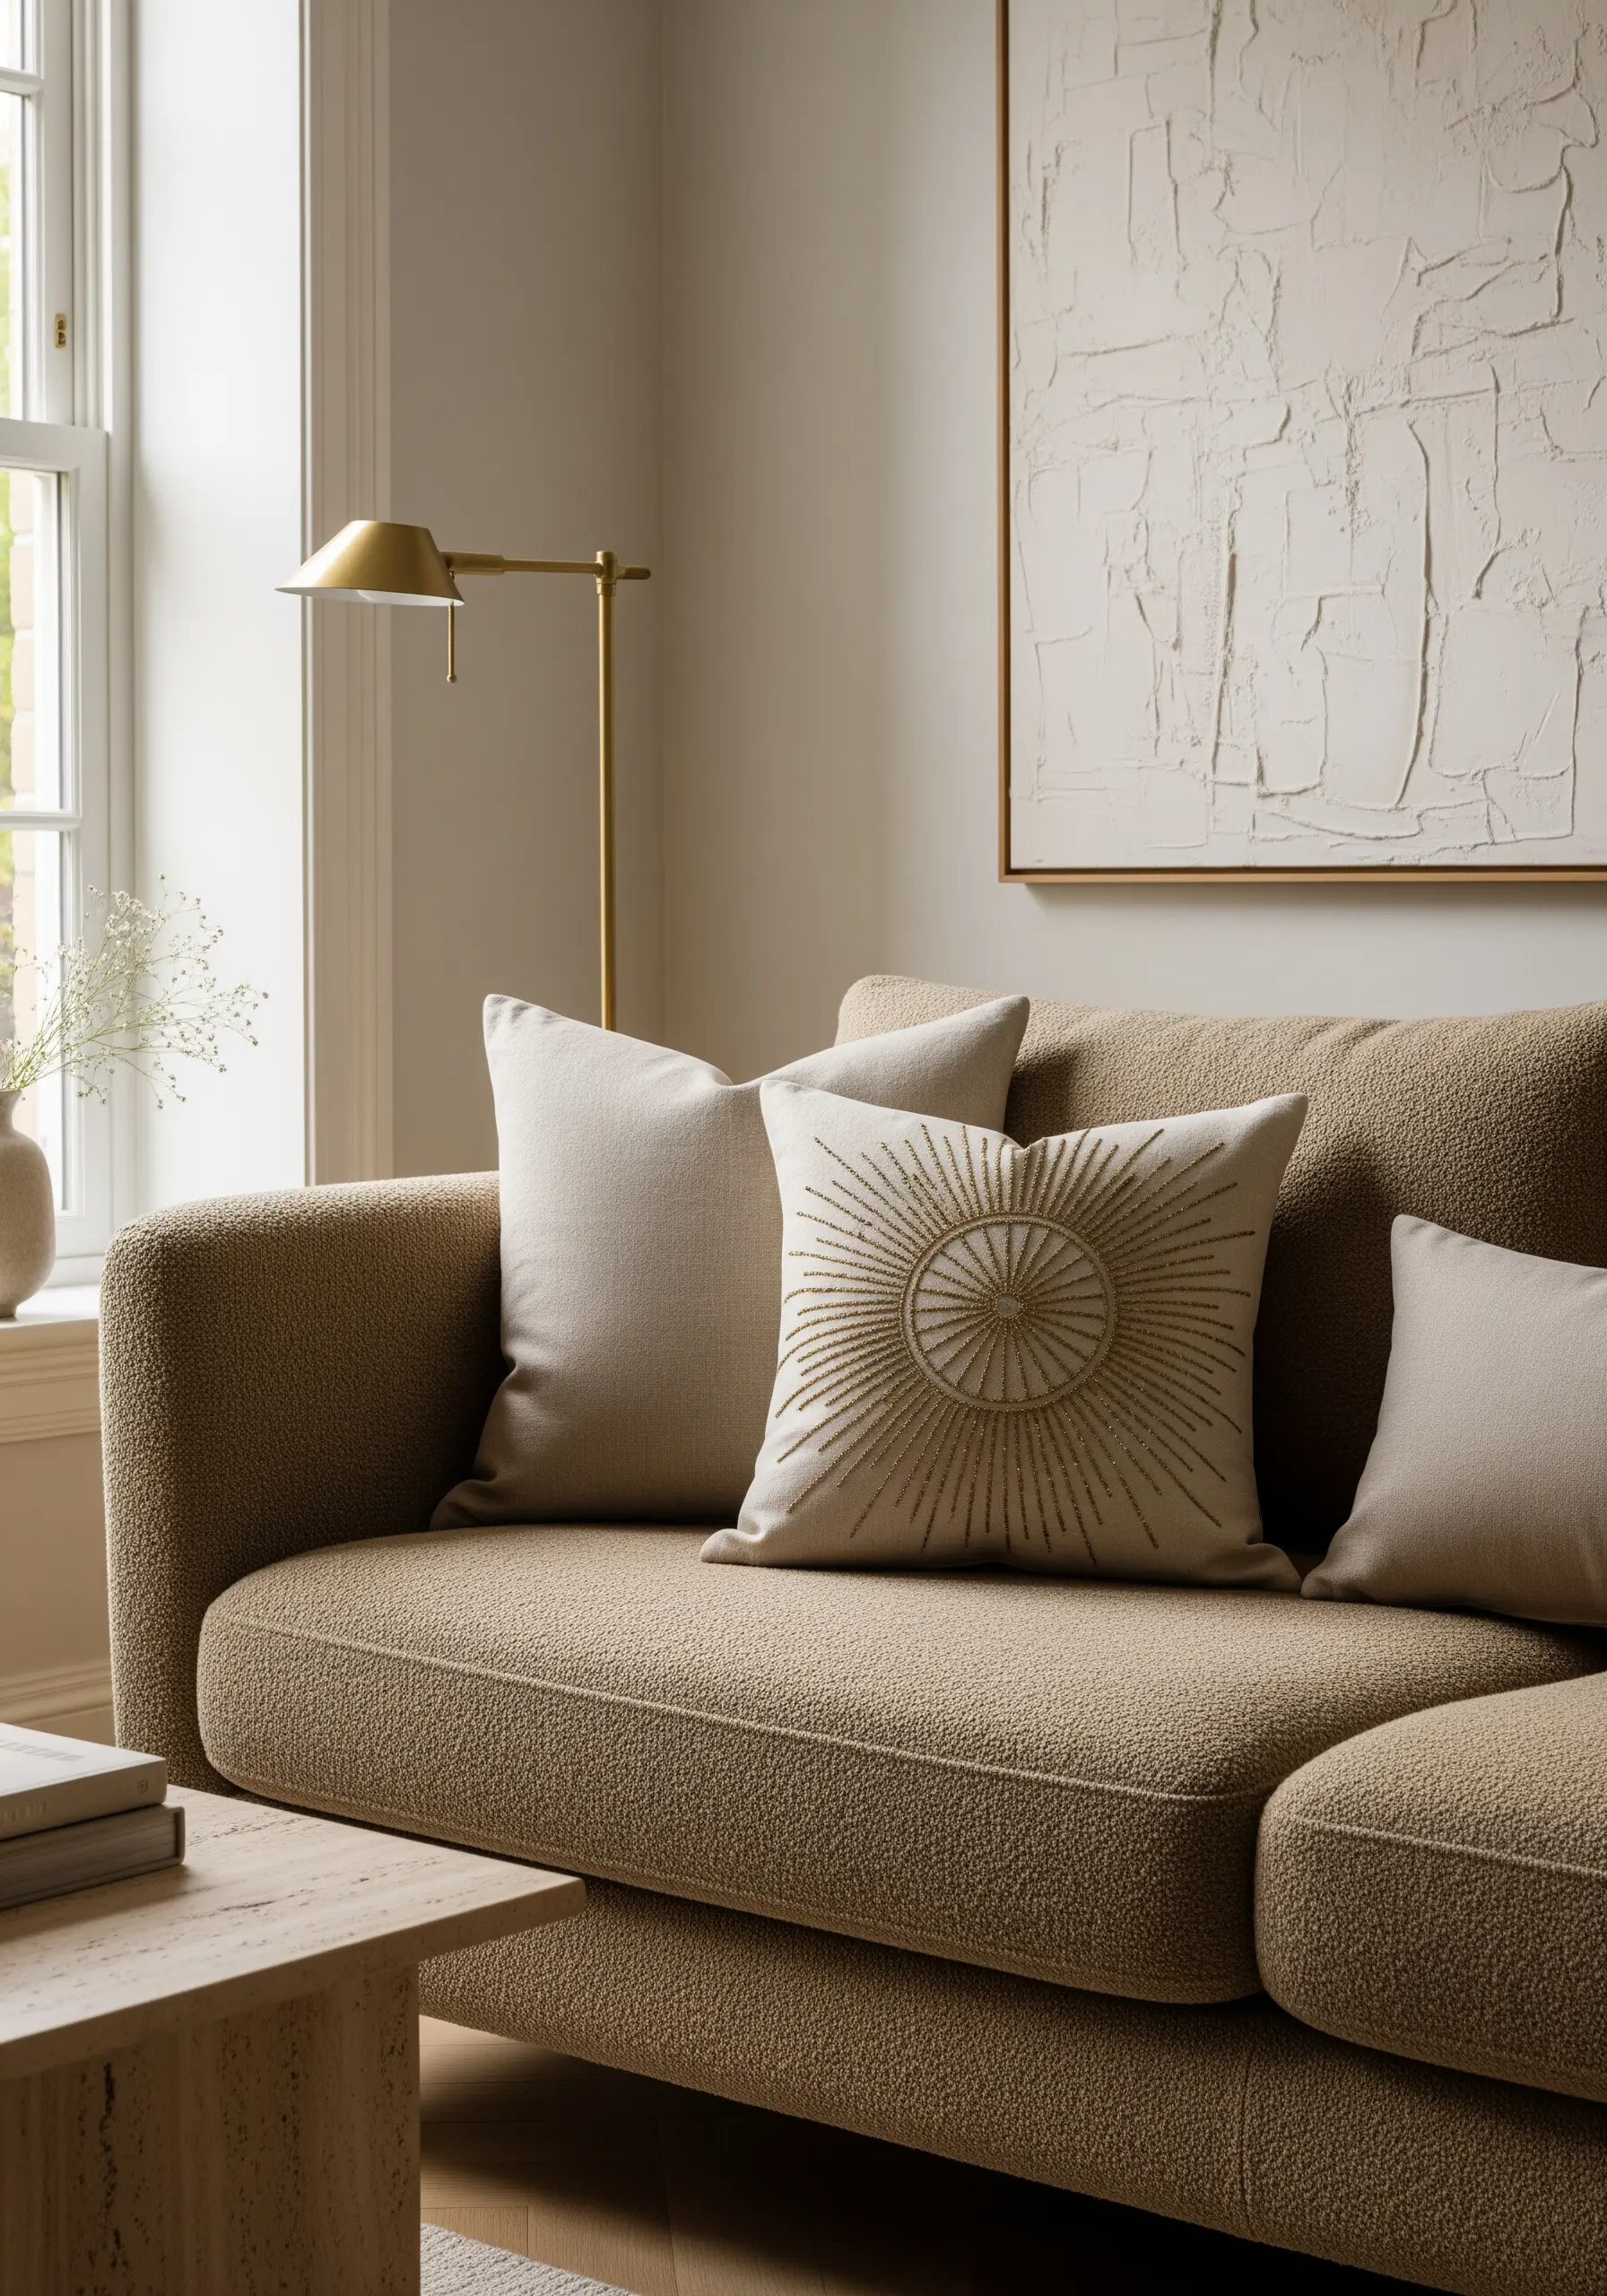
Create this radiant effect using carefully placed straight stitches of varying lengths, all originating from a central point.
To ensure your gold thread truly shines, choose a high-quality metallic floss and stitch it onto a matte fabric like linen or brushed cotton—the contrast in texture enhances the shimmer.
For perfect symmetry, lightly draw concentric circles with a water-soluble pen to guide the endpoints of your stitches.
This design adds a focal point of light and energy, making it ideal for a central cushion on a sofa.
2. The Organic Line: Stitching with Fluidity and Grace
To achieve these effortlessly flowing botanical lines, use a whipped backstitch or a stem stitch.
These stitches wrap around each other, creating a smooth, unbroken curve that mimics the natural growth of a vine.
Work with a single, long piece of thread for each main stem to avoid tiny knots or breaks that would disrupt the visual flow.
Let the thread rest gently on the fabric; pulling too tightly will cause puckering and ruin the soft, elegant drape.
3. The Art Deco Maze: Precision in Geometric Forms
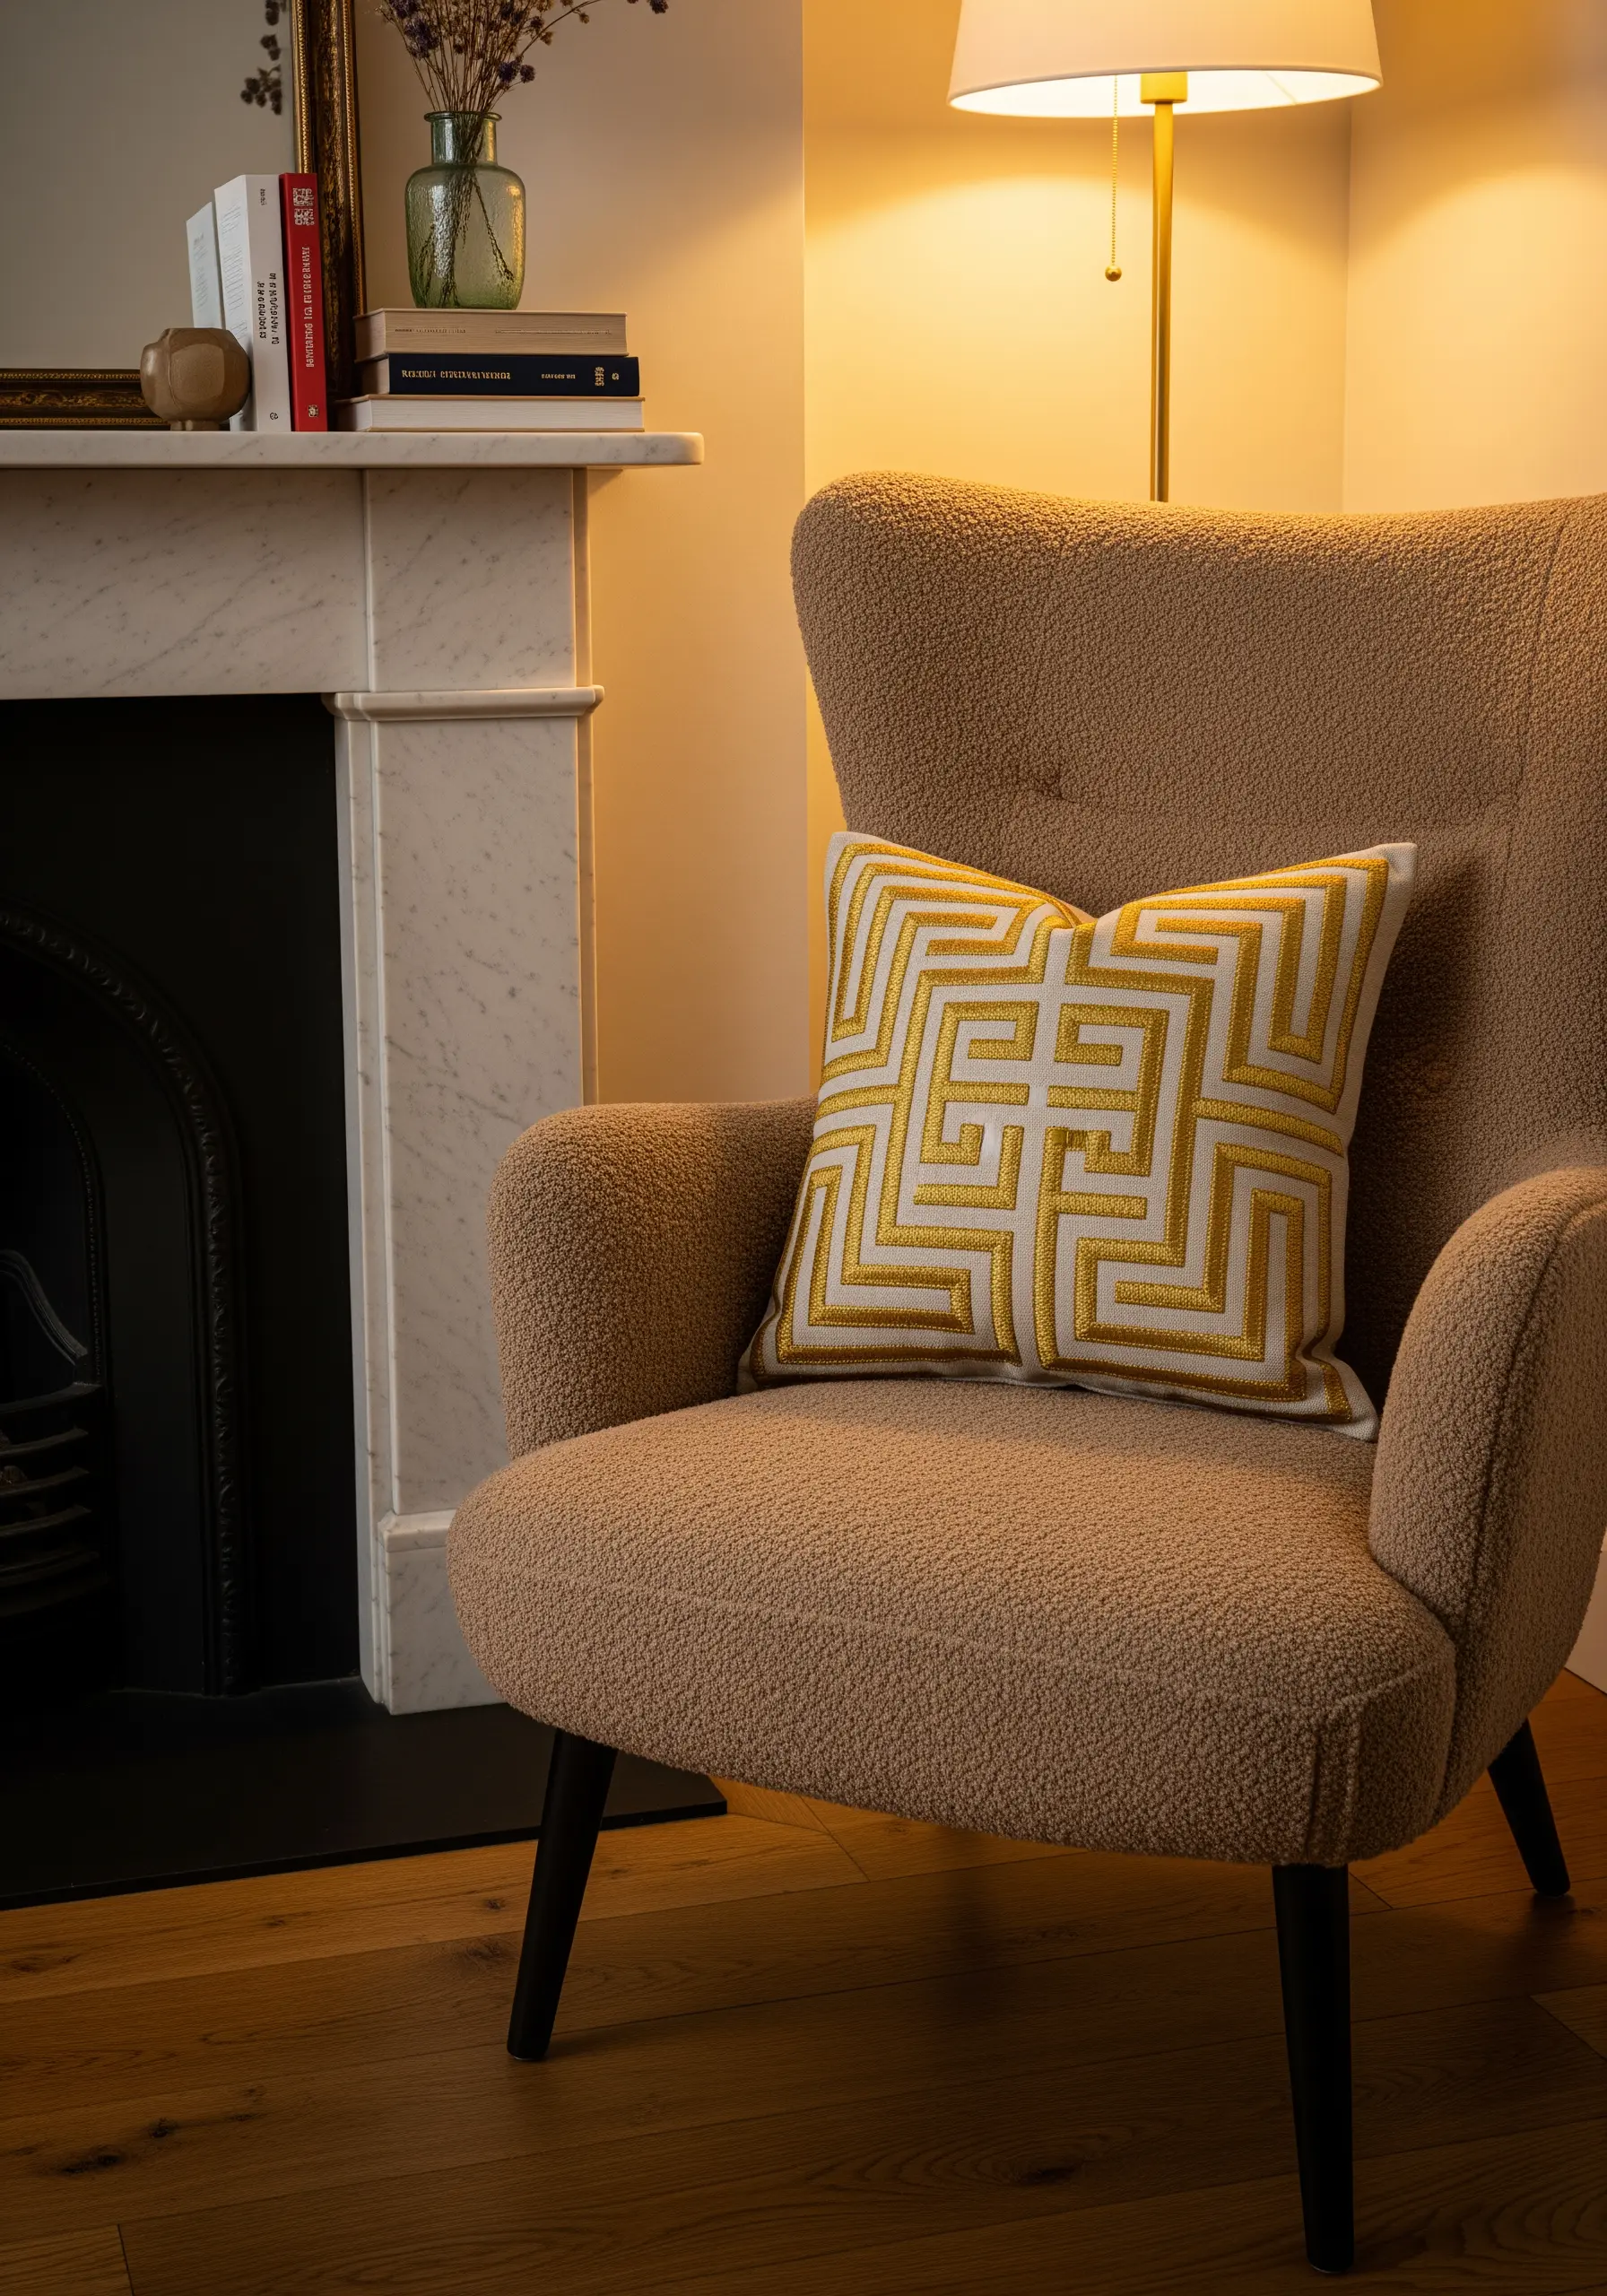
This bold design demands absolute precision. Use a dense satin stitch to fill the wide, graphic lines with metallic gold thread.
To guarantee sharp, clean edges, first outline the entire shape with a split stitch in the same color.
This foundational outline acts as a ‘dam,’ preventing your satin stitches from becoming uneven and creating a perfectly crisp edge.
The high contrast between the matte white fabric and the reflective gold thread gives it a striking, architectural quality.
4. The Minimalist Grid: Accentuating with Deliberate Texture
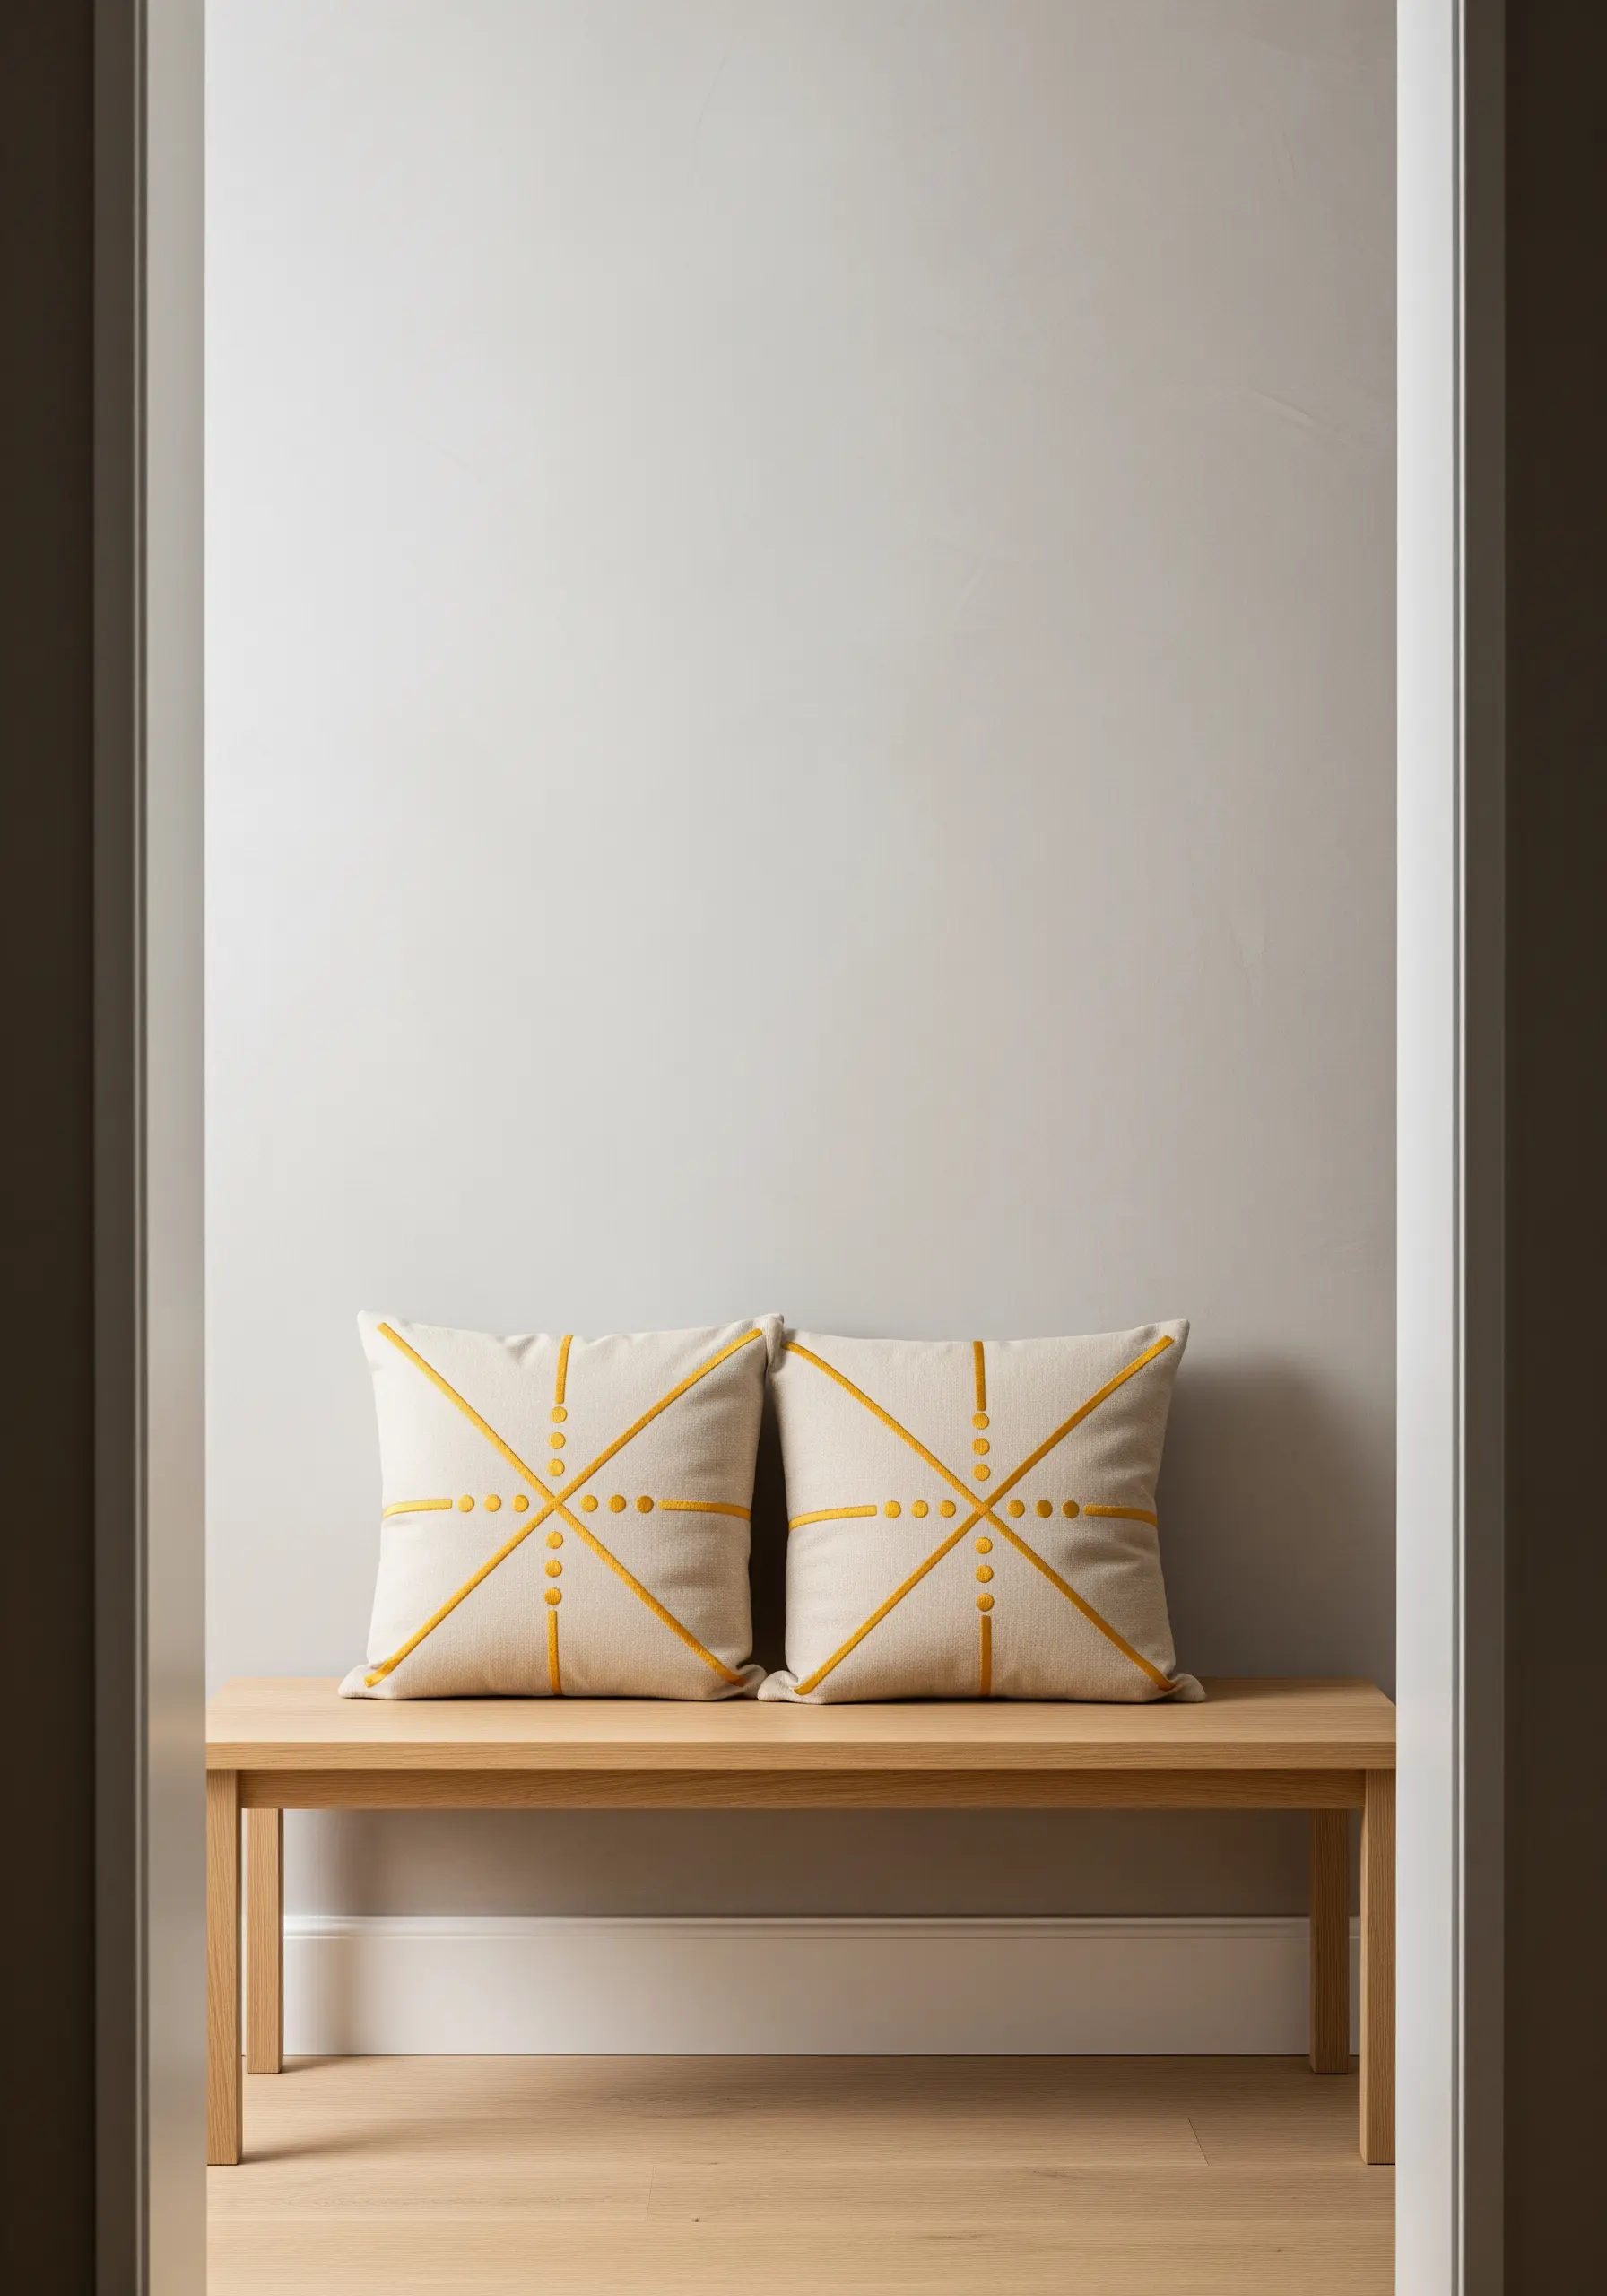
Create the grid lines using a simple backstitch, but choose a slightly heavier thread, like a Perle cotton, to give them presence.
The true elegance of this design lies in the perfectly placed French knots at each intersection.
These knots add a deliberate, tactile focal point, transforming a simple grid into a sophisticated pattern.
Control the size of each knot by varying the number of times you wrap the thread around the needle—consistency is key for a polished look.
5. Pattern Harmony: Blending Organic and Geometric Motifs
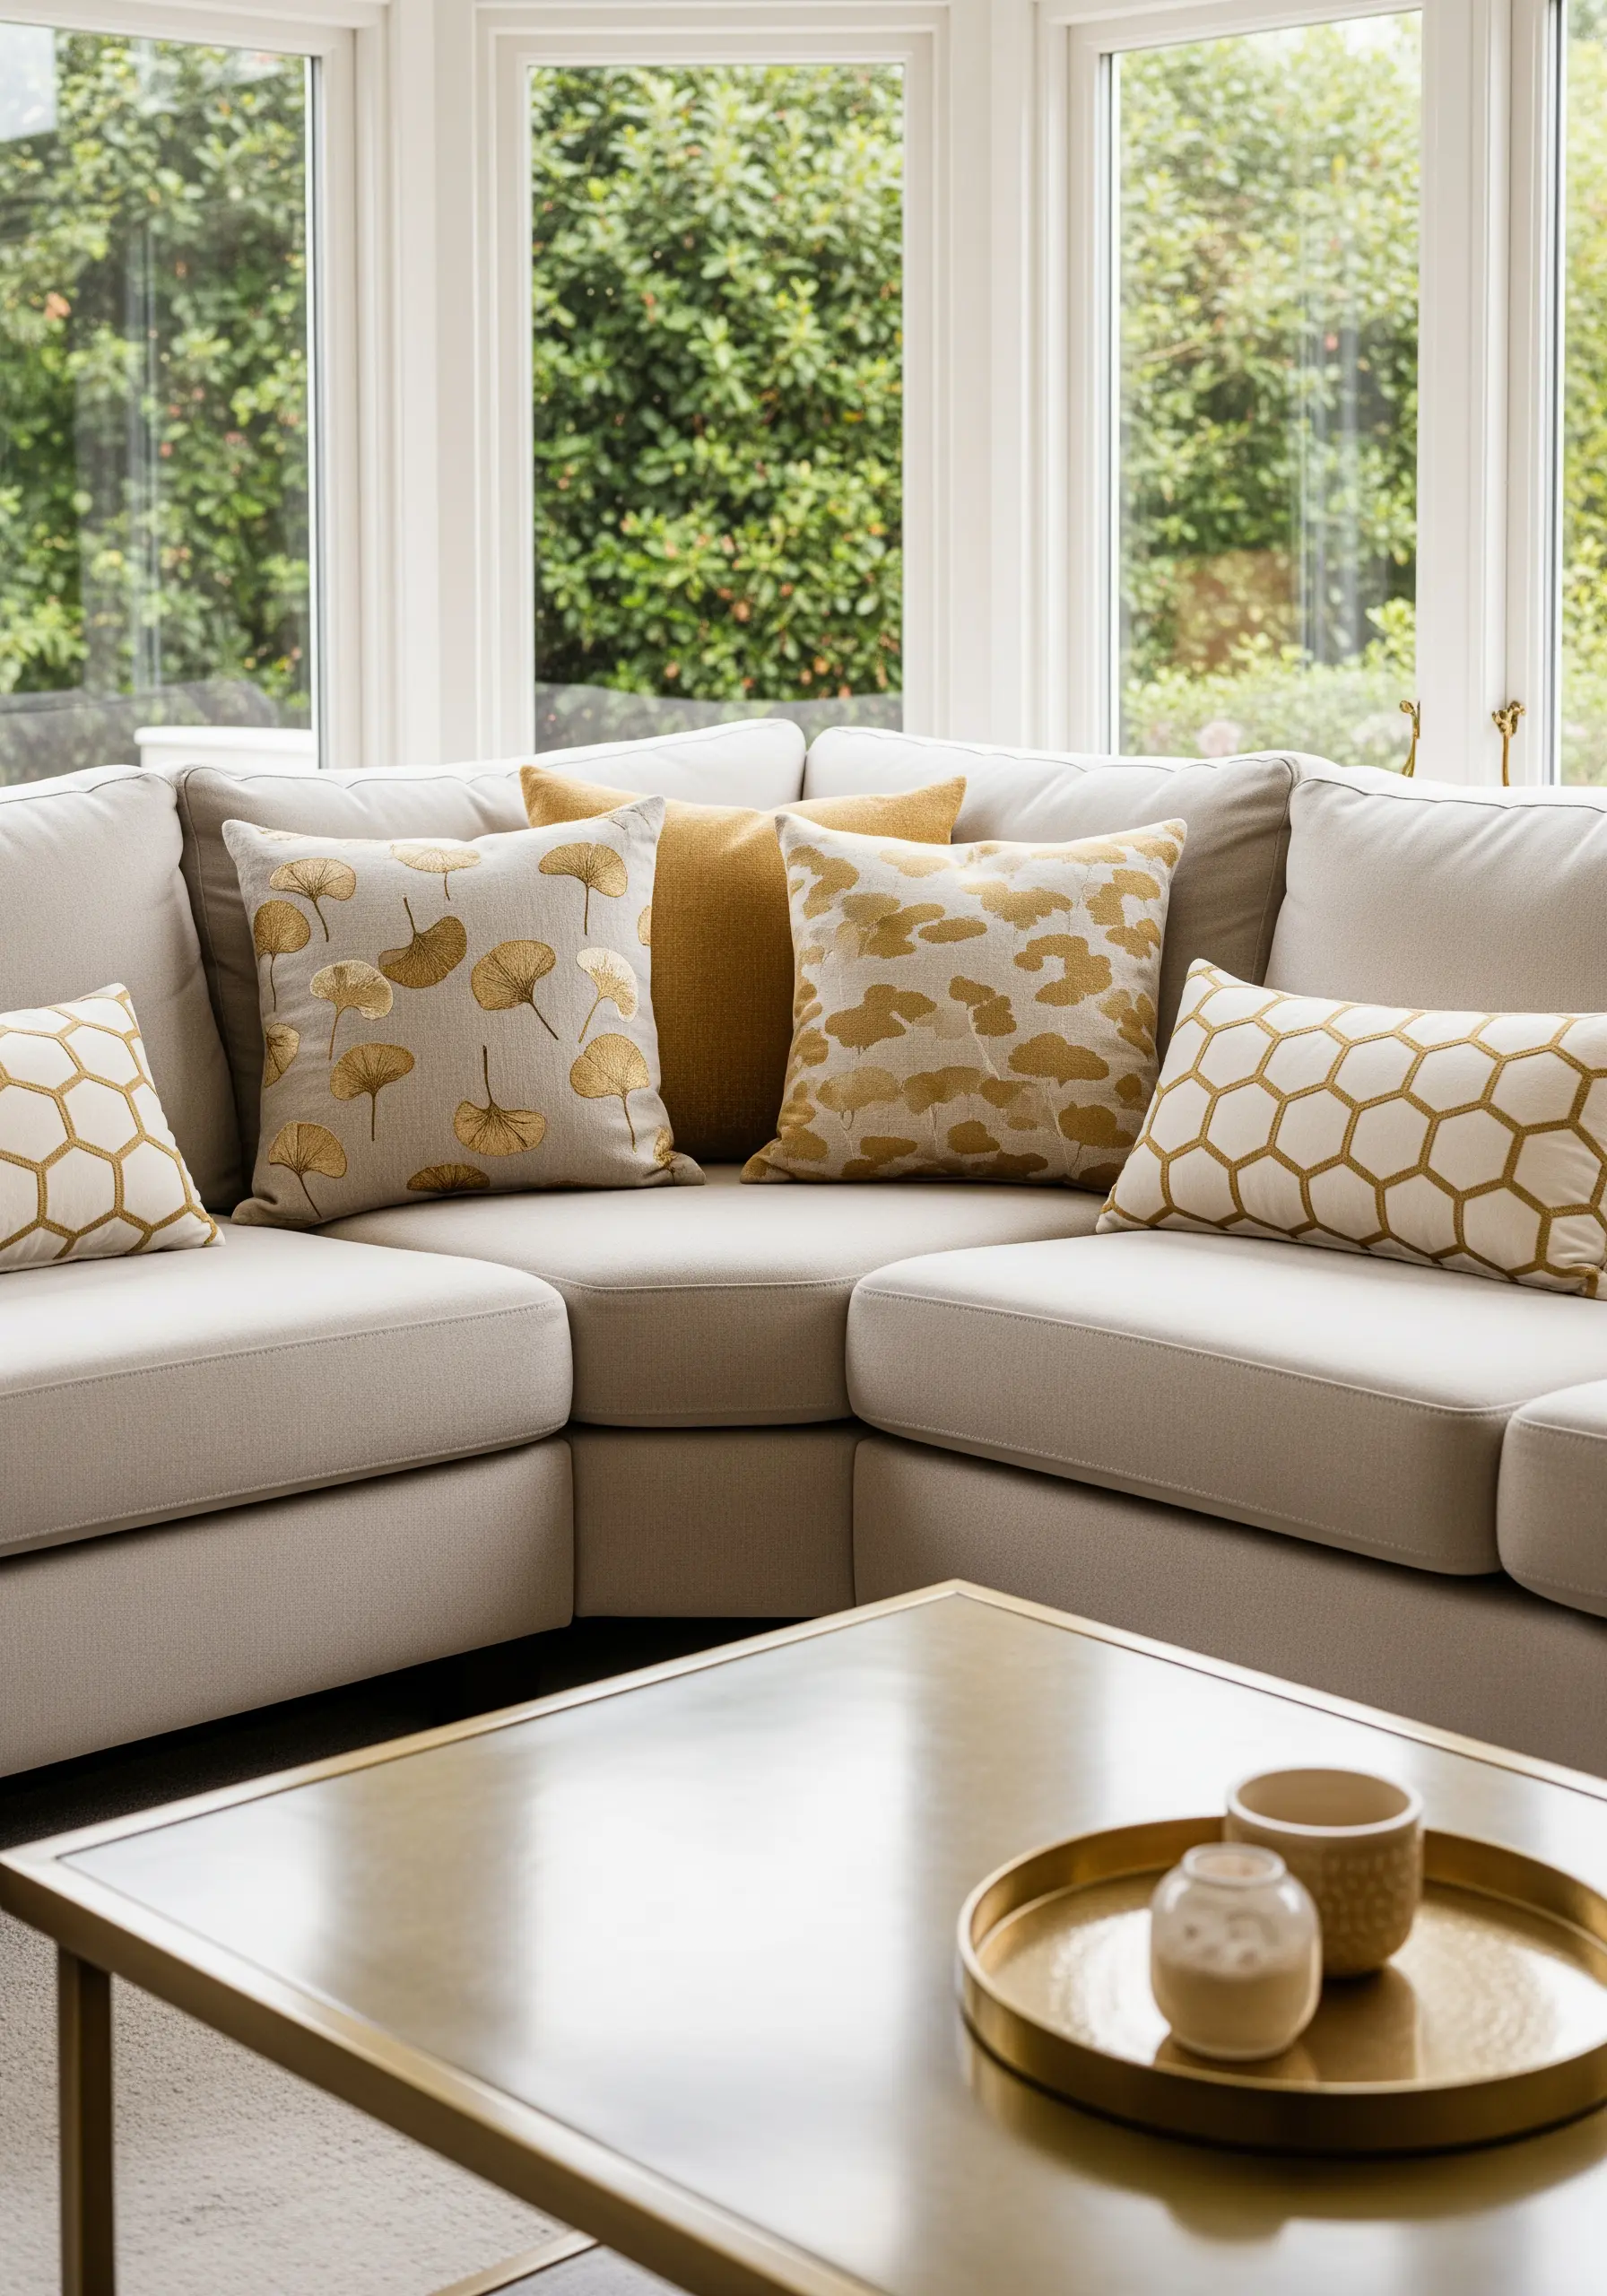
When combining multiple patterns on a single piece of furniture, create cohesion by using a consistent color palette.
Vary the scale and density of the designs: a densely filled ginkgo leaf pairs beautifully with a simple honeycomb outline.
For the solid leaves, use a satin stitch, and for the linear patterns, a clean backstitch is all you need.
Using the exact same gold thread across all cushions is what ties the different motifs together into a harmonious collection.
6. The Modern Arch: Mastering Concentric Curves

To achieve perfectly spaced, repeating arches, use a water-soluble marker and a compass or dinner plate to draw your guidelines directly onto the fabric.
A chain stitch is the ideal choice here, as it creates a line with beautiful texture and substance that stands out against the fabric.
Stitch each arch in the same direction to ensure the light catches the thread consistently, resulting in a clean, rhythmic pattern that feels calm and ordered.
7. The Subtle Trellis: Weaving Delicacy and Light
Create this ethereal, net-like pattern using just a single strand of metallic gold thread for the trellis lines.
A simple, delicate backstitch is sufficient to form the grid.
At the intersections, add tiny star stitches or single French knots to suggest scattered blossoms or dew drops.
This technique creates a jewel-like effect that feels incredibly intricate and detailed without appearing heavy or overwhelming.
8. The Harvest Sheaf: Building Texture with Layered Stitches
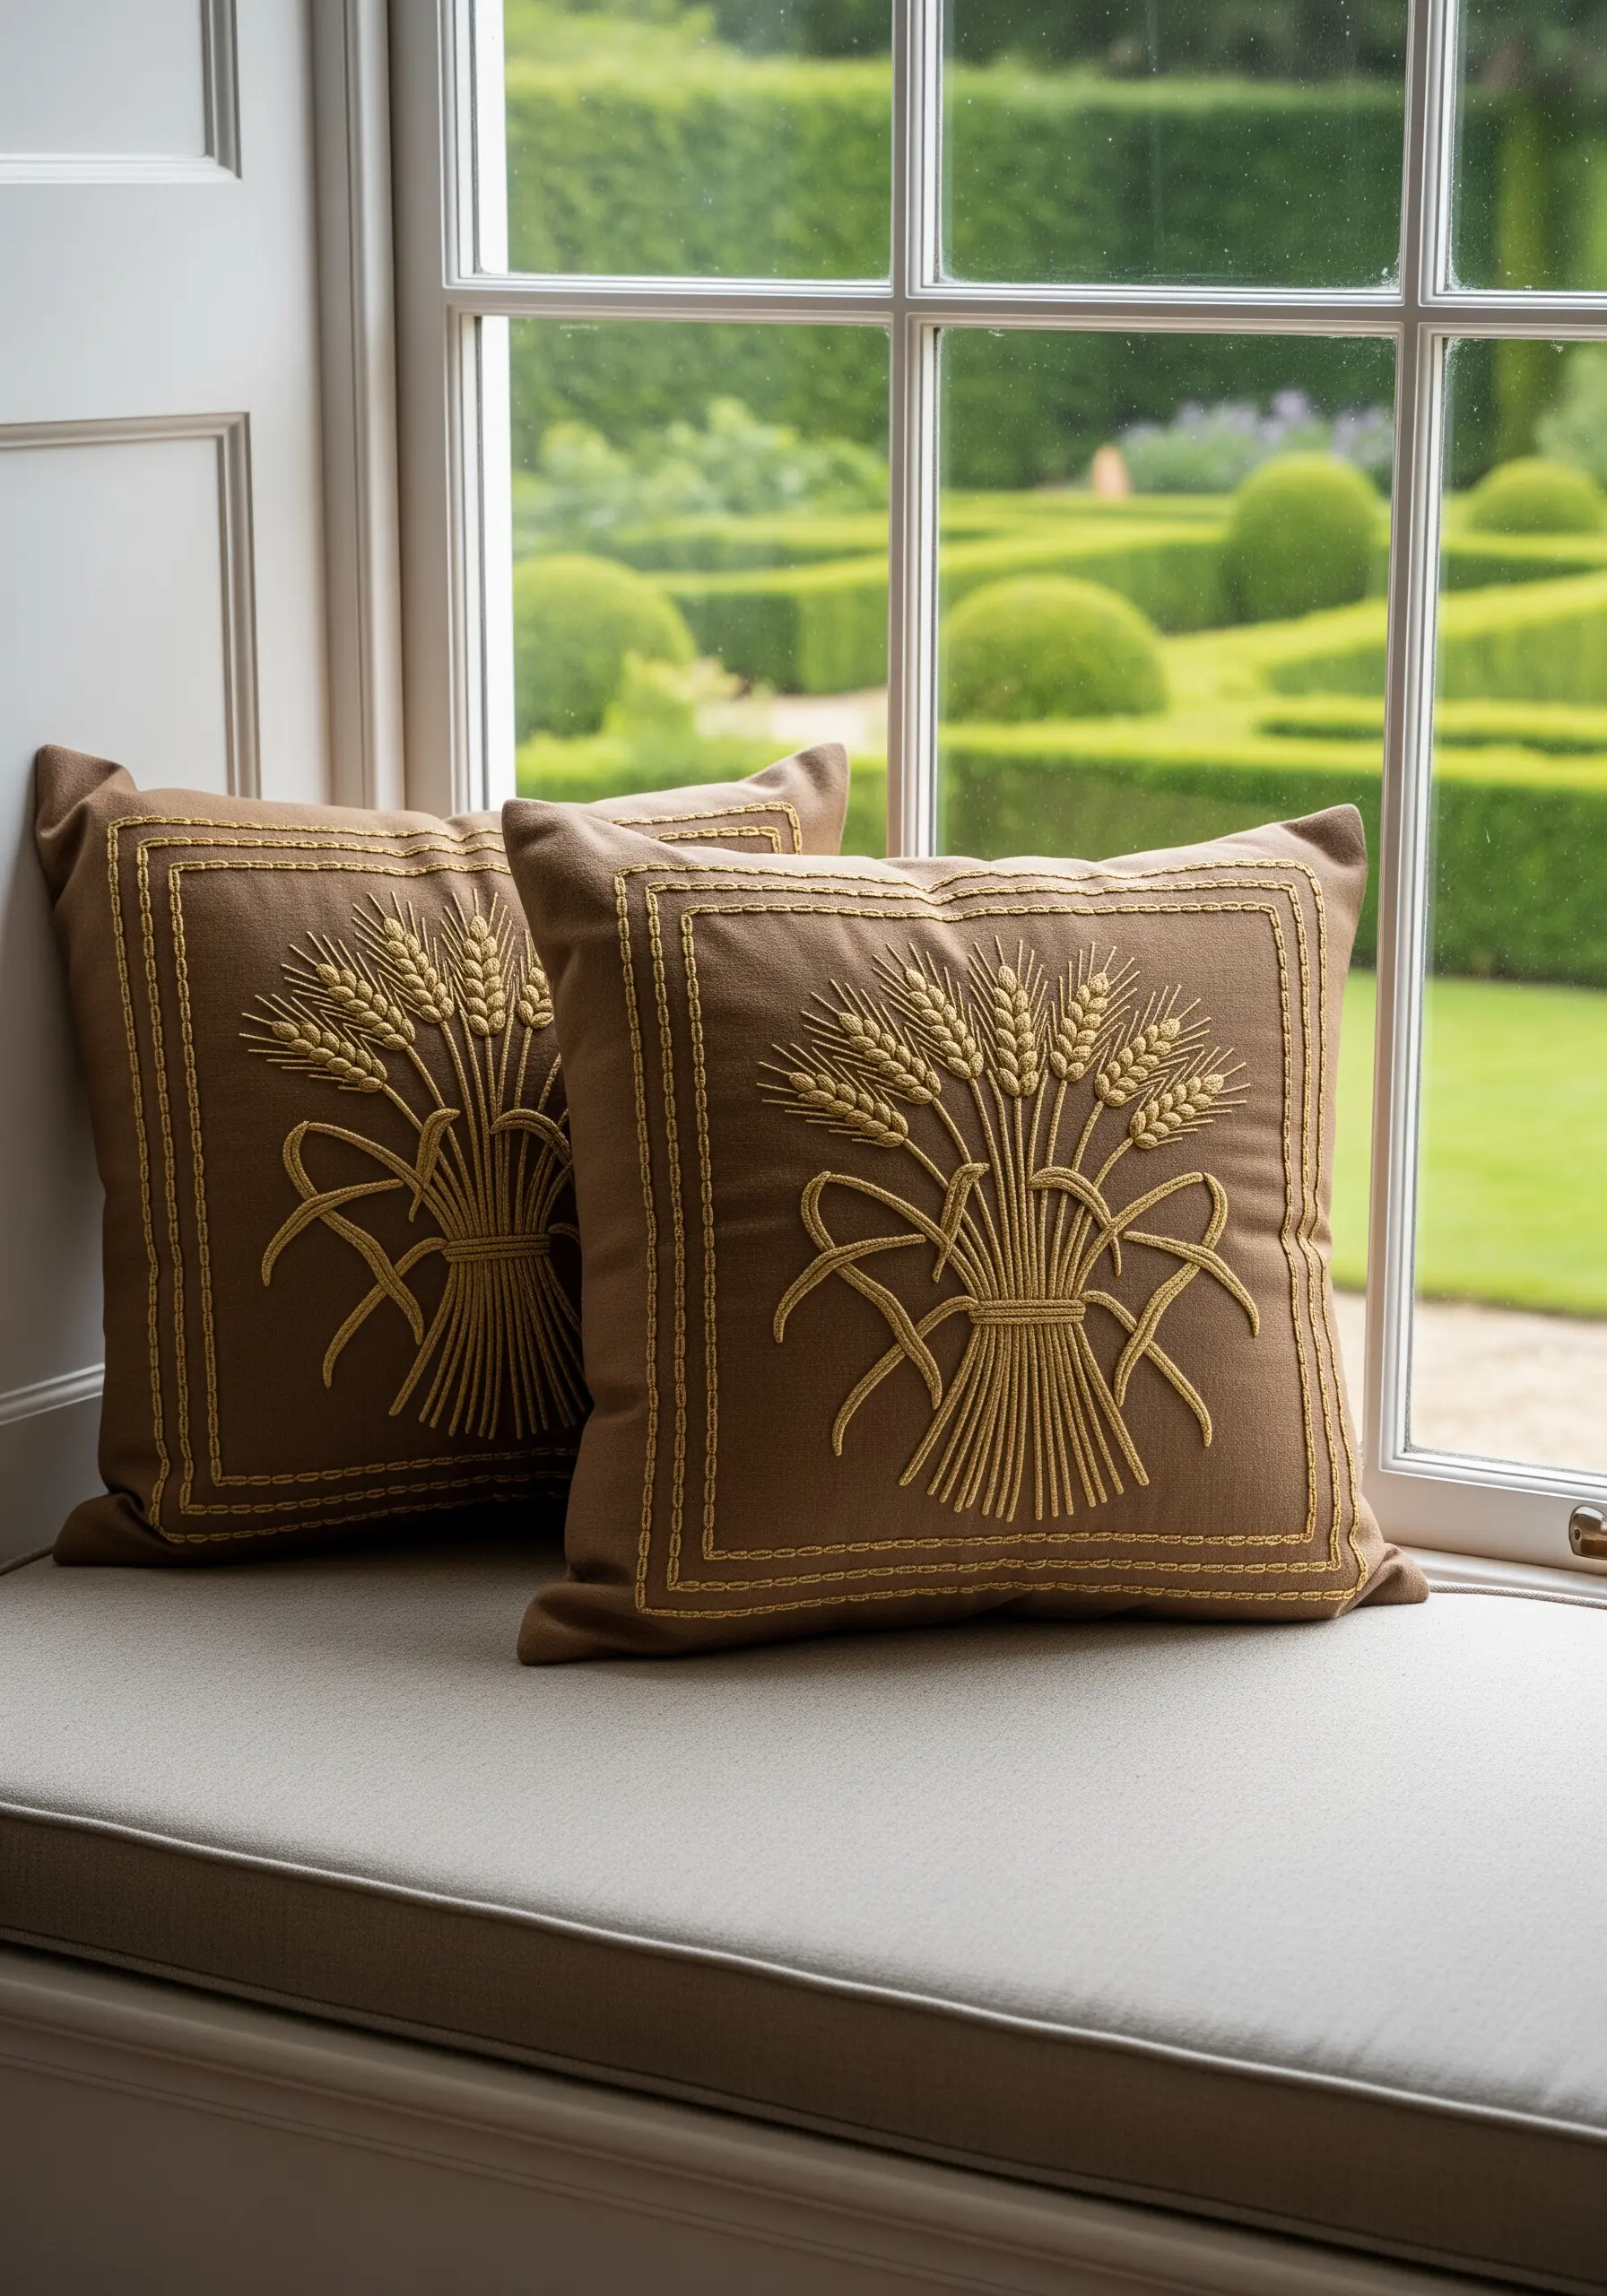
To give the wheat stalks a natural, tapered appearance, use a fishbone stitch or a long-and-short stitch.
Introduce a slightly lighter shade of gold or beige thread for the individual grains to create subtle depth and realism.
For the binding ribbon, use a raised satin stitch or the couching technique to give it a three-dimensional, rope-like quality that stands off the fabric.
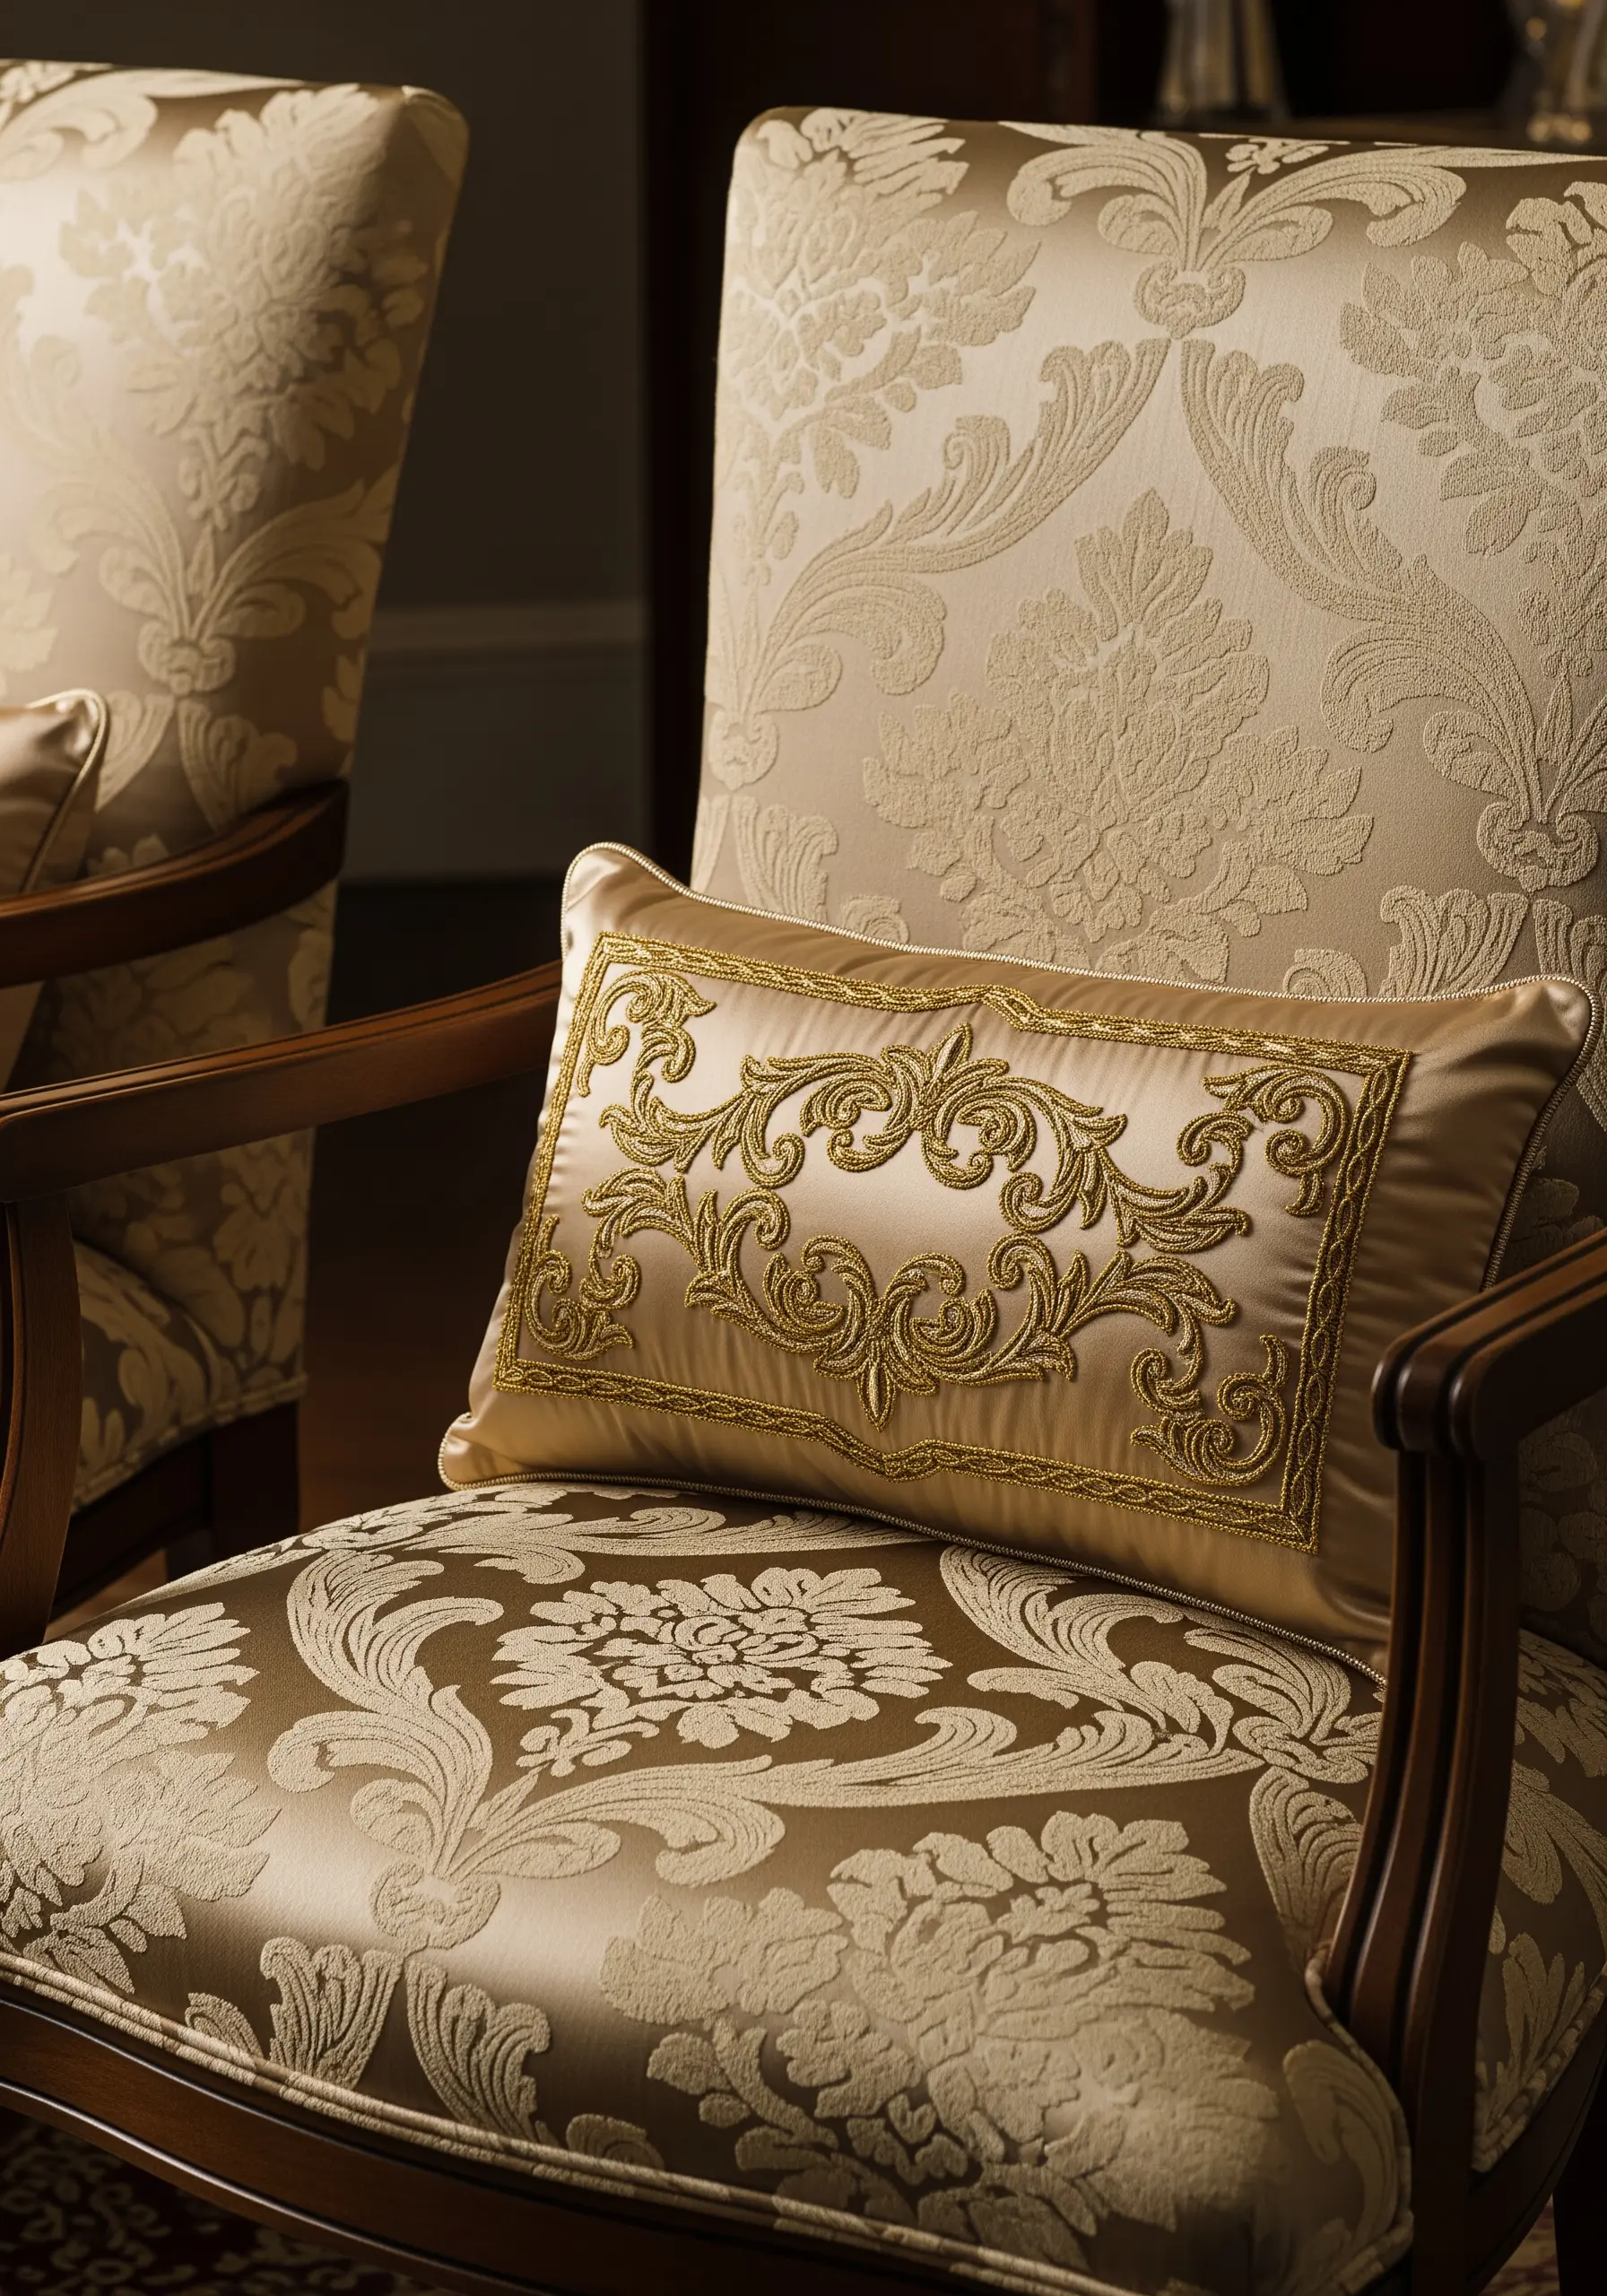
9. The Heirloom Monogram: Elevating with Padded Satin Stitch
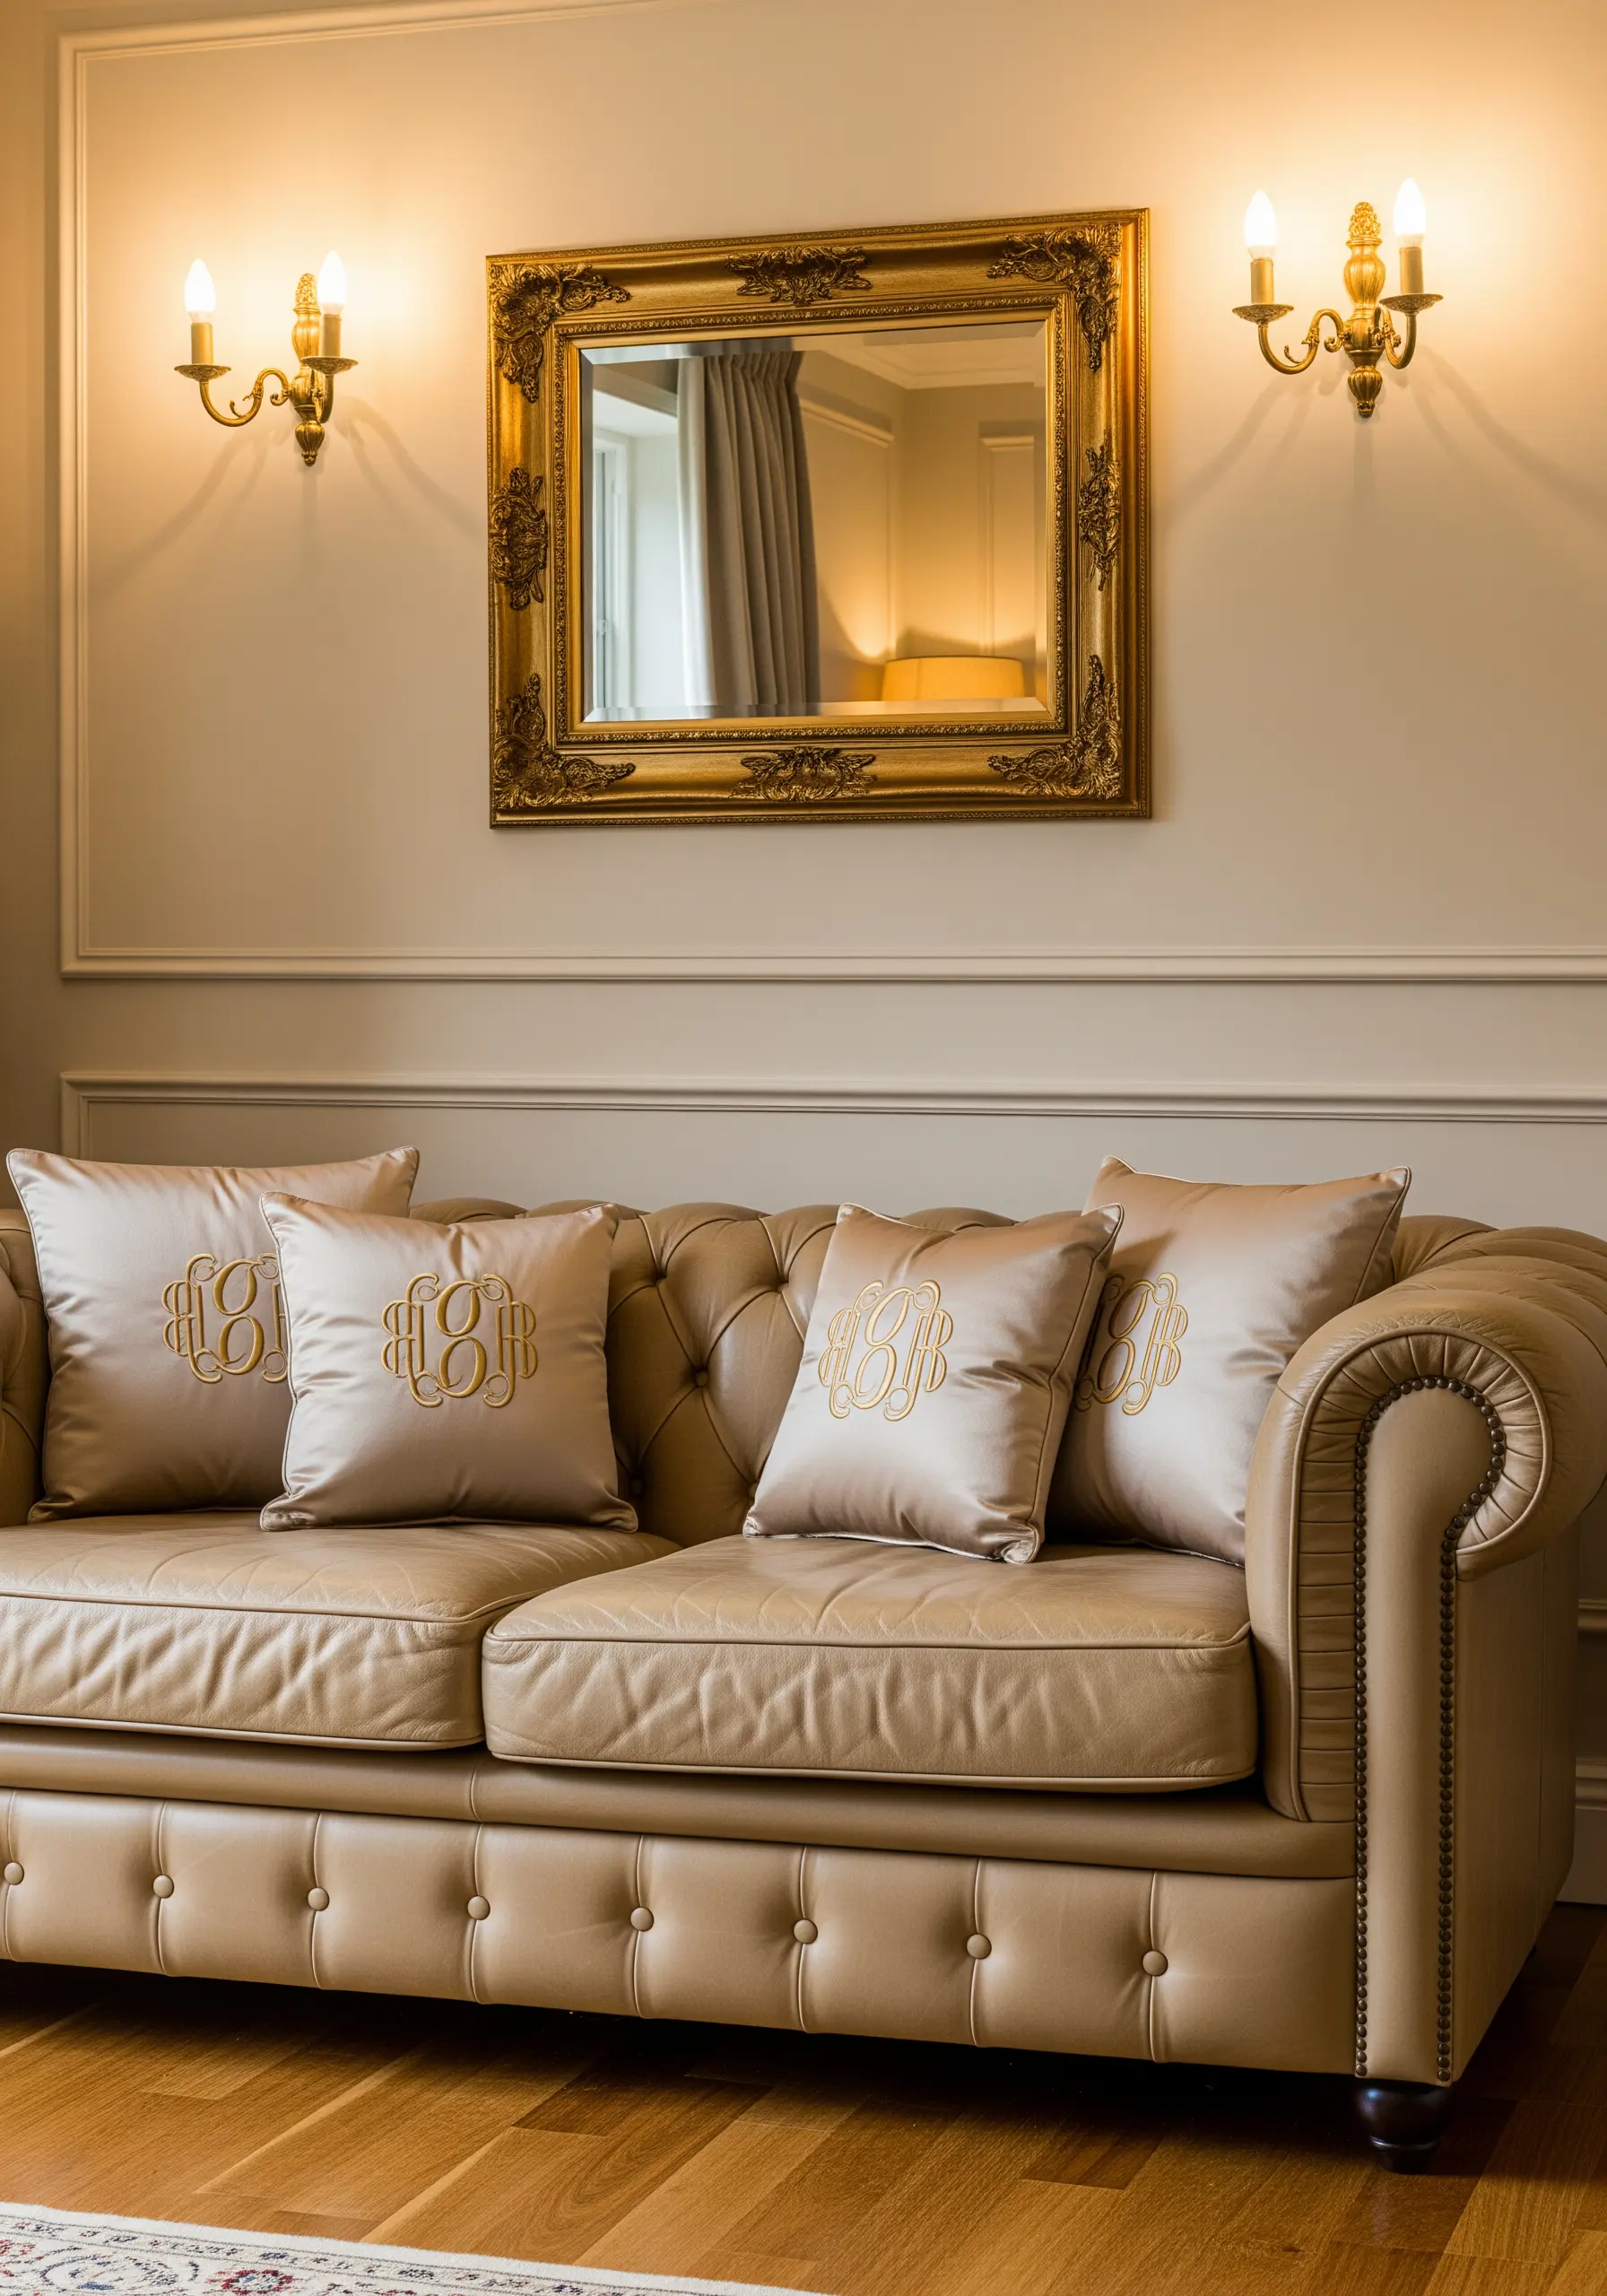
For a truly luxurious, raised monogram that looks professionally embossed, you must use a padded satin stitch.
First, create a foundation by filling the letter shape with small, underlying running stitches or seed stitches.
Then, work your final satin stitches neatly over this padding, pulling the thread just enough to create a smooth, raised surface.
This technique physically lifts the embroidery from the fabric, giving it an unmatched dimension and a high-end finish.
10. The Painterly Stroke: Achieving Abstract Thread Painting
Recreate the energetic look of a bold brushstroke by using a dense, directionless long-and-short stitch.
The key is to avoid perfect, uniform lines; instead, let your stitches flow organically to create movement.
For a truly painterly effect, blend multiple shades of gold, ochre, and beige floss together in your needle at the same time.
This technique adds stunning texture and color variation, making the thread feel like wet paint.
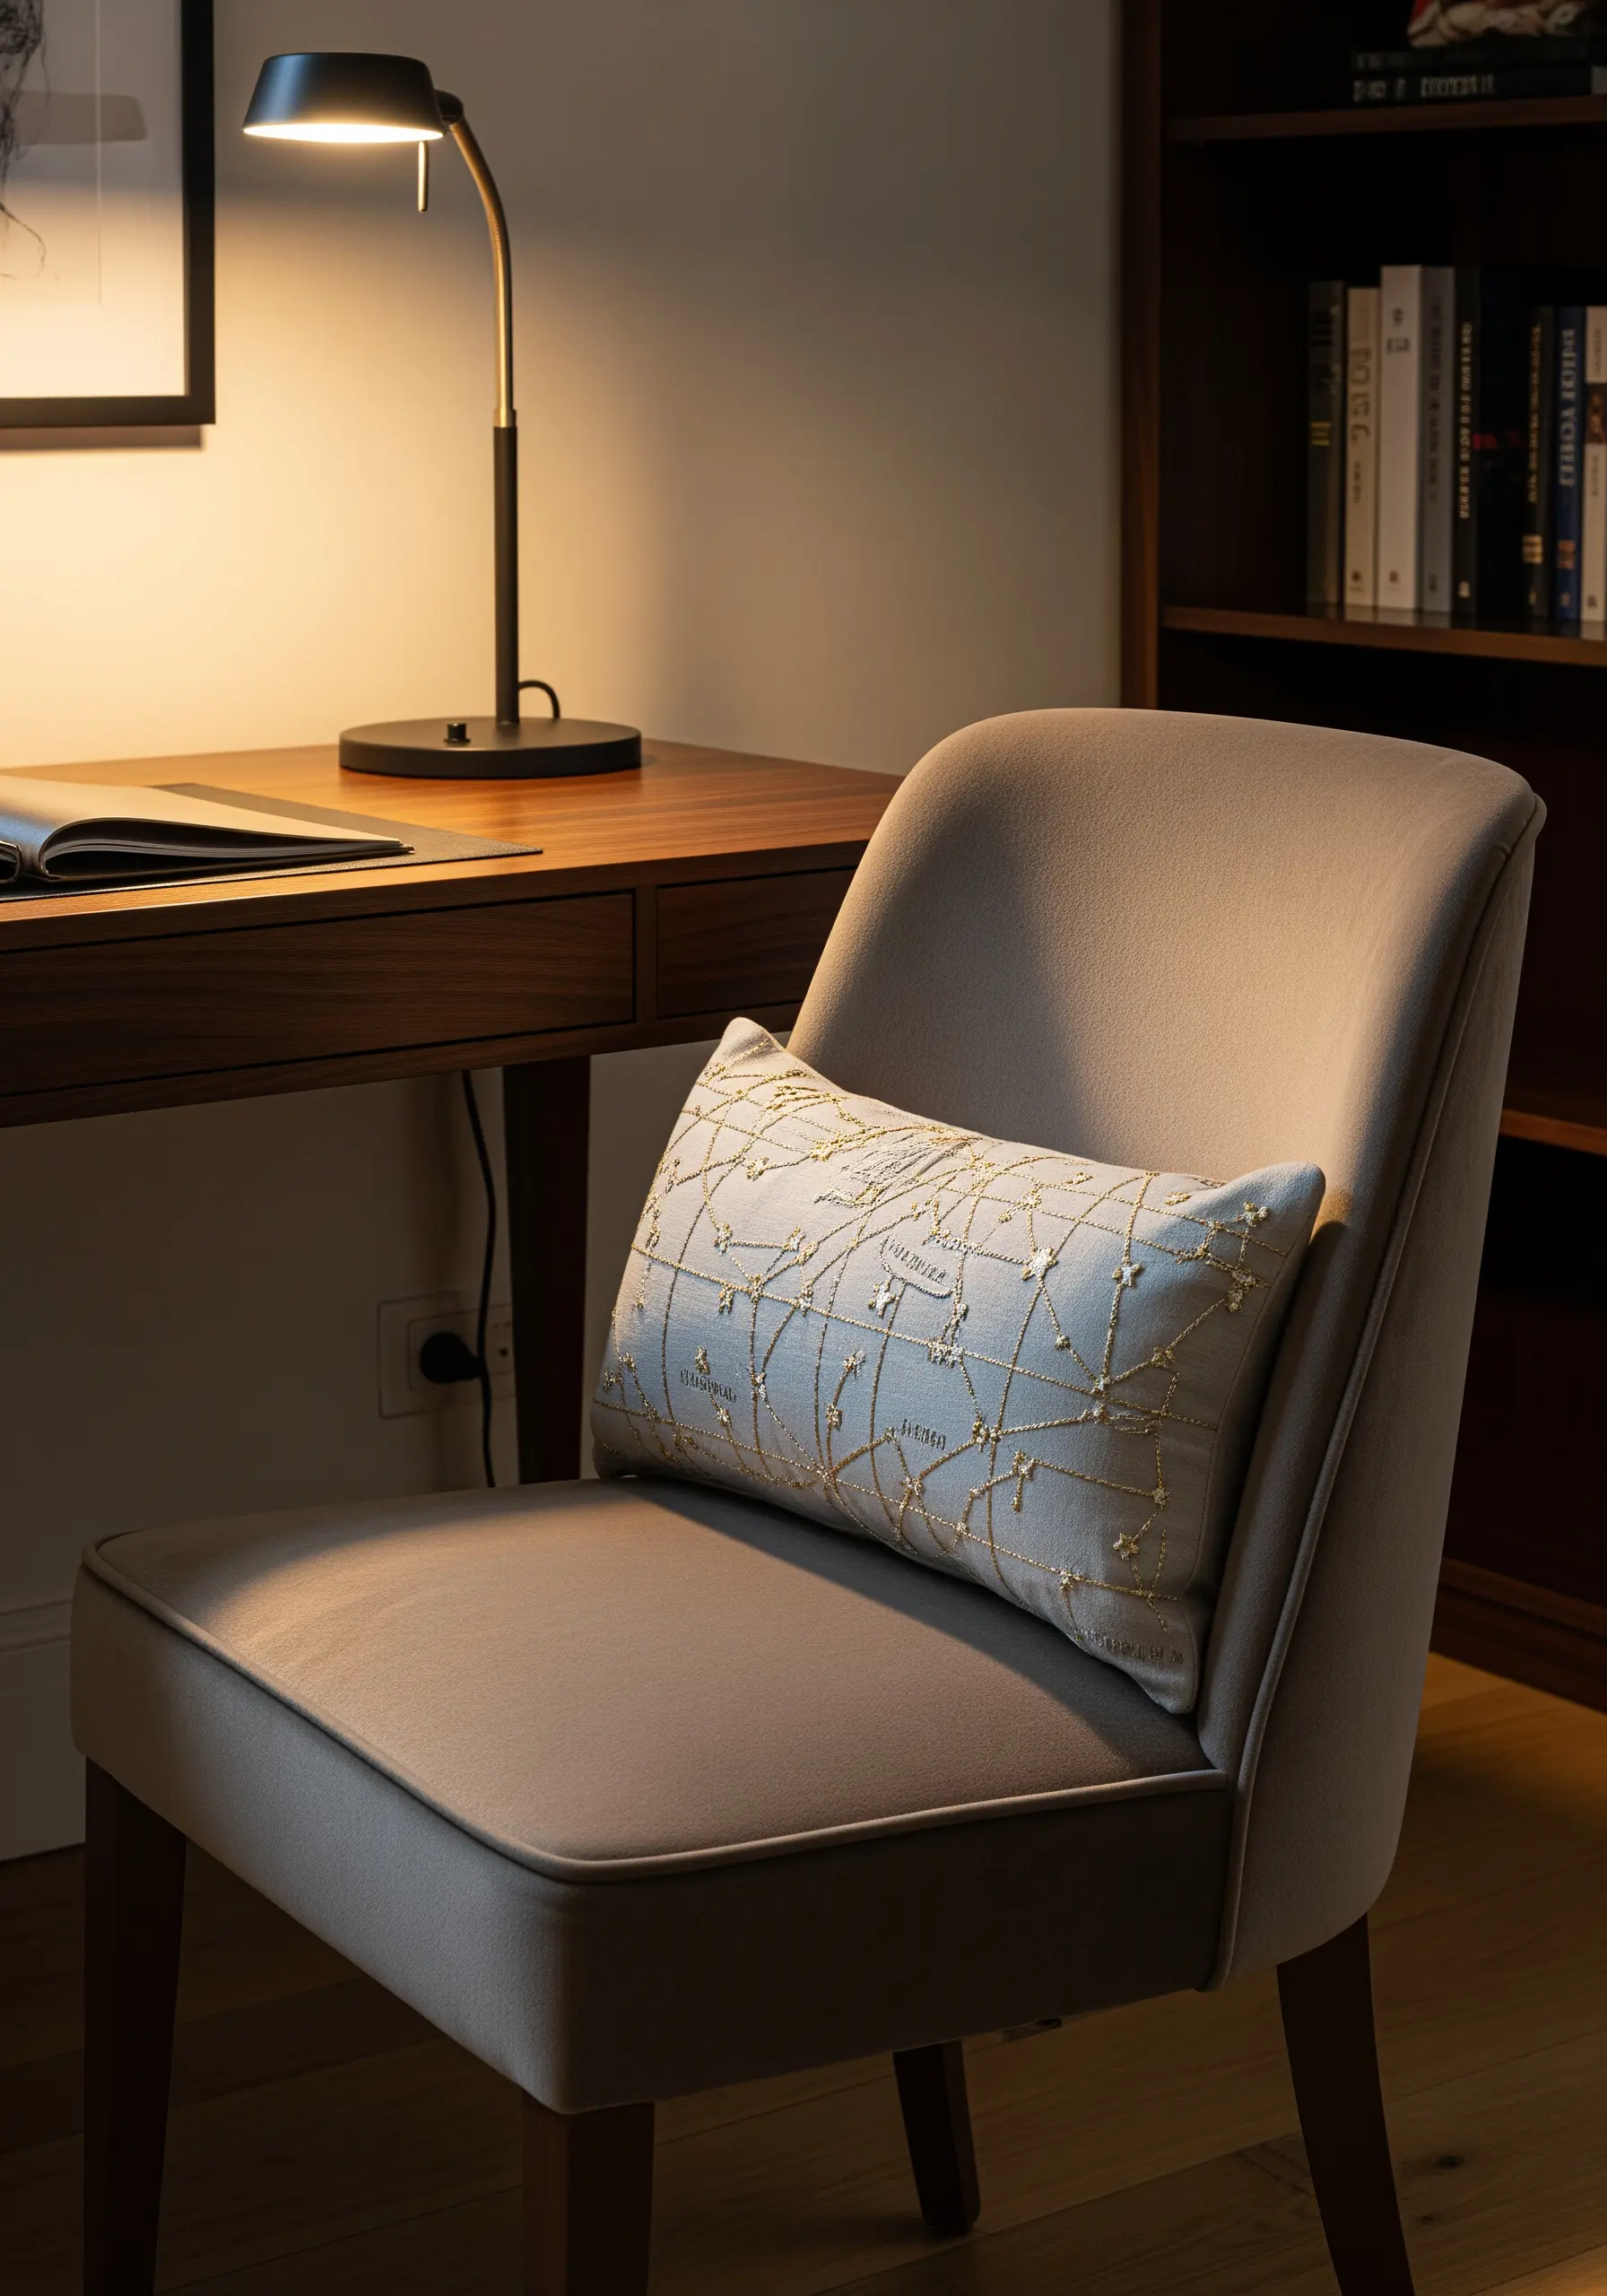
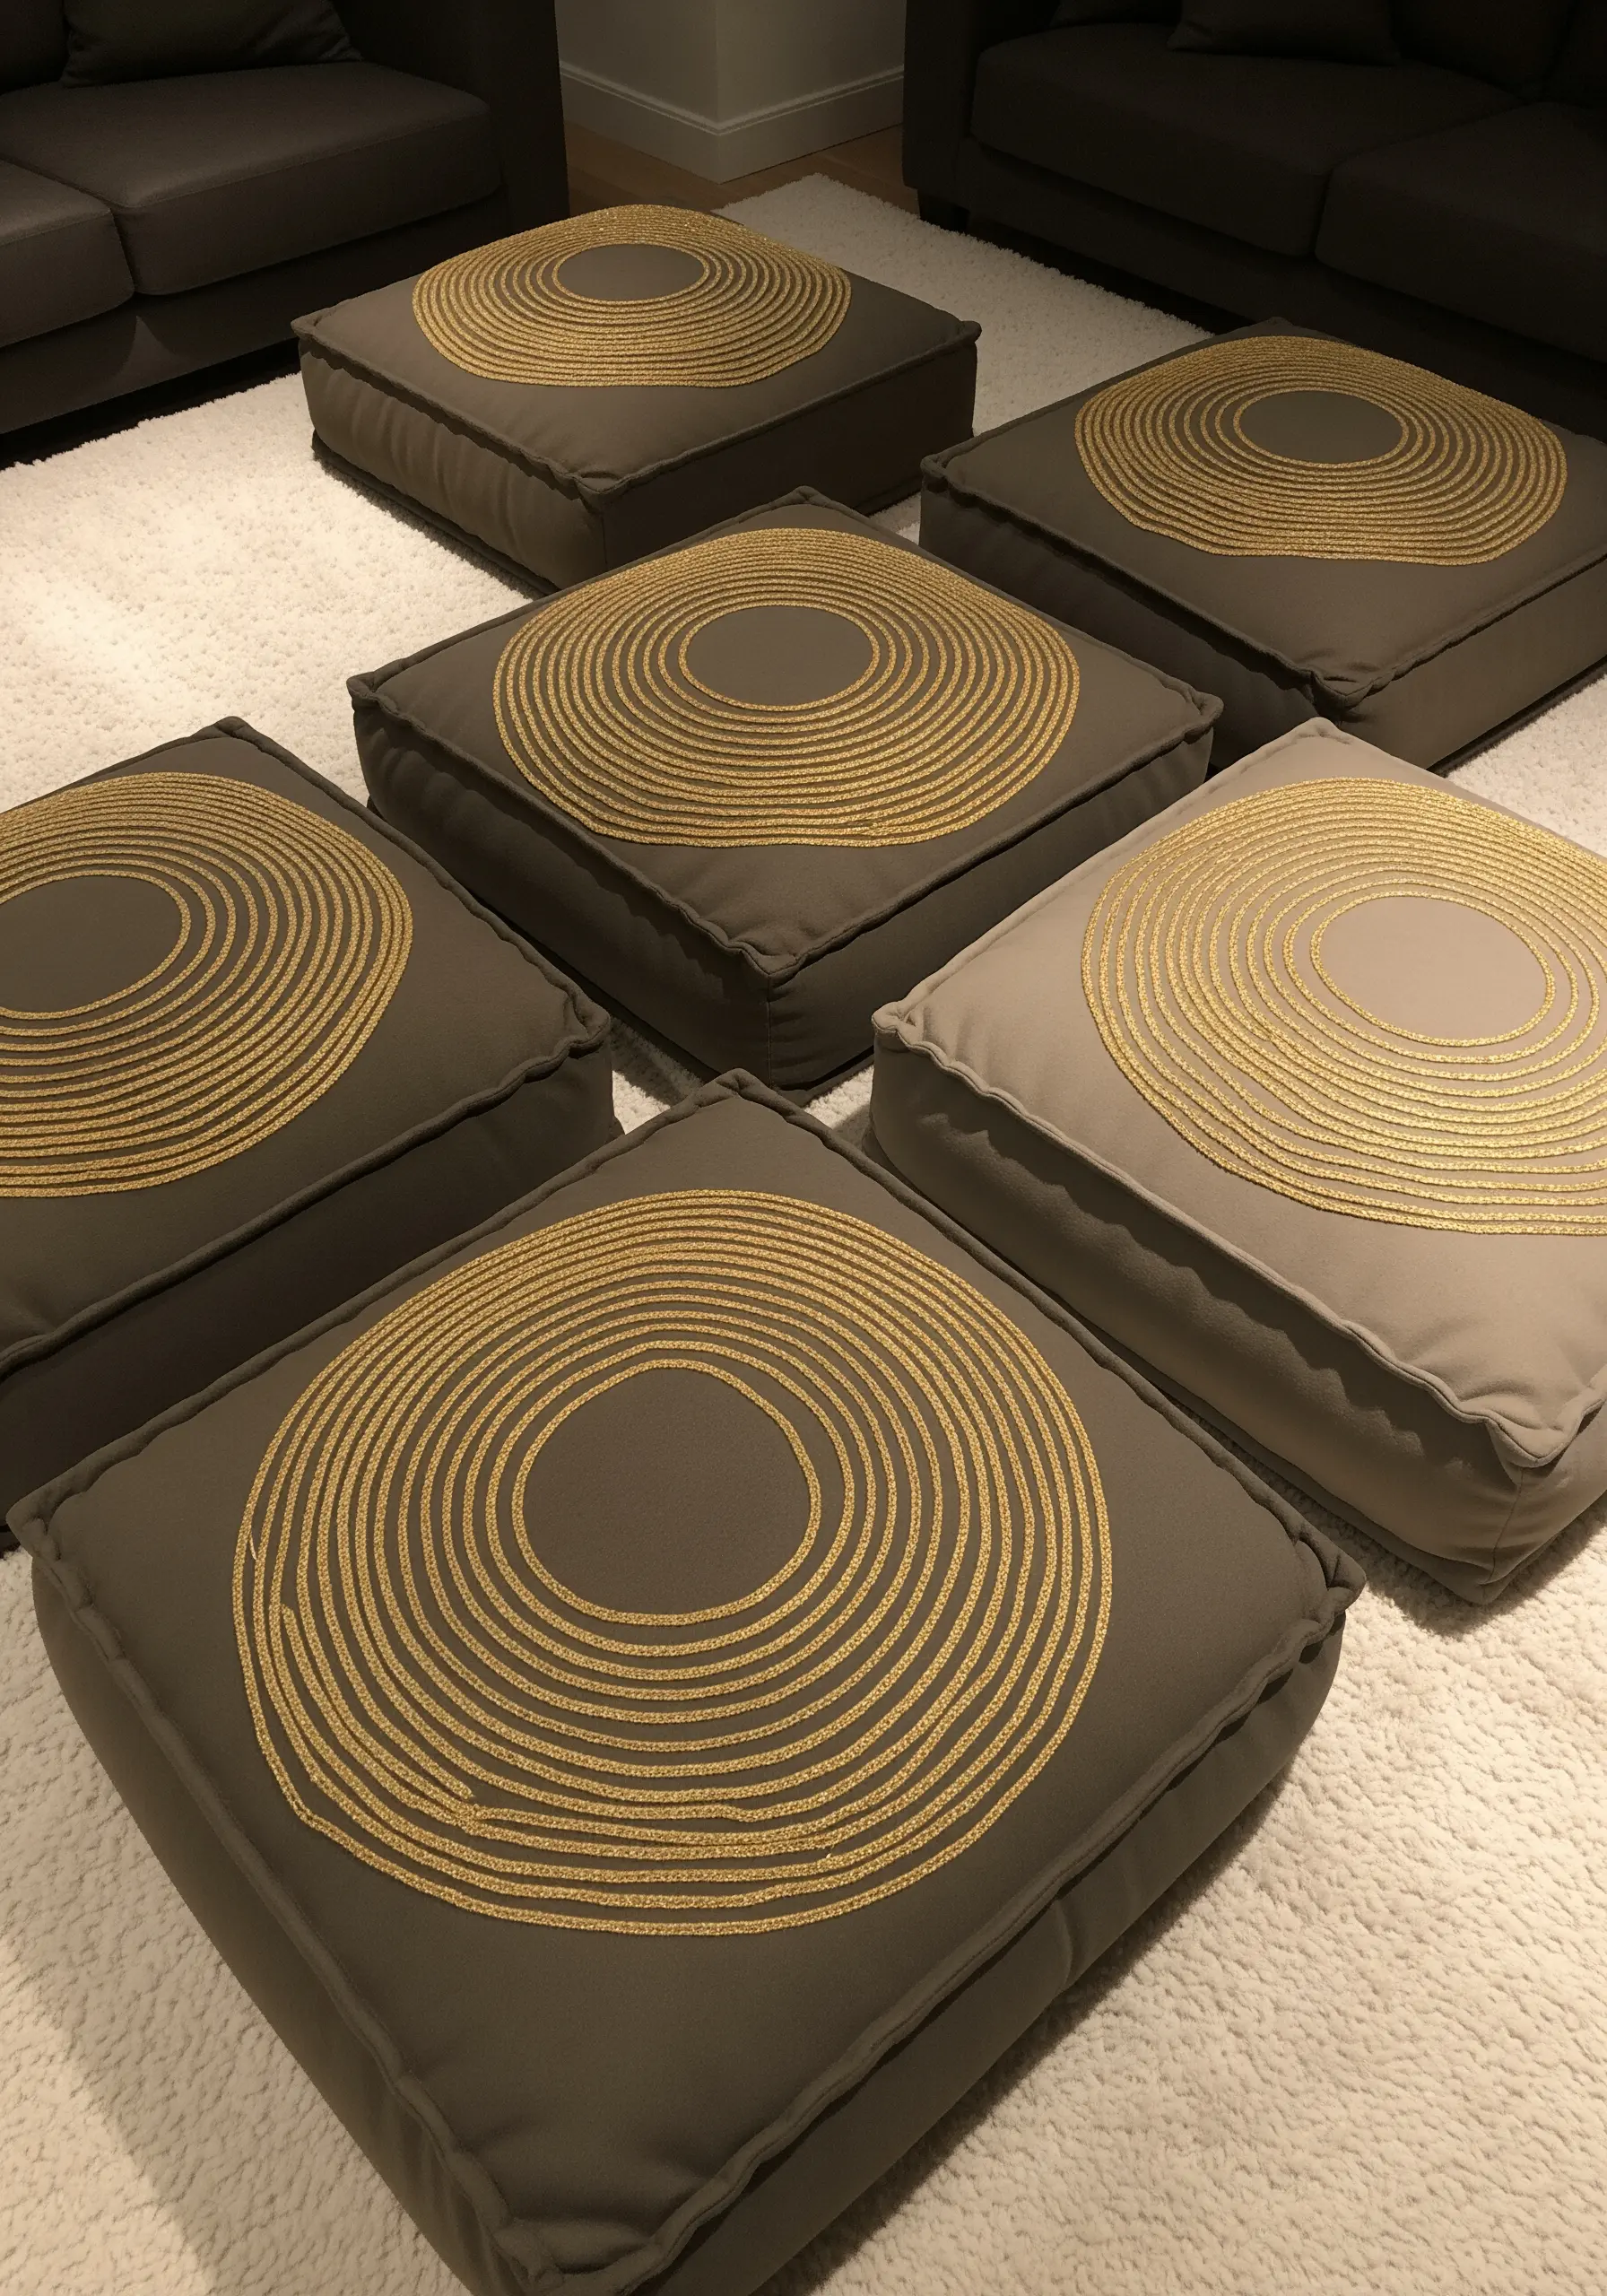
11. The Meditative Mandala: Precision on a Round Canvas
An intricate mandala benefits from a variety of stitches to differentiate its layers.
Use a fine backstitch for sharp outlines, seed stitches for a textured ‘stippled’ fill, and tiny satin stitches for reflective accents.
Always work from the center of the design outwards to maintain perfect radial symmetry.
Choosing a round cushion beautifully echoes the shape of the mandala, creating a complete and harmonious art object.
12. The Classic Border: Structured Satin Stitch for Sharp Angles
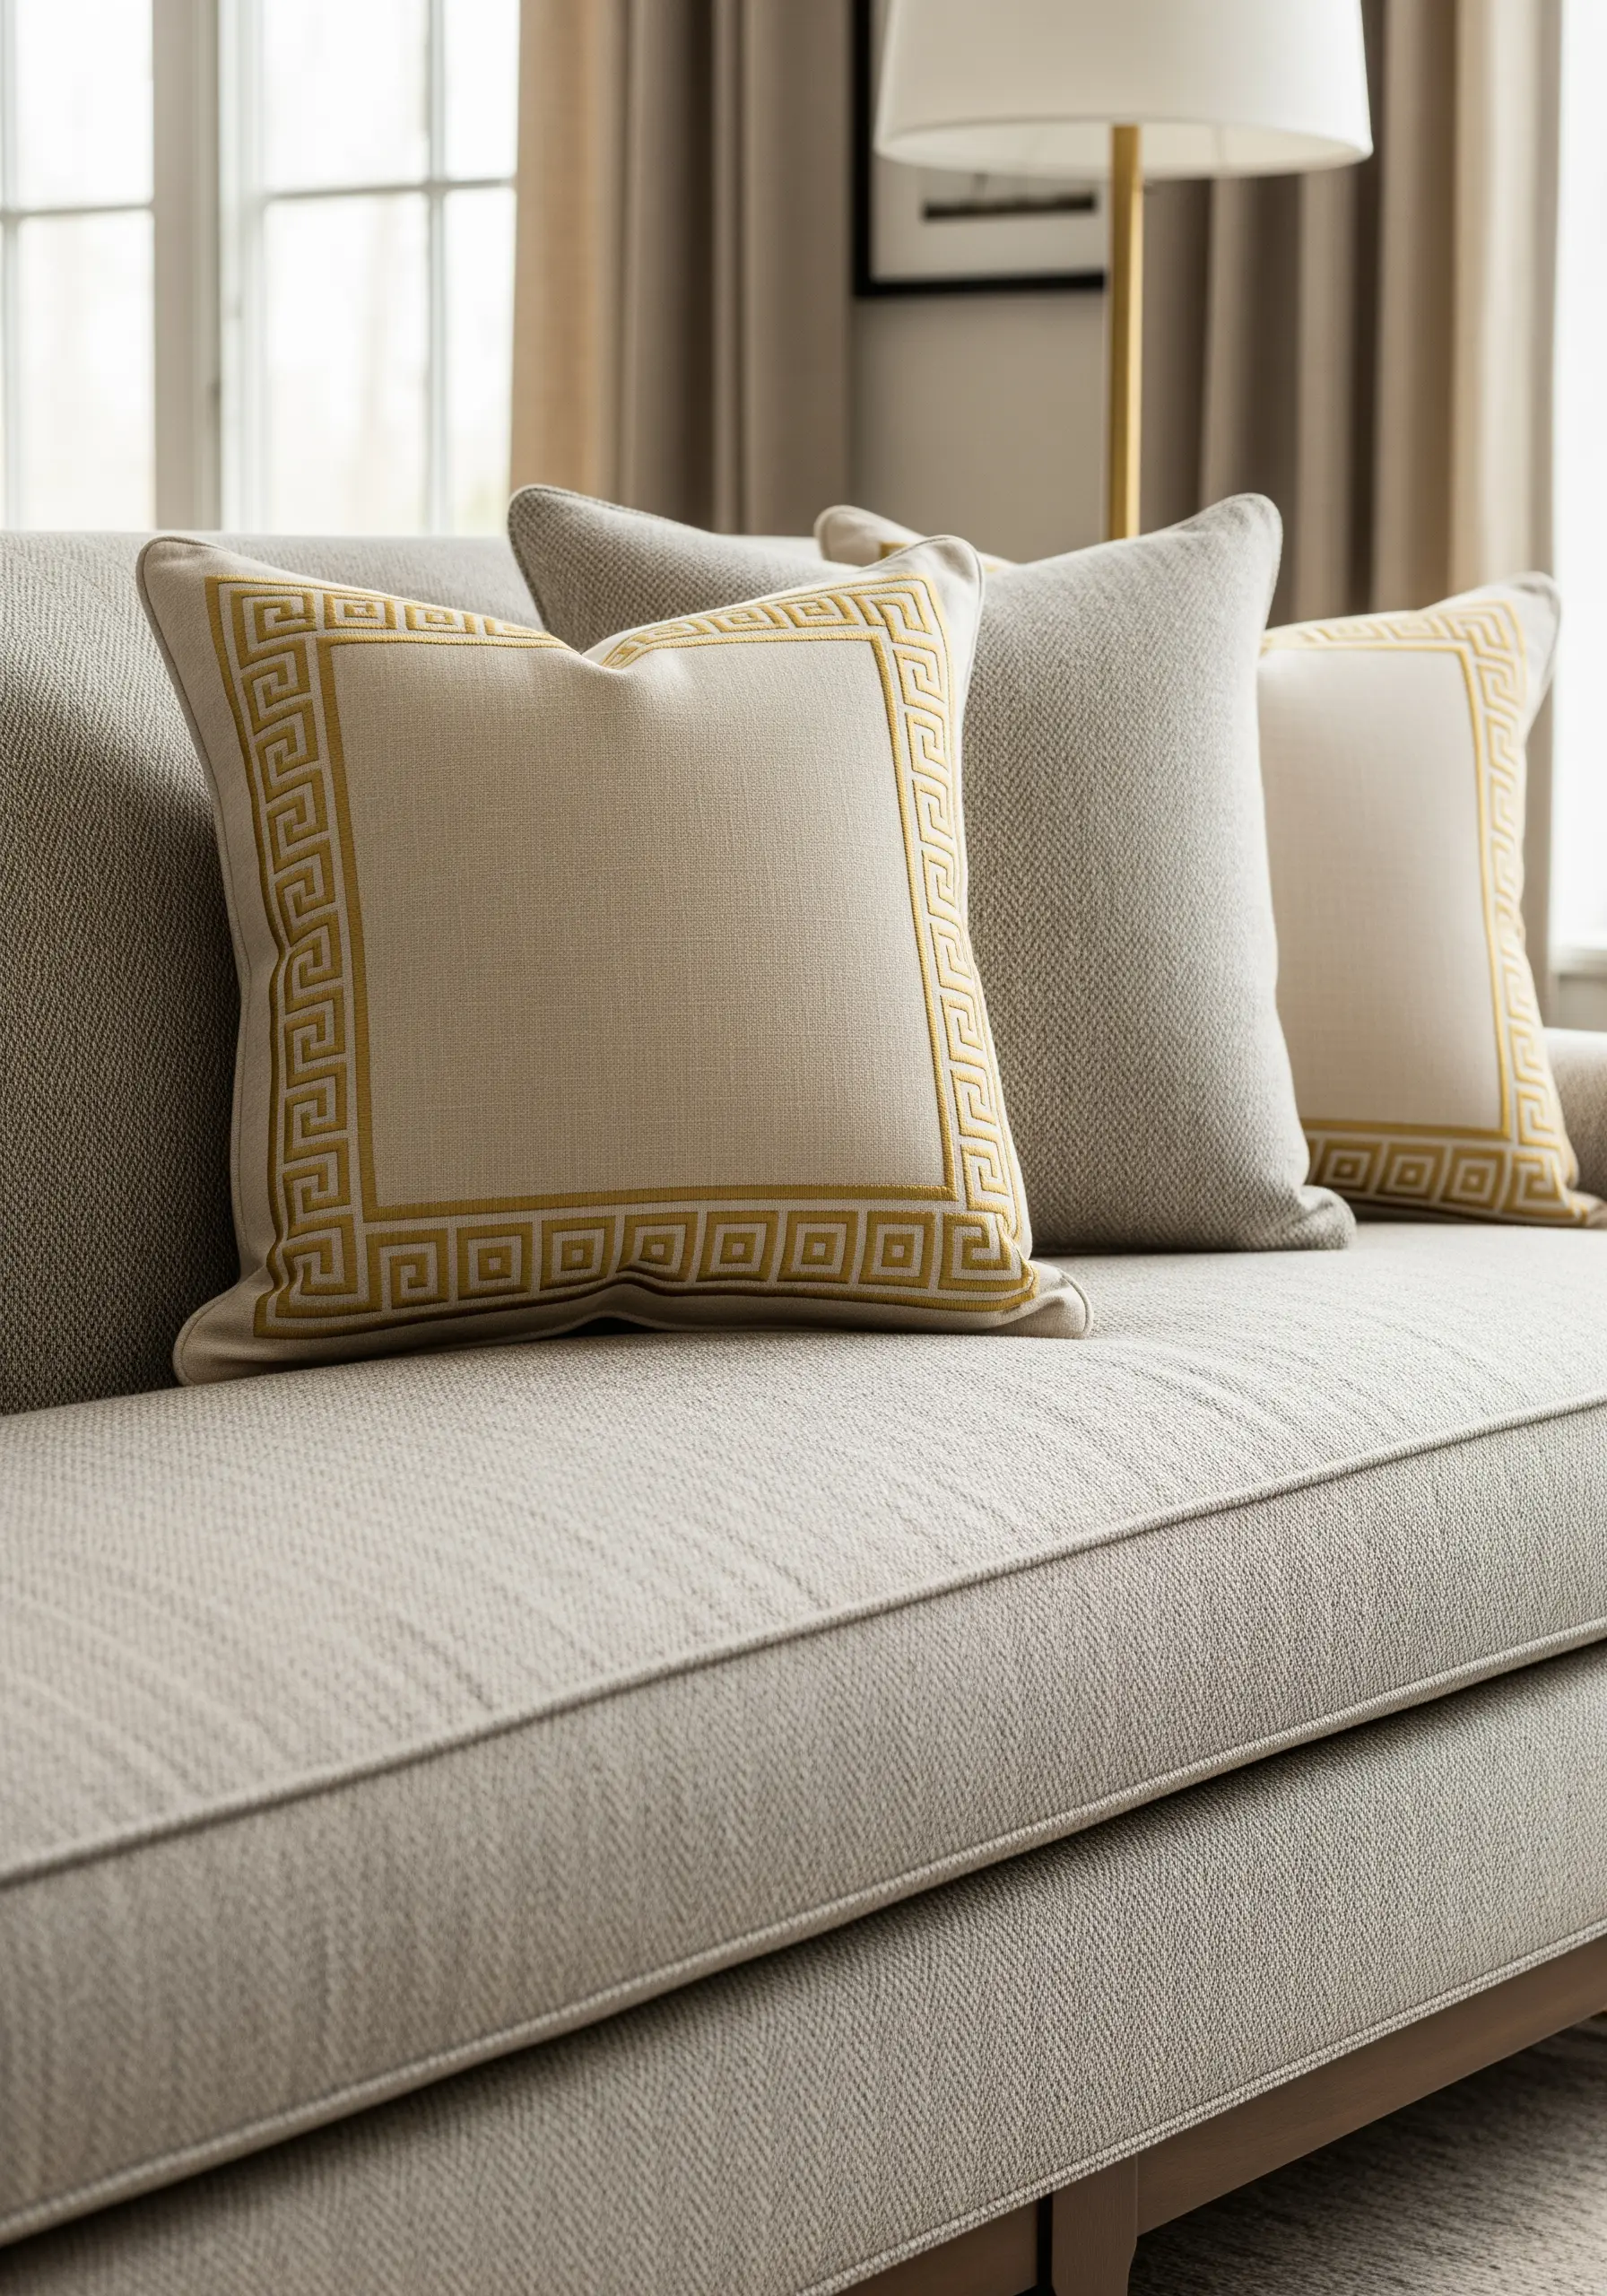
A Greek key design is all about flawless right angles and consistent spacing.
To achieve this, use a dense satin stitch, but plan your stitch direction carefully. Lay down single guiding stitches at each corner before you begin filling to ensure your thread turns on a perfect 90-degree angle.
The negative space is as crucial as the stitched lines, so maintain uniform spacing for a crisp, architectural look that feels timeless.
13. The Gilded Frond: Elegant Botanical Line Art
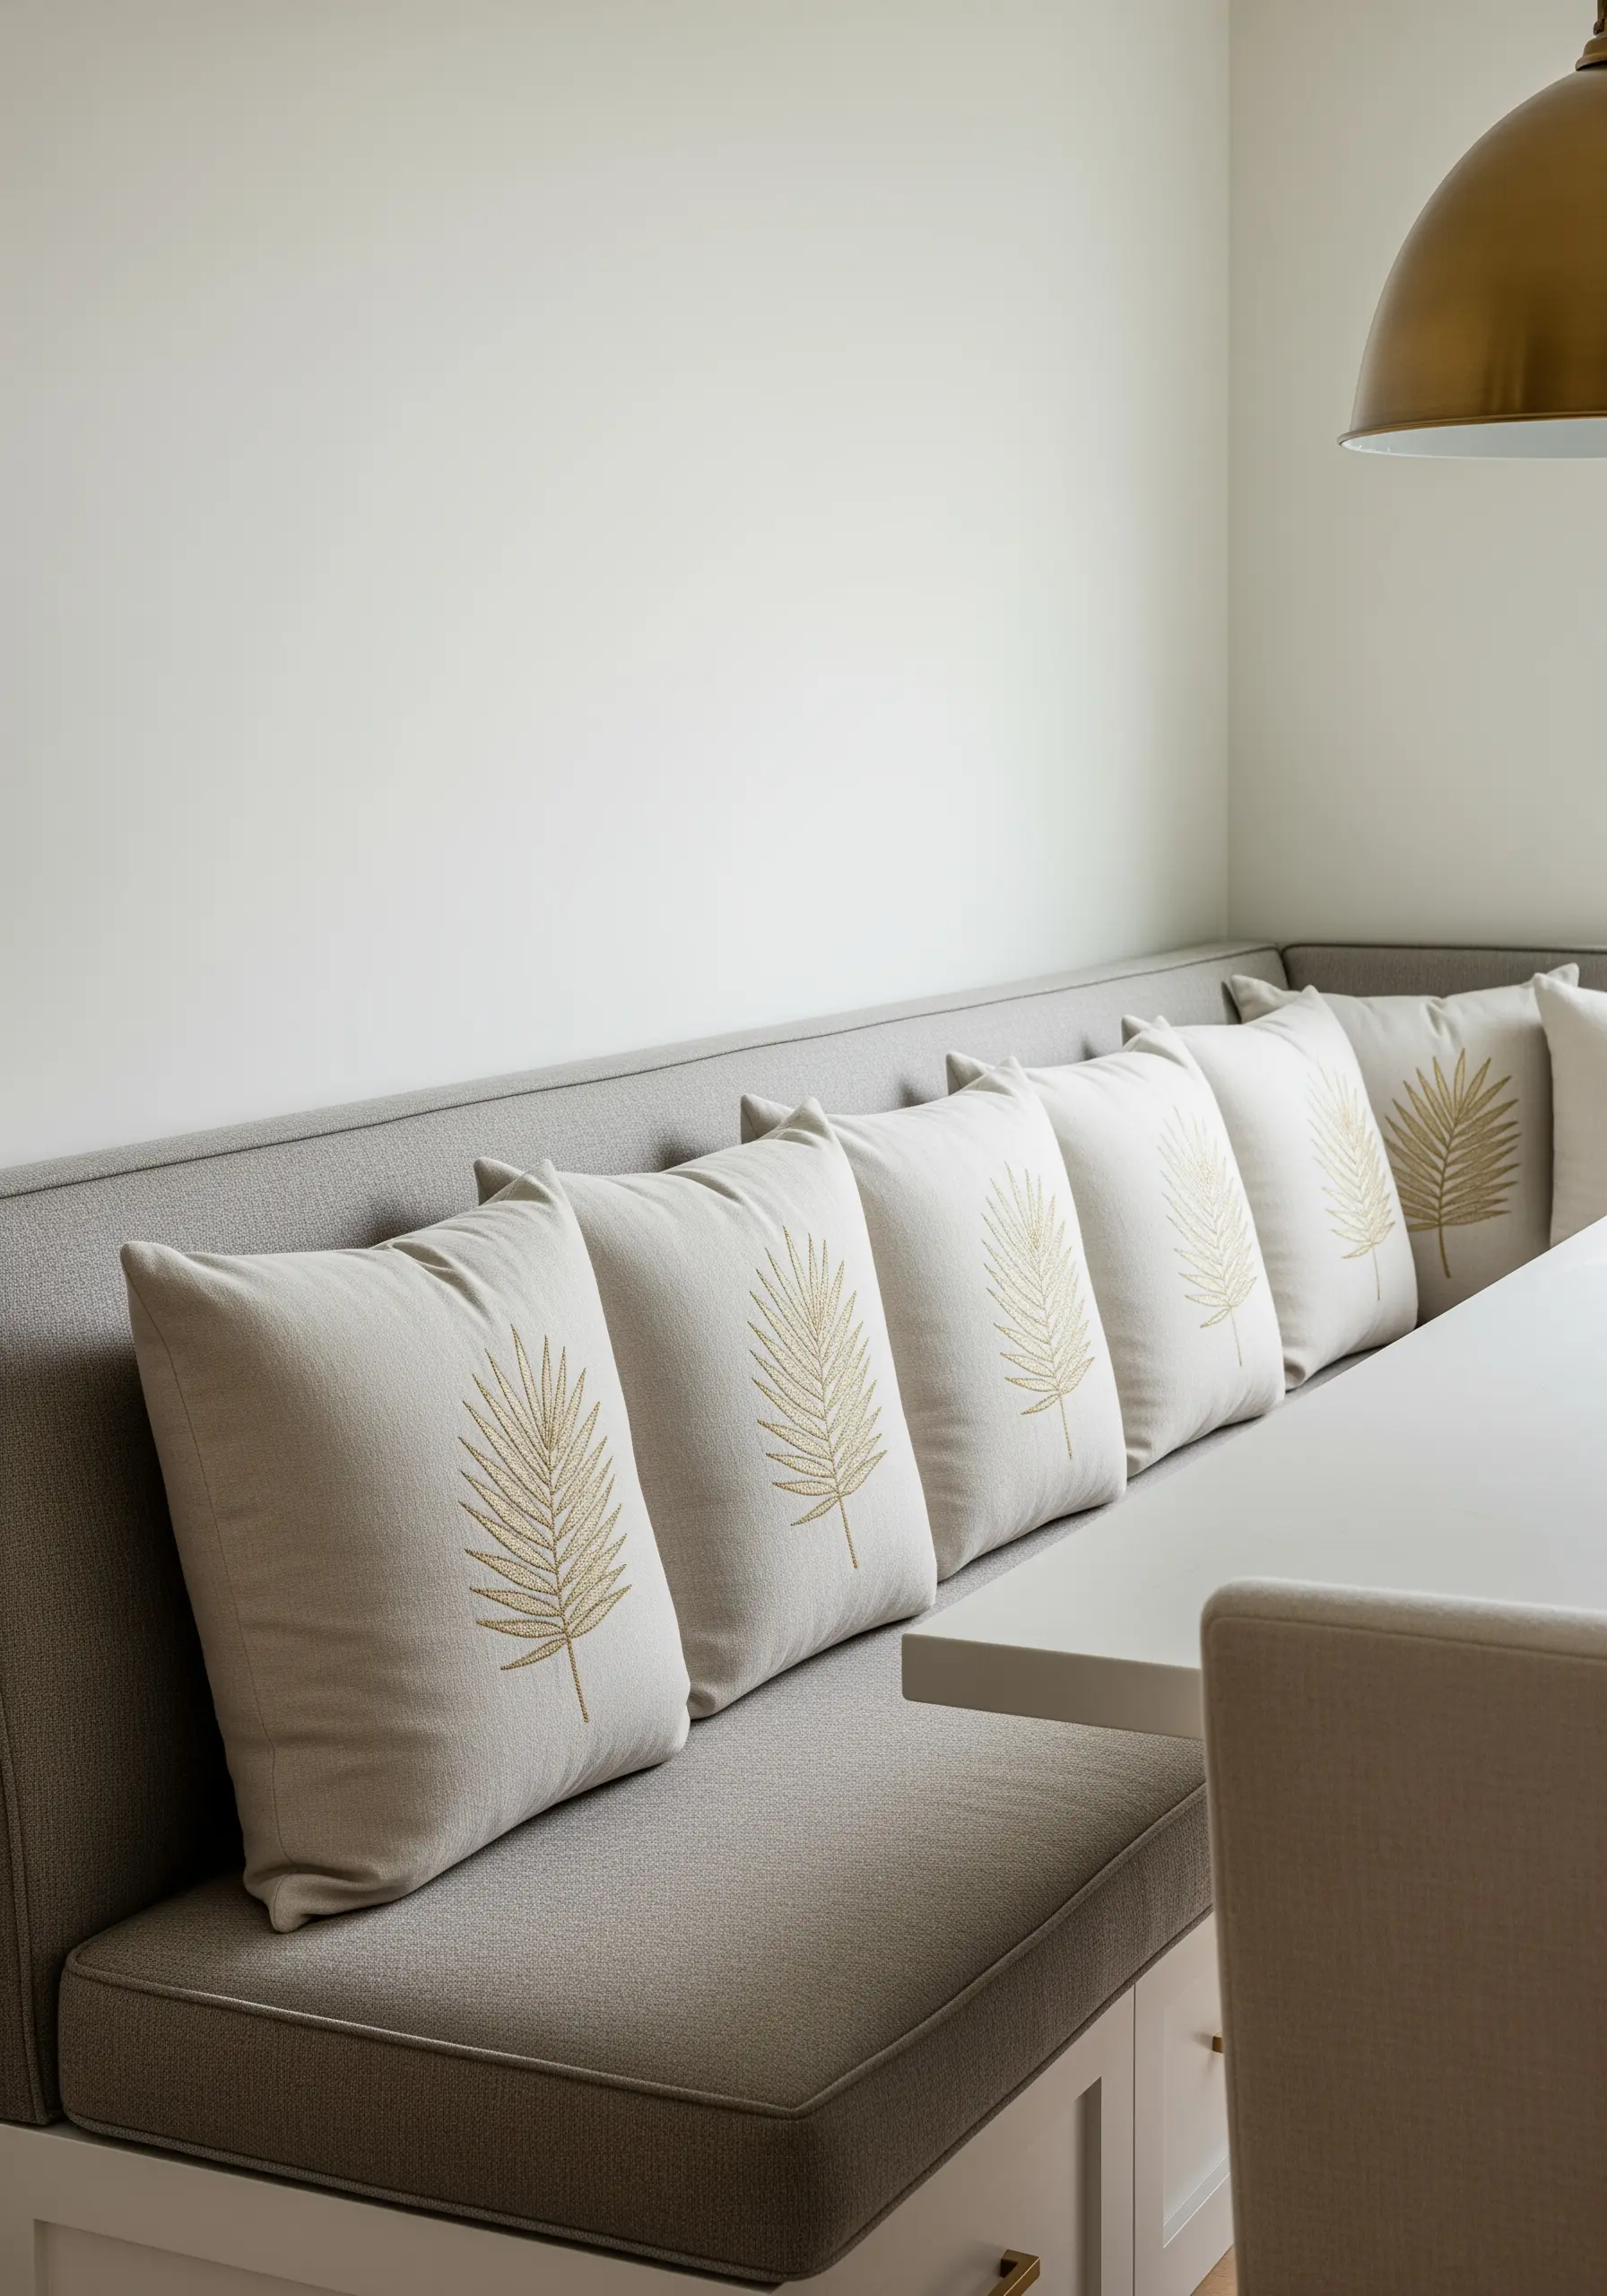
A classic stem stitch is the perfect choice for capturing the central stem and delicate leaflets of a palm frond.
Its twisted, rope-like appearance adds a touch of substance to the lines.
Keep your stitch length absolutely consistent throughout the design to achieve a smooth, uniform, and professional finish.
Using a single color of gold thread on pale linen creates a minimalist yet luxurious aesthetic that is both modern and natural.
14. The Scalloped Edge: Repeating Motifs for a Soft Border
Create this elegant fan or shell motif using a series of radiating straight stitches that all meet at a single point at the base.
To ensure all the motifs are perfectly uniform, mark the center point and the endpoints of each stitch with a removable pen before you begin.
This type of tone-on-tone stitching adds sophisticated texture and detail without overwhelming the design with color.
15. The Topographic Texture: Couching for Sculptural Lines
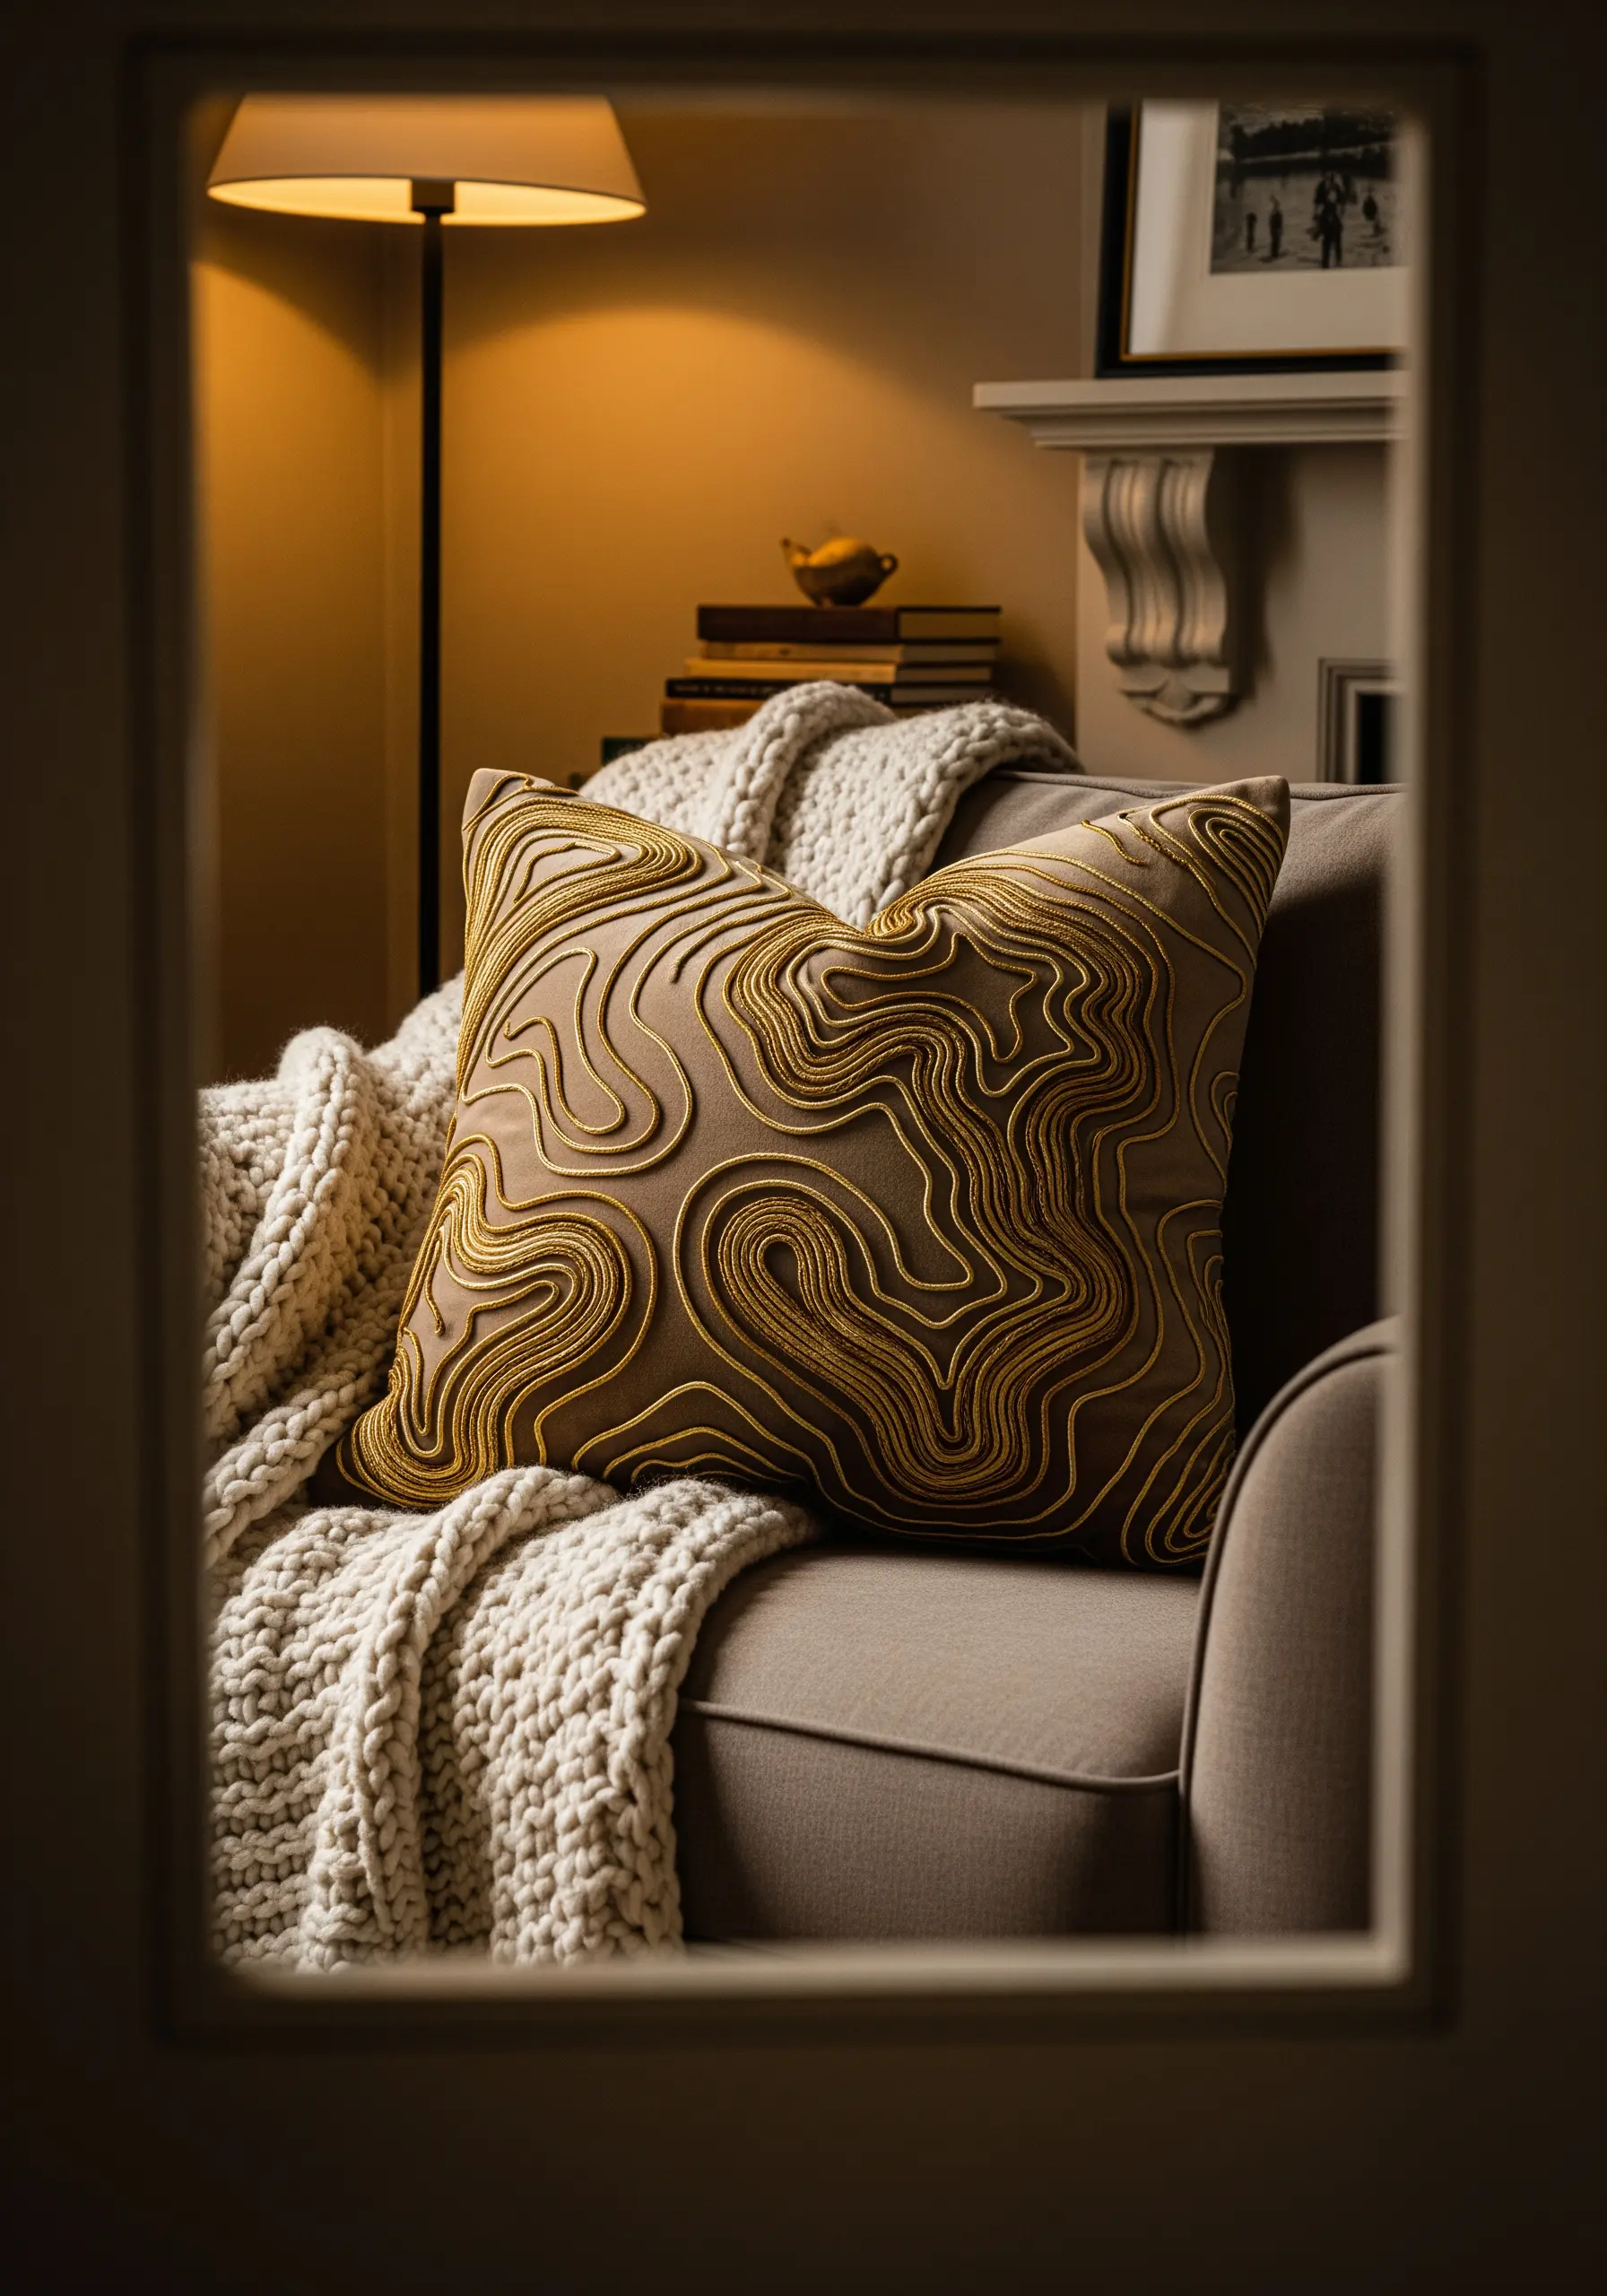
To achieve these thick, raised, map-like lines, you must use the couching technique.
Lay a thicker yarn or multiple strands of embroidery floss along your design line. Then, use a thinner thread (in either a matching or contrasting color) to tack it down with small, perpendicular stitches.
This method allows you to create incredible dimension and a bold, organic texture that you simply can’t get from a standard stitch.
16. Bold Geometry: The Power of a Perfect Fill Stitch
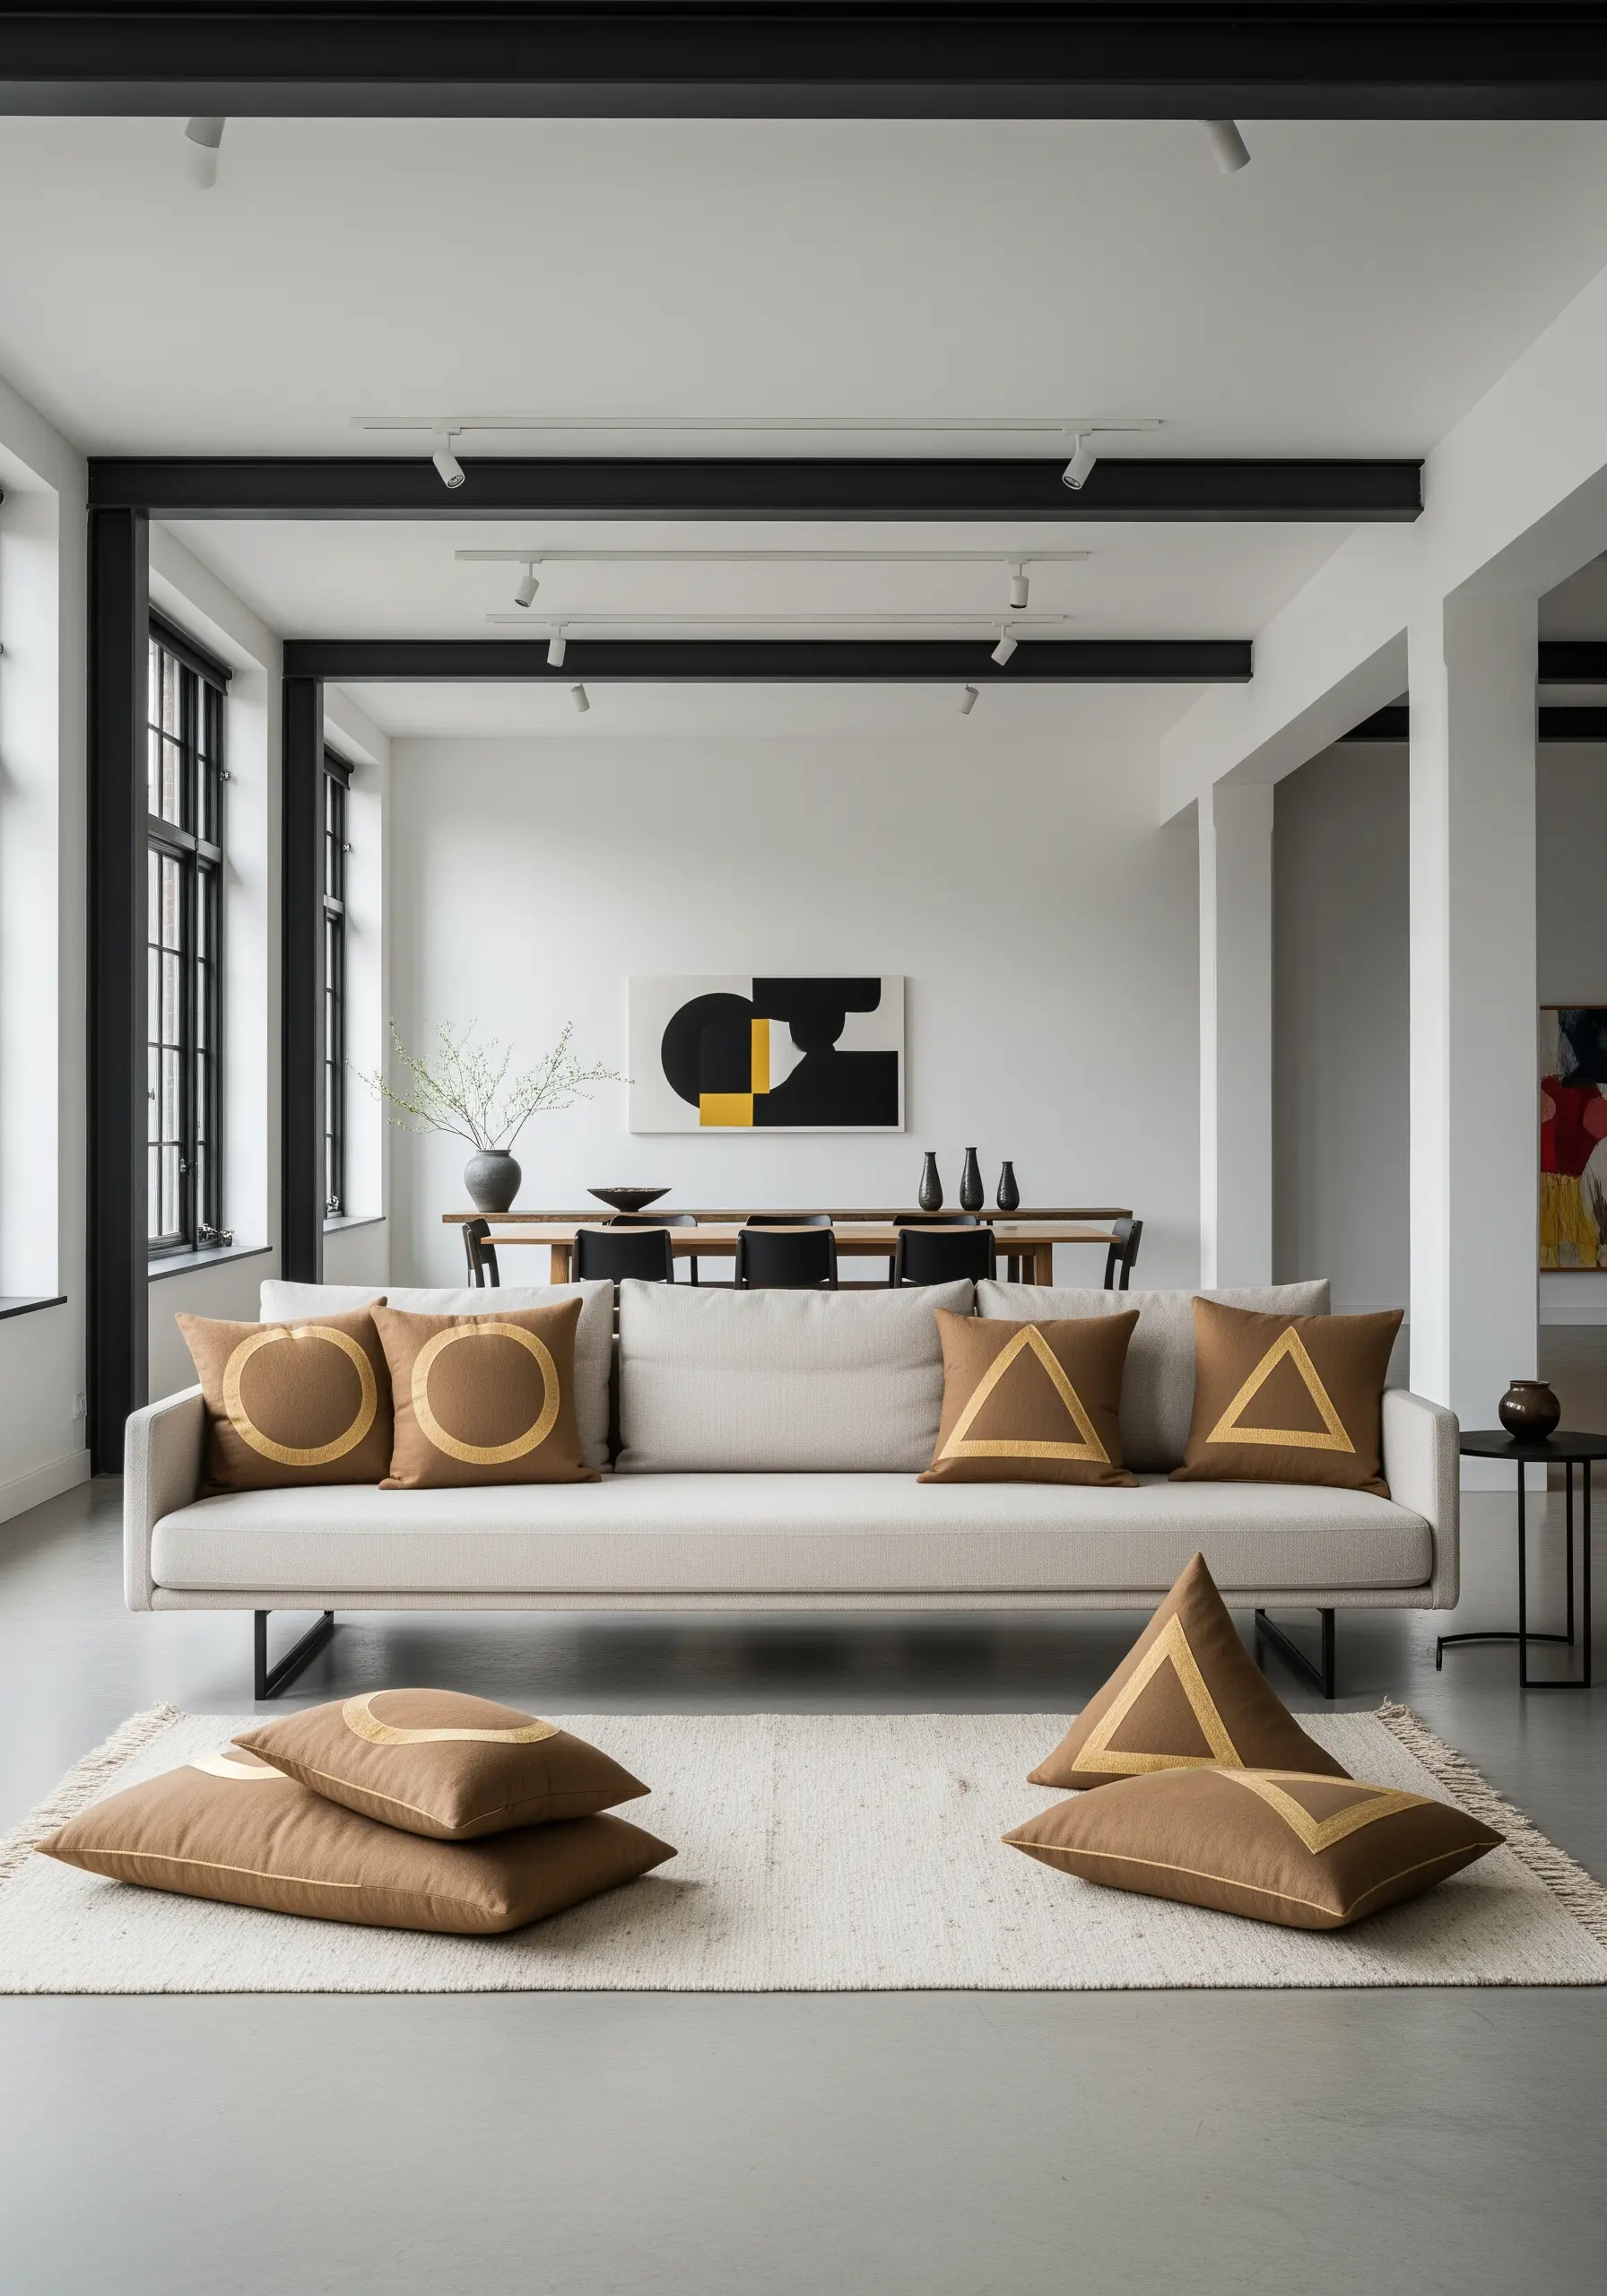
Make these simple geometric shapes impactful by using a perfectly executed, dense satin stitch.
For larger areas like these, it’s technically a long-and-short stitch, worked in sections to prevent long, loose floats of thread on the surface.
The power of the design comes from the stark contrast between the heavily stitched, light-reflecting shape and the unadorned, matte fabric.
17. The Floating Feather: Blending Shades and Stitches
Give your feathers a realistic, airy quality by blending two or three complementary shades of gold, cream, and beige thread within a single feather.
Use a fishbone stitch for the main body, as it creates the central line automatically.
Varying the angle and length of your stitches will make each feather look unique, as if it’s gently floating down.
18. The Rhythmic Wave: Creating Movement with Line Density
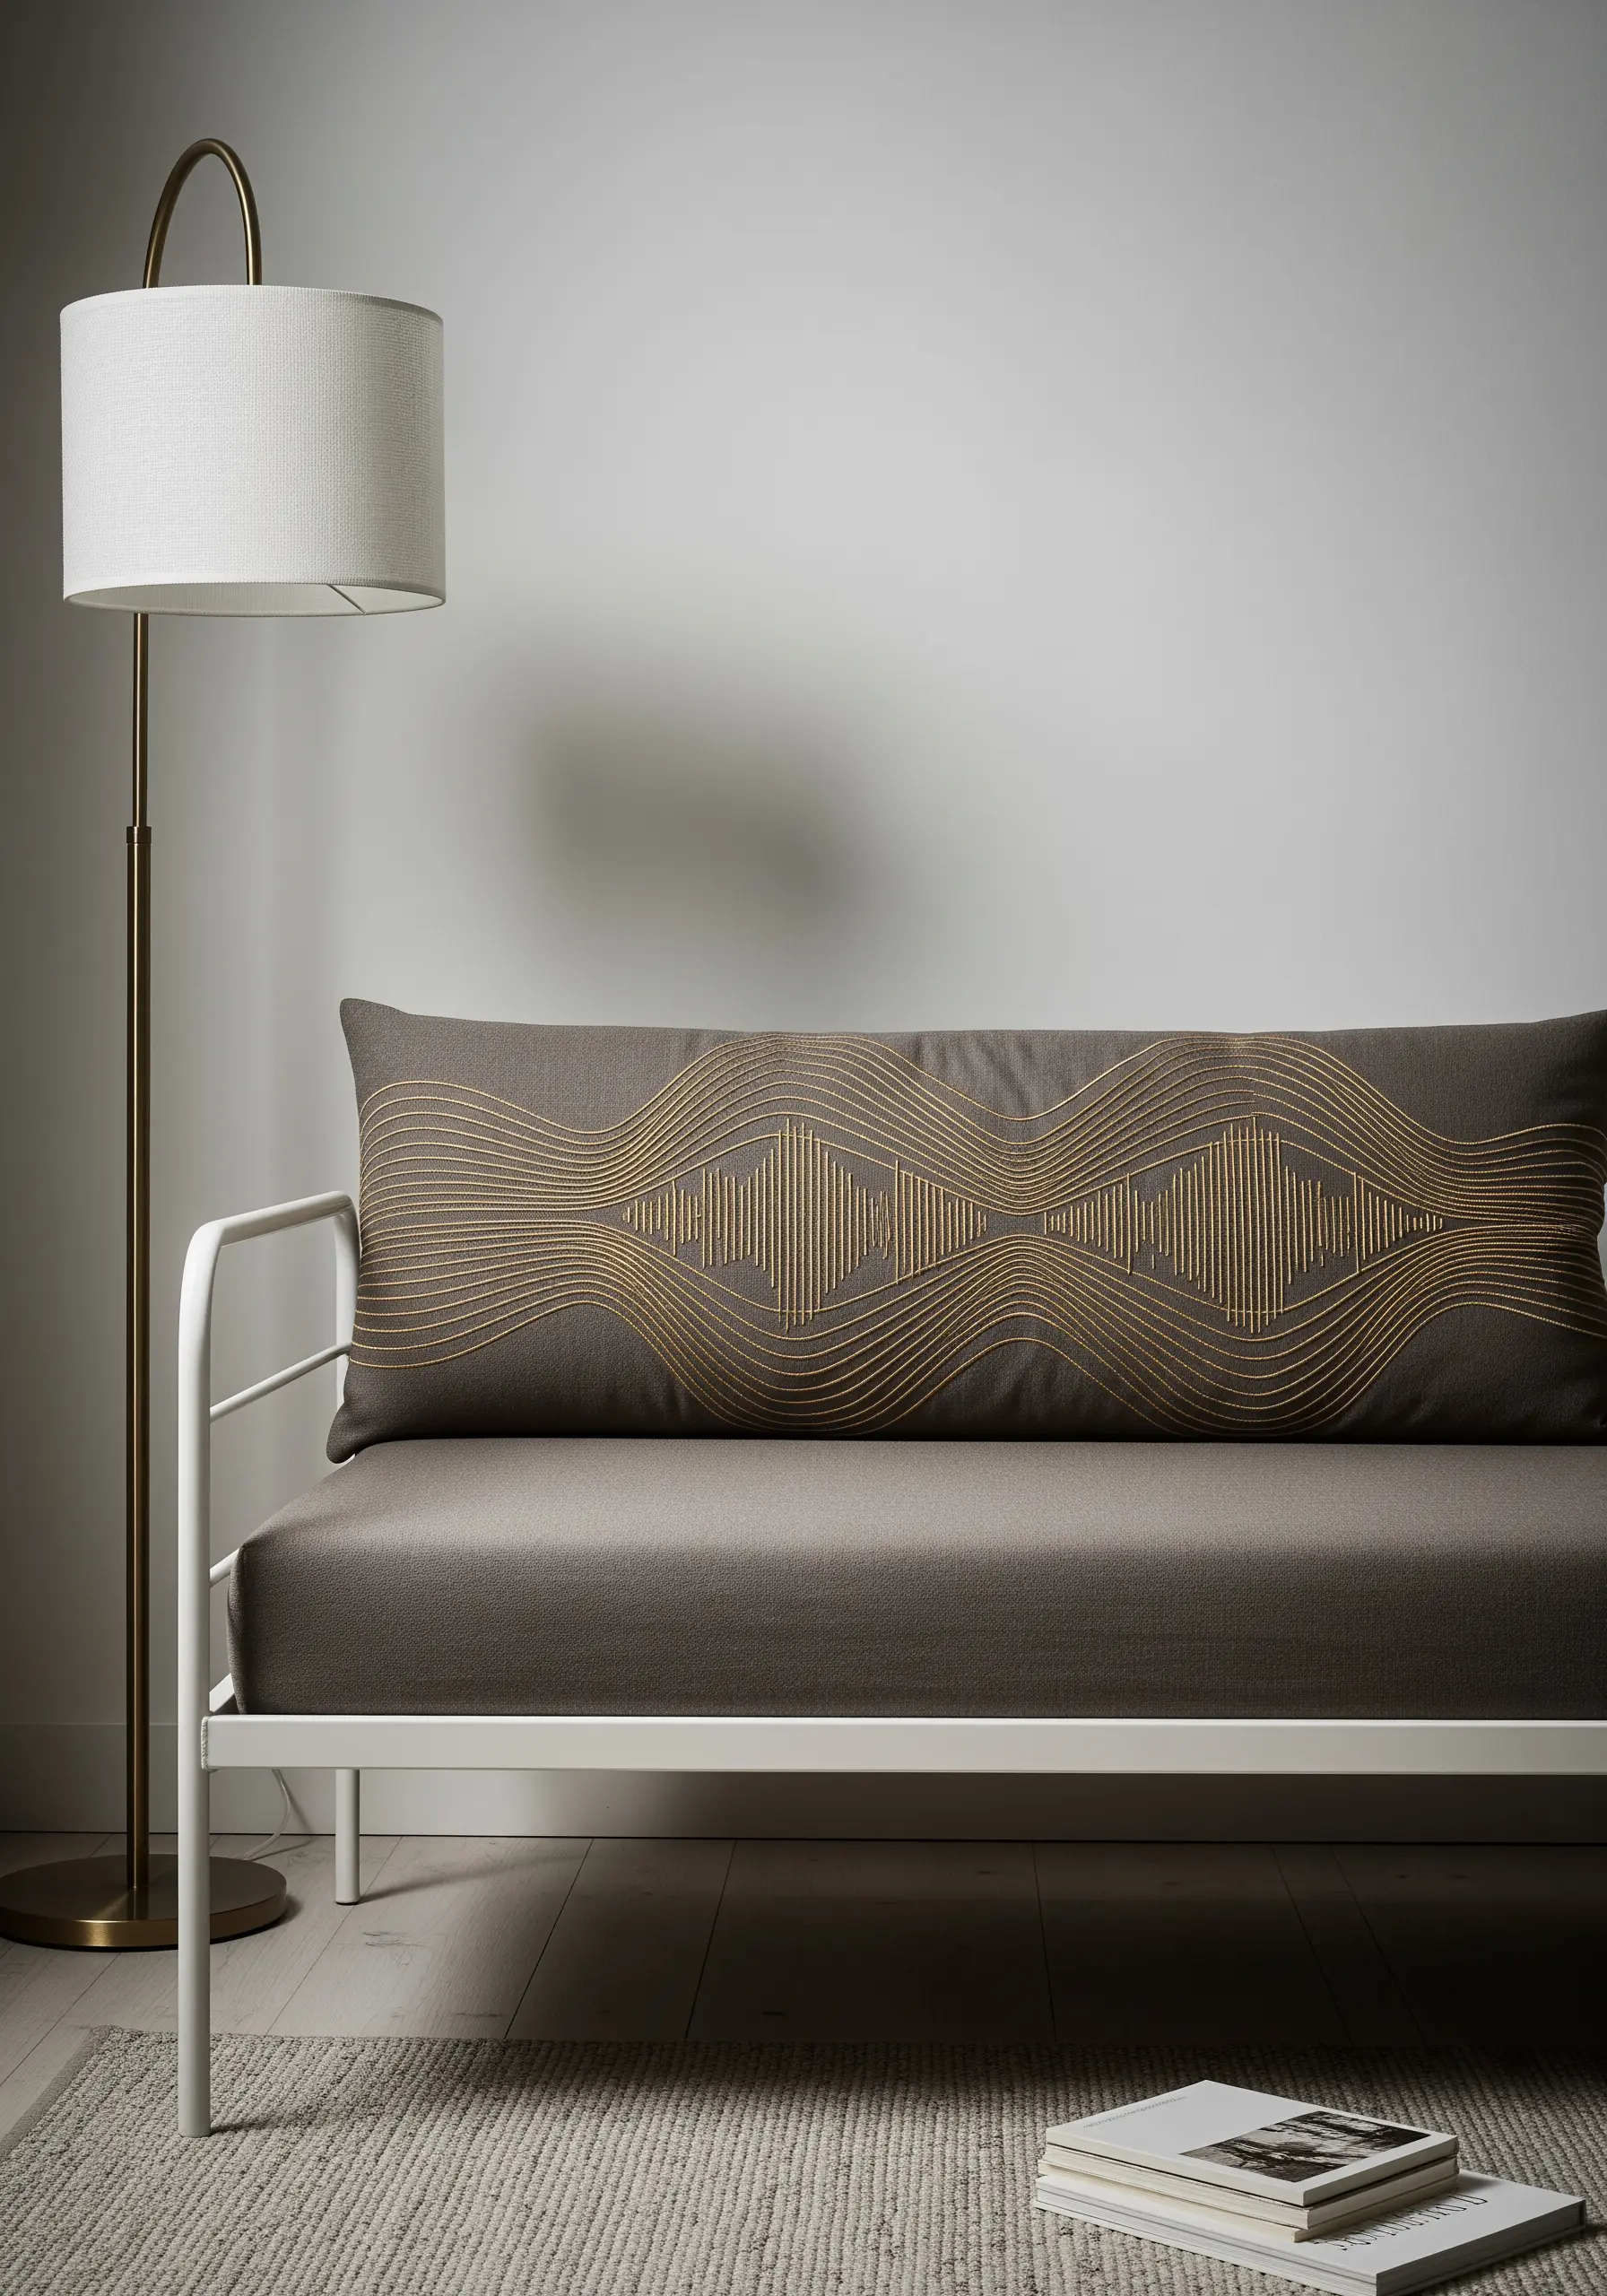
The visual power of this design comes from the interplay between dense and sparse lines, creating a sense of rhythm.
Use a simple backstitch or stem stitch for consistency.
In the compressed areas, place your stitched lines very close together; in the expanded areas, allow for more negative space between them.
This variation creates a visual pulse, like a soundwave or a ripple in water.
19. The Zen Circle: Meditative Spiral Stitching
For flawless concentric circles, use a whipped backstitch or a chain stitch to provide a solid, textured line that feels substantial.
Before you begin, use a compass and a removable fabric marker to draw your circular guides directly onto the fabric.
The repetitive motion of stitching in a continuous spiral is incredibly meditative, and the resulting pattern brings a sense of calm and focus to your decor.
20. The Moroccan Trellis: Interlocking Curves with Chain Stitch

A chain stitch is the ideal choice for this classic Moroccan pattern, as its linked structure gives the lines a rope-like texture that enhances the aesthetic.
Focus on maintaining an even stitch tension, especially as you navigate the curves, to ensure the pattern flows smoothly without any puckering.
The seamless repetition creates a beautiful, all-over texture that feels both timeless and perfectly suited to modern interiors.
21. The Whispering Dandelion: Achieving Lightness in Stitches
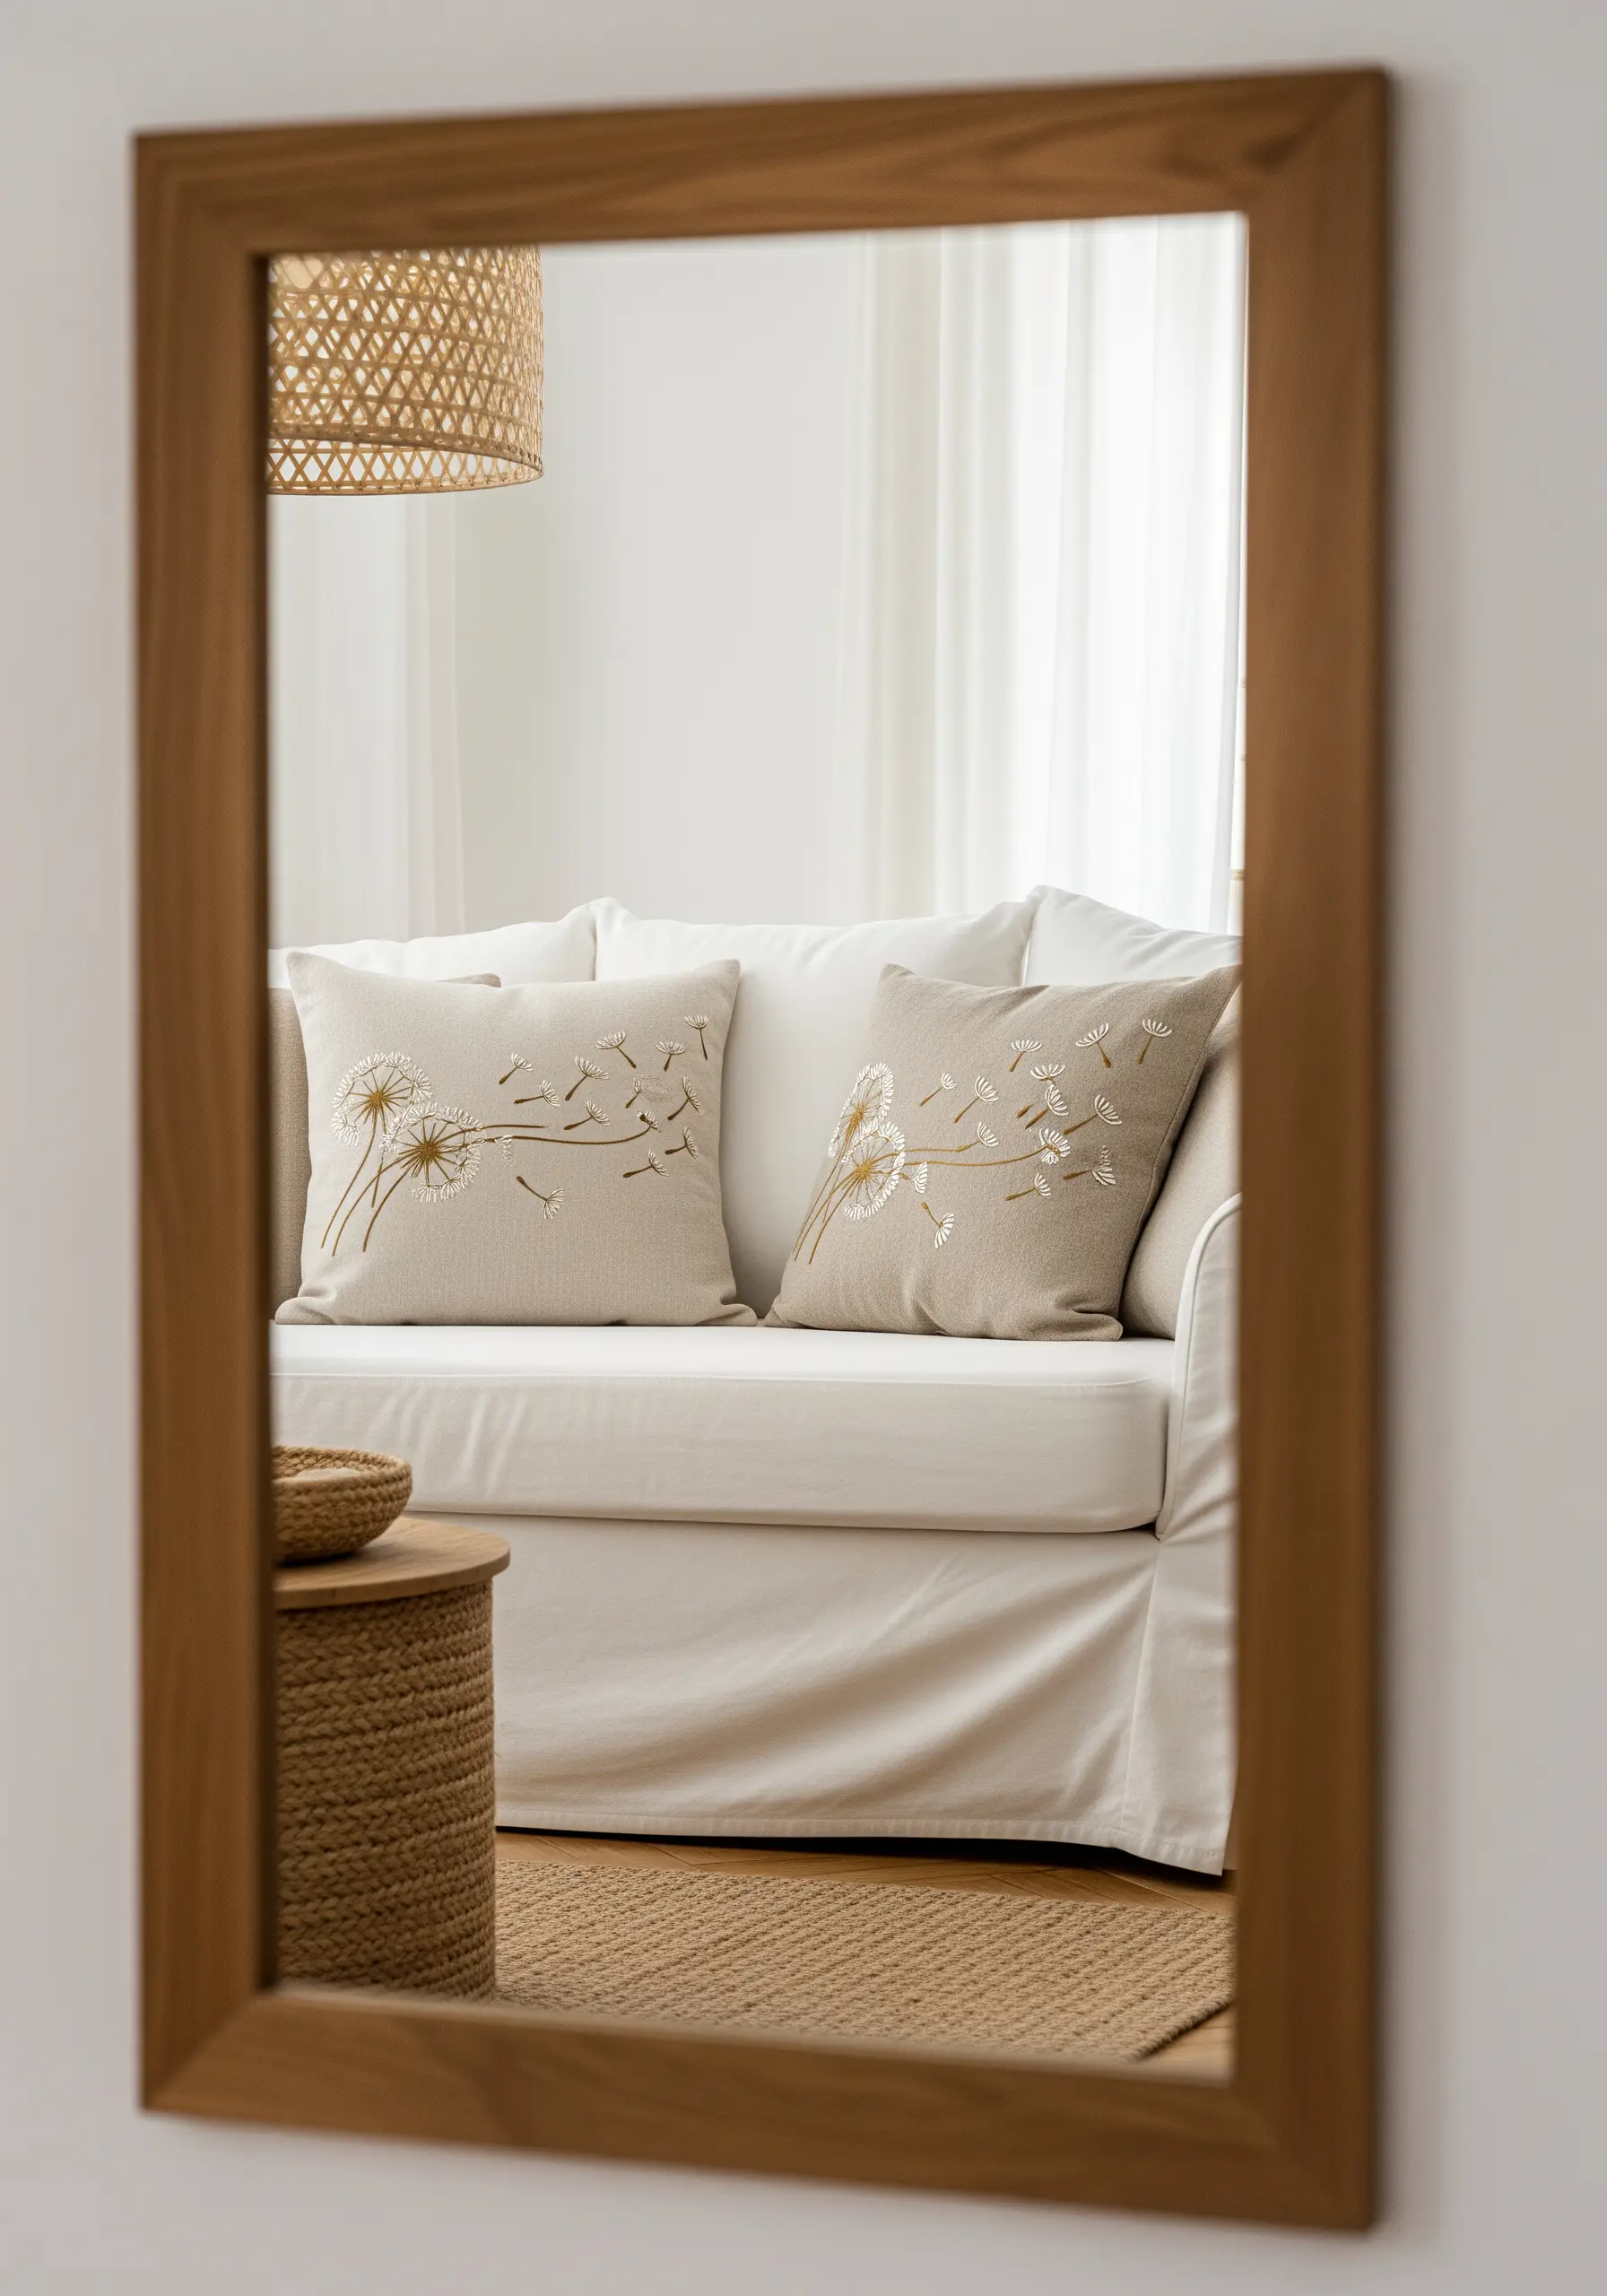
Capture the weightless quality of a dandelion clock by using just a single strand of floss for the delicate seeds.
Combine long straight stitches with tiny French knots for the central clock.
For the seeds that are drifting away, use a single straight stitch finished with a tiny ‘v’ stitch or a detached chain stitch at the top.
This minimal approach creates a beautiful sense of movement and airiness.
22. The Art of Kintsugi: Mending with Golden Thread
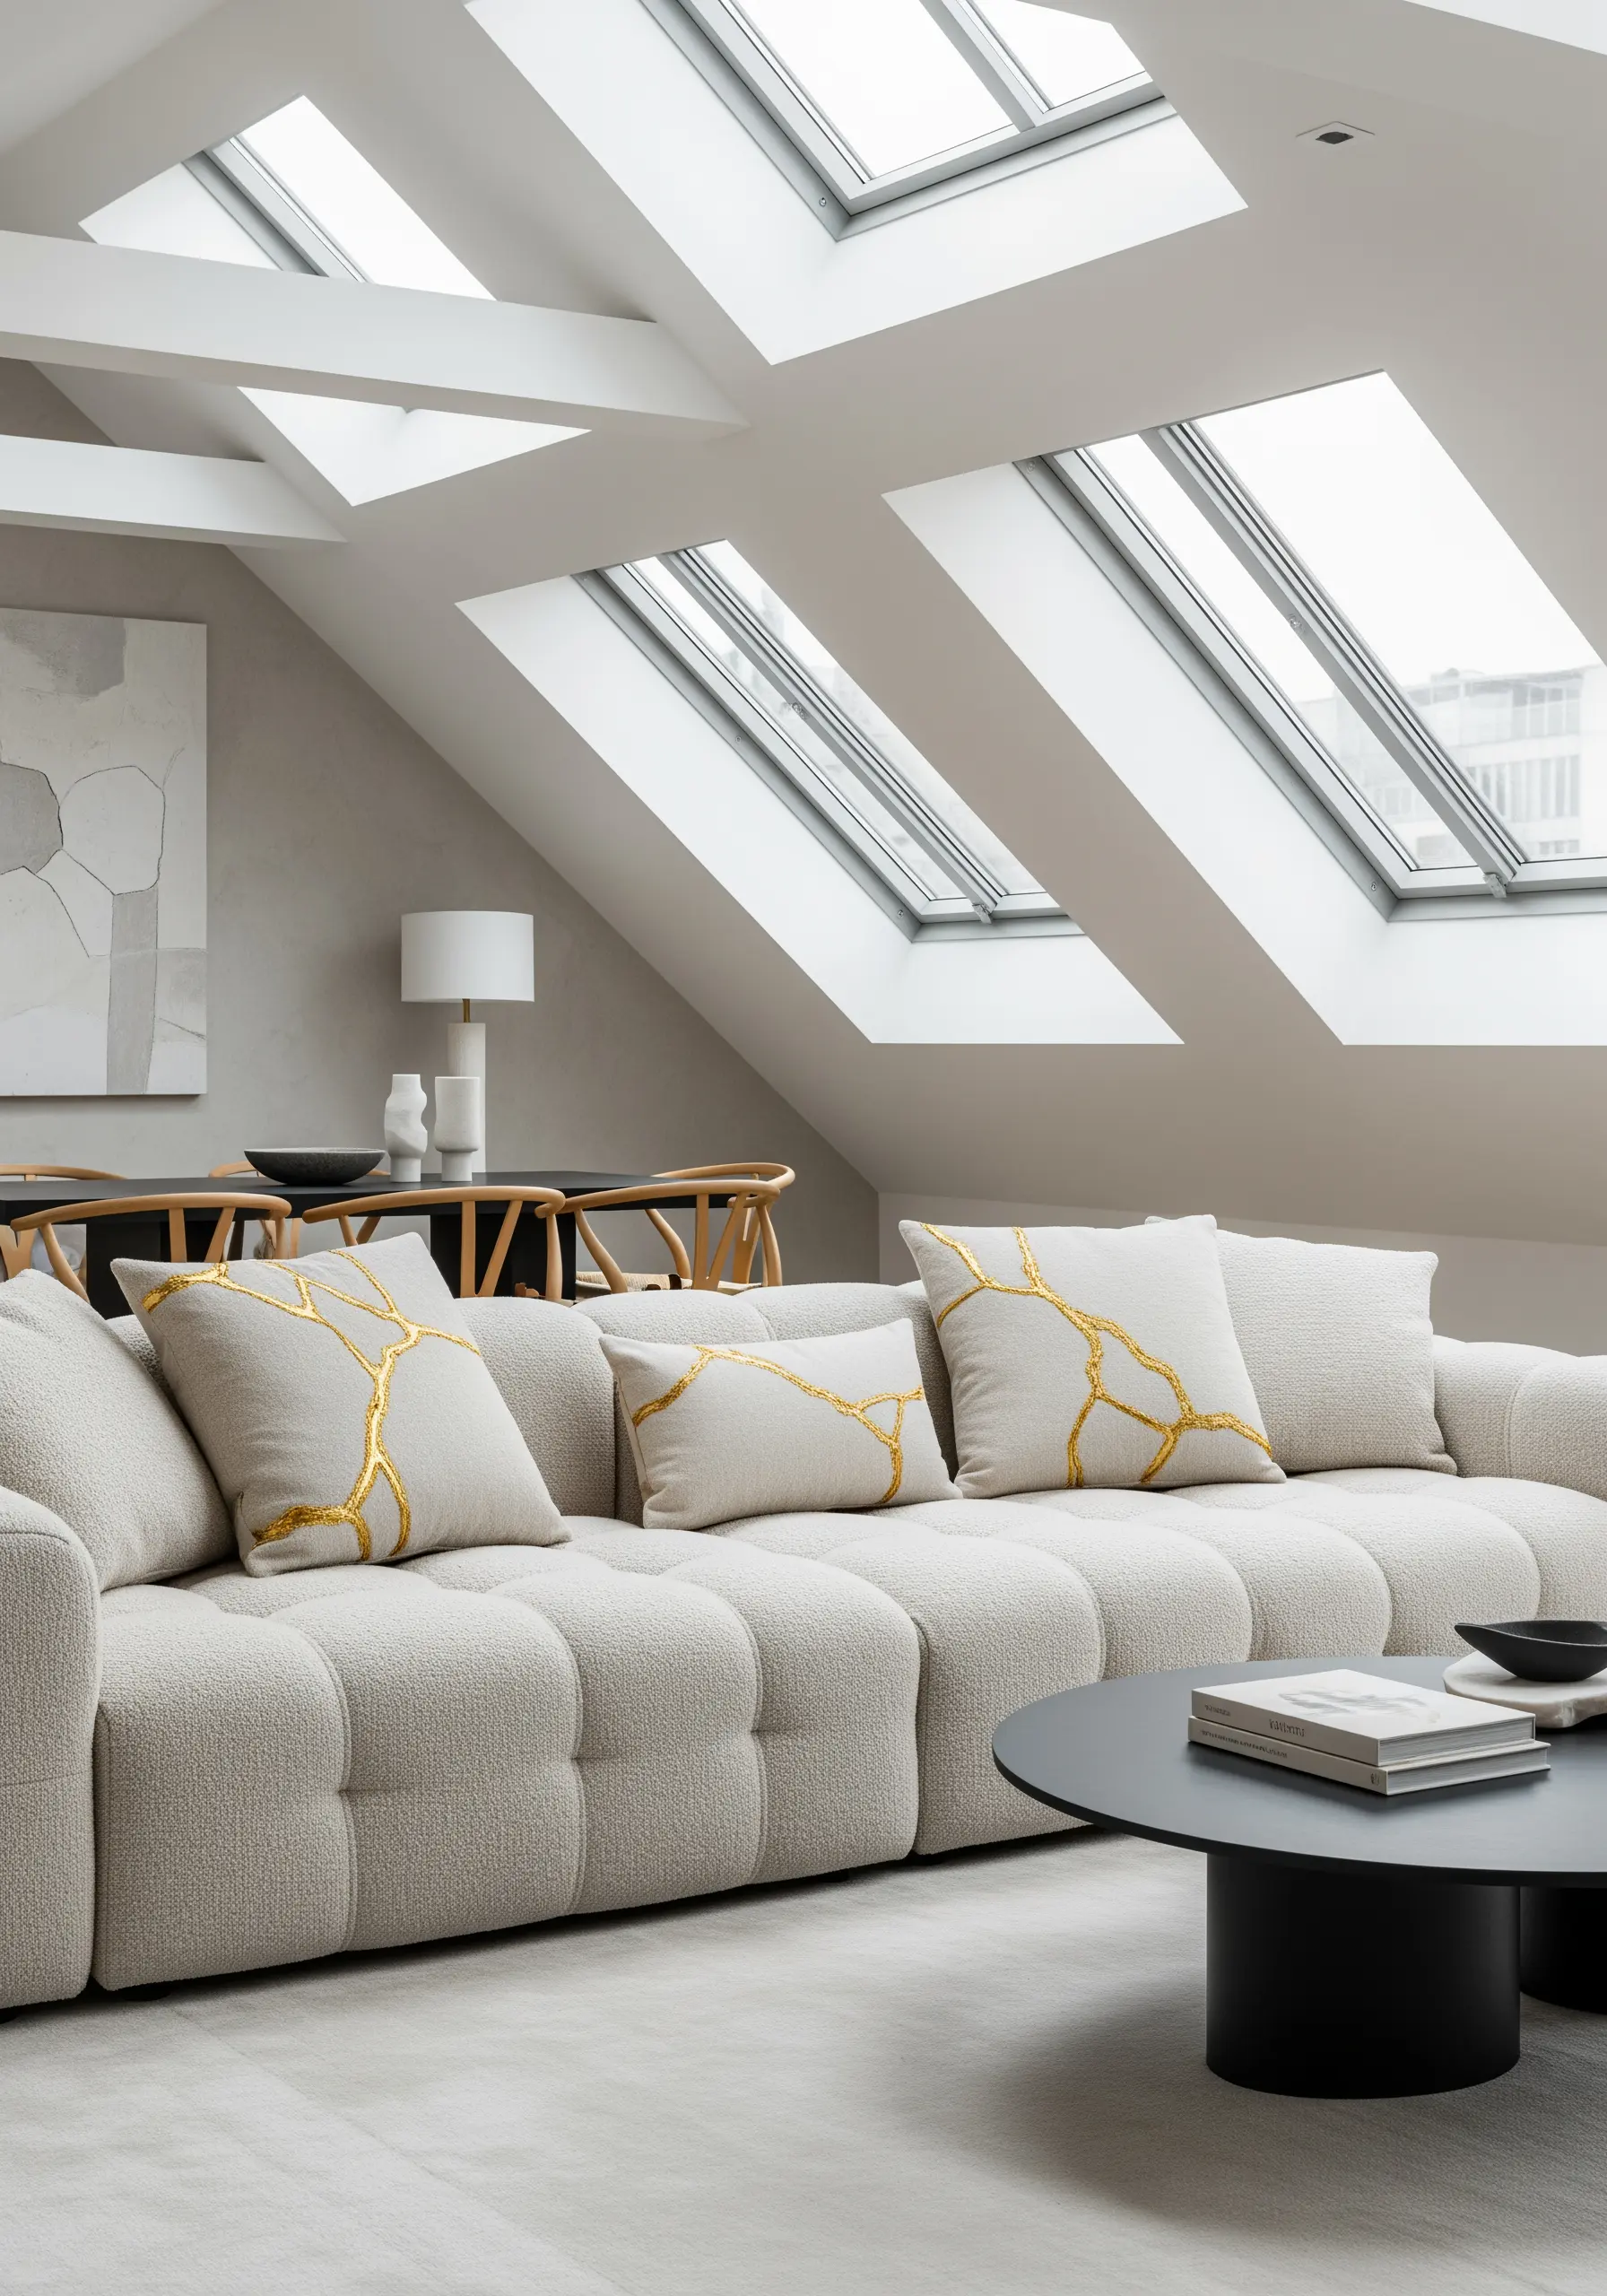
Emulate the beautiful Japanese art of kintsugi (‘golden joinery’) by stitching patterns that resemble repaired cracks.
Use a jagged, irregular backstitch or split stitch, intentionally varying the stitch length and direction.
To mimic the pooling of lacquer, make some lines thicker by adding more strands of metallic floss or by stitching over the line a second time.
This design celebrates imperfection and creates a powerful story of resilience and beauty.
23. The Ornate Scroll: Couching for Intricate, Corded Detail
For highly detailed, baroque-style scrollwork that looks like a metallic cord, couching is the superior technique.
Lay down a metallic cord or a thick, twisted floss like Perle cotton along your design line.
Then, use a fine, nearly invisible matching thread to tack it into place with tiny perpendicular stitches.
This method allows you to create the sharp curves and intricate details of classic embellishment with a truly luxurious finish.
24. The Rustic Line: Embracing Hand-Drawn Imperfection
This mudcloth-inspired style celebrates the unique beauty of the handmade mark.
Use a thick, slubby cotton or even a fine wool thread to enhance the rustic texture.
Stitch with a simple running stitch or backstitch, but resist the urge to make every stitch perfect.
Slight variations in stitch length and spacing are not flaws; they are what give this design its authentic, earthy character and charm.
25. The Literary Cushion: Combining Typography and Block Stitching
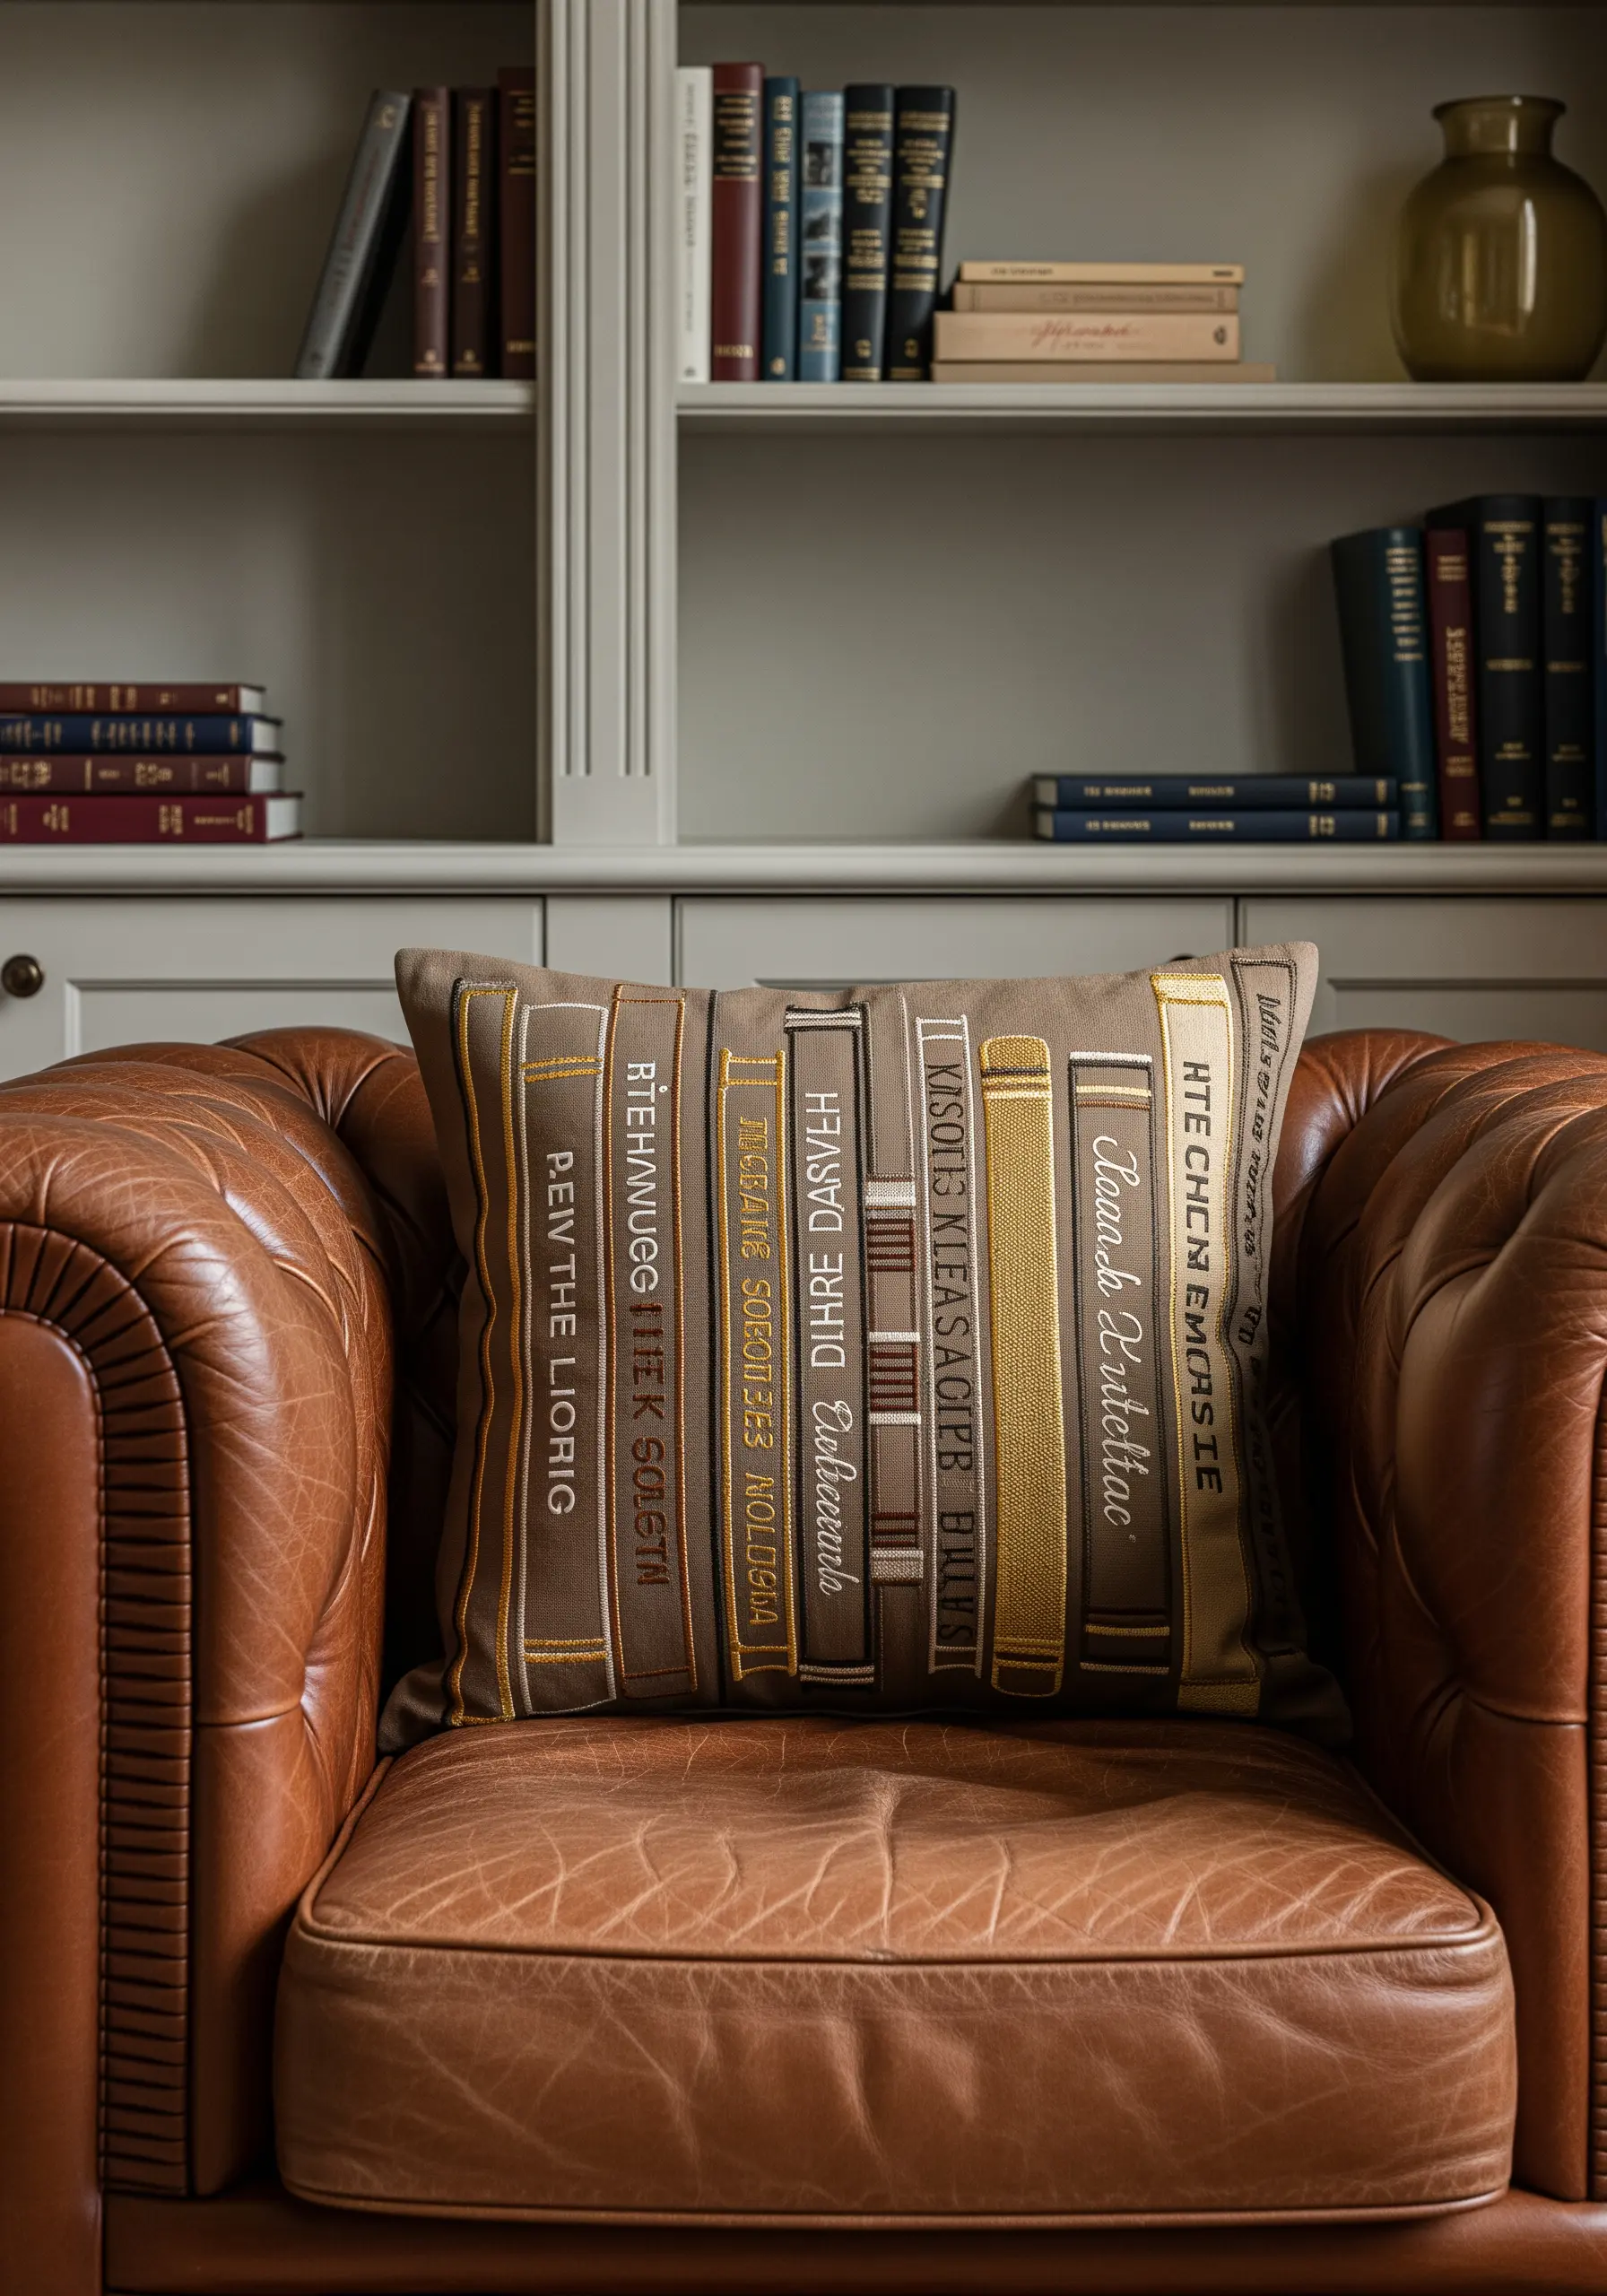
Create the solid book spines using vertical satin stitches. To keep the edges perfectly straight and crisp, outline each spine with a split stitch first.
For the tiny titles, switch to a single strand of floss and use a meticulous backstitch or stem stitch.
Varying the shades of gold, beige, and taupe for the different spines will add depth and realism to your personal embroidered library.
26. The Minimalist Sun: Radiating Lines on a Small Scale

On a smaller surface like a dining chair pad, simplicity is essential for creating an elegant impact.
Use a simple backstitch or a single-strand stem stitch to create the fine rays of the sunburst.
This creates a delicate, clean, graphic pattern that adds a touch of bespoke detail without overwhelming the furniture.
It’s a quick and effective way to unify a mismatched set of chairs with a personal, handcrafted touch.
27. The Tropical Outline: Capturing Iconic Monstera Leaves
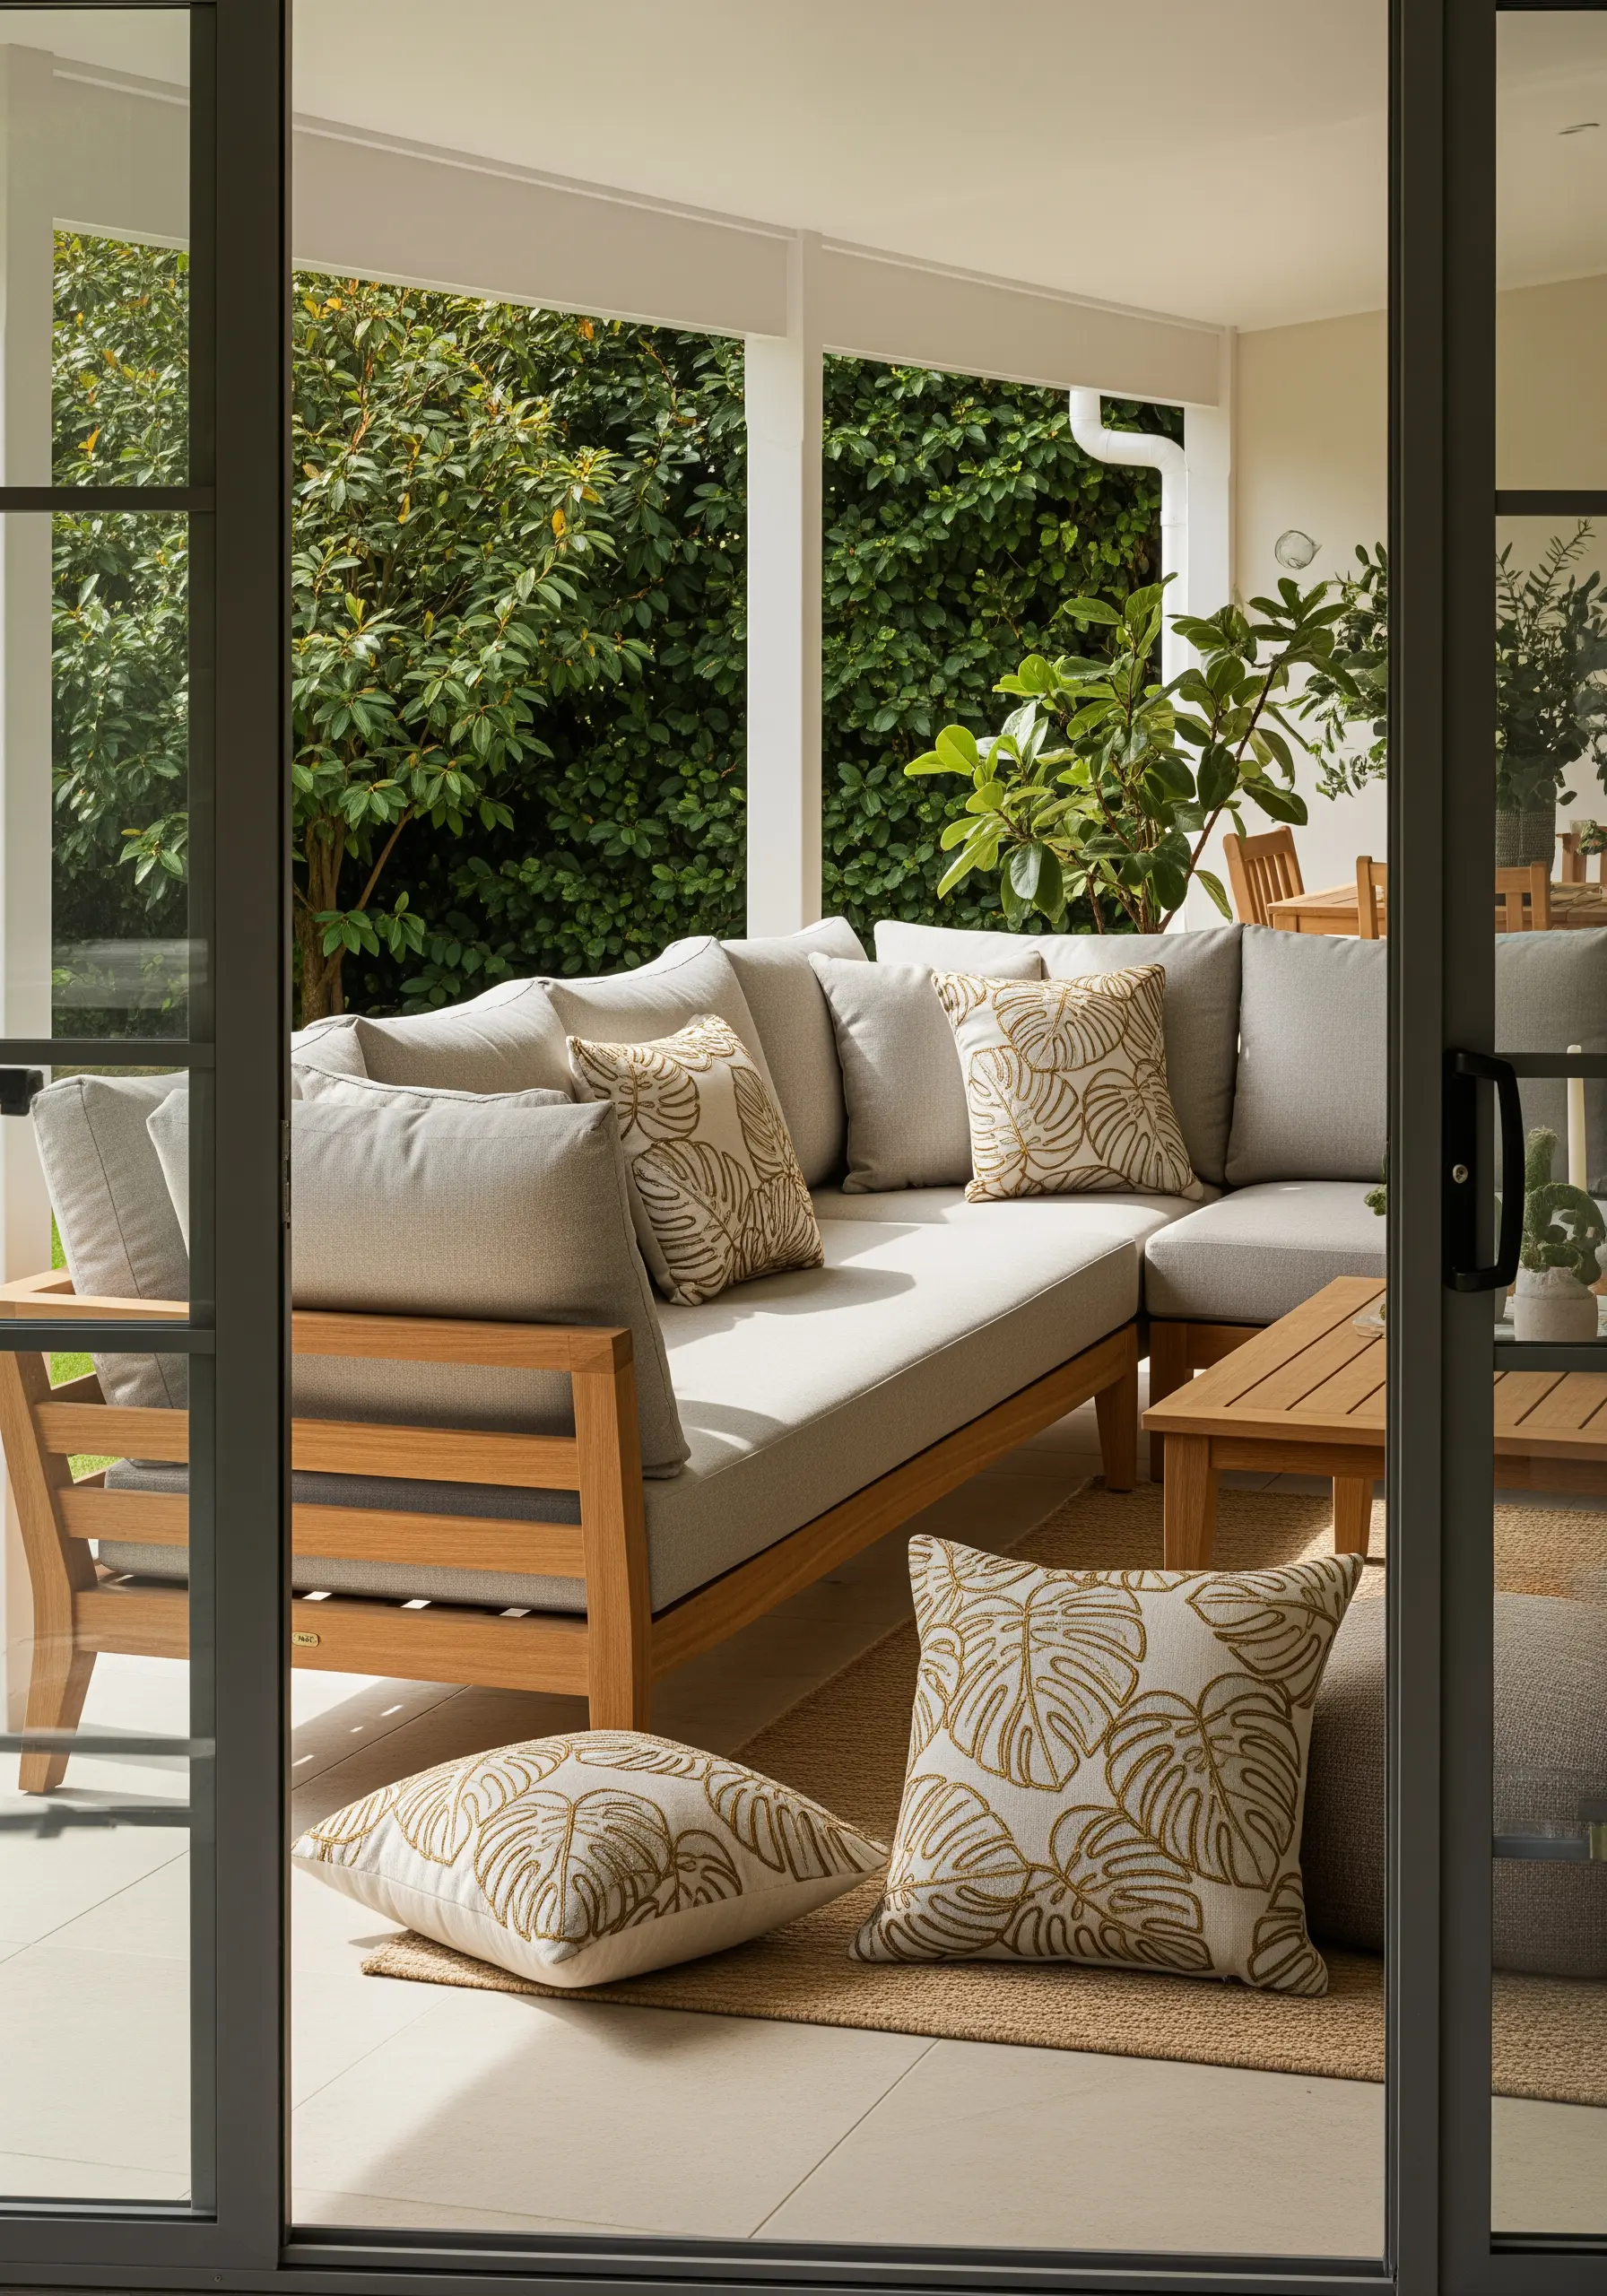
To cleanly stitch the iconic shape of a monstera leaf, a whipped backstitch is your best tool.
First, create a standard backstitch outline. Then, whip your thread around these stitches without piercing the fabric.
This technique creates a smooth, solid, slightly raised line that is perfect for defining the distinctive splits and curves of the leaf.
The simplicity of an outline allows the recognizable shape to be the hero of the design.
28. The Celestial Appliqué: Combining Fabric and Thread
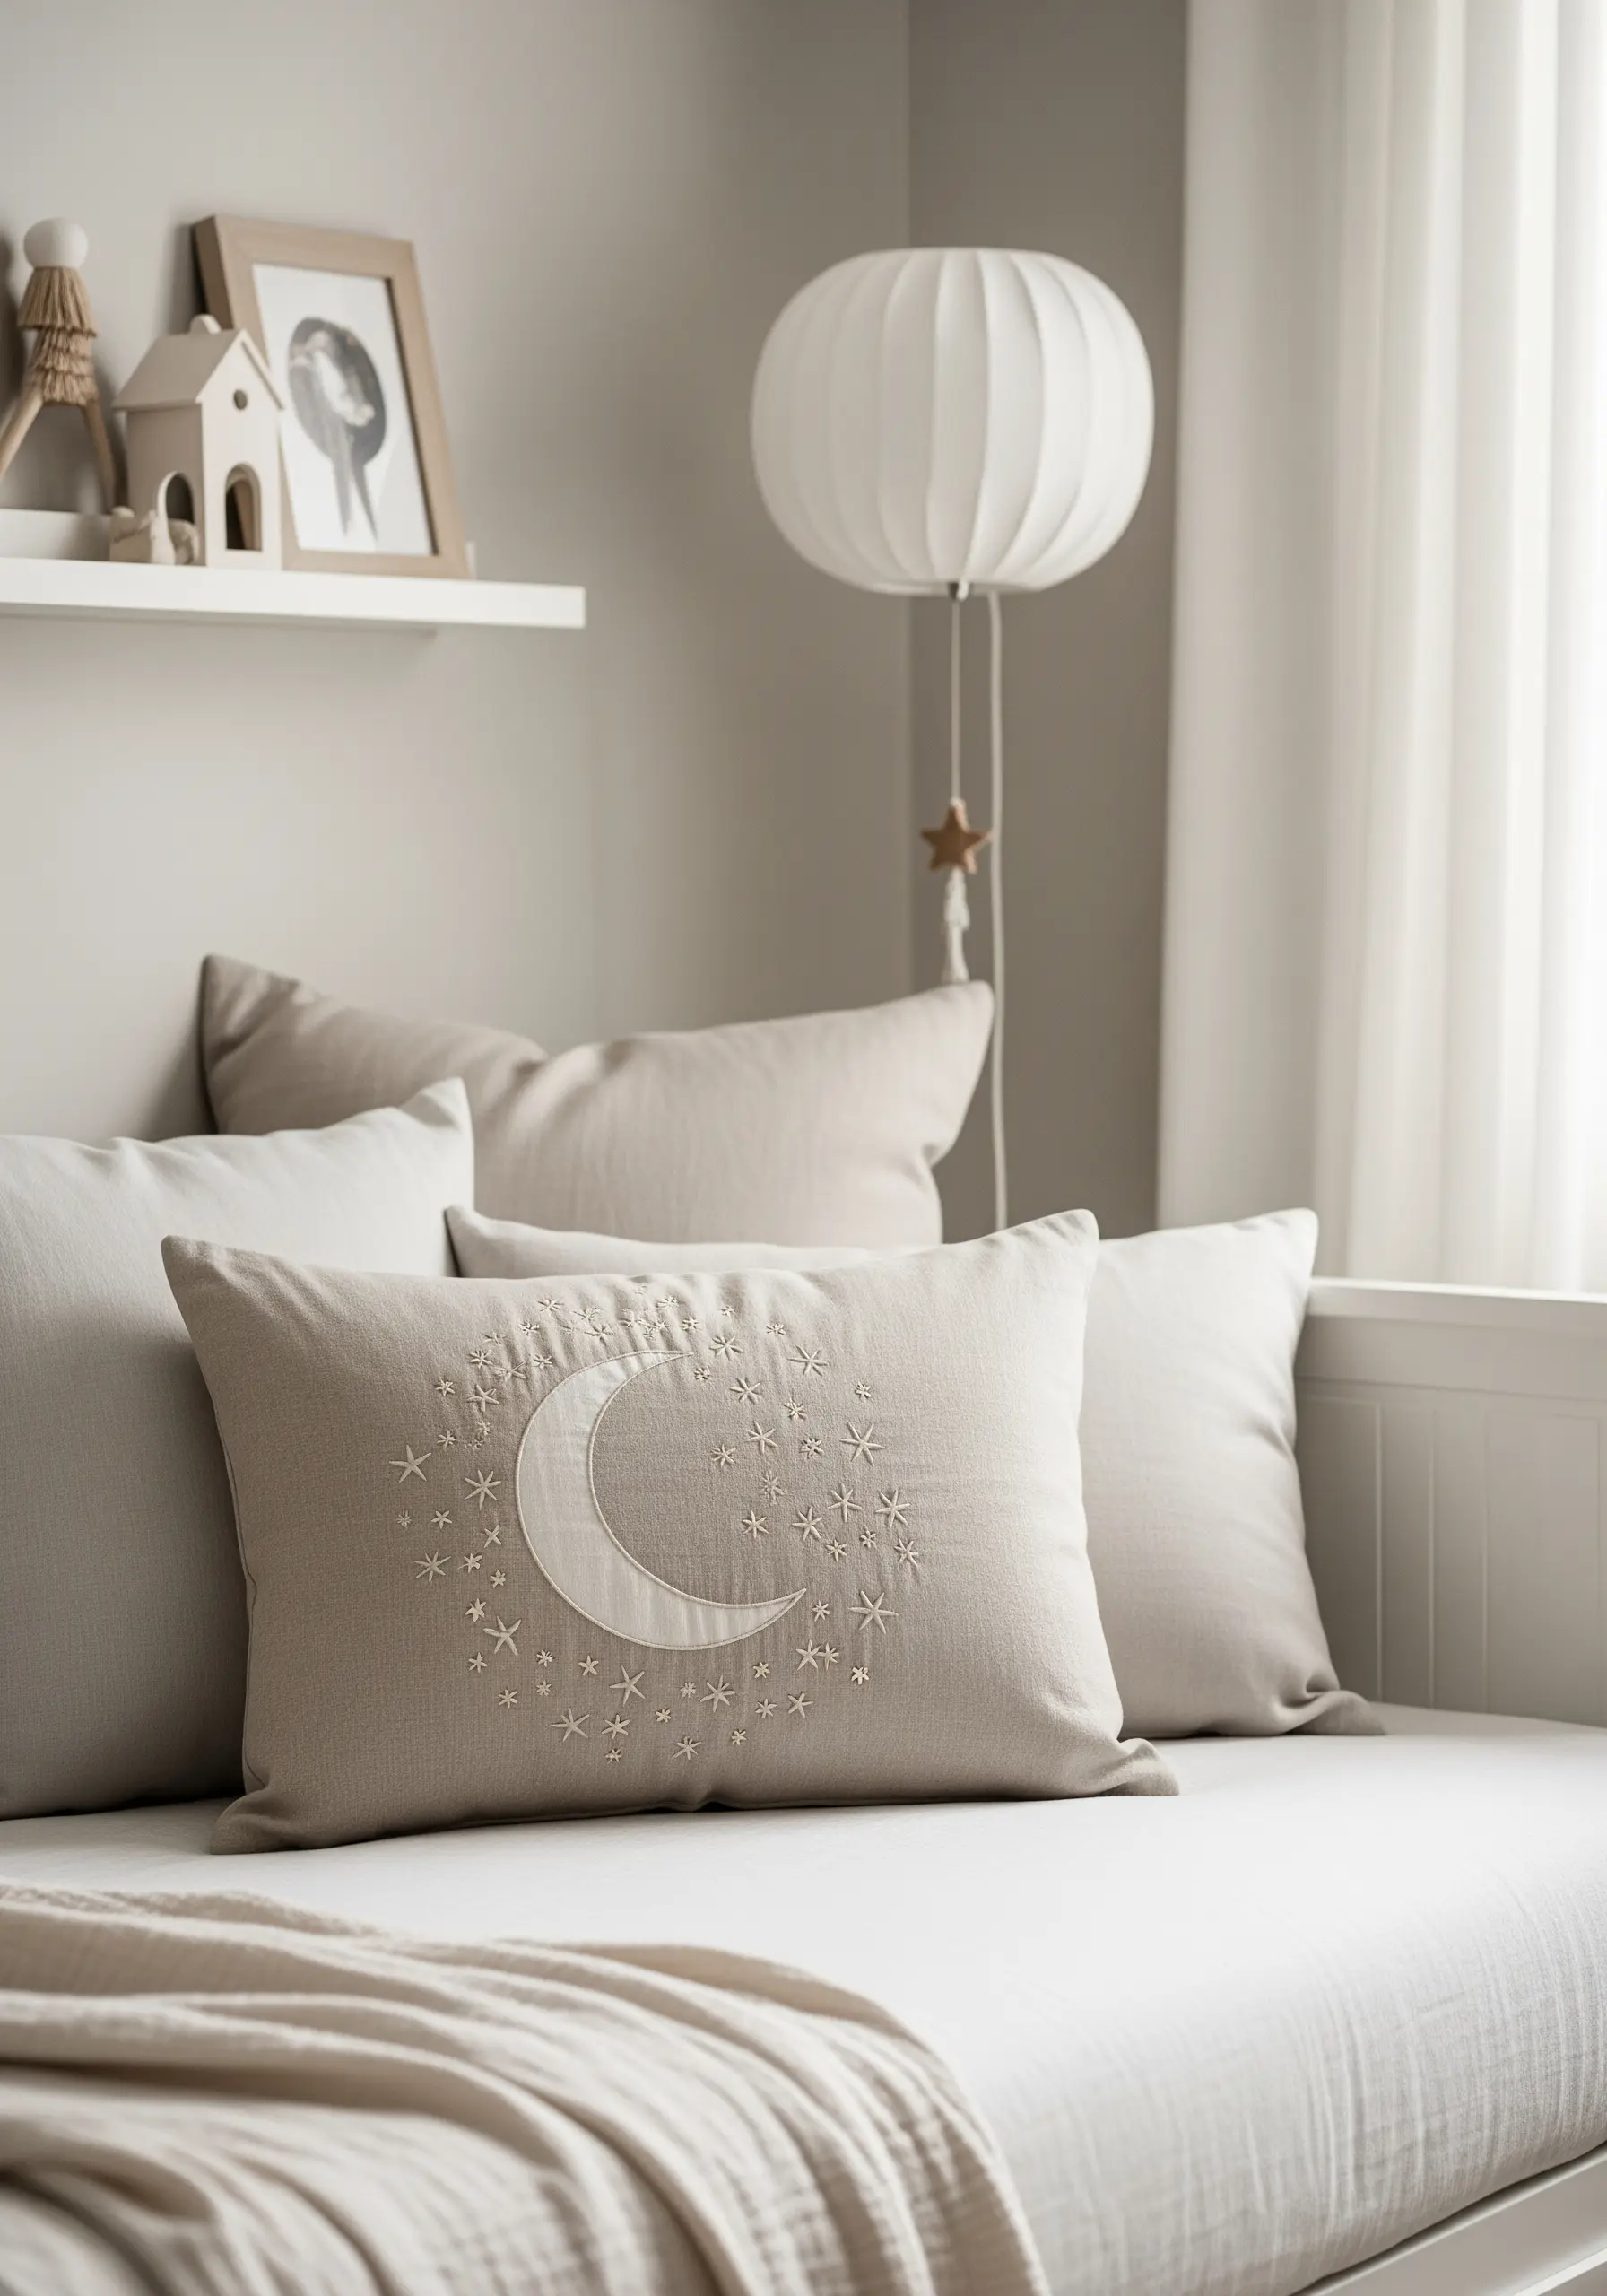
For a beautifully textured crescent moon, use appliqué instead of fill stitching.
Cut the moon shape from a contrasting fabric like raw silk or satin, and secure it to your cushion with a tiny, neat blanket stitch around the edge.
Then, scatter the surrounding area with star stitches and French knots using a shimmering metallic floss.
This mix of techniques adds a lovely depth and tactile quality to the celestial scene.
29. The Gilded Link: Dimension with Padded Satin Stitch
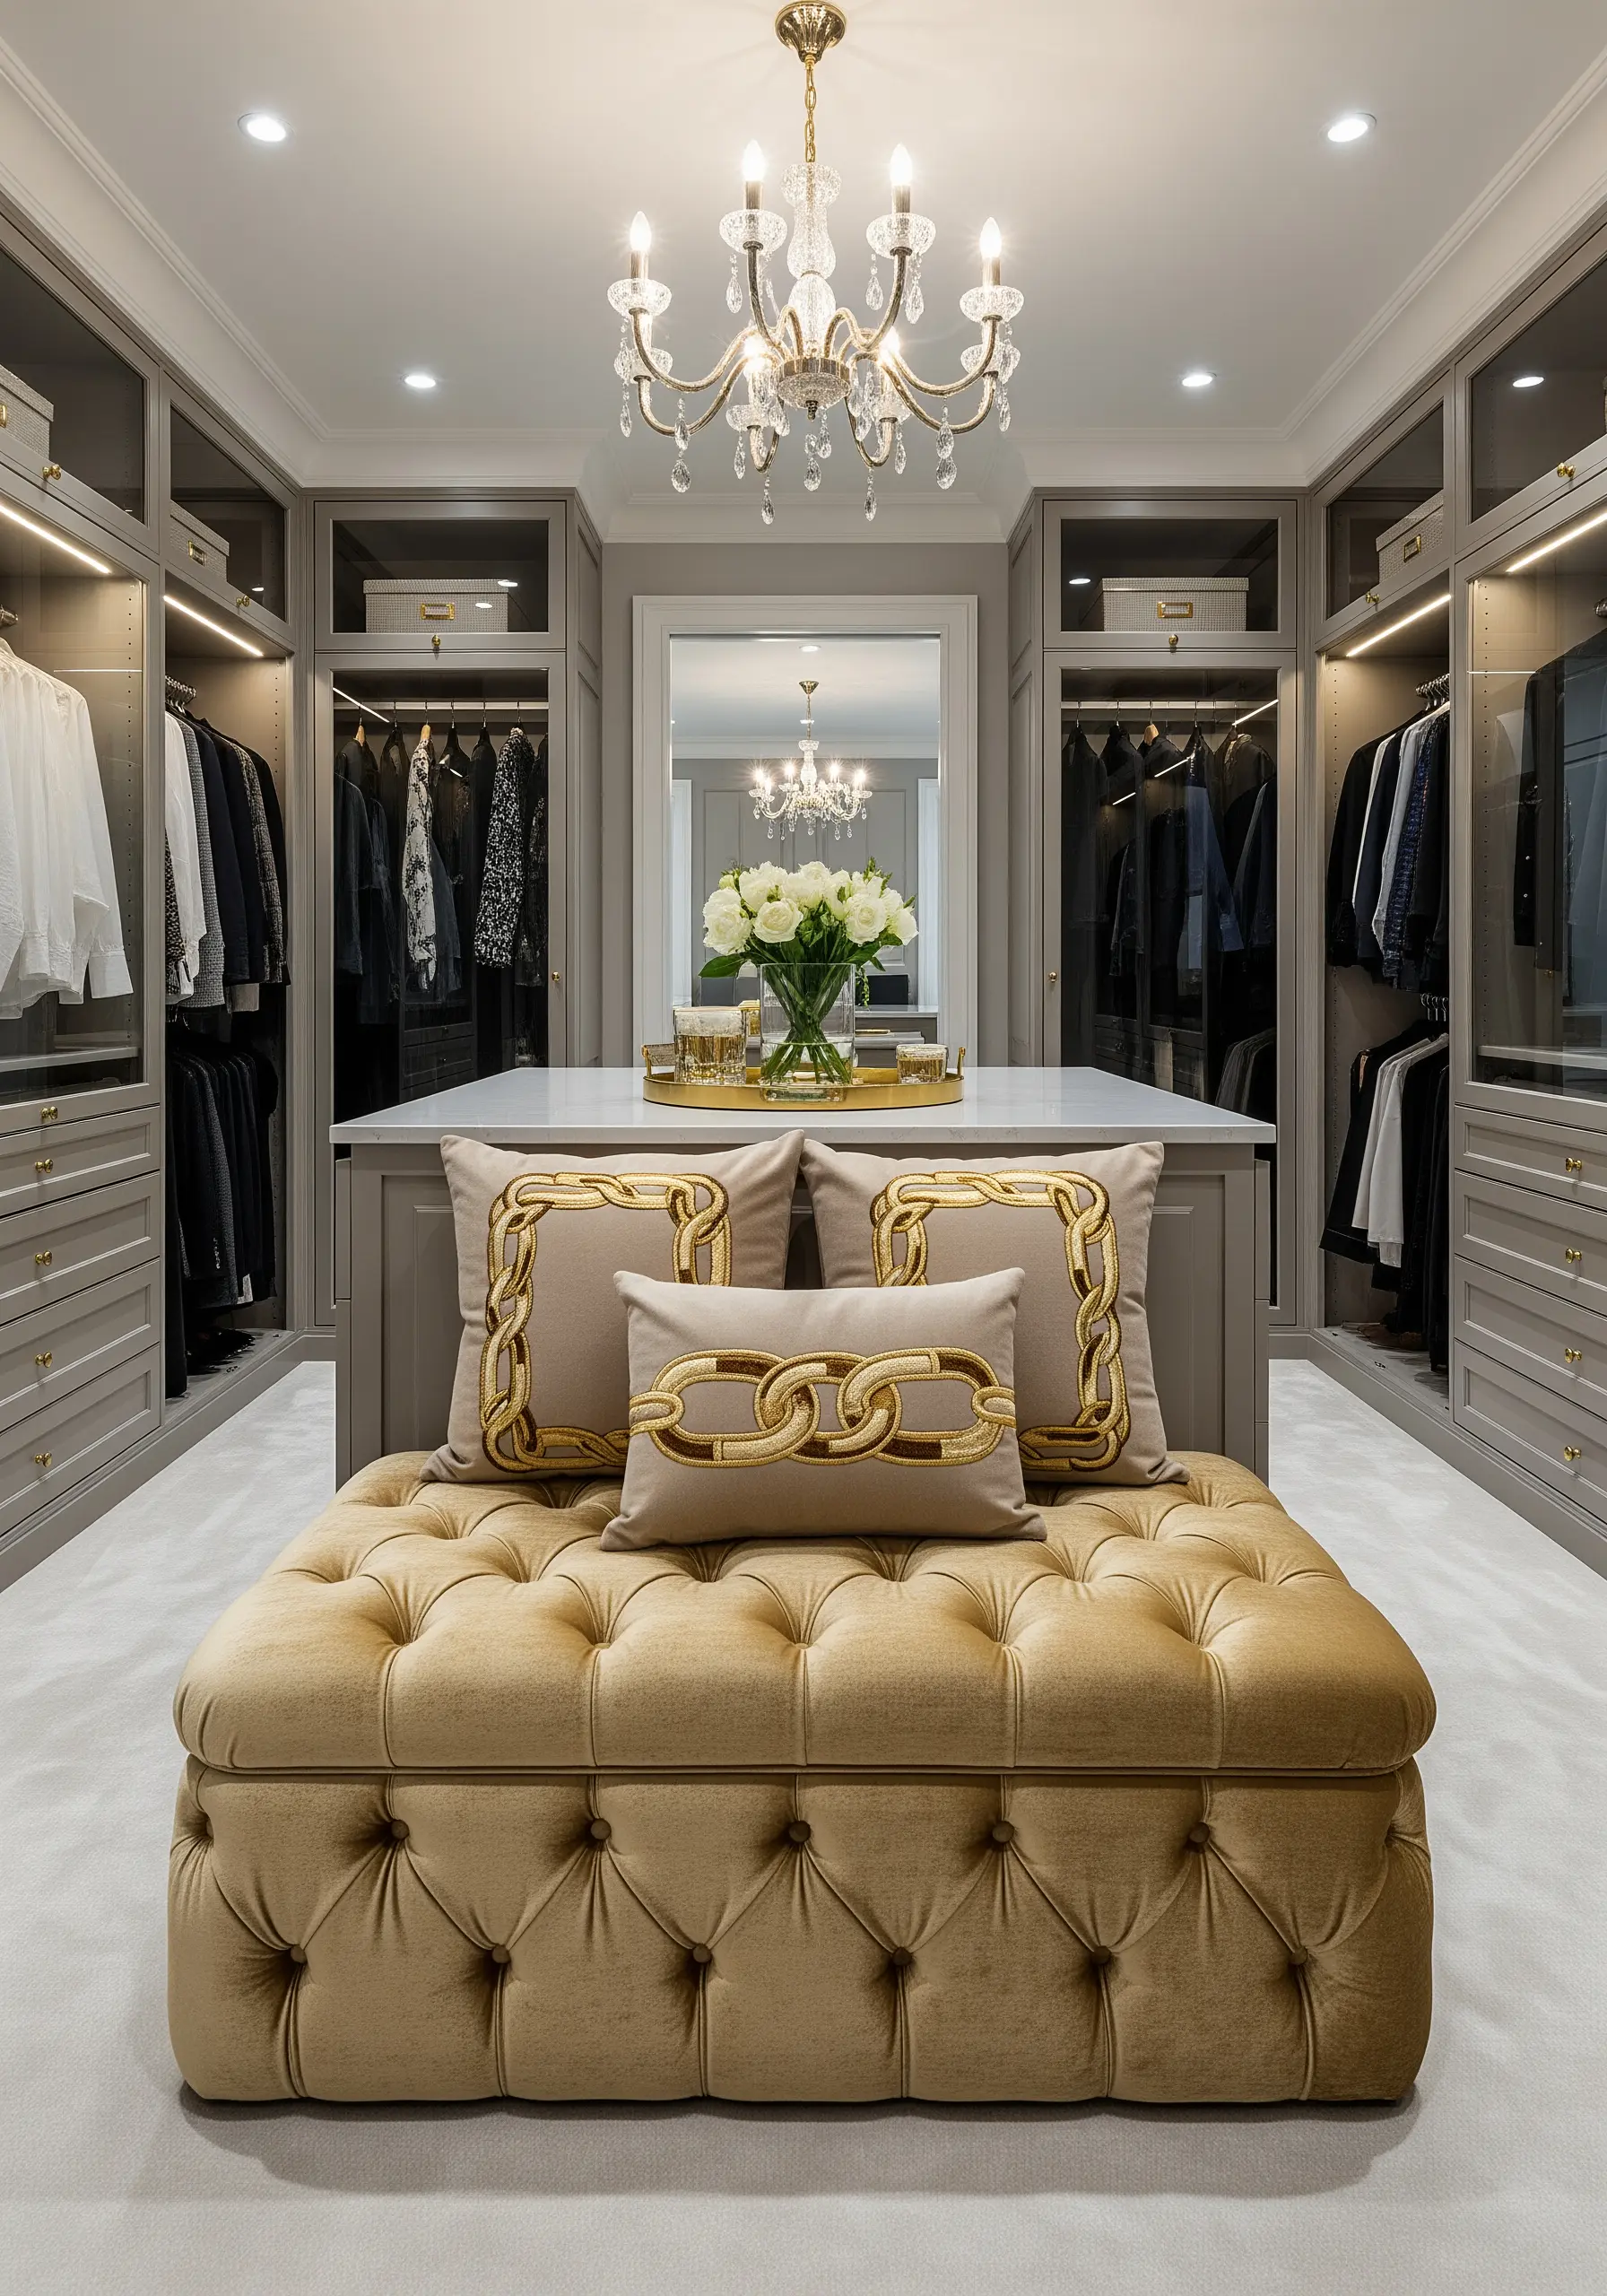
To make these chain links look truly three-dimensional and metallic, you need to use a padded satin stitch.
First, create a base layer of seed stitches or running stitches within the shape of each link.
Next, cover this padding with tight, smooth horizontal satin stitches using a high-sheen gold thread.
The padding underneath physically raises the stitches, causing them to catch the light for a stunning, hardware-like effect.
30. The Woven Effect: Layering Stitches for Tactile Warmth
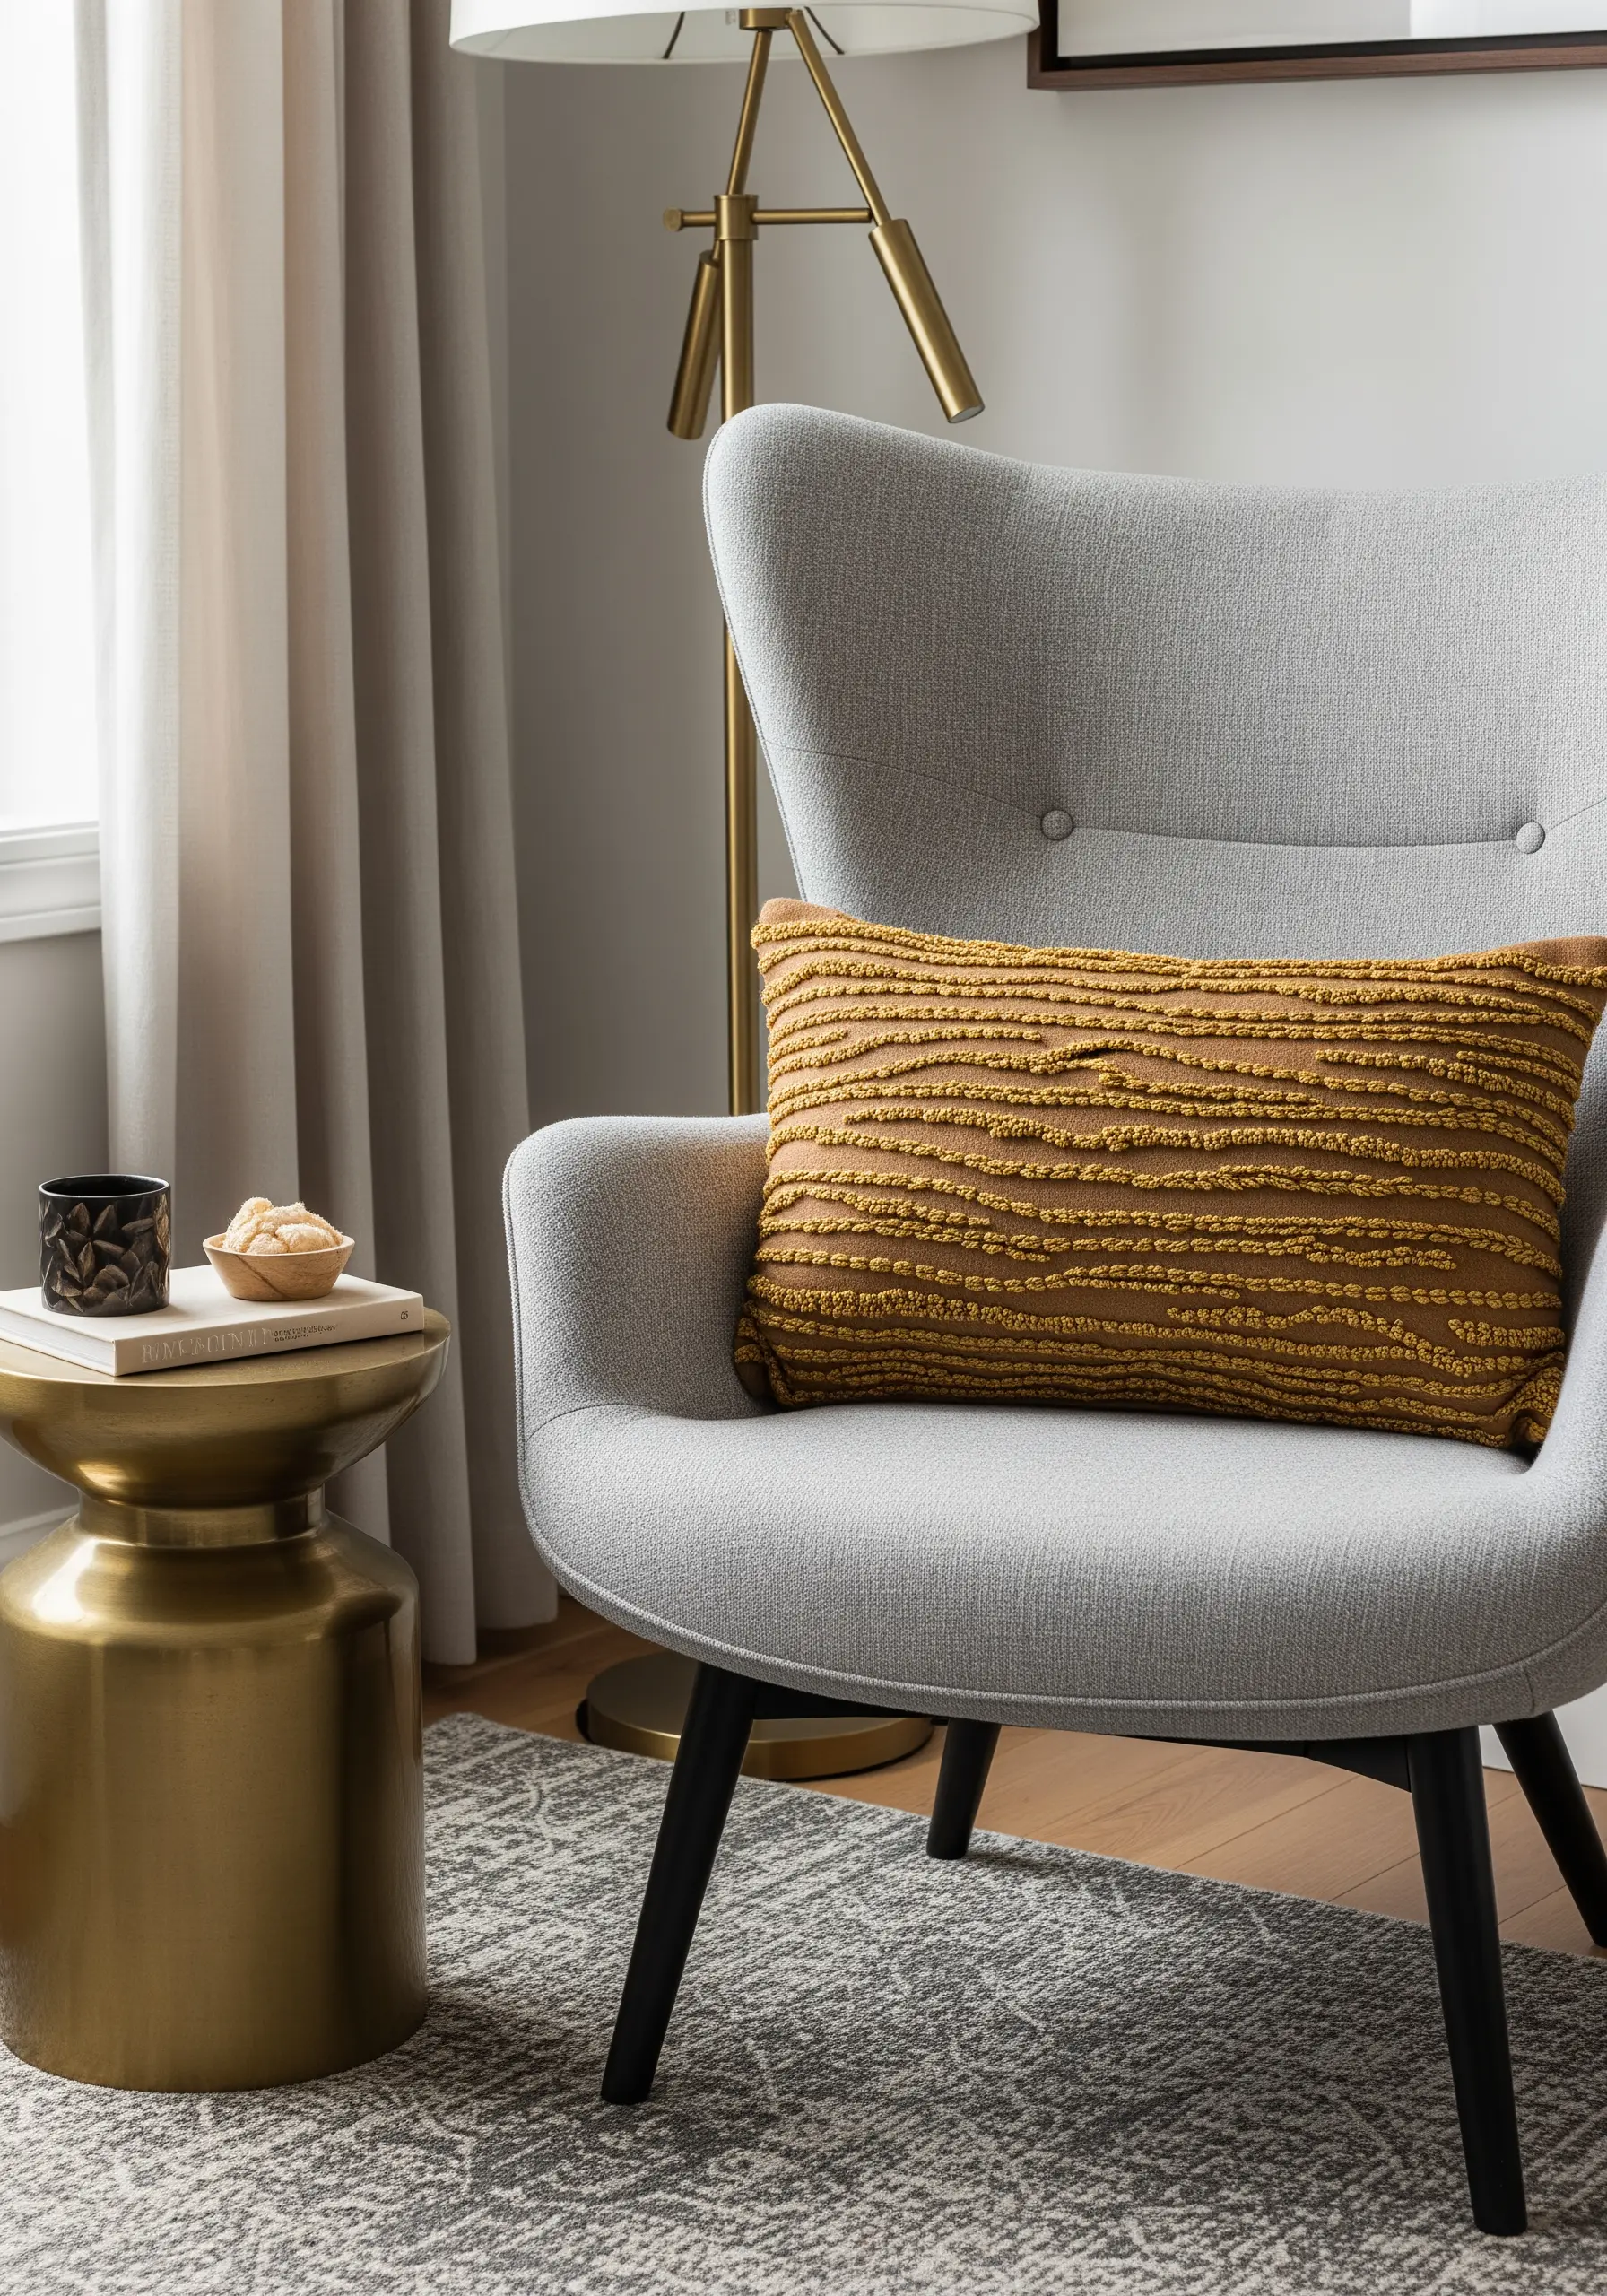
This design beautifully mimics the rich texture of a hand-woven textile.
You can achieve this effect by layering different textural stitches in dense, horizontal bands.
Use rows of French knots for bumps, seed stitches for a grainy feel, and short, straight satin stitches for bars of light.
By clustering them in irregular rows, you create a highly tactile surface that invites touch and adds organic warmth to a modern chair.
31. The Linked Rings: A Minimalist Take on the Monogram
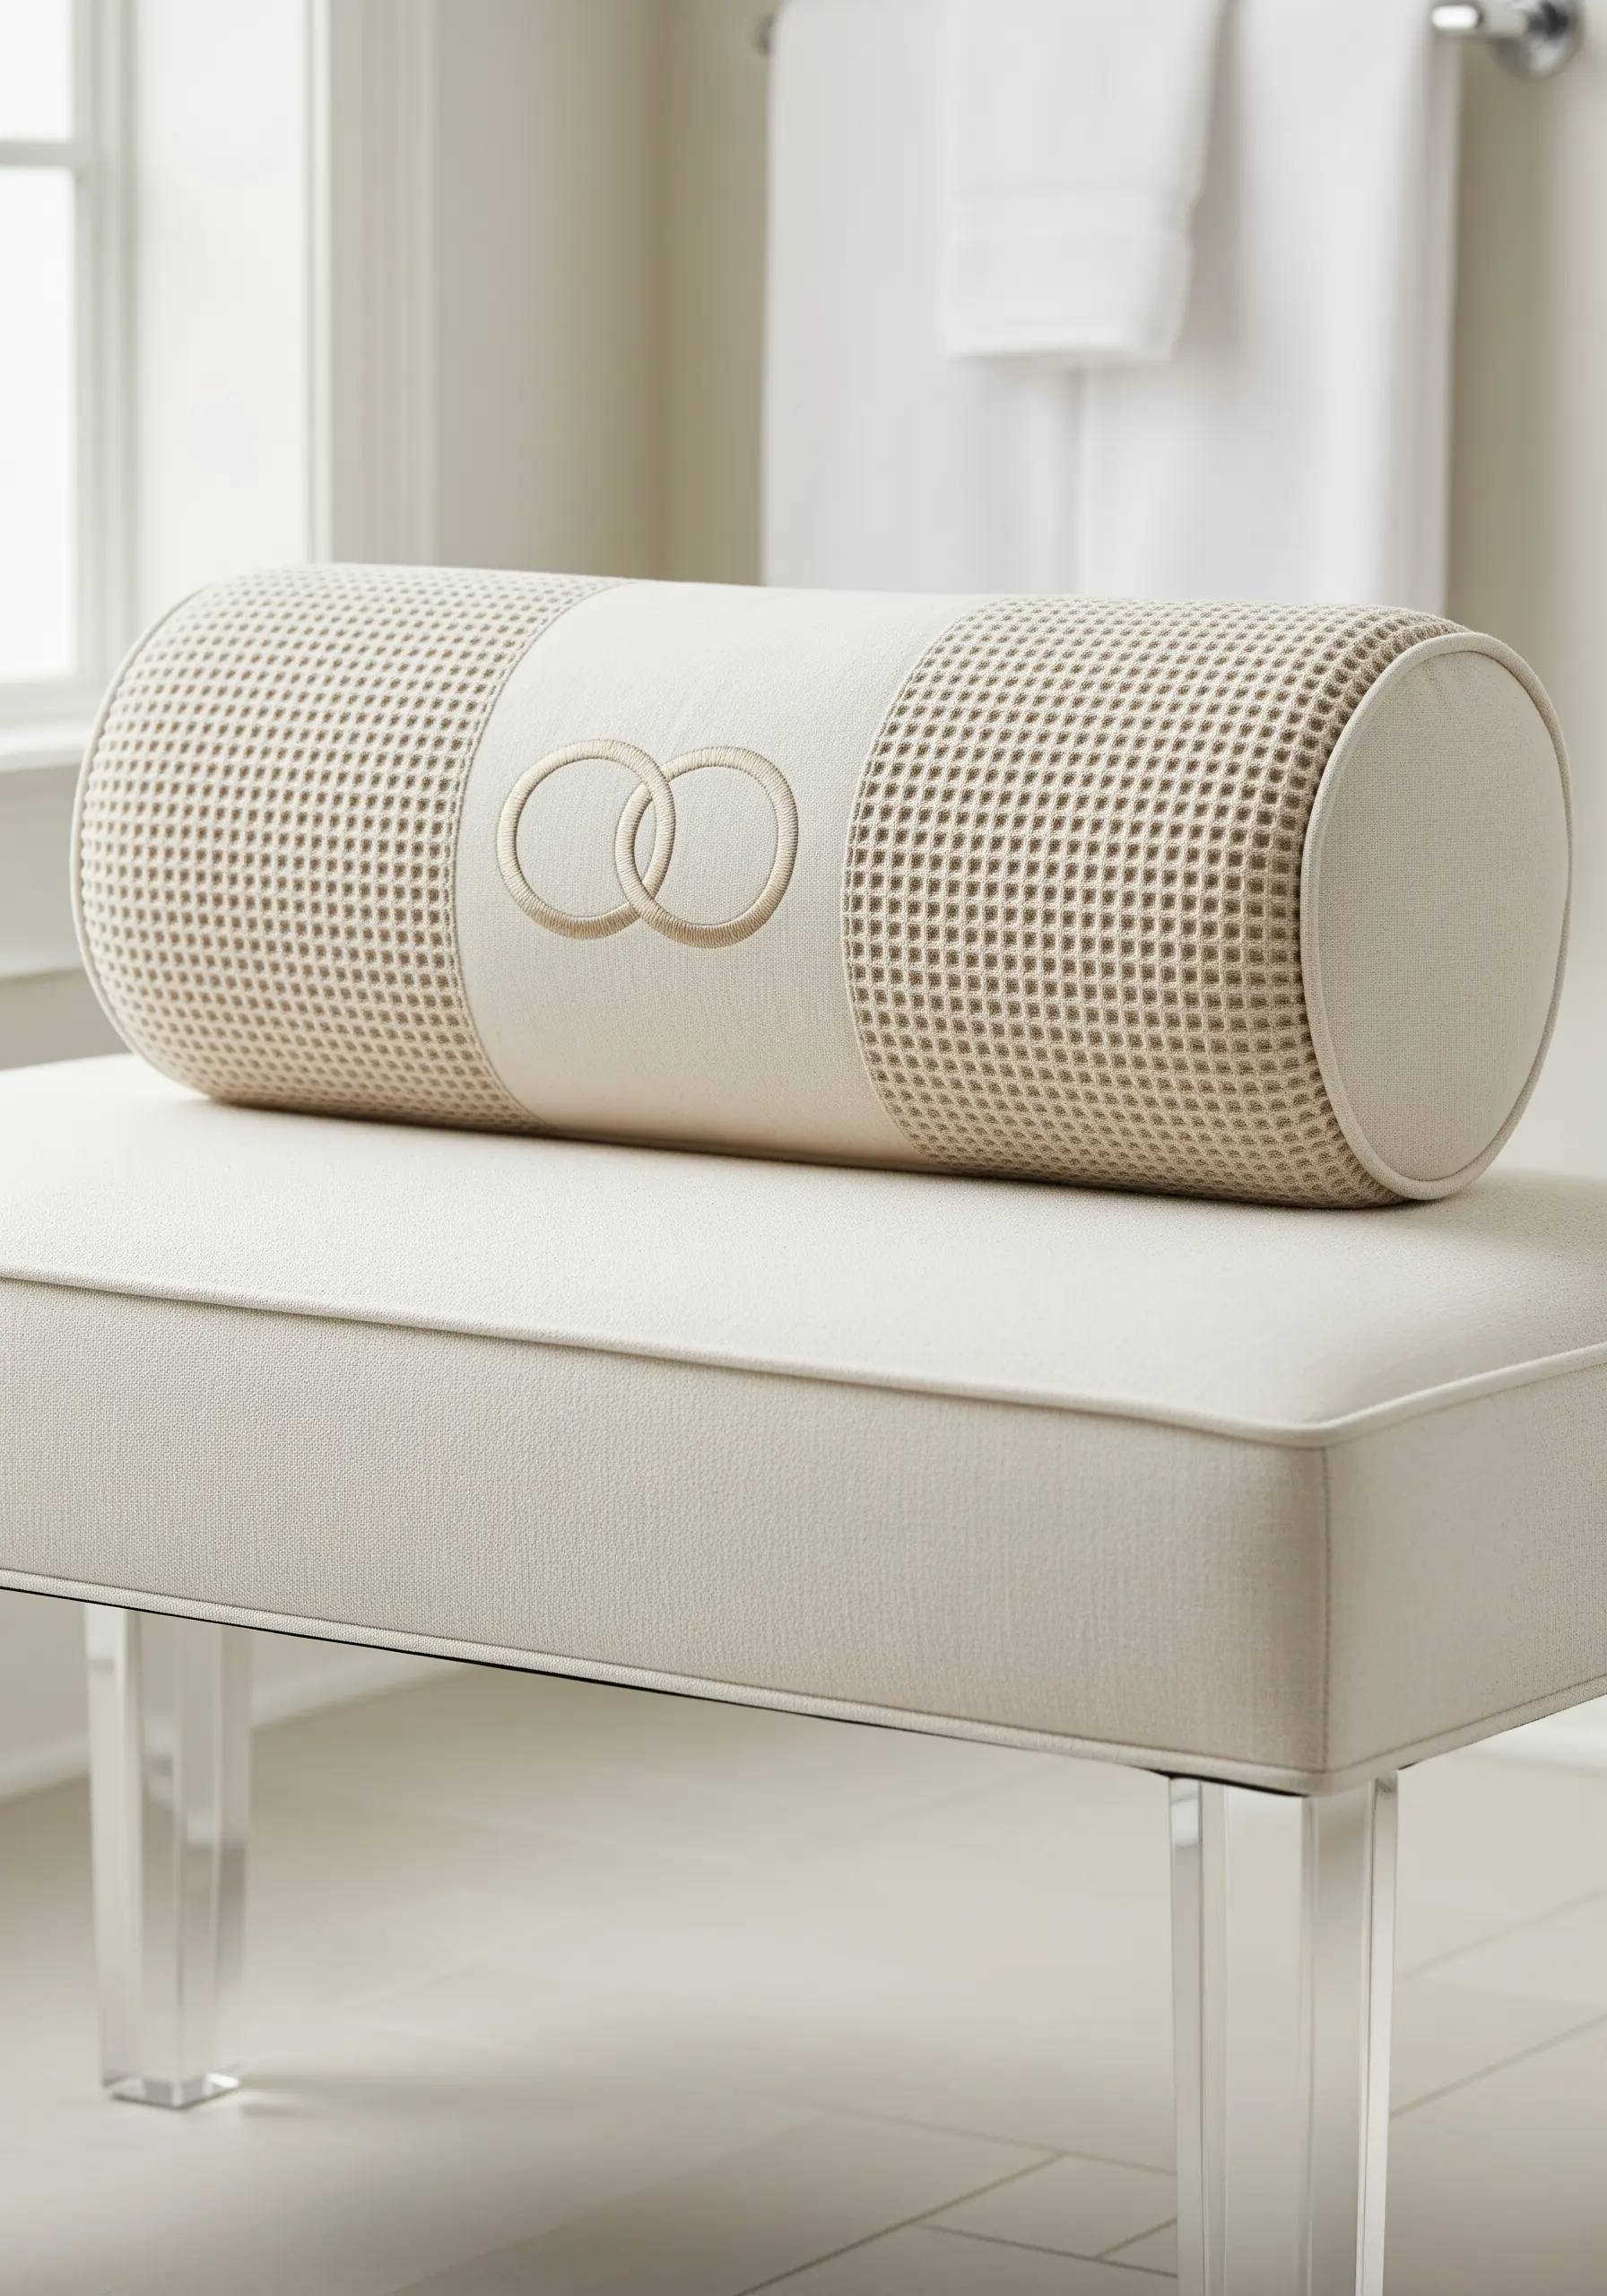
For a subtle and modern interpretation of a monogram, consider simple interlocking rings.
A fine chain stitch or a precise split stitch works perfectly, providing a clean, defined line without adding any unnecessary bulk.
Placing this small, elegant motif on a heavily textured fabric like waffle weave creates a beautiful and sophisticated contrast between the smooth stitched lines and the tactile background.


