

You have the threads, the fabric, and the desire to create something beautiful, but perhaps your finished pieces don’t quite capture the elegance you envision. It’s often not about learning a hundred new stitches, but about refining how you use the few you already know. A simple adjustment in thread weight, stitch direction, or composition can transform a simple border into a work of art that feels intentional and personal.
This is where your curtains become more than just window coverings; they become canvases. Think of these borders not as rigid patterns to be copied, but as starting points for your own expression. We will explore how a single line of well-placed stitches can ground a room, how texture can add warmth that paint never could, and how the simple pairing of cream and clay can create a sense of calm and sophistication.
Let’s move beyond just stitching and start designing with thread. I’ll guide you through the small decisions—the *why* behind a certain stitch or the placement of a motif—that make the biggest difference. Your needle is waiting, and your home is ready for the warmth only you can create.
1. Frame Your View with Geometric Precision
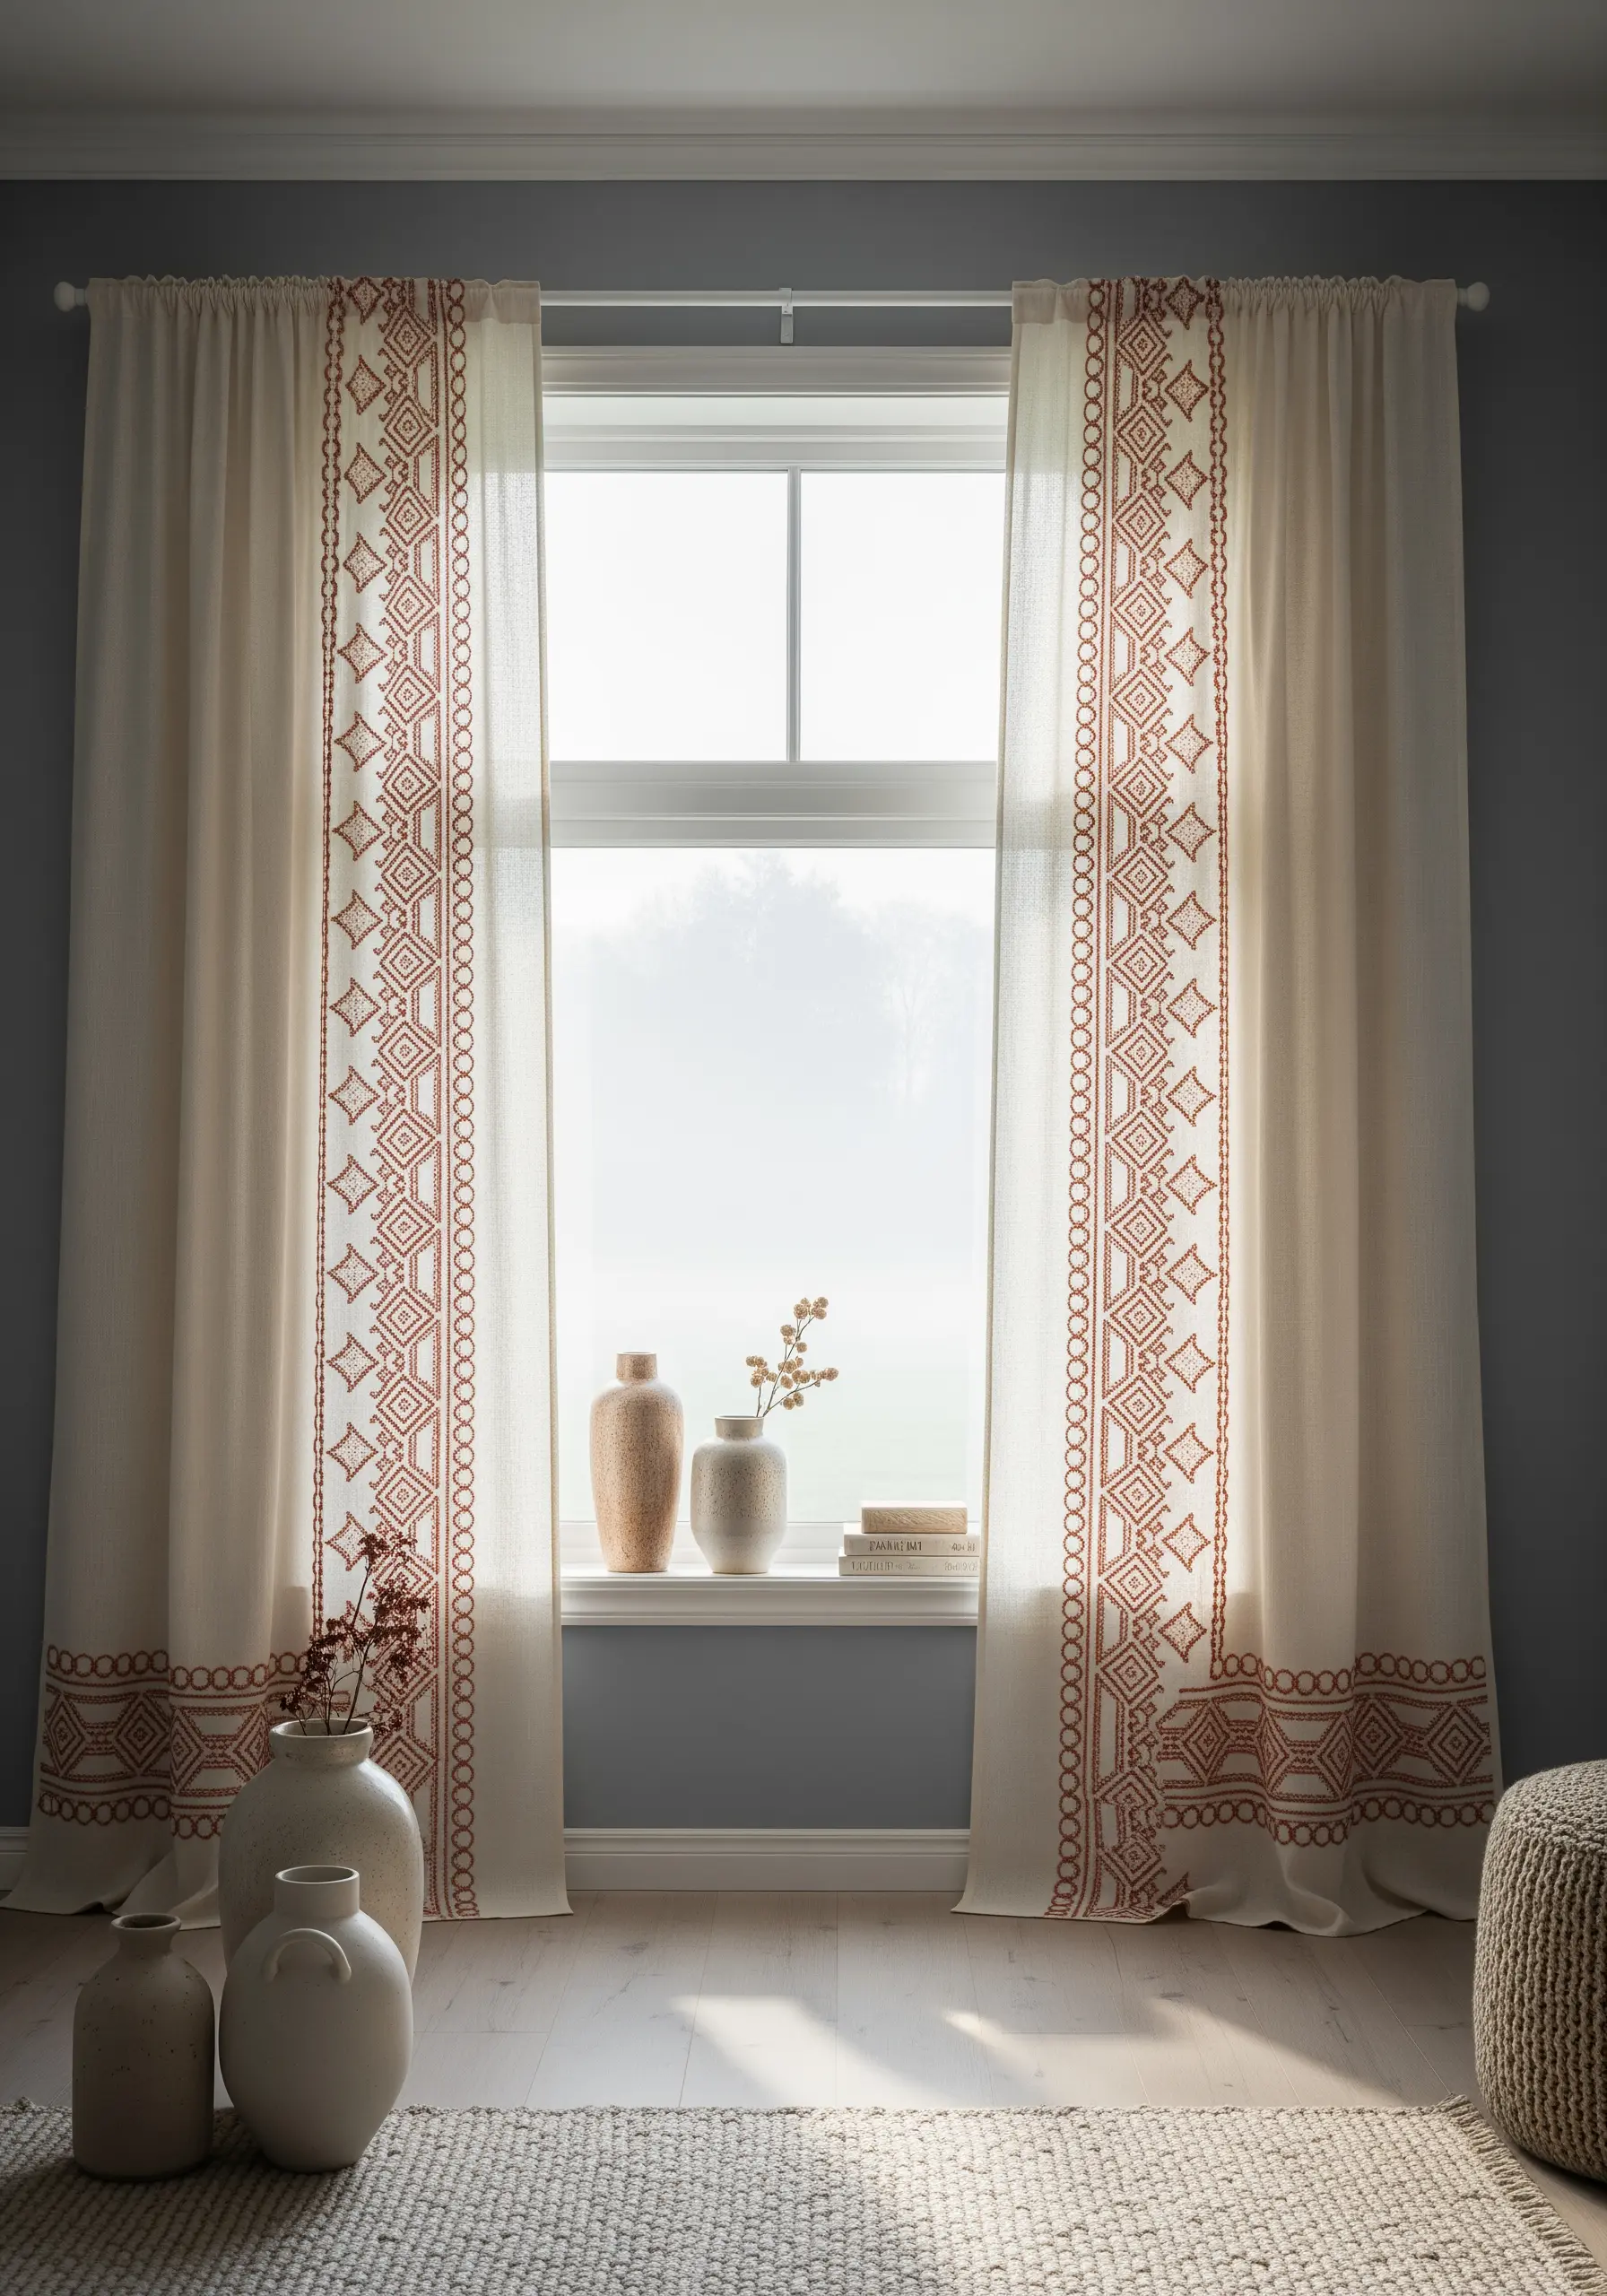
To achieve this bold, graphic look, use a medium-weight cotton floss, like DMC Pearl Cotton No. 5, which creates a raised line that won’t get lost in the fabric weave.
First, trace your geometric pattern onto the curtain border with a water-soluble transfer pen for perfect accuracy.
Use a consistent chain stitch or a heavy backstitch to build the lines; the interlocking loops of a chain stitch add a subtle, rope-like texture that enhances the pattern’s structure.
This technique works best on mid-weight linen or cotton, as the fabric has enough body to support the dense stitching without puckering.
2. Stitch a Folk Art Narrative
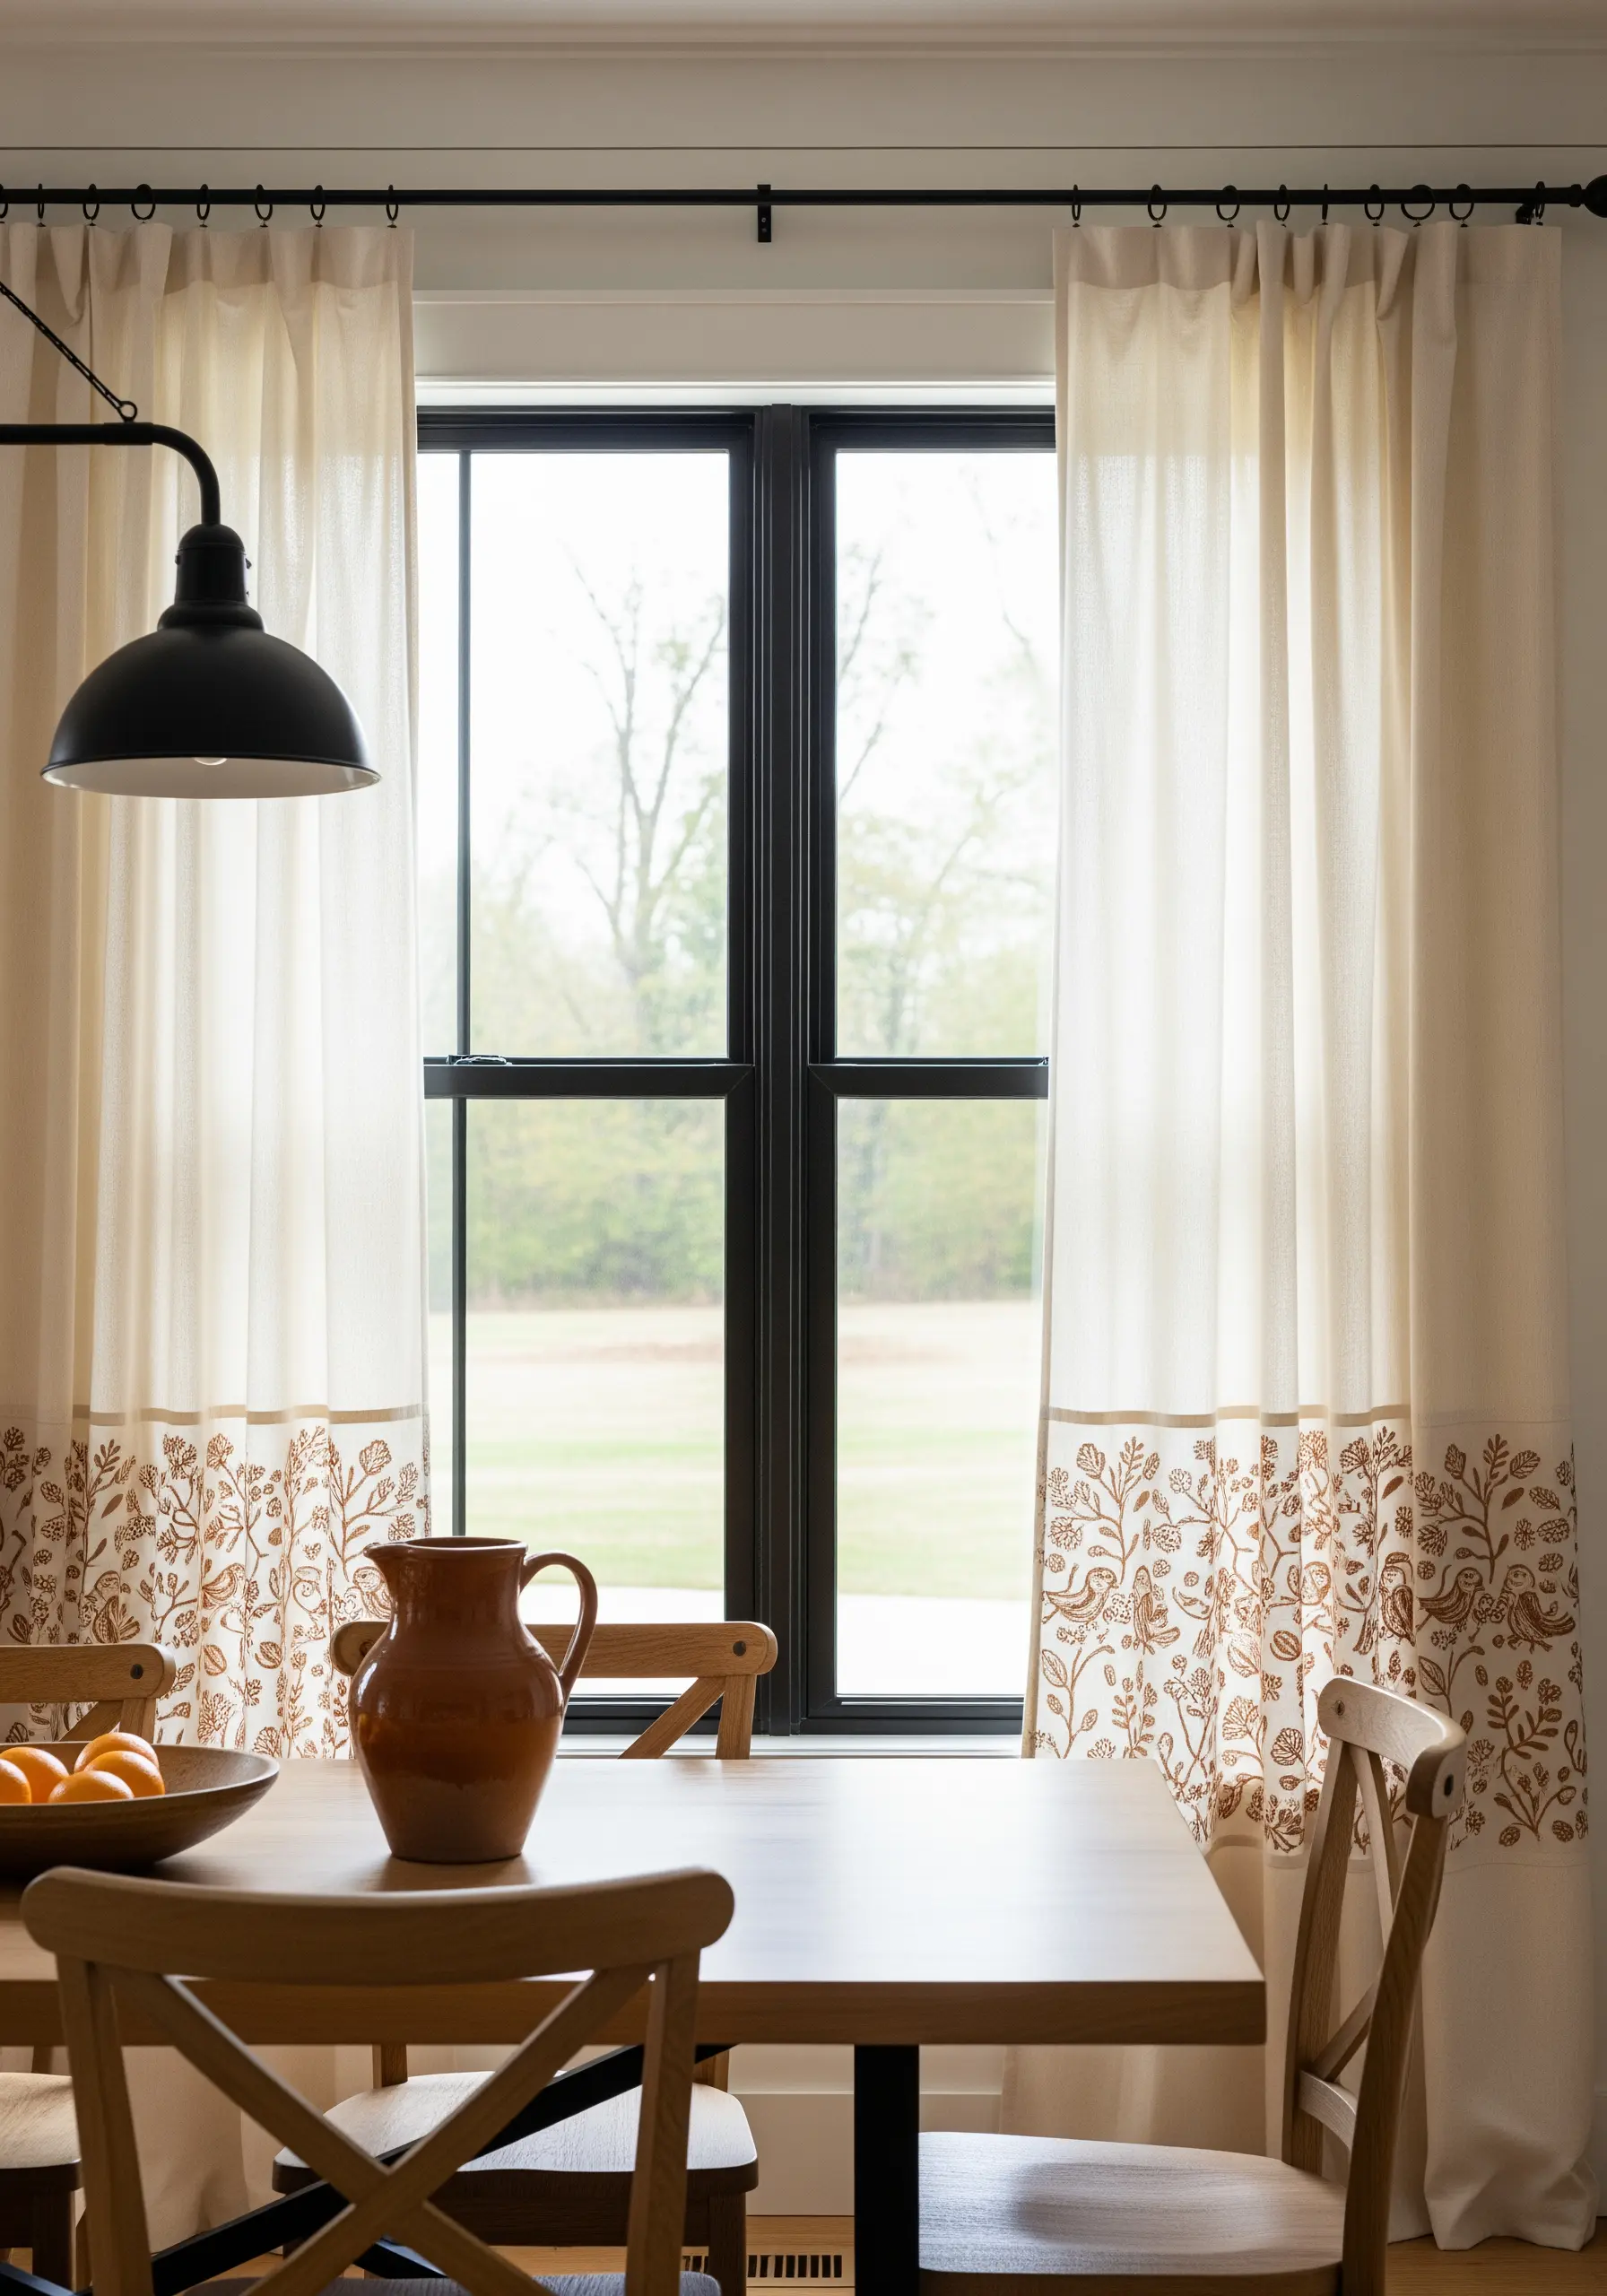
Create a charming, storybook border by repeating simple folk art motifs like birds, stylized flowers, and leaves.
Work with just two or three strands of embroidery floss to keep the details delicate and prevent them from feeling heavy or clumsy.
Combine satin stitch for filling the small shapes with a simple stem stitch for the outlines and branches, giving you a clean yet handmade feel.
The key to this design’s success is the rhythm and spacing; treat it like a sentence, allowing each motif a little breathing room before the next one begins.
3. Capture Expression with a Single Line
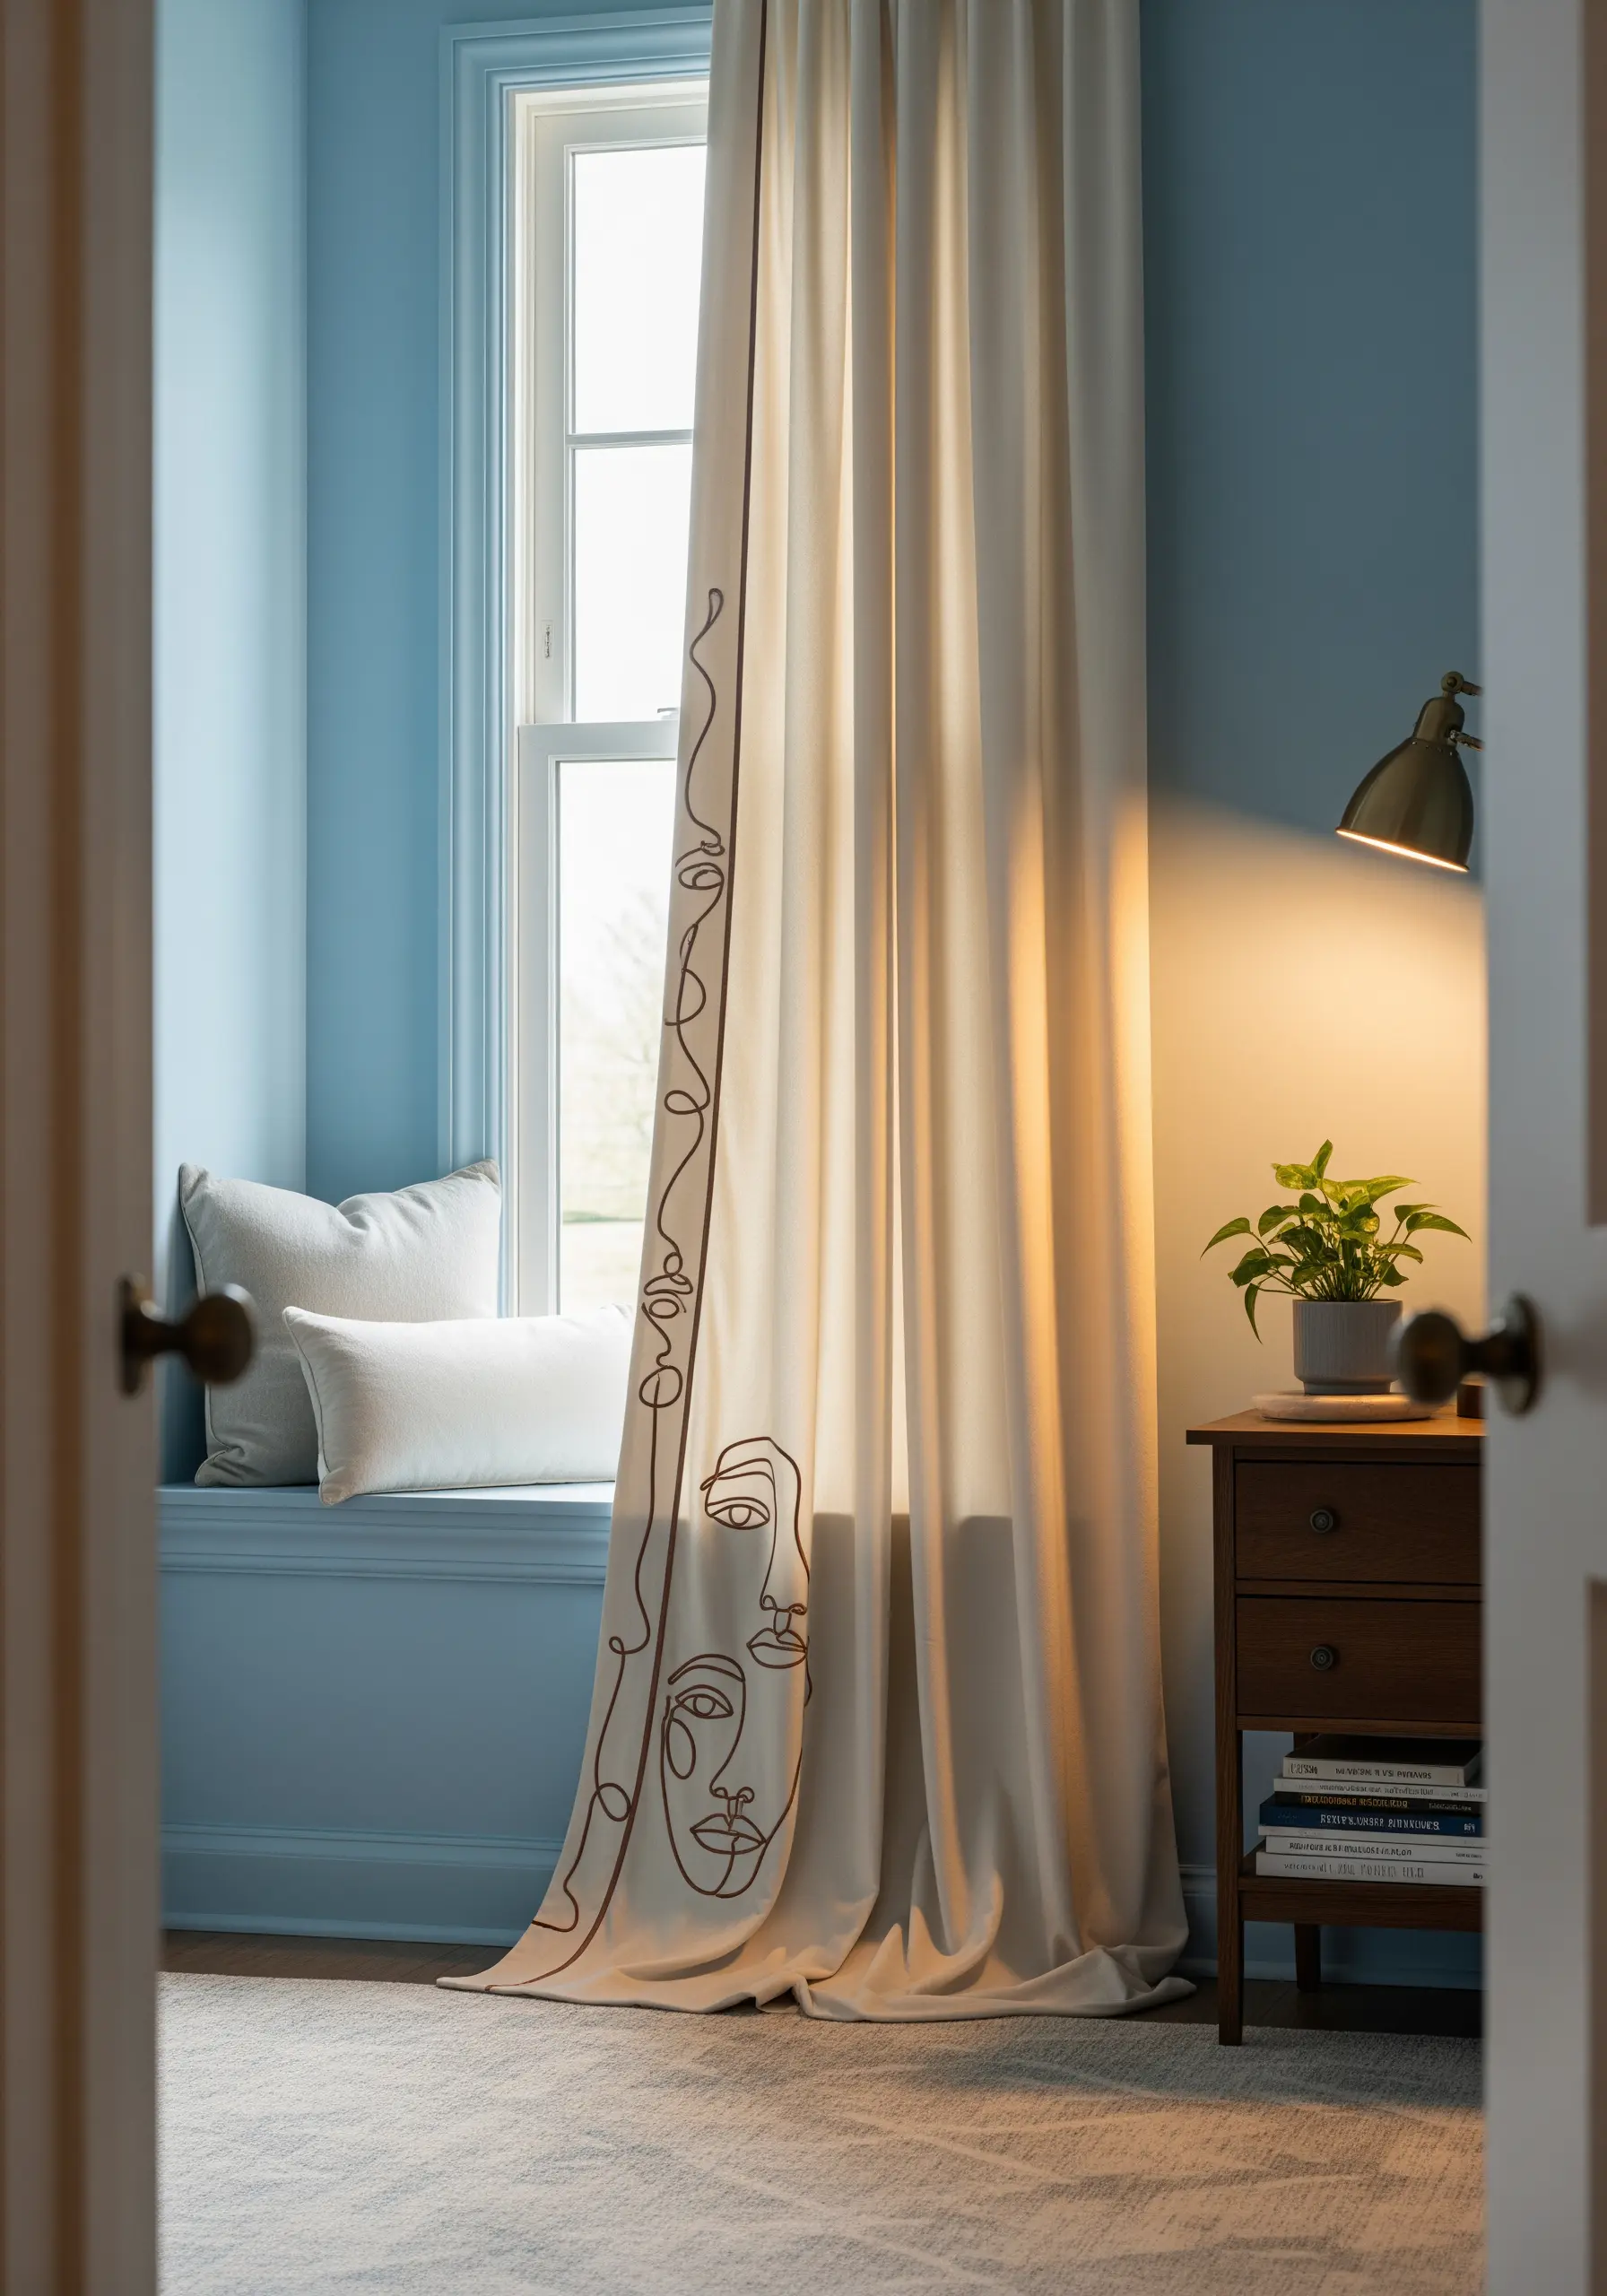
For a continuous line drawing, the goal is fluidity and grace, making whipped backstitch your best choice.
First, stitch the entire design using a standard backstitch, then whip the stitches with a second thread without piercing the fabric—this creates a smooth, raised cord-like line.
Using a single, unbroken thread for as long as possible enhances the illusion of a pen stroke.
This form of delicate line art embroidery adds a touch of modern artistry that is both personal and profoundly simple.
4. Add Architectural Structure to Roman Shades

Use embroidery to give your Roman shades a crisp, tailored finish that mimics architectural trim.
Opt for a thick thread, such as a tapestry wool or a full six strands of embroidery floss, to create bold, confident lines.
A simple running stitch, executed with precision, creates a clean, modern look that emphasizes the shade’s structure.
Measure and mark your lines carefully with a disappearing ink pen and a ruler to ensure every stitch is perfectly aligned, reinforcing the geometric quality.
5. Weave in Subtle, Scalloped Details

For an understated border, focus on texture rather than bold color.
Use a thread that is only a shade or two darker than your cream fabric for a tone-on-tone effect that whispers rather than shouts.
Create the scalloped line with a simple stem stitch, then add tiny French knots or seed stitches at intervals to catch the light and add delicate texture.
This technique is perfect for sheer or lightweight fabrics, as it adds a hint of detail without weighing down the drape of the curtain.
6. Master the Richness of a Paisley Panel

A dense, all-over pattern like paisley requires a methodical approach to feel balanced, not chaotic.
Work the design in sections, focusing on one large paisley motif at a time to maintain control over the composition.
Use a long-and-short stitch to blend clay, rust, and cream tones within each shape, giving the pattern depth and a painterly quality.
Outline each element with a single strand of dark brown or black split stitch to define the shapes and make the colors pop.
7. Define Your Space with Art Deco Fans

Achieve the sharp, graphic elegance of Art Deco by focusing on clean edges and smooth fills.
Before you begin your satin stitch, outline each fan segment with a split stitch; this creates a raised edge that your satin stitches can tuck into for a perfectly crisp finish.
Alternate the direction of your satin stitches in neighboring sections to create a subtle play of light and shadow, enhancing the geometric feel.
This high-contrast design adds a touch of formal glamour that can elevate an entire room.
8. Elevate the Playful Polka Dot

Give simple polka dots a sophisticated, textural lift with padded satin stitch.
First, create a small pad of foundation stitches (like seed stitches) within your circle shape, then cover it completely with smooth, even satin stitches.
This technique raises the dot from the surface of the fabric, creating a beautiful, three-dimensional effect that feels luxurious.
Vary the shades of clay and cream for a dynamic, modern pattern that adds rhythm and warmth.
9. Stitch a Clean, Minimalist Grid
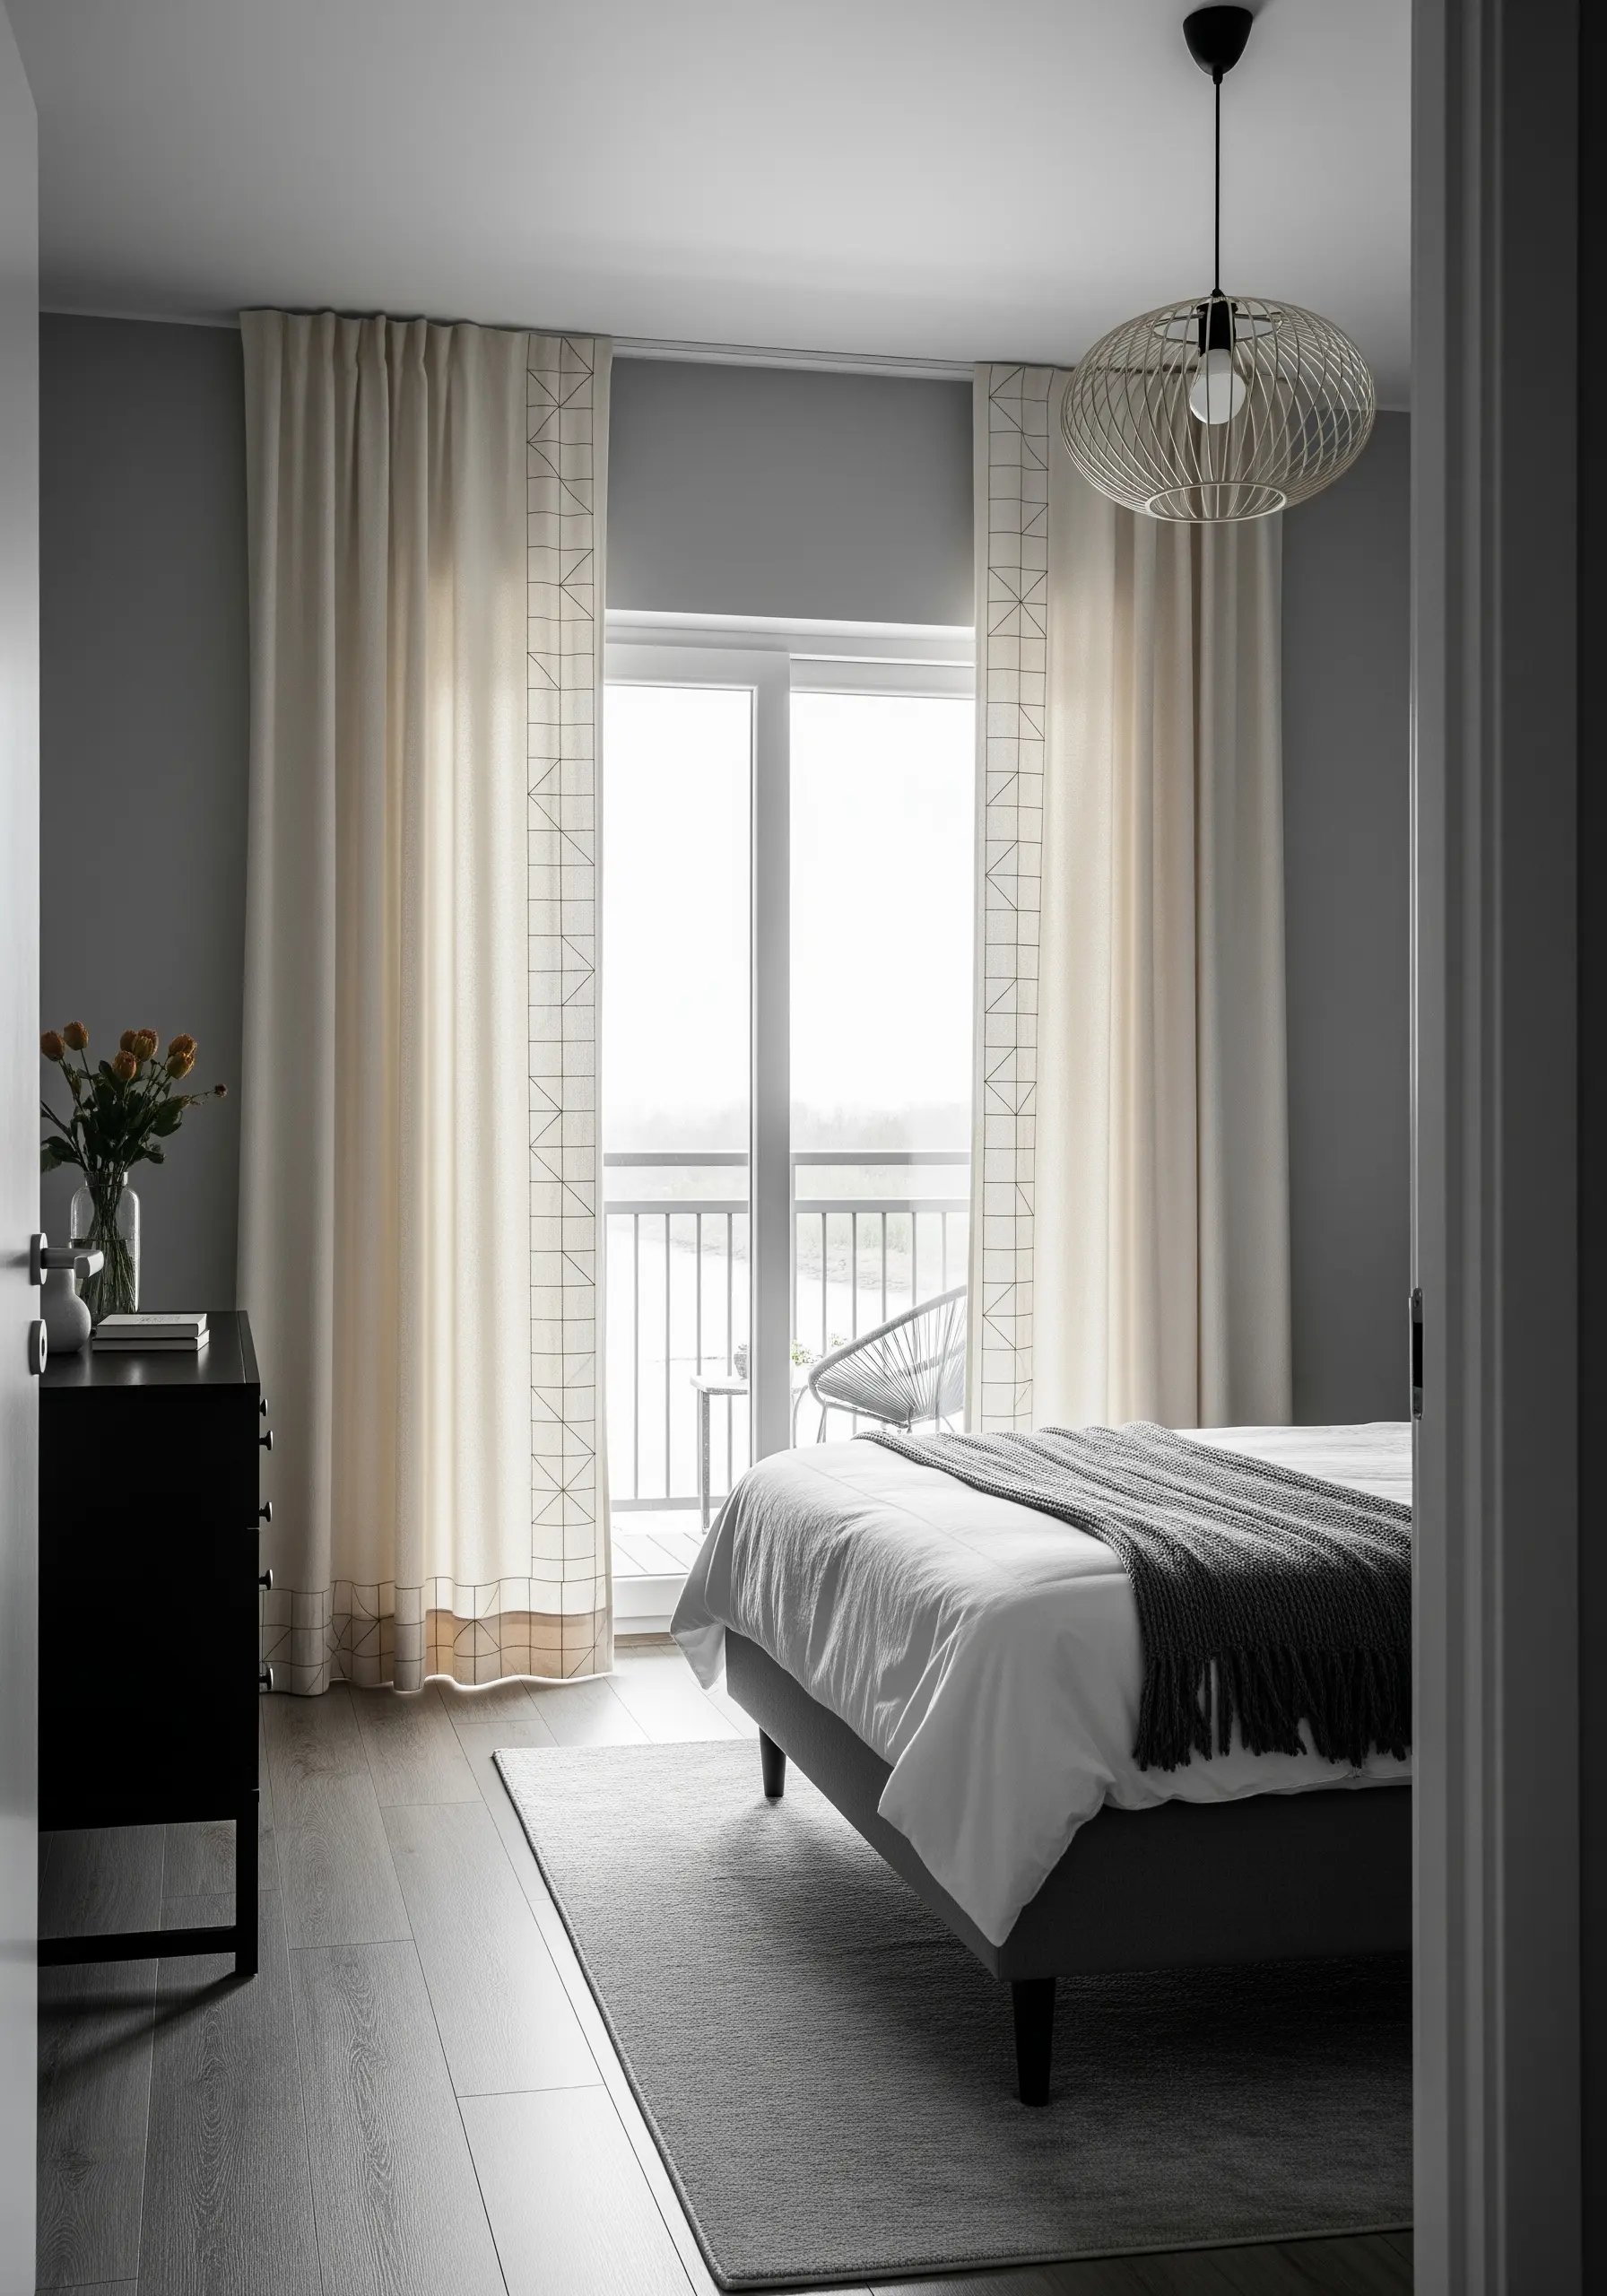
Embrace modern minimalism with a simple, linear grid that feels both airy and structured.
The key to this design is flawless precision, so use a ruler and a heat-erasable pen to draw your grid directly onto the fabric.
A simple backstitch using only two strands of floss is all you need; its strength lies in its consistency and clean execution.
This design beautifully frames a view without obstructing it, making it ideal for minimalist or Scandinavian-inspired interiors.
10. Complement Natural Wood with Earthen Tones
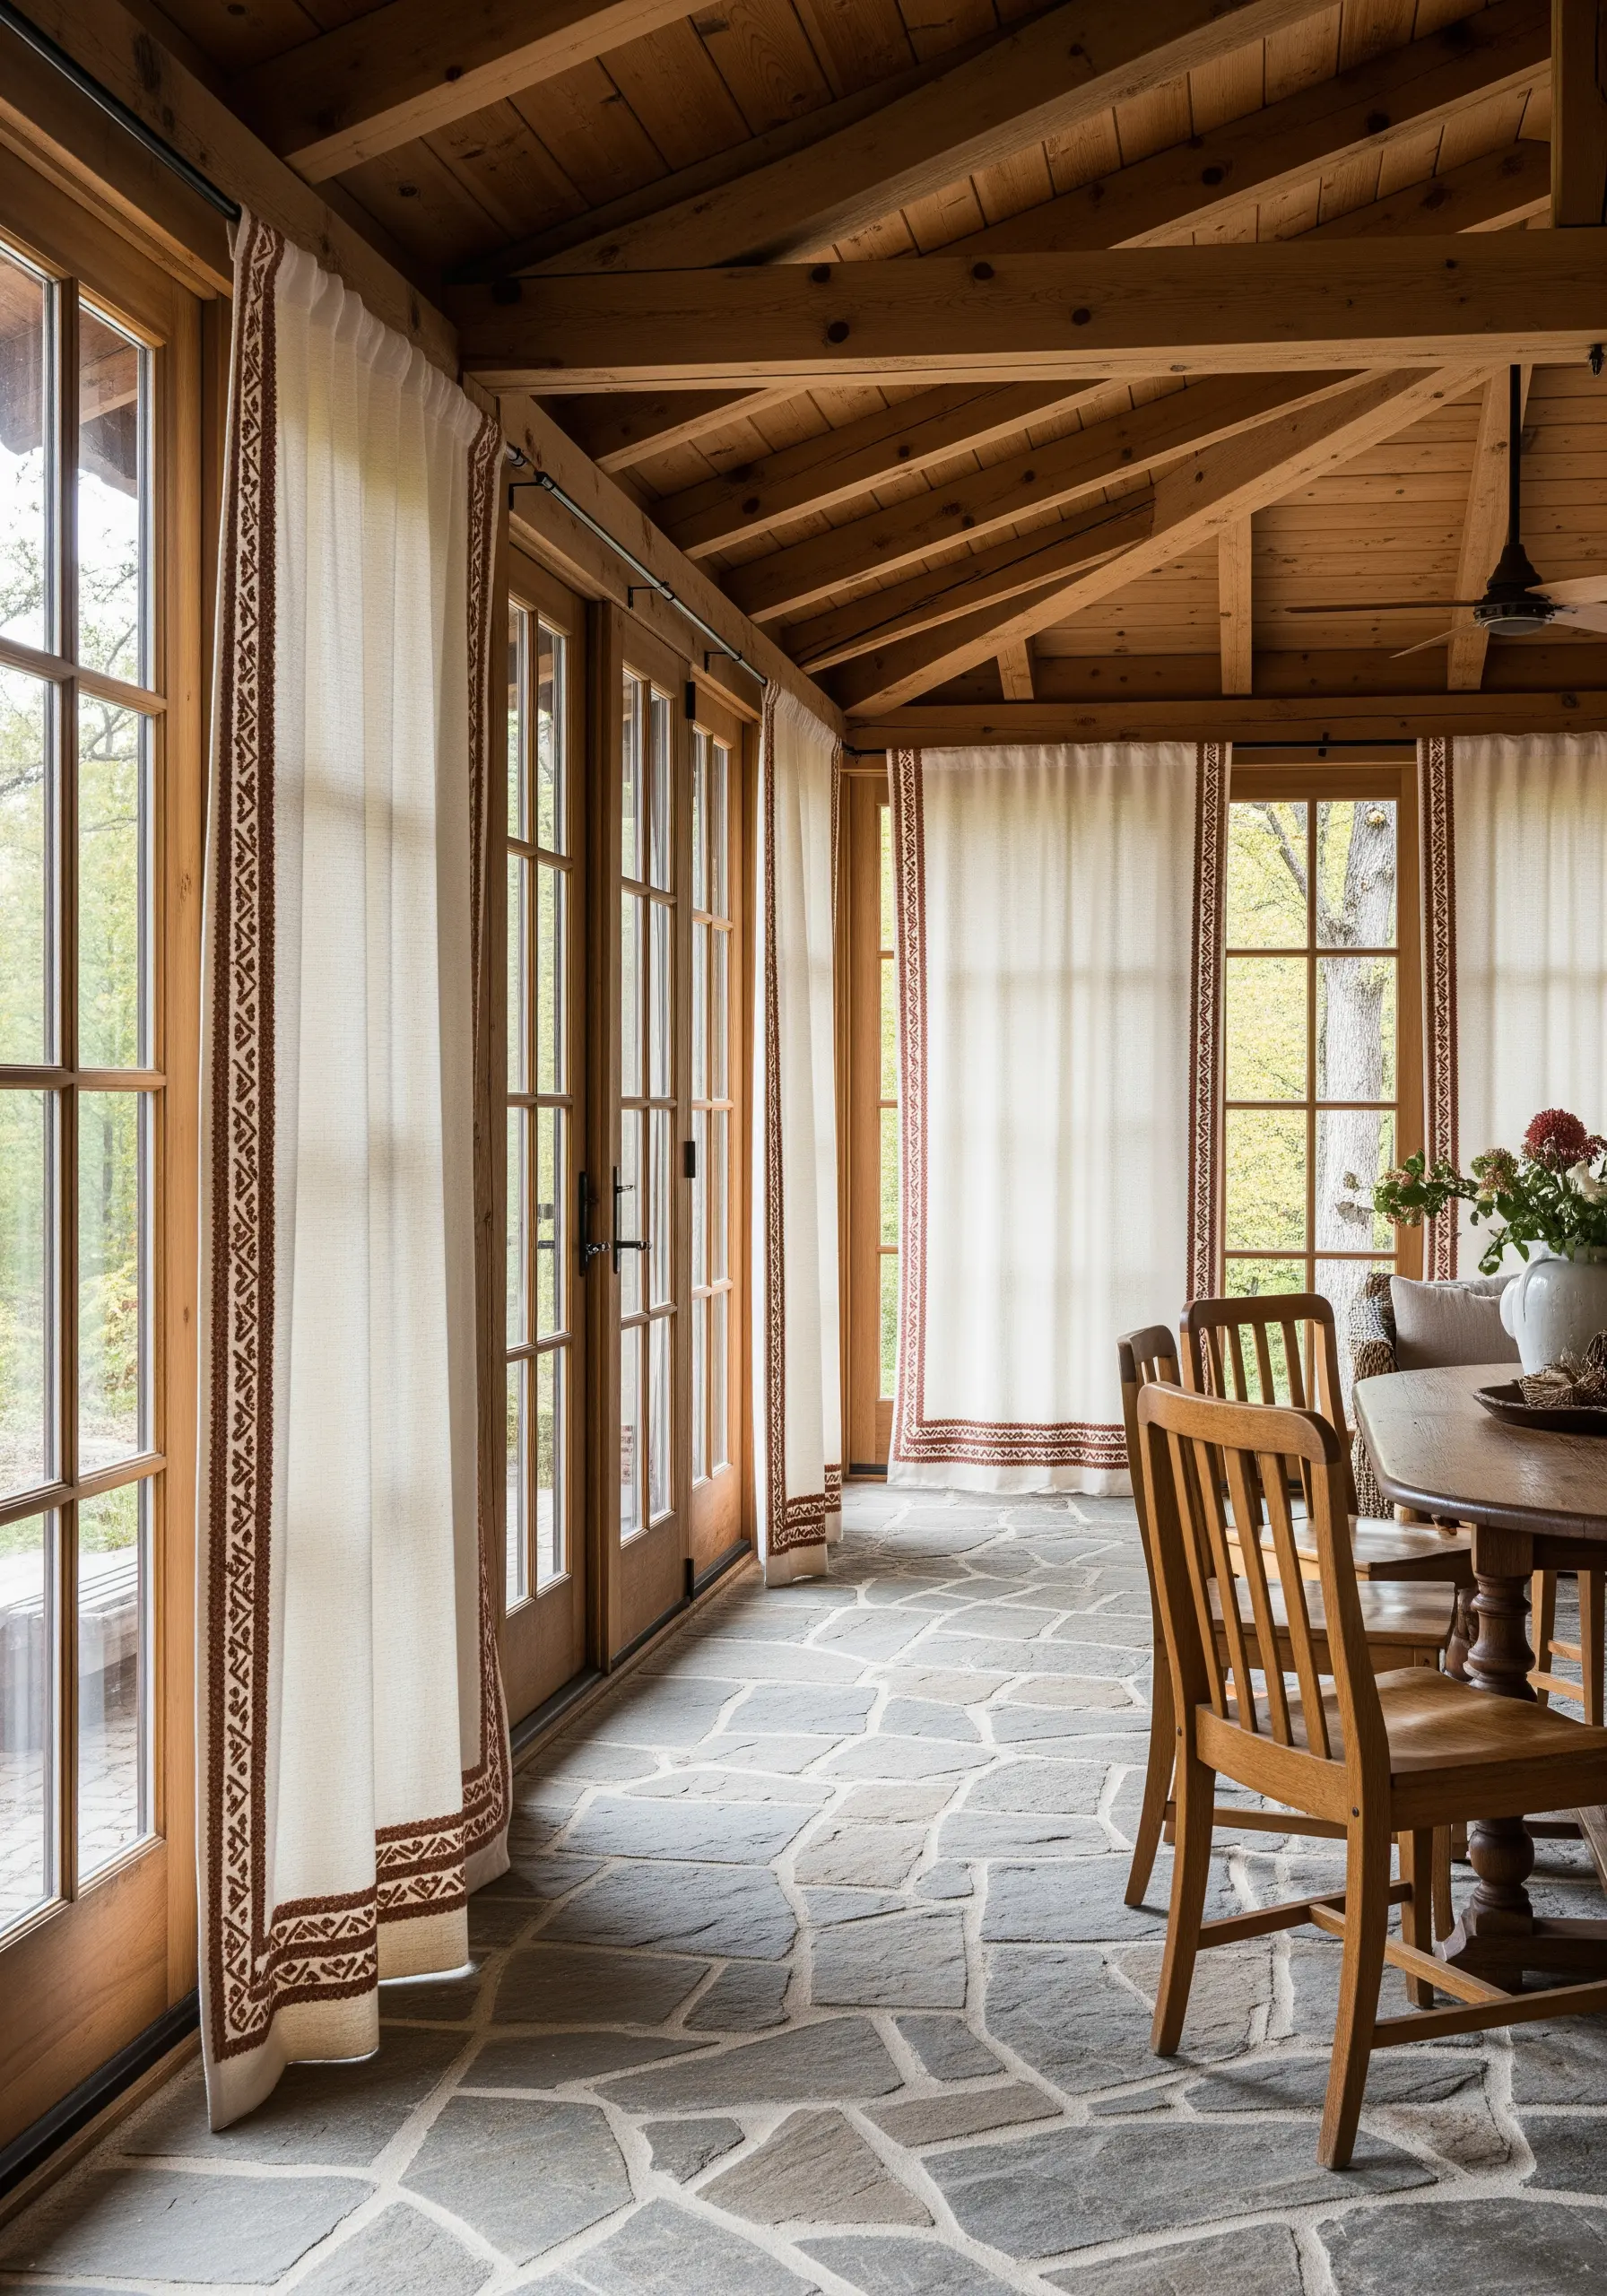
When embroidering for a room with warm wood and stone, select a clay-colored thread that echoes those natural materials.
A simple, repeating geometric motif connects the textiles to the room’s architecture, creating a cohesive and grounded atmosphere.
Use a durable stitch like the backstitch, which will hold up to the daily use of curtains in a high-traffic area like a sunroom.
The combination of cream fabric and earthy thread feels rustic yet refined, perfectly suited for a space that blends indoors and out.
11. Cultivate Organic Movement with Wheat Stalks

Capture the feeling of a breezy field by stitching wheat stalks that seem to grow up the fabric.
Use a fishbone stitch for the wheat heads; the overlapping diagonal stitches create a beautiful, herringbone-like texture that mimics the real thing.
For the stems, a simple stem stitch provides the strength and gentle curve needed for a natural look.
Vary the height and density of the stalks to create a more dynamic and organic composition, just as you would find in nature.
12. Master Elegance with Ornate Scrollwork
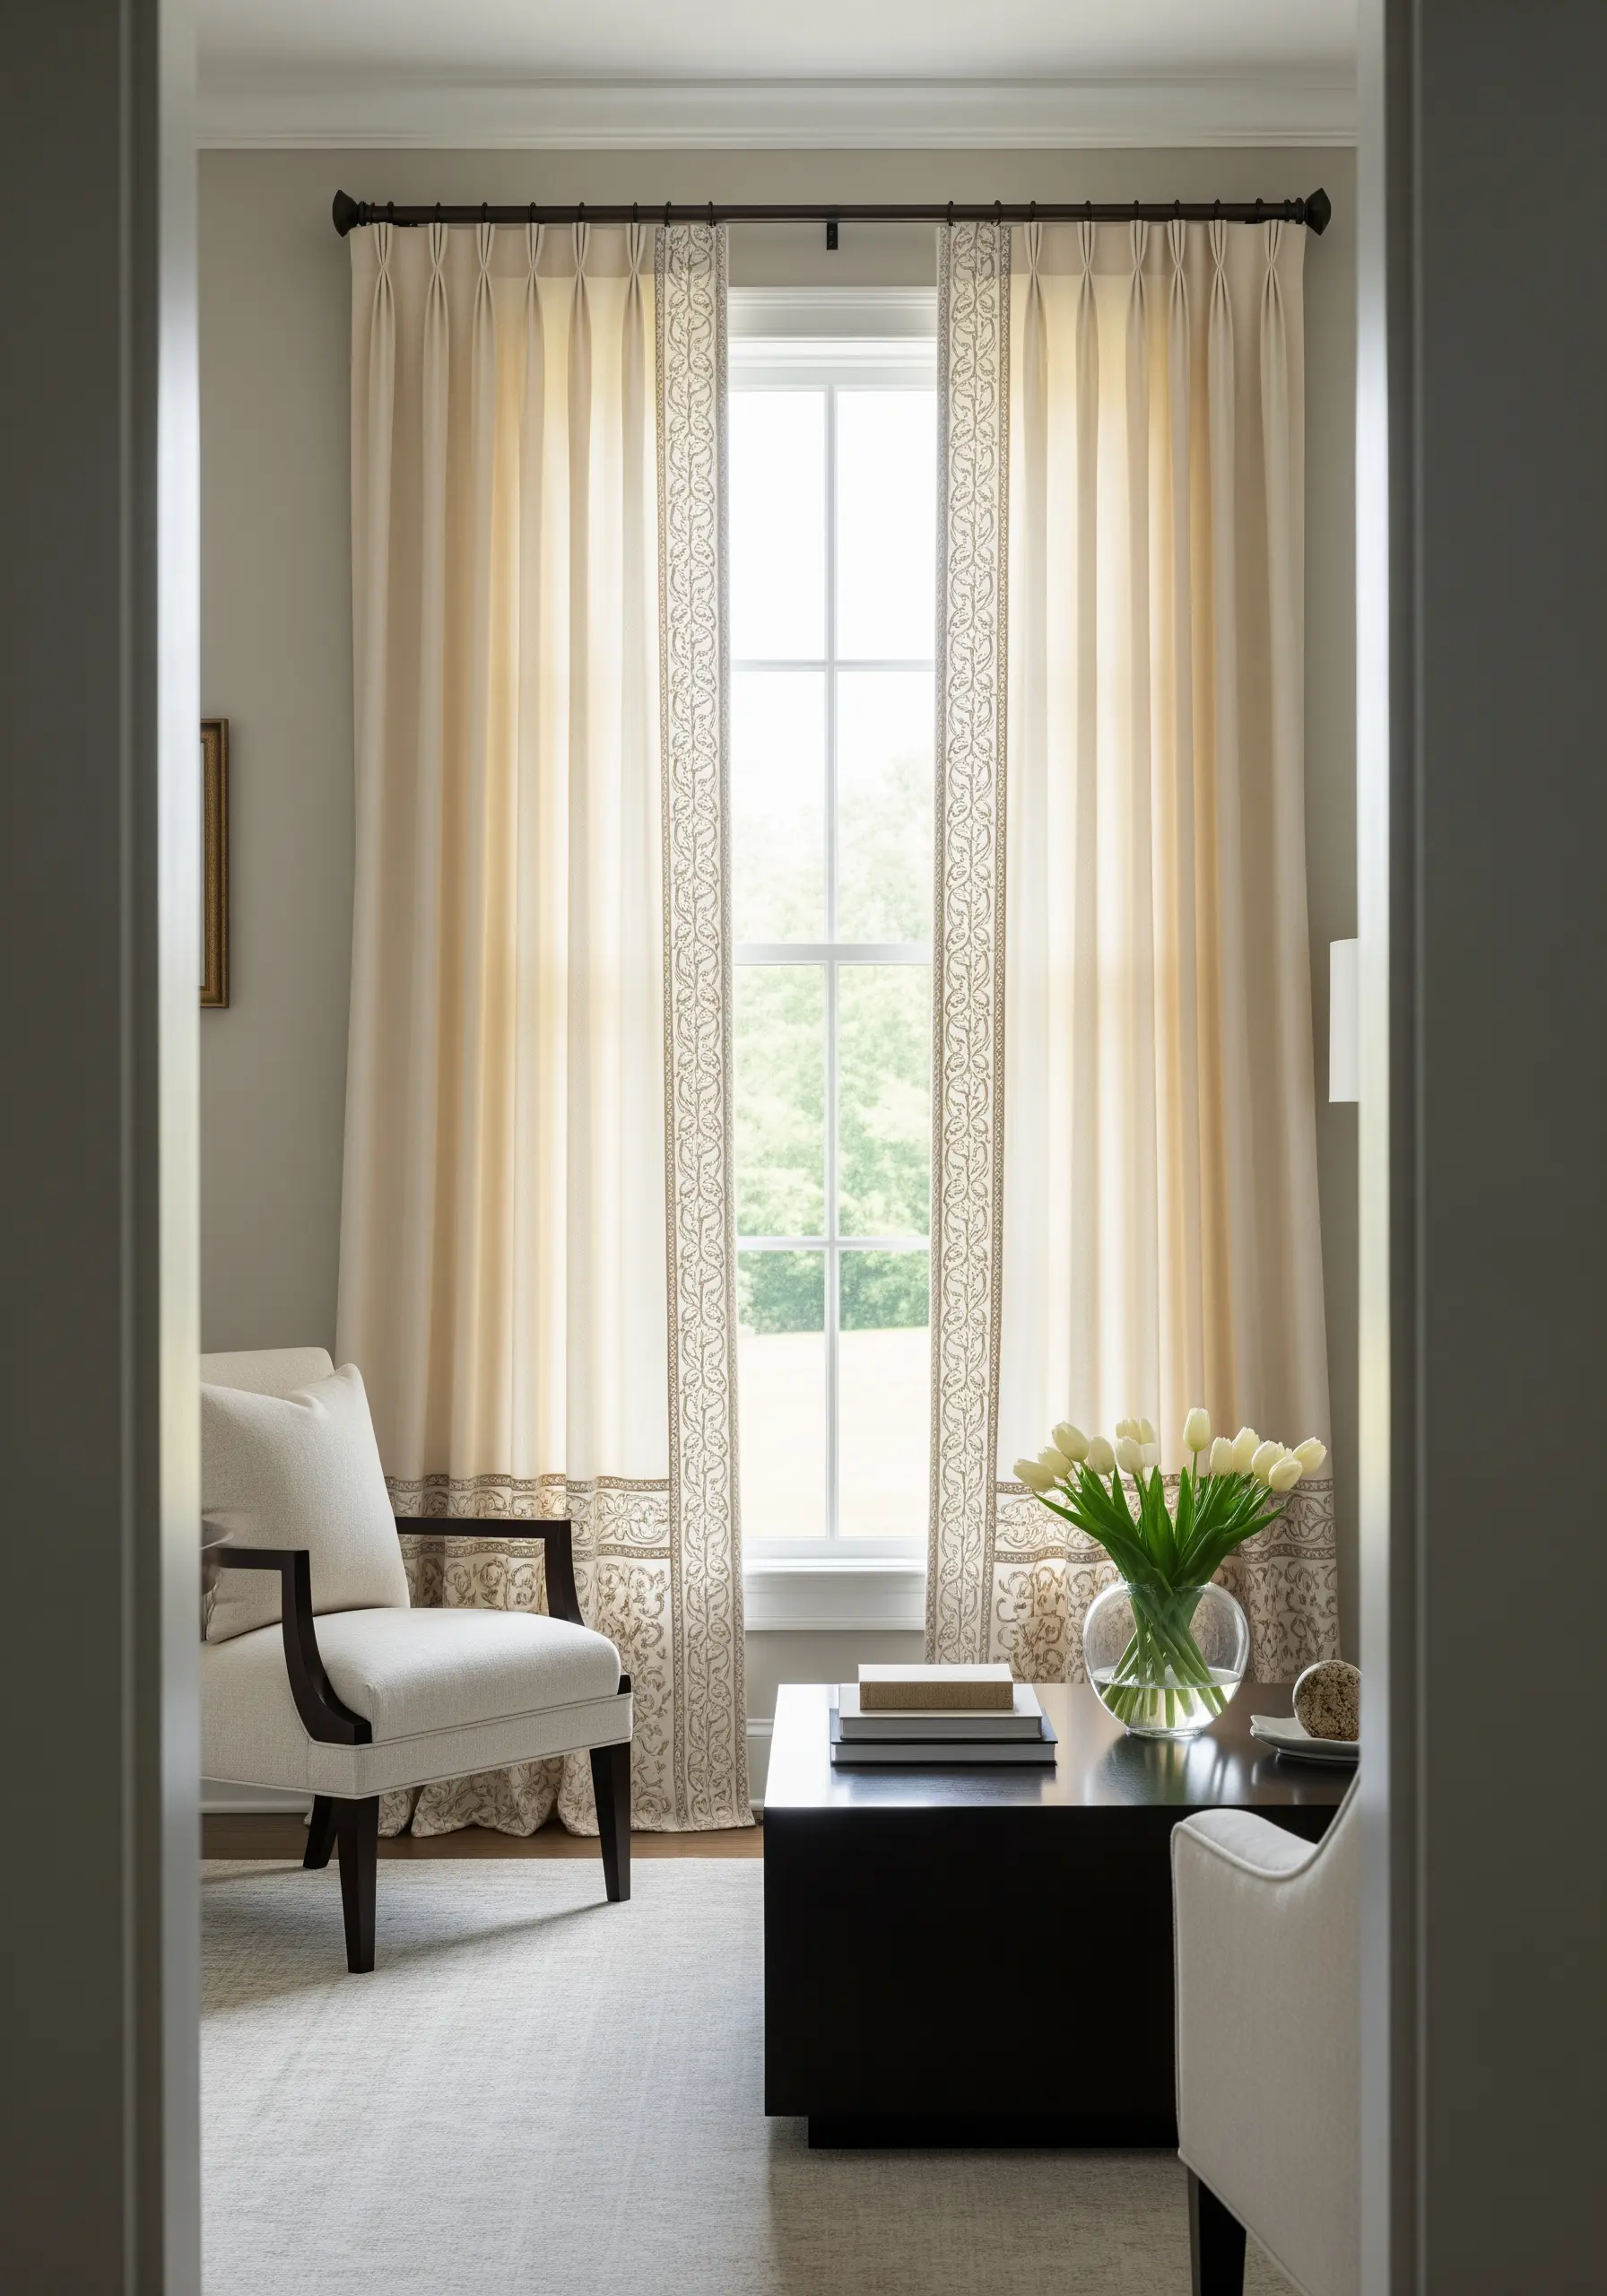
For delicate, curving scrollwork, your stitch tension is paramount to creating graceful lines.
Use a stem stitch or whipped backstitch, keeping your individual stitches small and even, especially around tight curves, to avoid any sharp angles.
Working with only two or three strands of floss allows for finer detail and prevents the intricate pattern from appearing bulky.
This style of border adds a timeless, formal elegance that works beautifully in traditional or transitional spaces.
13. Create a Painterly, Abstract Border
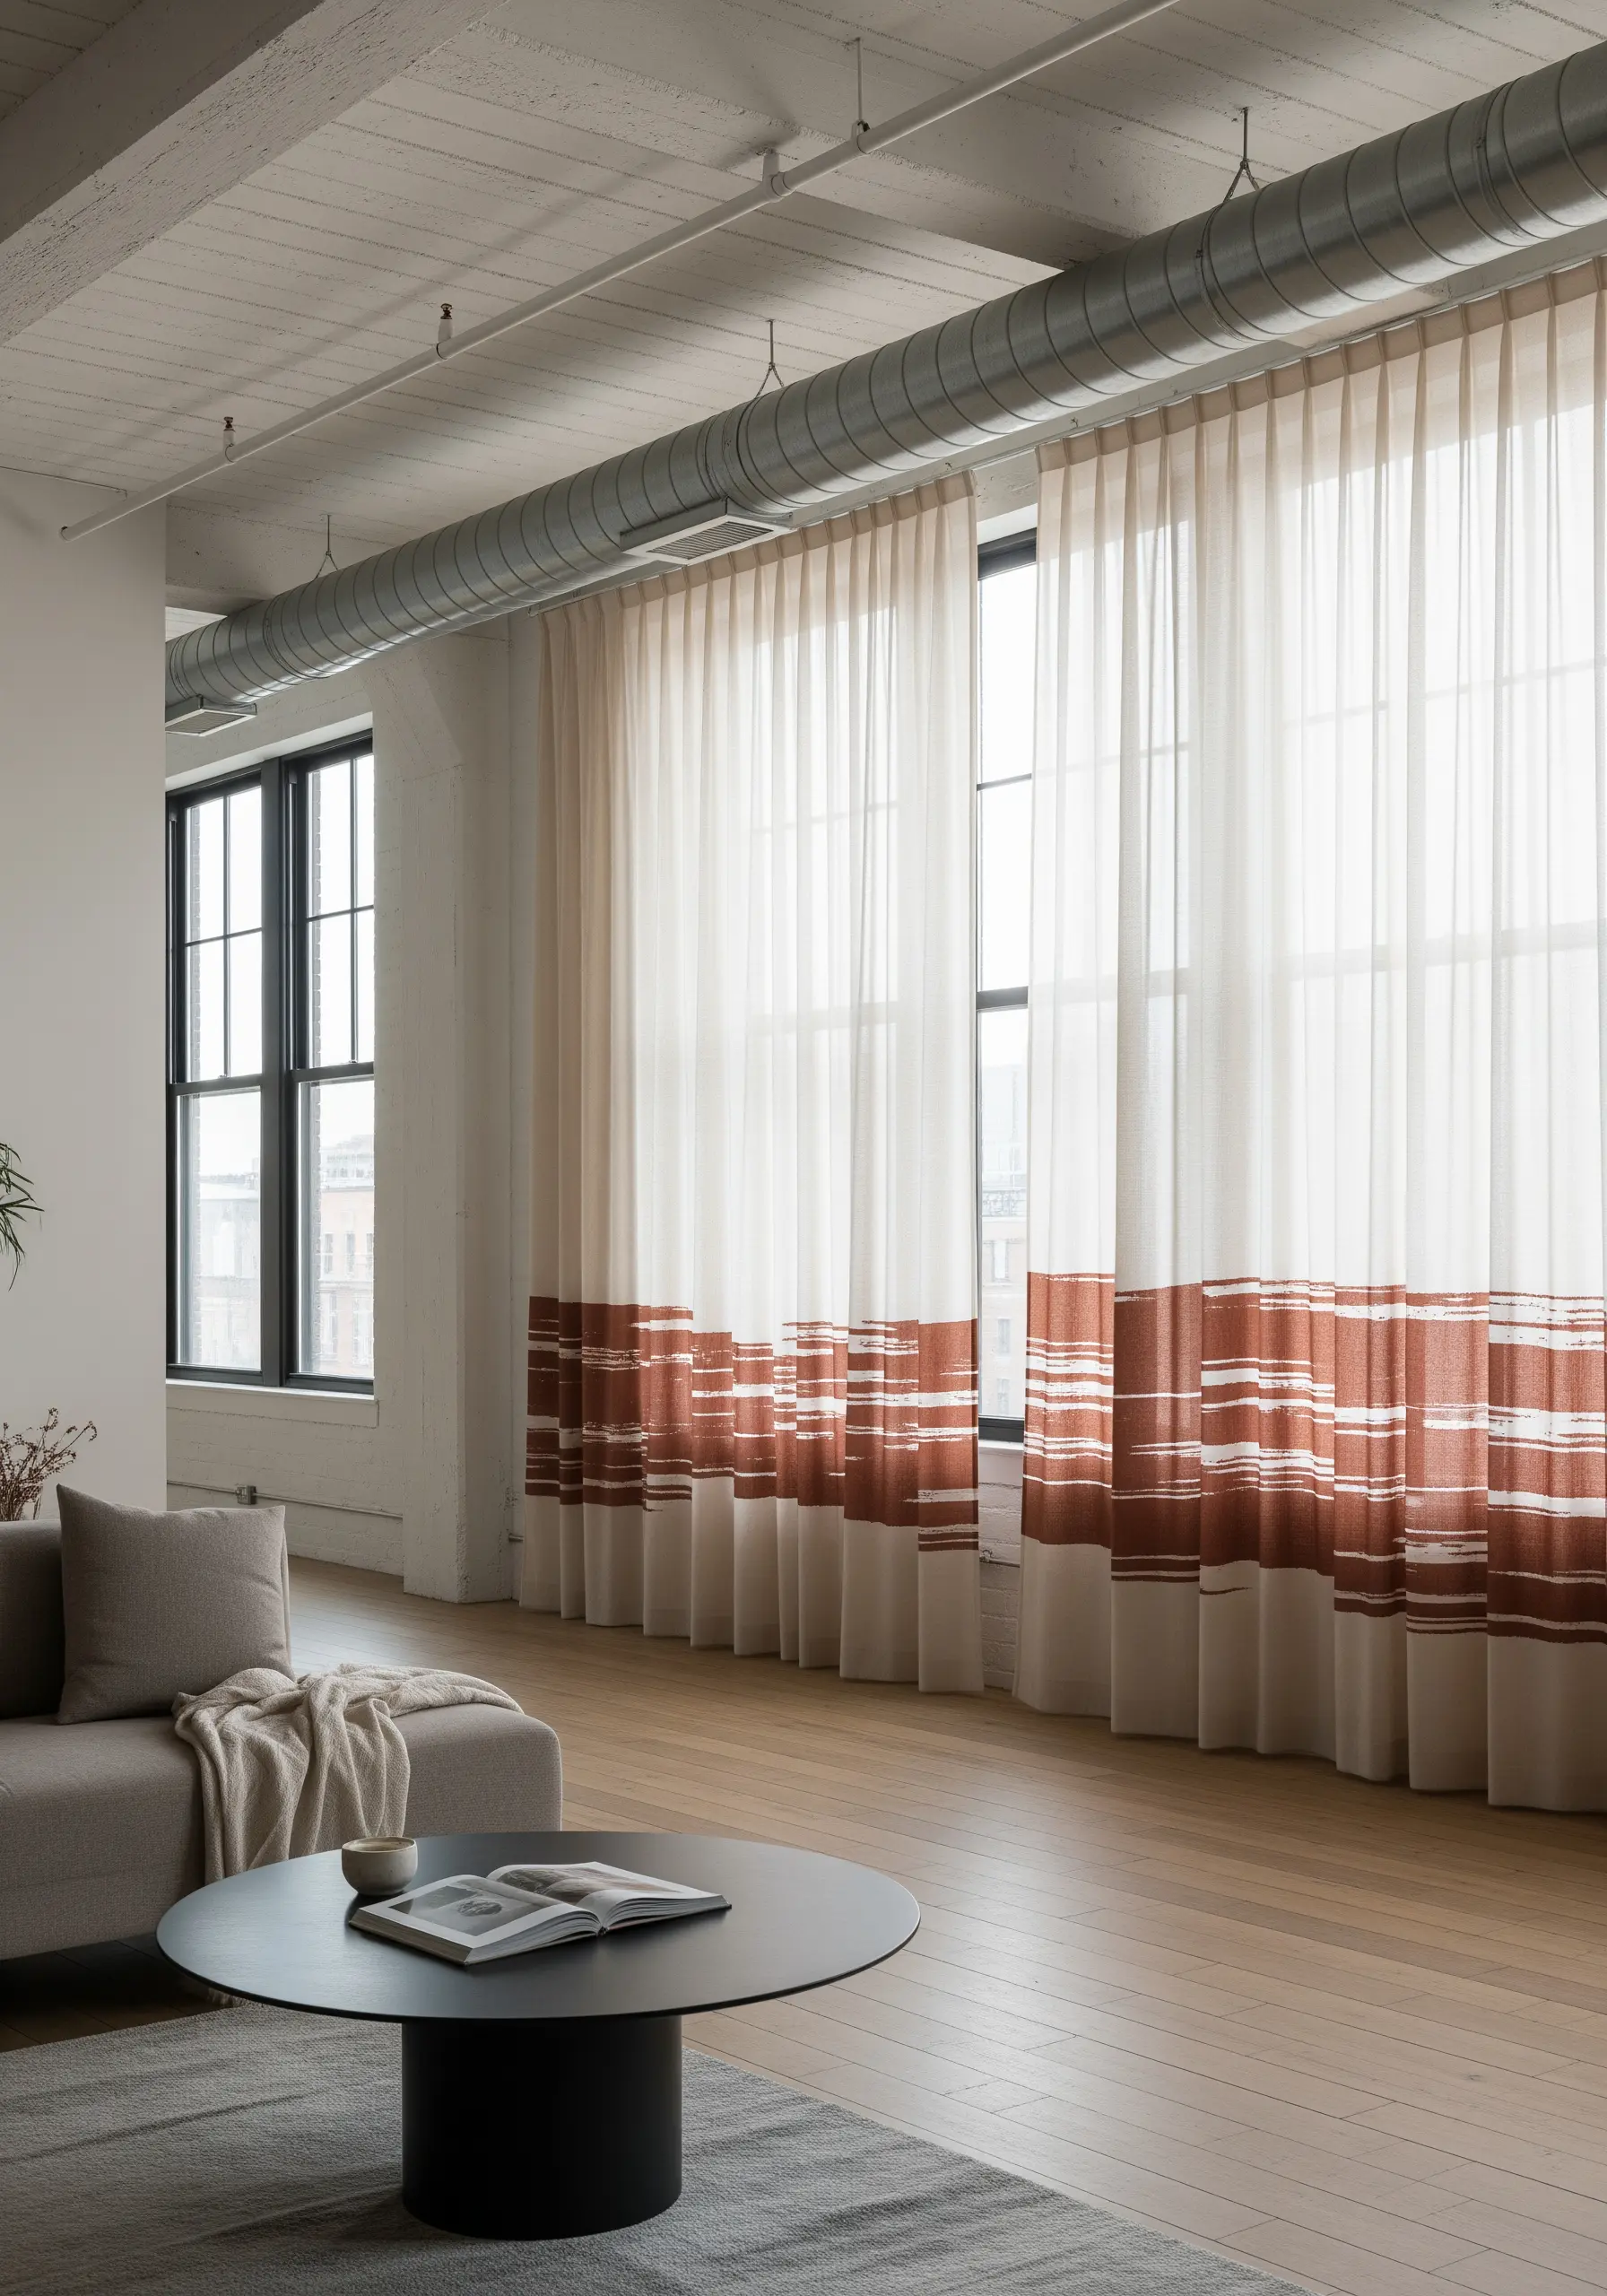
Mimic the look of abstract brushstrokes by layering long satin stitches in varied lengths and directions.
Use a mix of clay, cream, and terra-cotta threads within the same block of color to create depth and a hand-painted texture.
Don’t aim for perfect uniformity; the beauty of this style lies in its slight irregularities and the visible journey of the thread.
These bold, textural bands are a perfect example of abstract fabric collage embroidery ideas translated into a powerful statement for a modern, industrial space.
14. Achieve Classicism with a Greek Key Motif

The Greek key is a pattern of pure precision, making stitch choice and preparation essential.
To get perfectly sharp right angles, use a backstitch or a square couching technique where you lay down a guide thread and tack it at the corners.
If you’re working on an evenweave fabric like linen, you can count the threads to ensure every line segment is identical in length.
A single, contrasting color against the cream fabric gives this timeless pattern a modern, graphic impact.
15. Add Gentle Charm to a Nursery

For a child’s room, choose simple, recognizable motifs that feel soft and gentle.
Use a basic backstitch for outlines and just a few strategically placed seed stitches for texture to keep the design light and uncluttered.
Select a soft, washable cotton floss in a muted clay tone that is calming and won’t overwhelm the serene space.
These subtle embroidered nursery decor ideas add a personal, handmade touch that makes the room feel truly special.
16. Bring Coastal Textures Indoors

Capture the organic complexity of coral by using a stitch that mimics its form, like the feather stitch or coral stitch.
These stitches naturally create branching, textured lines that are perfect for depicting underwater botanicals.
For the shells, use a satin stitch, angling your stitches to follow the natural curves and ridges of the shell shape for a more realistic look.
This border adds a sophisticated coastal feel without resorting to clichés, focusing instead on beautiful, natural textures.
17. Imply Structure with Rhythmic Lines
Create a border with a modern, architectural feel by using rhythm and repetition.
This design uses a simple backstitch or running stitch, but its power comes from the precise variation in stitch length and spacing.
Use a fabric marker and a ruler to create your guidelines, ensuring the framework is perfect before you place a single stitch.
This technique turns a plain curtain into an element of design, showing how minimalist embroidery wall art ideas can be applied to functional home textiles.
18. Make a Statement with Bold, Graphic Circles
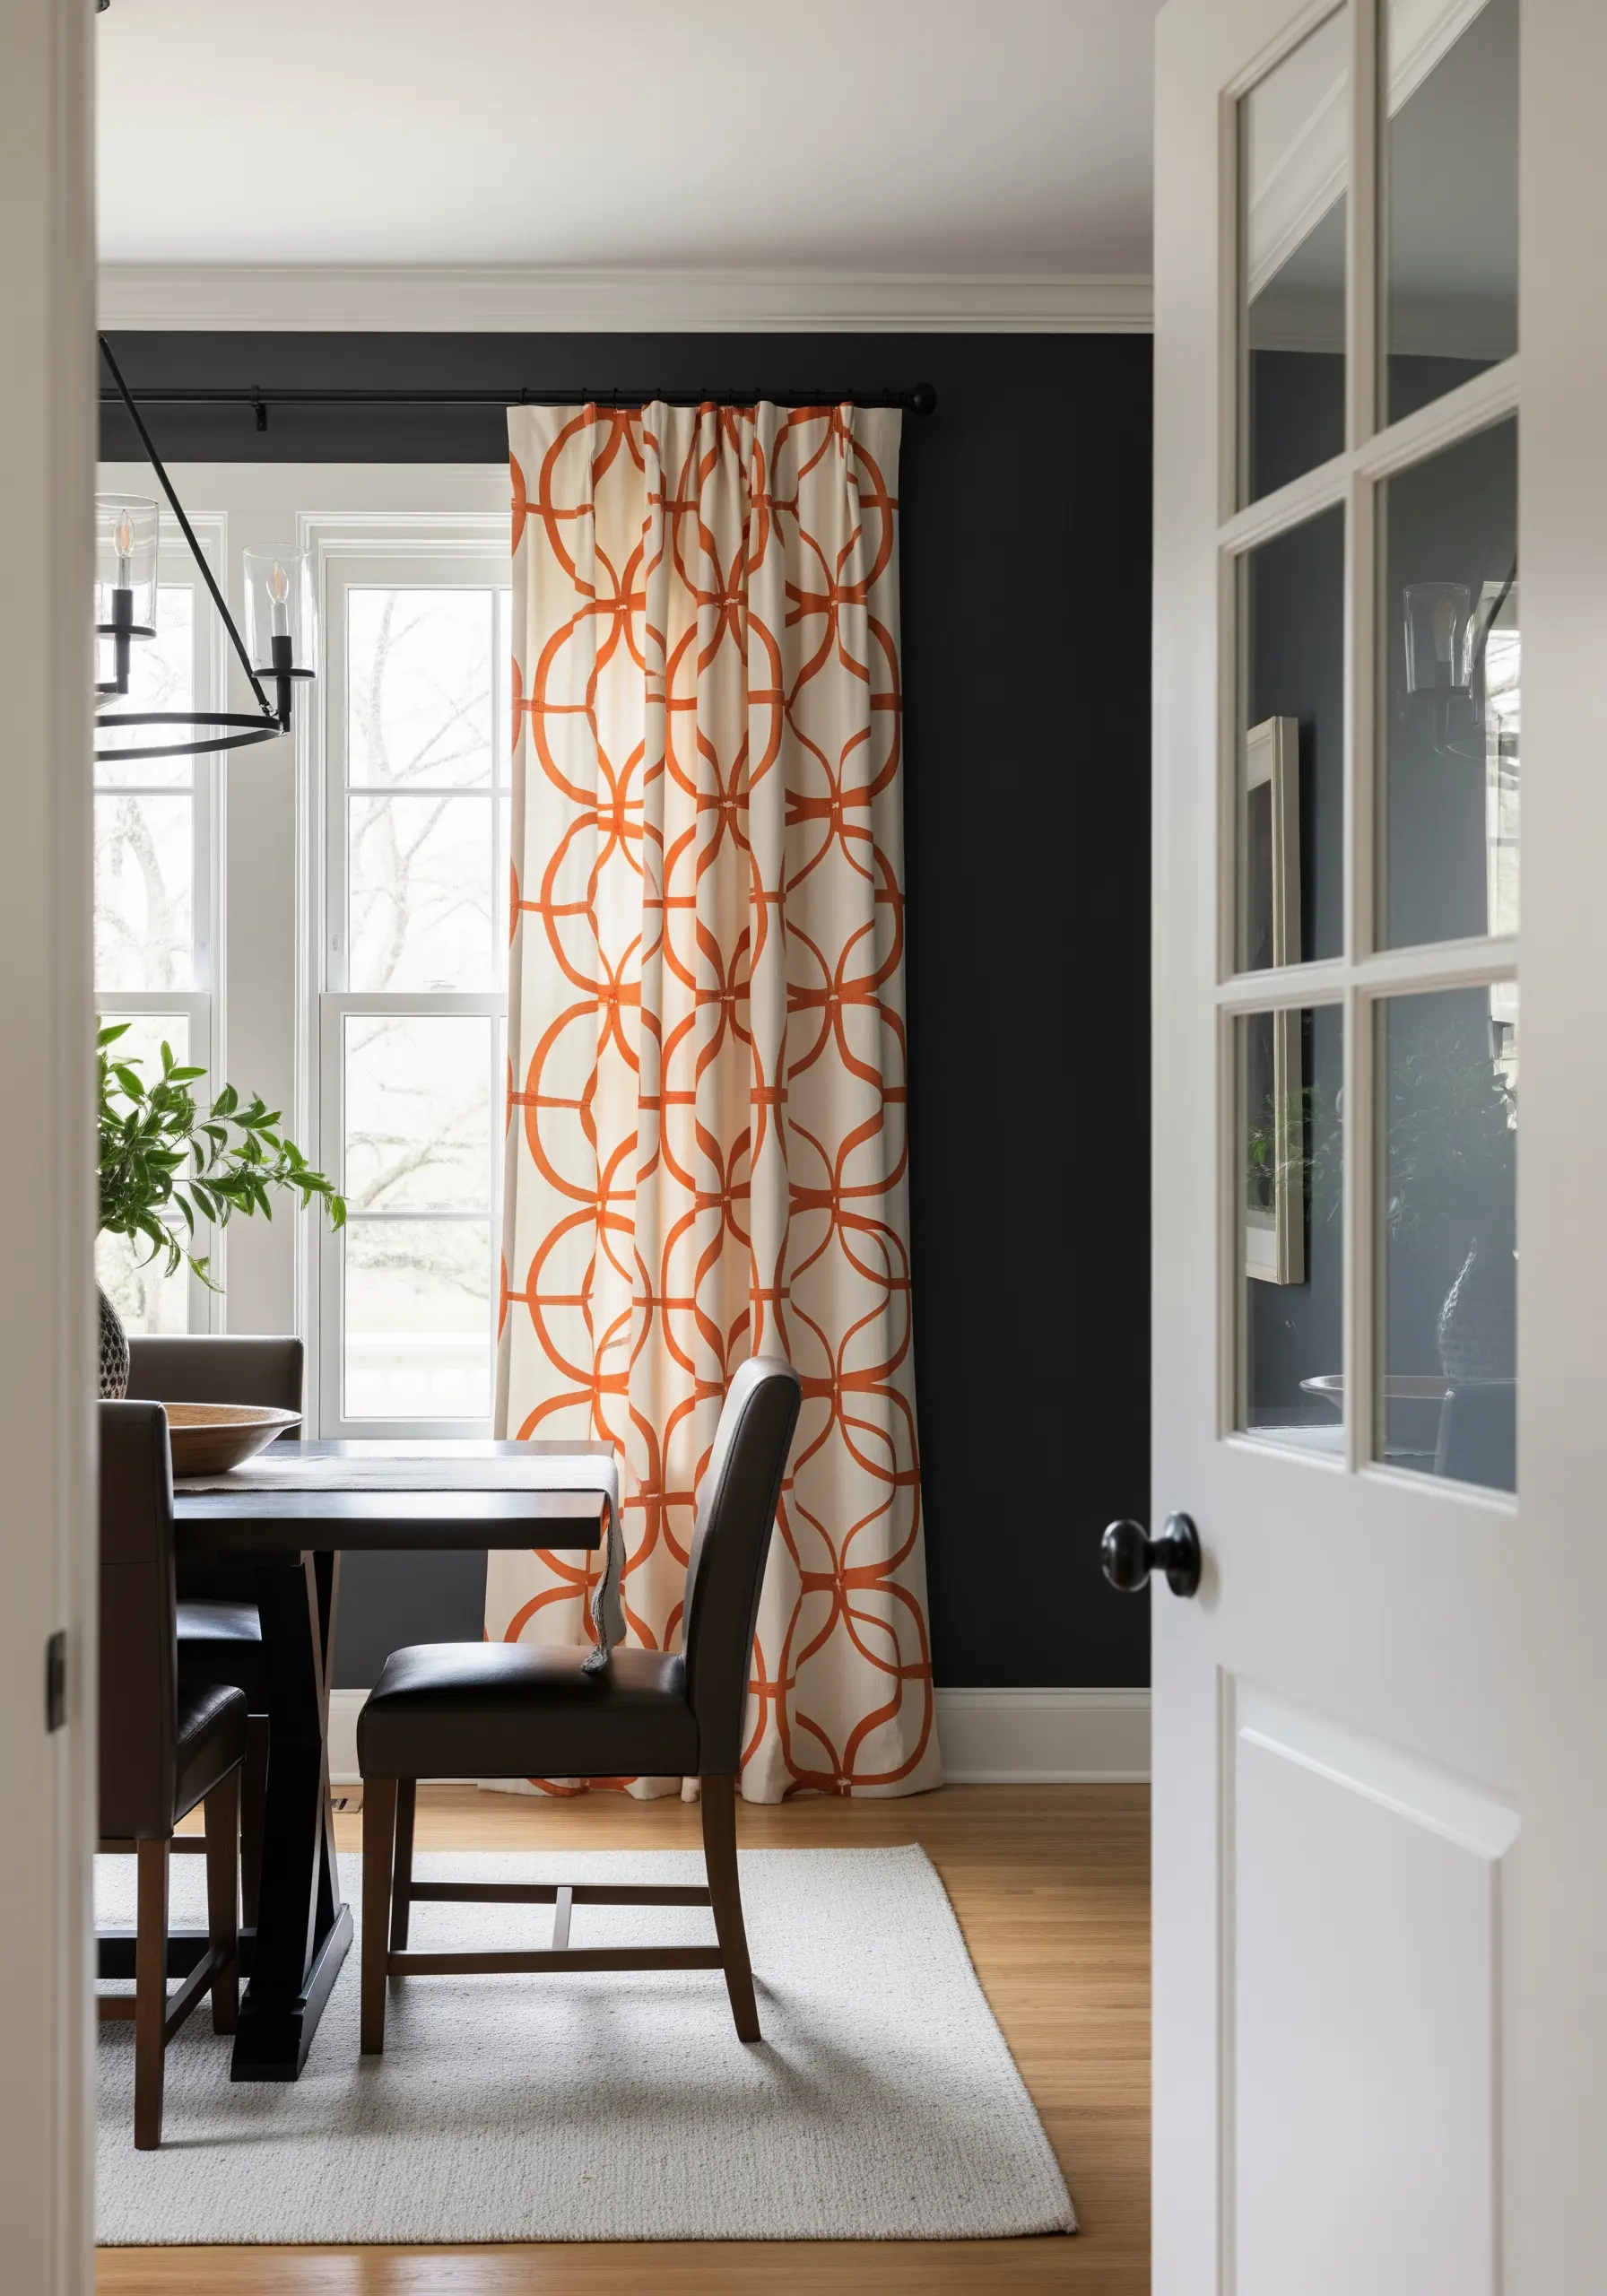
For a large-scale, repeating pattern, choose a stitch that provides a bold, continuous line, like the chain stitch.
The interlocking loops of the chain stitch create a substantial, textured line that won’t get lost on a large curtain panel.
A vibrant clay or terracotta orange makes a confident statement against a dark, moody wall, adding warmth and energy to the room.
To transfer a pattern this large, consider creating a stencil or using a projector to trace the design onto the fabric.
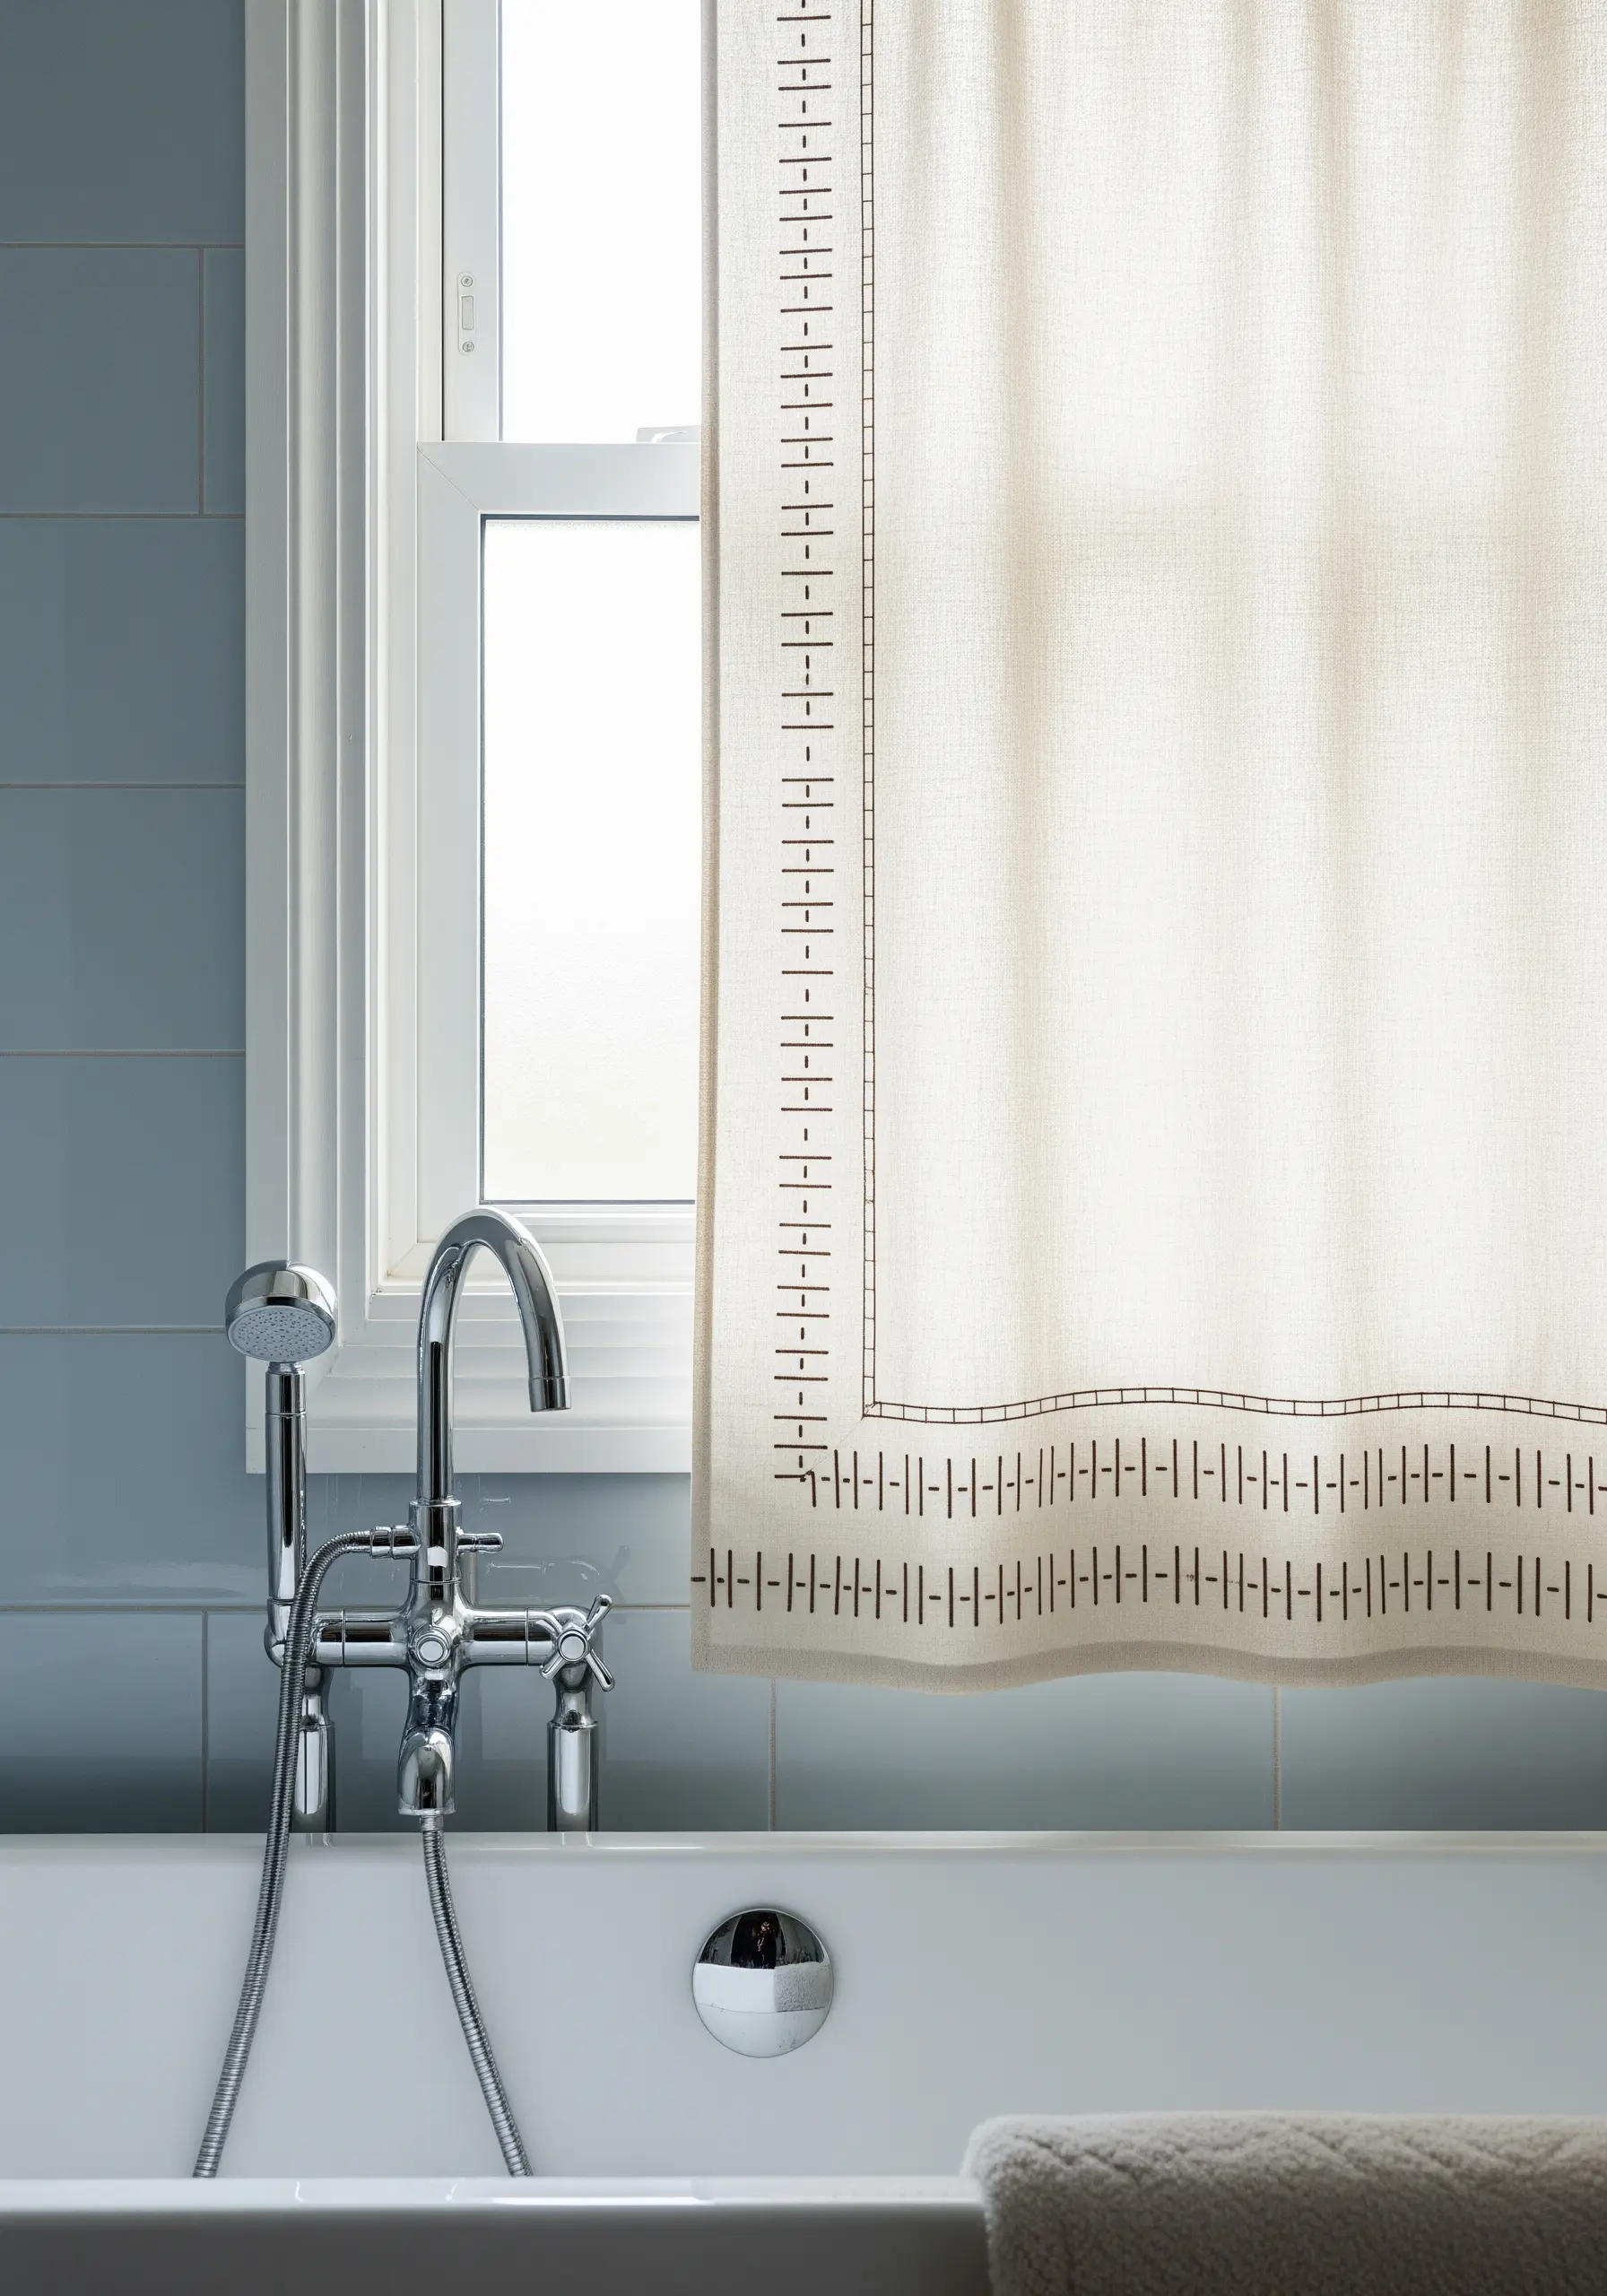
19. Add a Subtle, Handcrafted Edge

Elevate simple vertical blinds by adding a discreet, hand-stitched detail along the edges.
A simple row of cross stitches or plus signs, worked in a contrasting thread, adds a touch of bespoke quality without being intrusive.
This is a perfect project for using up leftover thread, as it requires very little material.
The key is perfect spacing; measure the distance between each stitch to create a clean, rhythmic pattern that feels intentional and refined.
20. Layer Tones for an Atmospheric Landscape

Create the illusion of a distant mountain range by layering simple outlines in a gradient of colors.
Use a single strand of floss and a simple backstitch to keep the lines delicate and airy.
Arrange your colors from darkest in the foreground to lightest in the background to create a sense of atmospheric perspective and depth.
This technique transforms your window into a piece of landscape art, connecting your indoor space to the view beyond.
21. Cultivate a Graceful, Trailing Vine

A meandering vine adds a touch of organic elegance and draws the eye vertically along the curtain’s edge.
Use a stem stitch for the main vine, which is designed to create smooth, flowing curves.
For the leaves, use detached chain stitches (also known as lazy daisy stitches); they create a perfect, natural leaf shape with a single motion.
Vary the direction of the leaves and the curve of the vine slightly to give the design a more natural, less repetitive feel.
22. Ground Sheer Curtains with a Solid Base

Embroidering on sheer or lightweight fabric requires stabilization to prevent puckering.
Place a layer of tear-away or wash-away stabilizer behind your stitching area; it will support the fabric and can be removed once you’re finished.
A simple, dense geometric pattern stitched along the hem adds visual weight, helping the light curtains hang more beautifully.
Use a bold chain stitch or backstitch in a dark clay color to create a strong, grounding element that contrasts with the fabric’s airiness.
23. Add a Playful Nod to Your Craft

For a craft room or creative space, a themed border adds a touch of personality and inspiration.
Use a satin stitch to fill in the colorful thread on the spools, keeping your stitches parallel and flat for a smooth, shiny finish.
Outline each element with a fine backstitch in a darker color to give them a clean, illustrative look.
This is a wonderful opportunity to play with color and add tiny embroidery ideas that celebrate your passion.
24. Explore the Elegance of Negative Space

In this classic diamond pattern, the unstitched cream fabric is just as important as the stitched clay lines.
Use a simple backstitch or double running stitch (Holbein stitch) to create the clean, intersecting lines of the pattern.
Focus on creating perfect intersections and consistent stitch length for a sharp, professional finish.
This understated design adds a layer of texture and pattern that feels sophisticated and timeless, enhancing the room without overpowering it.
25. Capture a Moment of Zen with a Brushstroke

Recreate the spontaneous energy of a sumi-e ink brushstroke using a combination of stitch textures.
Use long, straight satin stitches laid closely together for the main body of the stroke, varying their length at the ends to create a feathered edge.
Incorporate tiny seed stitches or French knots to suggest the texture of ink pooling or dragging on paper.
These organic shape embroidery patterns create a focal point that is both dramatic and deeply calming.
26. Blend Color with a Thread-Painted Gradient
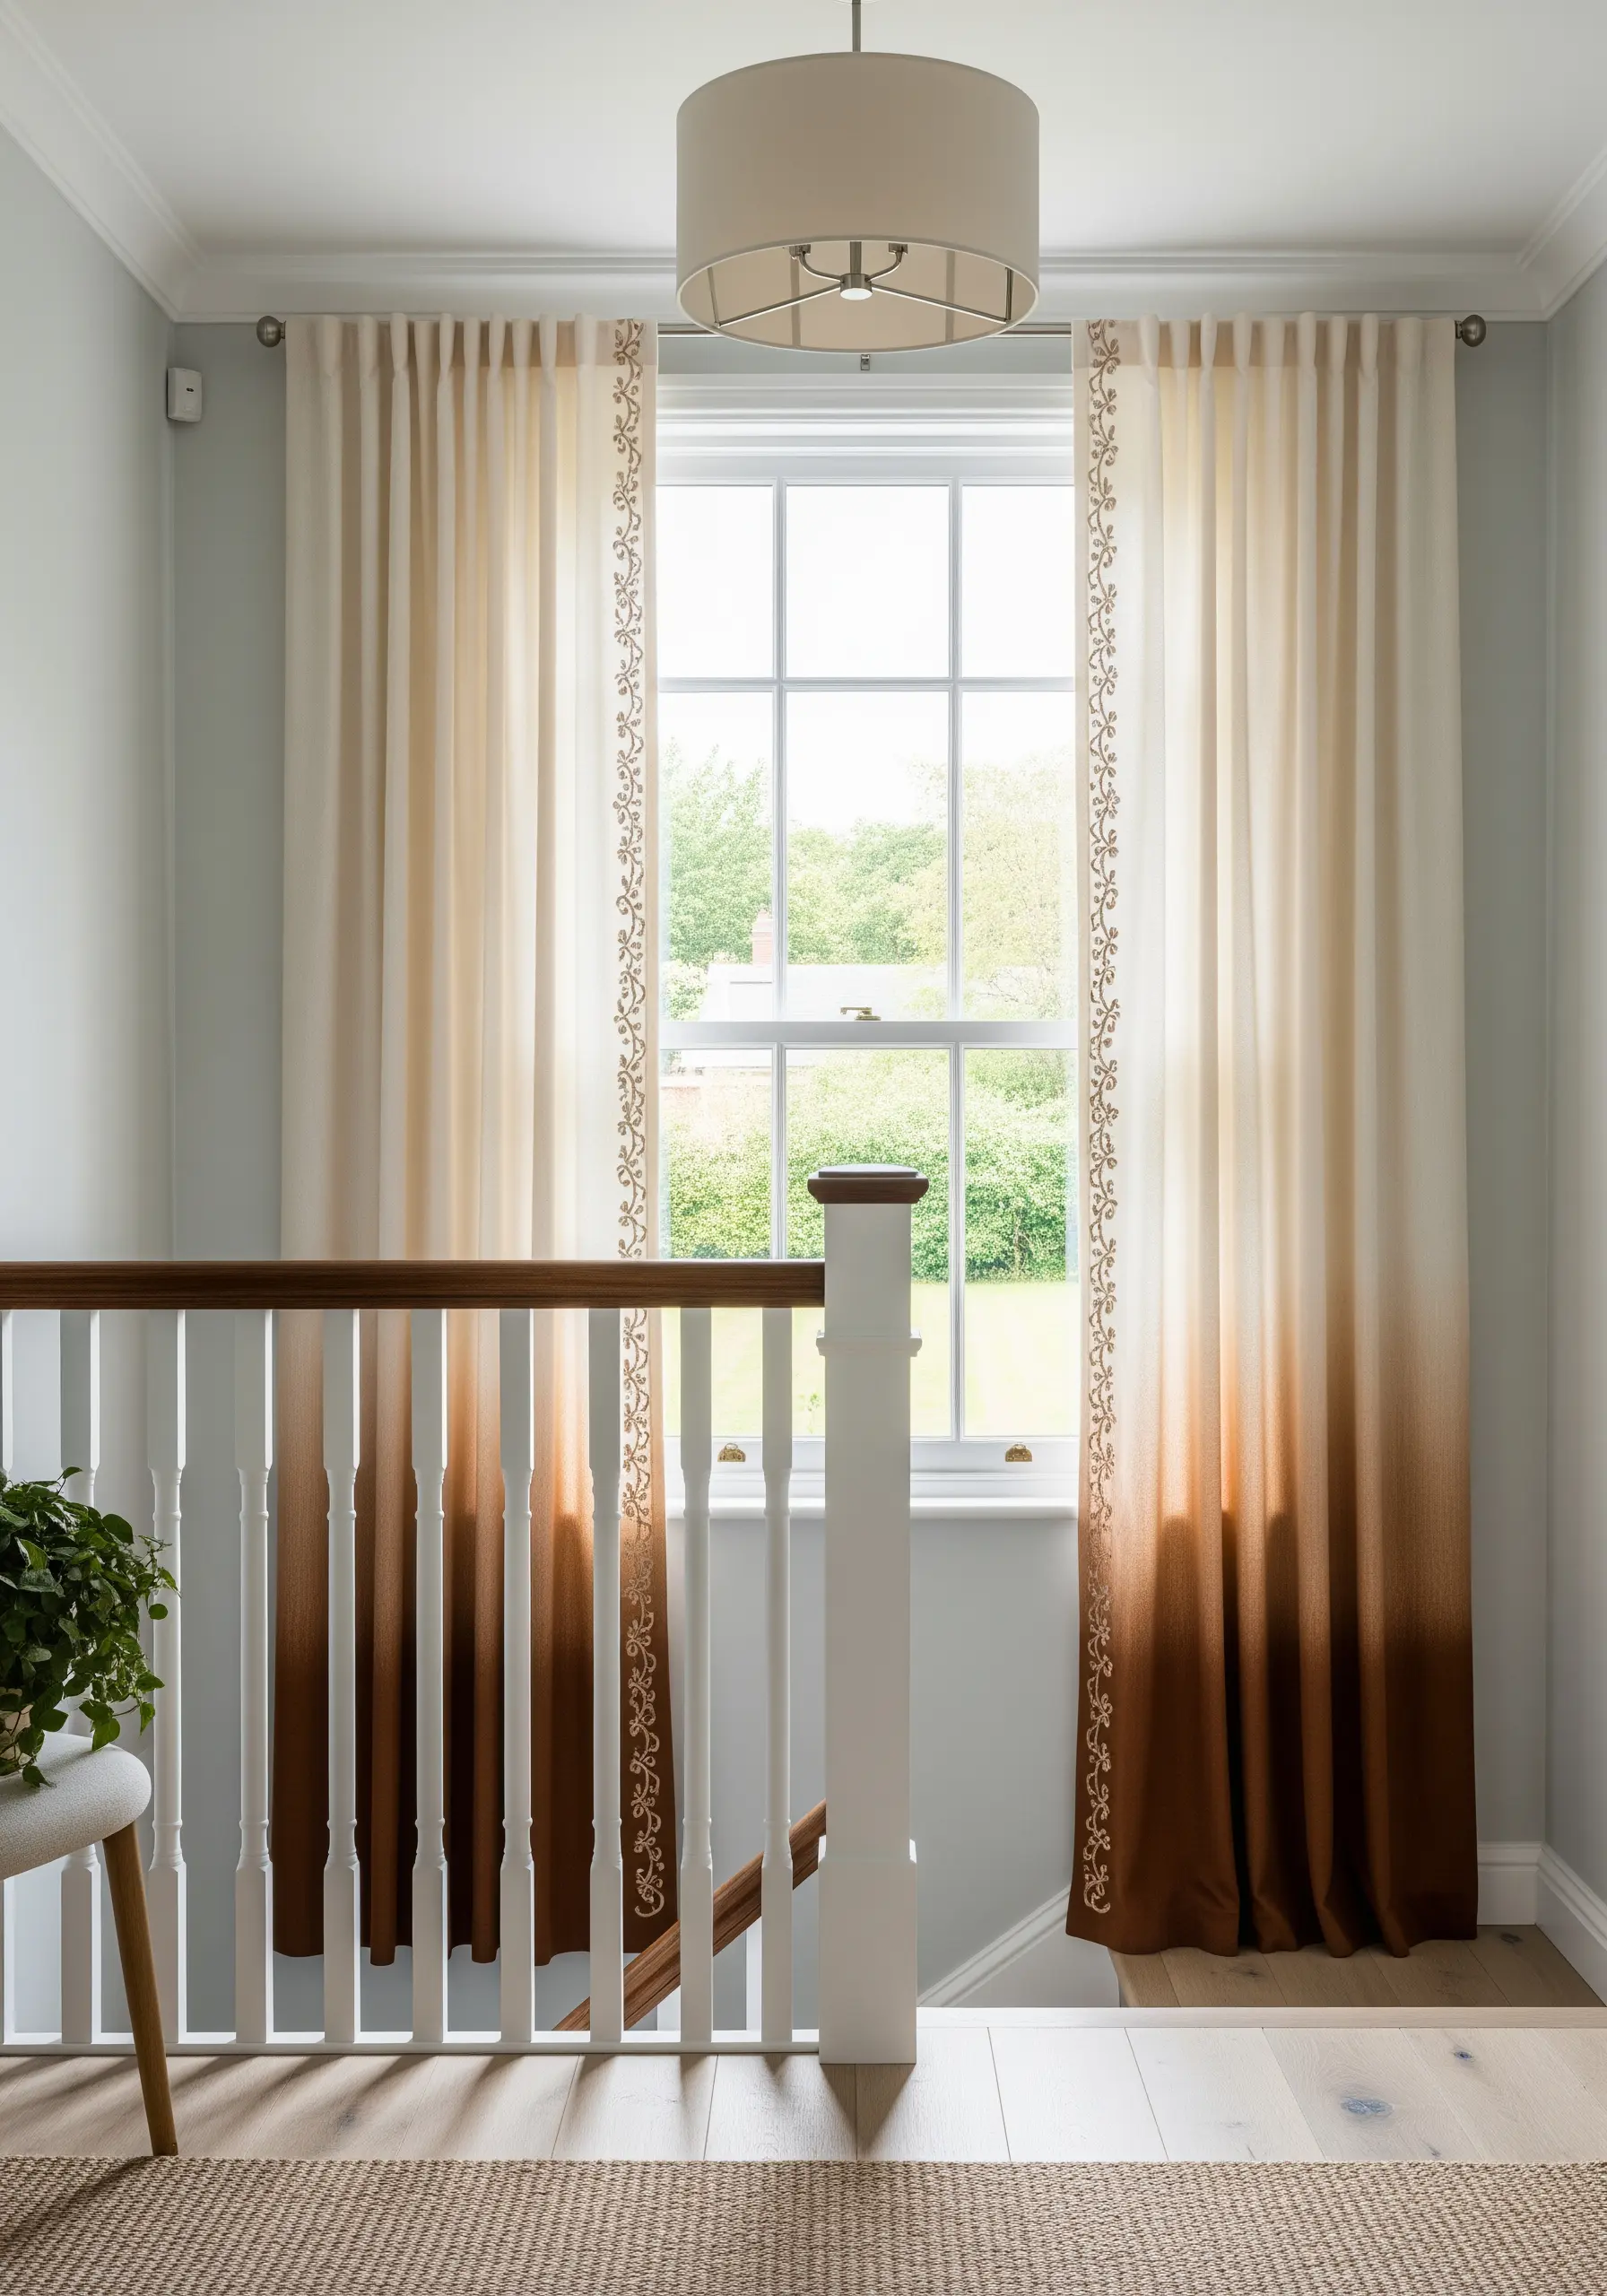
Achieve a dip-dyed look by creating an ombré effect with thread.
Use a long-and-short stitch, working in horizontal bands of color from deep clay up to a soft cream, blending the edges where the colors meet.
This technique, known as thread painting, creates a seamless transition of color that is rich and textural.
Neutral color gradient embroidery ideas like this, topped with delicate floral outlines, add incredible depth and artistry to a simple curtain panel.
27. Compose a Border of Musical Stitches

For a themed border with fine lines and solid shapes, combine two classic stitches for the best results.
Use a whipped backstitch for the staffs and stems; this creates a perfectly smooth, raised line that looks inked on.
Fill in the note heads with a tight, neat satin stitch, ensuring your stitches all lie in the same direction for a uniform finish.
This is a perfect way to add a deeply personal touch to a music room or creative studio.
28. Stitch a Gentle, Starry Night Sky

Create a dreamy, celestial border perfect for a bedroom or nursery.
Use a simple backstitch for the crescent moon outlines and scattered star stitches for a whimsical, twinkling effect.
Working with a variegated thread in shades of cream and beige can add subtle color variation that mimics the soft glow of moonlight.
The slightly irregular placement of the stars gives the design a natural, hand-drawn quality that feels calming and magical.


