
Sometimes the key to elevating your embroidery isn’t learning a dozen new complex stitches. It’s about refining how you use the ones you already know. It’s in the quiet details: choosing a single strand of thread over two, changing the direction of your stitches to follow the light, or letting the unstitched fabric become part of the story.
Think of your needle and thread not just as tools for filling color, but as instruments for creating texture, depth, and emotion. Each of the pieces you’re about to see holds a specific lesson in artistic intention—a small adjustment you can apply to your own work right now to make it feel more polished, more expressive, and more uniquely yours.
Let these ideas inspire you to look closer at your own projects. See where a change in thread weight could create perspective, or where a different fill stitch could add unexpected dimension. This is where your craft transforms into art.
1. Achieve Lifelike Detail with Strategic Stitching
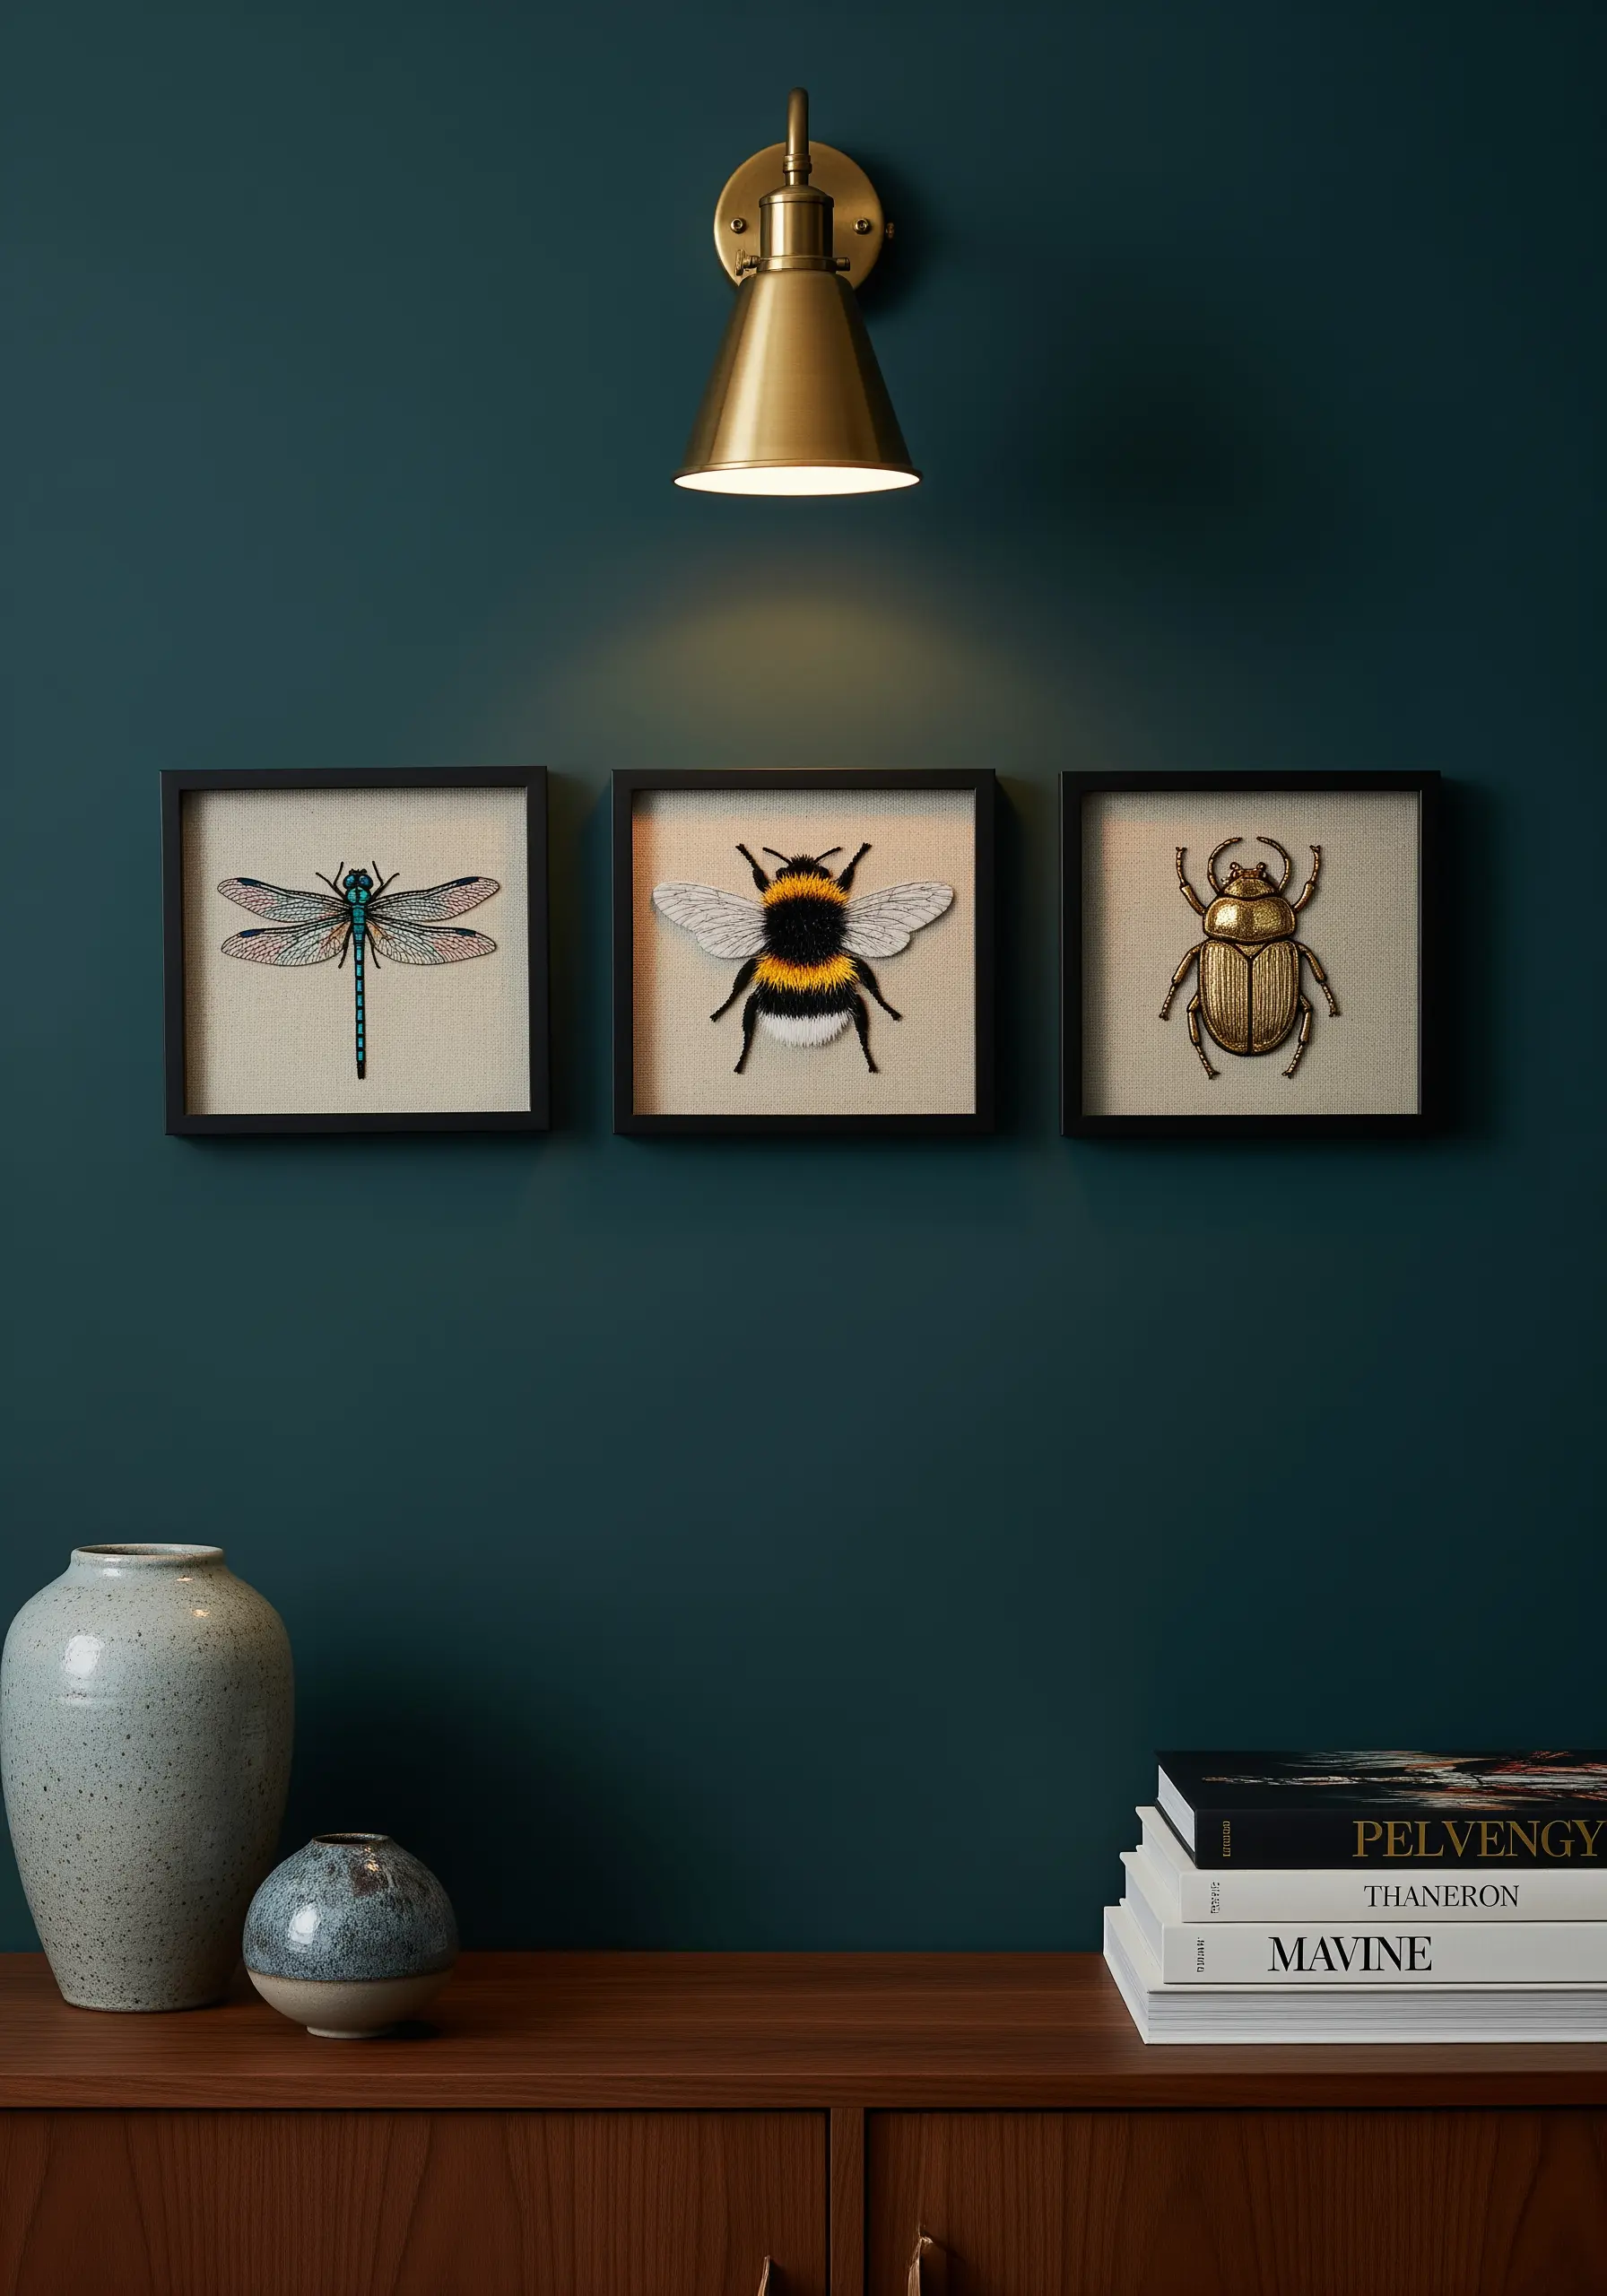
To capture the delicate iridescence of an insect’s wing or the metallic sheen on a beetle’s shell, think beyond standard satin stitch.
Use single-strand silk or rayon thread for the dragonfly’s wings, laying down long, parallel stitches that catch the light.
For the beetle, work with a fine metallic thread and use meticulous short stitches, changing the angle slightly to mimic the way light reflects off a curved surface.
This approach elevates a simple subject into a piece of fine art by focusing entirely on how different textures interact with light.
2. Master Scale with Minimalist Line Work

When creating a large-scale embroidered landscape, clarity is more important than complexity.
Use a single color of thread in varying weights—from one to three strands—to create a sense of atmospheric perspective.
Use thicker thread for foreground trees and thinner, more delicate lines for distant mountains.
This technique, executed with simple backstitch or stem stitch, gives the piece a clean, illustrative quality that feels both modern and serene in a large frame.
3. Capture Natural Variegation with Directional Stitches
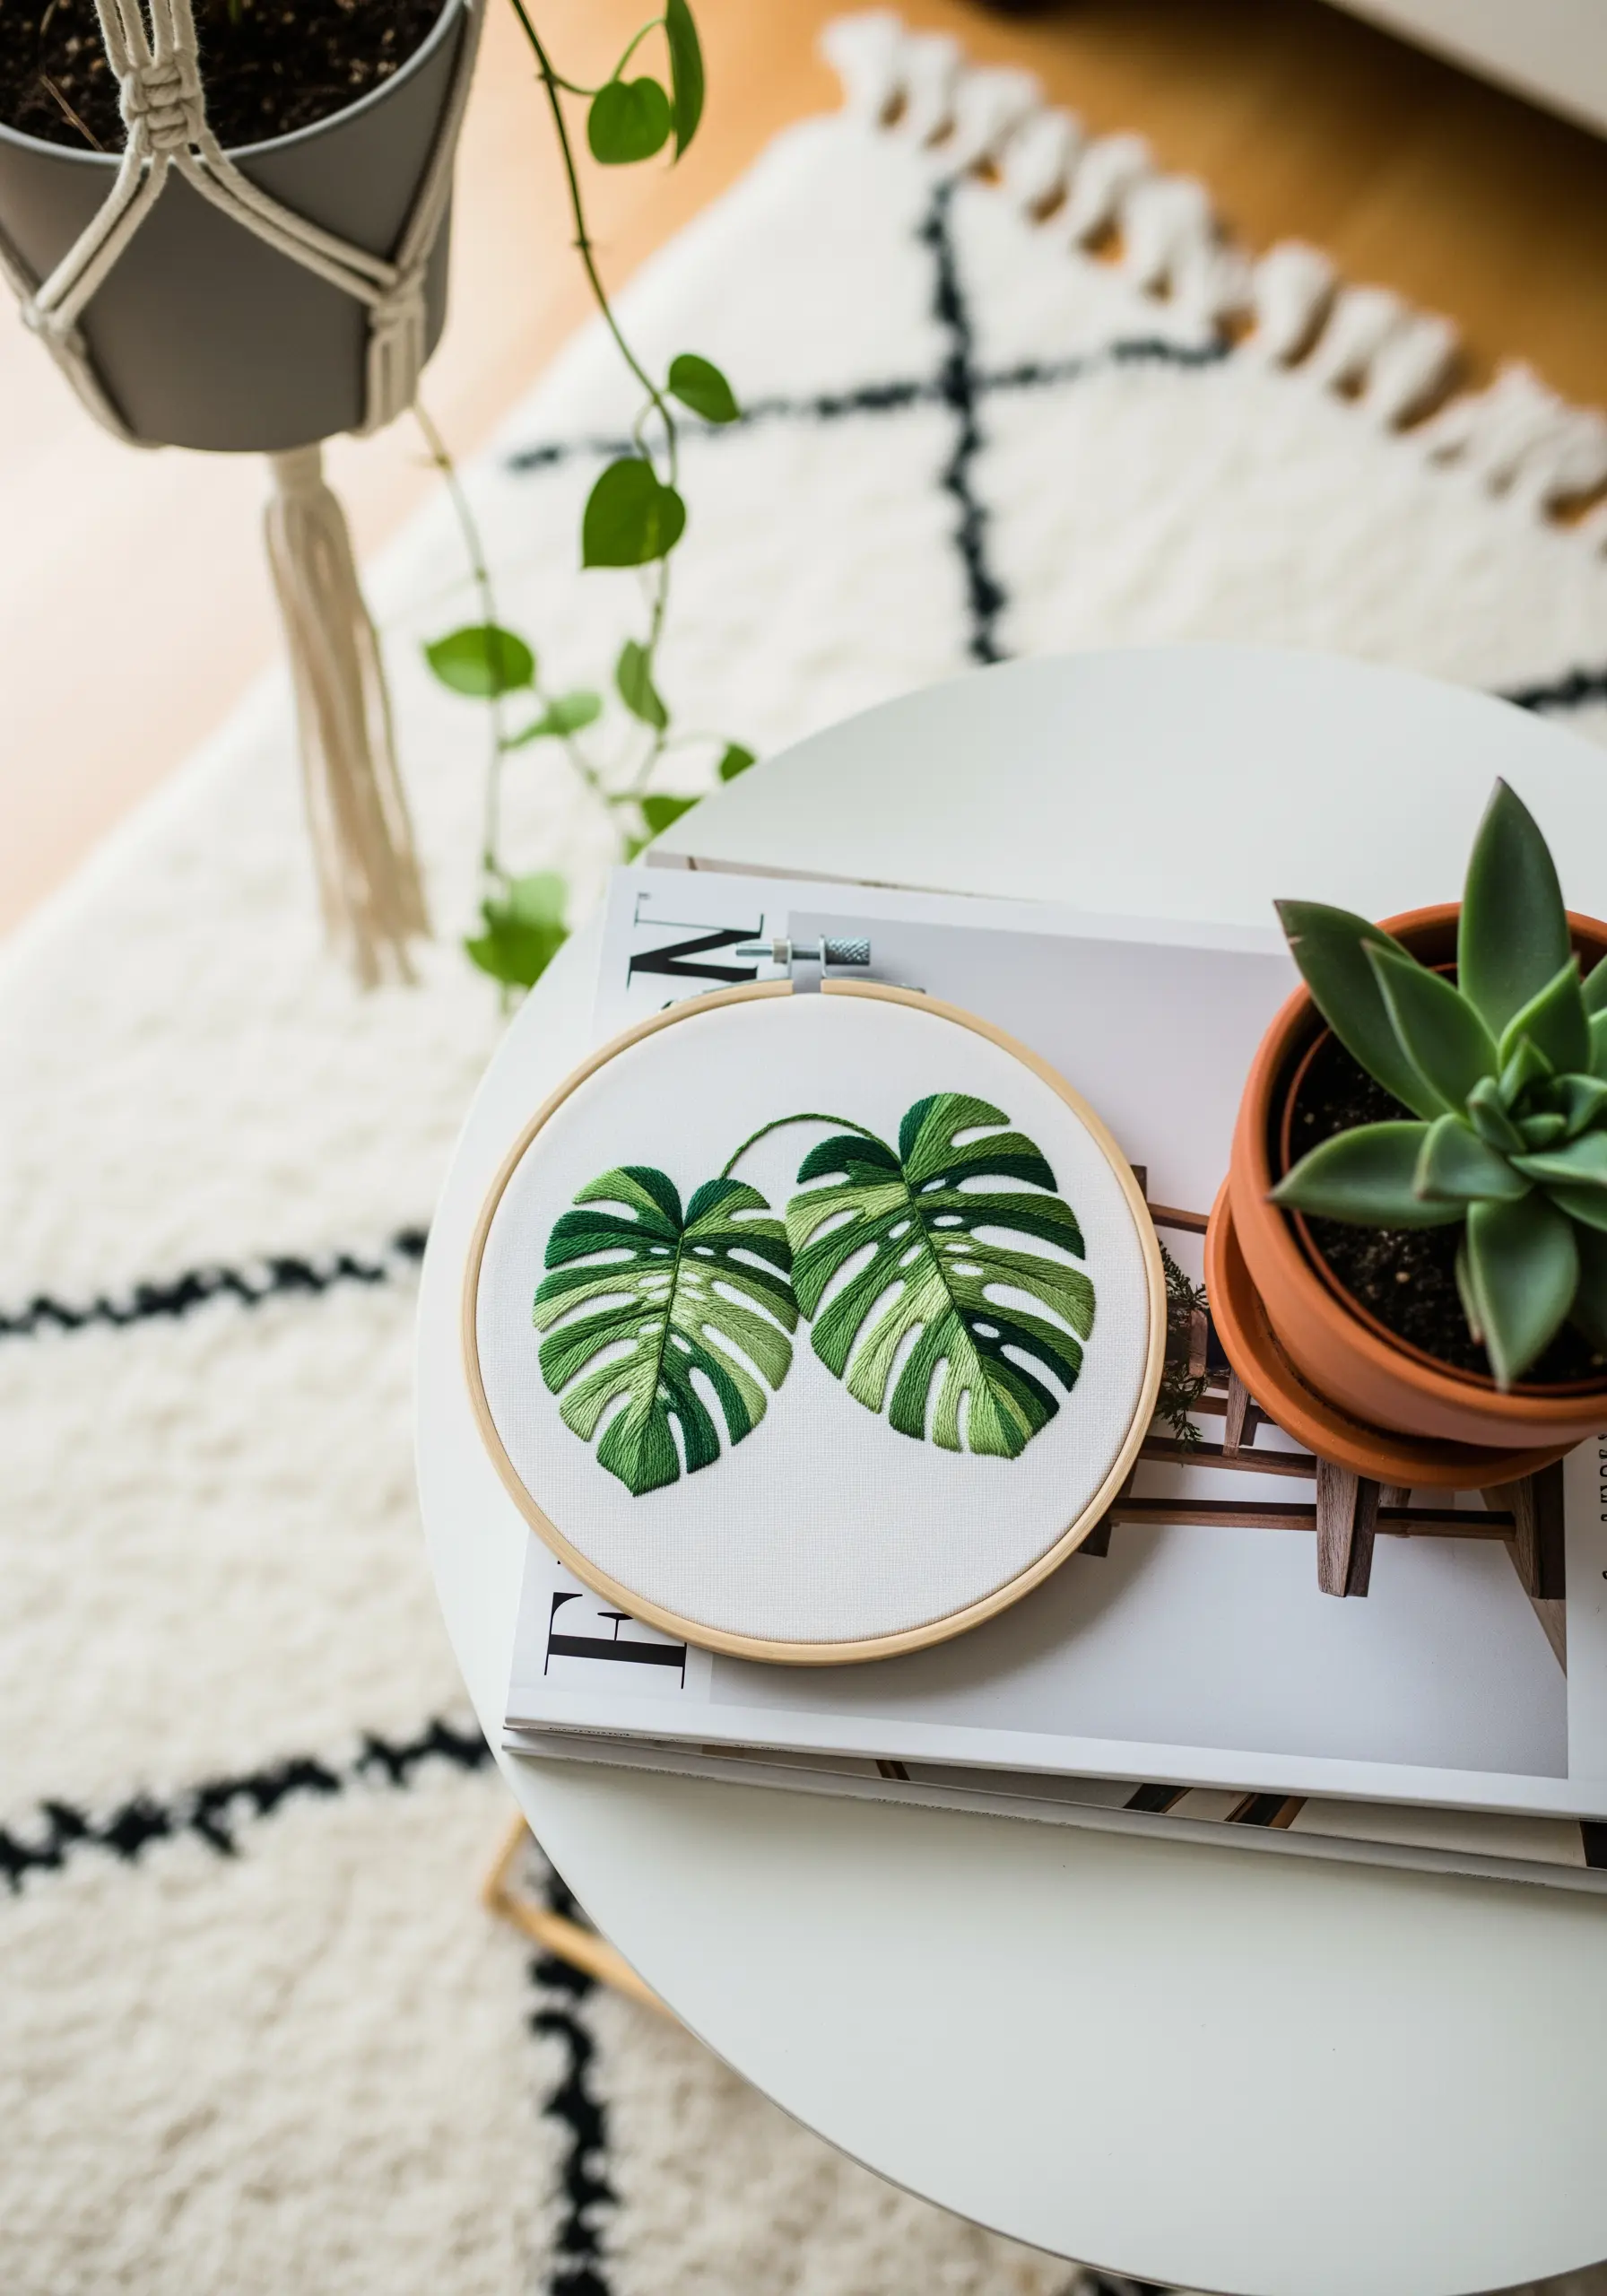
To embroider realistic leaves, the direction of your stitches is as crucial as your color choice.
Use long-and-short stitch to blend several shades of green seamlessly, creating the subtle variegation found in nature.
Ensure your stitches follow the natural direction of the leaf’s veins, angling outward from the central stem.
This directional flow creates movement and realism, transforming a flat motif into a dynamic, lifelike botanical study.
4. Build Soft Fur Texture with Layered Tones
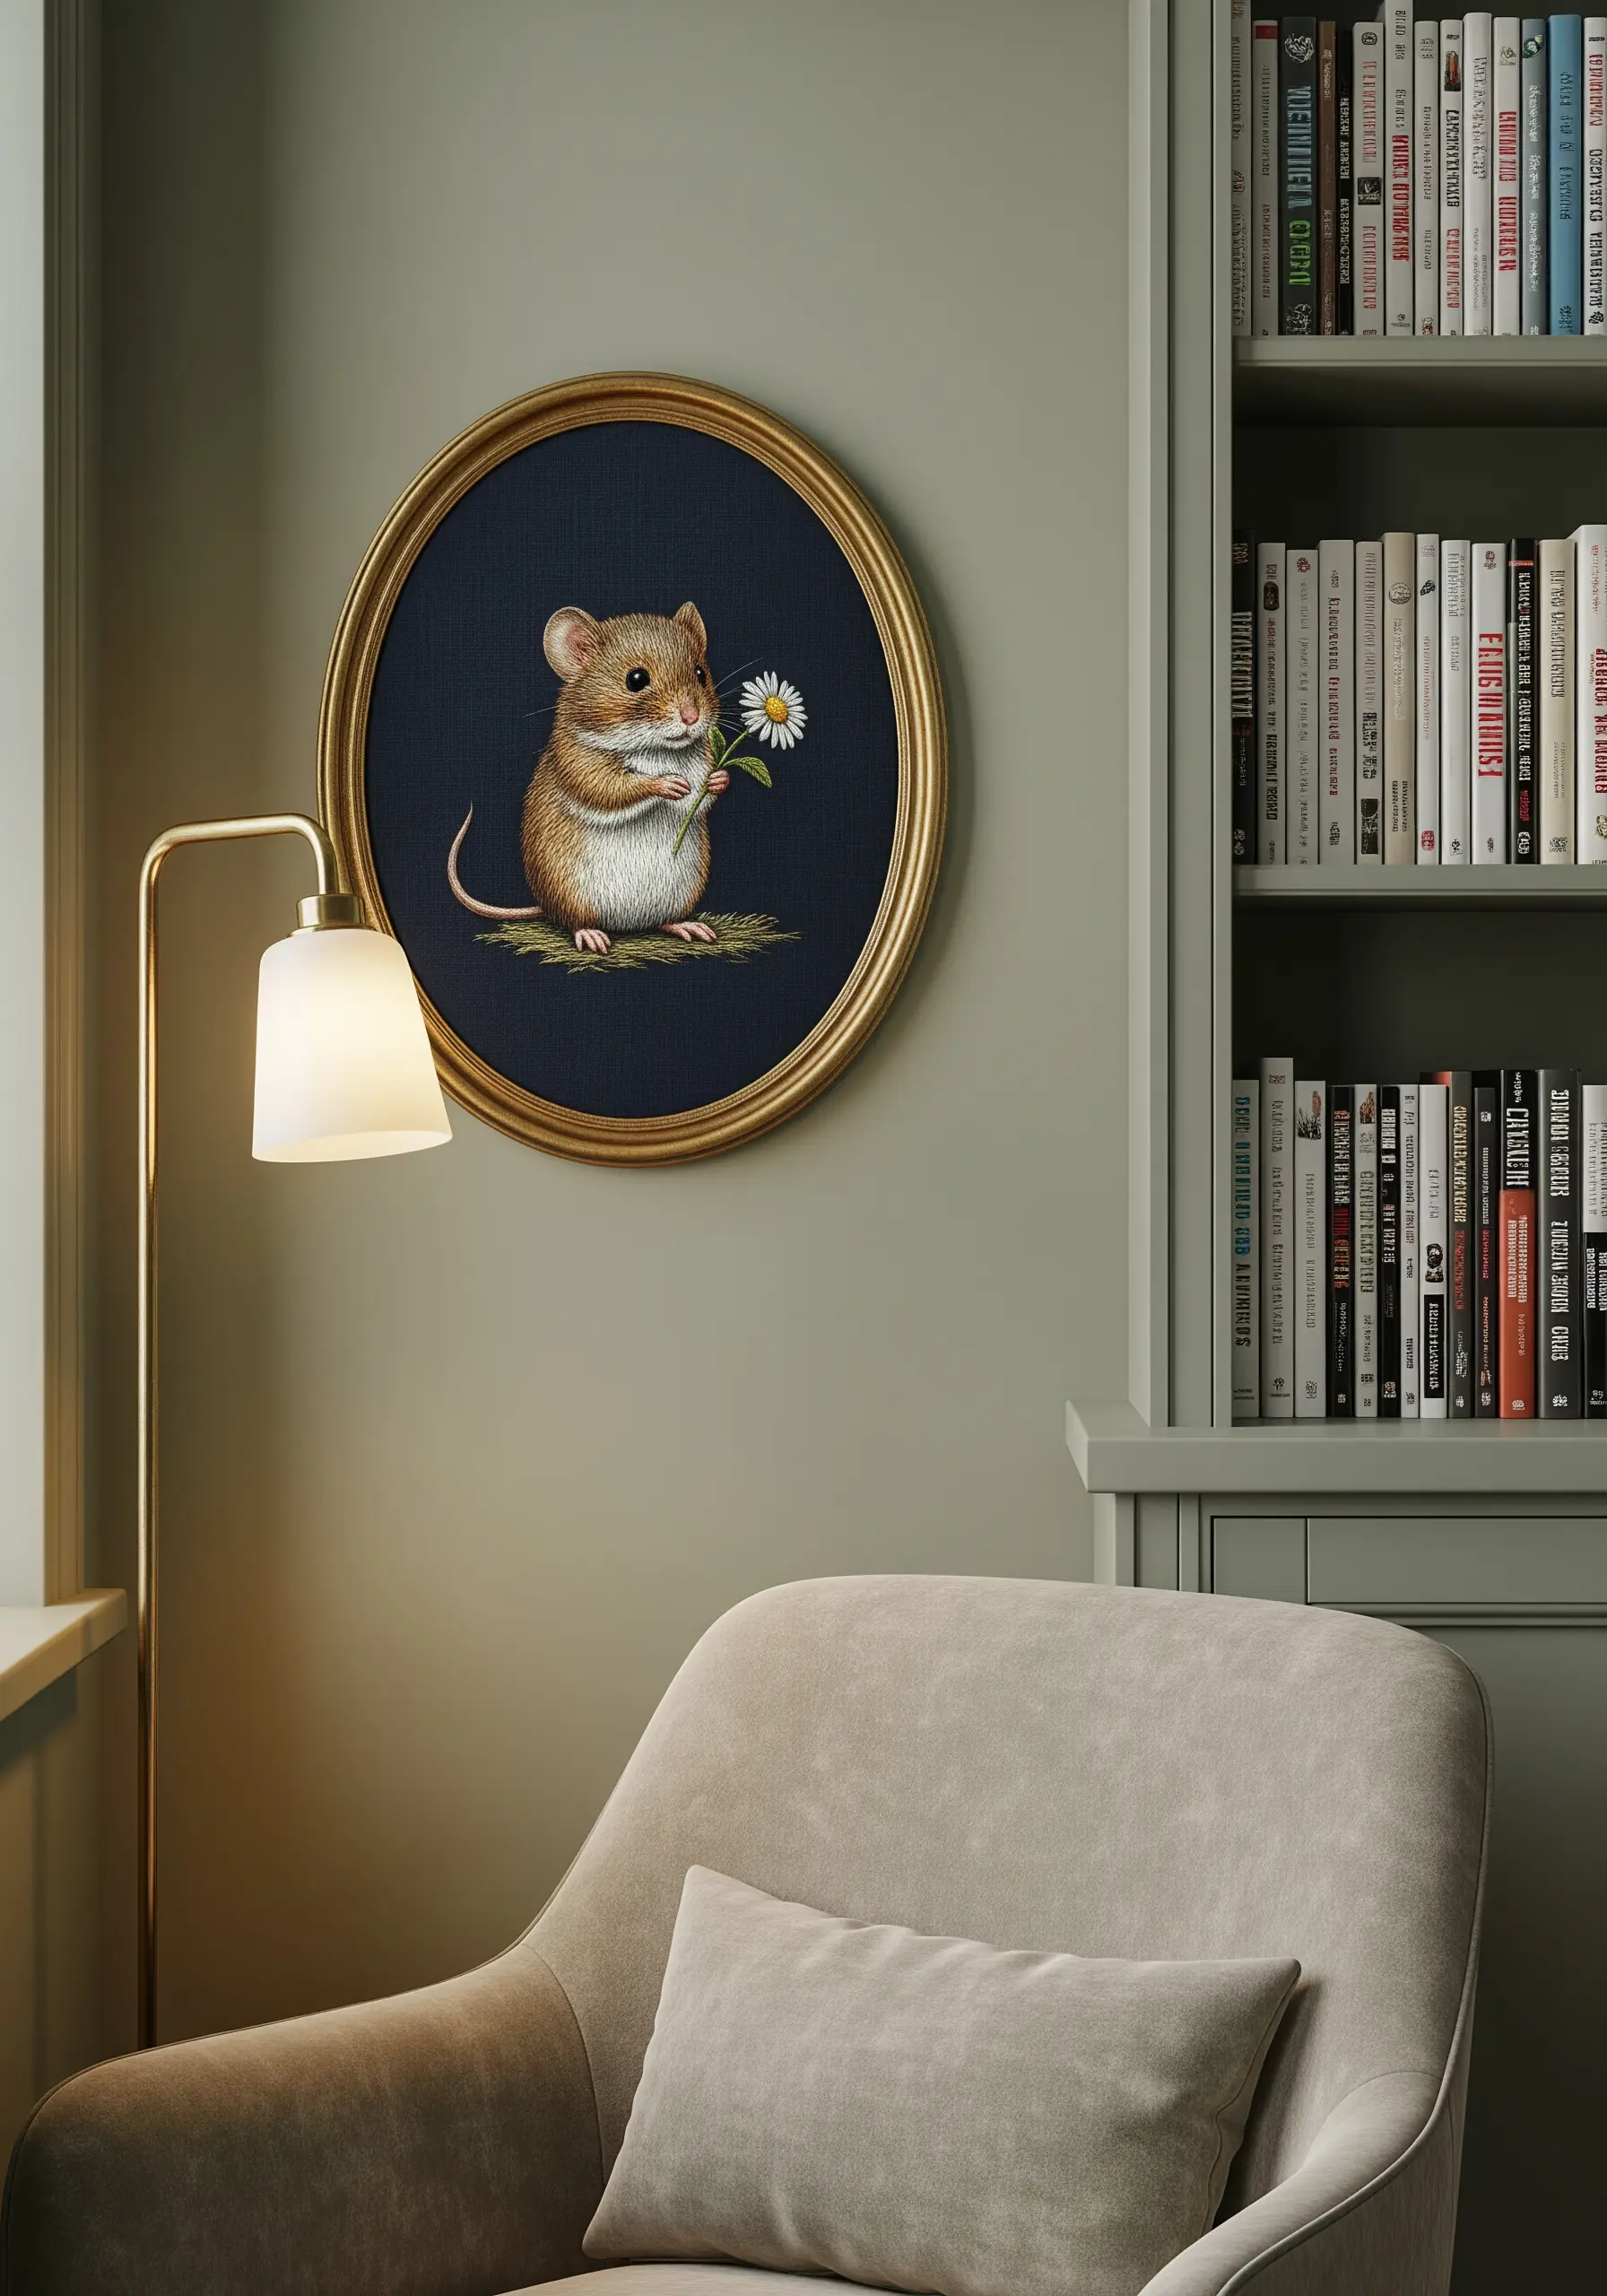
Creating soft, touchable fur requires building up layers of color, just like a painter would.
Work with single strands of thread in at least three to four similar shades—from light tan to deep brown.
Use short, split backstitches, layering them in the direction of fur growth. This breaks up any hard lines and creates a soft, blended texture.
Stitching on a dark, high-contrast fabric makes the subject pop, giving it a classic, portrait-like quality.
5. Explore Abstract Art with Textured Fills
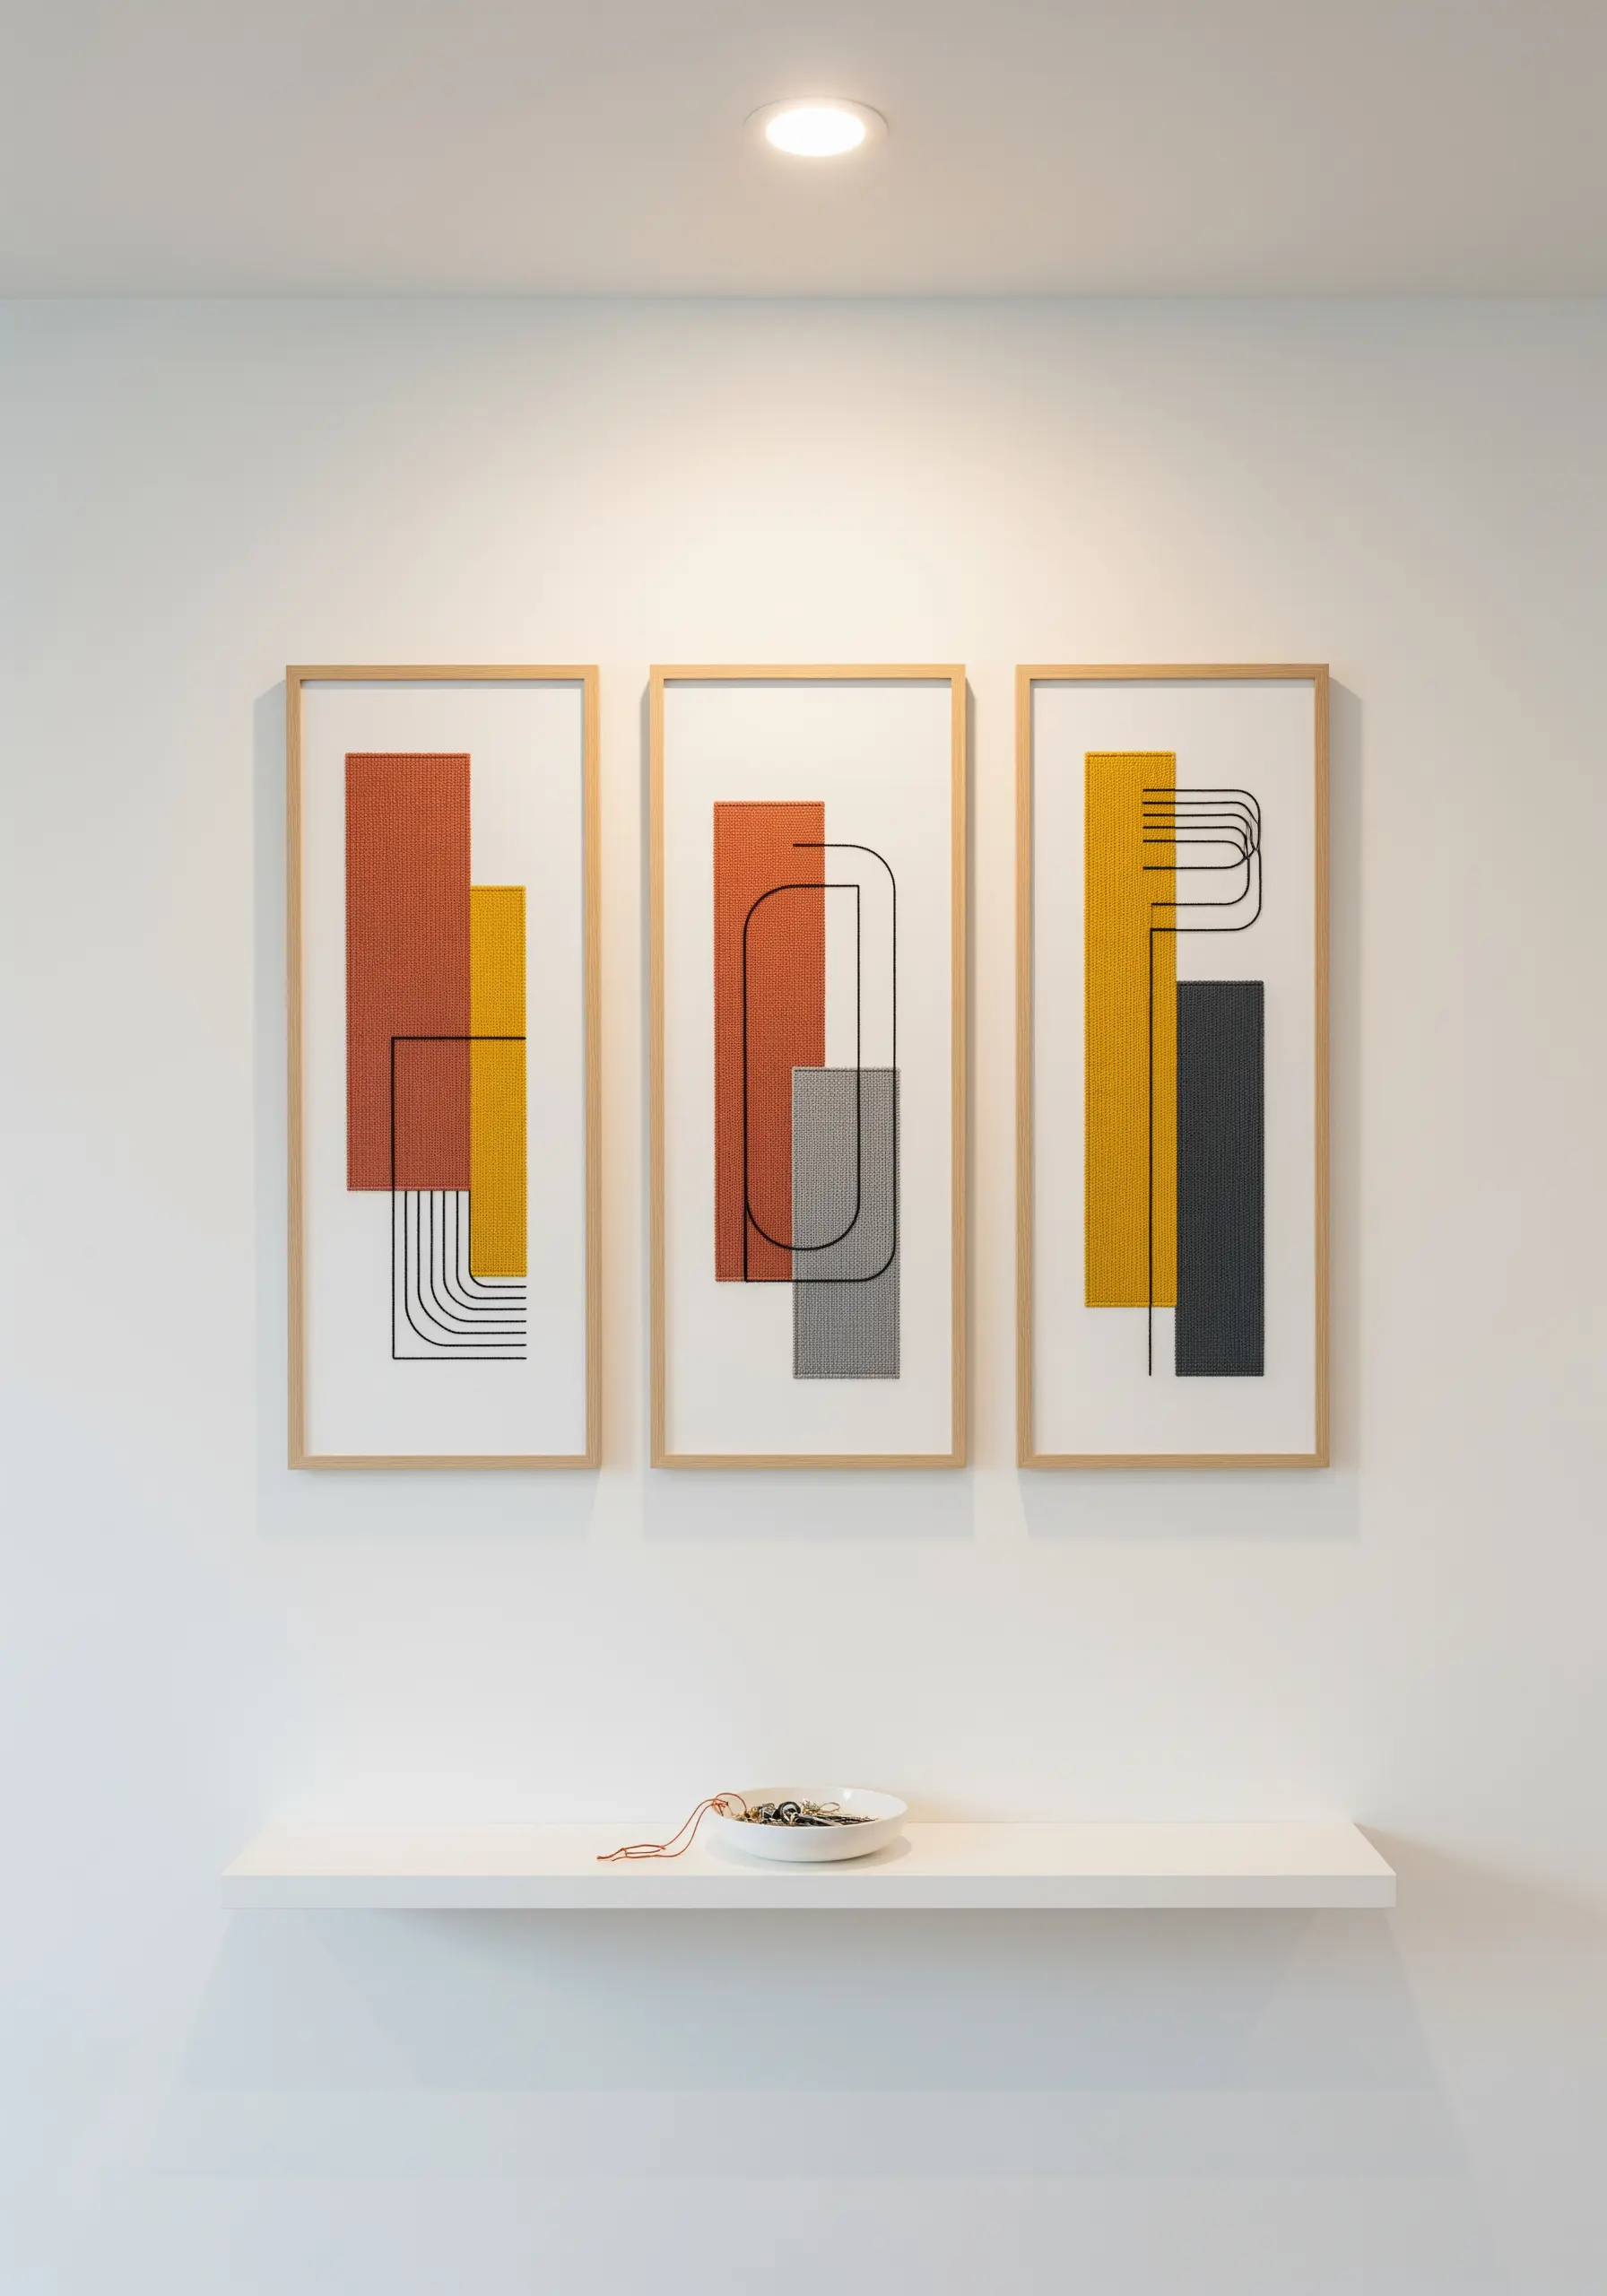
Move beyond satin stitch for filling abstract shapes to add a layer of unexpected texture and depth.
Use a dense seed stitch or a geometric pattern of straight stitches to fill your blocks of color.
This creates a woven, tactile quality that invites closer inspection. The contrast between the textured fills and the clean, sharp outlines of the black thread elevates the design from a simple graphic into a sophisticated piece of abstract framed embroidery.
6. Stitch Crisp Architectural Lines with Precision

When embroidering architecture, your goal is precision and clarity.
Always use a single strand of black thread for the sharpest possible lines. A split stitch or backstitch will give you the most control.
To prevent fabric from puckering and ensure your lines are perfectly straight, iron on a lightweight, tear-away stabilizer before you begin stitching.
This technical step is the secret to achieving a clean, professional finish that looks like a fine architectural rendering.
7. Recreate Food’s Vibrancy with Thread Painting
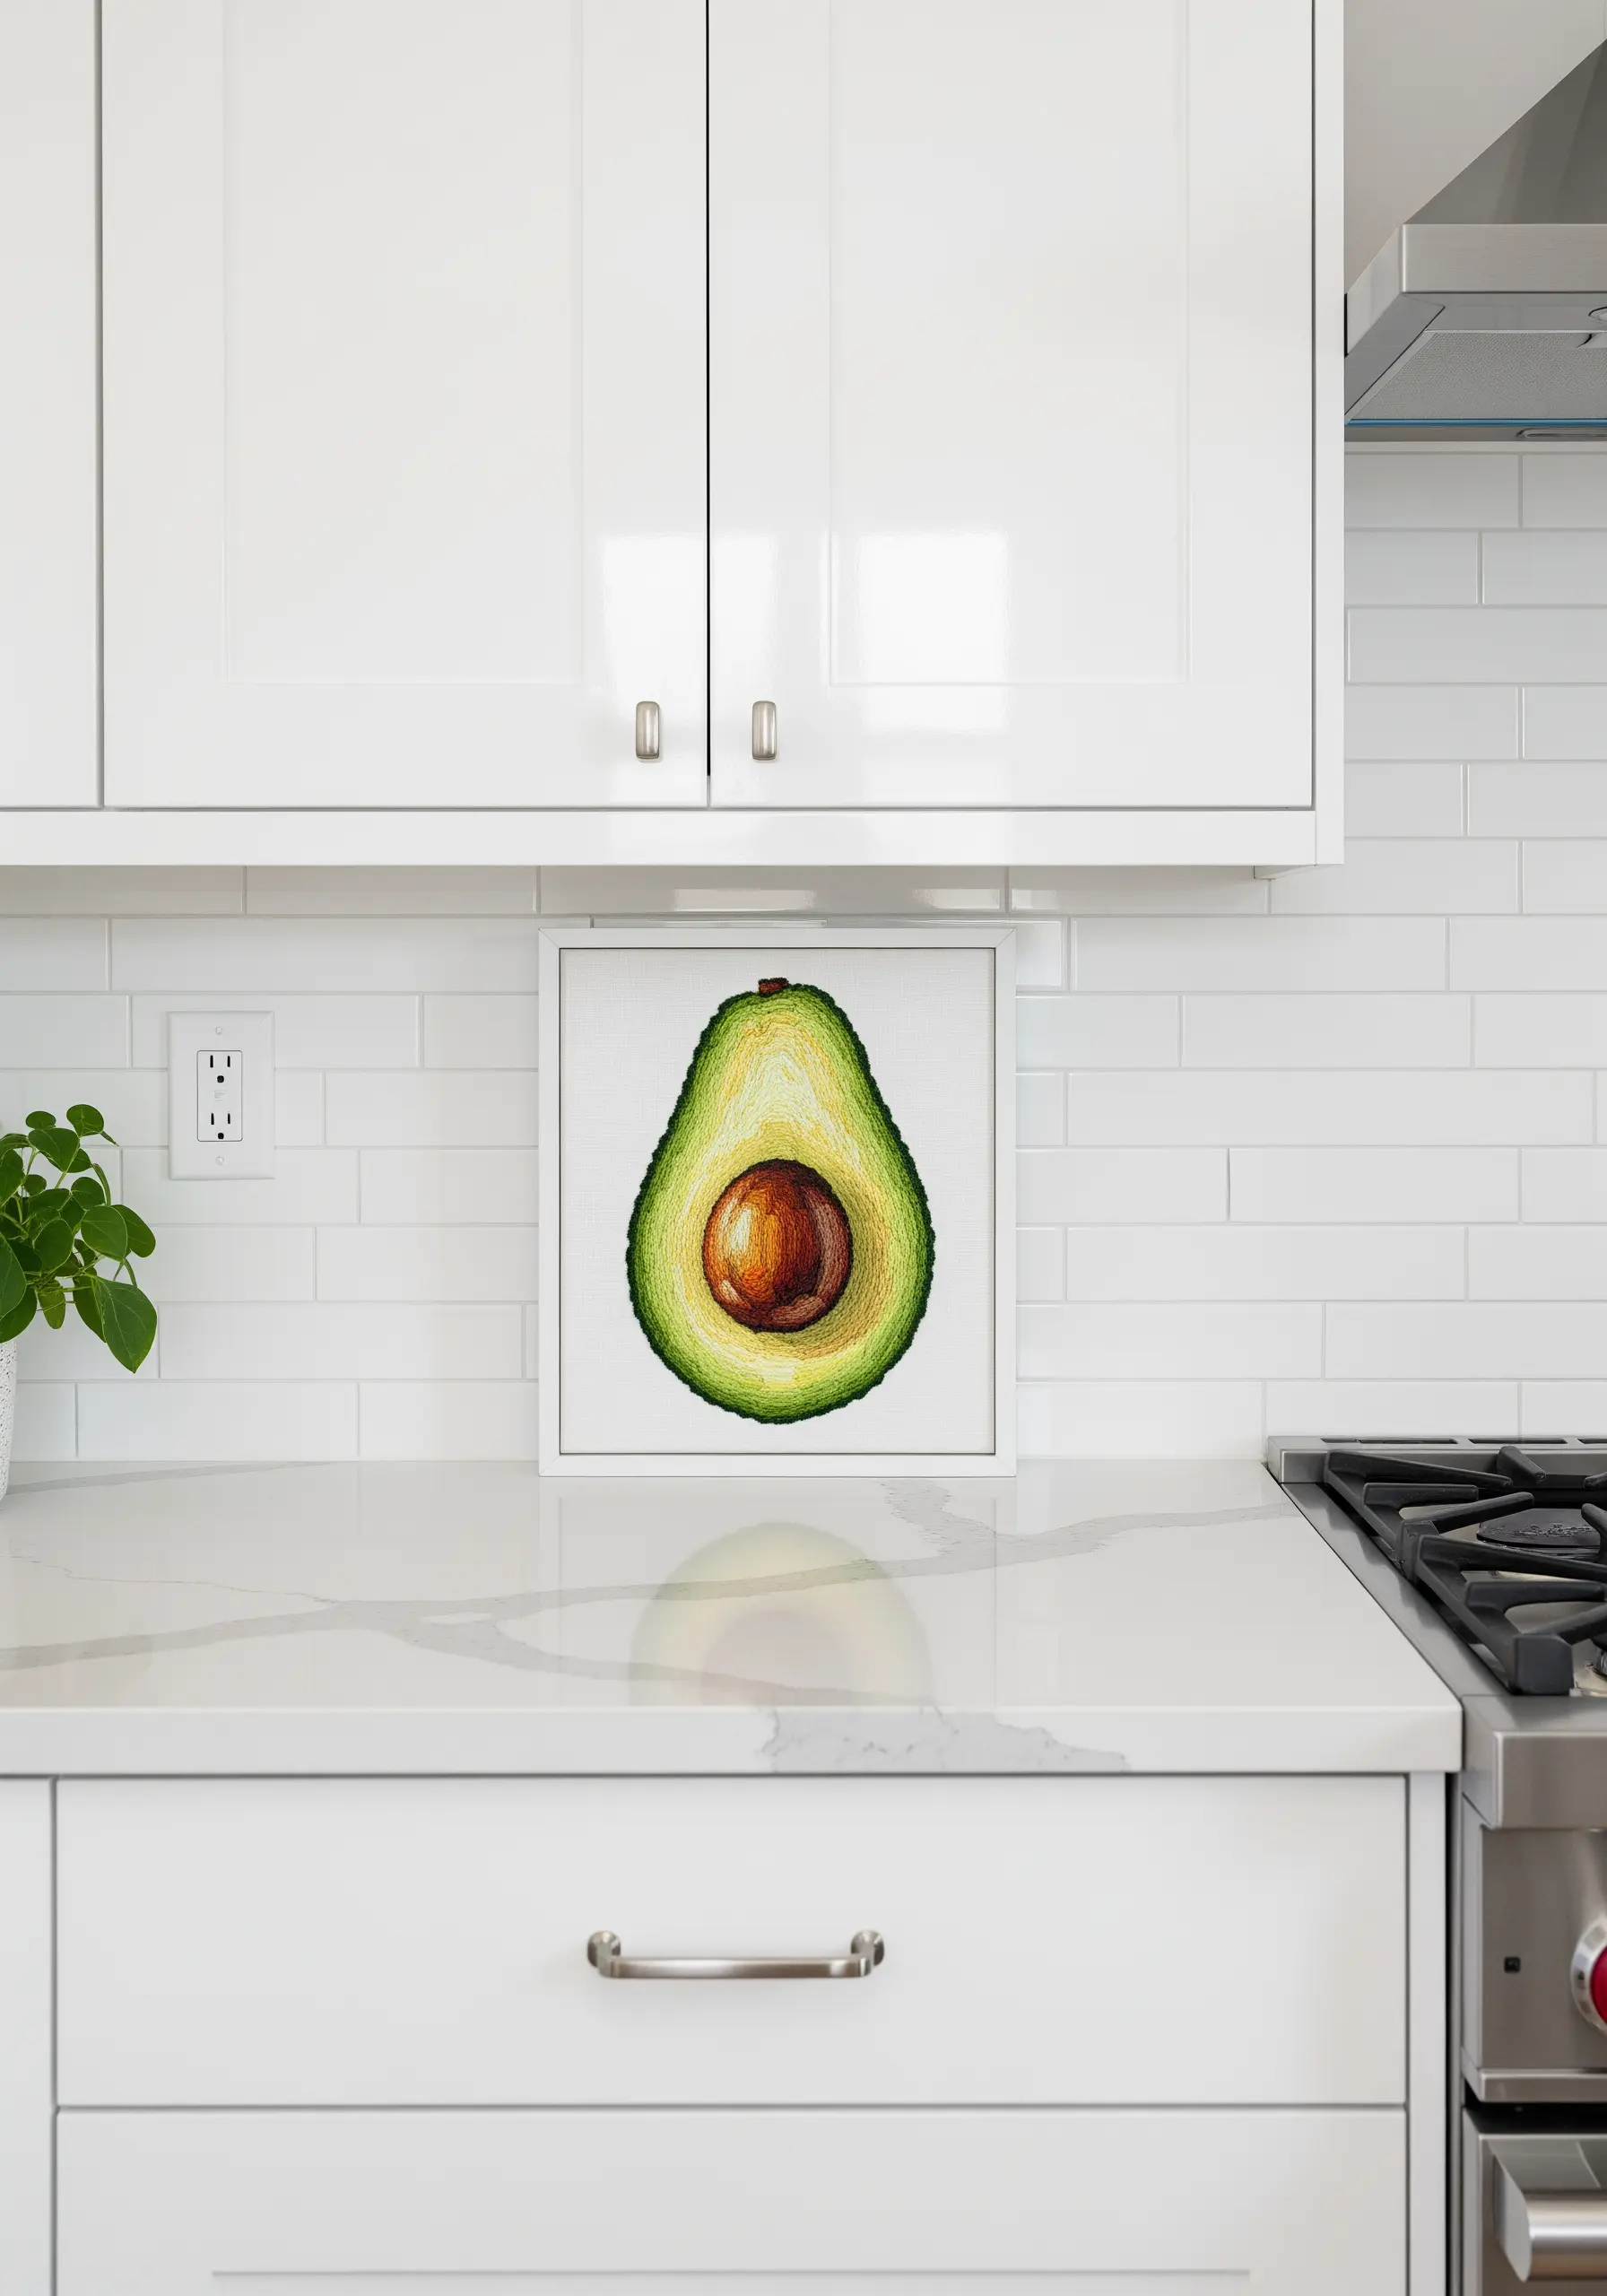
To capture the creamy gradient of an avocado or the glossy surface of a cherry, you need to think like a painter.
Use the long-and-short stitch technique with several shades of green to create a smooth, seamless transition from the dark skin to the light flesh.
For the pit, use satin stitches that curve around its spherical shape, adding a single white stitch as a highlight to create a sense of dimension and shine.
8. Create Cosmic Depth on a Dark Canvas

A black or navy fabric is the perfect backdrop for cosmic designs, allowing light threads to shine.
Use a dense spiral of seed stitches for the galaxy’s center, transitioning to sparsely scattered French knots for distant stars.
To make the constellations pop, connect the stars with a clean, single-strand backstitch. Incorporating one or two strands of silver metallic thread adds a subtle shimmer that mimics starlight.
9. Build a Lush Landscape with Layered, High-Texture Stitches
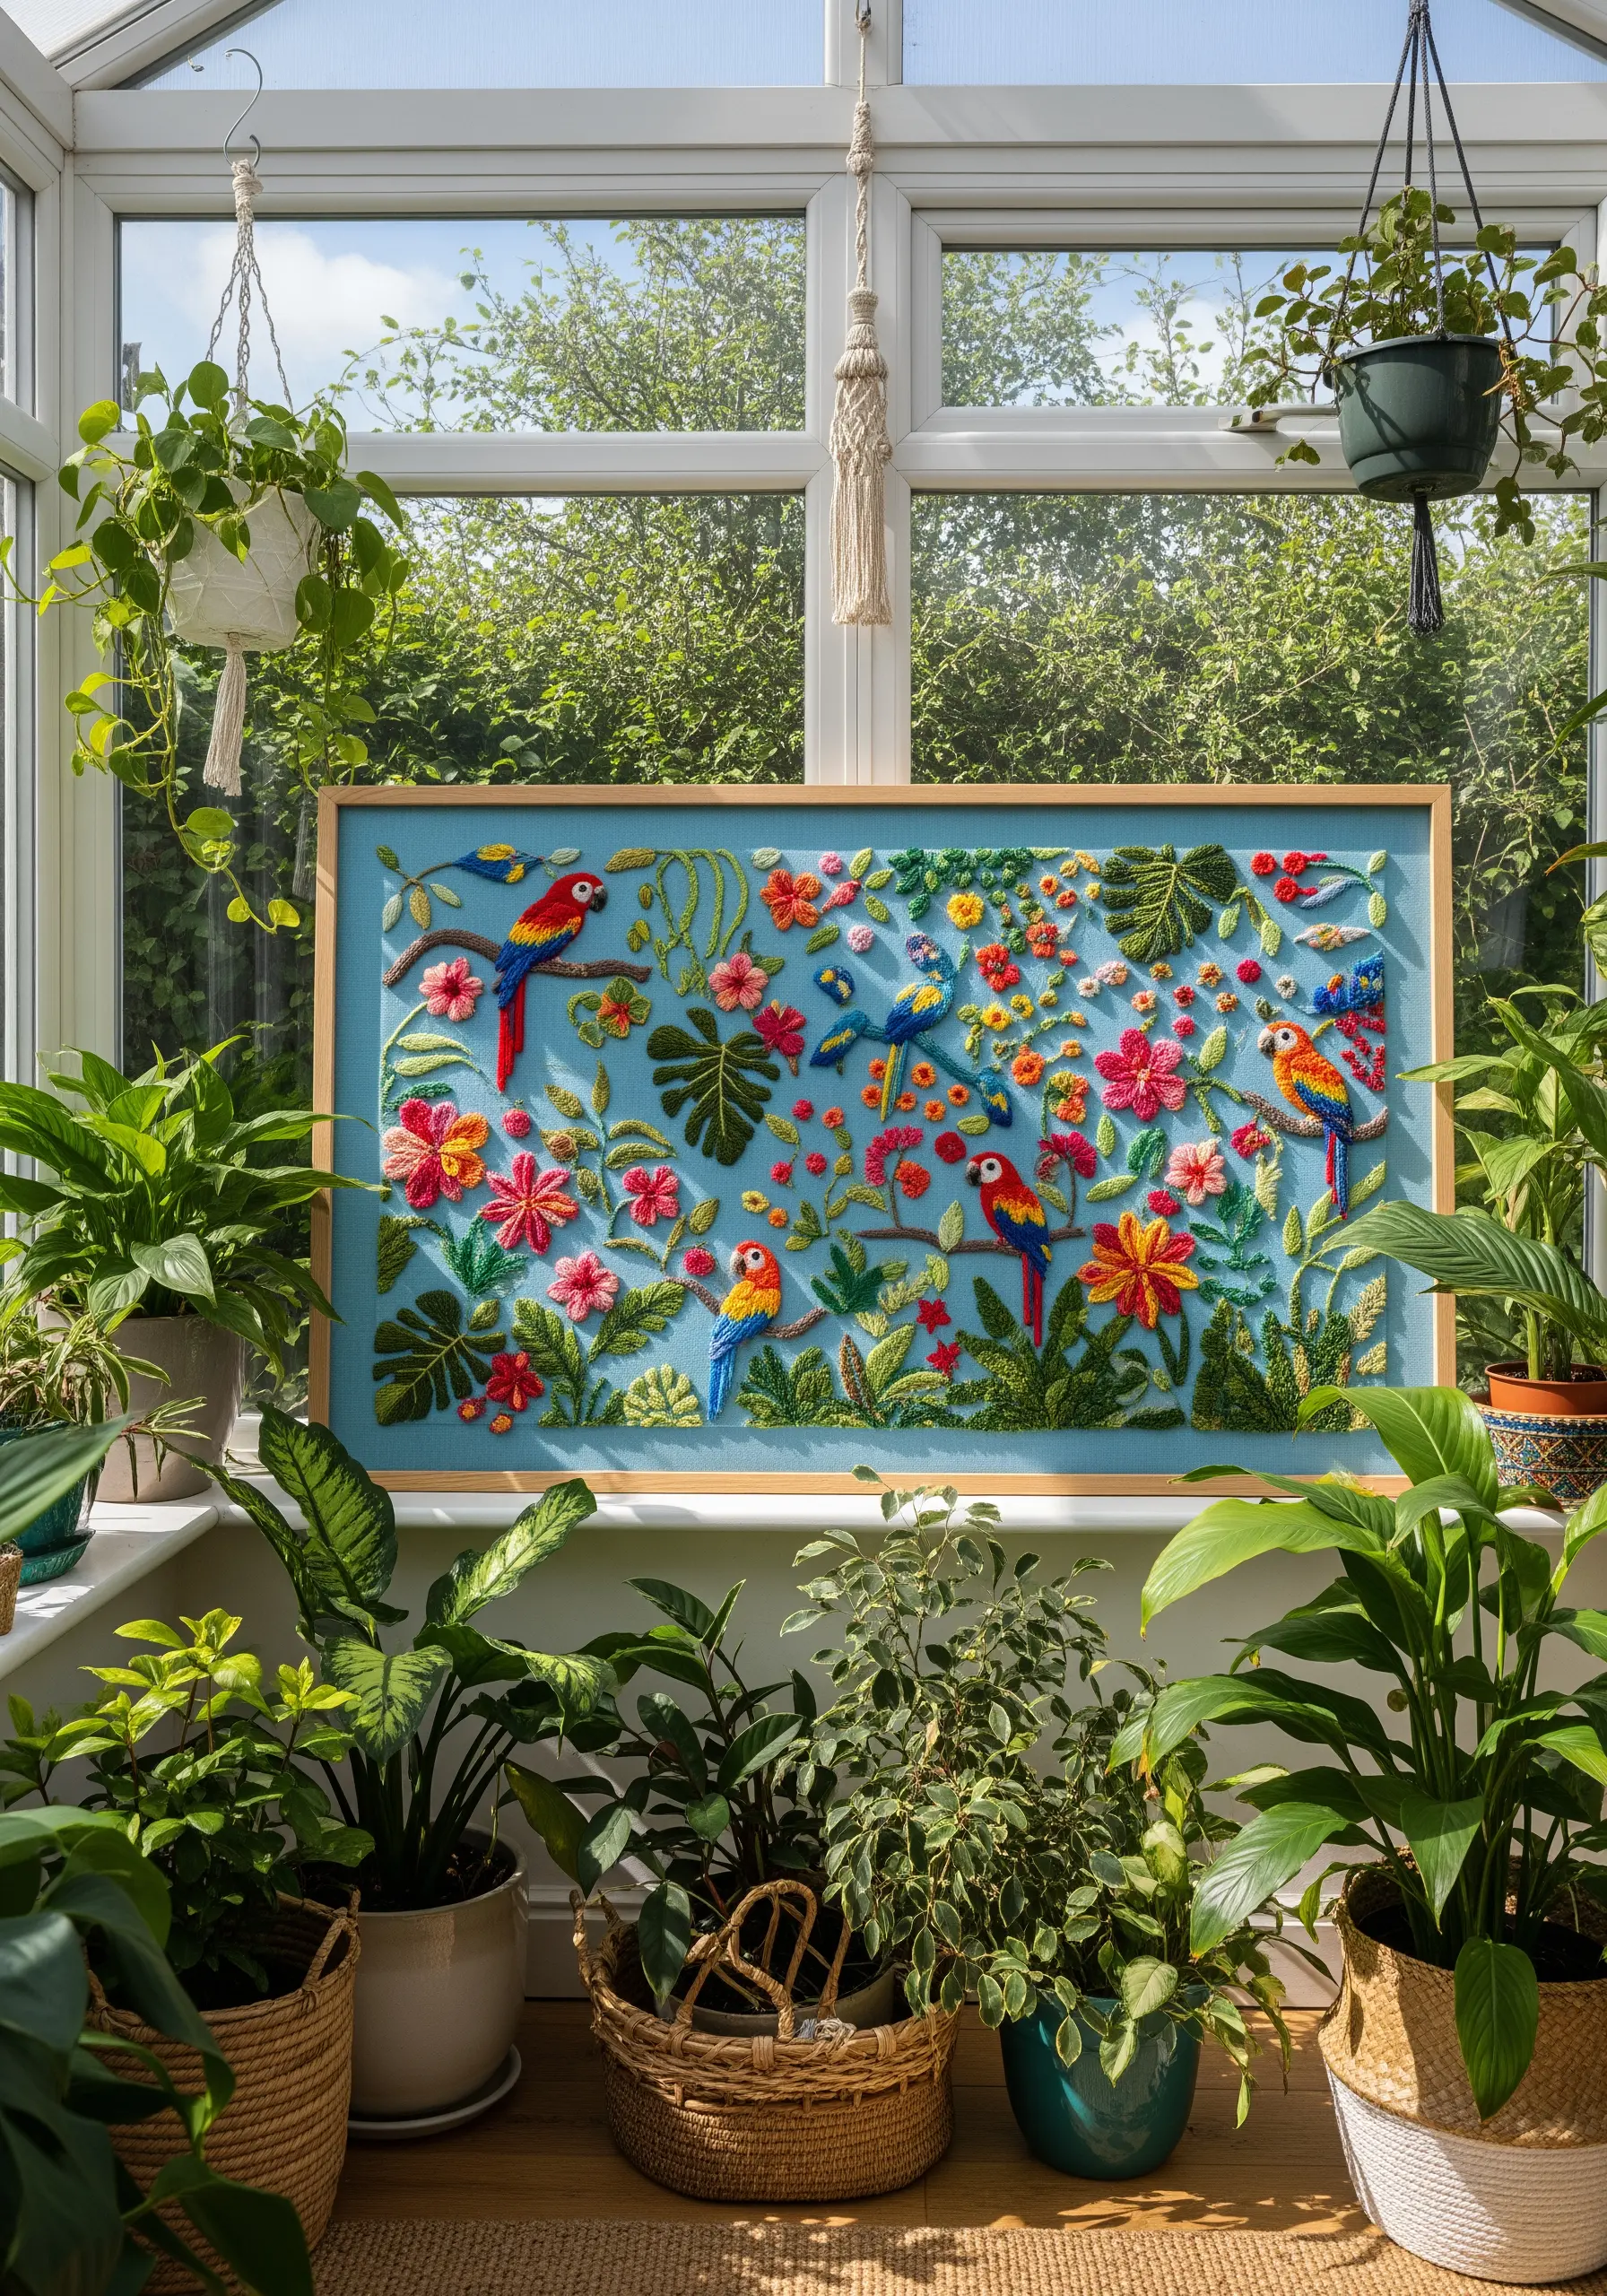
To create a vibrant, jungle-like scene that feels alive, you must build dimension through texture.
Bring focal points like flowers to the foreground with high-relief stitches like woven wheel stitches, bullion knots, or turkey work.
For the background foliage, use flatter stitches like satin stitch and fishbone stitch. This layering technique draws the eye through the composition and creates a true sense of depth.
10. Blend a Soft Palette for a Painterly Finish
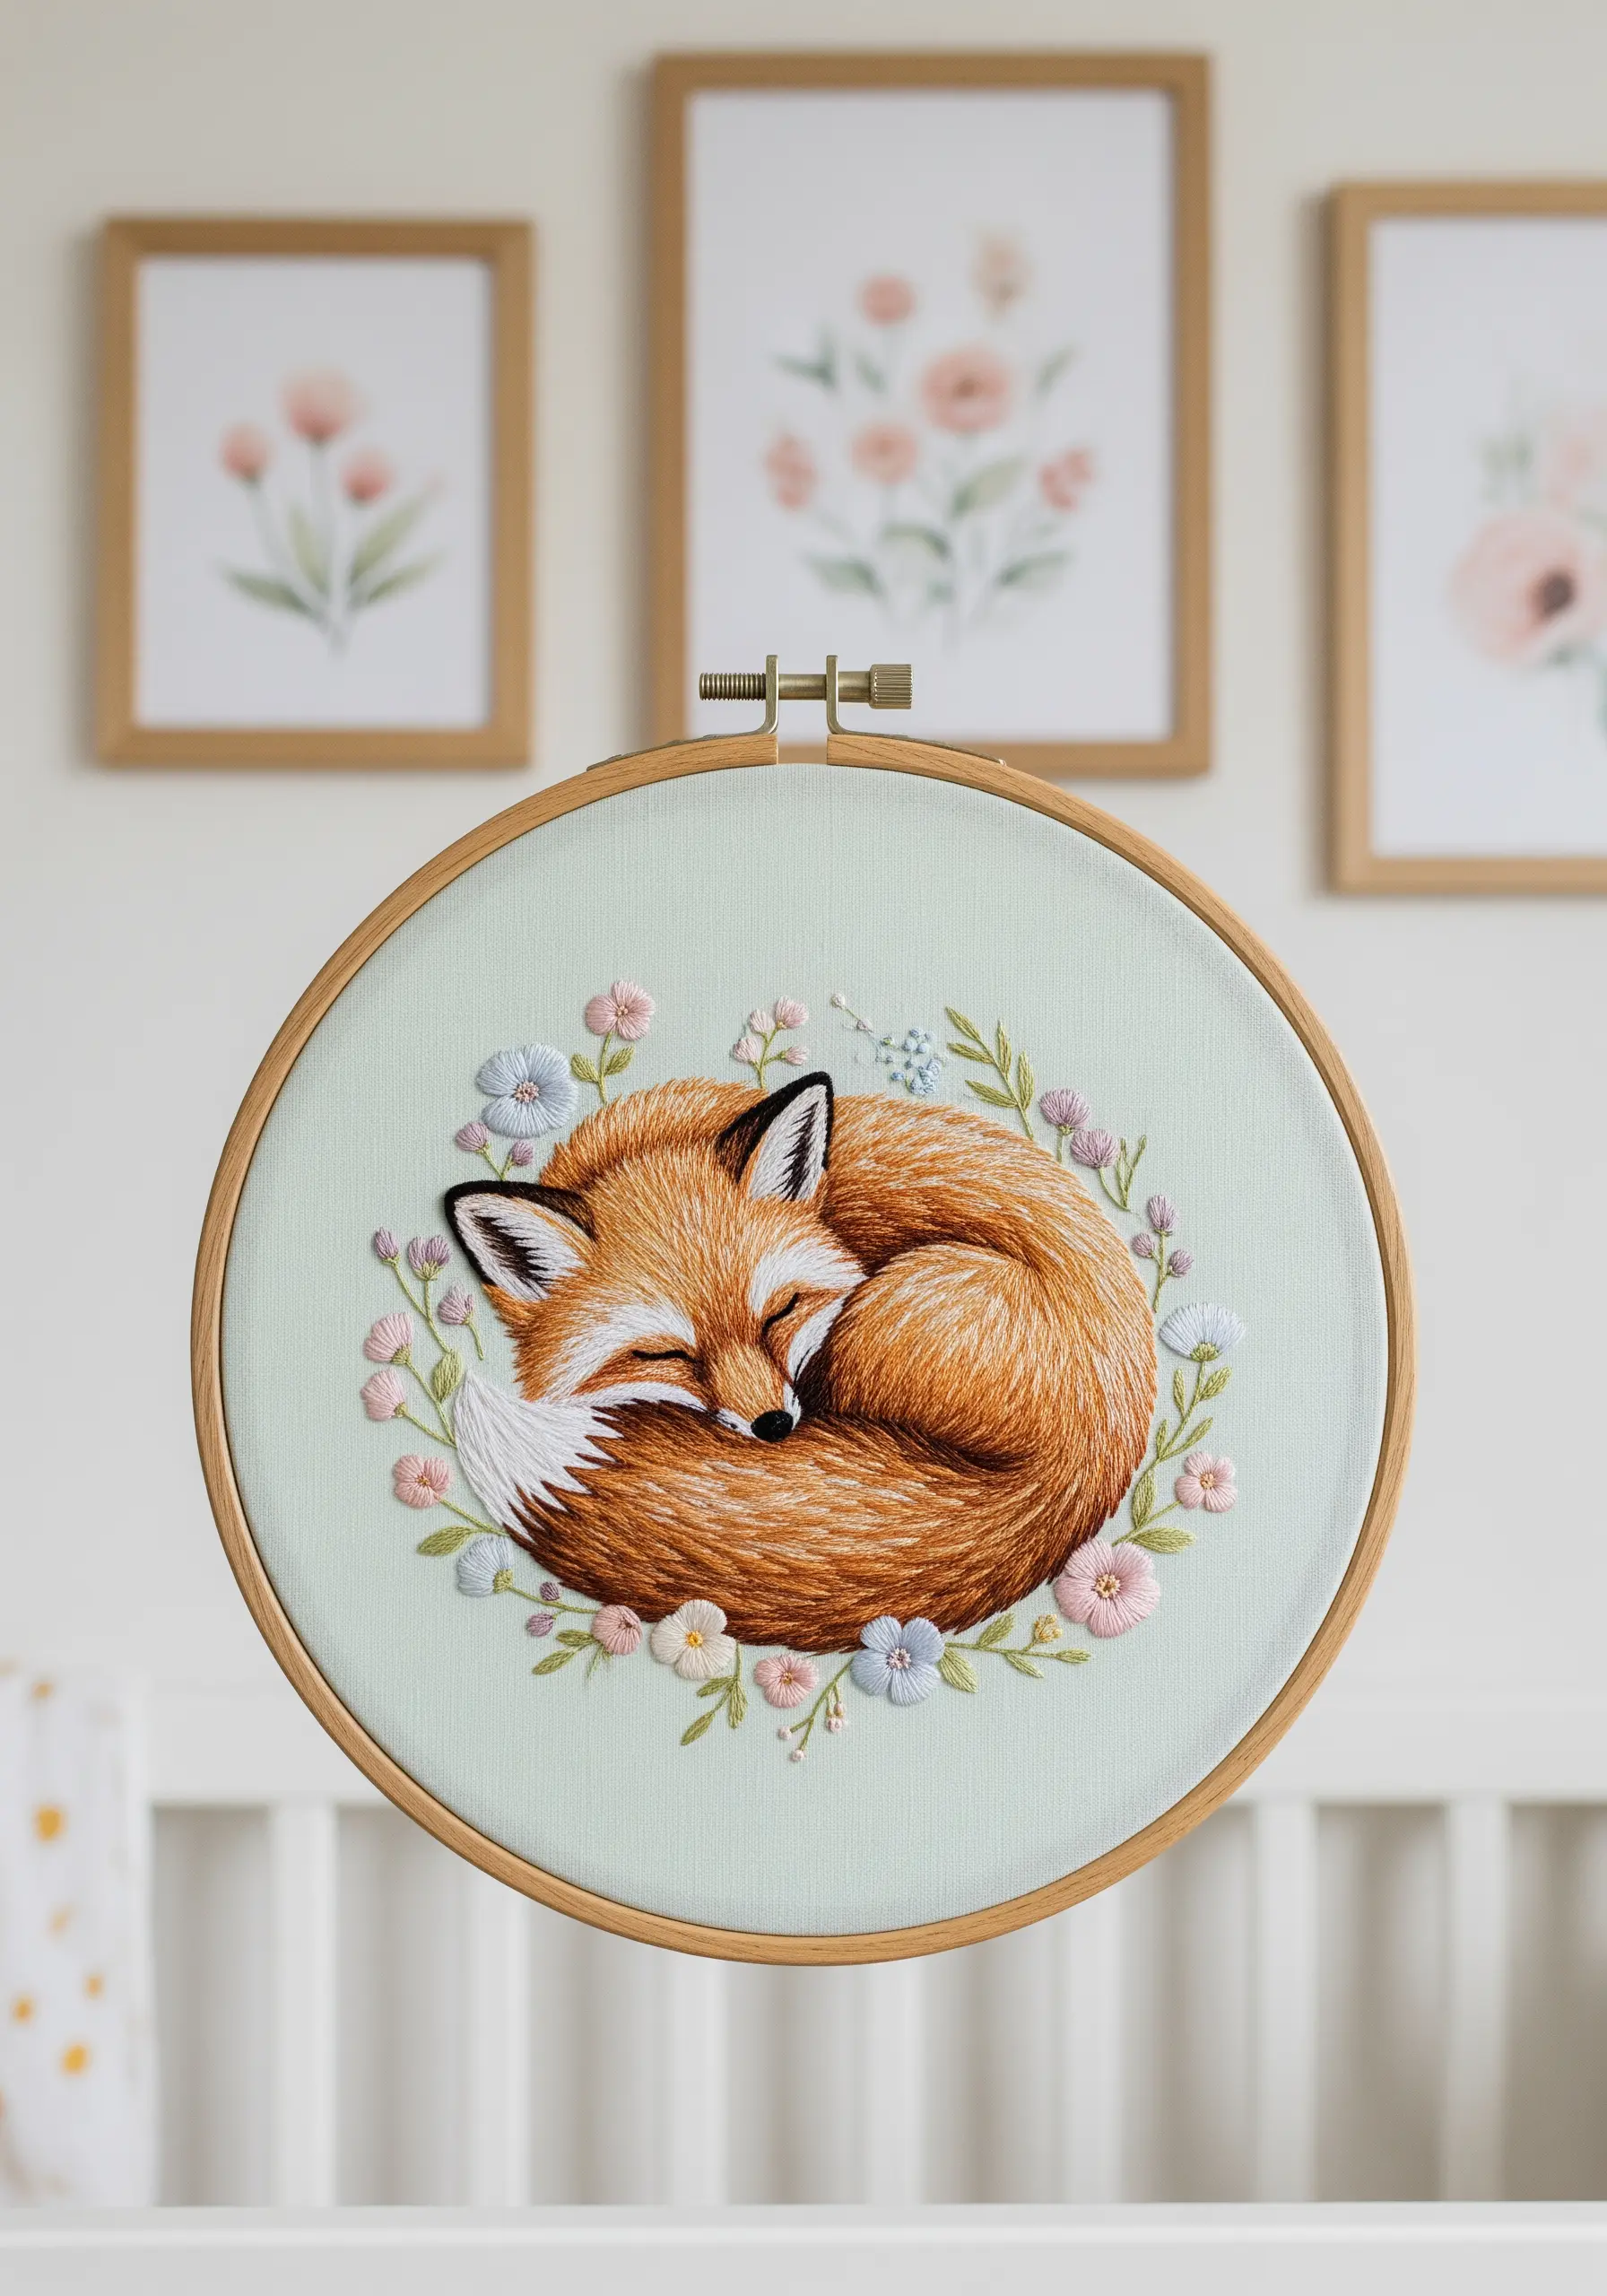
For gentle, storybook-style subjects, a soft and harmonious color palette is essential.
Select a muted fabric color, like sage green or dusty blue, to serve as your neutral base.
Use thread painting with closely related shades—like apricot, rust, and cream for the fox’s fur—to create a soft, painterly effect without harsh outlines.
Surrounding your subject with delicate florals in pastel tones unifies the piece, creating a serene and cohesive artwork perfect for a calm space.
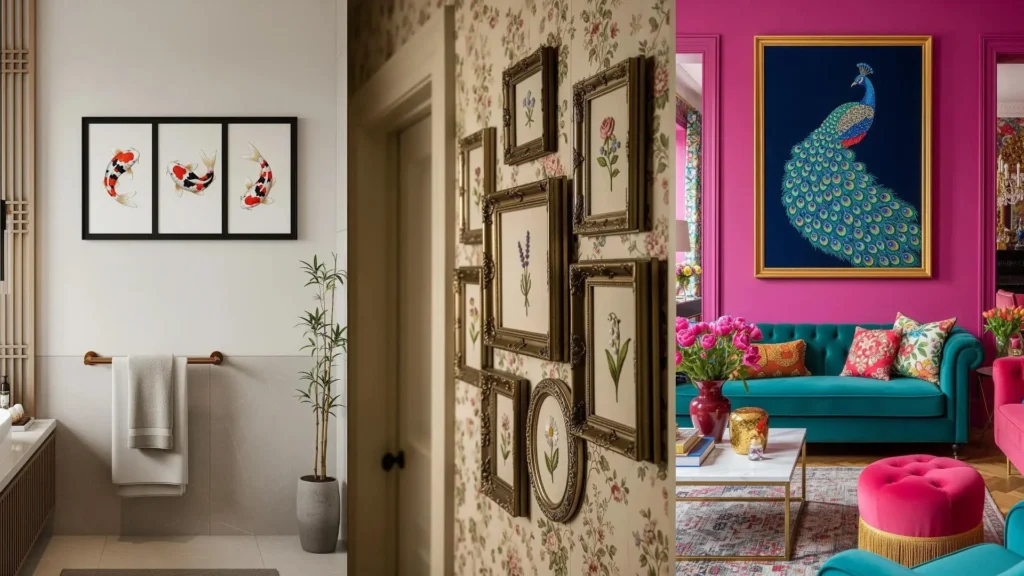
11. Use Negative Space to Create Focus and Flow

Sometimes, the parts you don’t stitch are what make a design successful.
In minimalist compositions like these koi fish, the clean, unstitched fabric acts as the water, allowing the viewer’s imagination to fill in the environment.
Concentrate your satin stitches to follow the curve of the fish’s body, creating a sense of movement. This intentional use of negative space results in a modern, gallery-style triptych that feels both calm and dynamic.
12. Master Classical Realism with Light and Shadow

To achieve the look of an old master’s painting, your focus must be on how light interacts with form.
For rounded objects like grapes, use a series of satin stitches in a crescent shape, blending from a dark tone to a mid-tone, and finishing with a single white stitch for the highlight.
This meticulous attention to light and shadow, stitched on a dramatic black background, is the essence of classical thread painting.
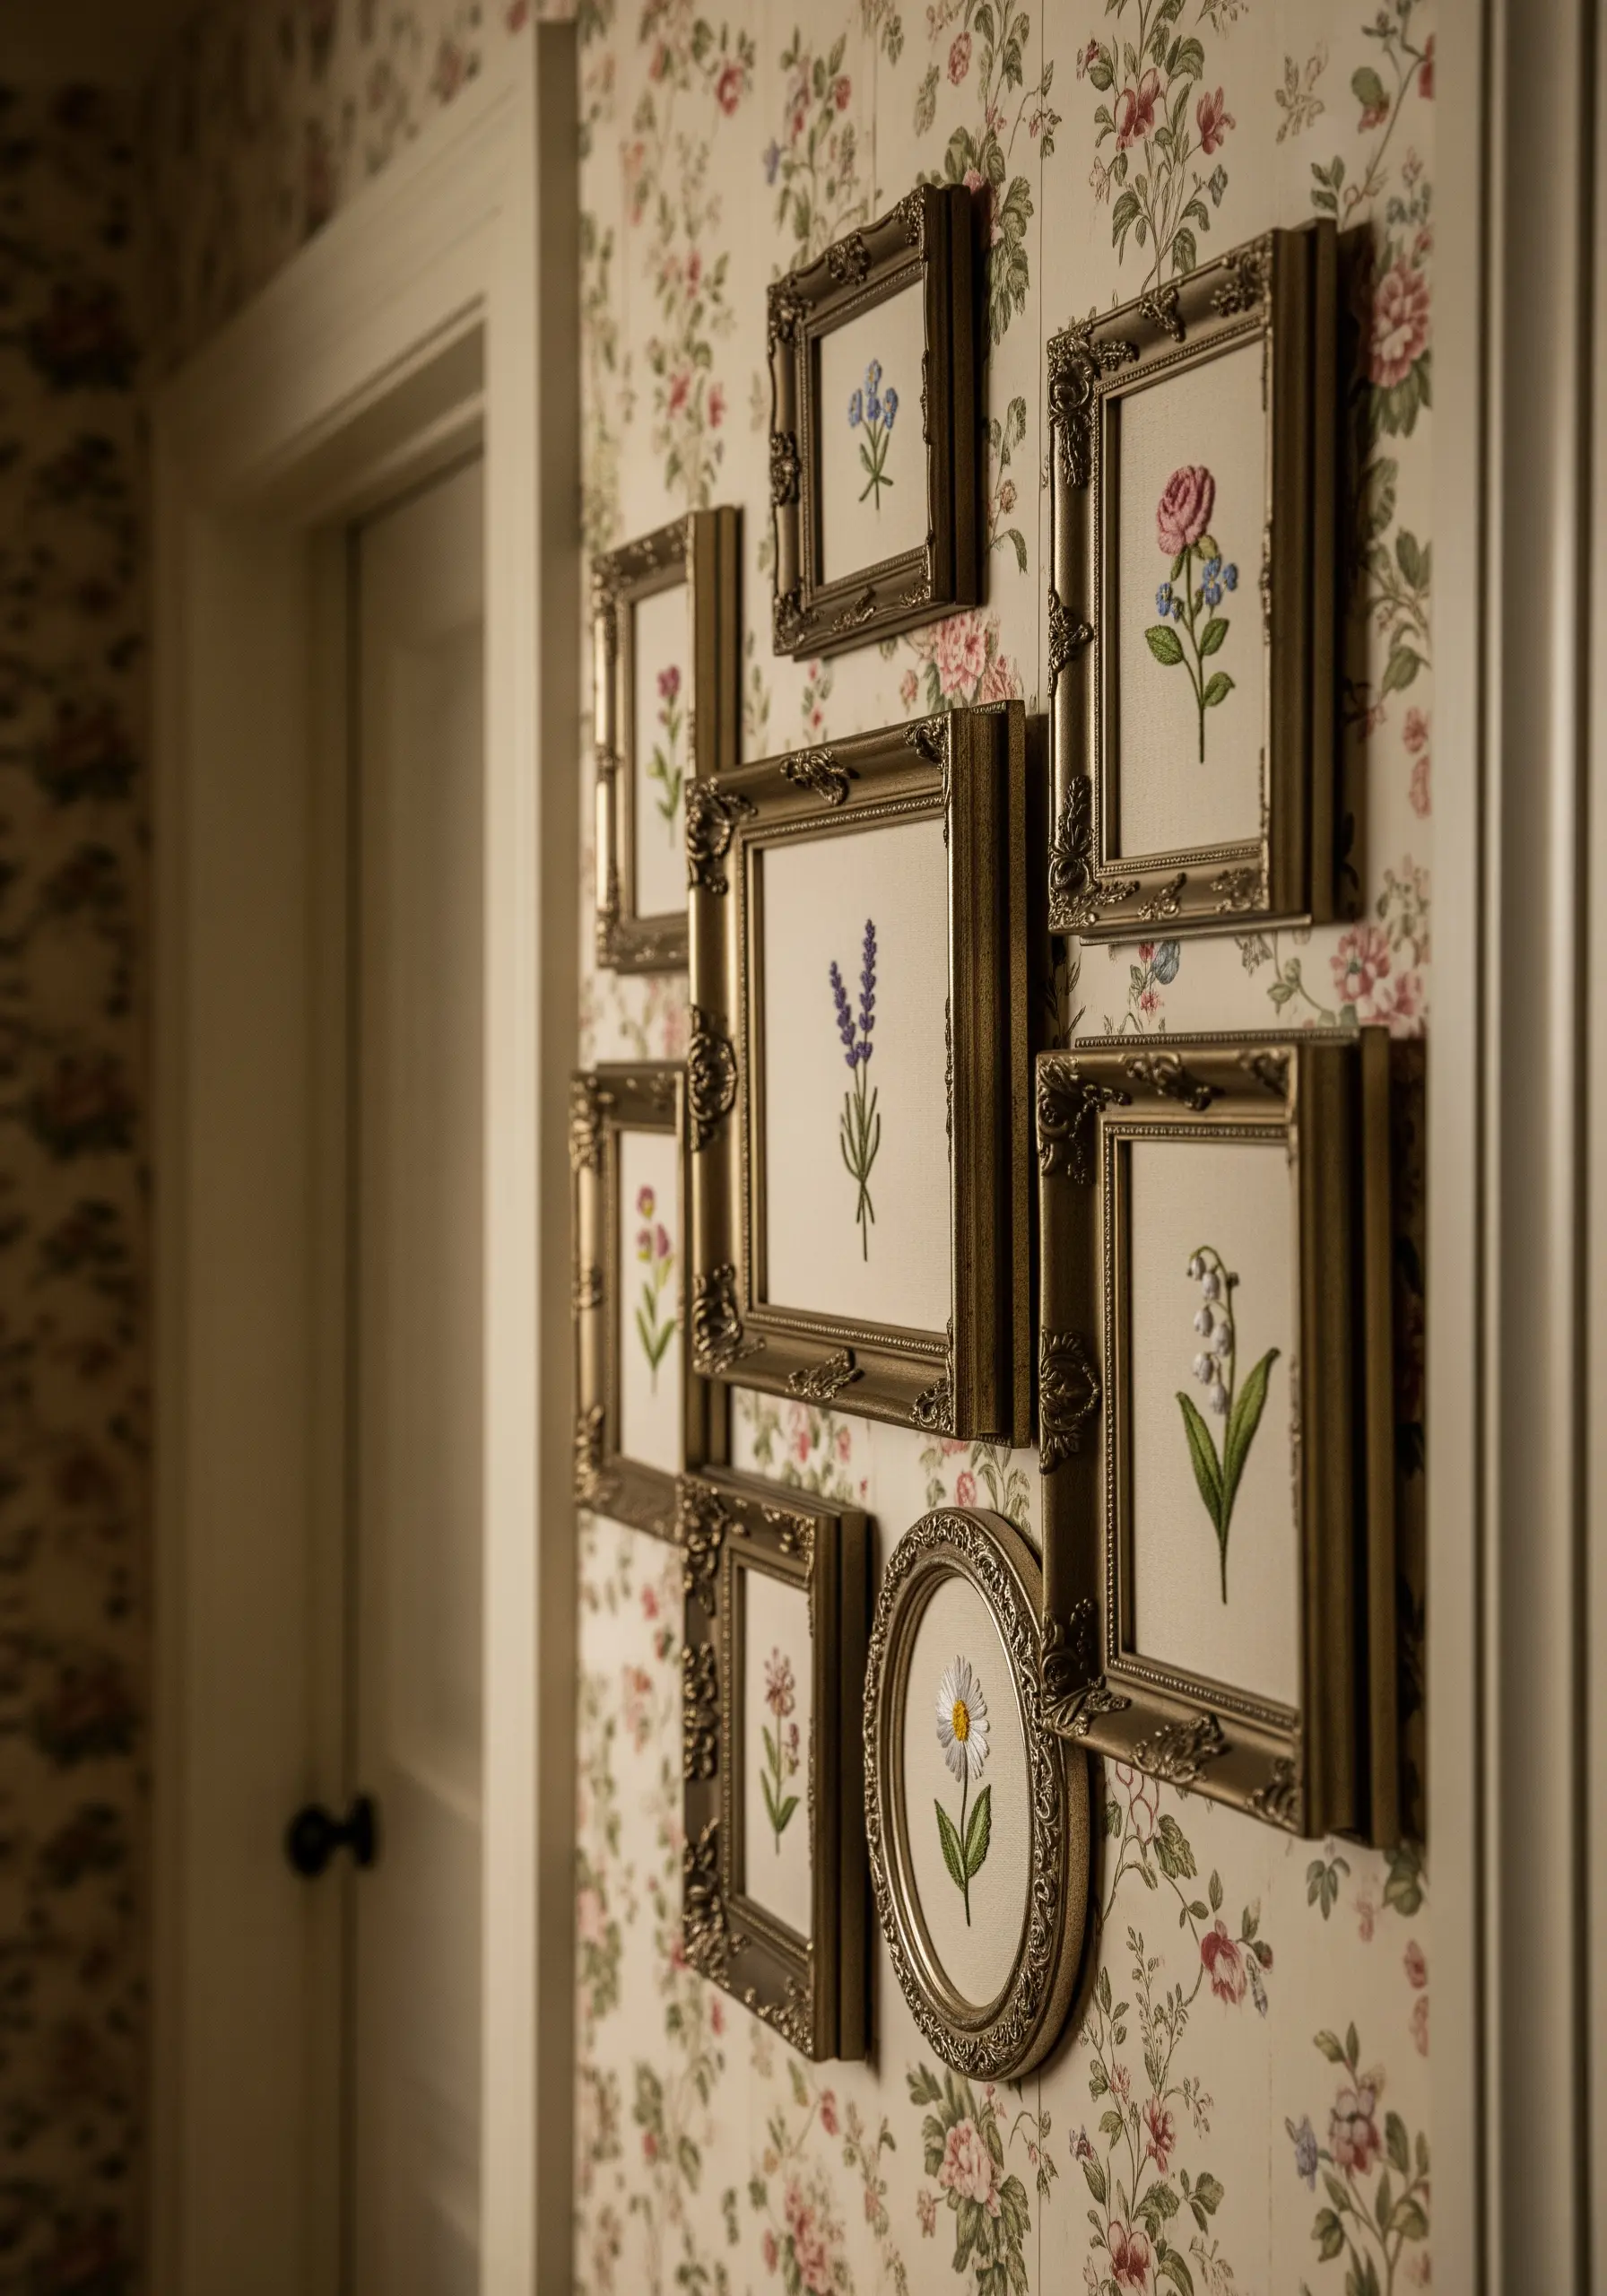
13. Curate a Cohesive Collection with a Unifying Theme
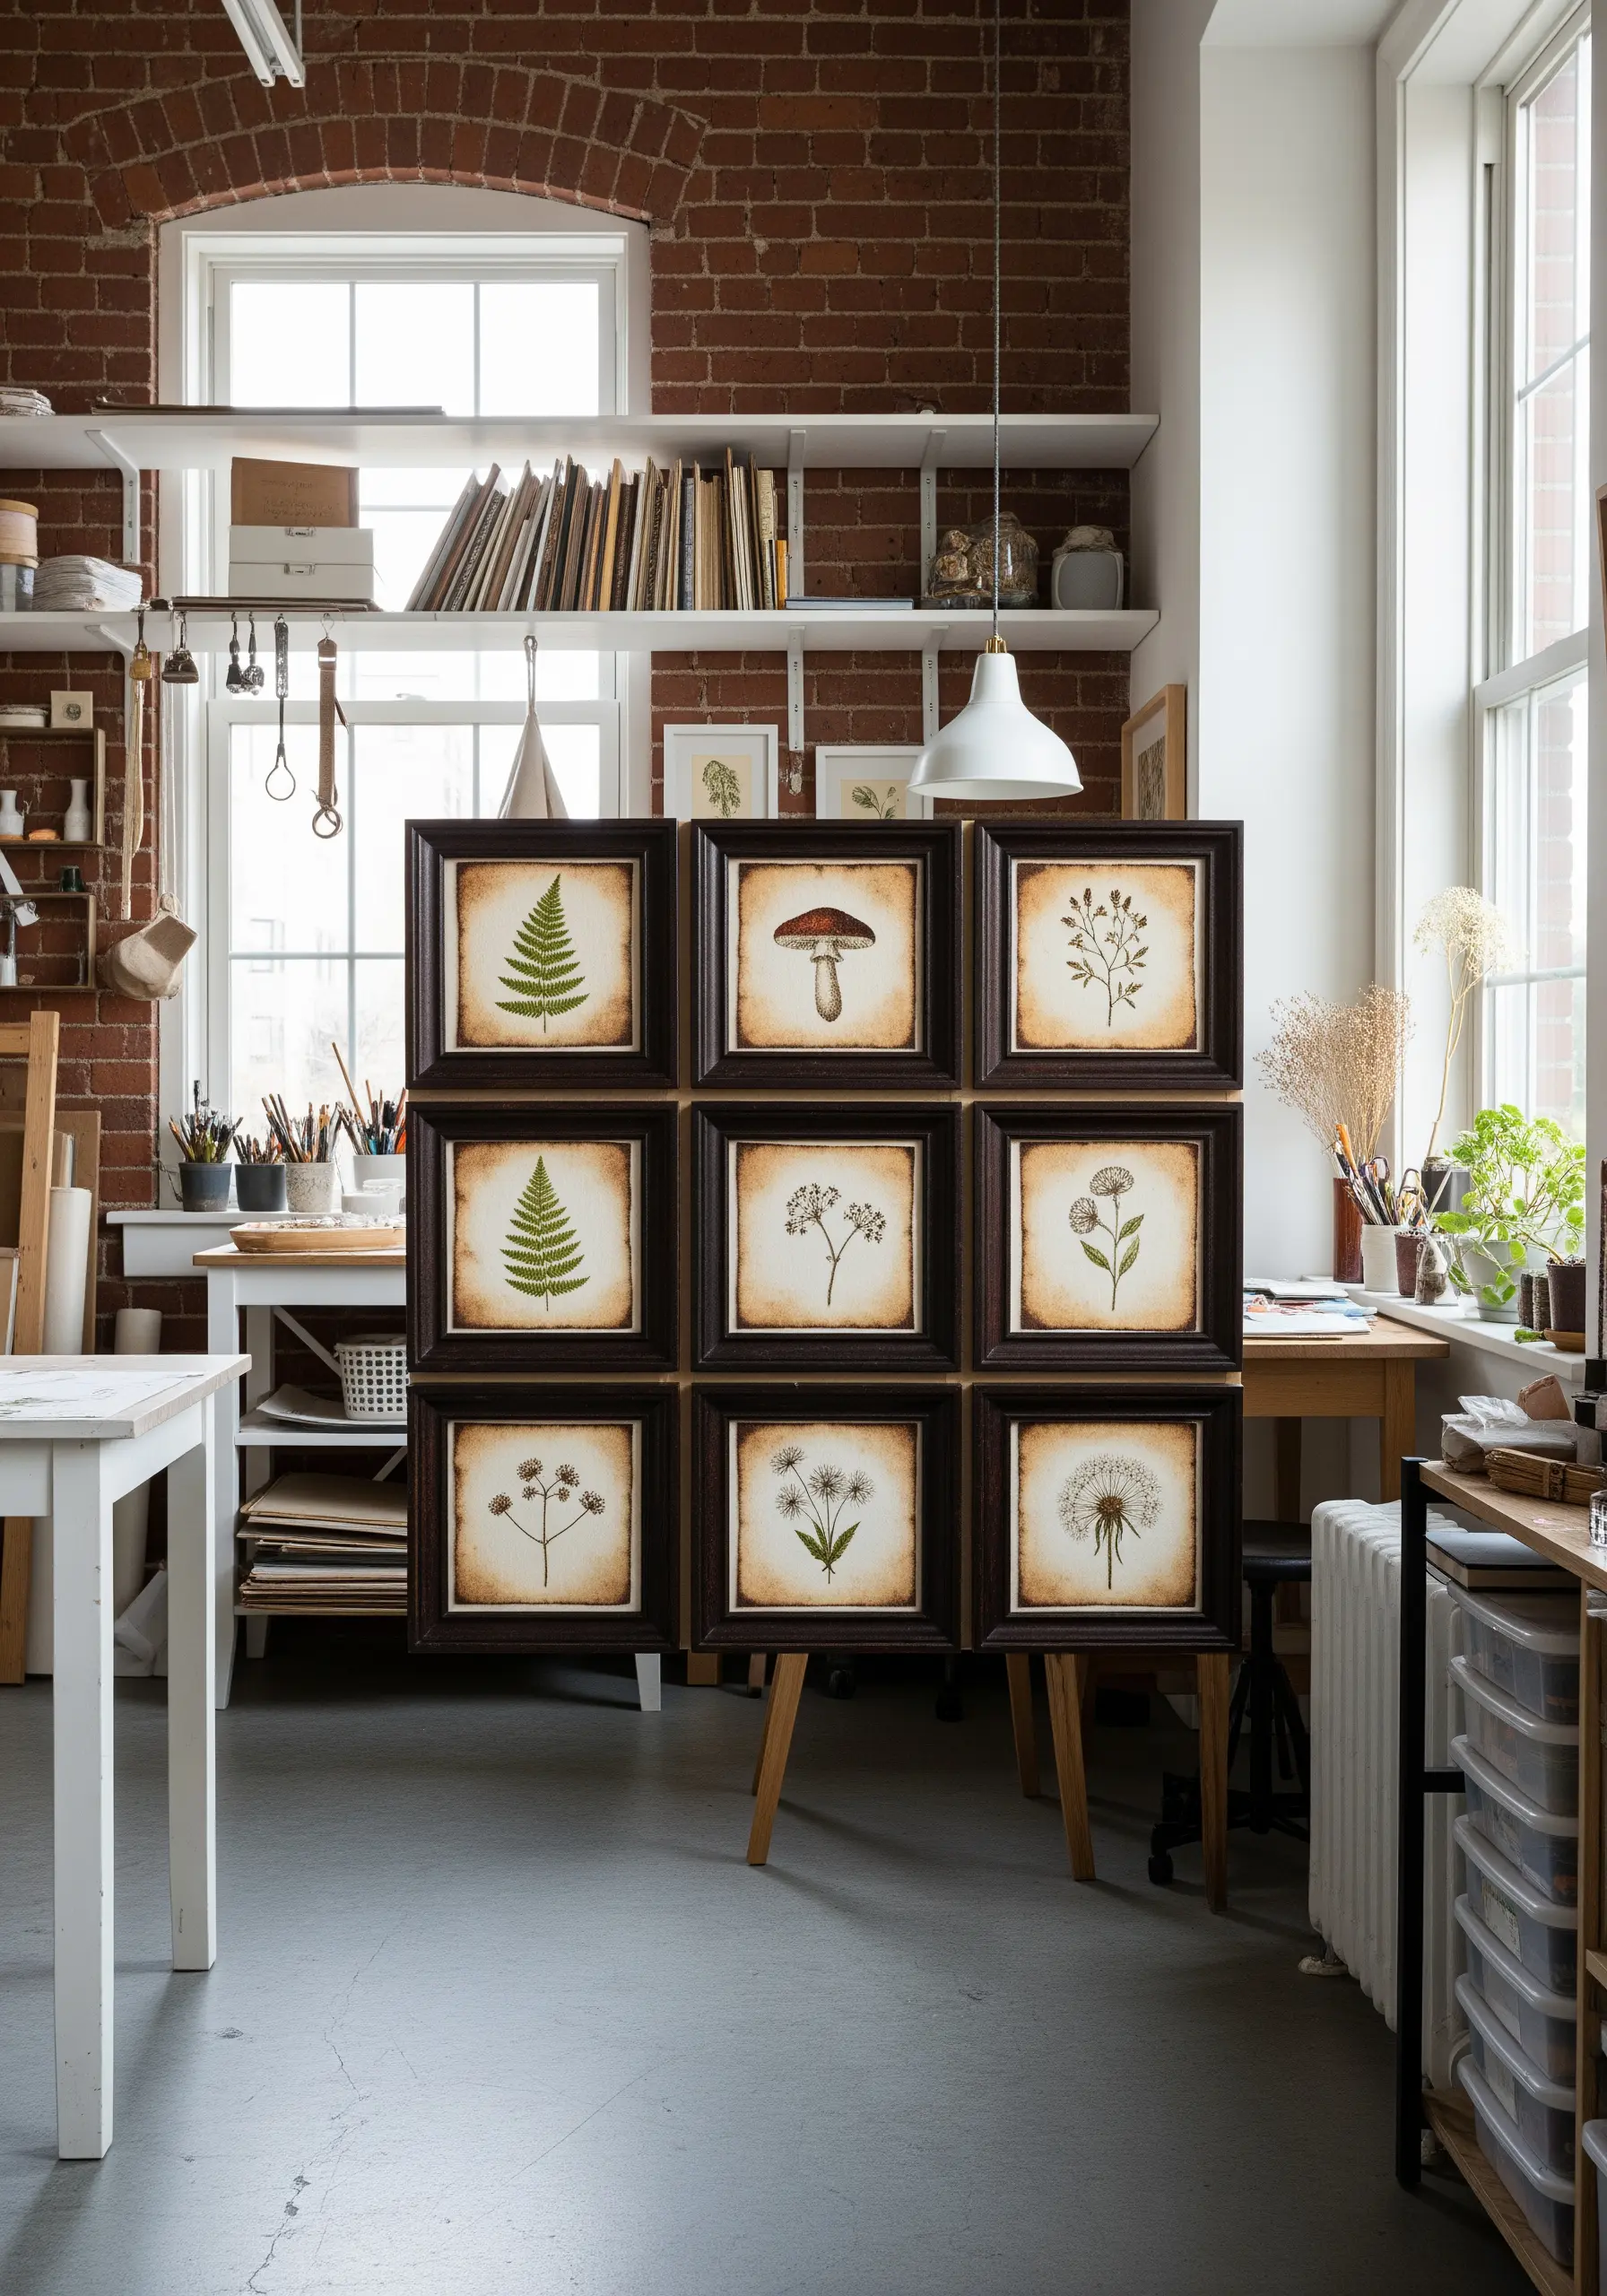
A gallery wall of small embroideries feels most intentional when connected by a clear theme and consistent presentation.
Choose a single subject, like botanical specimens, and stitch each one on the same type of fabric, perhaps tea-stained for a vintage feel.
Using identical frames is the final step that transforms individual pieces into a single, cohesive art installation. It’s a simple way to create a stunning visual impact.
14. Embrace Sculptural Dimension with Mixed Fibers
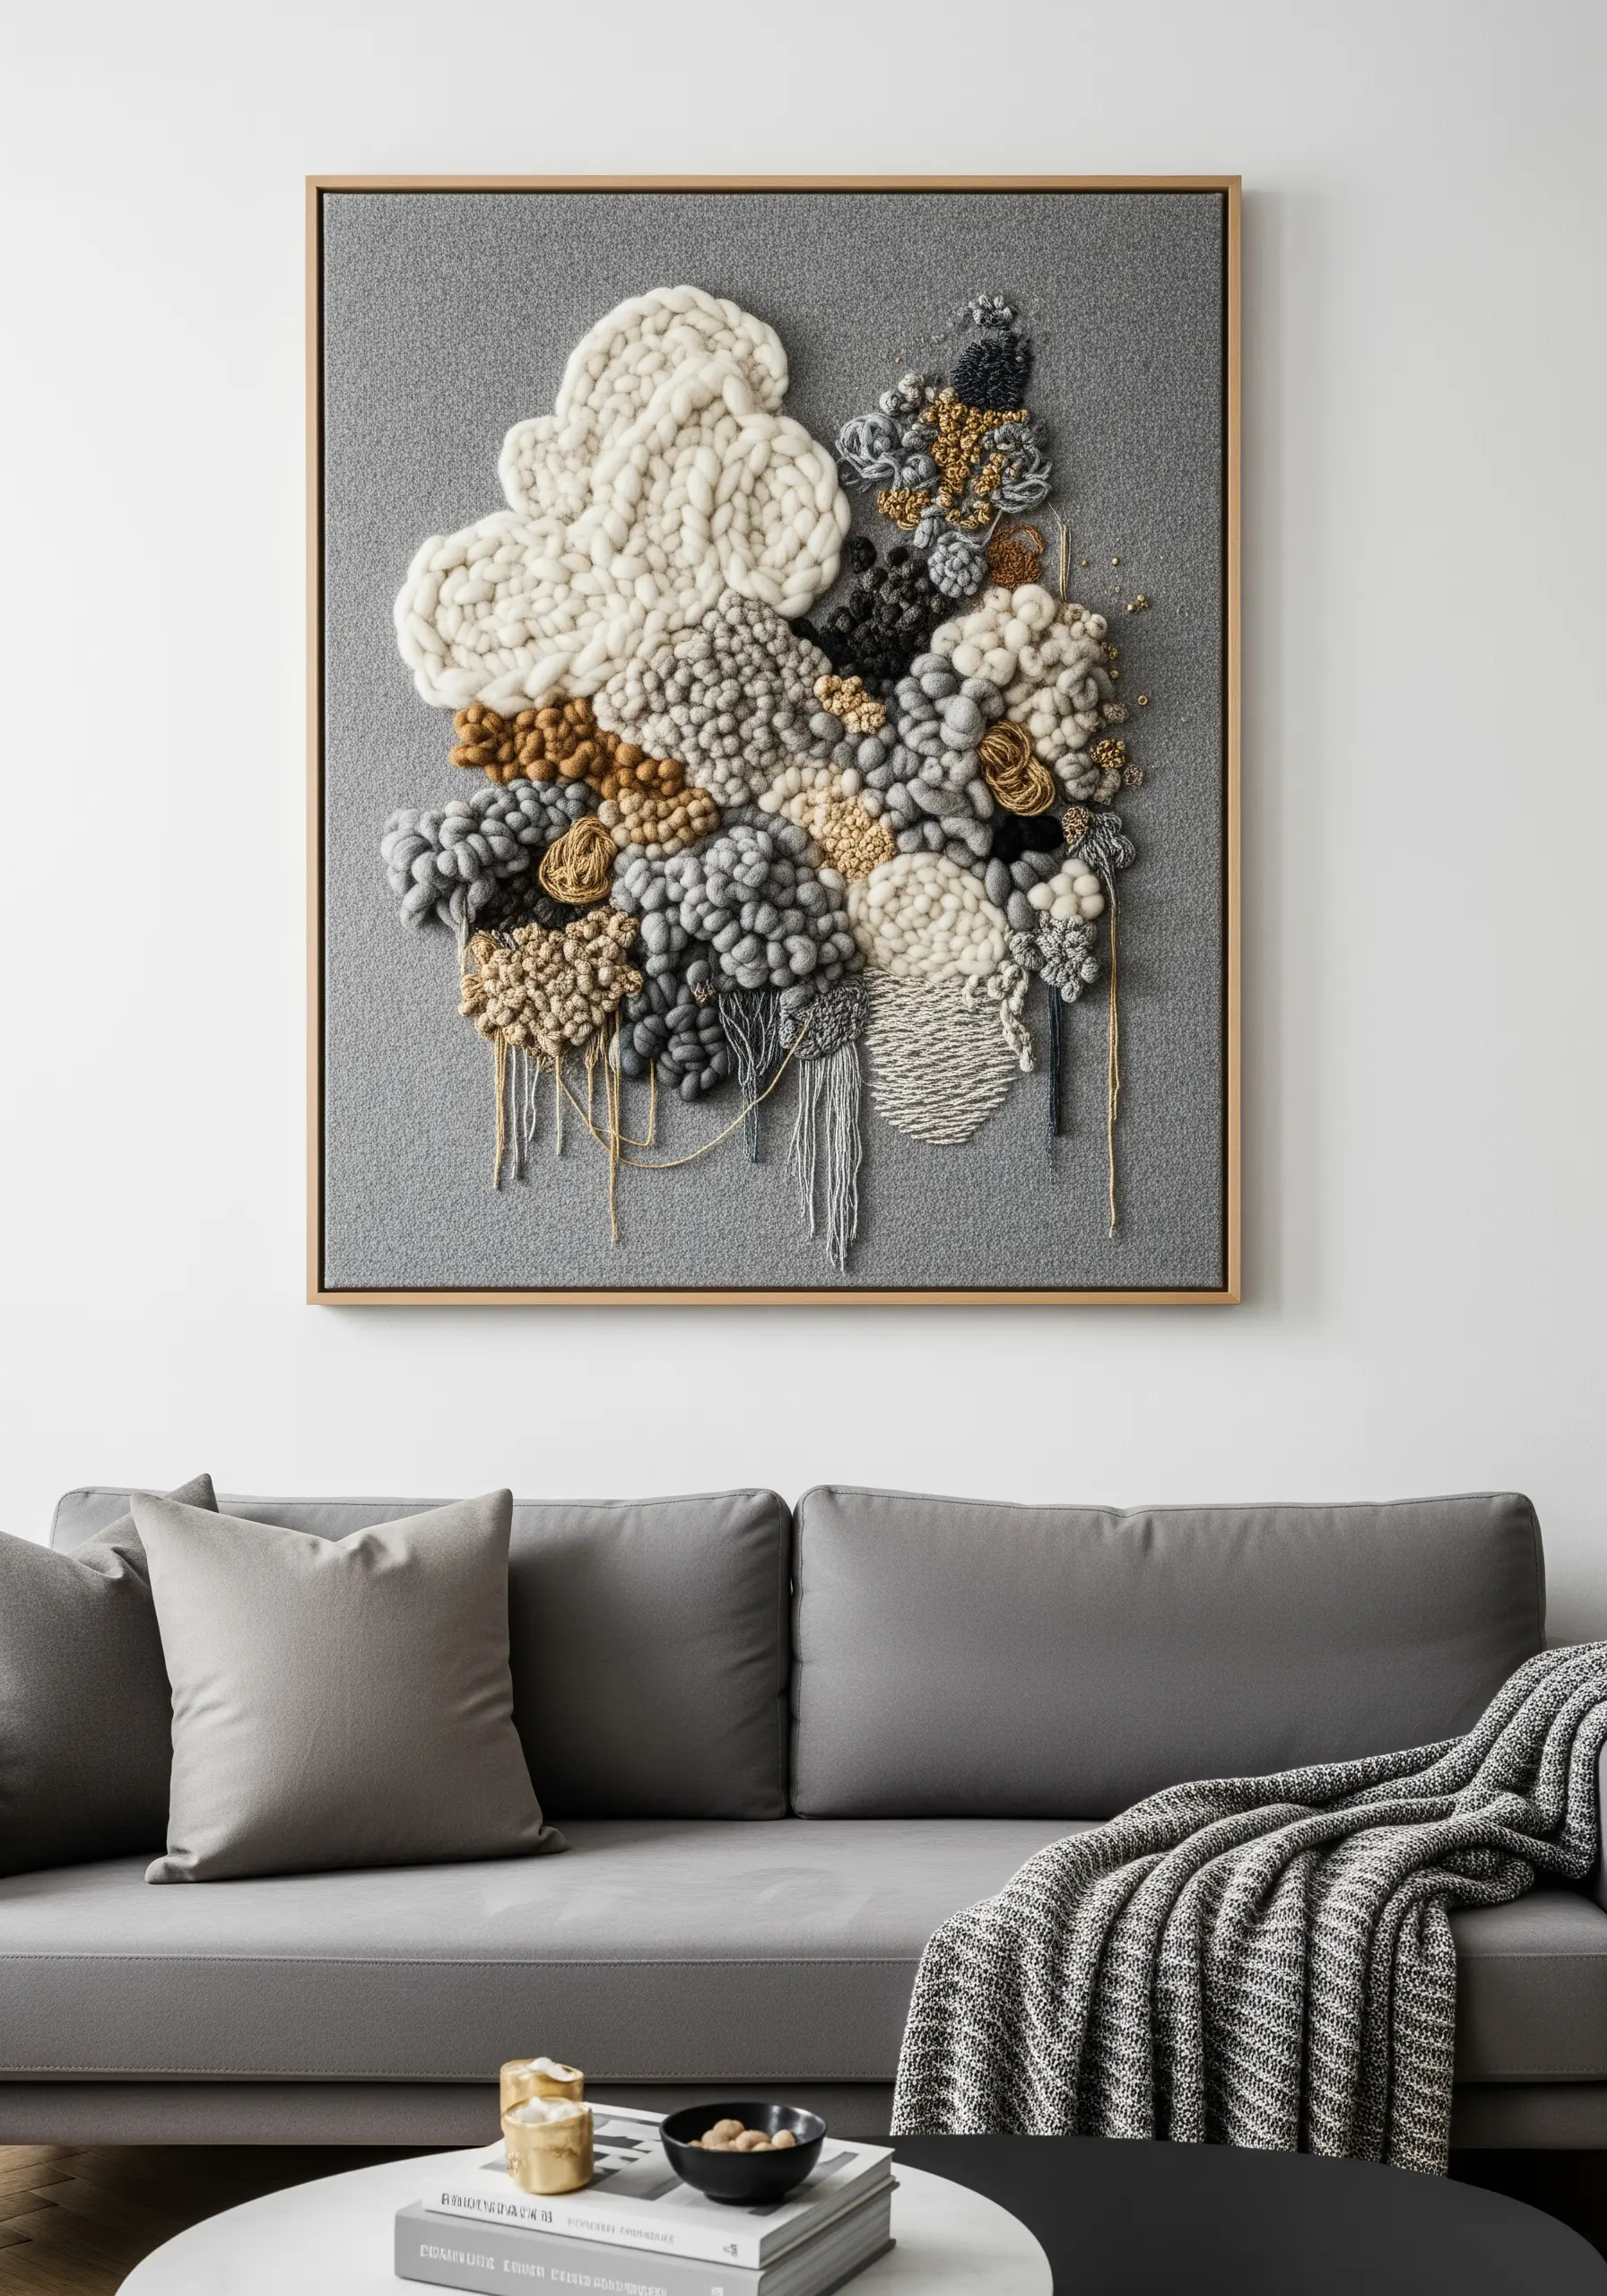
Take your work off the flat surface by incorporating sculptural elements.
Experiment with couching—tacking down thick yarn or cord with smaller stitches—and weaving chunky wool roving directly into your fabric.
Introduce different materials like metallic threads or even fine wire to add structure and shine. This mixed-media approach turns your embroidery into a tactile, three-dimensional fiber art installation.
15. Add Narrative Charm with Illustrative Details
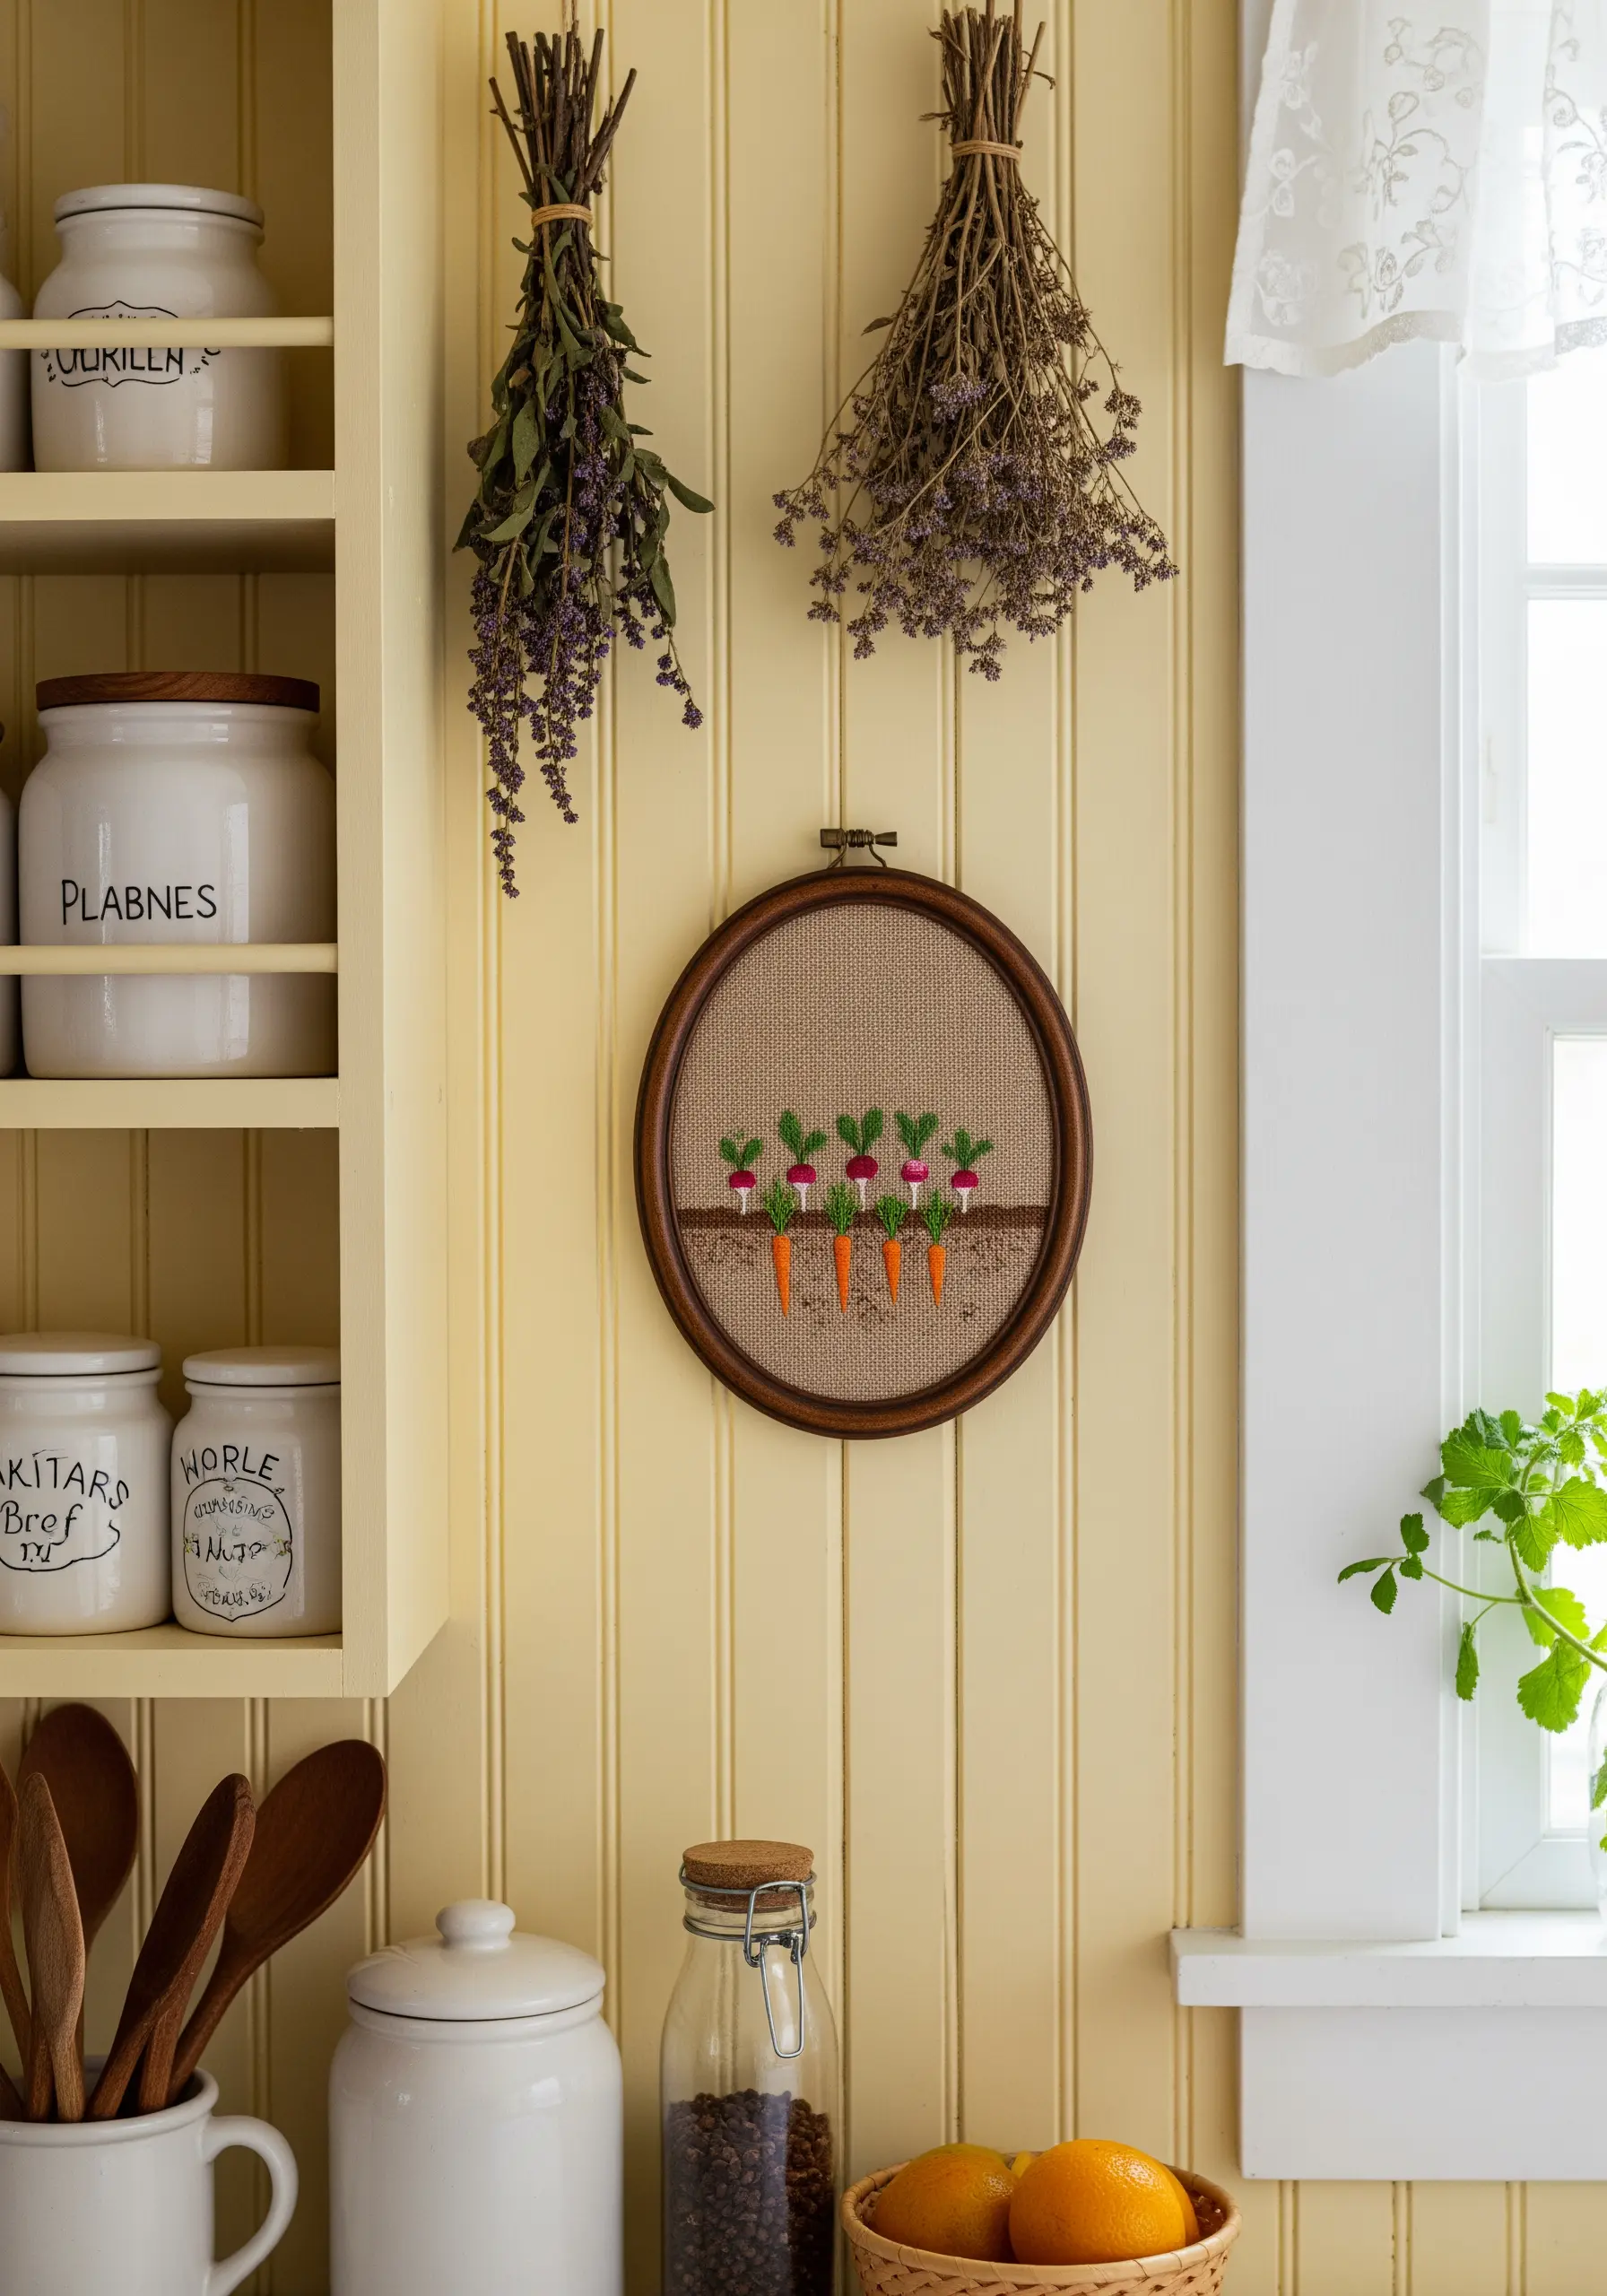
Even the simplest stitches can tell a story.
For this charming vegetable patch, use a smooth satin stitch for the carrots and radishes below ground. Then, switch to a more delicate and airy stitch, like a detached chain stitch, for the leafy greens above.
This subtle shift in texture helps define the two separate elements of the scene, creating a playful and endearing piece perfect for a cozy kitchen.
16. Capture Soulful Detail with Single-Thread Realism
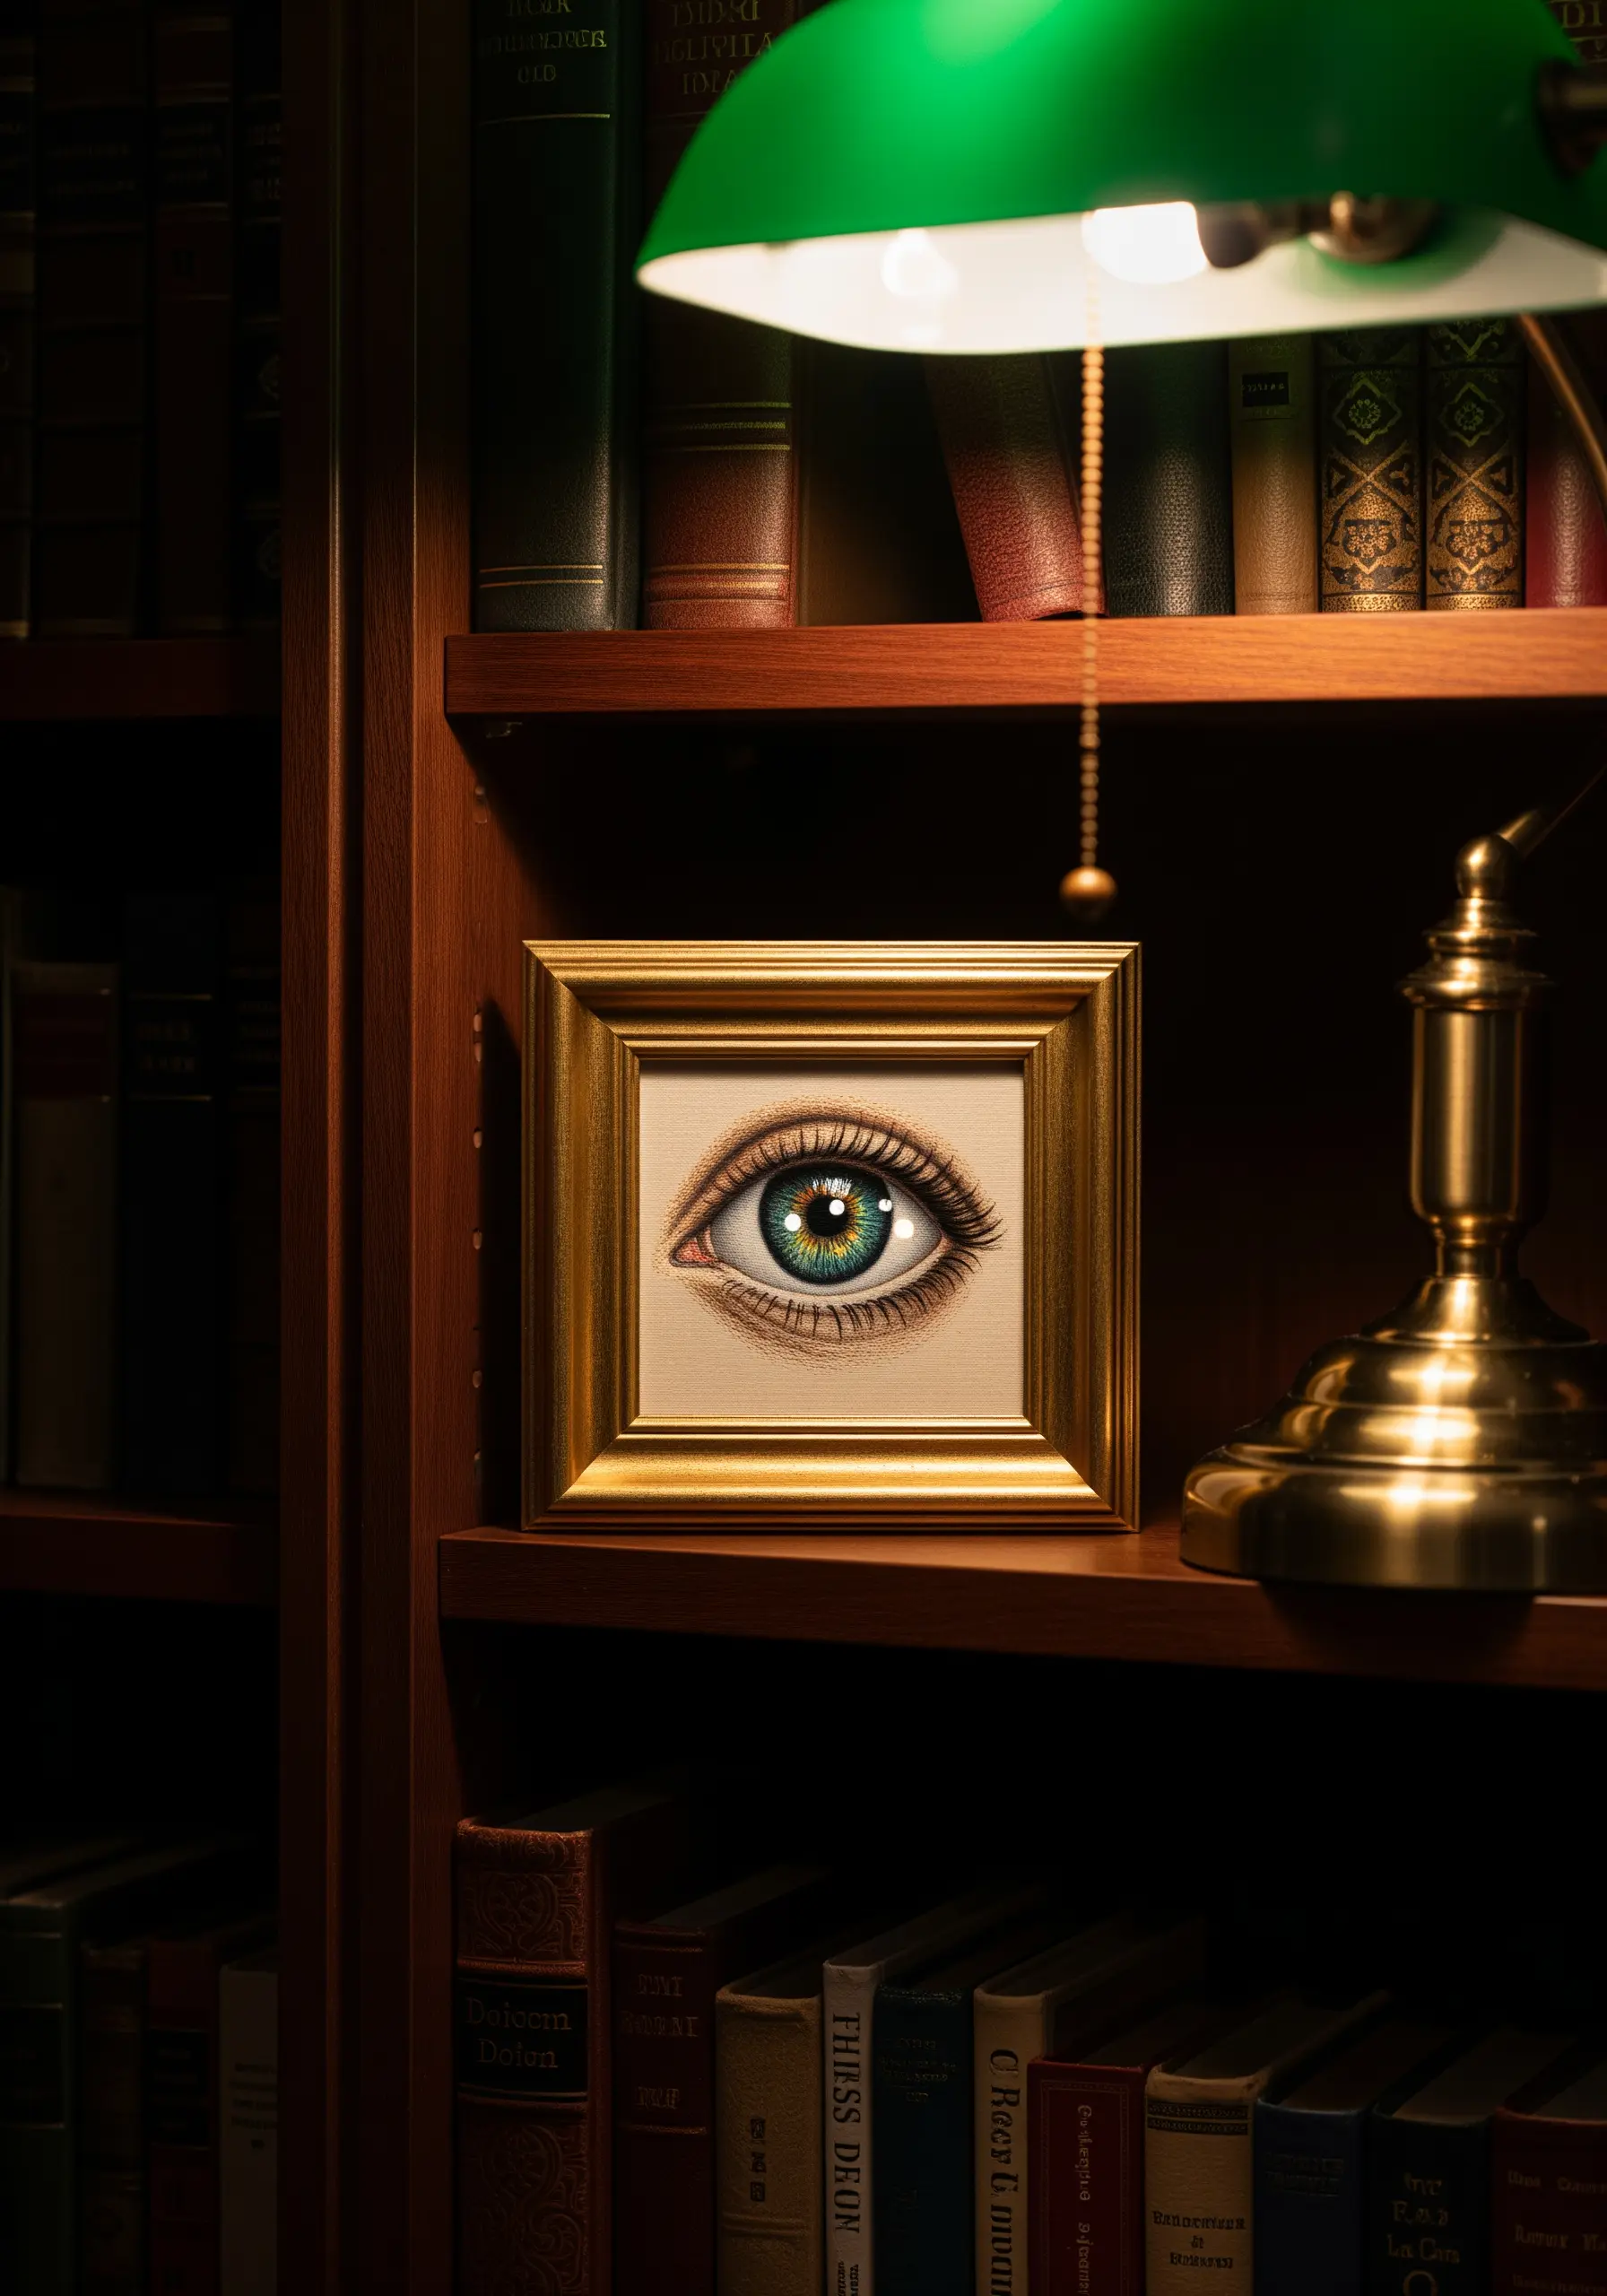
To embroider a realistic eye, precision and patience are everything. Work exclusively with a single strand of floss to achieve the finest detail.
Build the colors of the iris radially, using dozens of shades and tiny split stitches that blend into one another.
The key to making it look alive is the tiny, bright white catchlight—a few carefully placed satin stitches that give the eye its depth and sparkle.
17. Convey Movement with Directional Line Stitches

To capture the energy of ocean waves, your stitches must flow with the water.
Use directional stem, split, or chain stitches to outline the curves of each wave, creating a sense of powerful movement.
Incorporate several shades of blue, teal, and white, allowing the colors to swirl and mix. Filling the sky with simple seed stitches provides a calm contrast to the dynamic sea below, making the entire scene feel more alive.
18. Elevate Simple Motifs with Ornate Framing
Transform simple botanical stitches into an elegant gallery wall through your choice of framing.
Embroider single flower stems using basic stitches like lazy daisy, stem stitch, and French knots. The simplicity of the needlework is its strength.
By placing these delicate pieces in ornate, vintage-style frames of varying shapes and sizes, you create a beautiful tension between the humble craft and the high-art presentation.
19. Create Form and Shadow with Blackwork
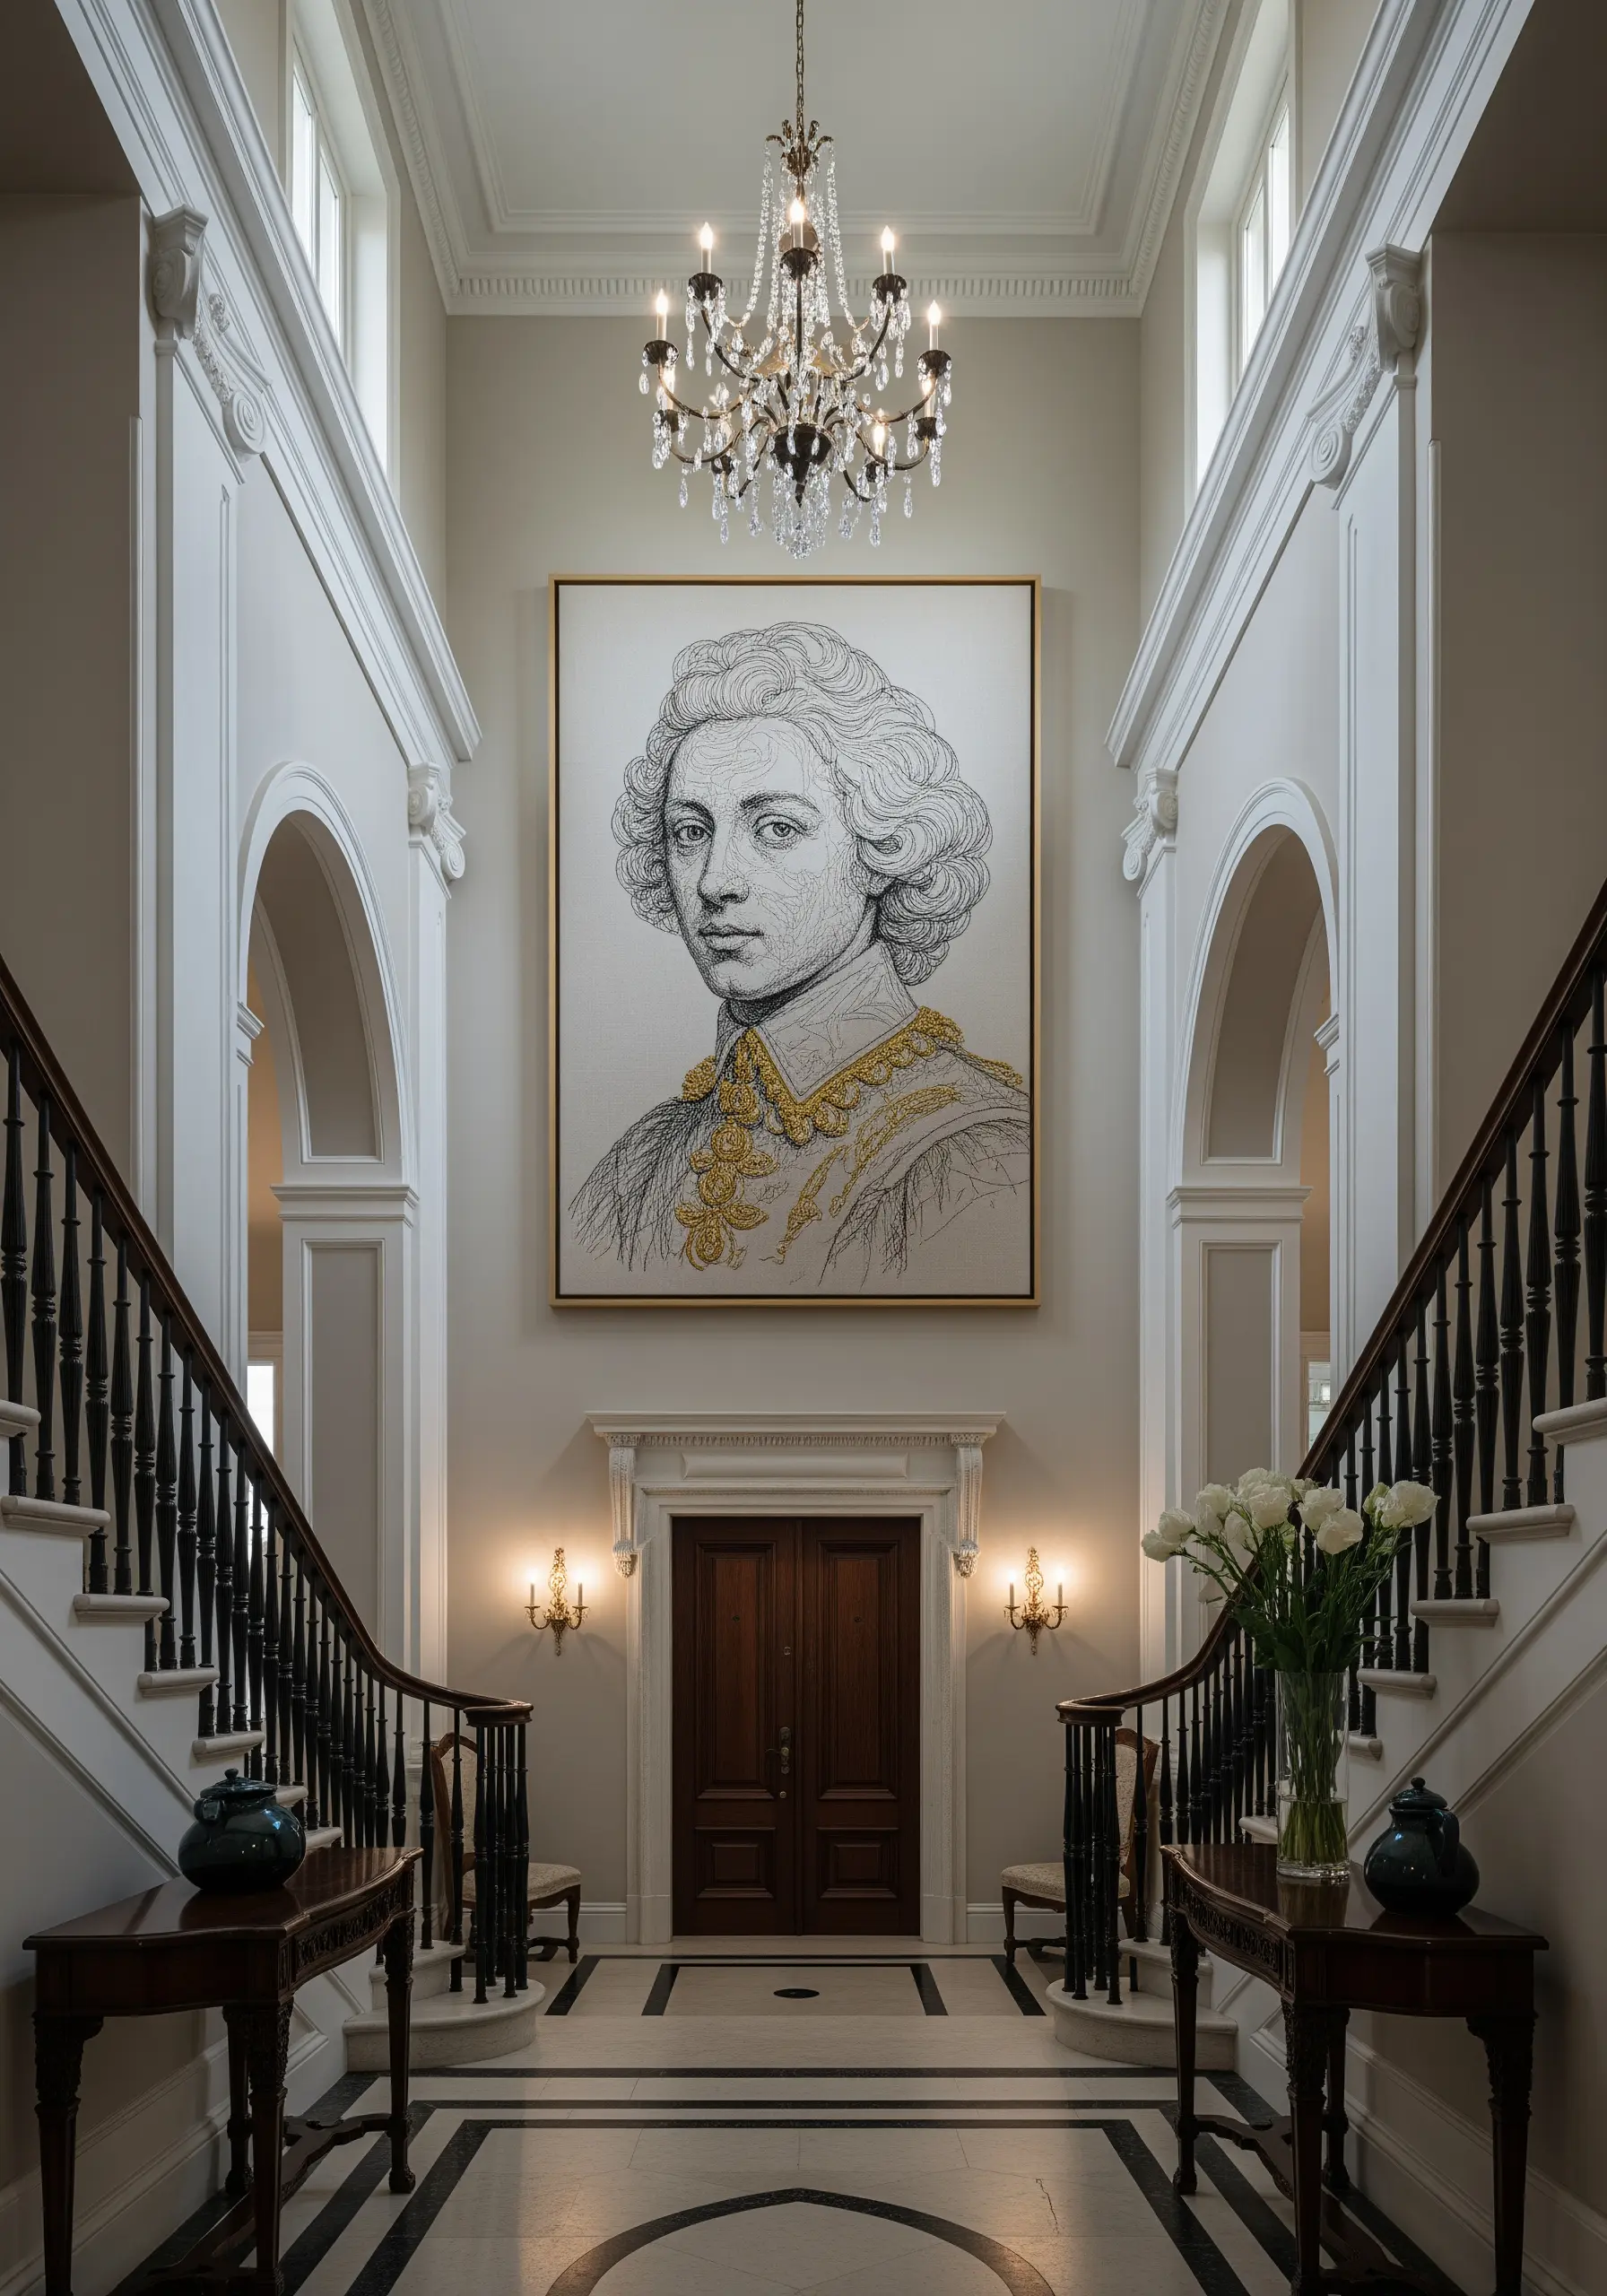
Explore the art of portraiture using only black thread on a white background, a technique rooted in historical Blackwork.
Instead of filling shapes with color, use the density and direction of your stitches—like cross-hatching with thread—to create shadows, contours, and form.
Varying the space between your lines creates the illusion of grey tones, allowing you to build a complex, expressive portrait with minimal materials.
20. Integrate Embroidery with a Printed Background
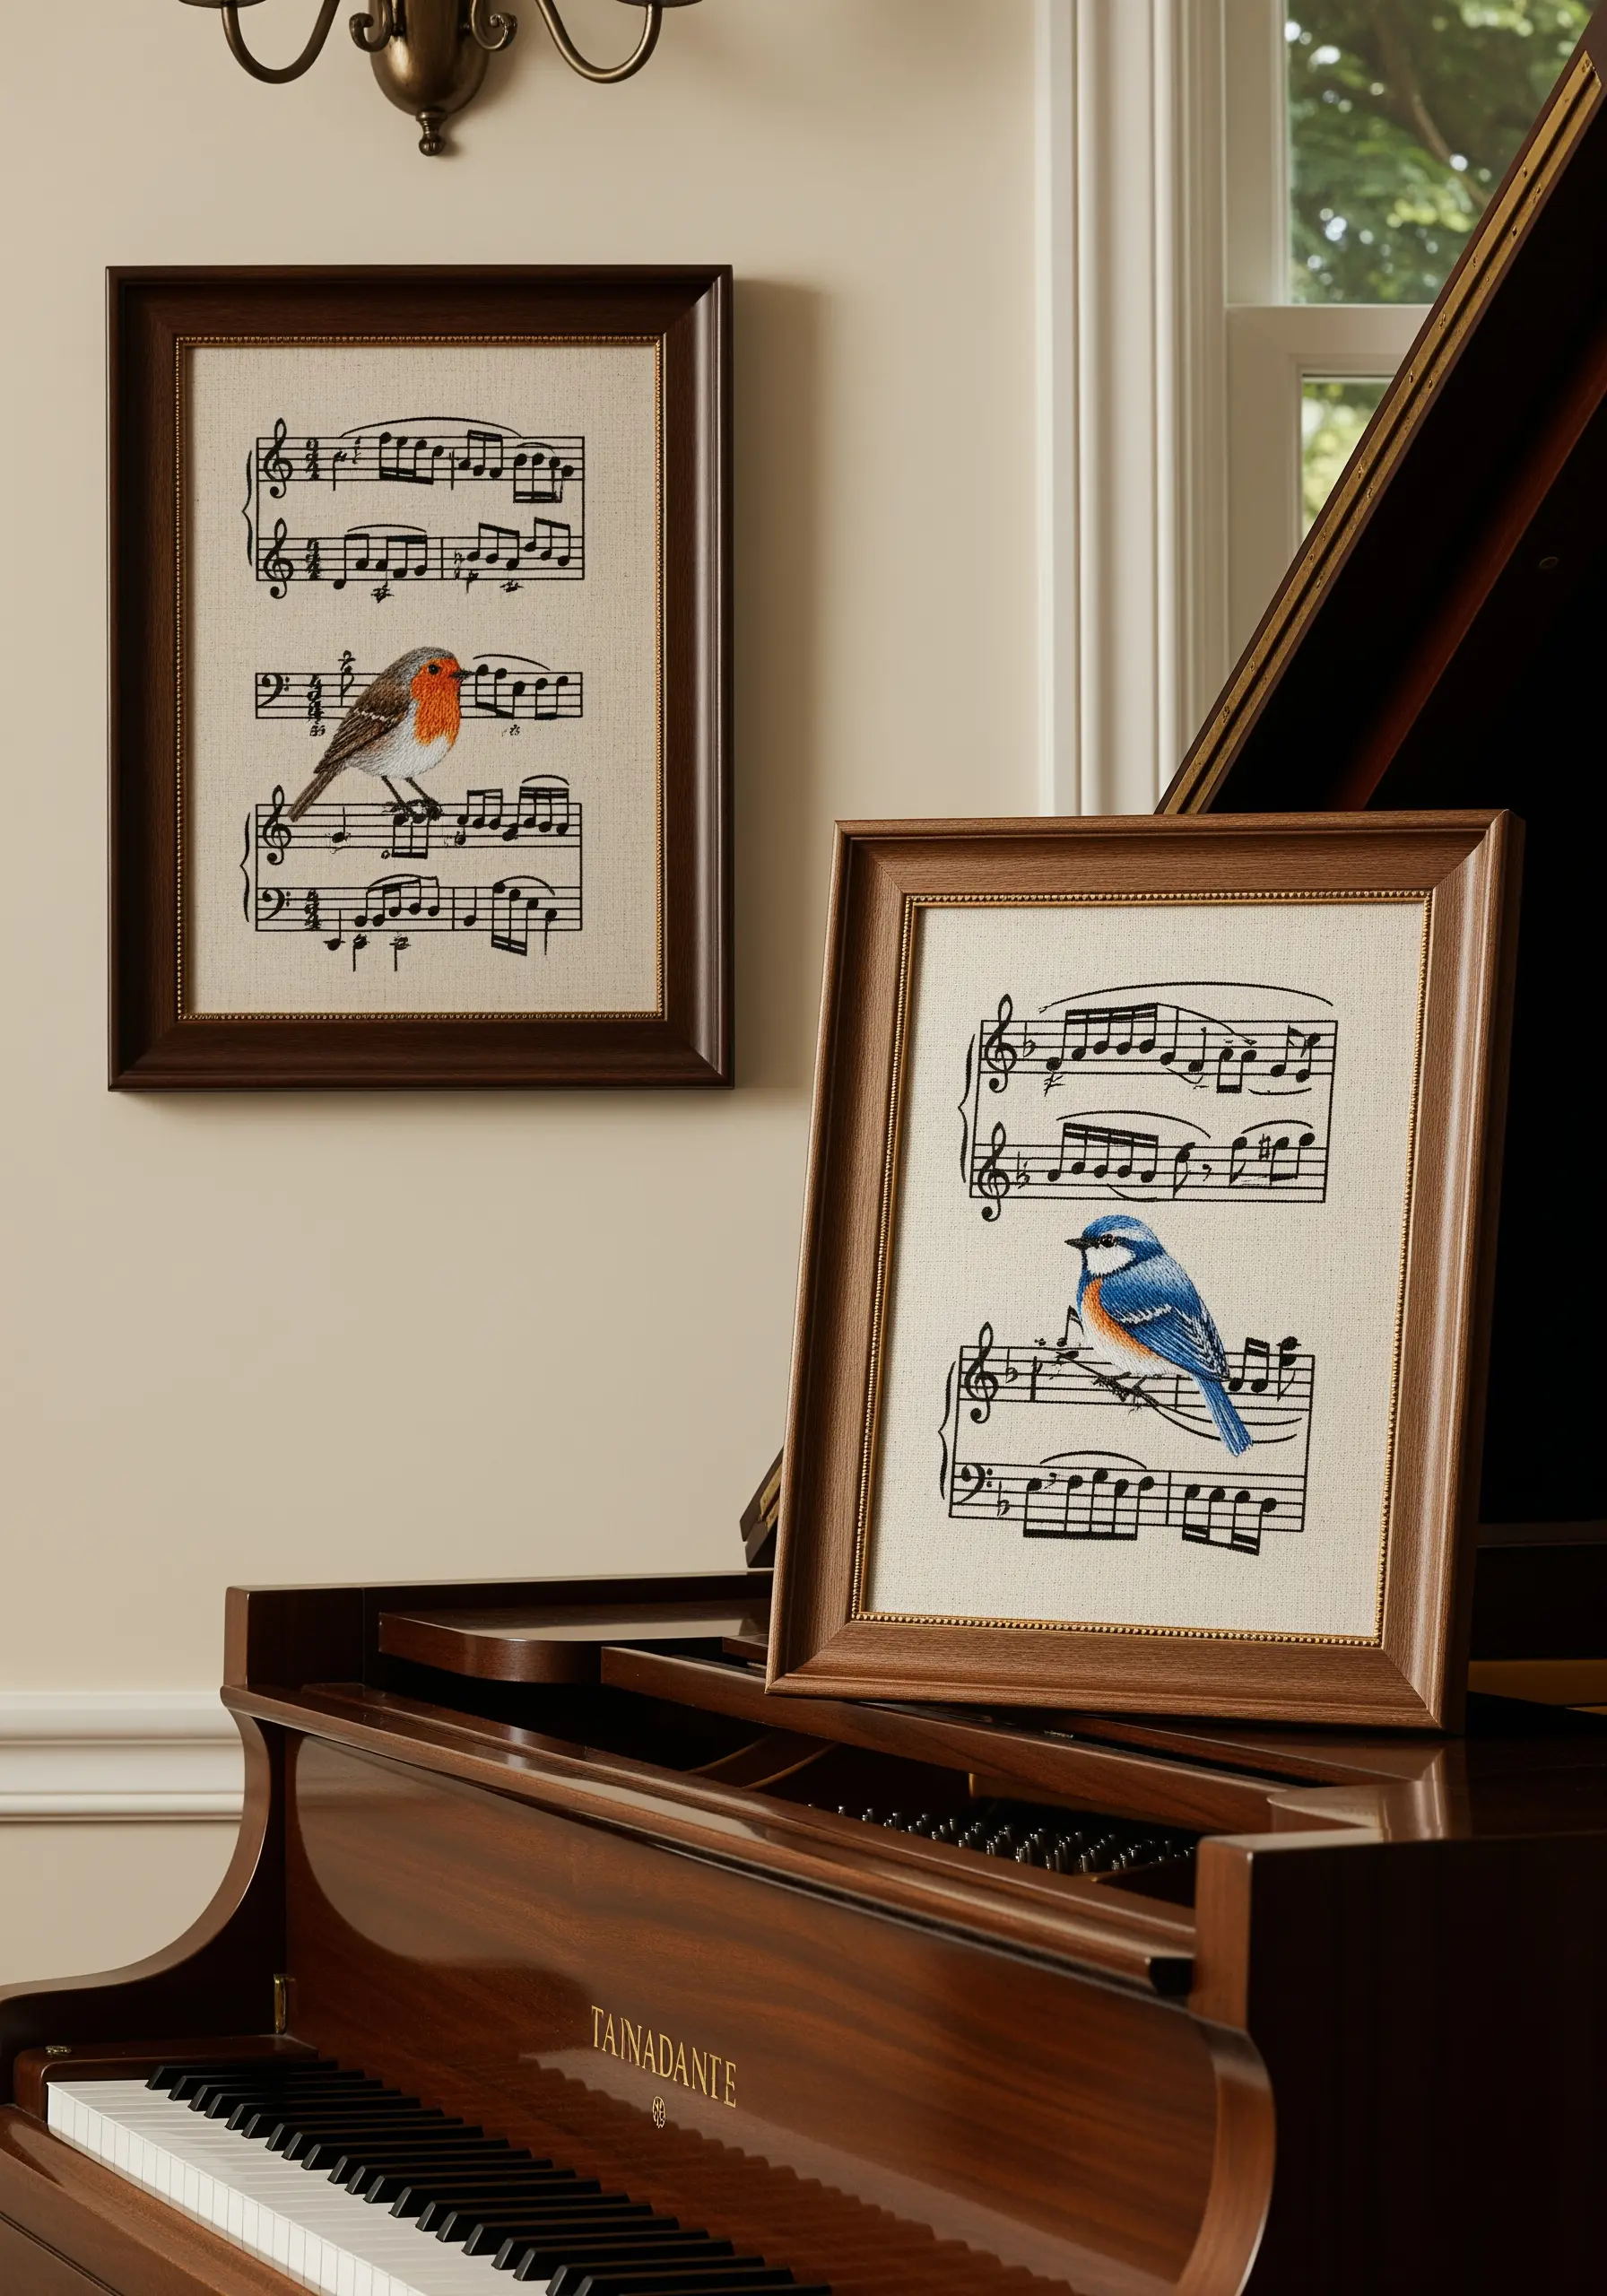
Add a personal, artistic layer to your work by stitching directly onto pre-printed fabric or a design you’ve transferred yourself.
The printed music notes here provide a meaningful context and a graphic backdrop for the embroidered birds.
Use thread painting to give the birds lifelike color and dimension, allowing them to stand out as the focal point. This technique merges two art forms into one cohesive piece.
21. Achieve Iridescence with Color and Texture
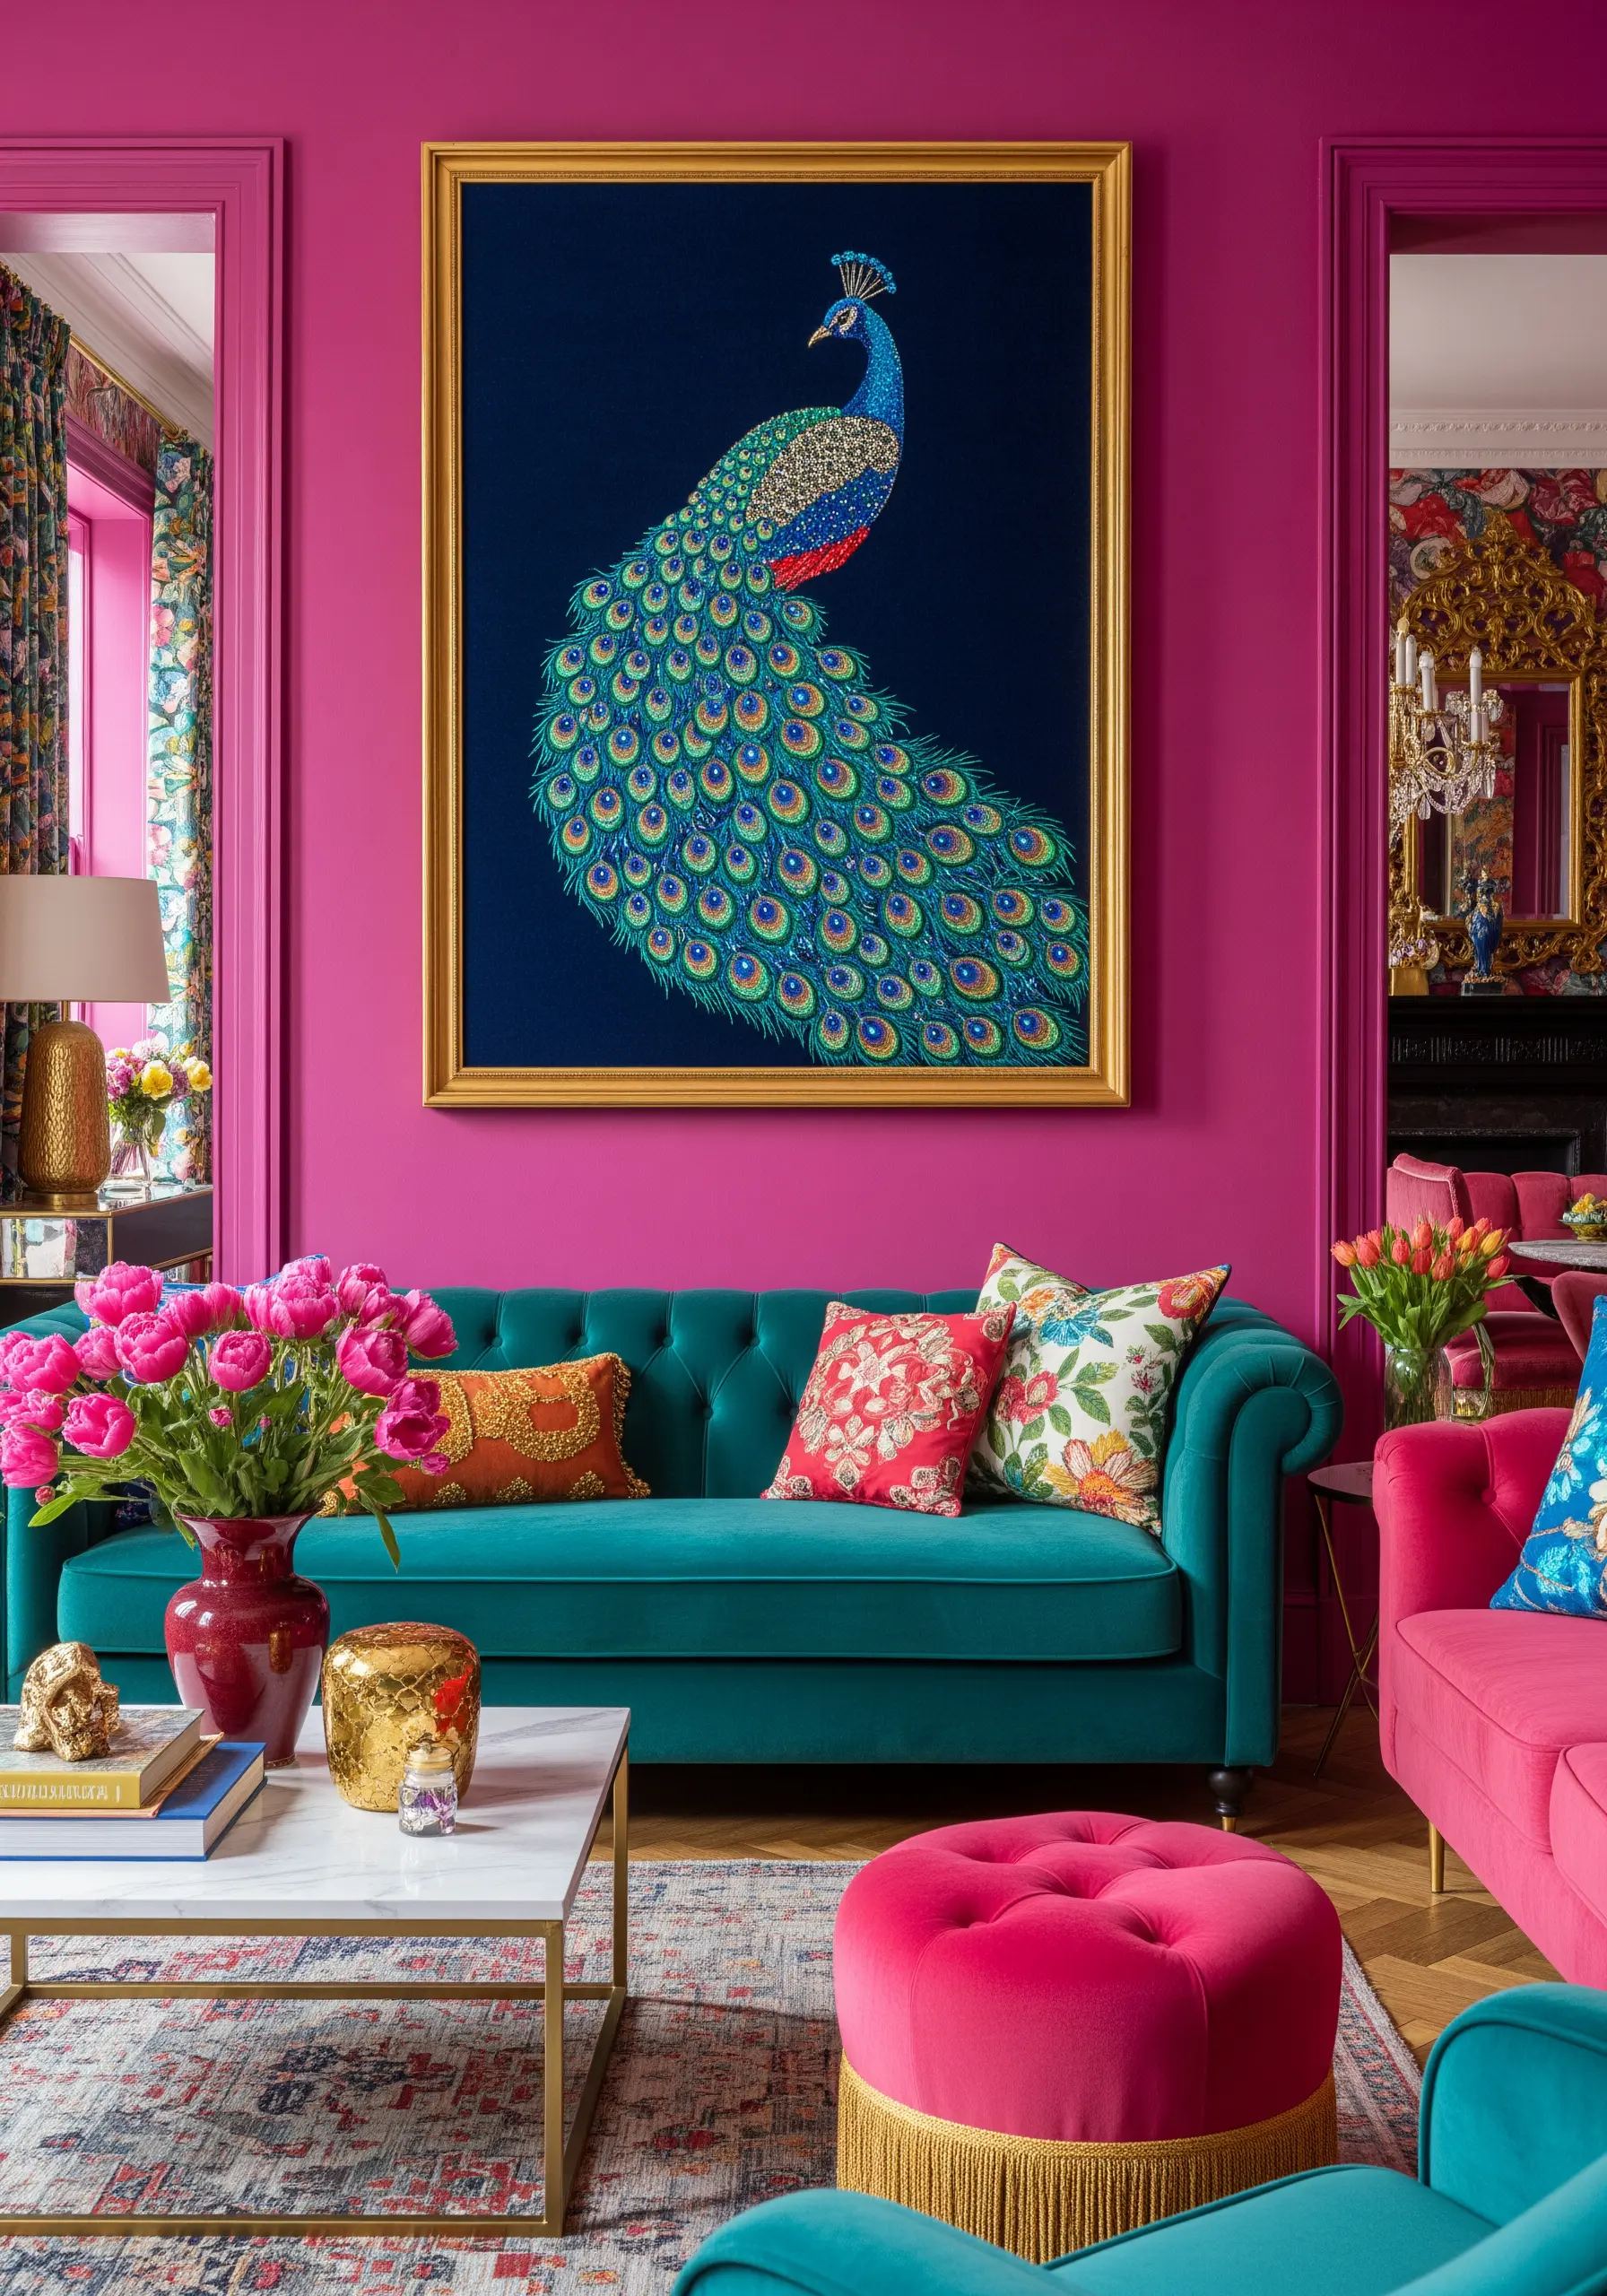
Capturing the shimmering magnificence of a peacock’s tail is a masterclass in color theory and texture.
For each ‘eye’ of the feather, use concentric circles of vibrant color—blue, green, and gold—stitched with lustrous satin stitch.
Introduce metallic or rayon threads sparingly to create highlights that catch the light. The sheer repetition and density of the stitching are what build the breathtaking, iridescent effect.
22. Replicate Lunar Texture with French Knots
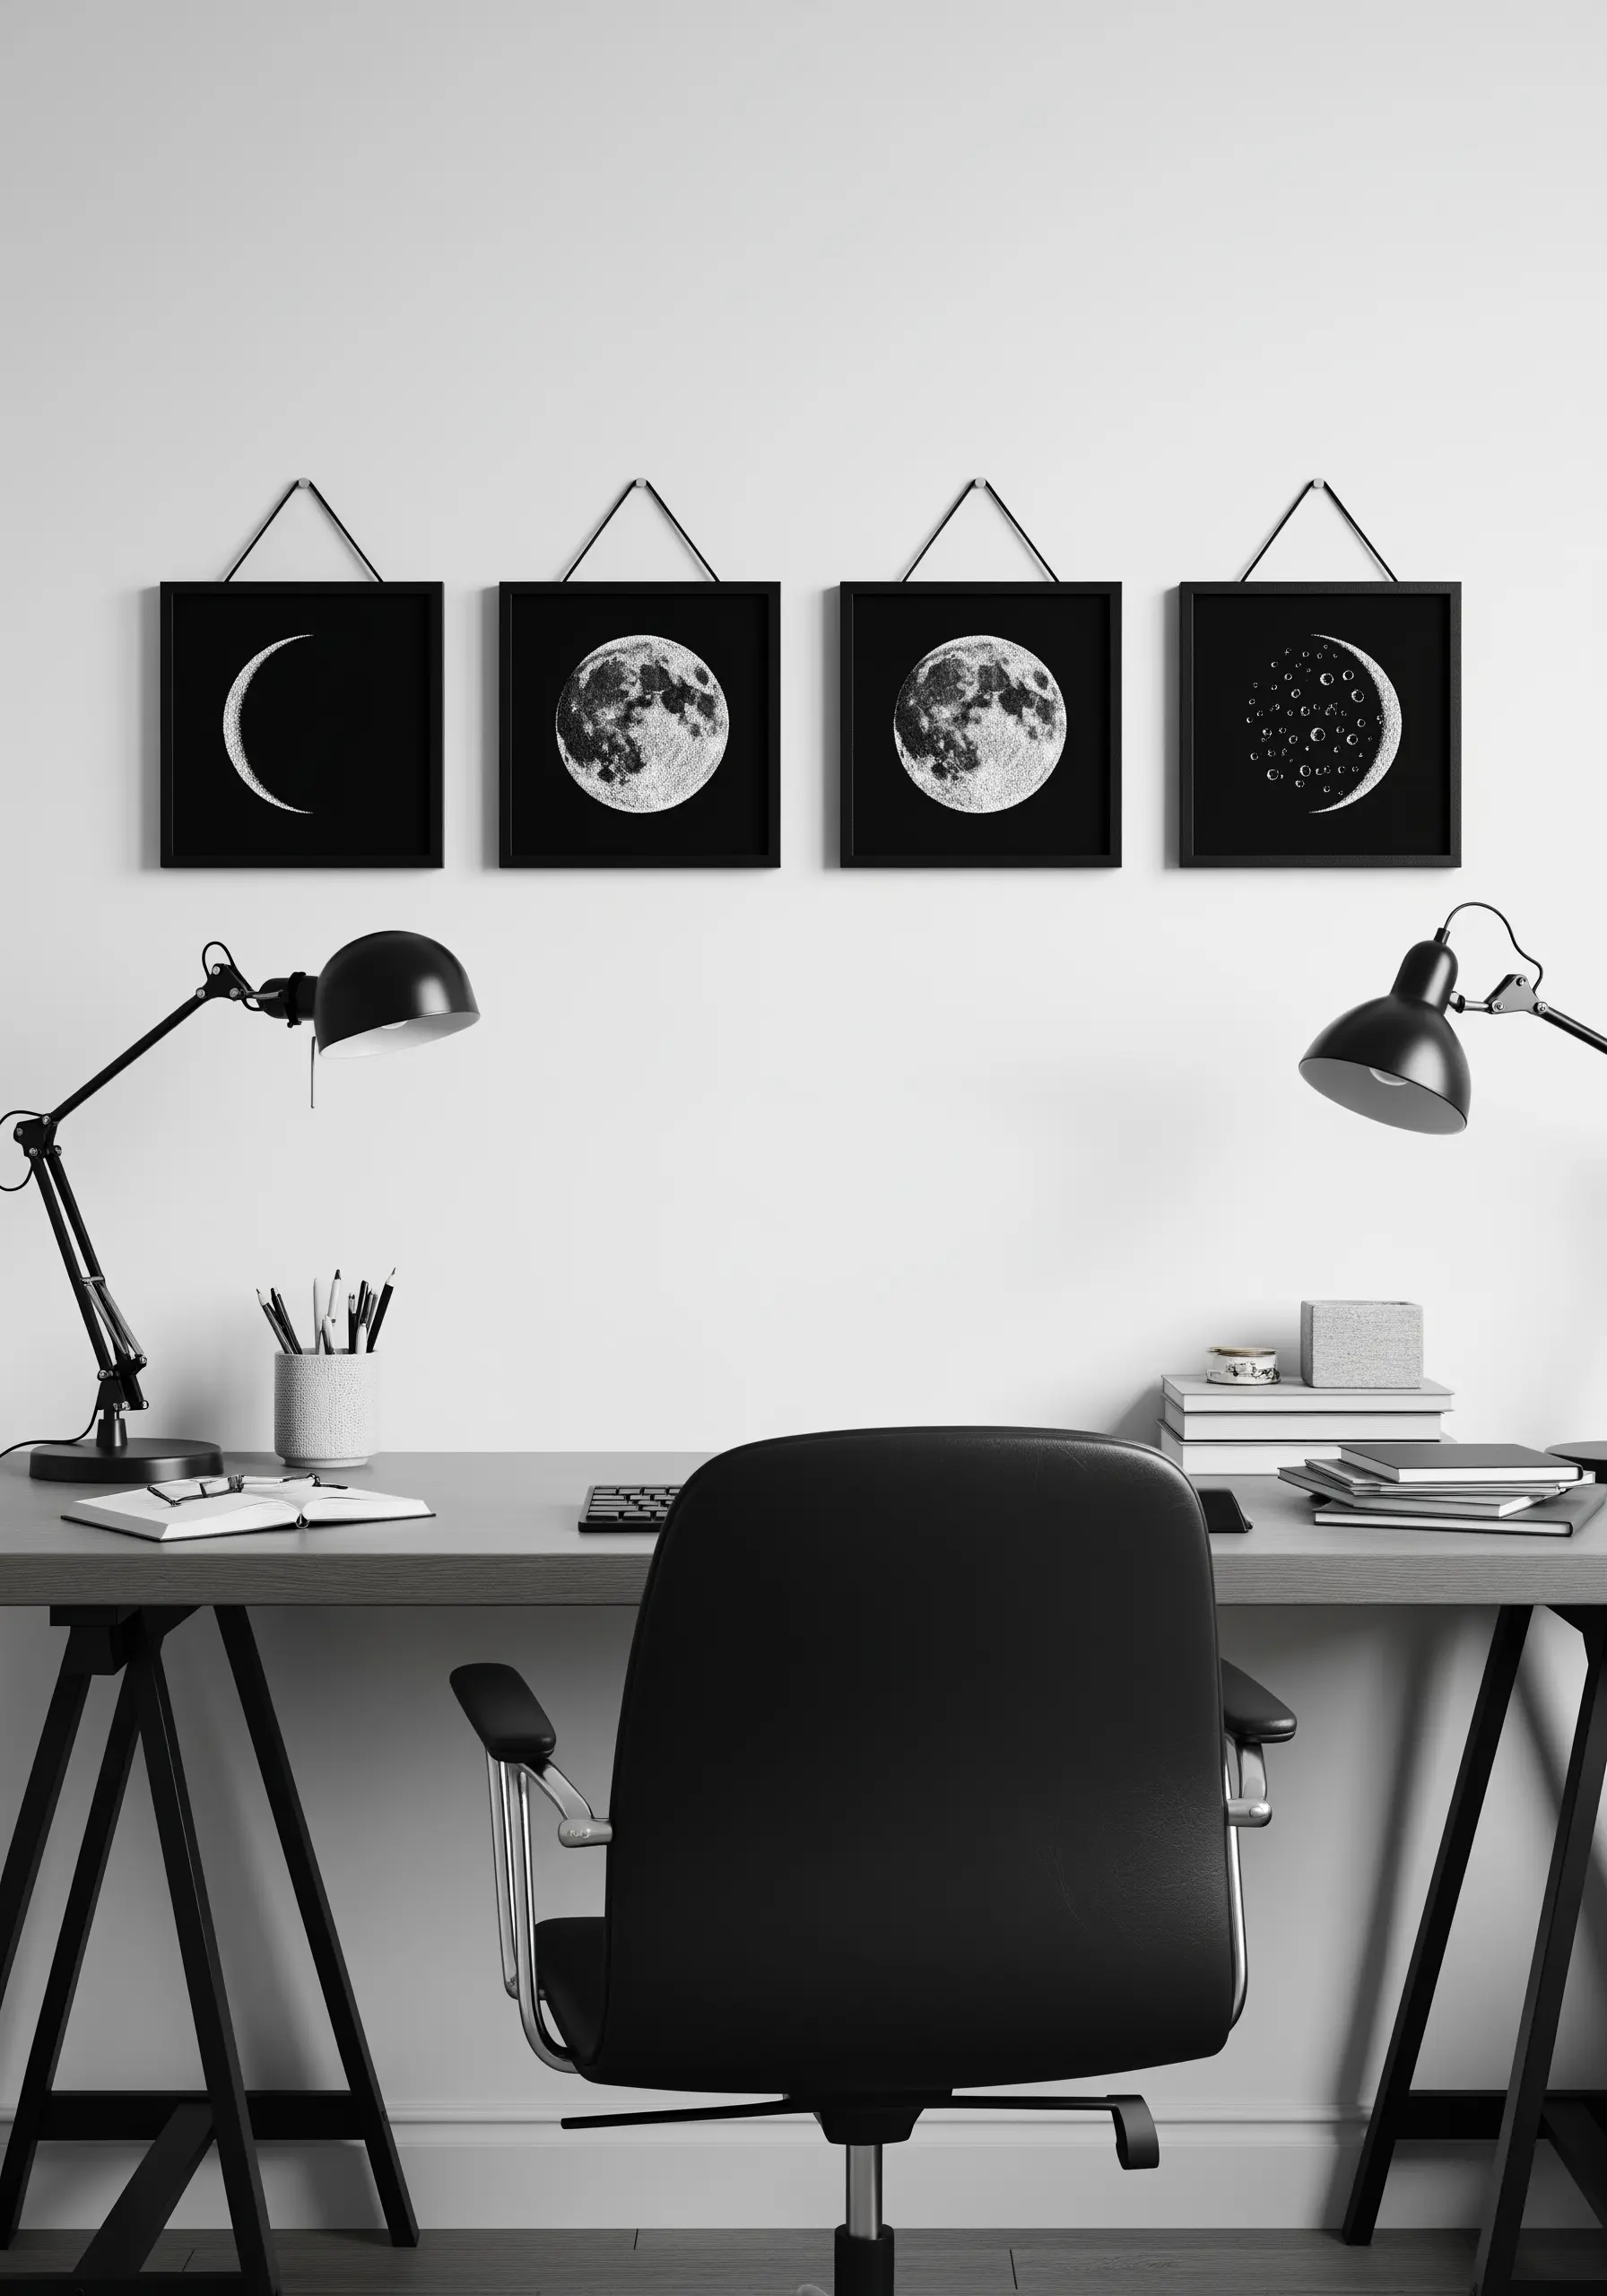
To create the cratered, tactile surface of the moon, the French knot is your most valuable tool.
Work on high-contrast black fabric, using white and light grey threads to build up dense clusters of knots.
Vary the size of your knots by changing how many times you wrap the thread around the needle. This creates a varied, dimensional surface that beautifully mimics the moon’s texture, transforming a simple circle into a celestial body.
23. Evoke Coziness with a Cross-Stitch Aesthetic
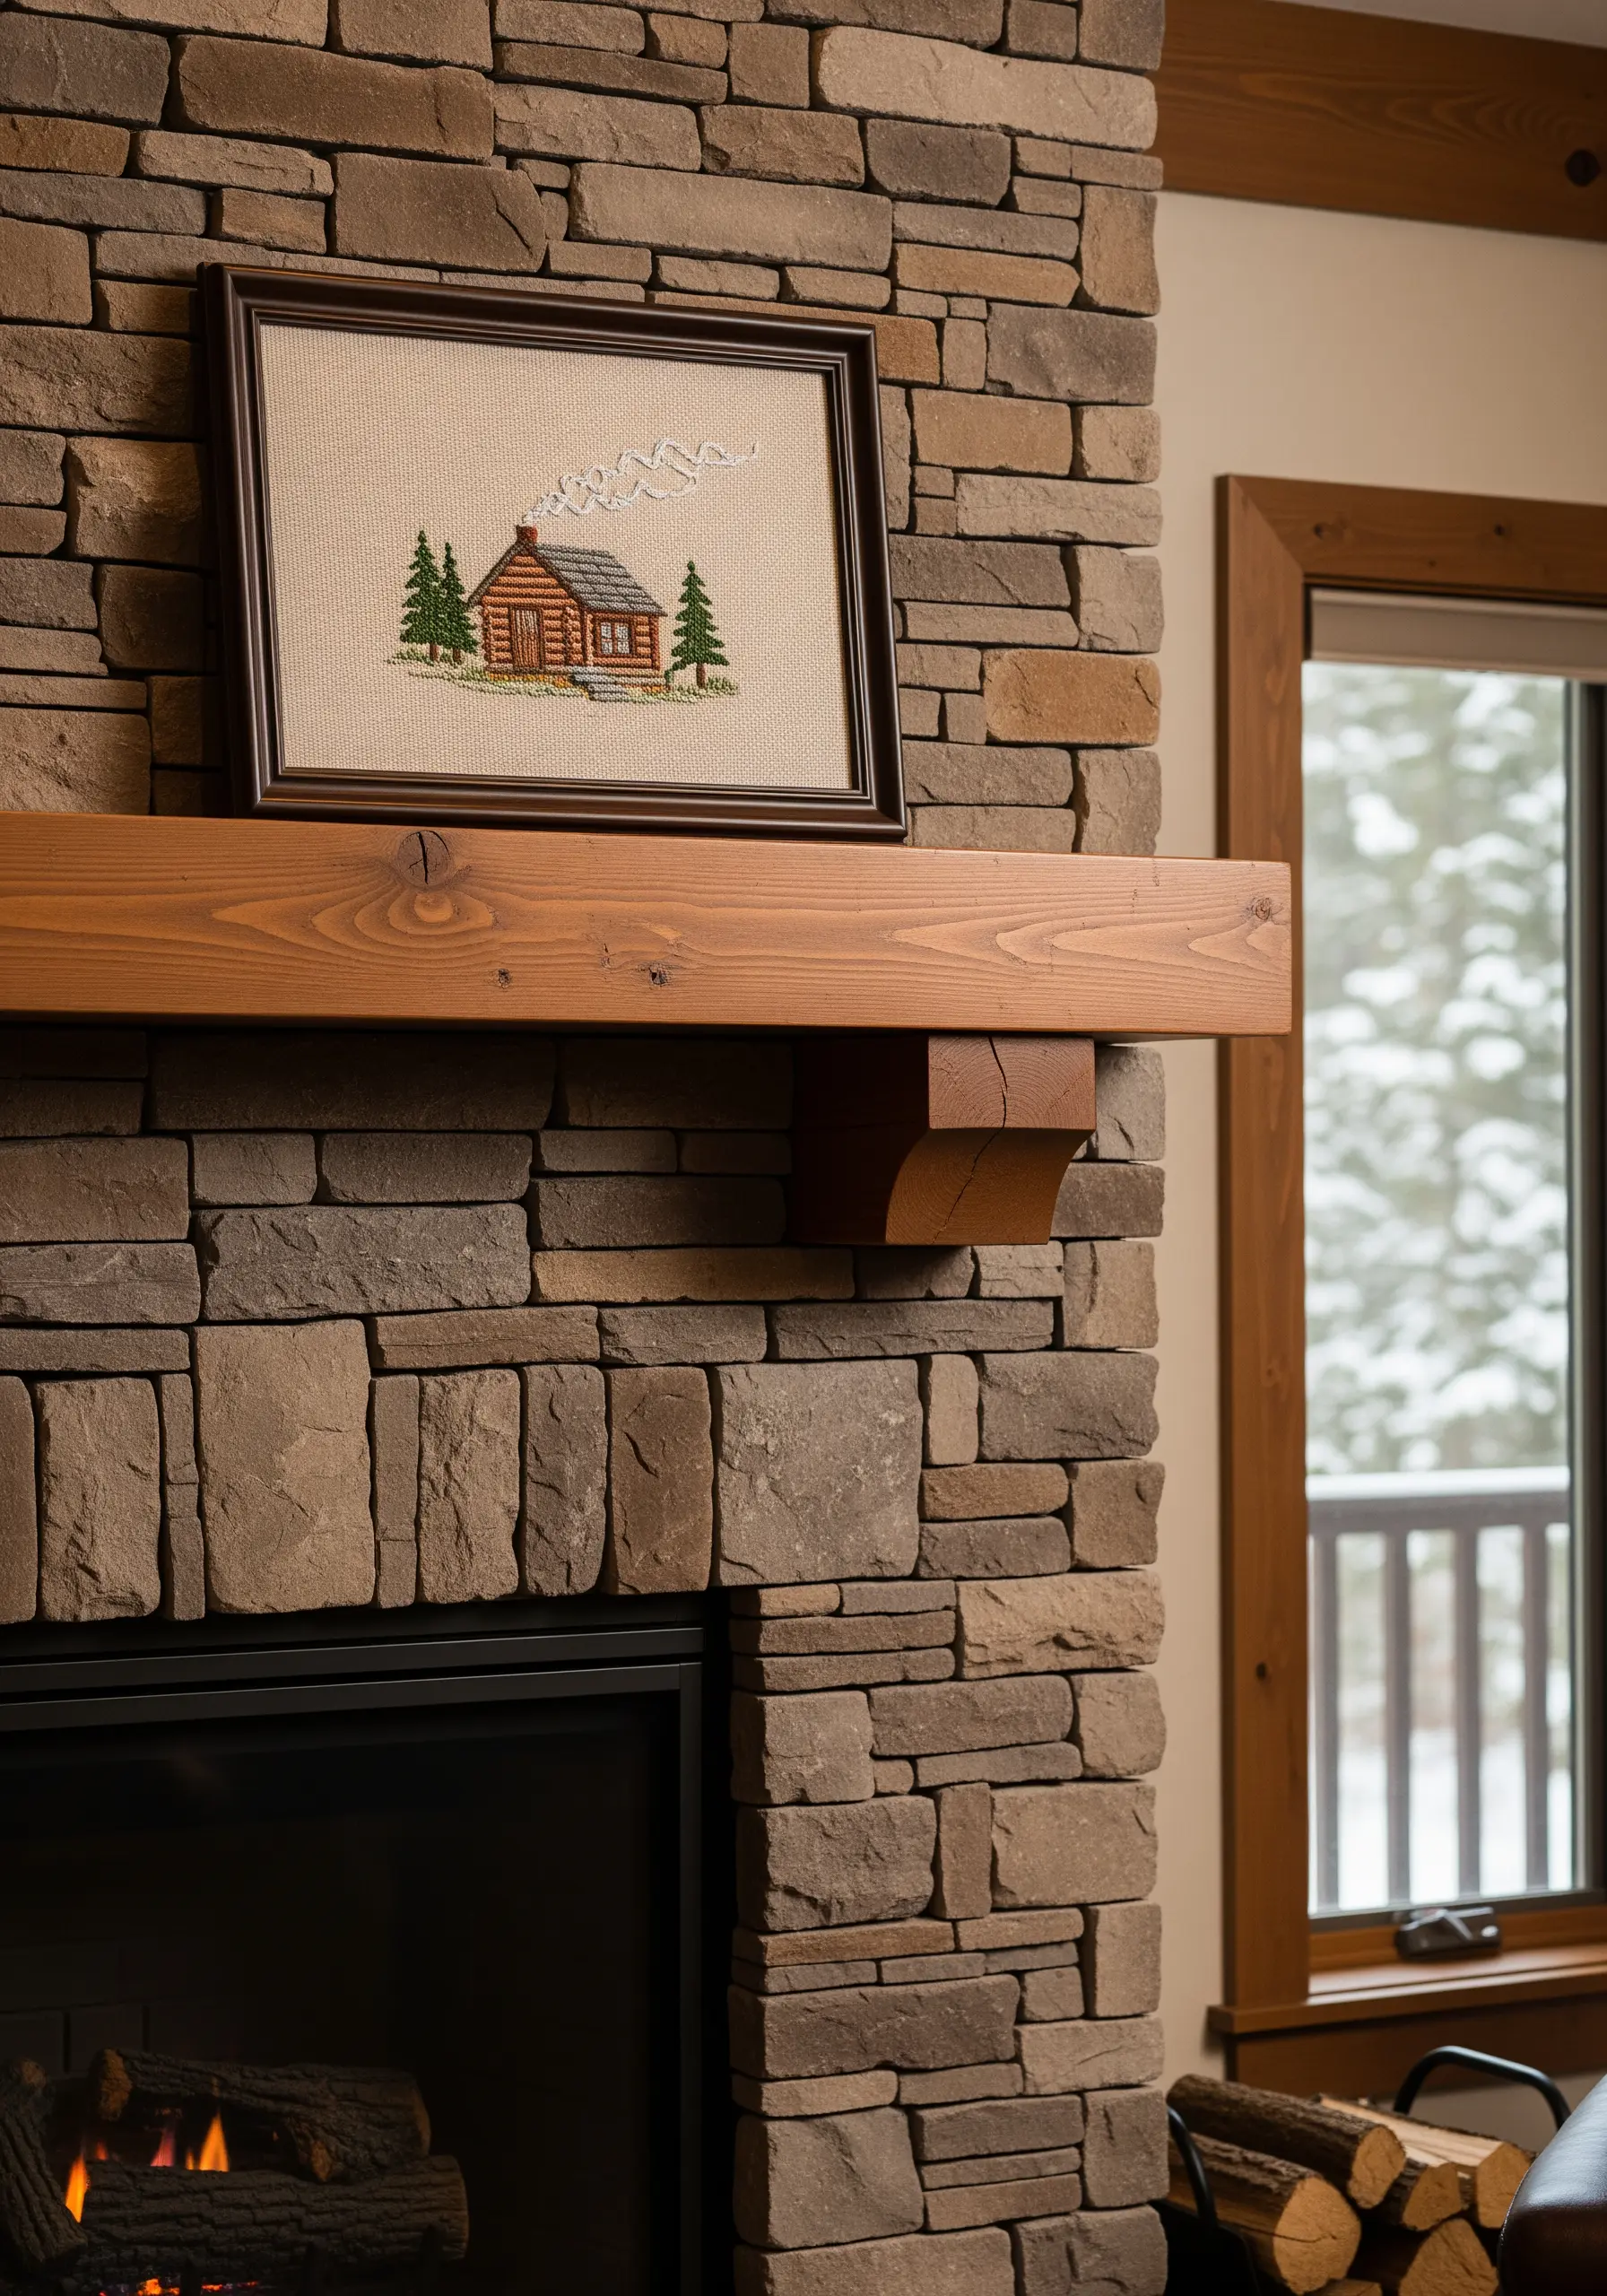
Sometimes, the charm of an artwork lies in its simplicity and nostalgic appeal.
Embrace a rustic, almost pixelated look by using cross-stitch or simple straight stitches on Aida cloth or even-weave linen.
This technique is perfect for creating charming, rustic scenes like a log cabin. The clean, grid-based stitches evoke a sense of warmth, tradition, and handmade coziness that more complex stitches might lack.
24. Suggest Transparency with Sparse, Glimmering Stitches
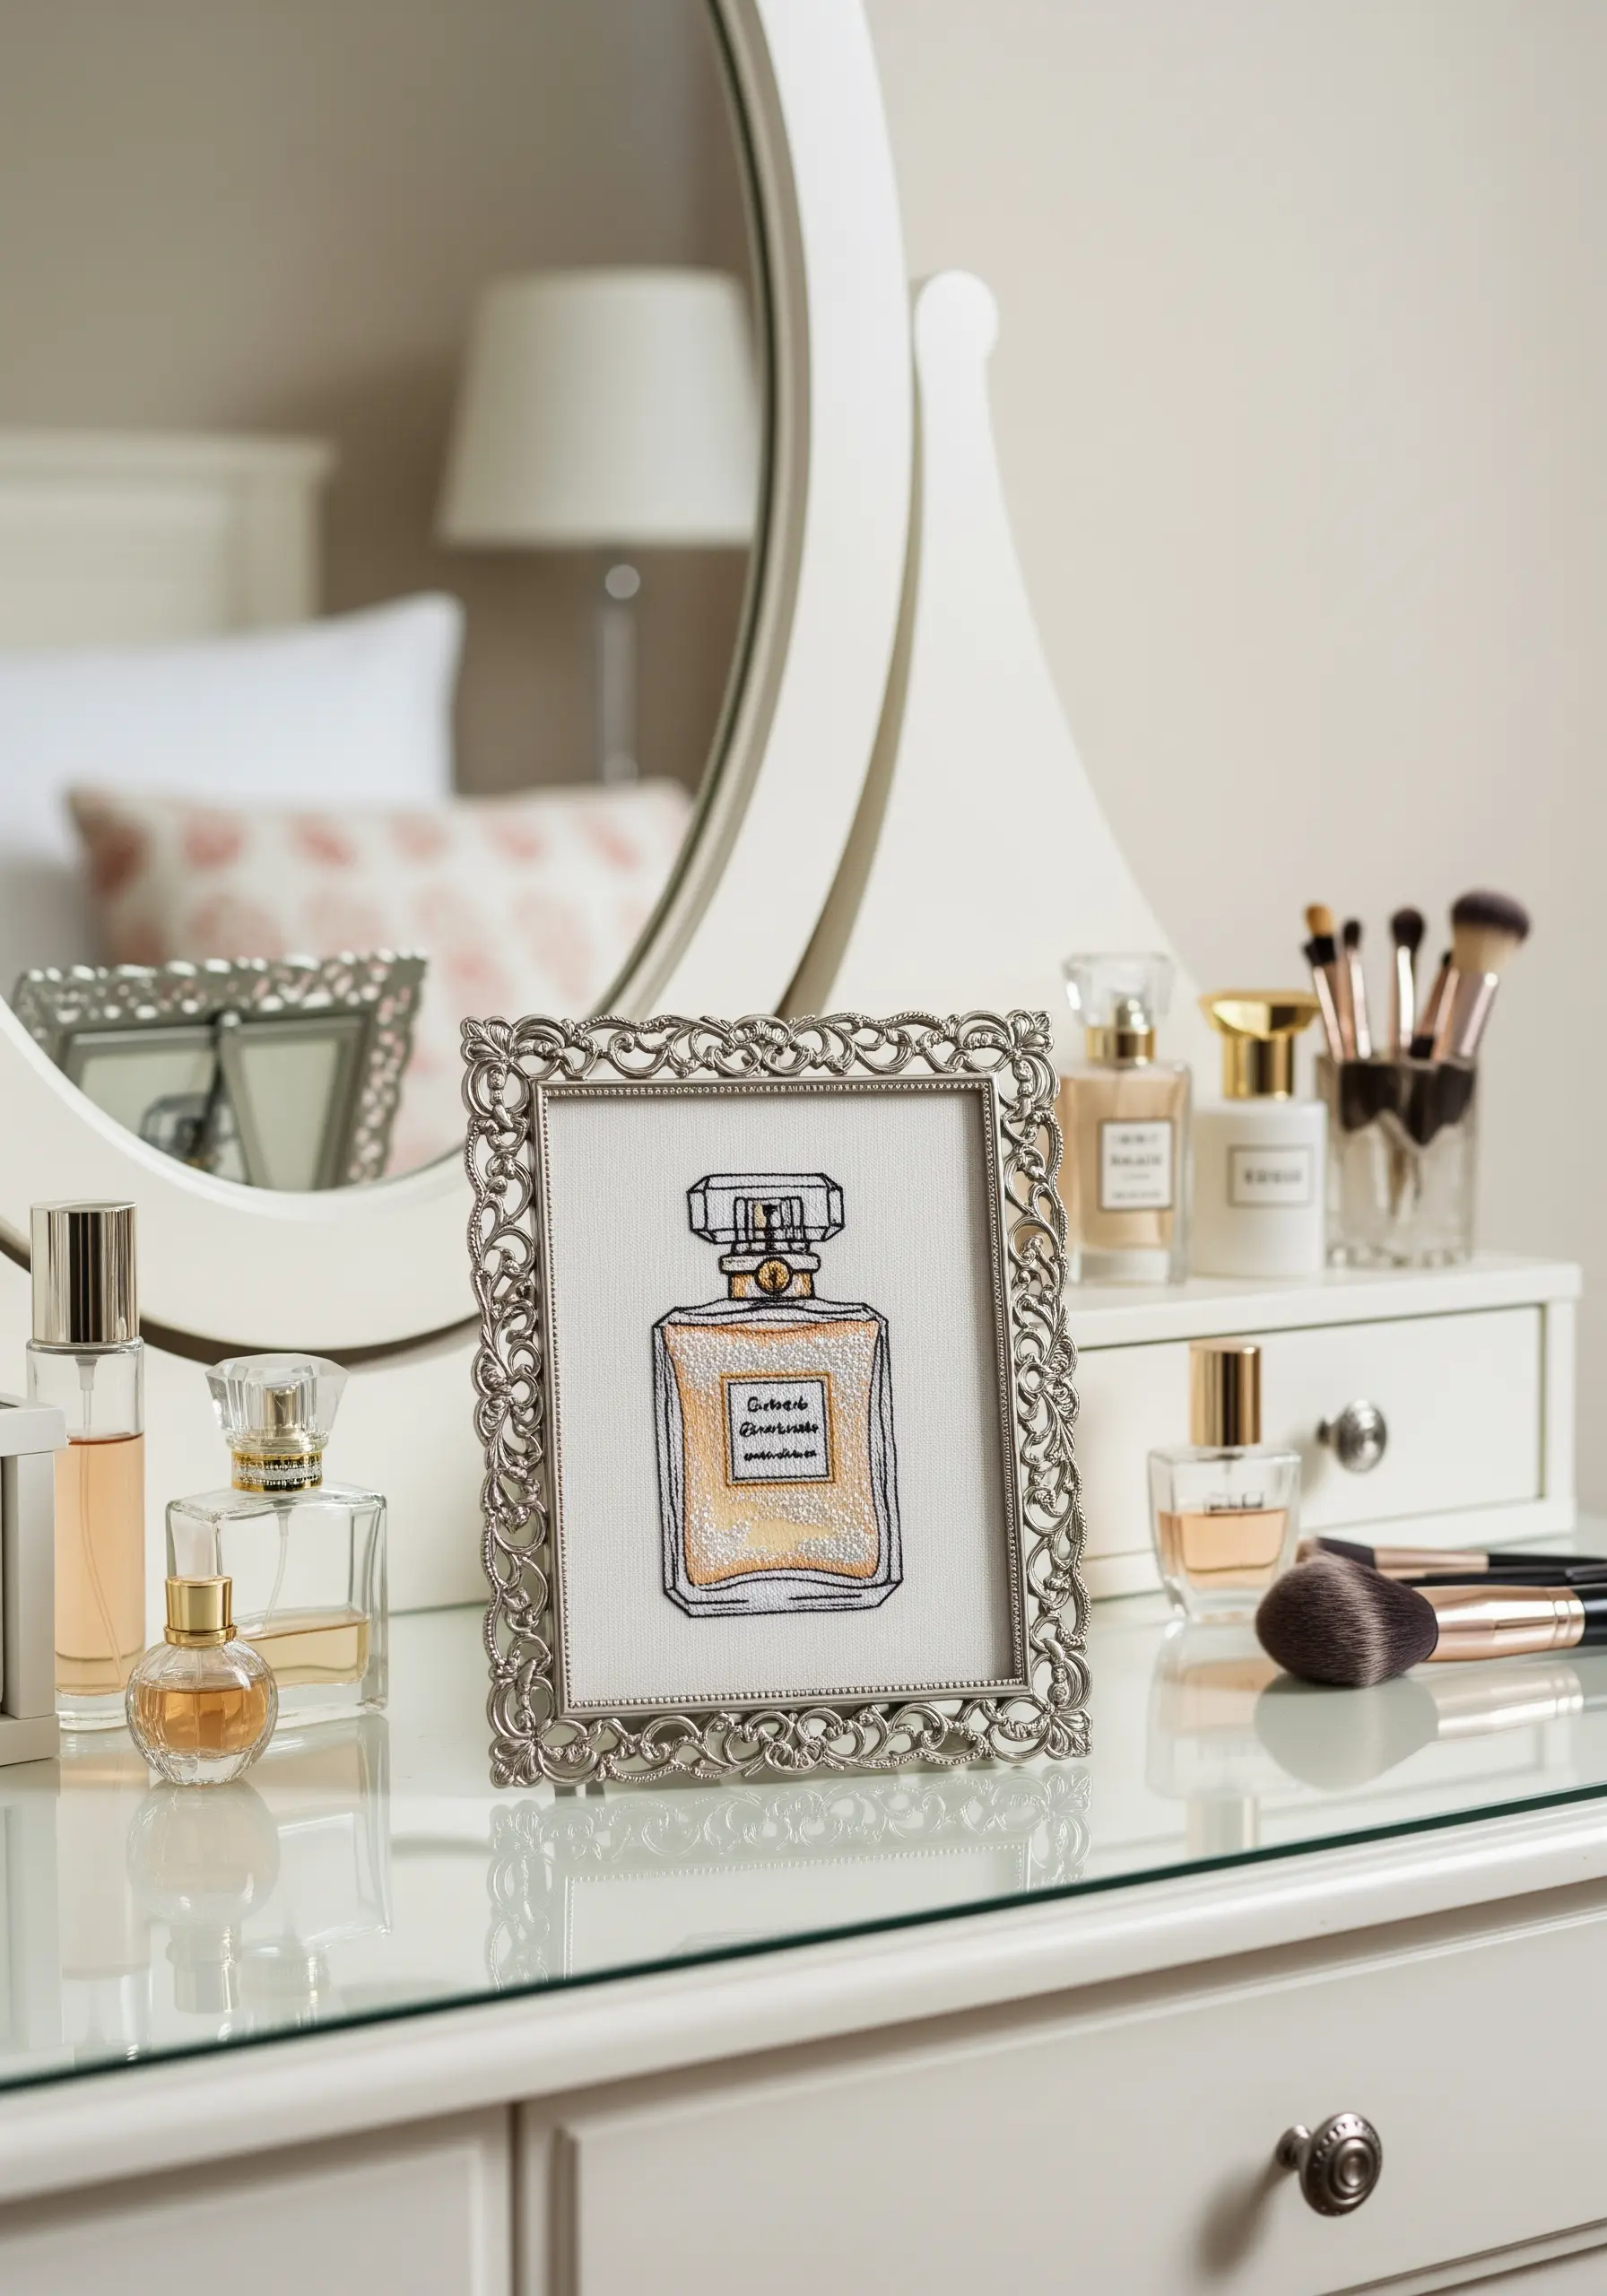
How do you embroider something that’s transparent, like glass or liquid? You stitch the light reflecting off it.
Use a fine, sharp backstitch to create the bottle’s outline. Inside, instead of a solid fill, use sparsely scattered seed stitches with a single strand of metallic or silk thread.
This technique suggests the glimmer of light passing through the perfume without making it opaque. It’s a sophisticated approach that relies on subtlety and restraint.


