

You have the threads, the fabric, and the desire to create something significant—something that does more than just sit in a hoop.
Large-scale embroidery is not about stitching bigger, but thinking differently about texture, composition, and purpose. It’s about turning a wall into your canvas and transforming a room’s atmosphere with a single, intentional piece of art that you made with your own hands.
Here, you’ll find techniques that empower you to move beyond small-scale projects. We’ll explore how to use chunky yarns to sculpt landscapes, how to combine stitches to create painterly effects, and how to finish your work so it becomes the undeniable focal point of your home. This is your guide to making an impact.
1. Build Sculptural Landscapes with Chunky Yarn
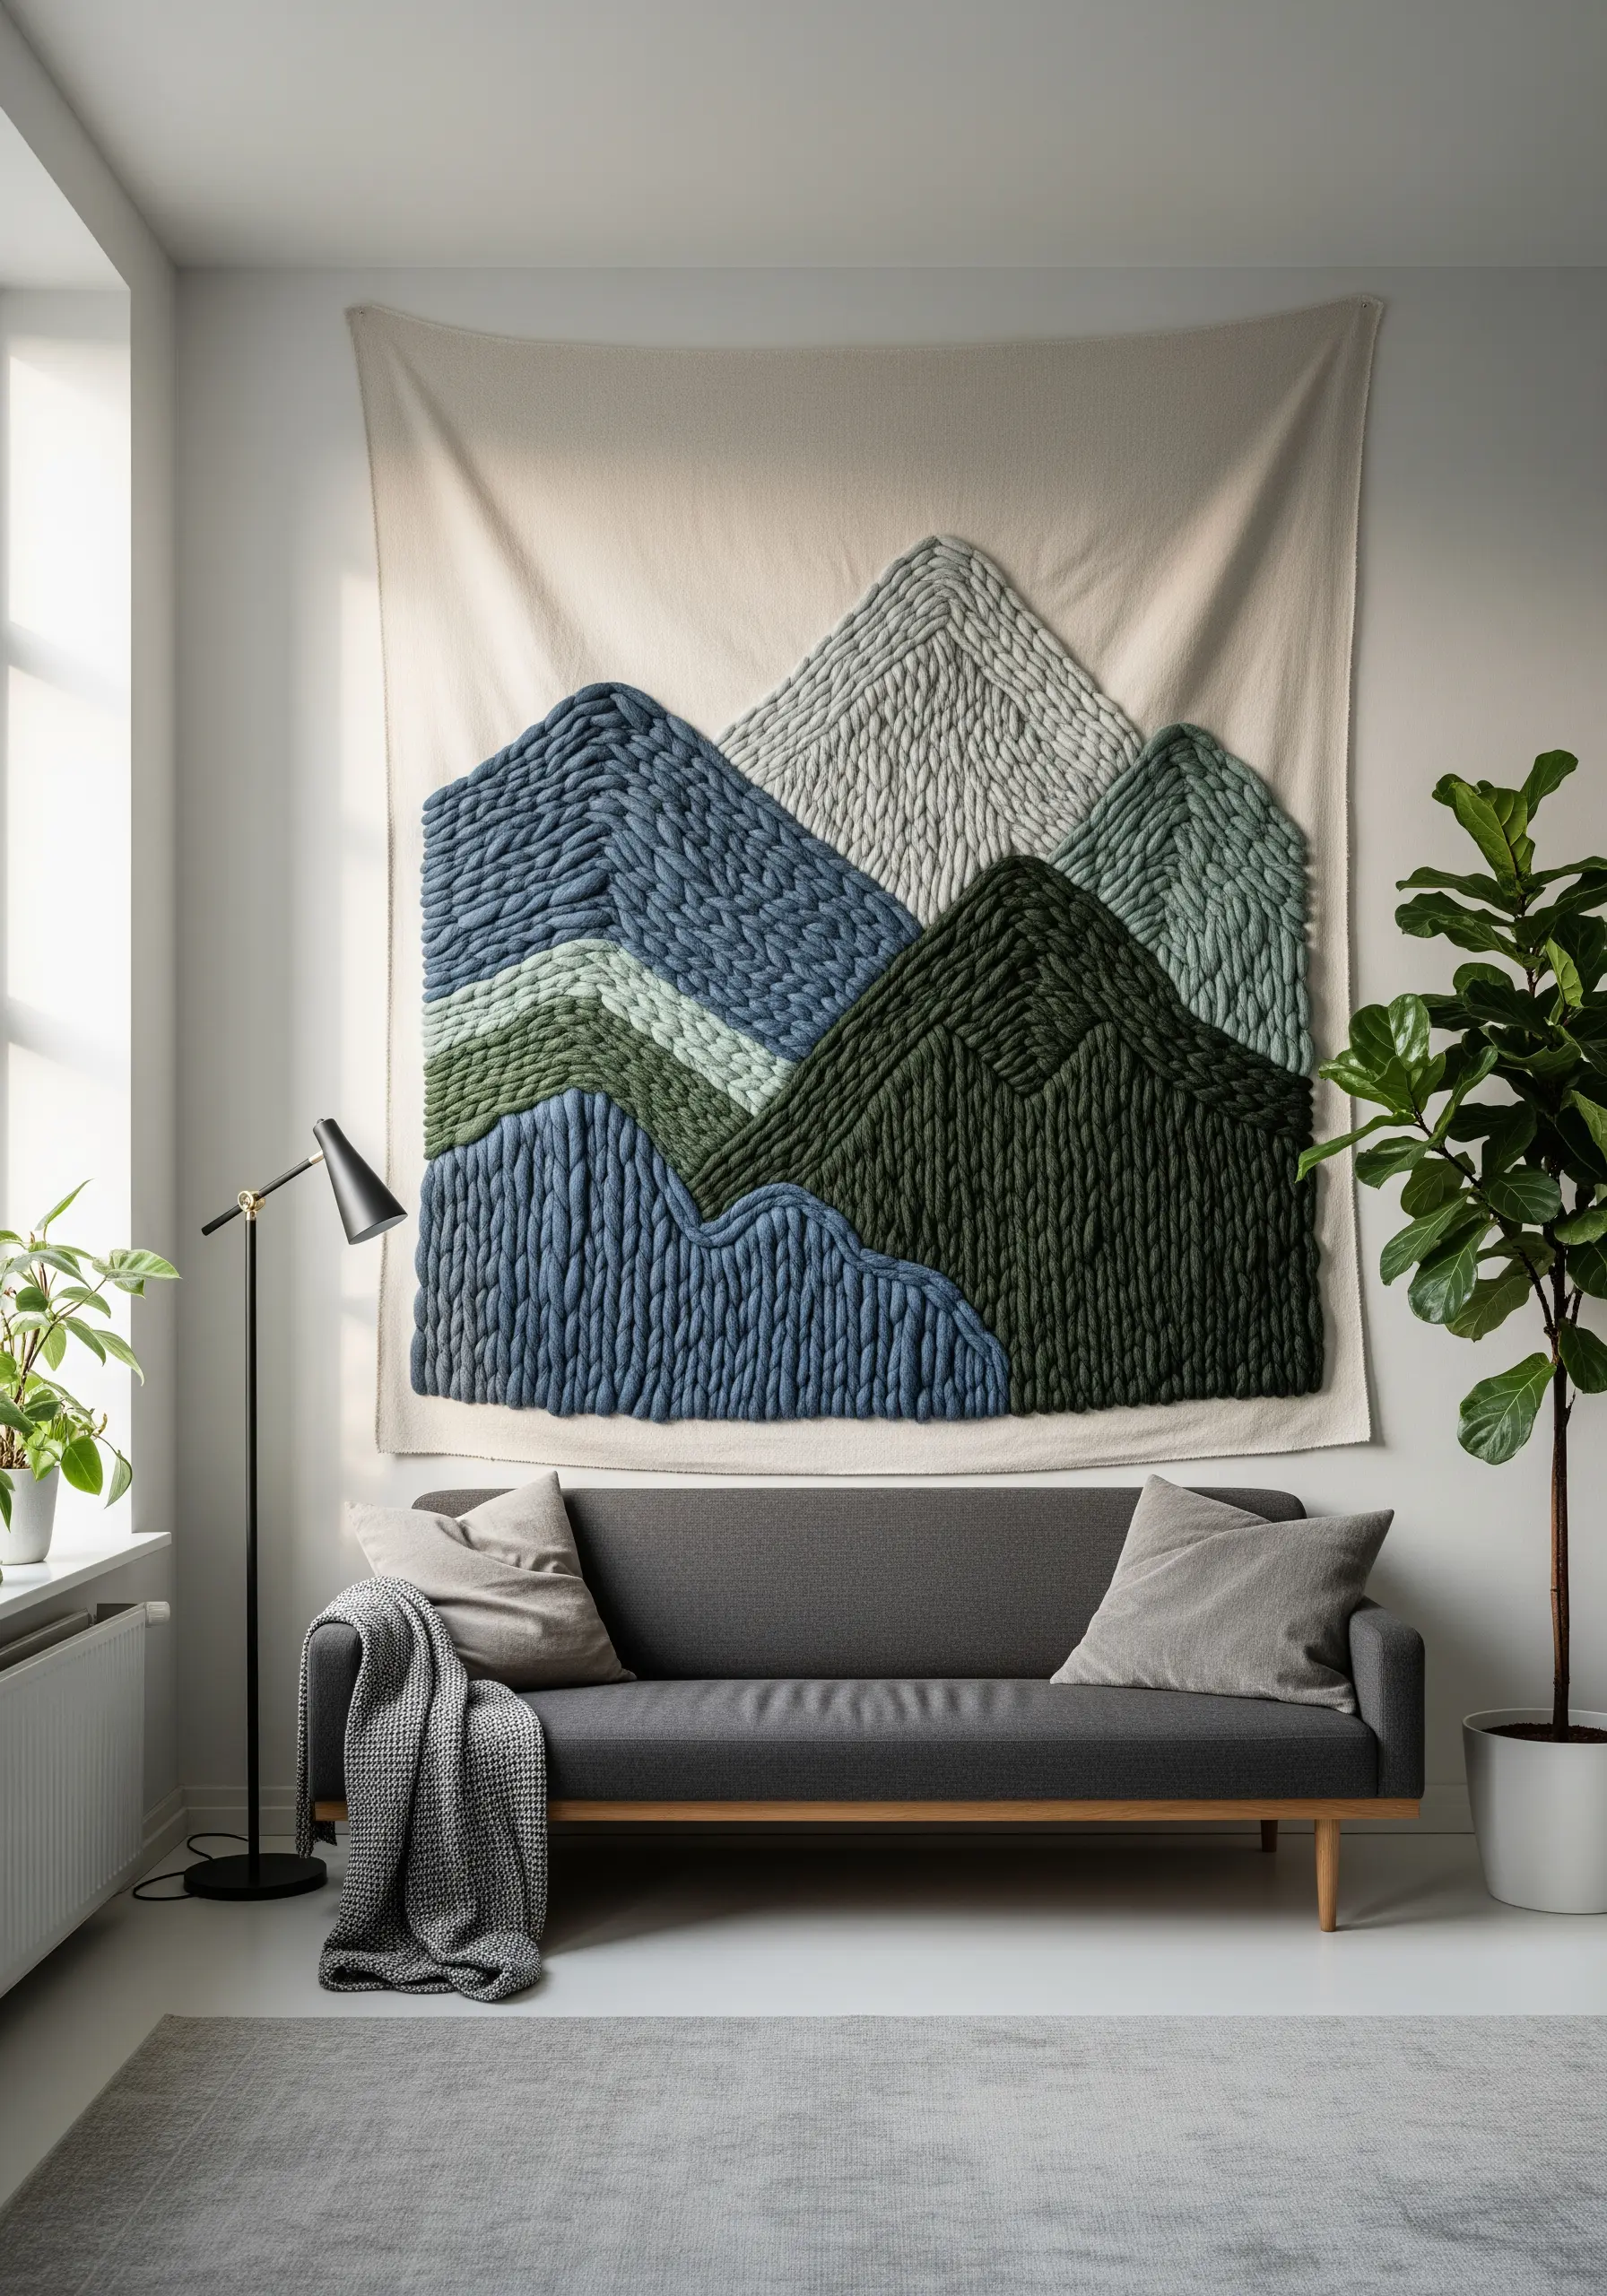
Move beyond fine floss and embrace the high-impact texture of chunky yarn to create a statement wall hanging.
Use a couching stitch to tack down thick, soft roving or yarn onto a heavy canvas or linen backing.
This technique allows you to essentially draw with texture, creating bold, dimensional shapes without needing a special frame or loom.
Vary the density of your couching stitches—placing them closer together on curves and farther apart on straightaways—to control the shape and flow.
The result is a piece with incredible depth that invites touch and transforms the scale of your embroidery.
2. Frame Your View with an Oversized Hoop
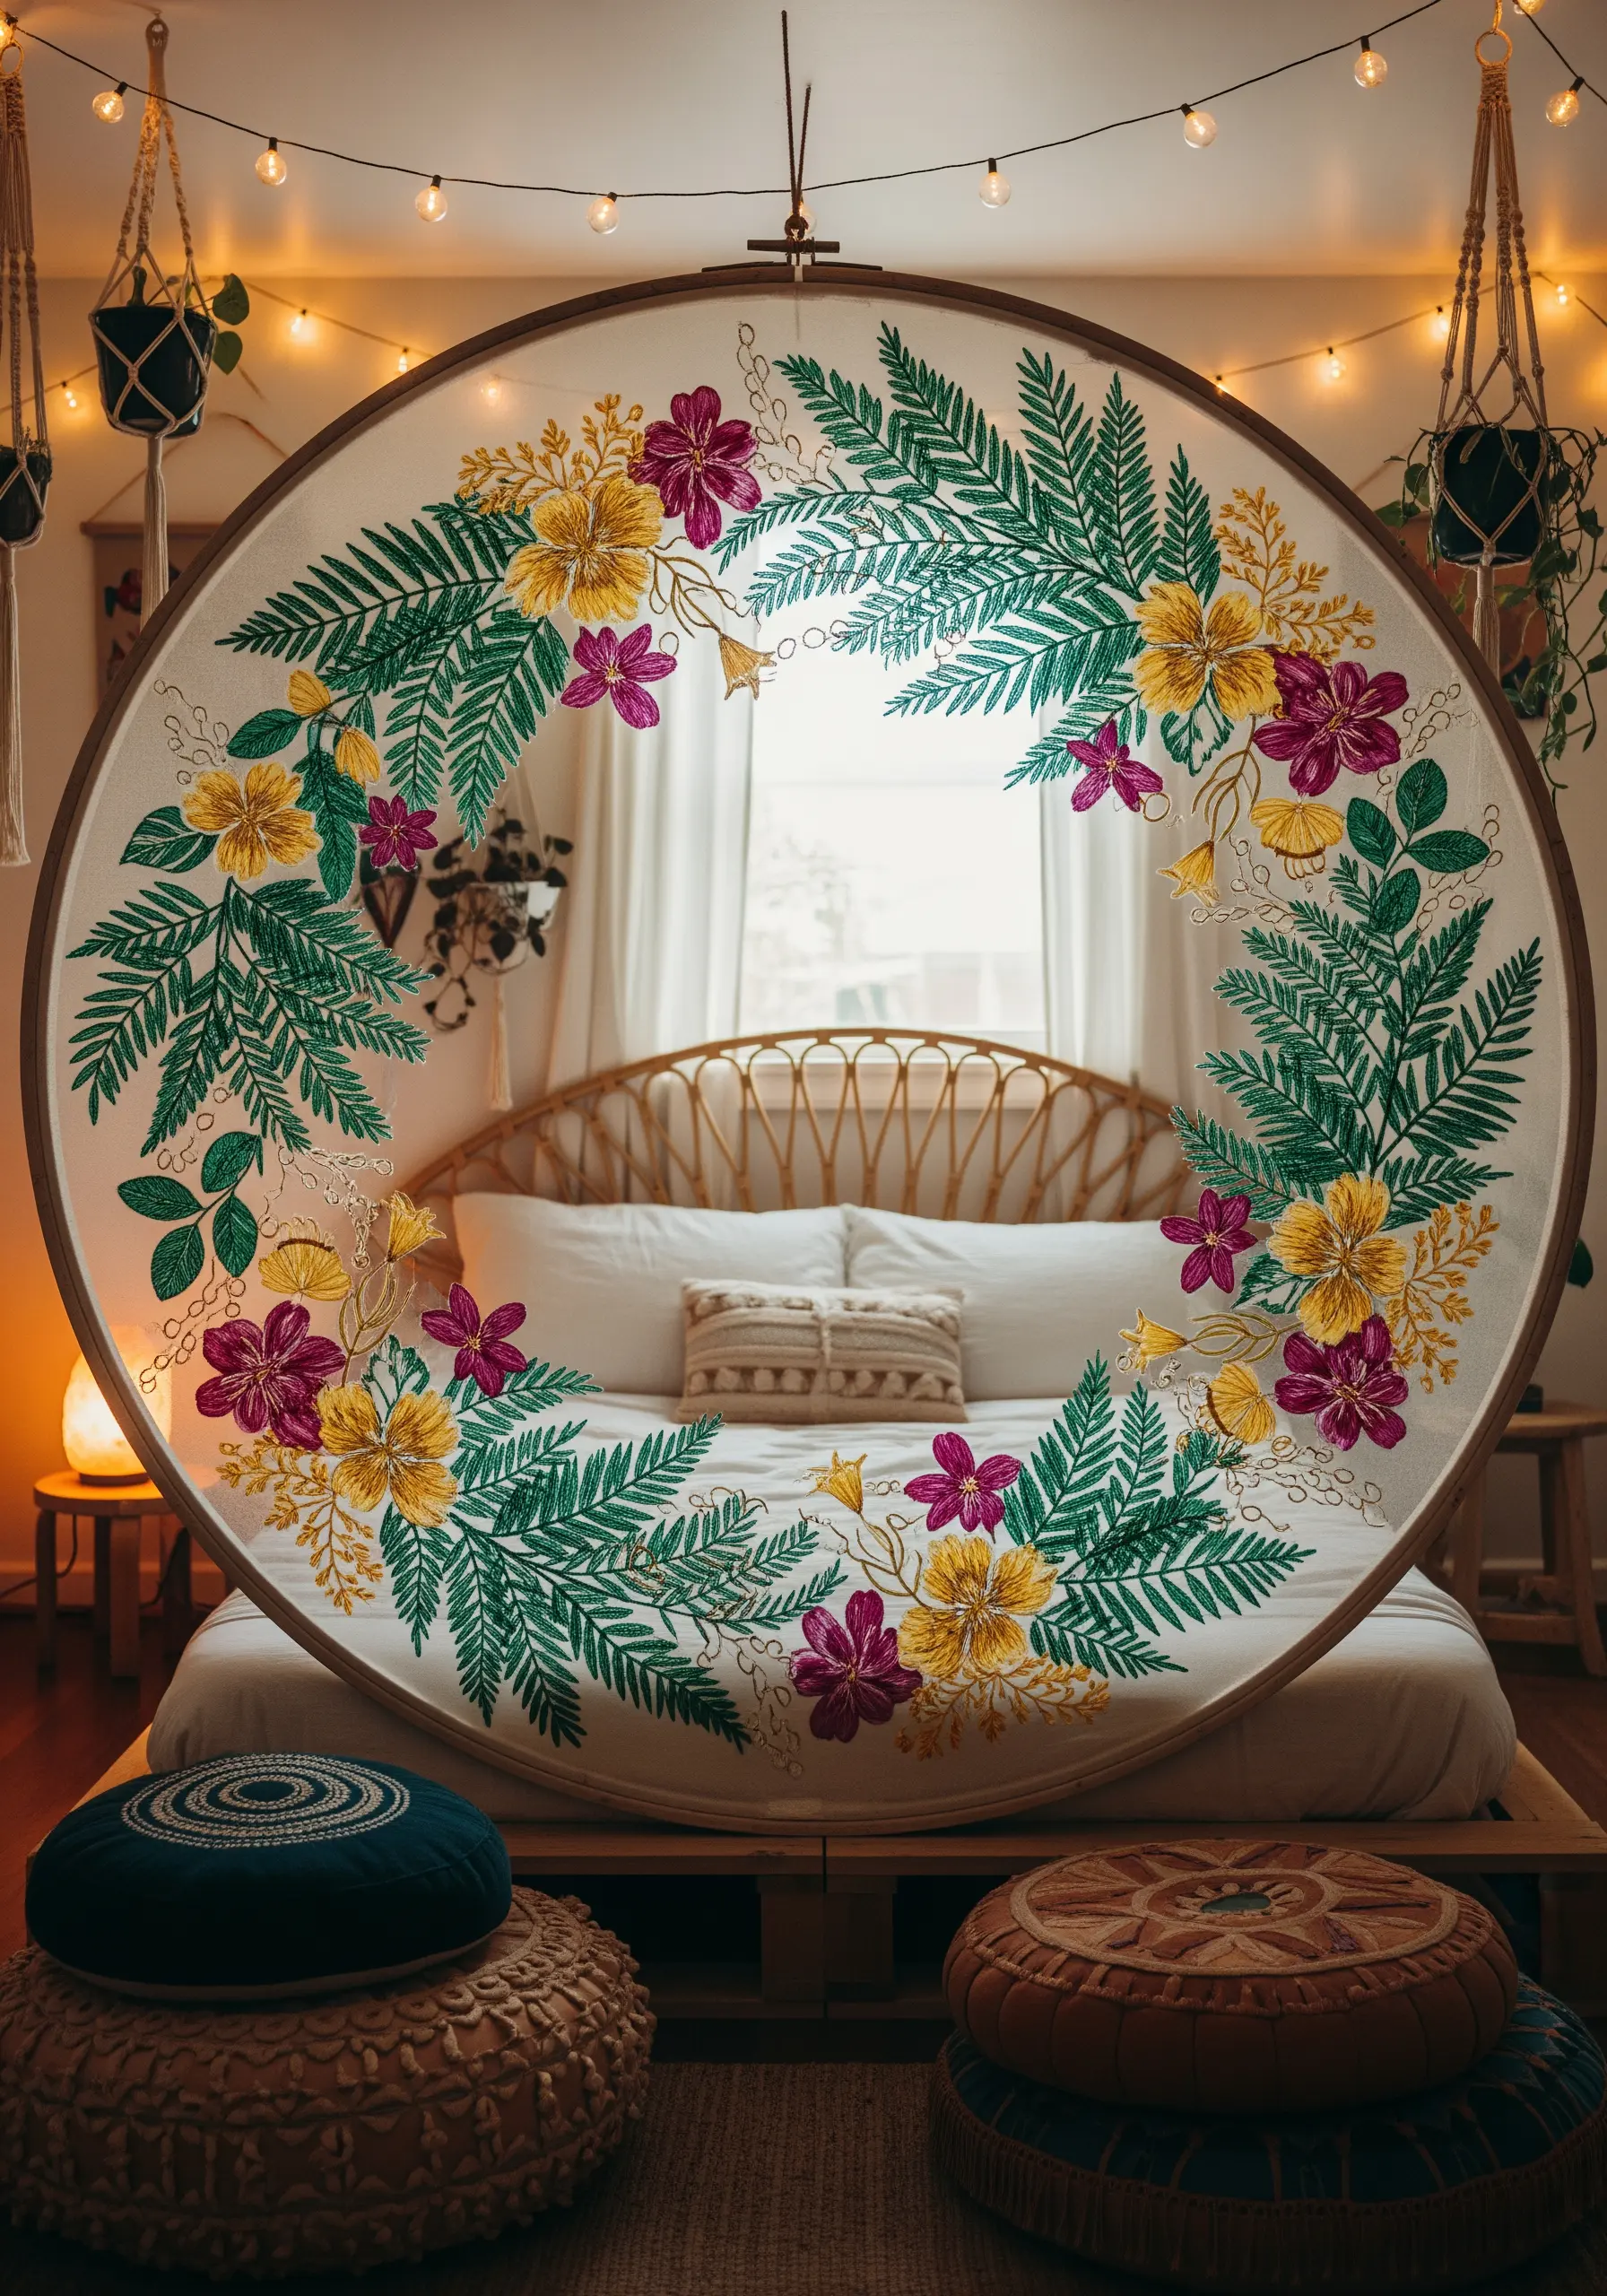
Transform a simple embroidery hoop into a significant architectural element by choosing the largest size you can find—some are over 30 inches in diameter.
Stretch sheer organza or tulle across the hoop to create a ‘floating’ canvas that interacts with the space behind it.
When stitching your design, use a water-soluble stabilizer to support the delicate fabric, then dissolve it away to leave only the threads.
This technique creates a stunning, transparent tapestry that feels both substantial and weightless, perfect for hanging in front of a window or as a soft room divider.
3. Channel Retro Graphics with Punch Needle
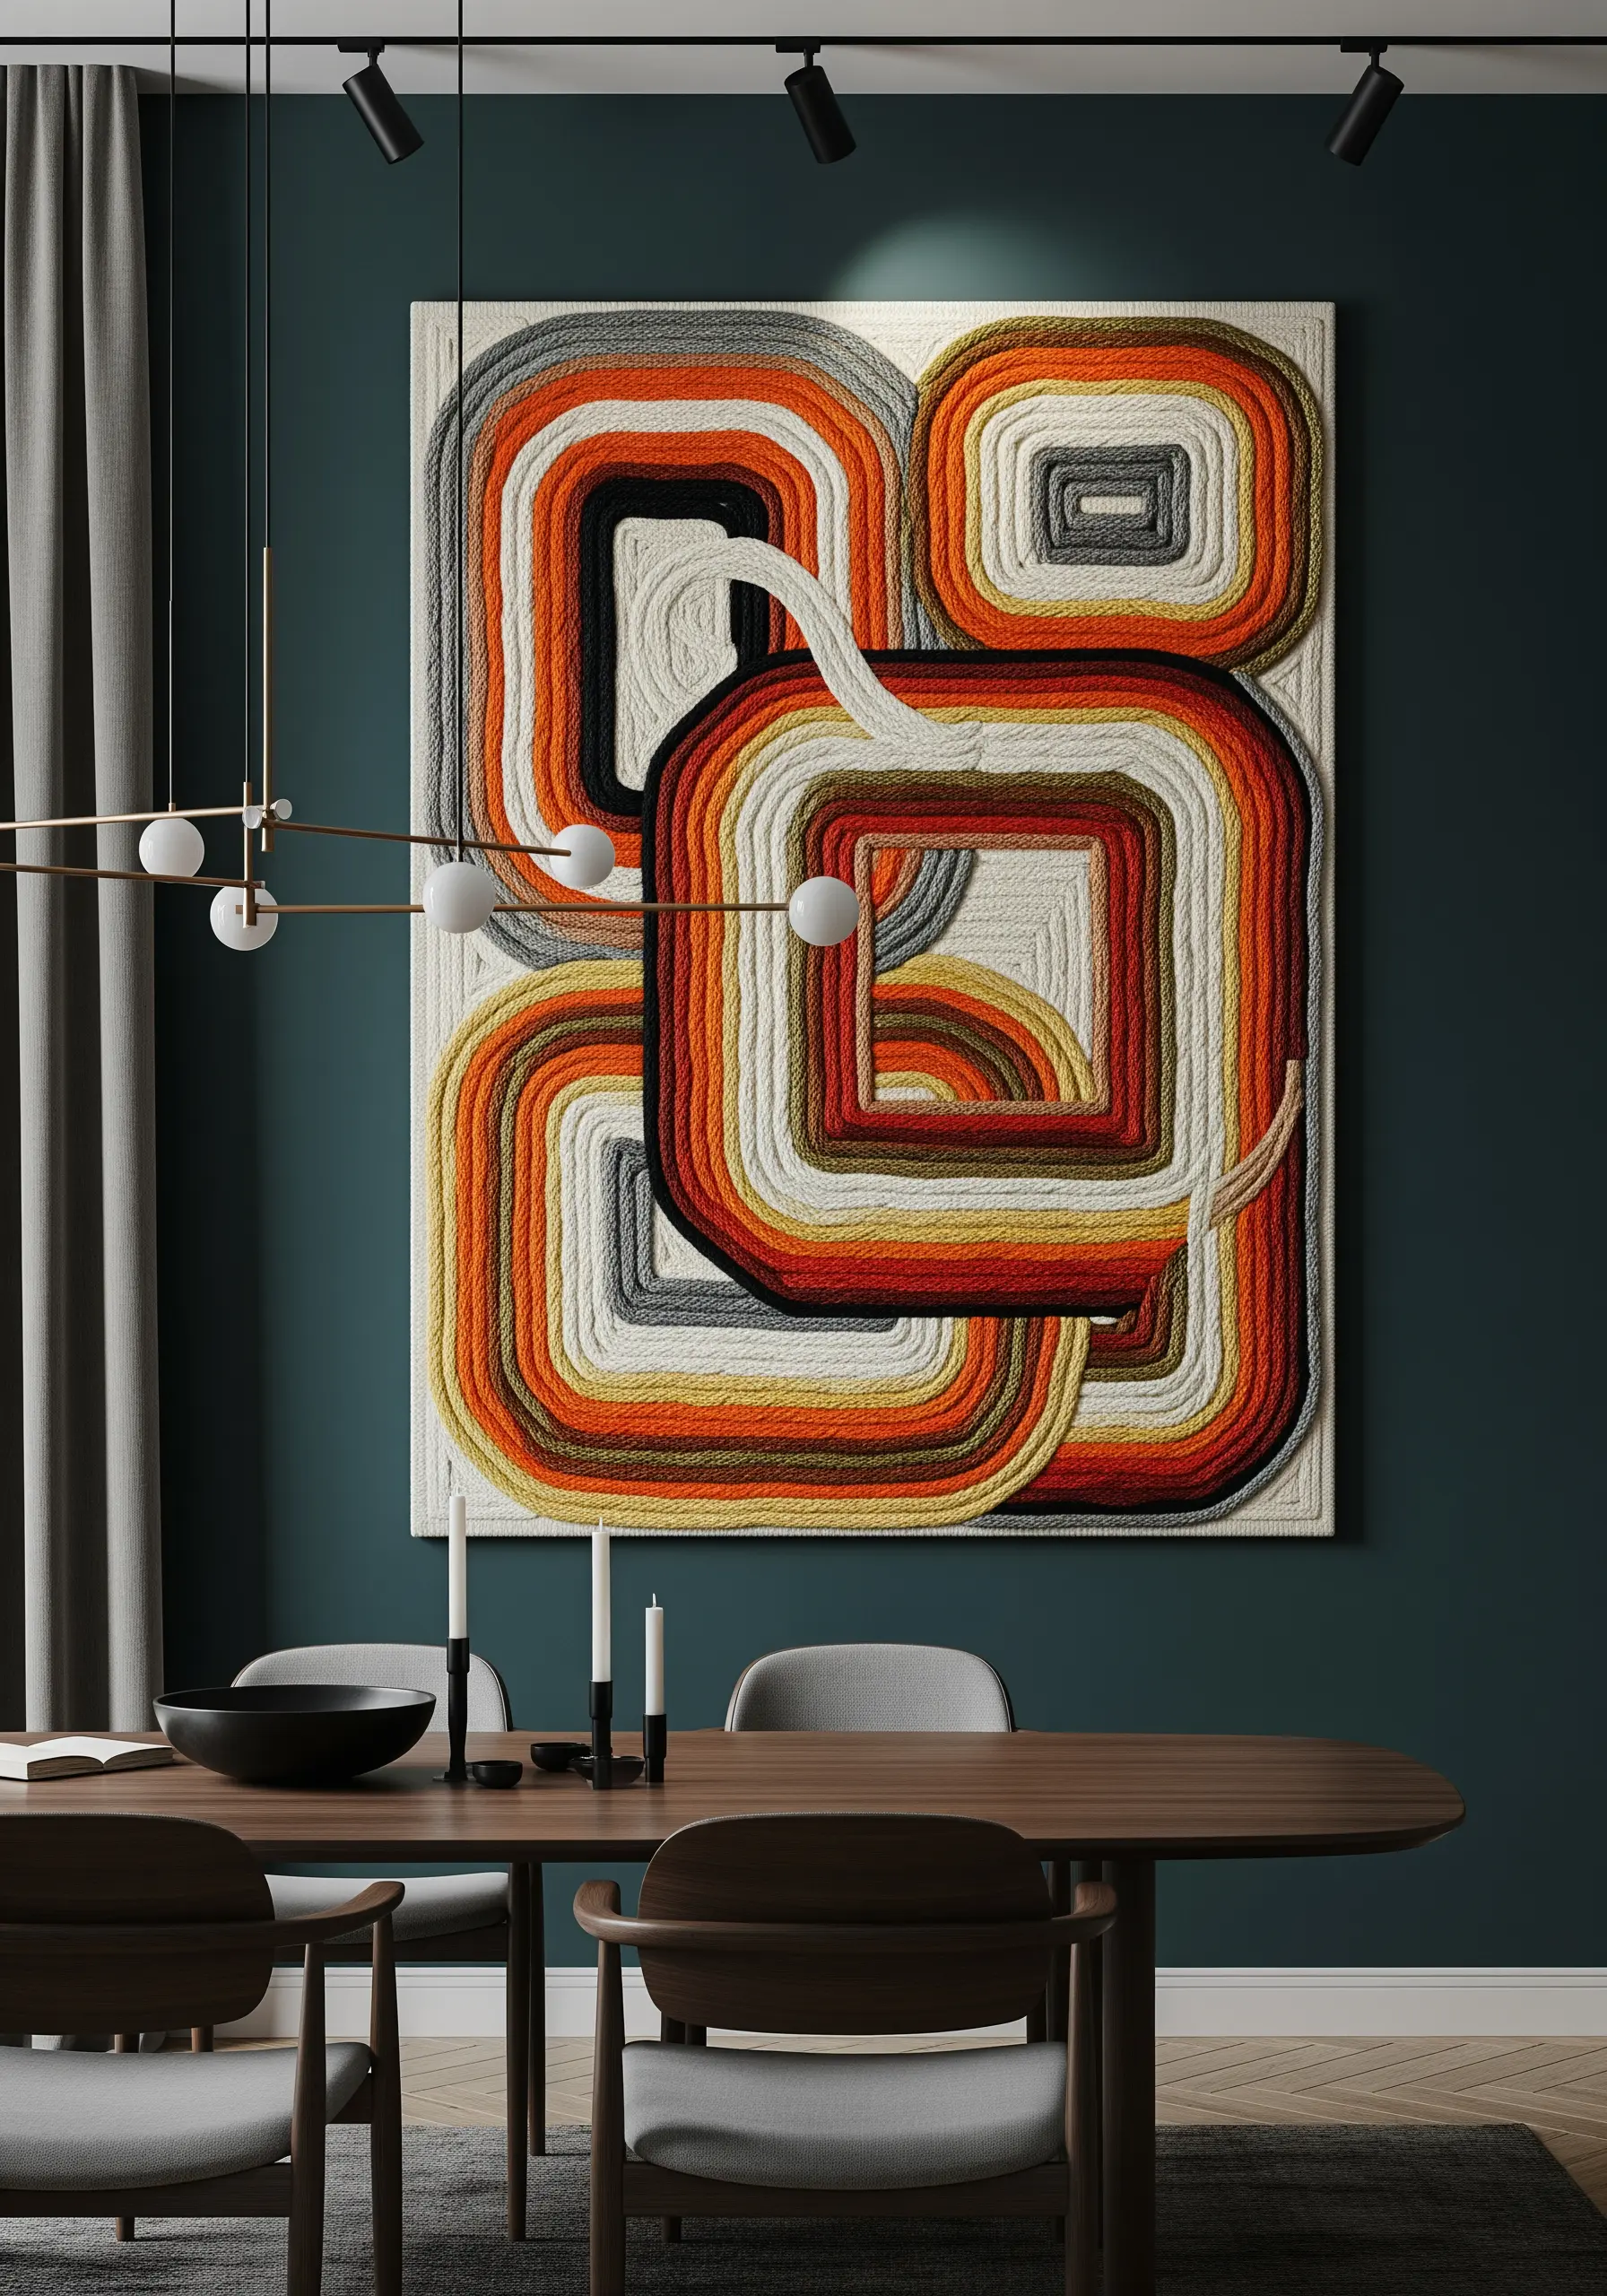
For dense, satisfying fields of color with a distinct retro vibe, turn to the punch needle technique.
Working from the back of the fabric, the punch needle creates tight, uniform loops on the front, similar to a rug’s pile.
This method is perfect for filling in large, graphic shapes with incredible speed and texture.
Use a heavy-duty fabric like monk’s cloth or linen and a bold, 70s-inspired color palette to create retro string art patterns that feel both nostalgic and modern.
4. Capture Water’s Flow with a Cascade of Thread
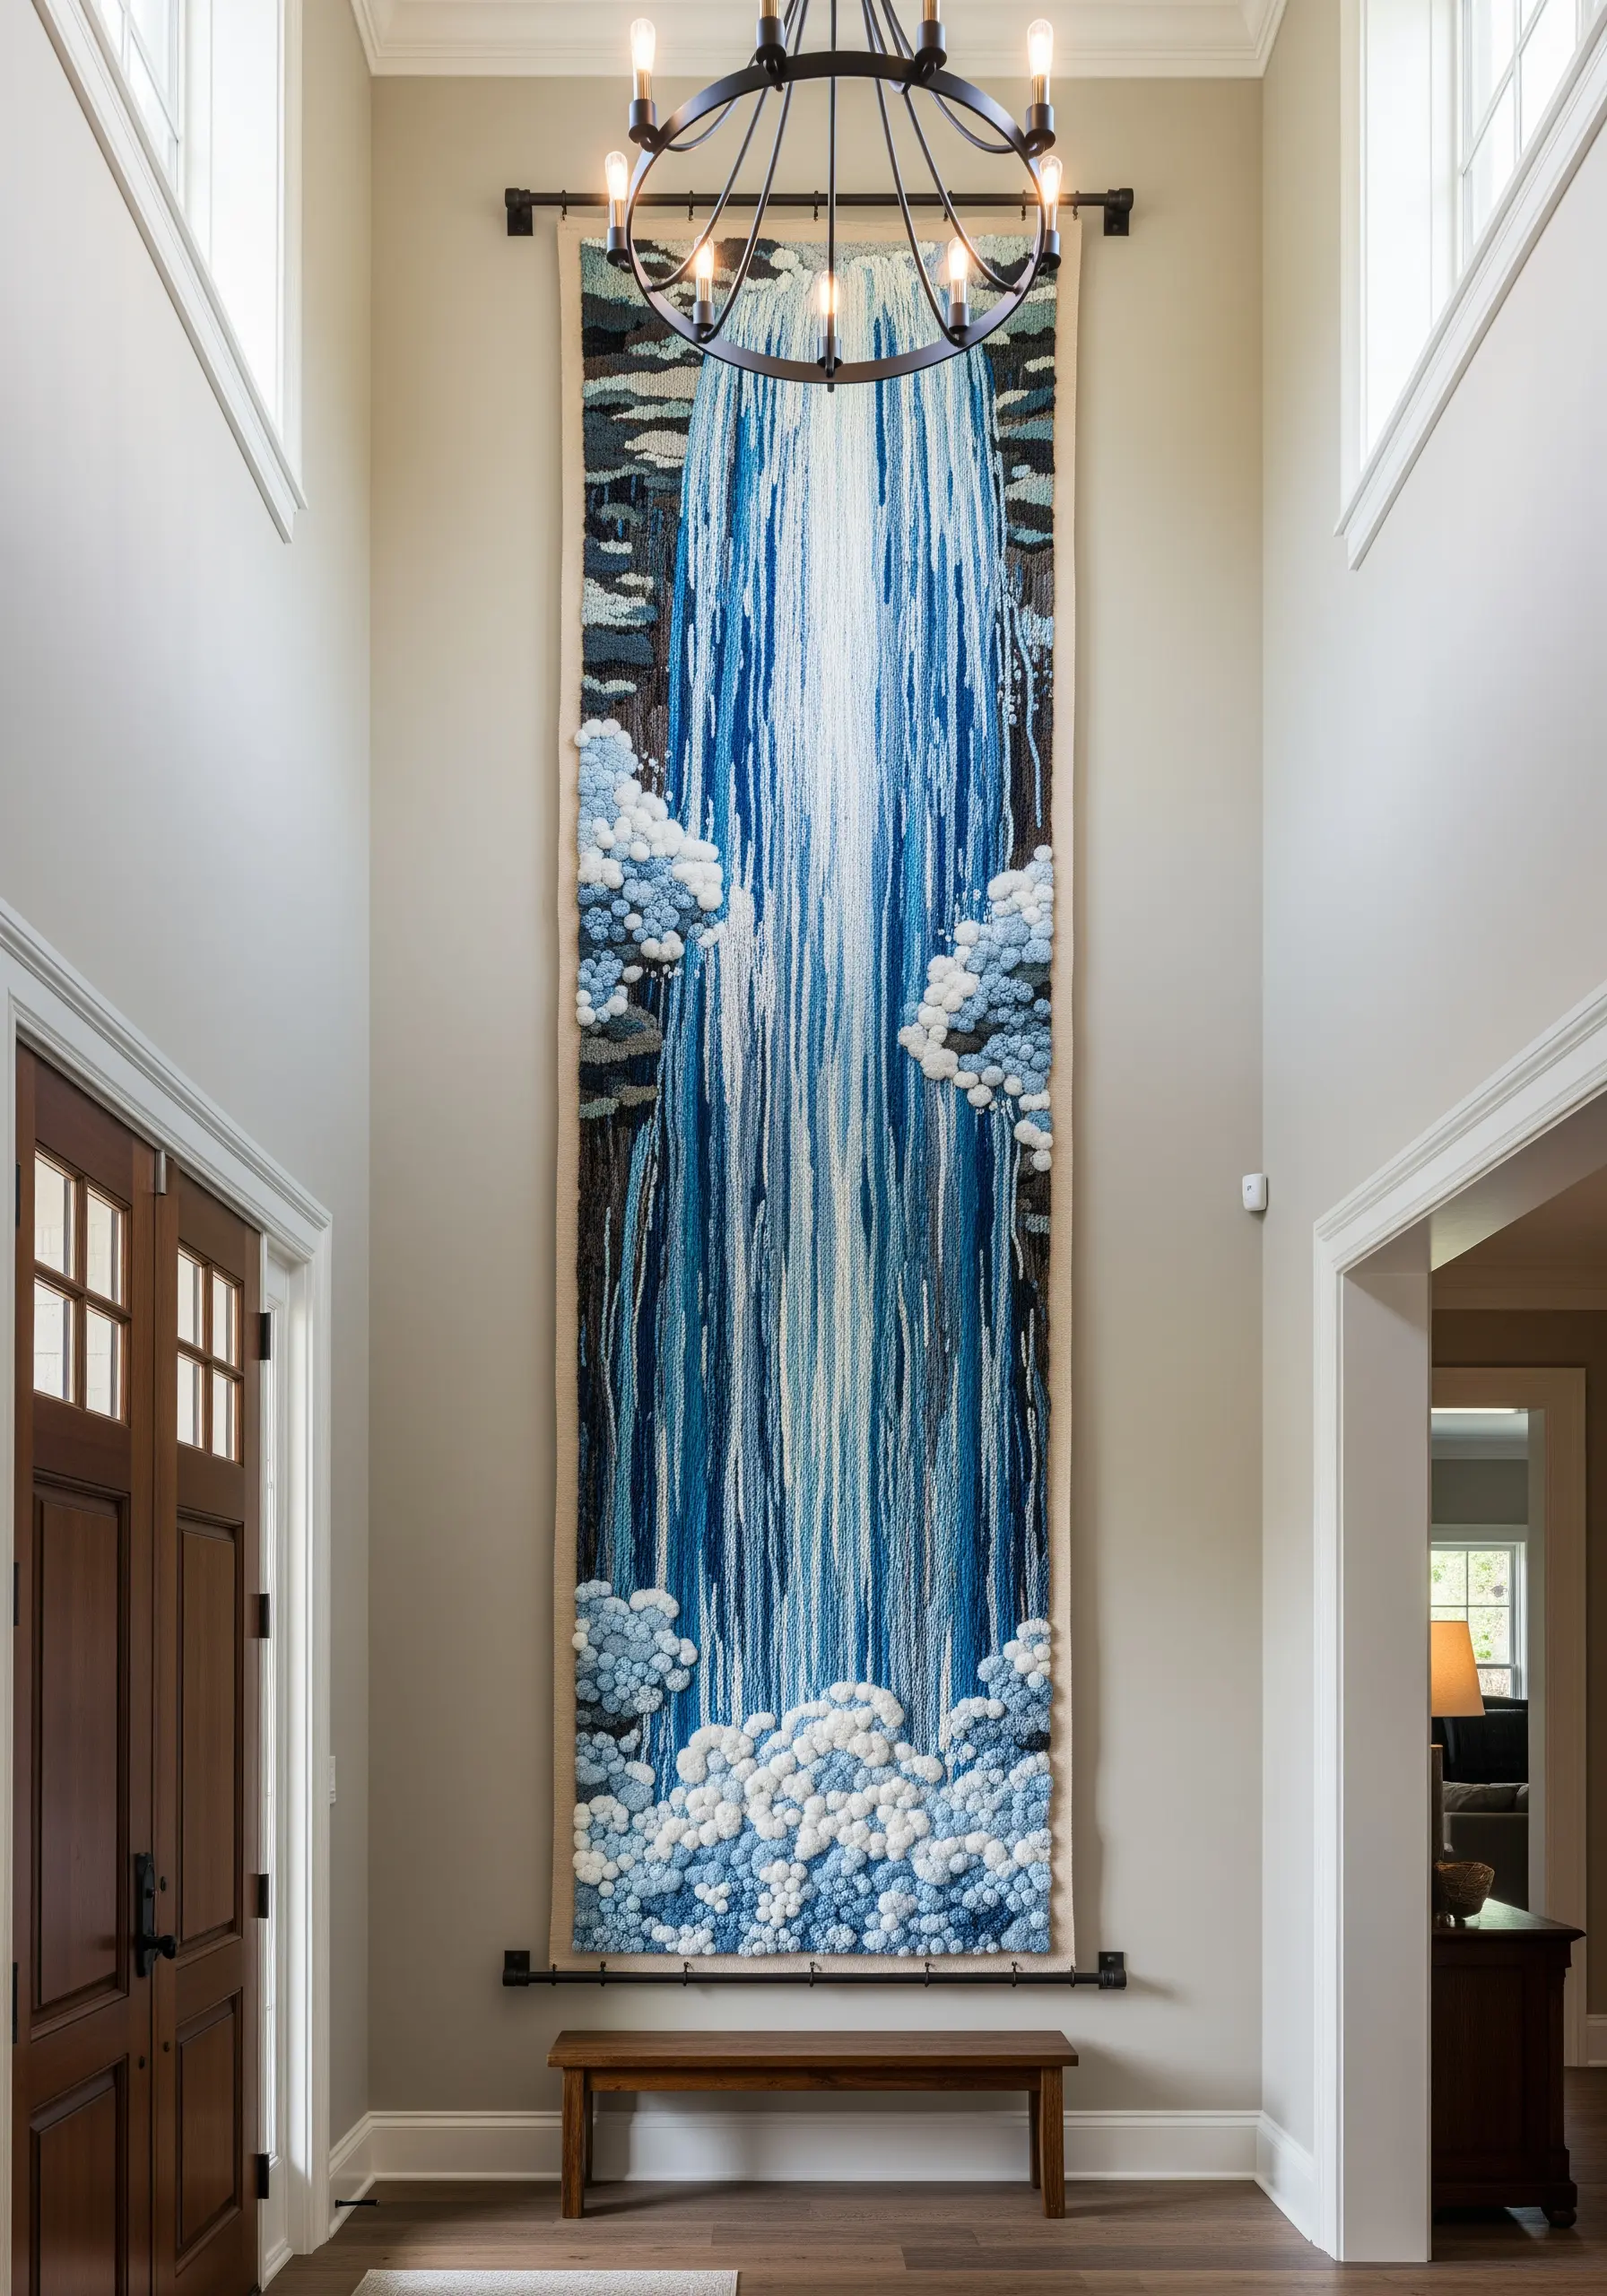
Evoke the dynamic movement of a waterfall by letting your threads hang loose and long.
Combine long straight stitches with sections of turkey work (Ghiordes knot), leaving the loops uncut to create dense, cloud-like textures at the base.
Use a mix of fiber types—silky rayon for sheen, matte cotton for depth, and variegated threads to mimic light hitting the water.
This approach transforms the tapestry into a tactile, sculptural piece where the material itself tells the story of motion.
5. Master the Large-Scale Satin Stitch
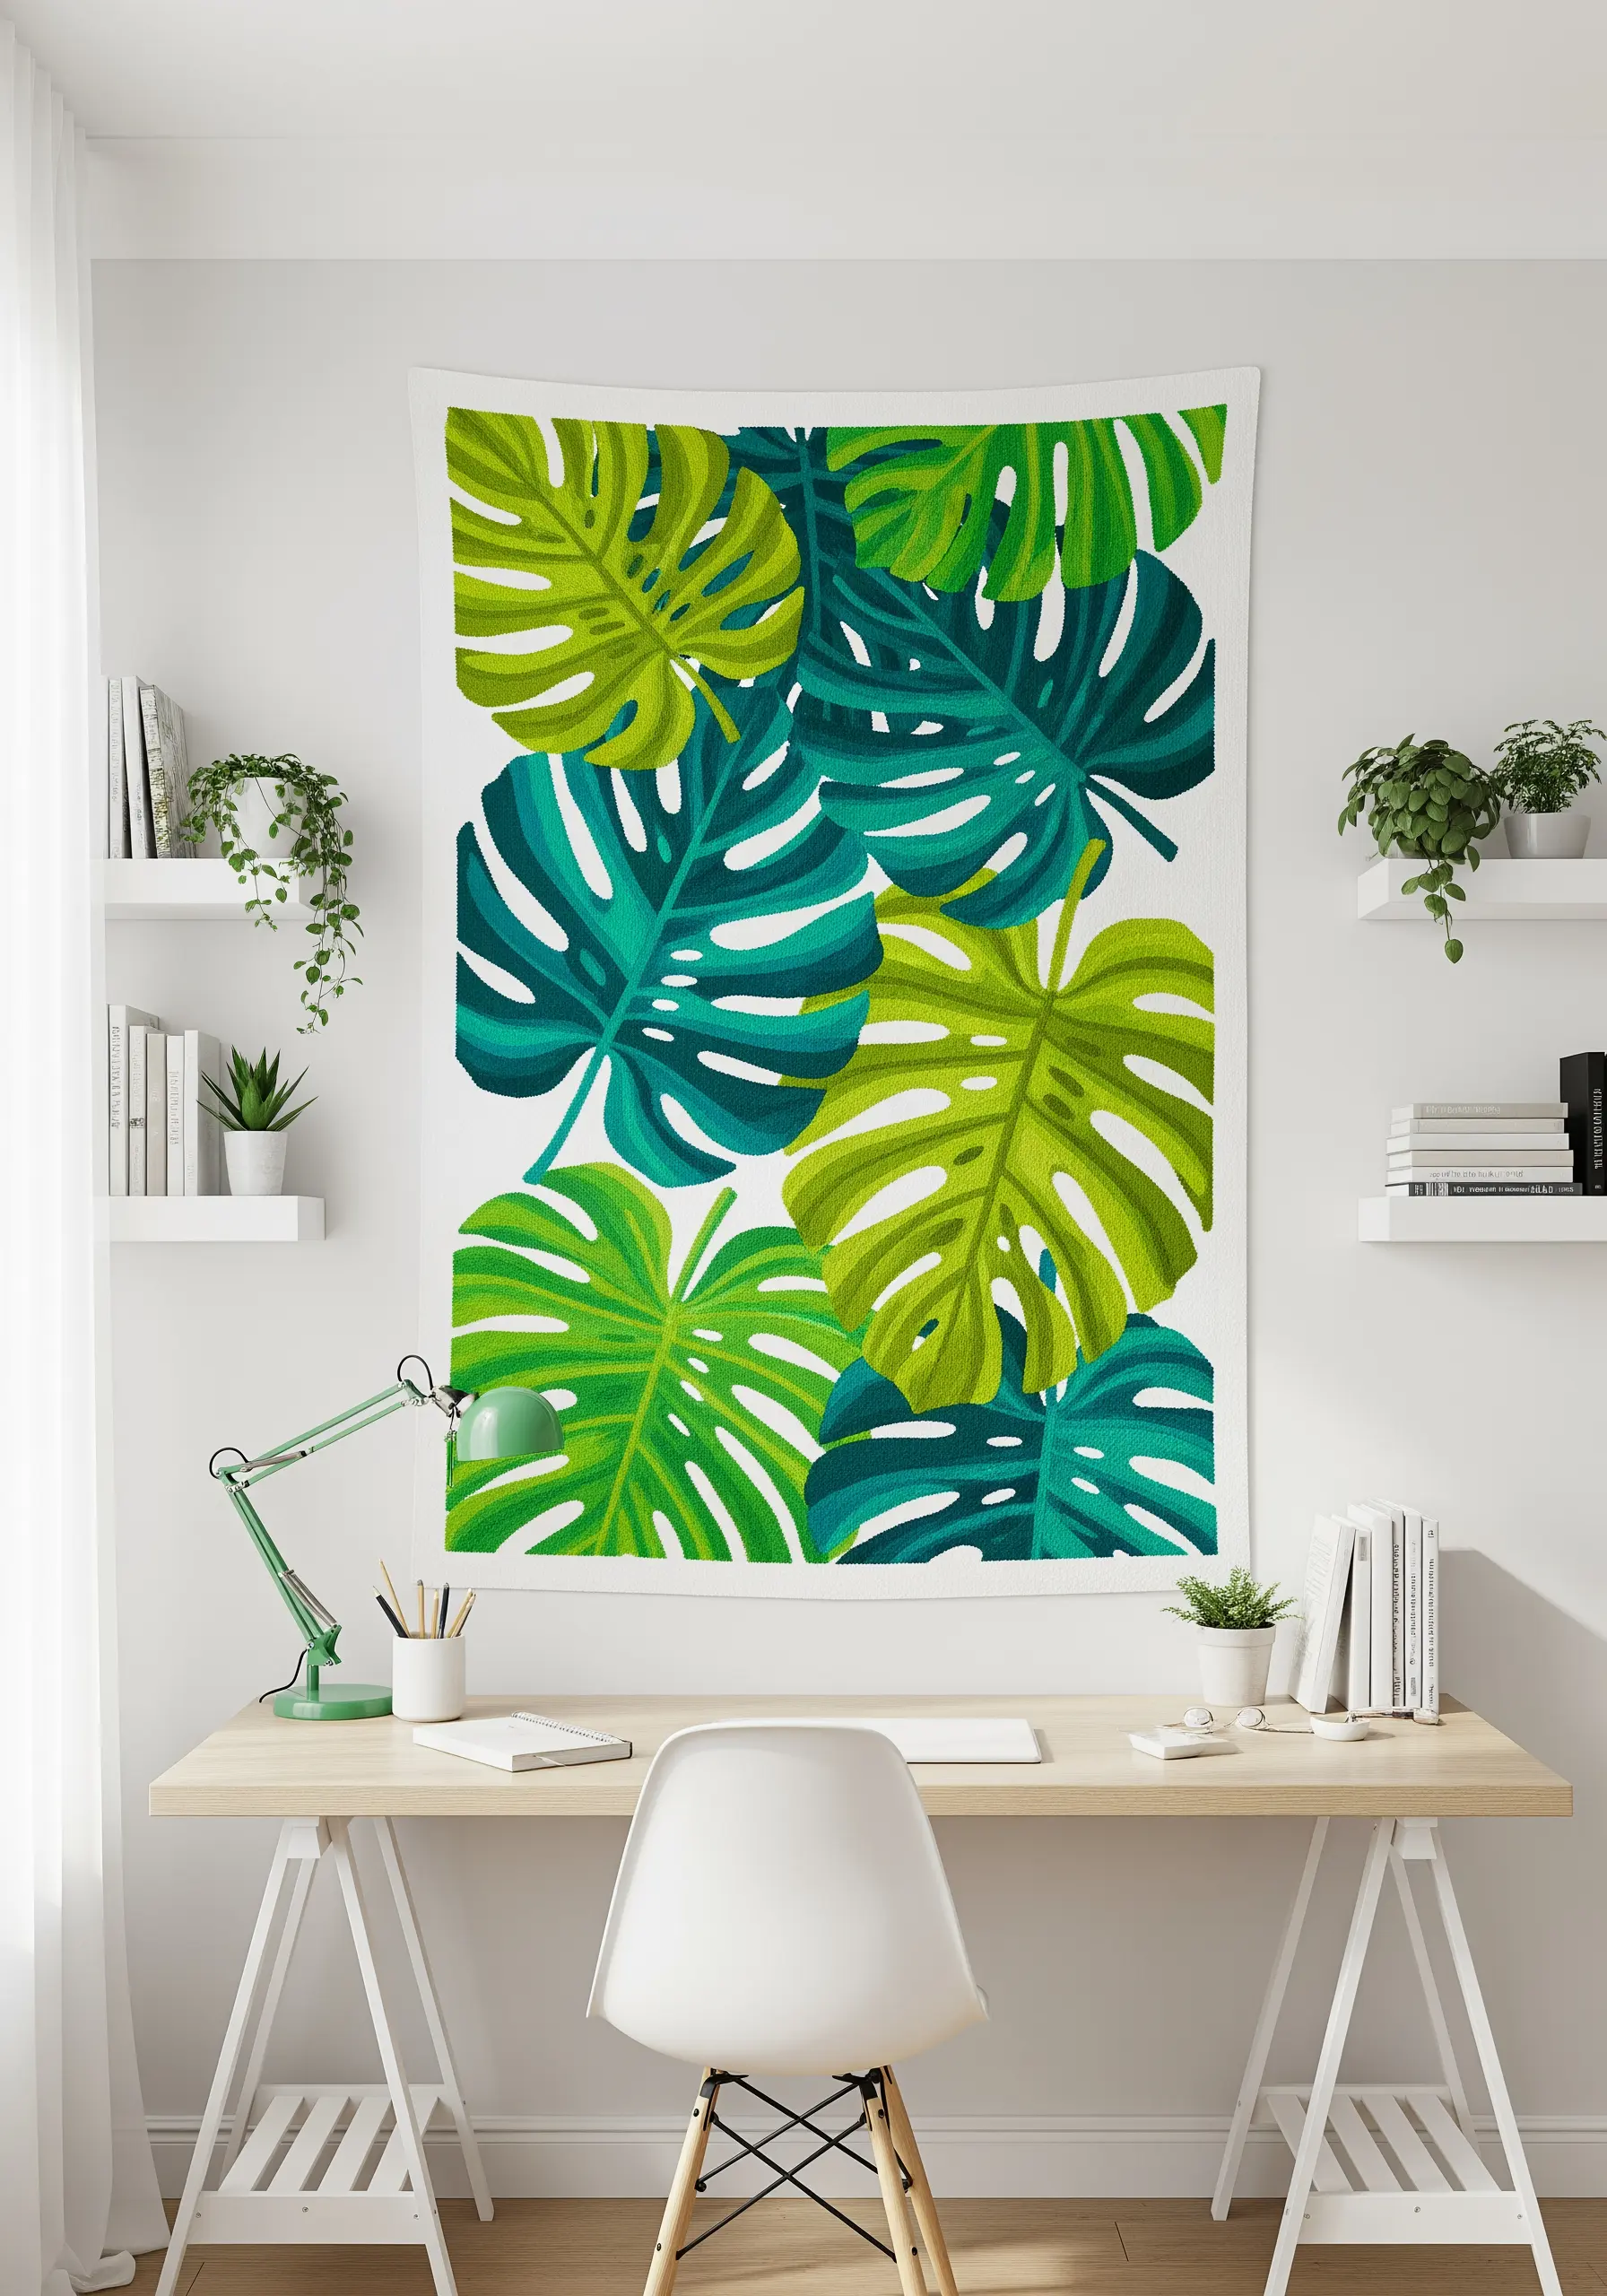
Filling large botanical shapes with a smooth satin stitch can be challenging, as long stitches tend to snag or loosen.
The solution is to break up the area with subtle outlines or use a couching stitch—a tiny, perpendicular stitch—to tack down the long threads at their midpoint.
This preserves the sleek, uniform finish of the satin stitch while adding durability and stability to your tapestry.
For vibrant tropical designs, use a high-sheen cotton floss to make the colors pop against a plain white background, turning rare leaf patterns into a graphic statement.
6. Create Atmospheric Depth with French Knots
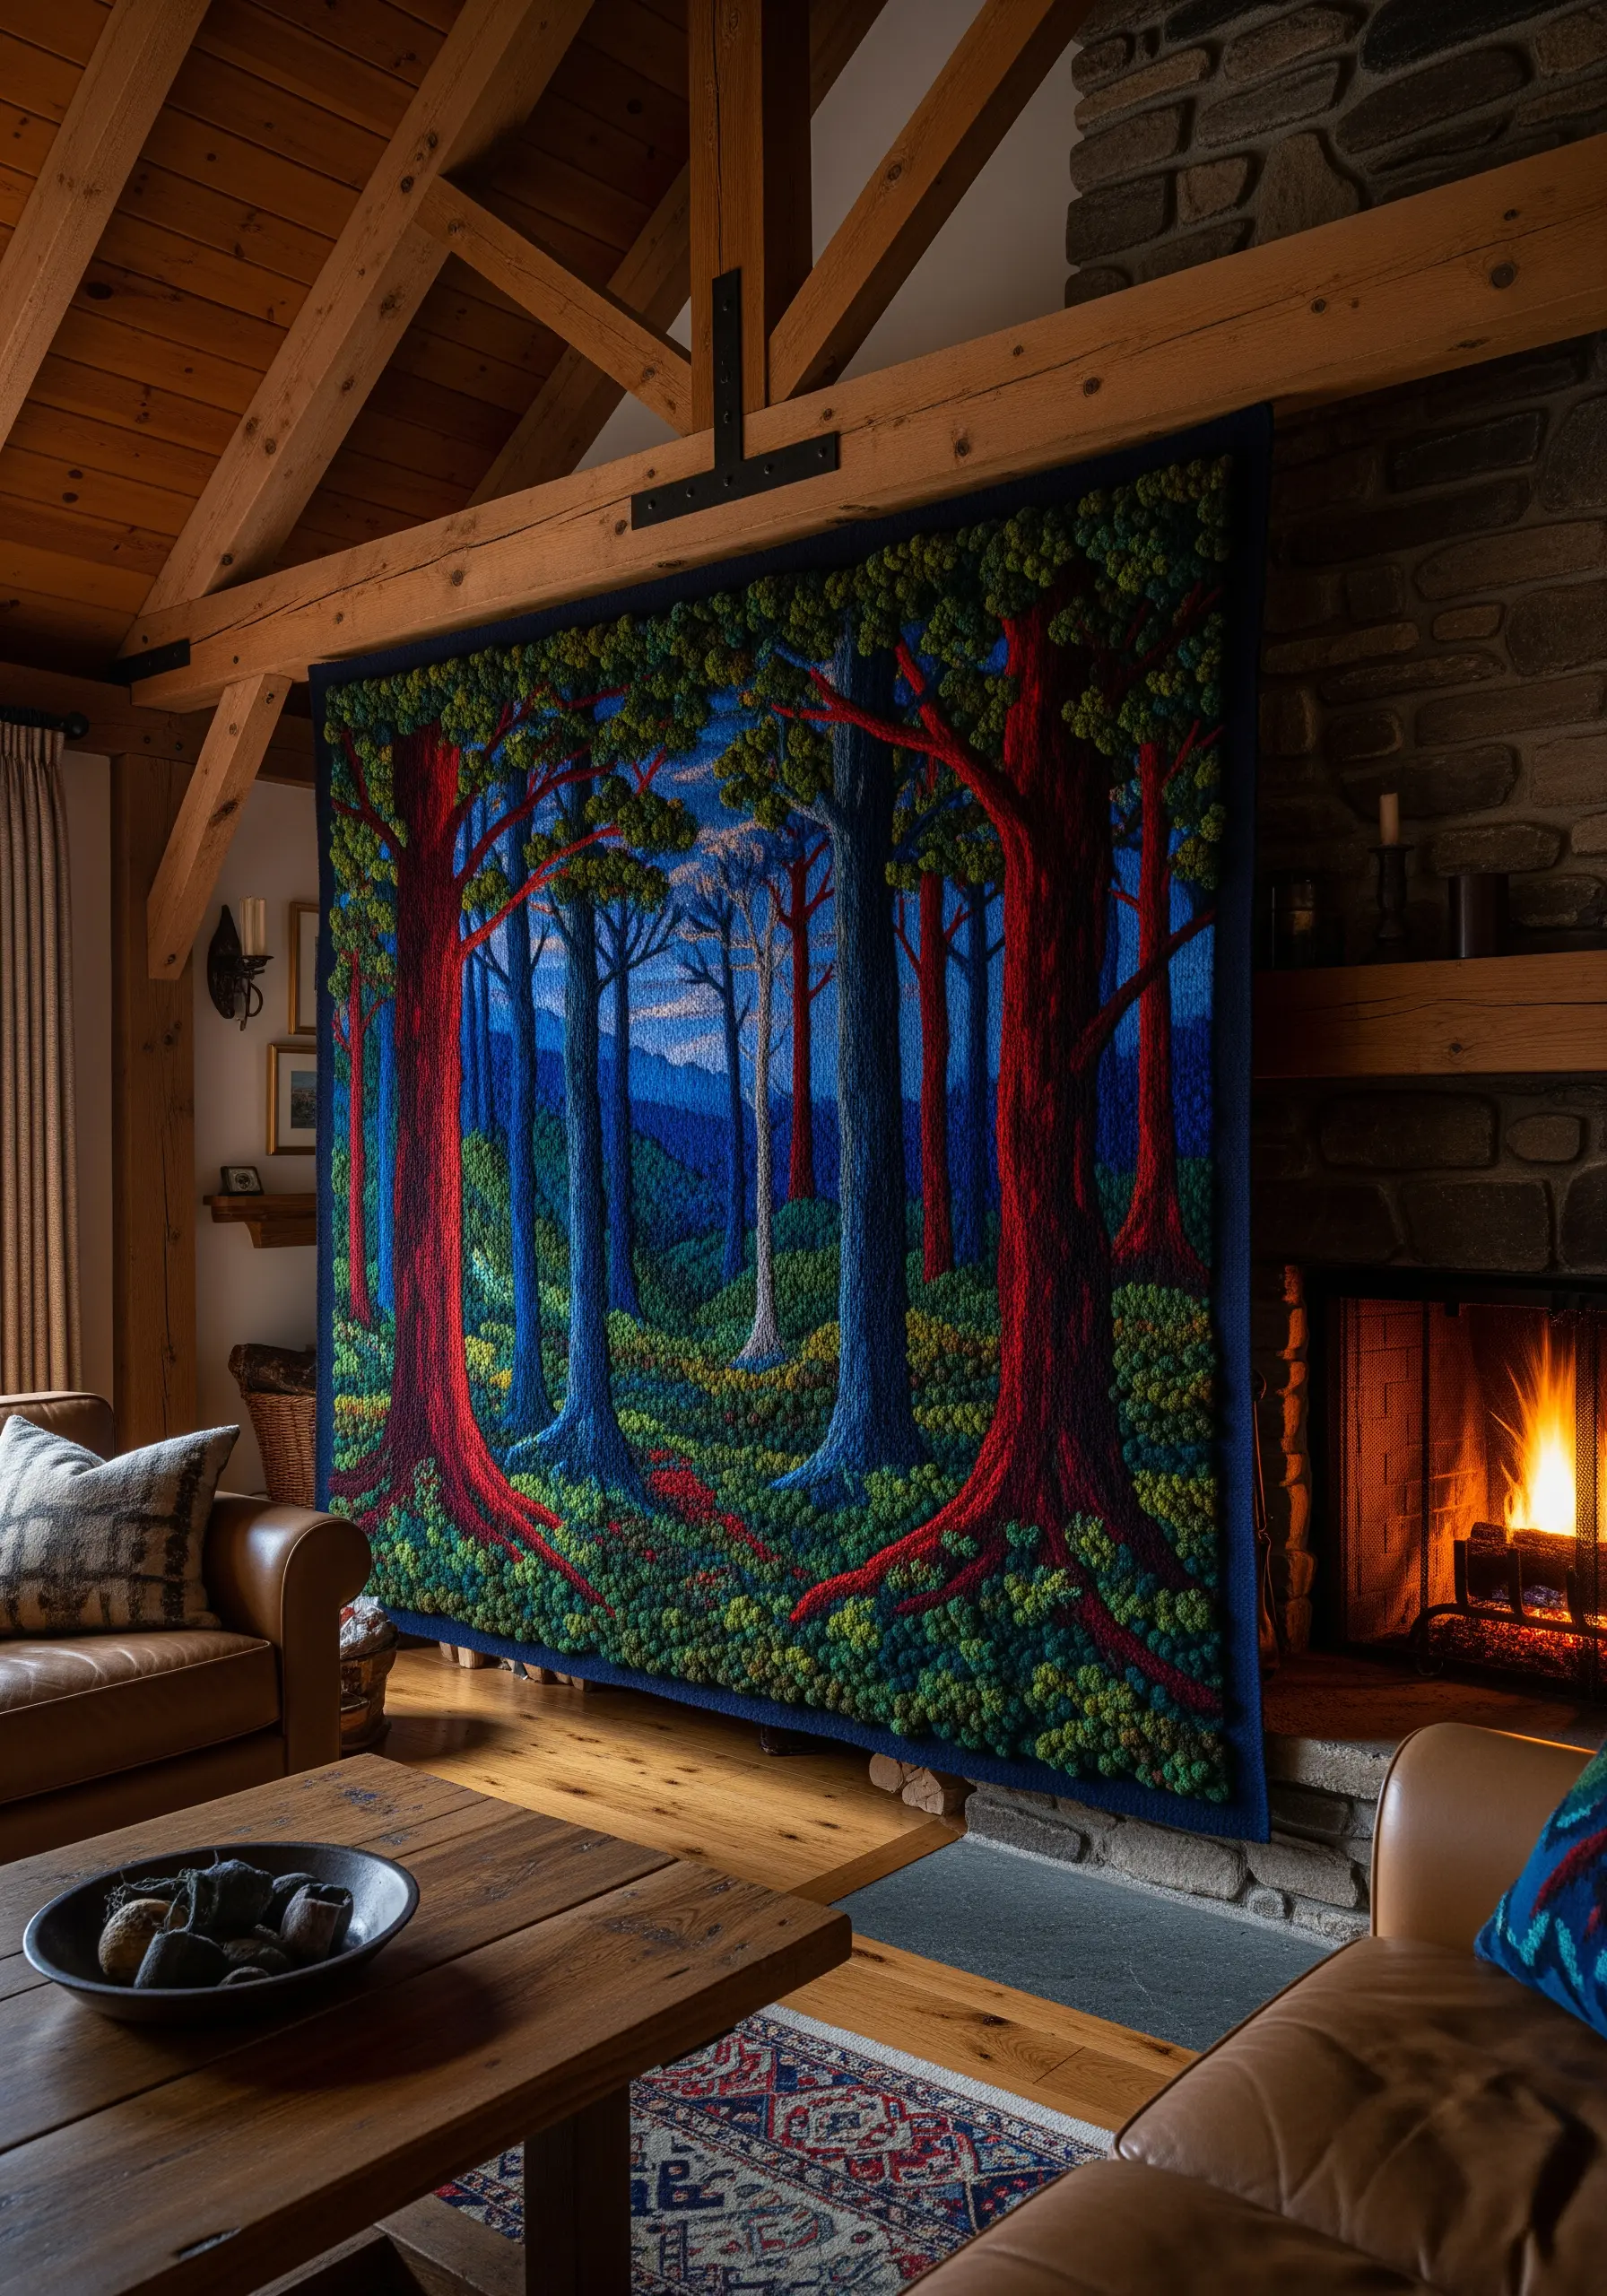
Build a rich, pointillist landscape by using French knots as your primary fill stitch.
Create a sense of depth by varying the color and density of your knots—use darker, more tightly packed knots for the foreground and lighter, sparser knots for the background.
This technique is particularly effective for rendering forest floors, mossy textures, and foliage.
The thousands of tiny knots blend together from a distance to create a painterly effect, adding a deep, tangible texture to your artwork.
7. Define Shapes with Quilted Contours
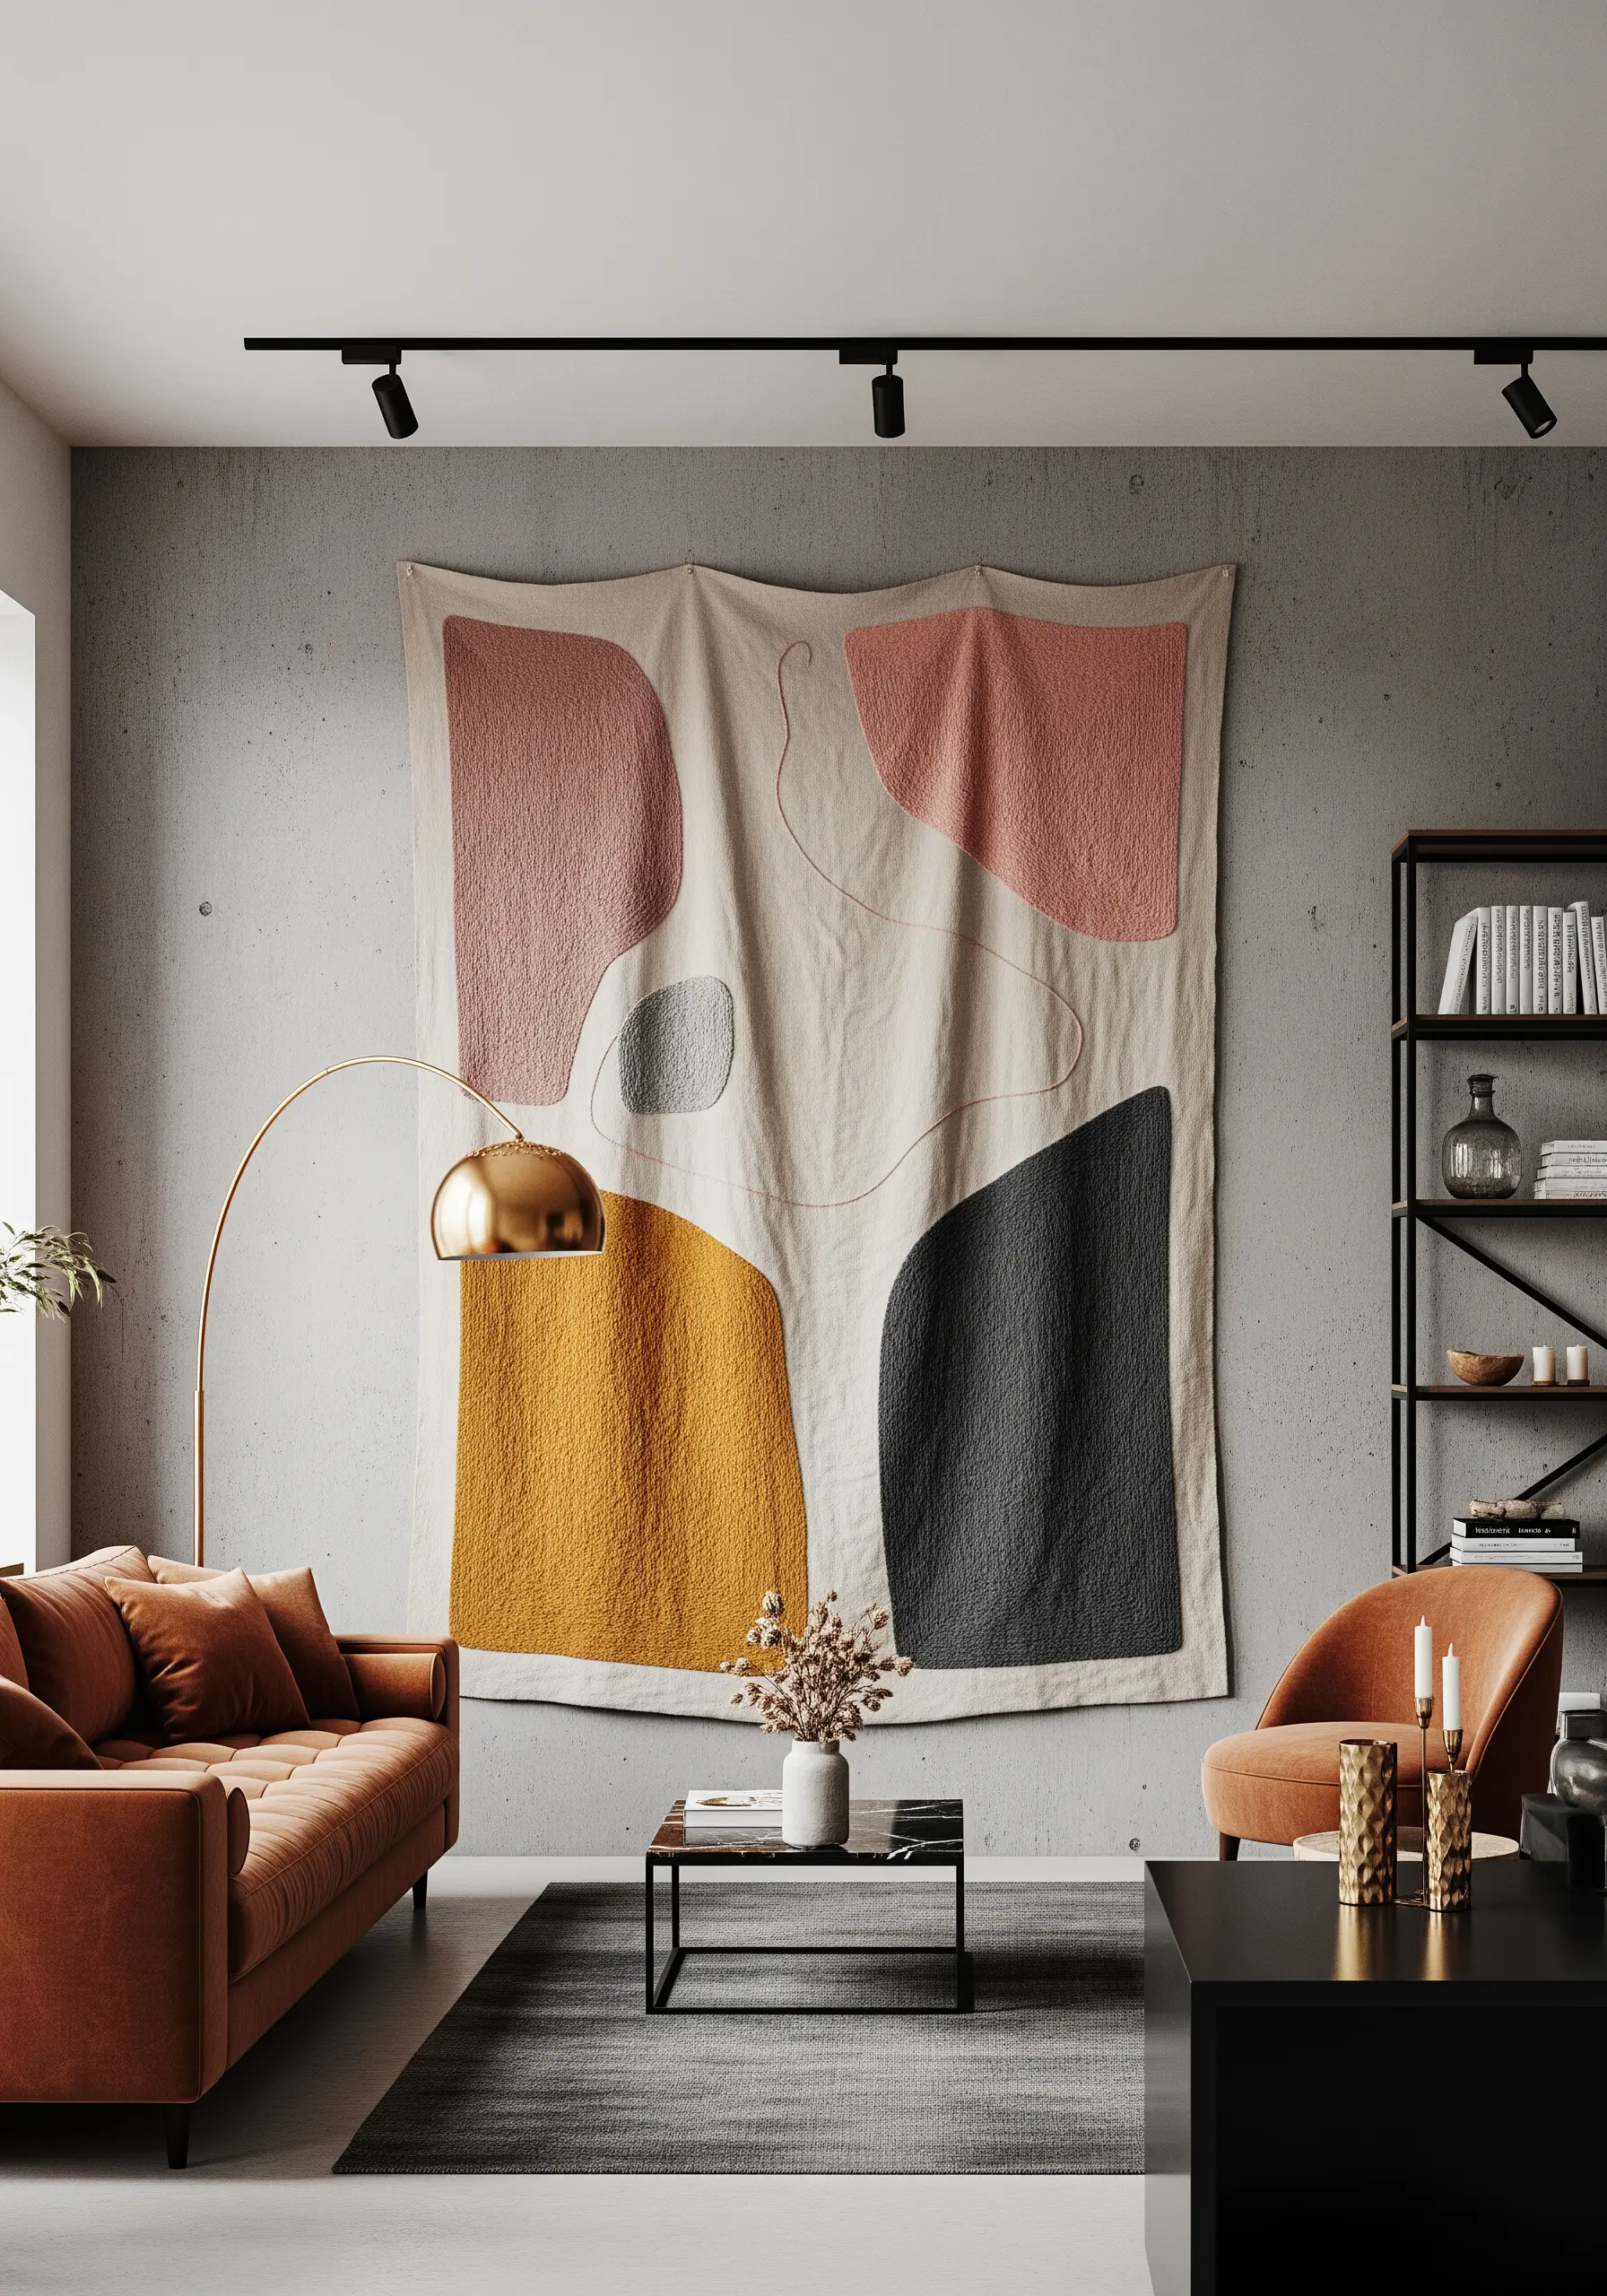
Add subtle texture and a modern, graphic quality to your tapestry with large-scale quilting.
Instead of filling shapes with dense embroidery, stitch them onto a backing fabric with a layer of batting in between.
Then, use a simple running stitch to outline the shapes and fill them with a grid or echo-quilting pattern.
This technique, known as sashiko in a different context, creates soft, pillowy dimension in your organic shape embroidery patterns, making the negative space just as important as the stitched areas.
8. Sculpt Seafoam with 3D Stitches and Beads
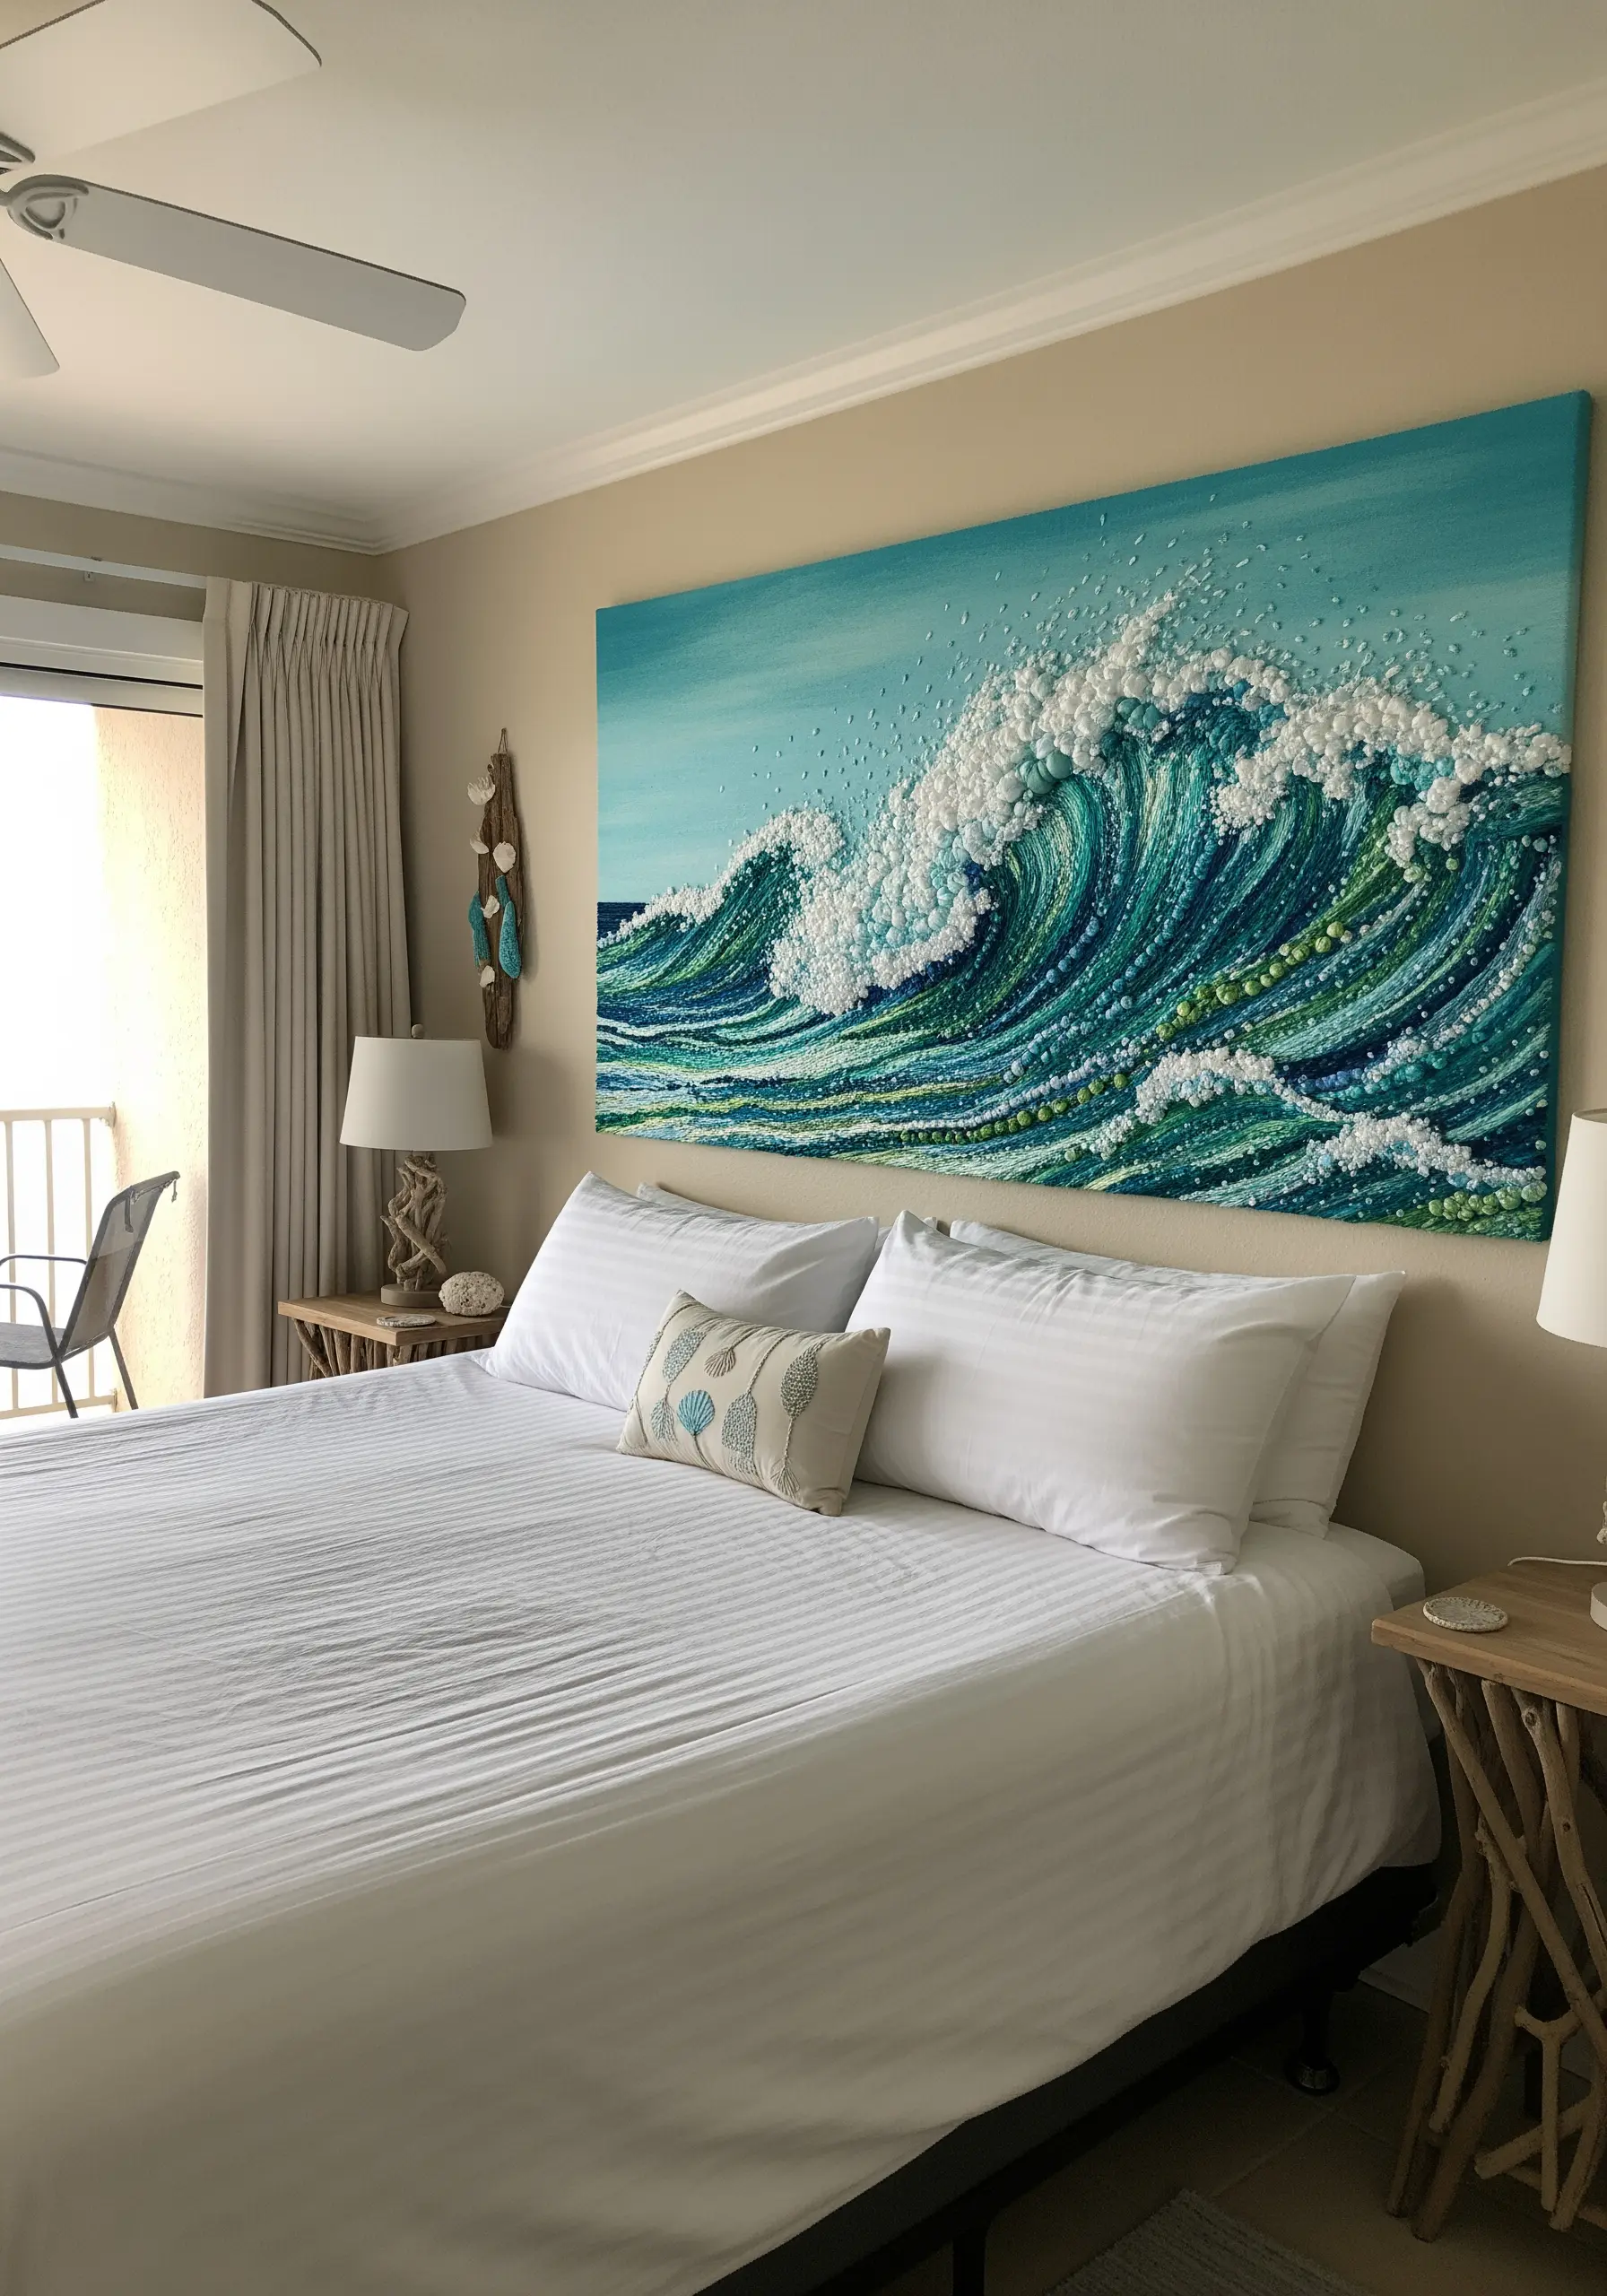
Capture the effervescent texture of a crashing wave by moving beyond flat stitches into three-dimensional embellishment.
Use a dense cluster of French knots, bullion knots, and colonial knots in shades of white and pale blue to mimic seafoam.
Incorporate translucent and pearlescent beads to catch the light and add a wet, glistening effect.
By layering these high-texture elements over a base of smoother long-and-short stitches, you create a dynamic composition that feels both realistic and expressive.
9. Achieve Opulence with Metallics on Velvet

For a truly luxurious tapestry, combine the light-catching quality of metallic thread with the deep, light-absorbing pile of velvet.
Because metallic threads can be brittle, use a couching technique to lay them on the surface rather than pulling them through the dense fabric repeatedly.
This method not only protects the thread but also allows you to create perfectly smooth, shimmering lines.
The contrast between the matte velvet and the gleaming metallic accents creates a piece of art that feels historic and regal.
10. Make a Statement with High-Contrast Fiber
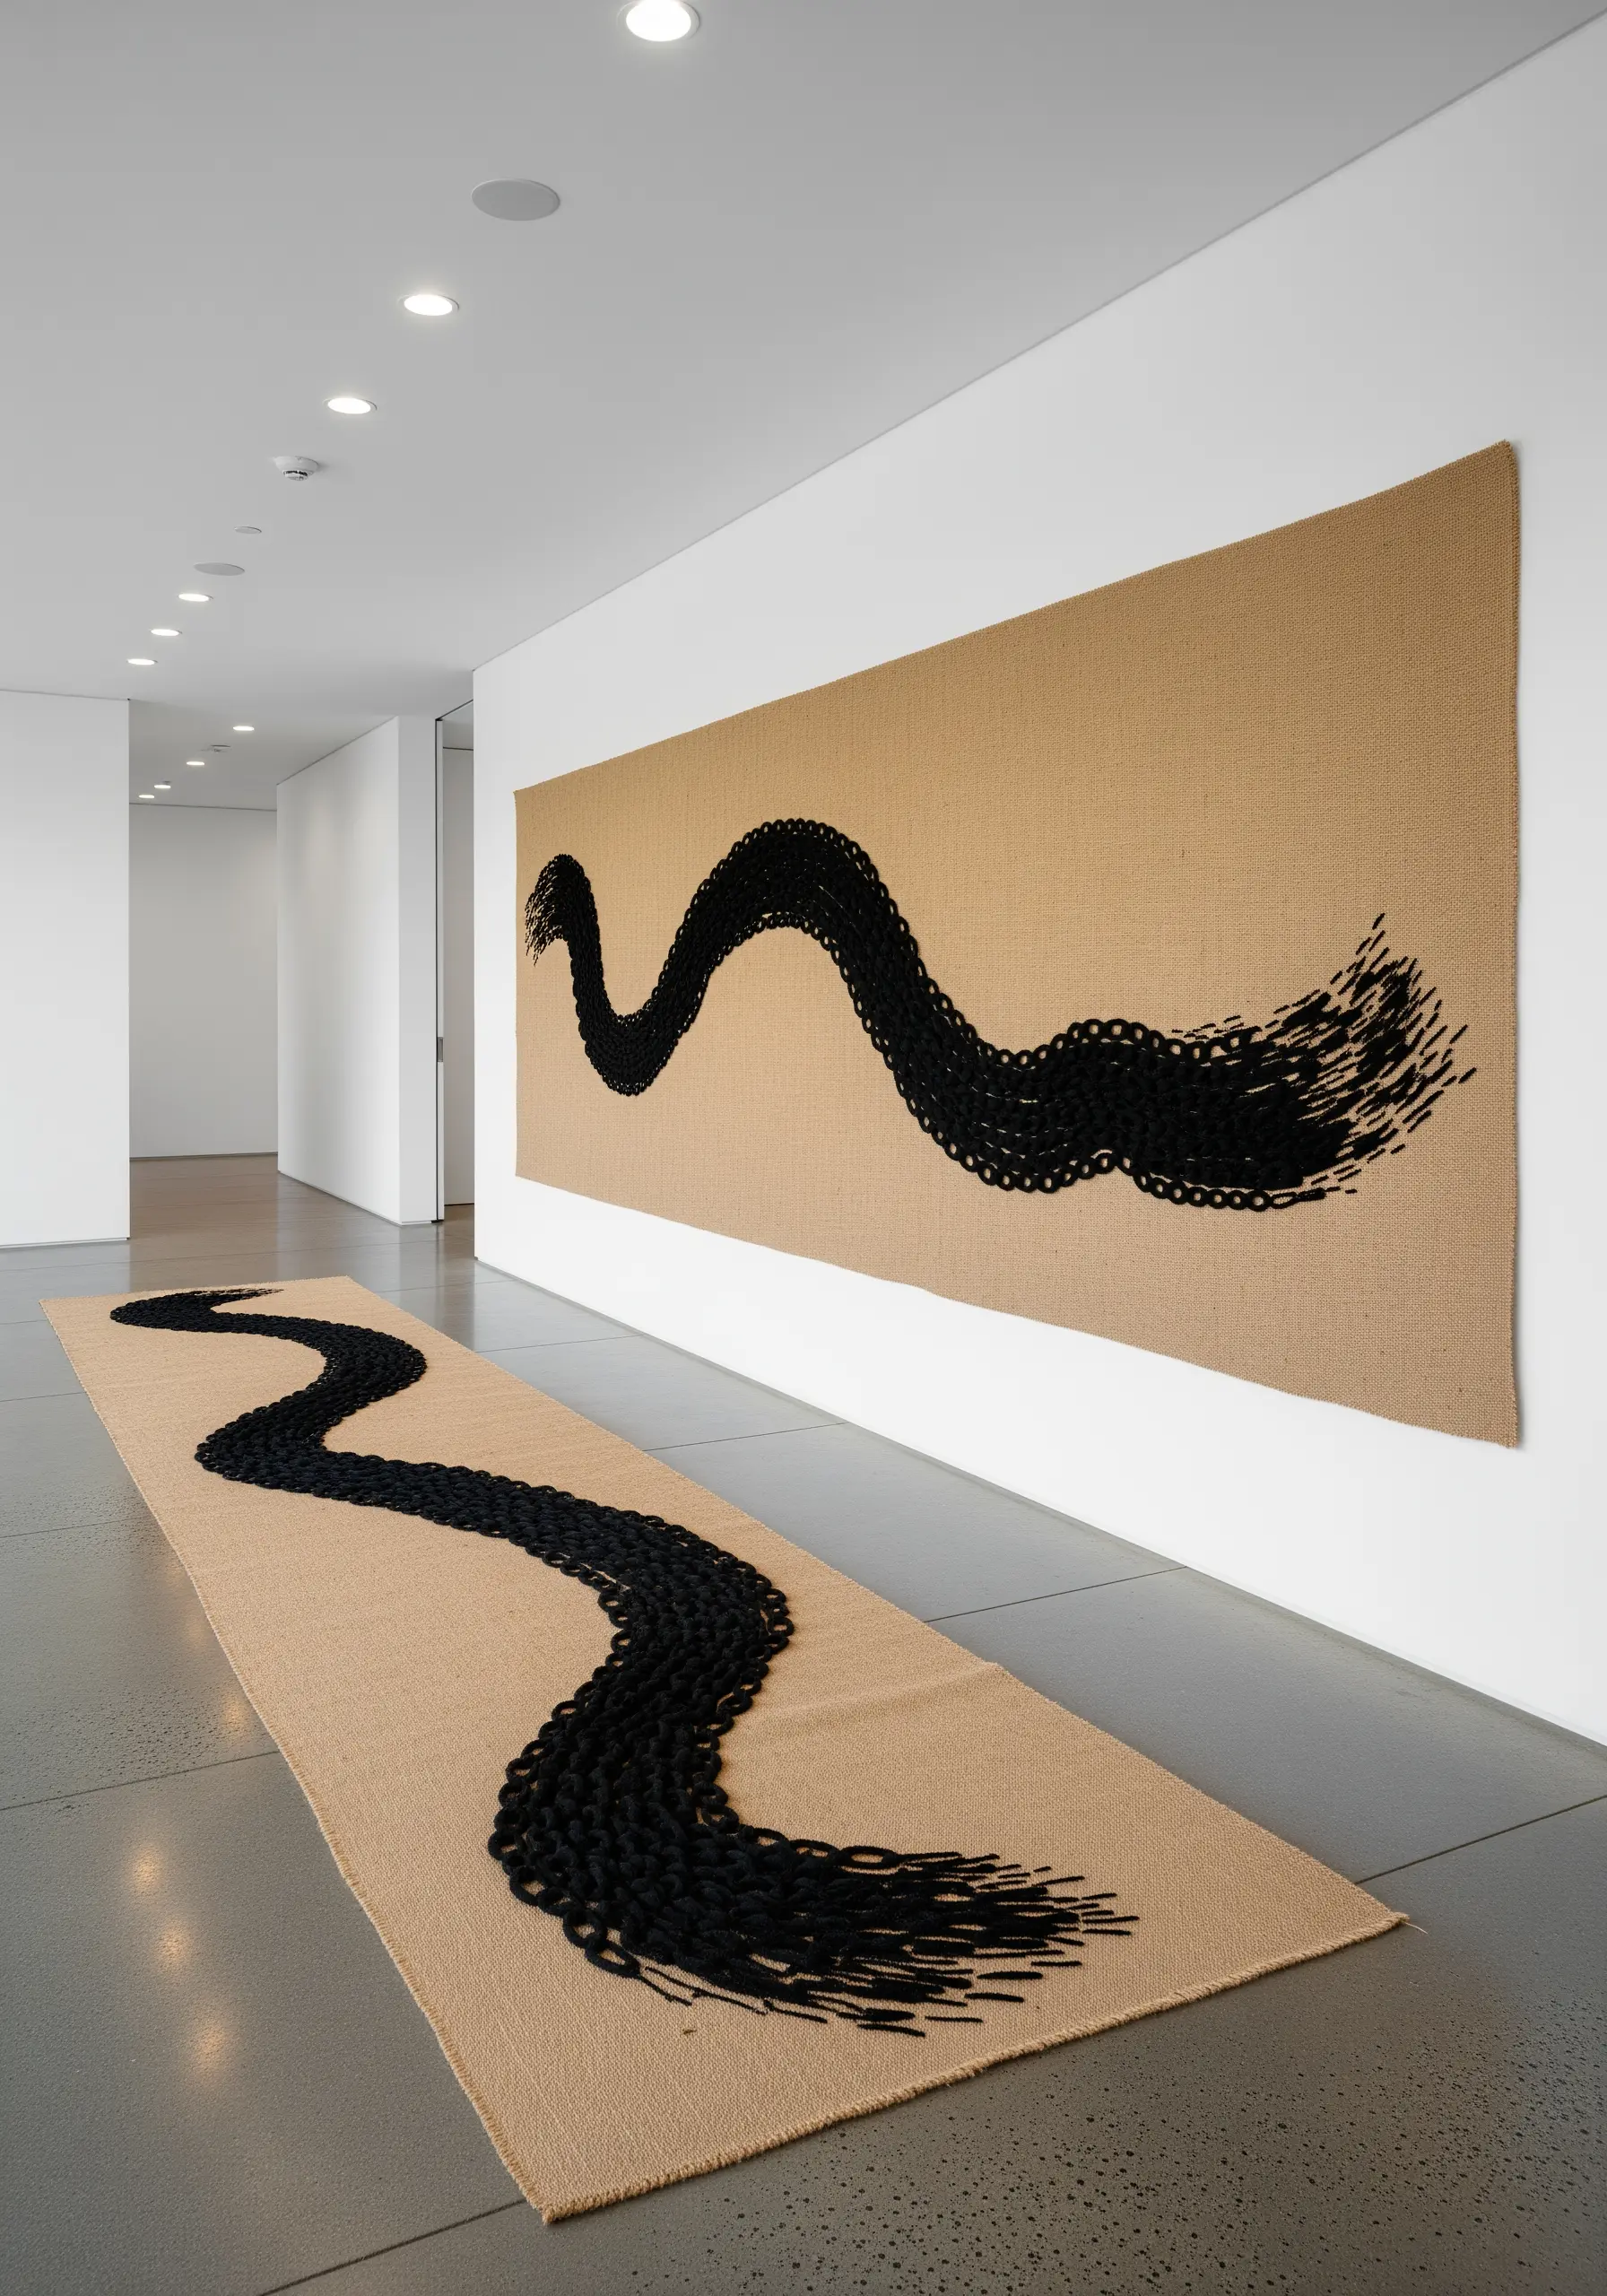
You don’t need complex colors or stitches to create a powerful focal point; sometimes, a single, bold gesture is enough.
Work with unconventional, thick materials like braided cotton rope or chunky felted wool, tacking it down onto a raw, neutral base like burlap or jute.
The stark contrast in color and texture creates an immediate graphic impact.
This approach emphasizes form and line, turning a simple swirl into a piece of contemporary stunning mixed-fiber projects that commands attention.
11. Curate a Cohesive Embroidered Gallery Wall
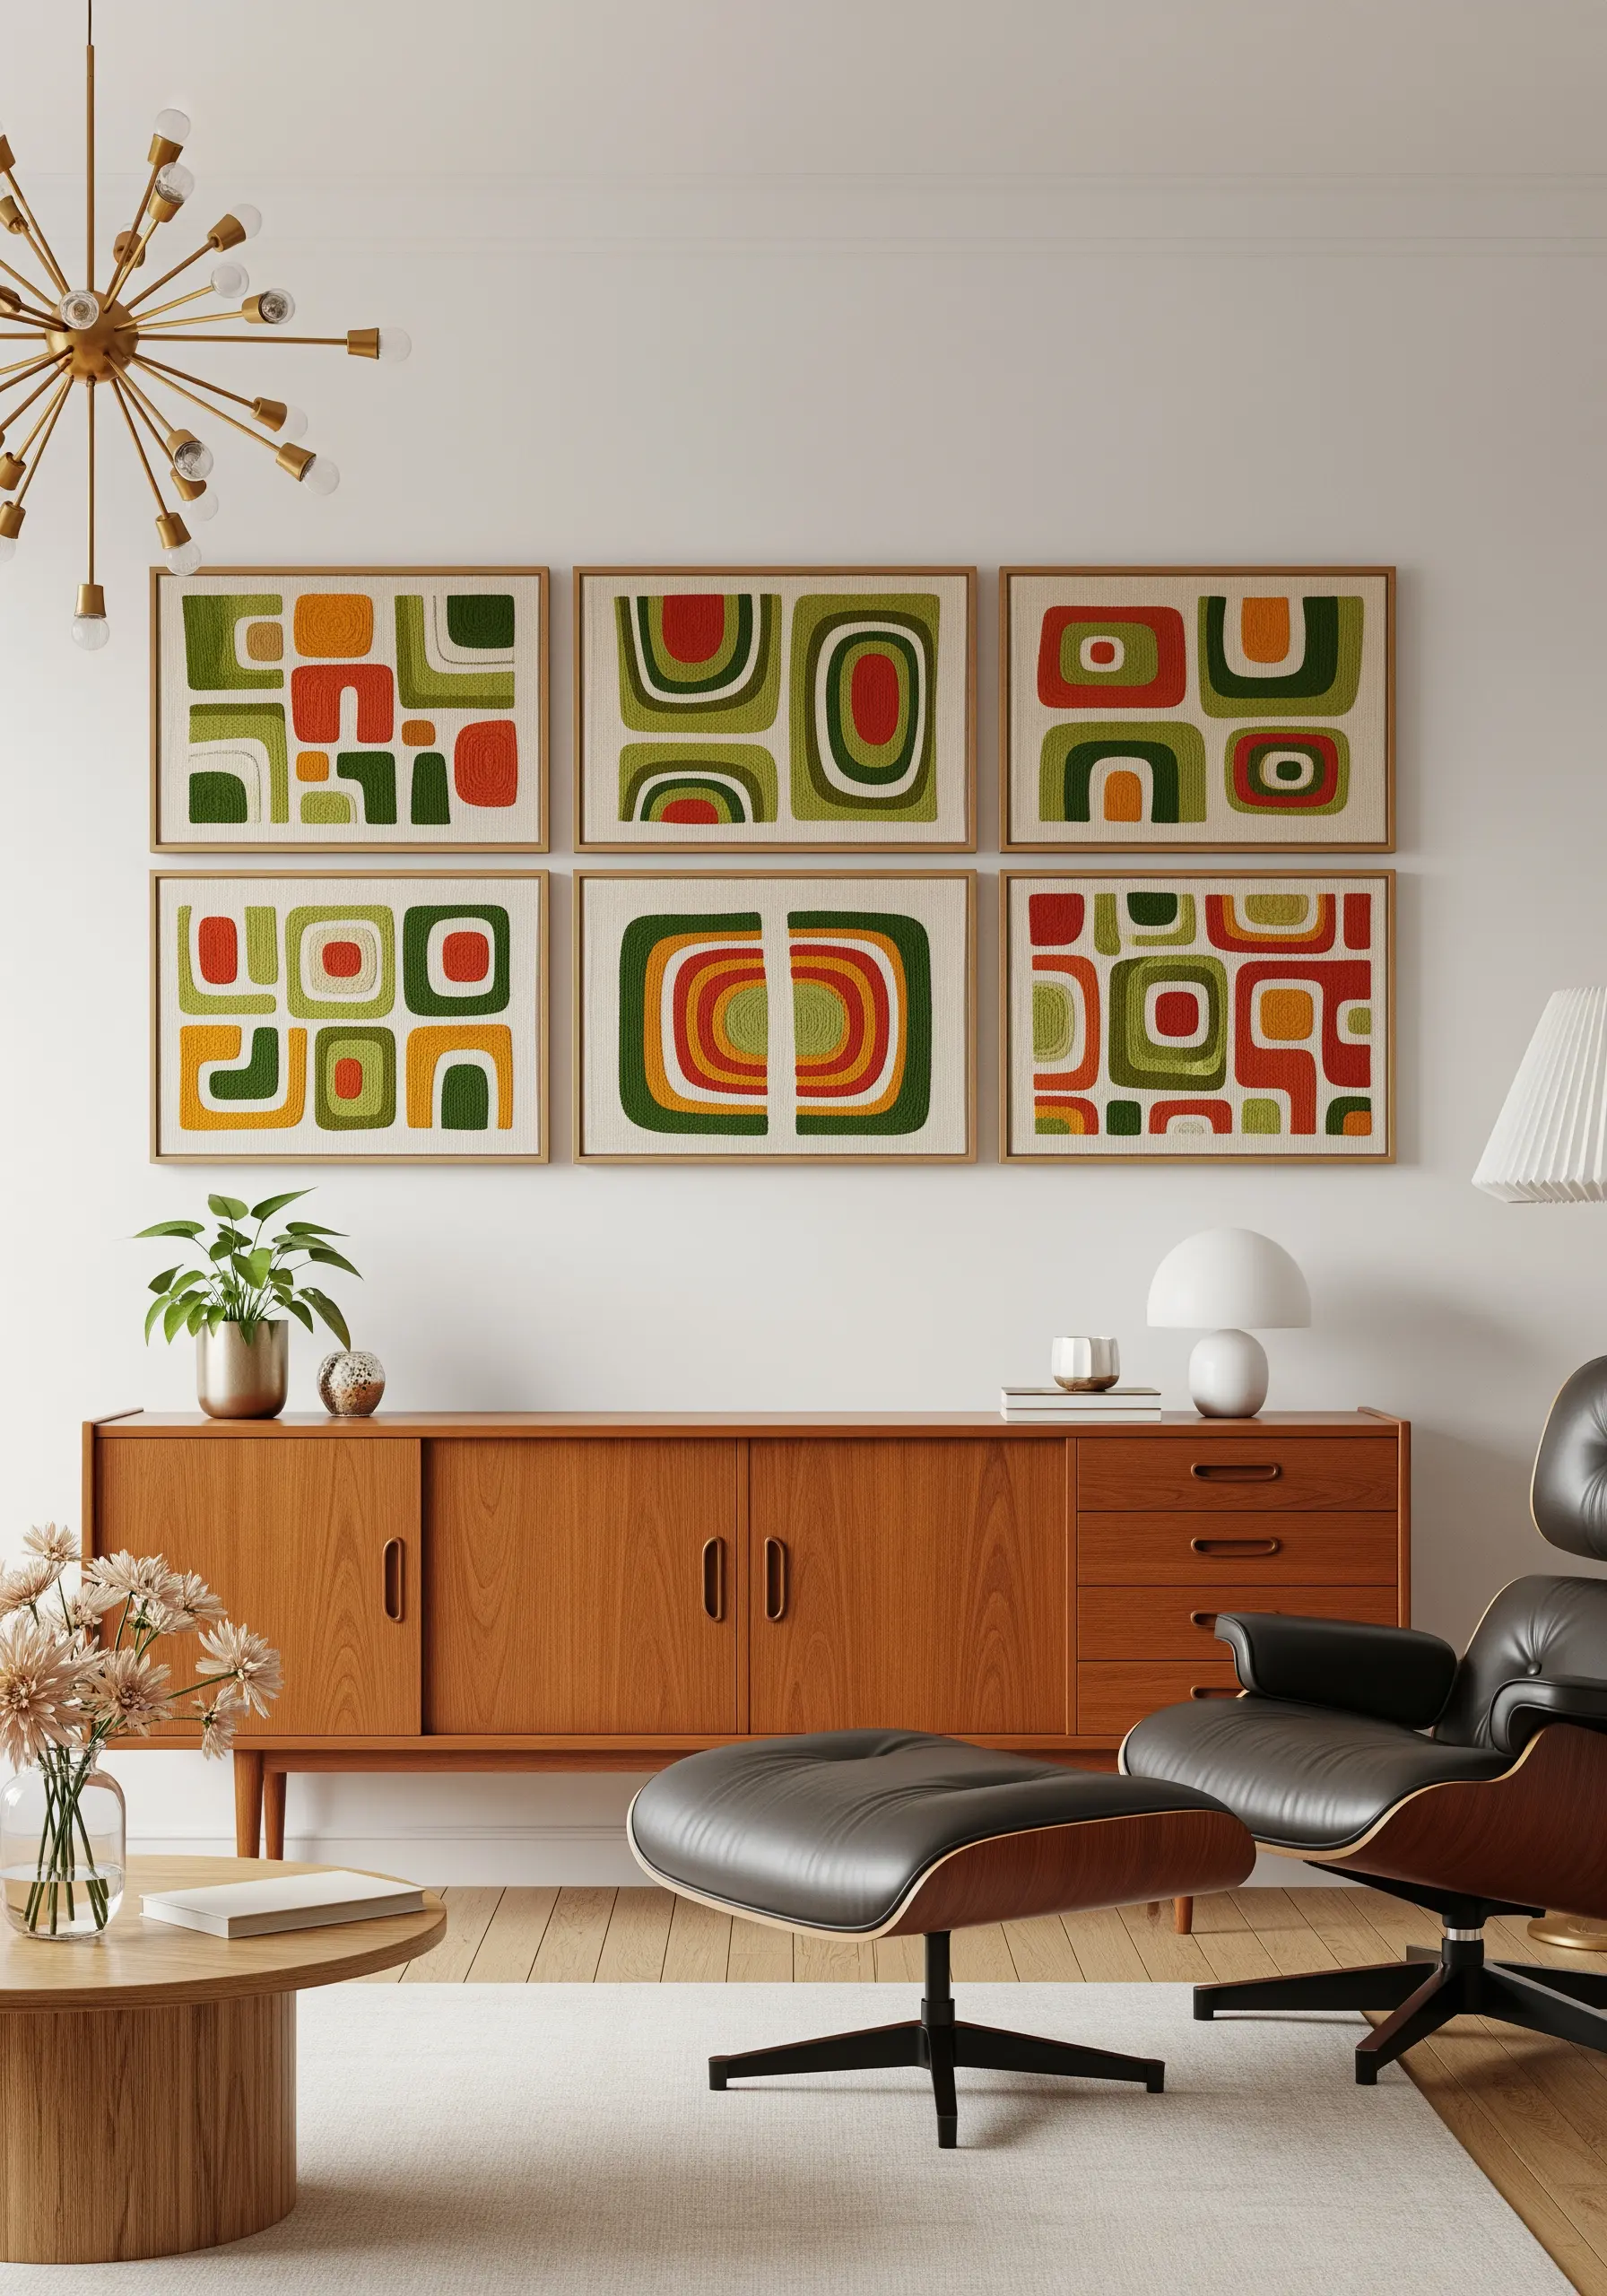
Instead of one massive piece, create a large-scale impact with a curated set of smaller, complementary works.
Choose a single technique, like punch needle or chain stitch fills, and use it across multiple frames.
The key to making the collection feel like a single, intentional tapestry is a strict, repeating color palette.
This allows you to explore different patterns and compositions while maintaining a unified aesthetic that ties the entire wall together.
12. Design Soft Textures for Nursery Art
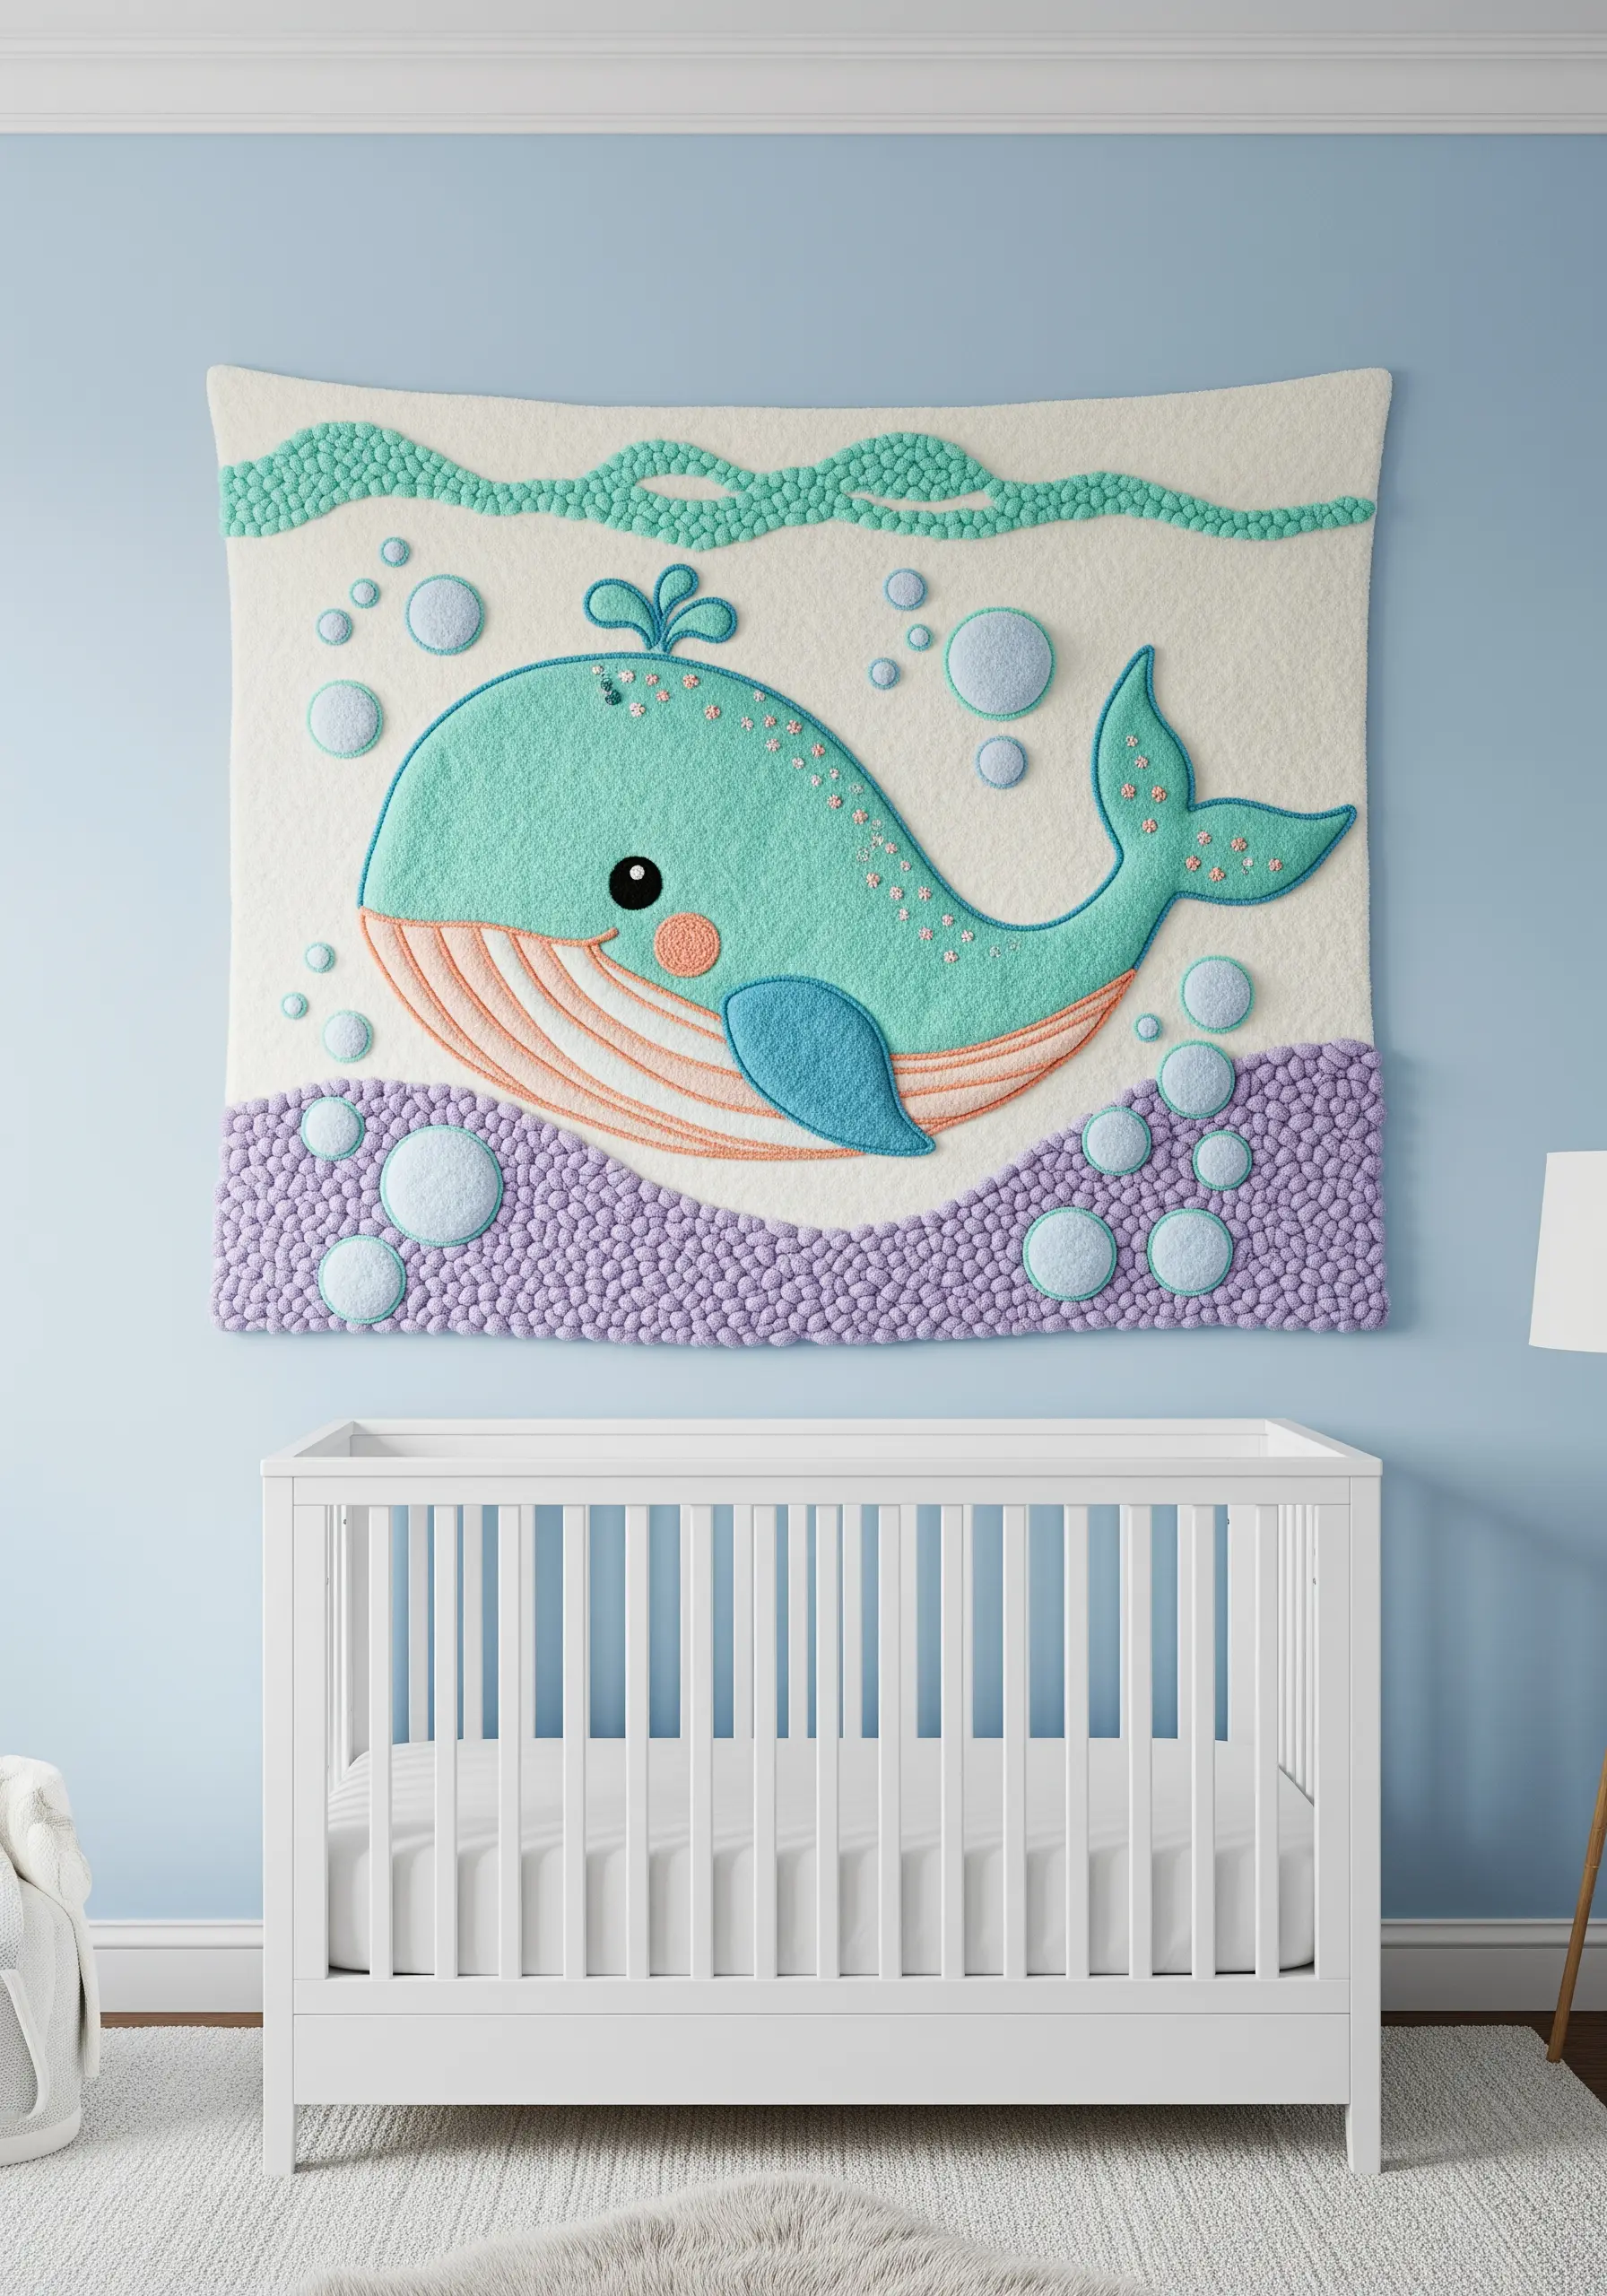
When creating a tapestry for a child’s room, focus on soft, touchable textures that feel gentle and inviting.
Use a combination of plush chenille yarns and soft merino wool to create different tactile sensations.
Fill large areas with dense French knots or uncut turkey work loops for a pillowy effect that is visually and physically soft.
These embroidered nursery decor ideas create a comforting, sensory focal point that is both playful and serene.
13. Embrace Deconstruction with Fabric Collage
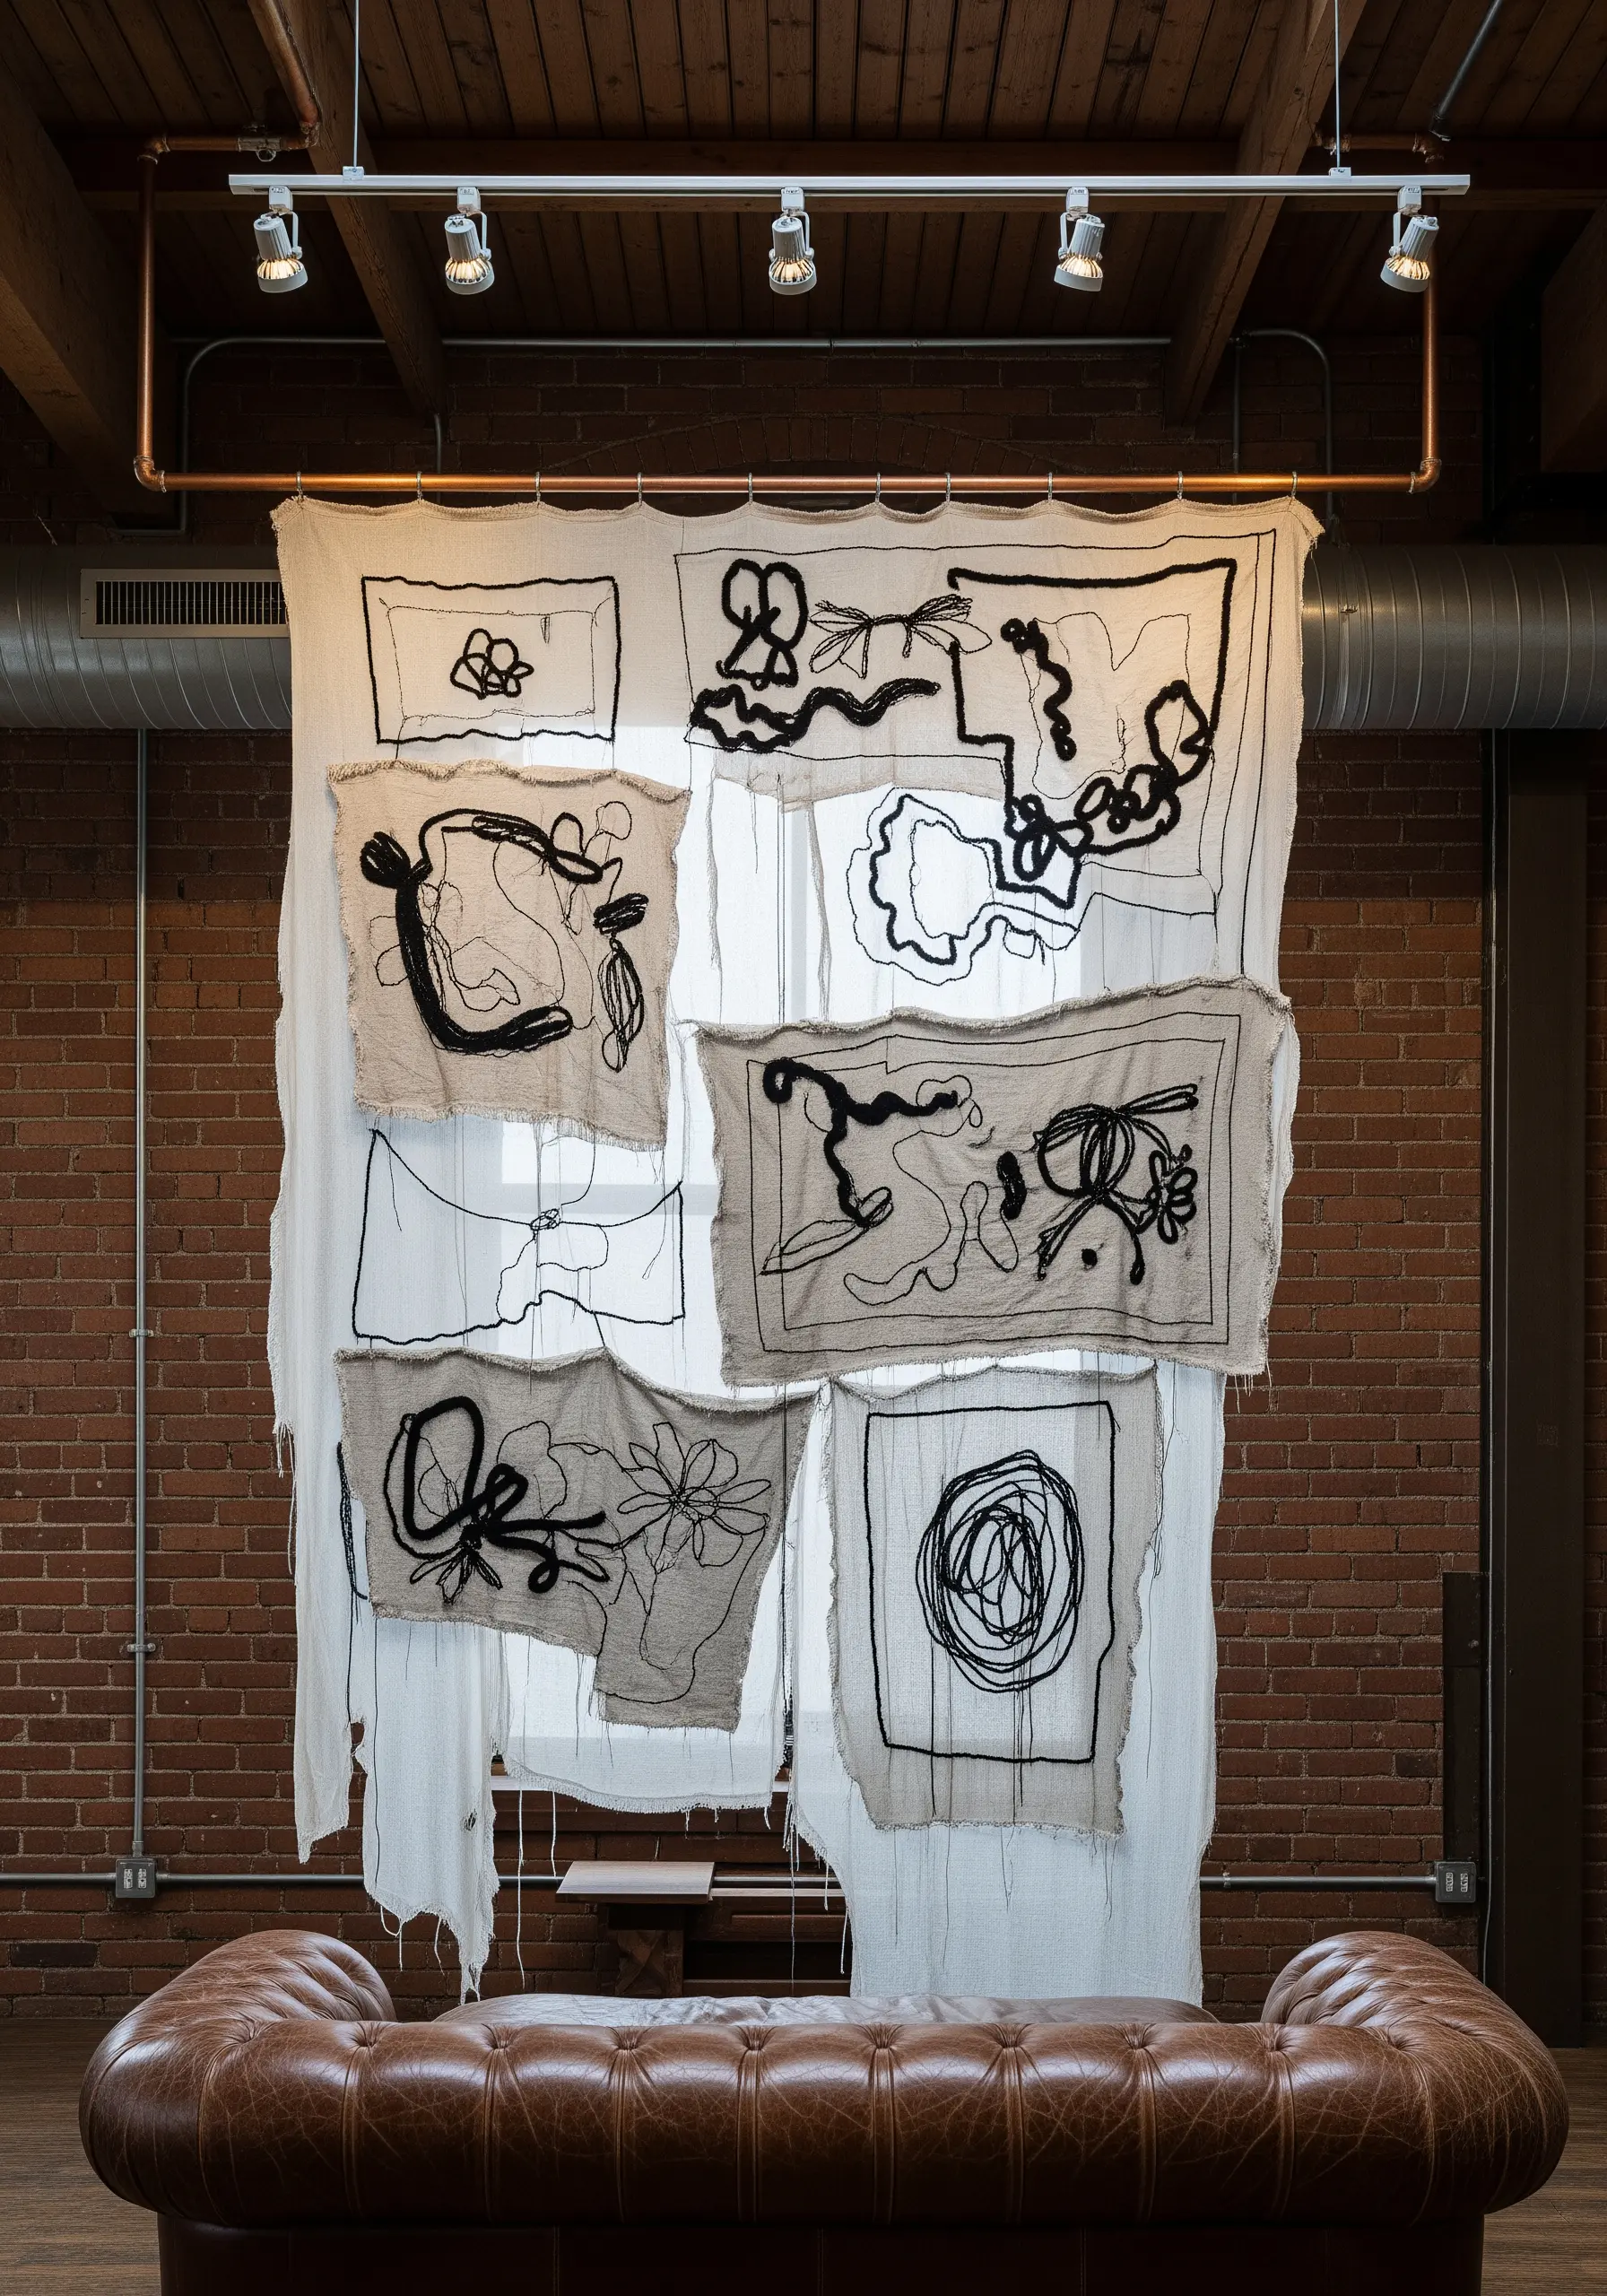
Build a large-scale composition from stitched-together fragments for a raw, expressive aesthetic.
Work on individual pieces of canvas or linen with frayed, unfinished edges, then appliqué them onto a larger, sheer backing fabric.
Use a thick, contrasting thread like black sashiko thread to ‘draw’ your designs with simple running stitches or backstitches.
This method of fabric collage embroidery celebrates imperfection and creates a dynamic, layered artwork with a strong graphic presence.
14. Paint with Thread Using French Knot Pointillism
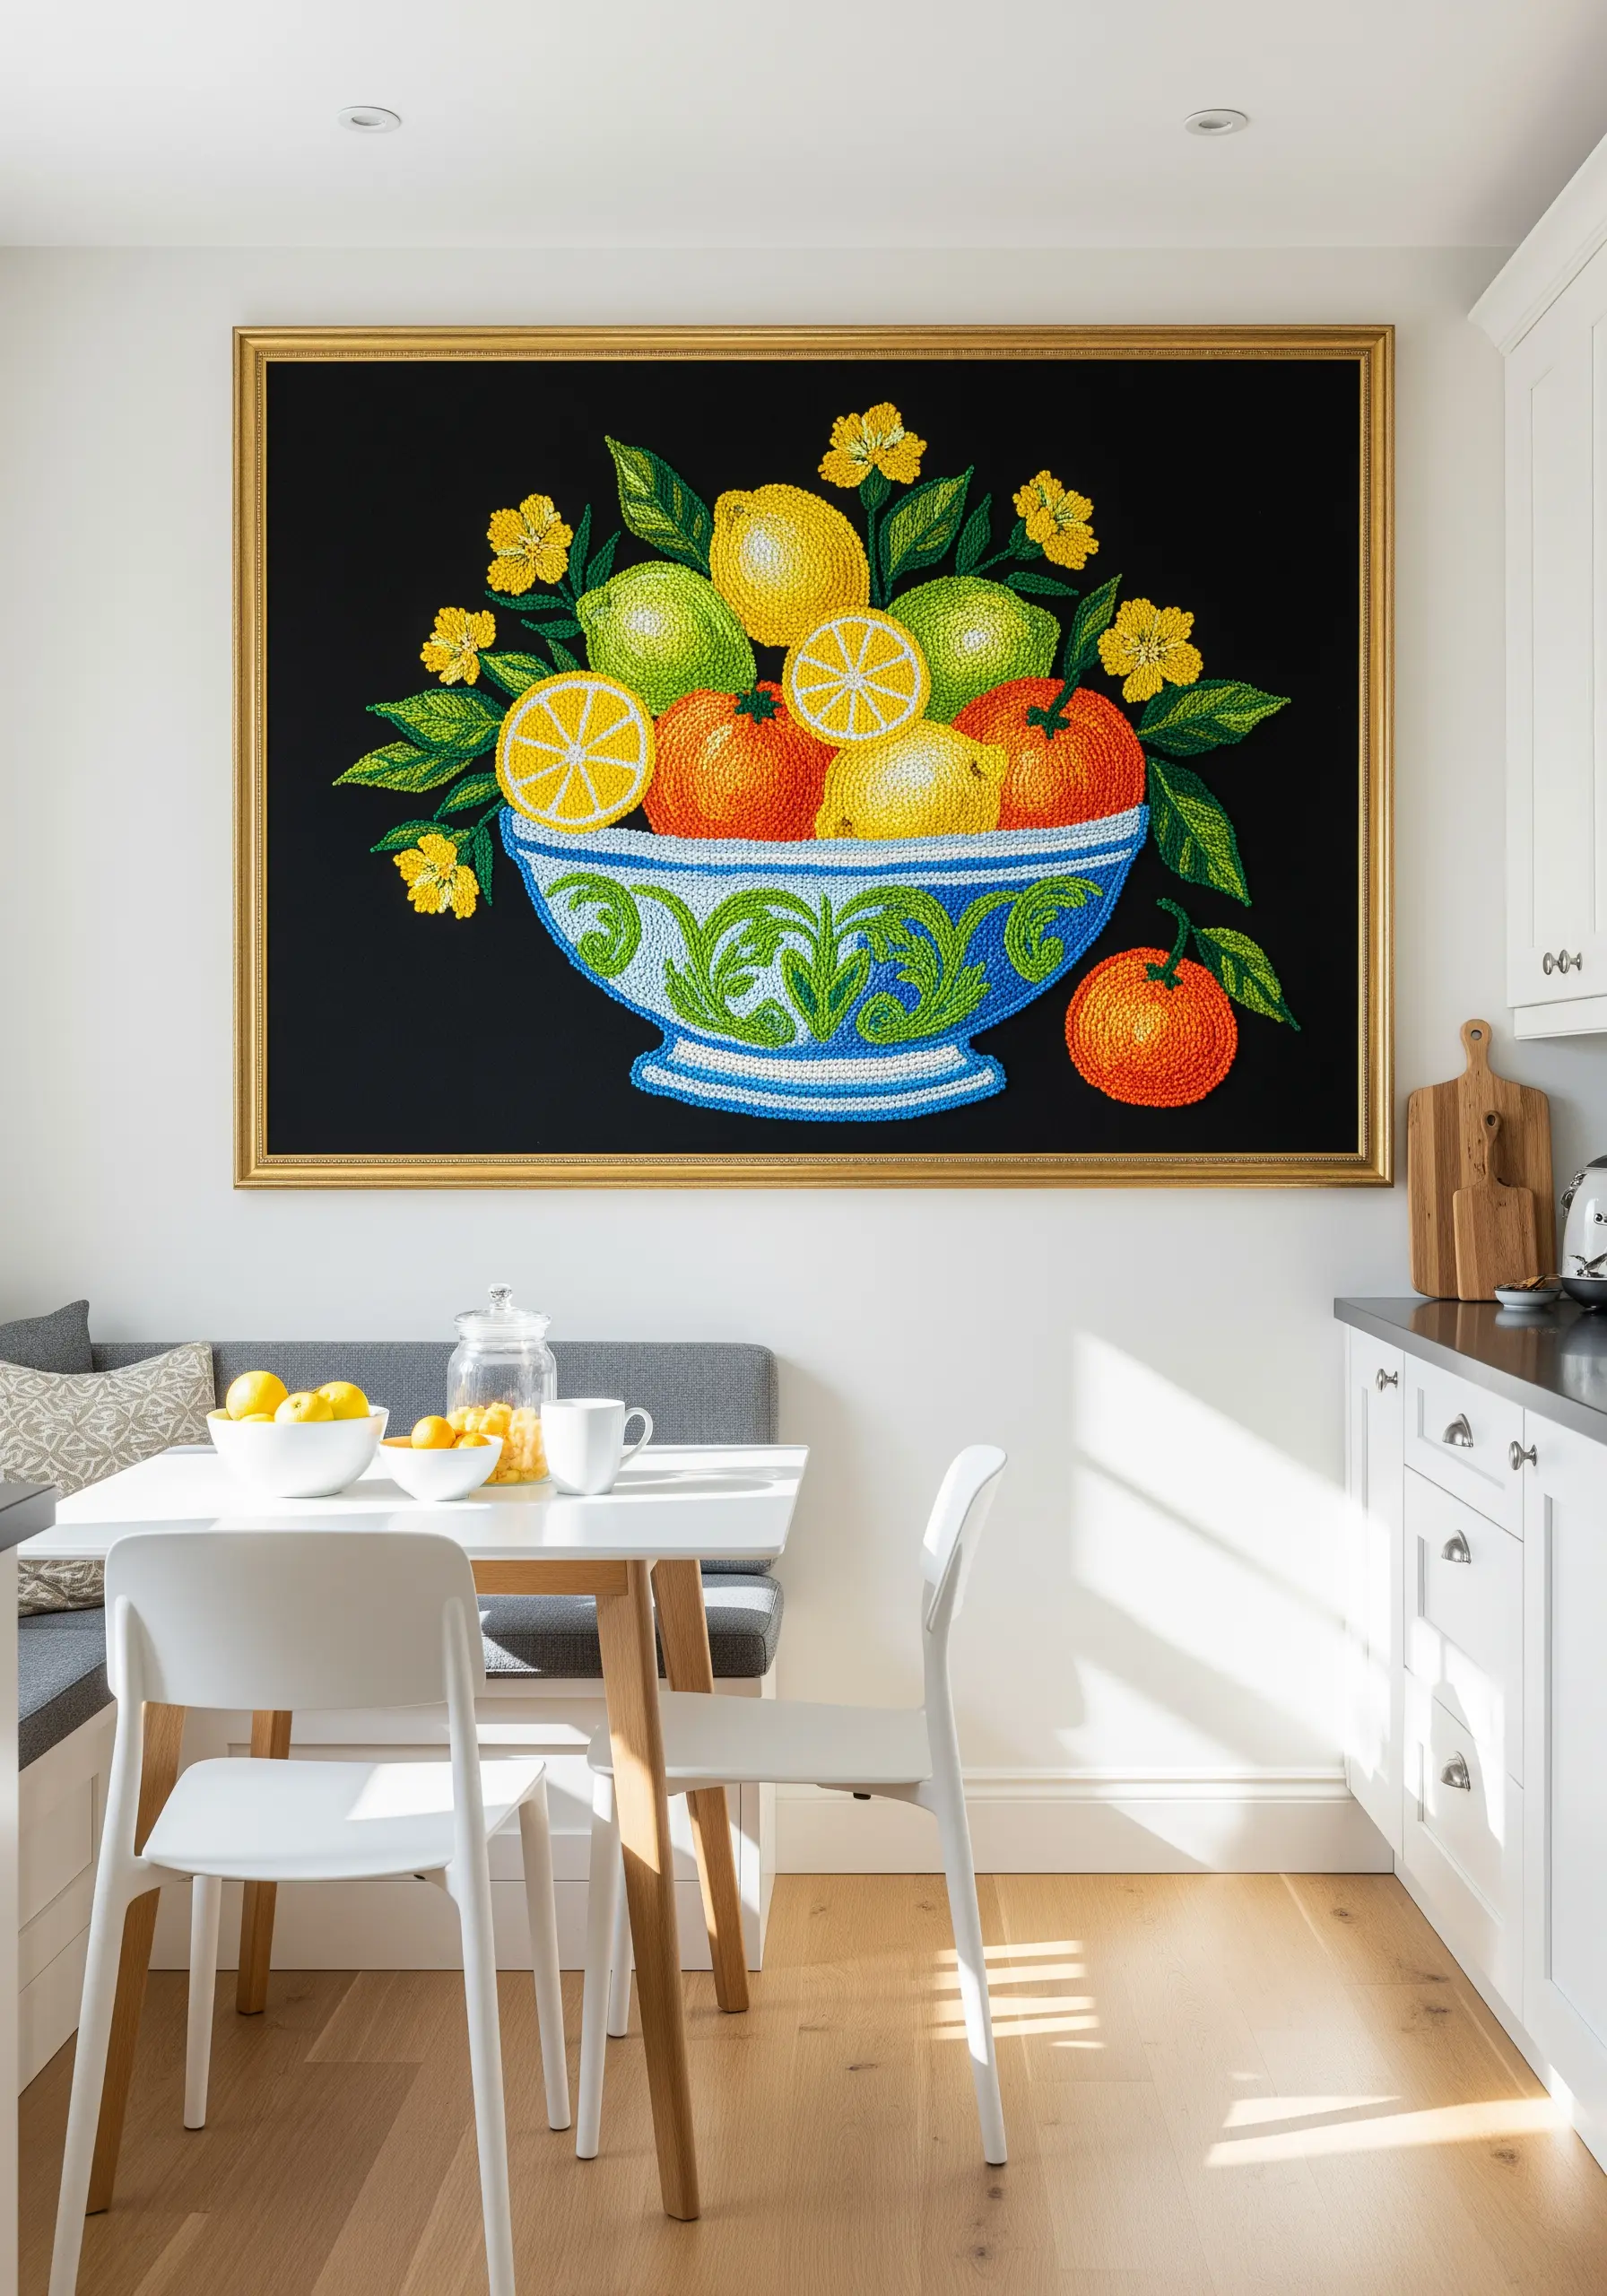
Achieve a stunning, painterly effect by filling your entire design with tiny French knots.
Just like in pointillist painting, you can blend colors and create gradients by placing knots of different shades next to each other.
To create highlights, use a slightly lighter thread color or incorporate a single strand of metallic or silk floss for a subtle sheen.
Working on a black background makes the colors appear exceptionally vibrant and luminous, giving your tapestry a classic, still-life quality.
15. Evoke Art Deco Glamour with Beading and Fringe
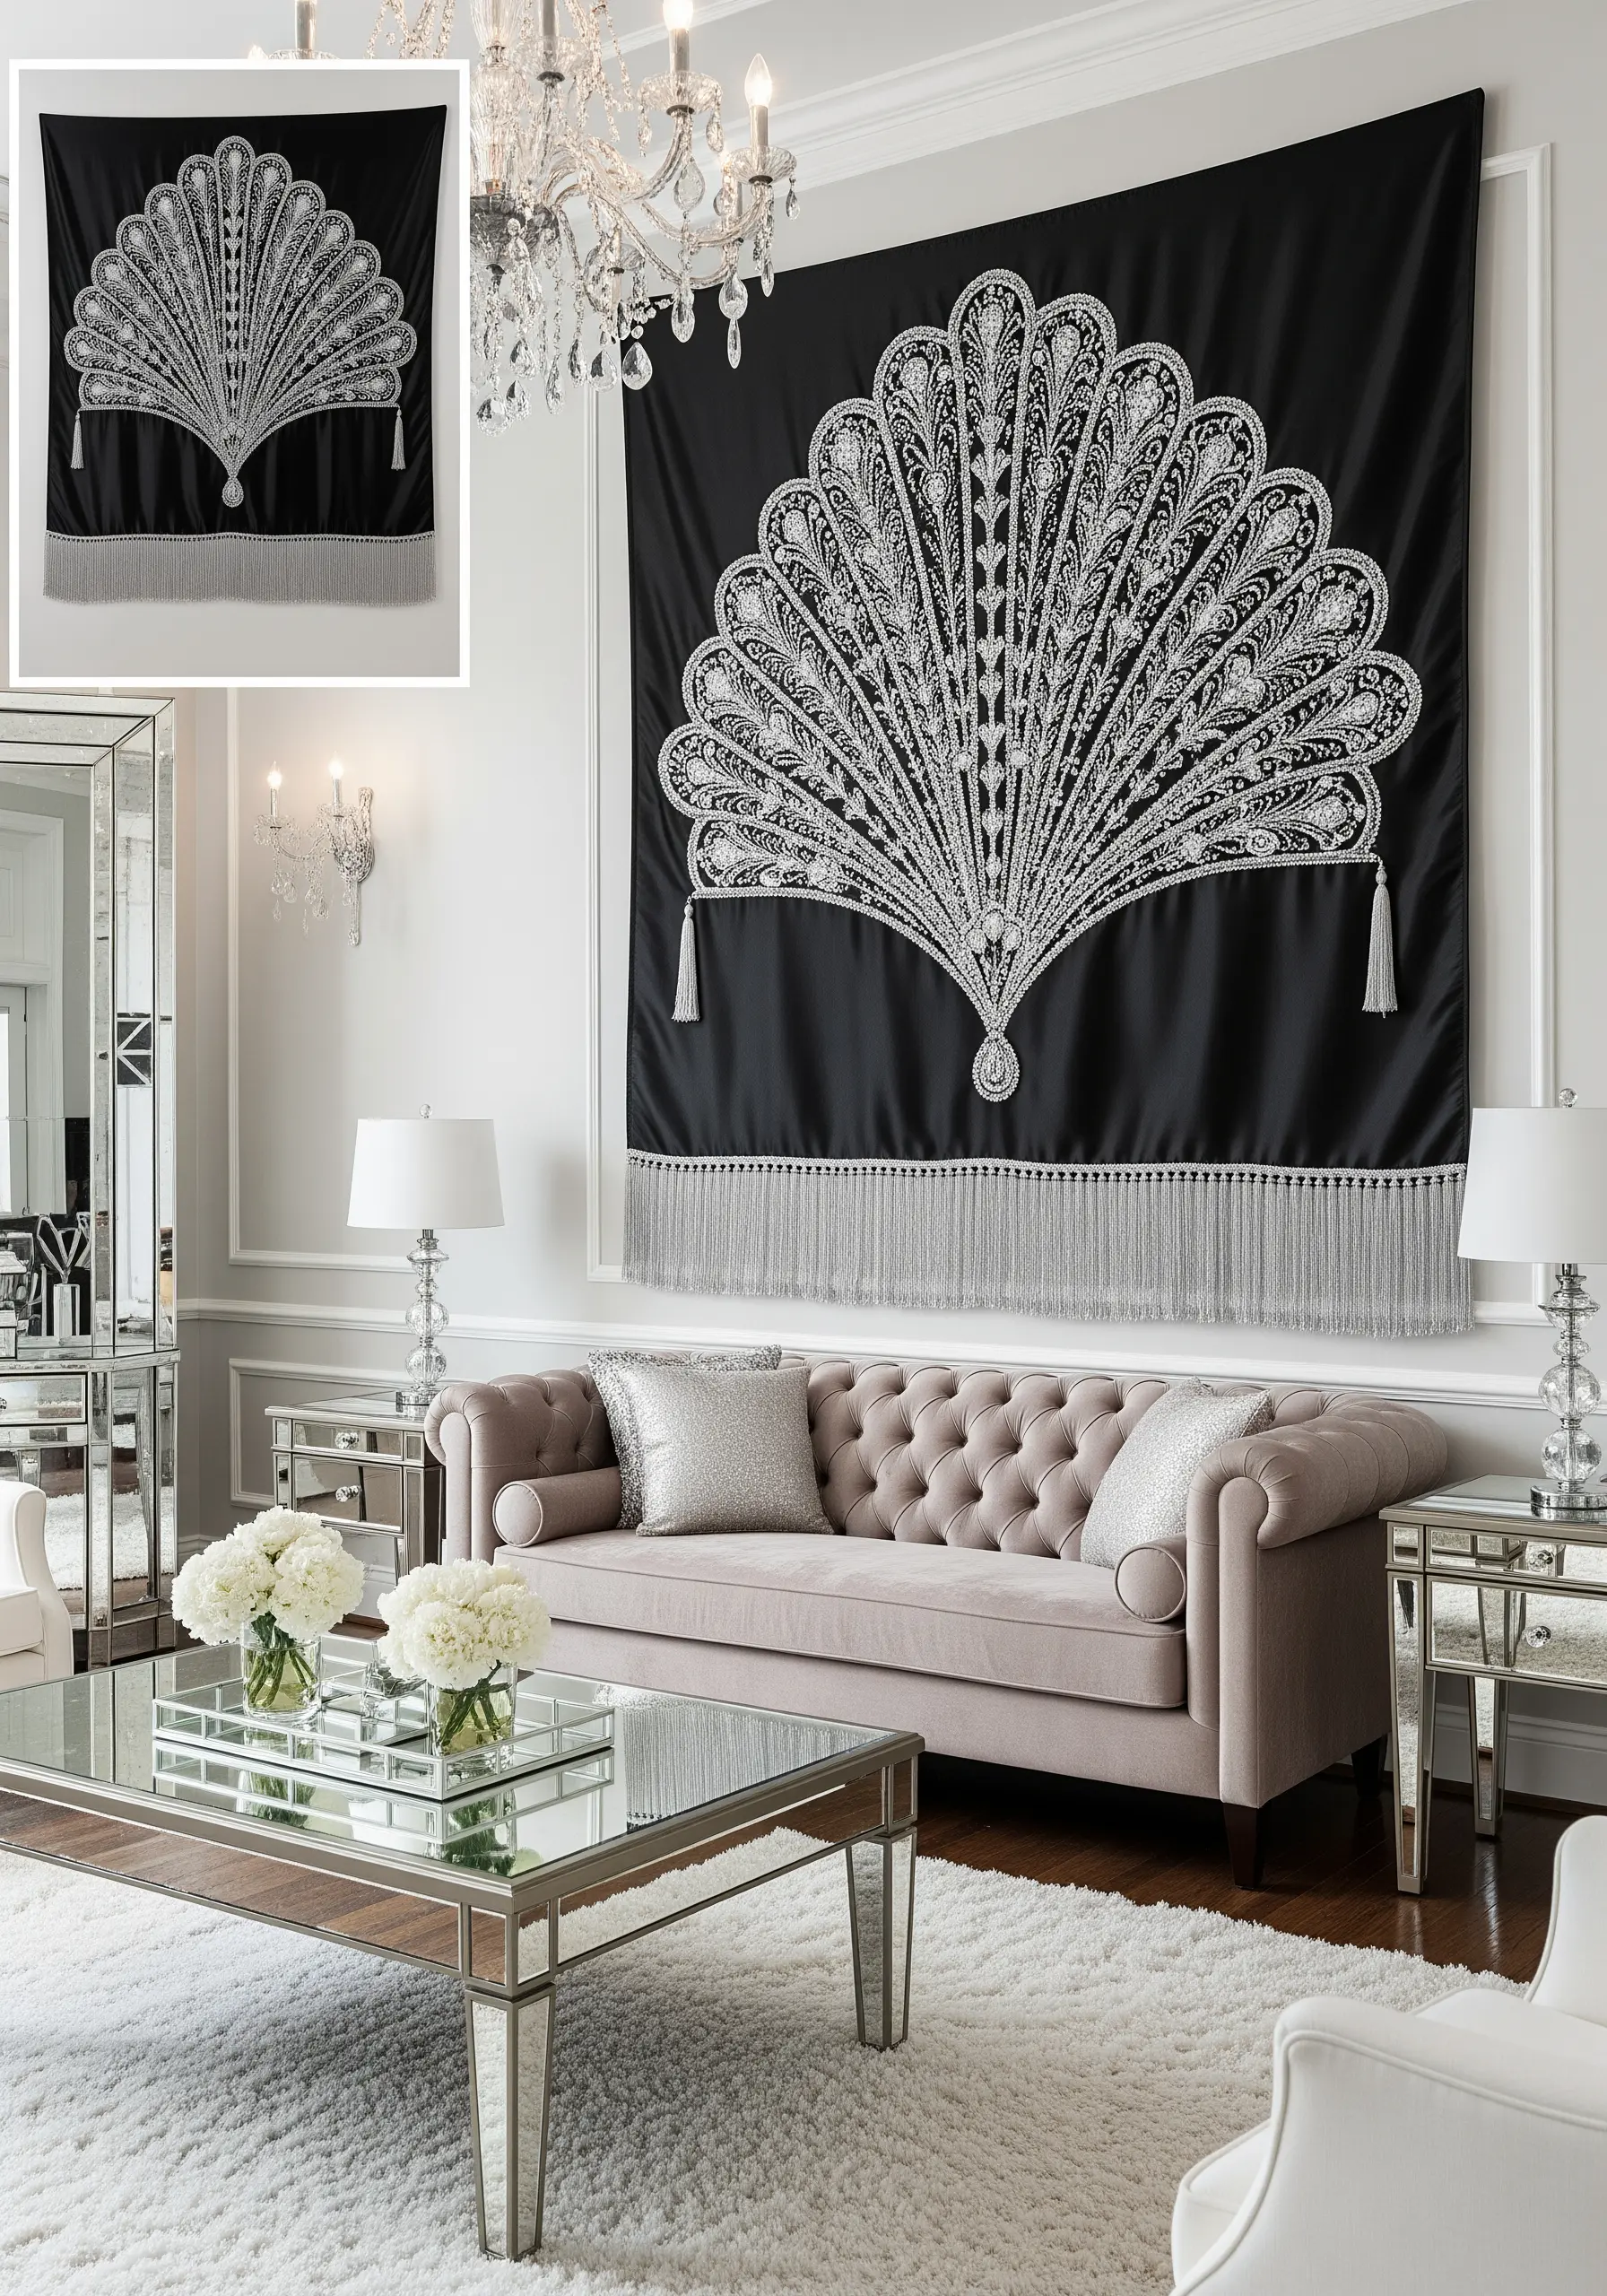
Combine fine backstitch with intricate beadwork to create the lavish detail of the Art Deco era.
On a dramatic black satin or silk background, use a bright white or silver thread to outline your design, then fill the shapes with shimmering seed beads and bugle beads.
This interplay between the matte thread and the reflective beads adds dimension and luxury.
Finish the piece with a thick, silky fringe along the bottom to complete the opulent, 1920s-inspired aesthetic.
16. Illustrate a Narrative with Detailed Line Work
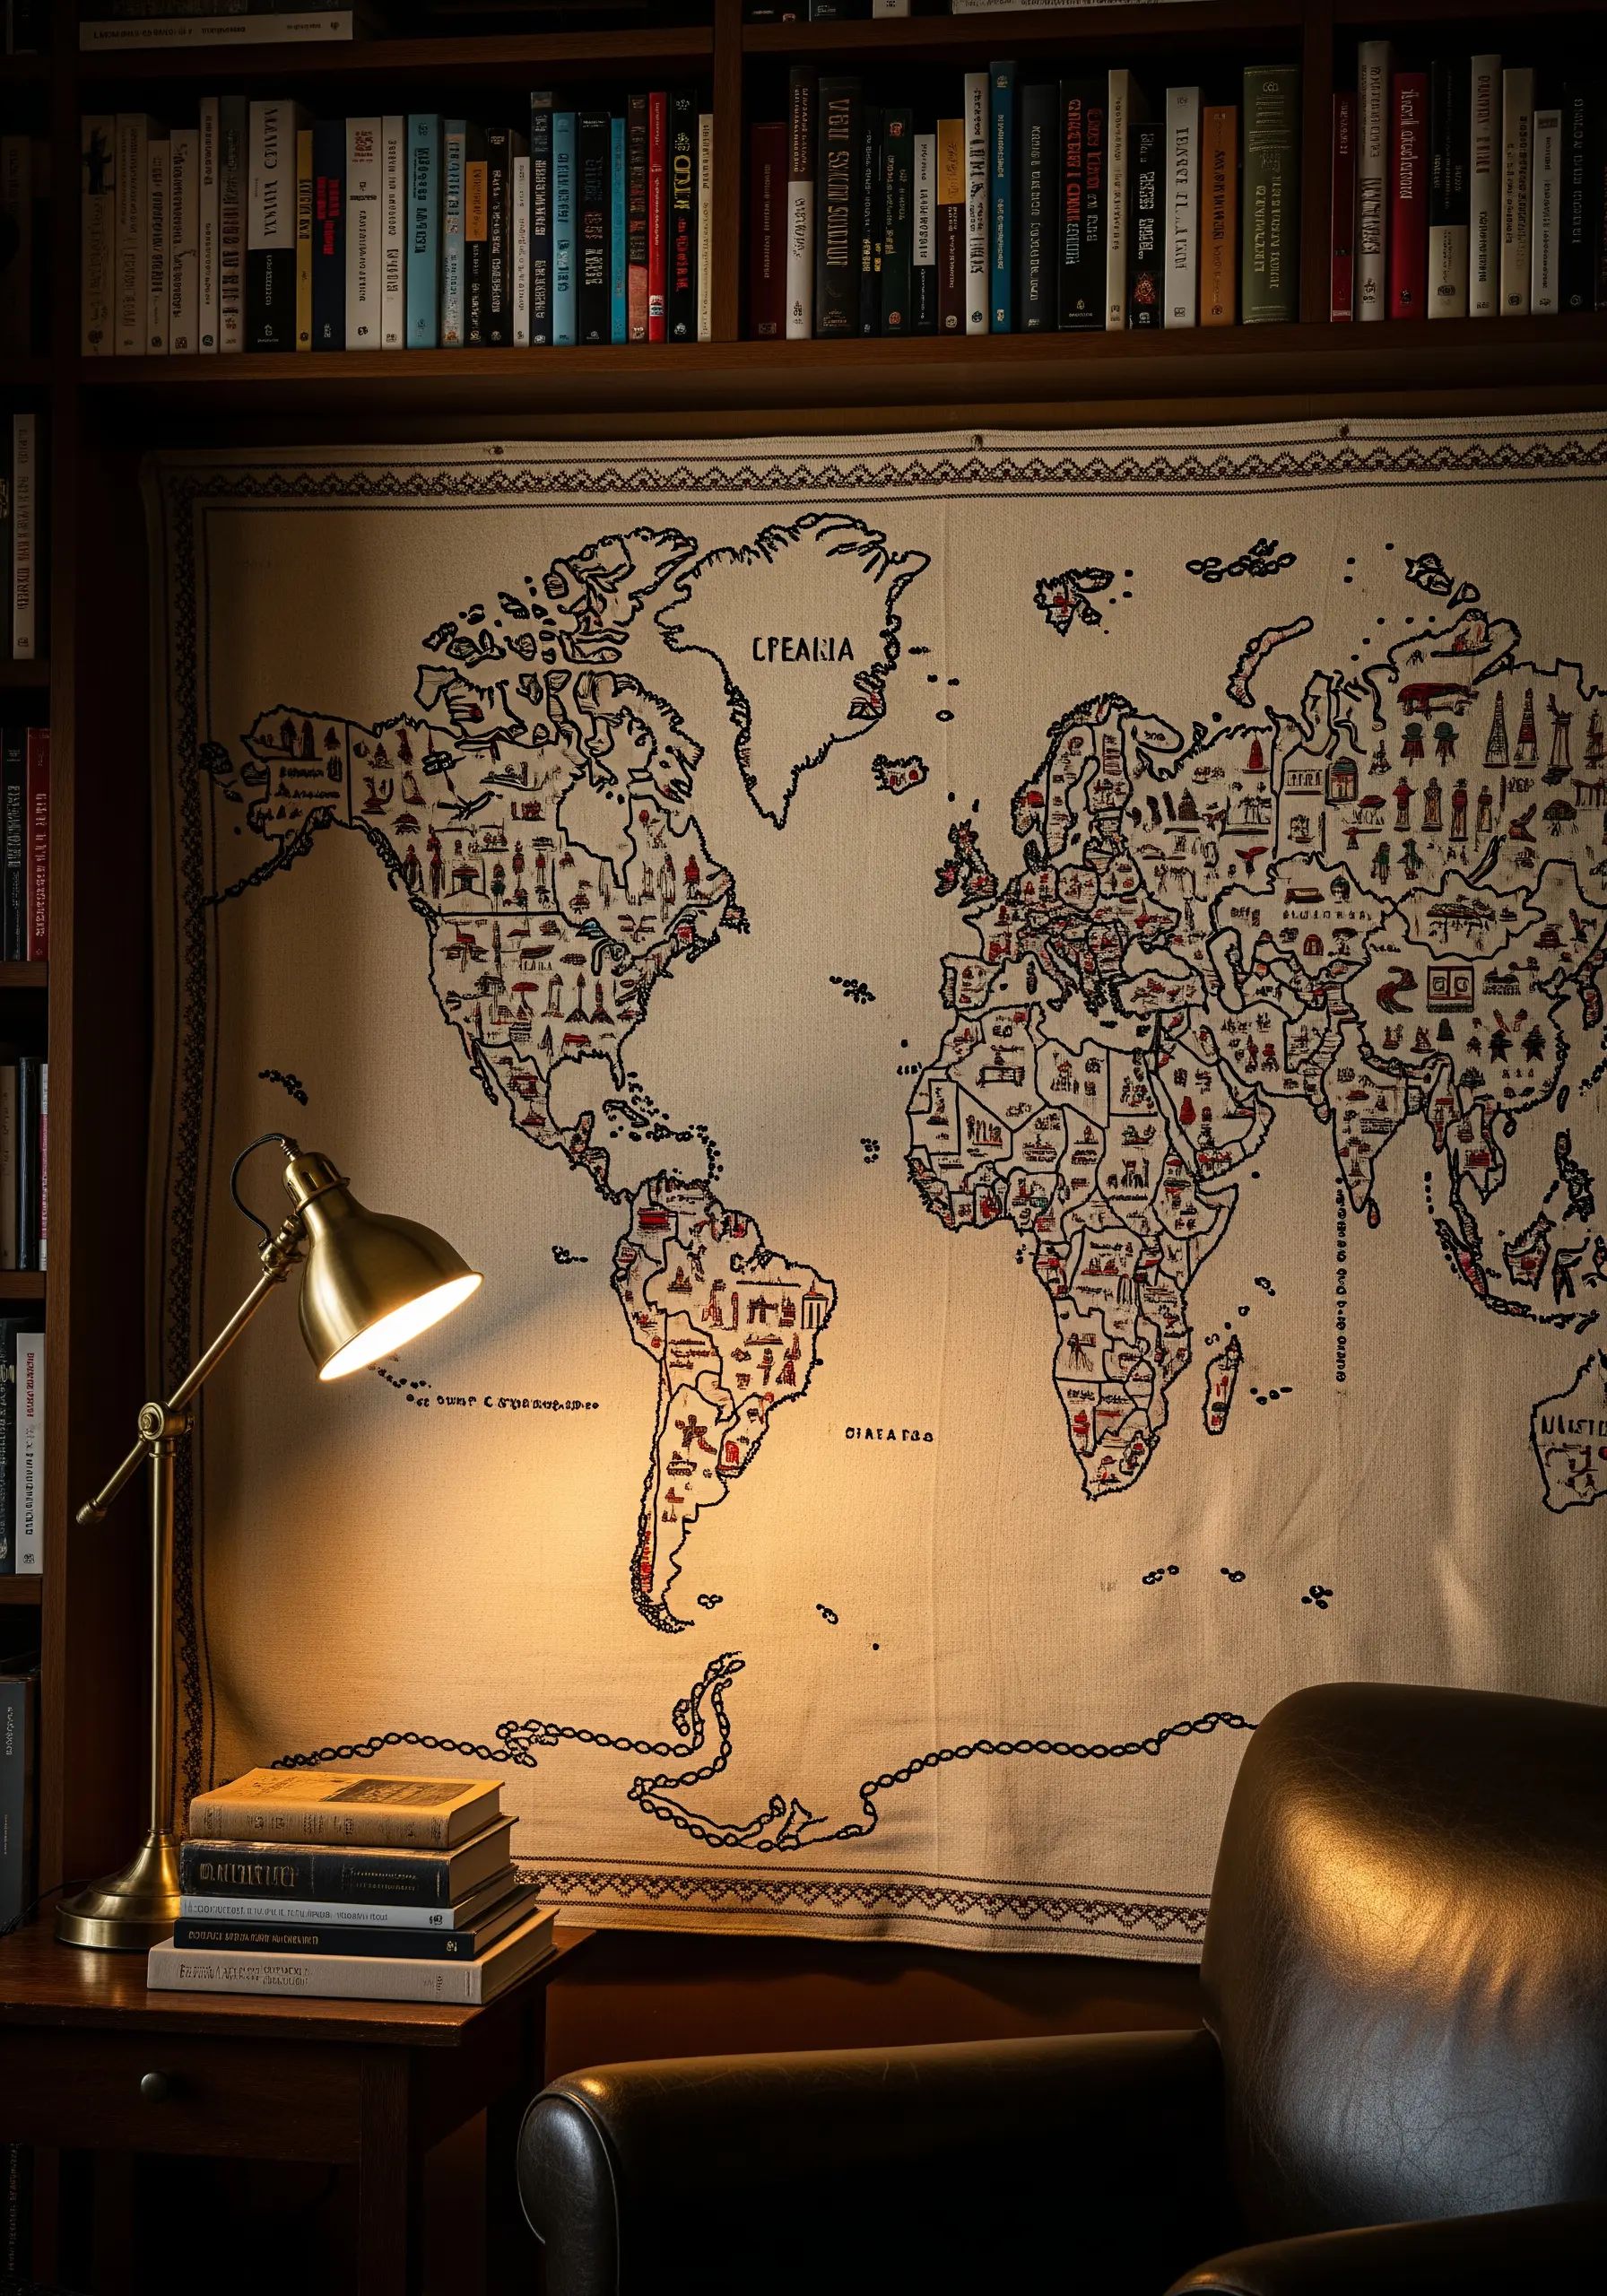
Turn a tapestry into a storytelling device by focusing on intricate, illustrative line work.
Use a simple backstitch or stem stitch with a dark, contrasting thread to render detailed maps, cityscapes, or narrative scenes.
Choose a heavy, unbleached cotton canvas to evoke the feeling of a vintage document or antique map.
The beauty of this technique is its simplicity; it relies on clear drawing skills translated through a basic stitch to create a piece rich with personality and detail.
17. Create Graphic Texture with Coiled Rope
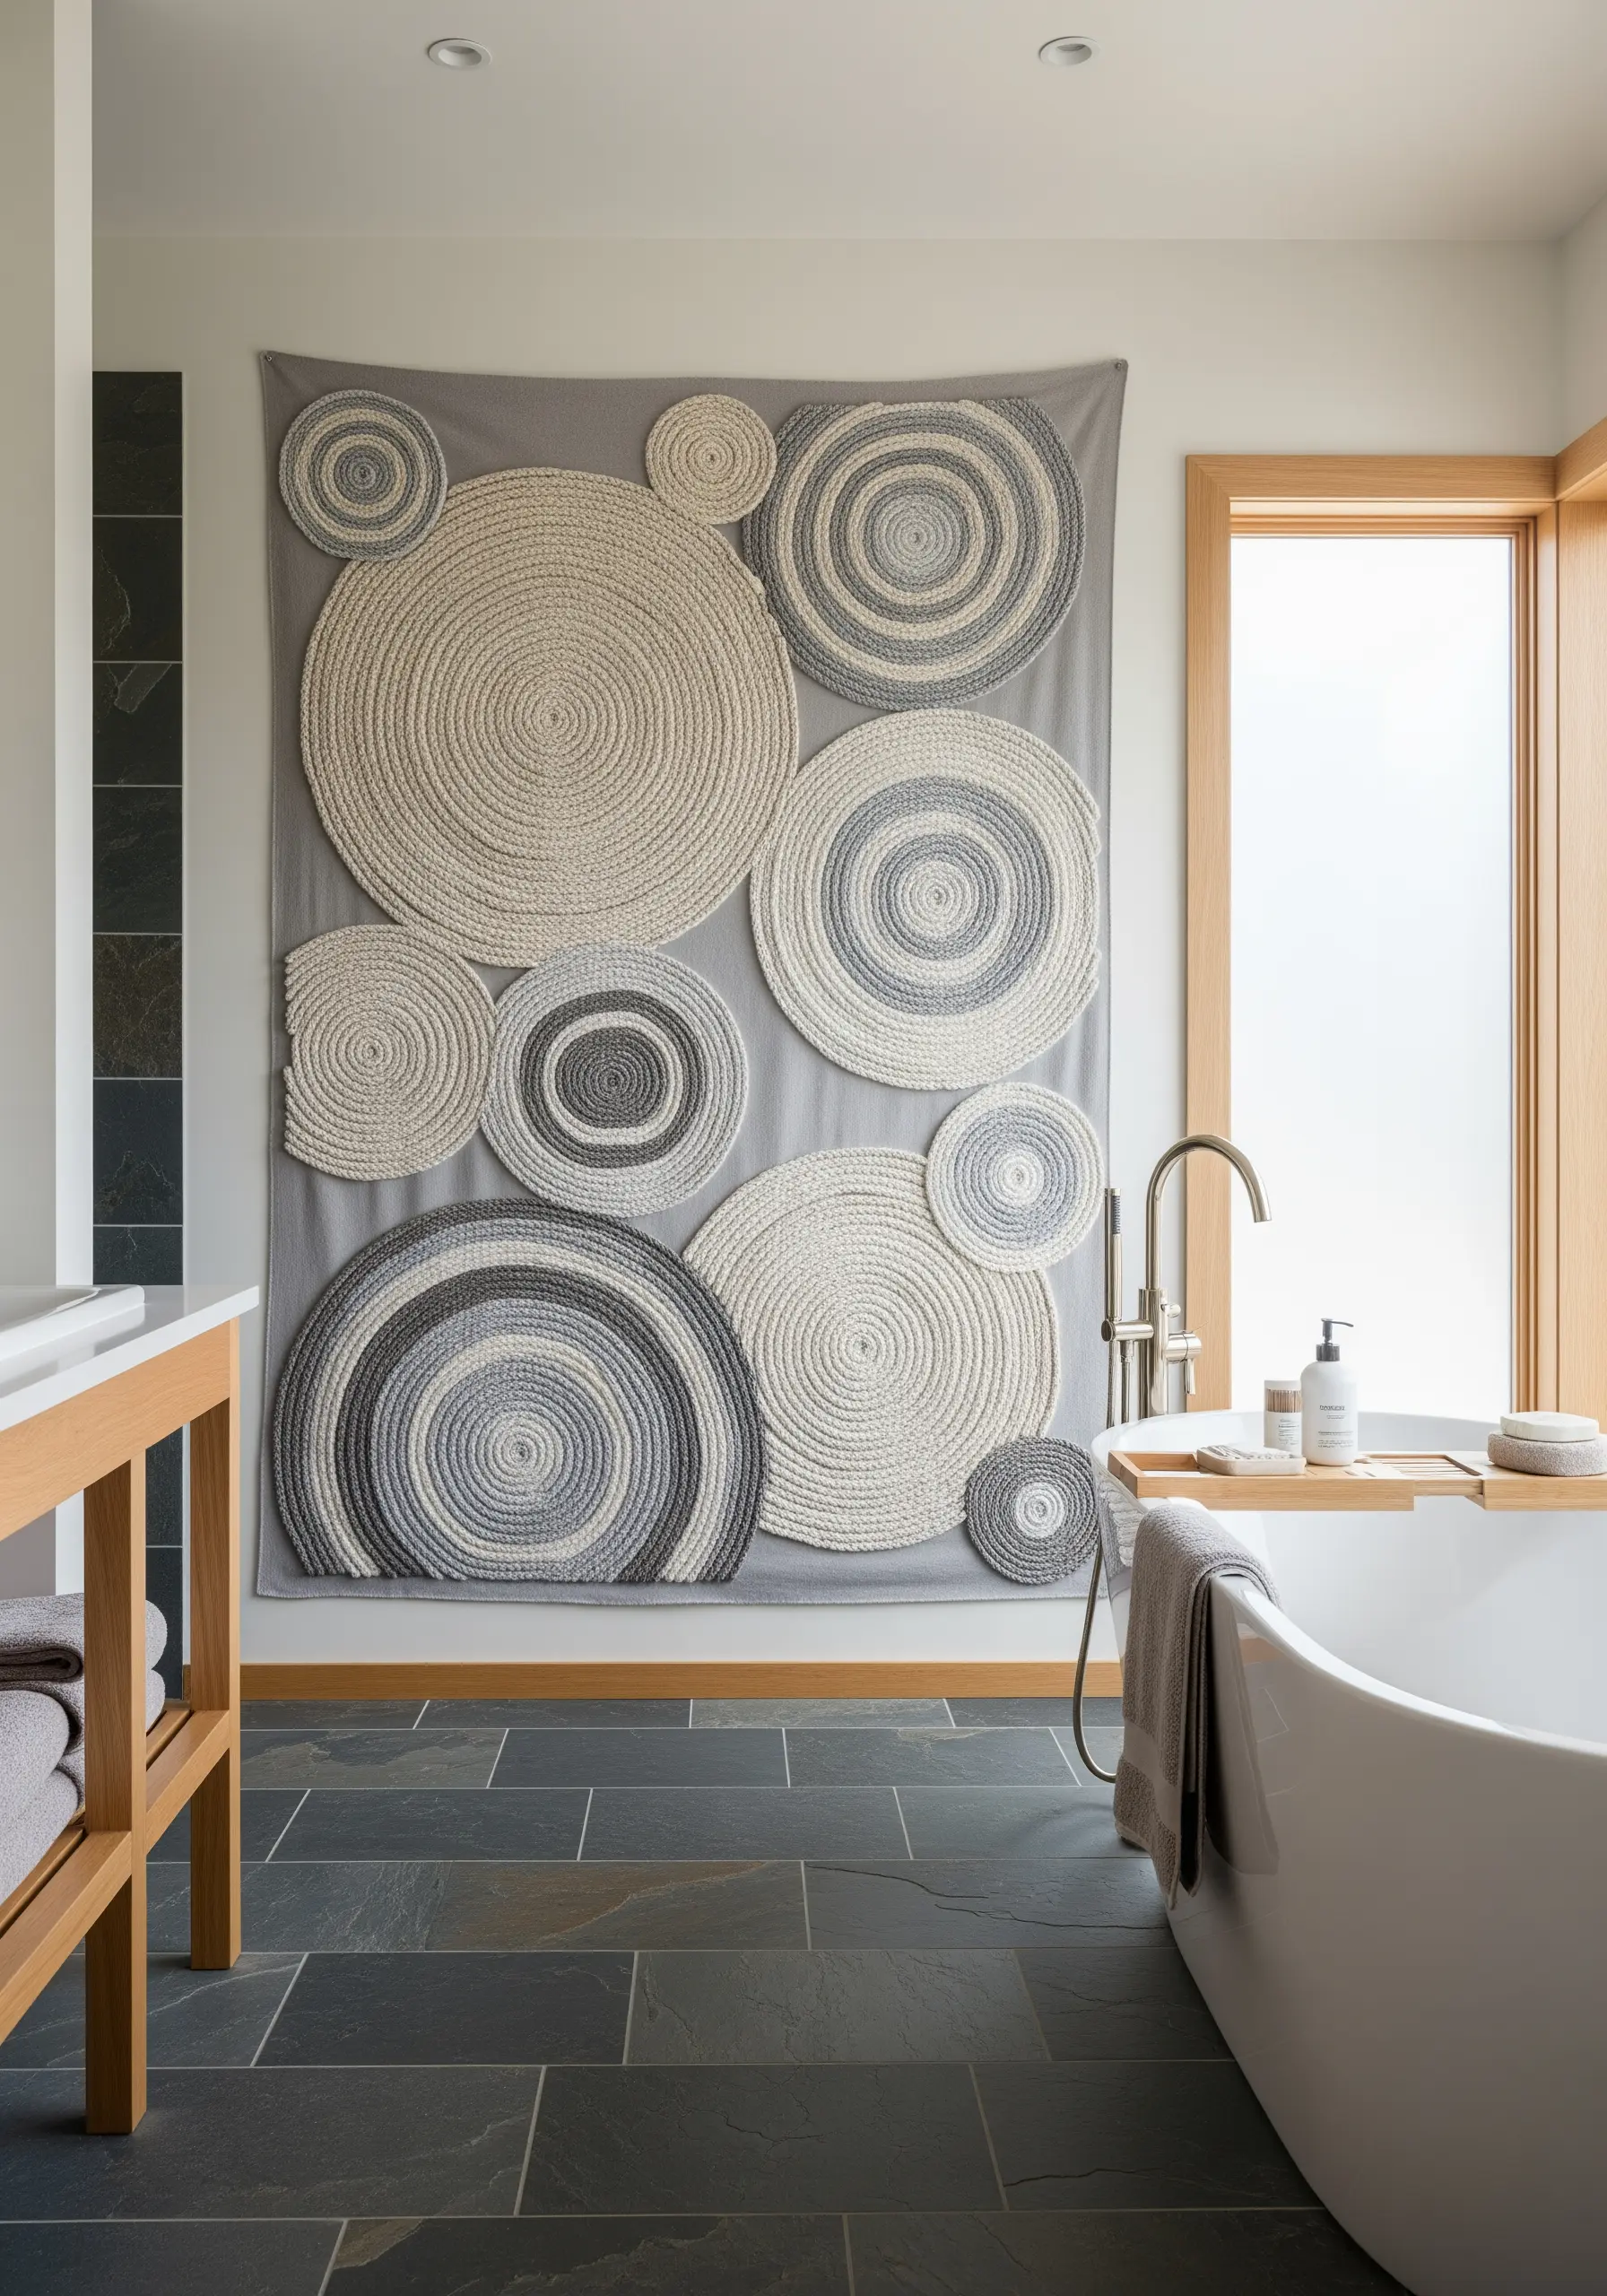
For a bold, sculptural tapestry with a clean, modern aesthetic, use a coiling technique.
Tightly wrap a core rope with yarn in your desired colors, then coil the wrapped rope into circles or other shapes, stitching it to a sturdy backing fabric as you go.
This method, borrowed from basket weaving, allows you to build large, highly textural forms with perfect consistency.
Play with different rope thicknesses and color combinations to create a dynamic composition that is all about rhythm and form.
18. Fill a Scene with Expressive Satin Stitch
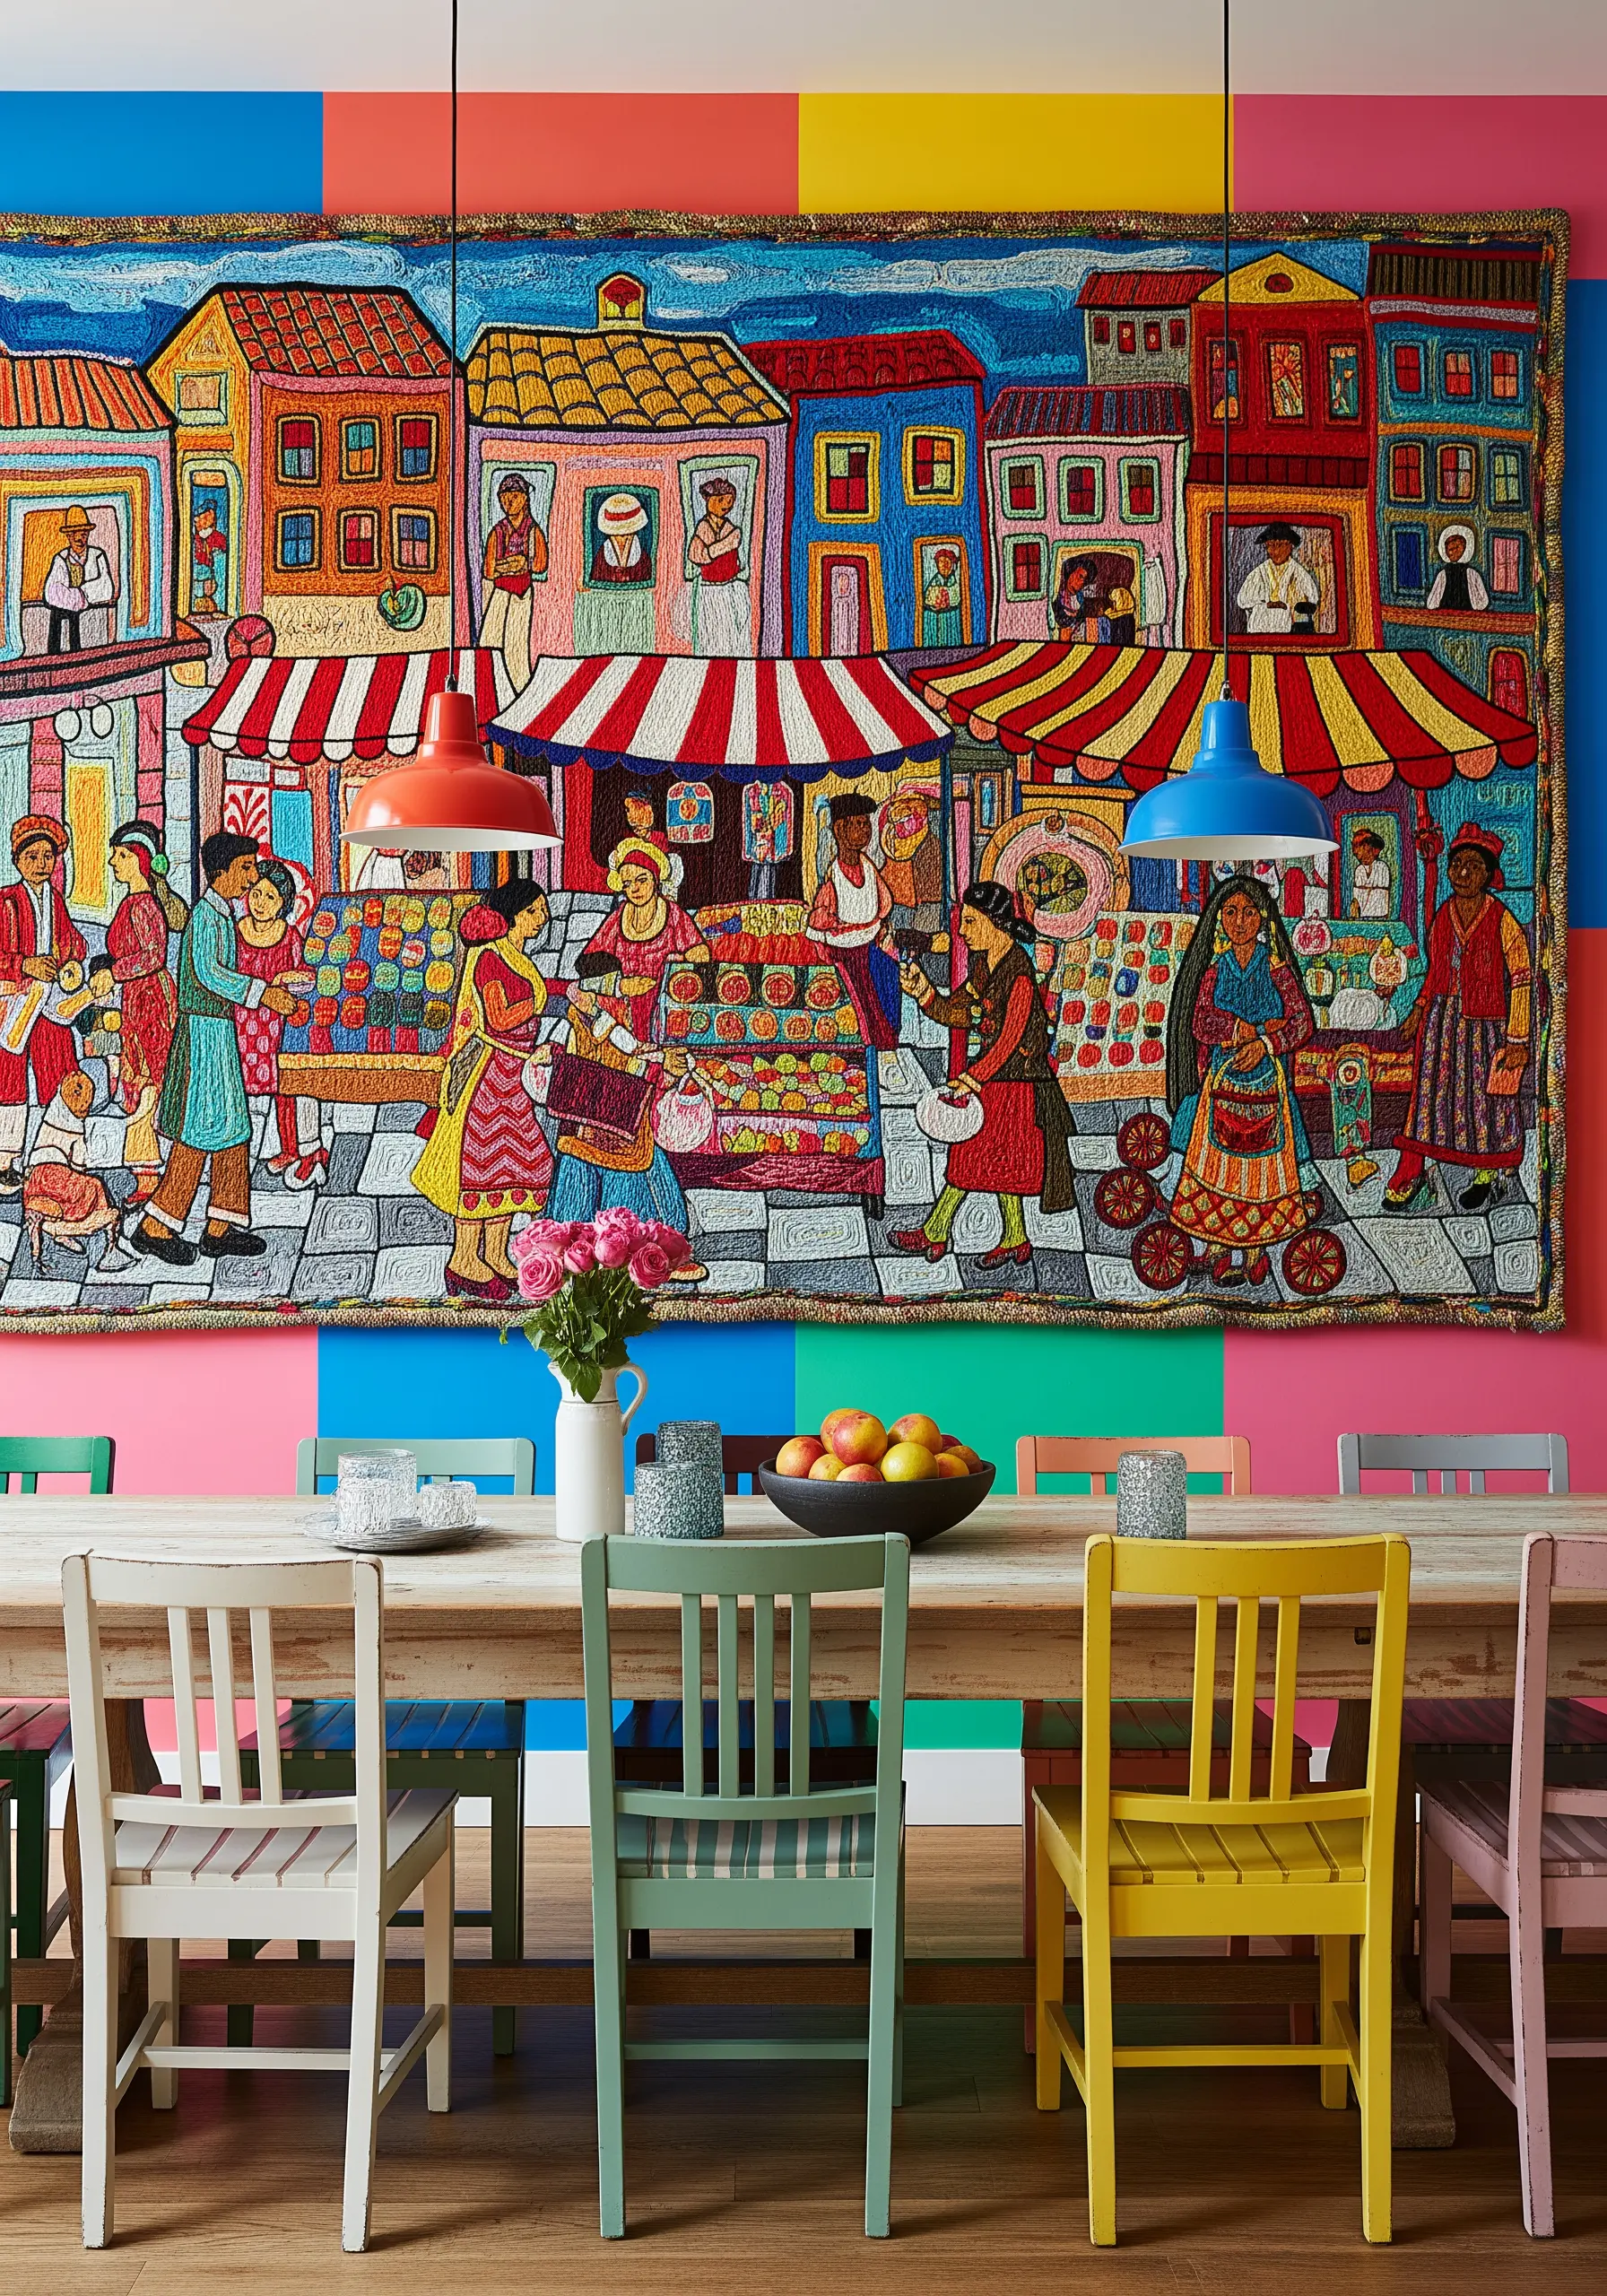
Capture the energy of a bustling scene with expressive, directional satin stitch.
Instead of perfectly uniform stitches, allow the angle and length of your stitches to follow the contours of the objects you’re depicting.
This ‘thread painting’ approach adds a sense of movement and personality to figures, architecture, and landscapes.
Use a vibrant, saturated color palette and bold outlines to give your narrative tapestry a folk-art feel that is full of life and character.
19. Craft Delicate Dimension with 3D Florals
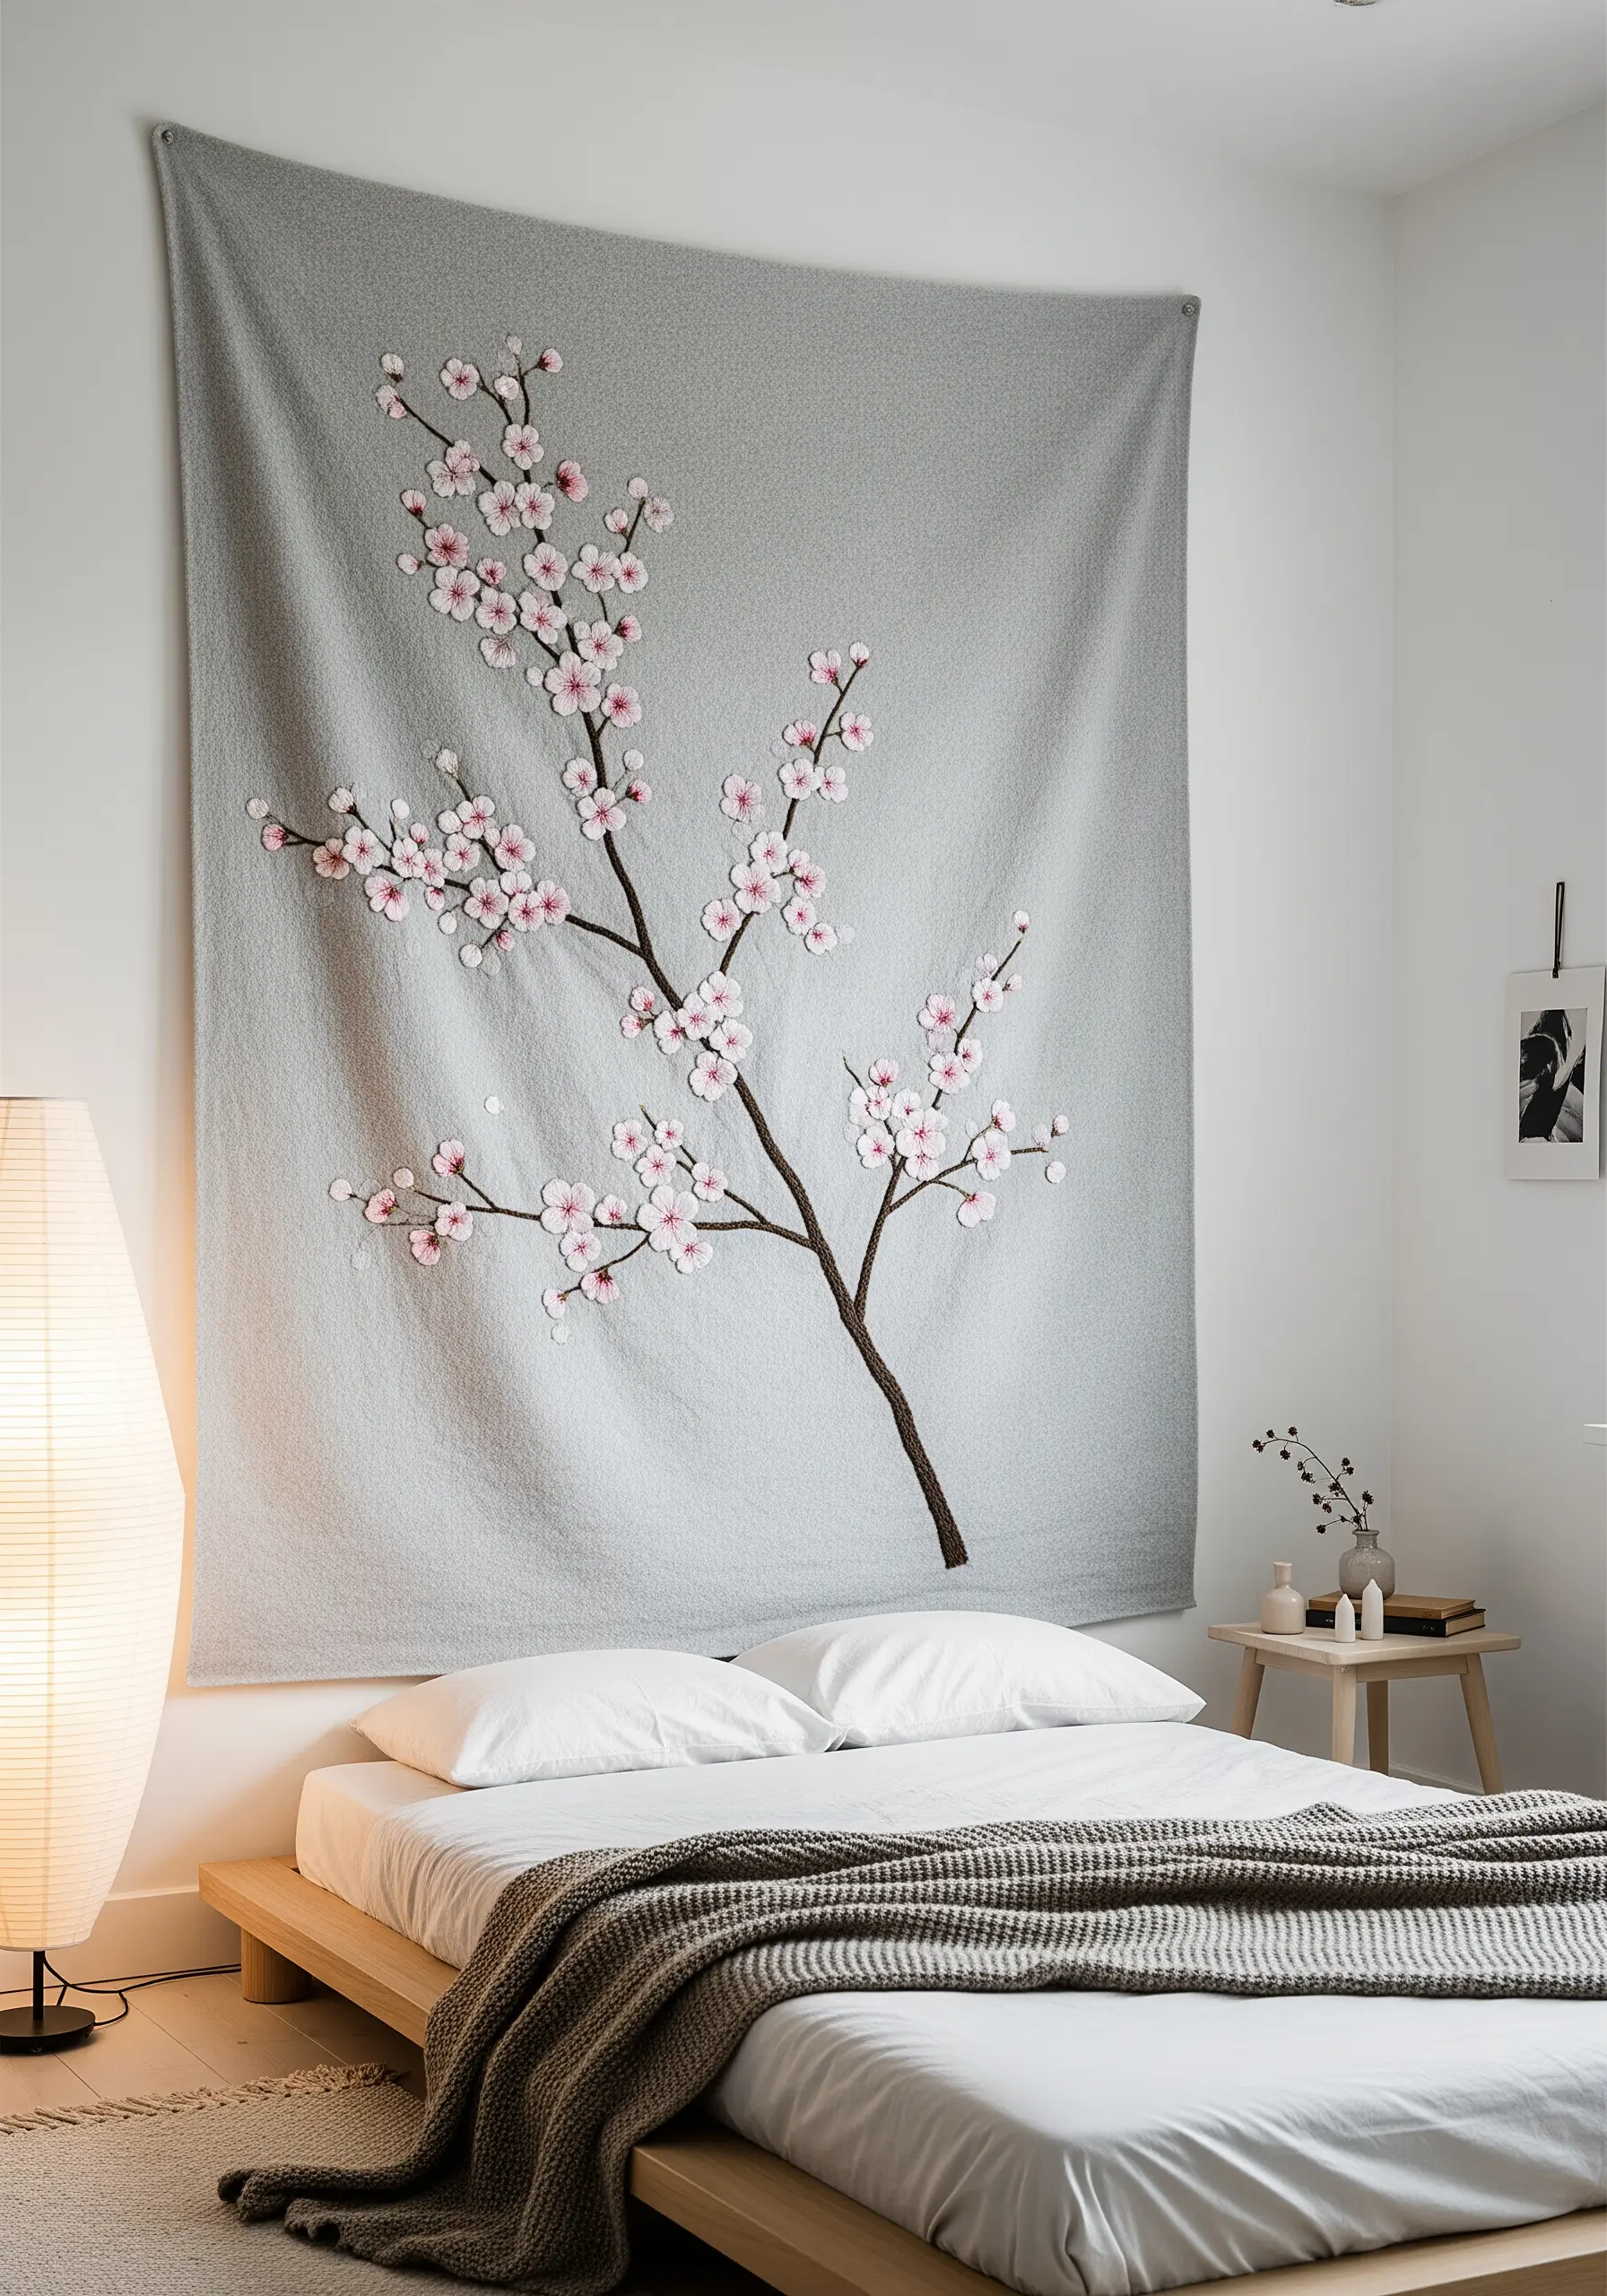
Make your embroidered blossoms pop from the fabric by using stitches that create physical dimension.
Use detached chain stitches (lazy daisies) for individual petals and clusters of French knots for the centers to create realistic cherry blossoms.
For the branch, use a padded satin stitch—stitching over a foundation of straight stitches—to give it a raised, rounded profile.
Stitching these floral framed embroidery ideas on a neutral linen background makes the delicate, 3D elements the undisputed focus of the piece.
20. Weave a Gradient for an Atmospheric Landscape
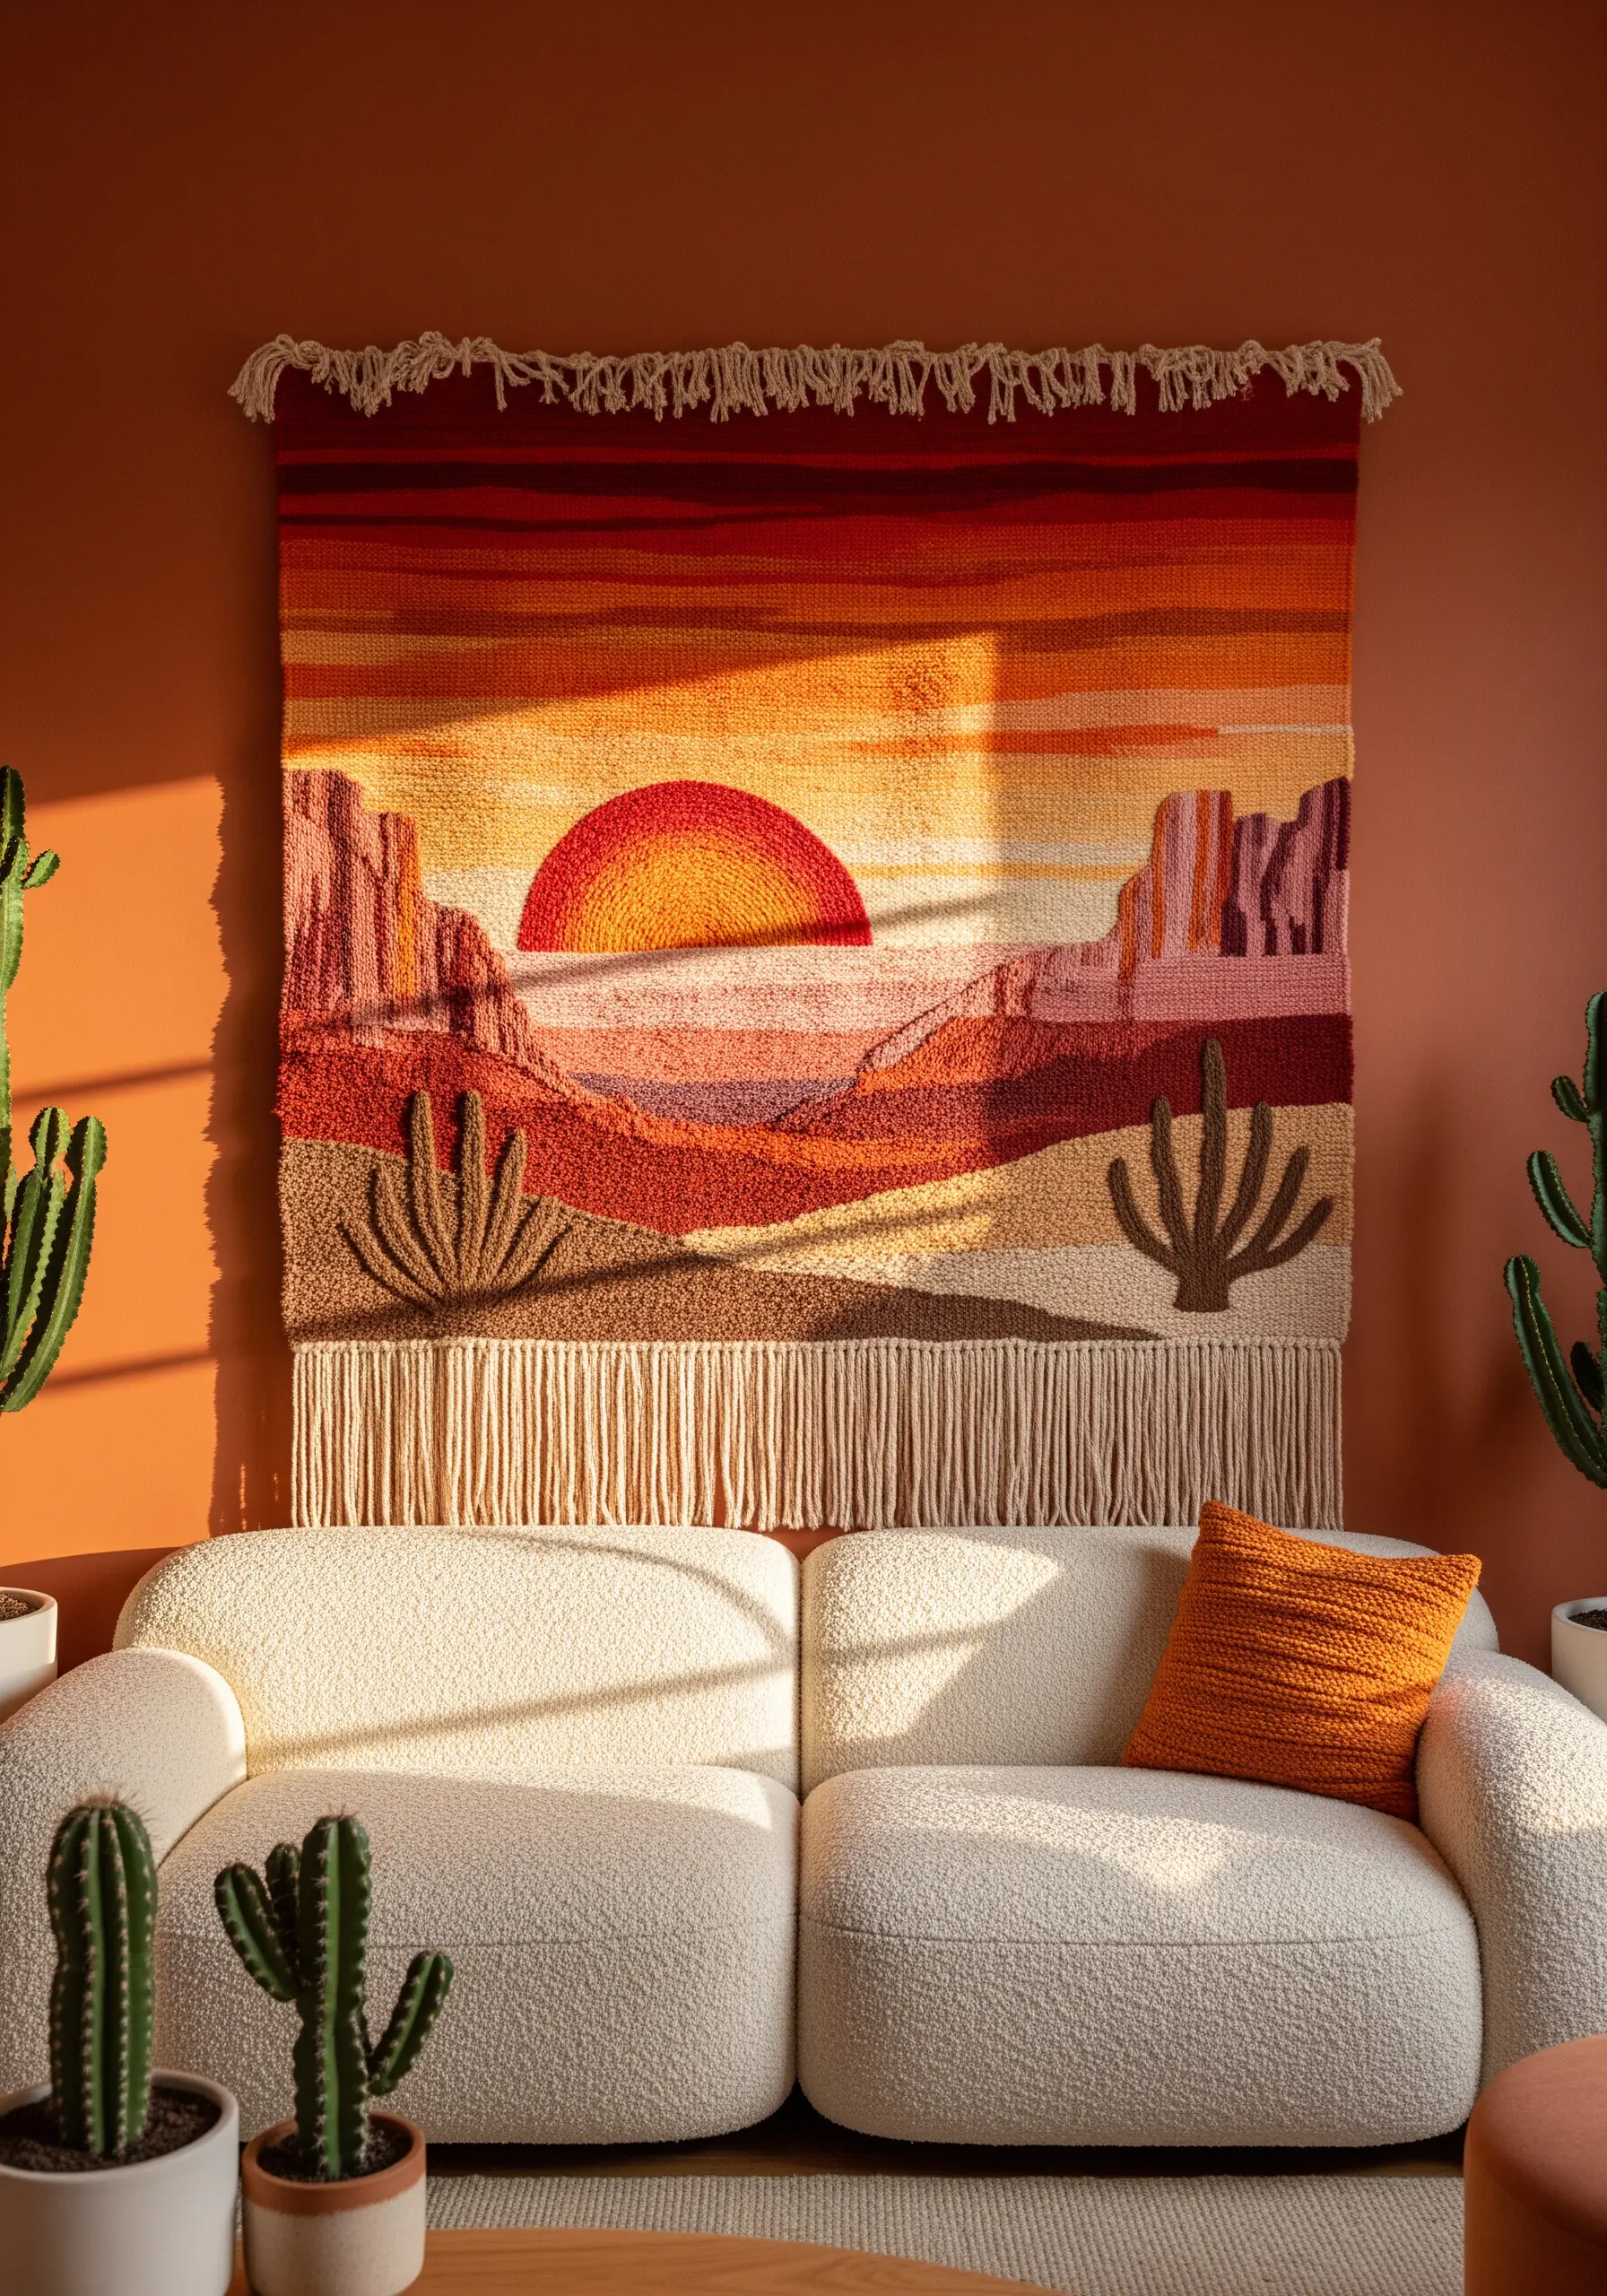
Create the soft, blended colors of a sunset or hazy landscape by adapting weaving techniques for your tapestry.
Using a frame loom or even a large, sturdy canvas, use a needle to weave different colored yarns back and forth, blending them where they meet.
This allows for smooth, painterly transitions that are difficult to achieve with traditional embroidery stitches.
Incorporate textural stitches like loops and knots for foreground elements to add depth and contrast against the smooth, woven sky.
21. Emulate Classic Millefleurs with Tiny Stitches

Create a modern interpretation of medieval ‘millefleurs’ (thousand flowers) tapestries with a dense composition of tiny, varied botanicals.
Cover a dark background fabric with countless small flowers and leaves, using simple stitches like lazy daisy, French knots, and straight stitches.
The key is to vary the shape, color, and scale of the flowers to create a rich, meadow-like texture.
This intricate, detailed approach transforms a simple wall into a captivating botanical field that draws the viewer in.
22. Design a Functional Art Room Divider
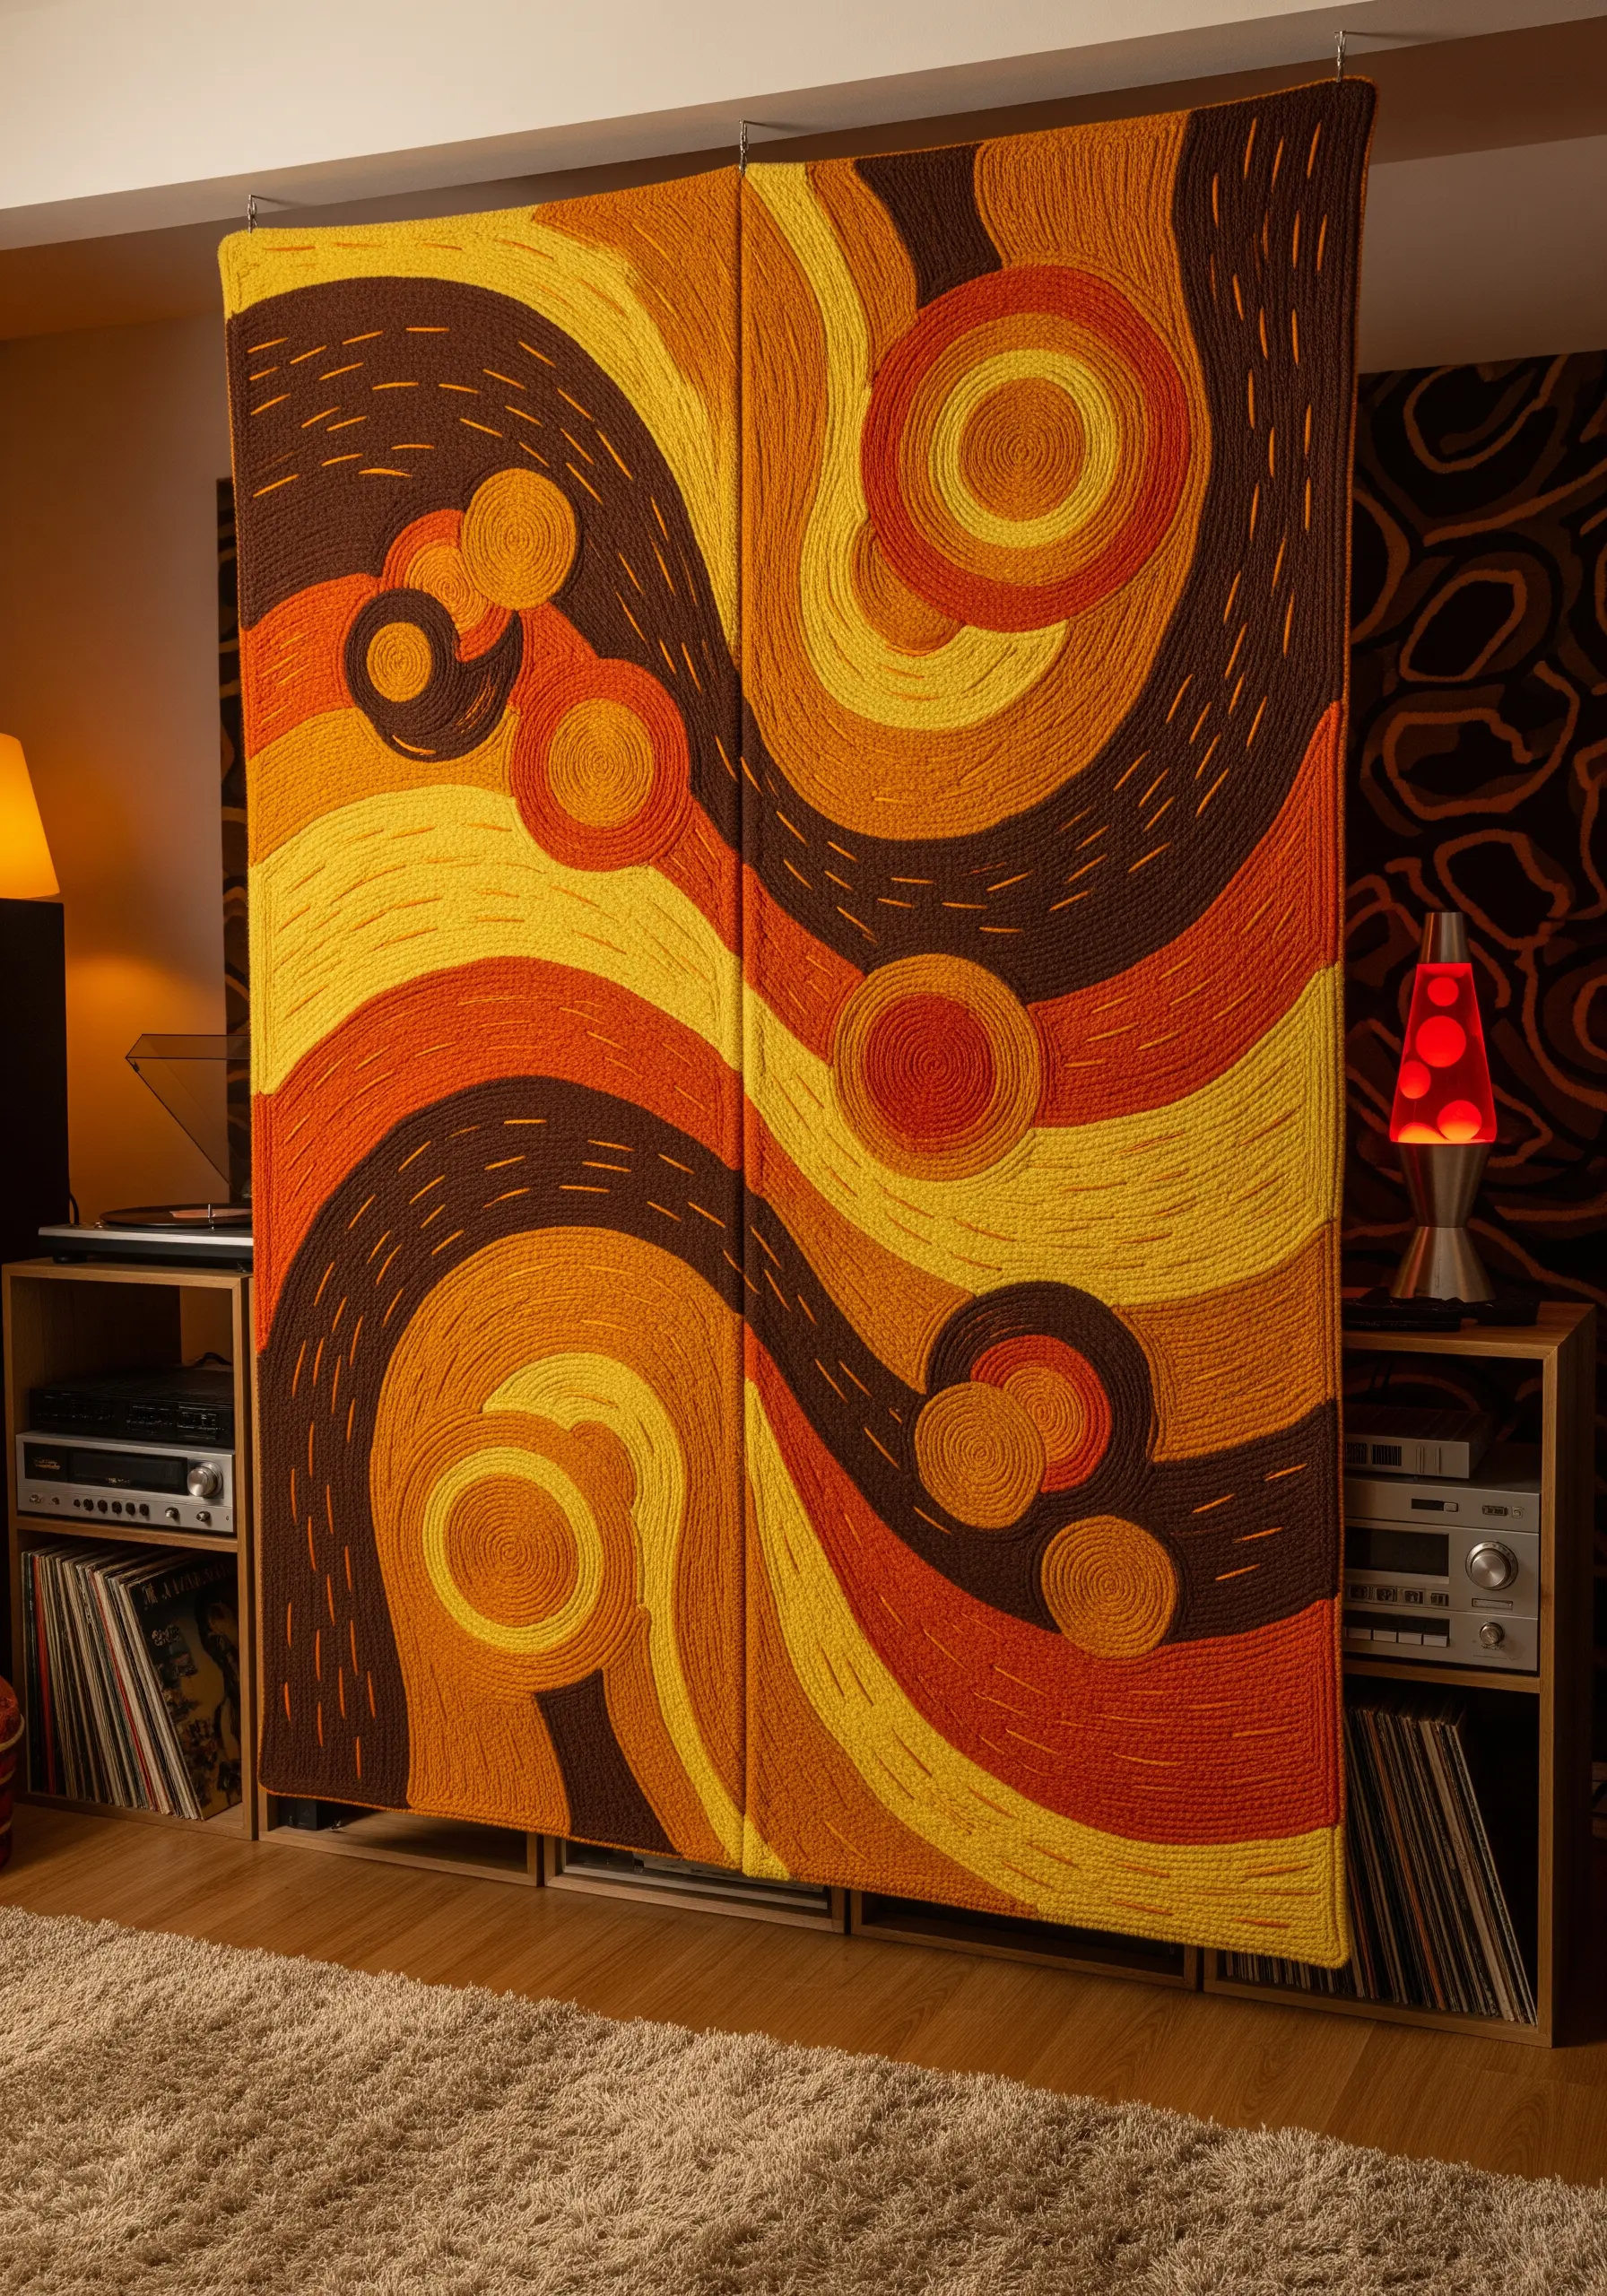
Take your embroidery off the wall and make it a functional part of your room’s architecture.
Create two or more long panels using a textural technique like yarn coiling or punch needle on a heavy canvas.
Mount the finished panels onto simple wooden frames with hinges, or suspend them from ceiling tracks to create a movable screen.
This project transforms a decorative tapestry into a piece of interactive, yarn wall art that defines and beautifies your space.
23. Embroider a Light-Filtering Window Screen
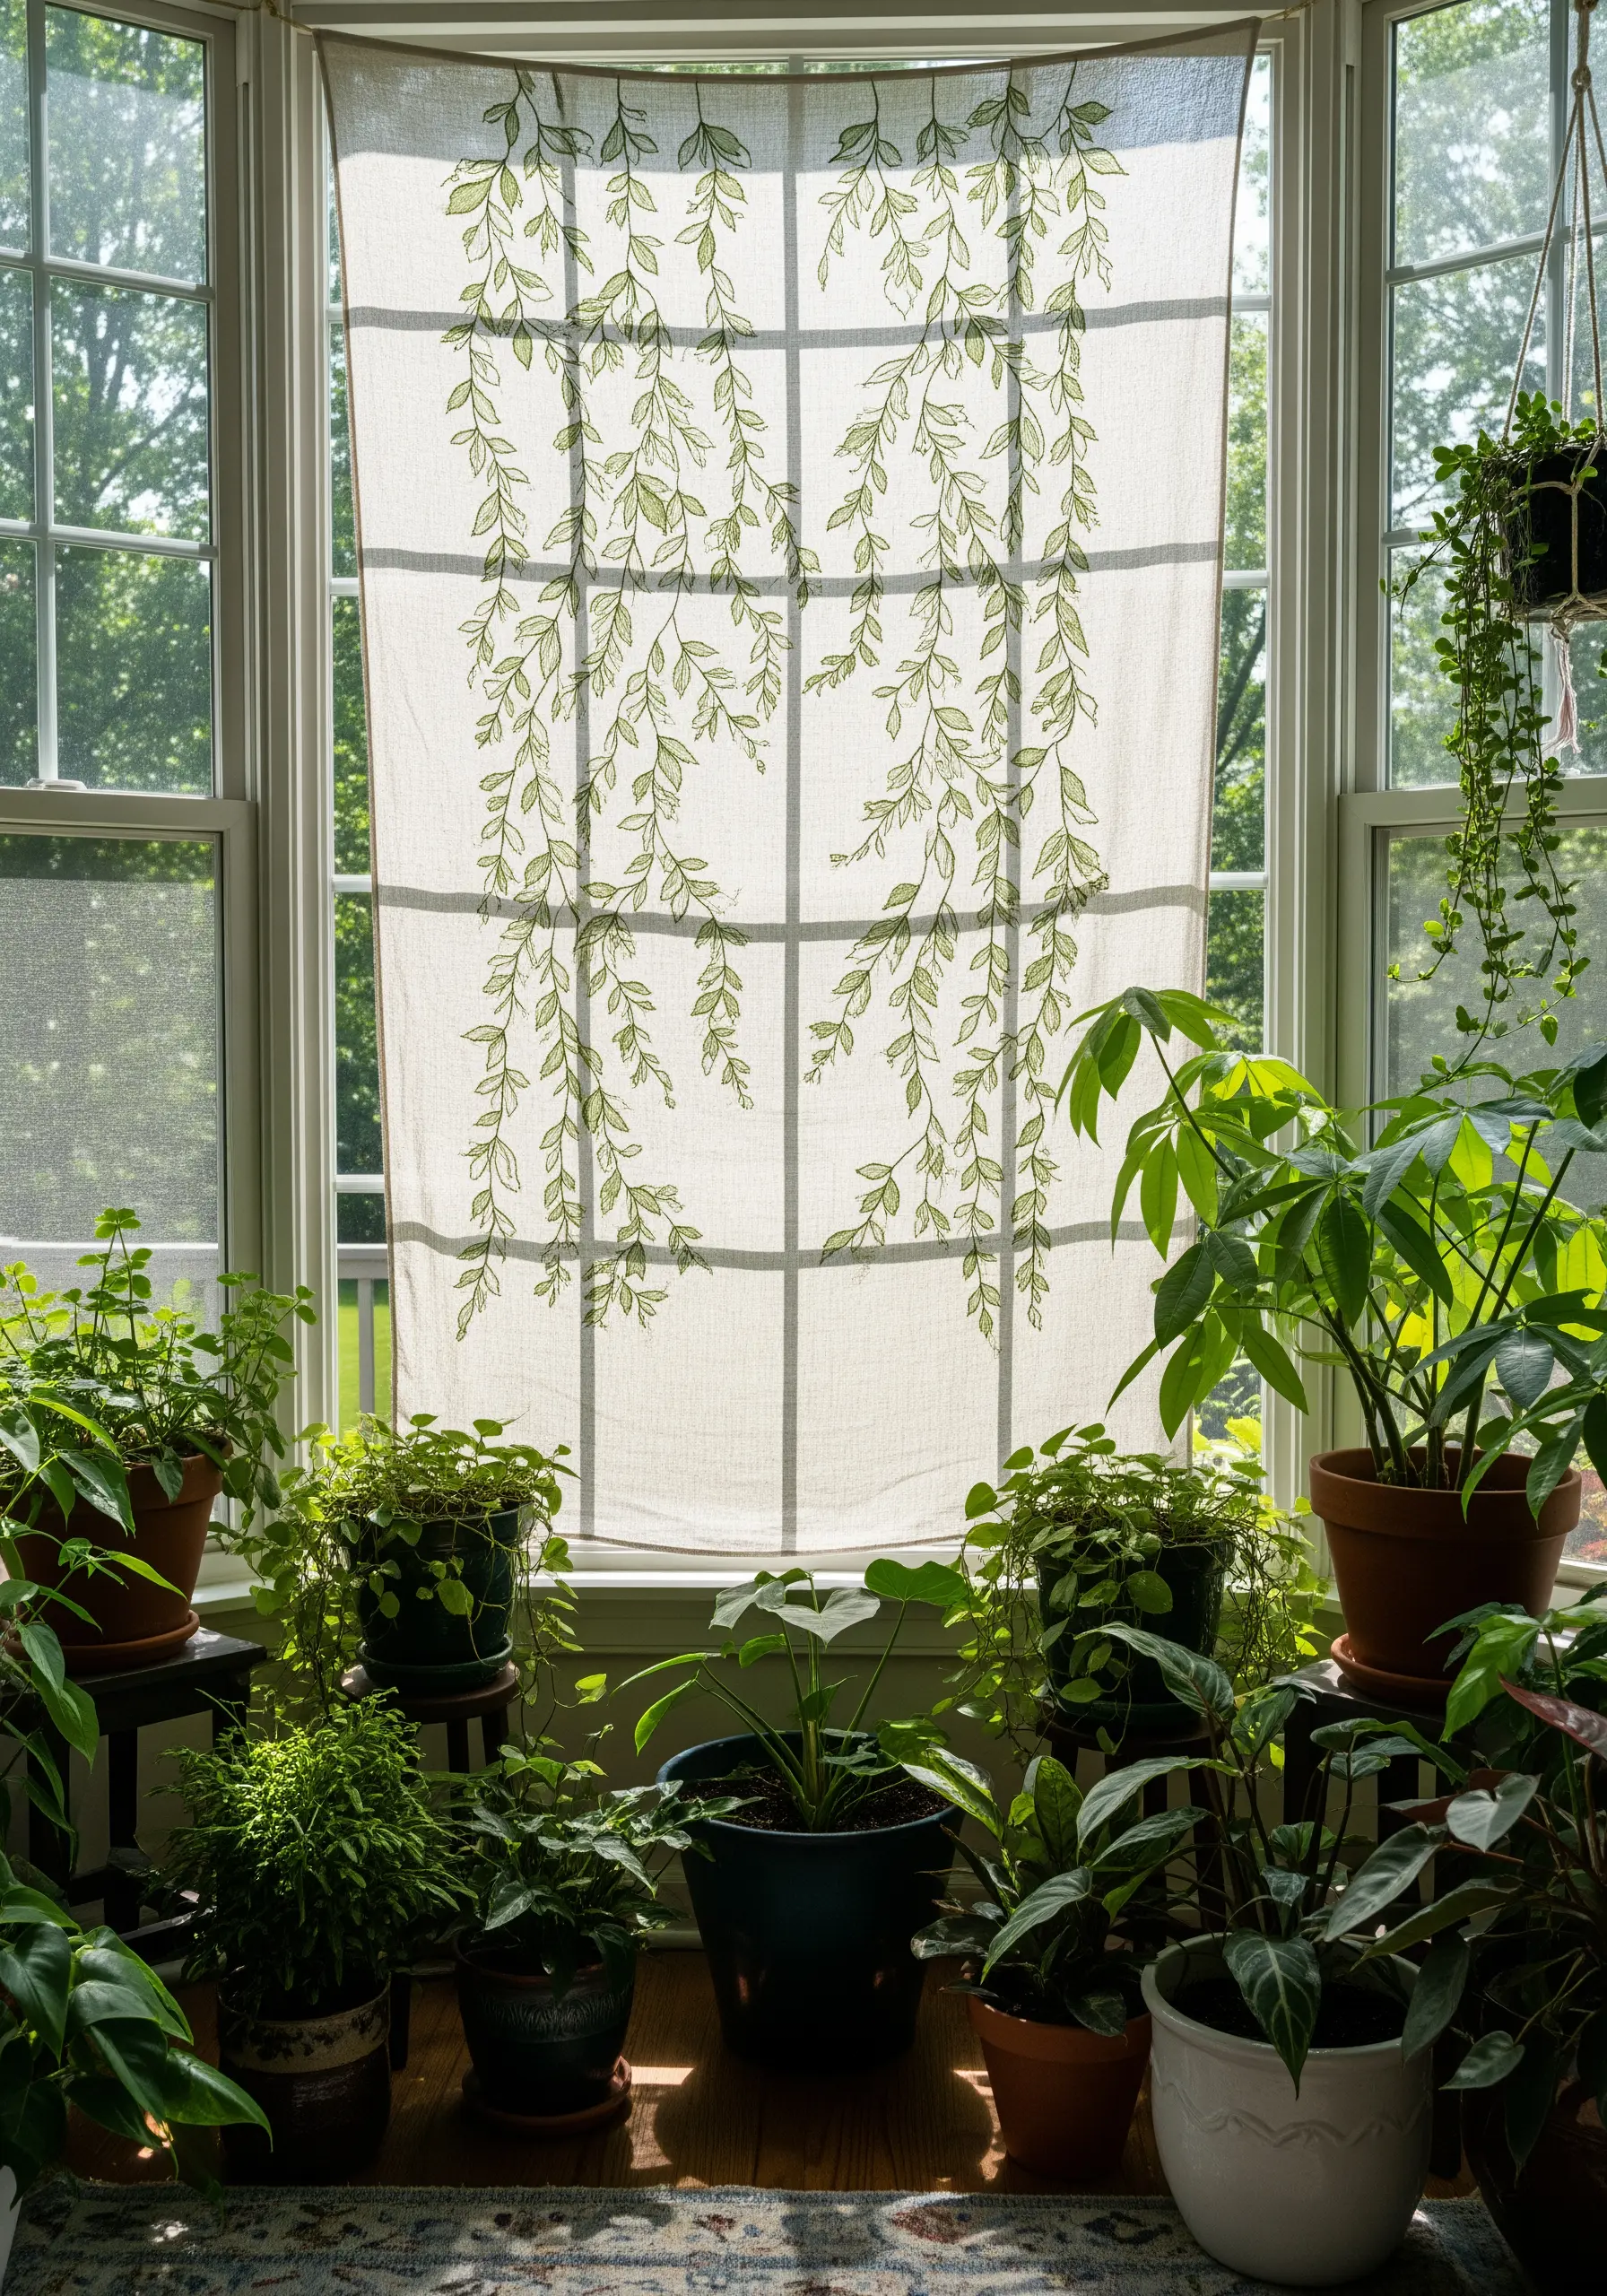
Stitch directly onto a semi-sheer fabric, like linen or cotton voile, to create a tapestry that interacts with natural light.
Use a simple backstitch or stem stitch to create delicate, trailing botanical designs.
The negative space is just as important as the stitched lines, allowing light to filter through and cast beautiful shadows.
Hanging this type of piece in a window turns your embroidery into a dynamic work of art that changes with the time of day.
24. Map the Cosmos with Knots and Metallics
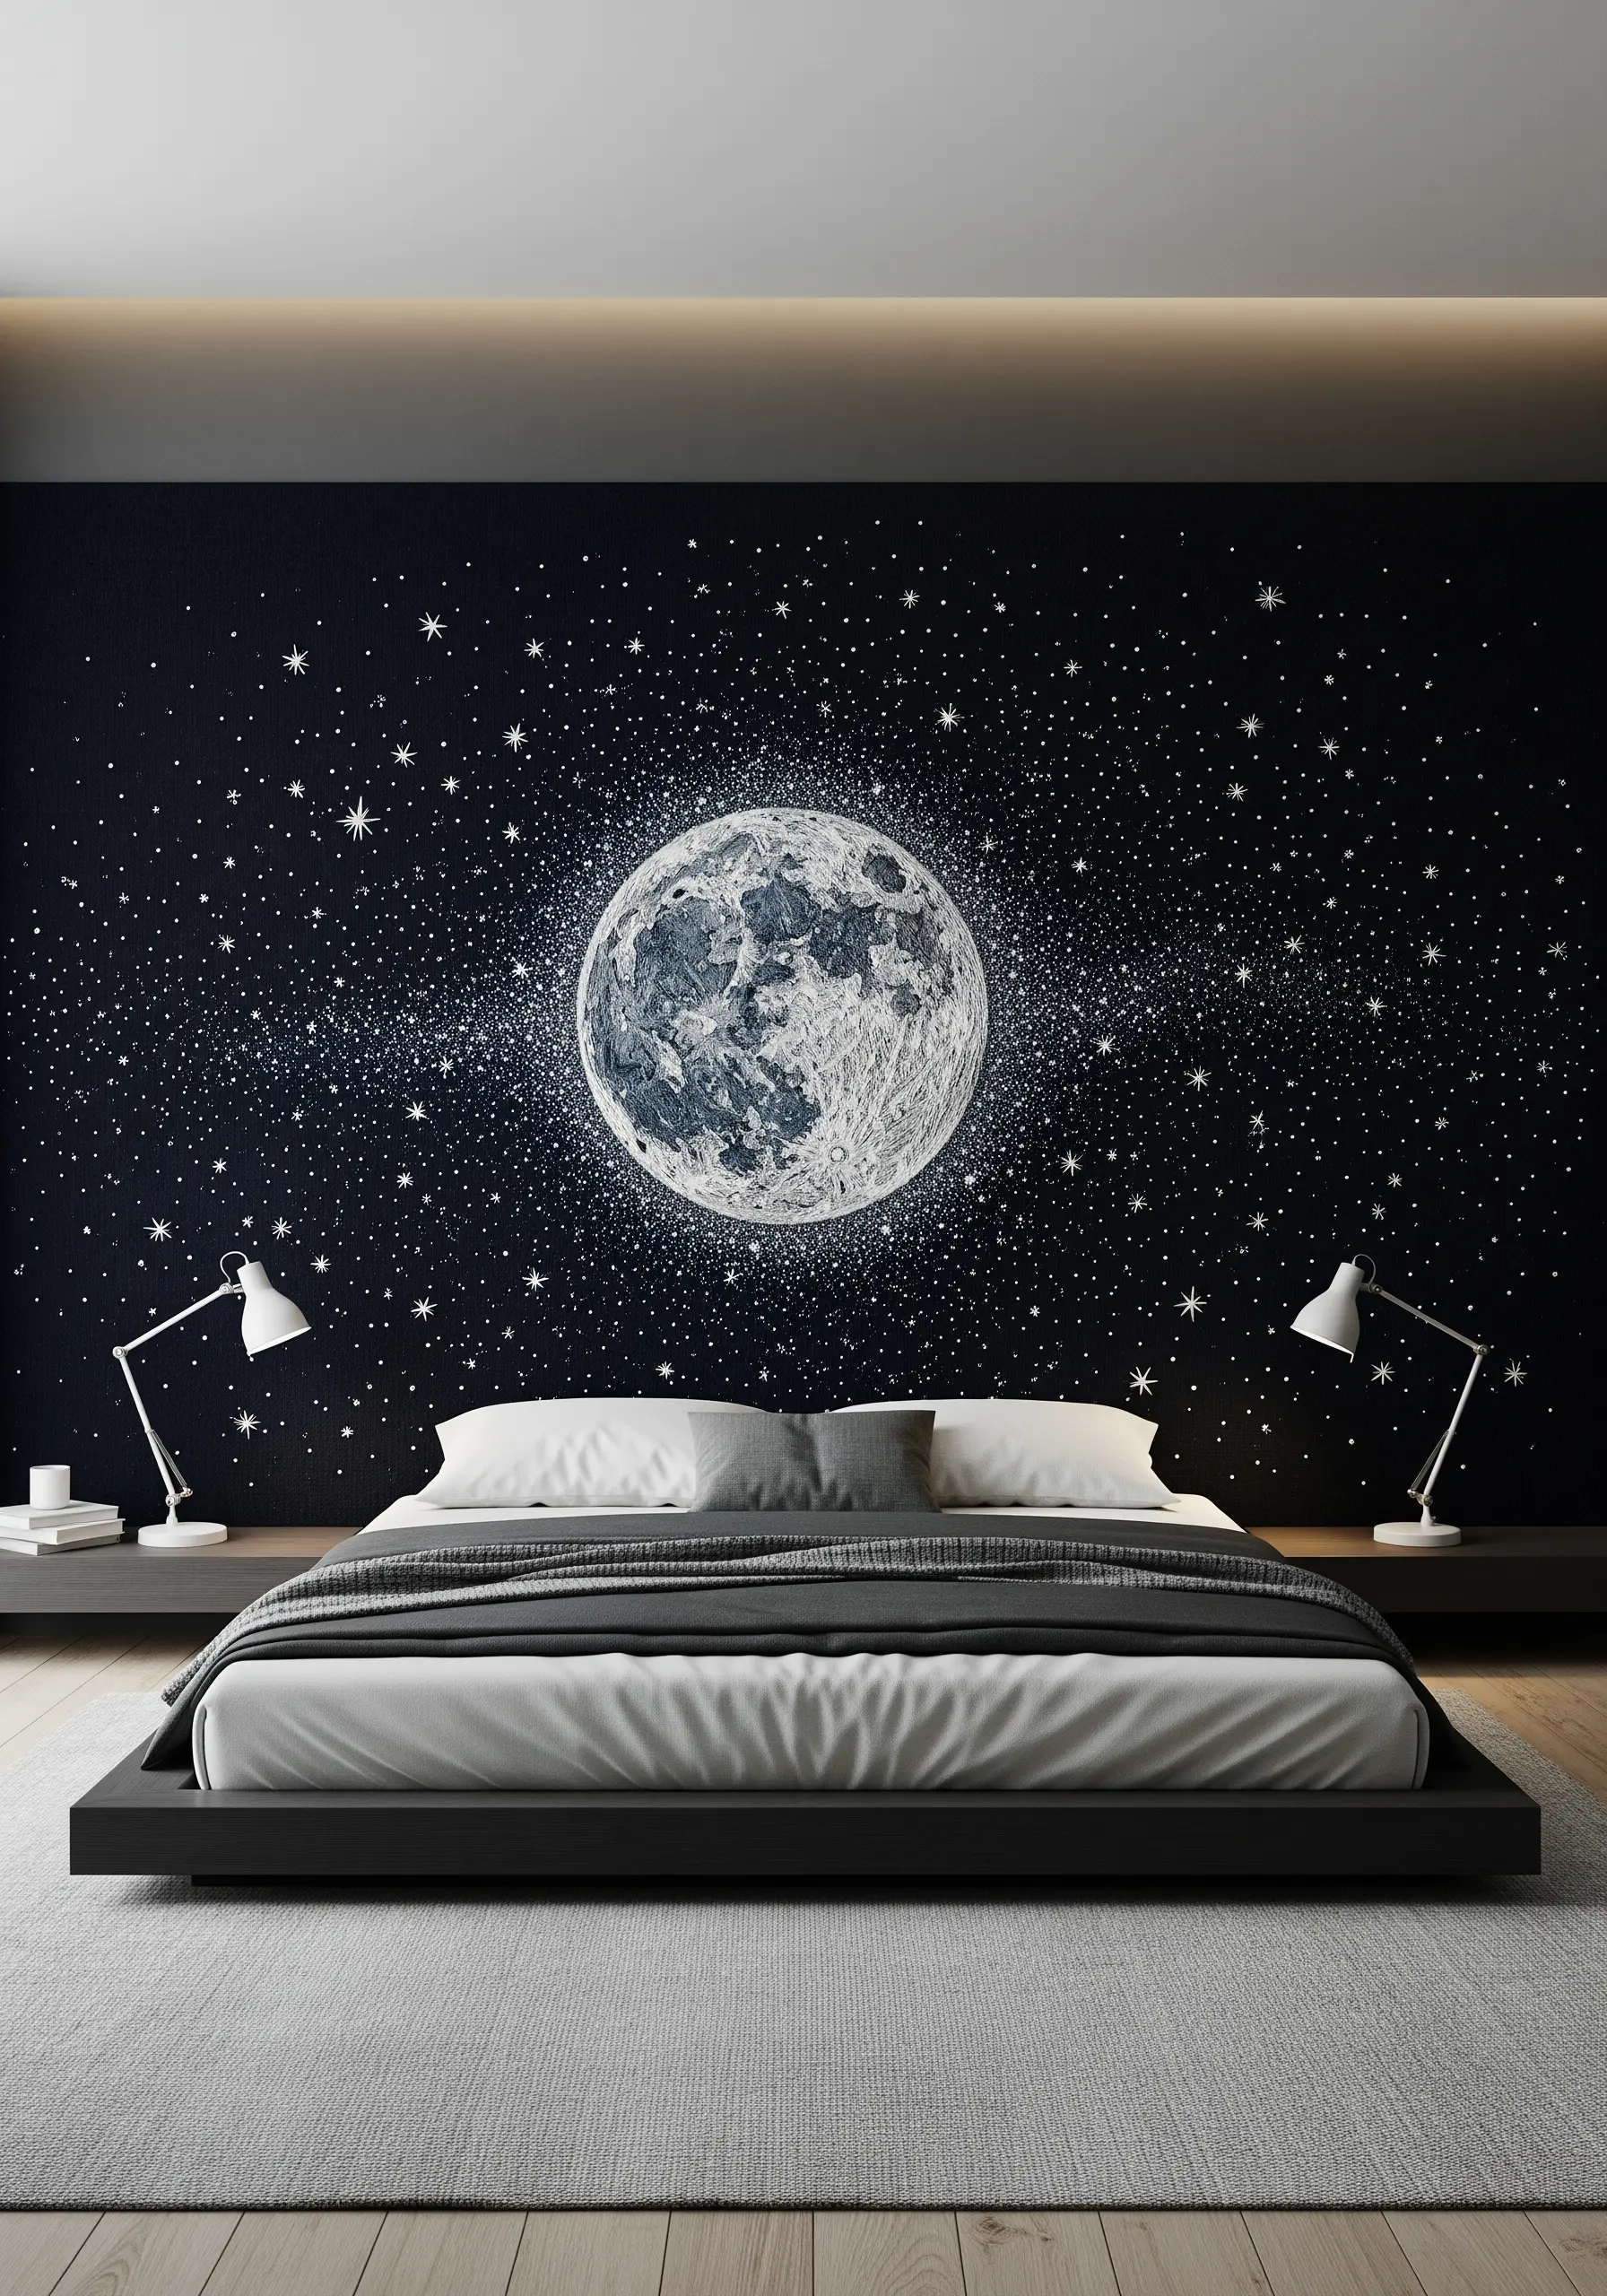
Recreate the texture of the lunar surface and the sparkle of a starry sky with a focused selection of stitches and threads.
For the moon, use a dense fill of French knots and straight stitches in various shades of grey, white, and silver to build up a cratered texture.
Scatter thousands of tiny French knots and single straight stitches using metallic and glow-in-the-dark thread on a dark navy or black background to represent the surrounding stars.
This creates a dramatic, high-contrast mural that feels both immense and intimately detailed.
25. Translate Line Art into Bold Thread Portraits
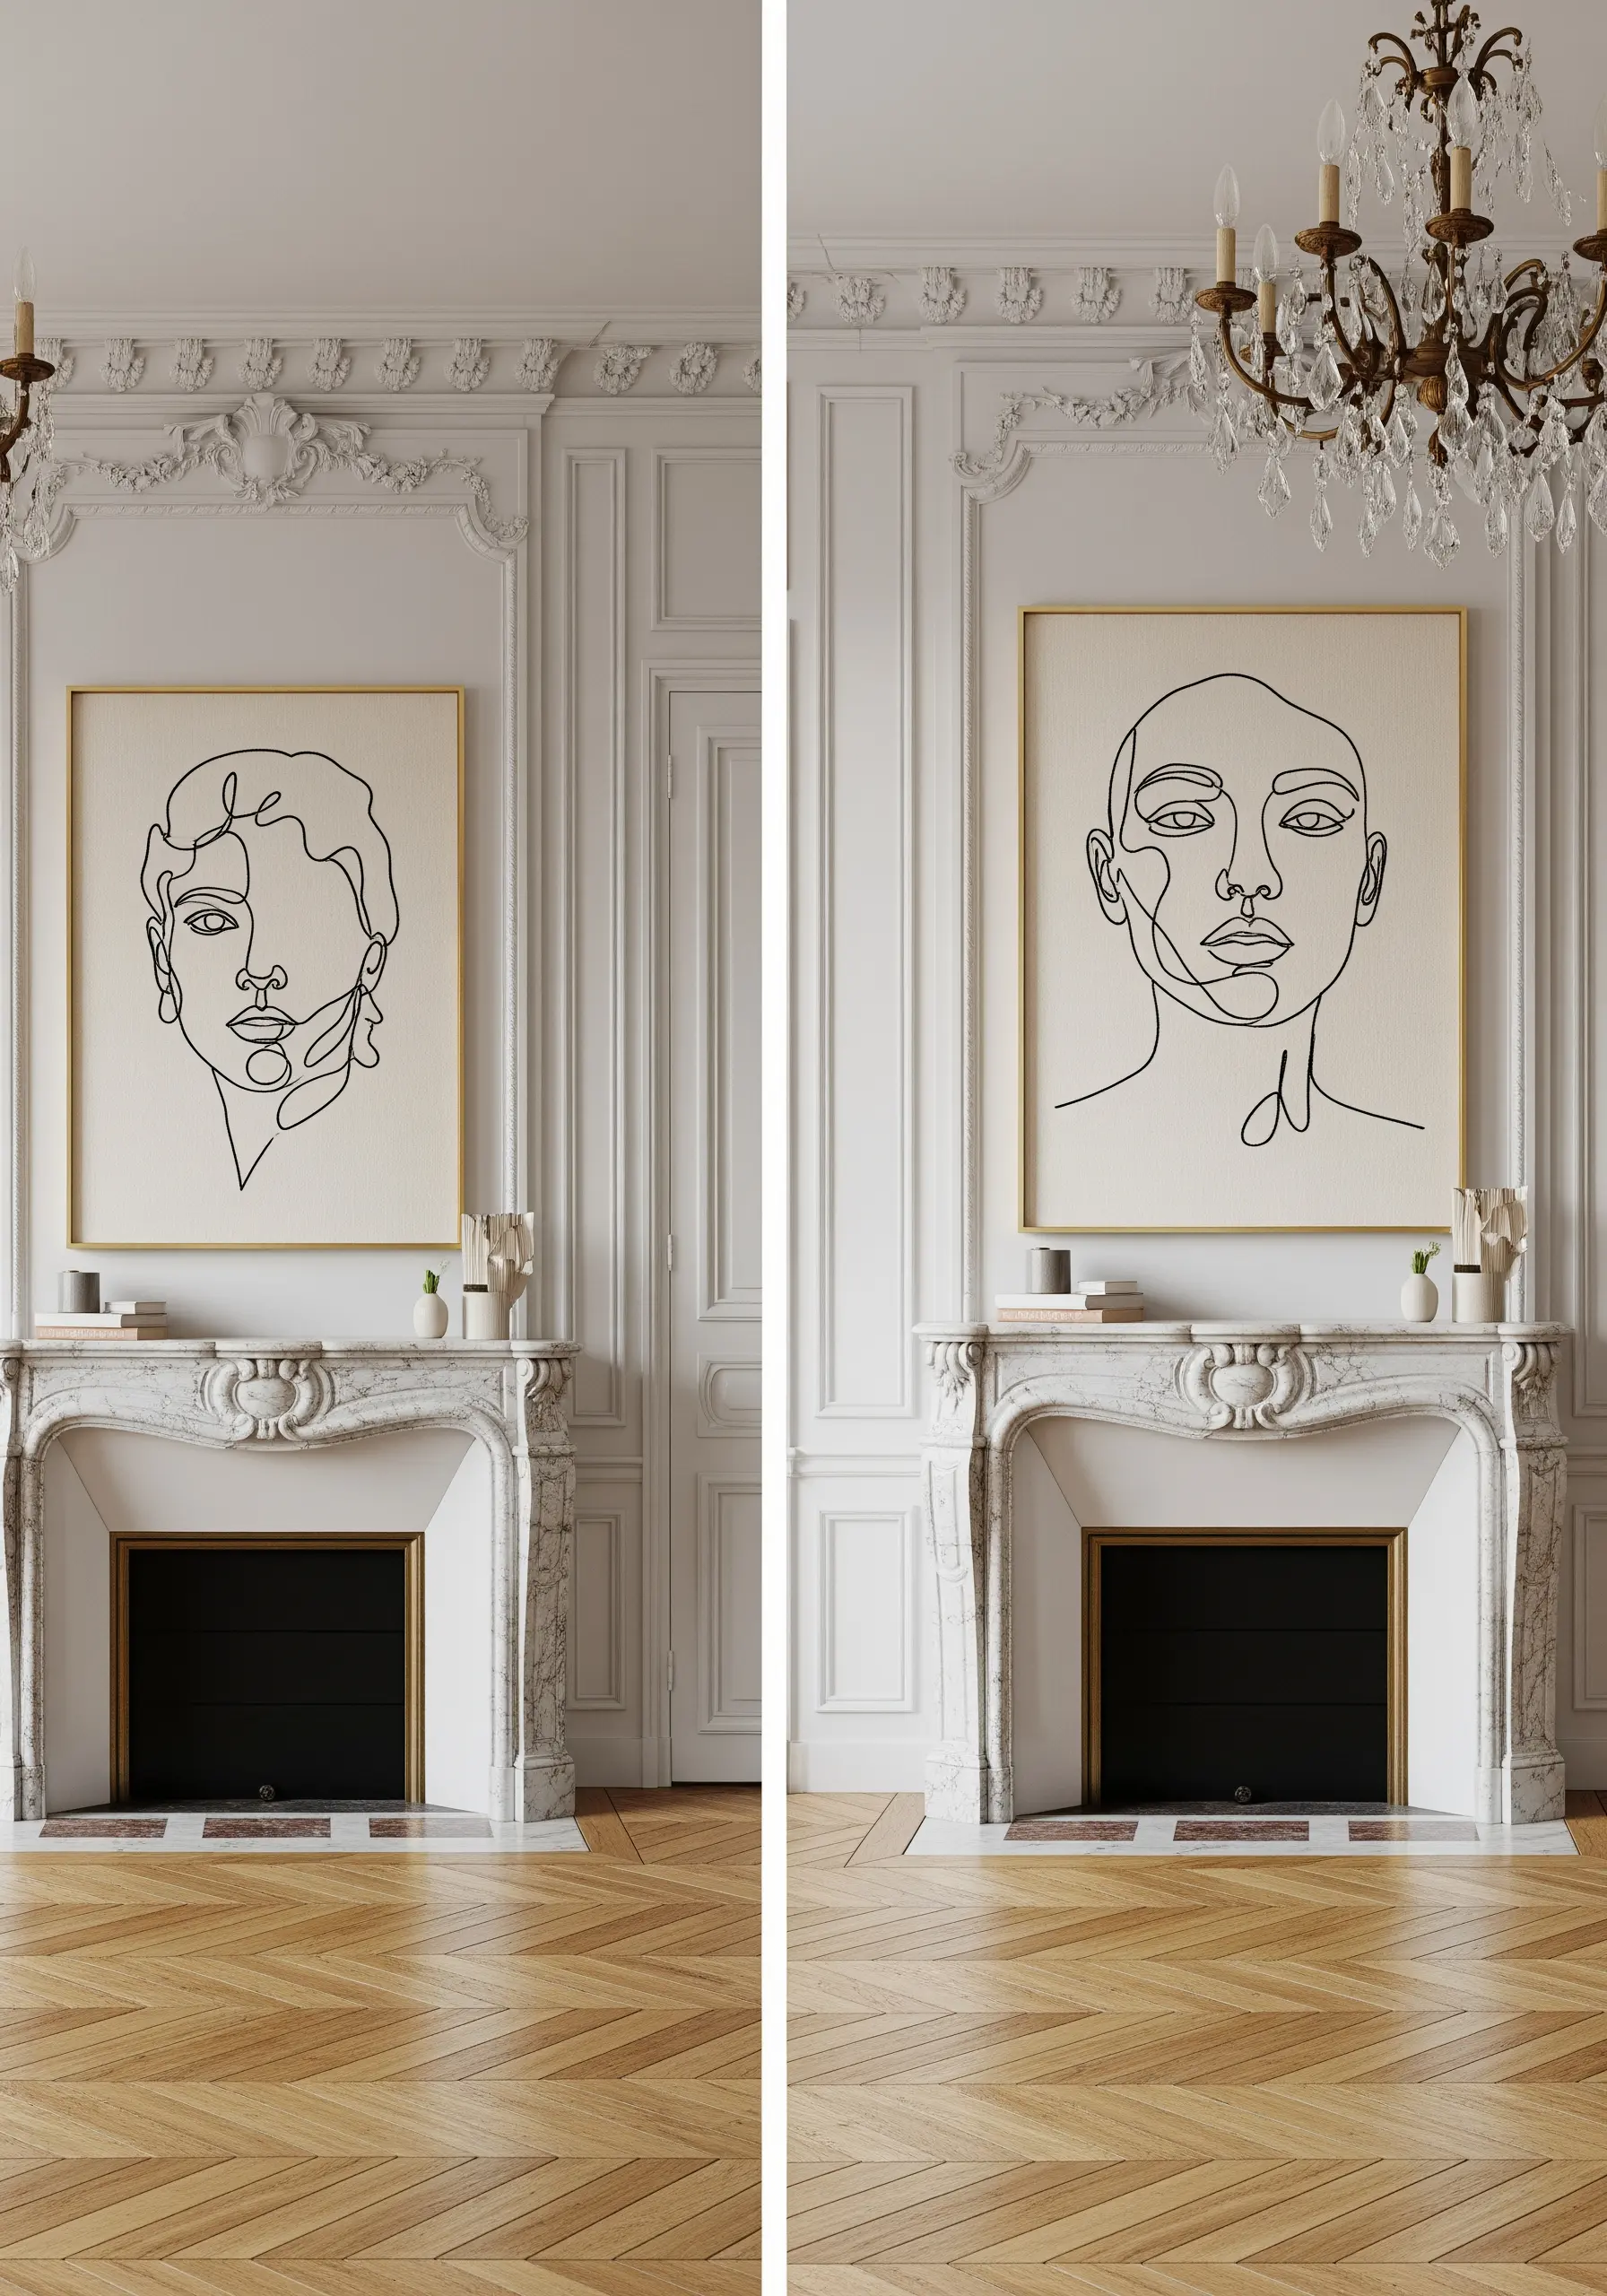
Capture the fluid energy of a continuous-line drawing by using a thick, bold thread as your ‘ink’.
Use several strands of black embroidery floss or even fine yarn and the couching technique to tack it down onto a neutral canvas.
This allows you to create smooth, unbroken curves and sharp angles without distorting the fabric.
Framing these single line face profiles simply and hanging them in a classic interior creates a striking blend of traditional and contemporary art.
26. Combine Appliqué and Satin Stitch for Clean Graphics
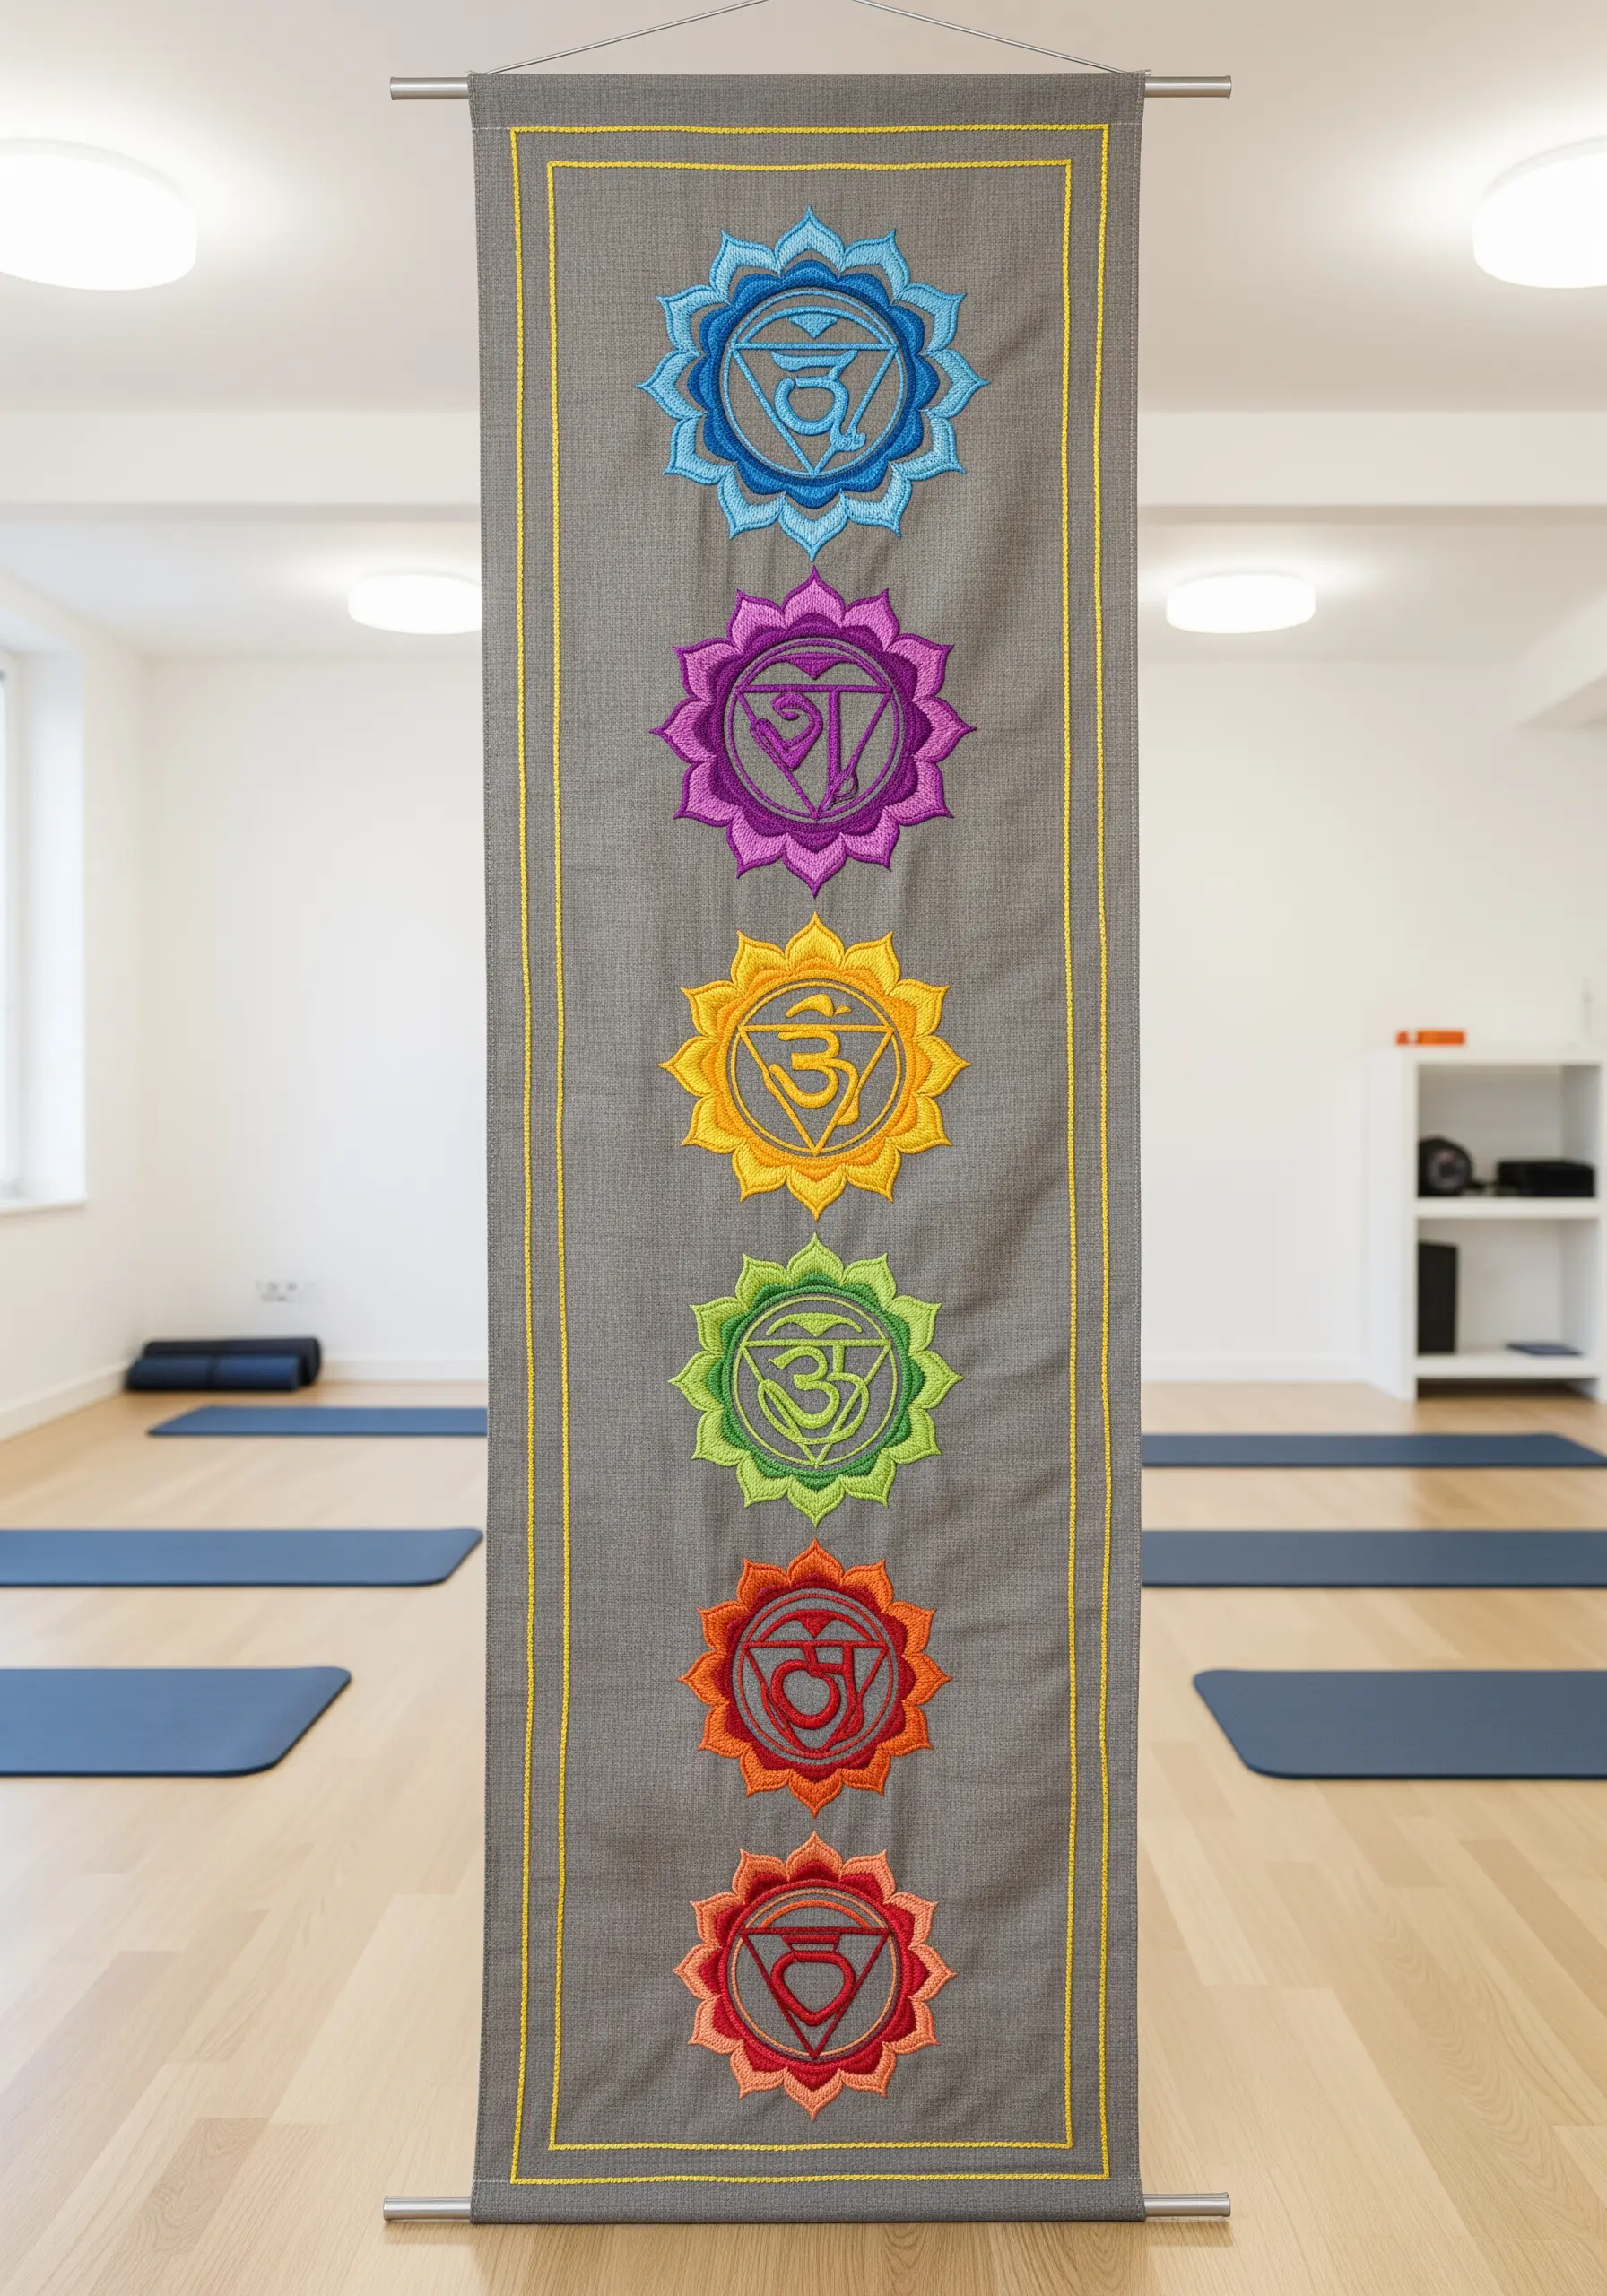
For perfectly crisp, colorful shapes like mandalas or symbols, use appliqué as your base.
Cut your main shapes from felt or non-fraying cotton, fuse them to your background fabric, and then encase the raw edges with a precise, tight satin stitch border.
This technique gives you intensely saturated color blocks with a clean, raised outline that is perfectly uniform.
It’s an ideal method for creating bold, graphic banners and flags with a professional finish.
27. Go Big with Pixel-Perfect Cross-Stitch
Translate the nostalgia of 8-bit video games into a large-scale tapestry by treating each cross-stitch as a single pixel.
You will need a very large piece of Aida cloth or evenweave linen, or you can use waste canvas on a backing of your choice.
The beauty of this technique is its meditative simplicity and precision; the final image is built from thousands of identical, perfect ‘X’s.
This method transforms a simple craft into a large, graphic art installation with a playful, retro appeal.
28. Adapt Geometric Weaving Patterns for Embroidery
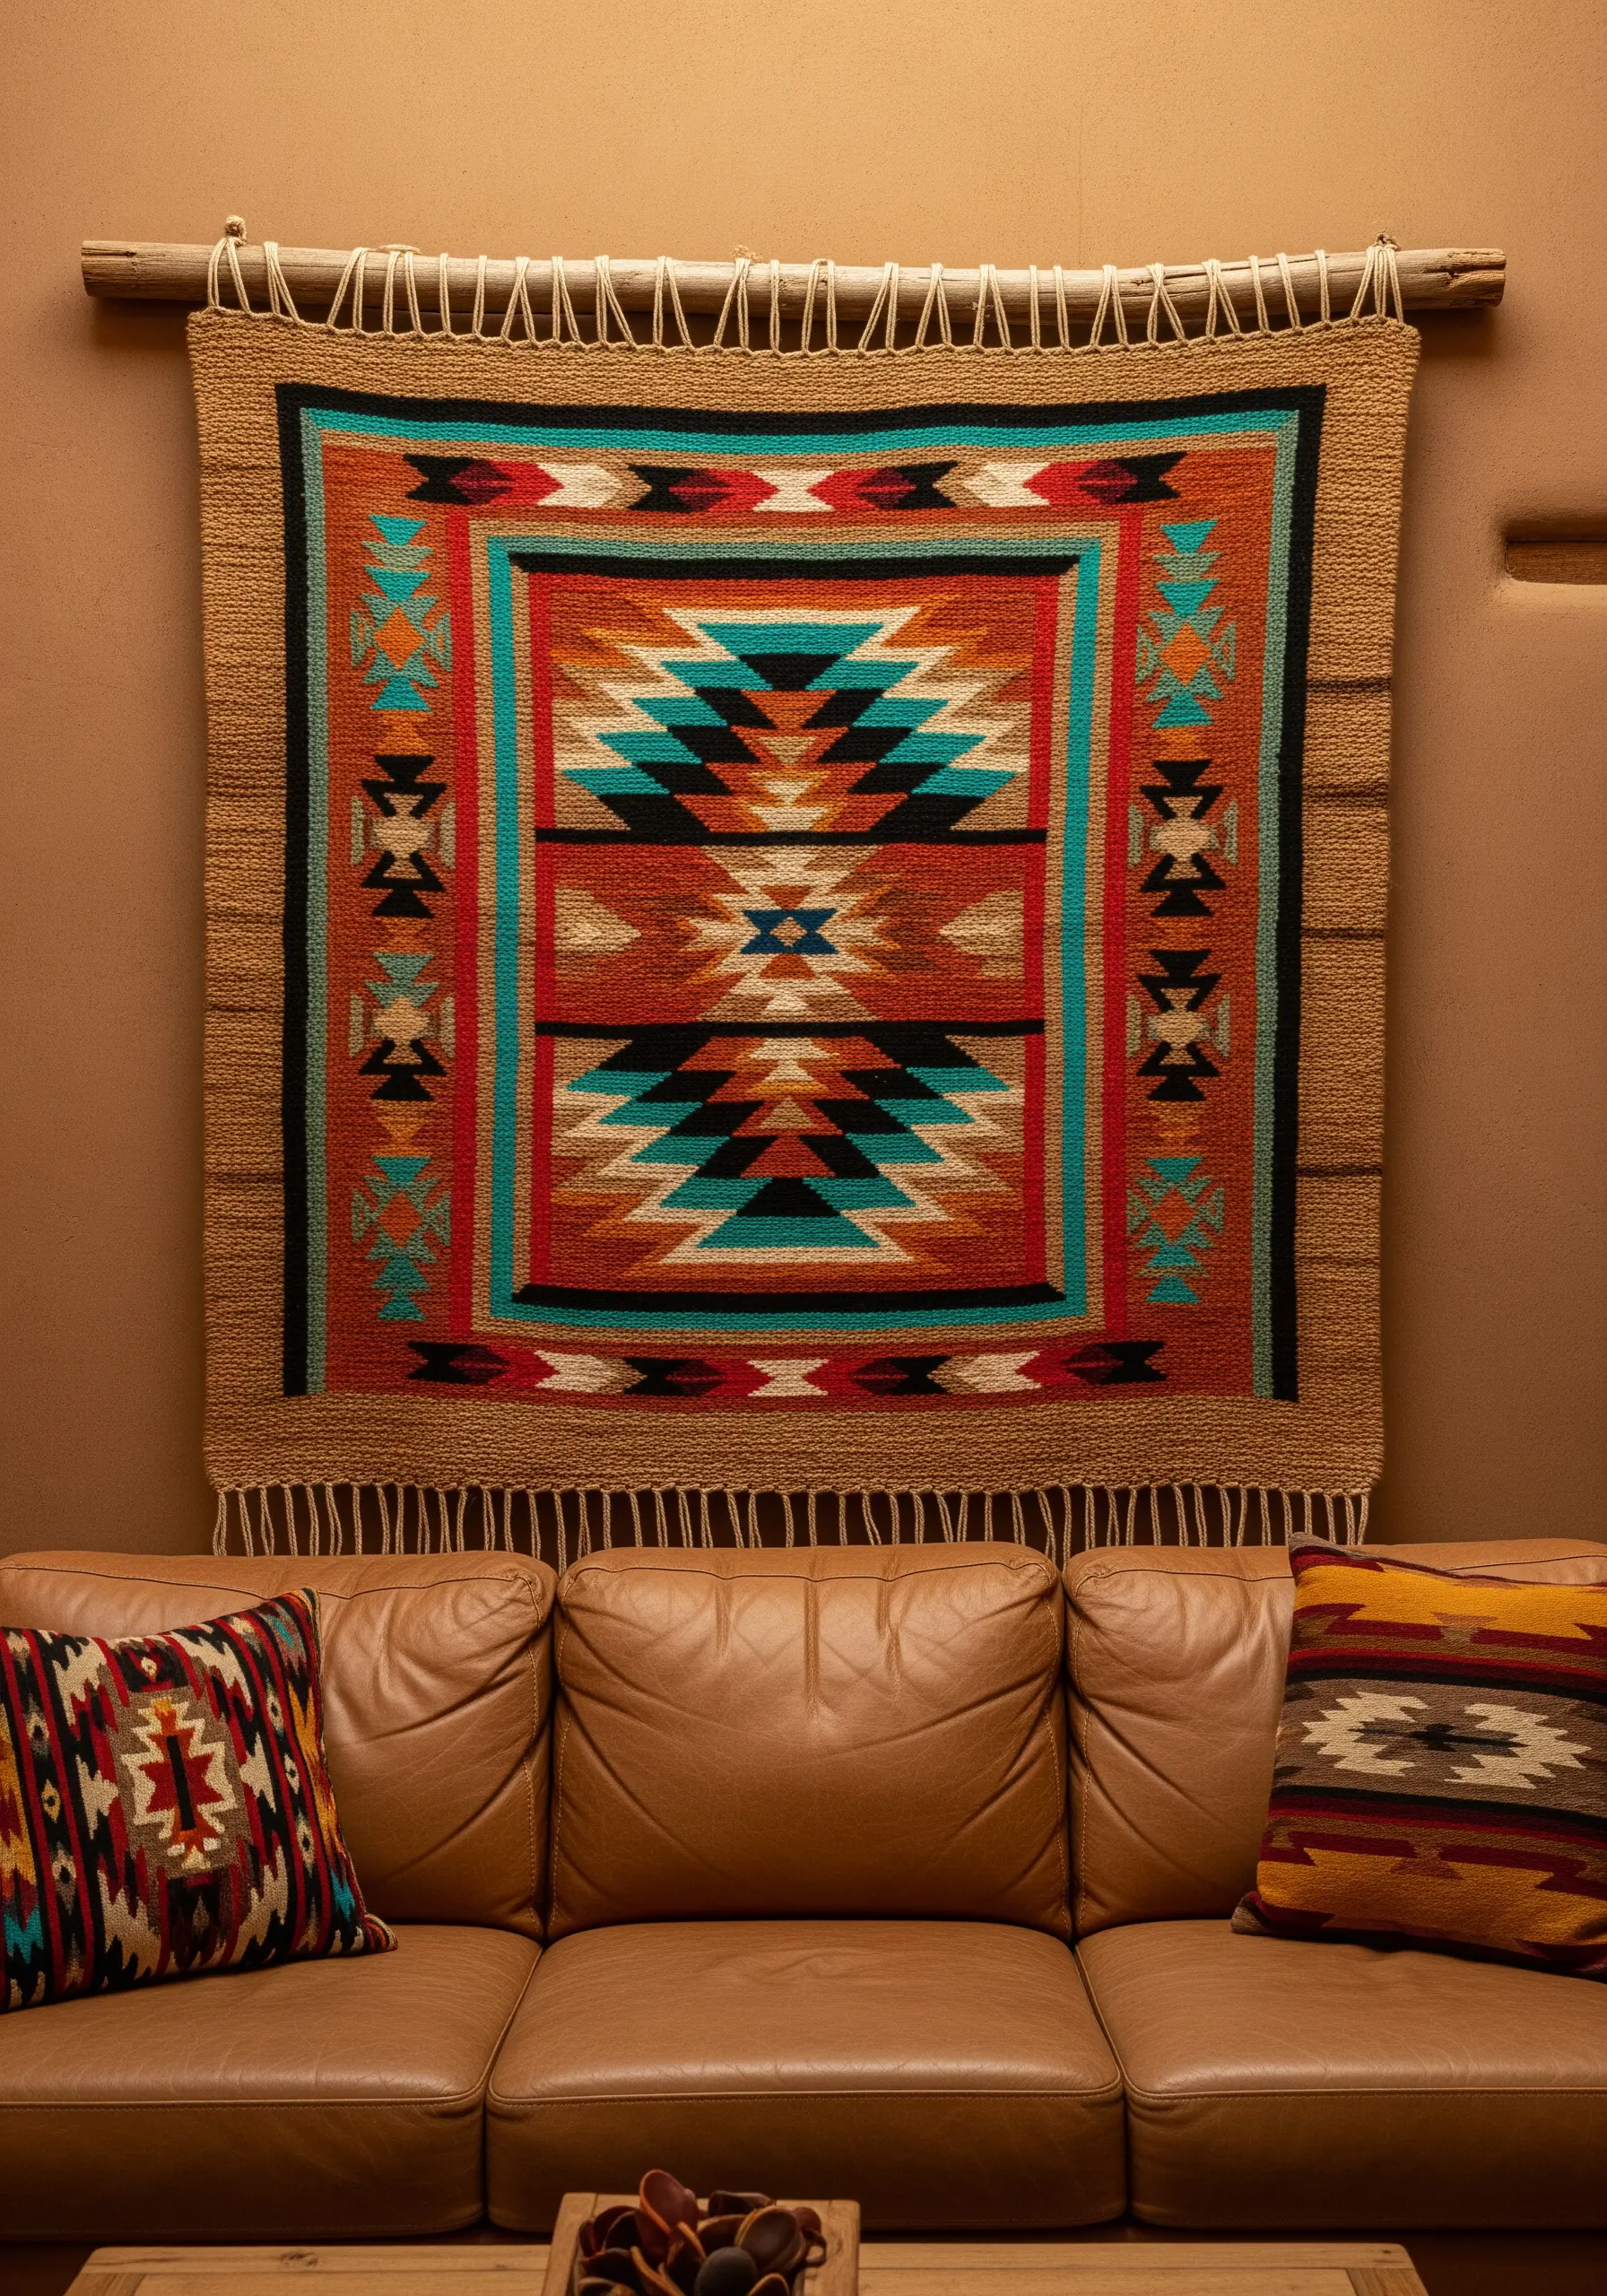
You can capture the spirit of Southwestern woven textiles using embroidery stitches.
Use stitches like the brick stitch or long-and-short stitch to fill in geometric shapes, mimicking the look of woven tapestry.
Choose a rustic, earthy color palette and work on a heavy, textured fabric like linen or wool felt.
This approach allows you to recreate the bold, graphic power of traditional weaving with the portable and accessible tools of hand embroidery.
29. Juxtapose Scientific Detail and Soft Botanicals

Create a compelling visual narrative by combining two unexpected subjects: anatomical illustration and delicate florals.
Use a fine, single-strand backstitch or split stitch to render the precise lines of the anatomical drawing.
Contrast this with soft, blended satin stitches and French knots for the surrounding flowers and leaves.
This juxtaposition creates a powerful piece that explores themes of life, science, and nature in a beautiful and thought-provoking way.
30. Construct a 3D Suspended Leaf Canopy
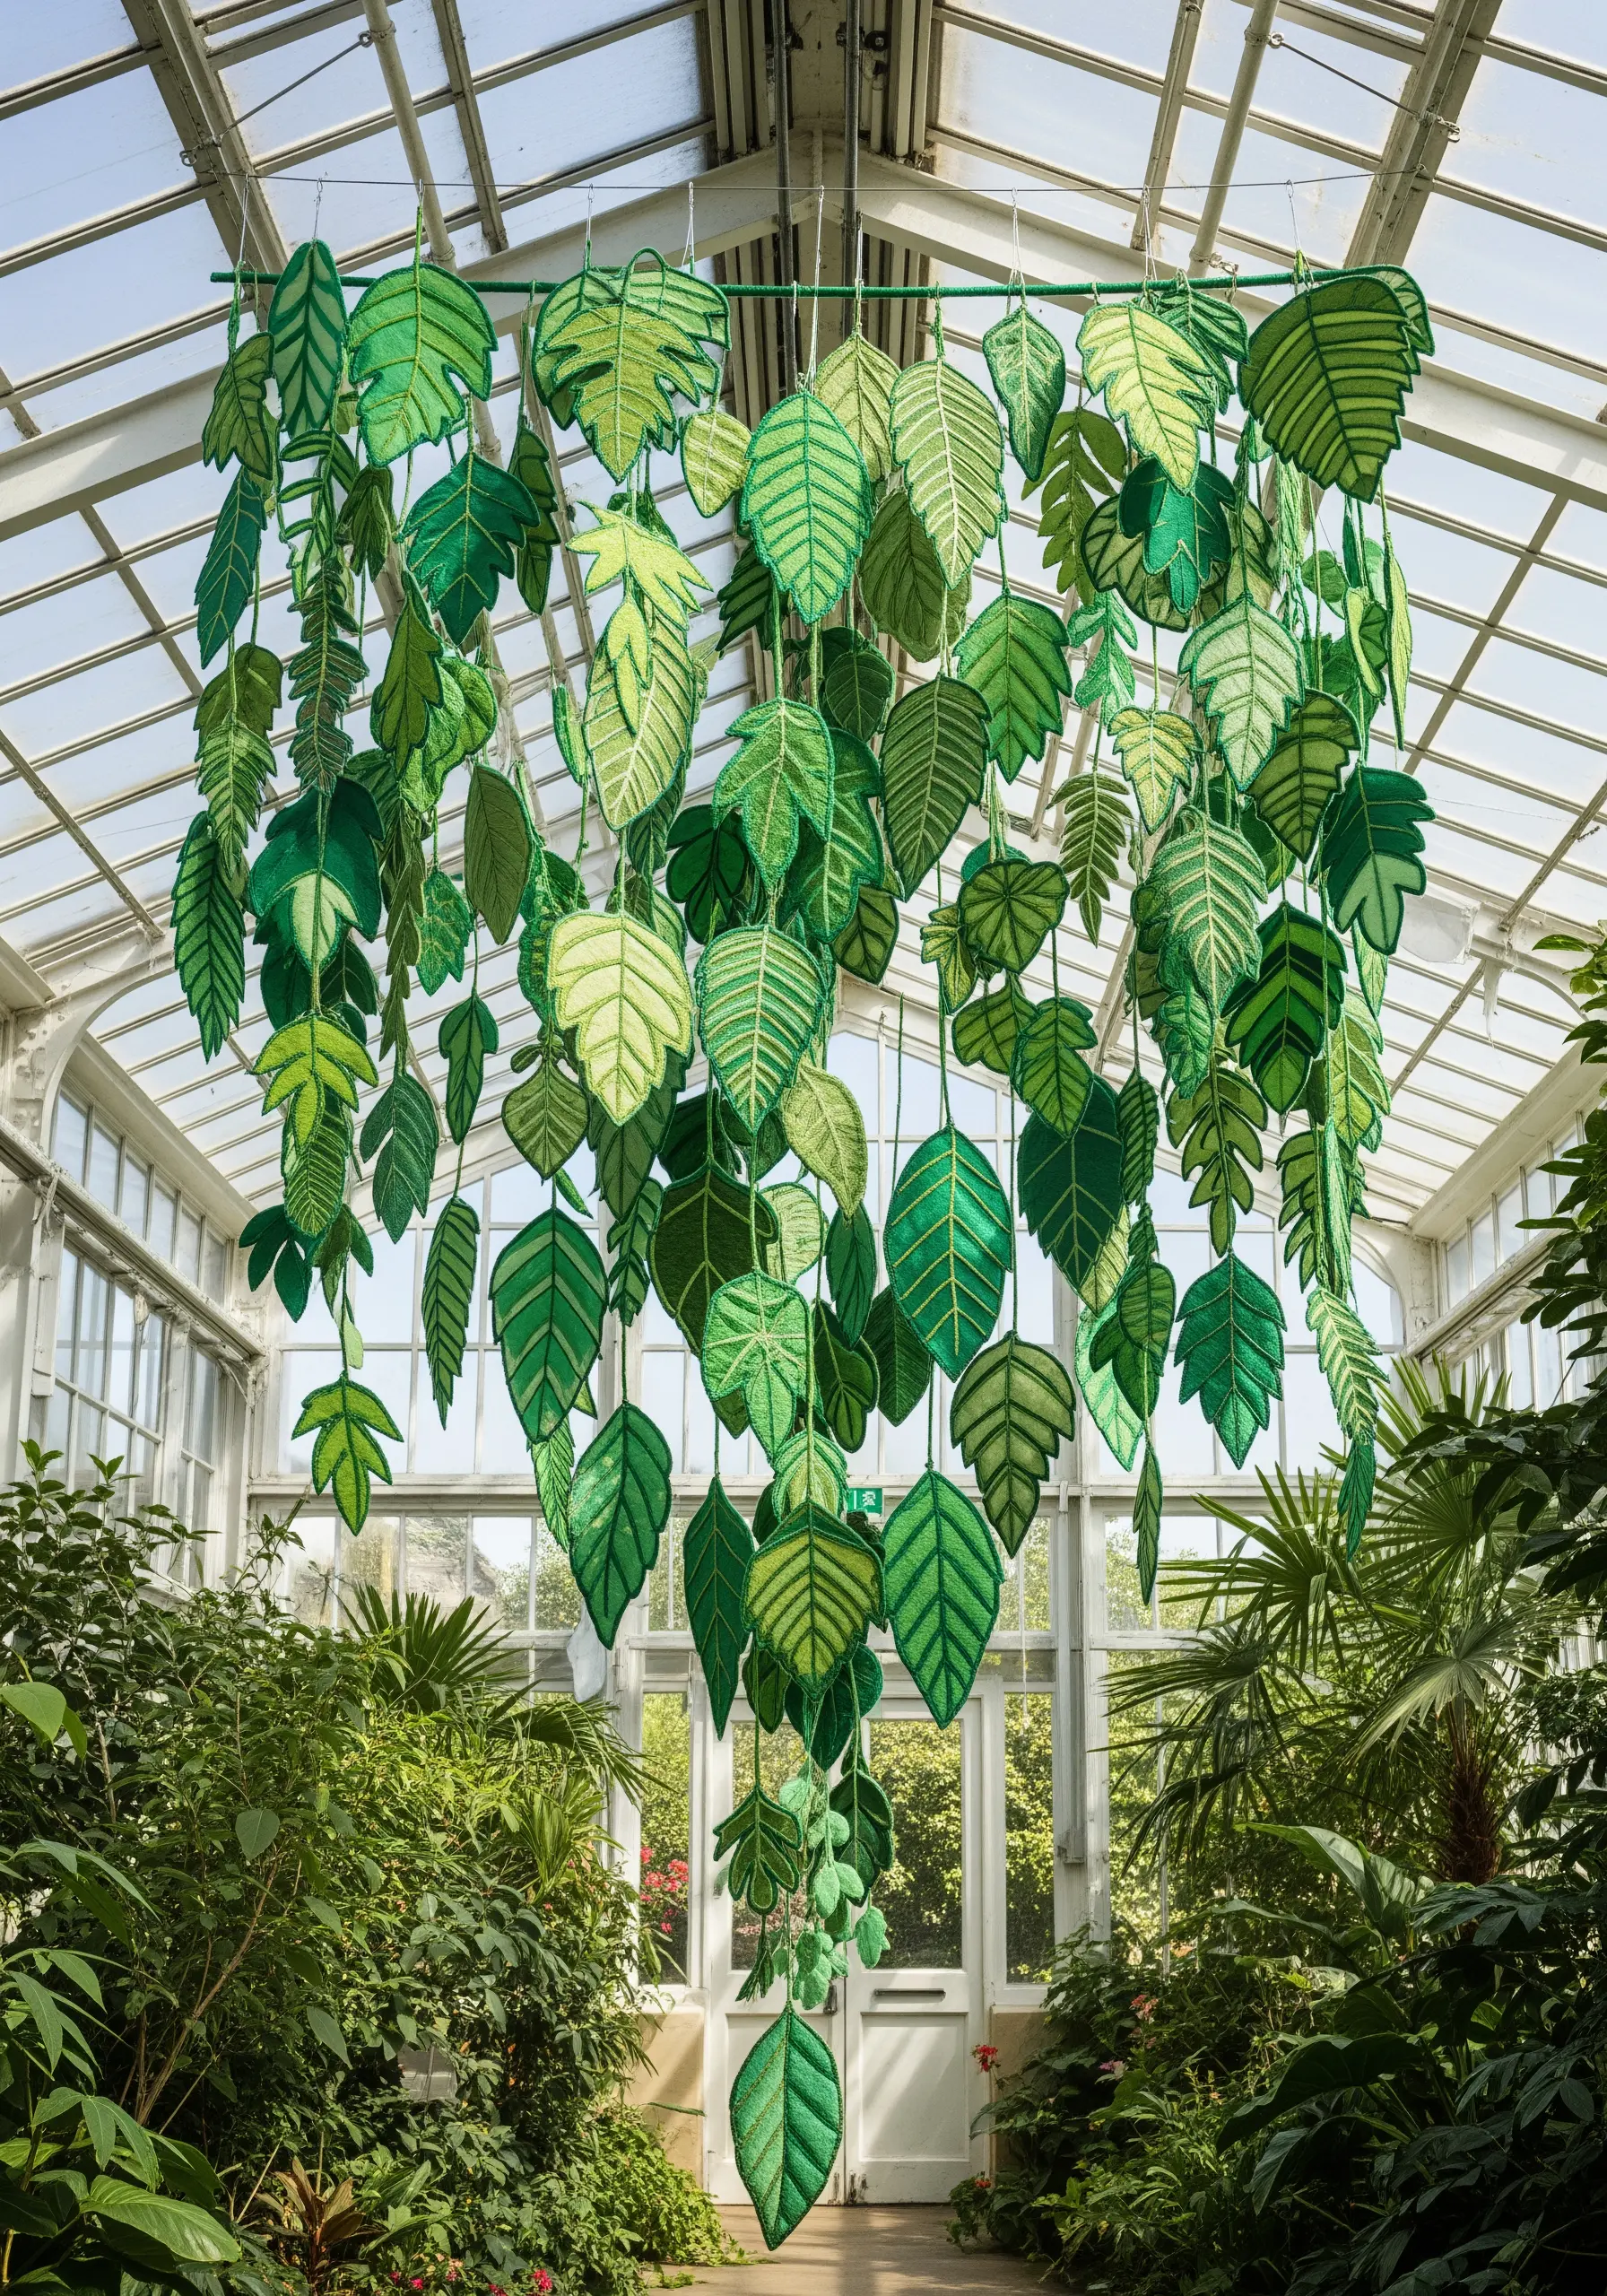
Take your embroidery fully into three dimensions by creating a suspended art installation.
Embroider individual fern & foliage stitch variations on two pieces of stiff felt or fabric, stitching a thin, flexible wire around the inside edge of the outline.
Place the two embroidered sides together, stitch them closed, and cut out the leaf shape. The wire allows you to bend and shape each leaf realistically.
Suspend dozens of these leaves from a ceiling or frame to create an immersive, floating botanical canopy.
31. Add Subtle Elegance with Tonal Quilting
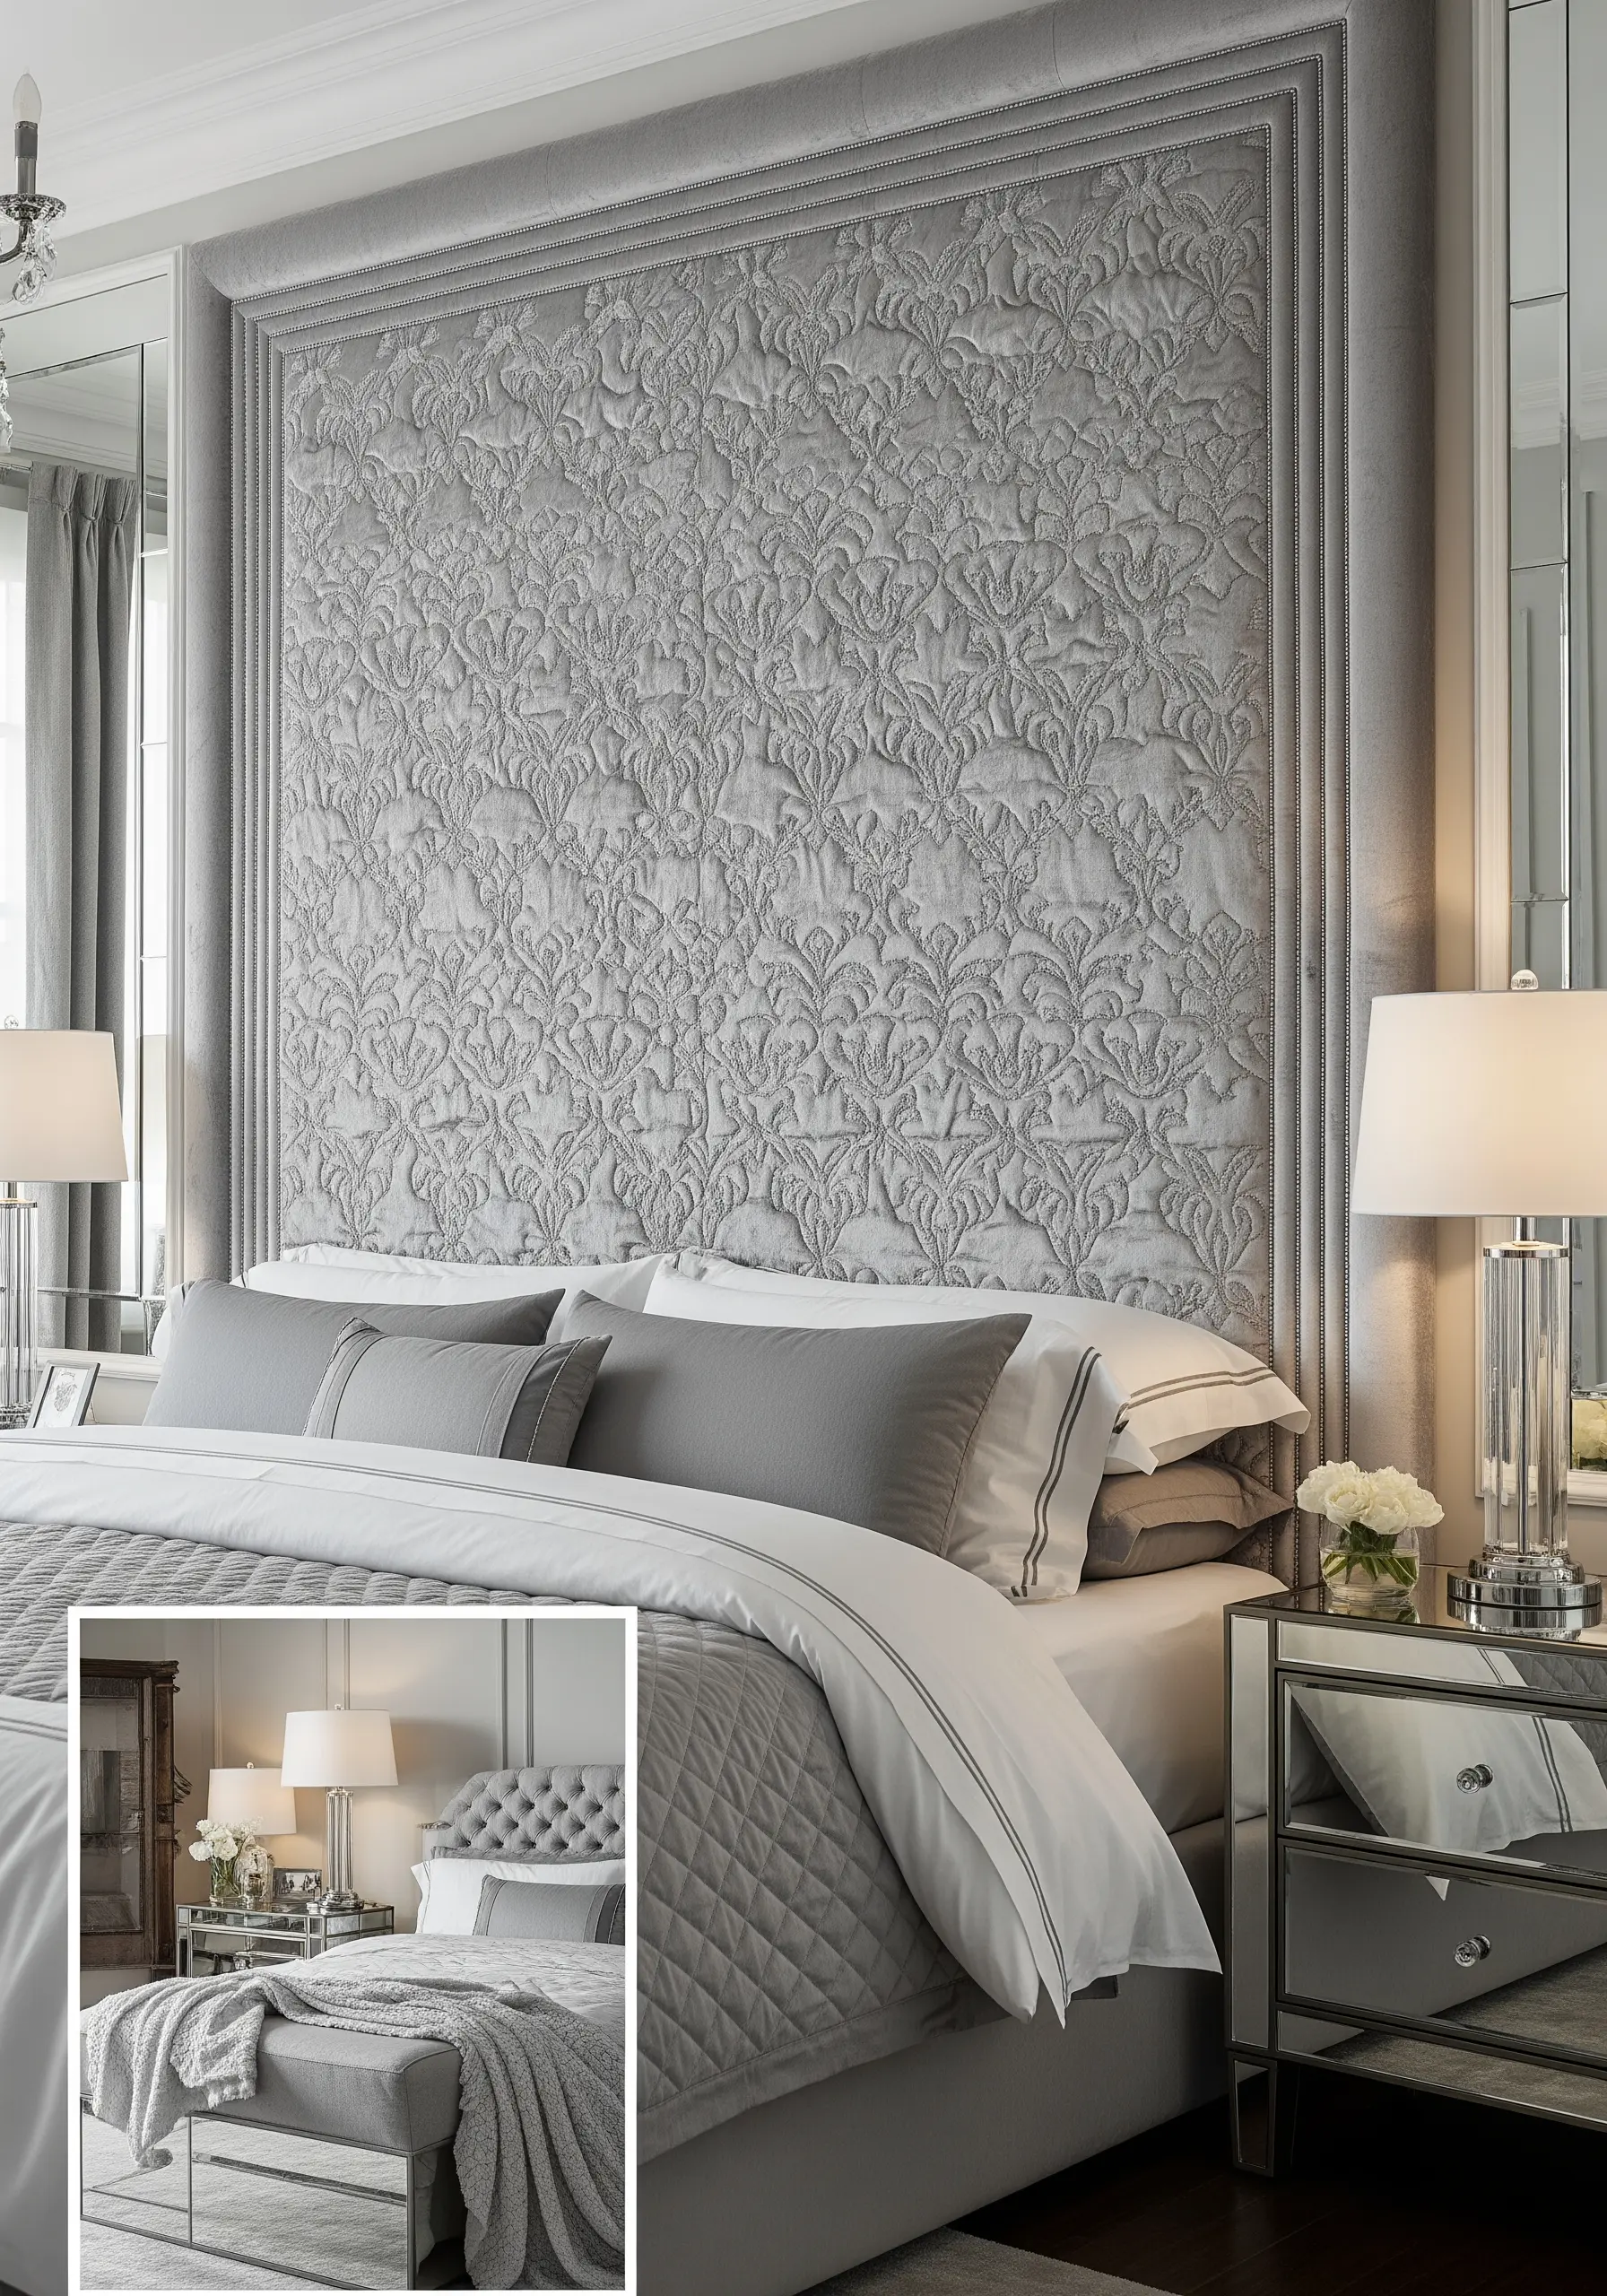
For a sophisticated, textural statement that doesn’t rely on color, explore tonal, padded embroidery.
This technique, often seen in quilting and called trapunto, involves stitching a design through a top fabric and a layer of batting.
Using a thread that matches the fabric color creates a subtle, sculptural effect where the pattern is defined by light and shadow.
It’s a perfect way to add a luxurious, custom-made feel to a headboard, pillow, or wall panel without overwhelming a serene, monochrome decor scheme.
32. Create a Tapestry of Expressive Chaos
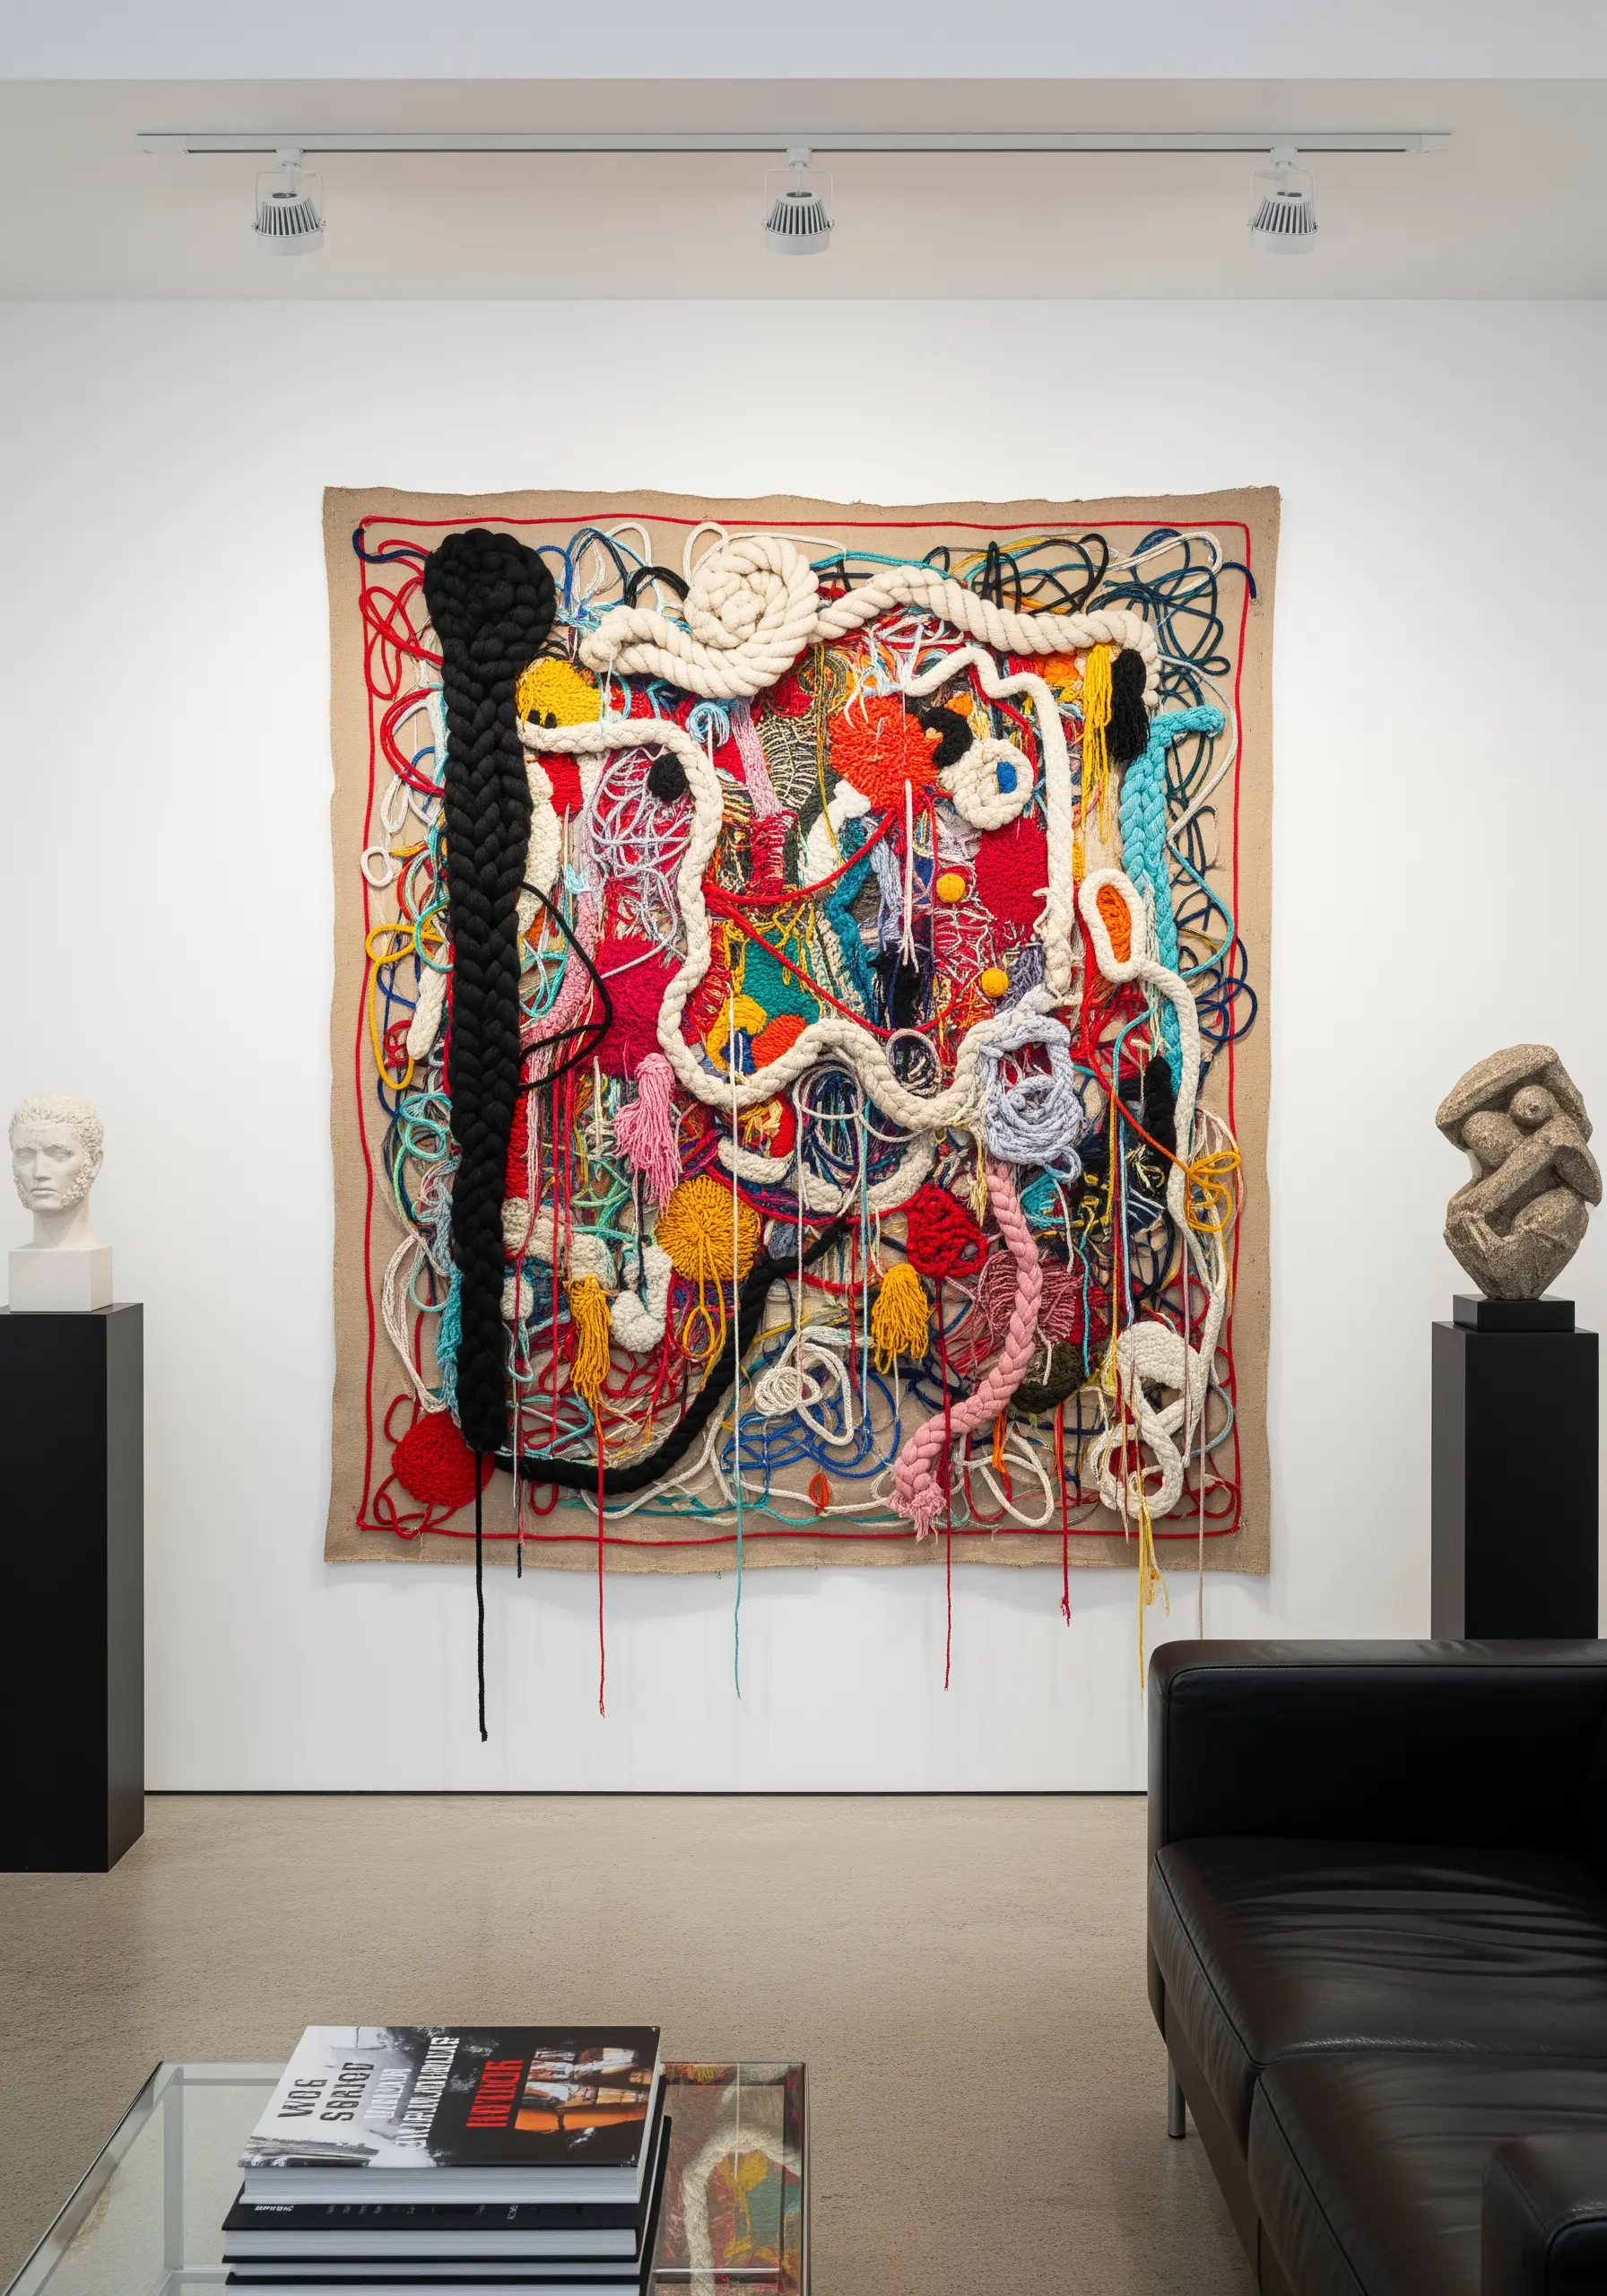
Let go of precise patterns and embrace intuitive, maximalist art with a mixed-fiber collage.
On a simple burlap or canvas base, combine a wild array of materials: thick braids of yarn, coiled rope, tassels, macrame knots, and loose, tangled threads.
Secure everything with large, visible couching stitches, making the act of attachment part of the design itself.
This technique is a freeing exercise in texture, color, and composition, resulting in a one-of-a-kind piece that is bursting with energy.
33. Reimagine the Traditional Alphabet Sampler
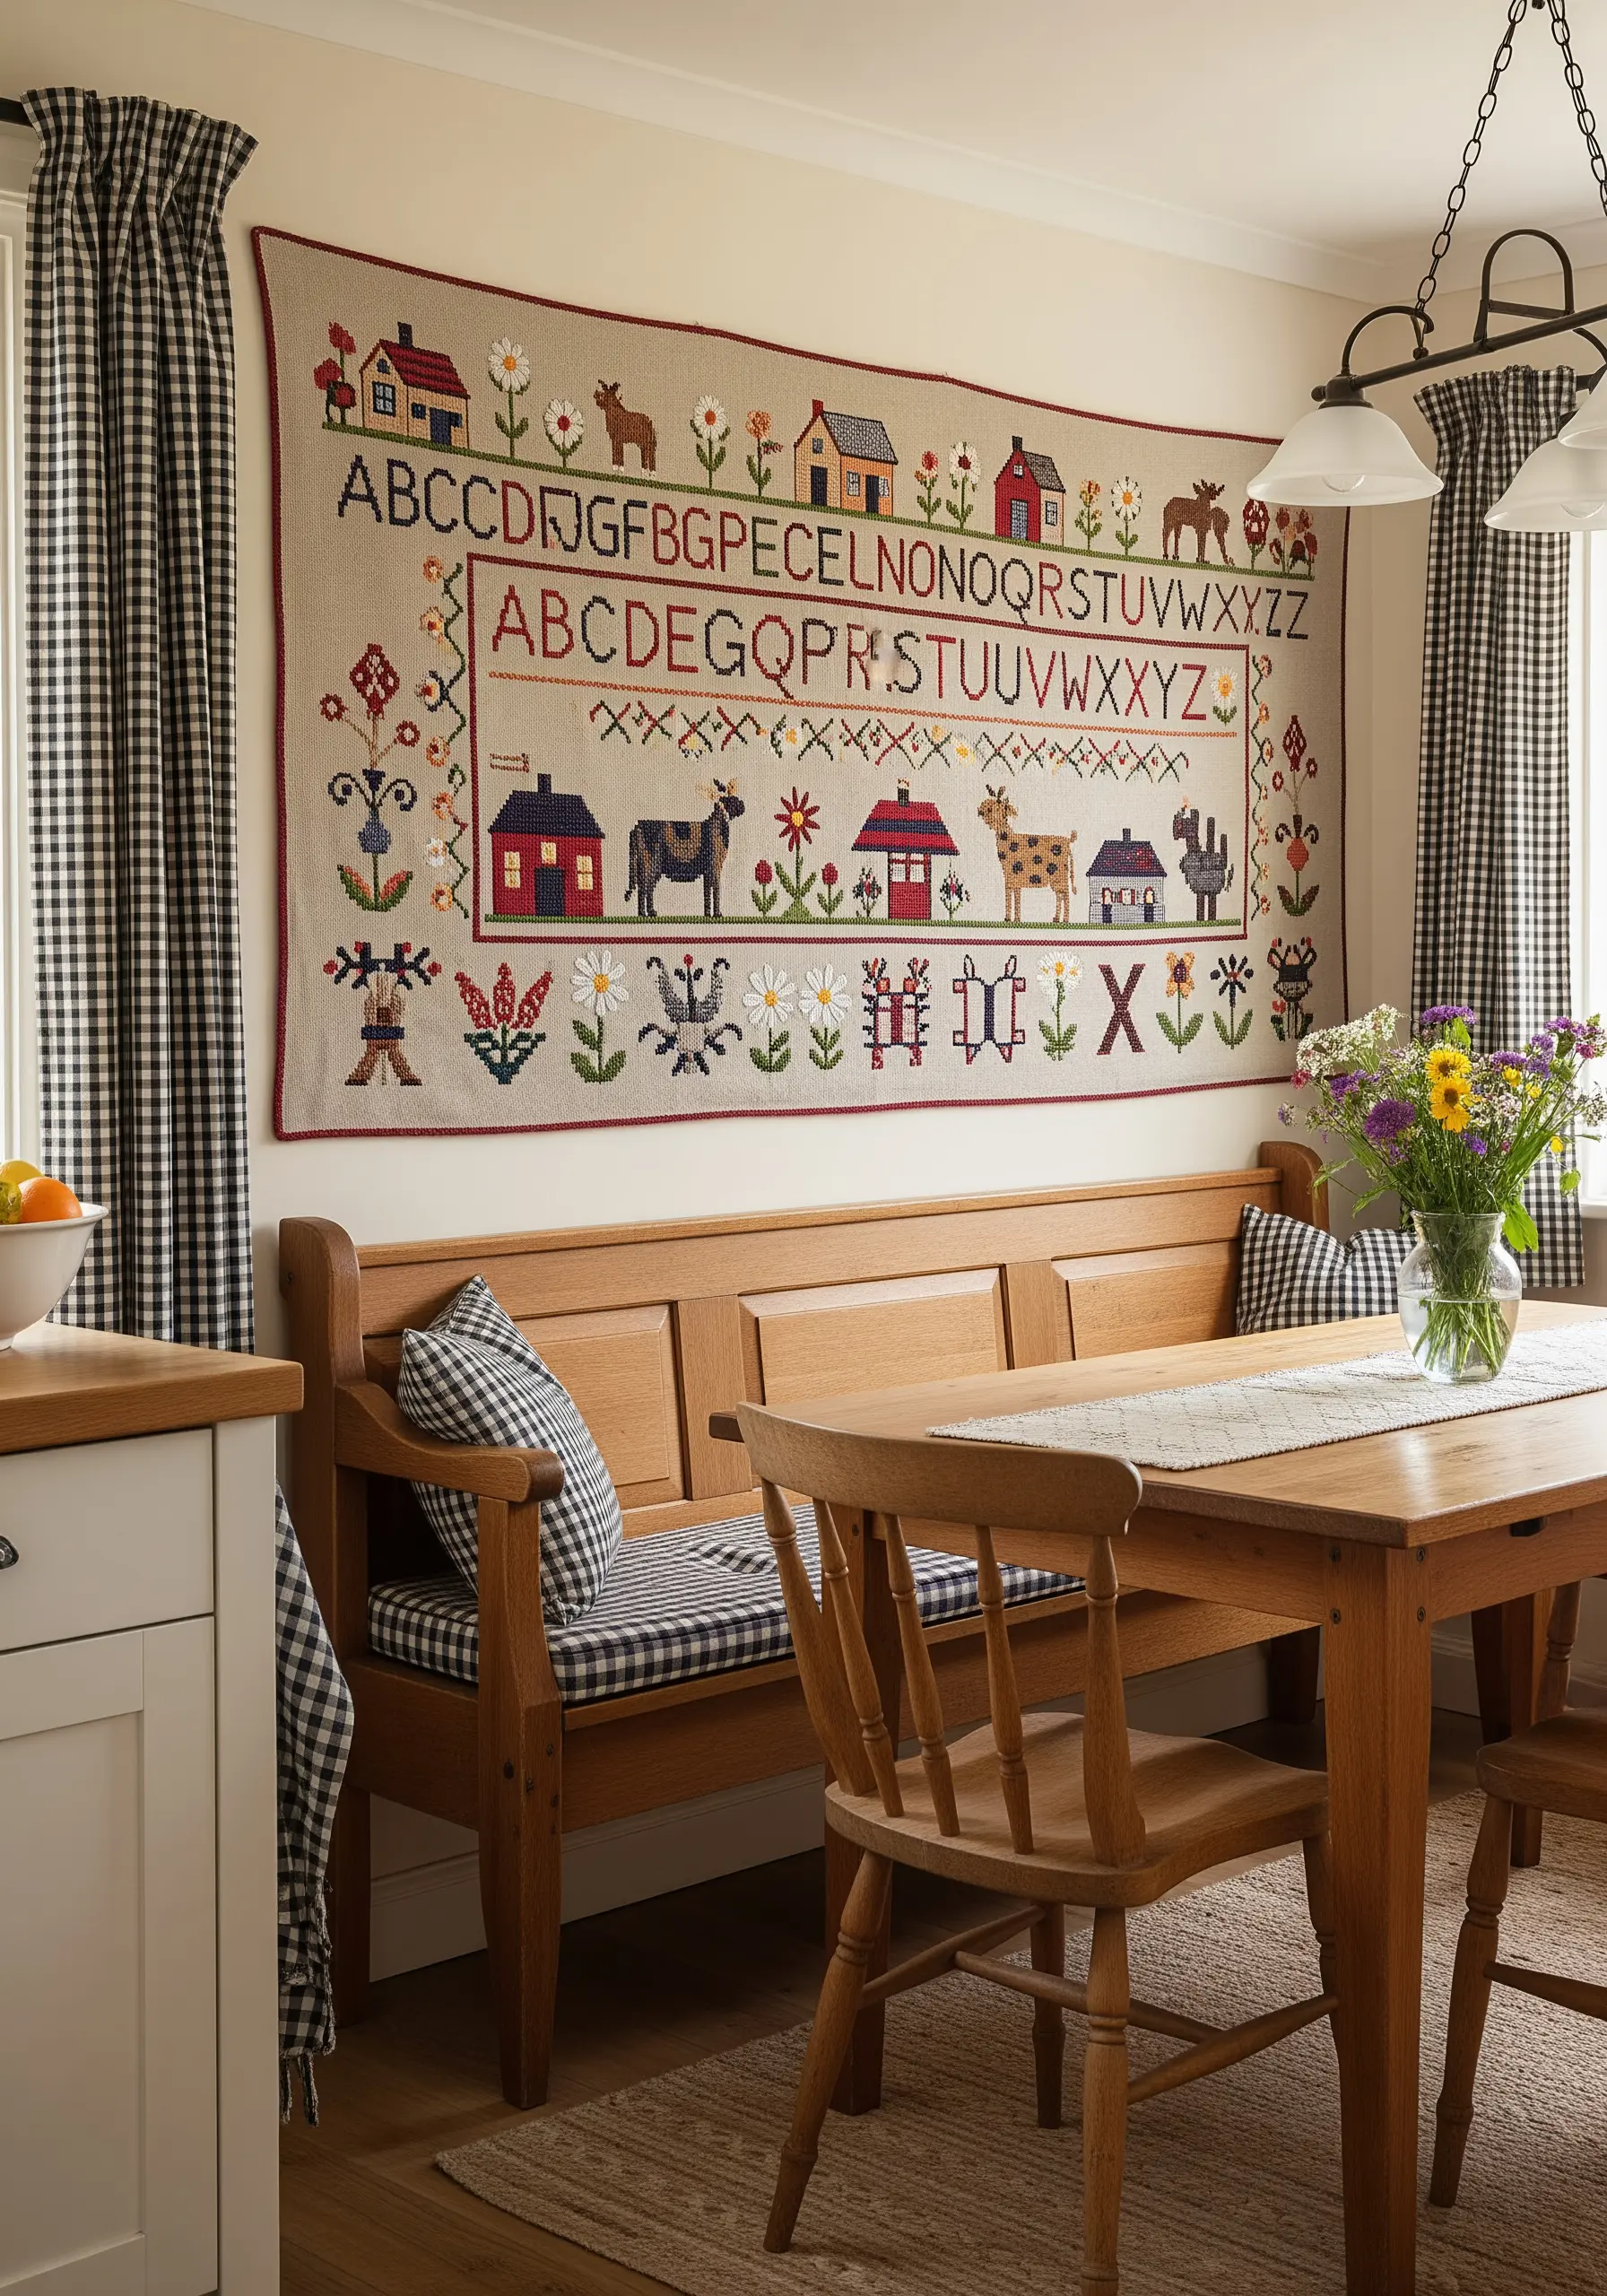
Elevate the humble sampler into a large-scale piece of nostalgic, narrative art.
Combine traditional cross-stitched lettering with charming, folk-art-inspired motifs like houses, animals, and flowers stitched in simple satin or long-and-short stitch.
By expanding the scale and creating a full scene rather than just a practice sheet, you transform the sampler into a heartwarming tapestry.
This is a wonderful way to create a personalized, heirloom-quality piece that tells a story about your family or home.


