

You have the threads, the fabric, and the desire to create something beautiful for your walls. But perhaps you feel stuck, sensing a gap between the simple projects you’re making and the polished, intentional art you envision.
The secret to elevating your work isn’t about learning hundreds of complex stitches. It’s about making deliberate choices—selecting the right stitch for a clean line, using texture to create depth, or choosing a muted color palette to evoke a specific mood. Minimalism in embroidery isn’t about emptiness; it’s about making every single stitch matter.
These ideas are designed to bridge that gap. Each one focuses on a specific technique or design principle that offers a visible, immediate improvement. They will help you create art that not only fills a space on your wall but also fills your home with a sense of calm, light, and thoughtful craftsmanship.
1. Create a Woven Landscape with Thread Painting

Mimic the calm of a horizon by laying dense rows of straight stitch side-by-side.
Instead of a perfect gradient, group your colors into distinct bands—sand, sea, and sky—to create a modern, graphic feel.
Use a full six strands of cotton floss and lay them flat, ensuring each stitch sits flush against the last without overlapping.
This technique, known as thread painting, relies on perfectly even tension to create a smooth, woven texture that feels both substantial and serene.
2. Use Pointillism to Stitch a Textured Moon
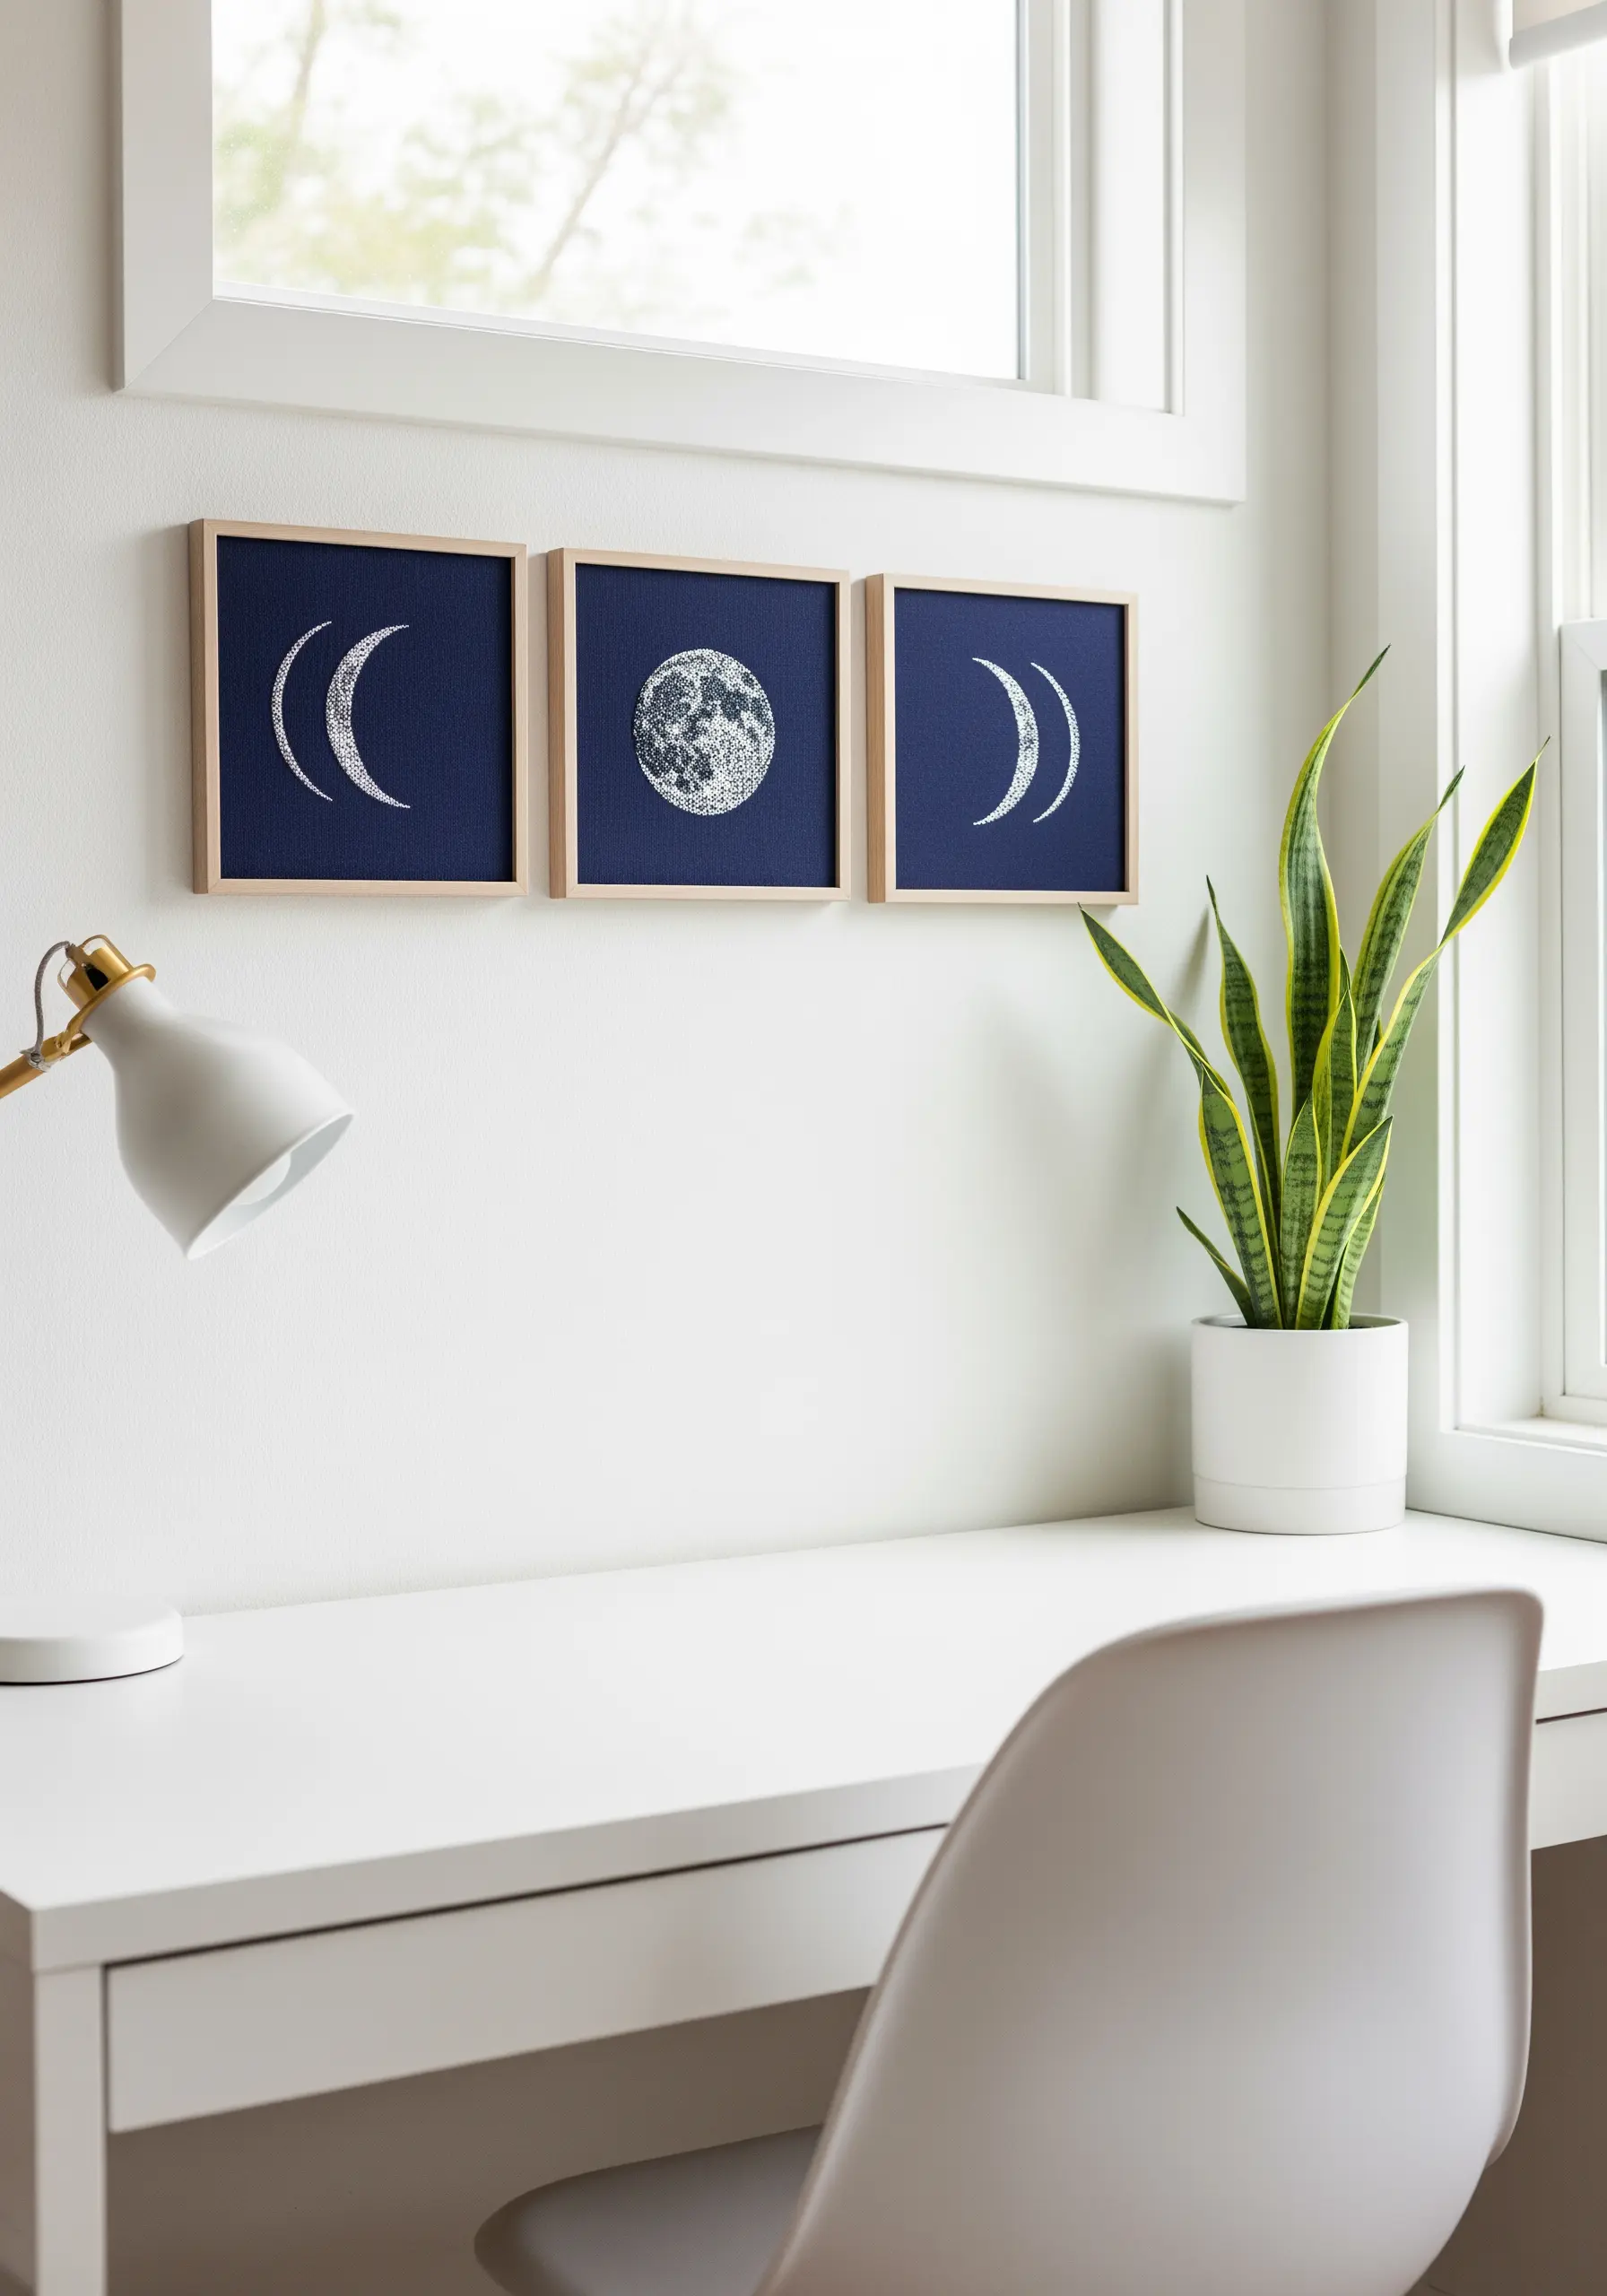
To give a full moon a realistic, cratered texture, fill the entire shape with tightly packed French knots using a light gray or silver thread.
For the crescent moons, switch to a perfectly smooth split stitch outline to create a sharp, graphic contrast against the textured centerpiece.
Stitching on a dark navy or black linen makes the white thread pop, giving the triptych a dramatic, cosmic effect.
This combination of textures elevates minimal sky moon designs from simple outlines into tactile art.
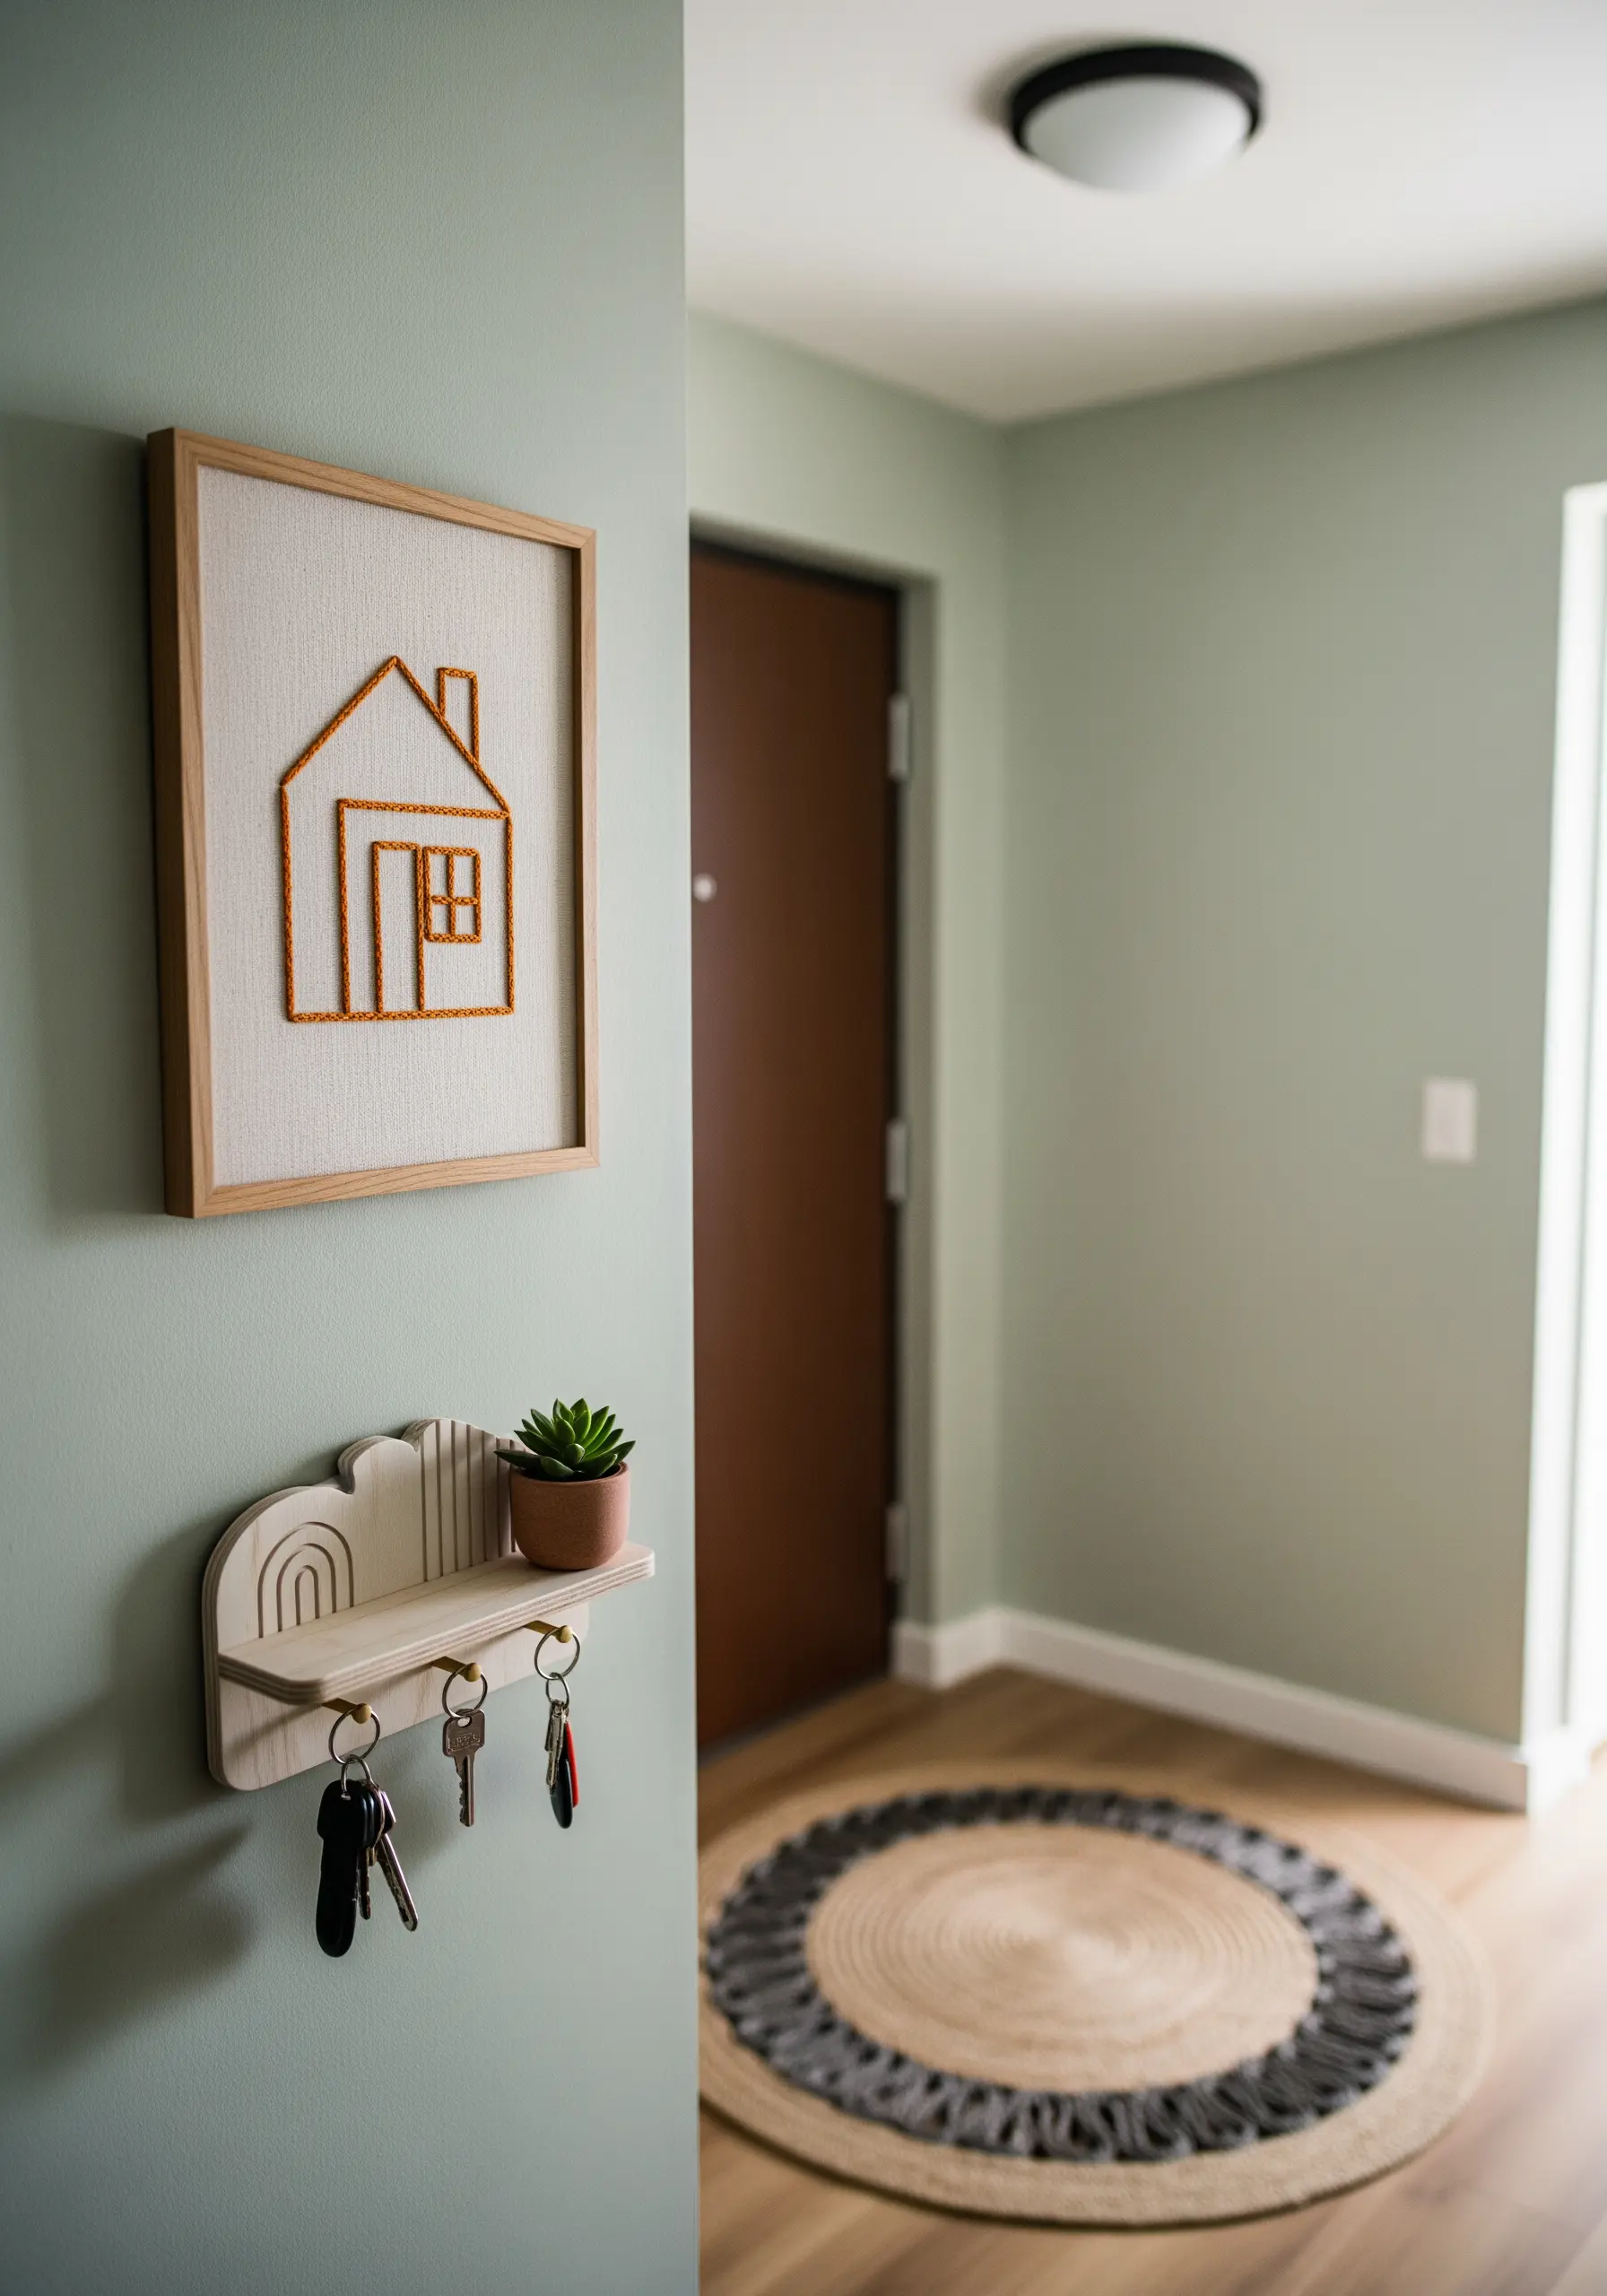
3. Draw the Eye Upward with Vertical Line Art

In a narrow space or next to a window, a vertical design creates an illusion of height.
Use a long, slim piece of canvas and stitch a continuous botanical motif that flows from top to bottom.
A whipped backstitch is perfect for this—first, you create a standard backstitch, then you whip the thread around each stitch without piercing the fabric.
This technique produces a raised, perfectly smooth, and rope-like line that gives your artwork a clean, sculptural quality.
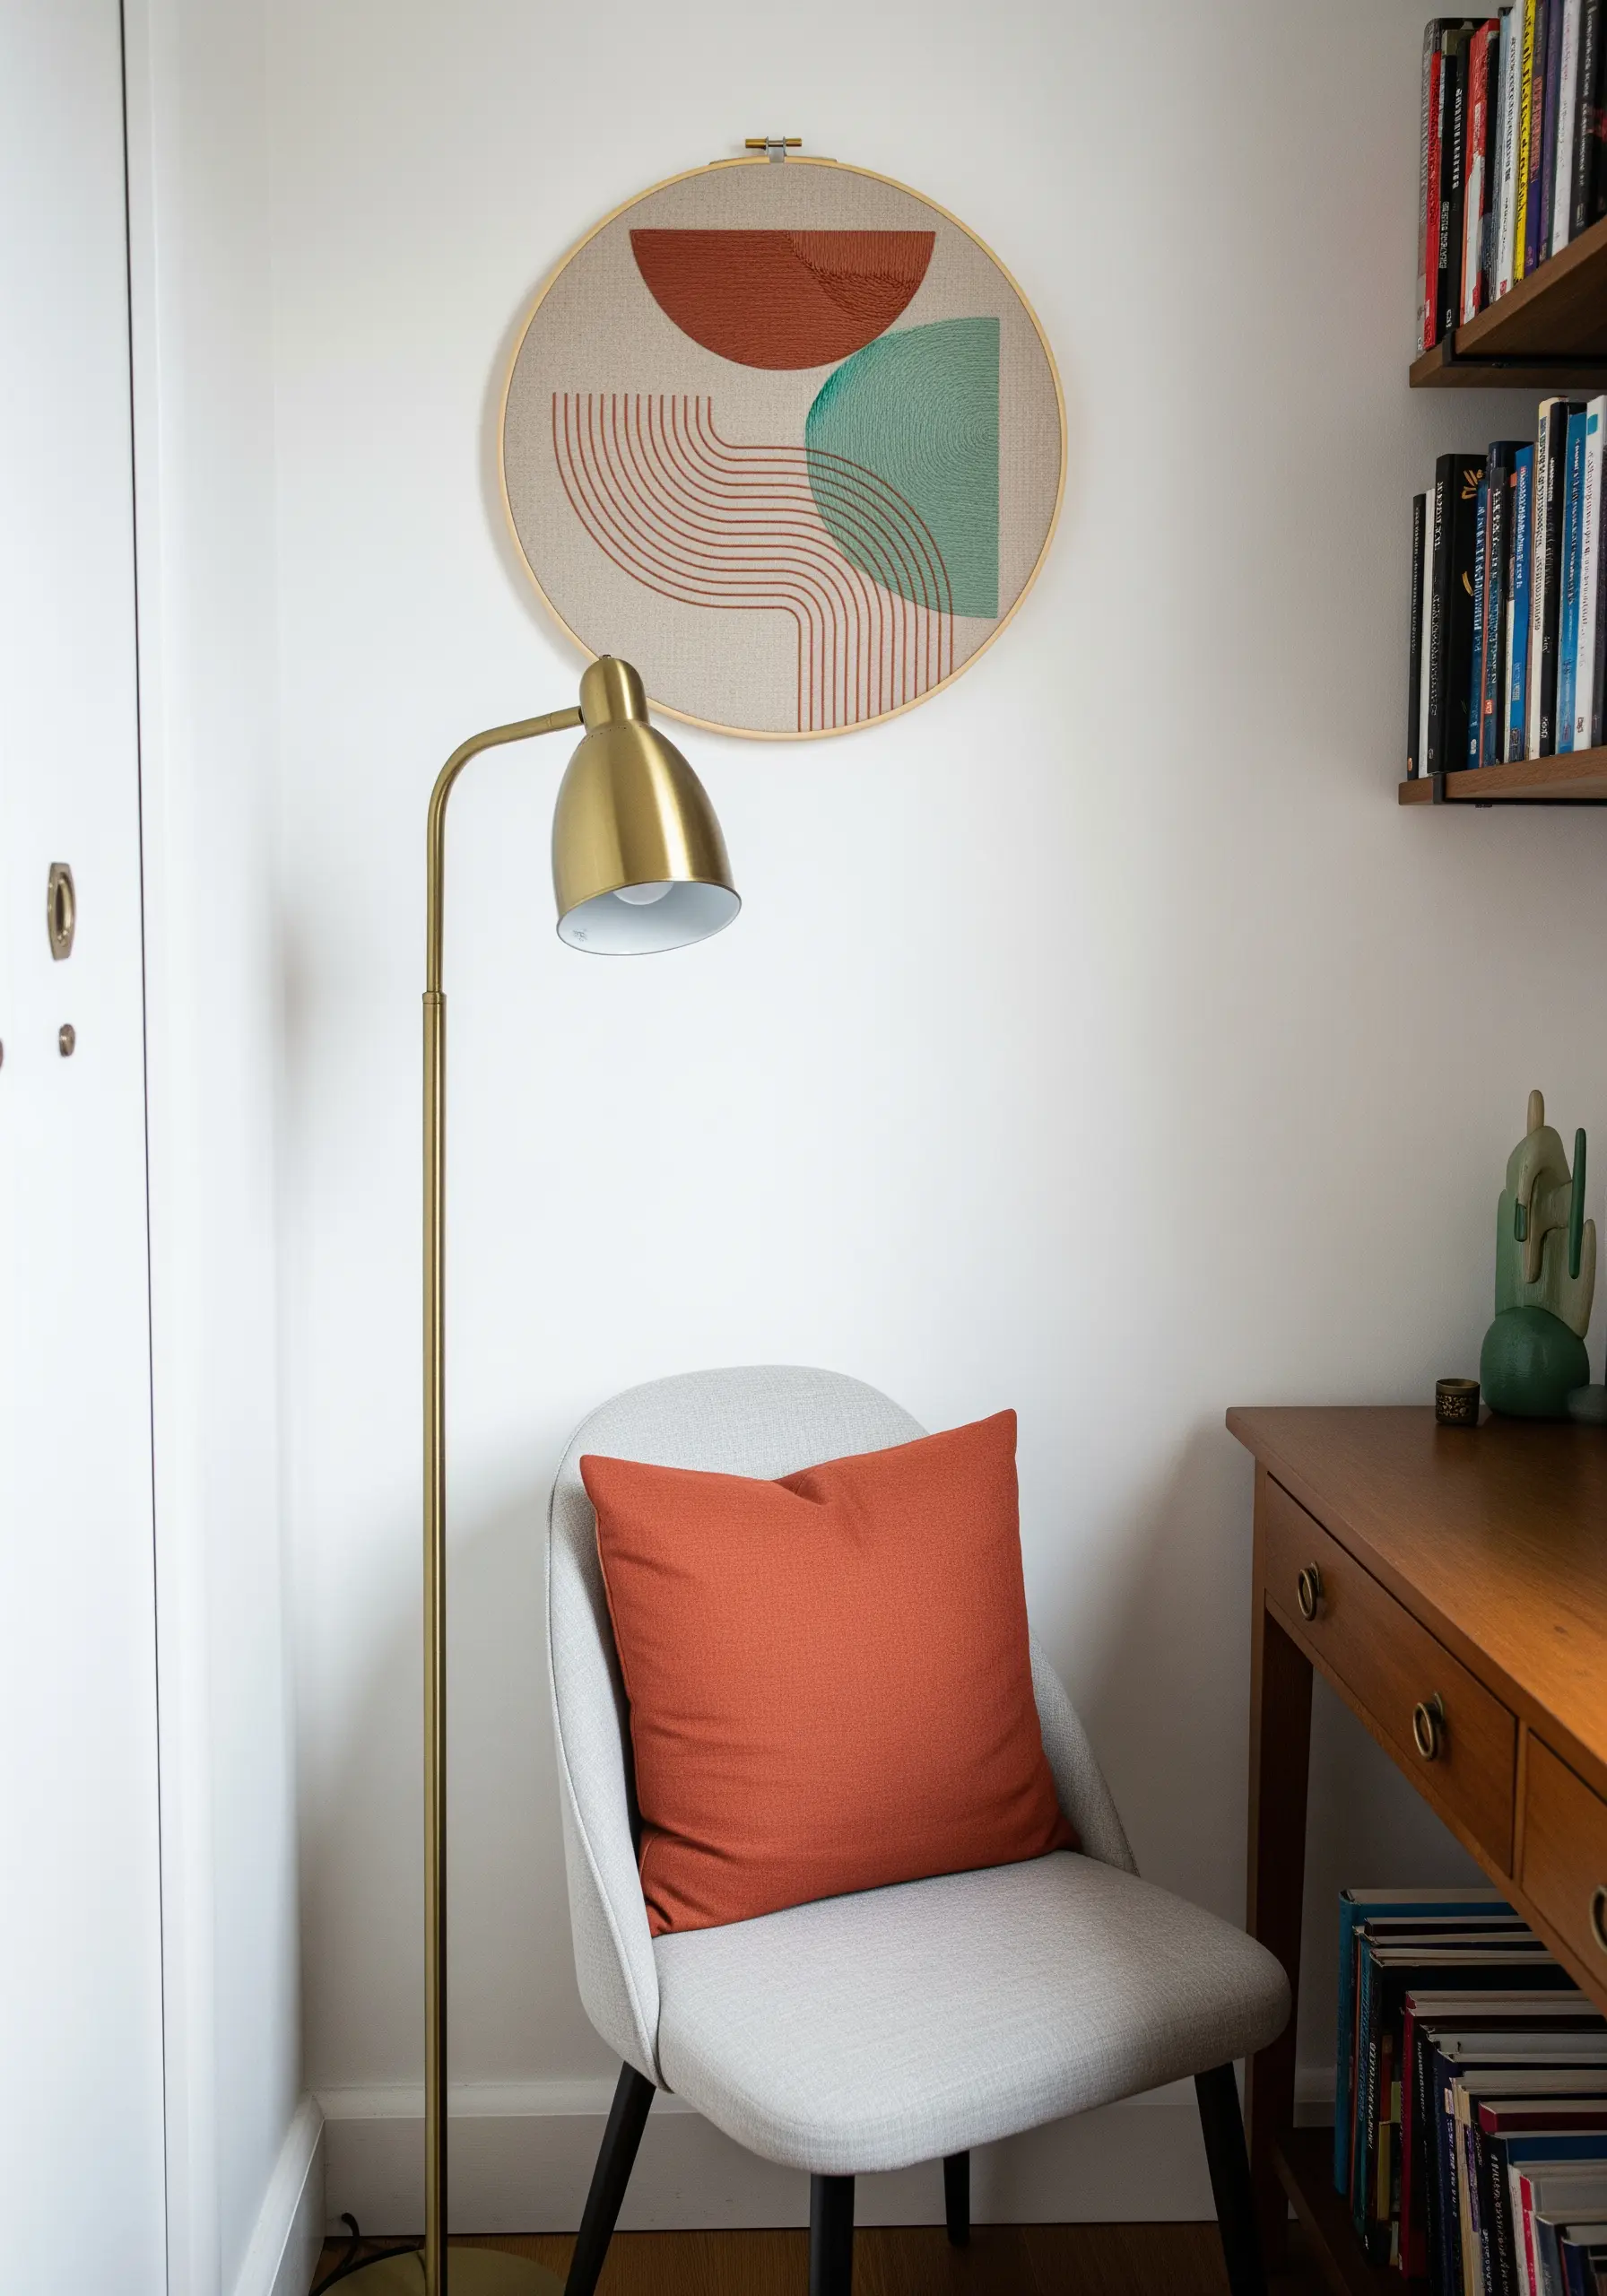
4. Soften Geometric Shapes with a Muted Palette
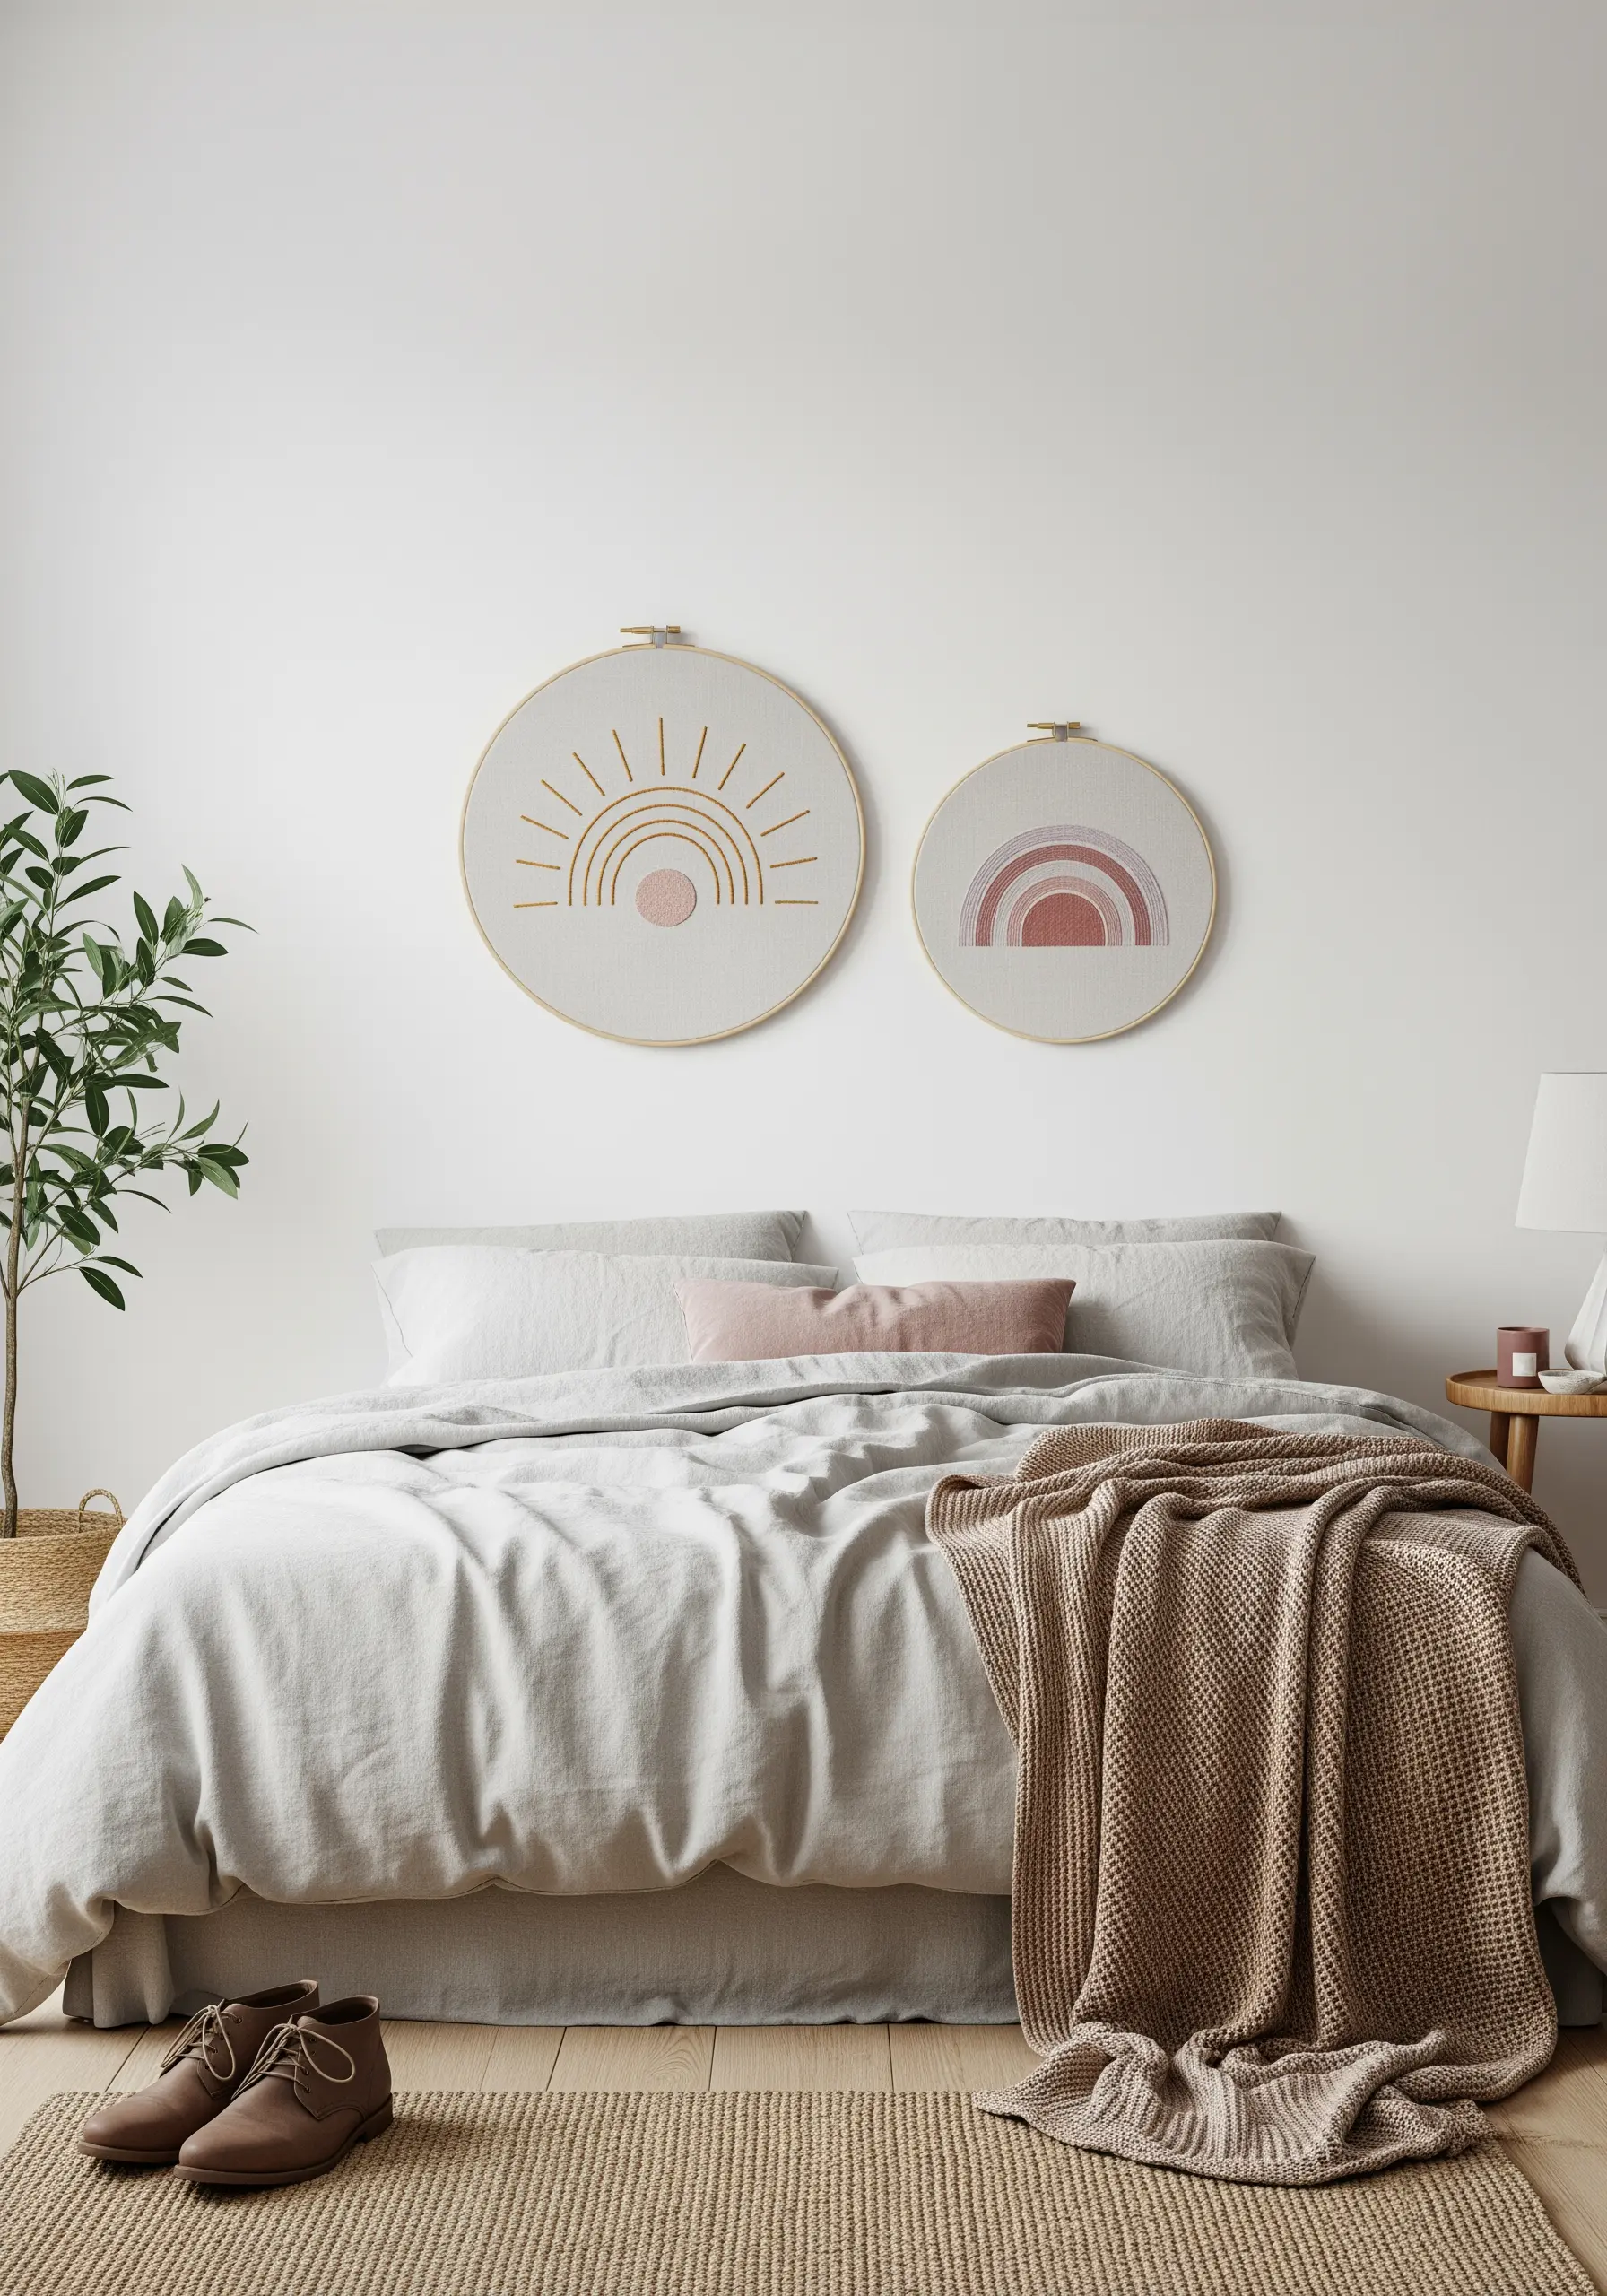
Even playful shapes like suns and rainbows can feel sophisticated and calming with the right color choices.
Swap out bright primary colors for a palette of dusty rose, terracotta, ochre, and soft beige.
Use a satin stitch for the filled-in areas, ensuring your stitches are parallel and flat to create a smooth, light-catching surface.
This approach transforms simple geometric forms into taupe vanilla embroidery designs that complement a quiet, restful bedroom.
5. Isolate Simple Forms for Graphic Impact
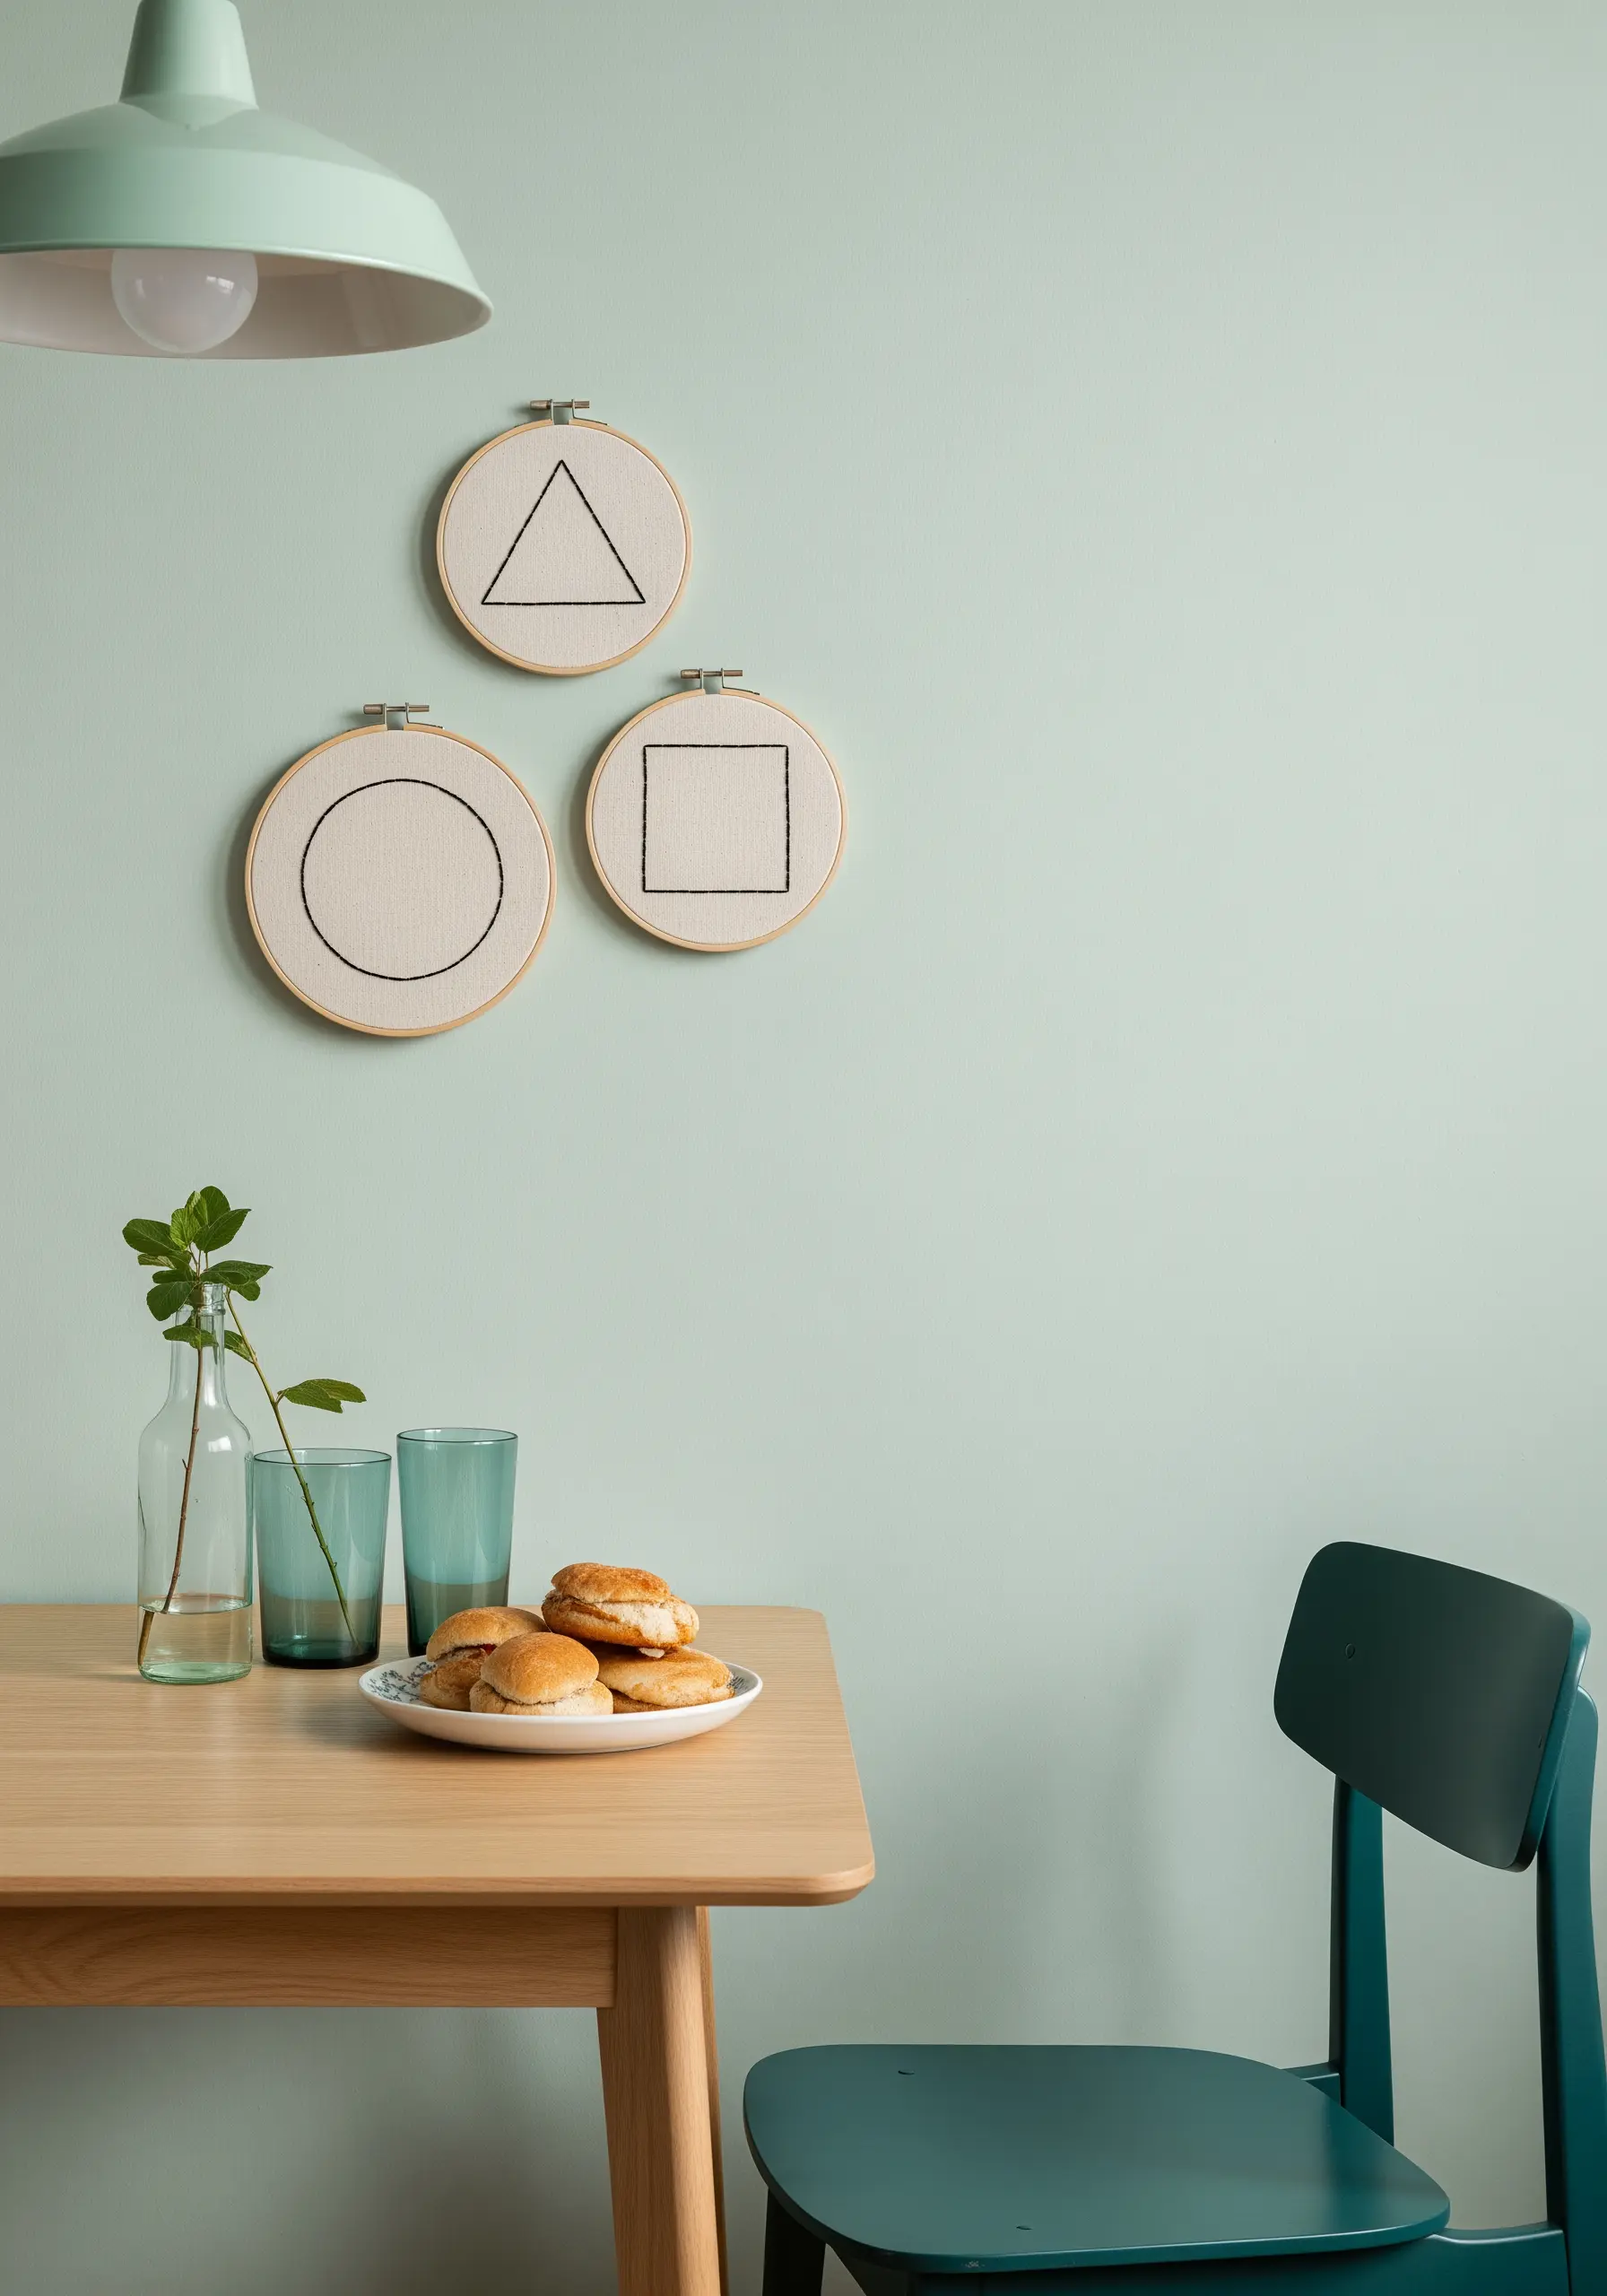
A single geometric shape, perfectly executed, can be more powerful than a complex scene.
Stitch a circle, square, and triangle, each in its own small hoop, using a crisp, two-strand backstitch.
The key to making this work is precision—ensure your stitch length is consistent and your corners are sharp.
Grouping them together creates a clean, modern art installation that celebrates the purity of form and adds a touch of thoughtful simplicity to your wall.
6. Layer Lines to Build Architectural Depth
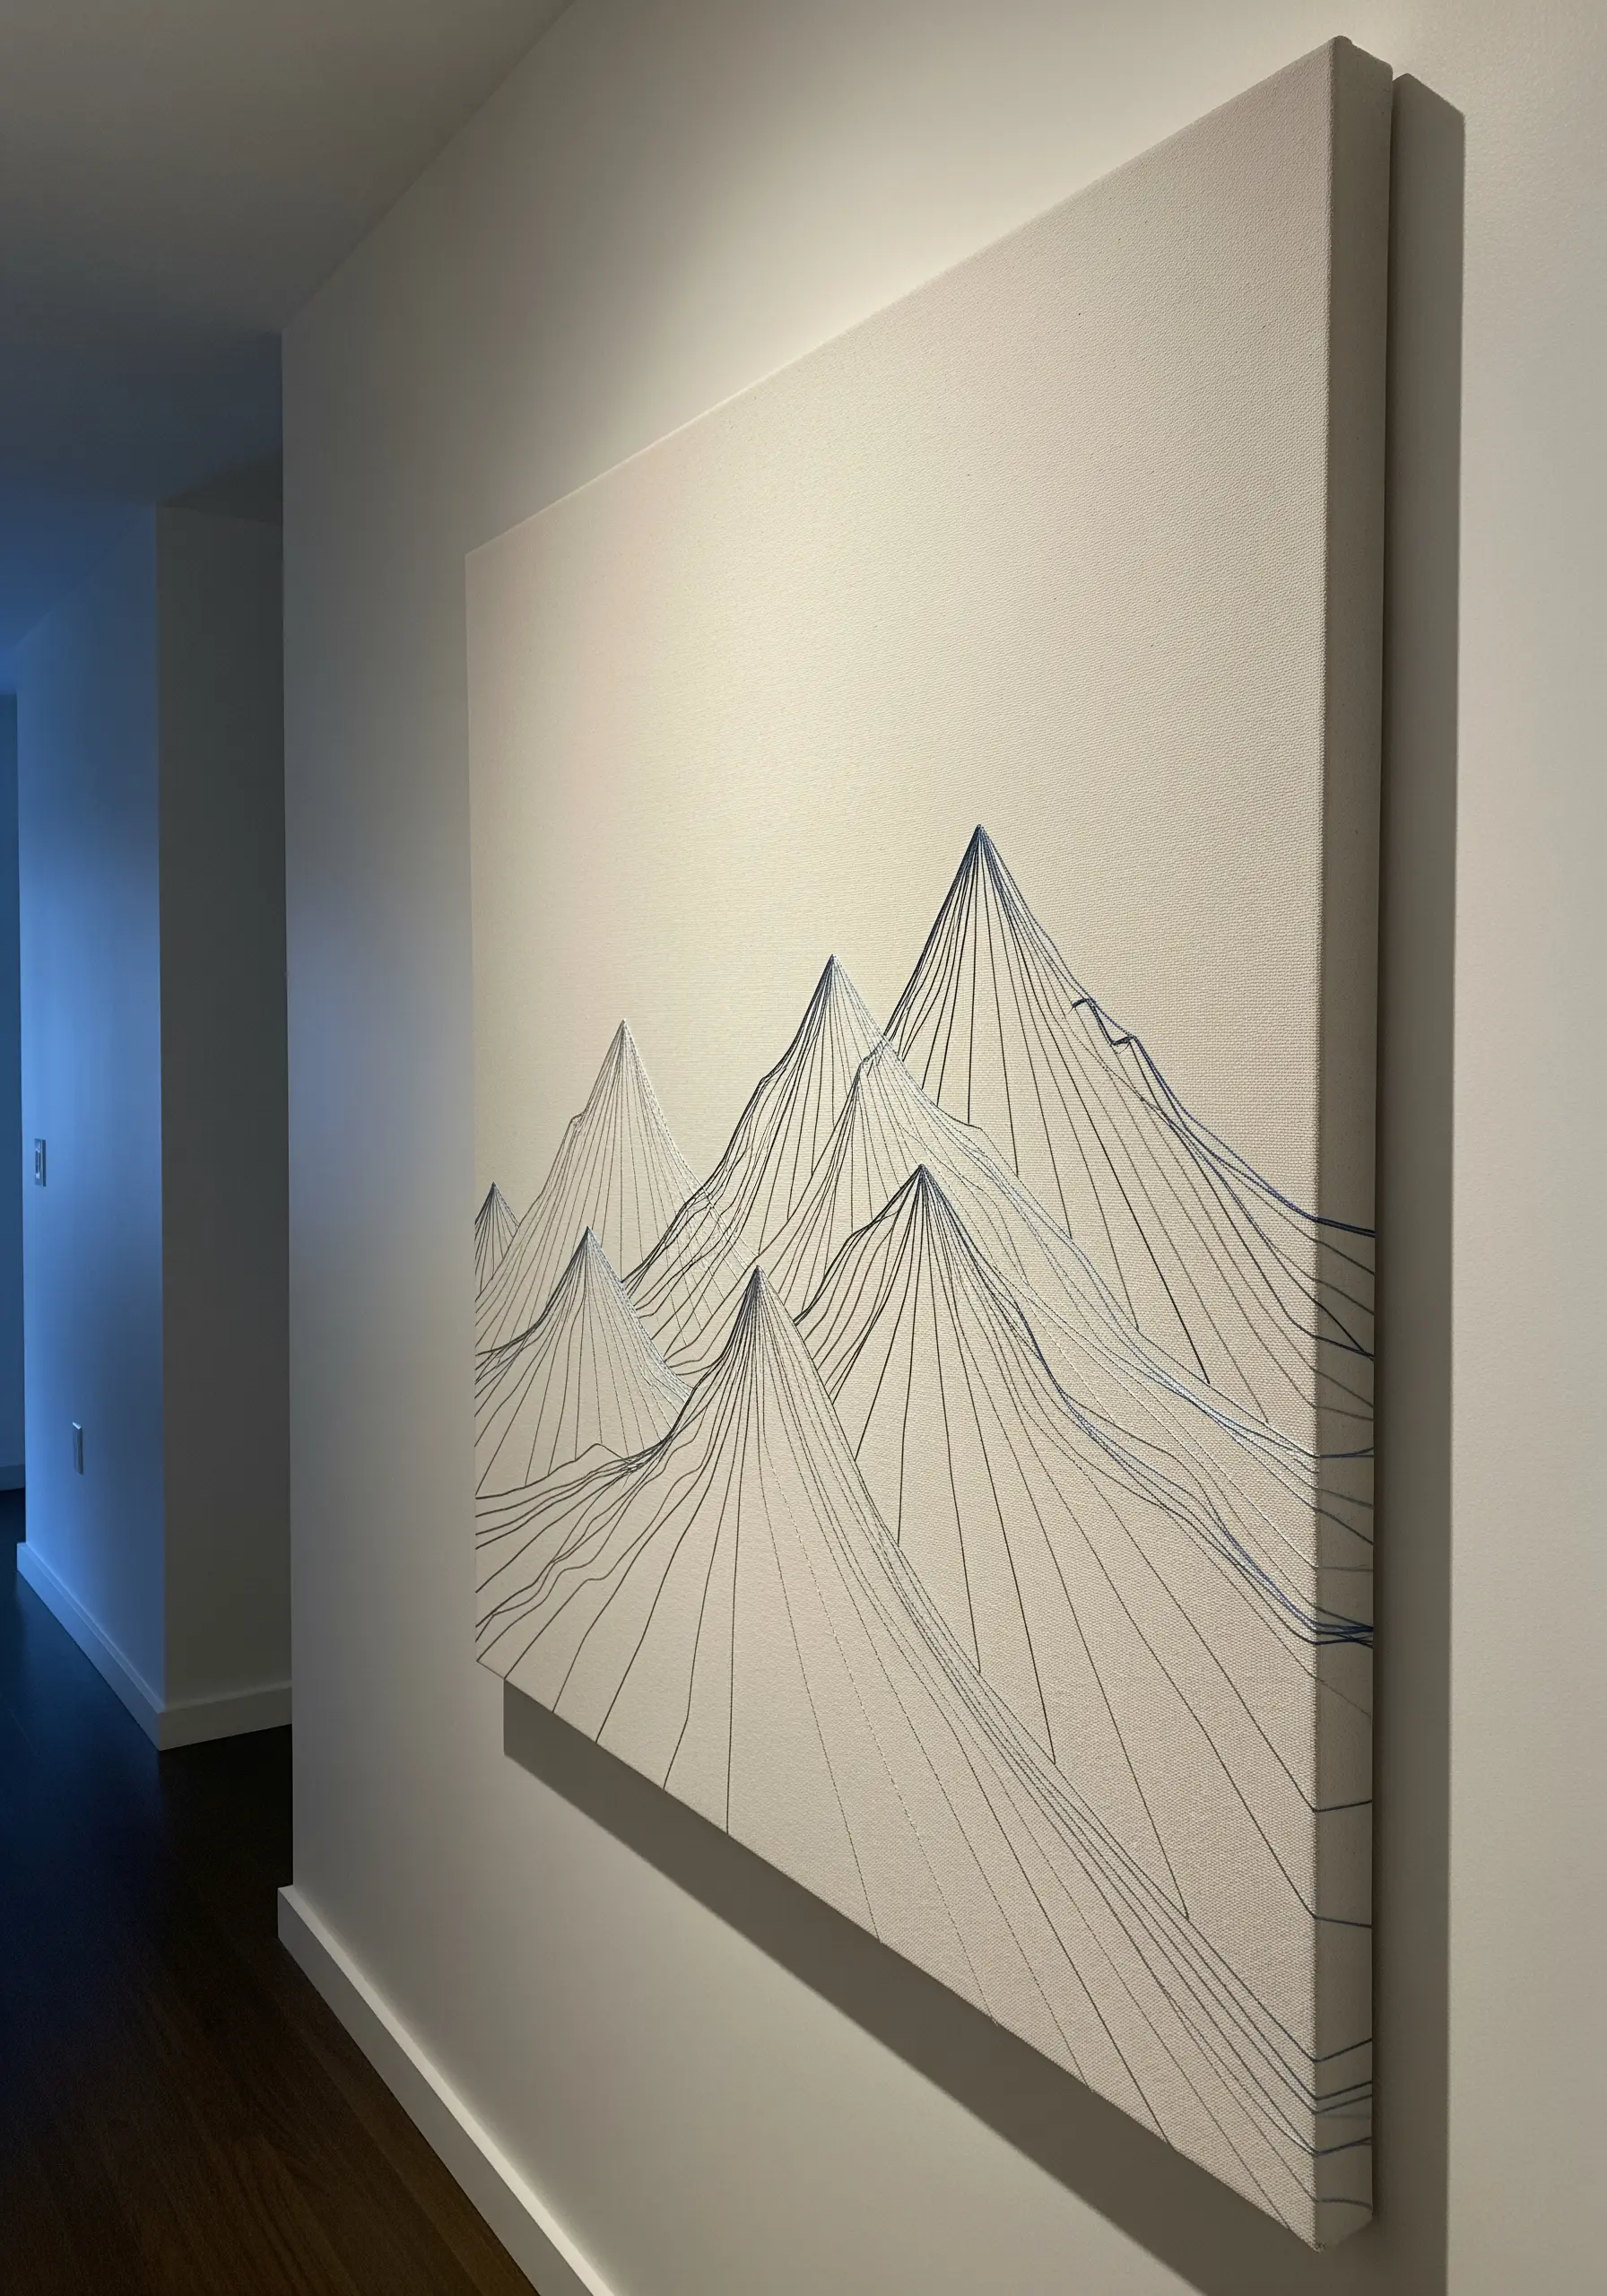
Create the illusion of a three-dimensional mountain range using only straight stitches on a large, stretched canvas.
Use a very fine, single strand of thread to suggest distant peaks and a slightly heavier two-strand thread for those in the foreground.
By layering lines and varying their density, you can create shadows and contours without any fill stitches at all.
This technique relies on precision and perspective to turn line art travel adventure symbols into sophisticated, large-scale art.
7. Let Raised Textures Become the Focal Point

Explore abstract forms by focusing on texture rather than color.
Use a thick yarn or Perle cotton and stitch organic, looping shapes with a chain stitch or couching technique—where you lay the thick thread on the surface and tack it down with a finer thread.
Sticking to a neutral palette of cream, gray, and beige with a single, unexpected pop of color (like mustard yellow) keeps the composition balanced and modern.
These high texture fabric collage embroidery projects invite touch and add sculptural interest to a flat wall.
8. Master Metallics for a Touch of Light

A single, elegant motif stitched in metallic thread can illuminate a small, dim corner.
To prevent metallic floss from tangling and fraying, work with shorter lengths—no more than 12 inches at a time—and use a thread conditioner like beeswax.
Fill the ginkgo leaf shape with a directional satin stitch, angling your stitches to follow the natural lines of the leaf veins.
This maximizes how the thread catches the light, creating a piece that genuinely shines.
9. Balance Filled Shapes with Delicate Lines
Create a dynamic composition by combining solid blocks of color with fine, intersecting lines.
First, fill the larger abstract shapes using a dense satin stitch for a smooth, solid appearance.
Then, stitch the linear elements over the top using a simple backstitch in a contrasting color.
This layering technique creates a sense of depth and movement, turning a simple hoop into a piece of contemporary abstract art.
10. Combine Stitches for Realistic Botanicals

Give your embroidered plants a lifelike quality by assigning different stitches to each part of the anatomy.
Use a stem stitch for the main stalks to give them a smooth, rounded edge.
For lavender blossoms, use lazy daisy stitches clustered together, and for eucalyptus, use a fishbone stitch to create the distinct central vein and angled leaves.
This thoughtful combination makes these botanical line art embroidery patterns feel delicate and botanically accurate.
11. Create Hypnotic Texture with Concentric Circles
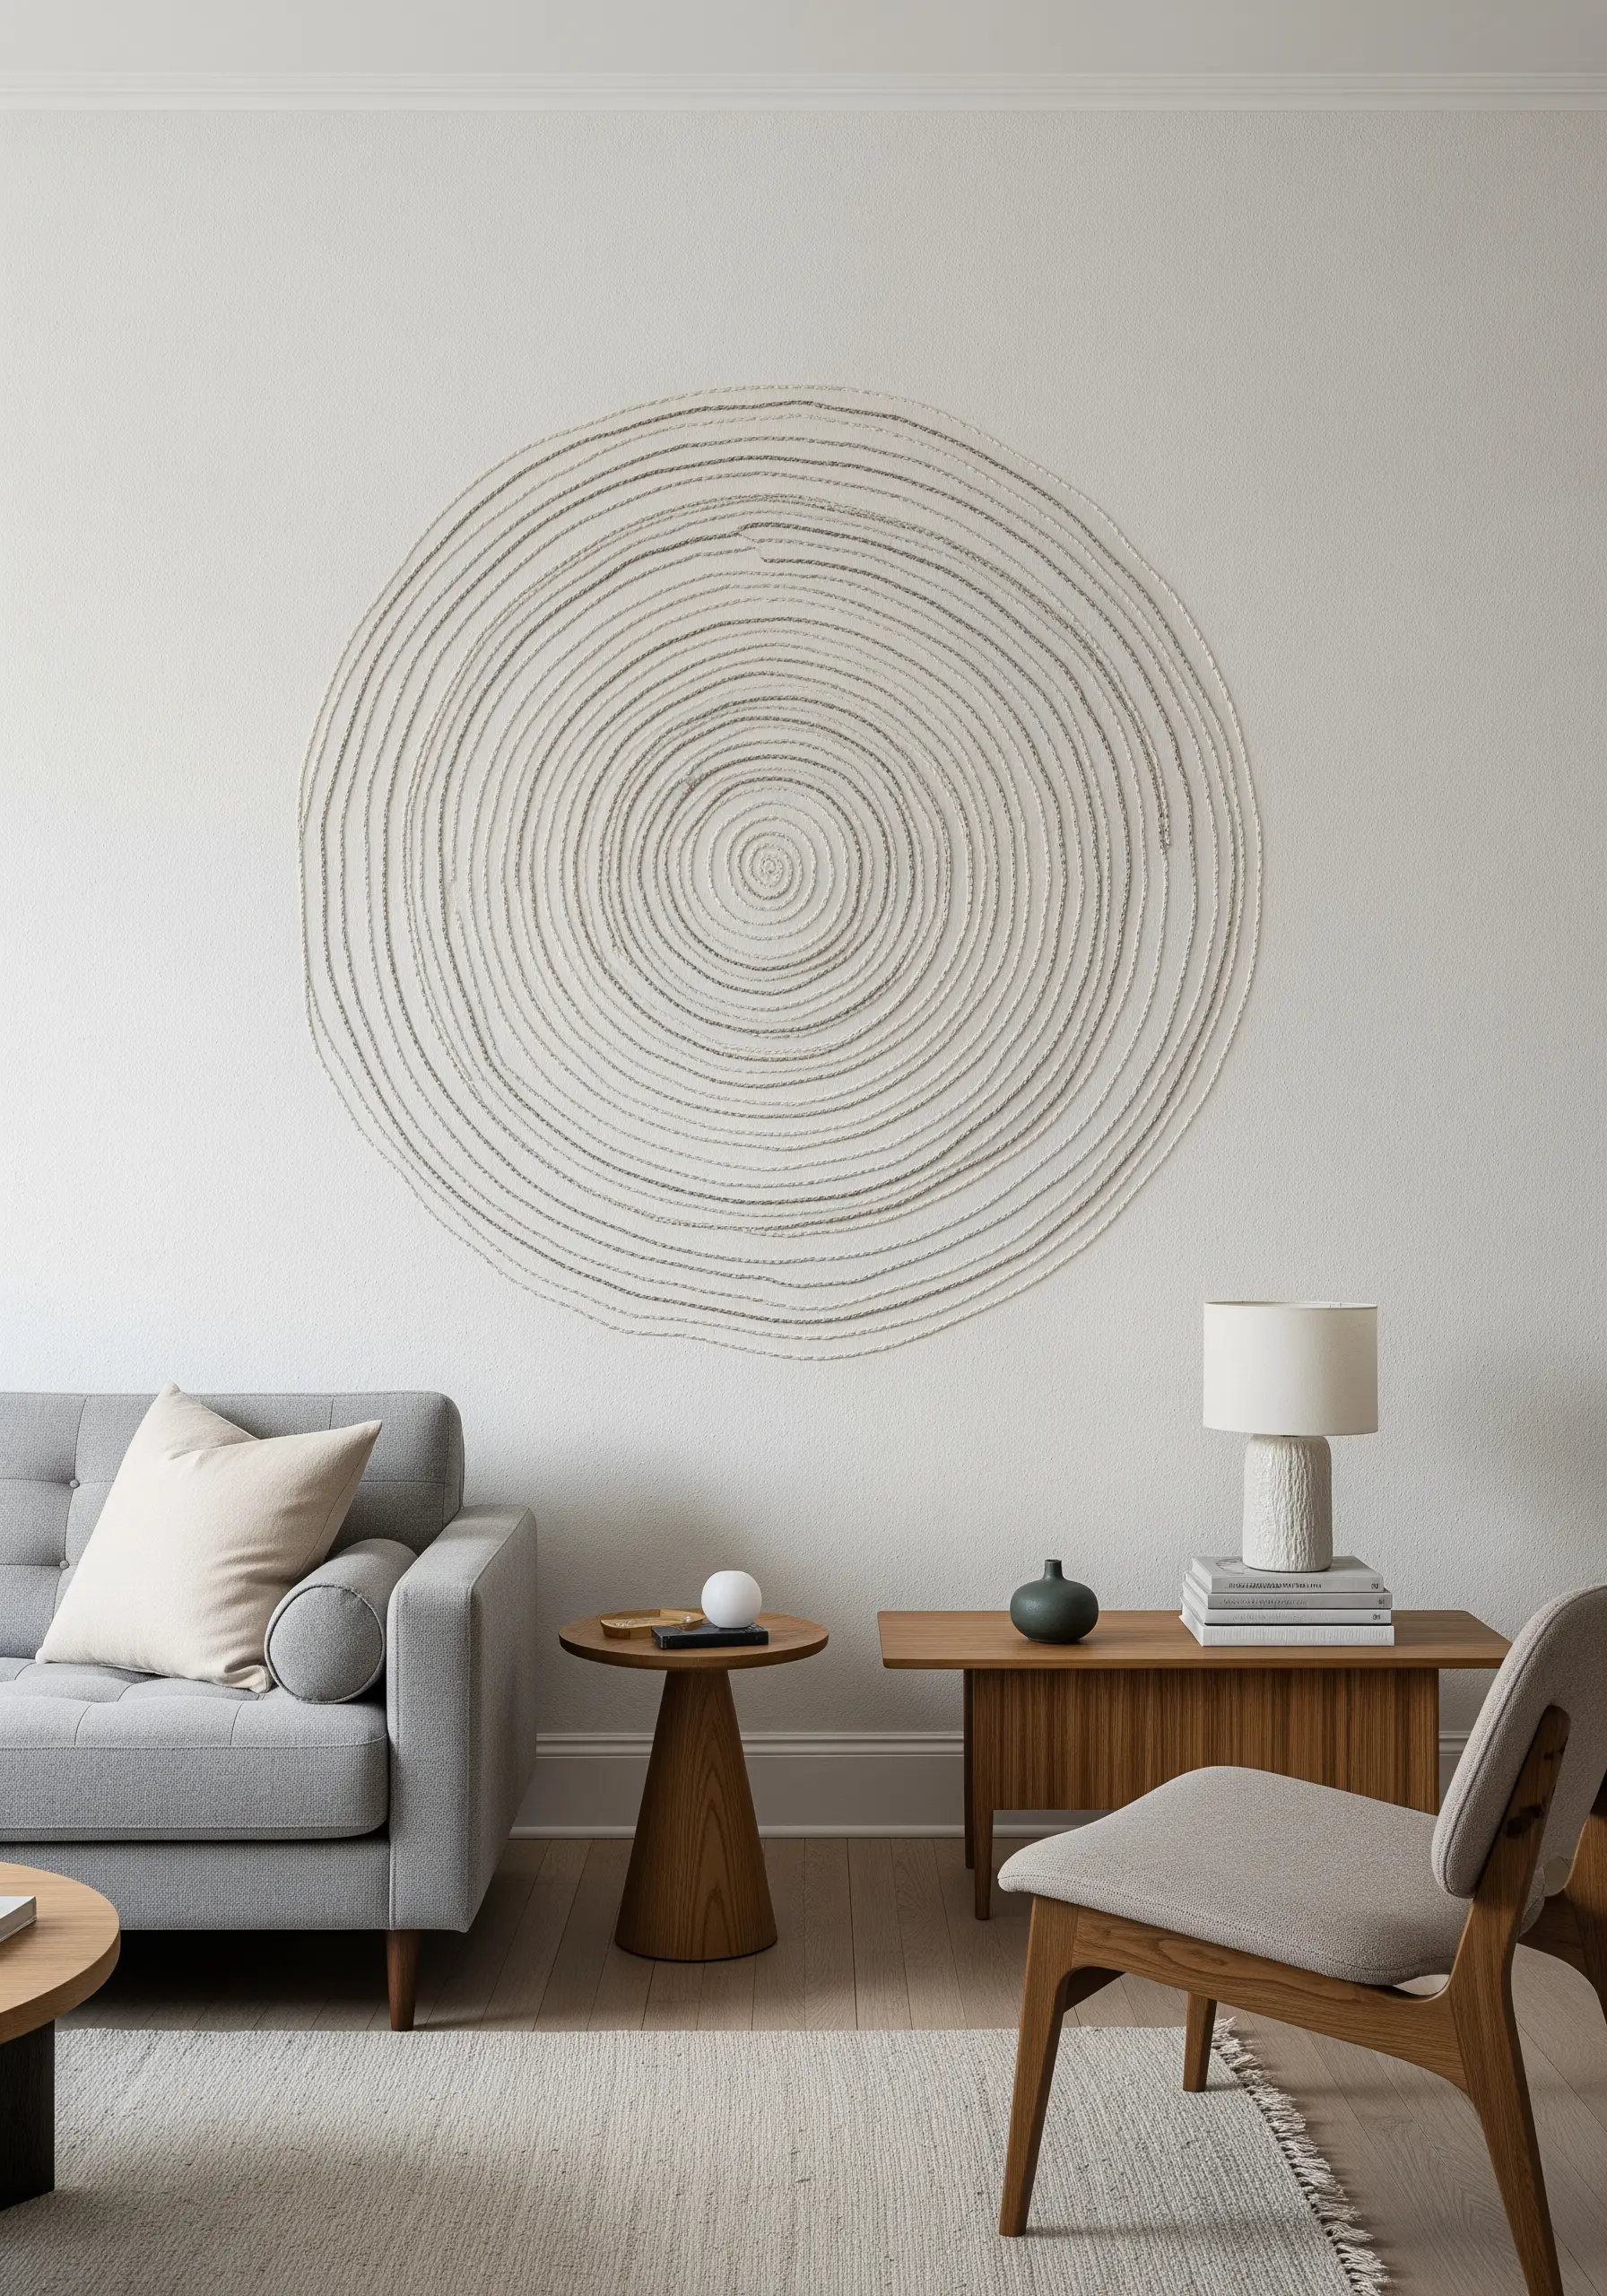
Transform a simple circle into a mesmerizing, large-scale piece by focusing on texture and repetition.
Starting from the center, couch a thick, textural yarn onto your fabric in a continuous spiral, or use a whipped running stitch with a heavy thread to build up raised rings.
The subtle imperfections in the hand-stitched circles are what give the piece its organic, compelling energy.
This is one of those stunning fiber art installations that feels both minimal and incredibly complex.
12. Blend Threads to Paint a Fluid Wave

Capture the movement of water by blending multiple shades of blue within a single element.
Use the long-and-short stitch technique, staggering your stitches and introducing new colors gradually to create a seamless gradient.
Incorporate a strand of white or silver metallic thread at the crest of the wave to suggest seafoam and light.
Stitching on Aida cloth or a gridded canvas helps keep your lines parallel and organized, resulting in a clean yet dynamic design.
13. Use Seed Stitch for an Airy, Expansive Feel

When you want to add texture to a large surface without overwhelming it, a scattered pattern is the perfect solution.
Fill a large piece of fabric, like a wall tapestry, with tiny, randomly placed straight stitches, known as seed stitches.
Use a variety of soft, complementary colors to create a subtle confetti effect that draws you in.
This technique adds a layer of handmade warmth and visual interest while keeping the overall feeling light, bright, and spacious.
14. Vary Thread Weight to Create Visual Hierarchy
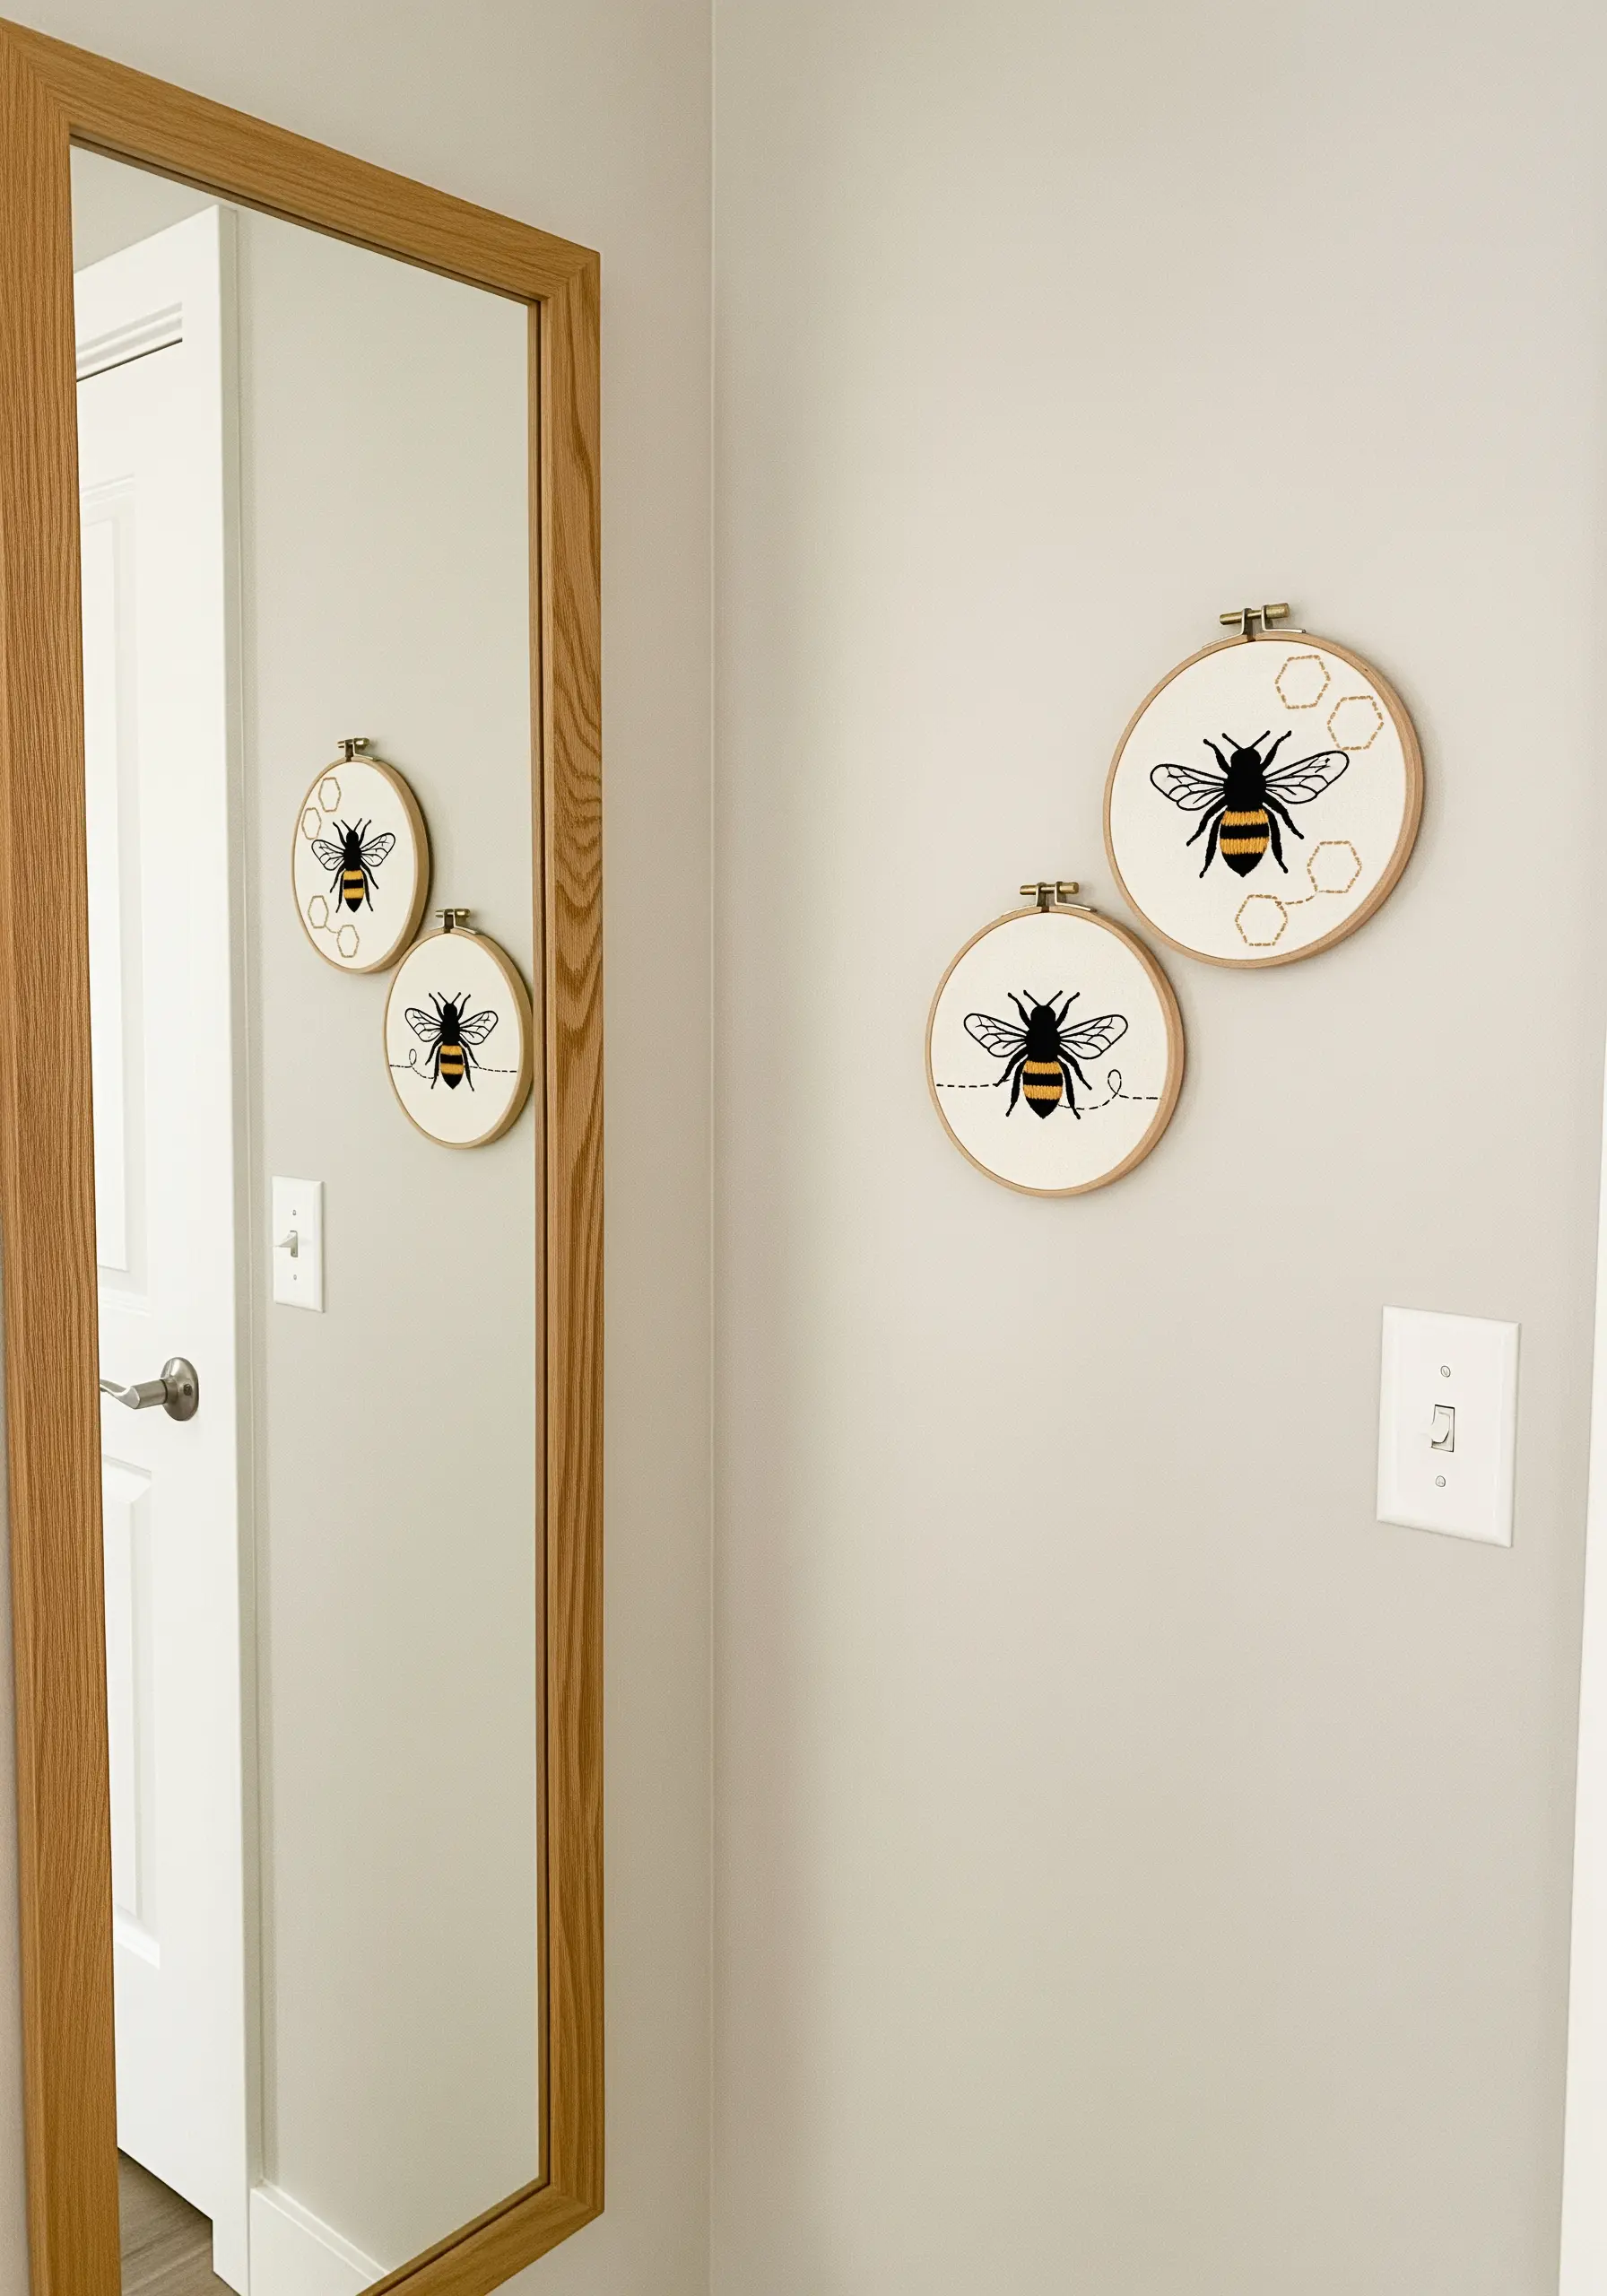
Guide the viewer’s eye by strategically changing the thickness of your thread.
For the bee’s body, use all six strands of floss to create bold, solid stripes that stand out.
For the delicate wings and the dotted flight path, switch to a single strand of thread.
This contrast in line weight makes the bee feel substantial while giving its movement a sense of lightness and whimsy.
15. Punctuate a Monochrome Scene with a Single Color
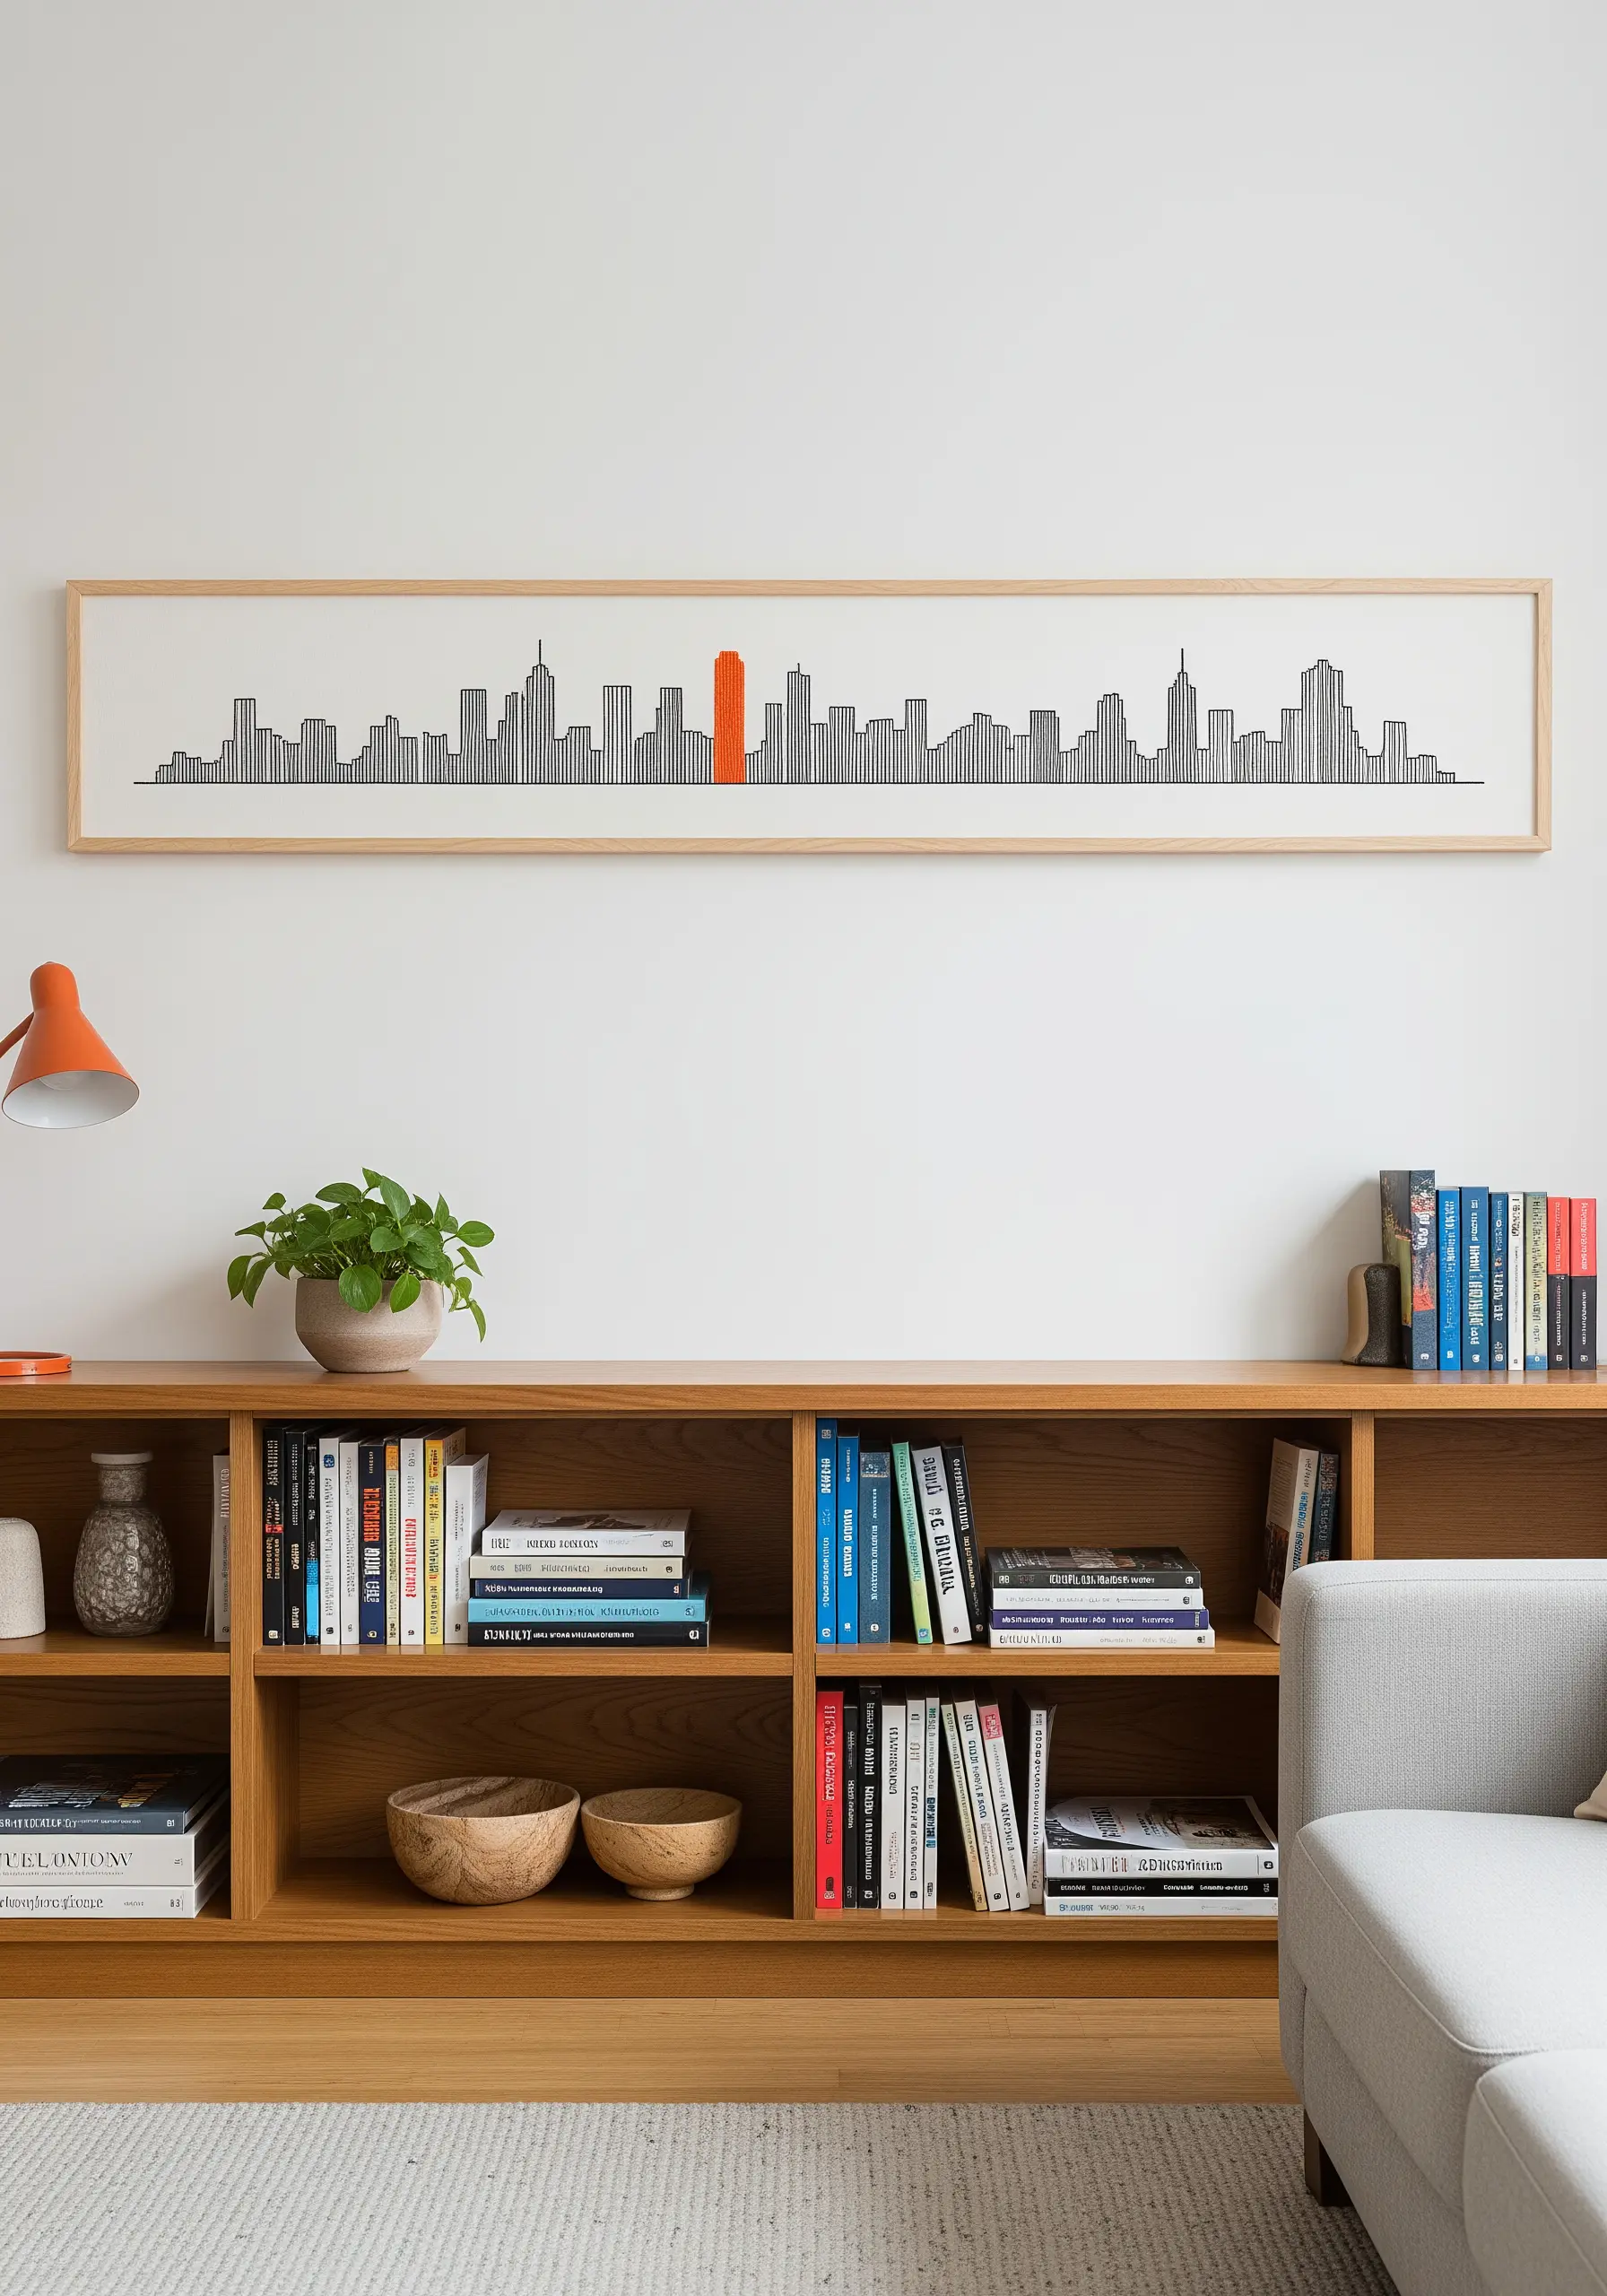
A long, panoramic format is perfect for a minimalist skyline, drawing the eye across the wall and making a room feel wider.
Stitch the entire cityscape using a crisp two-strand backstitch in black for a clean, graphic look.
Then, choose a single building and fill it with a bold, contrasting color using a vertical satin stitch.
This technique creates an immediate focal point and adds a sophisticated, personal touch to the otherwise monochrome piece.
16. Convey Movement with Detached Stitches
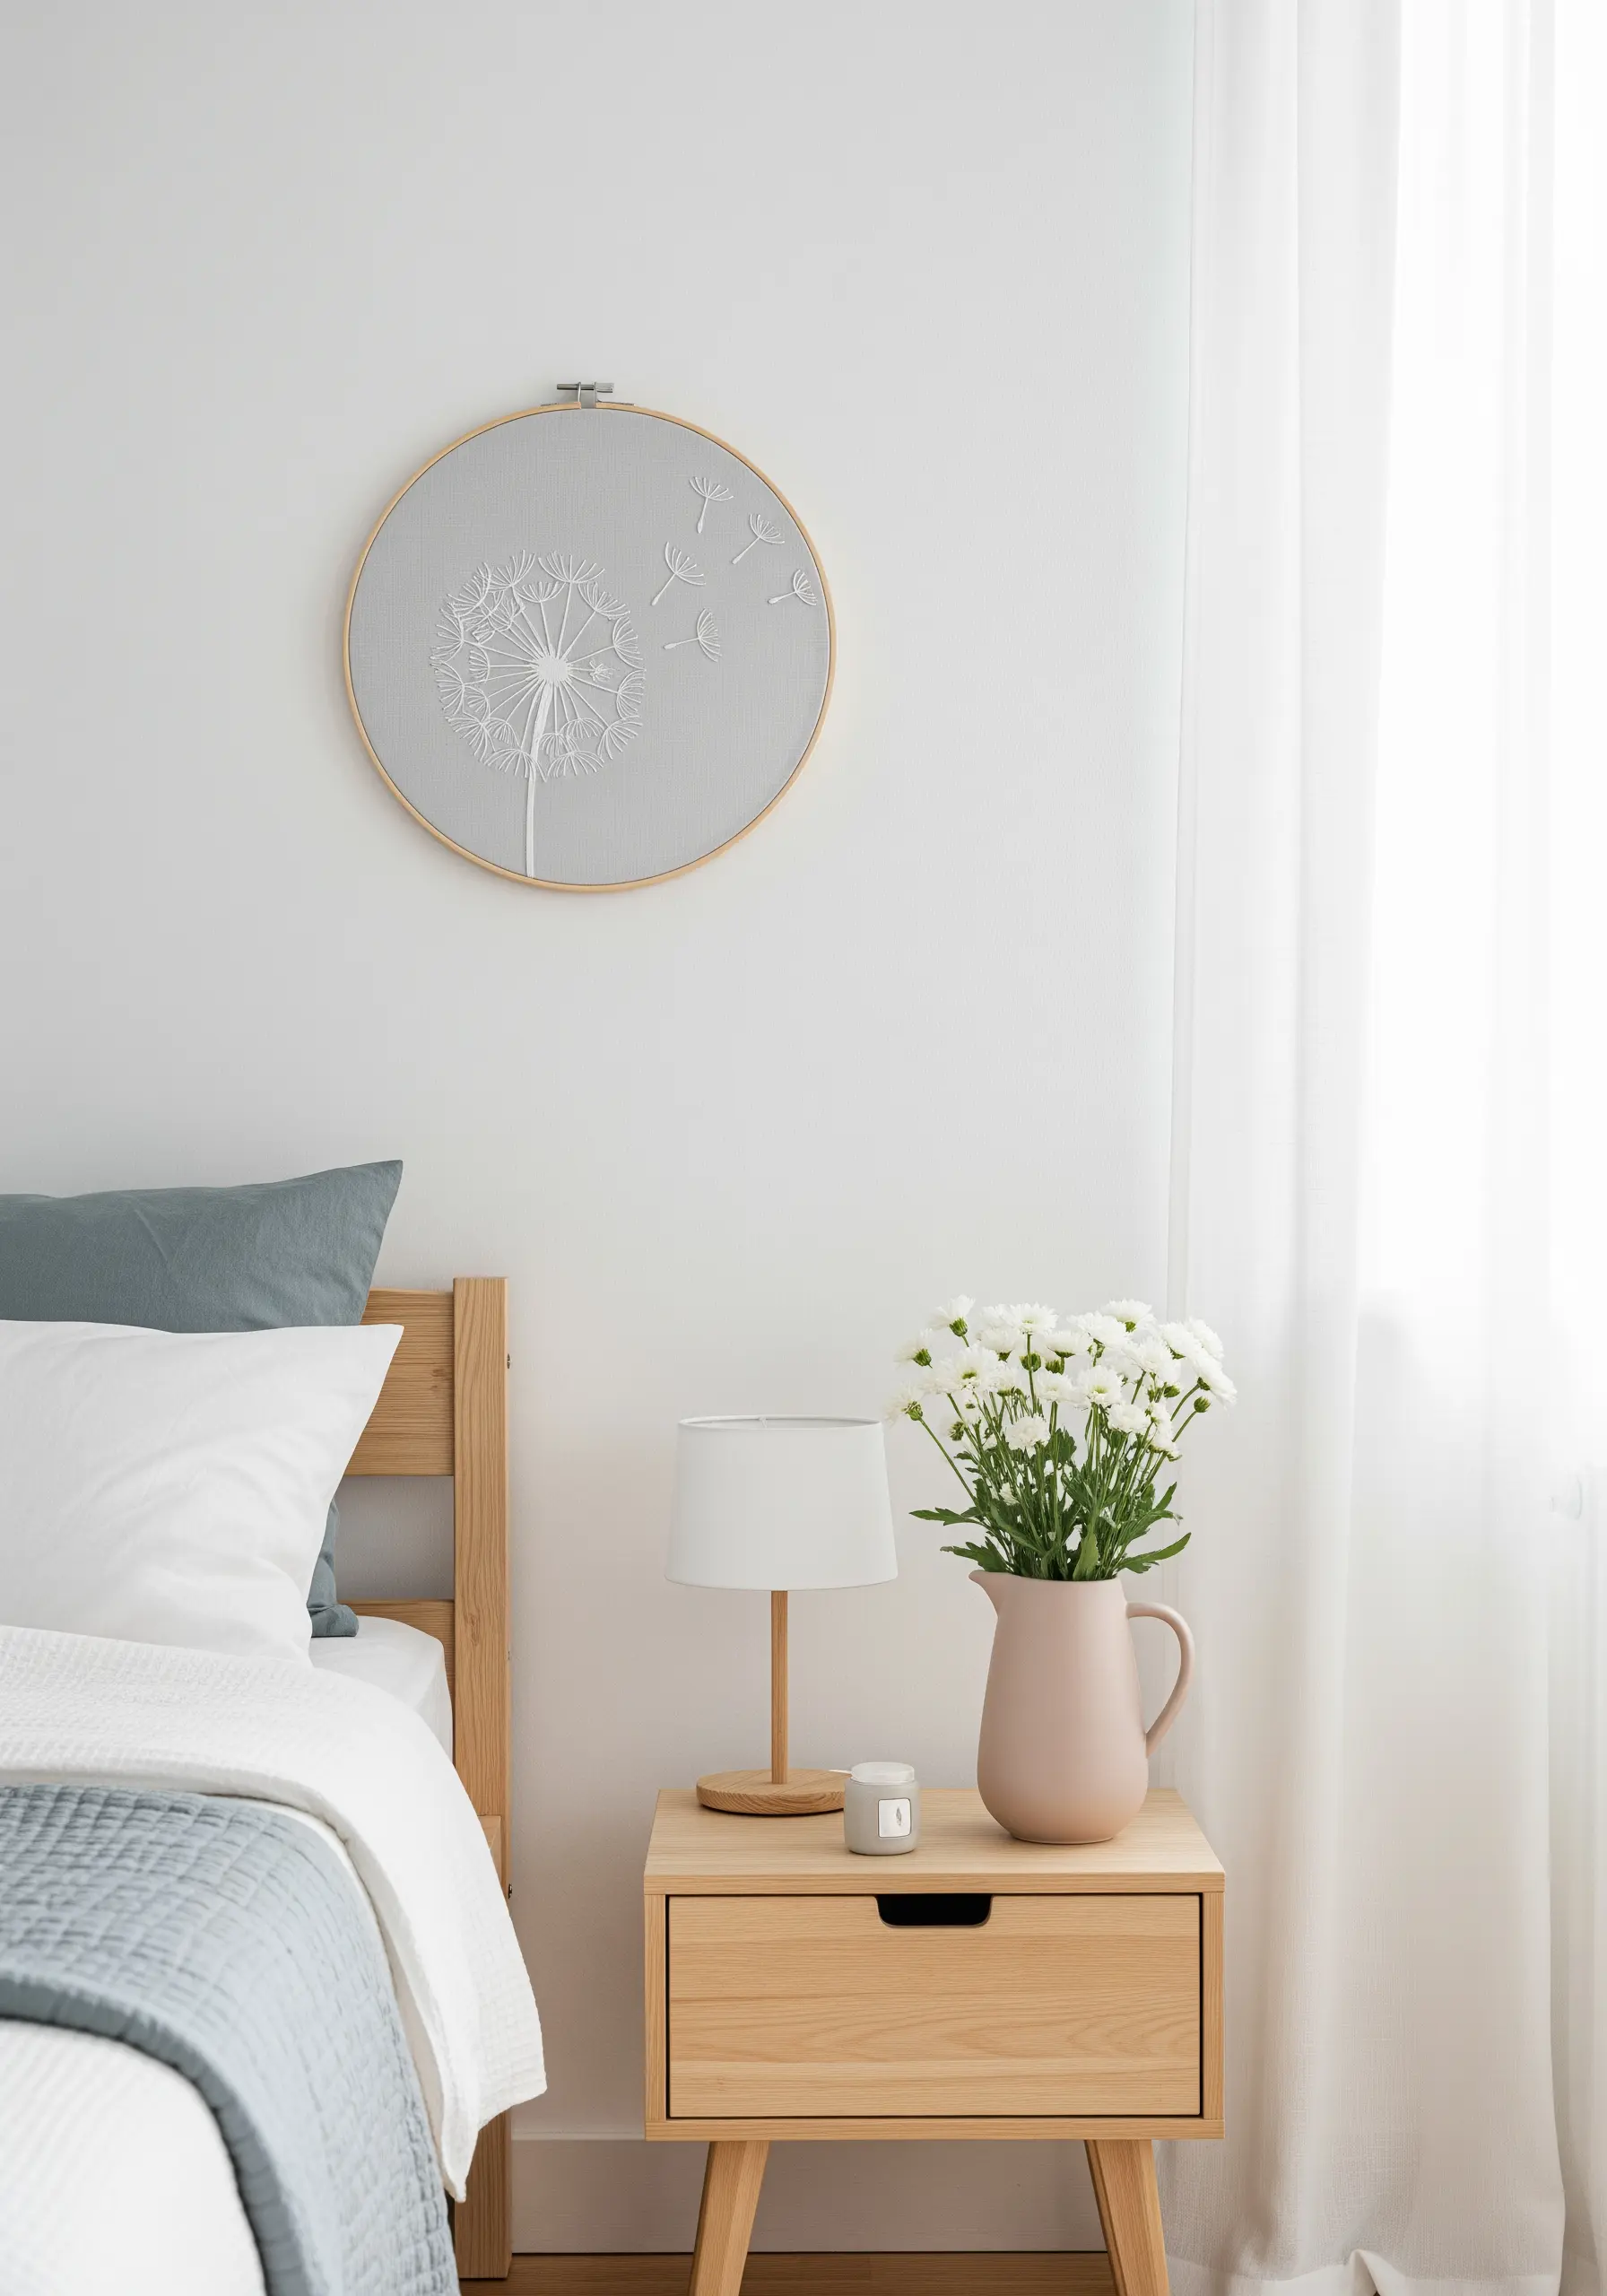
To capture the delicate, floating quality of dandelion seeds, avoid solid, connected lines.
Use detached chain stitches or single, isolated straight stitches for the seeds, scattering them across the fabric.
Vary the angle and length of each stitch to create a realistic sense of them being carried by the wind.
The negative space around the seeds is just as important as the stitches themselves, contributing to the feeling of lightness and motion.
17. Use Stitch Direction to Sculpt Natural Forms
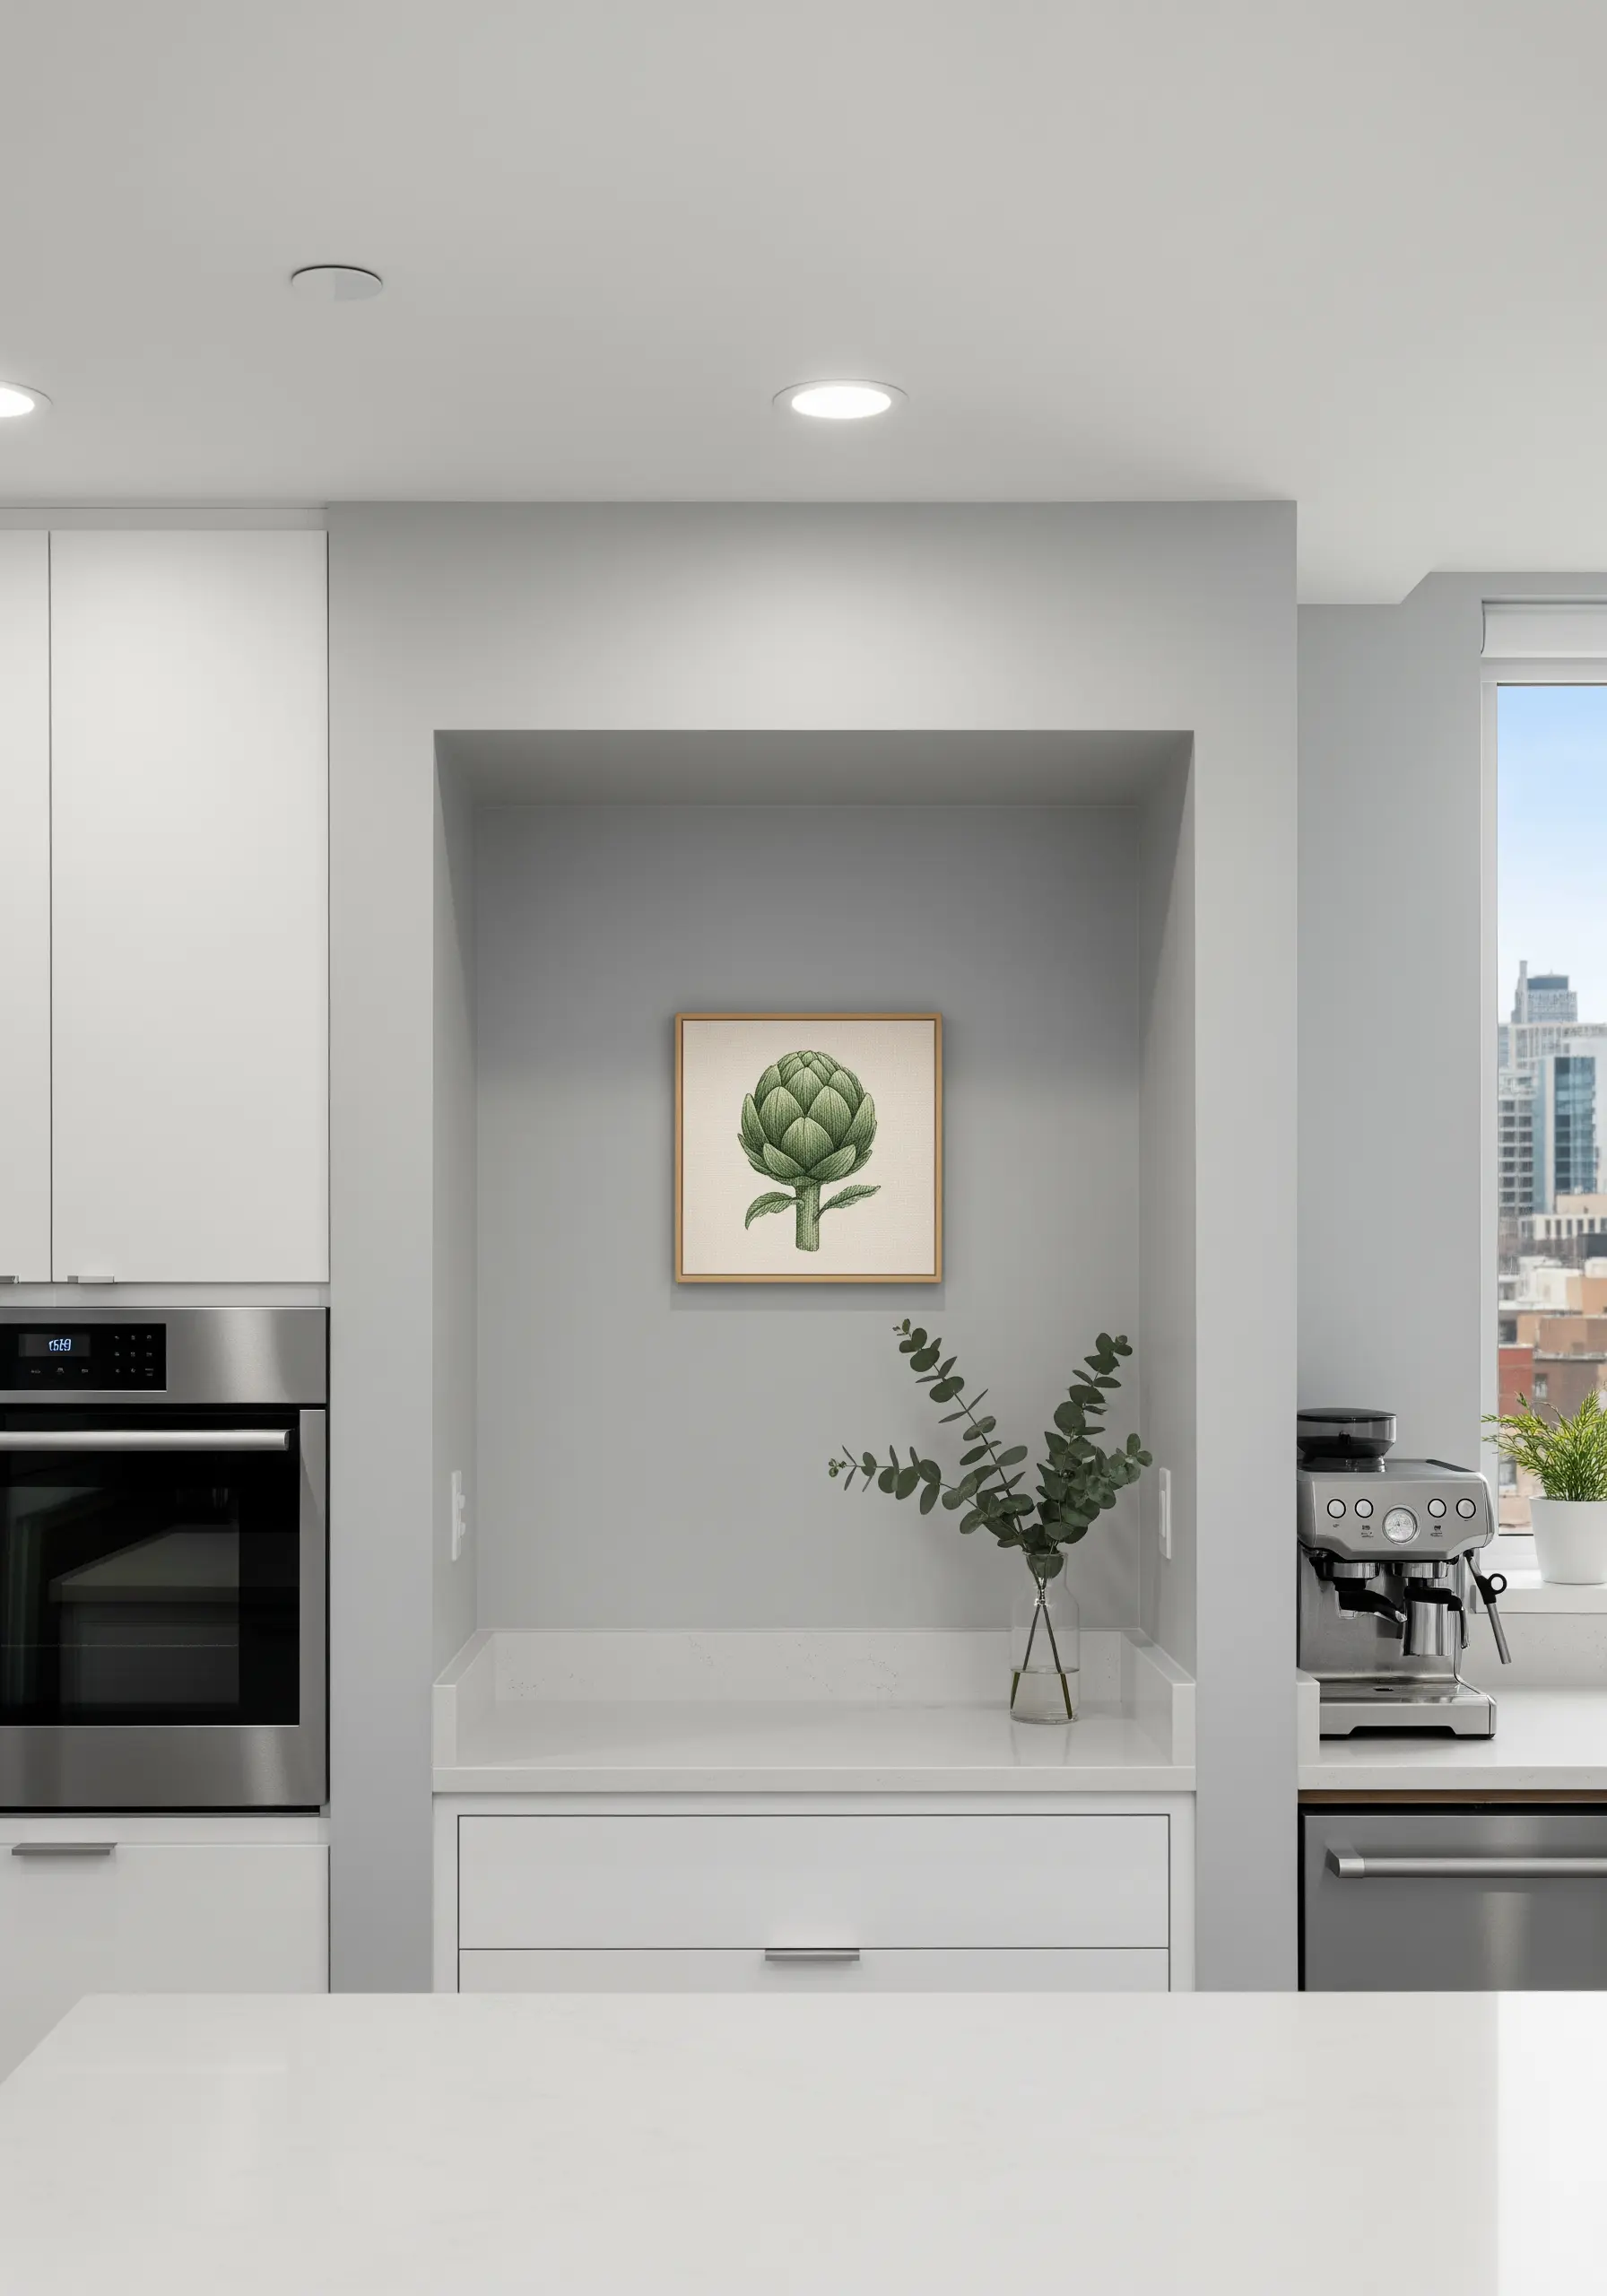
When embroidering a botanical subject like an artichoke, the direction of your stitches is everything.
Use a fishbone stitch or a directional satin stitch for each individual leaf, angling the stitches outward from a central line.
Slightly overlap each leaf as you work your way up to build the characteristic layered, dimensional shape.
This methodical approach turns a flat drawing into a tactile, sculptural study of a natural object.
18. Couch Thick Threads for Bold, Organic Lines
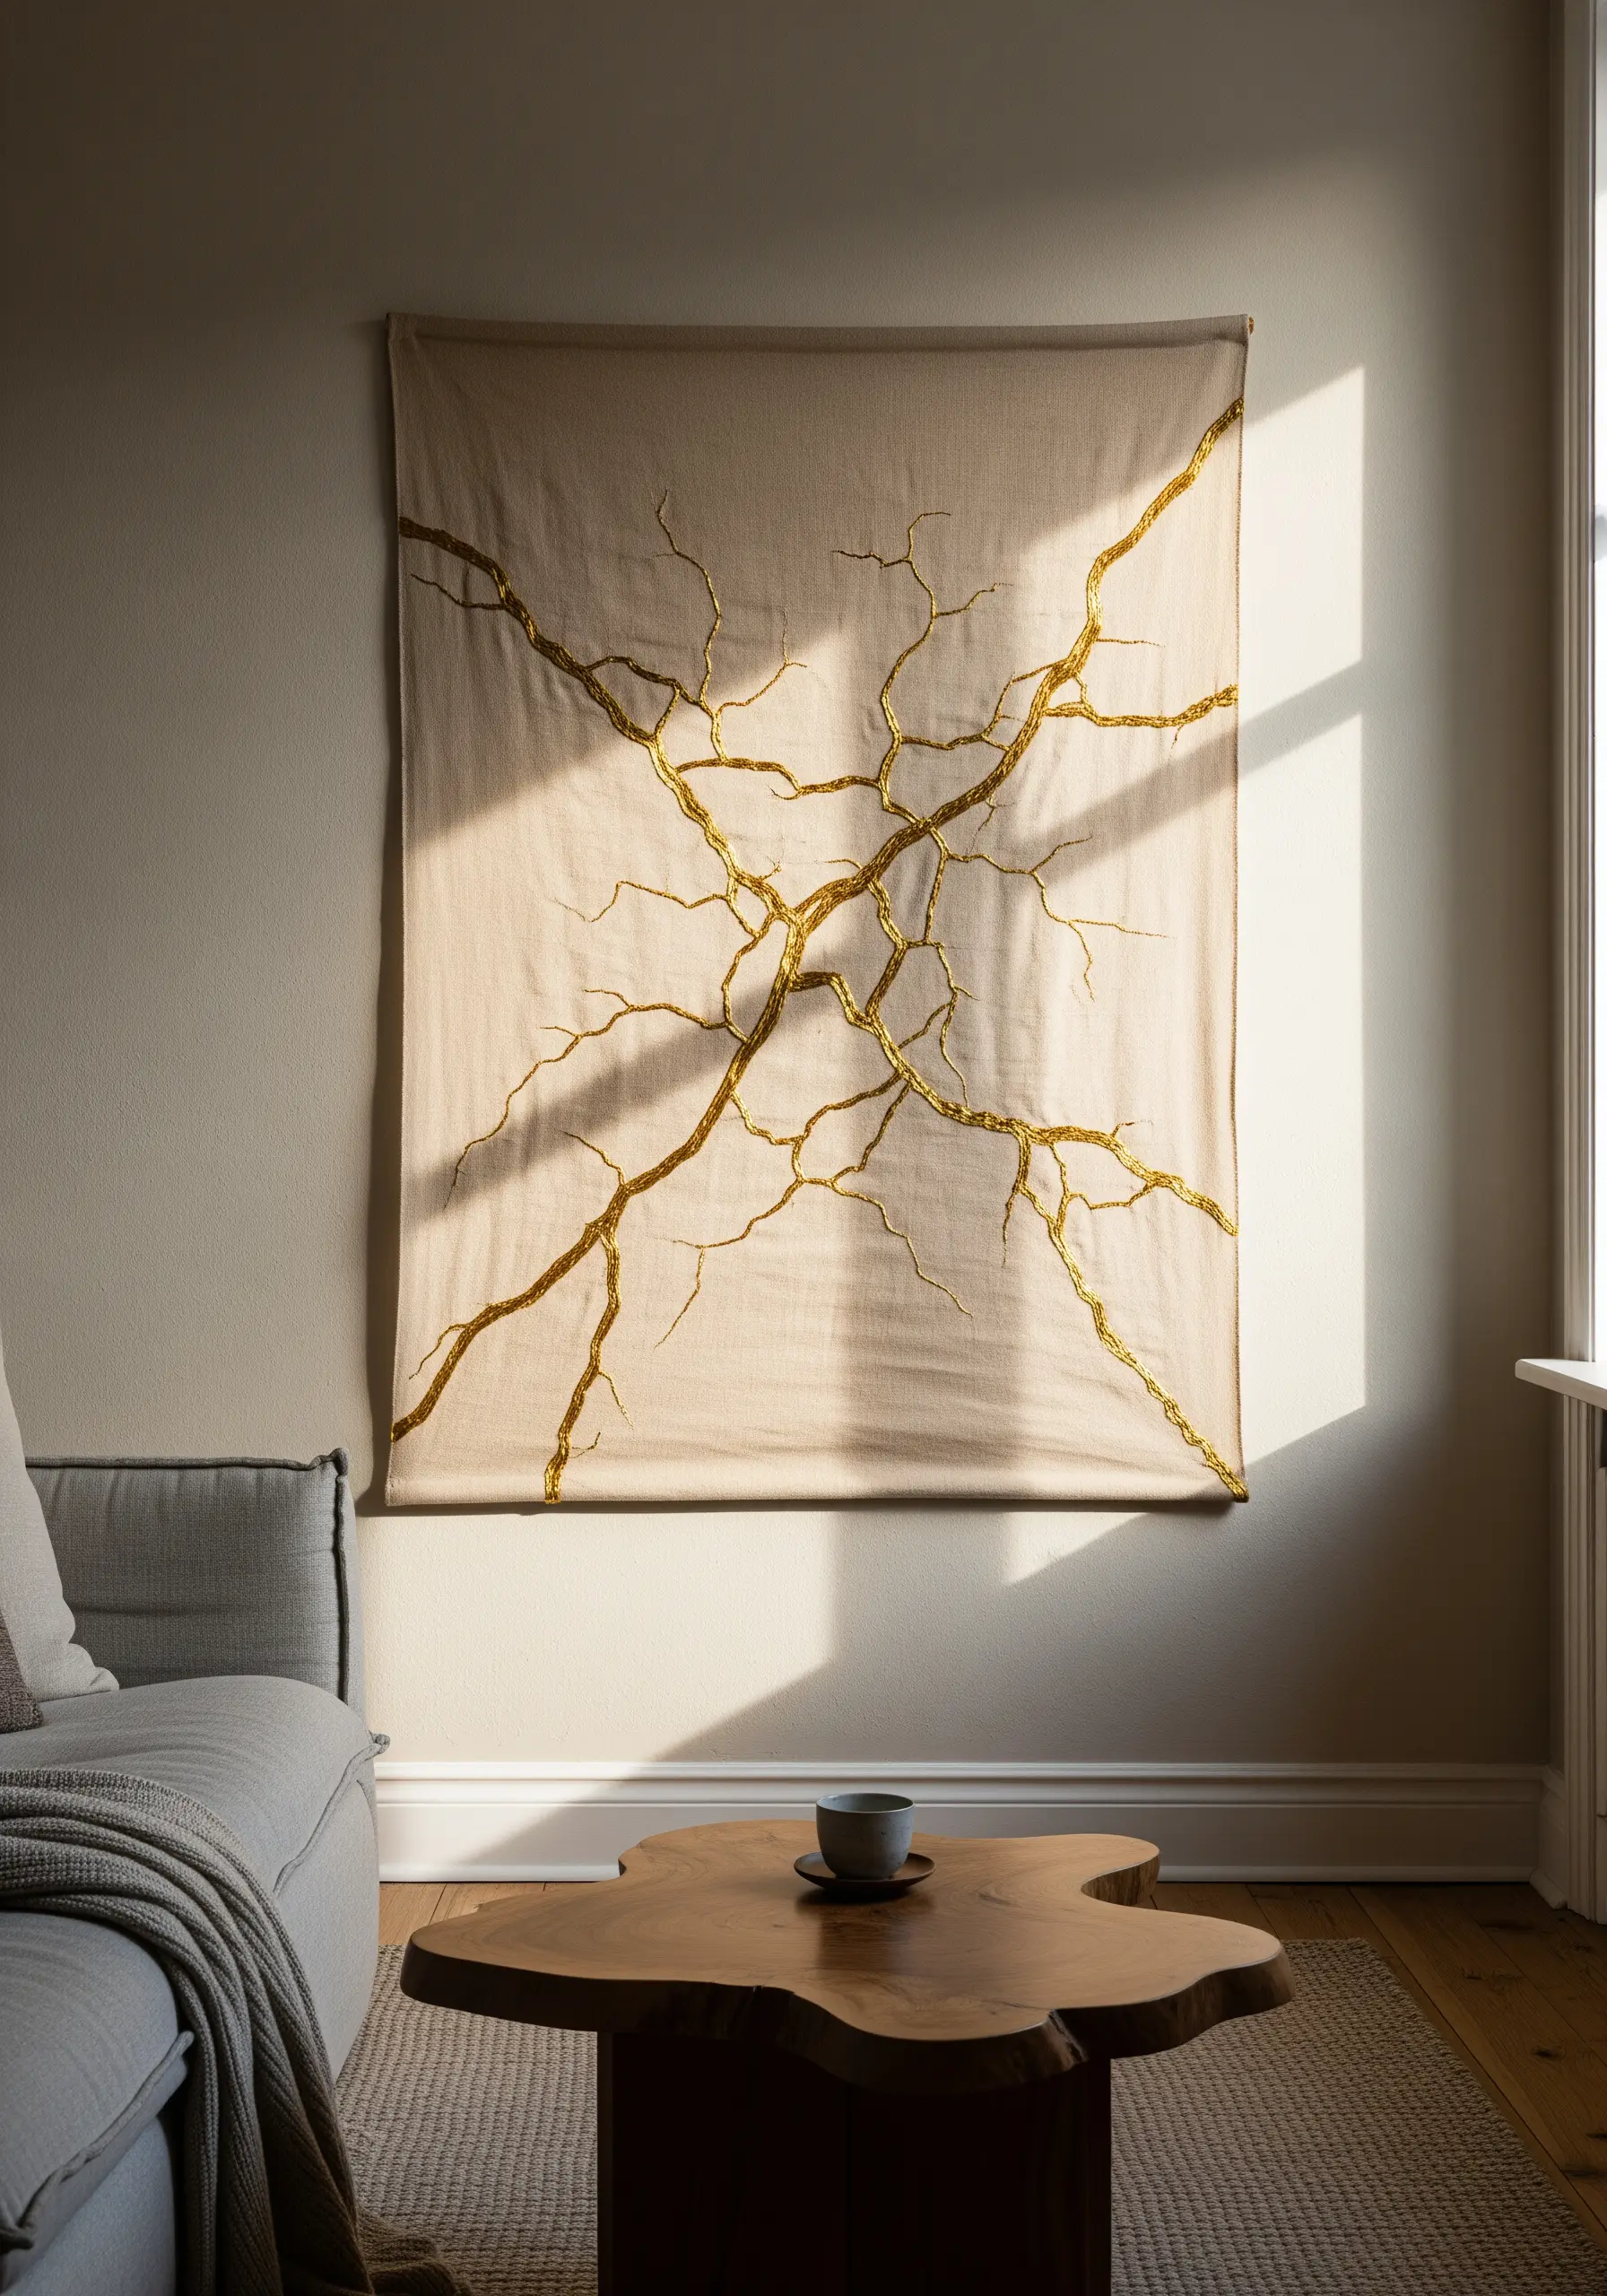
For a design that requires bold, fluid lines like these golden branches, traditional stitching can be too restrictive.
Instead, use the couching technique: lay a thick, metallic yarn or cord on the surface of your fabric and use a second, finer thread to tack it down with small, perpendicular stitches.
This allows you to create sweeping curves and organic forms with a raised, textural quality that feels both ancient and modern, reminiscent of Kintsugi, the Japanese art of repairing broken pottery.
19. Achieve Architectural Precision with a Whipped Backstitch
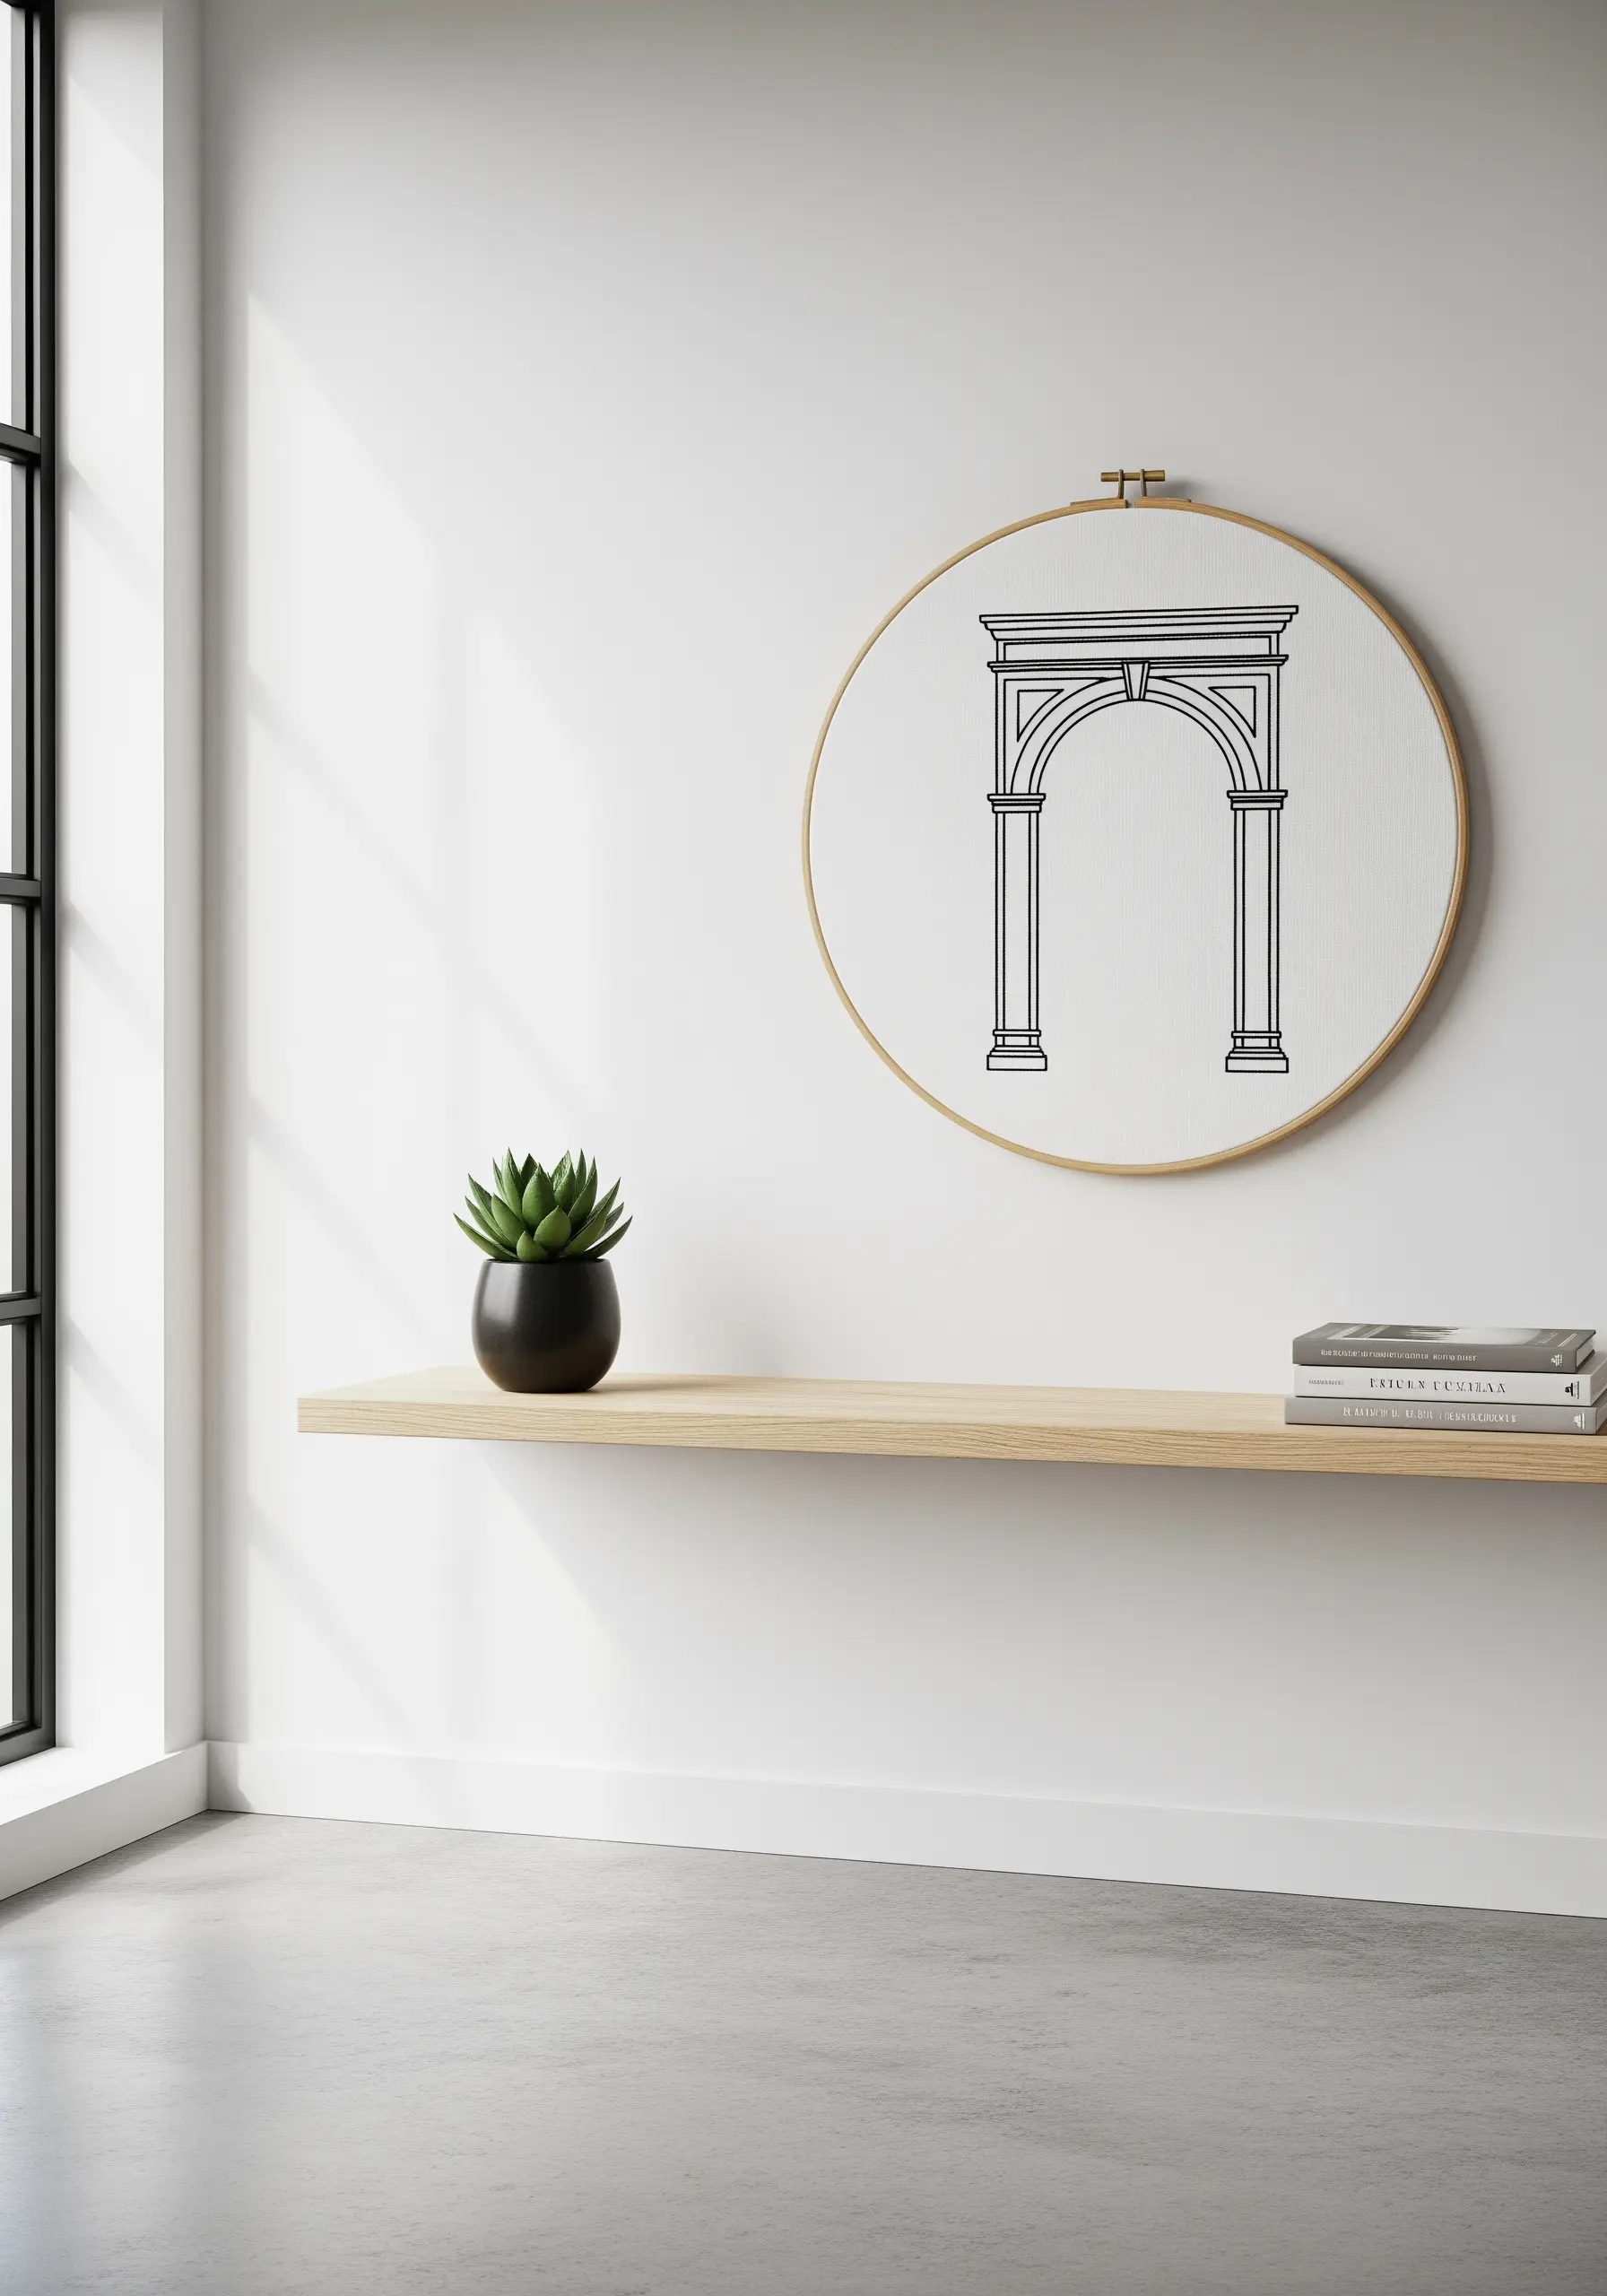
When stitching architectural forms, a clean, solid line is essential for a professional finish.
A whipped backstitch is the perfect choice, as it creates a smooth, raised line with no visible gaps between stitches.
To add extra weight and importance to key structural lines, simply go over them a second time with another layer of whipping.
This method provides the clean precision needed for architectural string art designs to look sharp and intentional.
20. Create a Cohesive Gallery with a Consistent Visual Language

When displaying multiple hoops together, consistency is what turns them from individual projects into a single, unified art piece.
Choose a limited color palette—here, just yellow, gray, and white—and use it across all four designs.
Apply the same stitch vocabulary throughout; for example, use backstitch for all outlines and a simple satin stitch for any filled areas.
This disciplined approach ensures your set feels curated and intentional, making a stronger visual impact.
21. Embrace High-Contrast Texture with Punch Needle

For a bold, graphic statement, nothing beats high-contrast texture.
Use a punch needle with thick, natural wool yarn to create the raised, looped texture of this maze-like pattern.
Working on a dark, felt-like background makes the cream-colored yarn pop, emphasizing the sculptural quality of the lines.
This technique creates yarn wall art projects inspired by geometric patterns that are incredibly fast to make and have enormous visual impact.
22. Explore Dimensional Stitches for a Tactile Rainscape
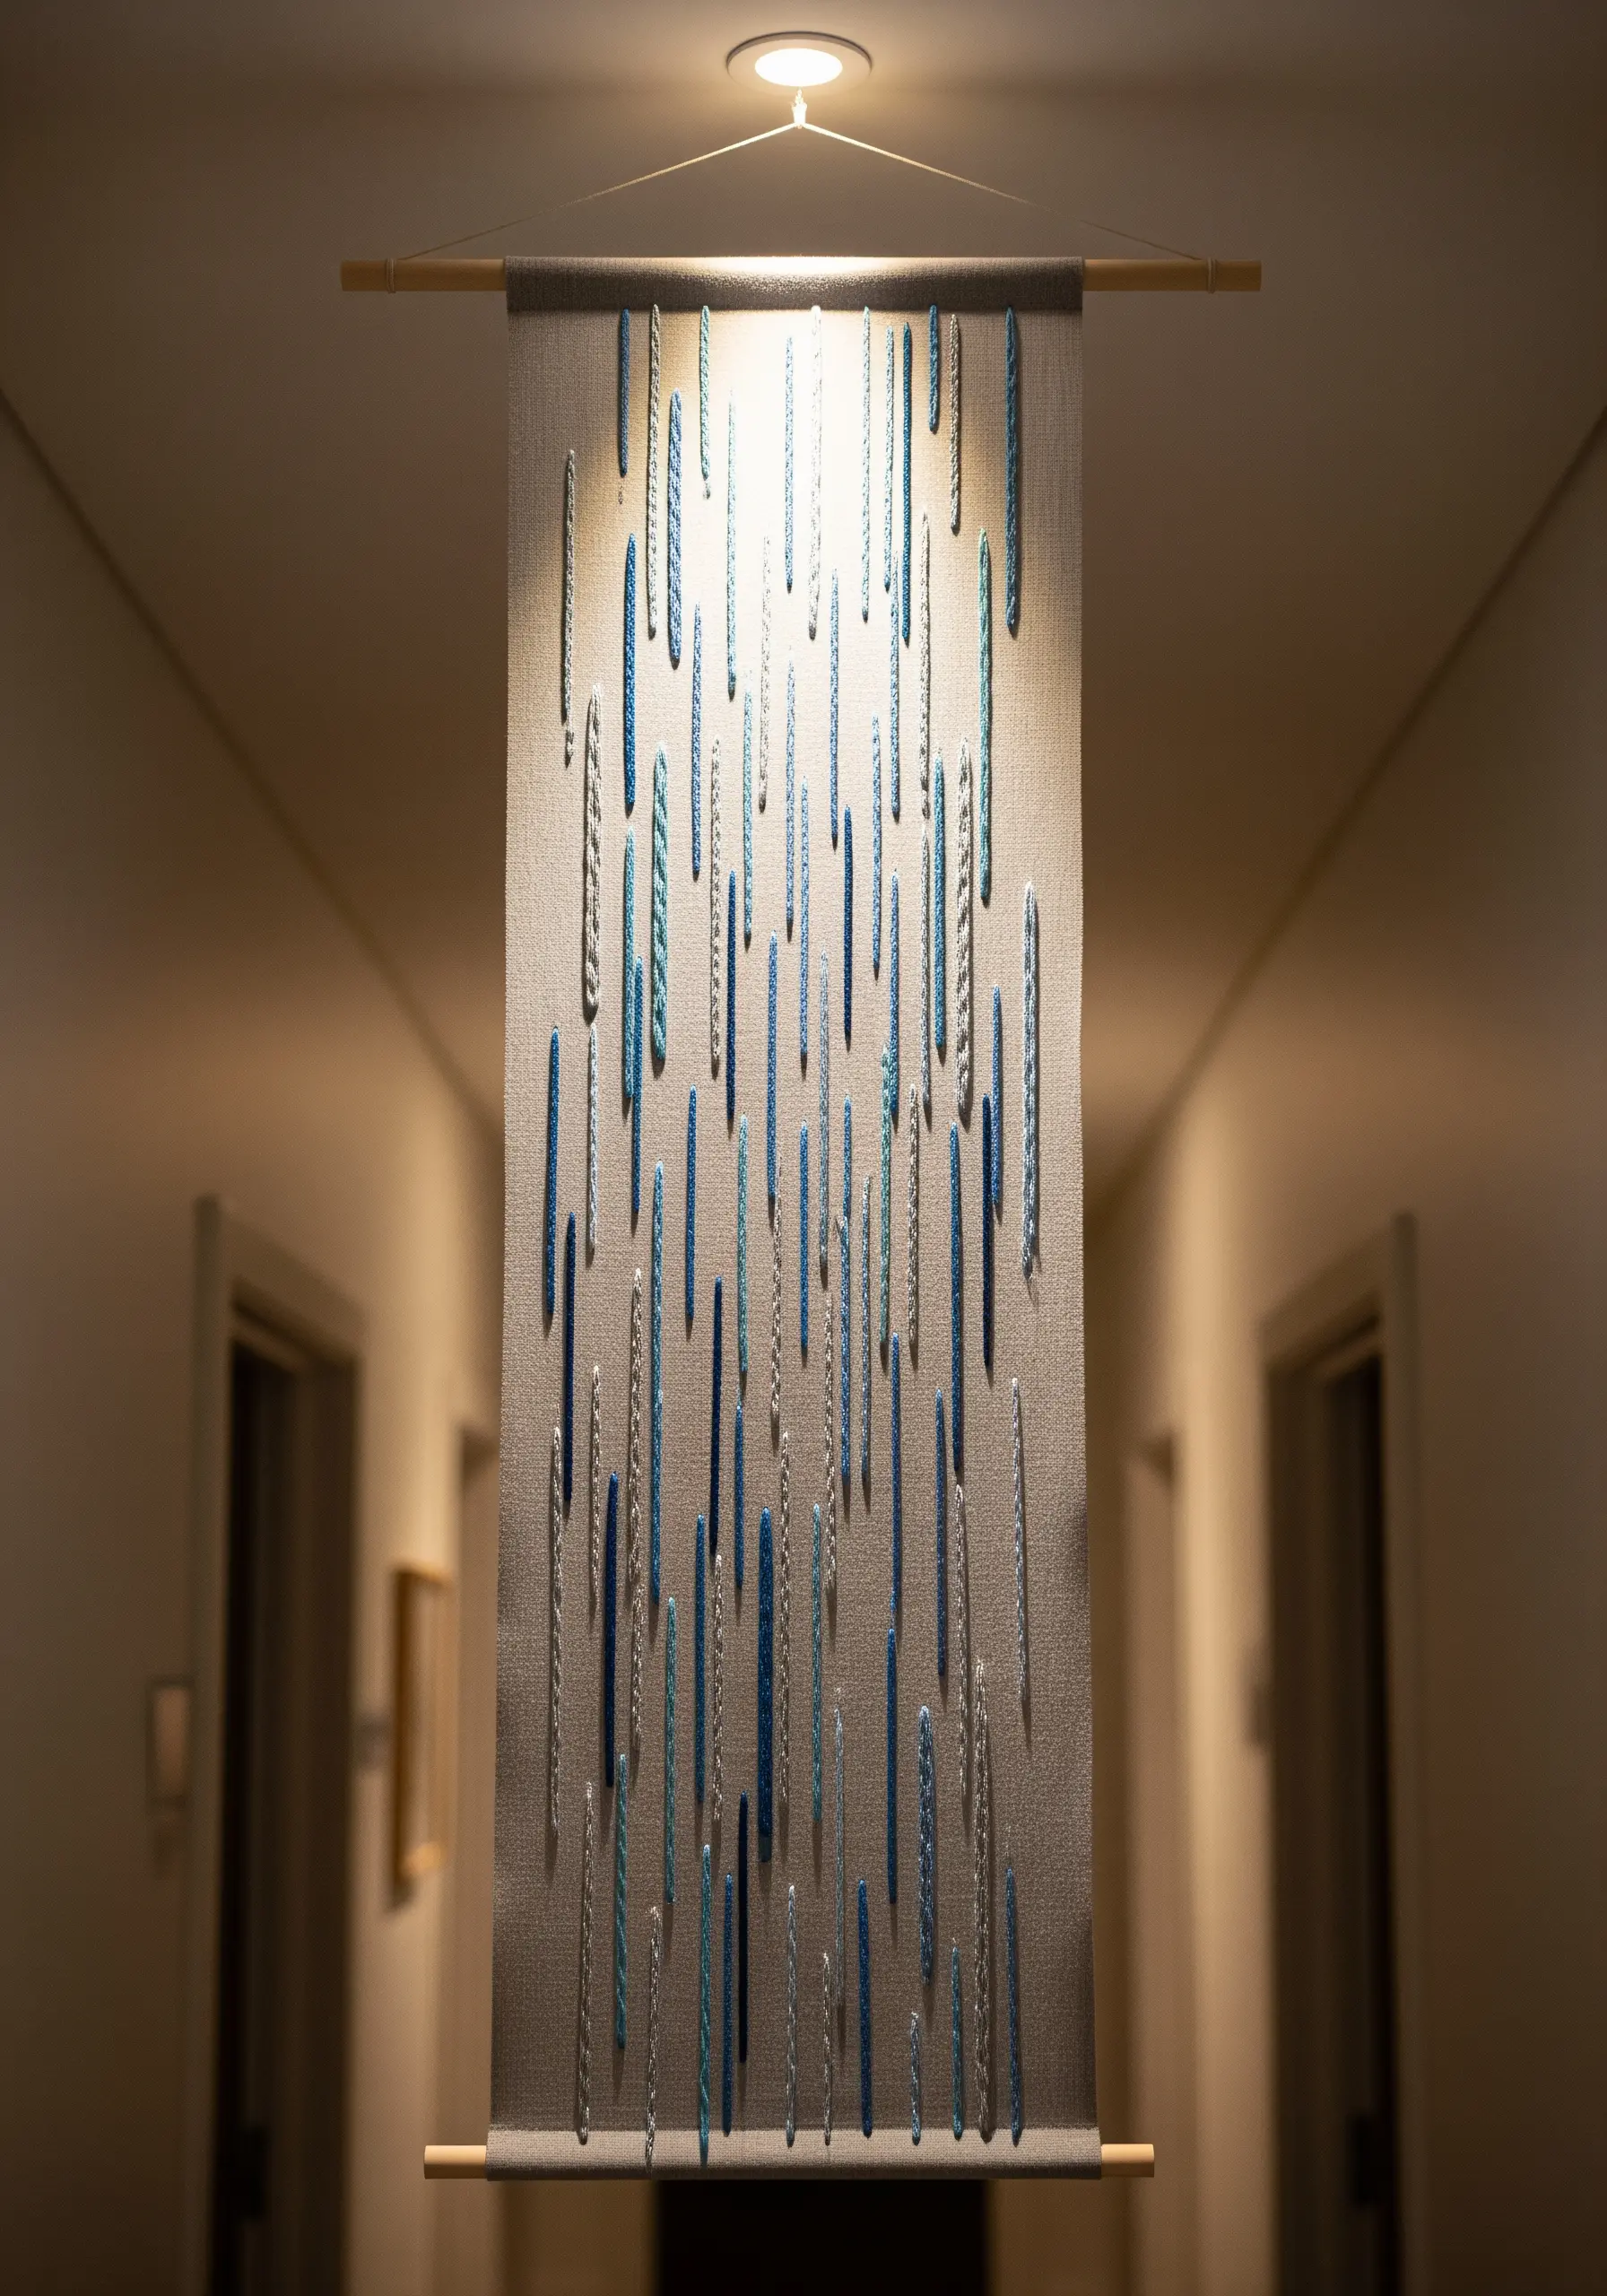
Create an abstract representation of falling rain by focusing on vertical, dimensional stitches.
Experiment with stitches like the drizzle stitch, bullion knot, or a wrapped backstitch to create these raised, caterpillar-like forms.
Use a variegated thread or several analogous shades of blue, gray, and green to give the piece subtle depth and color variation.
The finished wall hanging is a study in texture that invites viewers to look closer.
23. Capture the Essence of a Drawing with Stem Stitch
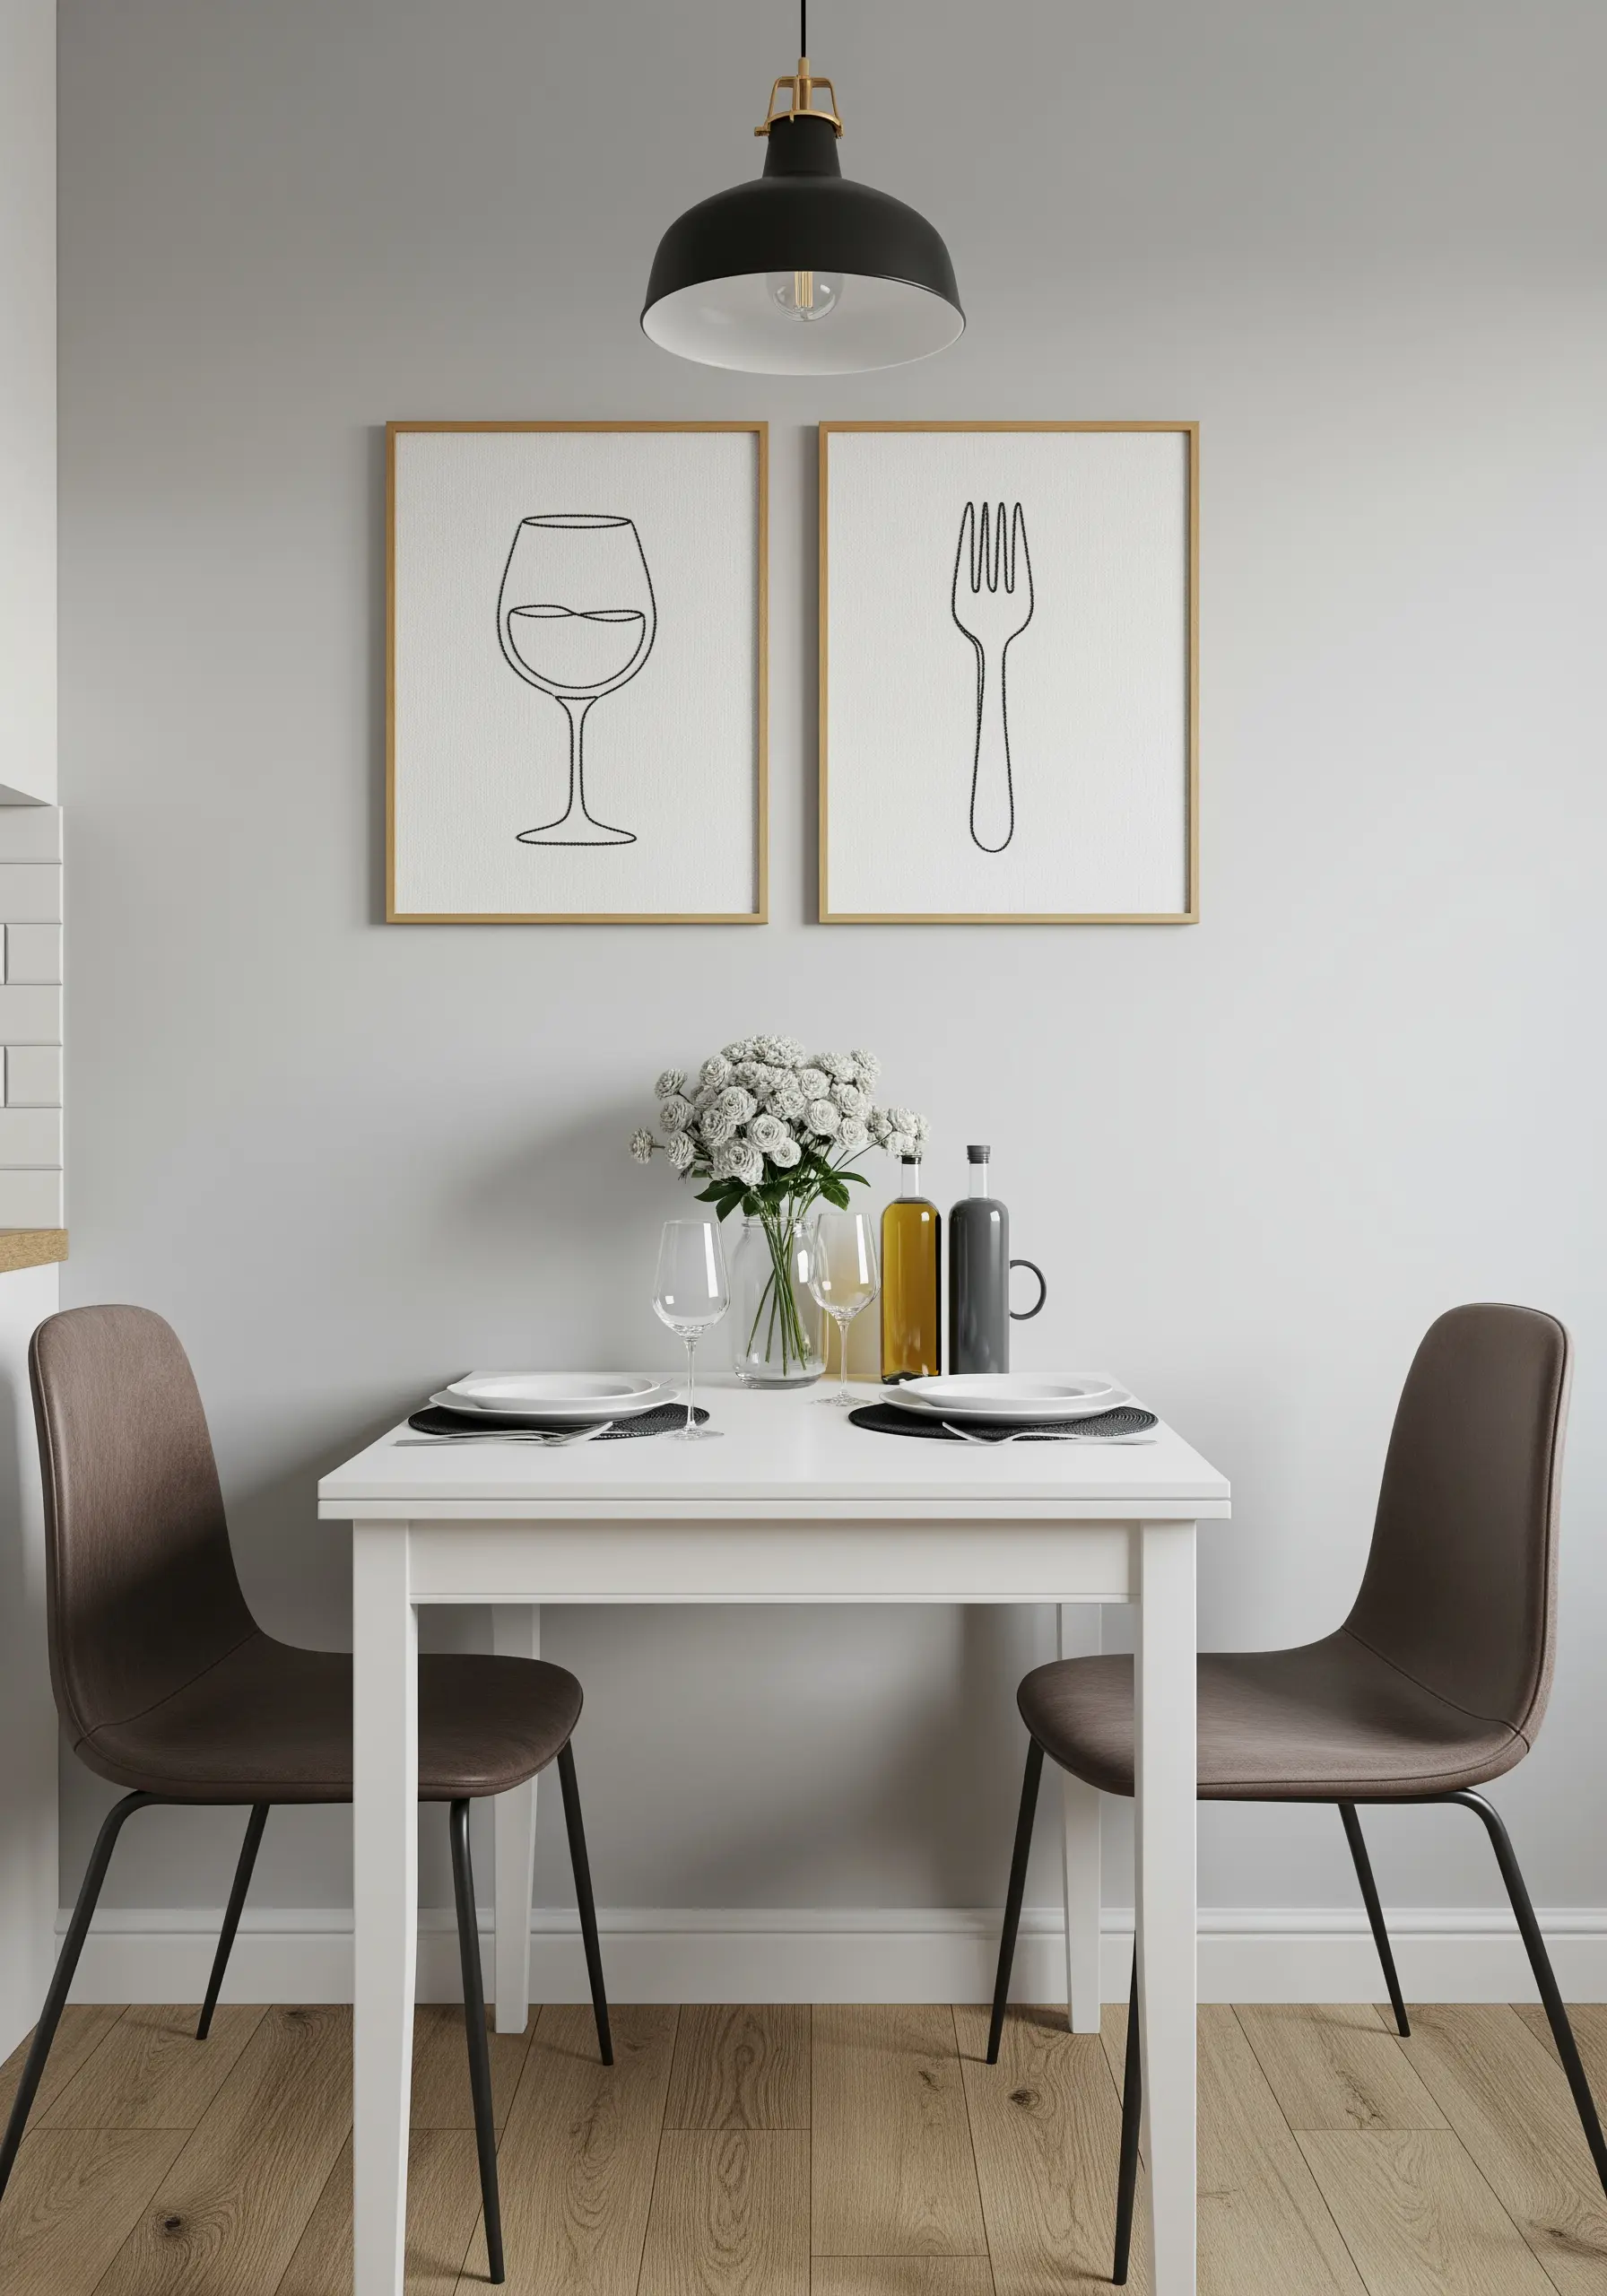
To give your embroidery the clean, continuous feel of a pen-and-ink drawing, the stem stitch is your best tool.
Use a single strand of black floss to maintain a delicate, precise line.
The slightly twisted, rope-like texture of the stem stitch provides a smooth, unbroken line that is perfect for minimalist illustrations.
Paired together, these simple motifs create a chic, bistro-inspired gallery wall for a dining nook.
24. Build Meditative Patterns with the Palestrina Knot
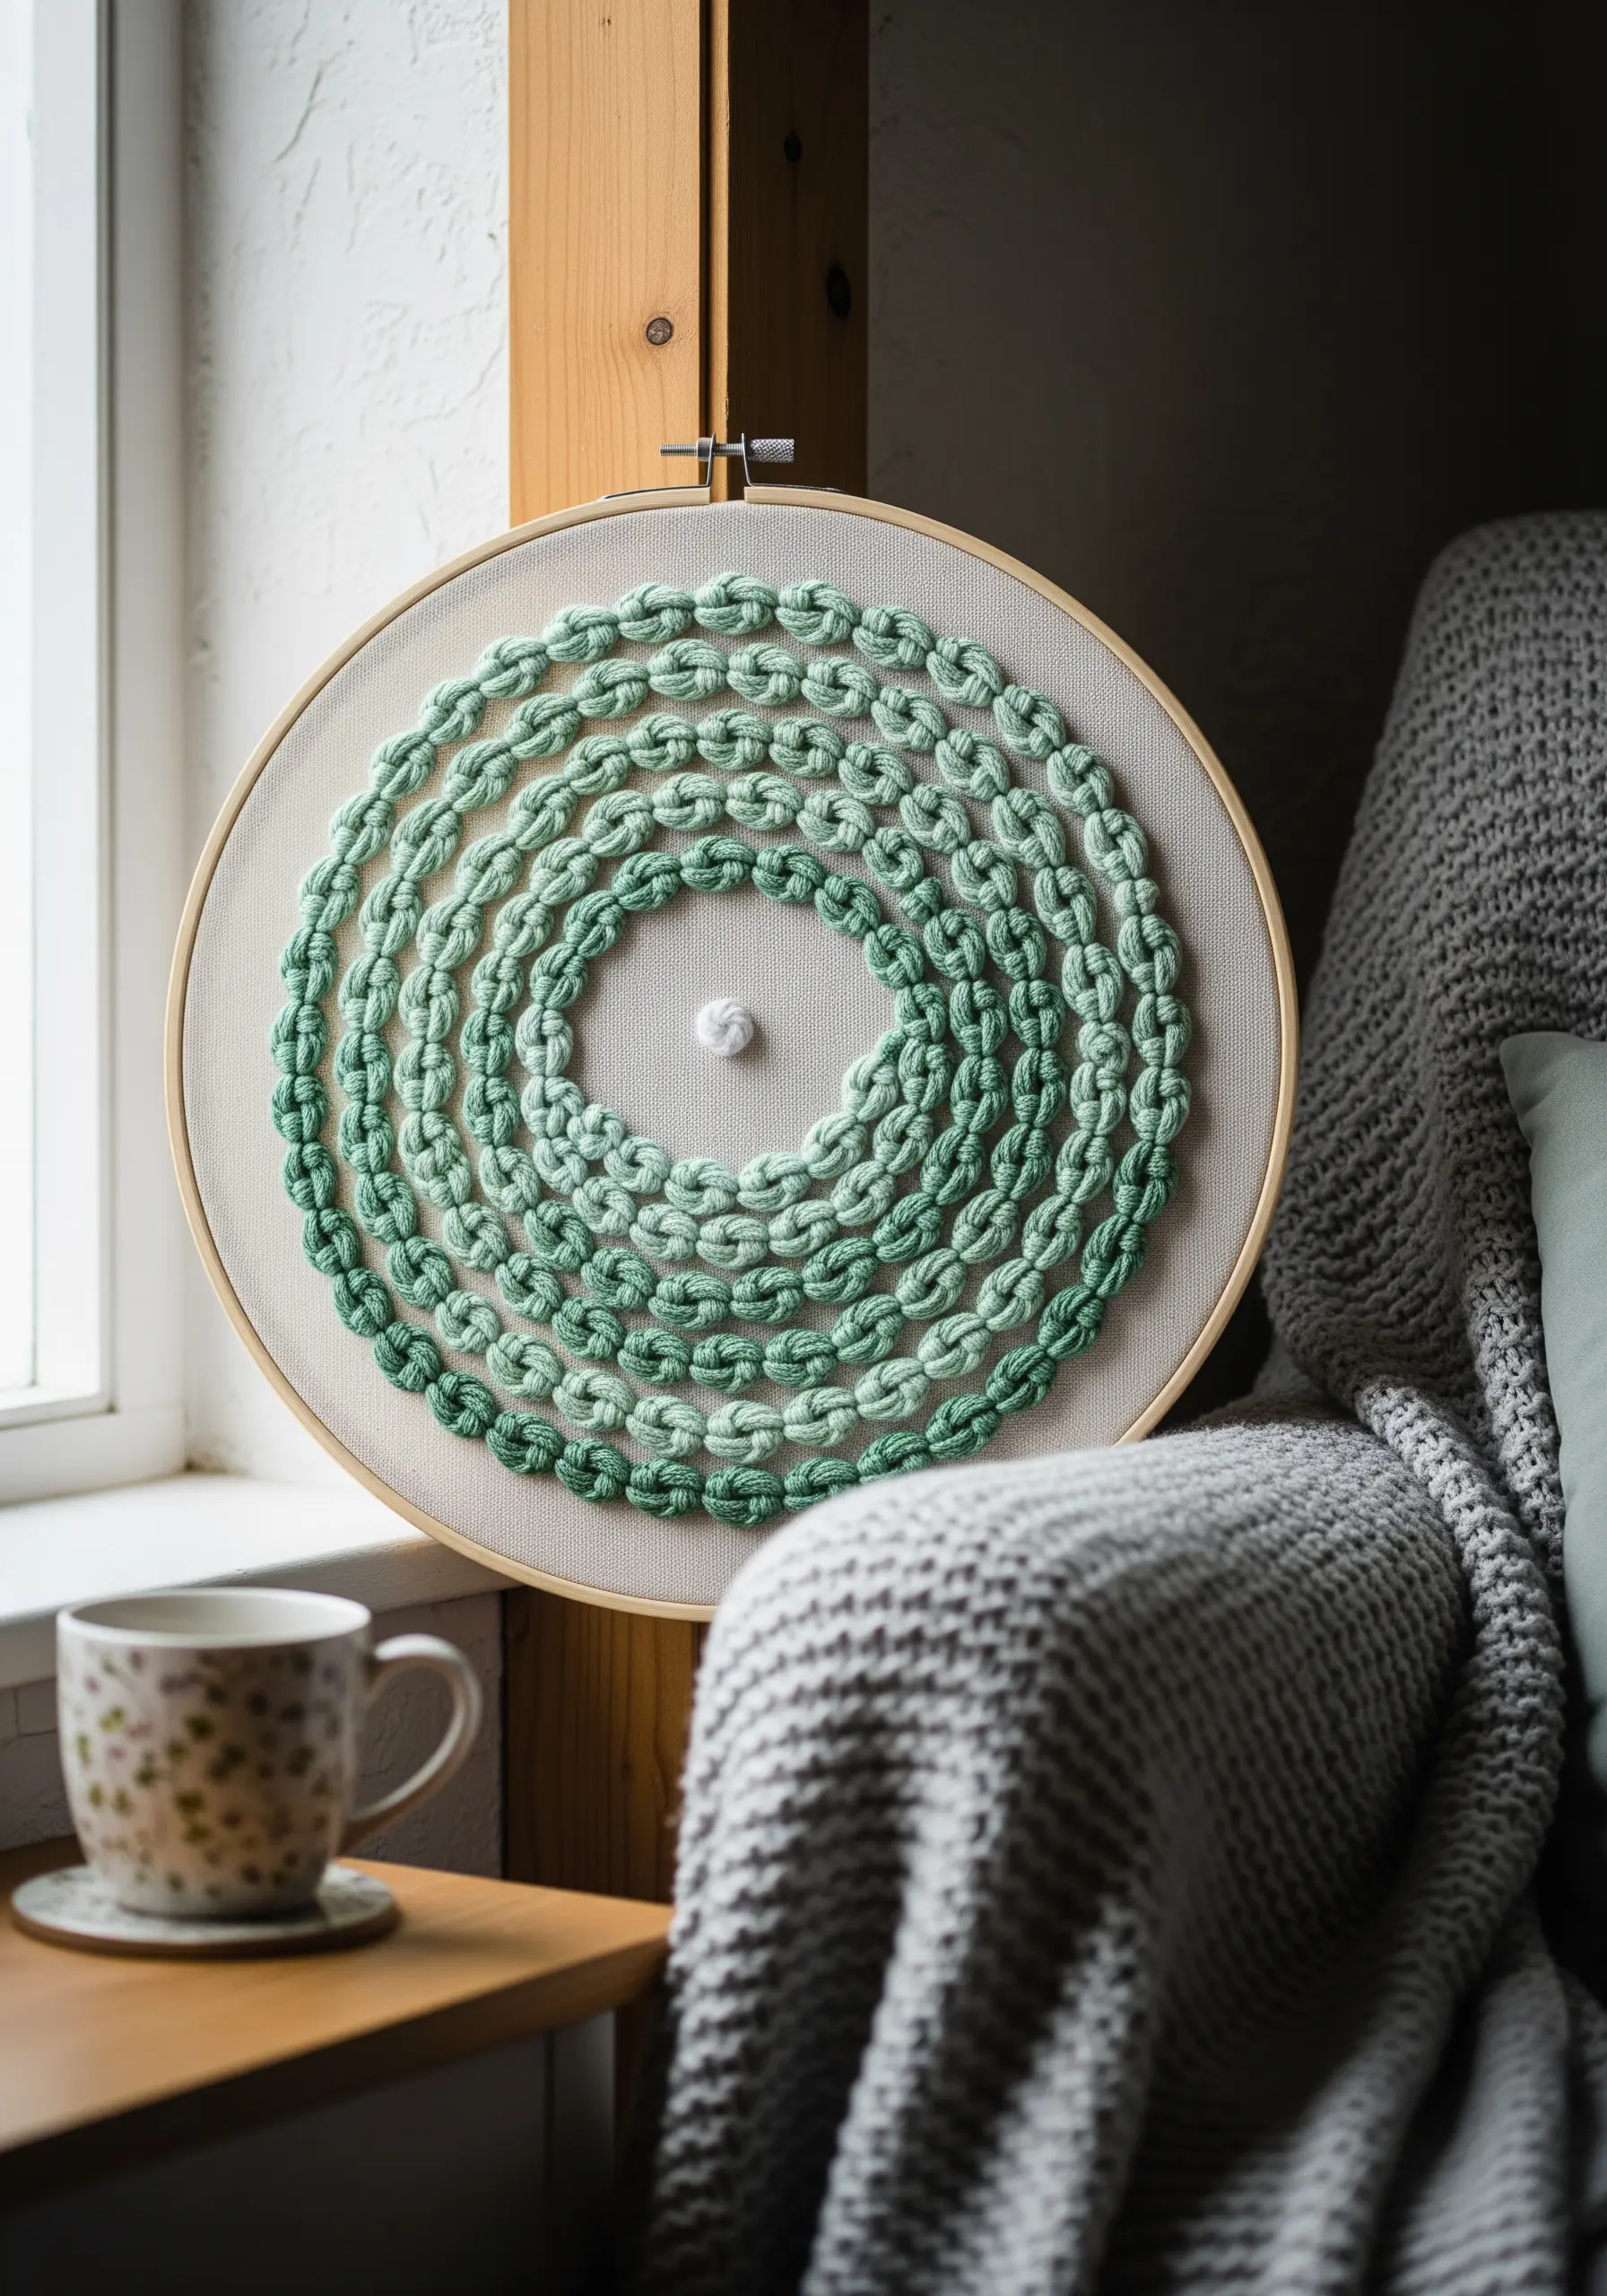
For a highly tactile and uniform texture, try the Palestrina knot (also known as the double knot stitch).
This stitch creates a row of neat, raised knots that look almost like a string of beads.
Work it in a spiral from the center outwards to create a stunning, mandala-like medallion.
Using a variegated thread in soft greens enhances the spiraling effect, as the color shifts subtly with each new ring of knots.
25. Translate Digital Forms into Stitched Art
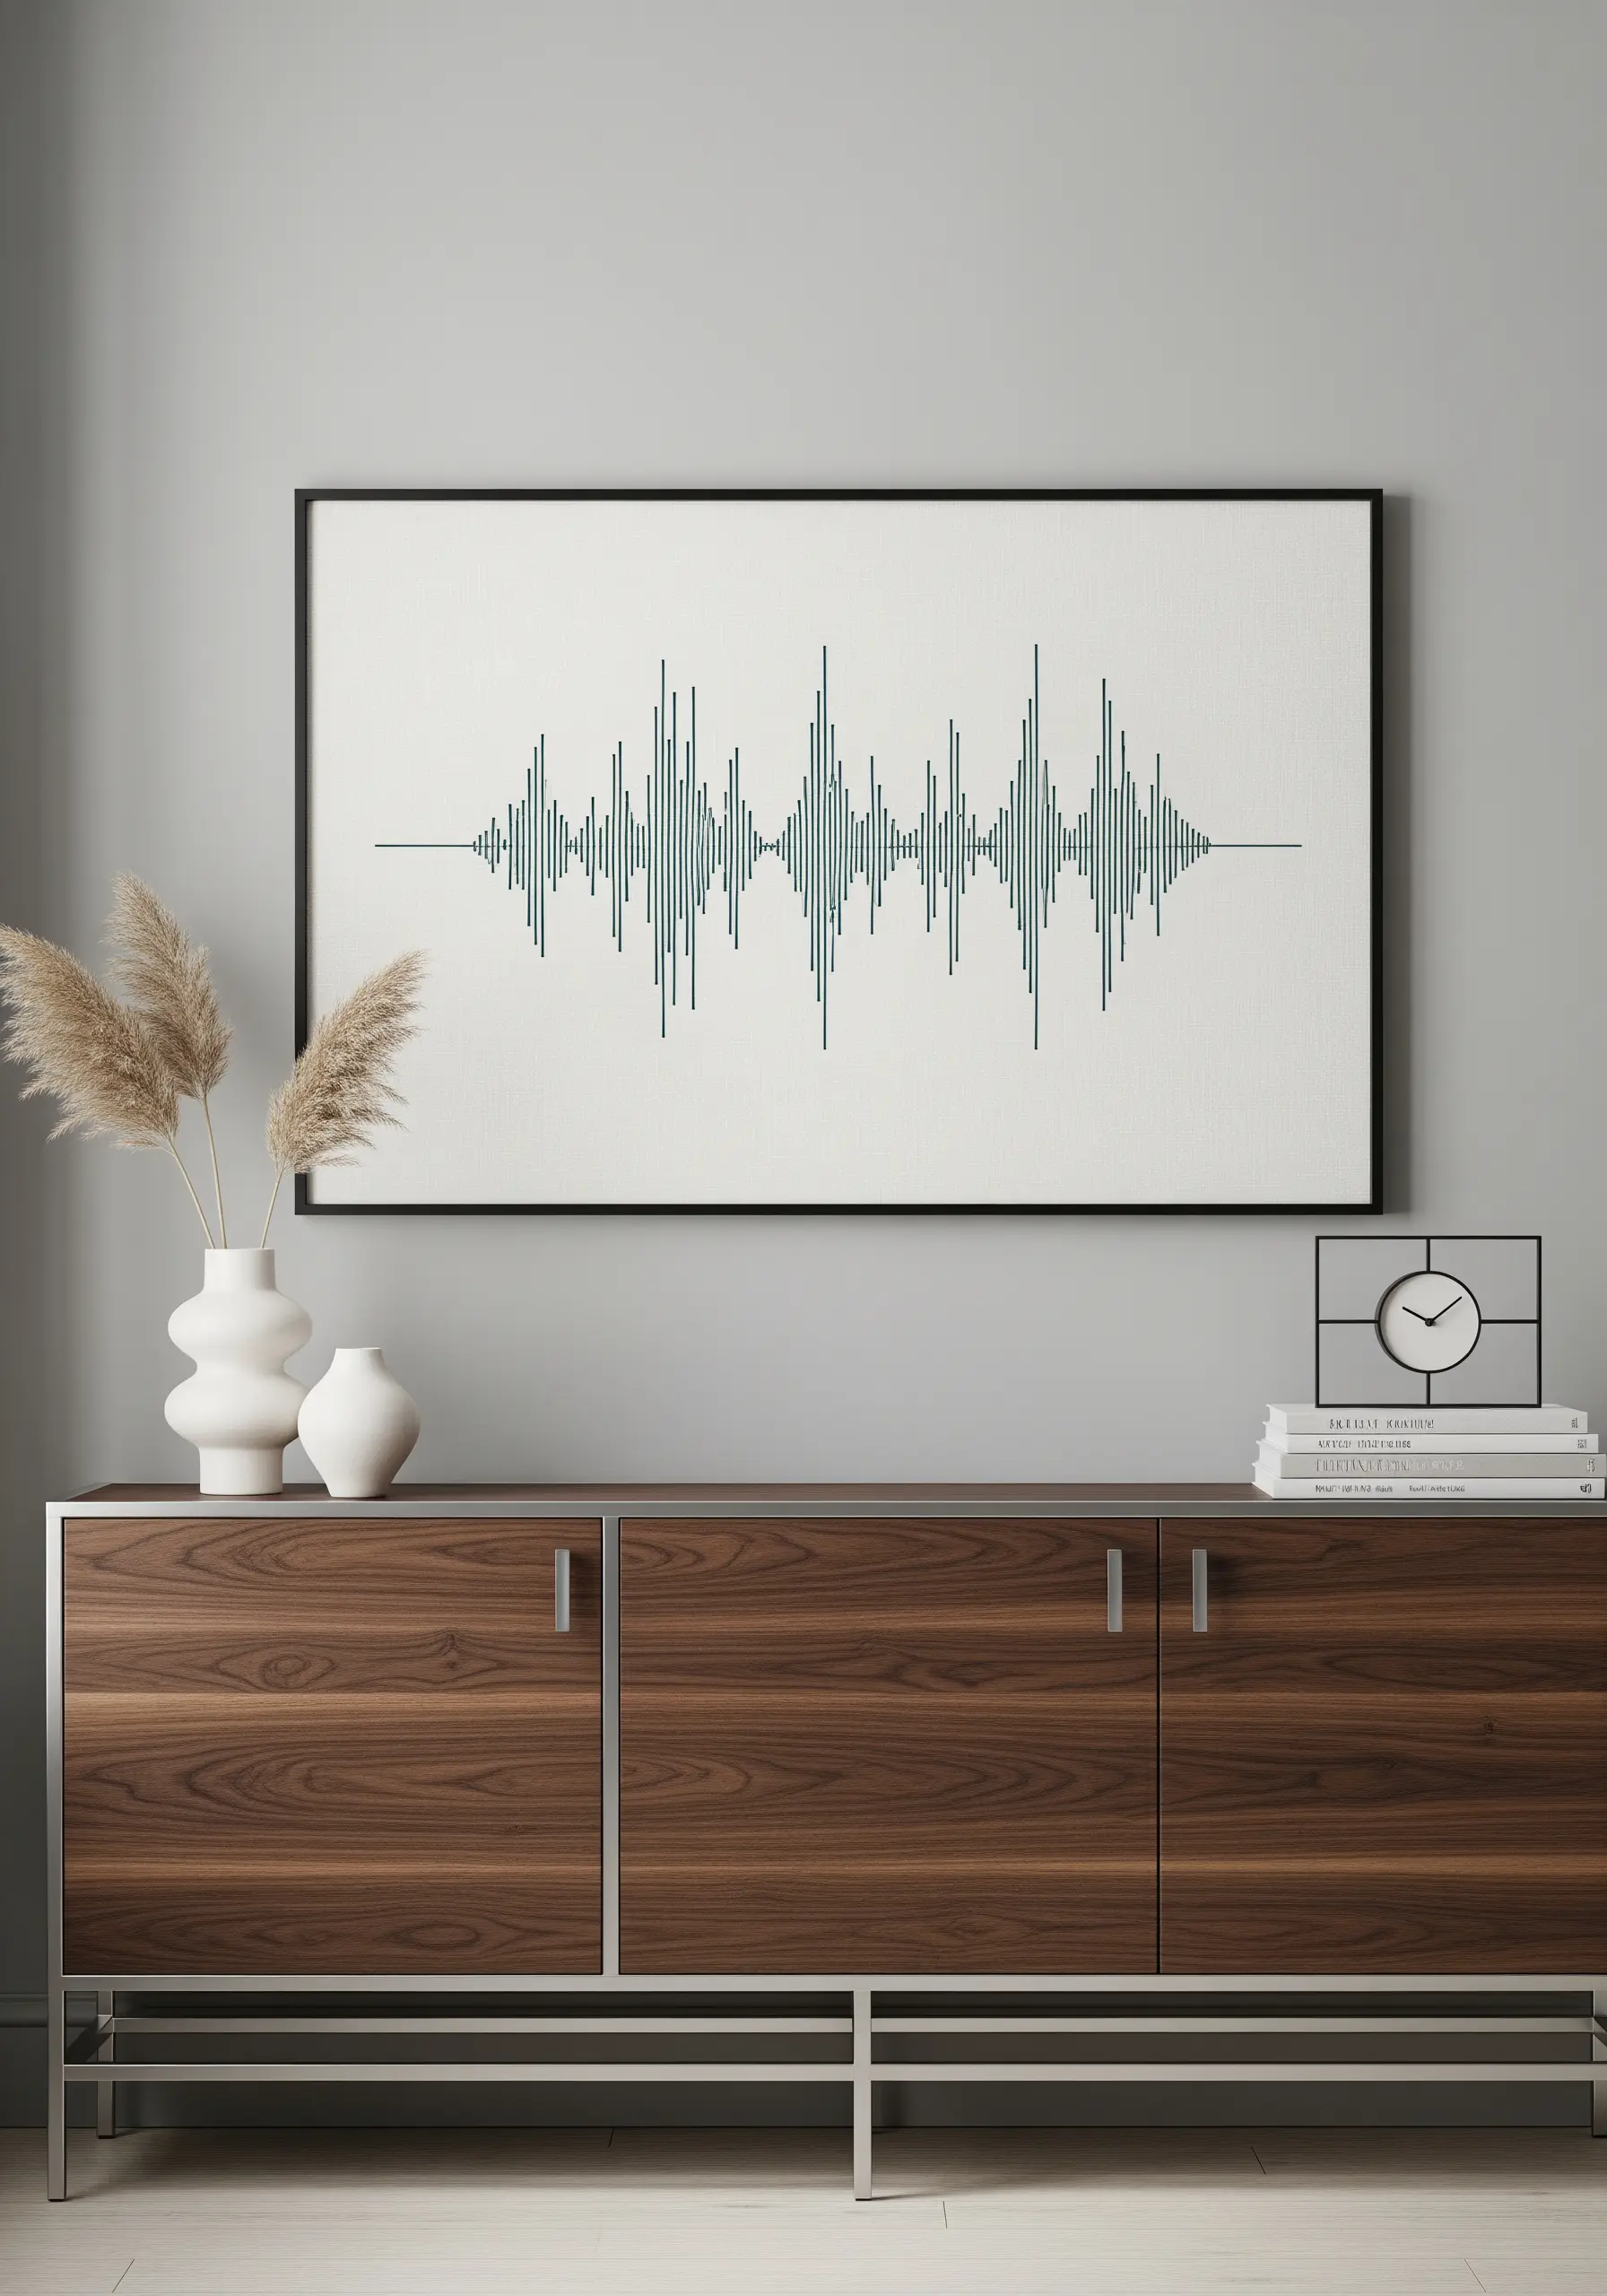
Personalize your space by translating a meaningful sound wave—like a favorite song or a loved one’s voice—into embroidery.
To get the crisp, graphic quality, use vertical satin stitches for each bar of the sound wave.
Use a water-soluble stabilizer to transfer the pattern precisely, as the accuracy of the heights and spacing is what makes the design recognizable.
This transforms a digital file into a unique piece of modern thread art.
26. Blend Color Fields with Pointillist Knots

Create soft, dreamy clouds of color using the pointillist effect of French knots.
Instead of creating a hard edge between colors, allow them to blend into one another by interspersing knots of different shades along the borders.
Varying the density of the knots—placing them further apart at the edges—will create a soft, diffused look.
This technique turns your hoop into a abstract floral embroidery hoops that look like fine art, with a texture that begs to be touched.
27. Give Your Lines Presence with Perle Cotton
When a design is composed of just a few simple lines, you want those lines to have a confident presence.
Instead of standard six-strand embroidery floss, try using a non-divisible thread like Perle cotton #8.
Its high twist and subtle sheen give your backstitch a beautiful, rope-like definition that stands out even from across the room.
This simple material swap instantly elevates minimal embroidery designs and gives them a more substantial feel.
28. Use Negative Space to Connect a Triptych
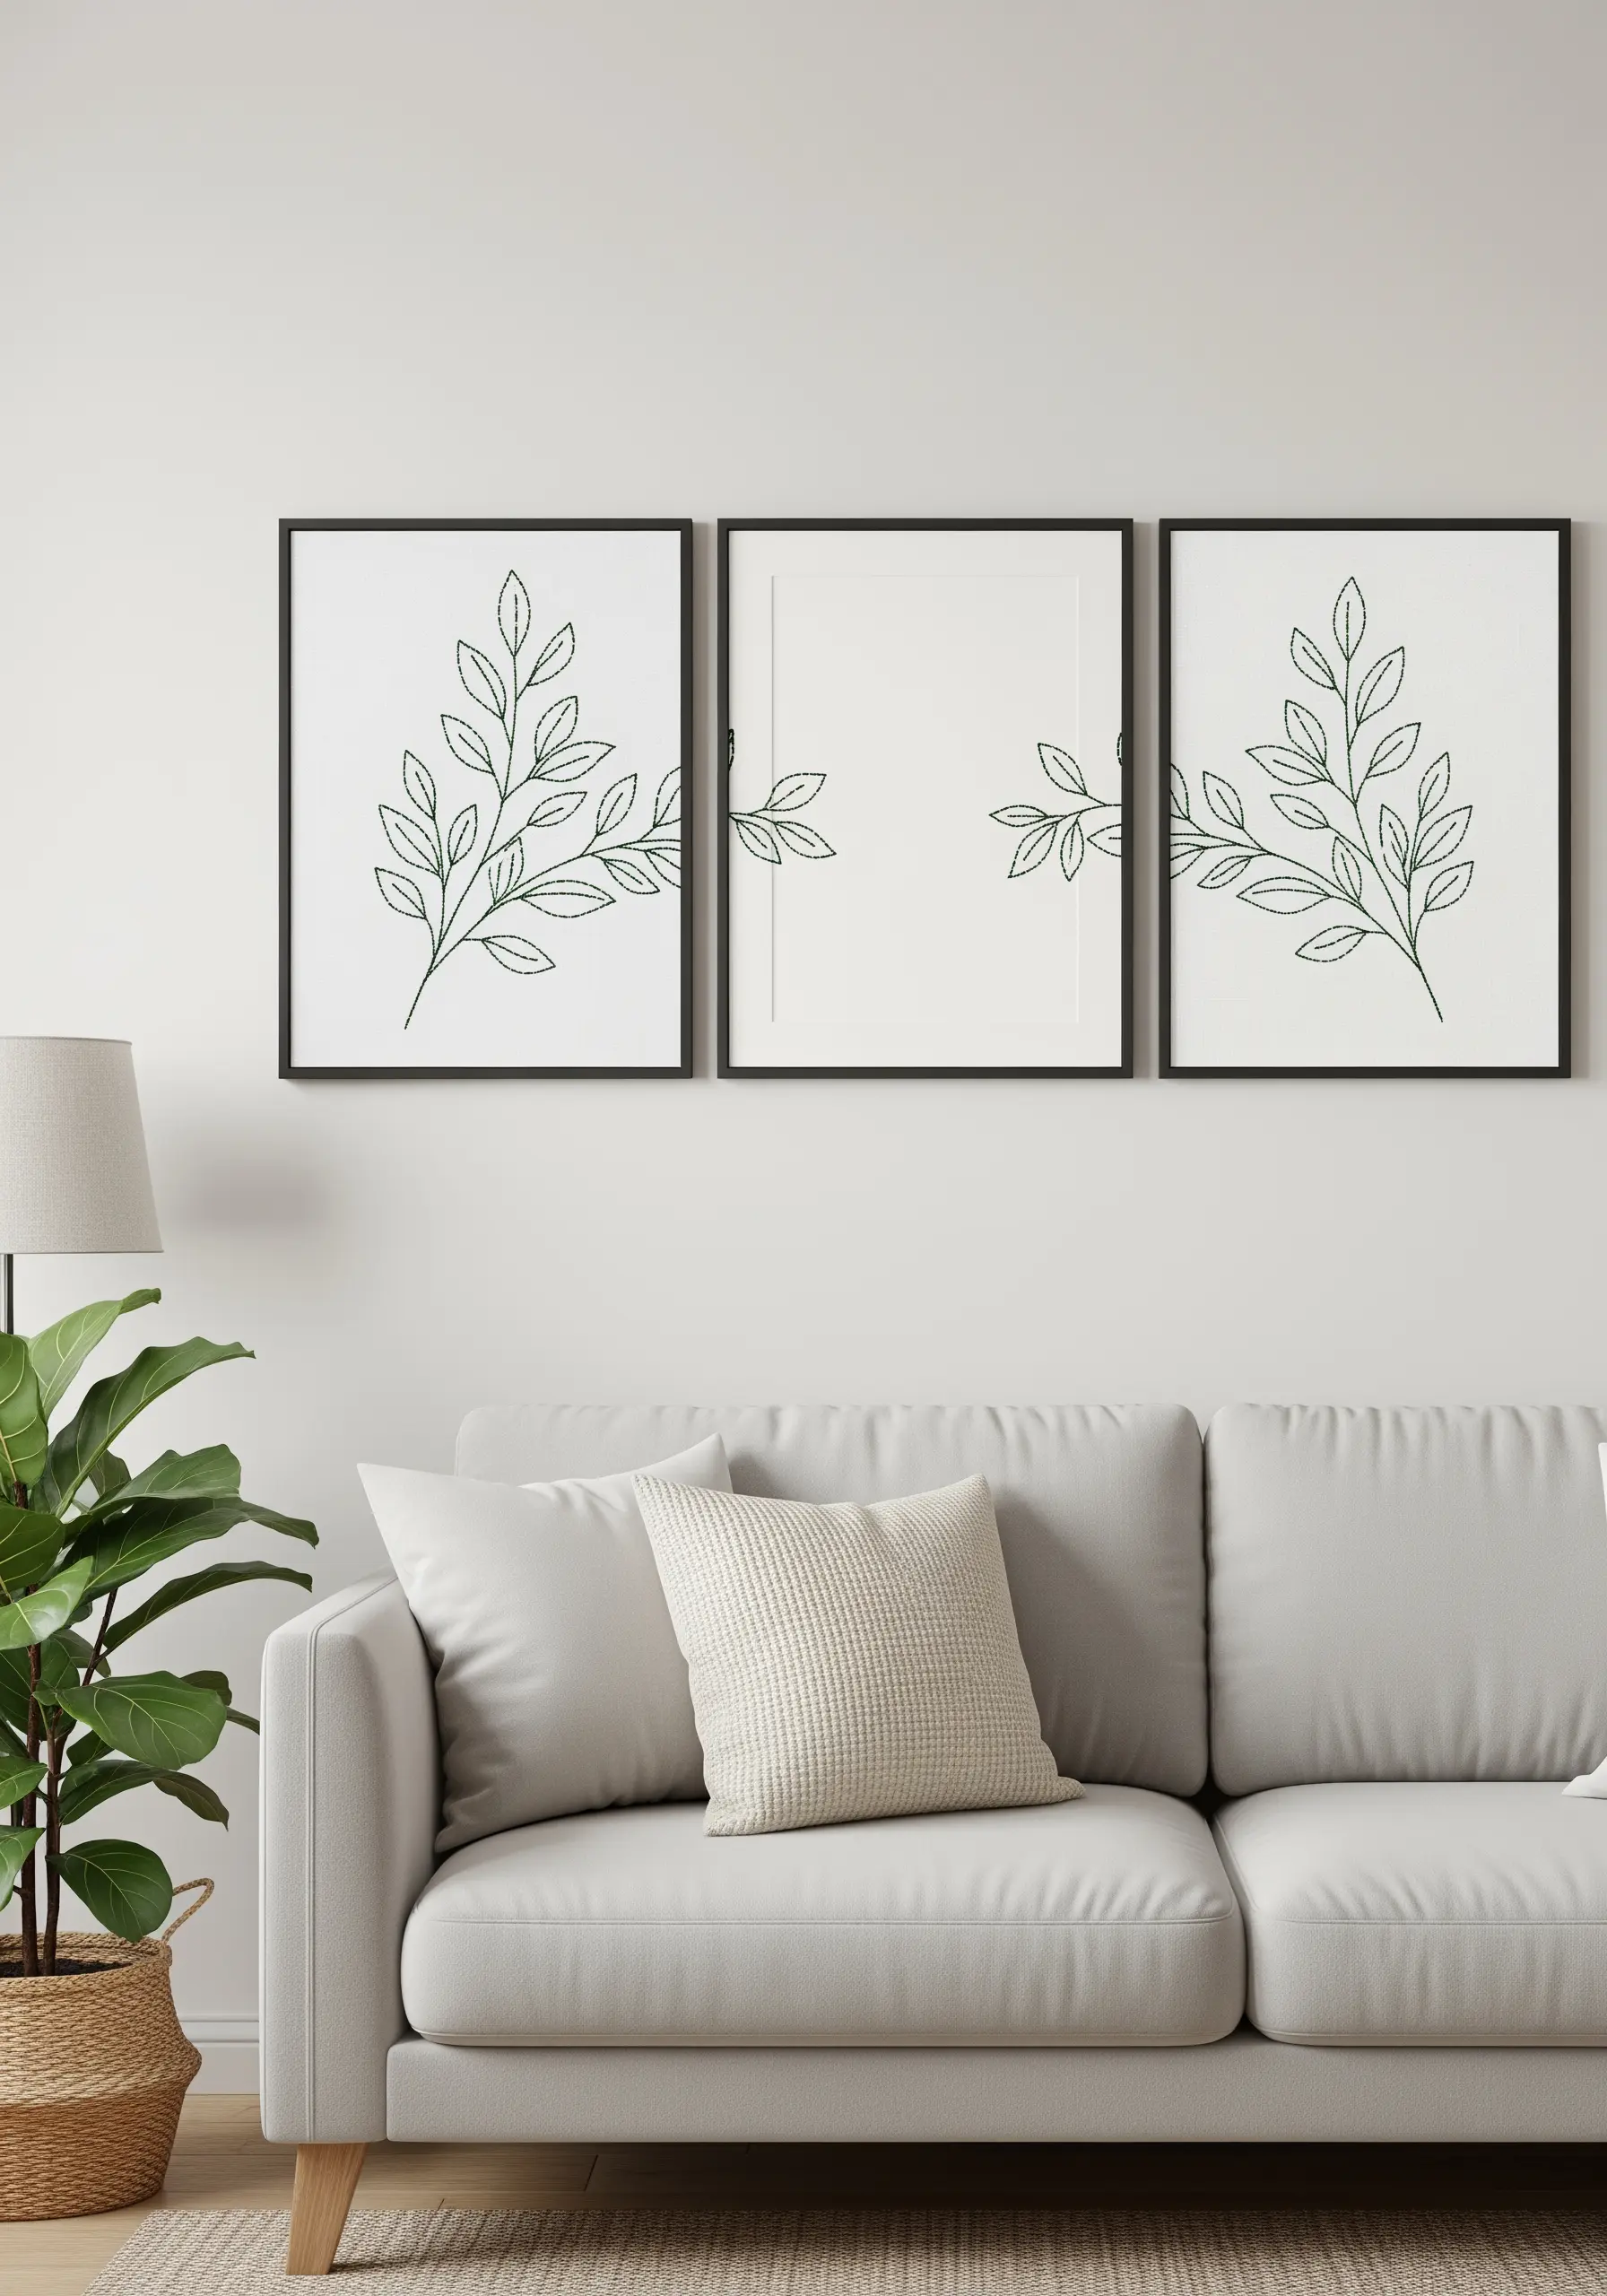
Make a bold statement by extending a single design across multiple frames.
The key to this technique is the clever use of a blank central frame. The viewer’s brain automatically connects the two embroidered panels, filling in the gap.
This use of negative space is a sophisticated design principle that draws attention and makes the artwork feel larger and more integrated with the wall itself.
It’s one of the most effective minimalist embroidery wall art ideas for creating a high-end gallery look.
29. Imply Transparency with Sheer Appliqué

To create the illusion of a glass lightbulb, combine simple line work with a layer of sheer fabric.
First, stitch the outline of the bulb and the filament details with a clean backstitch.
Then, cut a piece of translucent organza or tulle to the shape of the bulb and appliqué it onto your base fabric with tiny, nearly invisible stitches around the edge.
This subtle layering technique gives the object a sense of volume and transparency without complex shading.
30. Create Floating Motifs with a Soluble Stabilizer

For a truly modern and ethereal display, remove the fabric backing entirely.
Stitch your designs—like these delicate feathers—onto a water-soluble stabilizer. Once your stitching is complete, simply rinse the piece in warm water, and the stabilizer will dissolve, leaving only the thread structure.
You can then mount these thread-only motifs between two panes of glass or acrylic for a stunning, floating effect that plays beautifully with light and shadow.
31. Recreate the Look of Fine-Line Illustration
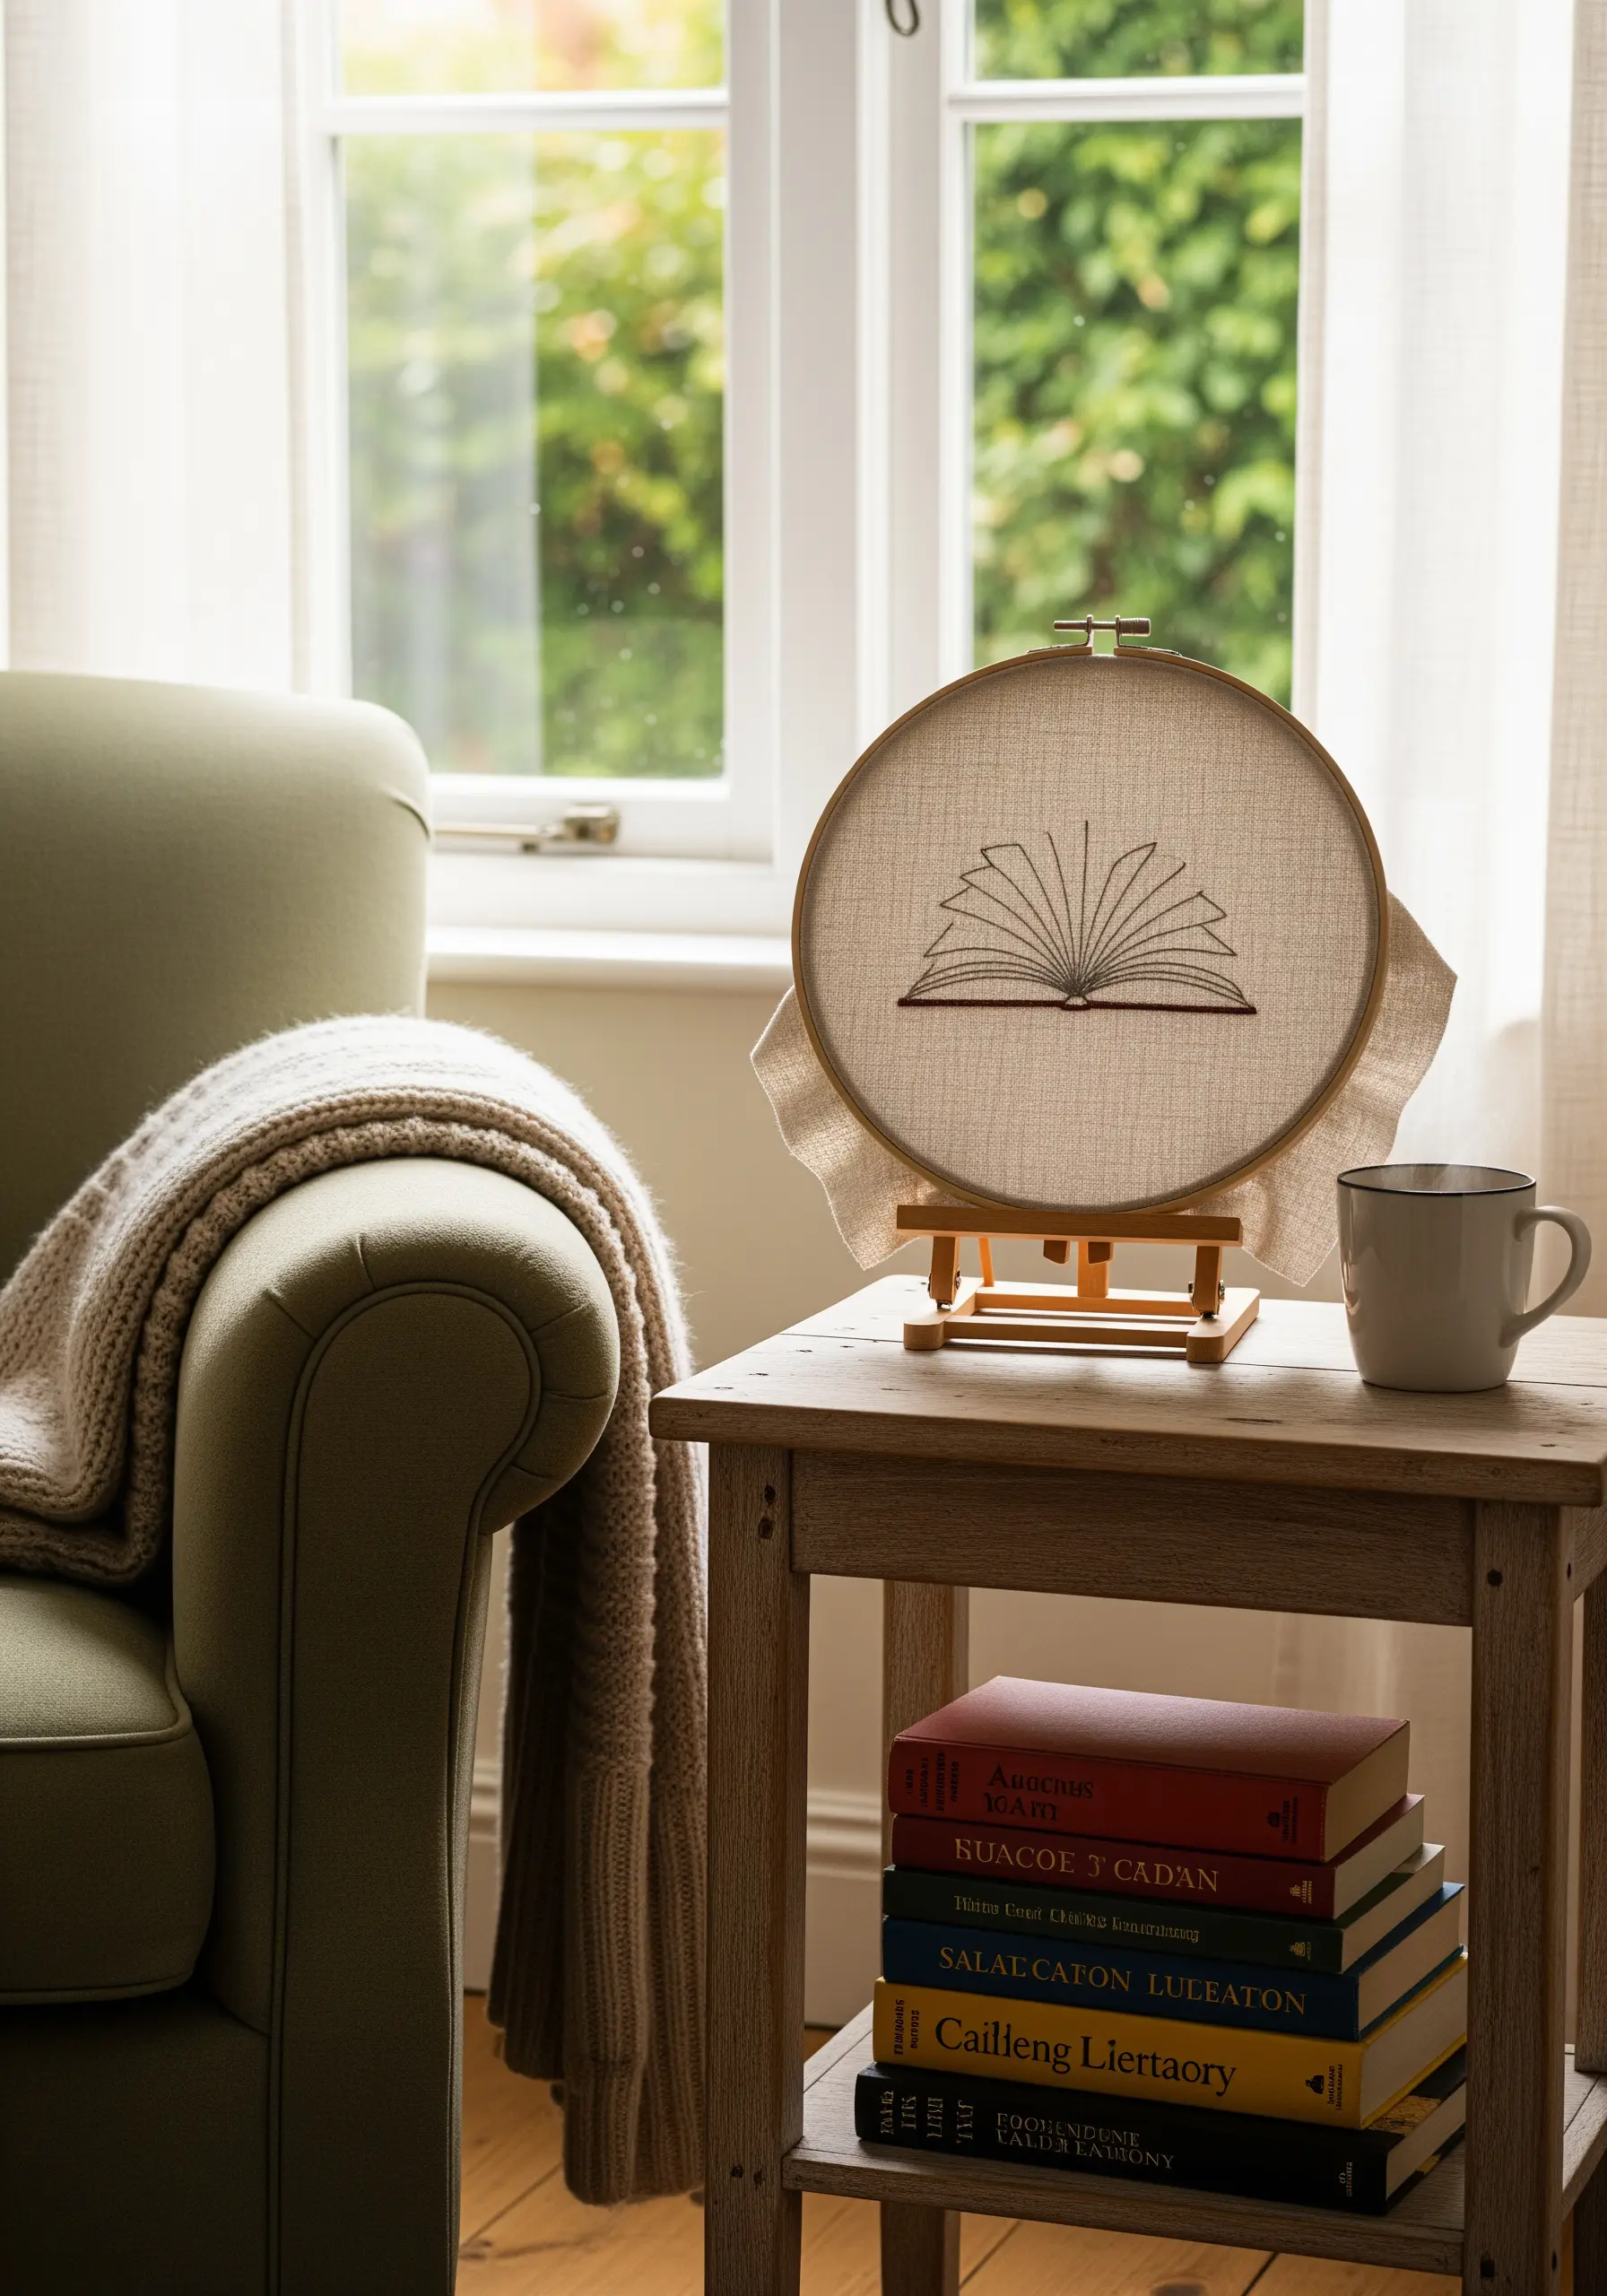
Capture the delicate detail of a sketchbook drawing by using a single strand of black thread and a tiny, precise stitch.
A split stitch is ideal here, as you bring the needle up through the middle of the previous stitch, creating a continuous line that looks more like ink than thread.
Focus on maintaining consistent stitch length, especially around the curves of the pages, to achieve a professional, illustrative quality.
32. Elongate a Room with a Vertical Pattern
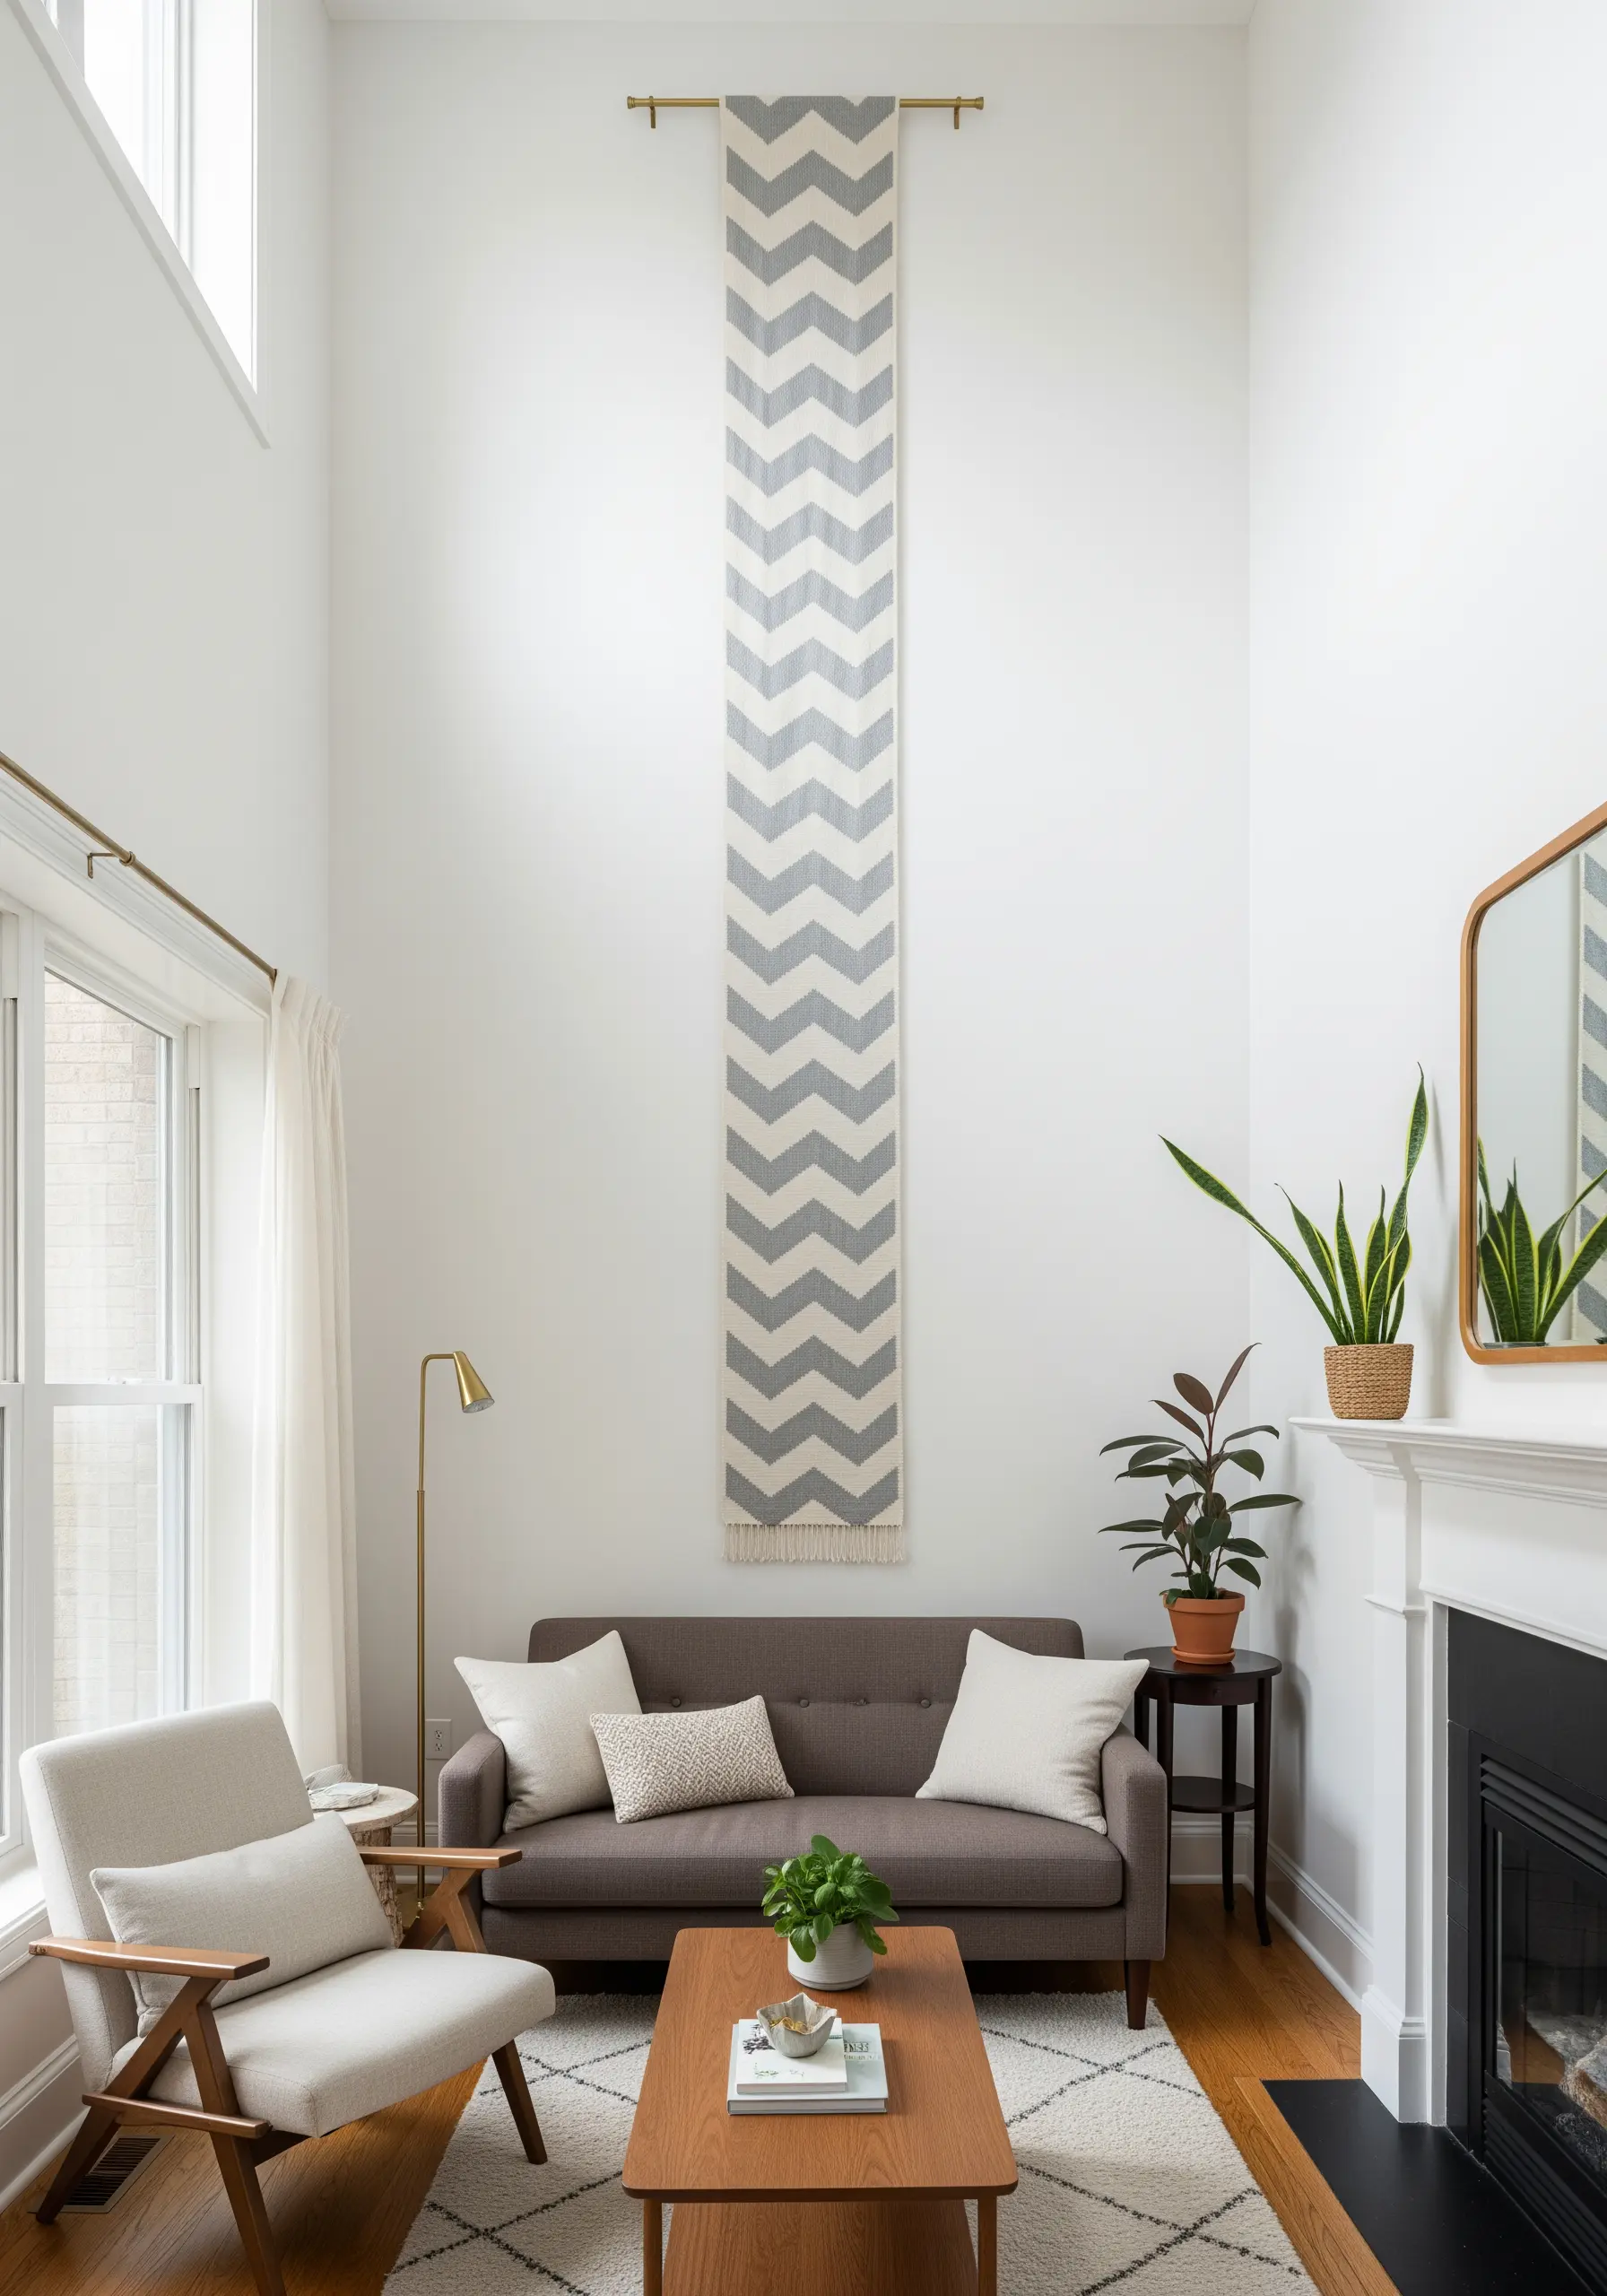
In rooms with high ceilings, a long, narrow textile can draw the eye upward and accentuate the room’s height.
The chevron pattern, created with Bargello needlepoint or long satin stitches on canvas, is particularly effective.
This rhythmic, geometric design adds pattern and texture without overwhelming the space, and its strong verticality makes the entire wall feel taller and more grand.
33. Emulate a Brushstroke with Textured Stitches

To capture the expressive, imperfect quality of an Enso circle (a Japanese symbol of enlightenment), avoid perfectly smooth stitches.
Use a chunky black yarn and couch it down, deliberately leaving some areas thicker or thinner, or use a heavily padded satin stitch with uneven edges to mimic the texture of ink from a brush.
The goal is not a perfect circle, but one that feels organic and alive. This approach turns a simple shape into a powerful, meditative statement piece.


