
Your bedroom is more than just a place to sleep—it’s a sanctuary. And the art you choose for its walls should do more than just fill a space; it should bring a sense of calm, intention, and personal meaning.
Embroidery, with its quiet rhythm and tactile beauty, is uniquely suited for this. It allows you to create not just a picture, but a feeling. It’s a way to weave your own energy into the fabric of your home.
Here, you won’t find fleeting trends. Instead, you’ll discover techniques that elevate your stitching from a craft into true textile art. We’ll explore how adjusting a stitch, choosing the right thread, or playing with texture can transform a simple idea into a stunning focal point—a piece that helps you rest, reflect, and recharge.
1. Create a Calming Landscape with Textured Fills
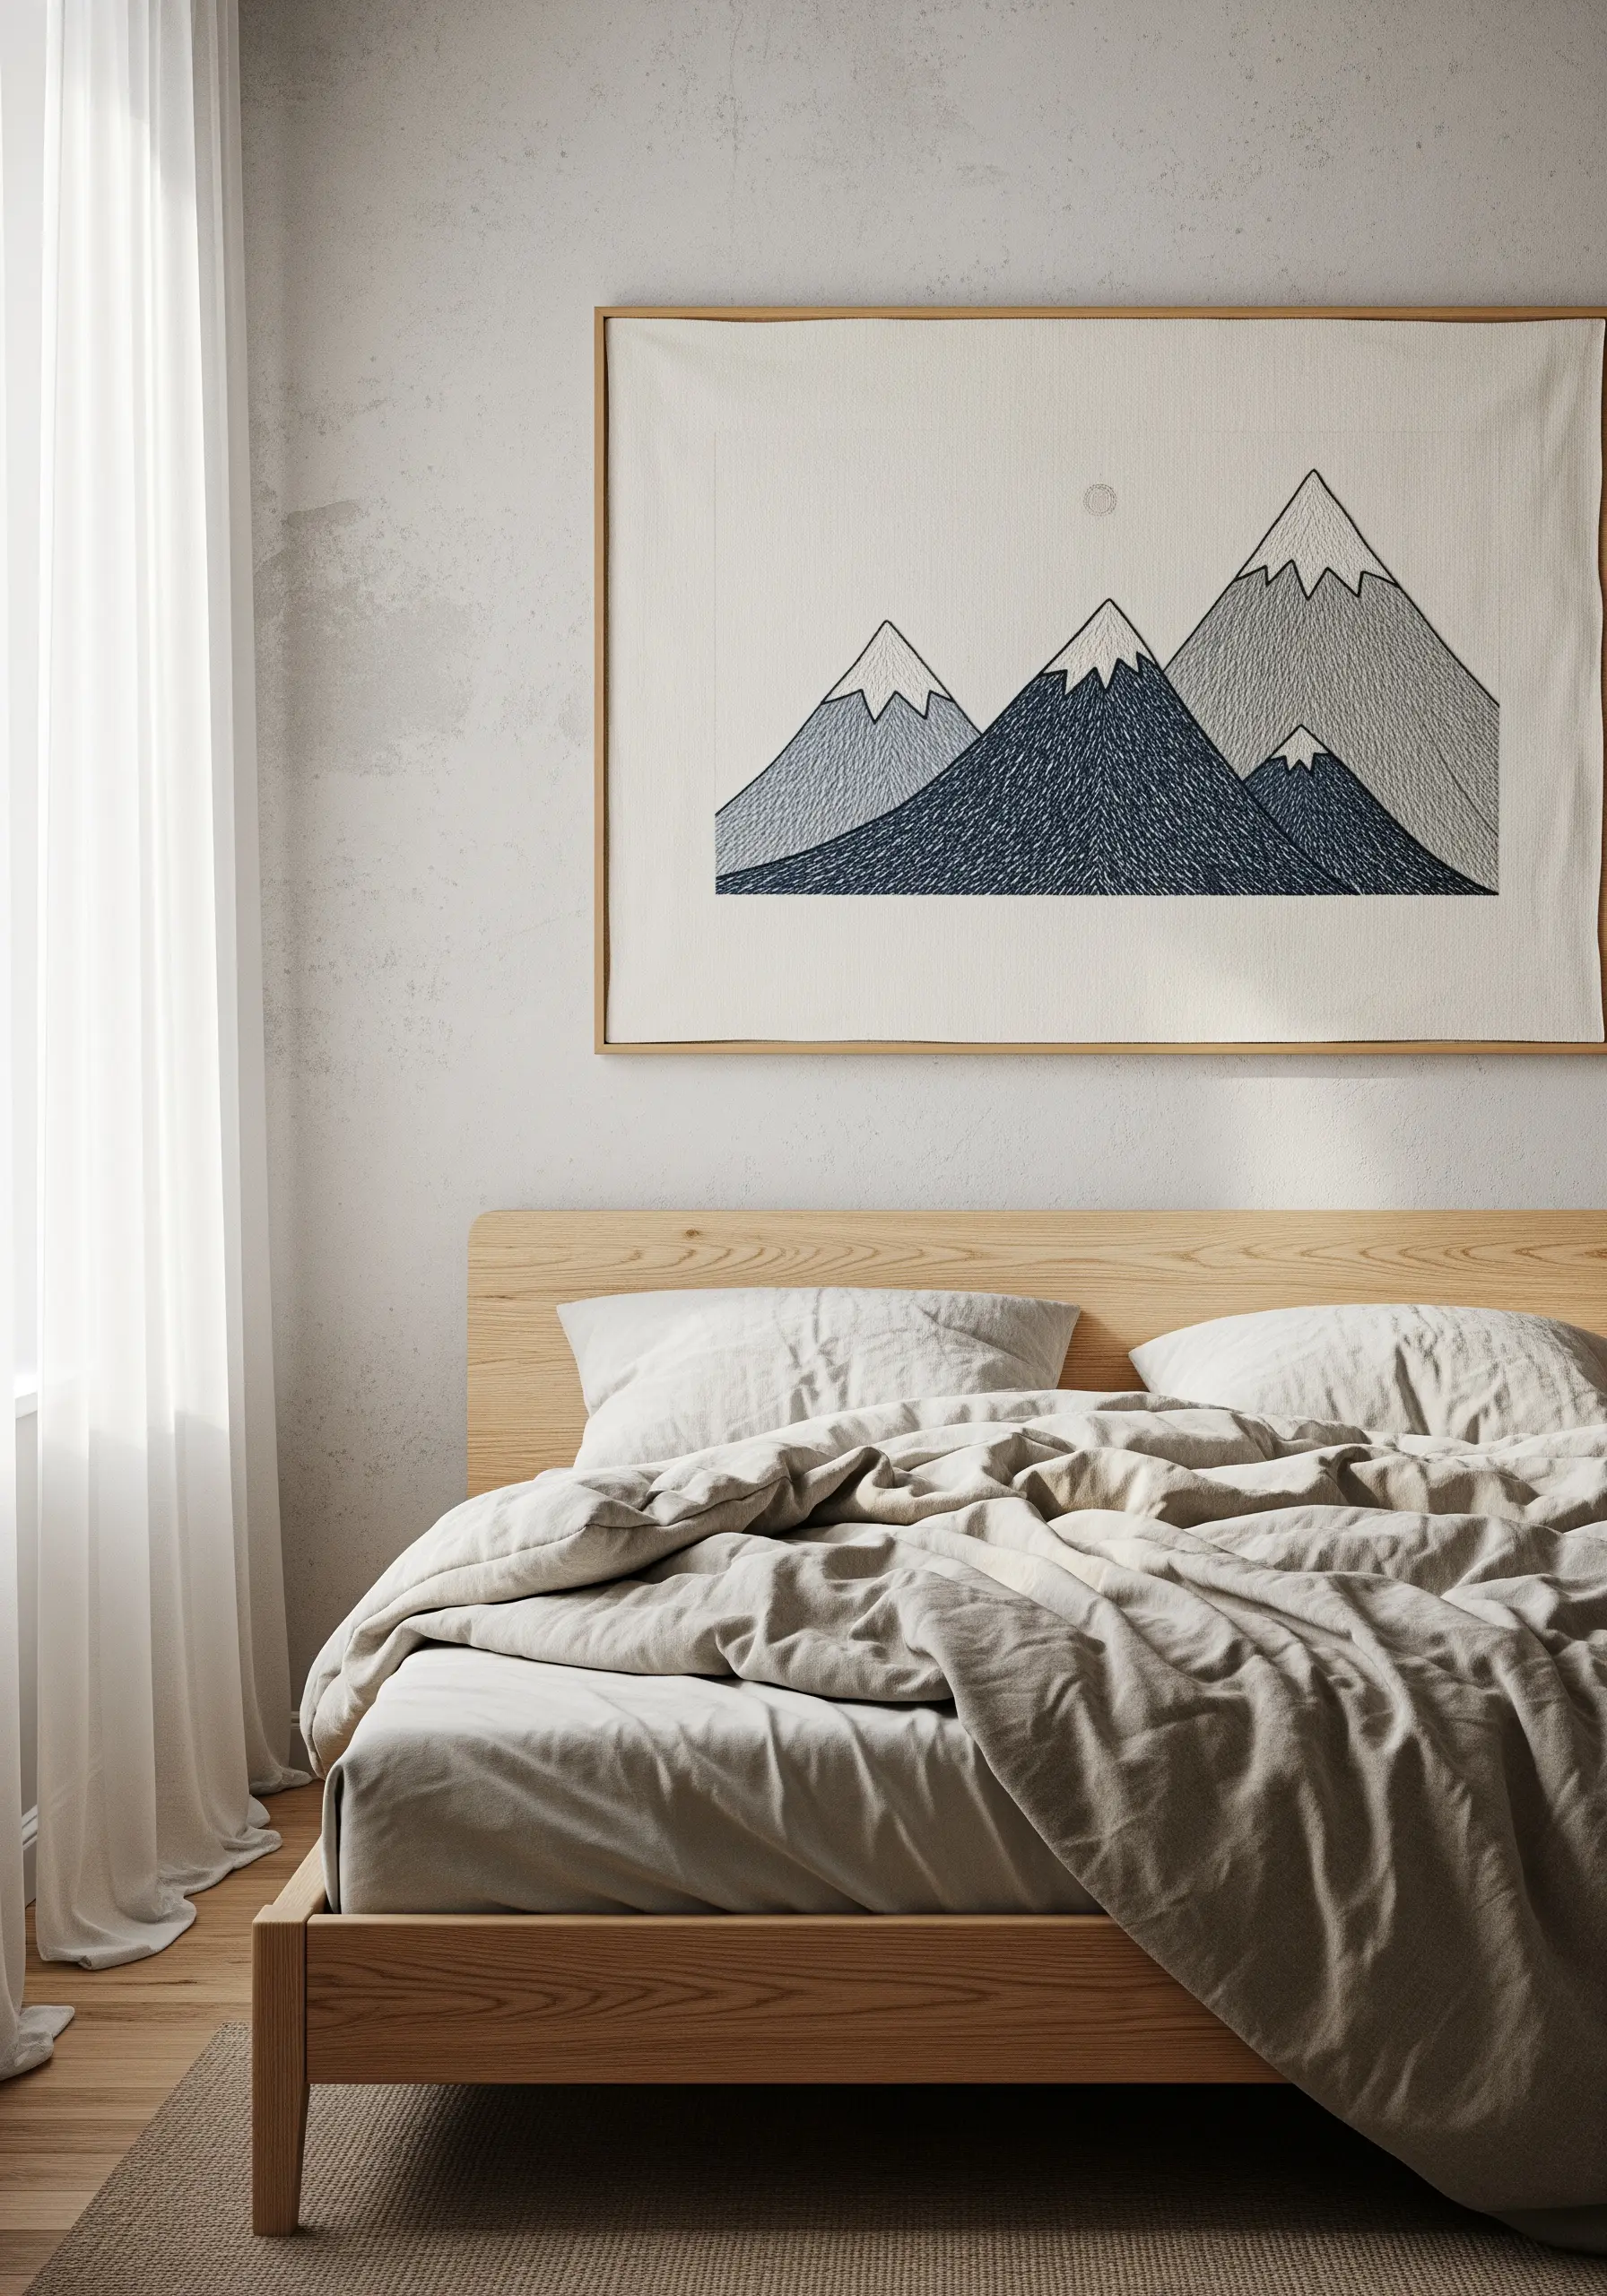
For large-scale, minimalist pieces like this mountain scene, texture is more important than intricate detail.
Instead of satin stitch, fill the large mountain shapes with a dense seed stitch or short straight stitches laid in different directions.
This technique, known as thread painting with texture, adds depth and a subtle, organic feel that catches the light beautifully.
Use a single, strong backstitch for the outlines to maintain clean, graphic lines that contrast with the softer fill.
Work on a sturdy fabric like cotton canvas or linen blend, which can support the weight of dense stitching without puckering.
2. Layer Stitches for Hyper-Vibrant Tropical Florals
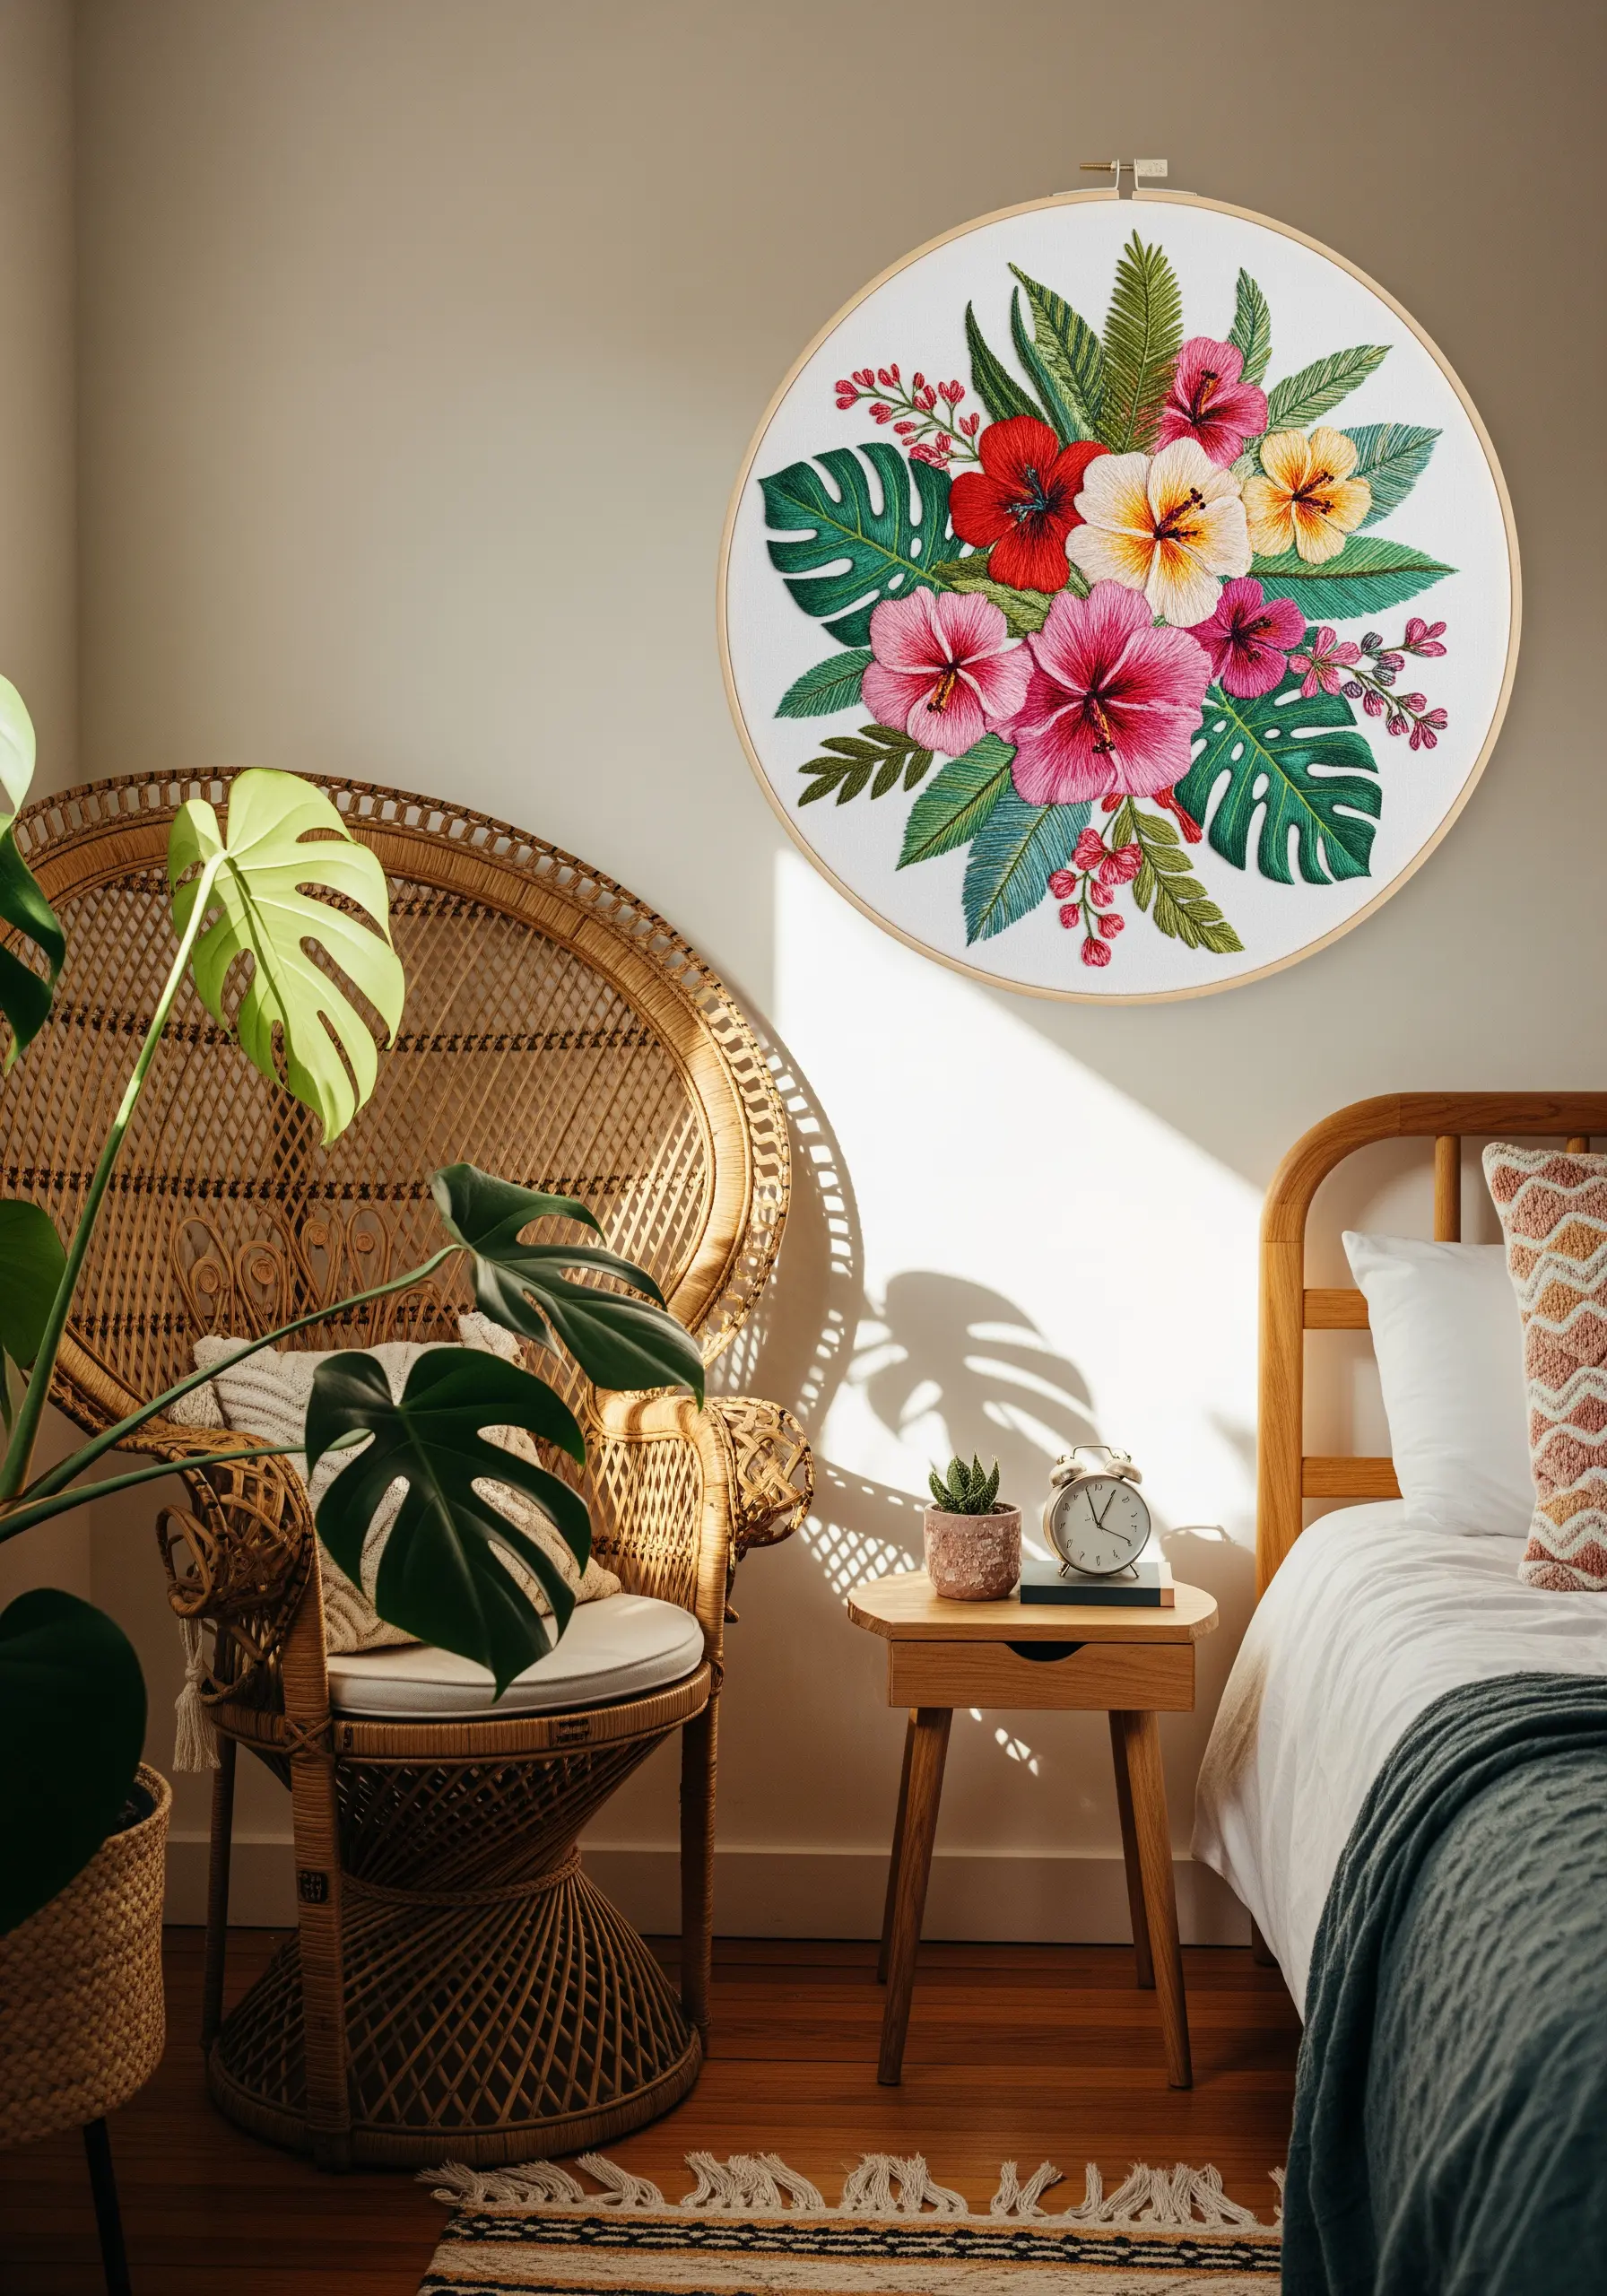
To make your floral embroidery pop, think in layers.
Start with a base of long-and-short stitches for the petals, blending 3-4 shades to create a gradient.
Then, add a second layer of single, detached straight stitches on top of the petals to suggest veins and dimension.
Use variegated green thread for the monstera leaves; the subtle color shifts will do the blending work for you, making the foliage look more natural.
For the flower centers, a cluster of tightly packed French knots in a contrasting color creates a realistic, pollen-dusted effect.
Choose an oversized hoop to turn your detailed work into a true statement piece.
3. Achieve Geometric Precision with a Stem Stitch
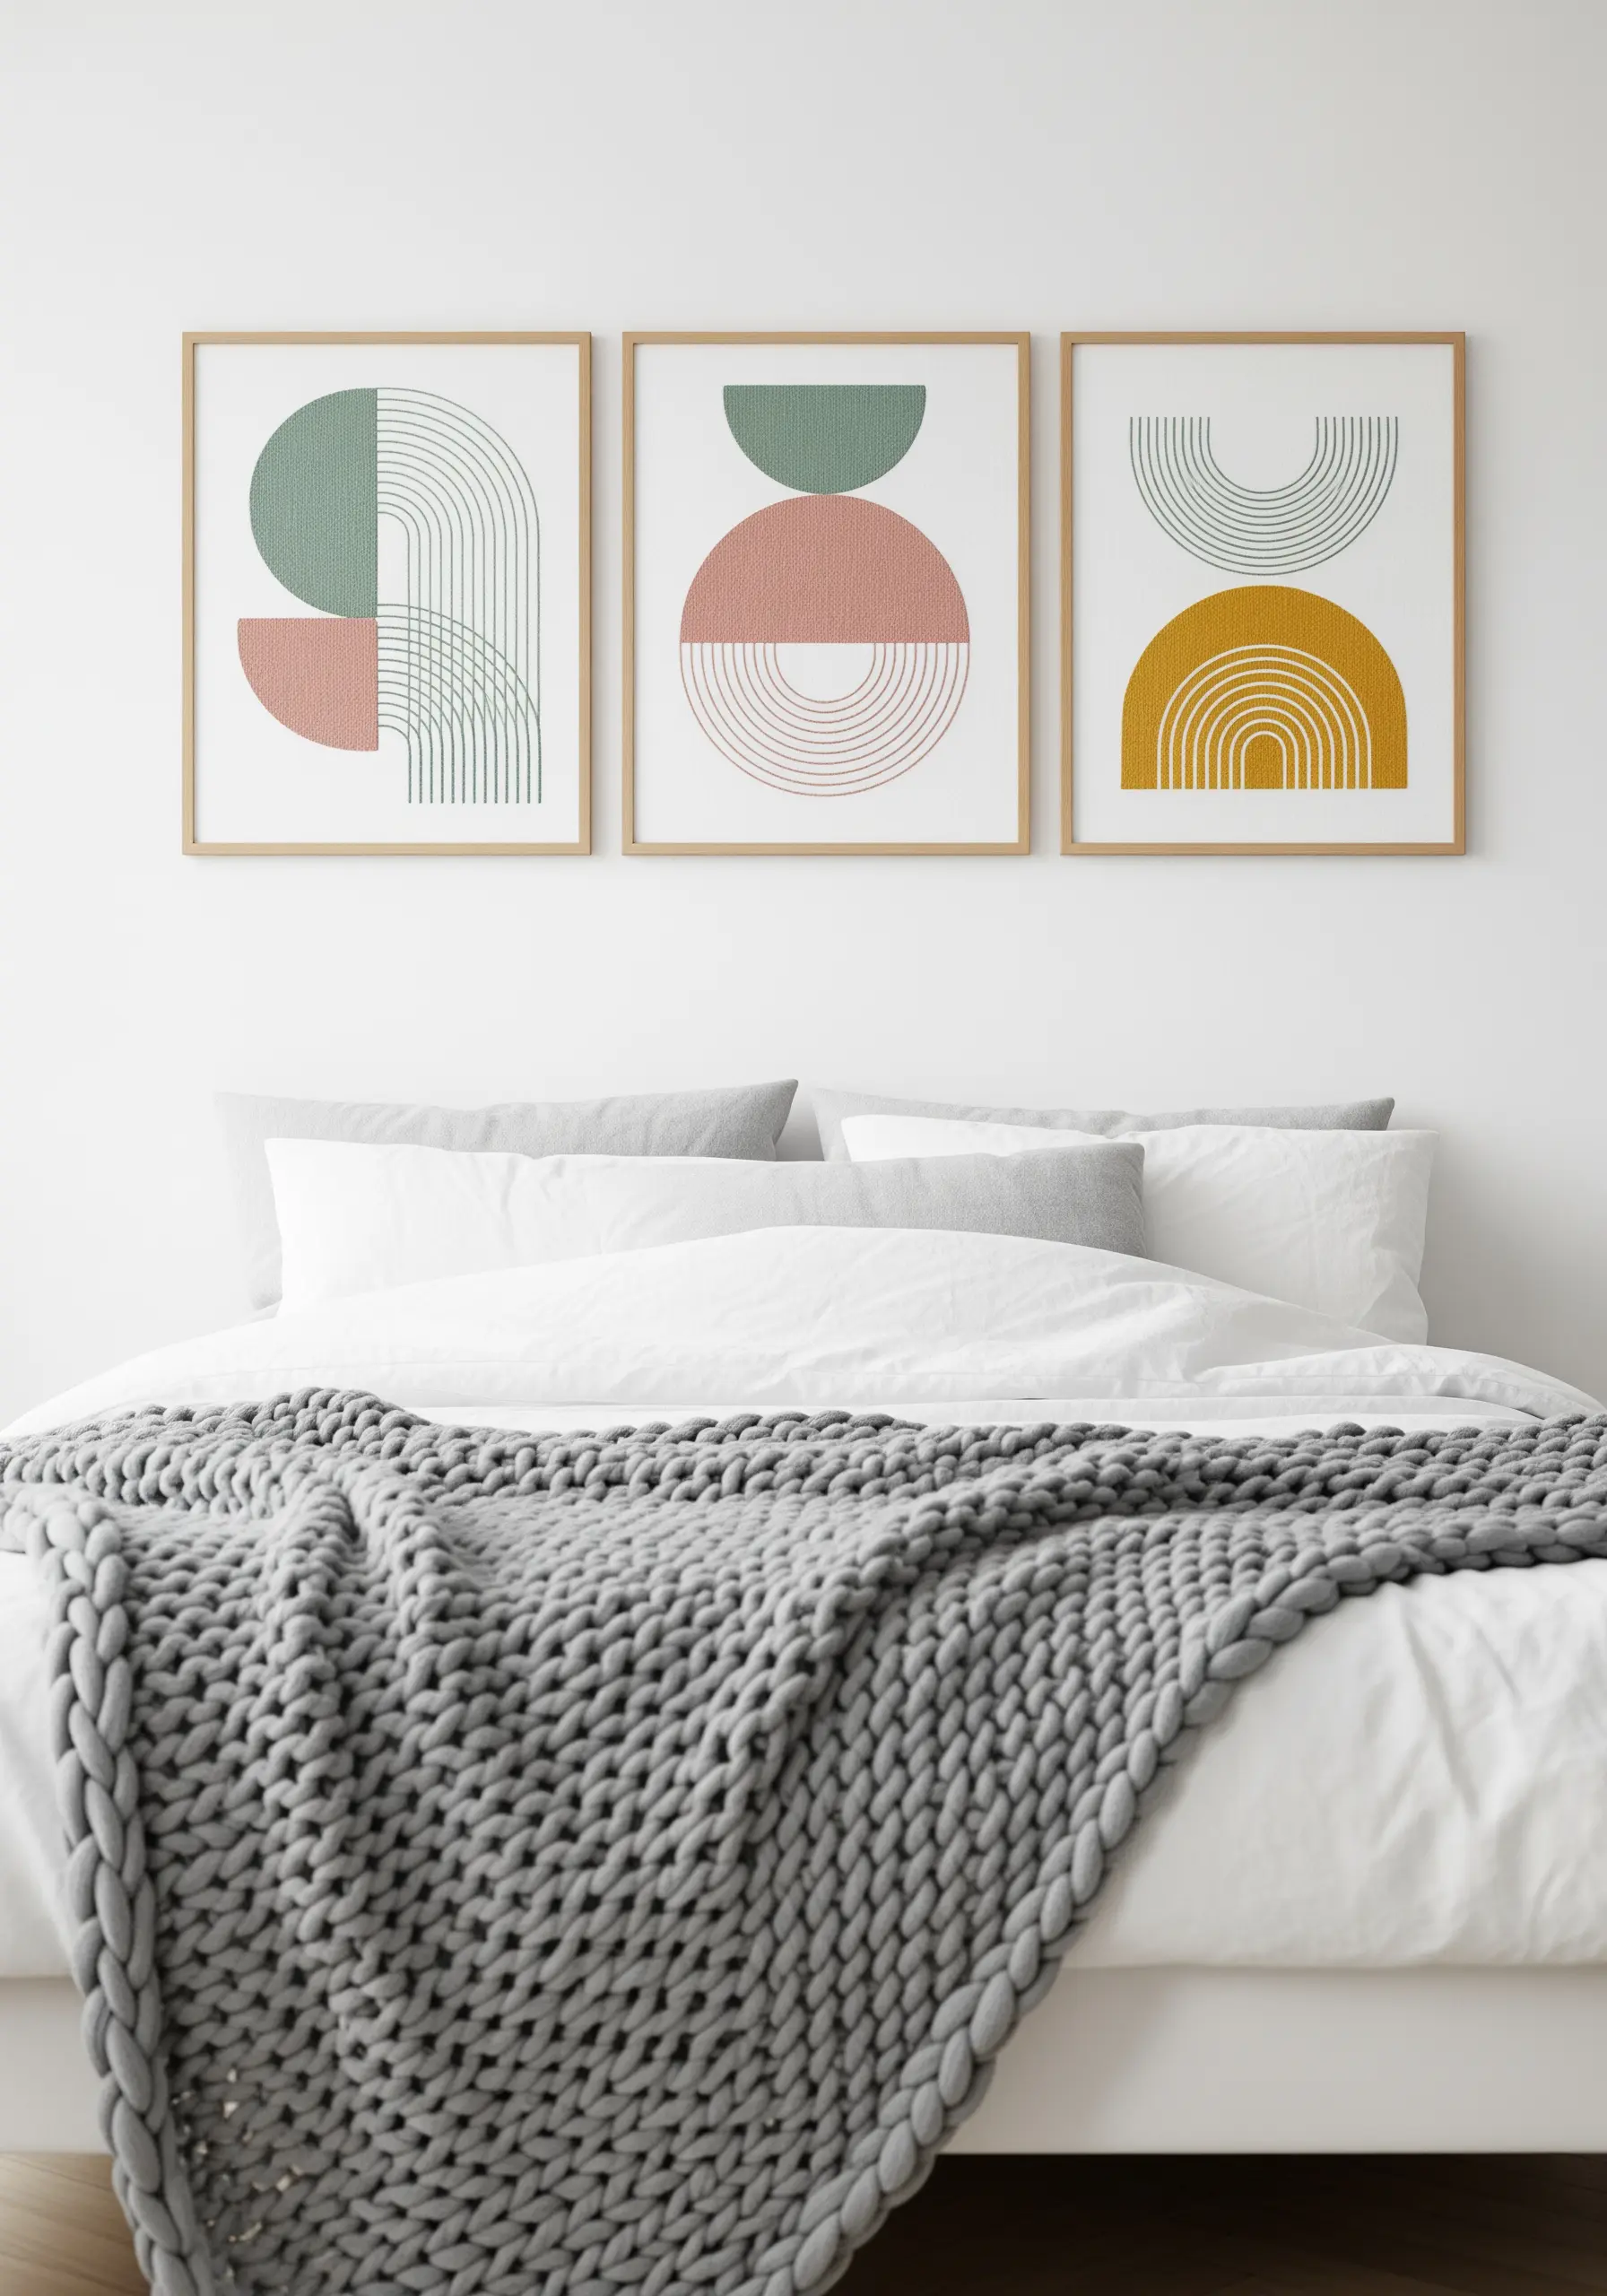
For clean, abstract designs, precision is everything.
Instead of a backstitch, which can look slightly jagged on curves, use a stem stitch for all your lines.
A stem stitch creates a smooth, rope-like line that remains consistent, which is crucial for parallel arcs and geometric shapes.
Use a water-soluble marker and a compass or ruler to draw your guidelines directly onto the fabric before you begin.
To make a triptych feel cohesive, use the same two or three colors across all three panels, simply changing their placement and dominance.
4. Combine Textures for a Realistic Botanical Wreath
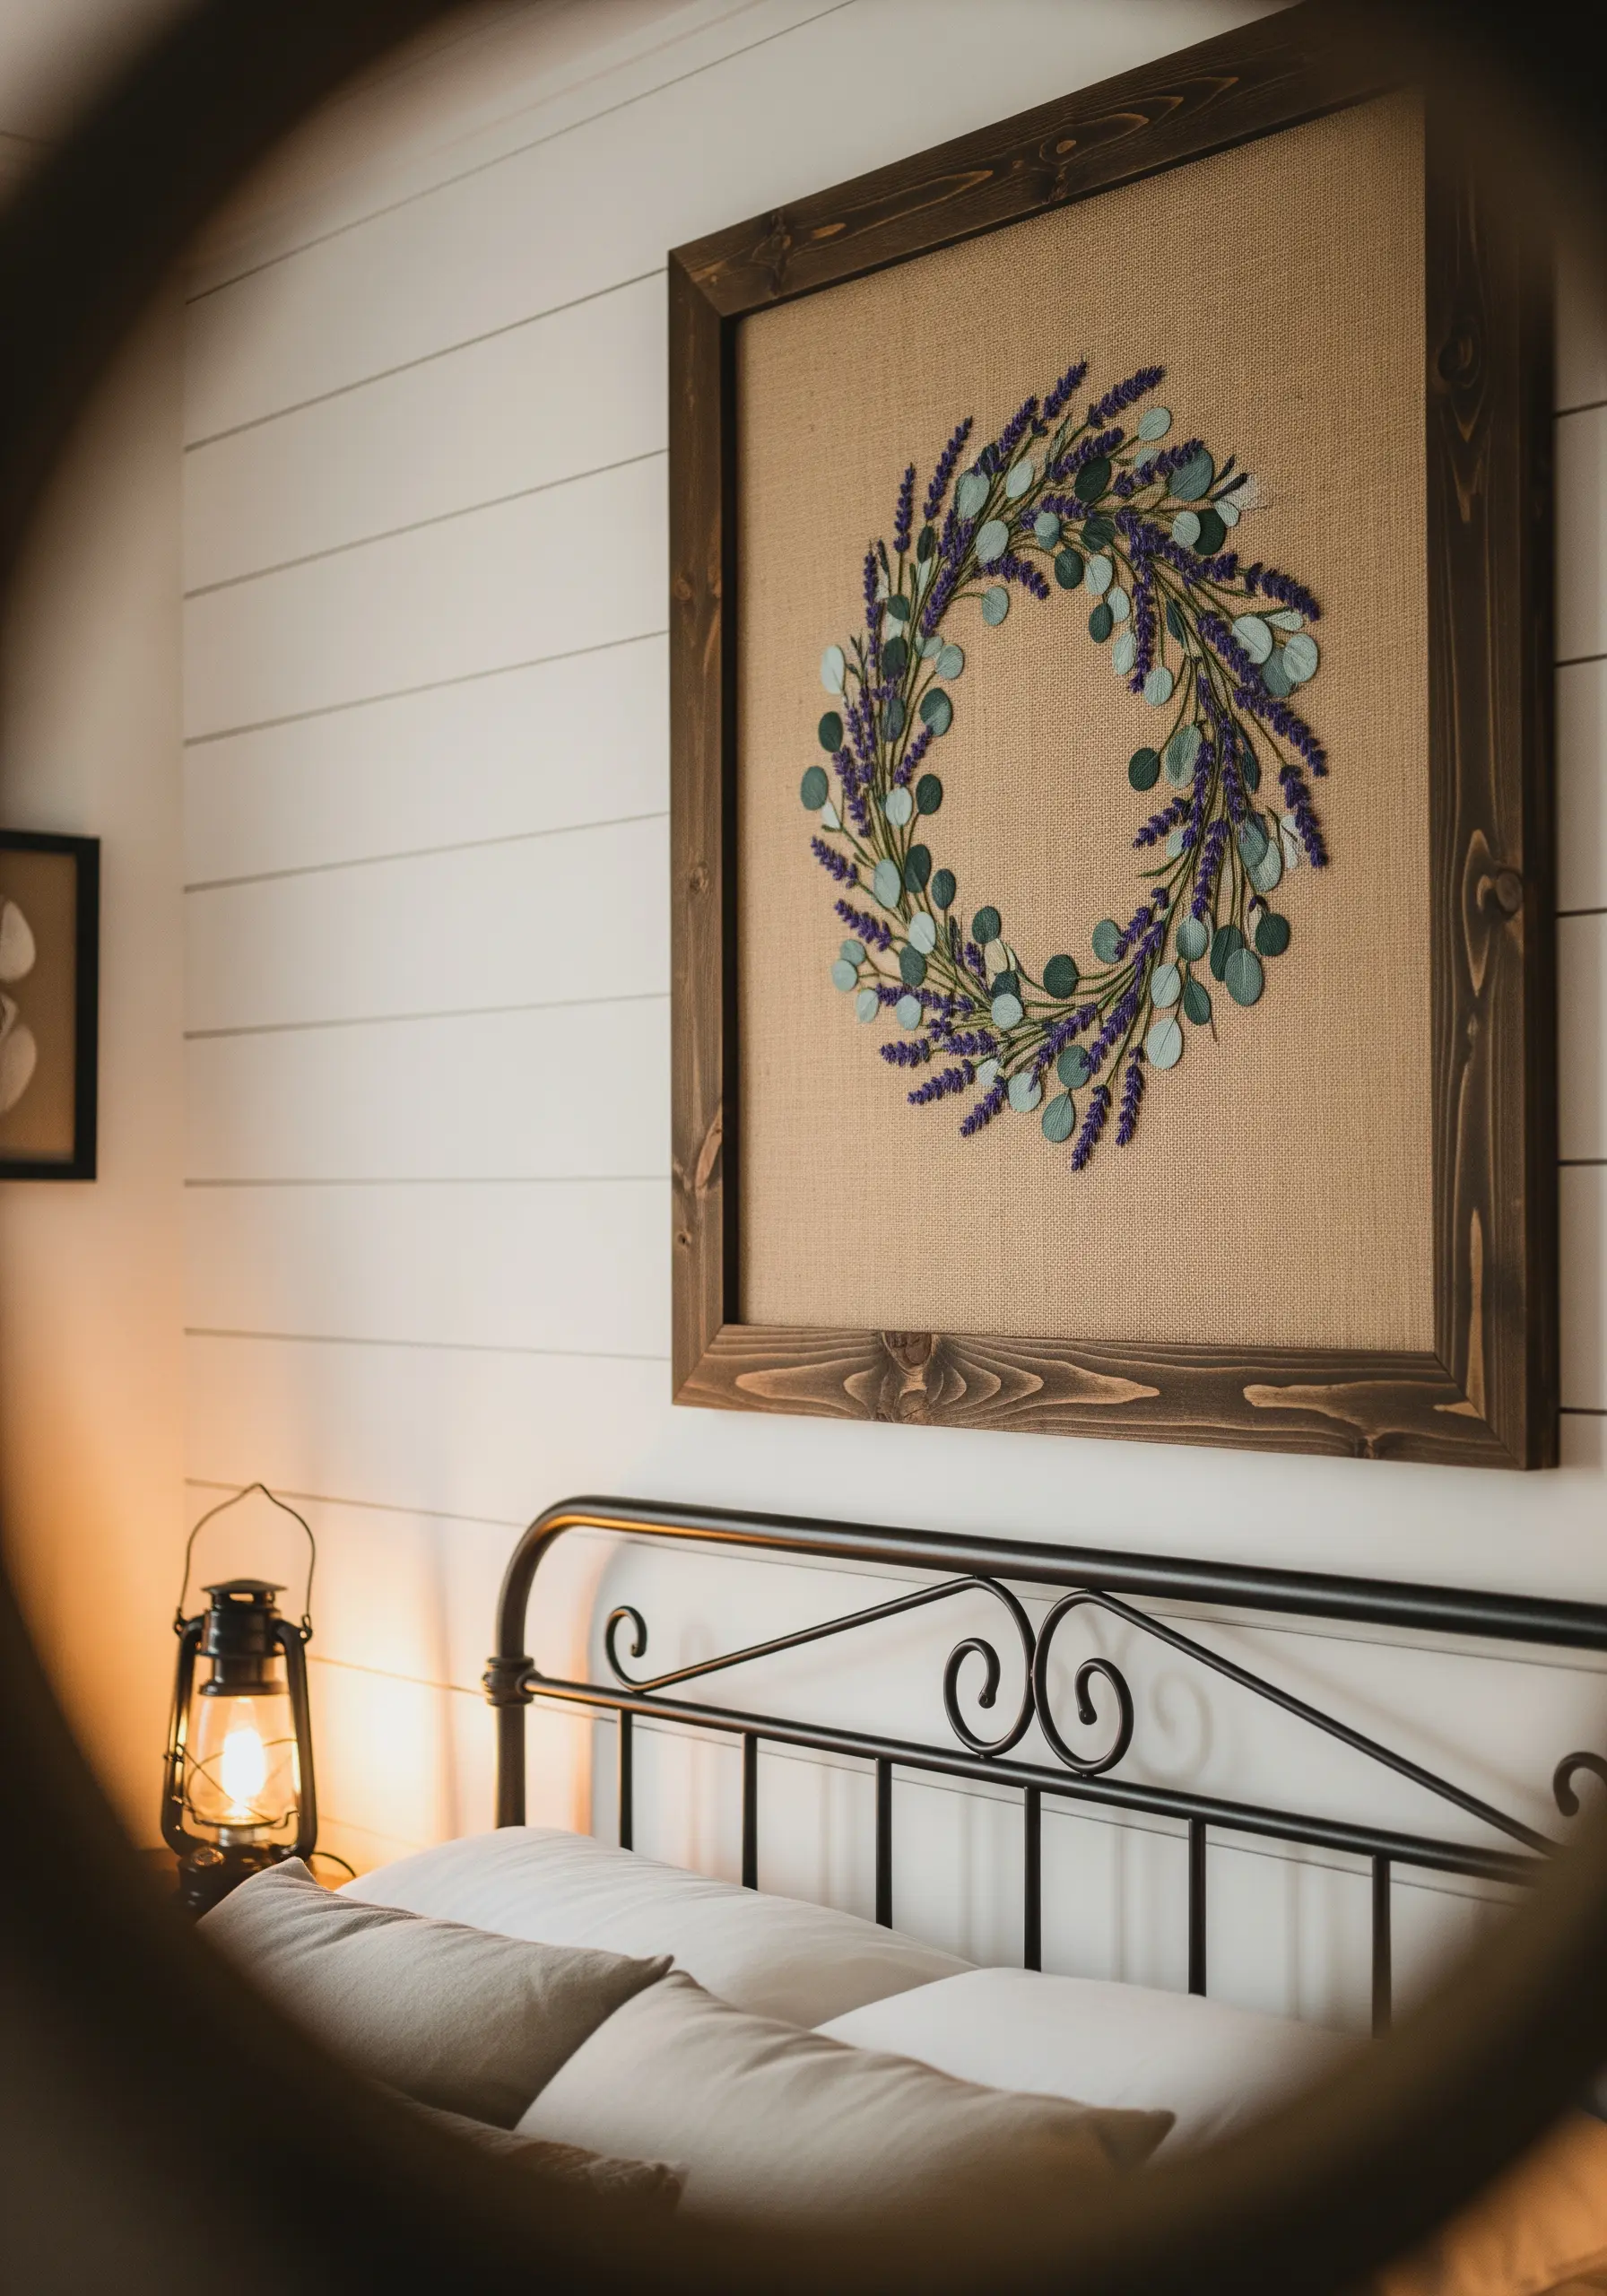
A successful botanical piece relies on varied textures that mimic nature.
For the delicate lavender buds, use bullion knots or small French knots clustered along a stem stitch stalk.
Create the silver dollar eucalyptus leaves with single, detached chain stitches (lazy daisies) using a grey-green thread to capture their soft, matte look.
Stitching on a coarse fabric like burlap or raw linen provides a rustic, neutral background that makes the greens and purples appear richer.
Frame the finished piece deeply to create a shadow-box effect, turning your embroidery into a preserved specimen.
5. Use High-Contrast Thread for Dramatic Celestial Art
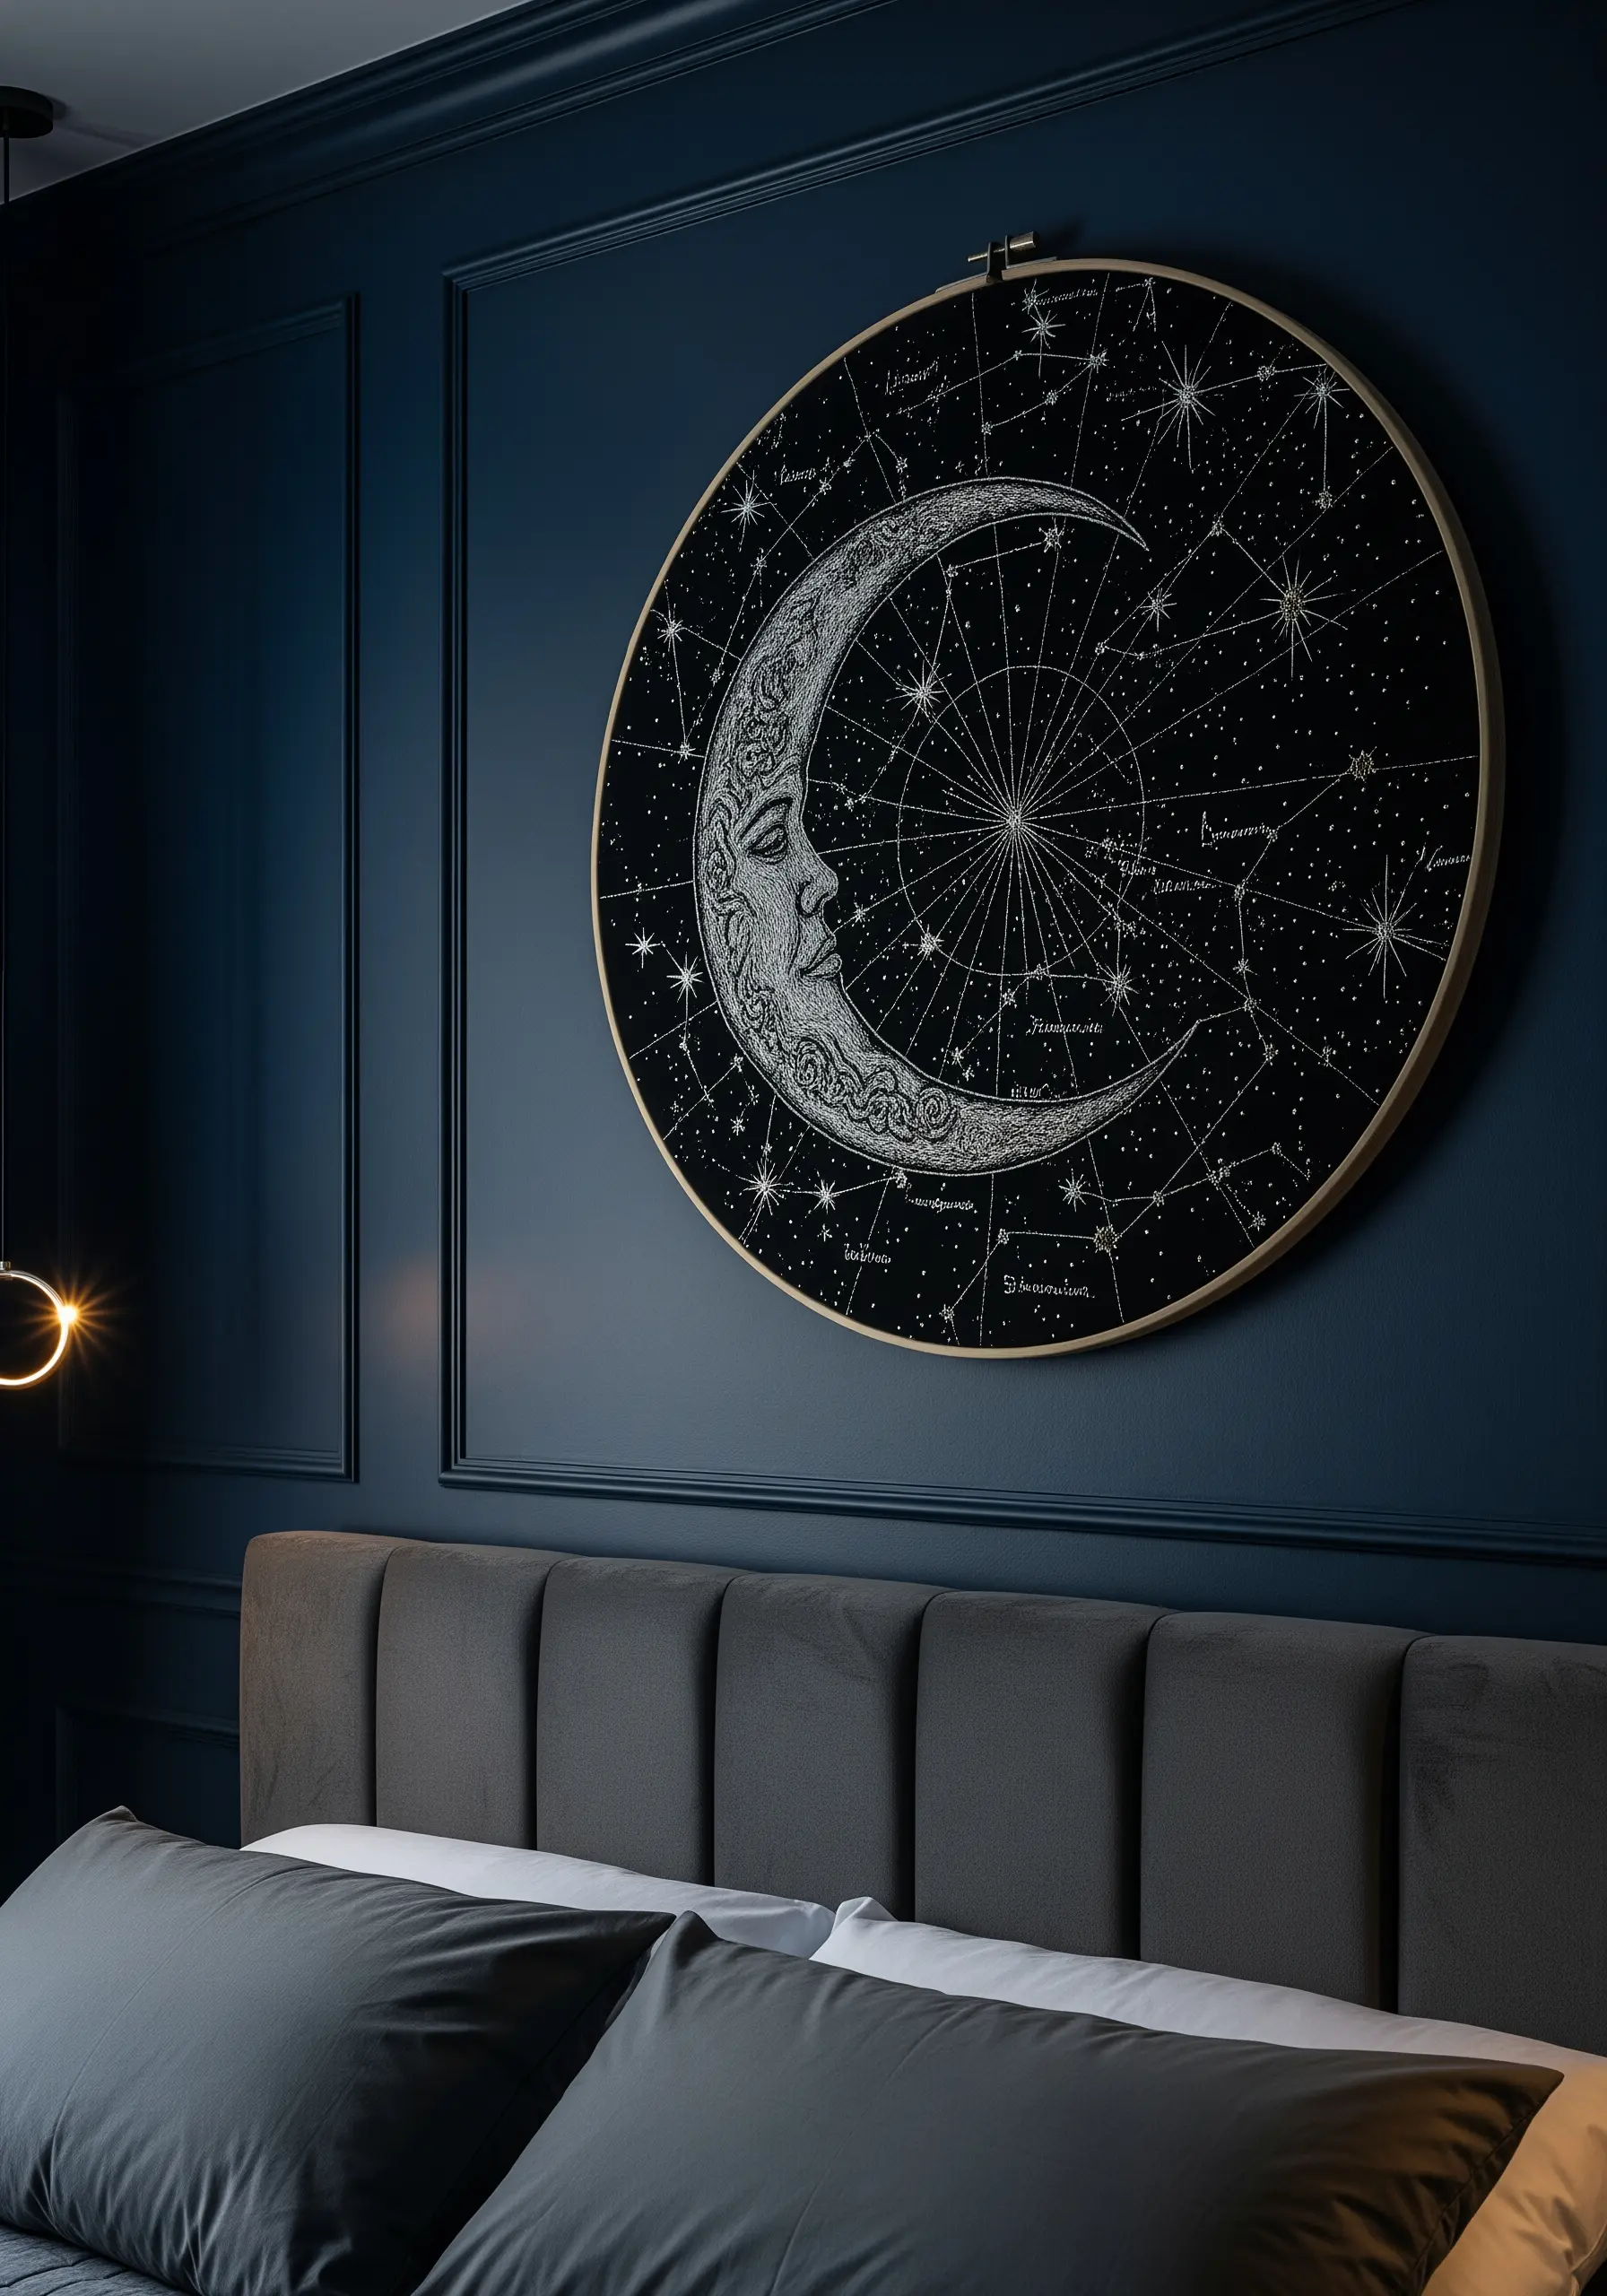
Create a stunning focal point by maximizing contrast.
Work with a high-sheen white or silver metallic thread on a dark, matte fabric like black or navy blue cotton twill.
To create the cratered texture of the moon, use a dense mix of French knots, seed stitches, and radiating straight stitches in varying lengths.
For the tiny stars, a single small seed stitch or a French knot is all you need—the key is to scatter them irregularly for a natural look.
When using dark fabric, metallic threads can be tricky, so use a needle with a larger eye and work with shorter lengths of thread to prevent fraying.
6. Master the Fluidity of Single-Line Embroidery
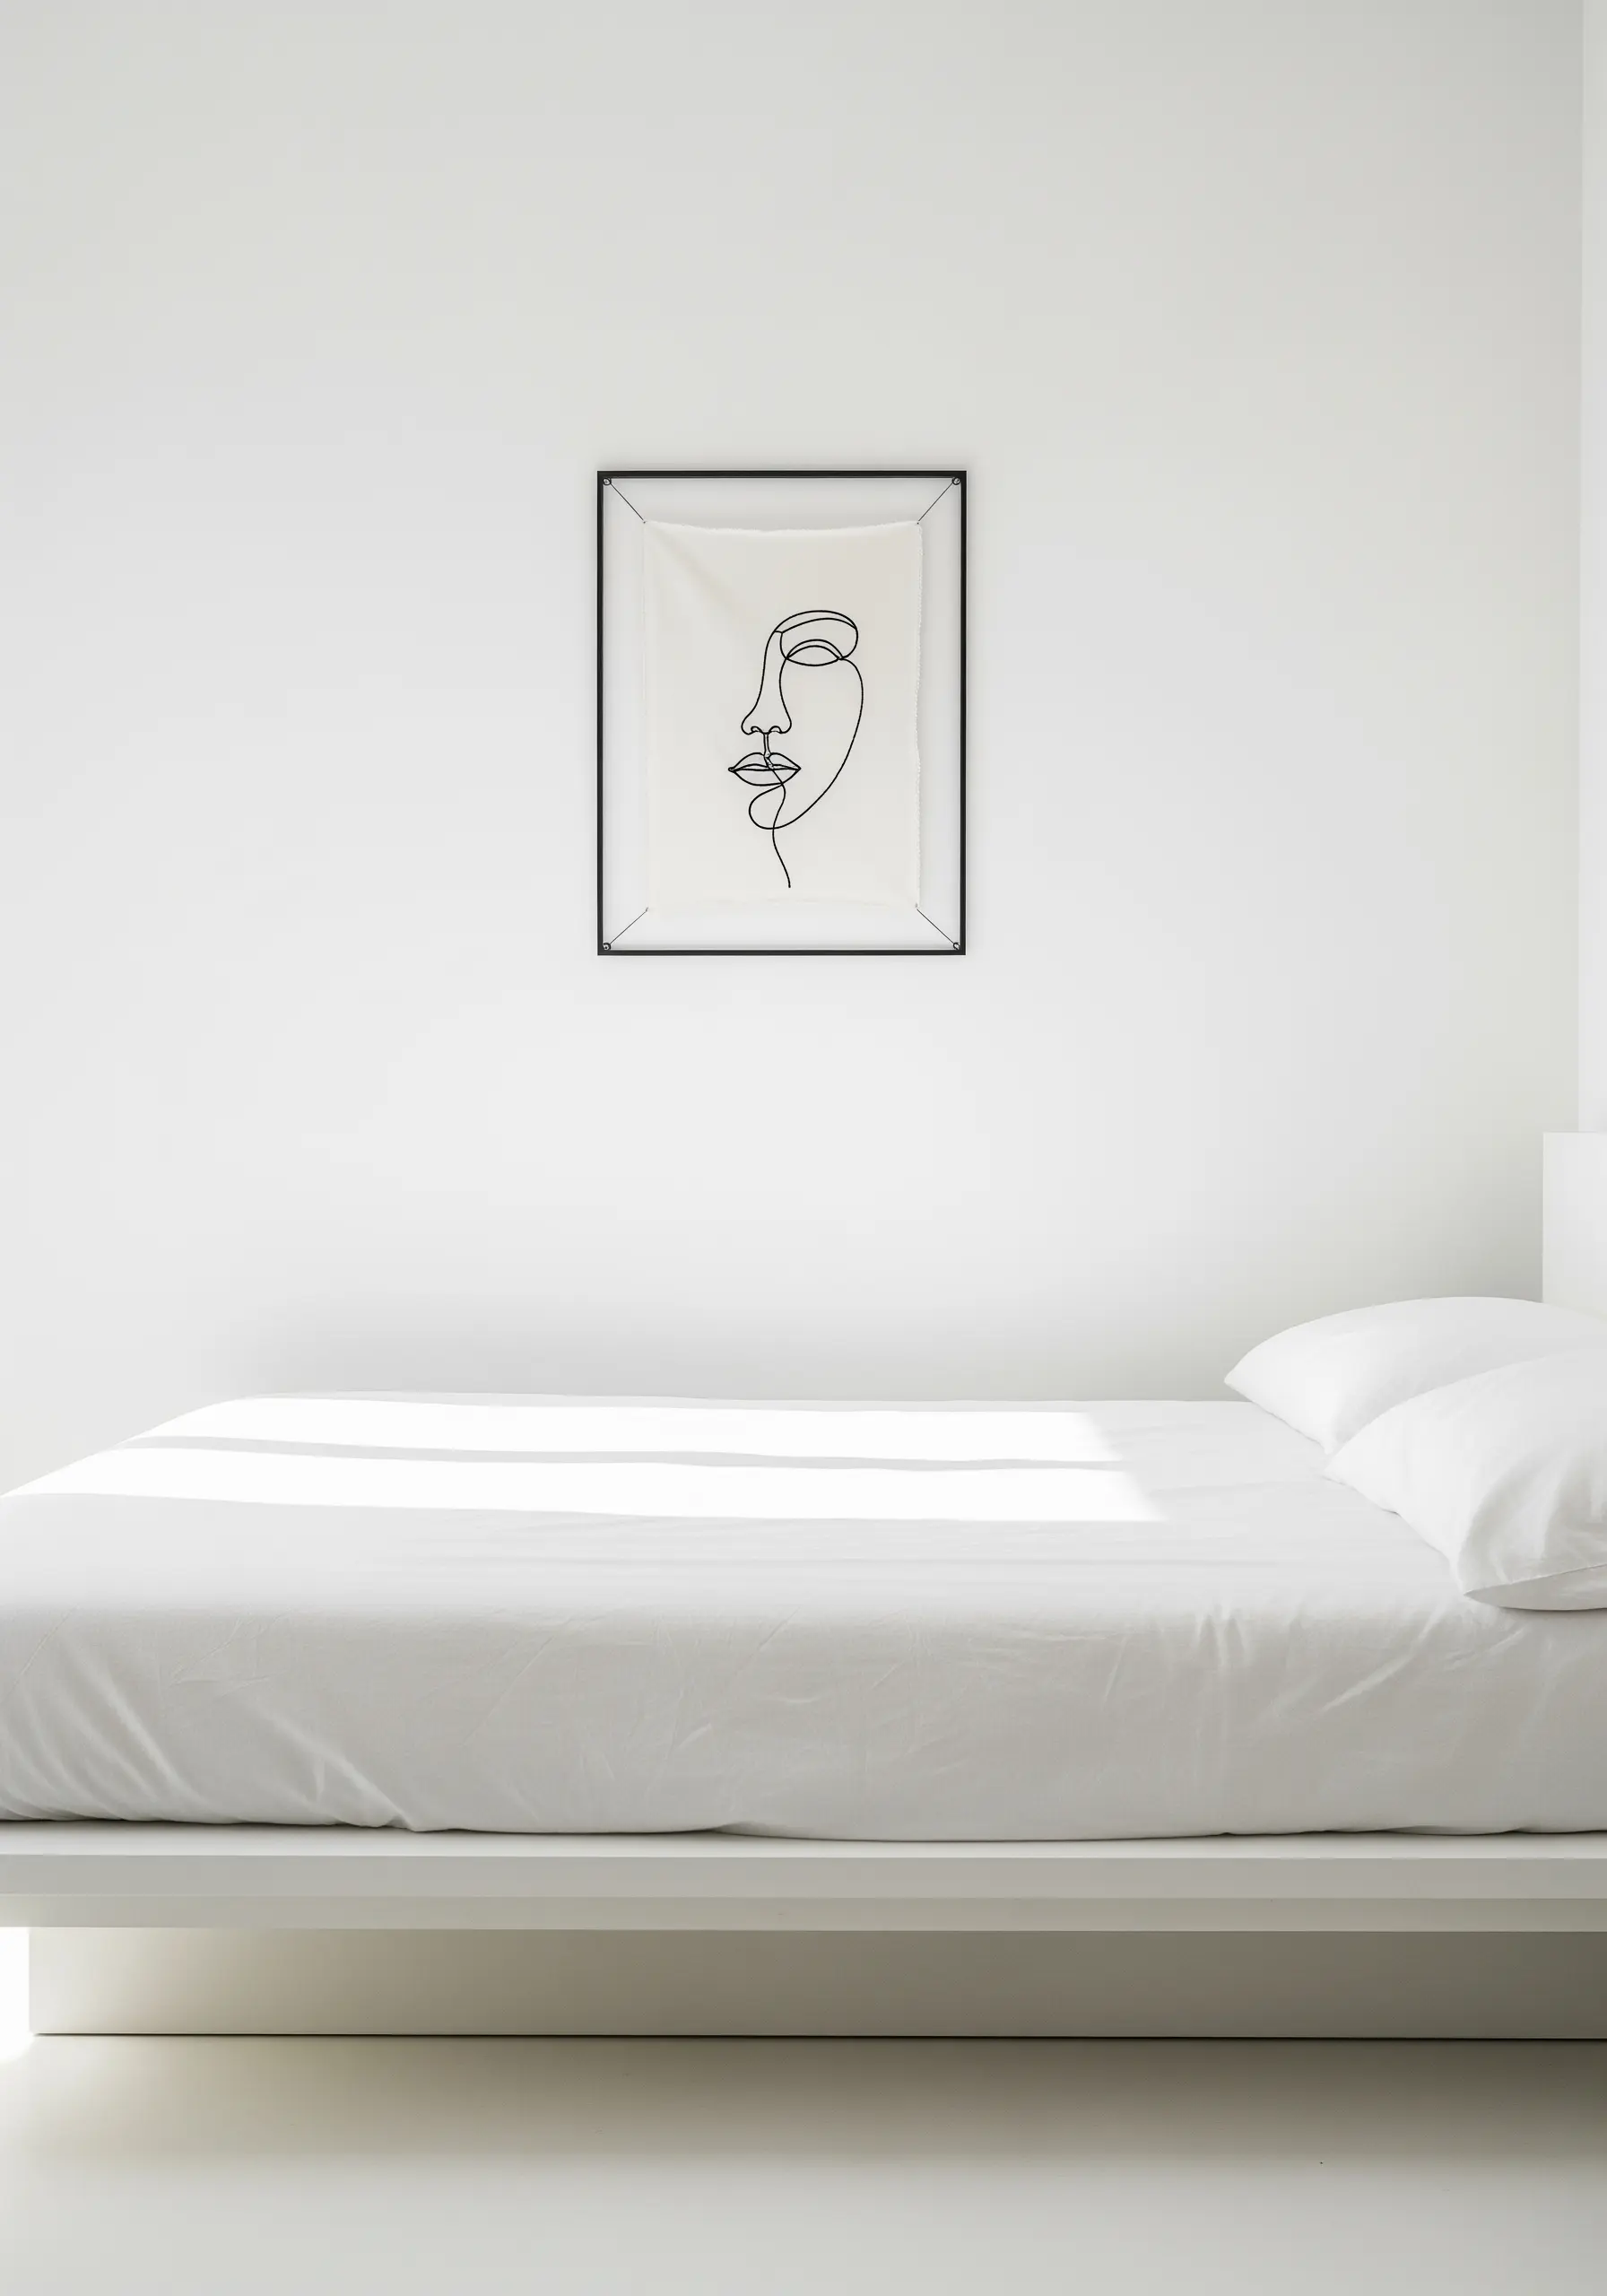
The elegance of line art embroidery lies in its unbroken, fluid motion.
To achieve a perfectly smooth line, use a whipped backstitch.
First, create a standard backstitch outline, then whip the thread around each stitch without piercing the fabric. This covers the gaps and creates a seamless, raised line.
Use three strands of floss for a line that is delicate yet substantial enough to be seen from a distance.
For these single-line face profiles, practice the drawing on paper first to understand the flow before committing to fabric.
7. Sculpt an Ocean Wave with French Knots
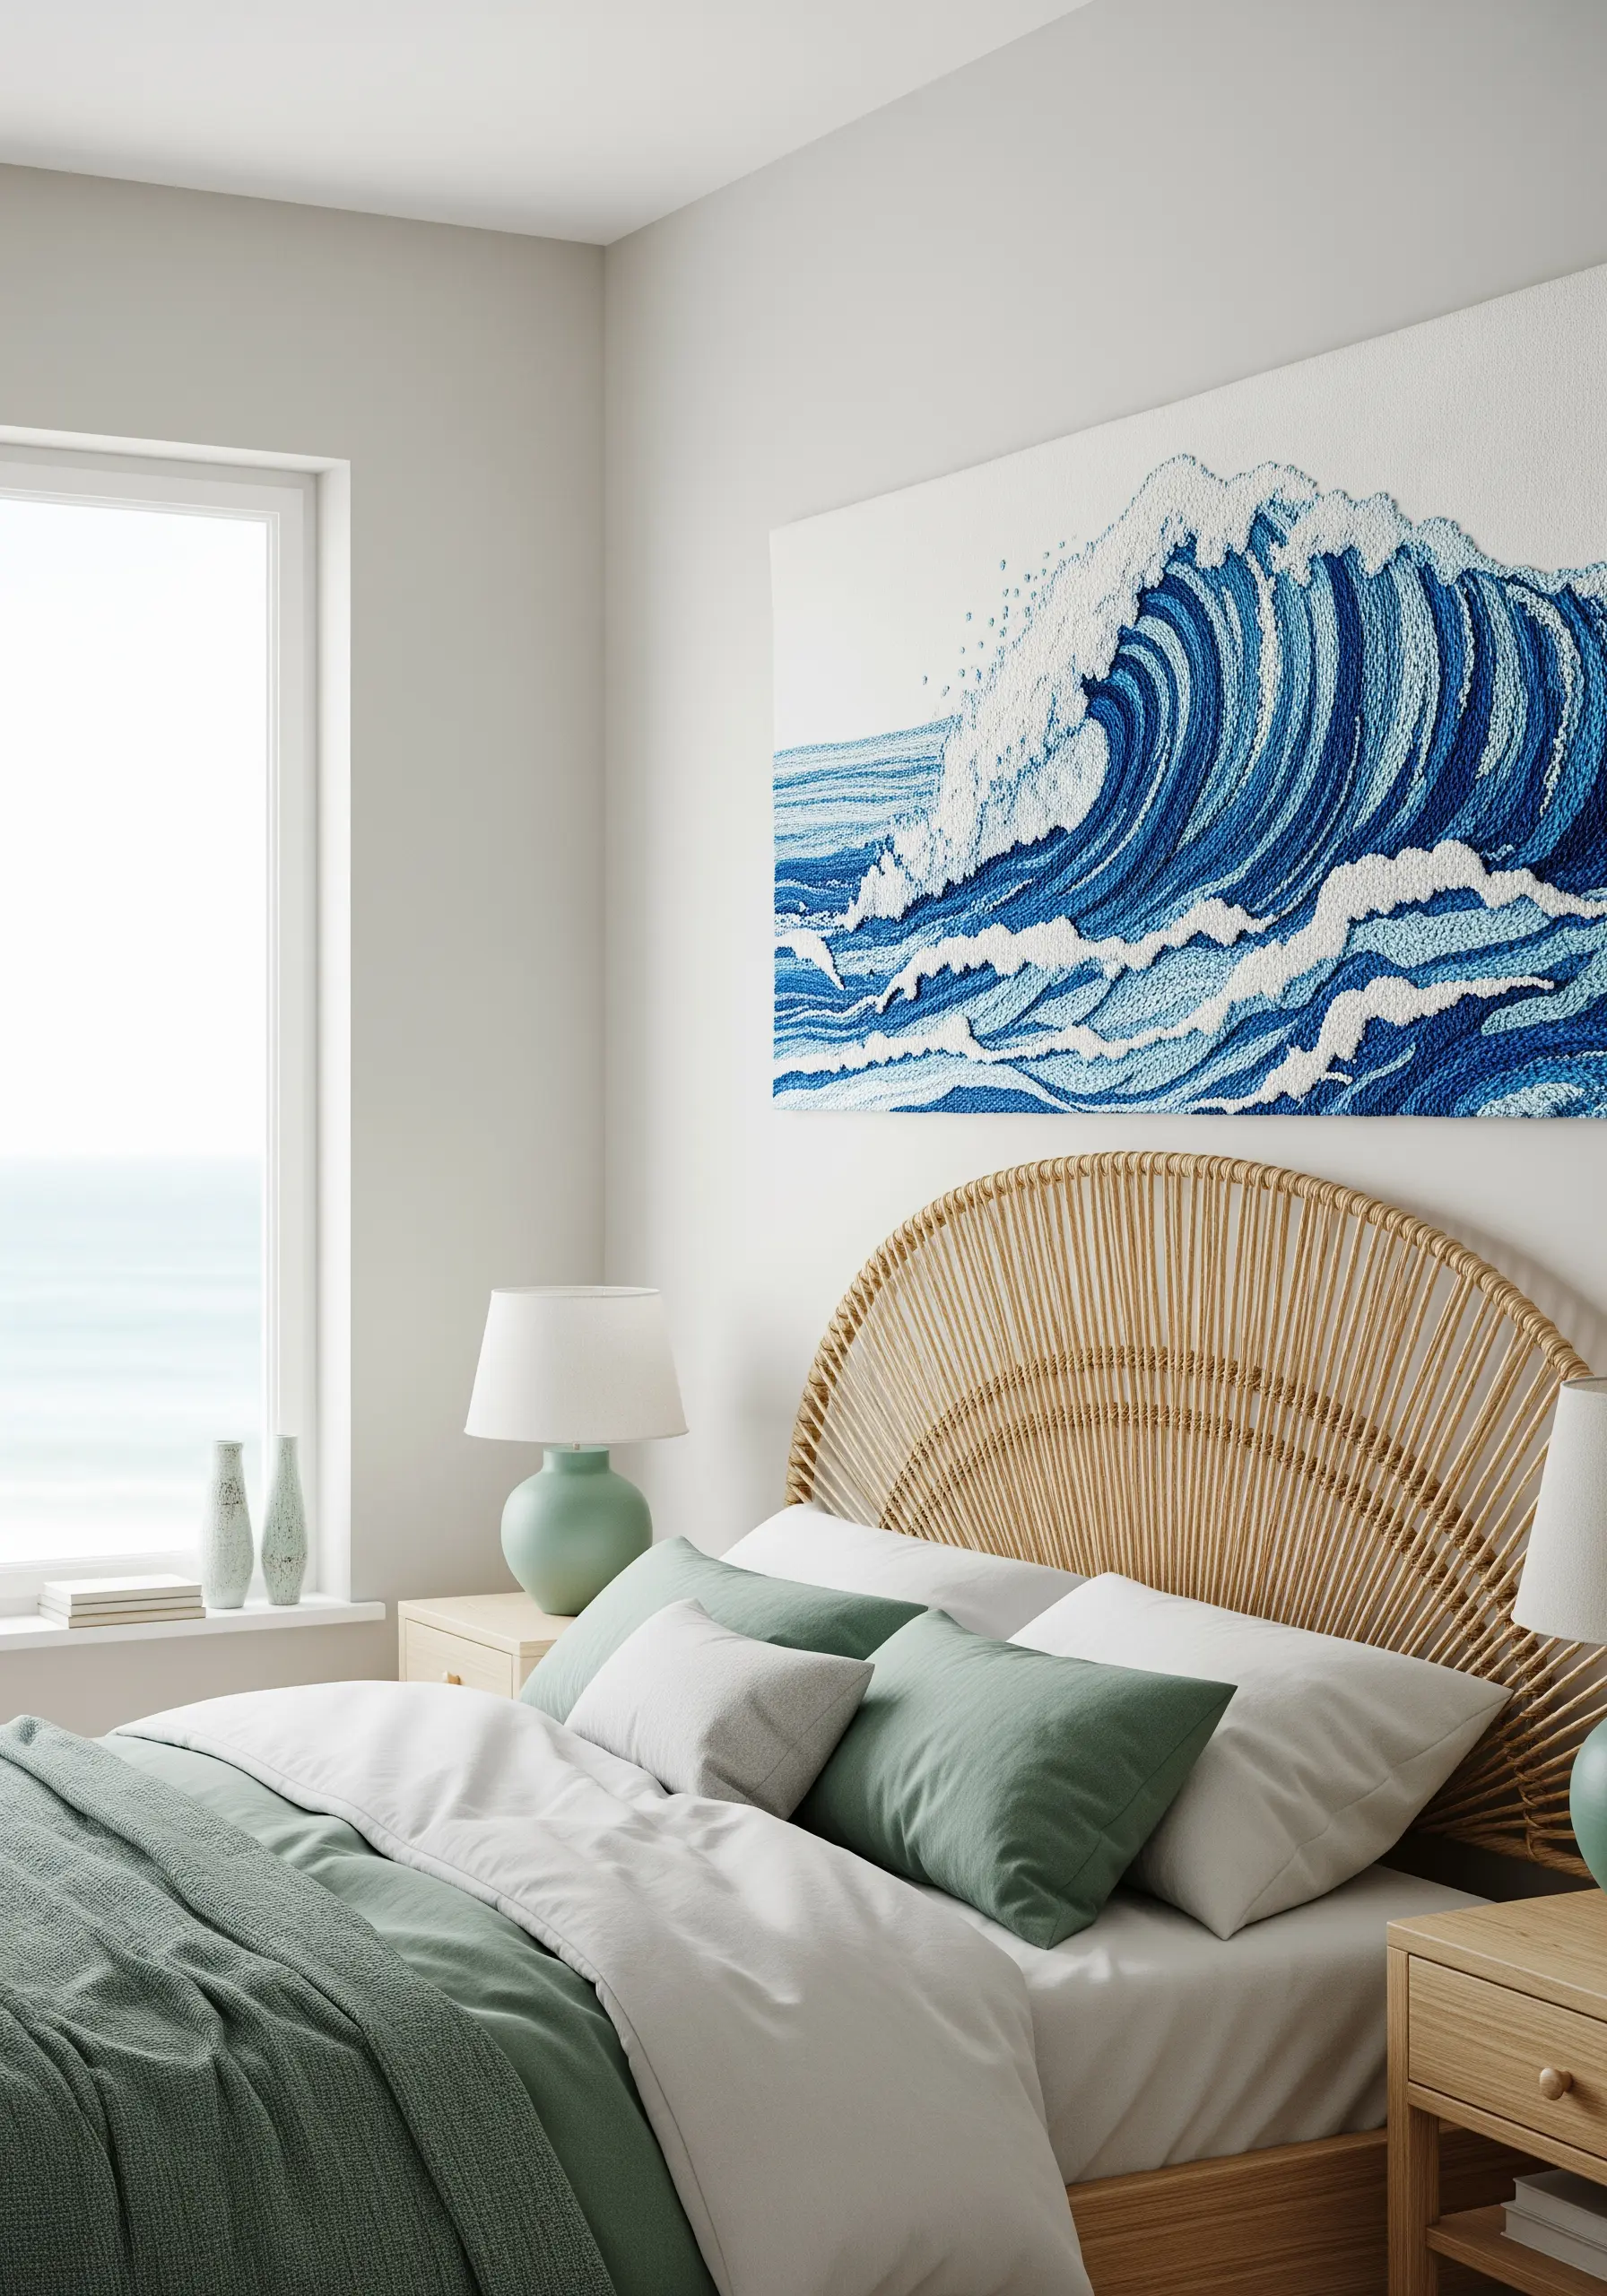
Capture the powerful texture of crashing waves using dense clusters of French knots.
Use at least five shades of blue, from deep navy to pale sky blue, plus white and off-white for the seafoam.
Concentrate the white and lightest blue knots at the crest of the wave to create the illusion of foam and spray.
For the body of the wave, arrange your blue knots in directional swoops to guide the eye and suggest movement.
This technique is incredibly forgiving and turns a simple stitch into a dynamic, sculptural piece of abstract thread art.
8. Curate a Cohesive Hoop Art Gallery Wall
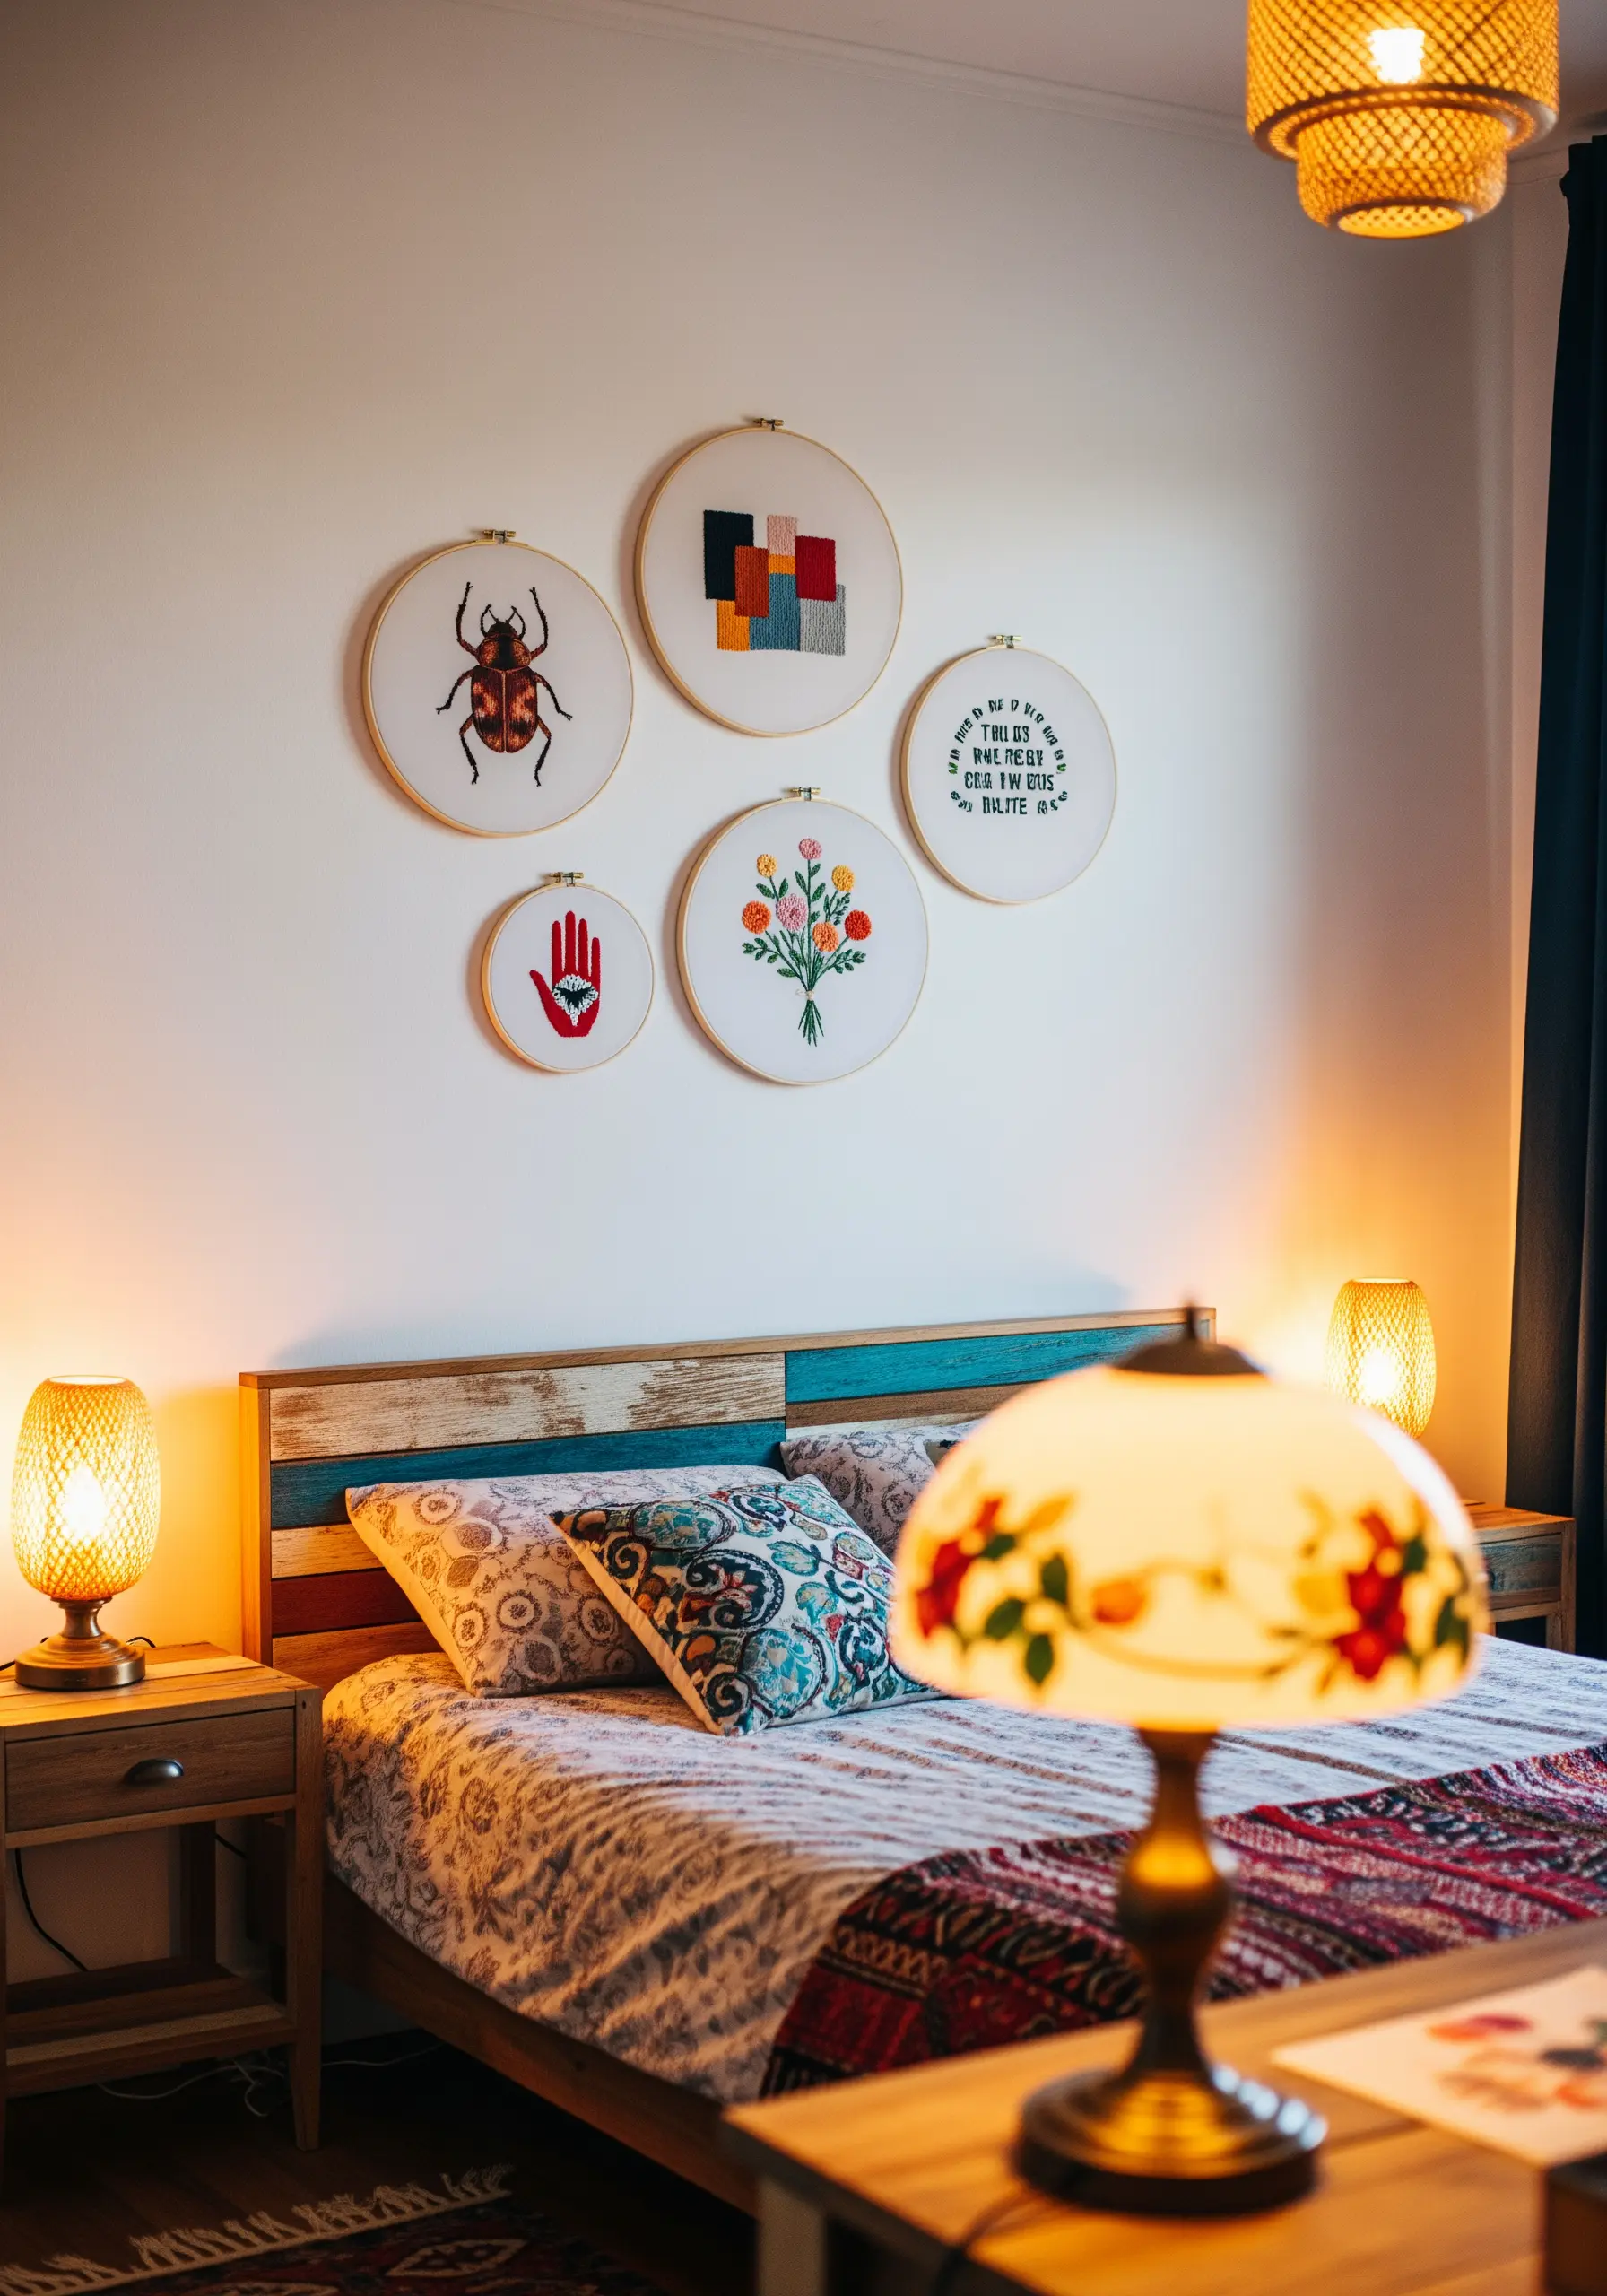
Turn a collection of smaller projects into a significant art installation.
To create a cohesive look, choose a unifying element: it could be a limited color palette, a common theme like botany or insects, or a consistent stitch style.
Vary the hoop sizes from three to nine inches and arrange them in an organic cluster rather than a rigid grid.
Mix densely stitched pieces with simpler line art to create visual balance and allow each piece to breathe.
These wall hoop art ideas are perfect for showcasing your progress and telling a personal story through your stitching.
9. Embrace Bold Texture with Chain Stitch Fills
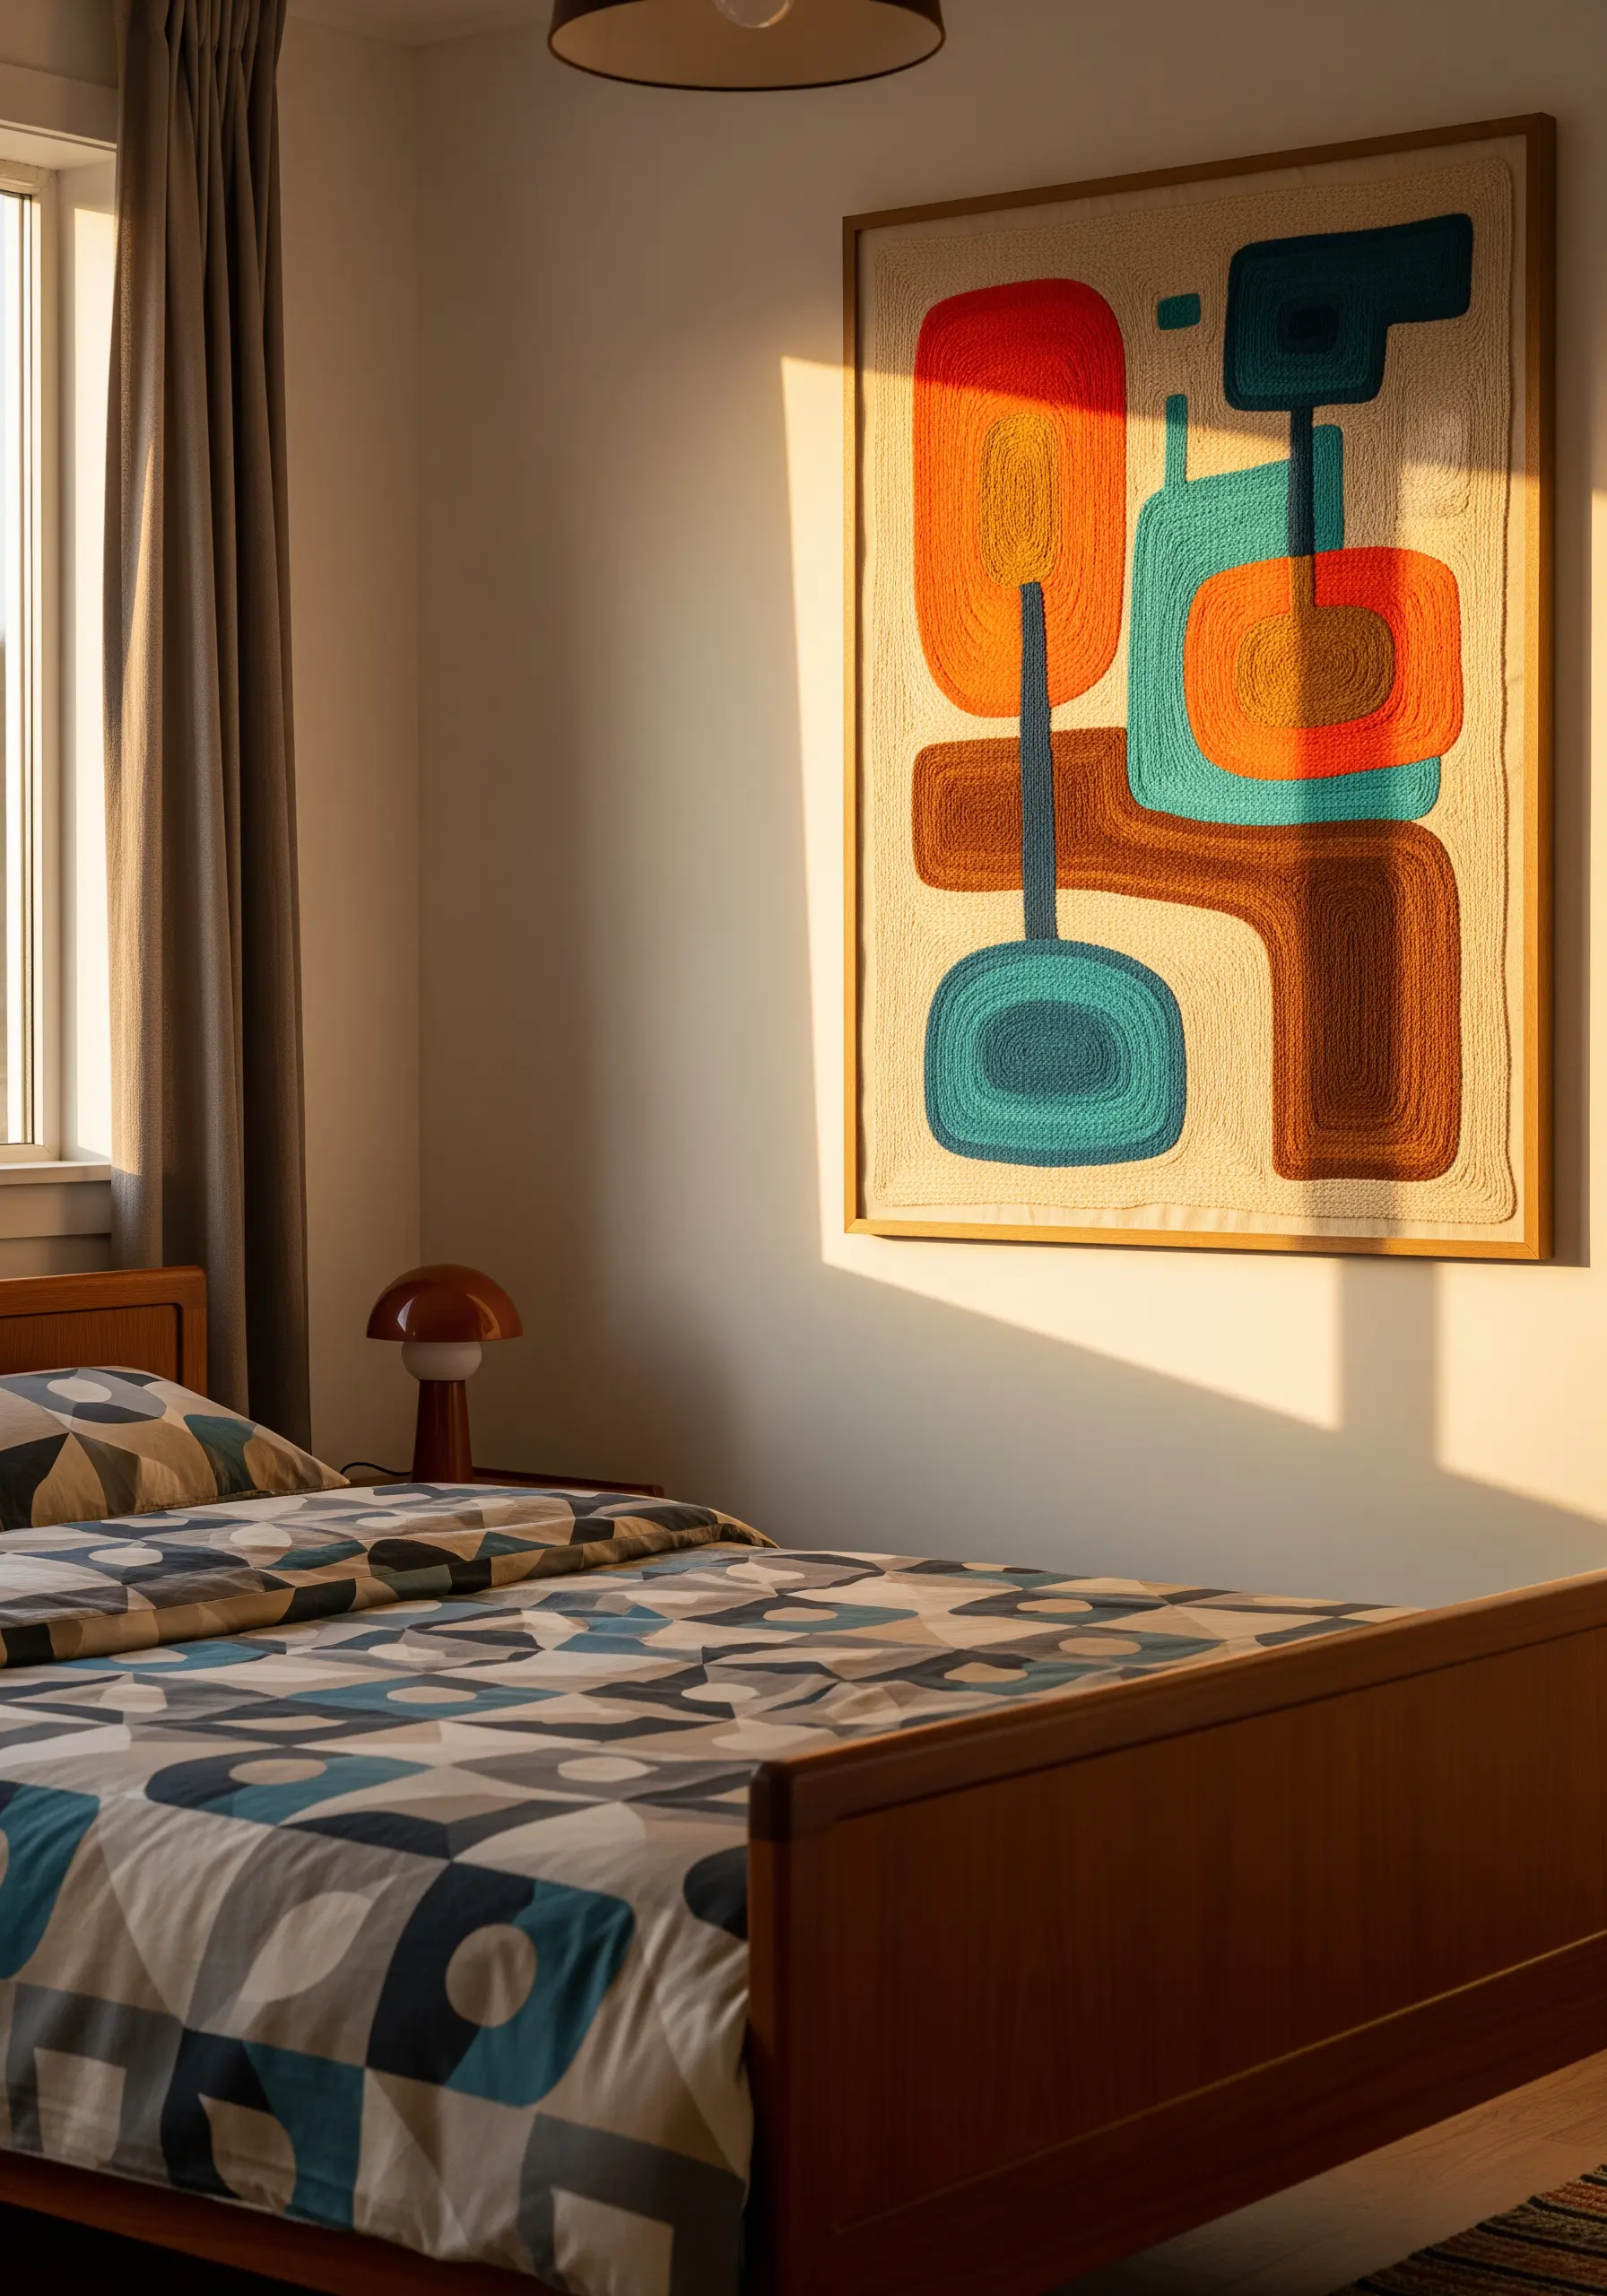
To achieve a bold, retro look with a woven texture, fill your shapes with rows of chain stitch.
Unlike satin stitch, chain stitch creates a looped, almost knitted surface that adds incredible dimension and a handmade feel.
Work the stitch in concentric circles or back and forth in rows to fill large areas of color.
Use thicker threads like pearl cotton or even fine wool yarn to emphasize the texture and speed up the filling process.
This technique is perfect for mid-century modern abstracts and large-scale color-blocking projects.
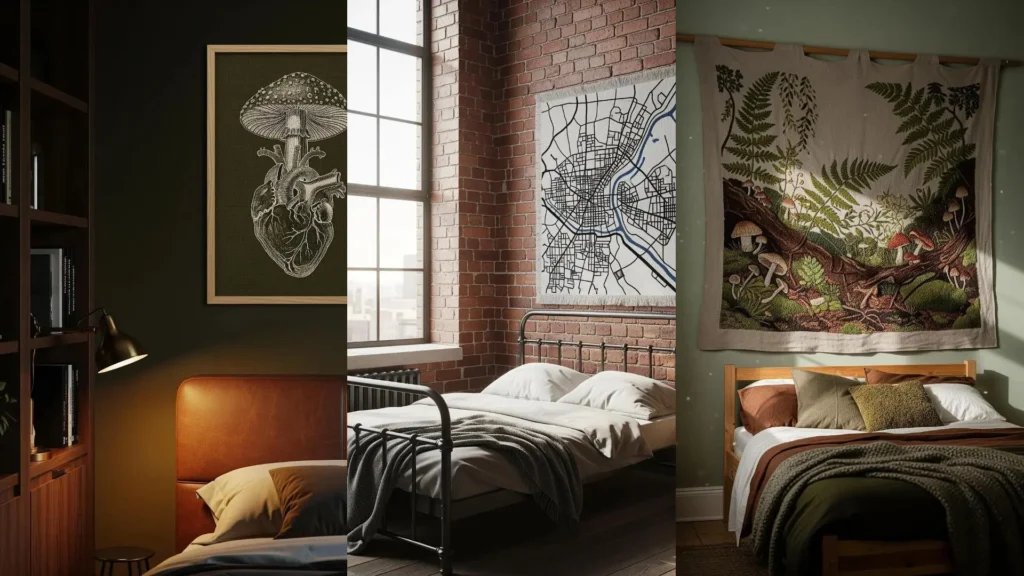
10. Capture a Forest Floor with Thread Painting
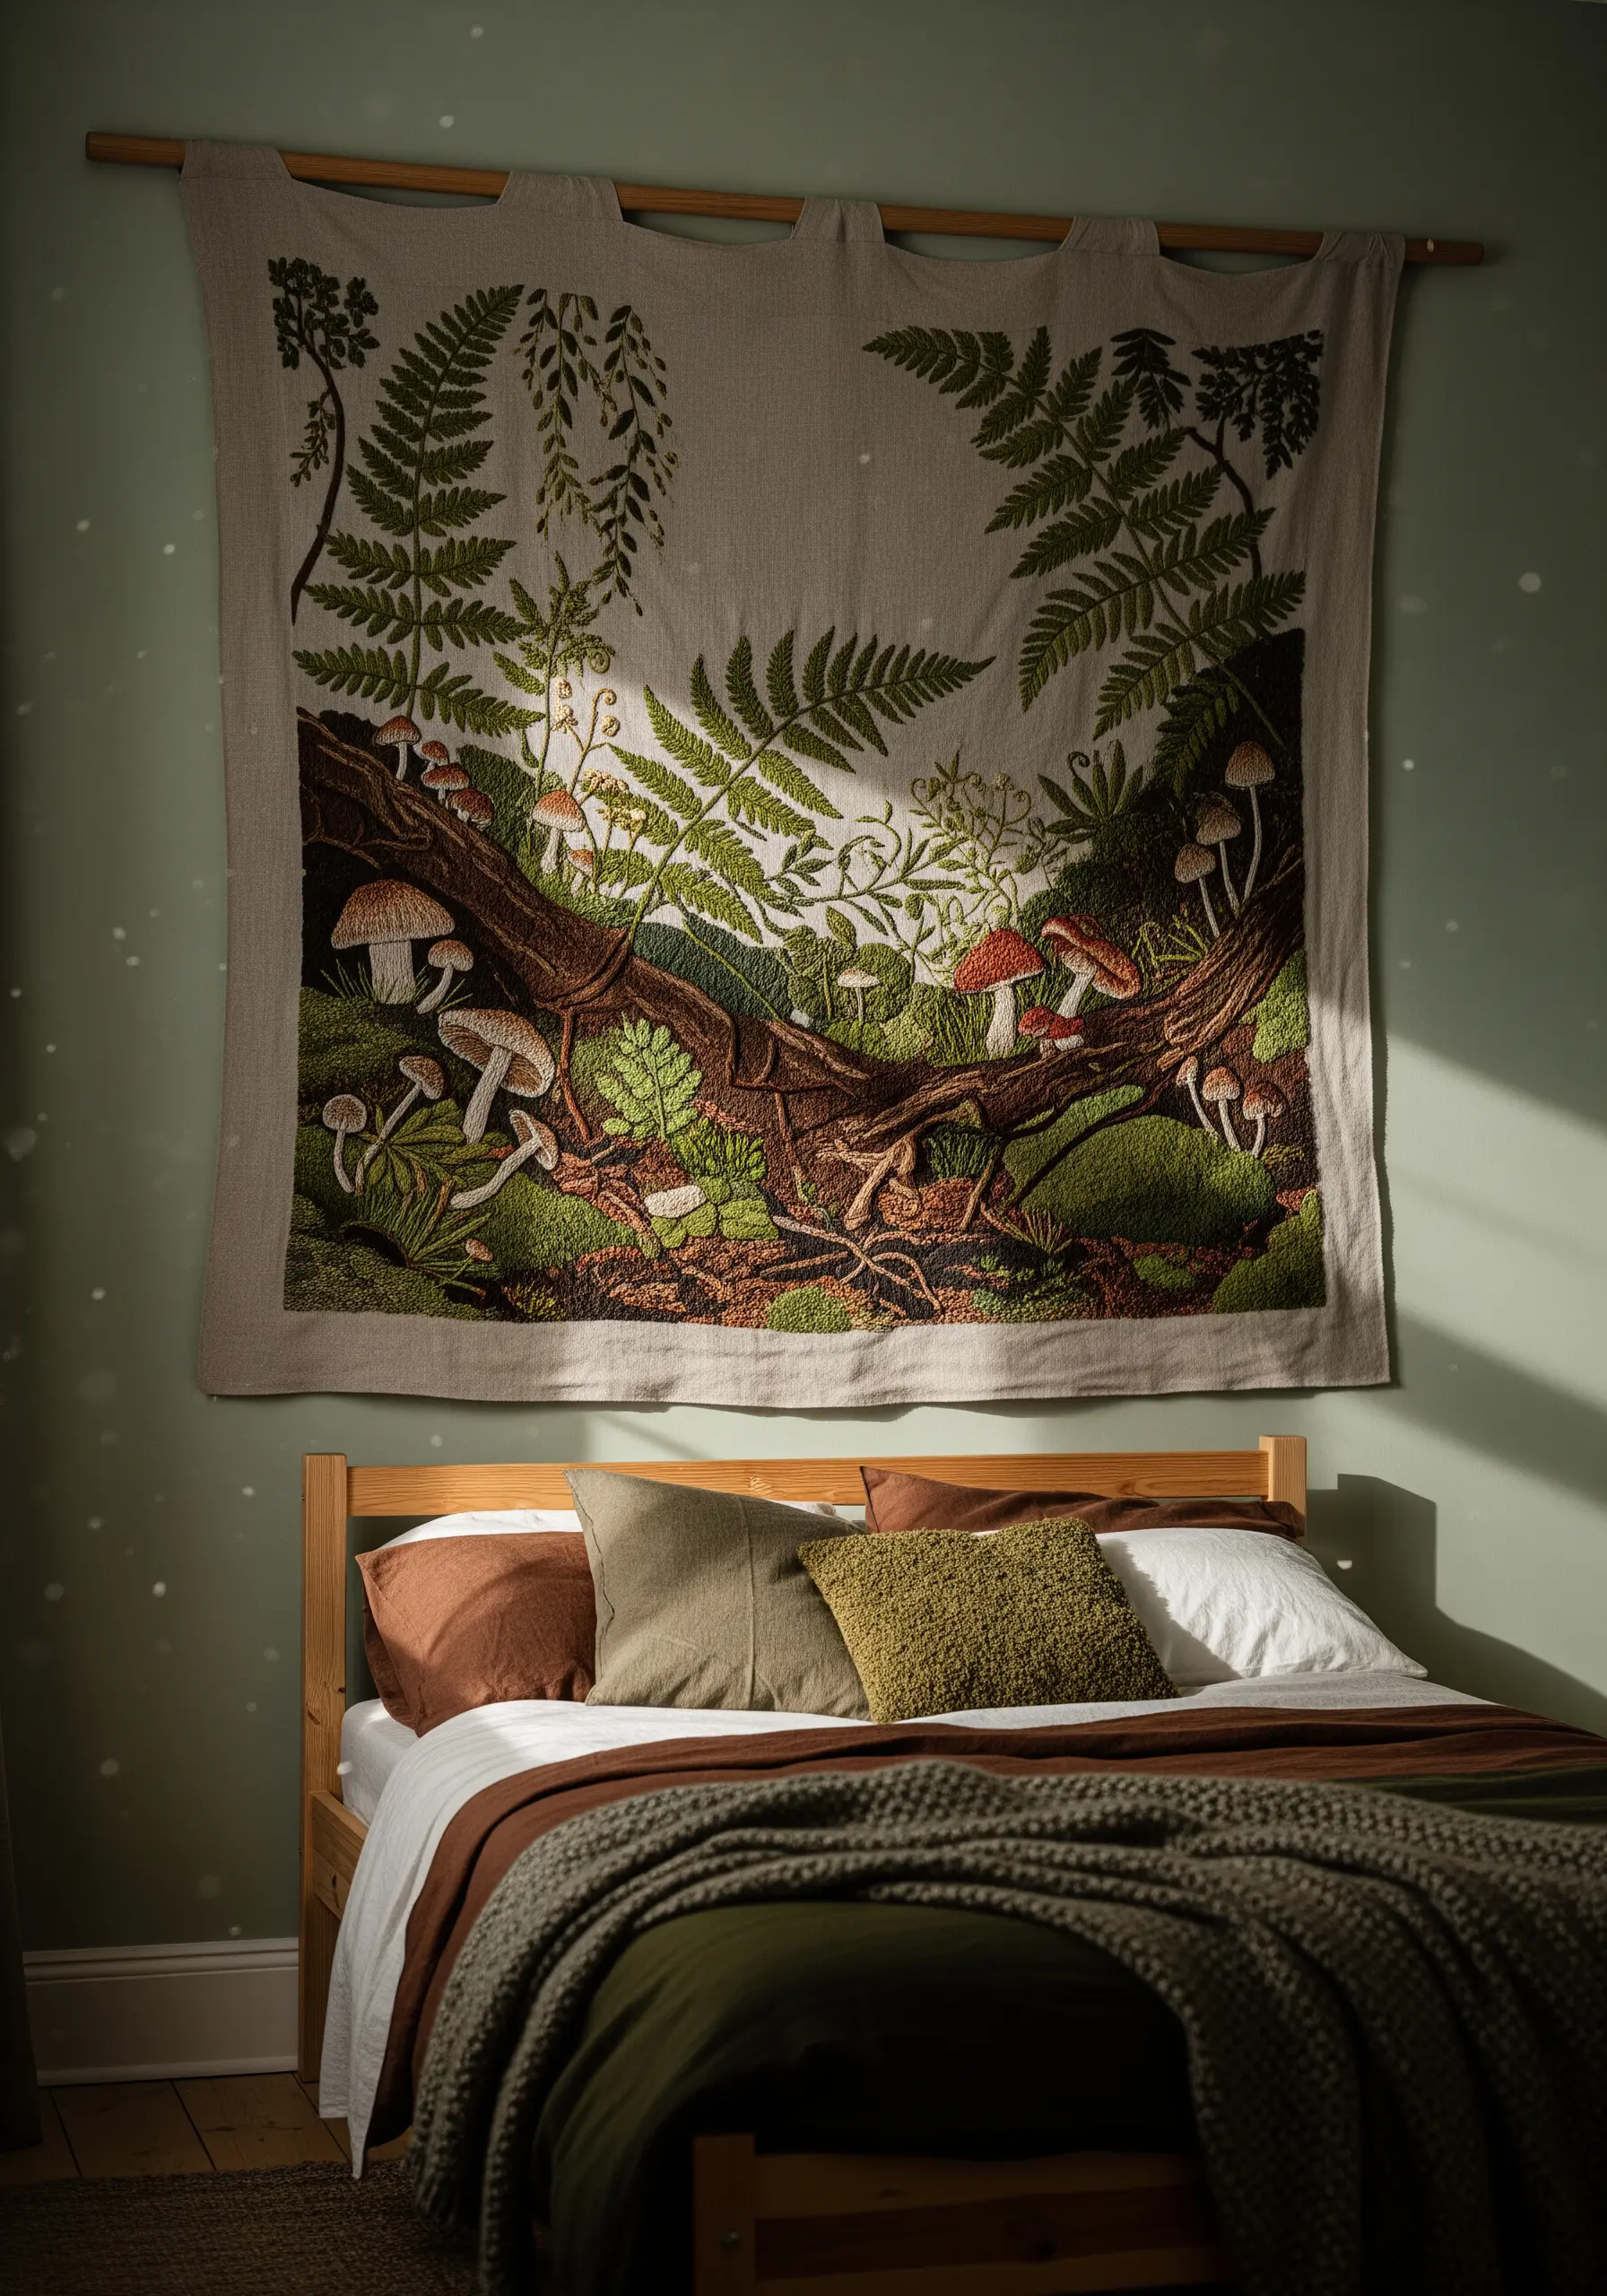
Bring an enchanting woodland scene to life with realistic detail.
Use the long-and-short stitch technique to blend shades of brown and green seamlessly, creating soft gradients on mushroom caps and mossy logs.
Incorporate stumpwork by placing a small piece of felt or a base of satin stitches under a mushroom to raise it from the fabric surface, giving it a true 3D effect.
For the delicate ferns, use a fishbone stitch to create a central vein and realistically angled leaves.
These realistic mushroom forest floor embroidery projects are a masterclass in texture and blending.
11. Stitch a Romantic Bouquet with Woven Wheel Roses
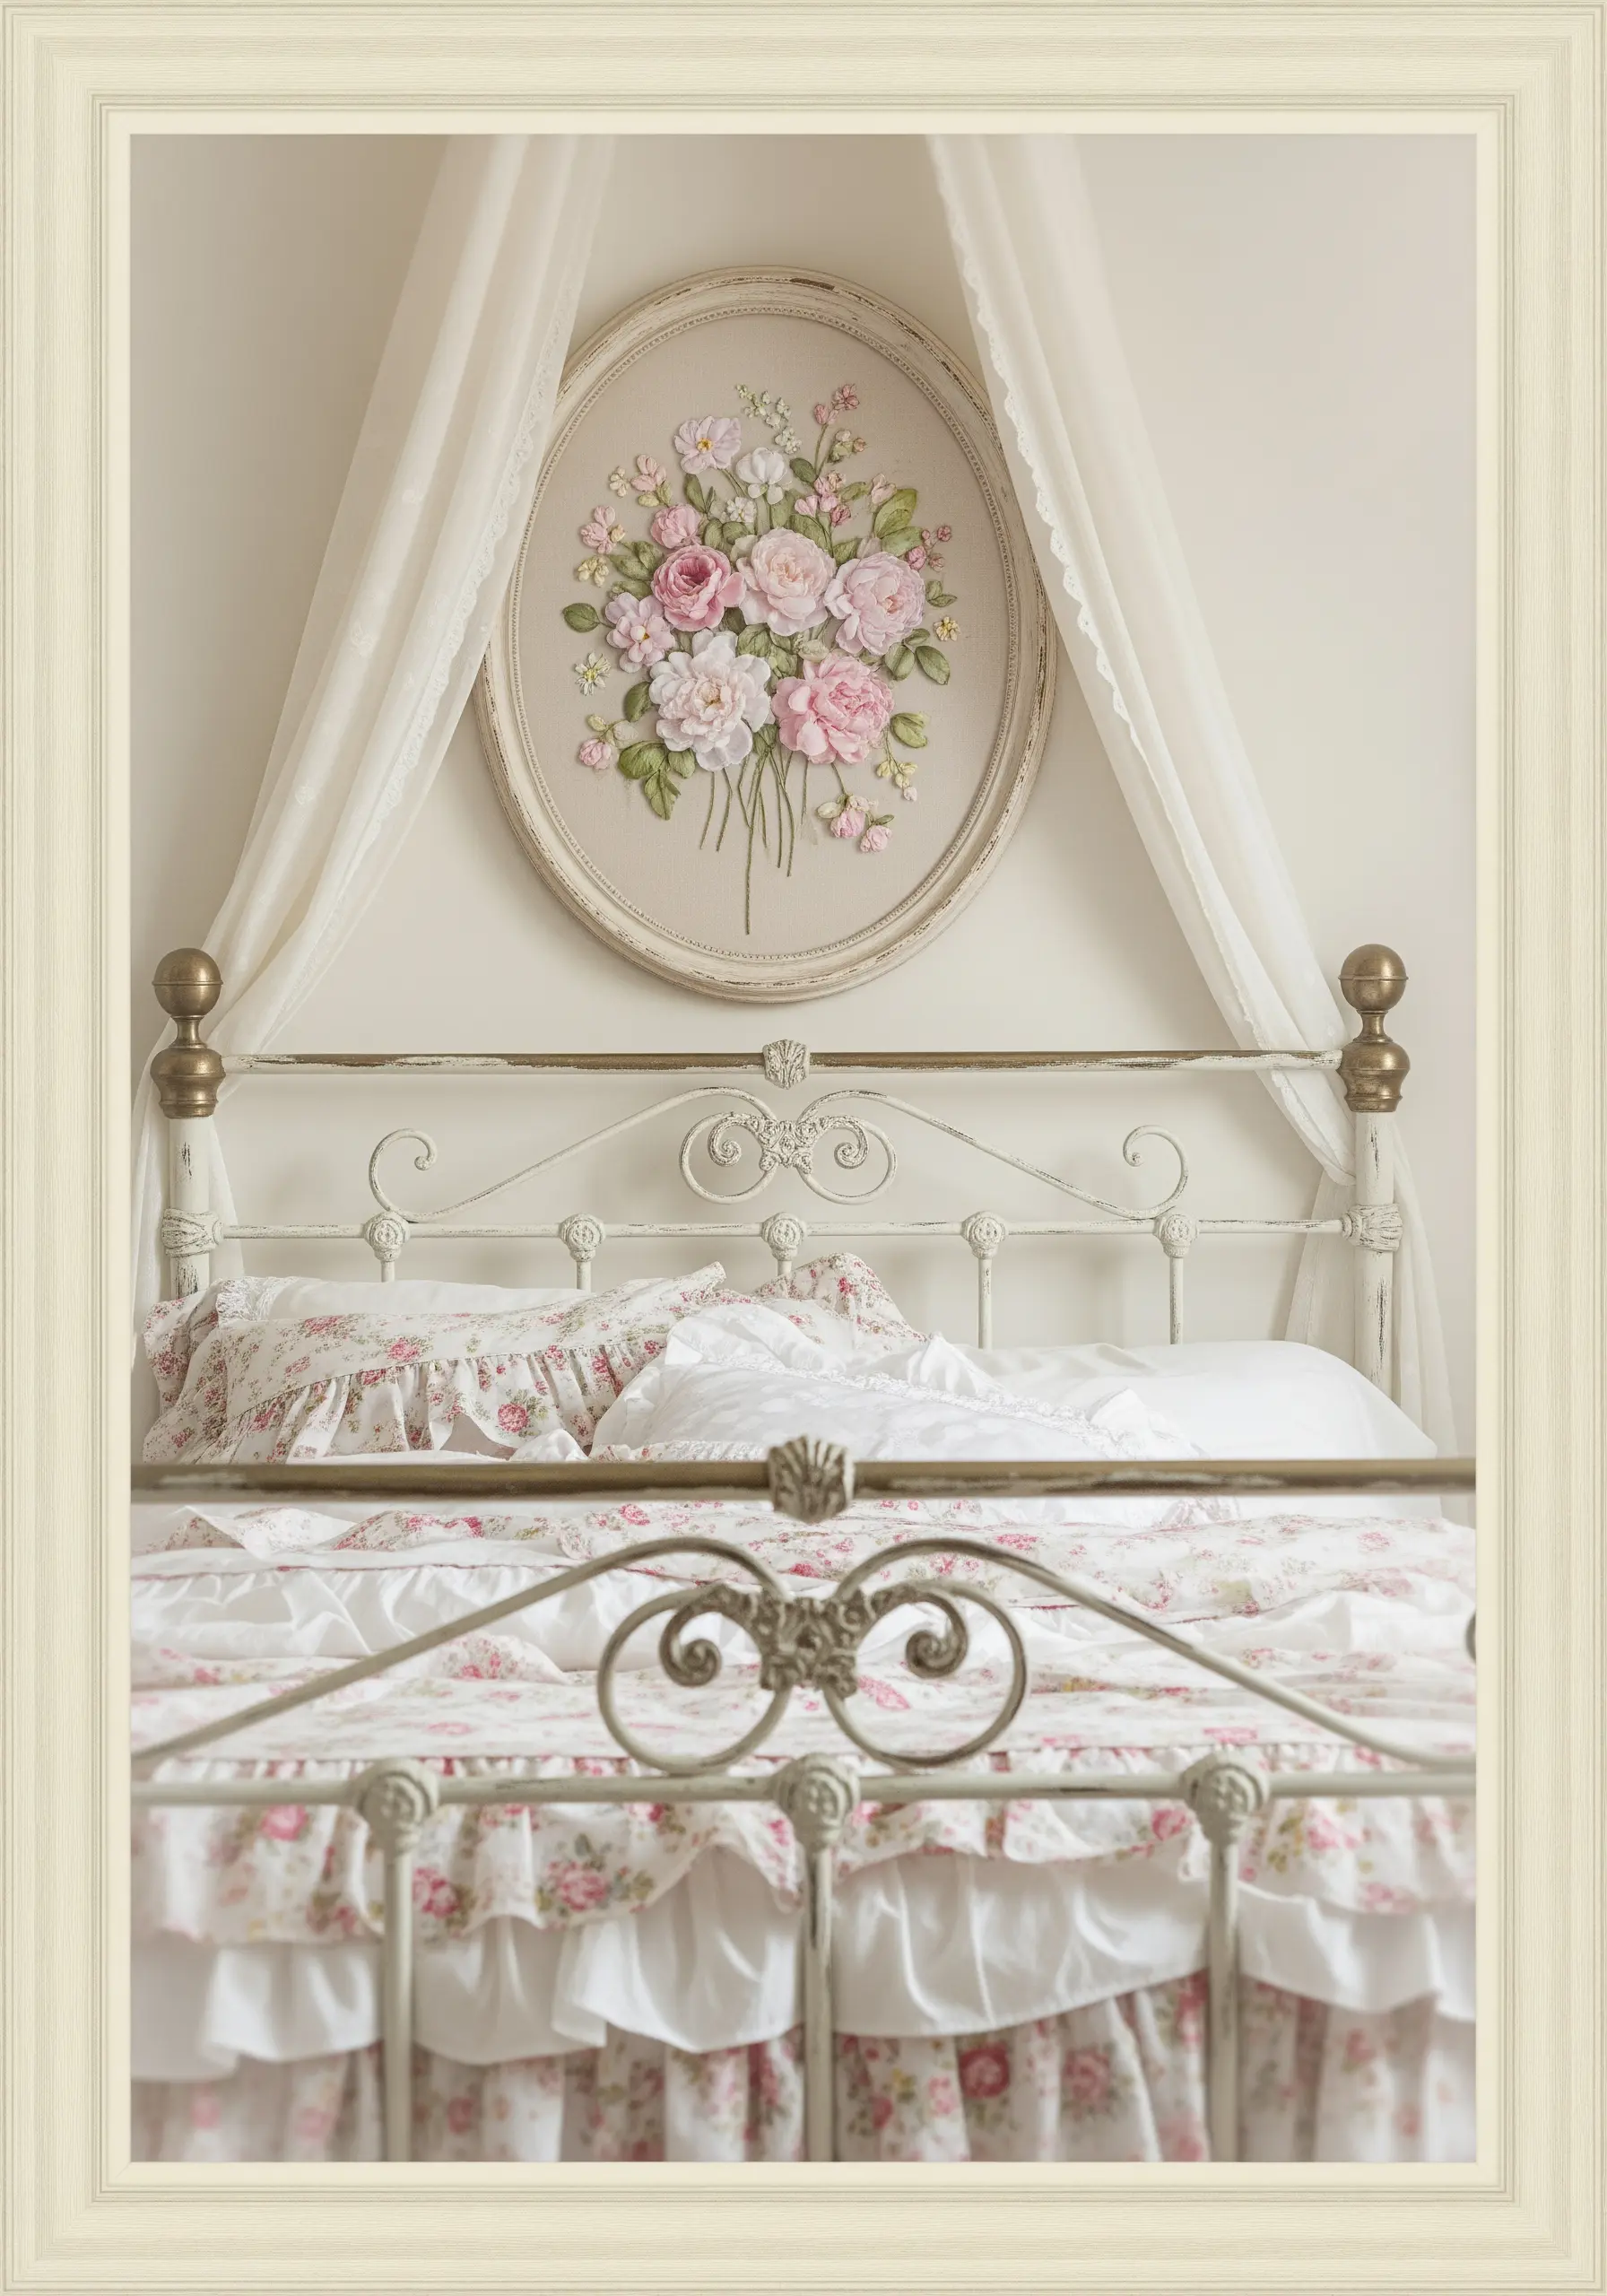
Create lush, full-petaled roses with the woven wheel stitch—it looks complex but is surprisingly simple.
Start by making a star of five or seven straight stitches, then weave your thread over and under each spoke until the shape is filled.
For a softer, more romantic look, use silk ribbon instead of standard floss; its width fills the rose faster and adds a beautiful sheen.
Pair your dimensional roses with delicate French knot baby’s breath and satin stitch leaves to complete the bouquet.
Displaying your work in a vintage-style oval frame enhances the classic, heirloom quality of these romantic rose embroidery designs.
12. Create Sculptural Art by Couching Thick Yarn
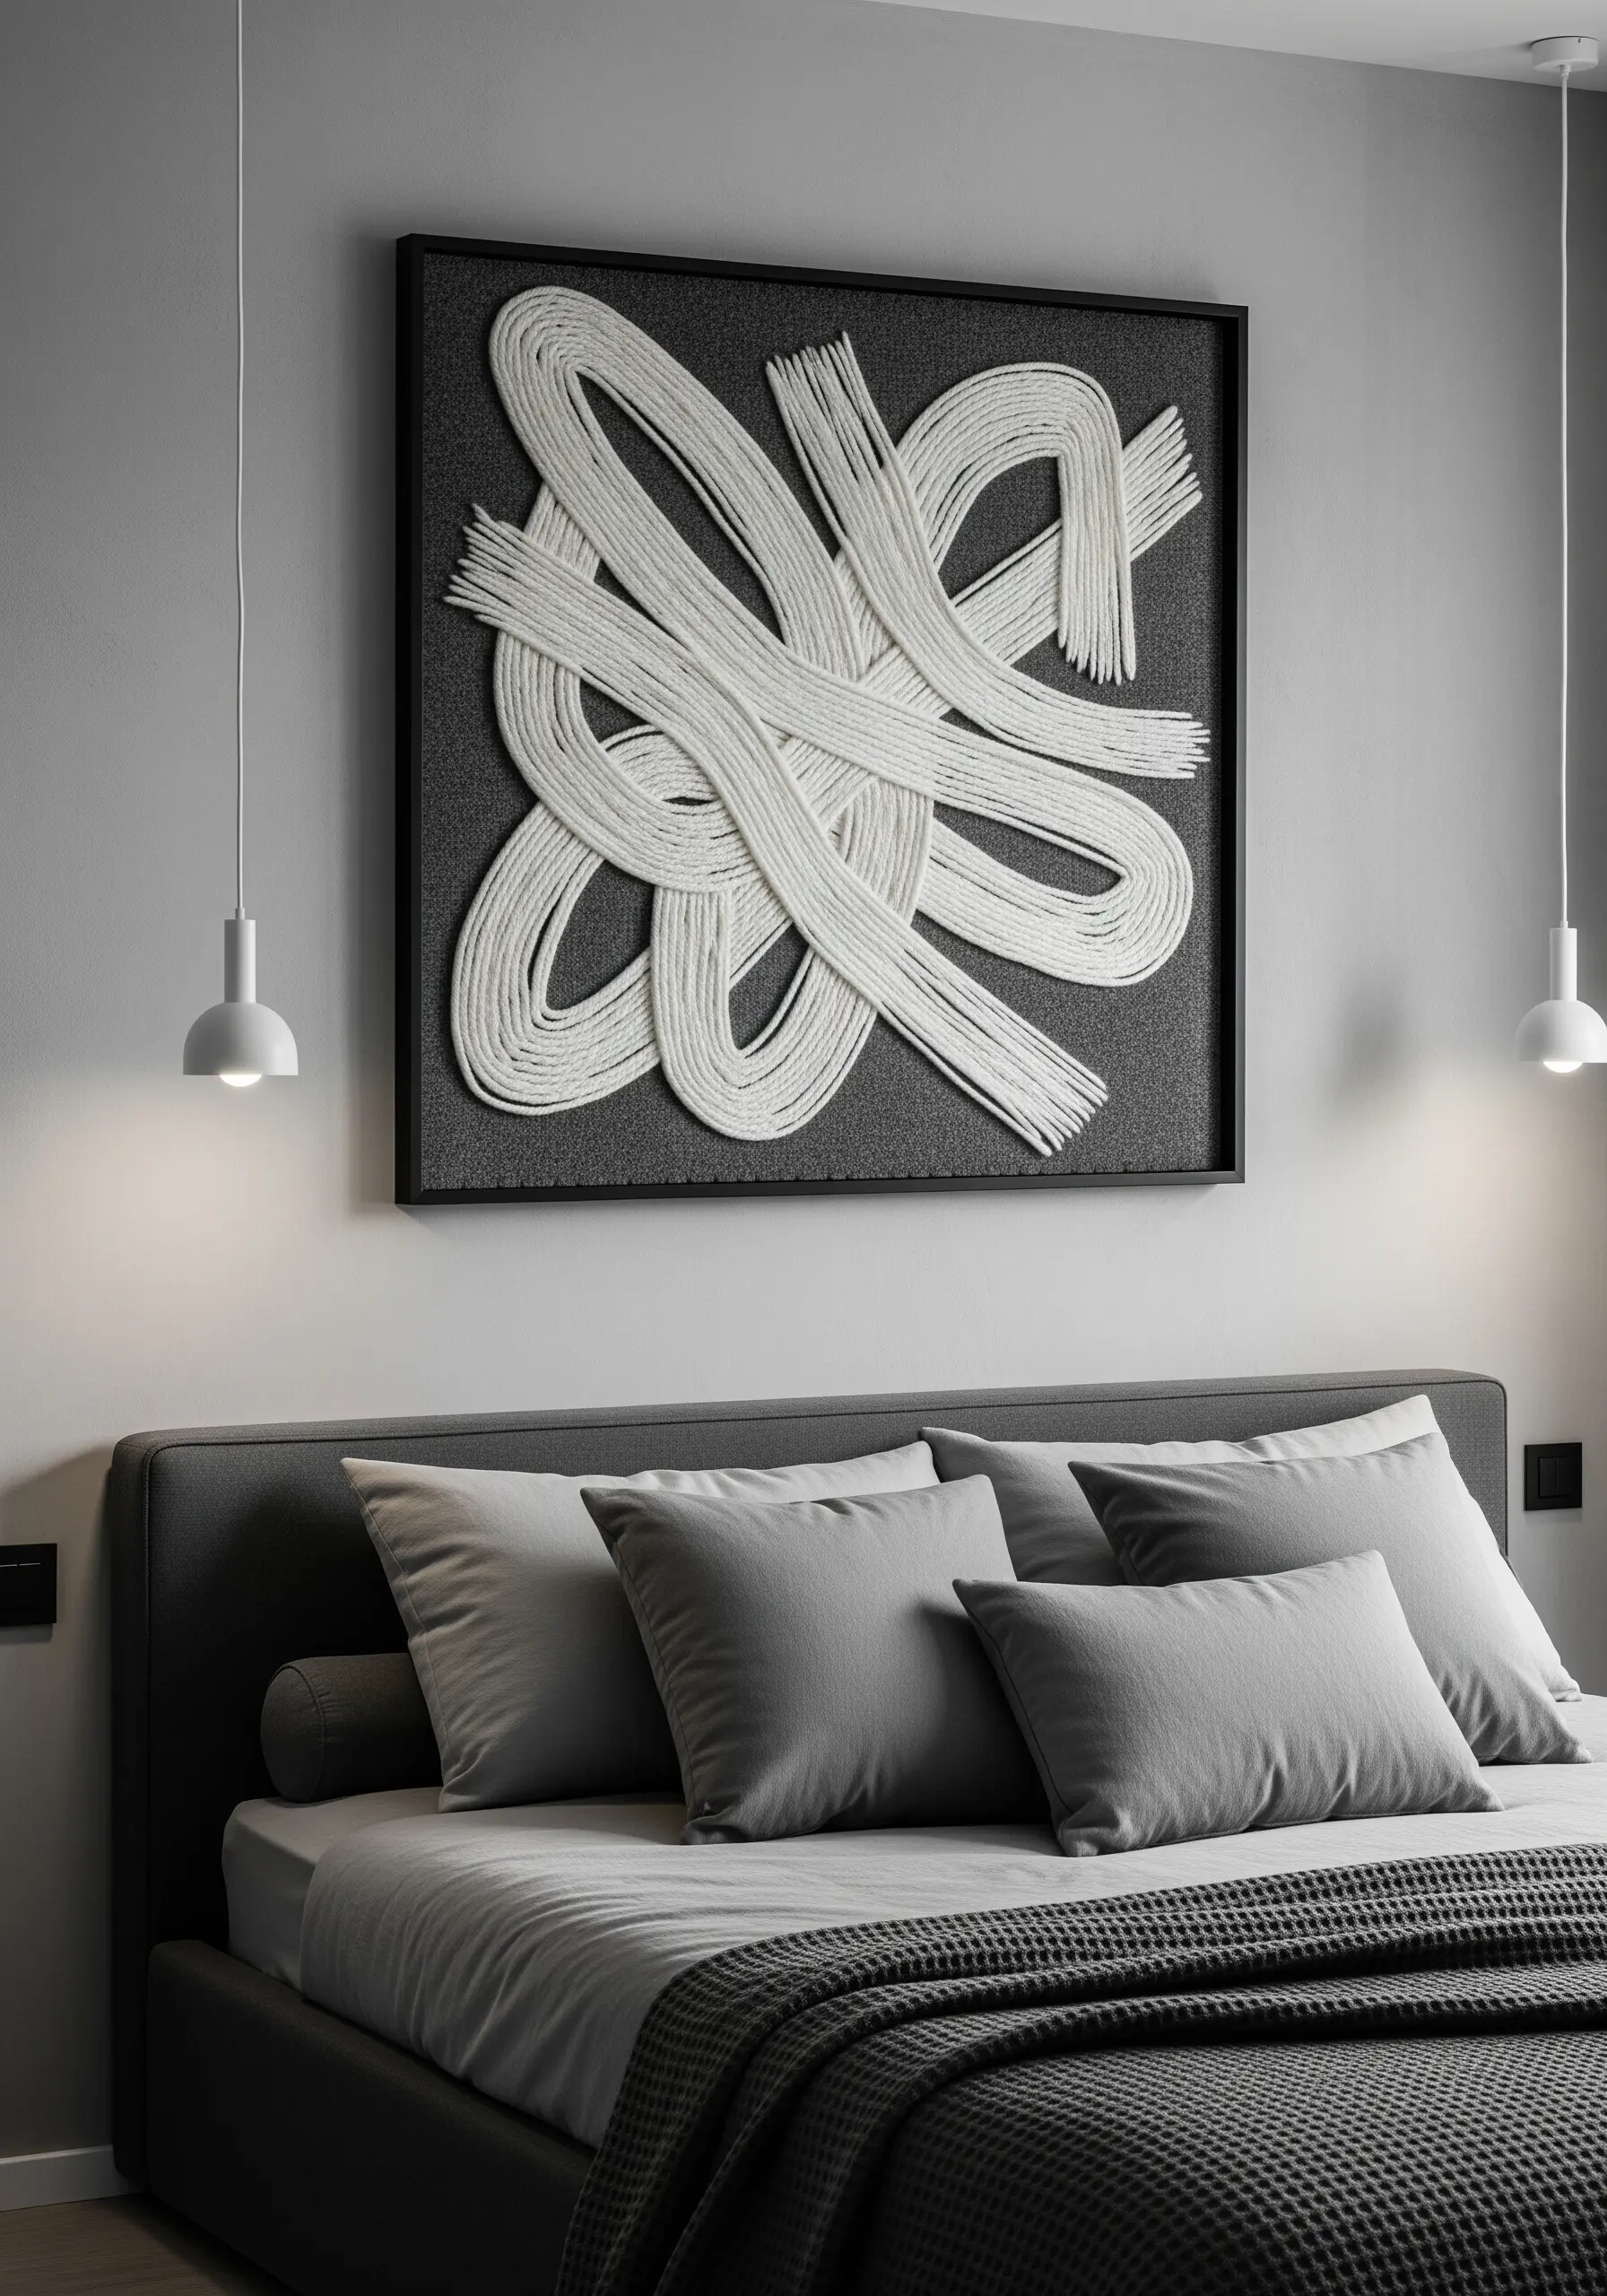
Move beyond traditional stitches and treat your thread as a sculptural element.
This high-impact abstract piece is made by couching thick yarn, roving, or even soft rope onto a fabric base.
Lay your thick fiber onto the fabric in a fluid, calligraphic shape. Then, using a regular, thinner sewing thread, make small, discreet stitches over the yarn to tack it into place.
The contrast between the chunky, textural yarn and the dark, flat background creates a powerful statement with minimal effort.
This is a fast and effective way to create large, dramatic embroidered textile wall hangings.
13. Imply a Landscape with Minimalist Running Stitches
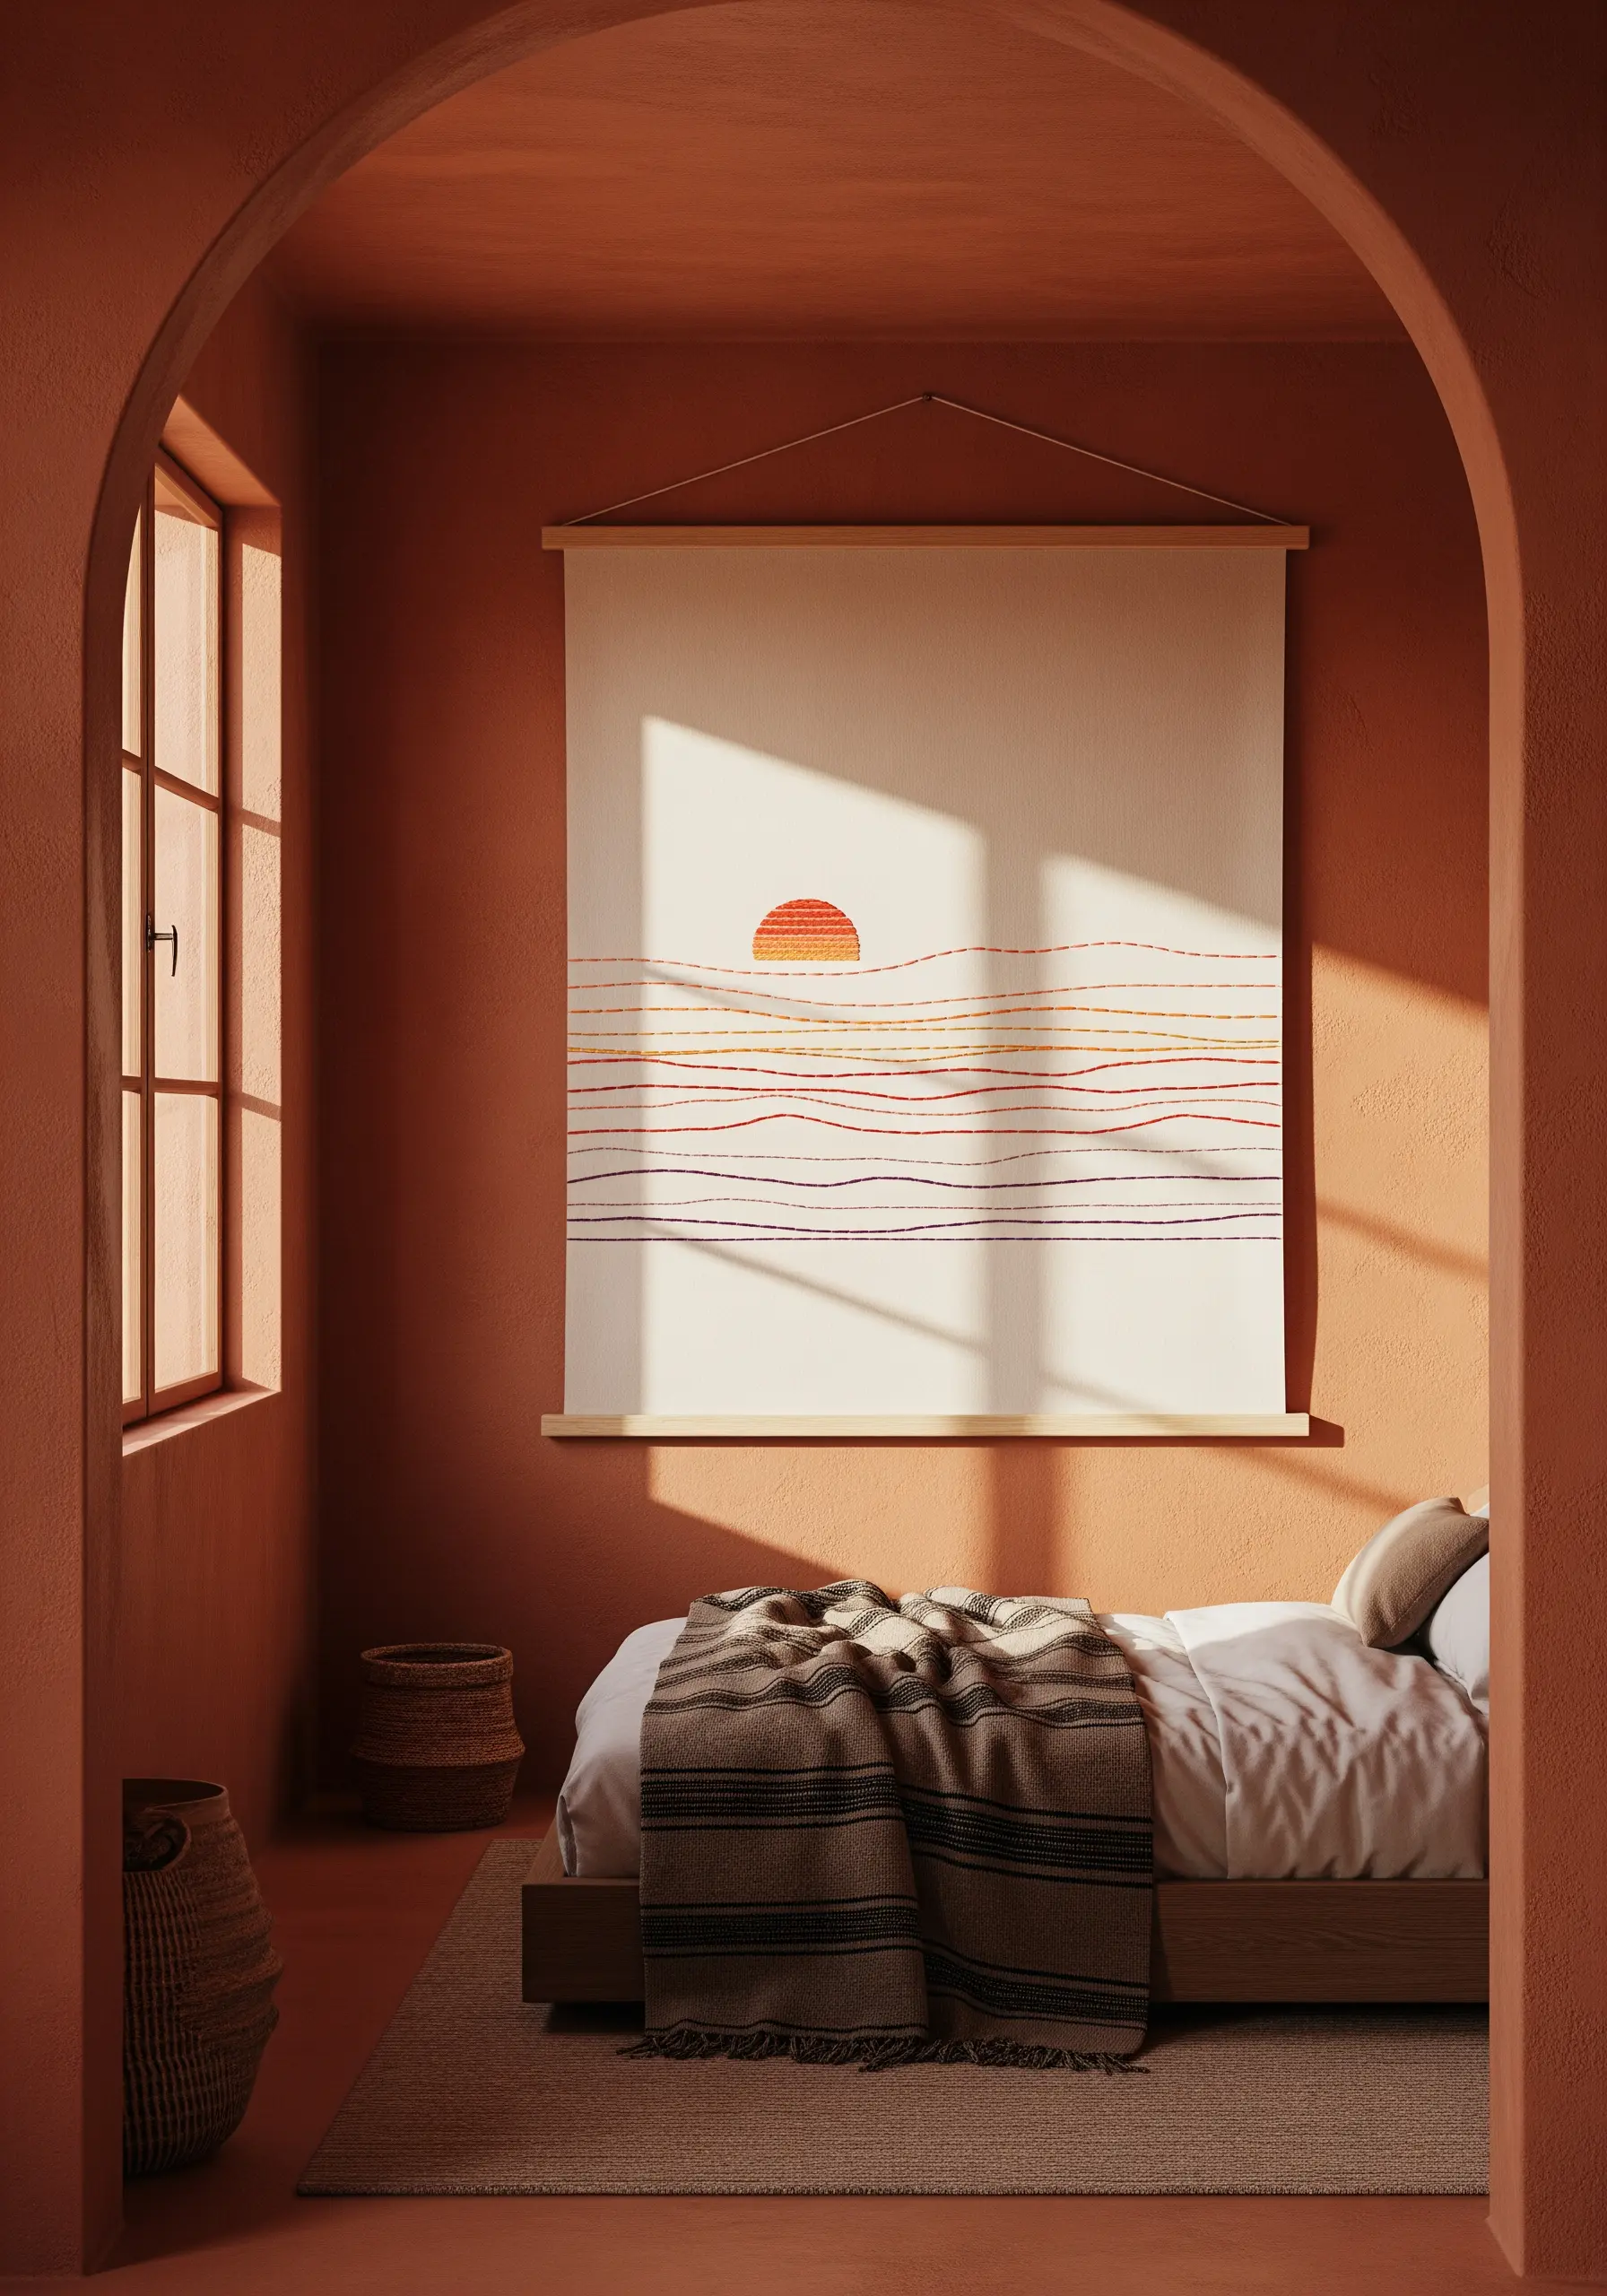
Suggest a serene sunset or horizon with the simplest stitch of all: the running stitch.
Use multiple strands of thread in a warm, analogous color palette—like ochre, rust, and deep red—to create wavy, imperfect lines across the fabric.
The beauty of this technique is its imperfection. Vary the length of your stitches and the spacing between the lines to create a sense of organic movement.
The half-sun motif can be filled with a simple satin stitch, anchoring the piece and providing a clear focal point.
This approach proves that meaningful art is about thoughtful placement, not complexity.
14. Define Art Deco Style with Metallic Thread
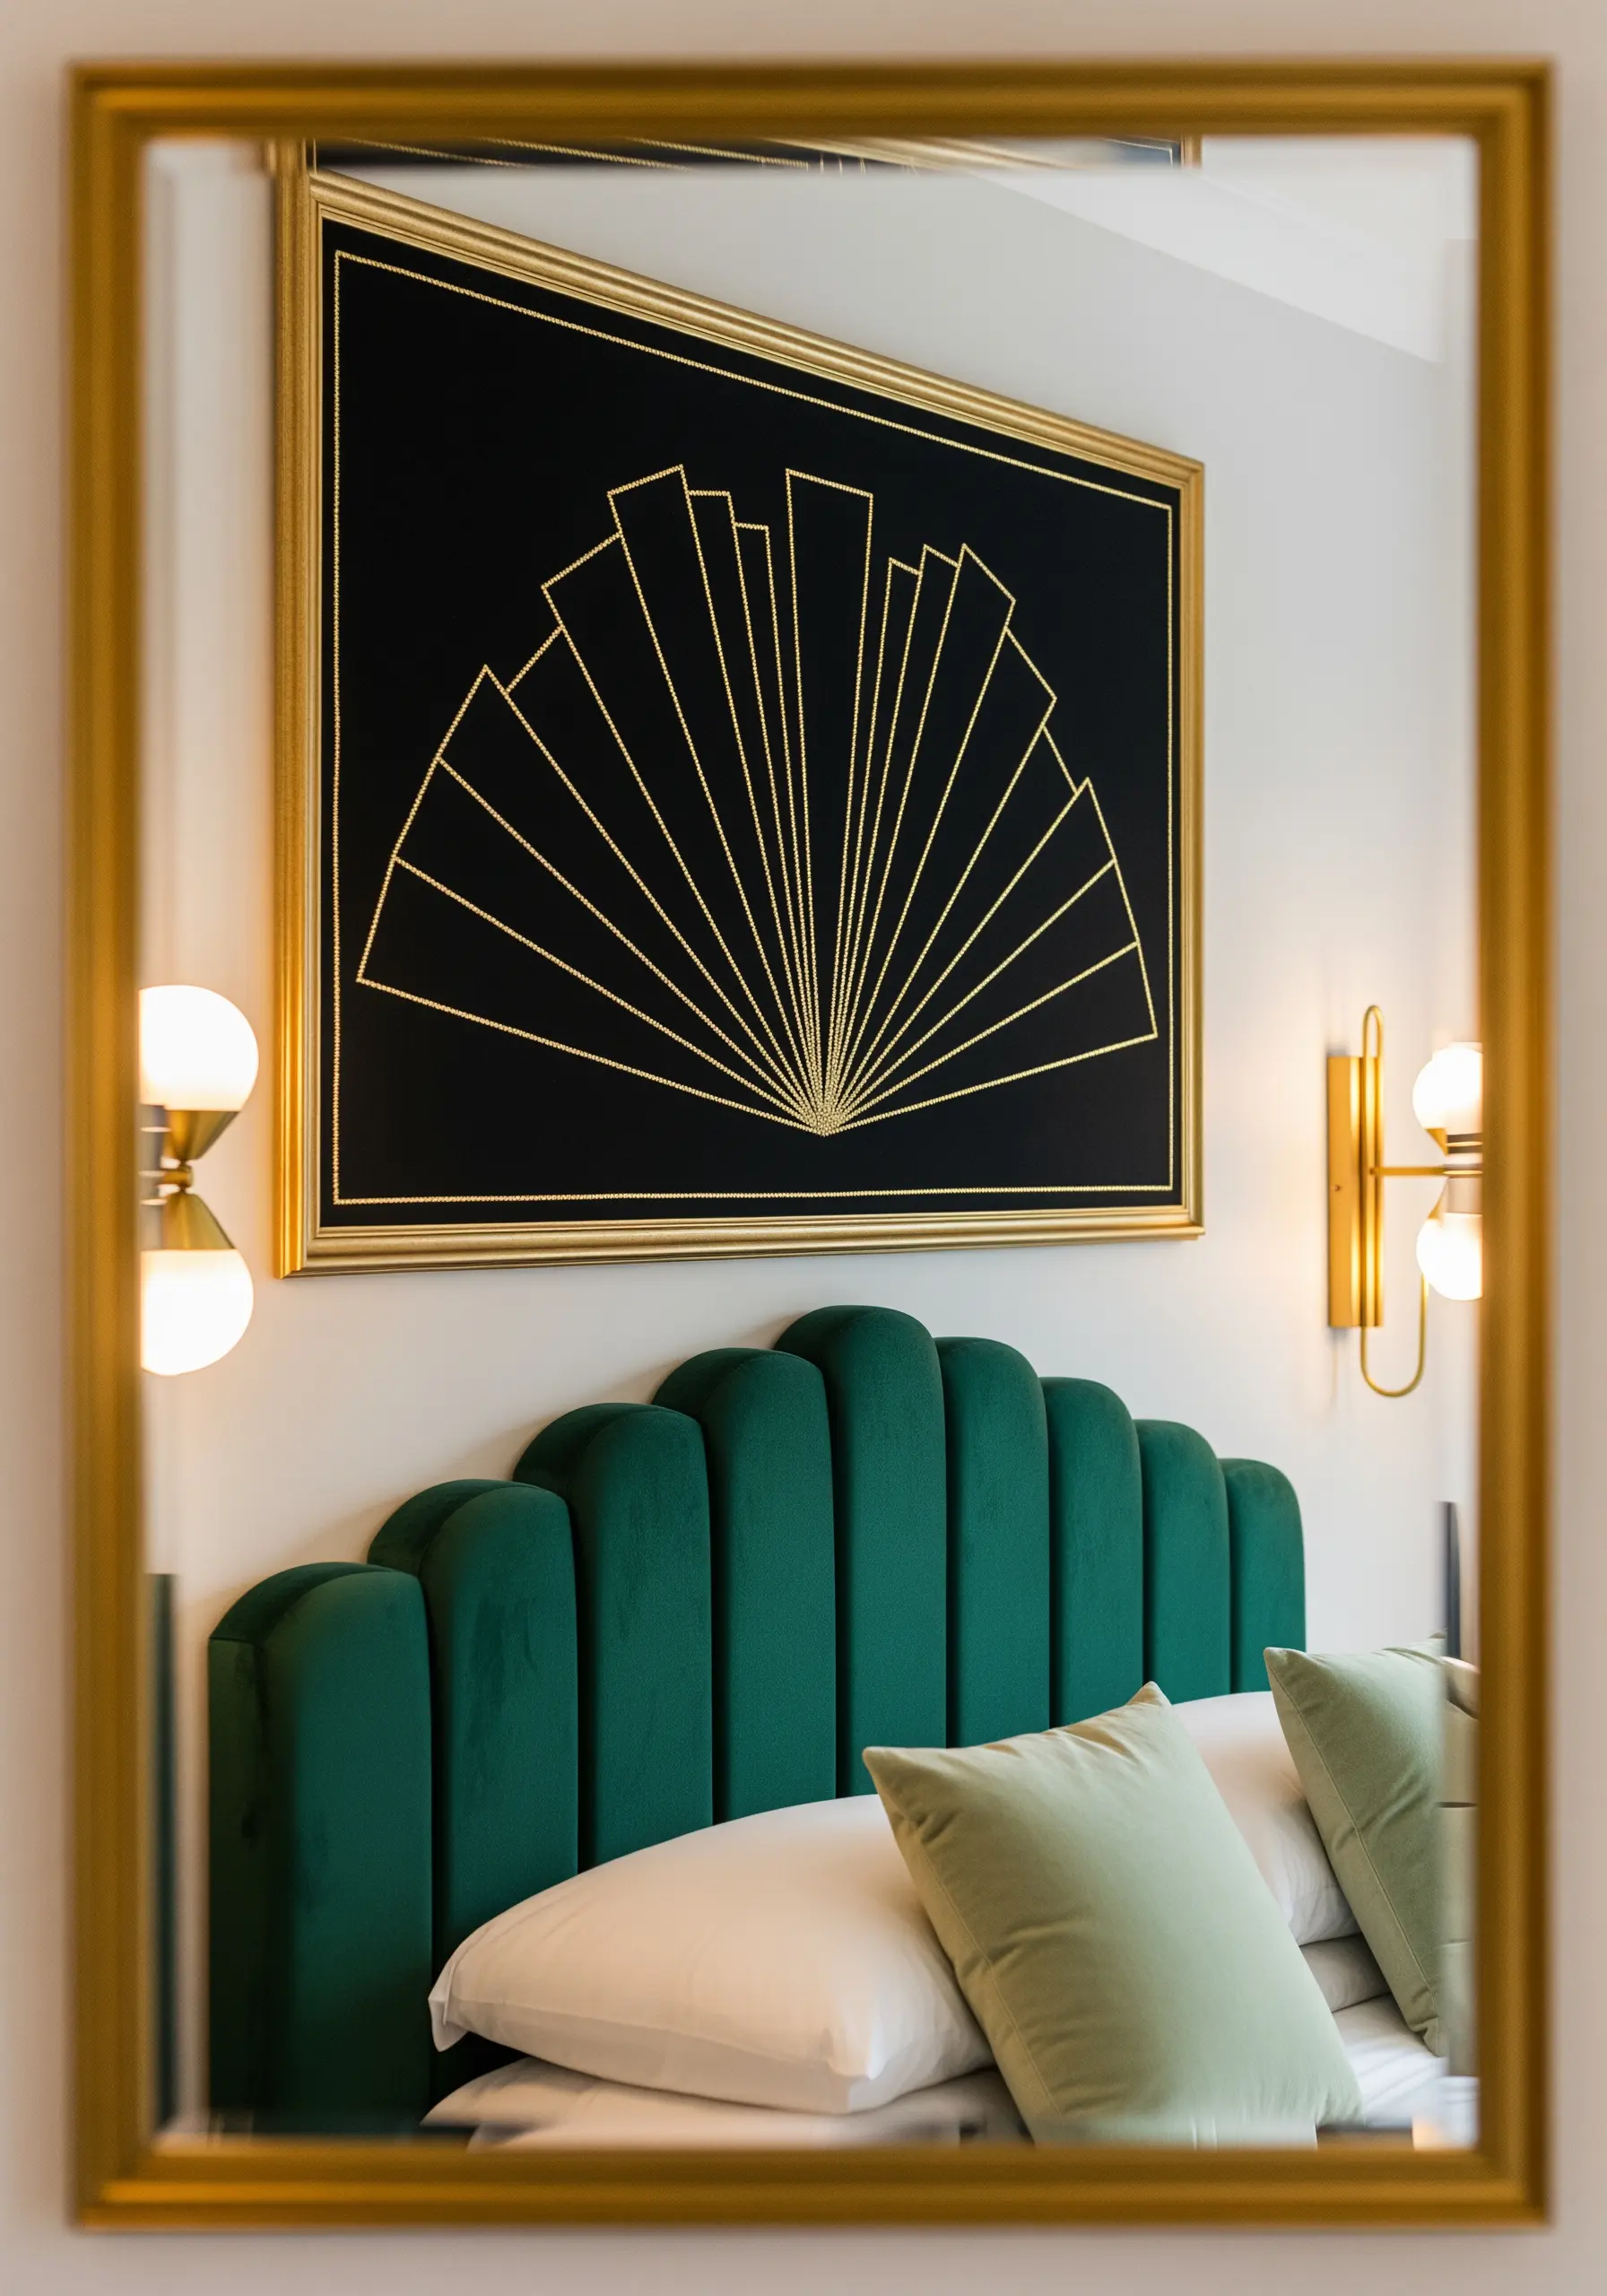
Capture the glamour of the Art Deco era with bold lines and high shine.
Use a gold metallic thread against a black or jewel-toned fabric for maximum impact.
To create perfectly straight, radiating lines, use a single, taut straight stitch for each one, securing it well on the back.
For longer lines, a couching stitch will work better to prevent sagging.
Always use a topstitch needle when working with metallic thread to reduce shredding and breakage.
These abstract metallic thread projects look stunning in a simple gold frame that echoes the design.
15. Elevate Simple Quotes with Perfect Script
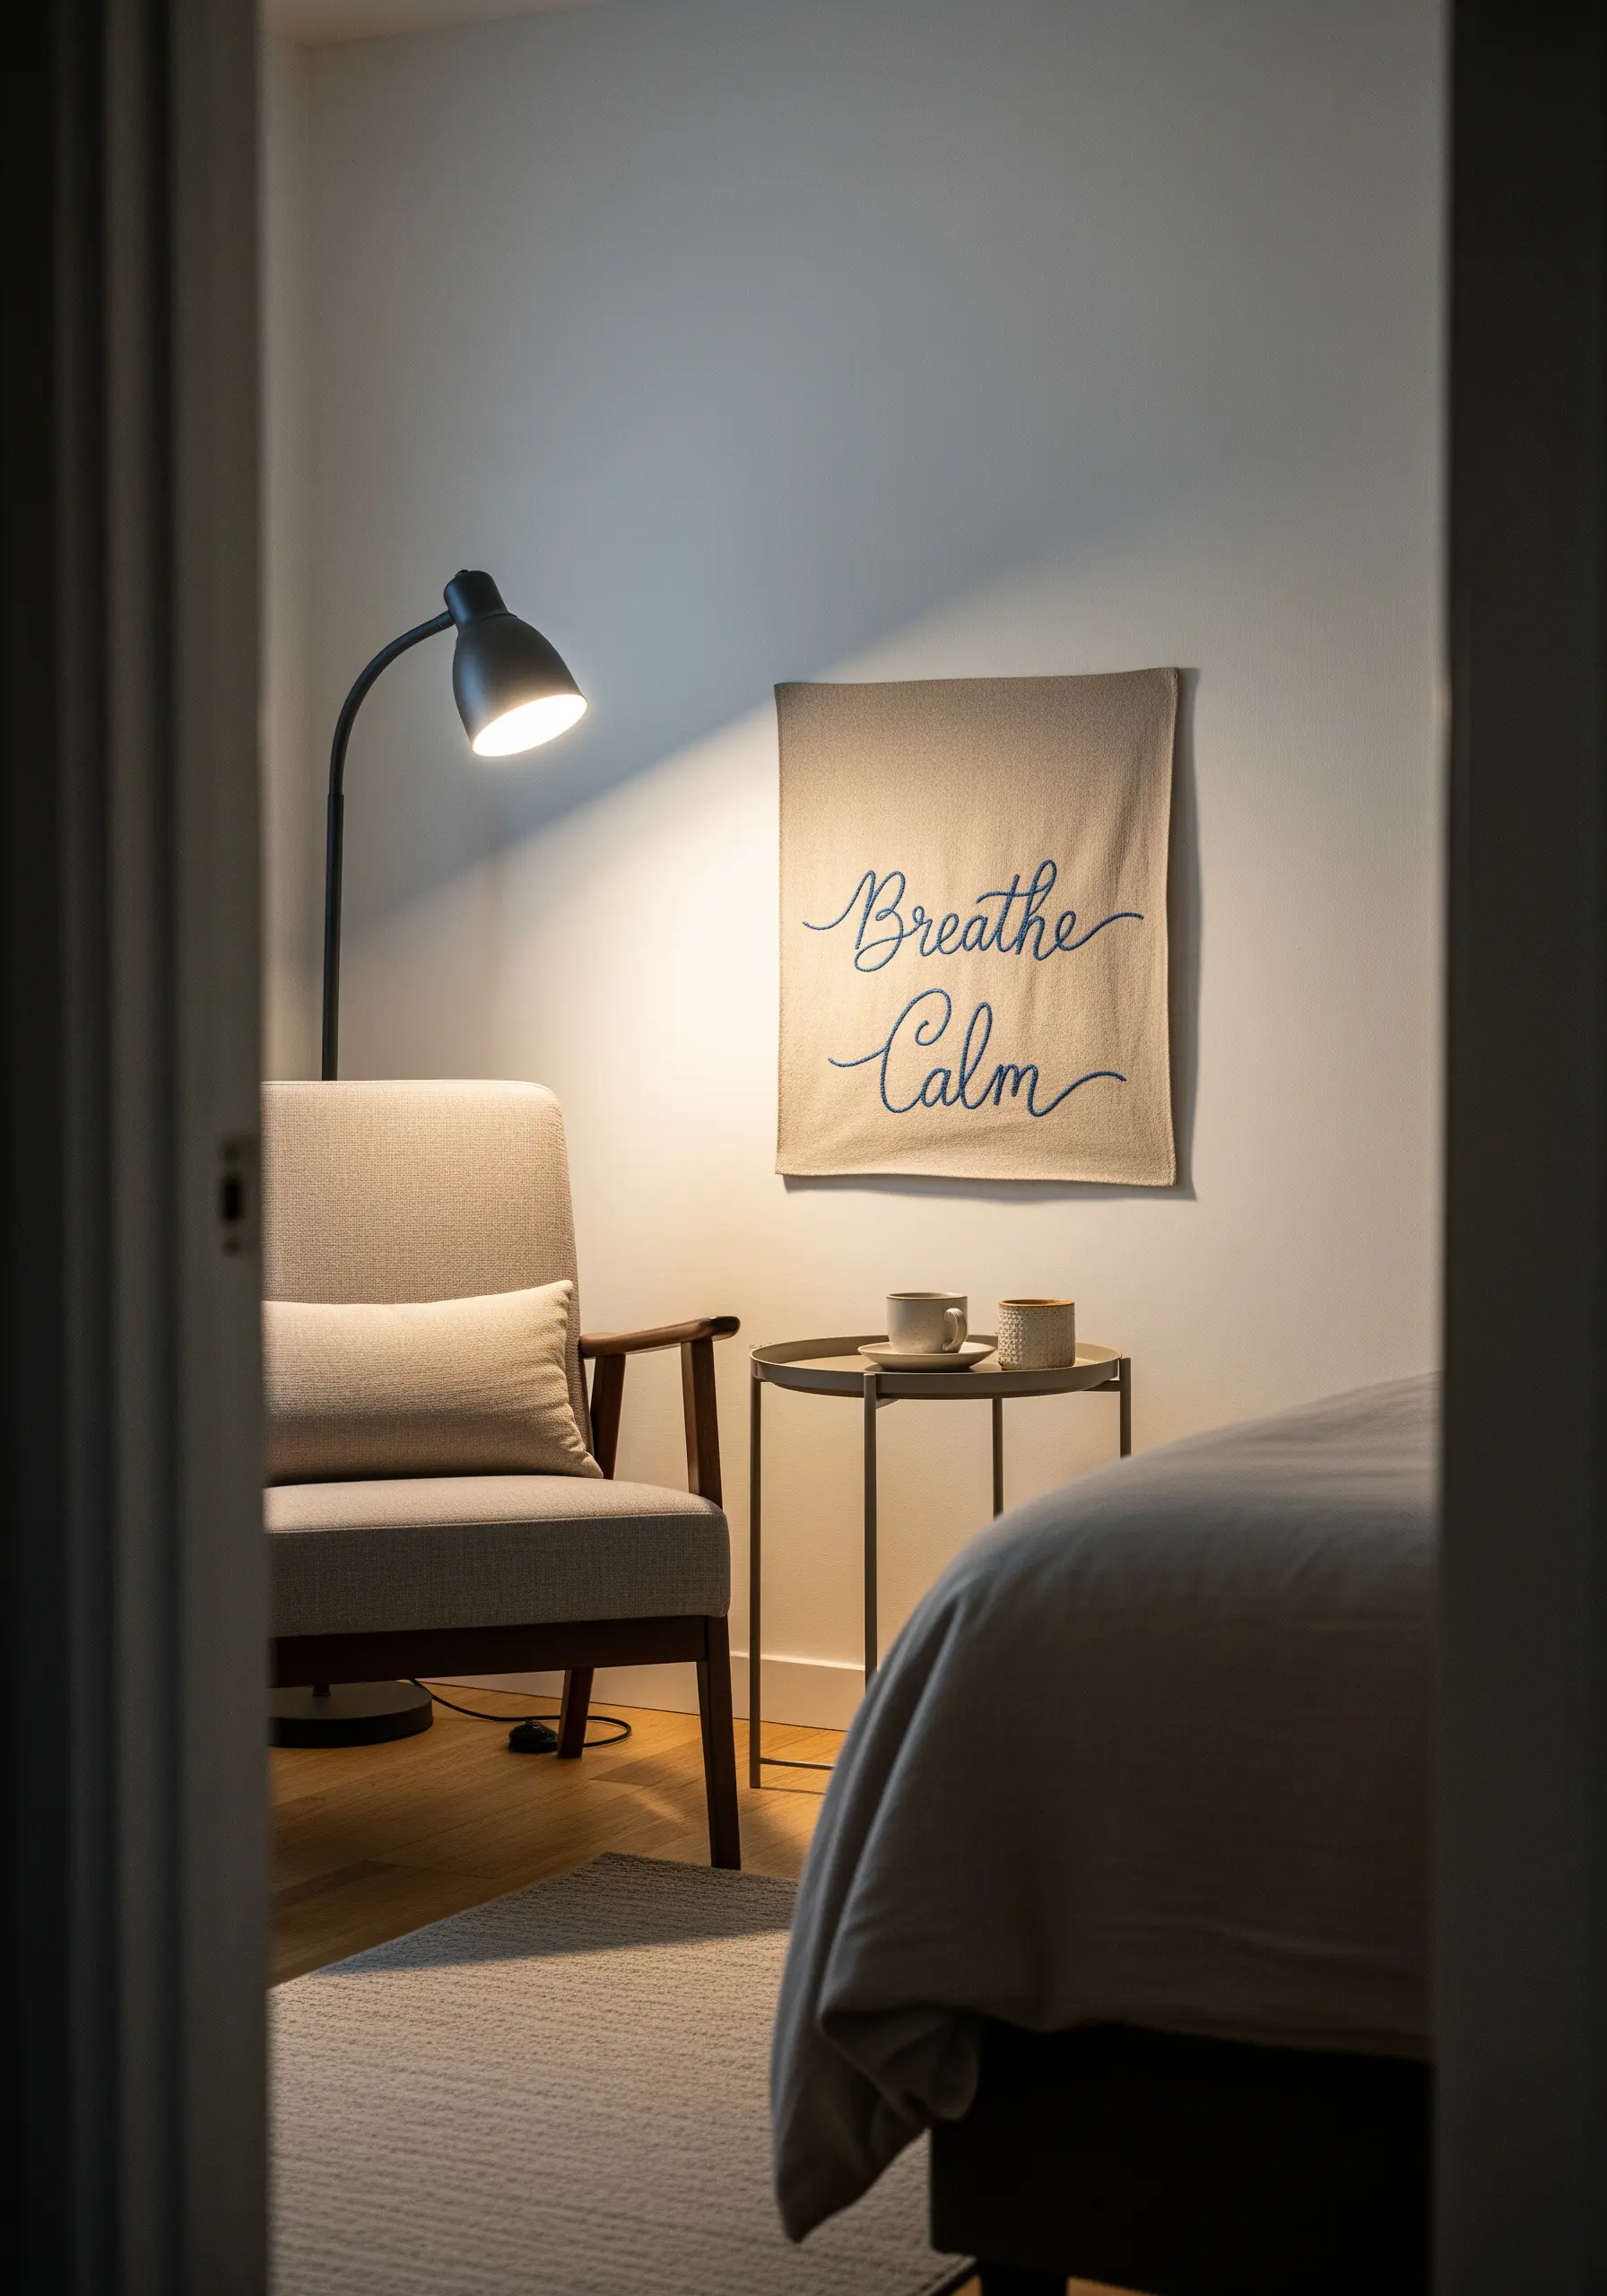
When embroidering text, clarity and flow are essential.
Transfer your chosen quote using a fine-tipped, water-soluble pen to ensure every curve is accurate.
For a smooth, calligraphic look, use a whipped backstitch or a tight stem stitch with 3-4 strands of floss.
The key is consistent tension, especially around loops and curves, to avoid pulling the fabric or creating wobbly letters.
Choose a thread color with enough contrast to be easily readable against your fabric, creating a piece that is both beautiful and inspiring.
Displaying framed embroidery ideas like this adds a personal, intentional touch to any quiet corner.
16. Design a Cascading Vertical Botanical
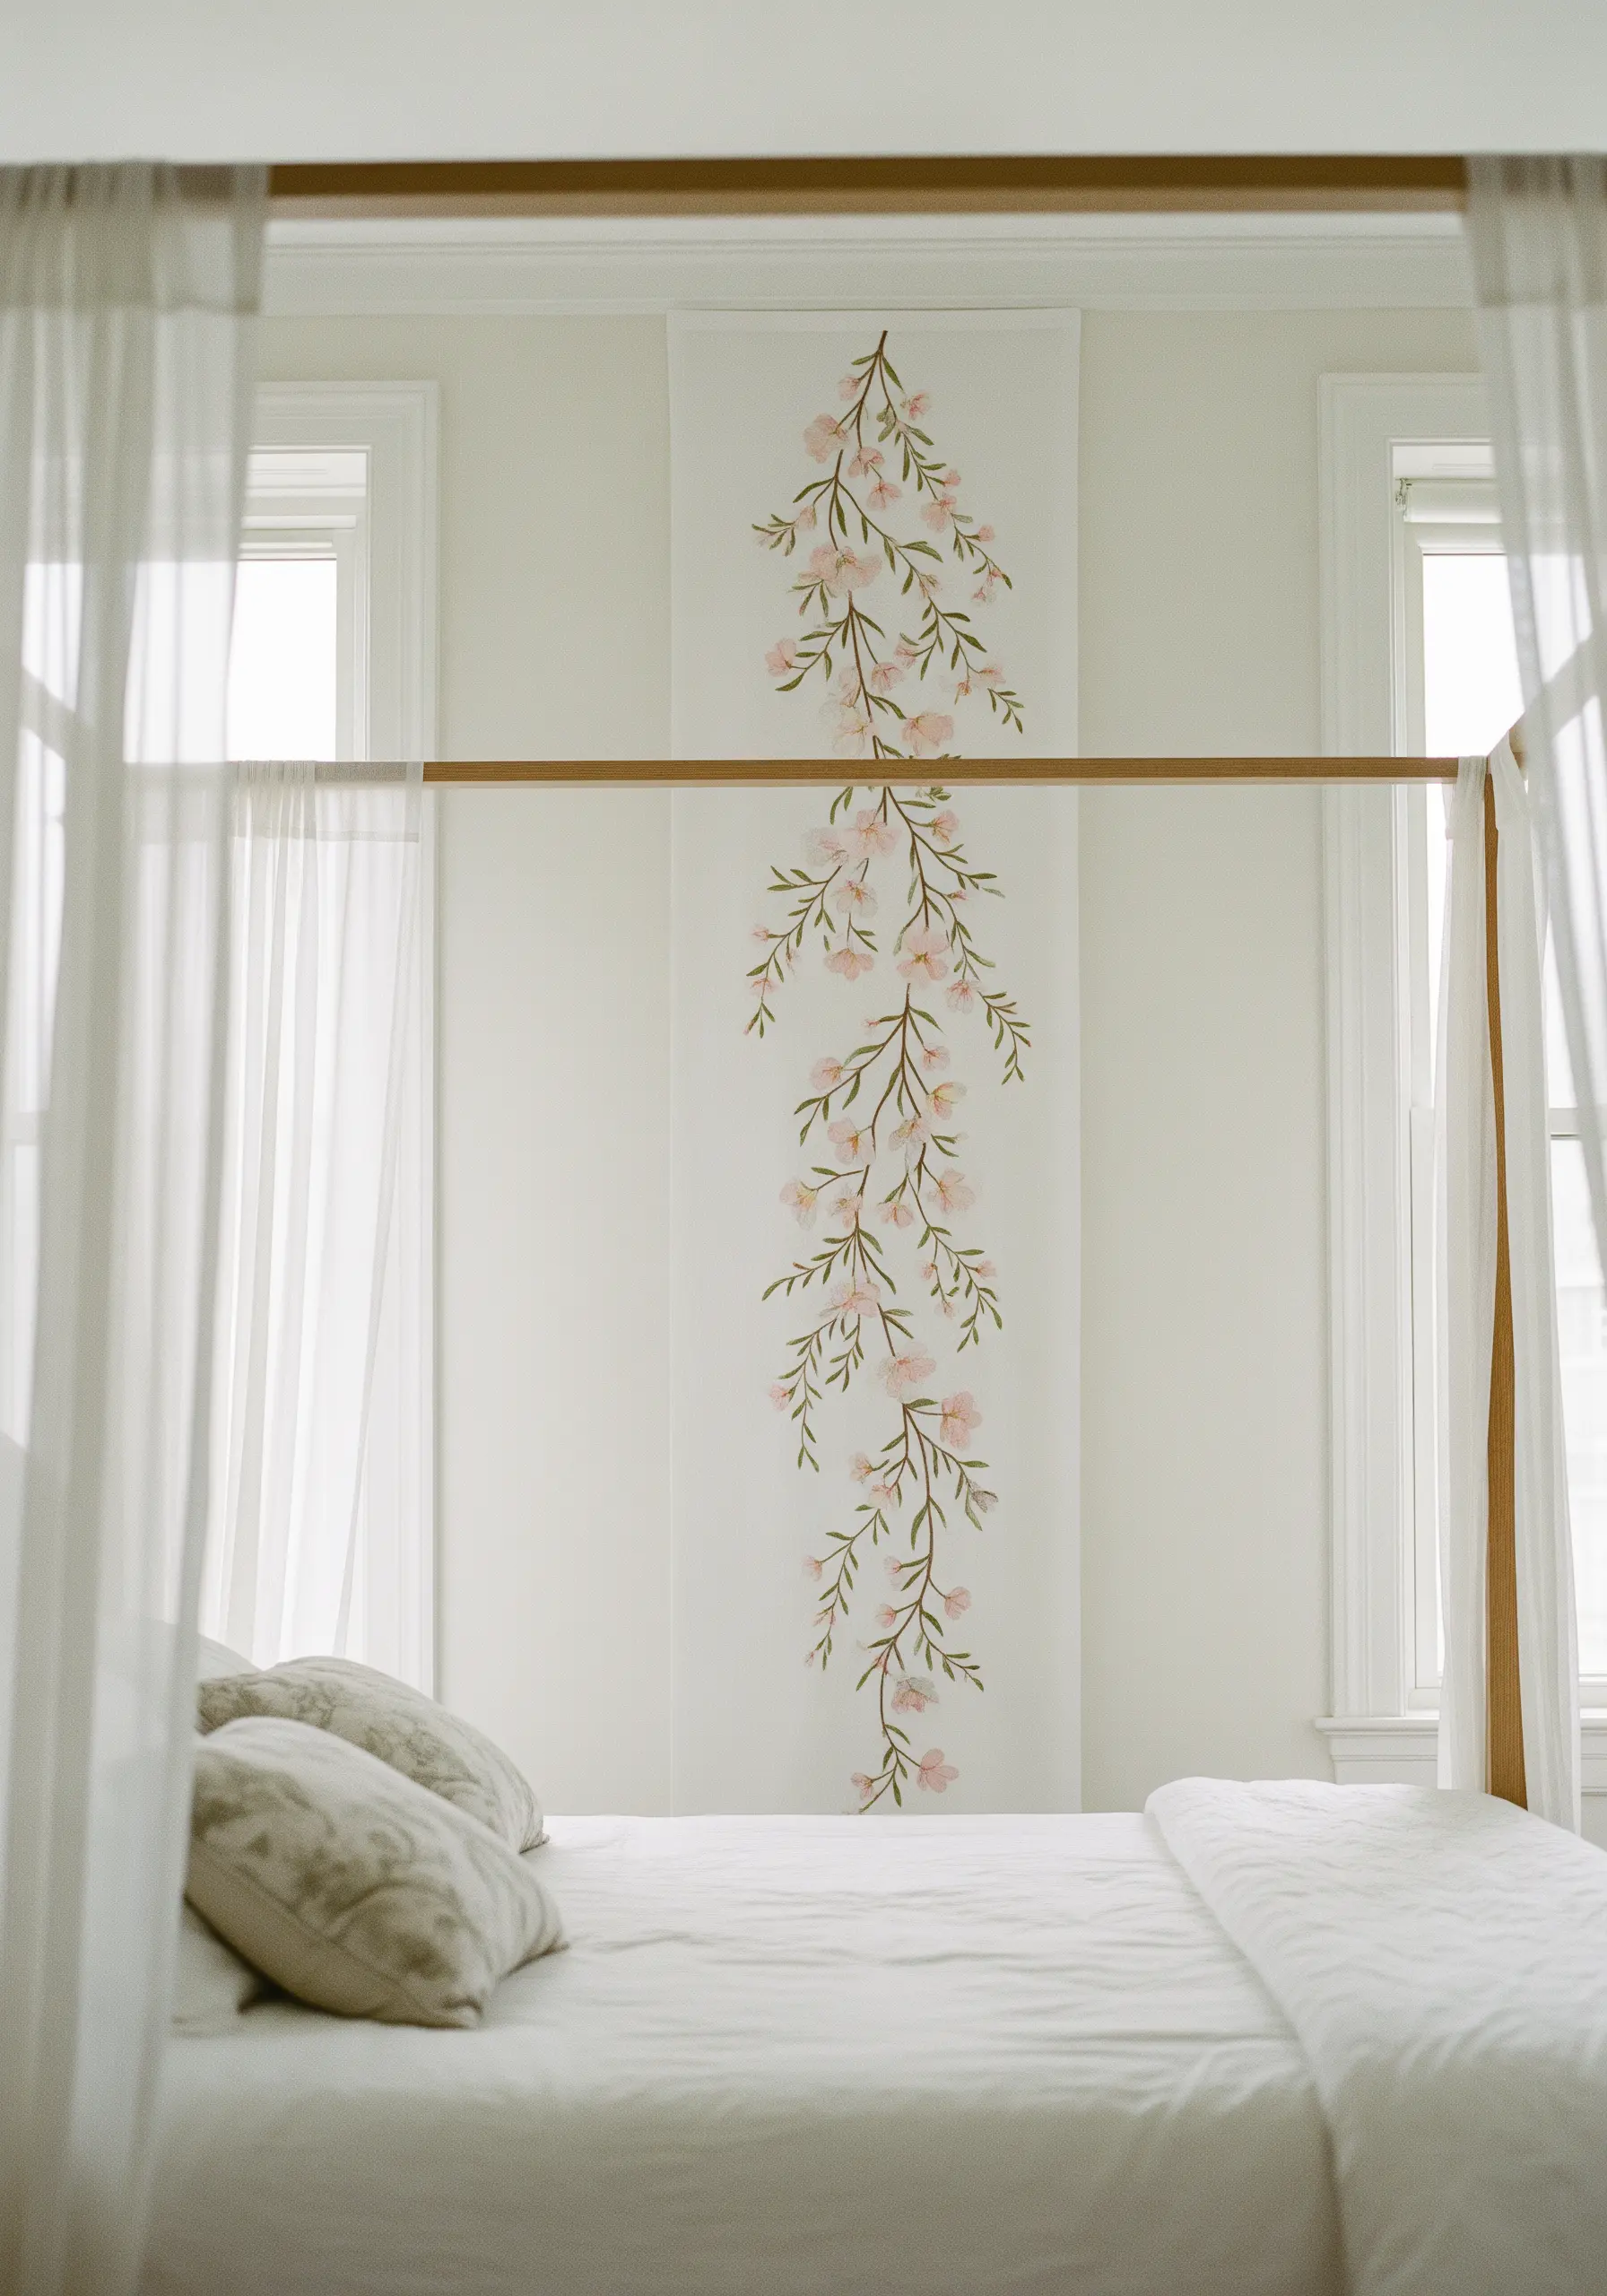
Break away from the traditional hoop format with a vertical wall hanging.
This design creates a sense of elegance and height, perfect for narrow walls or spaces between windows.
Use a delicate stem stitch for the winding branches to give them a natural, flowing appearance.
The blossoms can be created with simple lazy daisy stitches or satin-stitched petals for a soft, painterly effect.
Work on a long panel of linen or cotton and finish the top and bottom with a simple dowel for a clean, modern display.
17. Build Dimension with Punch Needle and Yarn
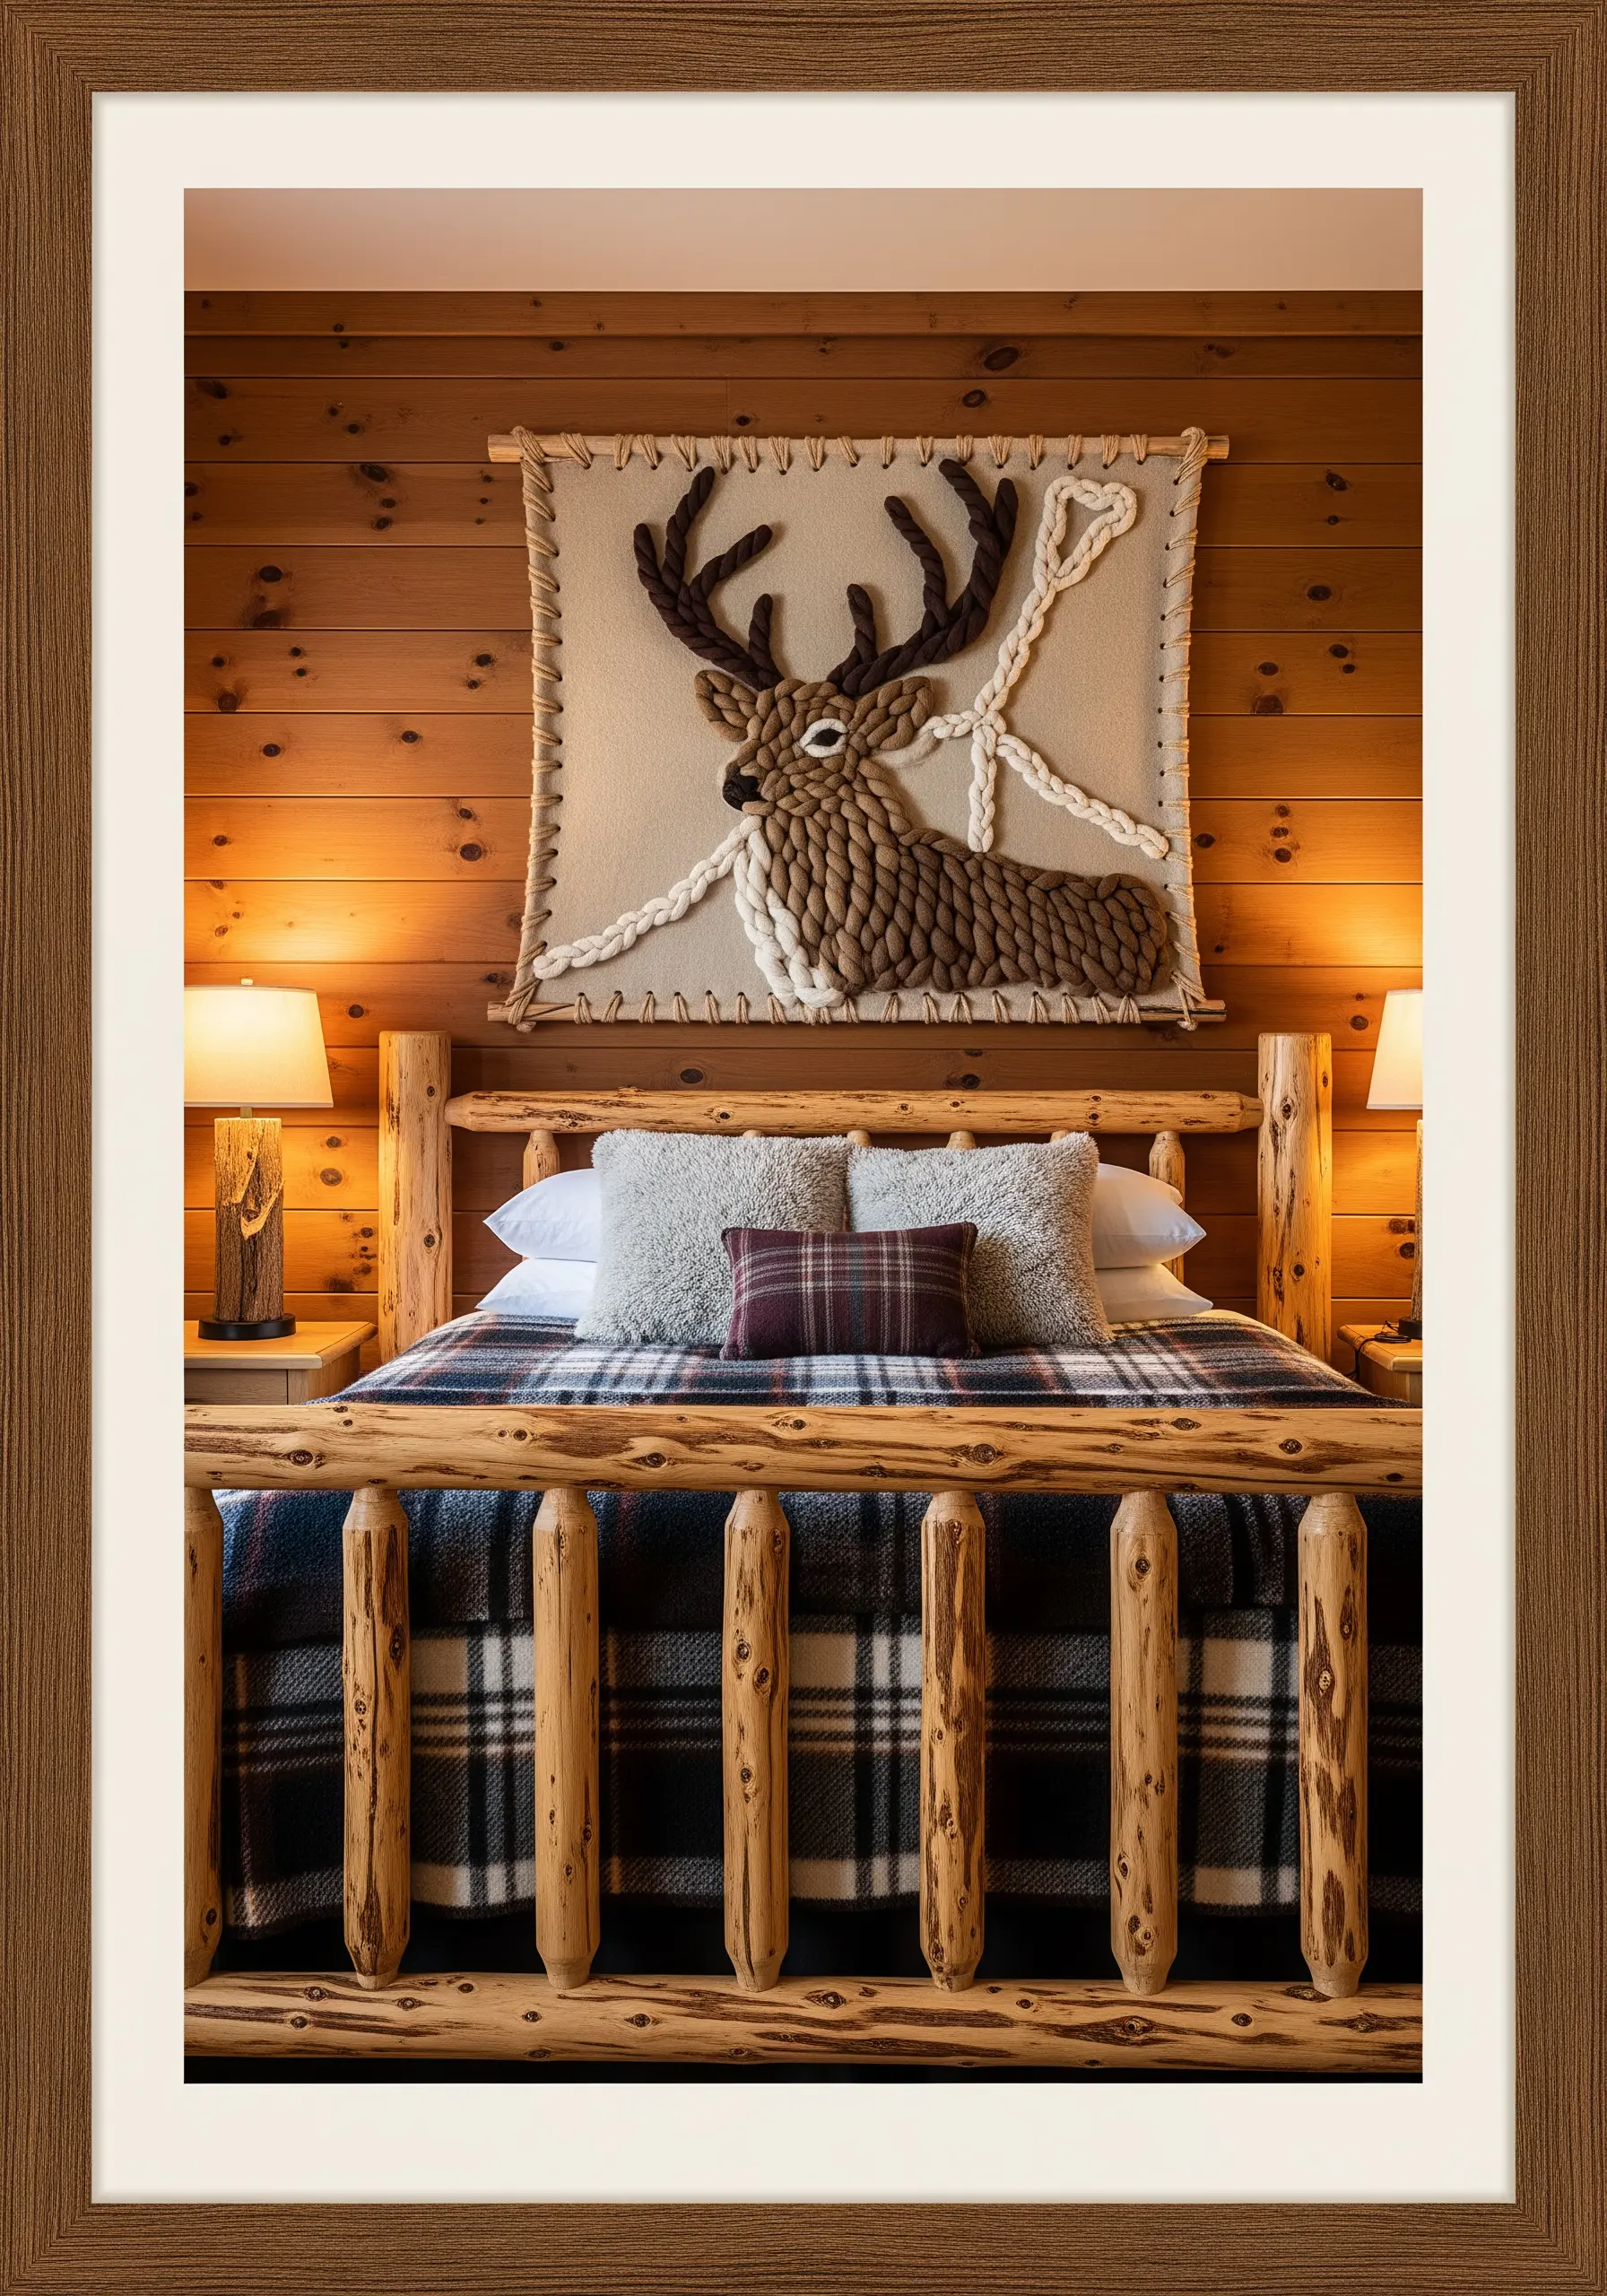
For a highly tactile, three-dimensional effect, explore punch needle embroidery.
This technique uses a special tool to create loops of yarn on the fabric, resulting in a texture similar to a hooked rug.
Use different loop heights to create dimension—shorter loops for the stag’s face and longer, denser loops for its body.
For the boldest elements like the antlers, couch down thick cord or rope to make them stand out even more.
This method is perfect for rustic, cabin-inspired decor and creates yarn wall art that begs to be touched.
18. Channel Global Style with Suzani-Inspired Patterns
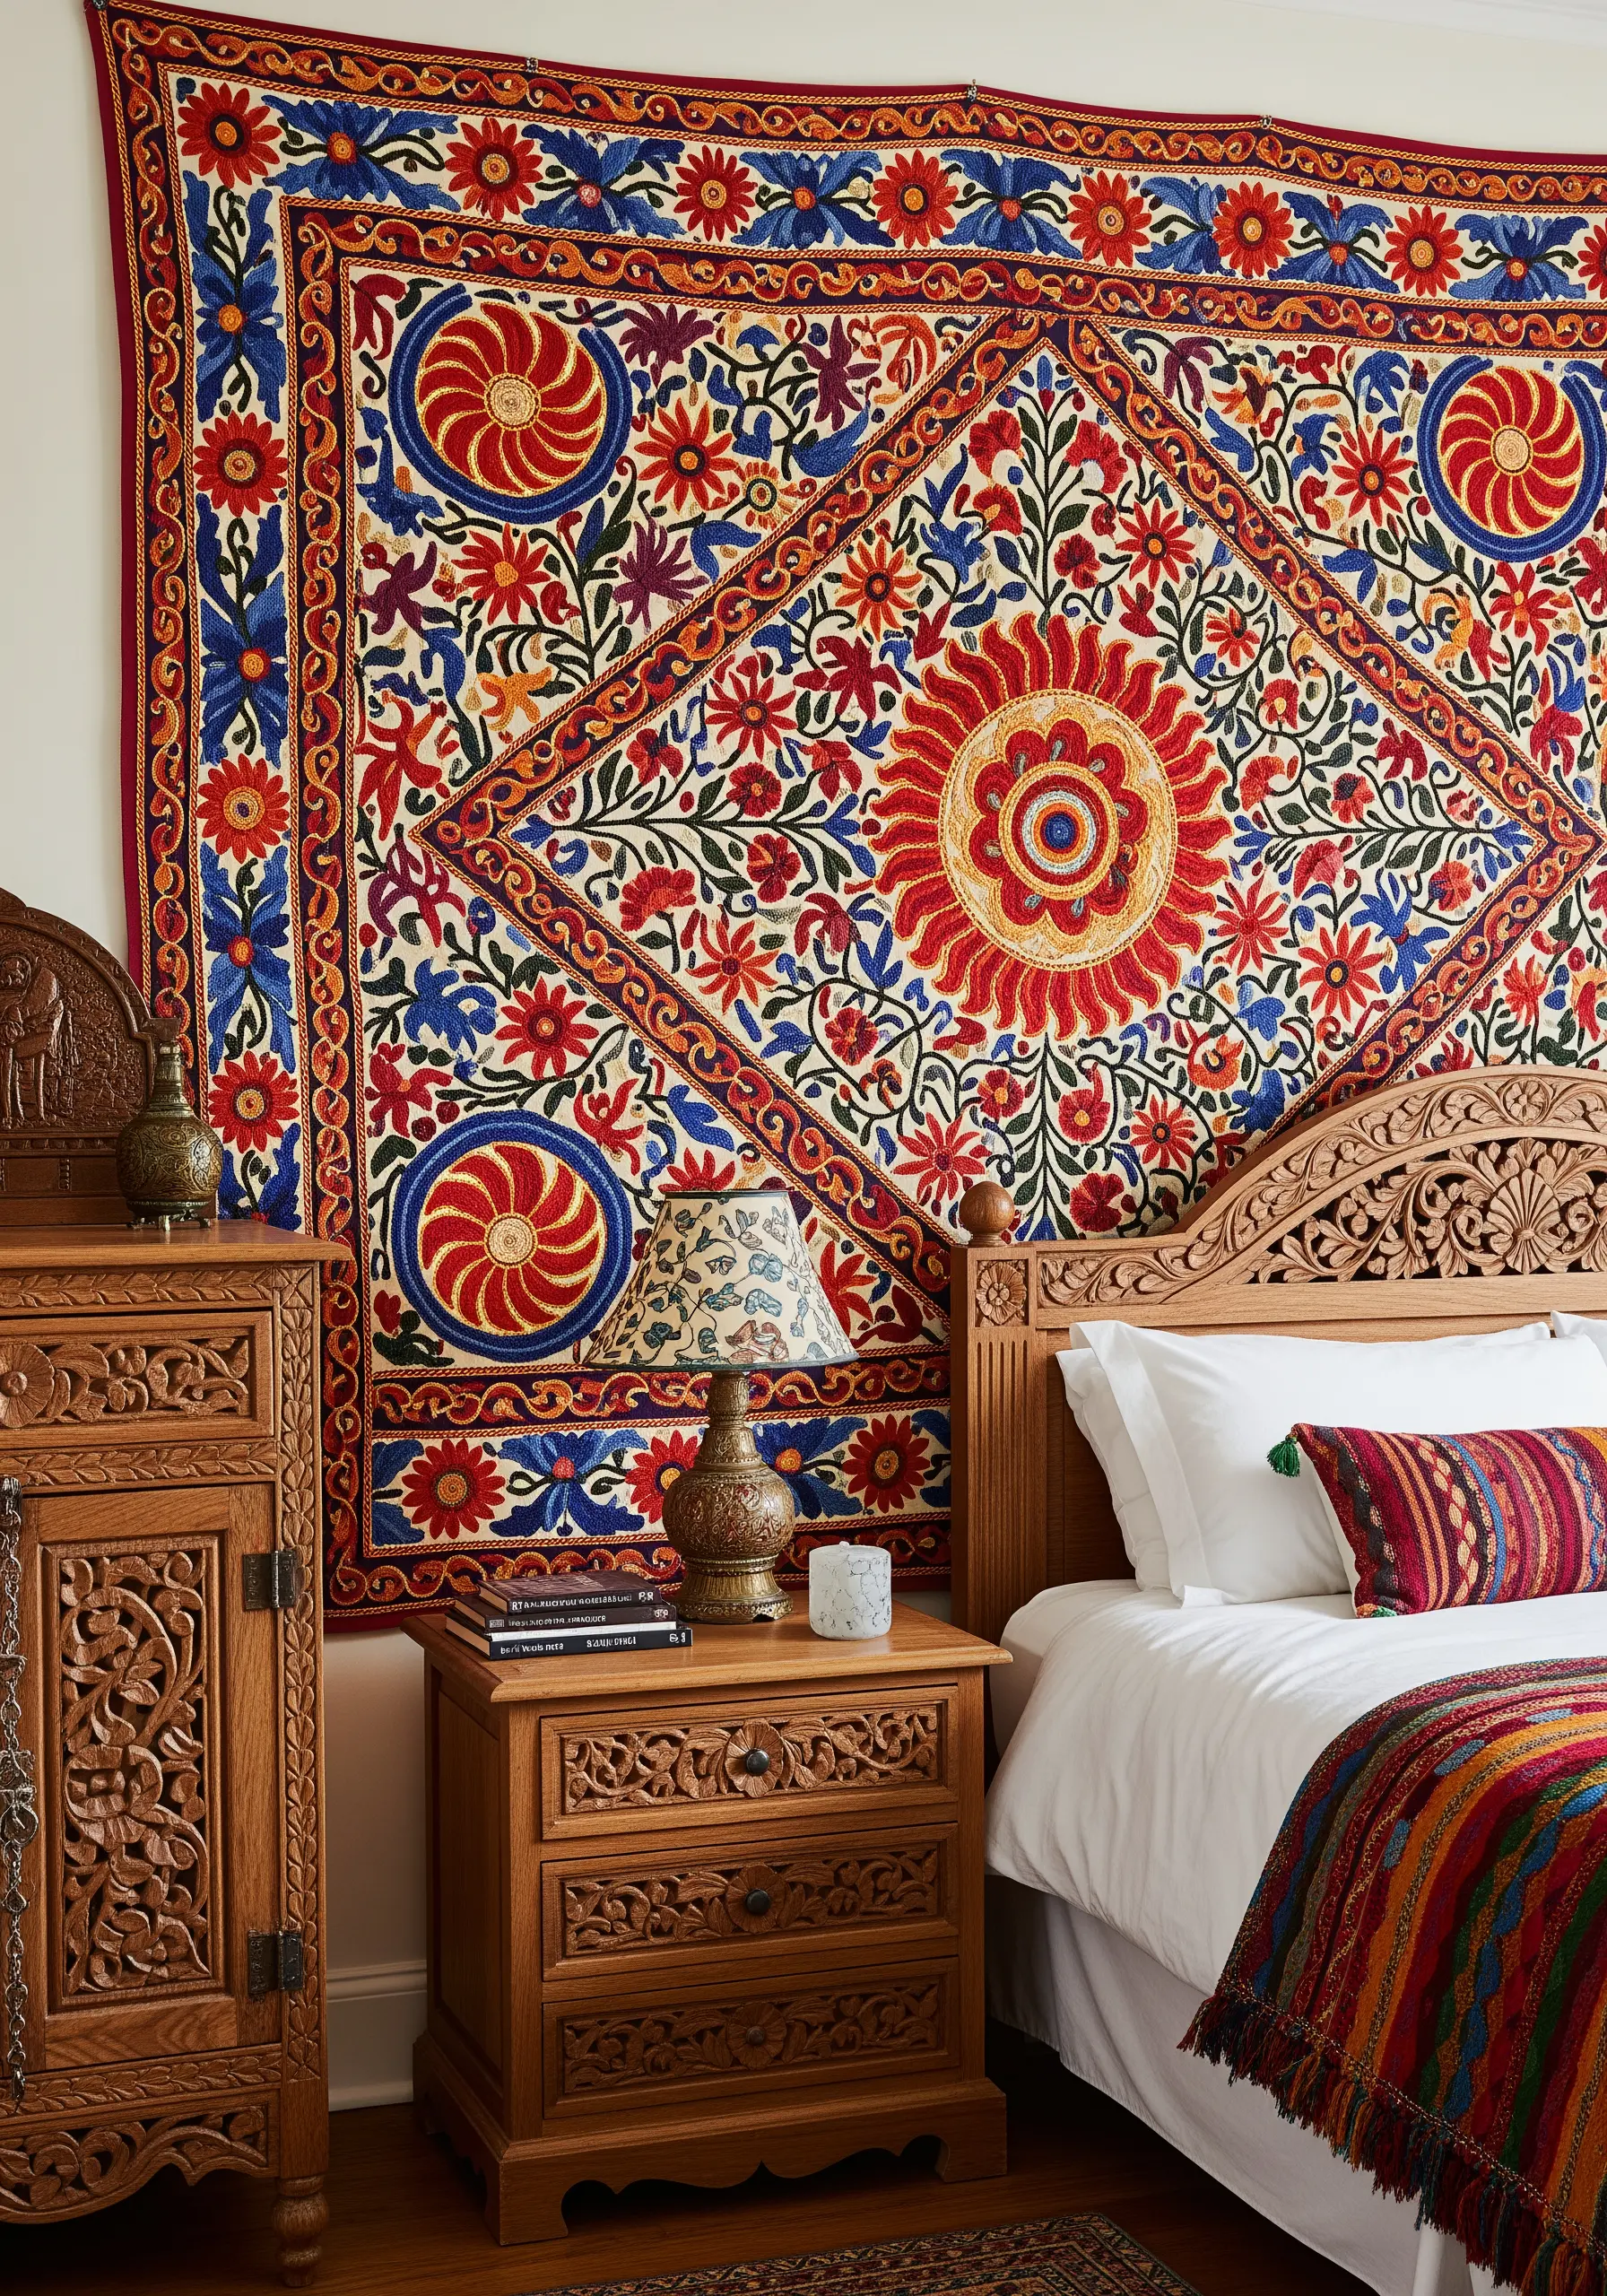
Create a bold, bohemian focal point with designs inspired by traditional Suzani textiles from Central Asia.
Suzani embroidery is characterized by vibrant, repeating floral and solar motifs worked in dense stitches.
Use a chain stitch or split stitch to fill the large, colorful shapes, which creates a durable and beautifully textured surface.
Don’t be afraid of bold color combinations—red, blue, orange, and yellow are classic choices that create an energetic and joyful feel.
A large-scale embroidery tapestry like this can replace a traditional headboard and define the entire room.
19. Fill Simple Shapes with Textural Seed Stitch
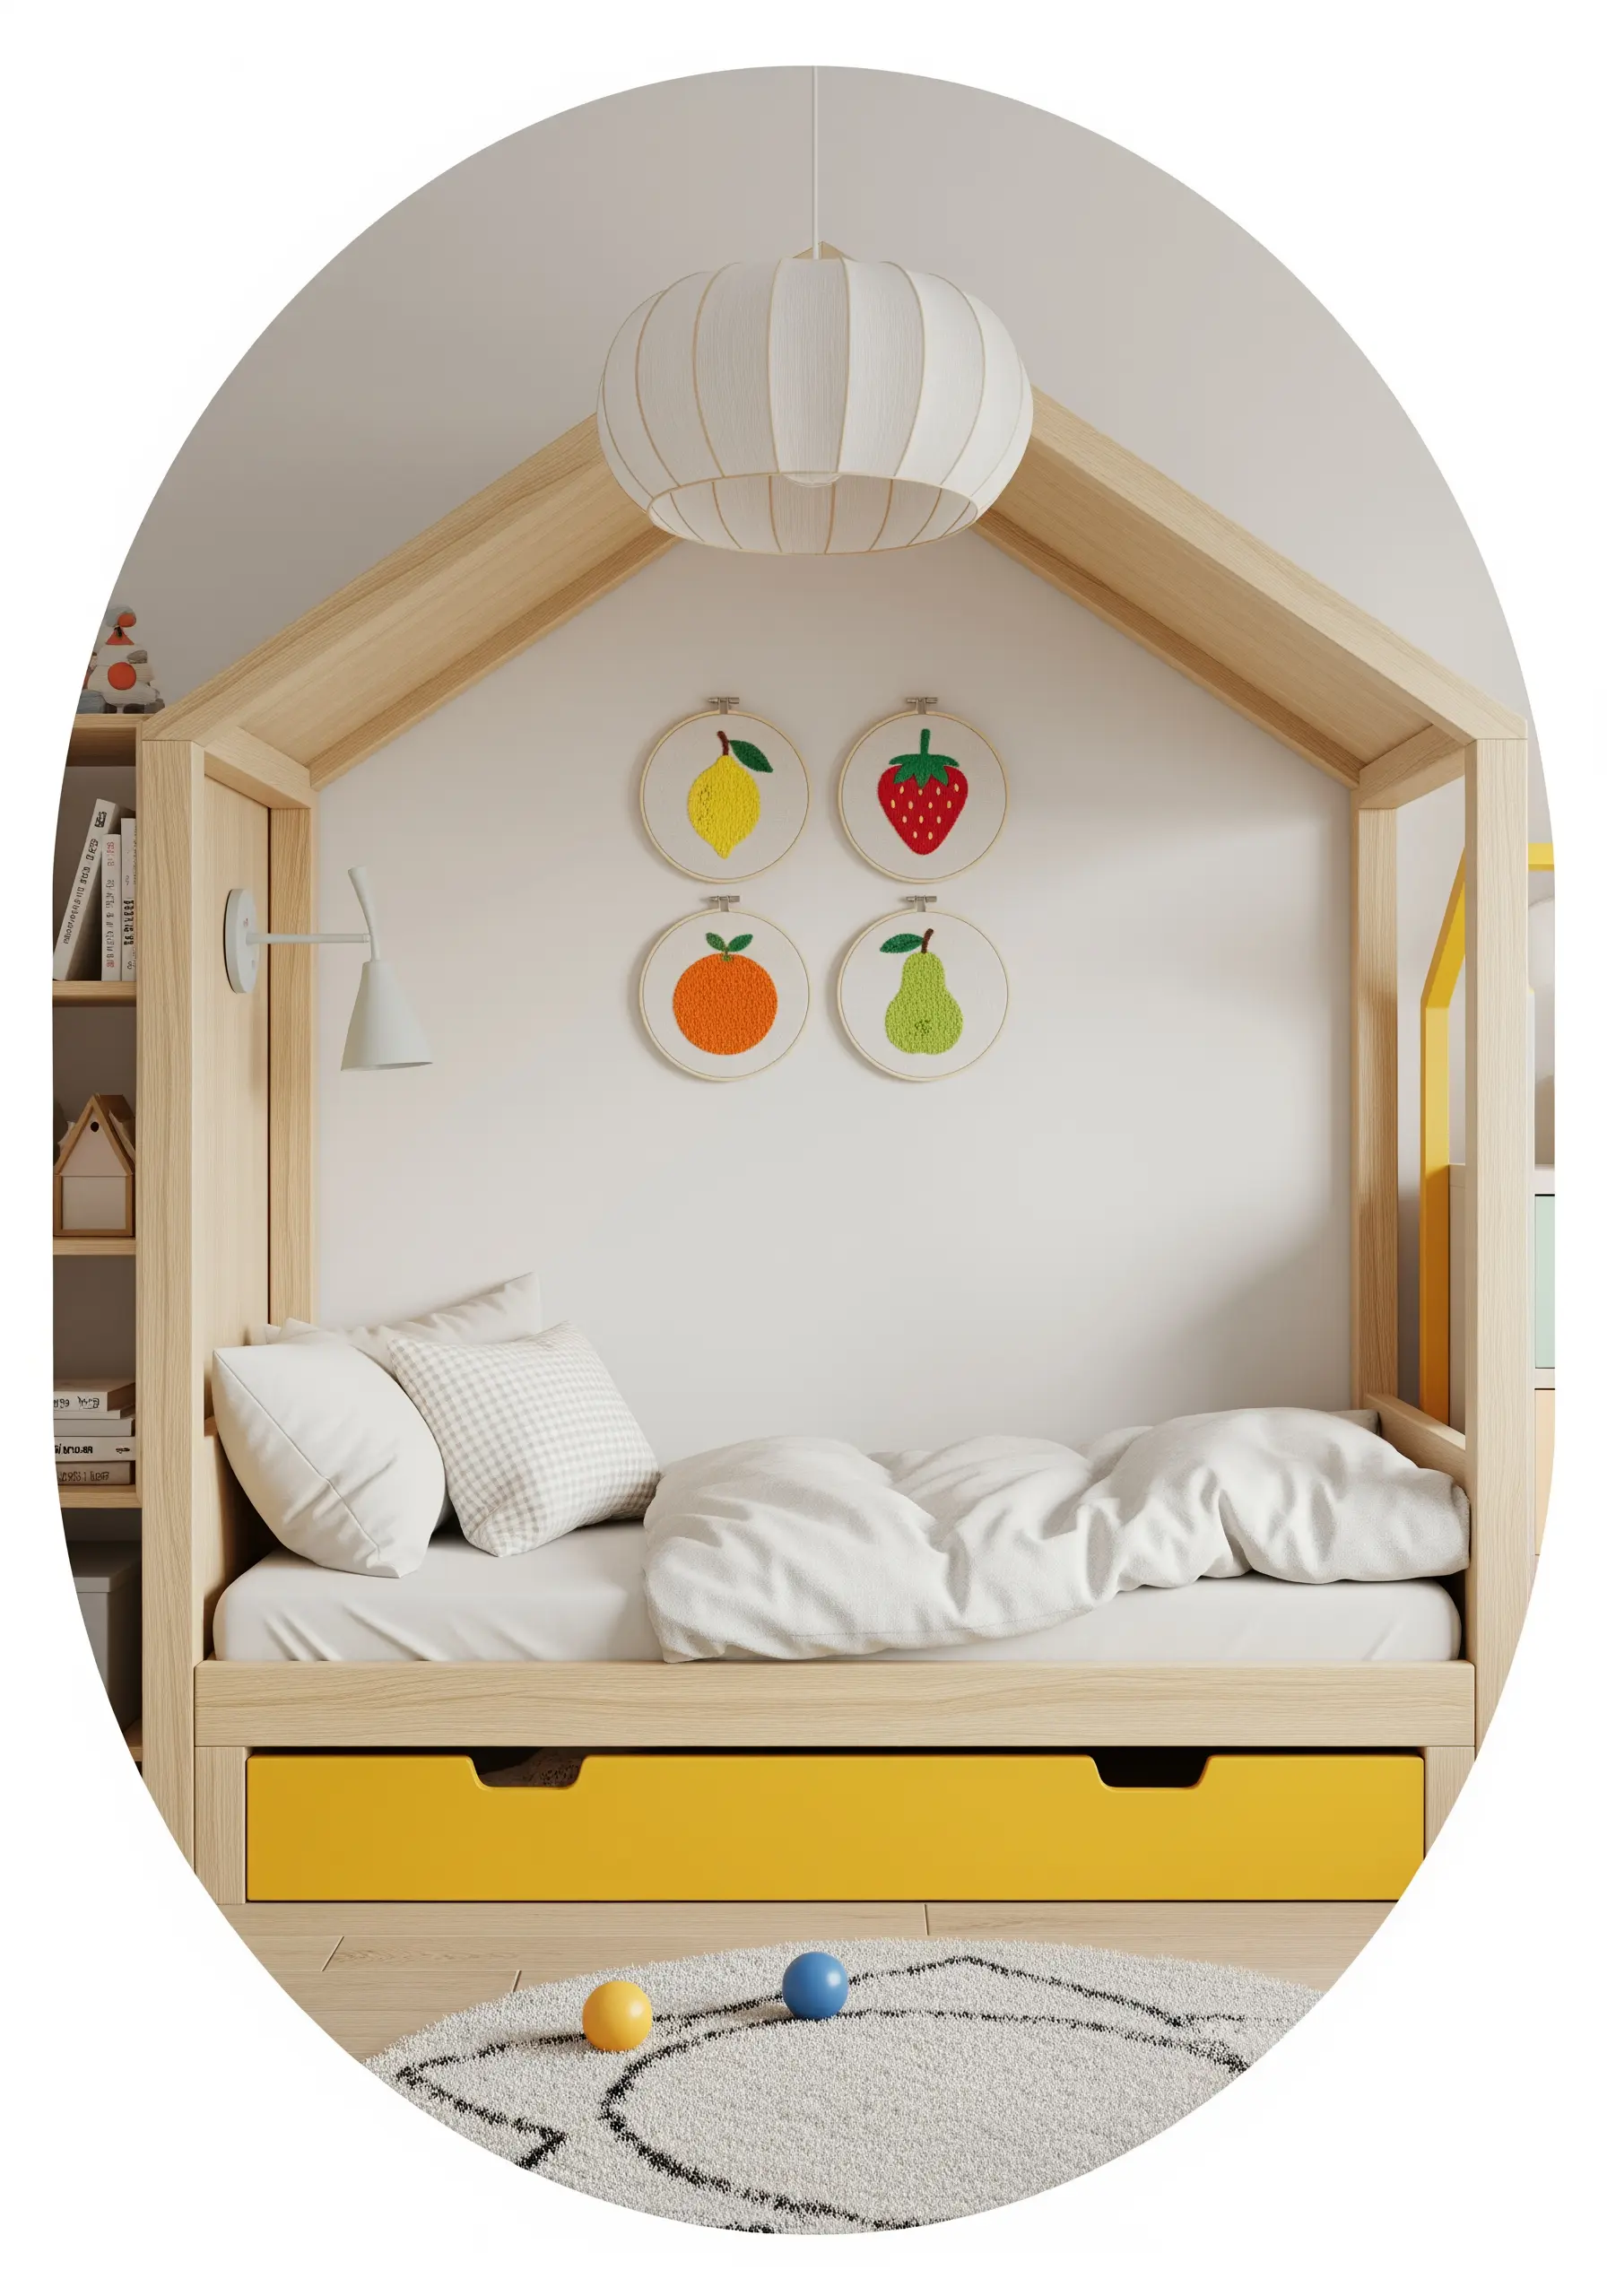
Add playful sophistication to simple motifs by filling them with a dense seed stitch.
Instead of a flat satin stitch, use tiny, randomly placed straight stitches to fill the fruit shapes. This creates a tactile, almost pointillist effect.
Outline each fruit with a clean backstitch in a darker, contrasting color to define the shape and make it pop.
Grouping four small hoop embroidery ideas together creates a charming, modern display that’s perfect for a child’s room or a cheerful kitchen nook.
20. Personalize Your Space with an Embroidered Map
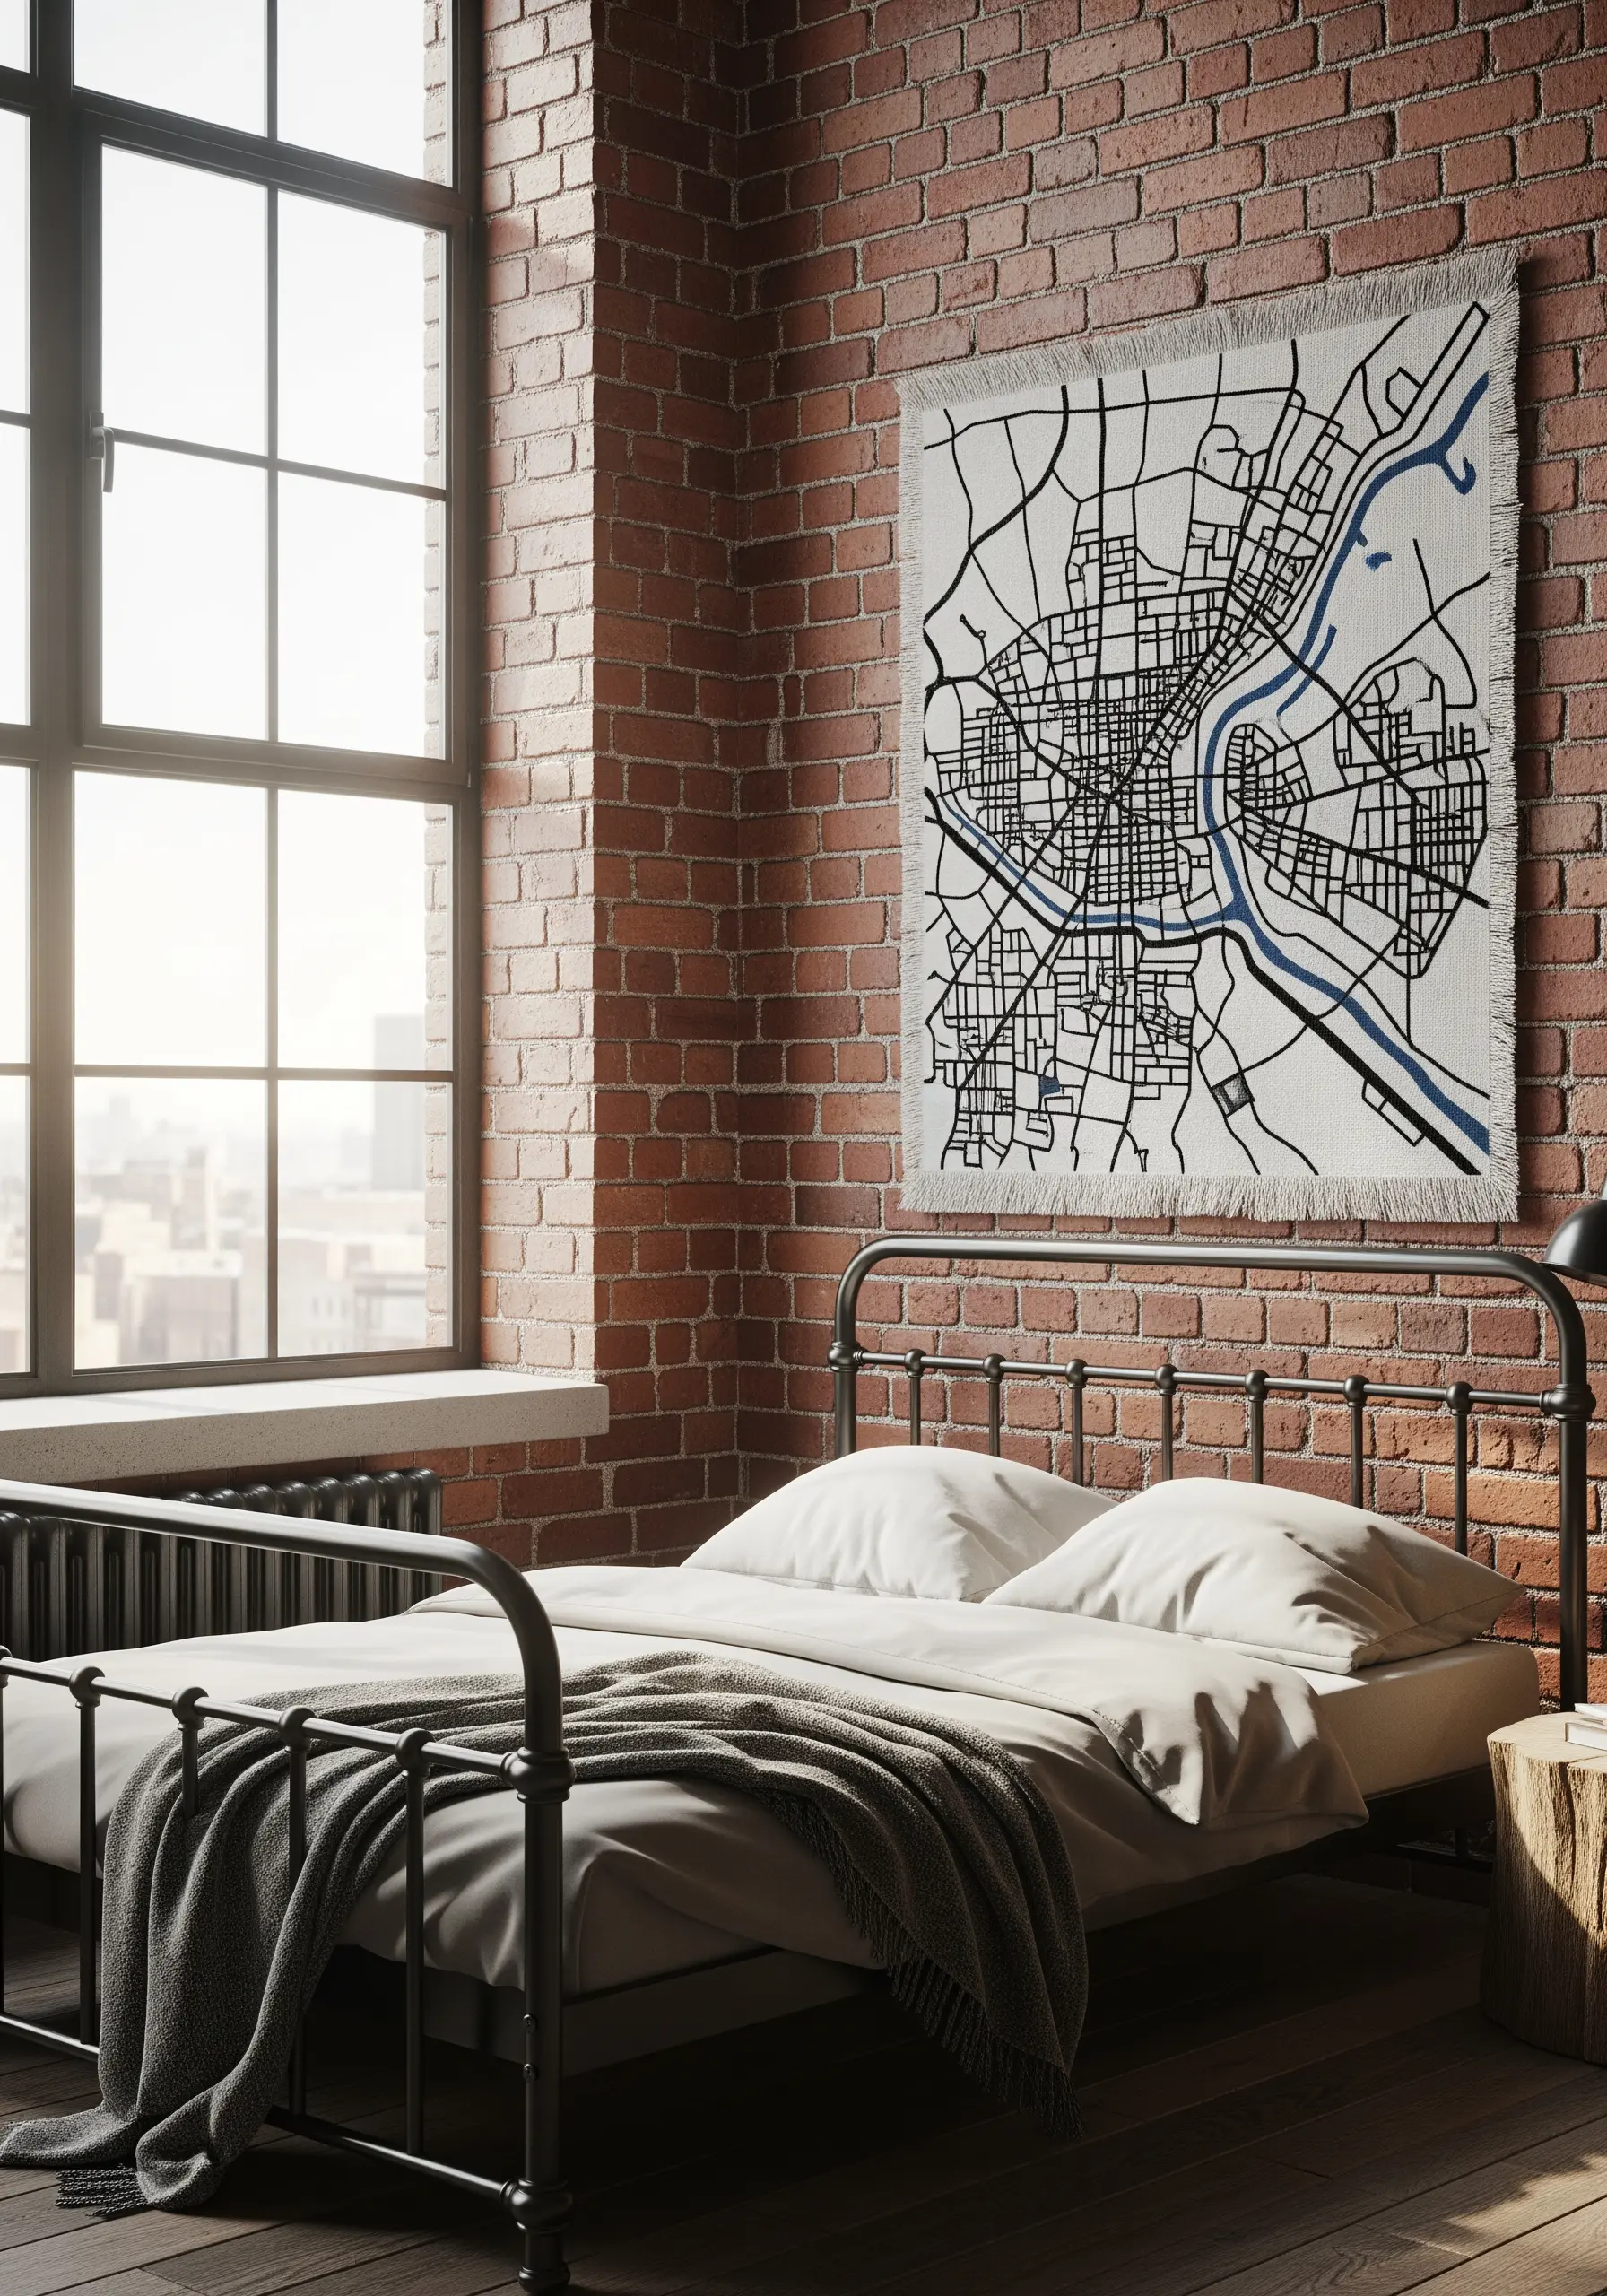
Commemorate a favorite city or meaningful place by transforming its map into graphic textile art.
Use an online map to trace the main streets and a significant river or landmark onto your fabric.
Stitch the smaller streets with a simple backstitch using two strands of black floss. For the river or a main thoroughfare, use a bolder color and a thicker stitch, like a stem stitch with six strands.
This creates a clear visual hierarchy and makes the map easy to read, turning personal geography into a stunning piece of embroidered wall decor.
21. Practice Mindful Stitching with Japanese Sashiko
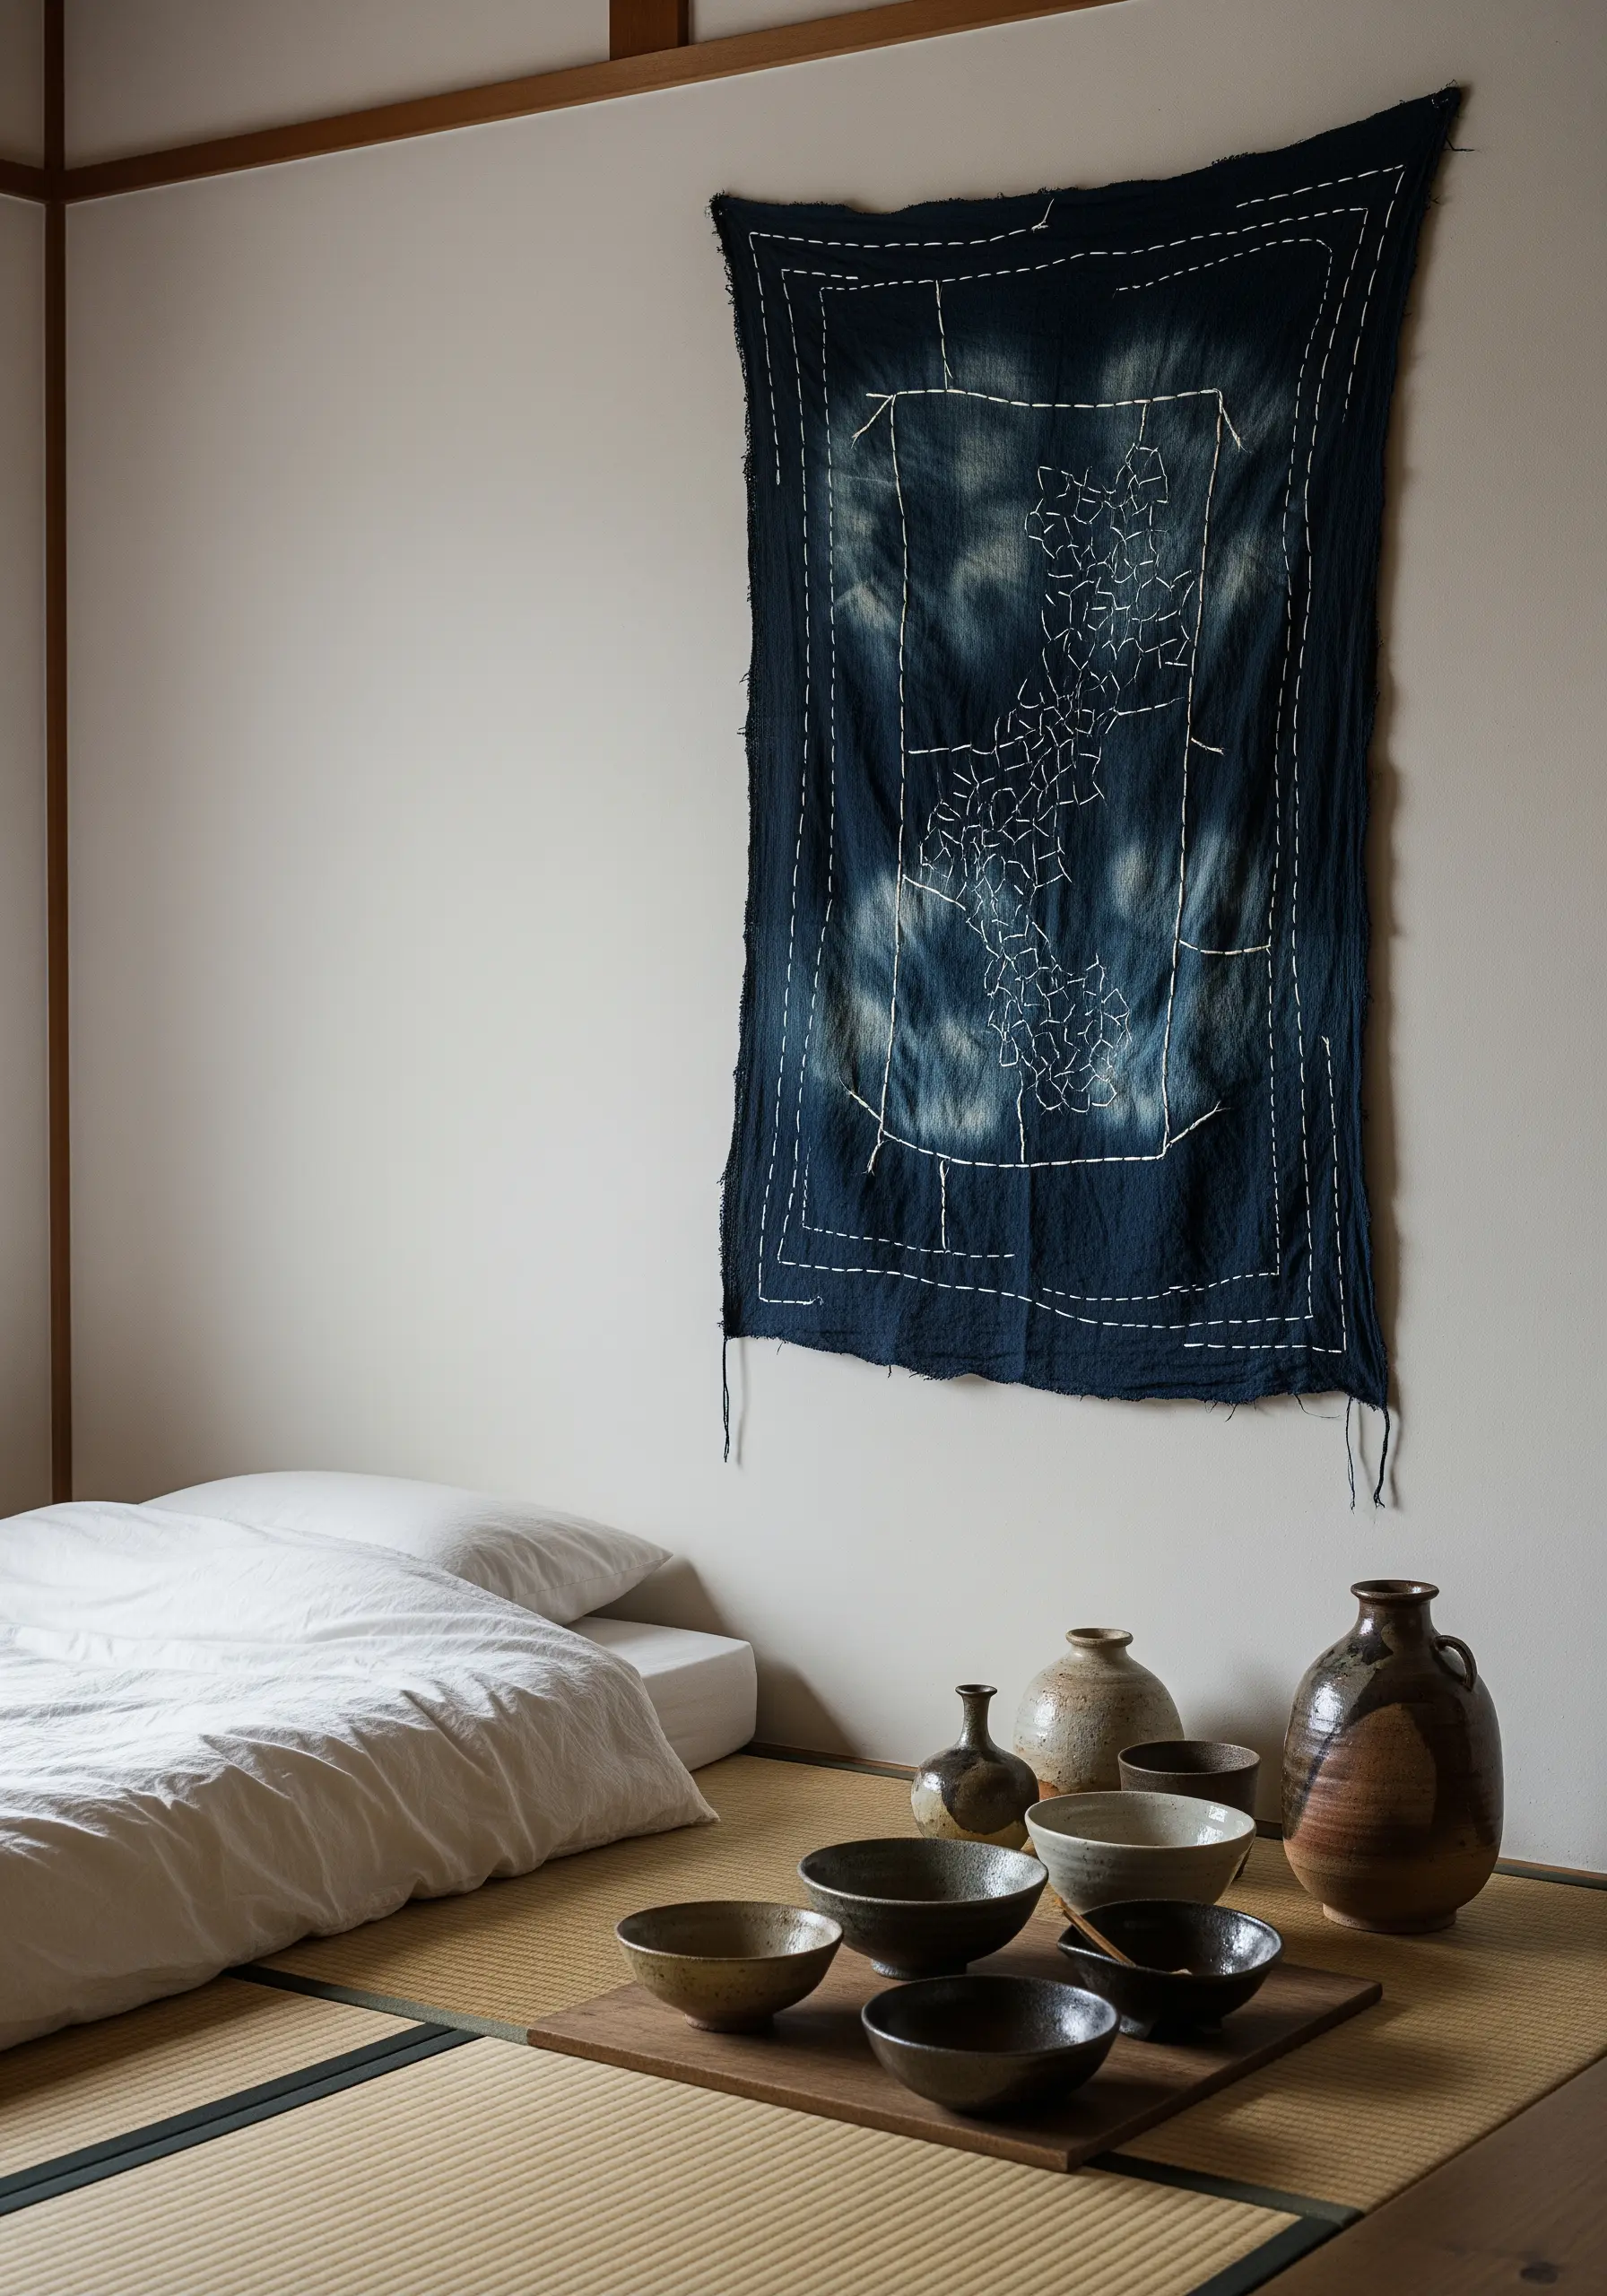
Create a piece of art that is as calming to make as it is to view.
Sashiko is a traditional Japanese technique that uses a simple running stitch to create beautiful geometric patterns.
The key is the consistency of your stitches—aim for each stitch to be the length of a grain of rice, with a small, even gap between each one.
Traditionally, white cotton thread is used on indigo-dyed fabric, creating a striking contrast that highlights the quiet beauty of the repetitive pattern.
The raw, unfinished edges add to the wabi-sabi aesthetic, celebrating the beauty of imperfection.
22. Explore Texture with White-on-White Embroidery
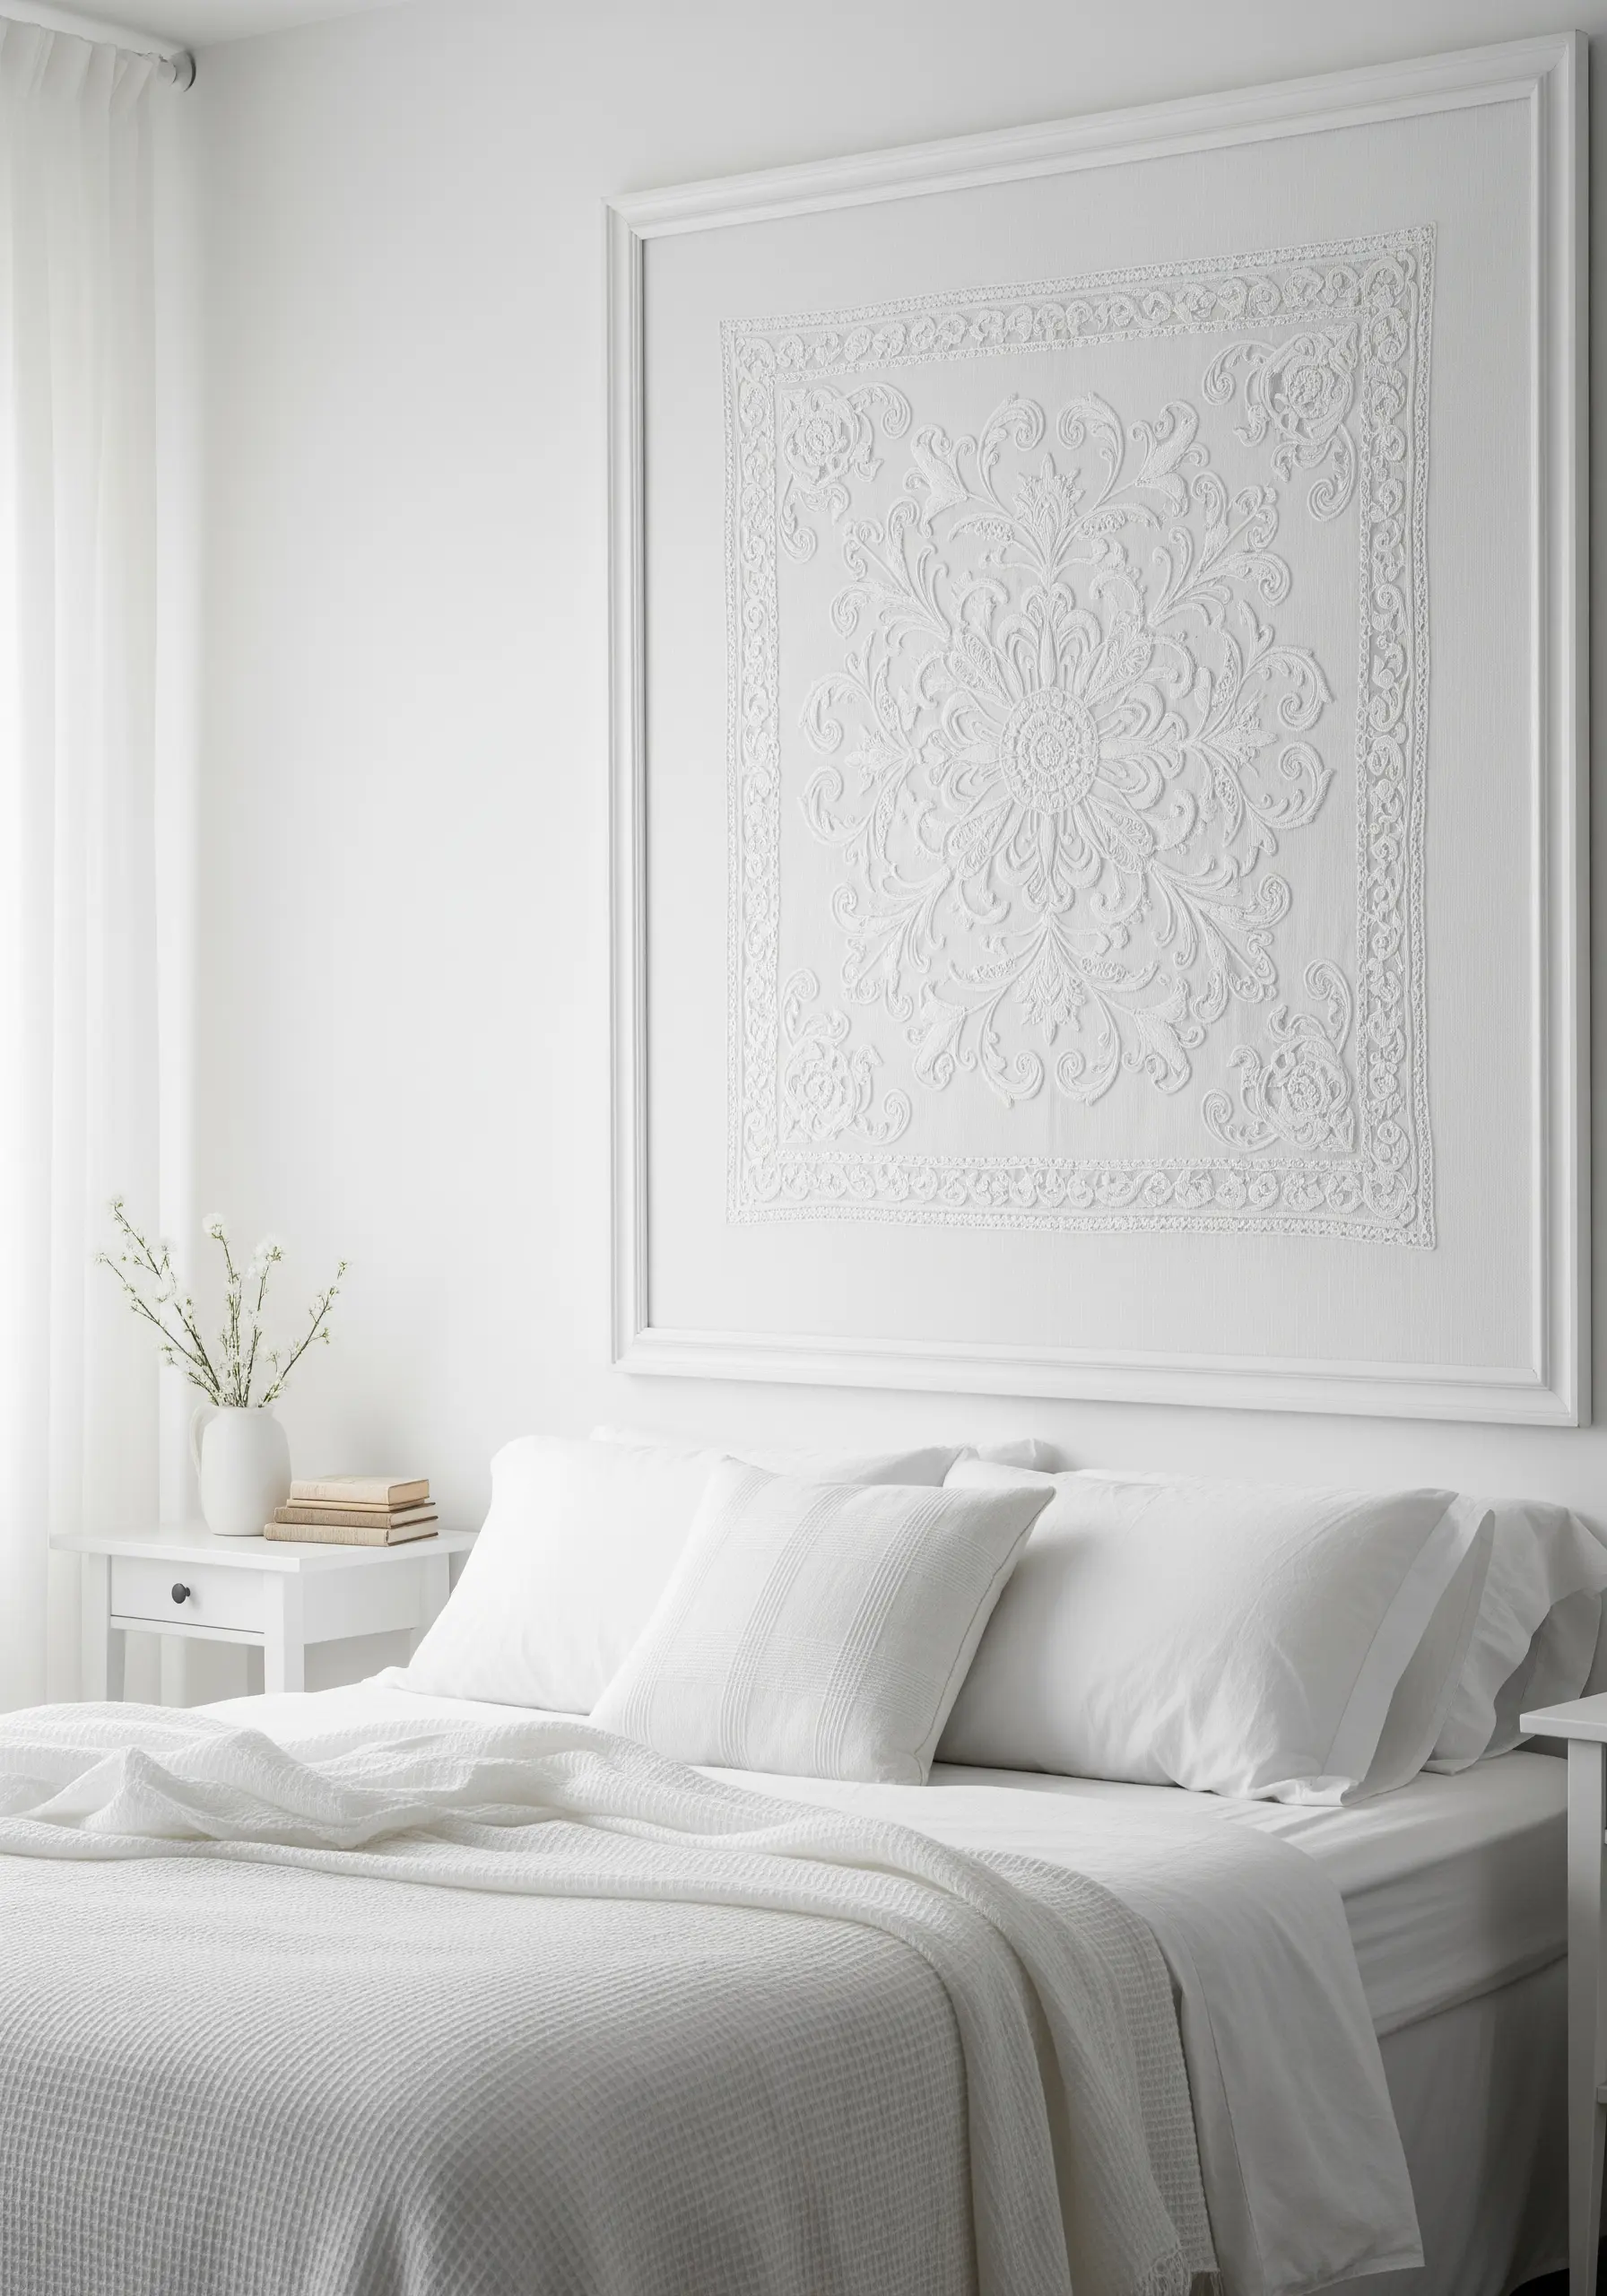
Make a sophisticated statement by focusing solely on texture, not color.
Working with white thread on white fabric, known as whitework, forces you to explore the sculptural possibilities of thread.
Use padded satin stitch to create raised, dimensional shapes. To do this, lay down a series of small straight stitches as padding, then cover them with smooth, vertical satin stitches.
Incorporate other textural stitches like French knots, bullion knots, and couched cording to build a rich, tactile surface.
The final piece is a subtle masterpiece where the design is revealed by the play of light and shadow.
23. Create an Etched Look with Fine Line Work
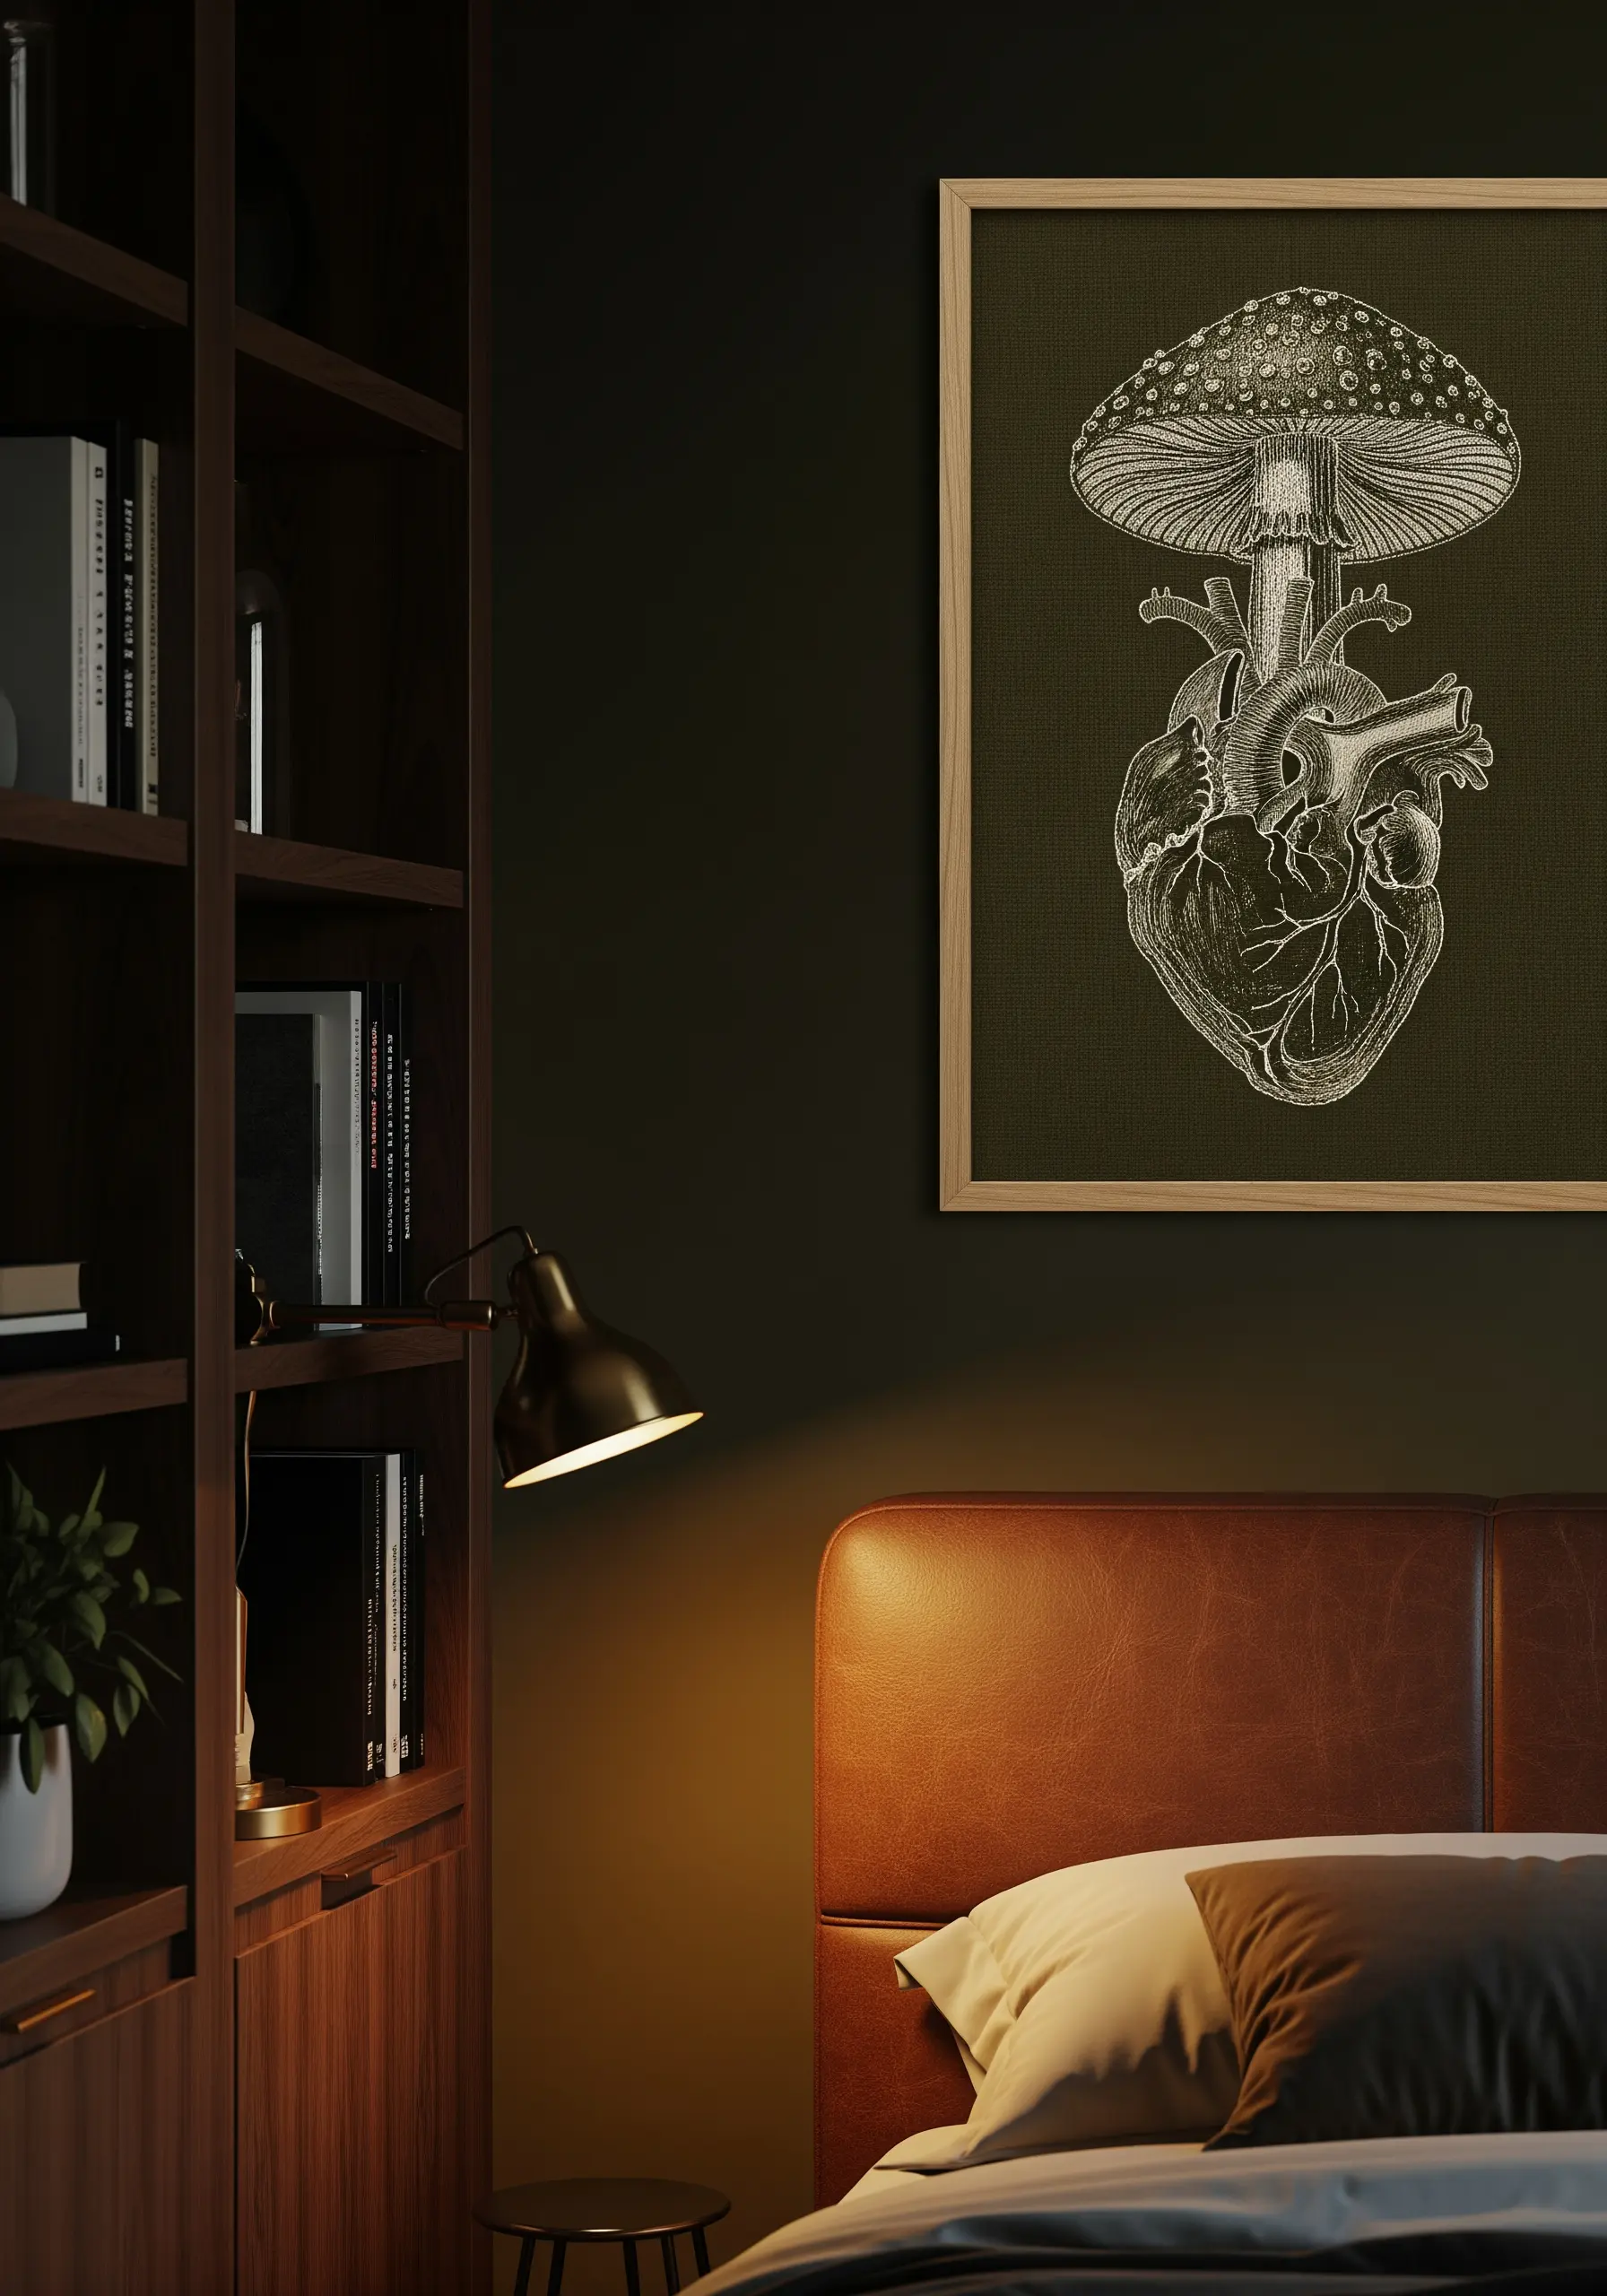
Replicate the look of a vintage scientific illustration or an etching by using fine, precise stitches.
Work with just one or two strands of floss in a single color on a contrasting background.
Use a tiny split stitch or a simple backstitch to create the detailed lines. For shaded areas, use closely spaced parallel lines or cross-hatching, just as an illustrator would with a pen.
This technique is perfect for surreal, anatomical, or botanical art, giving it a sophisticated, intellectual feel.
Choosing a fabric with a tight weave, like cotton twill, will ensure your tiny stitches are sharp and clear.
24. Add Depth to a Tree with Variegated Thread
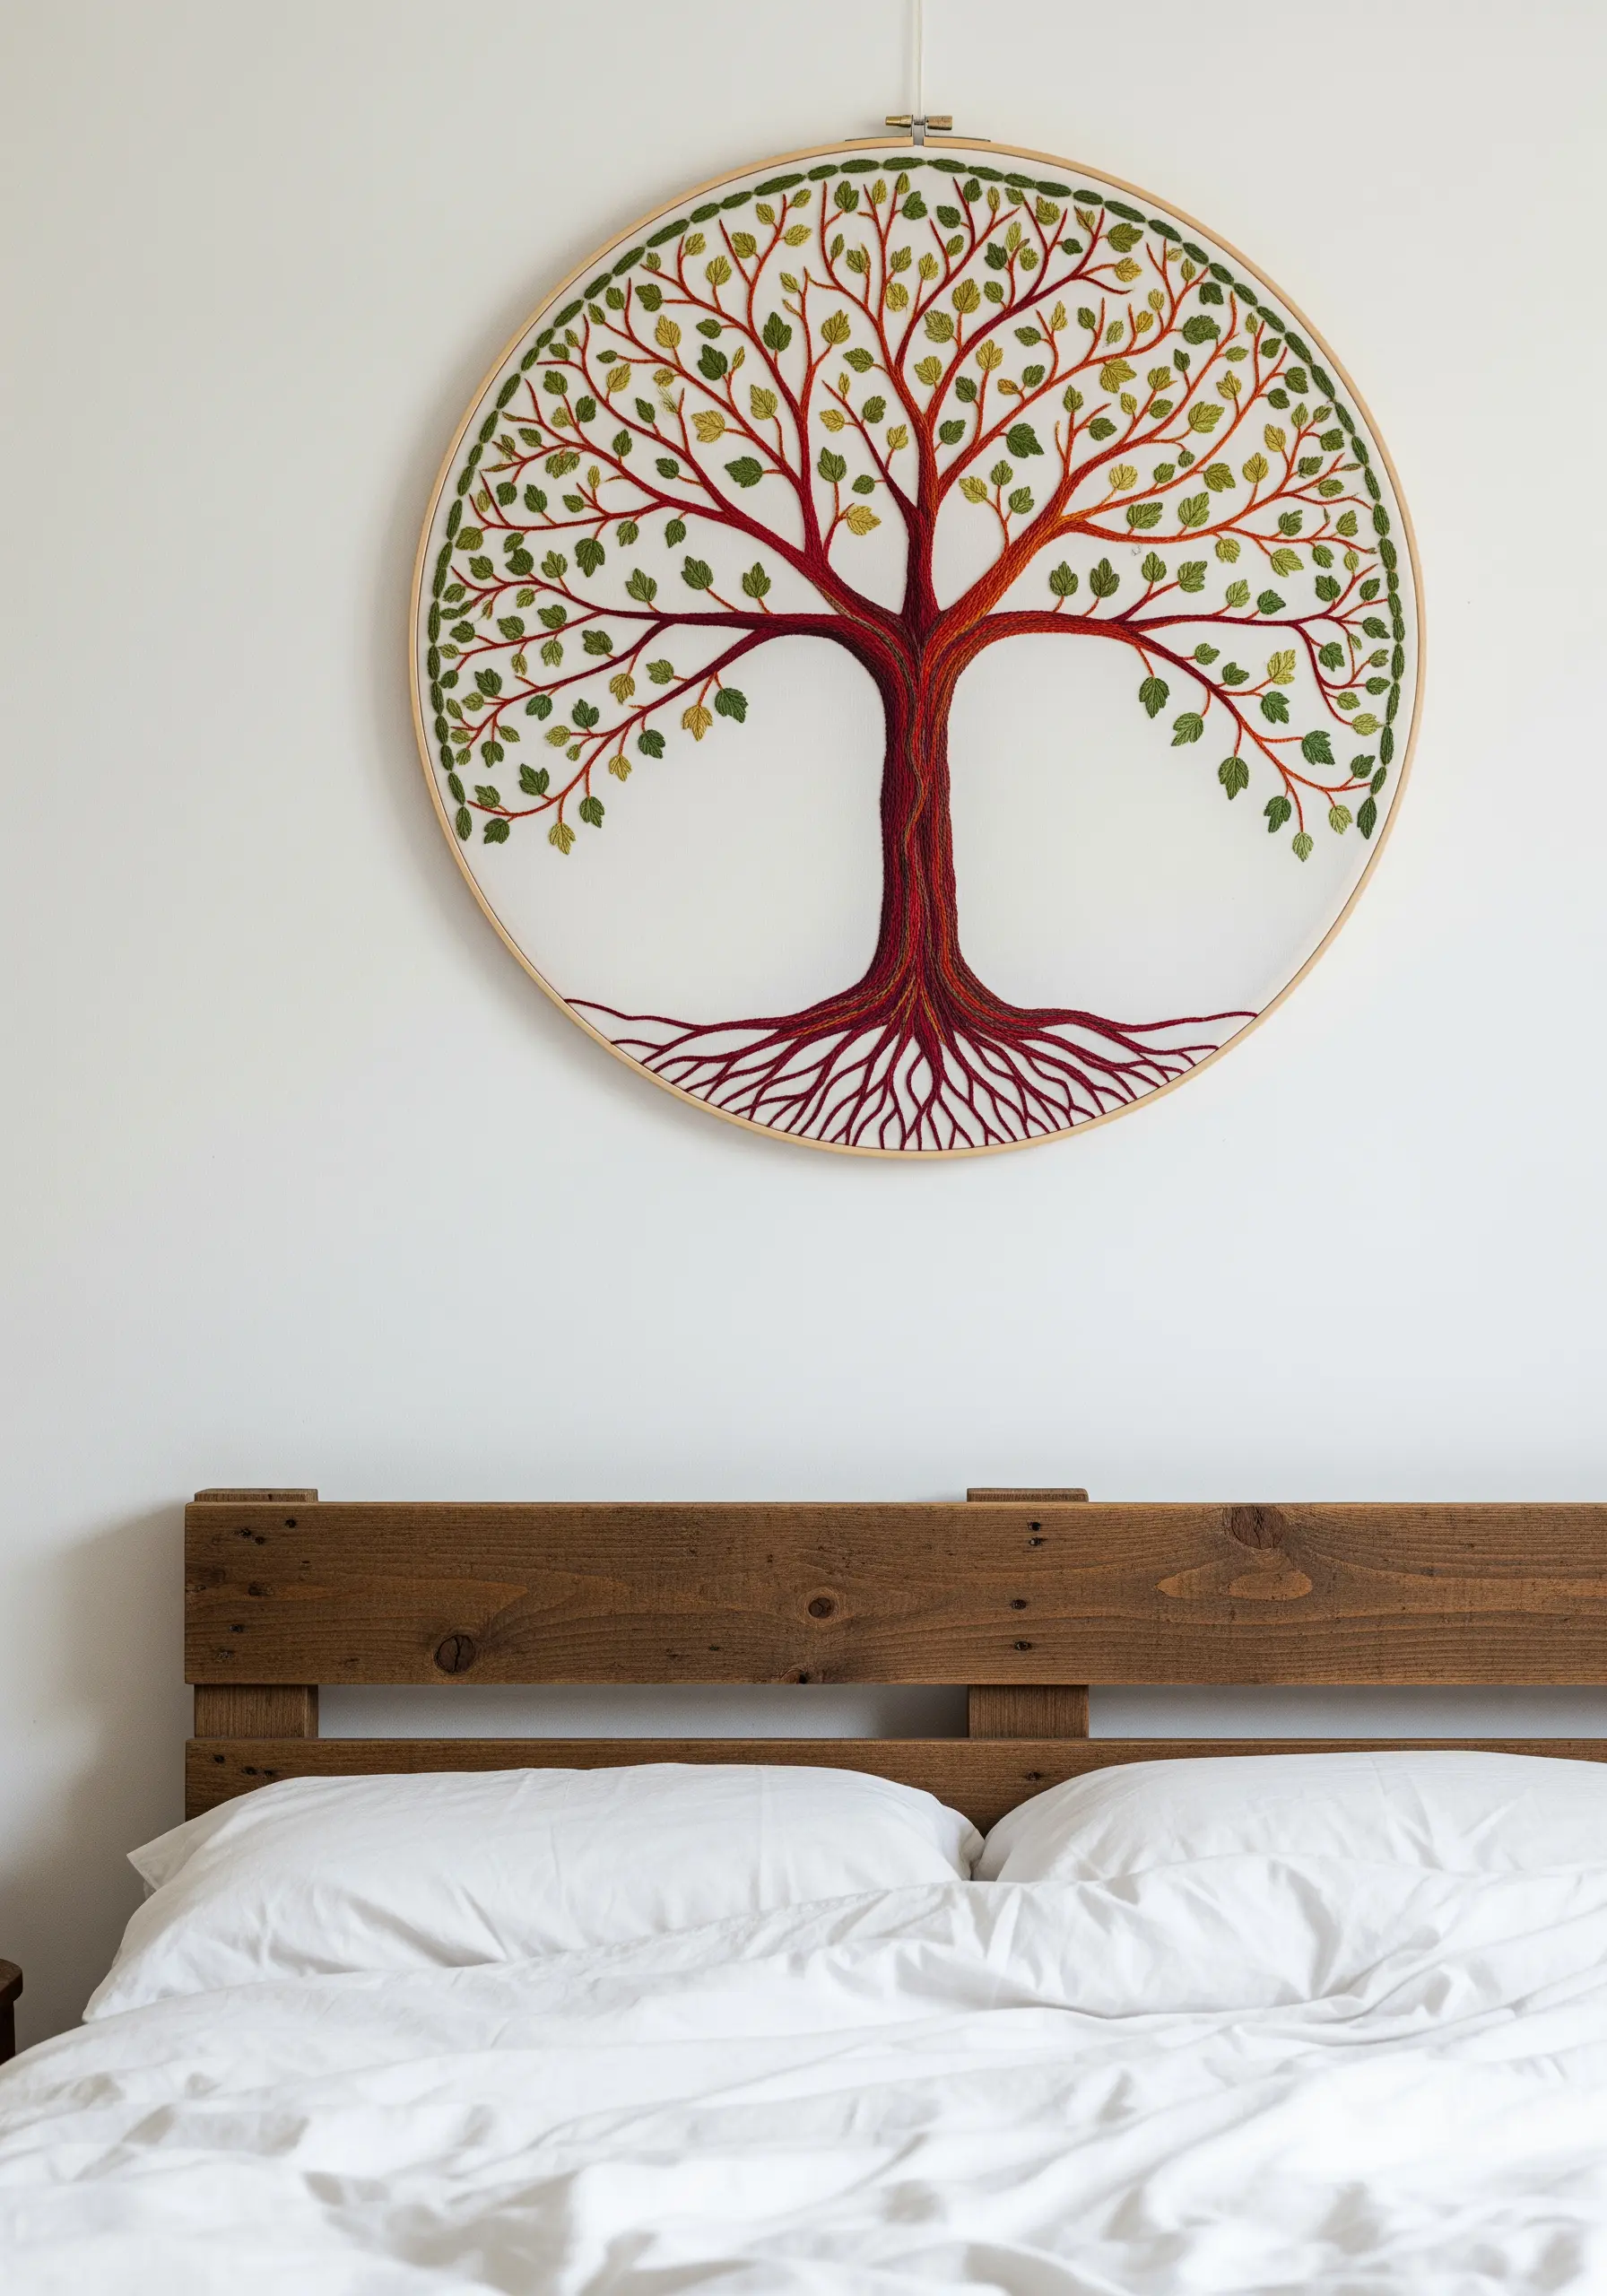
Give your embroidered trees a more realistic, vibrant feel by using variegated thread.
For the trunk and roots, choose a thread that shifts between shades of brown. As you stitch, the colors will change randomly, creating natural-looking highlights and shadows without any extra effort.
Use a whipped backstitch to create the solid, twisting branches, which gives them a smooth and continuous look.
For the leaves, mix two or three different shades of green, using a simple fishbone or lazy daisy stitch to fill out the canopy.
Stitching on sheer fabric and leaving the background empty makes the tree appear to float, creating a light and airy artwork.
25. Achieve a Painterly Effect with Thread Painting
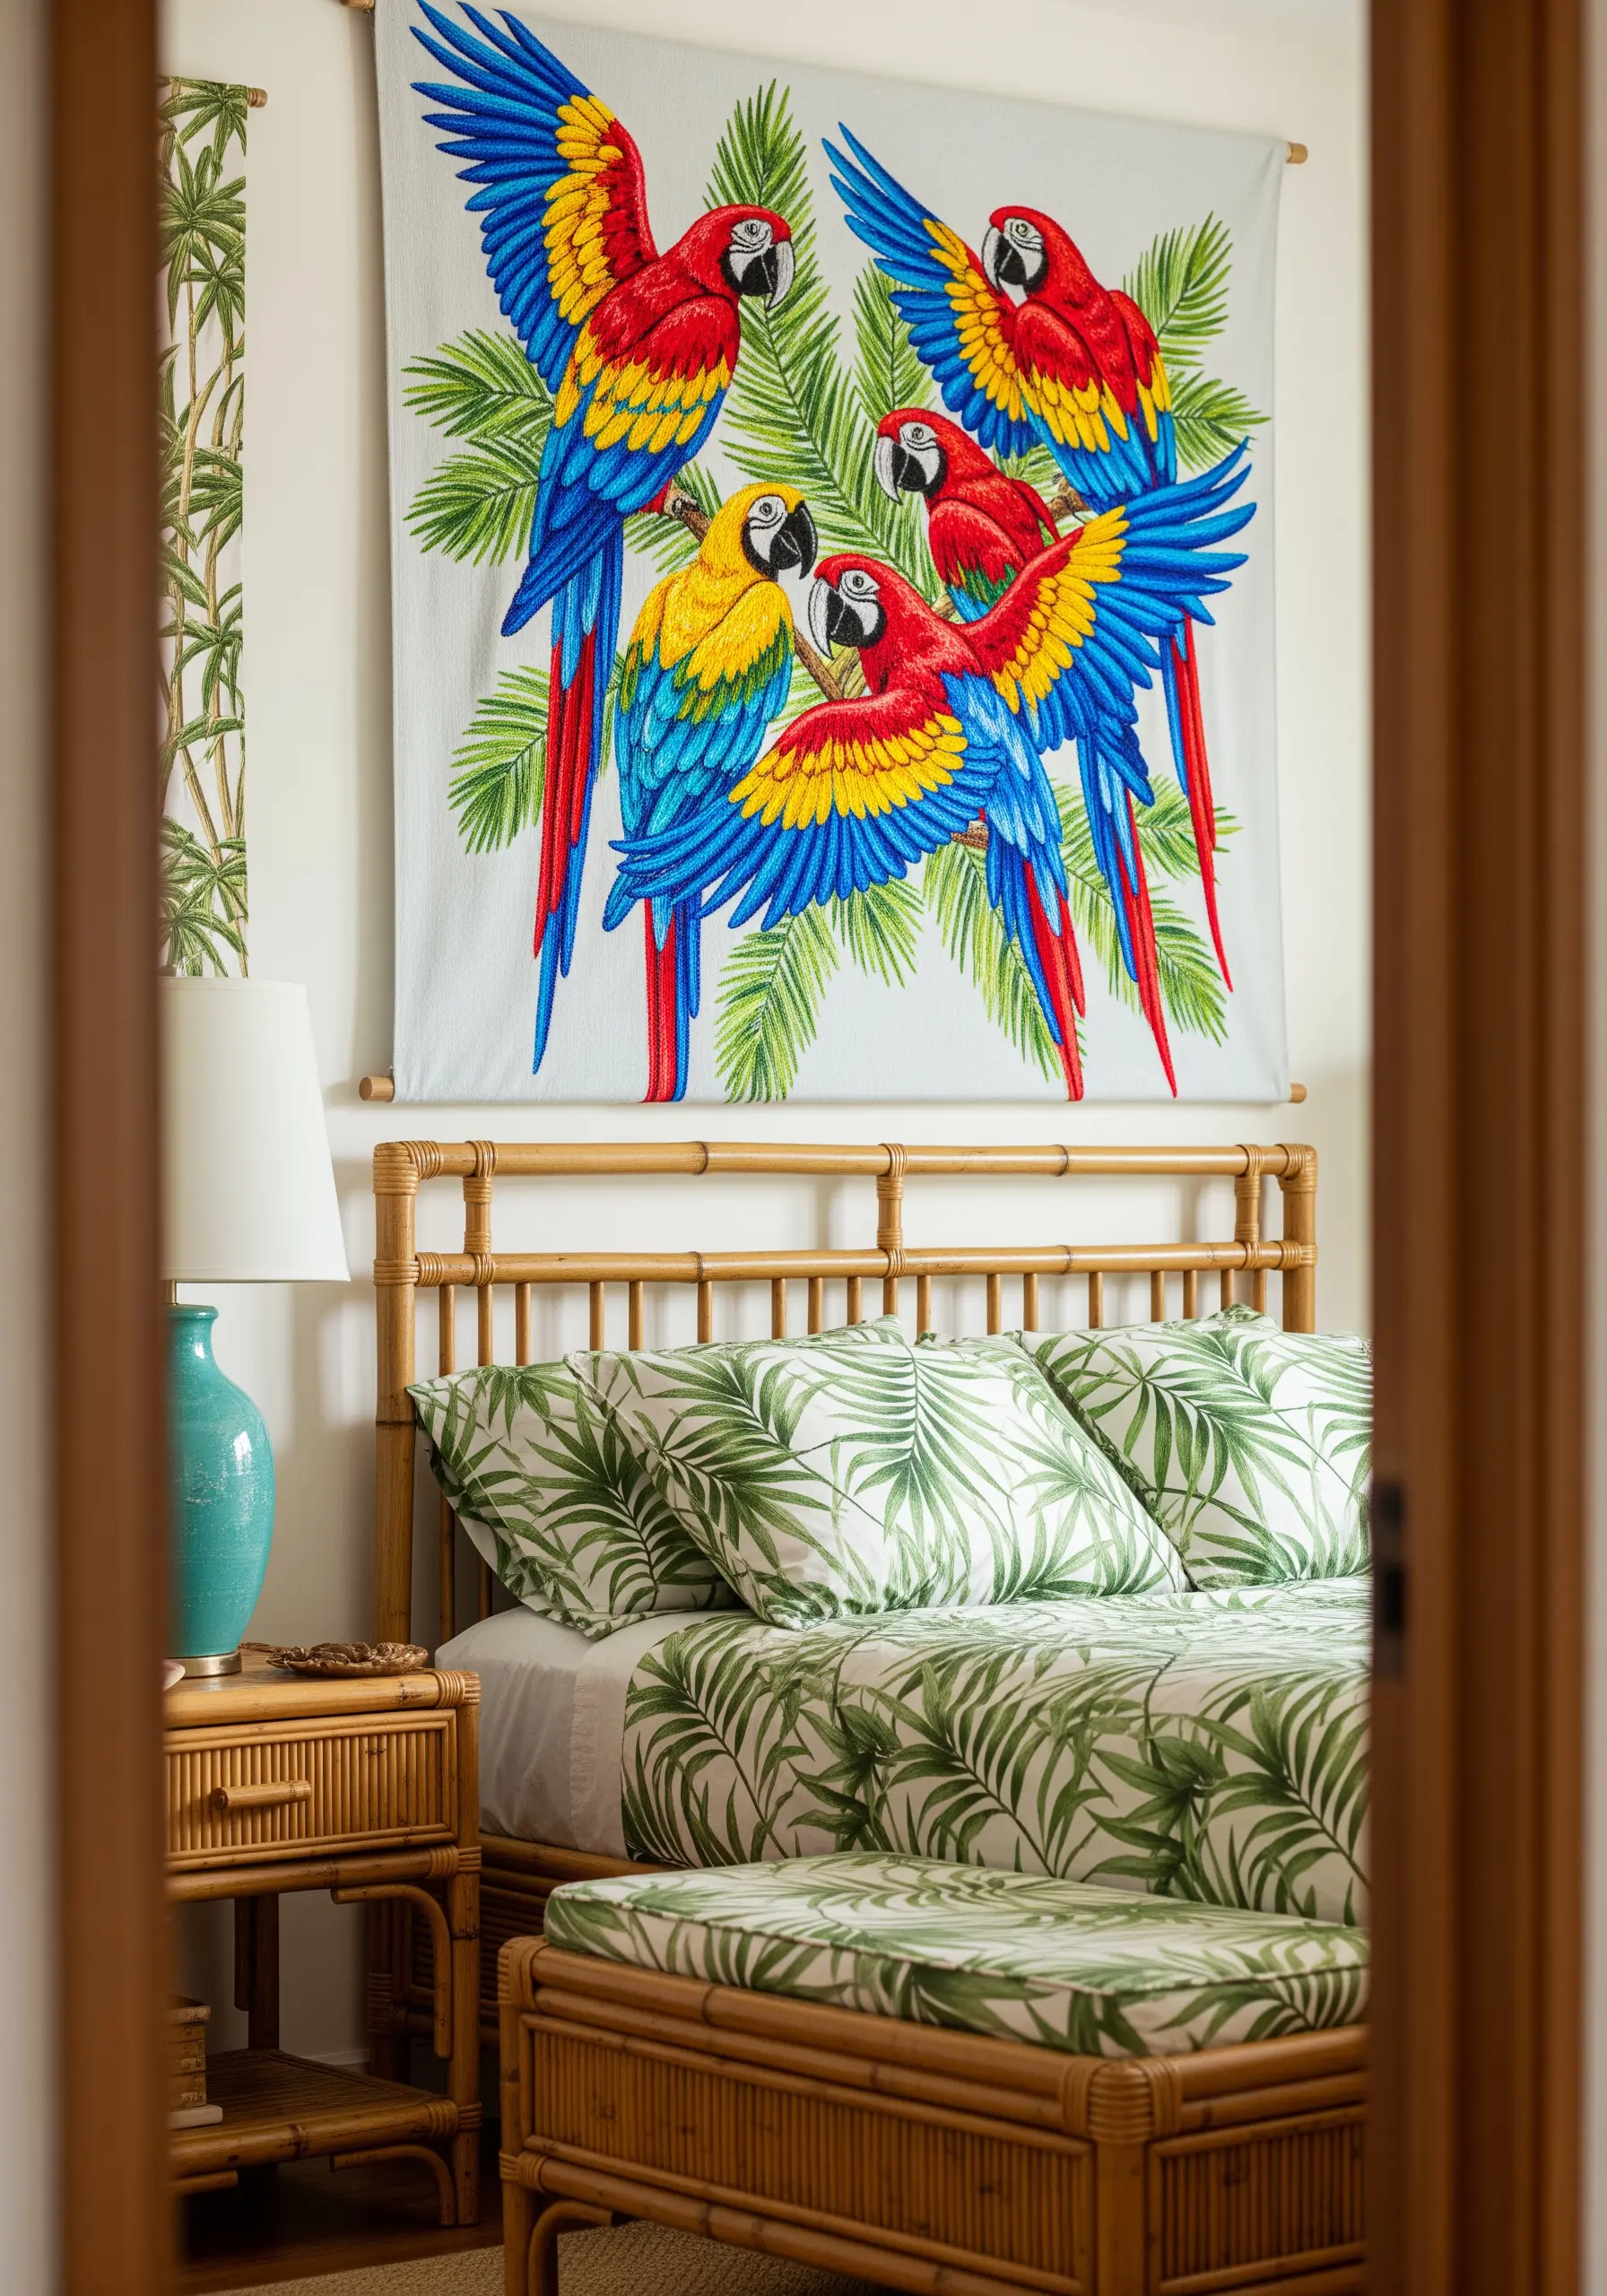
For highly realistic and colorful subjects like these macaws, thread painting is the ultimate technique.
This involves using the long-and-short stitch to seamlessly blend different colors of floss, creating gradients that look like brushstrokes.
Work with only one strand of thread at a time for the finest blending, and keep a reference photo nearby to guide your color placement.
To make the feathers shine, choose a high-sheen thread like silk or rayon. Its light-reflecting properties will make the birds look vibrant and alive.
These detailed tropical bird embroidery stitches create a masterpiece that commands attention.
26. Emulate Calligraphy with a Variable Satin Stitch
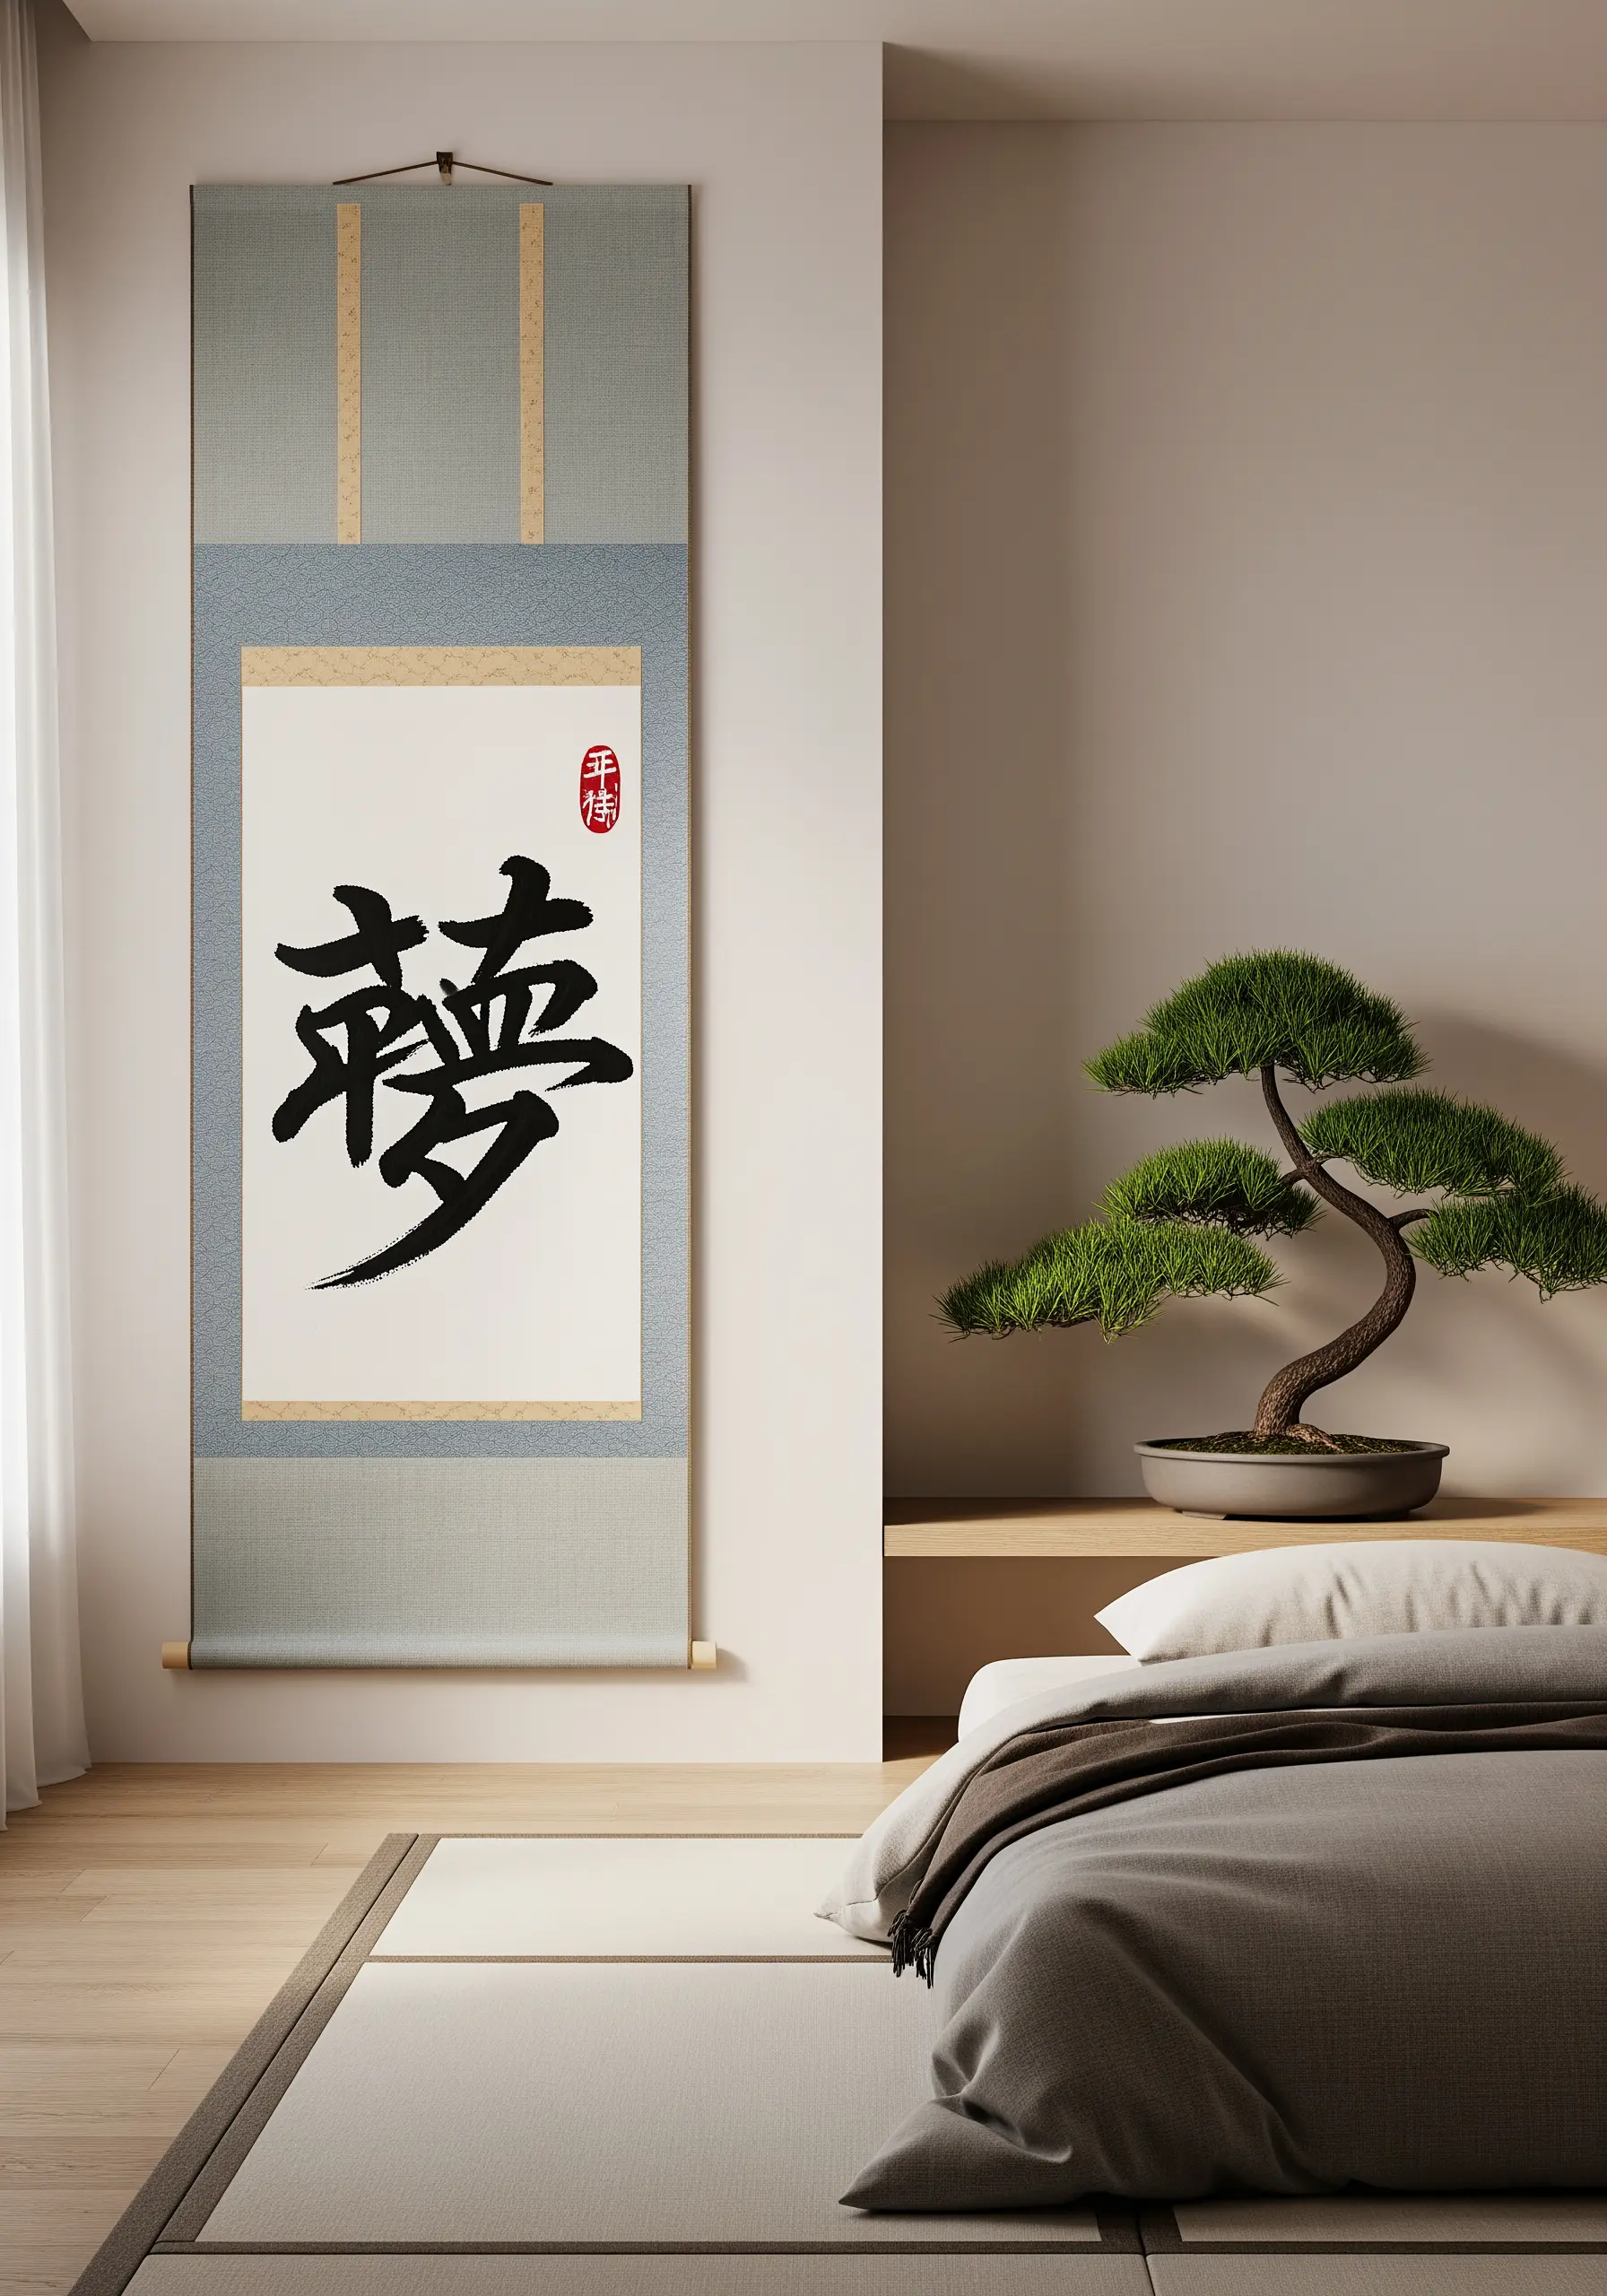
Capture the expressive energy of a calligraphy brushstroke in thread.
The challenge is to mimic the varying thickness of the ink stroke. You can achieve this by using a satin stitch and adjusting its width as you move along the character’s form.
Draw the character onto your fabric, then fill it with parallel straight stitches, making them longer in the wider parts of the stroke and shorter in the thinner parts.
Using a slightly glossy black thread, like rayon or silk, will help replicate the look of wet ink on paper.
Mounting the finished piece as a scroll adds authenticity and cultural context.
27. Achieve Opulence with Goldwork and Velvet
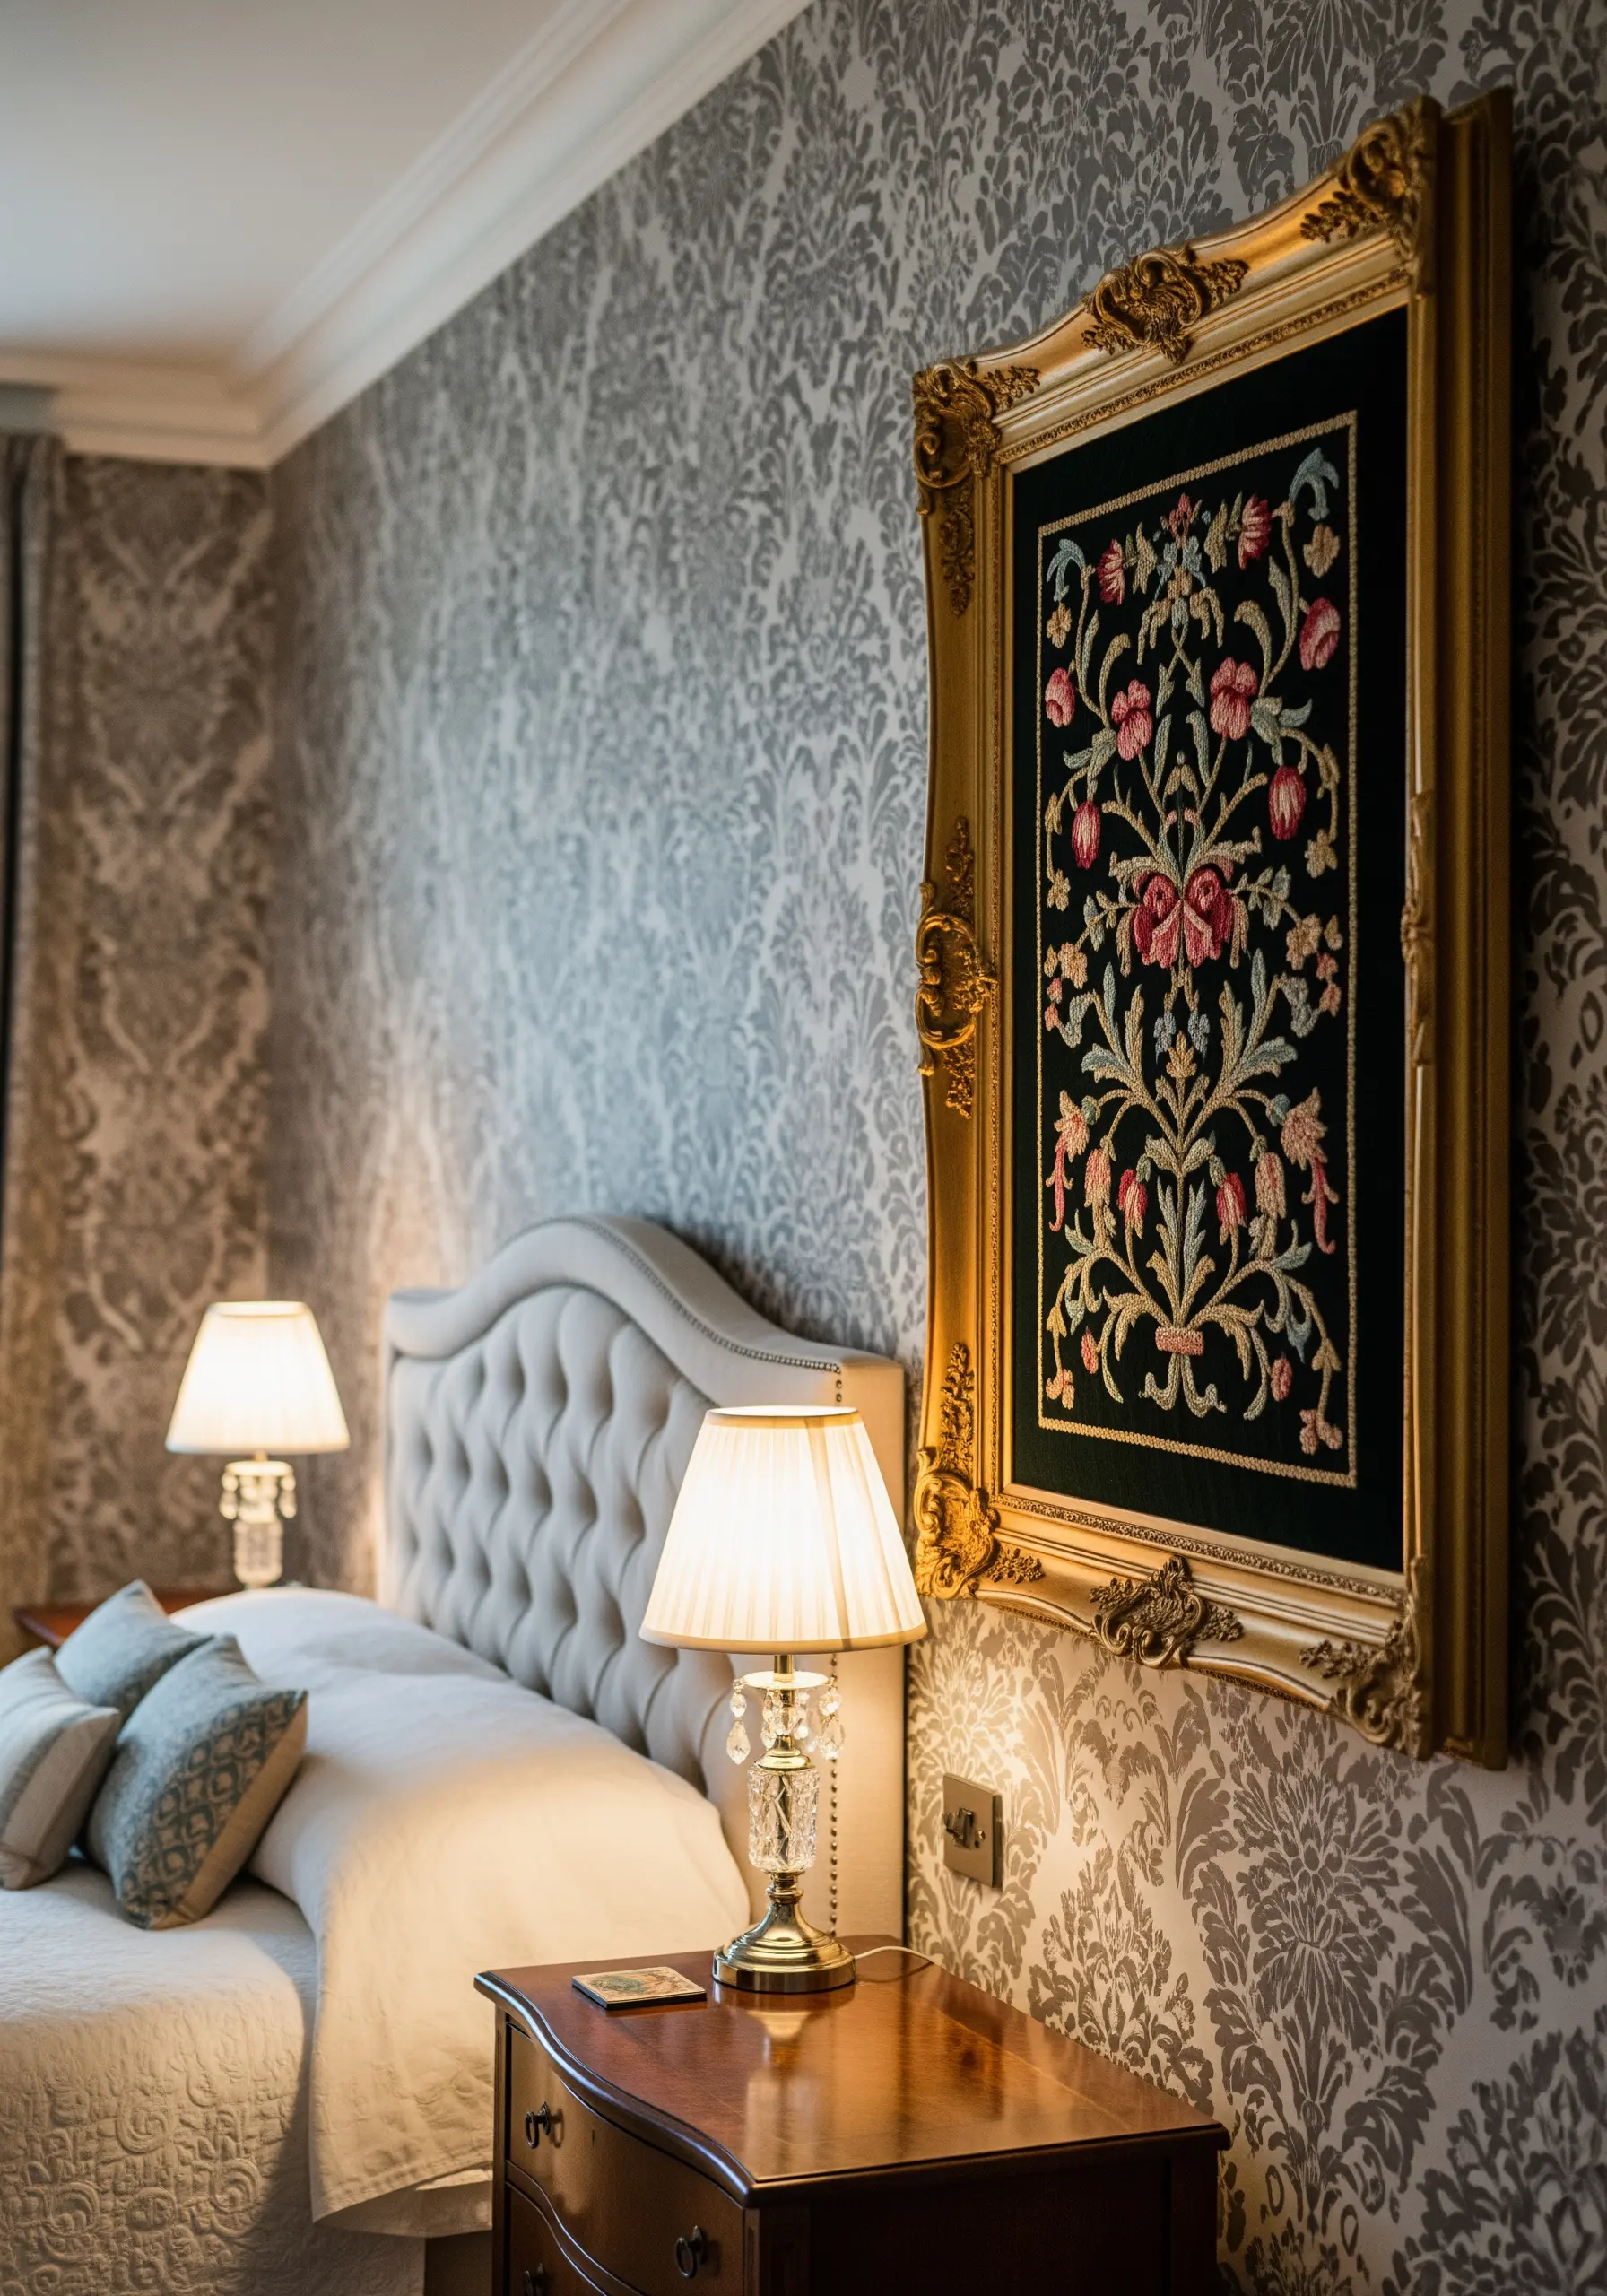
Create a piece with heirloom quality and undeniable luxury by combining rich materials.
Use a dark, plush fabric like black or deep green velvet as your base. The deep pile of the velvet will absorb light, making your stitches appear even more vibrant.
Incorporate goldwork techniques by couching down real metallic threads to outline the main floral motifs.
For the flower petals, use a padded satin stitch with silk threads to give them a raised, lustrous finish.
Finishing the piece in an ornate, gilded frame completes the baroque aesthetic, turning your embroidery into a piece of fine art.
28. Map the Solar System with Textured Stitches
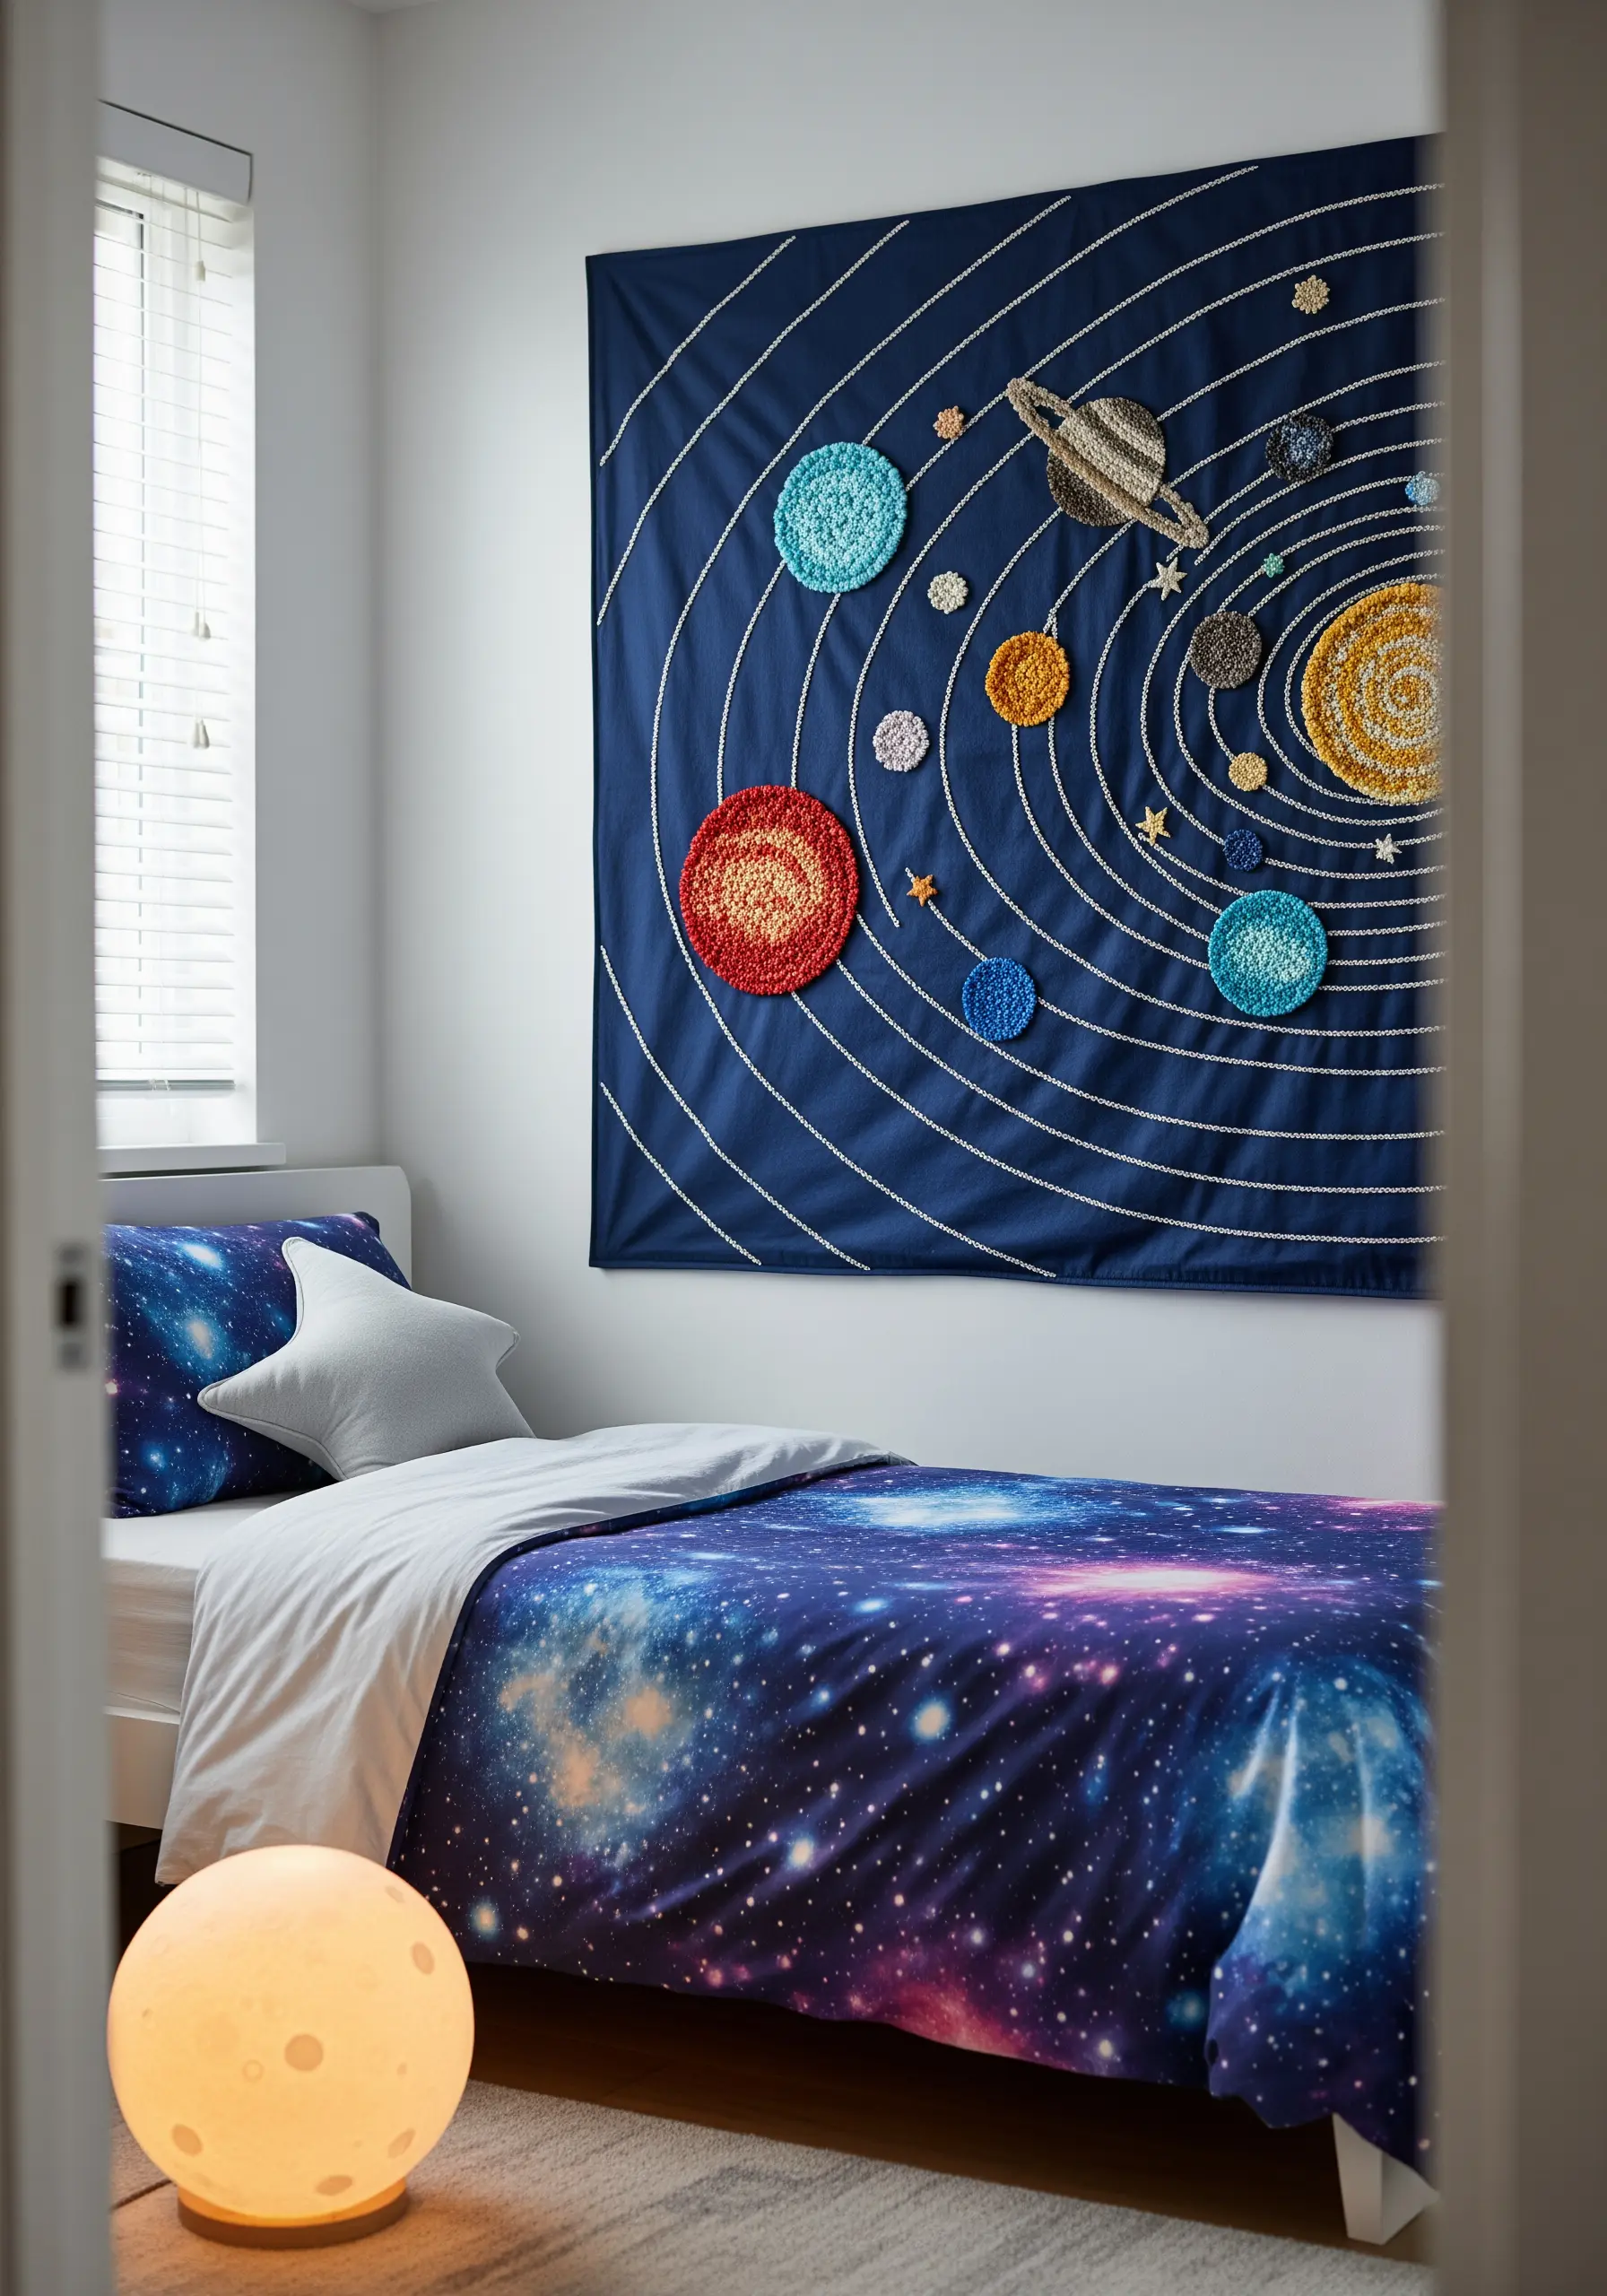
Make a cosmic wall hanging that’s both fun and textural.
Assign a different high-texture stitch or technique to each planet. Use a woven wheel stitch for the sun, dense French knots for a terrestrial planet, and a spiral of chain stitch for Jupiter’s storms.
For Saturn’s rings, couch down a piece of metallic cord or use a series of long, shimmering straight stitches.
The orbital paths can be stitched with a simple, clean backstitch in a contrasting white or silver thread.
This project is a fantastic way to create a tactile and educational piece of art for a child’s bedroom or a space enthusiast.
29. Personalize a Traditional Alphabet Sampler
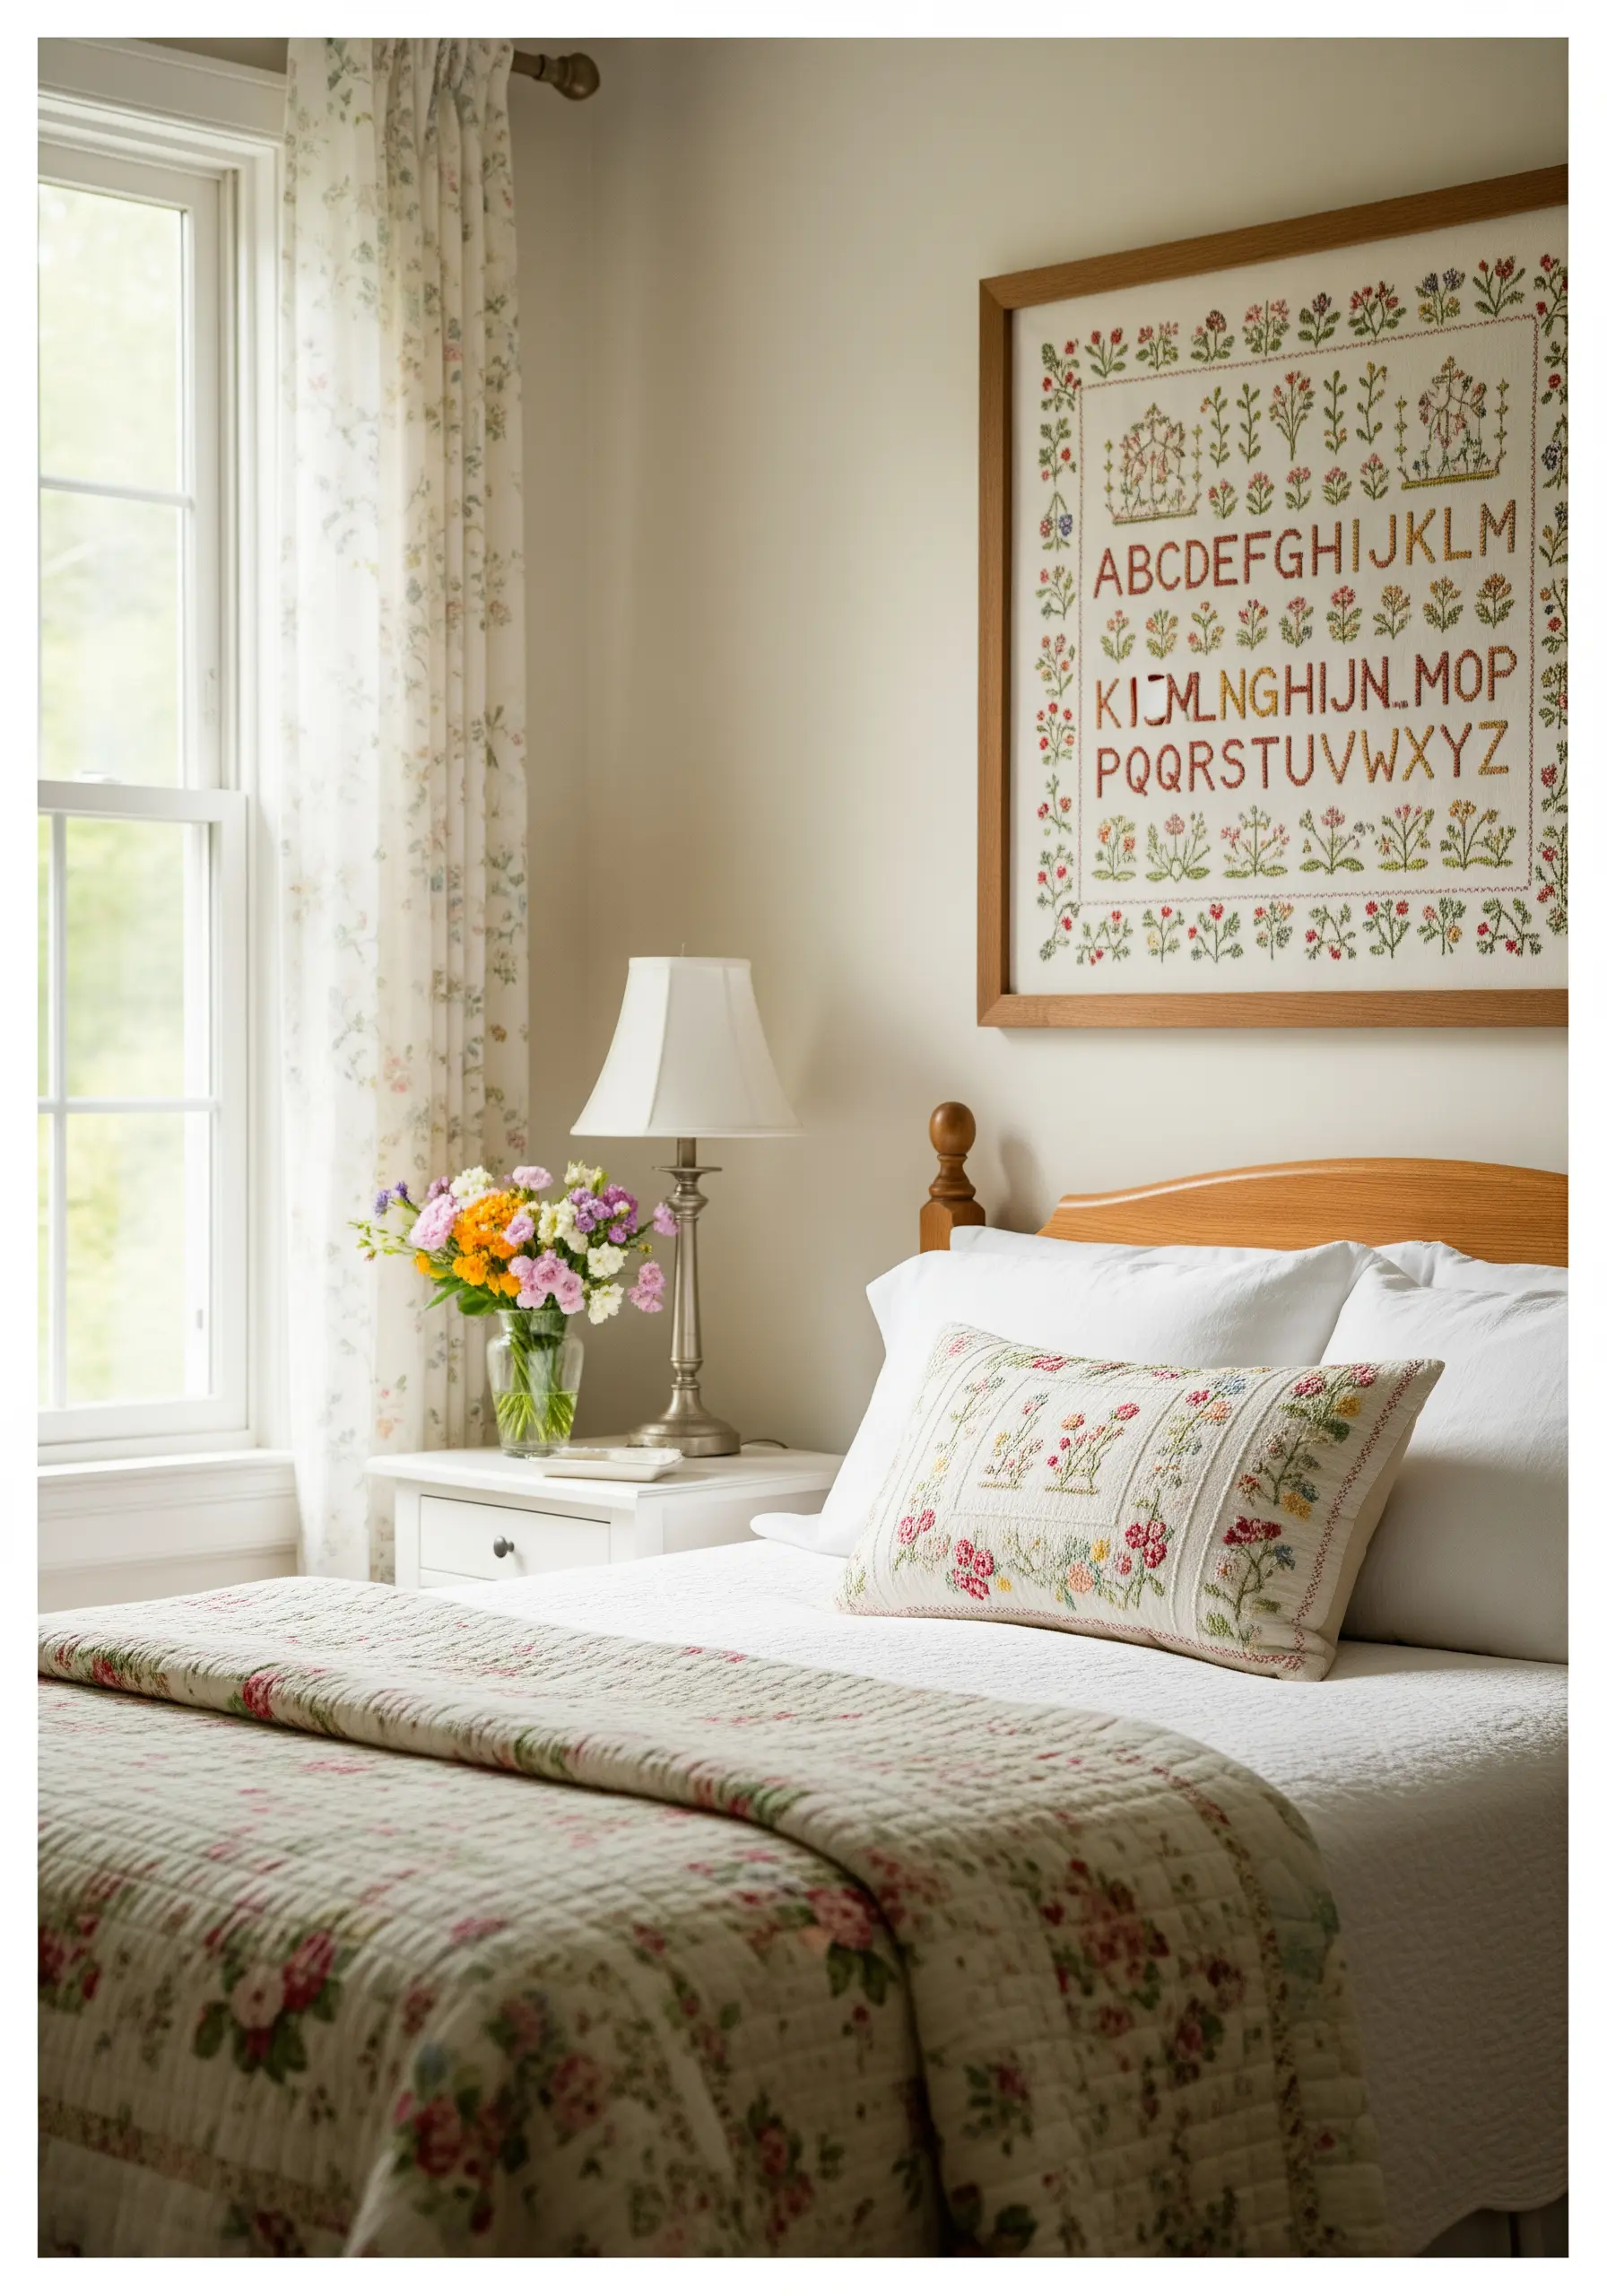
Reimagine the classic sampler with a modern and personal touch.
While samplers traditionally showcased a stitcher’s skill with letters and borders, you can update yours by choosing a contemporary color palette.
Instead of traditional red and blue, try a muted, earthy range of greens, golds, and terracotta.
Practice different lettering styles, from simple block letters in cross-stitch to elegant script in stem stitch.
Interspersing the alphabet with small floral or botanical motifs adds a personal, decorative element that makes the tradition your own.
30. Create an Ethereal Cloudscape with French Knots
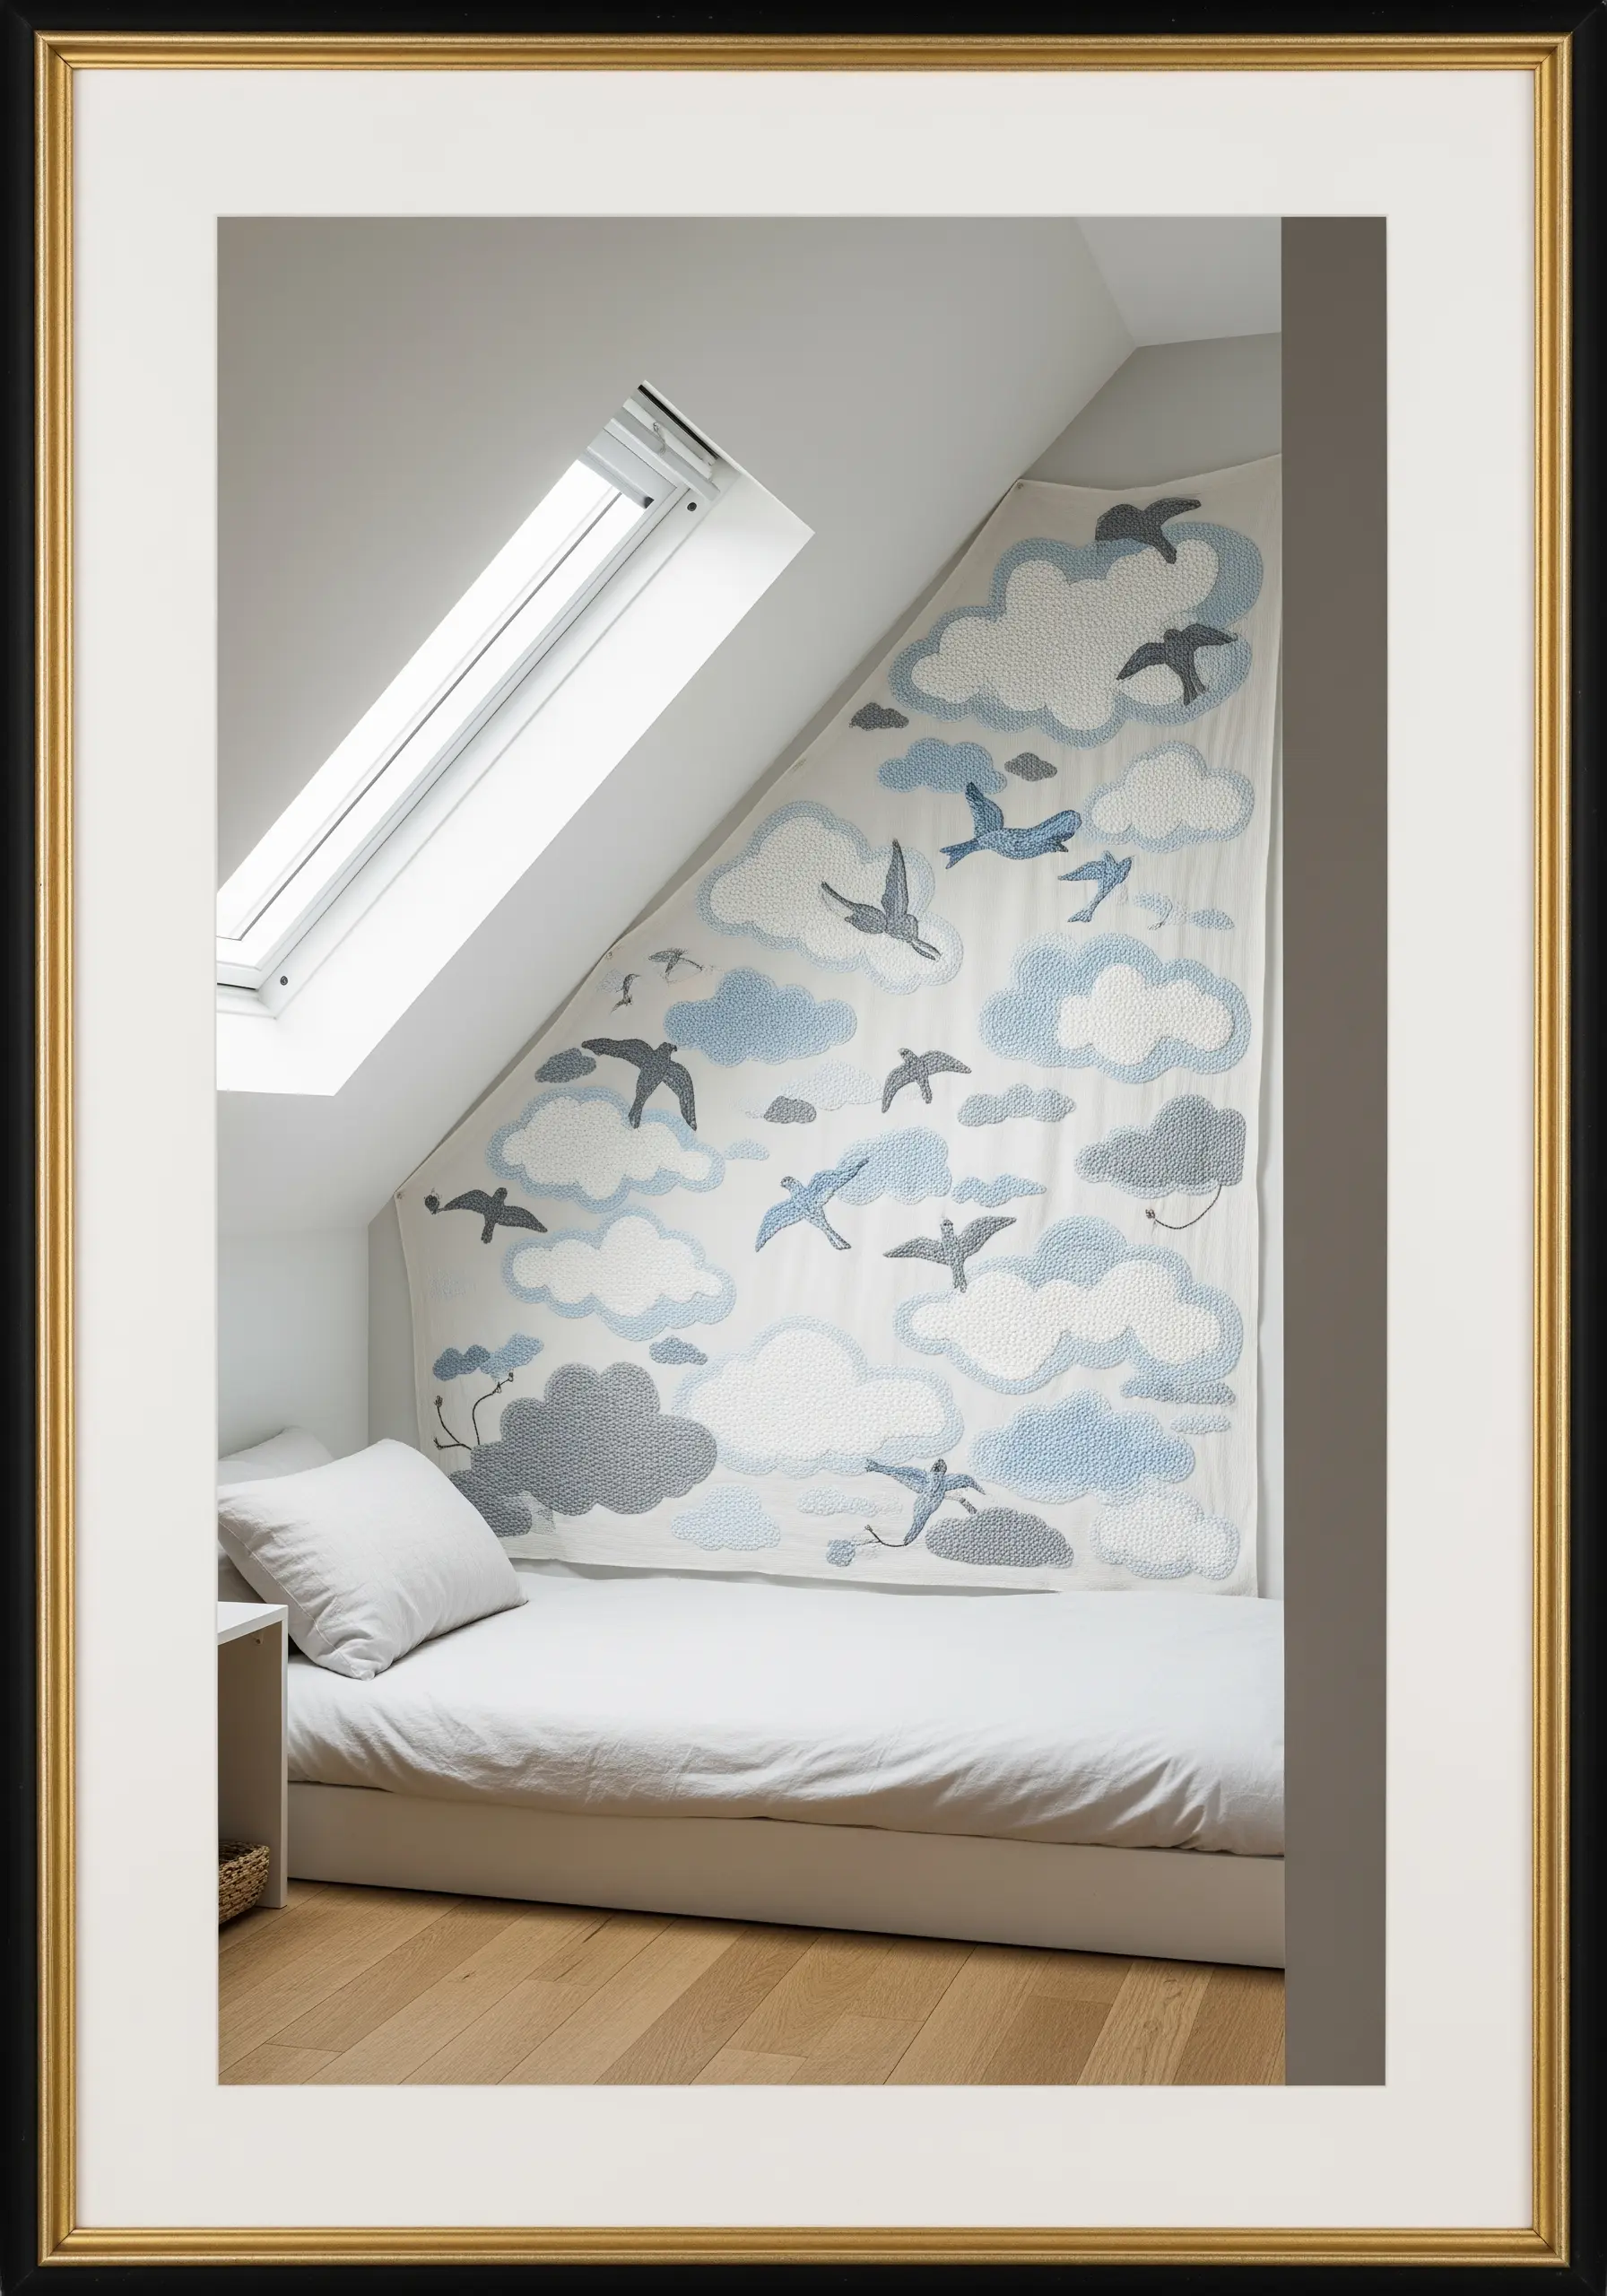
Stitch a dreamy, atmospheric scene that perfectly fits an unusual space, like an attic nook.
To create the soft, fluffy texture of clouds, fill their shapes with dense French knots.
Use several shades of white, grey, and pale blue, clustering the colors together to create highlights and shadows within each cloud.
The birds can be stitched in a simple, dark outline stitch, like a backstitch, to create a graphic contrast against the soft clouds.
By tailoring your tapestry to the unique angle of the wall, you create a custom installation that feels truly integrated with the architecture.
31. Craft a Refined Monogram with Padded Satin Stitch

A well-executed monogram adds a touch of bespoke luxury to any bedroom.
To give your letters a professional, raised appearance, use a padded satin stitch.
First, create a foundation for your letters by filling them with small, horizontal seed stitches or by cutting the shape from a thin piece of felt and tacking it to your fabric.
Then, cover this padding with perfectly smooth, vertical satin stitches using a high-quality thread.
This technique elevates simple initials into a sophisticated design element that coordinates beautifully with embroidered linens.
These minimal monogram styles transform a wall into a personal statement.


