
You know that box of metallic threads you own? The one filled with golds, silvers, and coppers that you save for holiday projects or tiny, special accents? I want you to open it. We’re going to rethink how these threads can be used—not just for sparkle, but for structure, texture, and pure, modern elegance.
The secret isn’t in complex, difficult stitches. It’s in the canvas you choose. By working on dark, matte fabrics like black linen, deep navy cotton, or charcoal gray felt, you create a void. Into that void, every single stitch you make with a metallic thread becomes a deliberate stroke of light. The contrast does the heavy lifting, turning simple lines into architectural forms and basic knots into rich, tactile constellations.
In these projects, you’ll discover how to use metallic thread not as a fleeting embellishment, but as the core of your design. You’ll learn to control its reflective quality, build dimension with simple techniques, and create abstract art that feels both personal and incredibly polished. Let’s begin.
1. Celestial Burst with Textured Core

Create stunning metallic thread wall art by contrasting a dense, knotted center with sharp, radiating lines.
Use French knots or bullion knots in varying sizes for the core, clustering them tightly to create a rich, tactile surface.
For the rays, use a single, long straight stitch for each, pulling it taut to ensure it lies flat and reflects light sharply.
Varying the lengths of these rays creates a dynamic, explosive effect, while blending gold, silver, and copper threads adds warmth and complexity.
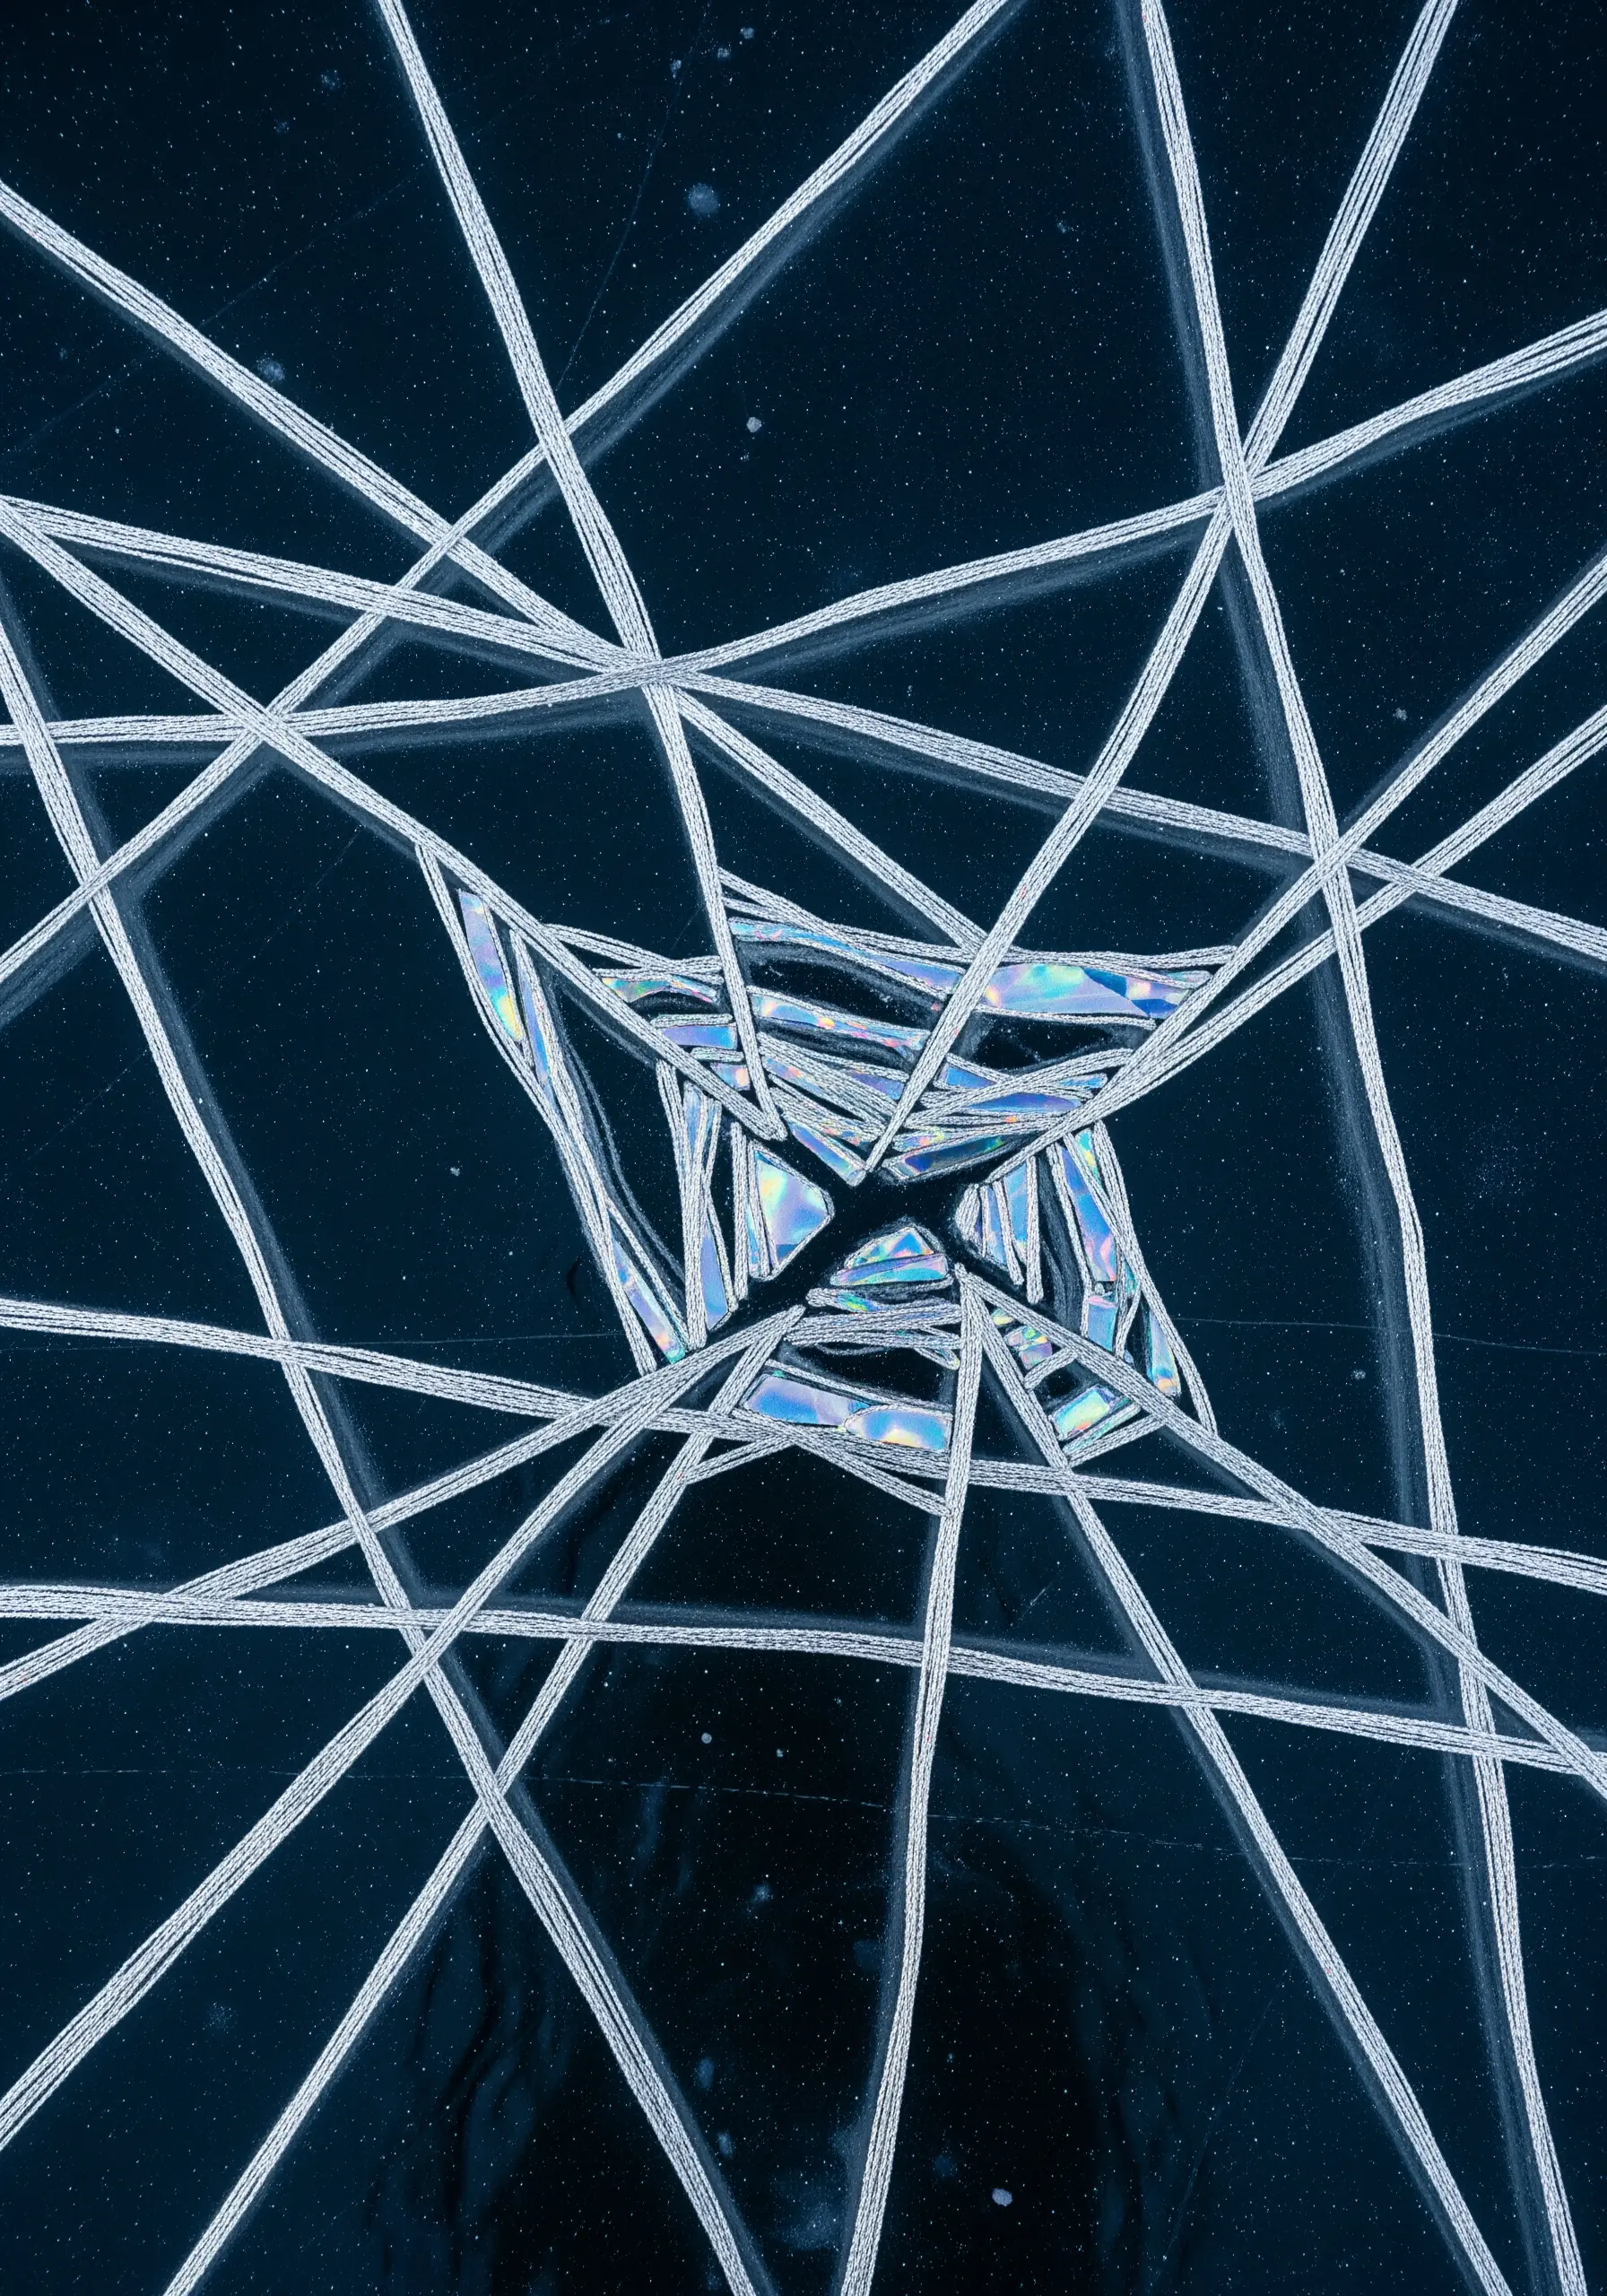
2. Architectural Thread Weaving
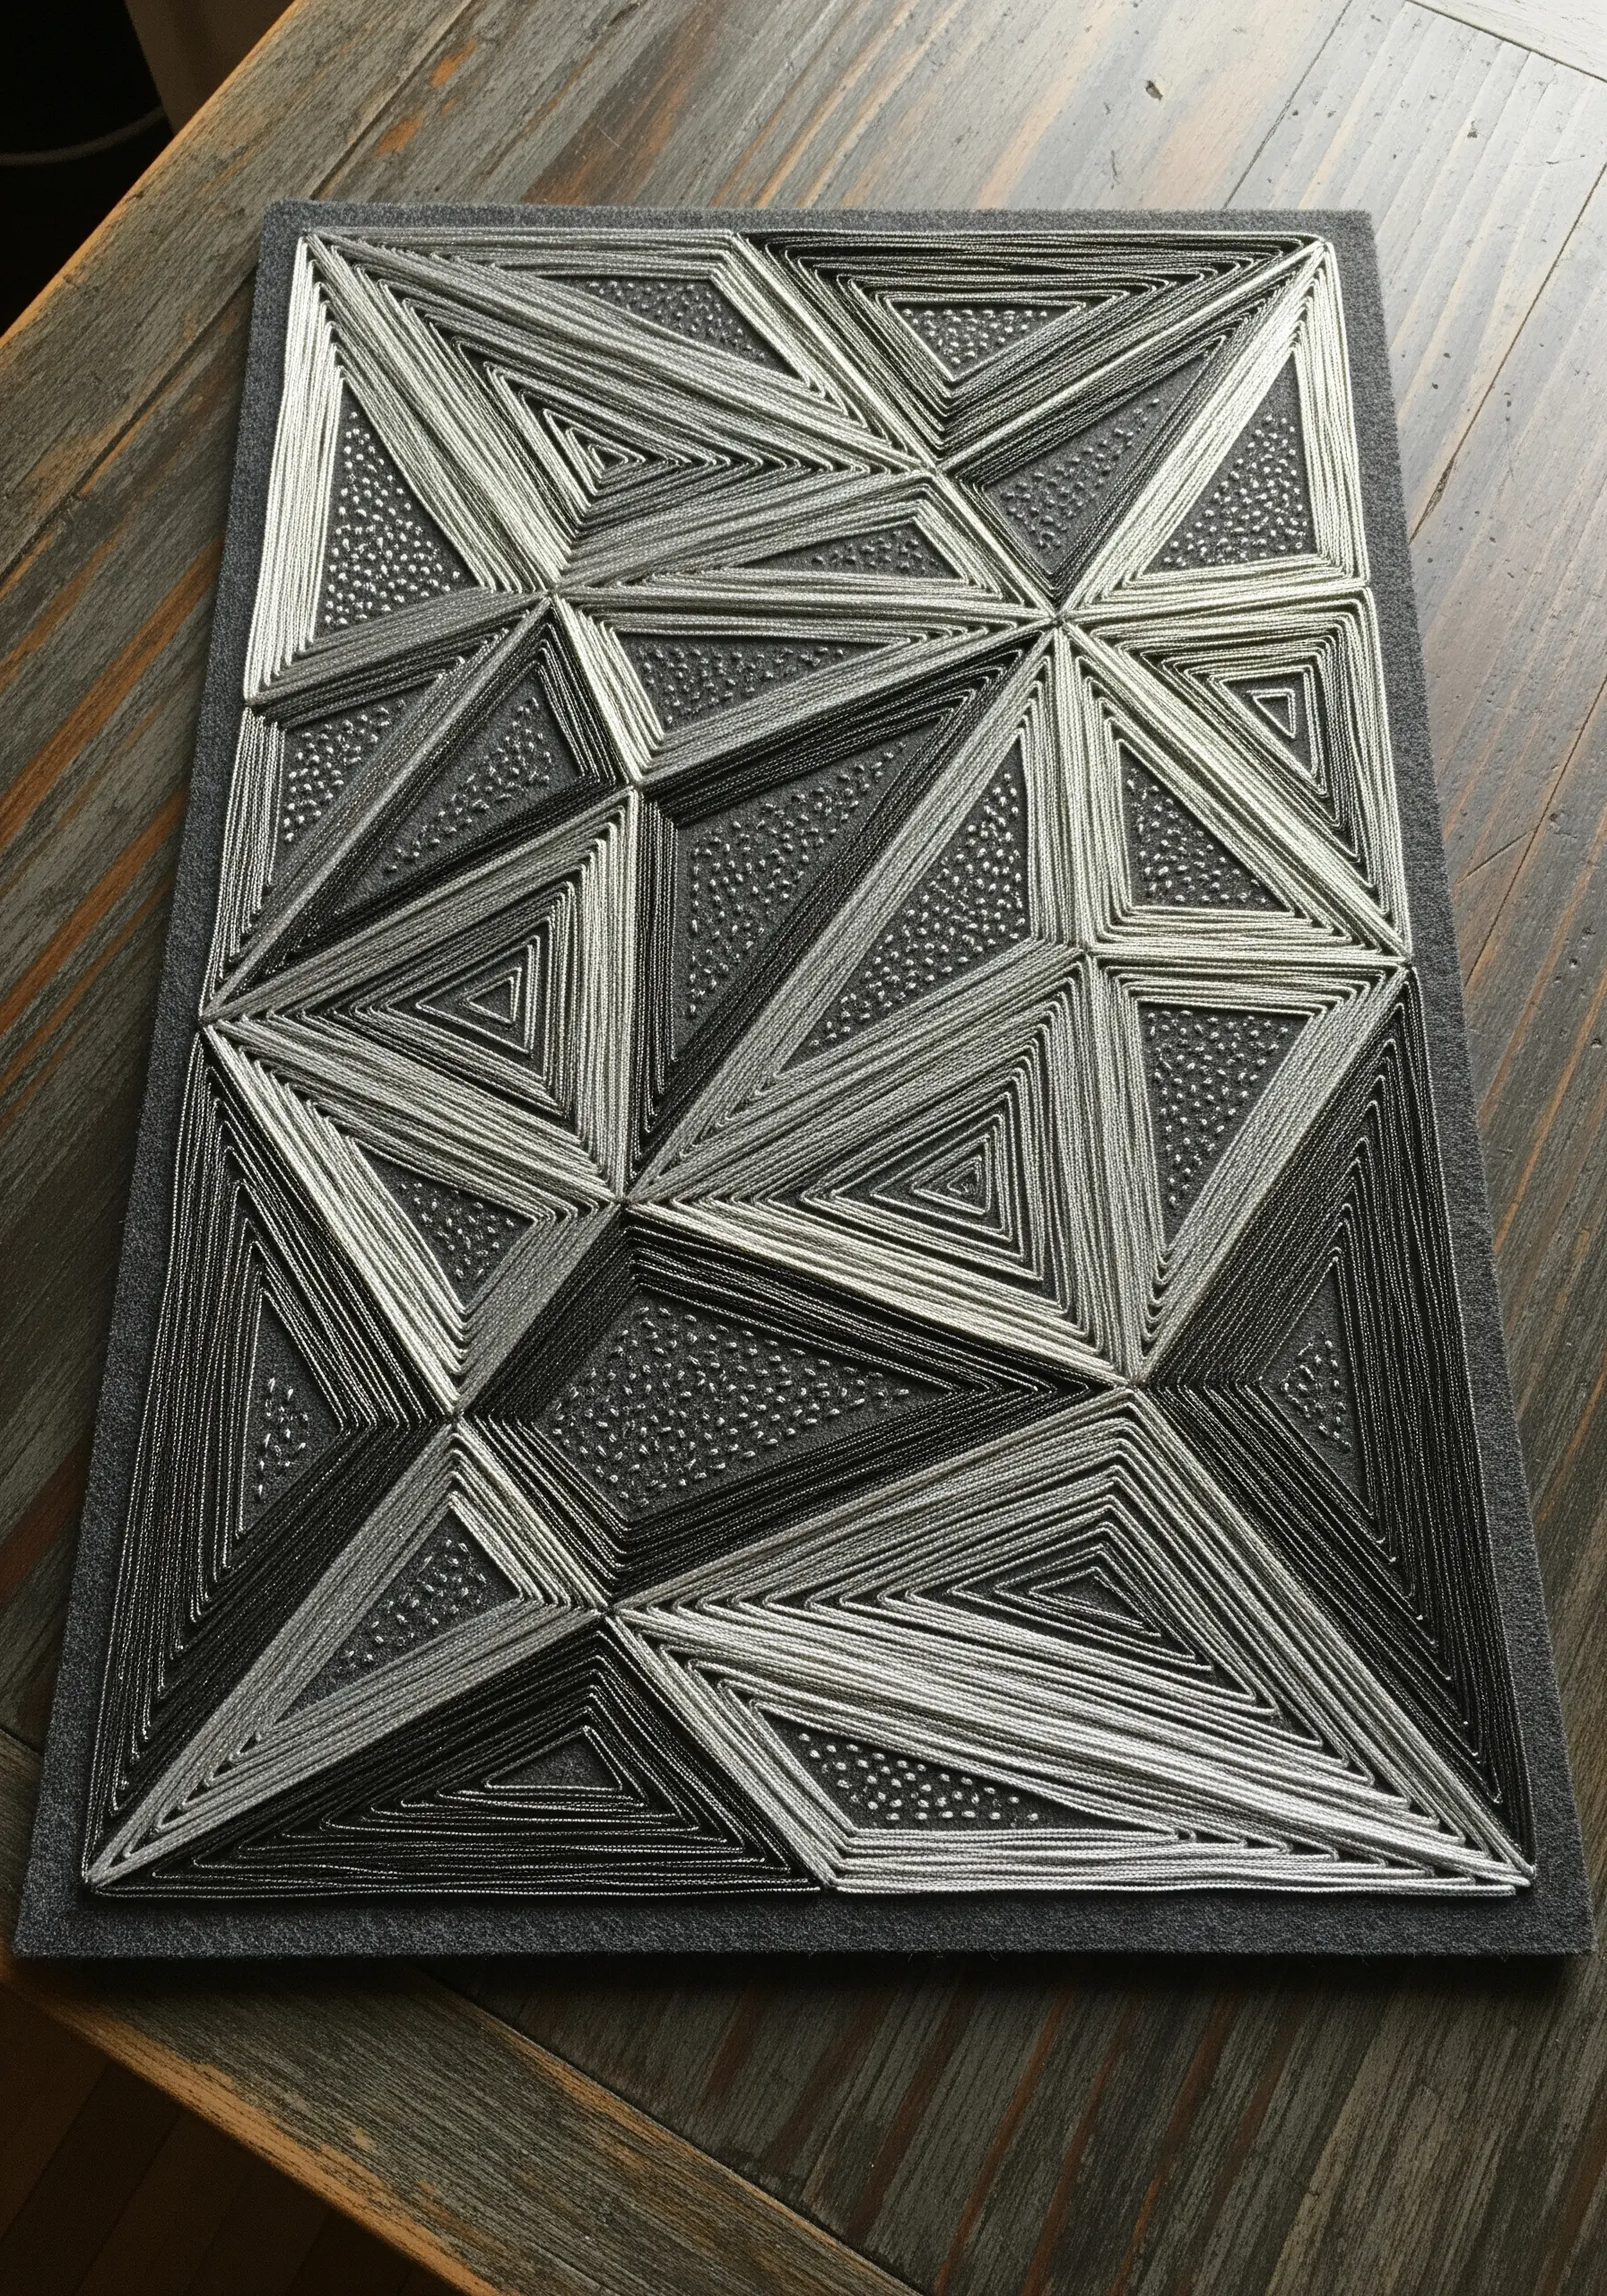
This technique mimics string art, but on fabric, to create striking geometric forms.
Start by marking your anchor points on a stiff backing or heavy fabric like felt.
Use a strong metallic thread, like a fine braid, to wrap around pins or through pre-pierced holes, building layered, concentric triangles.
By varying the thread color from dark gray to bright silver, you create a powerful 3D illusion and depth.
Keep your thread tension consistent to ensure crisp, sharp lines.
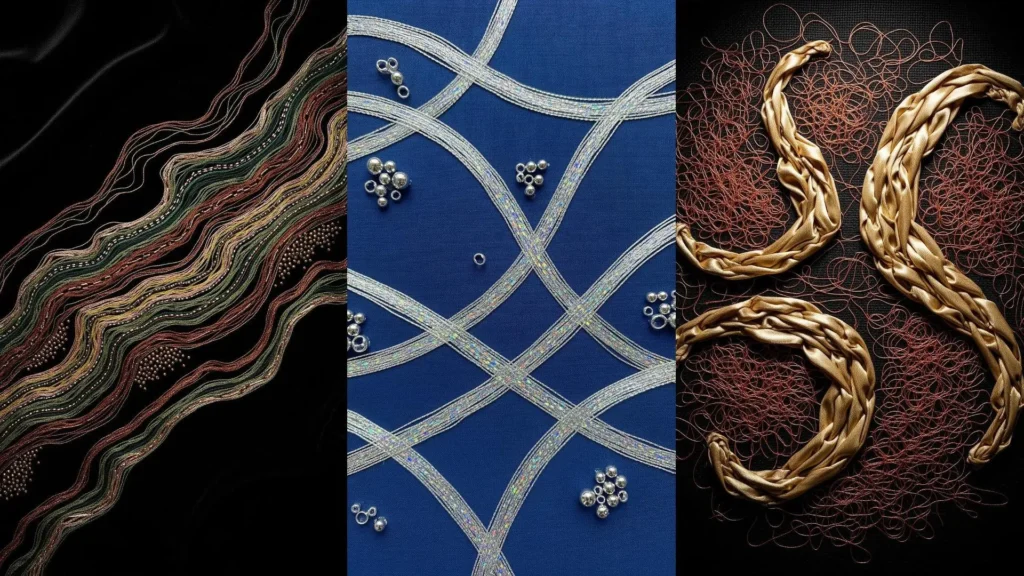
3. Organic Flow with Beaded Accents
To capture this fluid, river-like motion, use couching.
Lay down thicker metallic cords or multiple strands of thread and stitch over them with a finer, matching thread, allowing you to create smooth, elegant curves.
Introduce clusters of metallic seed beads at intervals to create pools of light and texture.
This technique breaks the linear flow and adds a delicate, granular sparkle that contrasts beautifully with the sleek, couched lines.
4. The Metallic Brushstroke Effect
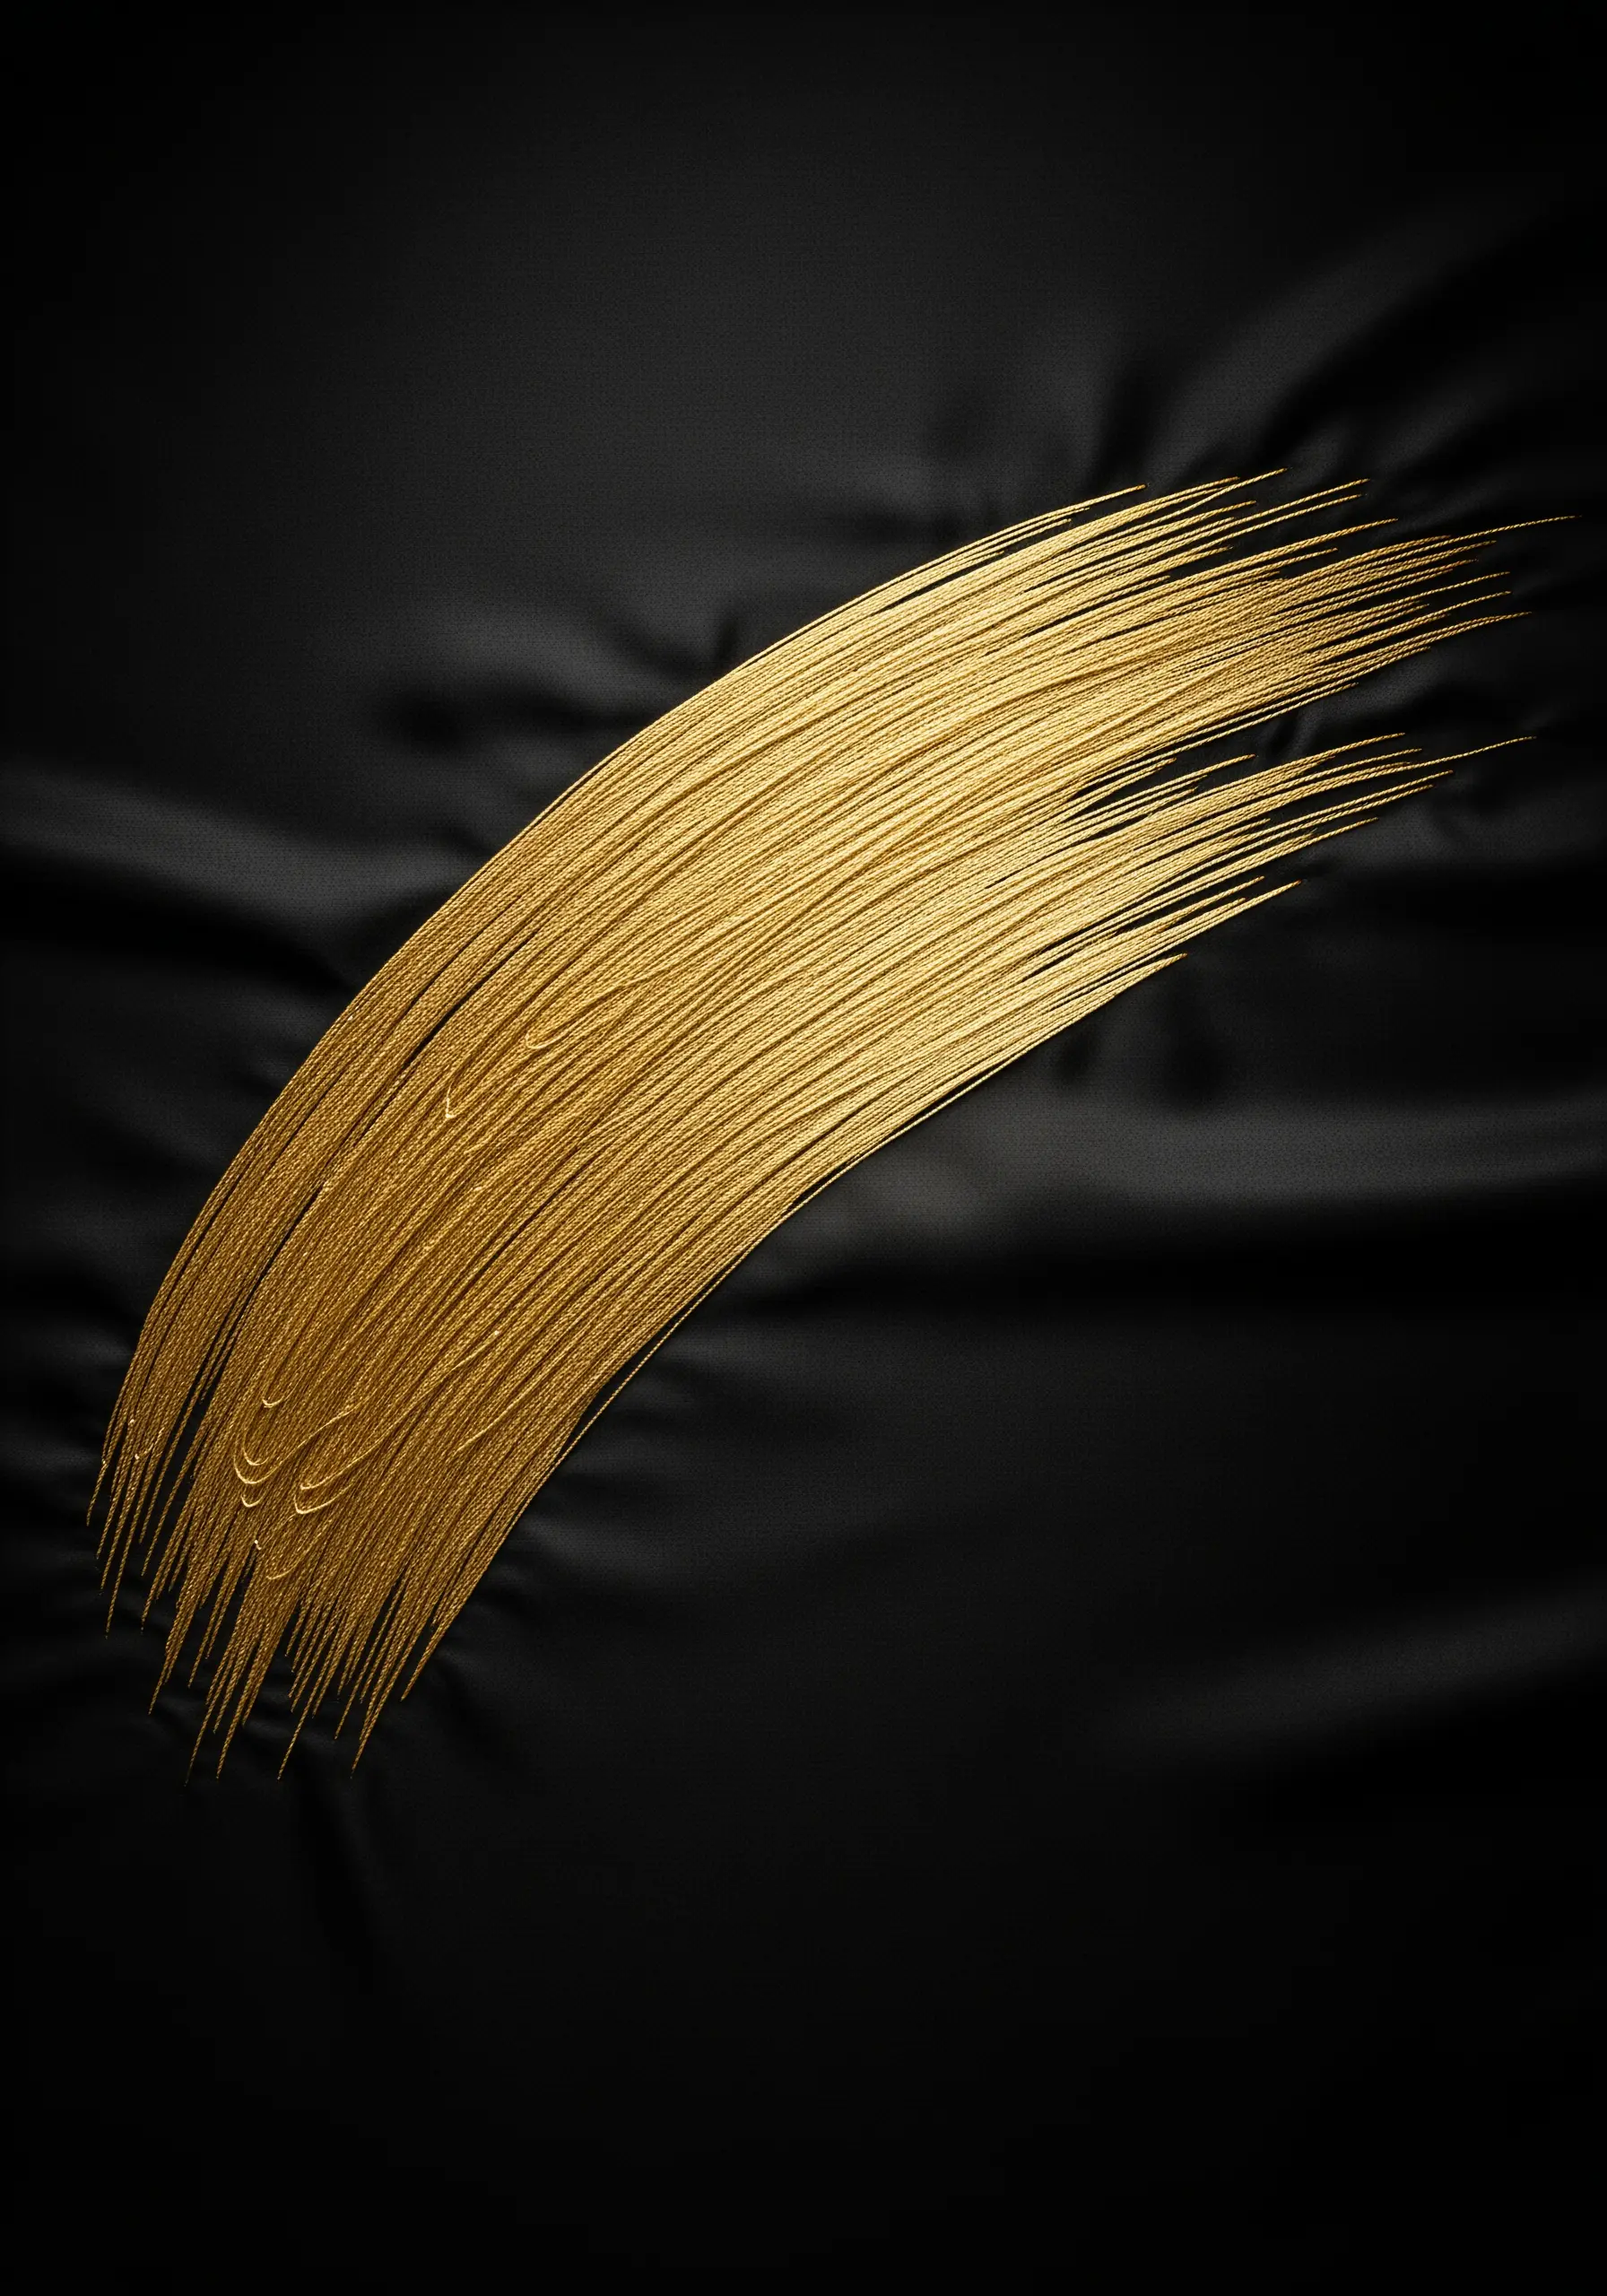
Achieve this painterly sweep using long-and-short stitch, where the goal is to blend light, not color.
Use a high-sheen, flat metallic thread and keep all your stitches flowing in the same direction, following the curve of the brushstroke.
The density is crucial; pack the stitches tightly so no fabric shows through, creating a solid, light-reflective surface.
On a satin or silk background, the contrast between the fabric’s sheen and the thread’s metallic gleam becomes the focal point.
5. A Quartet of Abstract Textures
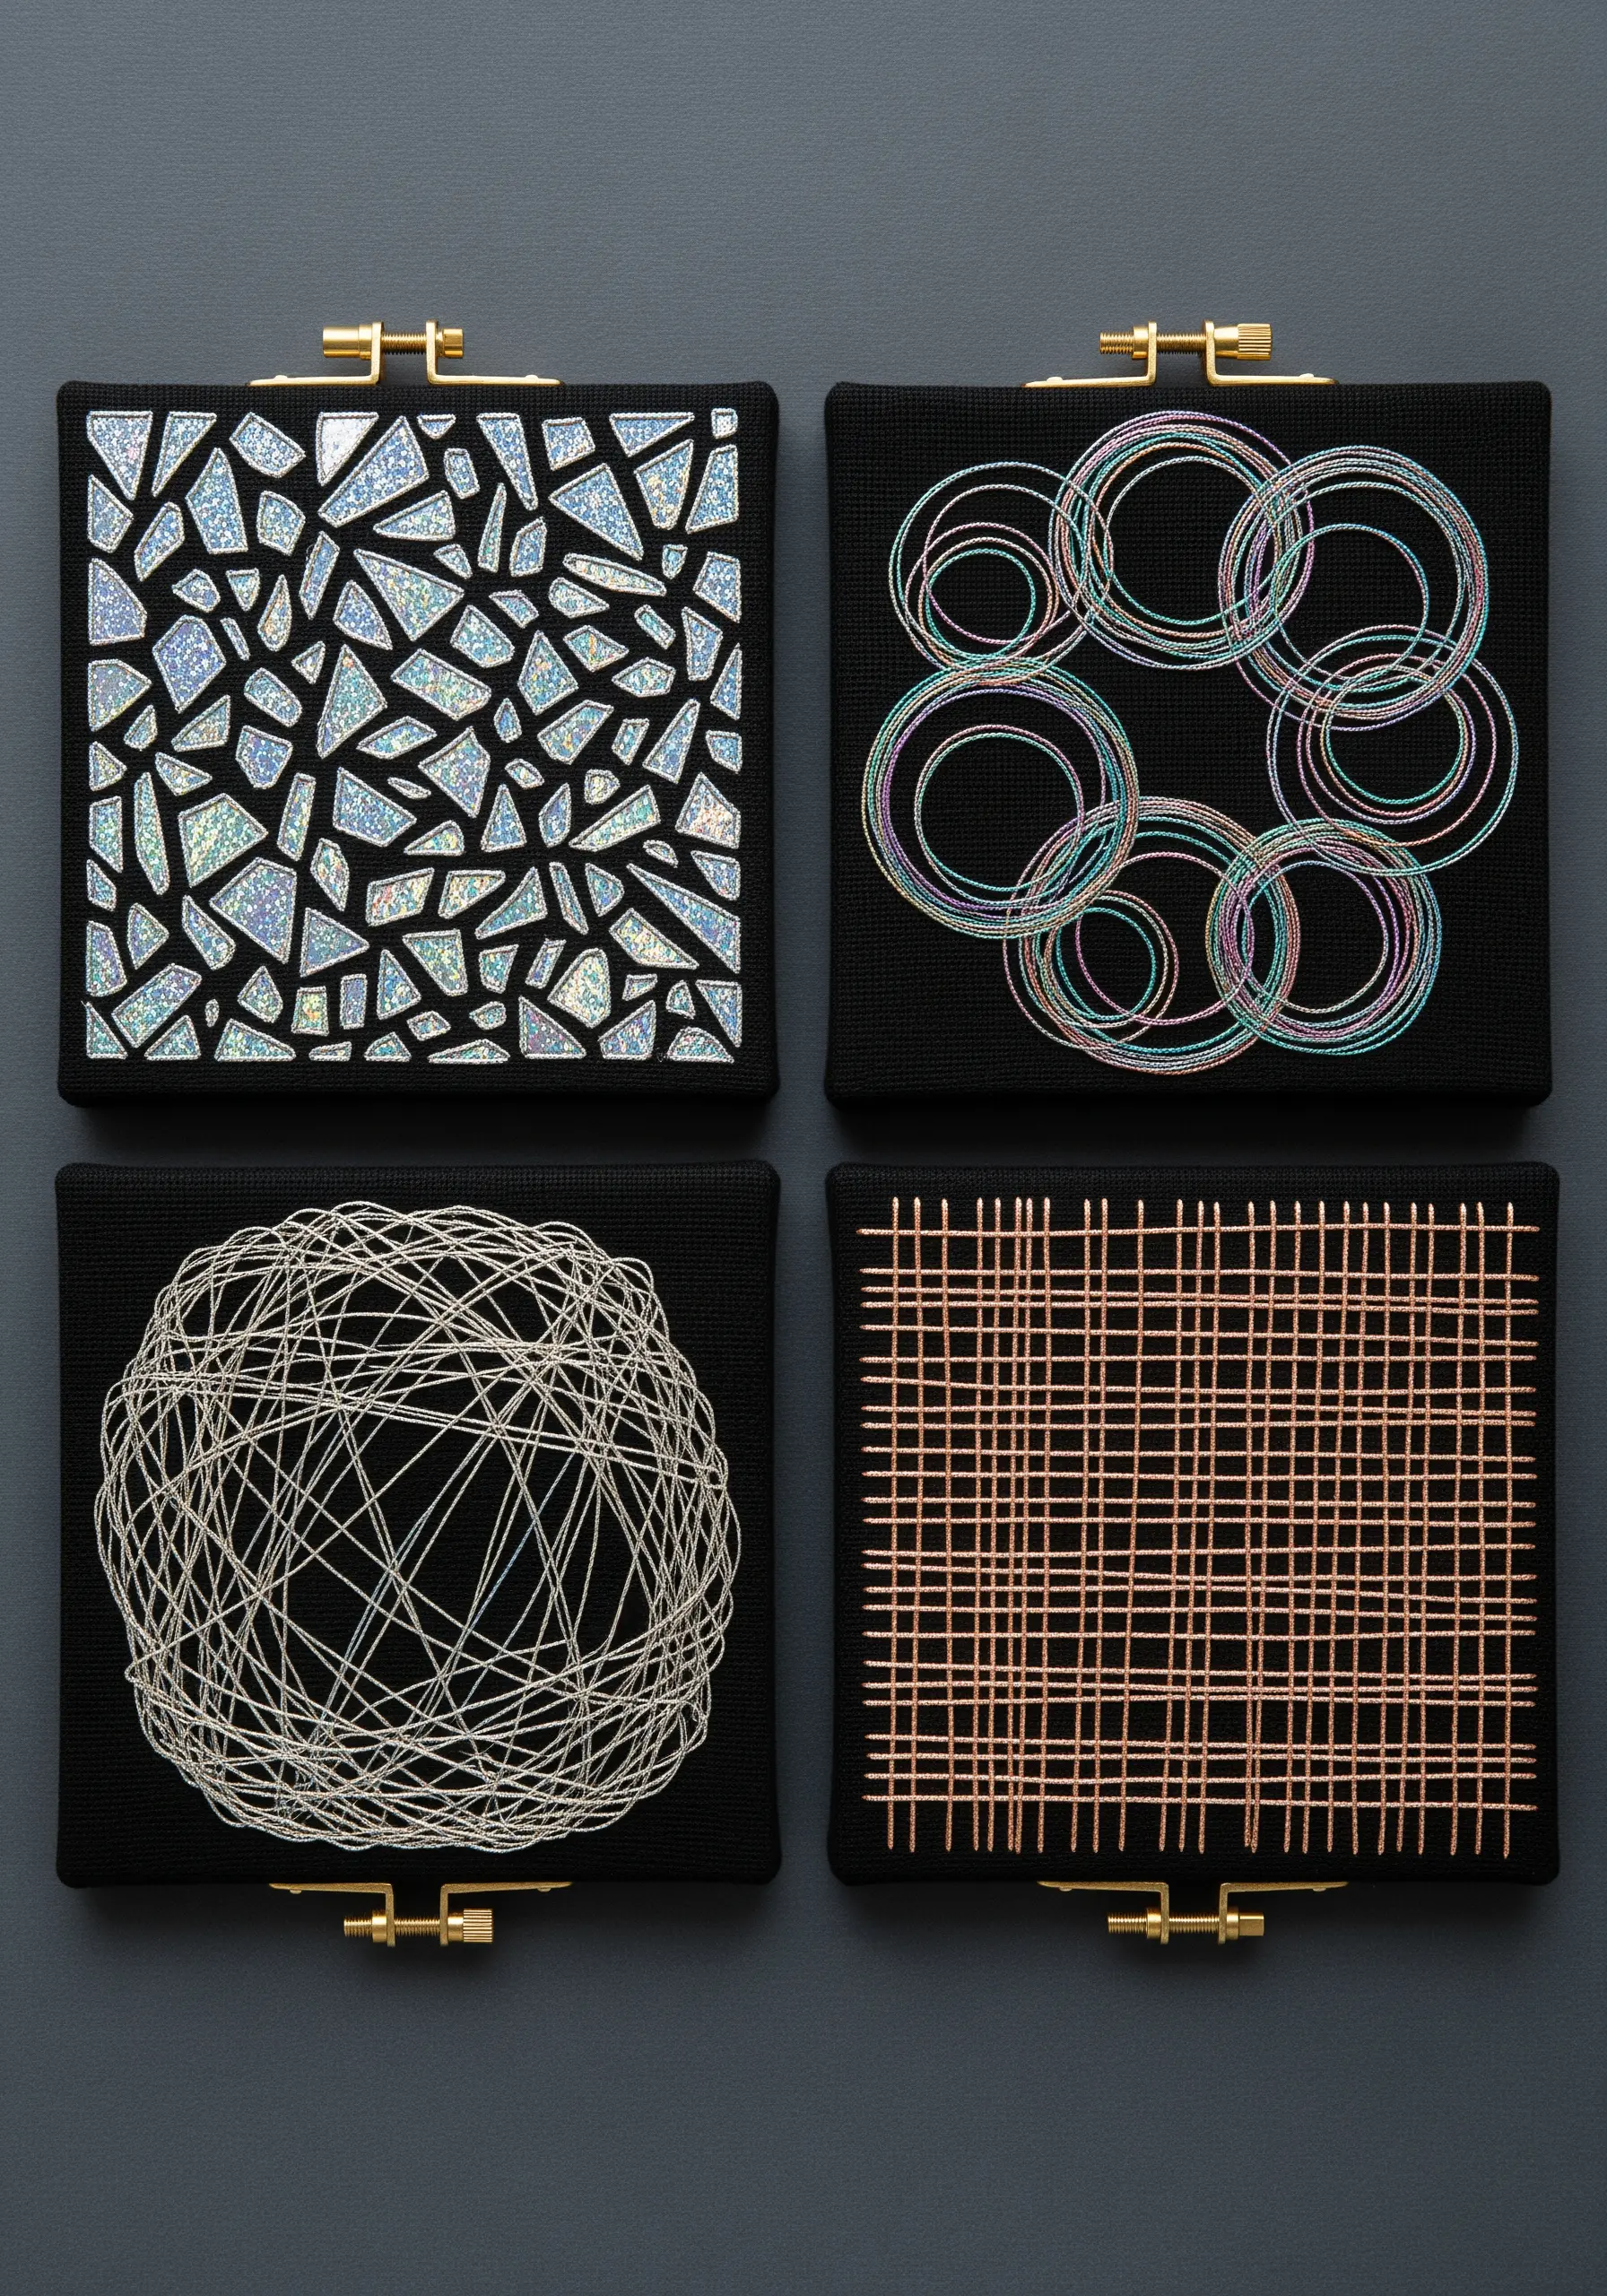
Explore how different metallic elements interact with a dark background by creating a study series.
For a shattered glass effect, appliqué small pieces of holographic vinyl.
For swirling circles, use a variegated iridescent thread in a simple backstitch.
Create a chaotic sphere with overlapping straight stitches in a fine silver thread, building density without a clear pattern.
For a clean grid, use a thicker copper thread for a bold, architectural look.
6. Dynamic Contrast with Satin Stitch Blocks
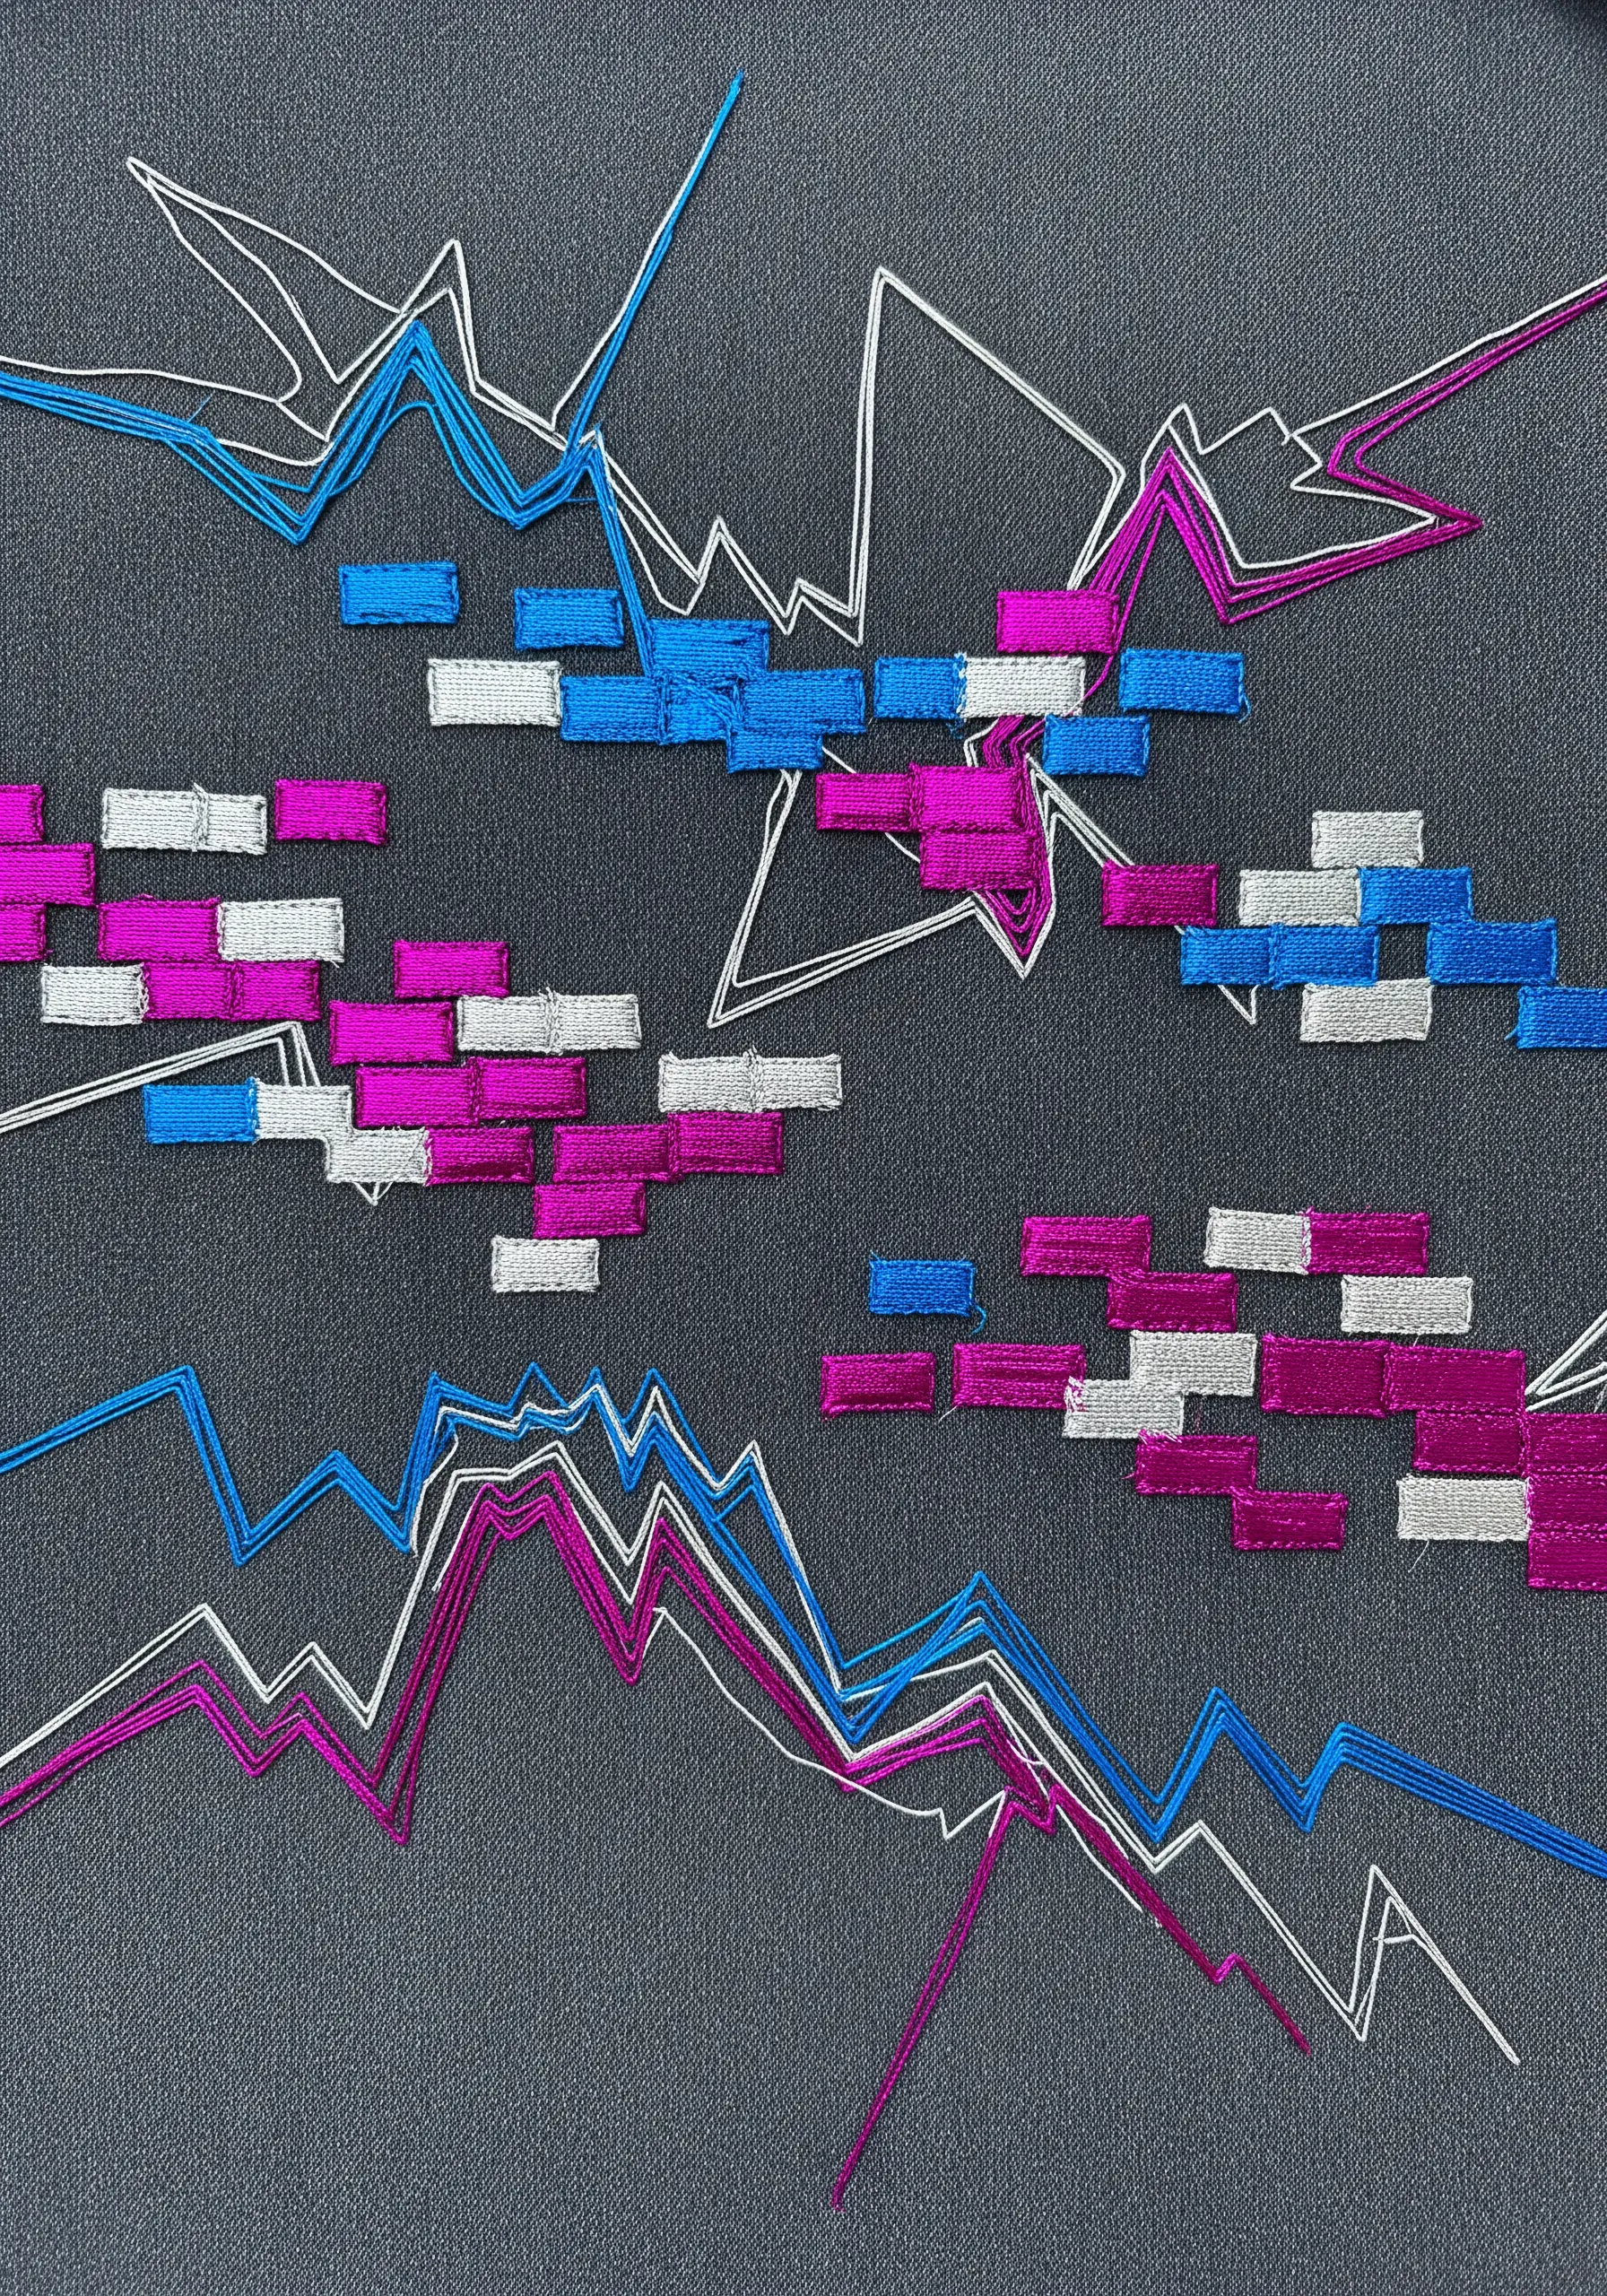
Create visual tension by pairing sharp, energetic lines with solid, stable blocks of color.
Use a single strand of metallic thread for the jagged outlines—a simple backstitch will keep them crisp.
For the rectangular blocks, use a padded satin stitch by laying down a foundation of straight stitches, then covering them with satin stitches going in the opposite direction.
This raises the blocks from the surface, giving them a three-dimensional quality and making their metallic sheen even more prominent.
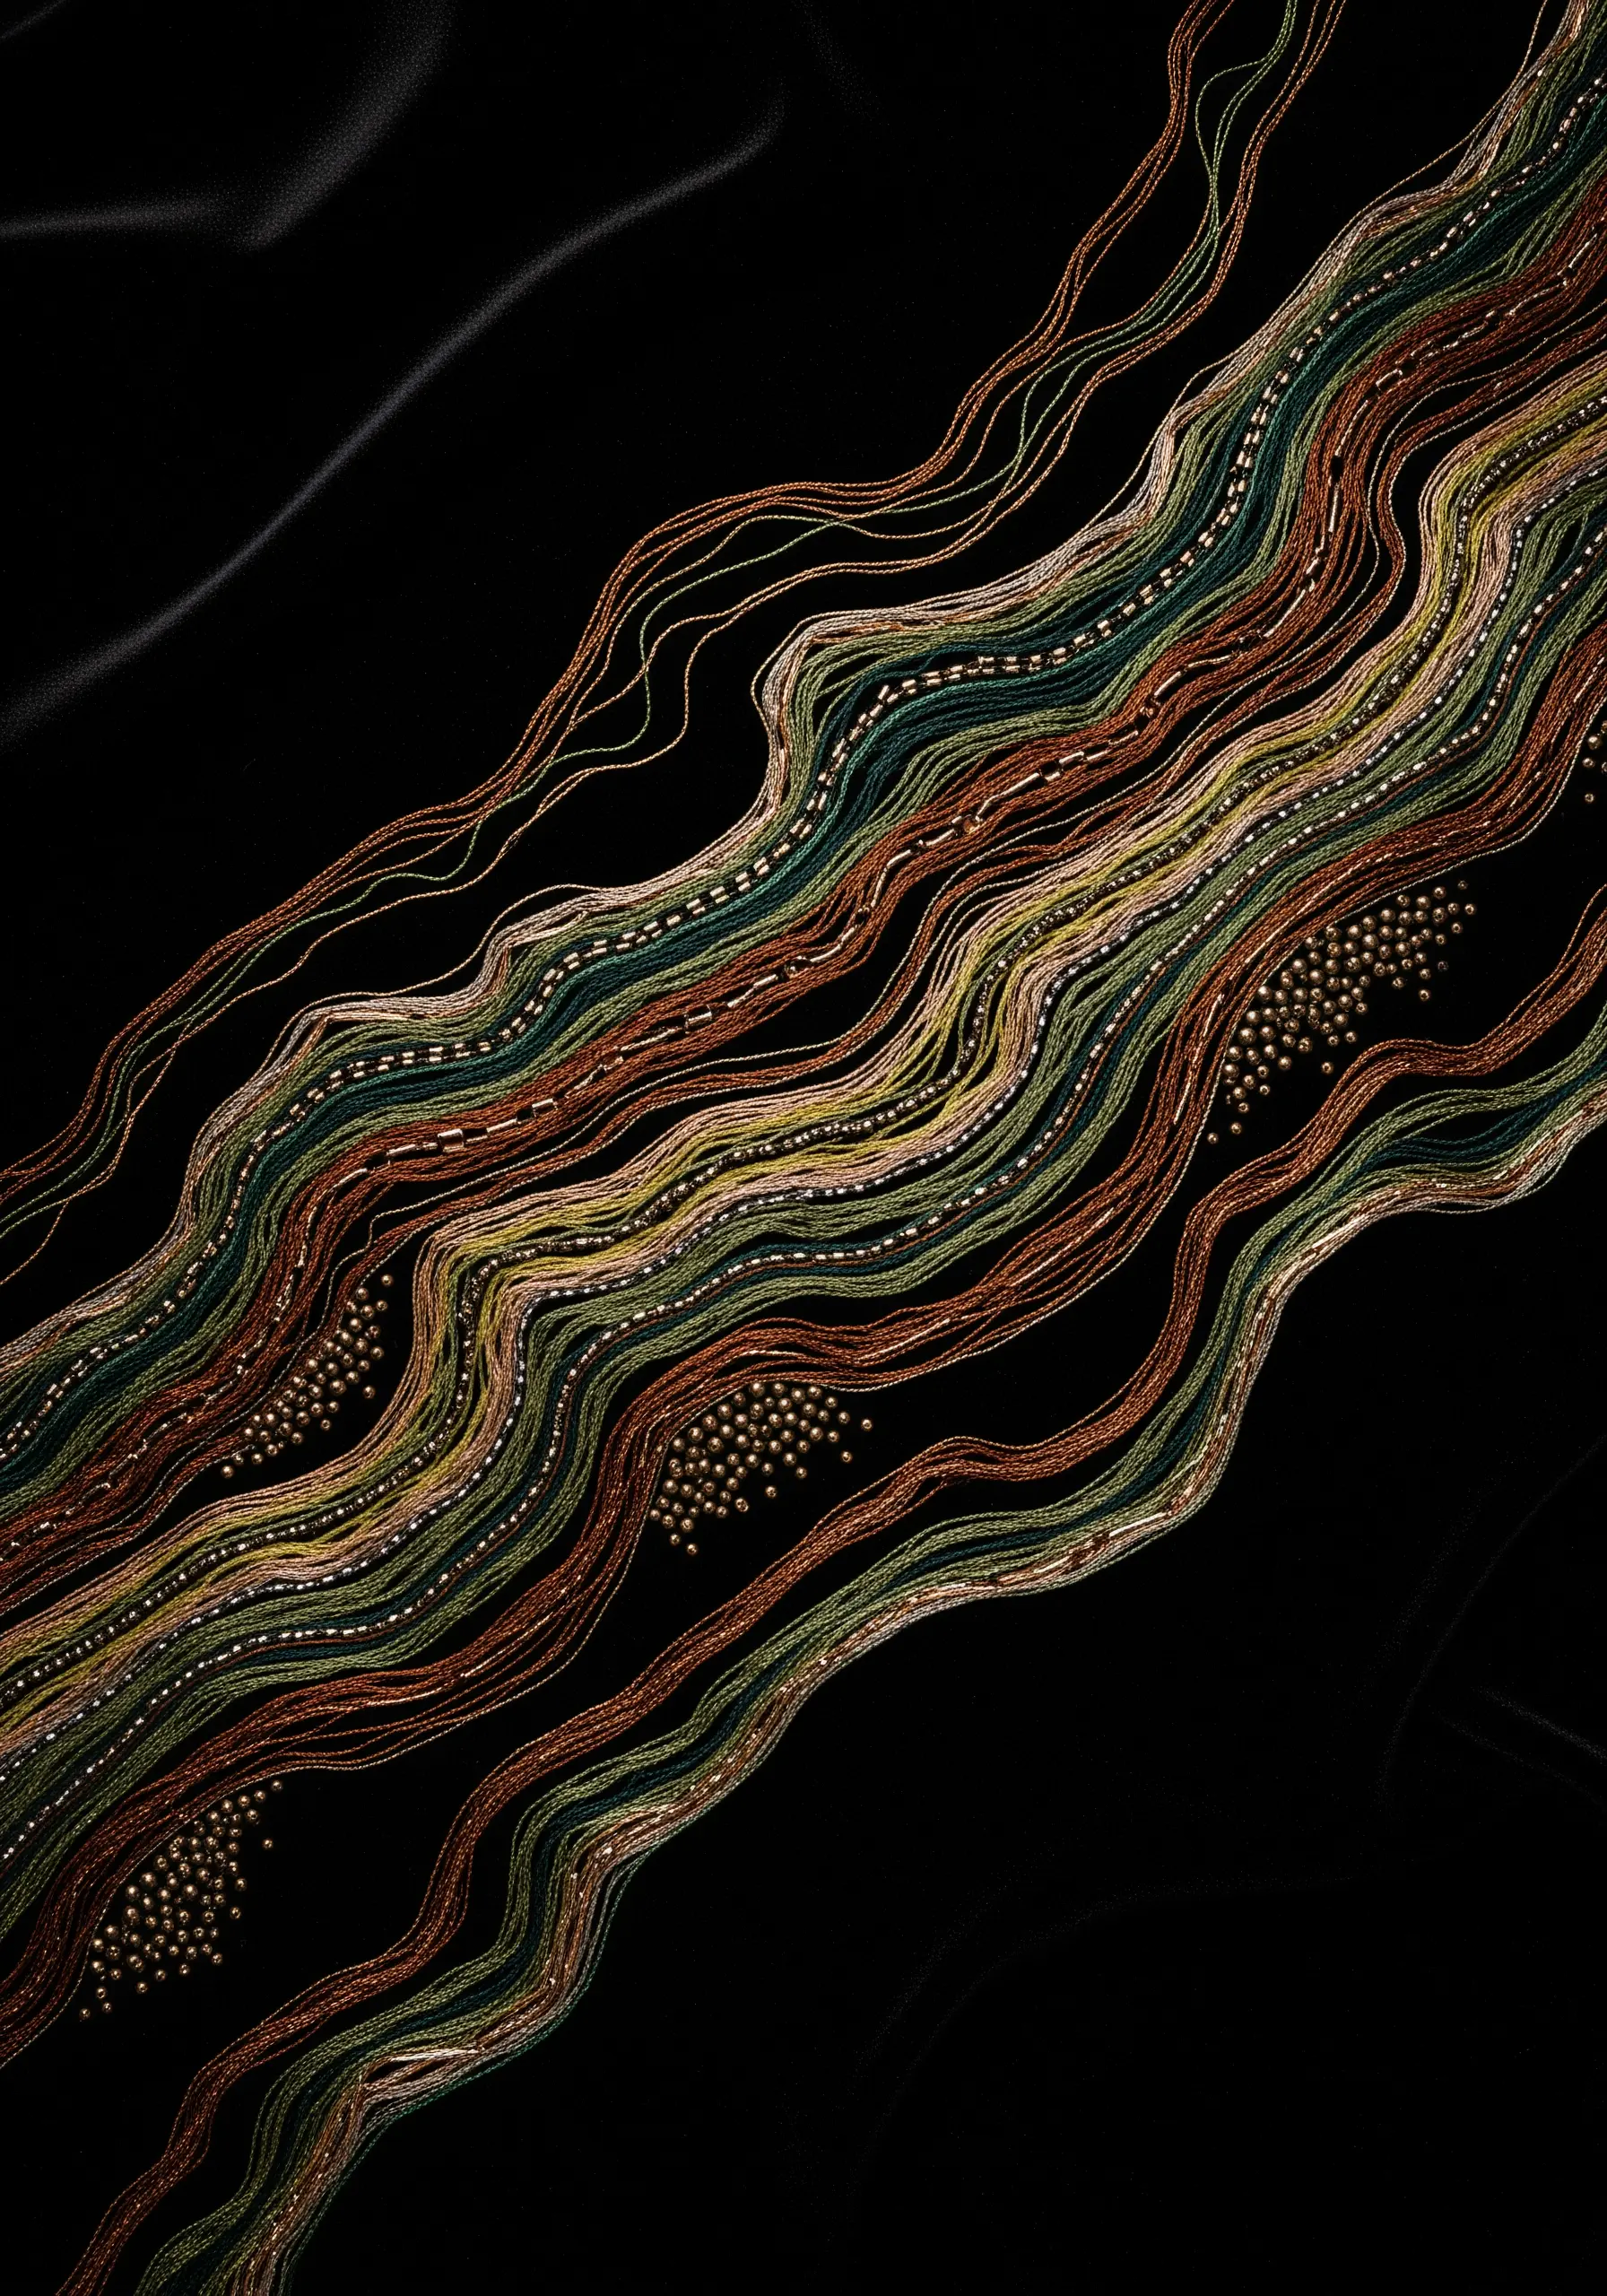
7. Gradient Density in Metallic Waves

This design plays with the idea of sound waves or ripples, creating an effect based on stitch density.
In the upper section, keep the lines open and airy, using a simple running stitch.
As you move down through the composition, make the stitches progressively denser, transitioning into a tightly packed satin stitch.
This creates a gradient not just of color, but of weight and light reflection, making the design feel like it’s fading in or out.
8. Sculptural Autumnal Foliage

Give your embroidery a sculptural quality by using highly textured stitches.
Fill leaf shapes with dense French knots using variegated metallic threads to mimic the mottled colors of autumn.
For the branches, create a rope-like effect by twisting multiple strands of a thicker metallic thread together before couching them onto the fabric.
This combination of granular knots and smooth, twisted cords creates a rich tactile experience that makes the composition feel alive.
9. Ethereal Bioluminescence on Velvet

Capture the delicate transparency of a jellyfish by working on a rich, dark velvet, whose pile will absorb light and make your metallics pop.
Use a fine silver thread for the bell, filling it with a light seed stitch to create a sheer effect, then outline details with a shimmering couched thread.
For the tentacles, use a mix of single strands of metallic thread and strings of tiny seed beads or teardrop crystals to simulate a floating, weightless quality.
10. Metallic Bead Painting for Abstract Shapes
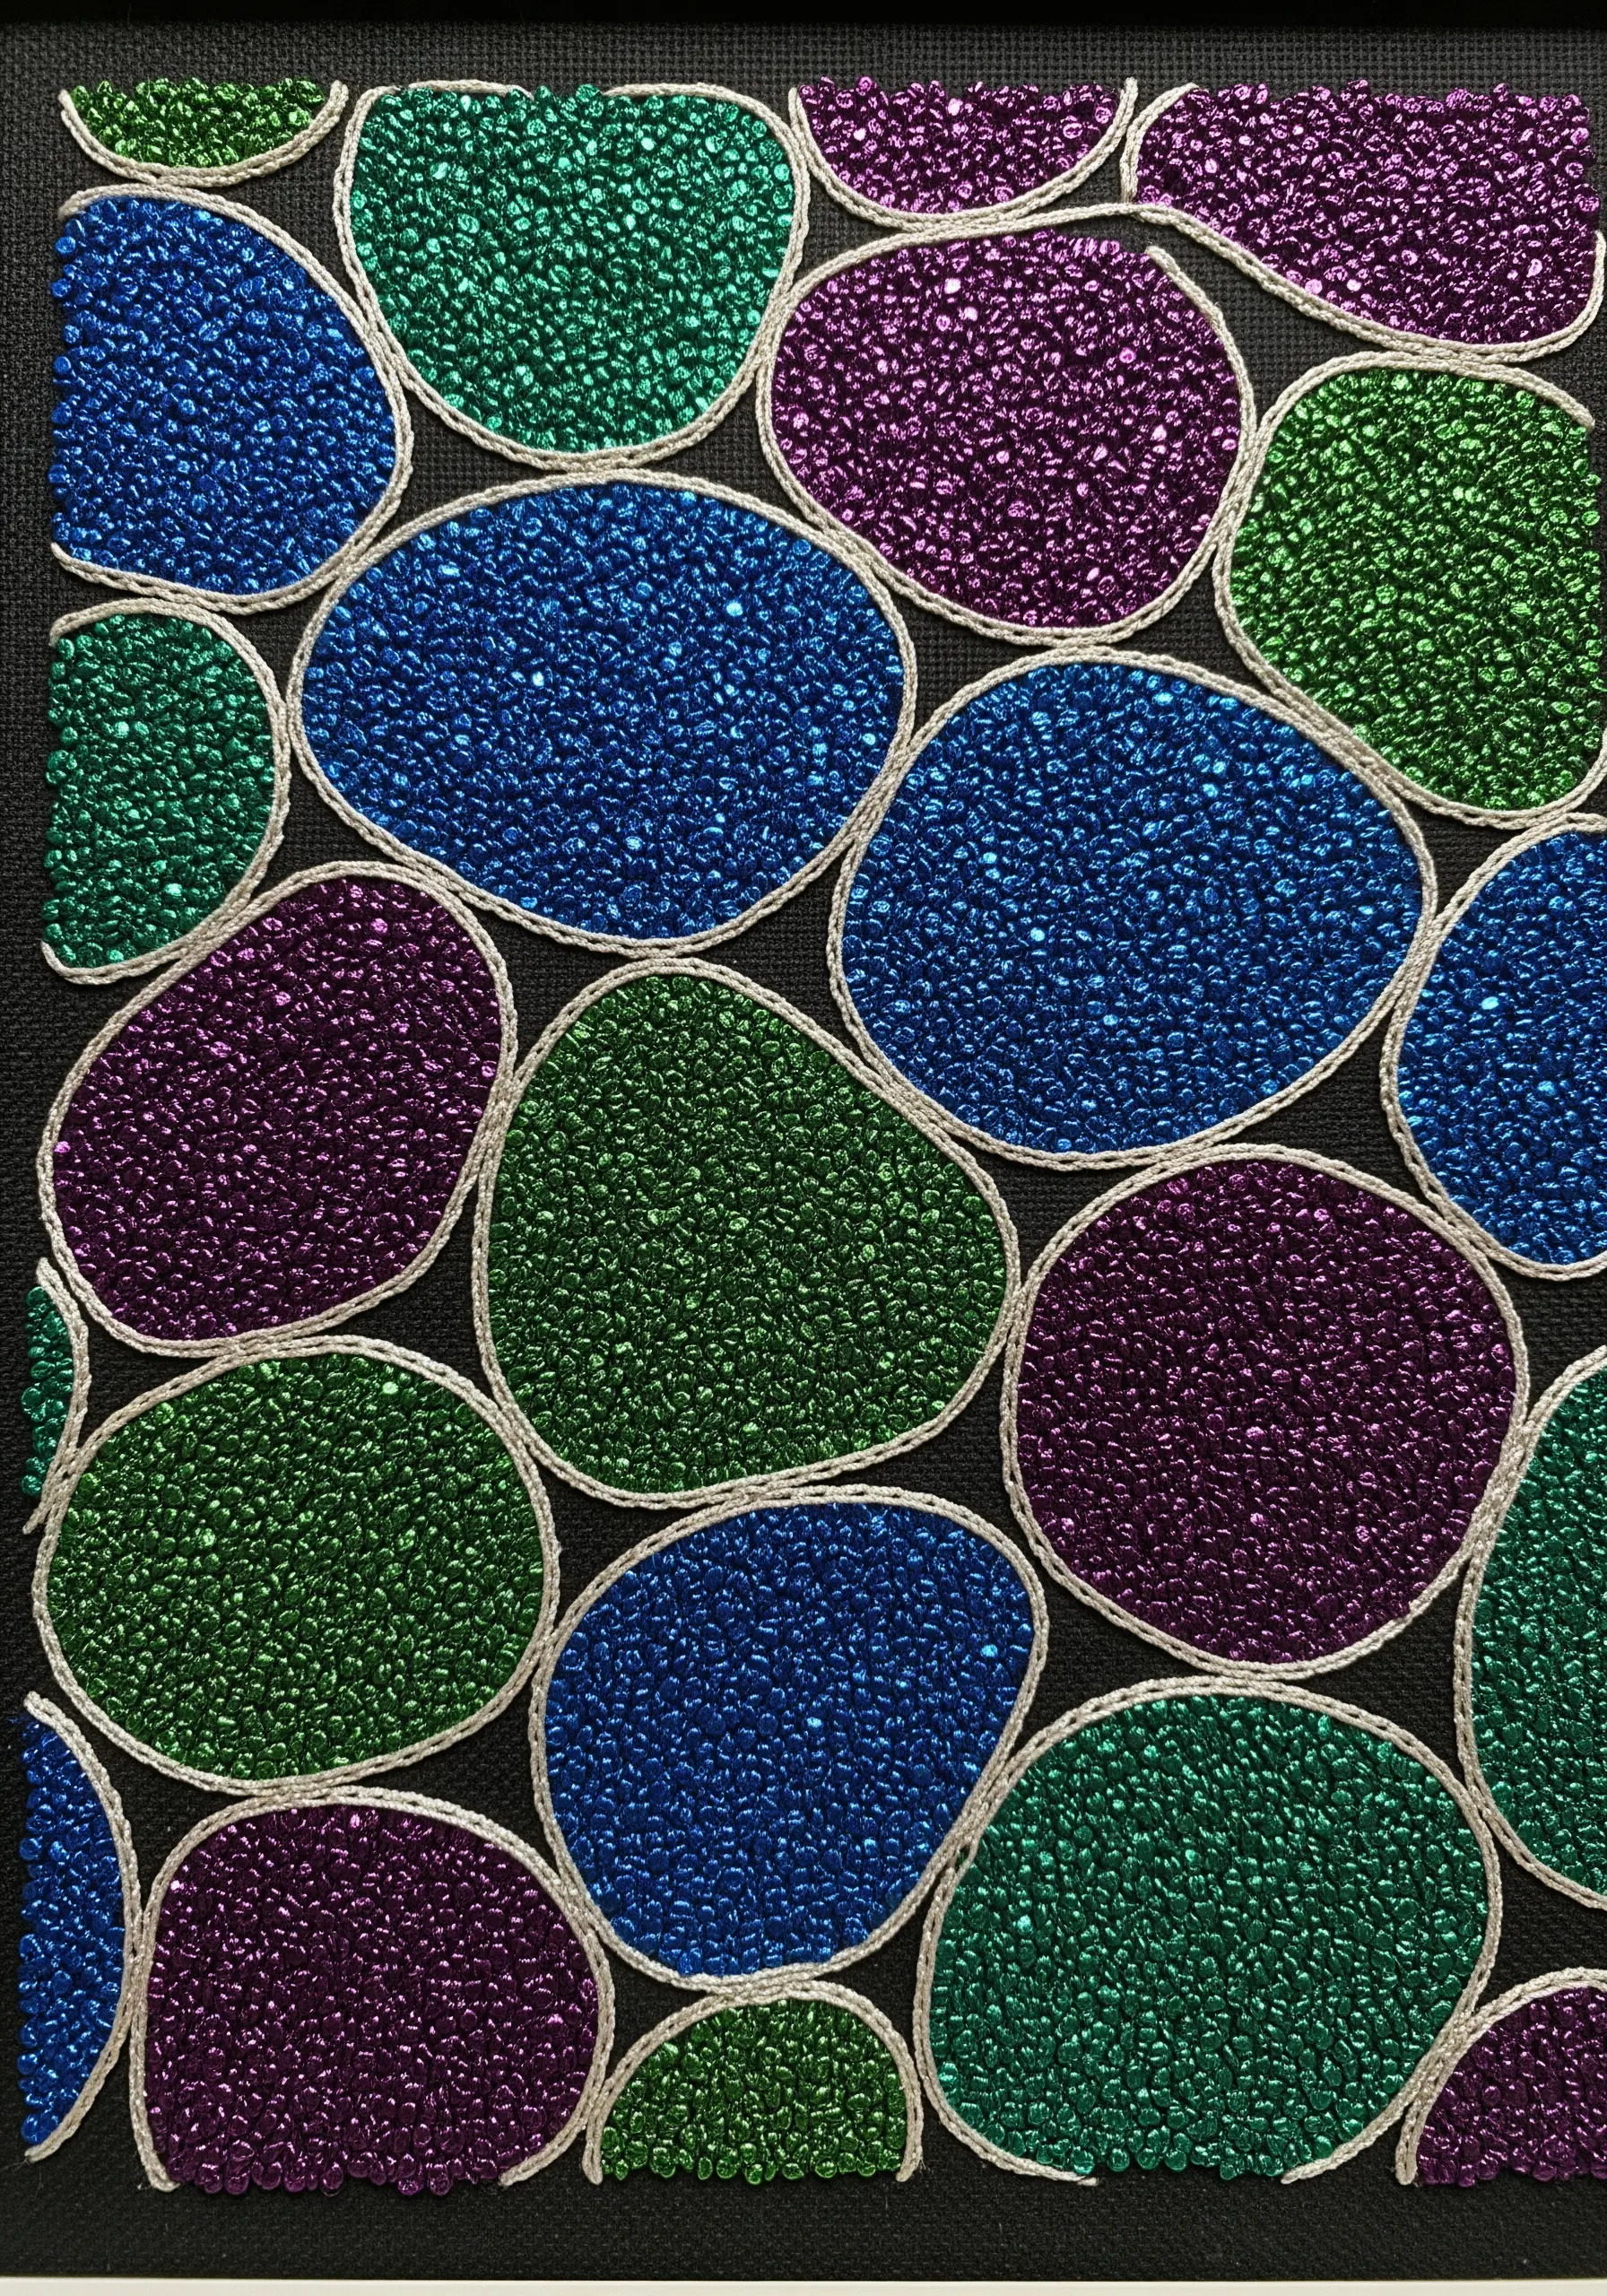
Instead of filling shapes with thread, use metallic seed beads for a jeweled, mosaic-like effect.
First, draw your organic, pebble-like shapes and outline them with a clean, couched silver cord to create a defined border.
Then, fill each shape with beads, attaching them one or two at a time to ensure a tight, even surface.
The light will catch the facets of hundreds of tiny beads, creating a shimmering texture that’s impossible to achieve with thread alone.
11. Braided Metallic Gradients
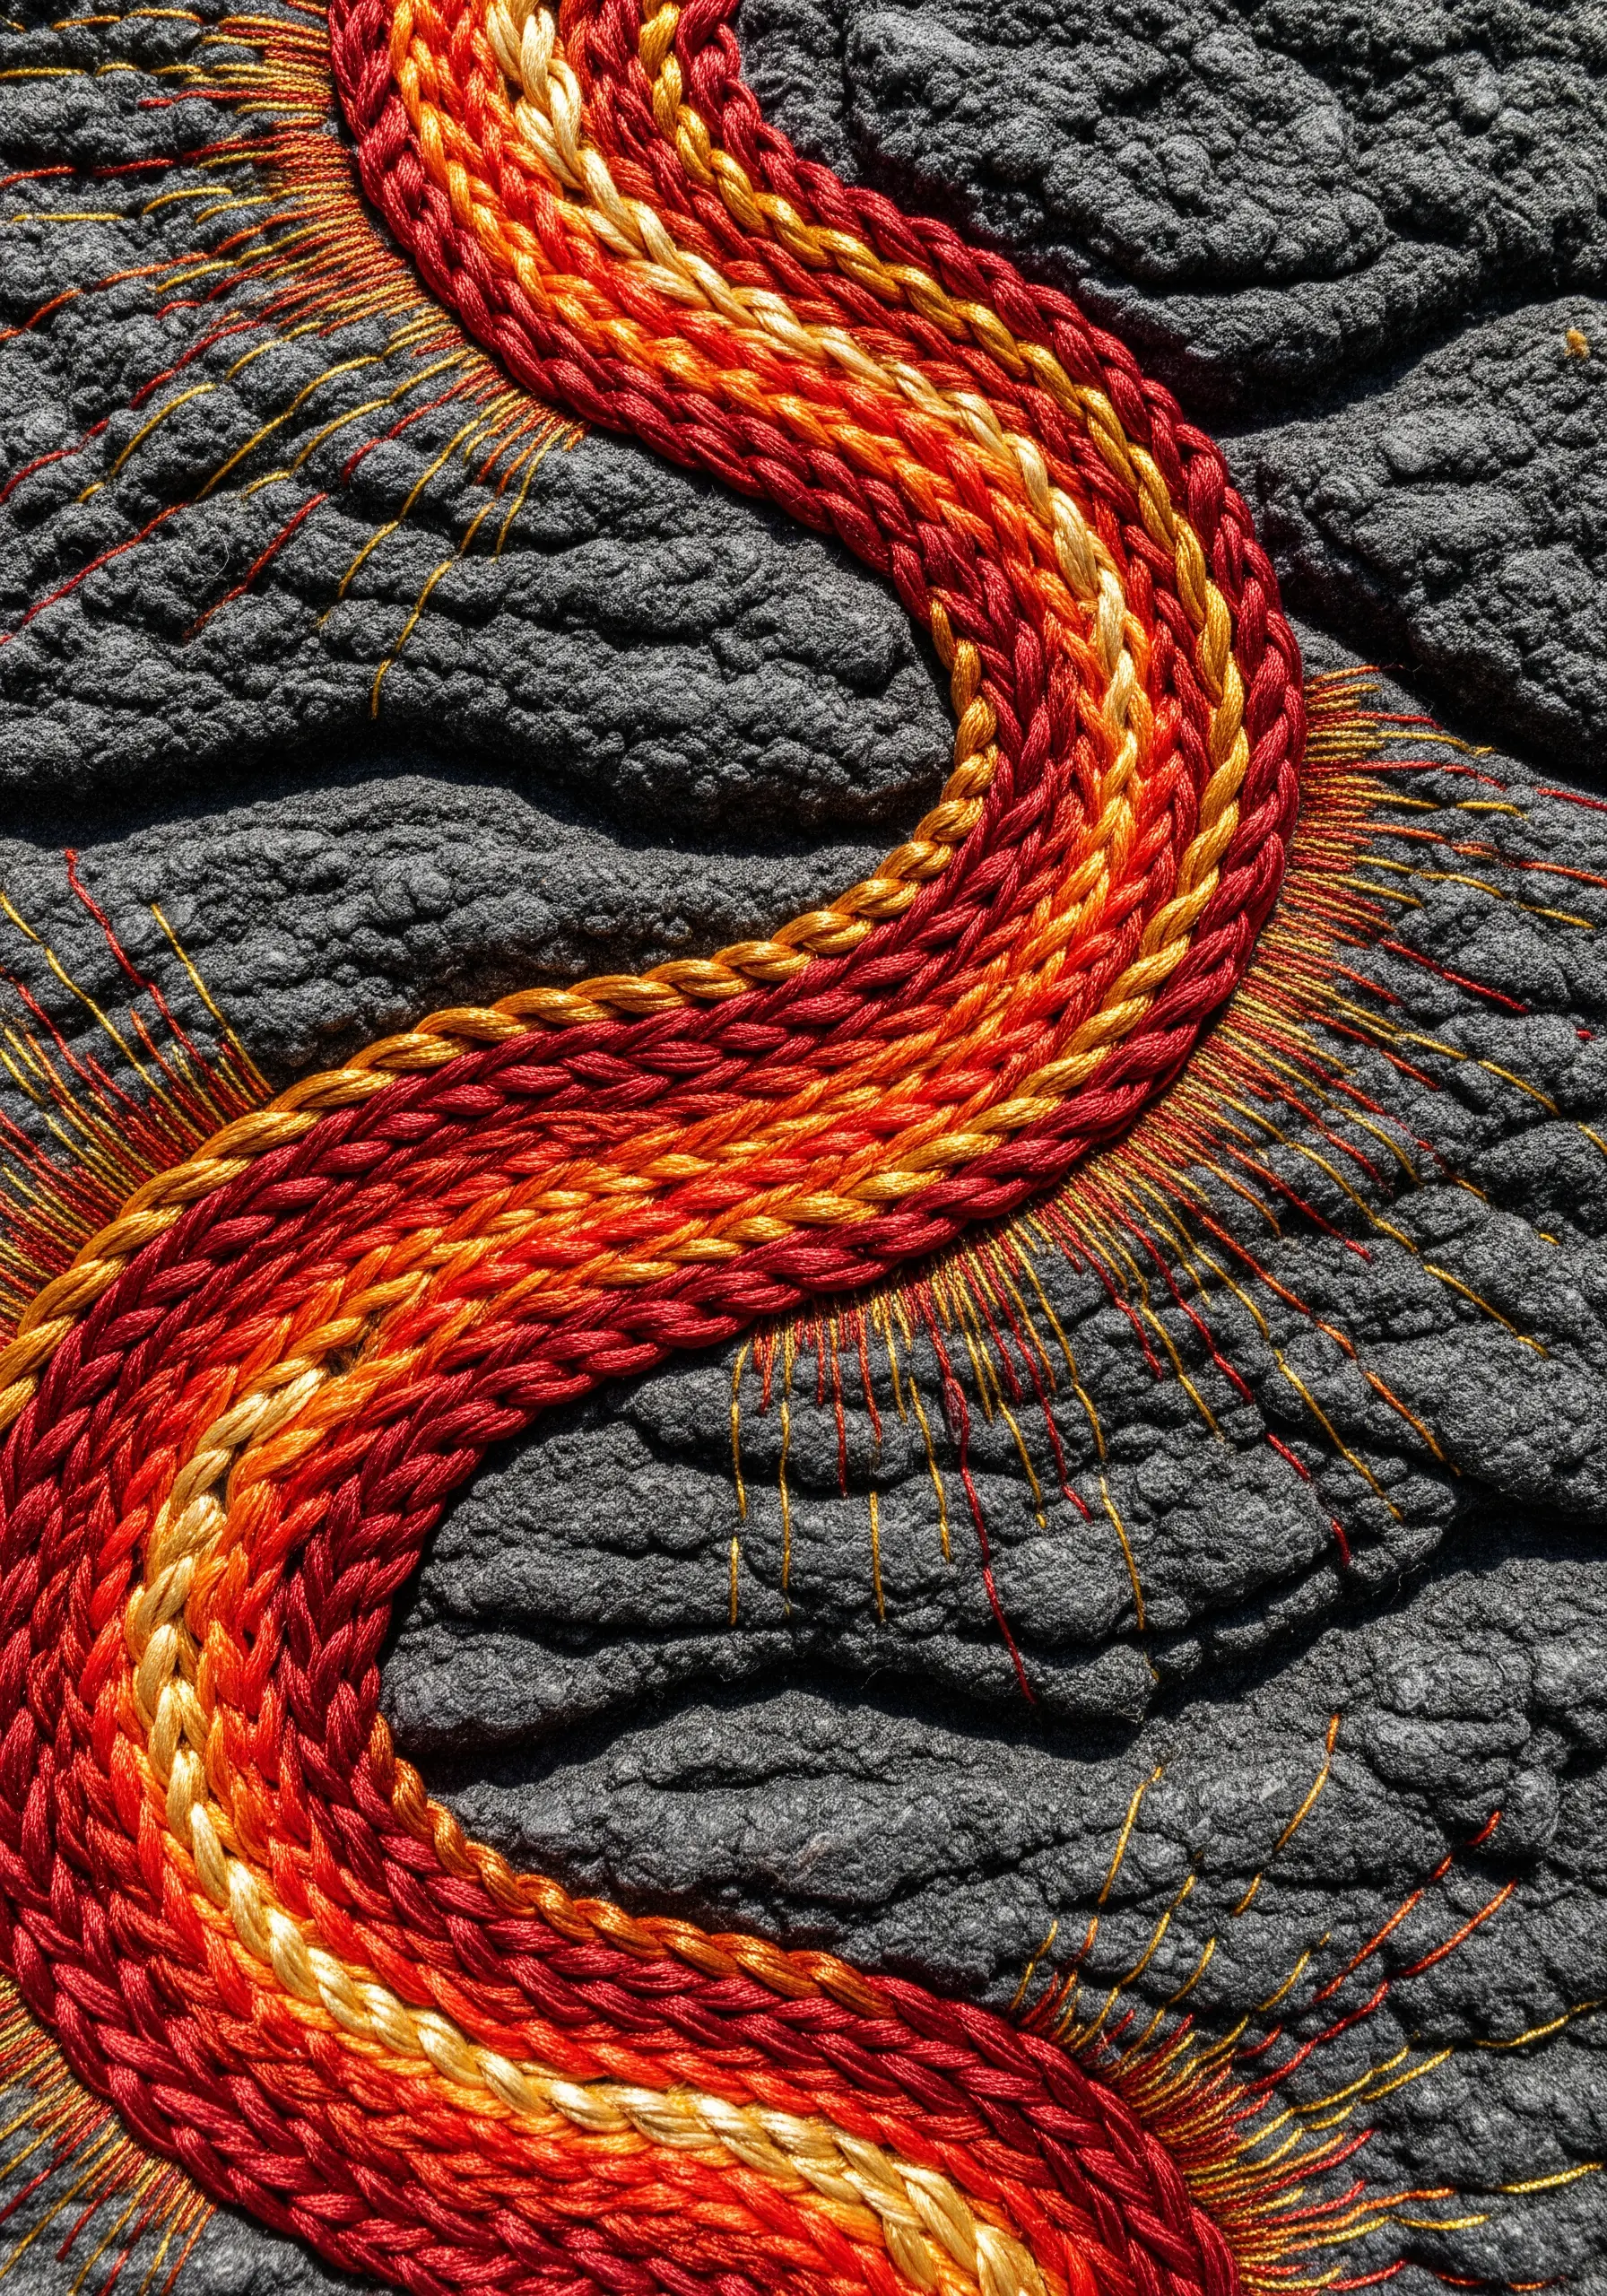
To create this bold, woven band of color, you’ll use a technique similar to a wide stem stitch but with multiple colors at once.
Thread several needles with different shades of metallic thread—for example, gold, orange, and red.
Work the stitches in a sequence, interlacing the colors to create a braided effect as you go.
This method creates a seamless, fiery gradient that appears woven directly into the fabric.
12. Minimalist Linear Fade
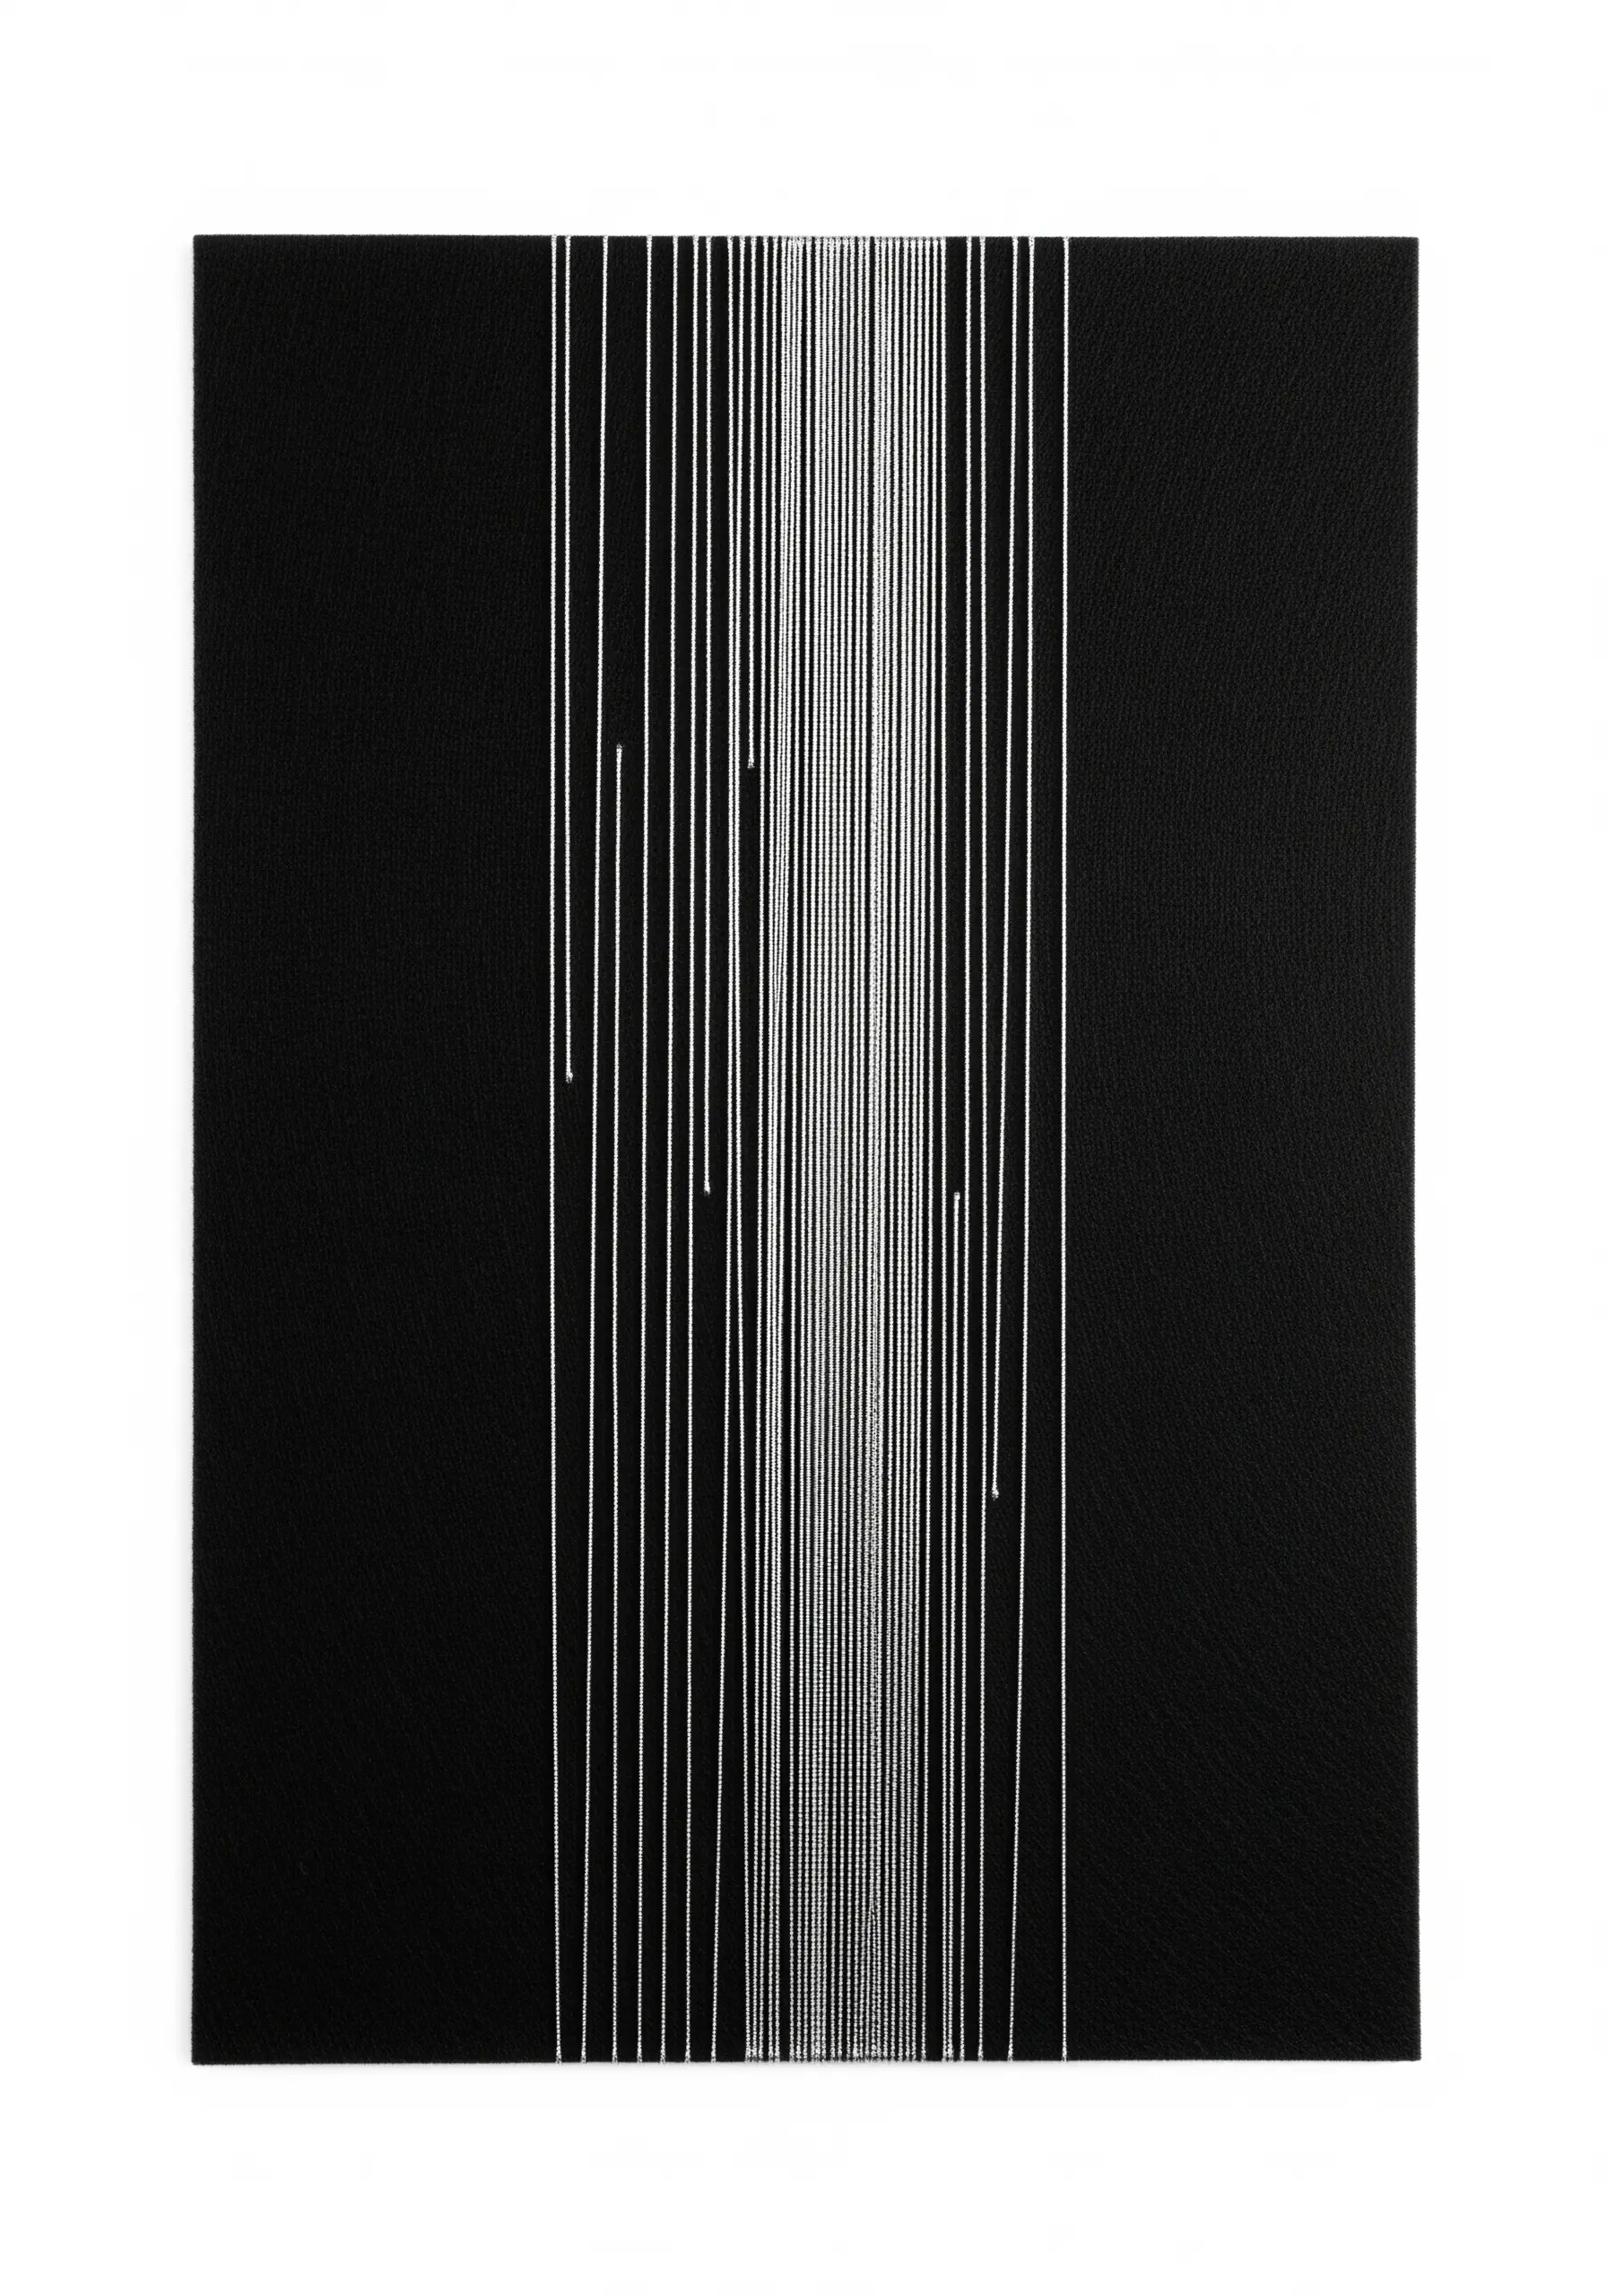
This design is a masterclass in using negative space, achieved with simple straight stitches of varying lengths.
It’s one of those minimal embroidery patterns that look harder than they are.
Start in the center with tightly packed, long stitches, and as you move outward, gradually increase the space between each stitch while shortening their lengths.
This creates a visual fade that draws the eye to the bright, dense core, producing a sharp, graphic result against the dark fabric.
13. Abstract Floral Mandala with Beaded Rays

Combine classic stitches with beading for a modern, hybrid mandala.
Create the petals using fishbone stitch or a satin-stitched leaf shape with variegated thread.
For the radiating lines, stitch a simple straight stitch and cap it with a single metallic bead.
This small addition transforms a simple line into a stamen-like element, adding a focal point of light and a delicate three-dimensional touch that elevates the entire design.
14. Stitching a City at Night

Create an embroidered city skyline by focusing on perspective and light against a dark background.
Use a simple backstitch in a light metallic thread to outline the buildings, establishing strong perspective lines that converge at a vanishing point.
The magic comes from the “lights”: use single French knots in yellow or gold for windows and longer satin stitches for streetlights to suggest a glowing lens flare.
15. Art Deco Elegance with Satin Stitch

The key to a successful Art Deco pattern is precision and sheen.
Use a high-quality, non-twisting metallic thread to achieve a smooth, mirror-like finish with your satin stitches.
To keep your edges perfectly clean, outline each shape with a tiny split stitch first.
This creates a raised “wall” for your satin stitches to rest against, ensuring they are uniform and sharp.
16. Controlled Chaos with Looped Stitches
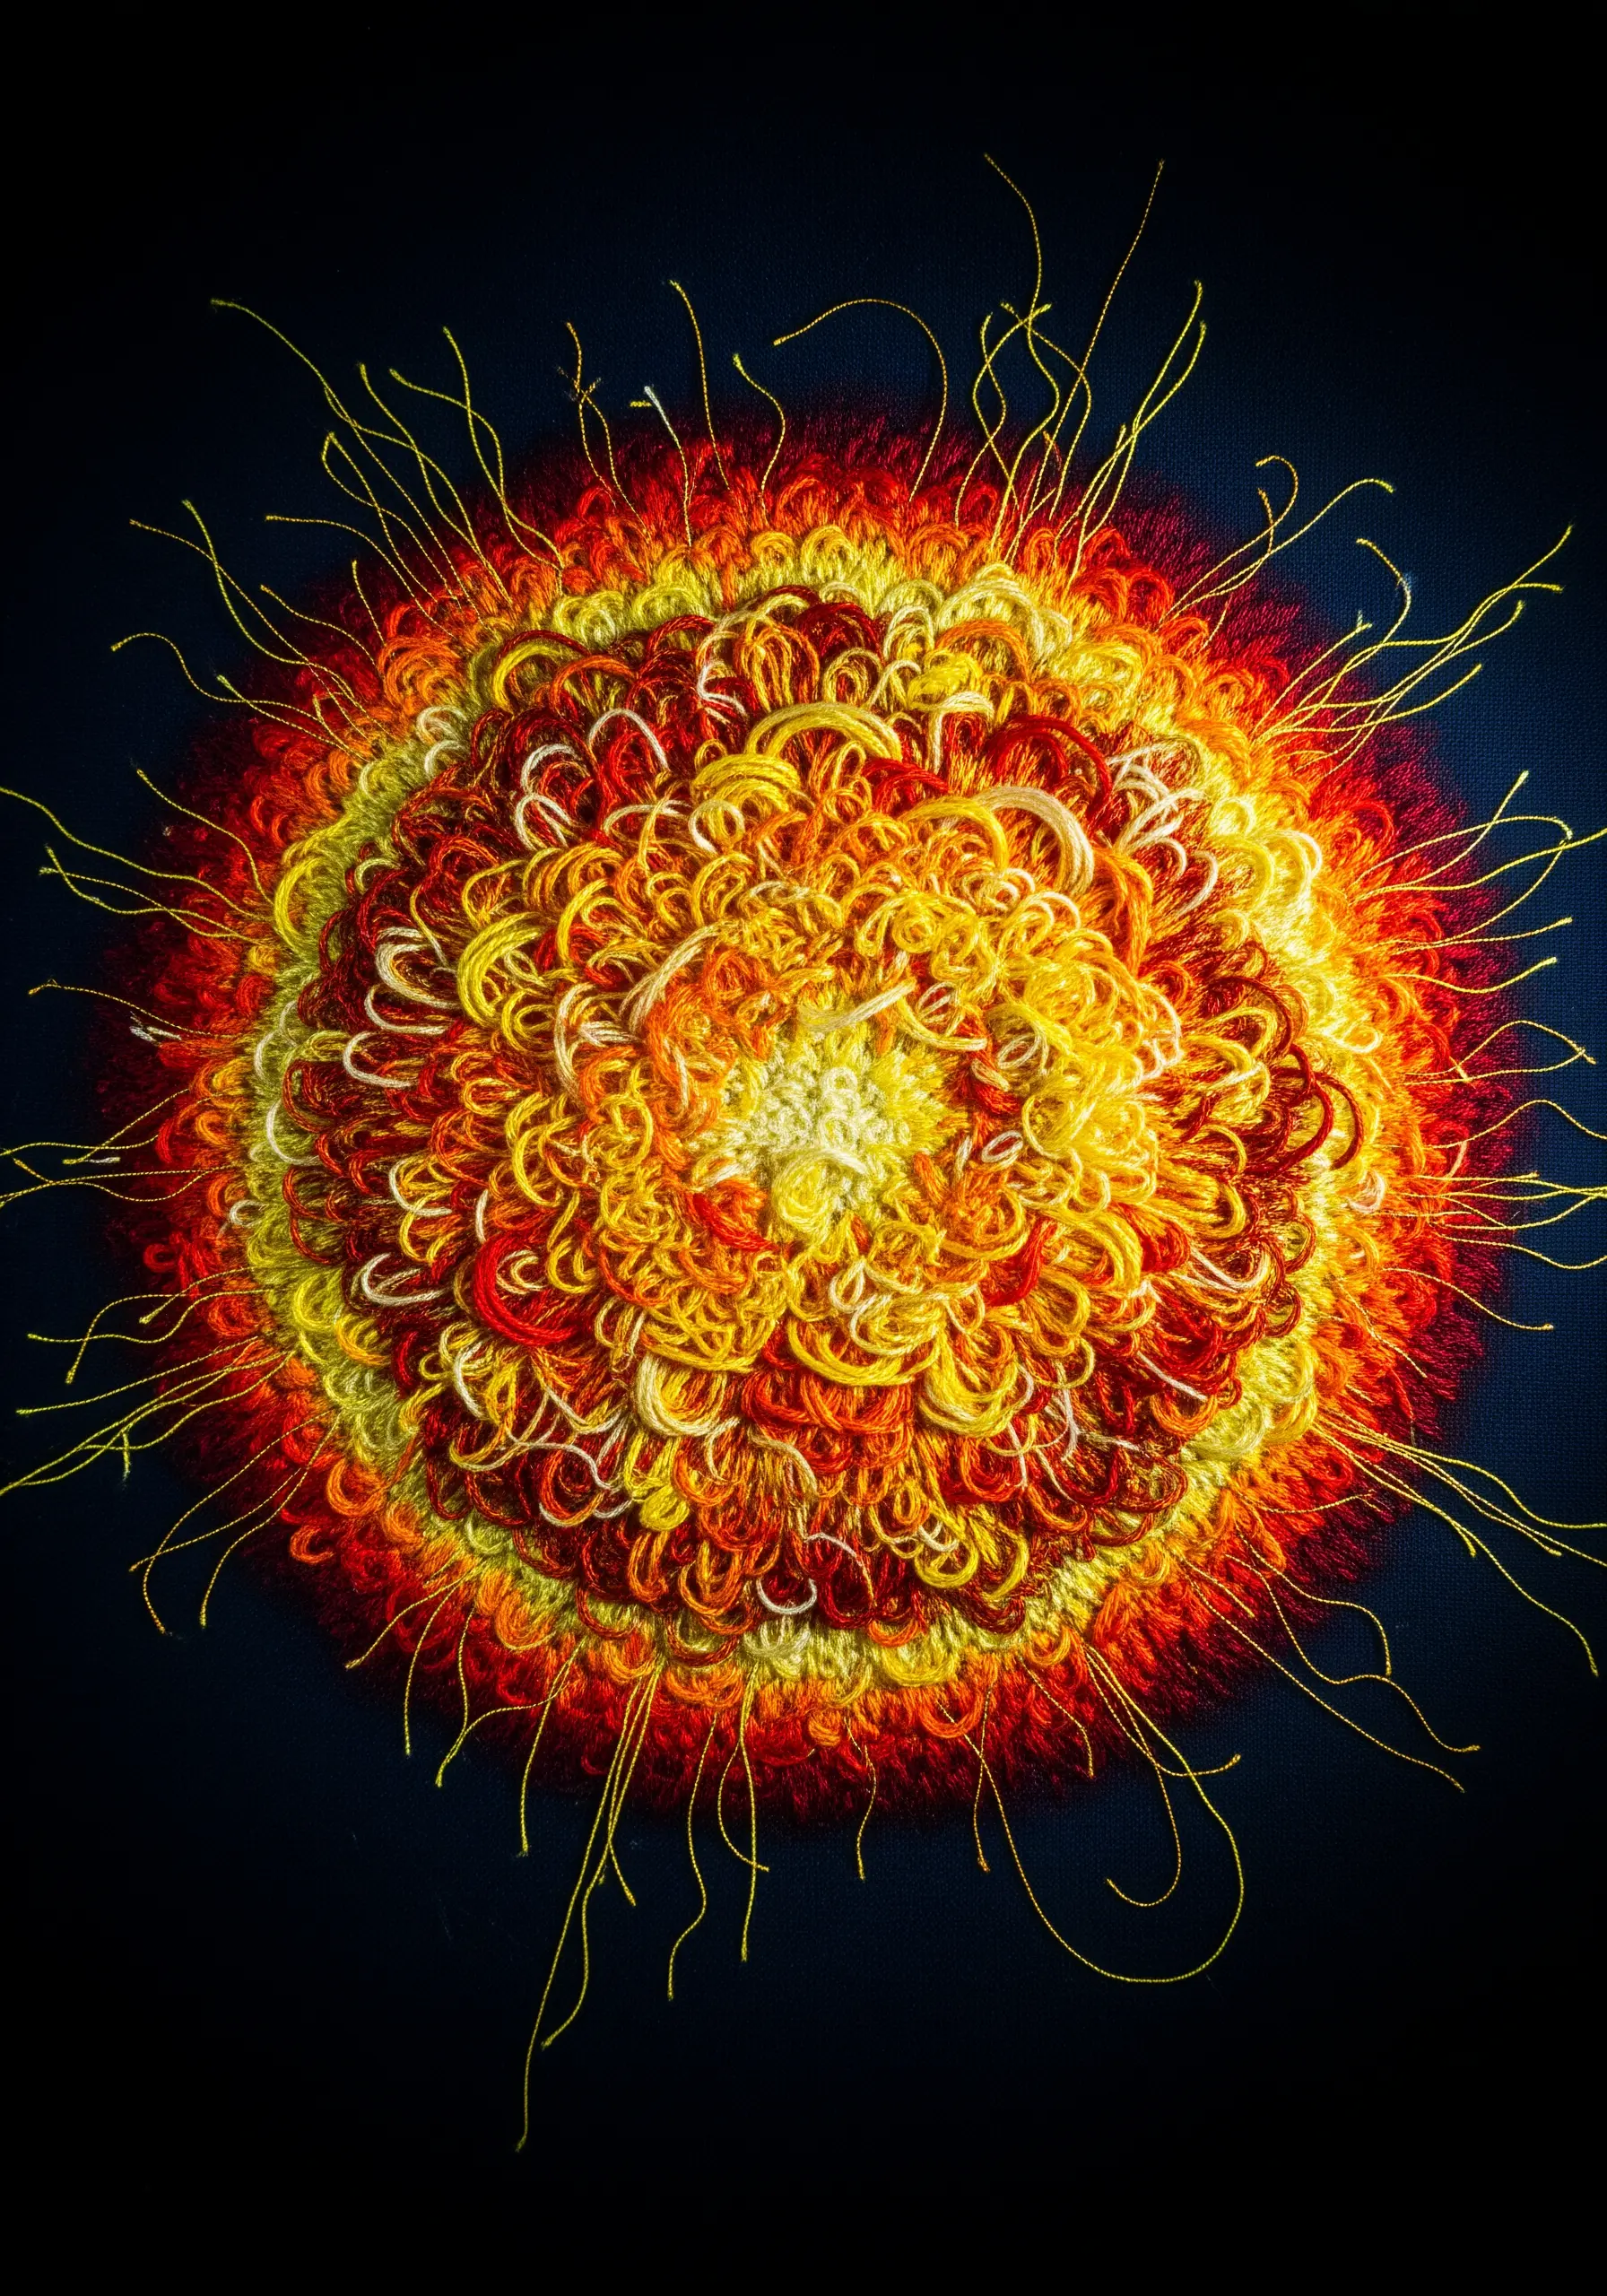
This explosive texture is built with Turkey work, but with a modern twist: instead of trimming the loops, leave them long.
Stitch the loops down at random angles to create a tangled, energetic surface, using variegated metallic threads in reds, oranges, and yellows.
For the solar flares erupting from the edge, use single, long straight stitches, allowing the thread to kink and curl naturally rather than pulling it taut.
17. The Subtle Power of Whipped Backstitch

For a line that needs to be both delicate and defined, elevate a standard backstitch by whipping it.
First, create your meandering line with a standard backstitch using a single strand of metallic thread.
Then, take a second strand of the same thread and “whip” it around each backstitch without piercing the fabric.
This technique covers the gaps, creating a smooth, solid, and slightly raised line that catches the light like a fine silver chain.
18. Open-Work with Chain Stitch
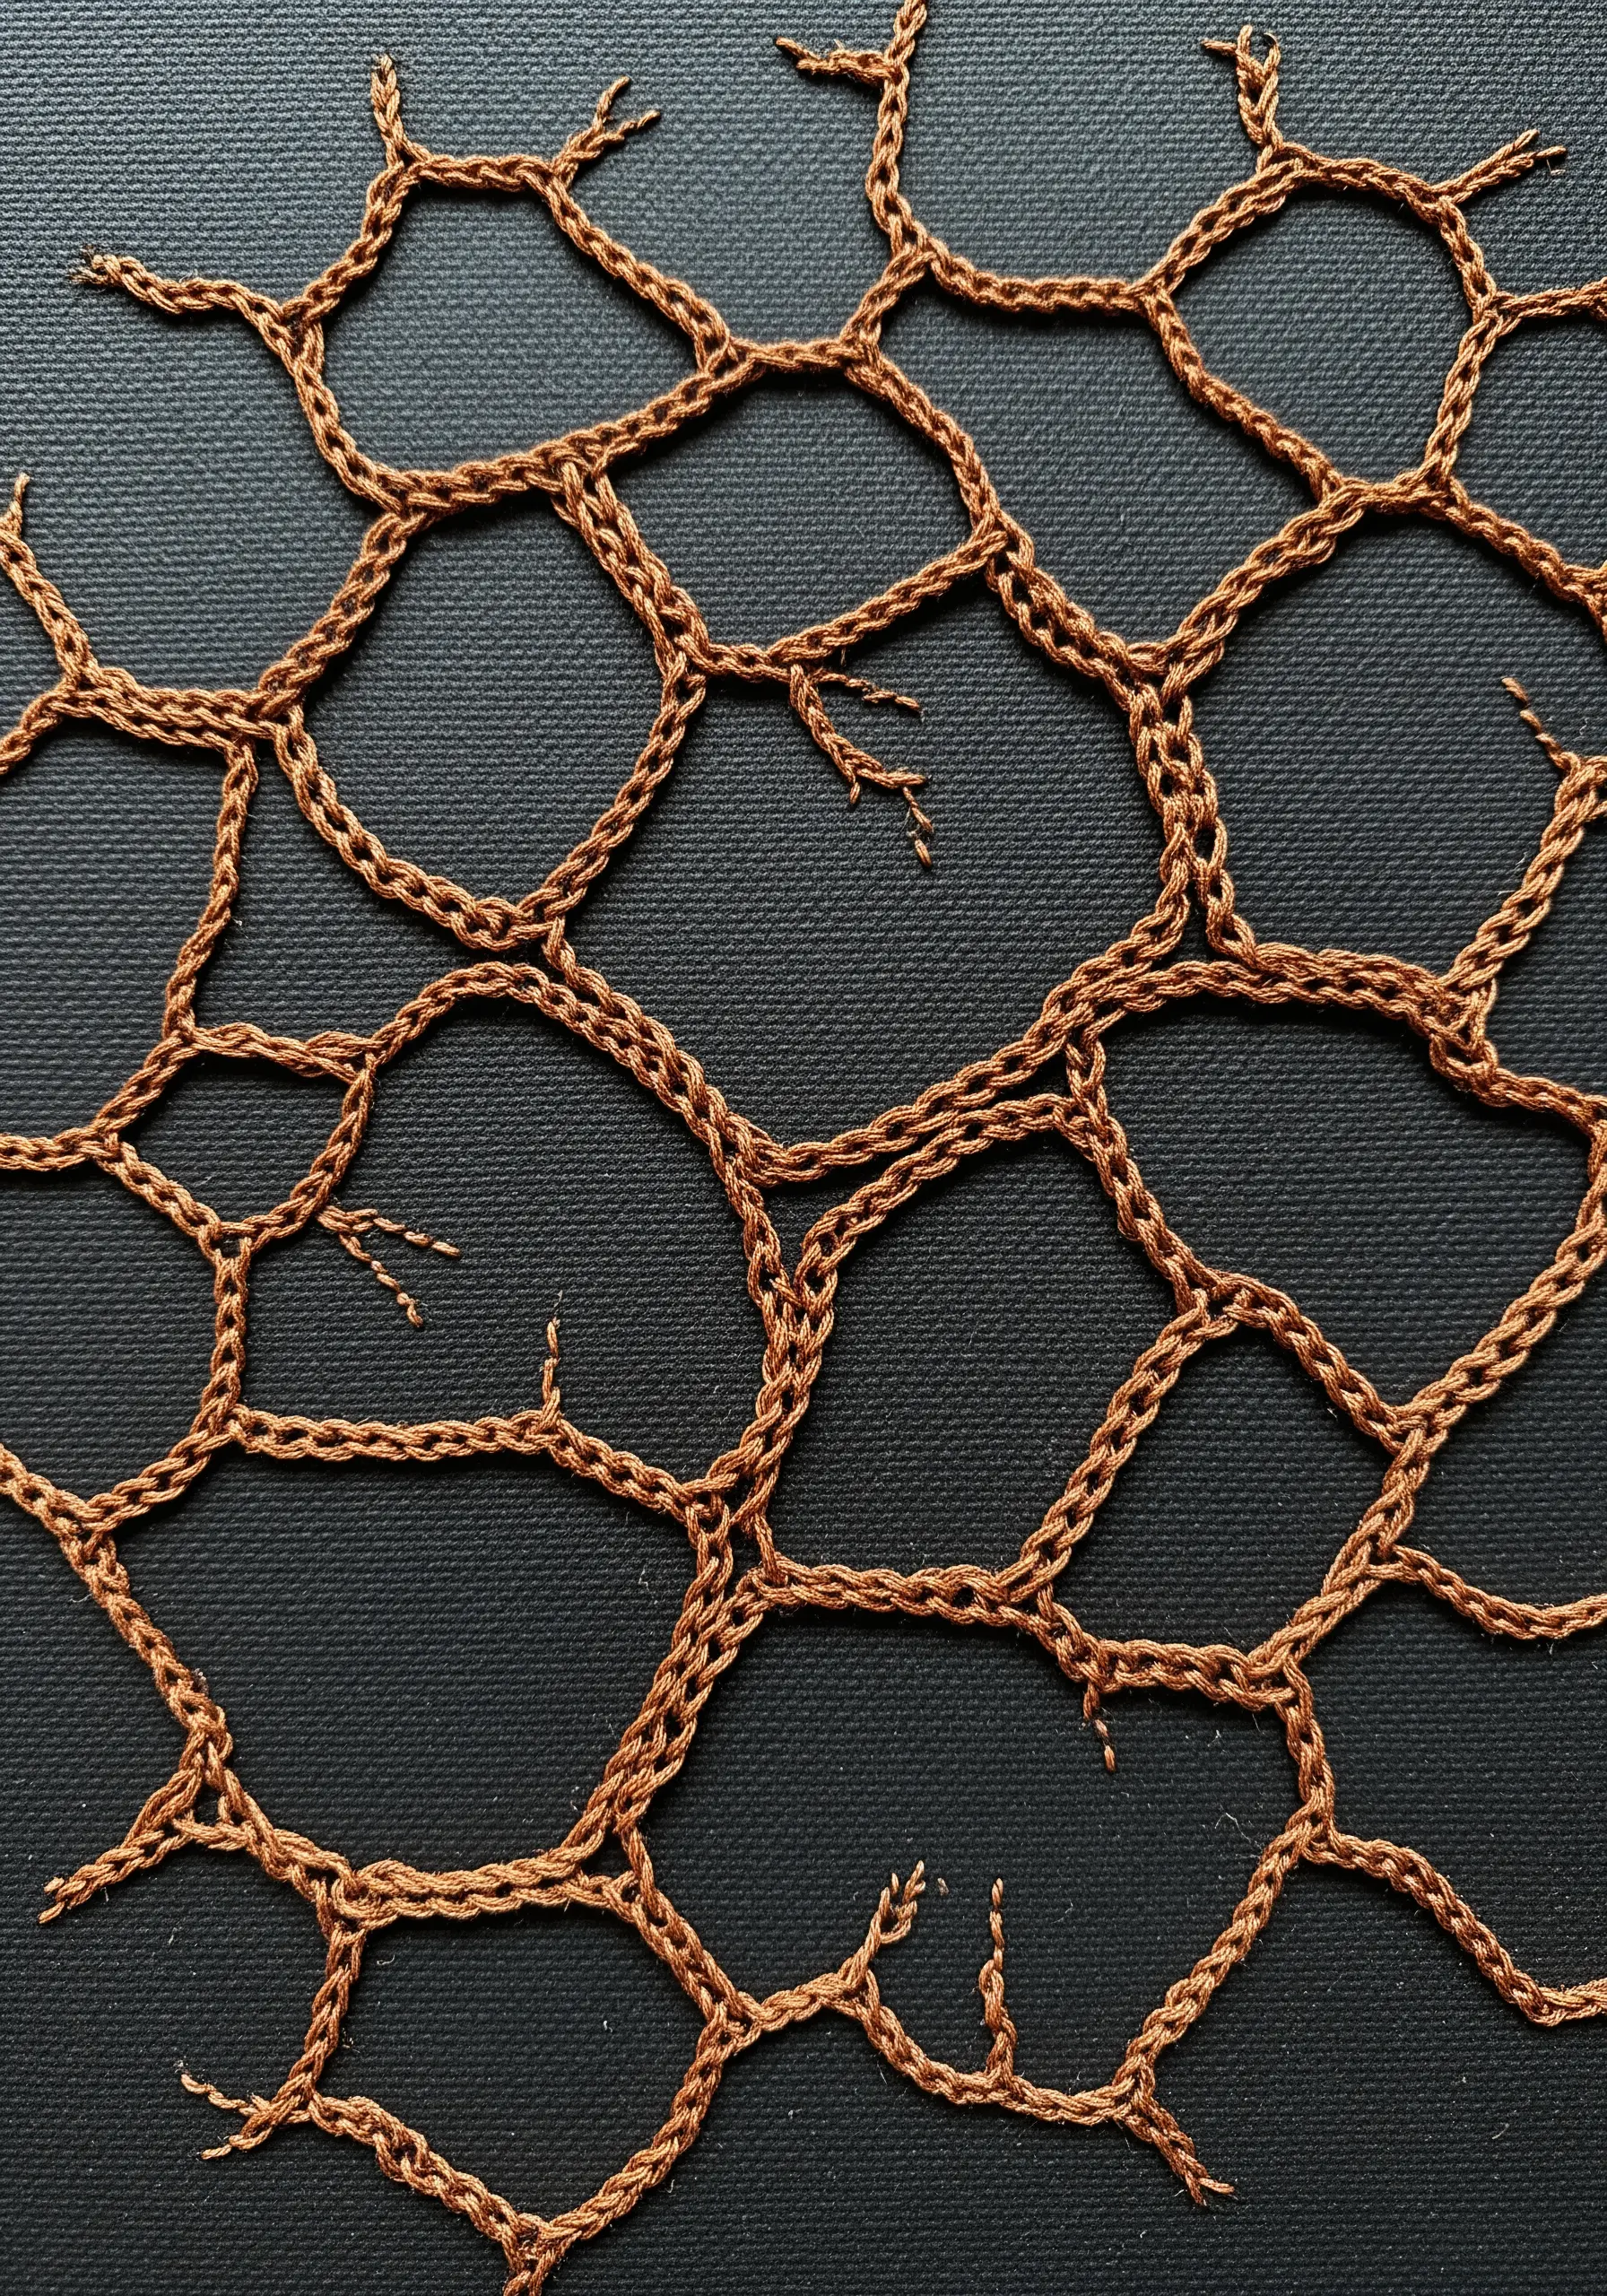
To create a pattern that feels both organic and structured, use chain stitch.
This stitch naturally forms interconnected loops, perfect for building a net or web-like structure without a rigid pattern.
Instead of stitching in straight lines, allow your paths to curve and branch off from one another.
Slight variations in stitch length and direction will make the final piece feel more natural, like a cellular structure or a vine network.
19. Shattered Light with Appliqué and Thread
This technique combines appliqué with linear stitching for a stunning “broken glass” effect.
For the center, cut a sheet of iridescent fabric transfer foil into irregular shards and iron them onto your base fabric.
Then, use a bright silver metallic thread to stitch long, straight lines that radiate from and cross over the central shattered element.
This frames the chaotic sparkle of the foil with clean, orderly lines, creating a powerful visual juxtaposition.
20. A Galactic Spiral of Metallic Ferns

Build this intricate spiral by repeating a single, simple element: the fern stitch.
Start from the center and work your way out, angling each fern stitch to follow the curve of the spiral.
As the spiral grows, you can gradually increase the size of your stitches for a sense of movement.
To add a celestial sparkle, use tiny silver seed beads at the tips of some branches or scatter them in the negative space, like distant stars.
21. Color Blocking with Padded Satin Stitch

Achieve this bold, graphic look by treating your thread like paint and giving shapes a raised, almost embossed quality with padded satin stitch.
First, fill each shape with a foundation of stitches, then cover that layer with satin stitches going in the opposite direction.
Keep the final stitch direction consistent within each block but change it for adjacent blocks (e.g., one vertical, one horizontal).
This technique makes the light hit each color differently, enhancing the separation between the shapes.
22. Luminous Mandala with Metallic Highlights
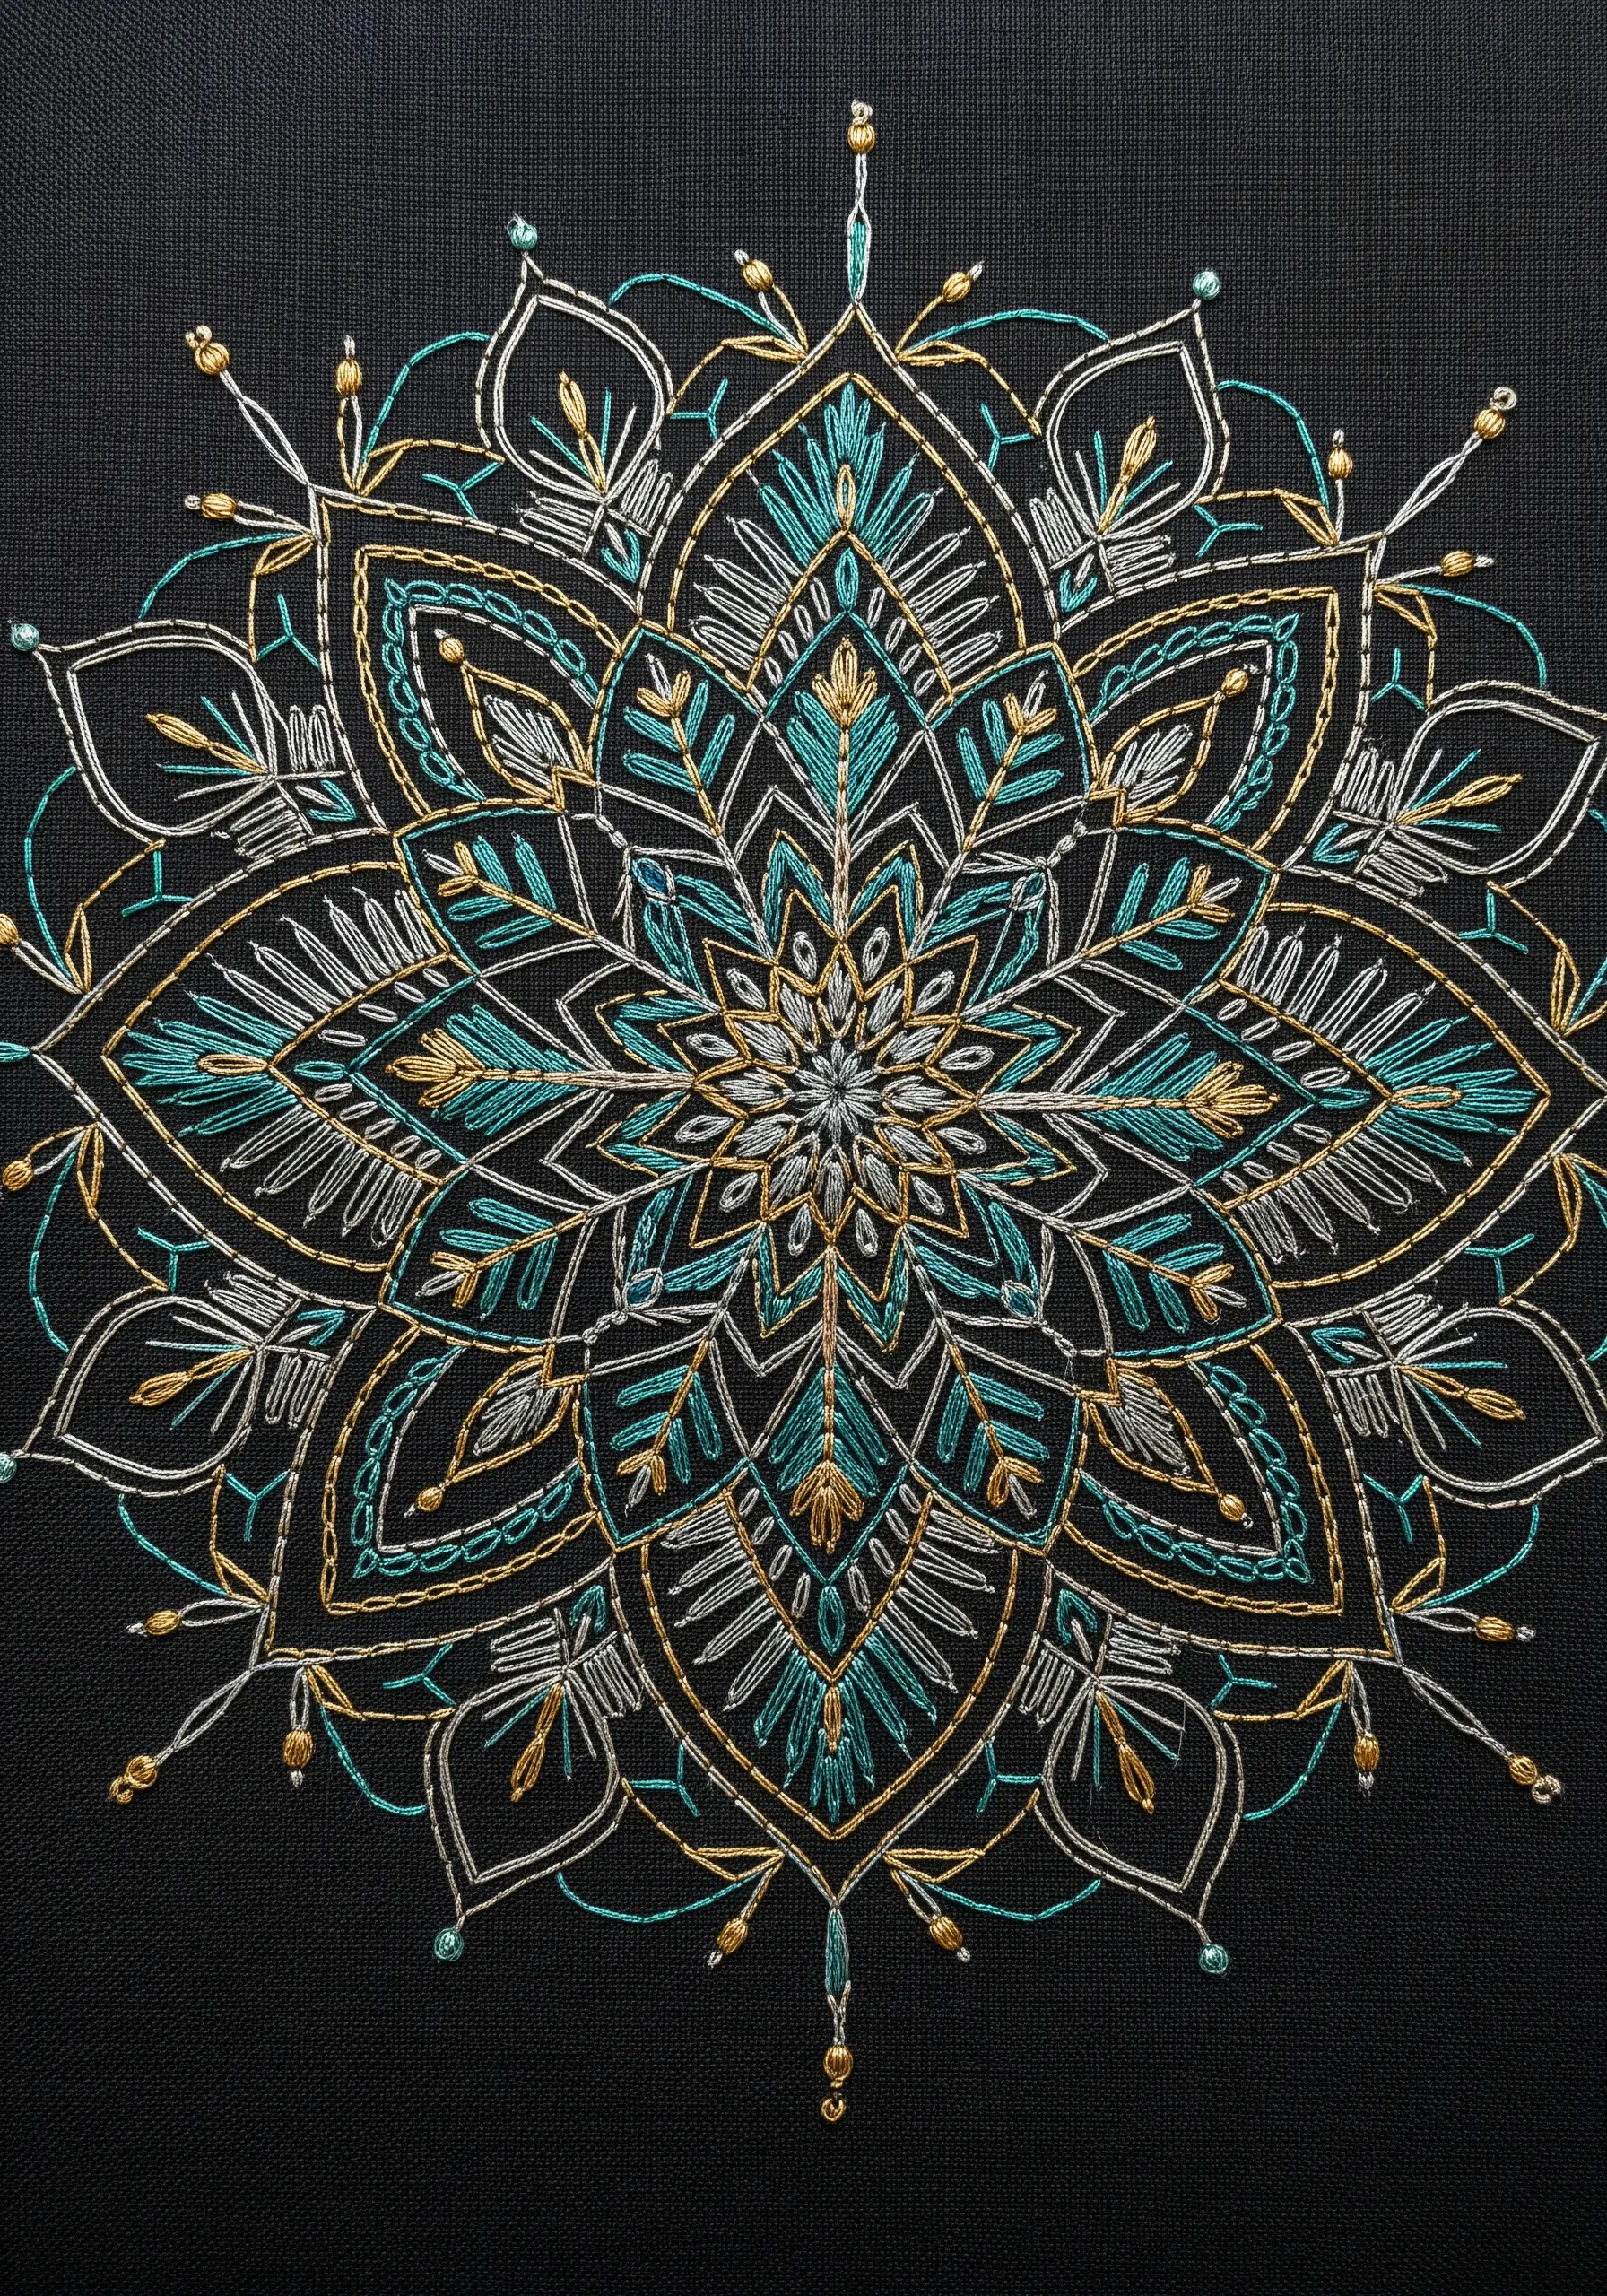
When stitching a detailed mandala with metallics, think about creating a light hierarchy.
Use your brightest threads, like silver and gold, for the primary outlines and structural elements.
Use the color—in this case, teal—as a secondary fill or accent to create a design that reads clearly from a distance.
To add delicate highlights, incorporate small beads or use a single detached chain stitch (lazy daisy) at key points to mimic tiny gems.
23. Tech-Inspired Circuitry with Beads
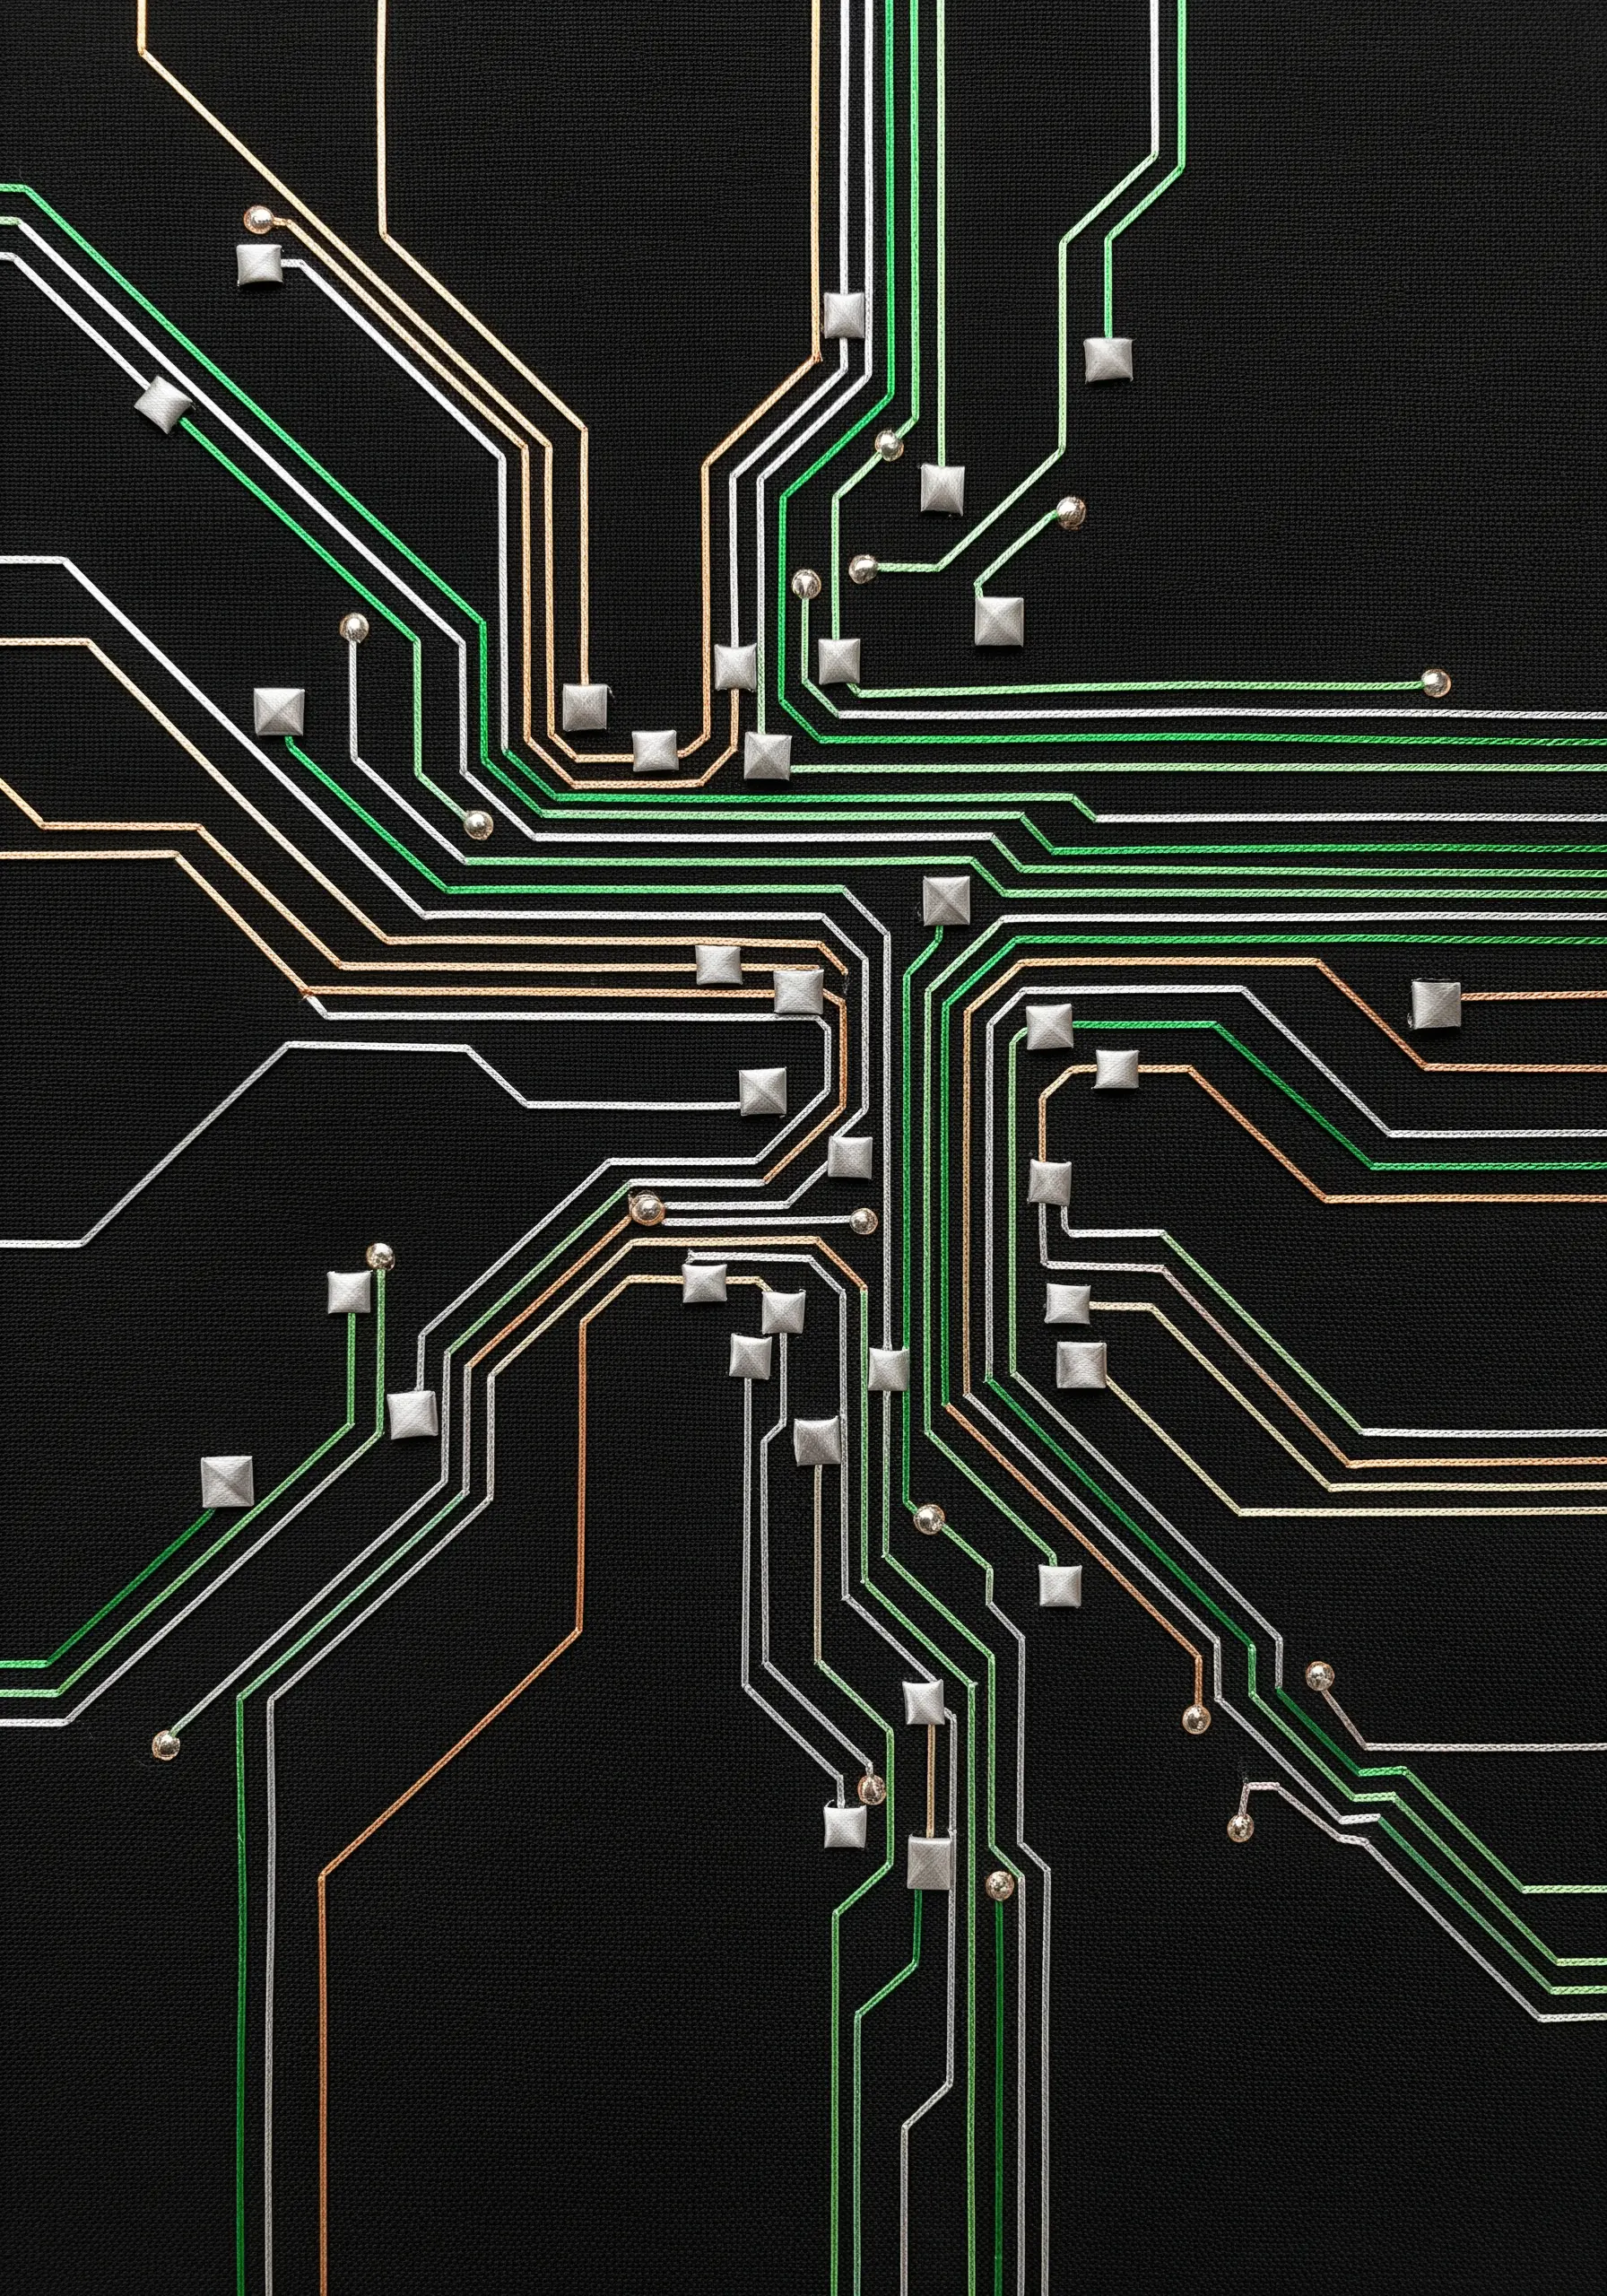
Recreate the aesthetic of a circuit board by combining precise stitching with hardware-like embellishments.
Use a simple backstitch with a fine metallic thread for the circuit traces, ensuring your lines are perfectly straight and your corners are sharp 90-degree angles.
At the junctions, instead of knots, sew on small, square metallic beads or studs.
This adds a three-dimensional, functional look that completes the high-tech illusion.
24. Deconstructed Lines with Dimensional Fringe
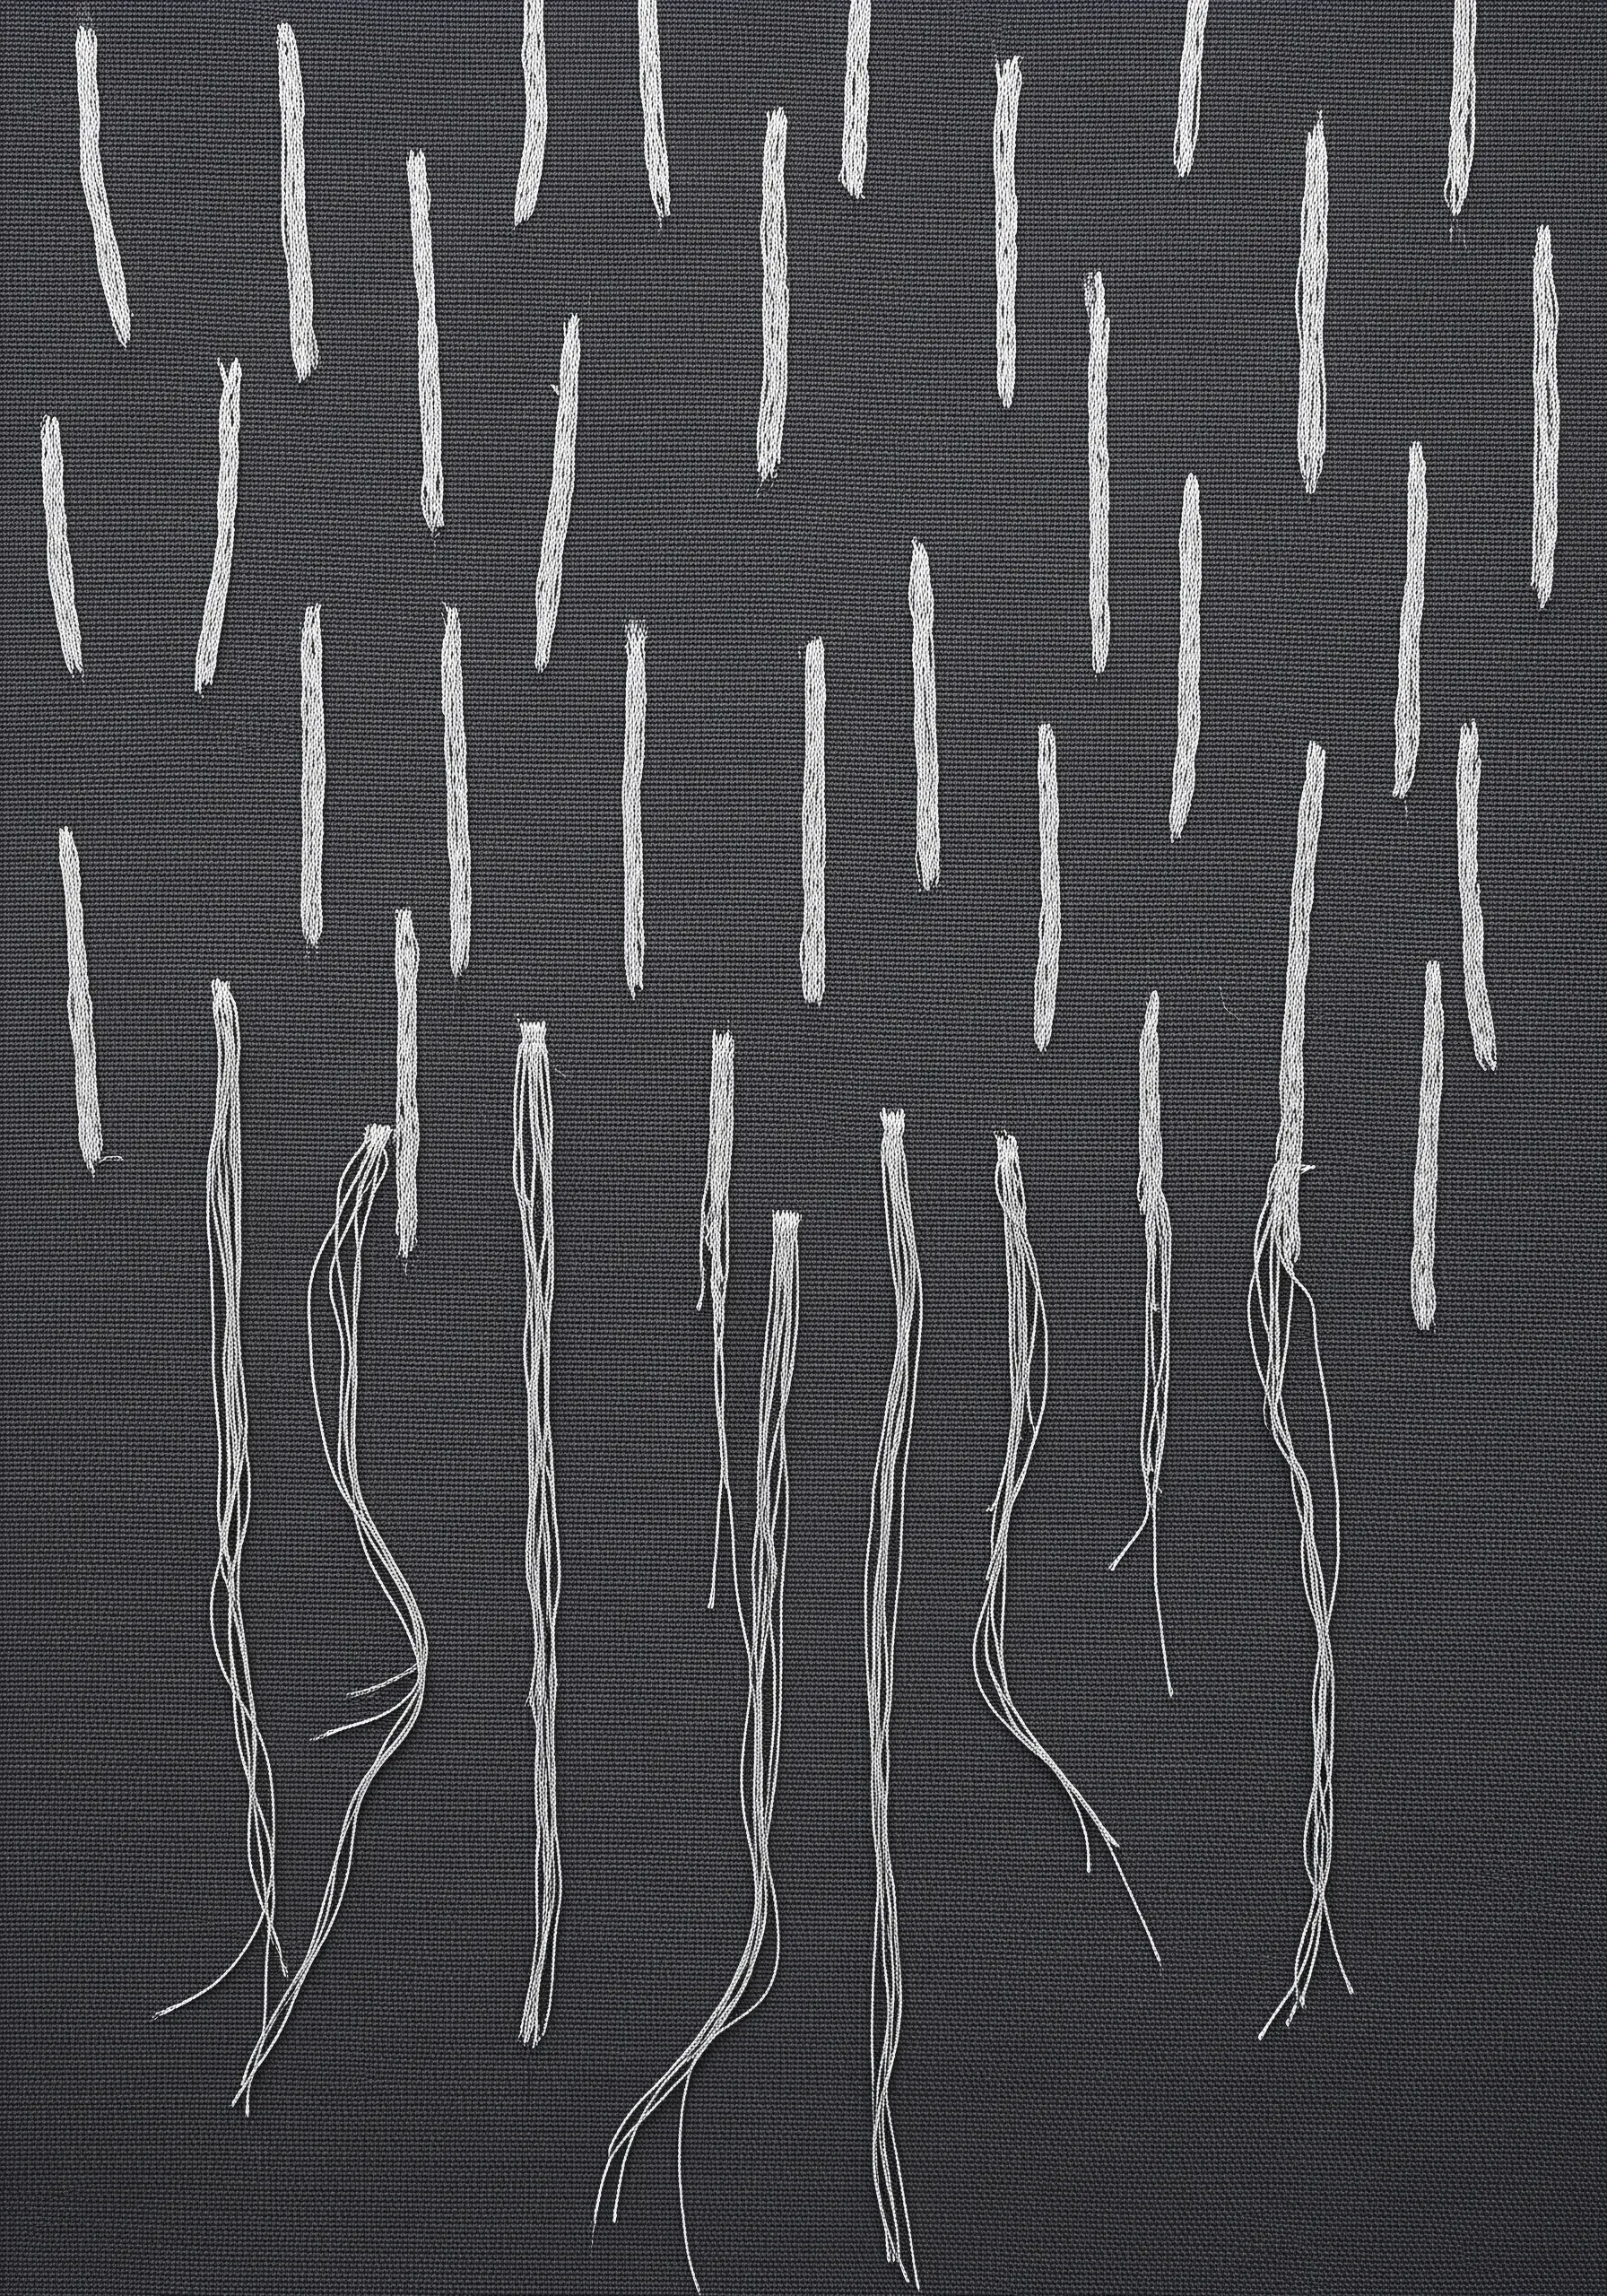
Play with texture and form by deconstructing the traditional stitch.
For the top section, create simple vertical satin stitch bars.
For the bottom section, create the same stitches but do not anchor the thread at the end.
Instead, leave a long tail and let it hang loose, creating a transition from a flat, controlled pattern to a free-hanging, kinetic fringe.
The effect is modern, unexpected, and adds movement to a static piece.
25. Mixed Media with Ribbon and Thread
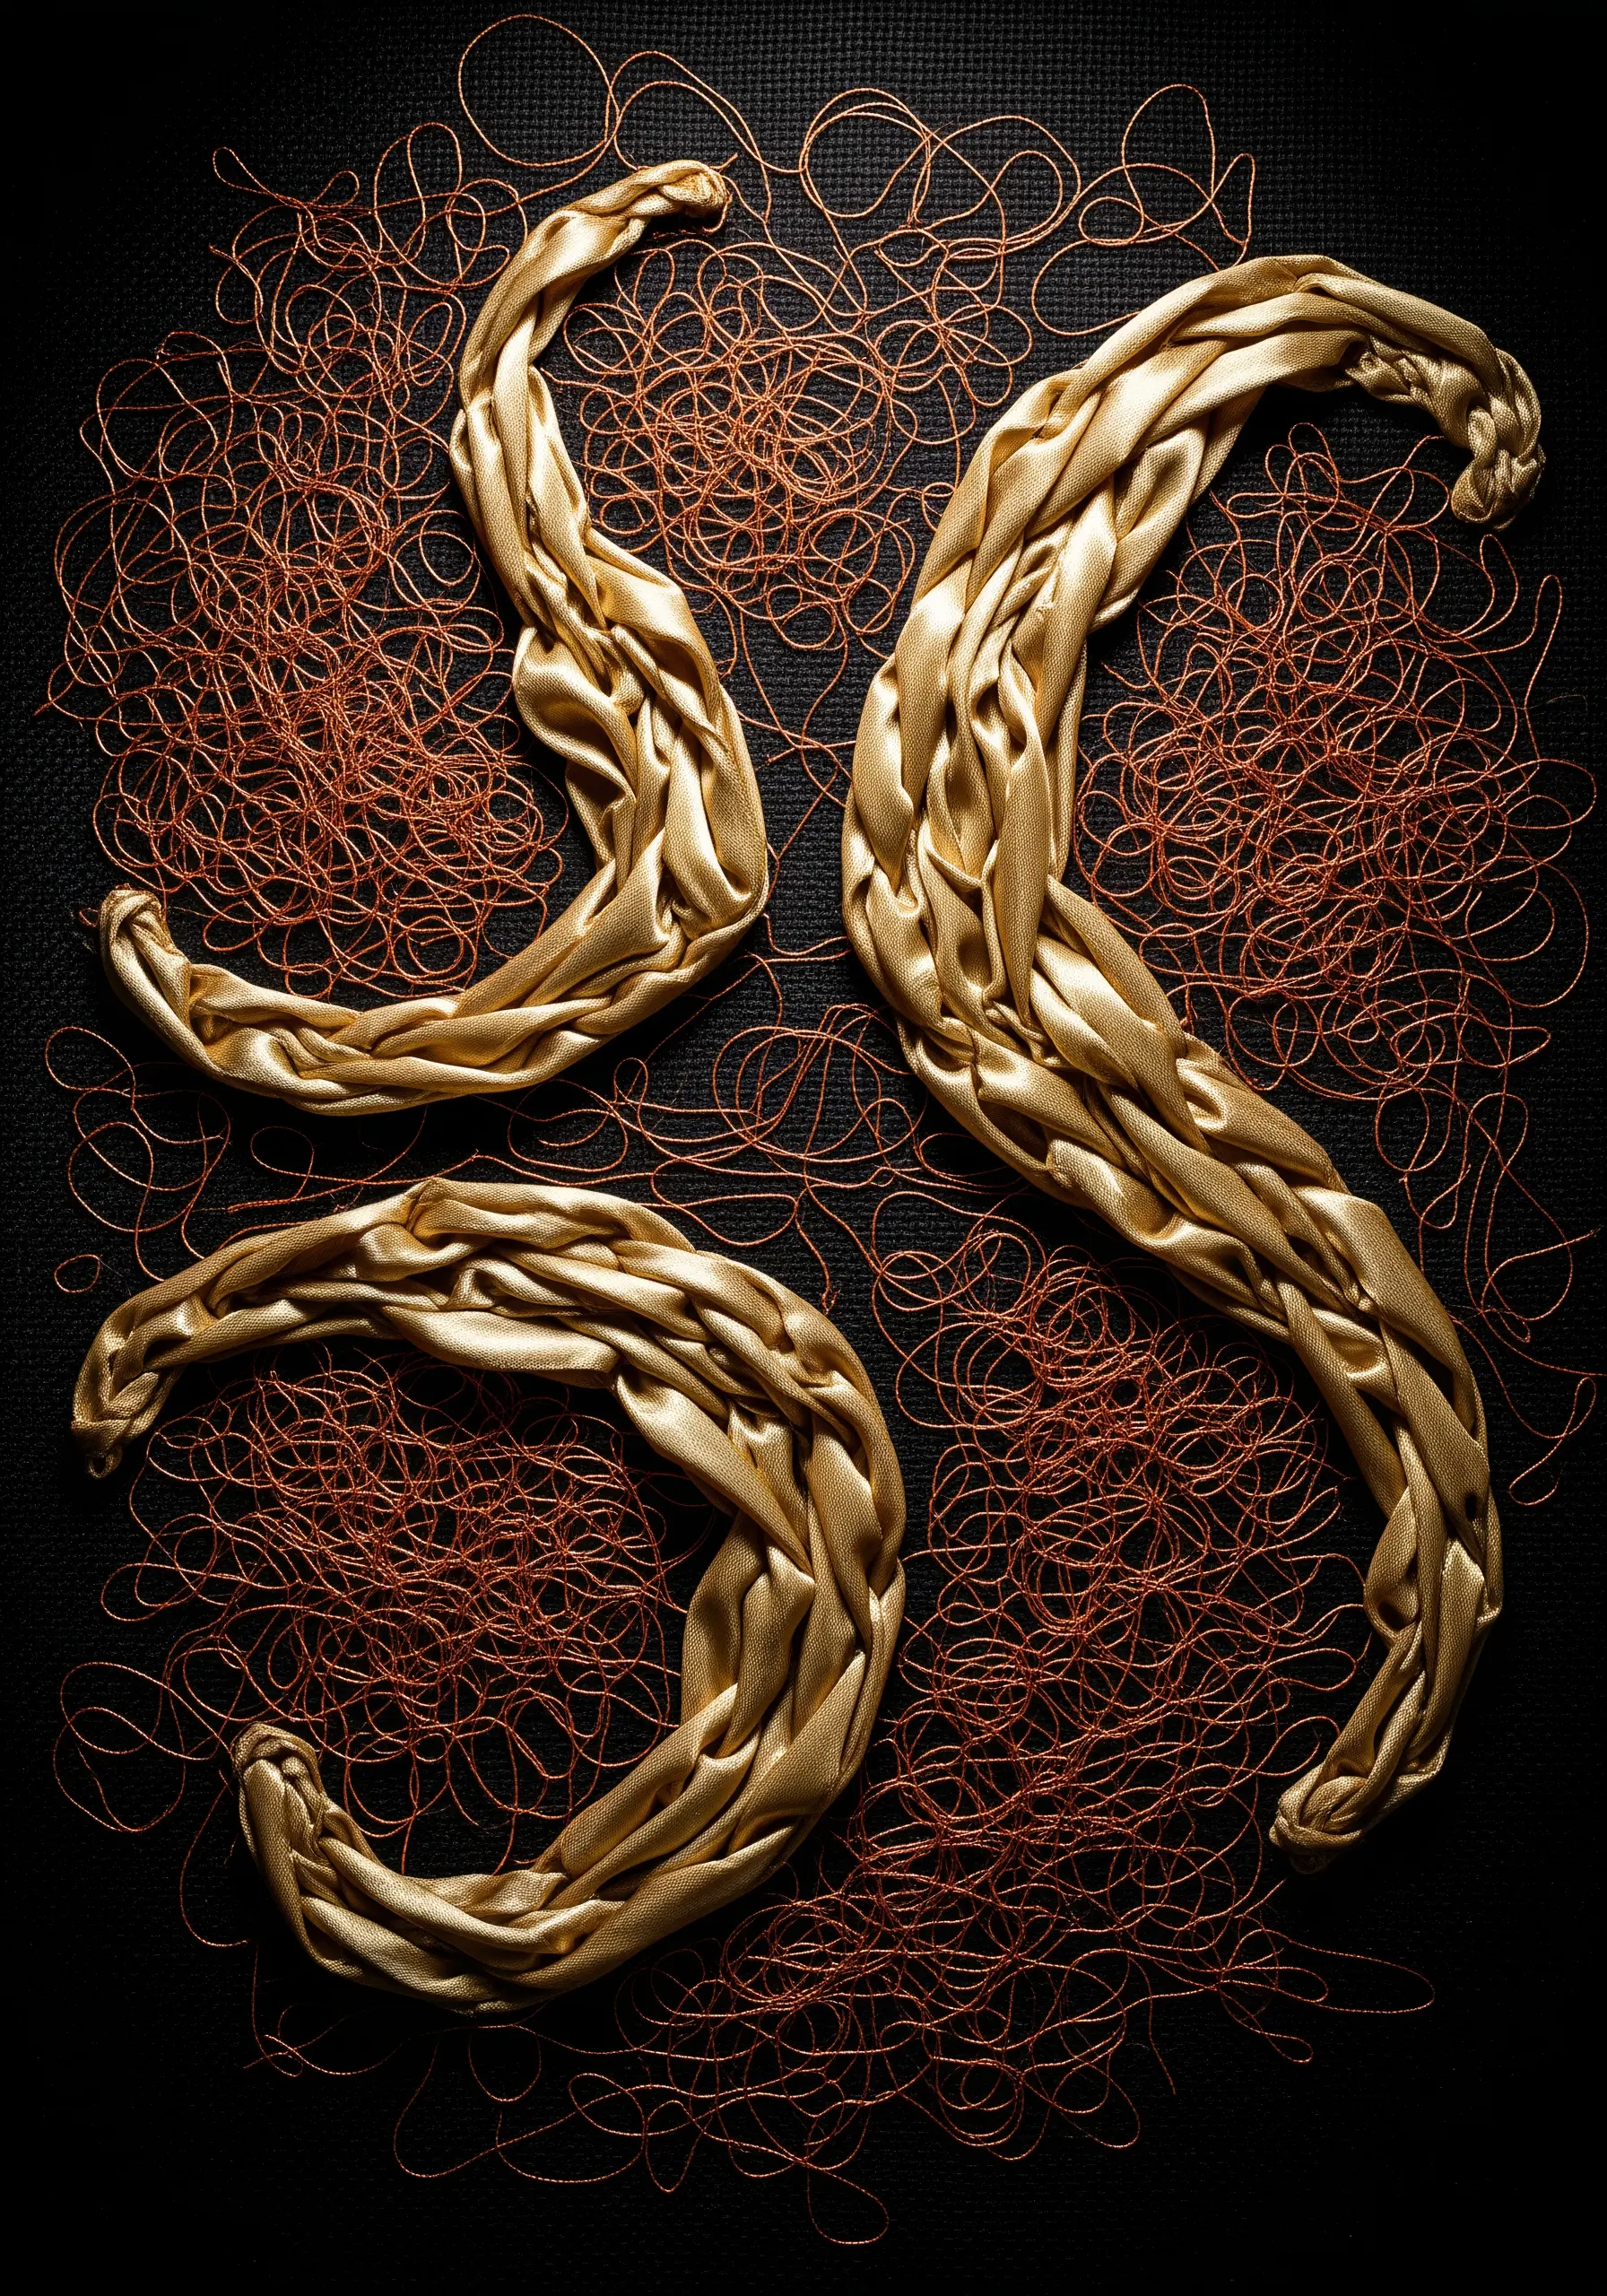
Combine different materials to create a dramatic textural landscape.
For the bold, sculptural forms, use a wide metallic ribbon, folding and twisting it into shape and tacking it down discreetly.
For the contrasting texture, create a “nest” of very fine, crinkly metallic thread by couching down loose swirls until you’ve built a delicate, chaotic mass.
The contrast between the ribbon’s smooth folds and the thread’s airy tangle is visually arresting.
26. Weaving with Holographic Threads
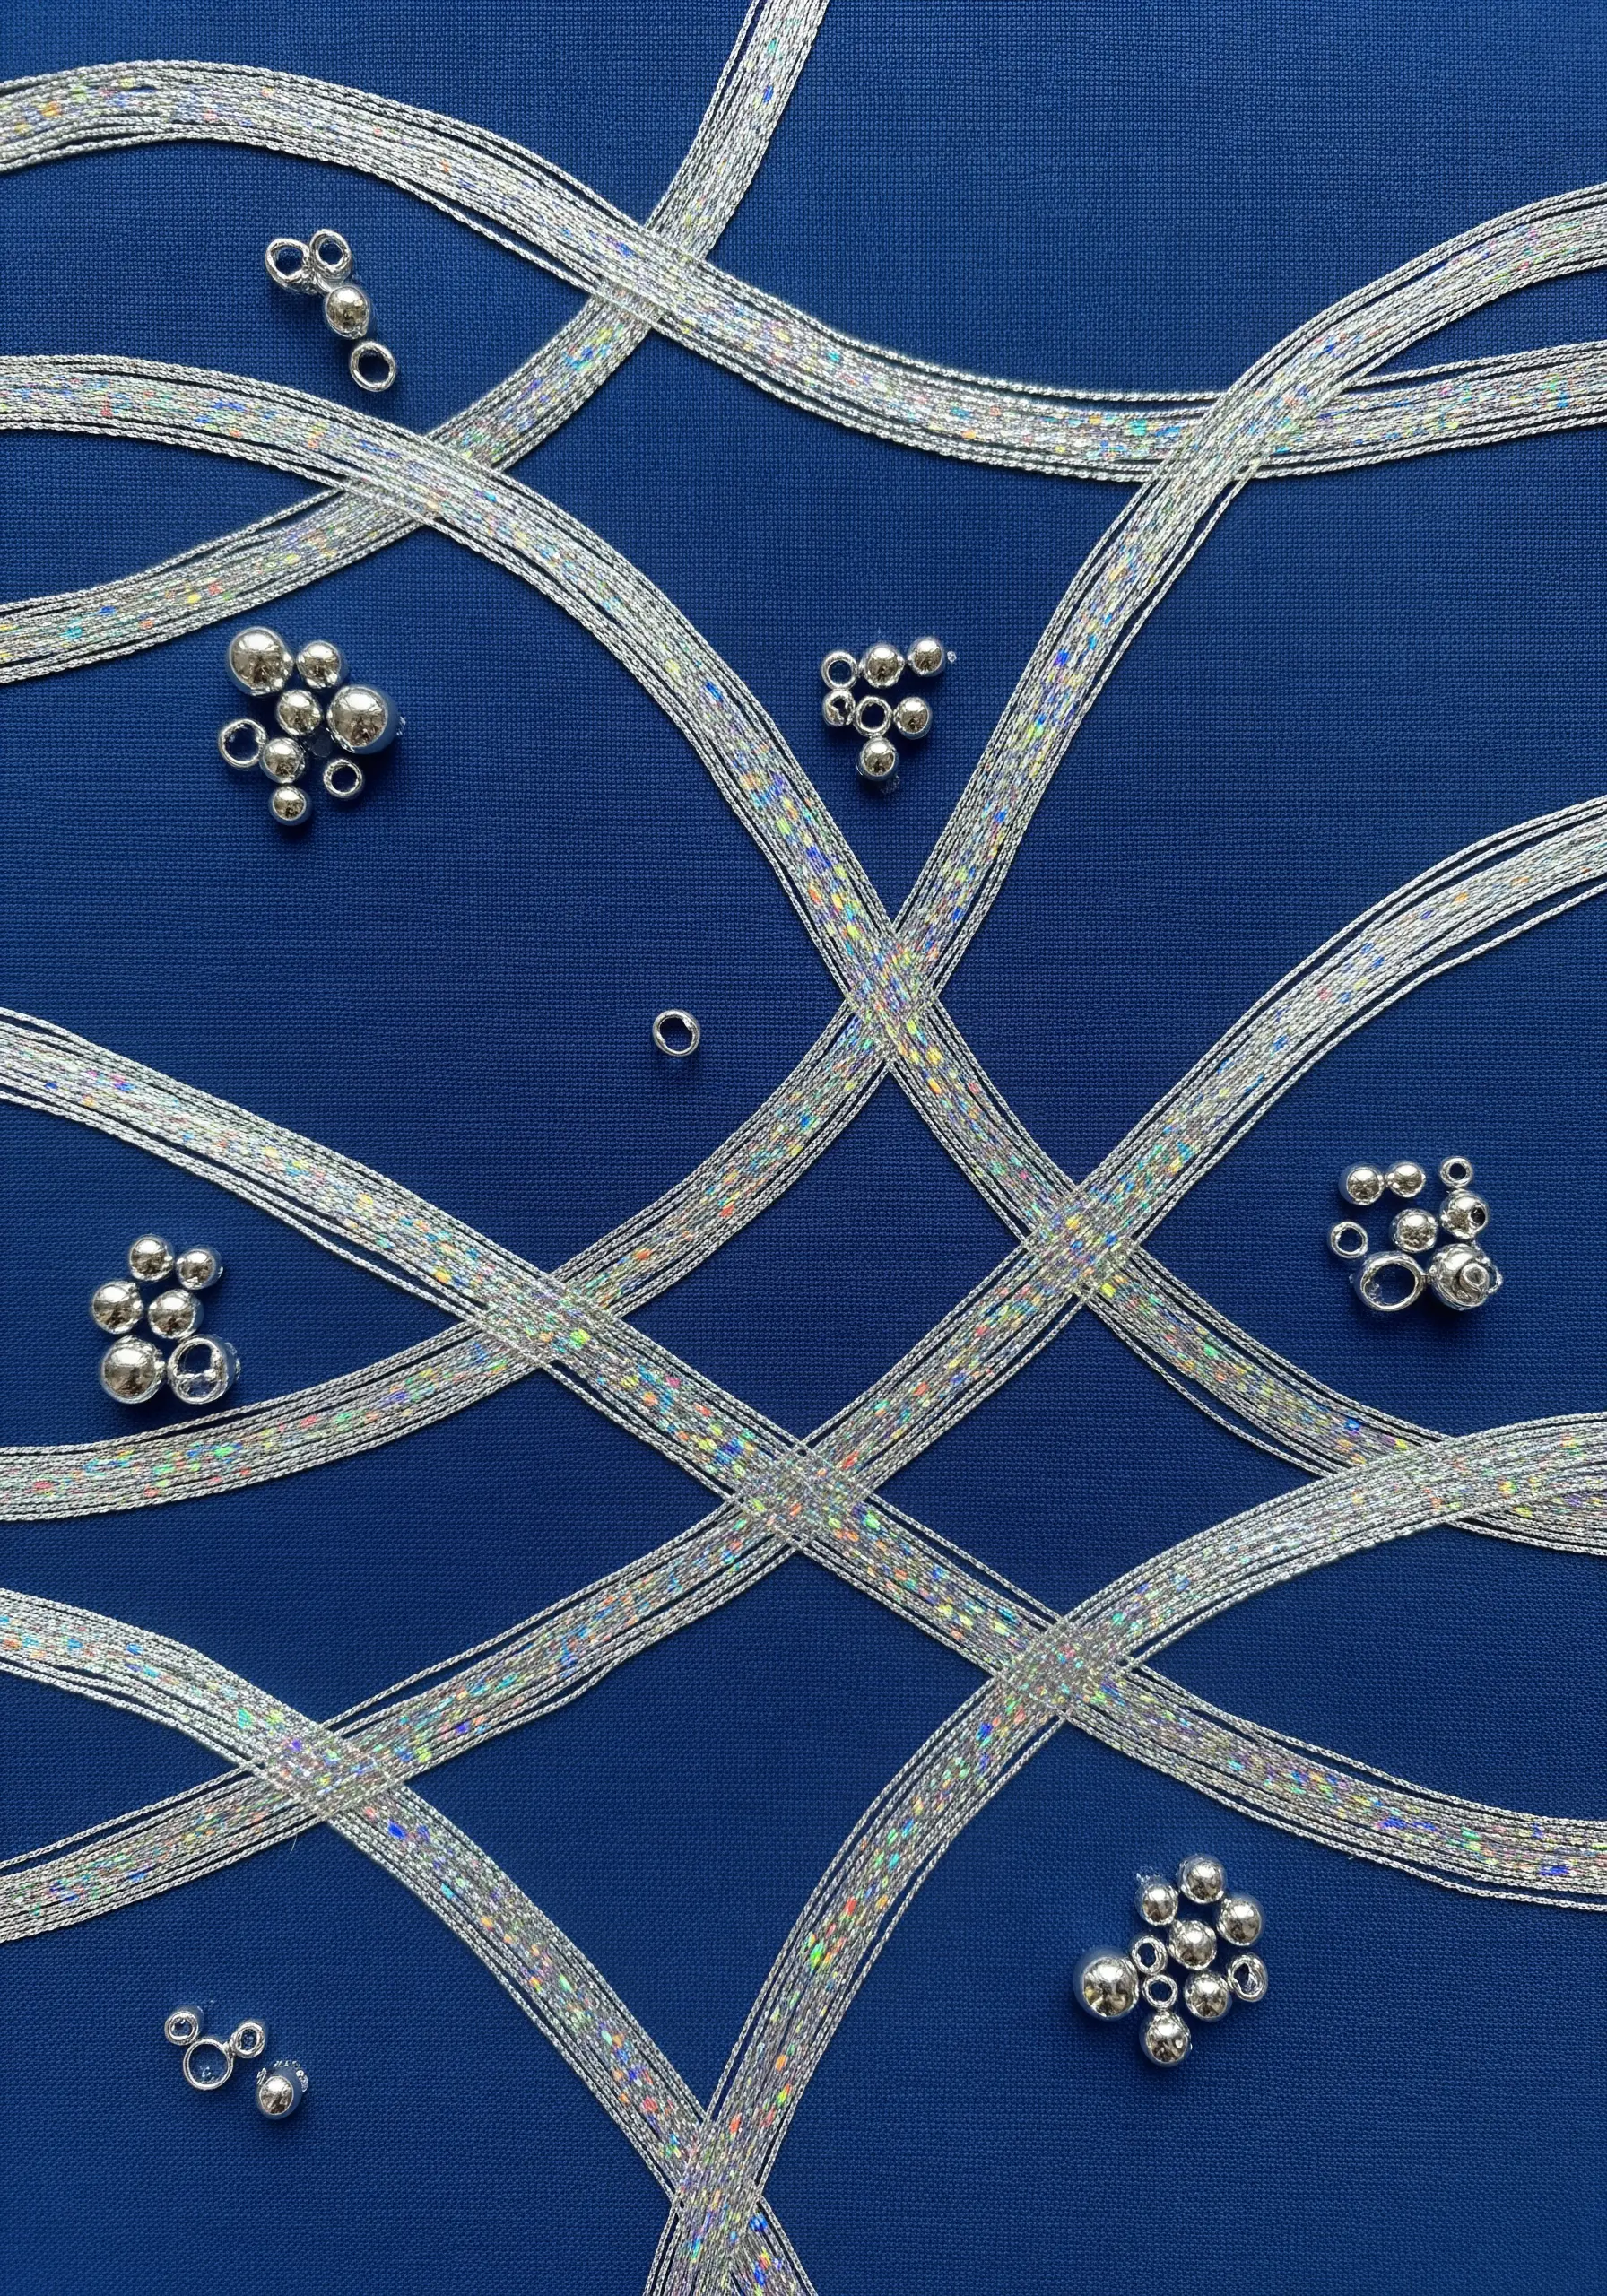
To get this iridescent, woven look, use a flat, tape-like holographic thread and think of it as weaving on the surface of your fabric.
Lay down your vertical strands first, anchoring them at the top and bottom.
Then, literally weave the horizontal strands over and under the vertical ones.
Use a tiny tacking stitch where the threads intersect to keep everything secure.
The clusters of silver beads add a liquid-like, bubbly texture that complements the holographic sheen.
27. The Illusion of Woven Fabric

This trompe l’oeil effect is created with carefully placed satin stitches.
For the “warp” threads (vertical), make your satin stitches horizontal.
For the “weft” threads (horizontal), make your satin stitches vertical.
This change in direction makes the light reflect differently, creating the powerful illusion that the threads are truly passing over and under one another.
Using three distinct metallic colors enhances the woven depth.
28. The Art of the Intentional Scribble

Embrace free-form stitching to create this energetic, doodle-like piece.
Use a wandering running stitch, letting go of control and allowing your lines to overlap, curl, and loop.
For a marled effect, try stitching with two different metallic threads—like gold and silver—in the needle at the same time.
Vary the density of the scribble across the fabric for an exercise in beautiful, abstract improvisation.
29. Capturing a Solar Eclipse
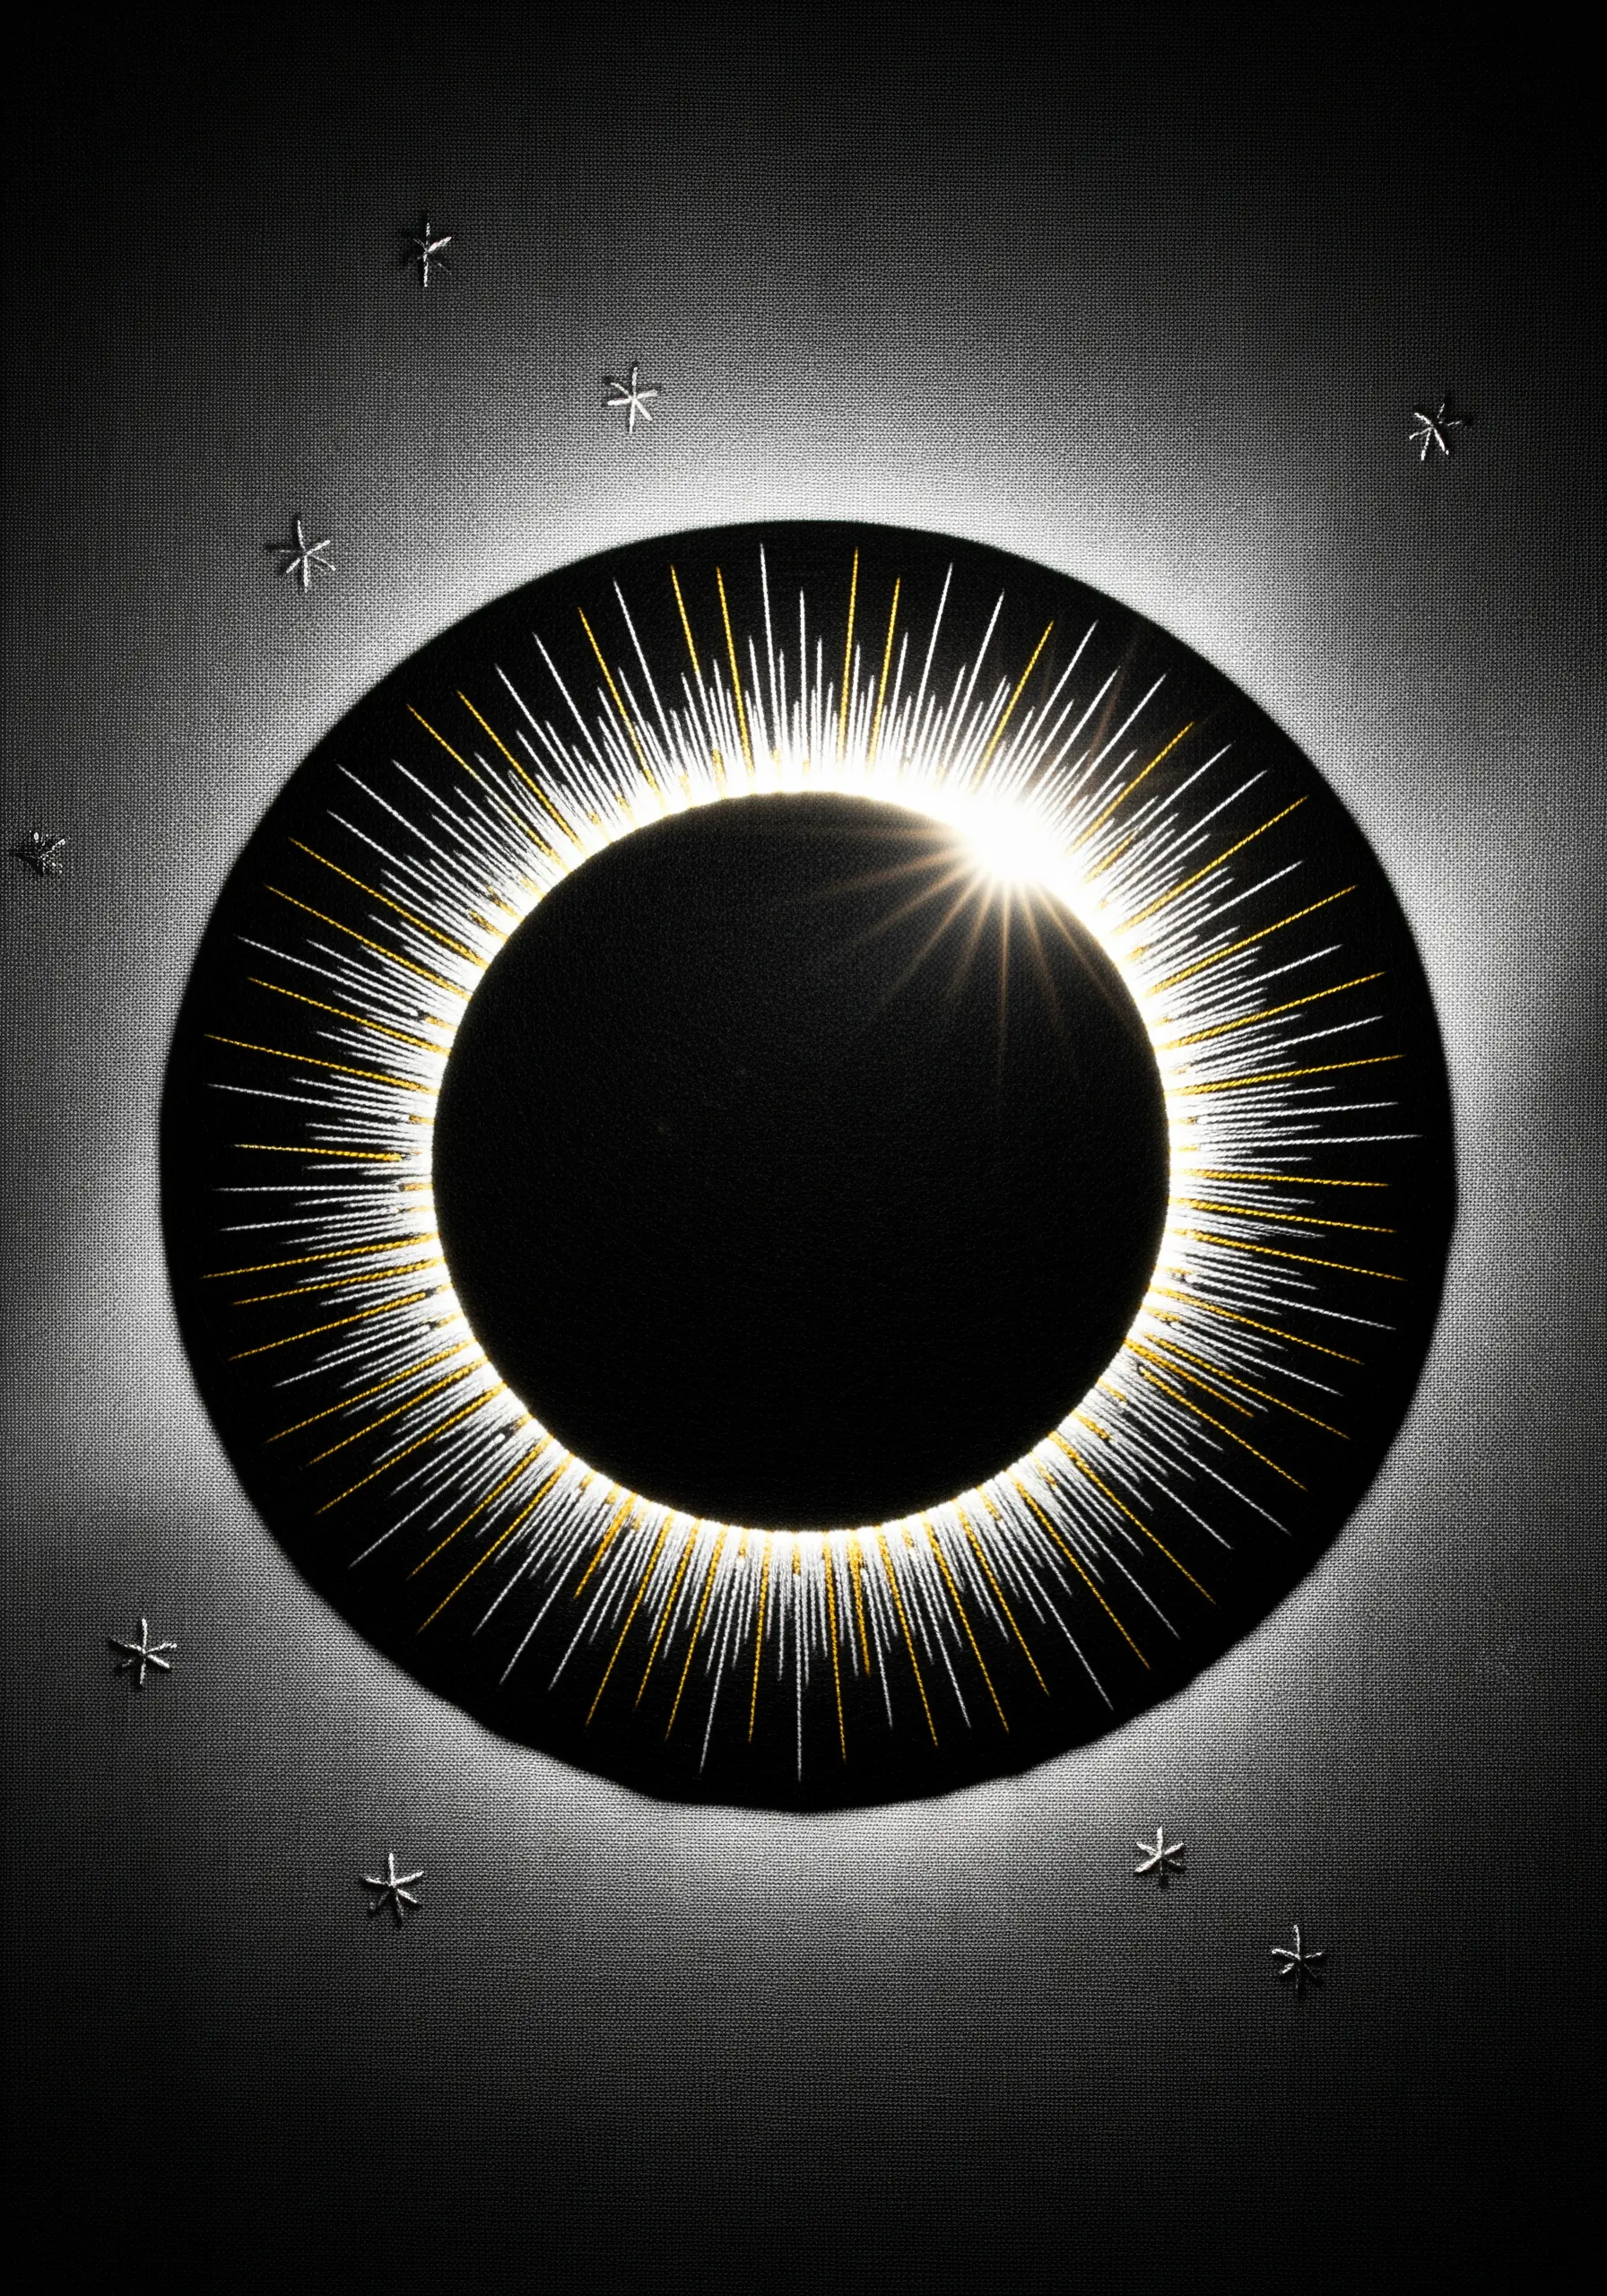
This piece uses negative space brilliantly to create its central element.
The dark “moon” is simply an un-stitched black fabric circle appliquéd onto the base.
For the glowing corona, use radiating straight stitches in a bright white or pale gold metallic thread.
Make the stitches dense at the edge of the circle and have them become sparser and shorter as they radiate outward.
Add a few tiny, scattered star stitches in silver to complete the celestial scene.
30. Layered Webs of Light

This intricate pattern is simpler than it appears, built by layering woven spider web stitches.
First, stitch the outlines of your overlapping circles using a simple backstitch.
Fill each circle with long straight stitches like the spokes of a wheel, then weave a spiral over the spokes from the center out.
Using a fine, glittery metallic thread on black satin creates a delicate, shimmering pattern that feels both geometric and organic.


