

Have you ever finished a piece and felt that something was missing—a certain spark that separates simple stitching from true textile art? Often, that missing ingredient is depth. It’s the subtle illusion that makes a design breathe, inviting the viewer’s eye to travel not just across the surface, but *into* it.
Many believe that creating depth requires complex, time-consuming techniques like photorealistic thread painting. But the truth is, you can achieve stunning, modern, and dimensional effects with the simplest of stitches. The secret isn’t in the complexity of the stitch, but in the intelligence of its application.
In this guide, we’ll explore how to manipulate color, tension, density, and line to trick the eye and build worlds within your hoop. These are not just patterns; they are principles of design translated into thread. Prepare to see your needle and floss not just as tools for decoration, but as instruments for sculpting light, shadow, and space.
1. Create a Concentric Color Well
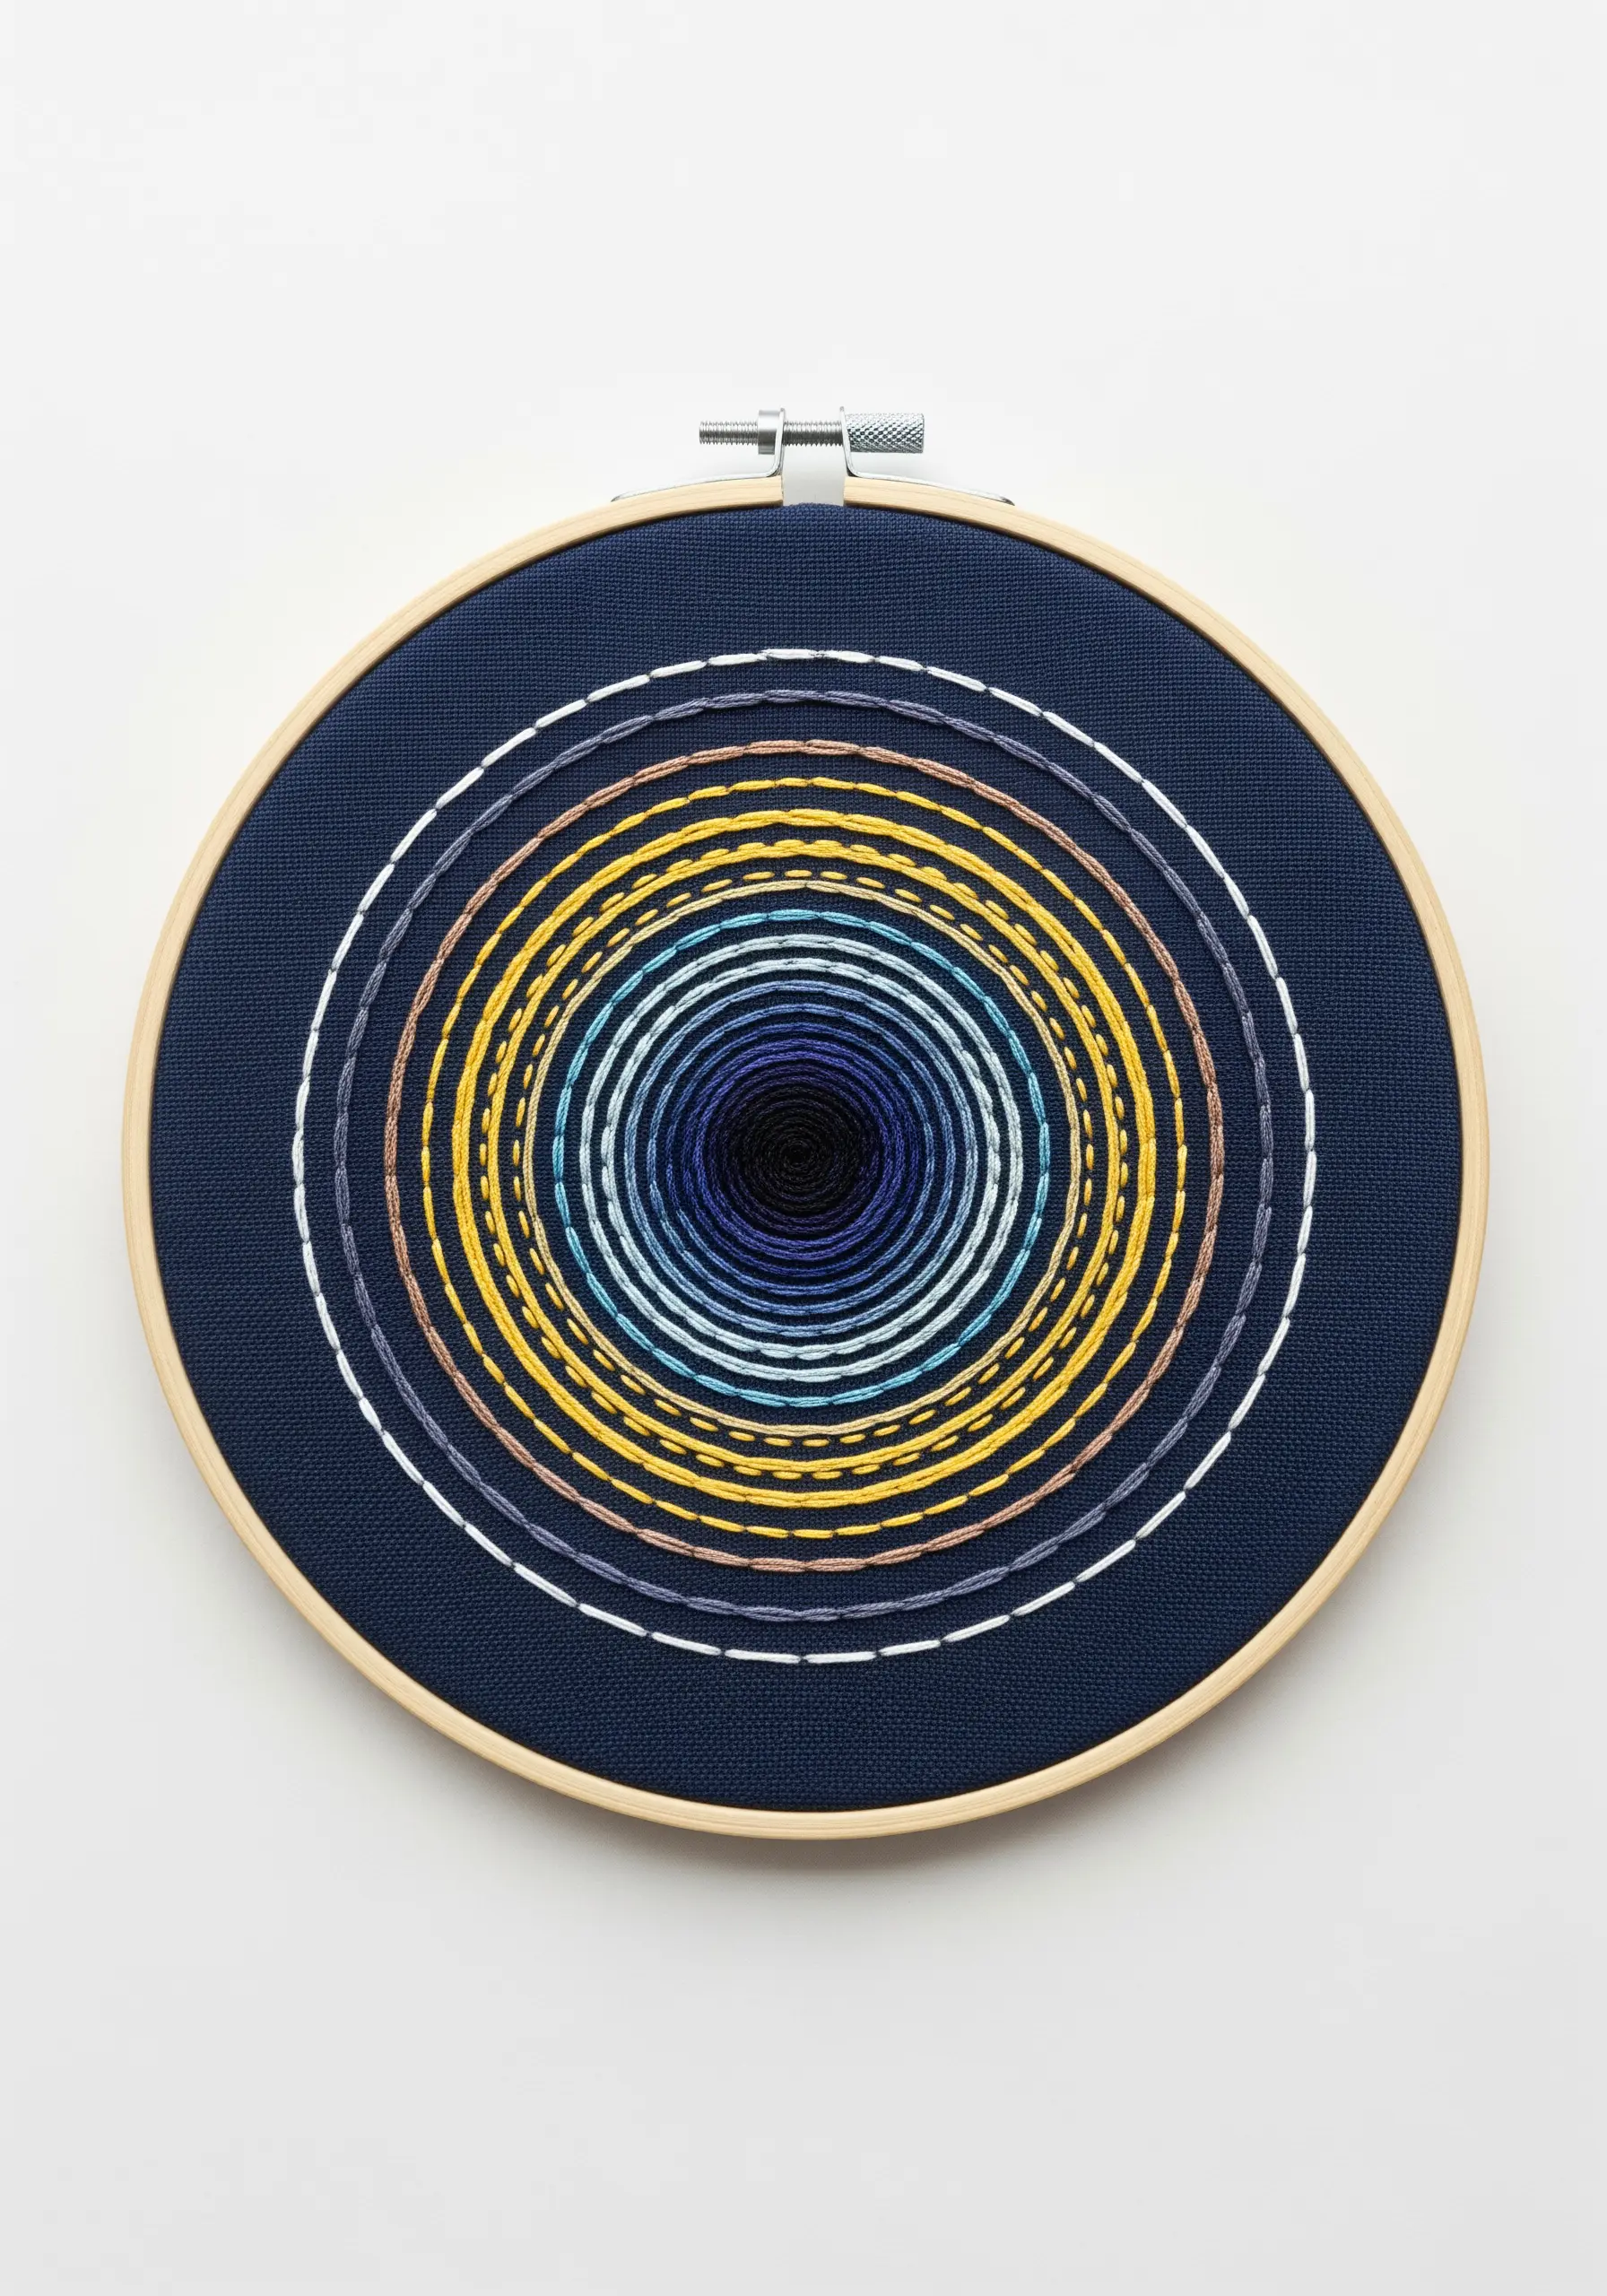
Build hypnotic depth by stitching concentric circles, moving from dark to light threads as you work from the center outward.
Use a dense, wrapped backstitch or single-strand satin stitch for the inner rings to create a solid core that appears to recede.
For the outer rings, switch to a lighter running stitch. This sparse texture makes the outer layers feel airy and closer to the viewer, enhancing the tunnel illusion.
The contrast between the tight, dark center and the light, open stitches on the periphery is what tricks the eye into seeing depth.
2. Warp a Grid with Strategic Tension

Create the illusion of a warped, three-dimensional surface by stitching a grid over a thick, pliable material like felt or foam.
Instead of stitching on a taut hoop, work on a flat, un-hooped piece. As you stitch the grid using a simple straight stitch, apply slightly more tension in the areas you want to recede.
The thread will physically pull and pucker the base material, creating actual hills and valleys that cast subtle shadows.
This technique turns the fabric itself into a sculptural element, making the depth real, not just visual.
3. Sculpt Optical Waves with Satin Stitch
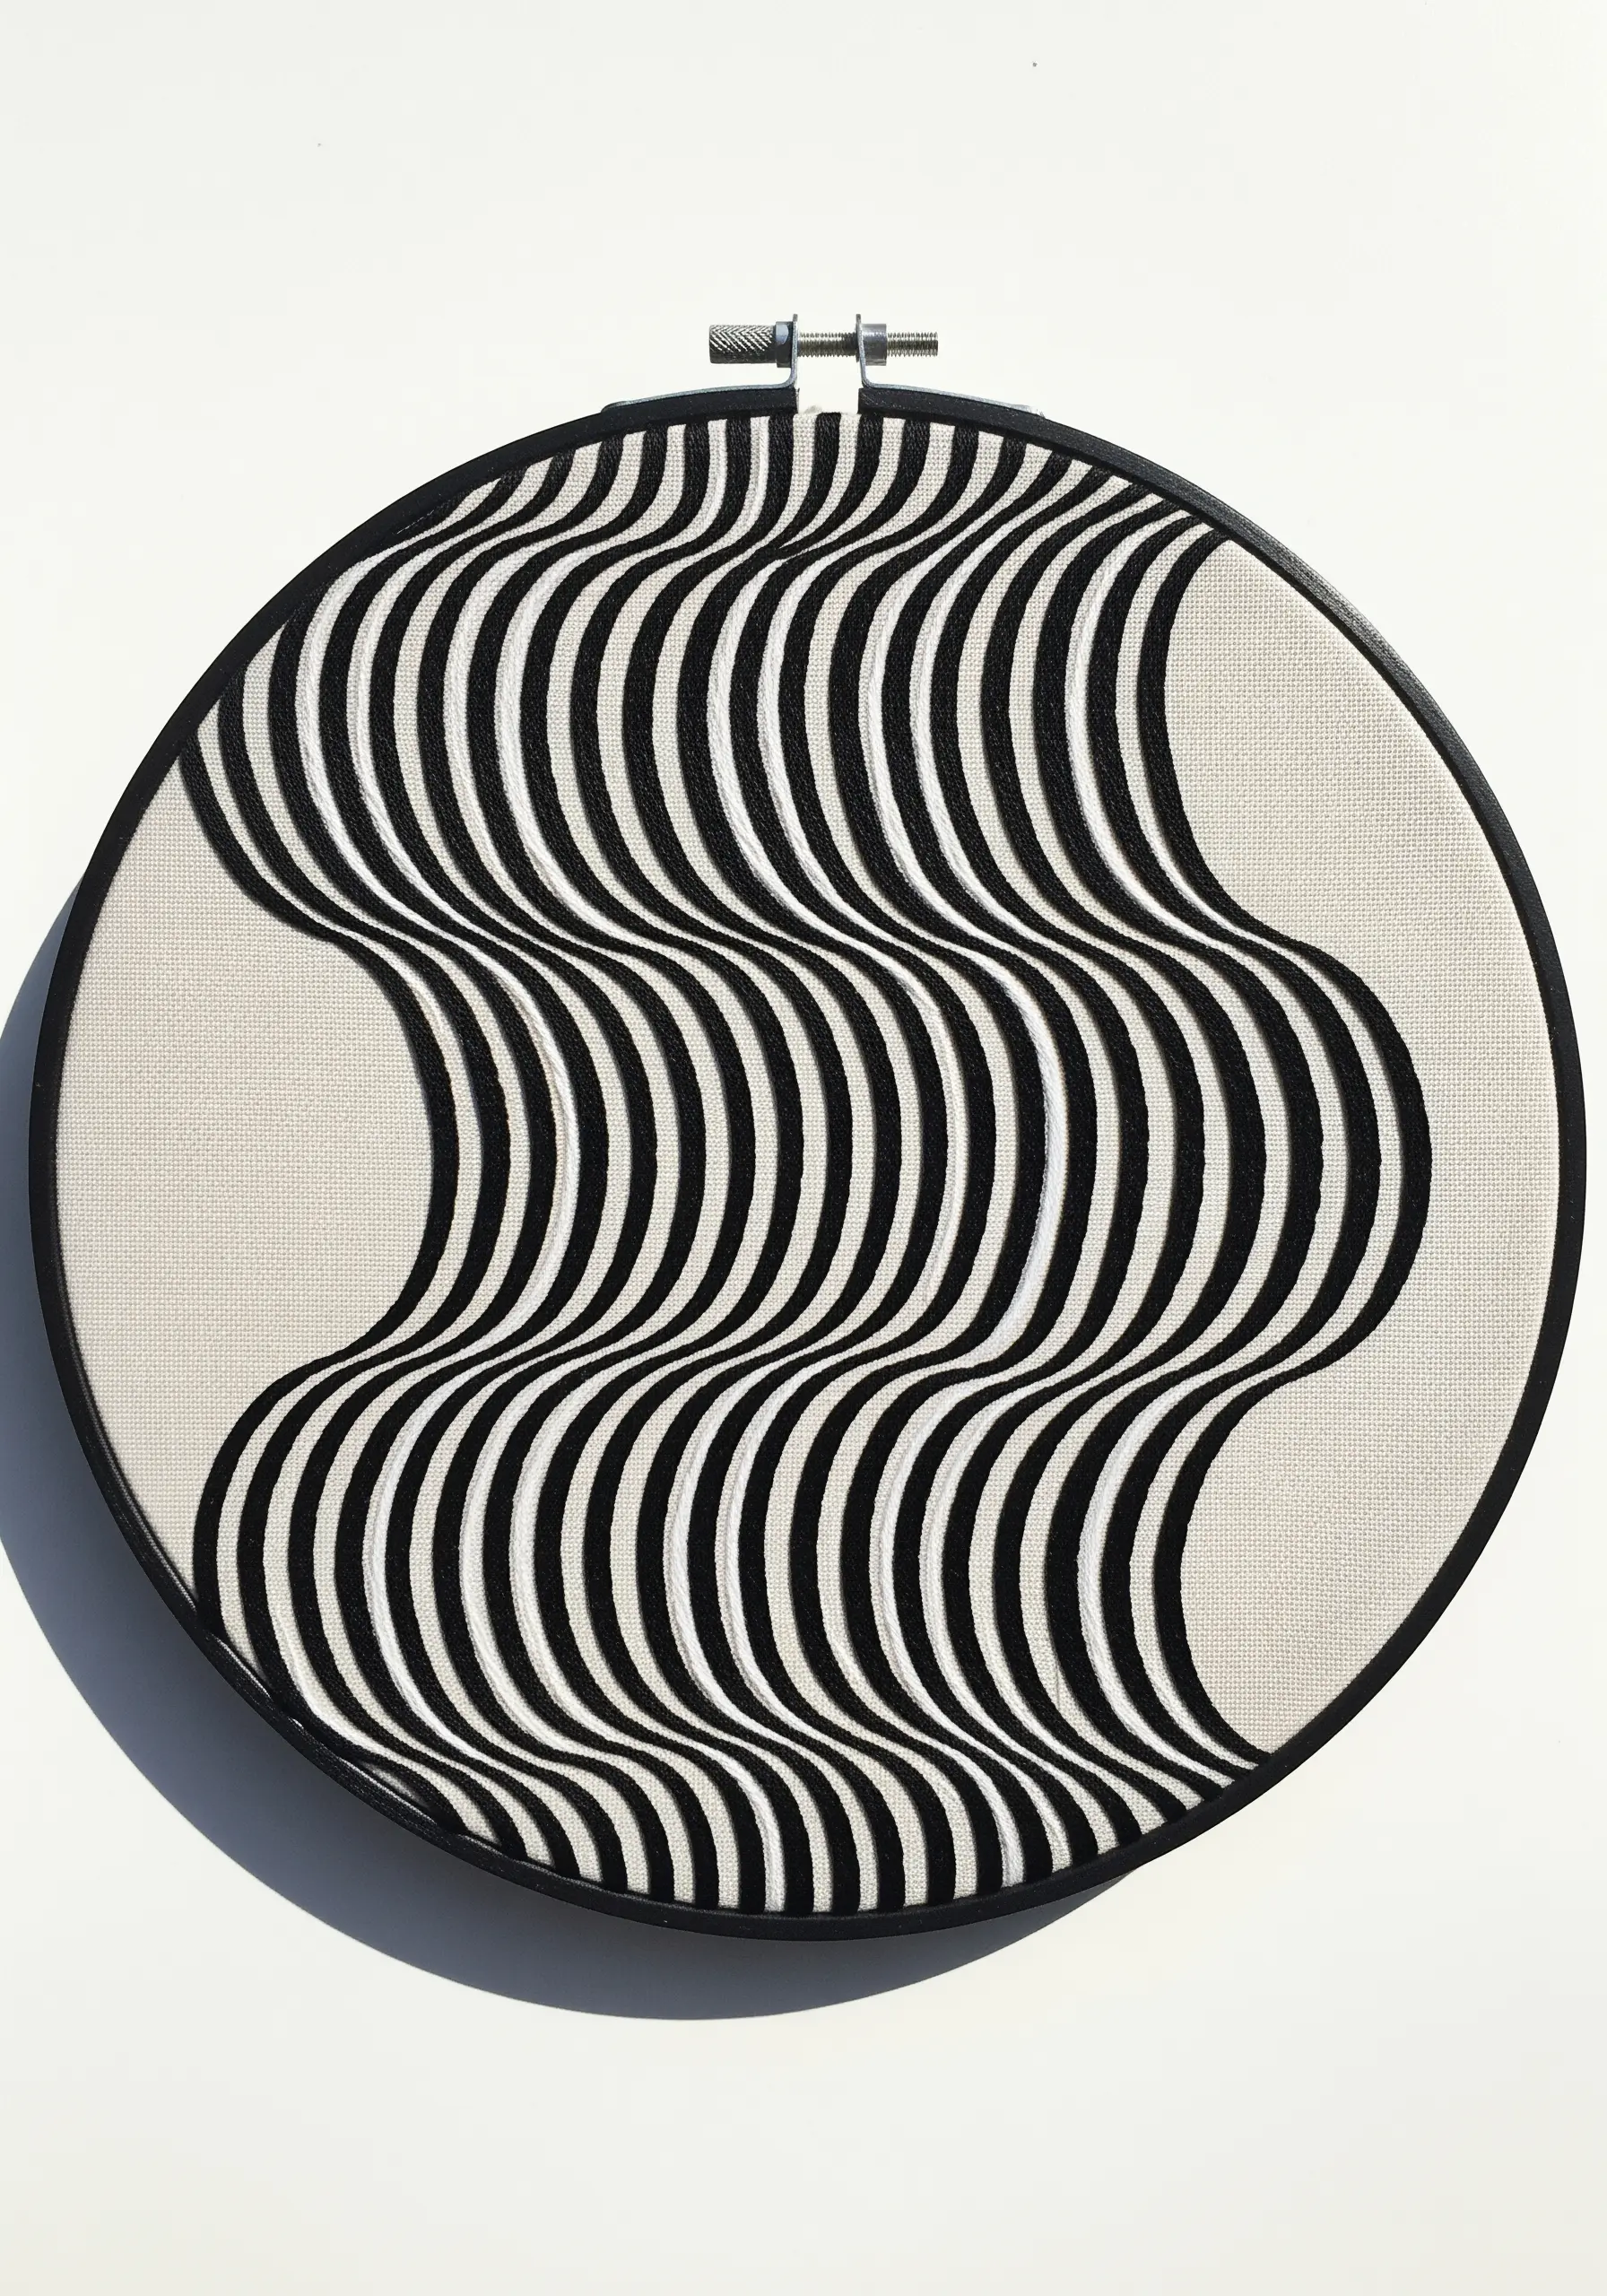
Use the classic satin stitch to create undulating, dimensional waves that seem to rise from the fabric.
The key to this illusion is flawlessly parallel stitches. Keep the entry and exit points of your needle perfectly aligned to create smooth, solid bands of color.
Work with a high-contrast palette, like black on white, to maximize the optical effect. The brain interprets the clean, curved edges as highlights and shadows on a folded surface.
To maintain crisp edges, outline each wave with a single backstitch before filling it in; this gives your satin stitch a defined boundary to press against.
4. Simulate Transparency with Open Fill Stitches

Mimic the effect of overlapping, transparent shapes using a simple cross-hatch or darning stitch fill.
Stitch your first shape using a grid of sparse, evenly spaced straight stitches. For the second, overlapping shape, stitch another grid in a different color directly on top.
In the area where the two shapes intersect, the two grids will combine, creating a denser pattern and a new, blended color.
This mimics how light filters through colored glass, giving your work an airy, layered quality without any complex shading.
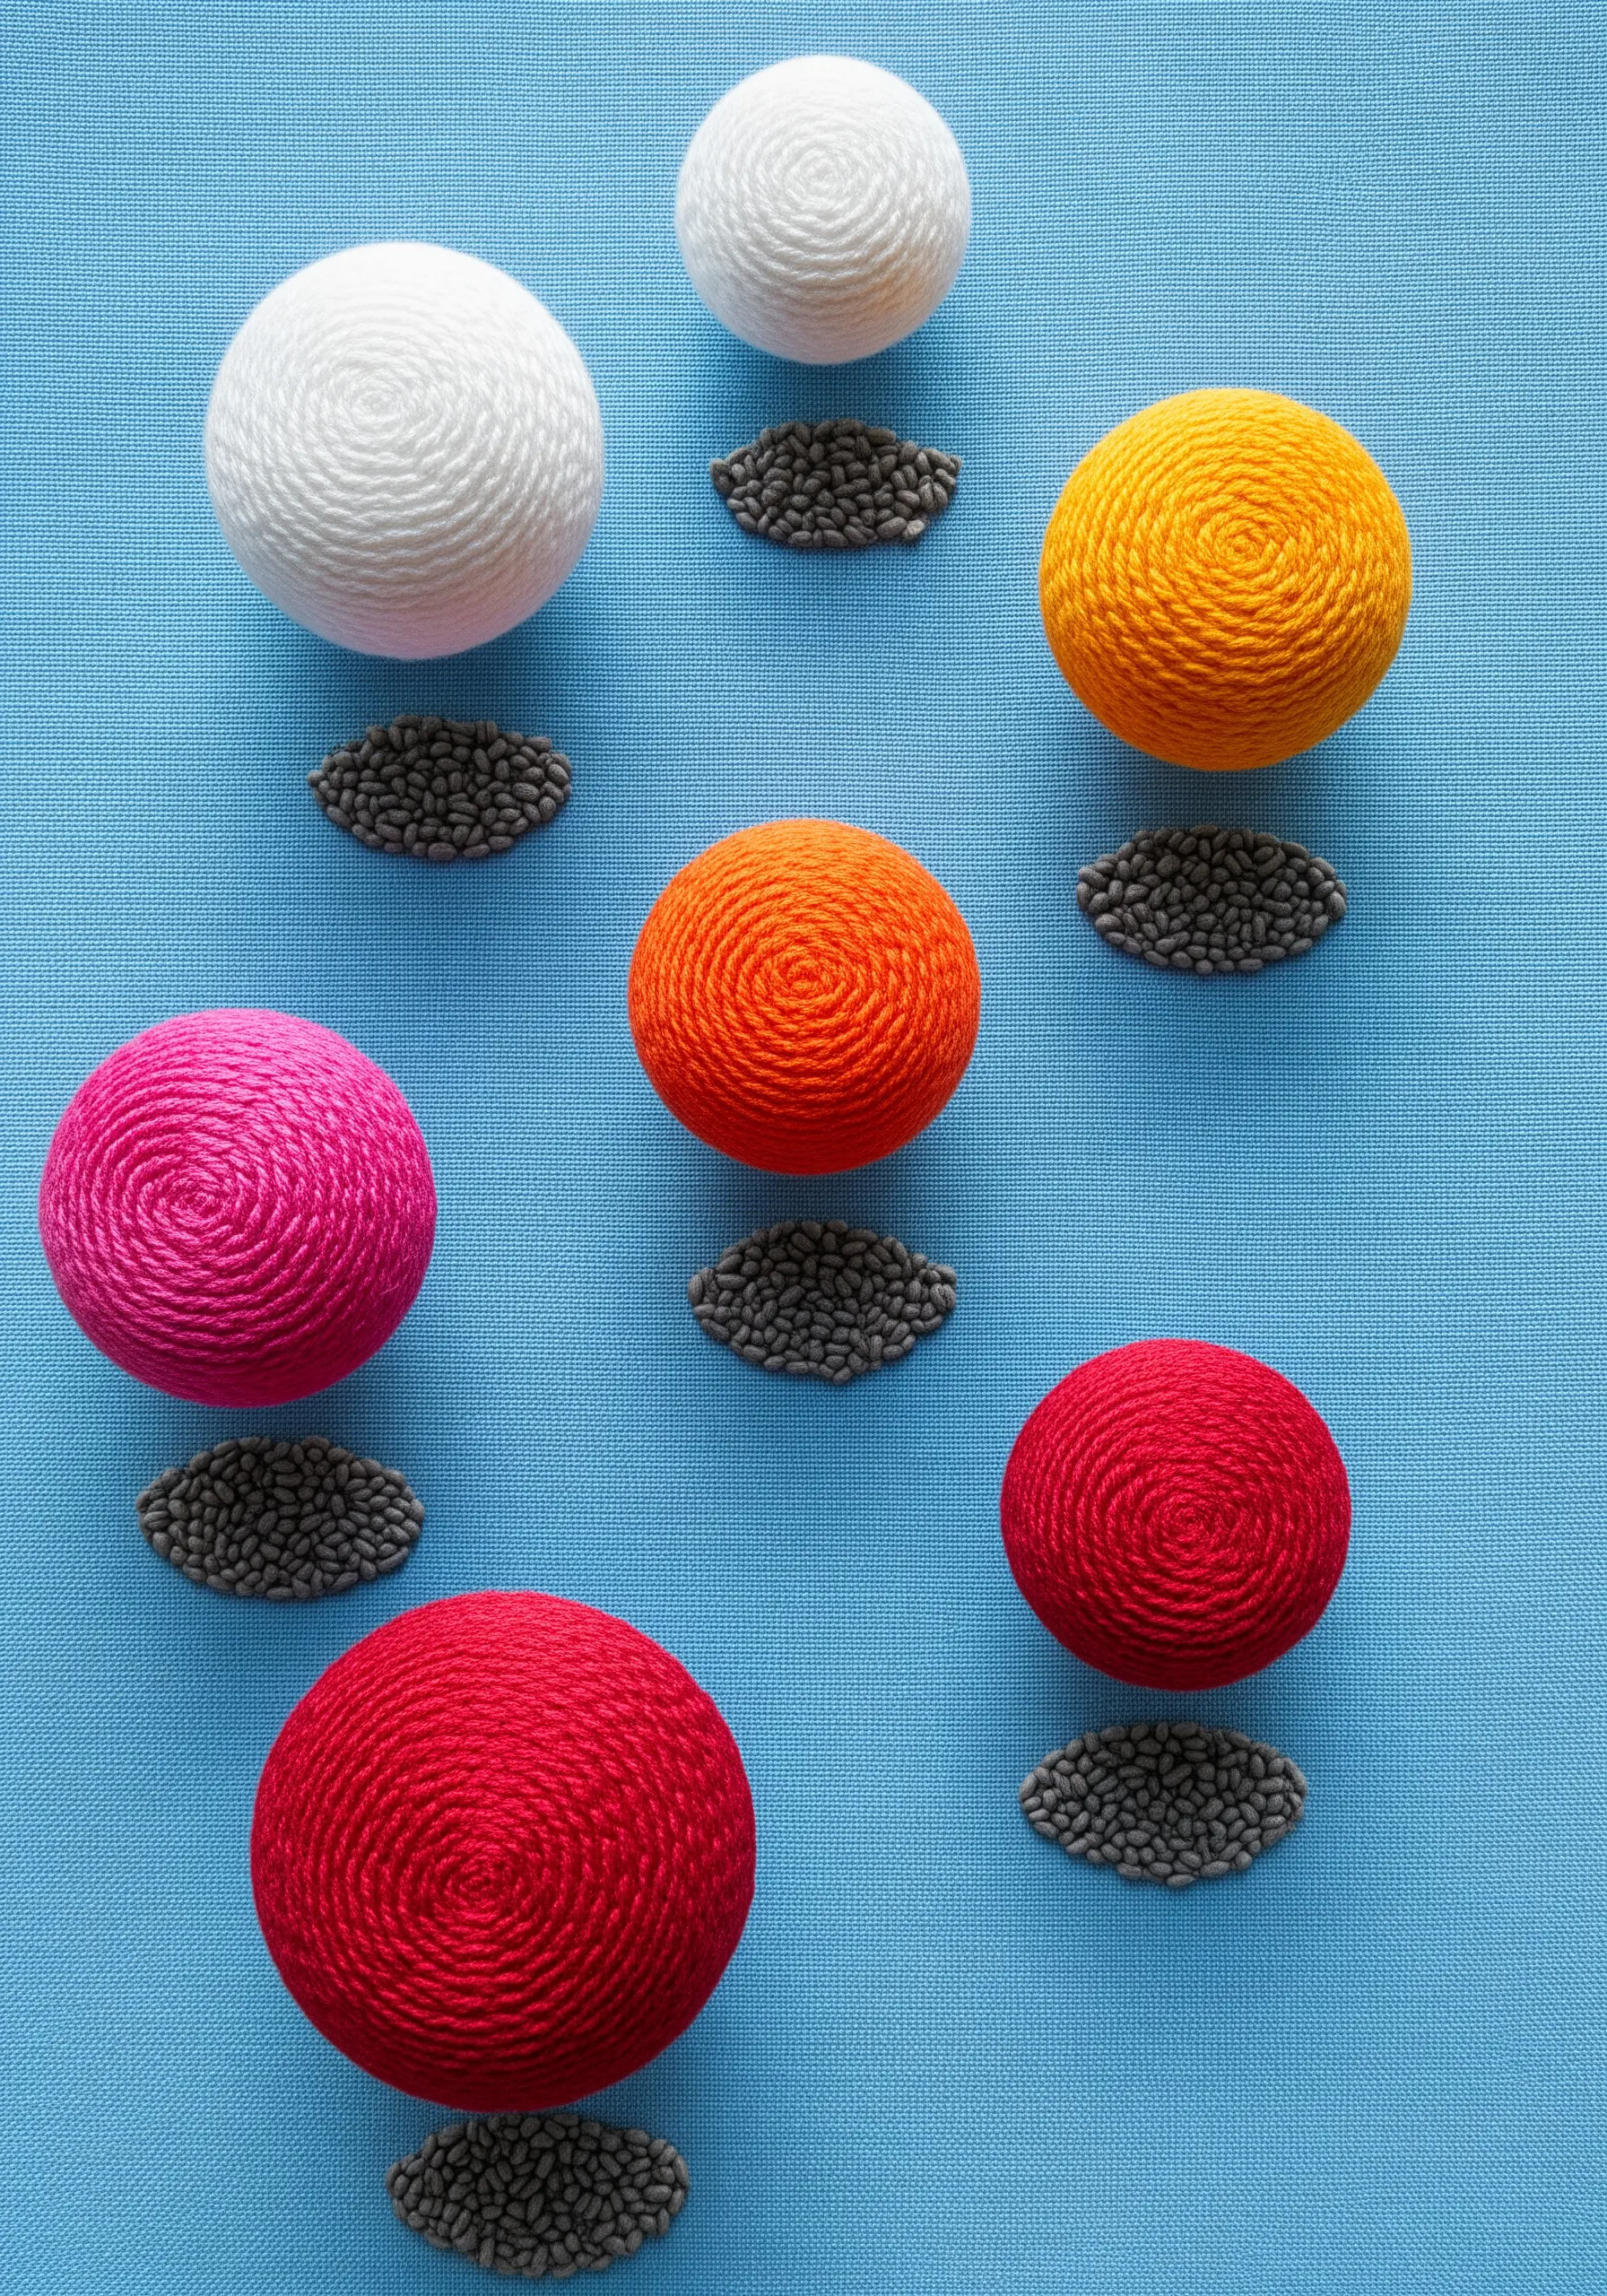
5. Cast Thread Shadows for a Floating Effect
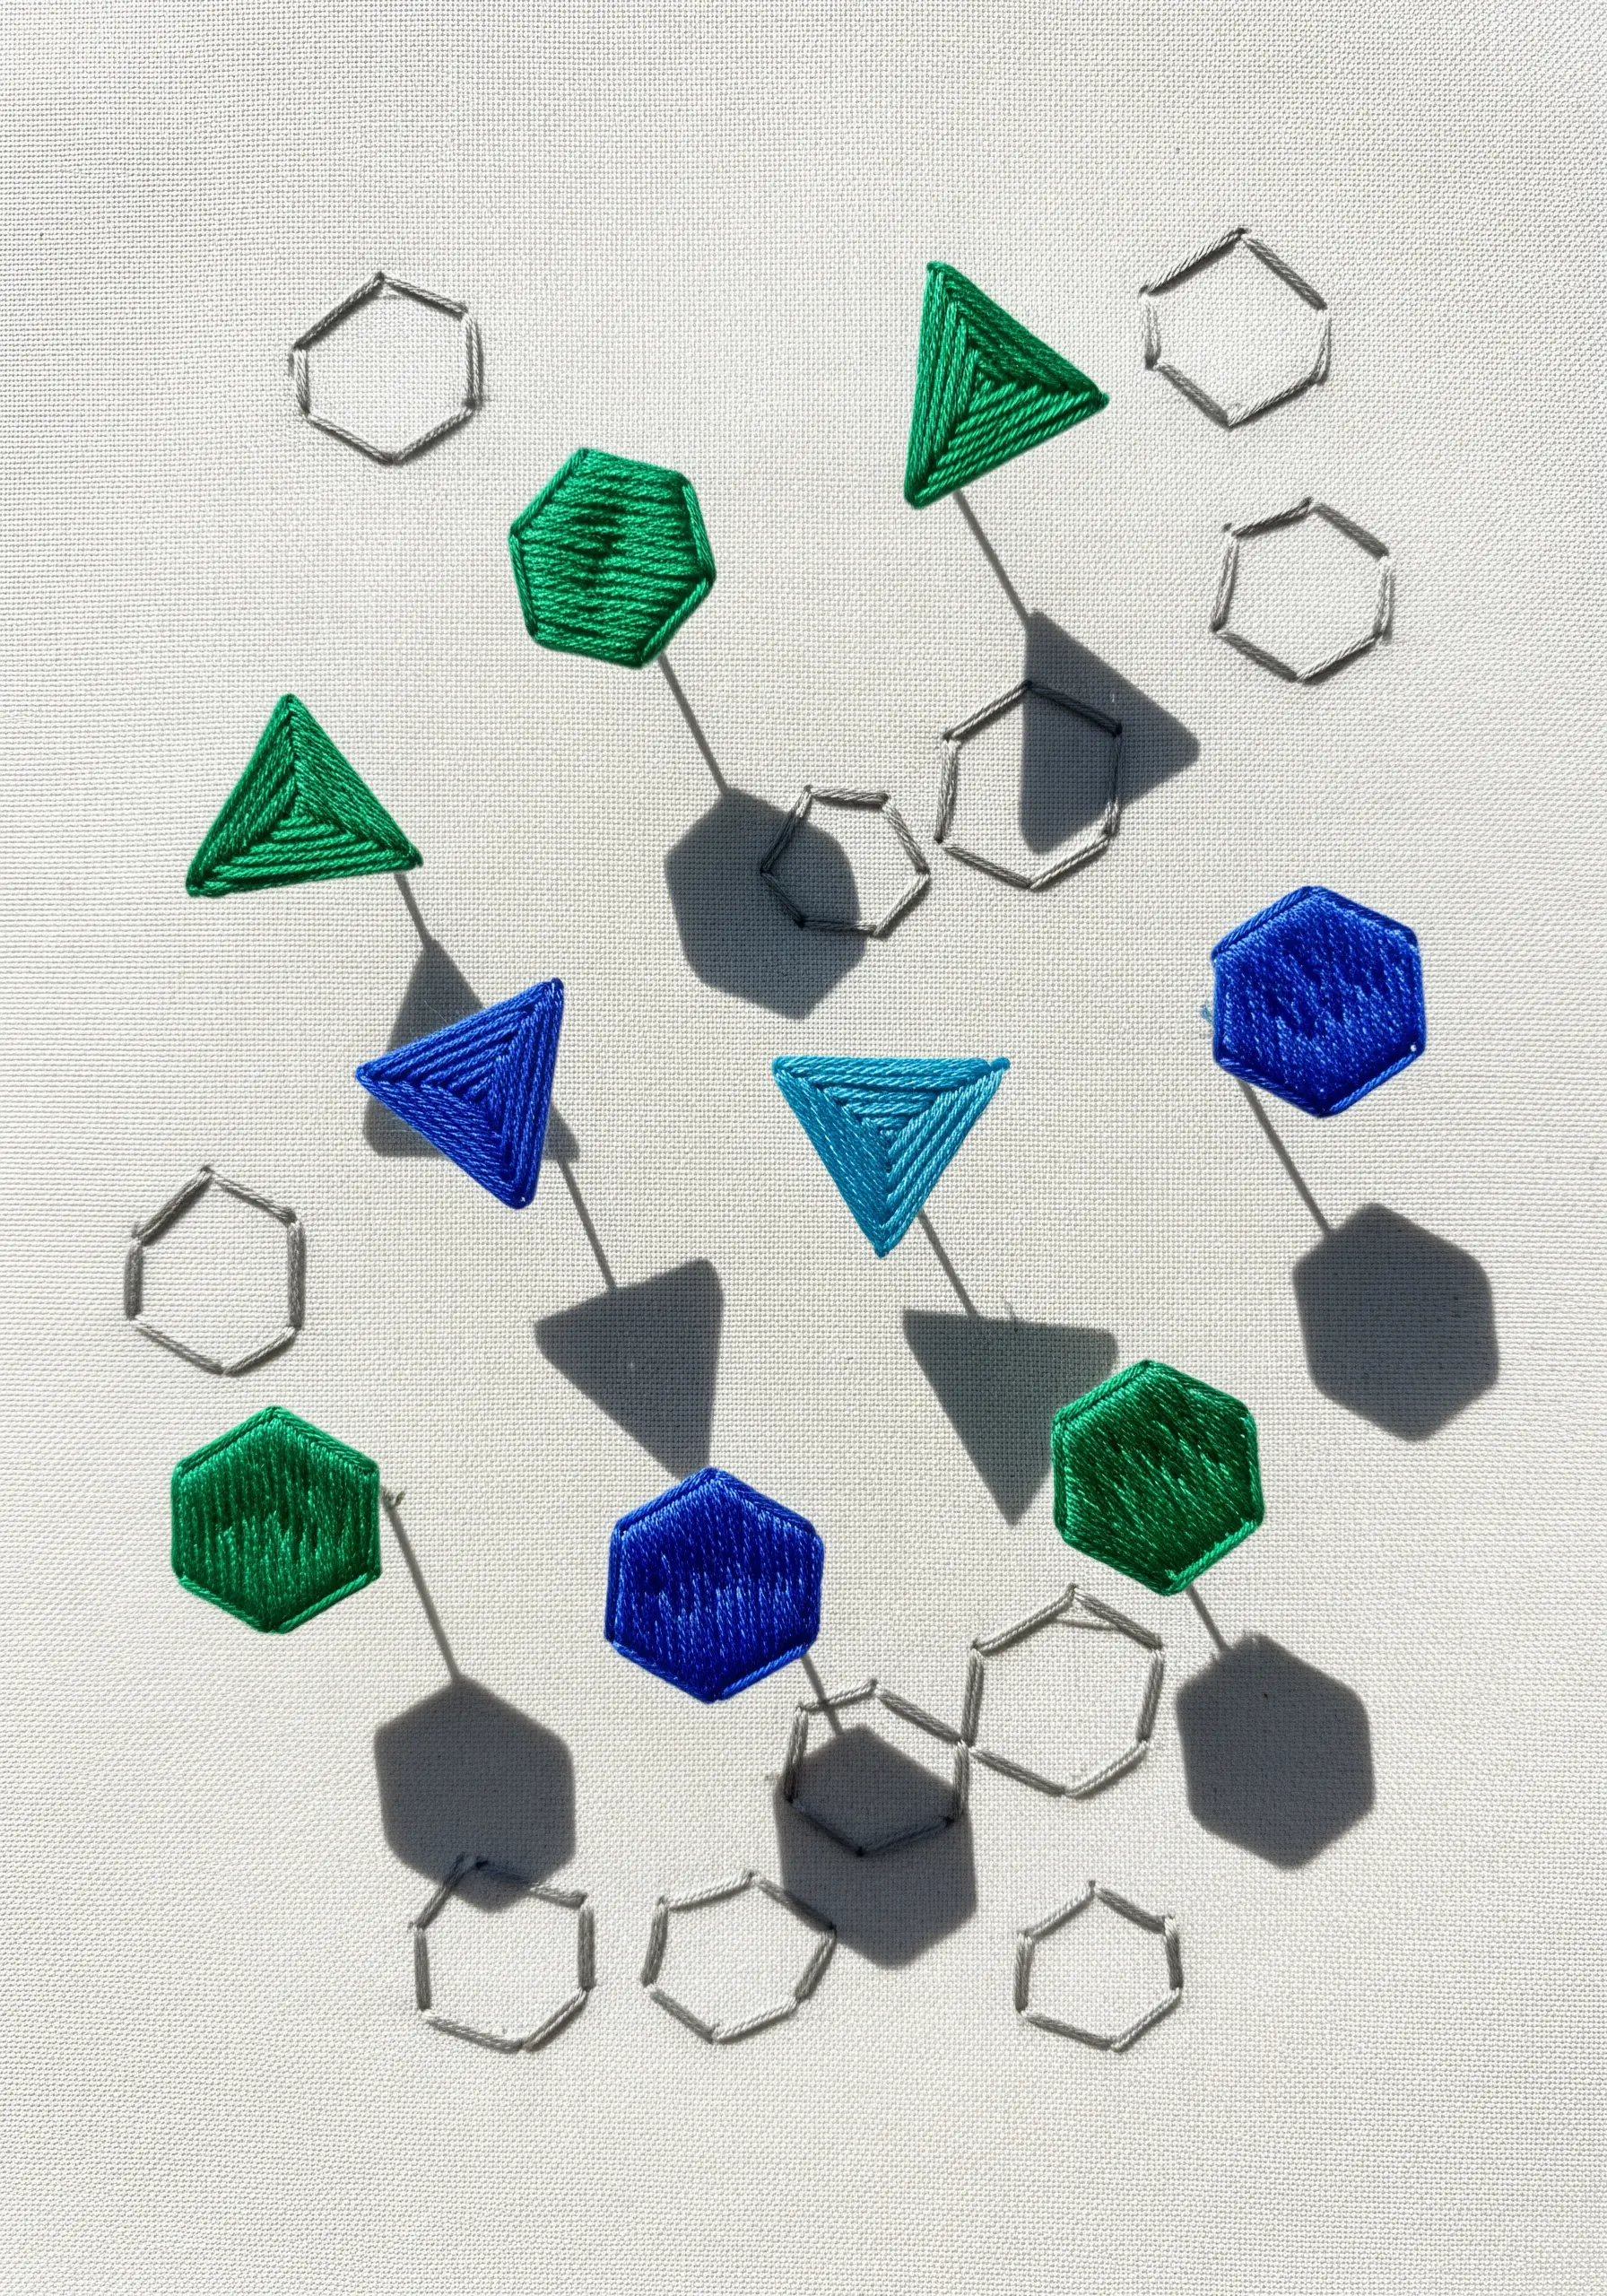
Make geometric shapes appear to levitate above the fabric by stitching a simple, subtle shadow beneath them.
First, stitch your primary shapes using a padded satin stitch to give them a slight physical lift. Use bold, vibrant colors for these elements.
Next, using a single strand of gray or muted thread, add a small, slightly offset shadow shape with a flat seed stitch or a few simple straight stitches.
Positioning this ‘shadow’ consistently gives the illusion of a single light source, making the primary shapes feel convincingly three-dimensional and detached from the background.
6. Engineer Depth with Linear Perspective
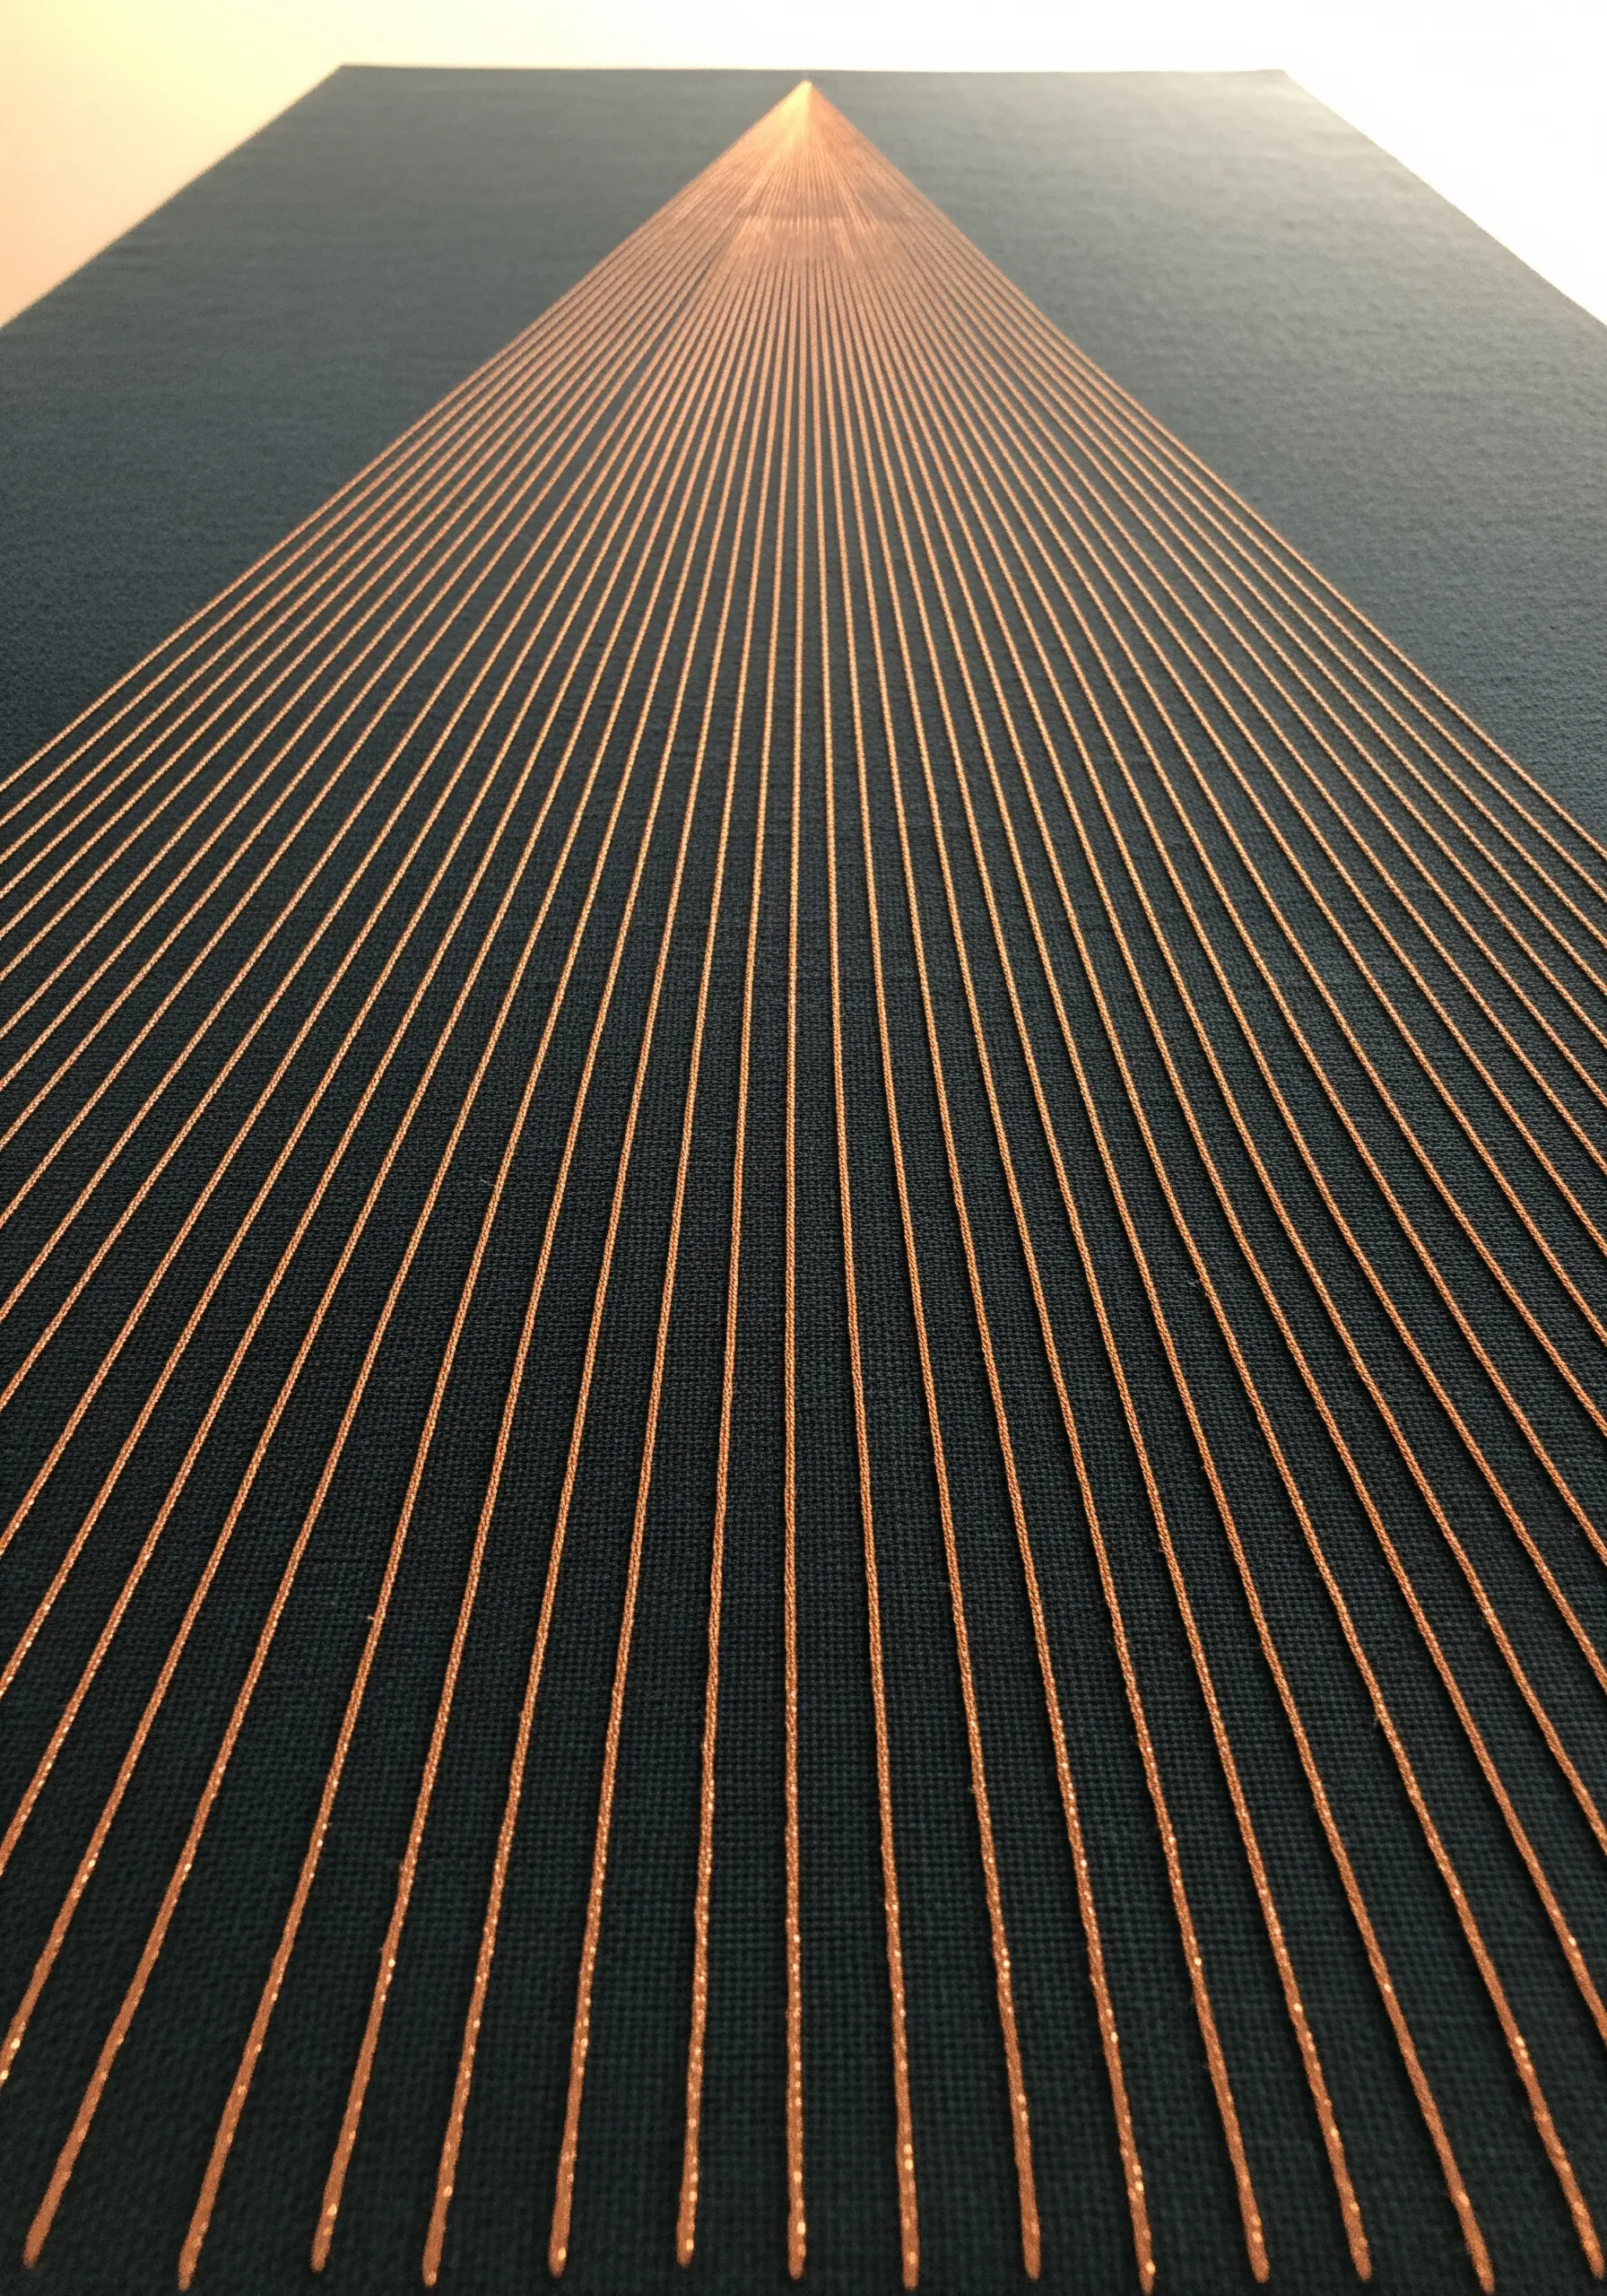
Use straight stitches to create a powerful illusion of distance and perspective, drawing the eye toward a single vanishing point.
Start by marking a point at one end of your fabric and a baseline at the other. Then, stitch perfectly straight lines connecting various points on the baseline to the single vanishing point.
Using a metallic or silk thread against a dark, matte cotton or linen fabric enhances the illusion. The sheen of the thread catches the light, making the lines pop like laser beams in a dark space.
This is a foundational technique in drawing, translated into thread to create abstract architectural or futuristic landscapes.
7. Create Visual Vibration with Interlaced Lines
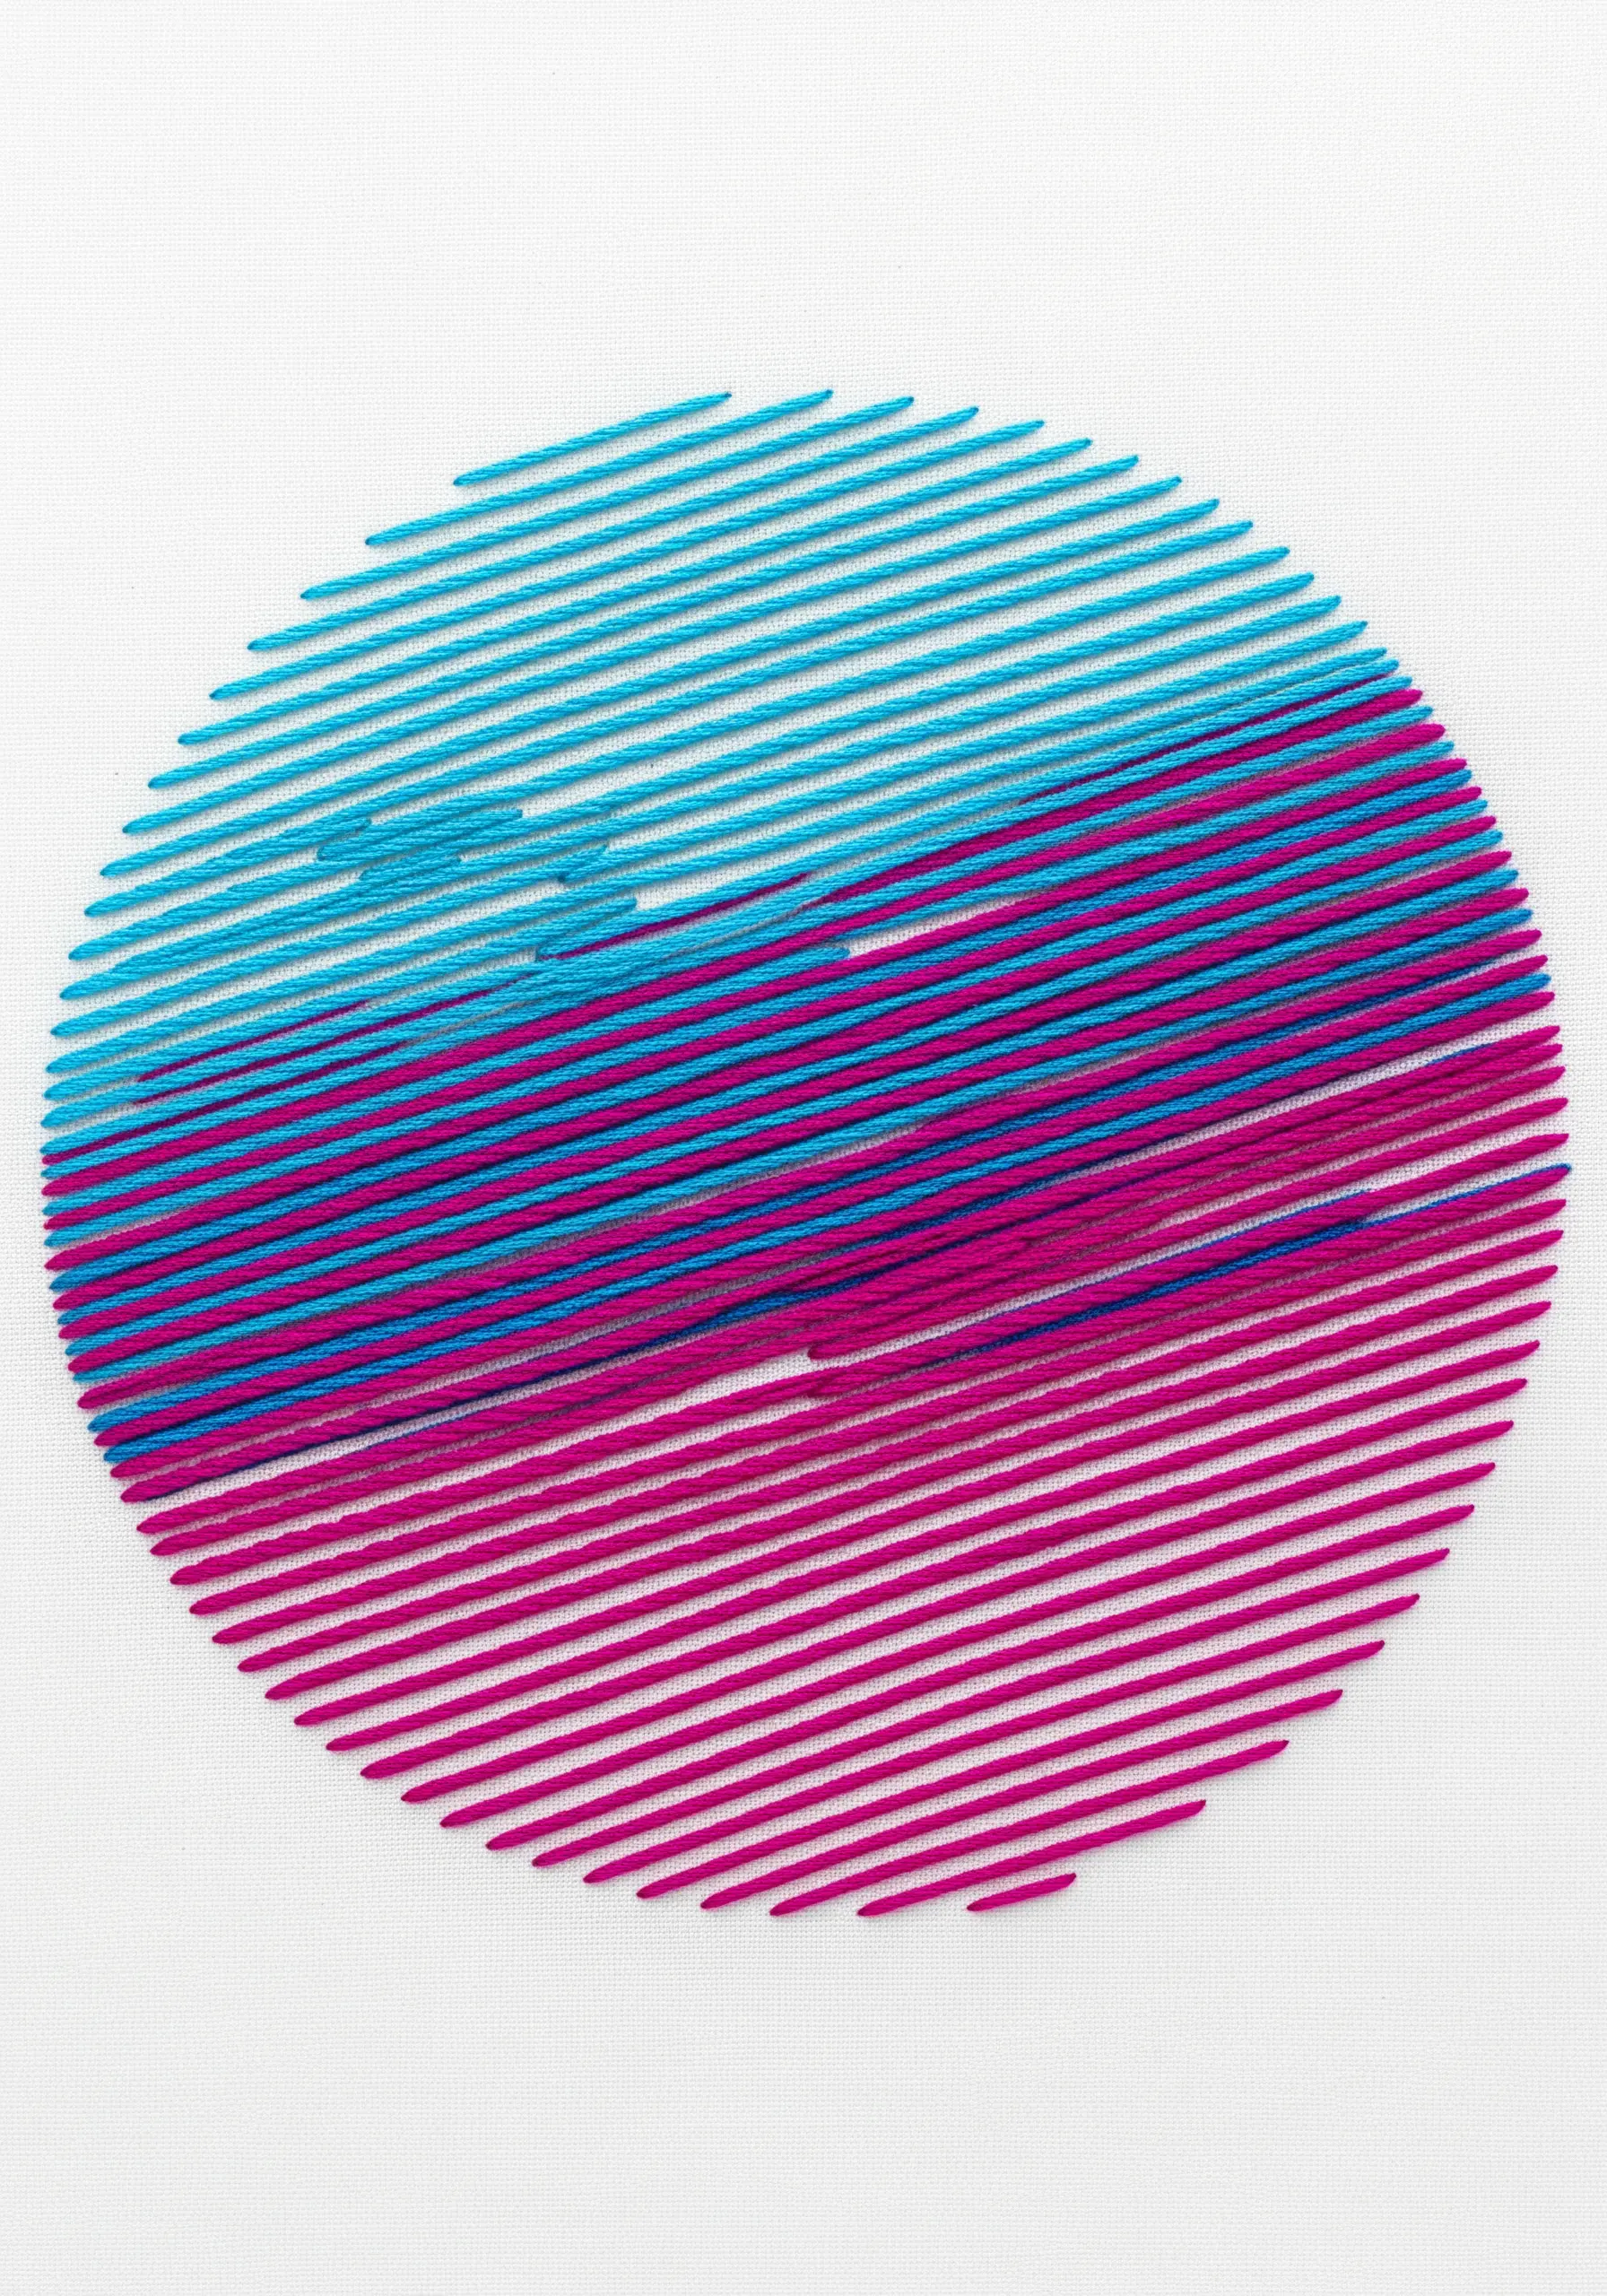
Generate a sense of movement and layered depth by interlacing two high-contrast colors with simple straight stitches.
Fill a shape with horizontal straight stitches in one color, leaving a small, consistent gap between each stitch.
Then, go back and fill those gaps with your second color. The eye will struggle to focus on just one, creating a visual vibration that feels dynamic.
This technique is particularly effective for filling circular or diagonal spaces, as the alternating lines create a shimmering, almost kinetic energy.
8. Stack Arcs to Build Rhythmic Texture
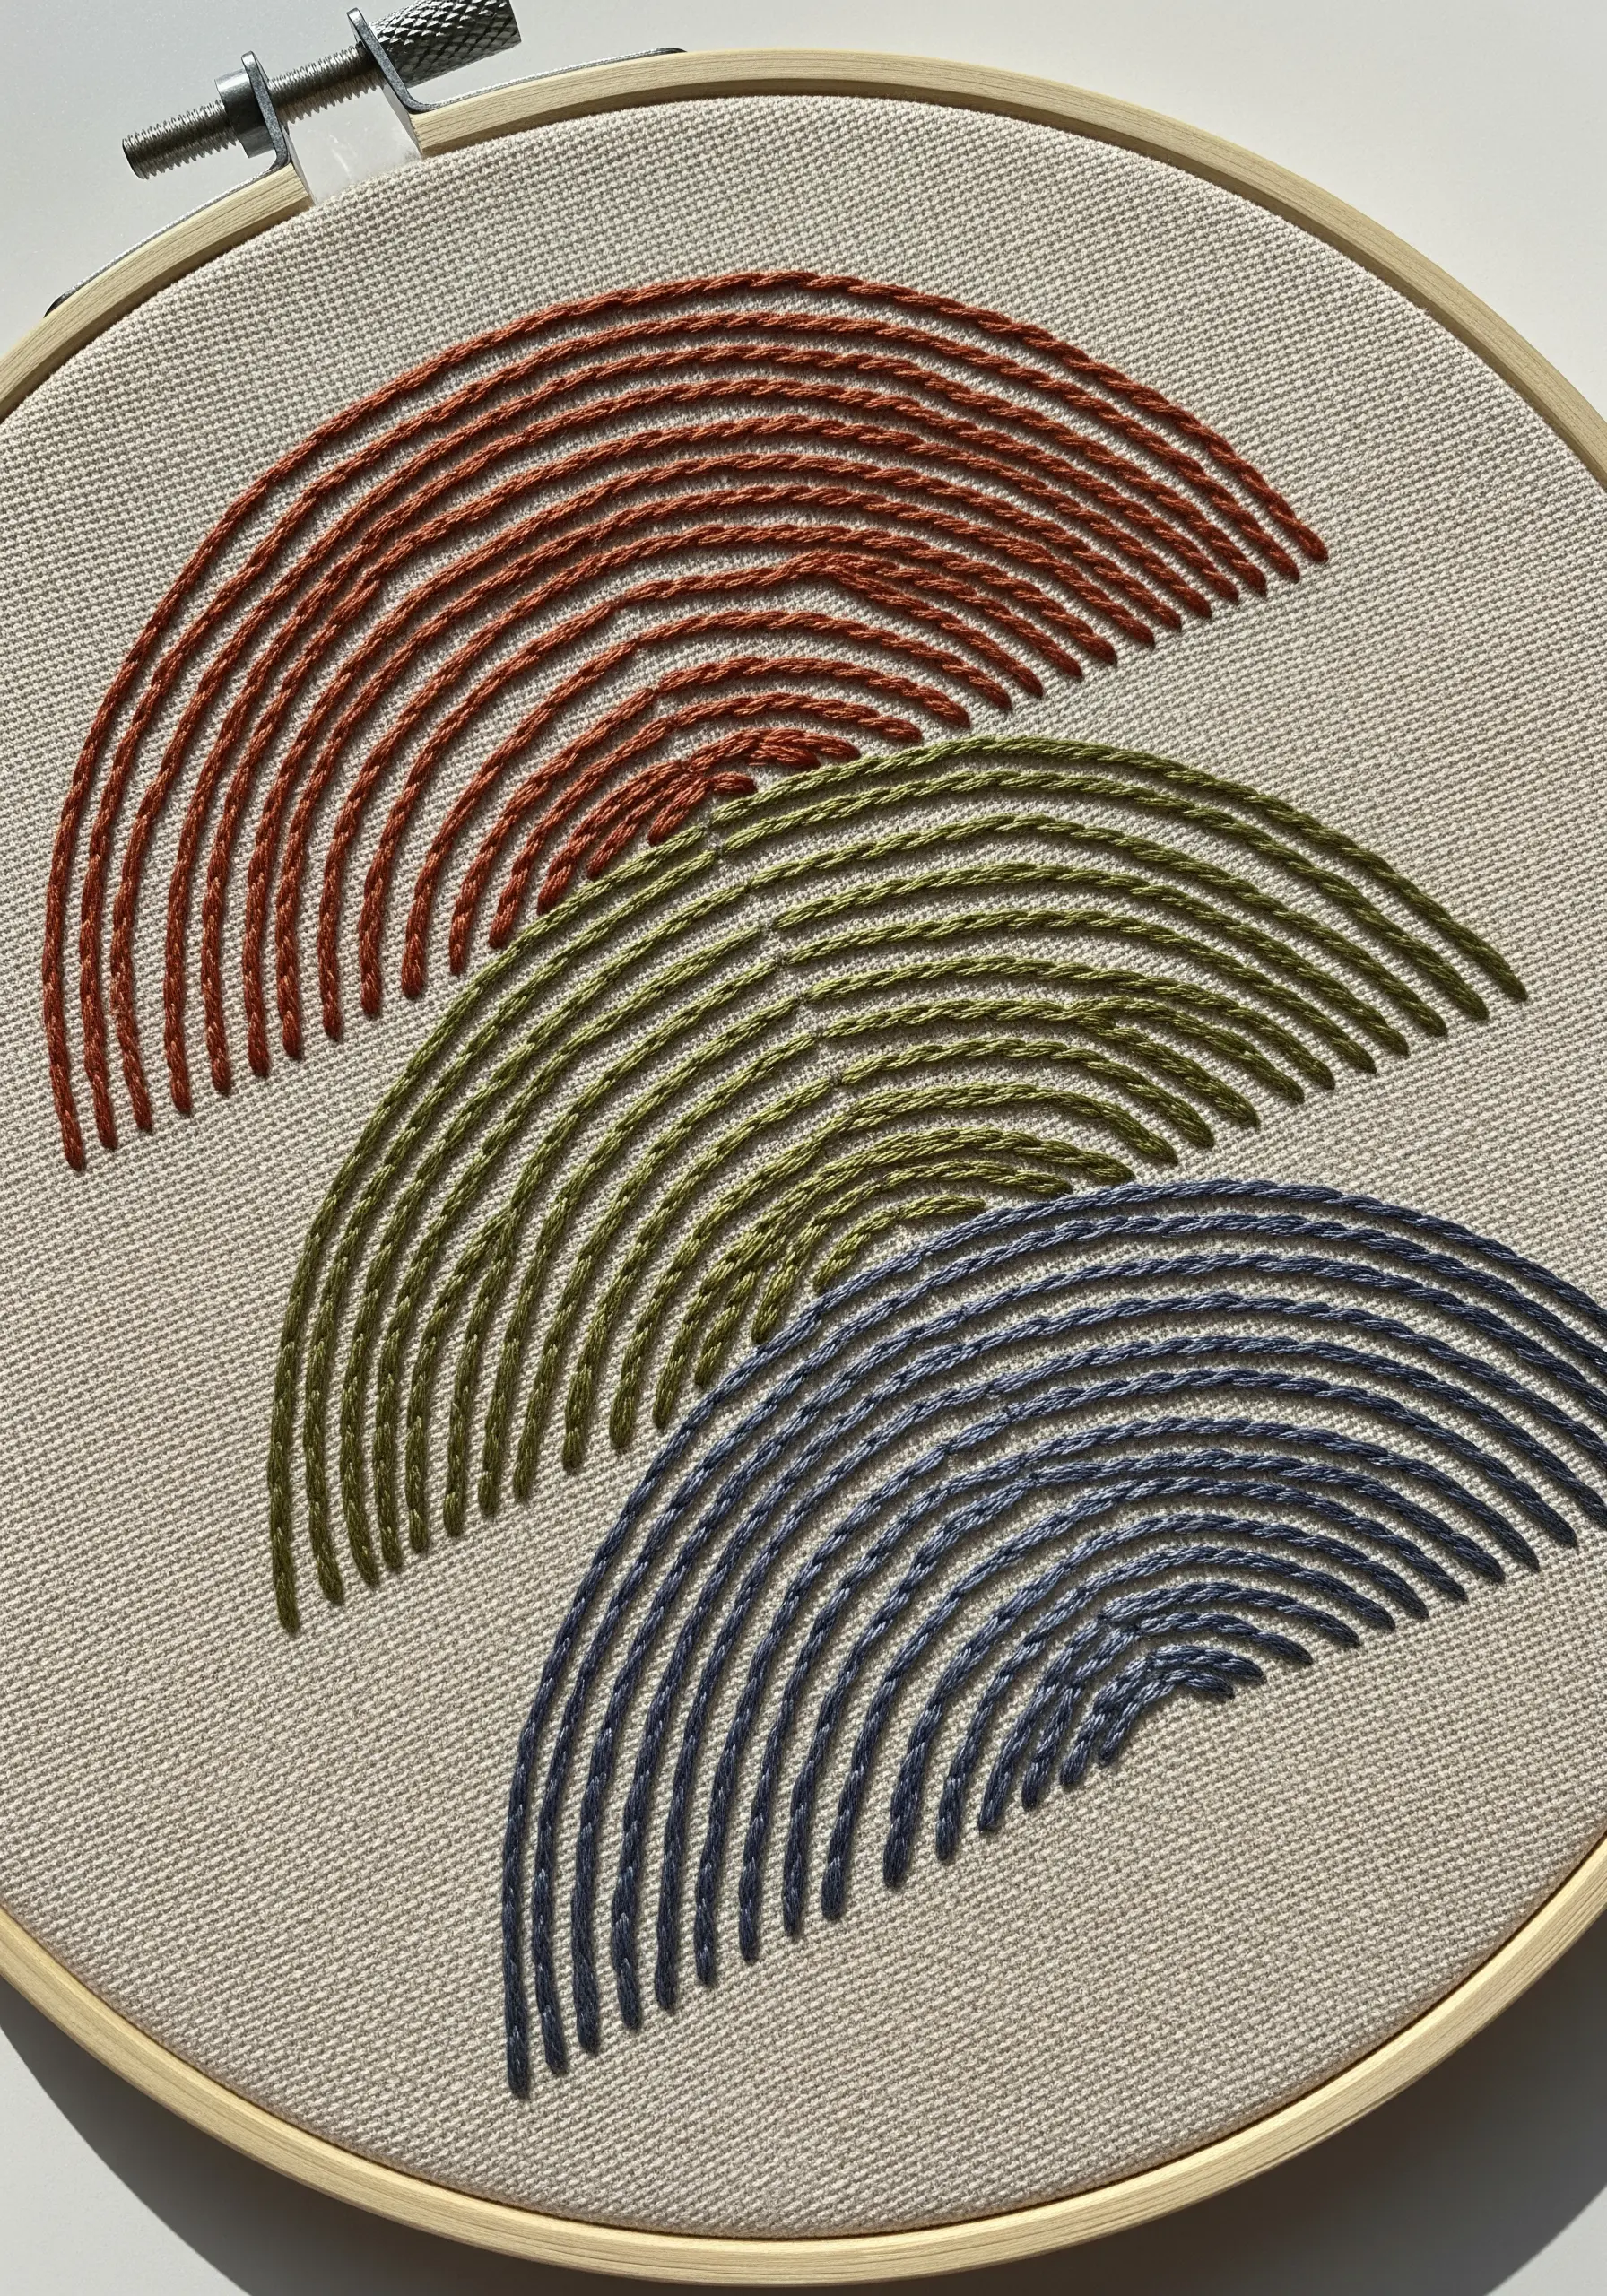
Create an illusion of layered, overlapping scales or gentle hills by stitching repeating, stacked arcs.
Use a textured stitch like a chain stitch or a whipped backstitch to give each arc a raised, cord-like finish. This slight physical dimension catches the light and creates its own micro-shadow, enhancing the depth.
Arrange the arcs in stacked rows, either perfectly aligned or slightly offset, to create different rhythmic patterns.
Working with an analogous color palette—like rust, olive, and navy—gives the composition a sophisticated, earthy feel that emphasizes form over color shock.
9. Carve a Pyramid with Thread Density
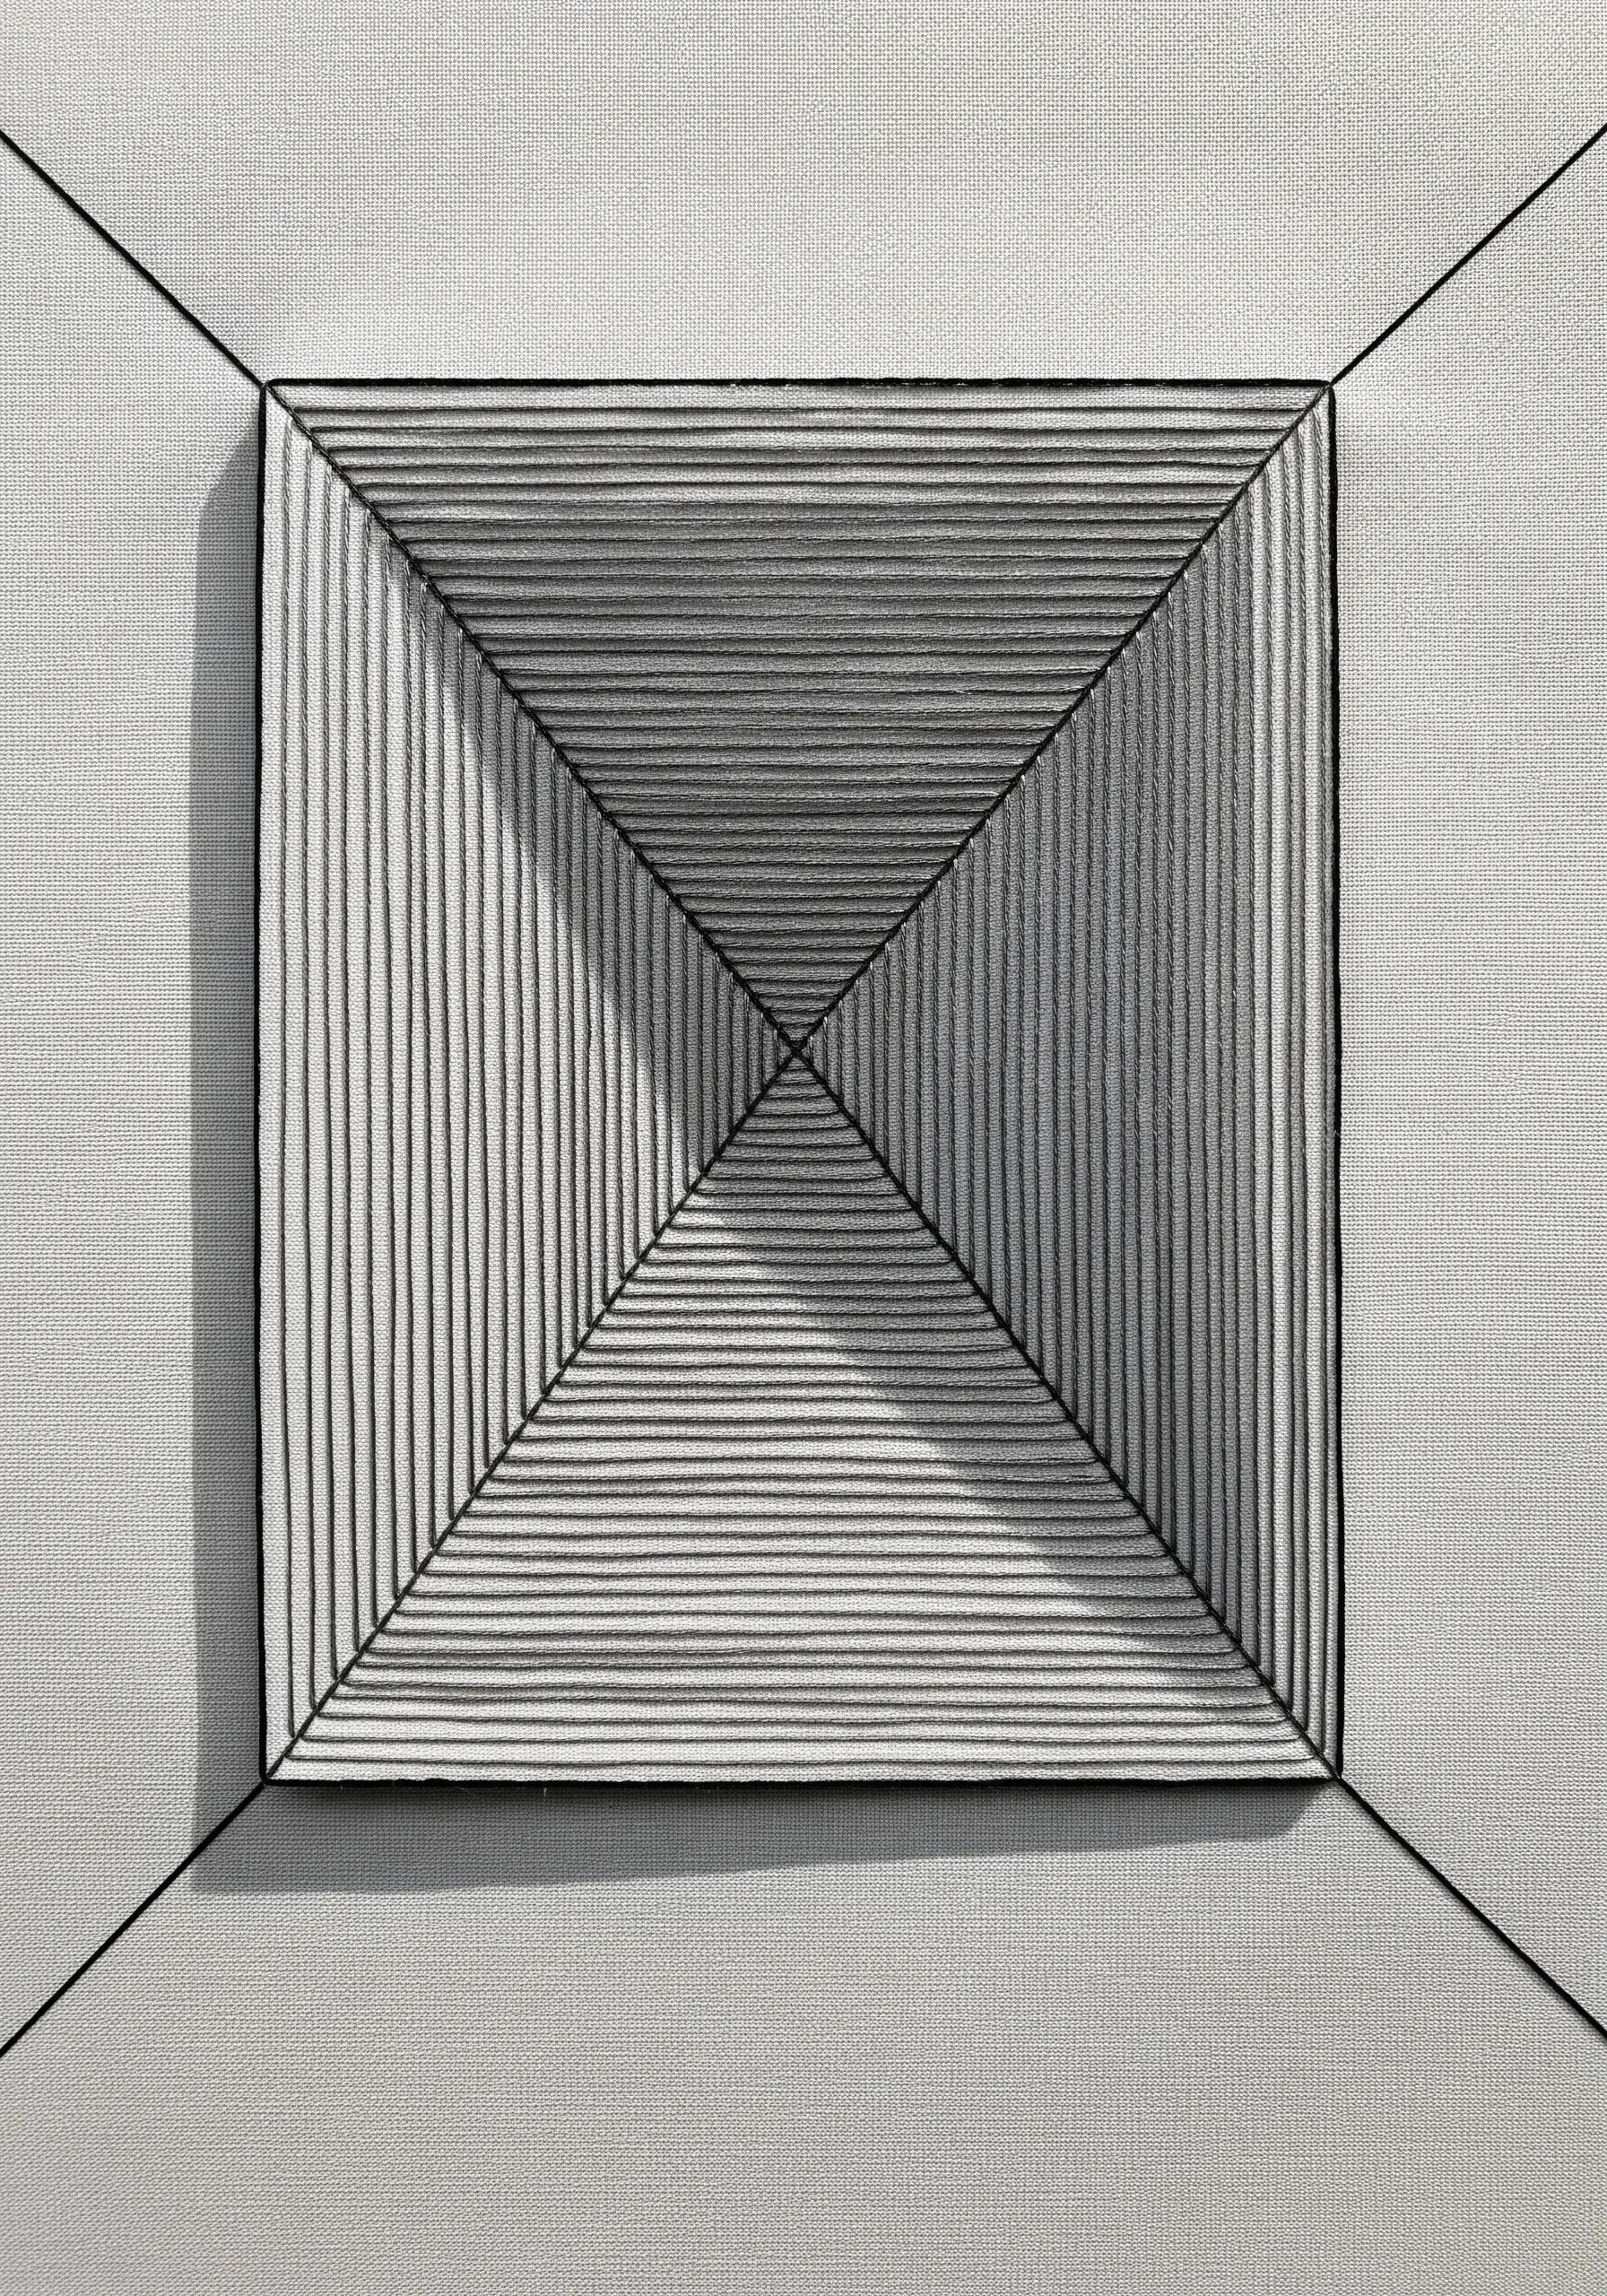
Sculpt a receding pyramid or tunnel illusion using only straight stitches and the principle of perspective.
Divide a square into four triangles, meeting at the center. In each triangle, fill the shape with straight stitches that are parallel to one of the outer edges.
As the stitches move toward the center point, they become shorter and more compressed. This increasing density makes the center appear darker and farther away.
The play of light and shadow across the thread directions adds to the illusion, making the flat surface appear faceted and dimensional.
10. Blend Colors with Pointillist Knots
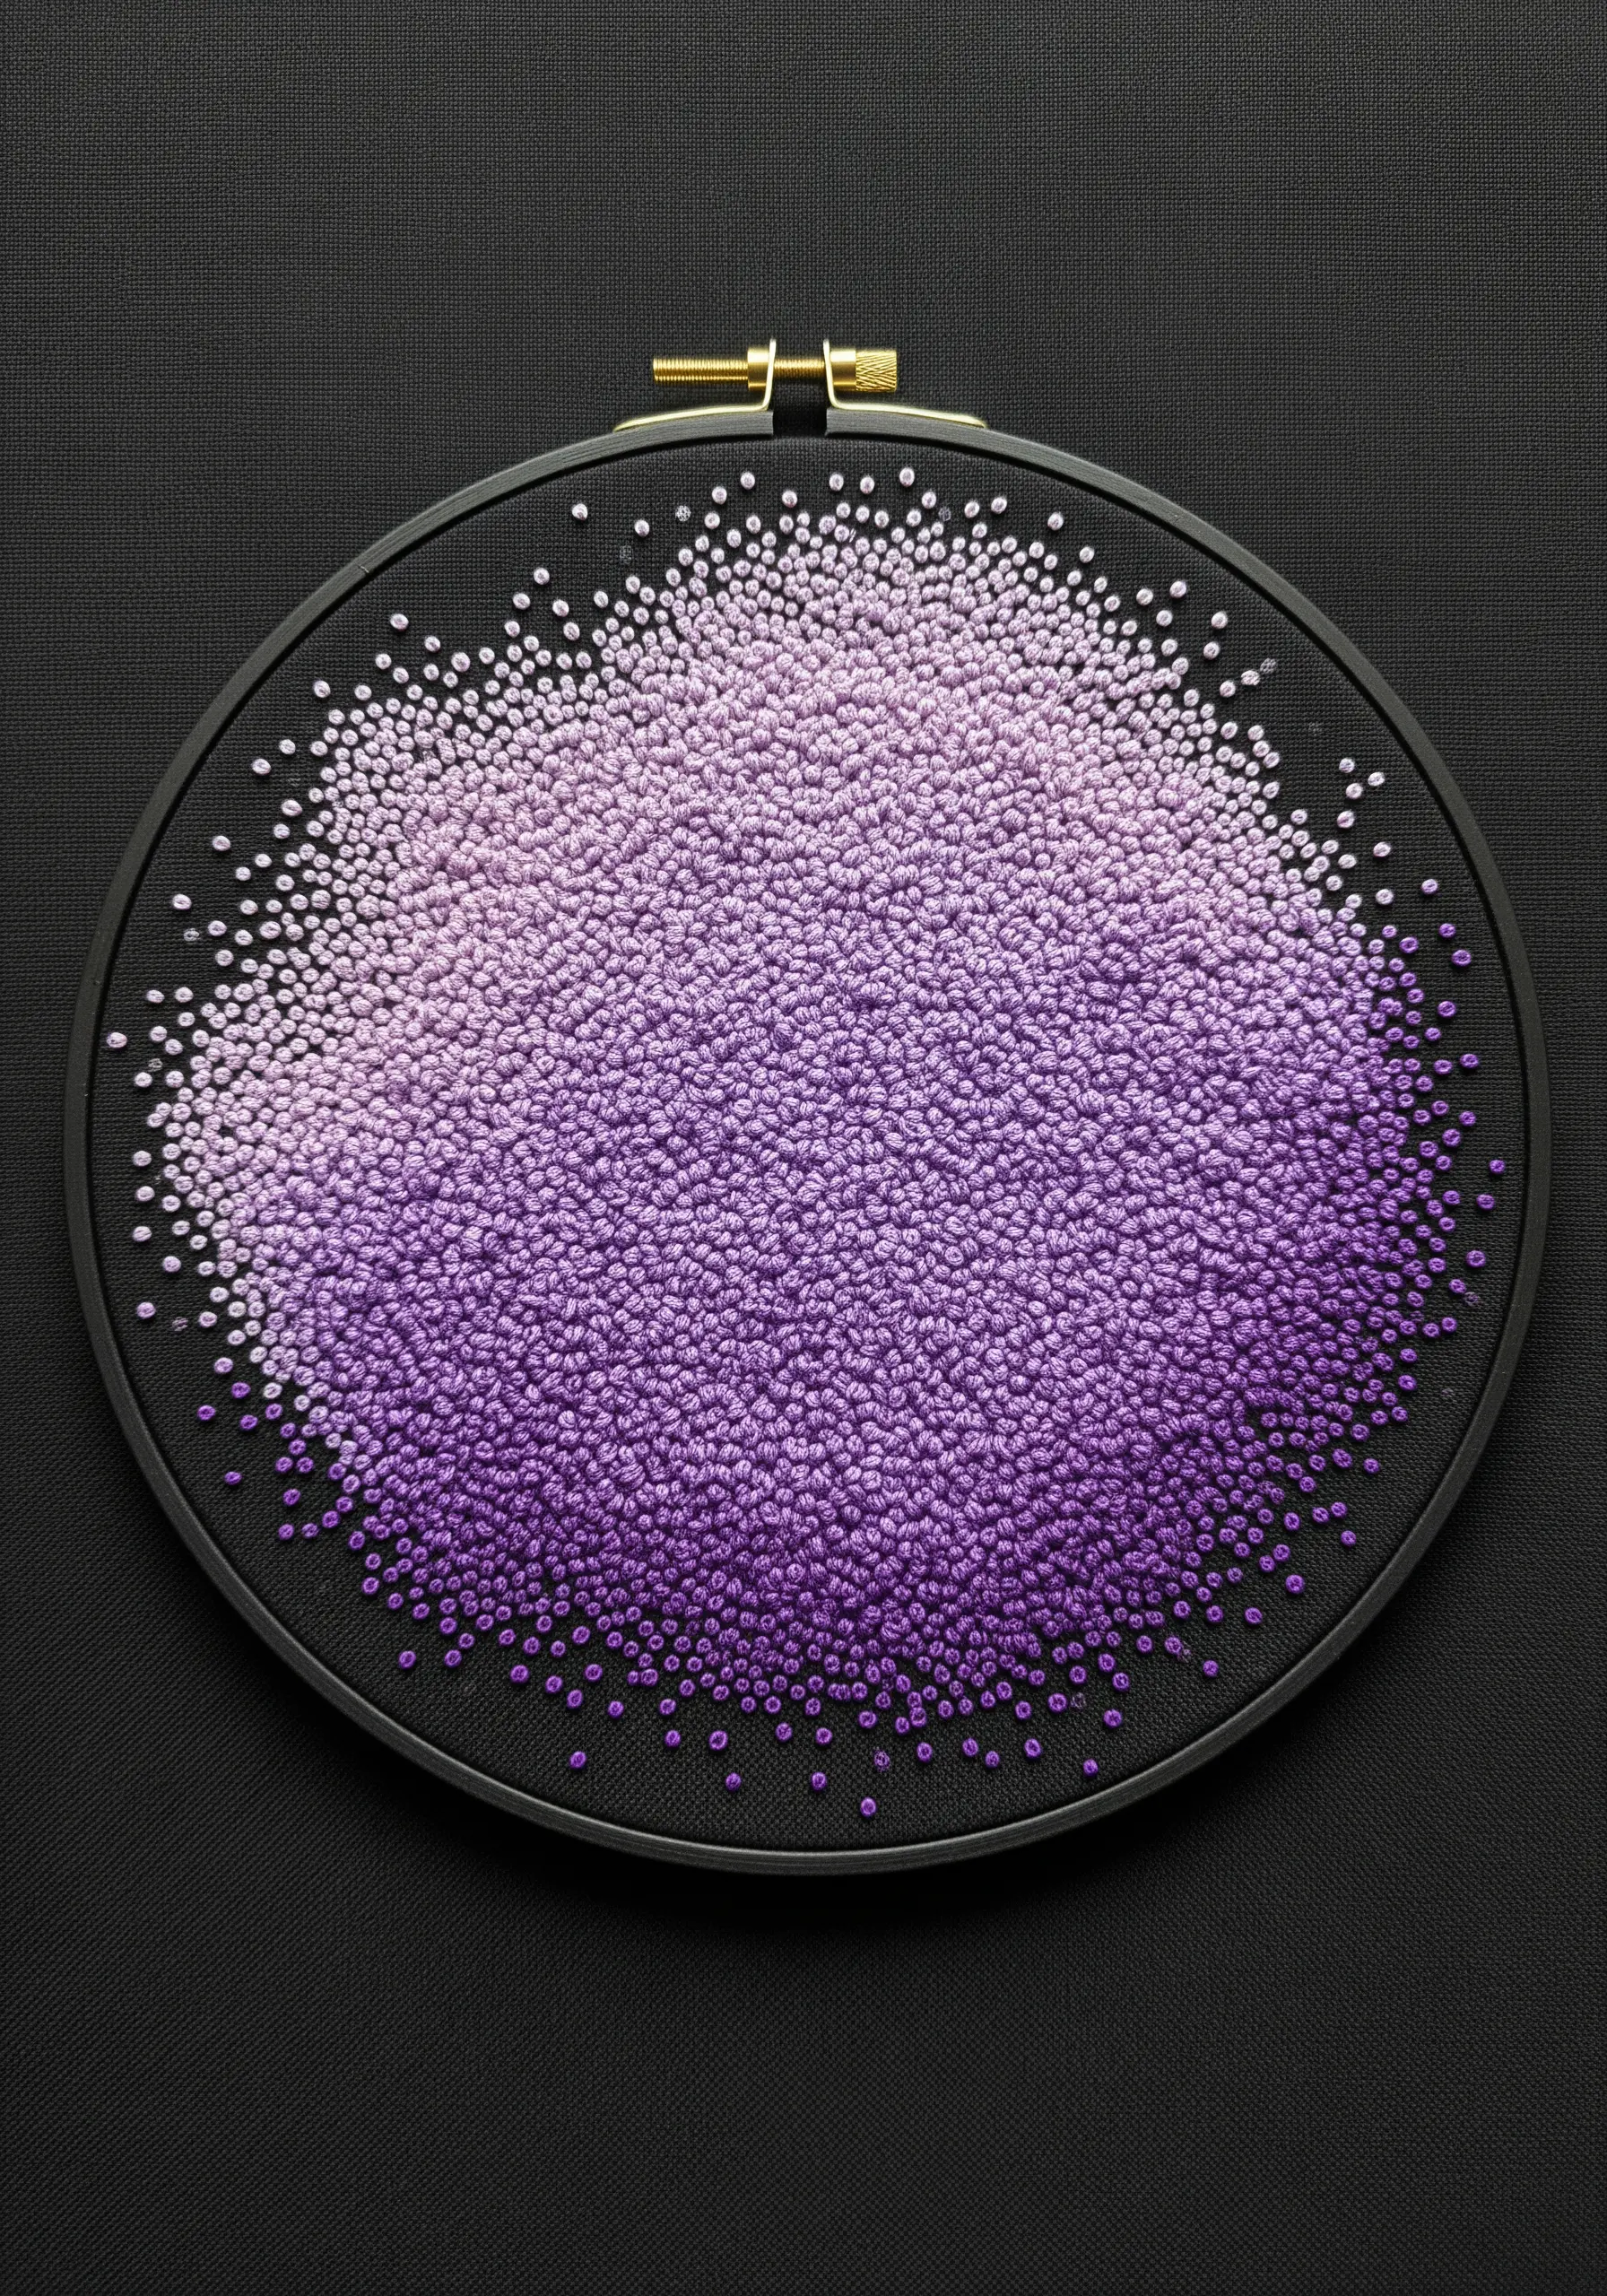
Create soft, cloud-like gradients by using French knots as points of color, similar to the Pointillist painting technique.
Start with your darkest shade and place the knots very close together. As you move into the next, lighter shade, begin to intersperse the new color among the dark ones.
Gradually decrease the density of the darker knots and increase the density of the lighter ones until the transition is complete.
The varied heights and shadows of the knots create a rich, tactile surface, while the color blending gives the illusion of a soft, diffused mass. This works beautifully on dark fabric for dramatic contrast.
11. Construct Impossible Shapes with Outlines
Play with perception by stitching isometric or ‘impossible’ shapes using a simple, clean outline stitch.
The illusion isn’t in the stitch itself, but in the geometry of the design. Use a backstitch or split stitch with 3-4 strands of floss to create a bold, graphic line.
Maintain consistent stitch length and tension to ensure the lines are crisp and the angles are sharp. Any wavering will break the geometric illusion.
This technique is a testament to the power of pure line work, transforming a few simple stitches into a mind-bending piece of art.
12. Weave a Vortex over a Thread Spoke
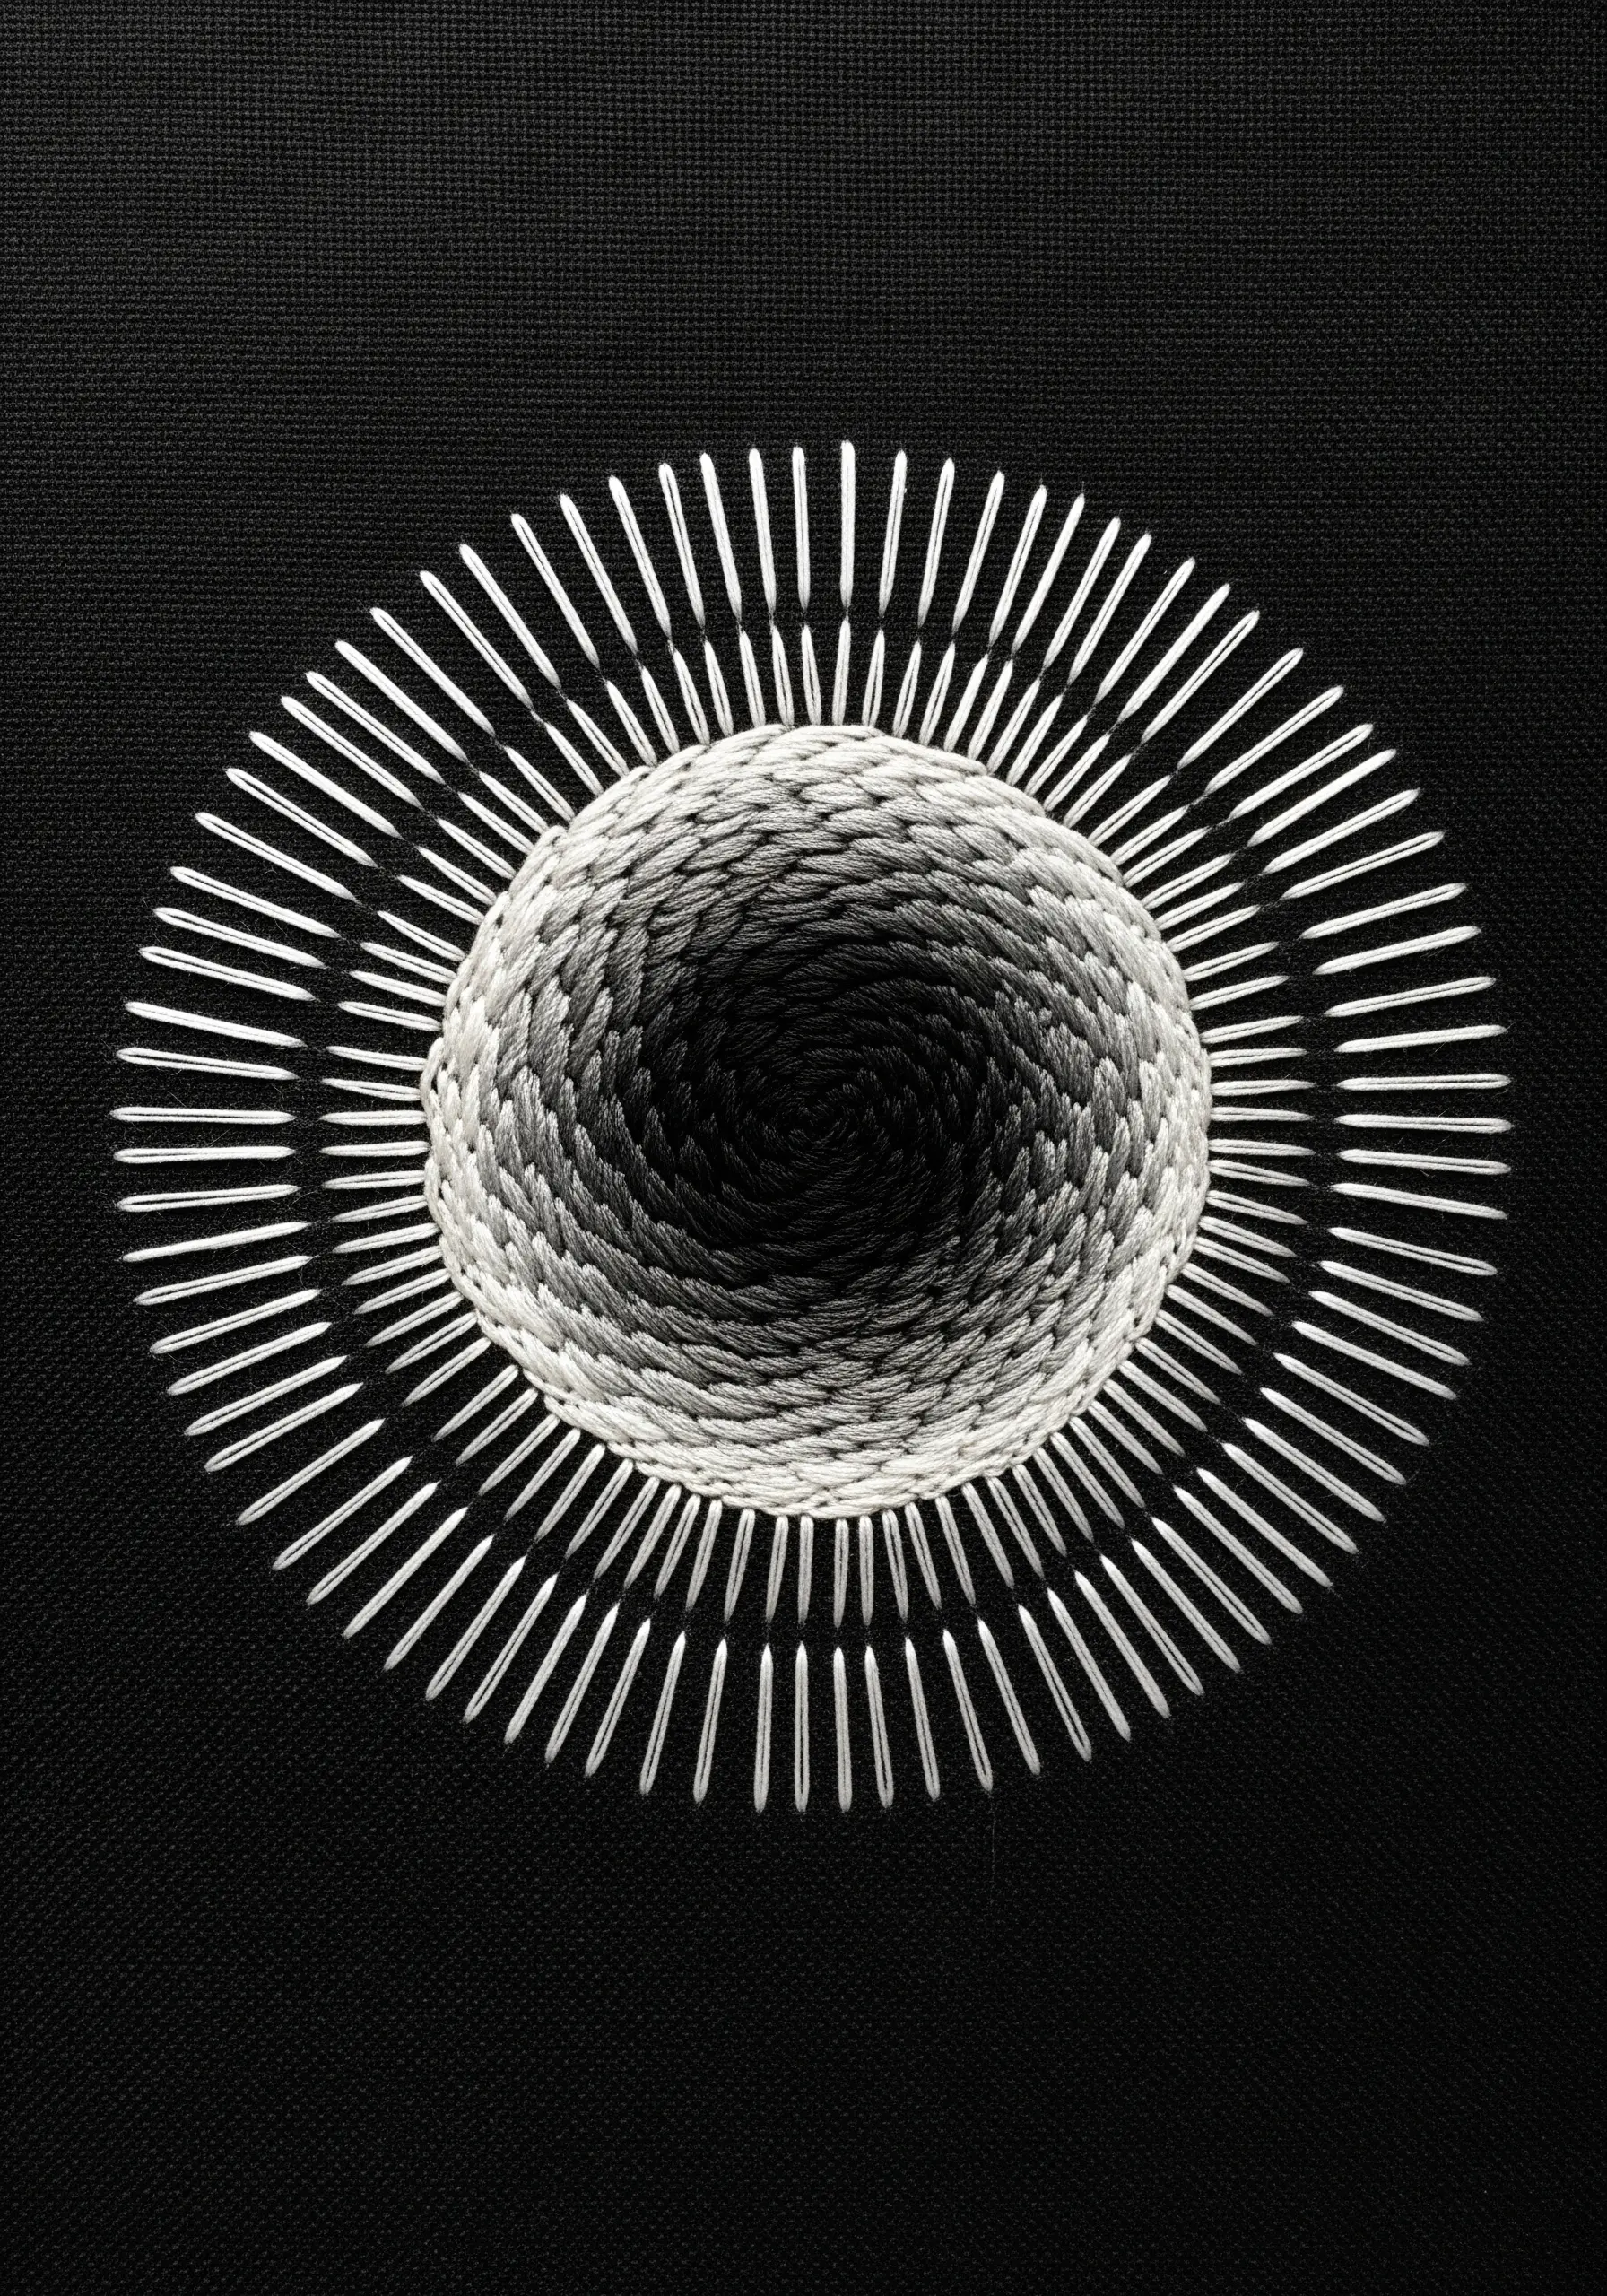
Create a stunning, three-dimensional vortex by weaving thread over a foundation of straight stitches arranged like the spokes of a wheel.
First, create your spokes by stitching long straight stitches from an outer circle to an inner circle. Then, bring a new threaded needle up near the center and begin weaving it over and under the spokes, working your way outward.
By using a color gradient from dark in the center to light on the edges, you’ll create a powerful illusion of a receding tunnel.
The radiating stitches outside the woven area add a sense of explosive energy, contrasting with the tightly controlled spiral.
13. Trace Topographic Contours

Evoke the gentle slopes of a landscape by stitching organic, flowing lines that mimic a topographic map.
Use a simple backstitch or stem stitch to create clean, continuous lines. The illusion of hills and valleys is created by how close the lines are to one another—closer lines indicate a steeper ‘slope’.
Work with a palette of earth tones, using variegated thread or changing colors every few lines to add subtle shifts and complexity to your landscape.
This organic embroidery design is perfect for minimalist decor, adding texture and interest without overwhelming a space.
14. Draft an Architectural Illusion
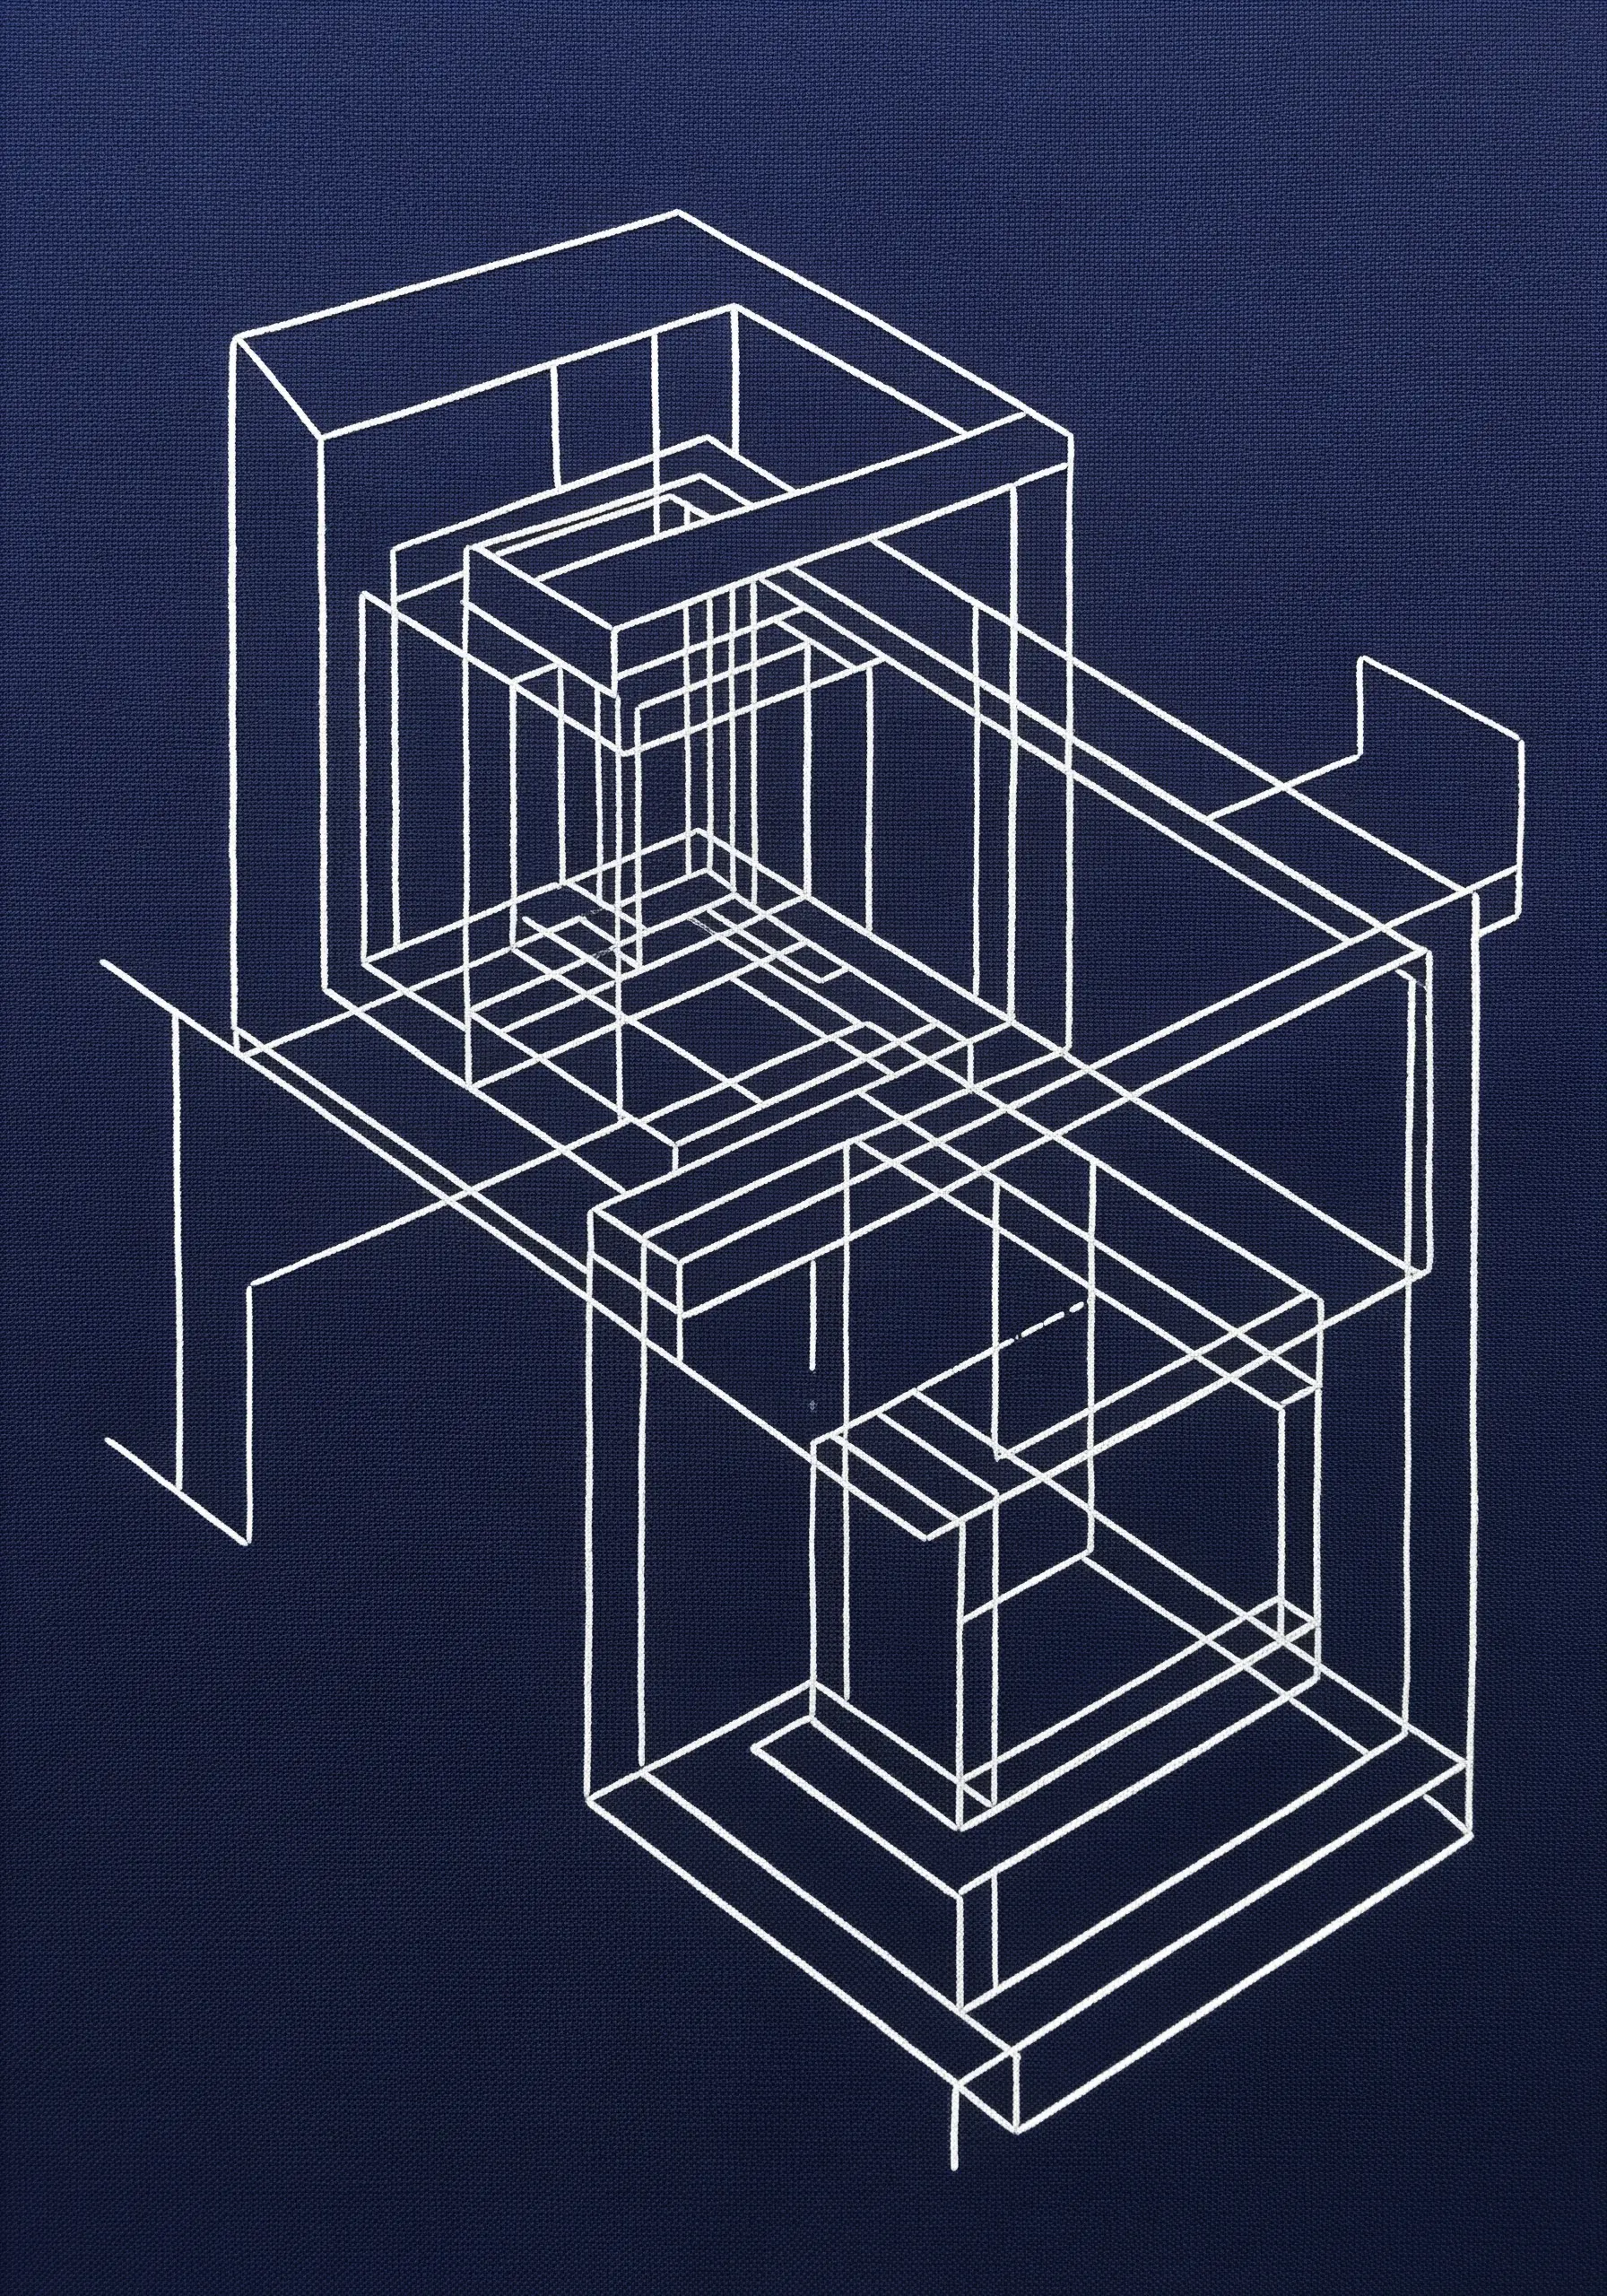
Create the feeling of a complex, multi-layered structure using only single-strand white thread on a dark background.
This technique relies on the principles of architectural drawing, using overlapping, transparent boxes and planes to suggest three dimensions.
A precise backstitch is essential. Keep your stitches small and uniform to maintain the integrity of the fine lines, making it look like a technical blueprint.
The high contrast of white on navy blue gives it a classic, crisp appearance, allowing the pure geometry of the form to take center stage.
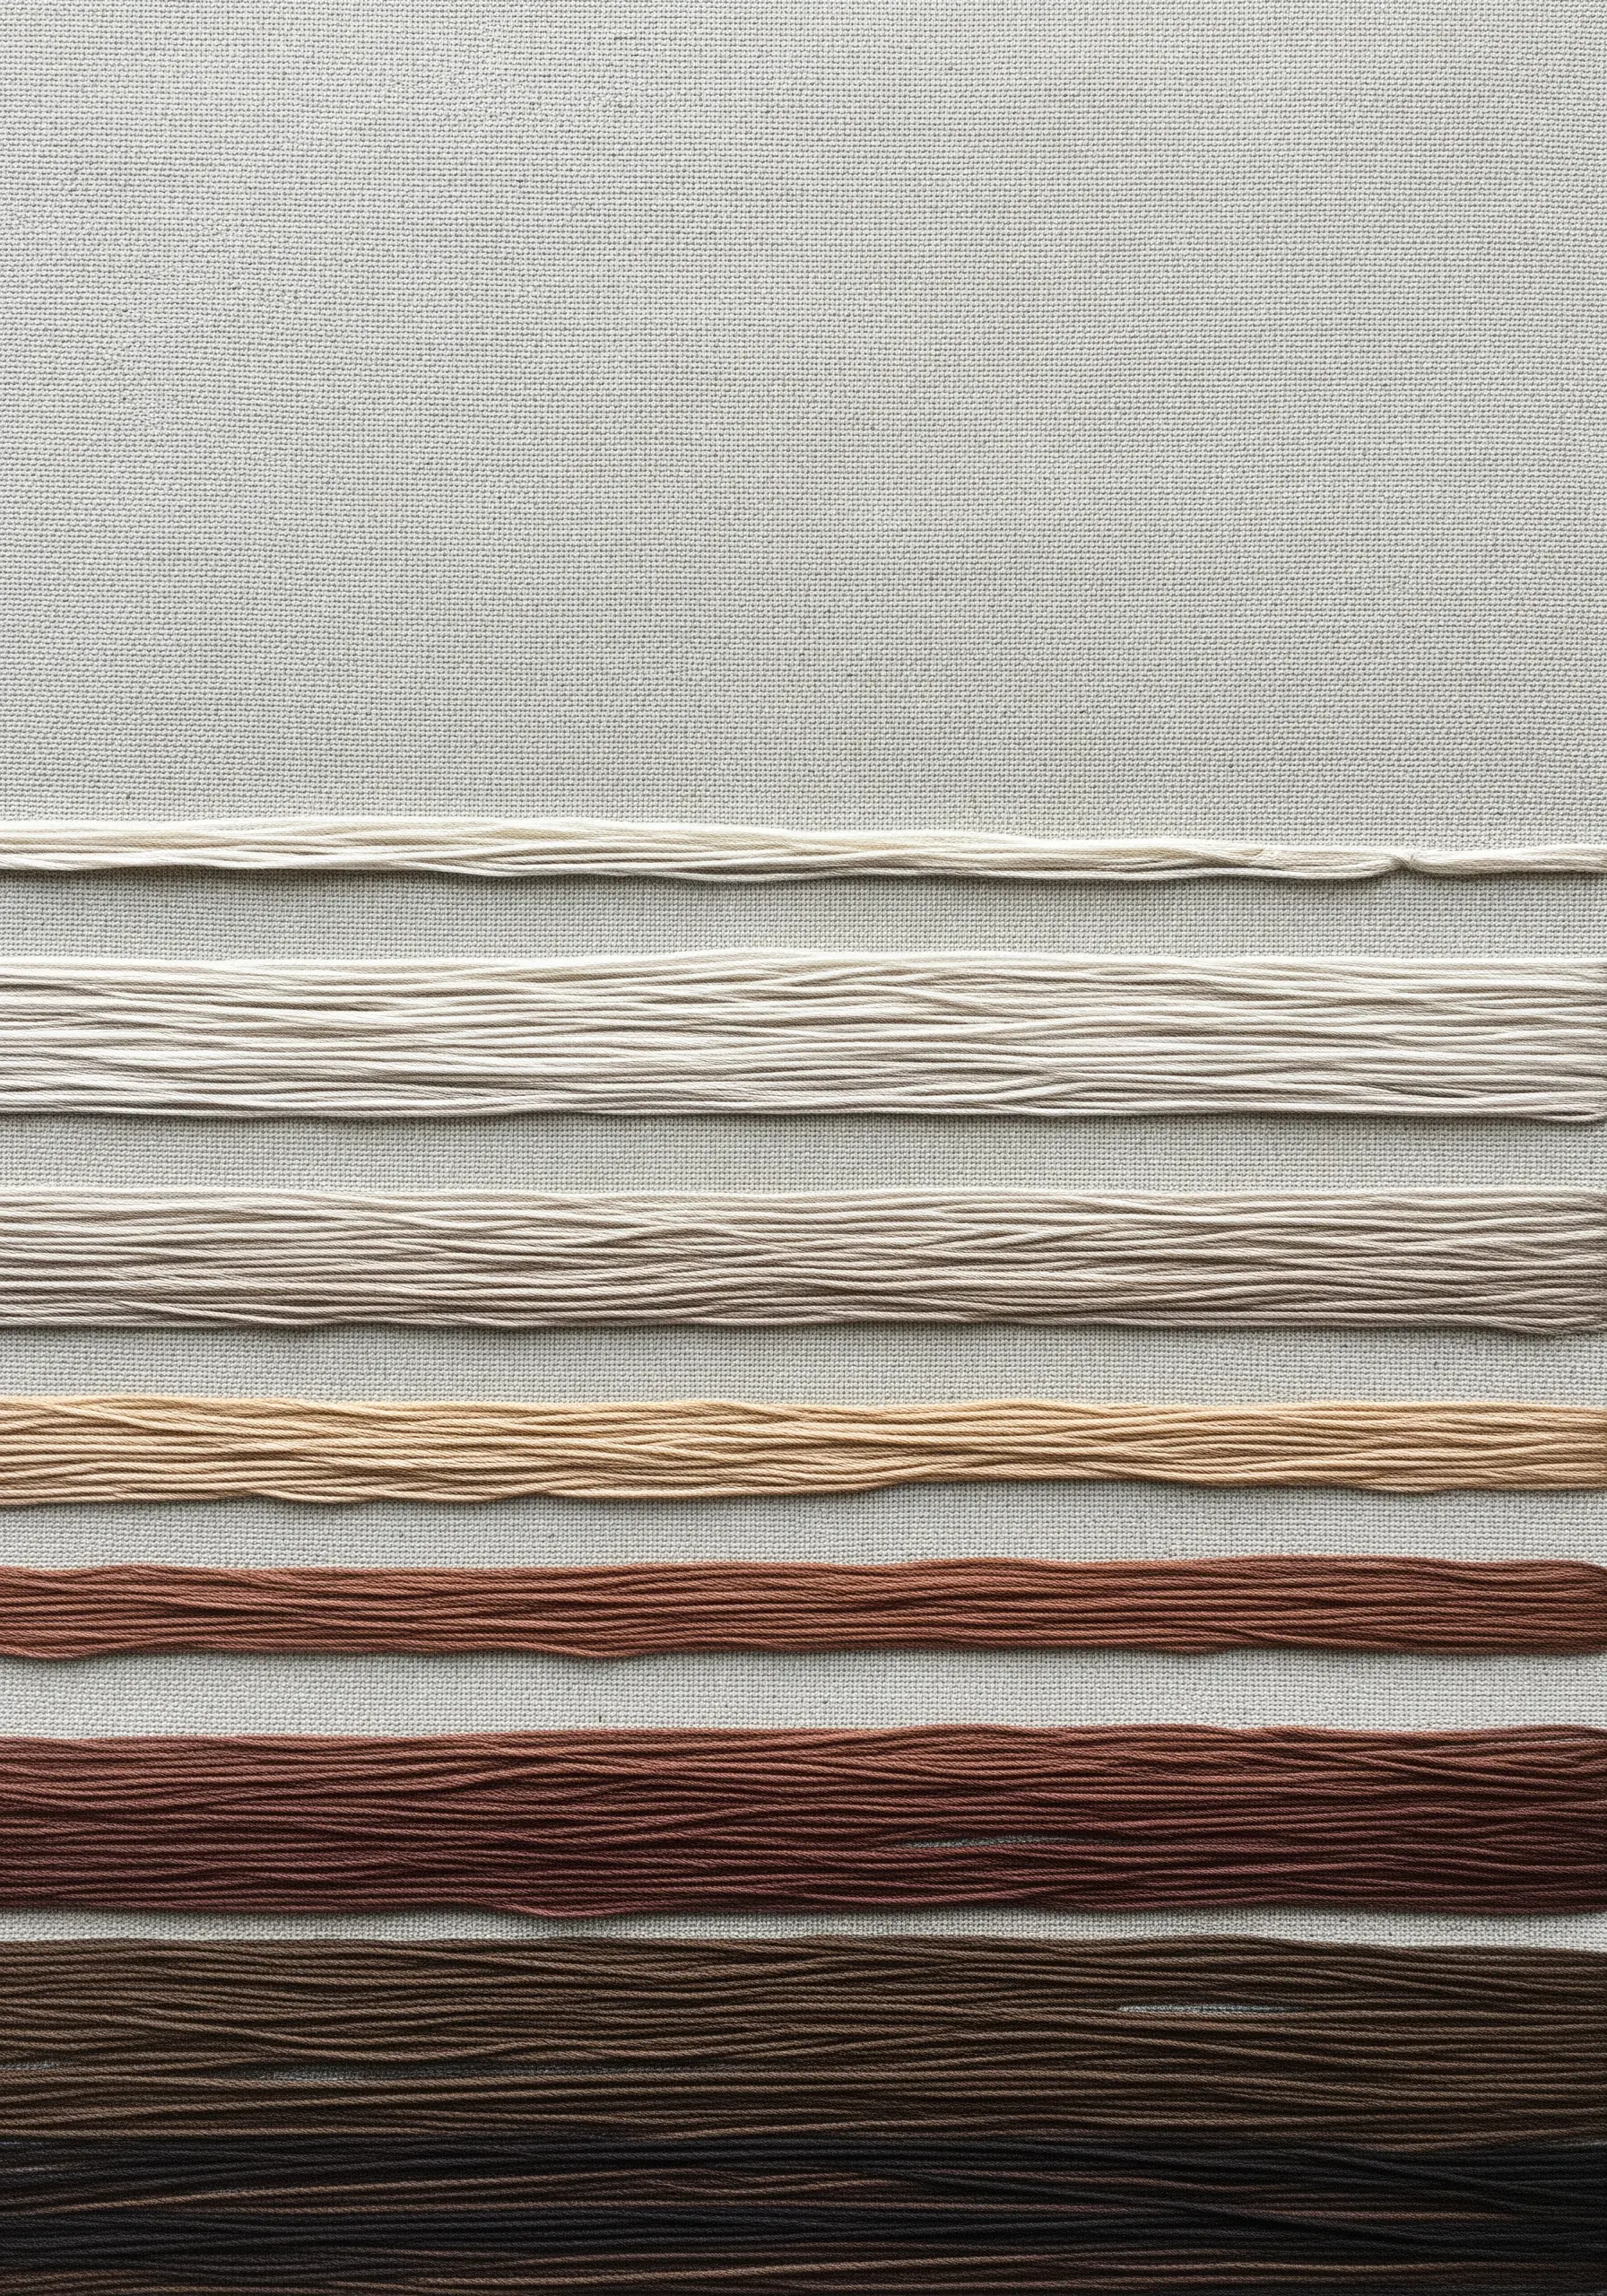
15. Block Color with Laid Floss
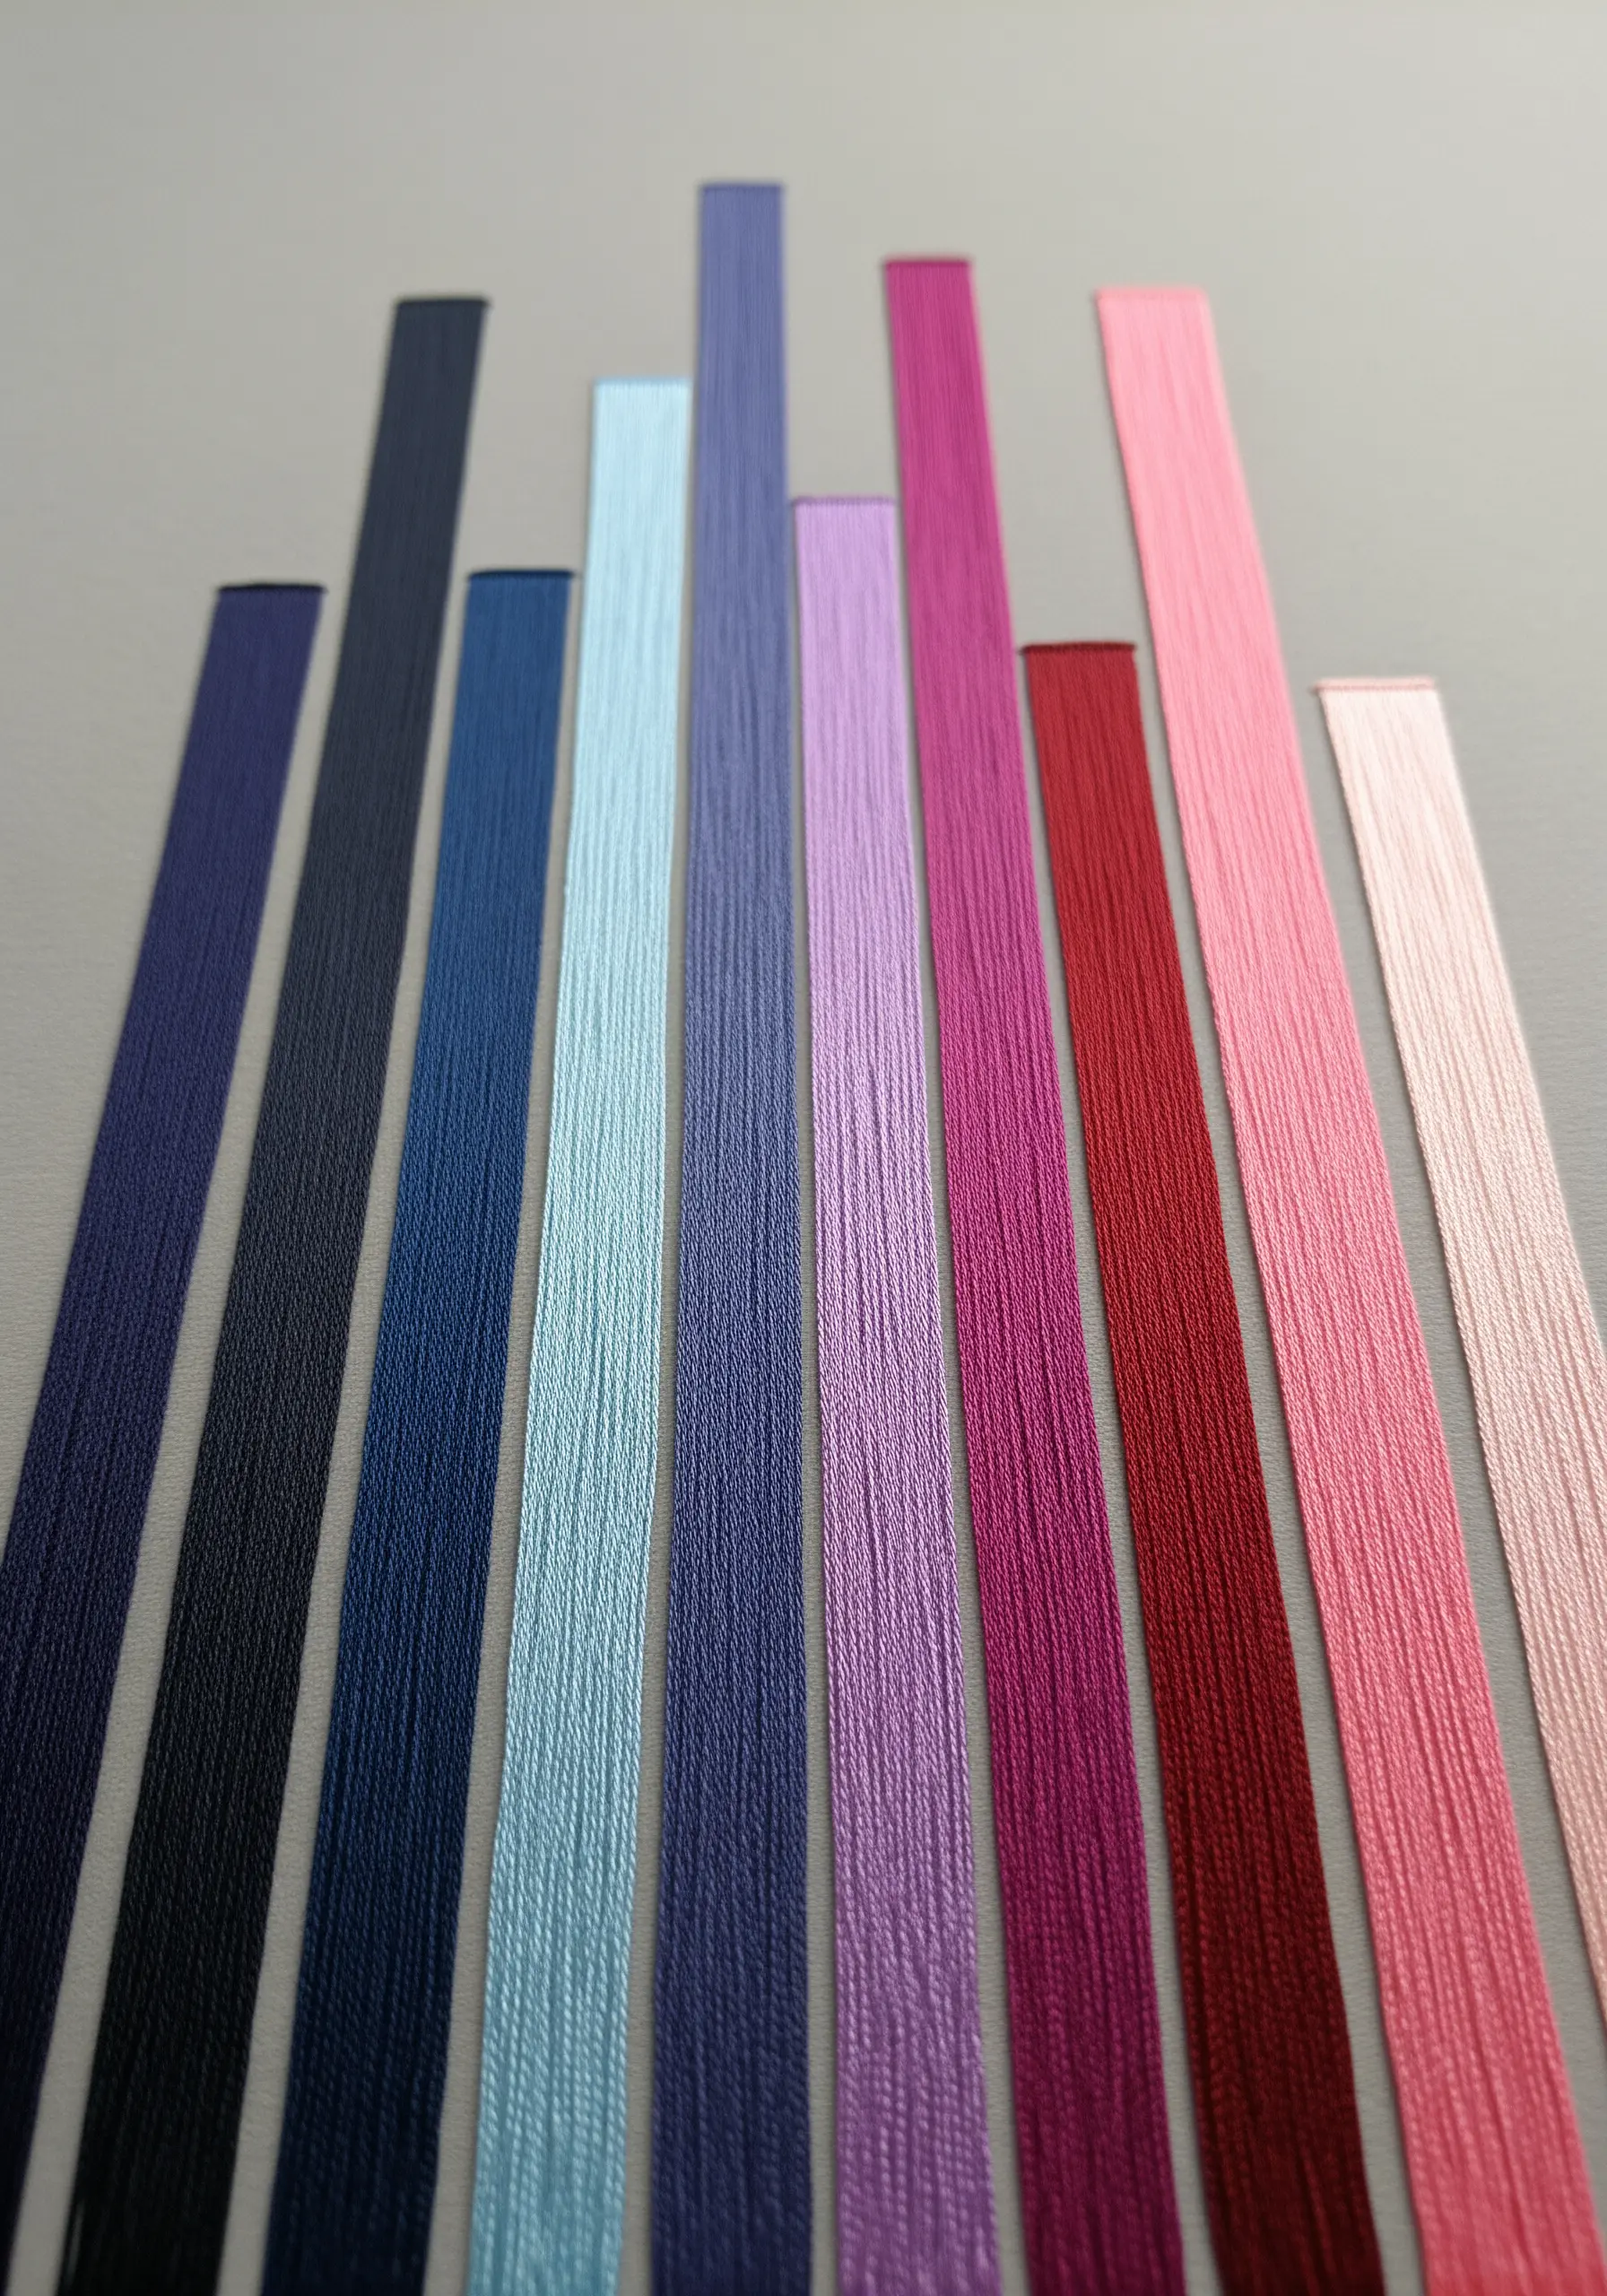
Achieve perfectly smooth, solid blocks of color by laying your embroidery floss flat against the fabric.
Instead of using a traditional stitch, lay all six strands of the floss down in a single, long straight stitch. To keep it flat, use a ‘laying tool’ (or a large tapestry needle) to smooth and guide the strands so they lie parallel without twisting.
This technique, known as laid work, creates a surface with a beautiful, subtle sheen that reflects light evenly.
Arranging these color blocks next to each other creates a clean, graphic composition that highlights the pure beauty and texture of the thread itself.
16. Weave Thread Bands for Physical Layers
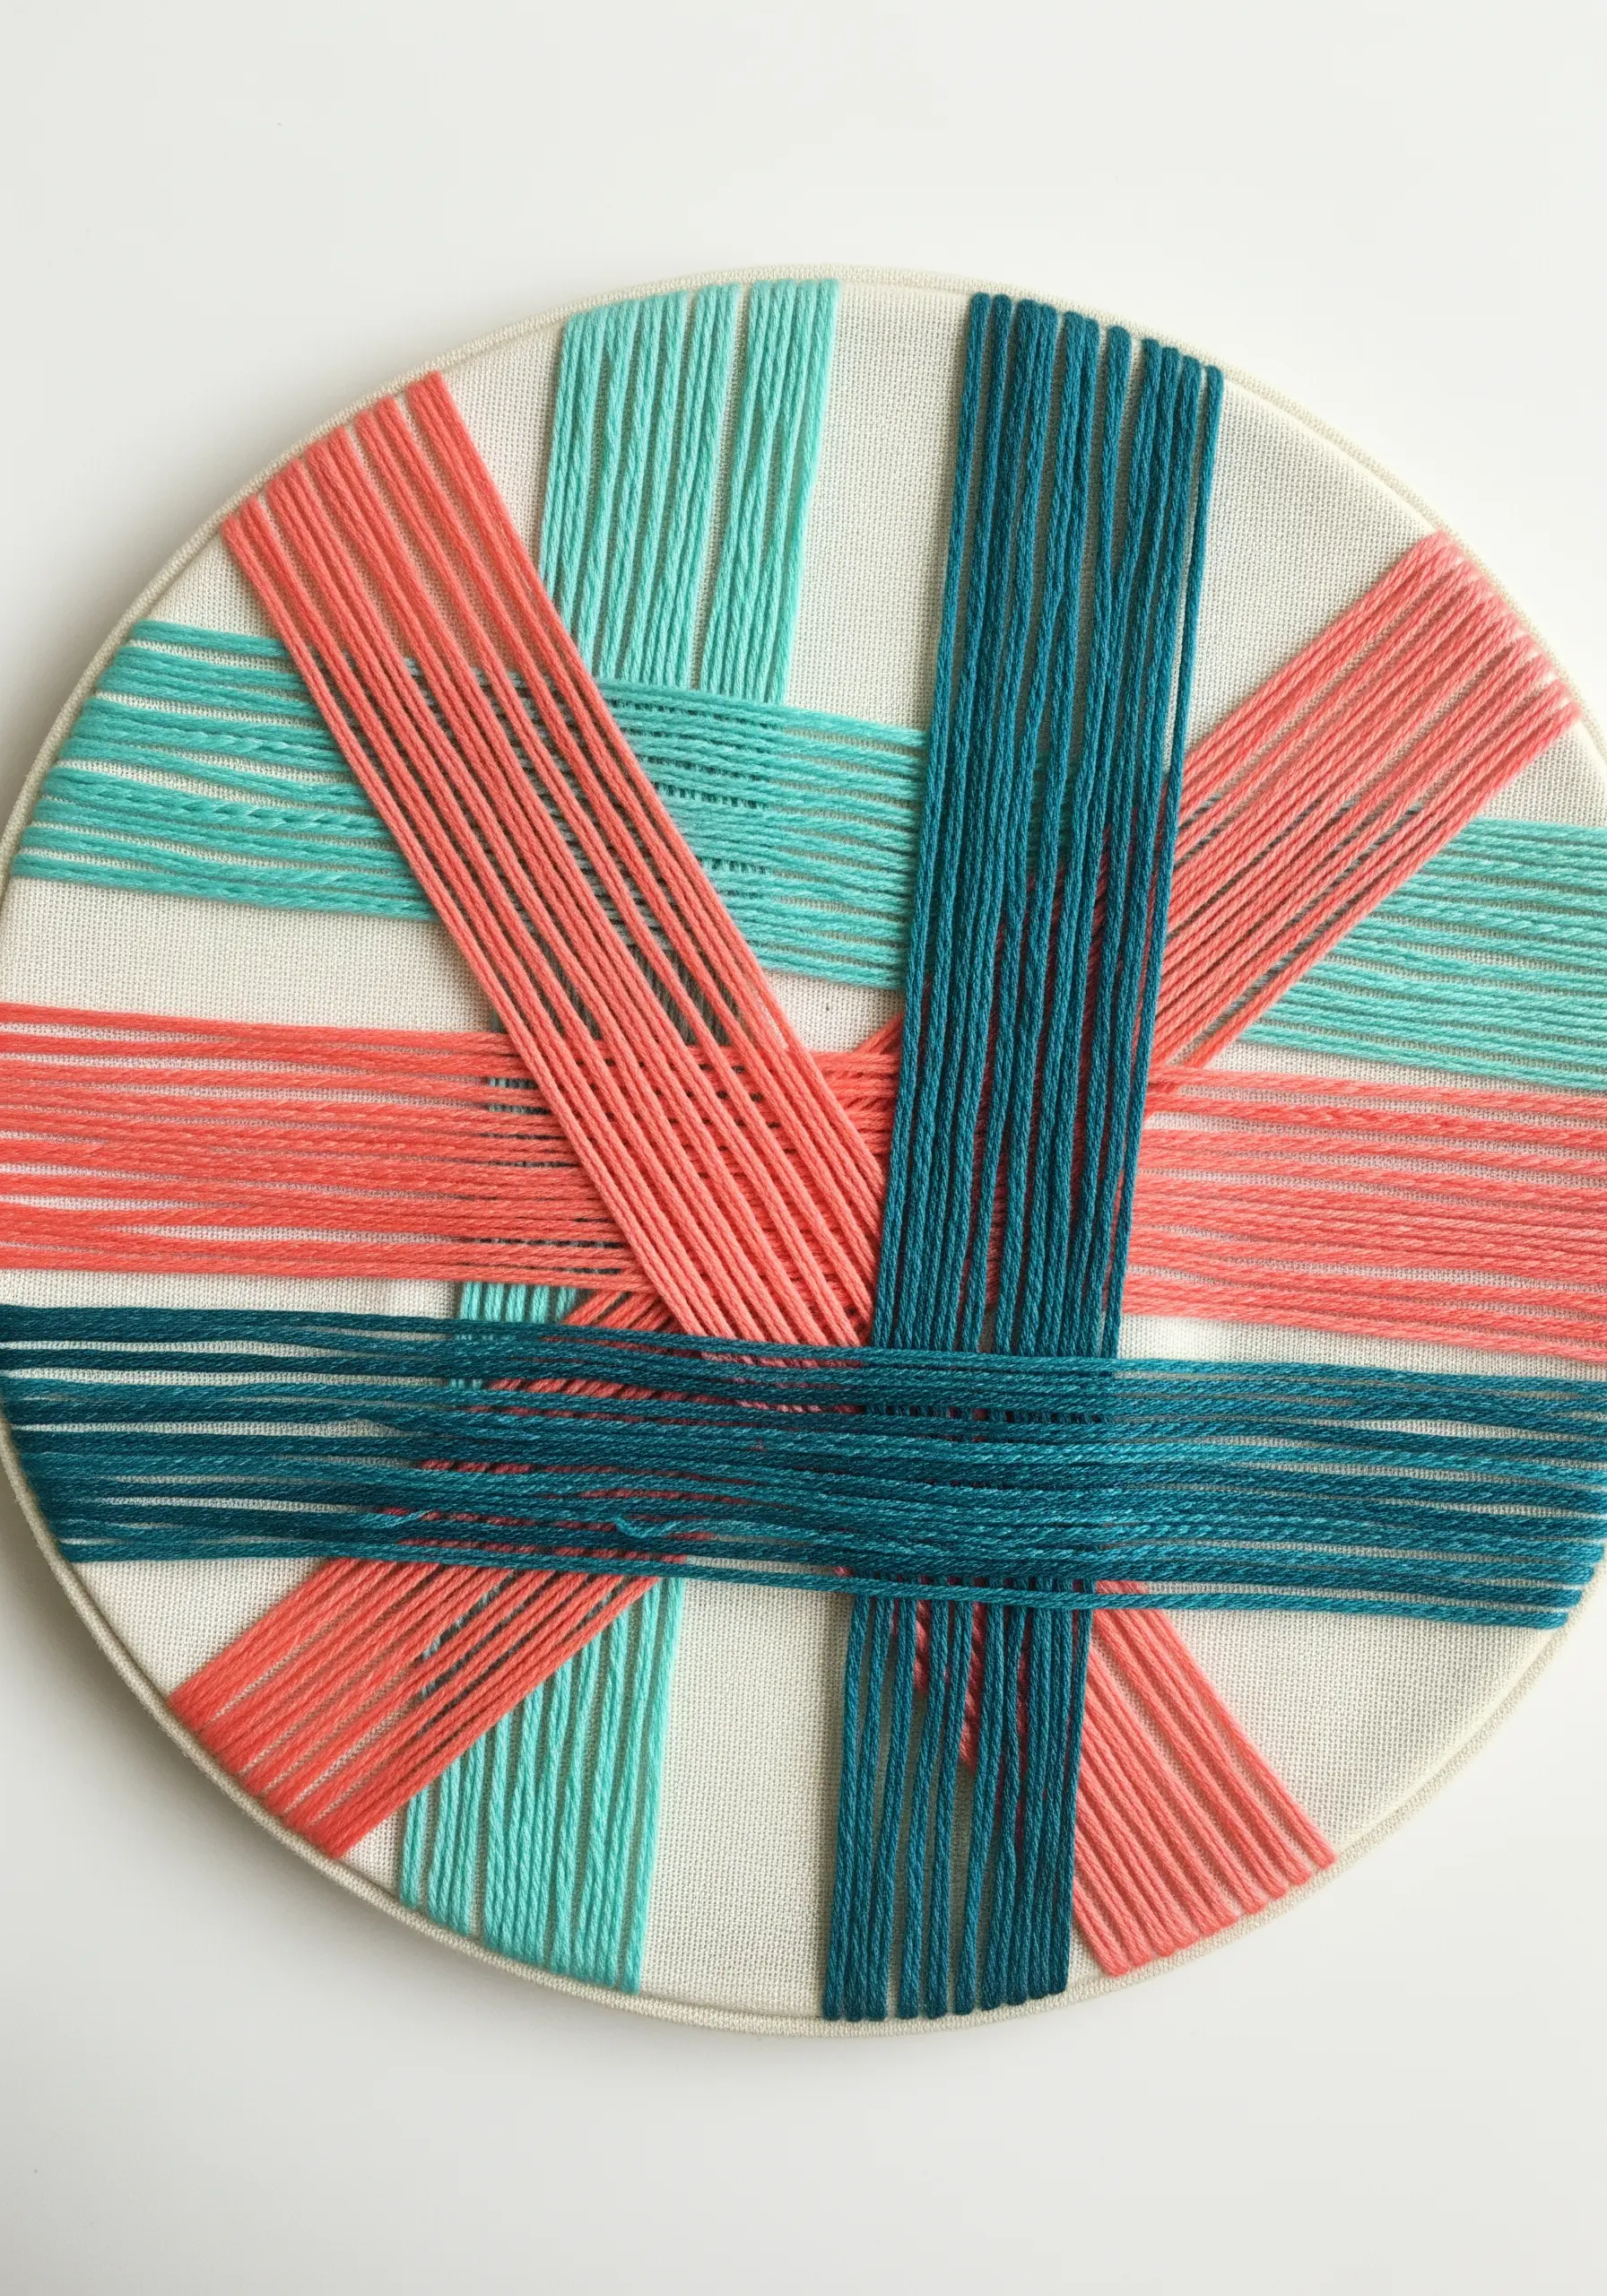
Move beyond stitching *on* the fabric and start weaving *over* it to create true, physical depth.
Stretch your fabric in a hoop, then wrap long, straight bands of thread from one side of the hoop to the other, securing them on the back.
Create a second layer of bands running in a different direction, weaving them over and under the first layer.
The depth here is not an illusion—it’s a real, tactile structure. The interplay of colors and the shadows cast by the overlapping bands make for a simple yet incredibly effective design.
17. Design a Radiant Starburst
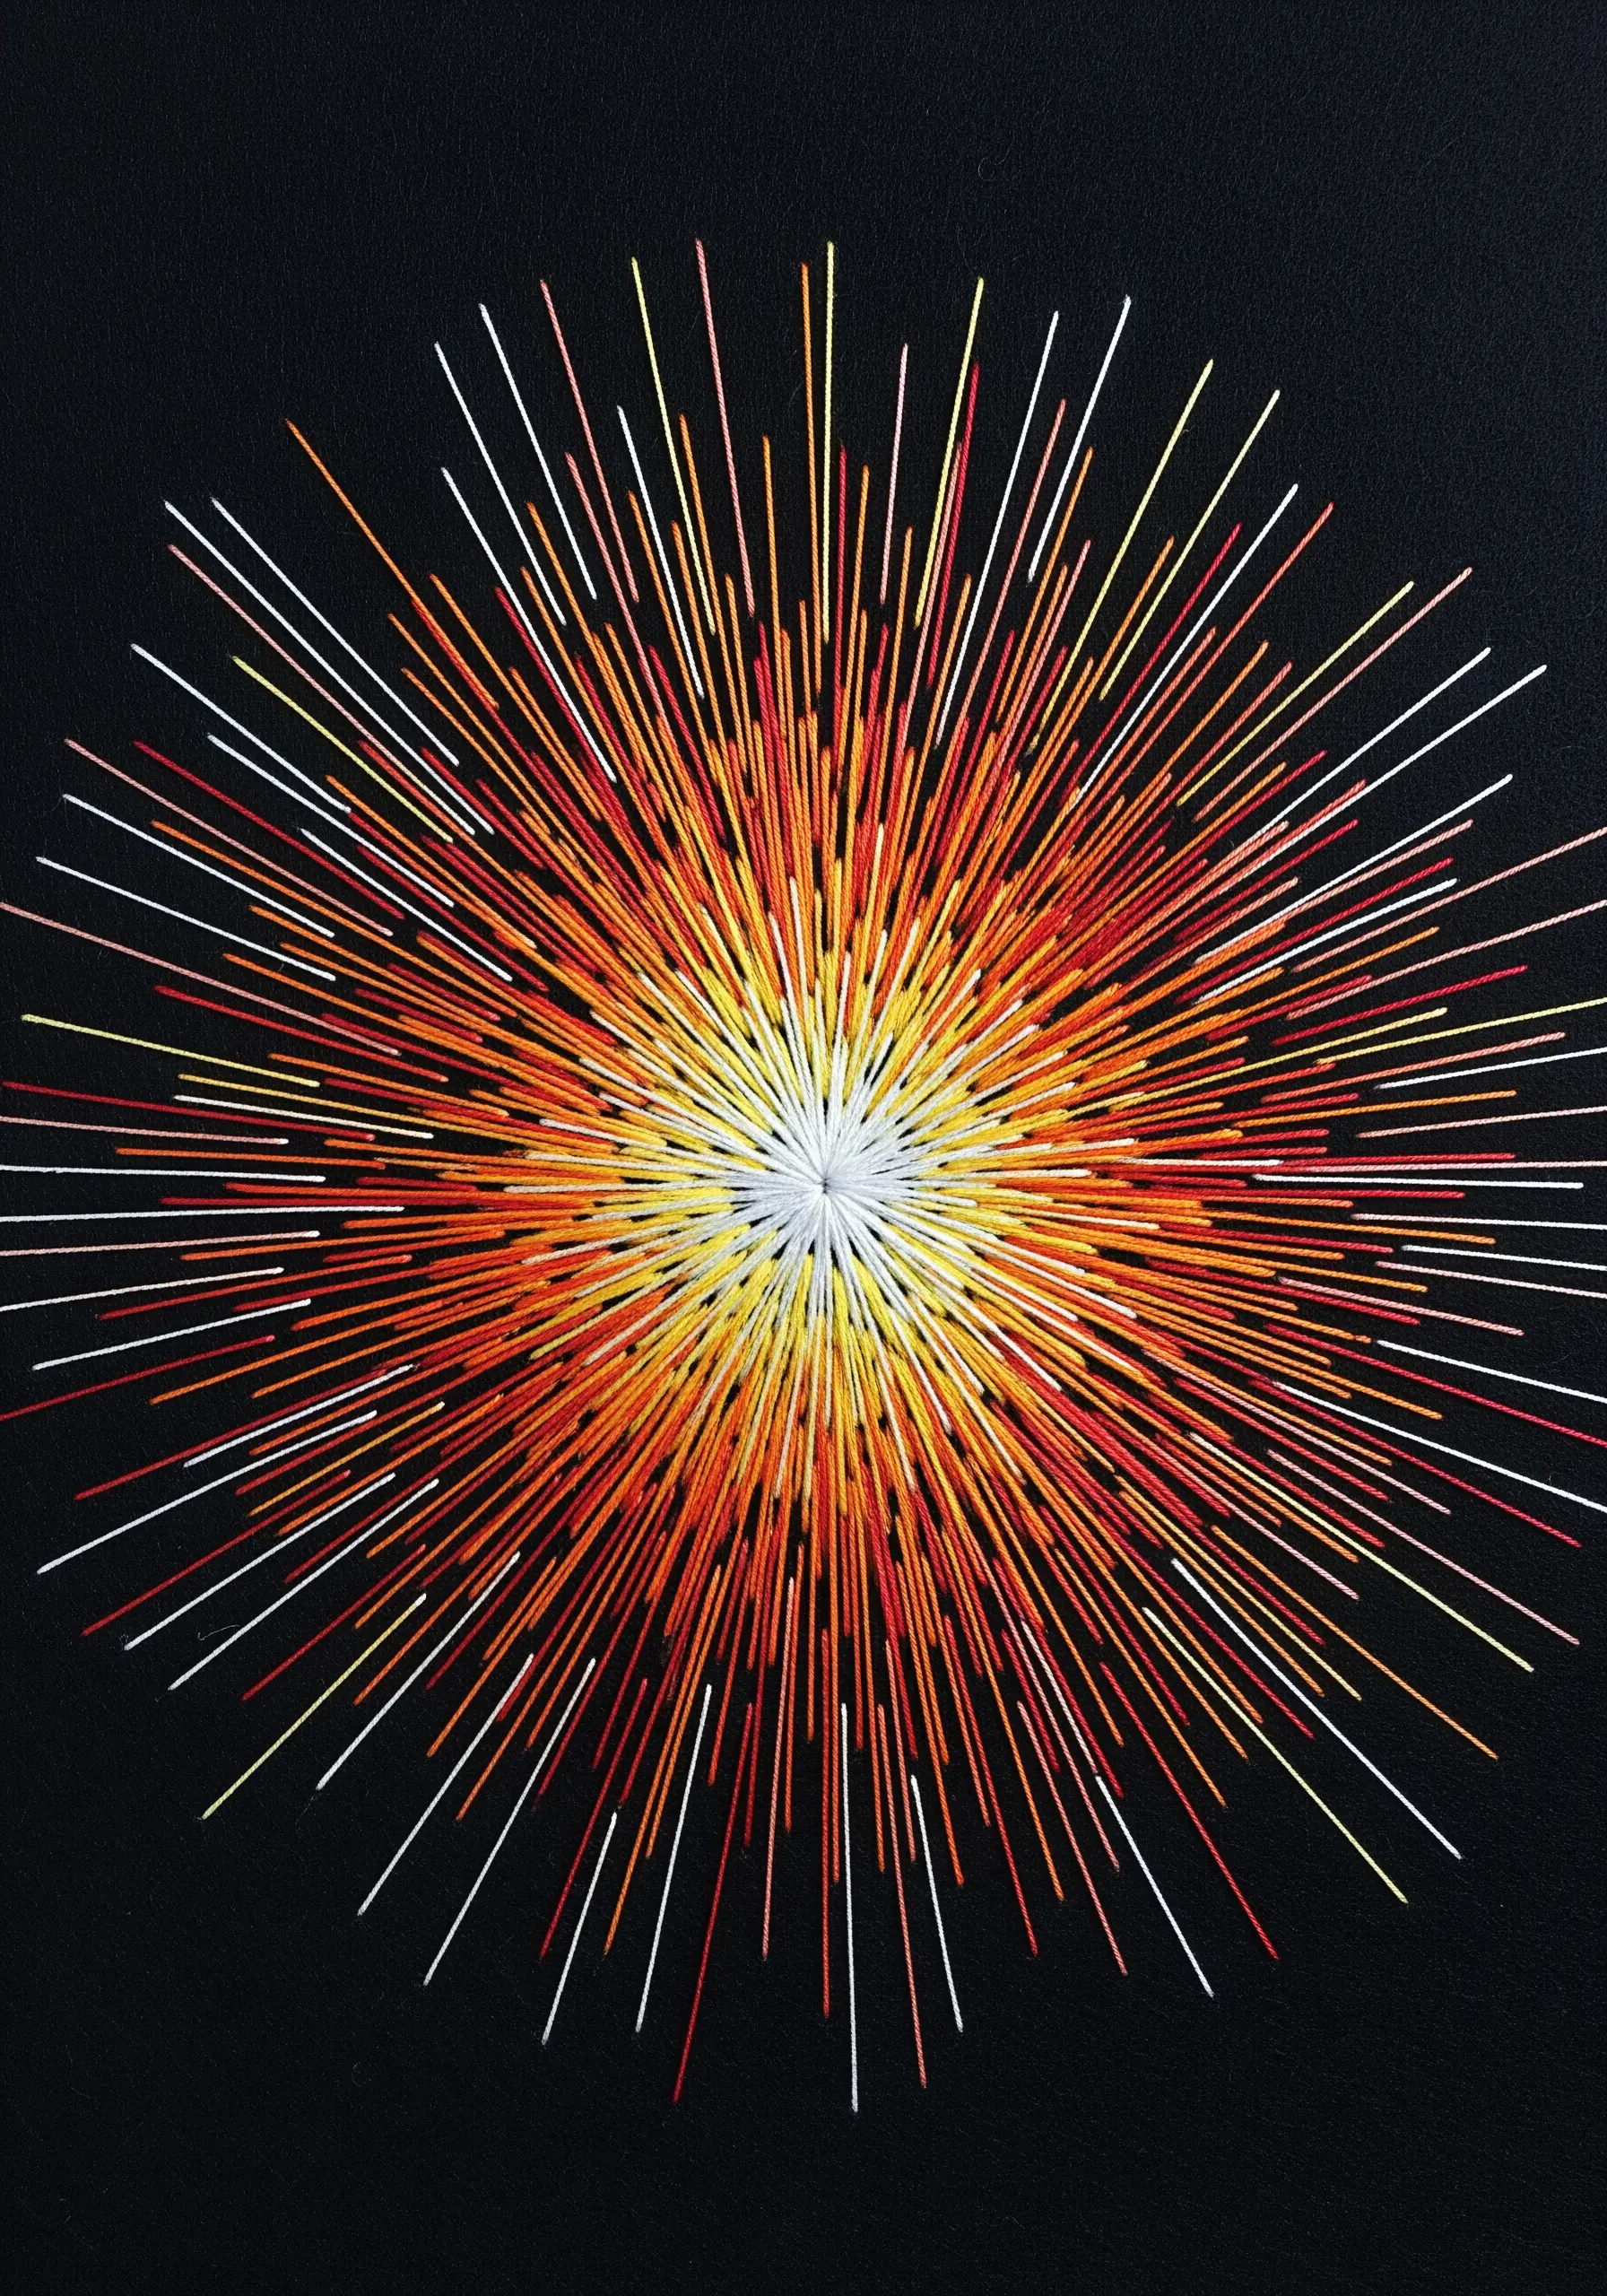
Capture the explosive energy of a supernova with radiating straight stitches that burst from a central point.
Create depth by starting with the brightest, warmest colors (like white and yellow) at the core, stitched very densely.
As you move outward, transition to cooler or darker colors (oranges and reds) and make the stitches longer and more spread out. This makes the center feel intensely hot and bright, while the outer edges dissipate.
This is a fantastic way to use up scrap threads, as the chaotic energy of the burst is very forgiving of slight color variations.
18. Suspend a Grid to Cast Real Shadows
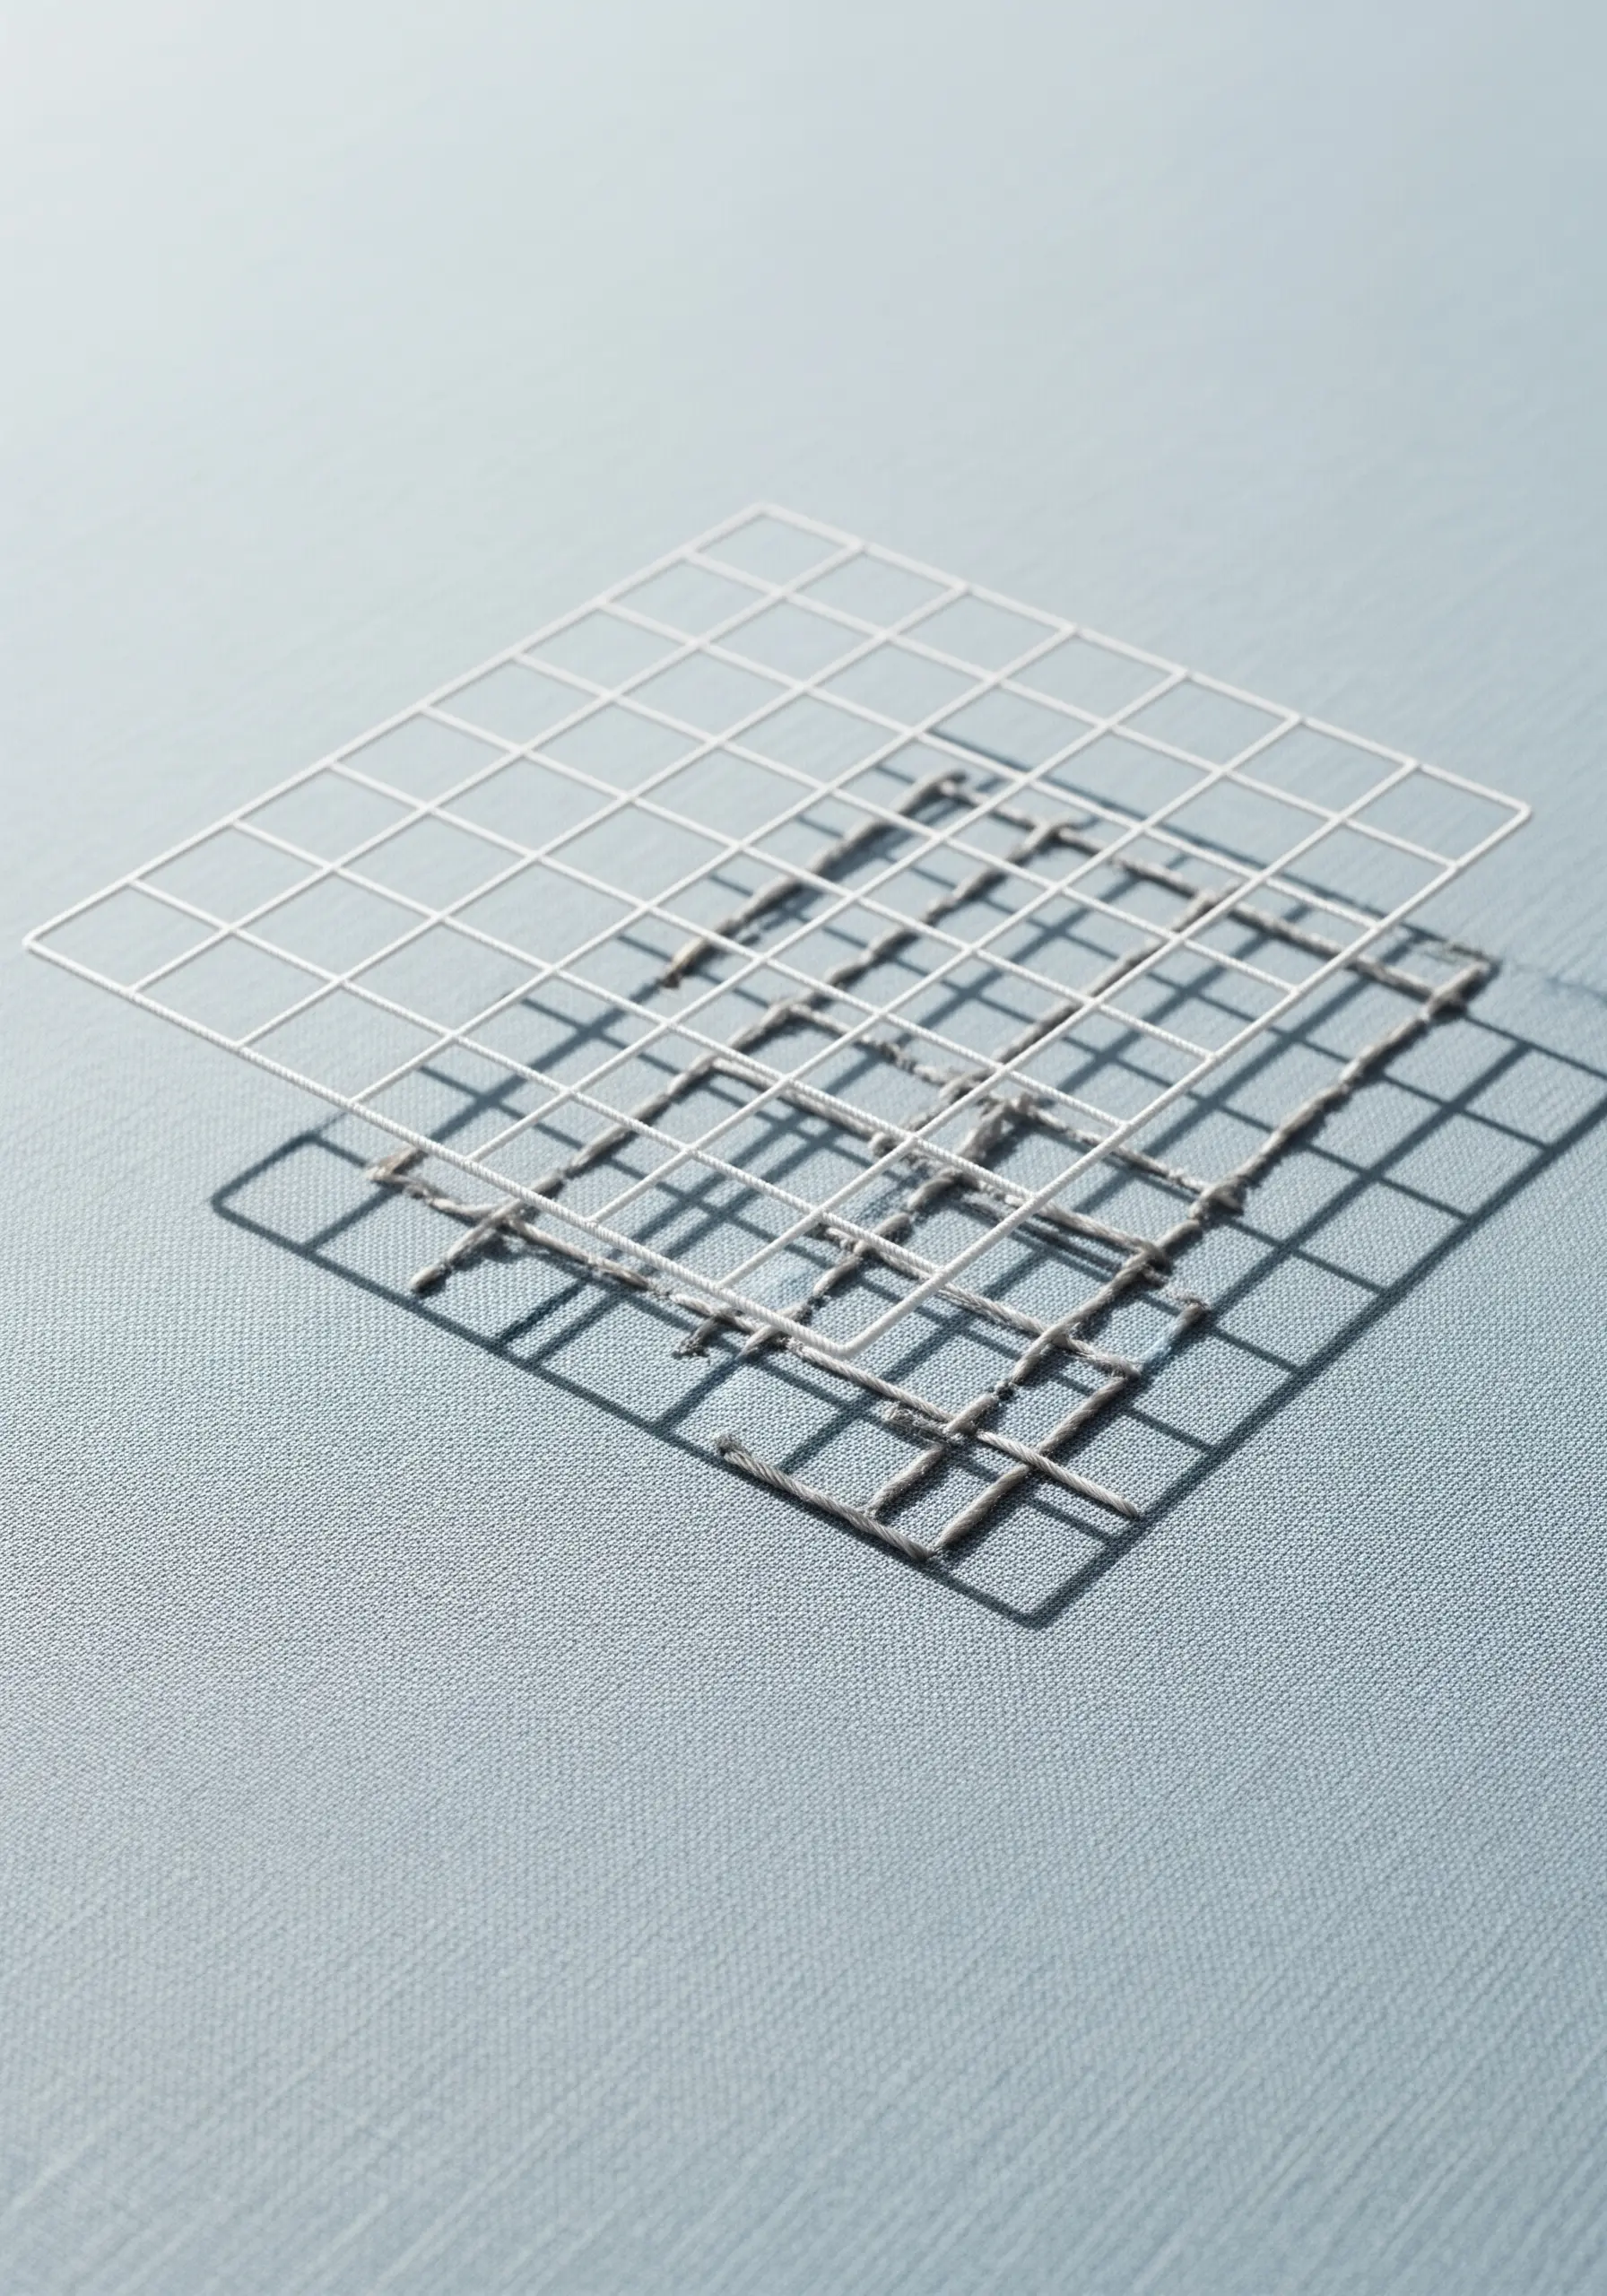
Take the shadow illusion to the next level by creating a structure that casts a real shadow onto your fabric.
Stitch a grid pattern onto a dissolvable stabilizer. Once complete, wash the stabilizer away, leaving you with a delicate, free-standing thread grid.
Use a few anchoring stitches to suspend this grid a few millimeters above your main background fabric.
When lit, the grid will cast a soft, genuine shadow that shifts with the light, creating a dynamic and ethereal piece of art that blends illusion with reality.
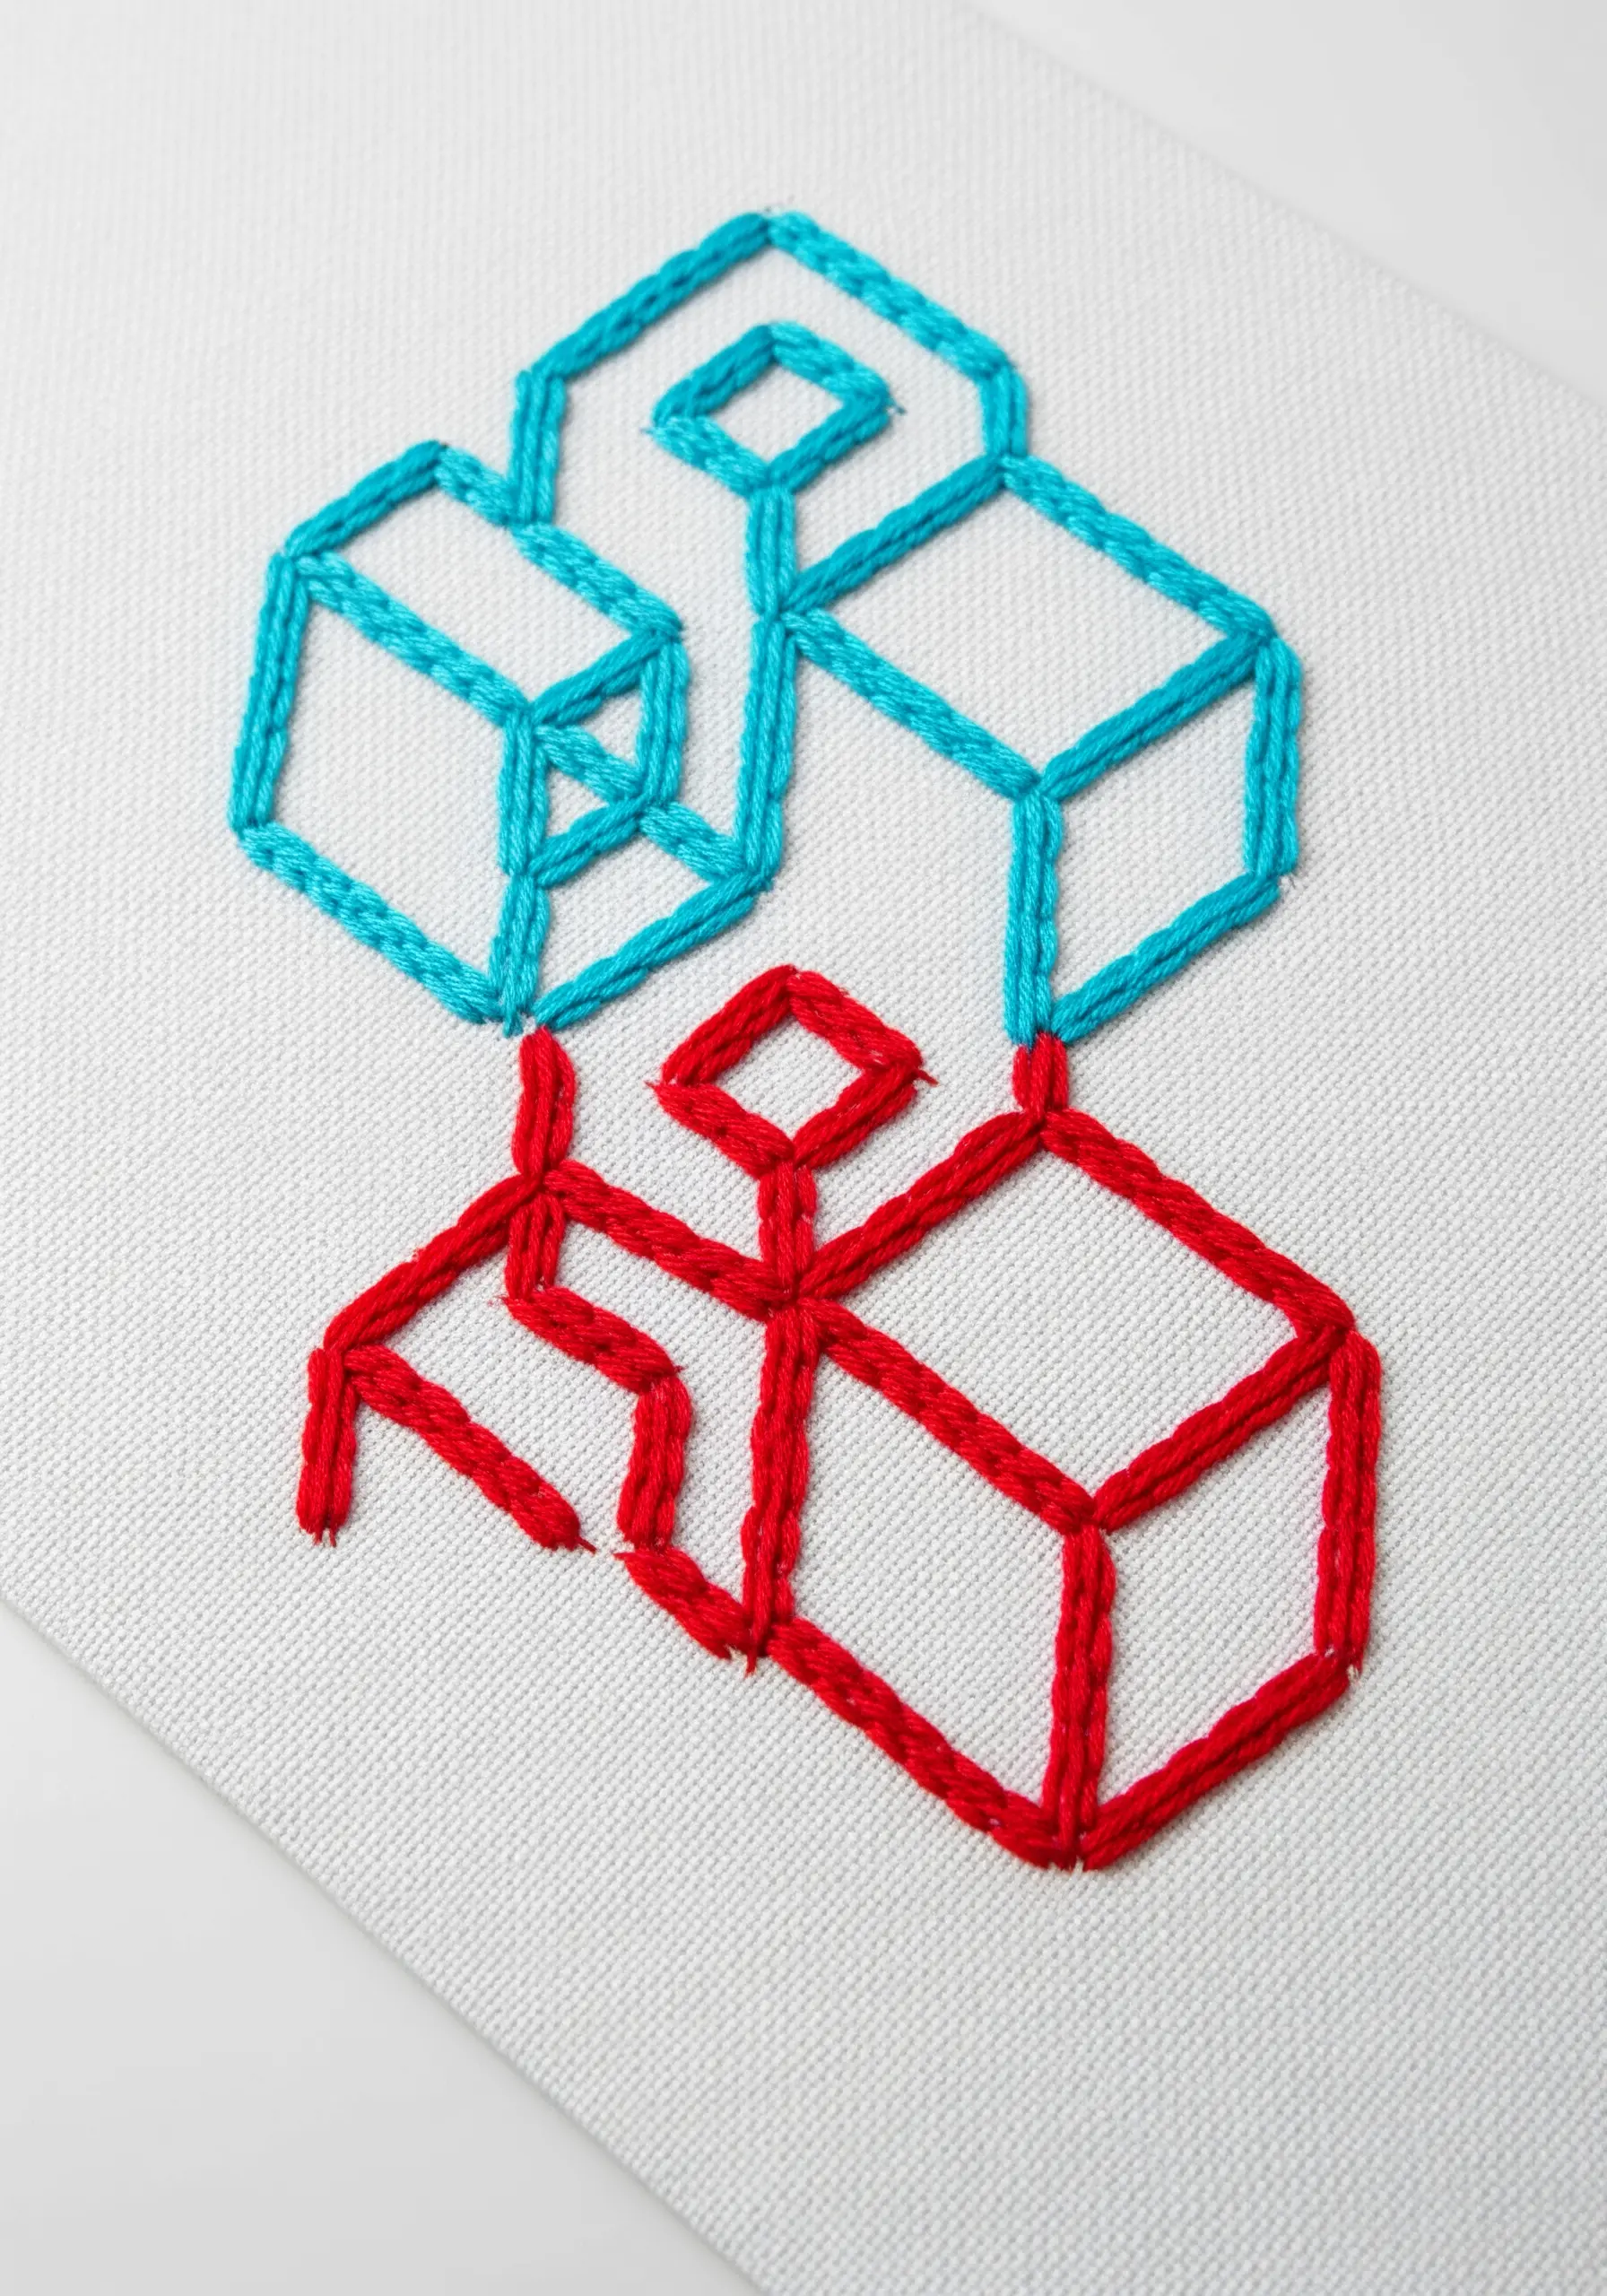
19. Recreate an Anaglyph 3D Effect
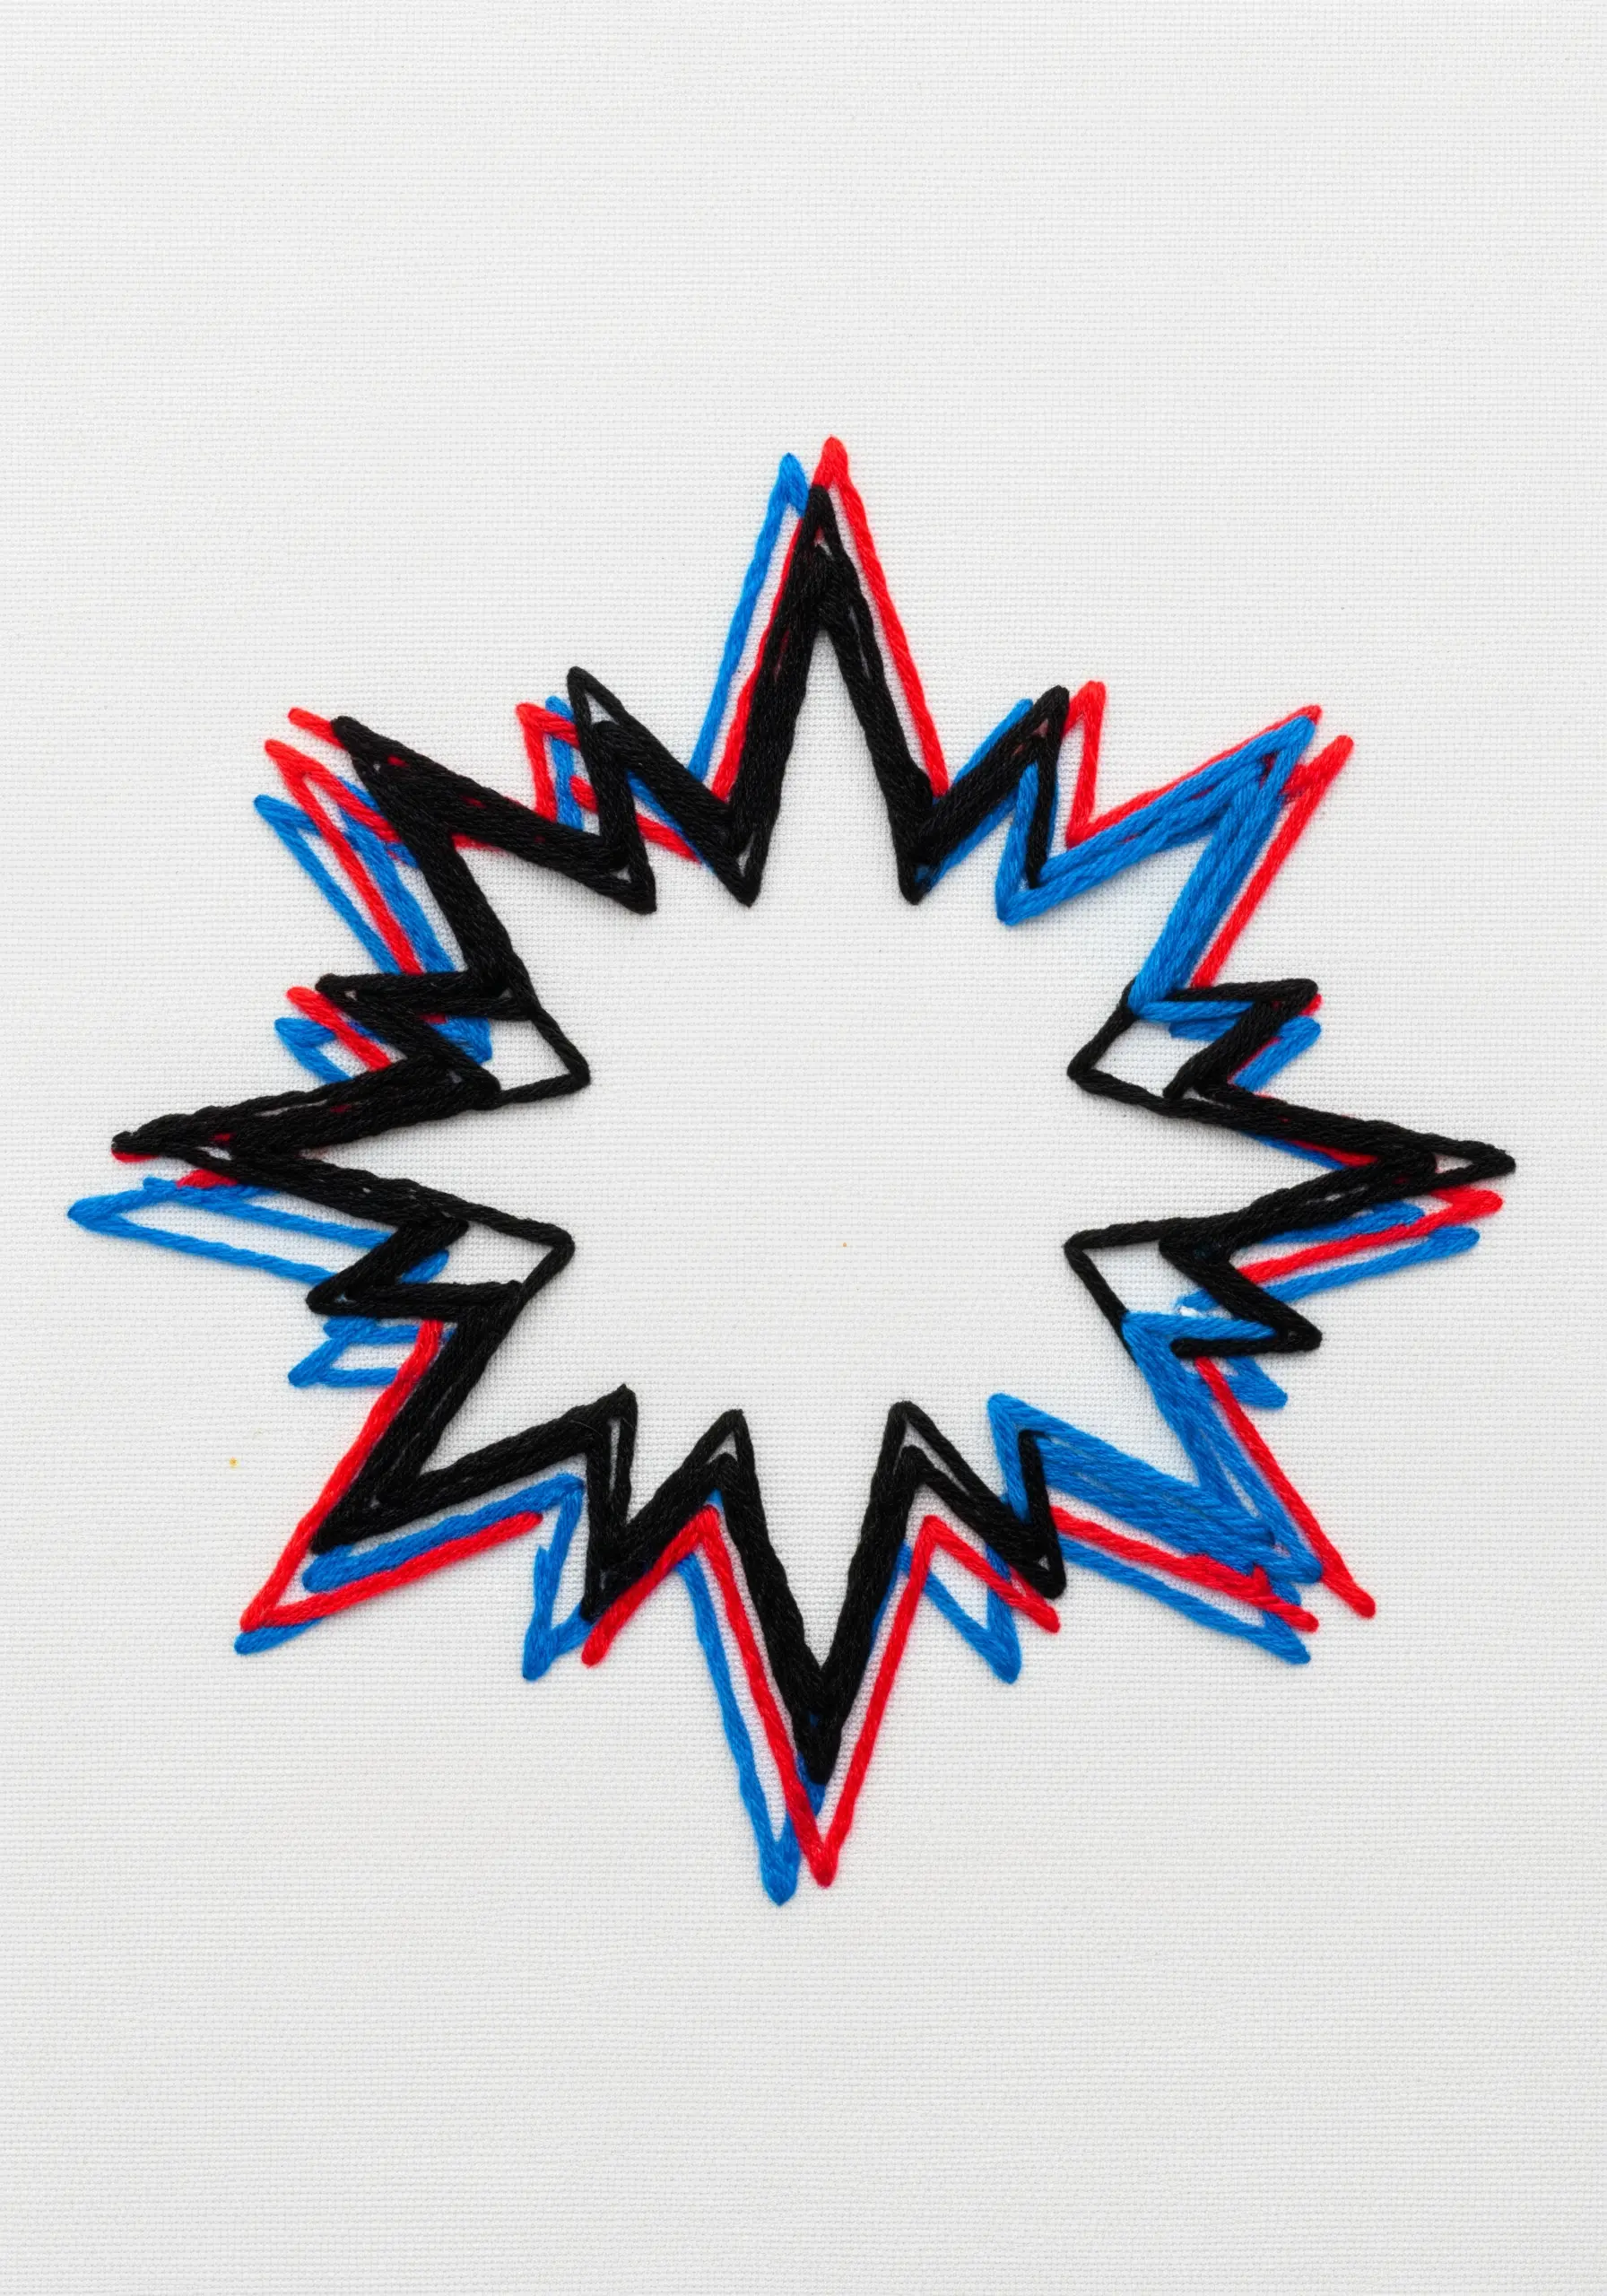
Mimic the vintage 3D effect of anaglyph images by layering slightly offset outlines in red and blue.
Start by stitching your shape’s outline in one color, for example, black. Then, stitch the same outline again, shifted just a millimeter or two to one side, using red thread.
Finally, stitch a third outline, shifted slightly to the other side, using blue or cyan thread.
The brain’s attempt to reconcile these three misaligned images creates a visual buzz and a subtle illusion of depth, making the design appear to vibrate or pop off the fabric.
20. Visualize Sound with Vertical Stitches
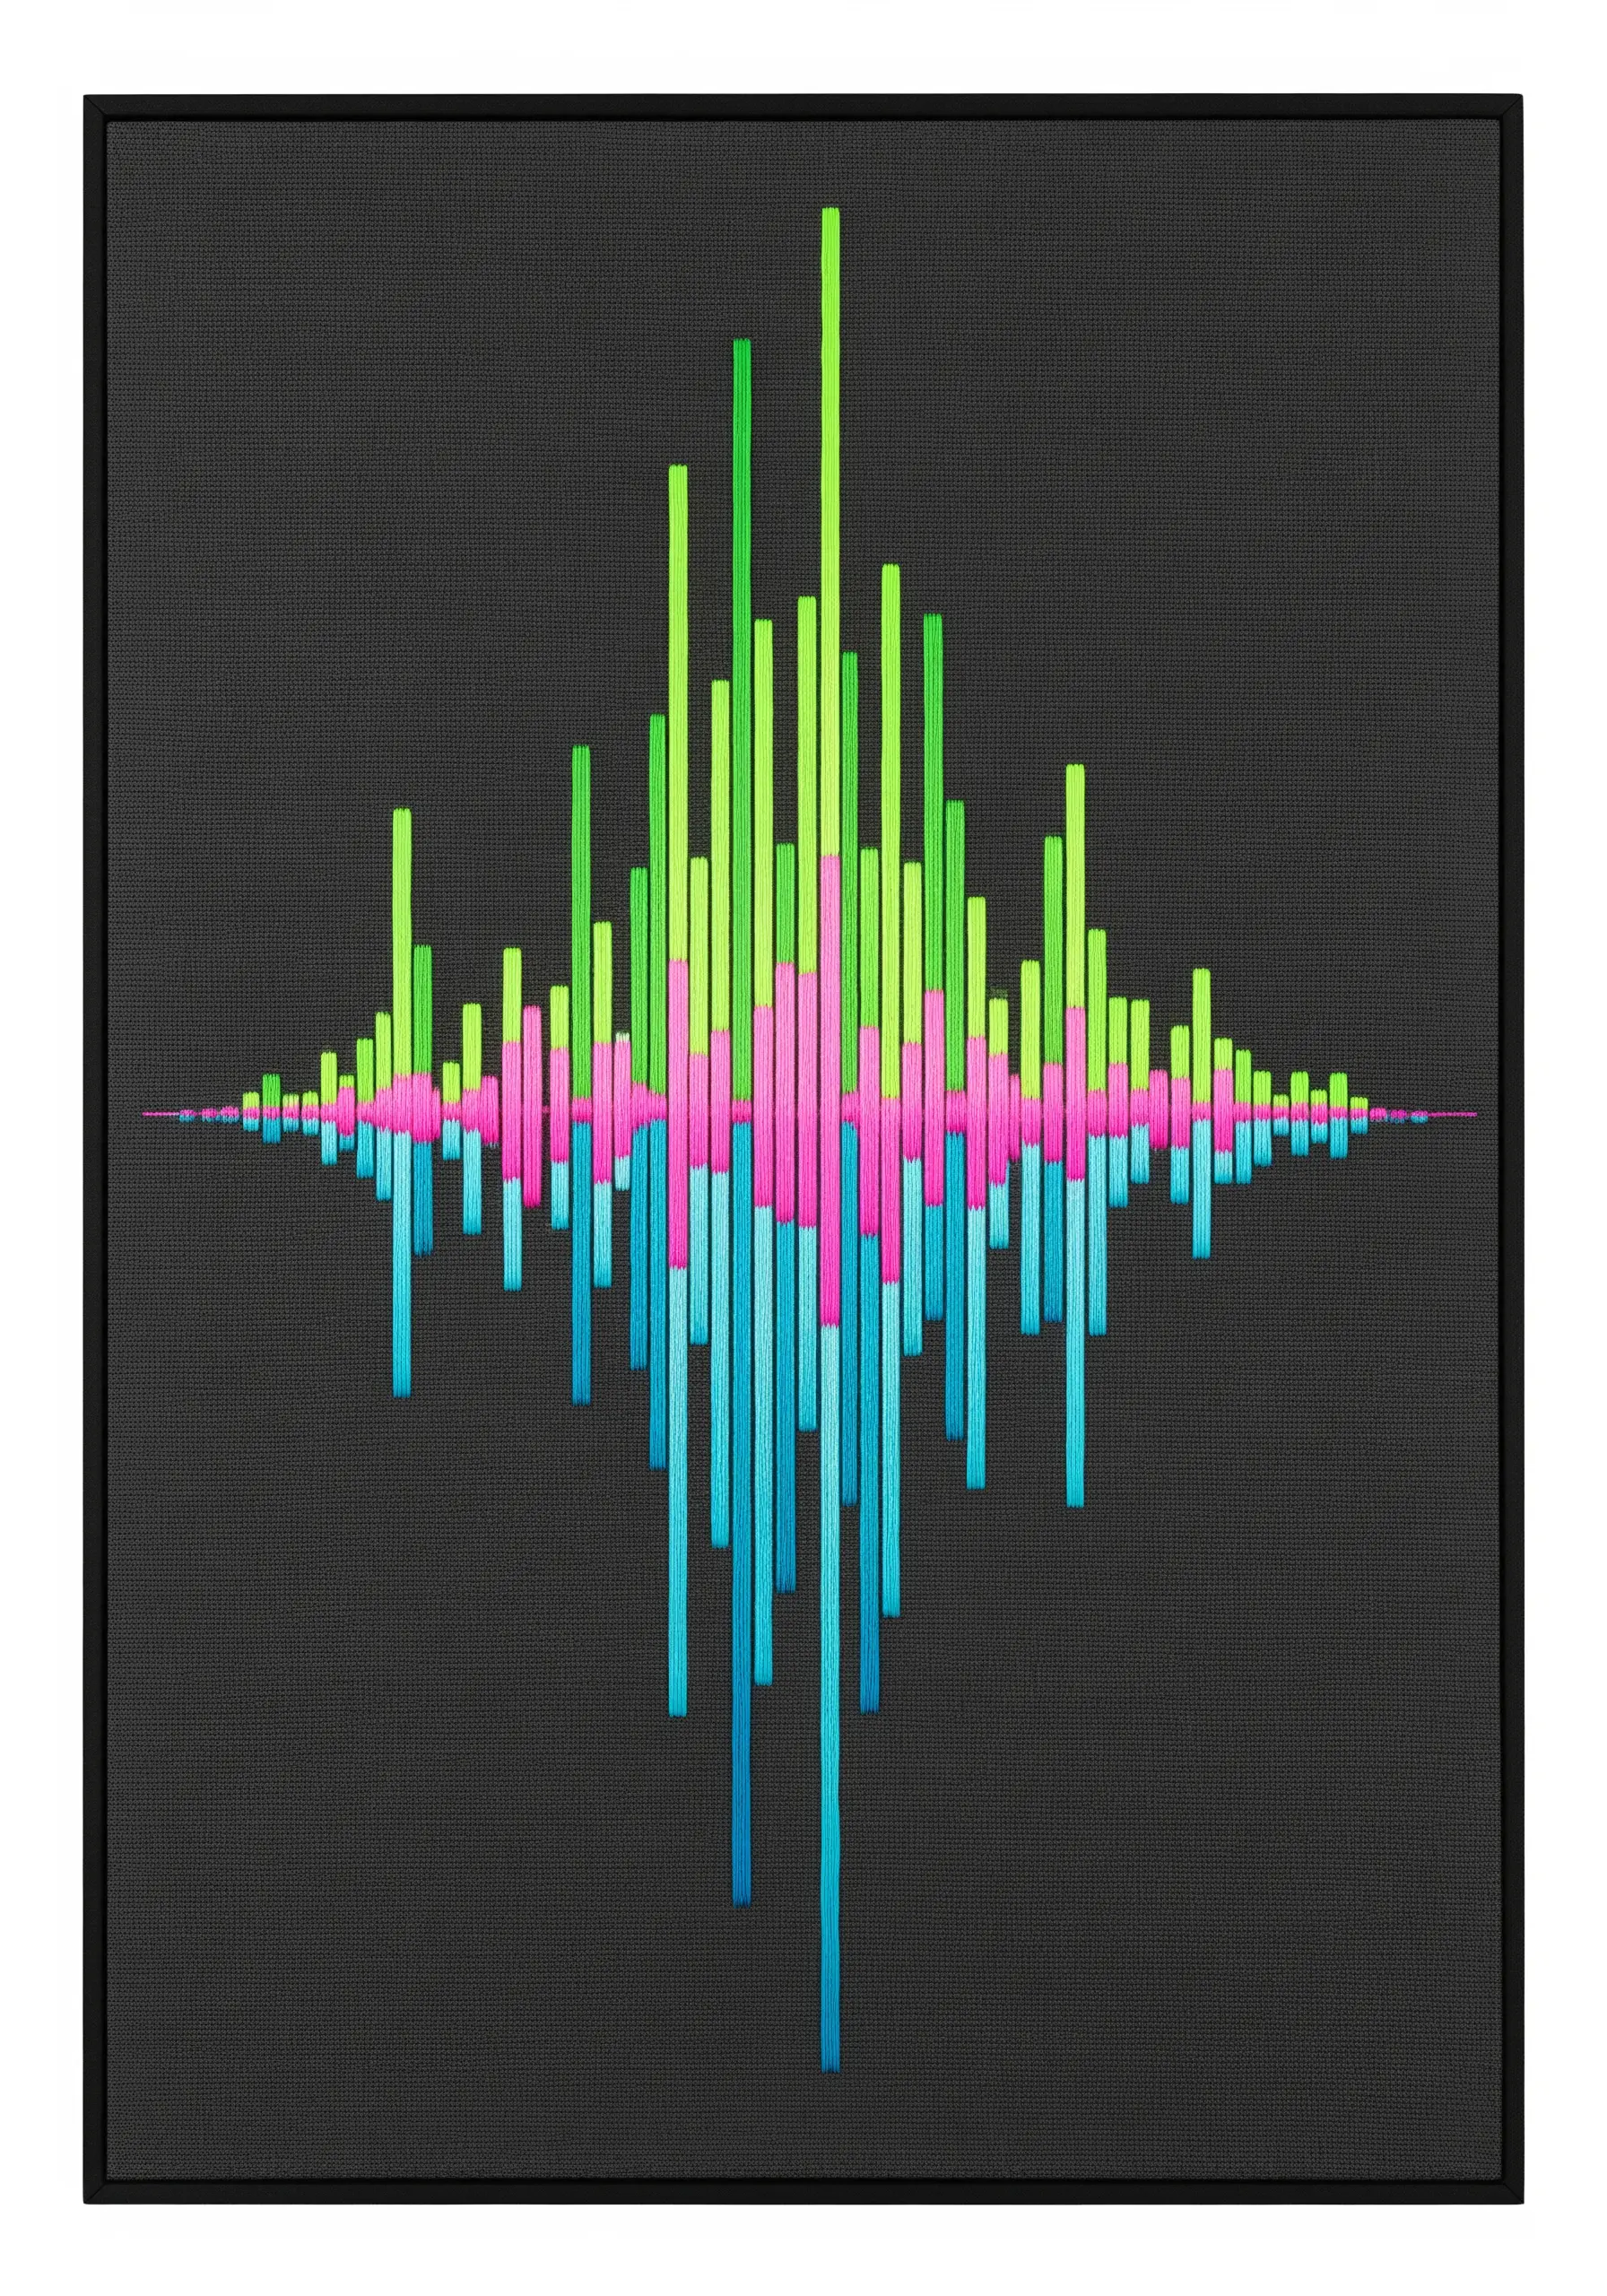
Translate the rhythm and flow of sound into a visual medium using vertical satin stitch bars of varying heights and colors.
Start with a central horizontal line as your baseline. Then, stitch bars of color extending both above and below it, mirroring a digital soundwave or equalizer display.
Use color gradients to represent changes in frequency or tone—perhaps cool blues for lower notes and hot pinks and greens for higher ones.
This technique turns an abstract concept like sound into a tangible, textural piece of fiber art that evokes emotion.
21. Layer Paper with Minimal Stitches

Combine papercraft and embroidery for an incredibly simple way to create clean, layered depth.
Cut shapes from high-quality colored cardstock and arrange them in overlapping layers on your fabric base.
Instead of glue, secure the paper with a simple, decorative running stitch or backstitch along one edge of each piece.
The thread adds a delicate, handmade detail, while the crisp edges and opacity of the paper create sharp, defined layers that would be difficult to achieve with thread alone.
22. Grow a Fractal Tree with Straight Stitches

Create a complex, organic-looking tree using a simple, repeating mathematical rule known as a fractal.
Start with a solid satin stitch trunk. From the top, stitch two branches angling outwards. From the end of each of those branches, stitch two smaller branches at the same angle.
Repeat this process, making the branches progressively smaller, until you have a full, intricate canopy.
This technique demonstrates how a simple, logical system can produce a beautifully complex and natural-looking result, all with the most basic straight stitch.
23. Map Organic Movement with Wandering Spirals

Capture the feeling of natural, chaotic growth by stitching overlapping, imperfect spirals with variegated thread.
Instead of planning a precise pattern, allow your stitches to meander organically across the fabric. Use a whipped backstitch or stem stitch to create a raised, rope-like line that gives the spirals definition.
The magic comes from using a variegated thread, which changes color as you stitch. This creates automatic, effortless color shifts that make the composition feel dynamic and alive.
This is a meditative technique that celebrates imperfection and the beauty of capturing motion and flow in your embroidery.
24. Paint Gradients with Thread Blending
Create impossibly smooth color transitions by treating your thread like paint and blending it strand by strand.
This technique, the foundation of thread painting, involves using a single strand of floss and long-and-short stitches to create a base color.
To introduce a new color, you bring single strands of the new shade up through the existing stitches, placing them sparsely at first and then with increasing density.
By physically blending the individual strands on the fabric, you can achieve a photorealistic gradient that gives any shape incredible depth and volume.
25. Pad and Sculpt 3D Spheres
Give your embroidered shapes true three-dimensional form by building up padding underneath them.
Start by creating a small mound of padding on your fabric—you can use layers of felt cut into circles of decreasing size, or build it up with dense seed stitches.
Then, cover this mound completely with your main color, using tightly packed satin stitches or by couching a thread in a spiral pattern from the outside in.
The result is a perfectly smooth, raised sphere that casts its own shadow, instantly adding sculptural quality to your work.


