

The secret to truly beautiful embroidery isn’t about mastering dozens of complex stitches. It’s about learning to see the small details that make a piece feel intentional and alive—the turn of a stitch, the weight of a thread, the space between shapes.
In these tiny projects, you have the perfect canvas to practice this art of intention. Each one is a chance to explore how a simple adjustment, like choosing a split stitch over a backstitch for a cleaner line, can completely transform your work.
Think of this as a quiet conversation between thread and fabric. You are here to guide that conversation with confidence and skill, creating not just a decorative object, but a small, meaningful keepsake that holds a piece of your focus and care.
1. Render Lavender with Tactile Detail
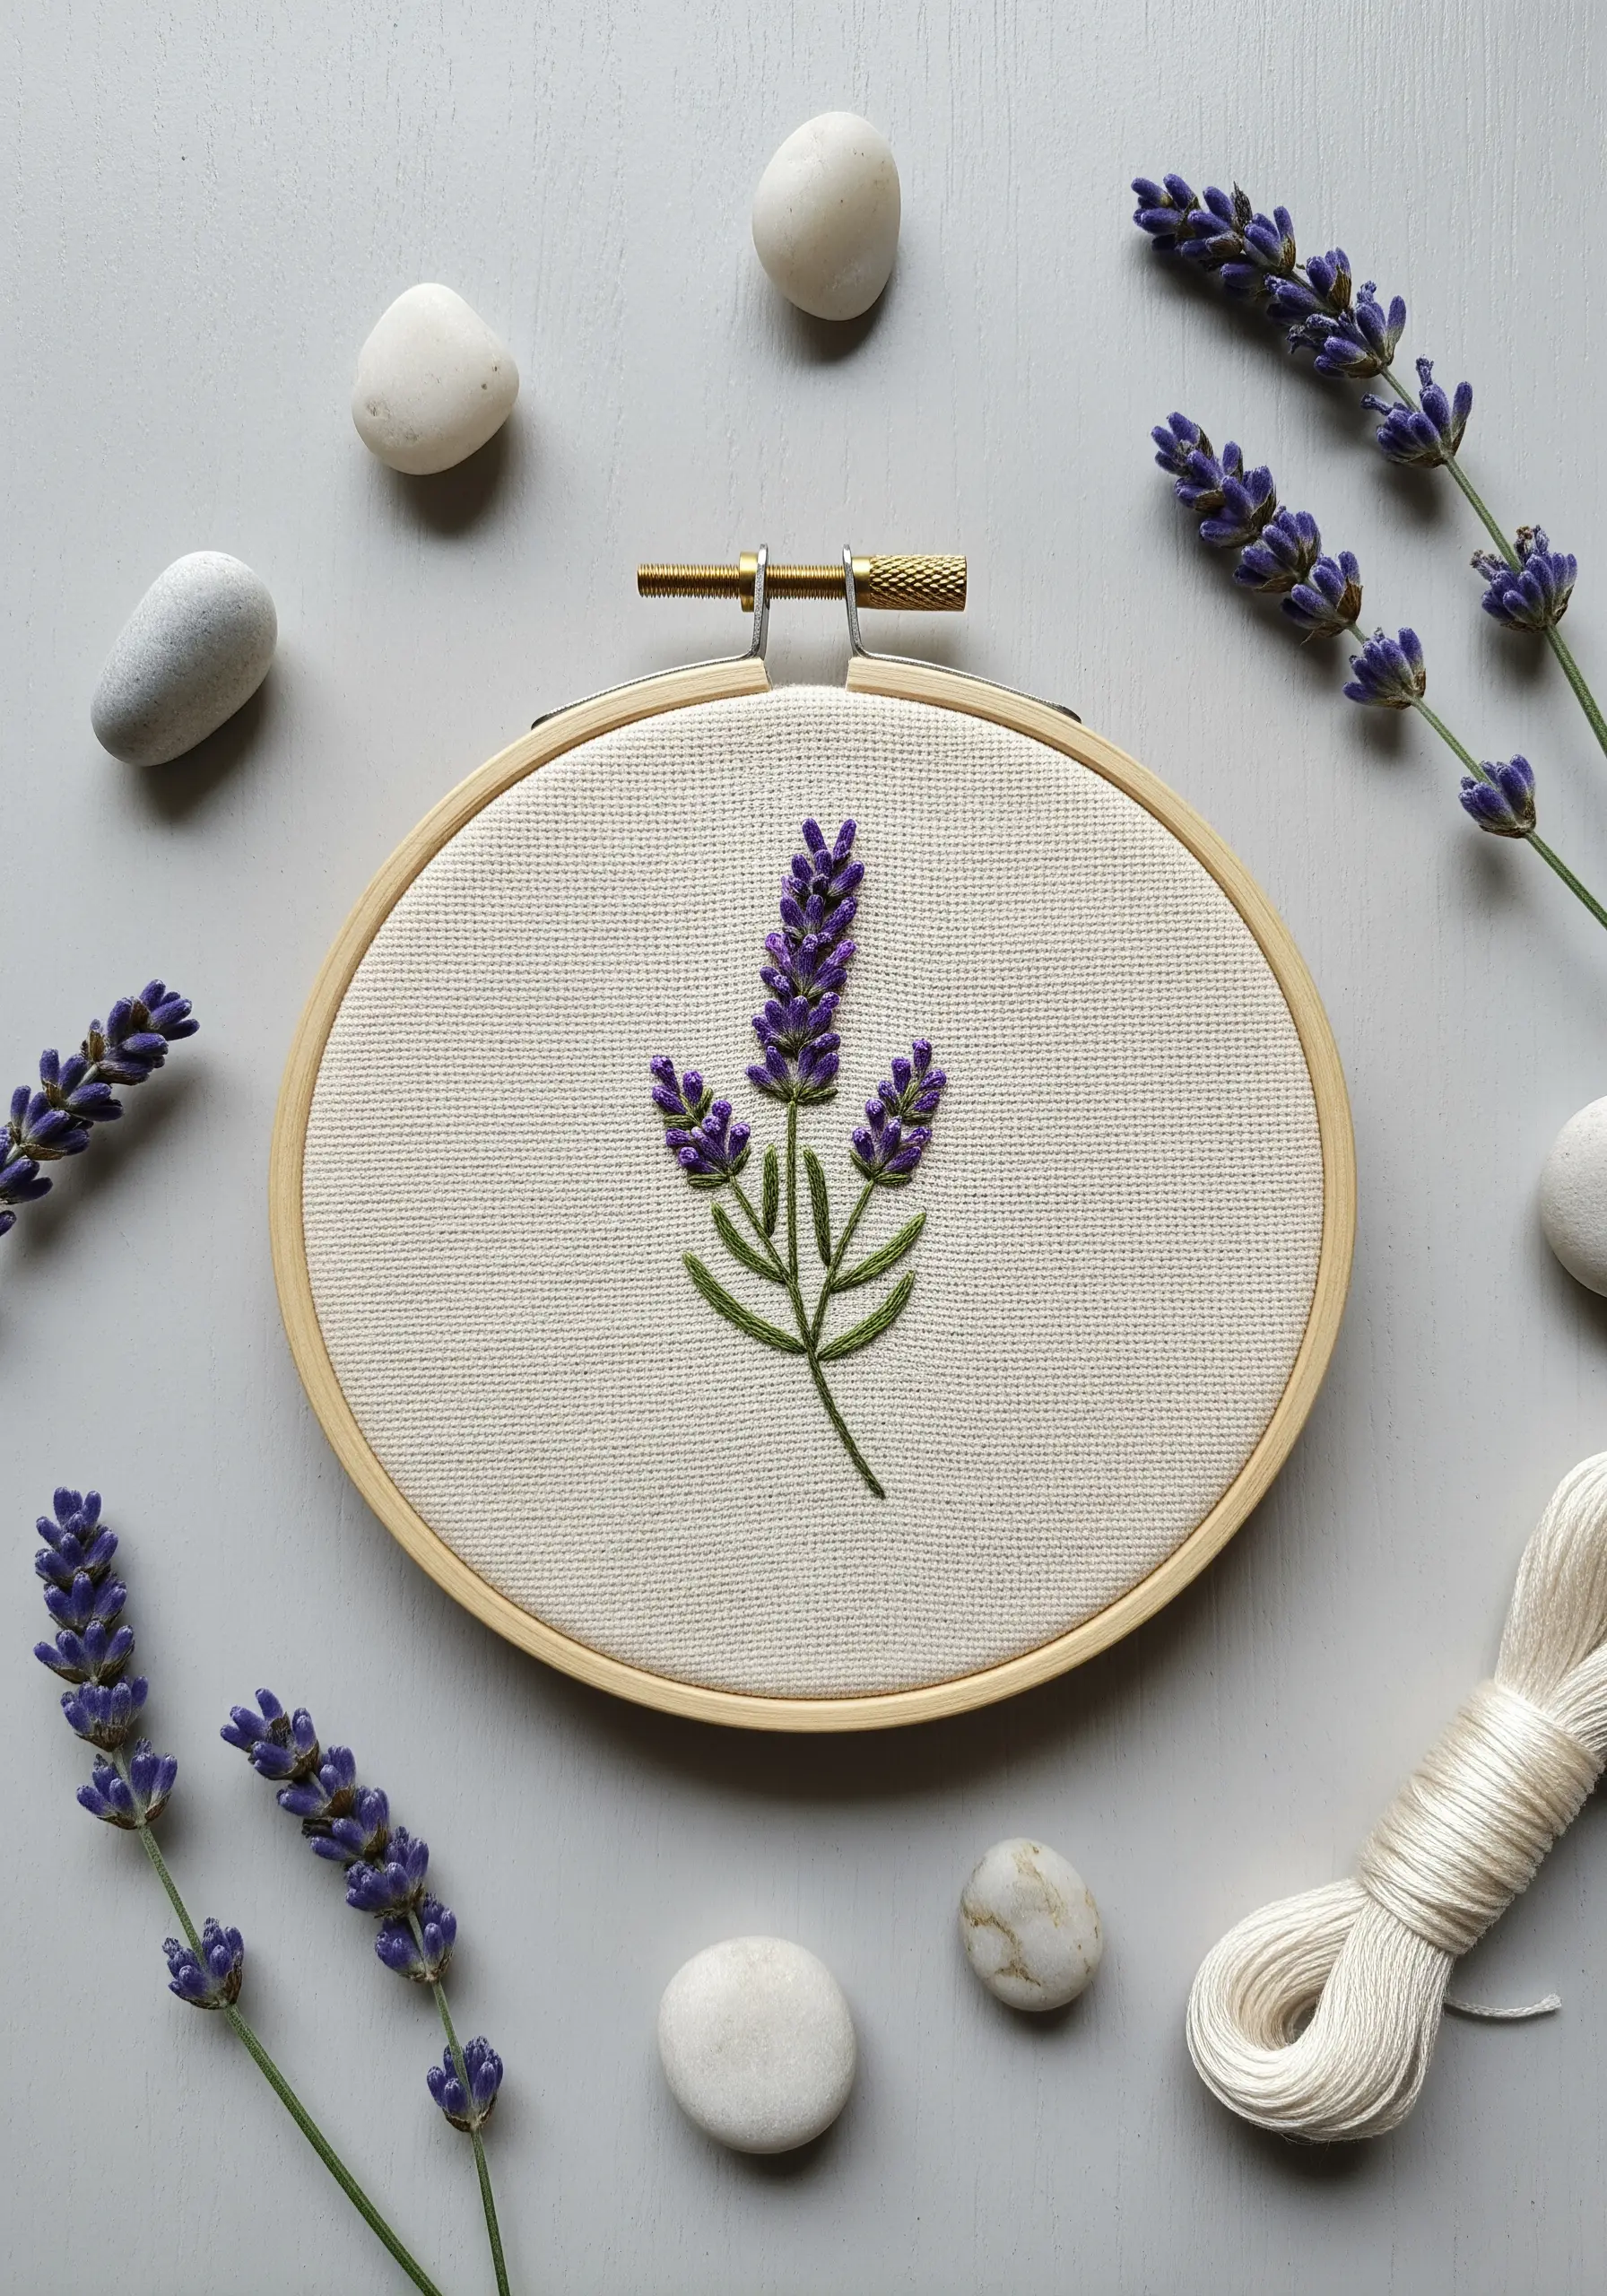
Give your lavender sprigs a lifelike texture by using French knots for the tiny blossoms and a whipped backstitch for the stems.
Vary the tightness of your French knots—some loose, some tight—to mimic the natural budding of the flowers.
For the stems, using a single strand of a slightly darker green thread adds depth and stops the design from feeling flat.
This approach moves beyond simple outlines, offering a piece that engages both sight and touch, perfect for calming bedroom art and relaxation gifts.
2. Master Metallics for a Luminous Moon
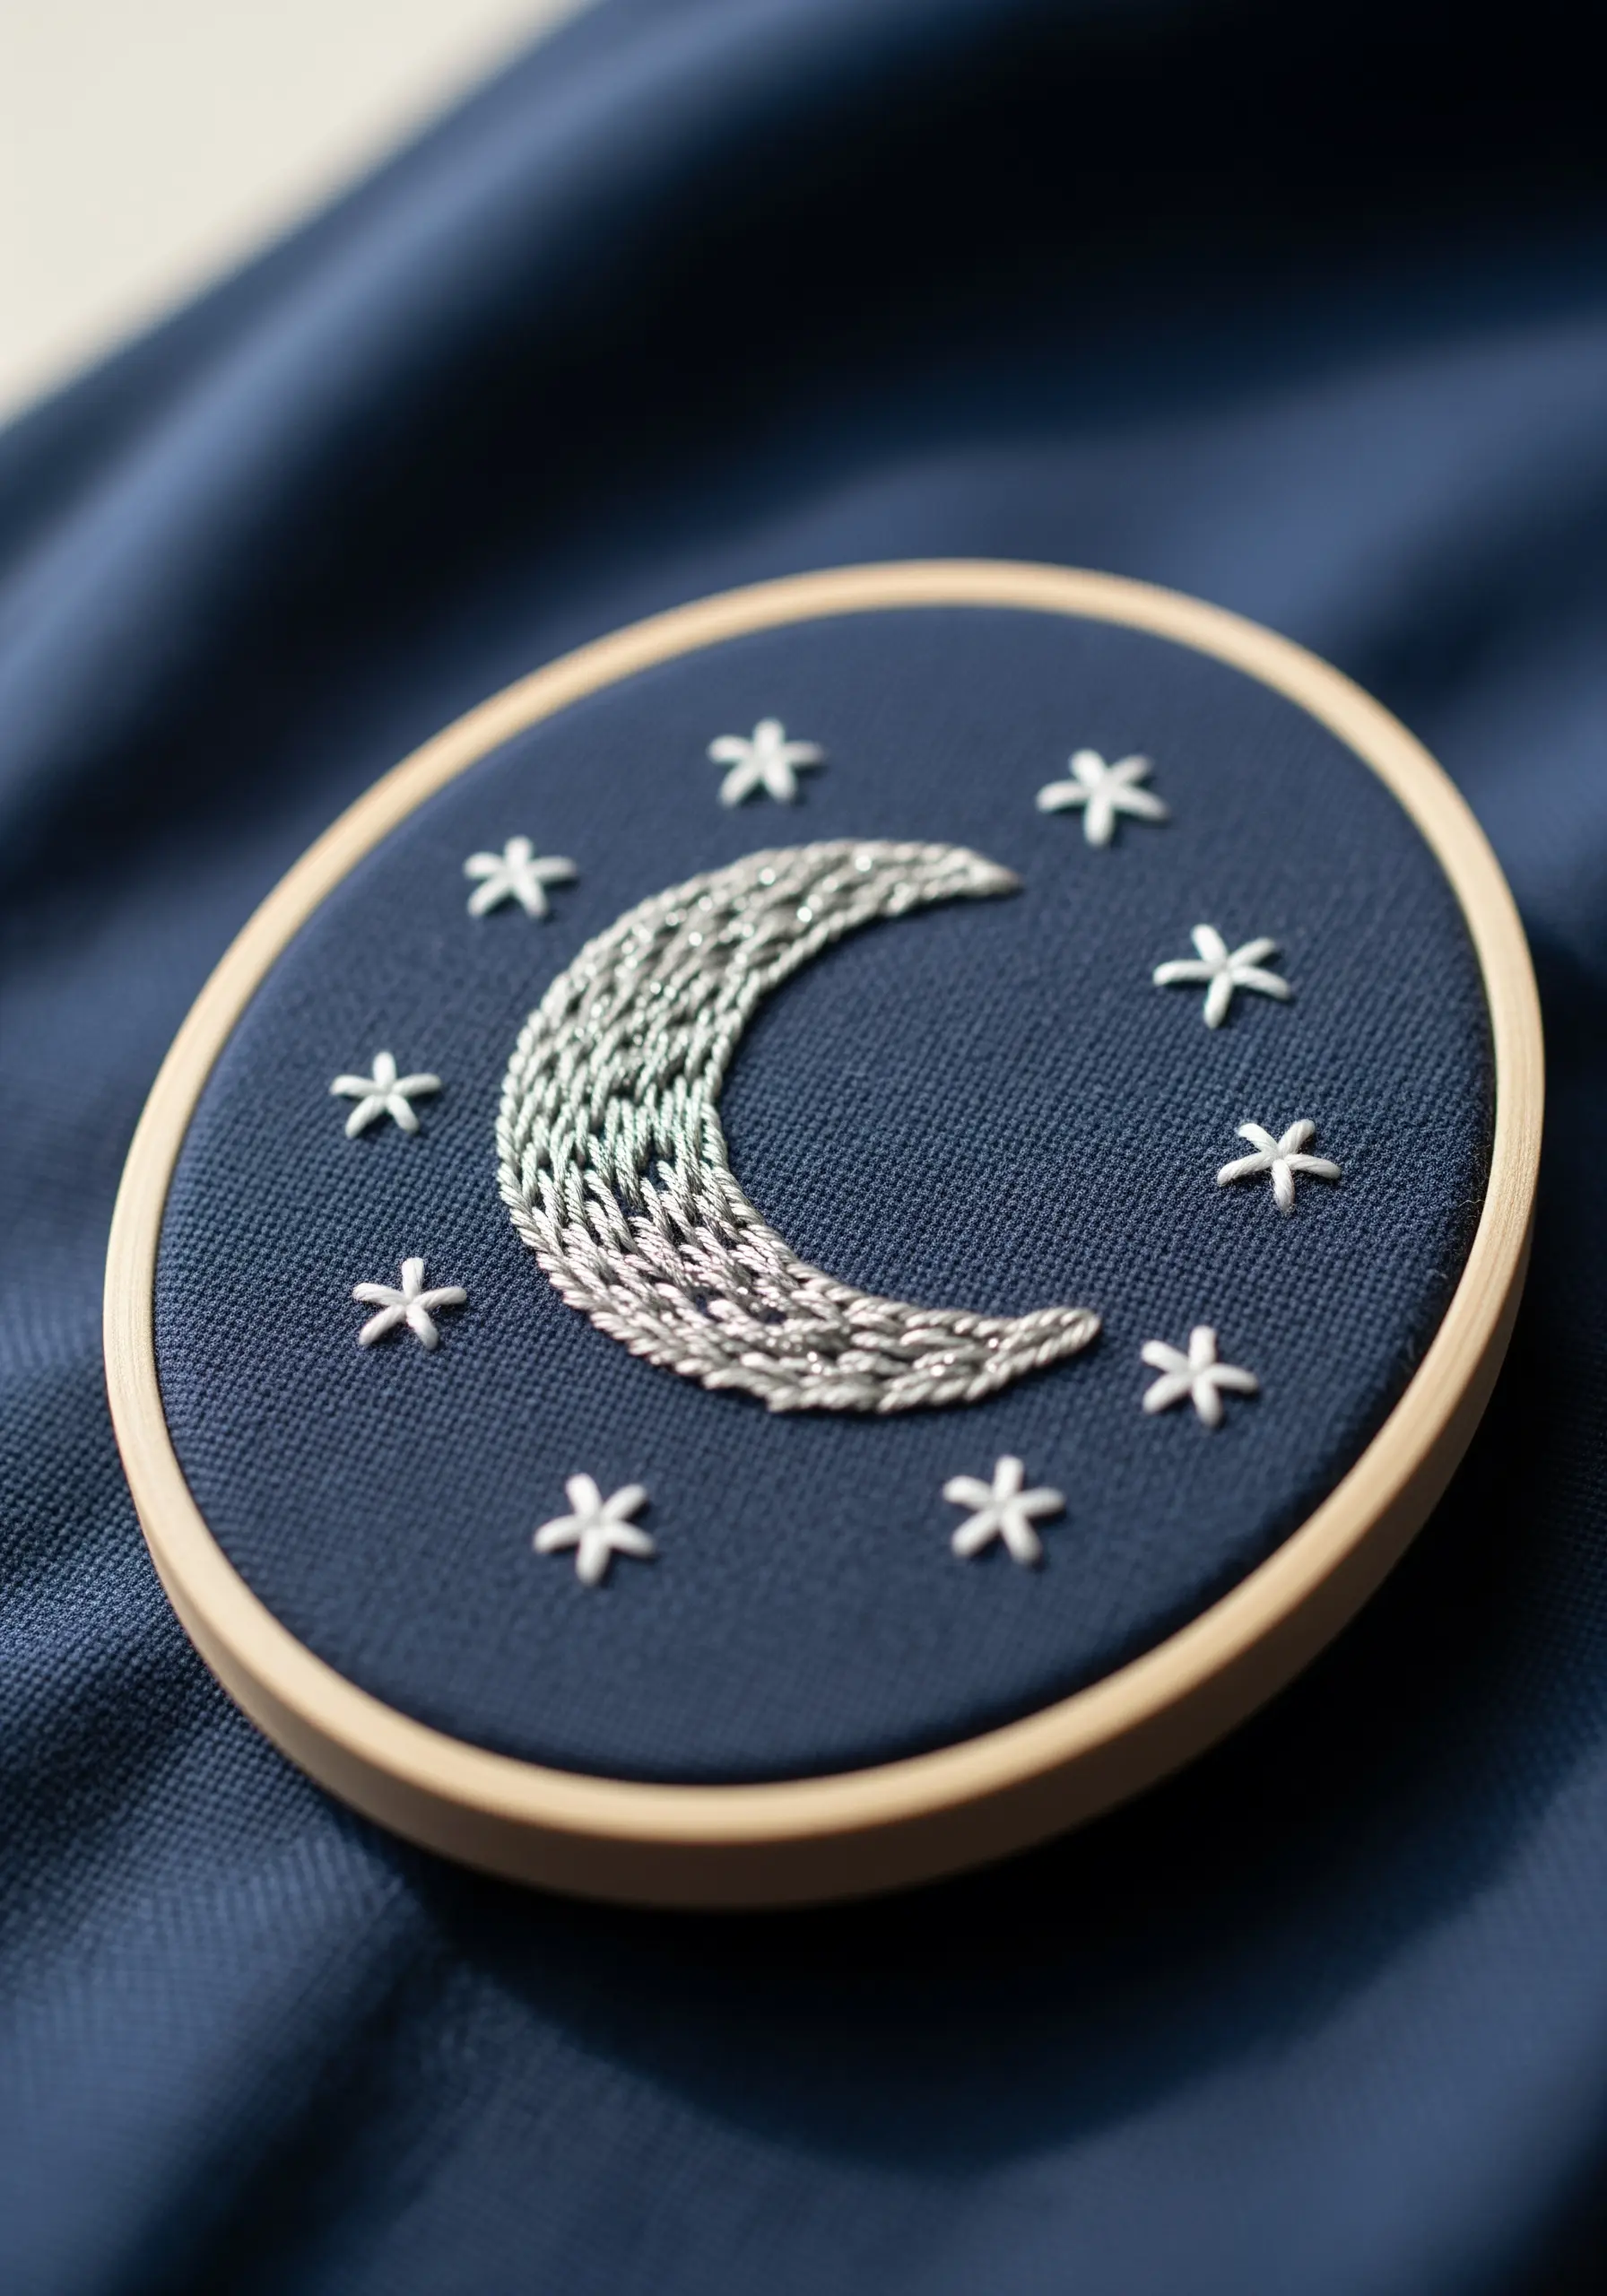
To create a radiant crescent moon, use a metallic silver or pearlescent thread and lay your satin stitches in curved rows that follow the moon’s shape.
Metallic threads can be difficult, so use a shorter length of thread (no more than 12 inches) and a thread conditioner like beeswax to prevent tangling and fraying.
Stitching on a dark, tightly woven cotton or linen makes the metallic thread pop, turning a simple motif into a captivating focal point.
These tiny night sky embroidery designs work beautifully as patches or small hoop art.
3. Capture a Bee’s Delicate Structure
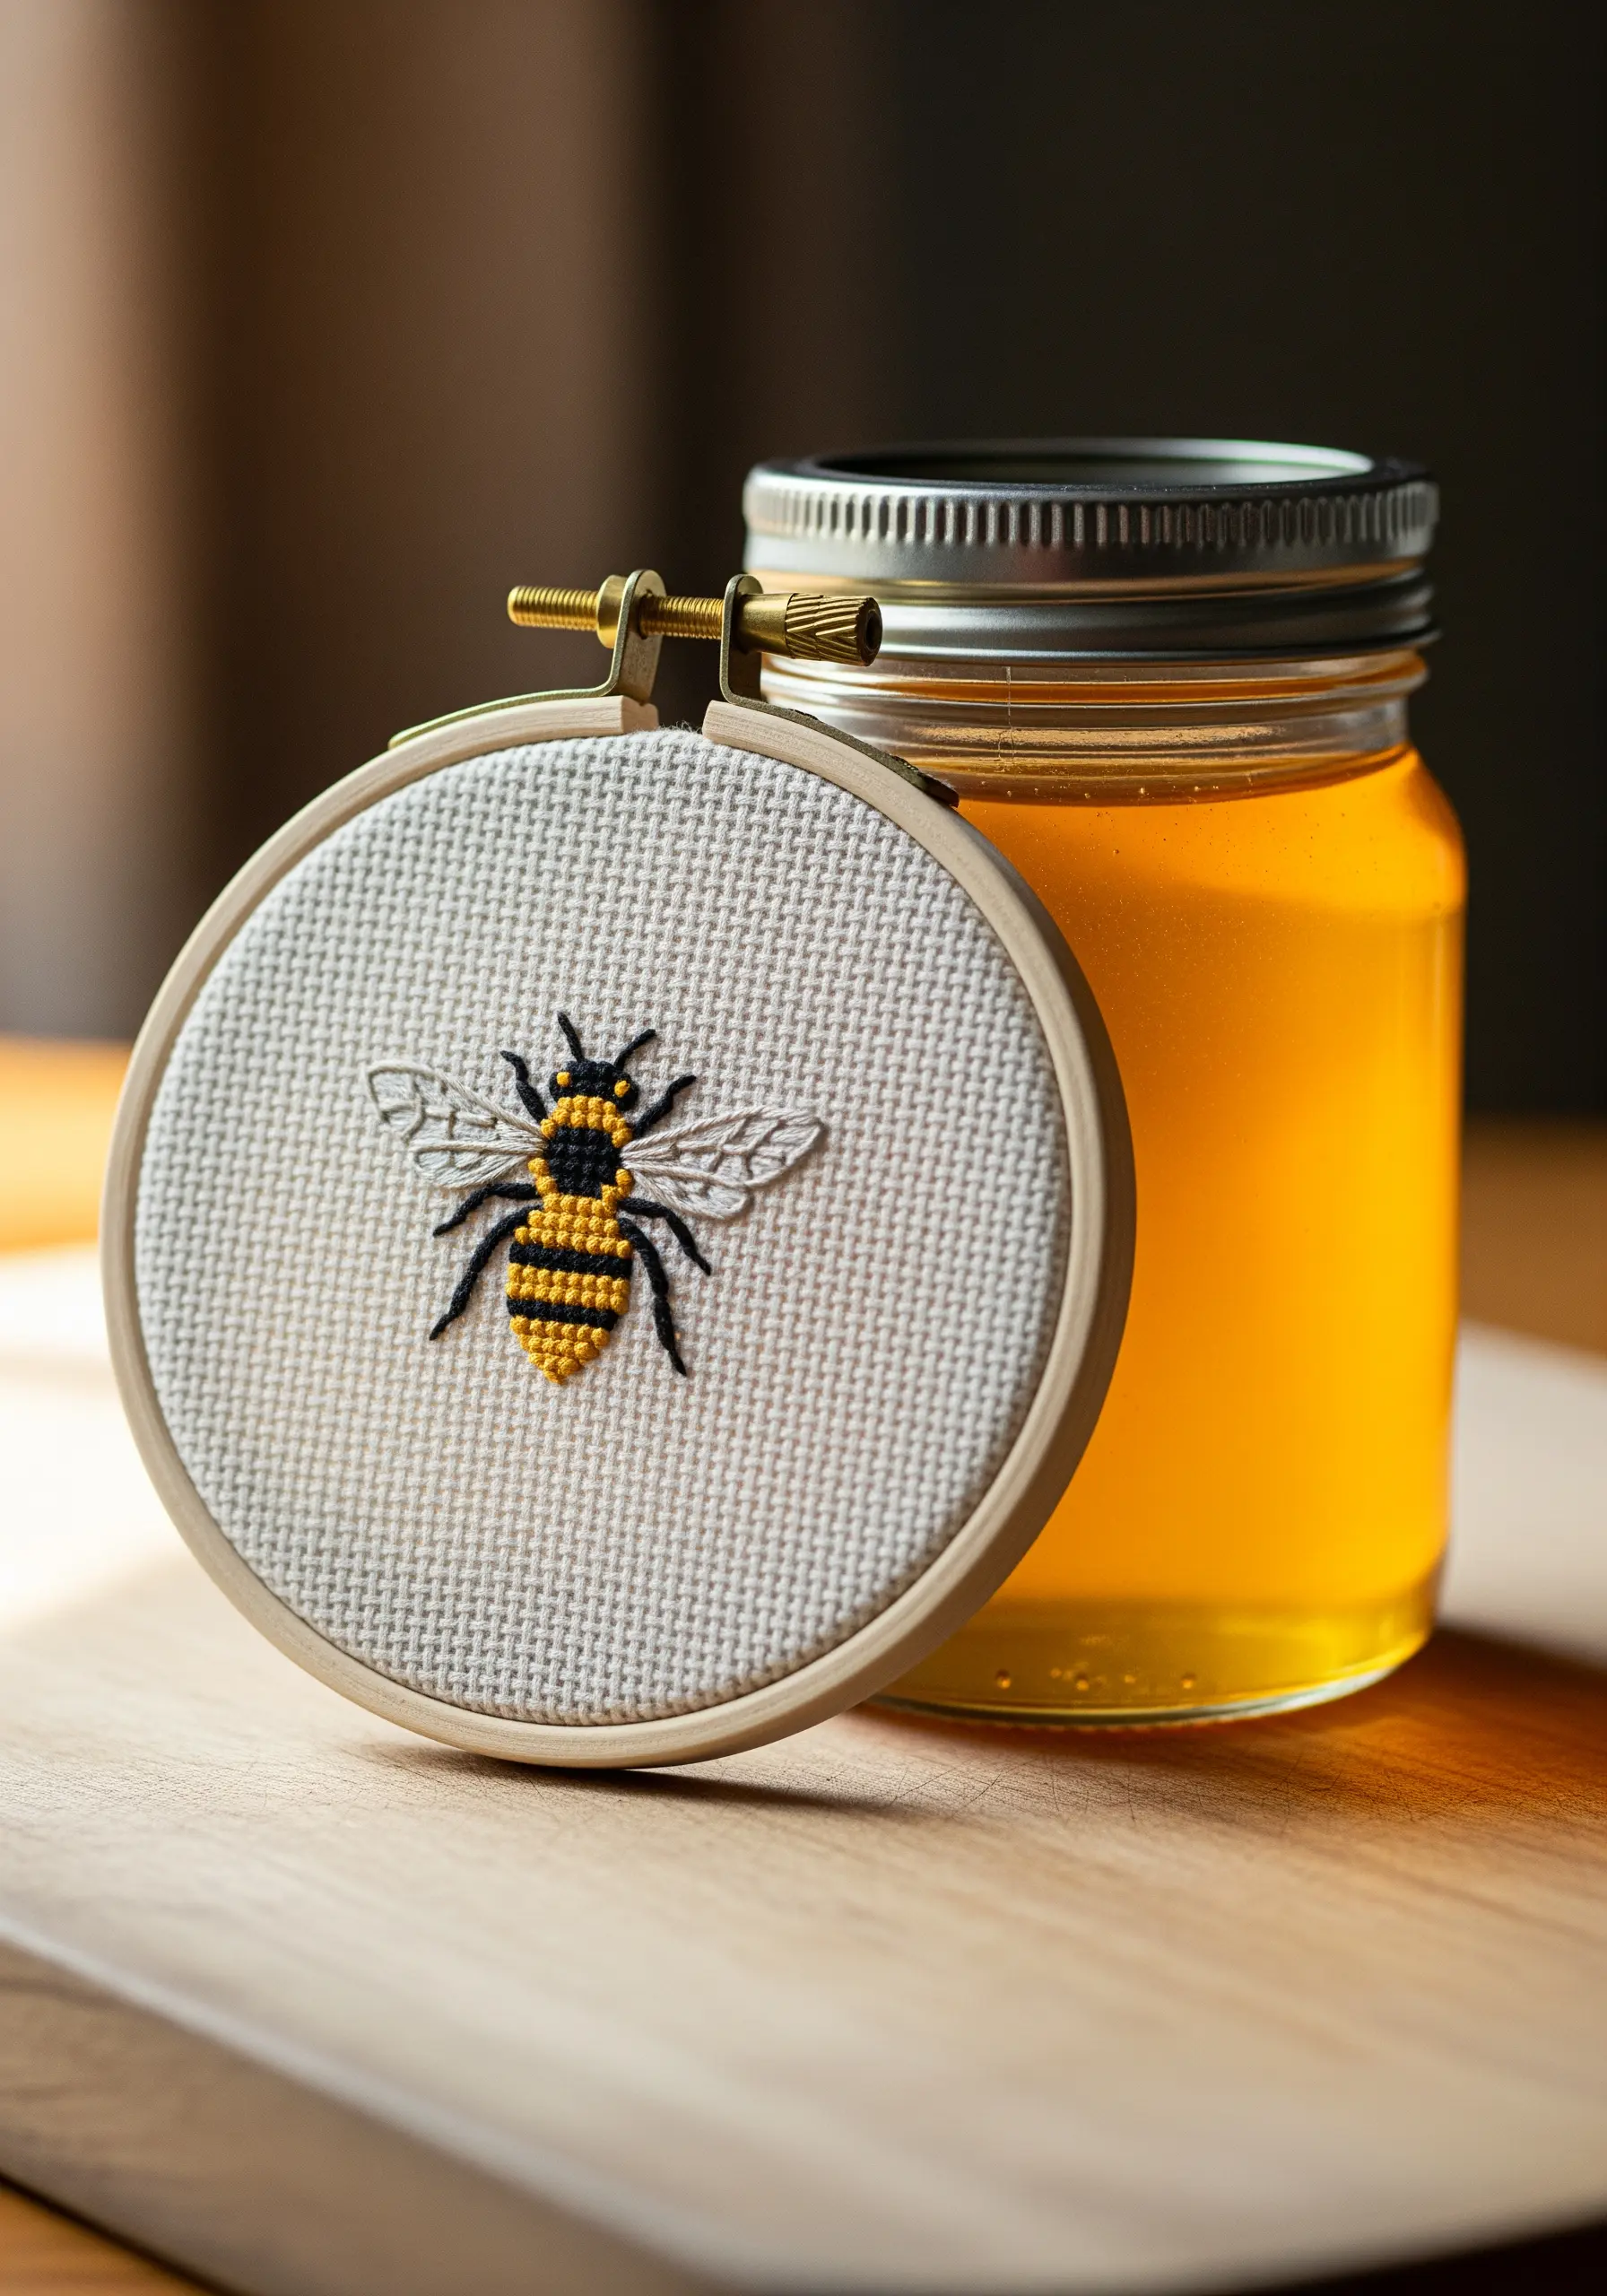
For a realistic bee, focus on the contrast between textures.
Use a padded satin stitch with two or three strands for the fuzzy, striped body, but switch to a single strand of grey or off-white thread for the wings.
Create the wing veins with tiny, precise backstitches, which gives them a delicate, almost transparent look against the fabric.
This level of detail transforms a common motif into one of the most charming realistic animal and insect embroidery patterns you can create.
4. Elevate Fruit with Dimensional Seeds
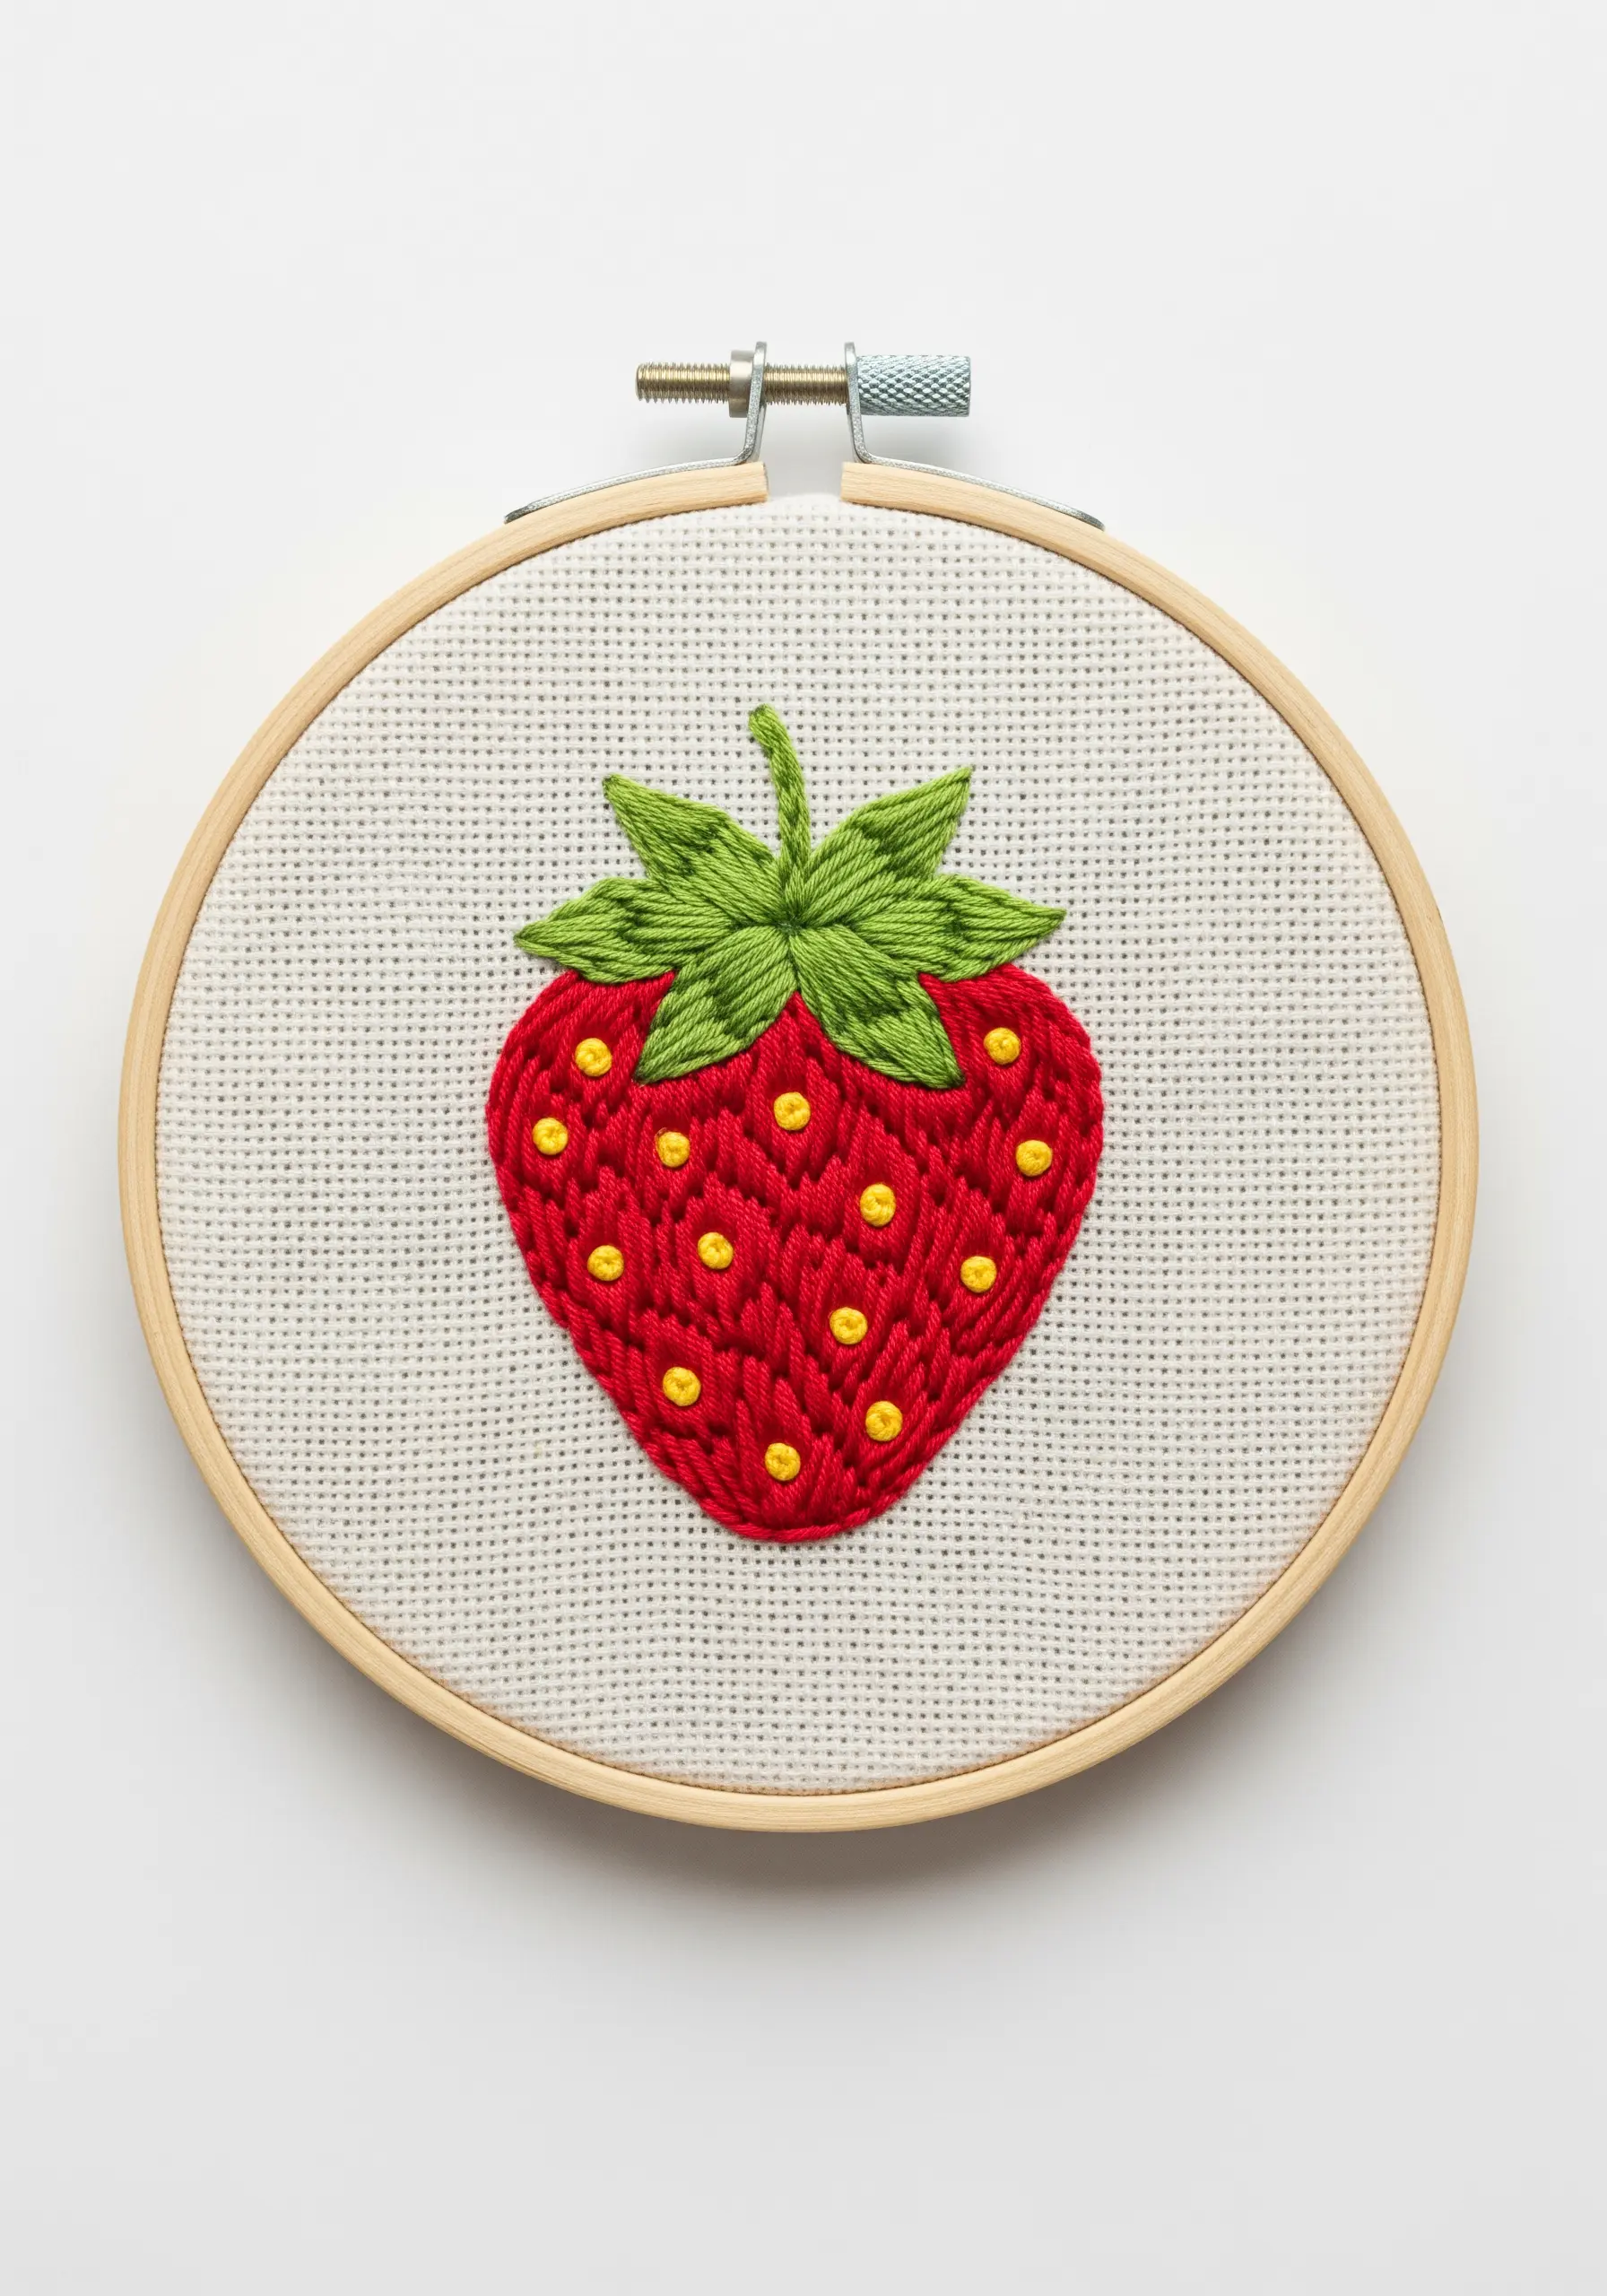
Make your embroidered strawberry feel plump and realistic by elevating the seeds.
First, complete the red body using a smooth, directional satin stitch.
Then, instead of stitching yellow seeds directly onto the red, add a single, tiny vertical stitch in a darker red *under* where each seed will go.
Finally, place a yellow French knot or a single detached chain stitch on top. This subtle padding lifts the seeds, adding dimension and a professional finish to your simple line art fruit motifs.
5. Weave Florals into a Monogram Pendant
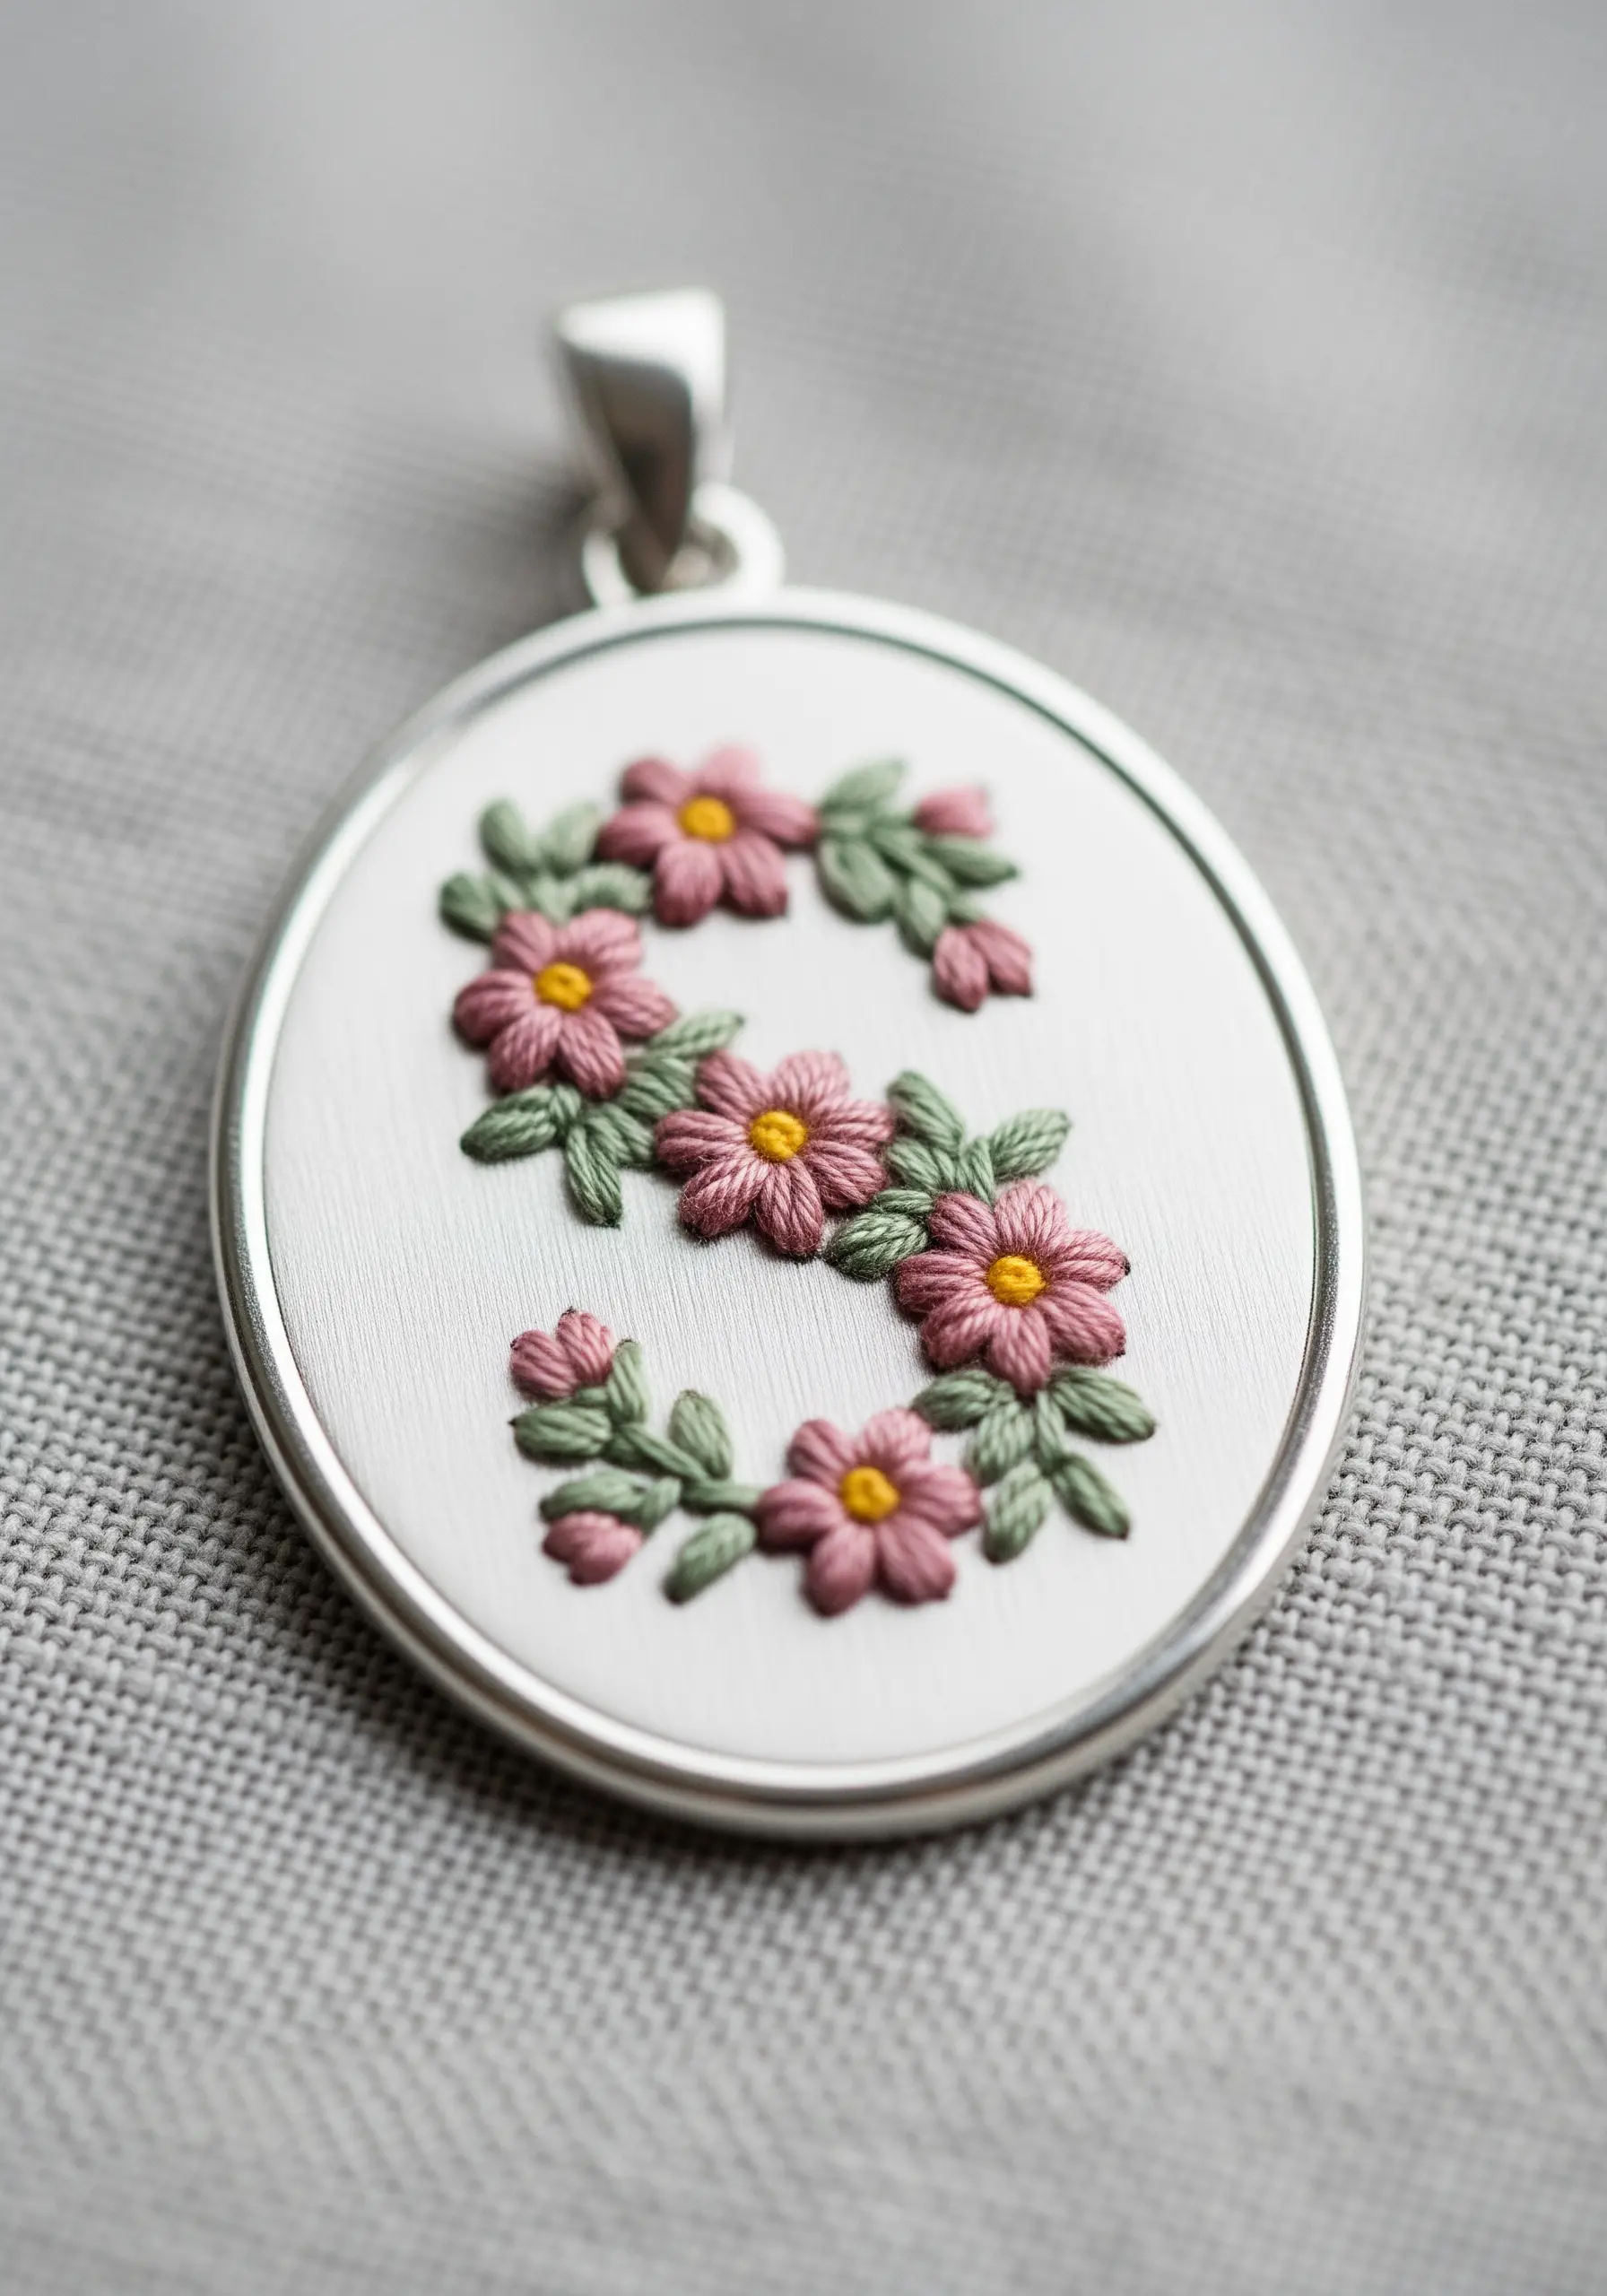
For miniature jewelry, every stitch counts.
Create a monogram shape using tiny, scrolling vines made with a whipped backstitch in green.
Then, add lazy daisy stitches for petals and French knots for flower centers. This combination creates a beautiful, dimensional effect that doesn’t feel crowded in a small space.
Using just two or three strands of silk thread will give your work a delicate sheen, making it perfect for wearable art and other tiny floral embroidery ideas.
6. Achieve Realistic Shading on Mushrooms
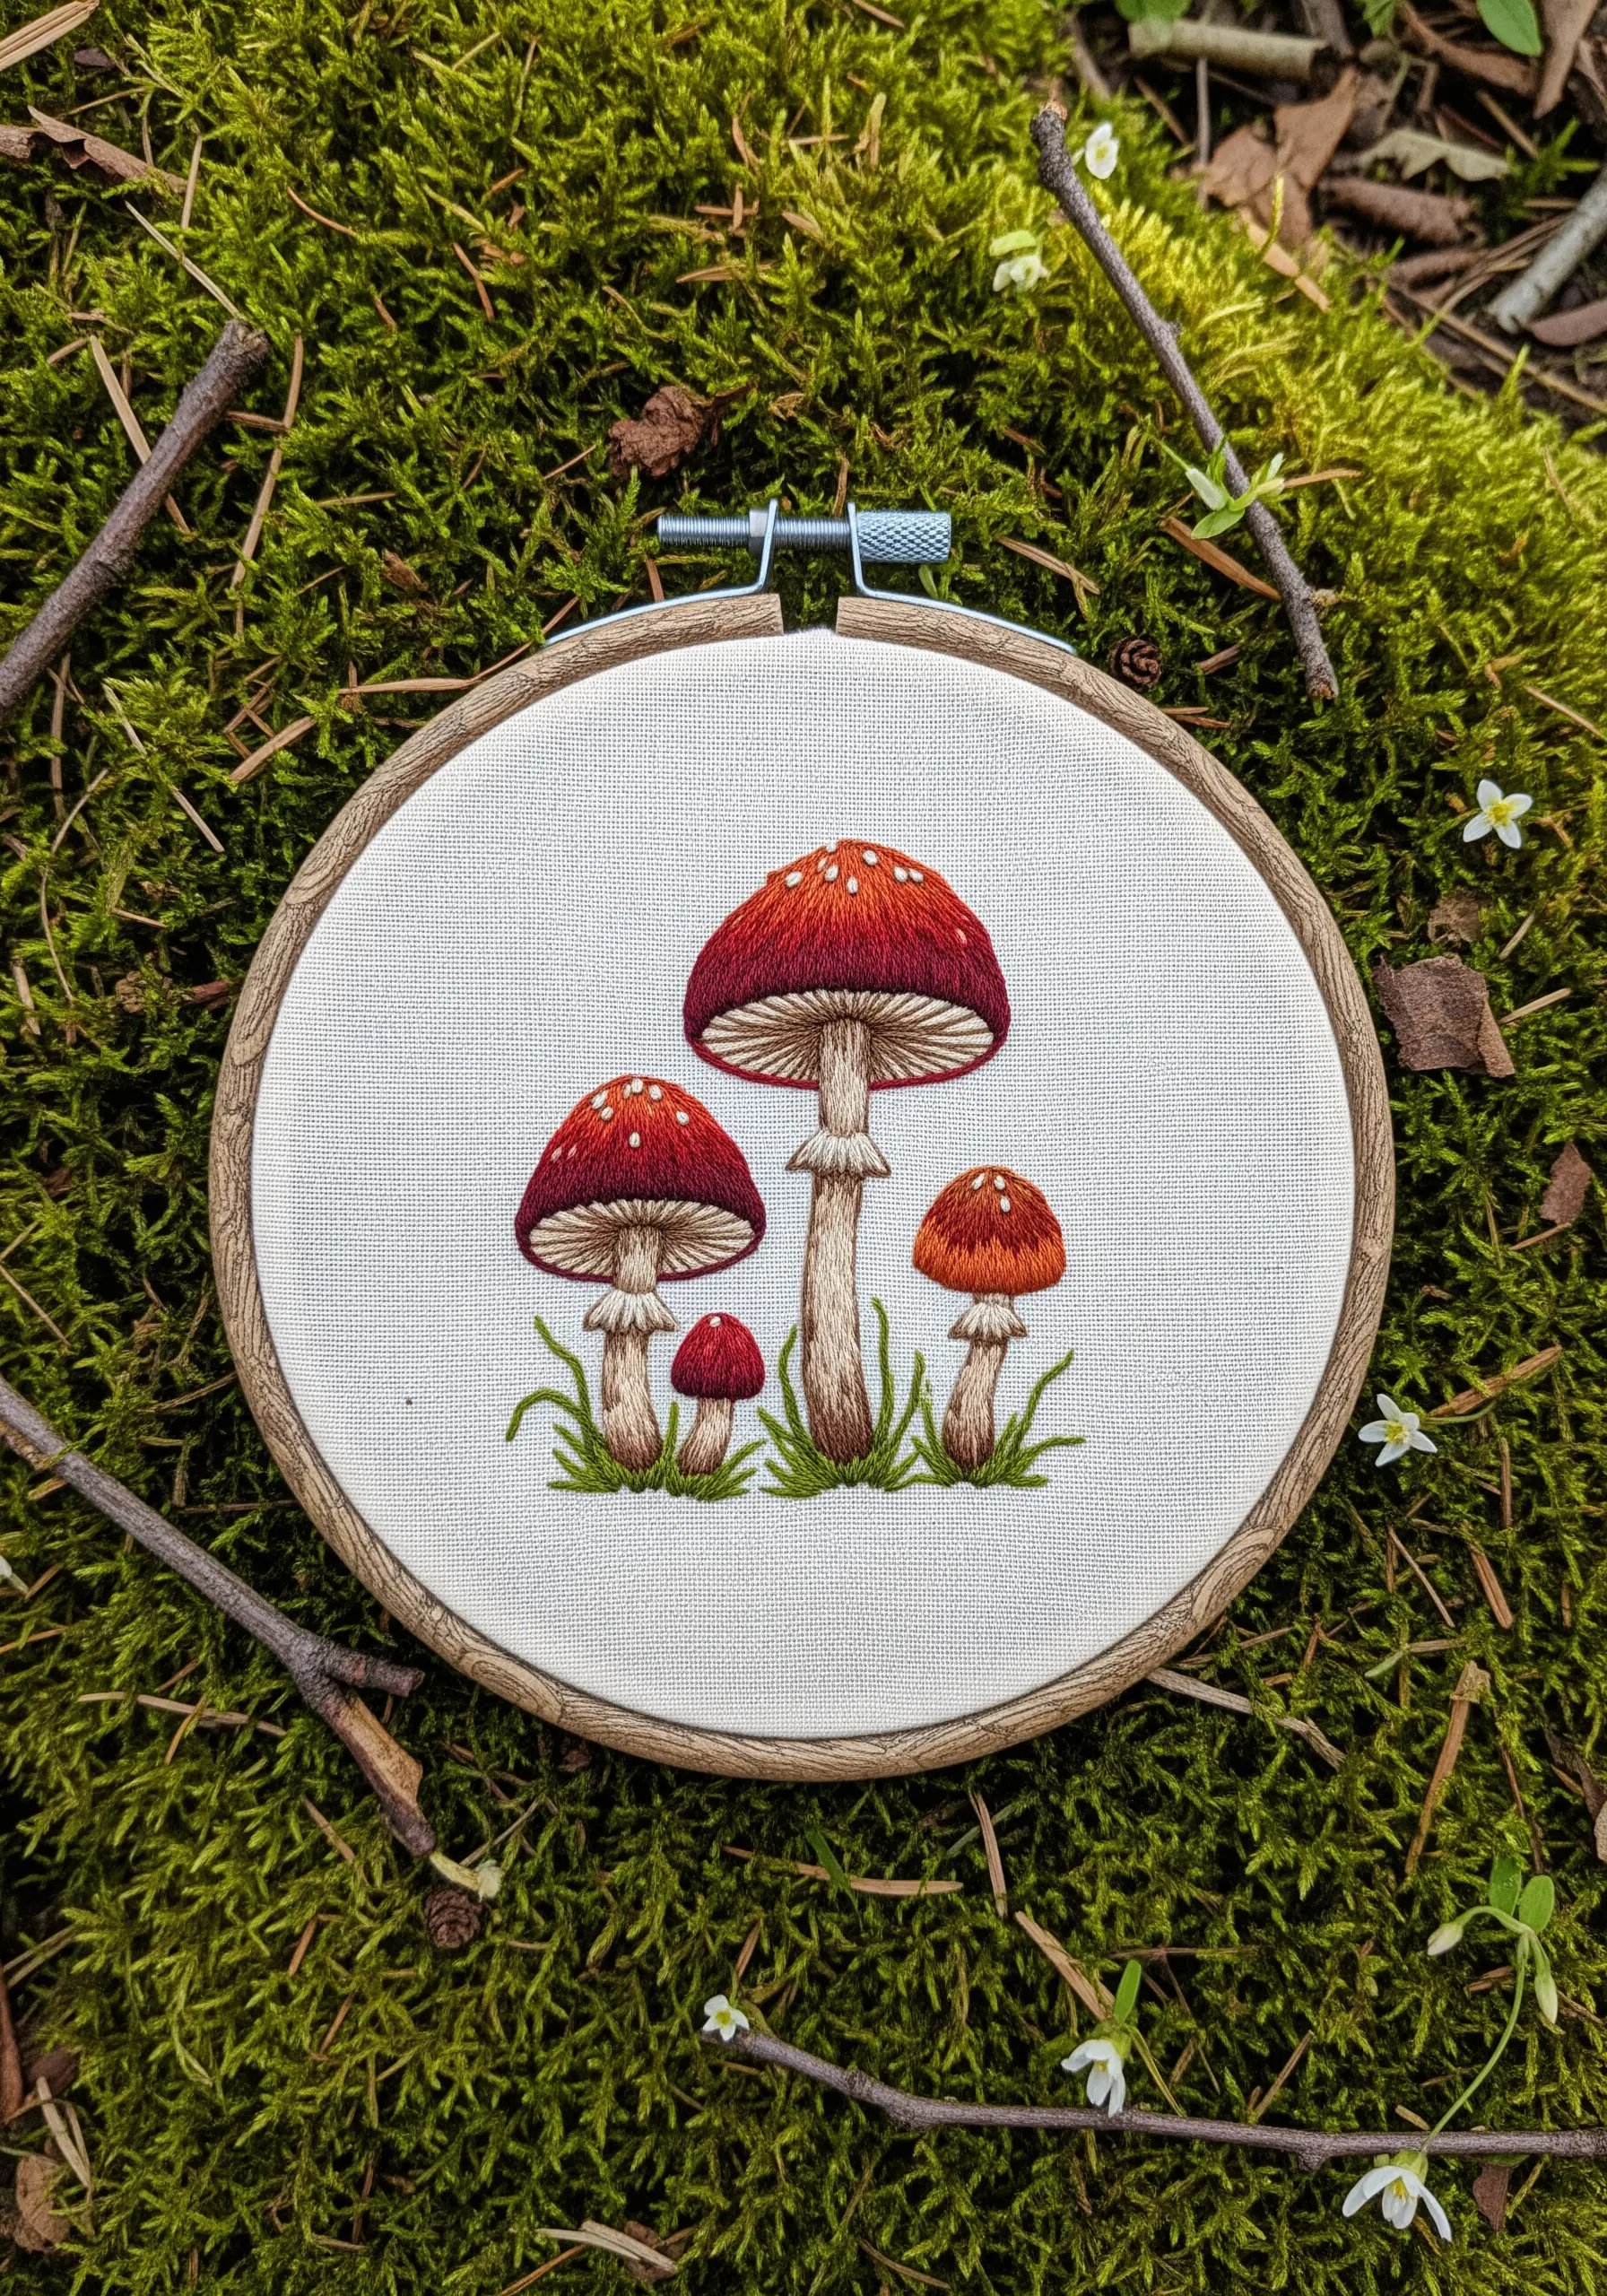
To give mushroom caps that classic gradient, use the long-and-short stitch technique with three shades of the same color—a dark, a medium, and a light tone.
Start with the darkest color at the bottom edge of the cap, then blend the medium tone into it, followed by the lightest tone at the very top.
Keep your stitches angled towards a central point to mimic natural growth lines. This painterly approach is key for all realistic mushroom and forest floor embroidery projects.
7. Create an Abstract Mountain Sunrise
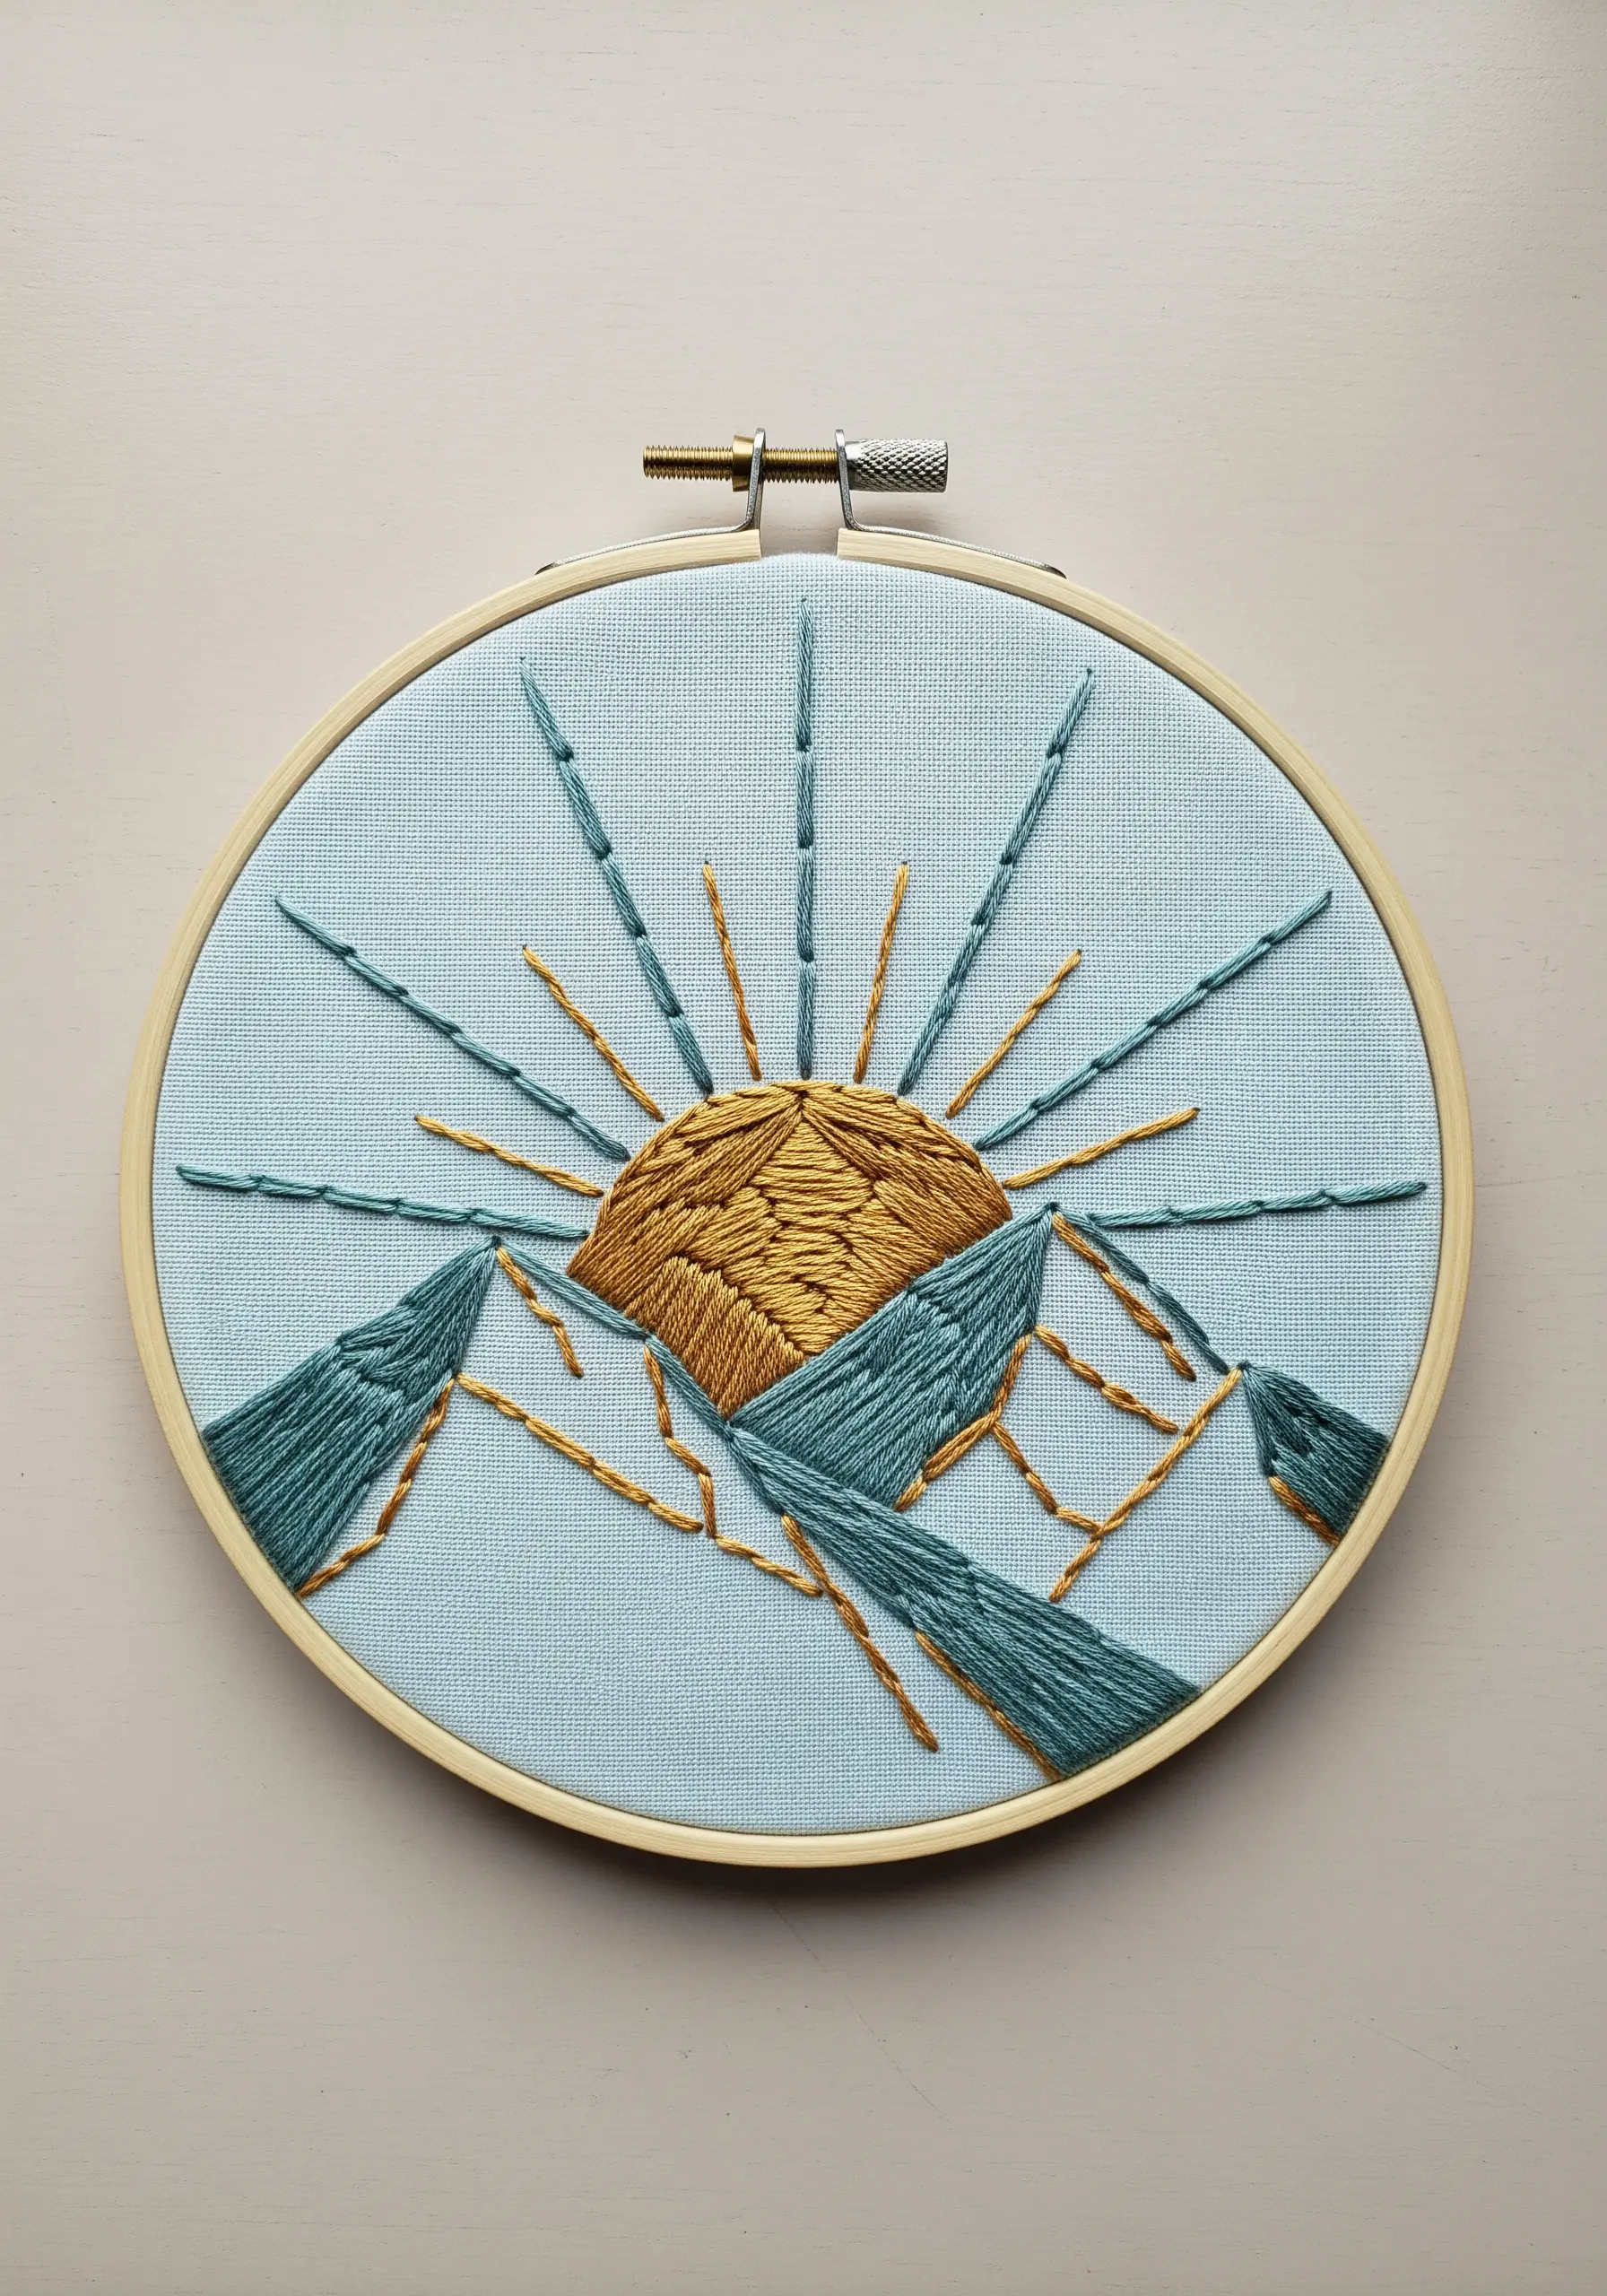
Capture the essence of a landscape with abstract shapes and directional stitches.
Fill the sun with a radiating satin stitch, where all stitches originate from a central point, to create a sense of light and energy.
For the mountains, use blocks of long, vertical satin stitches, and leave intentional gaps to suggest snowy peaks or shadows.
This stylized approach feels modern and is a great way to explore embroidery ideas inspired by national parks without overwhelming detail.
8. Give Objects a 3D, Sculptural Effect
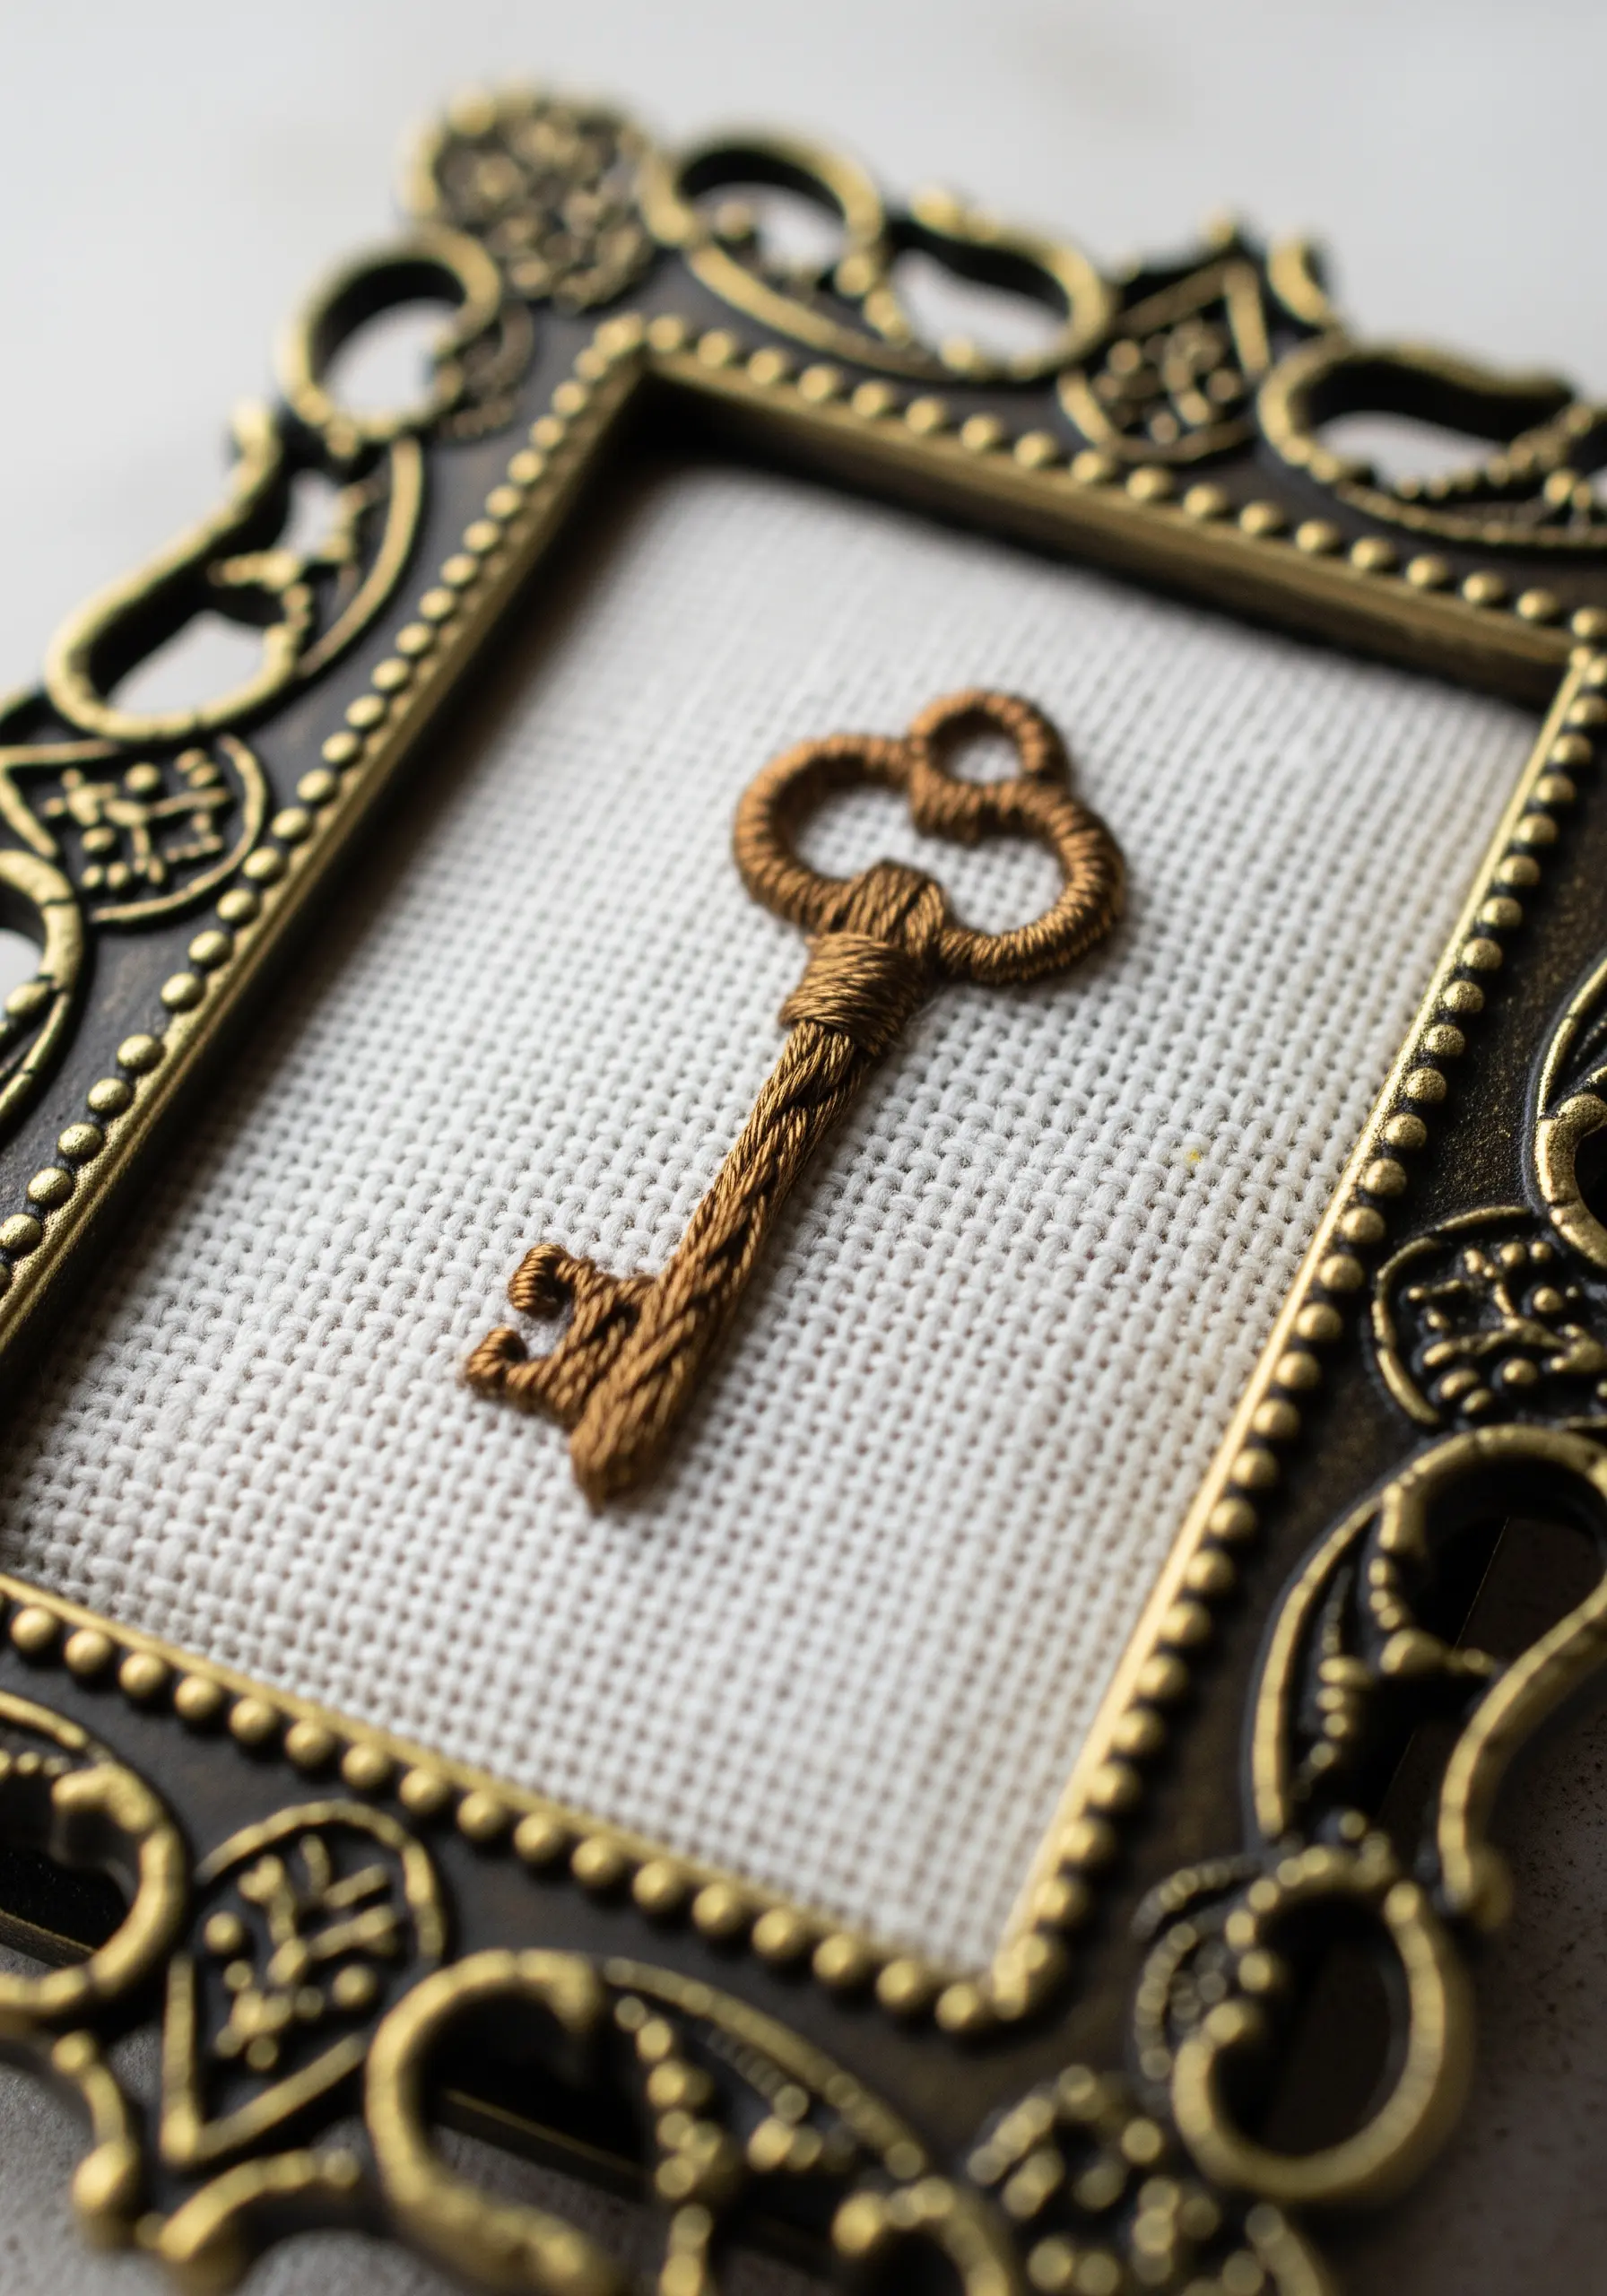
To make an object like this antique key look three-dimensional, use a technique called padded satin stitch.
First, fill the entire shape of the key with small, underlying running stitches. This creates a raised foundation.
Then, cover this foundation with smooth satin stitches using a variegated brown or metallic thread. The padding underneath lifts the stitches, creating highlights and shadows that give the object a tangible, sculptural quality, making your framed embroidery artworks feel exceptionally refined.
9. Define a Monstera Leaf with Negative Space

Instead of filling the entire leaf with a dense satin stitch, use an open fishbone stitch for the main sections.
This technique naturally creates the leaf’s iconic fenestrations (the holes) and gives a sense of lightness to the design.
Outline the entire leaf with a single backstitch line to sharpen the edges and make the shape instantly recognizable.
This method is faster than a full fill and adds a modern, graphic quality to tropical leaf embroidery designs.
10. Craft Fluffy Clouds with High-Texture Yarn
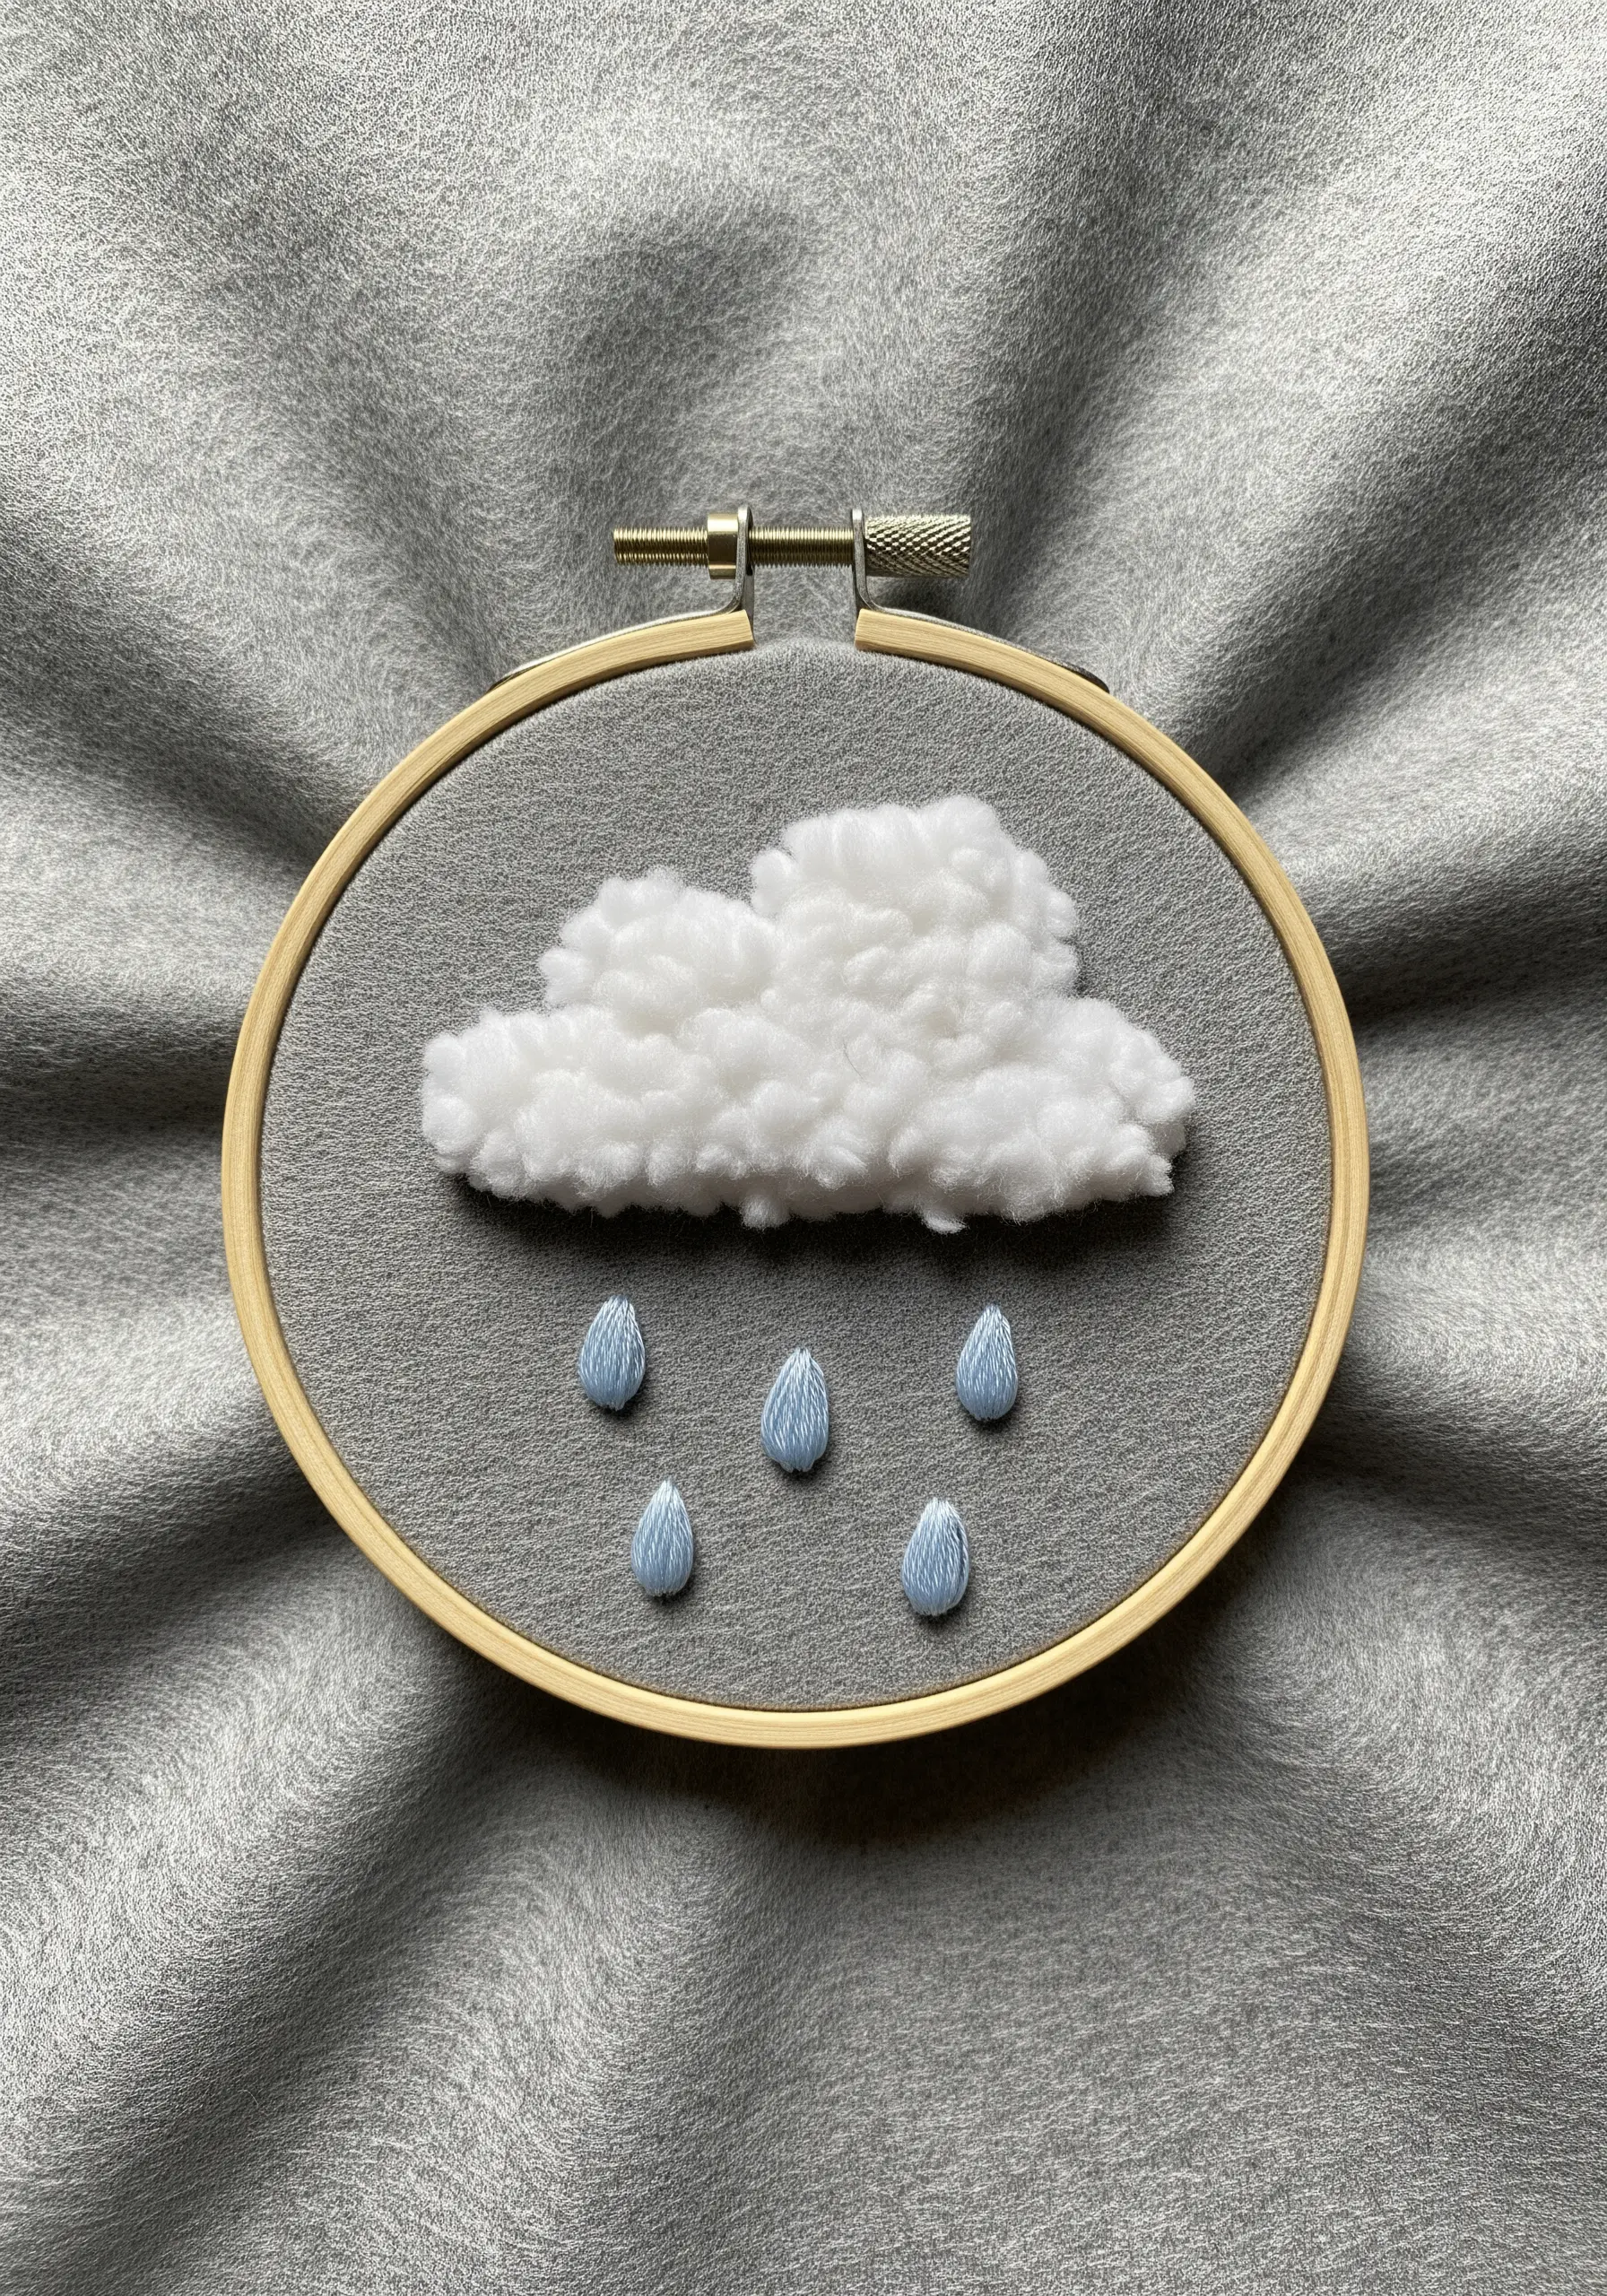
For an ultra-fluffy cloud, skip the standard embroidery floss and use a soft, loopy yarn like chenille or a brushed wool.
Use the turkey work stitch, leaving the loops long. Once the area is filled, carefully snip the tops of the loops and gently fluff them with your needle tip.
This creates a wonderfully plush, 3D texture that contrasts beautifully with the flat, satin-stitched raindrops, perfect for abstract thread embroidery ideas inspired by nature.
11. Stitch a Minimalist Star Constellation
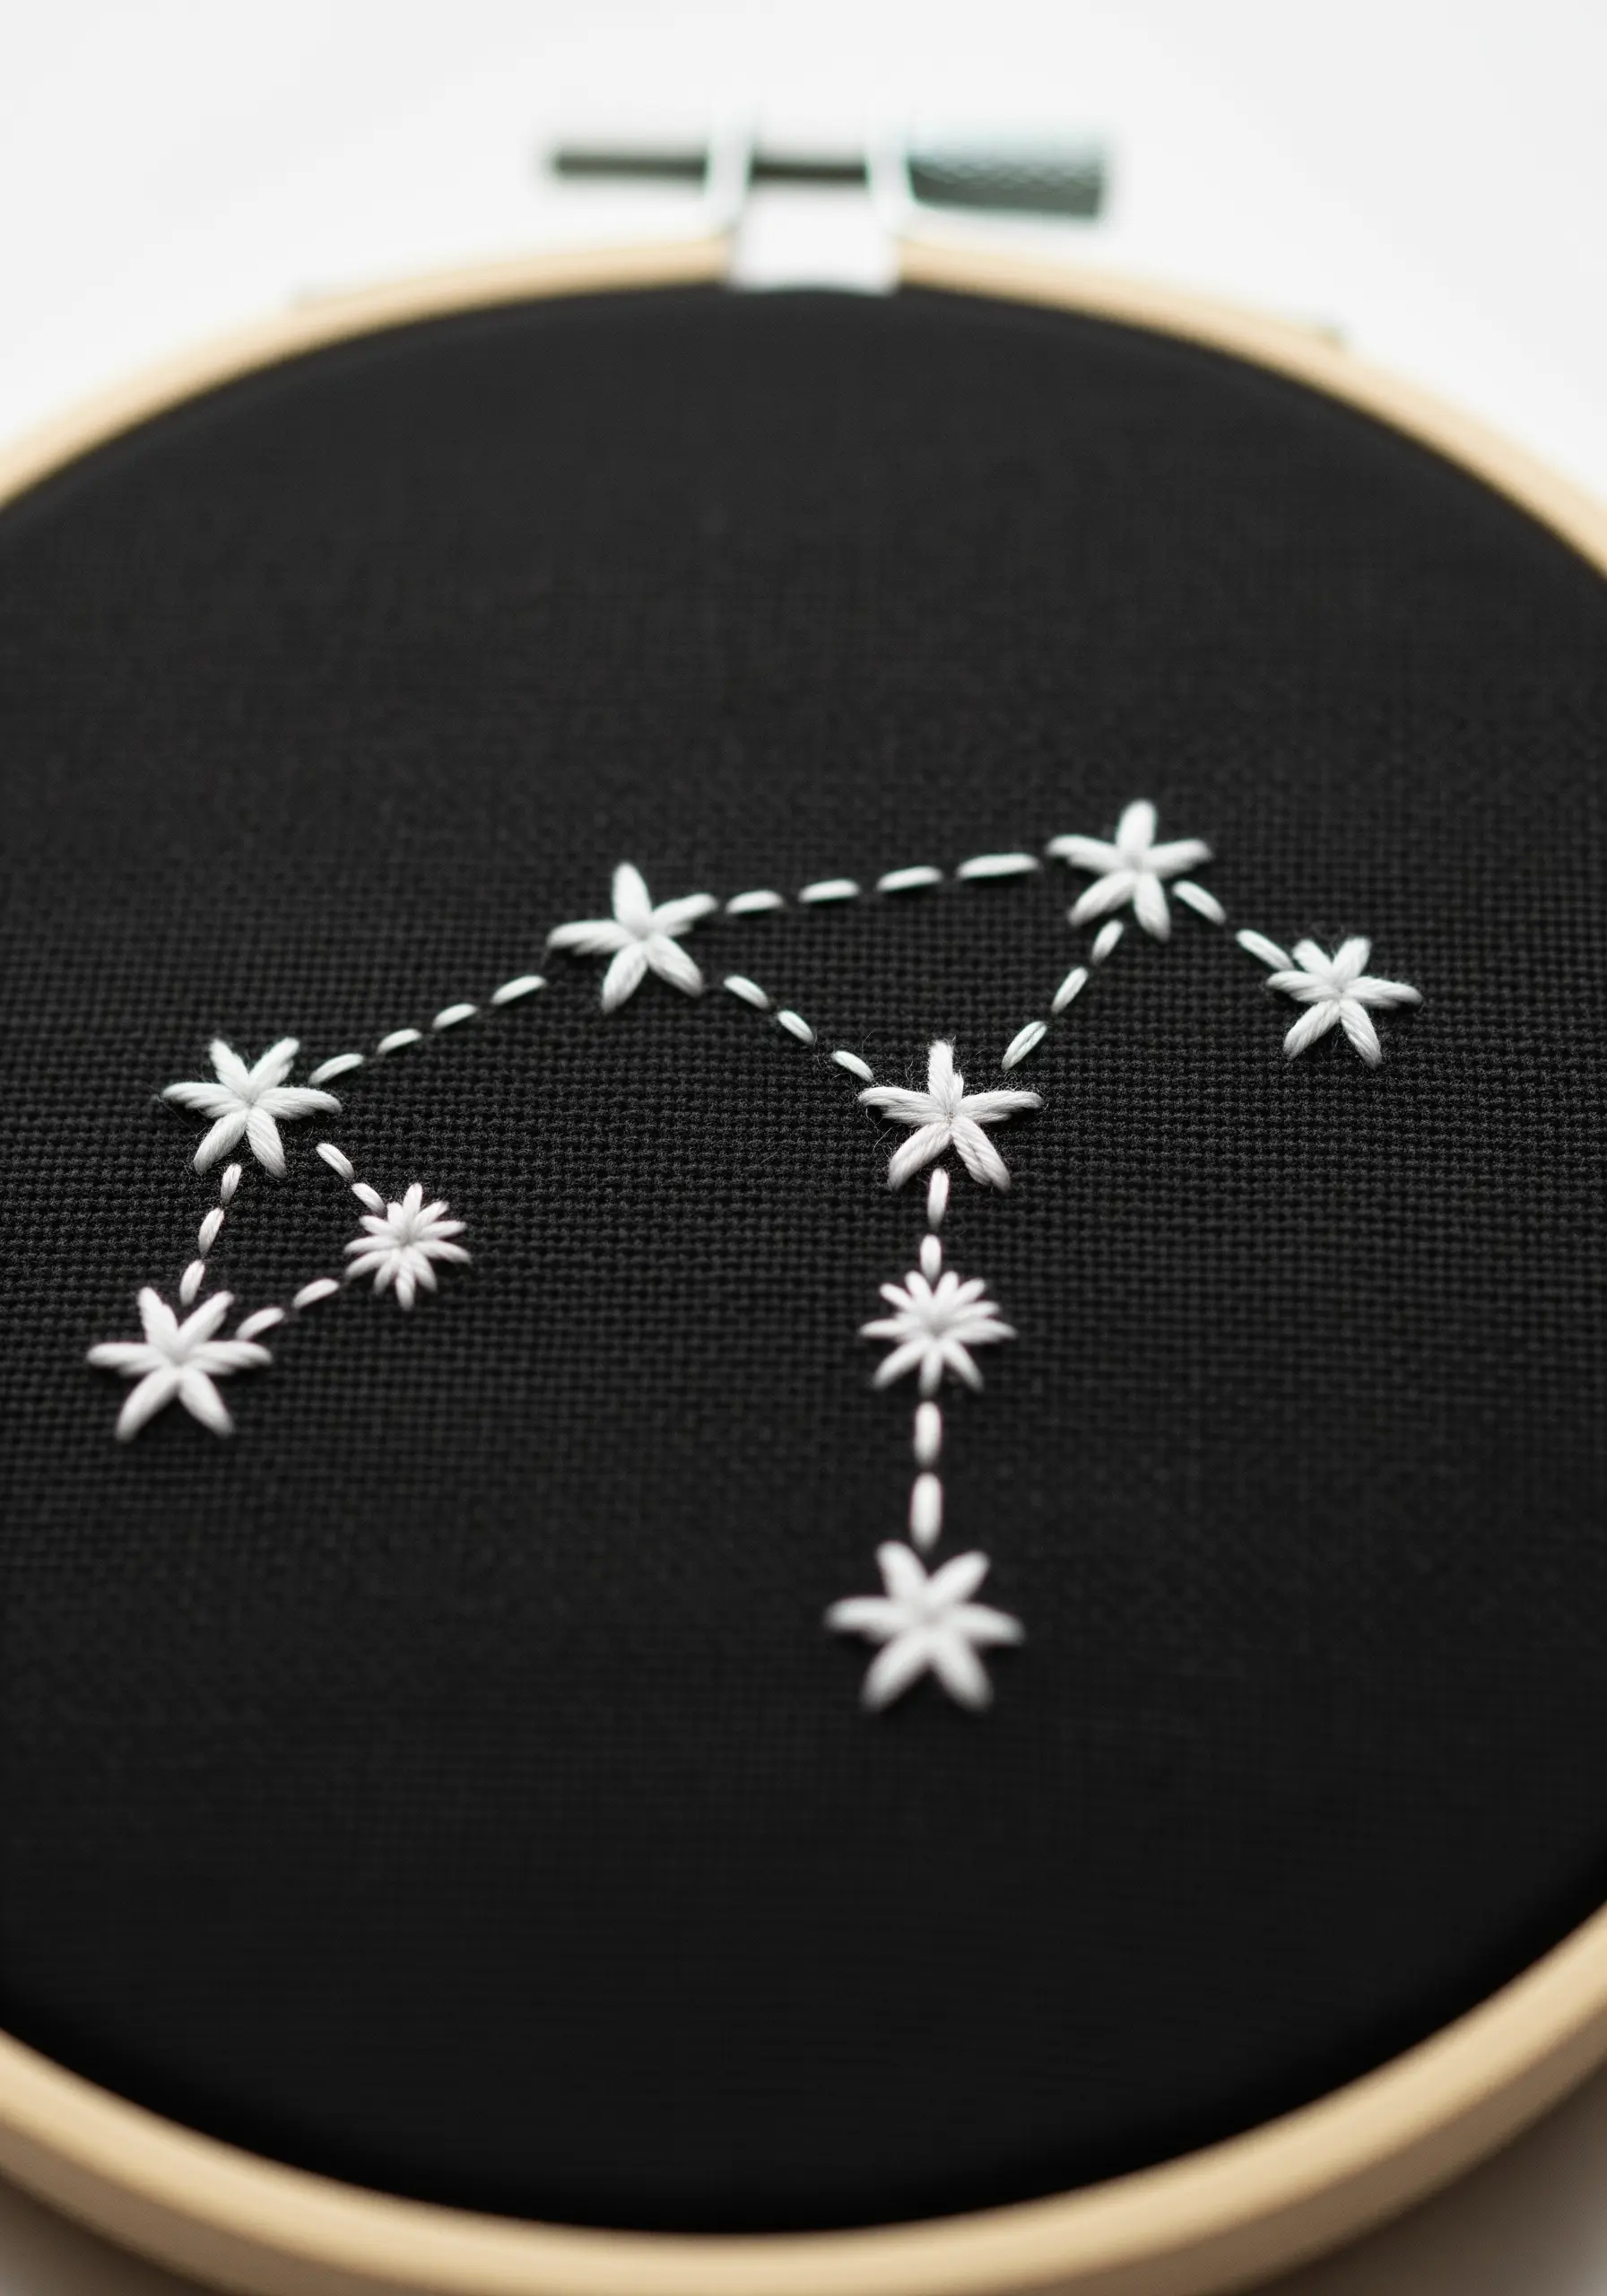
On dark fabric, less is truly more.
Create a constellation using simple lazy daisy stitches for the stars and a delicate dashed running stitch for the connecting lines.
Using a bright white or silver thread creates a stunning contrast that feels both modern and timeless.
This design is incredibly fast to execute but has a huge visual impact, making it ideal for anyone exploring minimal sky and moon designs.
12. Create Motion with a Single Line
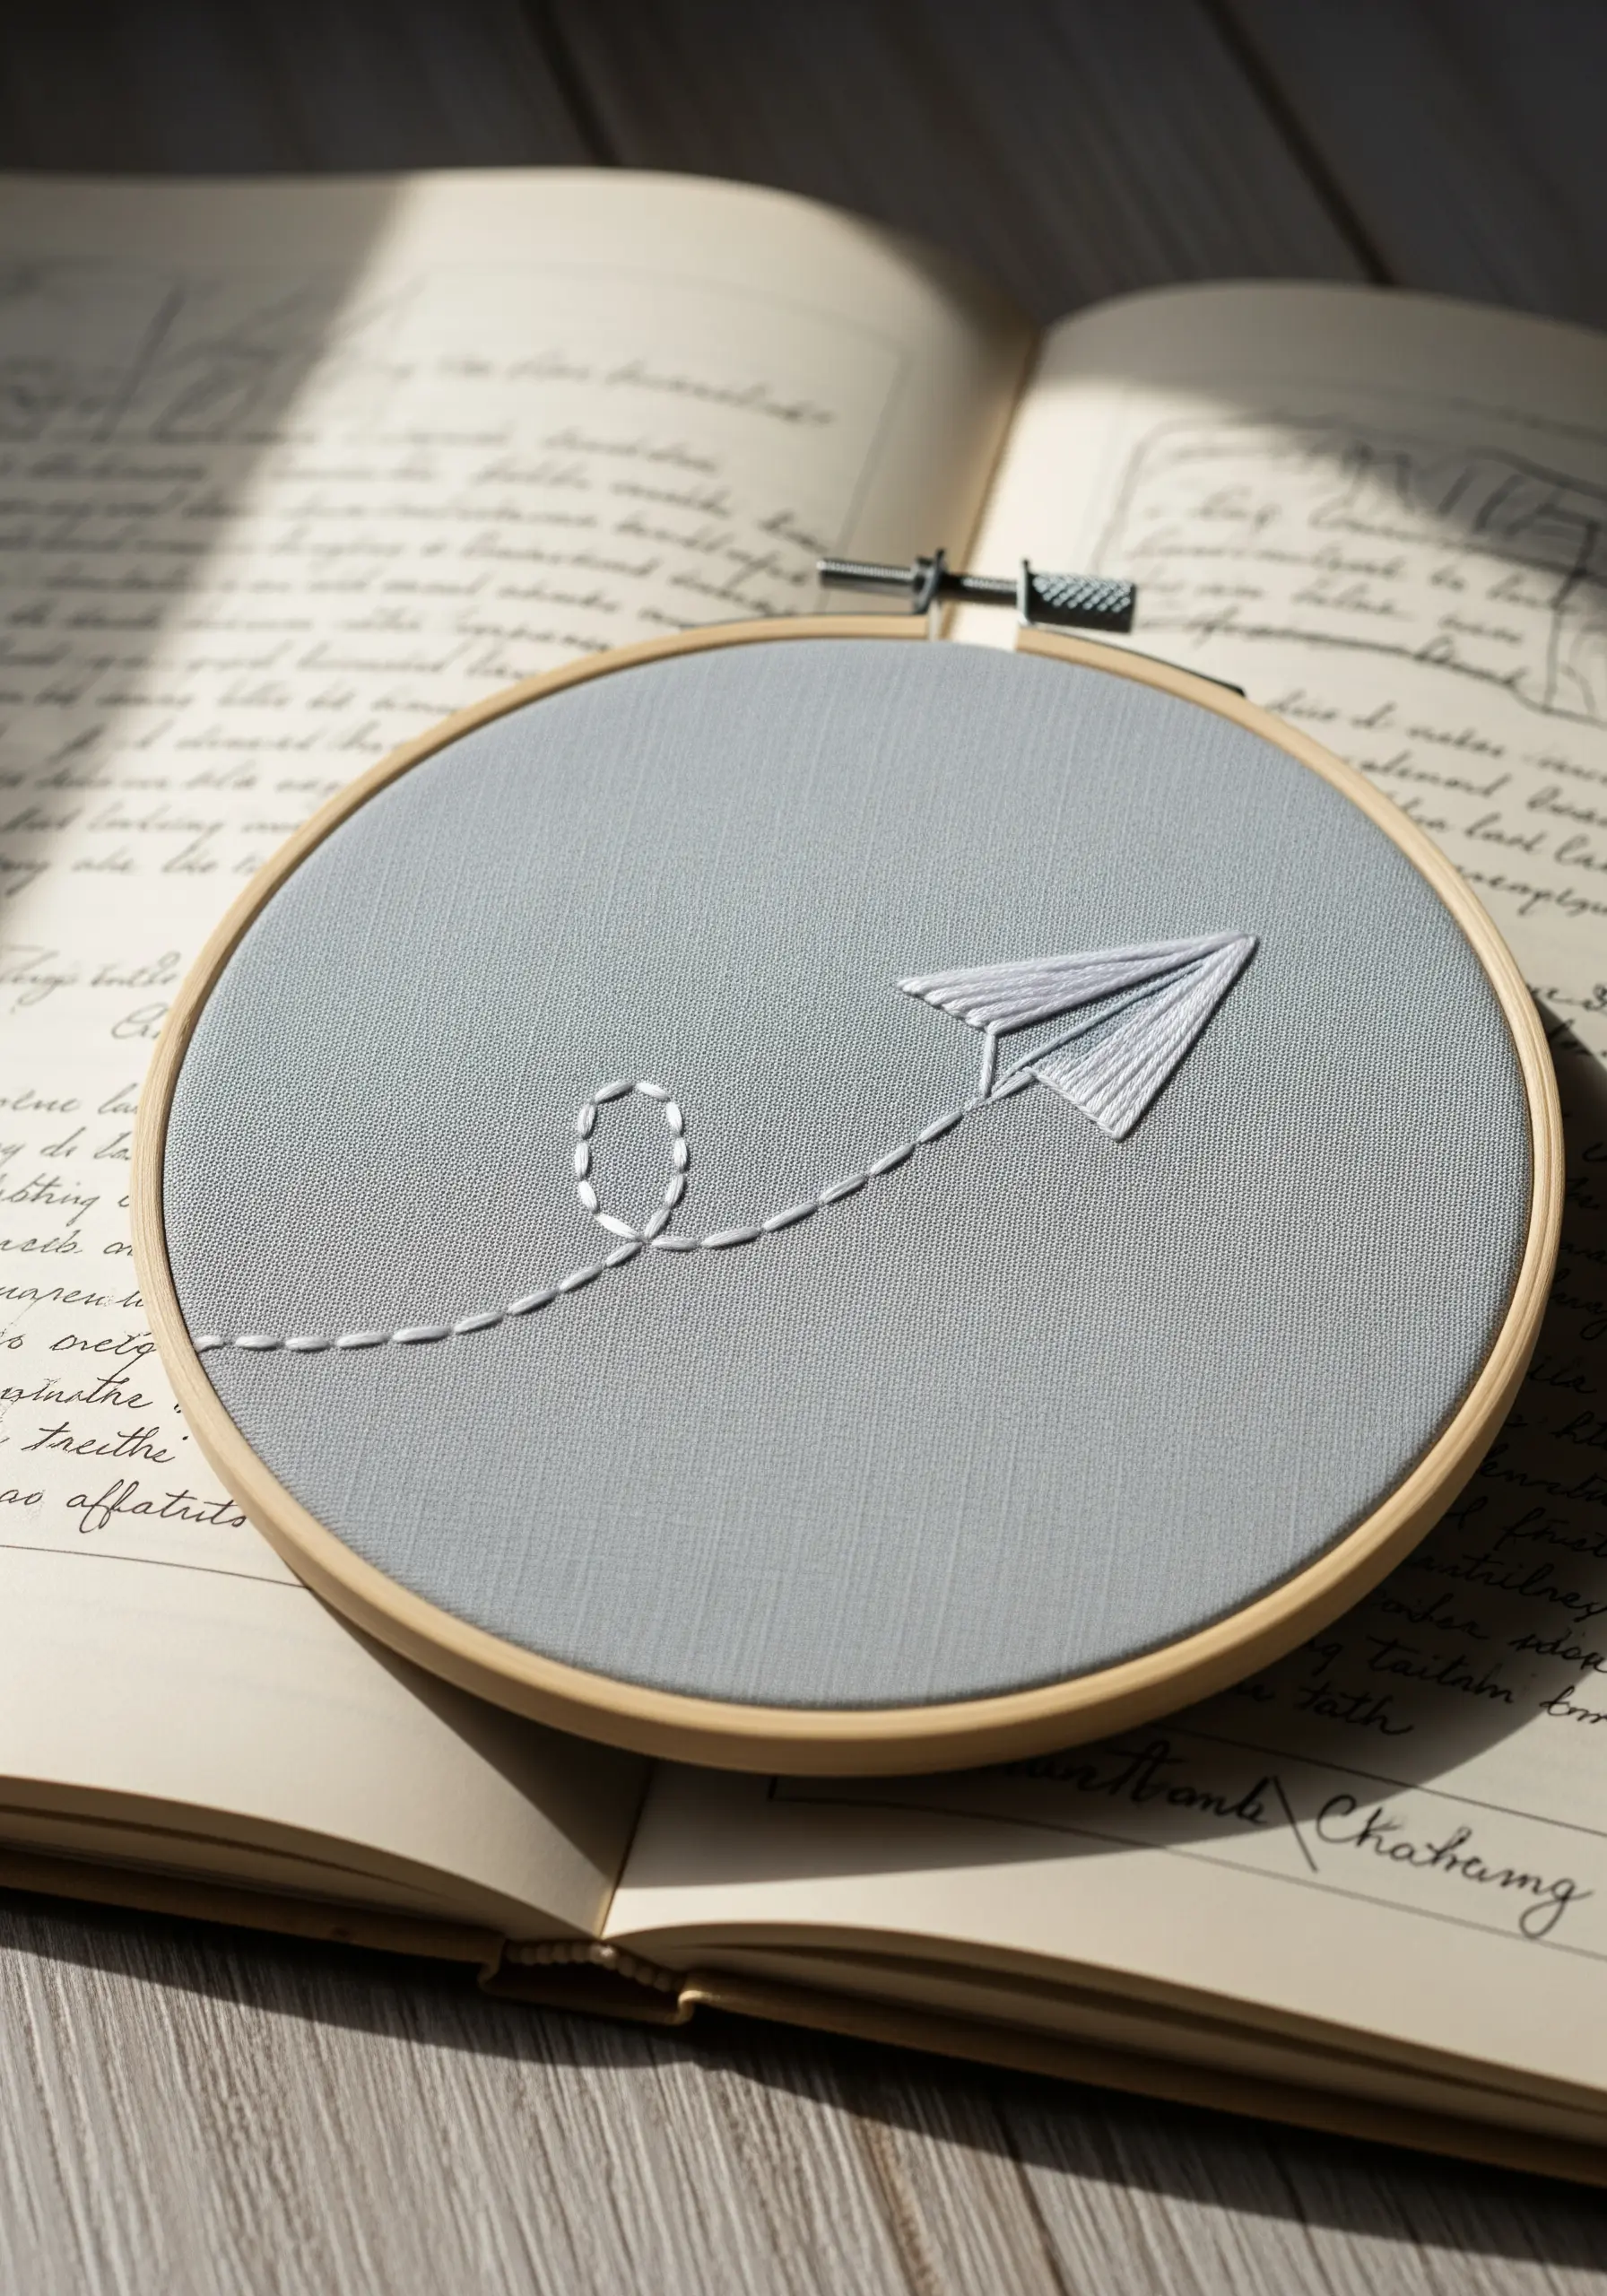
Evoke a sense of movement with a simple, well-placed stitch path.
For the paper airplane, use clean, directional satin stitches to define its form. The real magic, however, is in the flight path.
Use a backstitch for the solid line and a spaced-out running stitch for the loop. This variation in stitch density creates a visual rhythm that guides the eye and tells a story of flight and imagination in your travel-inspired embroidery hoops.
13. Mimic the Texture of Woven Yarn
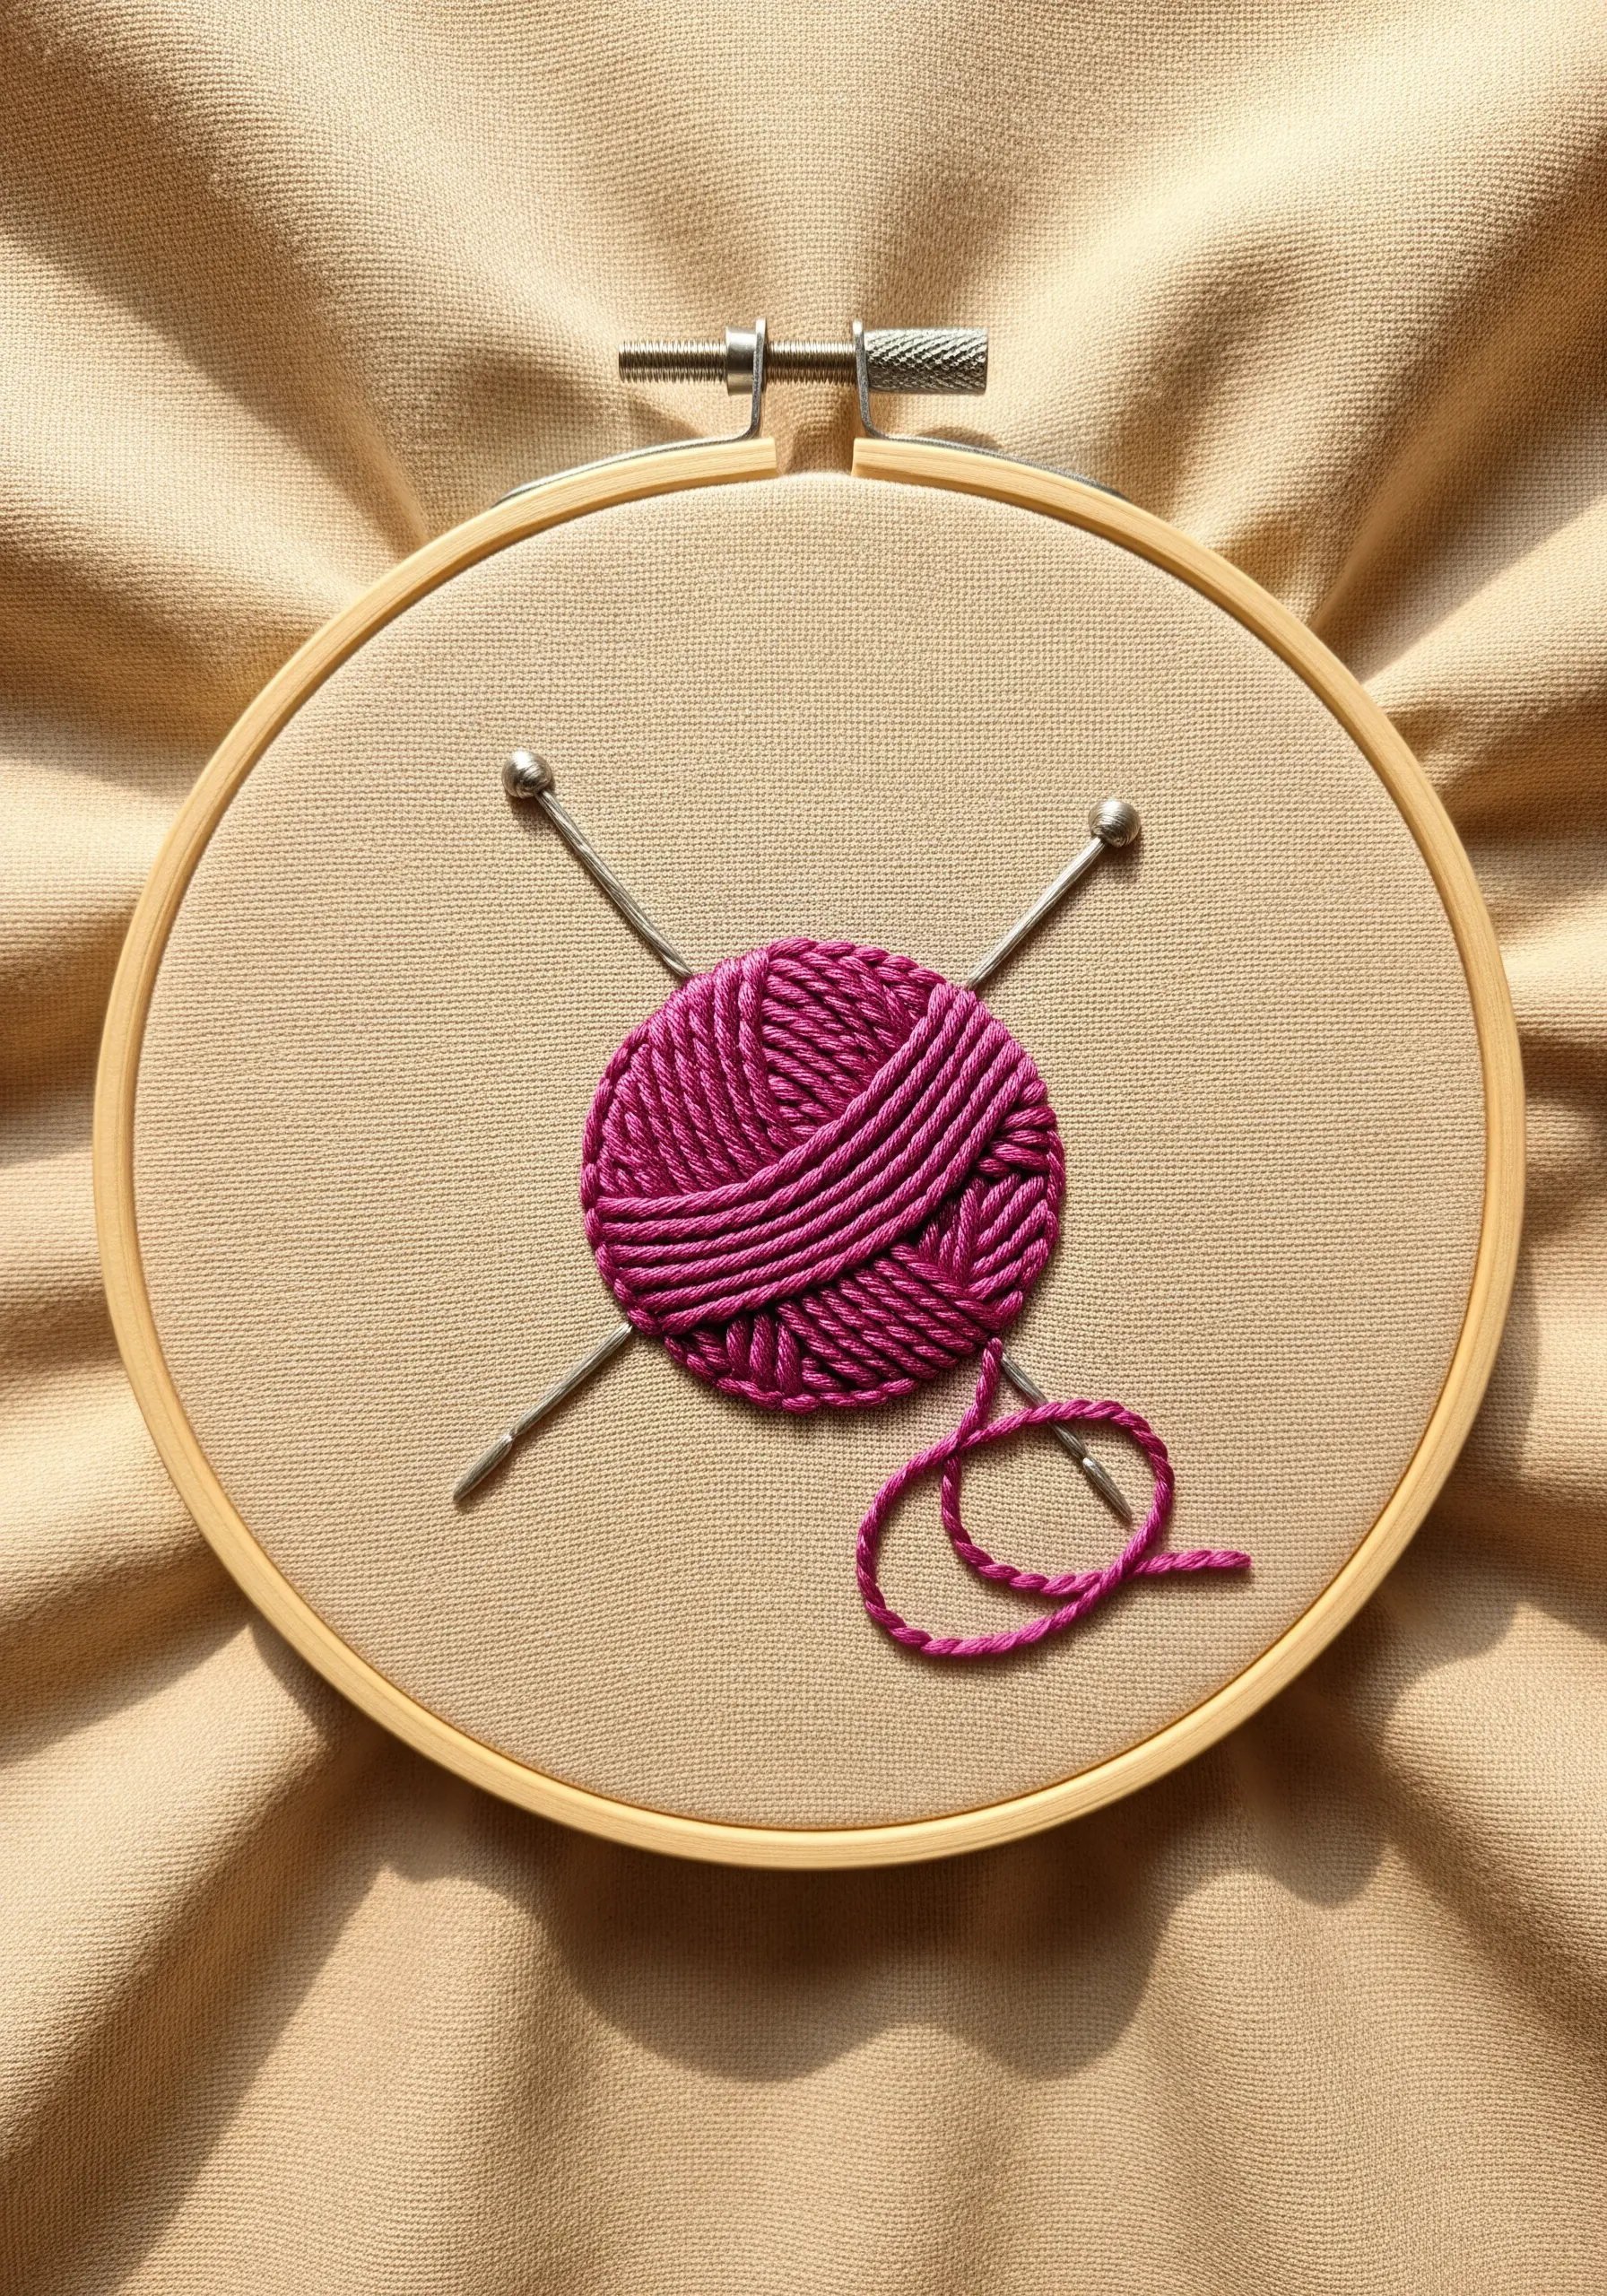
To create the look of a ball of yarn, use a technique that layers threads to build texture.
Fill the circle with a base of horizontal satin stitches. Then, using a slightly different shade, add overlying curved stitches that mimic yarn being wound.
Finally, use a couching stitch to lay down the loose end of the ‘yarn’ on the fabric surface. This layering is what makes stunning mixed-fiber projects so visually compelling.
14. Define Segments with Clean Outlines
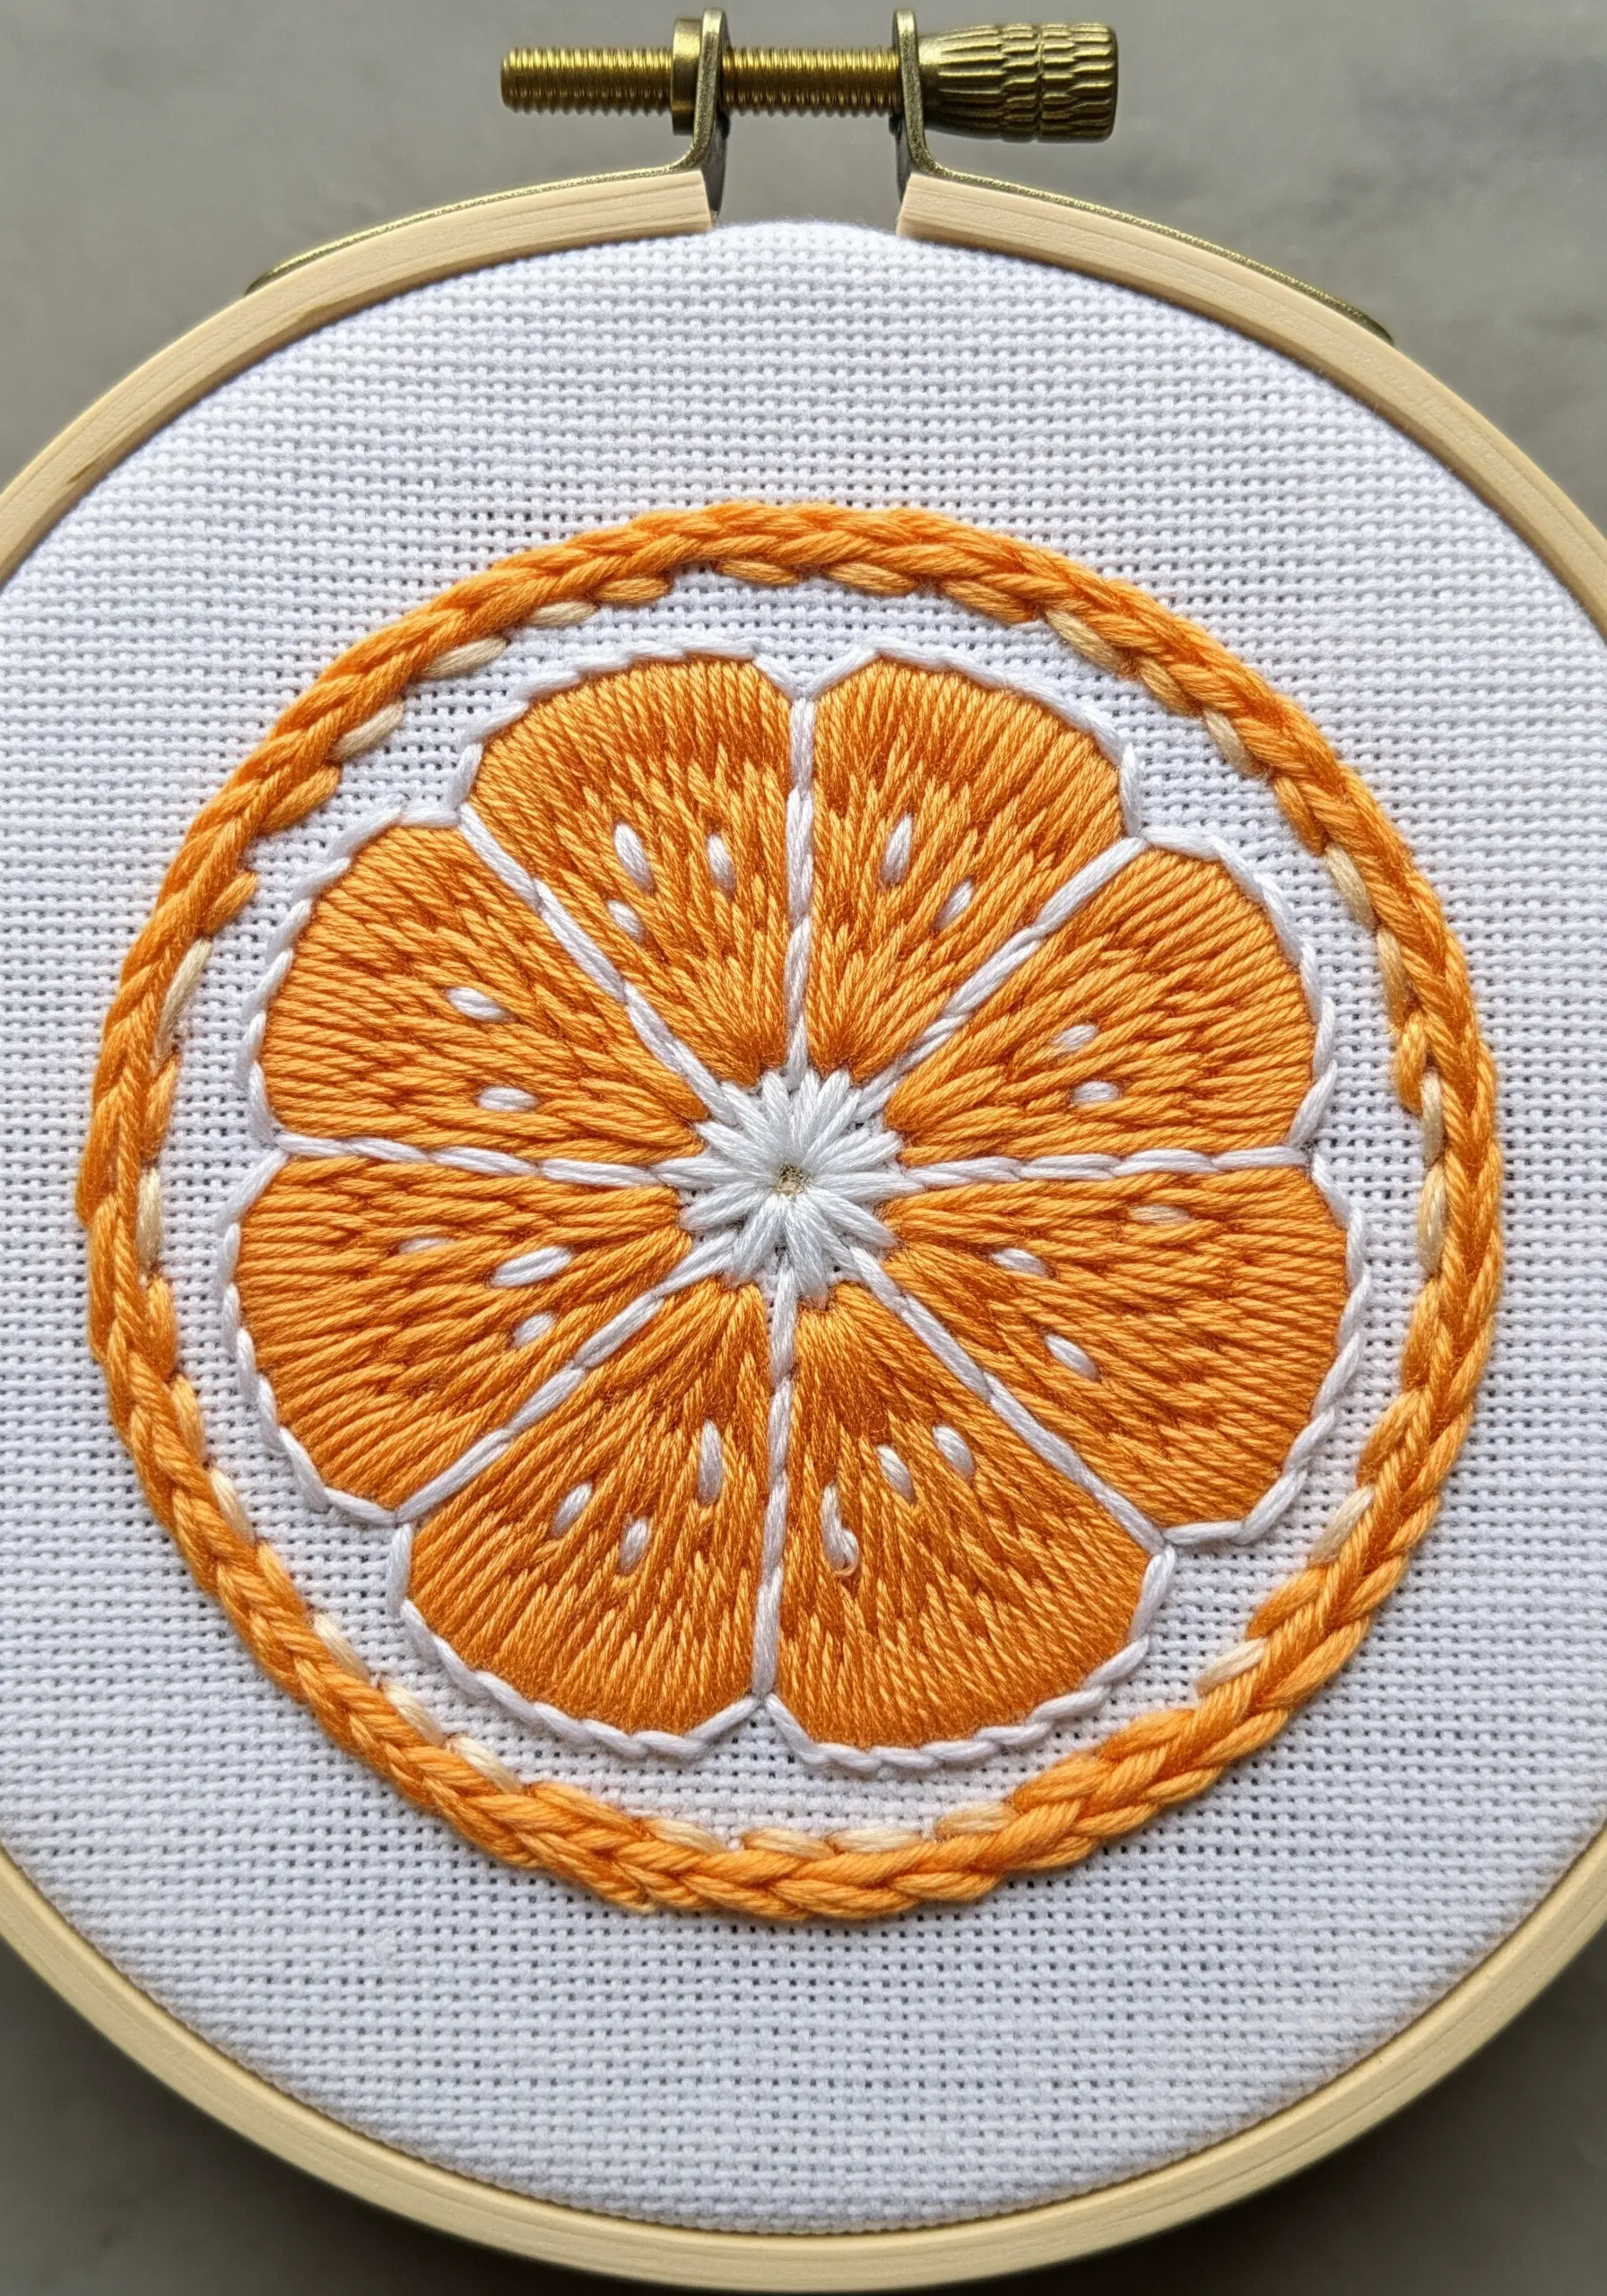
For a crisp citrus slice, clean outlines are everything.
Begin by stitching the white segment lines with a simple backstitch. This creates a framework to guide your fill stitches.
Next, fill each segment with a directional satin stitch, ensuring your stitches tuck neatly against the white outlines without crossing over.
This technique creates sharp, graphic definition that is perfect for minimal food and coffee motifs.
15. Sculpt a Seashell with Monochrome Stitches
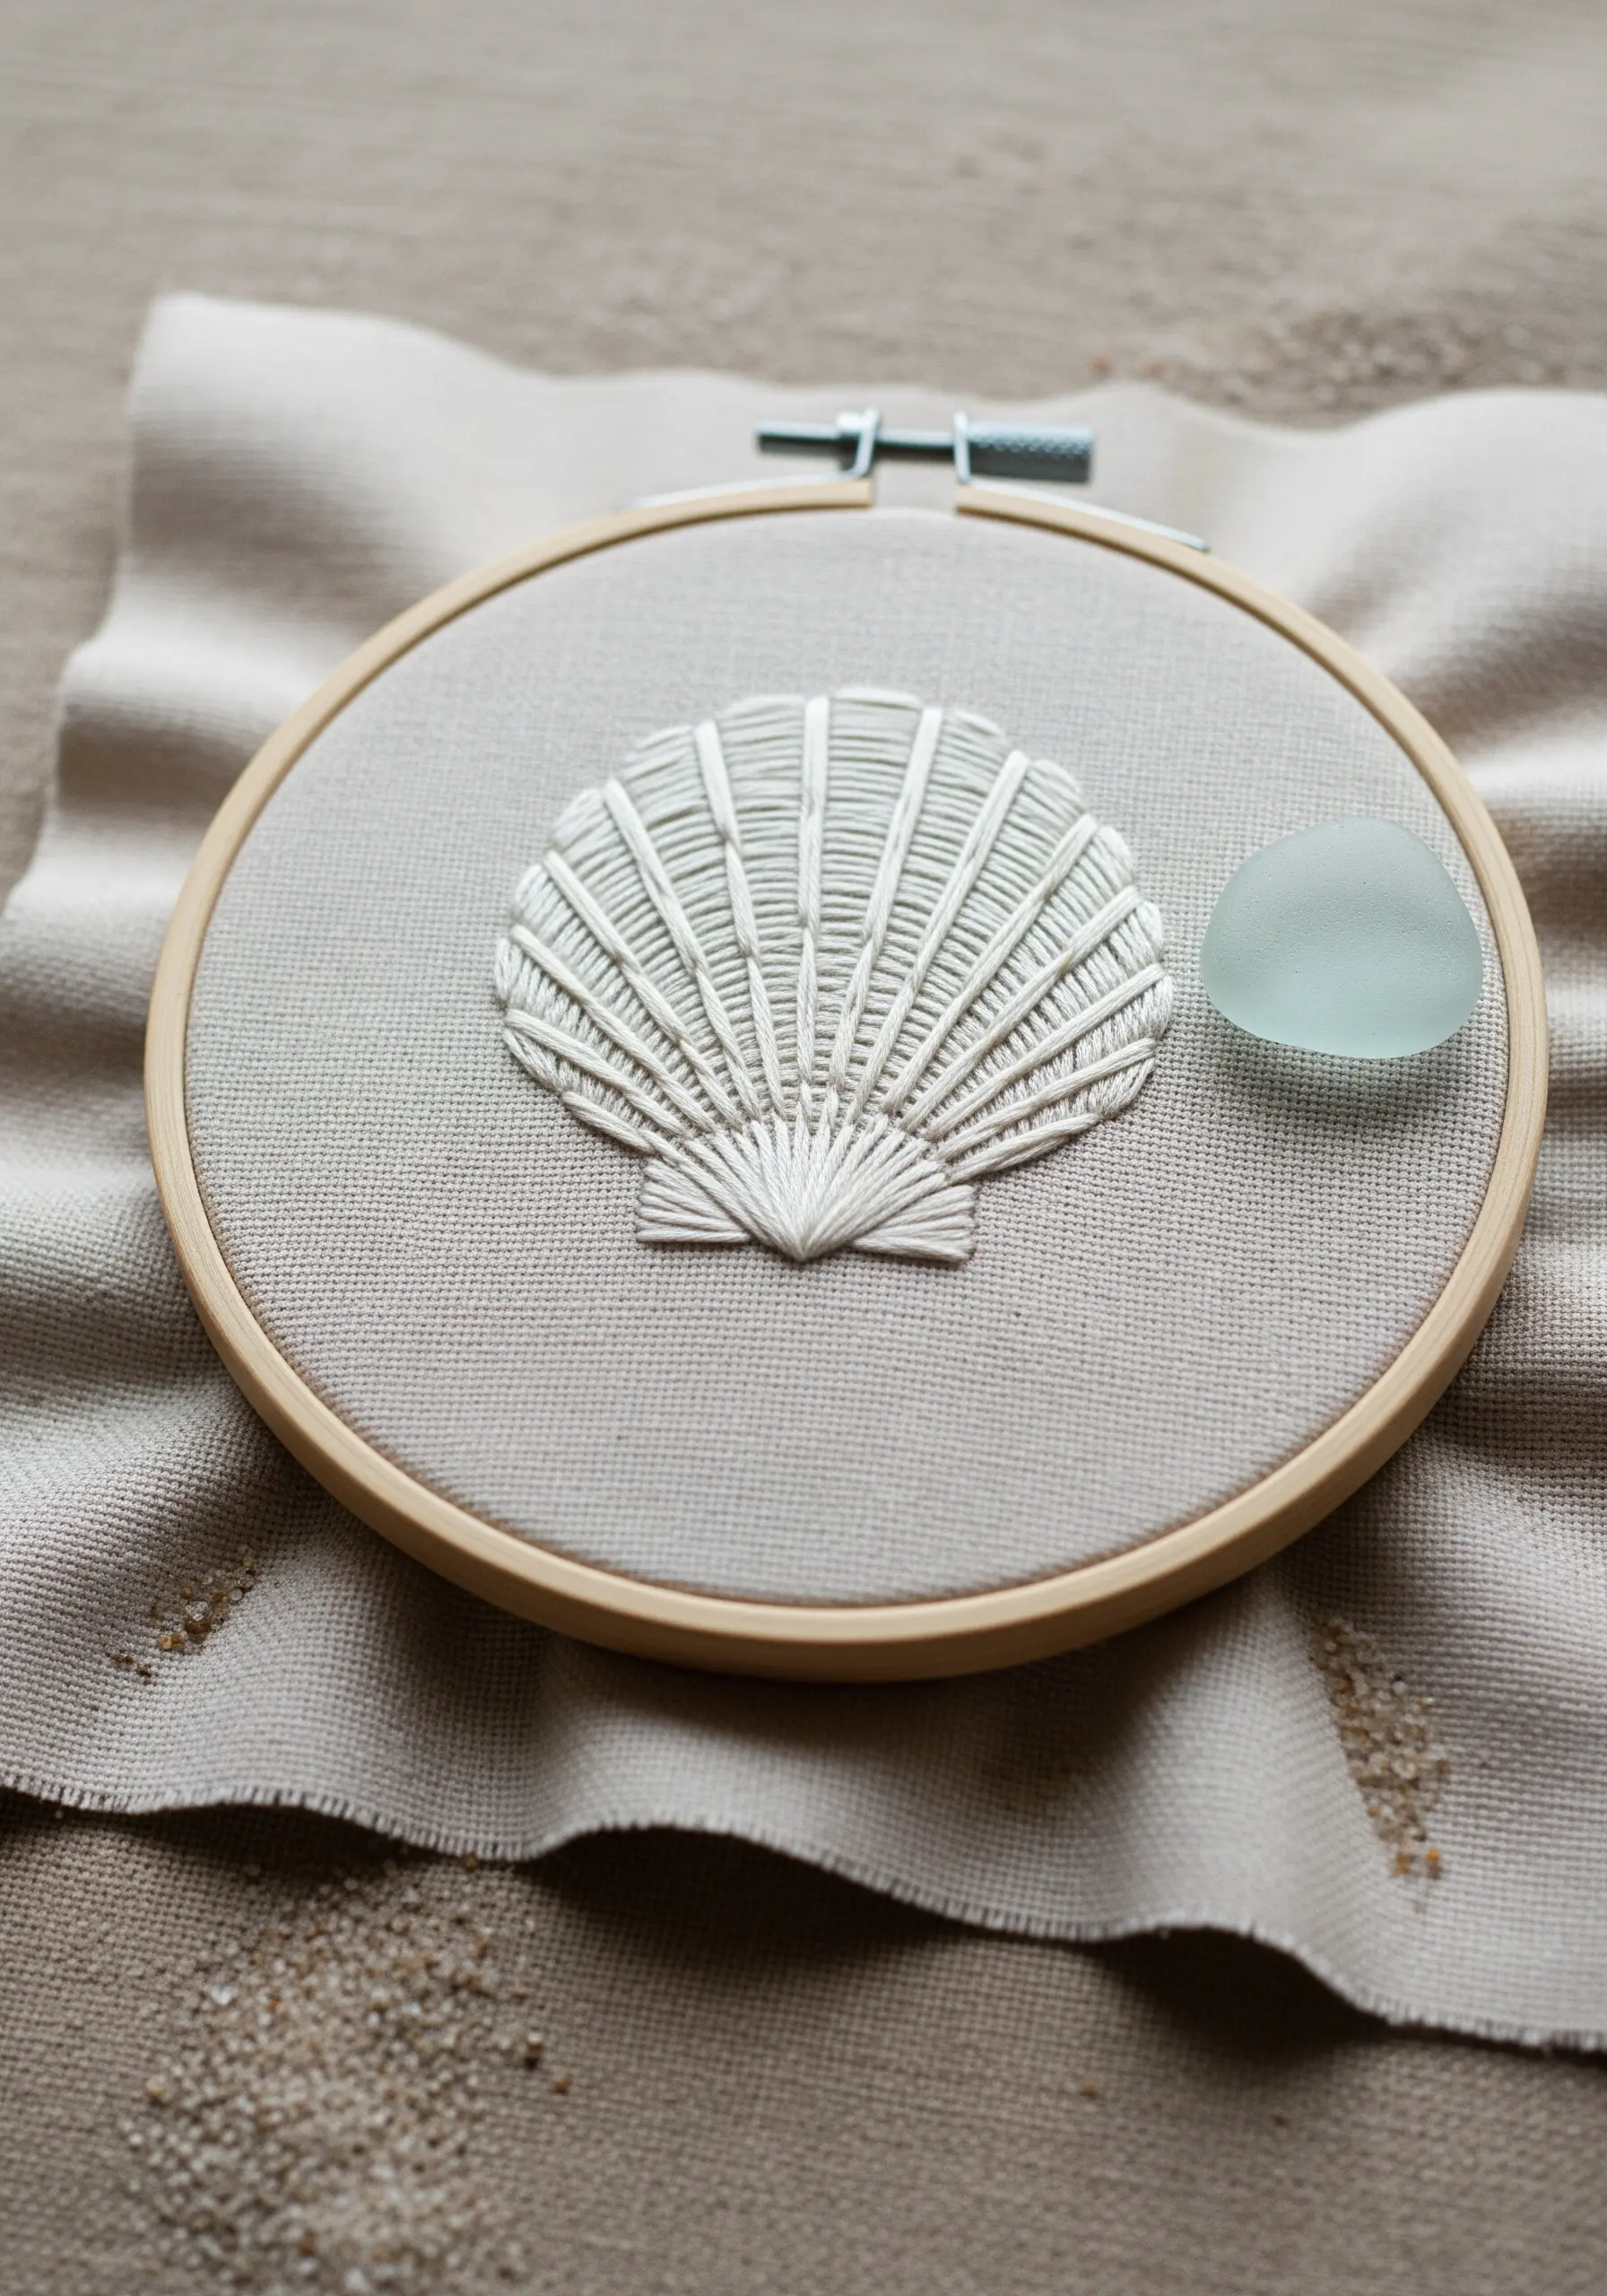
Create a stunning, sculptural seashell using only one color of thread.
The key is to use a padded satin stitch and vary the direction of your stitches to mimic the shell’s natural ridges.
Stitch the vertical ribs first, making them slightly raised. Then, fill the spaces between them with horizontal satin stitches.
This interplay of light and shadow on a single color creates depth and form, making it perfect for elegant, ocean-inspired hoop embroidery ideas.
16. Add Iridescence with Speckled Stitches
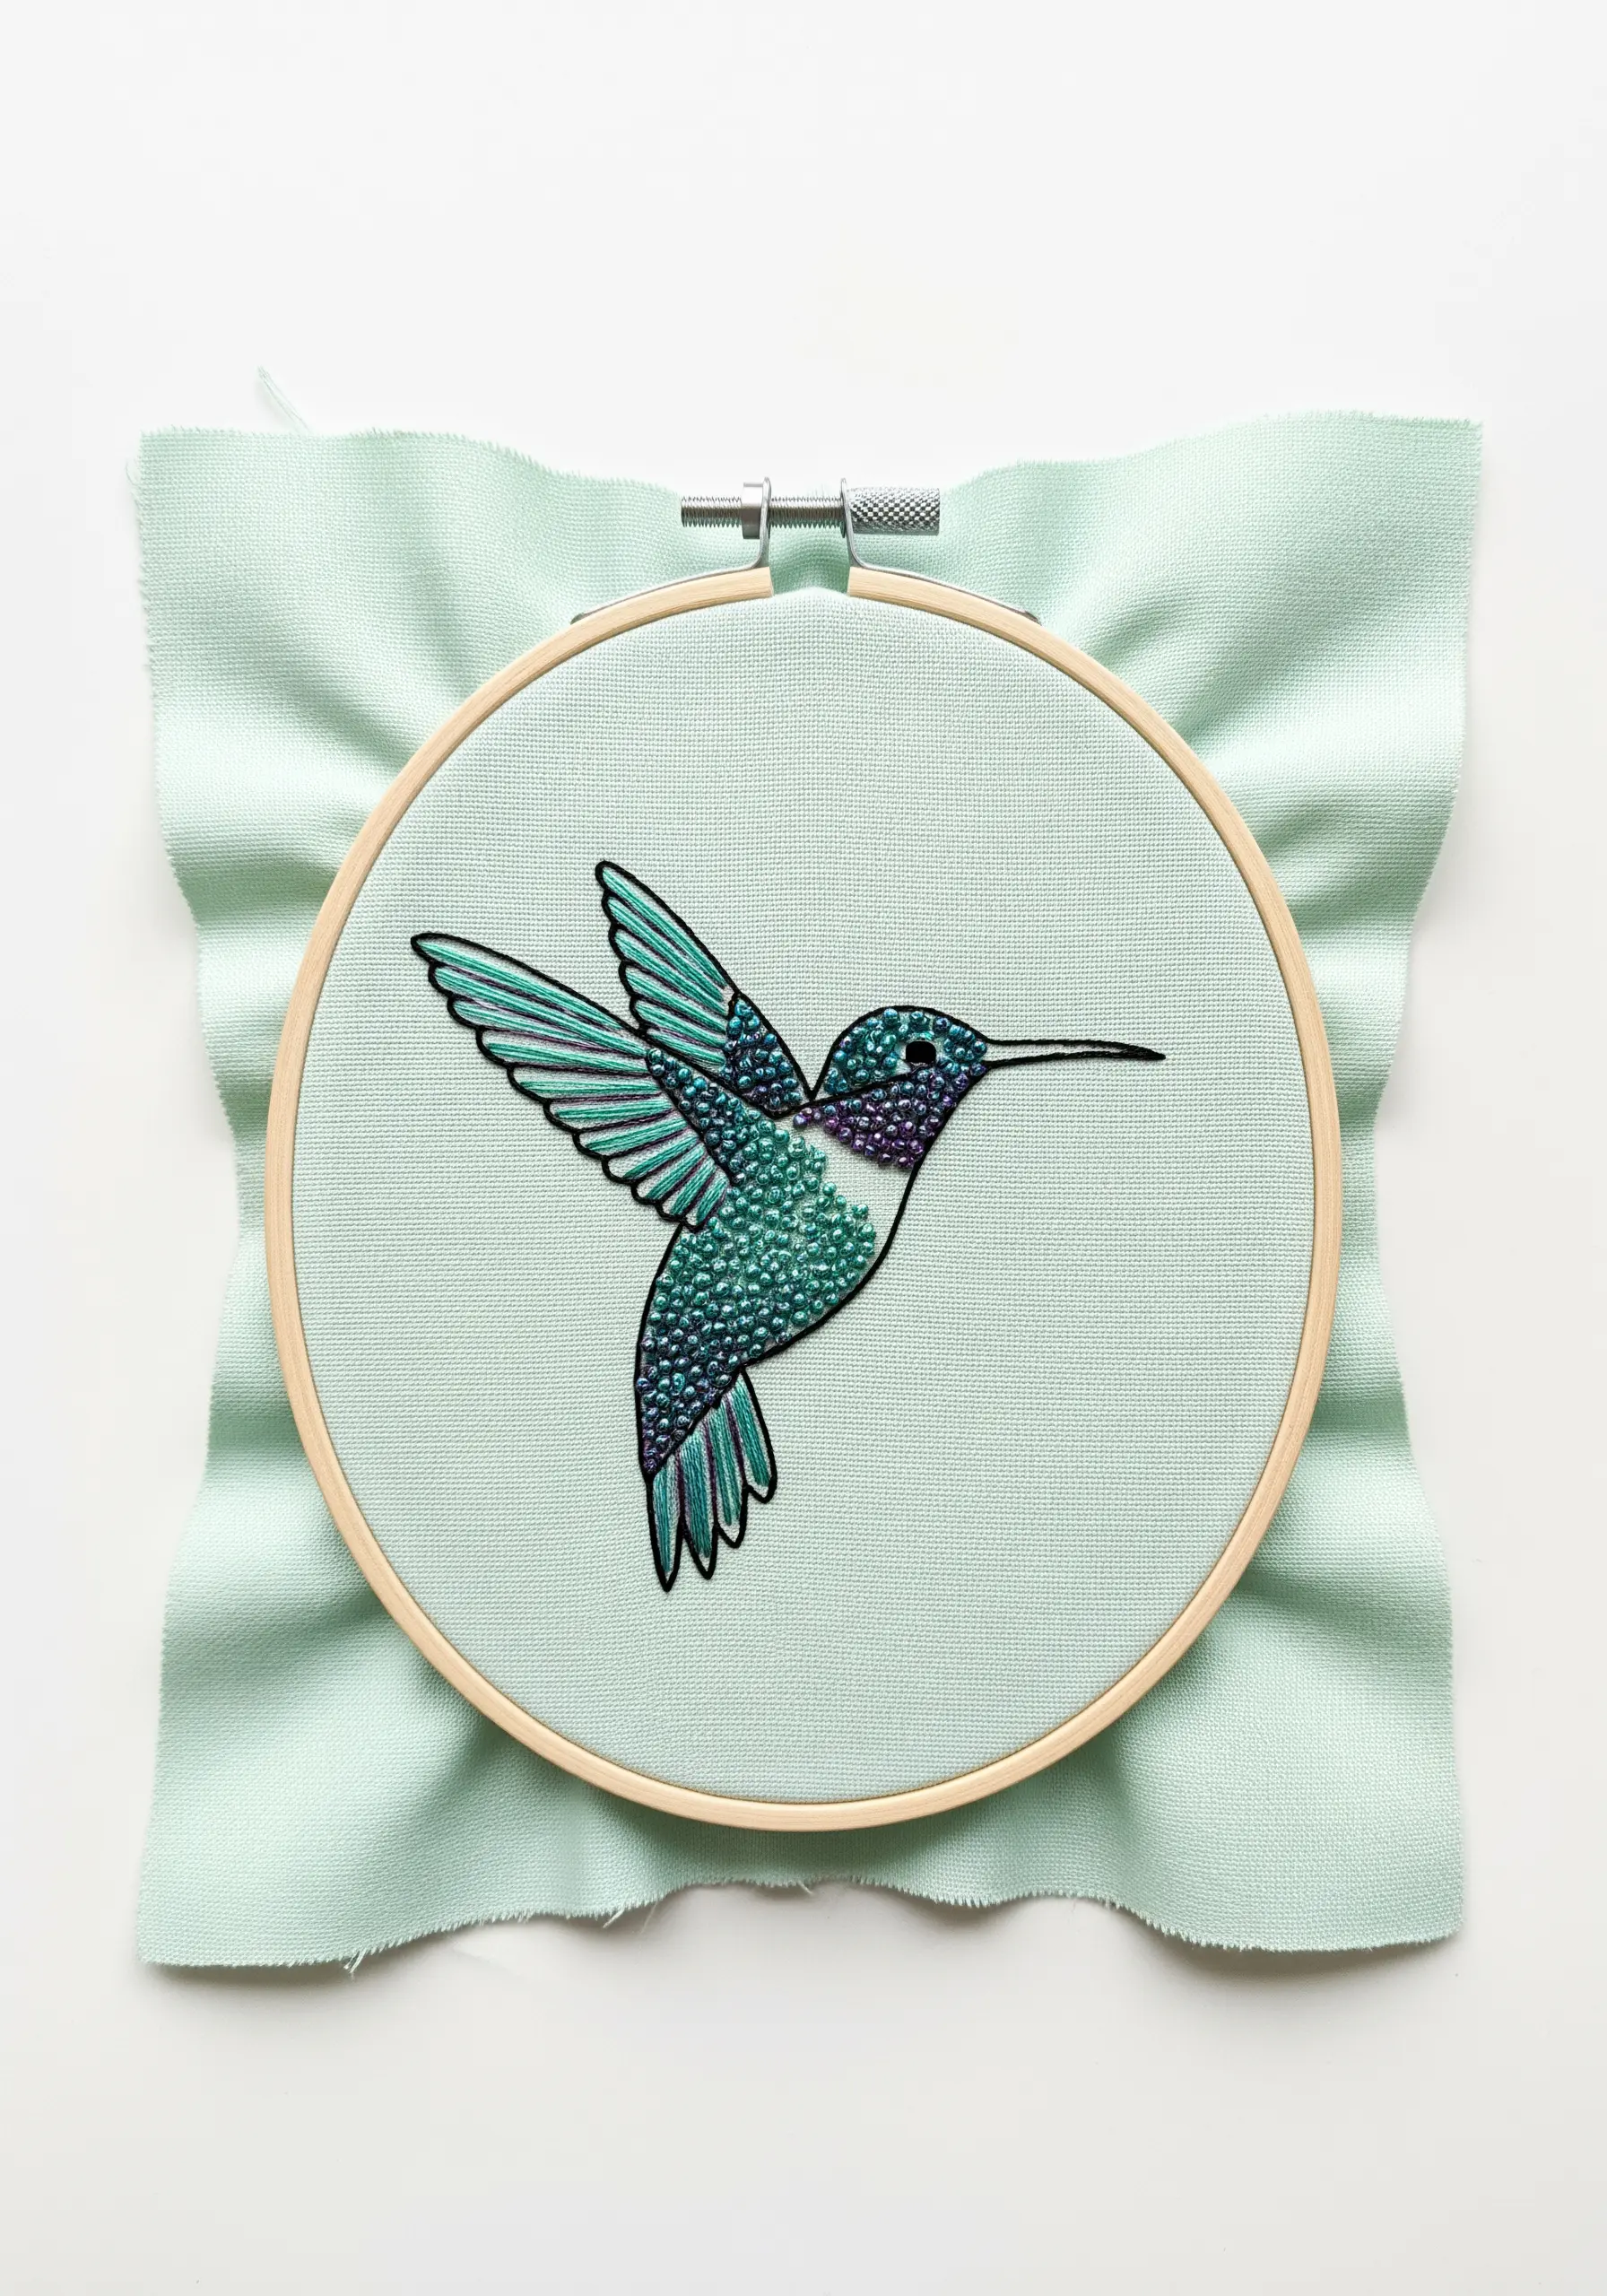
Capture the shimmering quality of a hummingbird’s feathers using the seed stitch—tiny, randomly placed straight stitches.
Fill the bird’s body and head with seed stitches using two or three iridescent or variegated threads in shades of teal, purple, and green. The random placement of stitches will blend the colors beautifully.
Contrast this textured fill with a sharp, black backstitch outline to define the form. It’s a signature technique for creating a tiny hummingbird embroidery that feels alive.
17. Build Up Frosting with French Knots
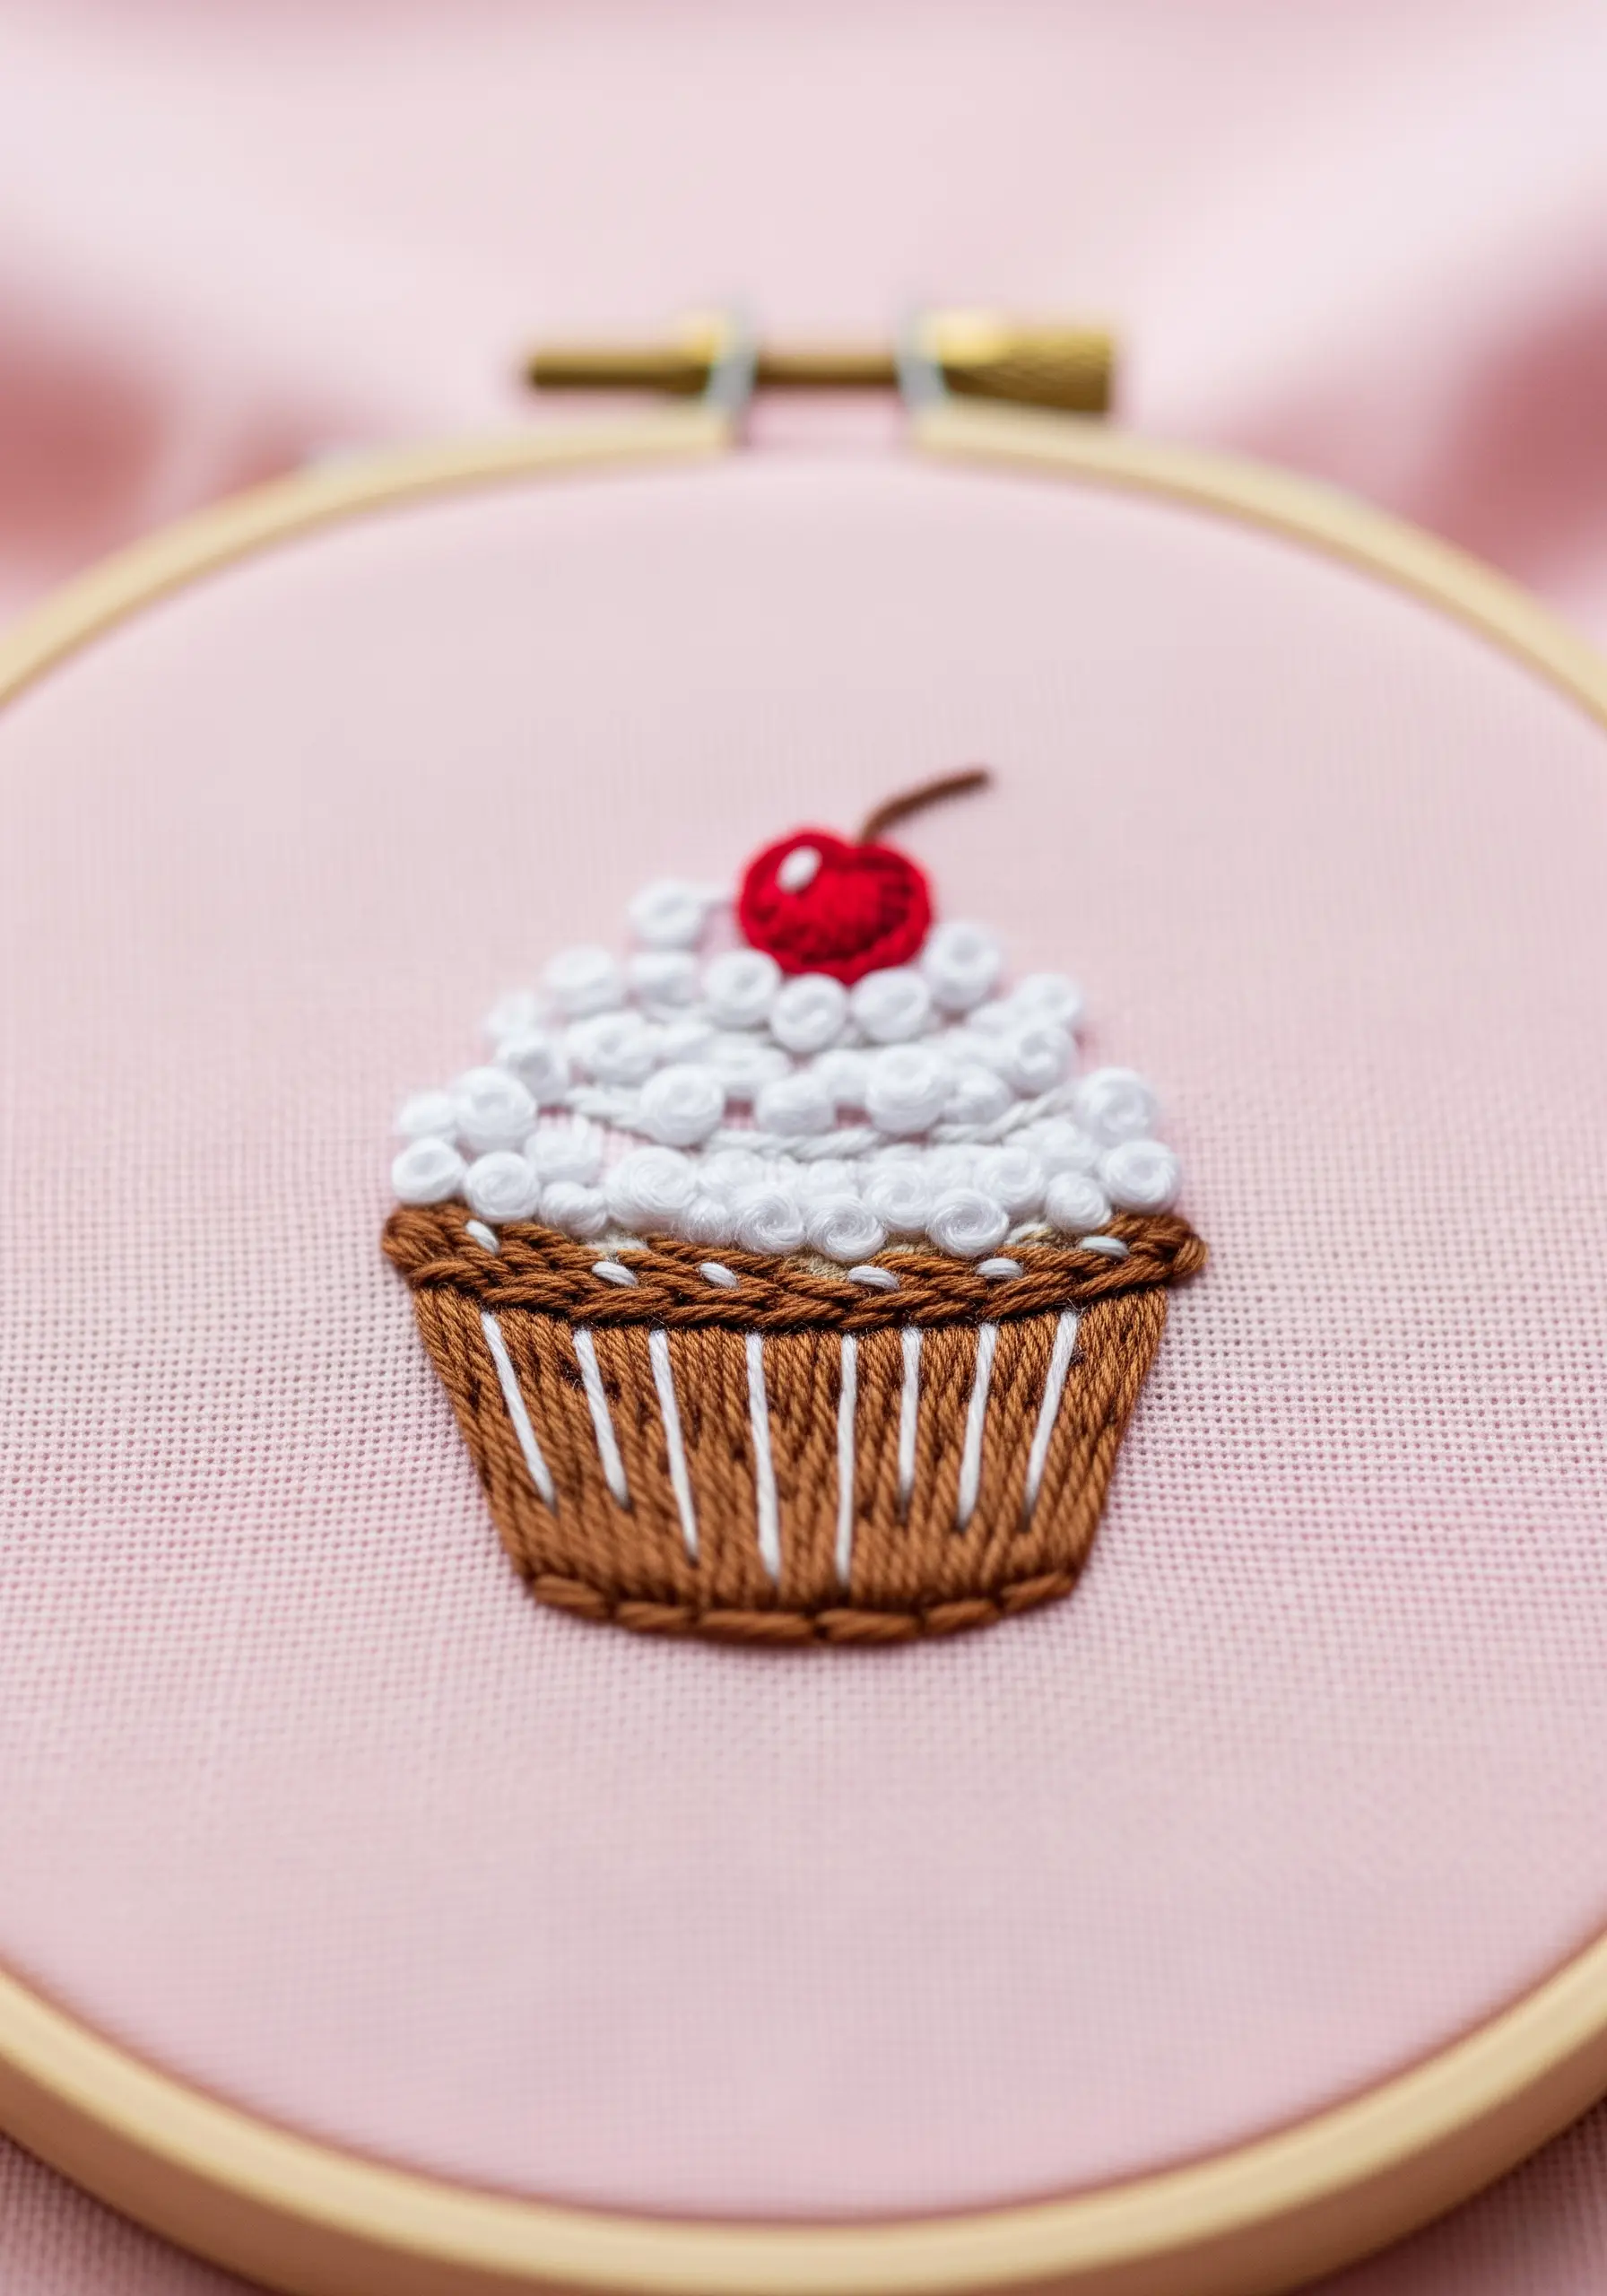
To create fluffy, voluminous frosting on a cupcake, use colonial knots or French knots packed closely together.
Use a thicker thread, like all six strands of floss or even a pearle cotton, to make the knots fuller.
Start from the outer edge of the frosting area and work your way inward in a spiral. This ensures even coverage and builds a gentle mound that looks delicious and tactile, elevating your cute dessert and tea theme motifs.
18. Blend Greens for a Vibrant Cactus
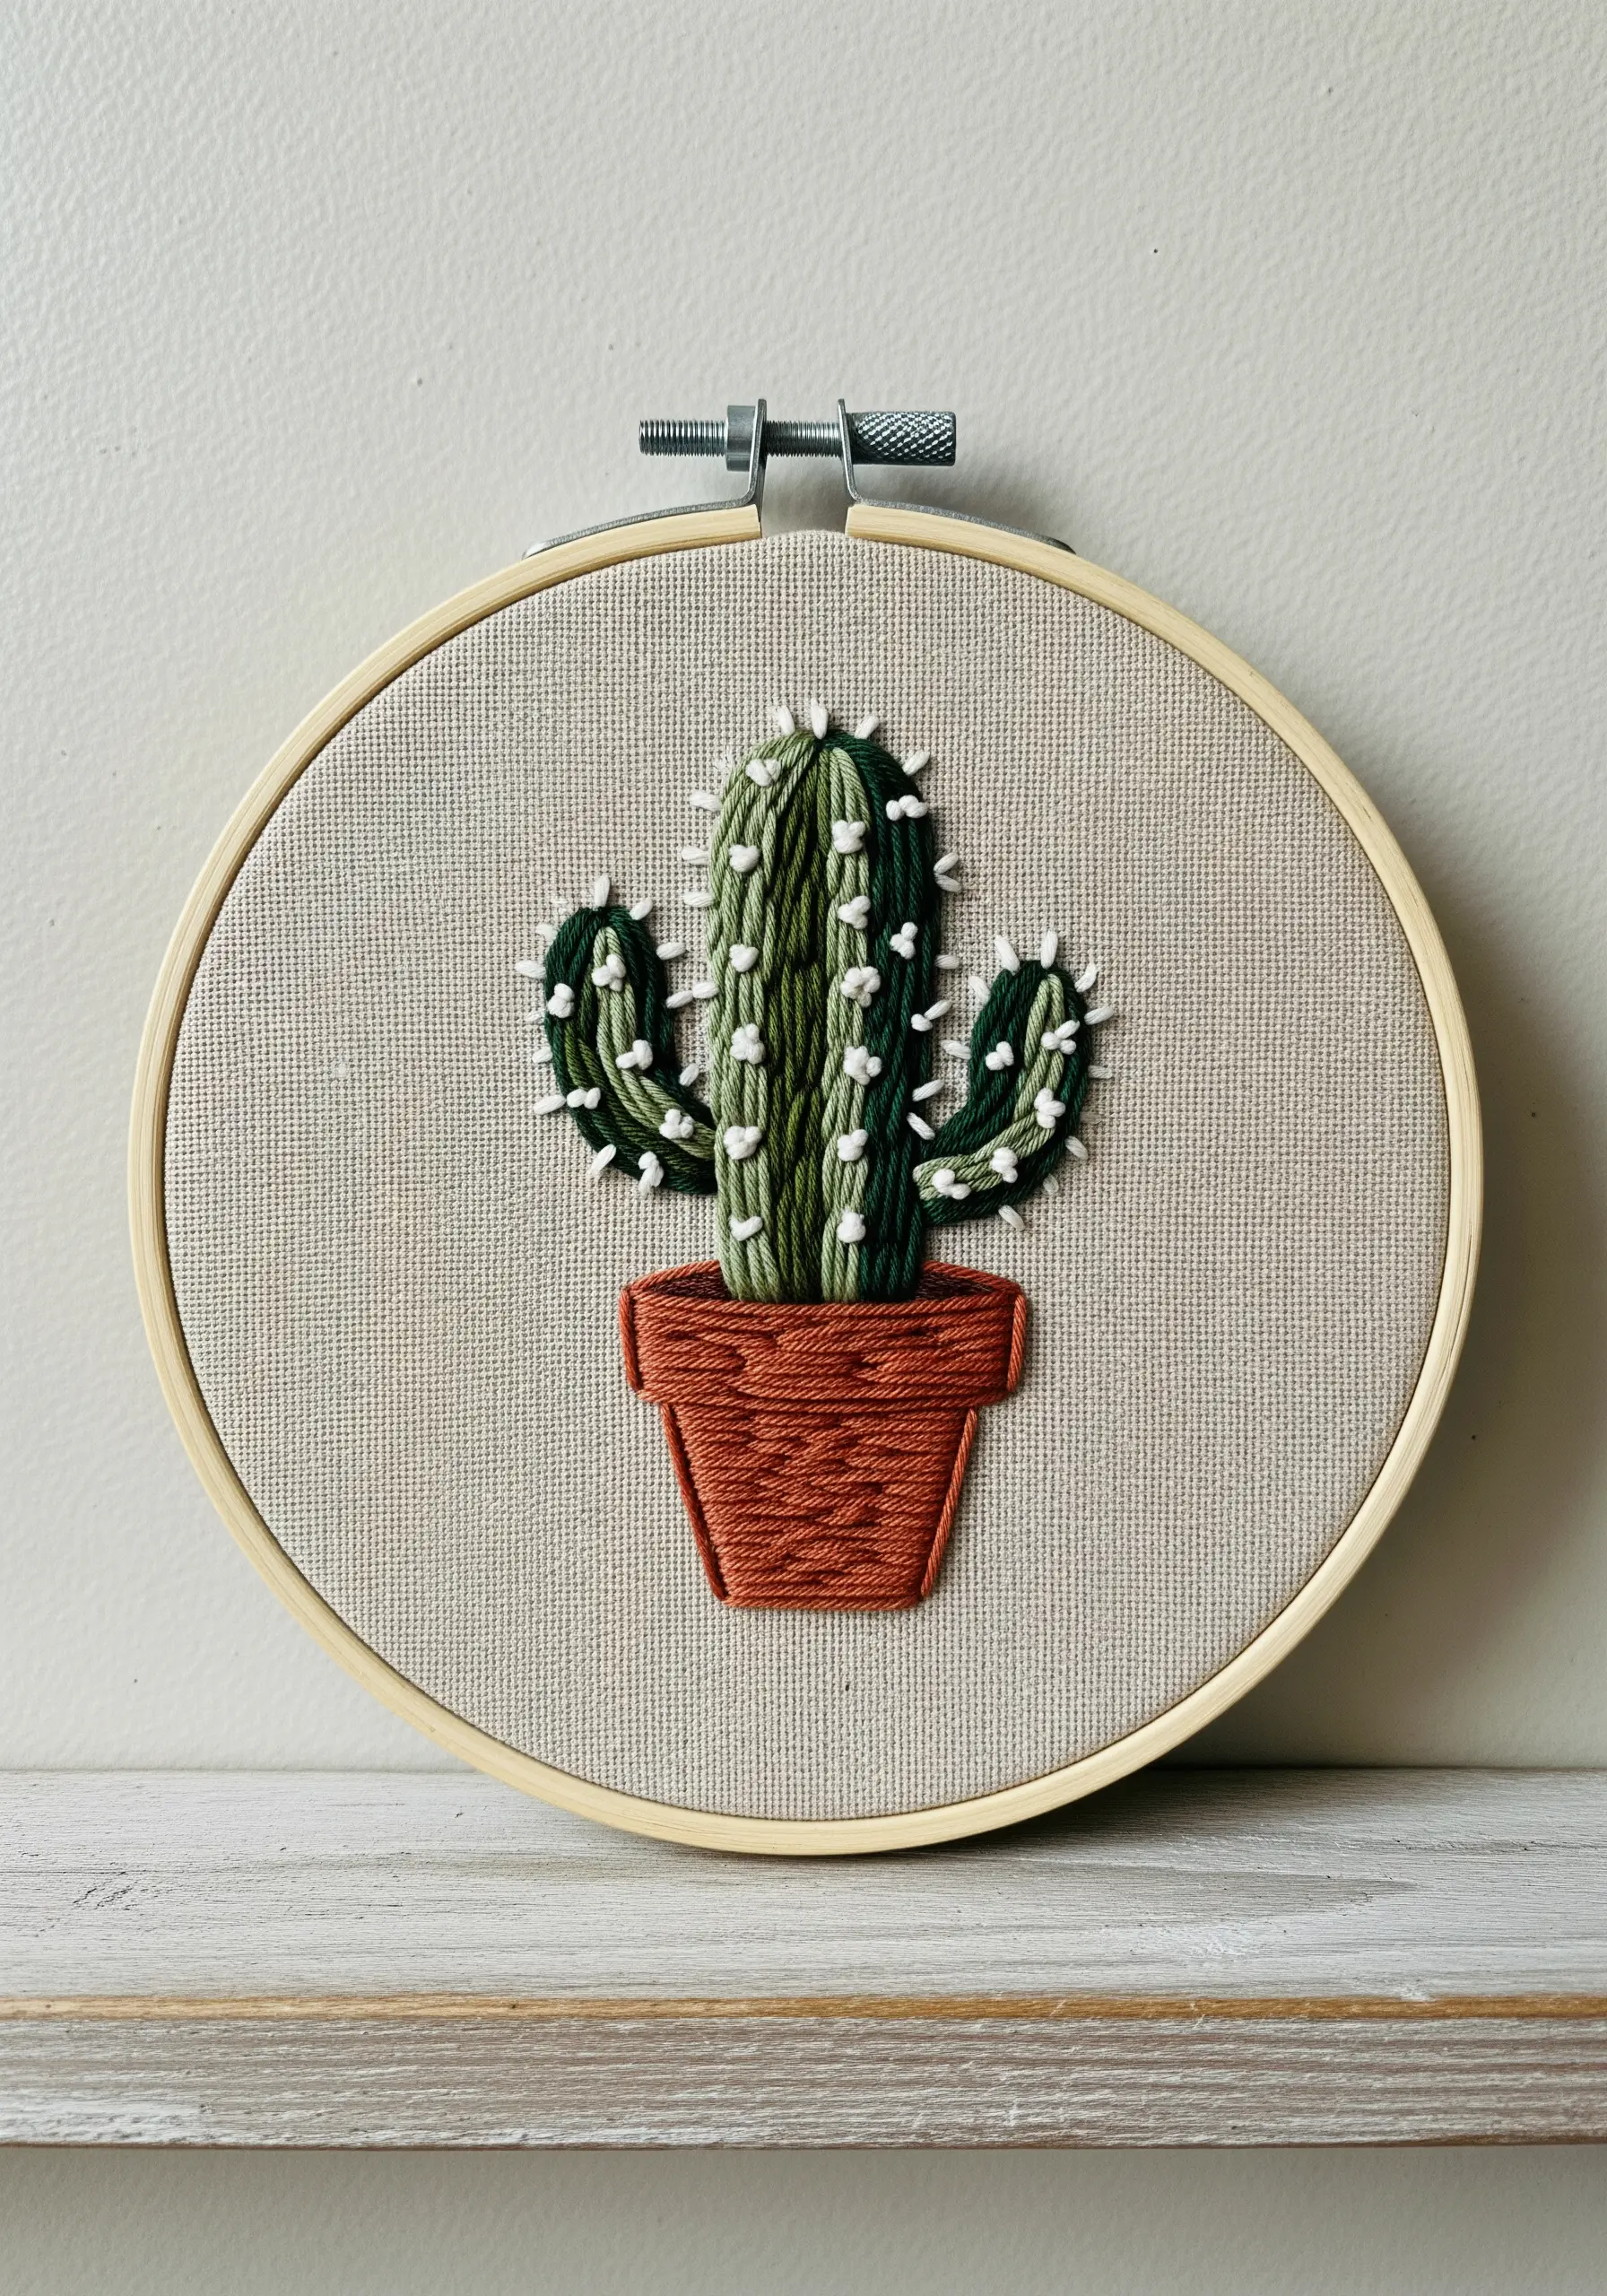
Give your cactus a healthy, sun-kissed look by blending two or three shades of green with the long-and-short stitch.
Instead of uniform stripes, allow the colors to merge organically to create subtle highlights and shadows.
For the spines, use a contrasting bright white or cream thread. A mix of tiny straight stitches and French knots will give the texture a more natural, varied appearance than perfectly uniform stitches. This attention to detail brings all botanical embroidery wall pieces to life.
19. Master Expressive Line Art Hands
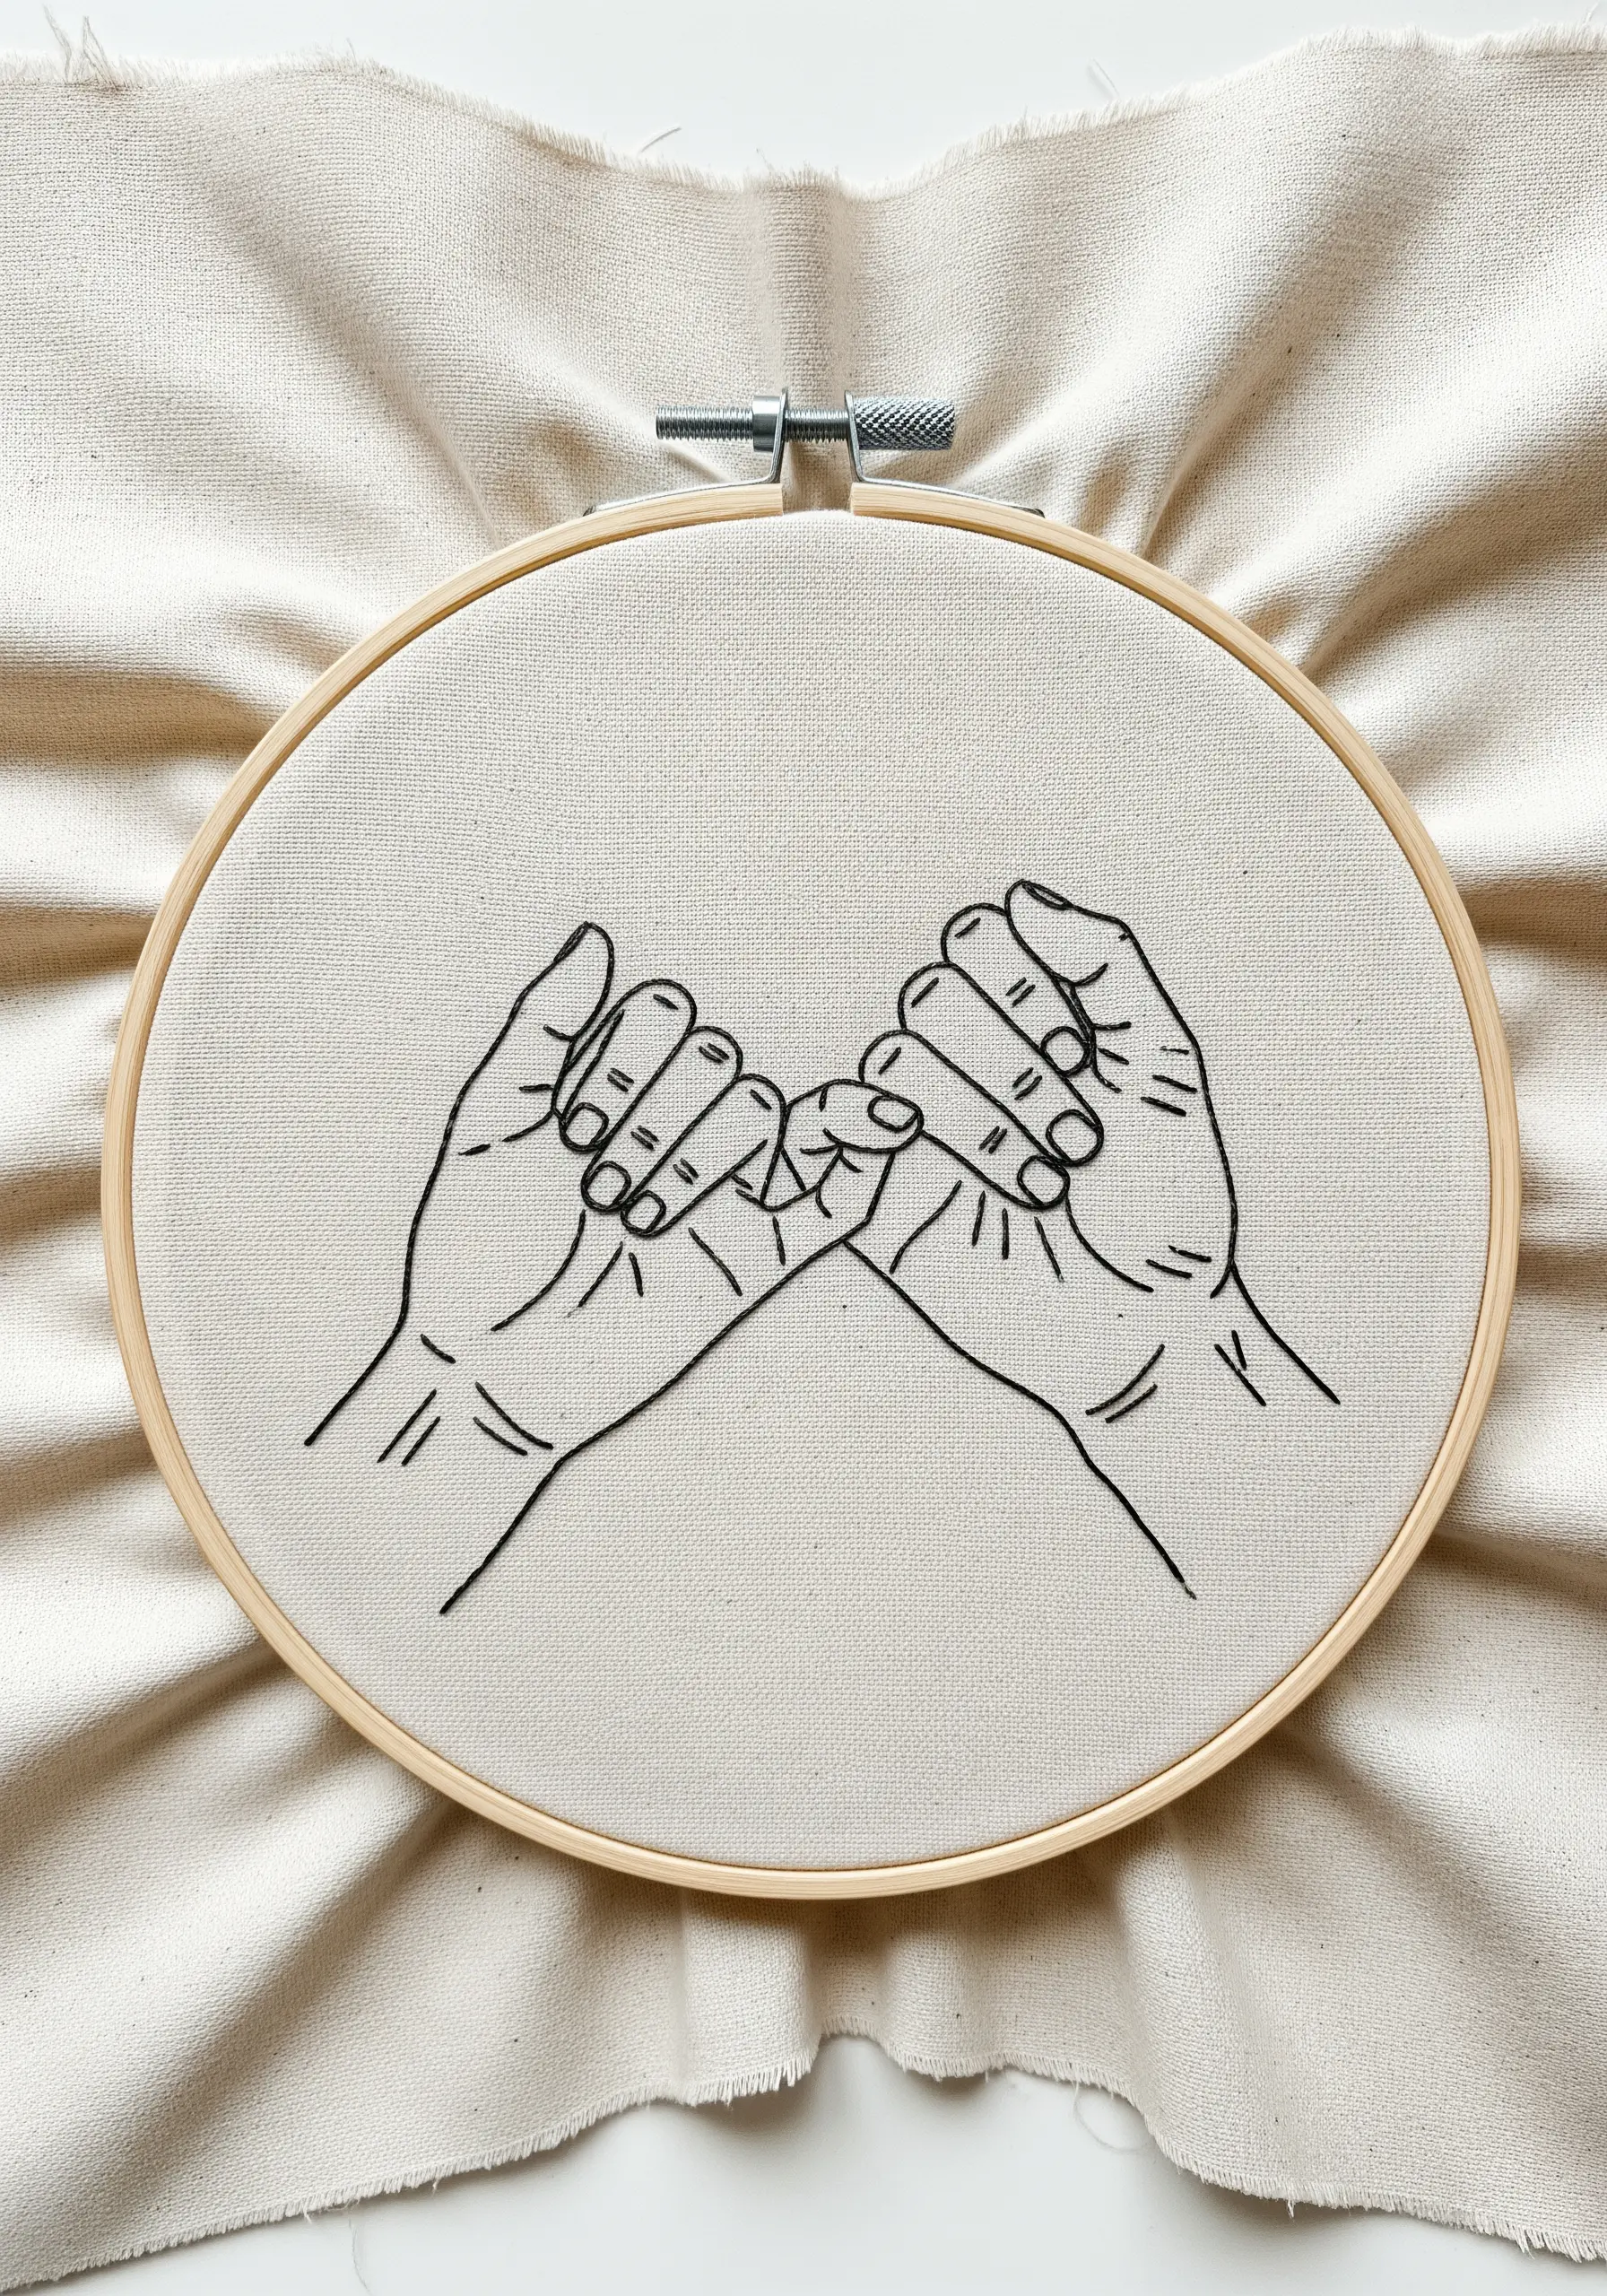
The beauty of line art is in its precision.
To create crisp, unbroken lines for a design like this, use a two-stranded split stitch instead of a backstitch. A split stitch creates a smoother, more solid line because each new stitch pierces the previous one, eliminating the tiny gaps that can occur with backstitching.
This technique is essential for any simple line art word and symbol embroidery ideas where the clarity of the line is the main focus of the piece.


