
When you picture a nursery, you might think of bright colors and bold patterns. But what if the most profound sense of calm comes from something softer? Imagine creating a space that feels like a gentle whisper, using only the quiet language of texture, neutral tones, and your own two hands.
The difference between an ordinary embroidery project and a piece of art lies in intention. It’s in choosing a chunky yarn for a couched cloud to make it feel tangible and plush. It’s in the way you angle your stitches to mimic the softness of fur, or how you group small, simple hoops to tell a larger, more meaningful story on the wall.
Here, you won’t find complex patterns that require weeks of work. Instead, you’ll discover techniques that elevate simple motifs into heirloom-quality art. These ideas are designed to give you visible, beautiful results, helping you create a serene and deeply personal sanctuary, one soft stitch at a time.
1. Master High-Relief Texture with Couching
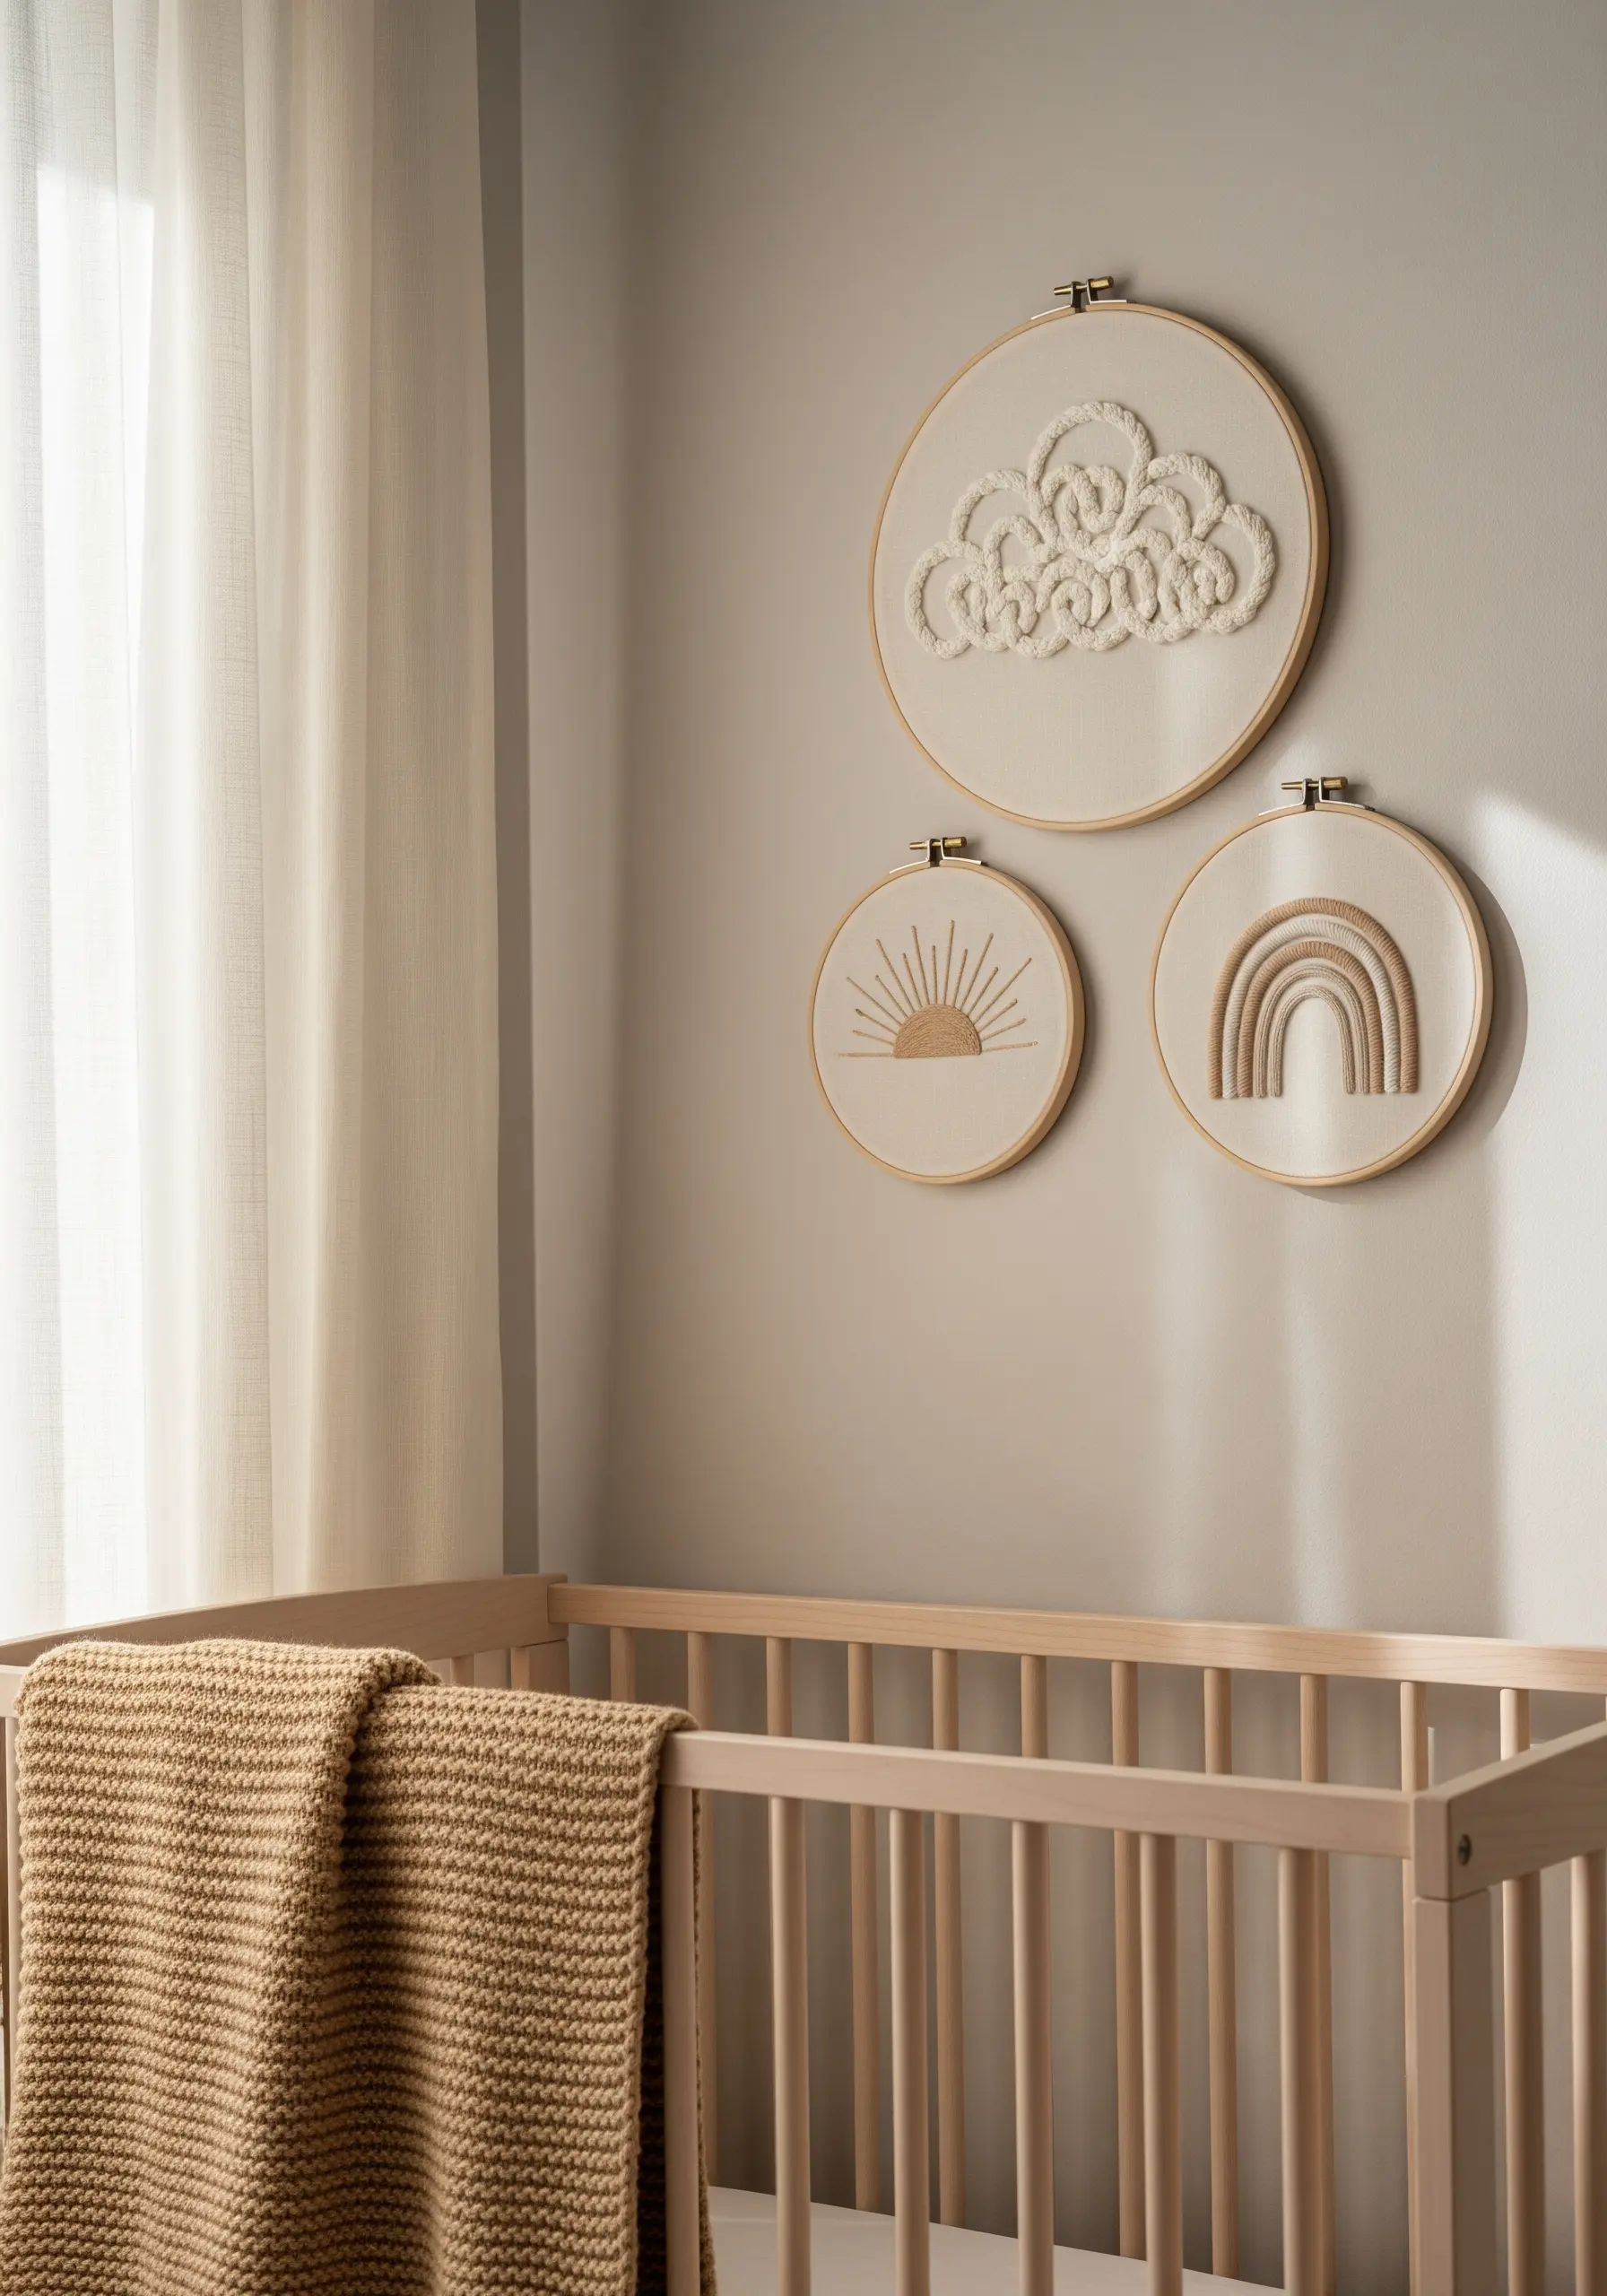
To achieve that plush, three-dimensional cloud, lay down a thick yarn or roving wool in your desired shape.
Then, use a single strand of matching embroidery floss to tack it down with tiny, evenly spaced stitches—this technique is called couching, and it adds sculptural volume without the time-consuming density of French knots.
For the sun rays, use a single, clean backstitch for a modern, graphic look that contrasts beautifully with the soft, rounded forms of the cloud and rainbow.
The rainbow’s perfect arch is achieved with disciplined satin stitches; ensure each stitch lays parallel to the last for a seamless, light-reflecting finish.
2. Emulate Fur with Directional Split Stitch
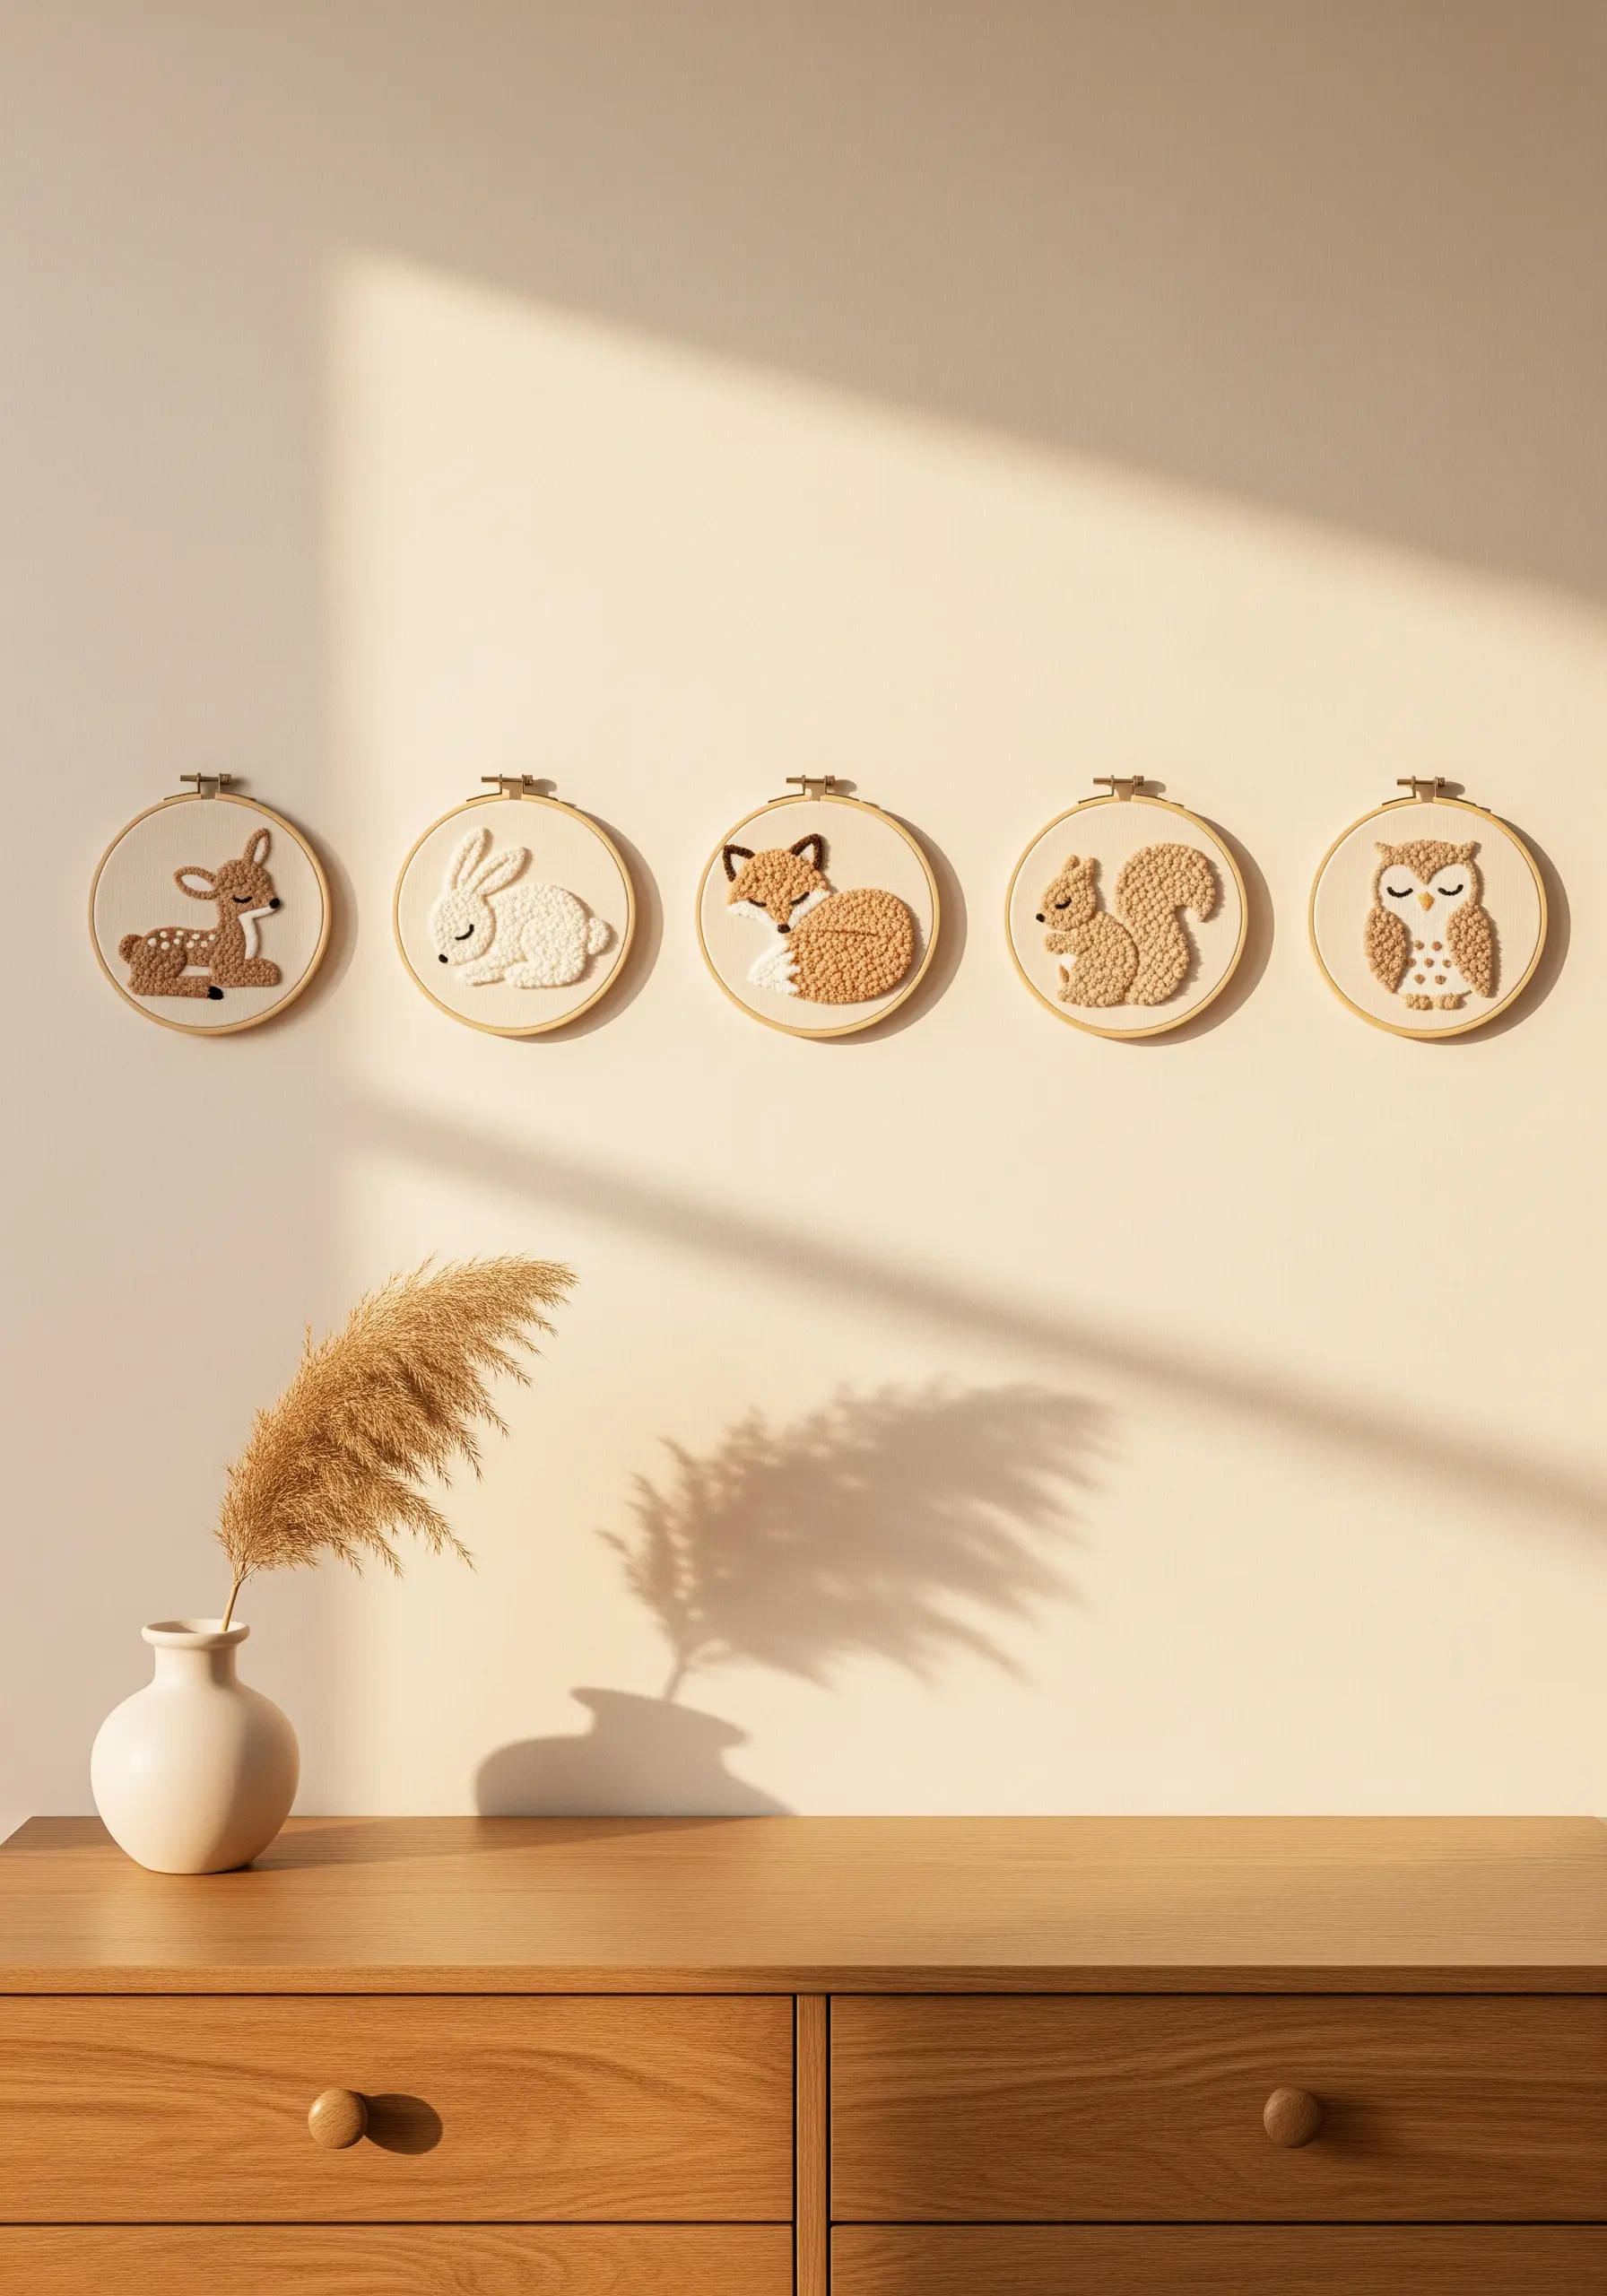
Create a soft, plush animal texture without a punch needle by using a dense split stitch fill.
Work with four to six strands of cotton floss and keep your stitches short, following the natural direction of the animal’s fur—for example, stitch outwards from the nose and downwards along the back.
This directional stitching creates a subtle, realistic movement and sheen that mimics a soft coat.
For the finest details like eyes and whiskers, switch to a single strand of a darker contrasting color to ensure they remain crisp and don’t get lost in the texture.
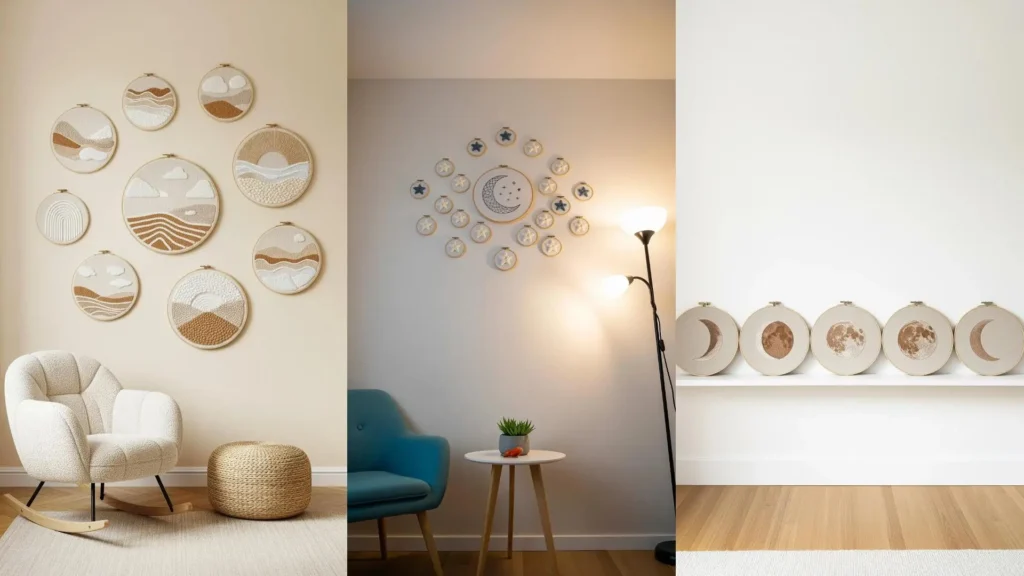
3. Curate a Cohesive Landscape Gallery Wall
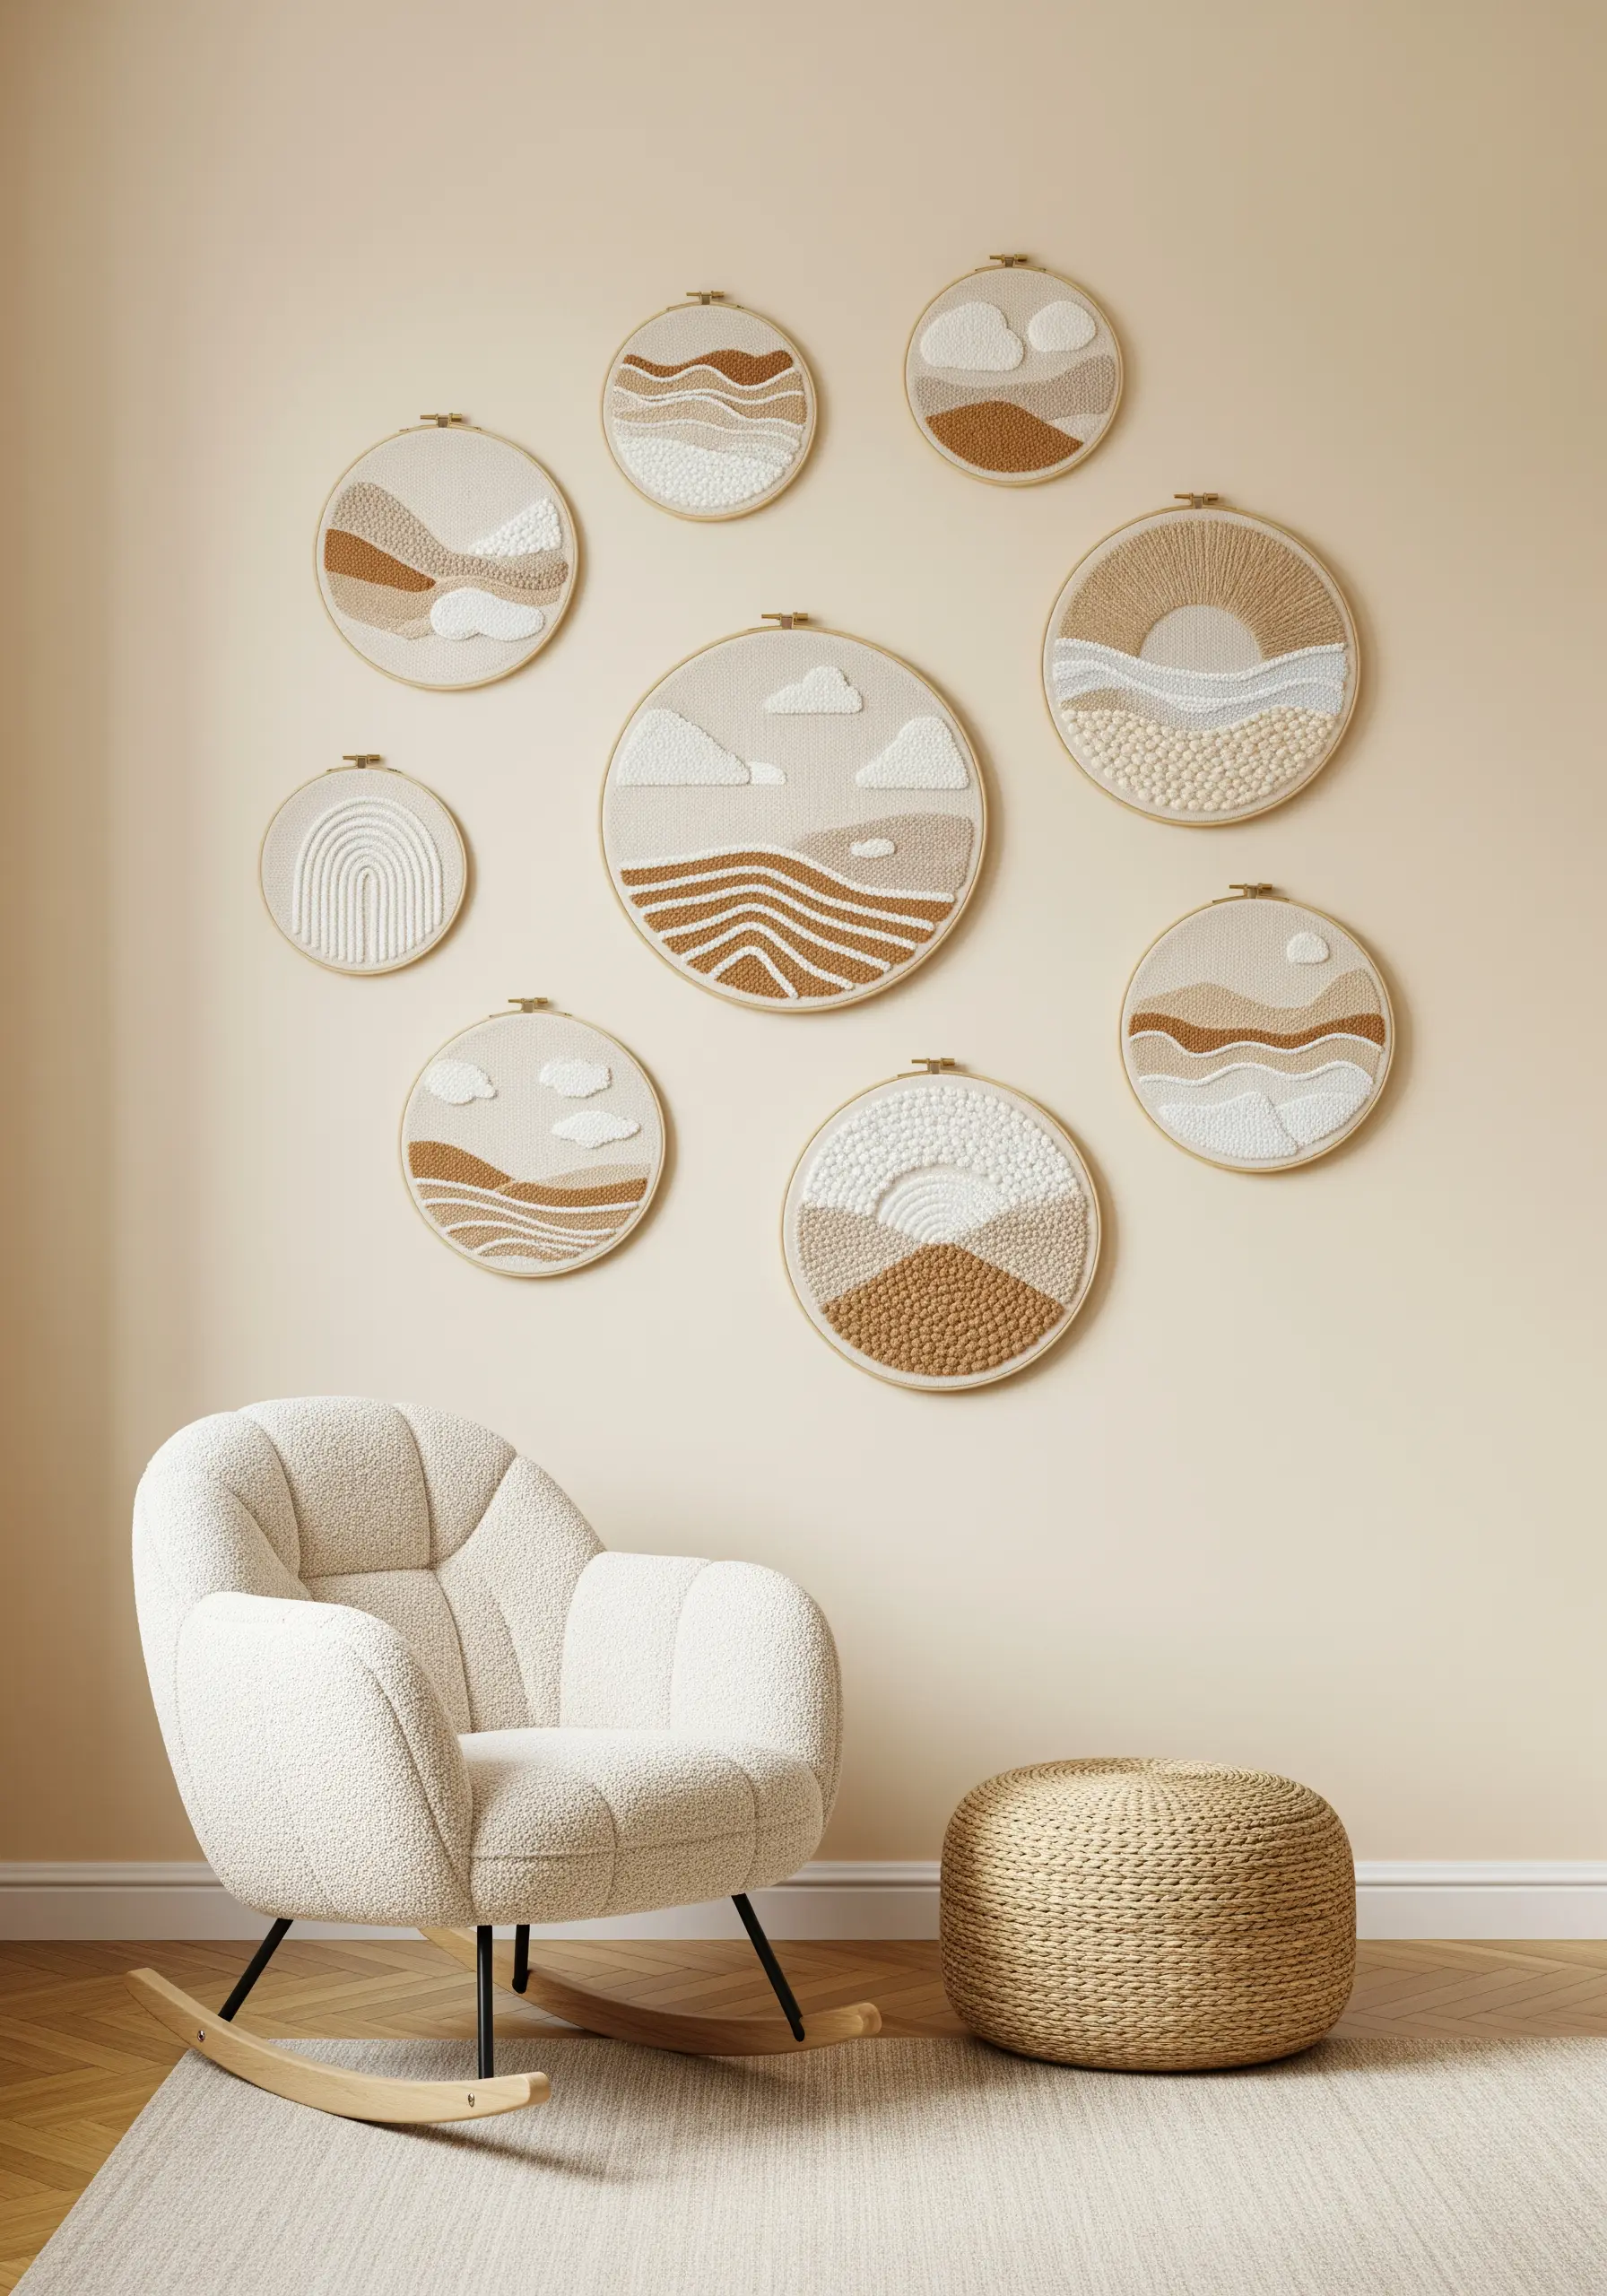
To design a multi-hoop installation that feels intentional, not cluttered, unite your pieces with a consistent theme and a strict color palette.
Select three to four tones—like sand, ivory, and taupe—and use them across all hoops to create visual harmony.
Create texture by filling large areas with dense French knots or seed stitches, which gives a pointillist effect and adds depth to your abstract landscapes.
Arrange the hoops in an organic, flowing shape on the wall to guide the eye and enhance the natural, calming theme of the collection.
4. Translate Designs from Hoop to Home Décor
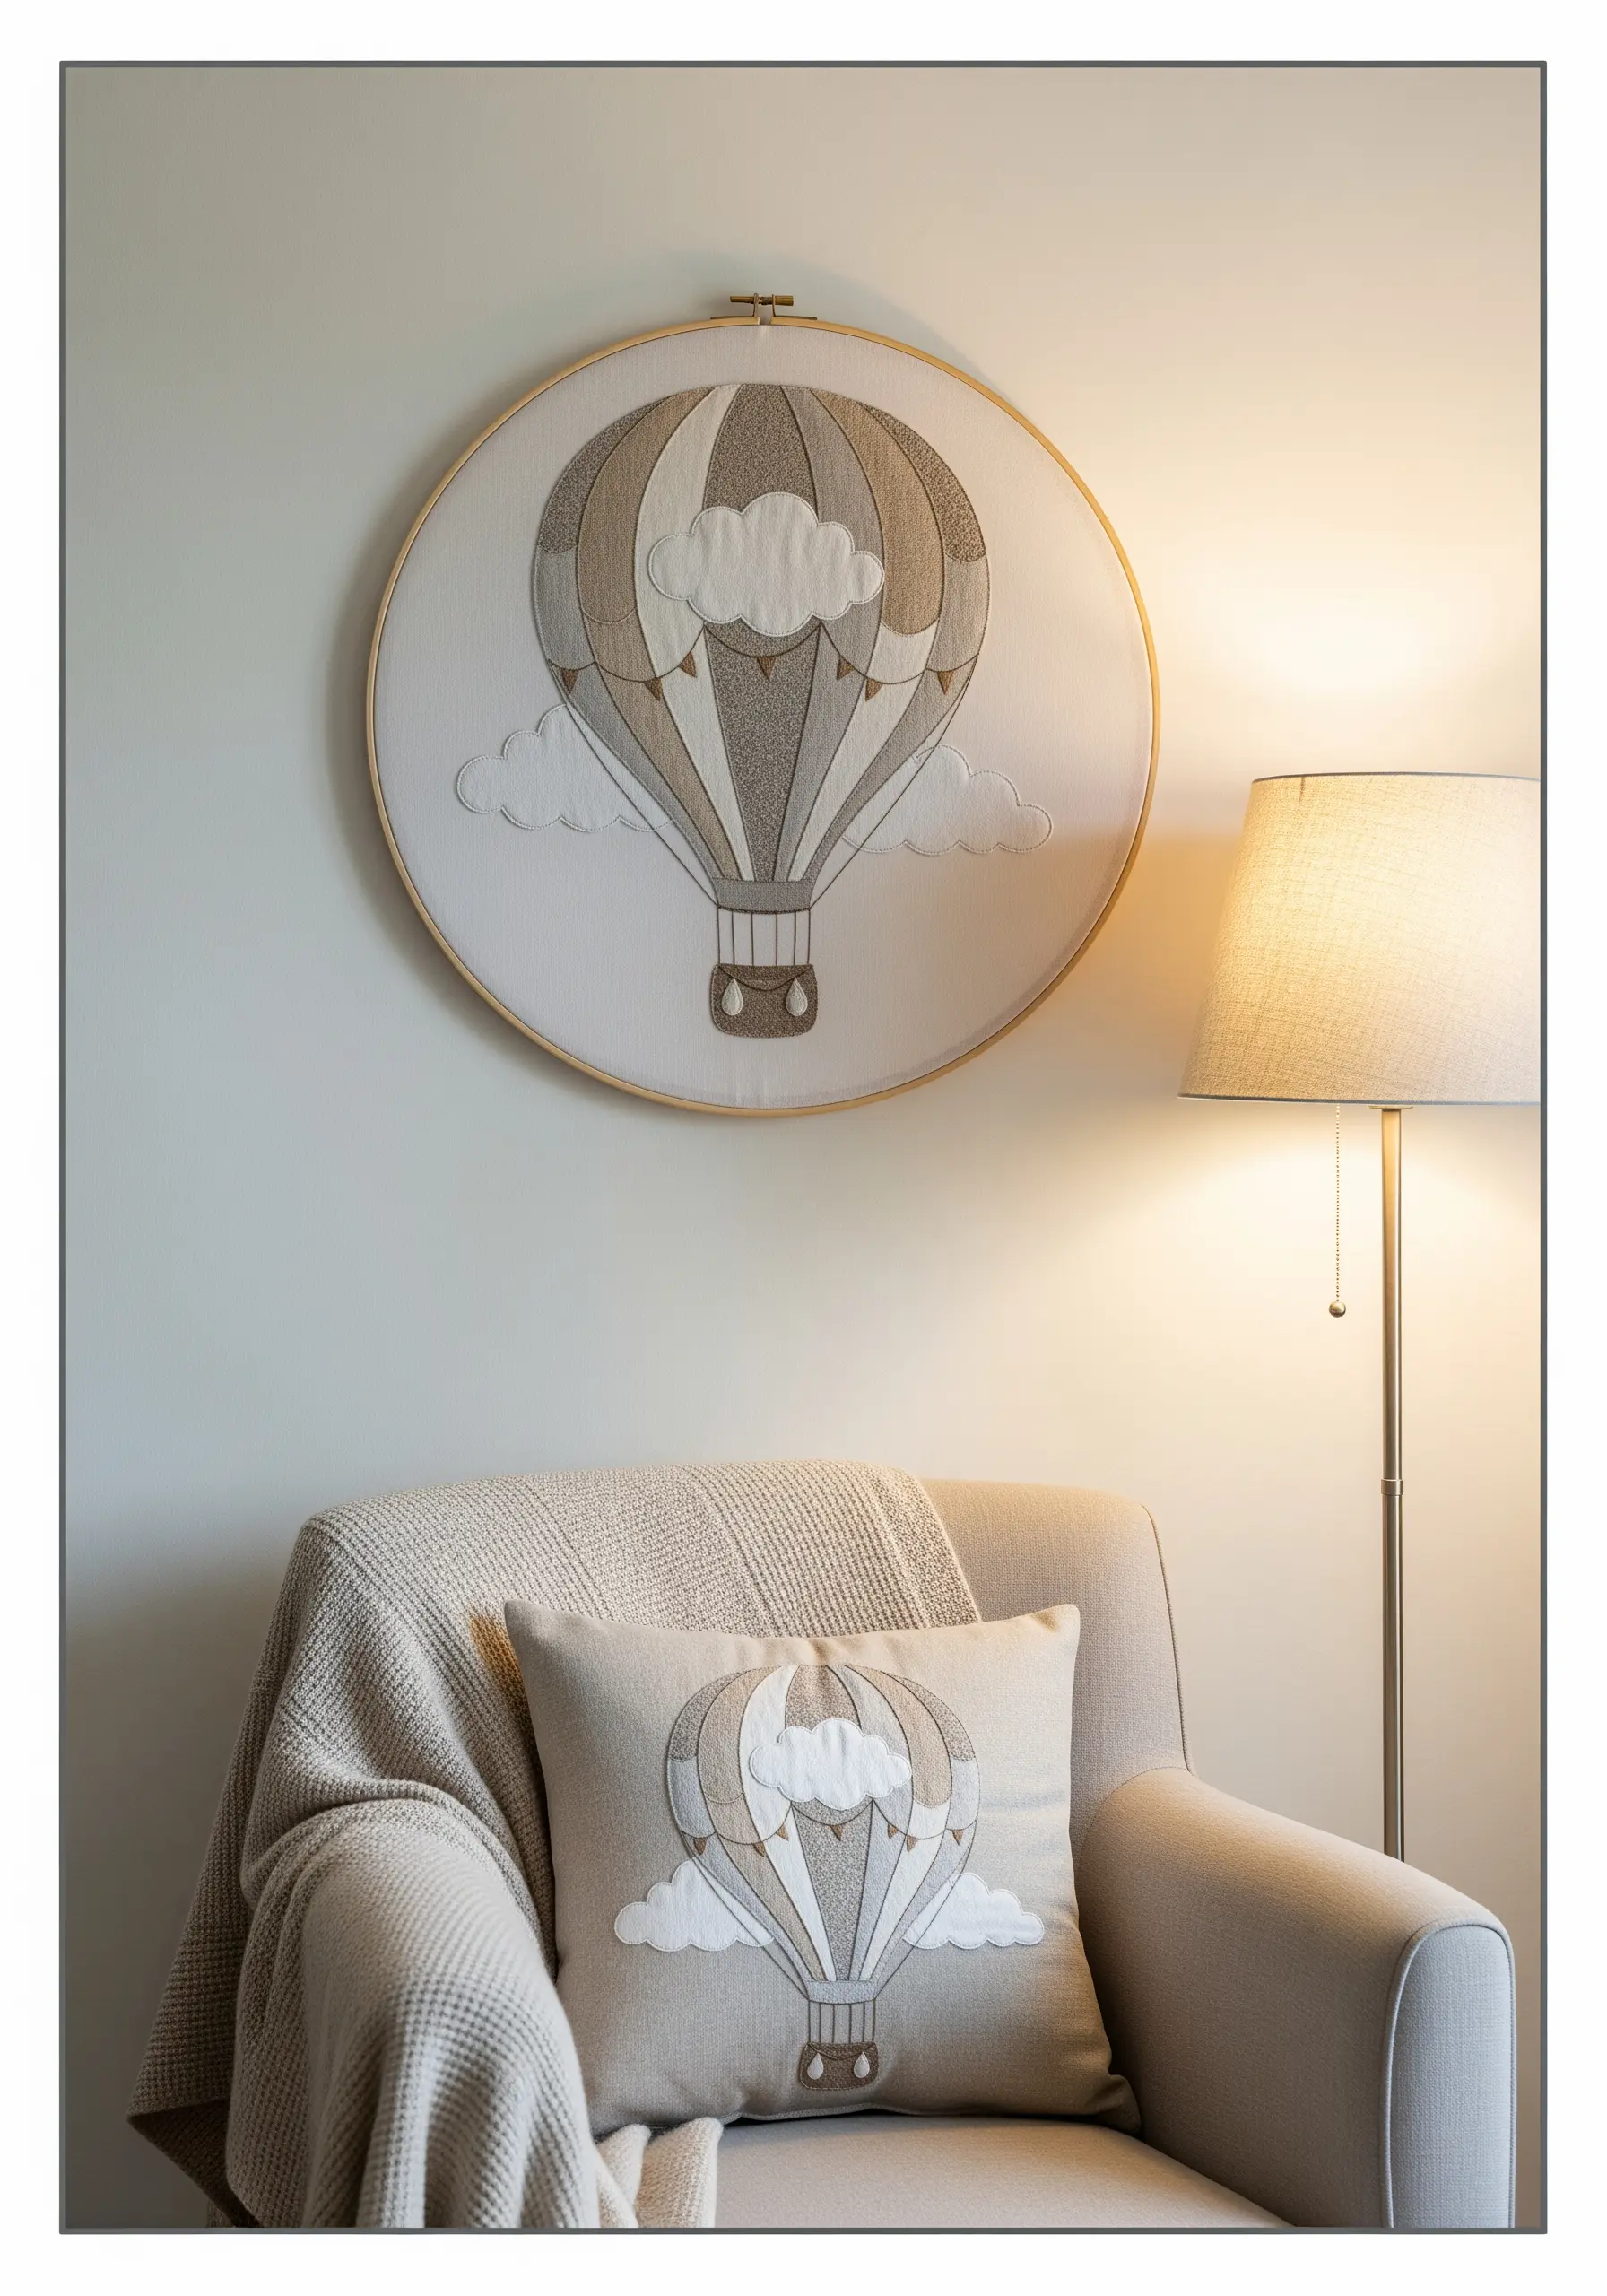
When adapting a design from a wall hoop to a functional item like a pillow, simplify the details to ensure durability.
Use sturdy stitches like chain stitch or stem stitch for outlines, as they hold up better to wear than a simple backstitch.
For the fill areas, opt for a fishbone stitch on the balloon panels; its overlapping nature creates a smoother, more resilient surface than satin stitch, which can snag.
The raised texture of the clouds, created with bullion knots, adds a playful tactile element perfect for a nursery setting.
5. Balance Script with Celestial Motifs
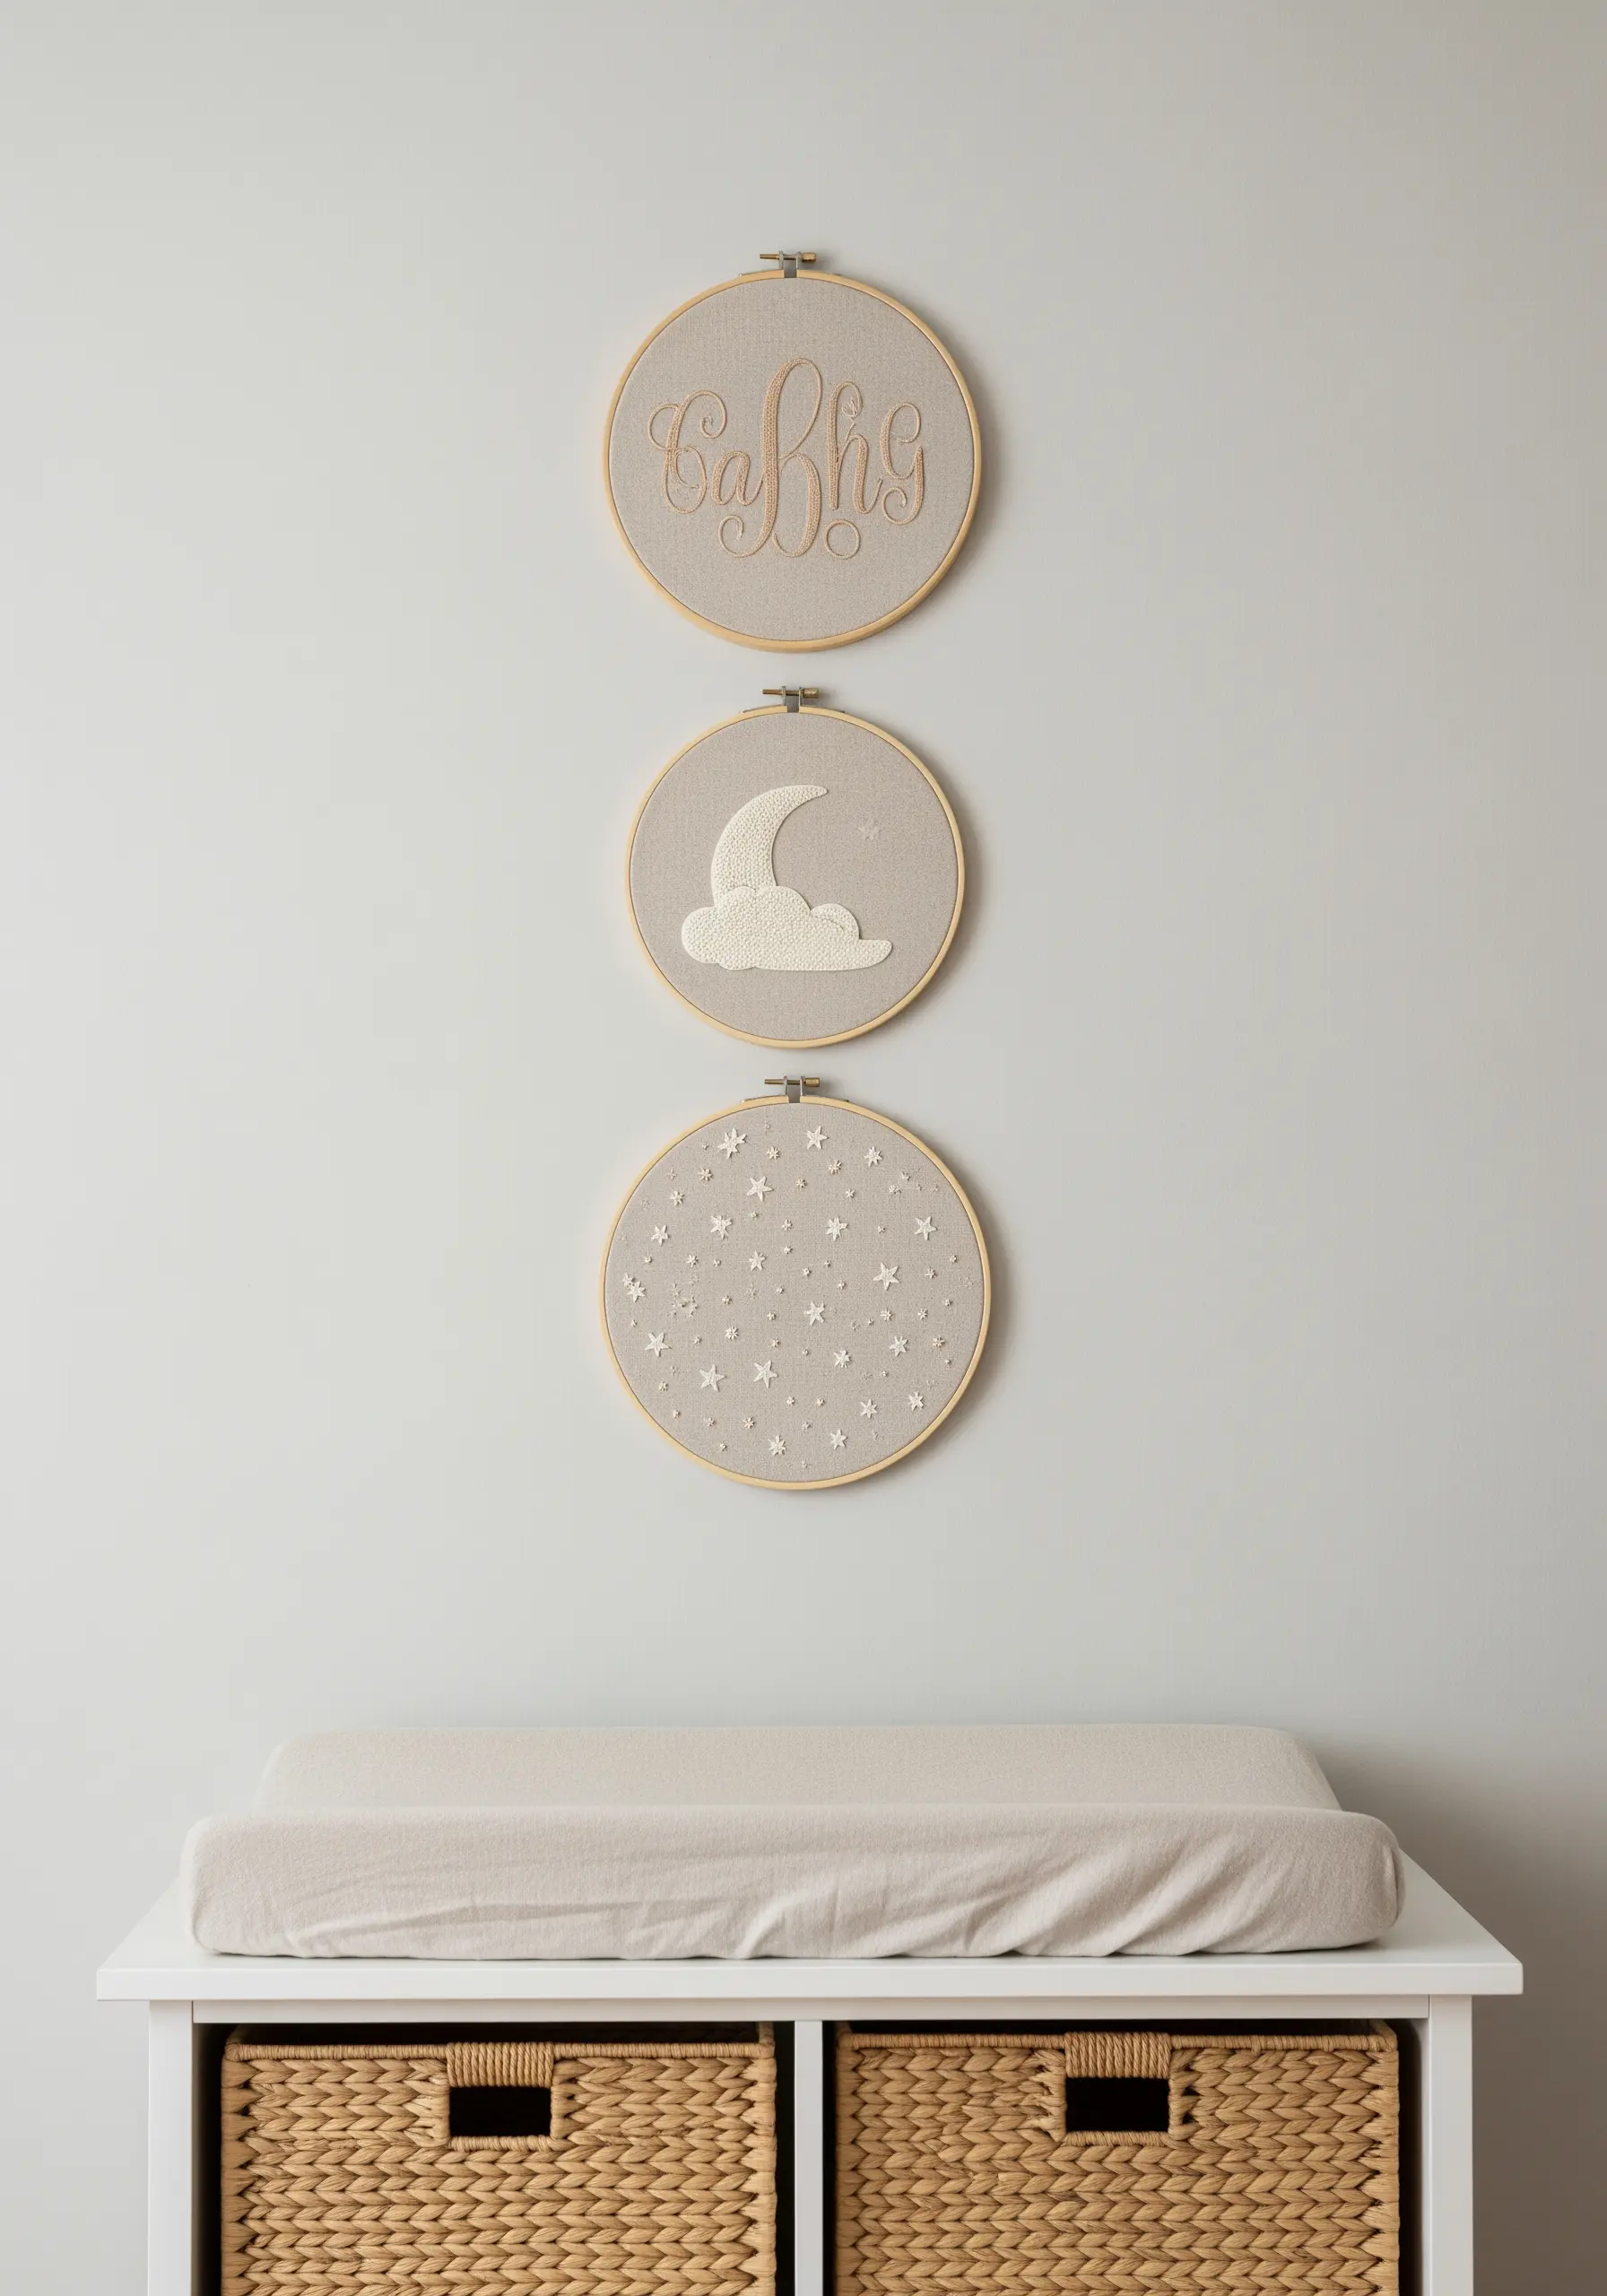
For personalized name hoops, choose a flowing script that can be executed flawlessly with a whipped backstitch—this creates a raised, cord-like line that looks far more polished than a standard backstitch.
Pair the lettering with softer, more textural elements like a cloud filled with French knots and a crescent moon in satin stitch.
To create a delicate field of stars, scatter single seed stitches and tiny cross stitches in a soft ivory or metallic silver thread for a subtle shimmer that catches the light.
6. Design a Geometric Arch Installation
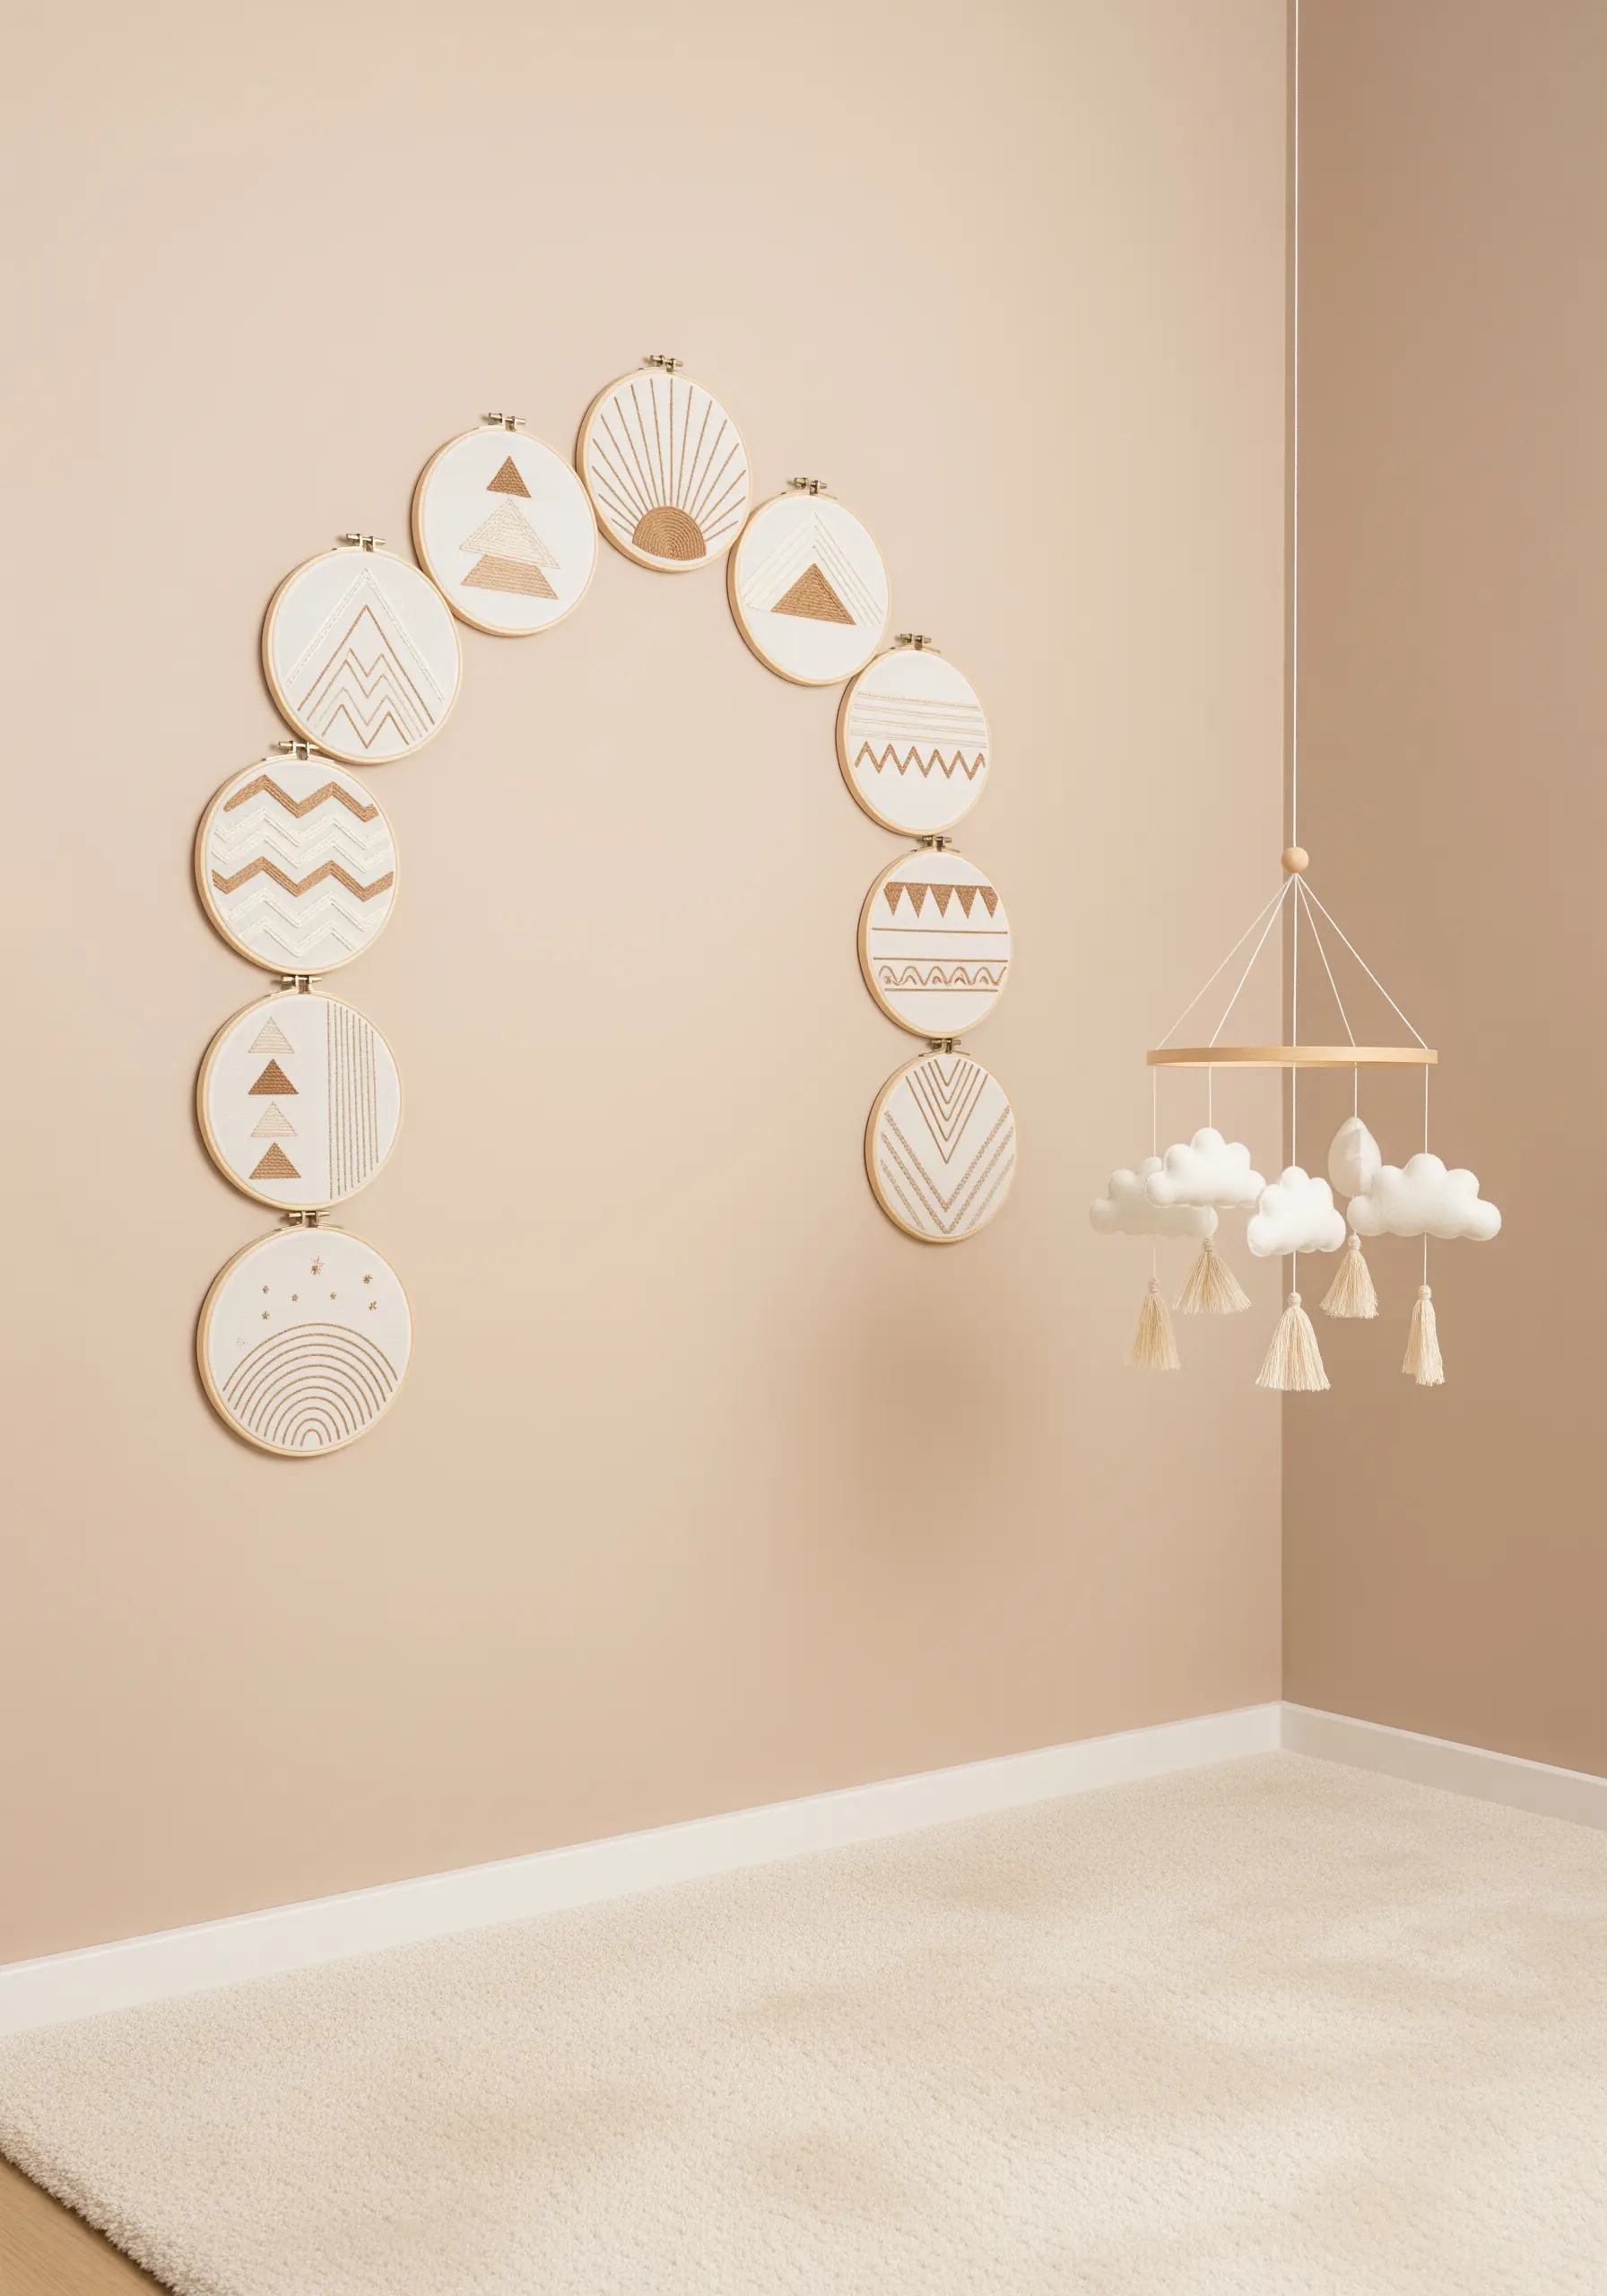
Create a stunning architectural feature by arranging smaller hoops in a sweeping arch.
To maintain a modern, cohesive feel, limit yourself to geometric patterns stitched in a single color, like off-white on a natural linen background.
Vary the patterns—chevrons, triangles, sunbursts, and parallel lines—to keep the installation dynamic and engaging.
Using the same thread weight and fabric across all hoops is critical; this consistency allows the patterns themselves to be the focus, resulting in a clean, graphic, and intentional statement piece.
7. Create a Dreamy Skyscape with Varied Textures
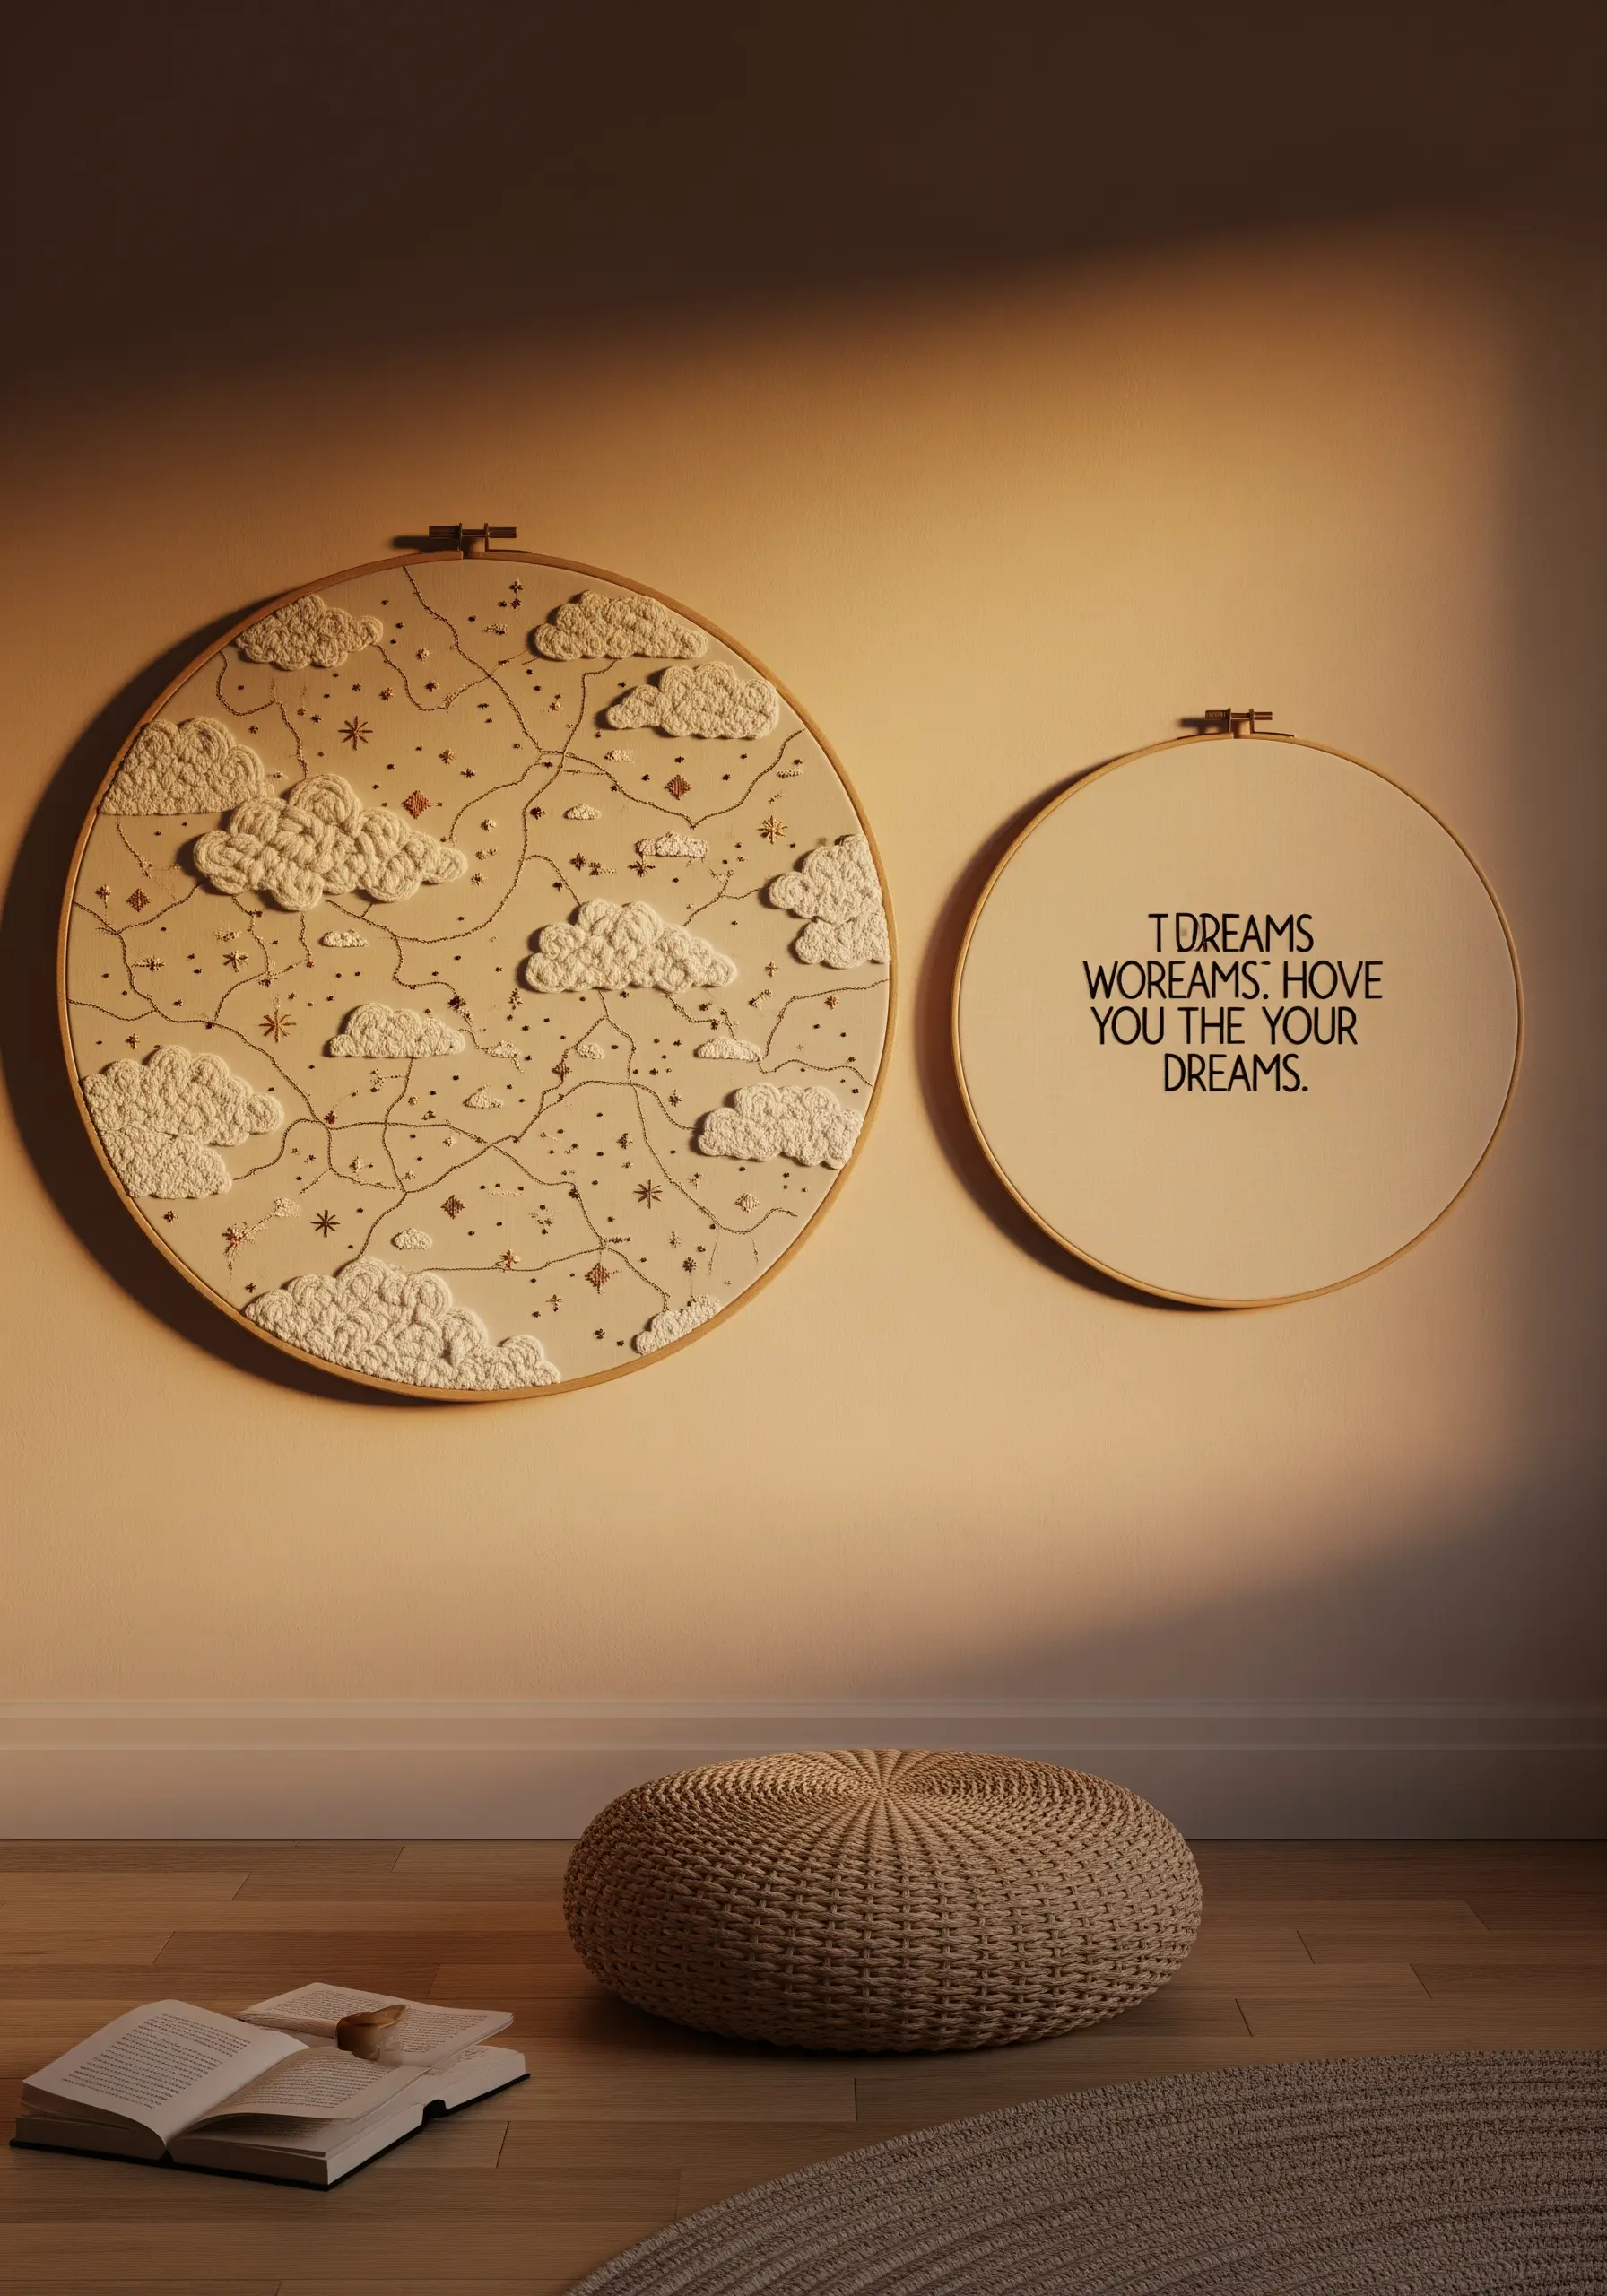
To craft an atmospheric night sky, use a mix of high and low-profile stitches.
Render the clouds with chunky, looped stitches like the detached chain stitch worked in a thick yarn for a billowy effect.
For the background ‘stardust,’ scatter tiny seed stitches and French knots using a single strand of floss in a slightly darker or lighter shade than your fabric.
This subtle tonal shift creates depth and a sense of vastness, turning a simple hoop into an imaginative skyscape.
Pair it with a hoop featuring a clean, modern font for a contemporary touch.
8. Achieve Botanical Elegance with Line Art
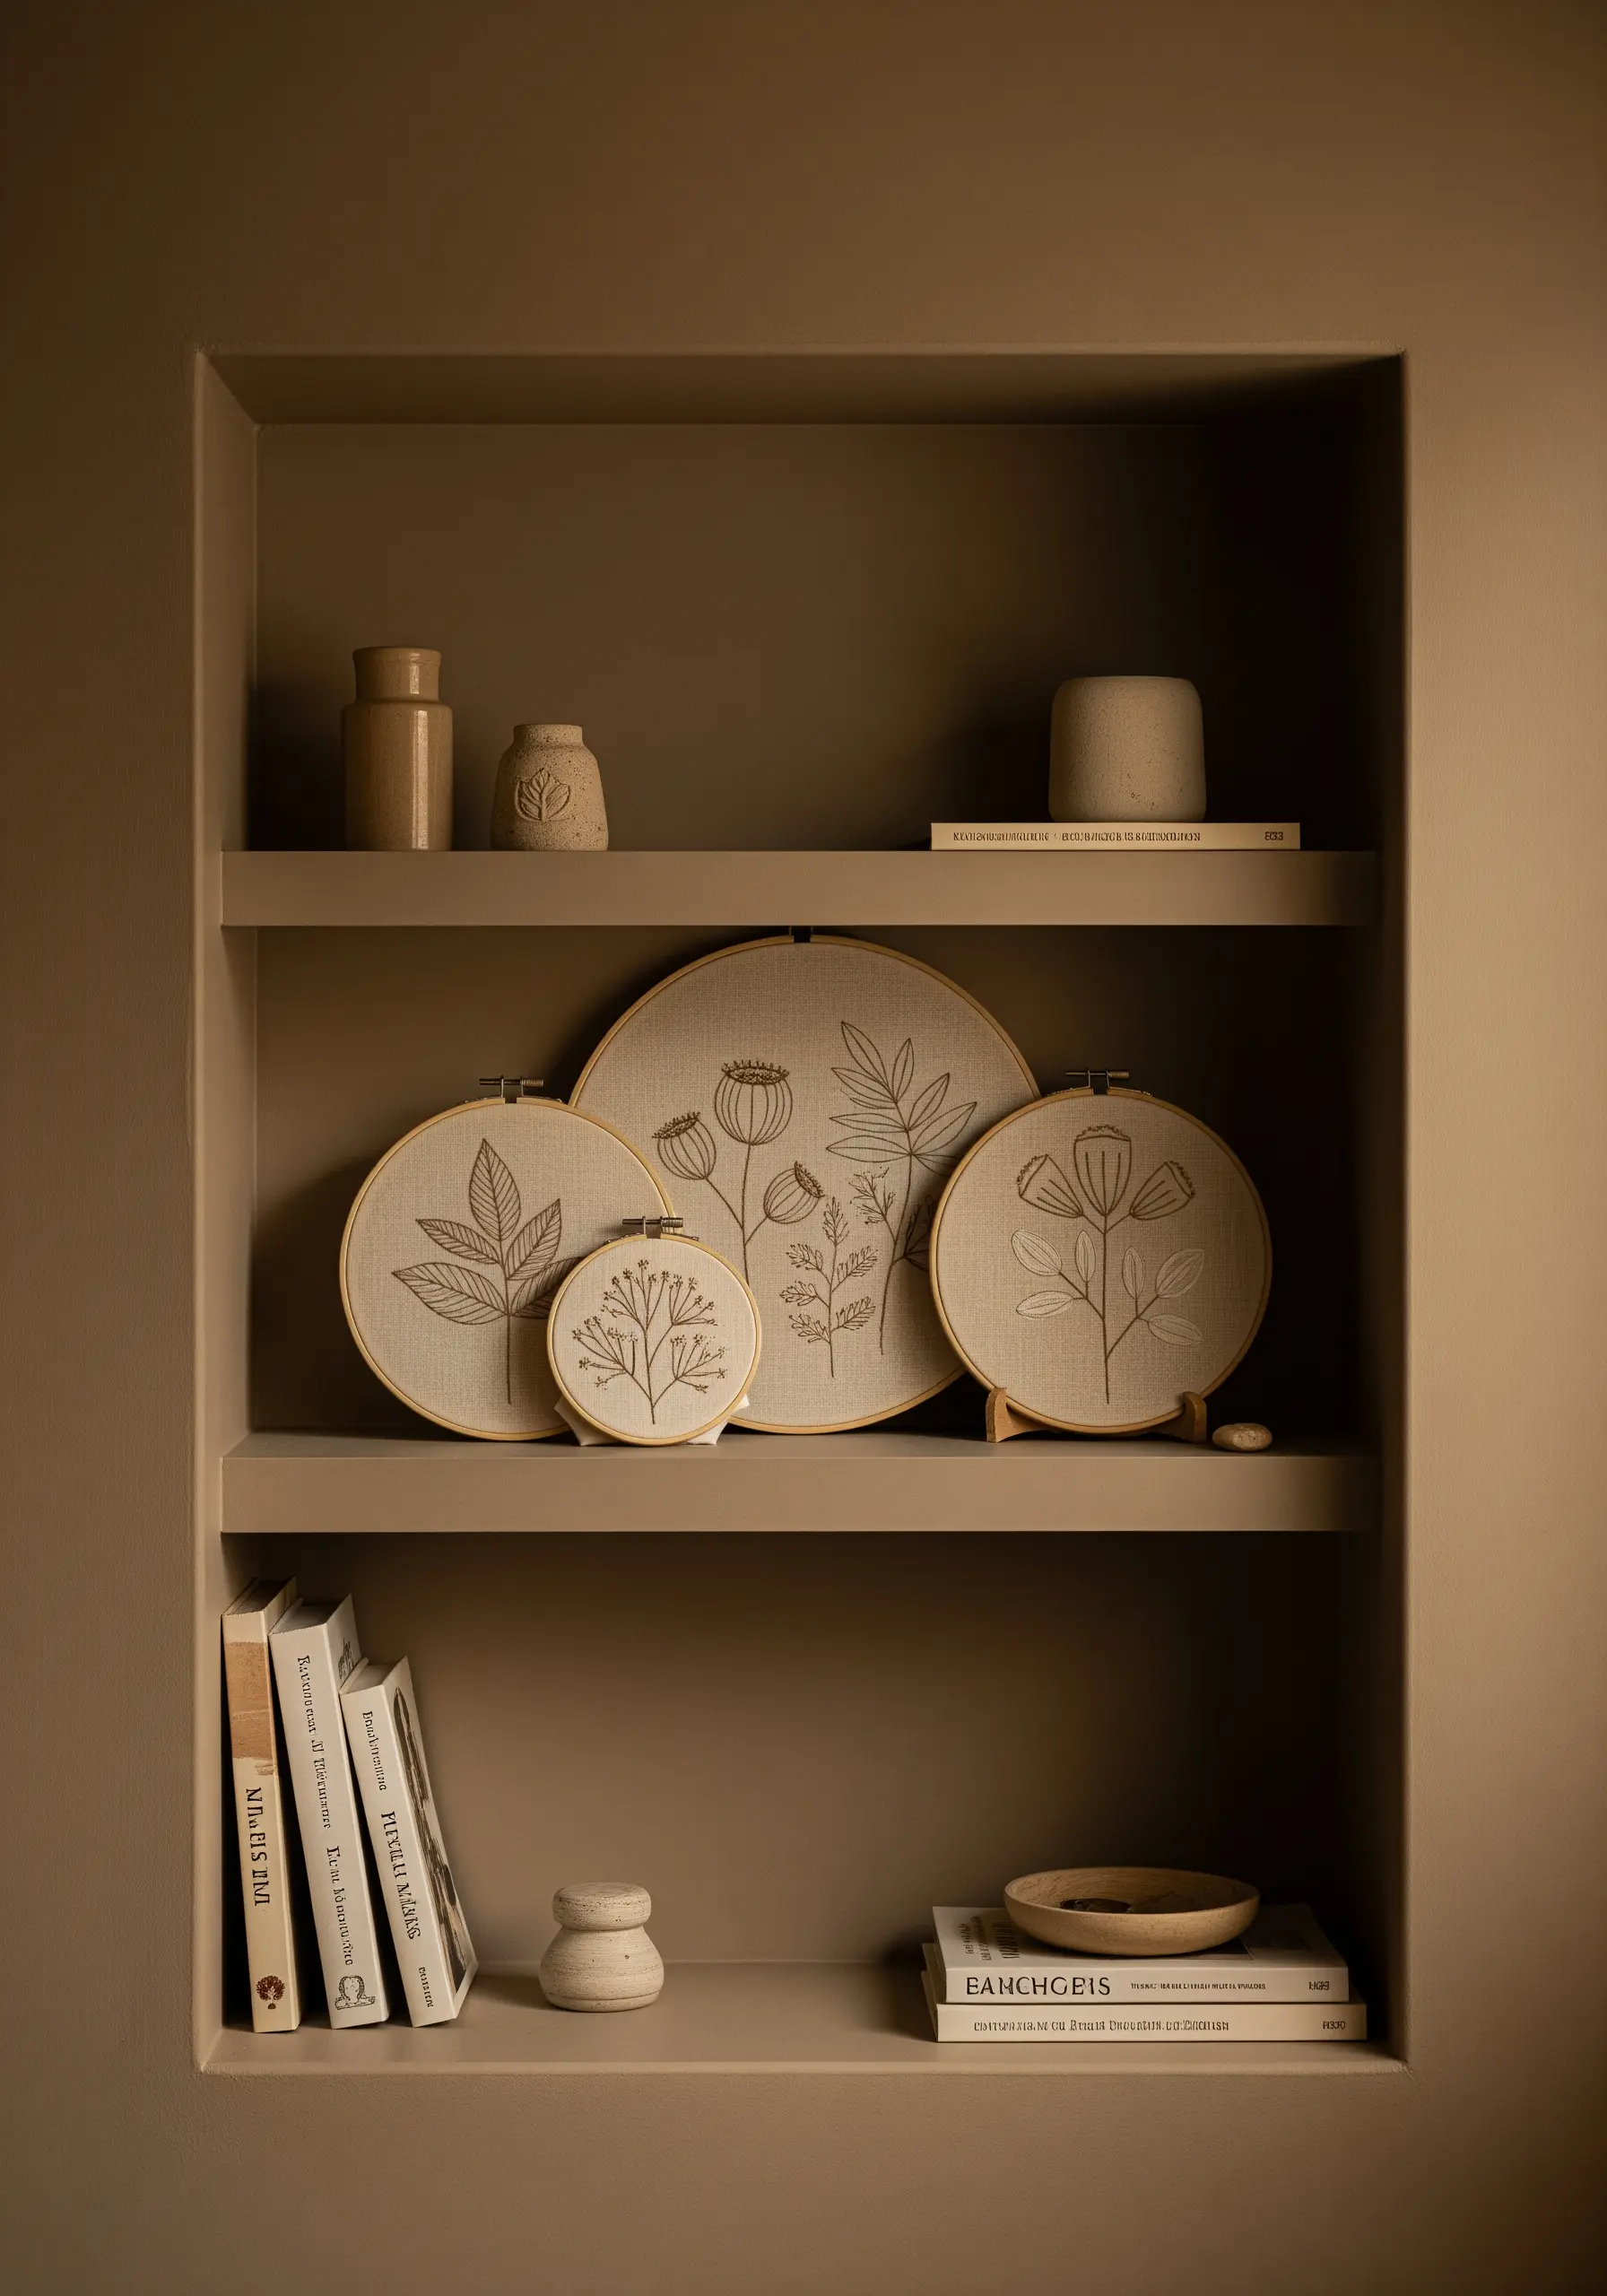
For sophisticated botanical designs, focus on the purity of line rather than dense color fills.
Use a two-strand stem stitch or split stitch to create clean, flowing outlines of leaves and flowers. This technique gives the lines a subtle, rope-like texture that adds dimension and refinement.
Varying the hoop size within your display adds visual interest and rhythm.
Choose a high-quality linen fabric; its natural, slightly irregular weave provides the perfect organic backdrop for delicate line art embroidery.
9. Stitch Rolling Hills with Thread Painting
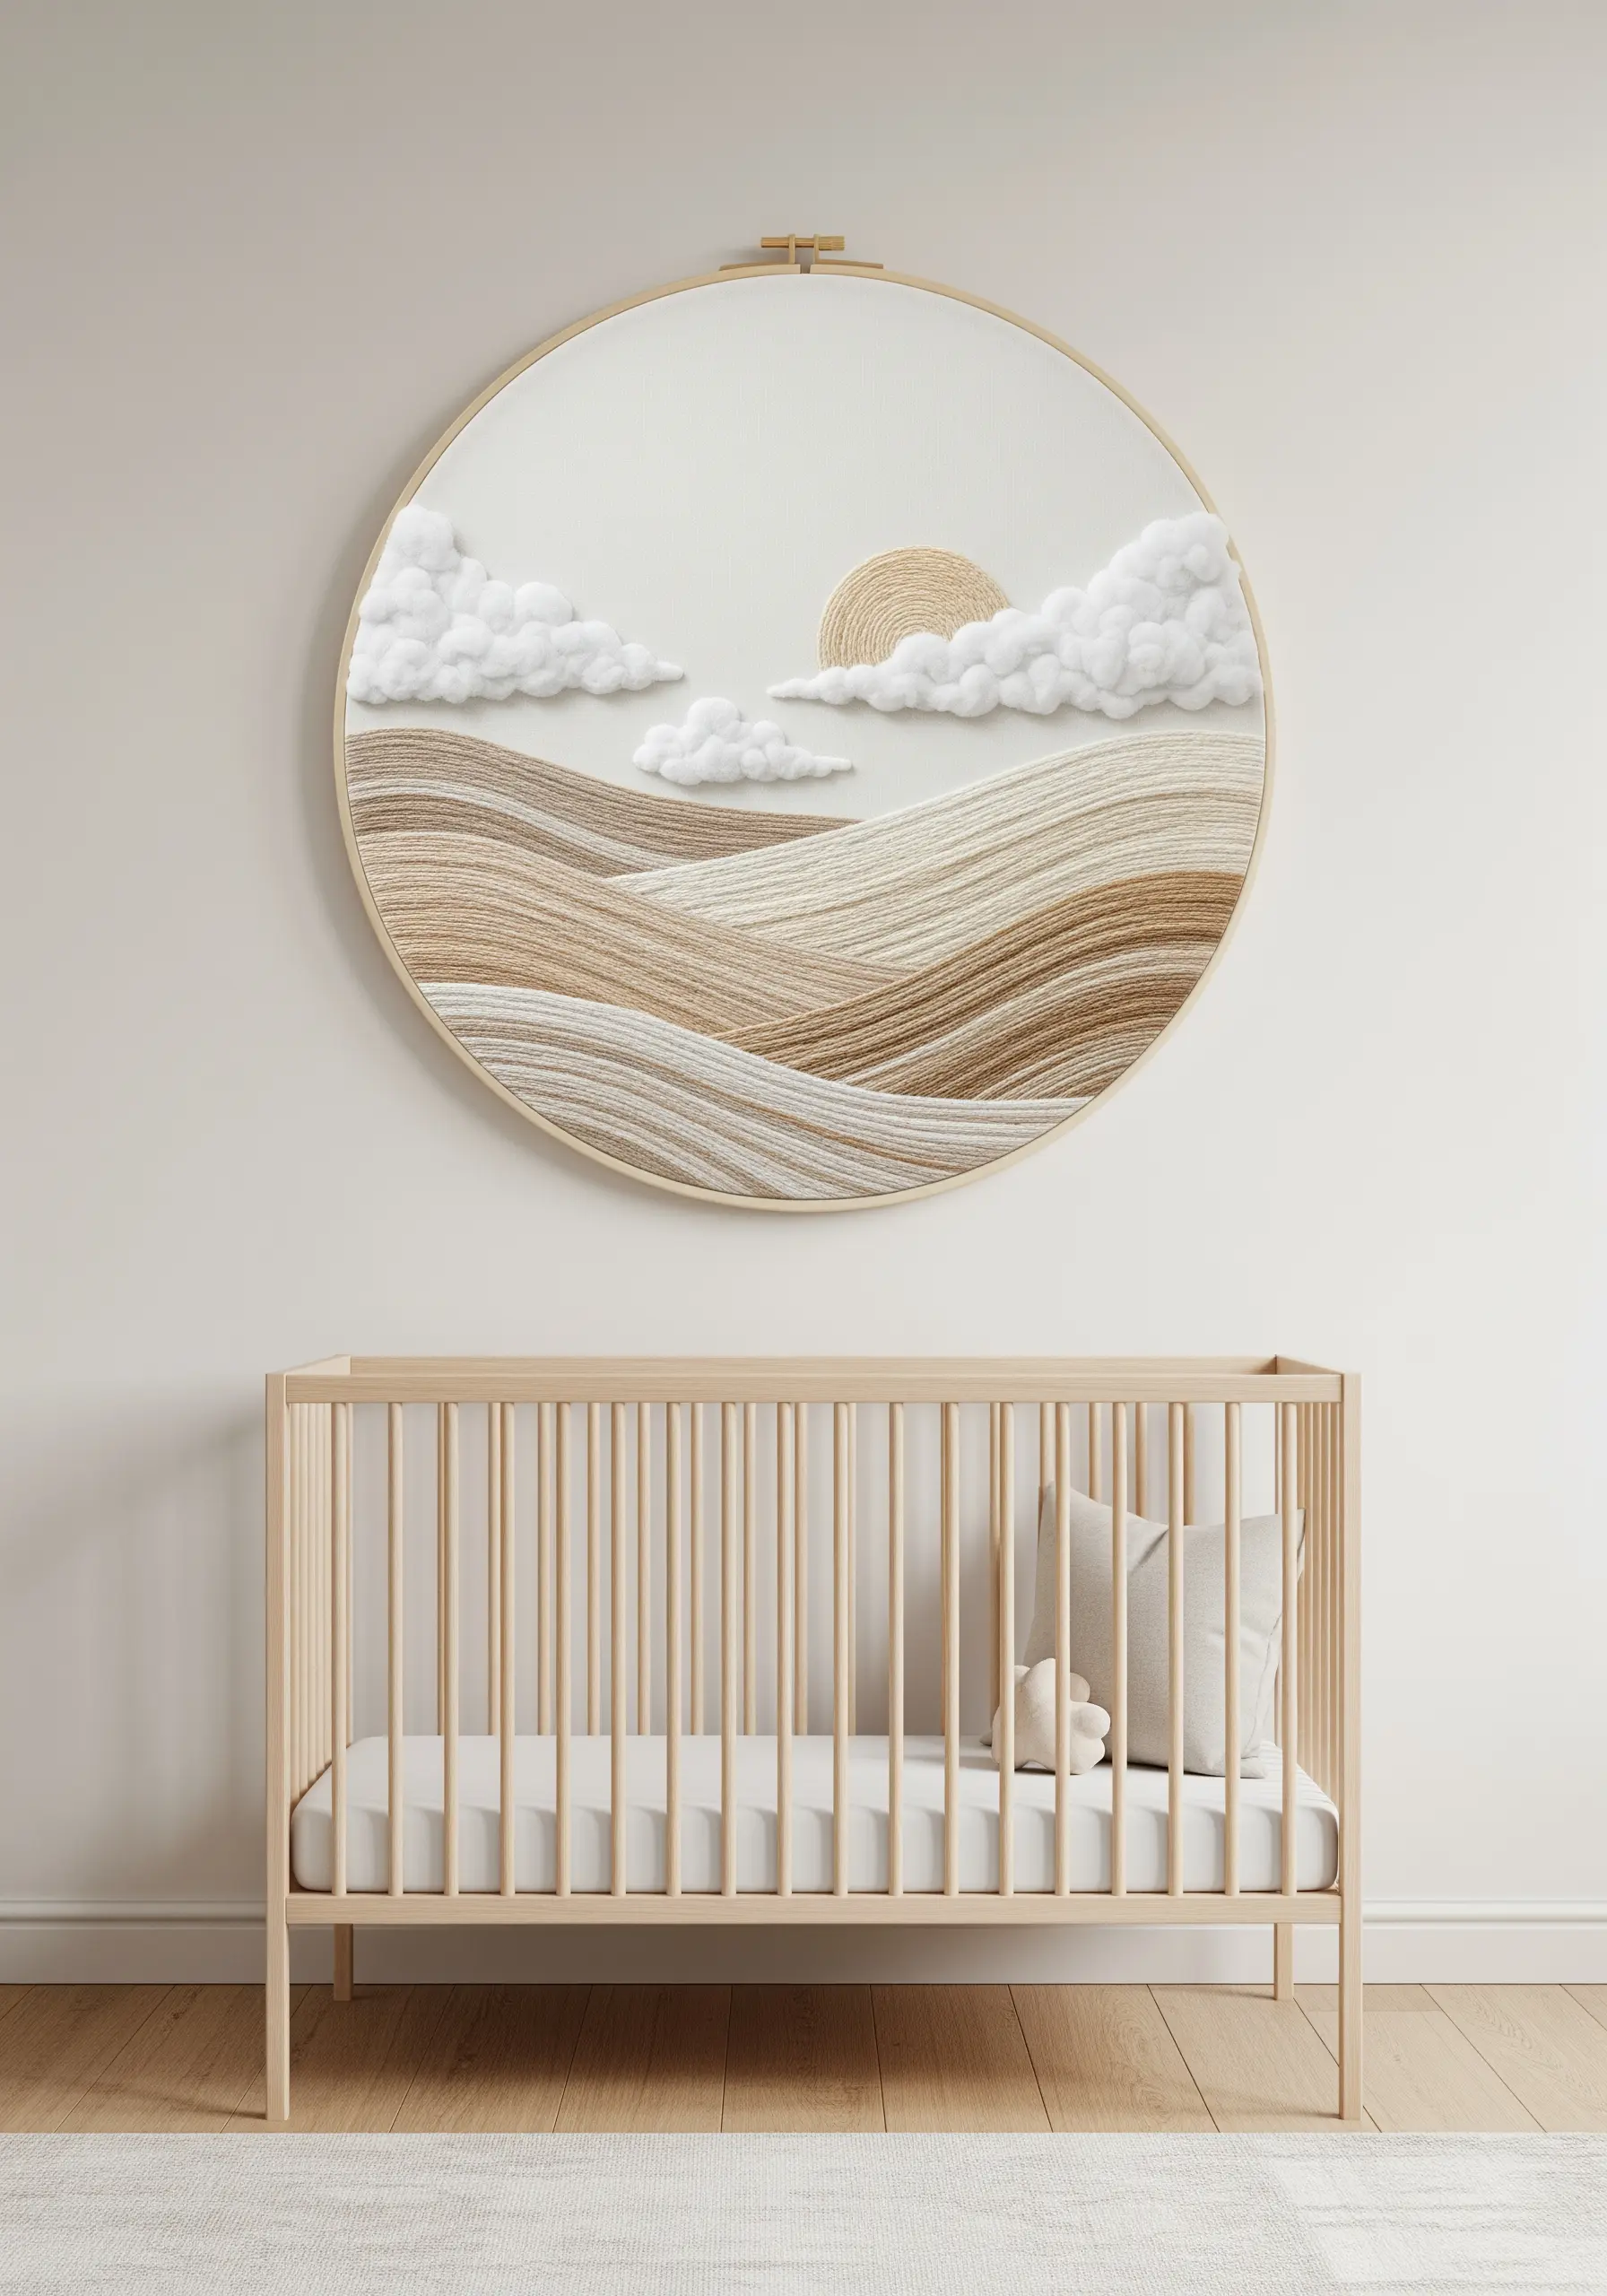
To create the soft, rolling hills of a serene landscape, use the long-and-short stitch technique, also known as thread painting.
Work with a single strand of floss and blend shades of sand, taupe, and ivory by overlapping your stitches in gentle curves that follow the contours of the hills.
The key is to avoid hard lines between colors; instead, your stitches should interlock like fine brushstrokes.
For the clouds, use clusters of French knots in a bright ivory to create a fluffy texture that appears to float above the smoothly blended landscape.
10. Explore Abstract Texture with Woven Details
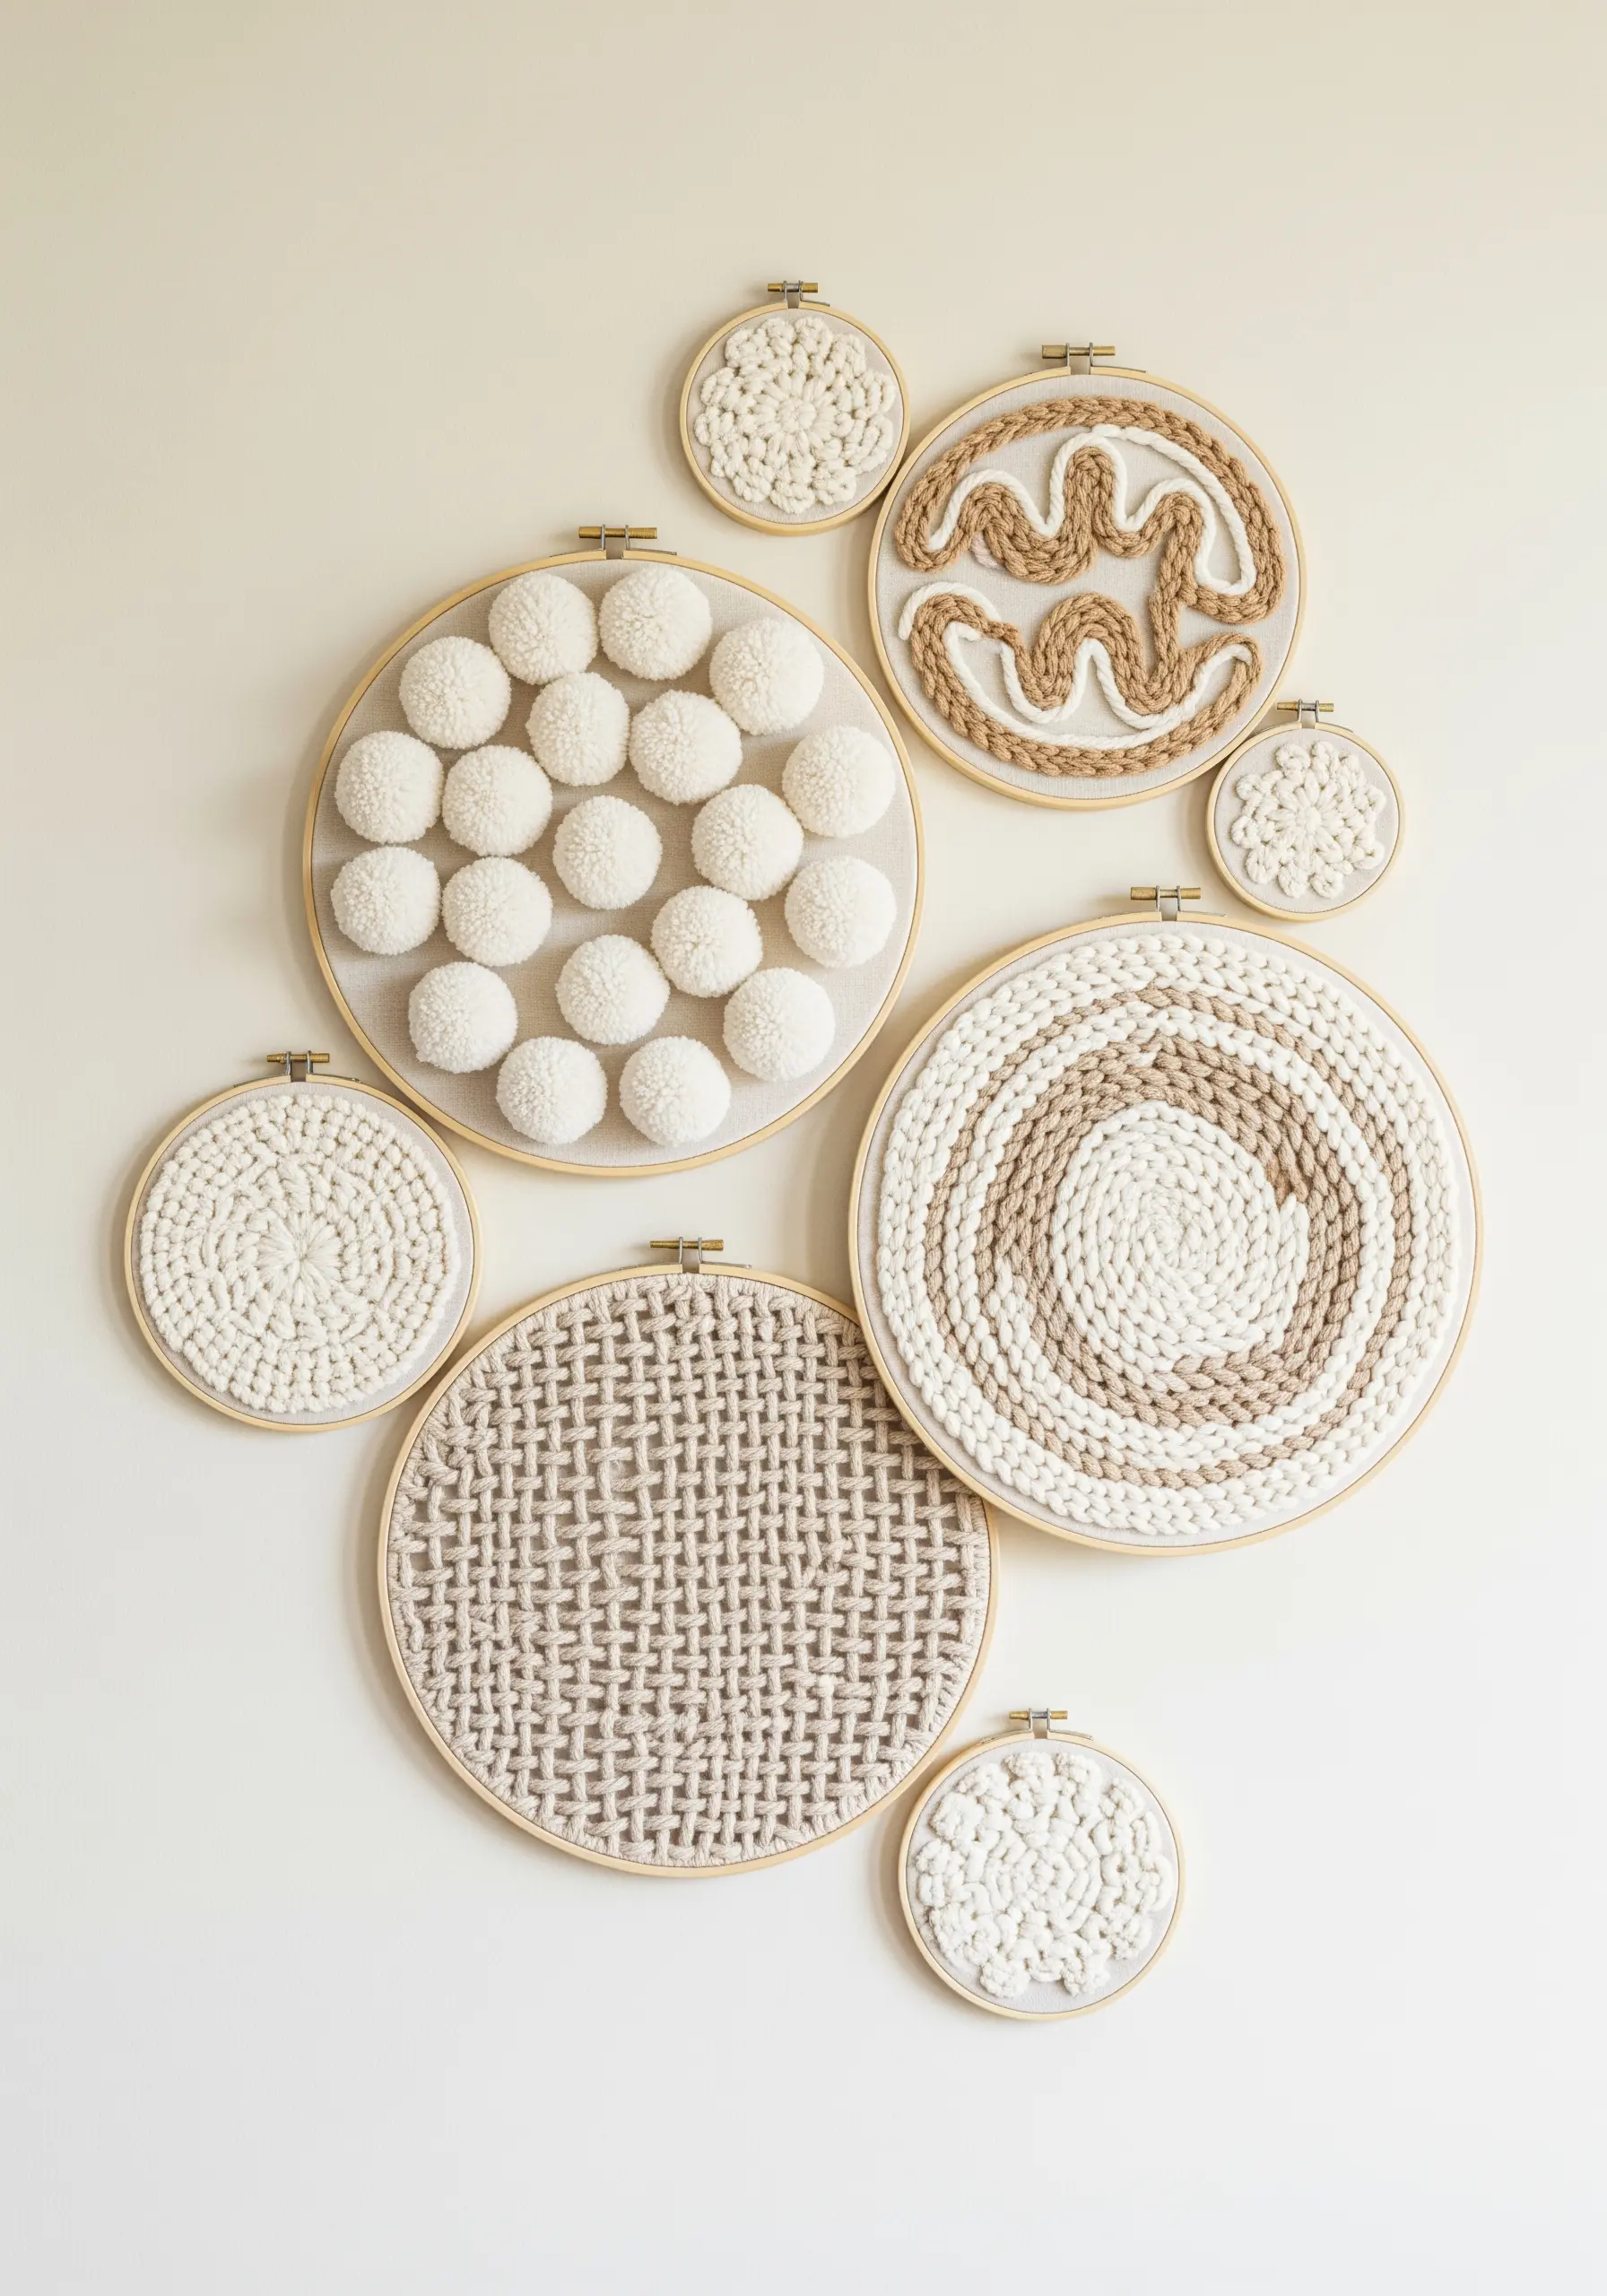
Move beyond traditional stitches and explore woven textures within the hoop.
Create a grid of straight stitches with thick yarn and then weave another yarn over and under to create a woven patch effect. This adds a bold, graphic element to your collection.
For the pom-pom hoop, create fluffy, dense pom-poms from yarn and secure them tightly to the fabric for an incredibly tactile and playful piece.
Combining these mixed fiber projects creates a gallery wall that invites touch and showcases a modern approach to fiber art.
11. Capture Fluid Motion with Directional Stitching
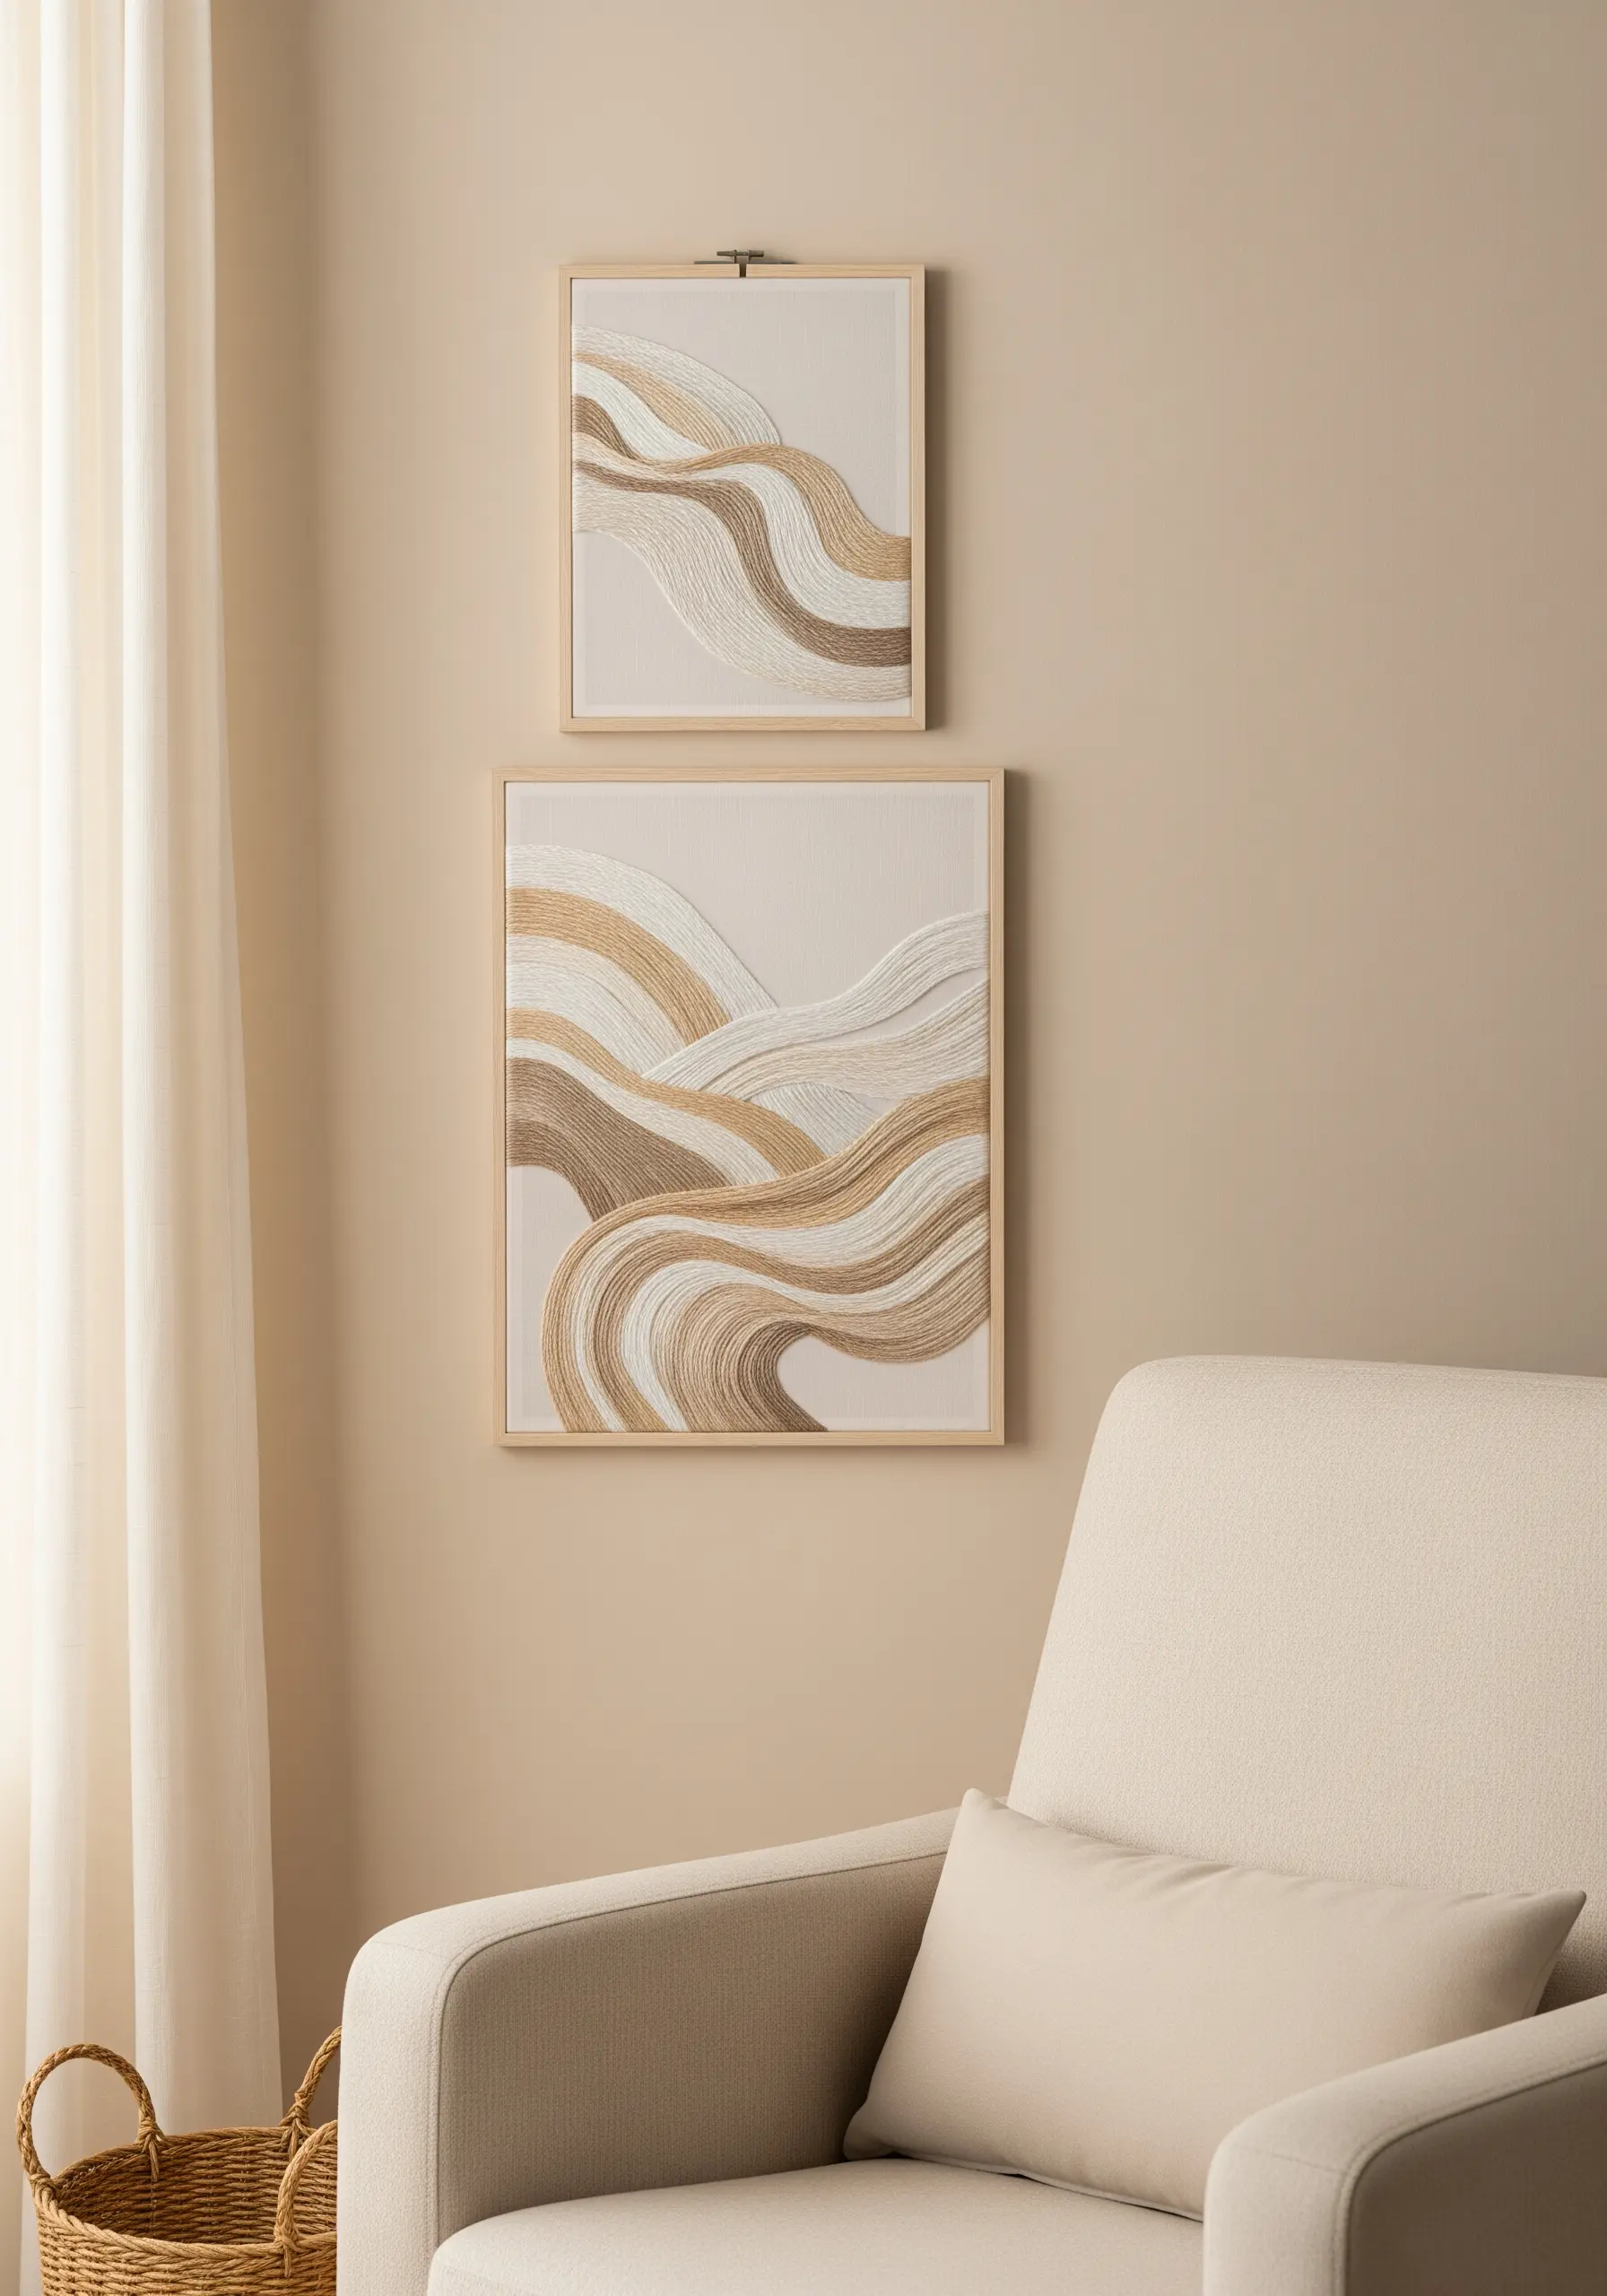
To make thread look like it’s flowing across the canvas, pay close attention to the direction of your satin stitches.
Instead of stitching in straight, parallel lines, angle your stitches to follow the curves of your design. This creates a sense of movement and reflects light in a way that mimics flowing water or wind-swept sand.
Use a single color family, blending from light to dark, to enhance the feeling of depth and motion.
Presenting this work in a simple rectangular frame elevates it from a craft project to a piece of modern thread art.
12. Create a Celestial Constellation with Mini Hoops
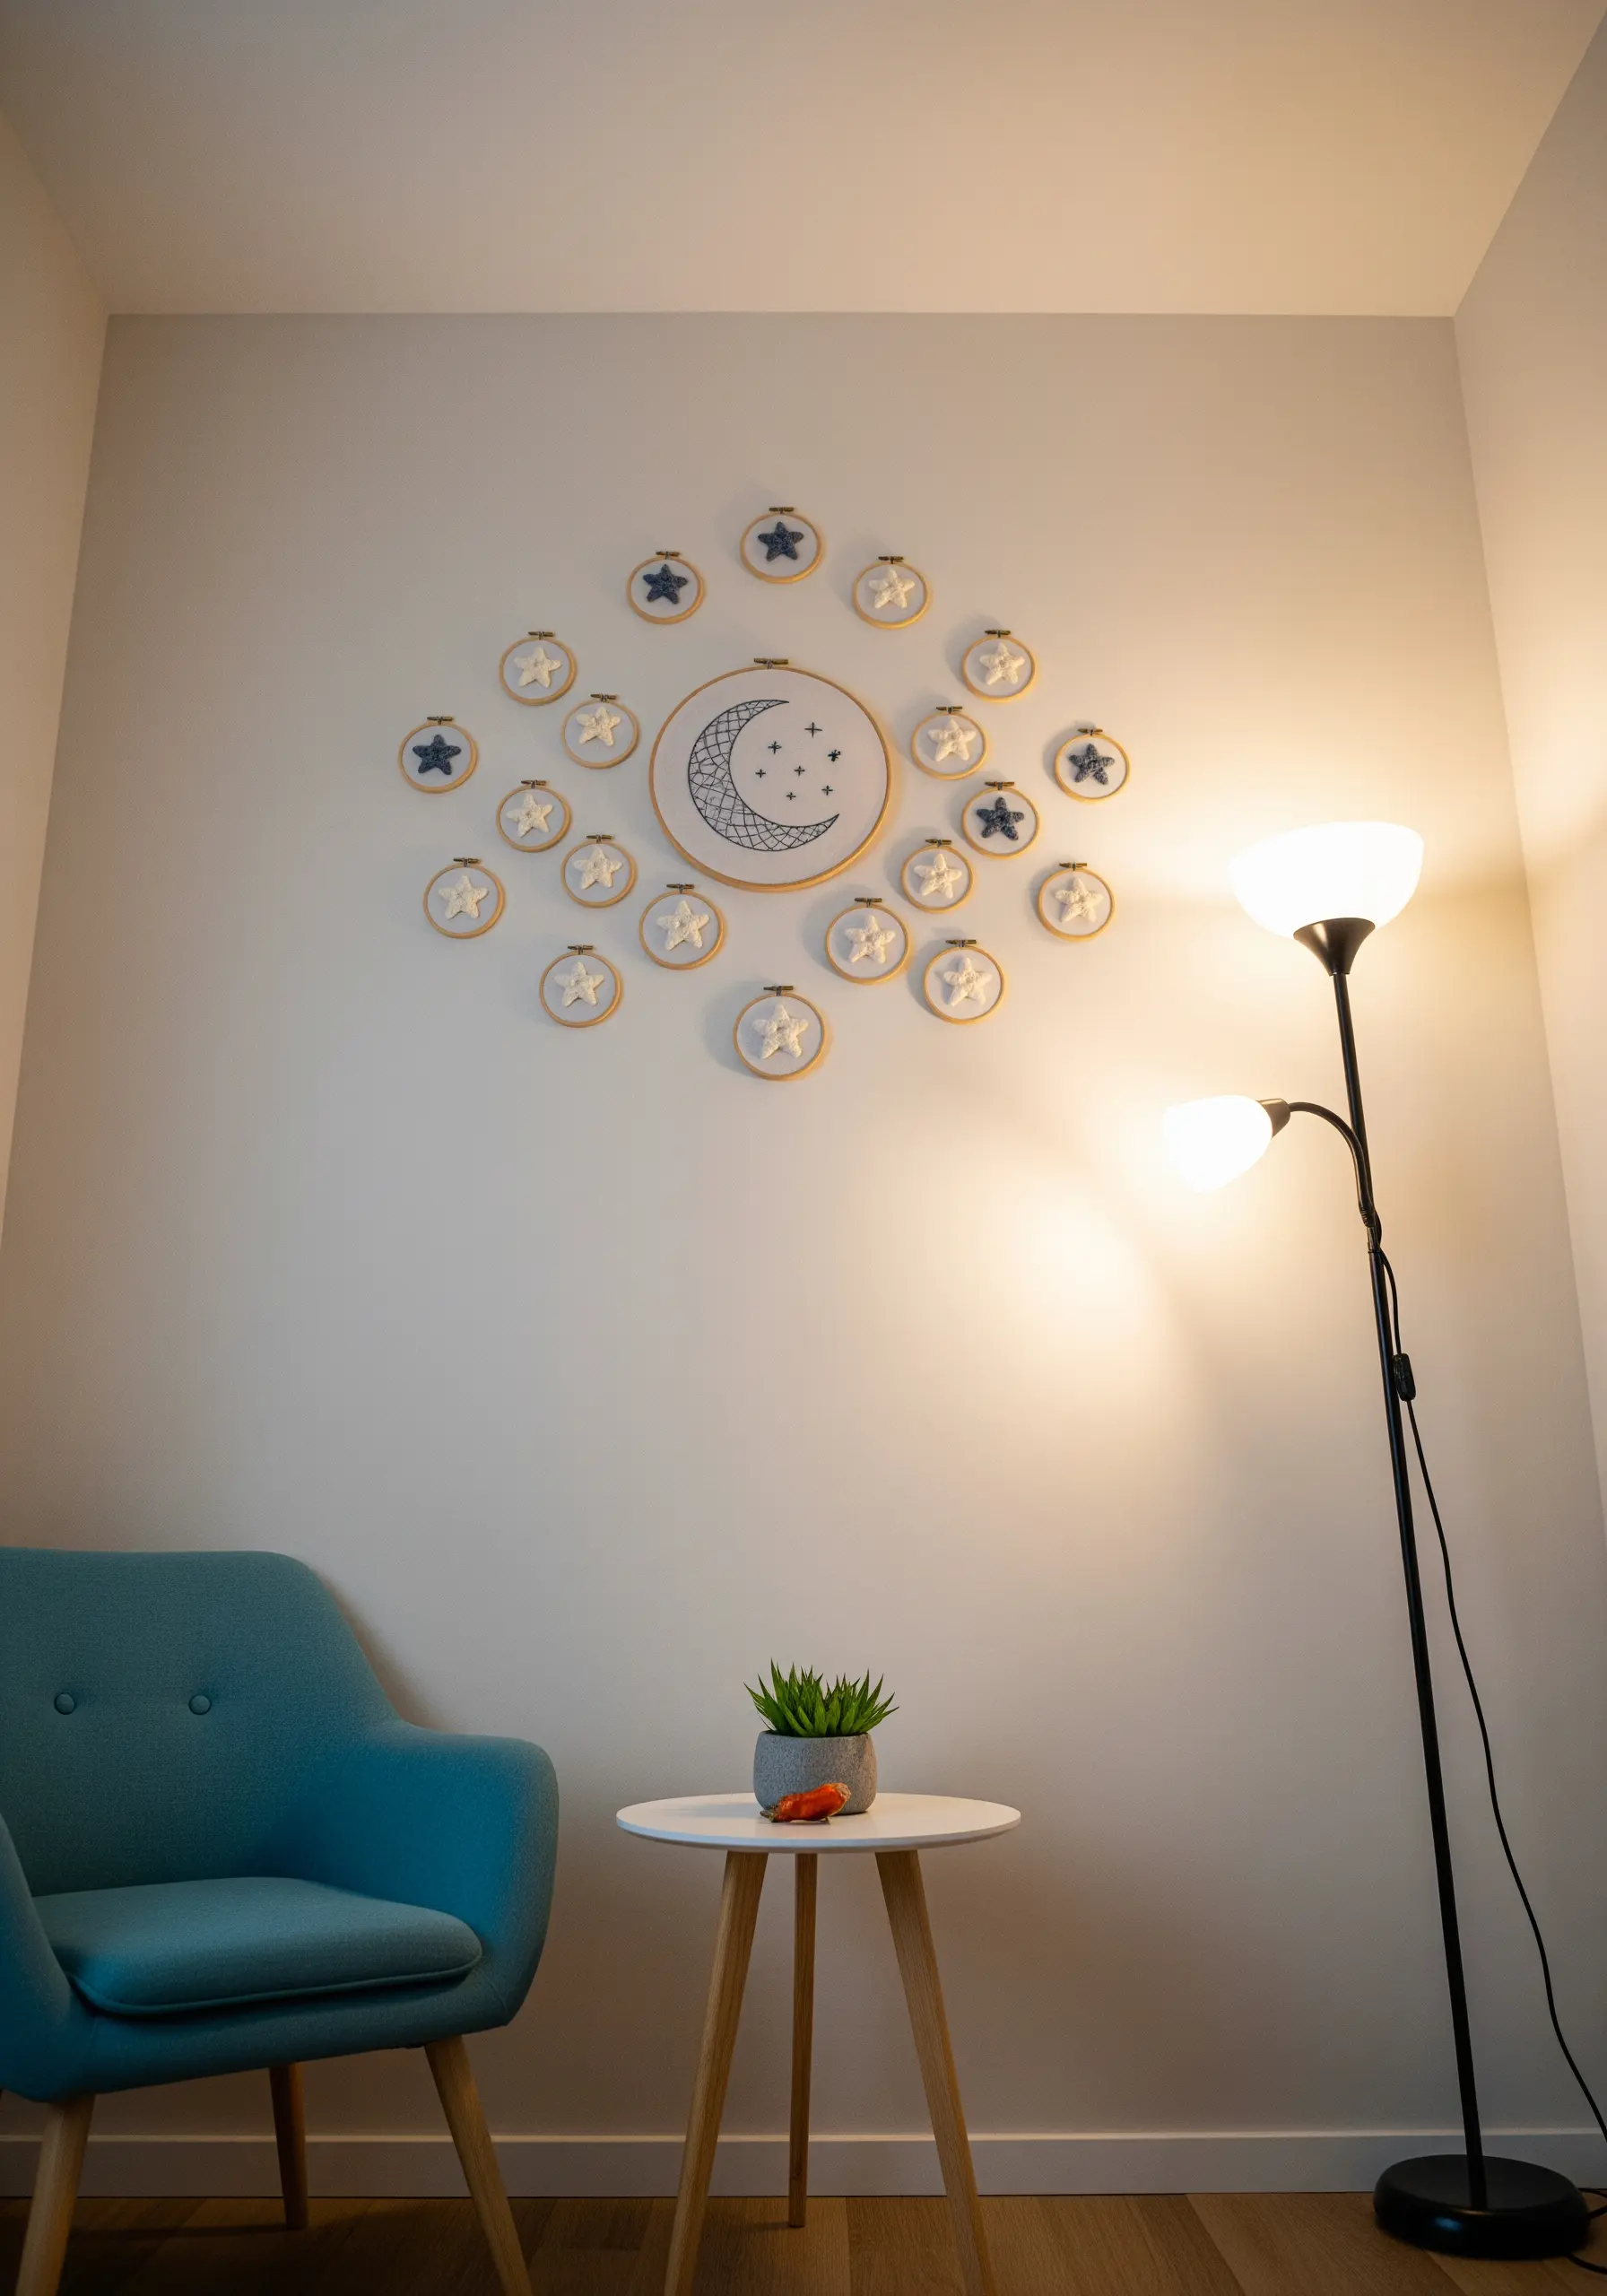
Design a captivating night-sky gallery by surrounding a central motif with a scatter of miniature hoops.
In the main hoop, use a contrasting thread color—like dark navy on cream fabric—to make the central moon design pop. A gridded fill, like a laid work or trellis stitch, adds texture without overwhelming the design.
For the surrounding ‘stars,’ use tiny 3-inch hoops and stitch simple, three-dimensional starbursts or padded satin stitch stars. This creates a dynamic, expansive composition that feels both magical and modern.
13. Tell a Story Across Custom-Shaped Frames
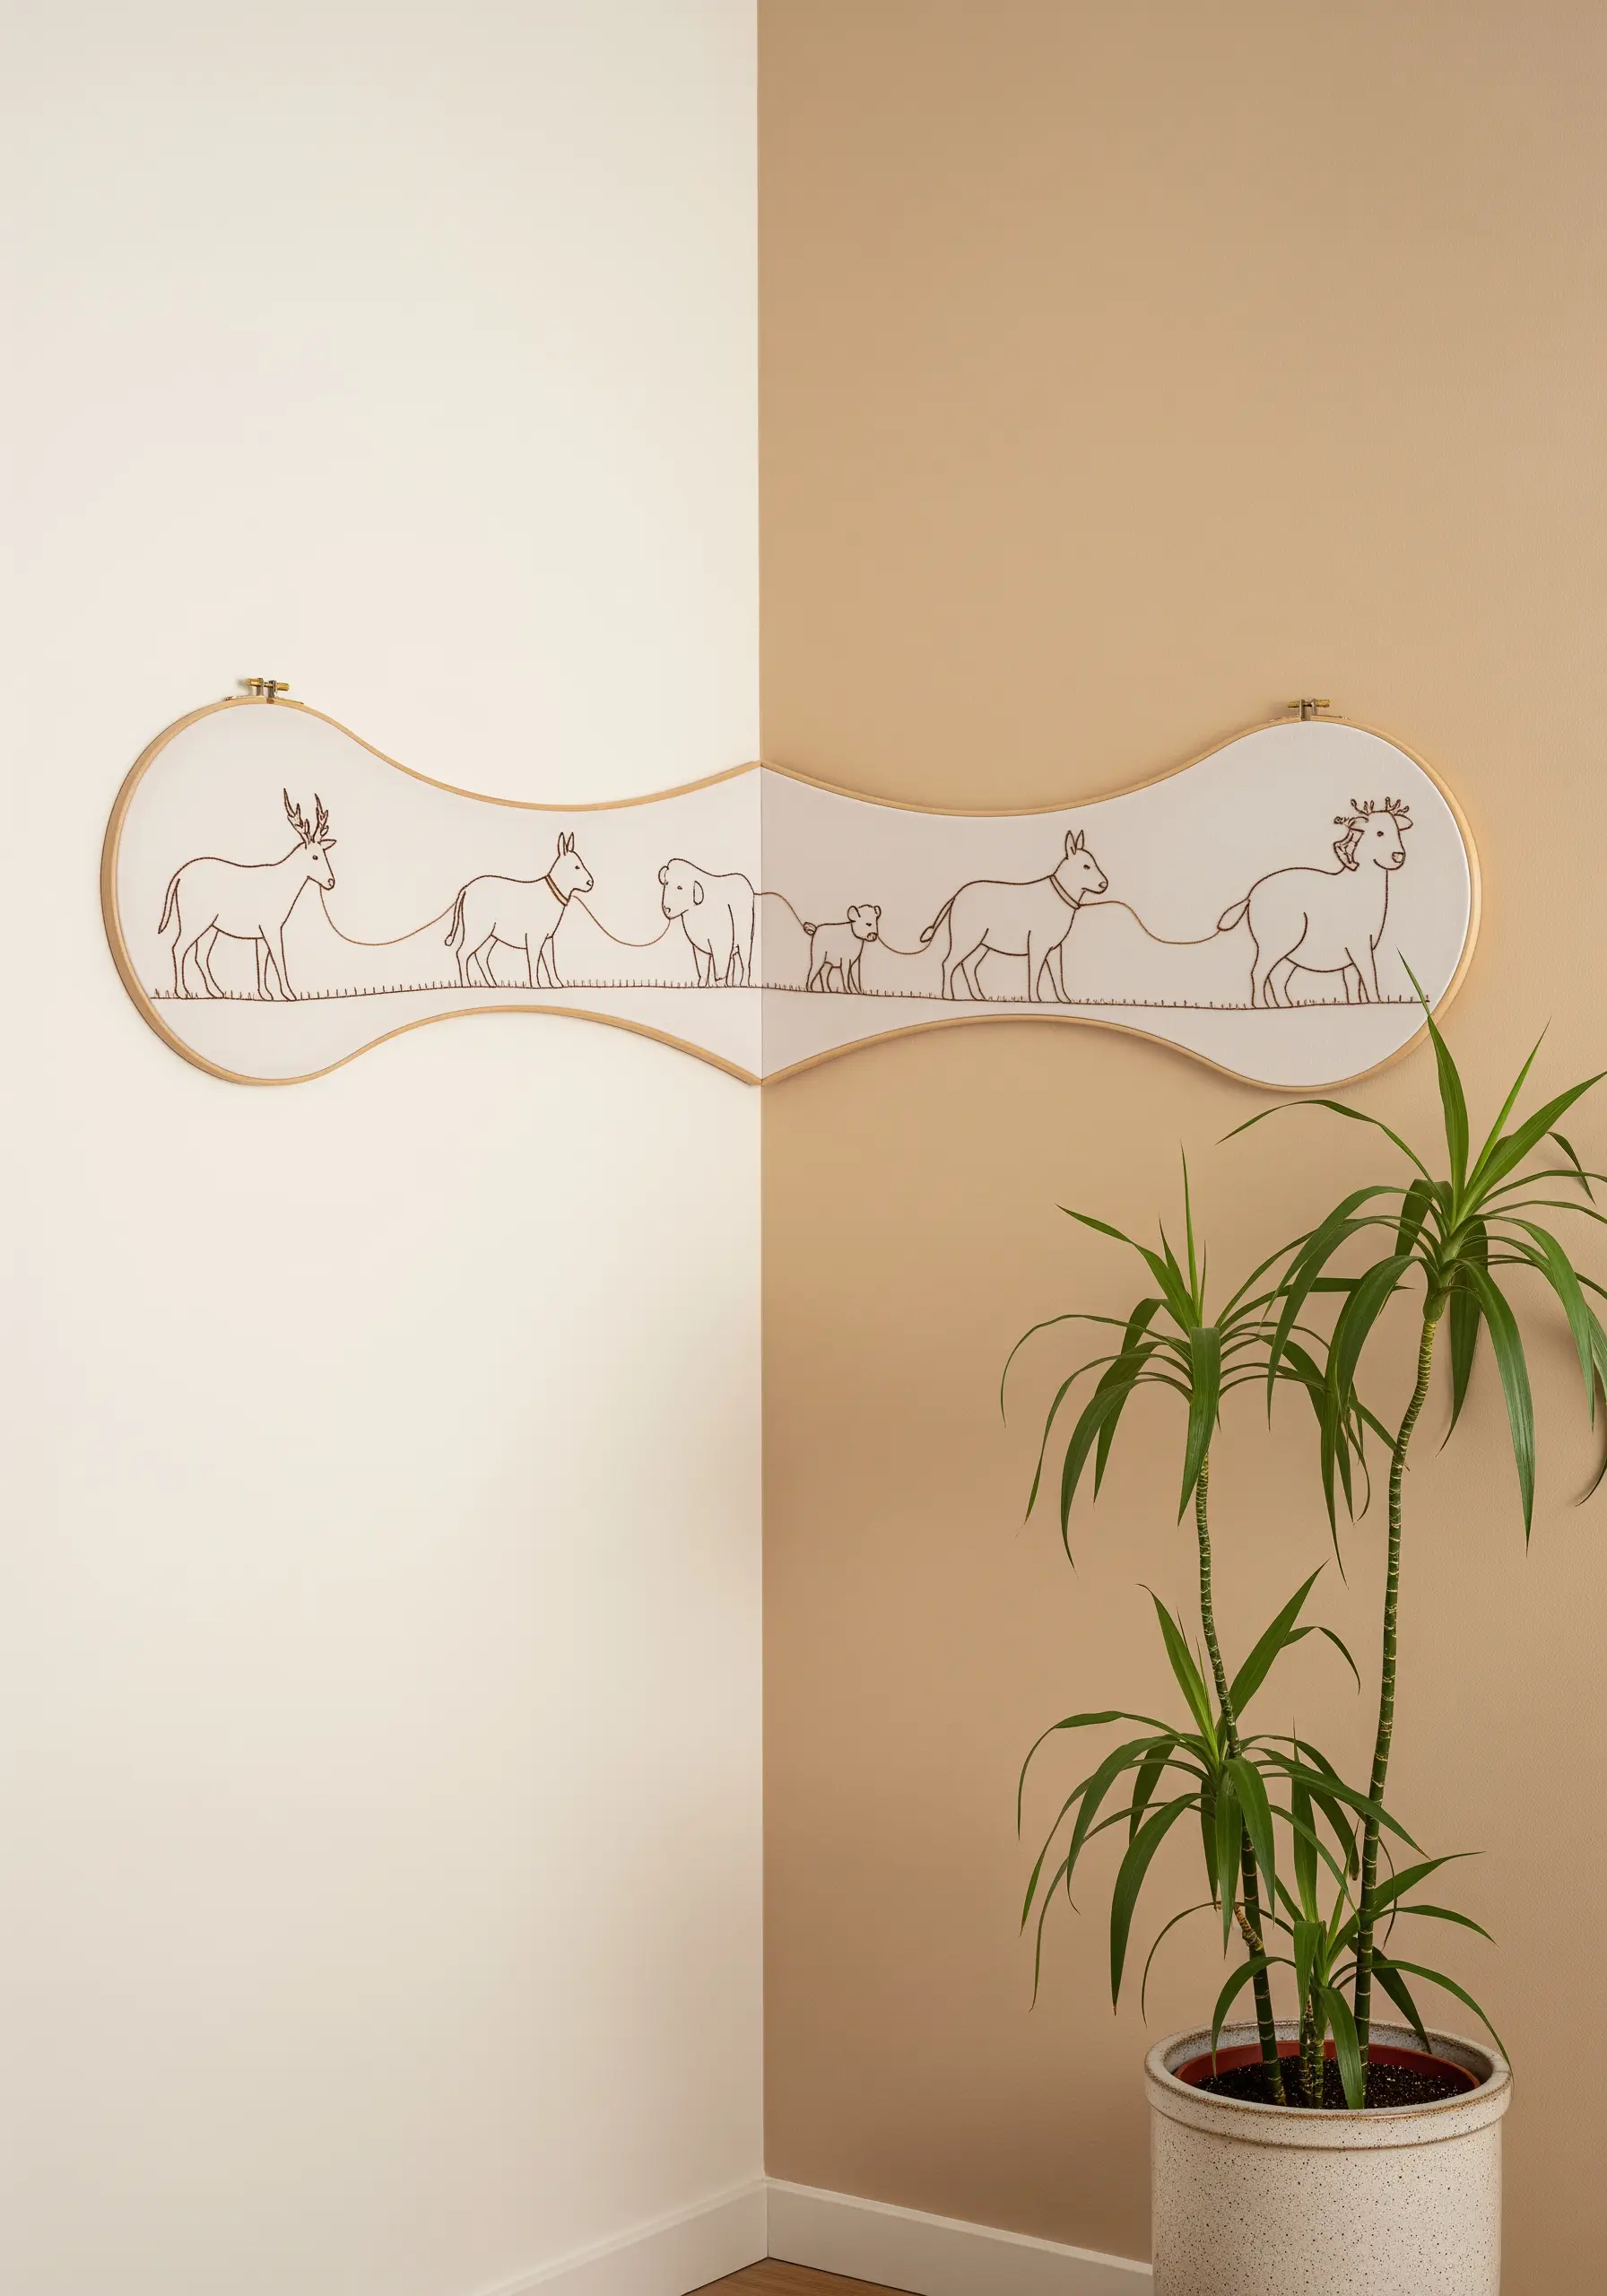
For a truly unique piece, break free from the traditional circle by using custom-shaped or connected embroidery hoops.
A simple backstitch or stem stitch is all you need for this narrative style of embroidery. The elegance comes from the clean, continuous line that connects each animal character, creating a whimsical parade.
The negative space is just as important as the stitching; keeping the design minimal allows the unique frame shape and the story to take center stage. This technique works perfectly for a corner wall, adding an unexpected and charming detail.
14. Achieve Delicate Realism with Floating Seeds
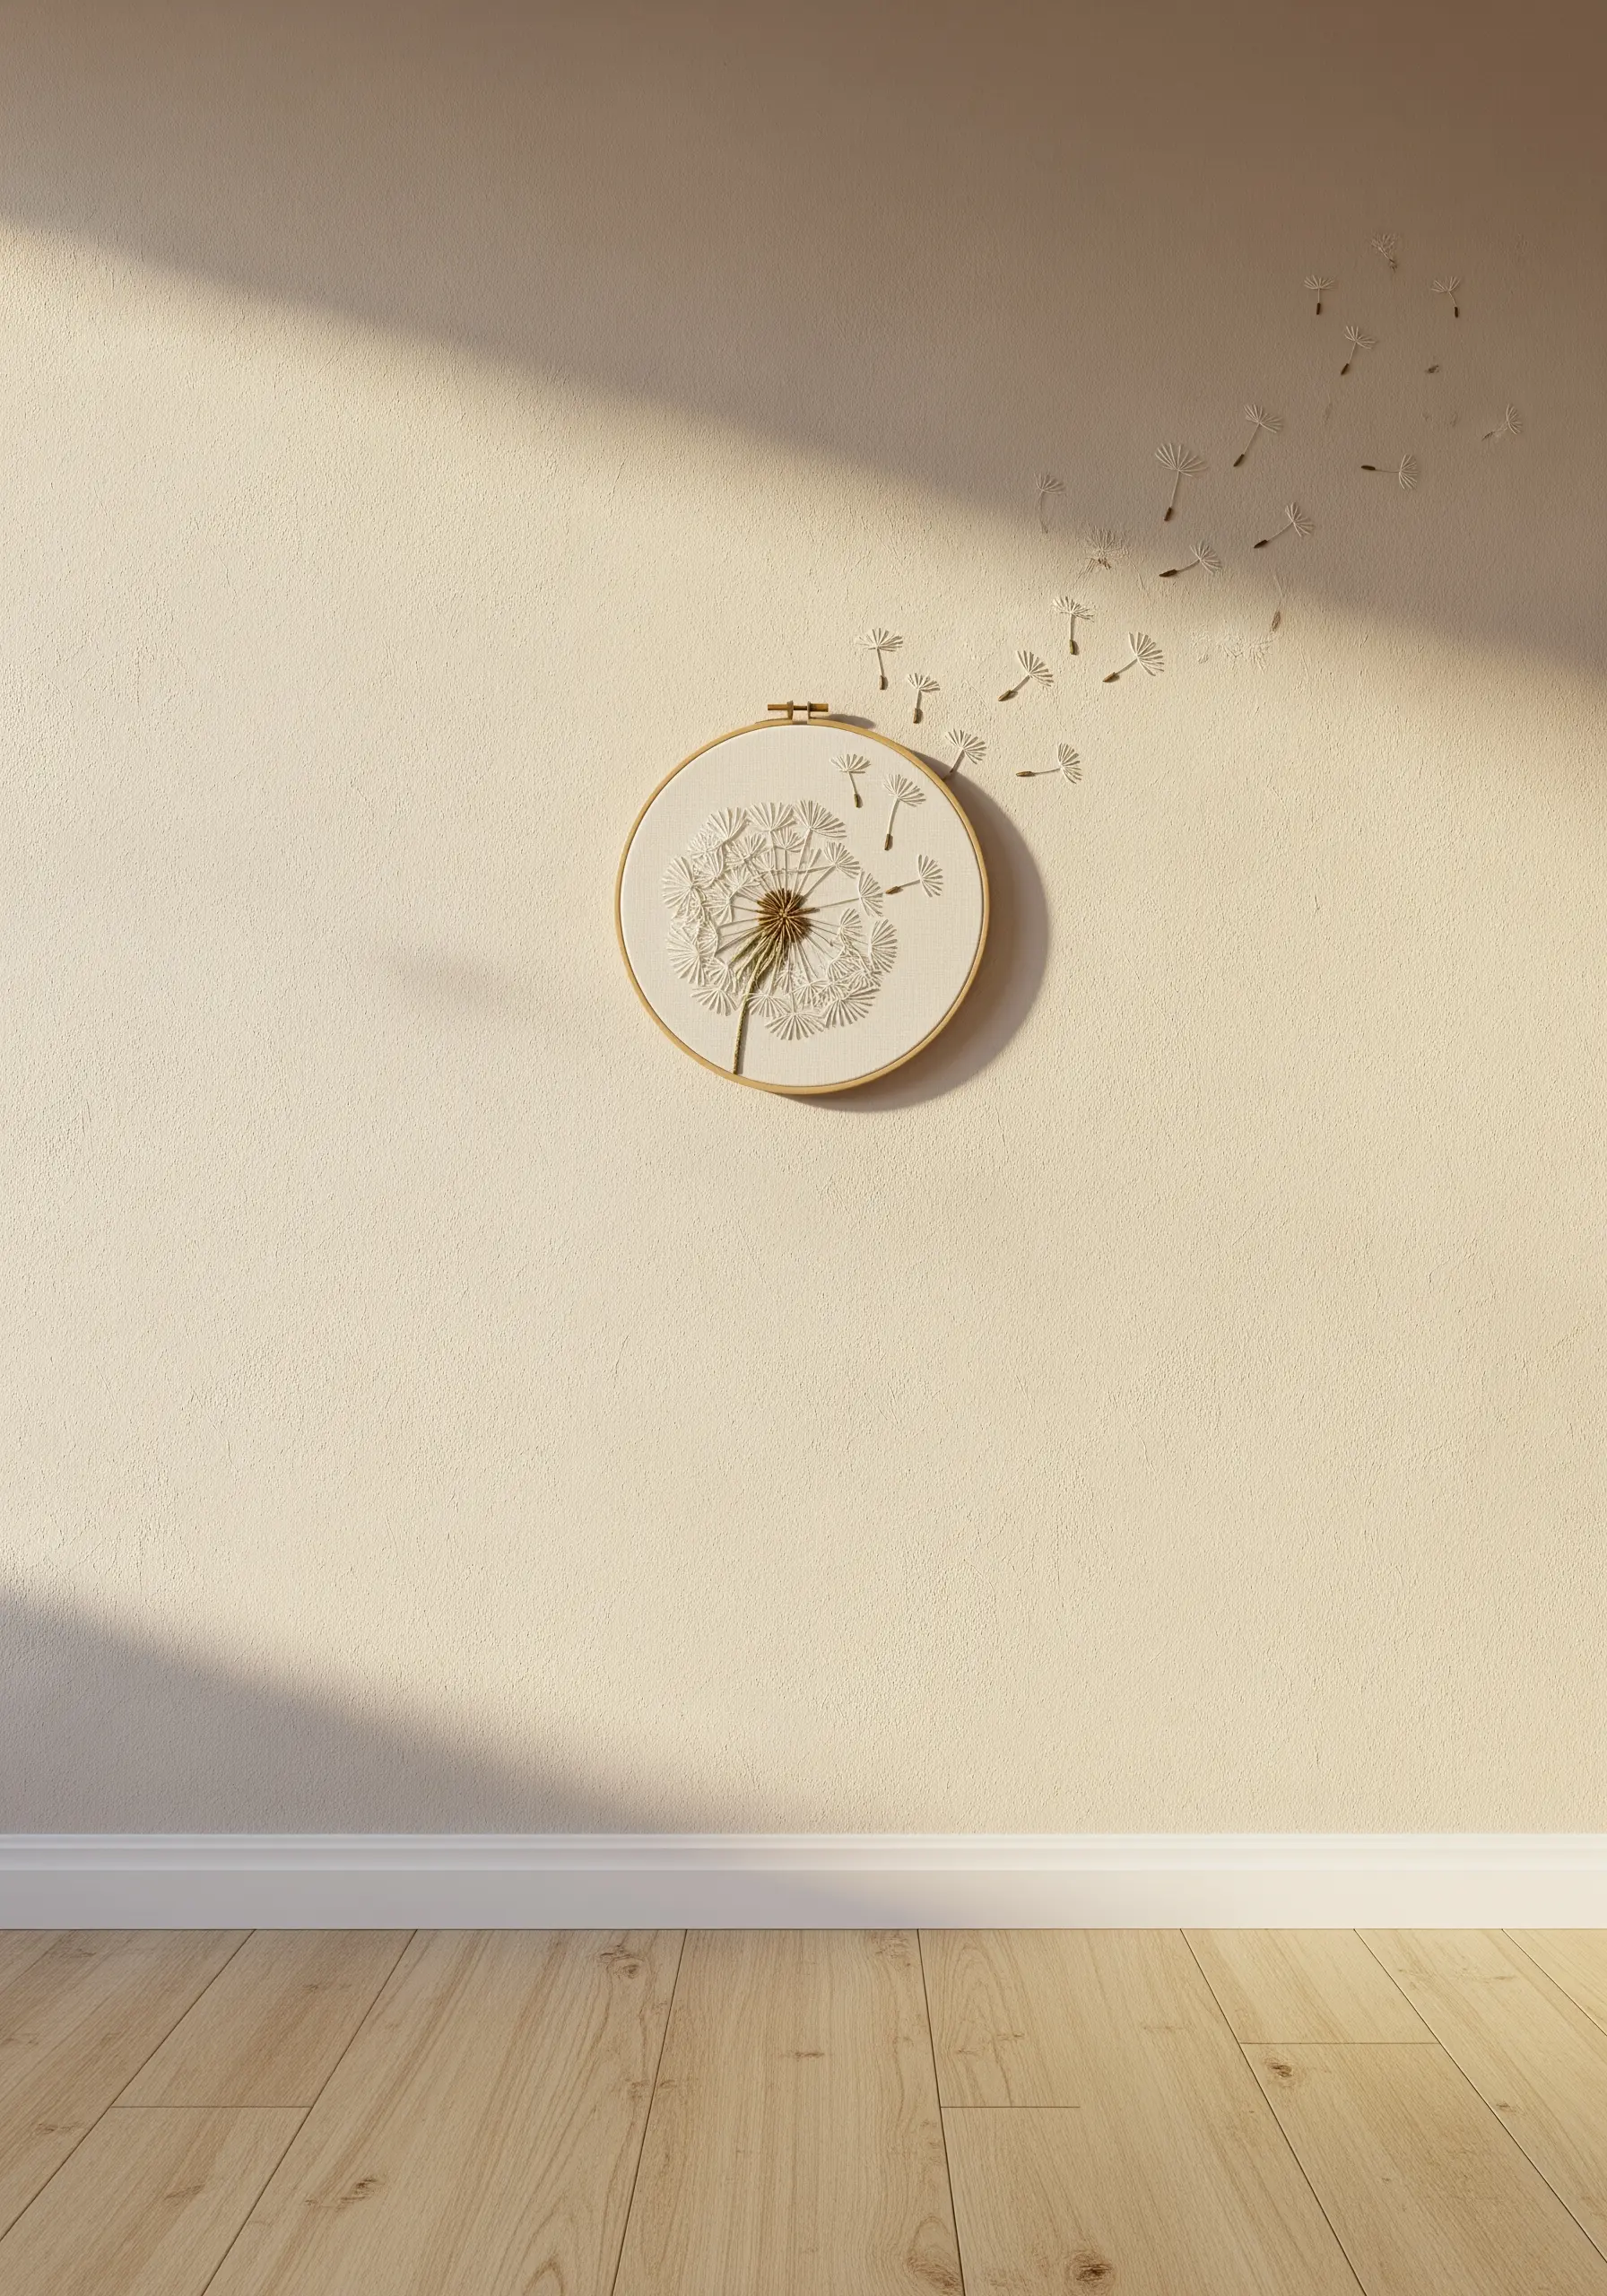
To create the illusion of dandelion seeds floating away, you need to extend your embroidery beyond the hoop.
Stitch the main dandelion head inside the hoop using a combination of straight stitches for the core and detached chain stitches for the fluffy pappus.
For the seeds, use a permanent, fabric-safe adhesive to carefully place individual stitched elements directly onto the wall. You can pre-stitch them on a dissolvable stabilizer, wash it away, and then affix the hardened thread motifs for a clean, delicate effect.
15. Master Lunar Textures with French Knots
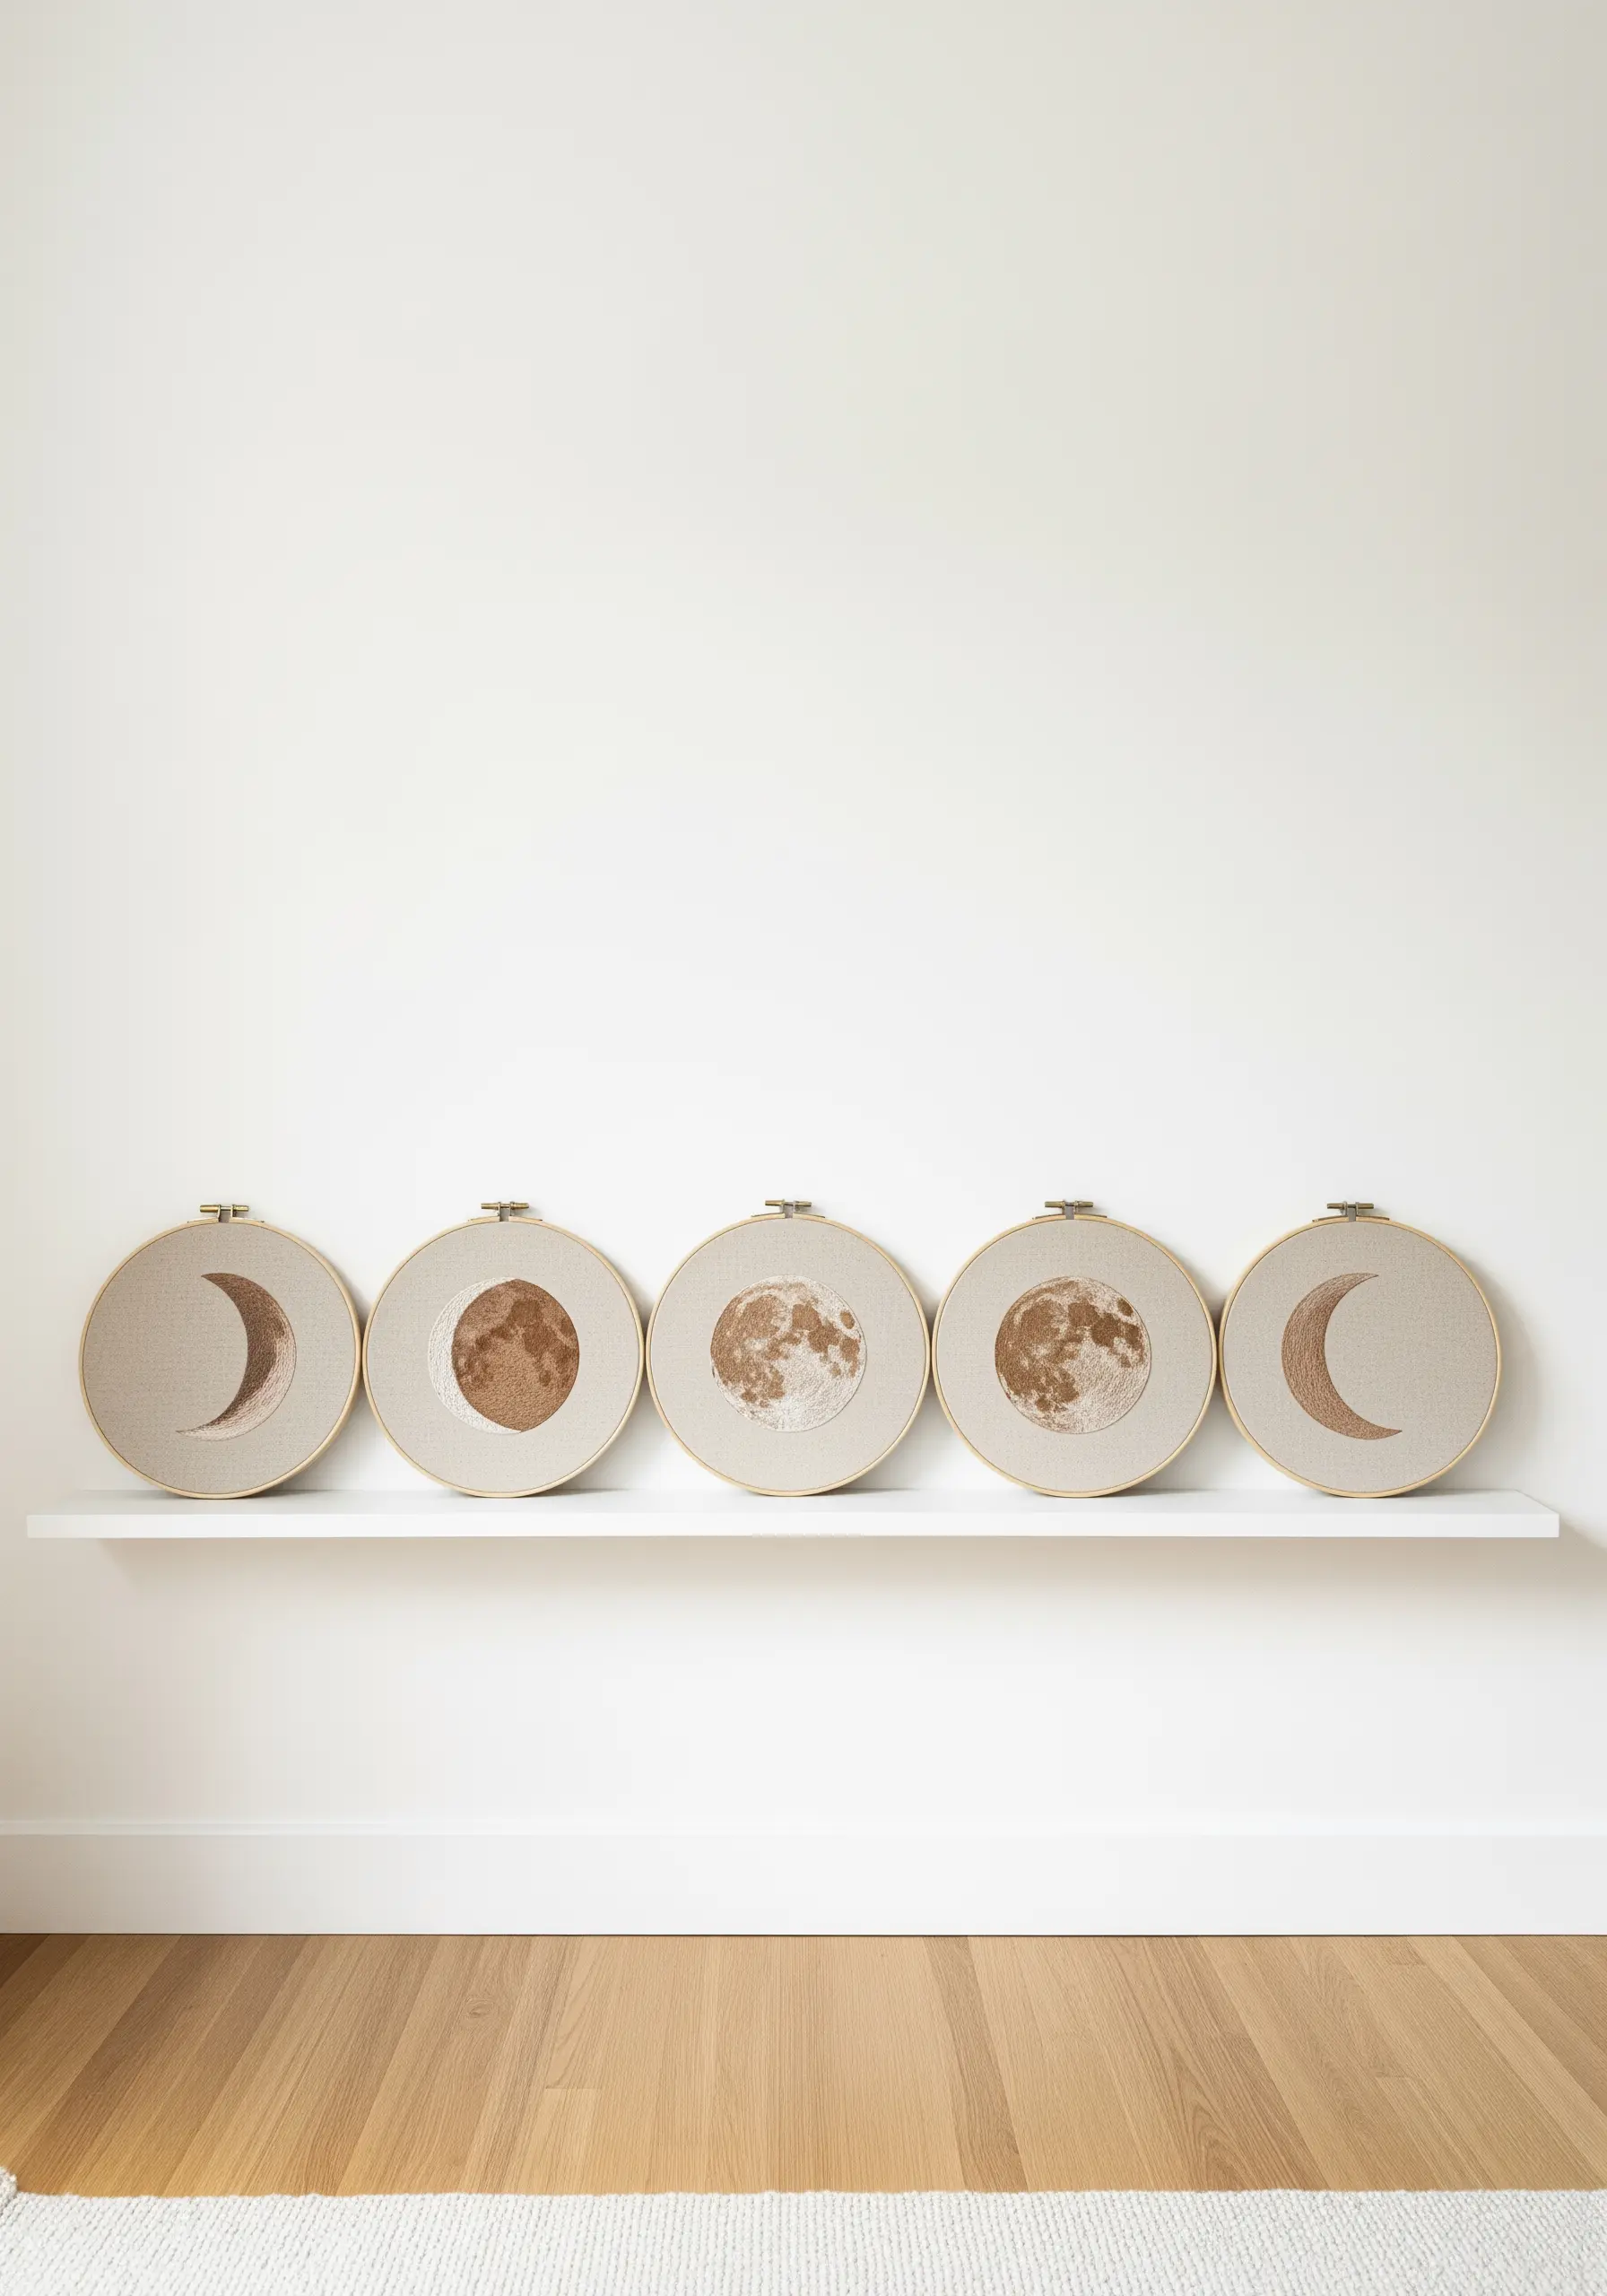
To capture the cratered texture of the moon, fill the shape with tightly packed French knots.
Vary the texture by using different numbers of thread strands and wrapping the needle once for small knots and two or three times for larger, more prominent ‘craters’.
Use several closely related shades of beige, grey, and sand to create subtle shading and depth. This tonal variation is what gives the design a realistic, three-dimensional quality.
Arranging the different moon phases in a linear display on a floating shelf creates a sophisticated and educational piece of art for a nursery.
16. Create an Elegant Feather Cascade
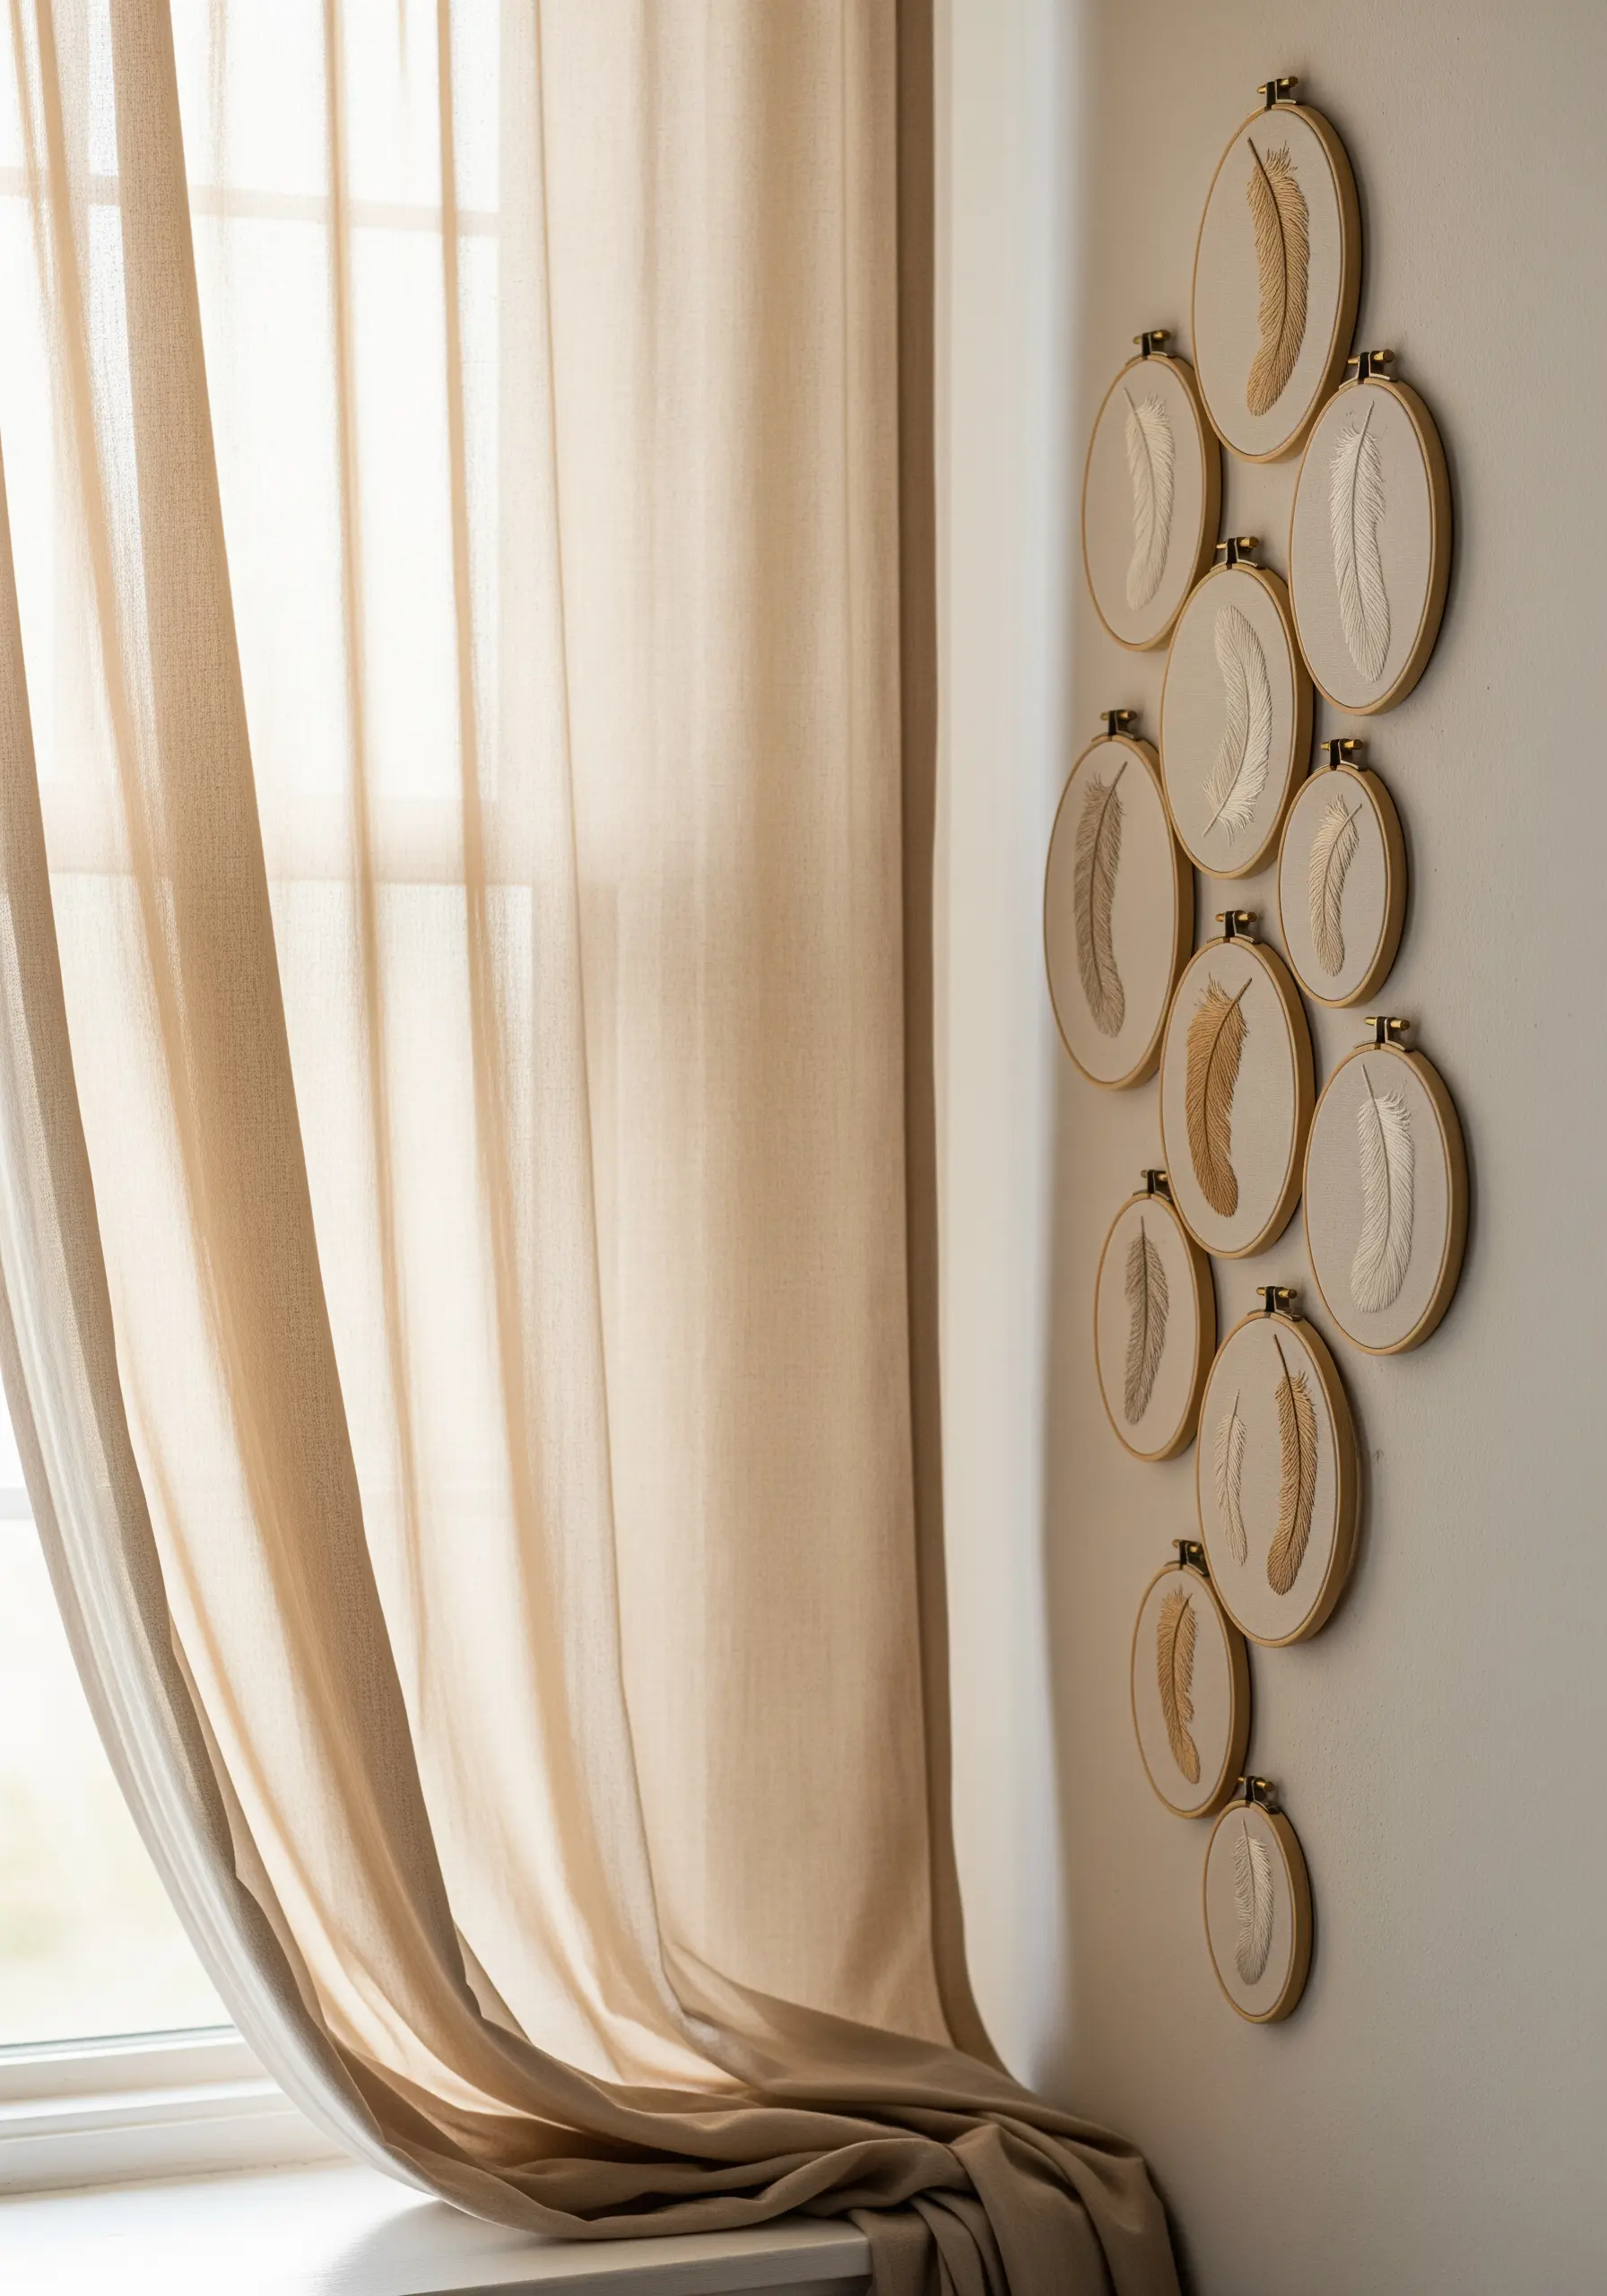
For a composition that feels light and airy, arrange multiple hoops in a vertical, cascading pattern.
To stitch the feathers, use a fishbone stitch for the body. This stitch creates a central spine and angled sides that perfectly mimic the structure of a real feather.
Introduce a single metallic thread alongside your cotton floss in a few of the feathers. This adds a subtle, luxurious shimmer that catches the light and draws the eye without being overwhelming.
Using oval hoops instead of round ones enhances the long, elegant shape of the feathers and contributes to the downward, flowing motion of the arrangement.
17. Mix Embroidery with Macramé and Crochet
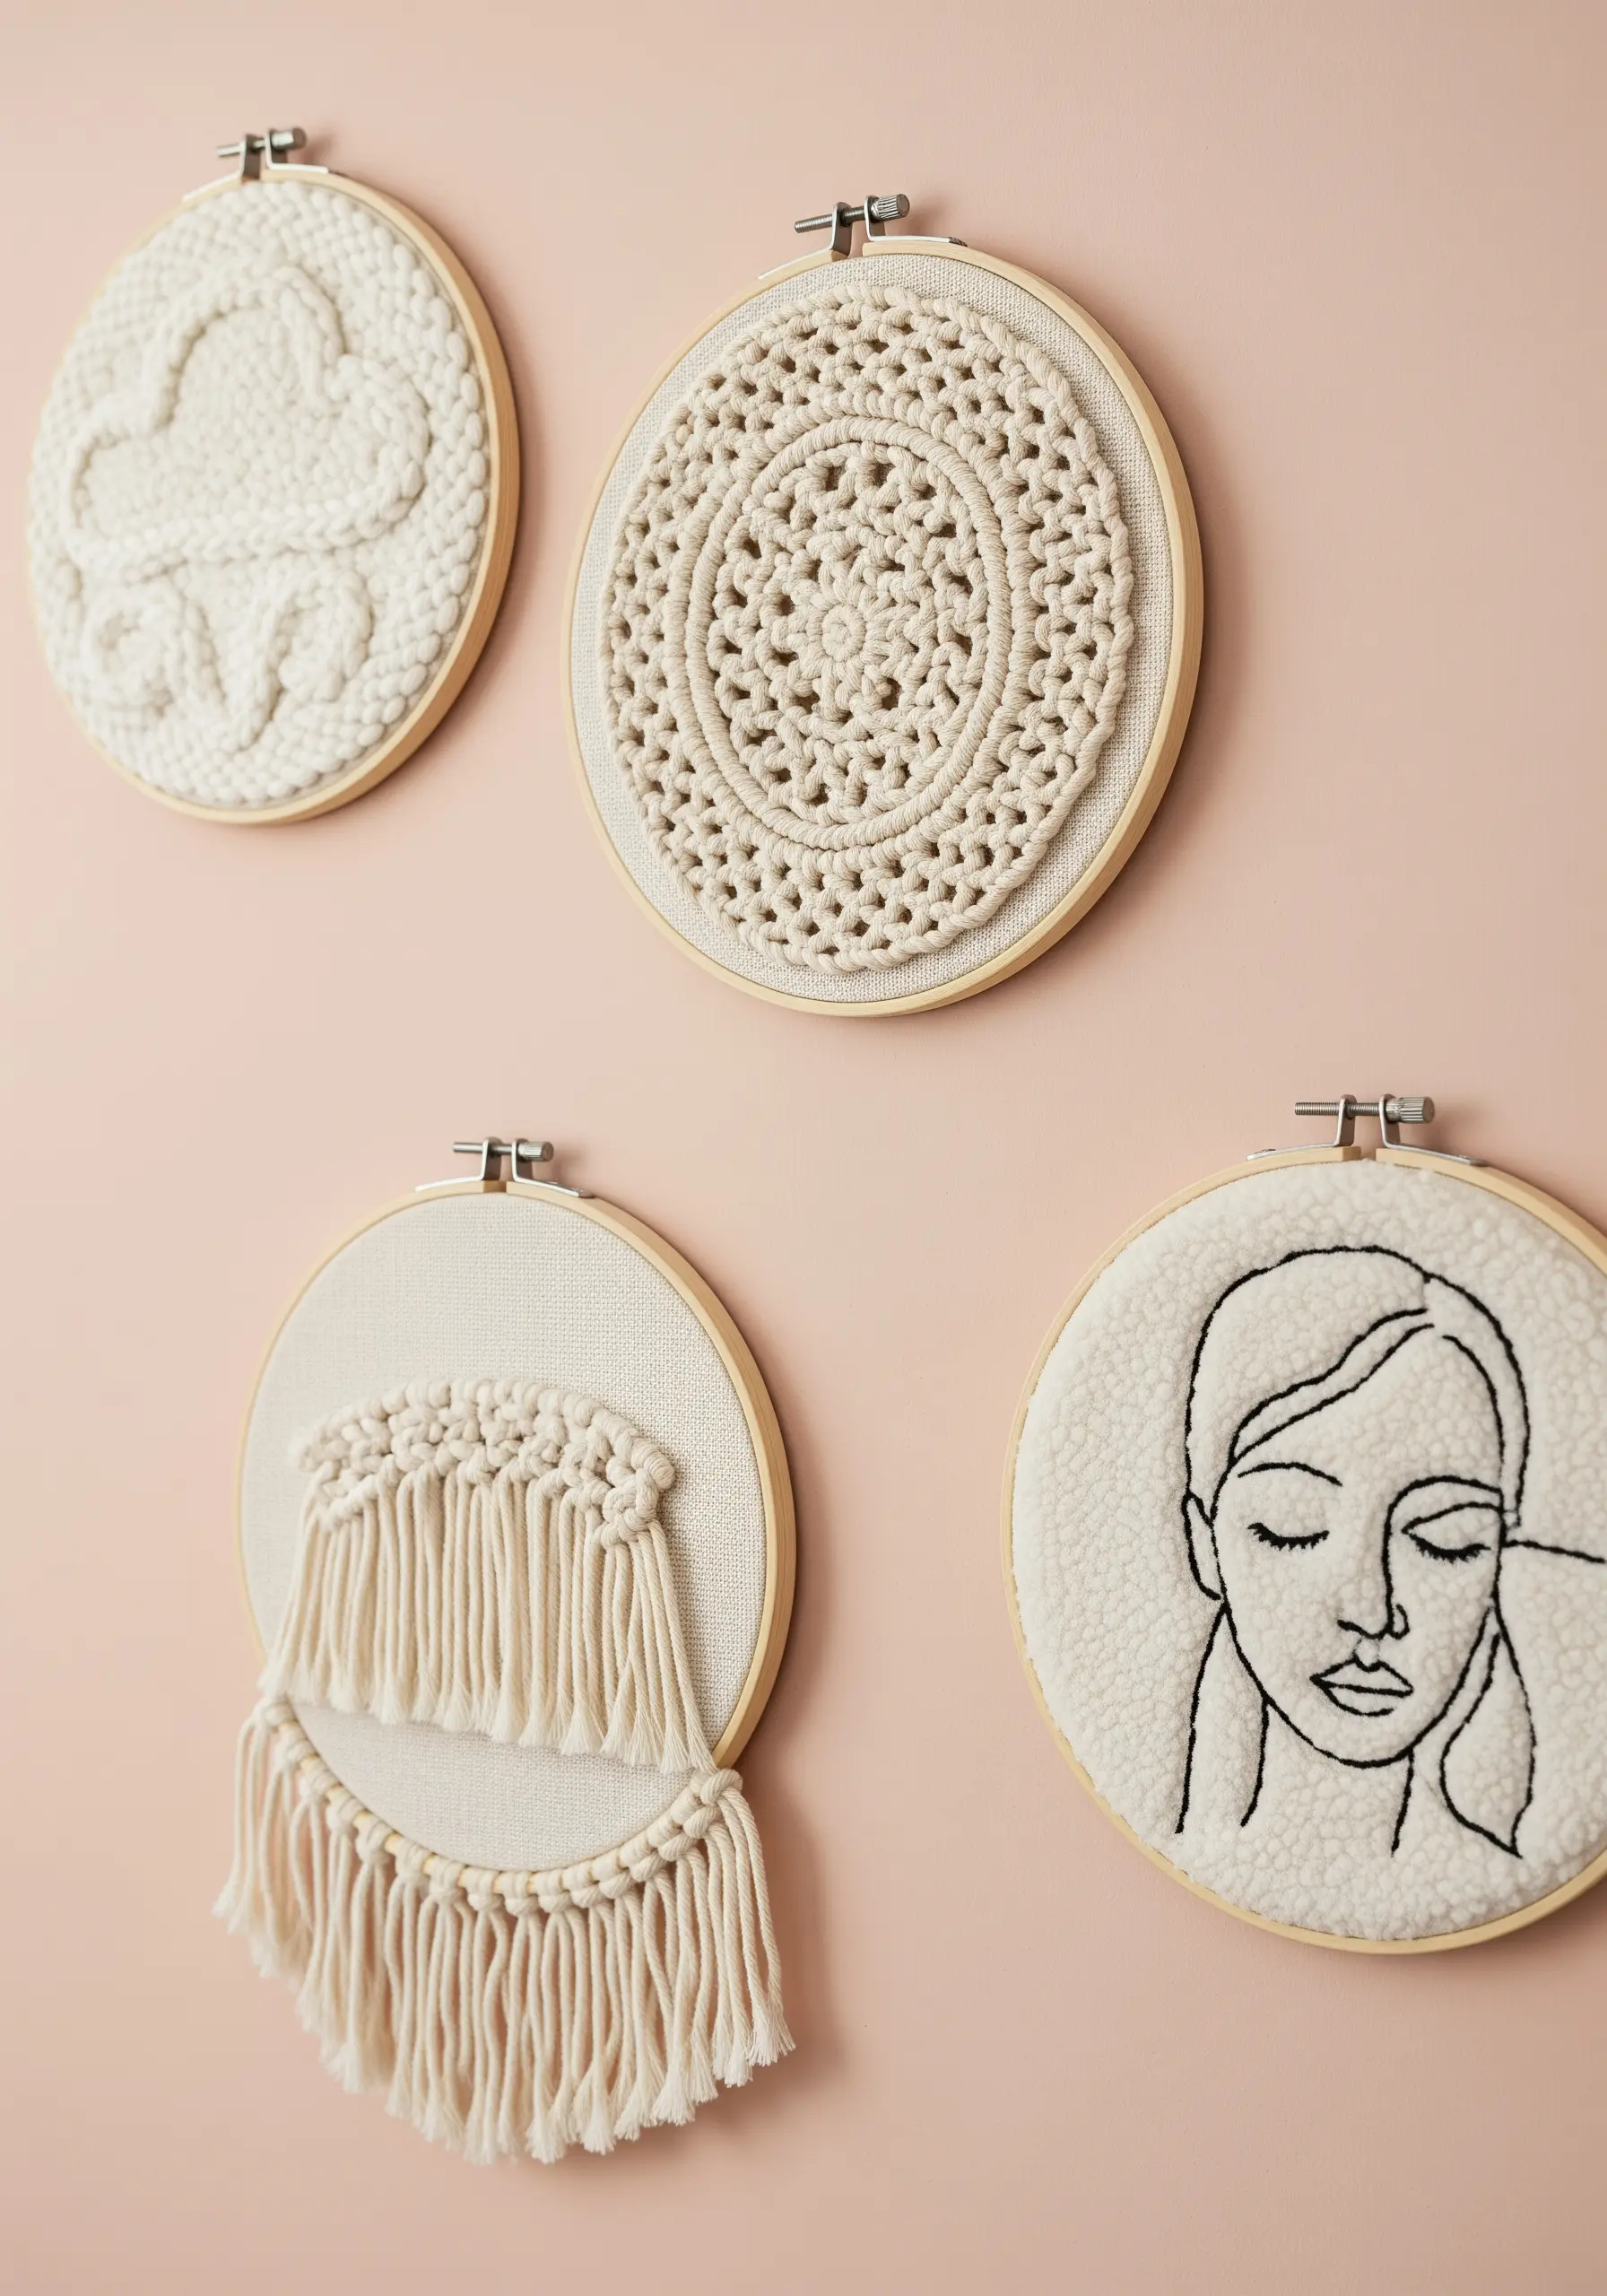
Elevate your hoop art by incorporating other fiber art techniques for a rich, textural experience.
Mount a small crocheted doily or a macramé weaving onto the fabric within the hoop. This adds instant depth and a handcrafted, bohemian feel.
For the line art portrait, try stitching on a textured fabric like sherpa or fleece. The simple backstitch outline gains a new dimension against the plush background, blending illustration with soft sculpture.
This mixed-media contemporary embroidery approach results in pieces that are visually and tactilely engaging.
18. Fill Large-Scale Designs with Seed Stitch

For oversized statement pieces like an embroidered world map, filling large areas can be daunting.
Use a dense seed stitch—tiny, randomly placed straight stitches—to create a stippled texture that is much faster to complete than satin stitch but still provides full coverage.
Outline the continents with a crisp, two-strand backstitch first to define the shapes clearly. Then, fill them in with the seed stitch using a slightly lighter thread color to create a subtle contrast and highlight the clean outlines.
This technique creates a beautifully textured, graphic piece that serves as a stunning focal point.
19. Group Miniature Hoops for Maximum Impact
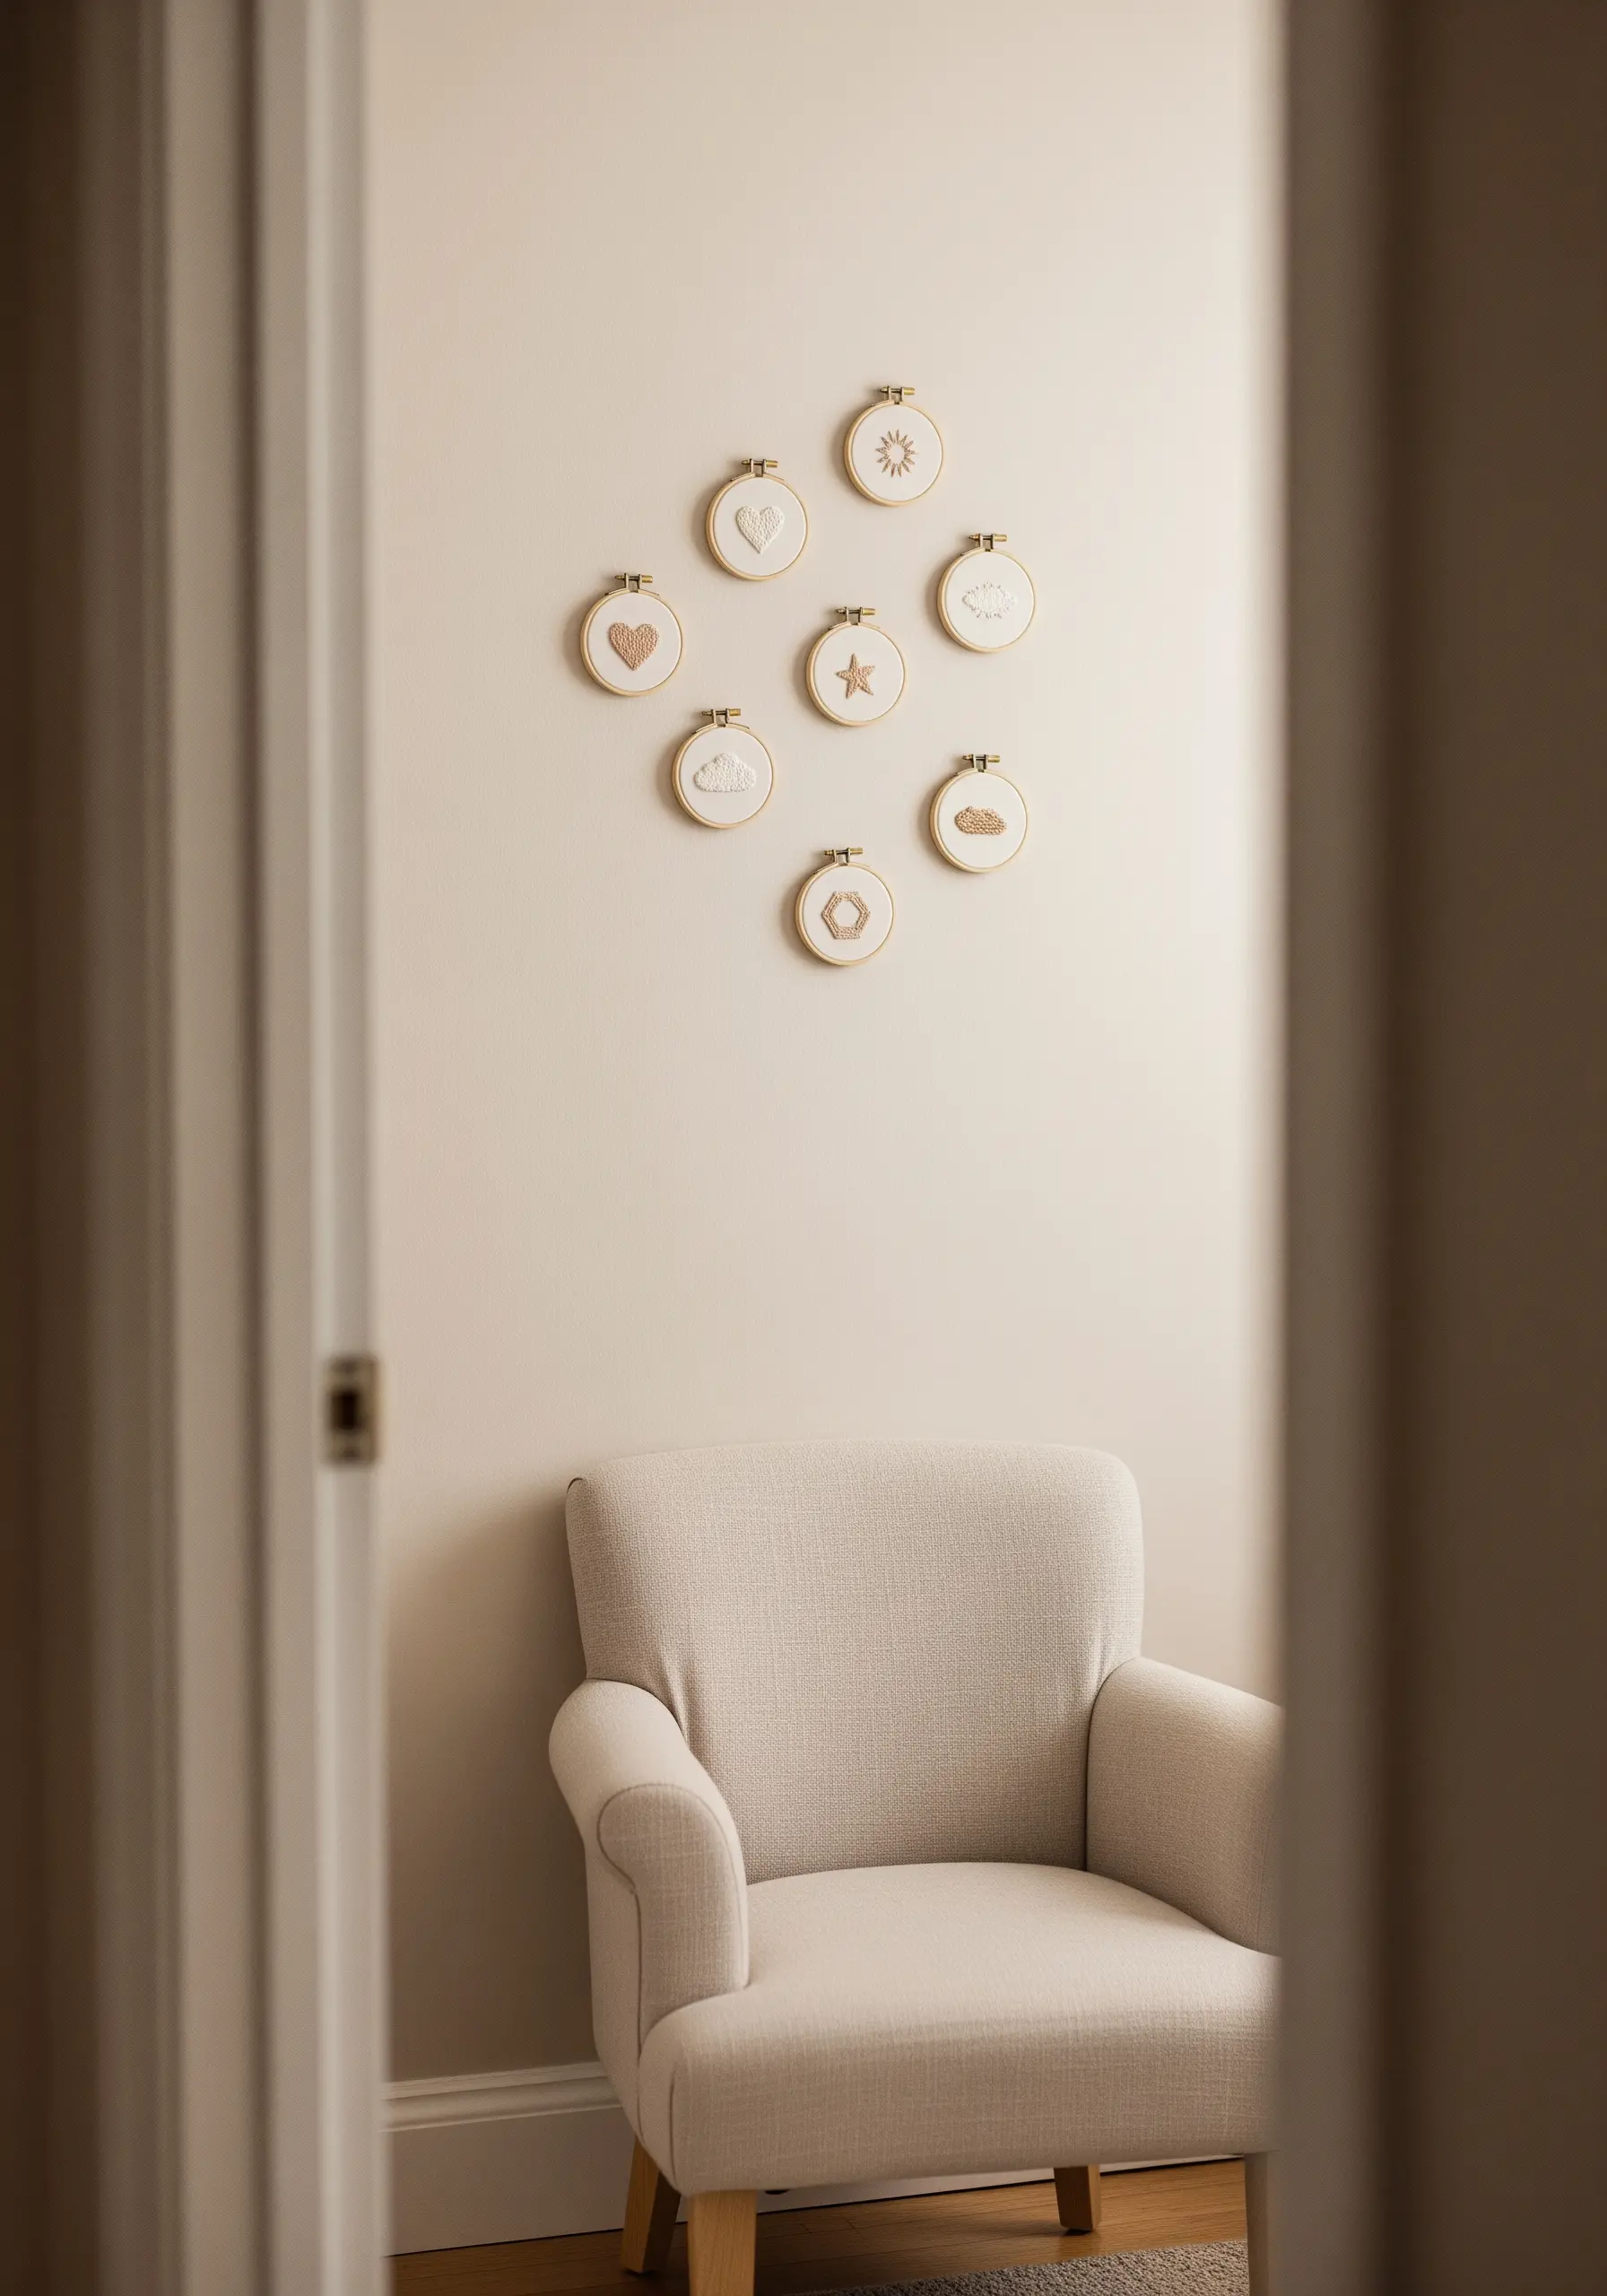
Even the simplest motifs can become a significant art piece when grouped together.
Work with tiny 3 or 4-inch hoops and stitch one simple, iconic symbol in each—a heart, a sun, a cloud. Use basic stitches like backstitch for outlines and satin stitch or French knots for fills.
The magic is in the arrangement. A tight, geometric cluster or a soft, organic cloud shape creates a sense of unity and purpose.
This is a perfect way to use up scrap fabric and threads, turning tiny embroidery motifs into a charming, bespoke gallery wall.
20. Construct a Mobile with Layered Hoops

Create a gentle, kinetic sculpture by using embroidery hoops as the frame for a nursery mobile.
Stretch sheer organza or tulle in the hoops to create a transparent, airy effect. This allows light to pass through and creates beautiful shadows.
Embroider simple motifs like clouds and a sun onto felt, cut them out, and suspend them within and below the hoops using fine, strong thread.
Adding wooden elements like beads or raindrops provides a natural touch and a little weight, helping the mobile turn gently in the breeze.
21. Illustrate Growth with a Botanical Triptych
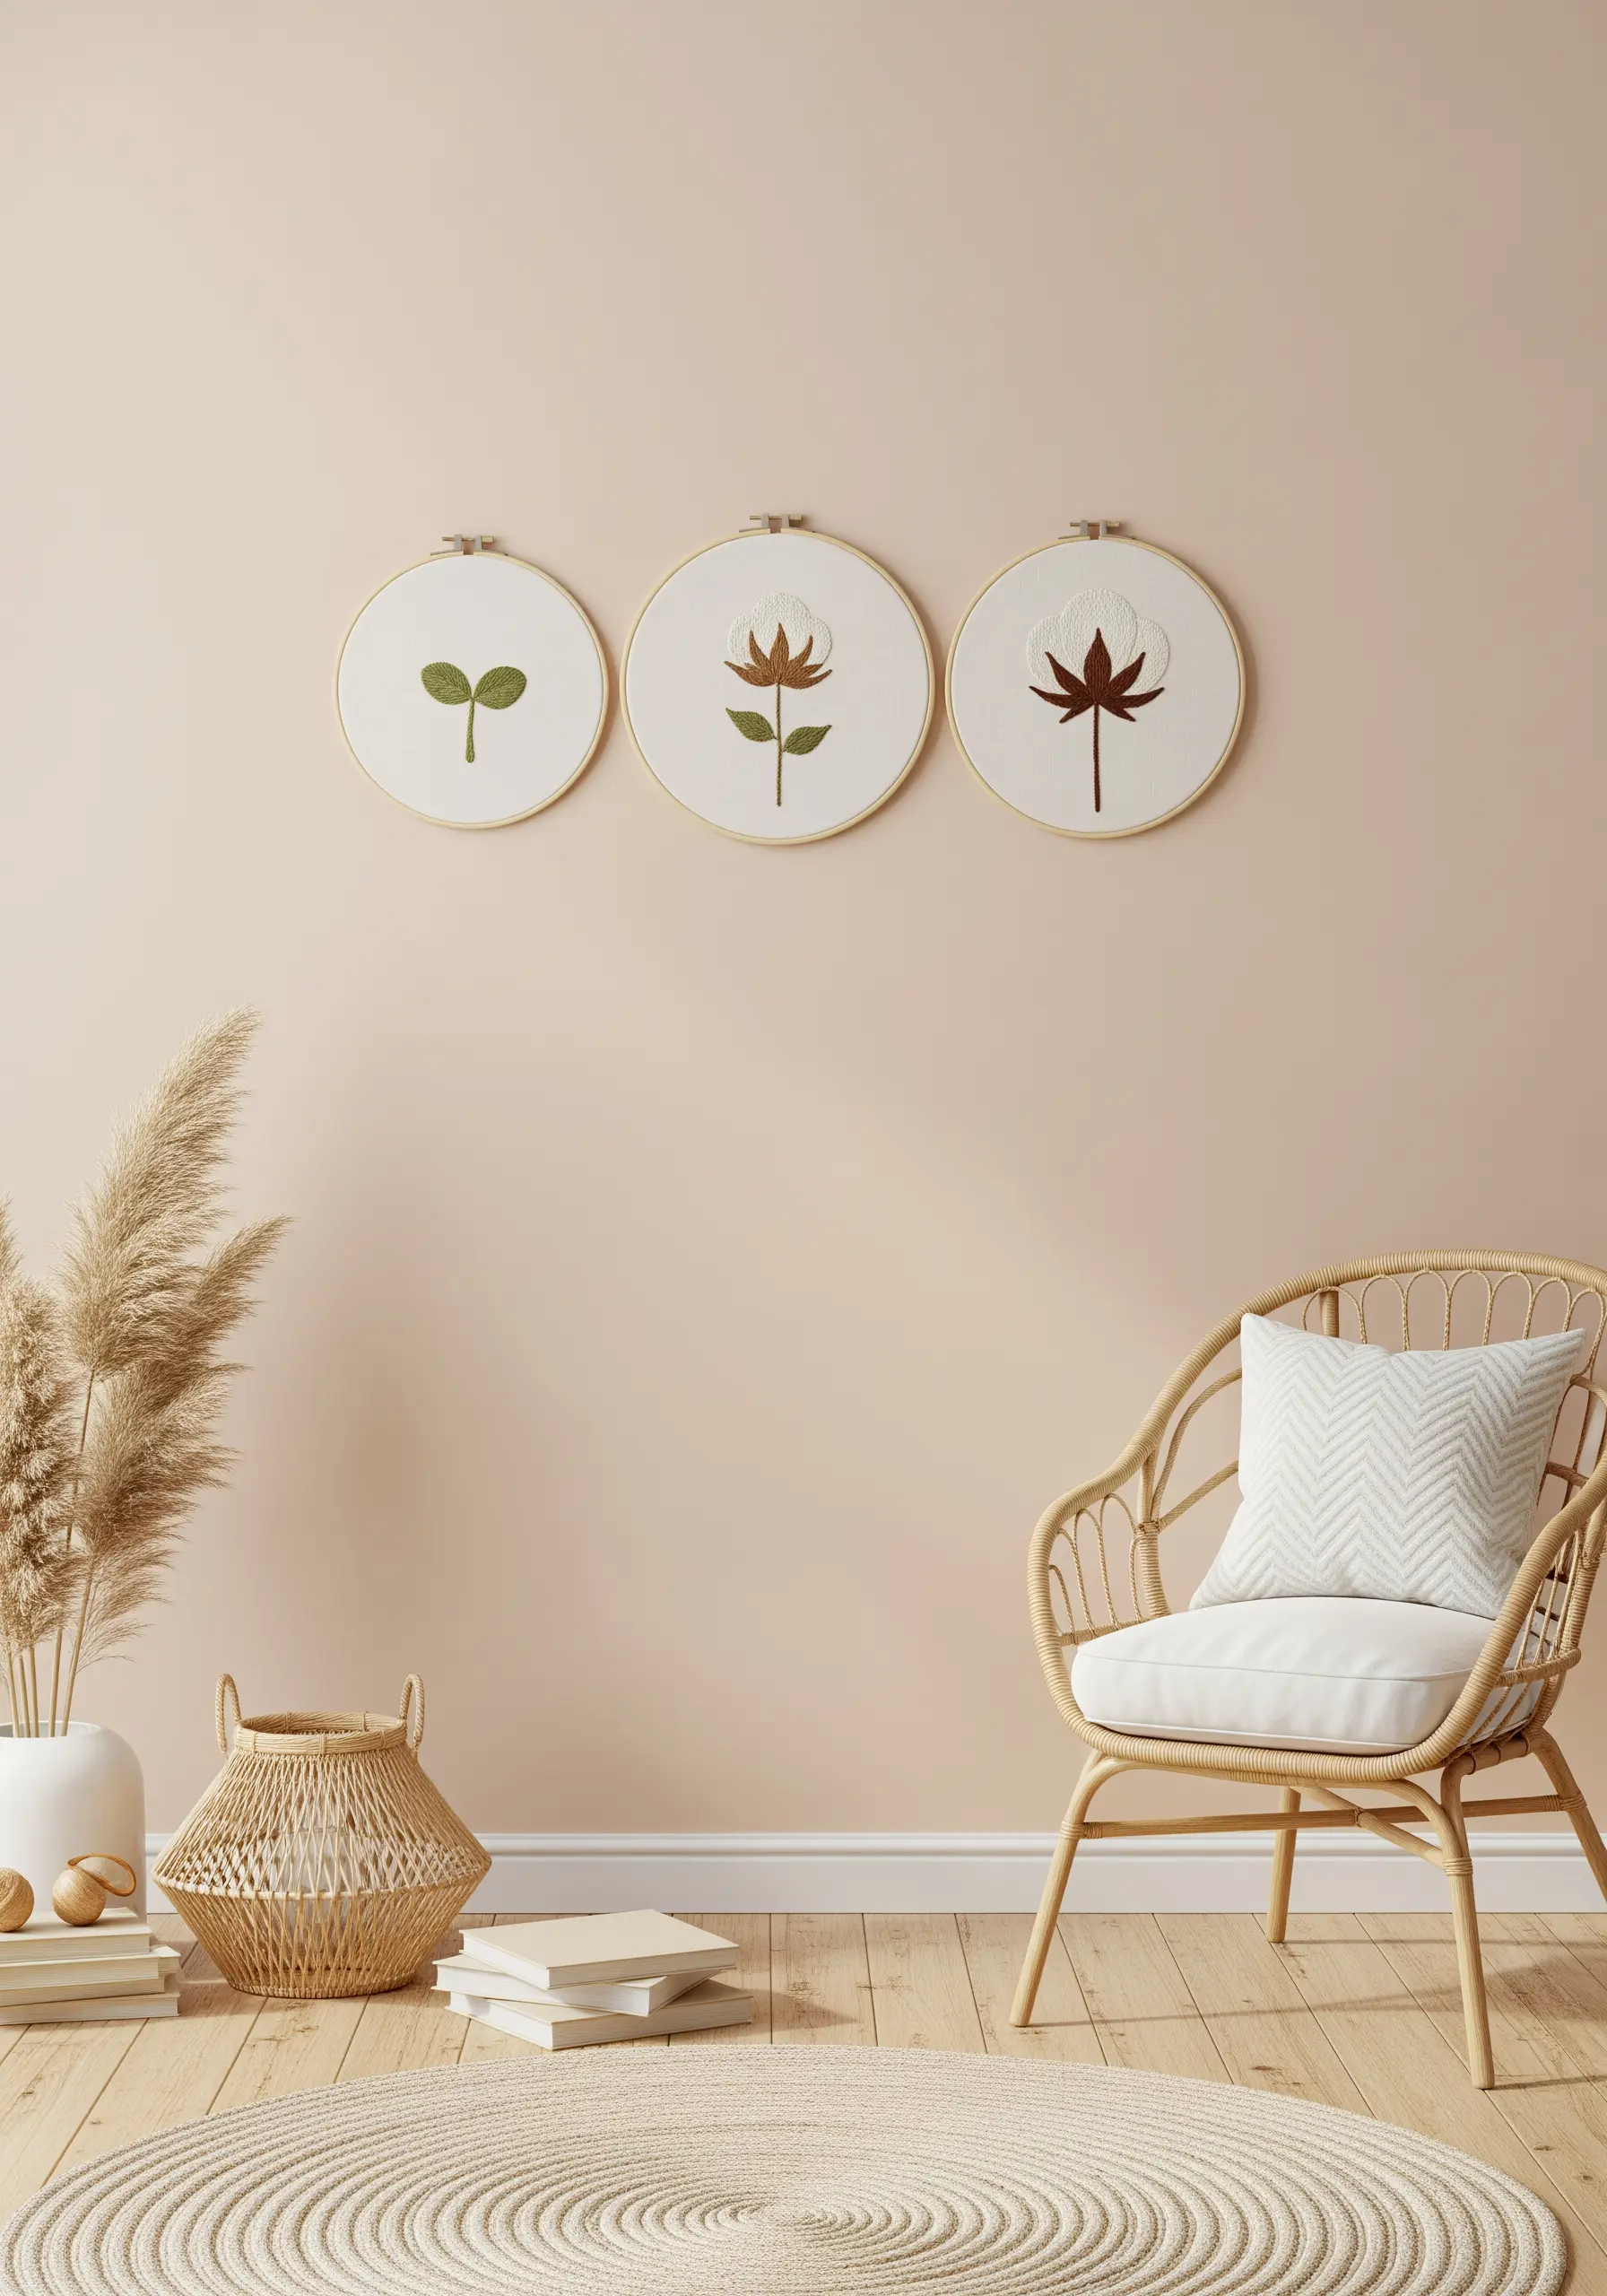
Tell a quiet story of growth by creating a series of three hoops that depict the life cycle of a plant.
Use appliqué for the main shapes; cut the leaf and flower forms from felt or cotton fabric and attach them with a neat blanket stitch around the edges. This creates a clean, graphic look with soft dimension.
Add embroidered details on top of the appliqué, like veins on a leaf or the texture of a cotton boll, using a simple backstitch.
Displaying them in a simple, linear progression creates a narrative that is both educational and artistically serene.
22. Create a Sampler of Neutral Textures
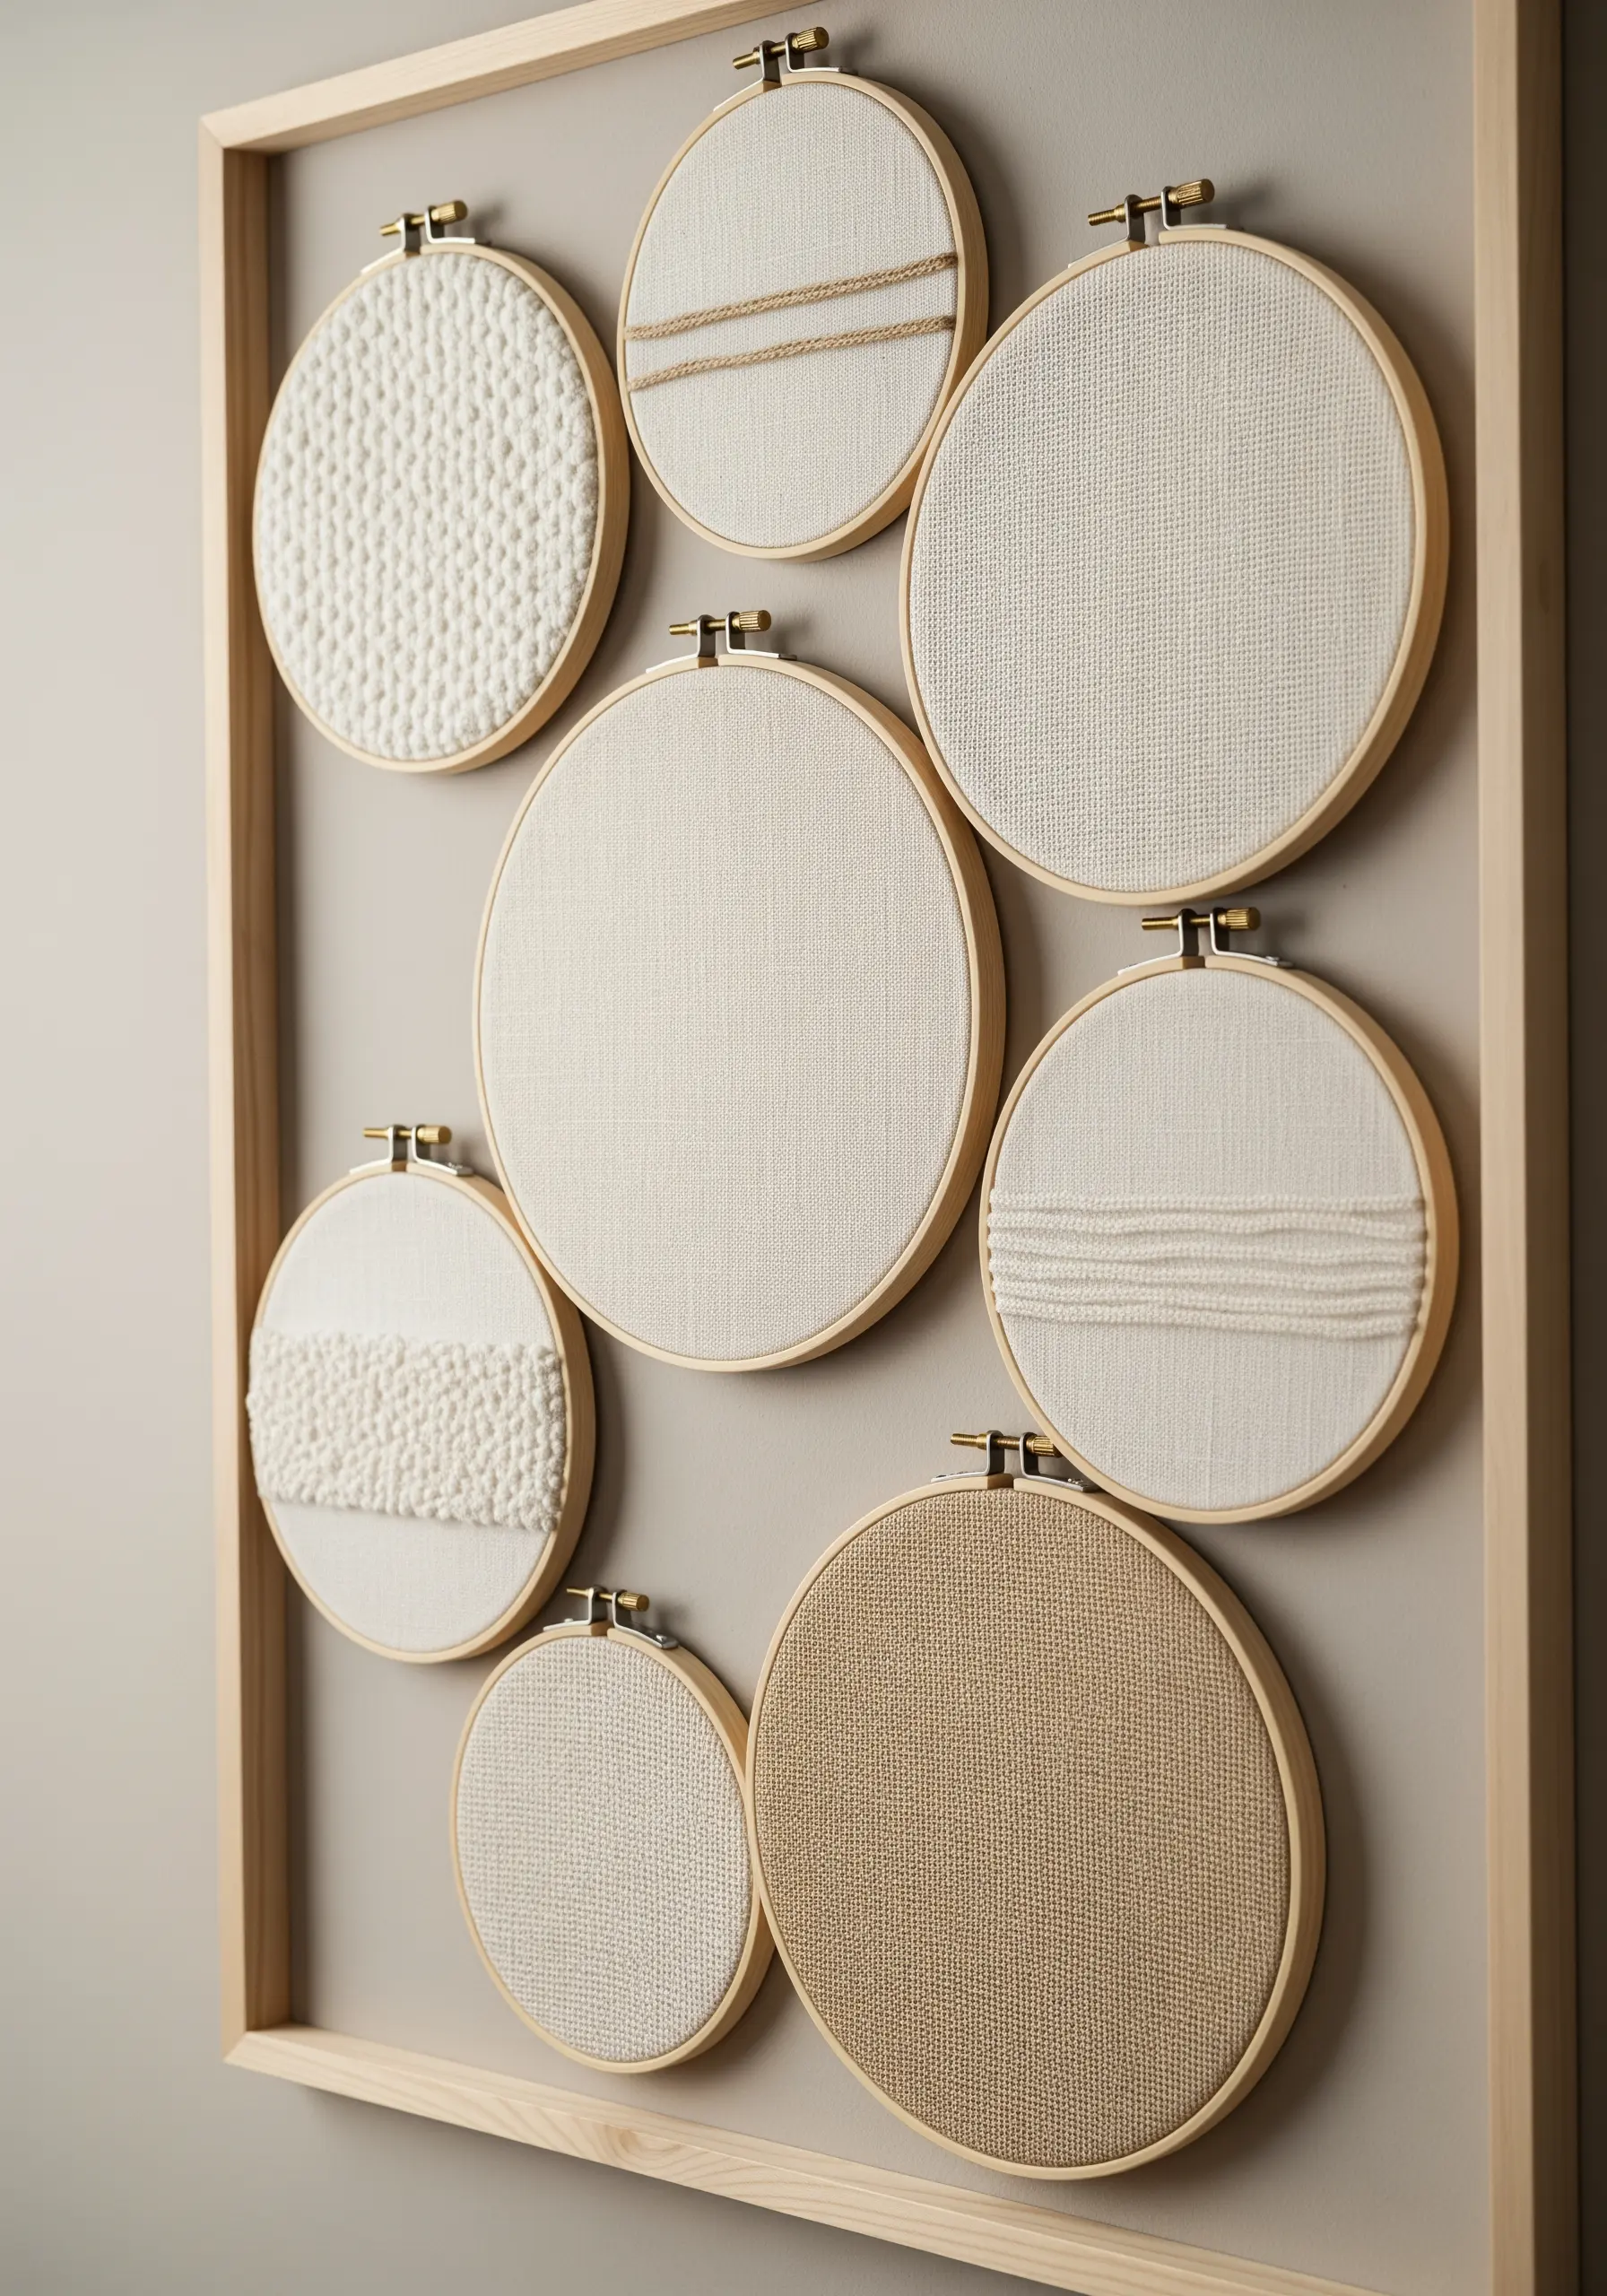
Instead of focusing on pictorial designs, create a gallery of pure texture.
Dedicate each hoop to exploring a different stitch or material in a monochromatic palette. Try filling one hoop with tightly coiled yarn (couching), another with woven bars, and a third with raised satin stitch blocks.
Mounting the finished hoops inside a larger, shallow box frame unifies the individual pieces into a single, cohesive art object.
This approach transforms basic stitches into a sophisticated study of form and texture, perfect for a modern, neutral thread & linen aesthetic.
23. Frame an Aerial View with Window Hoops
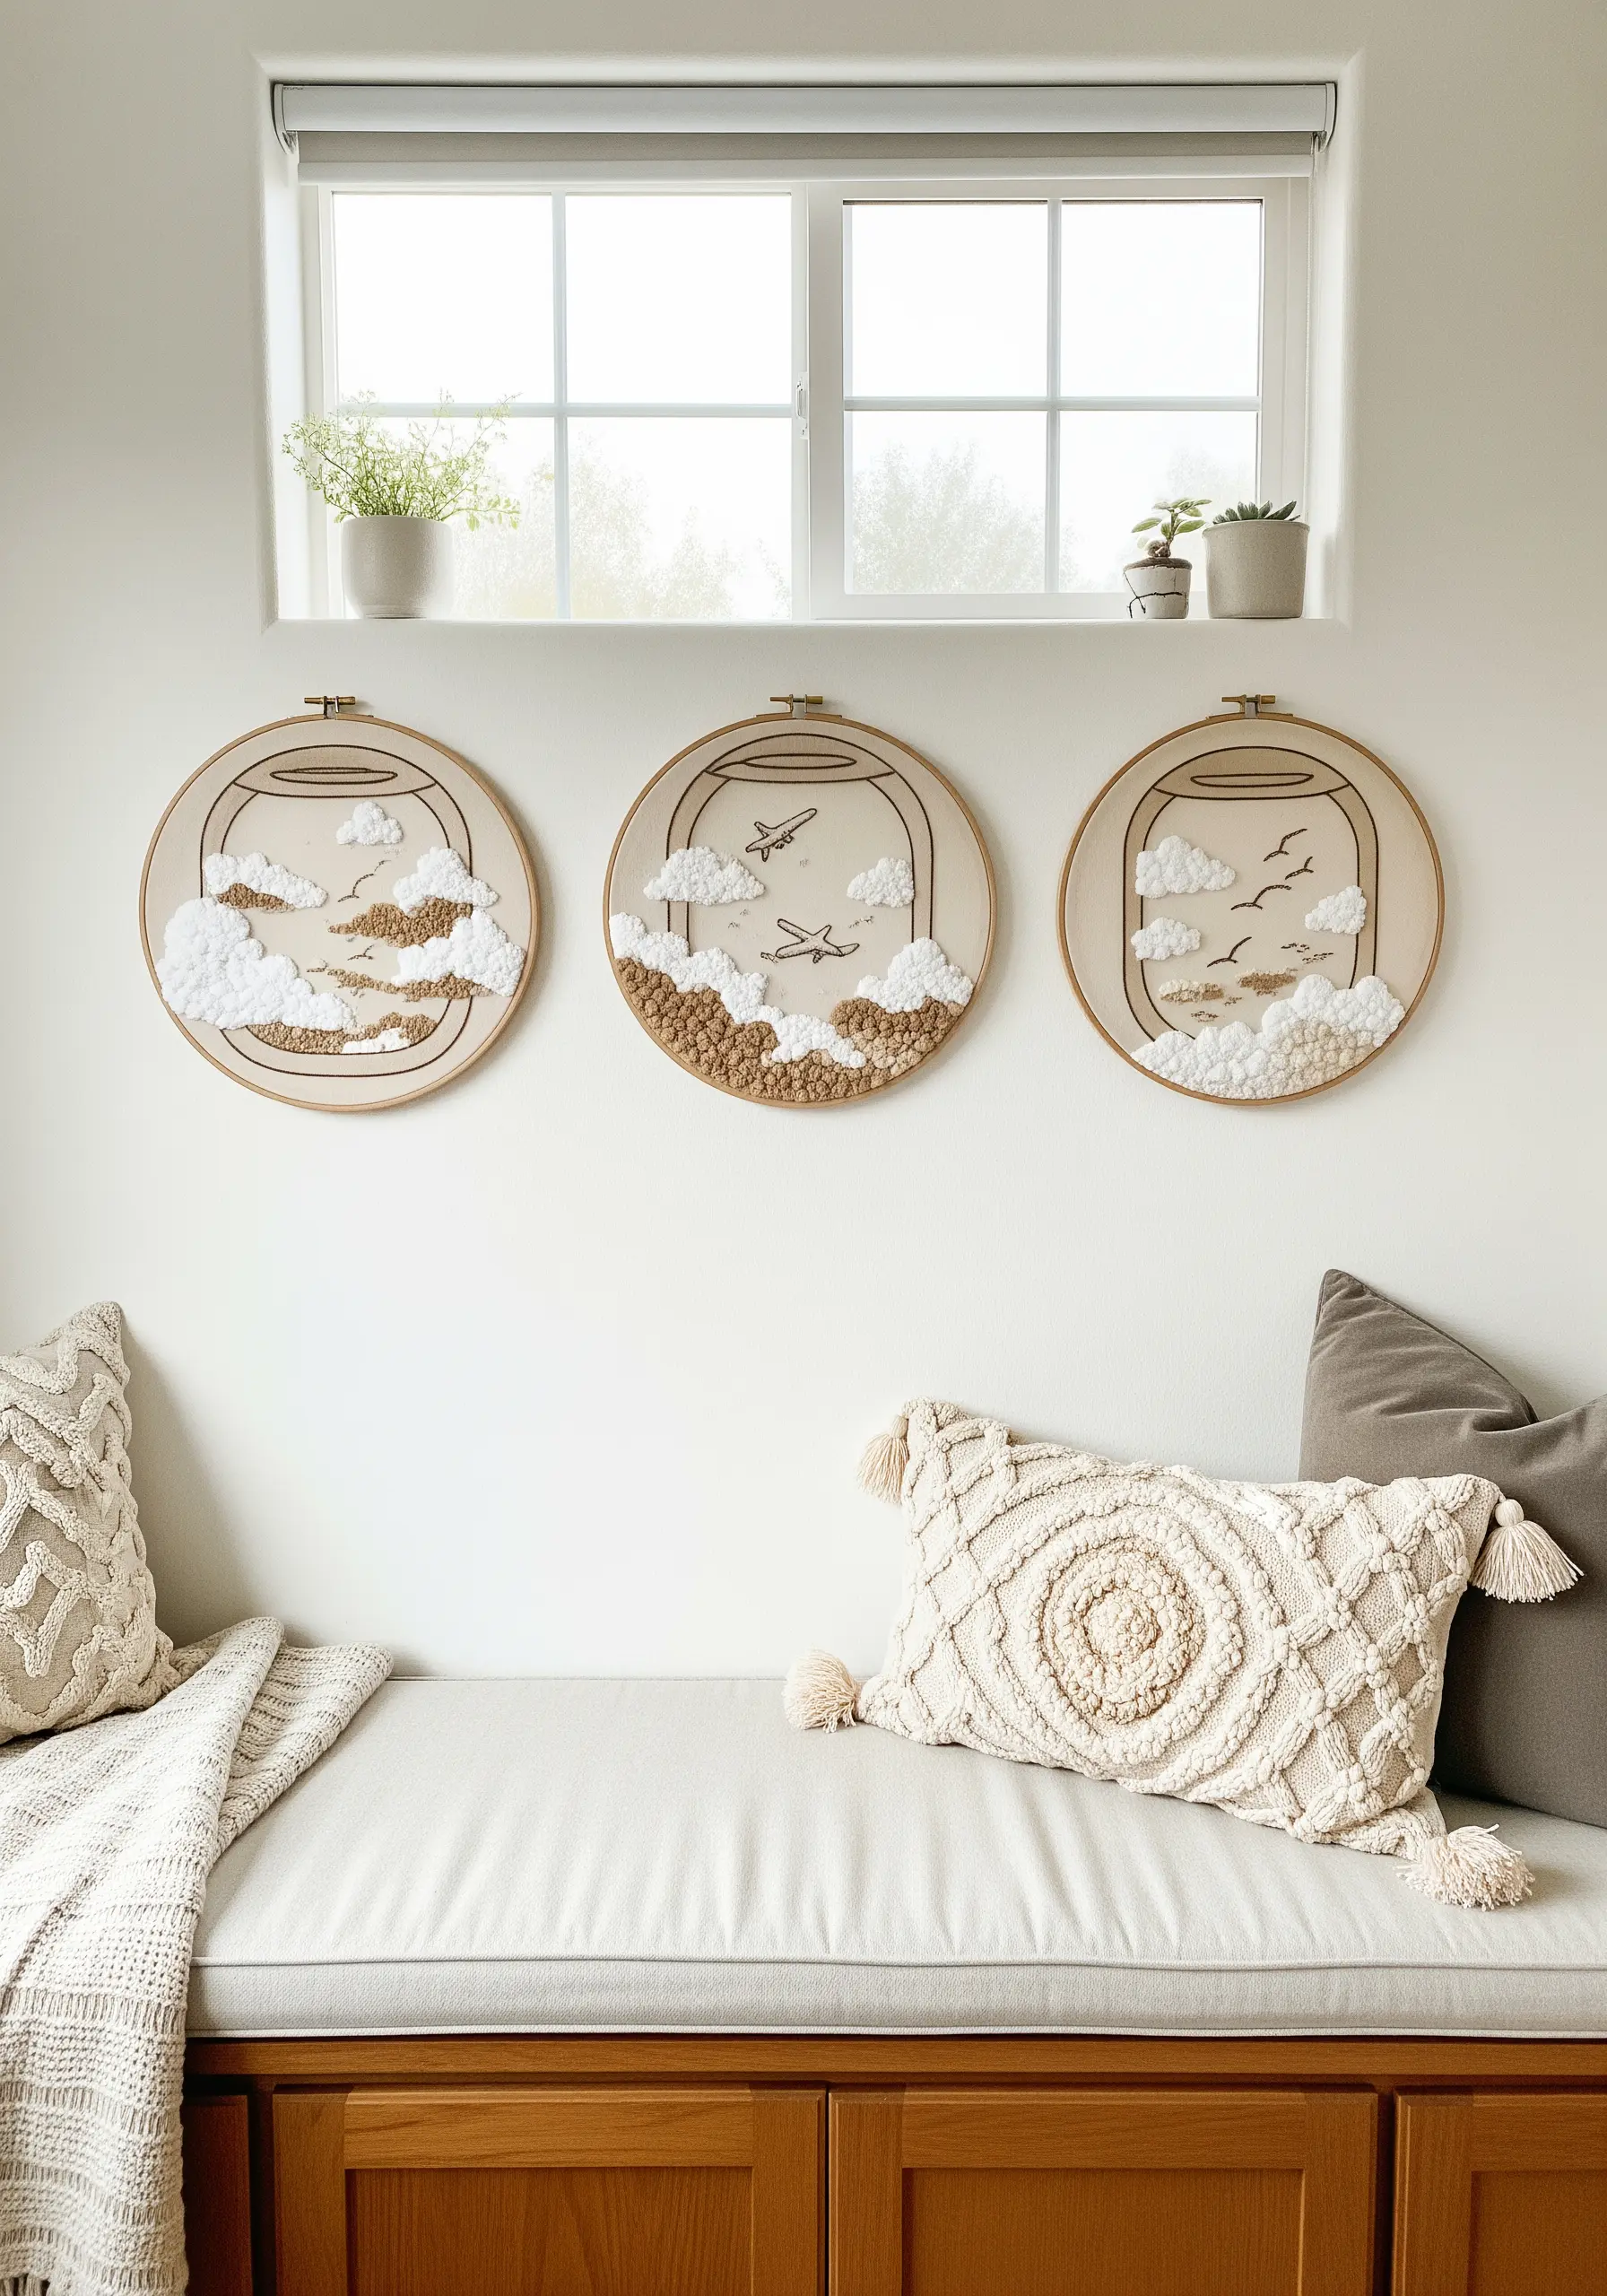
Capture the feeling of looking out an airplane window by using the hoop as a frame for a sky scene.
Use a combination of French knots and turkey work (or ghiordes knots) for the clouds, varying the density and loop height to create a sense of perspective—denser textures for clouds in the foreground.
Stitch the land below with seed stitch in earthy tones for a textured, distant effect.
Adding a tiny, single-stitch airplane or a few birds provides a focal point and completes the charming narrative of travel and wonder.
24. Build a 3D Mobile with Felt and Appliqué
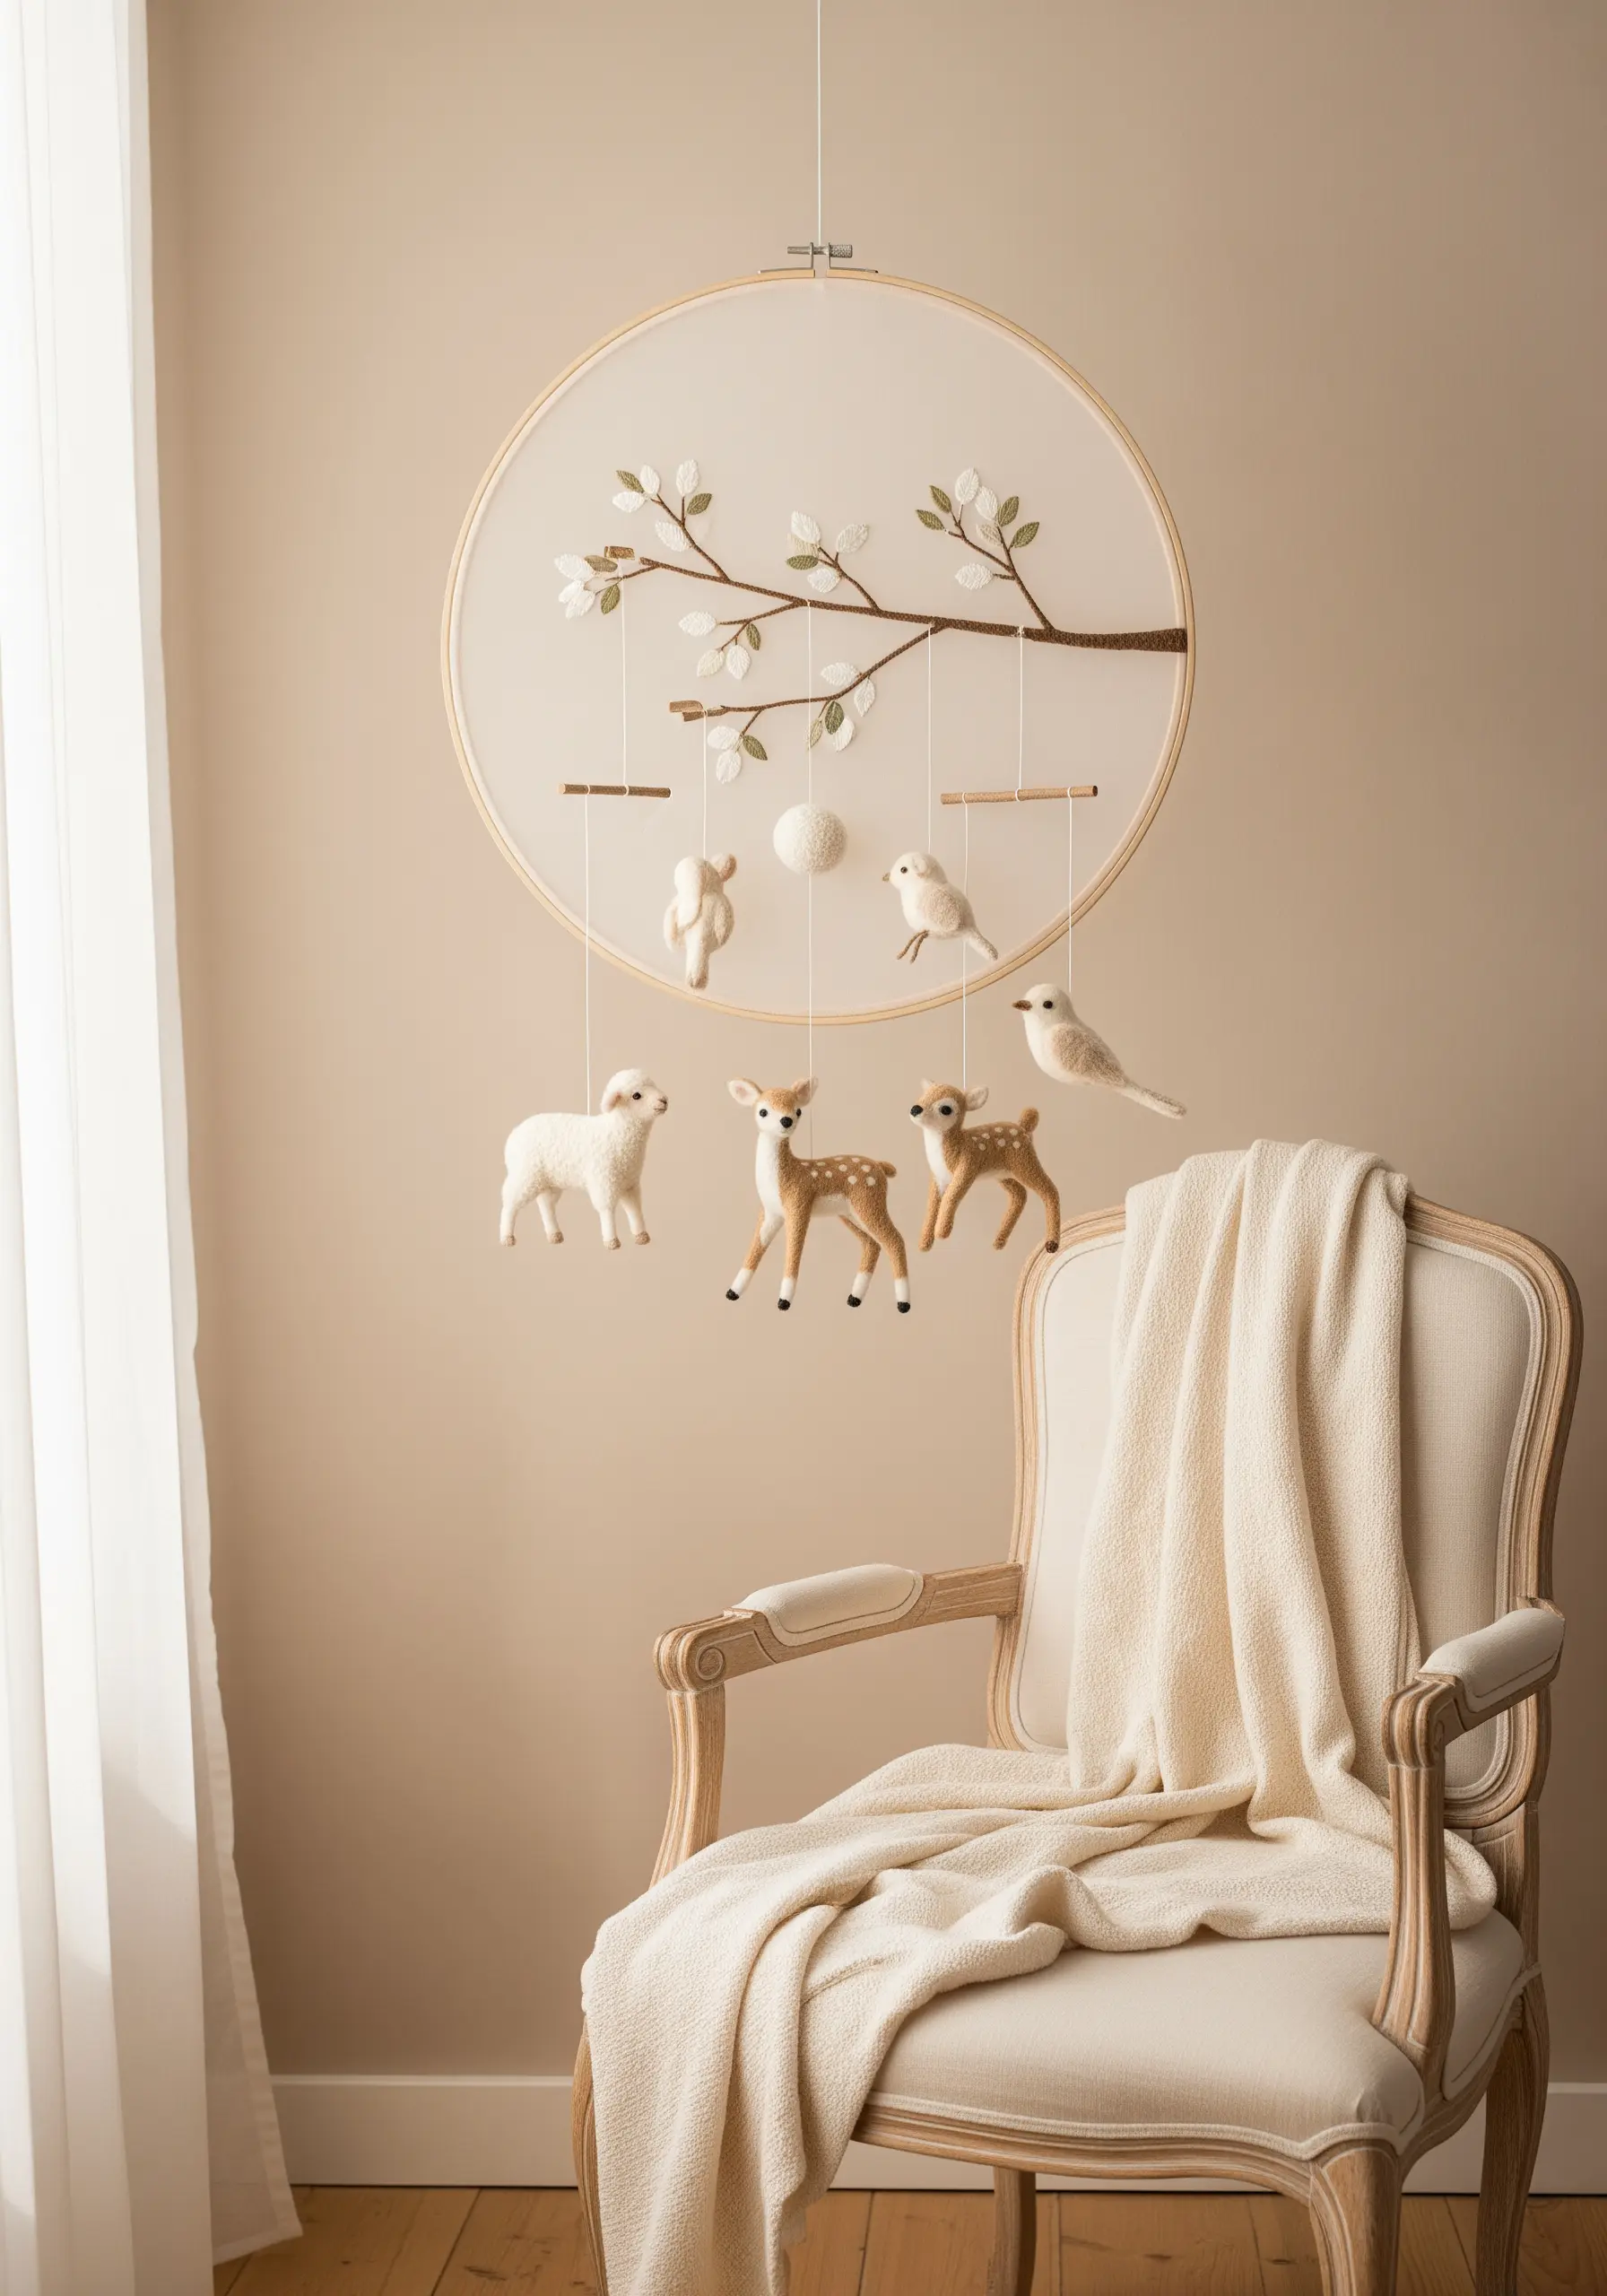
Combine two-dimensional embroidery with three-dimensional felt objects to create a truly enchanting mobile.
Embroider a delicate branch directly onto the fabric in the hoop using a textured stem stitch. Add leaves using appliqué with a few stitched veins for detail.
Craft the hanging animals and birds from felt, using simple sewing and stuffing techniques. A few embroidered details, like eyes or spots, will bring them to life.
Suspending these soft sculptures from the embroidered branch creates a beautiful, layered scene that bridges the gap between wall art and mobile.
25. Frame Geometric Yarn Art for a Bold Statement
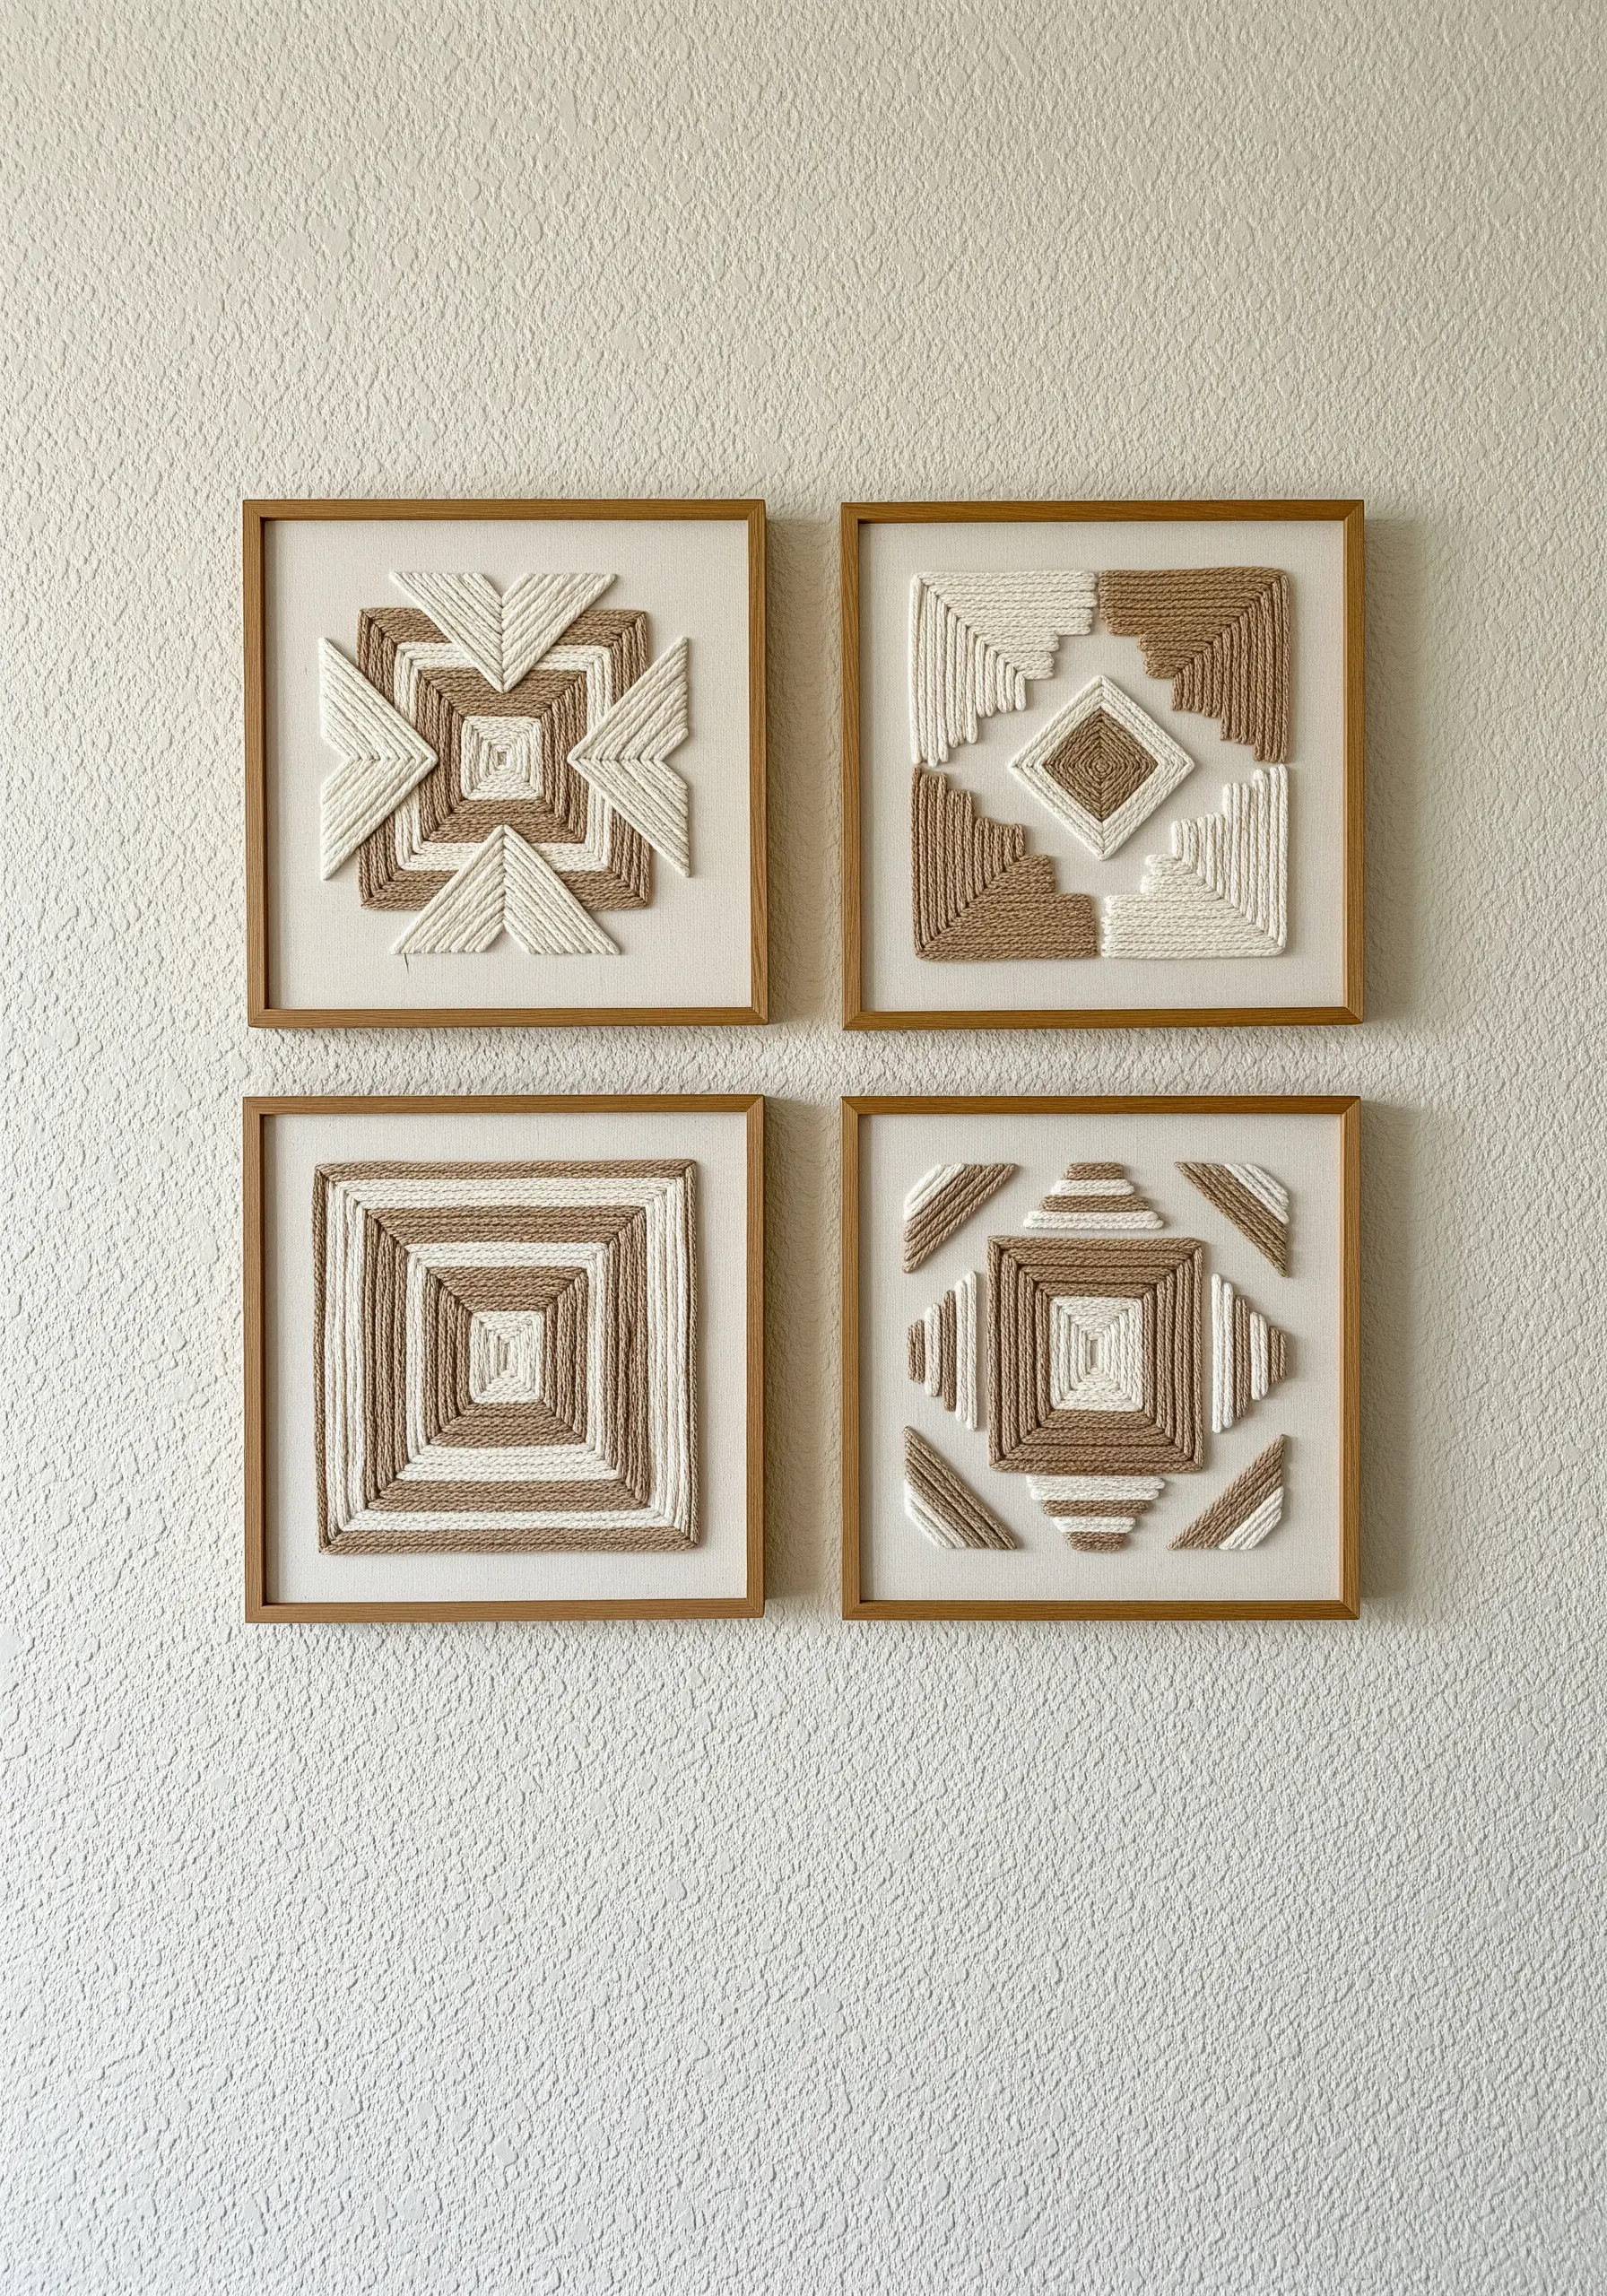
Achieve a bold, graphic look by adapting geometric patterns for yarn embroidery on canvas.
Instead of floss, use a thick, smooth yarn and a large-eyed needle. The technique involves wrapping yarn in straight, disciplined lines to fill in shapes, creating a highly textured, almost architectural effect.
Play with color blocking by dividing your design into distinct sections of contrasting ivory and sand tones.
Mounting the stitched canvas in simple, deep-set wooden frames provides a clean, contemporary finish that elevates the yarn wall art to gallery quality.
26. Craft Character with Looped Stitches
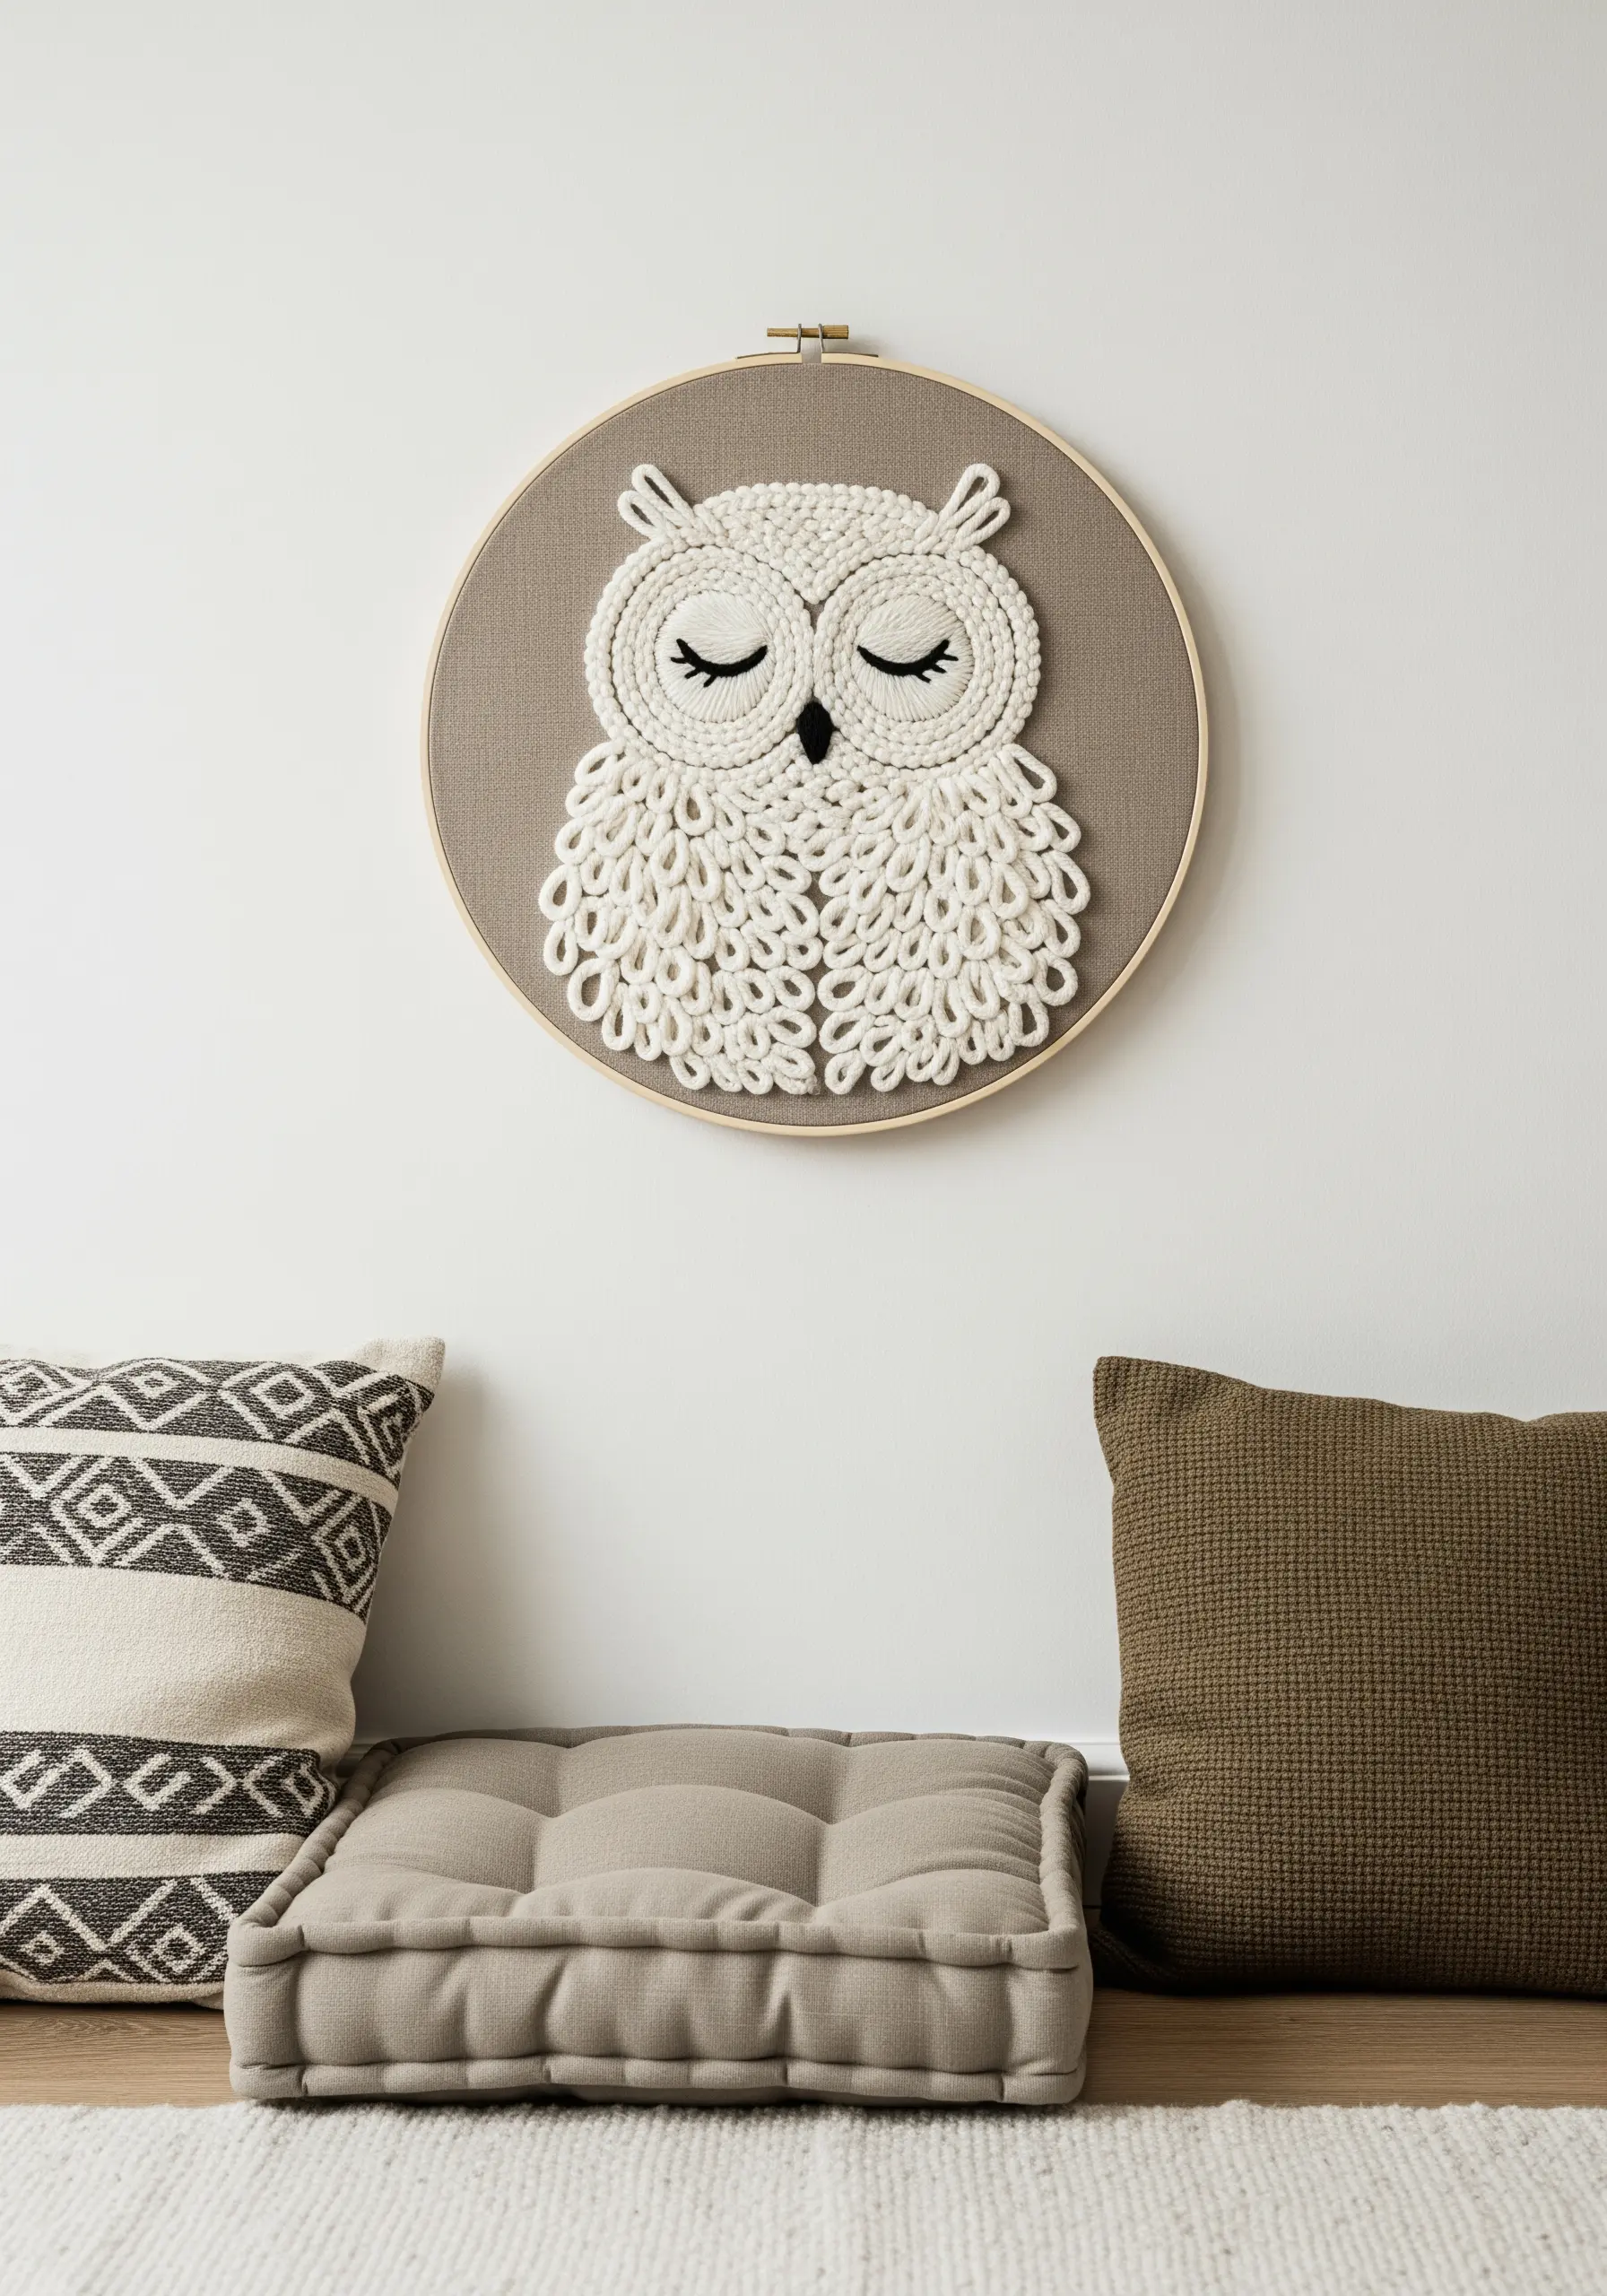
Give animal motifs a wonderfully plush and stylized texture by using a detached chain stitch or a lazy daisy stitch.
Create the owl’s feathers by working rows of looped stitches, layering them like shingles on a roof. This builds incredible dimension and a soft, scalloped appearance.
For the sleepy eyes, use a simple curved backstitch, but go over it two or three times to thicken the line and make it stand out against the textured body.
This technique turns a simple shape into a characterful piece with irresistible tactile appeal.
27. Create Movement with an Embroidered Swirl
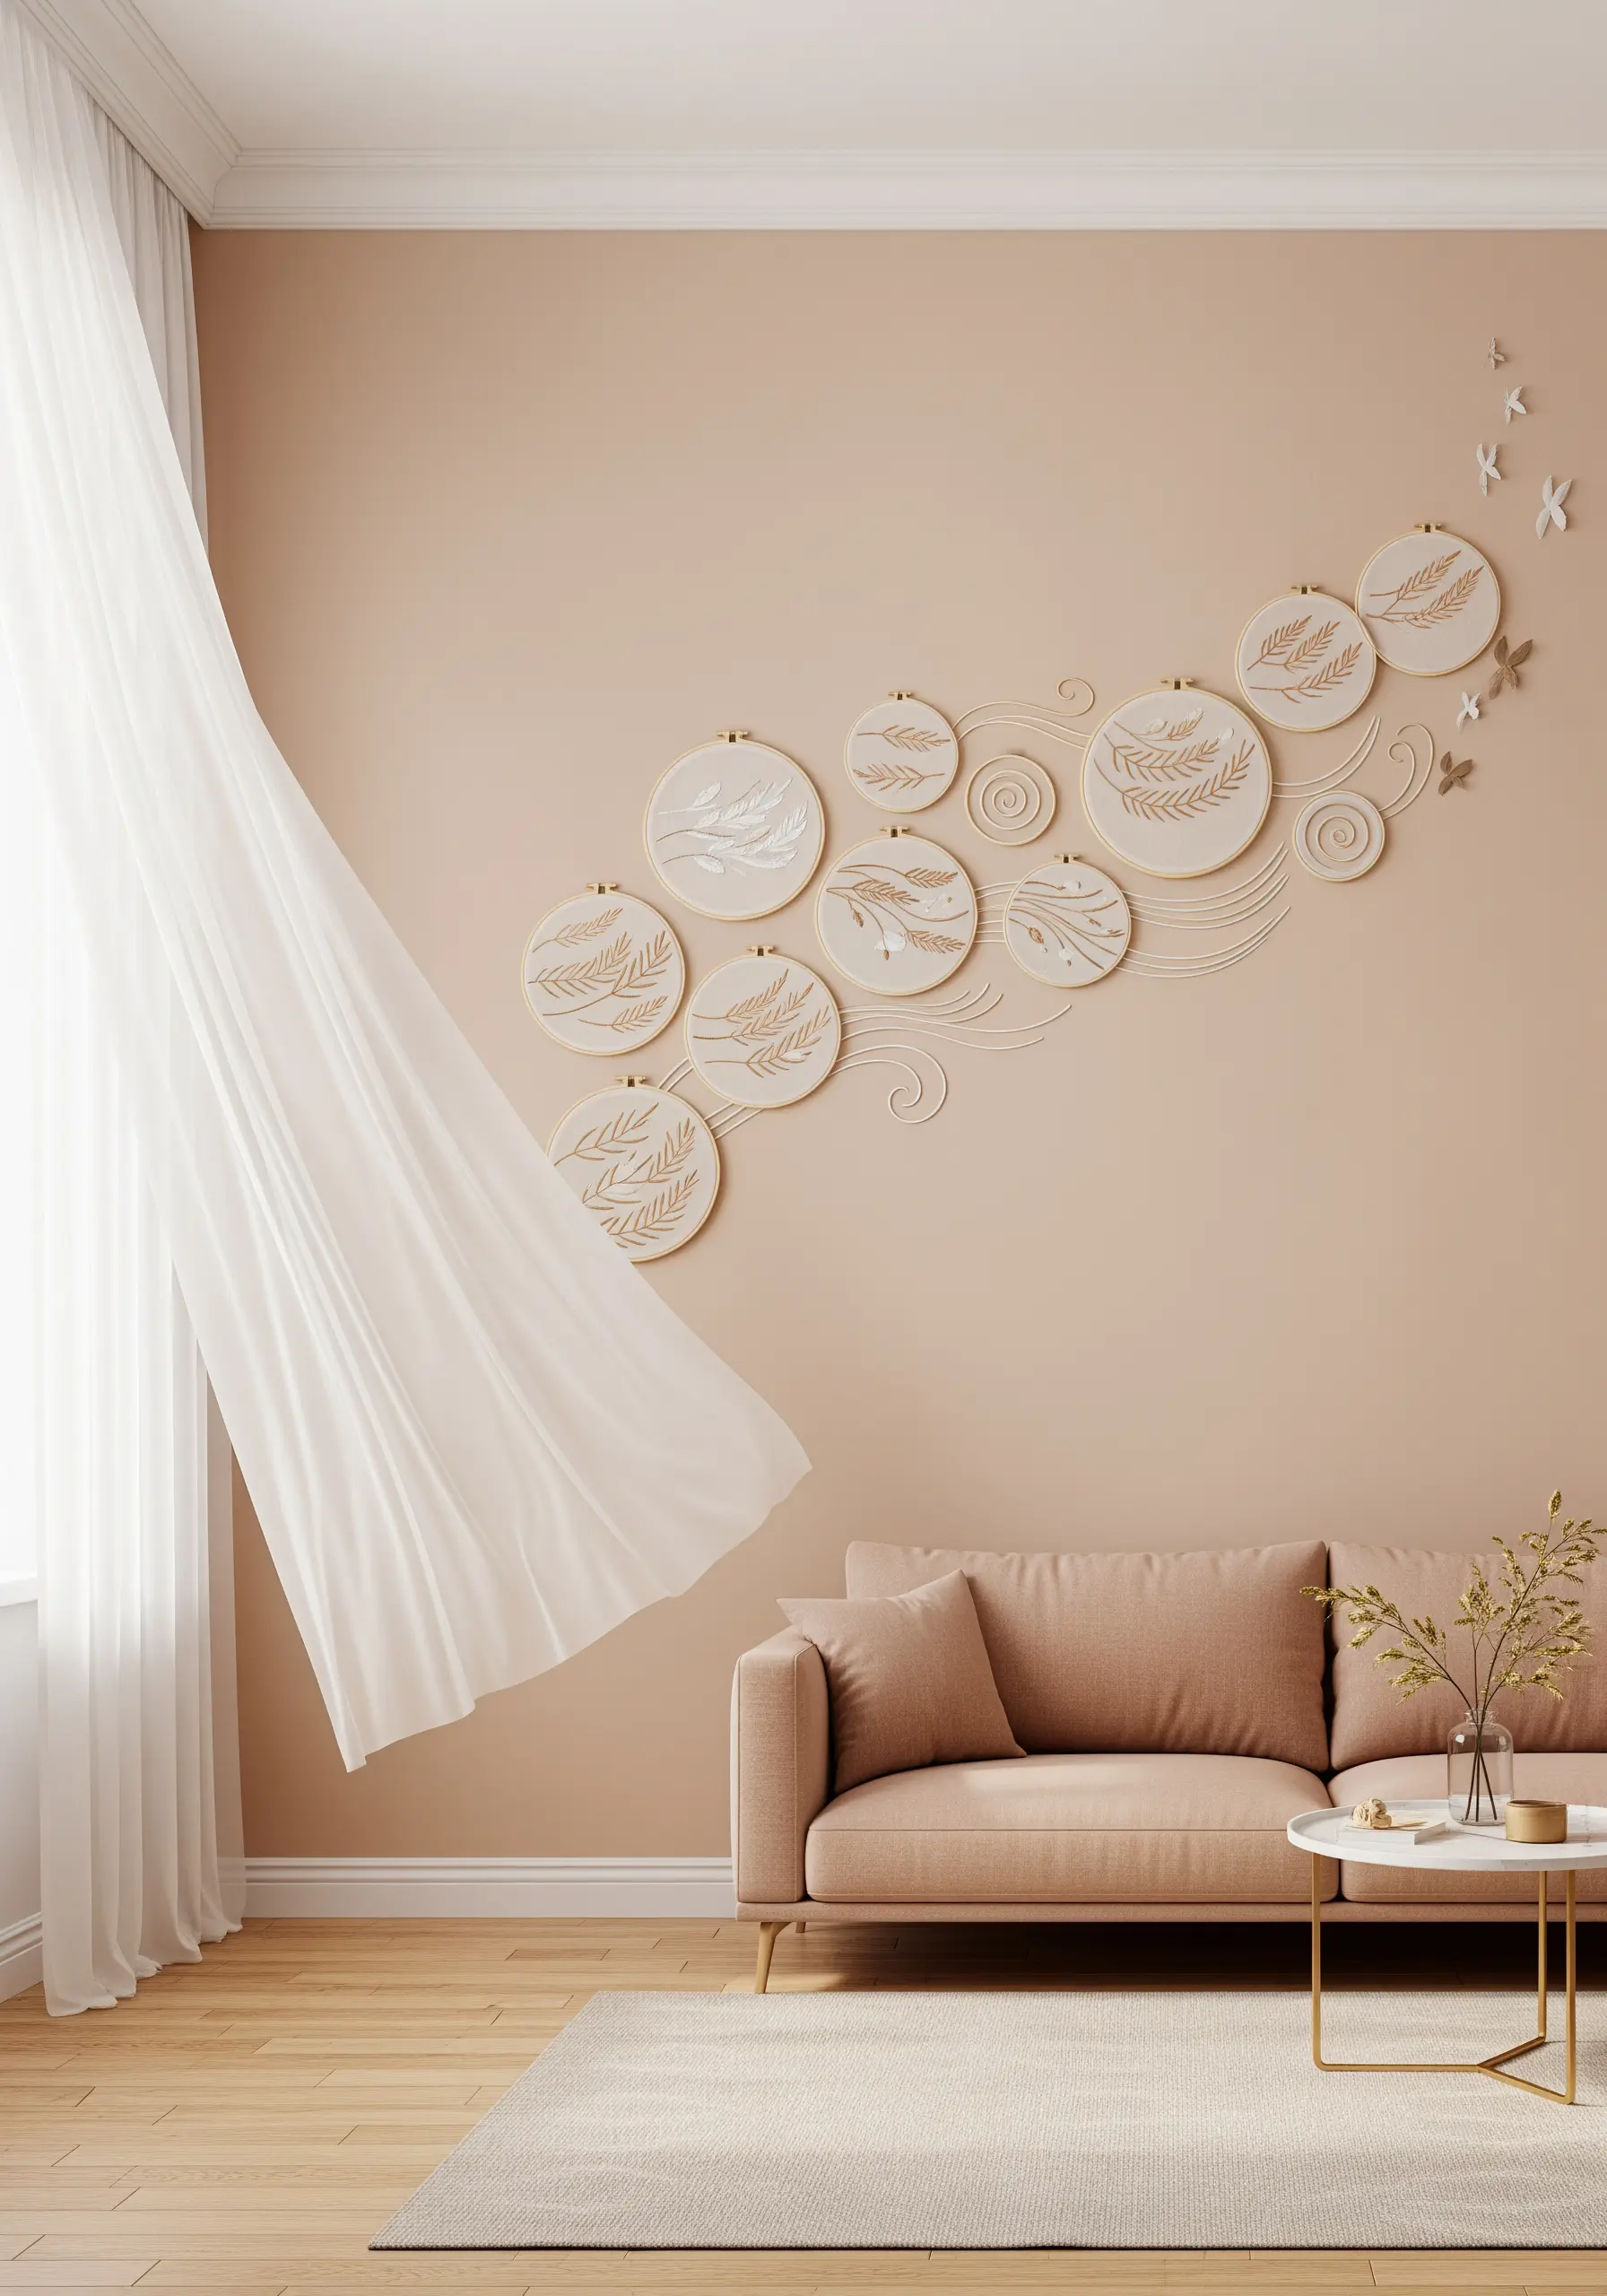
Design a dynamic wall installation that suggests movement, like wind or flowing water.
Arrange hoops of varying sizes in a sweeping, curved line across the wall. This organic placement is key to creating a sense of flow.
For the connecting swirls, you can stitch them directly on the wall if you’re feeling bold, or stitch them on a dissolvable stabilizer, rinse, and then affix the hardened thread lines to the wall for a less permanent option.
This technique turns a collection of individual hoops into a single, breathtaking piece that interacts with the architecture of the room.
28. Use Negative Space in Word Art
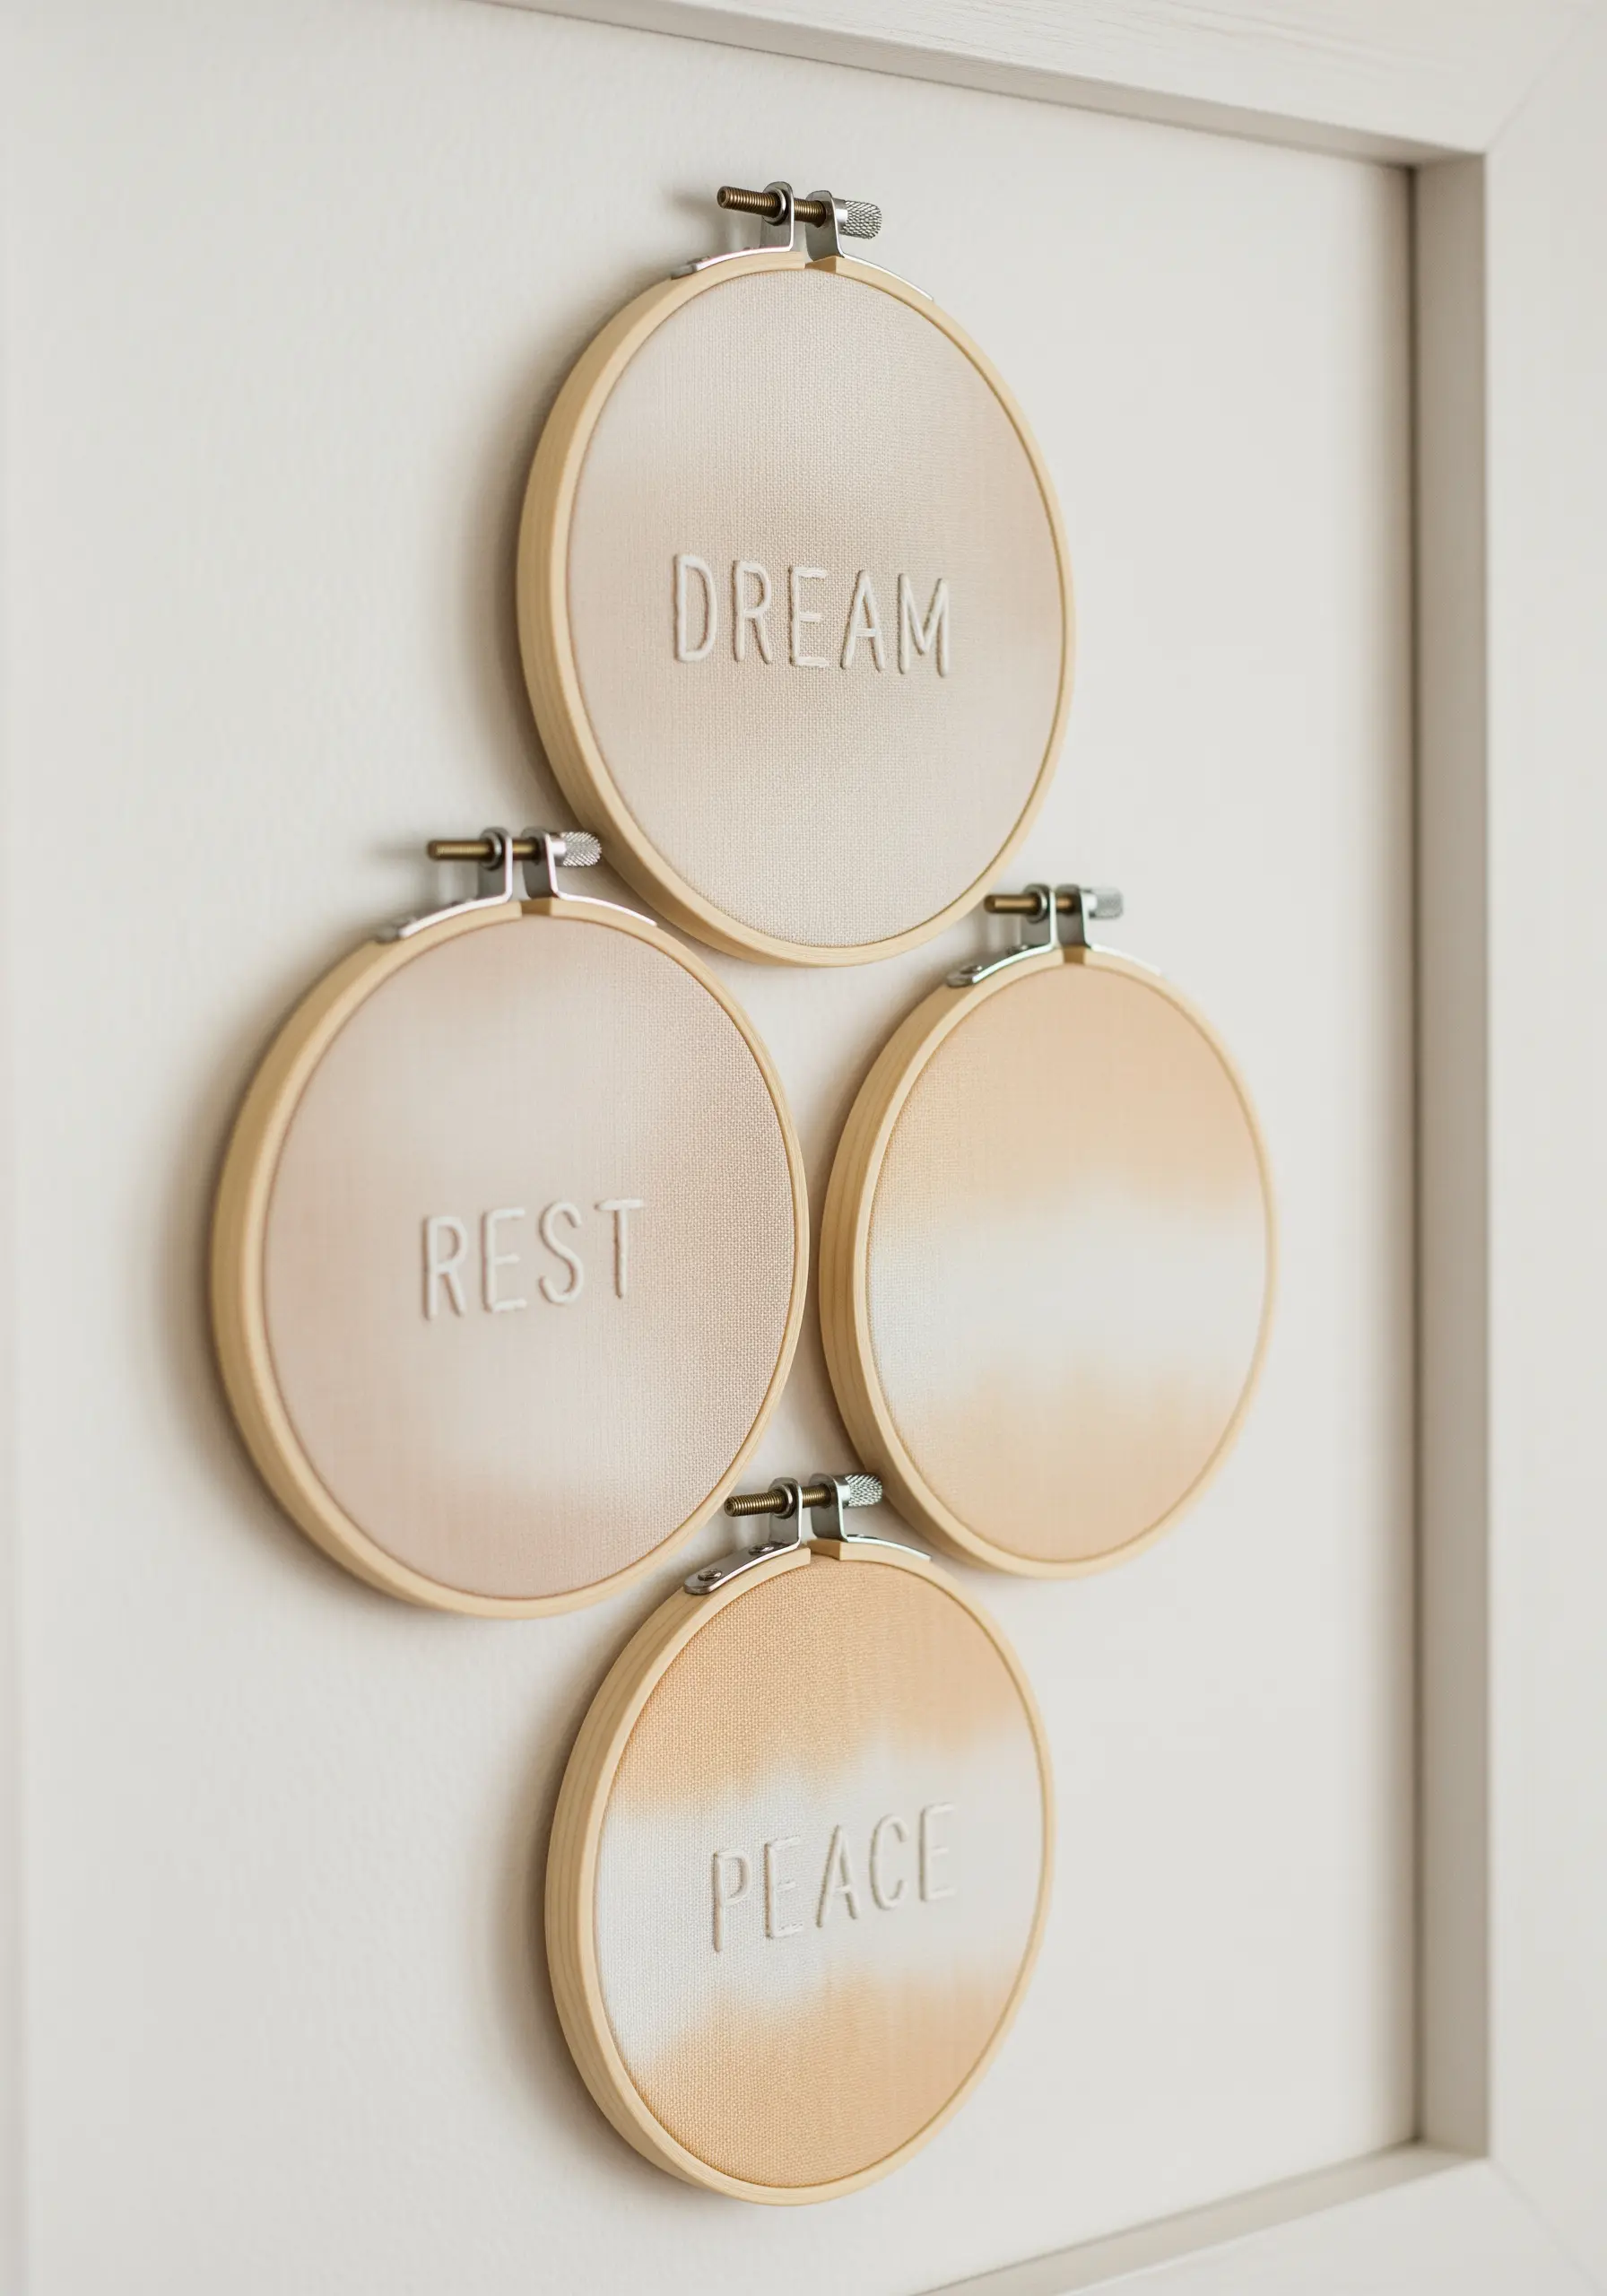
Create subtle and sophisticated word art by stitching the background, not the letters themselves.
Lightly trace your letters onto the fabric. Then, fill the entire area around them with a dense satin stitch or long-and-short stitch. The unstitched fabric will form the letters.
This reverse-fill technique, known as voiding, creates a beautiful, embossed effect. For a softer look, dip-dye the bottom half of the fabric in a complementary color before stitching to add a gentle gradient that enhances the calm, dreamy words.
29. Compose Abstract Shapes with Directional Fills
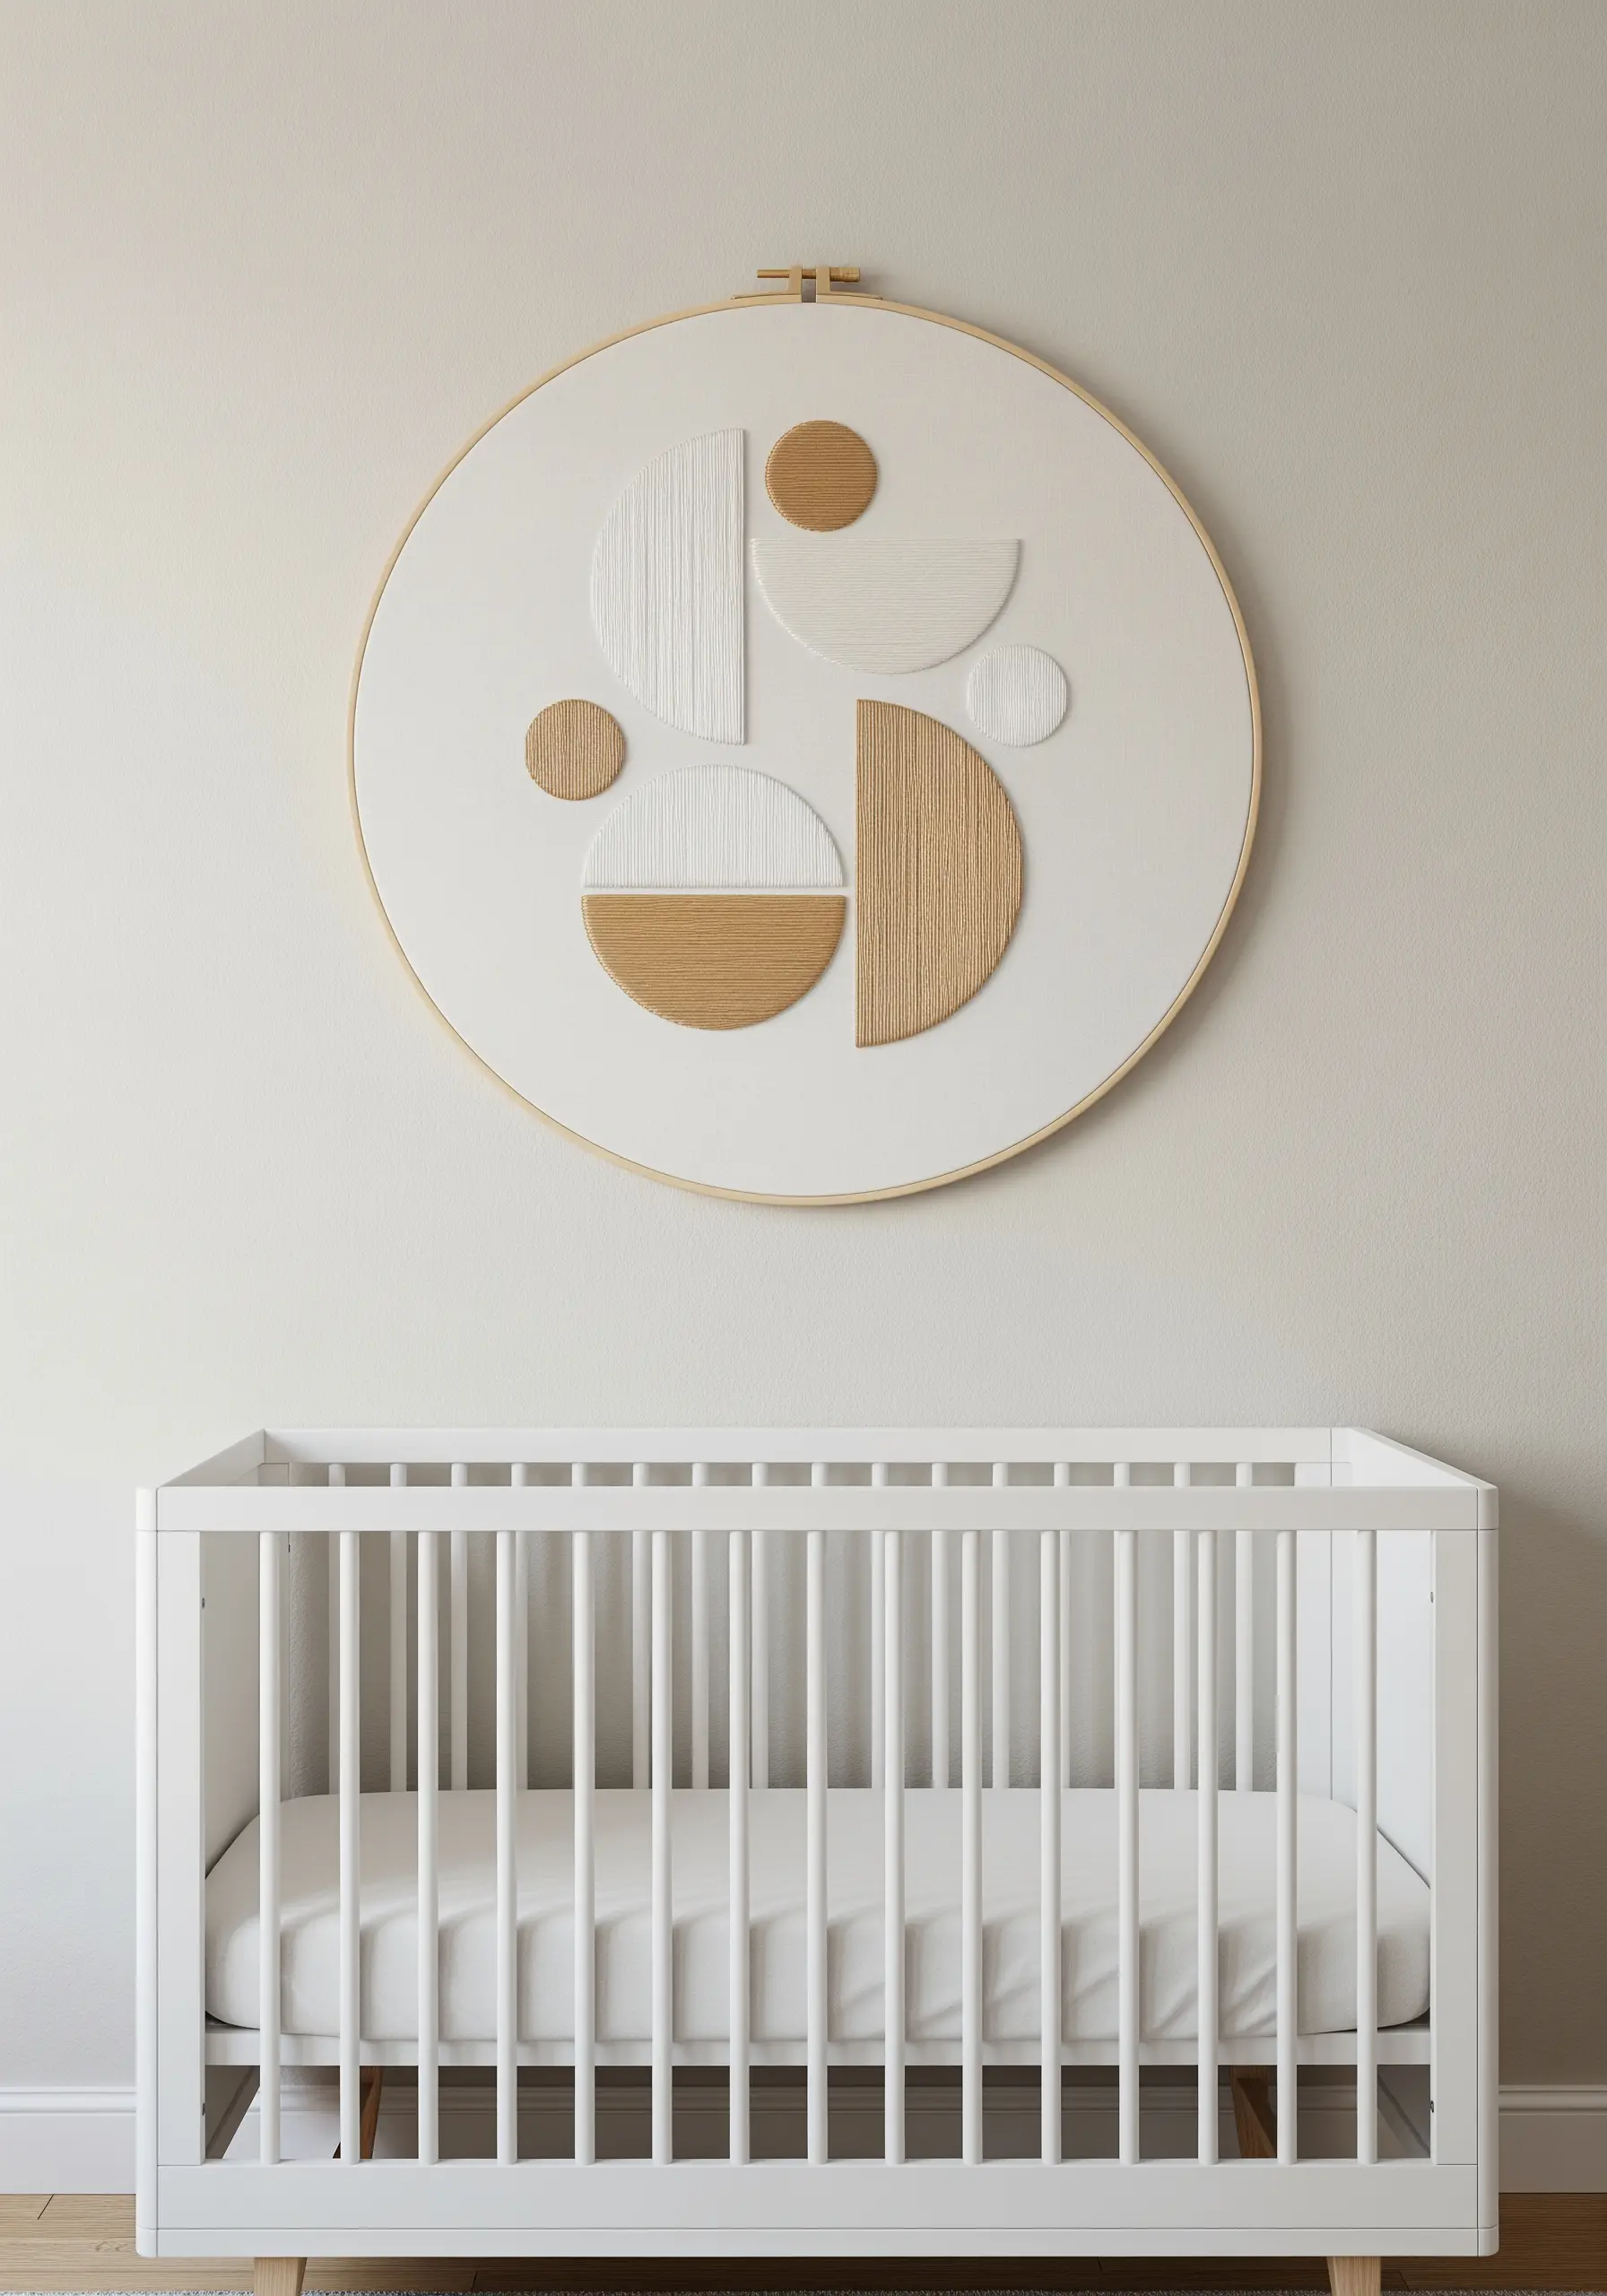
Explore modern composition by filling geometric shapes with directional satin stitch.
Divide your design into semi-circles, circles, and other abstract forms. Fill each shape with satin stitches, but change the direction of the stitches for each distinct segment—vertical, horizontal, diagonal.
This simple shift in stitch direction causes the light to reflect differently off each shape, creating visual separation and a dynamic, textured surface even when using similar colors.
It’s a powerful technique for creating sophisticated, abstract concept art with minimal effort.
30. Illuminate Your Stitches with Fairy Lights
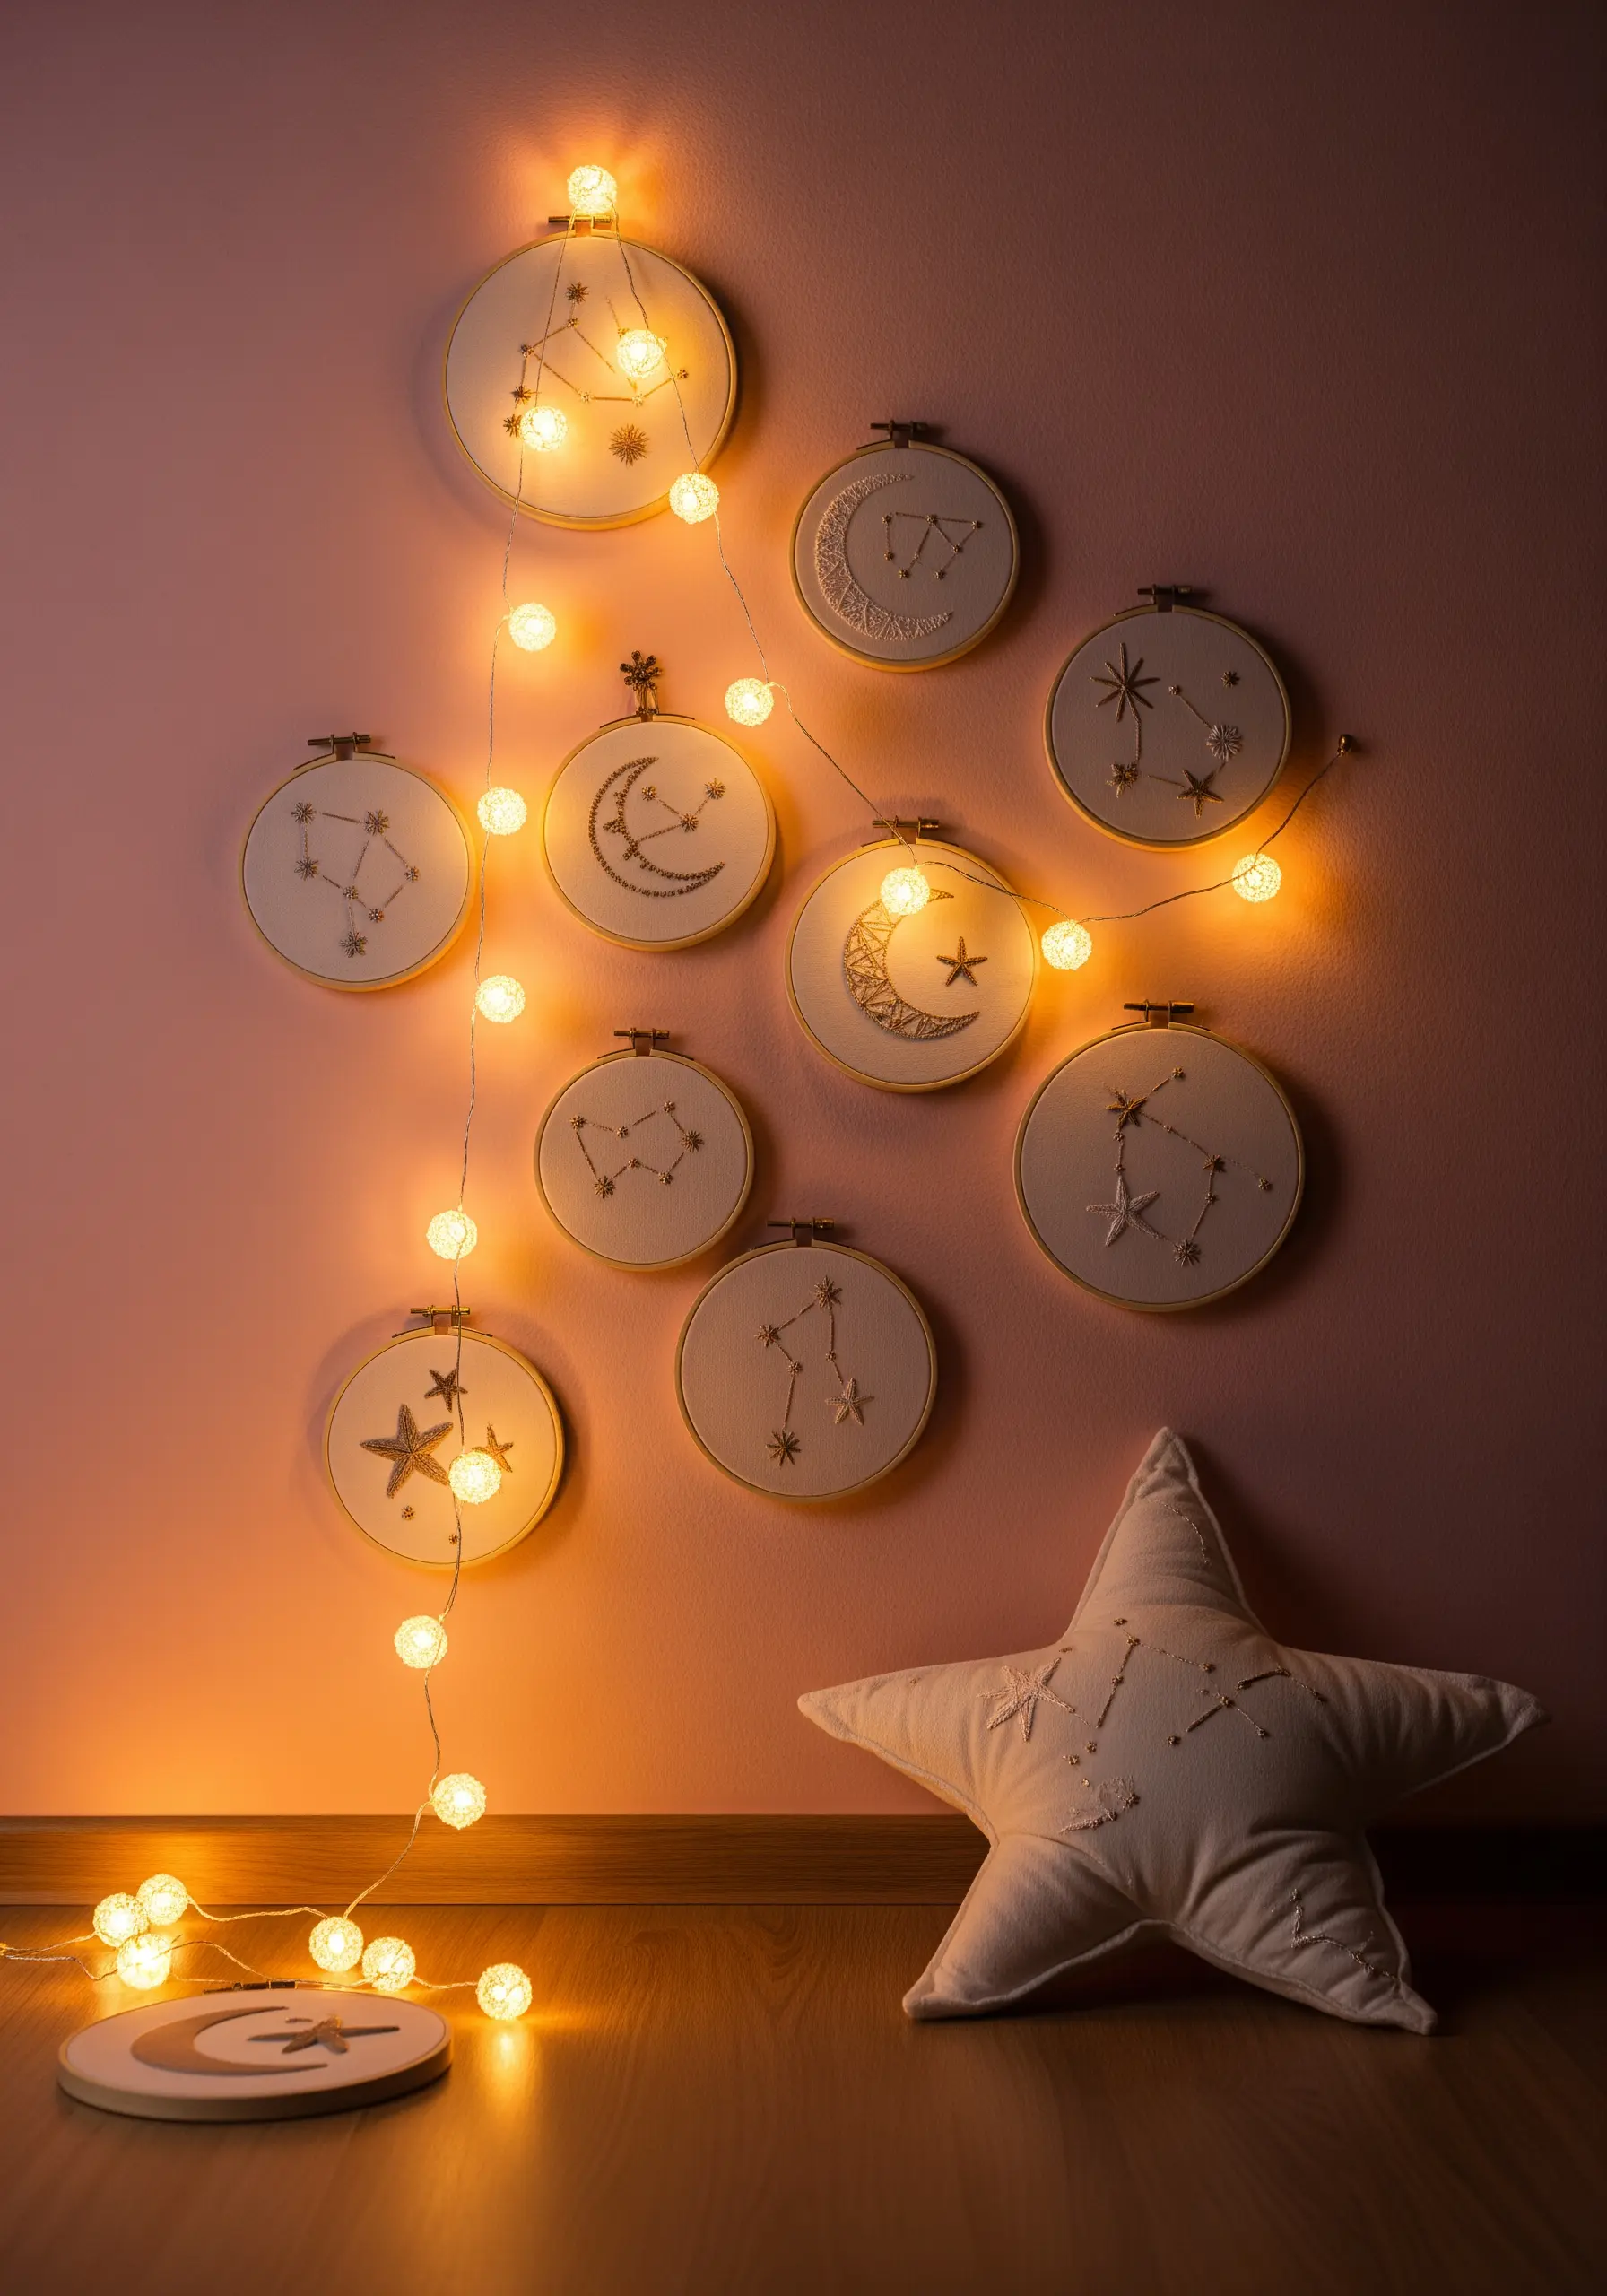
Add a magical, comforting glow to a celestial-themed gallery wall by intertwining it with delicate fairy lights.
Choose battery-operated LED lights with a fine, flexible wire that can be easily woven around and between the hoops.
For the embroidered constellations, use a silver or light gold metallic thread for the stars. This will catch the ambient light from the fairy lights and create a gentle twinkle, even when the lights are off.
This combination of textile art and soft lighting creates a functional piece of decor that doubles as a gentle nightlight, perfect for a peaceful nursery.


