
You’ve mastered the basics—your stitches are neat, your lines are clean, and your vision is clear. But you feel a pull toward something more, a desire to create work that doesn’t just hang on the wall, but interacts with the space around it.
Texture is where embroidery transcends the two-dimensional and becomes sculpture. It isn’t about learning dozens of complex new stitches, but about making intentional choices: using a thicker thread, packing your knots closer together, or adding an unexpected material. It’s the subtle art of turning thread into form.
Consider this collection your guide to thinking sculpturally. Each technique is a doorway to creating work that you can not only see, but feel. It’s time to let your embroidery rise from the fabric and tell a story with depth, dimension, and tangible artistry.
1. Build Sculptural Reefs with Layered Knots
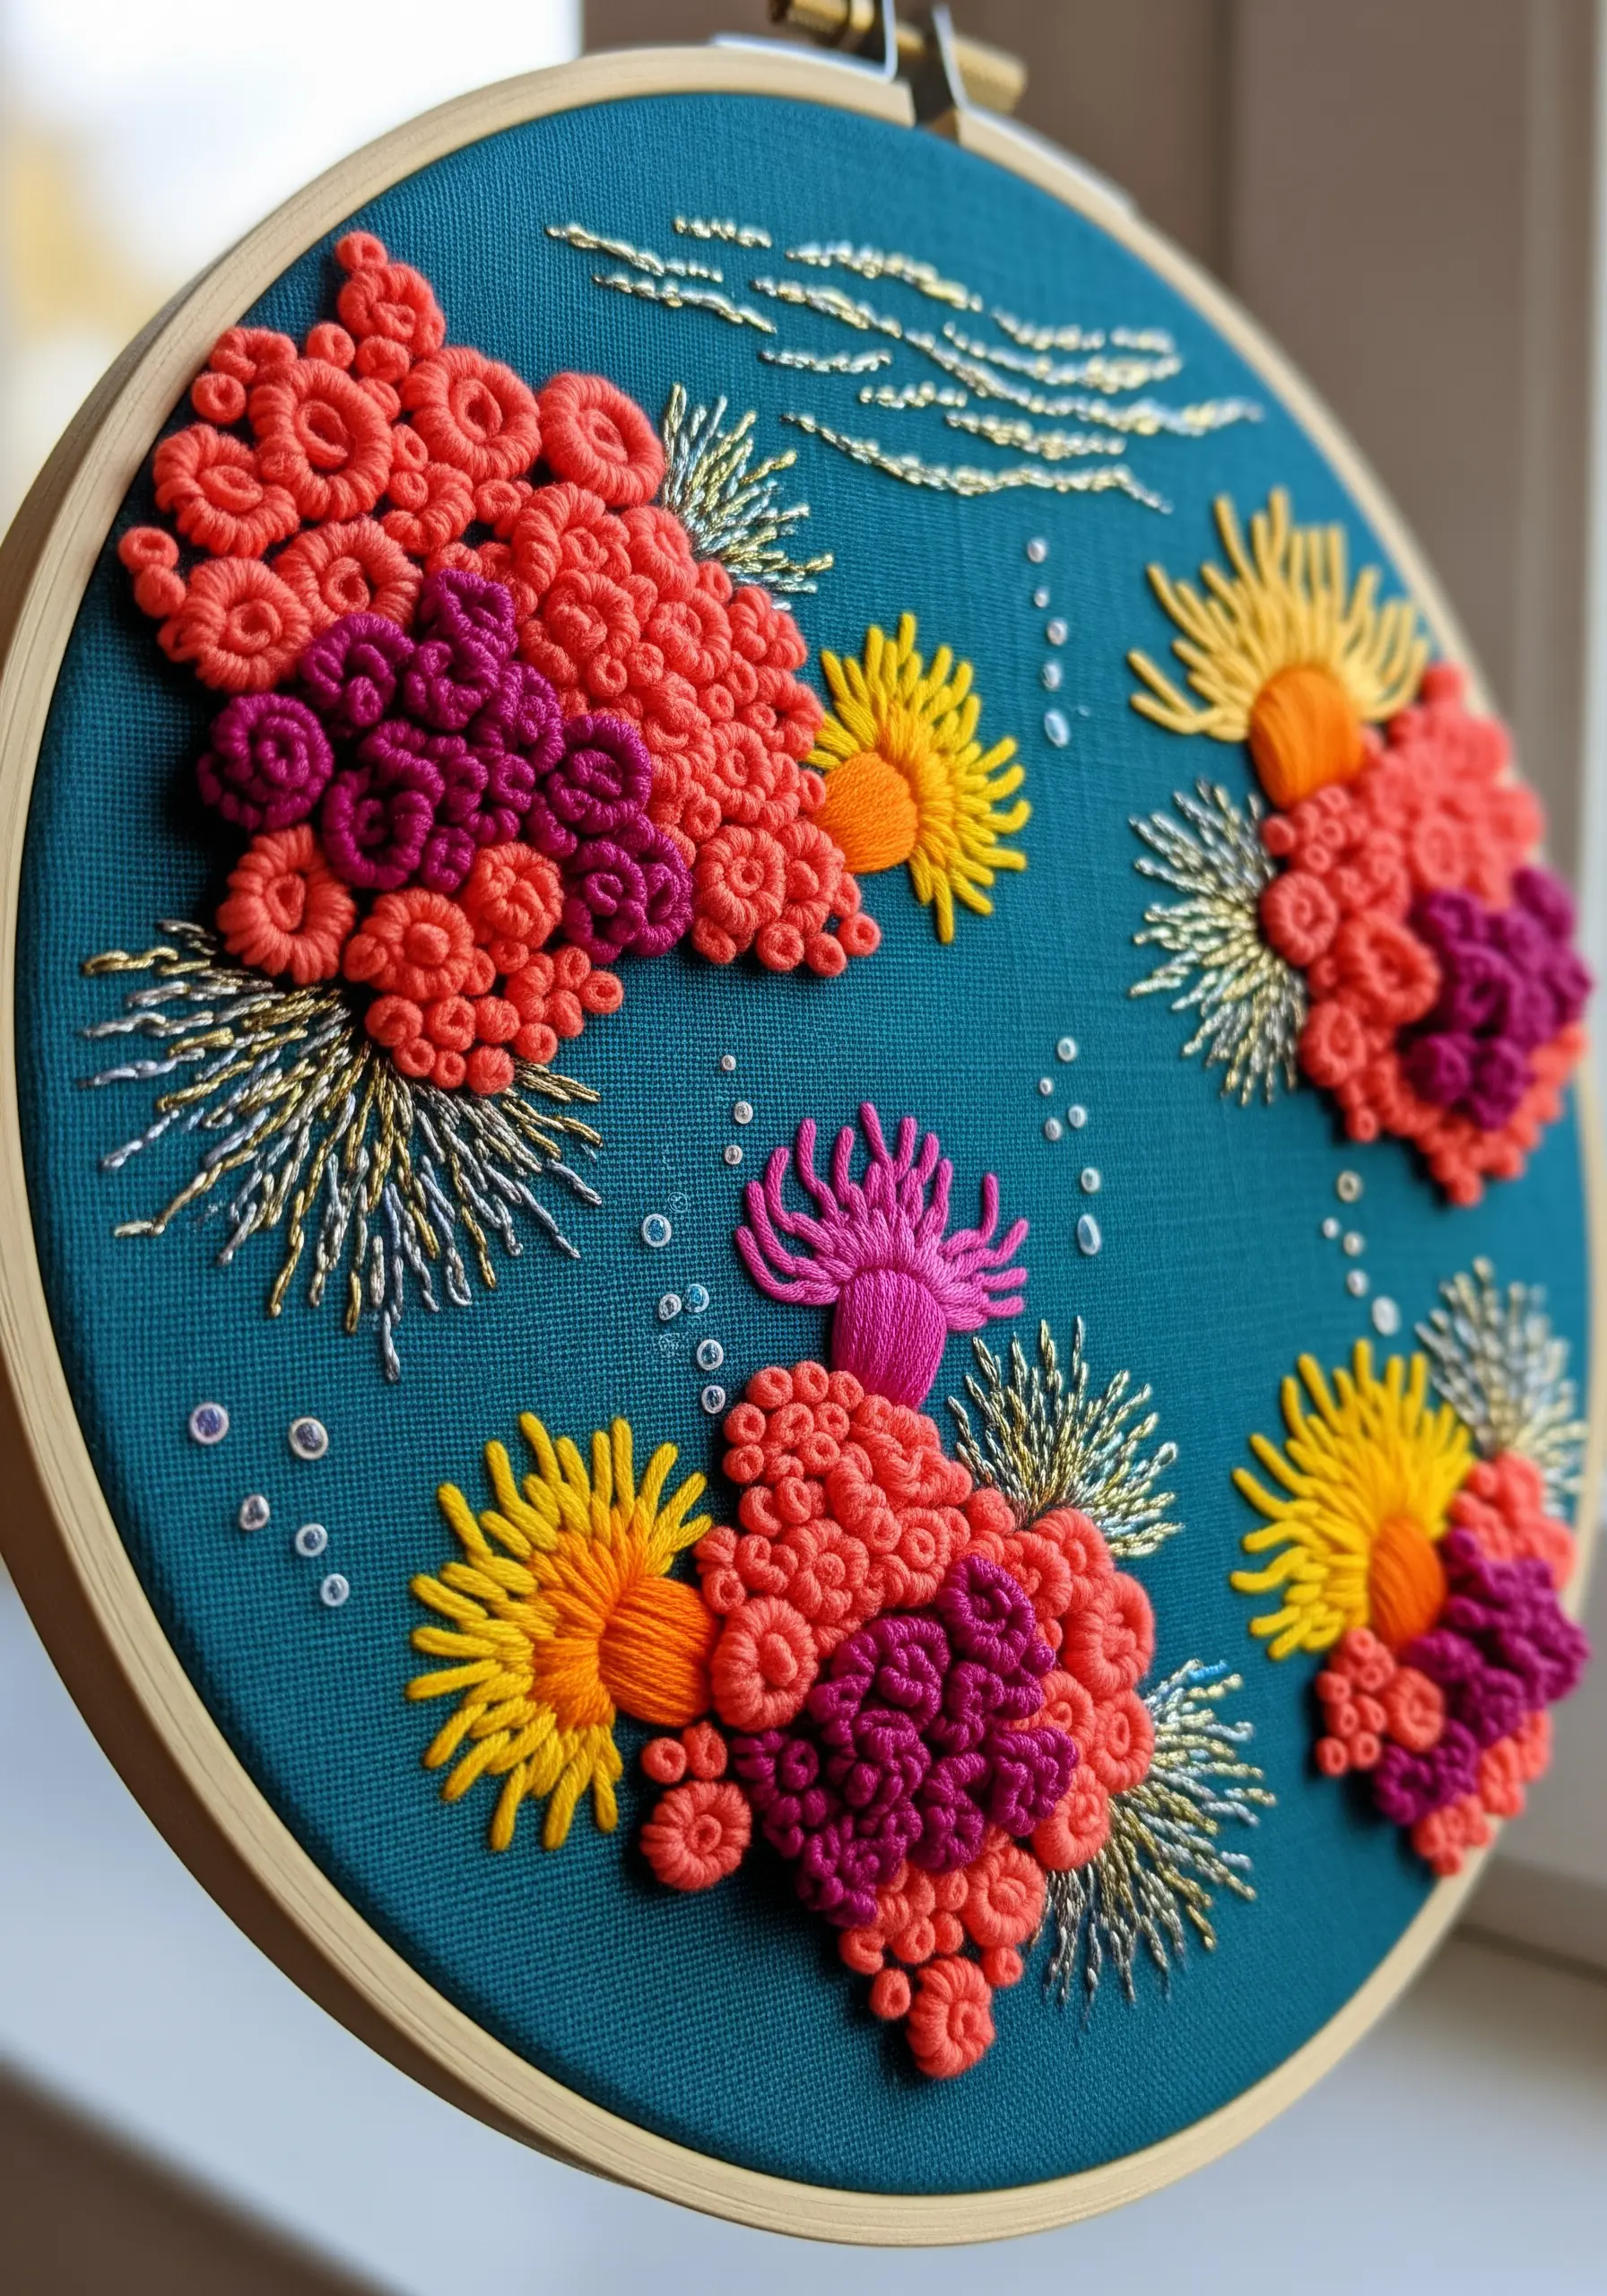
Create a dense, coral-like surface by tightly packing French and bullion knots in vibrant, contrasting colors.
Vary the number of wraps and strands of floss for each knot to build organic, uneven clusters that mimic natural growth.
Incorporate fine metallic thread using straight stitches or delicate couching to add glints of light, suggesting sunlight filtering through water.
This technique relies on density; the closer your knots, the more sculptural and impactful the final piece will be.
2. Weave Tactile Landscapes with Roving Wool
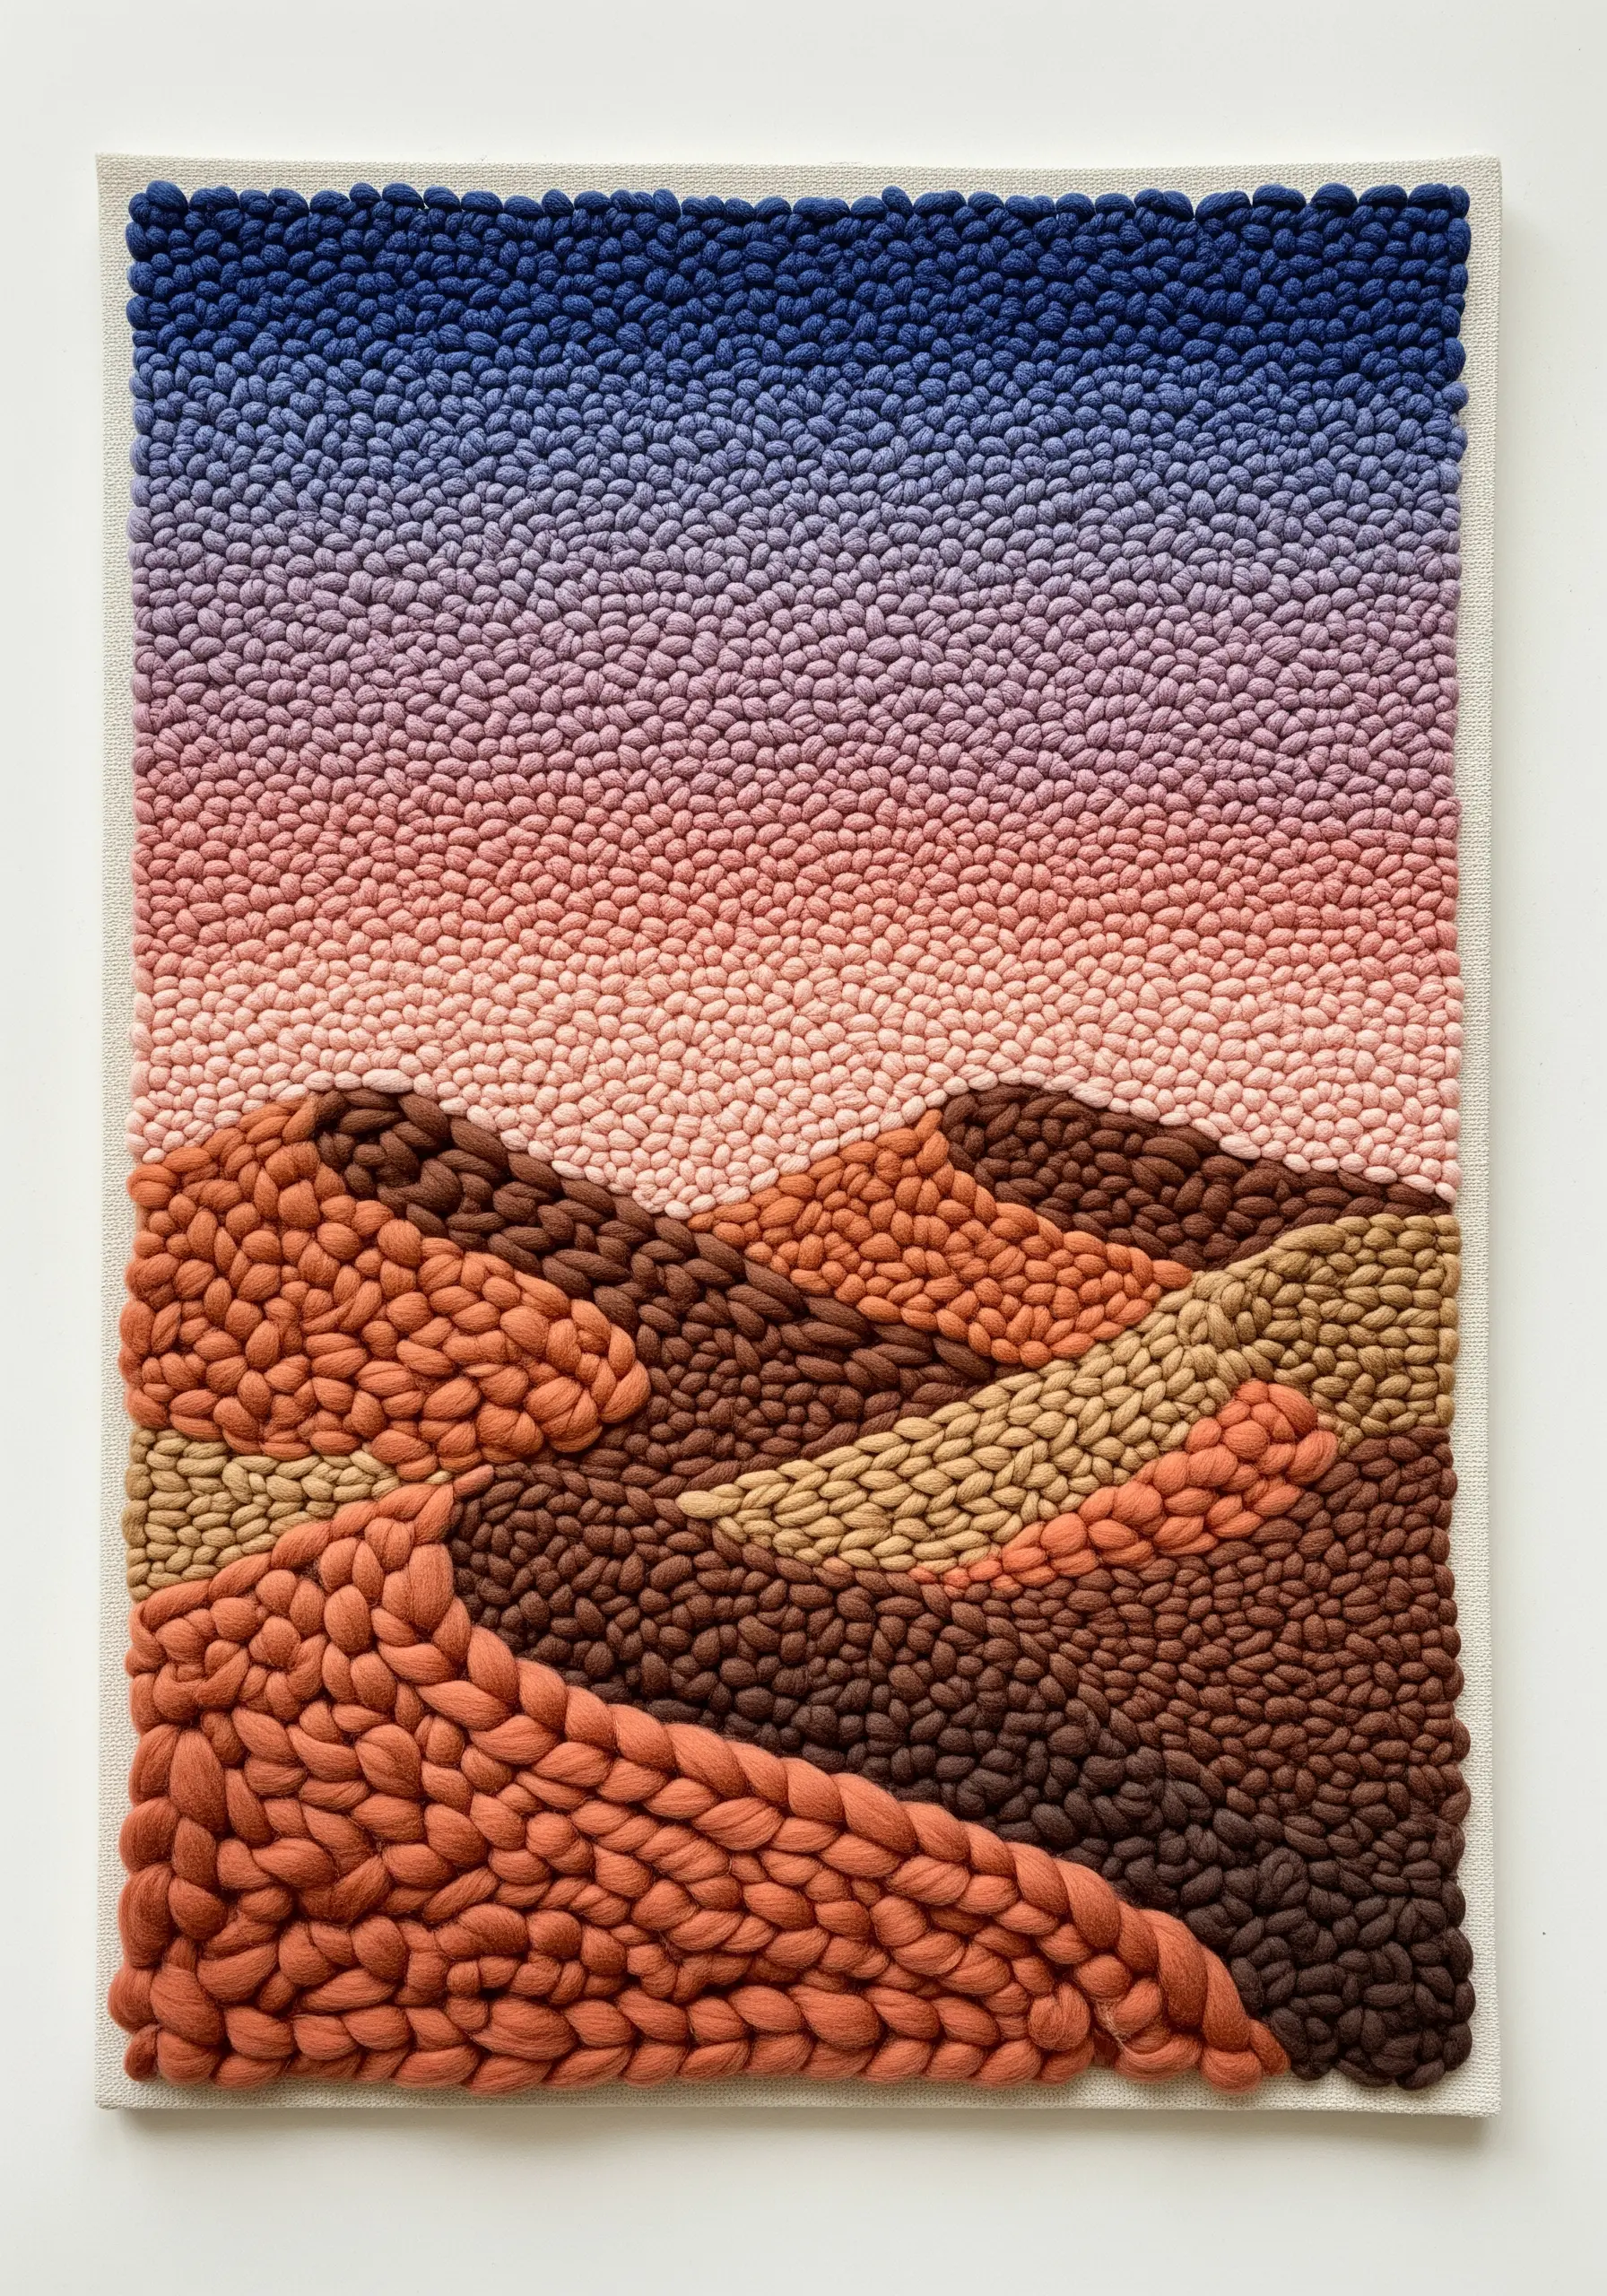
Move beyond traditional floss and use thick wool roving to create broad, soft textures with incredible depth.
This effect is achieved by either punch needling on a sturdy backing like monk’s cloth or by couching the thick roving onto the fabric surface.
Plan your color fields carefully, allowing the soft gradients and the sheer volume of the wool to define the shapes of your landscape.
The result is less about individual stitches and more about building sculptural blocks of color and form.
3. Elevate Florals with Directional Stitching
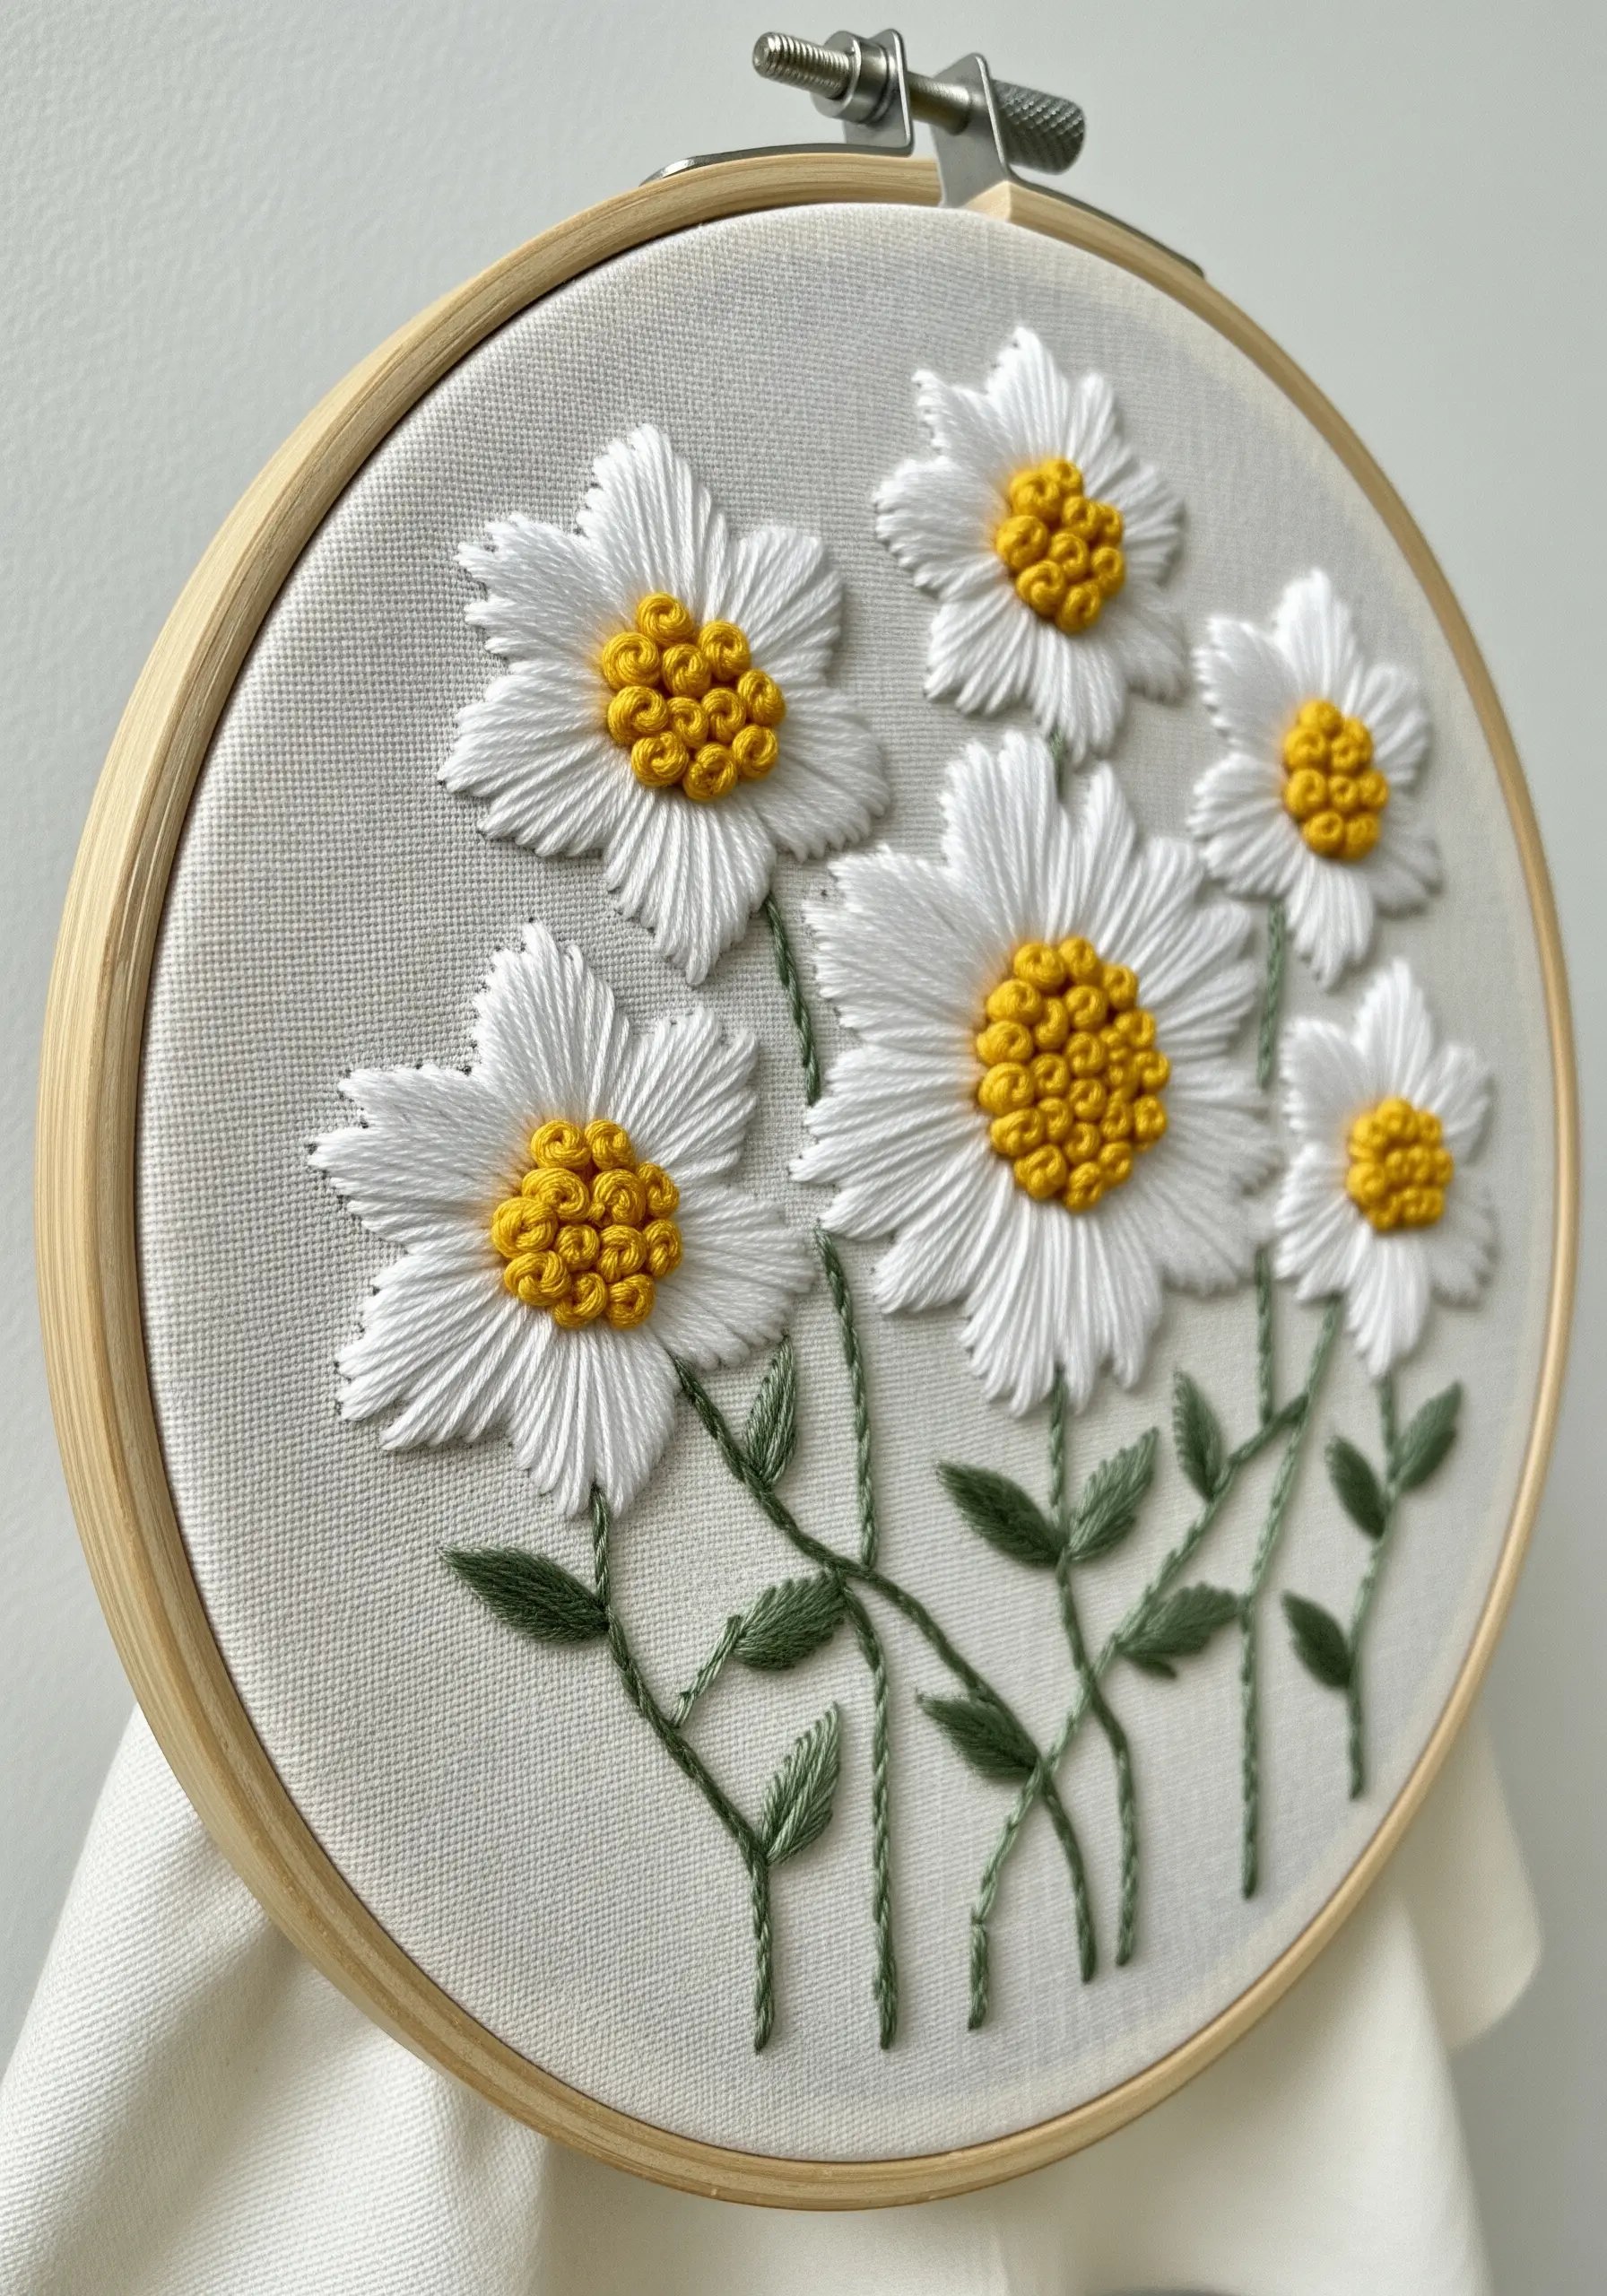
To give petals a realistic, dimensional quality, use long-and-short satin stitches that radiate from the flower’s center.
For a raised, pollen-dusted center, build up a dense mound of French knots using a full six strands of floss.
This contrast between the smooth, light-catching petals and the bumpy, matte texture of the center is what creates a believable, three-dimensional effect.
It’s a simple adjustment in stitch choice that dramatically enhances the realism of your floral work.
4. Master Hyper-Realism with Thread Painting
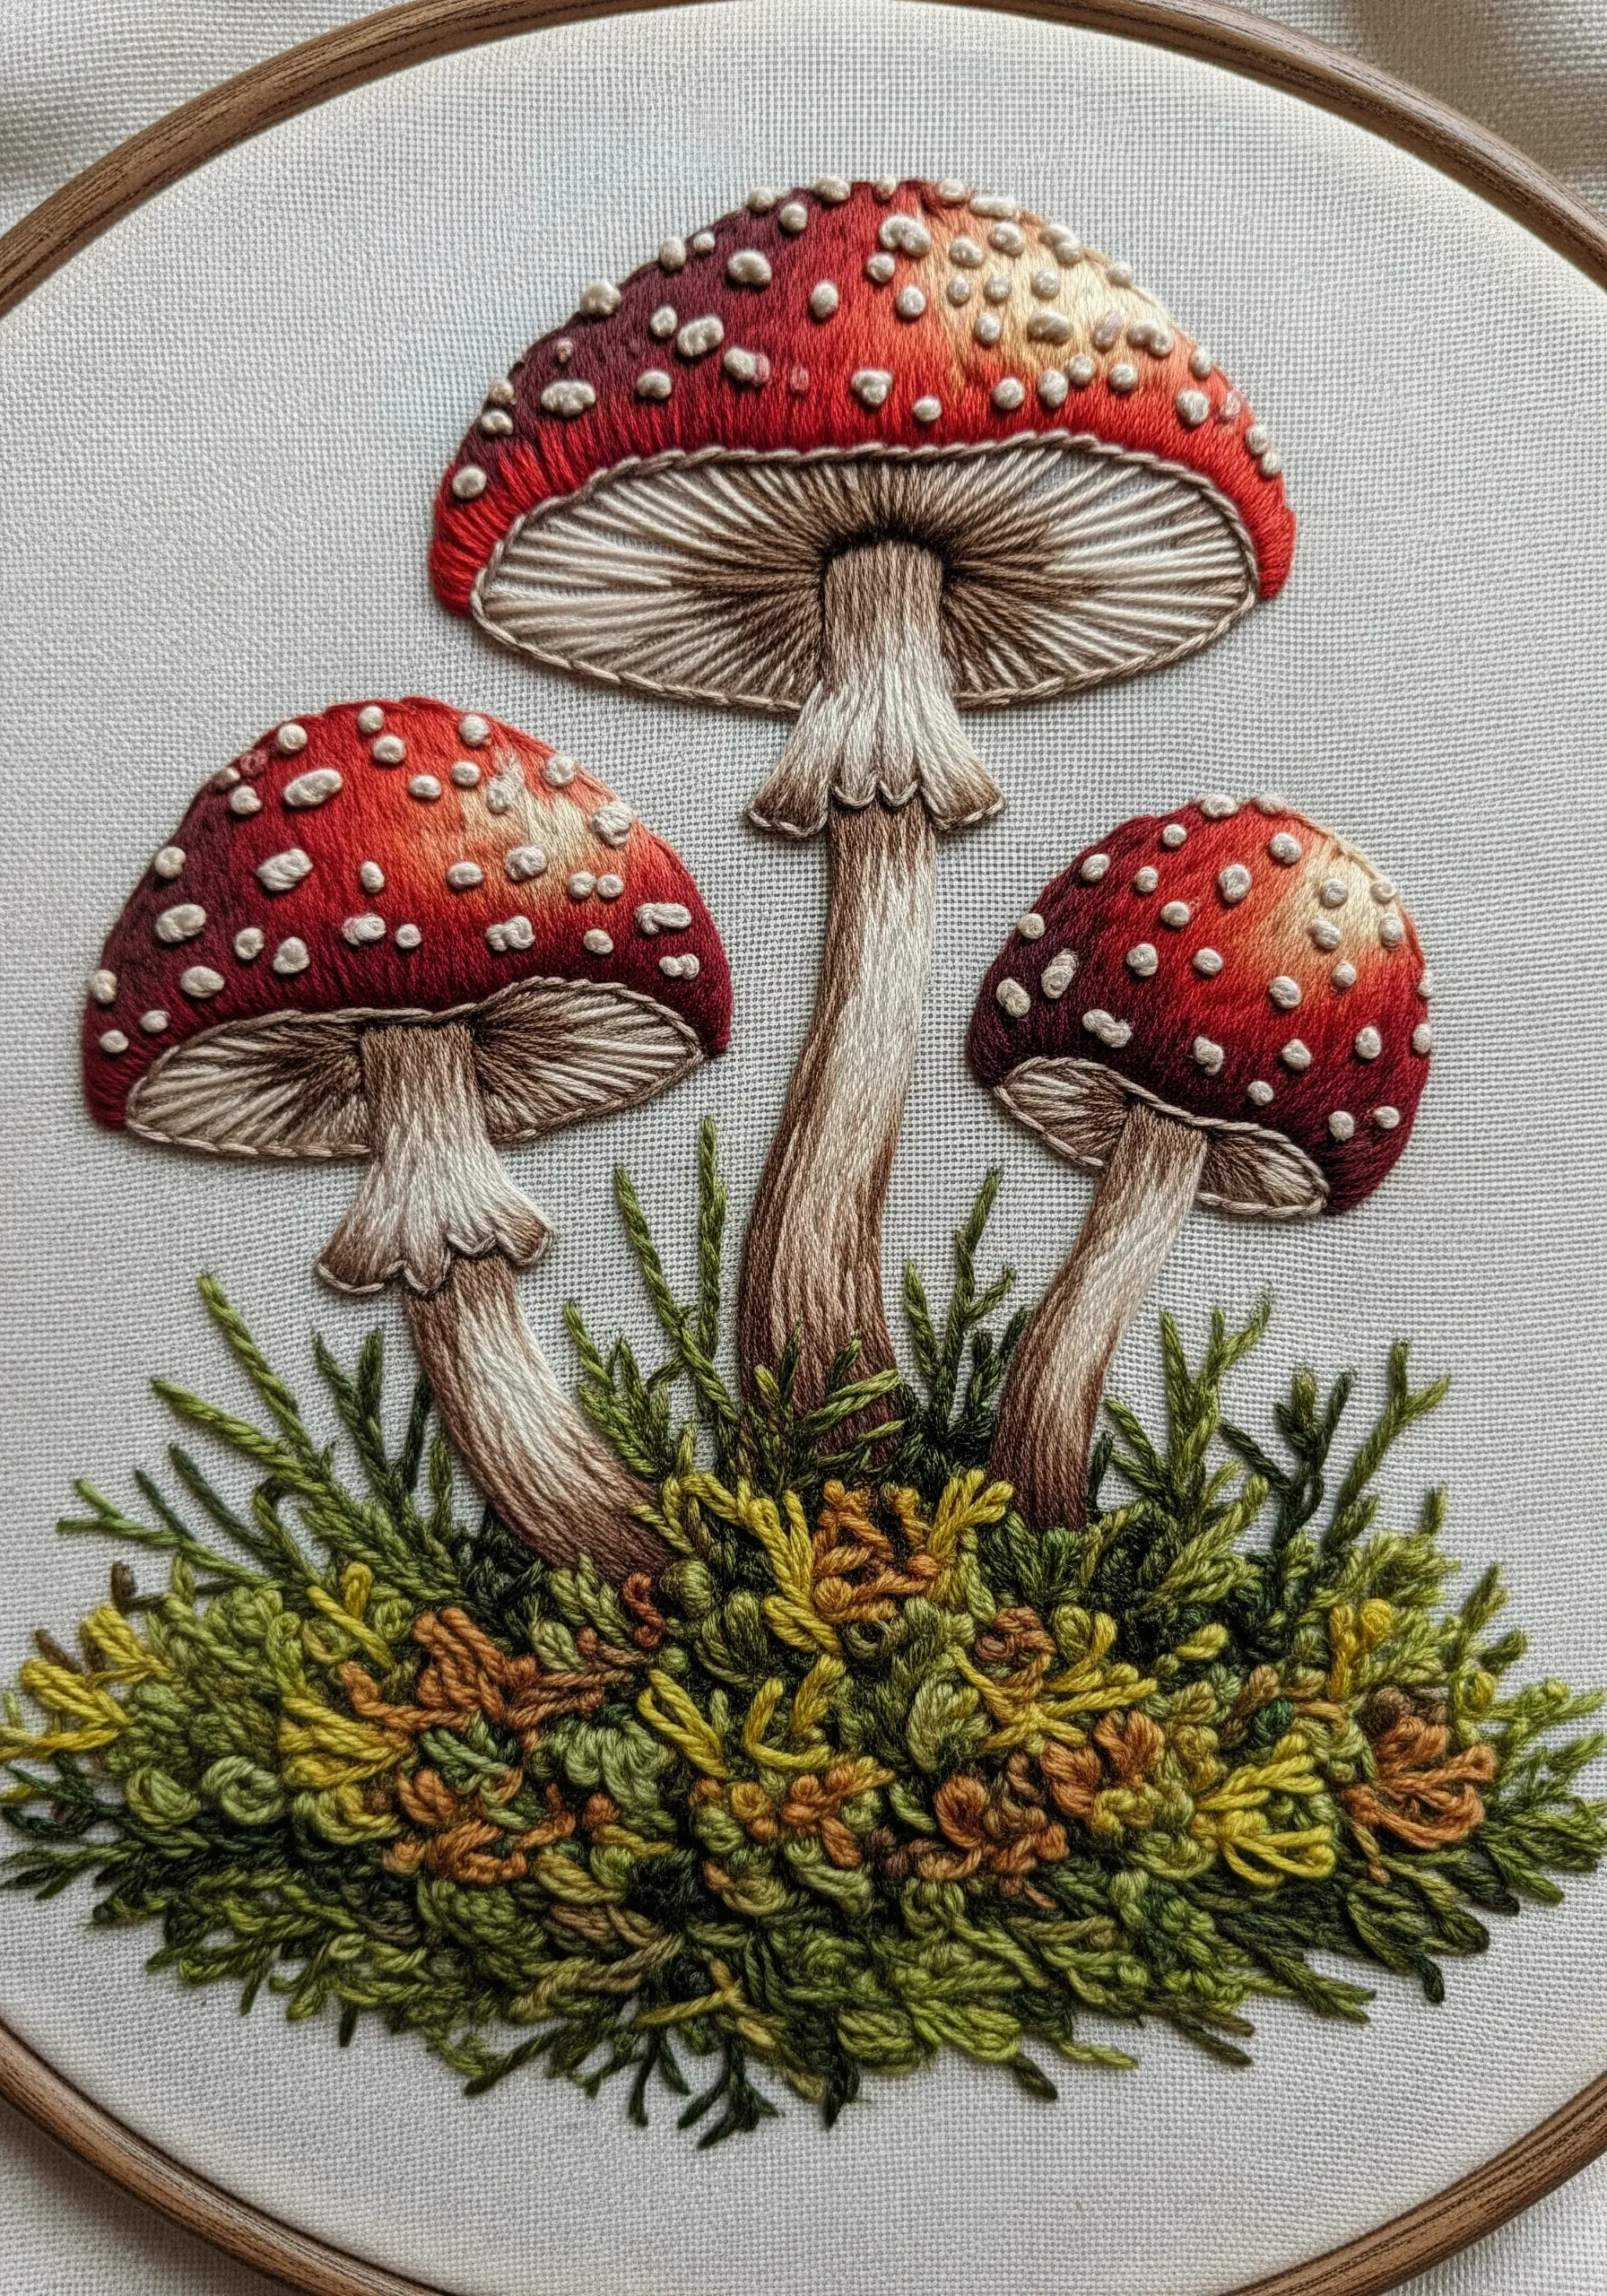
Use the thread painting technique—small, directional stitches with a single strand of floss—to create seamless color gradients on the mushroom caps and stems.
For the mossy forest floor, abandon precision and embrace controlled chaos.
Combine French knots, colonial knots, and short, random straight stitches in variegated green and brown threads to mimic organic texture.
The technical skill is in contrasting the flawlessly smooth surfaces with the rugged, disorderly base.
5. Introduce Architectural Form with Woven Cord
Incorporate non-traditional materials like cotton cord or rope to add a bold, architectural element to your work.
Instead of stitching through the fabric, couch the cord onto the surface using a strong, matching thread that becomes nearly invisible.
Work on a tightly stretched canvas or heavy-duty fabric panel that can support the weight and tension of the cord.
This minimalist approach allows the inherent texture of the cord and the purity of the lines to make the statement.
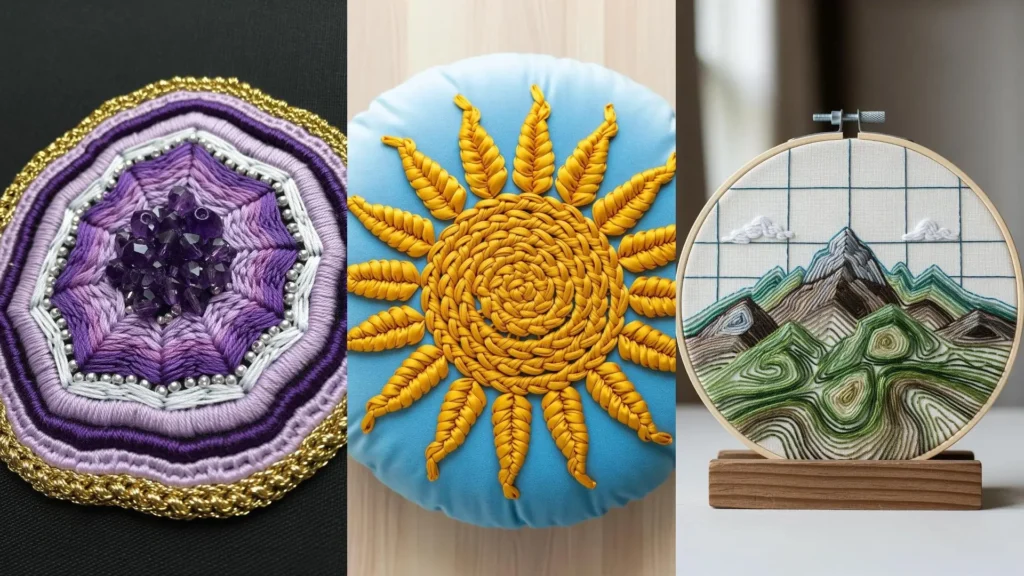
6. Integrate Crystals for Tactile Dimension
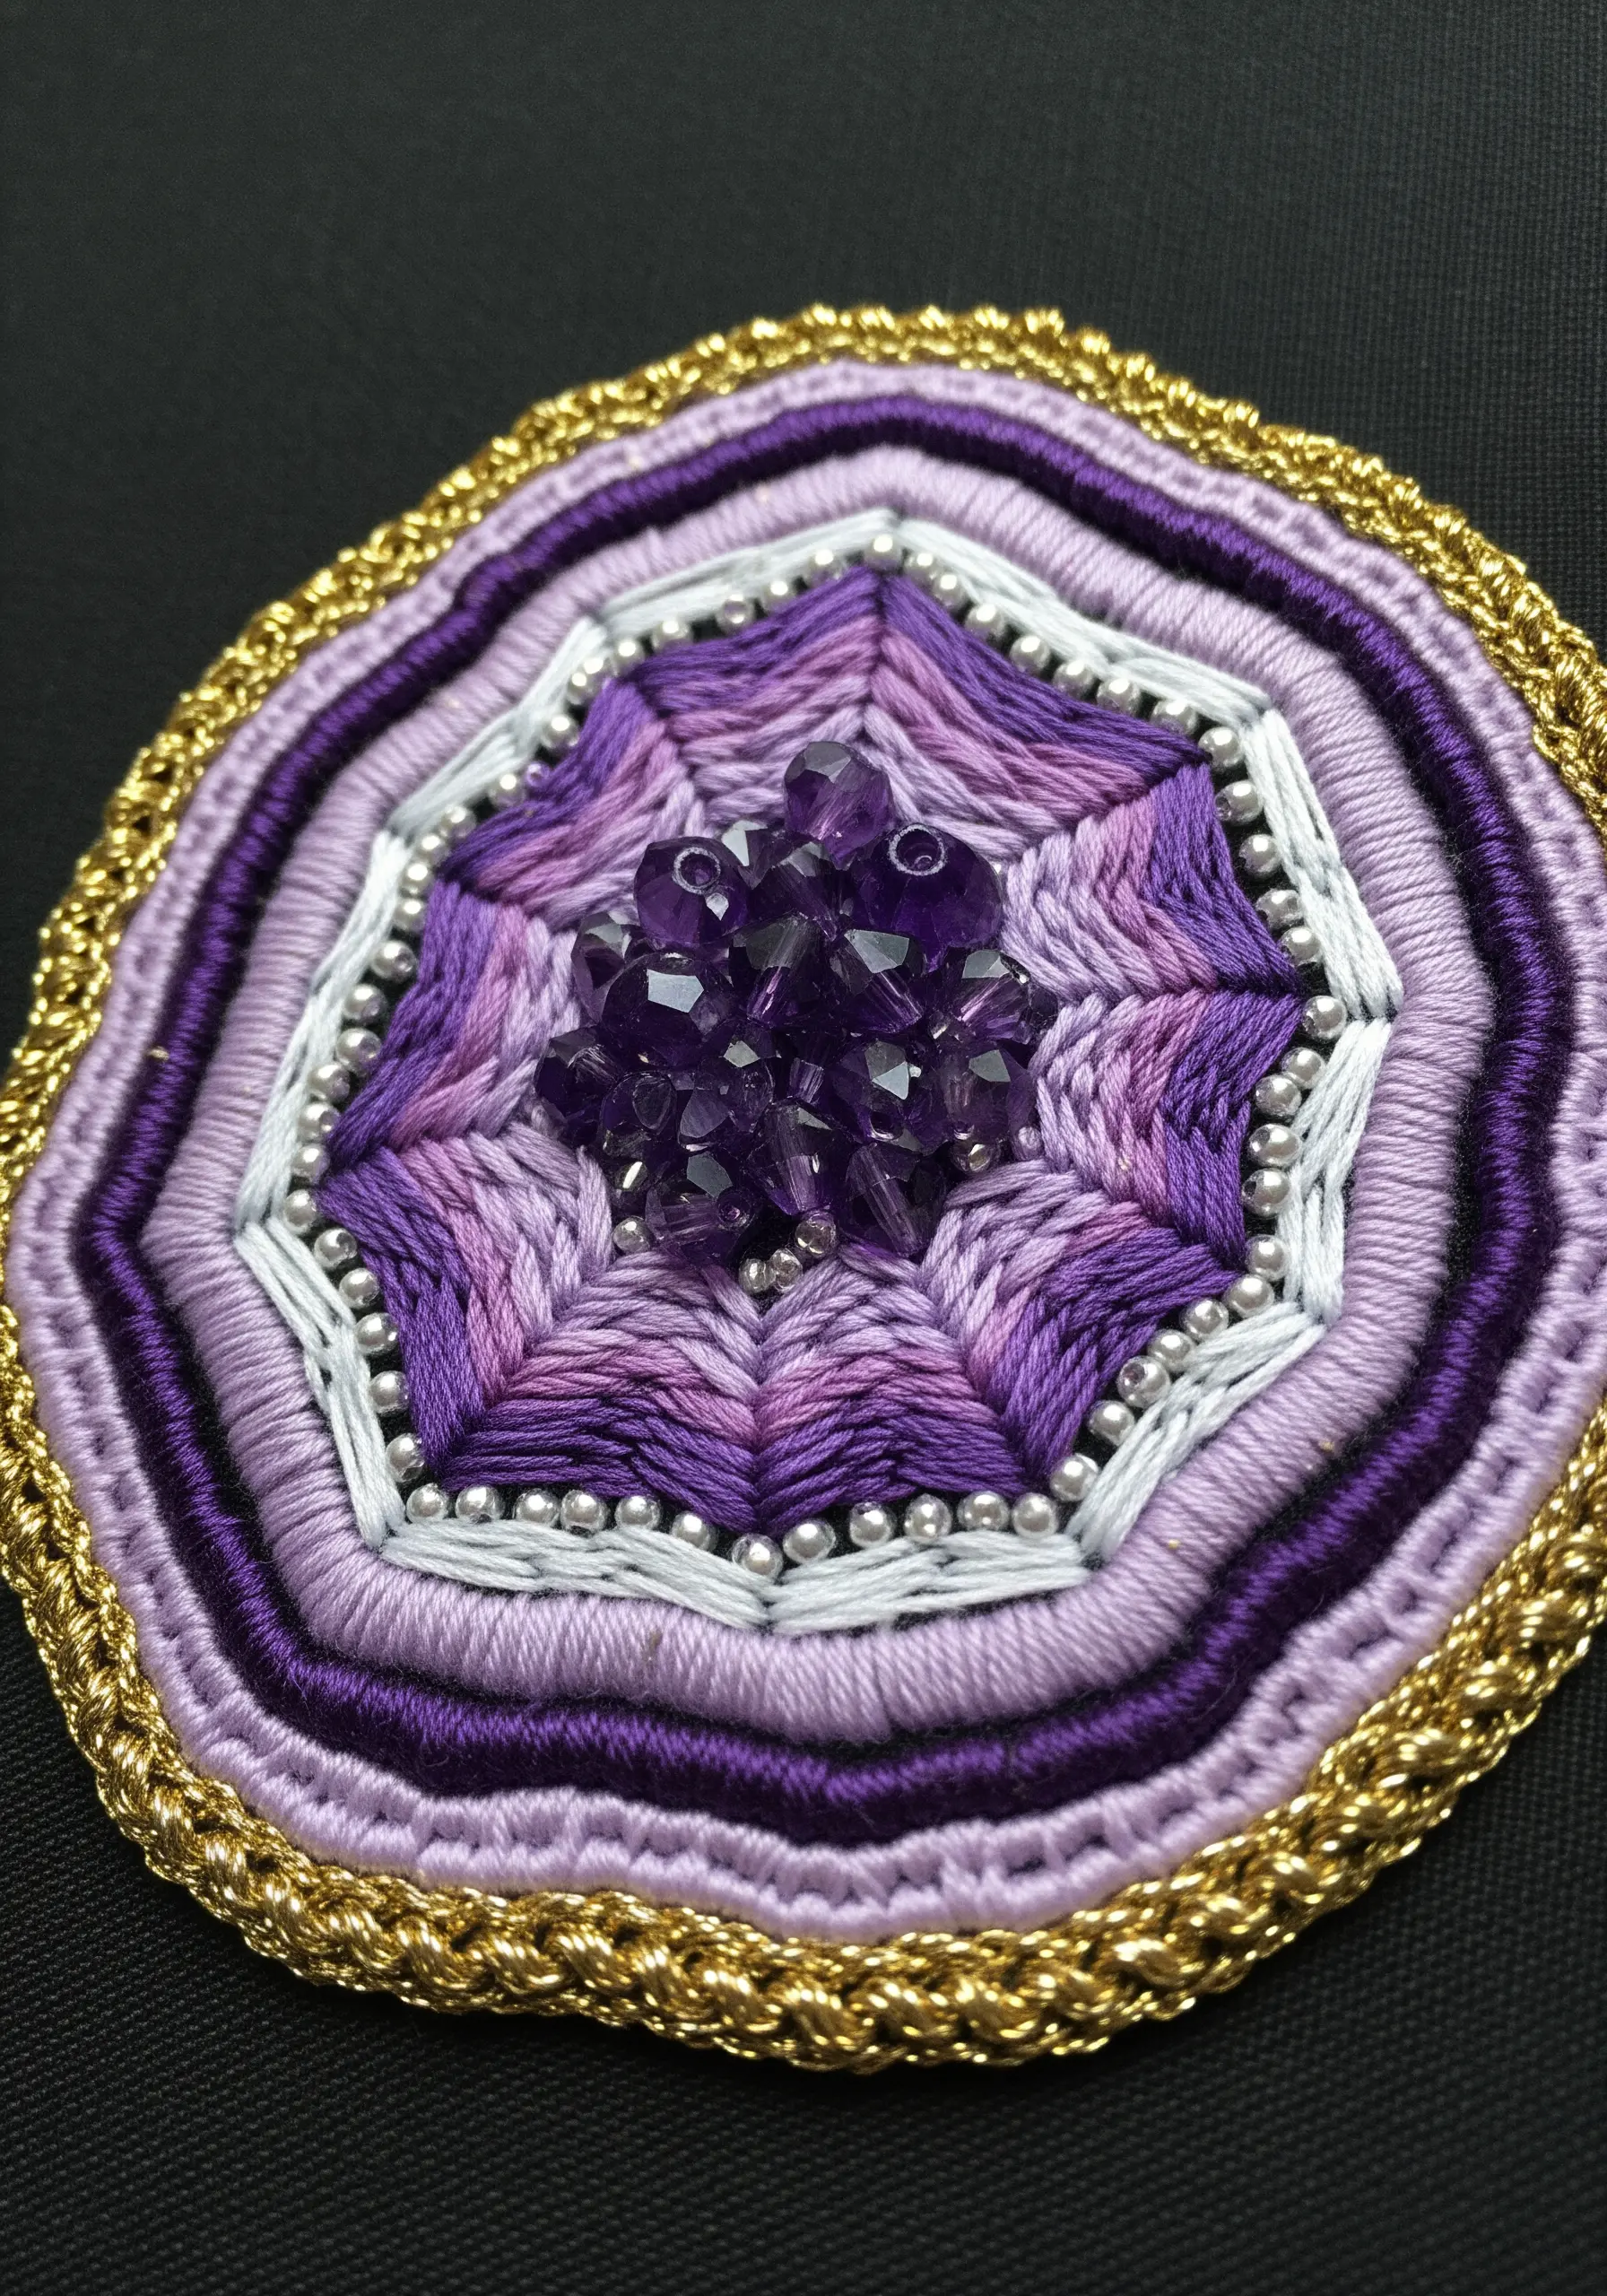
Elevate your embroidery by incorporating beads, crystals, or other non-thread elements into your geometric designs.
Secure larger stones by creating a bead bezel around their base or by couching threads over them in a star pattern.
Use fine beading needles and a single strand of thread for delicate lines of seed beads, which add a subtle sparkle and a contrasting hard texture against the soft floss.
The interplay of matte thread, metallic beads, and faceted gems creates a rich, multi-sensory experience.
7. Weave with Silk Ribbon for Luminous Volume
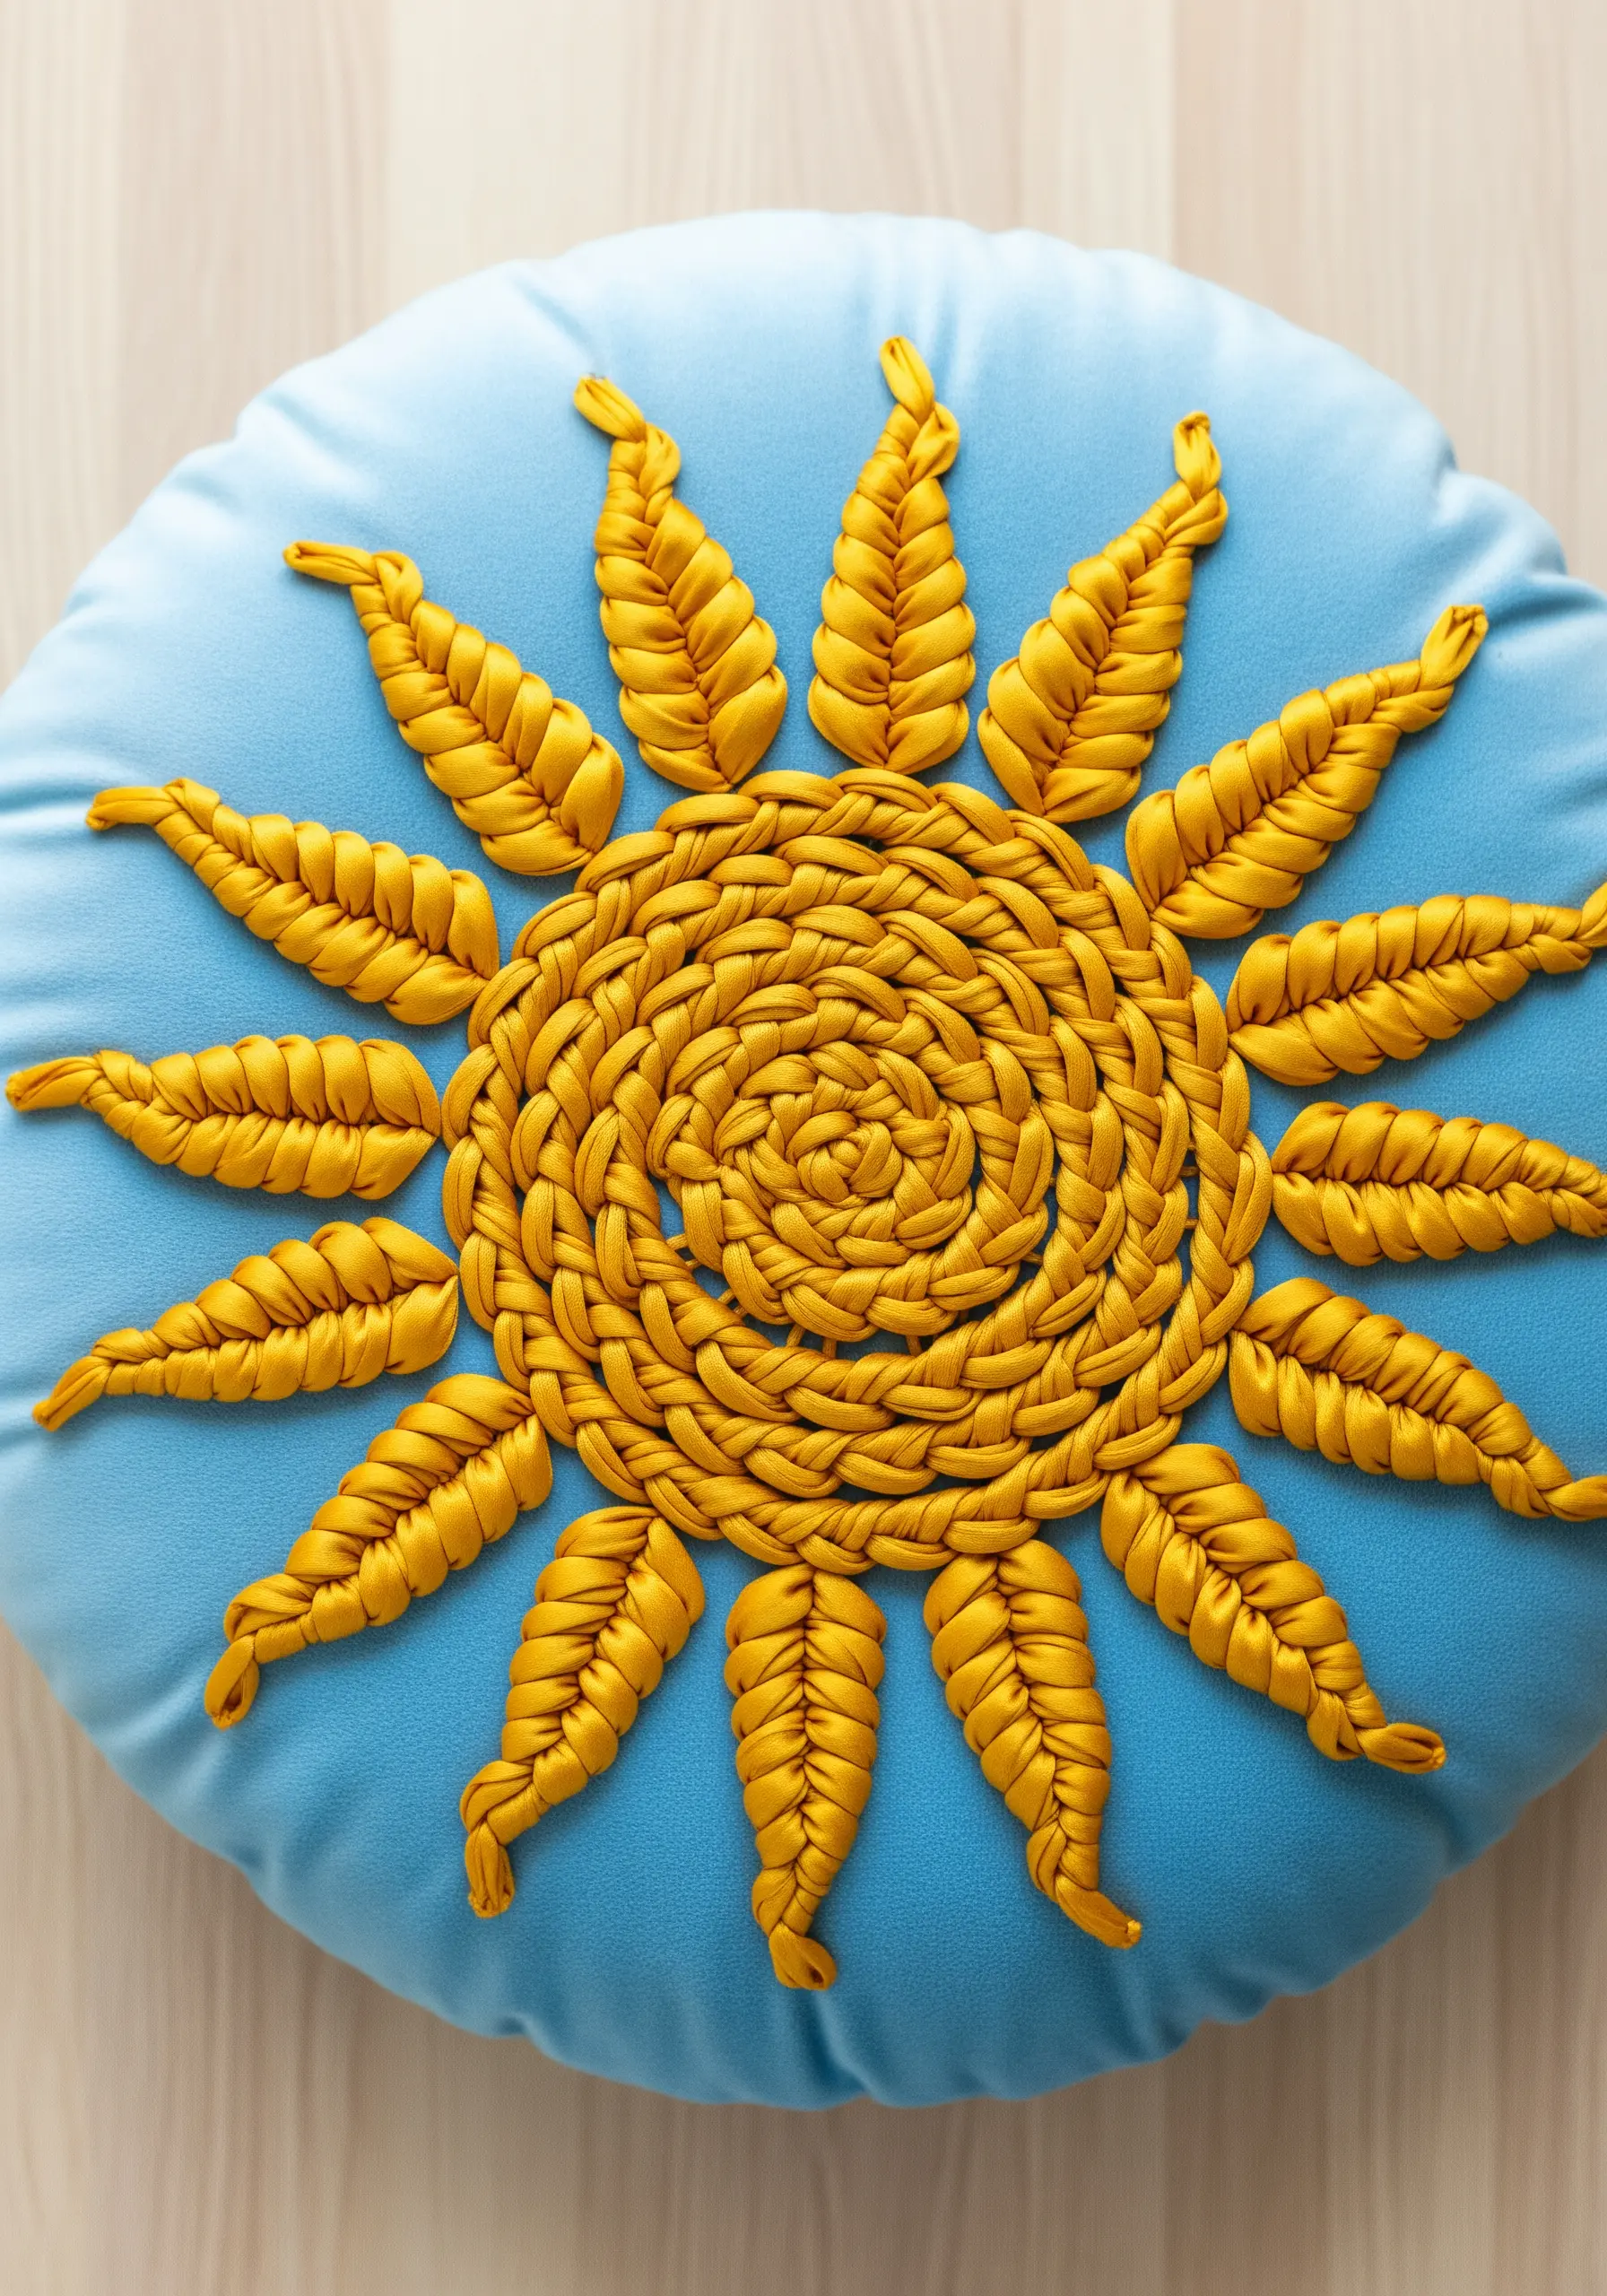
Swap floss for wide silk ribbon to achieve a lustrous volume and high-impact texture in a fraction of the time.
Use a large-eyed chenille needle, which parts the fabric fibers rather than piercing them, preventing snags.
Create sculptural sun rays with stitches like the folded ribbon or Japanese ribbon stitch, which leverage the ribbon’s width to create dimension.
The center can be woven directly onto the fabric, creating a beautiful spiral that draws the eye.
8. Sculpt Topography with French Knot Clusters
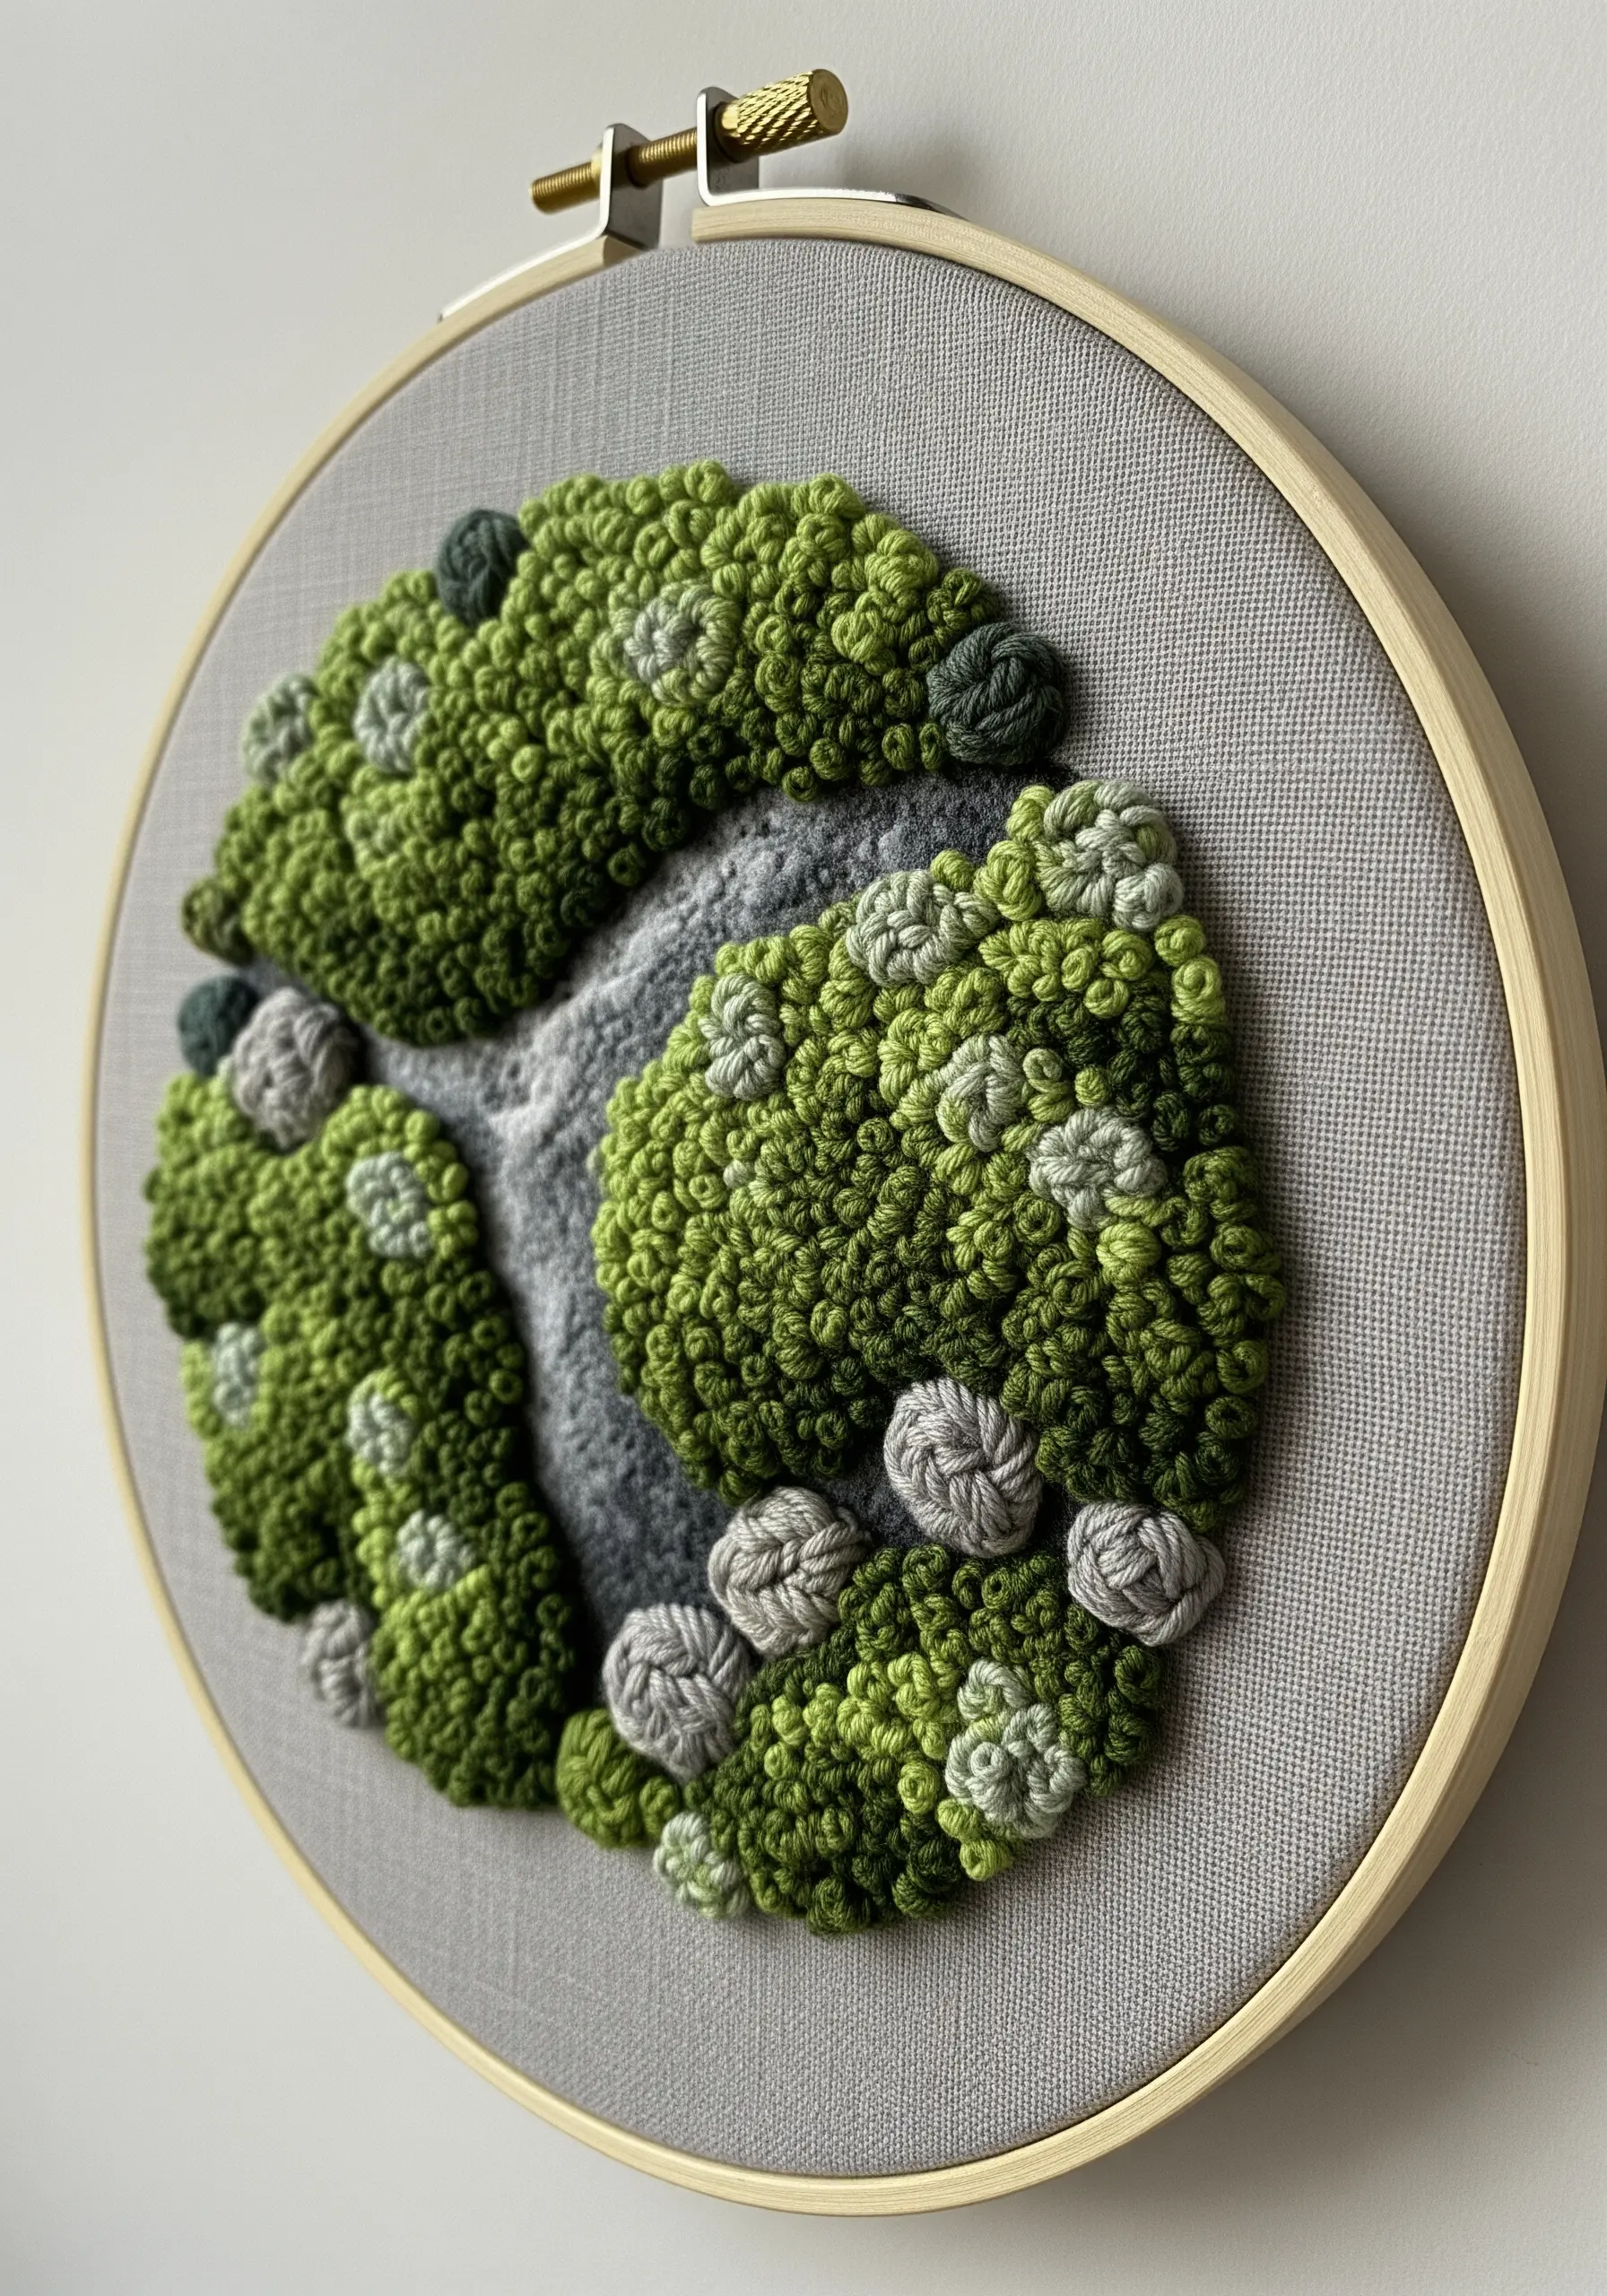
Use the humble French knot as a powerful tool for sculpting landscapes by varying its density, color, and size.
For raised, mossy hills, pack knots tightly together using a full six strands of floss and a mix of greens and greys to mimic natural variegation.
In flatter areas, space the knots out to suggest a sparser texture. This technique turns a simple stitch into a method for creating topographical maps you can touch.
It’s a wonderful tool for sculpting nature’s textures with just a needle and thread.
9. Compose with a Symphony of Stitches
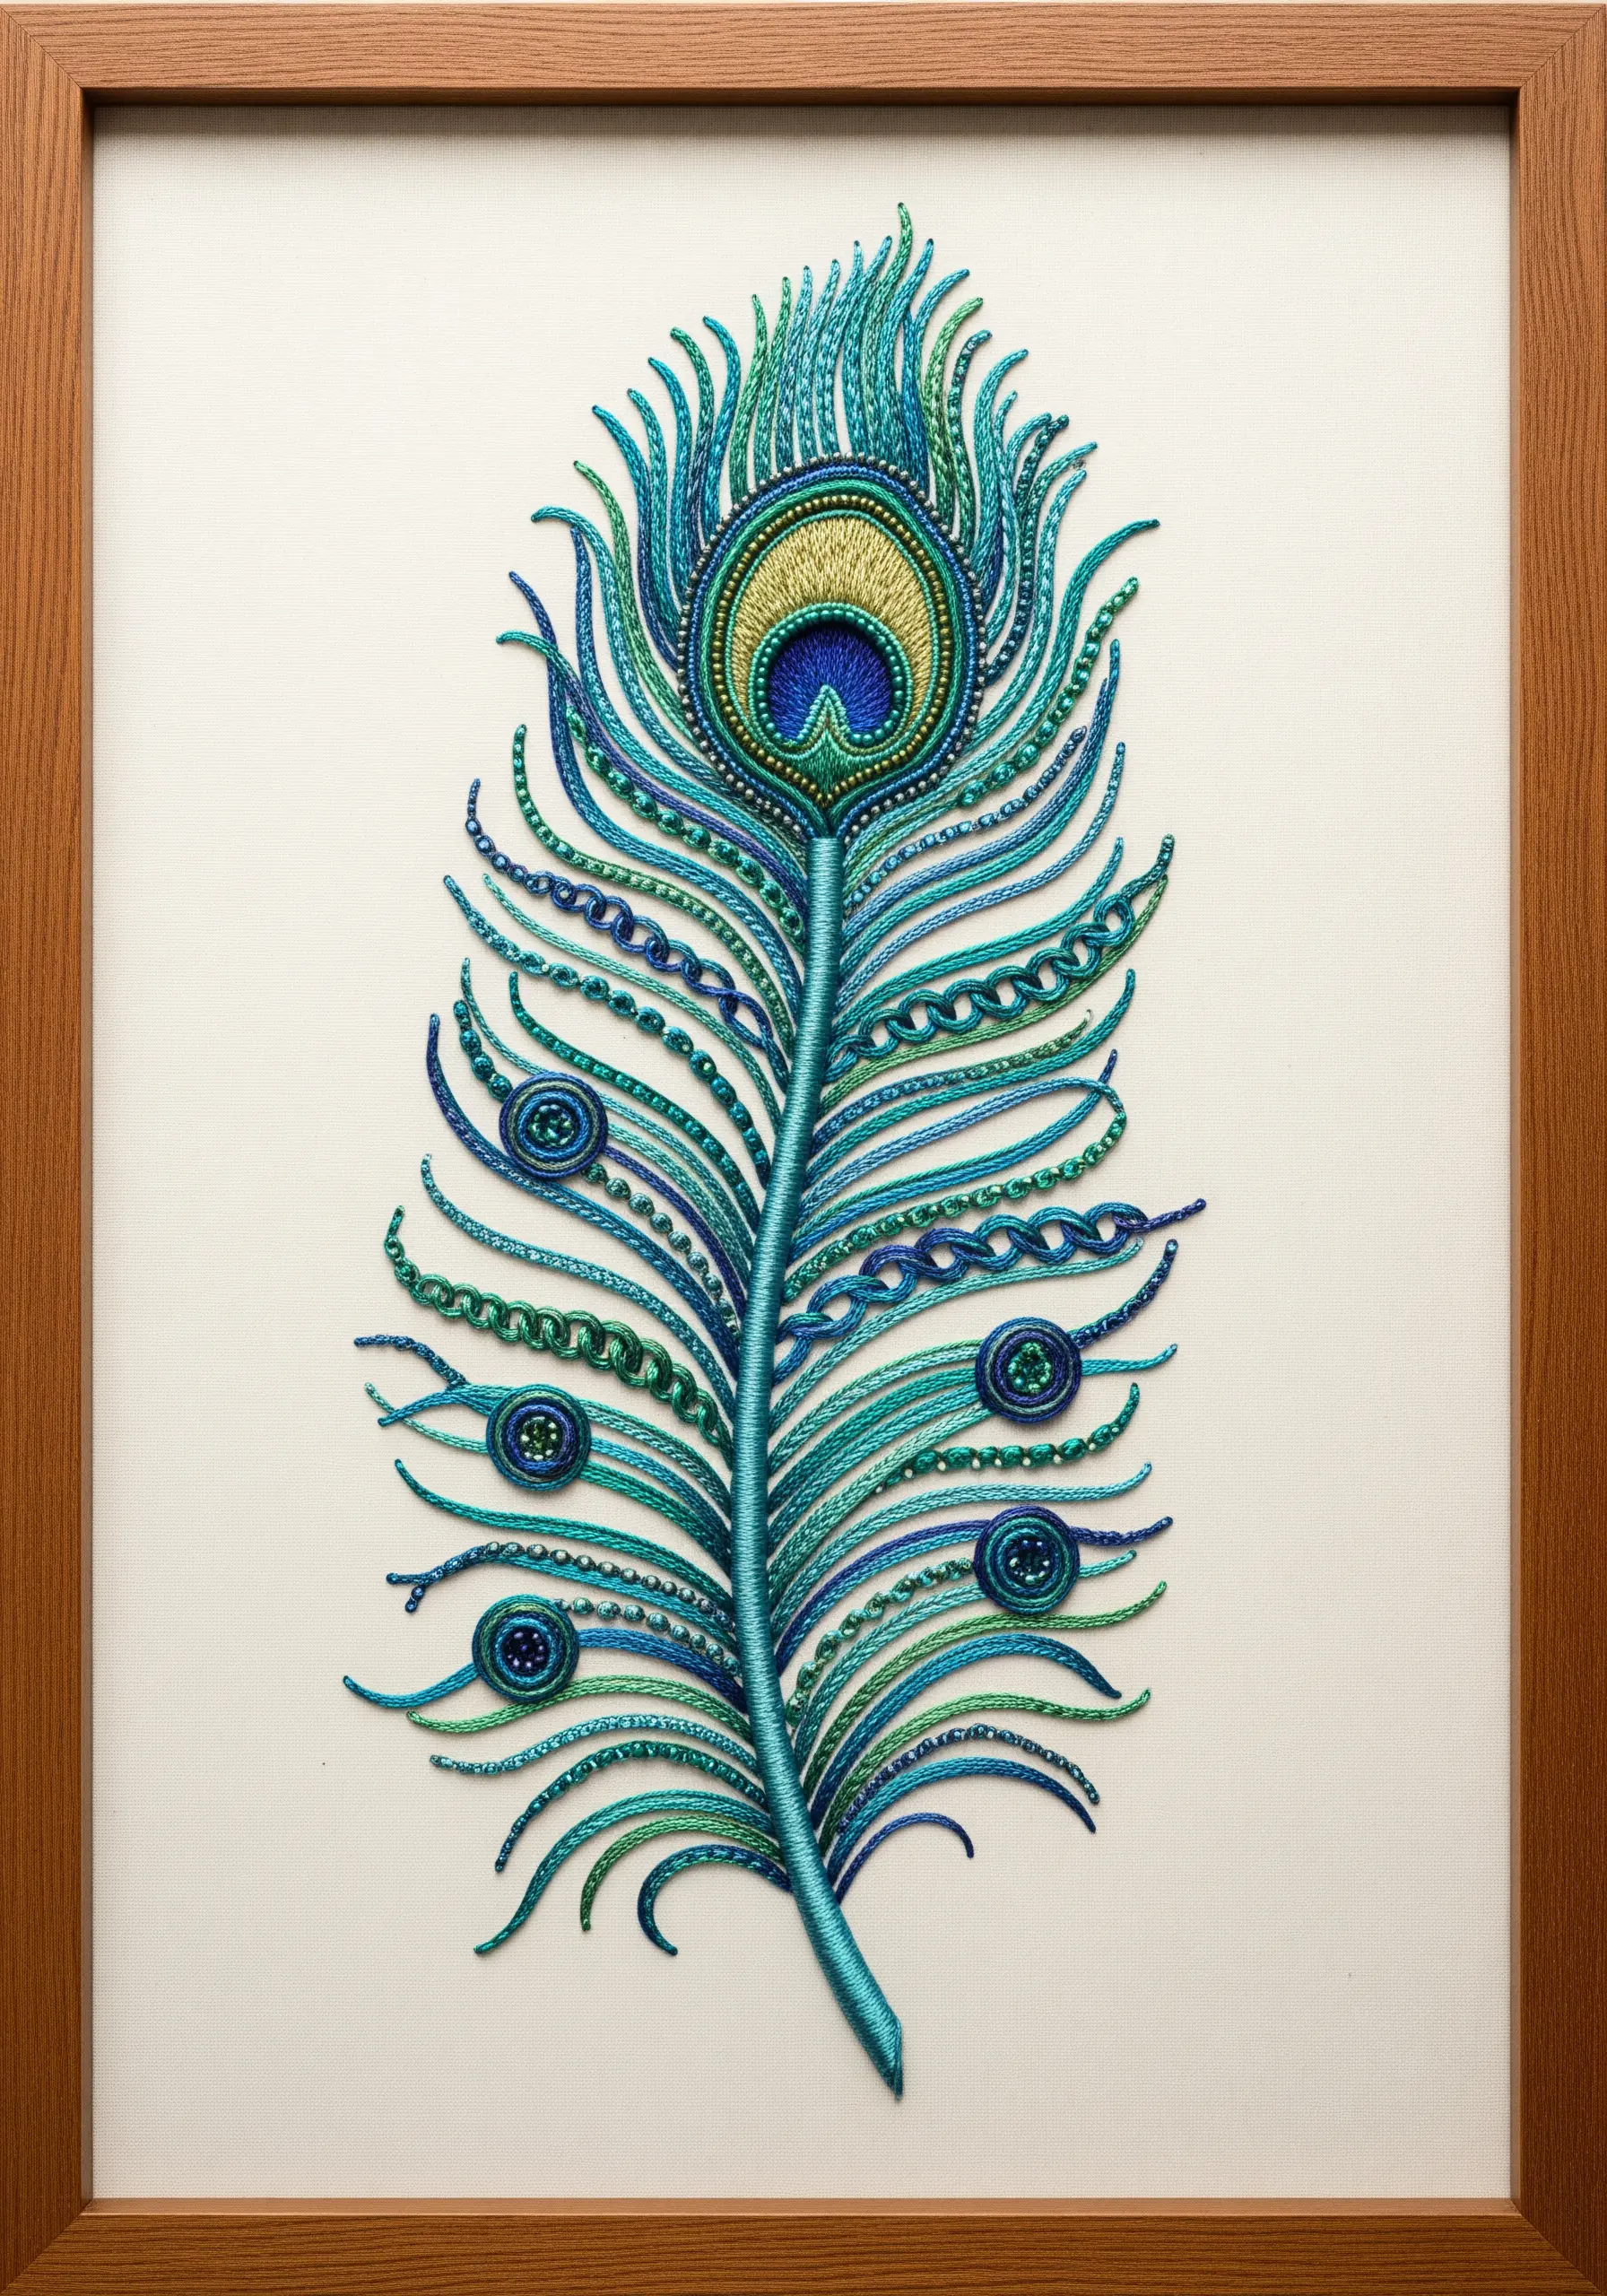
Instead of relying on one technique, treat your motif as a sampler of complementary stitches and textures.
Recreate the complexity of a peacock feather by assigning a different stitch to each part: satin stitch for the stem, bullion knots for the eyes, couched cord for the delicate barbs, and beads for sparkle.
This approach creates a visual hierarchy and rhythm, guiding the viewer’s eye through the different layers of detail.
It transforms a single subject into a rich tapestry of texture.
10. Sculpt Lifelike Petals with Stumpwork
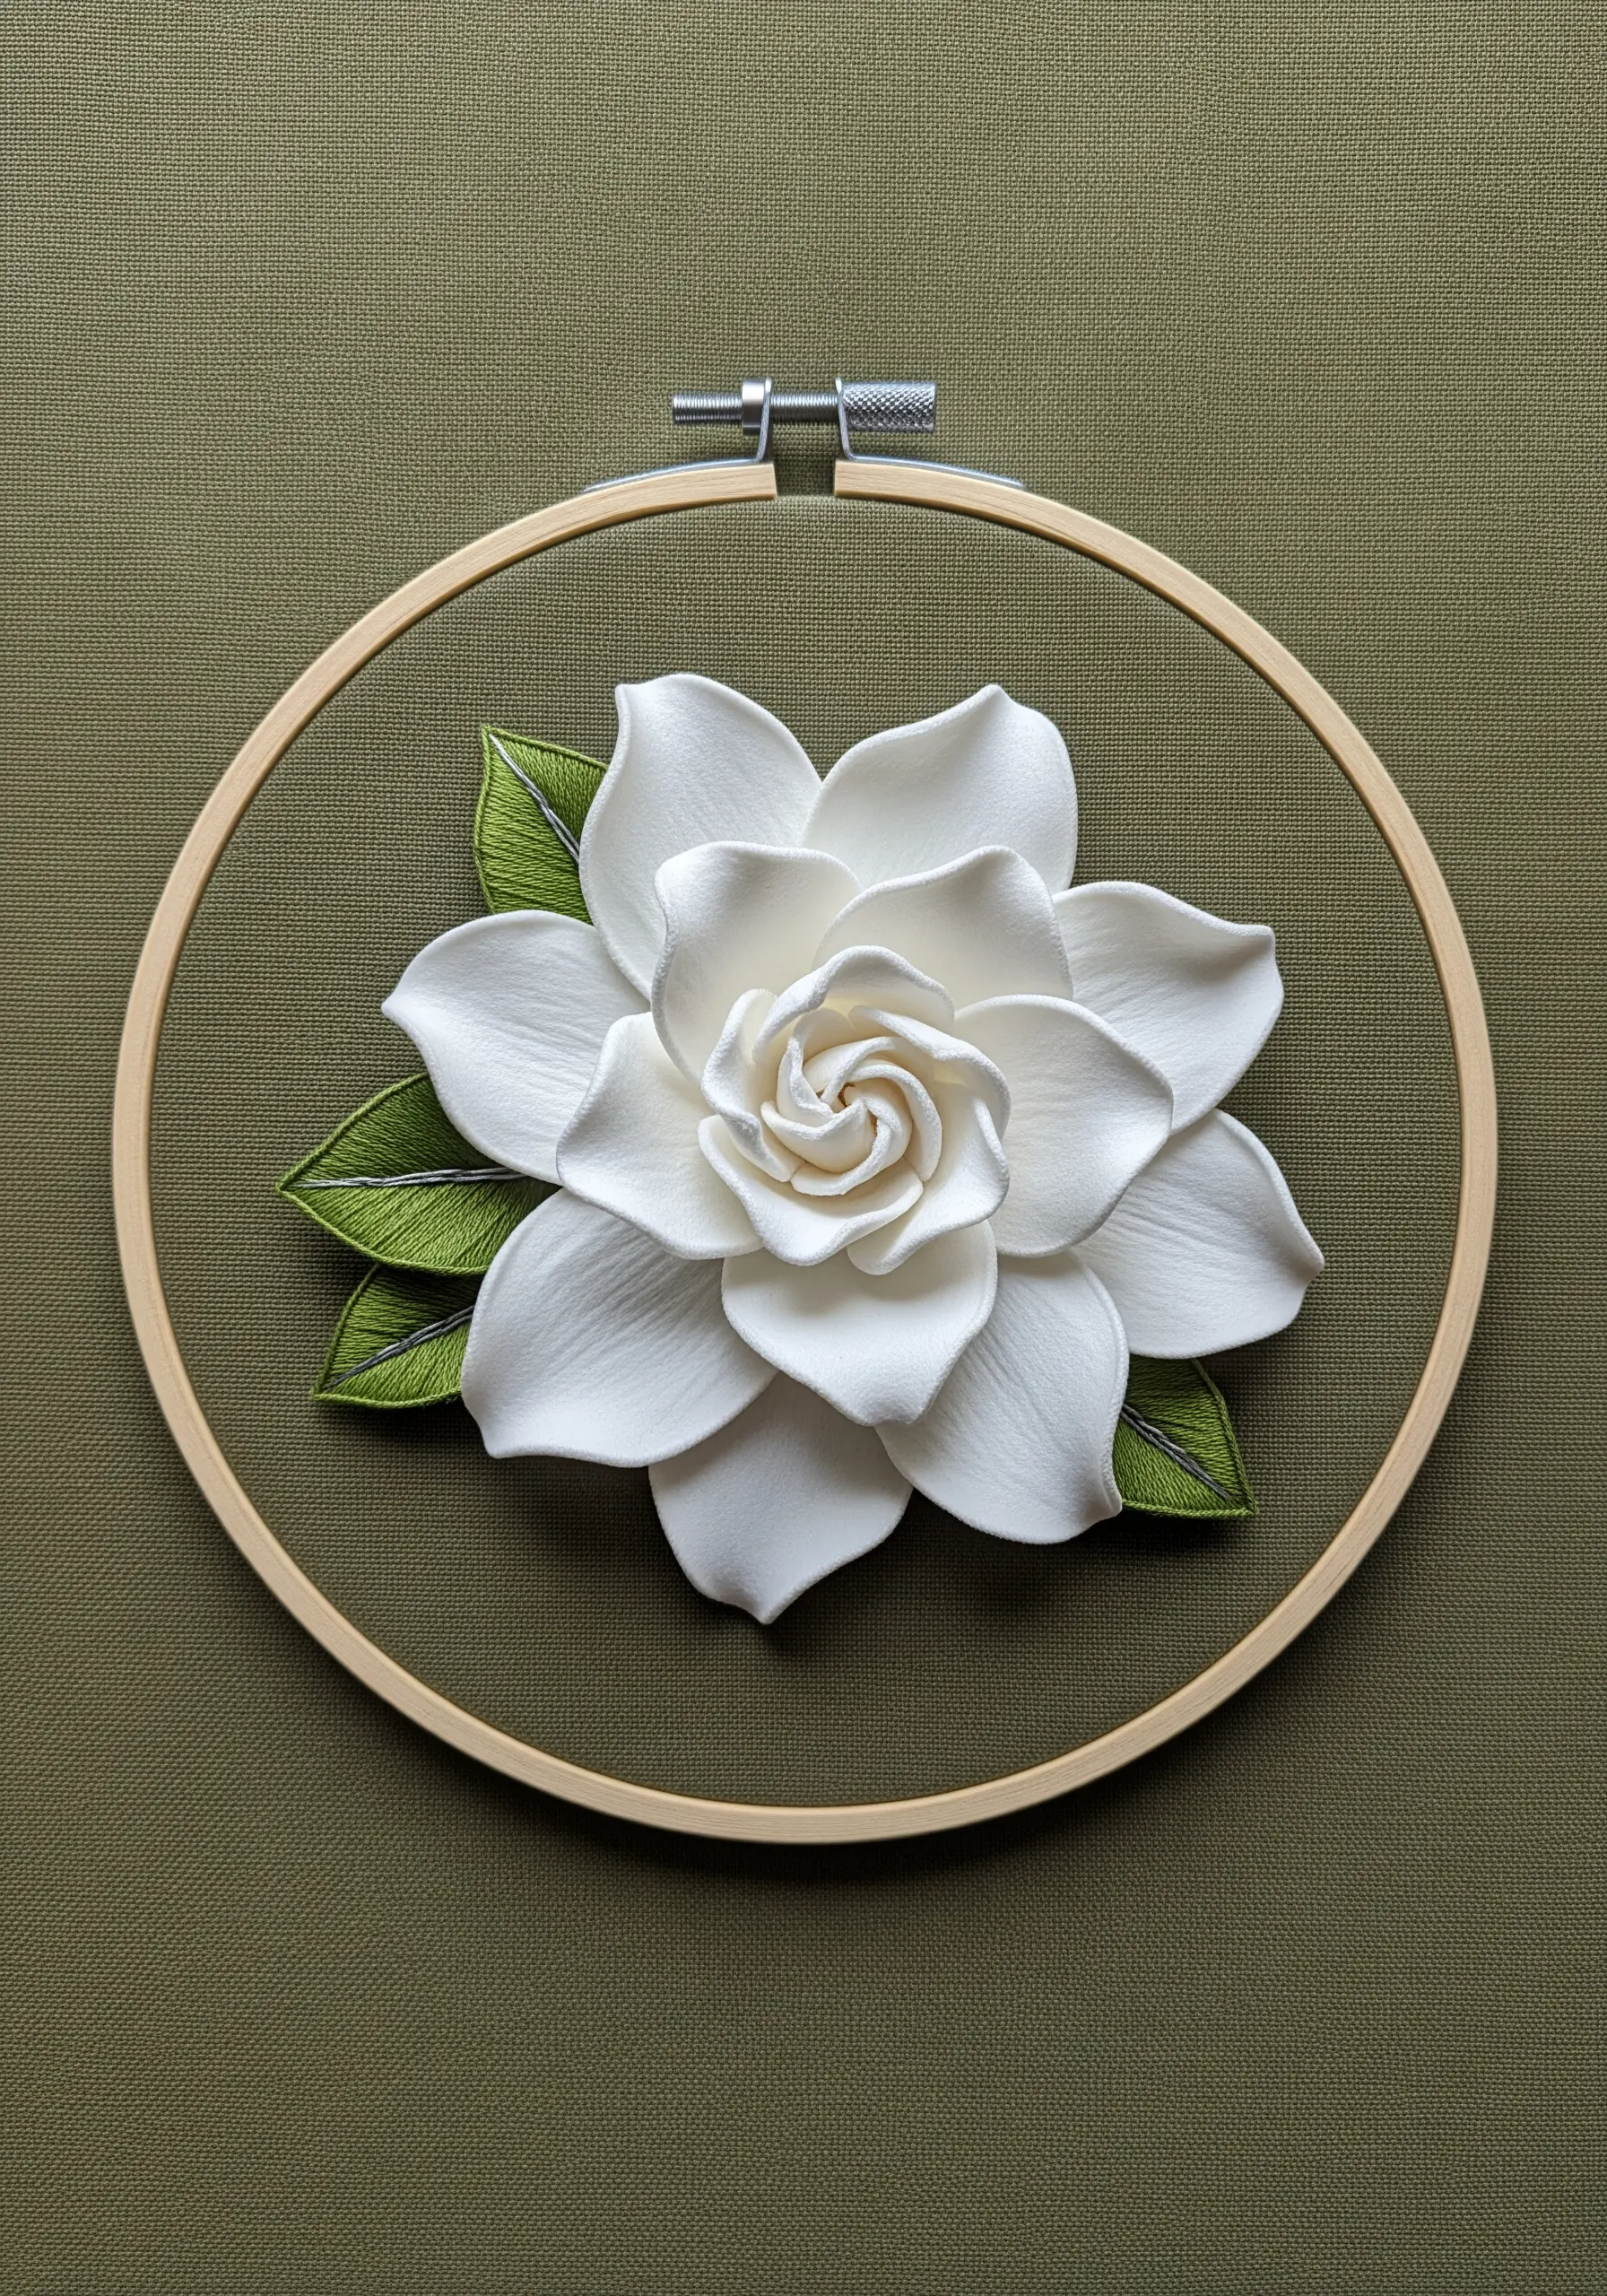
Take your embroidery into the third dimension with stumpwork, a technique that allows elements to lift off the fabric surface.
Create each petal individually by stitching over a fine wire frame on a separate piece of fabric.
Once complete, carefully cut out the petal and attach it to your main design, using the wire to bend and shape it into a realistic form.
This method transforms flat floral embroidery into a delicate botanical sculpture.
11. Achieve Plush Density with Punch Needle
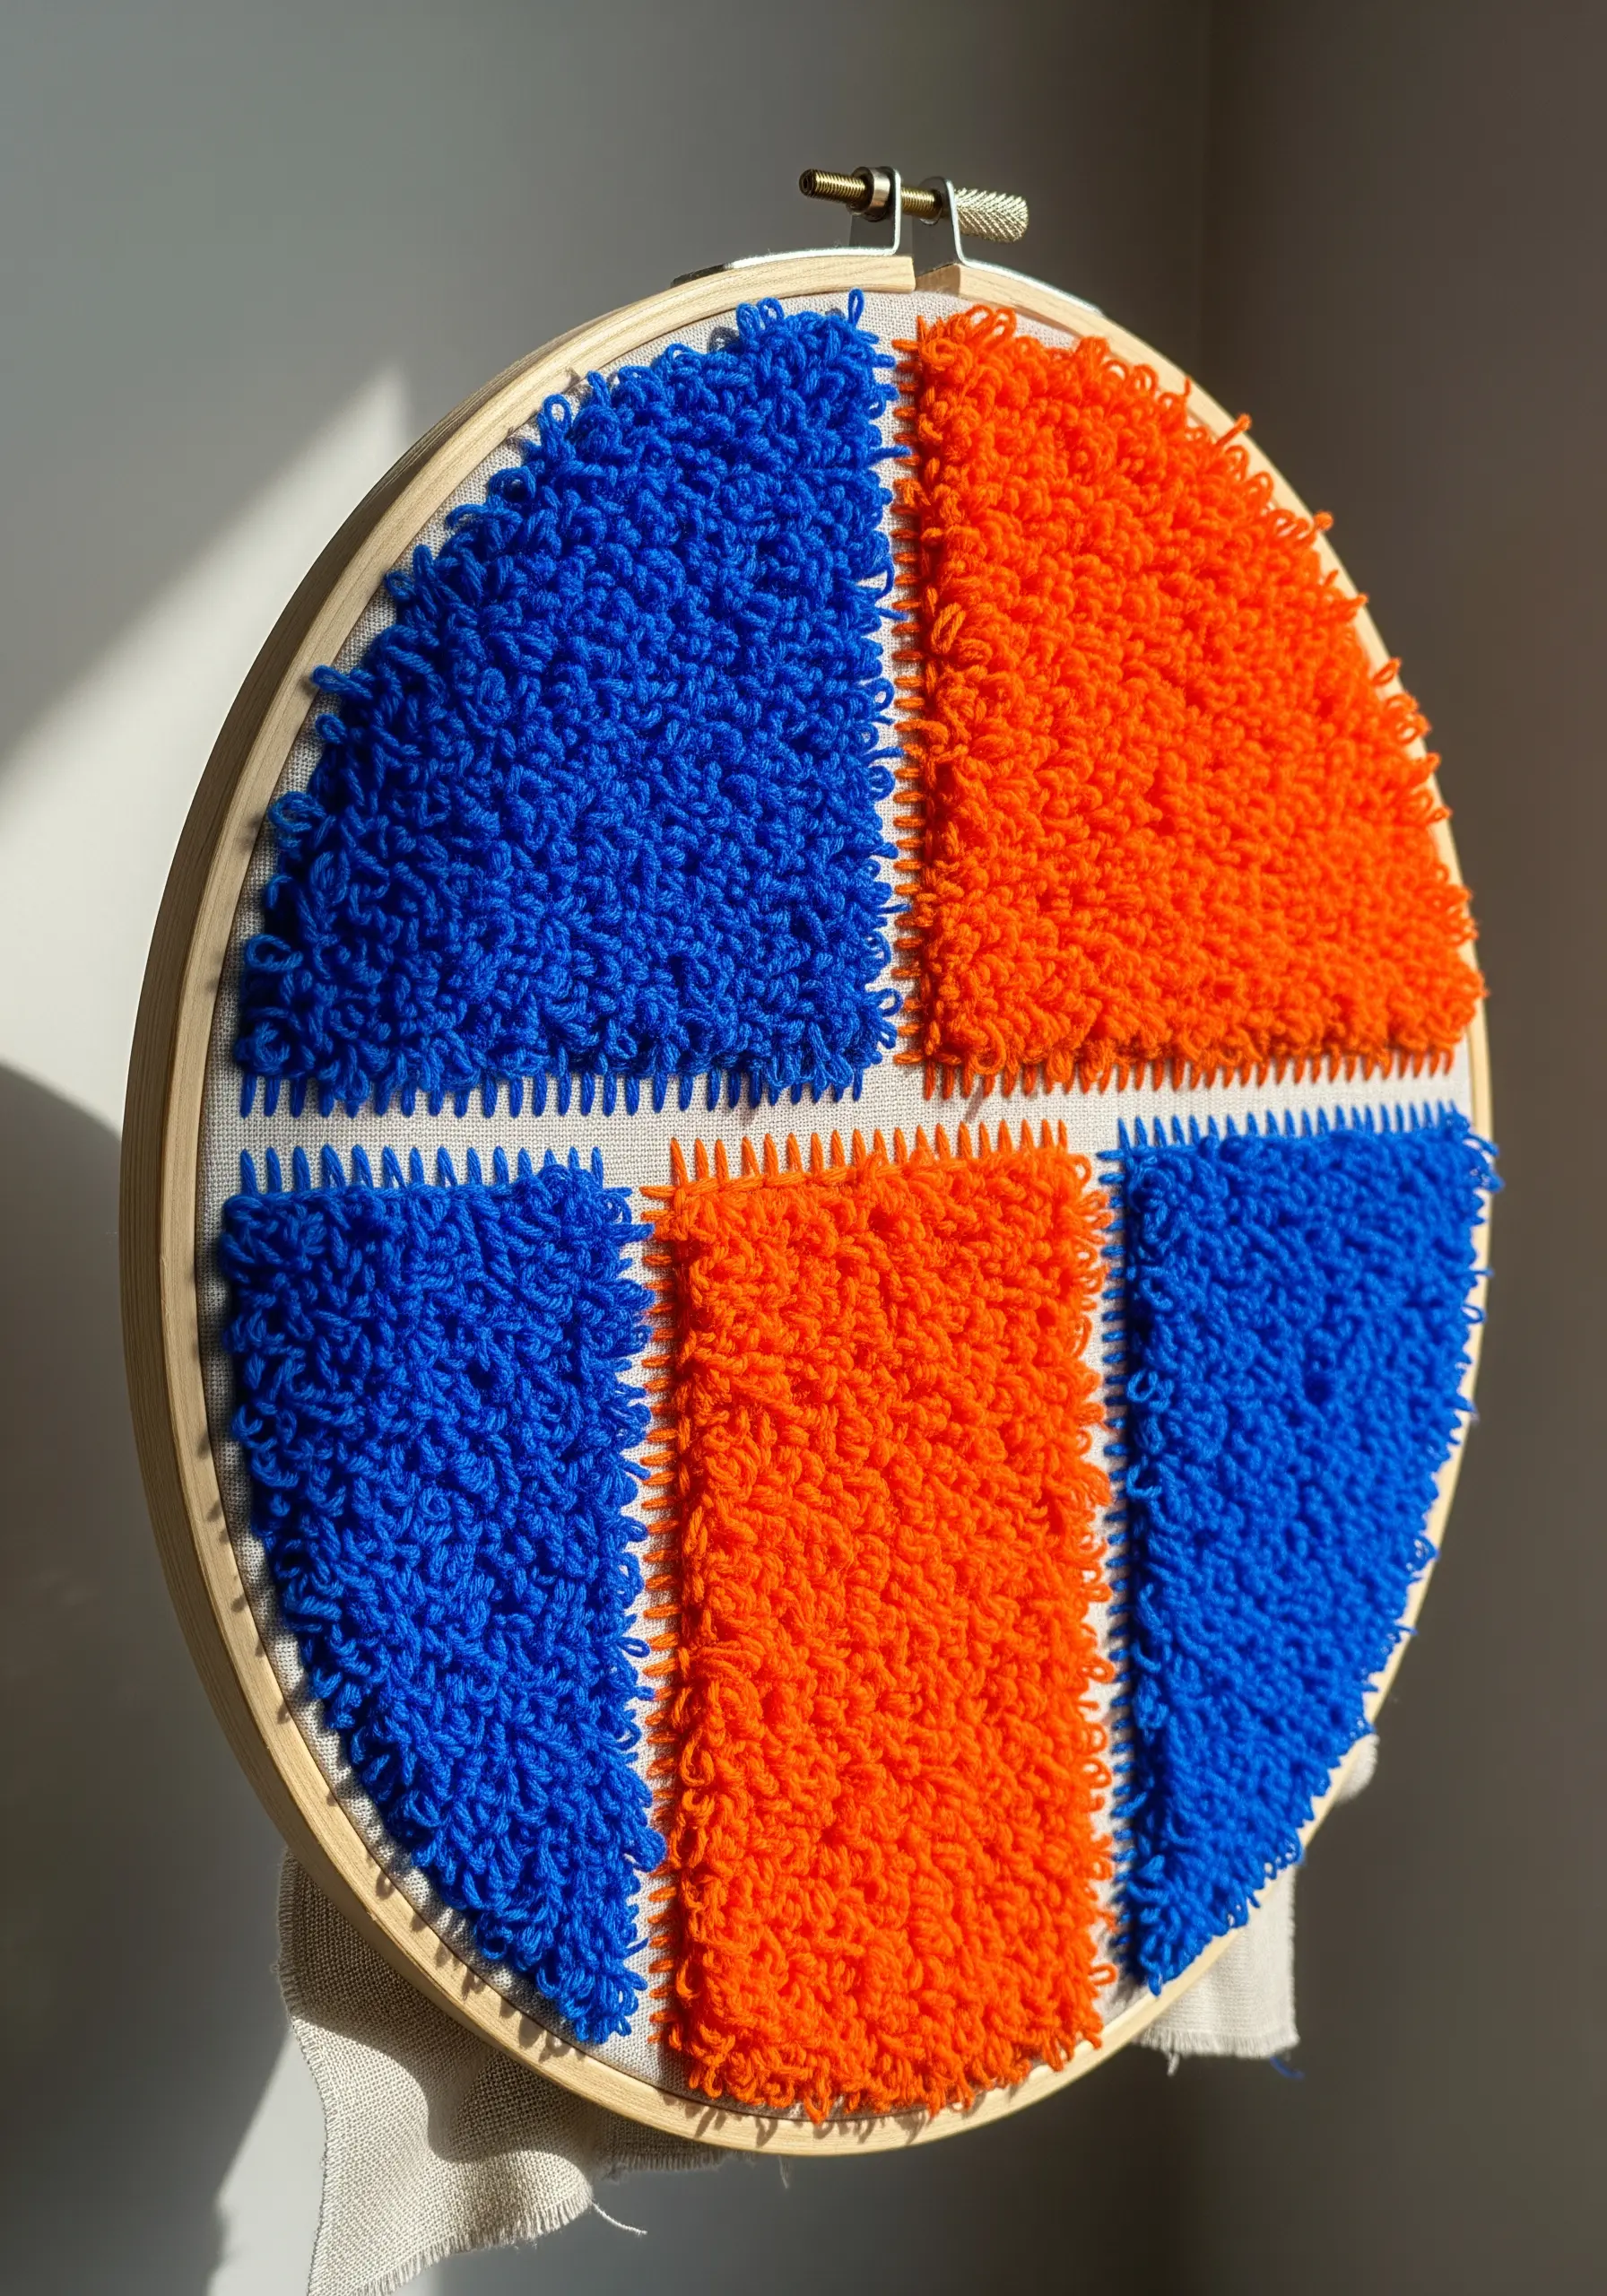
For a satisfying, carpet-like texture, explore the art of punch needle embroidery.
This technique uses a special tool to create uniform loops of yarn on the front of your fabric while you work from the back.
The key is to use a non-slip hoop and a proper foundation fabric, like monk’s cloth, that can hold the loops securely.
By adjusting your needle’s length, you can control the height of the pile, creating everything from low-profile textures to shaggy surfaces.
12. Contrast Geometry with Organic Fillings
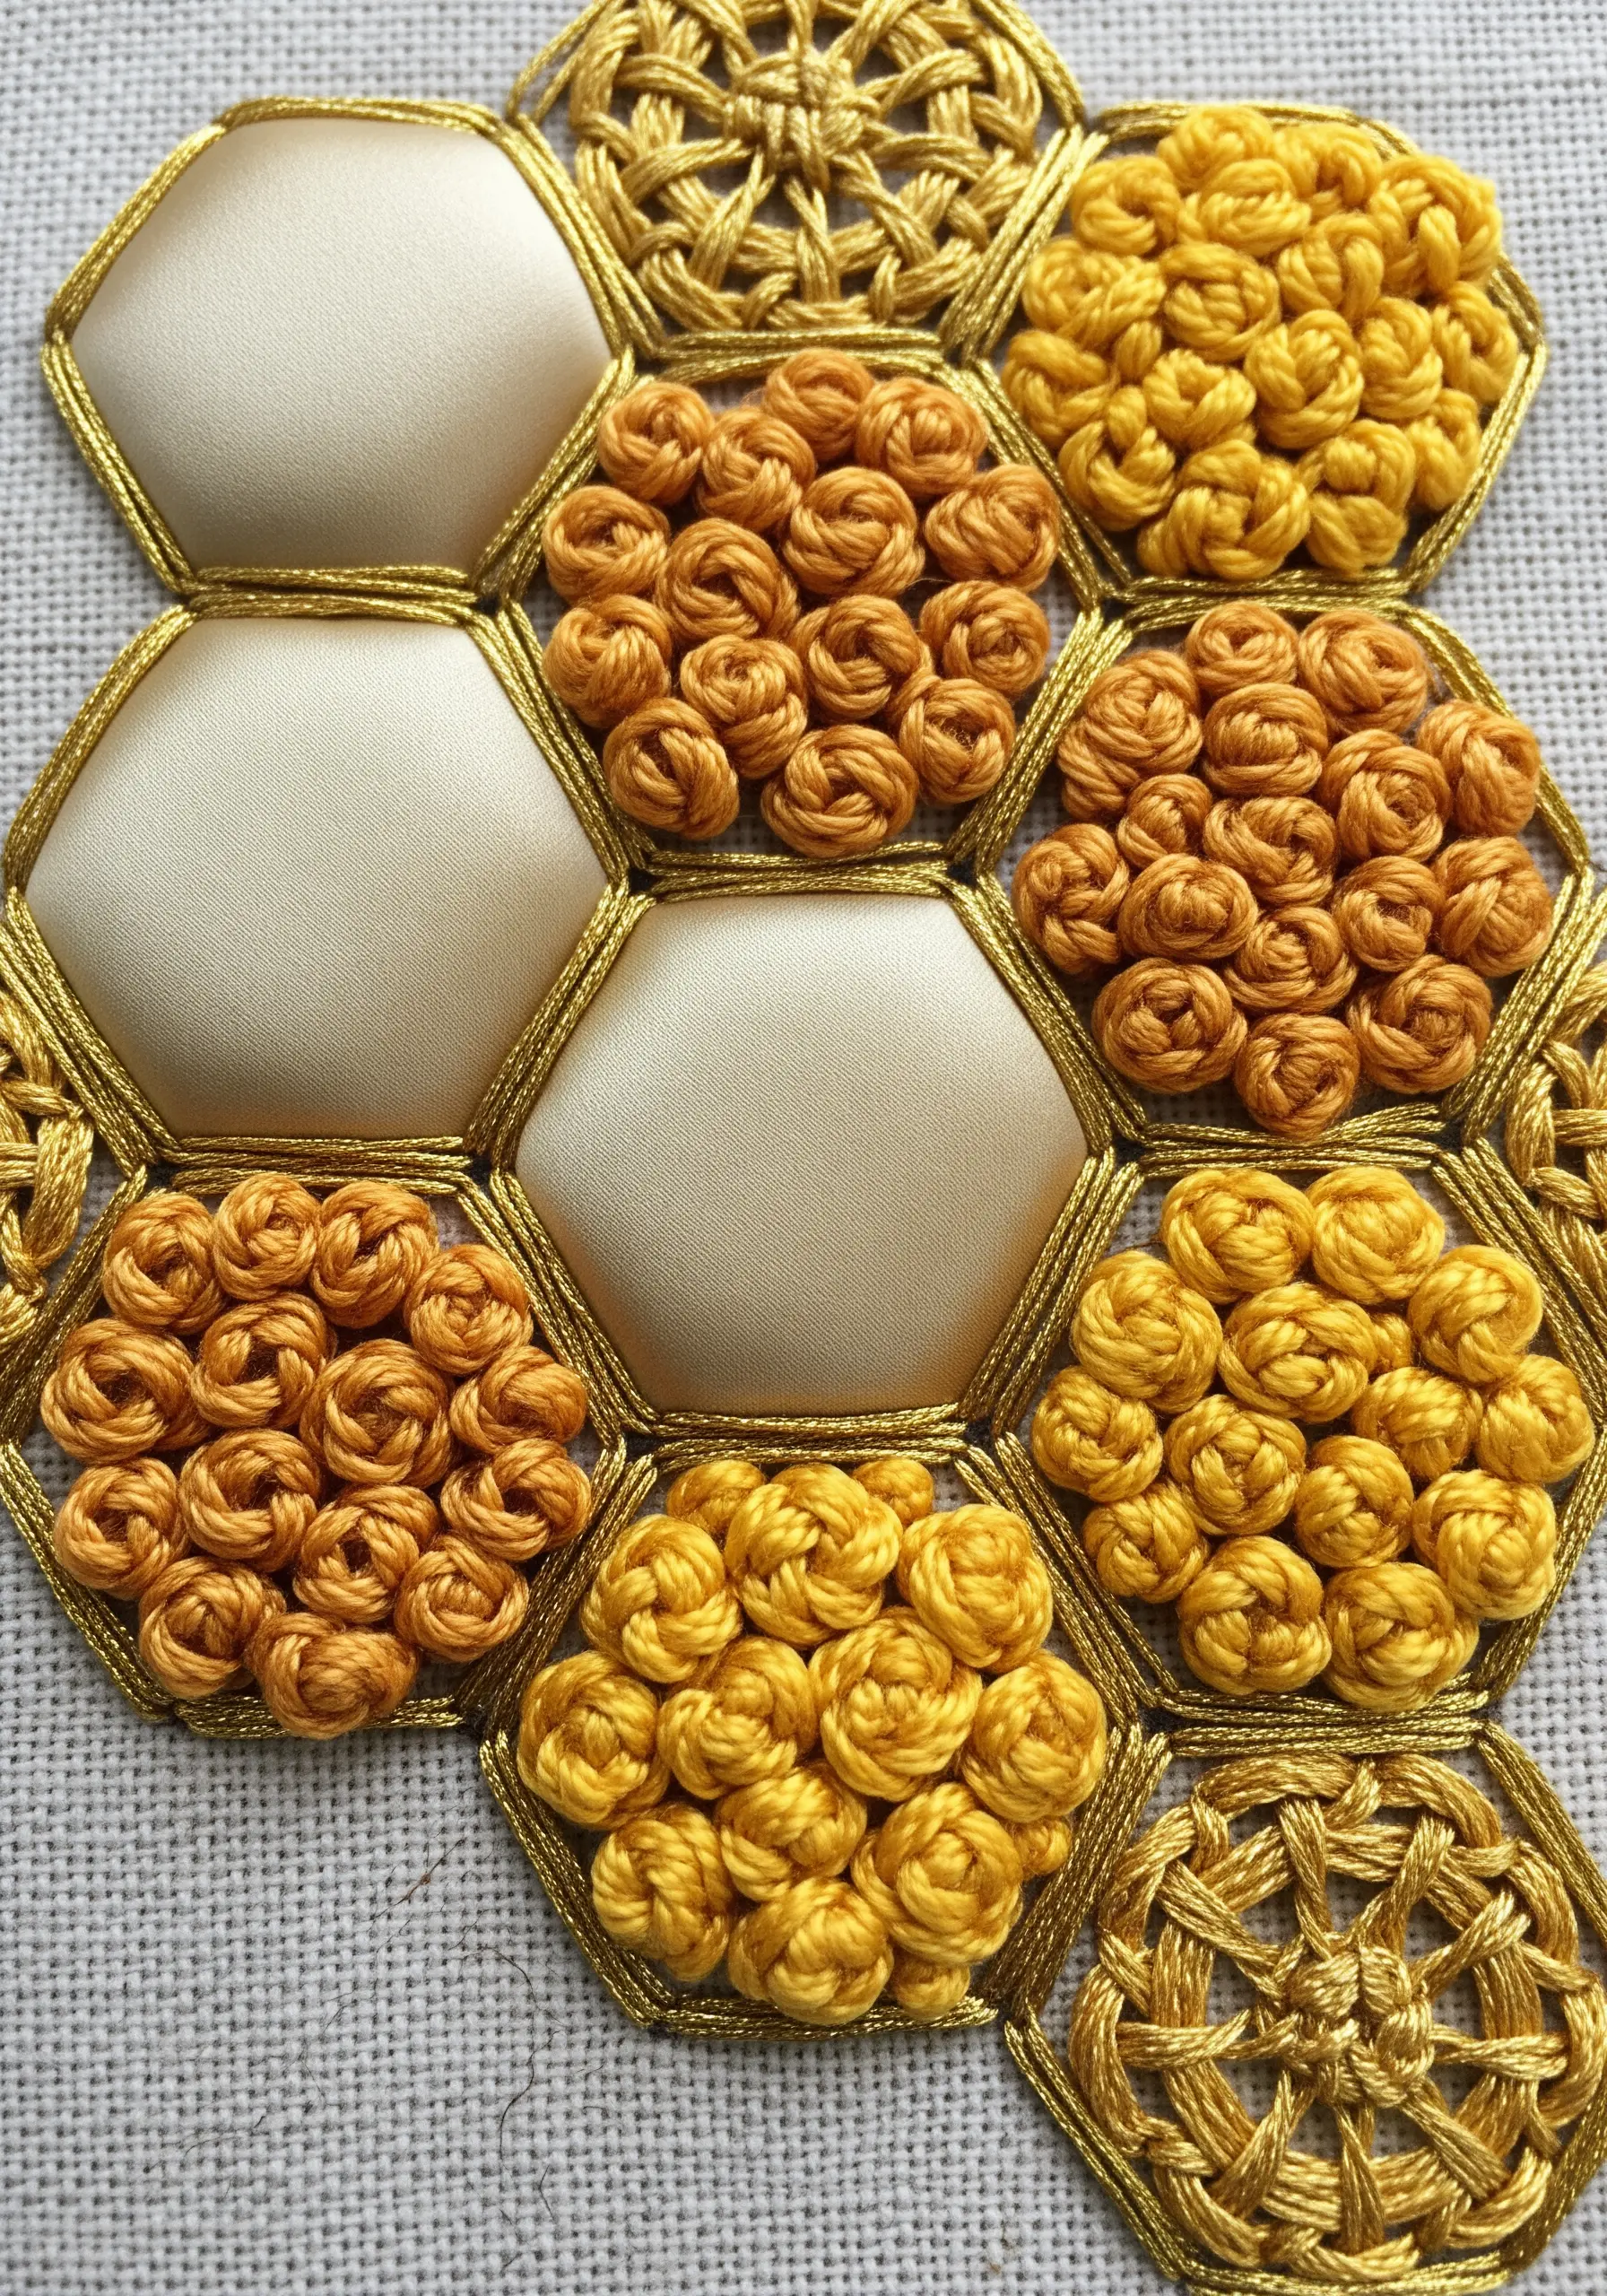
Create a stunning visual effect by pairing crisp, geometric outlines with soft, textured fillings.
Outline your honeycomb pattern with a precise stitch like a split stitch or couched metallic cord.
Fill the cells with bullion knots coiled into tiny rosettes, packing them tightly for a dense, floral feel.
Leaving some cells smooth—either with satin stitch or applied fabric—provides a visual rest and makes the textured areas appear even more dimensional.
13. Create Braids with Raised Chain Stitch Bands
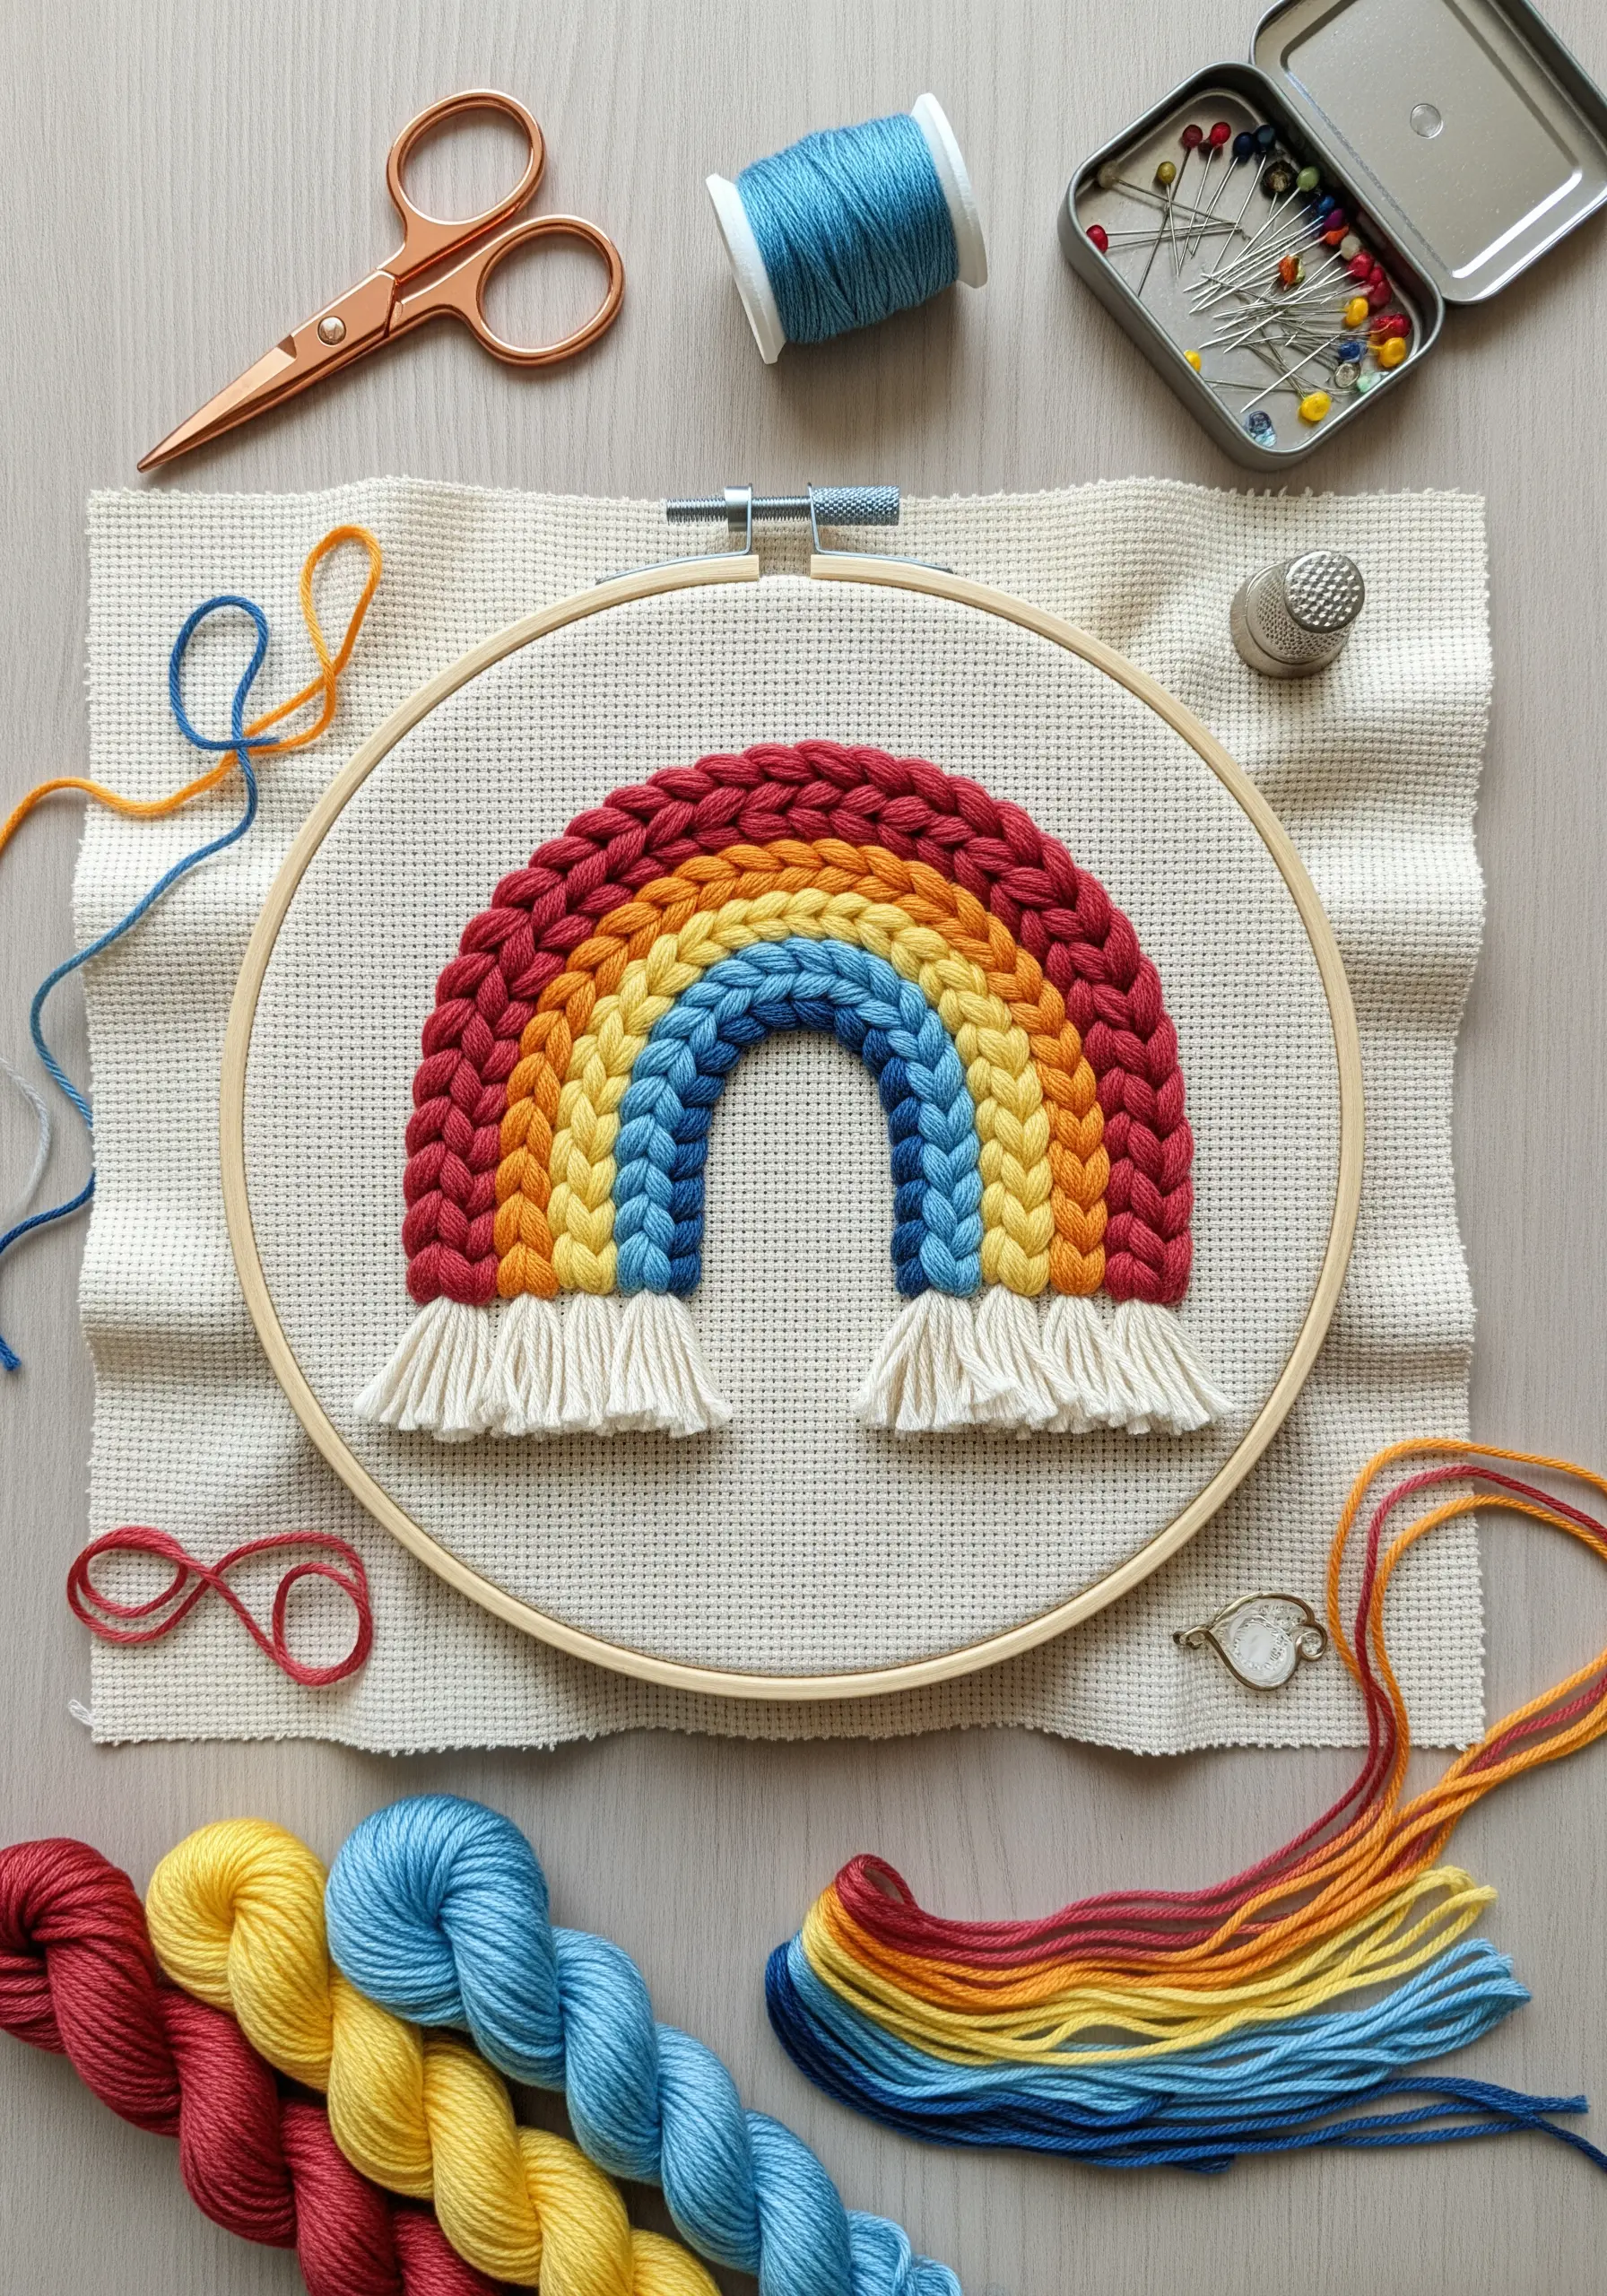
To achieve this chunky, braided texture, use a raised chain stitch band, which is worked over a foundation of several parallel straight stitches.
This technique lifts the chain stitch off the surface of the fabric, creating a highly sculptural, three-dimensional line.
Use a thick thread, like pearl cotton or all six strands of floss, to maximize the effect.
Add a final textural touch by leaving the thread ends long and unraveling them to create a soft fringe.
14. Capture Fluid Motion with Couching and Knots
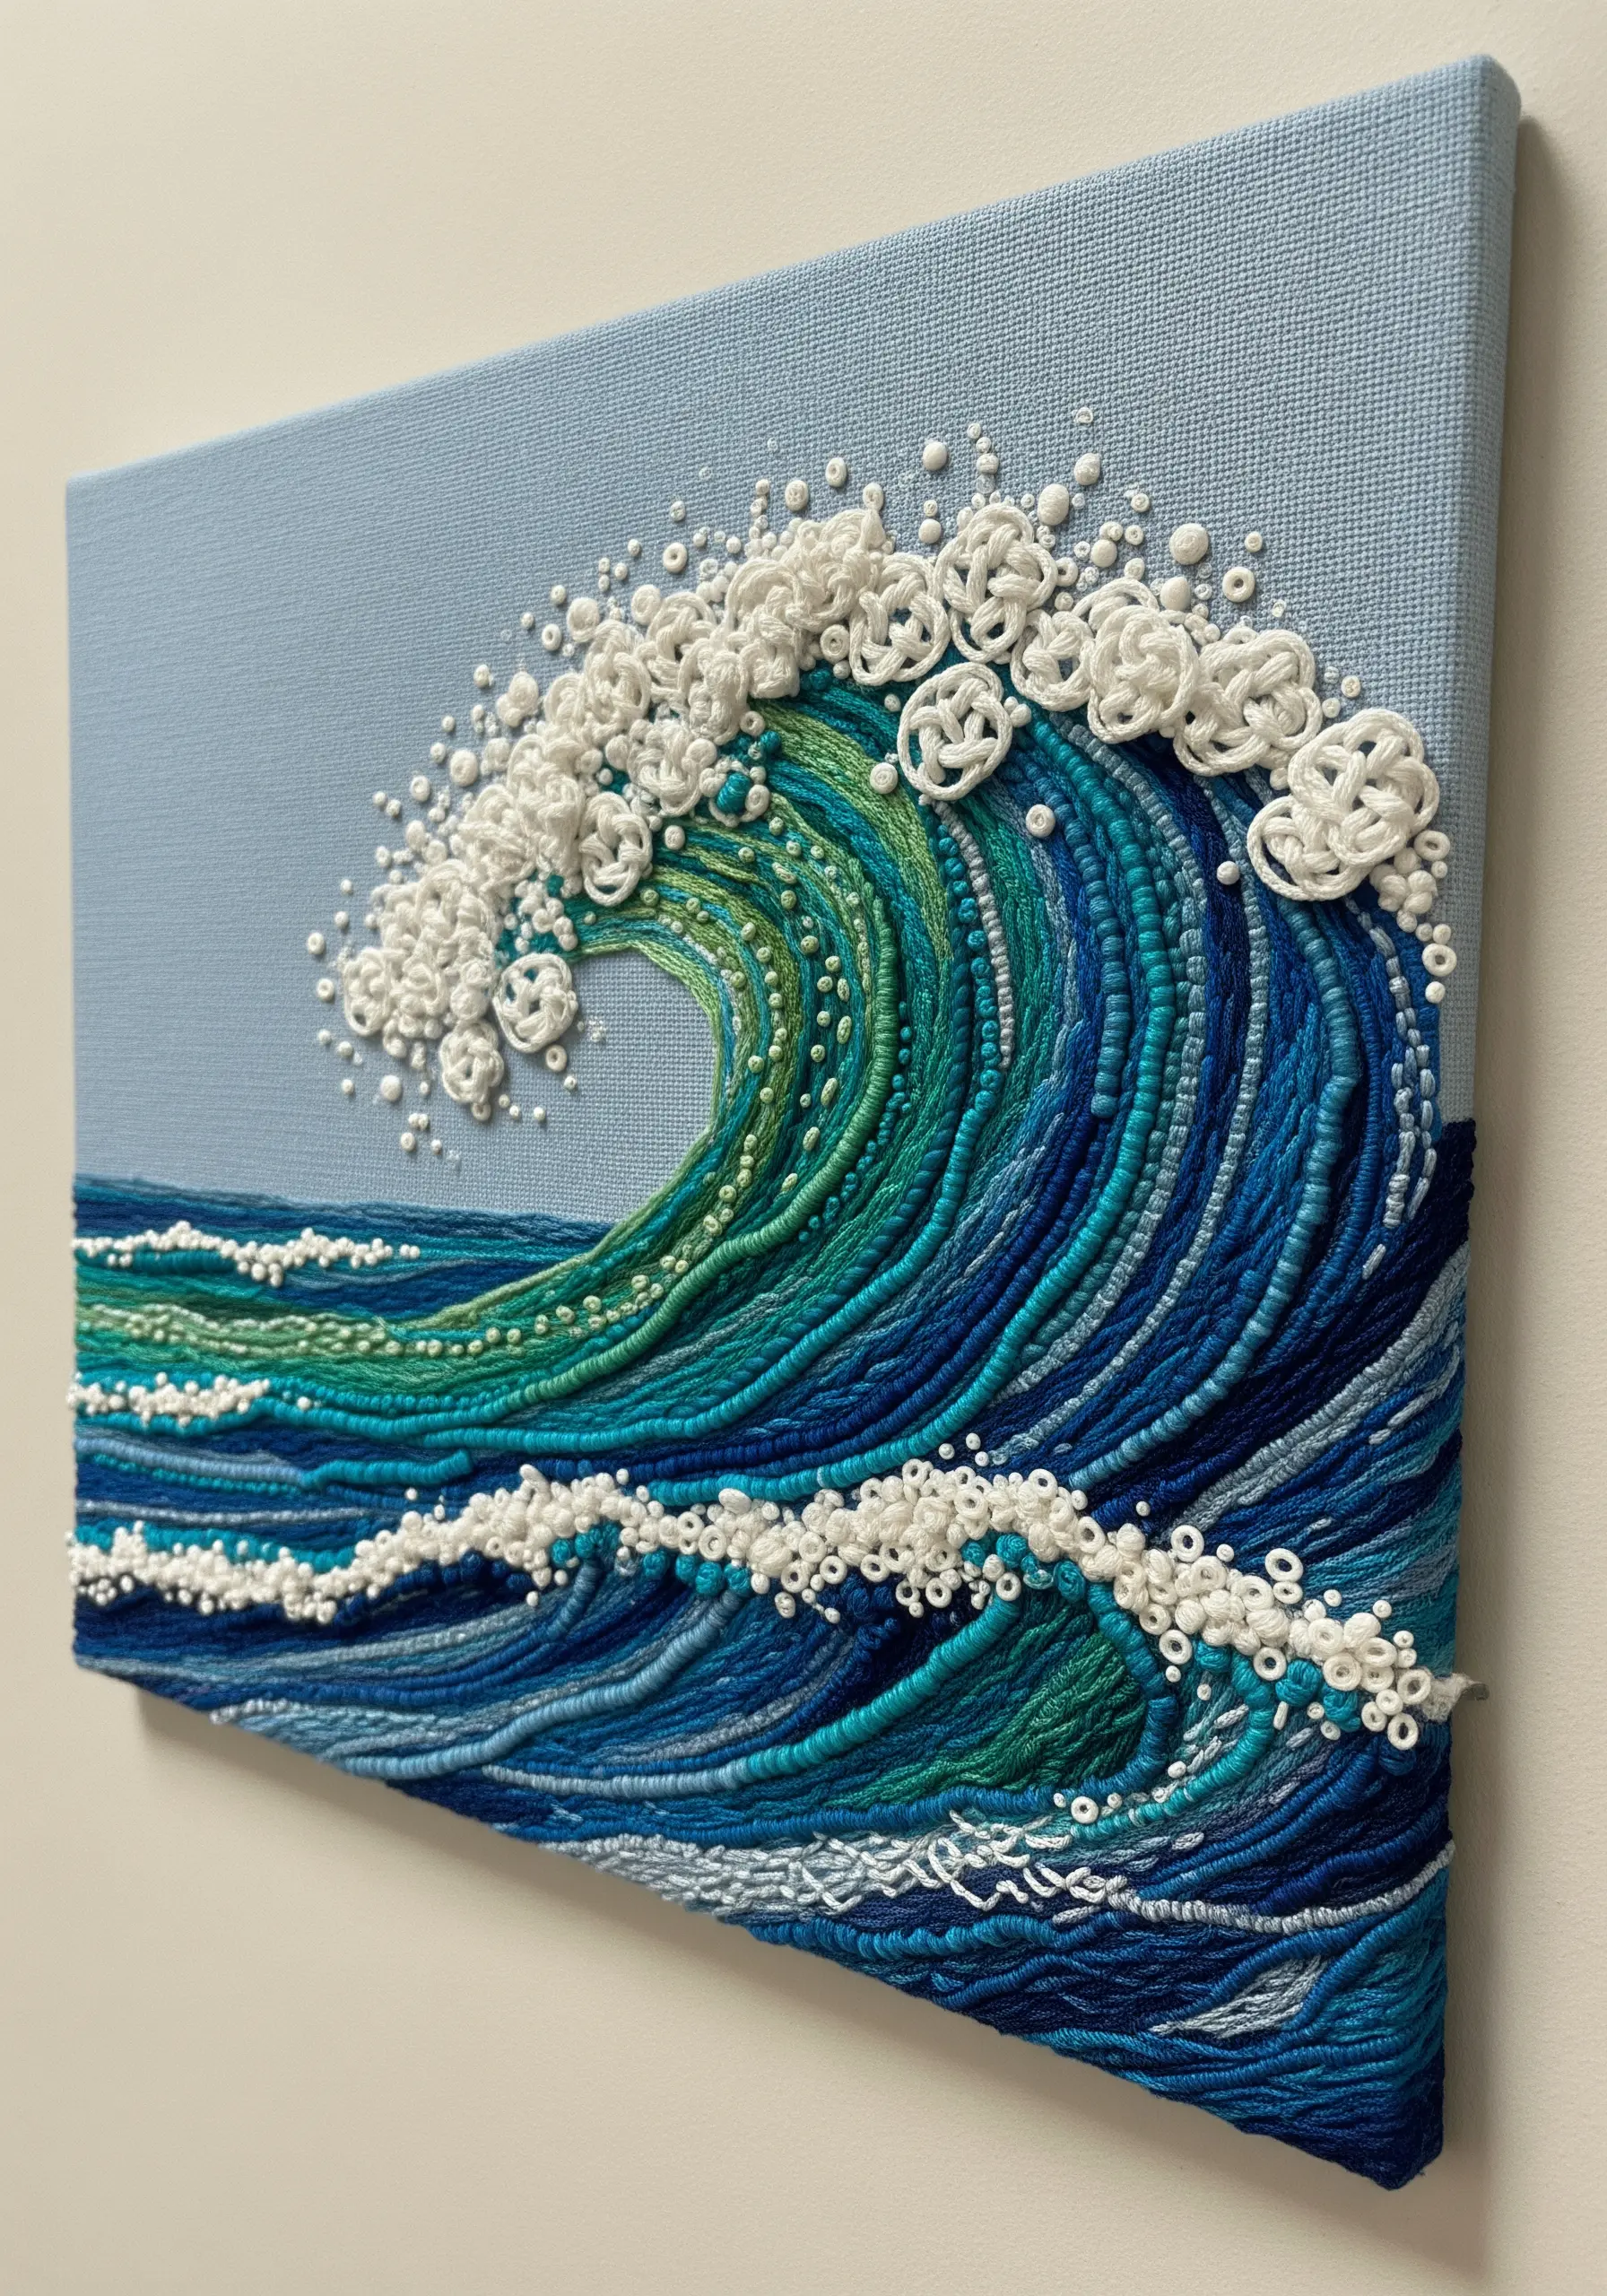
To depict the movement of water, couch down bundles of thread in flowing, organic lines, varying the thread count in each bundle to create swells and dips.
Use a gradient of colors to build depth and perspective within the wave’s crest.
For the chaotic energy of seafoam, fill areas with a dense, random scattering of French knots and small bullion knots in white and off-white.
This combination is perfect for depicting abstract thread waves and capturing the essence of water in motion.
15. Imply Delicacy with Detached Stitches
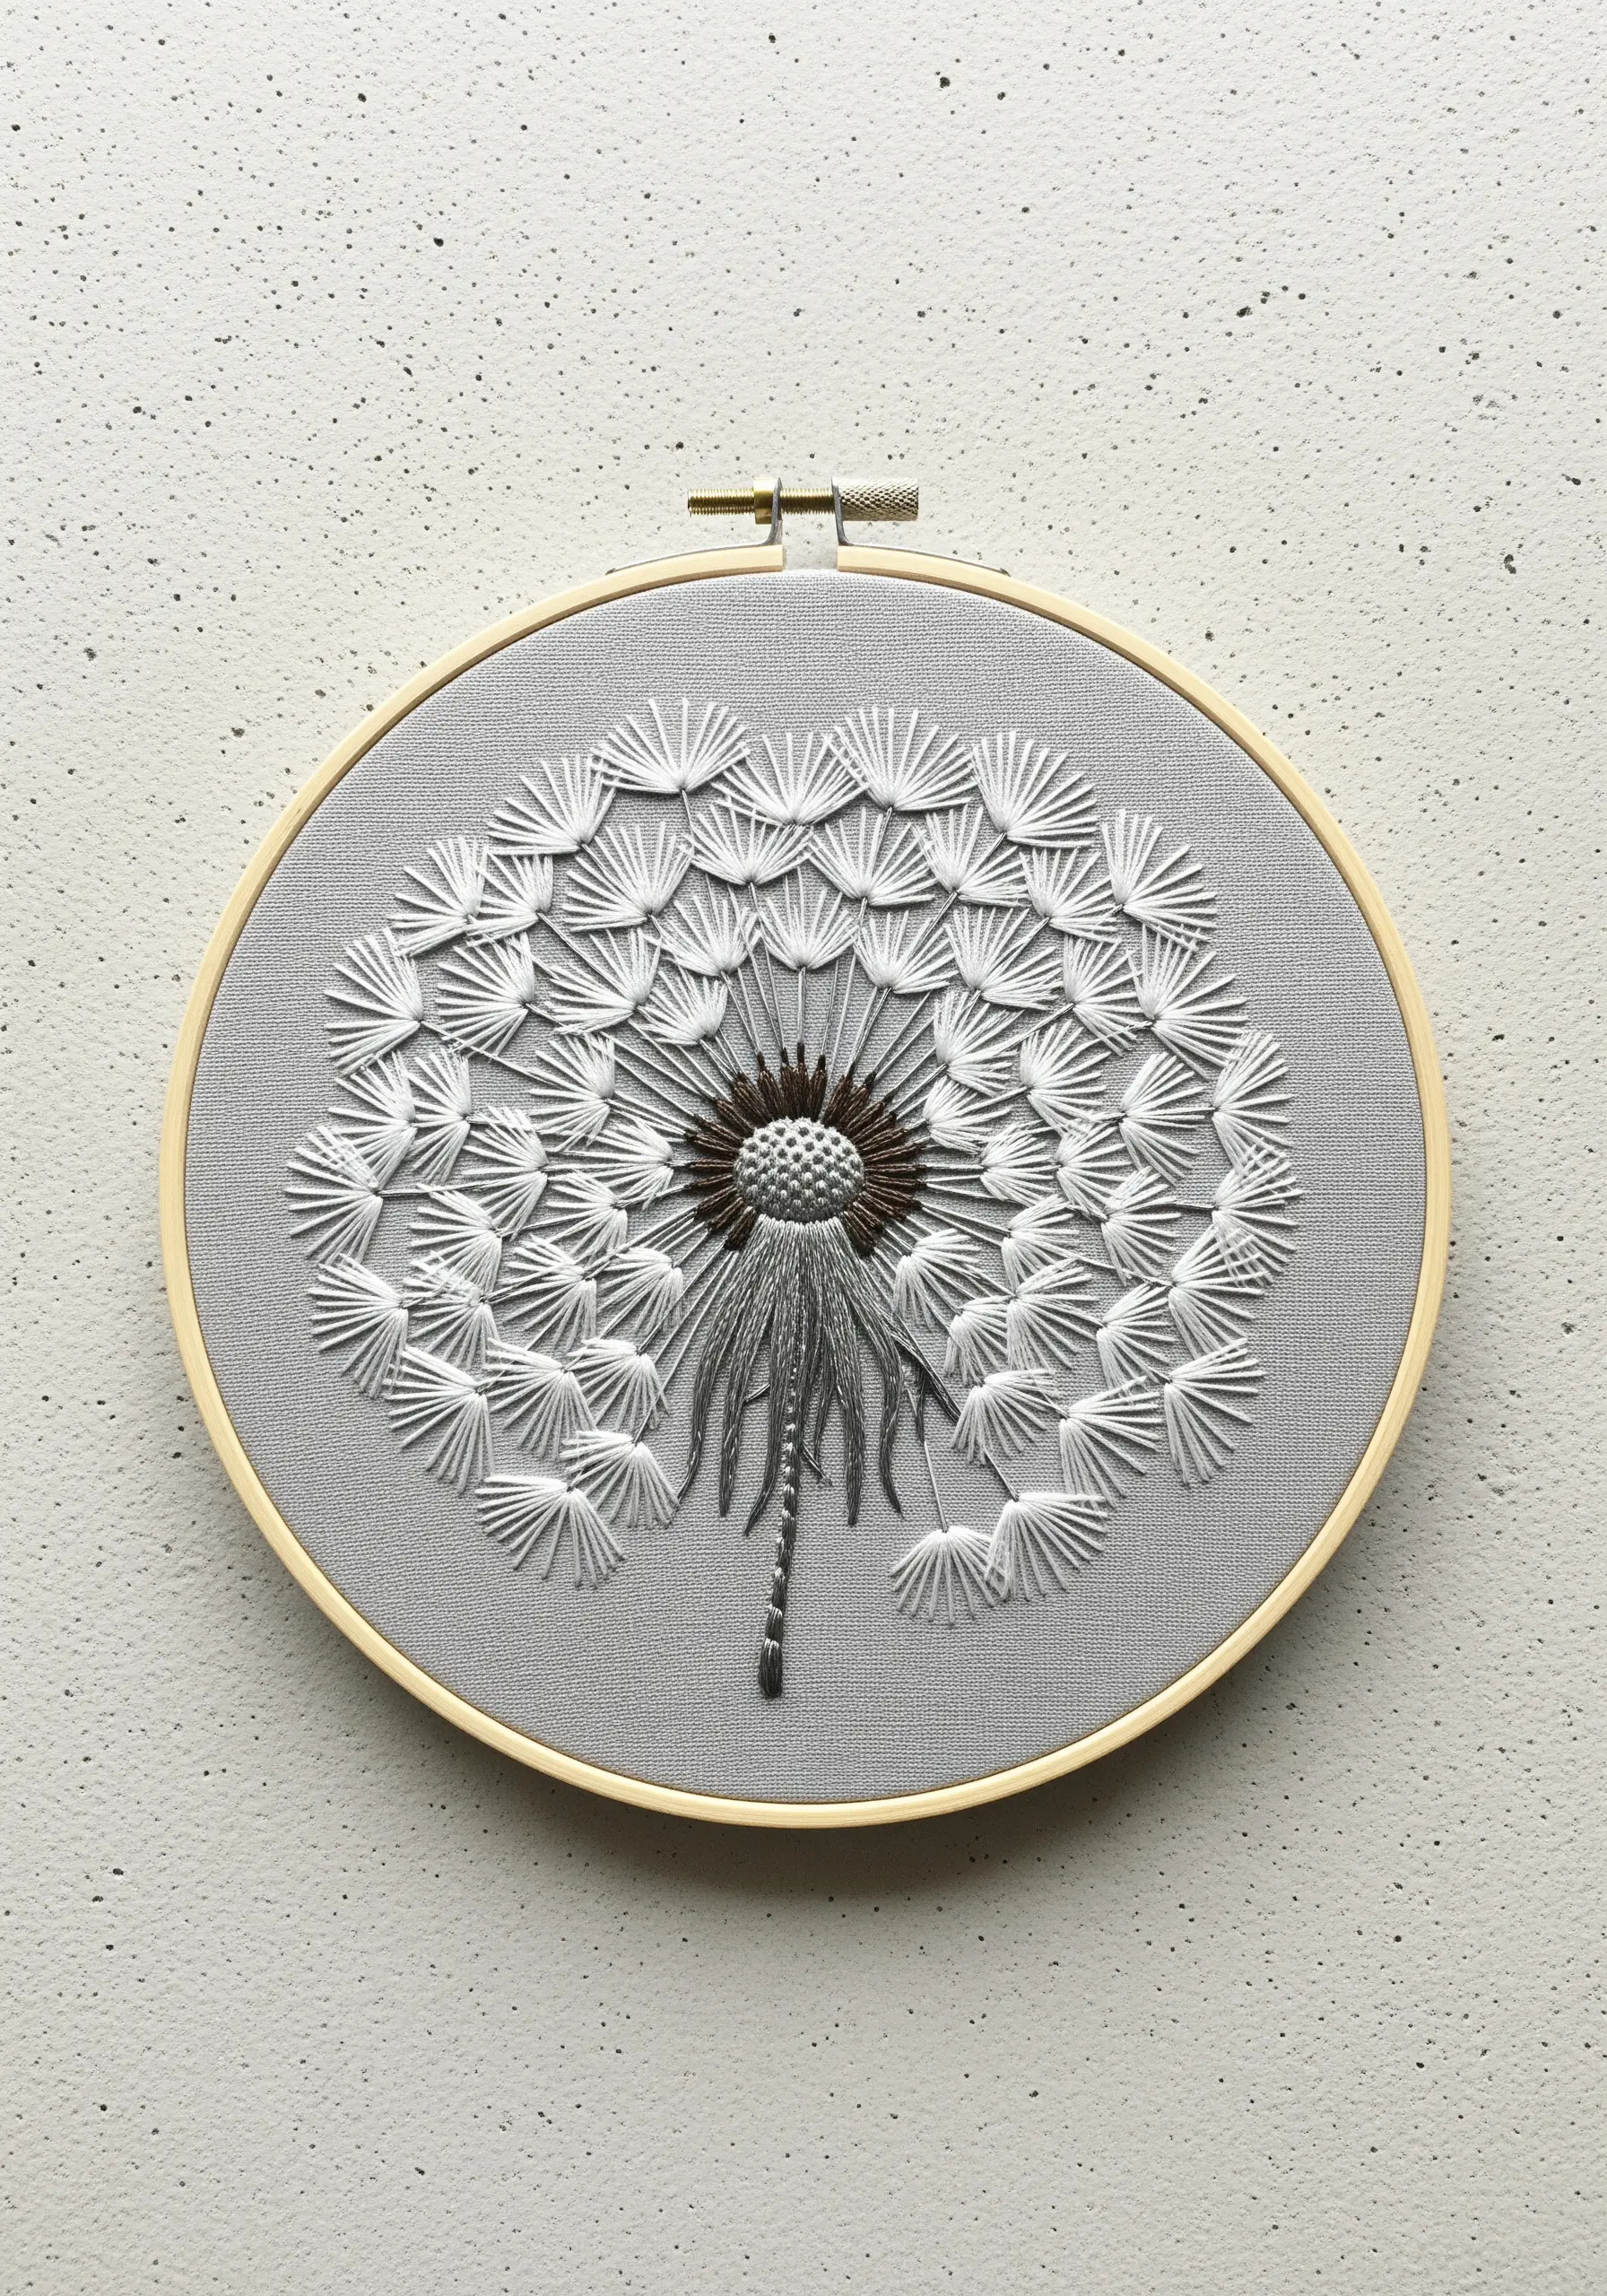
Suggest the airy, fragile quality of a dandelion seed head by using stitches that aren’t fully anchored to the fabric.
Form each seed with a single straight stitch for the stem, topped with a detached fly stitch to create the delicate ‘Y’ shape of the pappus.
The magic of this technique lies in the precise repetition and alignment, creating a pattern that feels both structured and ready to disperse with the slightest breeze.
It’s a masterclass in creating volume and a sense of movement with minimal thread.
16. Mix Padded Satin Stitch and Couched Yarn
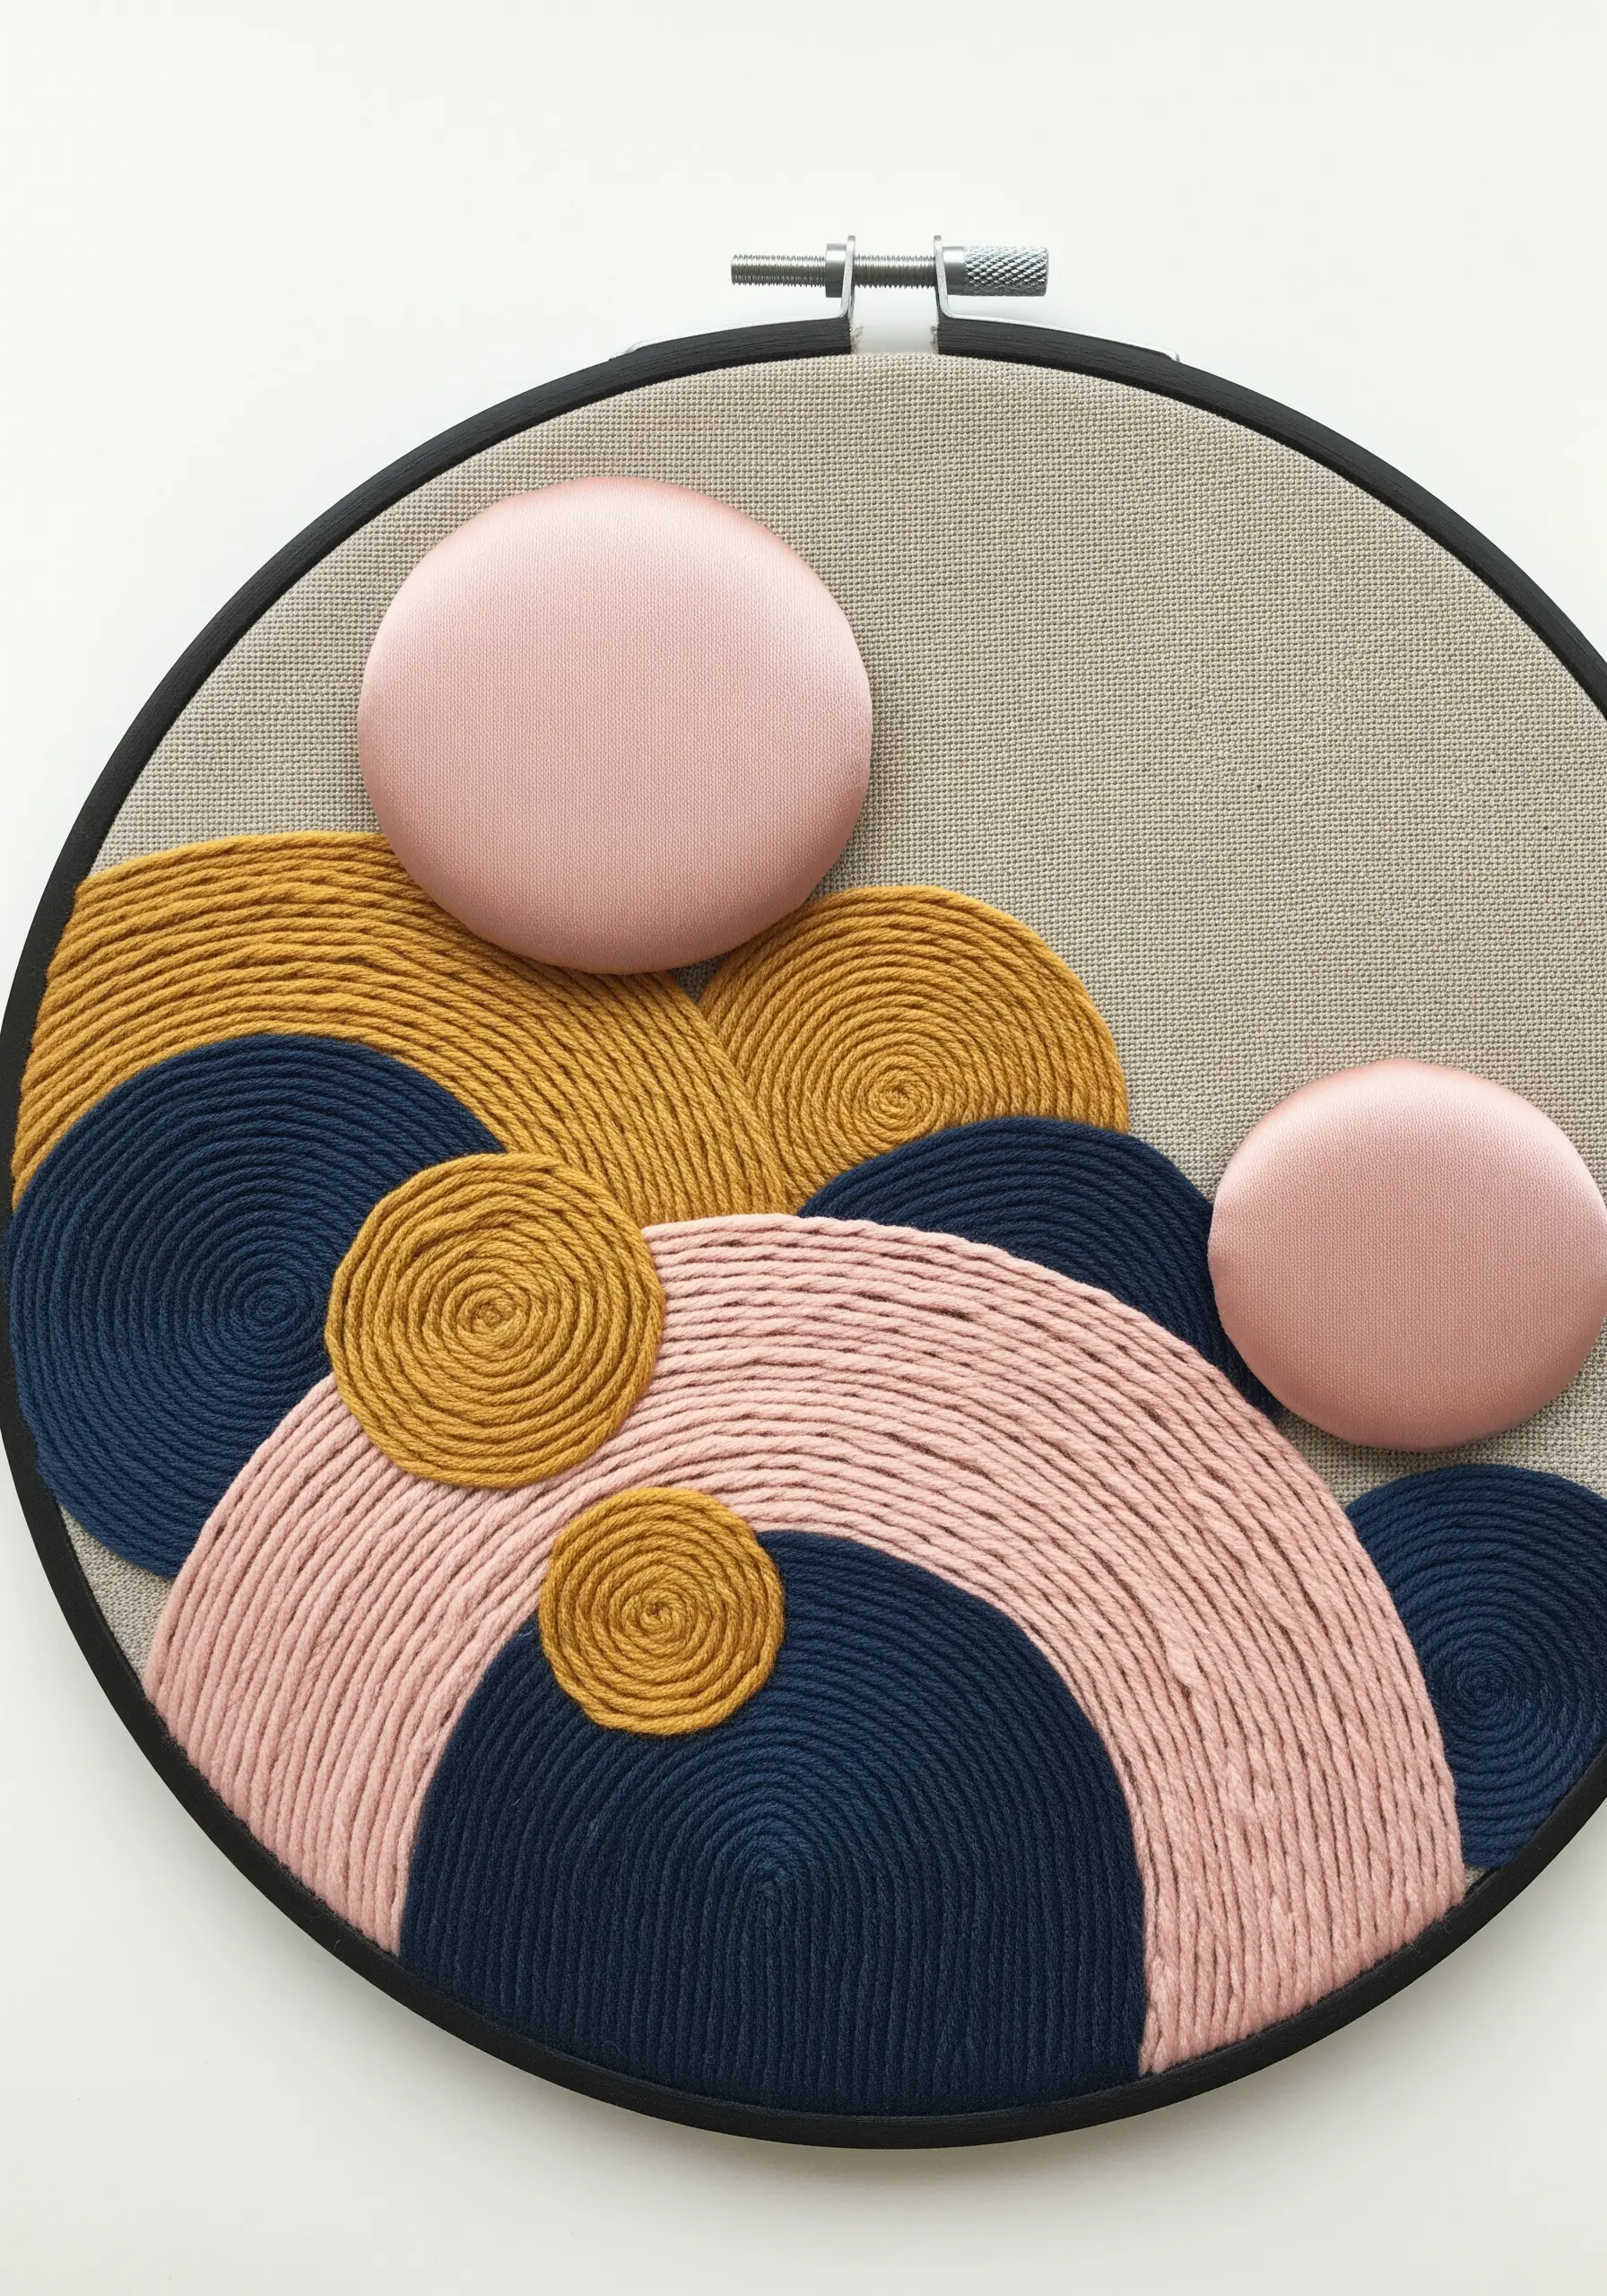
Build a sophisticated abstract composition by contrasting different sculptural techniques.
Create the smooth, raised circles using padded satin stitch: first, build a foundation of small stitches within the shape, then cover it with neat, uniform satin stitches.
For the larger, swirling forms, couch thick yarn or wool cord onto the fabric, letting the texture of the yarn itself become a design element.
This creates a dynamic, multi-dimensional piece of abstract embroidery with both sheen and matte finishes.
17. Build Free-Standing Forms for Lifelike Art
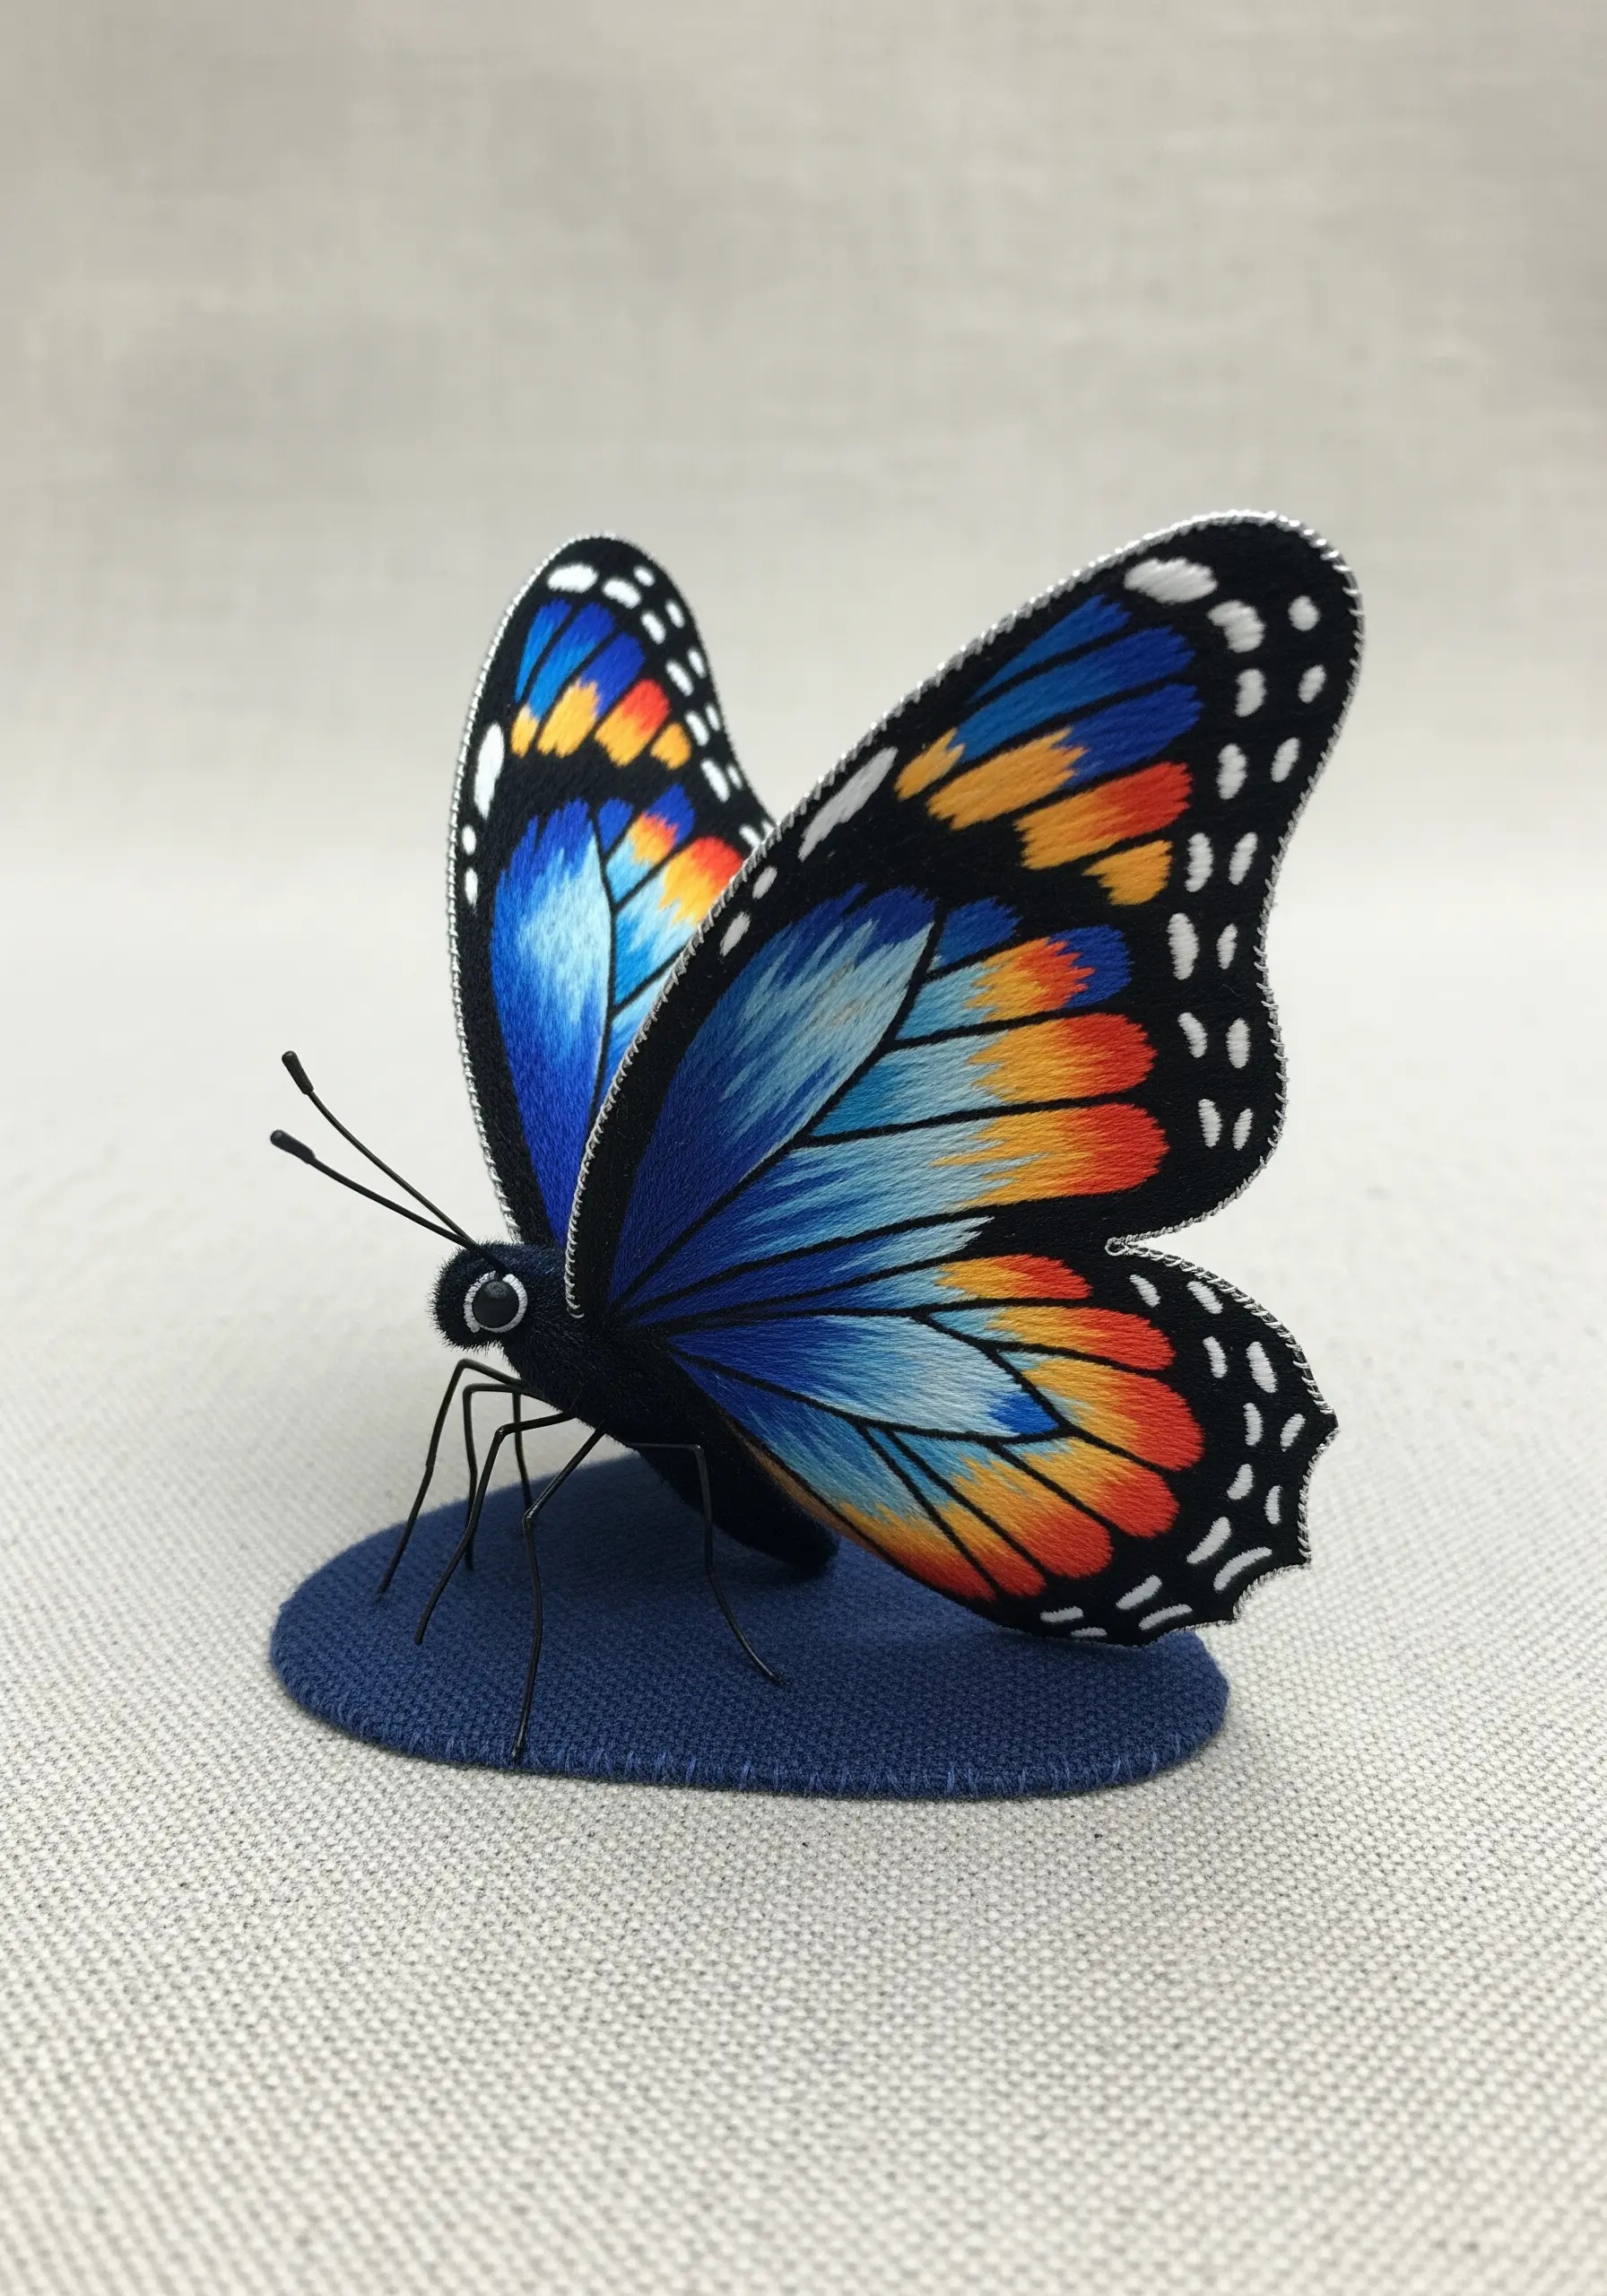
Allow your embroidery to break free from the two-dimensional plane with advanced stumpwork.
The butterfly’s wings are meticulously thread-painted on a separate piece of fabric stretched in a hoop, with a fine wire stitched securely along the outer edge.
Once stitching is complete, the wings are carefully cut from the fabric and the wire allows you to shape them before attaching them to the stitched body.
This turns your creation from a picture into a sculpture.
18. Define Topography with Contoured Thread

Create the illusion of elevation and dimension by using thread to draw contour lines, much like a topographic map.
Instead of filling shapes with satin stitch, you build them by outlining the form repeatedly with tightly packed rows of backstitch or stem stitch.
Varying the thread colors between the contoured sections enhances the sense of depth and perspective.
It’s a meditative process that turns simple lines into complex, abstract thread landscapes.
19. Weave Dimension with the Plaited Braid Stitch
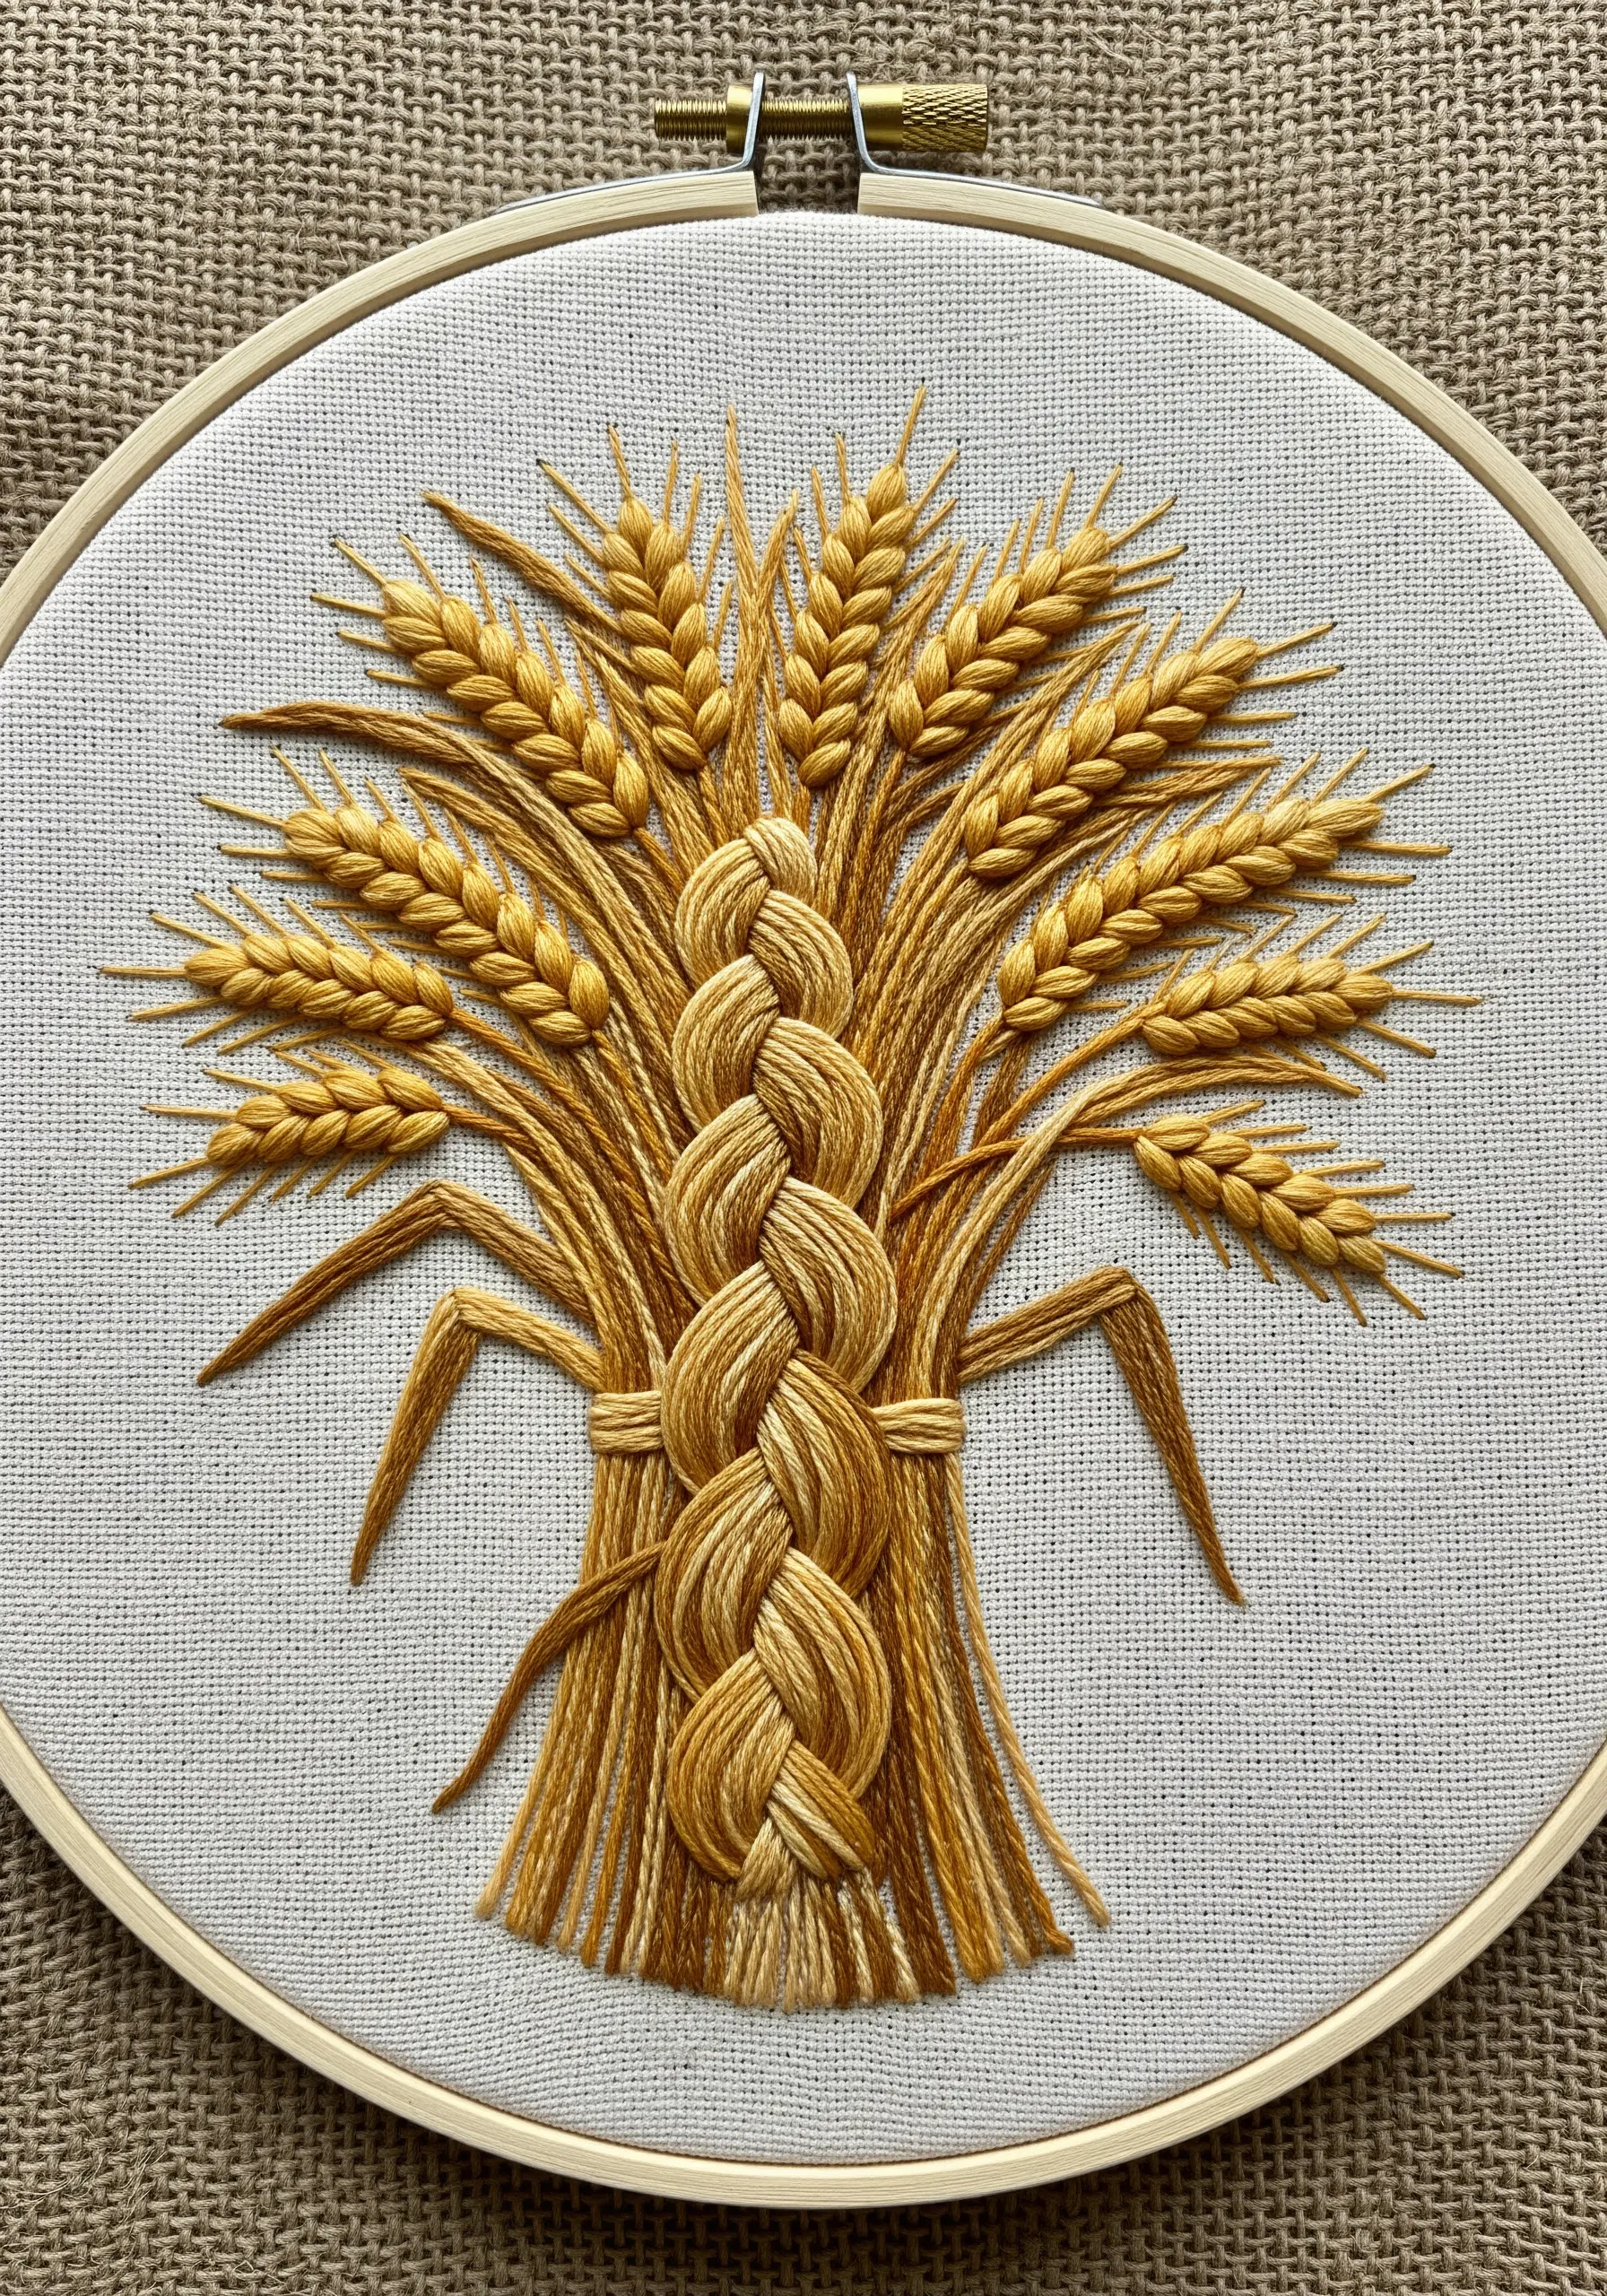
Add a stunning, raised woven texture to your designs using the plaited braid stitch.
This stitch creates a substantial, decorative line that is perfect for focal points, like the binding on this sheaf of wheat.
Contrast its intricate, woven appearance with simpler stitches, like the angled satin stitches used for the wheat stalks, to make the braid the hero of the composition.
It looks complex, but is a rhythmic, methodical stitch that adds instant sophistication.
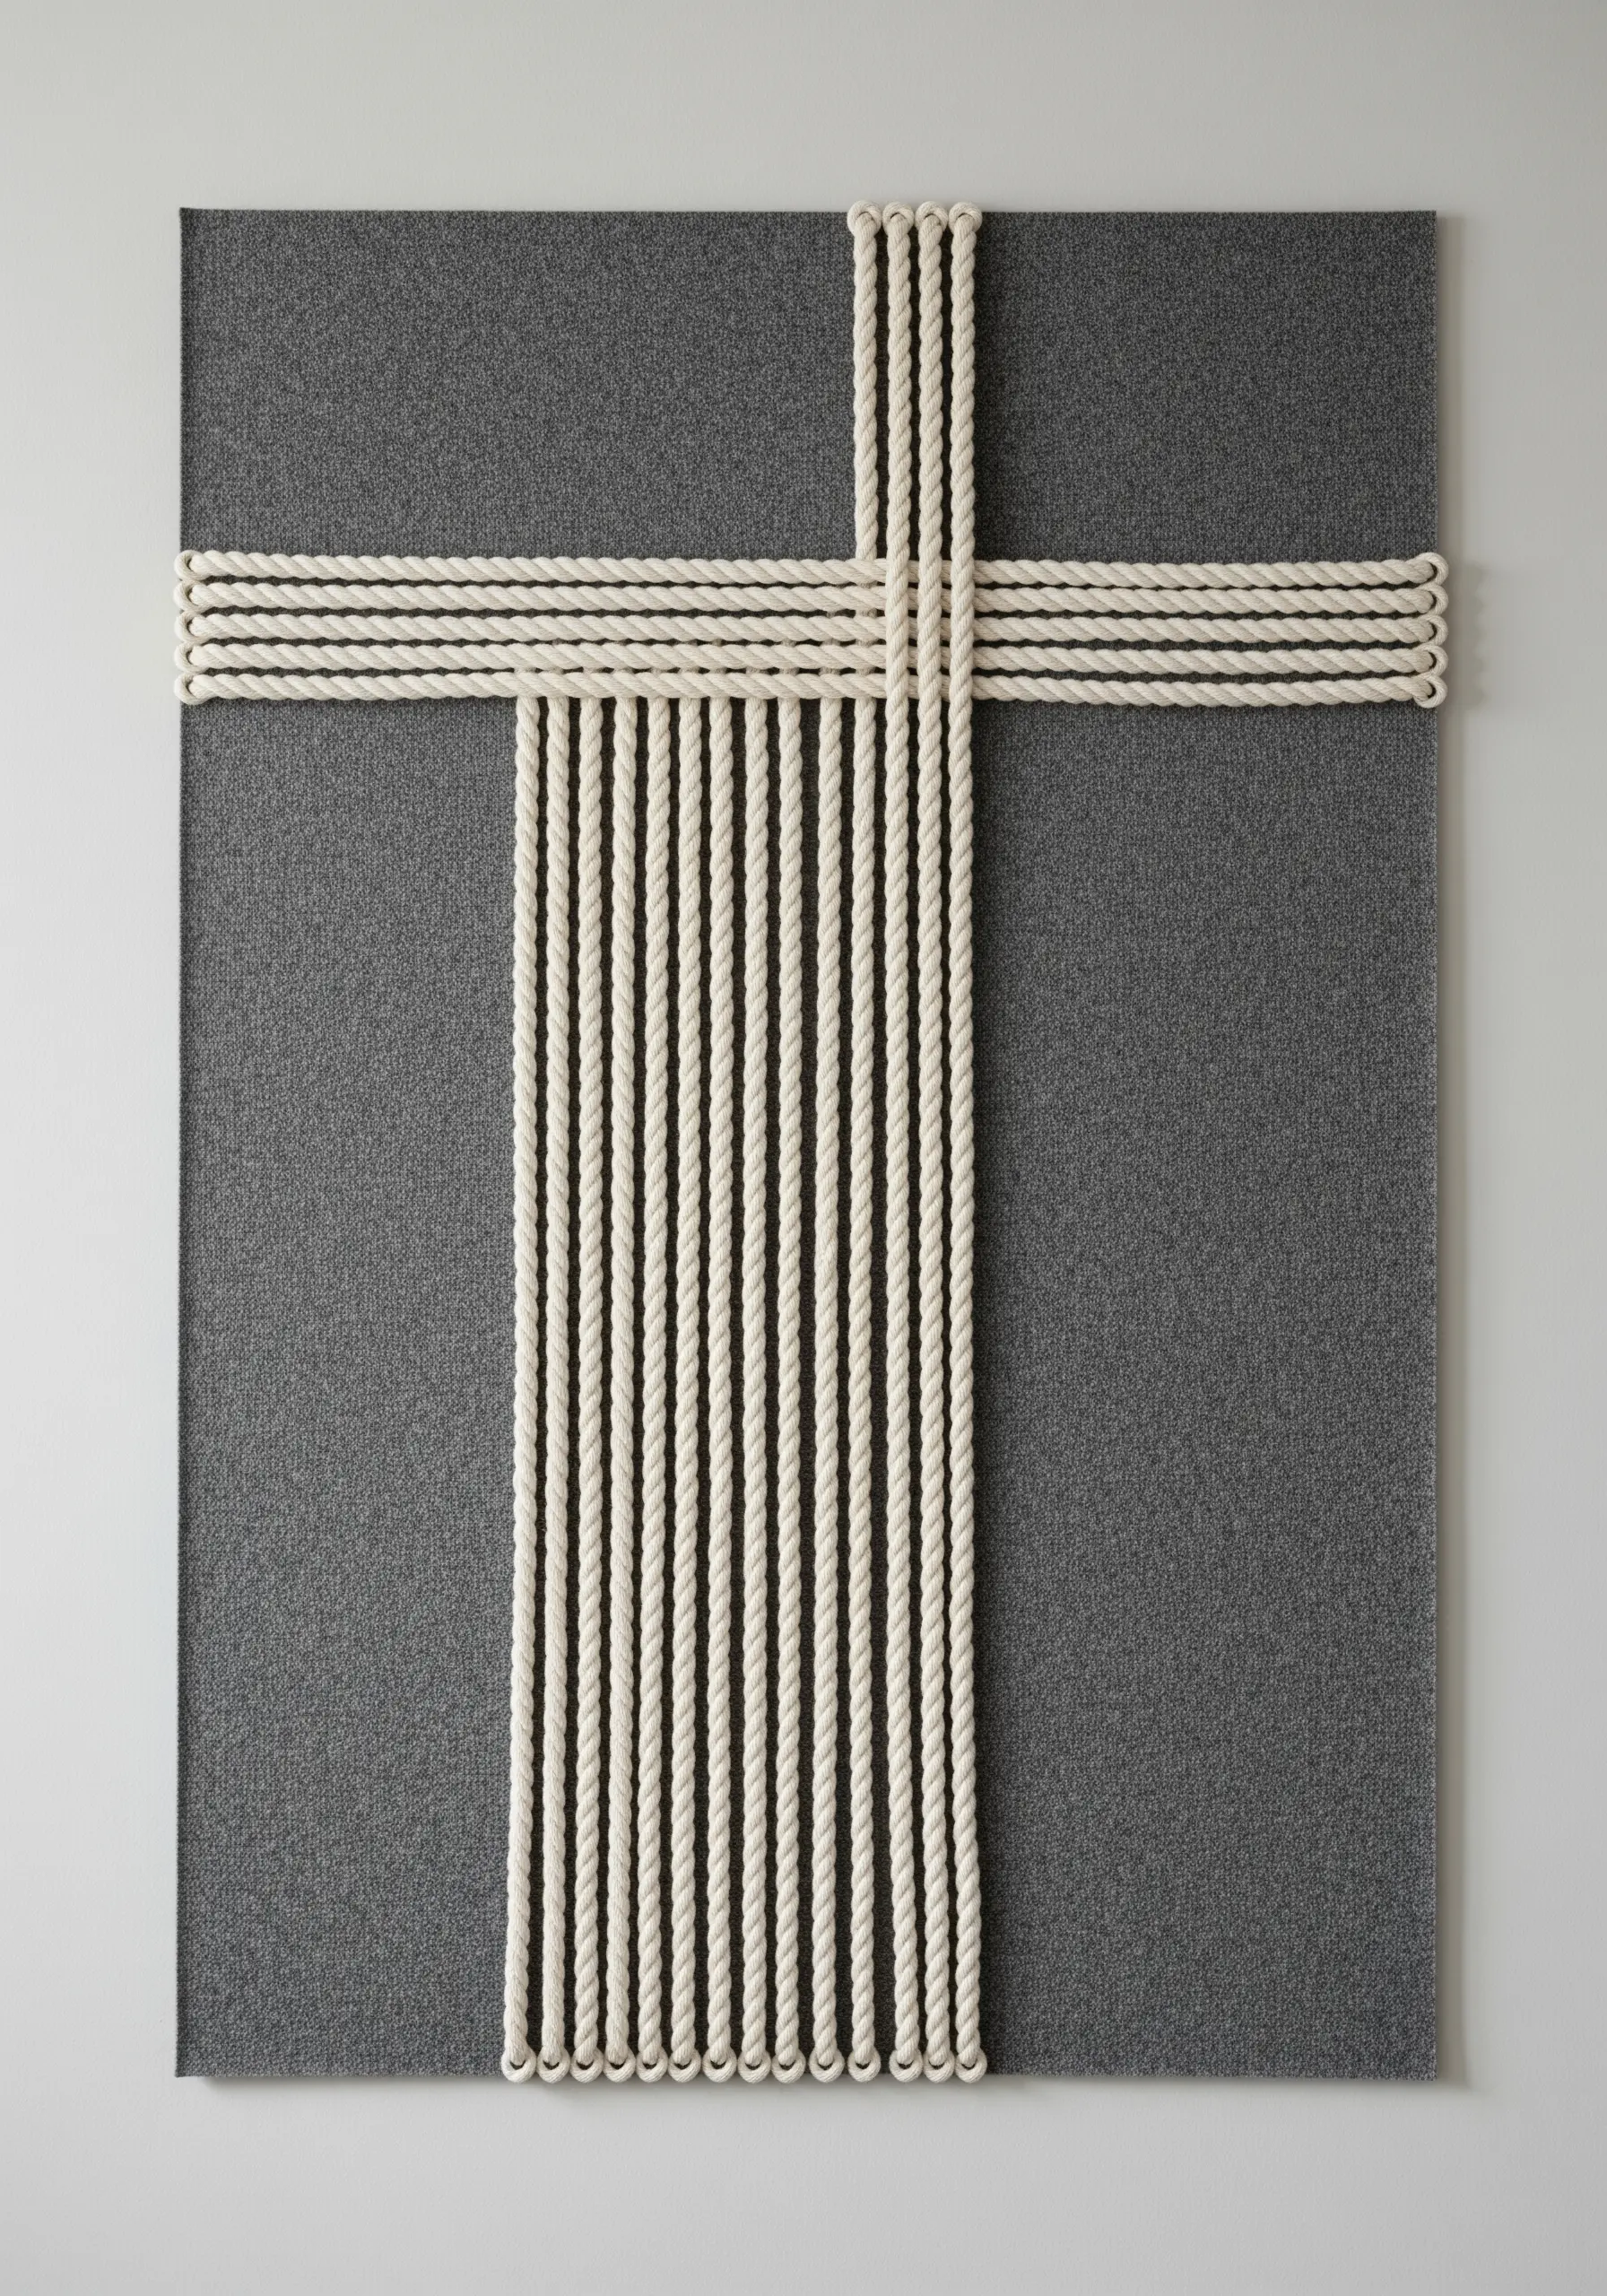
20. Create Minimalist Lines with Felted Cord
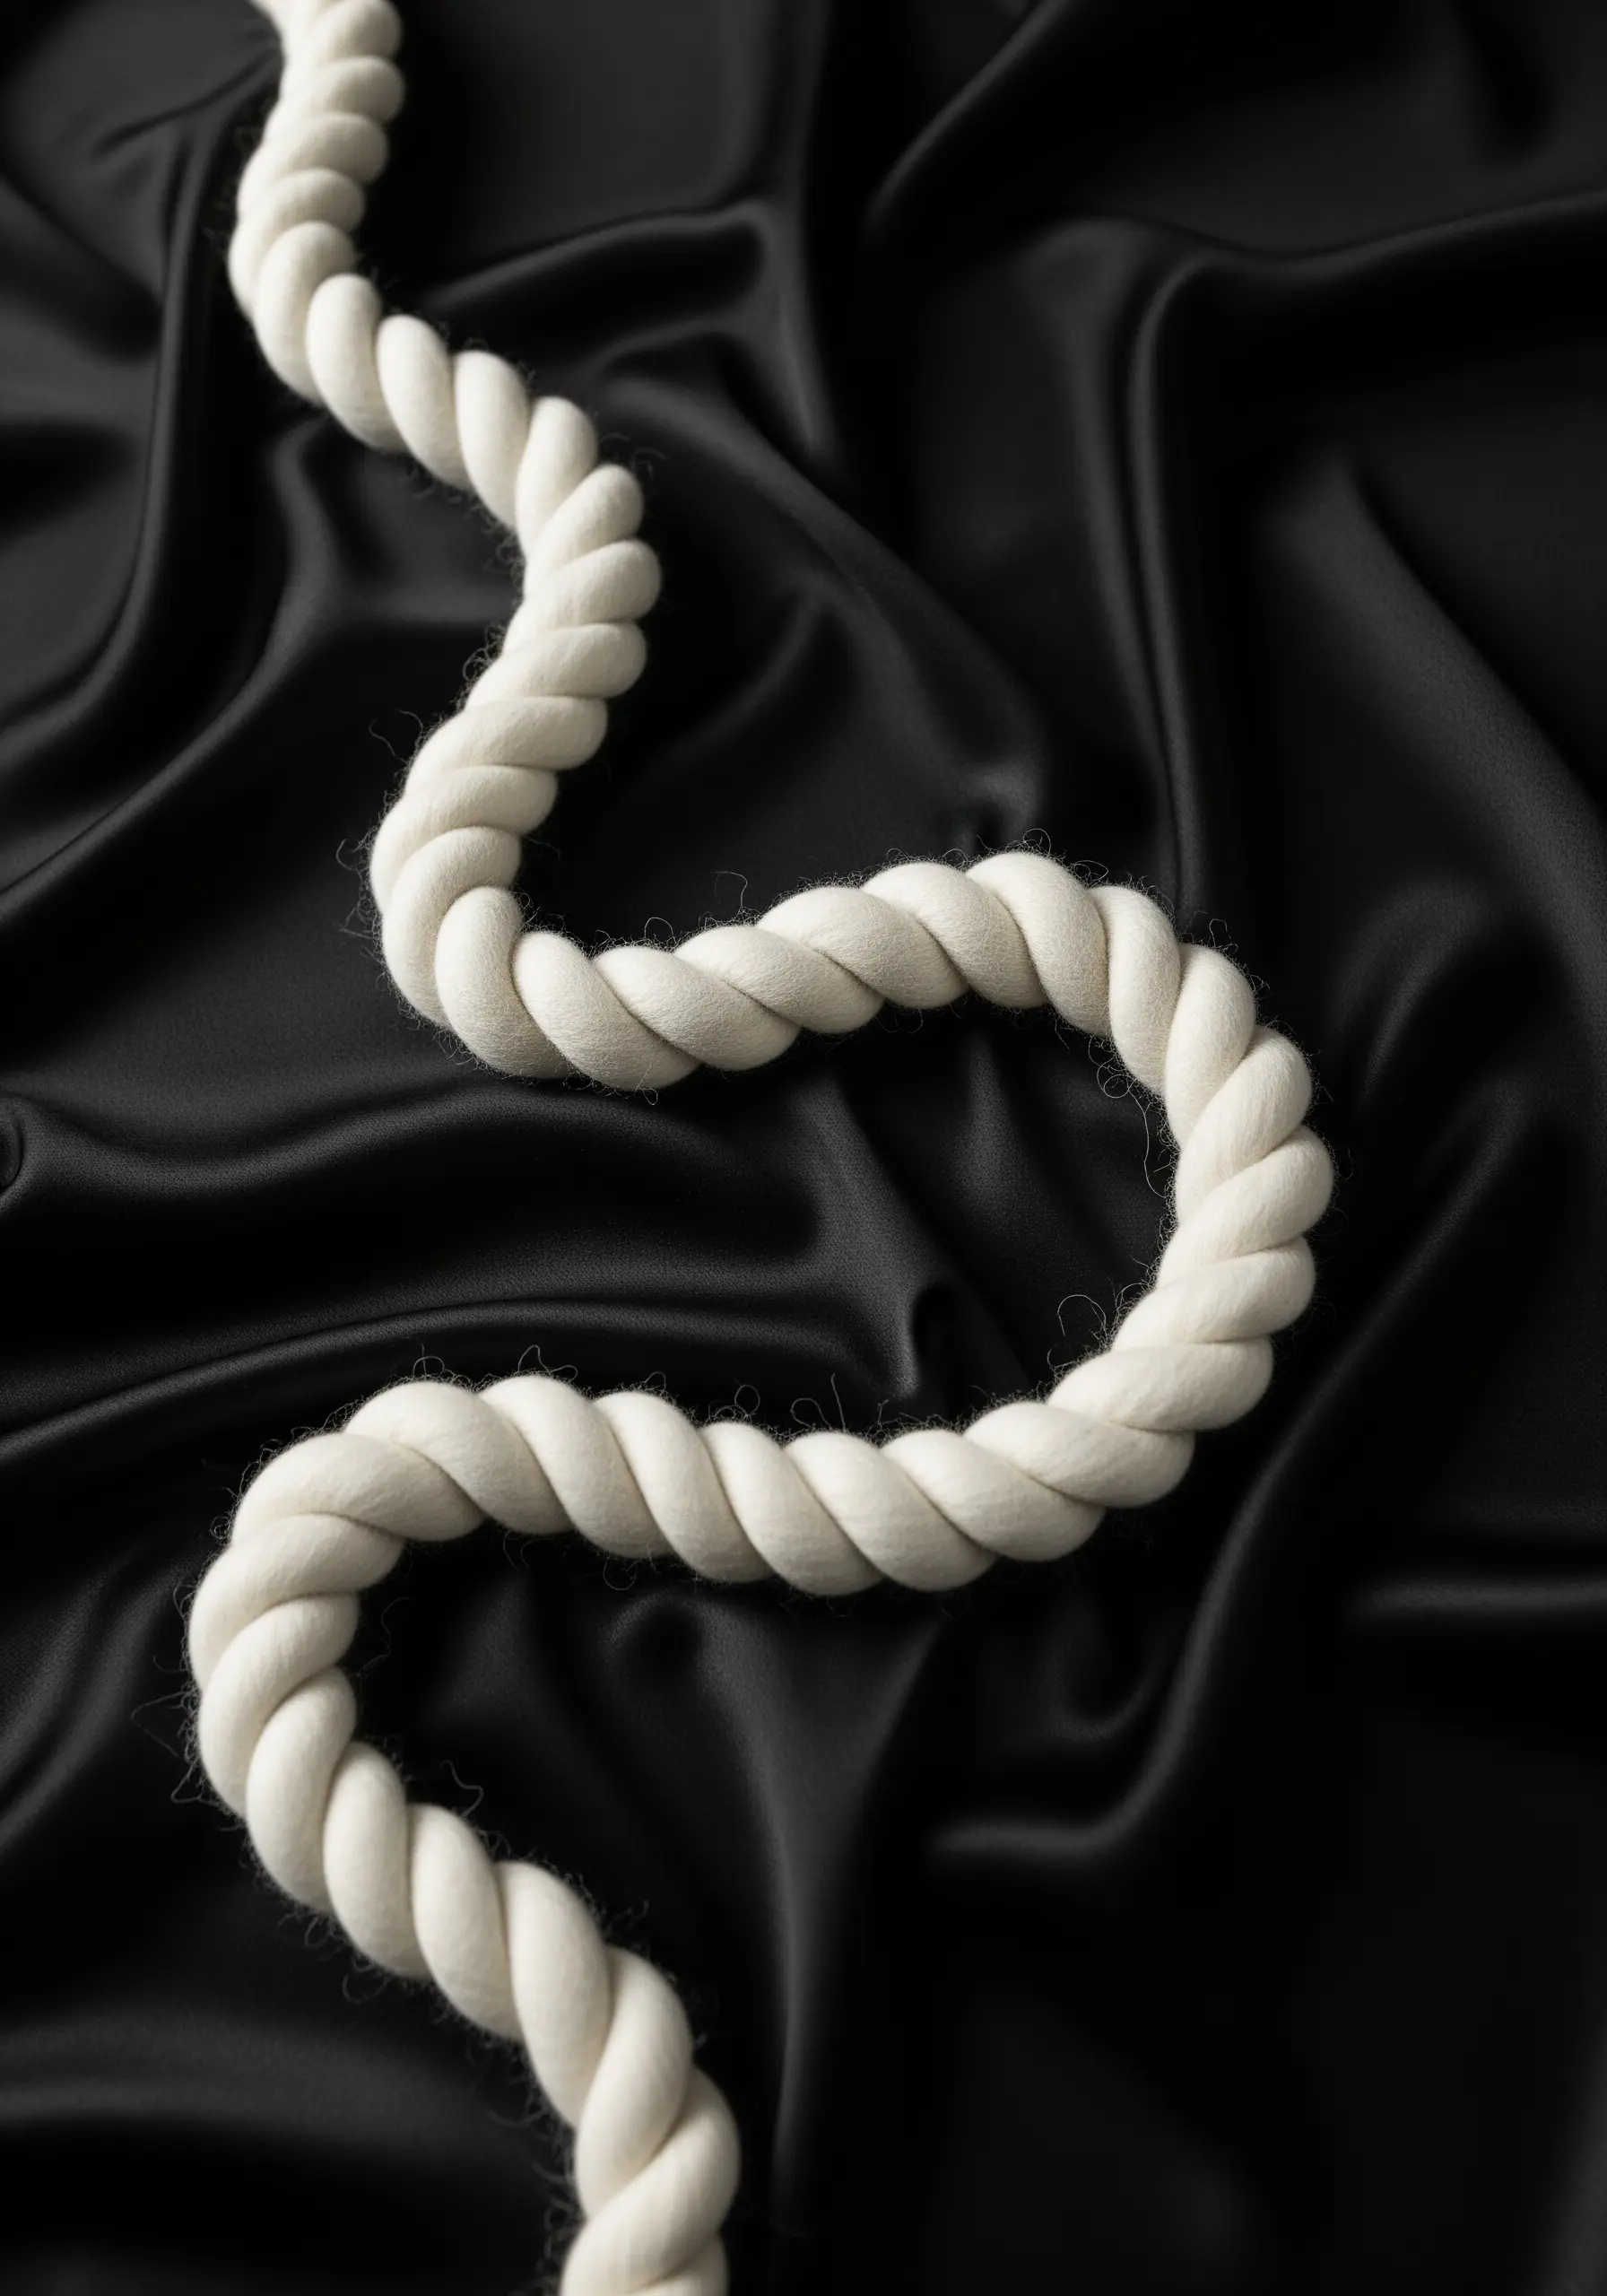
Make a bold, sculptural statement by focusing on the purity of line and material.
Couch a thick, textural cord—like this matte, felted wool rope—onto a dramatically contrasting fabric, such as lustrous black silk.
Secure the cord with a strong, near-invisible thread, using tiny stitches that sink into the fibers of the rope.
The aesthetic power comes from the stark contrast in texture and color, proving that sculptural embroidery can be incredibly minimalist.
21. Construct Plush Florals with the Cast-On Stitch

To create these highly dimensional, plush flowers, use the cast-on stitch, a technique borrowed from knitting.
You create this stitch by wrapping, or ‘casting on,’ the thread around your needle multiple times before pulling it through the fabric.
This forms a raised, caterpillar-like stitch that can be arranged in circles to build dense, rose-like blooms that sit high above the fabric.
For smaller buds, use bullion knots or tightly packed French knots to complement the larger woven flowers.


