

You have a desire to create something deeply personal—a keepsake that holds more than just thread and fabric. It’s a way to capture a fleeting moment, a quiet connection, a love that feels too big for words. But how do you translate that emotion into a piece that feels both modern and timeless?
The answer lies in the elegant simplicity of line art. Here, every stitch matters. It’s not about complex techniques or intricate color palettes; it’s about the character of a single line. The way it curves, the weight it carries, and the story it tells with quiet confidence.
These ideas are your guide to making small, intentional choices that lead to beautiful results. You’ll learn how to refine your stitches, choose the right materials for your project, and transform a simple outline into a piece of art that truly resonates. You can do this, and it will be beautiful.
1. Master the Continuous Line with a Whipped Backstitch

To achieve that fluid, single-line effect in your portrait, first lay down a standard backstitch.
Next, without piercing the fabric, whip your thread around each backstitch, always from the same direction (e.g., top to bottom).
This technique smooths the jagged edges of a standard backstitch, creating a seamless, cord-like line that is essential for capturing the gentle curves of a facial profile.
Use three strands of six-strand floss for a line with presence that isn’t too bulky.
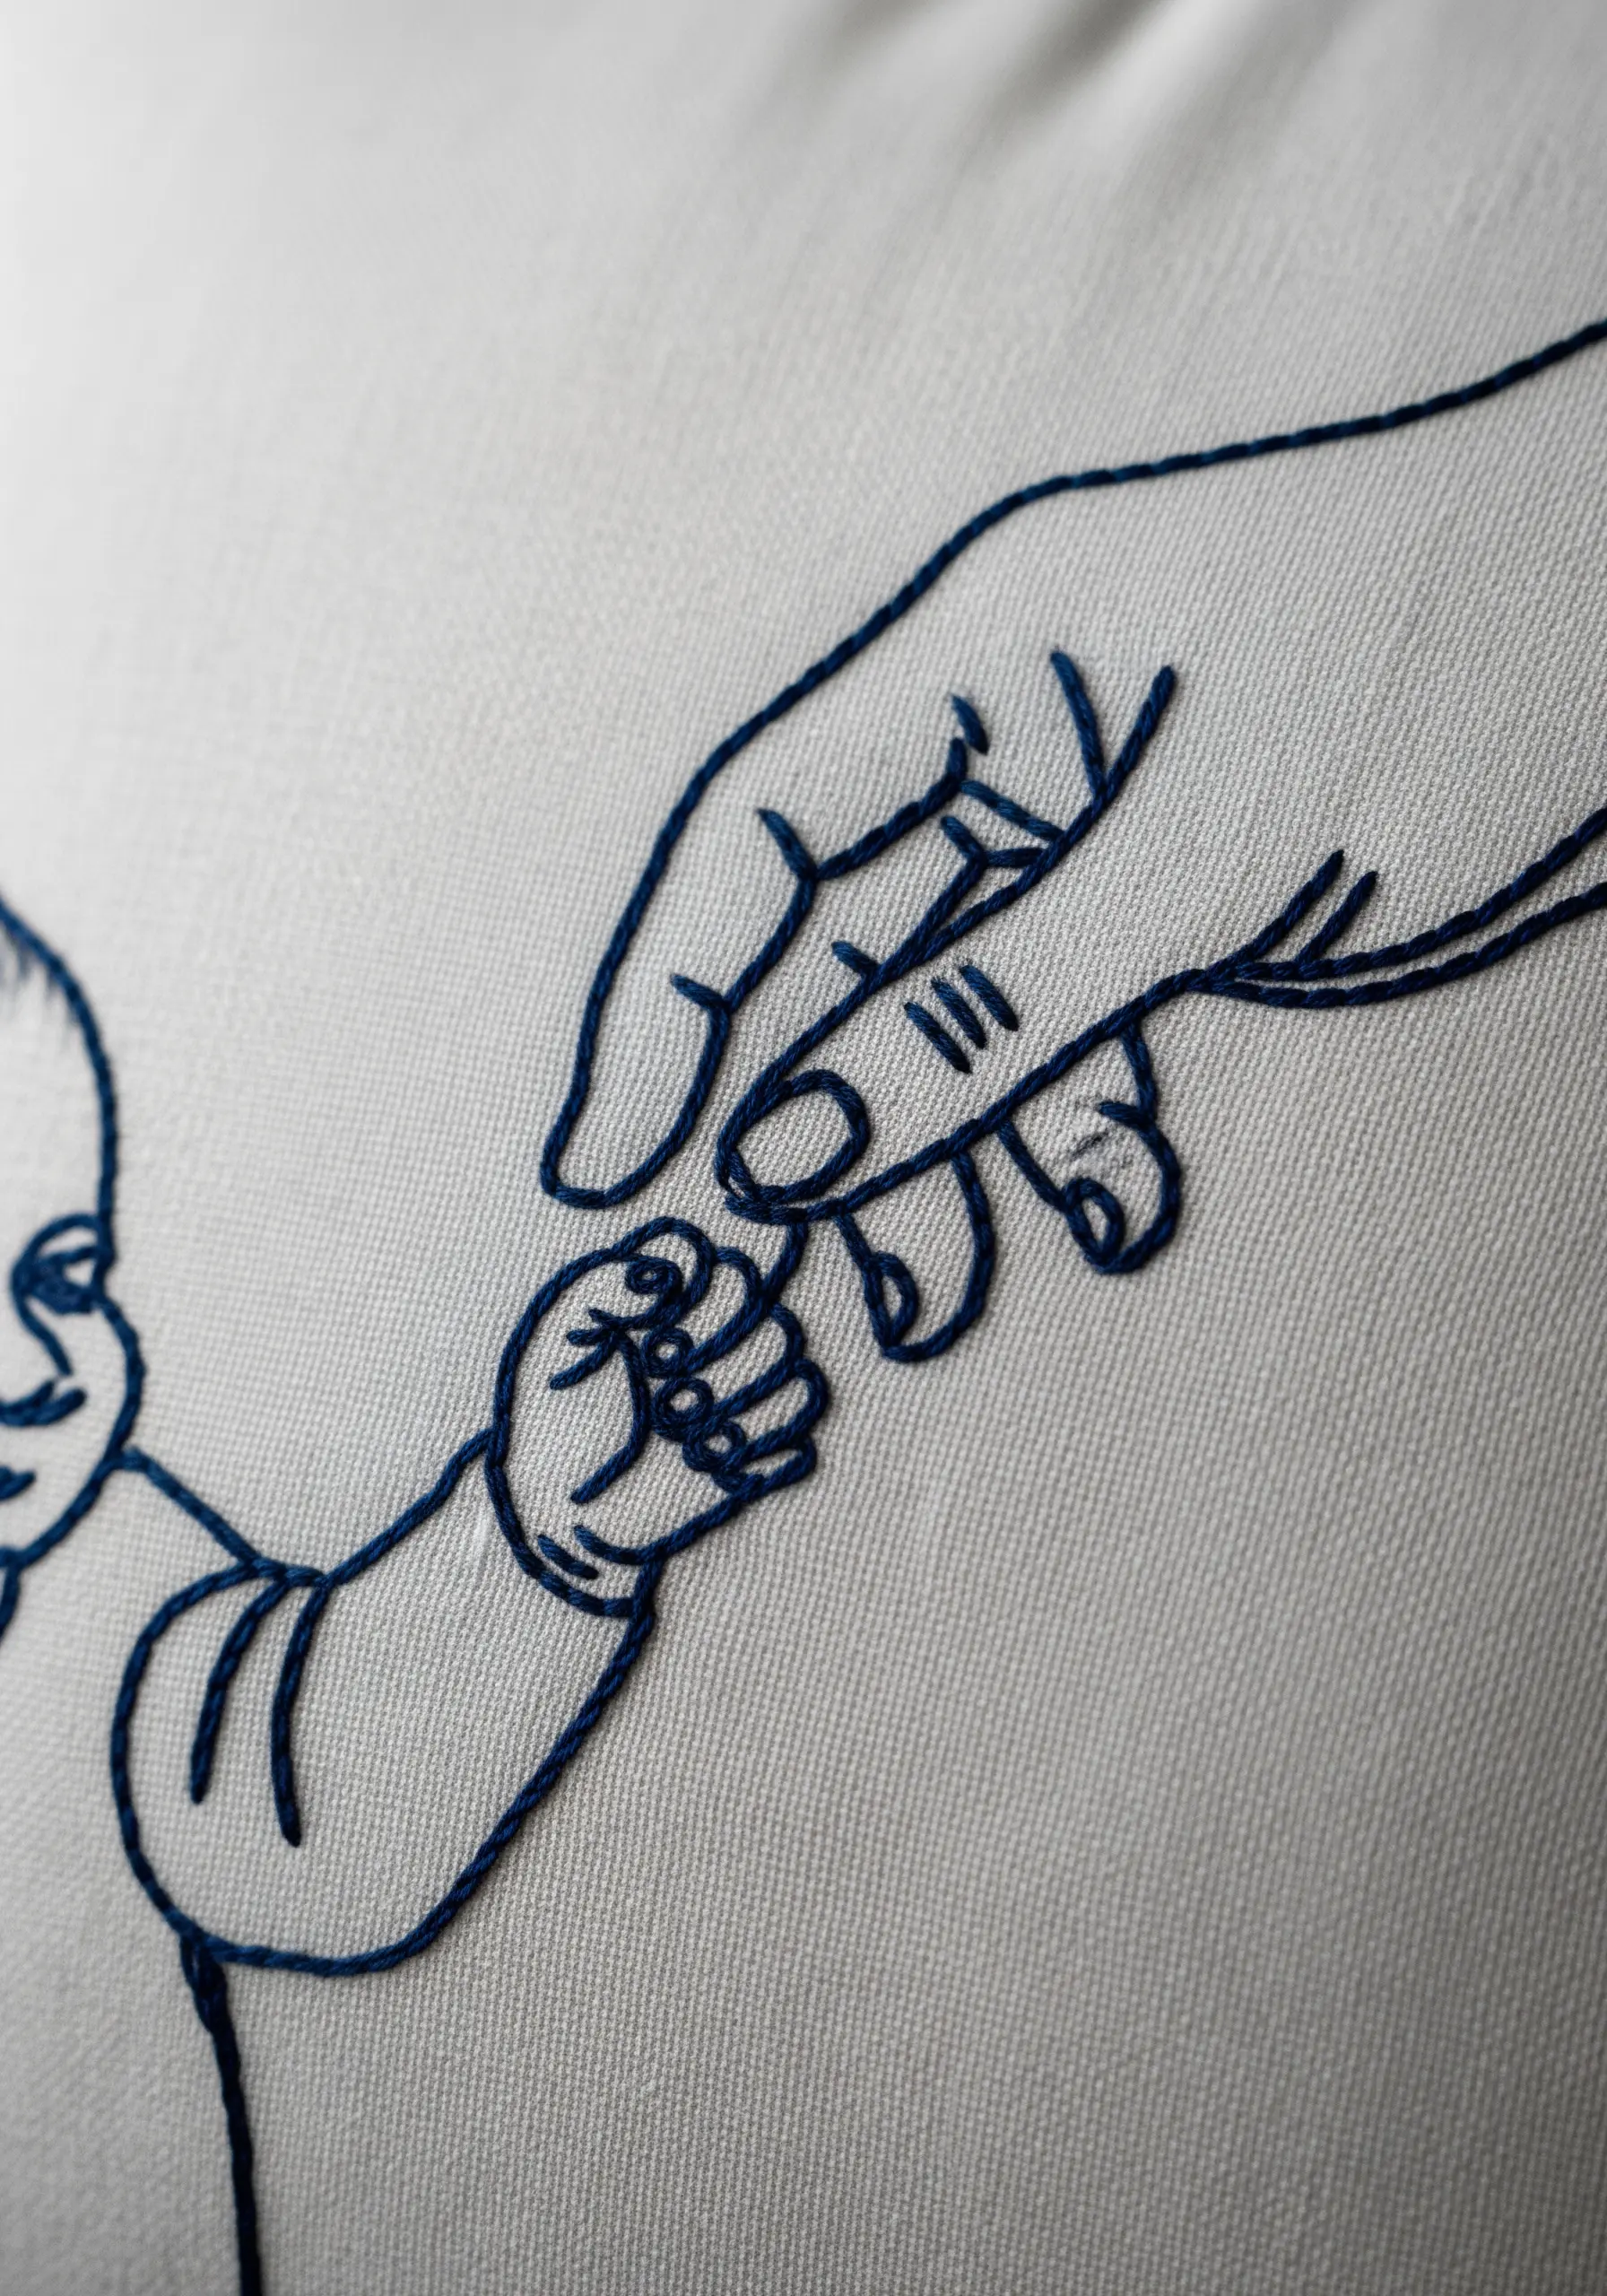
2. Create Depth with Varied Thread Weights

Don’t stitch the entire design with the same number of threads; instead, use thread weight to create a subtle hierarchy of detail.
Use three strands of floss for the primary outlines of the hands and feet to give them structure and weight.
For the delicate creases on the baby’s soles and knuckles, switch to a single strand of the same color.
This simple adjustment adds a layer of realism and sophistication, drawing the eye to the tiniest, most tender details.
3. Tame High-Pile Fabrics with a Stabilizer Topper
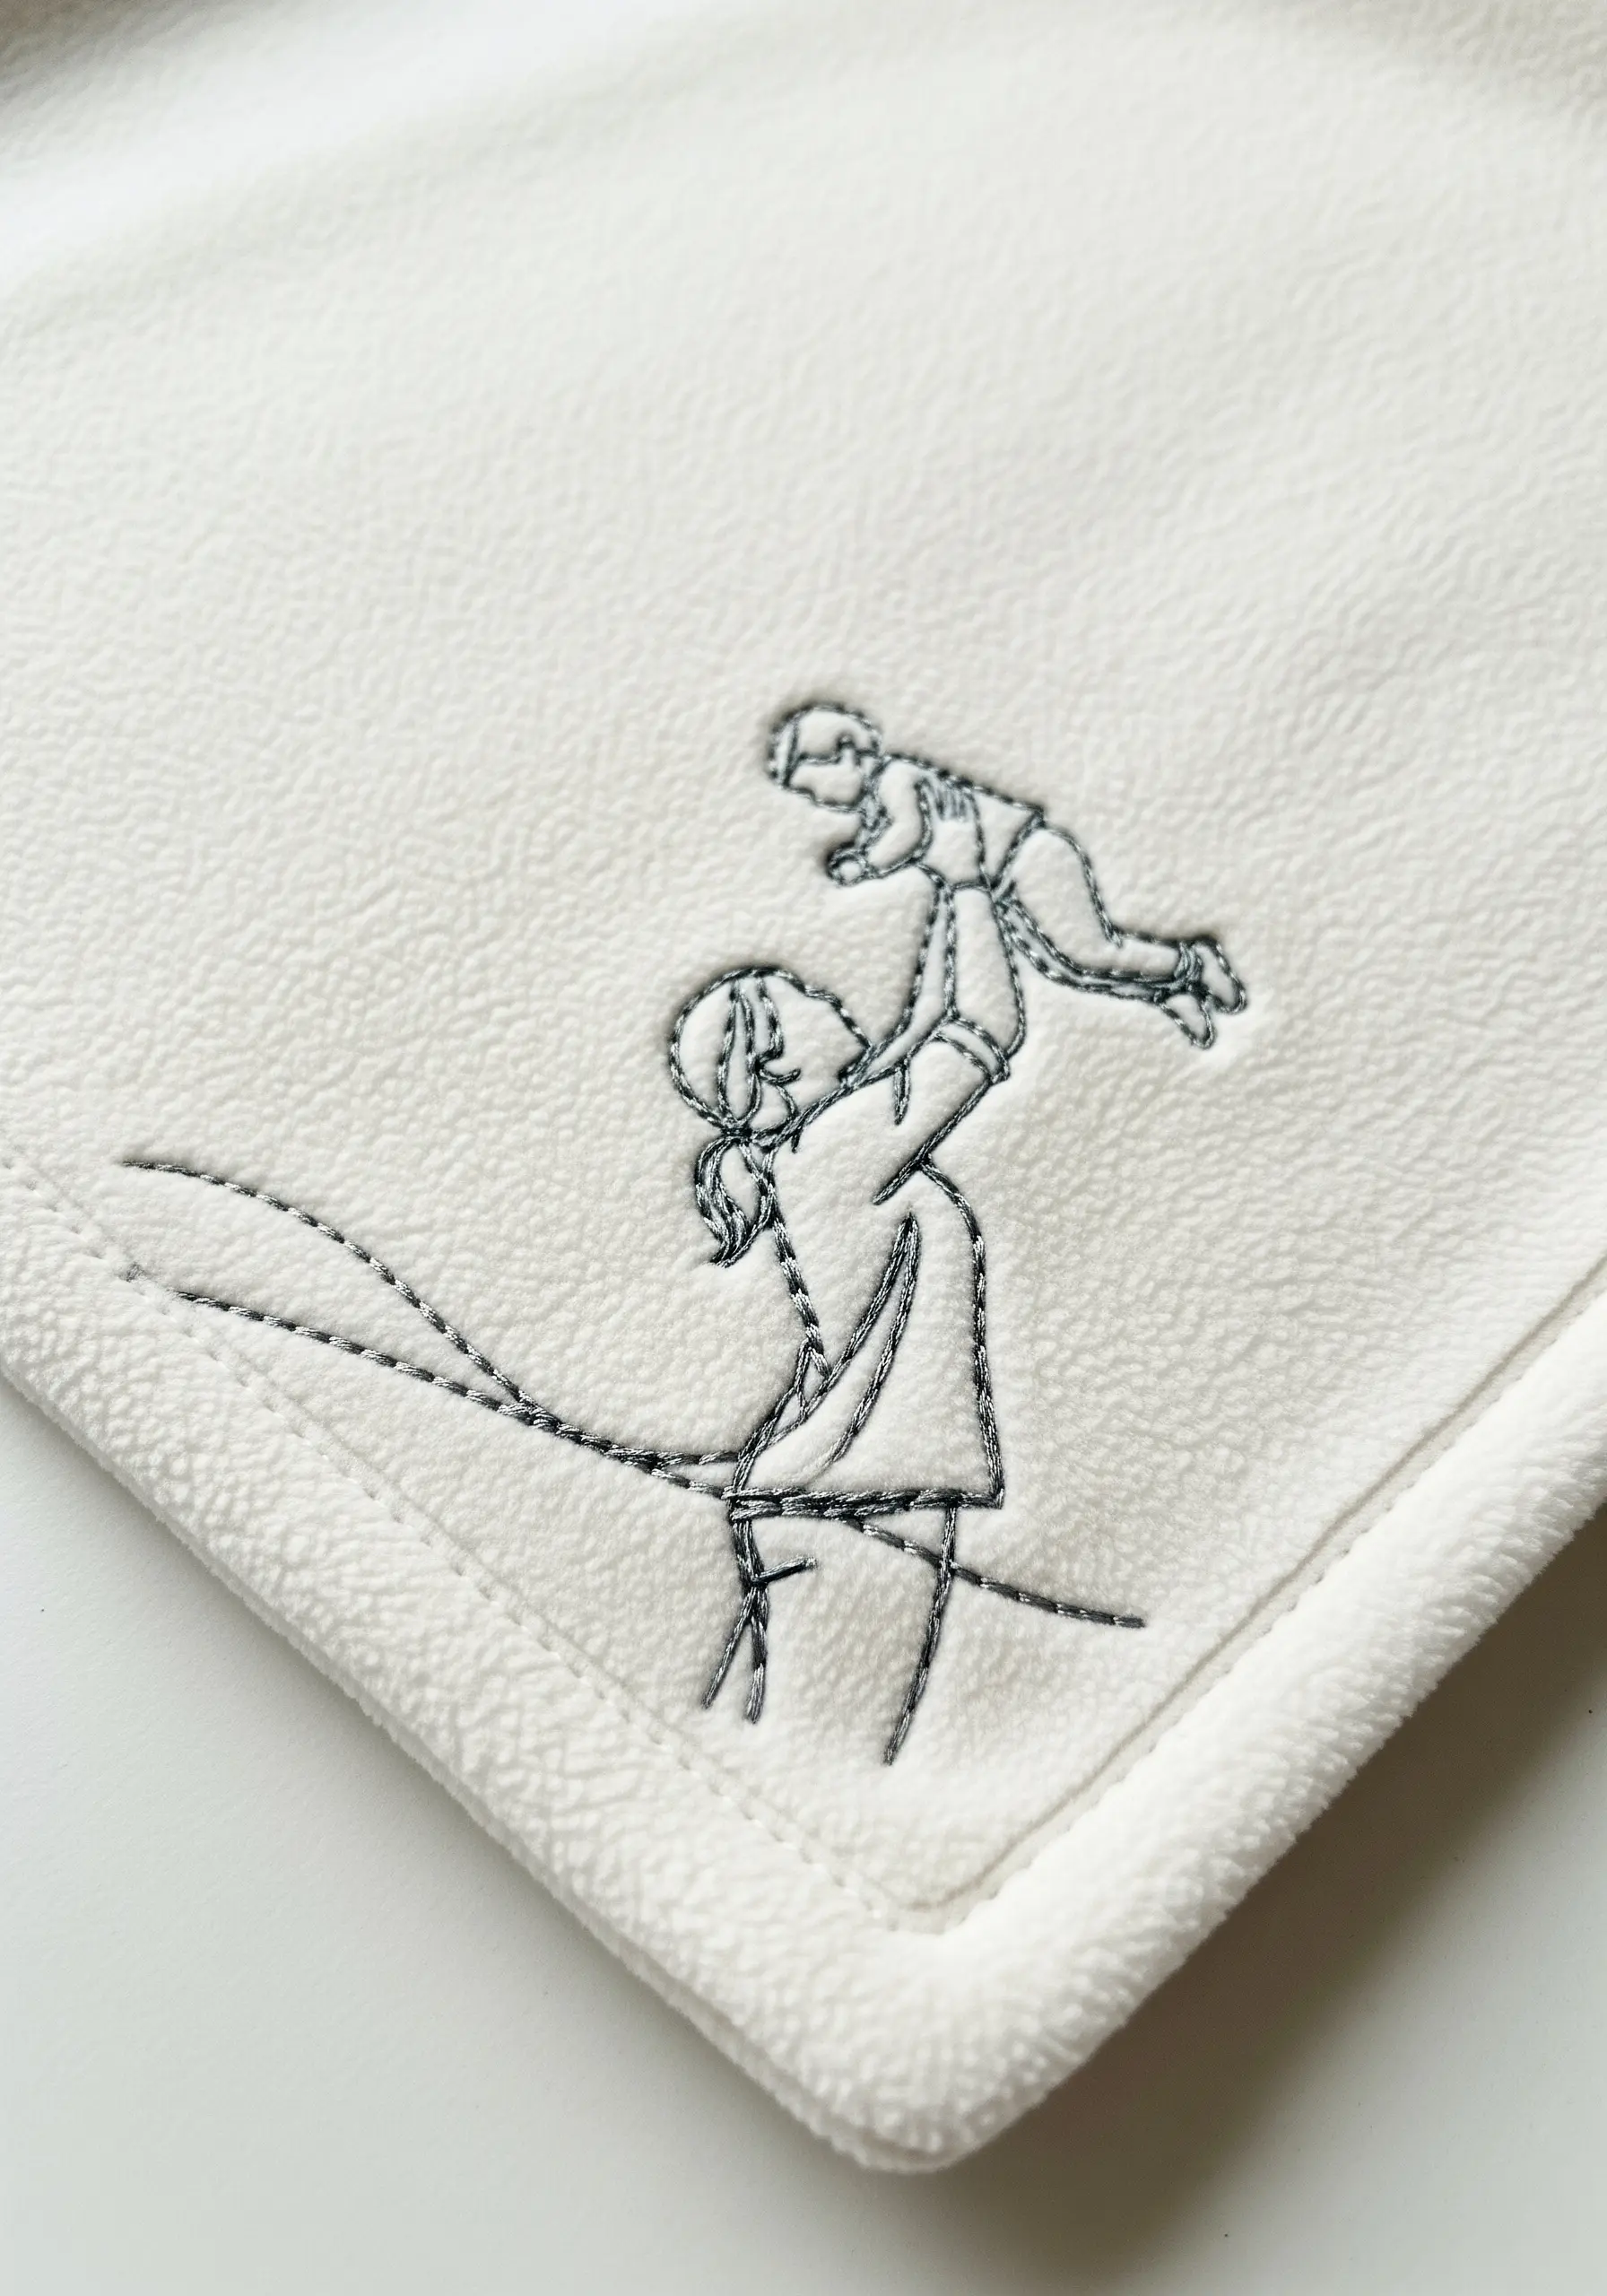
When embroidering on textured fabrics like fleece or terry cloth, your stitches can sink and disappear into the pile.
Prevent this by placing a layer of water-soluble stabilizer on top of the fabric before you hoop it.
Stitch your design through both the fabric and the stabilizer; the topper provides a smooth, firm surface for your needle, ensuring clean, defined lines.
Once finished, the stabilizer dissolves away with water, leaving only your crisp linework on the soft surface.
4. Use Split Stitch for Textured Hair Fill
Instead of a dense satin stitch, fill in areas like hair with rows of simple split stitch worked closely together.
This creates the illusion of texture and flow without adding bulk, maintaining the delicate feel of the line art.
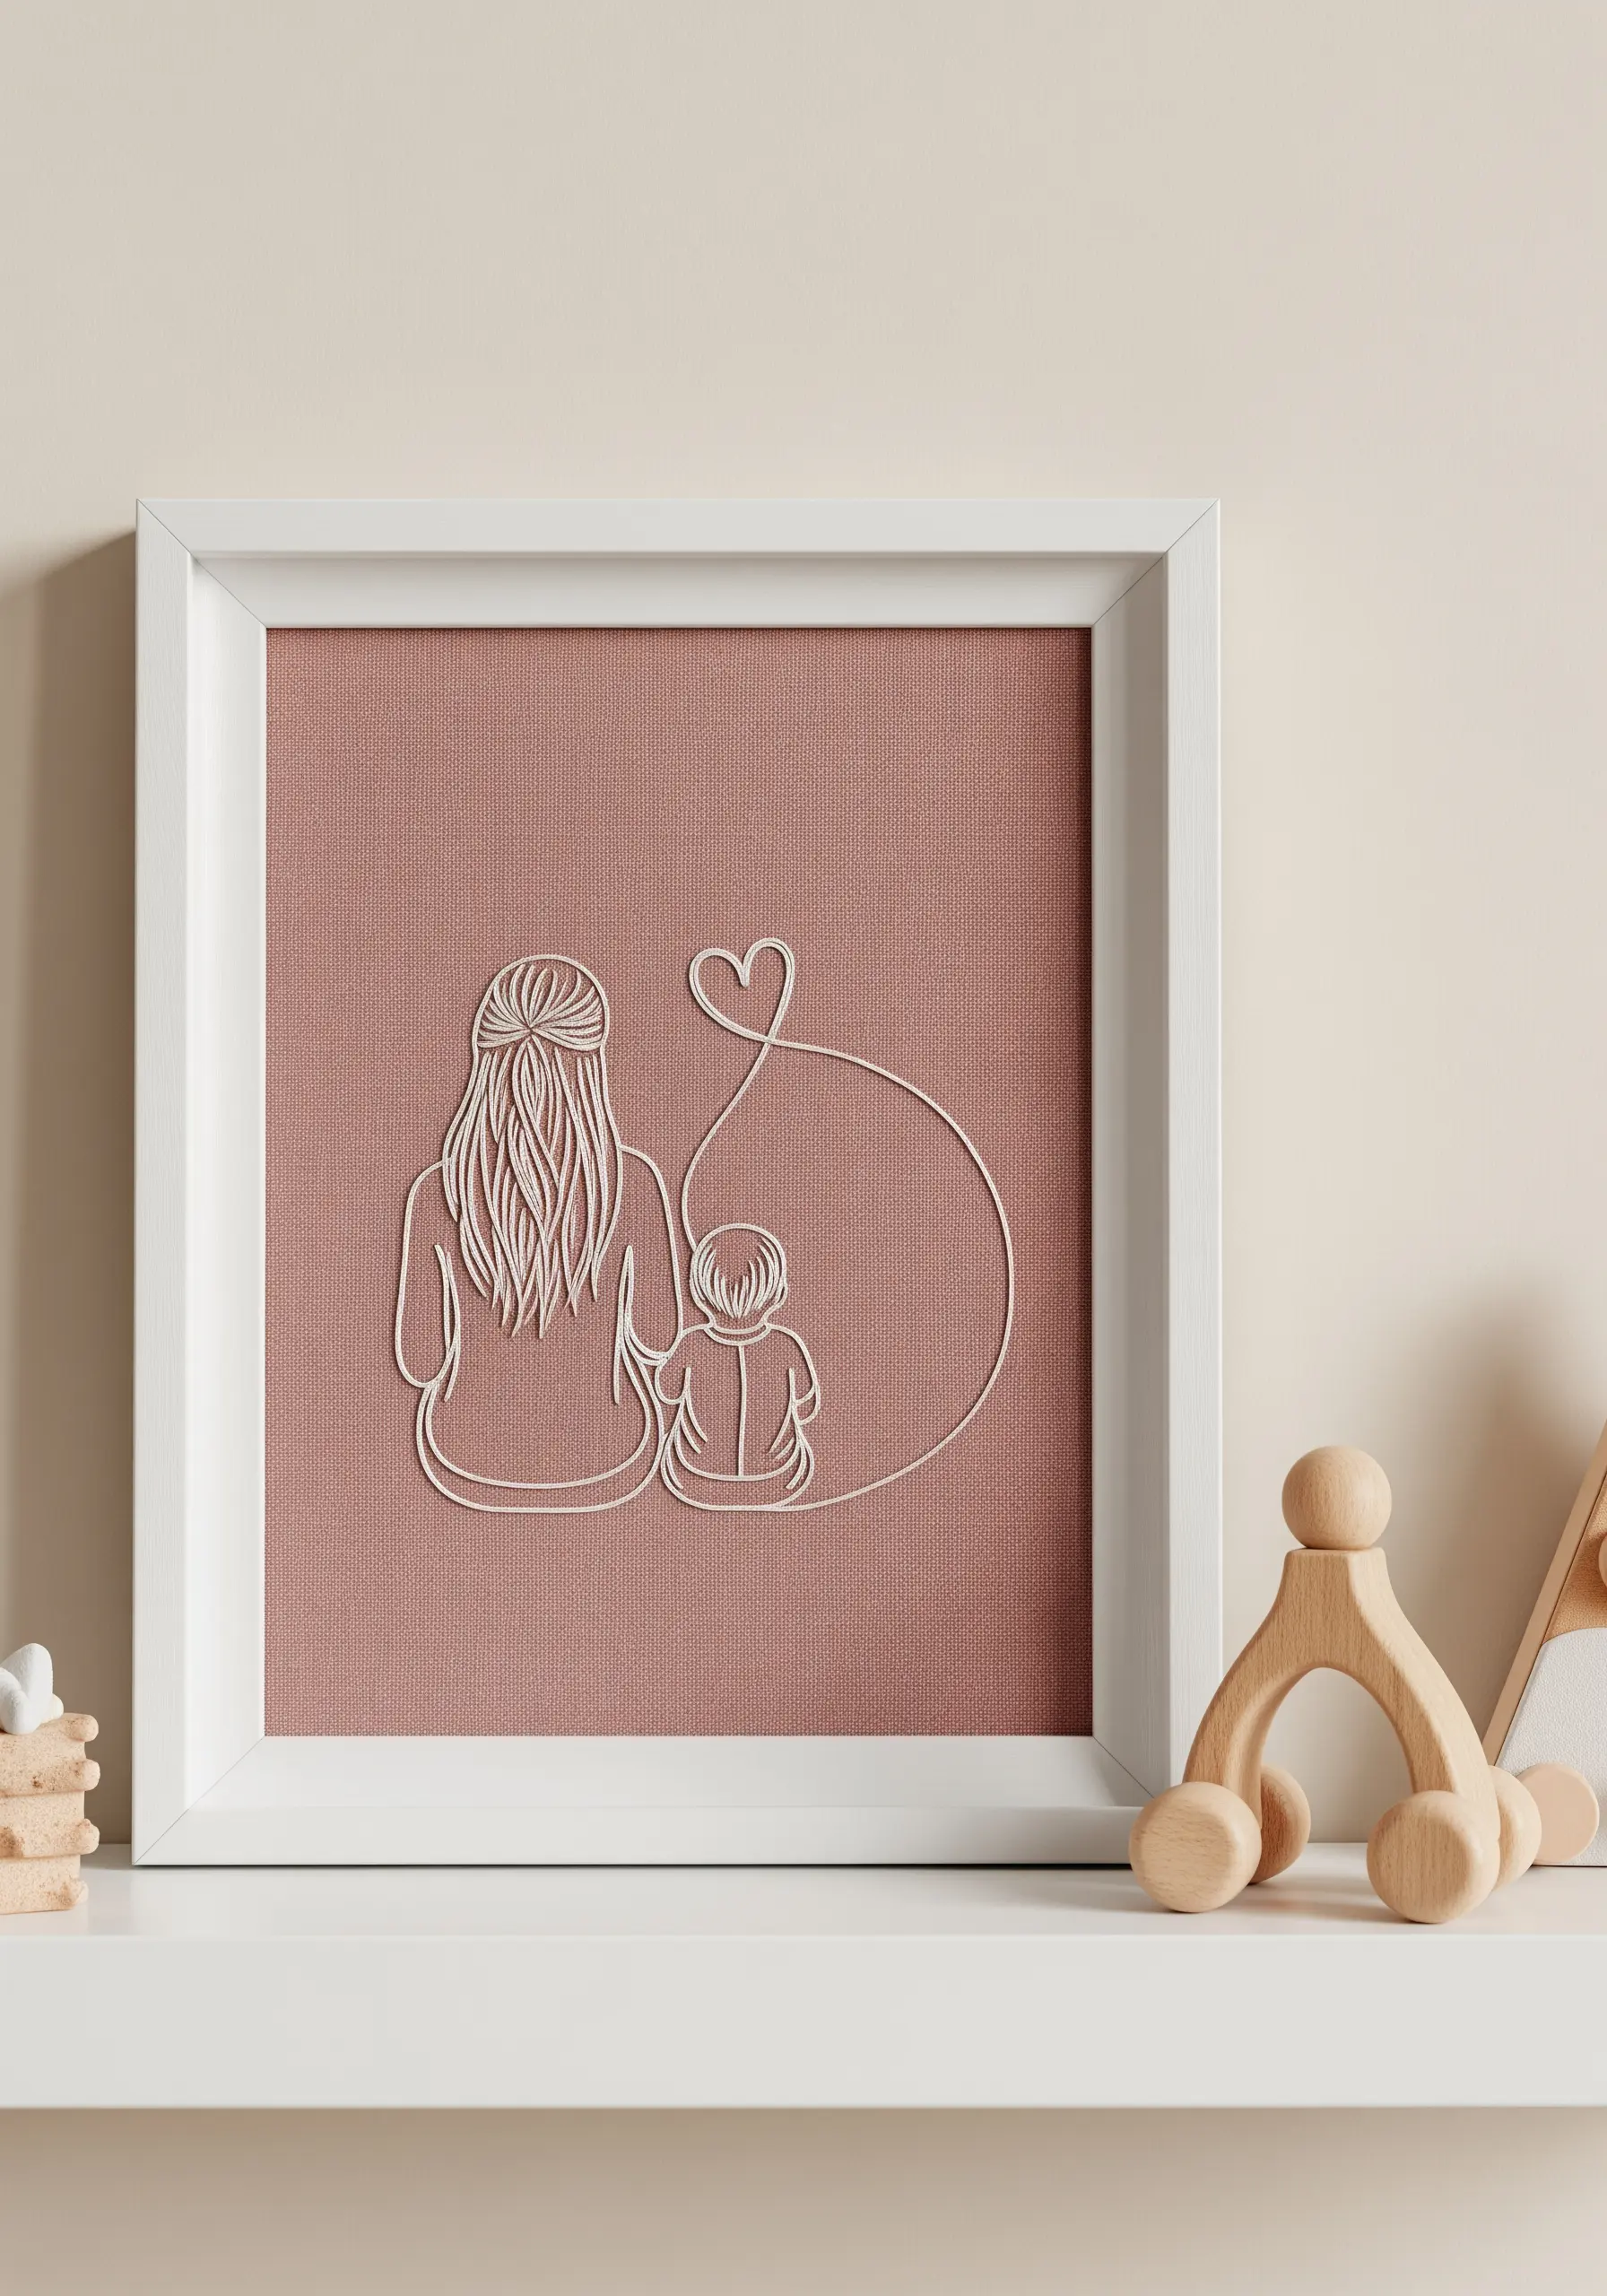
For the single thread connecting the figures to the heart, use only one or two strands of floss to create a fragile, symbolic line that contrasts with the figures.
The high contrast between the white thread and dusty rose fabric makes every stitch intentional and impactful.
5. Achieve Precision with the Right Needle Size
For designs with intricate details like hands and facial features, the choice of needle is as important as the stitch itself.
Switch to a finer needle, such as an embroidery needle in size 9 or 10, especially when working with only one or two strands of floss.
A smaller needle creates smaller holes in the fabric and allows for tighter curves and sharper points, preventing fabric distortion and keeping your linework exceptionally clean.
6. Introduce Soft Color with a Variegated Thread Fill
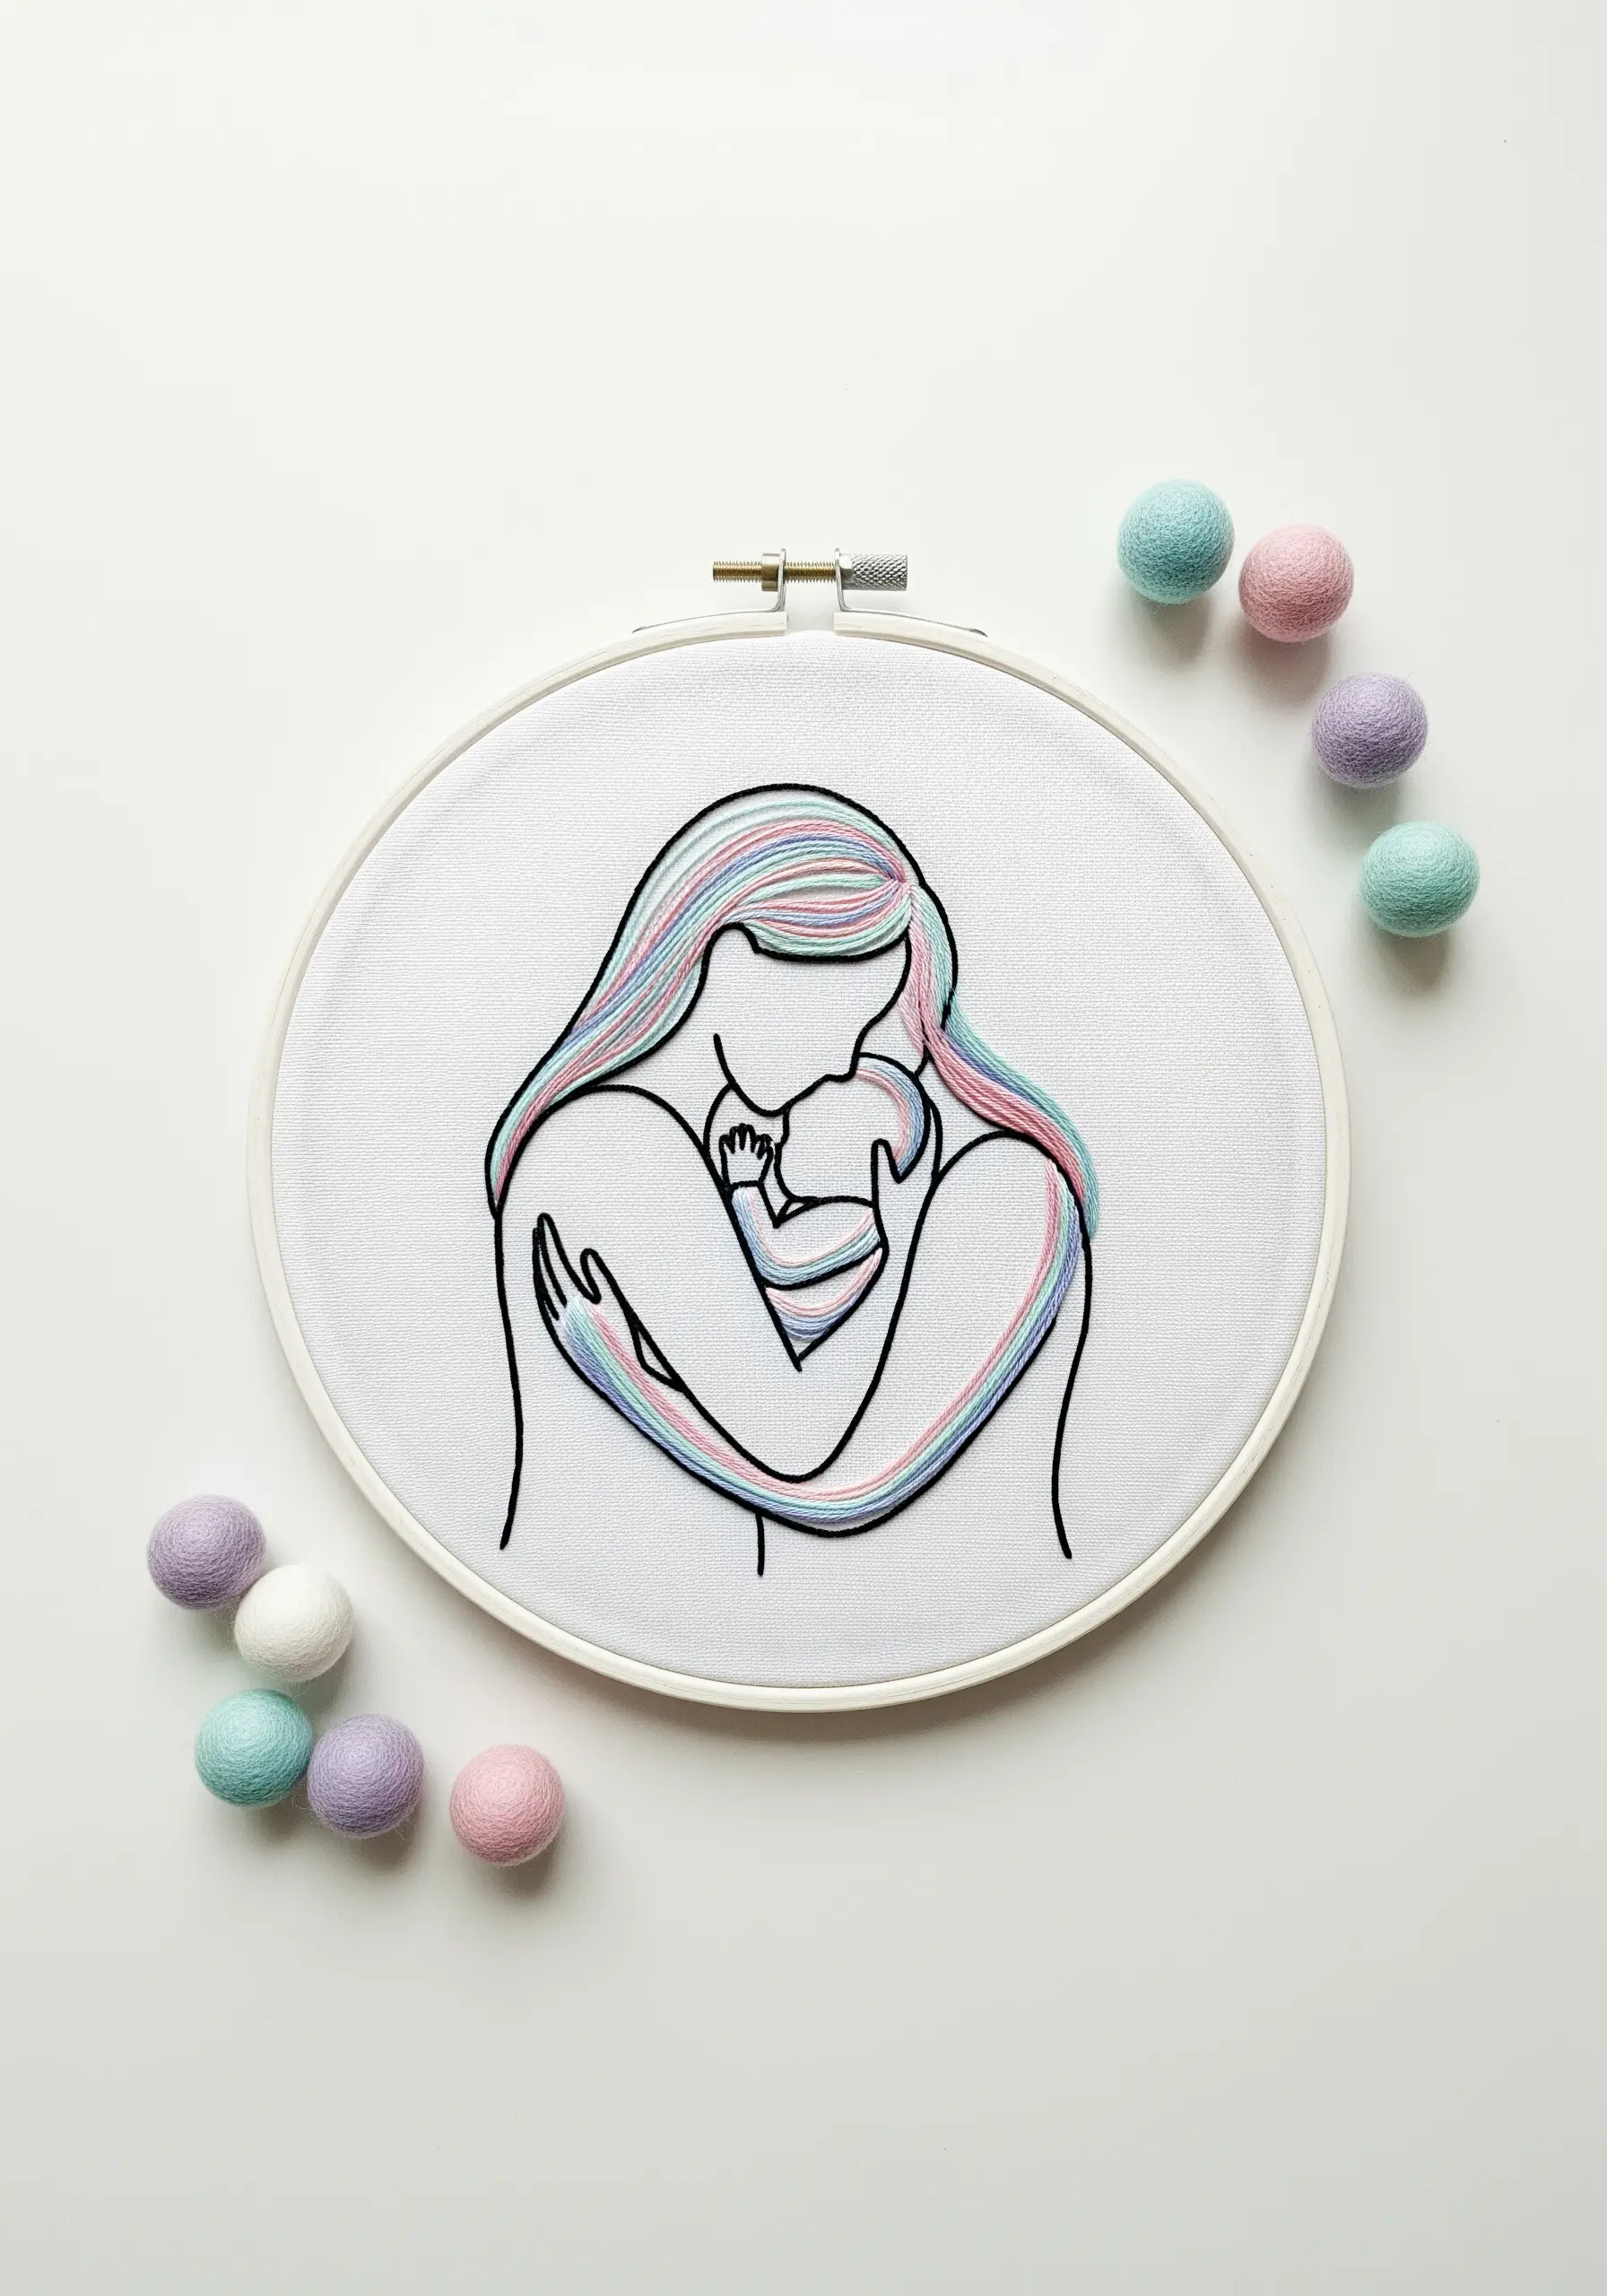
To add color without overpowering the minimalist aesthetic, fill the shapes with a long-and-short stitch using a single variegated or ombré thread.
This method allows colors to blend seamlessly, creating a soft, watercolor-like effect within the bold outlines.
Alternatively, you can manually blend several solid colors for a more controlled gradient, a technique common in contemporary rainbow blend stitches.
Maintain a consistent stitch direction that follows the contours of the body to enhance the sense of form and movement.
7. Tell a Story with a Cohesive Triptych Display
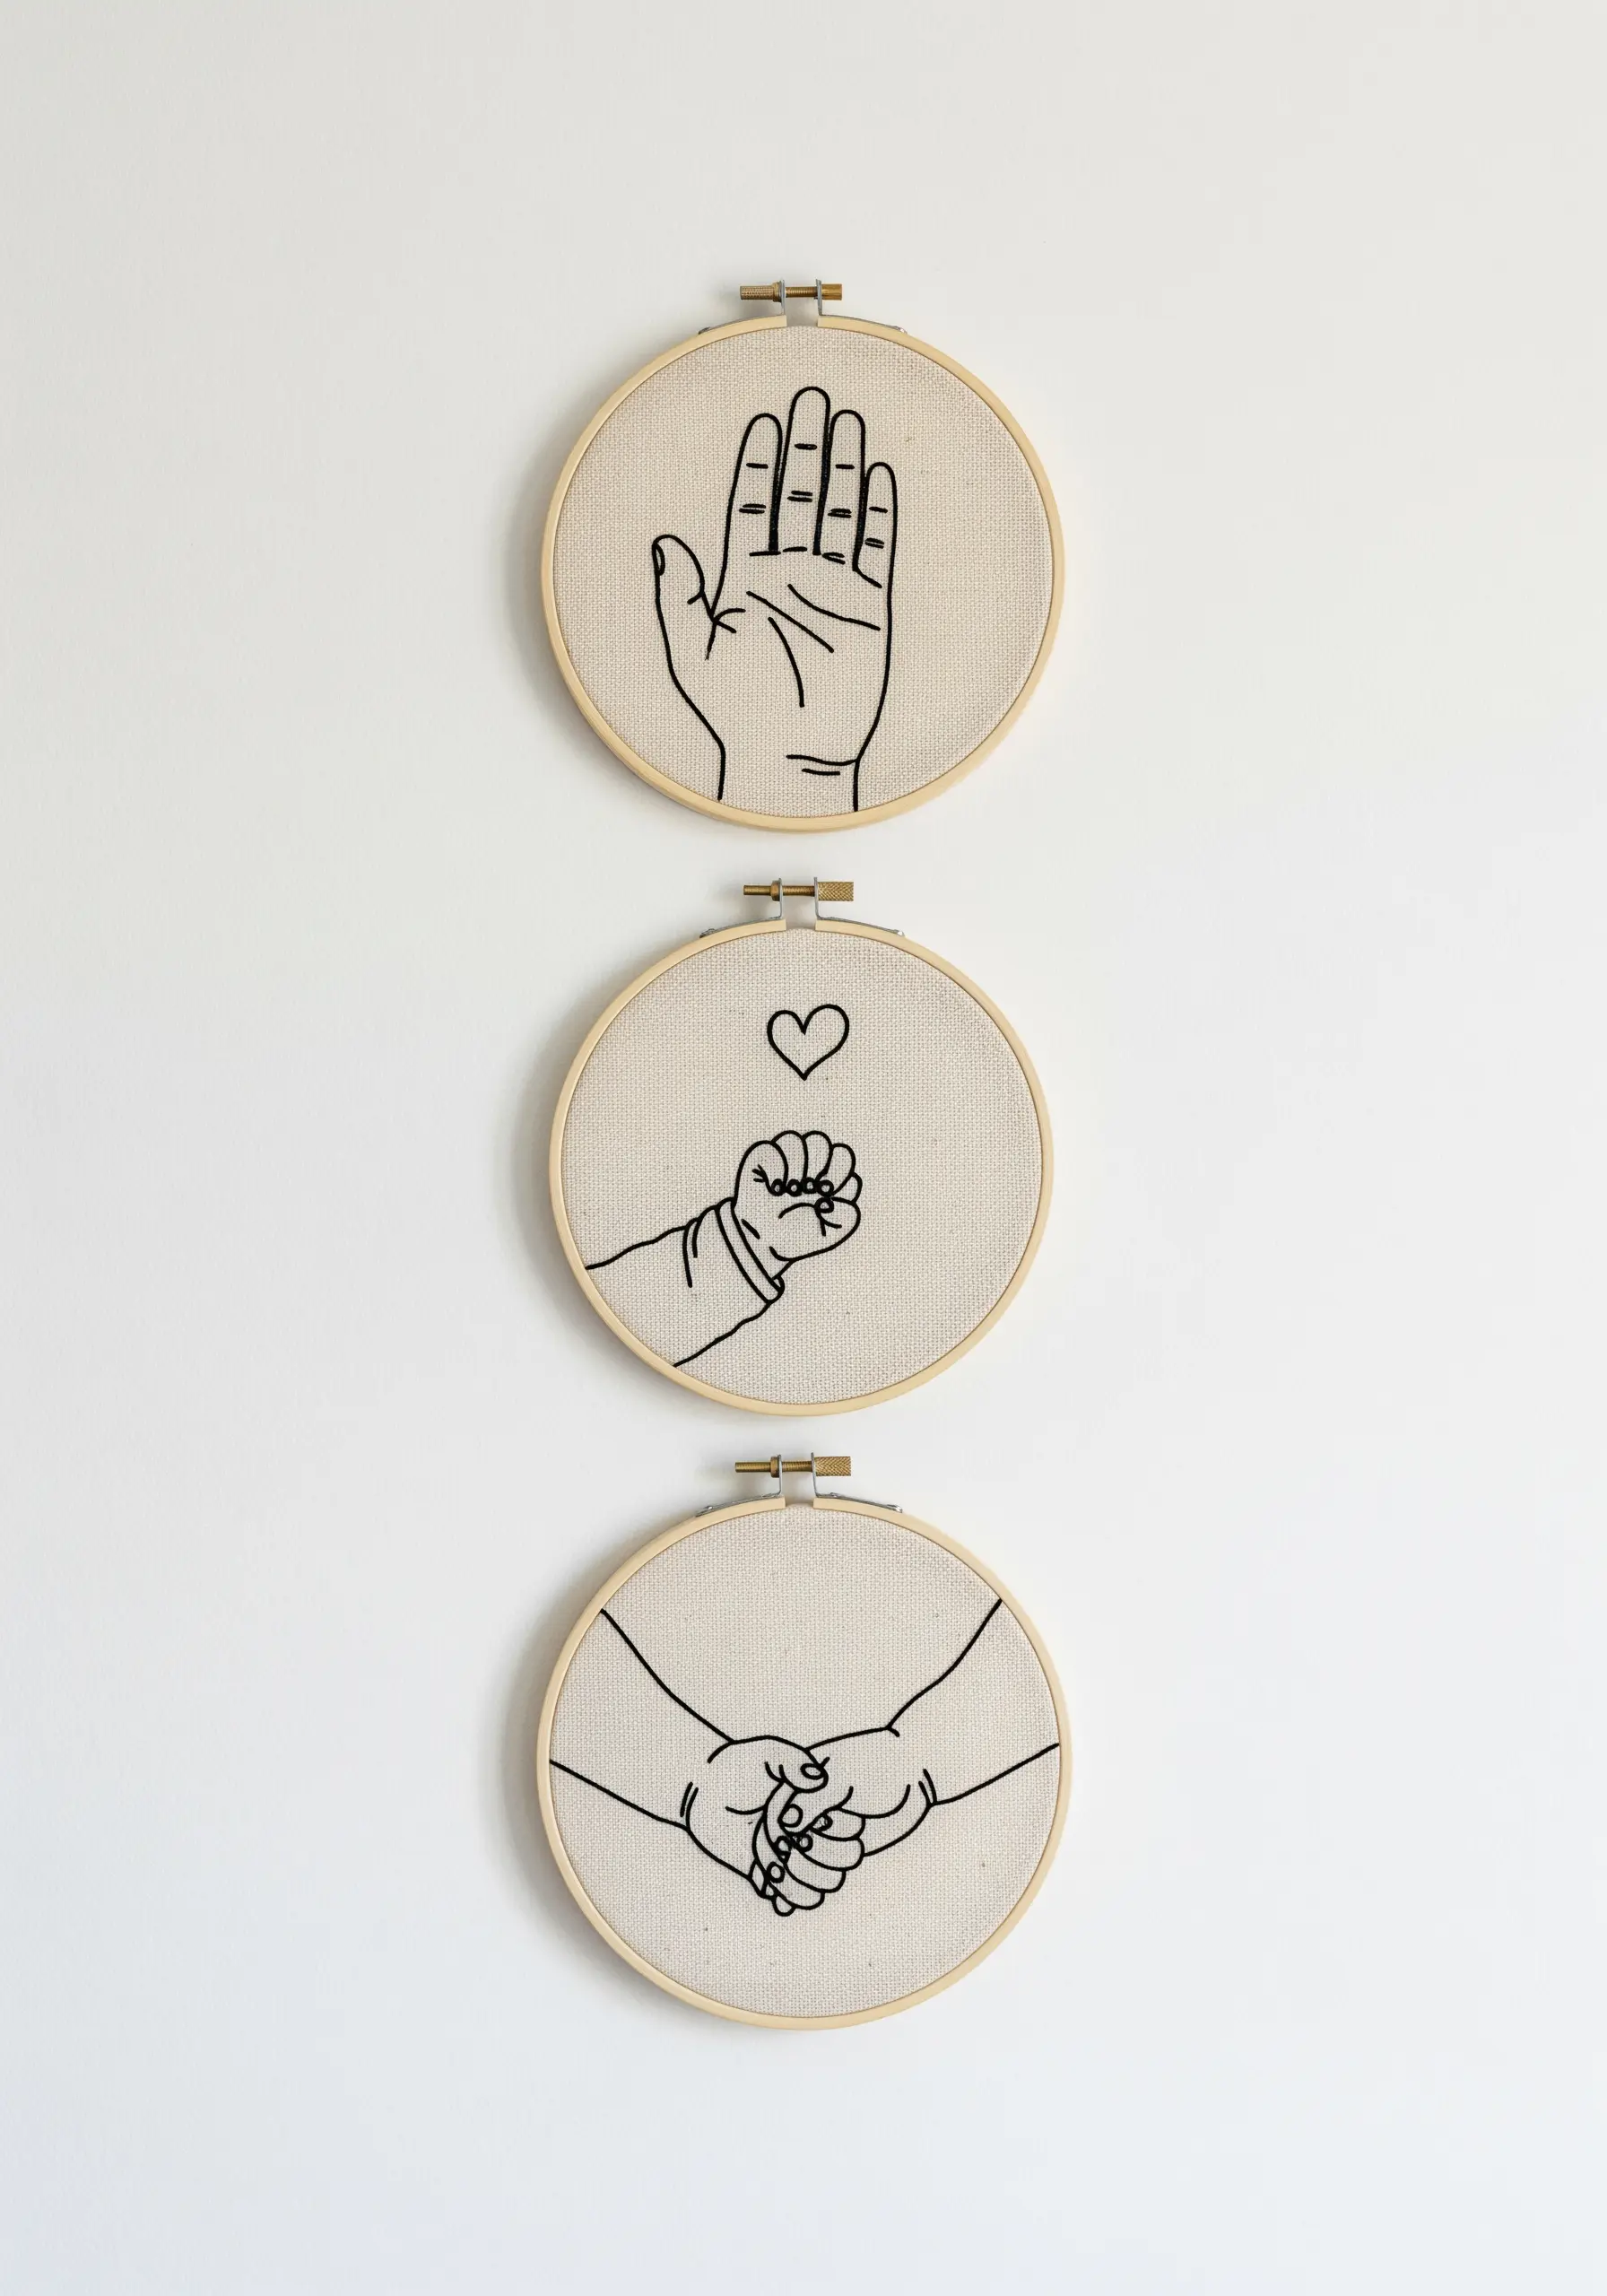
Transform individual motifs into a single, compelling narrative by displaying them as a triptych.
To ensure the collection feels intentional, maintain absolute consistency across all three pieces: use the same fabric, thread color, hoop size, and line weight.
When hanging, the negative space between the hoops is part of the art. Arrange them vertically to suggest a progression or timeline, connecting each moment into a larger story.
8. Add Luxe Detail with Metallic Thread on Velvet

Stitching on velvet adds instant opulence, but the fabric requires careful handling. Always use a stabilizer on the back to prevent shifting.
Metallic thread can be prone to tangling and fraying. To combat this, work with shorter lengths of thread (no more than 12 inches) and use a thread conditioner like beeswax.
A simple stem stitch will create a raised, defined line that sits beautifully atop the velvet’s plush pile, catching the light and enhancing the metallic sheen.
9. Stabilize Stretch Knits for Pucker-Free Results
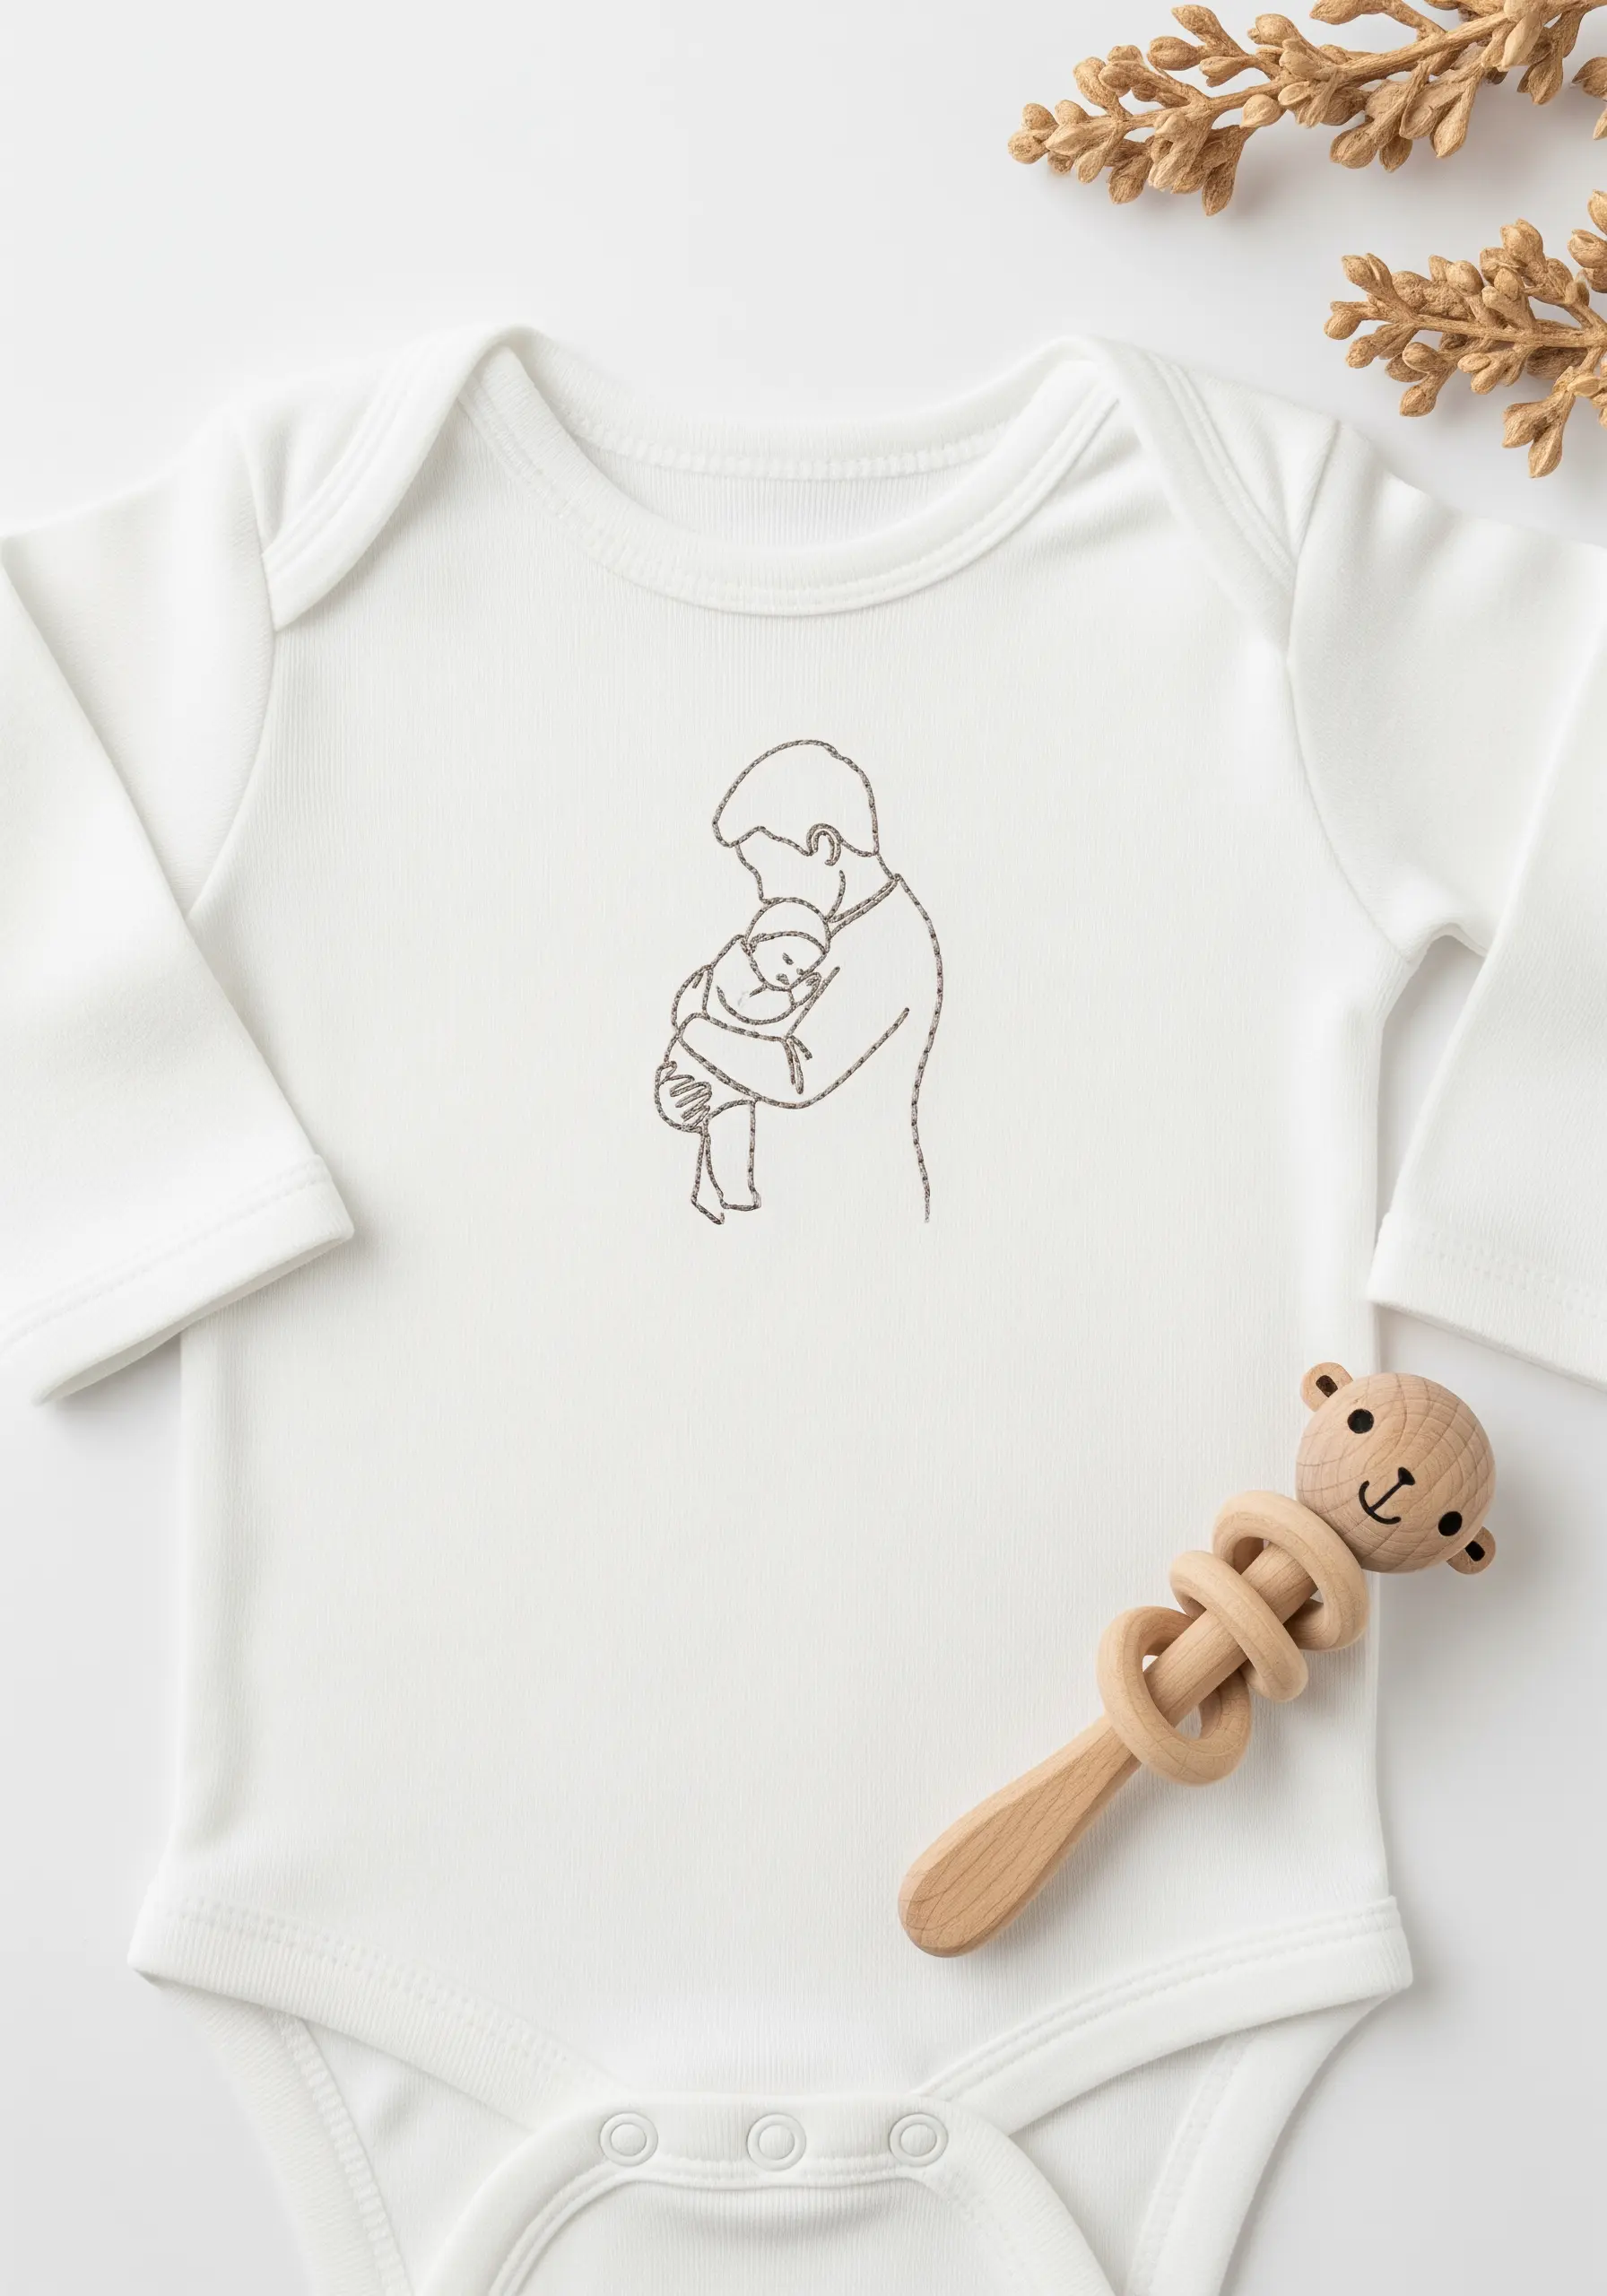
Embroidering on stretchy baby clothes like onesies can lead to puckered fabric and distorted designs.
Before you begin stitching, iron a cut-away stabilizer onto the back of the fabric. This provides a rigid foundation that prevents the knit from stretching as you work.
Use a ballpoint needle, which is designed to pass between the knit fibers rather than piercing them, further preventing snags and runs in the delicate garment.
10. Let Your Fabric Color Set the Mood

In minimalist line art, the background fabric is not just a canvas—it’s an active component of the composition.
Choose a fabric color that evokes the feeling you want to convey. Here, a warm ochre or mustard canvas creates a sense of intimacy and coziness for the reading scene.
A cool blue might suggest tranquility, while a soft grey offers modern neutrality. Let the fabric do the emotional work so your linework can remain clean and simple.
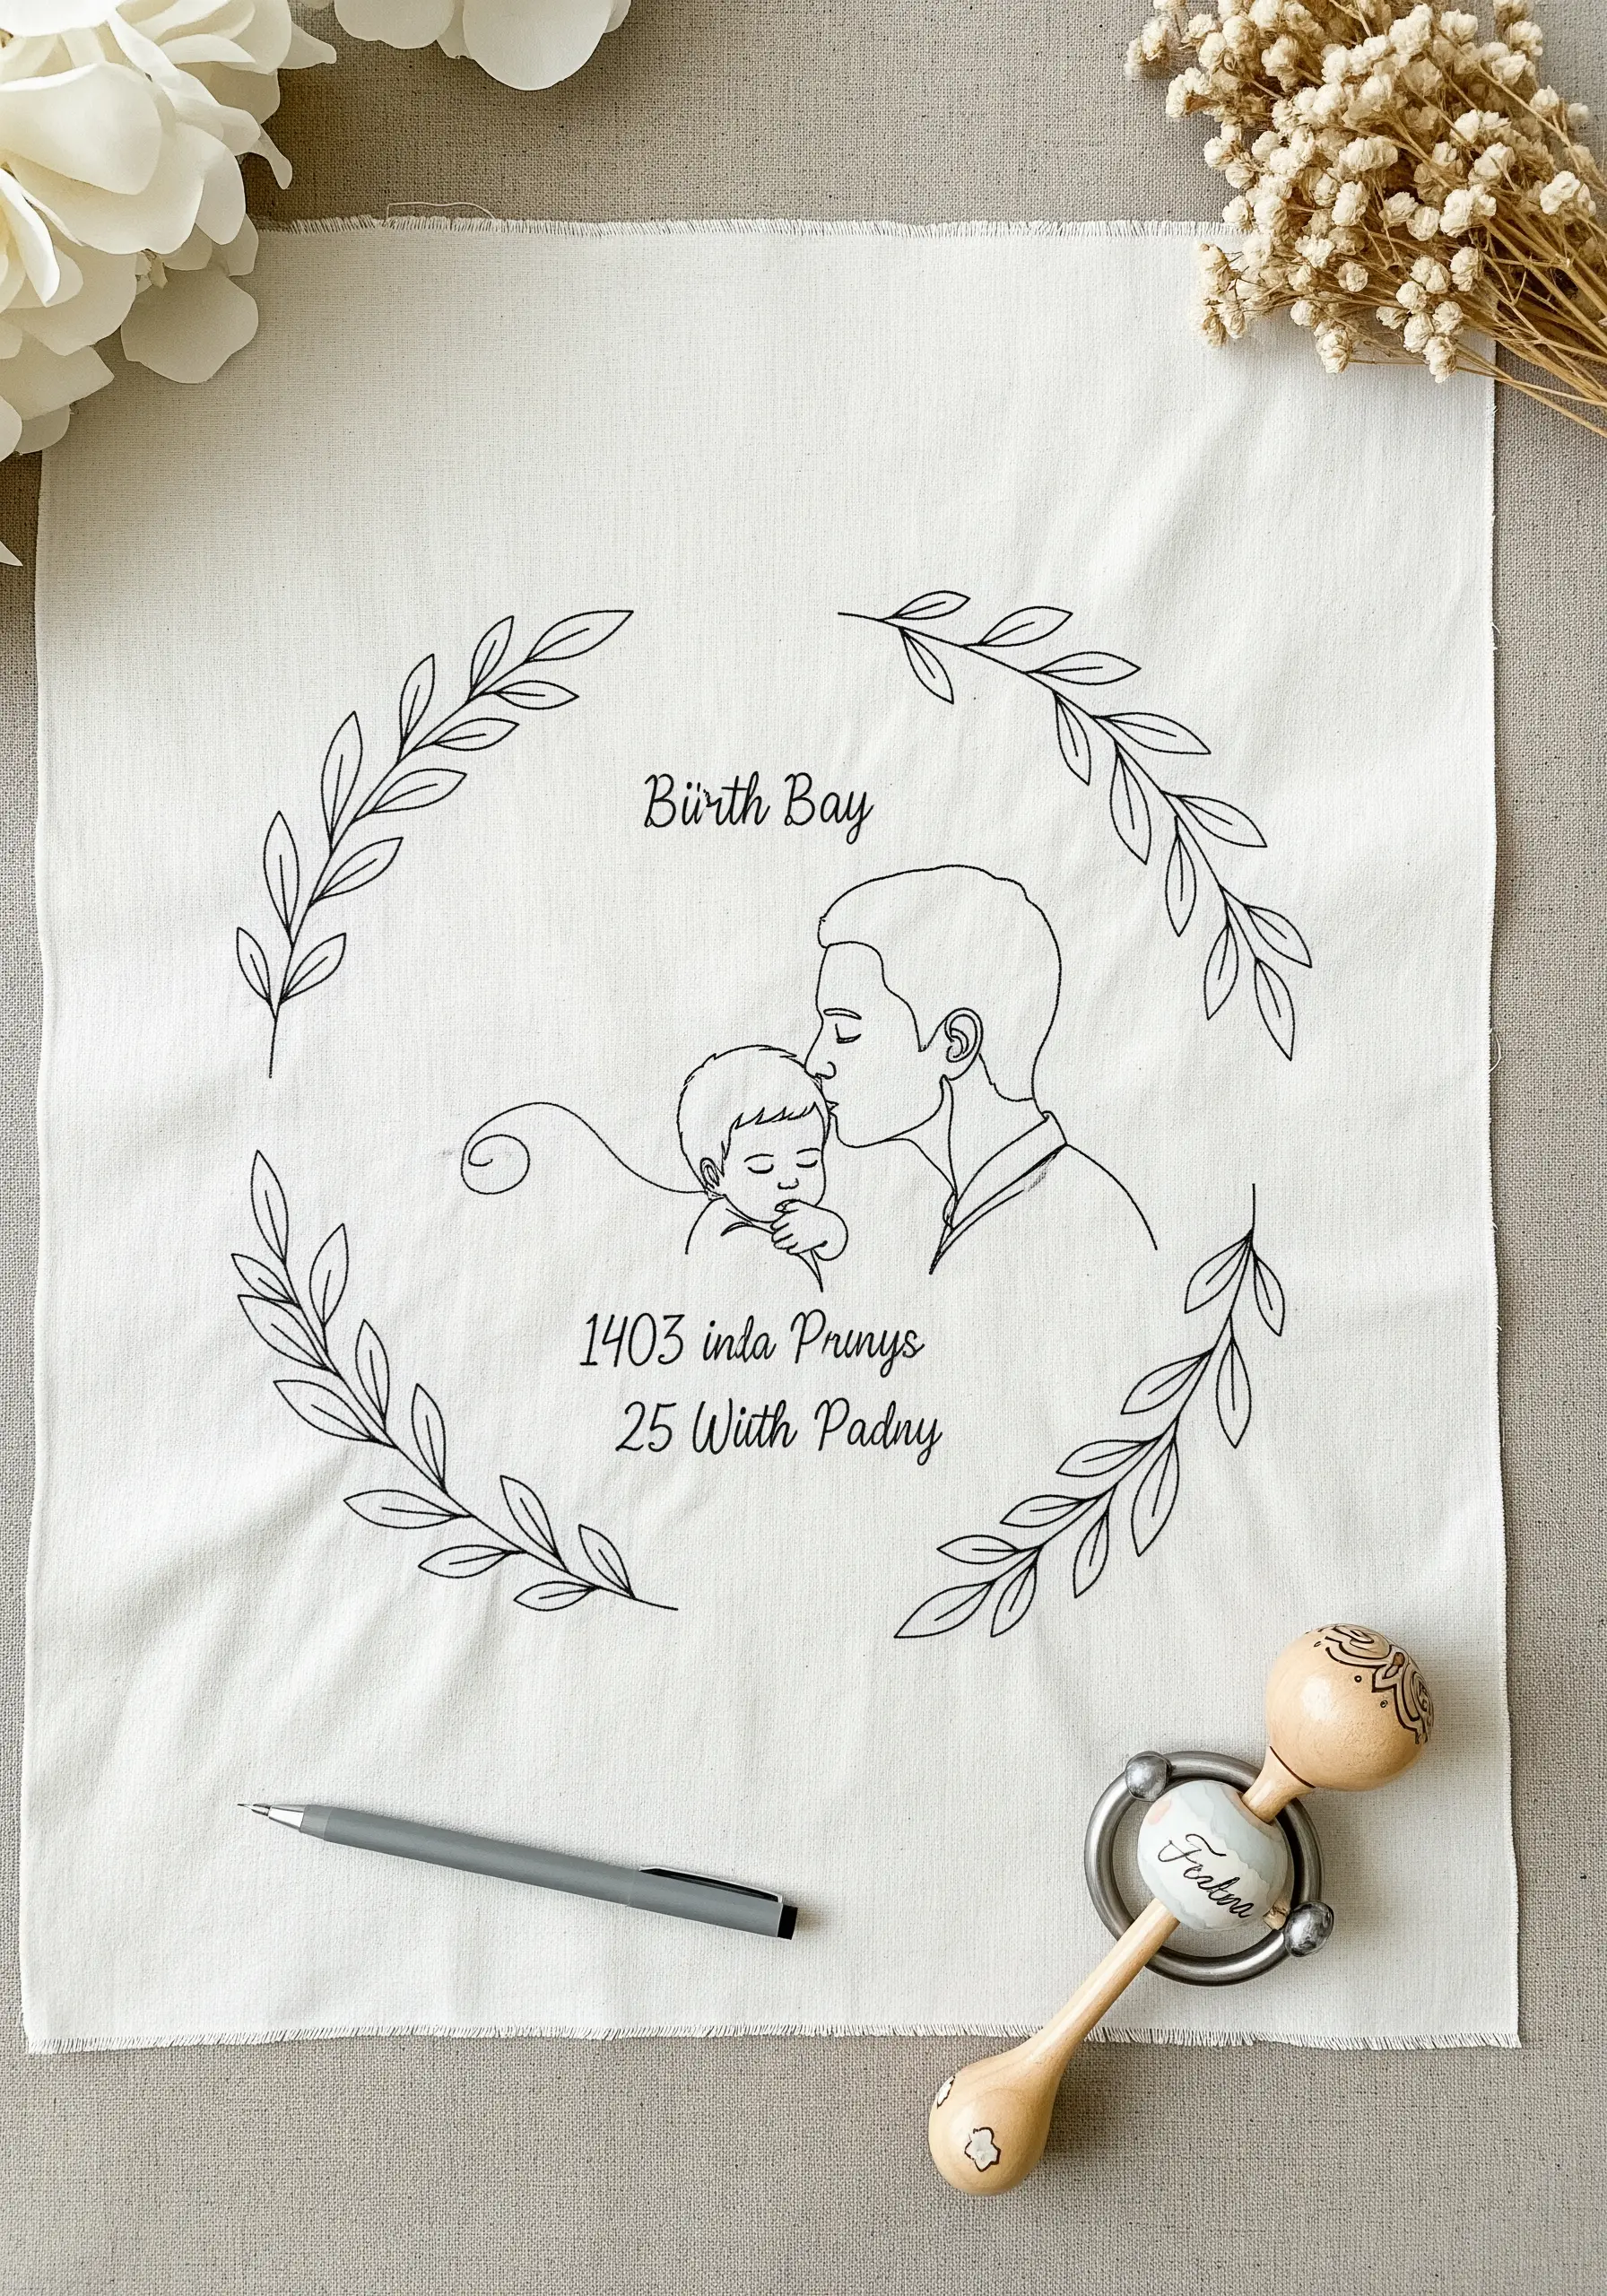
11. Frame Your Portrait with a Botanical Wreath
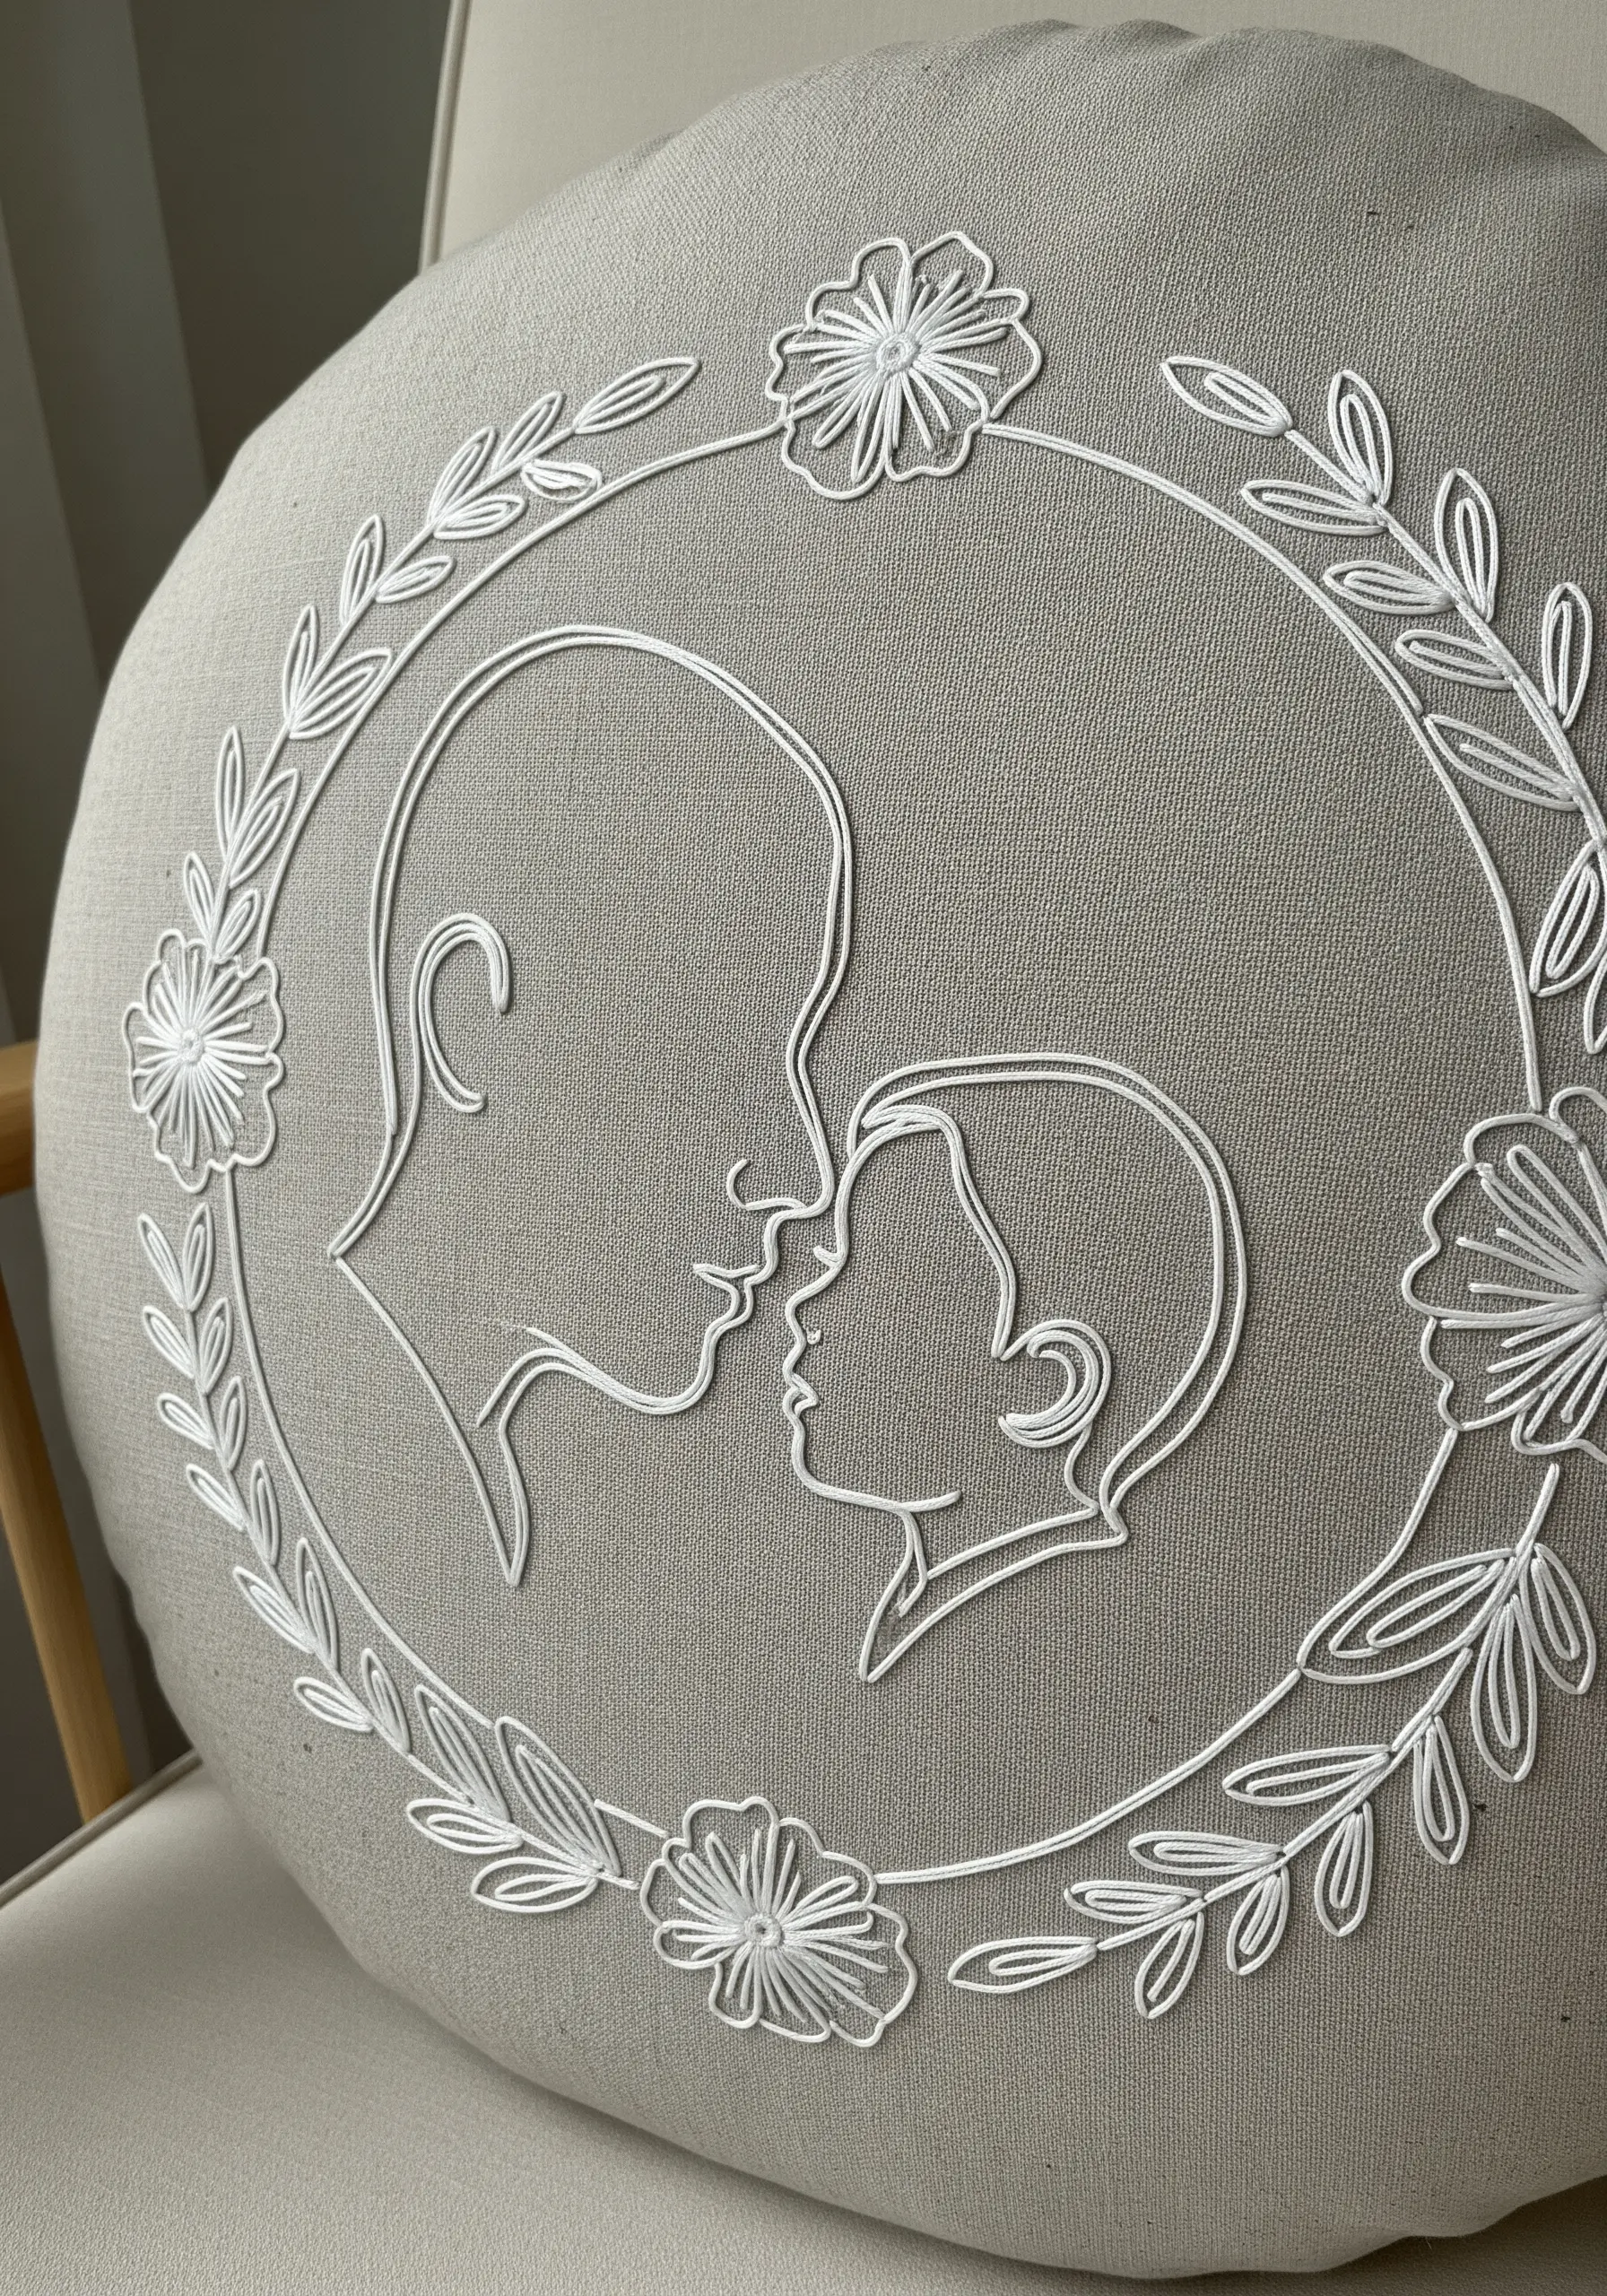
Elevate a simple portrait by enclosing it within a delicate botanical frame, stitched directly onto the fabric.
Use a stem stitch for the twisting vines and detached chain stitches (lazy daisies) for simple leaves and petals. This creates a pleasing textural contrast to the smooth whipped backstitch of the central portrait.
This technique draws inspiration from classic botanical line art embroidery patterns, turning a simple motif into a complete, decorative piece perfect for a nursery pillow.
12. Create a Celestial Scene with French Knots
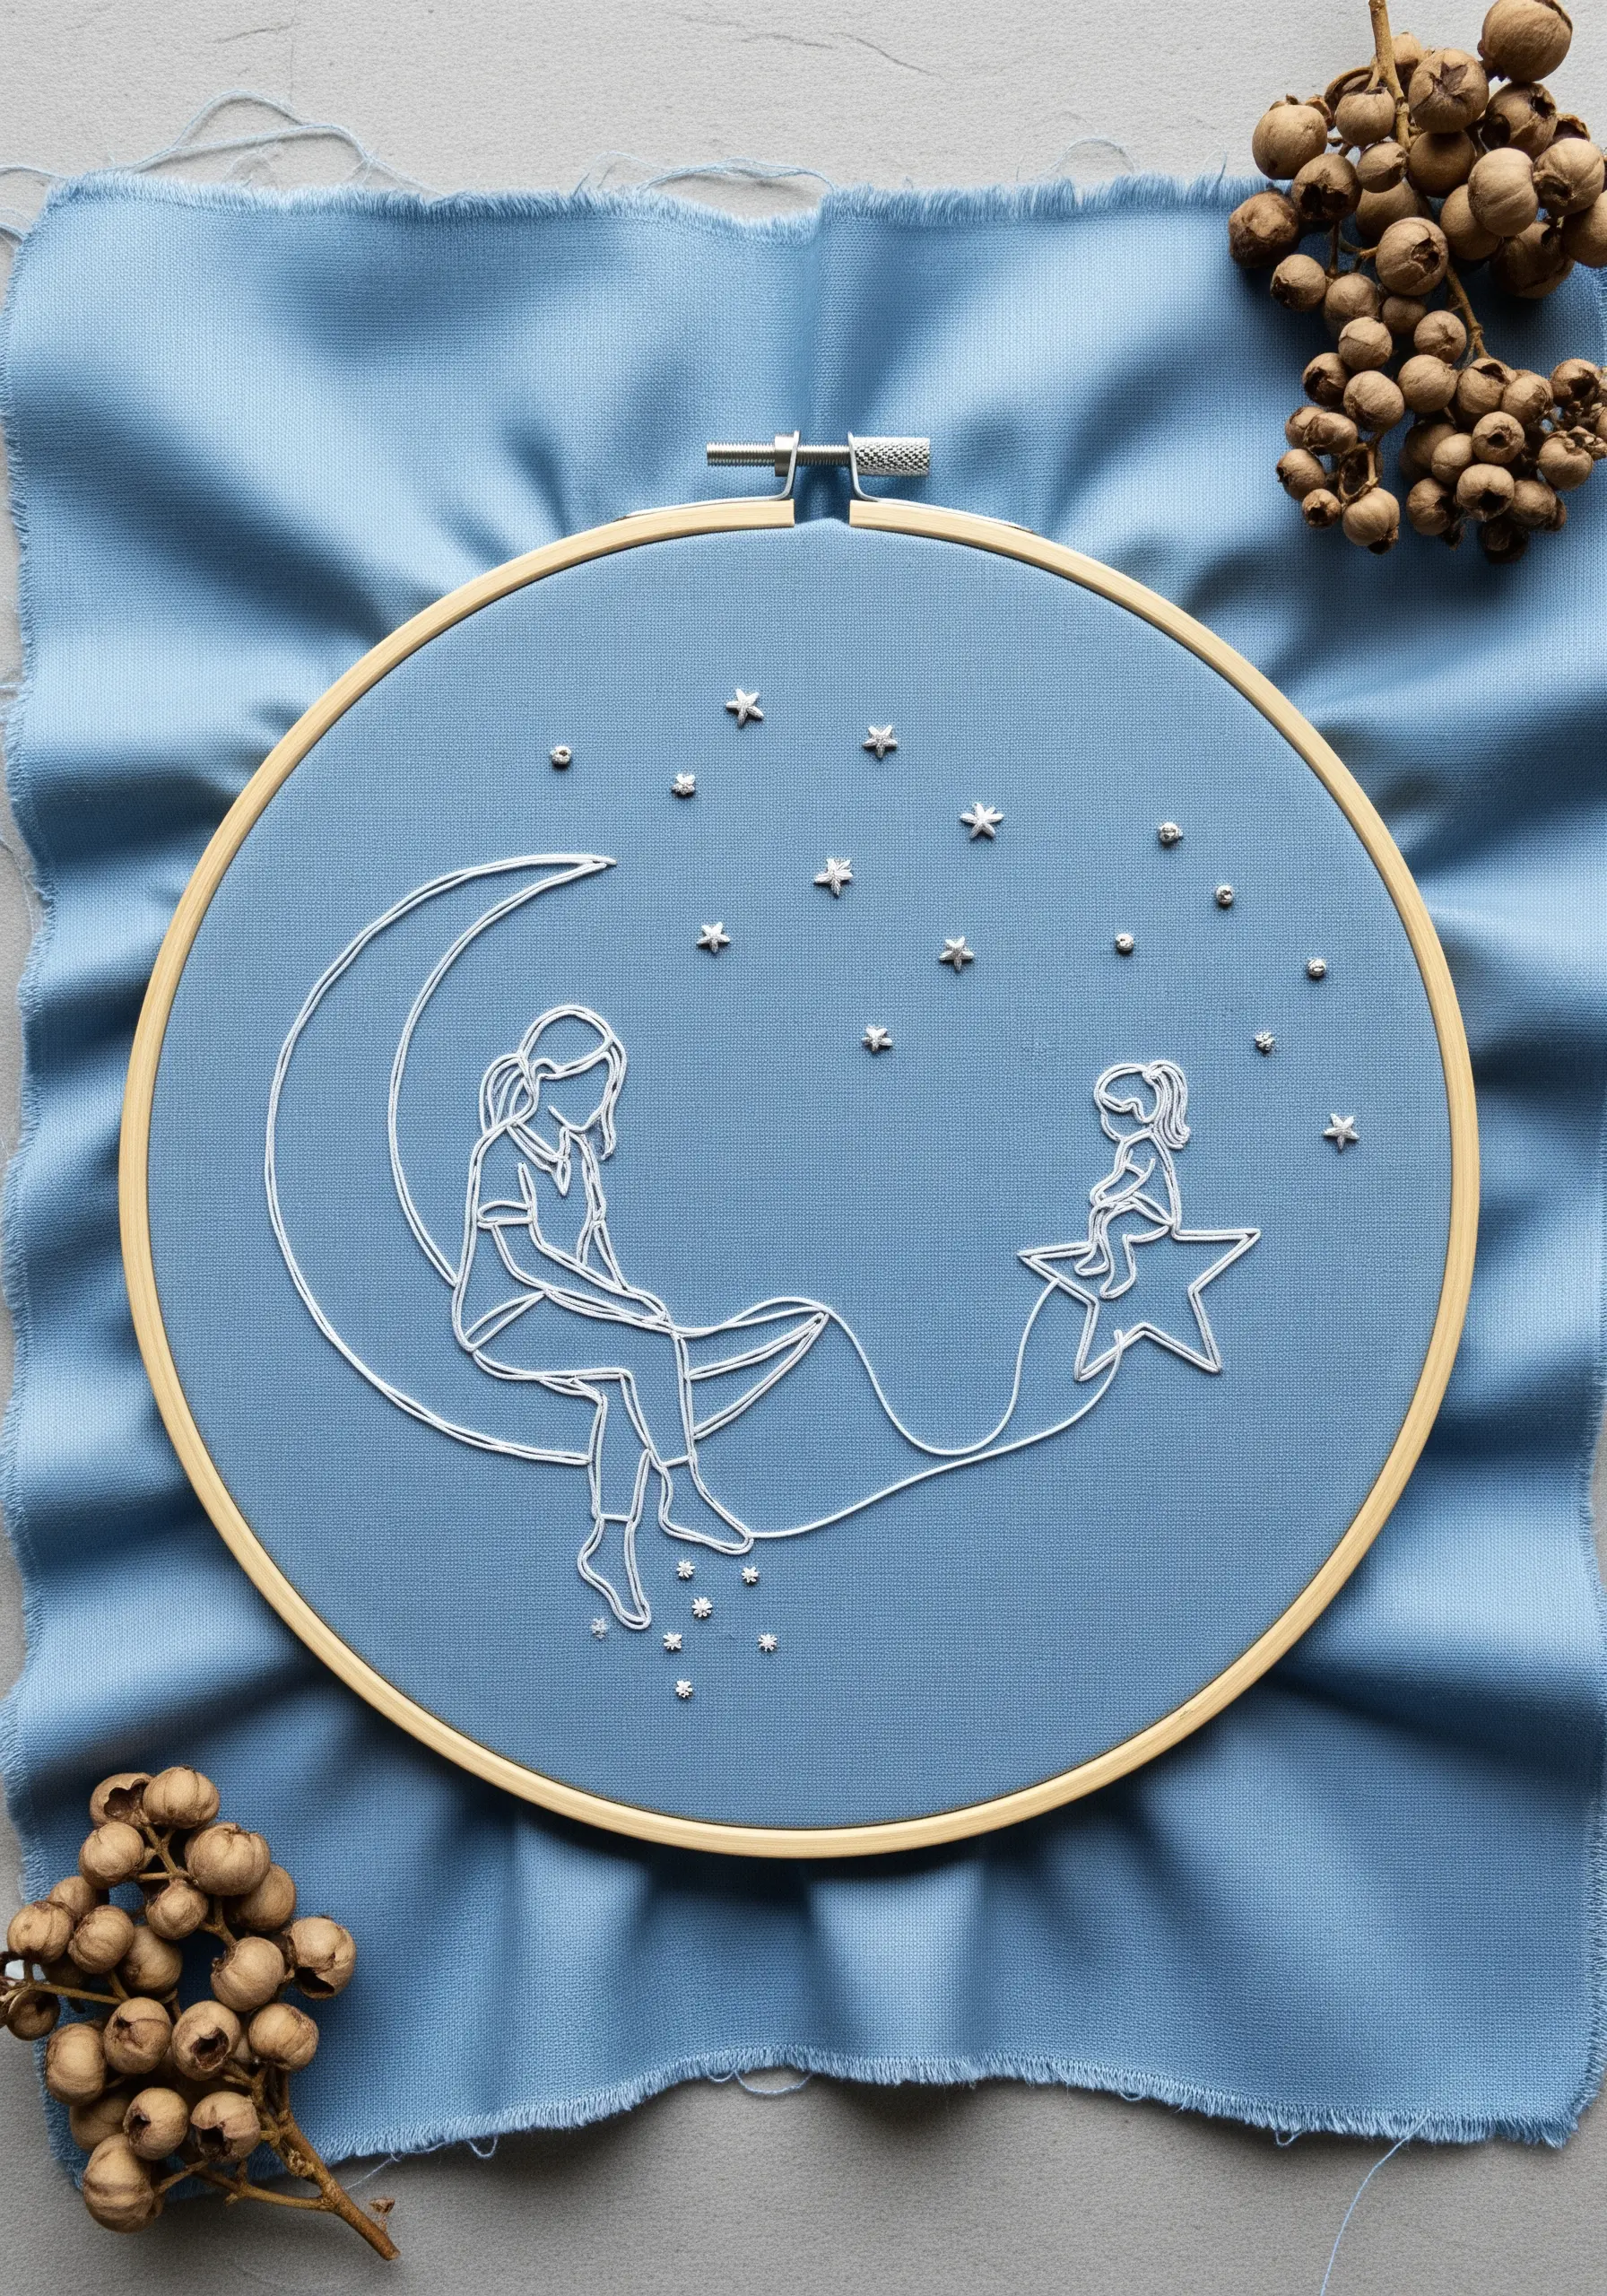
Add a touch of magic to your composition by scattering a constellation of tiny stars around your main figures.
Use French knots for a classic starry effect, varying the number of times you wrap the thread around the needle (once, twice, or three times) to create stars of different sizes and brightness.
For a subtler twinkle, you can also add tiny, single straight stitches. For maximum effect, consider a metallic silver or glow-in-the-dark thread.
13. Scale Up Your Linework with a Heavy Chain Stitch
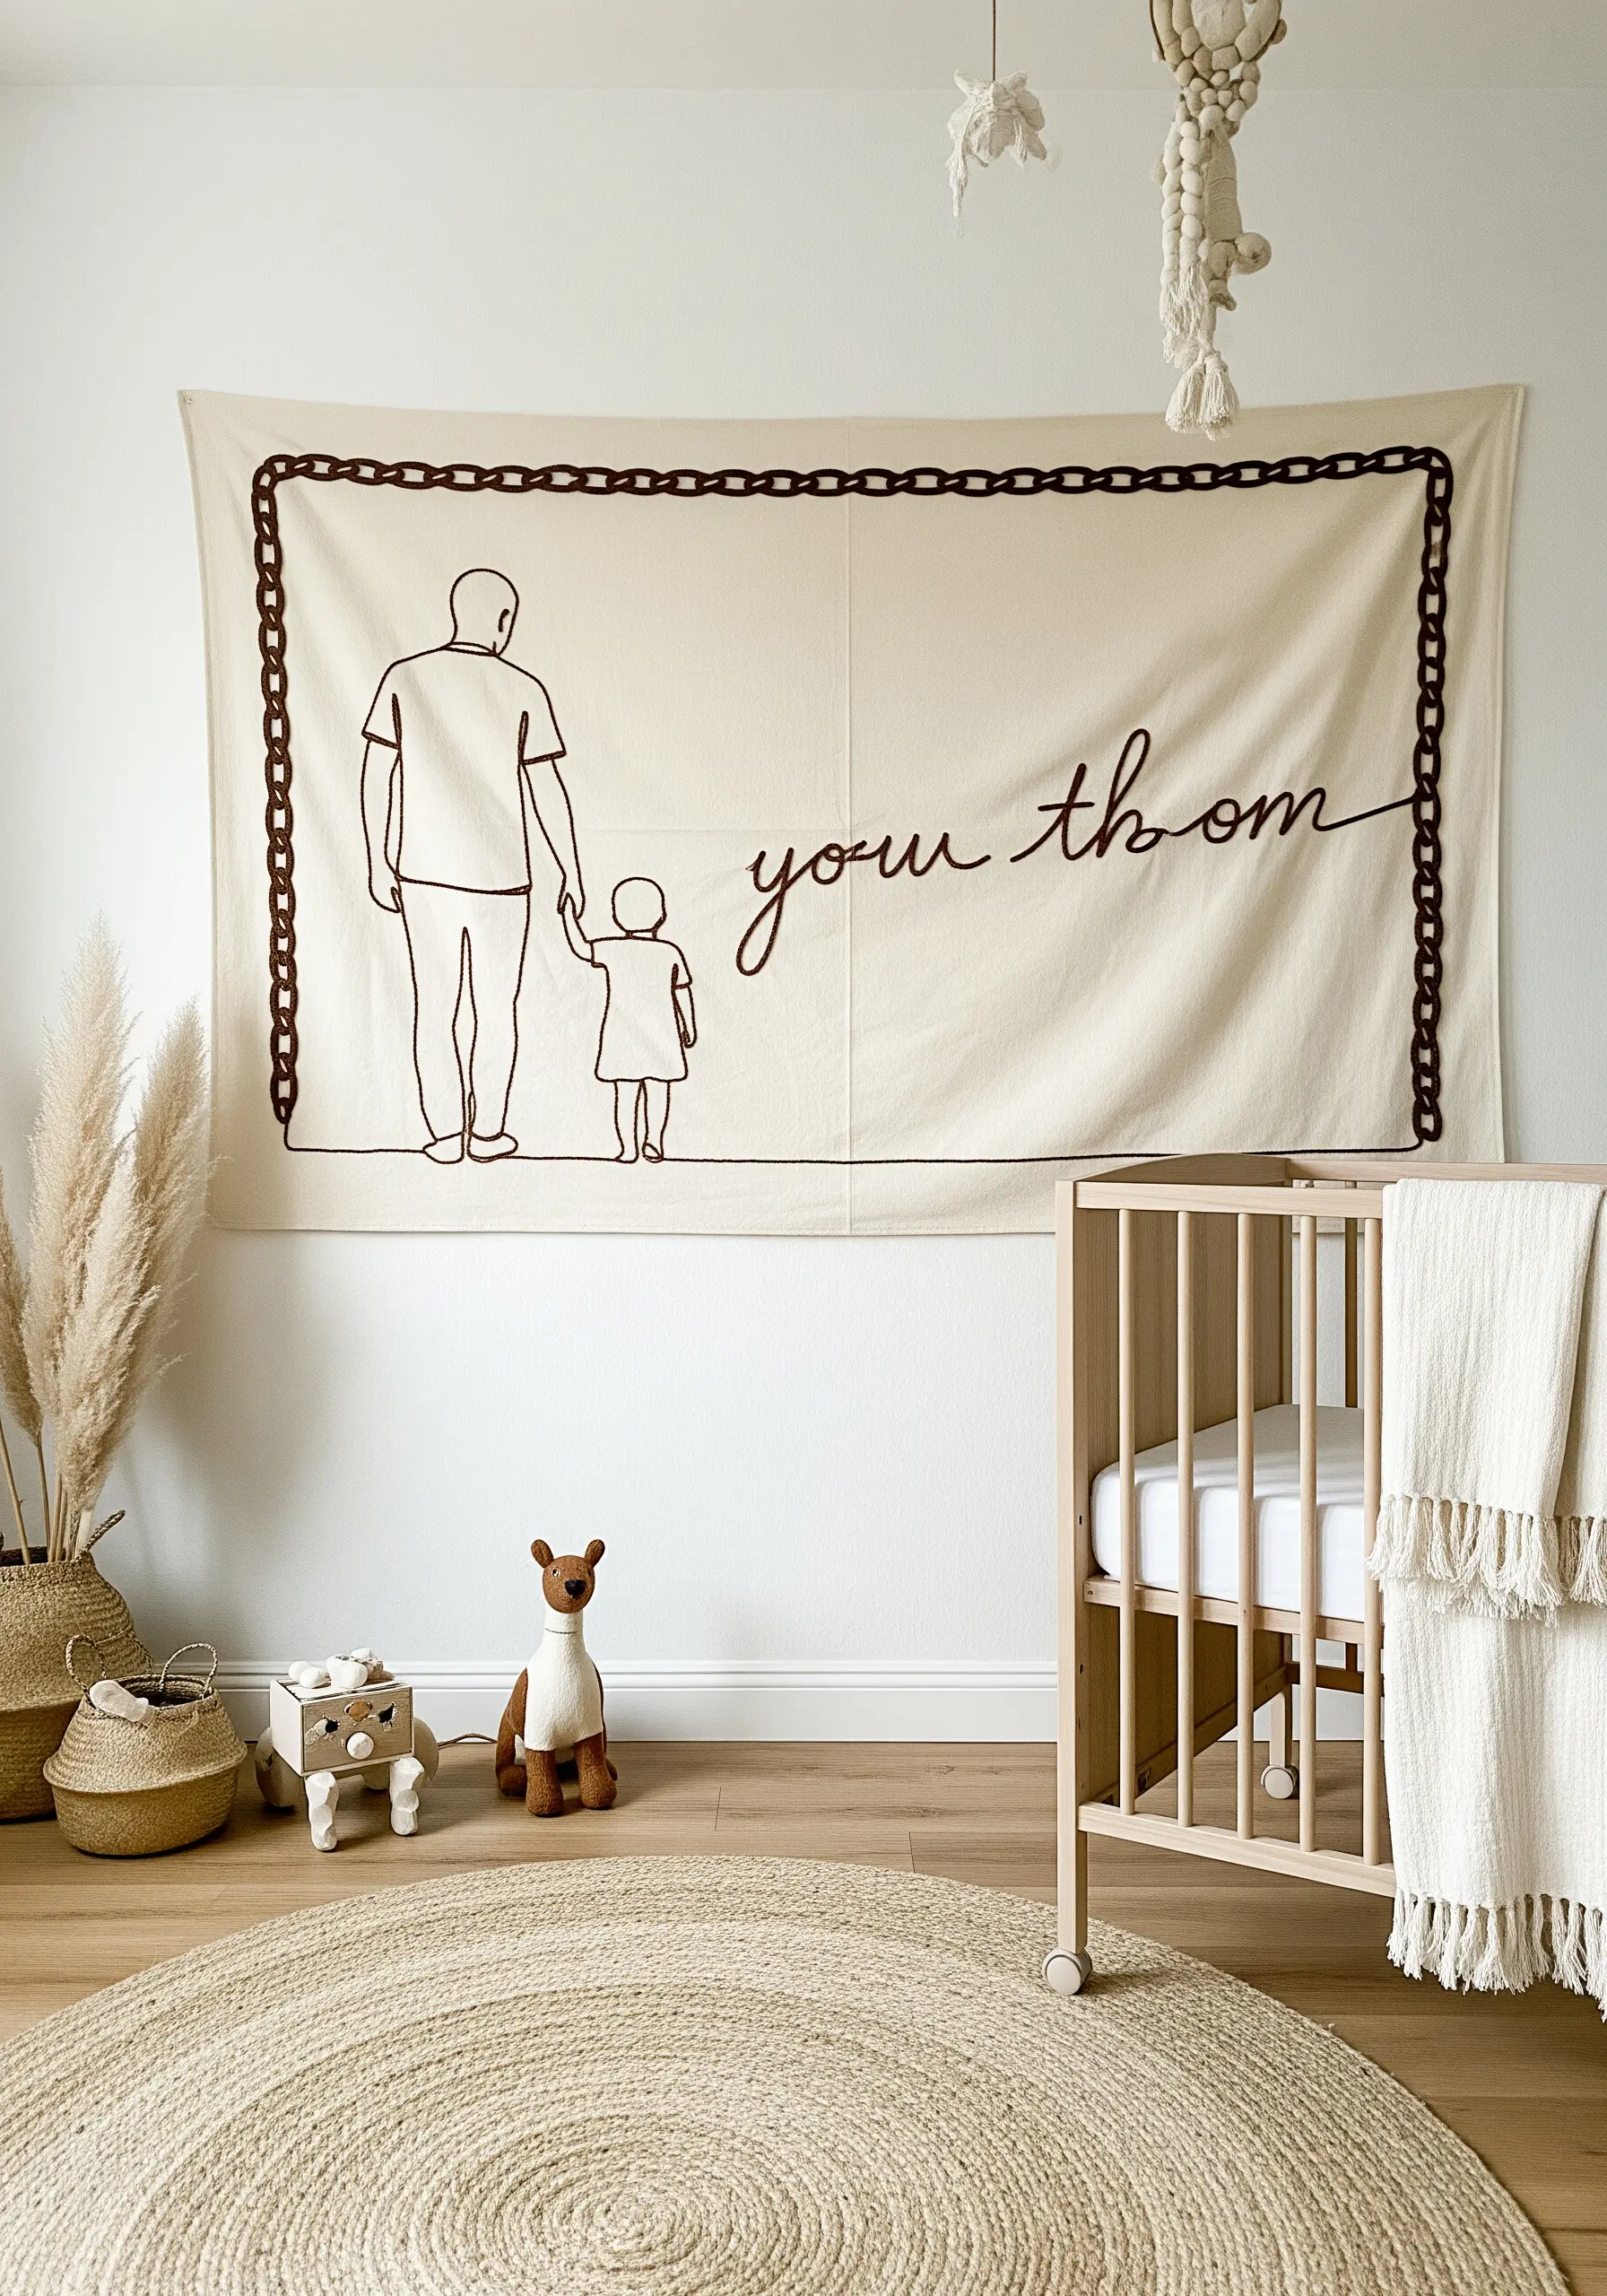
When creating a large-scale piece like a wall hanging, a single strand of floss will look thin and lost.
Instead, create a bold, graphic line by using all six strands of embroidery floss, or switch to a thicker thread like pearl cotton No. 8 or No. 5.
A heavy chain stitch or a stem stitch will produce a substantial, rope-like line that has the visual weight needed to make an impact from across a room.
14. Secure Your Stitches for Wearable Keepsakes

For items that will be handled and washed, such as a bib or blanket, durability is paramount.
Secure the back of your work meticulously. Instead of knots which can unravel, weave the thread tails under at least four or five stitches on the reverse side before trimming.
To protect a baby’s sensitive skin, iron a soft, permanent backing like Sulky Tender Touch over the finished embroidery. This covers any scratchy threads and adds stability.
15. Emphasize Emotion by Varying Line Thickness
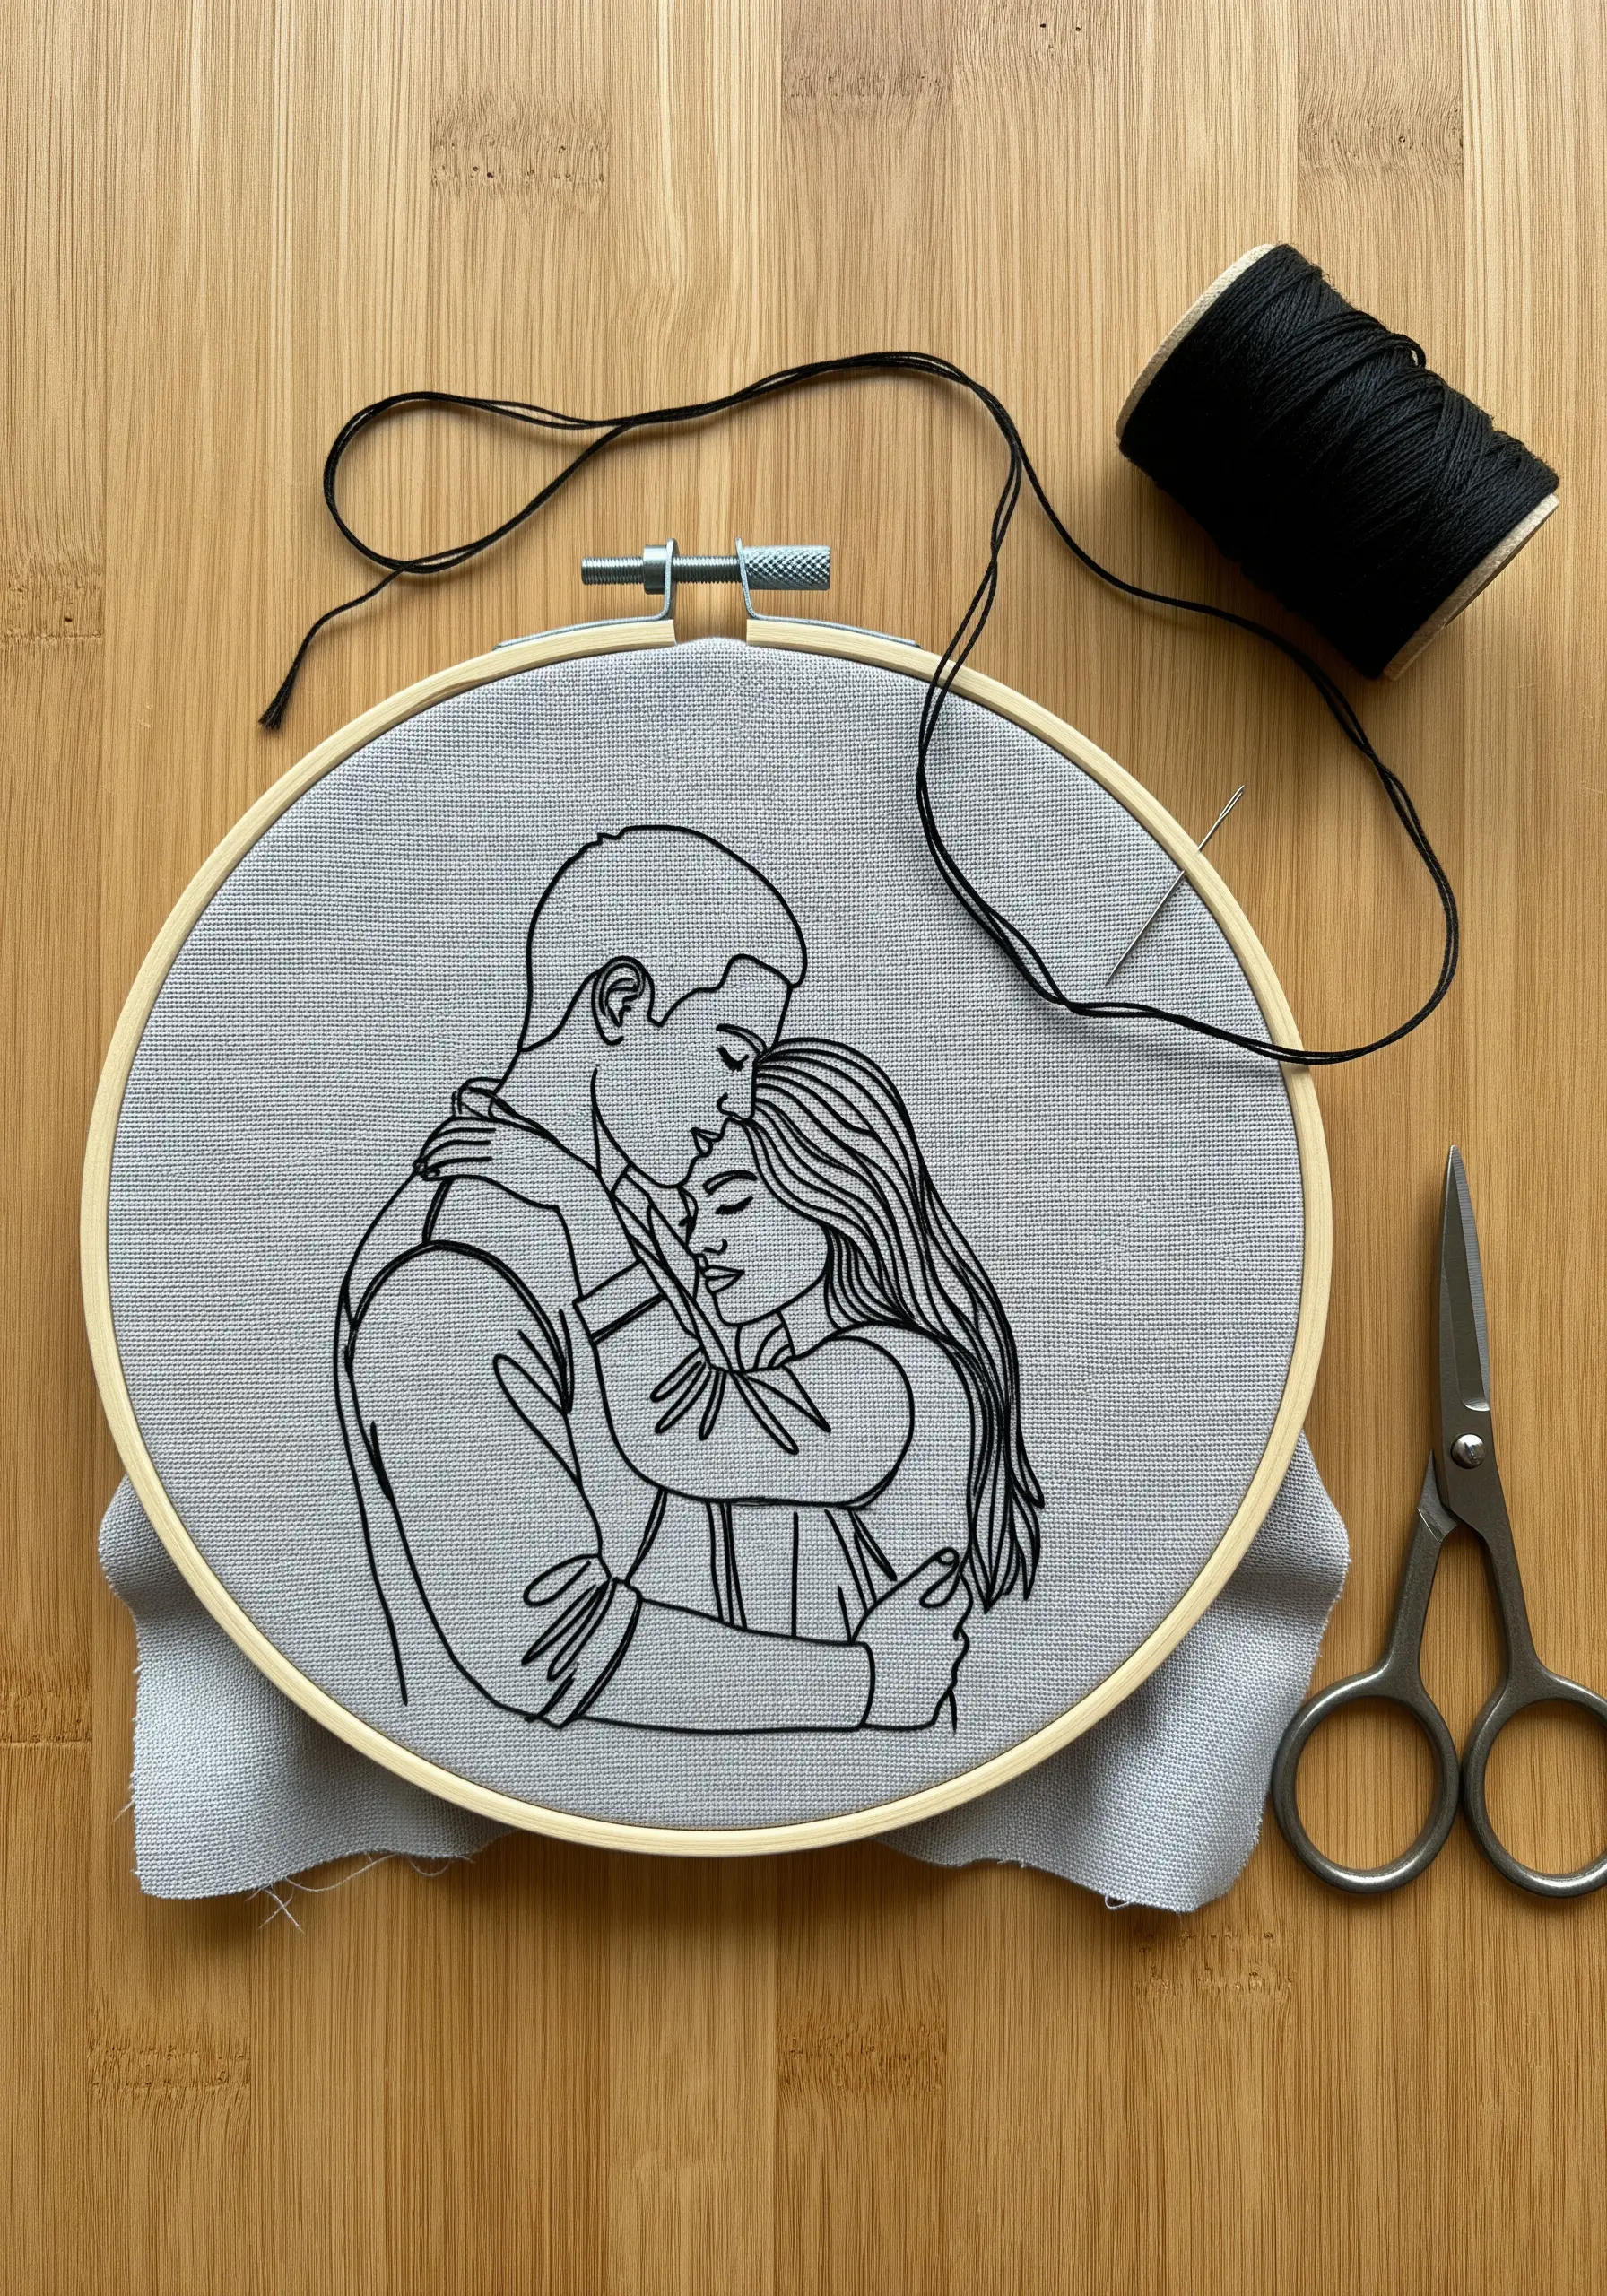
Guide the viewer’s eye and amplify the emotional core of your piece by intentionally varying the thickness of your lines.
Use a whipped backstitch or stem stitch as your base. To add weight and emphasis to key areas—like the arms in an embrace or the curve of a cheek—simply stitch over that same line a second time.
This subtle technique mimics the pressure of a pen on paper, creating a dynamic, expressive quality that elevates your work beyond a simple tracing.
16. Create an Ethereal Effect on Sheer Fabric

Stitching on transparent fabric like organza or tulle creates a stunning, dreamlike effect where the design appears to float in the air.
This advanced technique requires meticulous planning, as every thread carried across the back will be visible.
Plot your stitch path carefully to minimize jumps. When you must jump, leave long tails and weave them back into the stitched areas later, or secure and trim them with absolute precision.
The result is a delicate, gallery-worthy piece that plays beautifully with light.
17. Integrate Text Seamlessly with Your Imagery
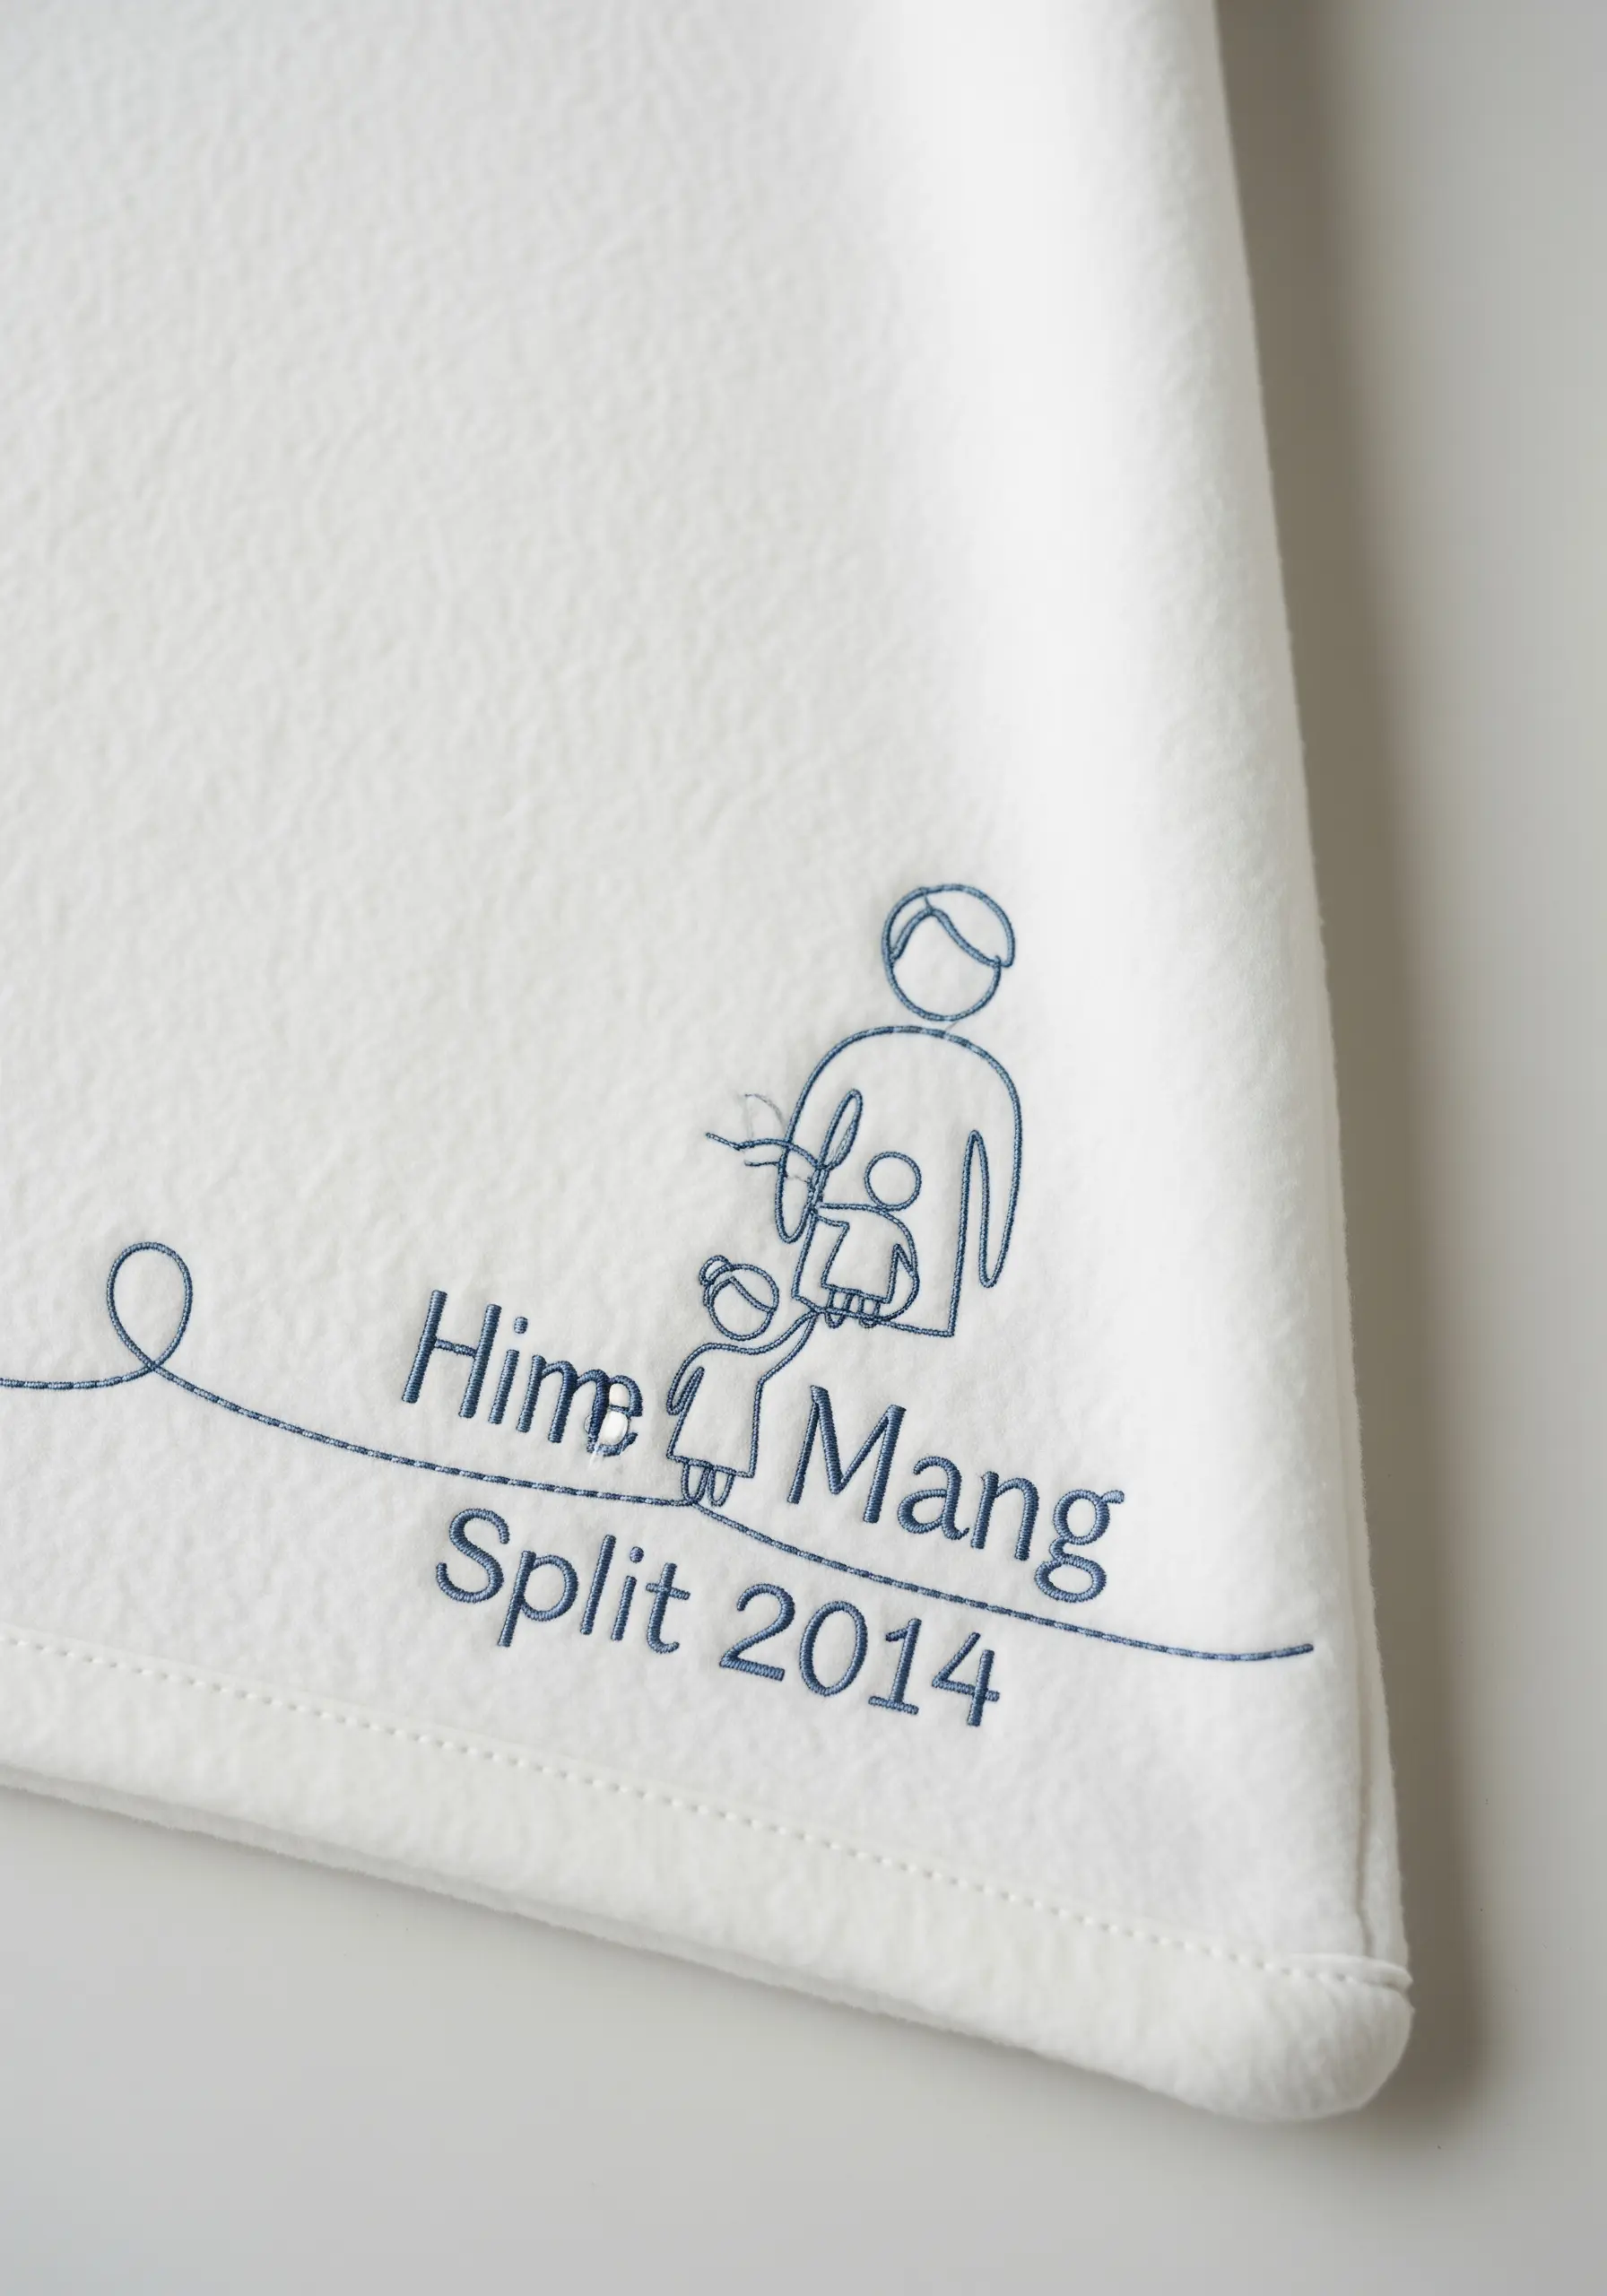
When combining a motif with names or dates, the goal is visual harmony. Treat the text as an extension of the line art.
Use the same thread color and a stitch that complements your image—a clean backstitch is almost always a perfect choice for its readability.
To unify the composition, use a single, continuous stitched line to underline the text and connect it to the figures, turning separate elements into one cohesive design.
18. Master Sharp Corners in Geometric Designs
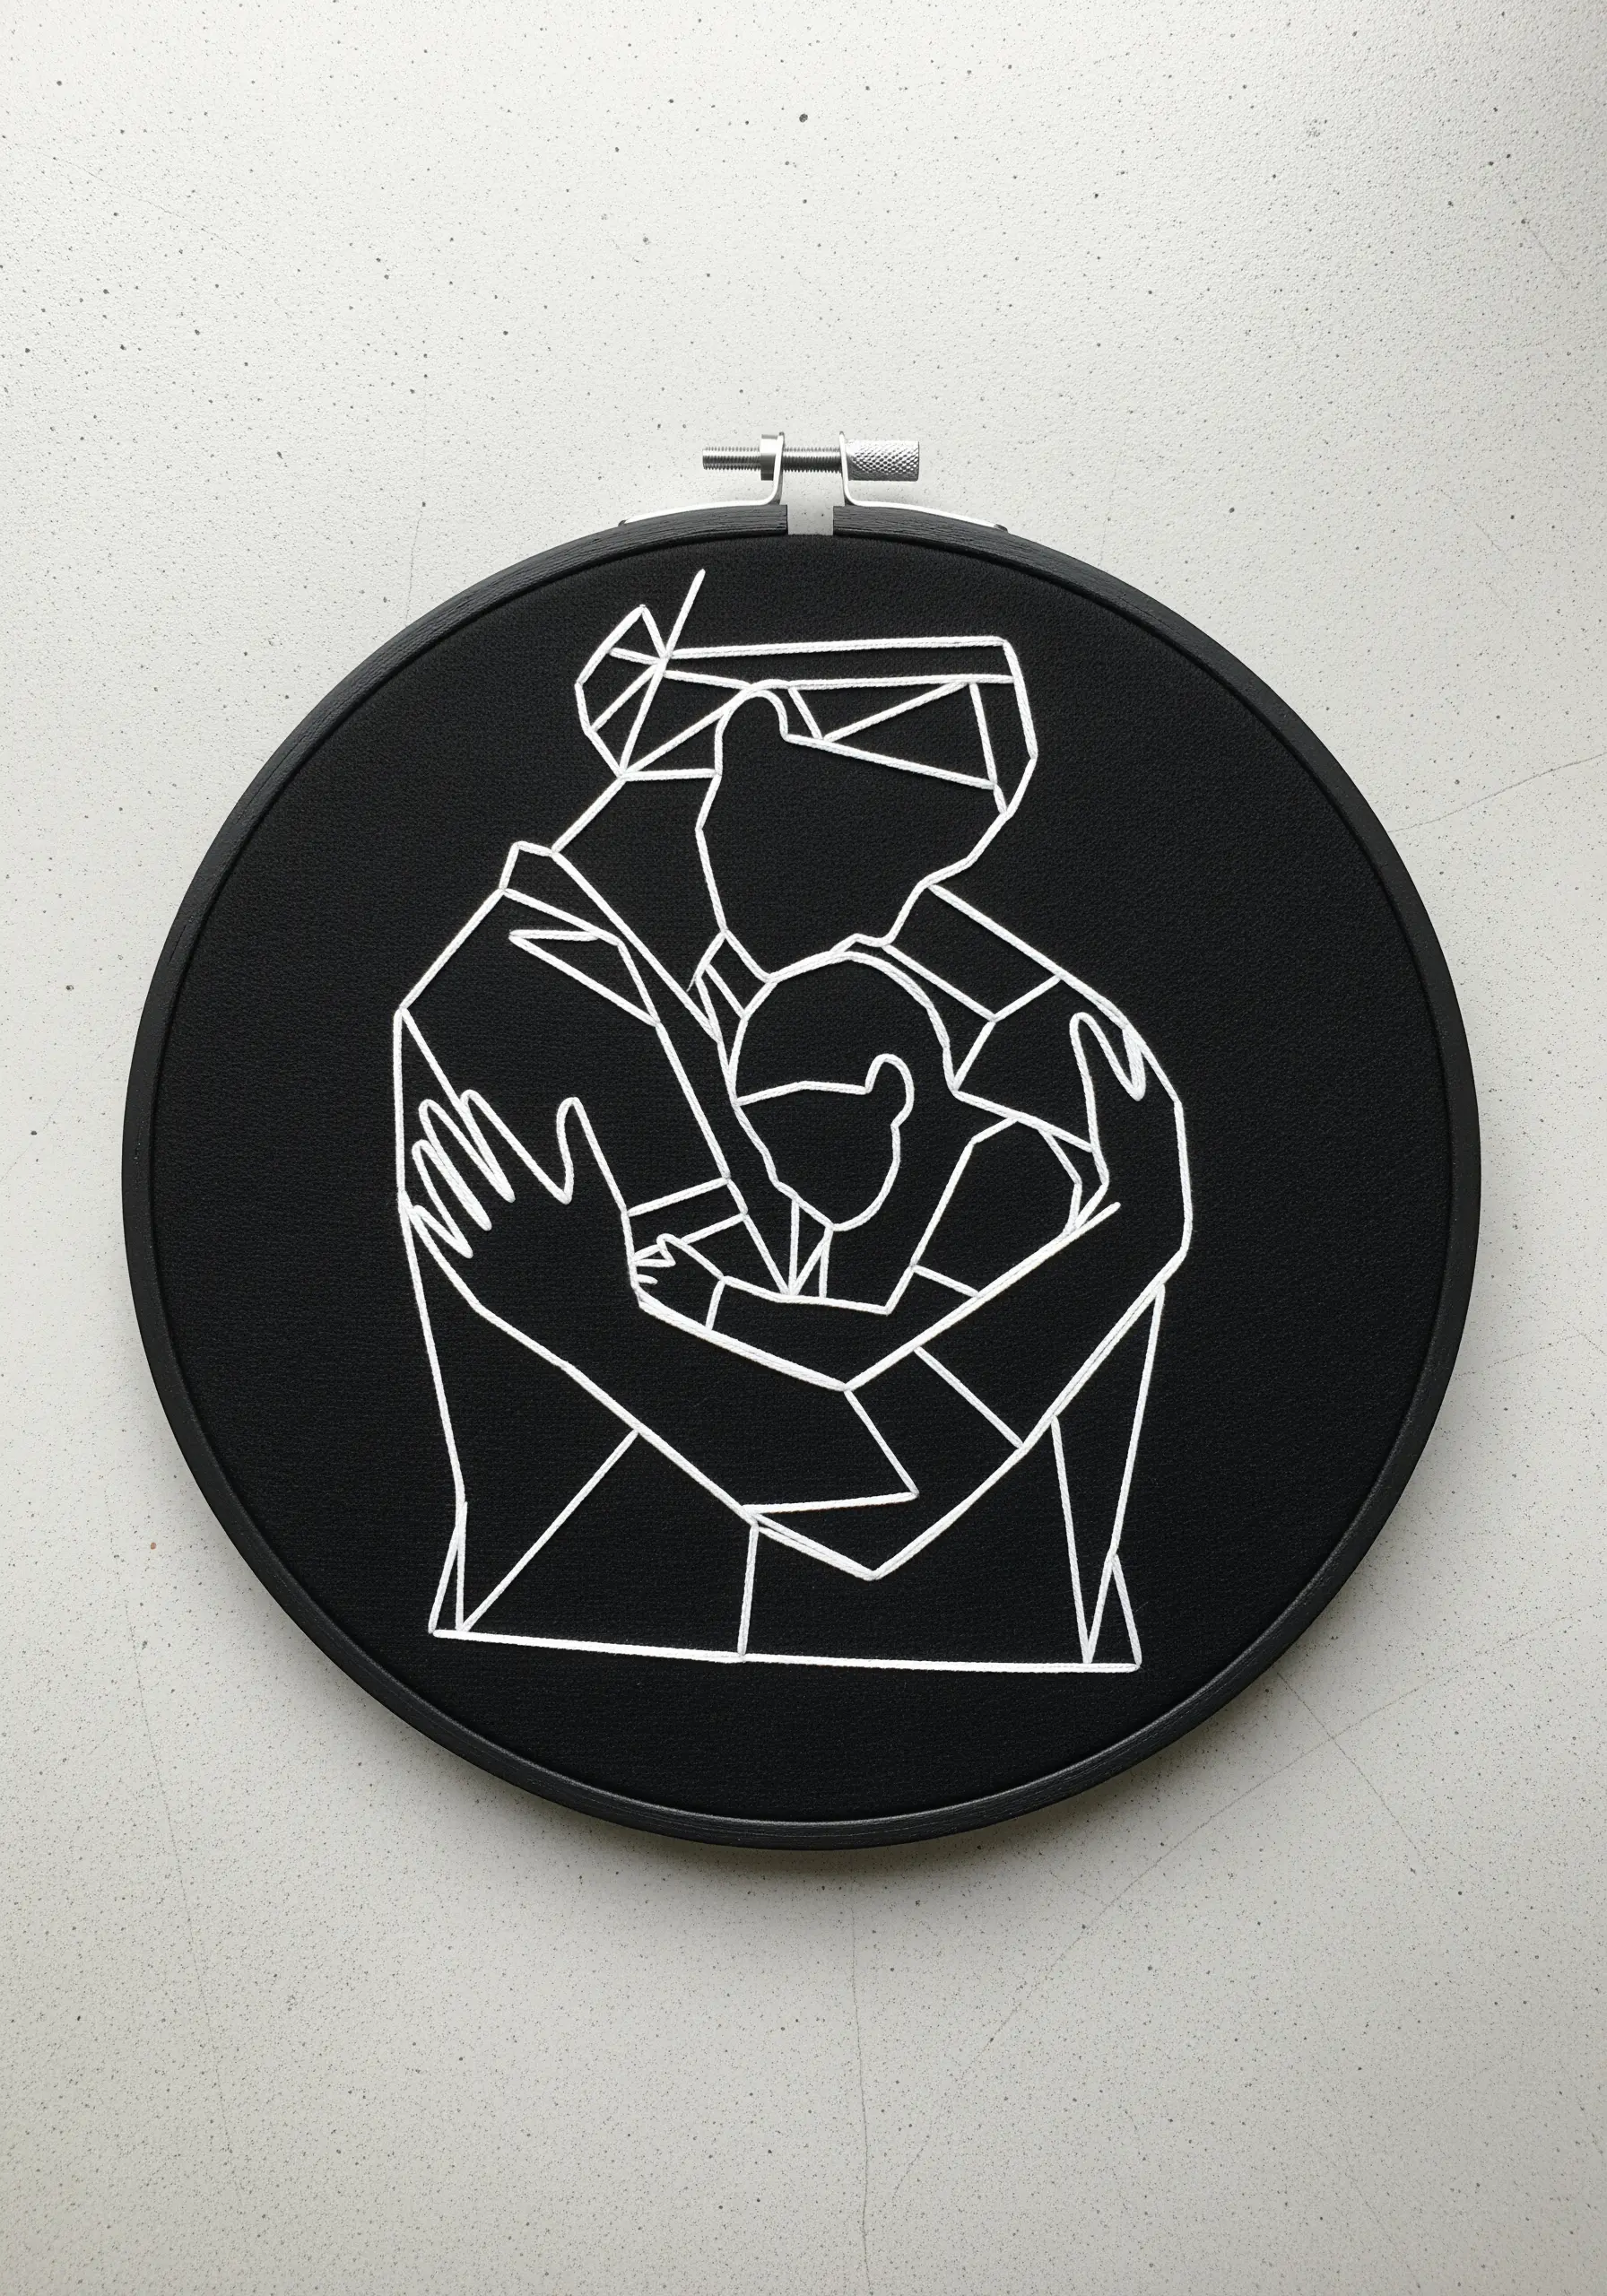
For geometric or faceted art styles, crisp lines and sharp angles are everything. A standard backstitch can sometimes create a soft corner or a small gap.
To achieve a perfectly sharp point, end your line of stitches precisely at the corner. Then, bring your needle up in that exact same hole to begin the next line in the new direction.
This technique forces the threads to pivot at a clean, sharp angle, maintaining the design’s intended angular integrity.
19. Capture Precious Details with Single-Thread Stitches

When your subject is as small and delicate as a pair of baby shoes, the power of your embroidery lies in its subtlety.
Use only a single strand of embroidery floss and small, neat backstitches to render the finest details, like the laces and eyelets.
This minimalist approach ensures your work doesn’t become heavy or cartoonish. Instead, it creates a refined, tender illustration that honors the delicate scale of the subject.
20. Adapt Your Tools for Heavy-Duty Fabrics
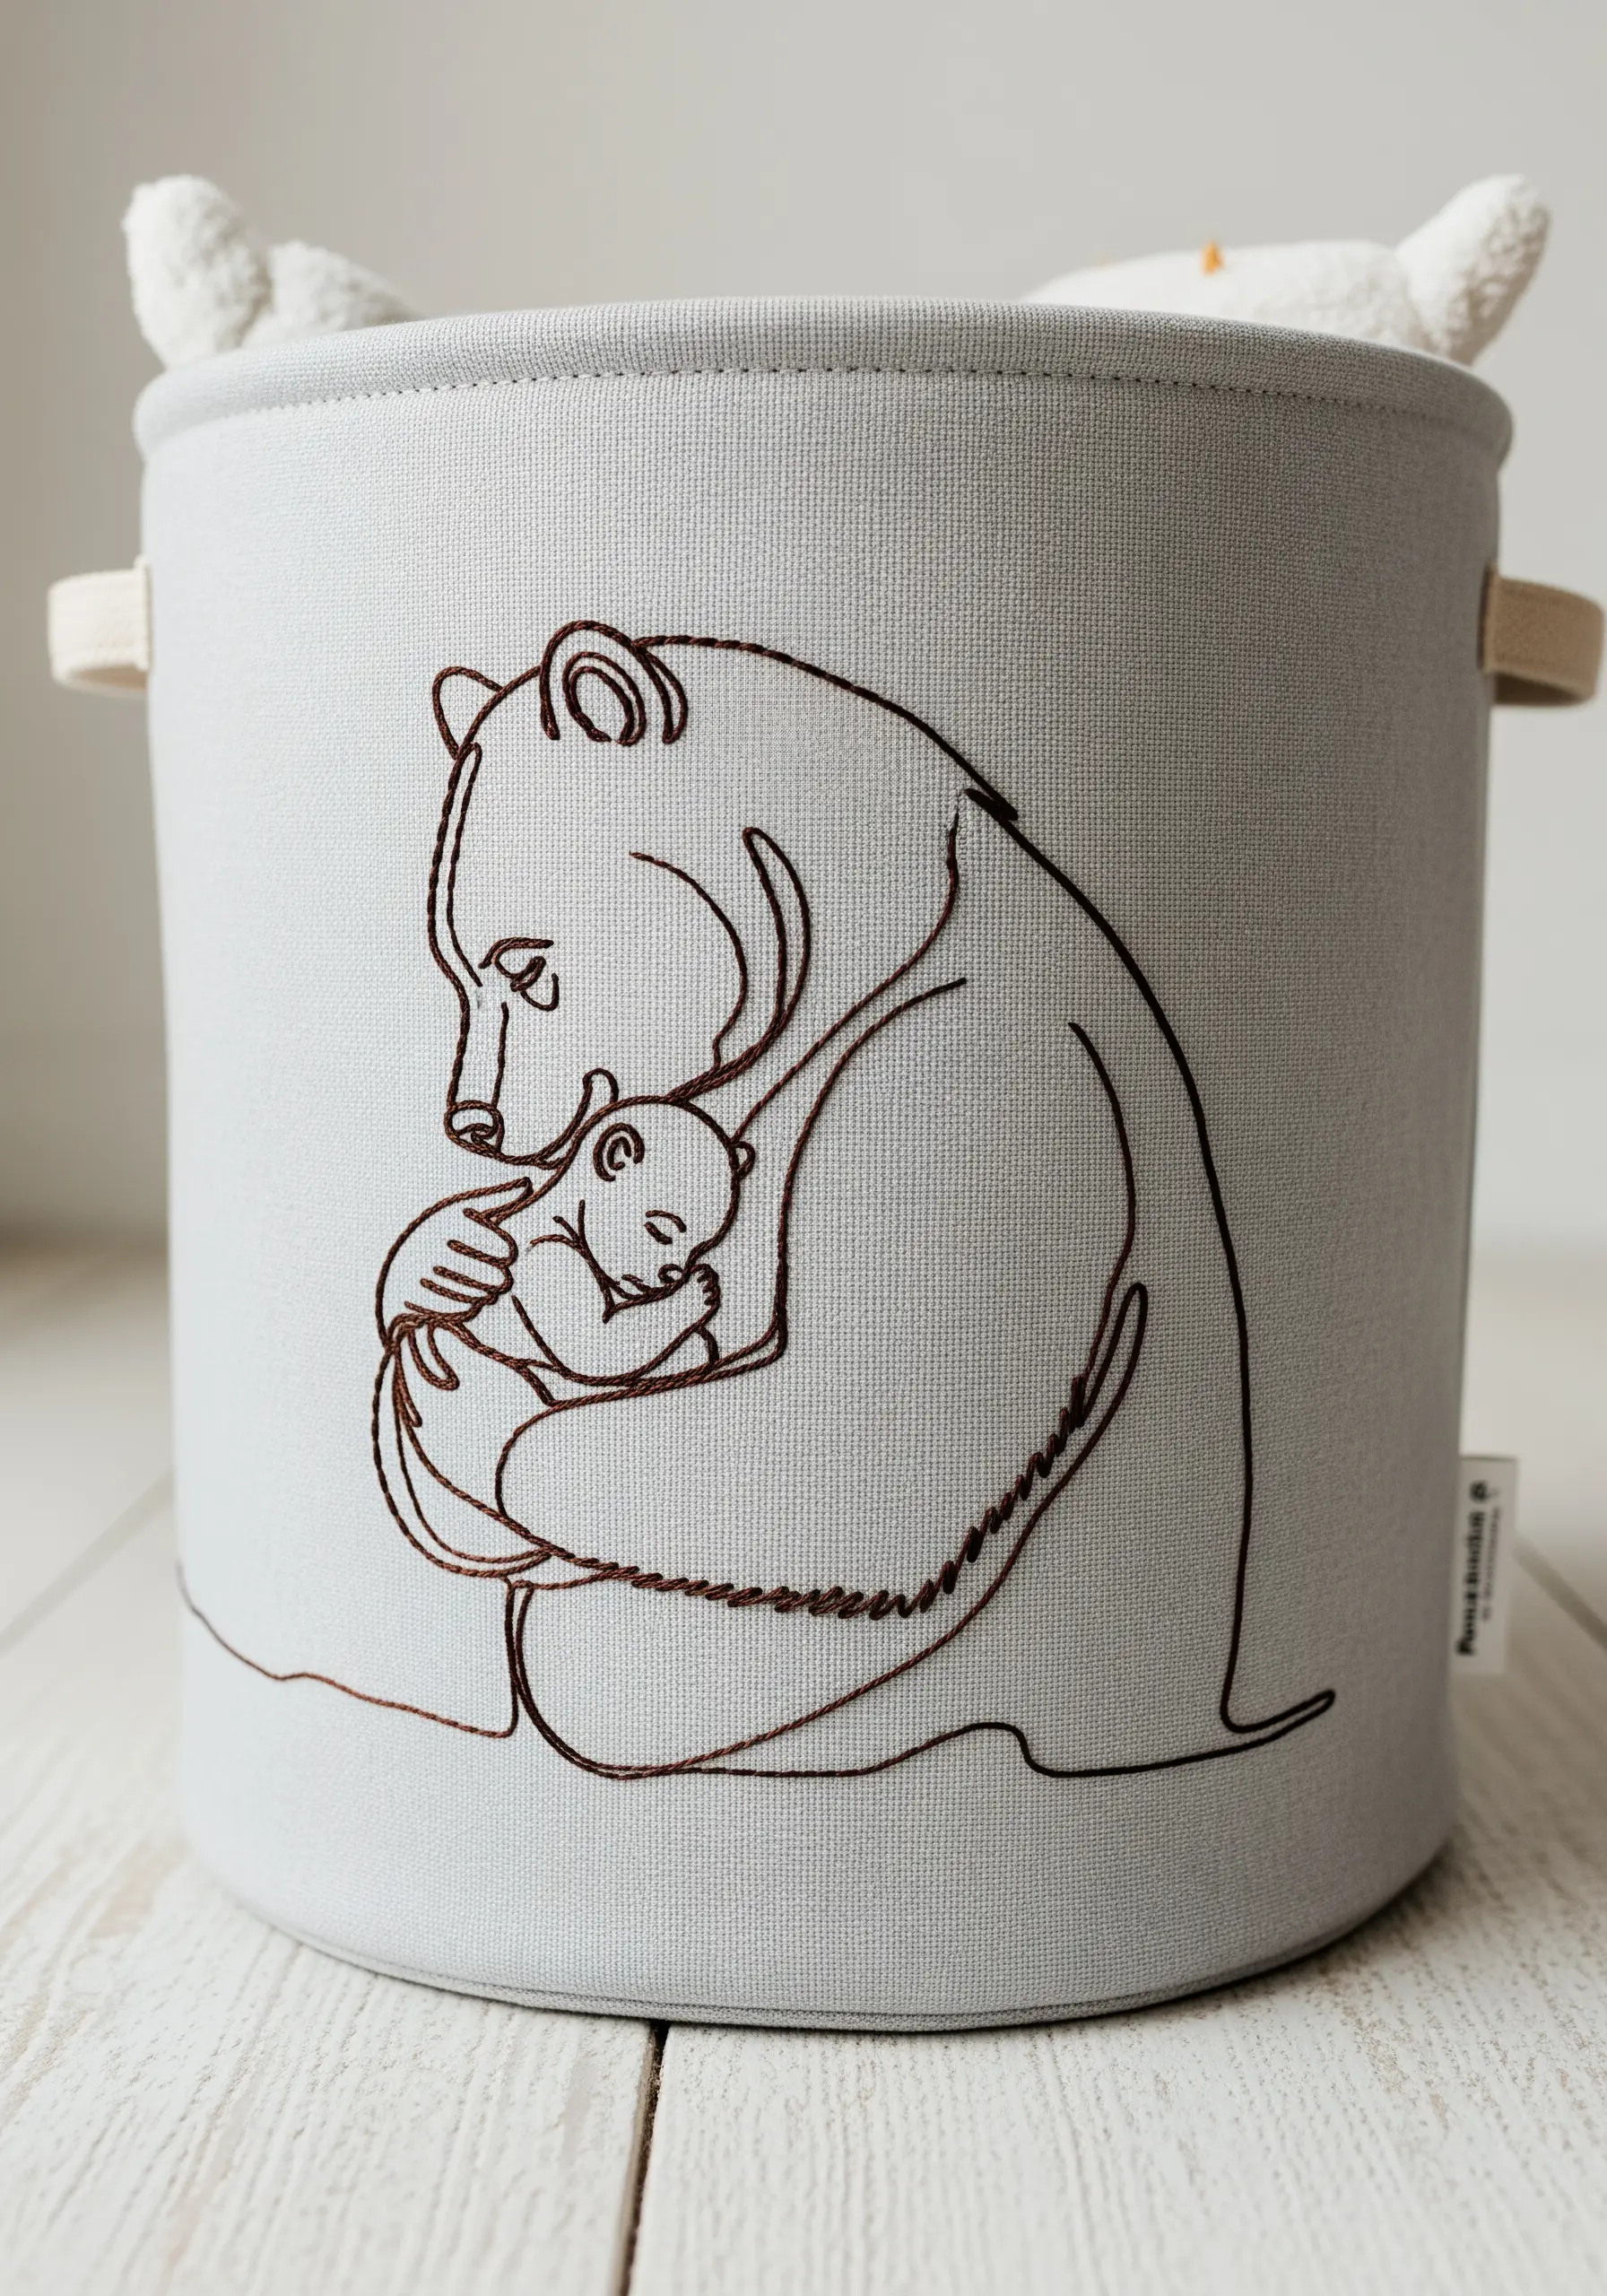
When embellishing functional items like a sturdy canvas storage bin, your standard embroidery tools may not be sufficient.
Switch to a heavy-duty needle with a larger eye and a sharper point, which can penetrate dense fabric without bending or breaking.
You may also need a thimble to comfortably push the needle through the material. Using the right tools prevents frustration and ensures a clean, professional finish on durable home décor items.
21. Focus on Stitching with a Pre-Printed Fabric Kit

If transferring patterns feels intimidating, a pre-printed fabric kit is an excellent way to build confidence and focus purely on your technique.
With the lines already on the fabric, you can dedicate all your attention to achieving consistent stitch length, smooth curves, and perfect tension.
This is a perfect environment for mastering the foundational stitches—like backstitch, stem stitch, and split stitch—that are the building blocks of all line art embroidery.
22. Create a Silent Dialogue with Paired Hoops

A diptych, or a pair of artworks, can tell a more profound story than a single piece. The key is to create a visual connection between them.
Stitch each portrait in a separate hoop, maintaining identical fabric, thread, and scale. When you display them, the empty space between the hoops becomes charged with meaning.
Hang them facing each other to imply conversation, connection, and a shared gaze, letting the composition tell the story of their bond.
23. Make Your Mark on Denim with Bold Stitches
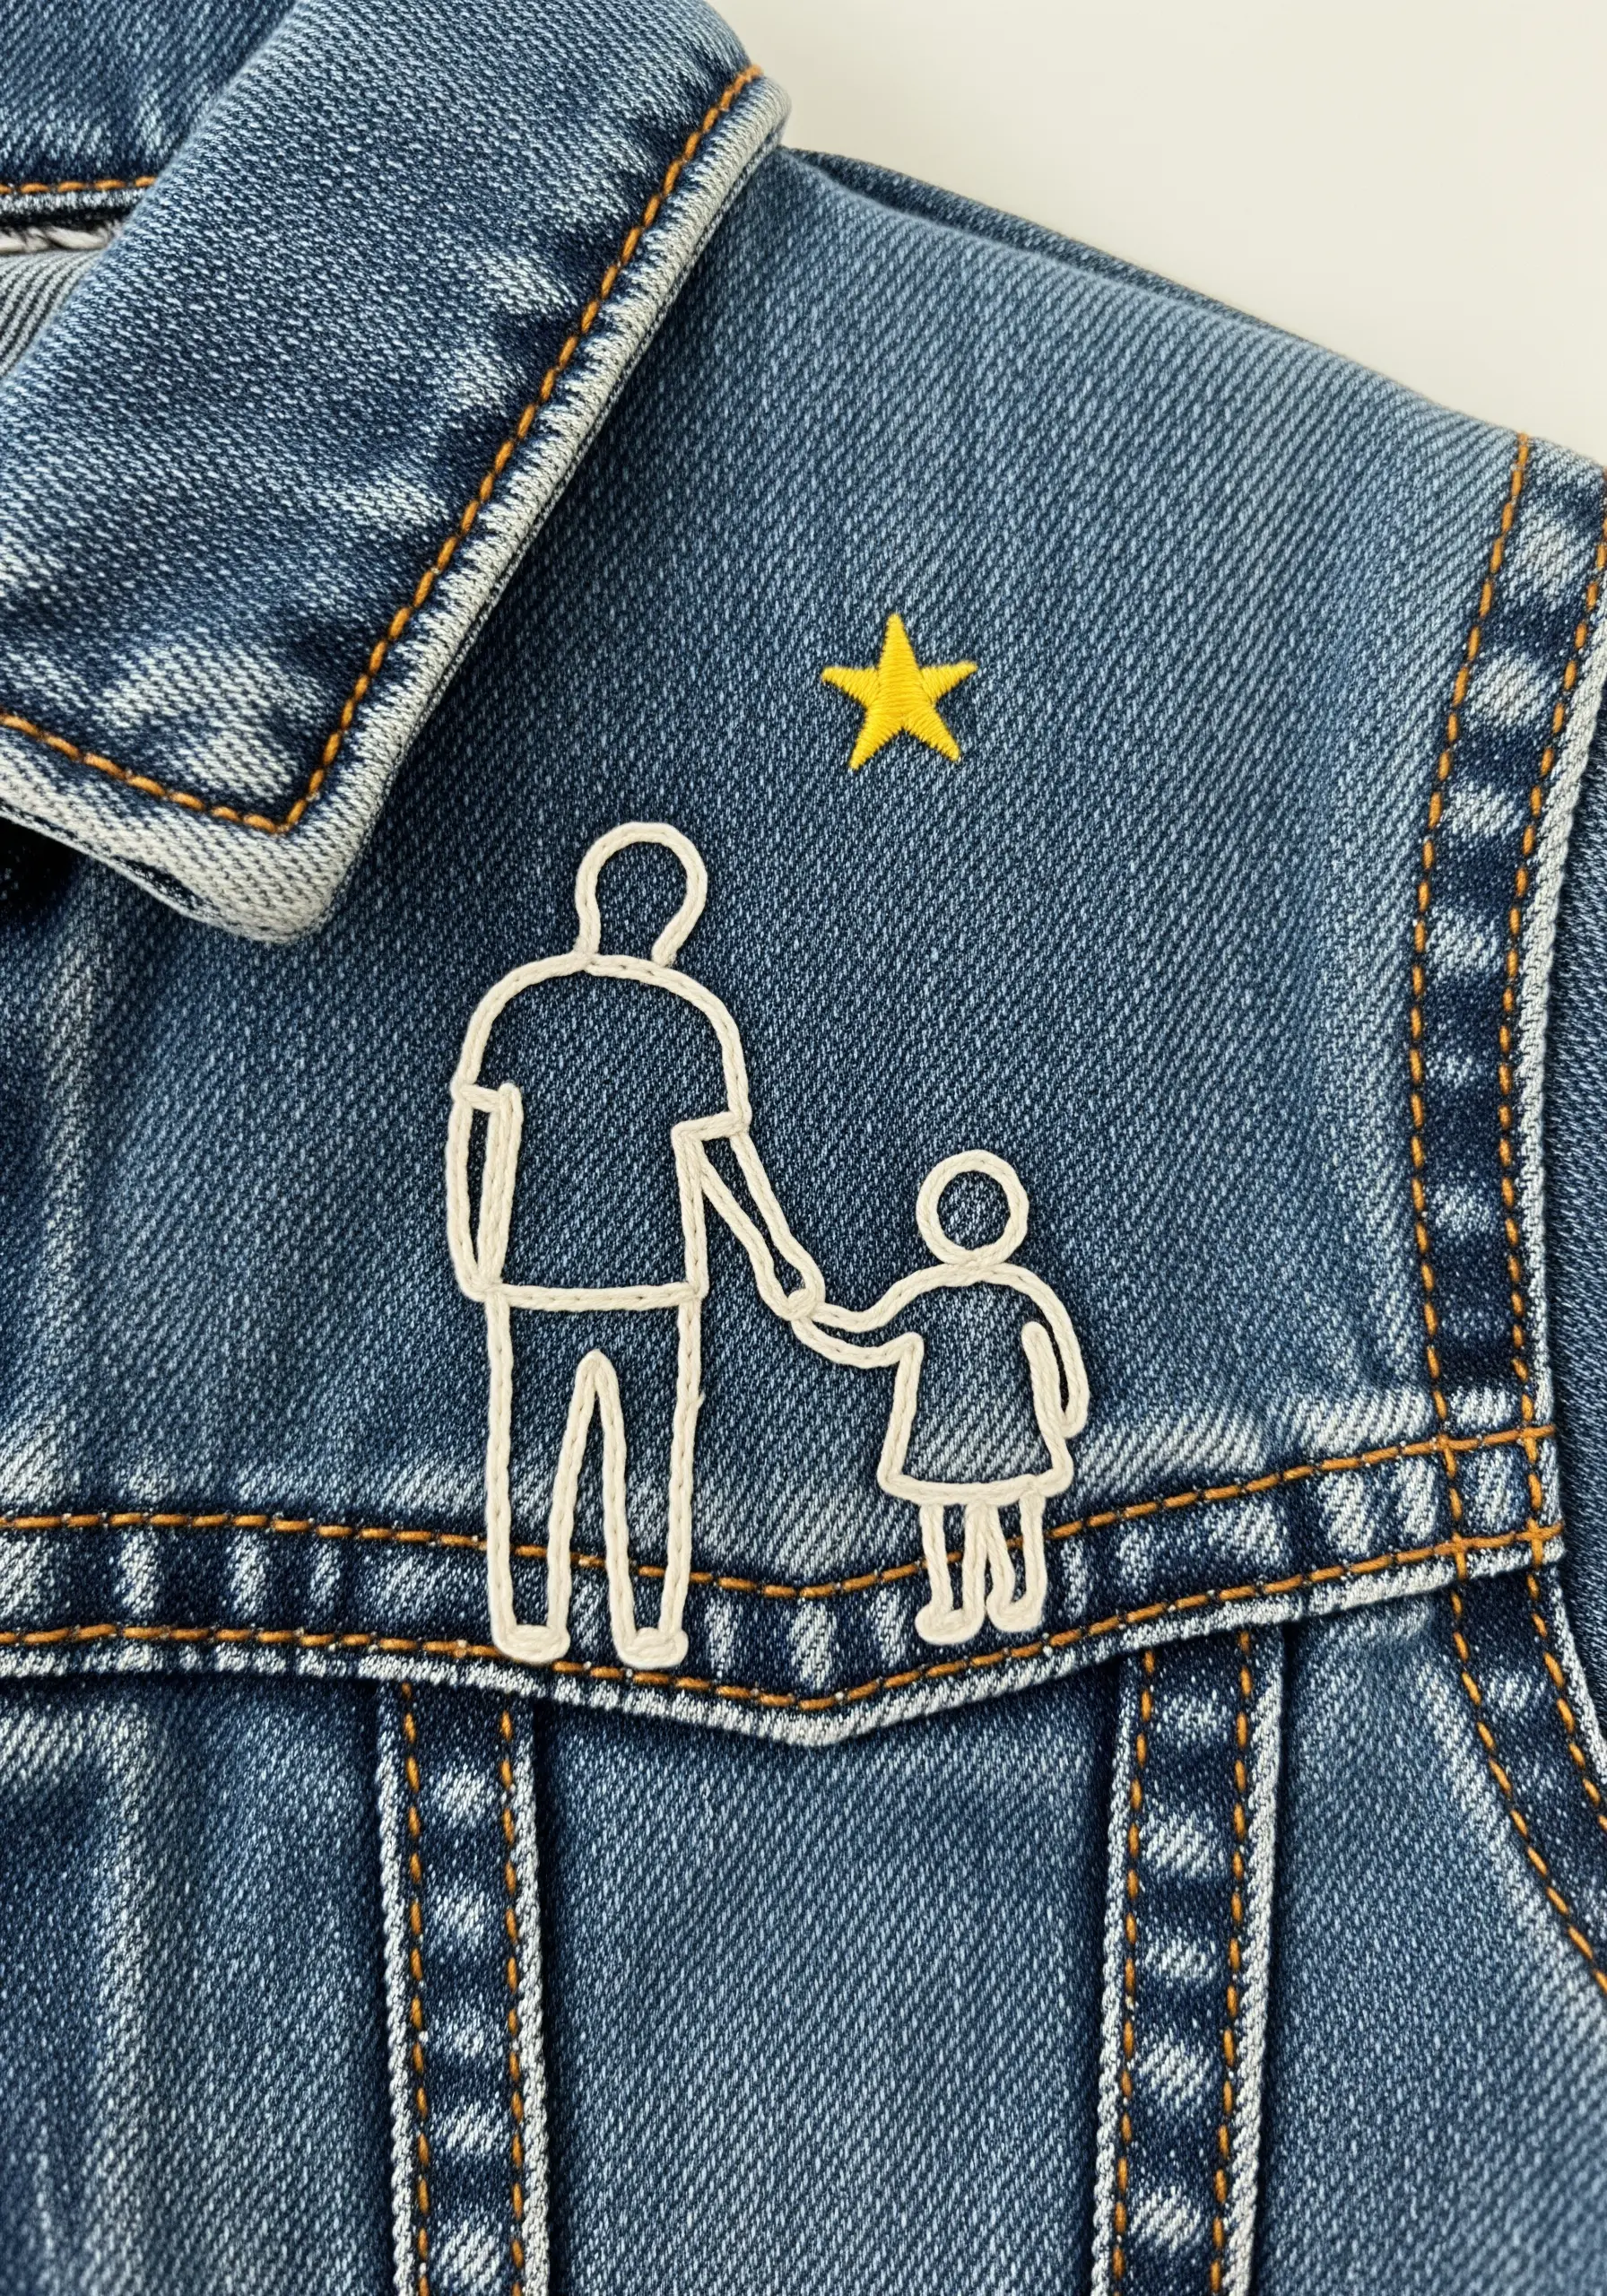
Denim is a wonderfully durable canvas for embroidery, but its thick texture can easily overwhelm delicate stitches.
To ensure your design stands out, use a thicker thread—at least four strands of standard floss, or even all six. A simple backstitch or stem stitch will create a clean, bold line that holds its own against the fabric’s twill weave.
Just as you might add line art travel adventure symbols to stitch on backpacks, adding a personal motif transforms a garment into a unique story.
24. Achieve Flawless Lettering with a Split Stitch
For adding names, dates, or quotes to a keepsake, legibility is crucial. The split stitch is your best tool for creating smooth, readable letters.
Its ability to create clean curves makes it superior to backstitch for letters like ‘S’, ‘O’, and ‘C’, which can otherwise appear jagged or segmented.
Before you start, lightly draw pencil guidelines on your fabric to ensure your text is perfectly straight and evenly spaced. These can be gently erased after stitching.
25. Construct a Balanced and Beautiful Nursery Mobile
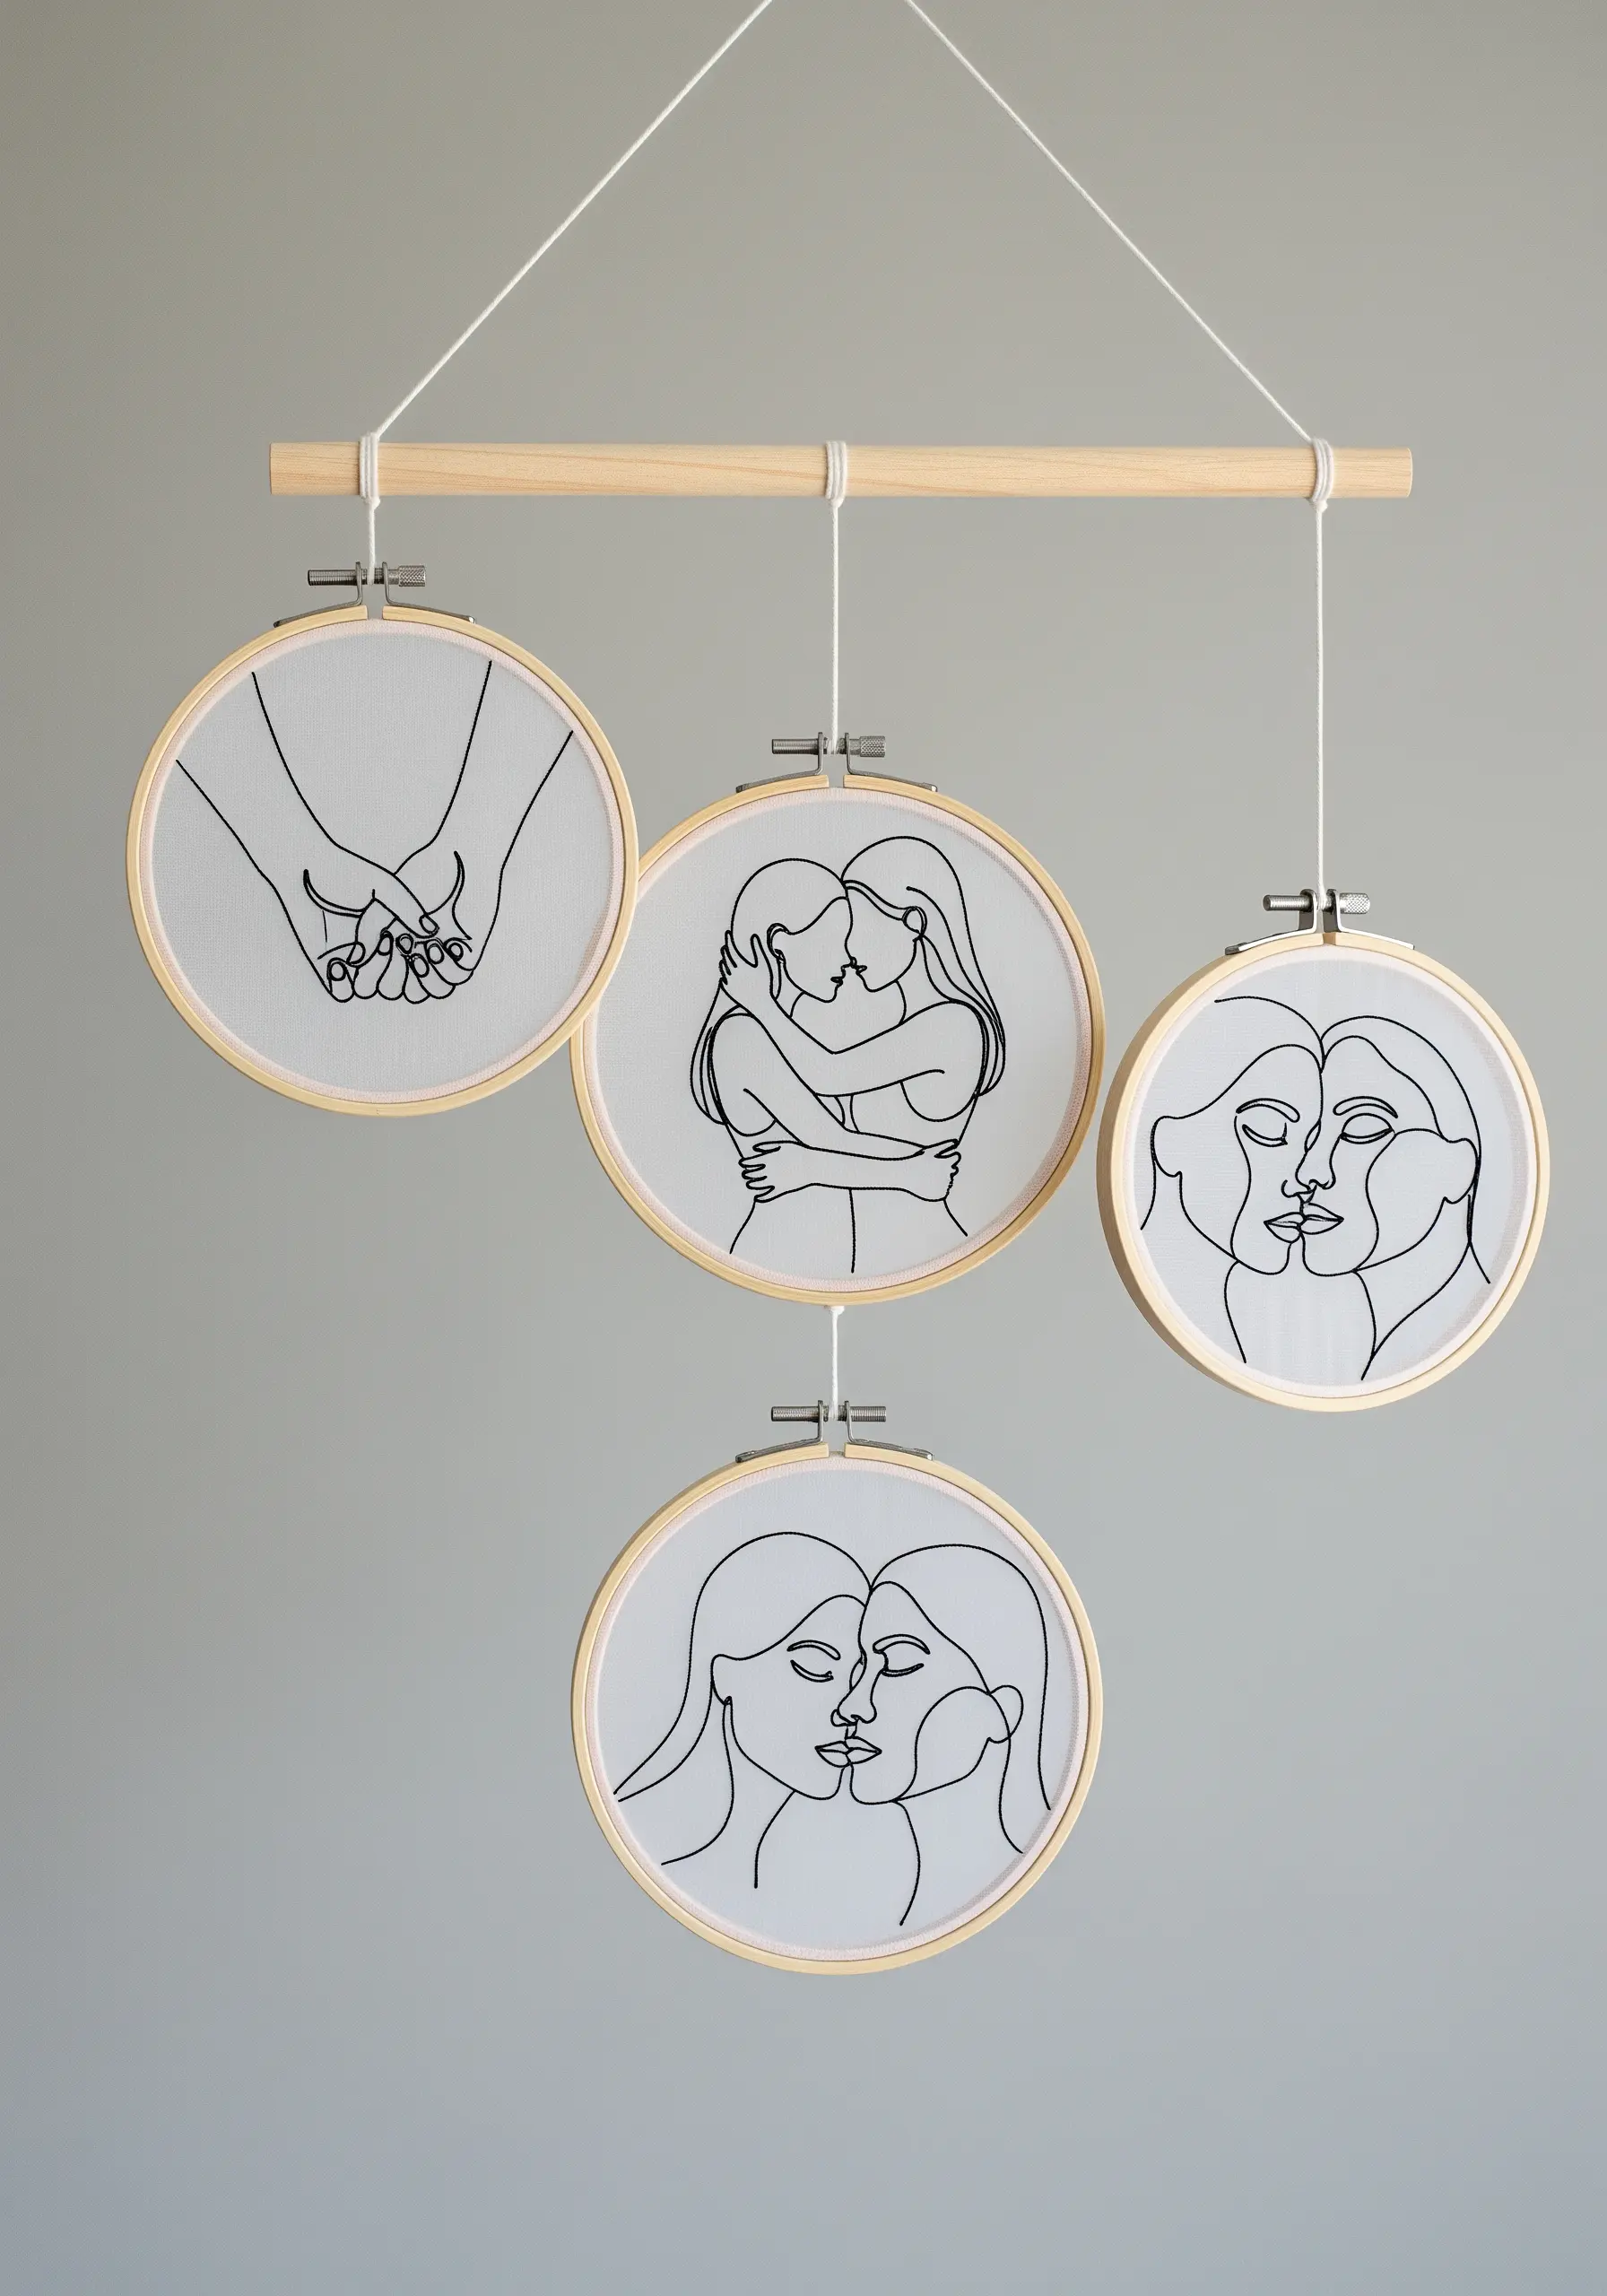
When creating an embroidery mobile, remember that the back of your work is just as visible as the front.
Conceal the reverse side of your stitching by gluing a perfectly cut circle of felt to the back of each hoop. This provides a clean, professional finish from every angle.
To ensure the mobile hangs evenly, use lightweight wooden hoops and balance them carefully on a central dowel, varying the lengths of the hanging threads for dynamic visual interest.
26. Add Sculptural Dimension with Braided Chain Stitch
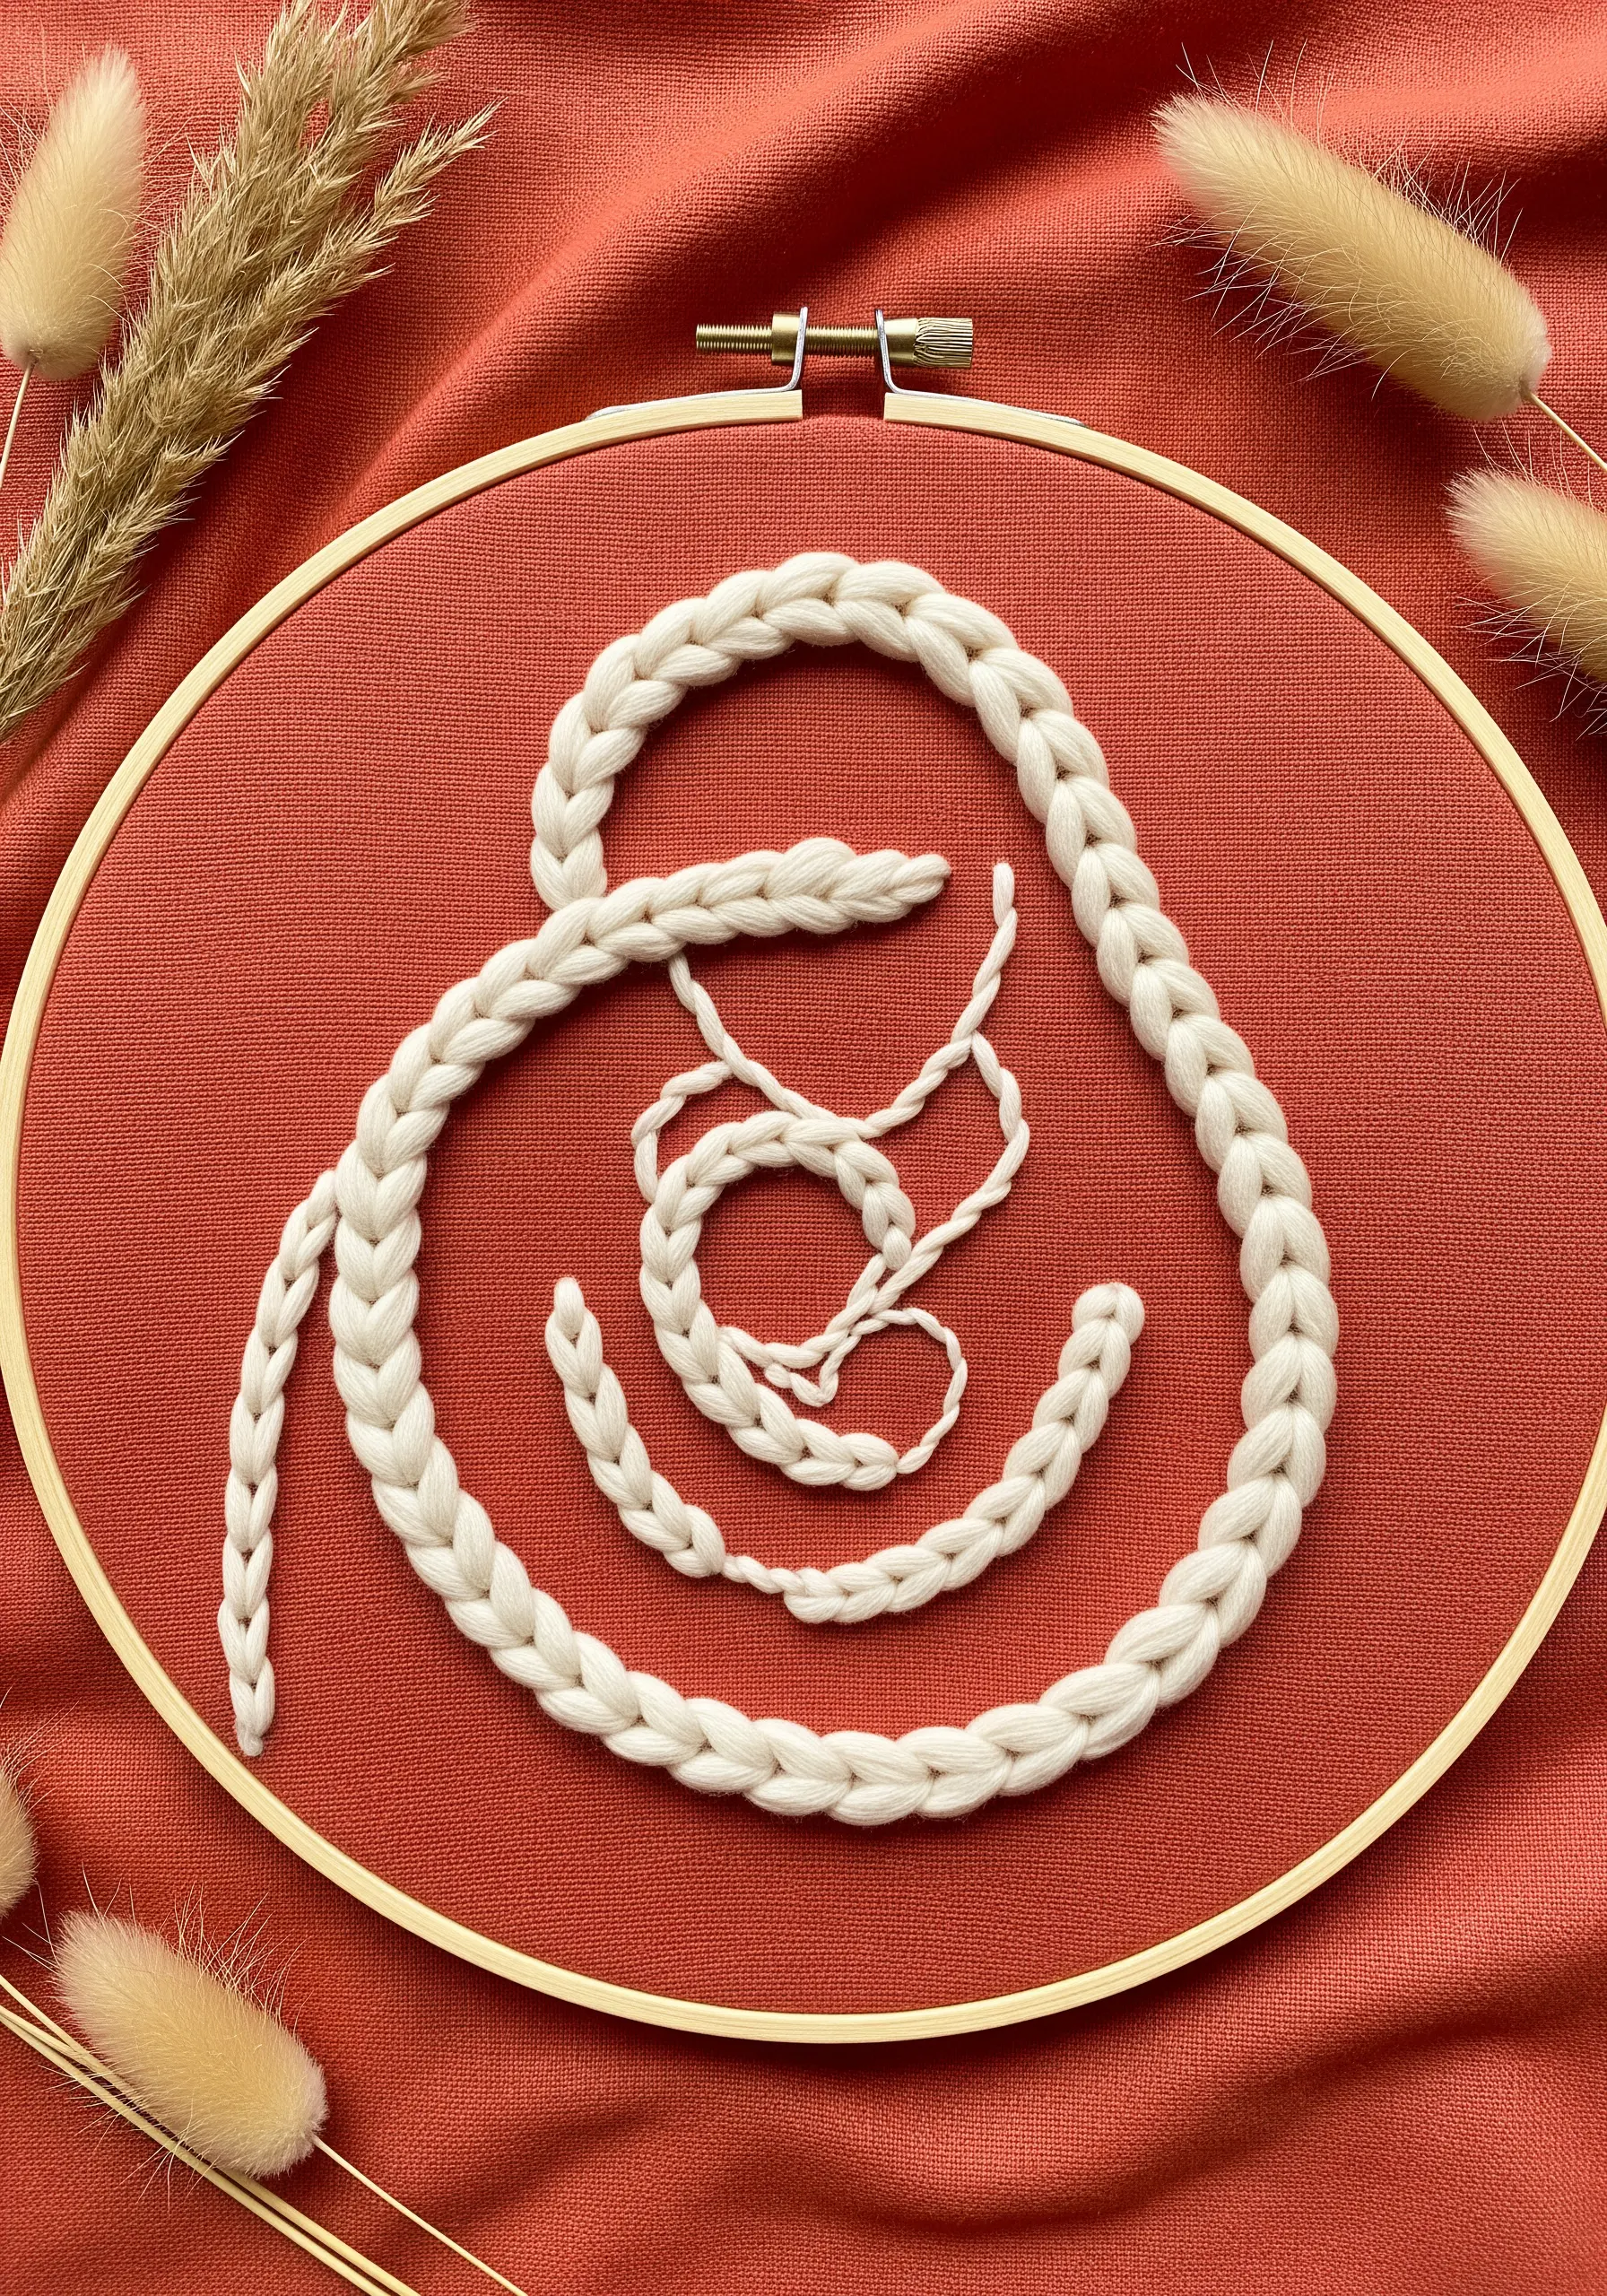
To give your line art a bold, three-dimensional quality, move beyond standard floss and stitch with a chunkier material like soft cotton yarn.
The braided chain stitch (also known as the heavy chain stitch) is the perfect partner for thick threads. It forms a substantial, textured plait that sits high on the fabric surface.
This technique turns a simple outline into a tactile, sculptural element, adding dramatic impact to even the most minimalist design.
27. Seamlessly Integrate Embroidery into a Quilt Block
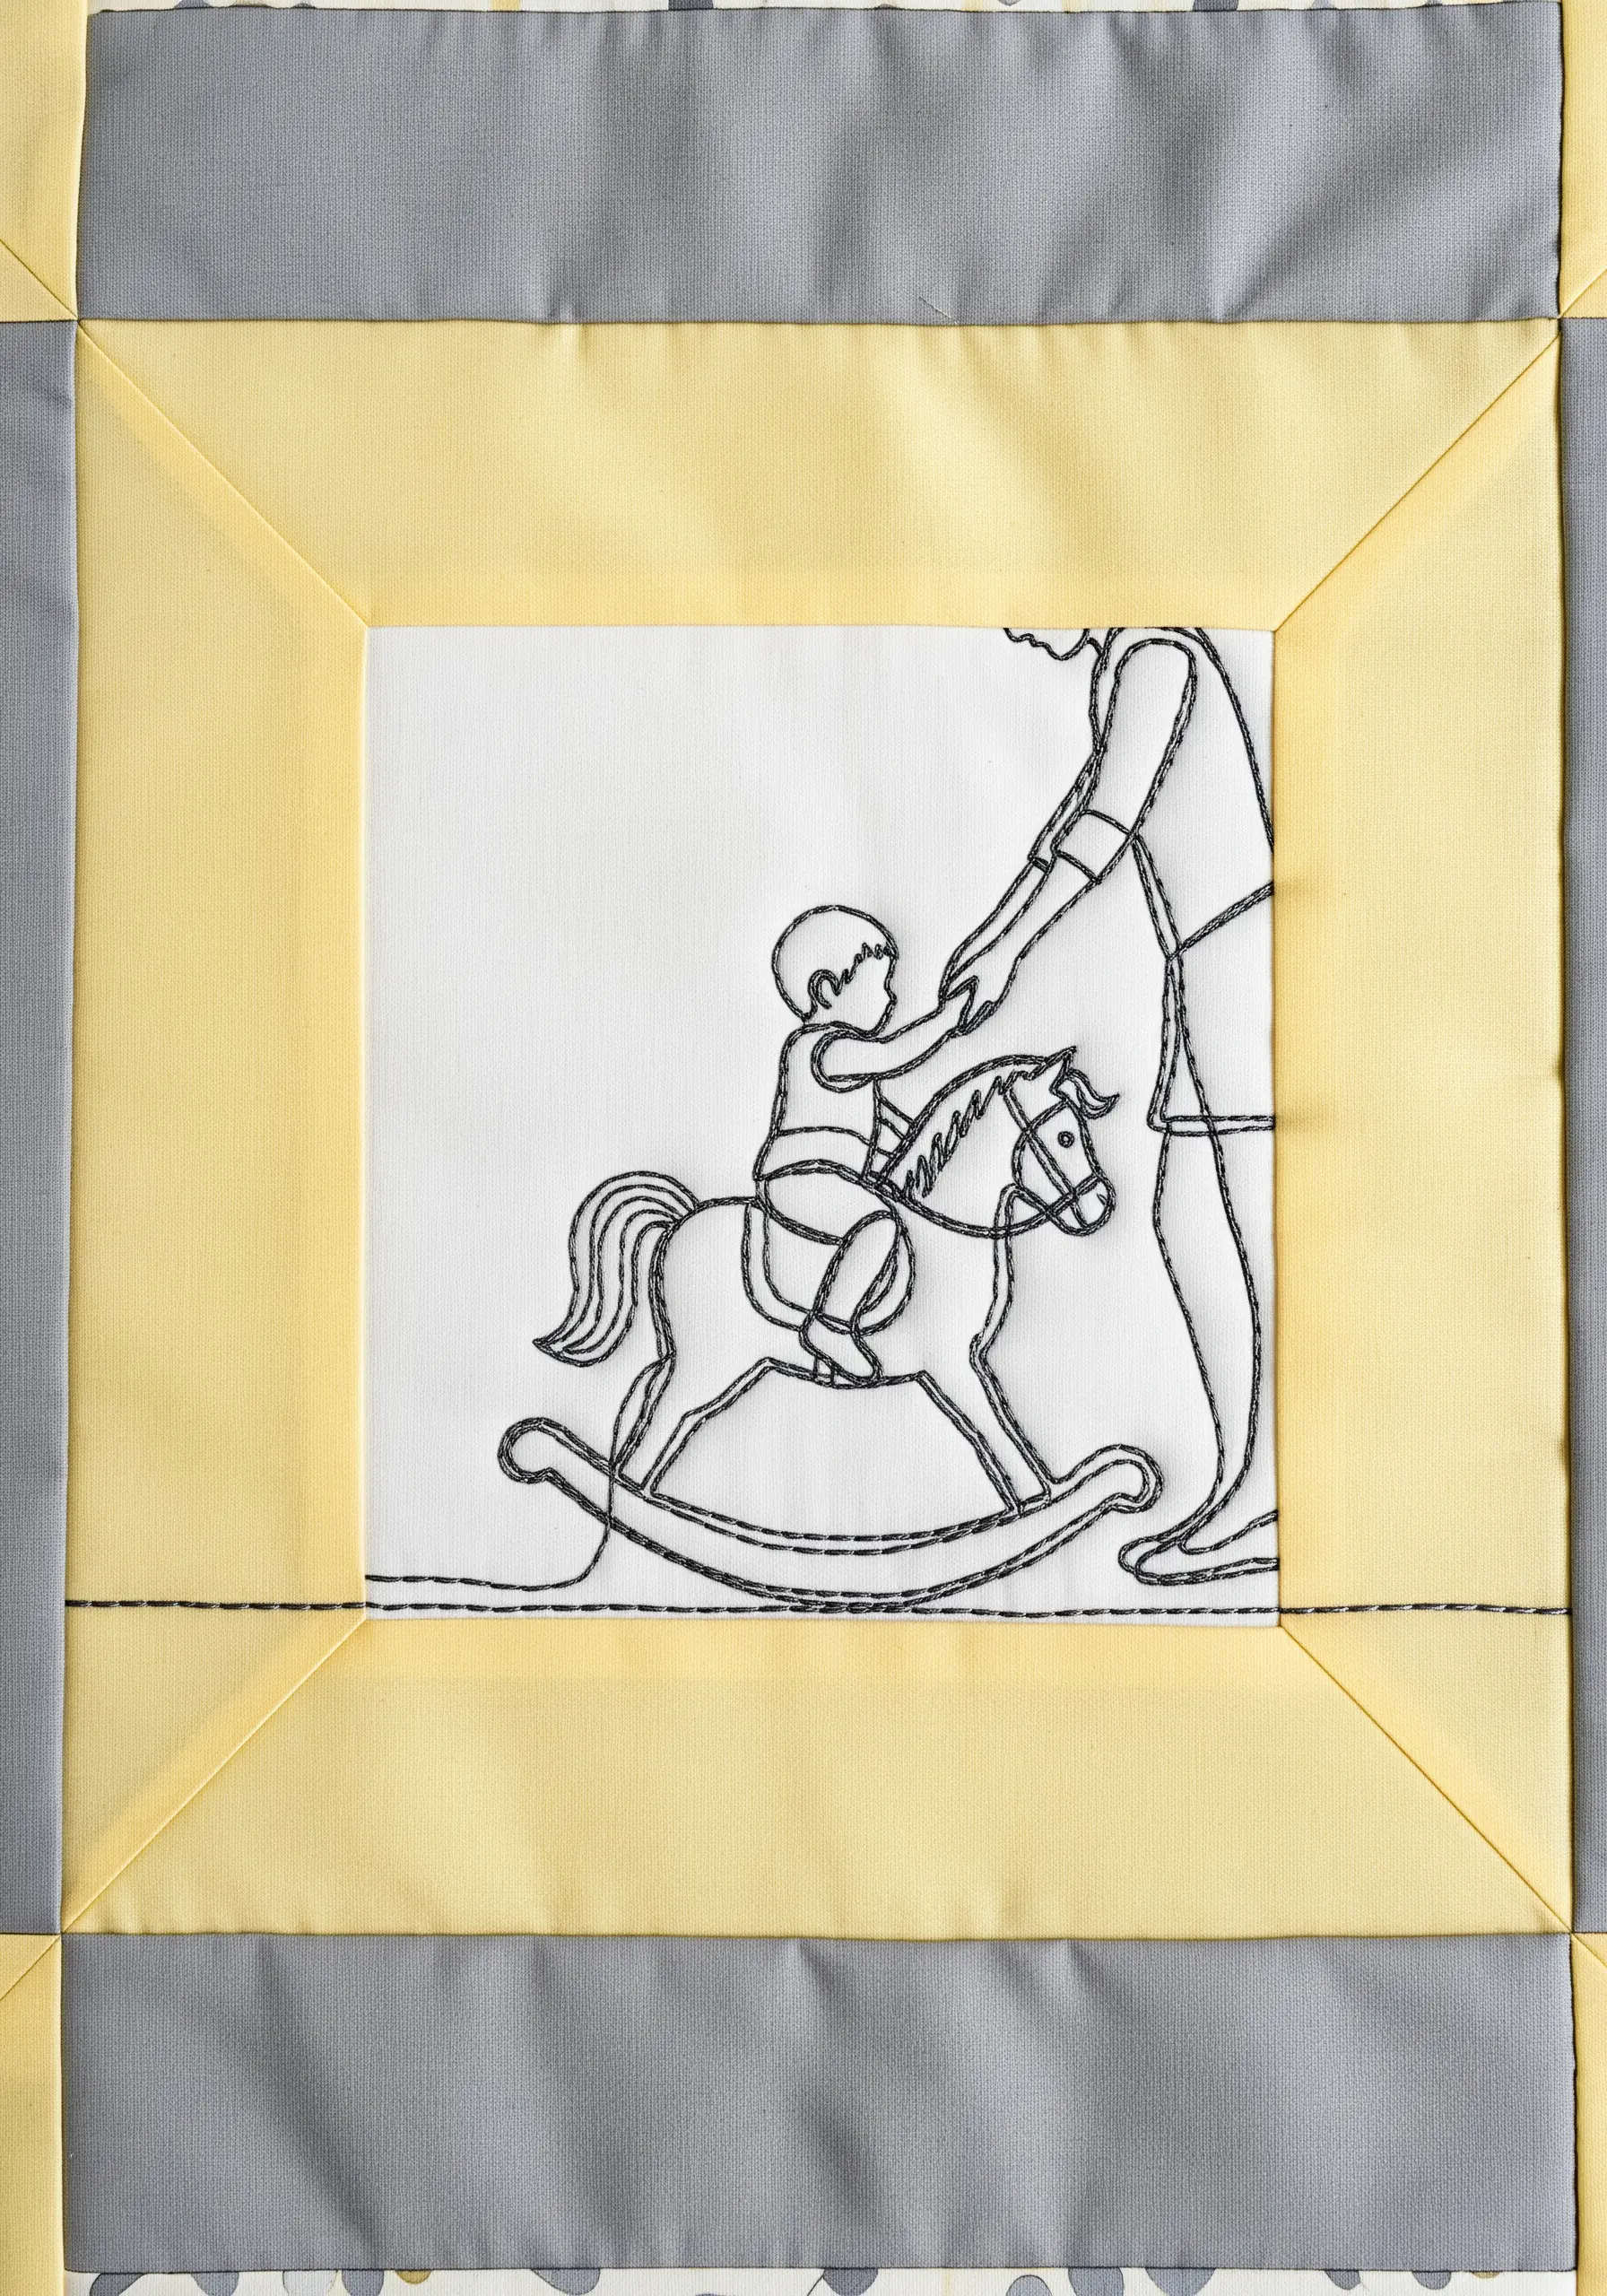
To incorporate an embroidered panel into a larger patchwork project, always complete the stitching *before* you assemble the quilt block.
Stitch your design onto a piece of fabric that is larger than the final block size, leaving at least a two-inch margin all around. This gives you plenty of room for hooping without creasing your seam allowance.
Iron a lightweight stabilizer to the back before stitching to prevent any puckering, ensuring your embroidered panel lies perfectly flat when sewn into the final quilt.


