

Creating a portrait that feels truly alive is less about artistic talent and more about learning to see—and stitch—with intention. Hyper-realism isn’t born from complex stitches, but from your careful observation of light, color, and form, translated into thread.
Think of your needle as a paintbrush and your floss as a palette. Each stitch is a deliberate stroke that can either flatten an image or give it breath. The key is to understand how to manipulate thread direction, color blending, and texture to replicate the way light falls on a face, the texture of hair, or the glint in an eye.
In this guide, we’ll move beyond basic fills and explore the specific techniques that create depth, emotion, and startling realism. You already have the tools. Now, it’s time to refine your approach and transform your portraits from simple likenesses into profound works of textile art.
1. Capture Character with Directional Stitching
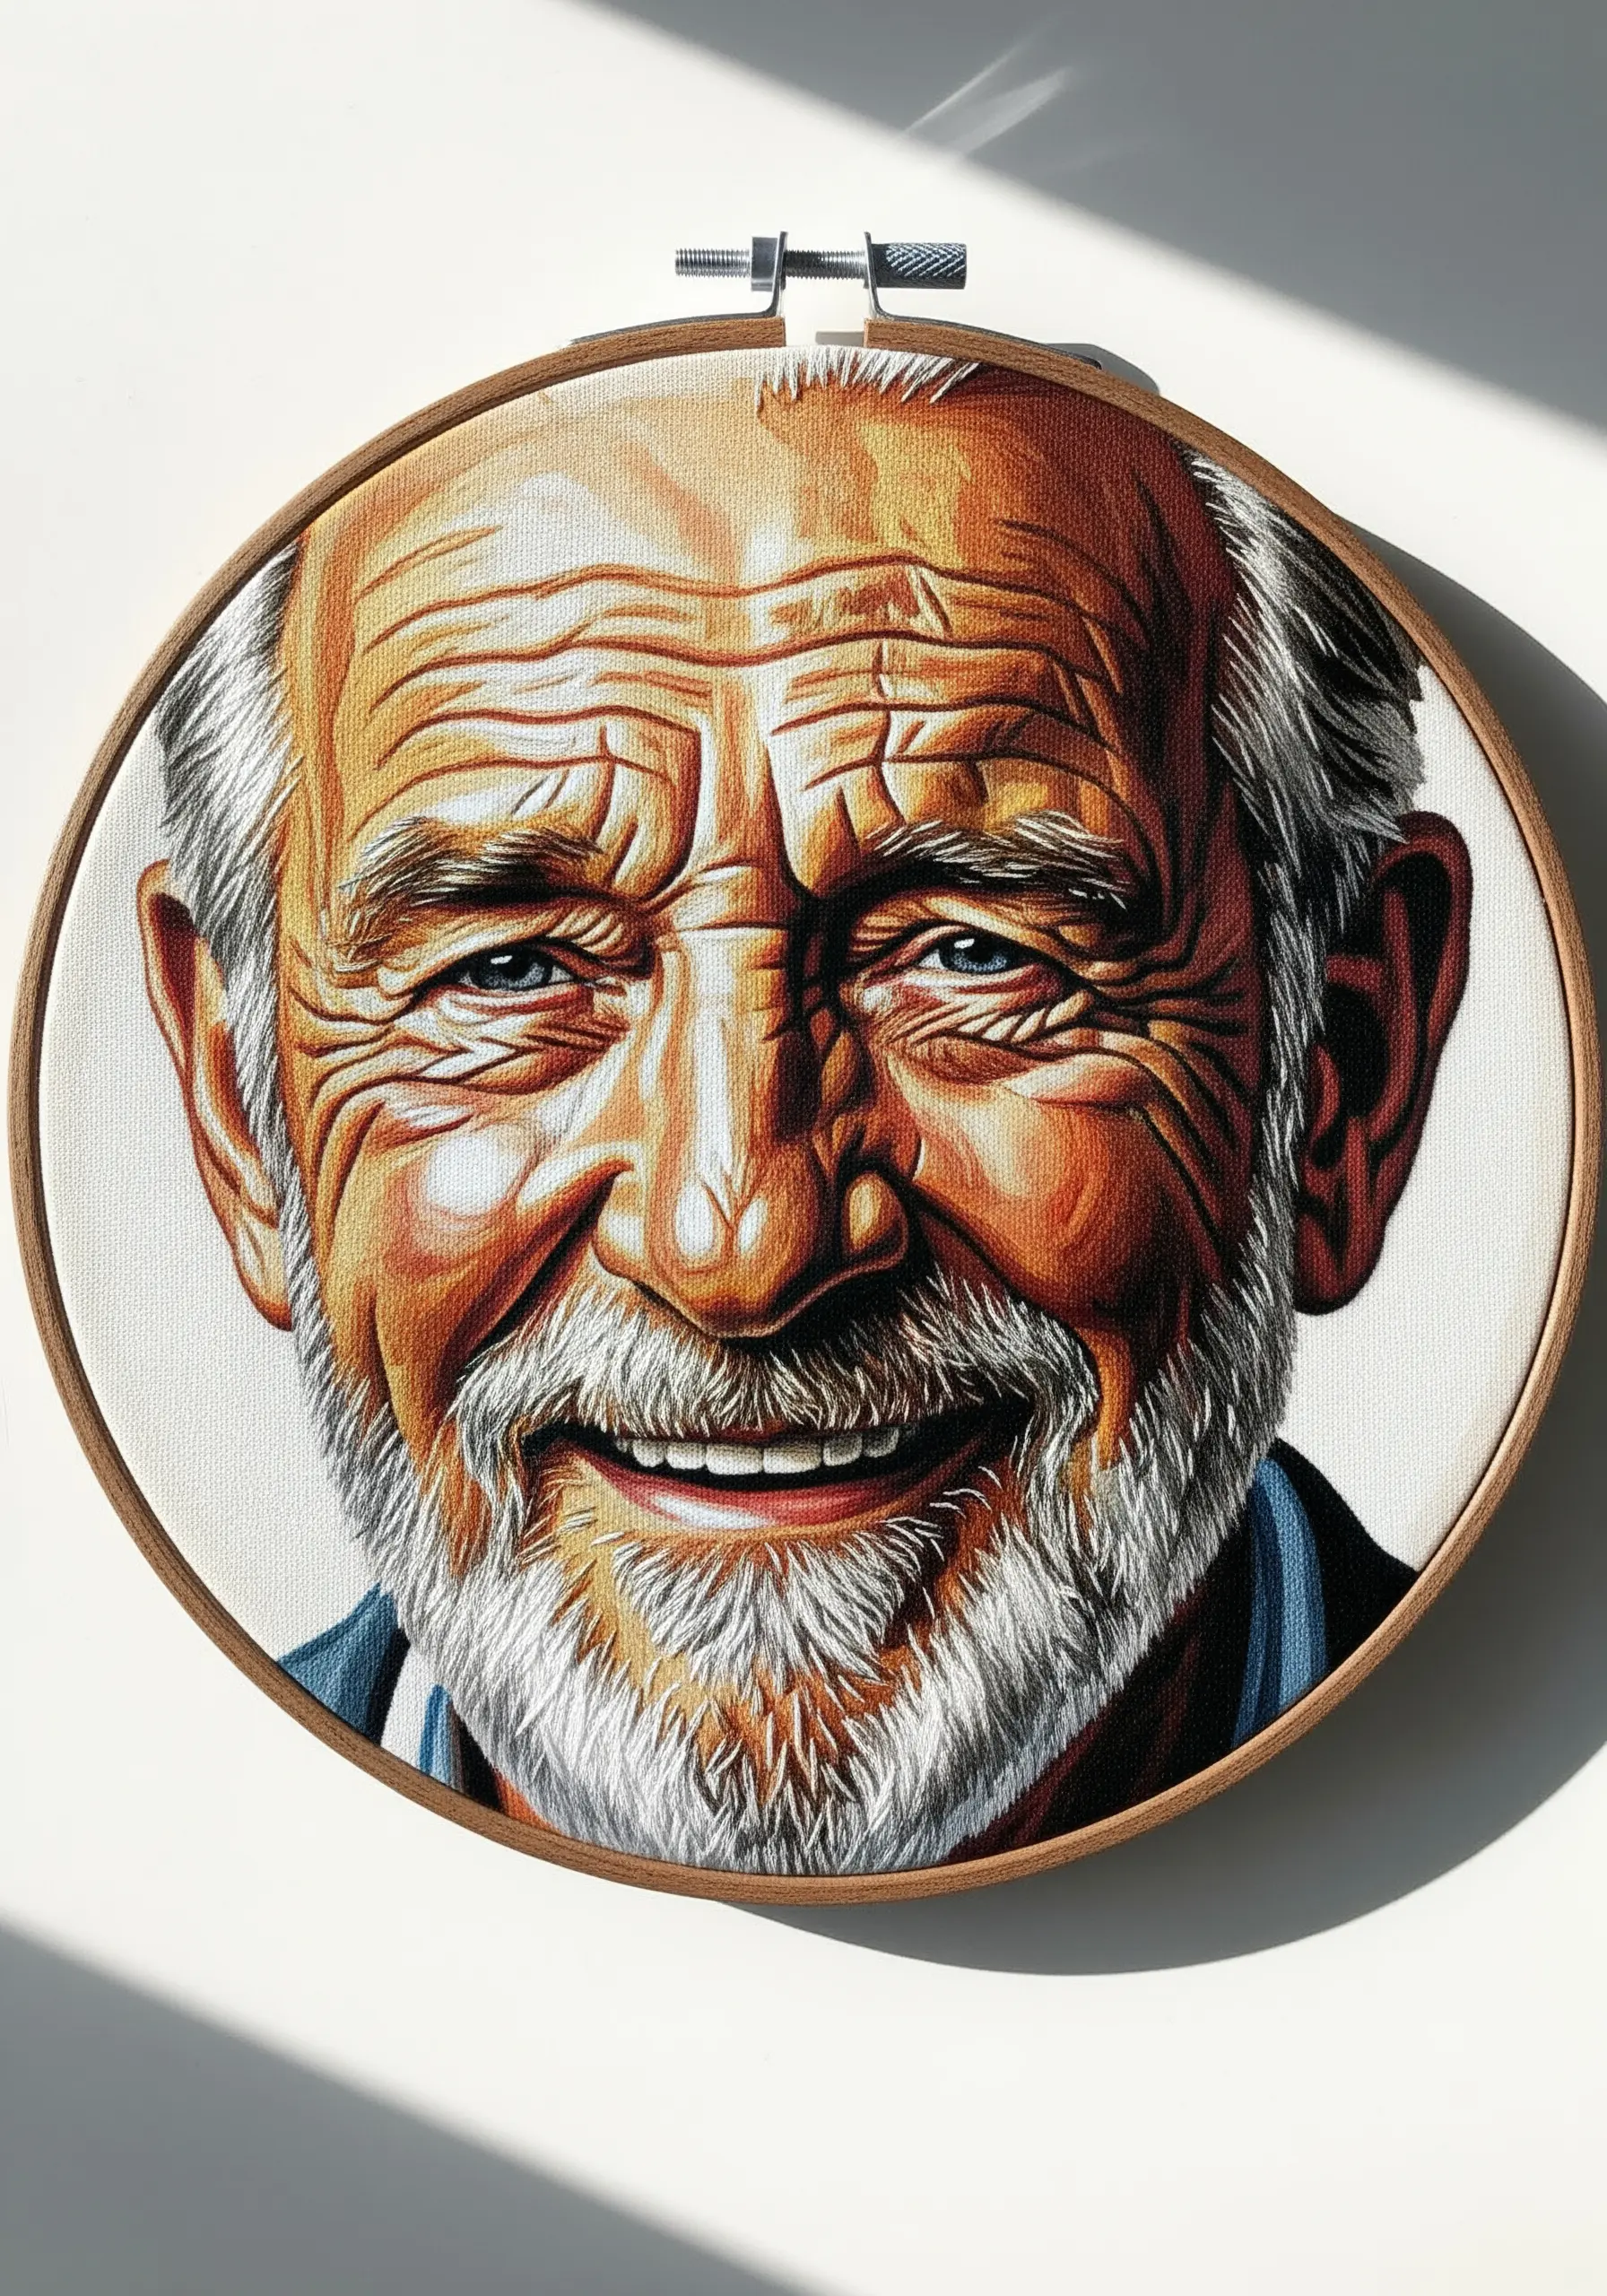
To render the complex texture of aged skin, you must treat your stitches like pencil strokes, following the natural contours of the face.
Instead of filling areas with uniform satin stitch, use single-thread long-and-short stitches that curve and sweep along the lines of each wrinkle and fold.
This directional approach builds form and volume, transforming a flat surface into a landscape of experience.
Vary the stitch length slightly to avoid a rigid, unnatural pattern, which enhances the organic feel of the portrait.
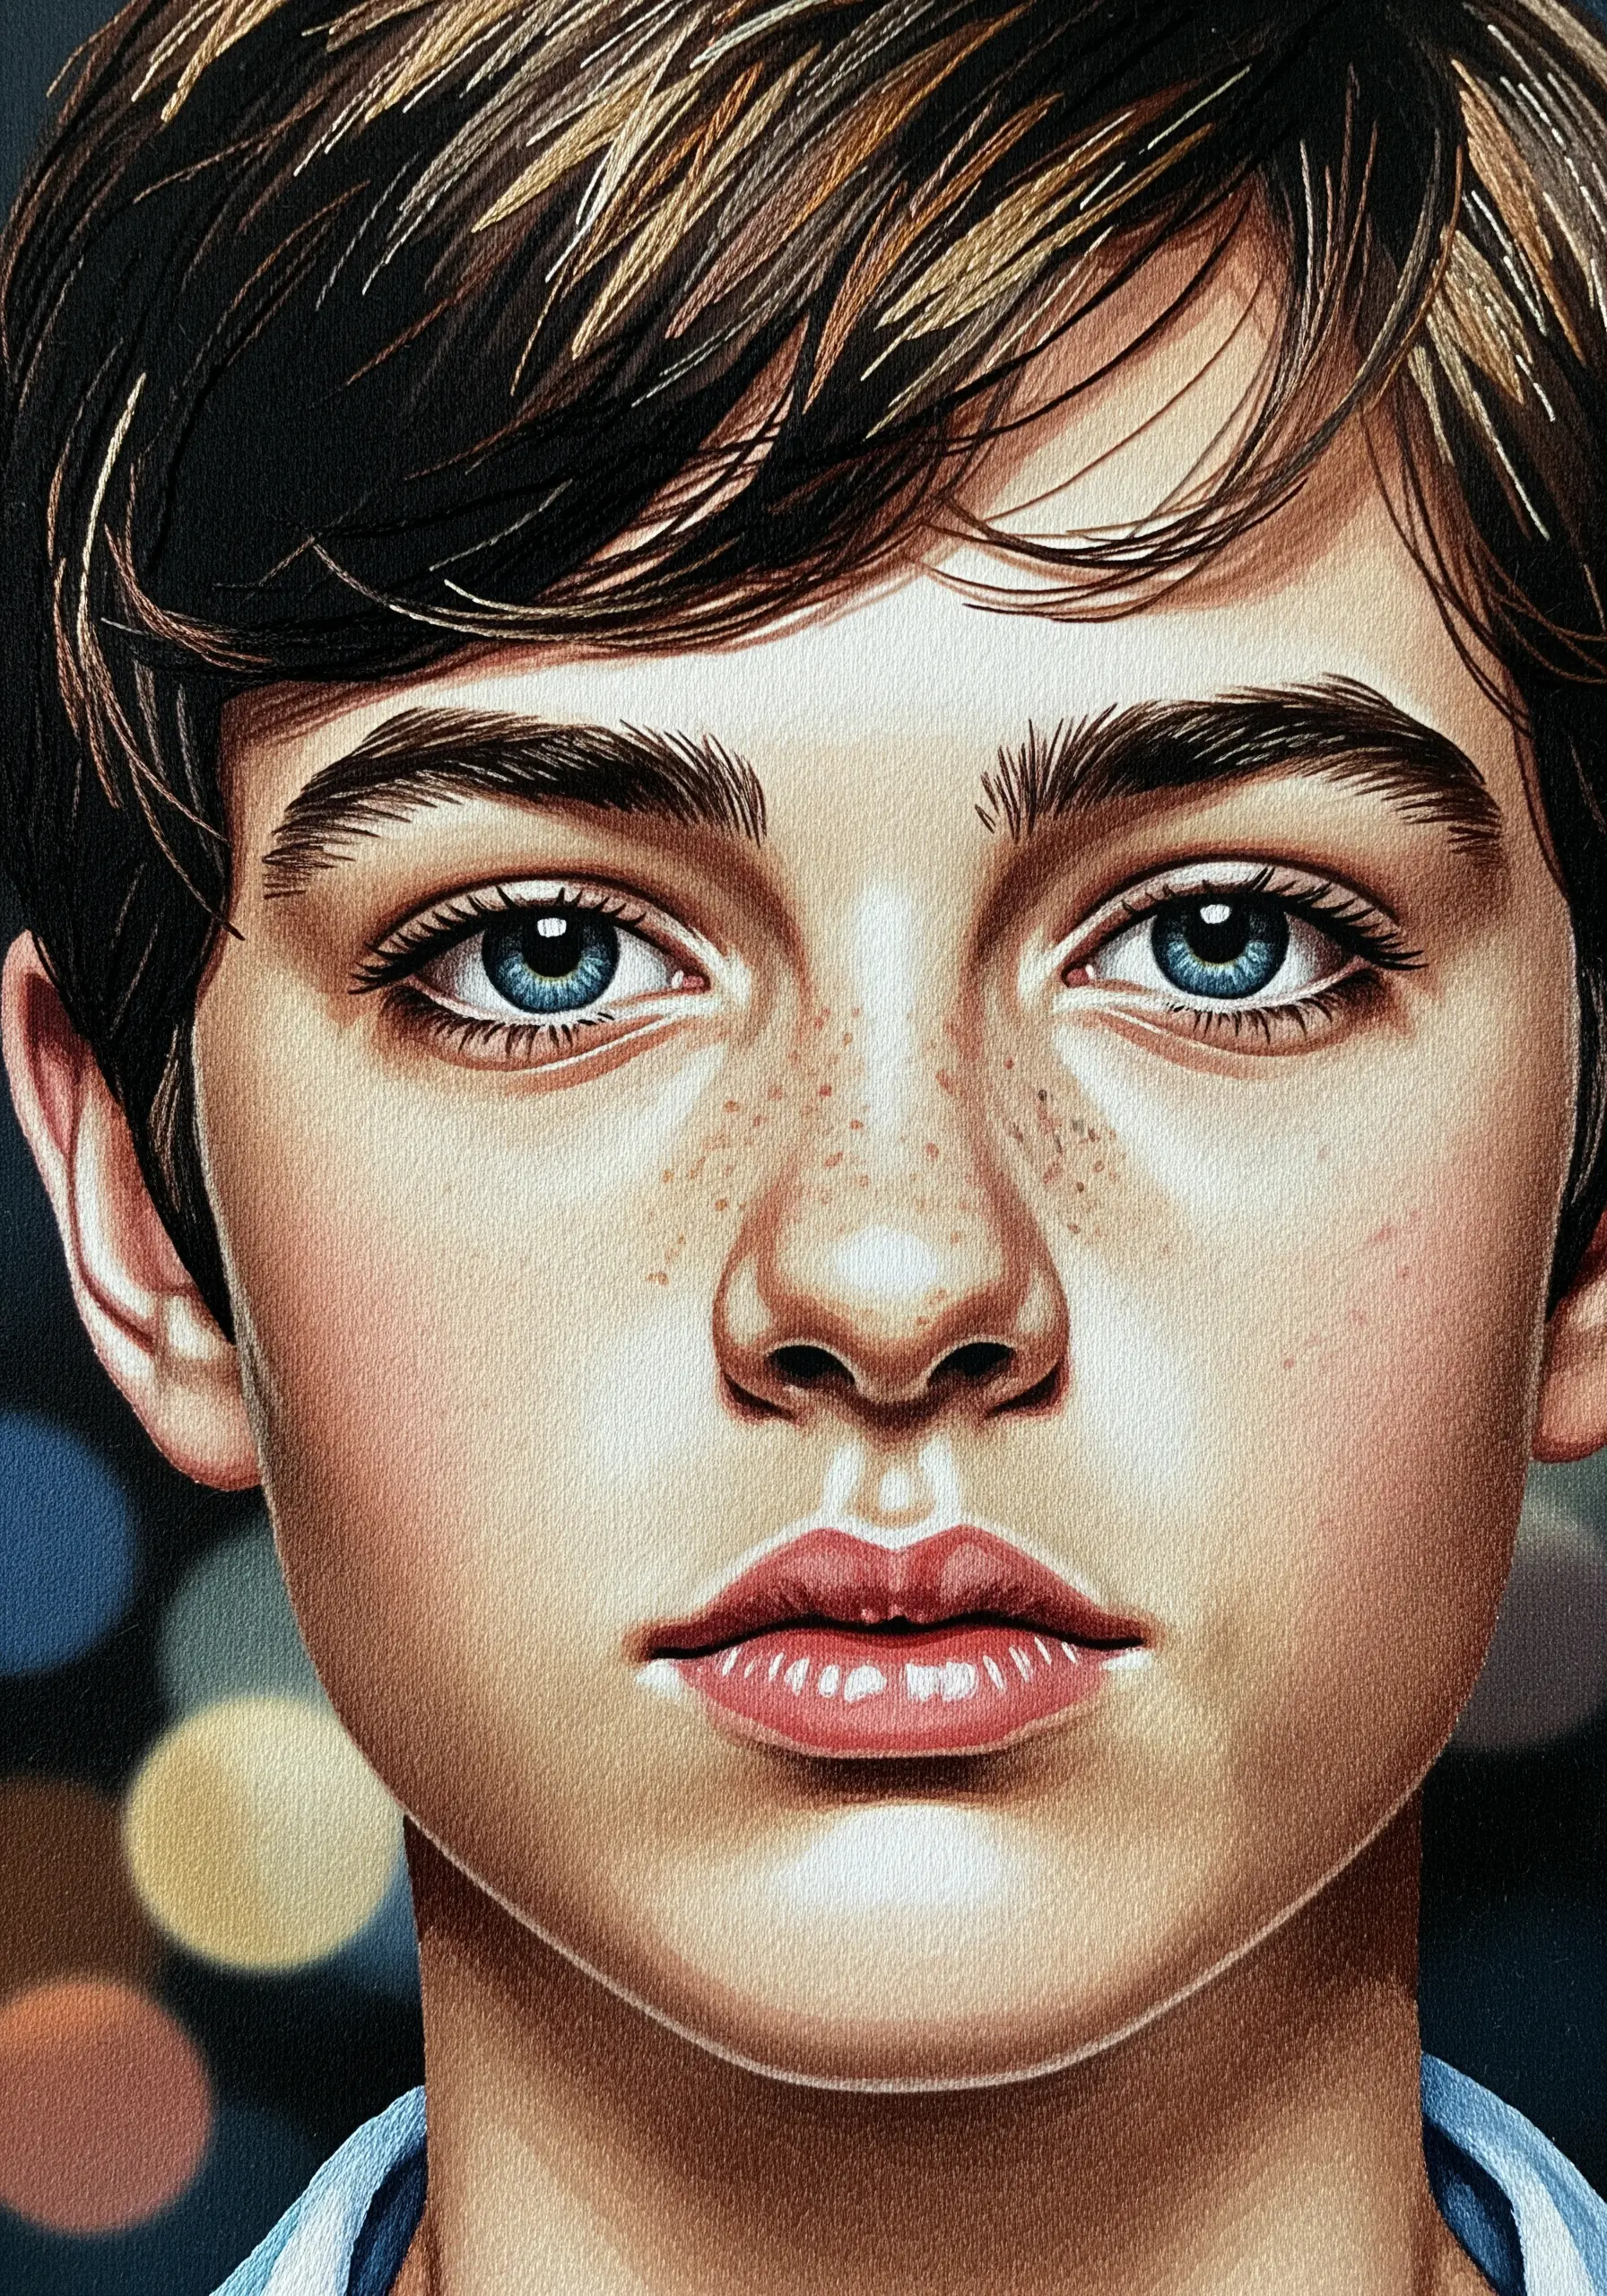
2. Render Freckles with Varied French Knots
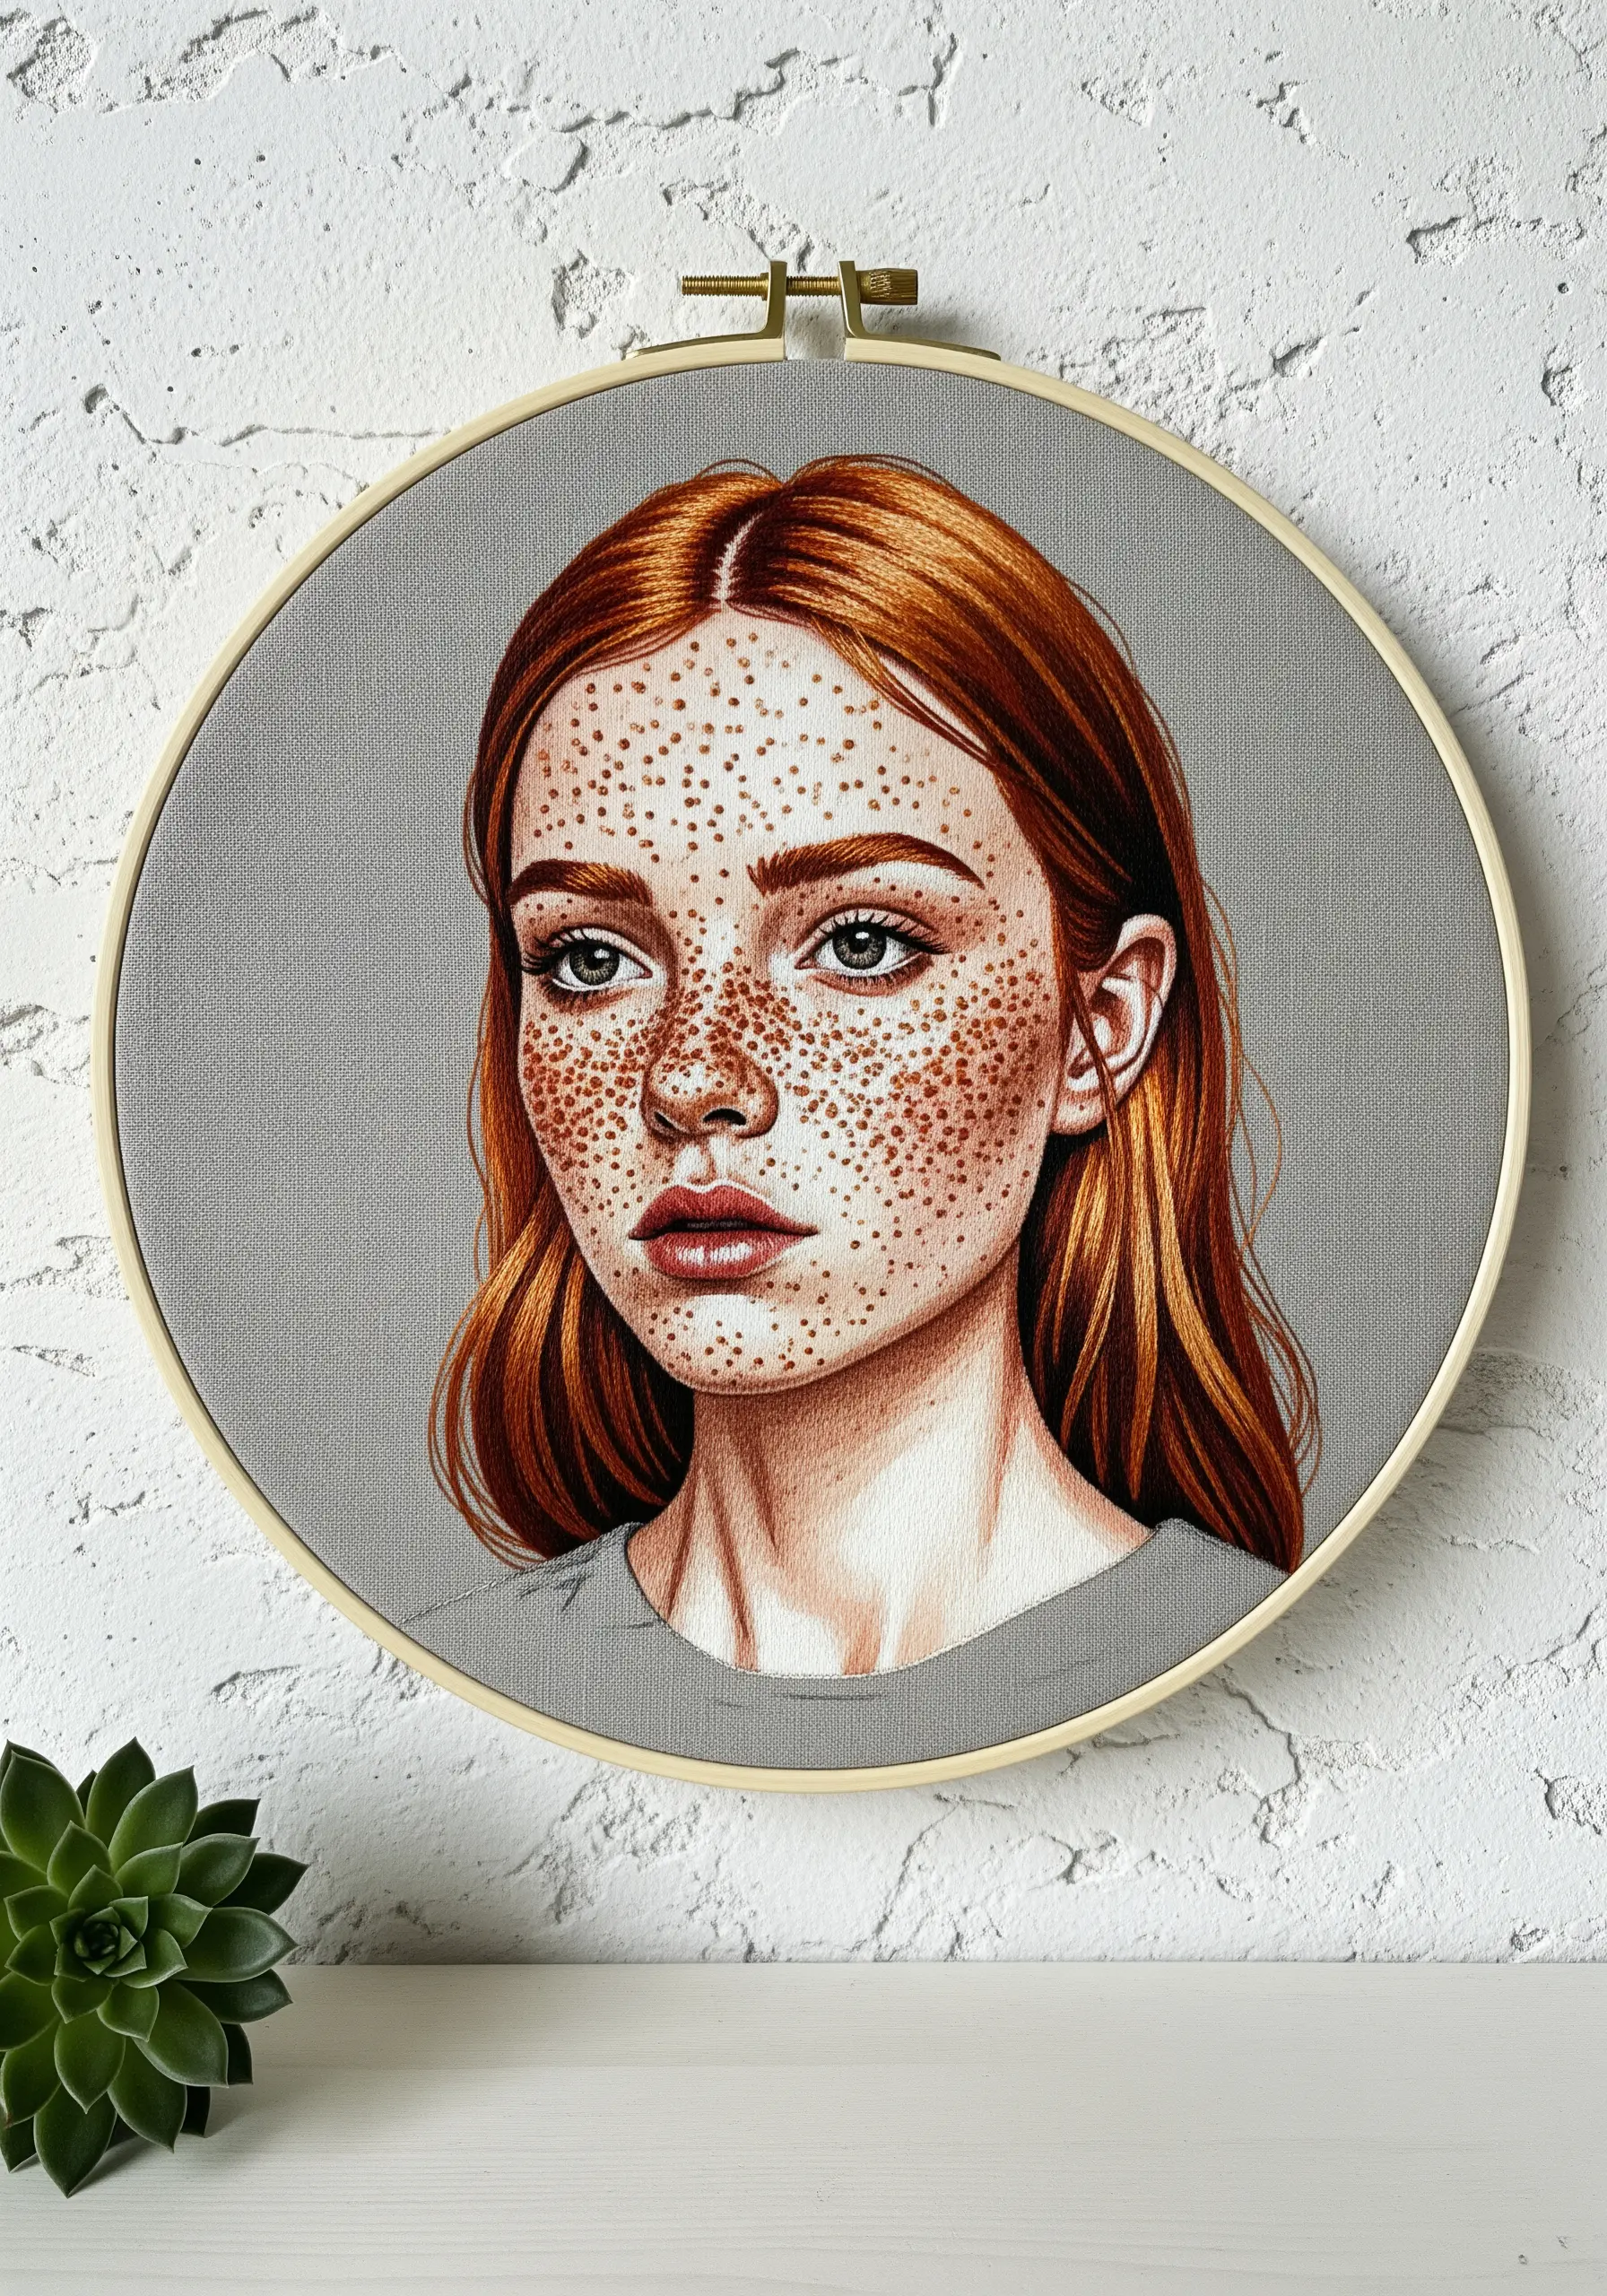
Achieving realistic freckles is about mastering controlled randomness.
Use a single strand of thread in a slightly darker shade than the surrounding skin tone and create tiny French knots or seed stitches.
Vary the size and spacing of each stitch to mimic the natural, imperfect distribution of freckles.
For softer, more subtle spots, use a single, straight stitch. This combination prevents the texture from looking uniform and adds a layer of convincing realism to your portrait.
3. Master Value and Contrast on Dark Fabric
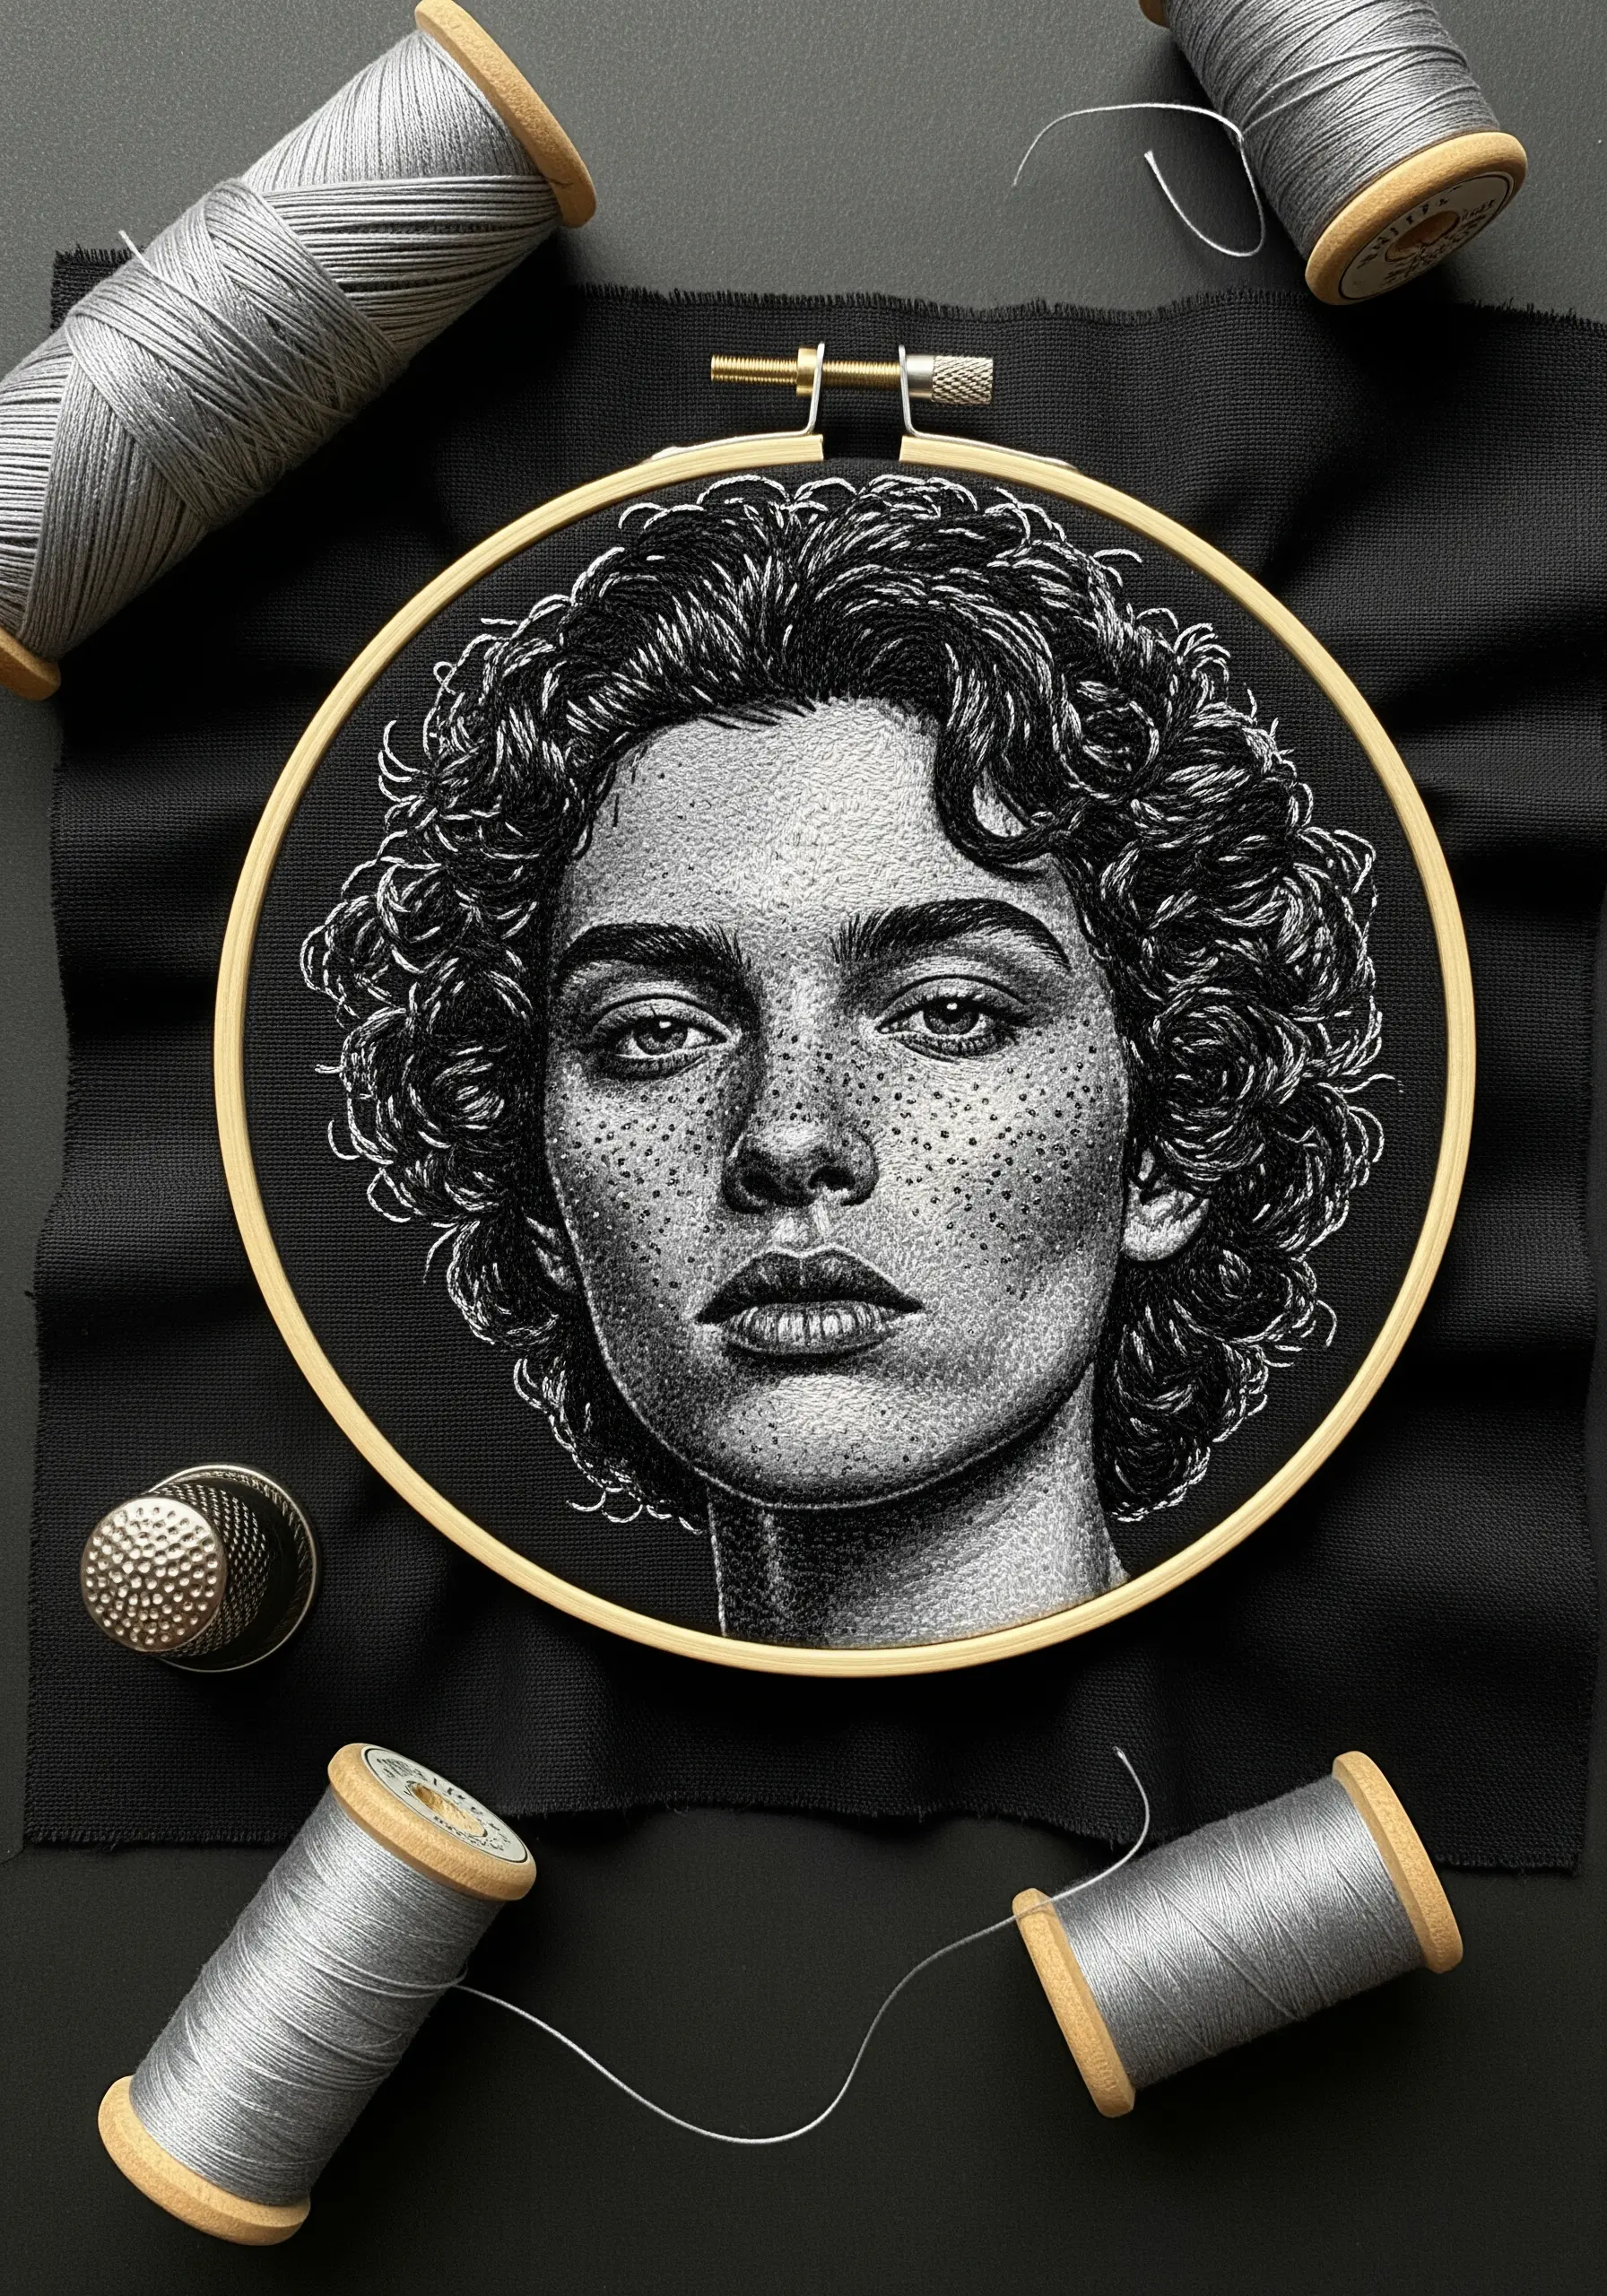
When working on black or dark fabric, your thread isn’t just adding color—it’s creating light.
Think in terms of value, not just lines. Use shades of grey and white to build highlights, allowing the dark fabric to serve as your deepest shadows.
This technique, known as chiaroscuro, creates dramatic depth and form.
Start with your mid-tones and gradually build up to your brightest whites, placing them only where the light would hit most intensely.
4. Blend Unnatural Hair Color Seamlessly

To create vibrant, multi-toned hair, the long-and-short stitch is your most powerful tool.
Map out the sections of color first, then fill them by staggering your stitches and overlapping the color transitions.
Use a single strand of floss to ensure the blend is gradual and soft, avoiding harsh lines between hues.
For extra dimension, introduce a slightly darker shade at the roots and a lighter one at the tips to mimic how light interacts with hair.
5. Stitch Realistic Reflections in Eyeglasses

The key to believable eyeglasses is capturing the subtle distortion and reflection on the lenses.
Using single strands of white and light blue, stitch fine, curved lines to suggest the glare of a window or light source.
Keep these stitches sparse and delicate; overdoing it will obscure the eyes beneath.
This small detail instantly adds a layer of realism and context, grounding your portrait in a tangible space.
6. Use High-Contrast Outlines on Velvet

When stitching on a textured fabric like velvet, you can use its light-absorbing qualities to your advantage.
Create a strong, crisp outline for your subject using a single strand of white or a very light color. This defines the silhouette against the deep, dark background.
Fill the interior with directional long-and-short stitches that follow the facial planes.
The contrast between the sharp outline and the soft velvet creates a powerful, cameo-like effect that feels both classic and modern.
7. Build a Multi-Tonal Beard with Layered Stitches
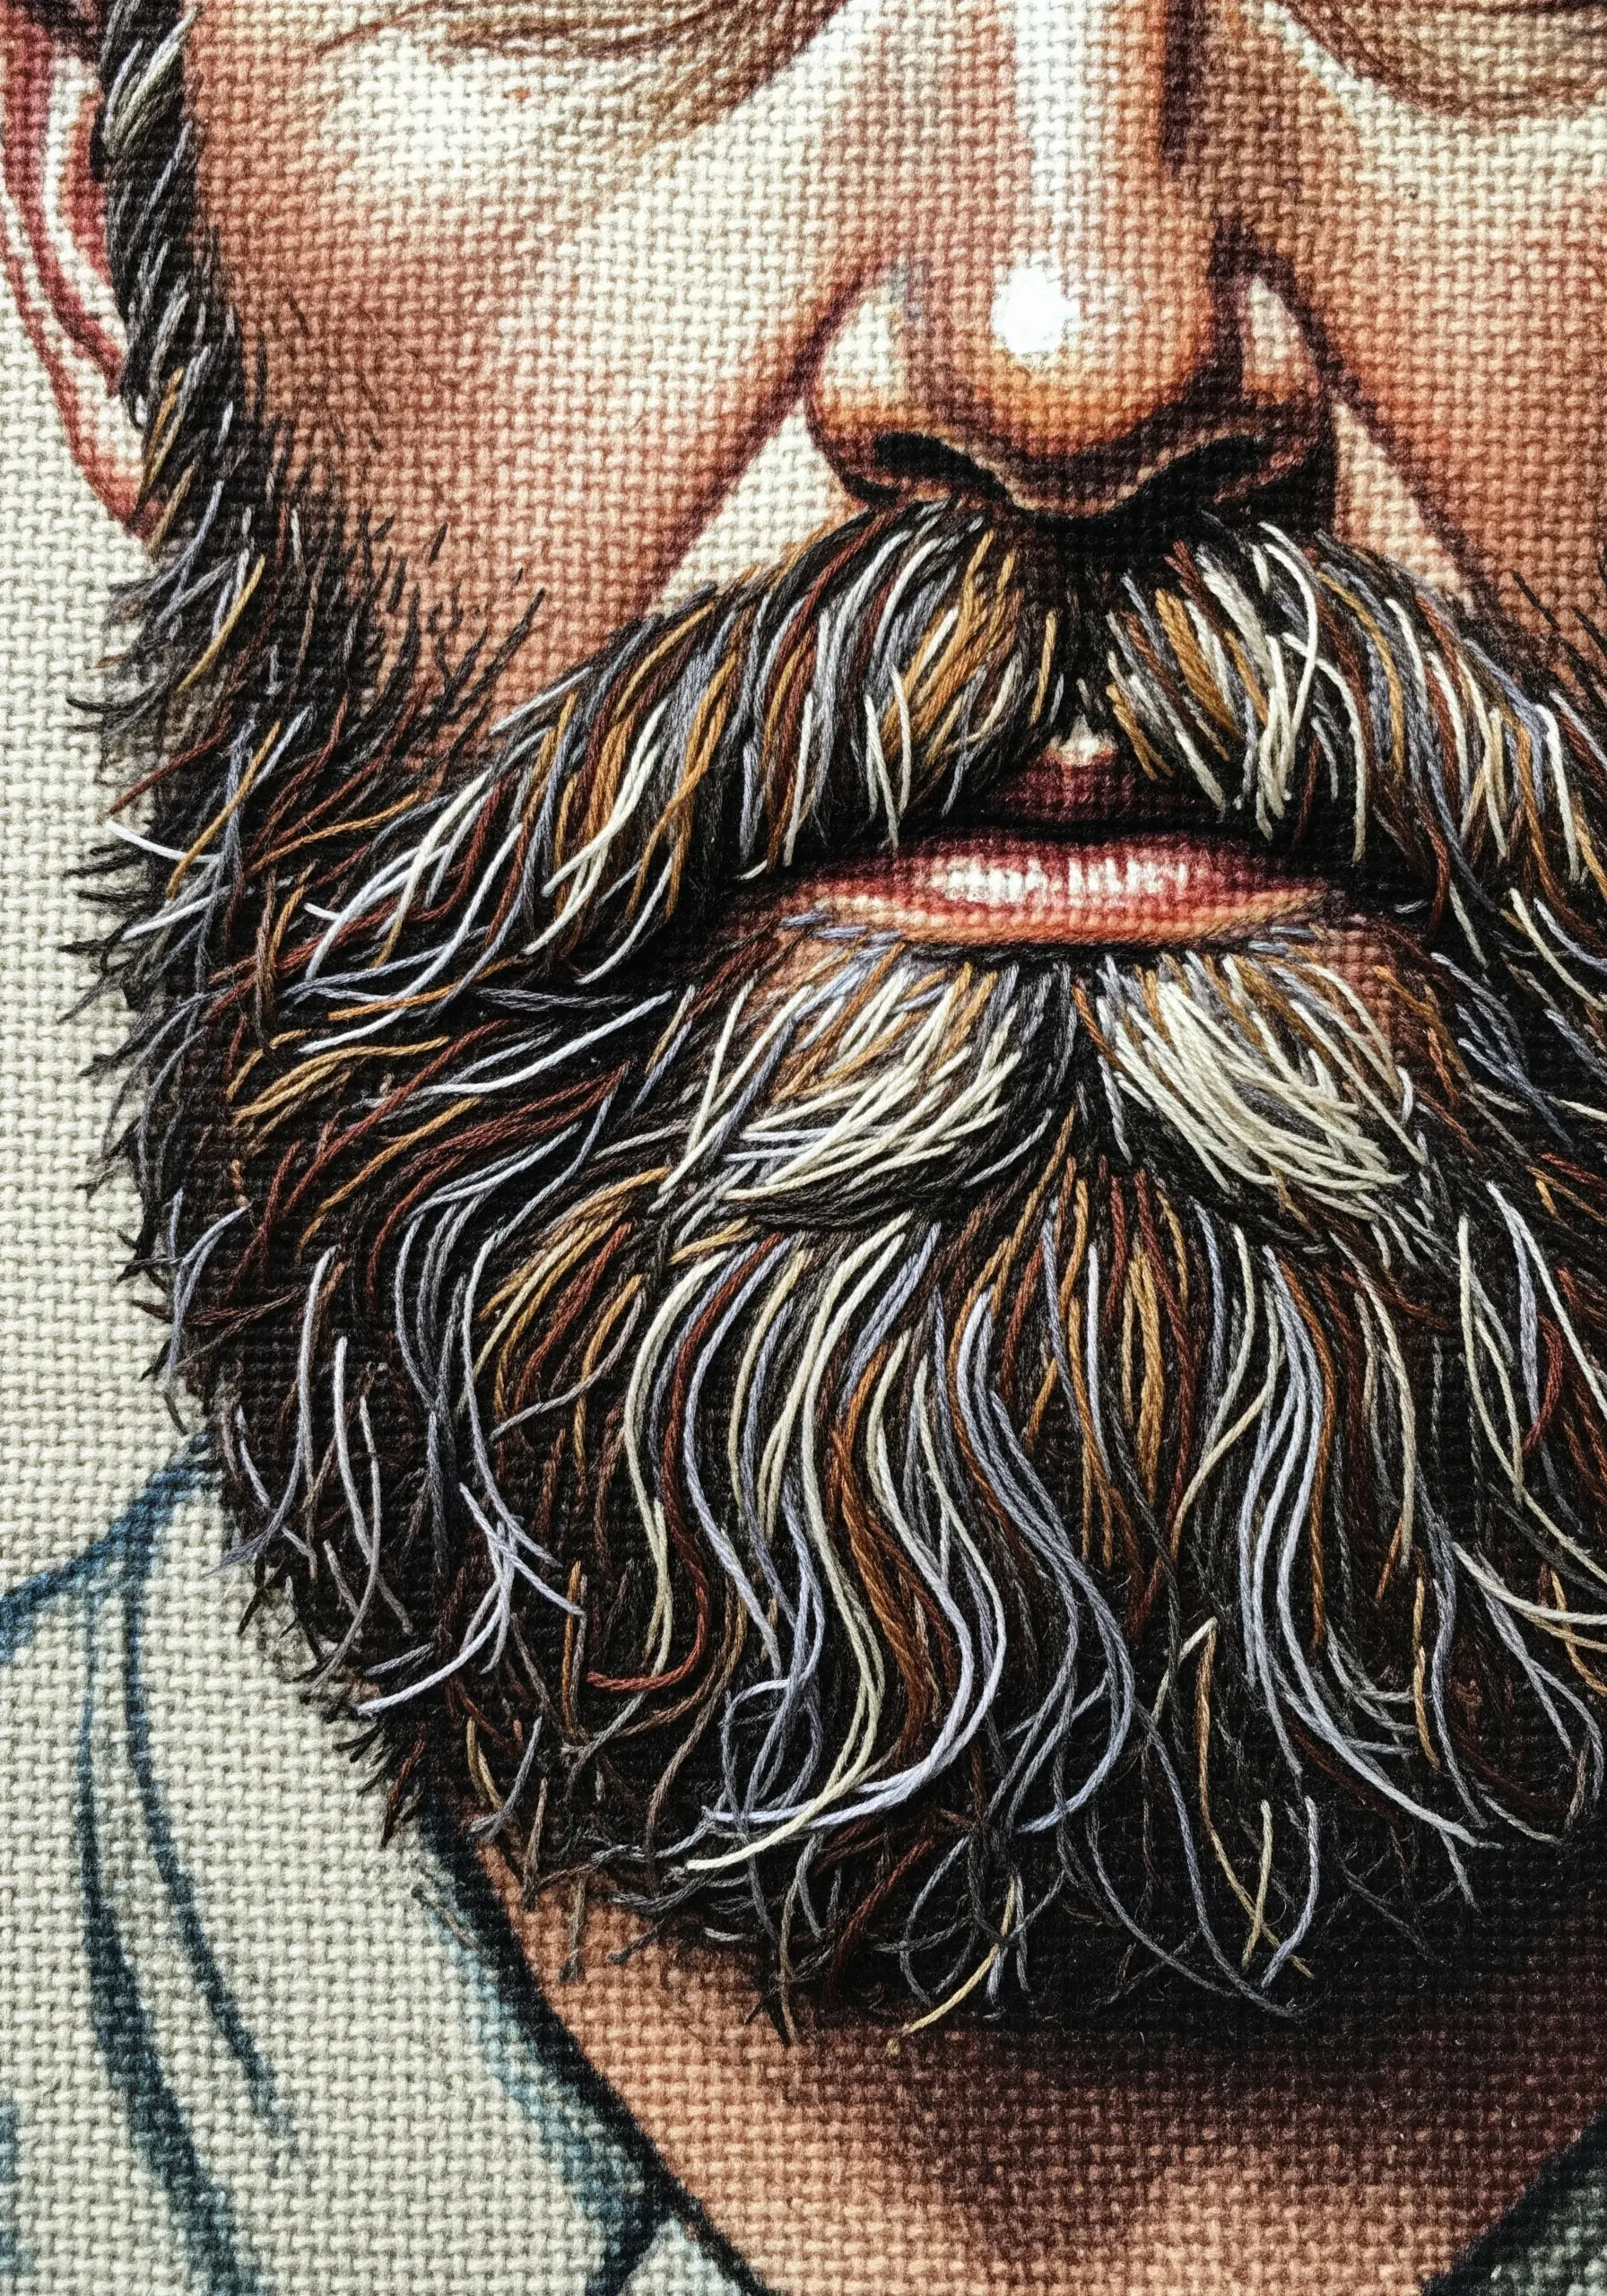
A realistic beard is a chaotic yet harmonious blend of colors and textures.
Instead of filling the area uniformly, use a variety of straight stitches in different lengths, directions, and colors—browns, blacks, grays, and even whites or reds.
Lay down a base of darker tones first, then layer the lighter and gray hairs on top, allowing them to overlap freely.
This layering technique creates incredible depth and a tactile quality that looks truly authentic.
8. Achieve Soft Skin Tones with Subtle Blending
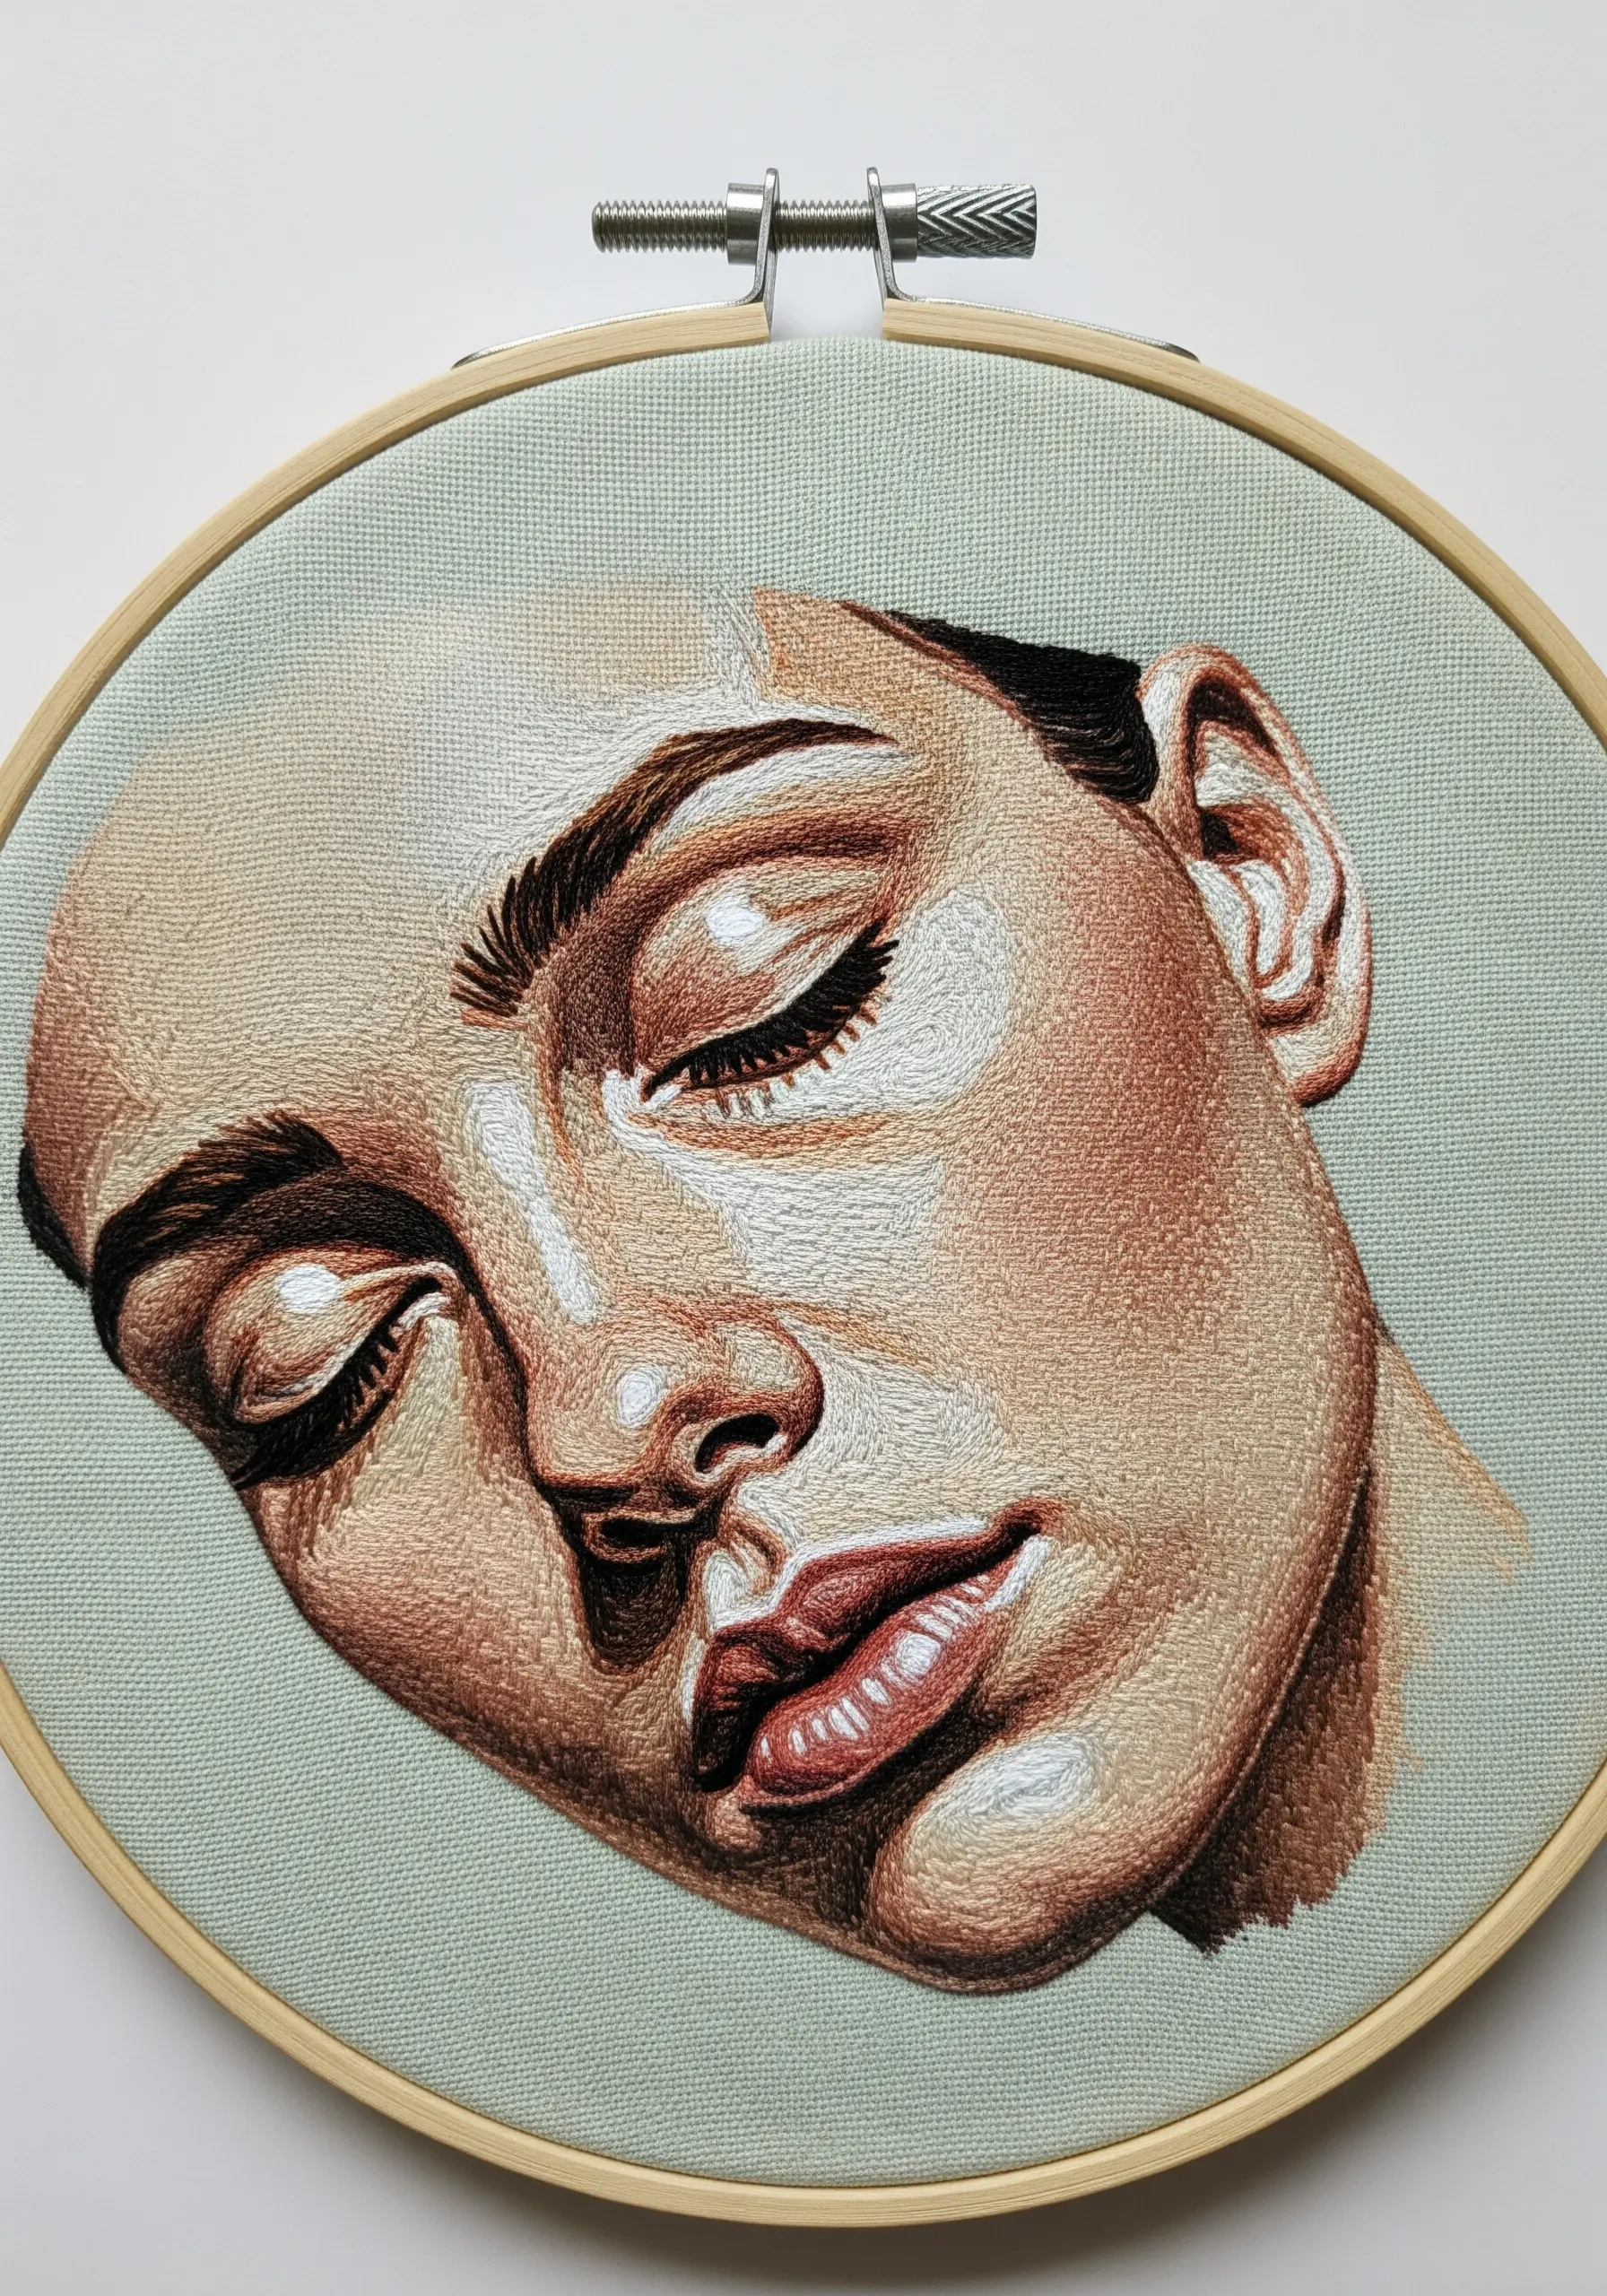
The illusion of soft, luminous skin comes from exceptionally smooth color transitions.
Work with a palette of closely related skin tones, using only a single strand of floss for each.
Employ the long-and-short stitch, ensuring your stitches are tiny and tightly packed. Blend the colors gradually, allowing the shades to merge almost imperceptibly.
This meticulous process eliminates harsh lines and creates a finish that mimics the gentle gradations of light on a real face.
9. Create a Lifelike Iris with Radial Stitches

To make an embroidered eye look truly alive, focus on the details of the iris and the catchlight.
Use tiny, radial satin stitches that emanate from the pupil, layering different shades of green, gold, and brown to replicate the iris’s complex pattern.
Finally, add a single, sharp stitch of bright white silk or rayon thread for the catchlight—the reflection of light on the cornea.
This one stitch is the critical element that breathes life and emotion into your portrait.
10. Sculpt 3D Hair with Textural Stitches
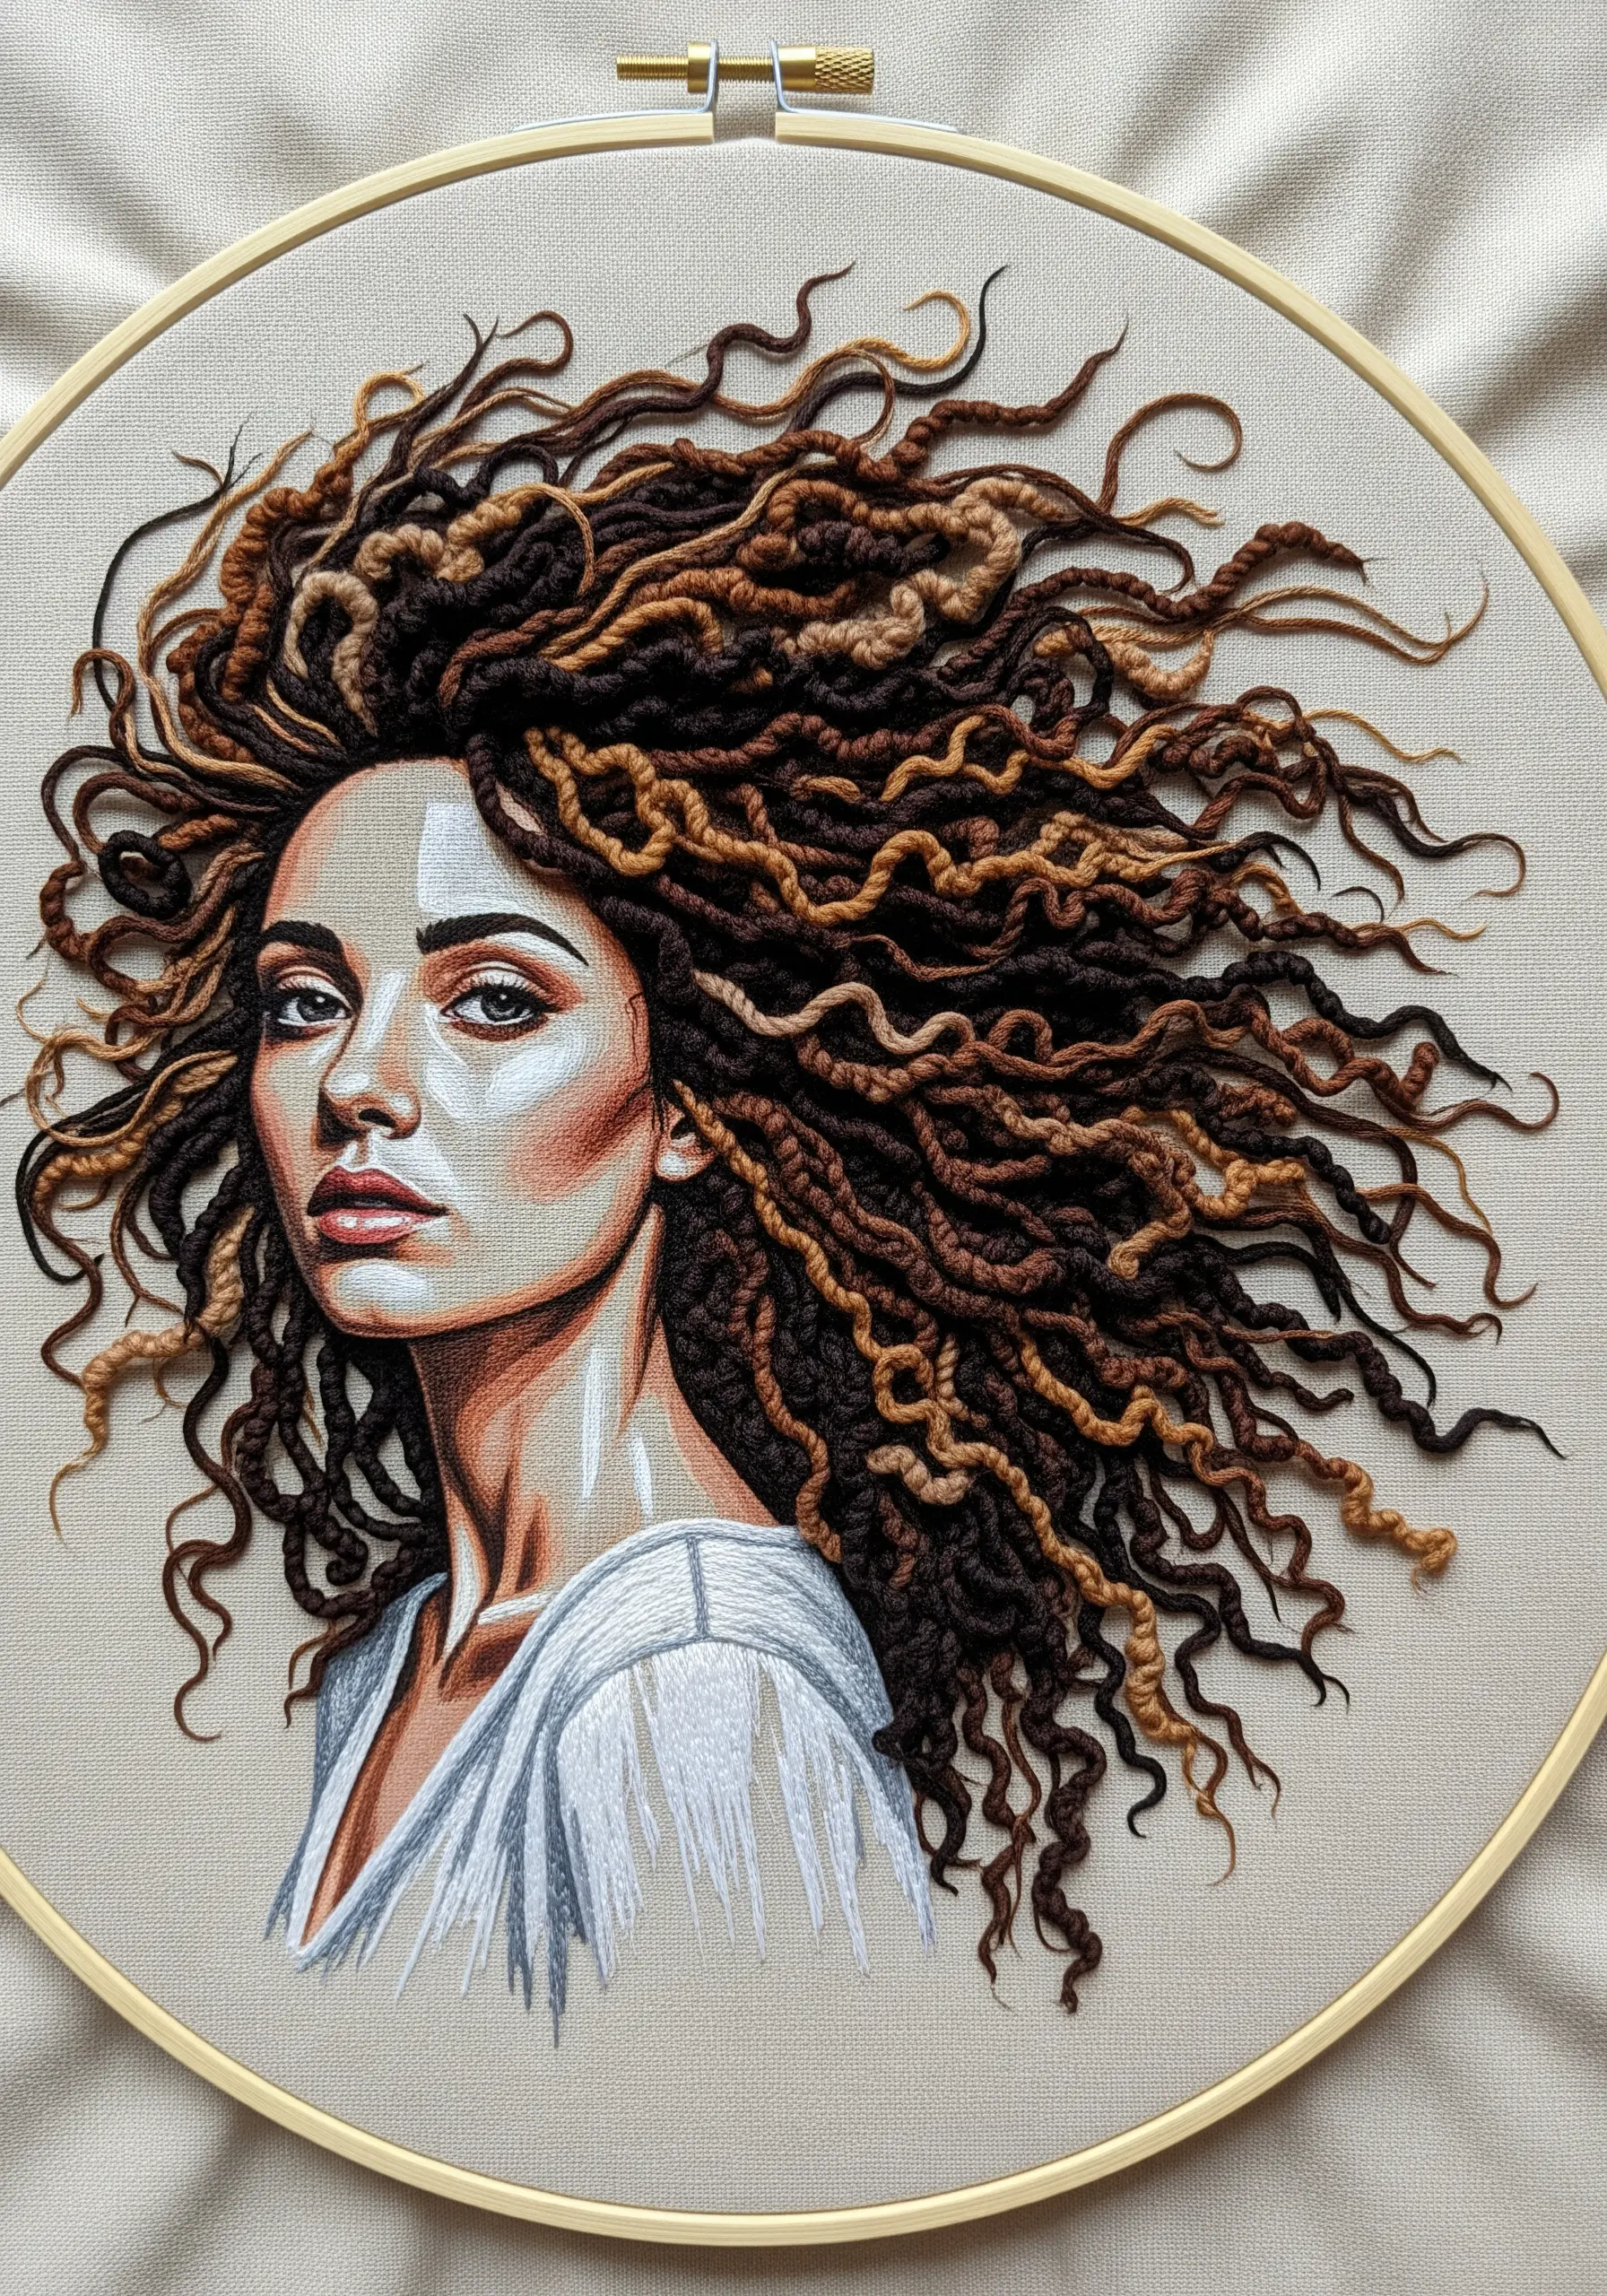
For hair with immense volume and texture, move beyond flat stitches.
Incorporate techniques like French knots for tight curls, couching for defined locks, and raised stem stitch bands to build structure.
Work in layers, starting with a foundation of long-and-short stitches, then building the more dimensional stitches on top.
Don’t be afraid to let some threads sit loosely on the fabric’s surface; this enhances the dynamic, untamed quality of the hair.
11. Contrast Skin and Fabric Textures

To make both skin and clothing feel more realistic, exaggerate their textural differences.
Use smooth, dense thread painting for the skin to create a soft, luminous finish.
For the knitted sweater, switch to thicker thread or yarn and use stitches that mimic the structure of knitting, like ribbed stem stitch or couched cords.
This juxtaposition of smooth and coarse textures makes each element more believable and adds a satisfying tactile dimension to the artwork.
12. Capture Expression with Contour Stitching
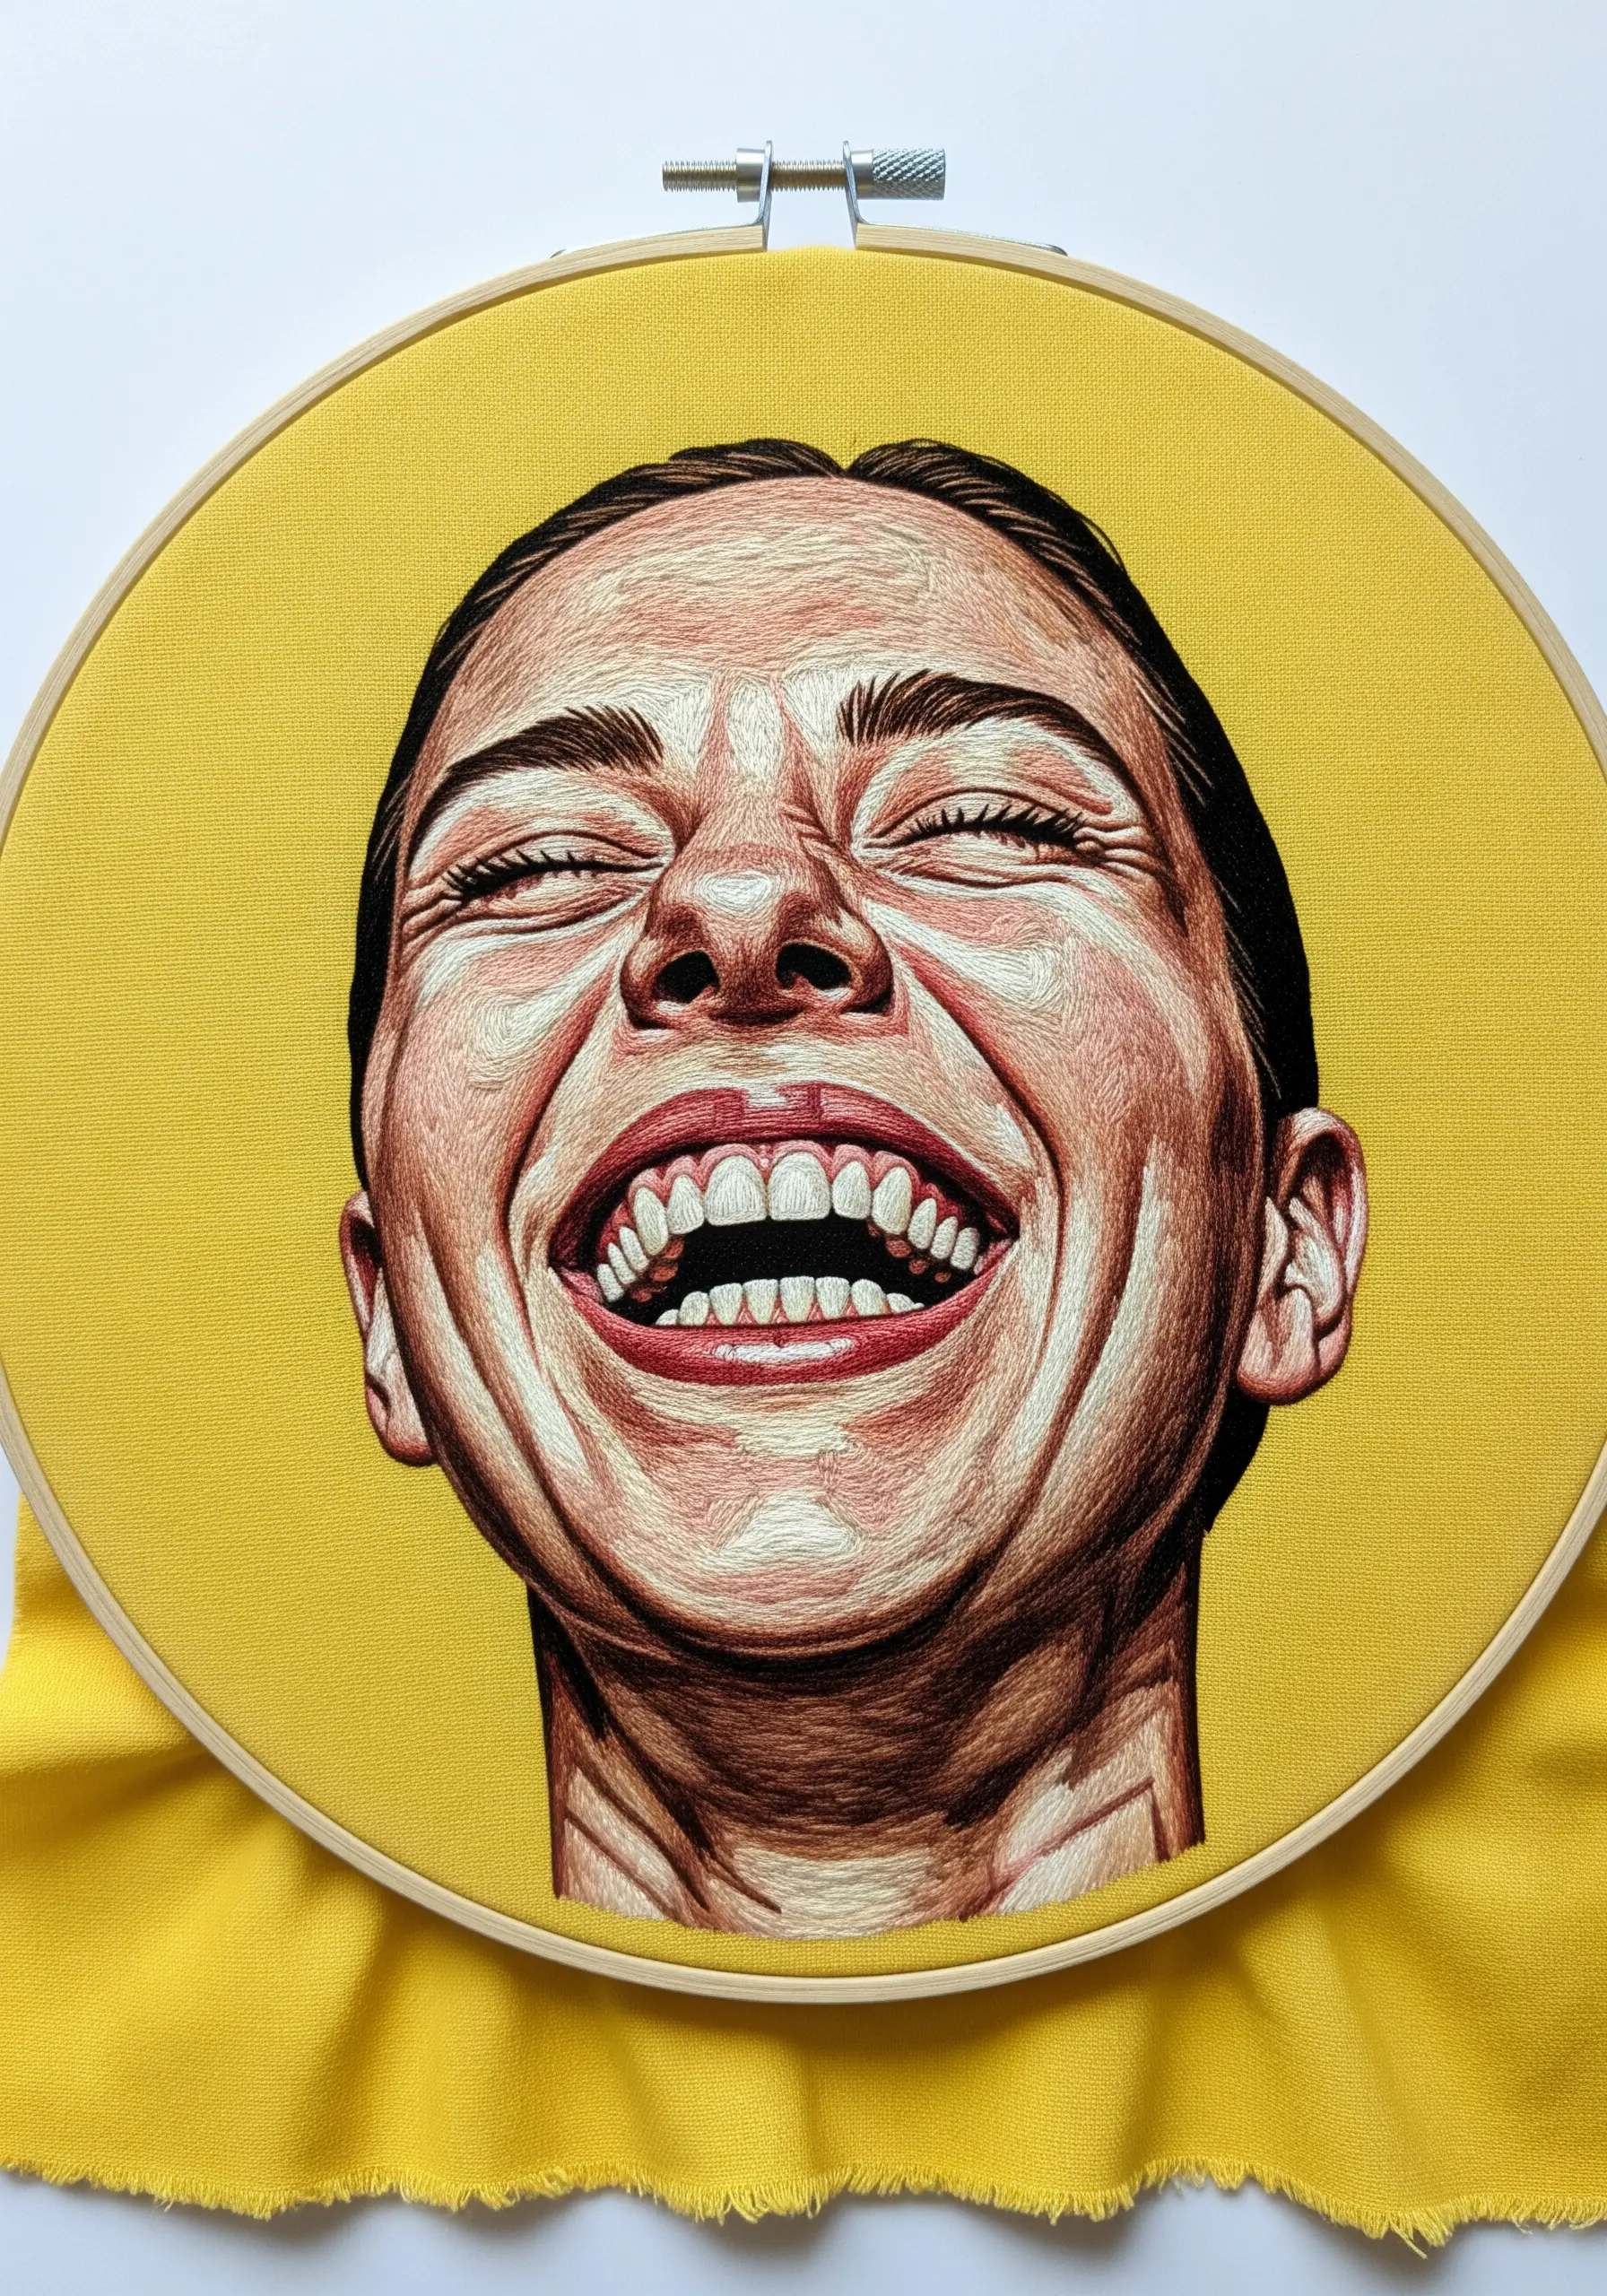
A genuine expression, like a wide laugh, is defined by the lines it creates in the face.
Use directional stitching to emphasize the curve of the cheeks, the crinkles around the eyes, and the stretch of the mouth.
Your stitches should follow these tension lines, acting as miniature anatomical guides.
By aligning your thread with the muscles of expression, you embed that emotion directly into the structure of your work, making it feel dynamic and alive.
13. Depict Tears with a Single, Glistening Thread
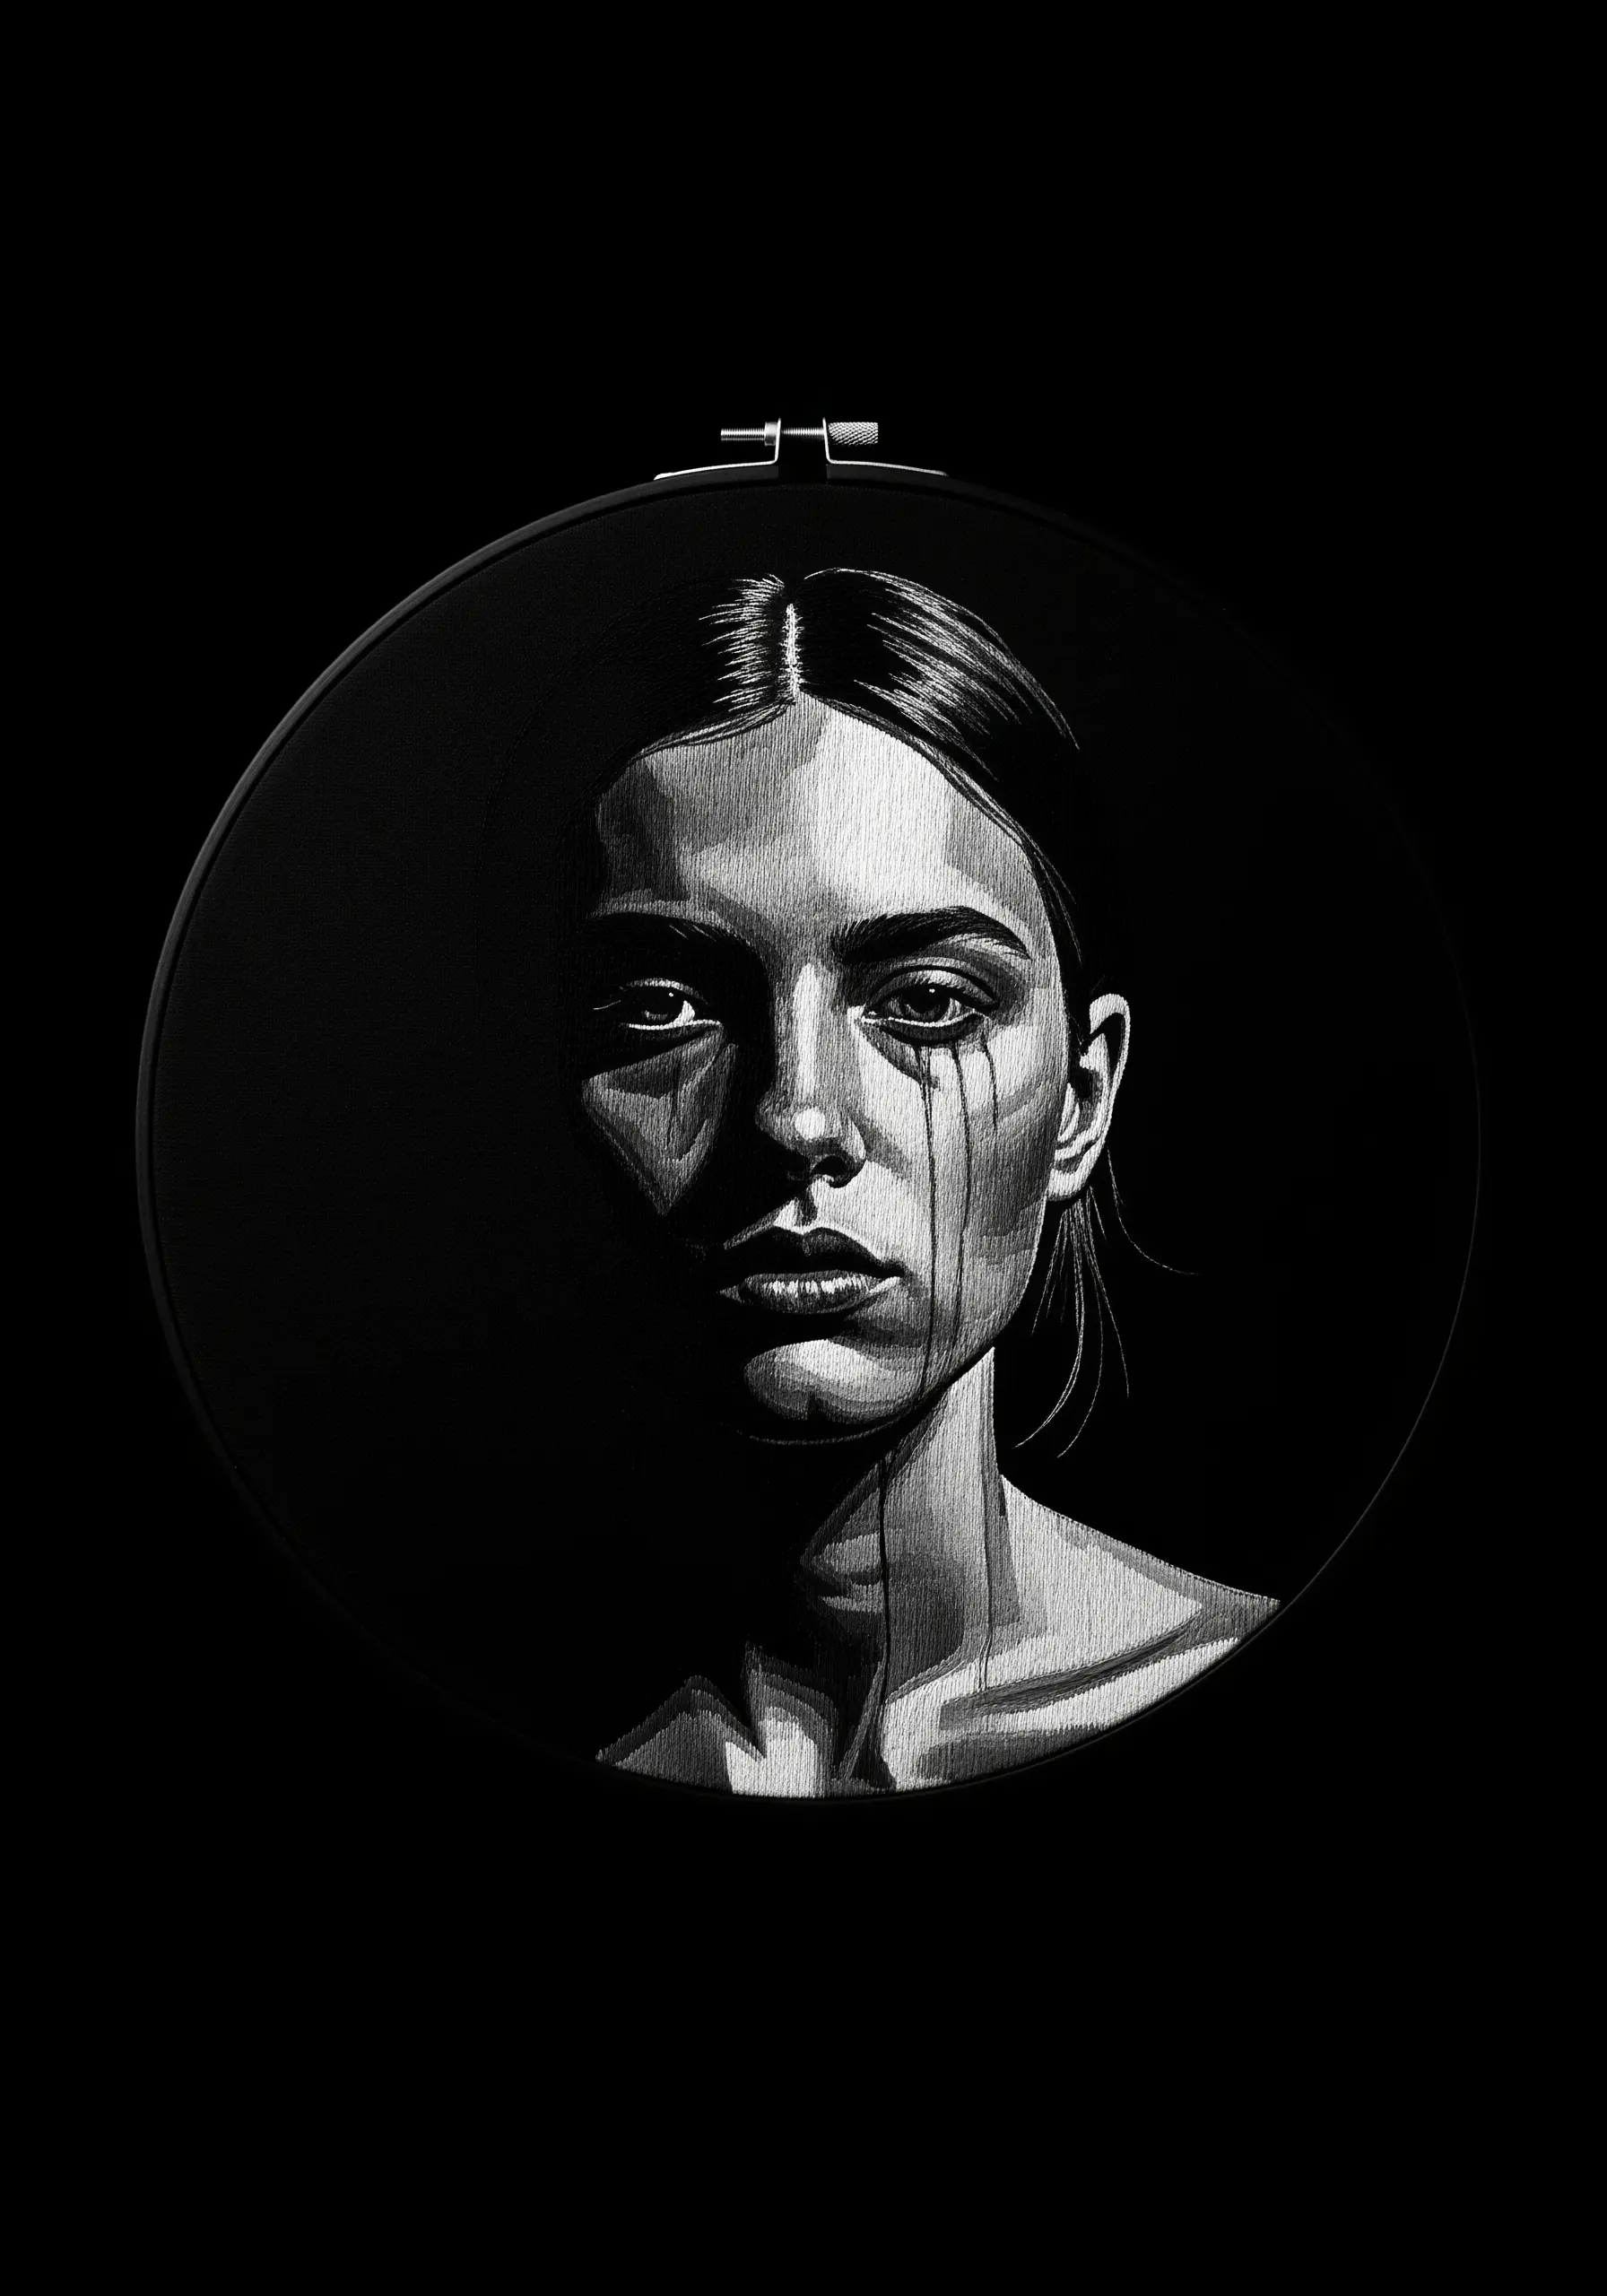
To create the effect of tears or moisture, realism hinges on the illusion of transparency and light.
Use a single, long strand of white or light grey silk floss, which has a natural sheen.
Lay the thread down in a vertical path from the eye, securing it with tiny, nearly invisible couching stitches made with a matching thread.
The unbroken, reflective line of the silk thread against the matte skin tones creates a convincing illusion of wetness.
14. Evoke a Vintage Feel with a Sepia Palette
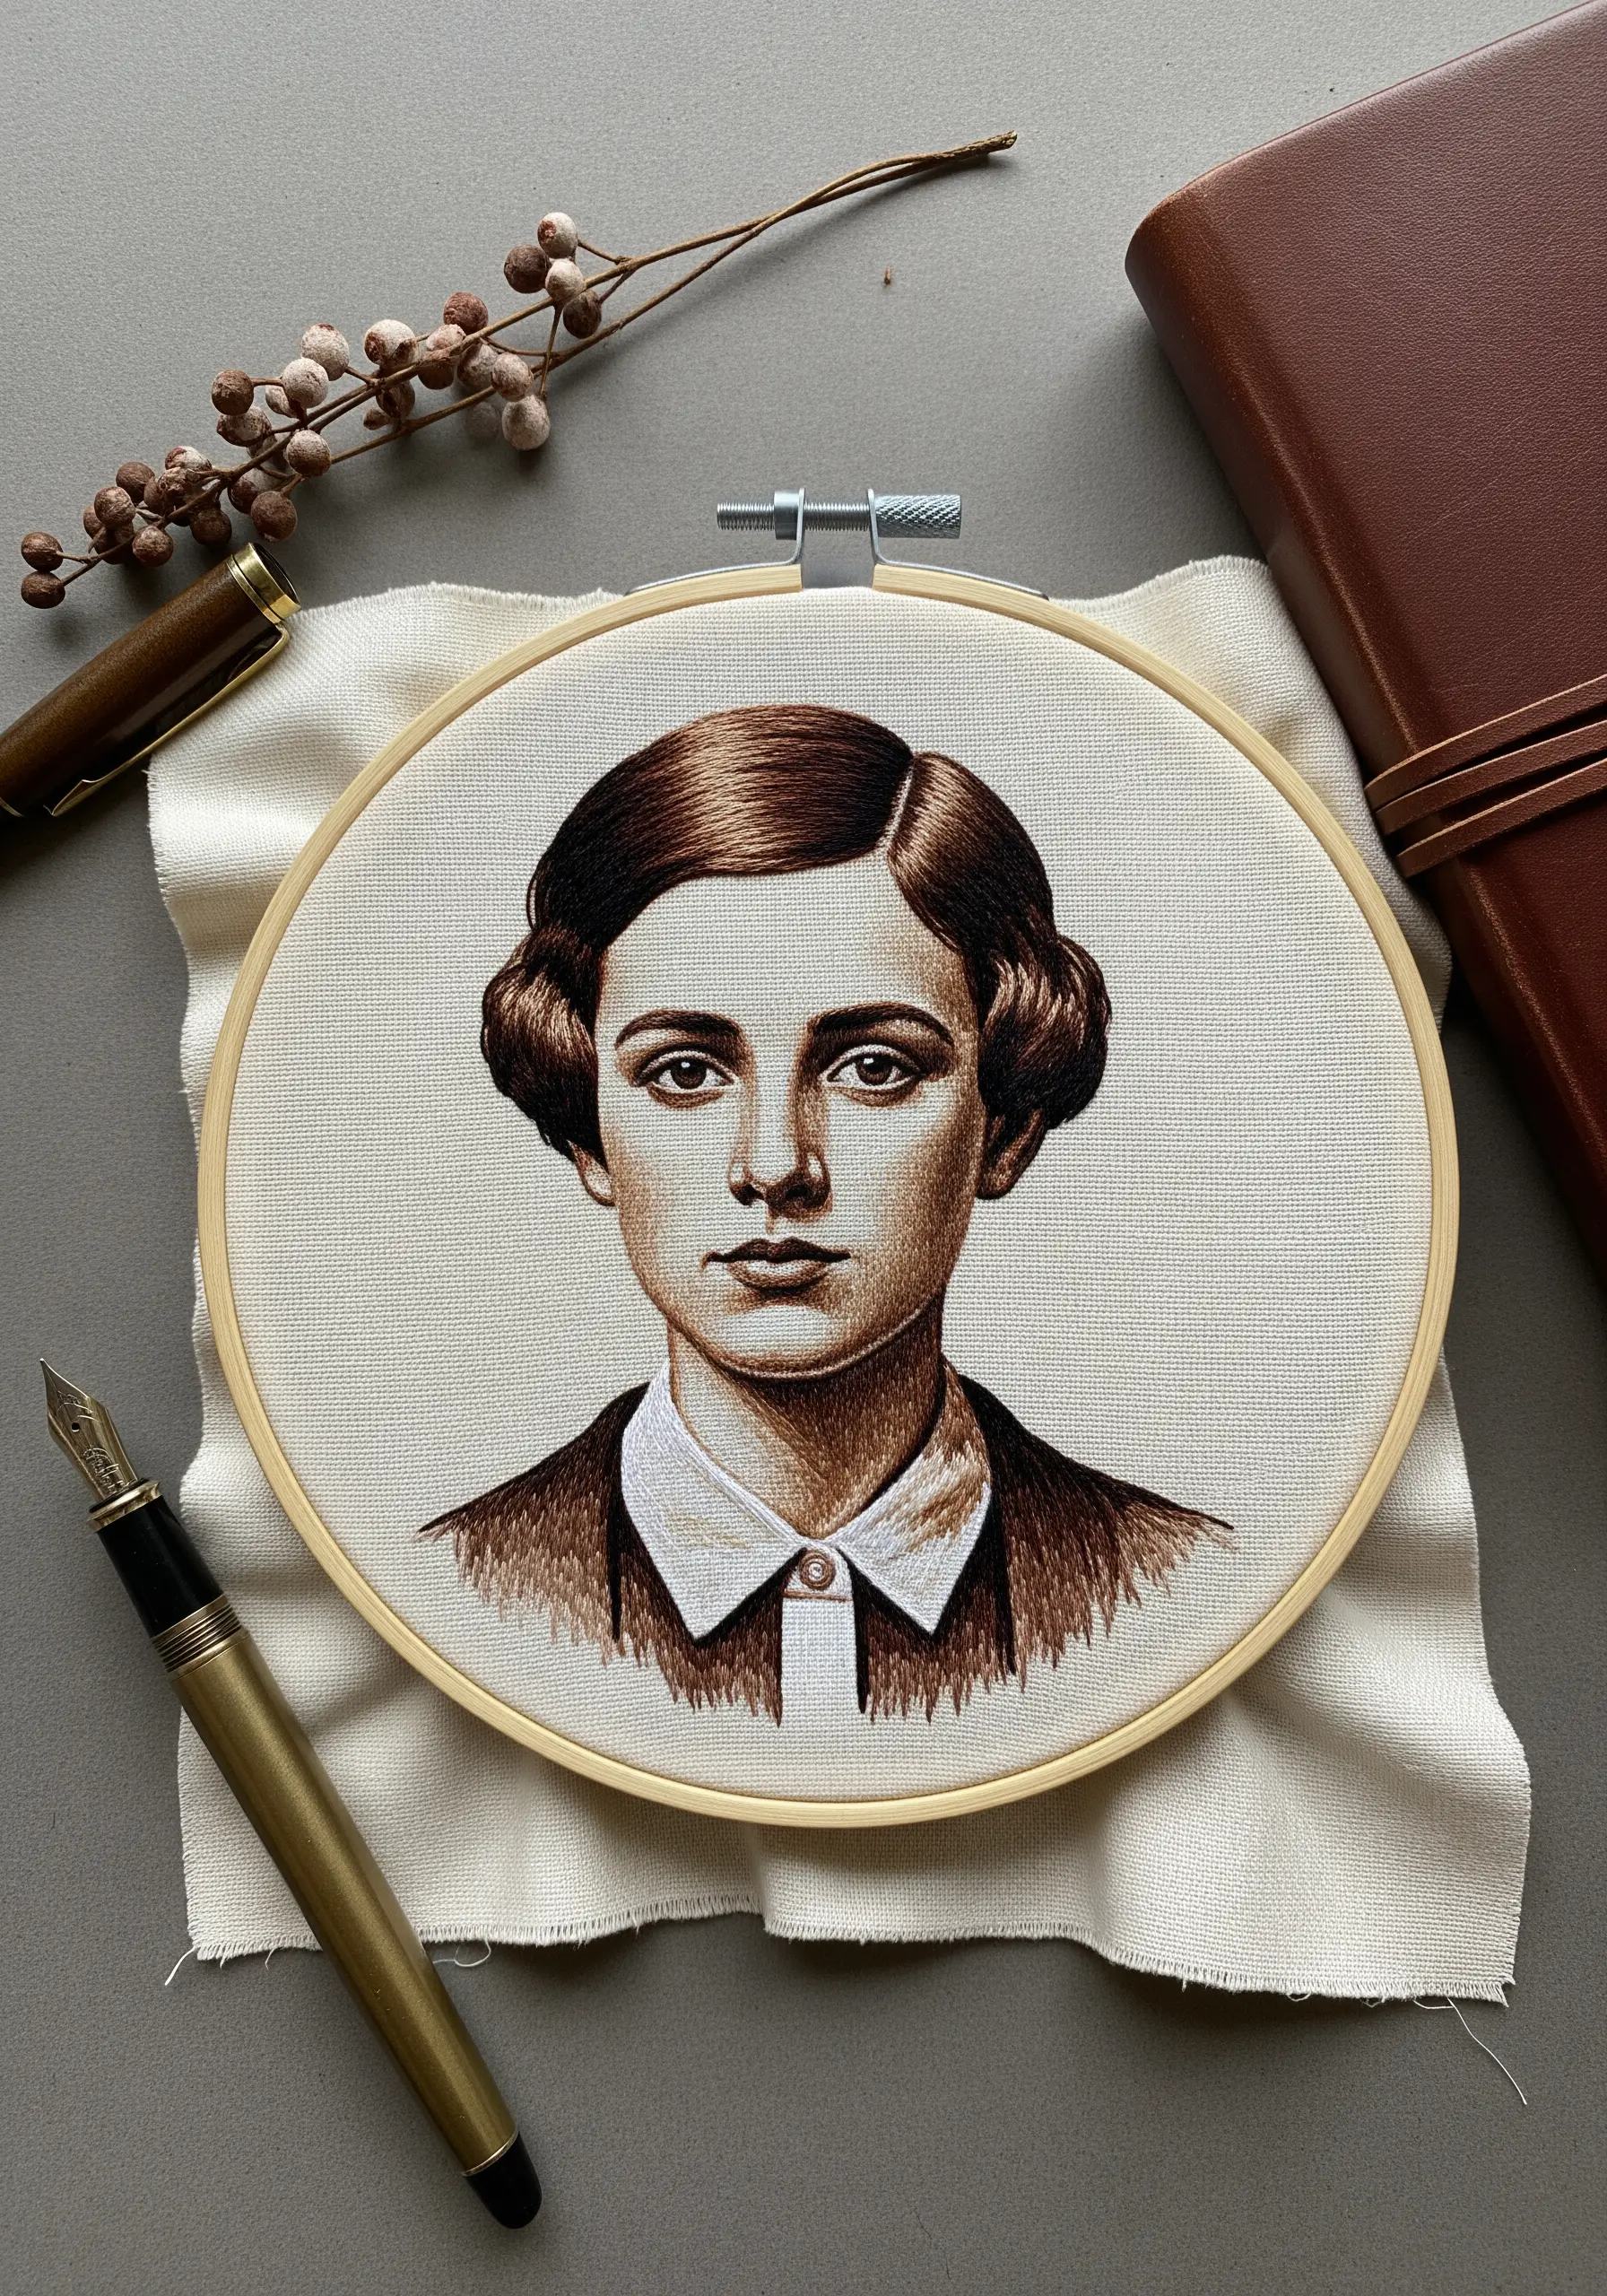
Recreate the timeless quality of an old photograph by strictly limiting your color palette.
Work exclusively with shades of brown, cream, and off-white to create a sepia-toned effect.
This forces you to focus entirely on value—the relative lightness and darkness of your tones—to build form and depth.
The result is a portrait that feels nostalgic and historical, imbued with a quiet, elegant character.
15. Embellish with Metallics for a Touch of Fantasy

When a portrait calls for something magical, integrate mixed media elements.
Use fine metallic threads for shimmering makeup or intricate filigree designs, but secure them with couching stitches, as they can be difficult to pull through fabric.
For raised elements like gems or glitter, use tiny seed beads or apply dimensional fabric paint.
Combining these materials with traditional thread painting creates a stunning interplay of texture and light that elevates the piece beyond pure realism.
16. Render Deep Skin Tones with Rich Undertones
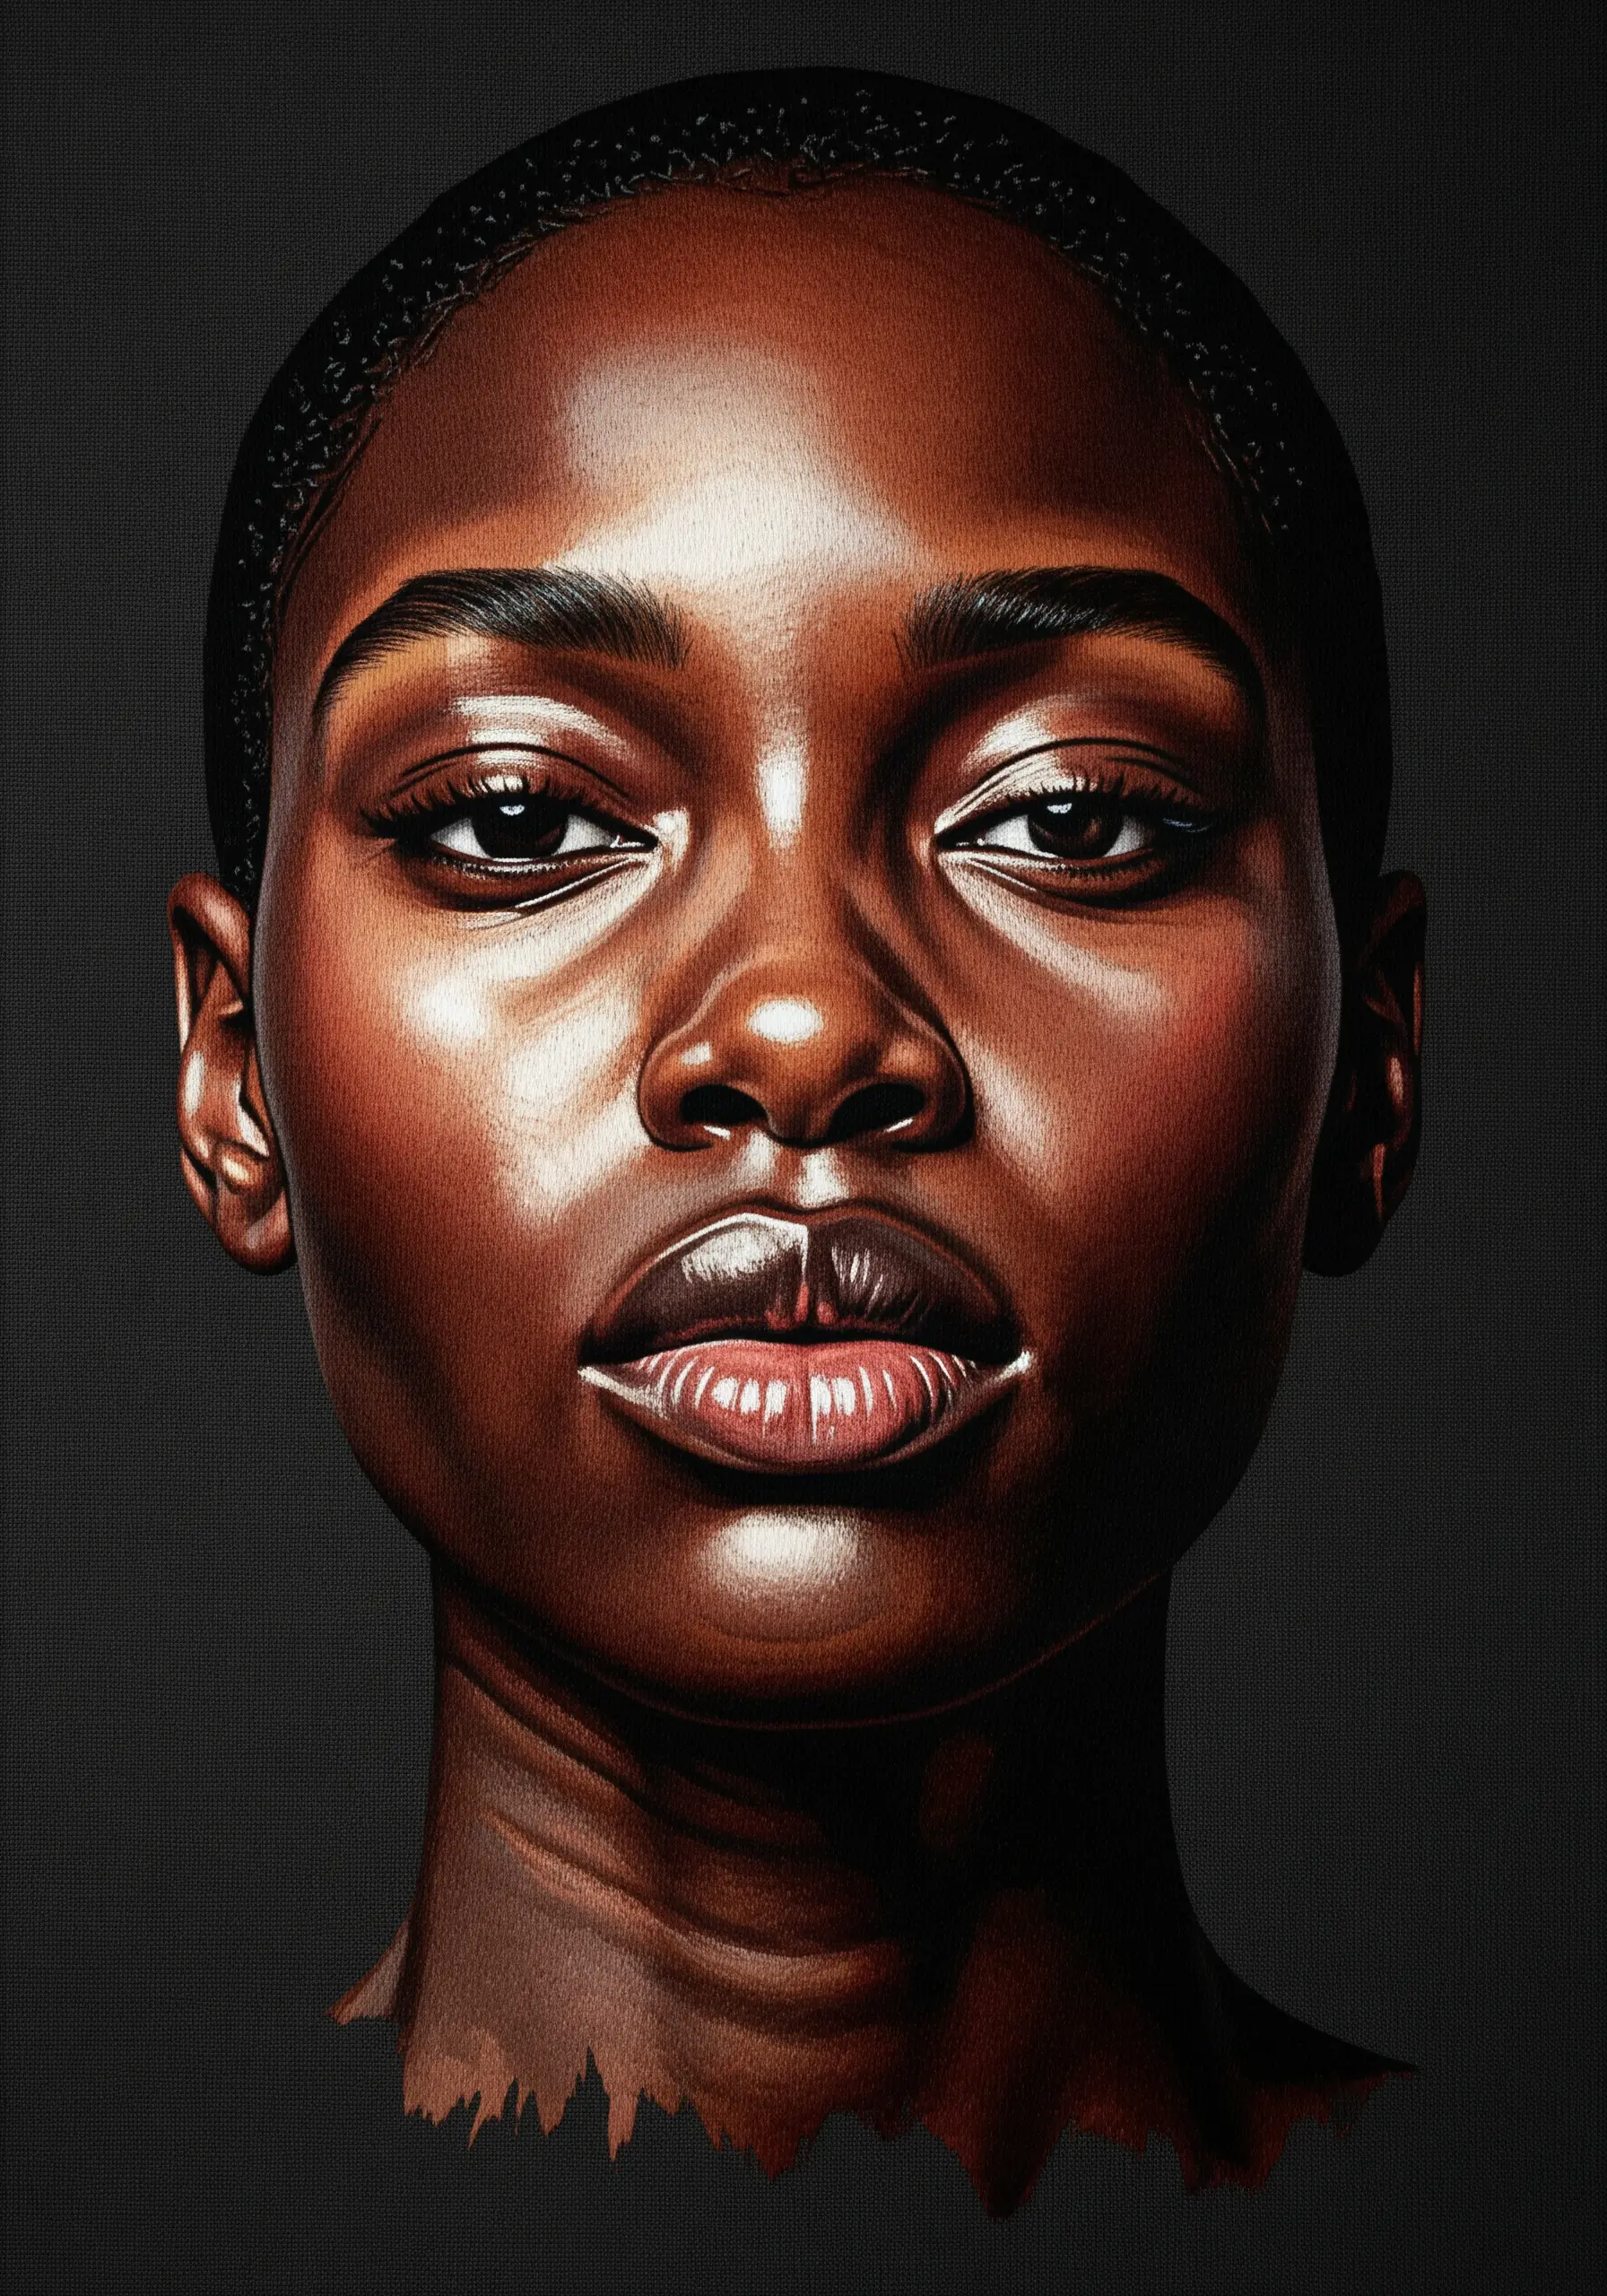
To capture the luminosity of deep skin tones, you must look beyond browns and blacks.
Build your base with layers of rich undertones like deep reds, purples, and blues, especially in the shadow areas.
Then, layer your main skin tones over this foundation. For highlights, use silk or rayon threads in warm ochres or soft golds; their natural sheen will create a realistic glow that cotton floss cannot replicate.
This technique gives the skin a vibrant, living quality rather than a flat, uniform color.
17. Create Glossy Lips with Silk Thread Highlights

The illusion of wetness or gloss is all about capturing sharp, bright highlights.
After thread painting the lips with matte cotton floss, switch to a single strand of bright white silk or rayon thread.
Place tiny, precise satin stitches only where the light would hit directly—on the curve of the cupid’s bow and the fullest part of the lower lip.
The high sheen of the silk against the matte cotton creates a powerful textural contrast that reads instantly as moisture.
18. Define Skin Patterns with Clean Satin Stitches

When depicting vitiligo, the goal is to create clear, defined shapes without losing the softness of skin.
Carefully map out the patterns and fill each section with dense, smooth satin stitches.
To ensure the edges where the tones meet are crisp, outline the lighter areas first with a split stitch before filling.
This technique provides a subtle boundary, preventing the colors from visually bleeding into one another and honoring the unique beauty of the skin.
19. Use 3D Stumpwork for Statement Jewelry
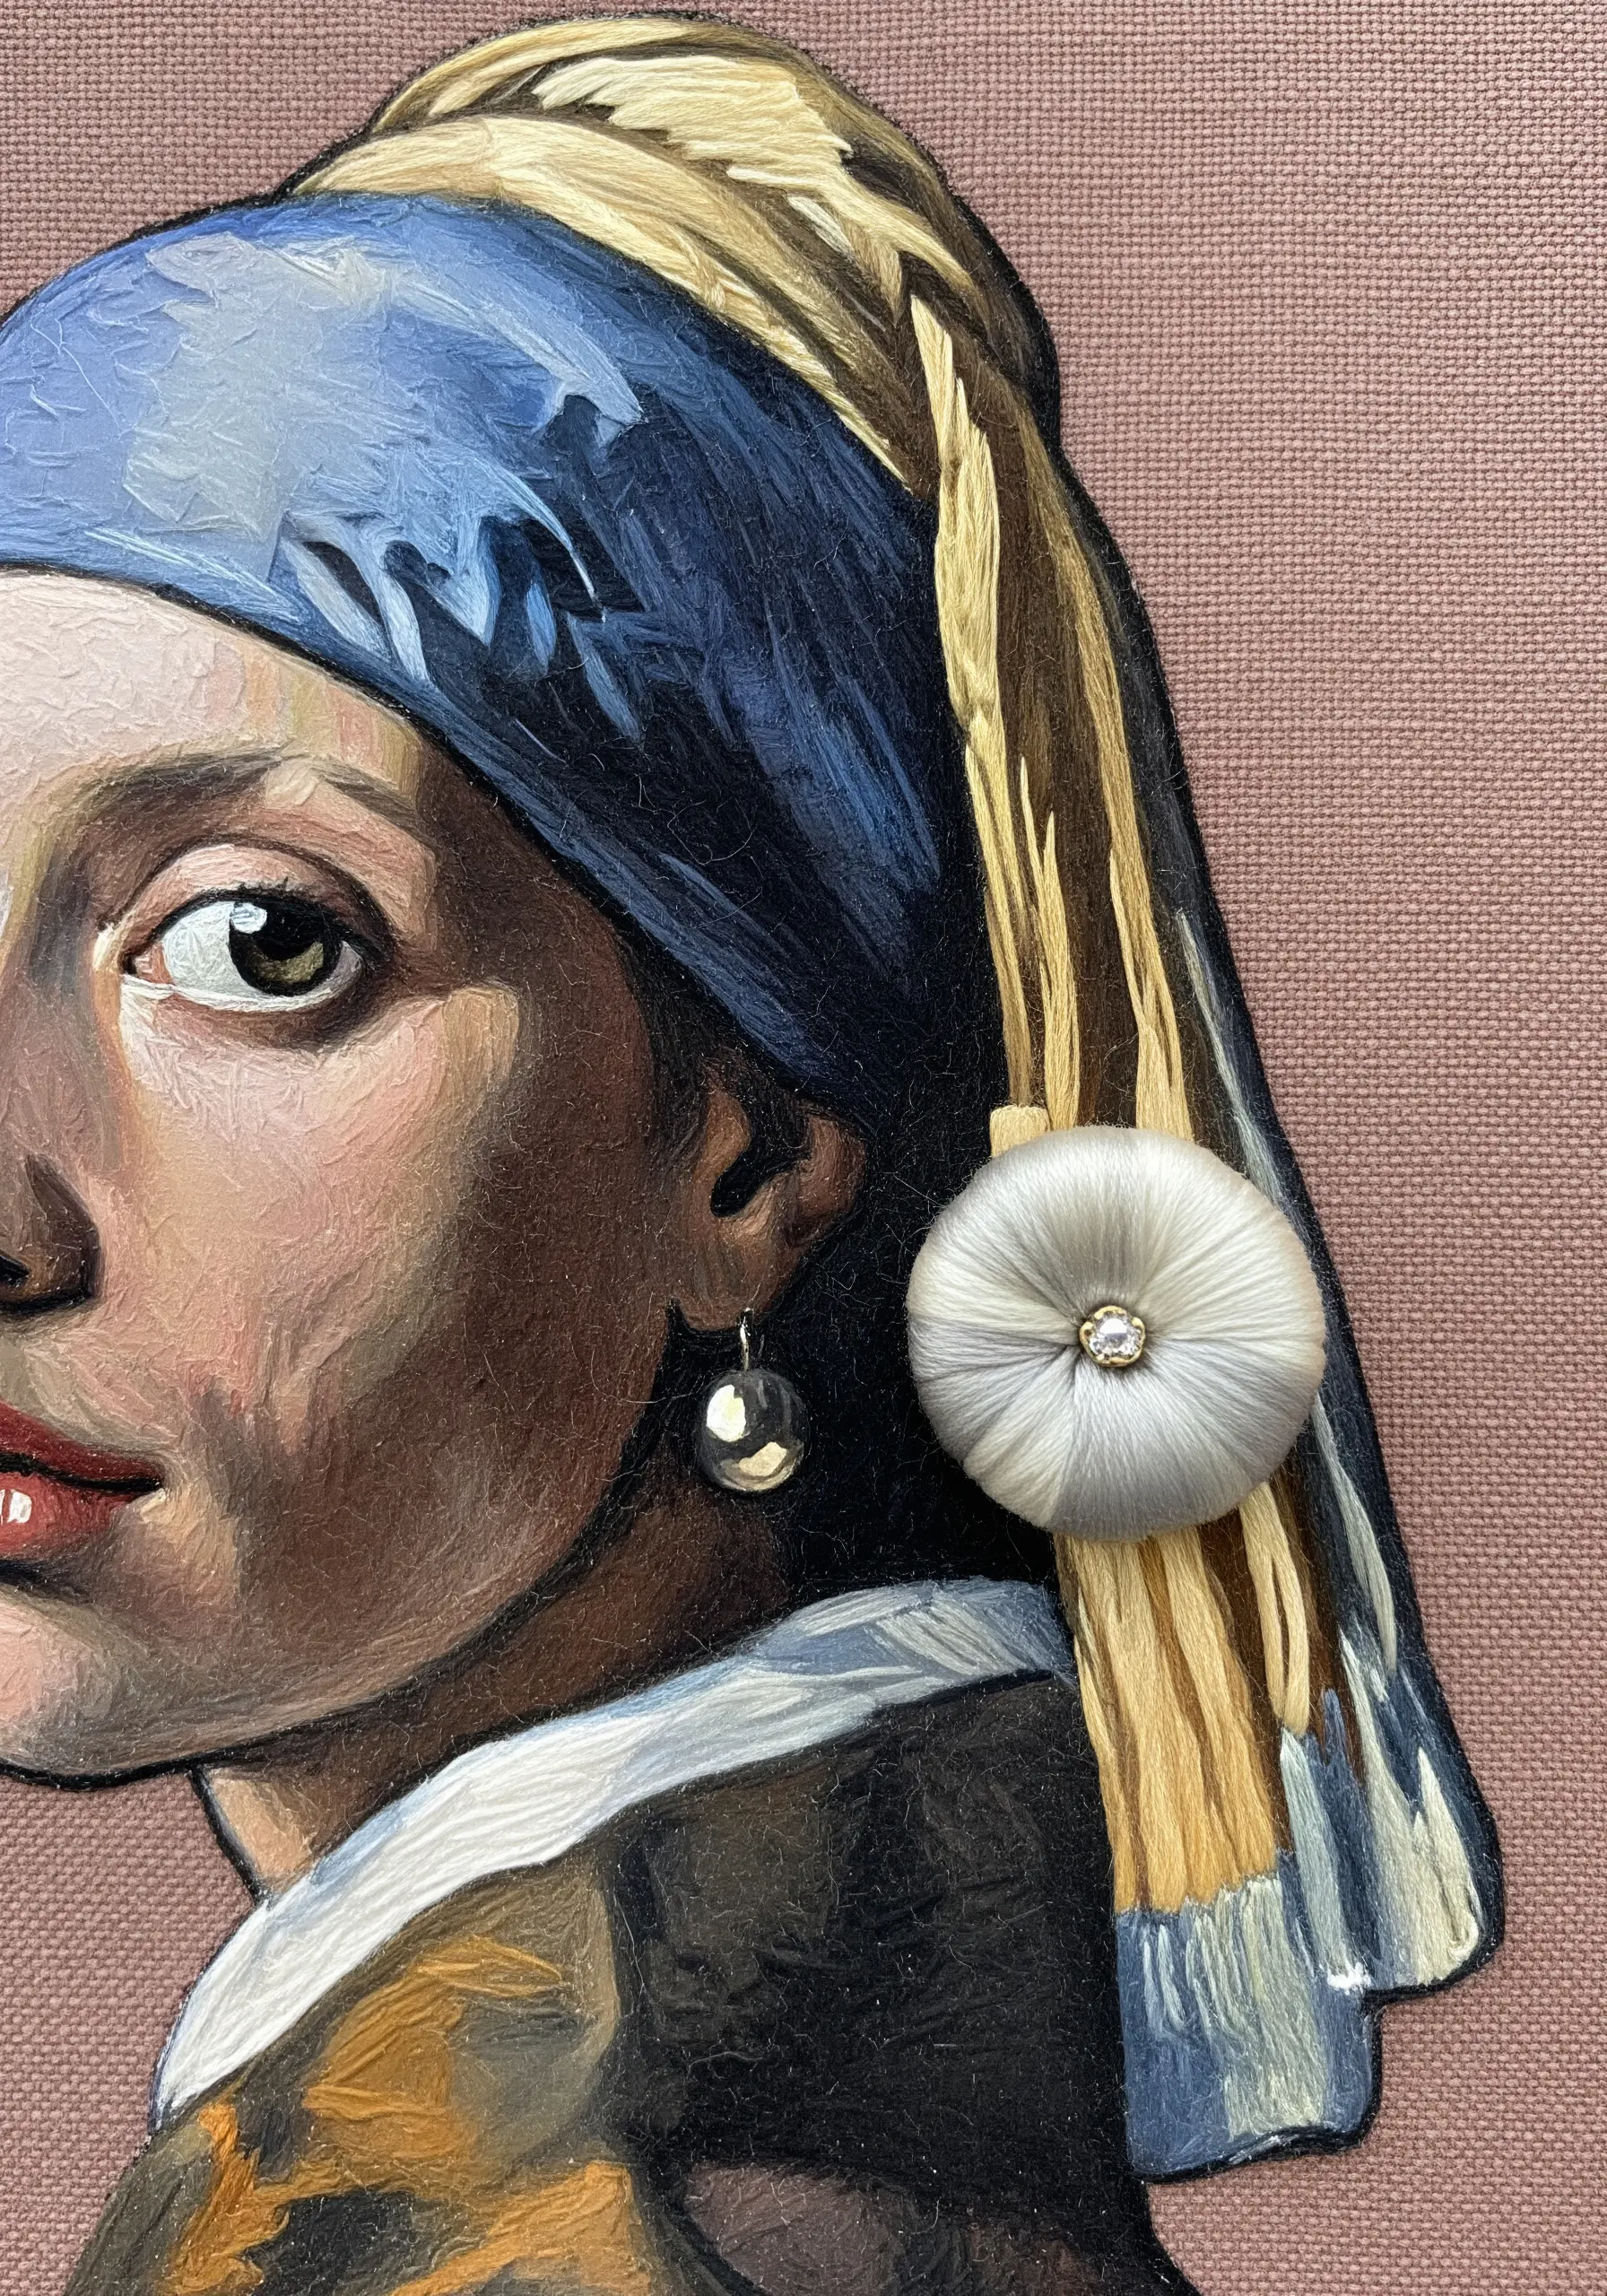
To make an element like an earring truly stand out, lift it off the fabric surface using stumpwork techniques.
Create a separate, padded shape using felt or layered stitches as a base. Then, wrap it with fine silk threads to create a smooth, domed surface, like a pearl.
Attach this 3D element to your main embroidery, perhaps adding a tiny bead or a metallic thread detail.
This instantly transforms the piece from a two-dimensional image into a multi-layered object.
20. Build Your Portrait in Transparent Layers

Hyper-realism is achieved layer by layer, not all at once.
Start with a detailed line drawing on your fabric, establishing the key features and shadow shapes.
Begin stitching the deepest shadows and mid-tones first, using sparse, single-thread stitches. This is your underpainting.
Gradually build up the density and introduce lighter colors, allowing the underlying threads to show through subtly. This process mimics classical painting techniques and creates unmatched depth and luminosity.
21. Create a Mosaic Effect with Geometric Fills
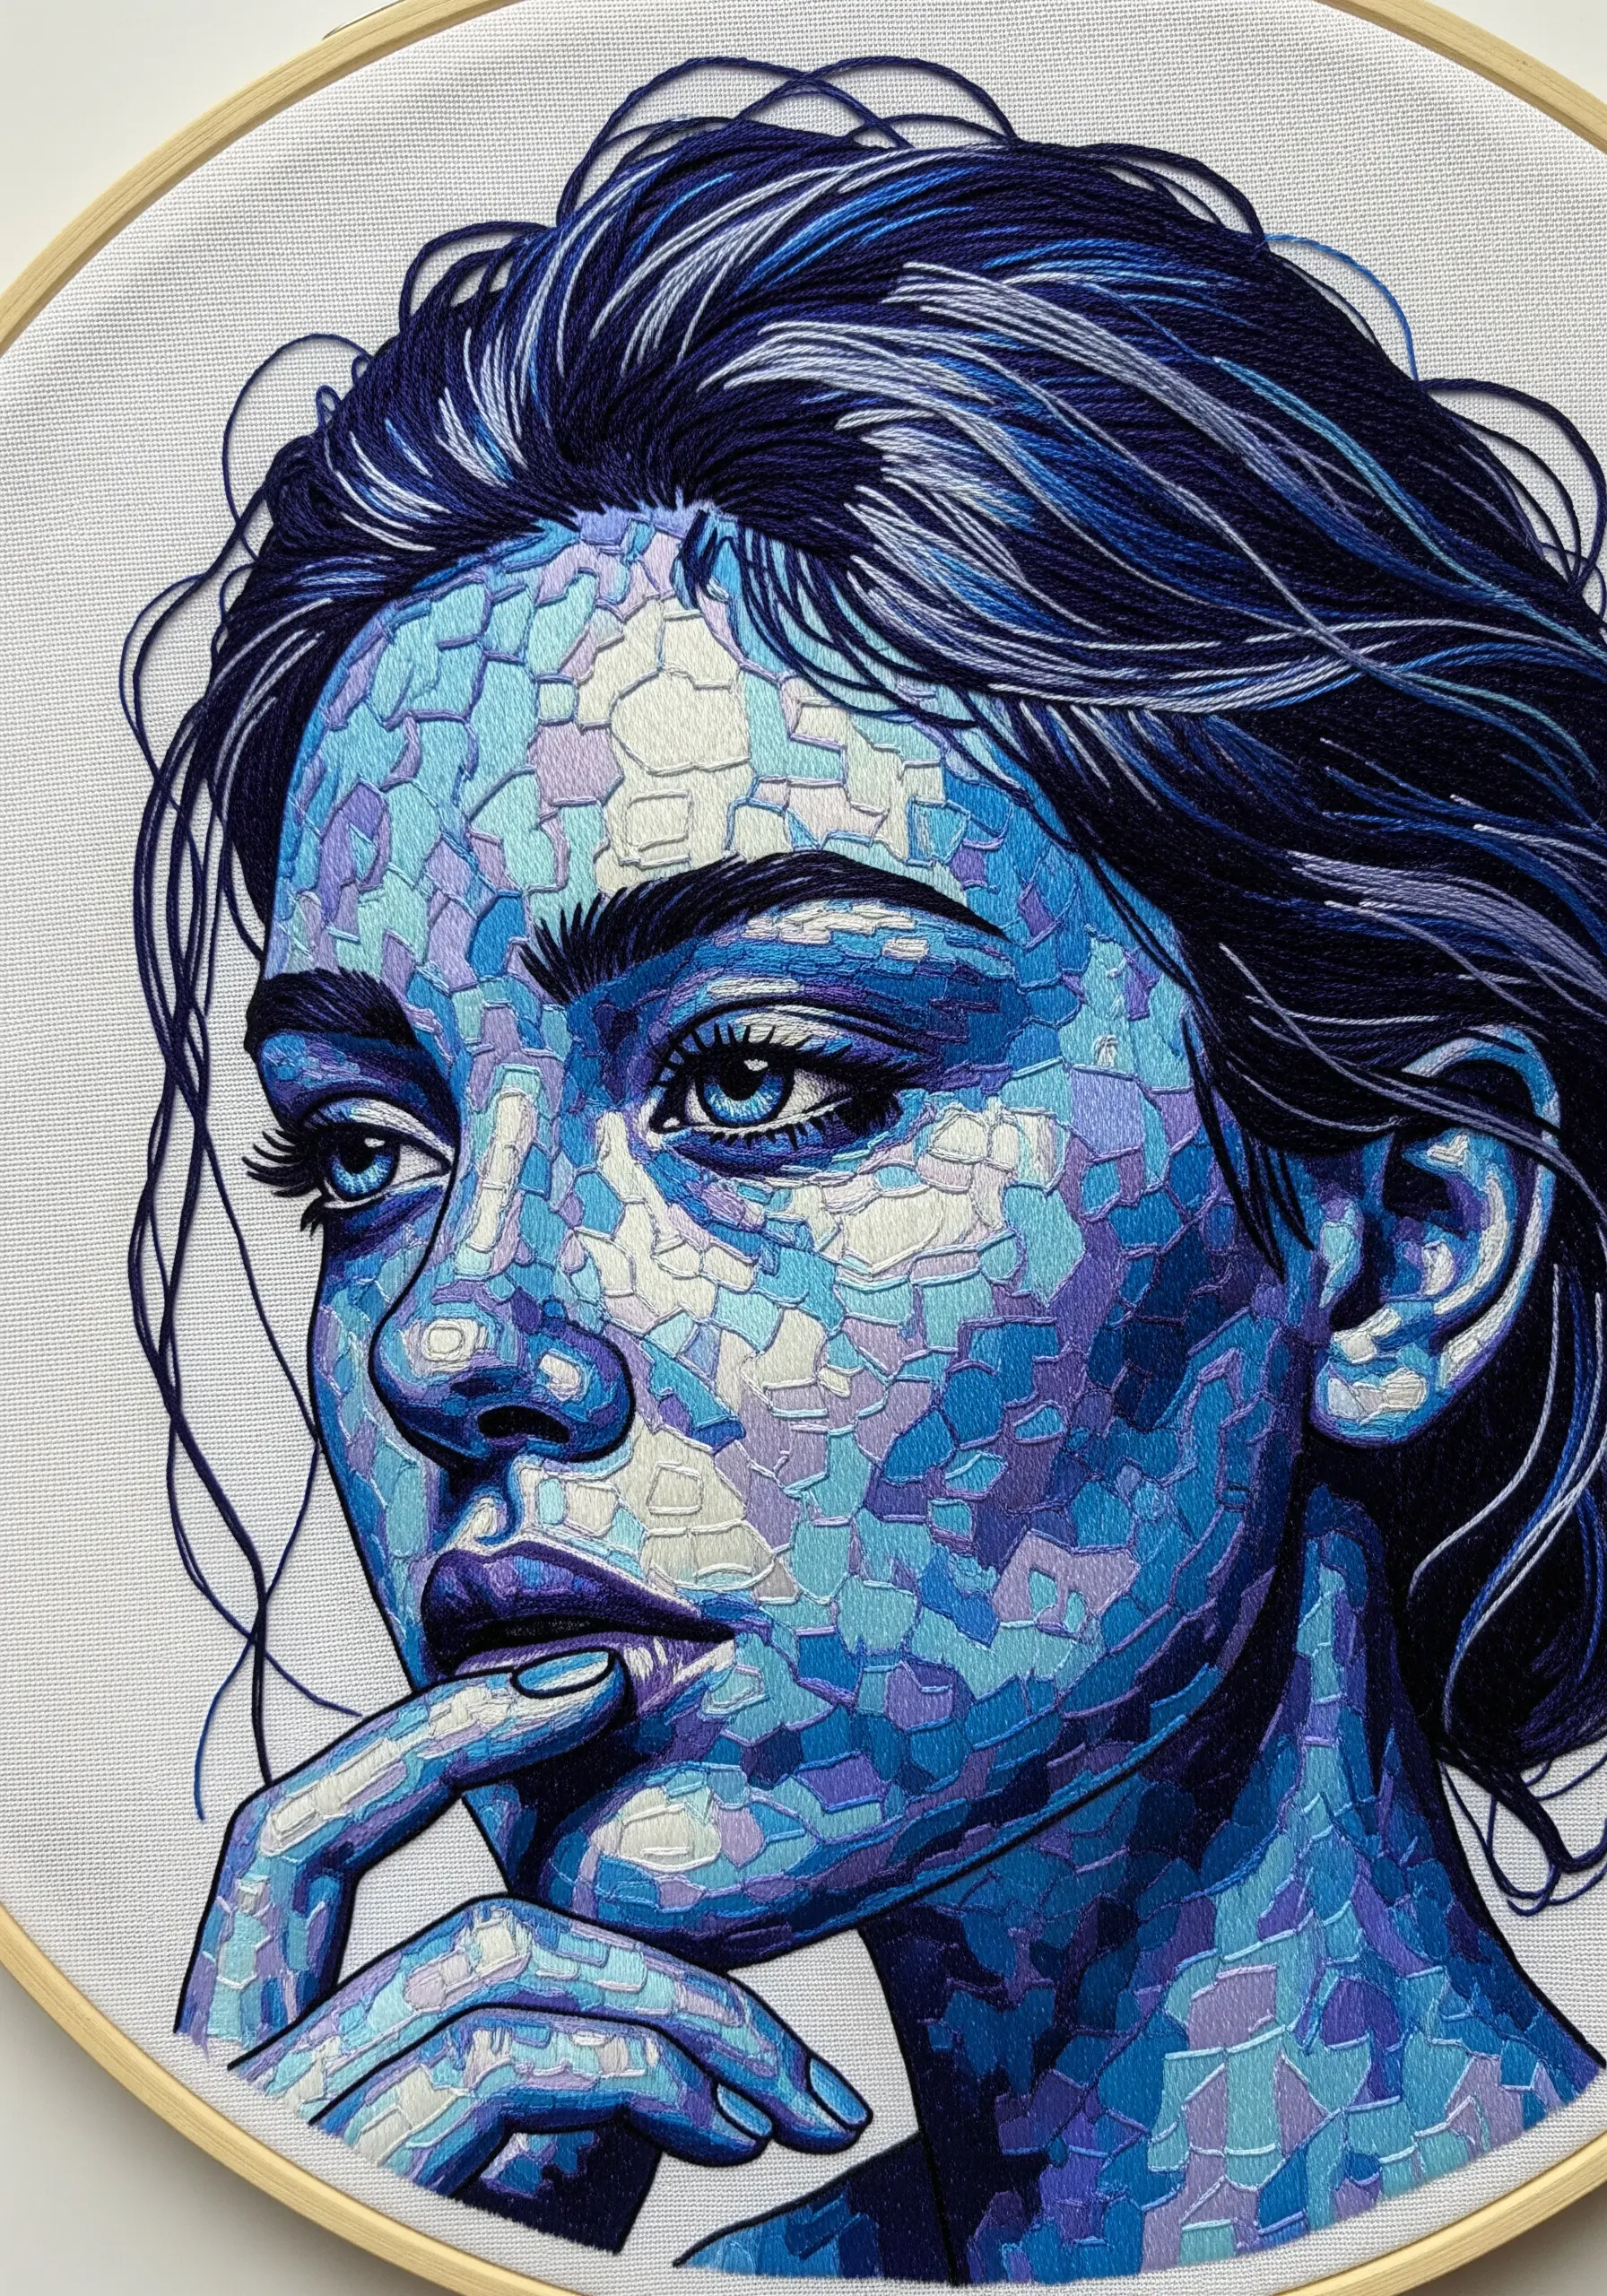
For a stylized, contemporary take on a portrait, break the image down into small, geometric cells.
Instead of blending colors smoothly, fill each tiny shape with a uniform satin stitch, keeping all stitches within a cell parallel.
Vary the direction of the stitches from one cell to the next. This technique creates a faceted, mosaic-like surface that catches the light in interesting ways, blending modern aesthetics with classical portraiture.
22. Use a Monochromatic Palette to Convey Mood

Convey powerful emotion by working with a single color family to represent light.
Instead of using realistic skin tones, translate the values of your reference photo into shades of red, orange, and yellow.
Use the darkest reds for shadows, mid-tone oranges for transitional areas, and bright yellows for the most intense highlights.
This abstract approach to color forces the viewer to focus on the light and mood of the portrait, creating a dramatic and highly evocative piece.
23. Replicate Braids with Directional Weaving Stitches

To capture the intricate structure of braids, your stitches must mimic the over-and-under pattern of the hair itself.
Use short, angled satin stitches, changing their direction for each section of the plait to create a woven, three-dimensional effect.
Add fine, single-thread highlights along the top curve of each braid segment and deeper shadows in the crevices between them.
This meticulous attention to light and direction is what transforms flat threads into a believable, textured hairstyle.
24. Capture Movement with Loose, Sweeping Stitches
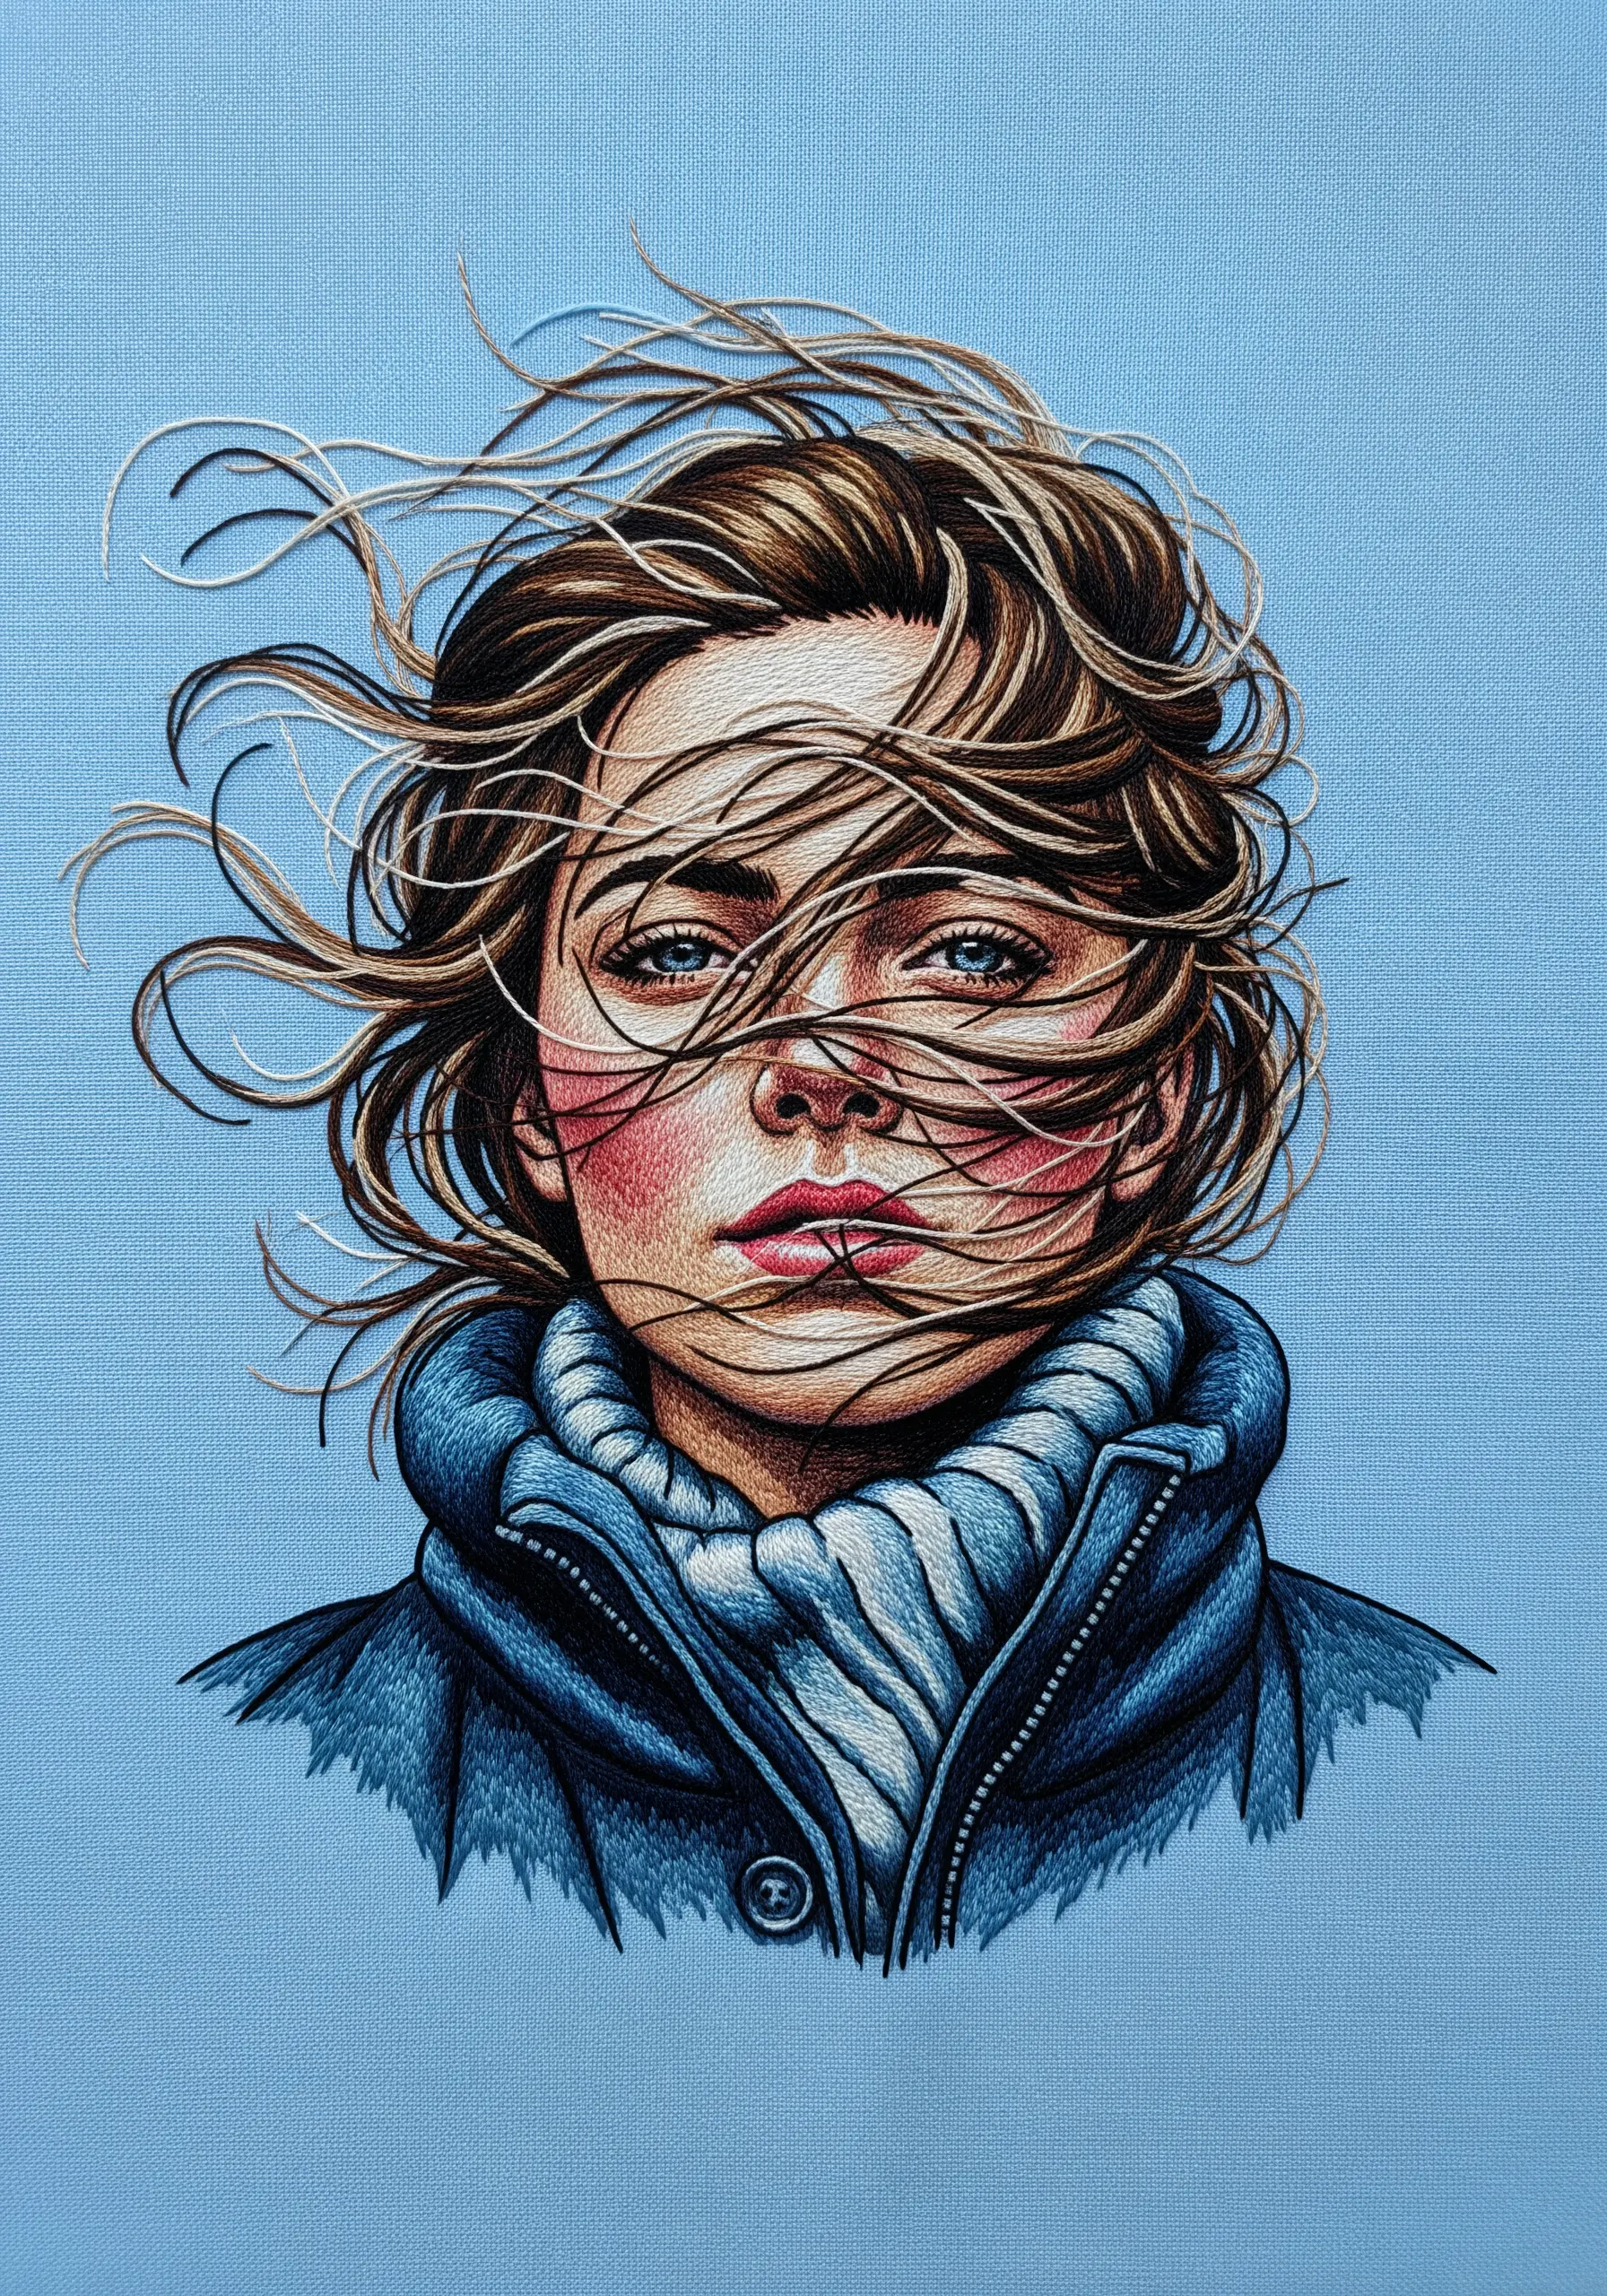
To embroider hair that feels alive with motion, you must abandon perfect tension.
Use long, single-strand stitches that sweep across the fabric in the direction of the wind.
Allow some of these strands to lay slightly looser than others, and even let a few lift partially from the surface.
This intentional imperfection breaks the static nature of embroidery and infuses the portrait with a palpable sense of energy and movement.
25. Detail Veins and Wrinkles with a Single Thread

The story of aged hands is written in their surface details—the veins, wrinkles, and sunspots.
Render these features using the finest possible thread: a single strand of cotton floss.
Use tiny backstitches or split stitches to trace the delicate, branching pattern of veins with a muted blue-green thread. For wrinkles, use a darker shade of the main skin tone.
These subtle lines, when layered over a meticulously blended base, add a profound layer of history and realism.
26. Achieve a Soft-Focus Effect for Youthful Skin
To capture the smooth, unblemished quality of young skin, your stitching must be flawless and almost invisible.
Use a single strand of floss and incredibly dense long-and-short stitches, ensuring there are no gaps between them.
Keep your color transitions extremely gradual, often using shades that are nearly identical.
This technique creates a soft-focus, almost airbrushed finish that beautifully conveys the delicate nature of a youthful complexion.
27. Create Focal Points with Varying Detail
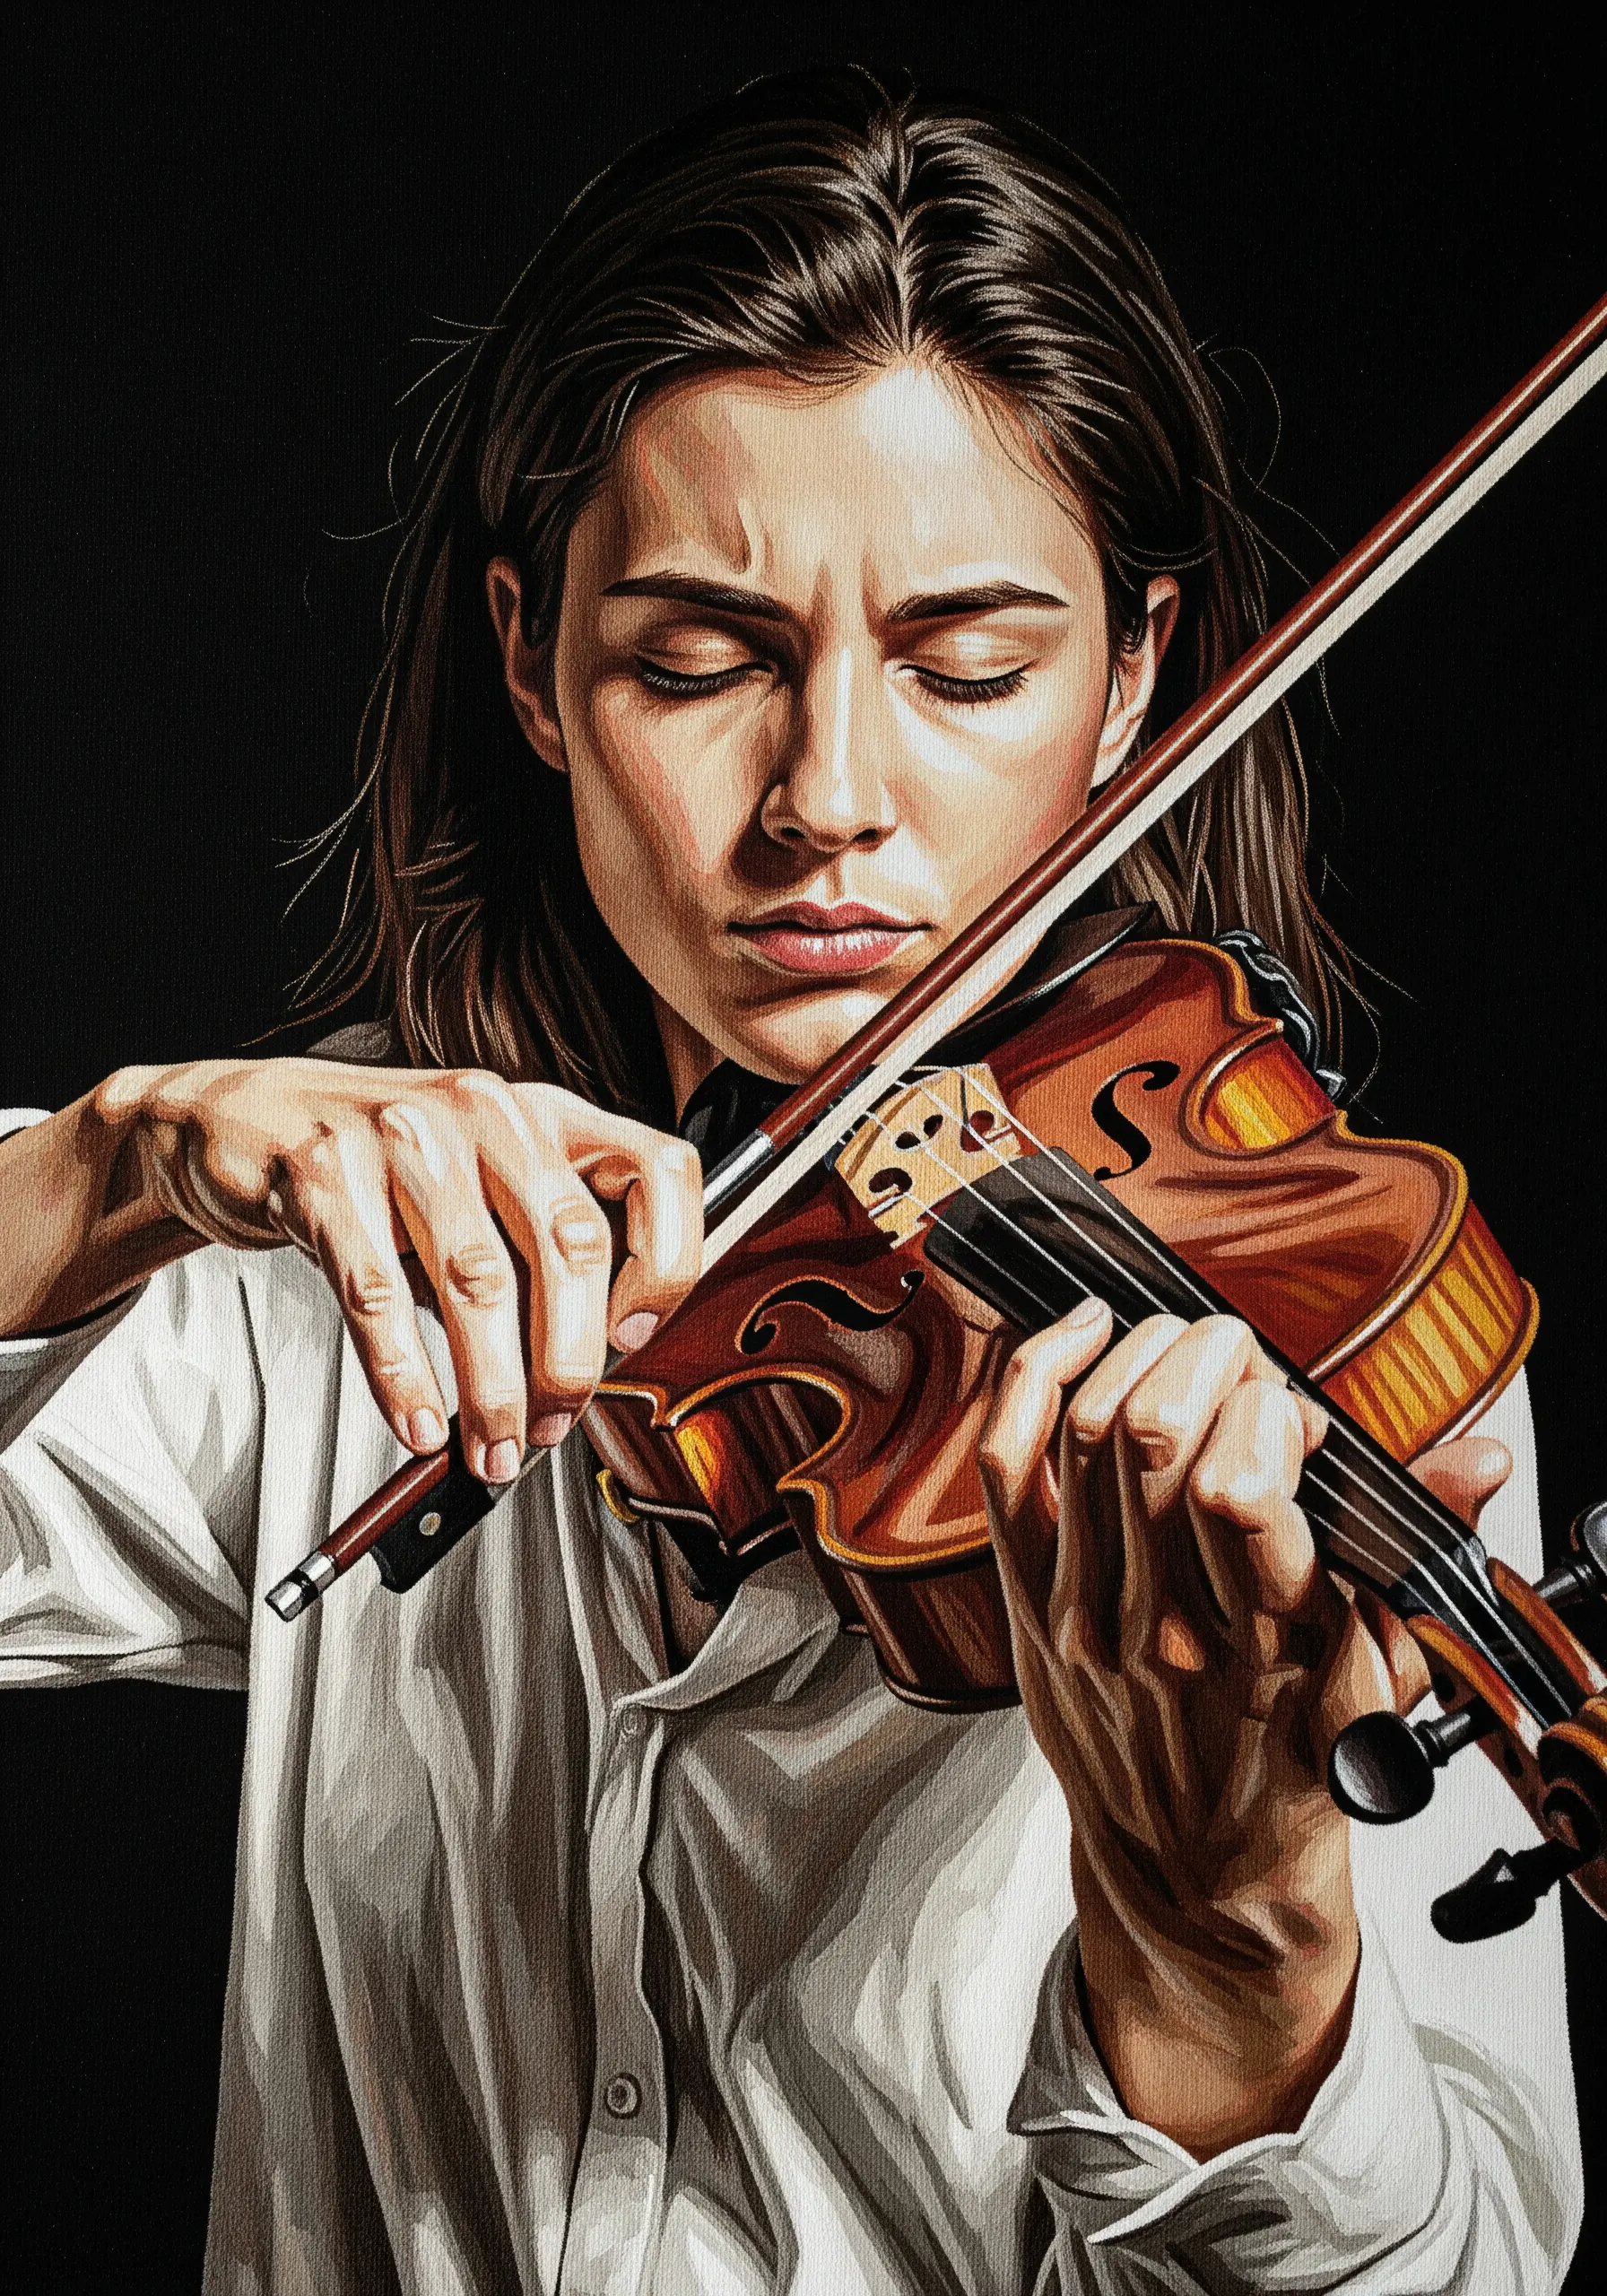
Guide the viewer’s eye by strategically varying the level of detail in your portrait.
Render the most important features—like the eyes, hands, and face—with hyper-realistic, single-thread precision.
For less critical areas, such as clothing or the background, use broader, simpler stitches and a less detailed color palette.
This contrast in rendering not only saves time but also creates a clear visual hierarchy, ensuring the emotional core of the portrait remains the undeniable focal point.


