
You’ve mastered the basic stitches, and now you’re looking for that next step—the secret that transforms a pleasant hobby into a true art form. You sense there’s more to embroidery than just following a pattern, and you’re right. It’s in the subtle choices: the way a thread catches the light, the texture of a stitch against the fabric, the balance of a composition.
The difference between a nice piece and a breathtaking one isn’t about complexity or expensive tools. It’s about intention. It’s about understanding how to use a simple satin stitch to convey form, or how a single strand of metallic thread can change the entire mood of a design.
Here, you’ll find 27 ideas designed to sharpen that intention. These aren’t just projects; they are focused techniques that will elevate your work, giving you the clarity and confidence to make any room—and every piece you create—uniquely yours.
1. Achieve Depth with Directional Satin Stitch
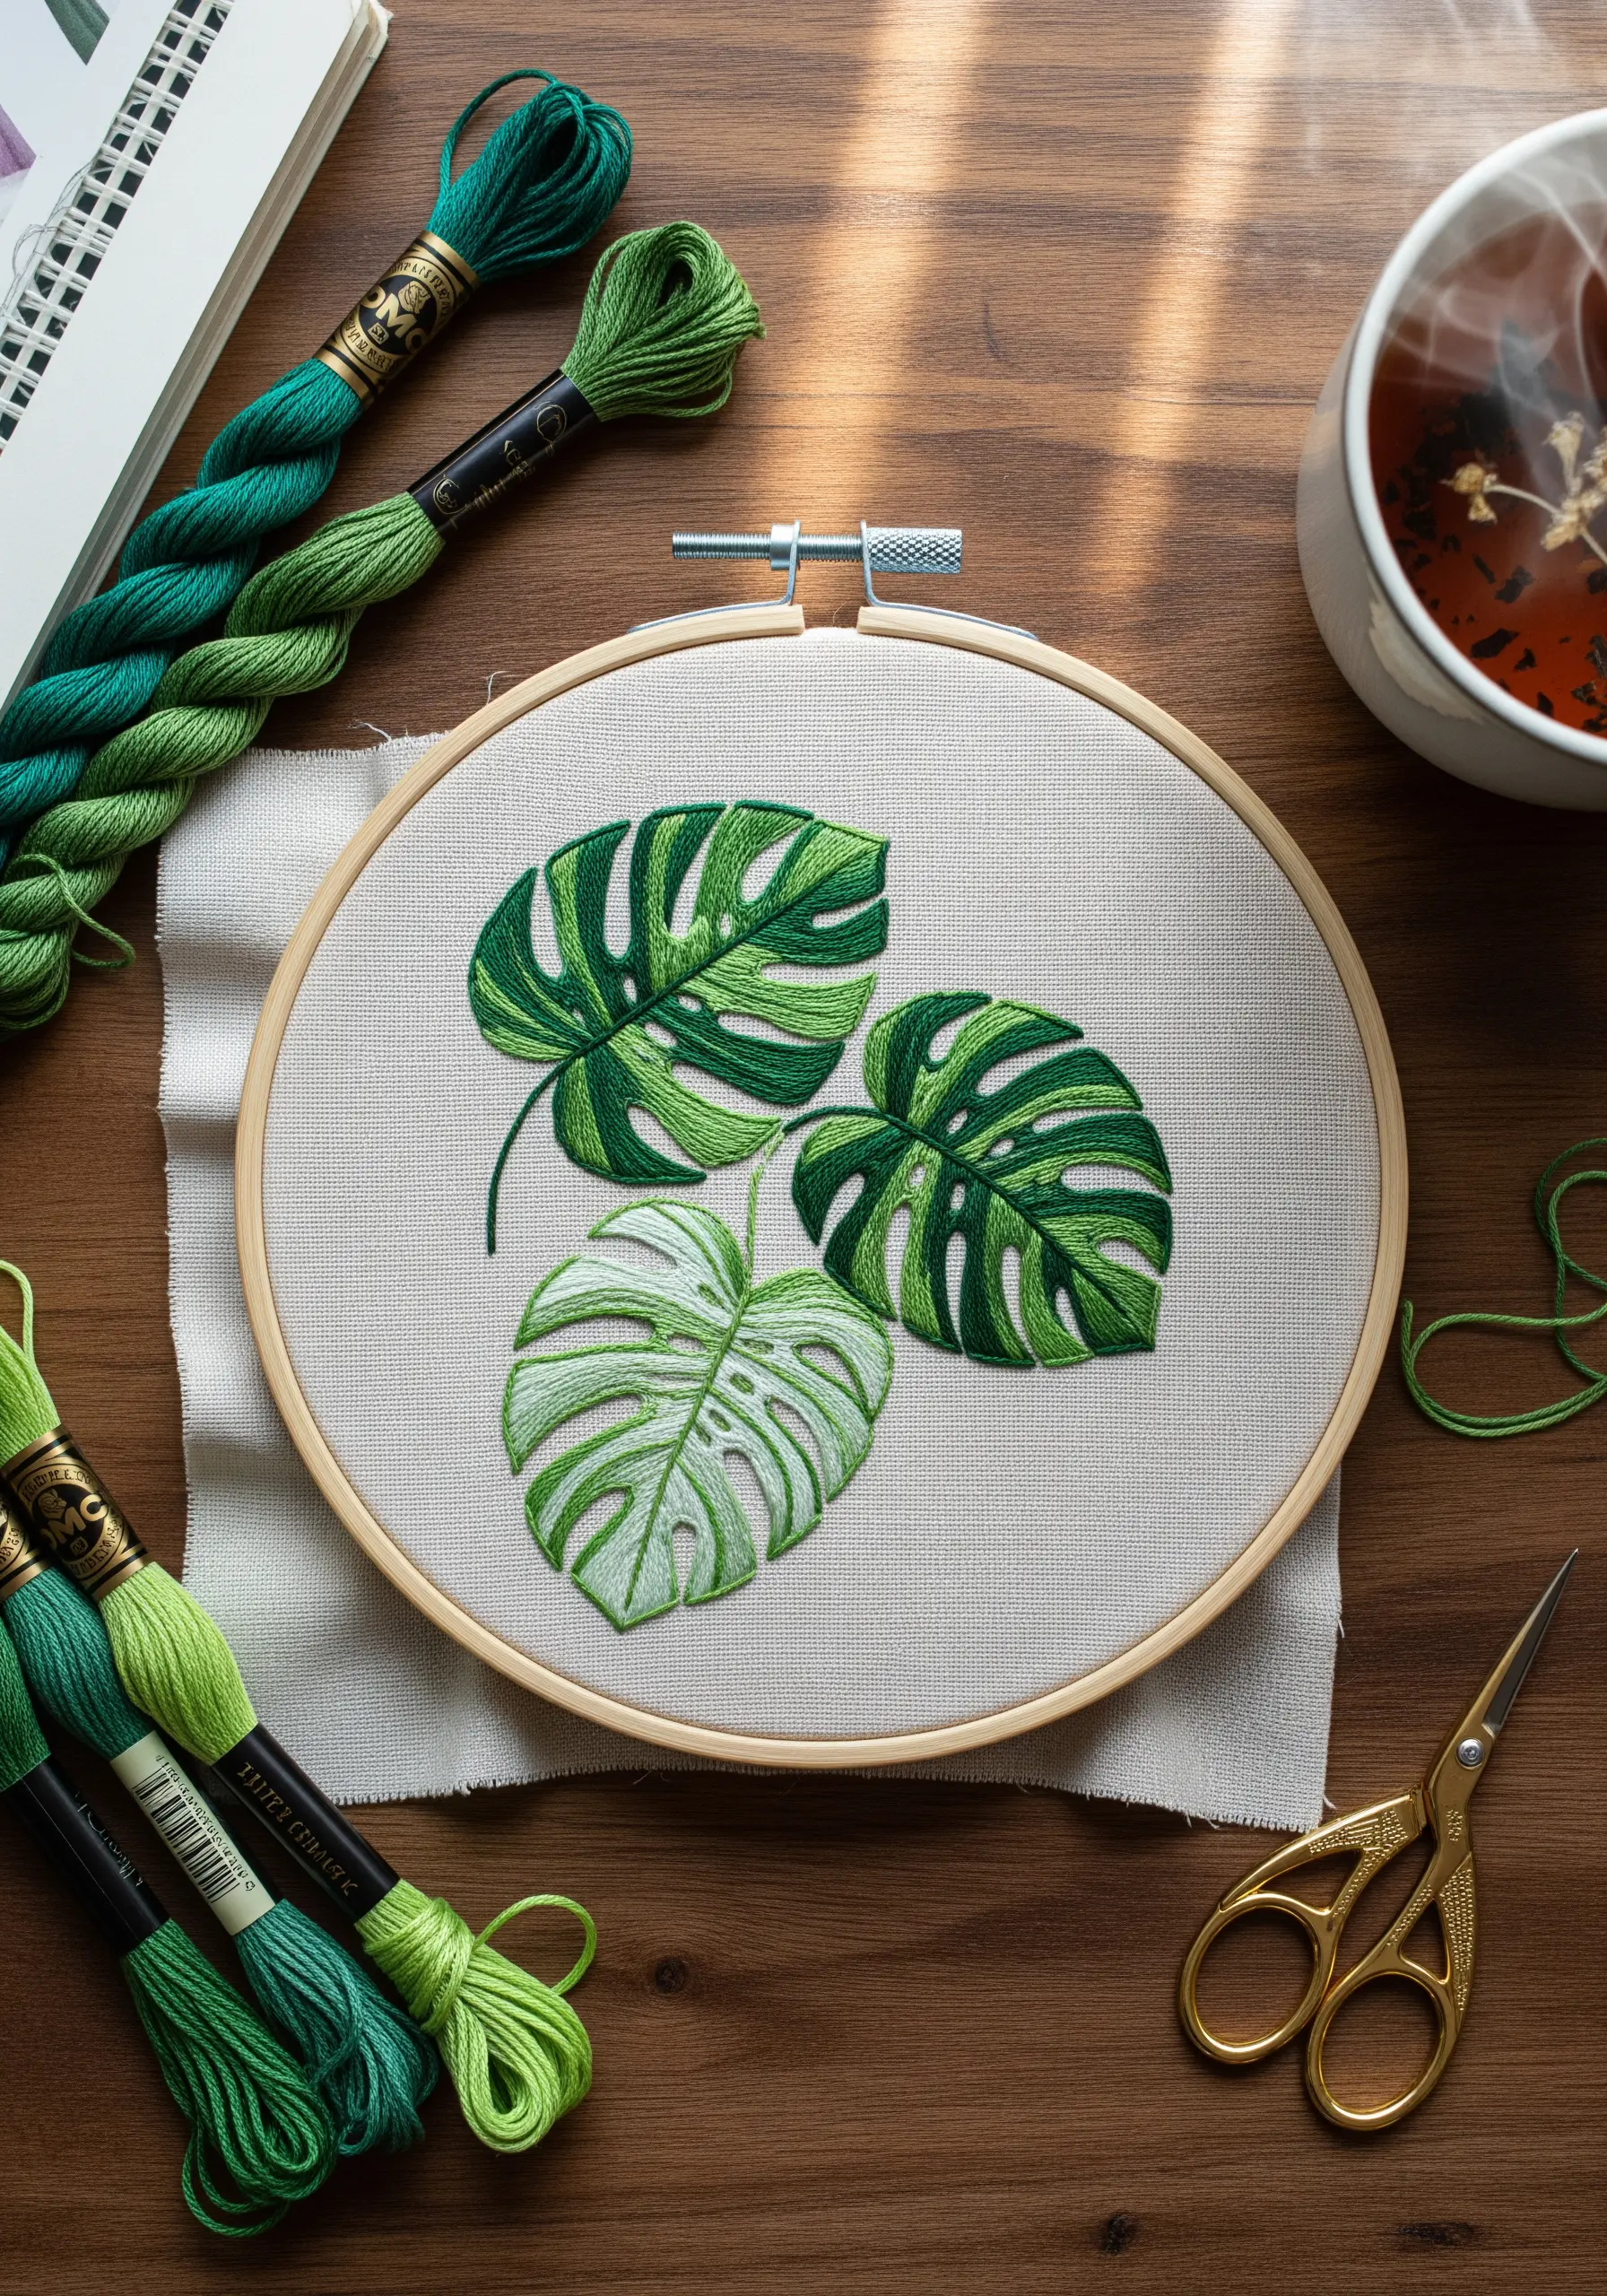
To give botanical subjects like these Monstera leaves a realistic, three-dimensional quality, vary the direction of your satin stitches within each leaf section.
Instead of filling an area with parallel stitches, angle them to follow the natural curve and veins of the leaf.
This simple adjustment mimics how light hits the surface, creating natural highlights and shadows without needing dozens of thread colors.
For the smoothest finish, use only two or three strands of floss and ensure your stitches lay flat and close together.
2. Create Radiance with Metallic Thread on Velvet
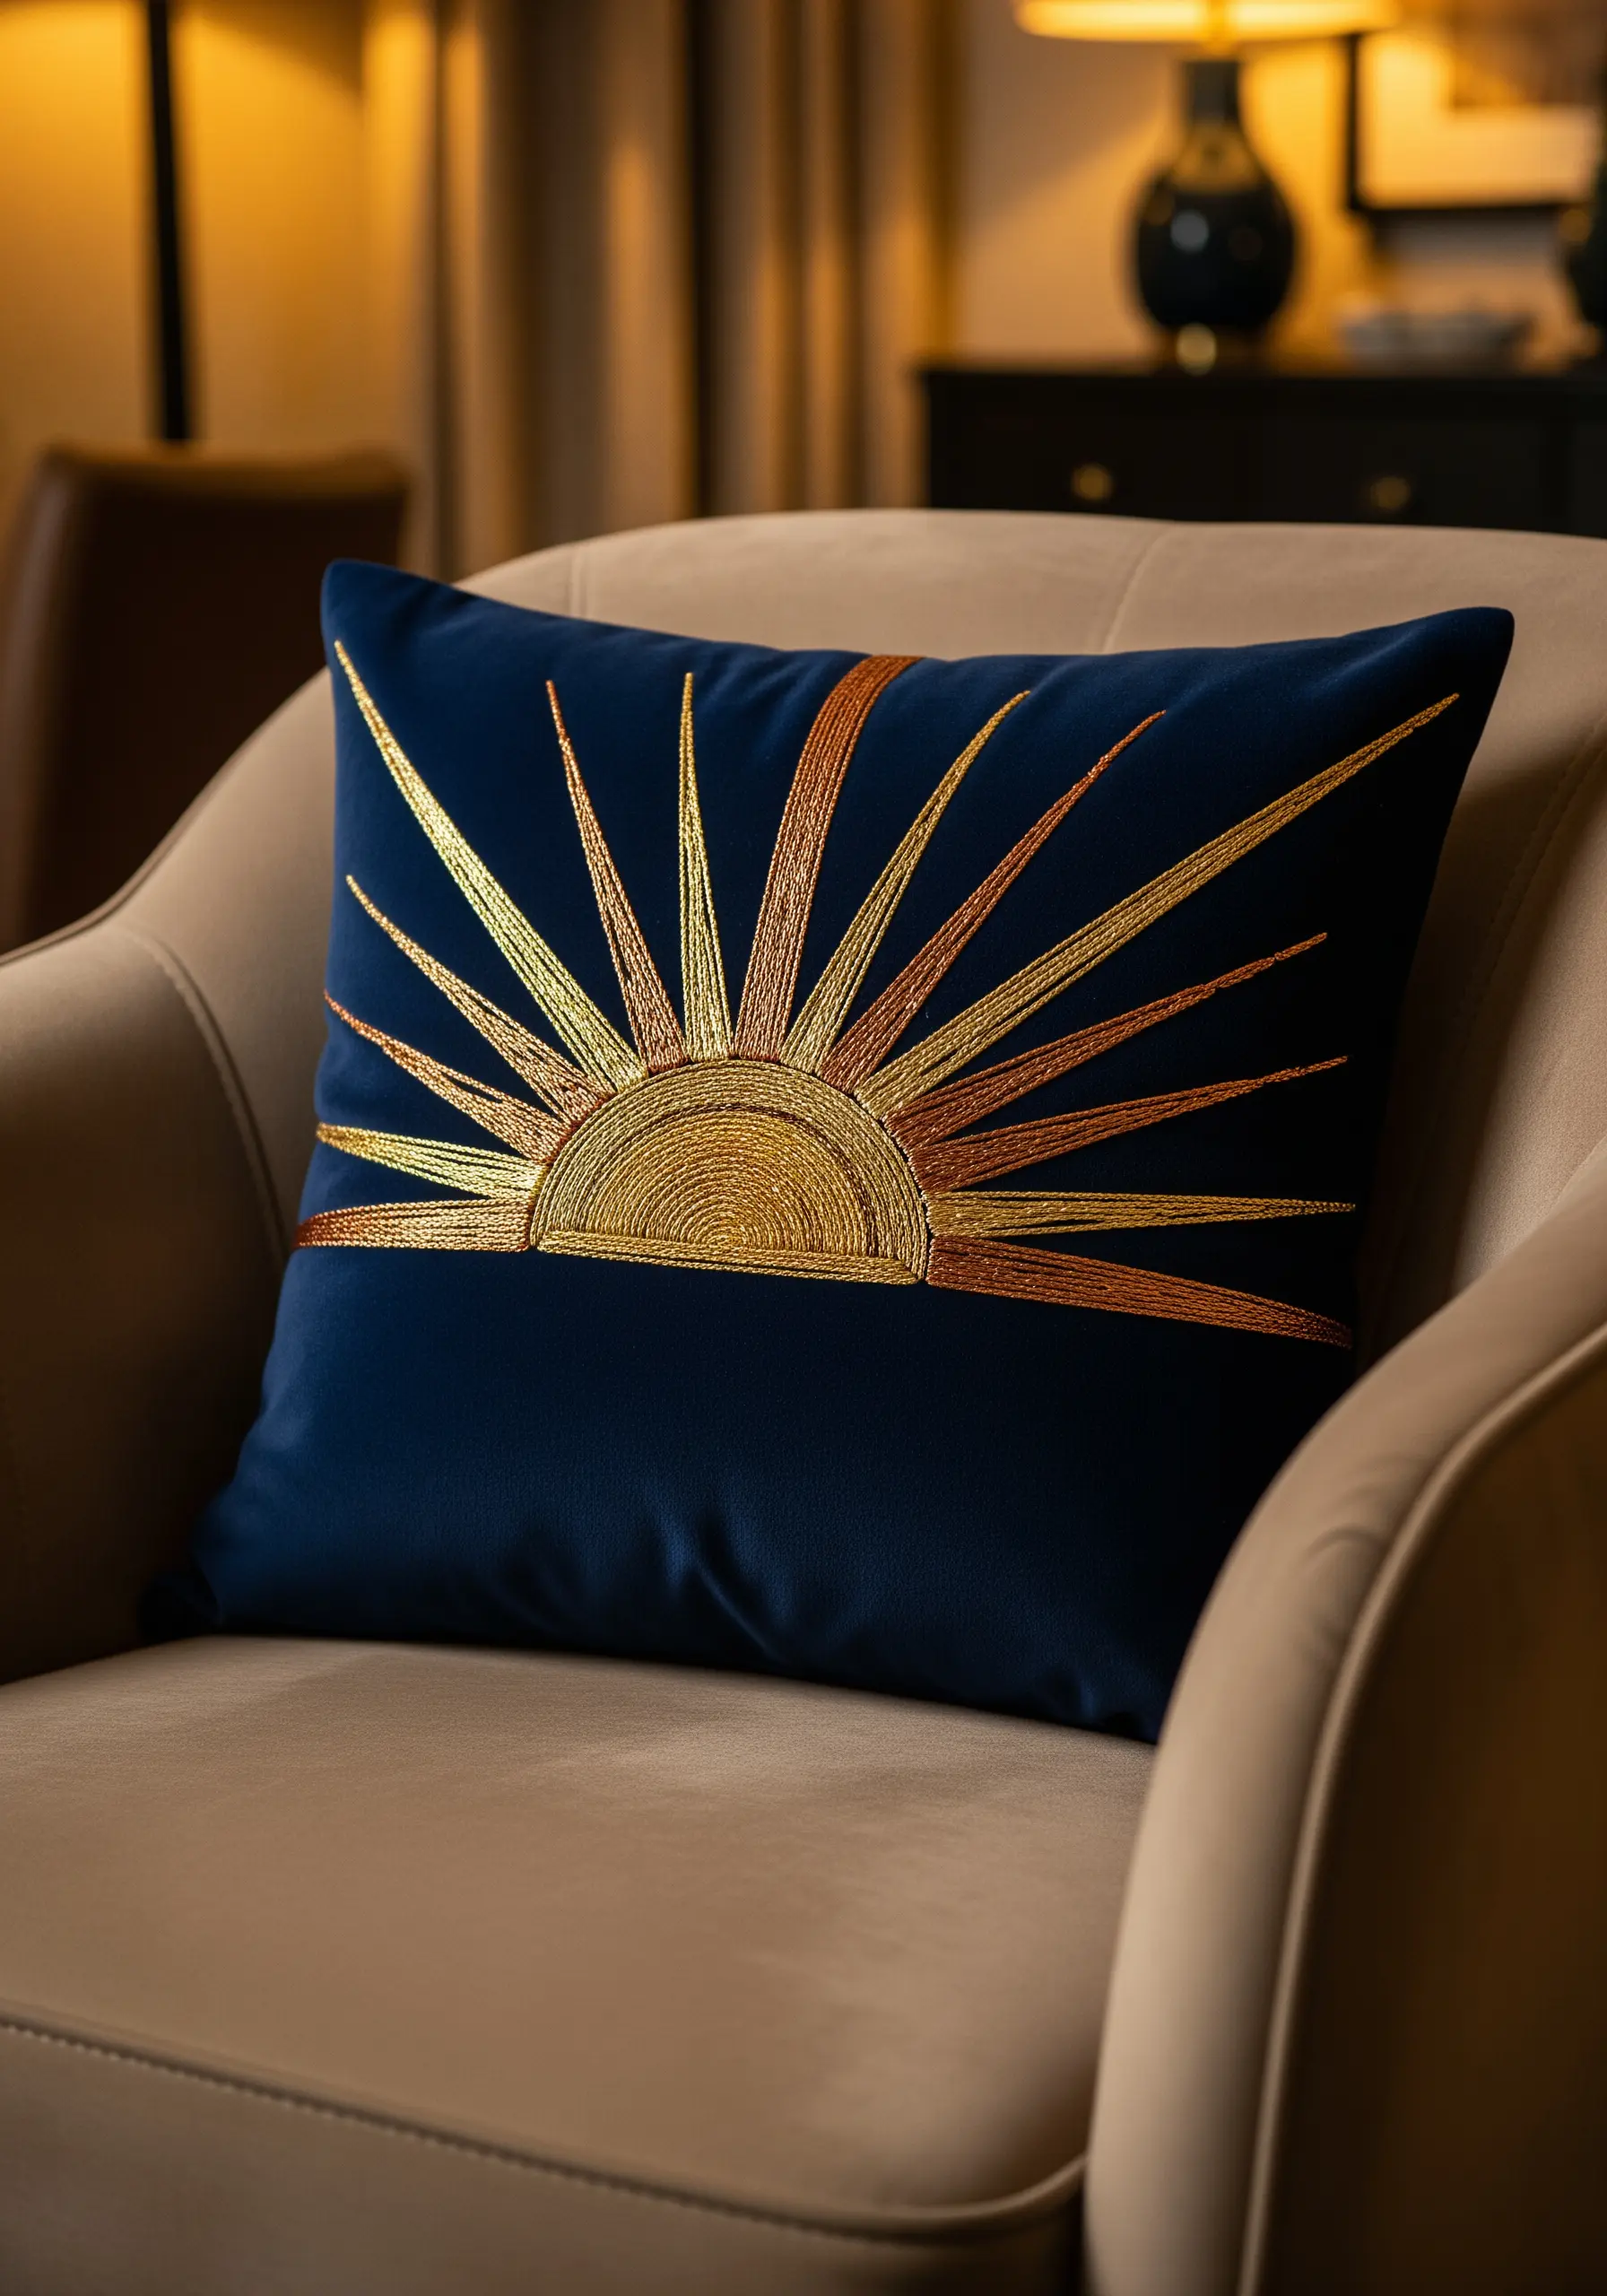
Combine the high sheen of metallic thread with the deep matte of velvet for a dramatic, luxurious effect.
To make the sun’s core, use a dense, circular satin stitch, and for the rays, use long straight stitches that vary in length and color.
Blend multiple metallic tones—like gold, copper, and bronze—to give the light a more complex, shimmering quality.
Work with shorter lengths of metallic thread and use a thread conditioner to prevent it from tangling and breaking, which is common with these specialty fibers.
3. Capture Detail with Monochromatic Thread Painting
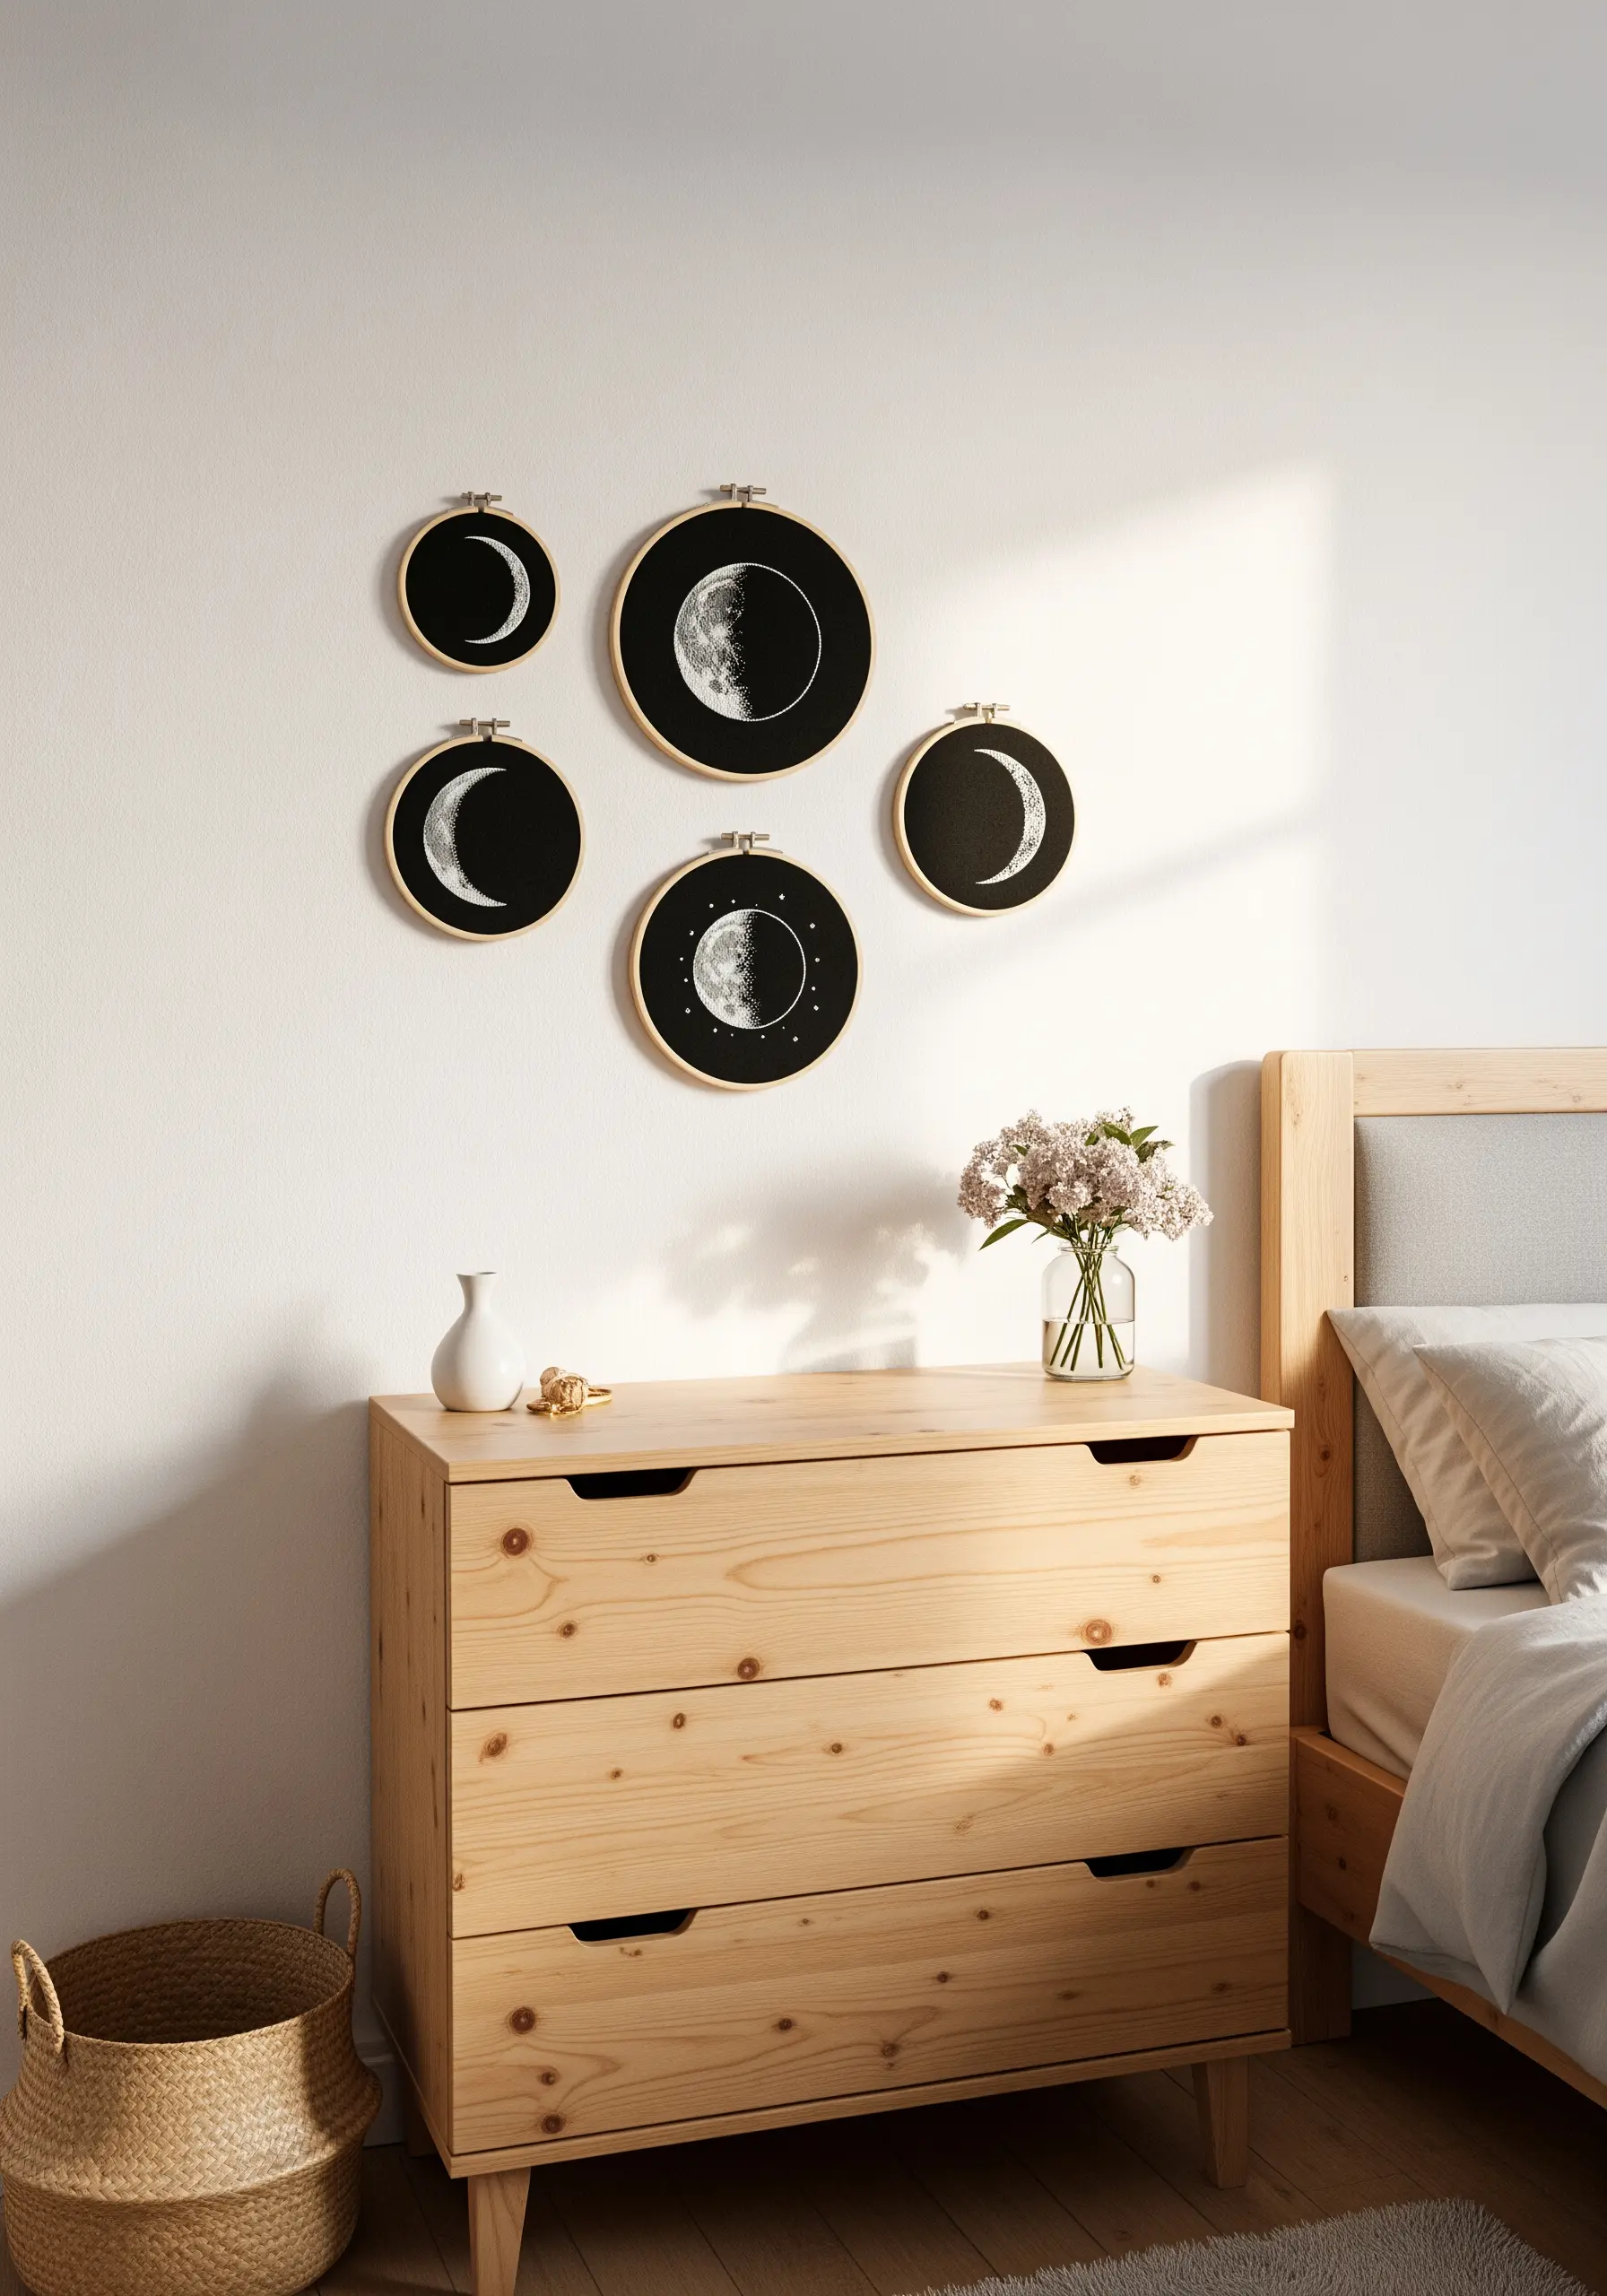
Create a photorealistic moon surface by using just a few shades of grey and white thread on black fabric.
The technique relies on using a single strand of floss and the long-and-short stitch to blend the colors seamlessly, creating the soft gradients and sharp crater edges.
The black fabric acts as your deepest shadow, allowing even the slightest color variations to pop.
Group several hoops of different sizes to create a dynamic embroidered wall art installation that feels like a modern gallery display.
4. Embroider on Unexpected Surfaces Like a Lampshade
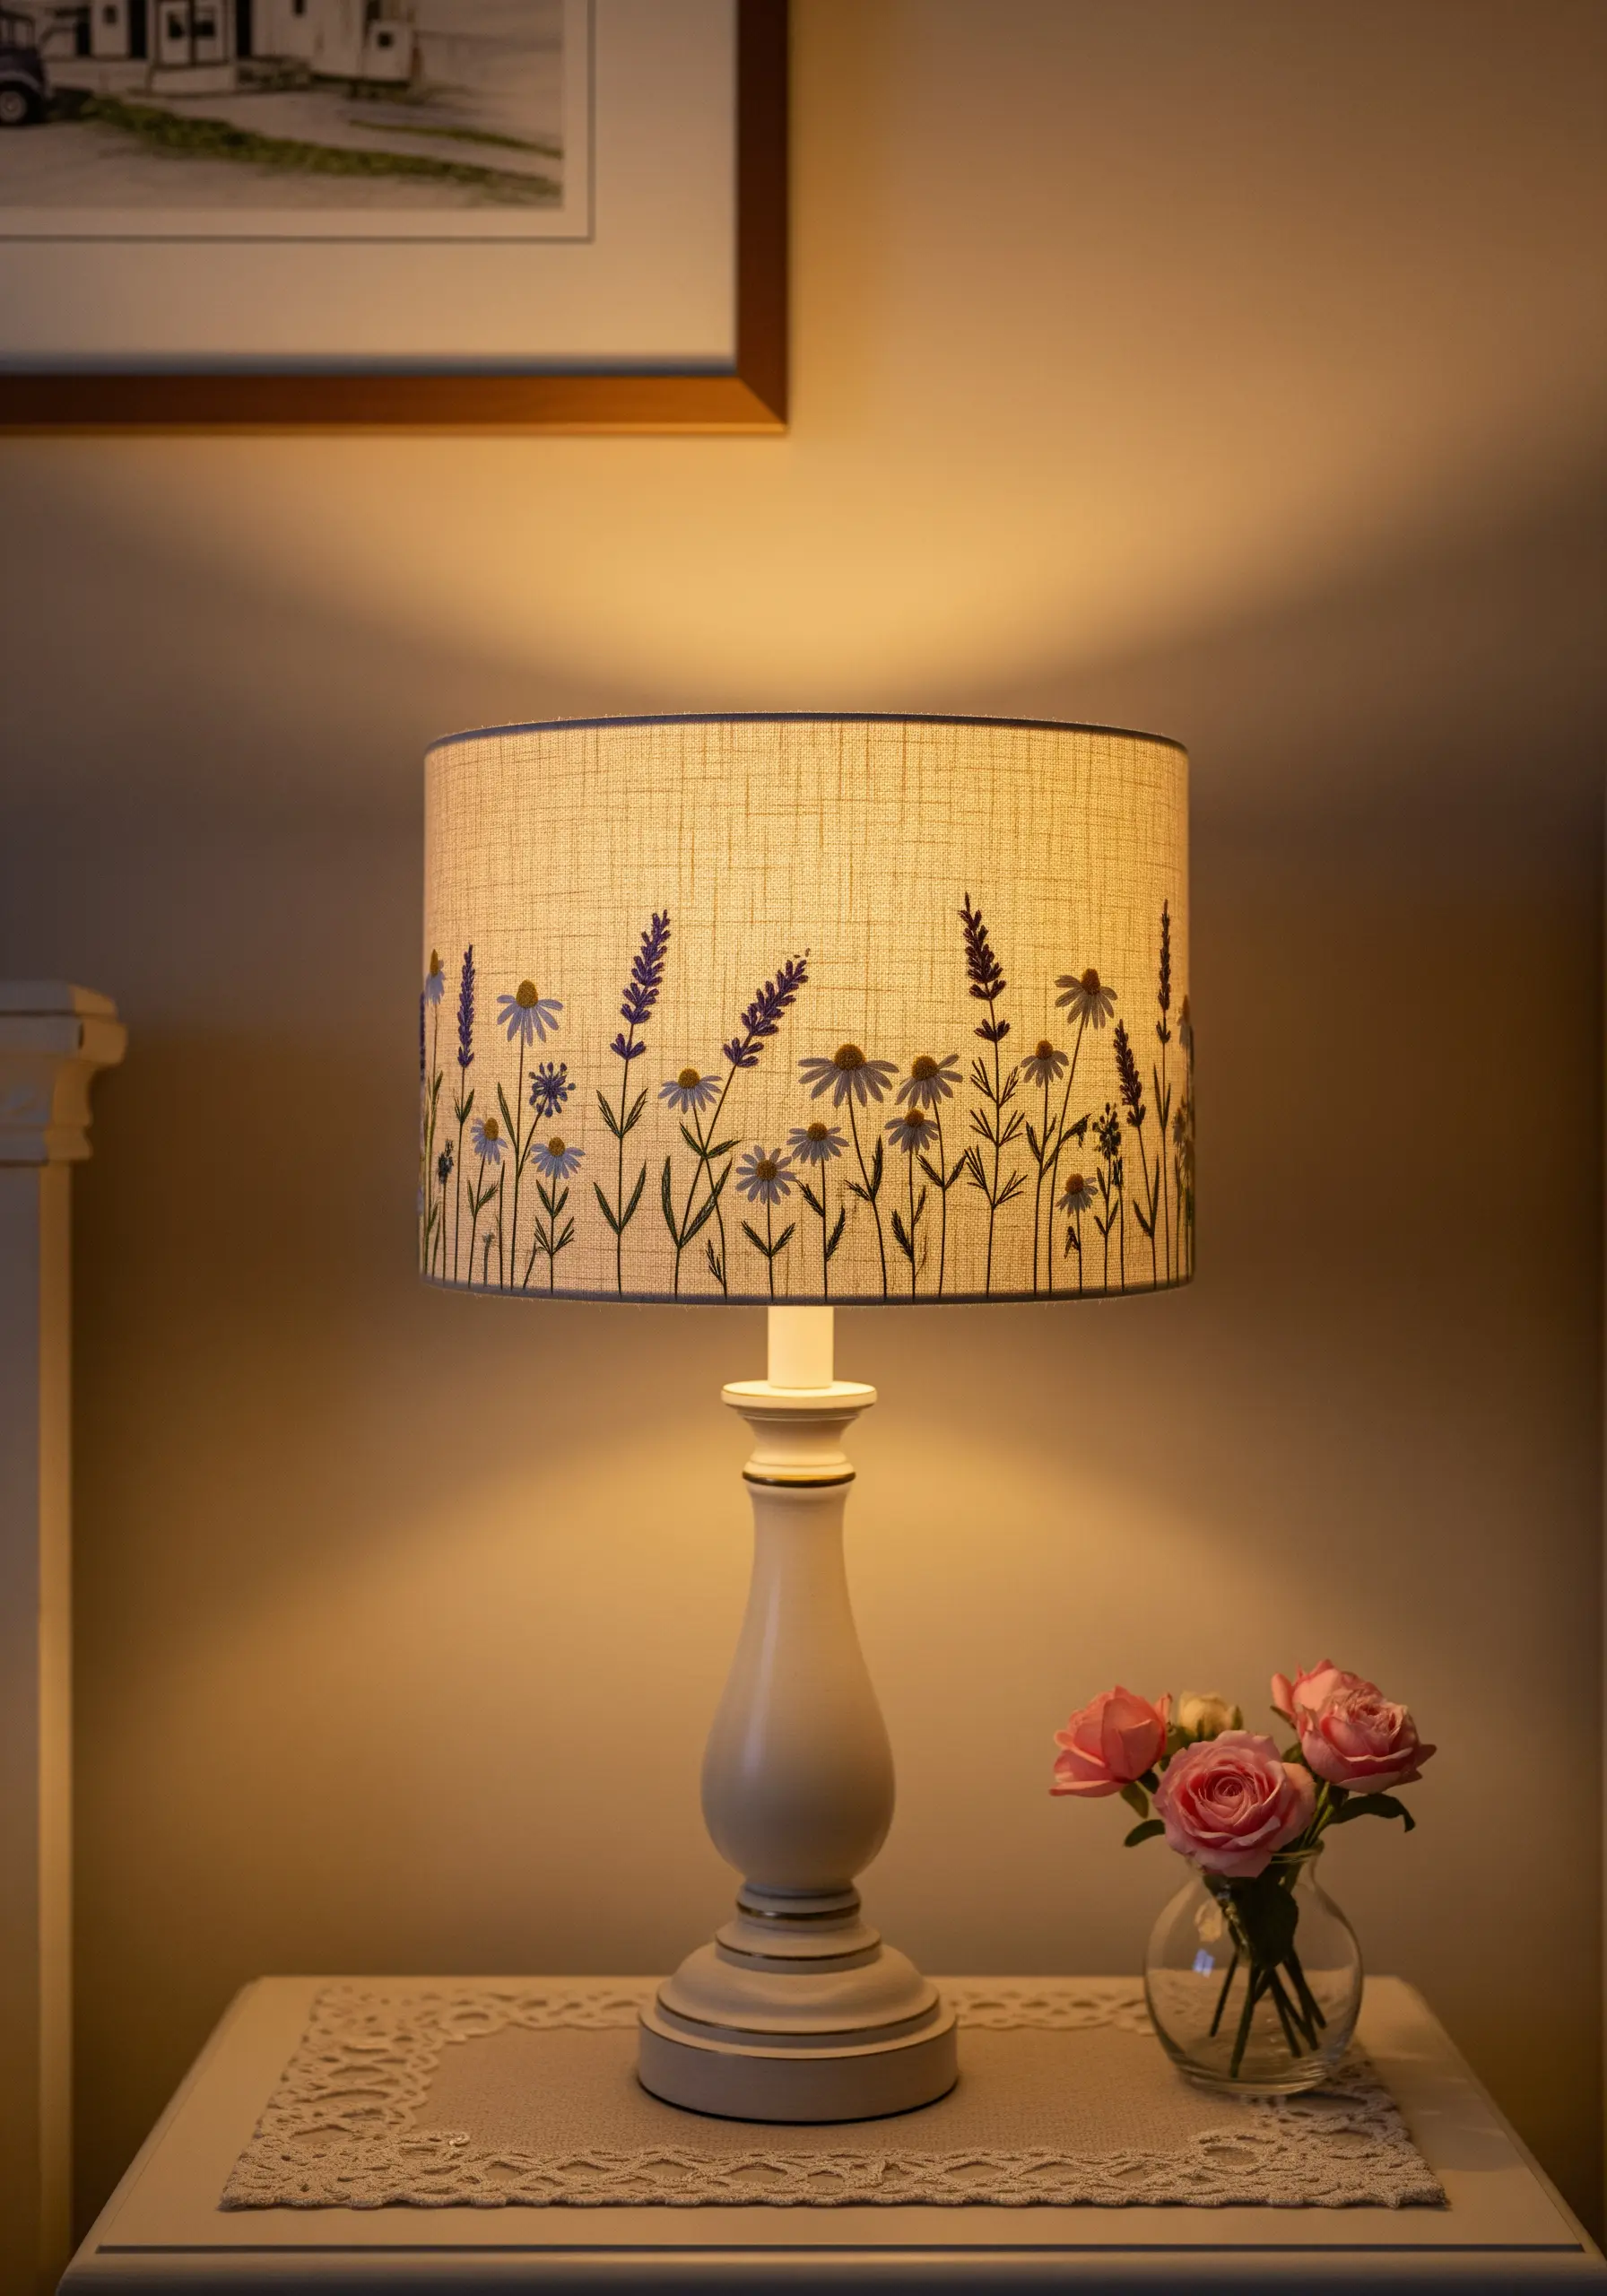
Take your embroidery beyond the hoop by stitching on functional home decor items like a linen lampshade.
Since you can’t use a hoop, you must be careful to maintain even tension with each stitch to avoid puckering the fabric.
Choose simple, open designs and use outline stitches like stem stitch or backstitch, which are less likely to pull on the delicate surface.
A lightweight, iron-on interfacing applied to the inside of the shade can provide extra stability for your stitches.
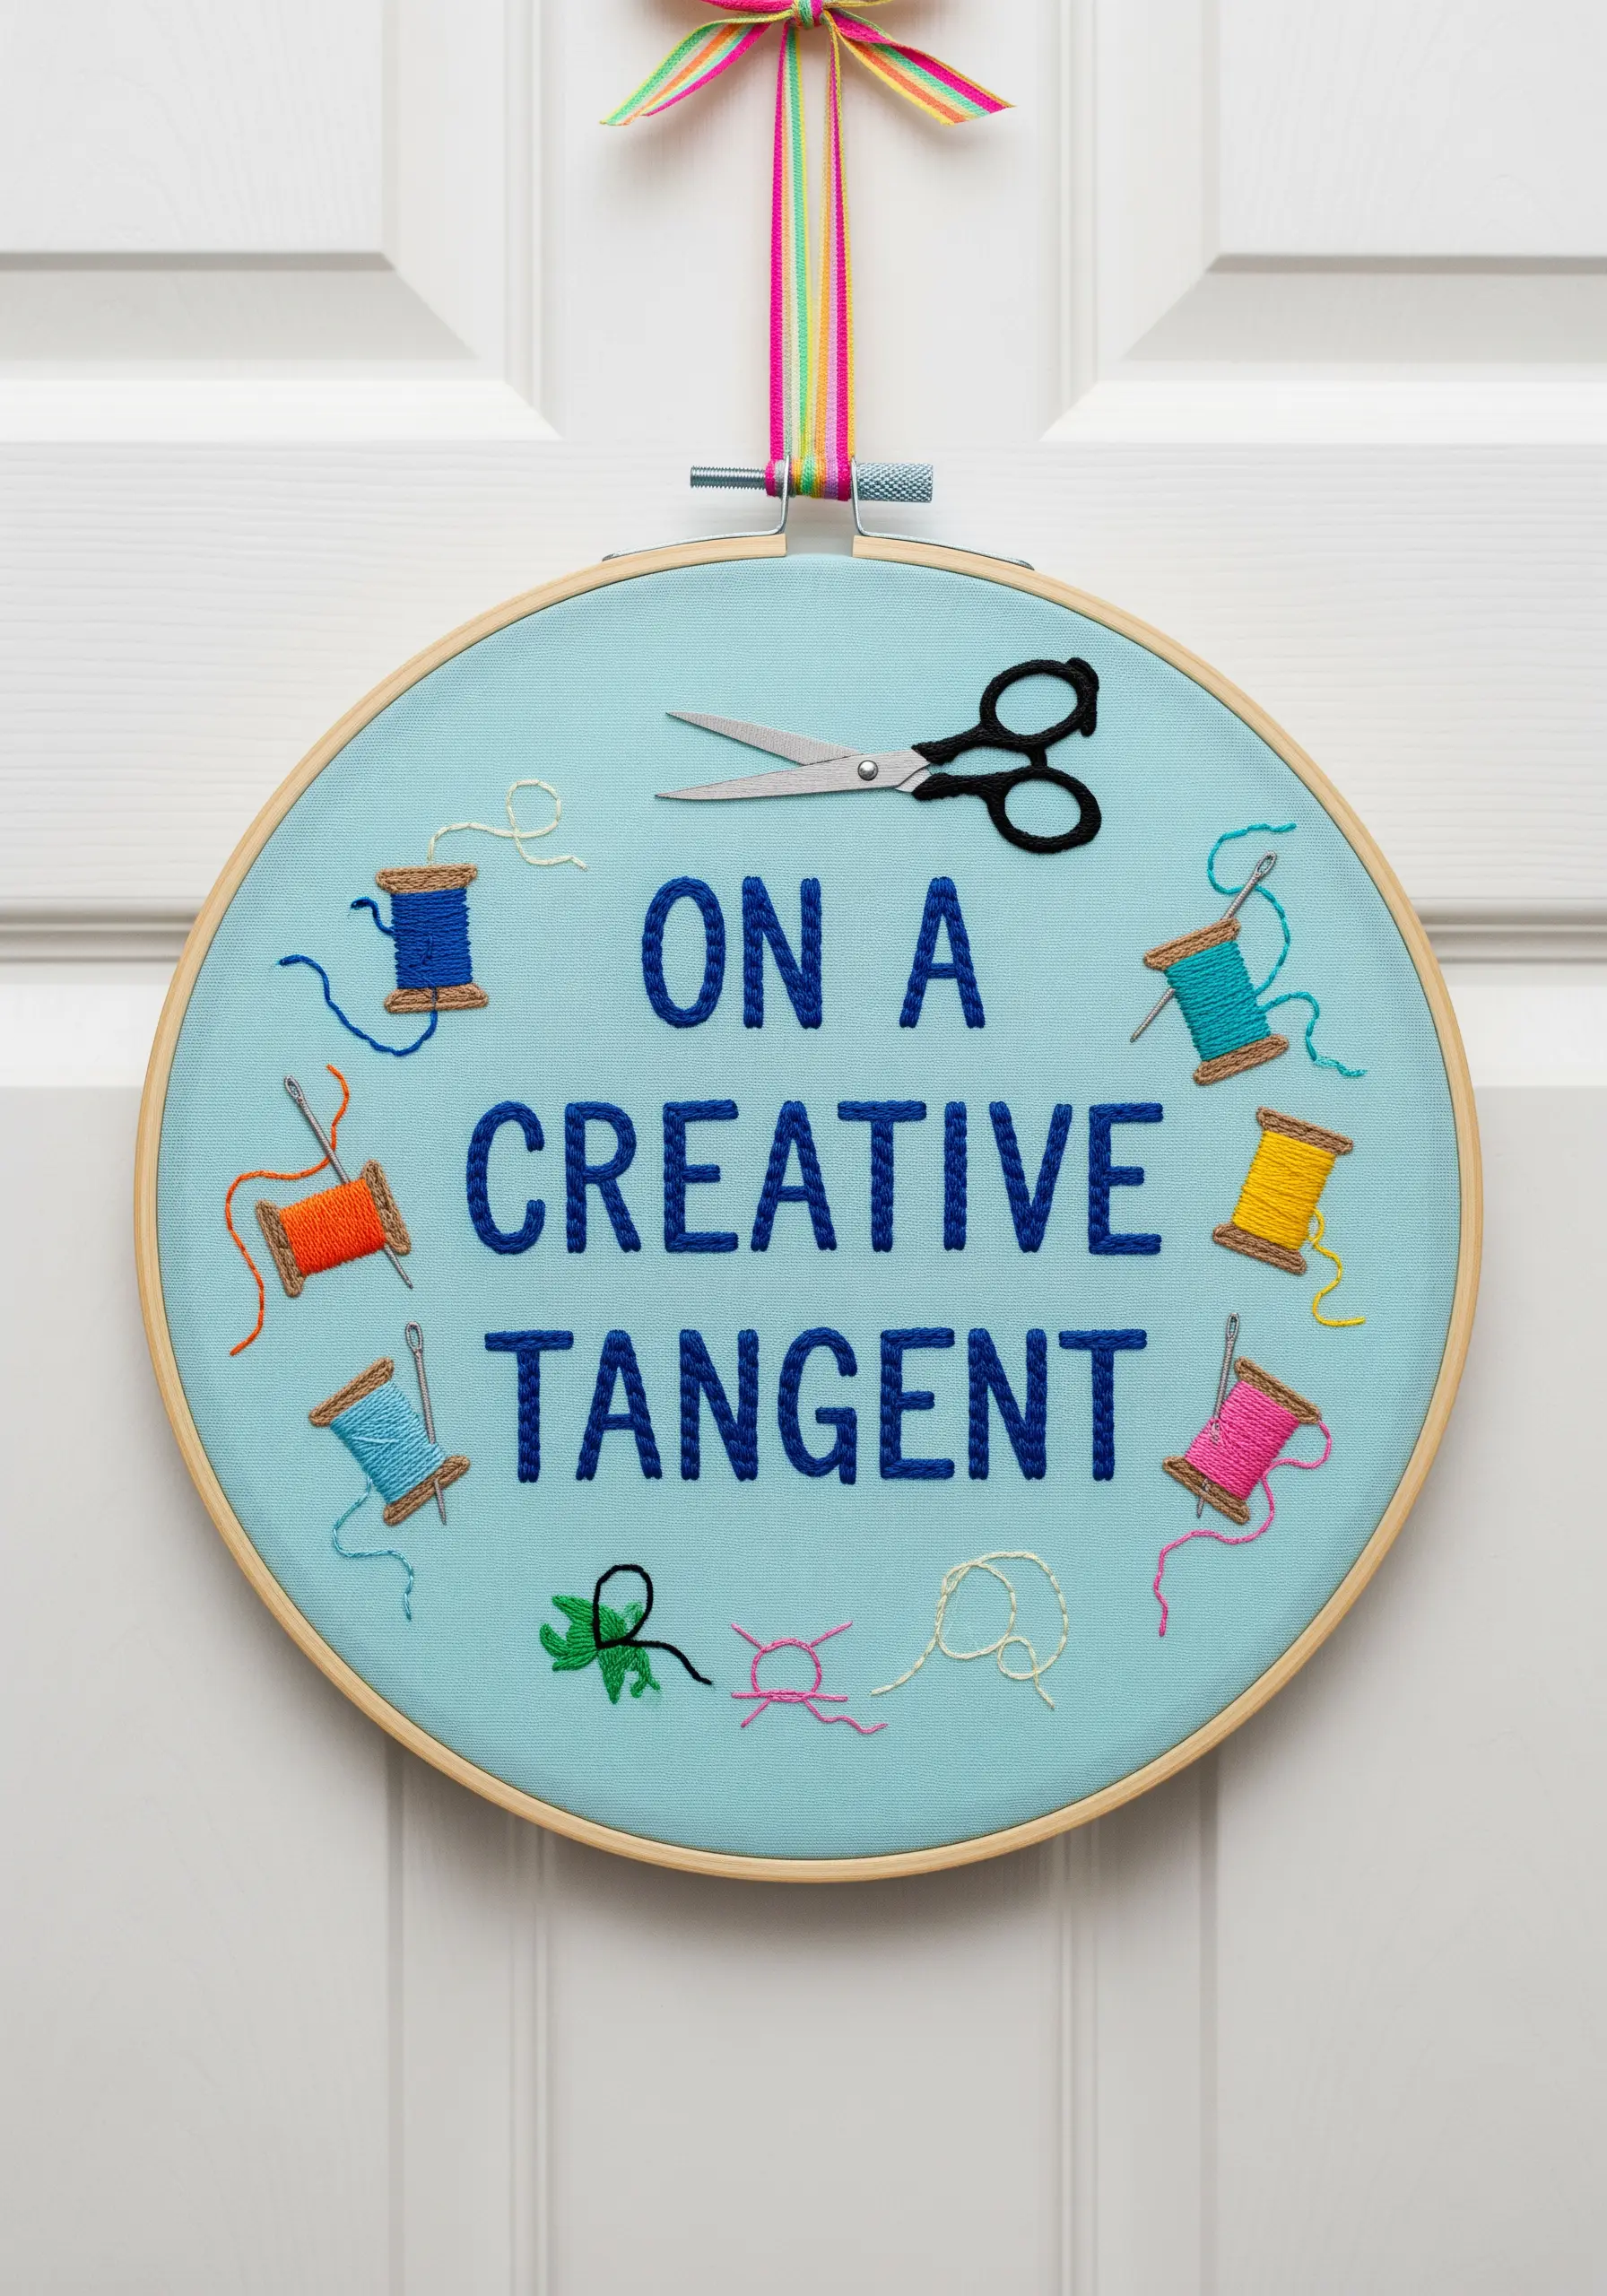
5. Make a Statement with 3D Roped Lettering
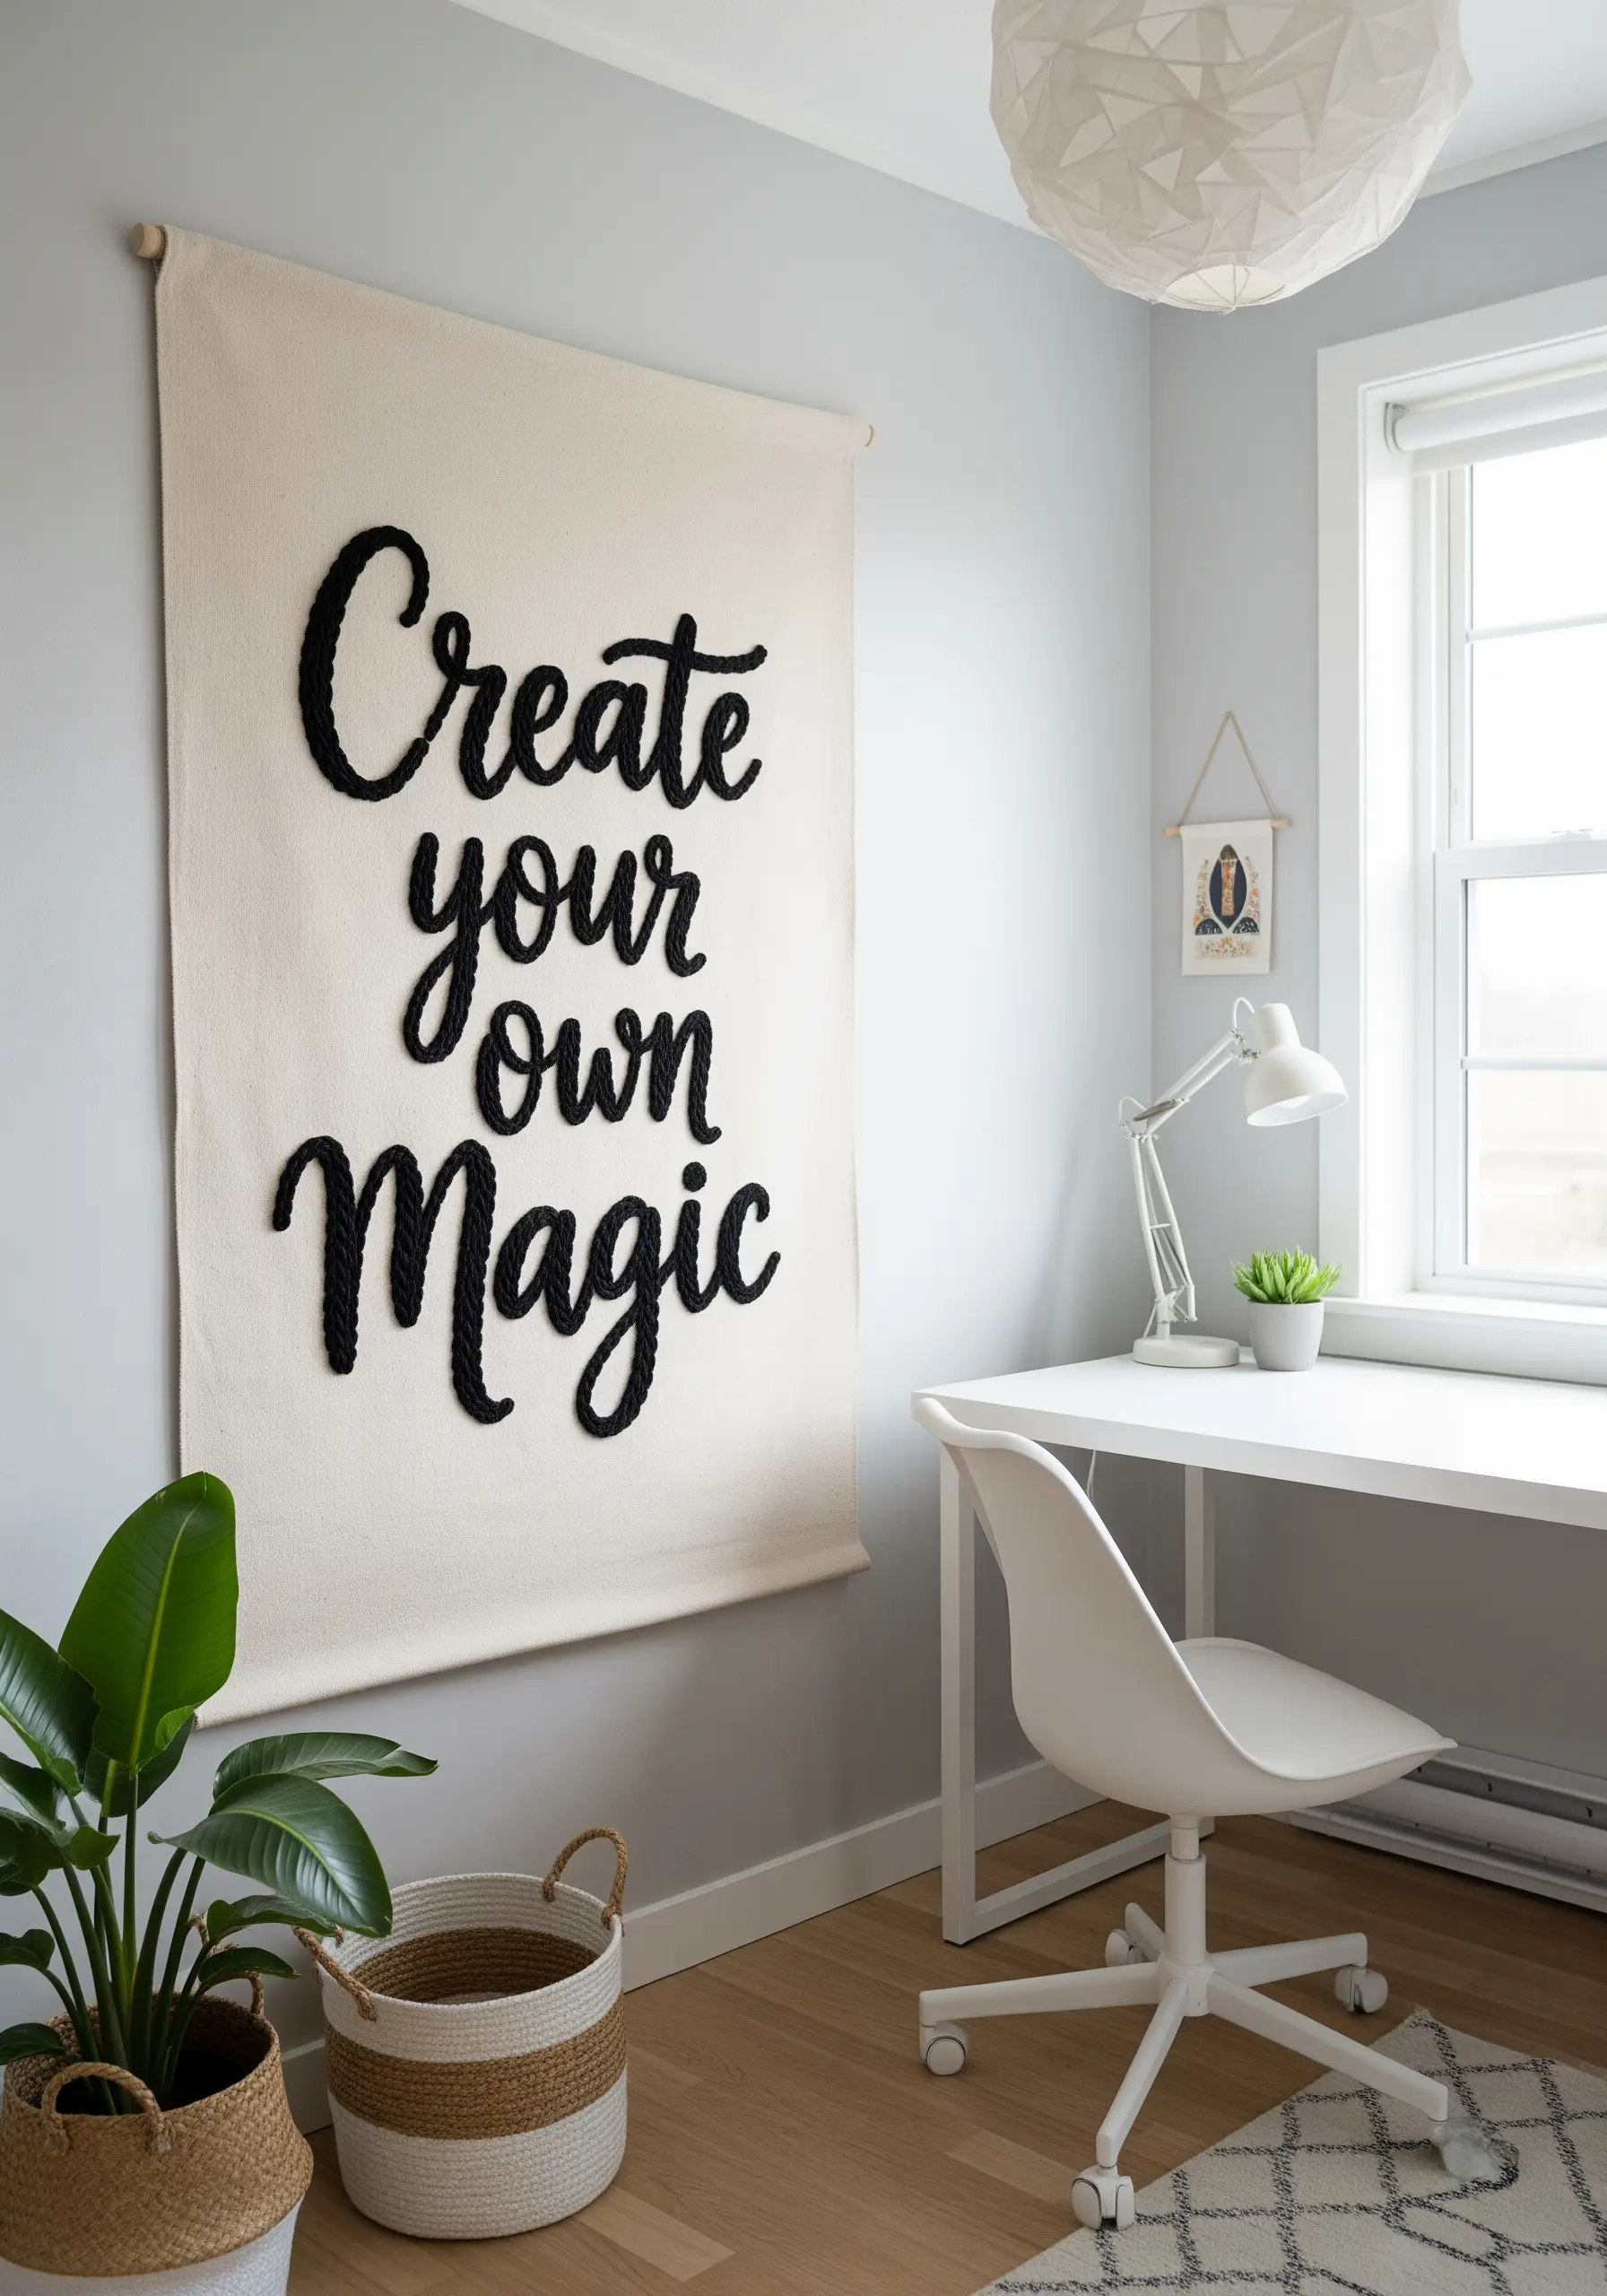
For large-scale, high-impact text, abandon floss and embrace thick cord or rope.
This technique, called couching, involves laying the rope on your fabric surface and securing it with small, evenly spaced stitches using a matching, thinner thread.
The result is bold, dimensional lettering that creates shadow and texture, turning a simple quote into a piece of commanding statement-size wall art.
6. Adorn Objects with Symmetrical Mandala Designs
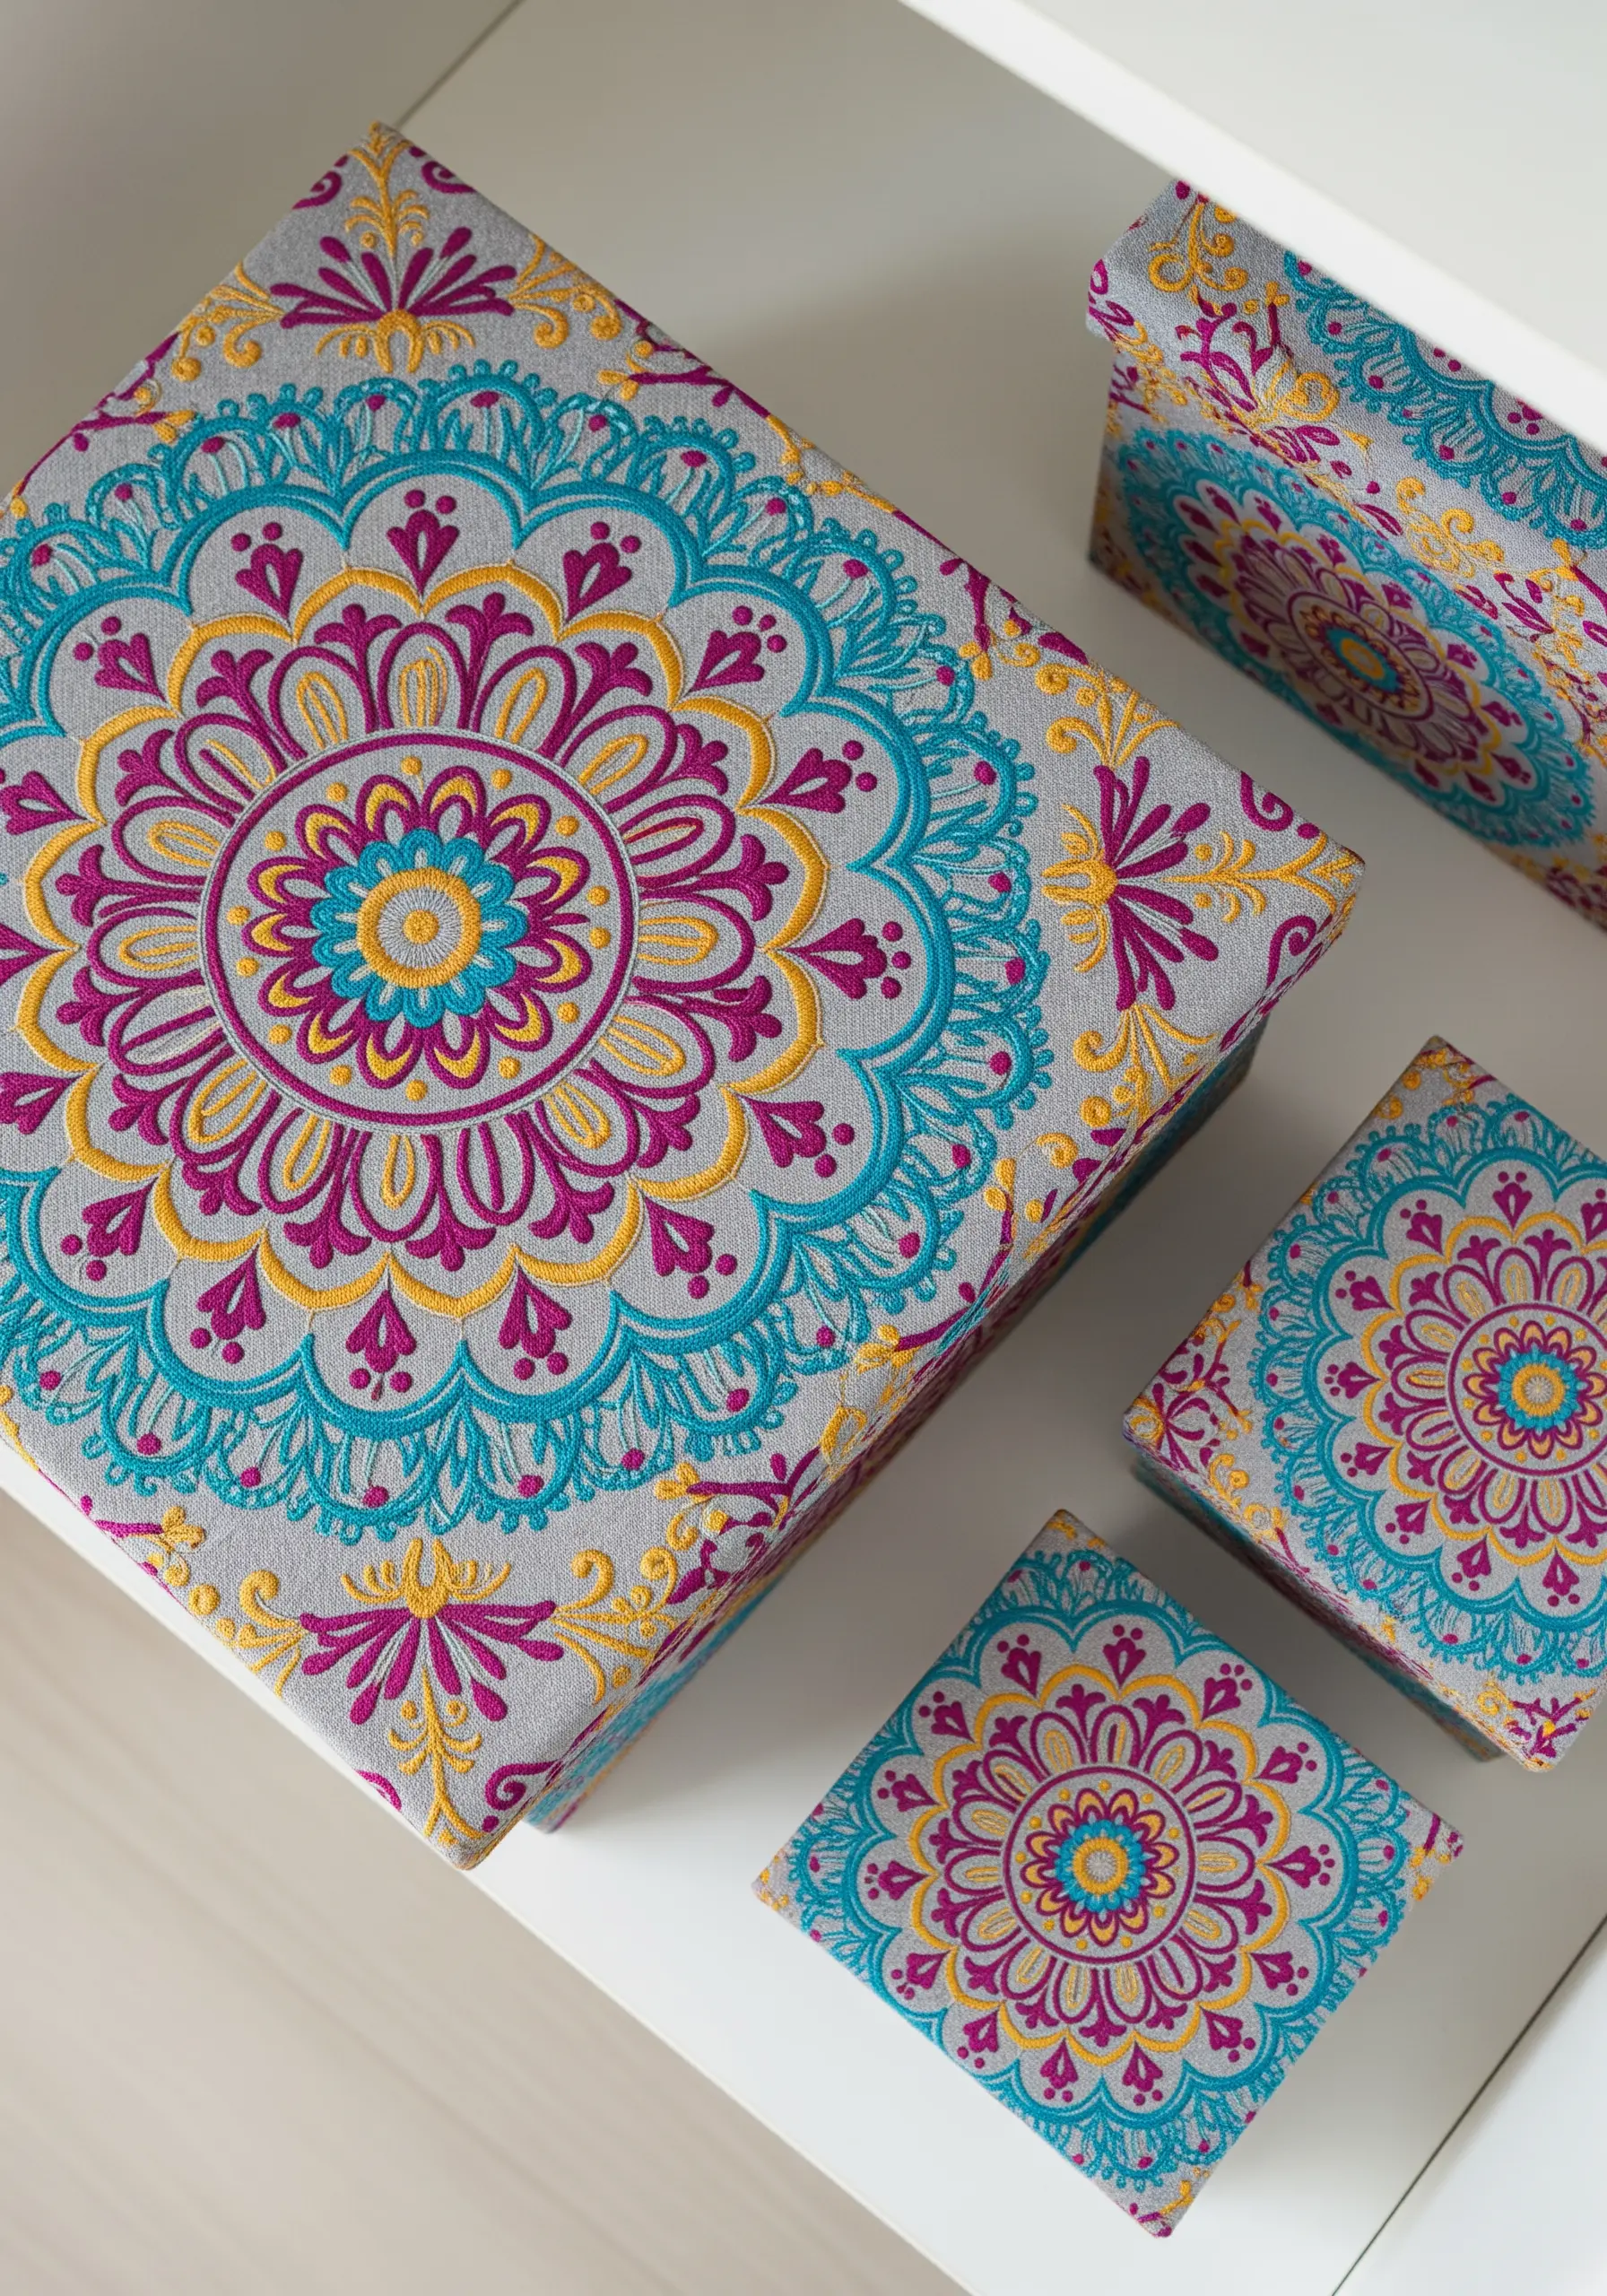
Turn plain storage boxes into decorative accents by covering them with embroidered fabric.
For a flawless mandala, print your pattern onto a water-soluble stabilizer; this ensures perfect symmetry and lets you focus on your stitching.
Use a crisp satin stitch and a vibrant, high-contrast color palette to make the geometric shapes pop.
This approach elevates functional items, making them an integral part of your room’s aesthetic.
7. Define a Pot with Minimalist Line Art
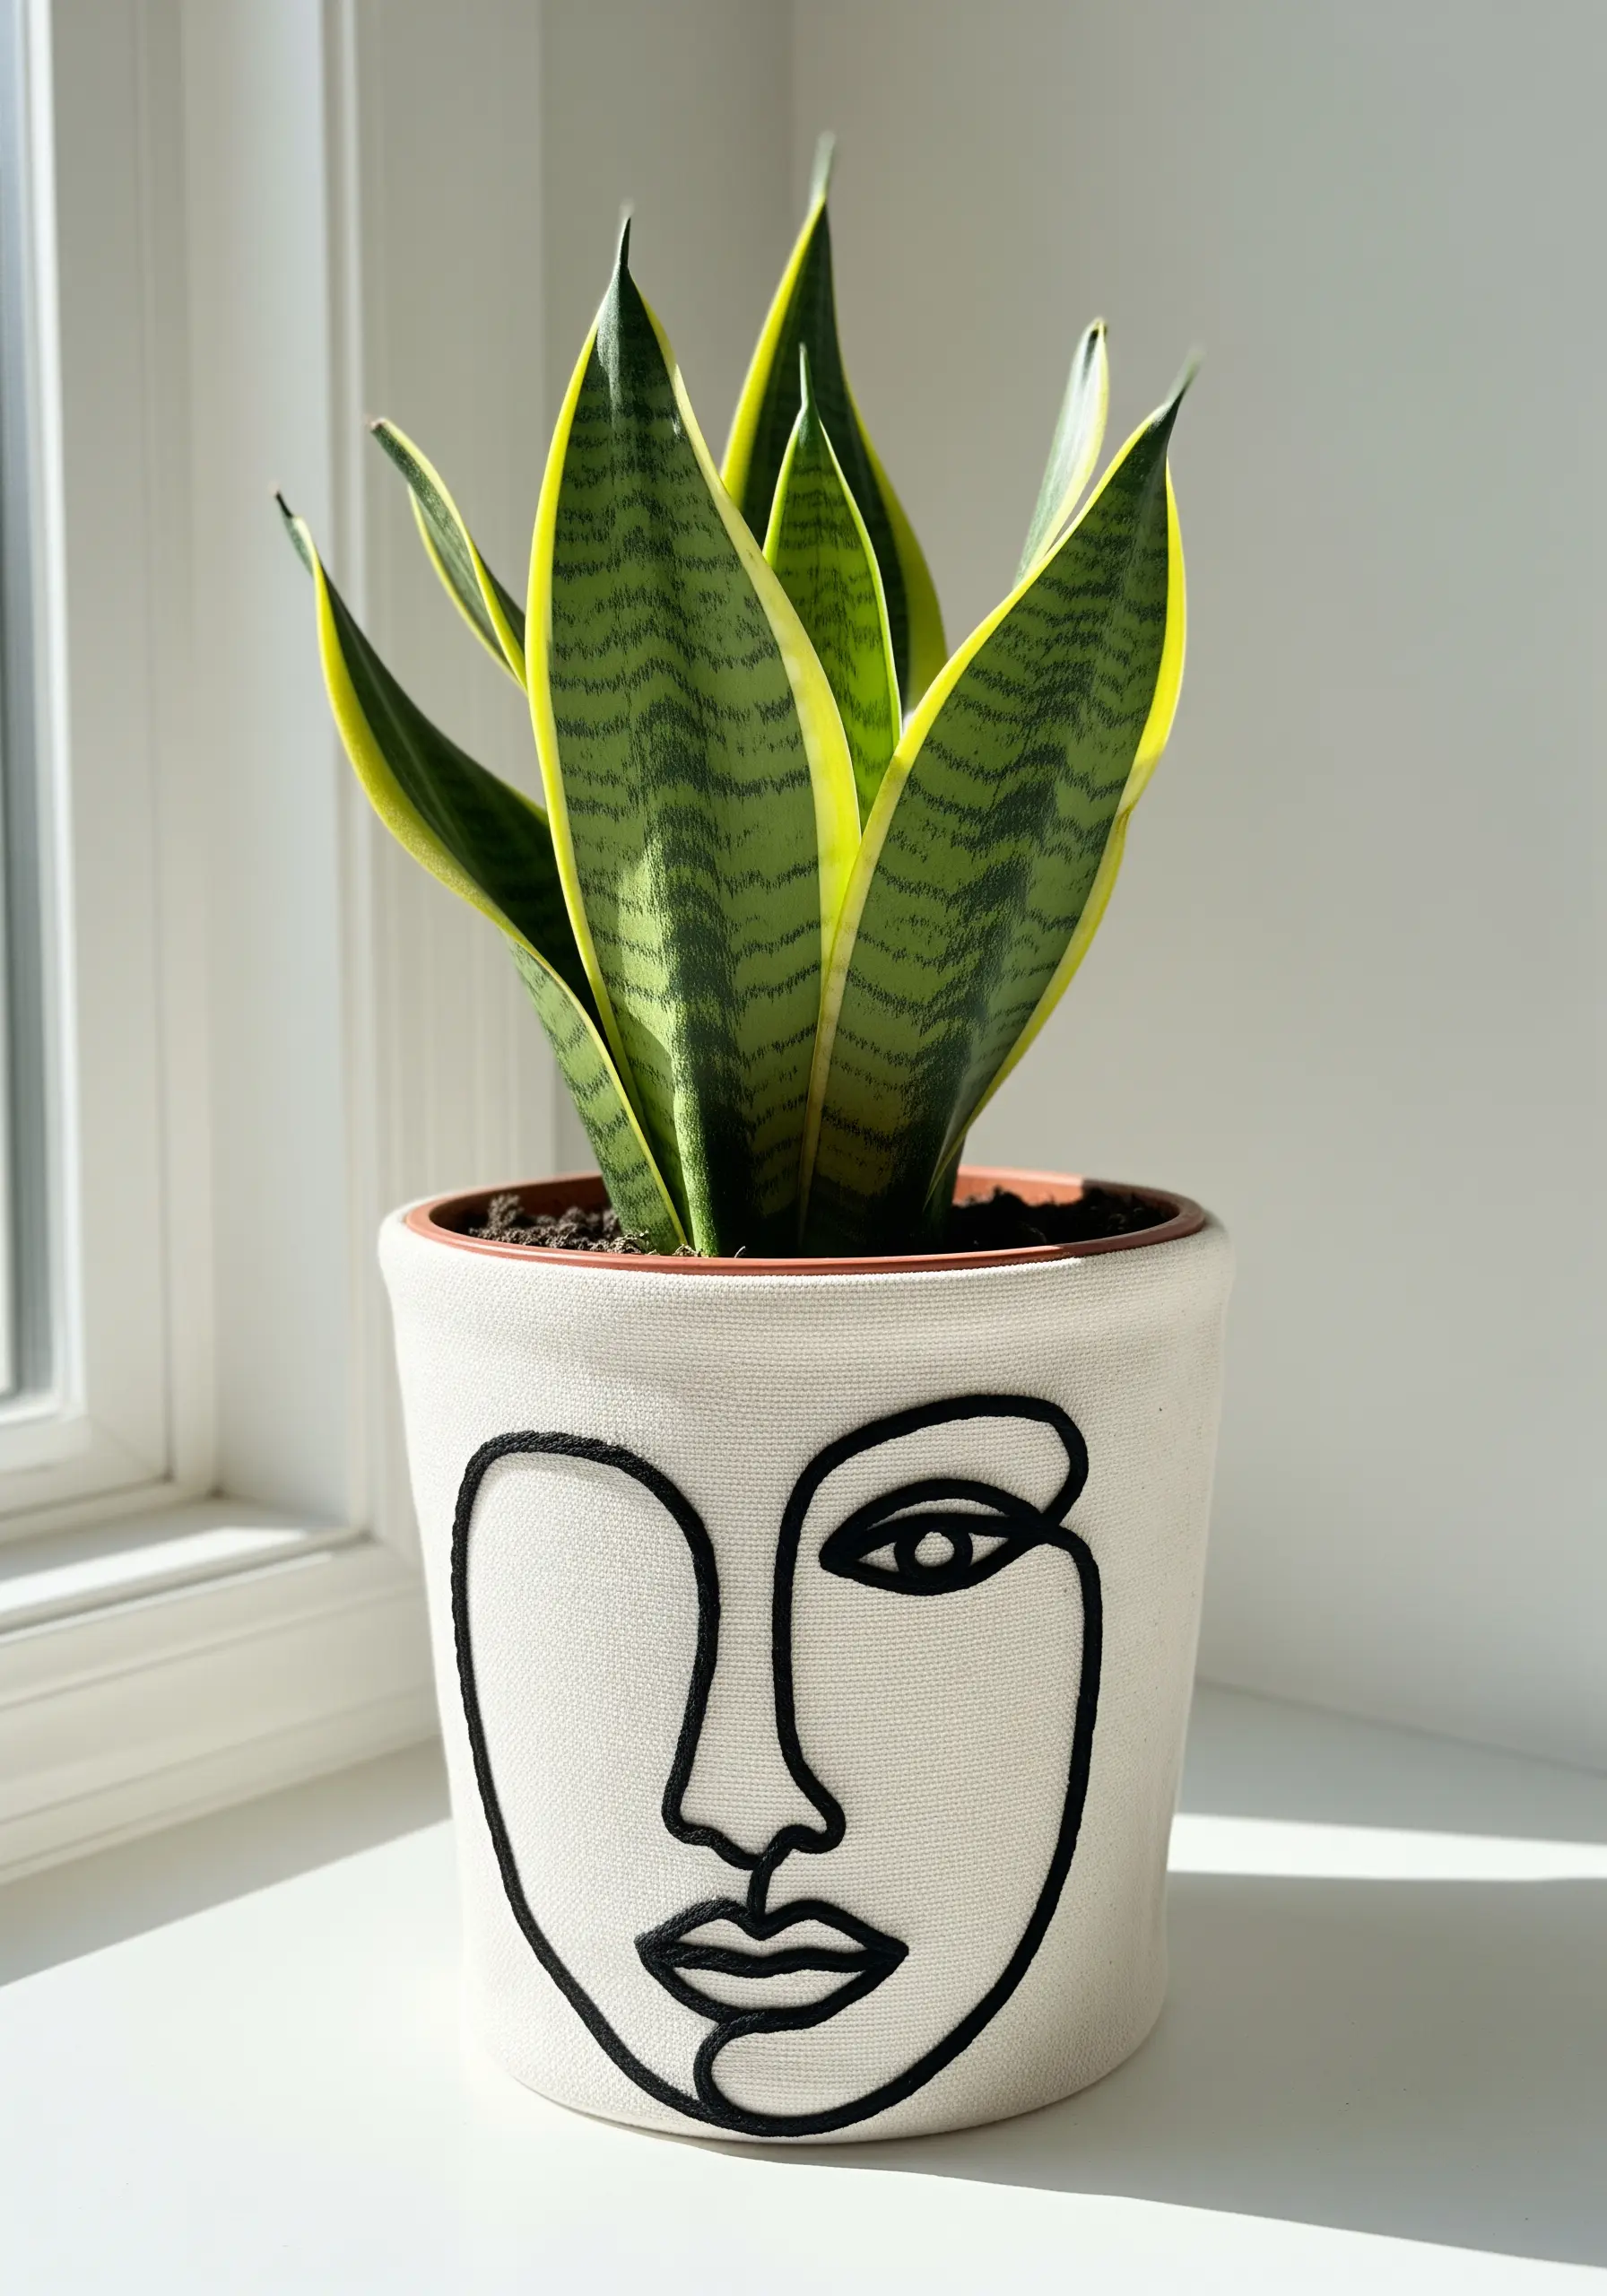
Embrace the power of a single line to create a modern, graphic statement on a canvas plant pot cover.
Use a thick black yarn and the couching technique—tacking it down with a finer, matching thread—to achieve a clean, continuous line that mimics an abstract drawing.
This minimalist approach adds a touch of personality without overwhelming your decor, proving that sometimes the simplest ideas have the most impact.
8. Chronicle Your Travels on a Stitched World Map
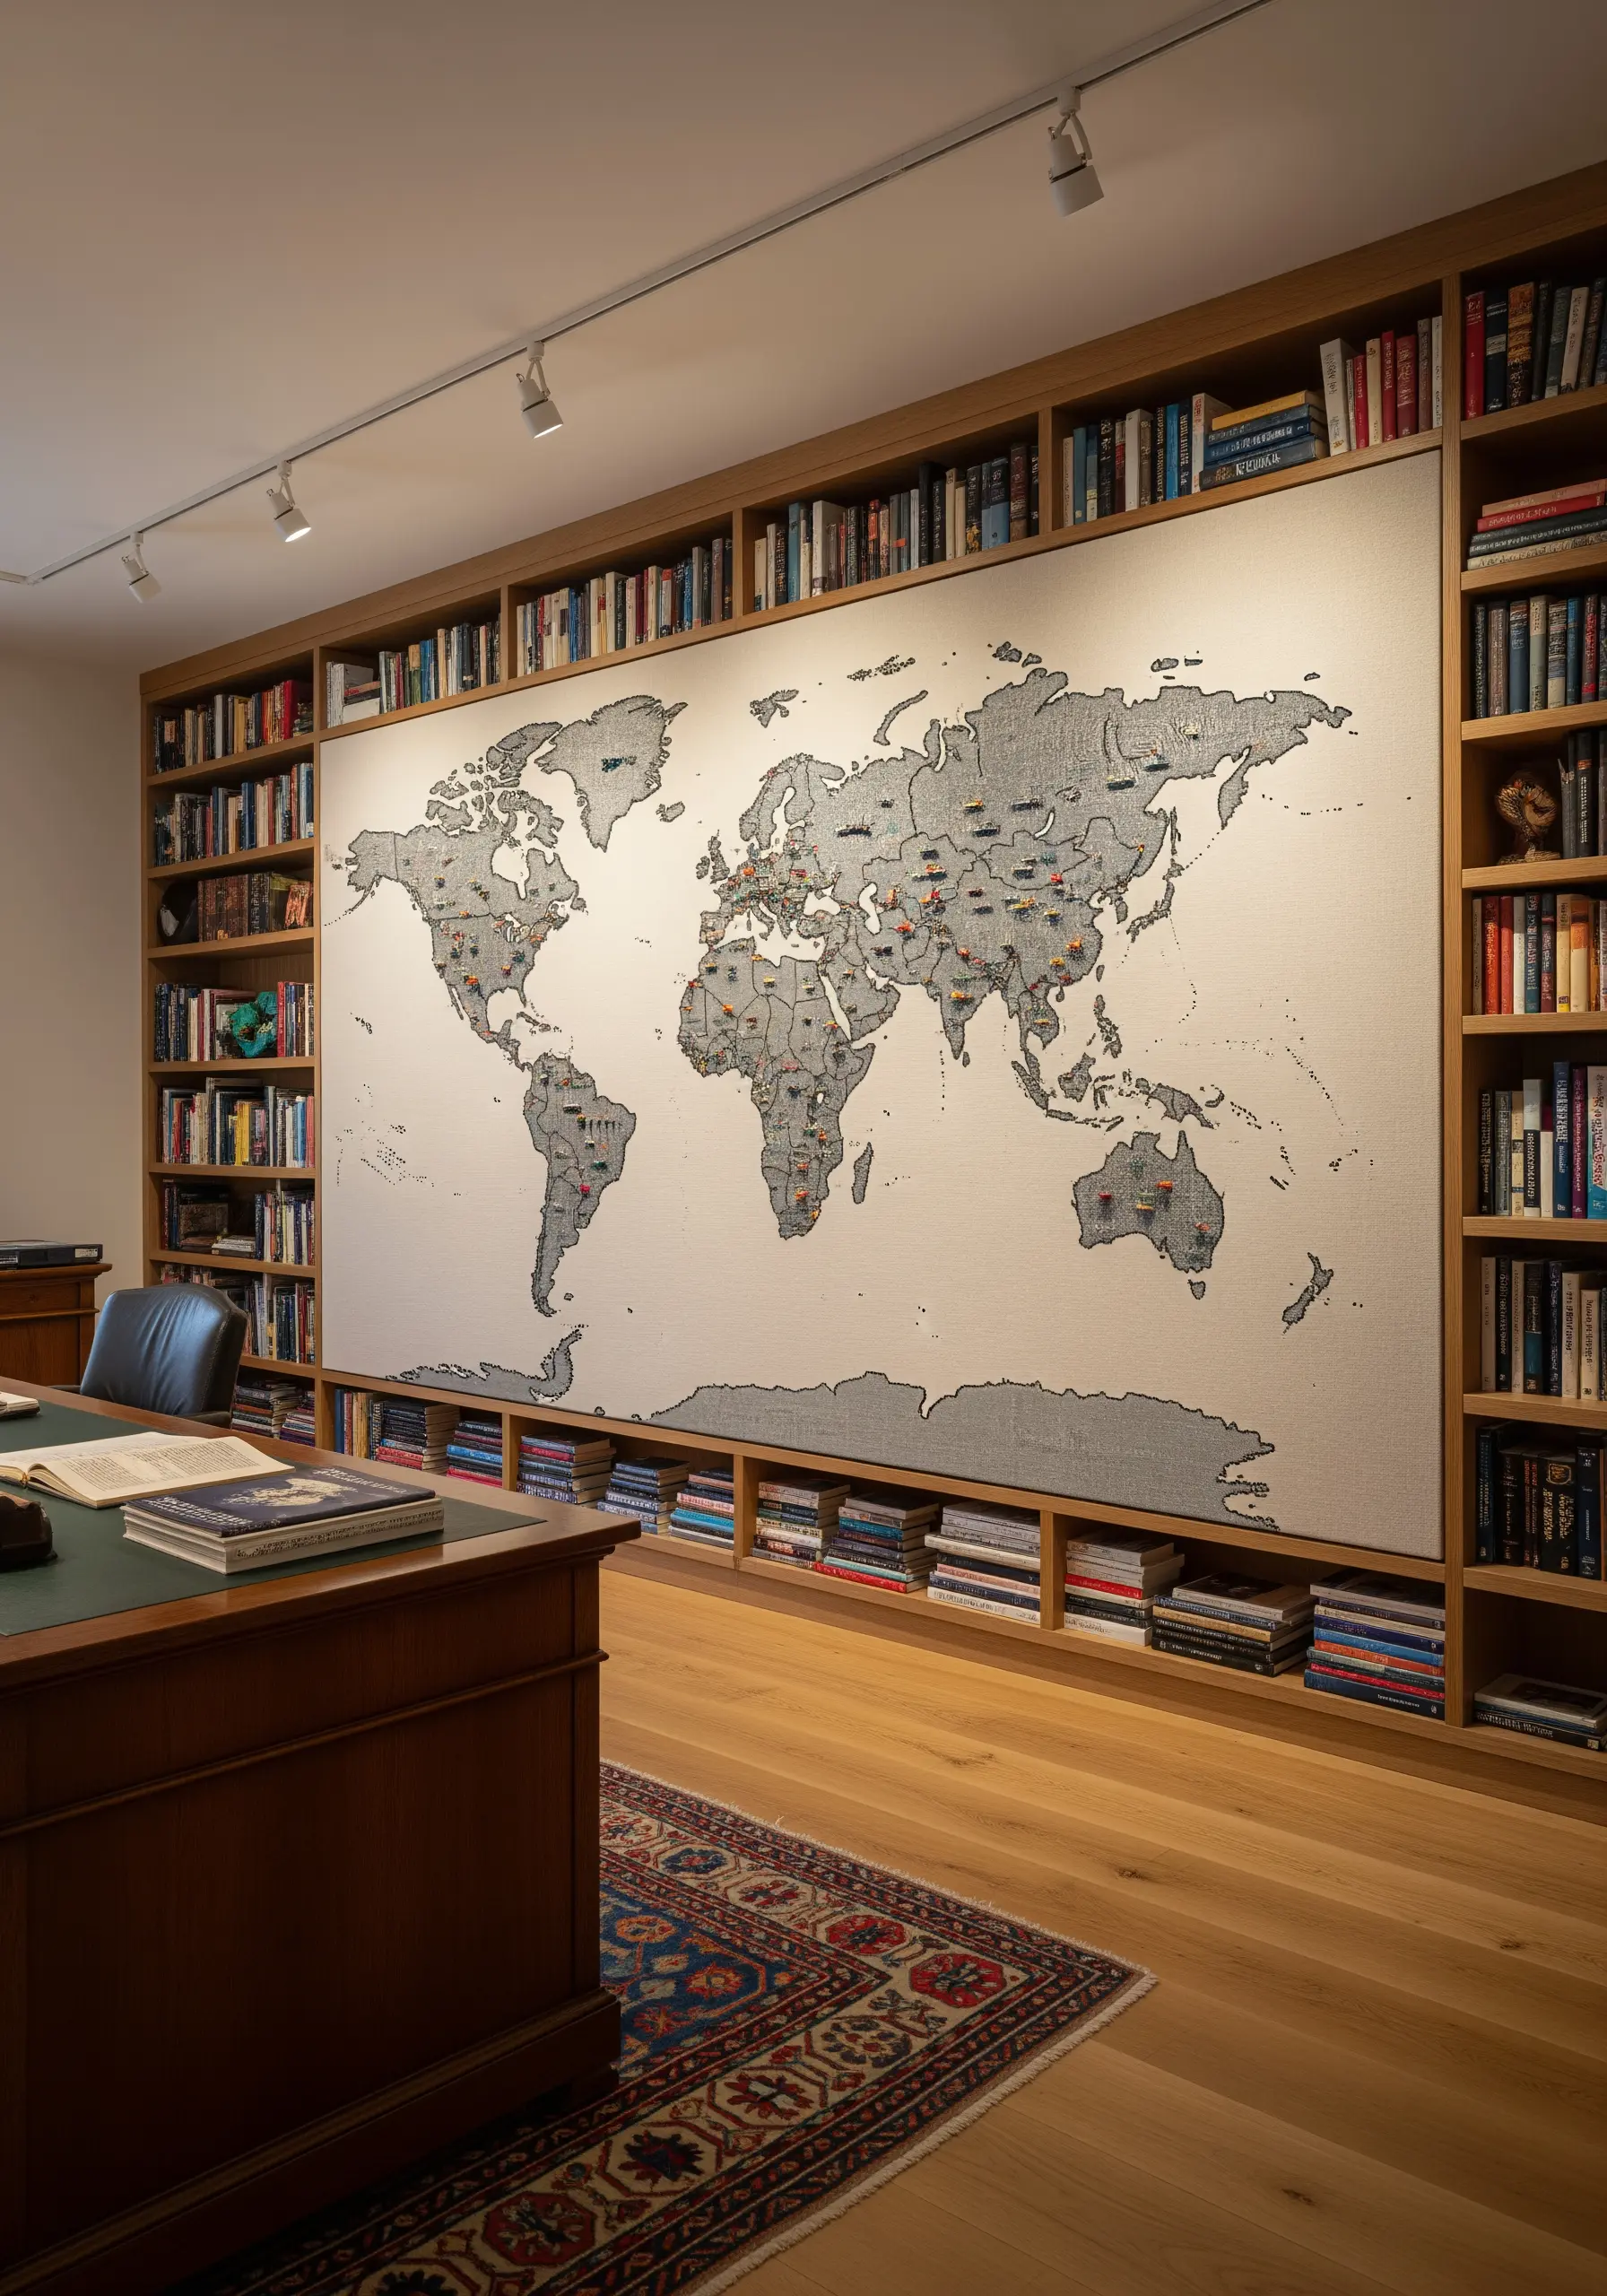
Create a truly personal and epic piece of wall art by embroidering a world map.
Fill in the landmasses with a textured but simple stitch, like the seed stitch, using a single neutral color.
This creates a subtle, tactile background that doesn’t distract from the map’s purpose.
Then, use colorful French knots or tiny flag pins to mark the places you’ve visited, turning the map into a living document of your adventures.
9. Blend Punch Needle and Thread for Ultimate Texture
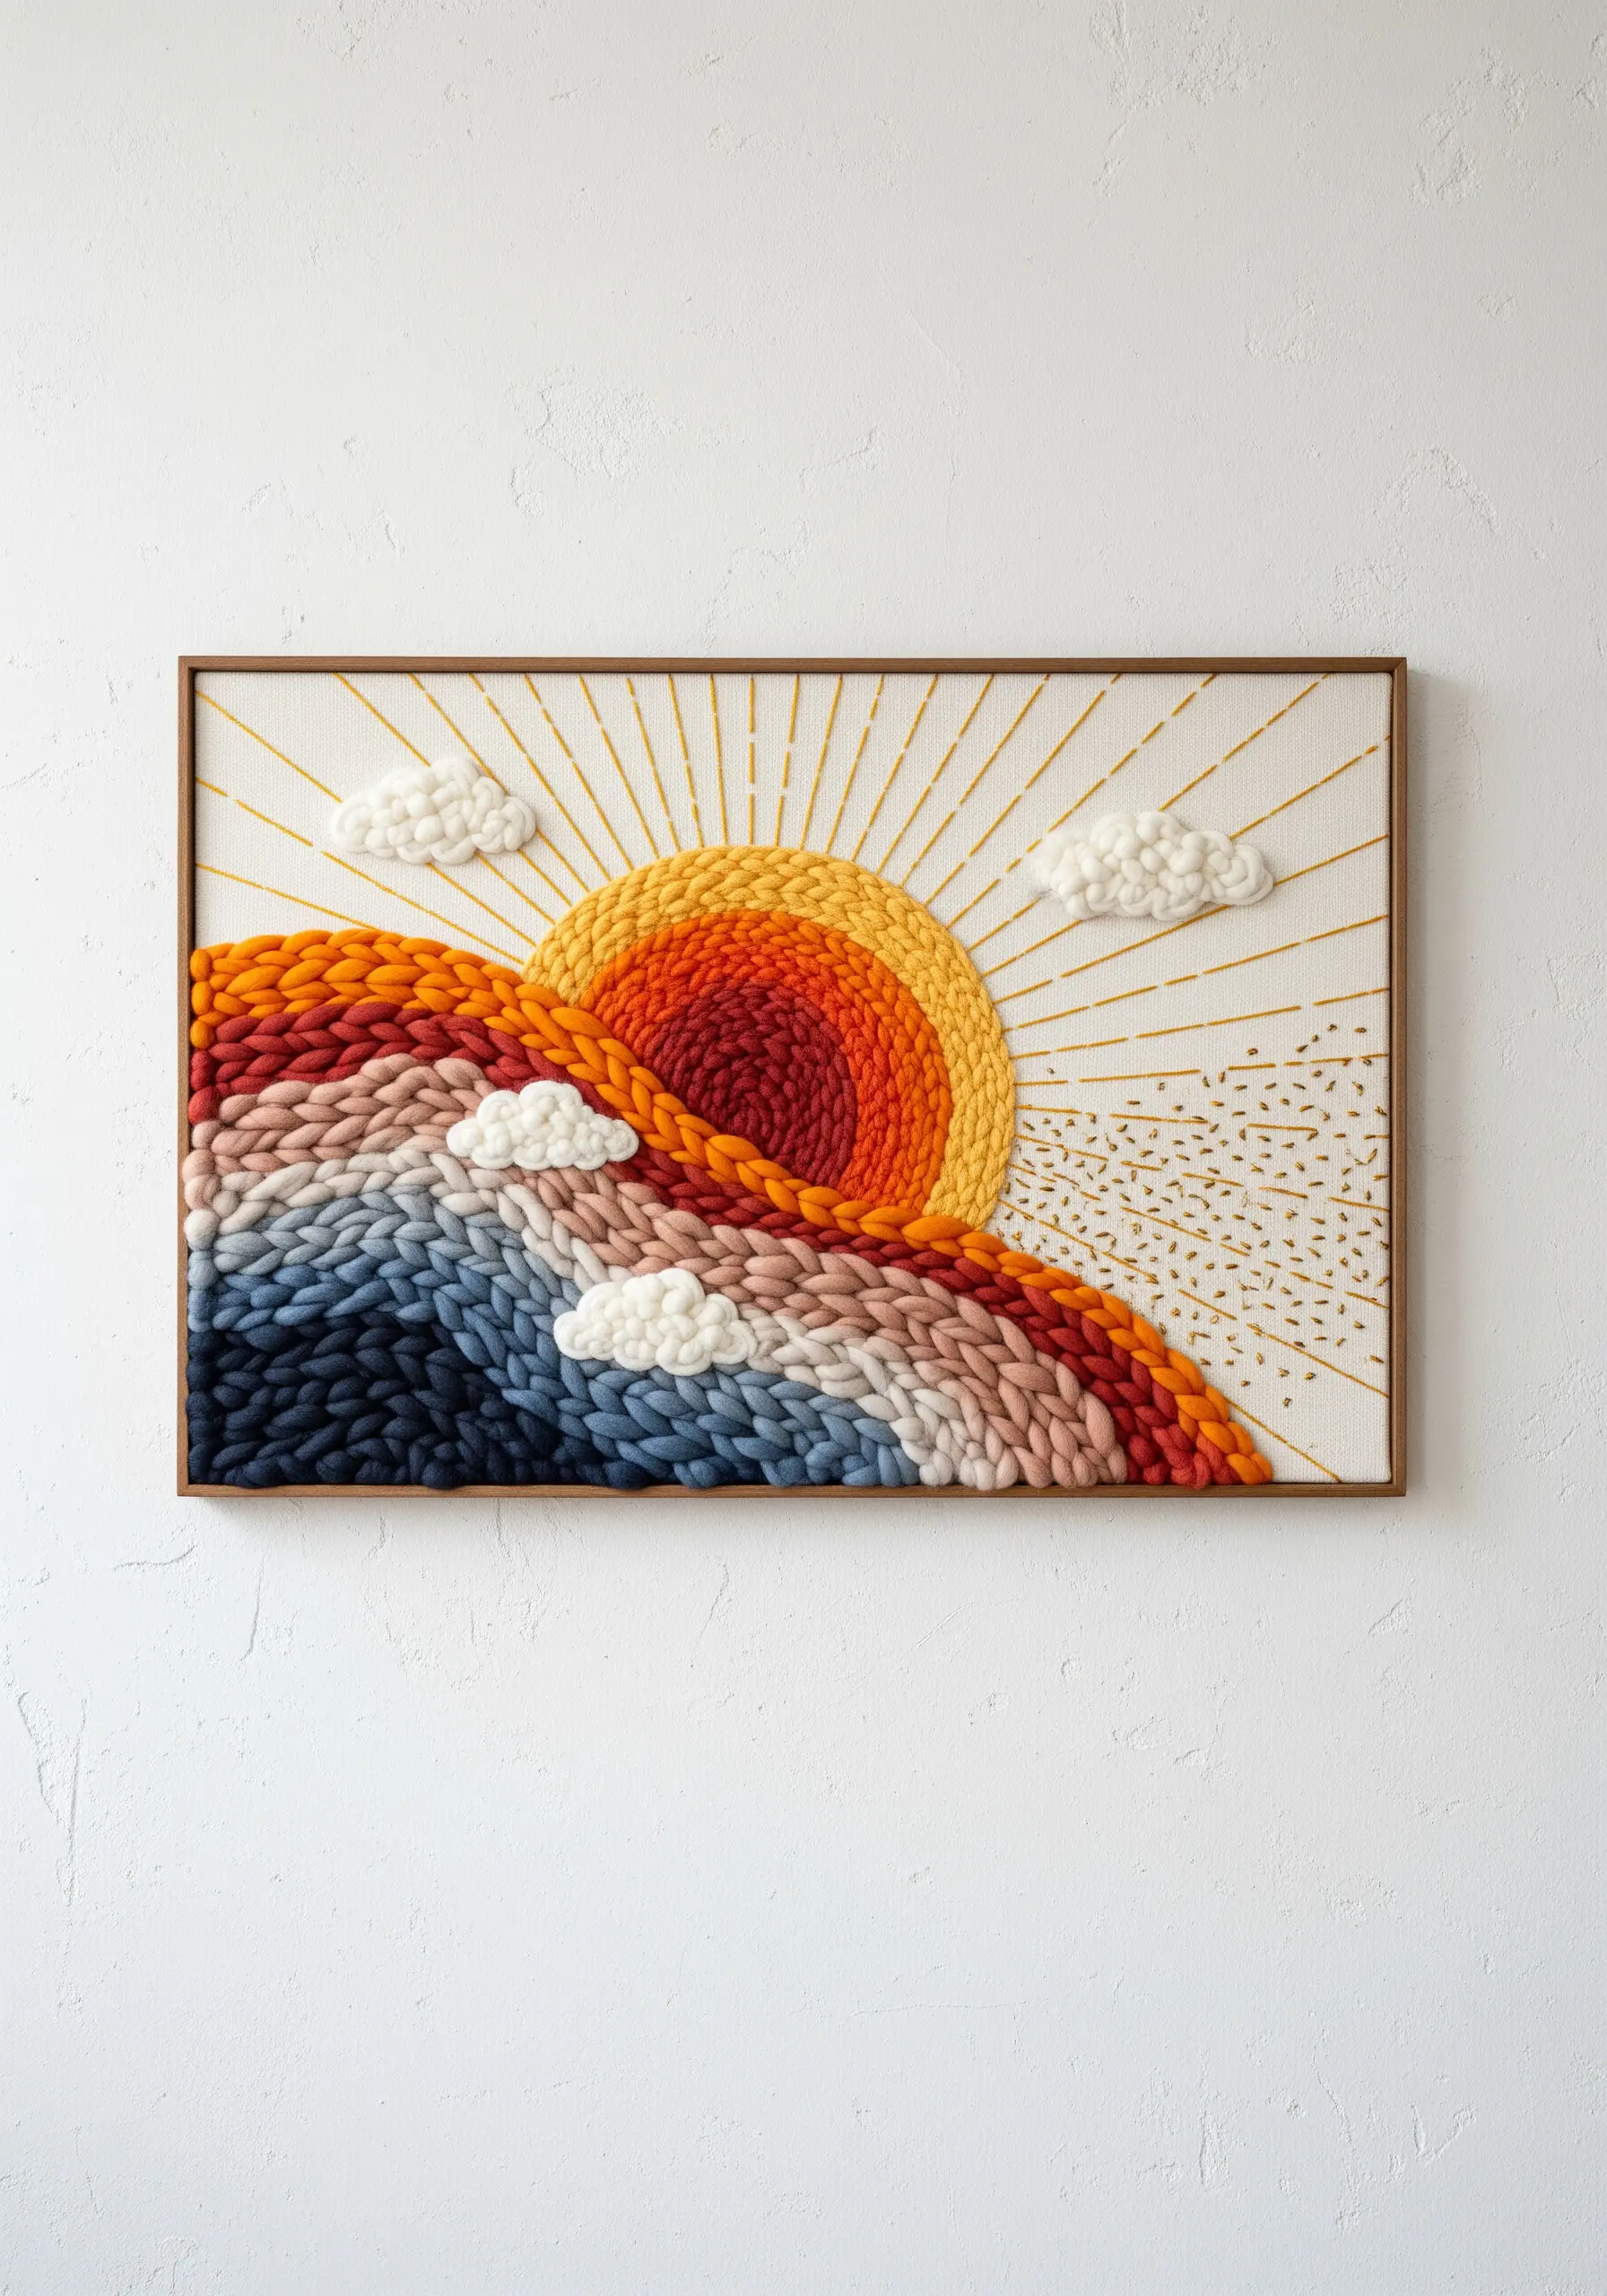
Create a dynamic landscape by combining the plush, high loops of punch needle with the delicate precision of traditional embroidery.
Use chunky yarn and a punch needle for the large, soft shapes like the hills and clouds.
Then, contrast that soft texture by adding fine, sharp details—like the sun’s rays—with long straight stitches in a thin, metallic floss.
This play on scale and texture makes the artwork incredibly tactile and visually engaging, a perfect example of gorgeous mixed-fiber textures.
10. Frame a Mirror with 3D Botanical Elements
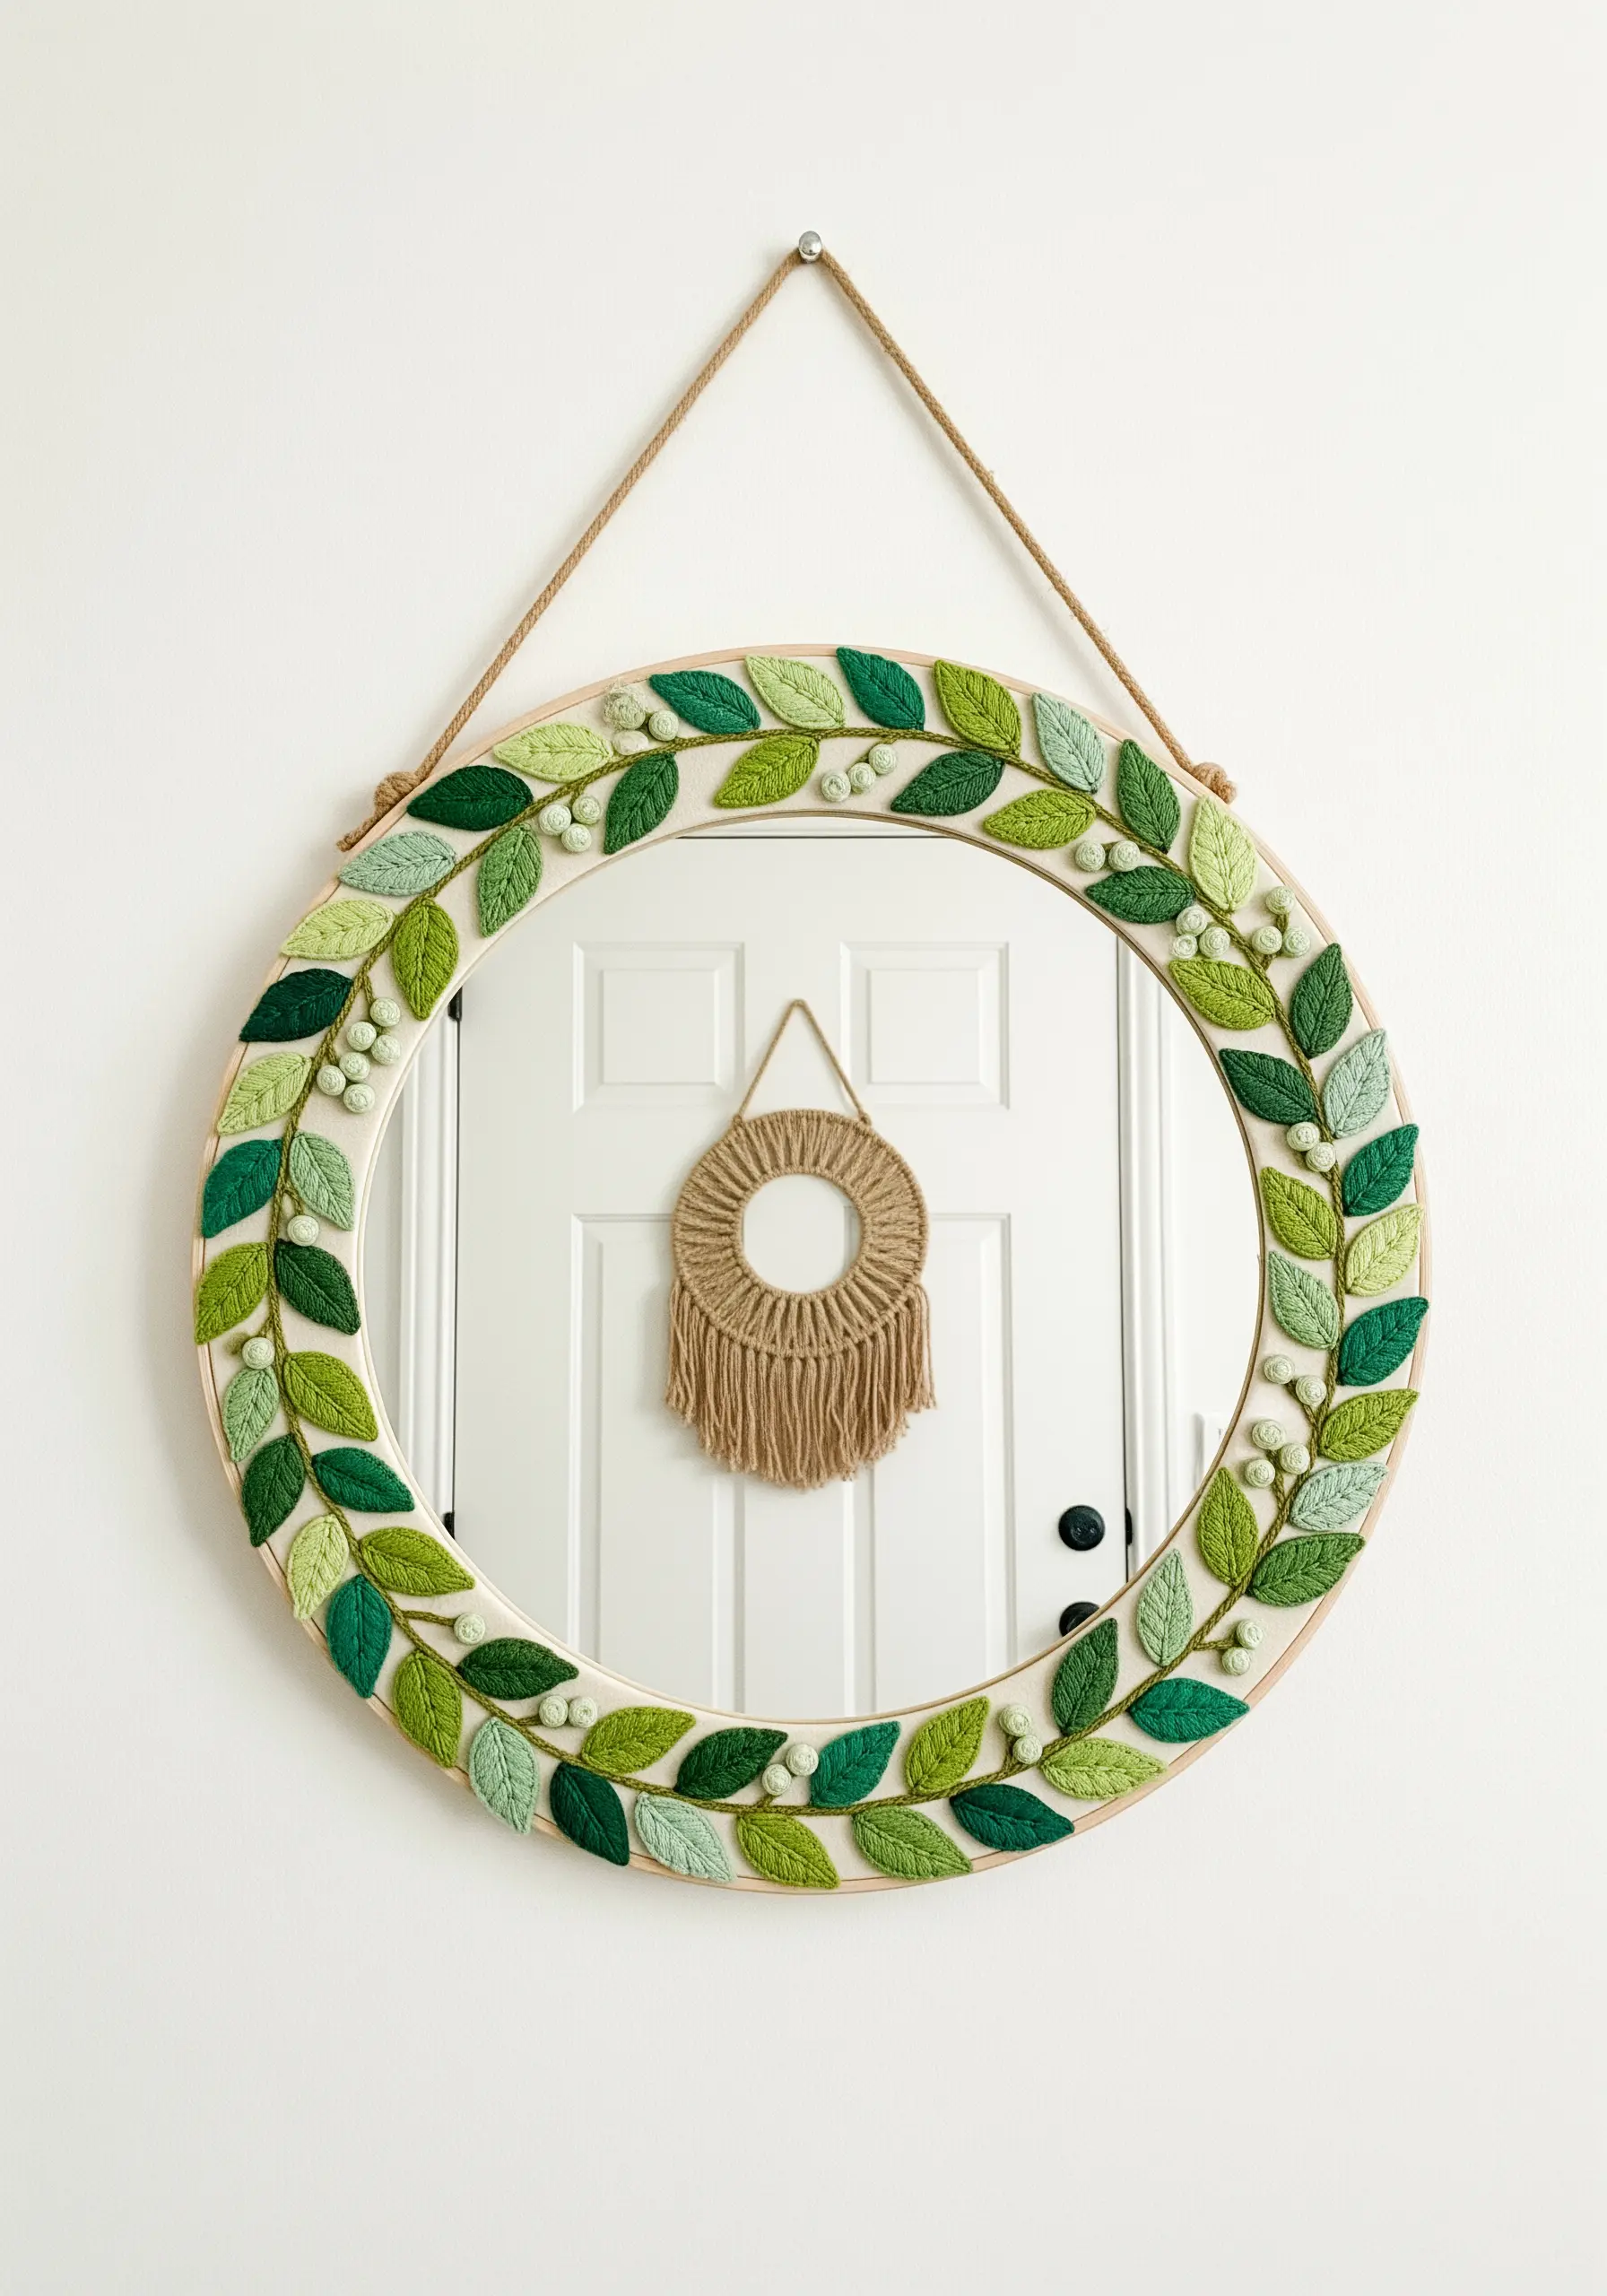
Elevate a simple mirror by framing it with dimensional, embroidered leaves.
This technique, a form of stumpwork, involves creating a padded base for each leaf with felt or layers of stitches before covering it with a smooth satin stitch.
This padding makes the leaves pop off the surface, creating a lush, 3D effect that interacts with the reflection and adds a touch of organic beauty to your wall.
11. Stitch Vibrant and Functional Felt Coasters
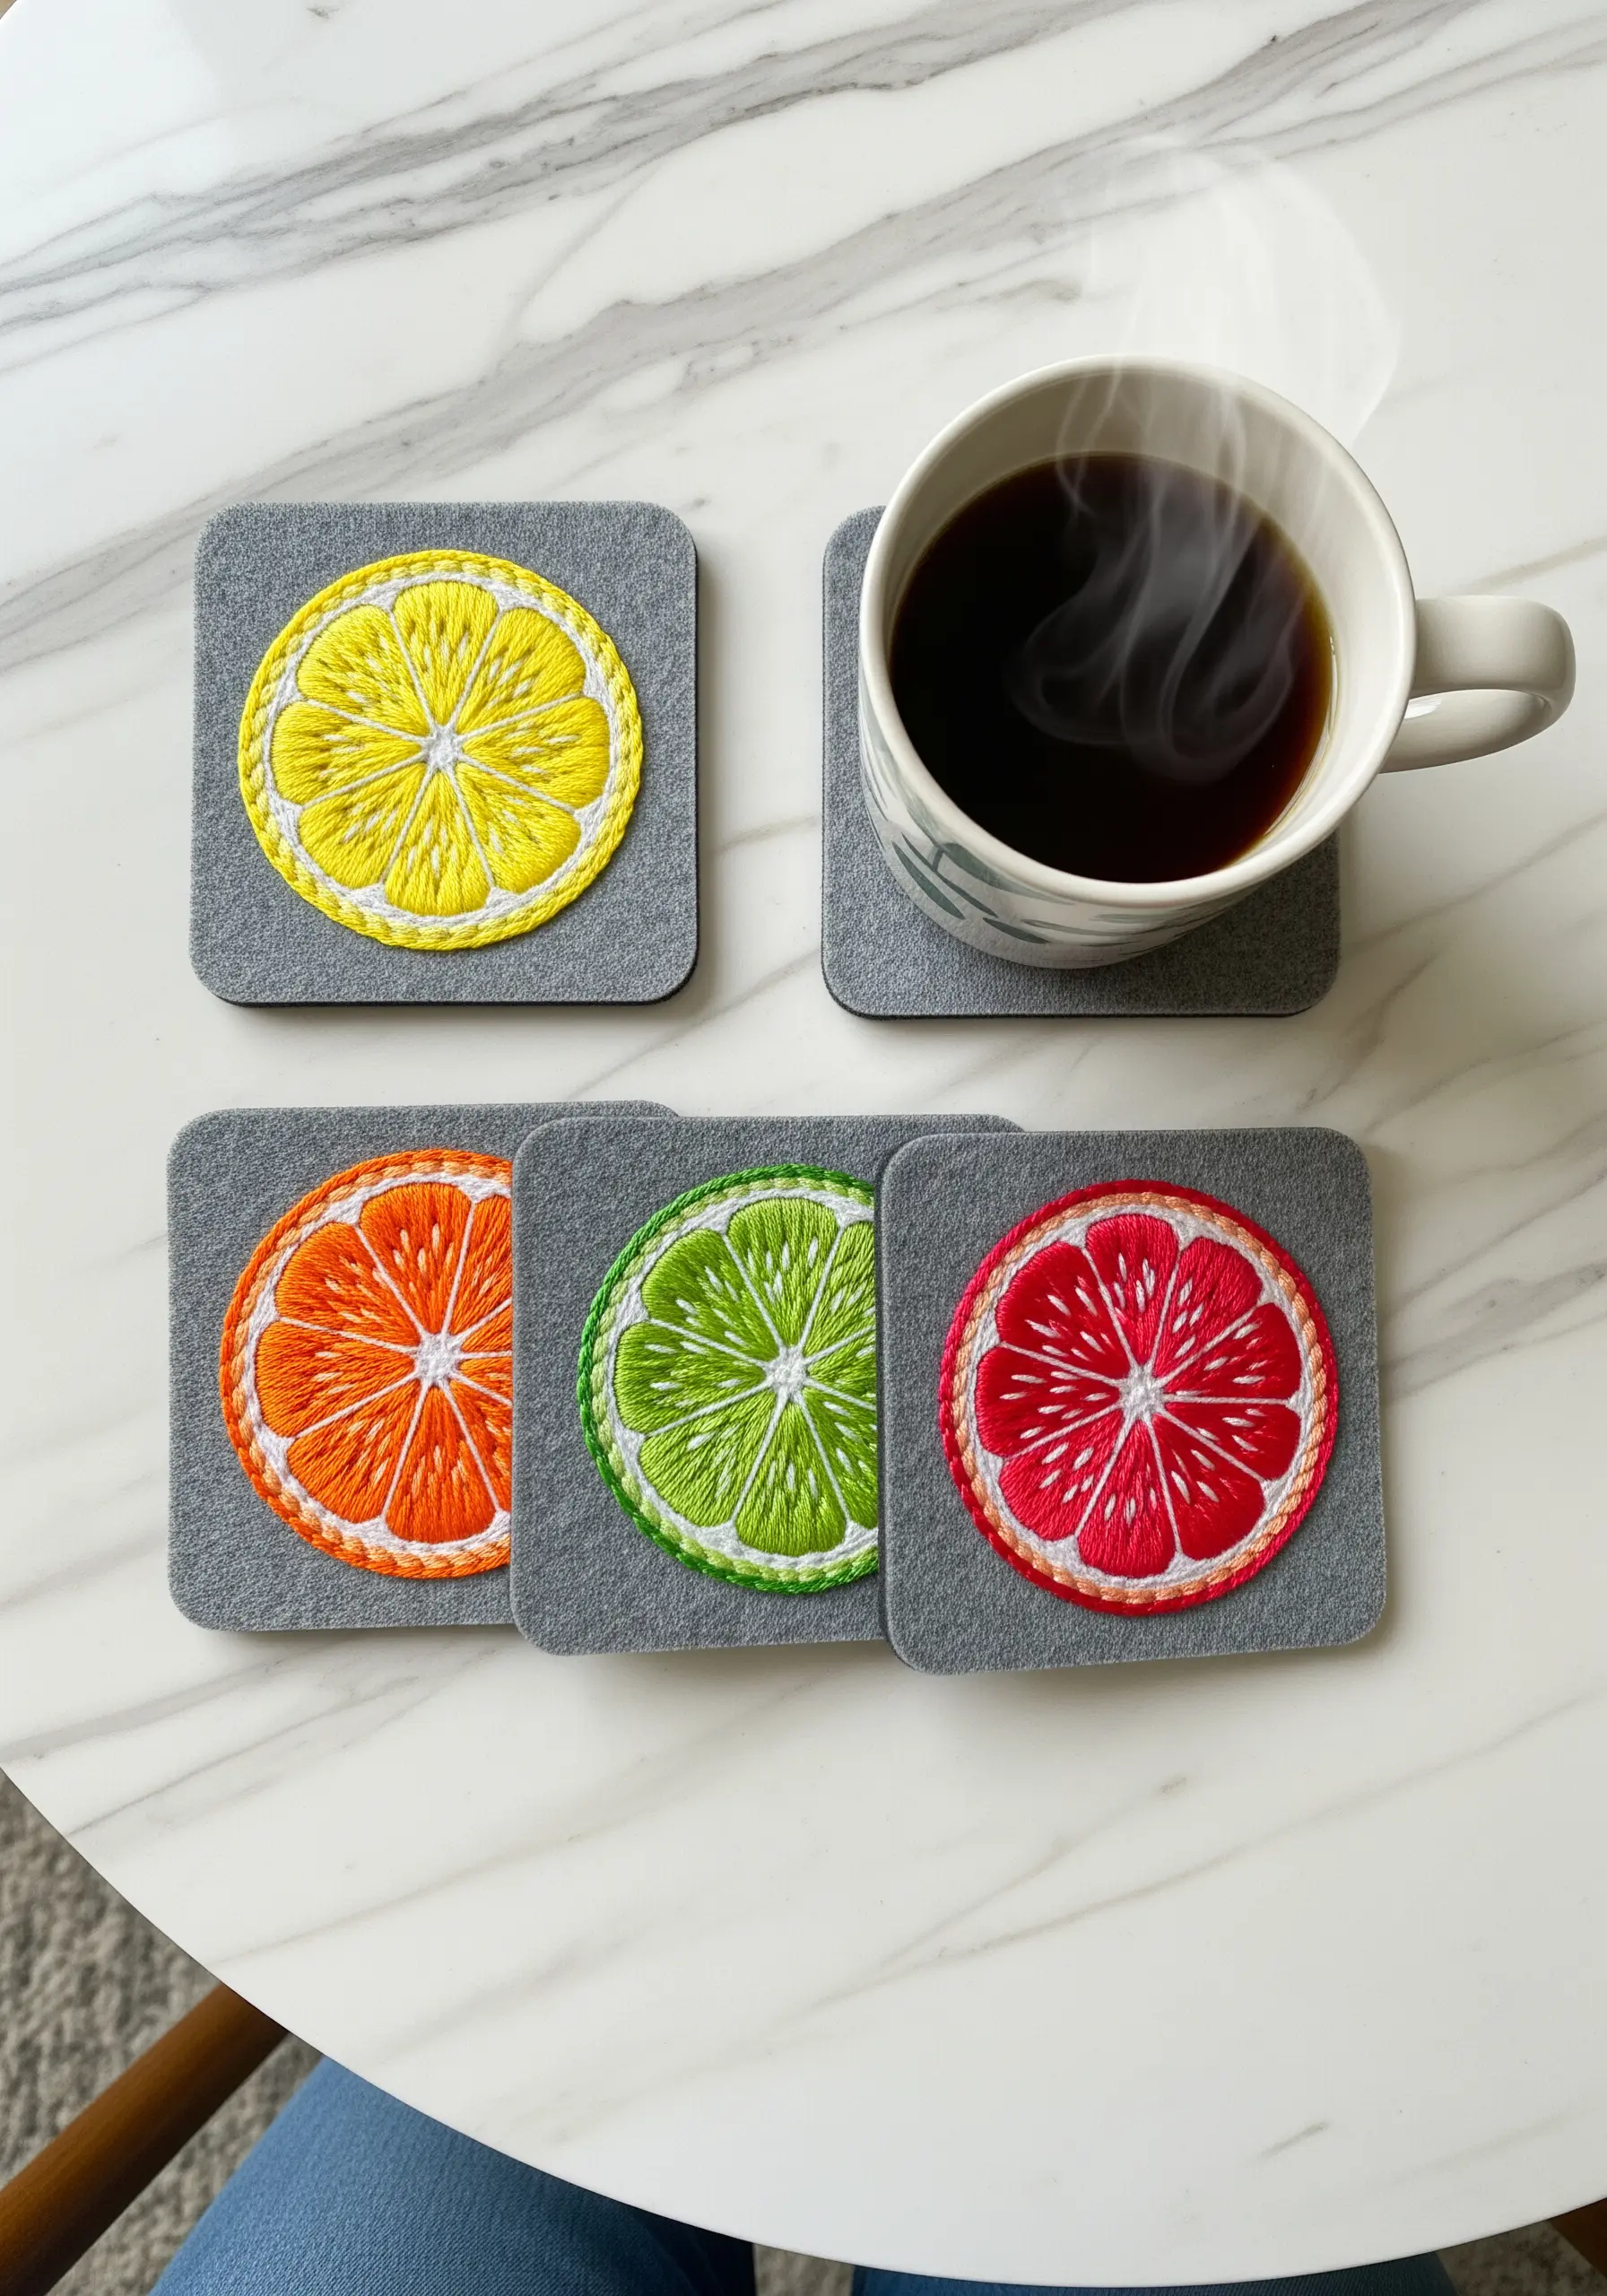
Use dense, non-fraying felt as a stable base for functional embroidery projects like coasters.
To create the citrus slices, use a directional satin stitch for each segment, radiating from the center to mimic the fruit’s natural structure.
Add a clean, defining edge by outlining each segment with a single line of backstitch in a slightly darker shade.
The result is a set of bright, playful objects that are as practical as they are beautiful.
12. Capture a Soulful Gaze with Thread Painting
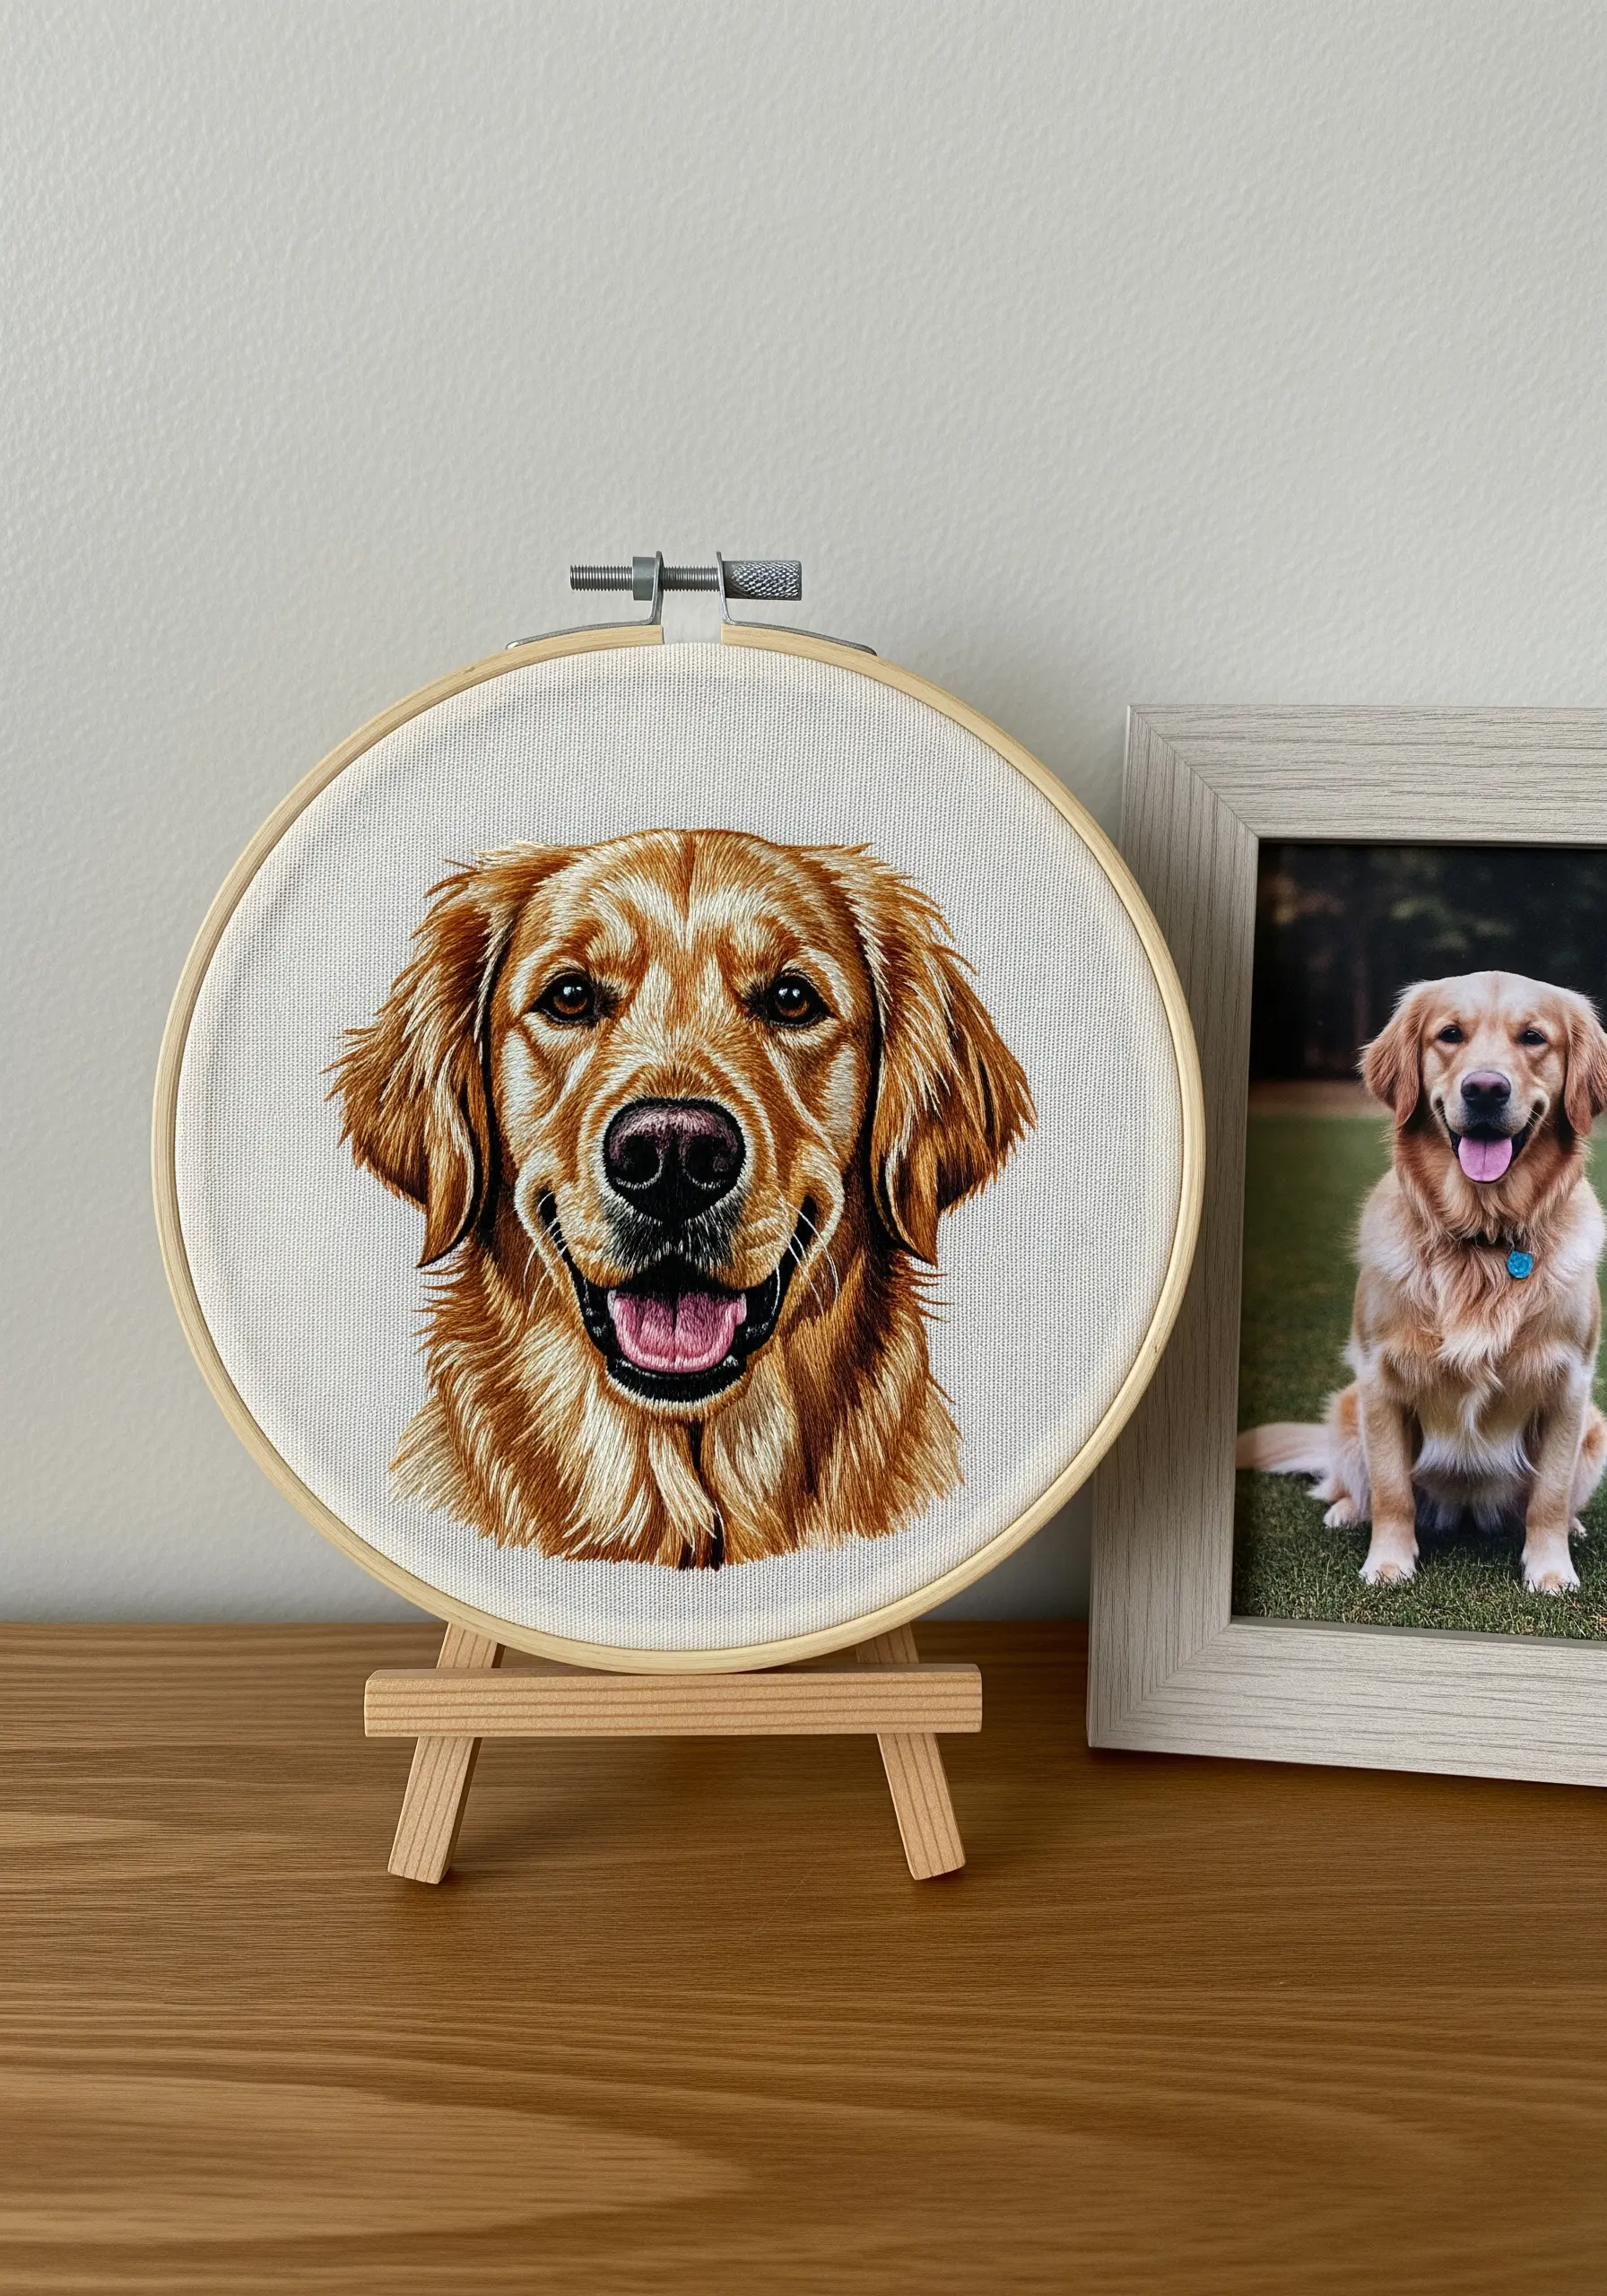
A realistic pet portrait is an exercise in observation and patience, achieved through the thread painting technique.
Using a single strand of floss, blend dozens of colors with the long-and-short stitch to mimic the texture and direction of fur.
Work in layers, starting with the darker undertones and building up to the highlights. It’s this careful layering that creates the depth and personality that bring the portrait to life.
13. Design a Functional Hoop for Storing Jewelry
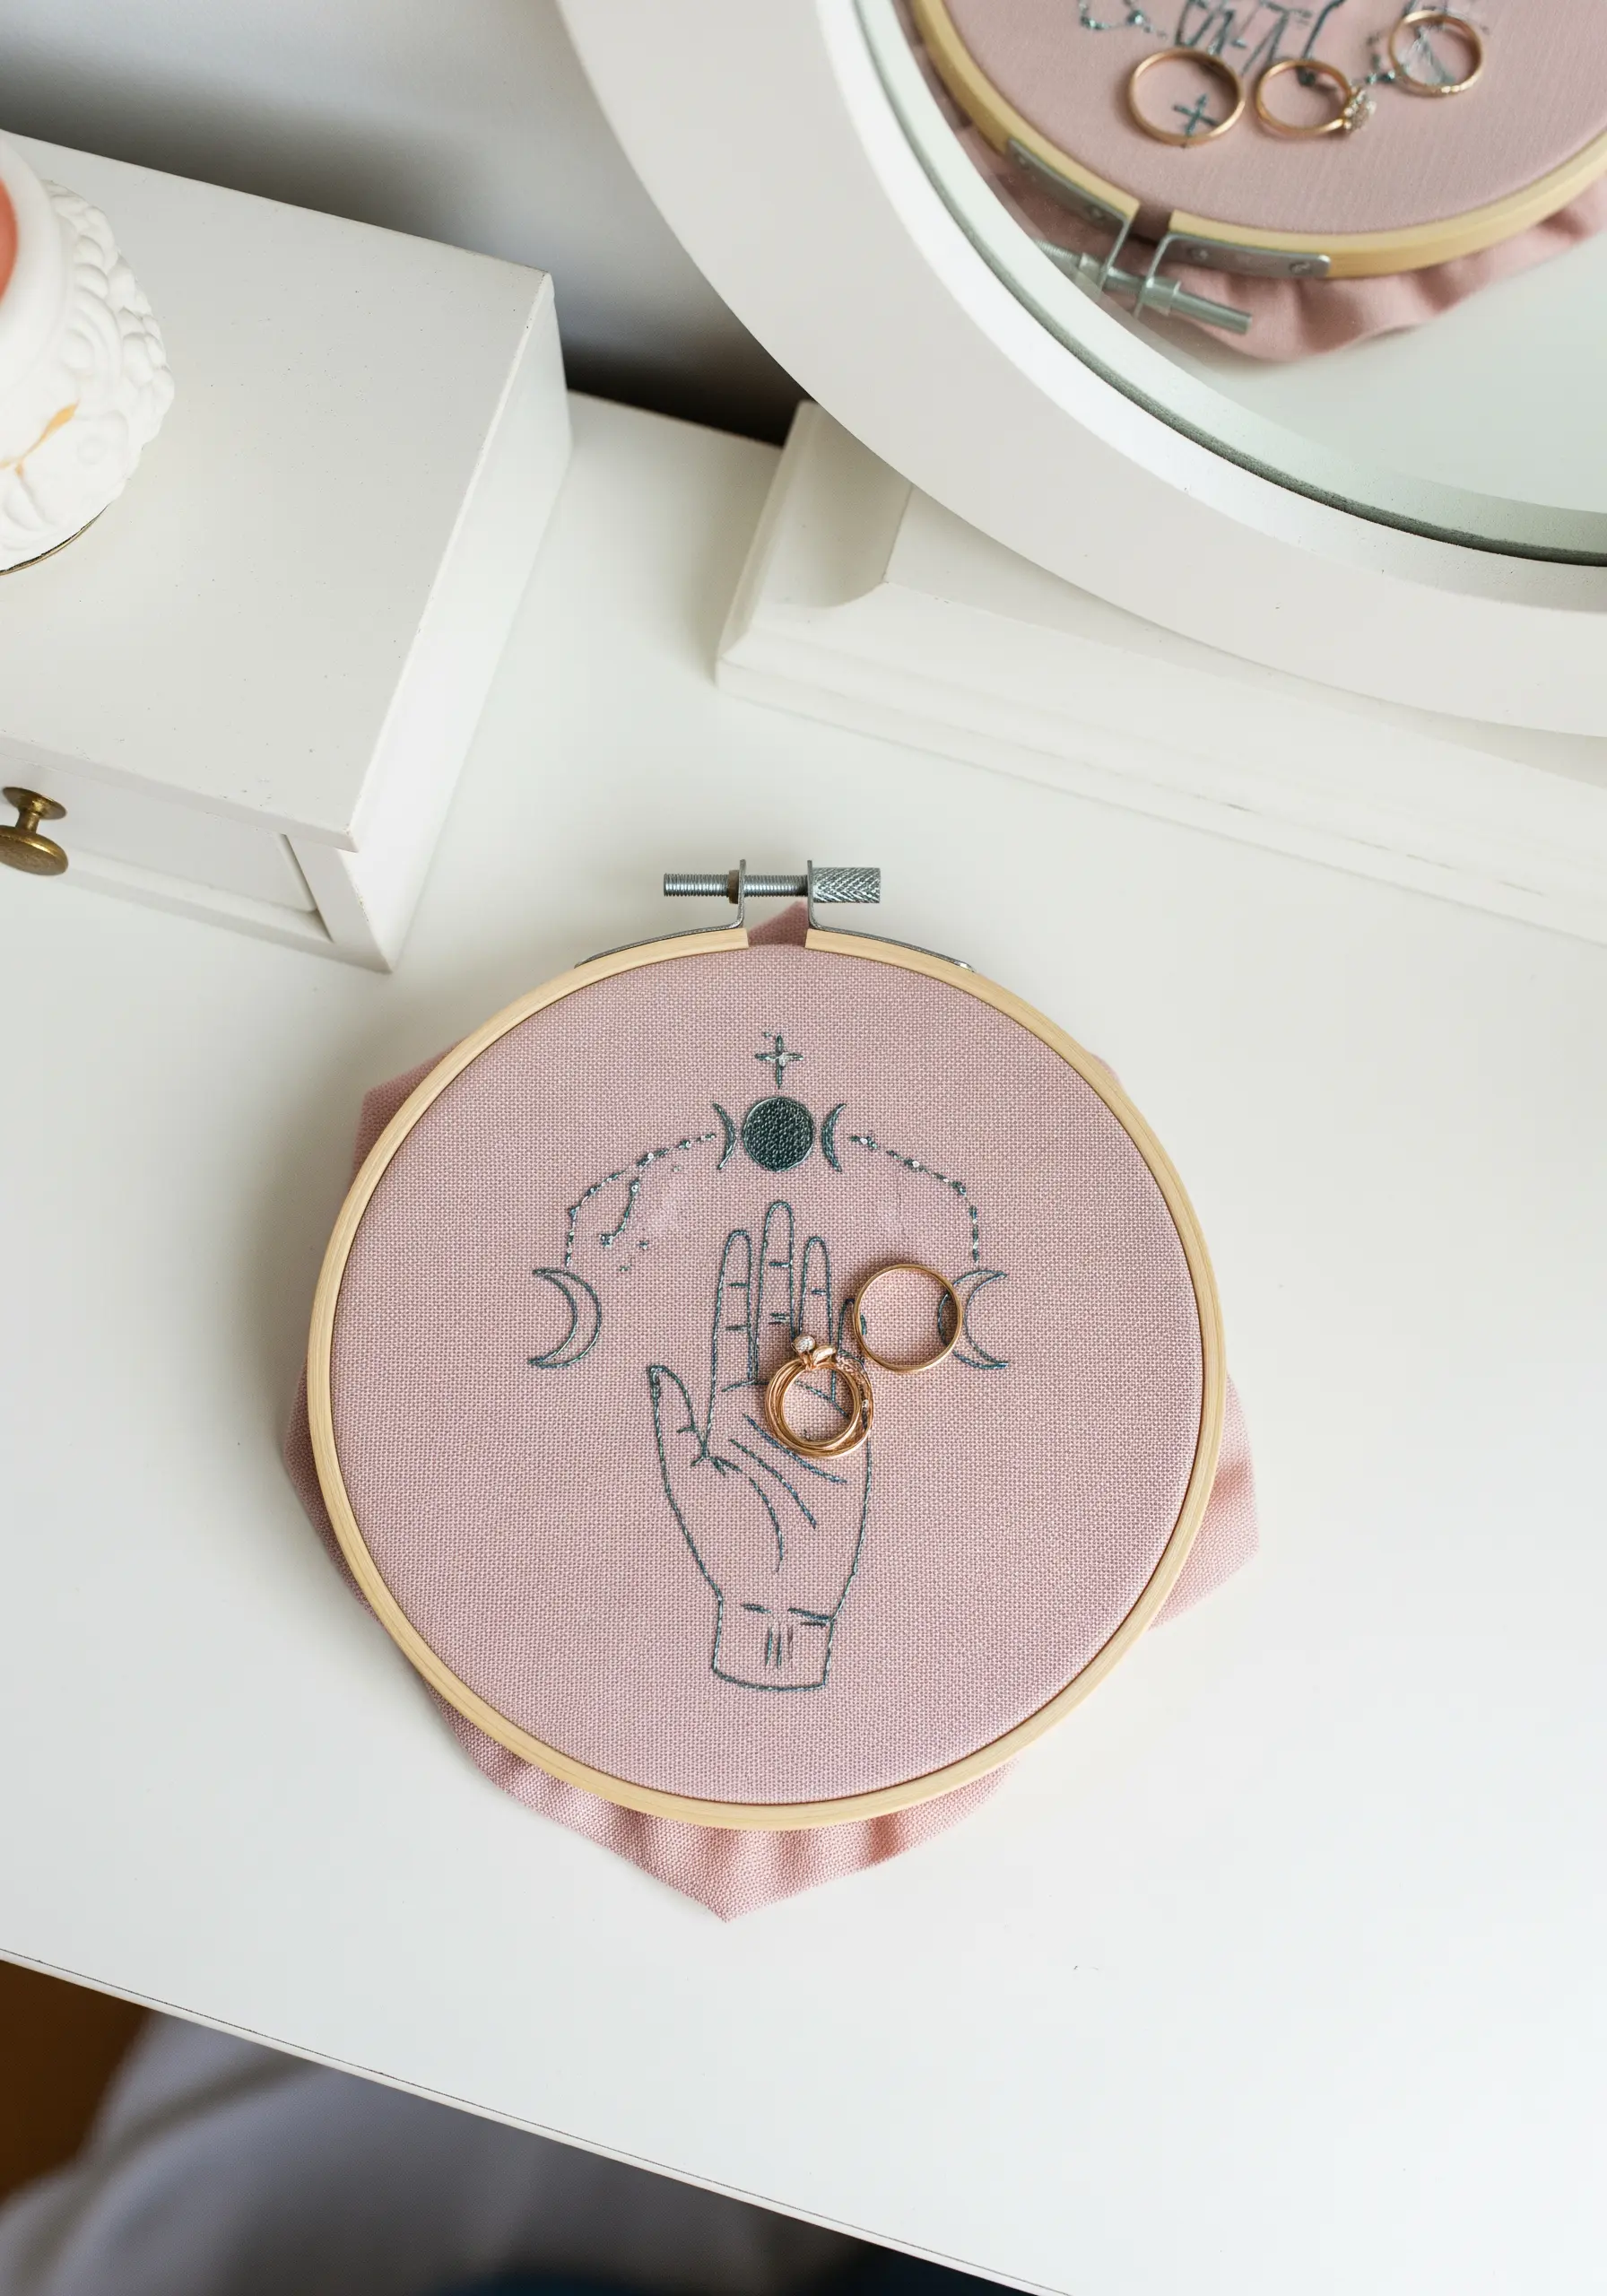
Transform an embroidery hoop from a purely decorative piece into a beautiful and practical ring holder.
Choose a minimalist, symbolic design and stitch it with a low-profile stitch like backstitch or stem stitch to prevent snagging your jewelry.
The key is balancing the stitched motif with ample negative space, creating an elegant composition that serves a purpose on your vanity or dresser.
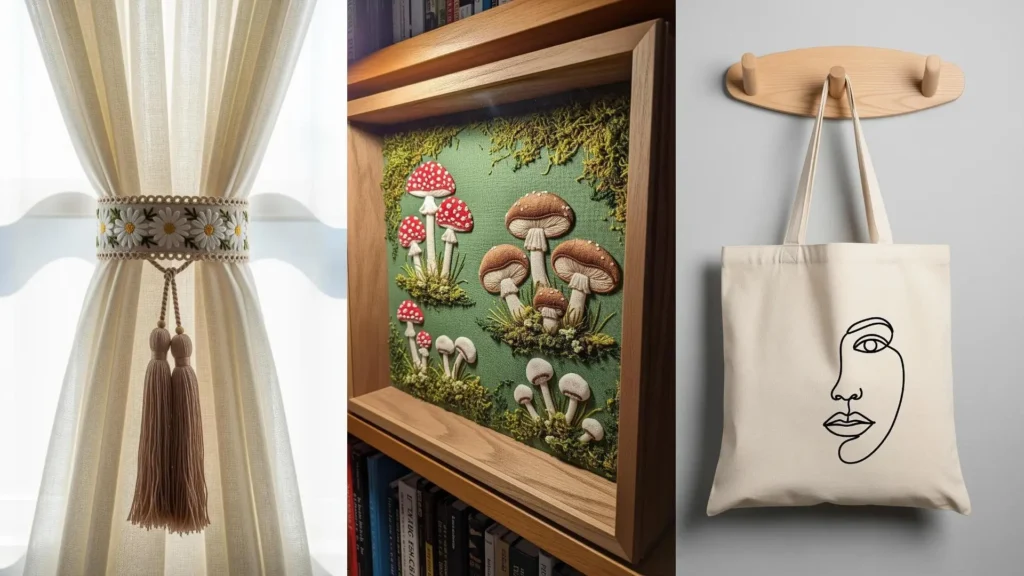
14. Craft Elegant Curtain Tie-Backs with Floral Details
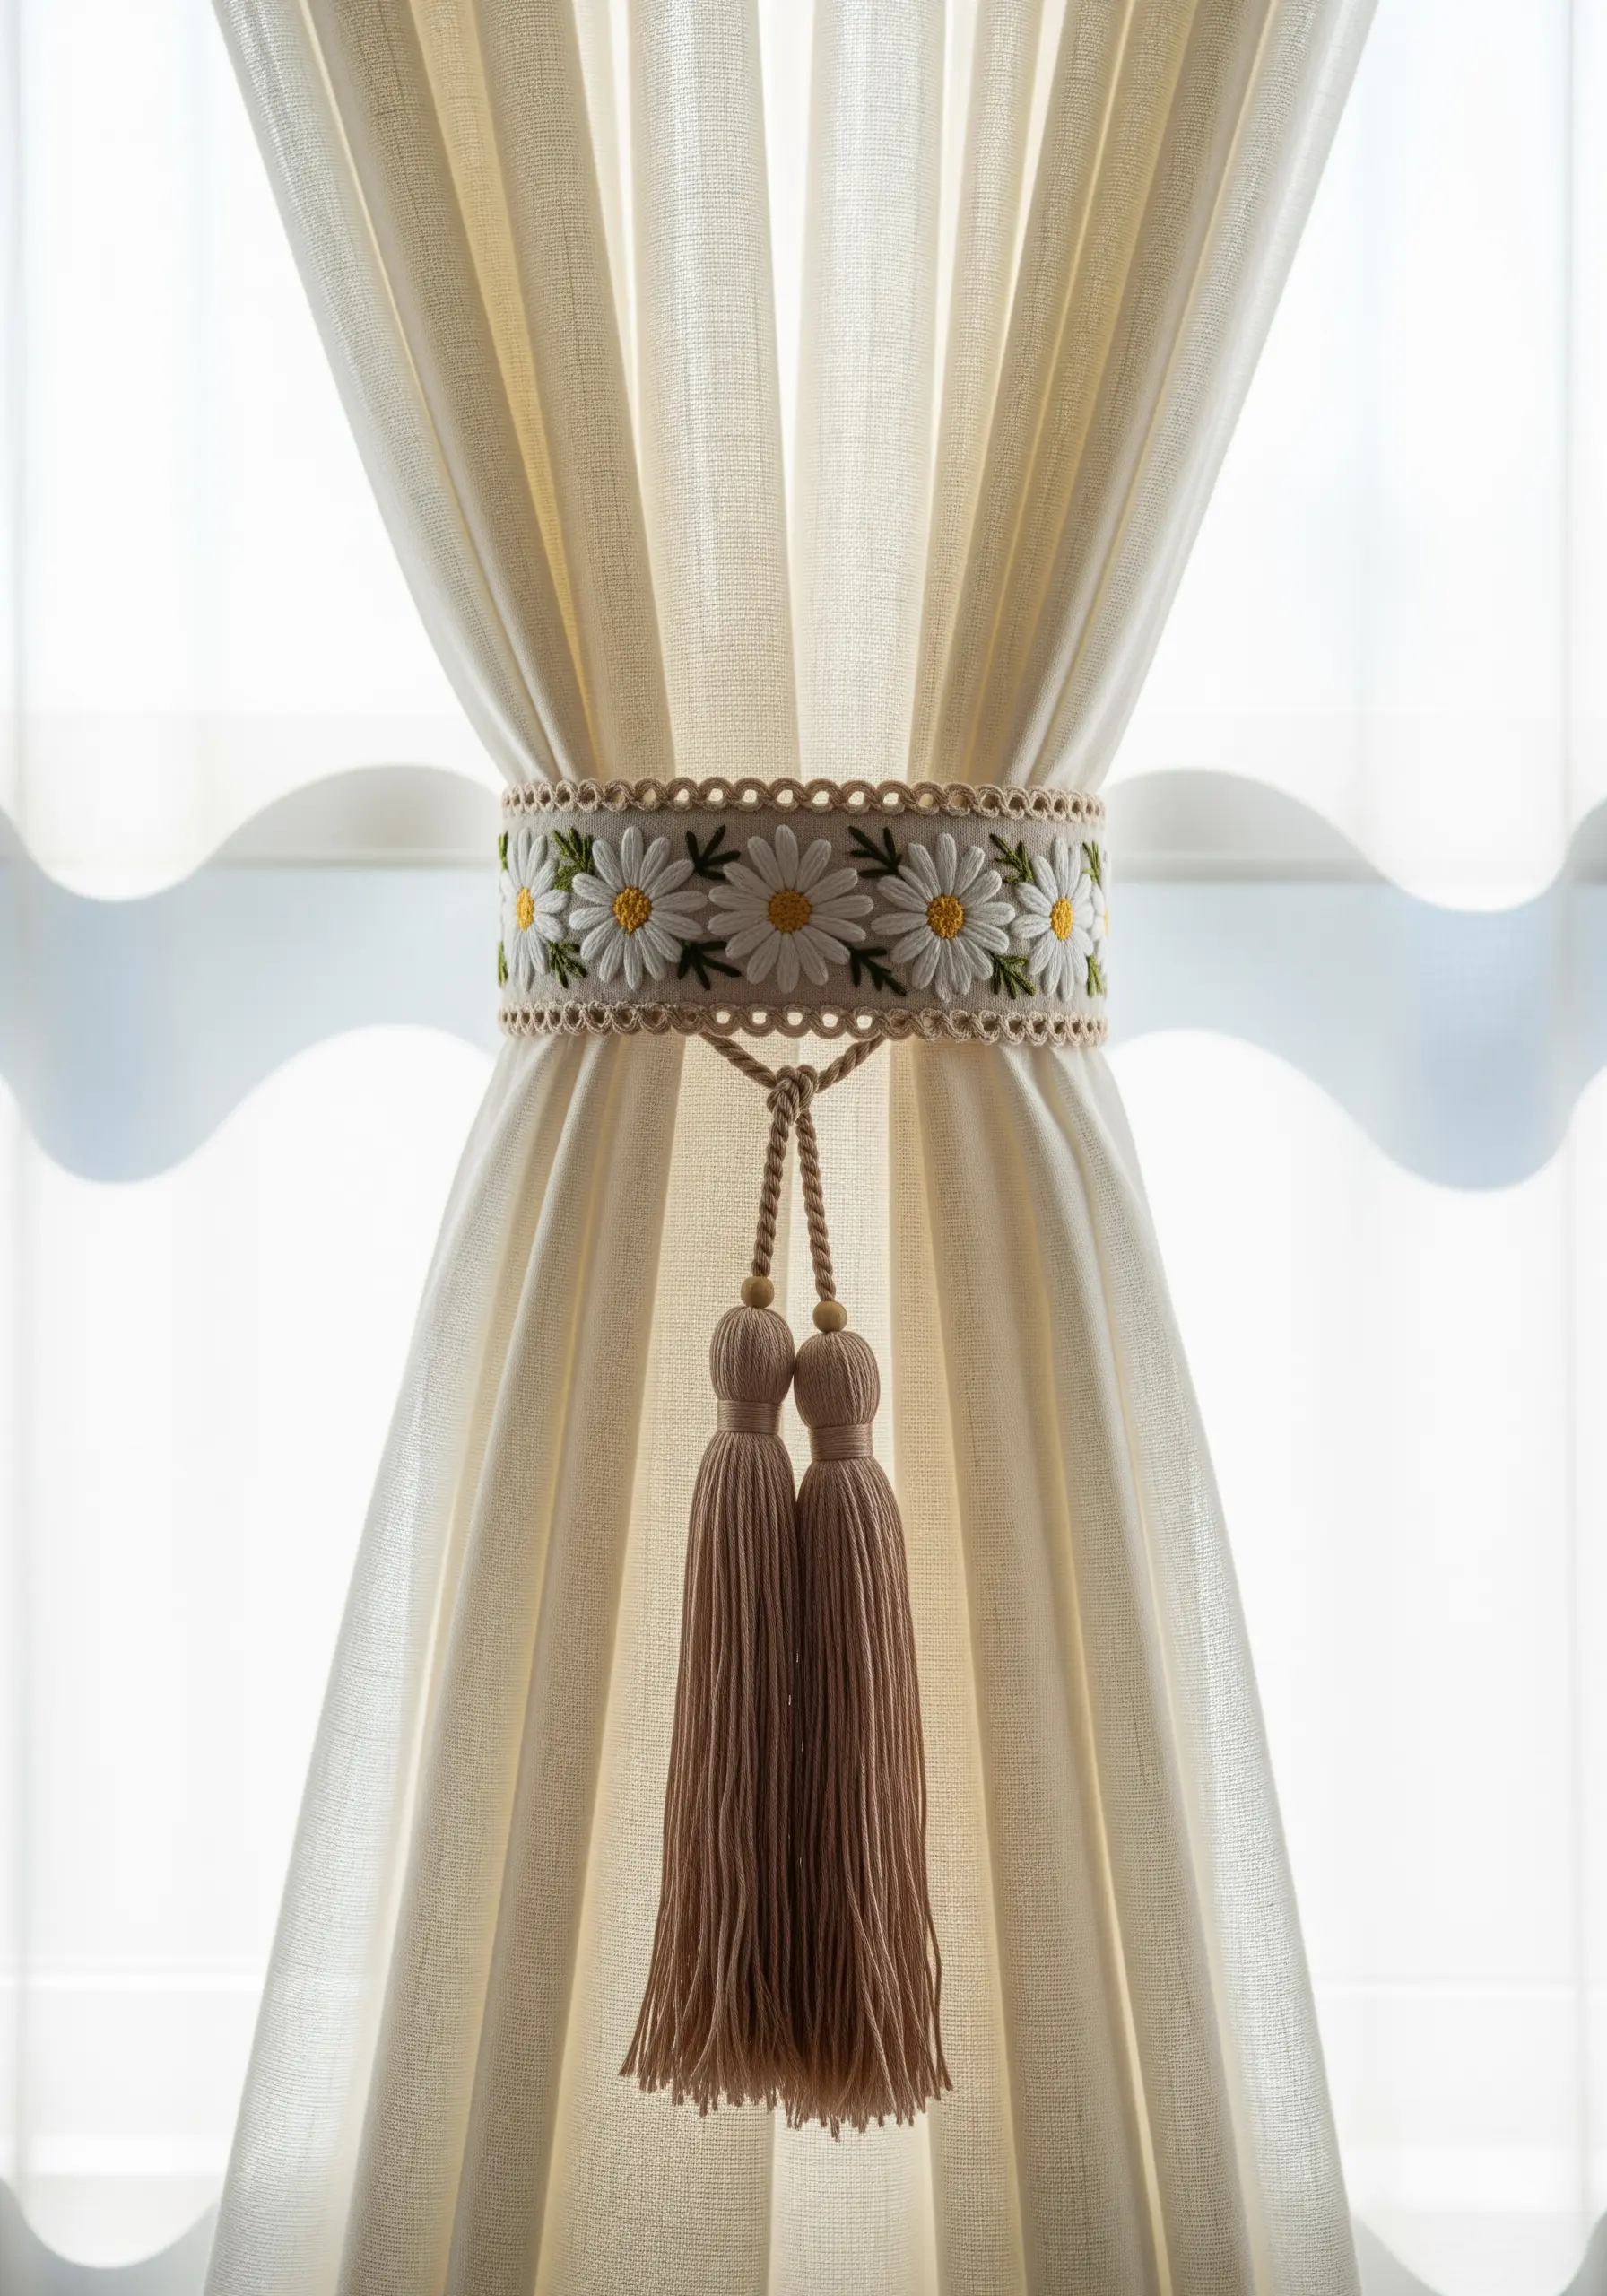
Add a bespoke, polished touch to your window treatments with custom embroidered tie-backs.
Work your design on a sturdy band of linen or cotton, using classic floral stitches like lazy daisy and French knots.
For a truly professional finish, edge the entire band with a decorative buttonhole stitch scallop. It’s these small, considered details that create an heirloom-quality piece.
15. Give Lettering a 3D Pop with Padding
To make your embroidered text look raised and professional, use a technique called padded satin stitch.
First, create a foundation by outlining your letters with split stitch and filling them with a base layer of horizontal straight stitches.
Then, cover this padding entirely with vertical satin stitches.
This simple two-step process gives your lettering a clean, rounded, and dimensional quality that stands out beautifully.
16. Build a Miniature World with Stumpwork

Create a captivating 3D scene by combining stumpwork and mixed-fiber techniques in a shadow box.
Craft the mushroom caps separately over padded felt forms, then attach them to the background fabric to create realistic depth.
For the forest floor, use textured stitches like the turkey stitch or clusters of French knots with fuzzy yarn to create a rich, mossy effect.
This layered approach turns embroidery into a form of miniature sculpture.
17. Elevate Linens with a Single, Perfect Motif
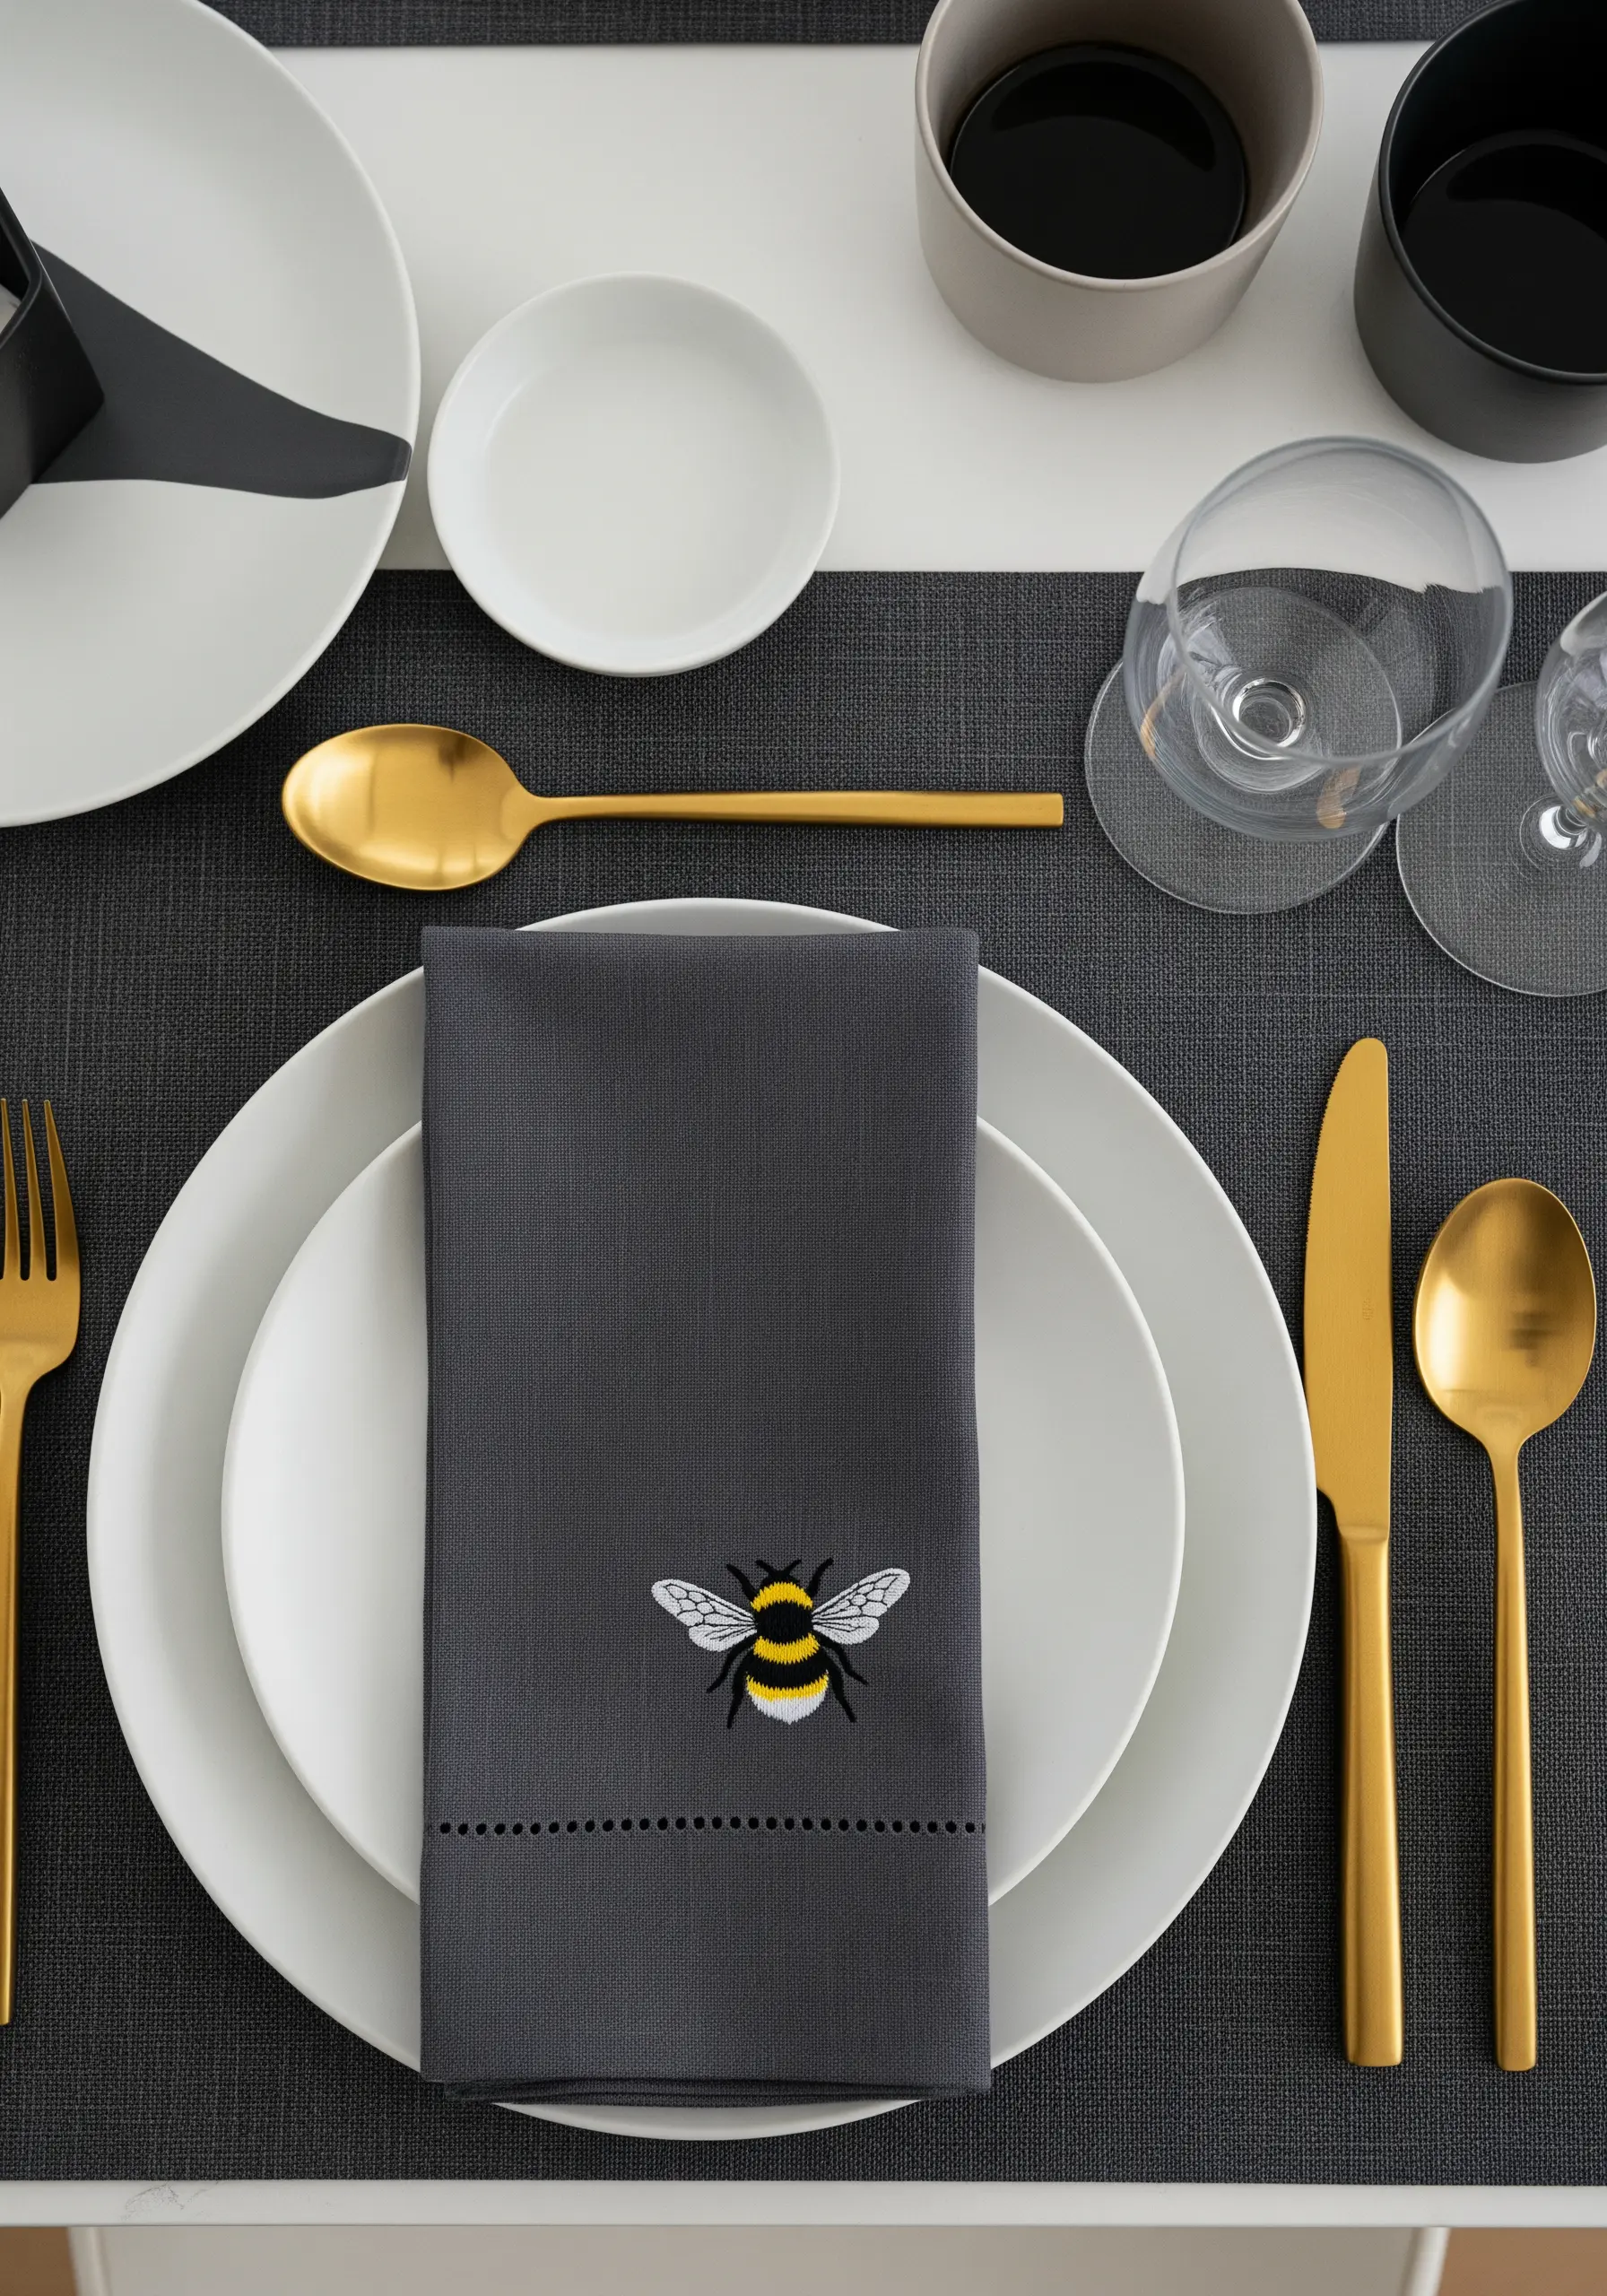
You don’t need a complex design to make a statement; a single, impeccably stitched motif can transform an ordinary object.
On this napkin, the bee’s wings are given a sense of transparency not by filling them completely, but by using an outline stitch and then adding a few scattered seed stitches with an iridescent thread.
This thoughtful, minimalist approach adds a touch of sophisticated charm to your table setting.
18. Create a Painterly Tapestry with Latch Hook
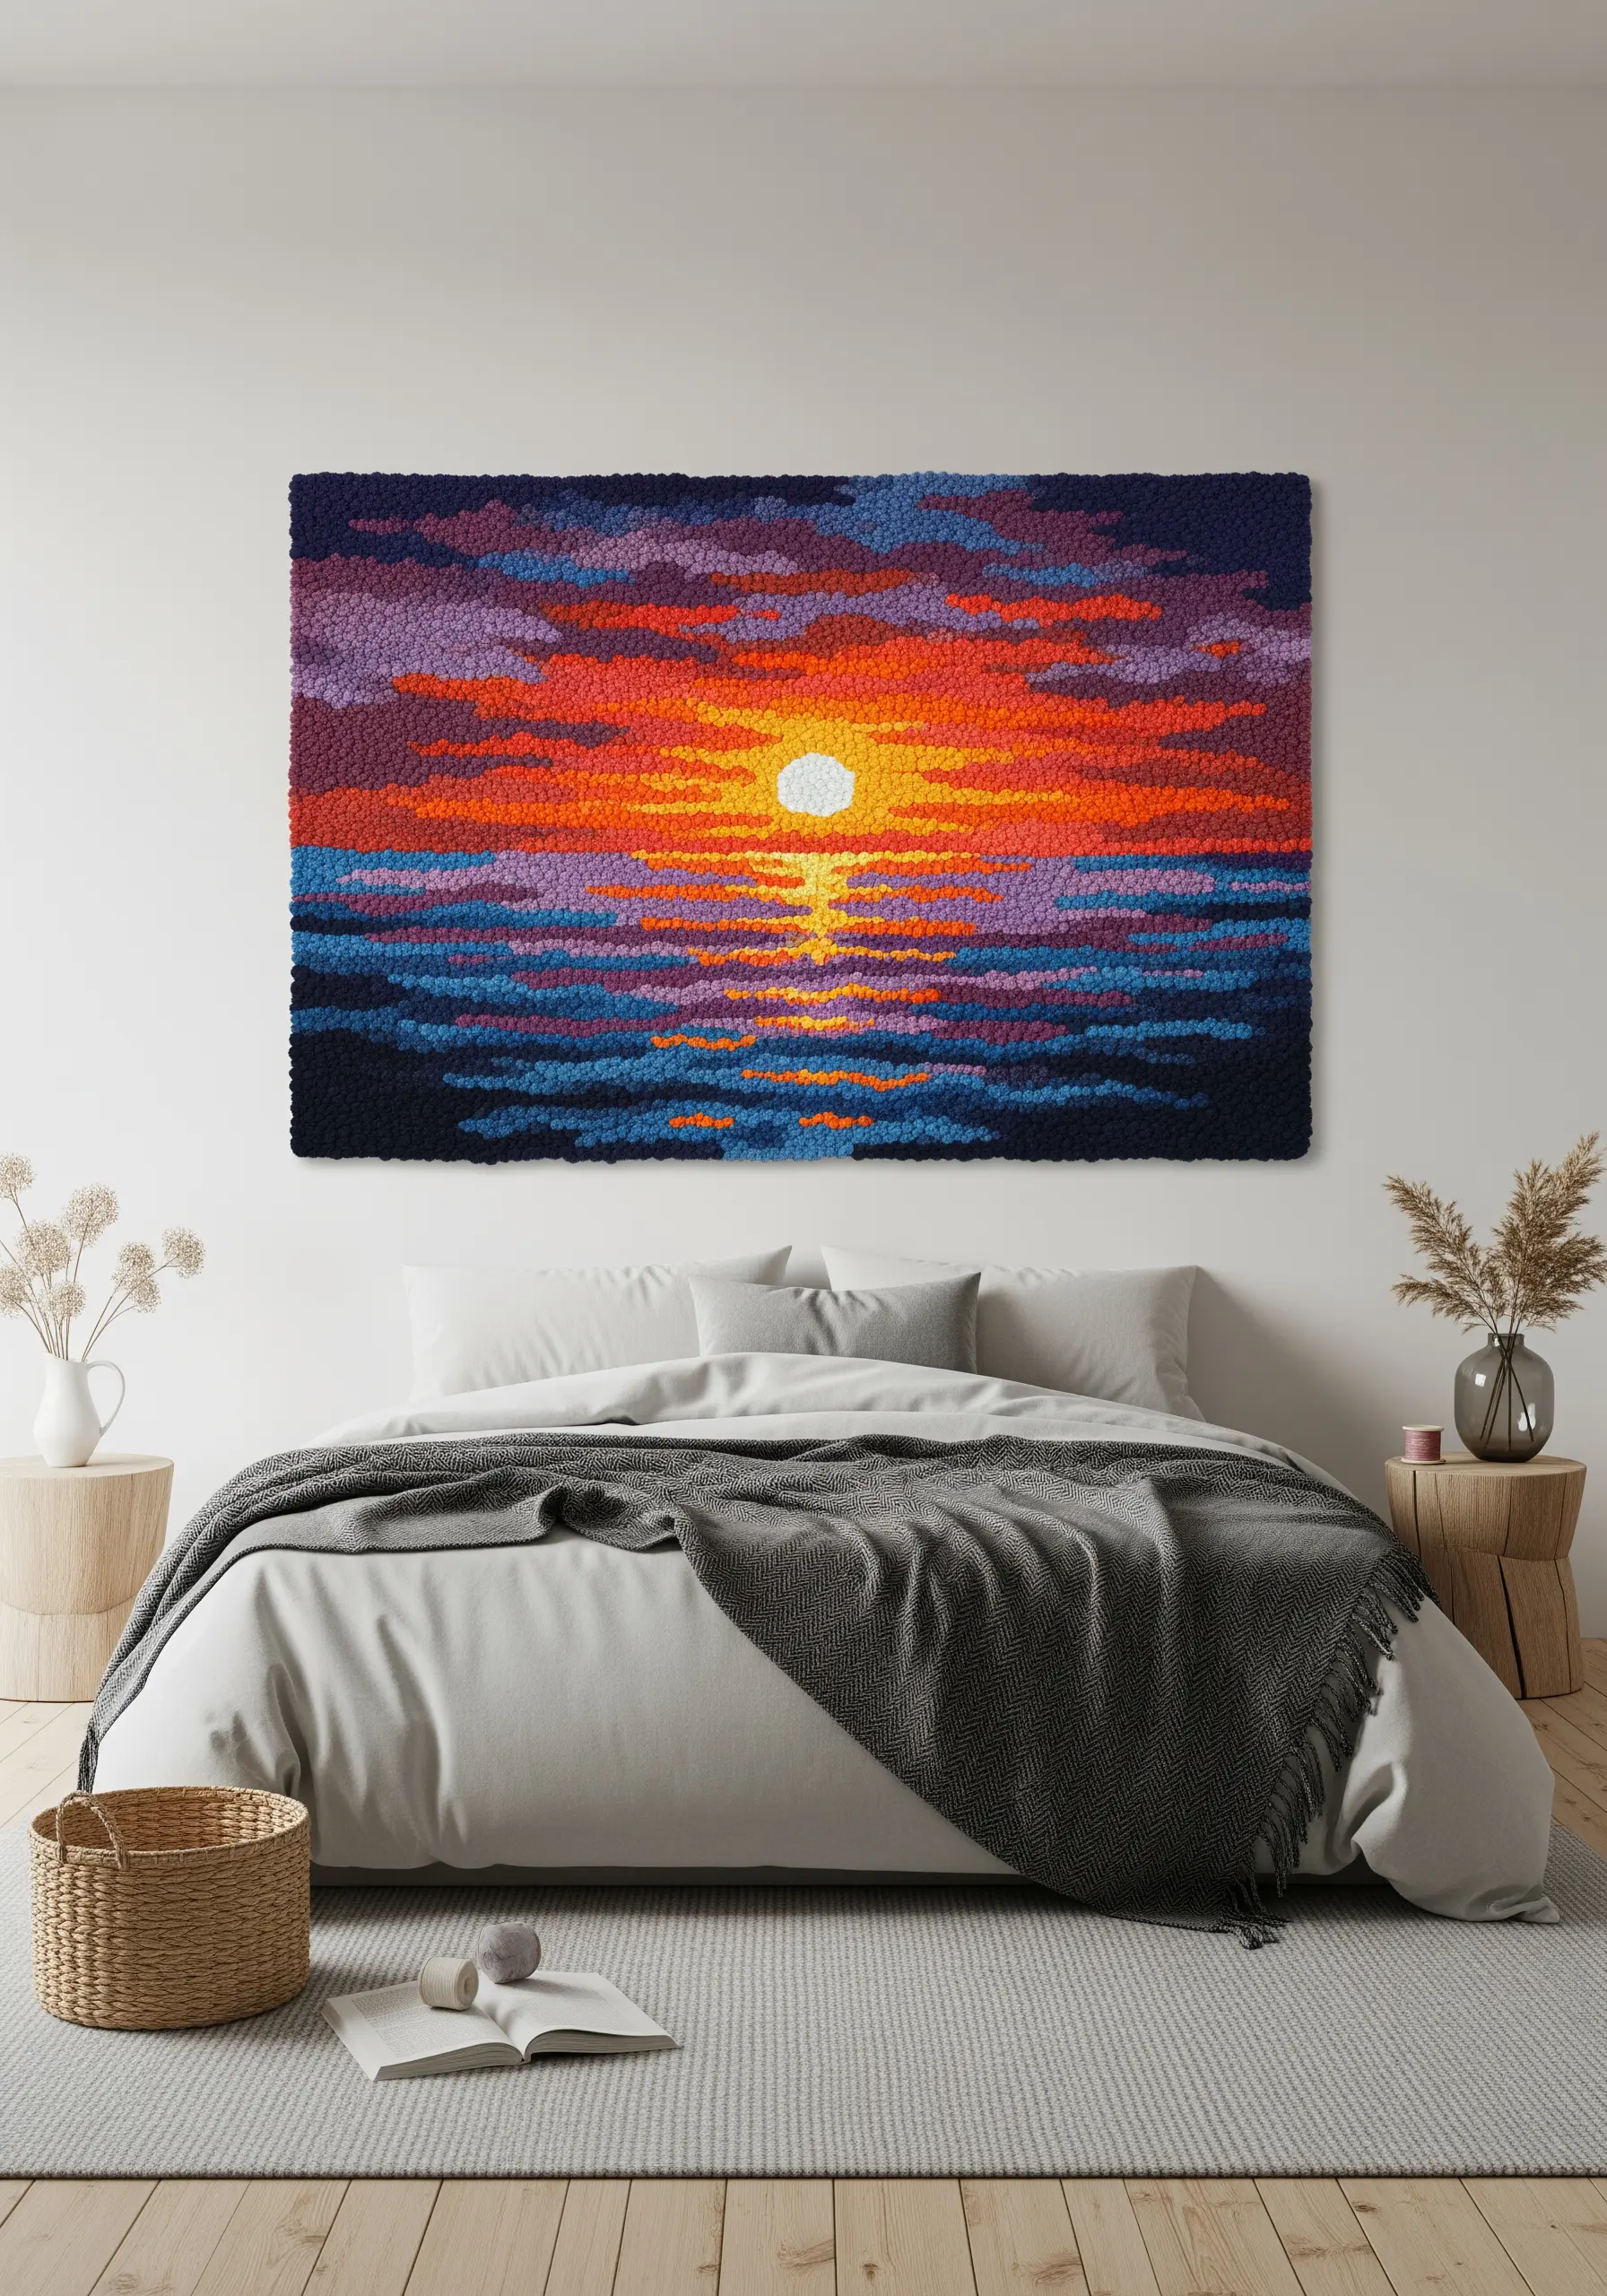
For a large, expressive piece of wall art, embrace the impressionistic quality of latch hook or rug hooking.
Instead of focusing on sharp lines, work in blocks of color with thick yarn to build a textured scene, like this sunset over water.
The resulting shag texture softens the transitions between colors and adds incredible depth and warmth to a room, making it a stunning focal point above a bed.
19. Define a Tote with Bold Single-Line Embroidery
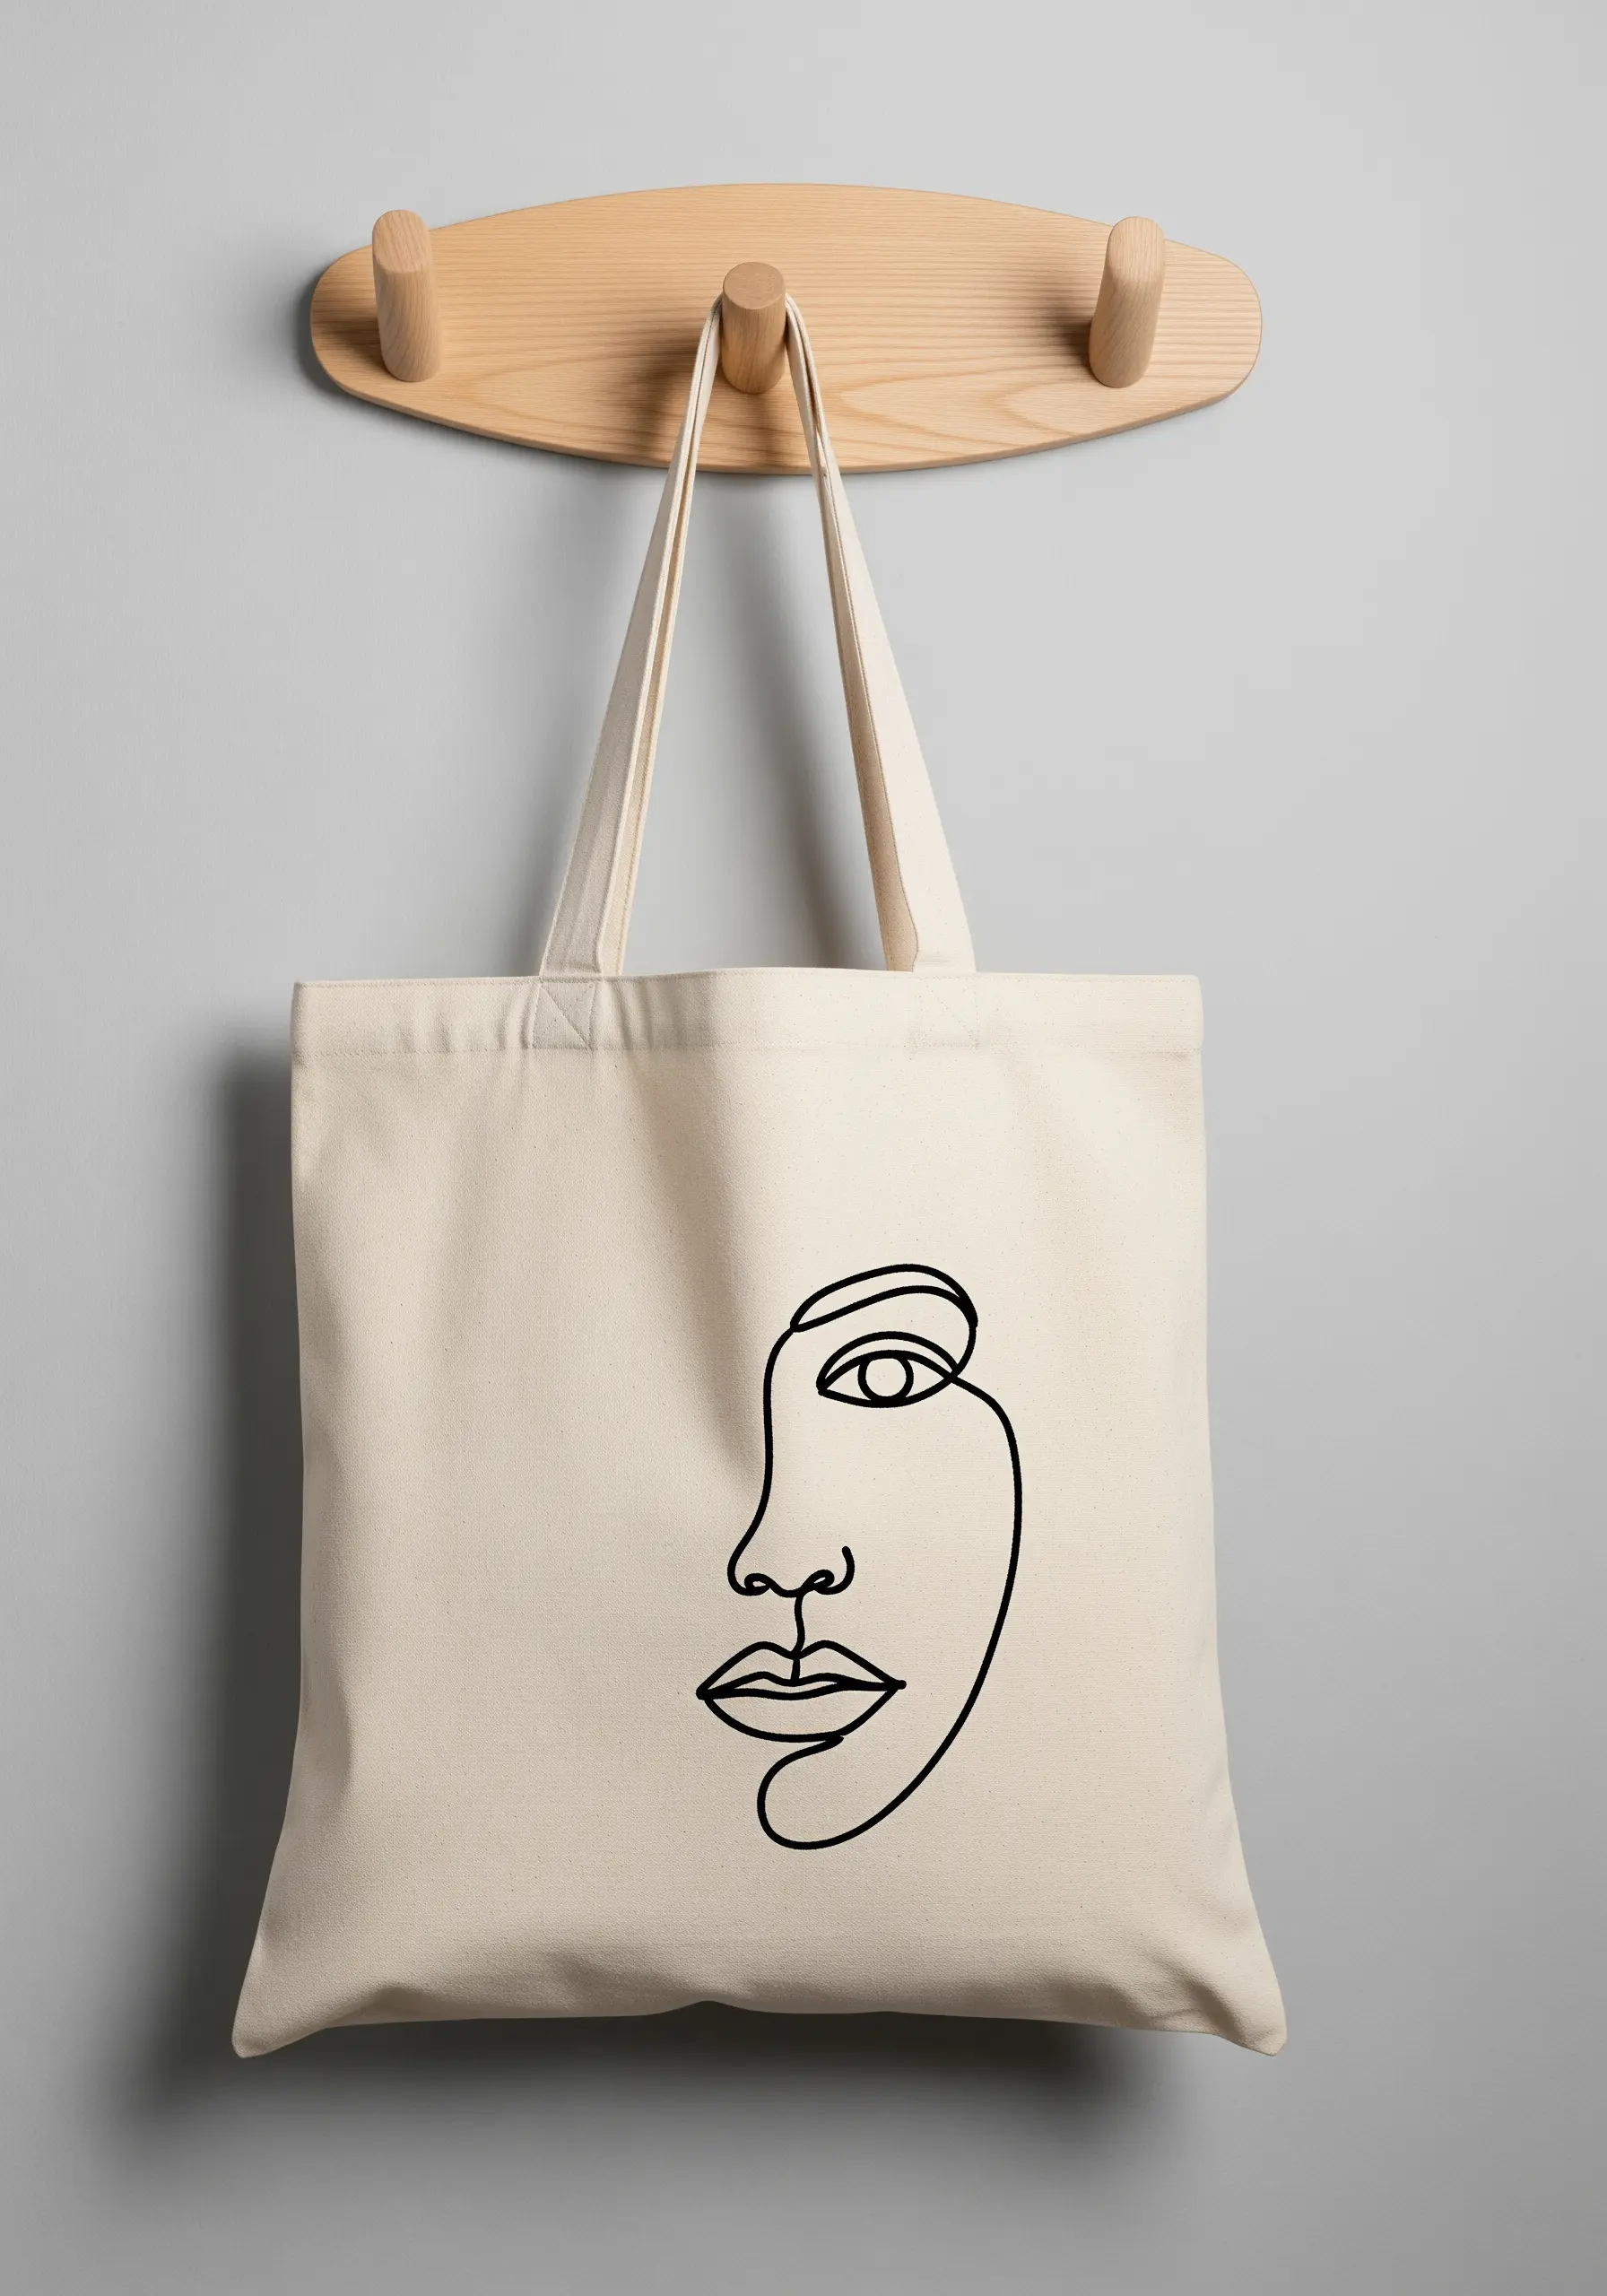
To achieve the clean, graphic look of a continuous line drawing, use a method that creates a smooth, raised line.
A whipped backstitch or a stem stitch using all six strands of floss or a thick perle cotton will give your line definition and weight.
Precisely transferring your design is crucial; a fine-tipped, water-soluble pen will ensure your single line flows without interruption, turning a simple tote into a piece of wearable art.
20. Weave Dimension with Silk Ribbon Embroidery
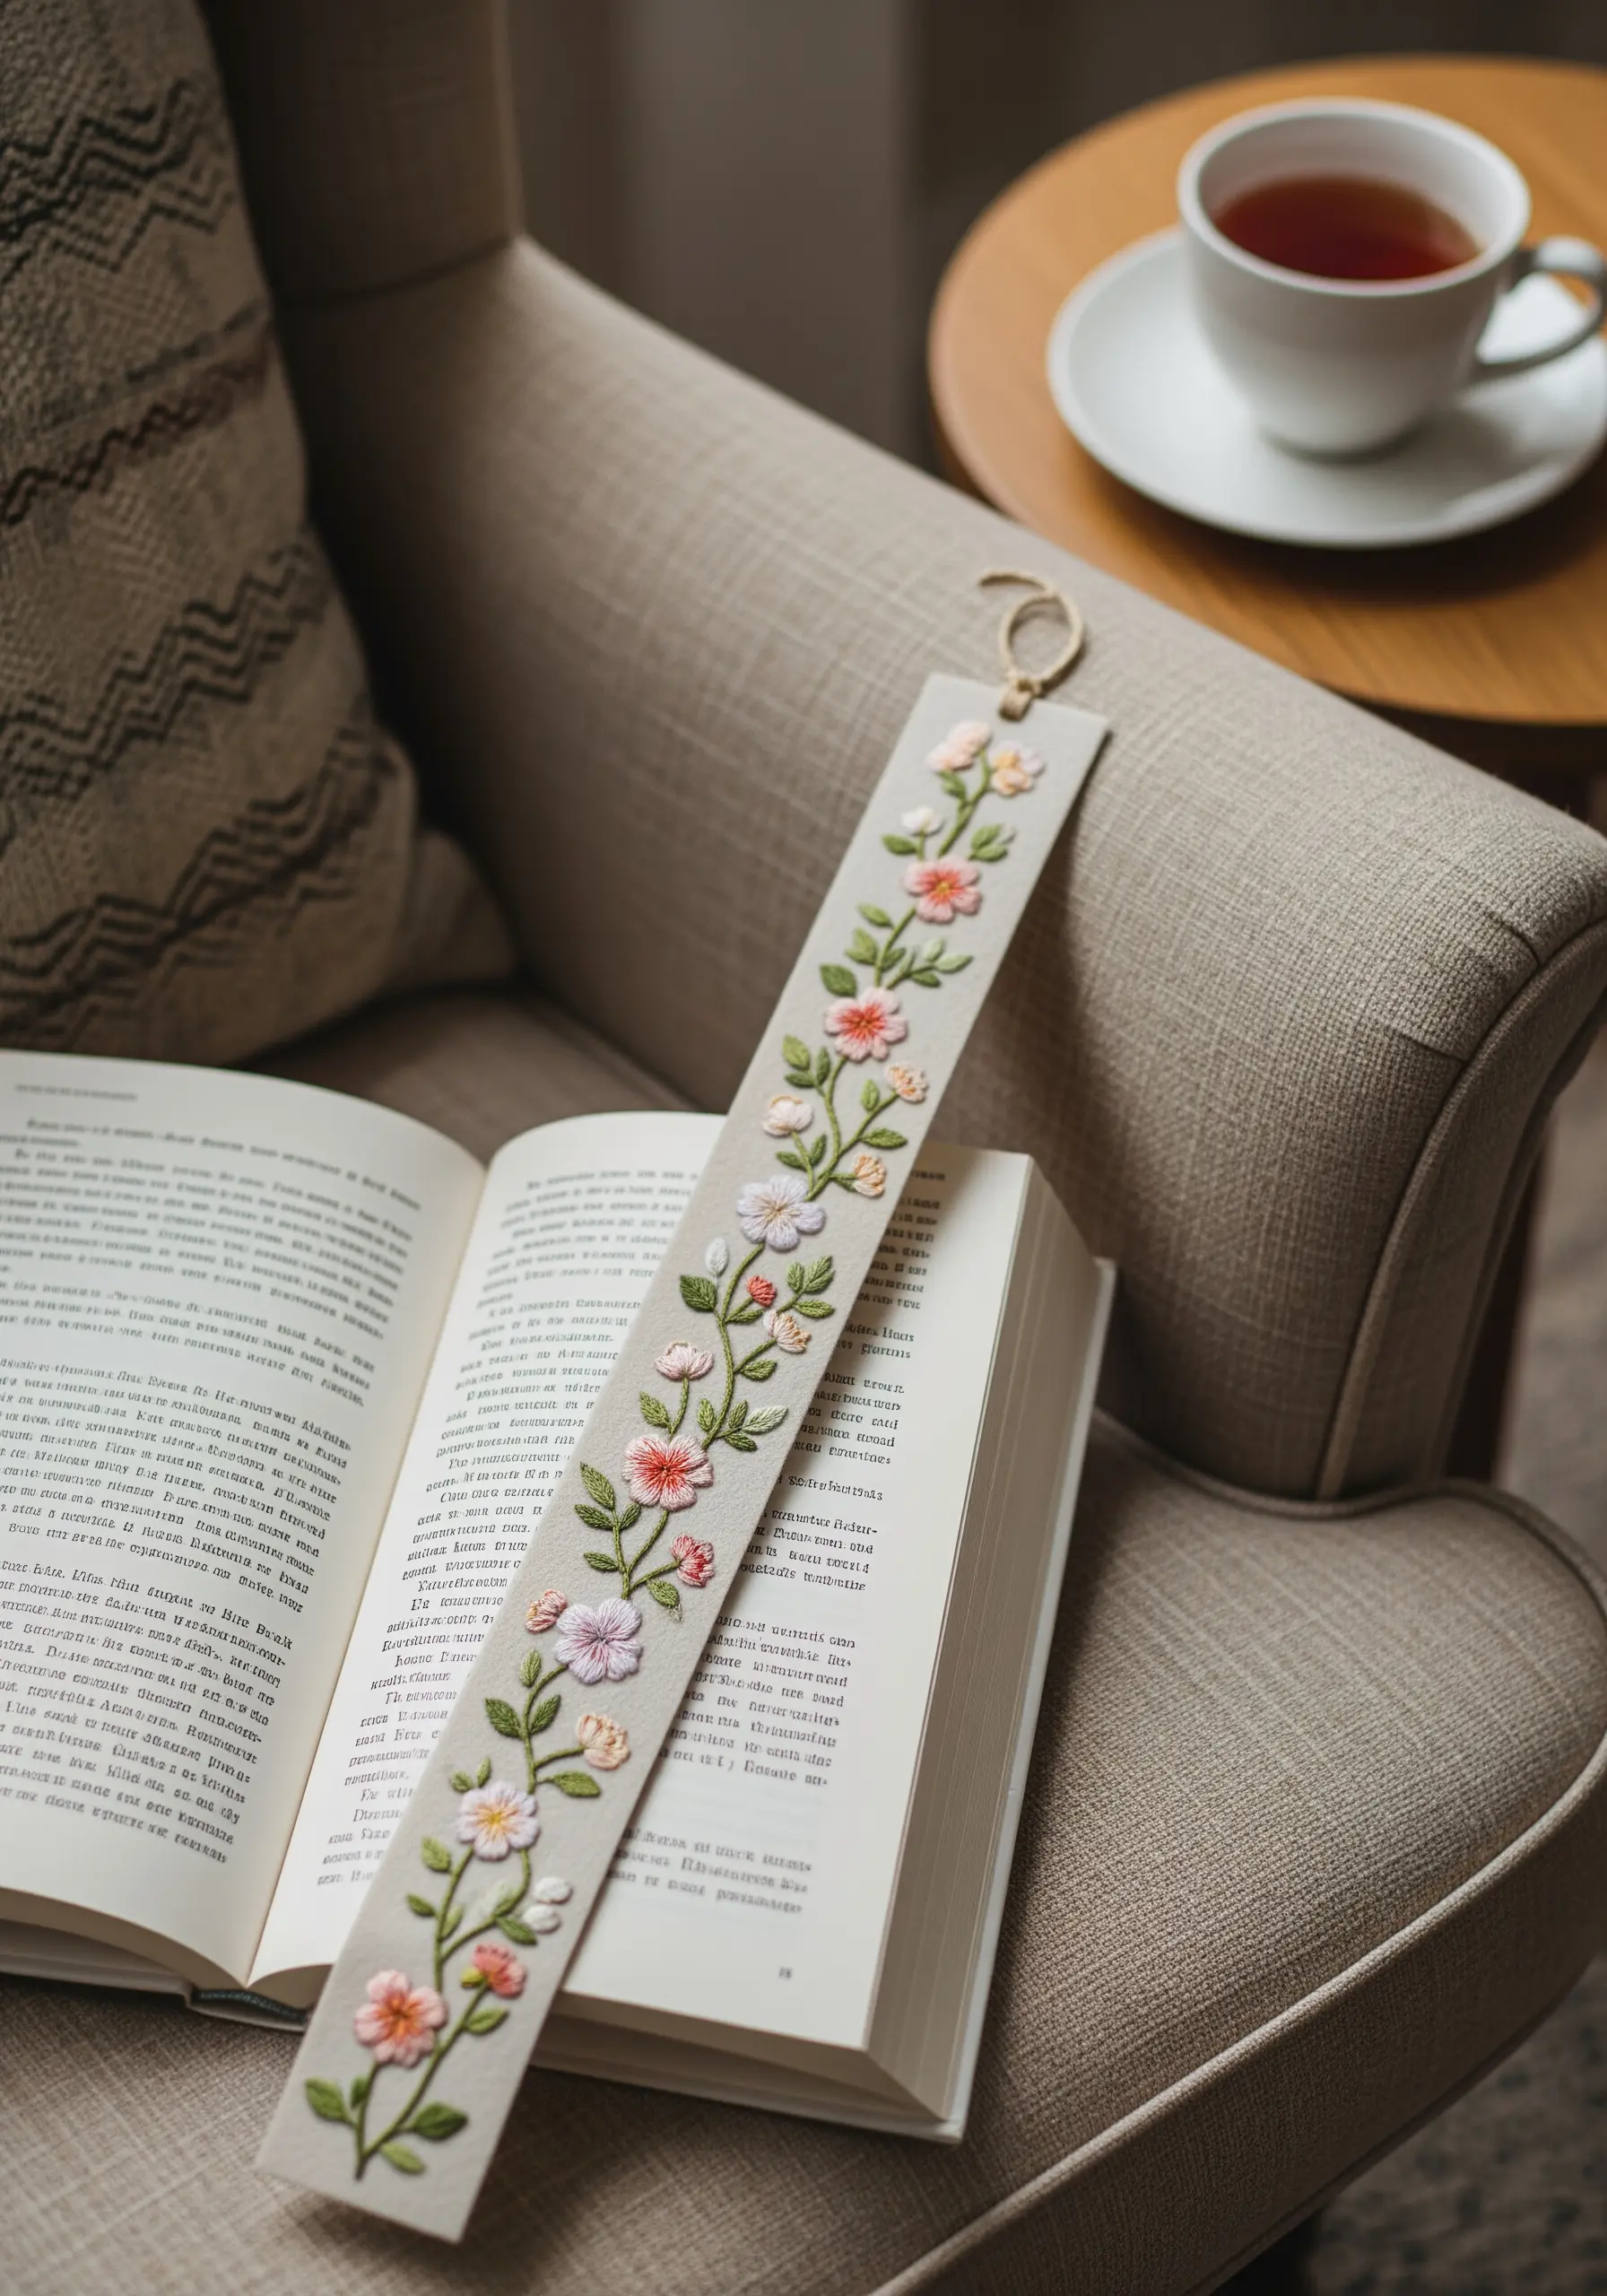
Introduce a new level of texture and realism to your florals by swapping floss for silk ribbon.
Use a ribbon stitch to allow the silk to twist and fold, creating soft, dimensional petals that catch the light beautifully.
Combine these larger ribbon flowers with delicate French knots and leaves stitched in traditional floss for a piece with varied textures and a romantic, vintage feel—perfect for an elegant bookmark.
21. Integrate Embroidery into Your Room’s Architecture

Make embroidery a permanent and integral part of your decor by stitching directly onto an upholstered furniture piece like a headboard.
Use a rugged stem stitch with a darker thread to create the gnarled texture of tree branches.
For the delicate cherry blossoms, scatter simple satin stitches and French knots across the branches, allowing the design to flow naturally across the panel and onto the wall. This turns furniture into a canvas.
22. Craft Charming Felt Corner Bookmarks

Felt is the ideal material for quick, satisfying projects as it doesn’t fray and provides a stable surface for stitching without a hoop.
To create these corner bookmarks, simply stitch two triangles of felt together on two sides.
Before you sew them up, add tiny, charming embroidered motifs.
These make perfect unique DIY embroidery presents that are both thoughtful and quick to complete.
23. Personalize a Journal with a Sampler of Stitches
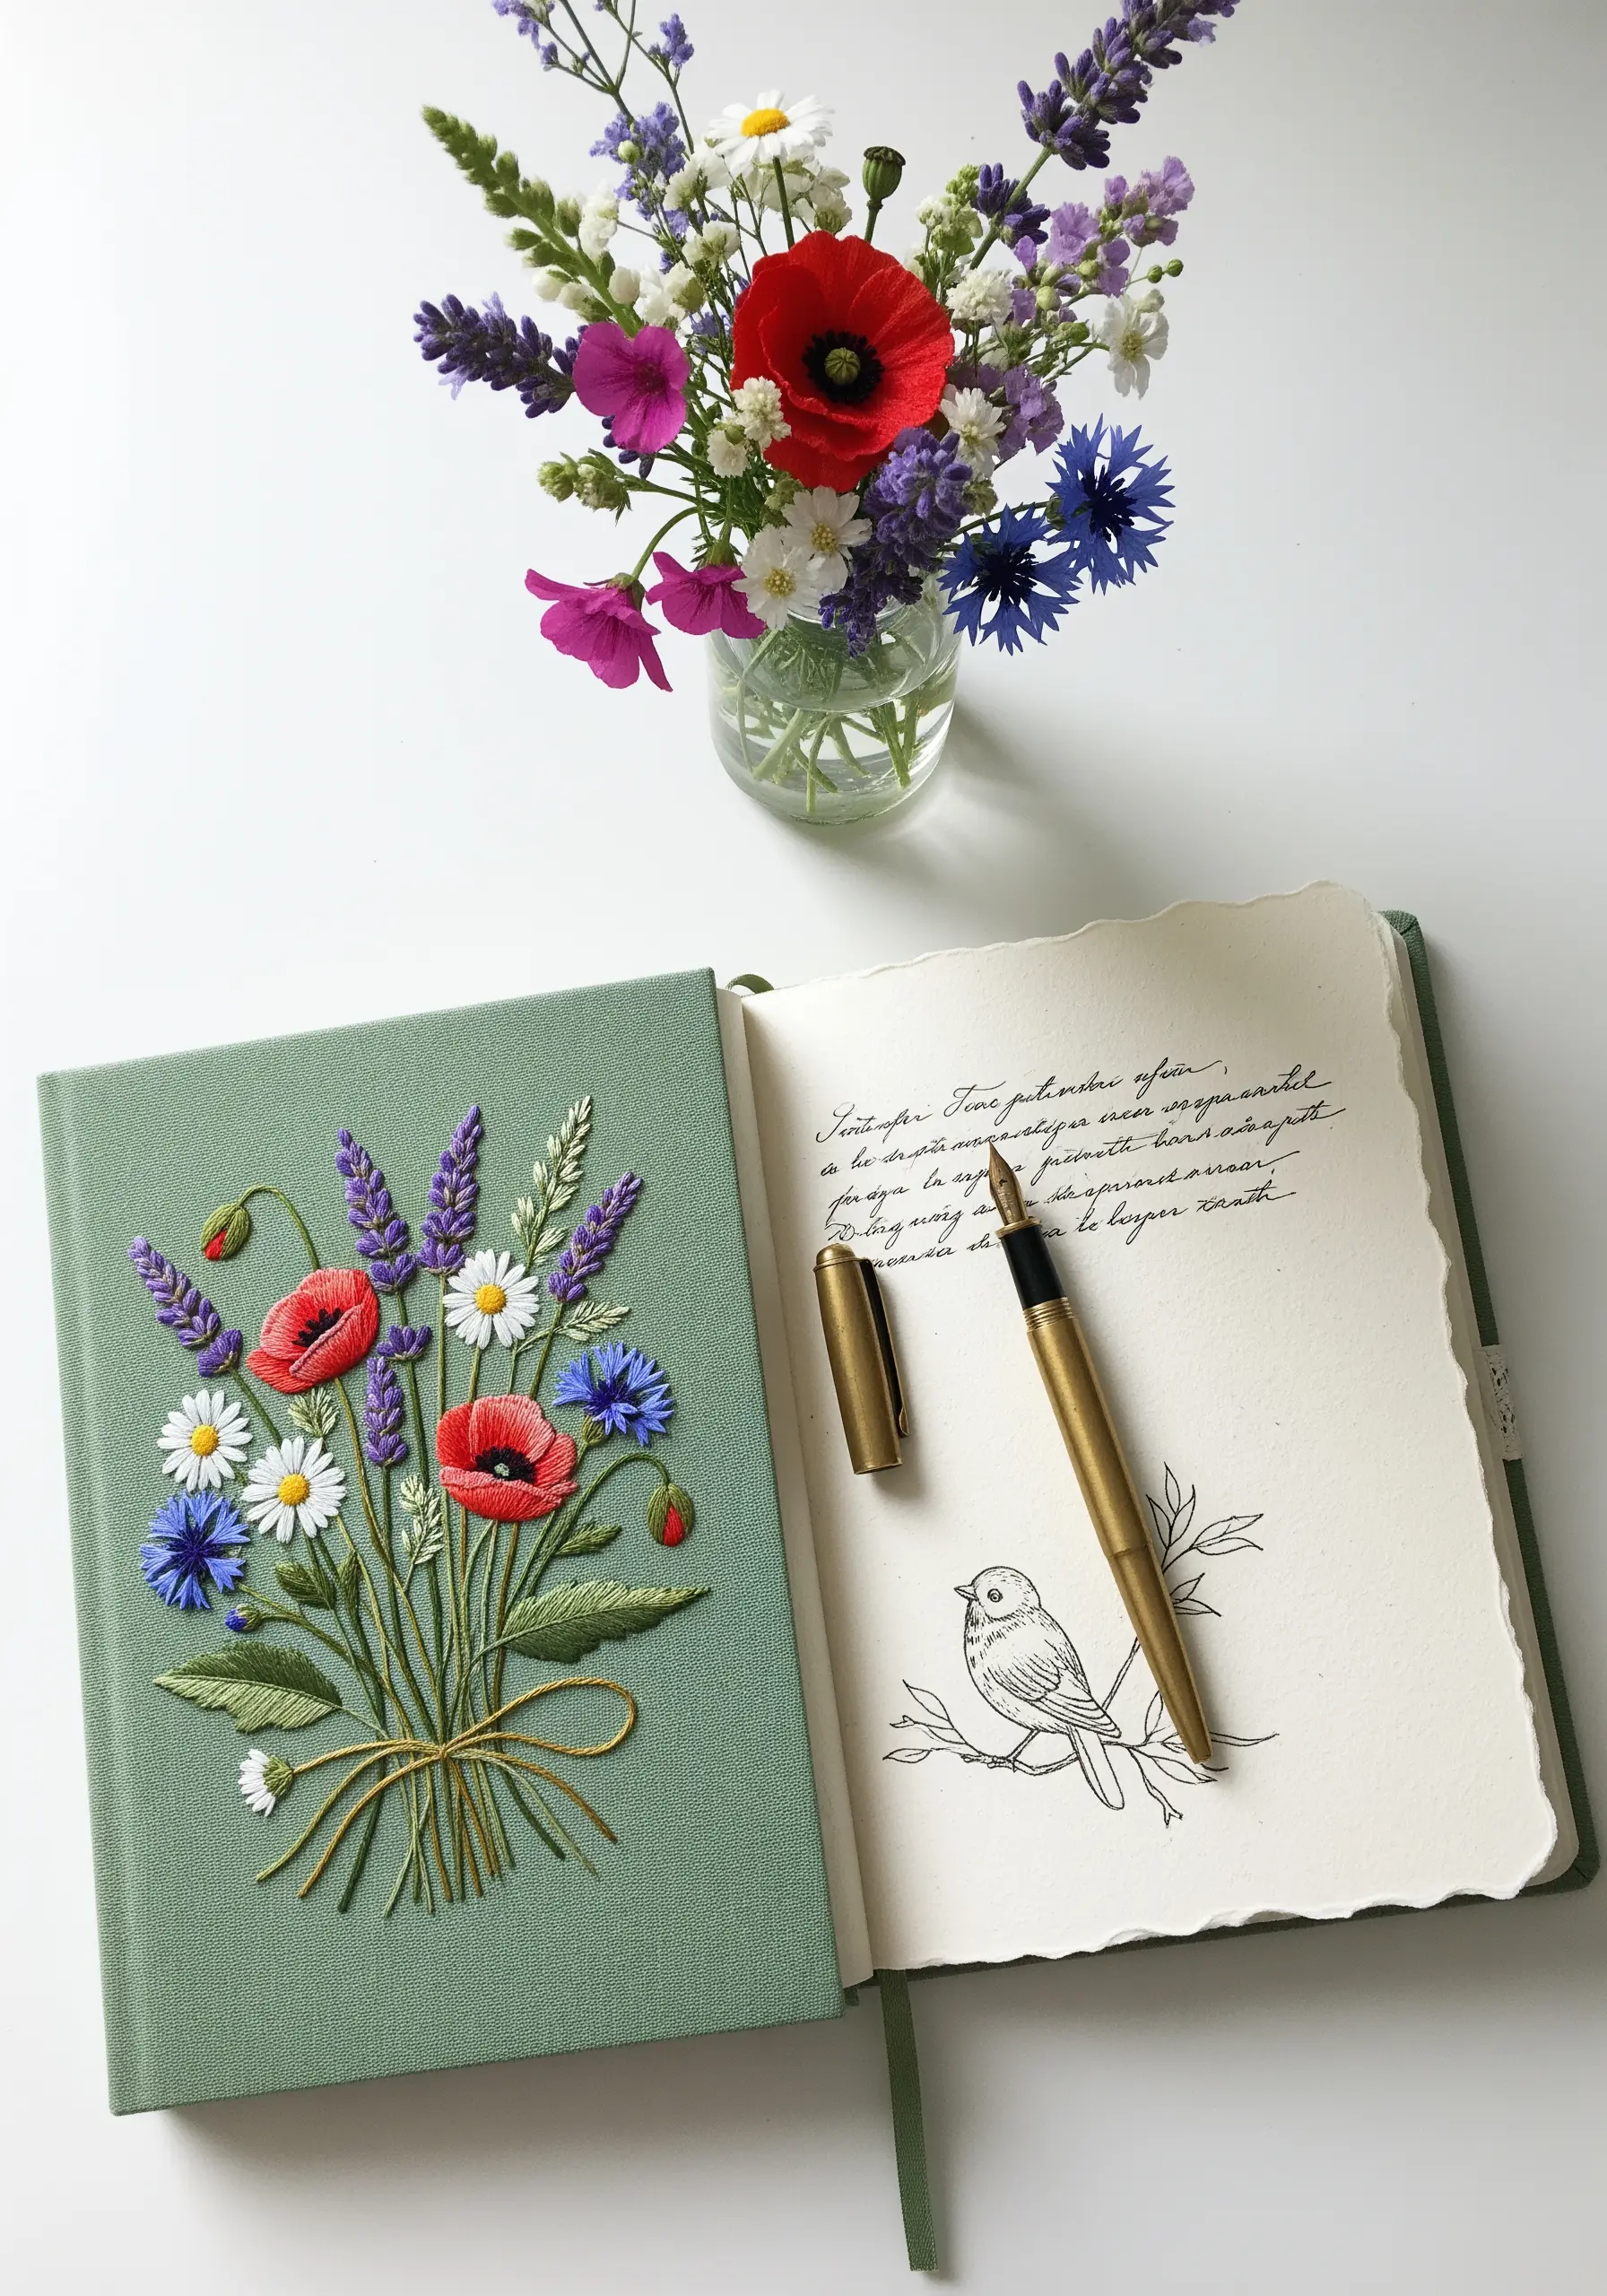
Turn a plain journal into a cherished keepsake by embroidering a botanical bouquet on its fabric cover.
Treat the design as a stitch sampler, using a different technique for each type of flower to create a rich variety of textures.
Combine lazy daisy stitches for petals, French knots for fluffy centers, and woven wheels for dimensional roses. This mix of stitches makes the bouquet feel vibrant and alive.
24. Explore Geometric String Art on Acrylic
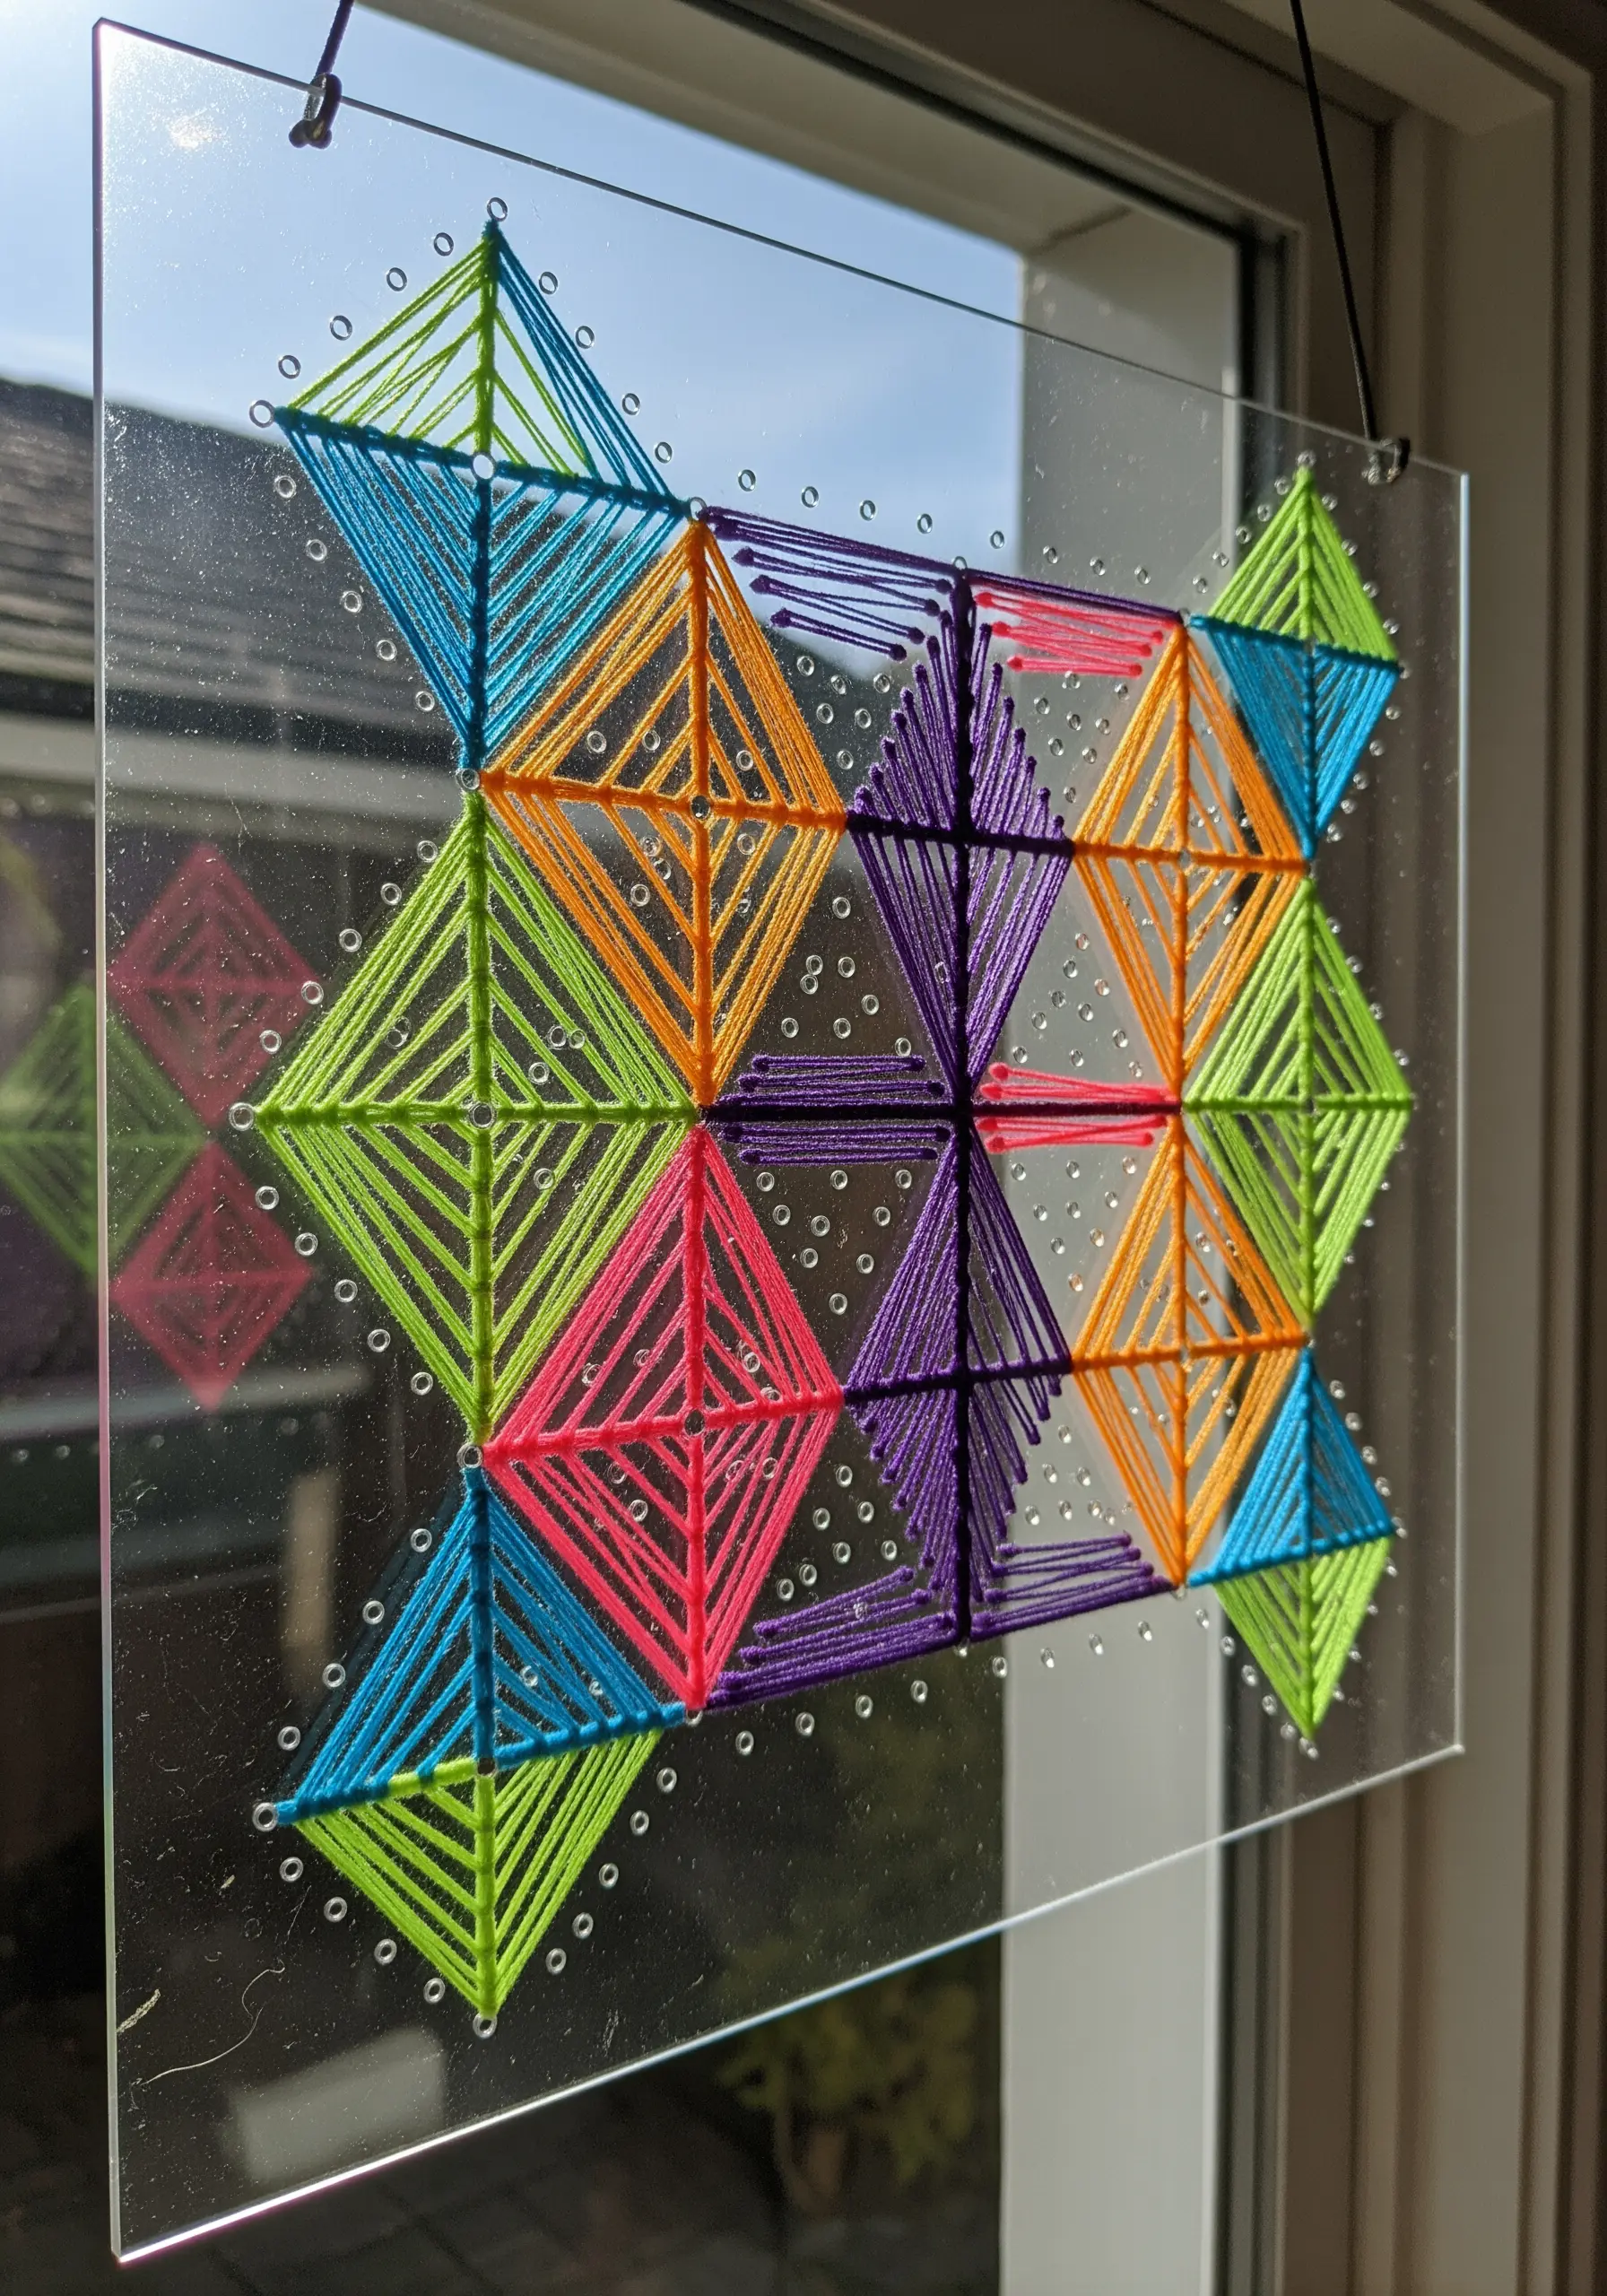
Move your stitching from fabric to a transparent surface like plexiglass for a modern, architectural effect.
Start by drilling a grid of small, evenly spaced holes into the acrylic sheet.
Then, weave your embroidery floss between the holes to create layered, geometric patterns.
When hung in a window, this piece interacts with light, casting colorful shadows and revealing the intricate structure of your thread work.
25. Sculpt a Dreamy Nursery Mobile with Felt and Thread
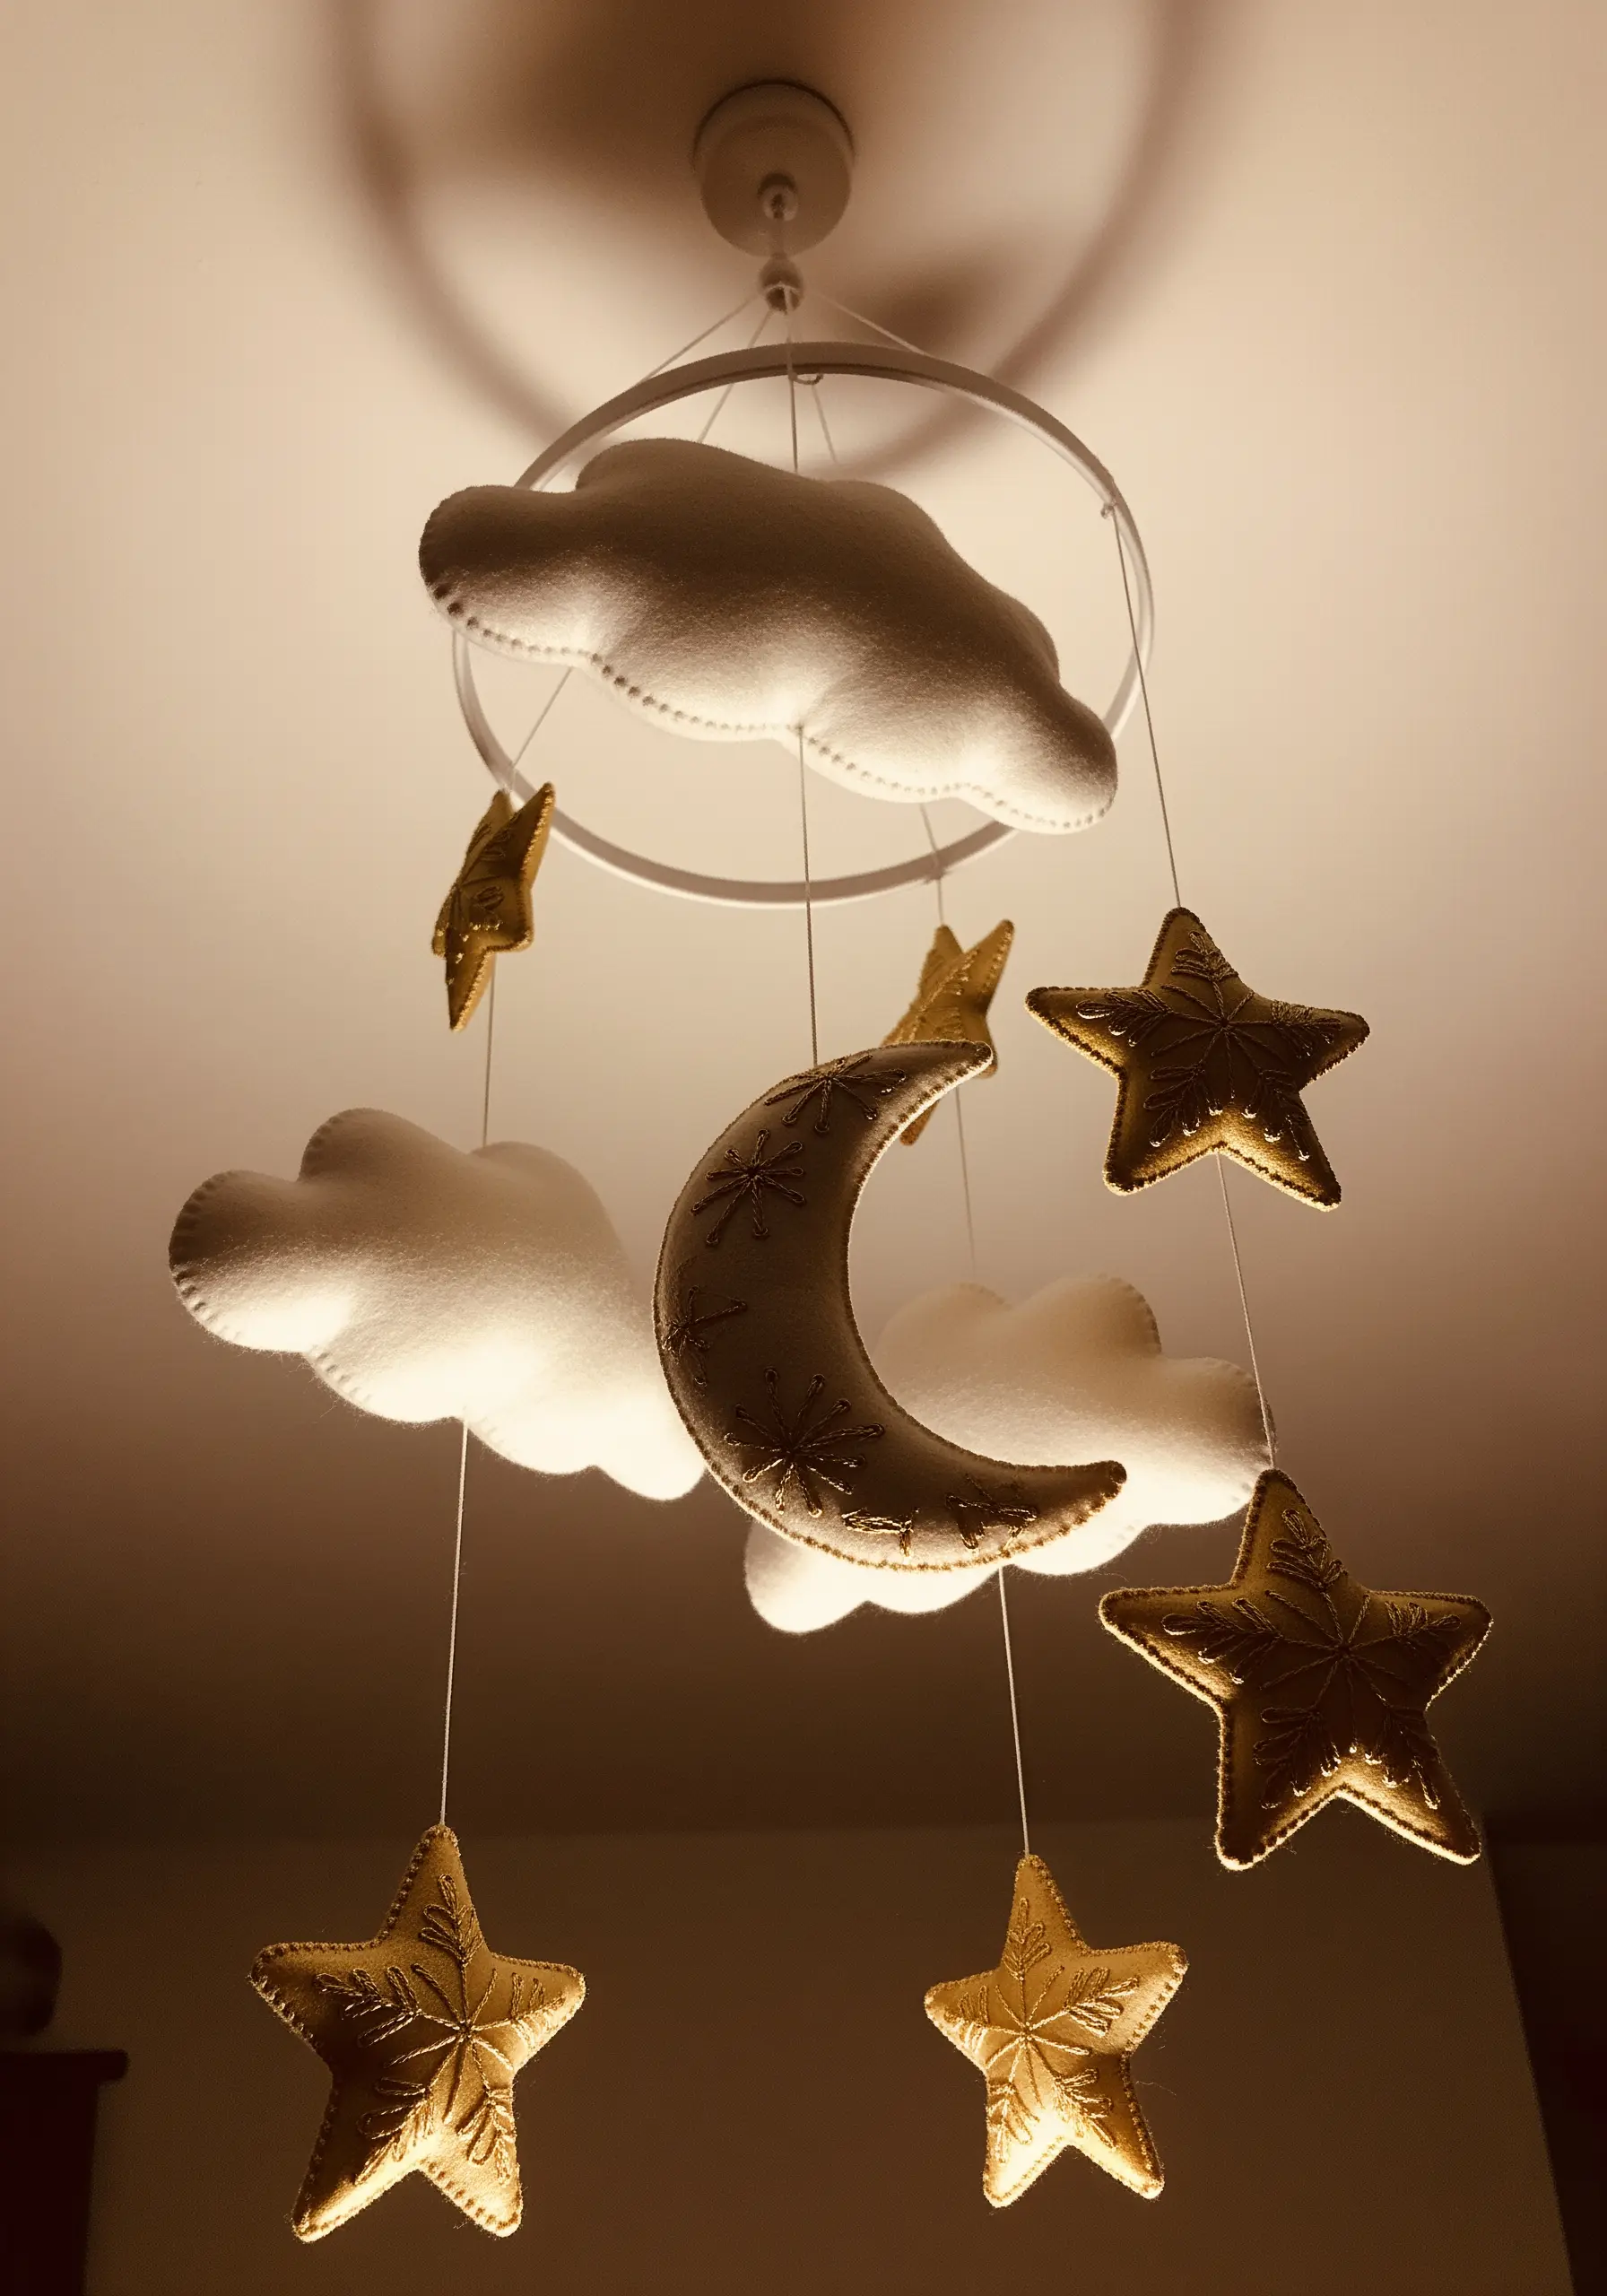
Combine basic sewing and embroidery skills to create a soft, sculptural mobile.
Cut your cloud, moon, and star shapes from felt, add delicate embroidered details with metallic thread for a hint of magic, and then stitch the pieces together with a neat blanket stitch, adding a little stuffing for dimension.
This project transforms simple materials into a gentle, floating piece of art for a serene nursery.
26. Channel Art Deco Glamour with Precise Stitching
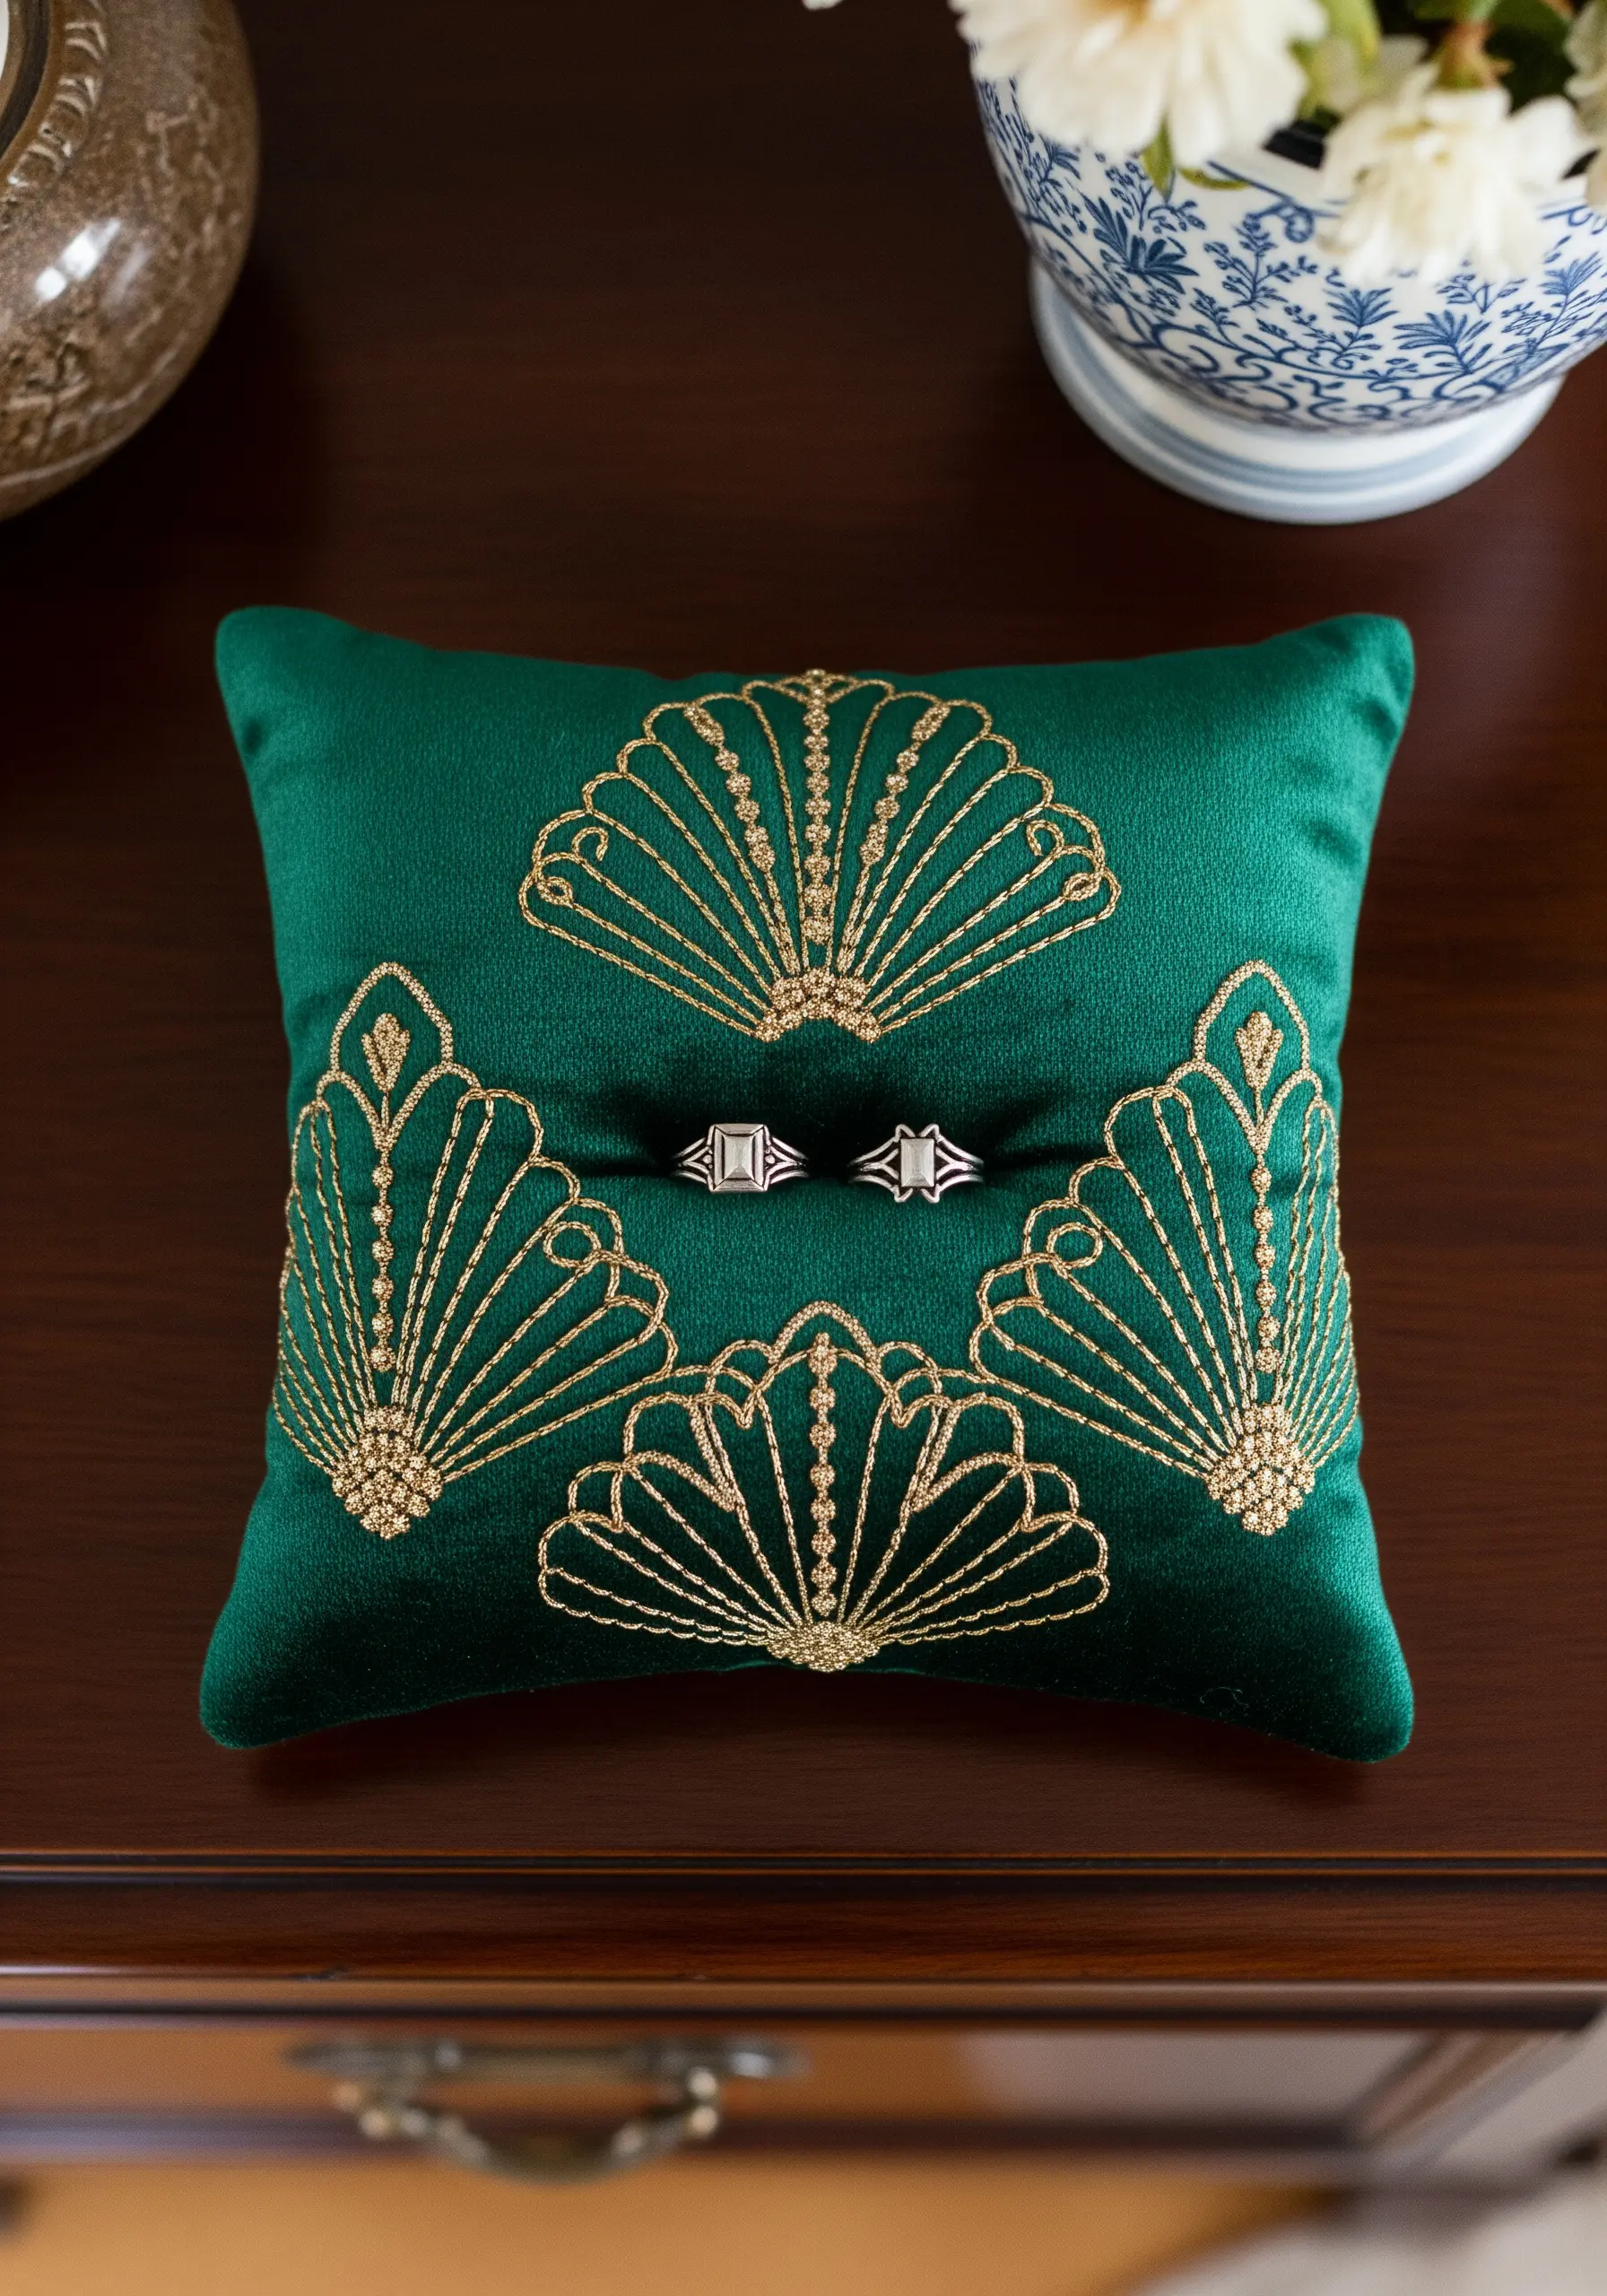
Capture the essence of the Art Deco era by using only metallic gold thread and straight stitches on a jewel-toned velvet.
The design’s power comes from the precise geometry and radiating lines, not complex stitches.
The high contrast between the shimmering thread and the deep, matte pile of the fabric creates a look of pure, understated opulence, perfect for a ceremonial piece like a ring pillow.
27. Break the Frame with 3D Wired Embroidery
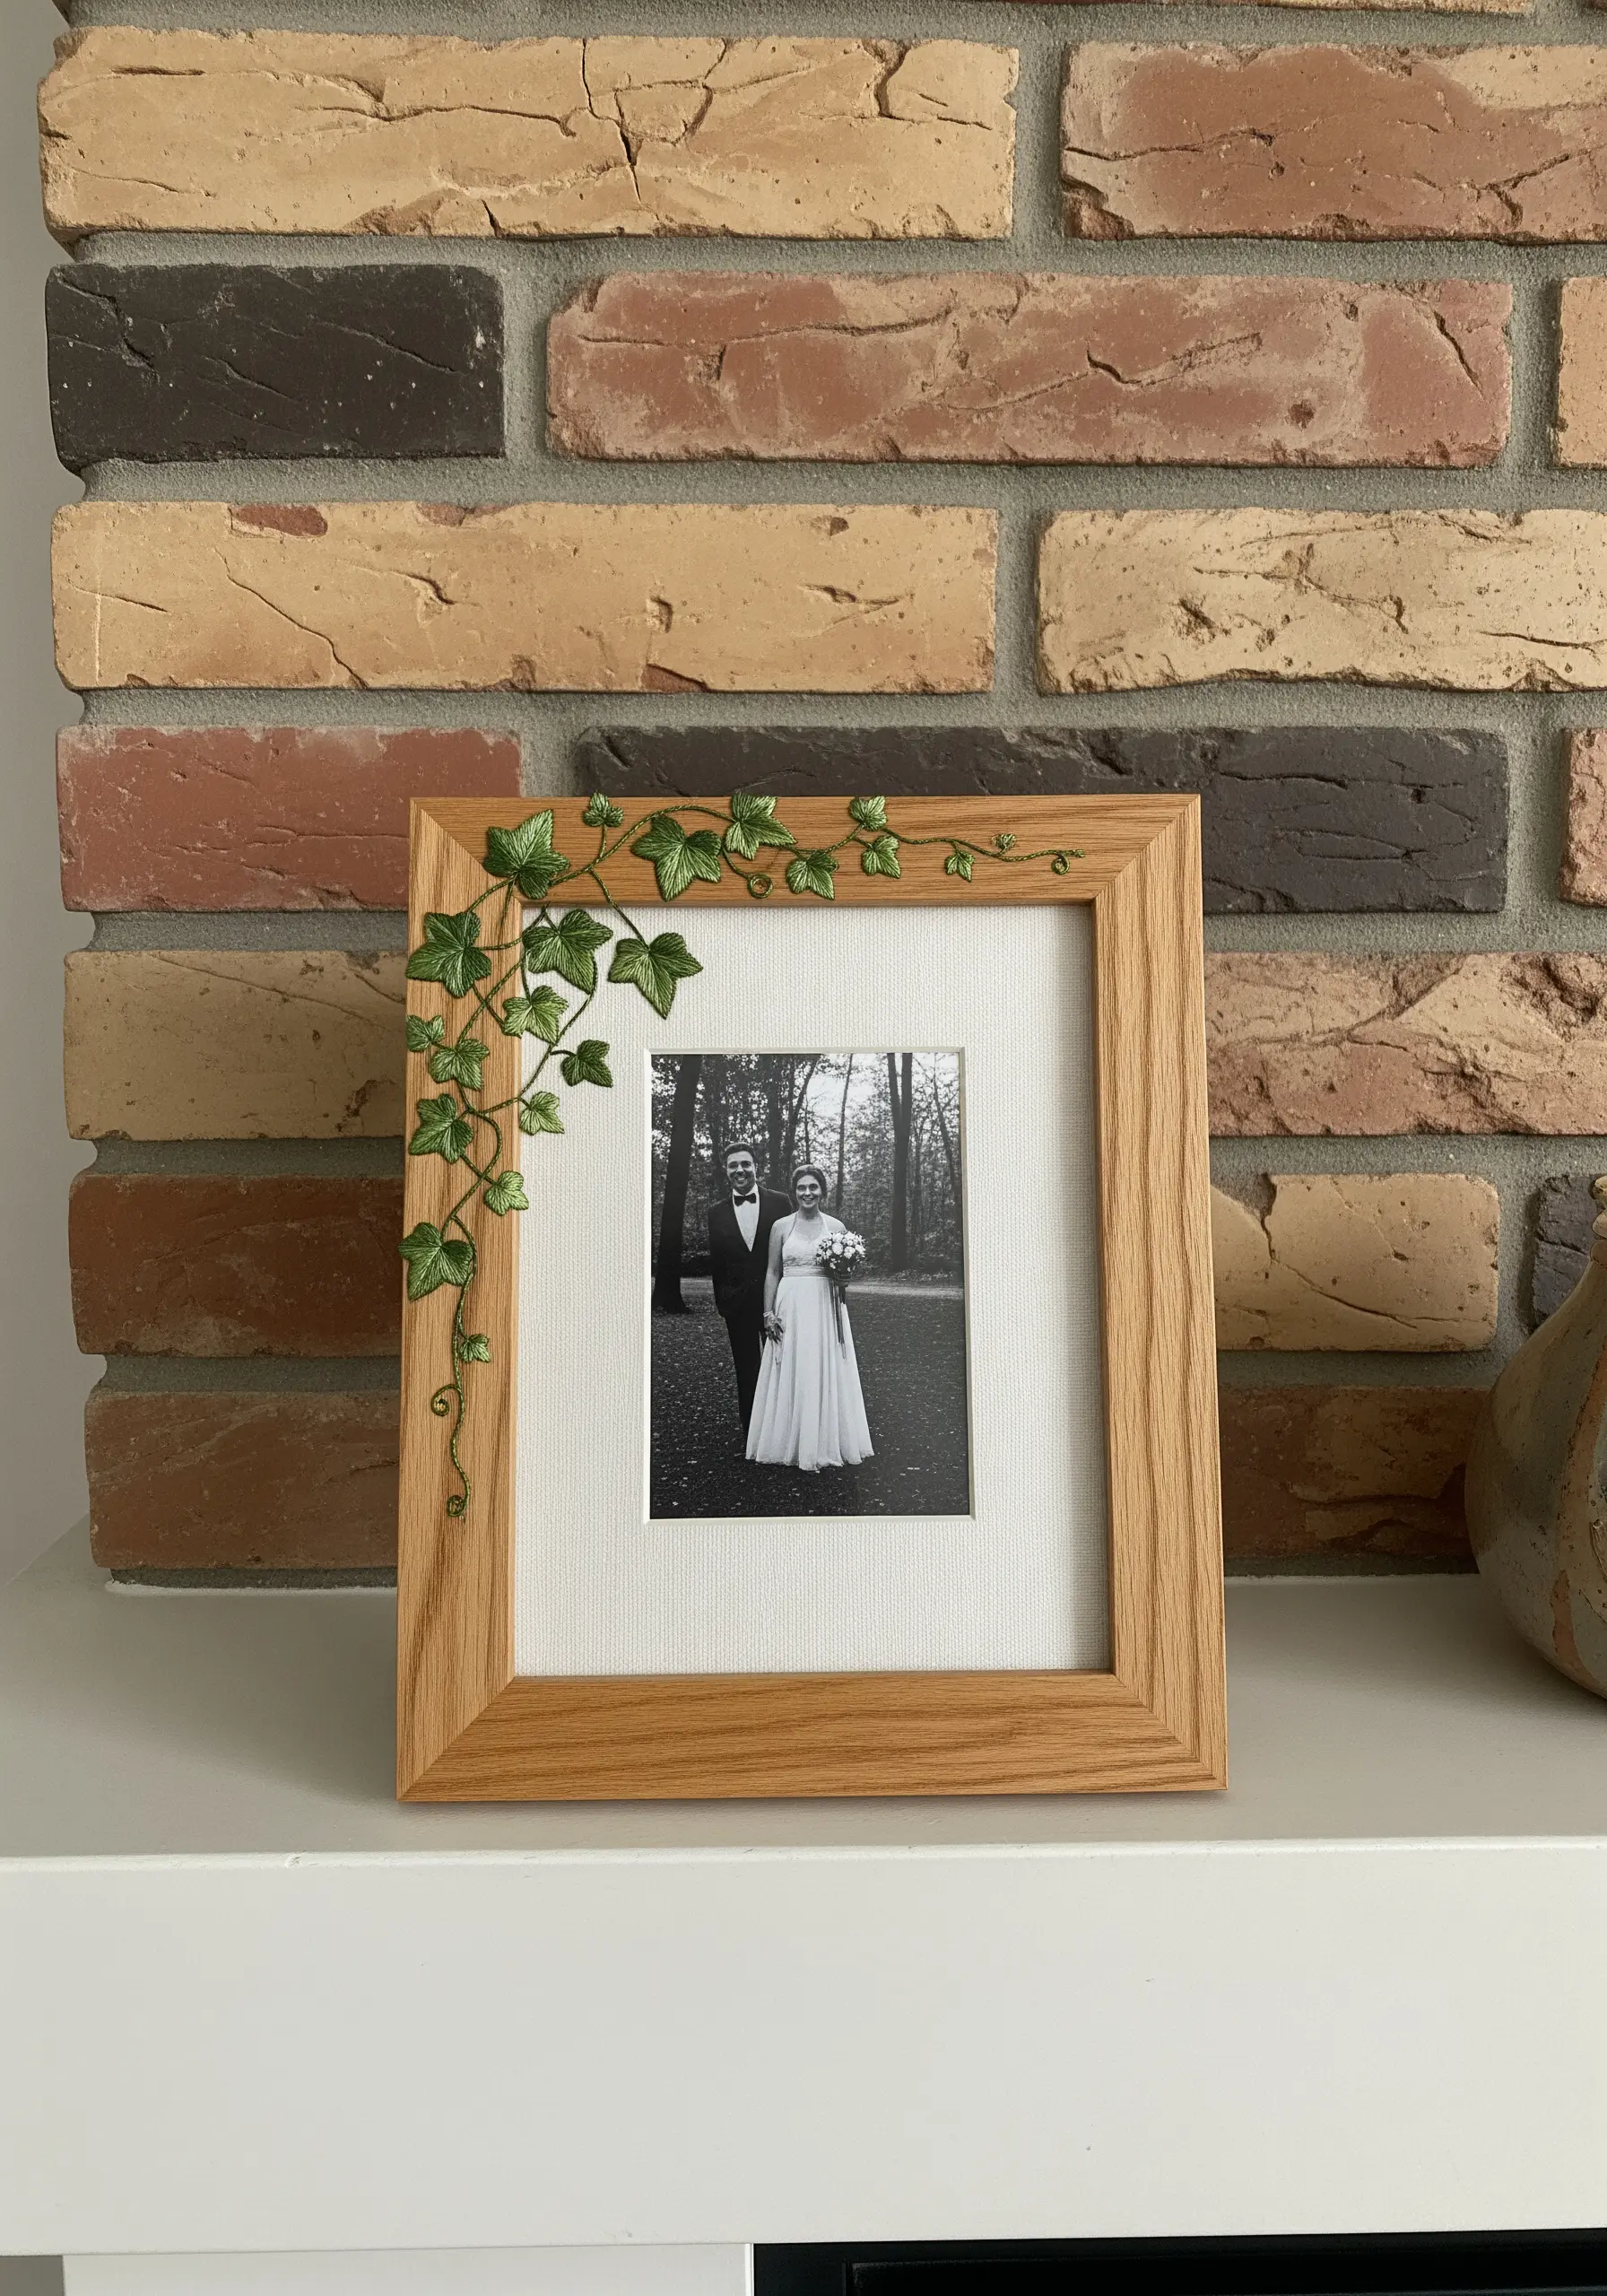
Take your embroidery into the third dimension by incorporating wire into your stumpwork.
To create these ivy leaves, lay a thin, flexible wire on your fabric and secure it with dense buttonhole stitches around the edge.
Once you cut the leaf from the fabric, the wire allows you to bend and shape it.
Attach these sculptural leaves to a photo frame to create a piece where the art literally grows beyond its boundaries.


