

What if the secret to elevating your embroidery isn’t found in a new thread or a more complex stitch, but in the surface you choose? For a moment, let’s look beyond linen and cotton and consider the quiet, versatile beauty of paper.
Paper offers a completely different tactile experience. It provides a stable, crisp foundation that can sharpen your outlines, a blank canvas for mixed-media collage, or even a sculptural element to be folded and formed. It invites you to think like an architect as much as an artist, focusing on structure, line, and dimension in a new way.
In these examples, you won’t just see paper and thread side-by-side. You’ll discover how to use paper art principles to inform your stitching—how a paper fold can inspire a 3D petal, how a torn edge can guide a landscape, and how a simple cutout can create breathtaking negative space. Let these ideas open a new door in your creative practice, one where thread and paper begin a beautiful conversation.
1. Stitch a Celestial Scene on Textured Paper

Introduce an unexpected layer of texture by stitching directly onto crinkled paper instead of smooth fabric.
First, gently crumple a sheet of heavyweight, dark-colored paper, then smooth it out before hooping it carefully.
This process creates a unique, uneven surface that catches the light and adds instant depth to your composition.
Use fine metallic threads for constellations and scattered seed beads for stars; their sparkle contrasts beautifully against the matte, creased background, making your cosmic scene feel more dynamic.
2. Use Paper as a Guide for Perfect Satin Stitch
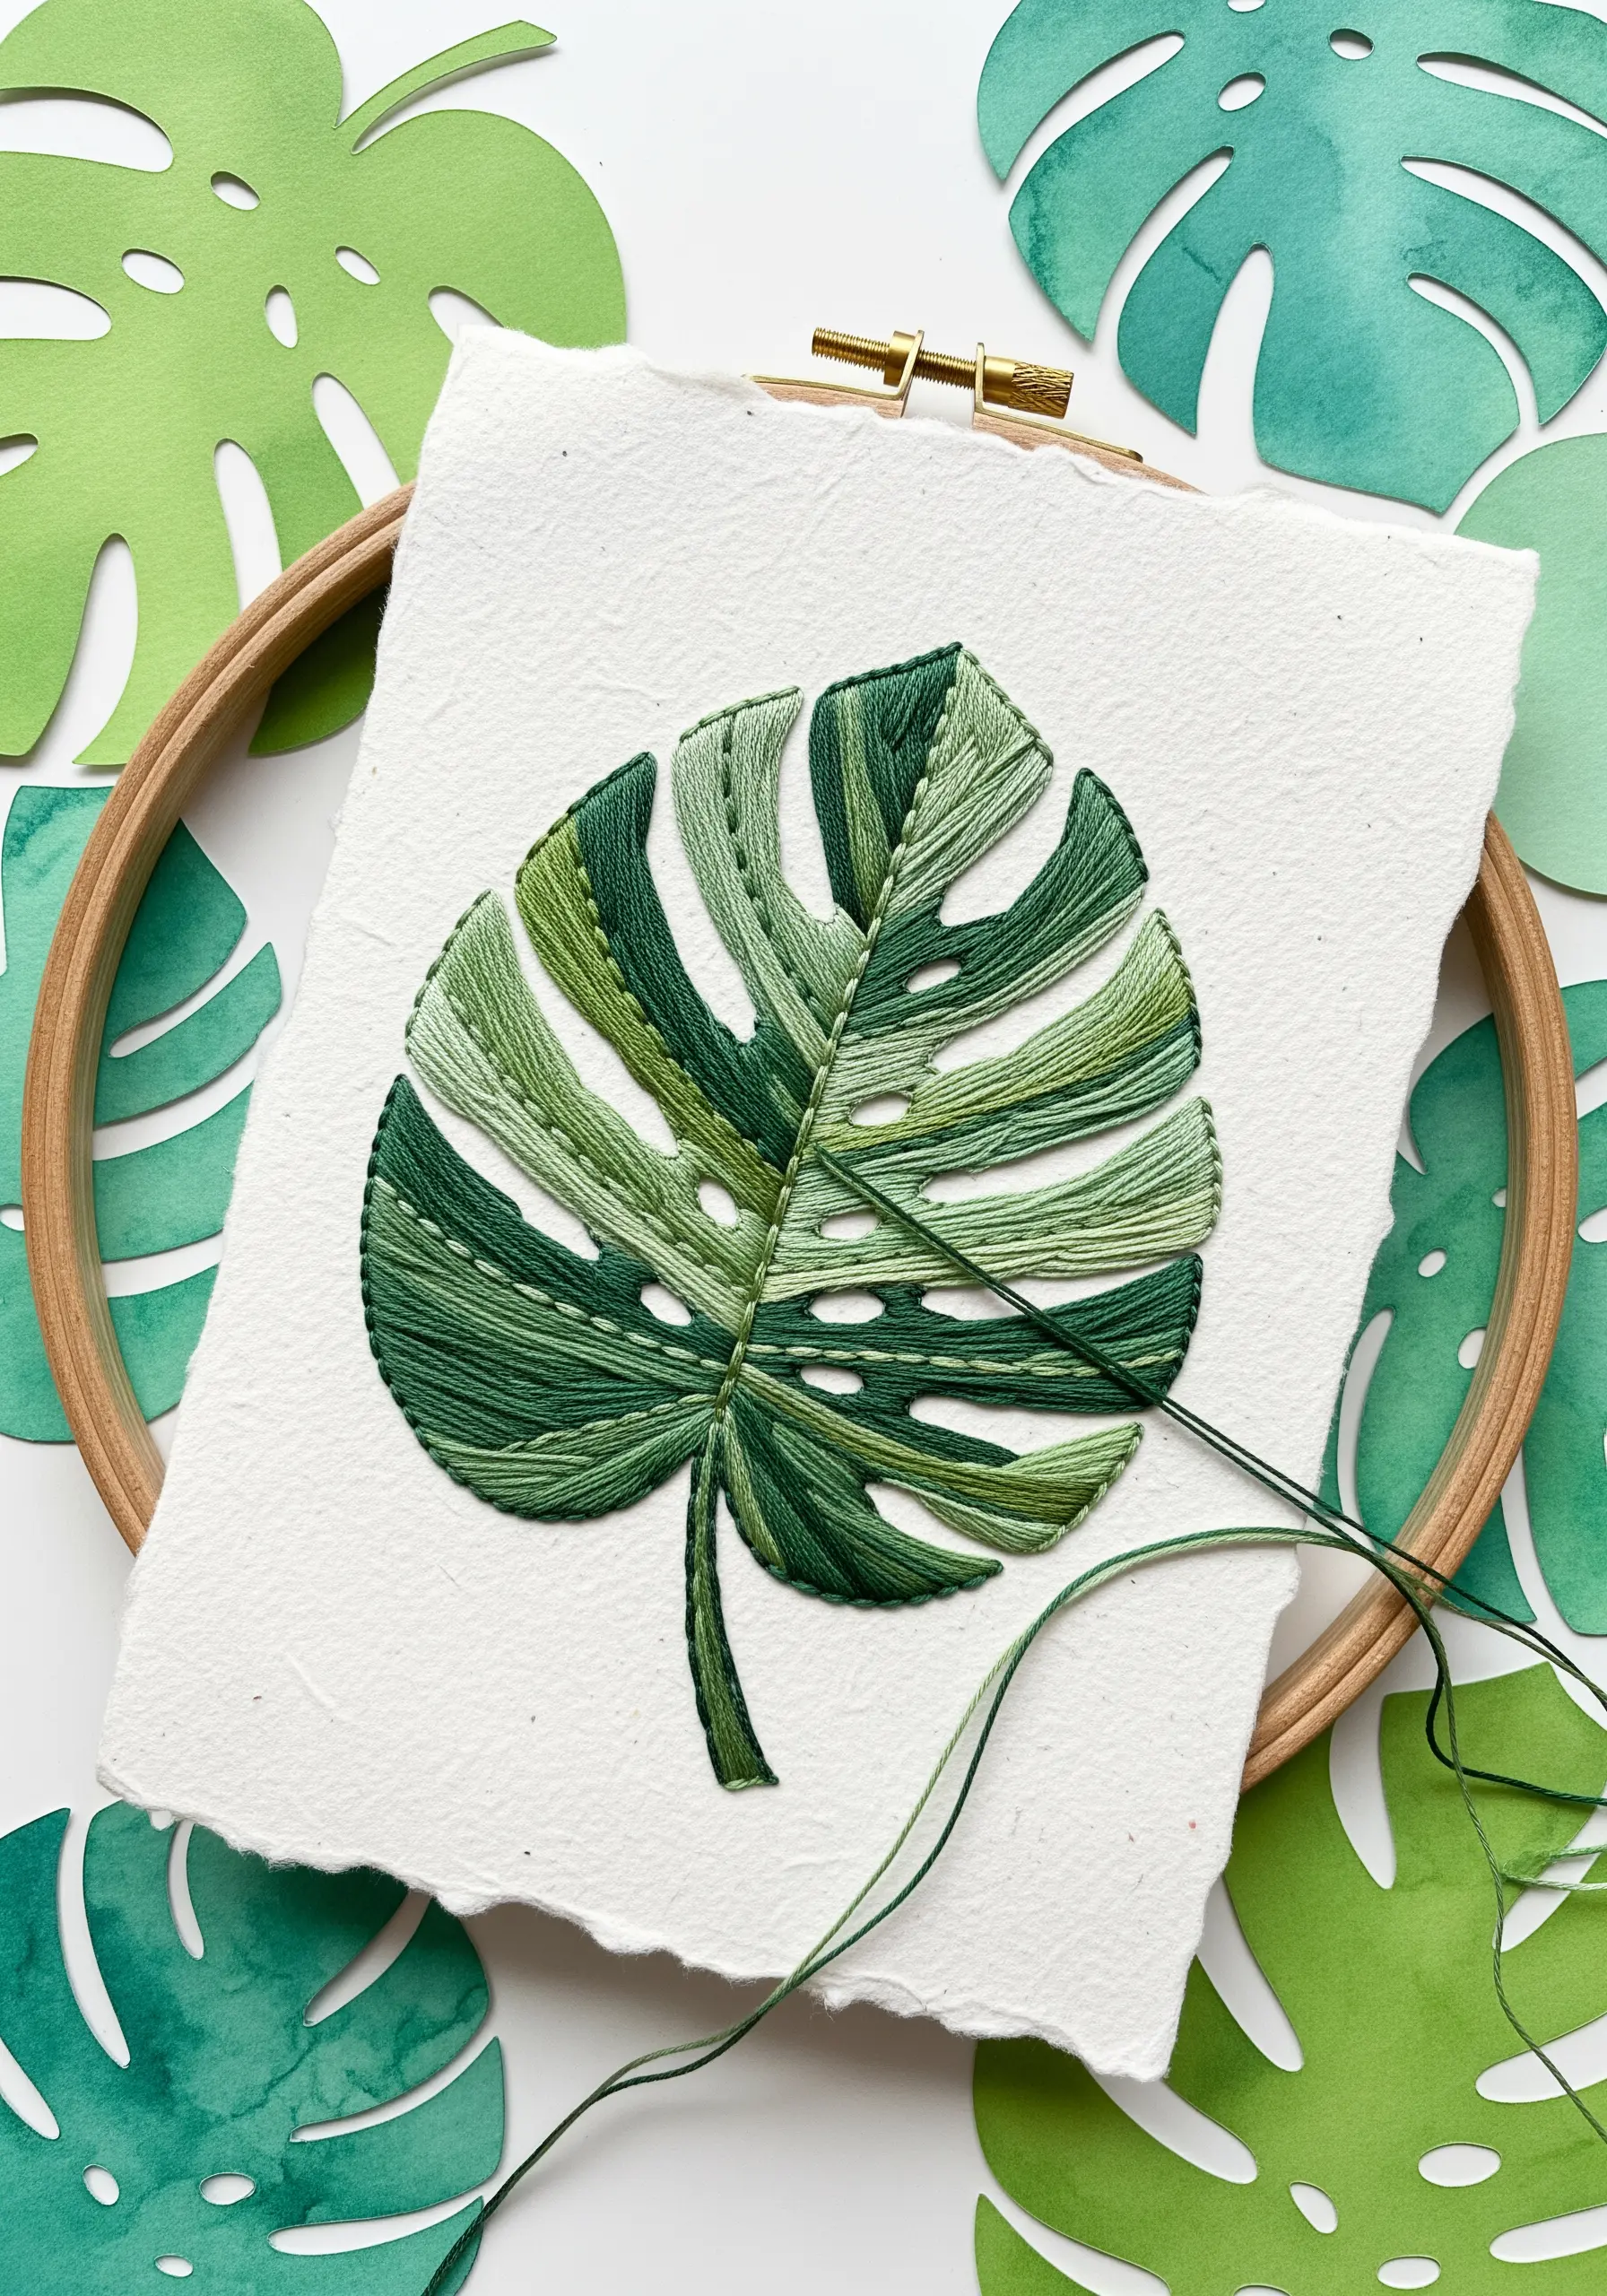
When stitching on paper, the material itself guides your needle toward cleaner, more defined shapes.
Choose a thick, fibrous paper, like cotton rag or watercolor paper, which is less prone to tearing.
Use a sharp, fine needle (like a size 10) to pre-pierce your entry and exit points along the outline of your design.
This simple step ensures your satin stitches lay flat and have crisp, graphic edges that are often harder to achieve on woven fabric.
This is one of the best houseplant embroidery motifs for practicing directional stitching.
3. Translate Paper Folds into 3D Stitched Petals
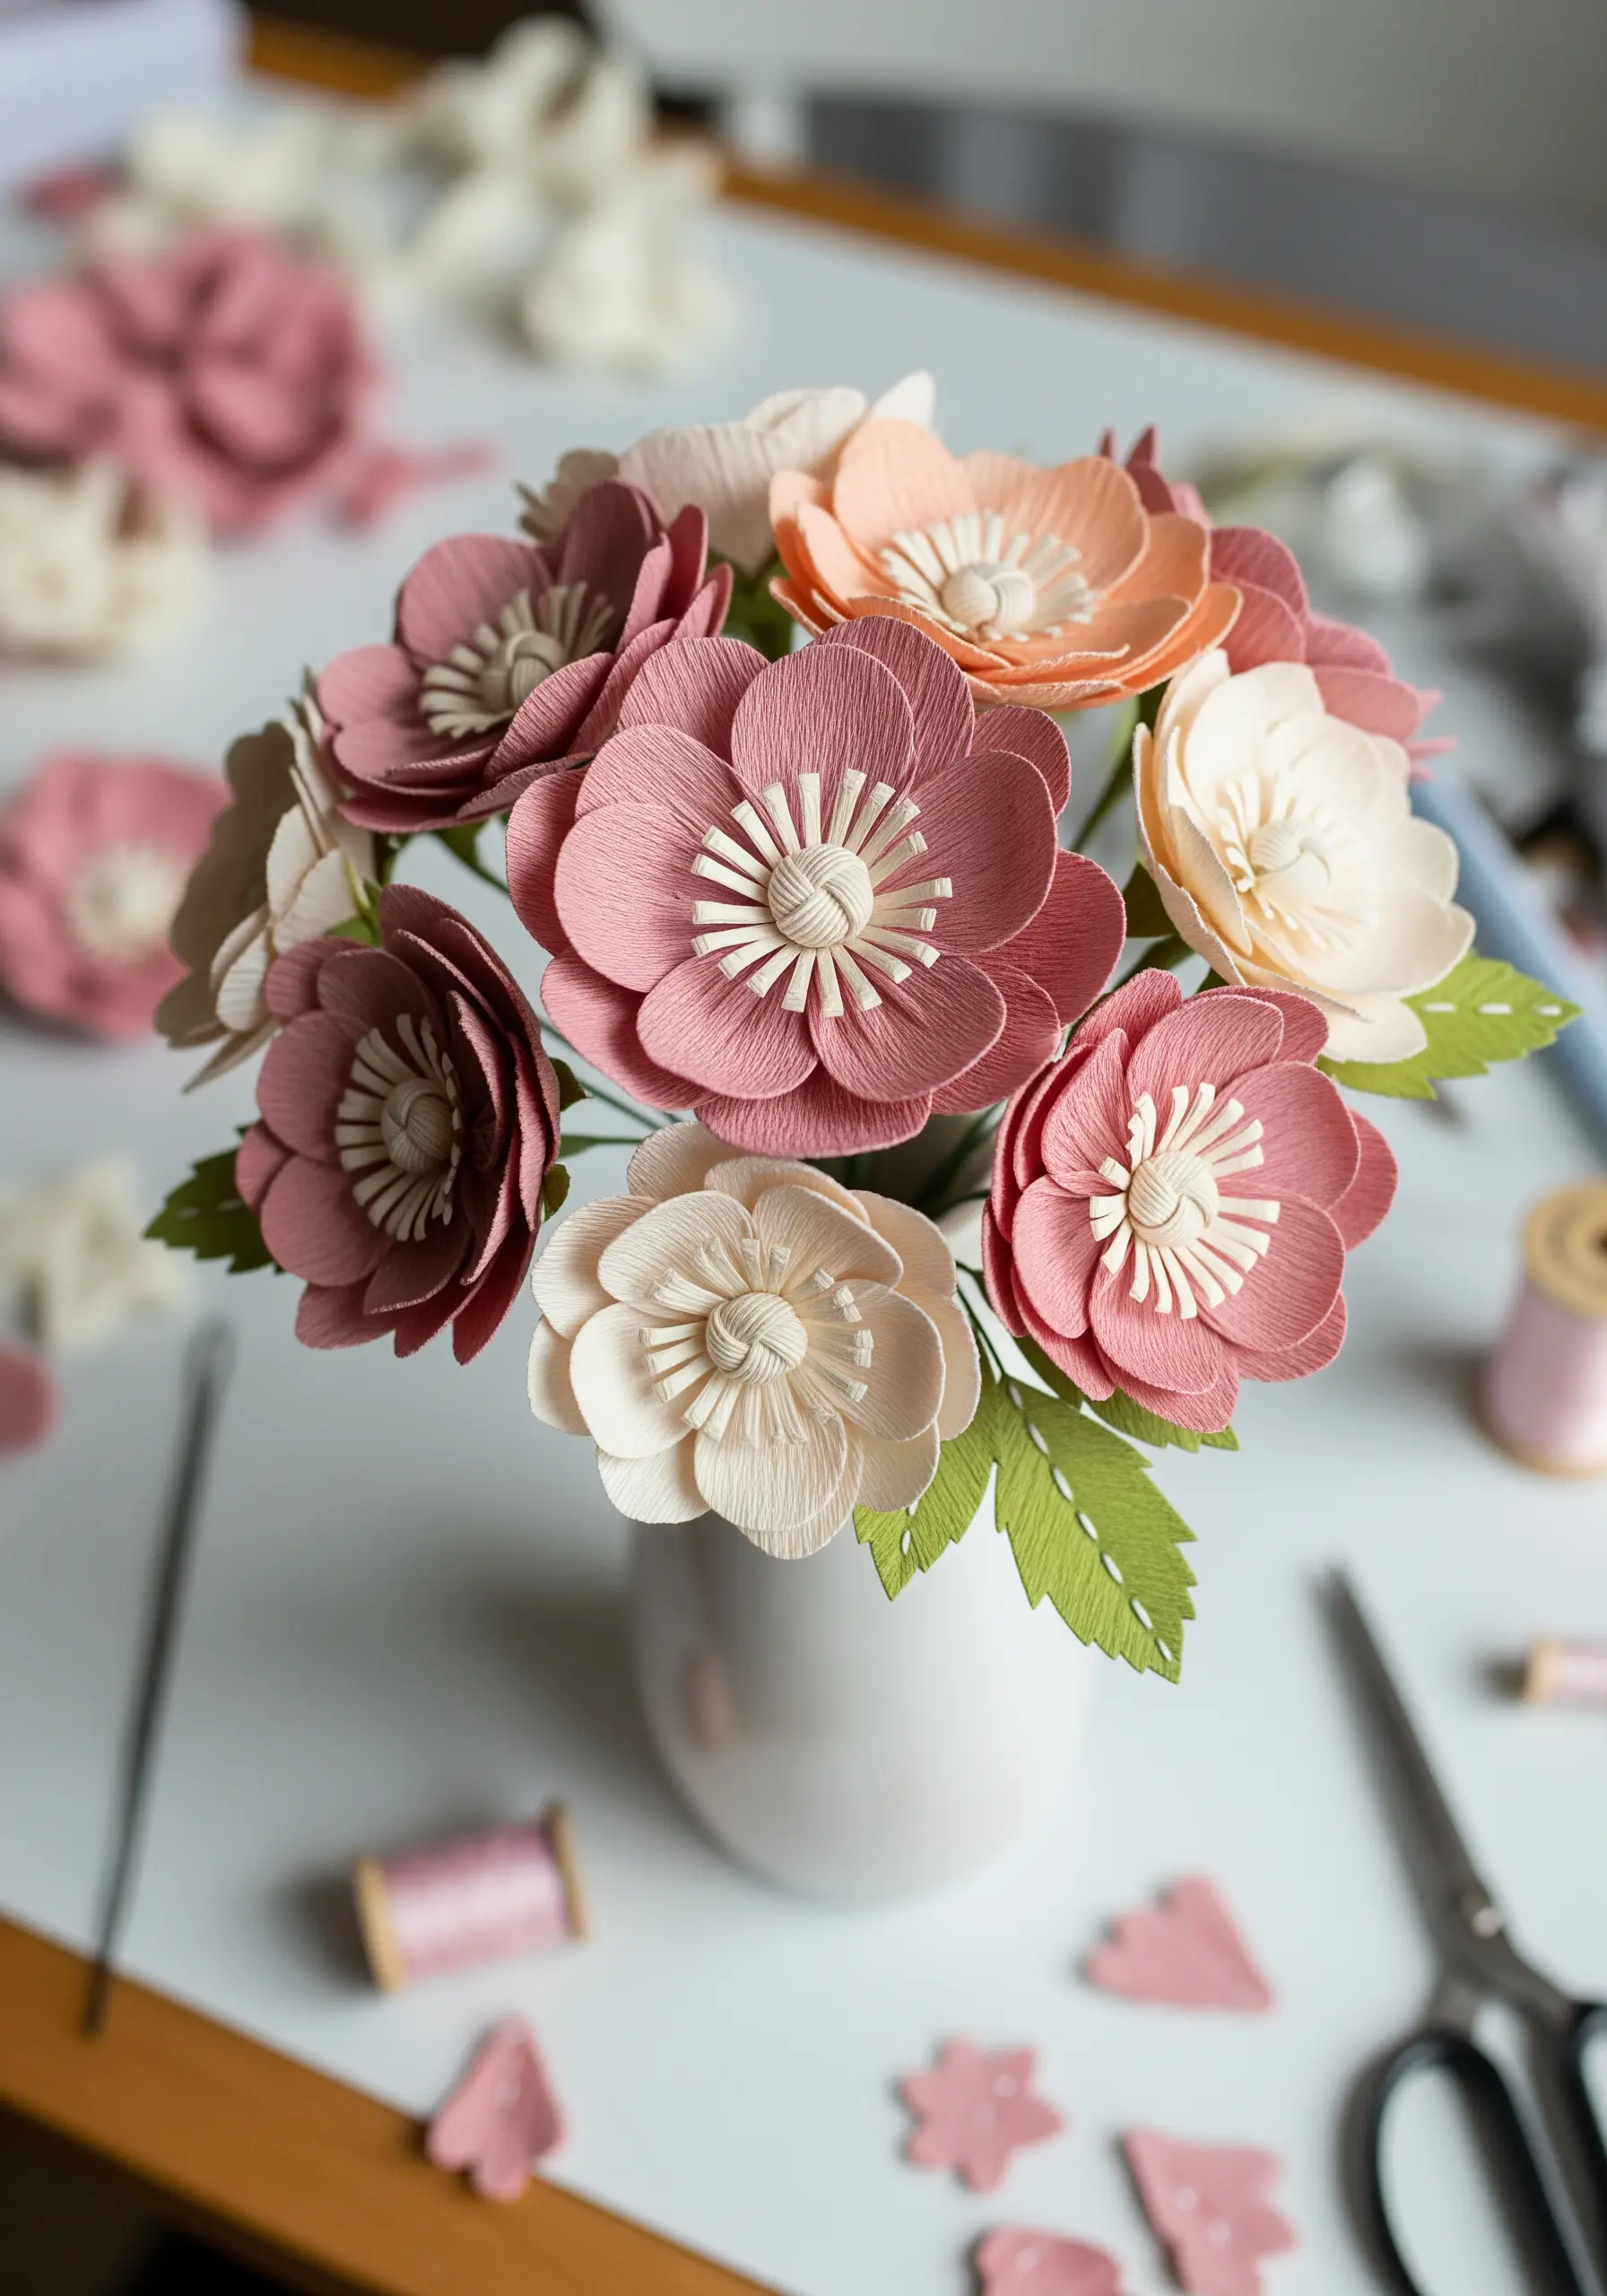
Observe how paper flowers are built from layers of cut and folded shapes, and apply that same logic to your embroidery.
Instead of filling a petal with flat stitches, build it with stumpwork techniques.
Create wired slips by stitching over a thin wire frame, then cut the shape out and bend it to mimic the curl of a paper petal.
Layering these dimensional elements gives your florals a sculptural quality that feels both delicate and lifelike.
4. Craft Elegant Bookmarks with Minimal Stitches
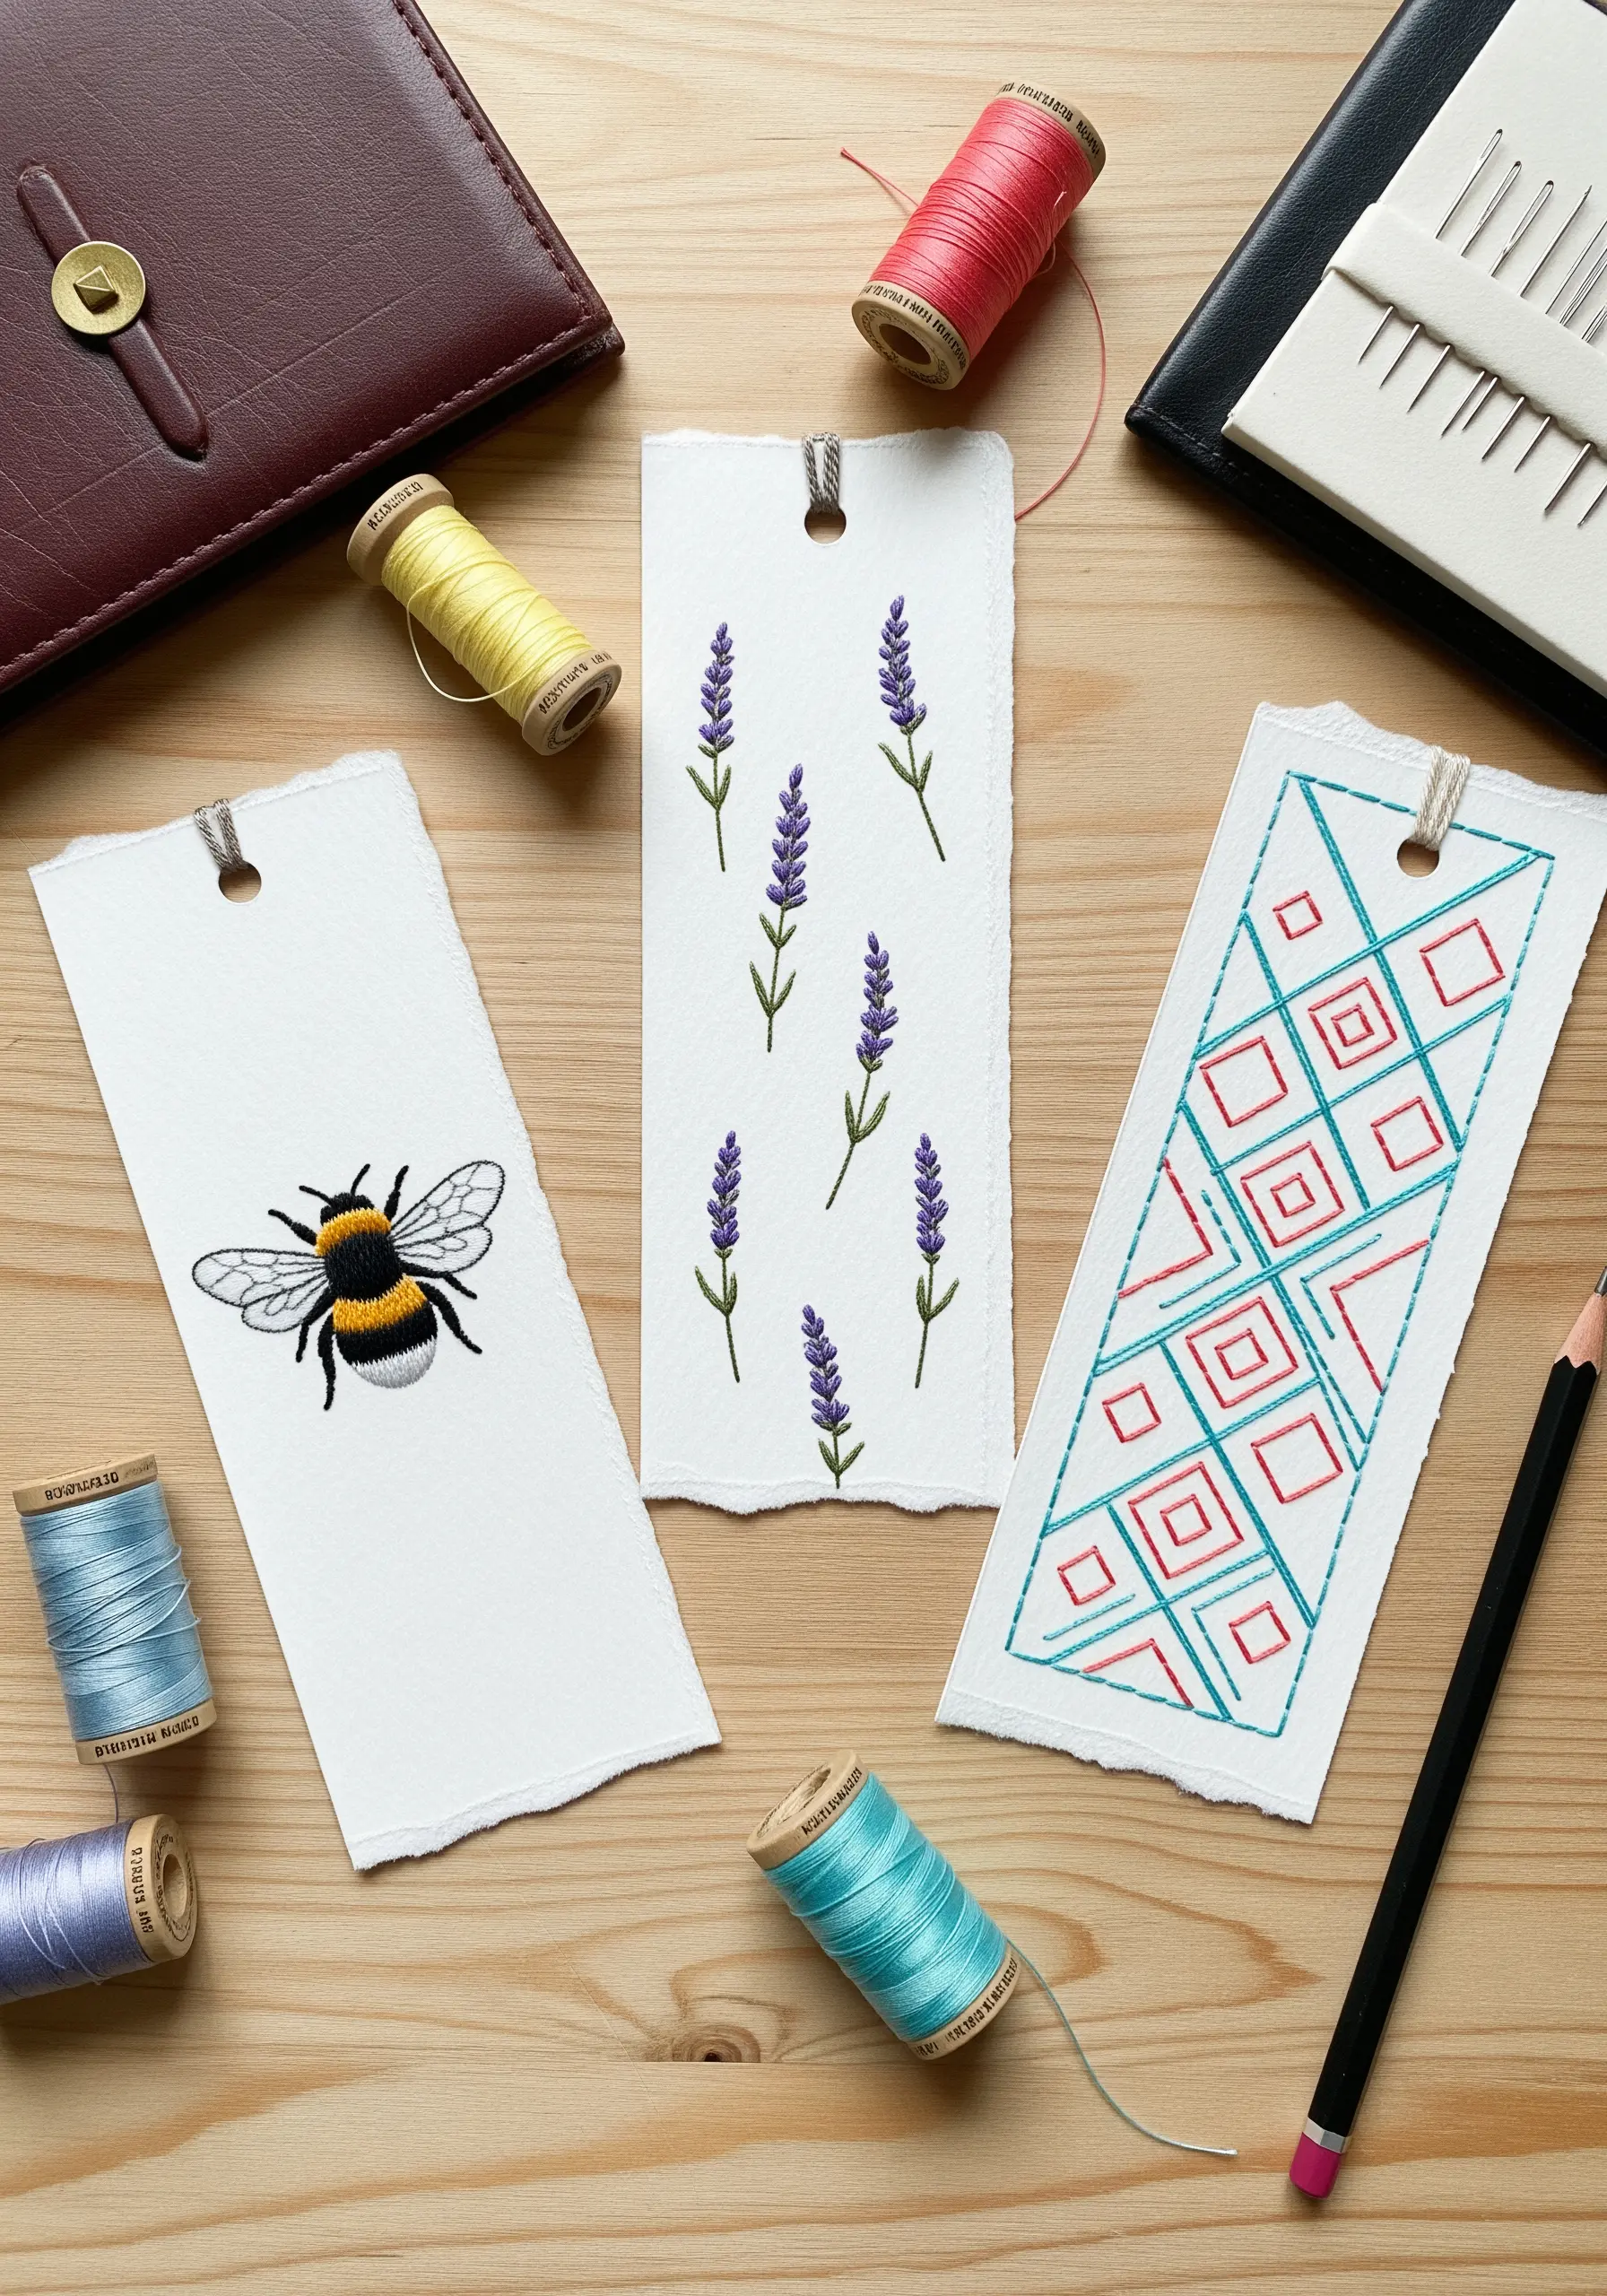
Stitching on paper is perfect for small, functional items like bookmarks, where precision is key.
Use a sturdy cardstock or a heavy watercolor paper with a torn edge for an organic feel.
Keep your stitches simple and sparse—delicate backstitched botanicals or single motifs work best.
This restraint prevents the paper from buckling and allows the texture of the paper itself to be a central part of the design, creating a refined and thoughtful gift.
These delicate lavender stitch ideas are perfect for this project.
5. Combine Paper Collage with Embroidered Line Art
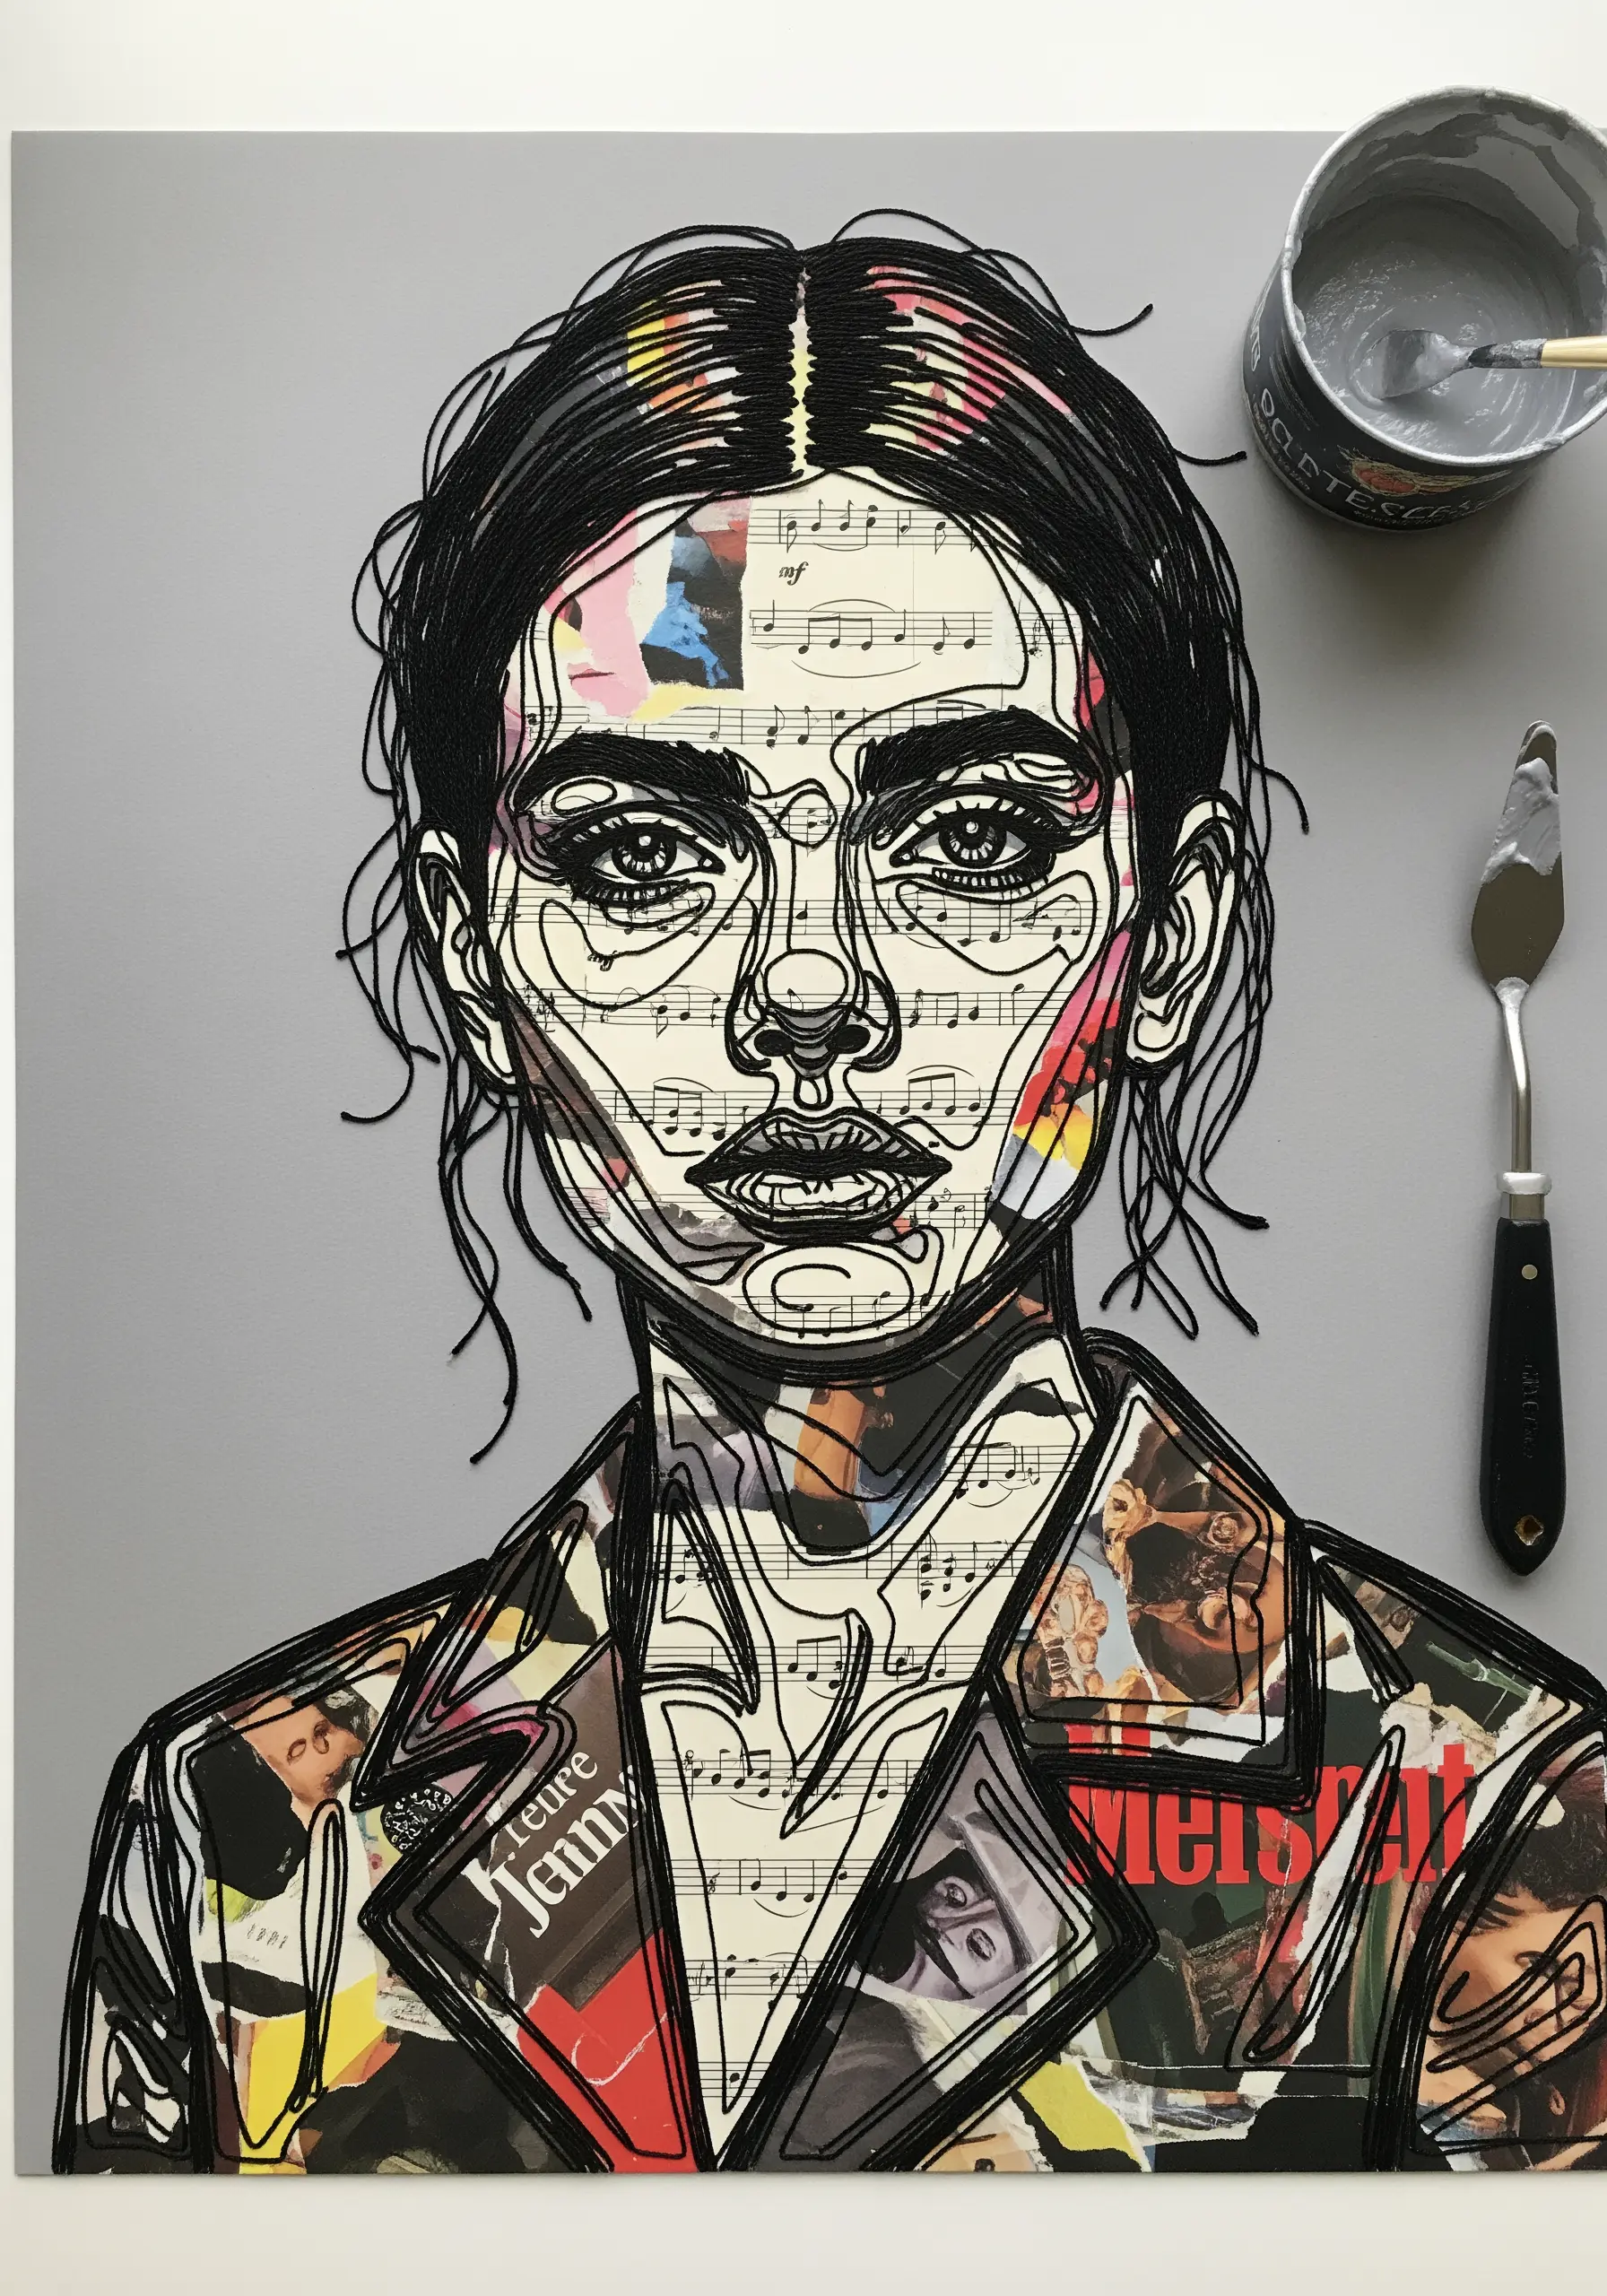
Elevate a simple line drawing by using paper collage as your color fill, creating a dynamic mixed-media portrait.
First, complete your embroidered outline on a sturdy base fabric.
Then, cut pieces of decorative paper—like sheet music, maps, or magazine pages—to fit within the stitched areas and secure them with a light touch of fabric glue.
Finally, use a couching stitch to trace over the paper edges, integrating them seamlessly into your thread work for a graphic, layered effect.
6. Mimic Paper Lanterns with Cutwork Embroidery
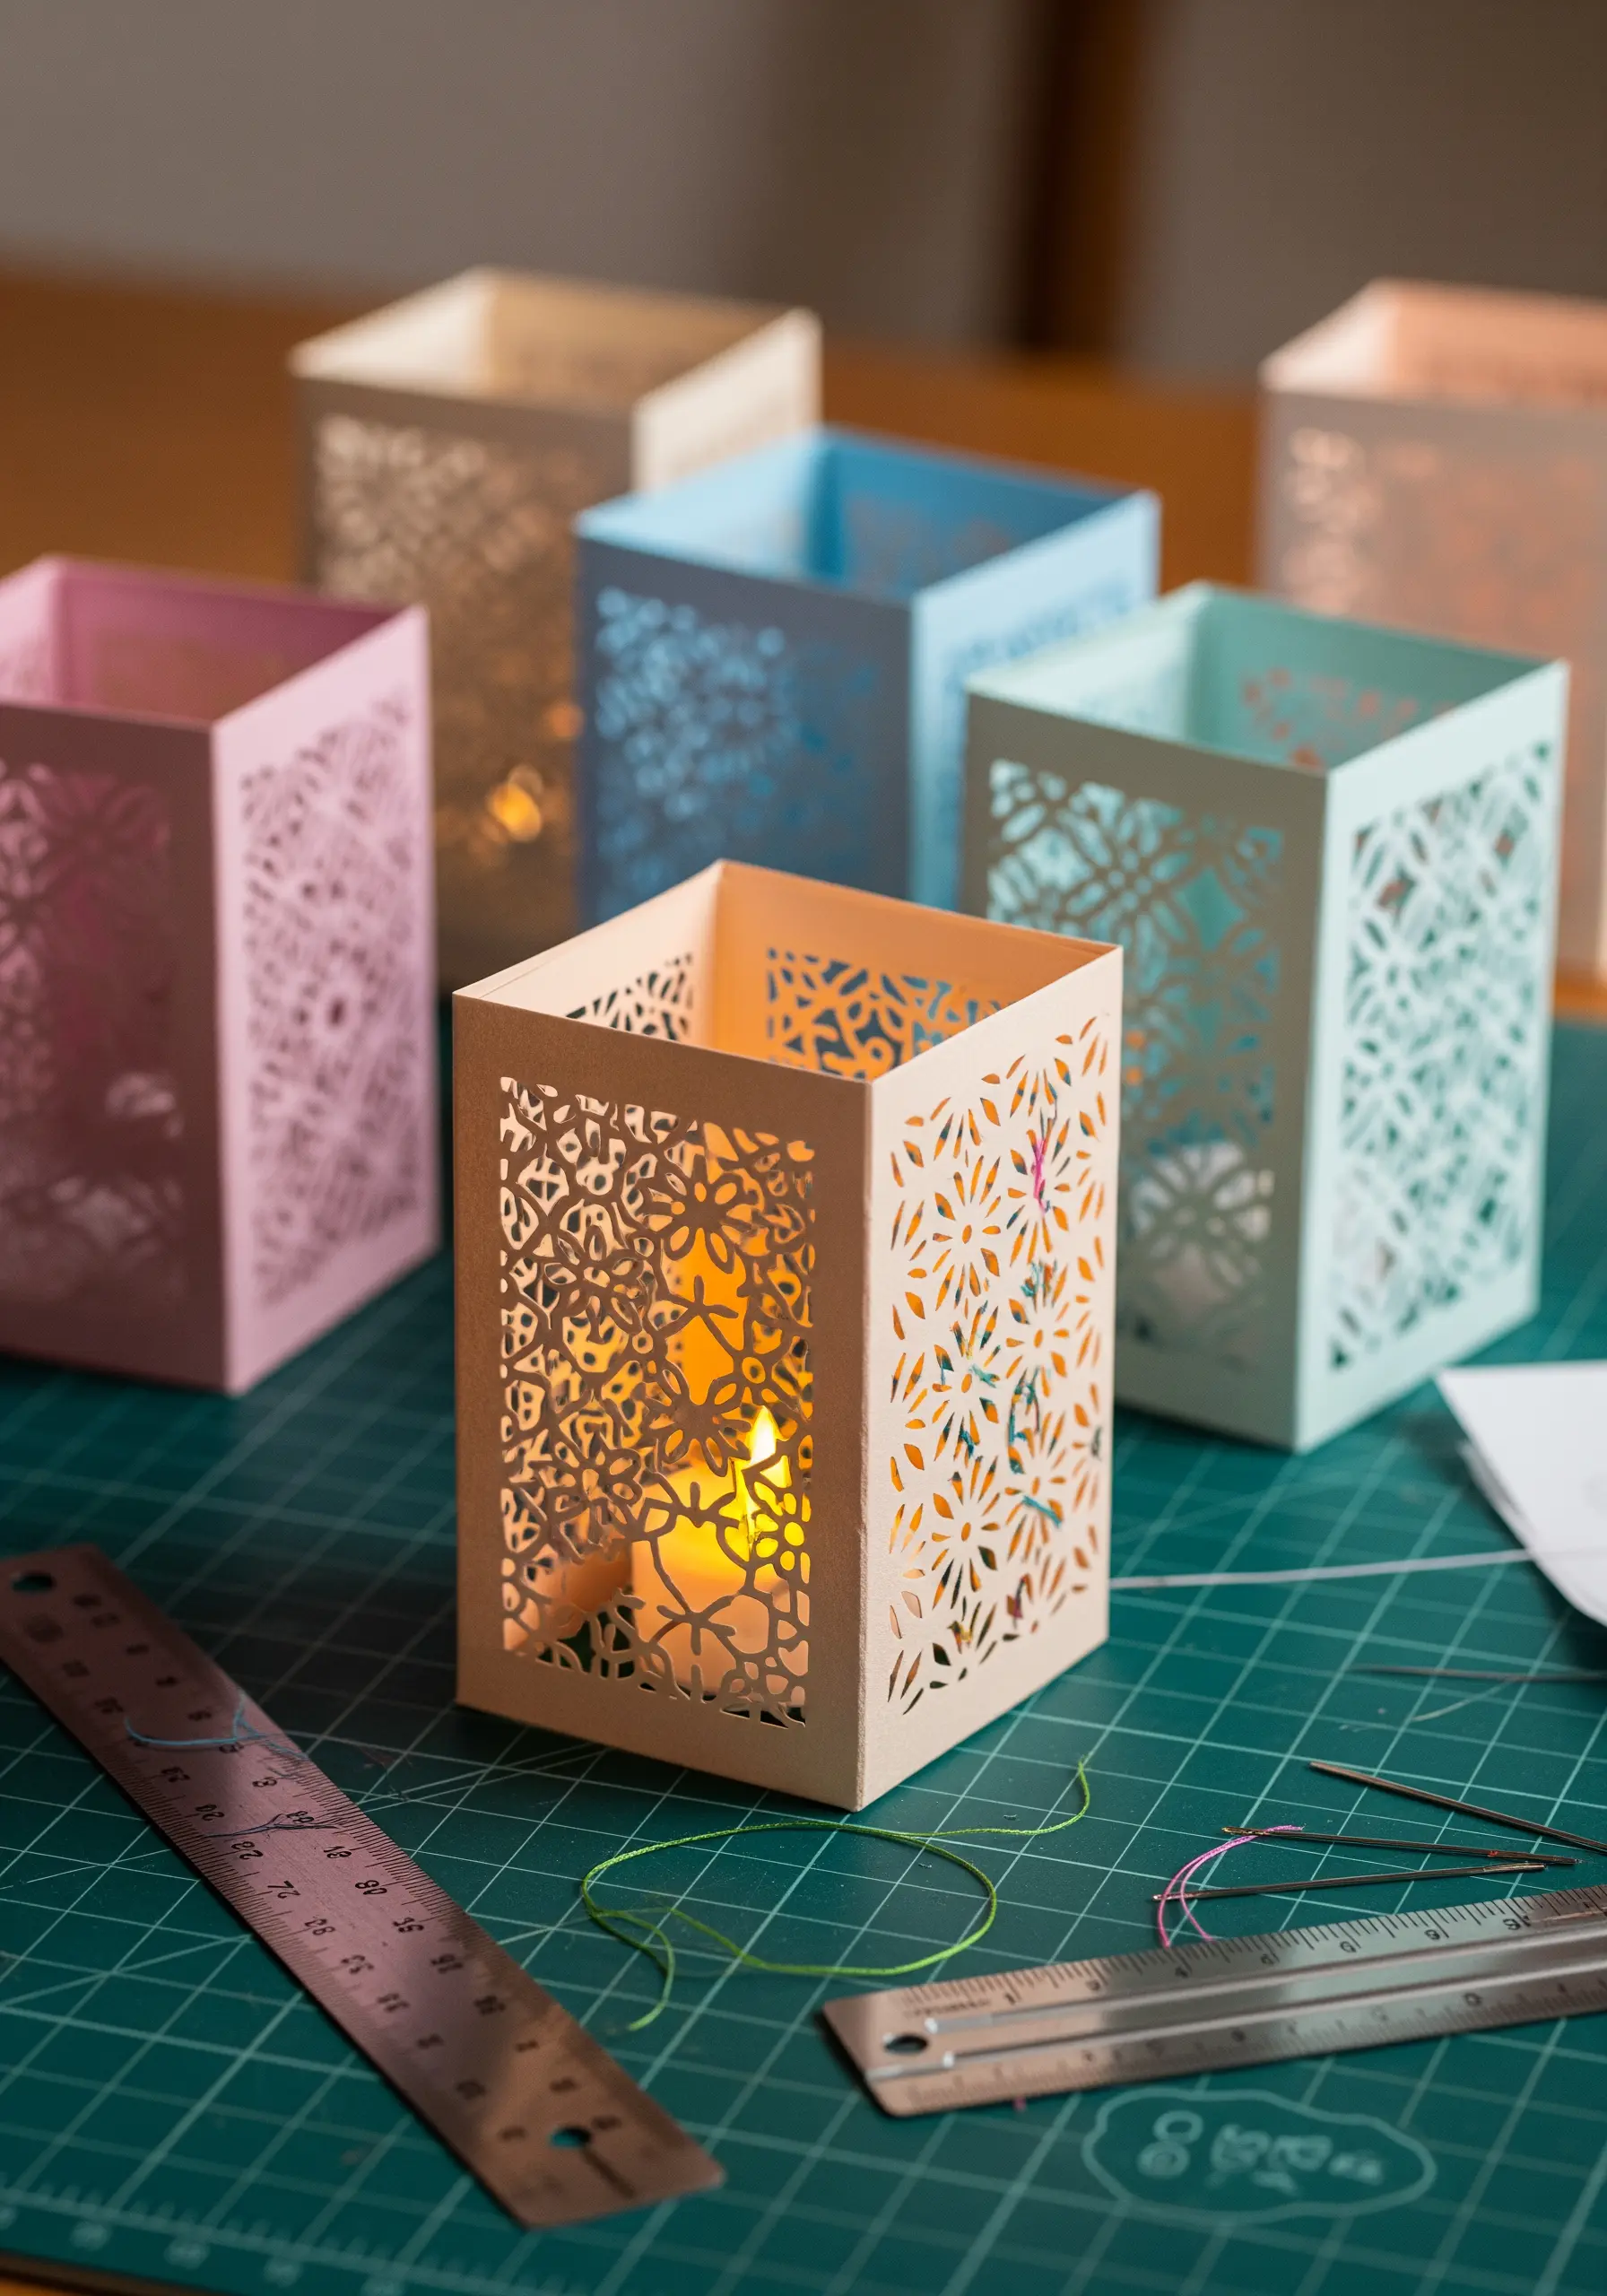
The delicate, light-filtering quality of paper lanterns can be beautifully replicated with cutwork or Richelieu embroidery.
Instead of cutting paper, you will be cutting away small sections of your fabric within a stitched border.
Draw a geometric or floral pattern onto a tightly woven linen and outline it with a dense buttonhole stitch.
Carefully snip away the fabric inside your stitched shapes to create an intricate, lace-like design that plays with light and shadow.
7. Create a Landscape with Torn Paper Textures
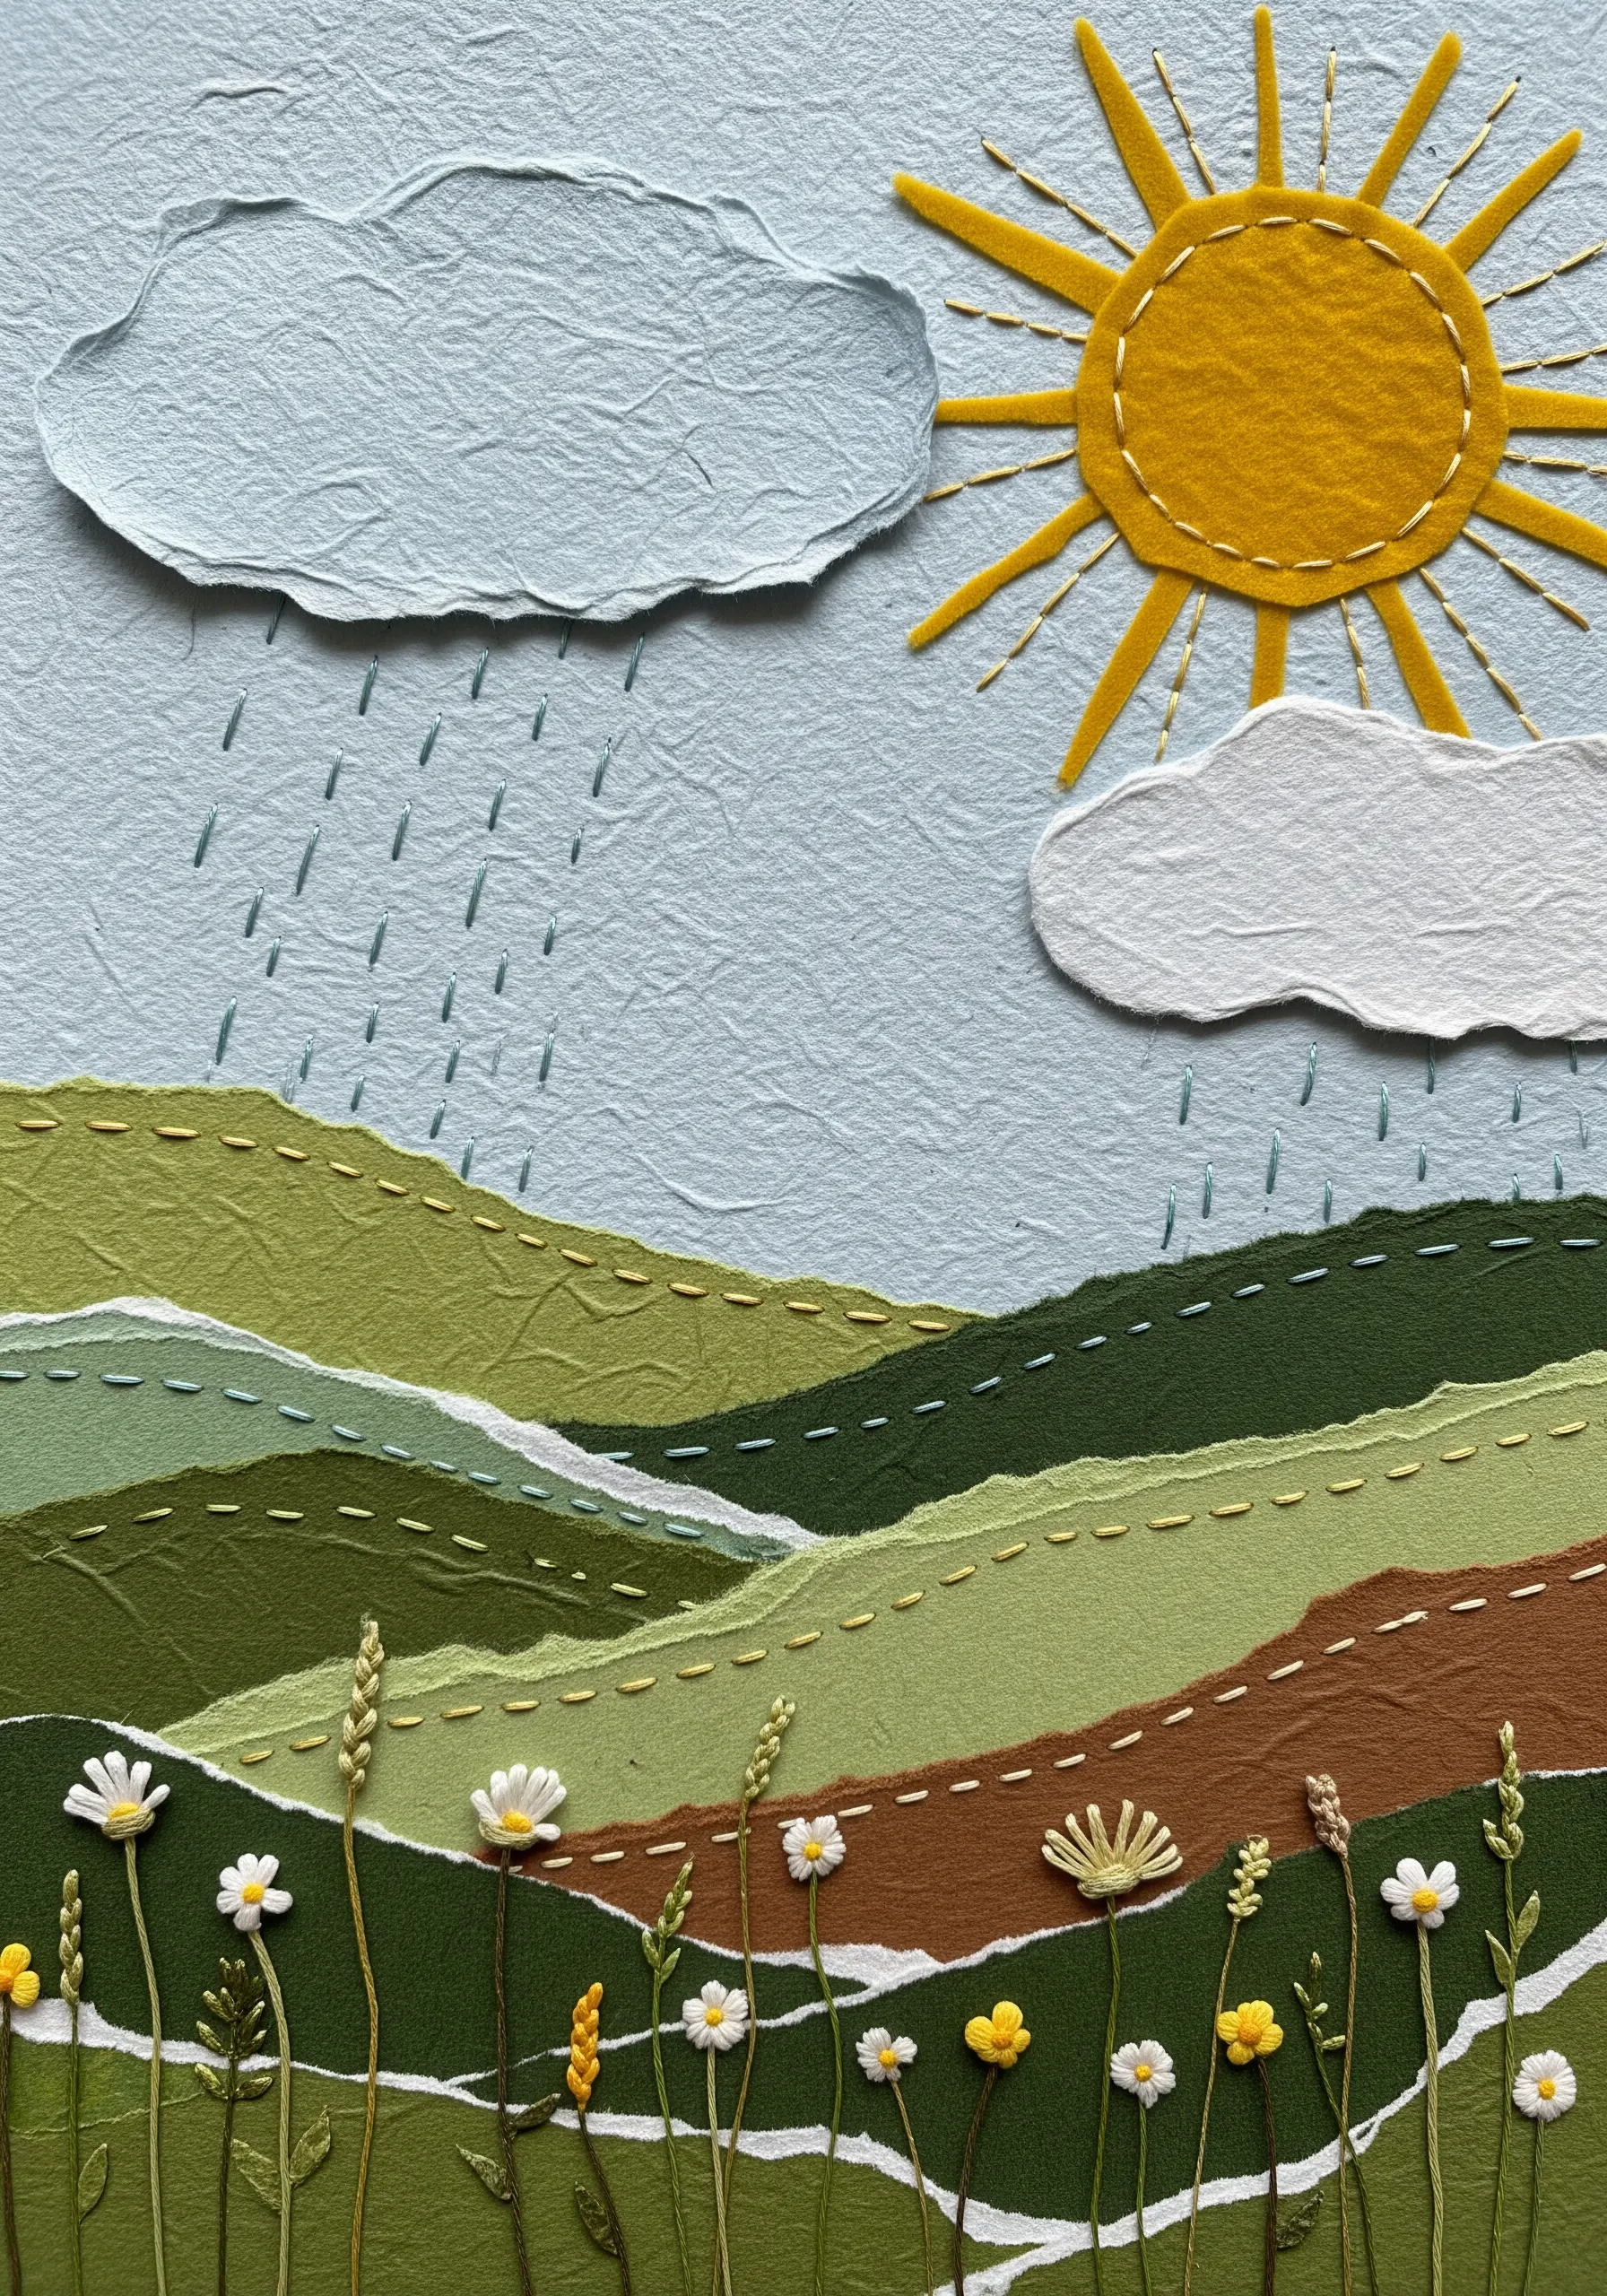
Instead of fabric, use layers of torn, textured paper to build a rolling landscape with soft, organic edges.
Choose papers in varying shades and textures to represent hills, fields, and sky, arranging them to create depth.
Once your paper collage is glued down, add simple running stitches along the contours to unify the composition and add a delicate, handmade detail.
This approach combines the tactile joy of collage with the quiet rhythm of stitching, creating nature-texture embroidery projects that feel truly unique.
8. Master Thread Tension with Paper String Art
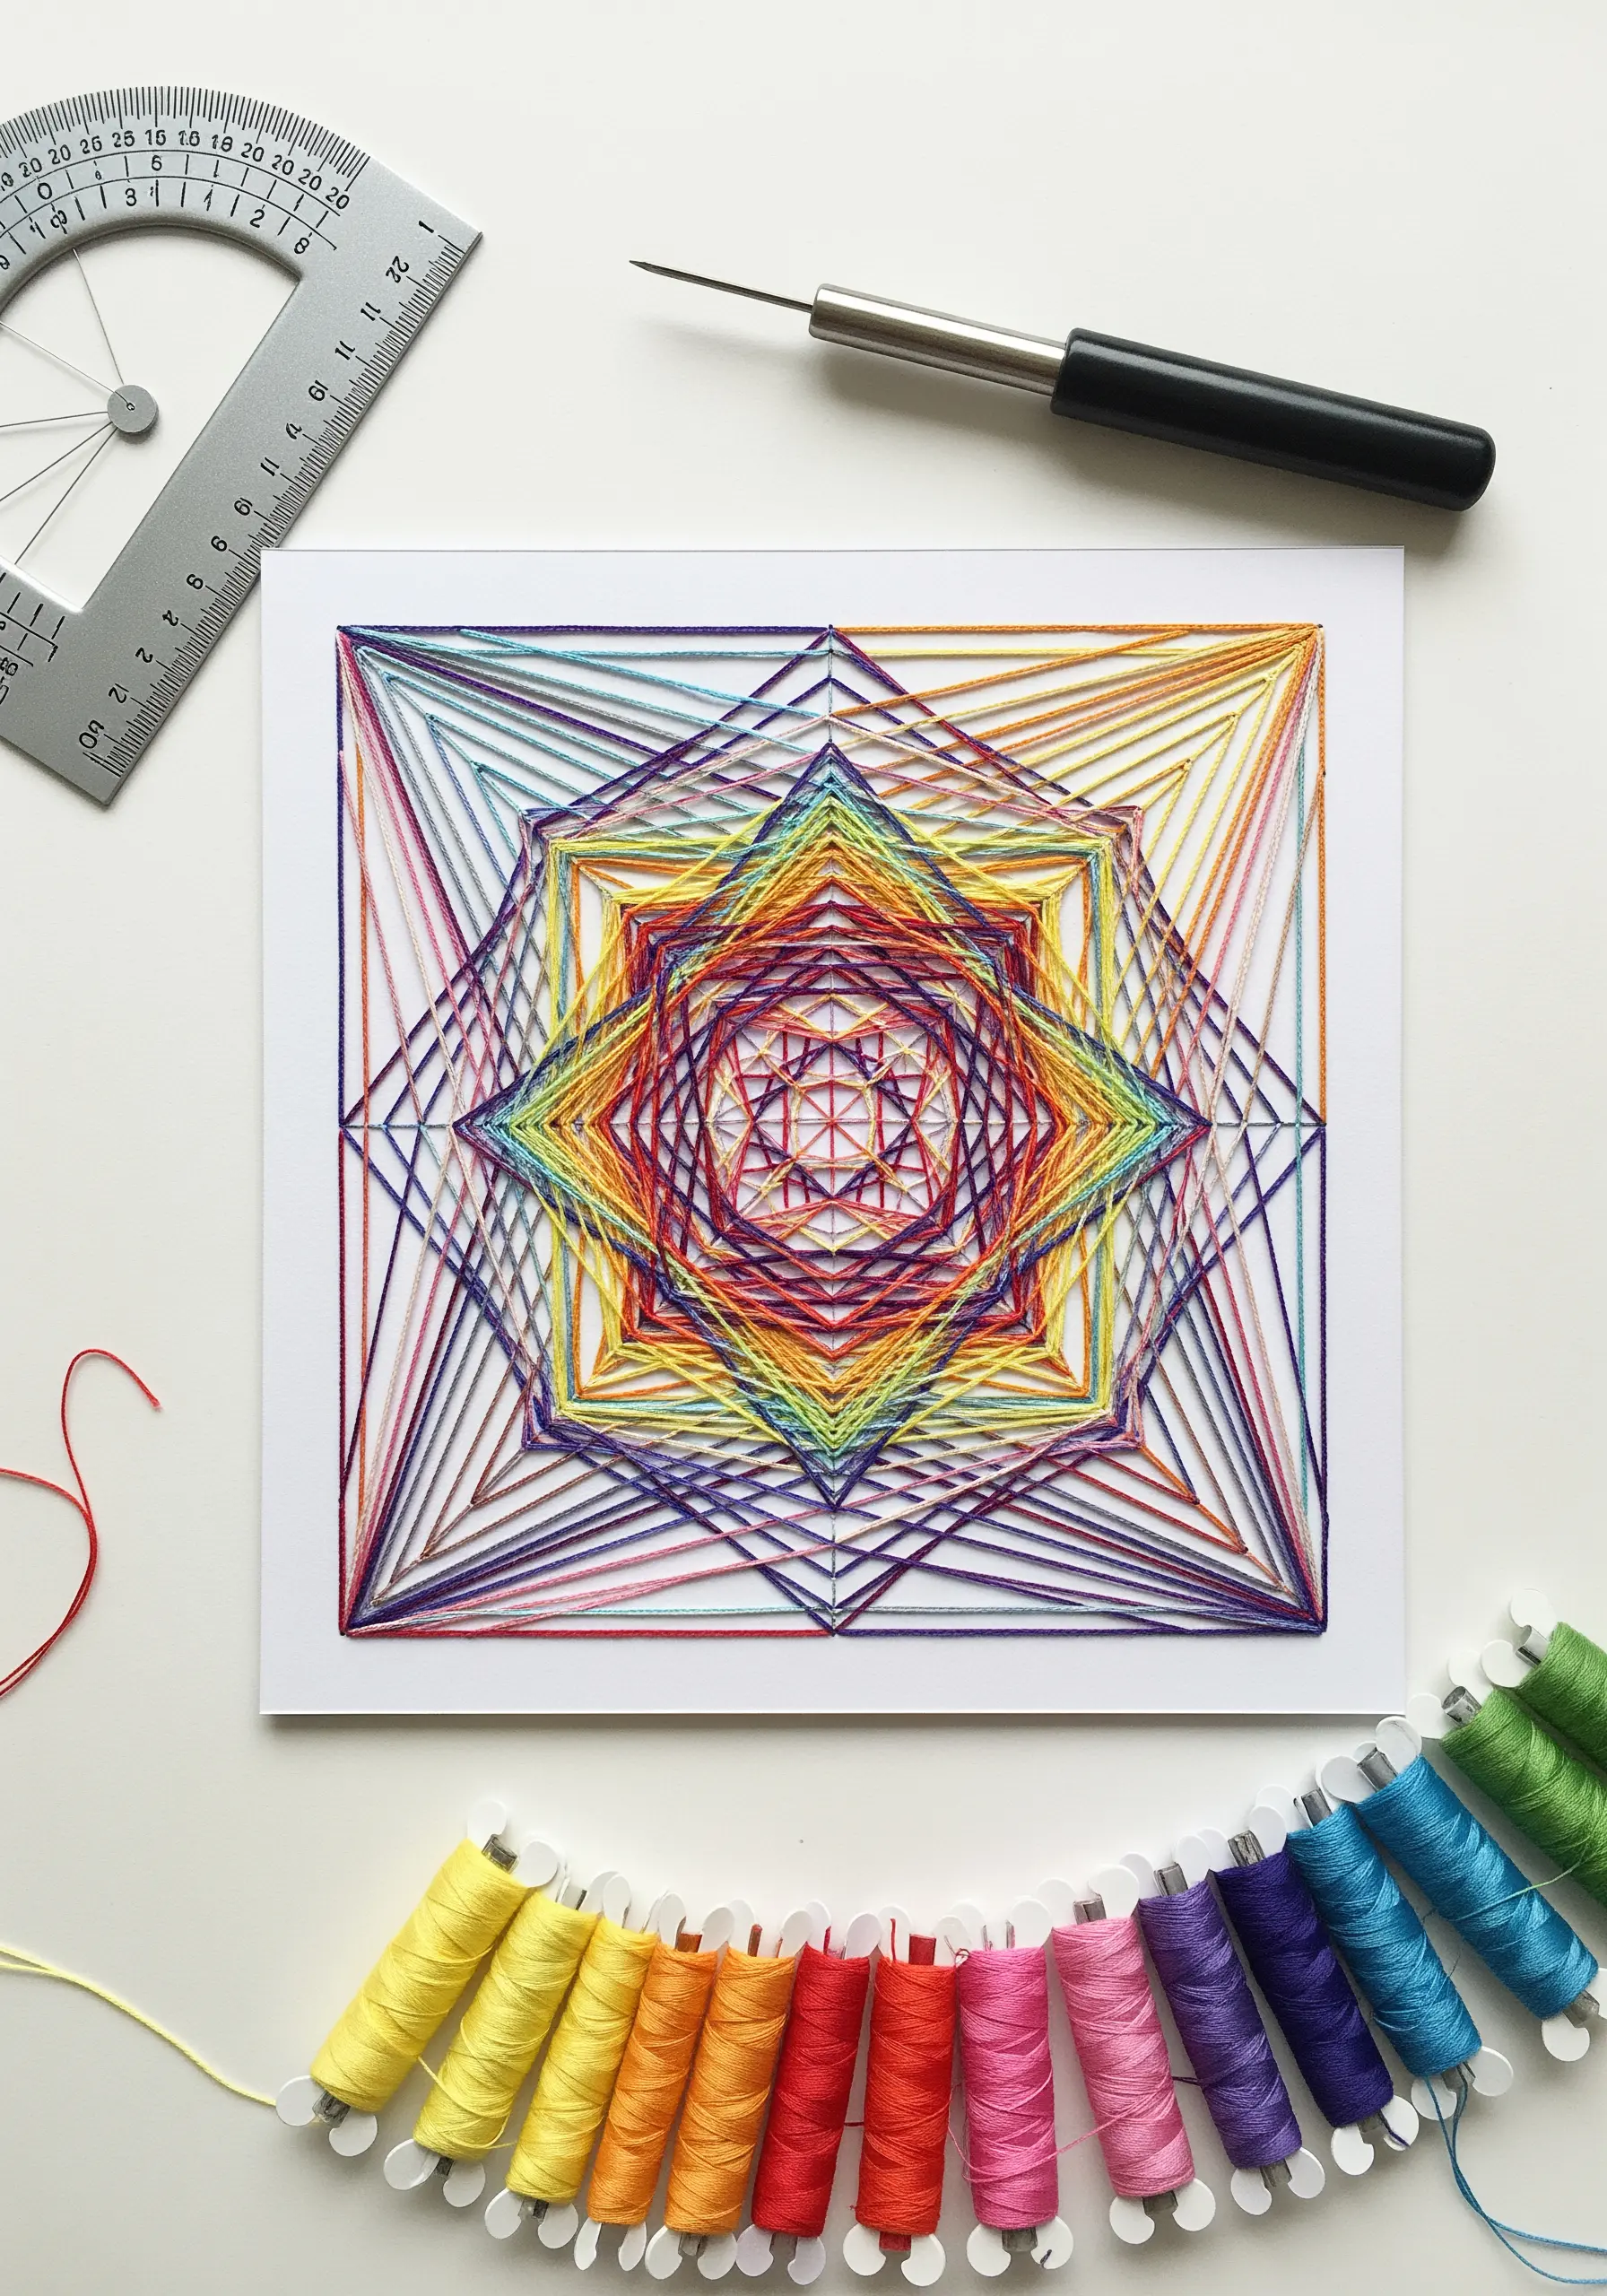
Use heavy cardstock as a canvas to explore the geometric precision of string art with embroidery thread.
Begin by drawing a grid or geometric pattern on your card, then use an awl or a thick needle to pre-punch holes at key intersections.
Stitching through these prepared holes keeps the paper from tearing and allows you to focus entirely on maintaining even thread tension.
This exercise sharpens your skills in creating clean lines and optical effects that can be transferred to fabric-based string art nature trails.
9. Elevate Greeting Cards with Stitched Appliqué
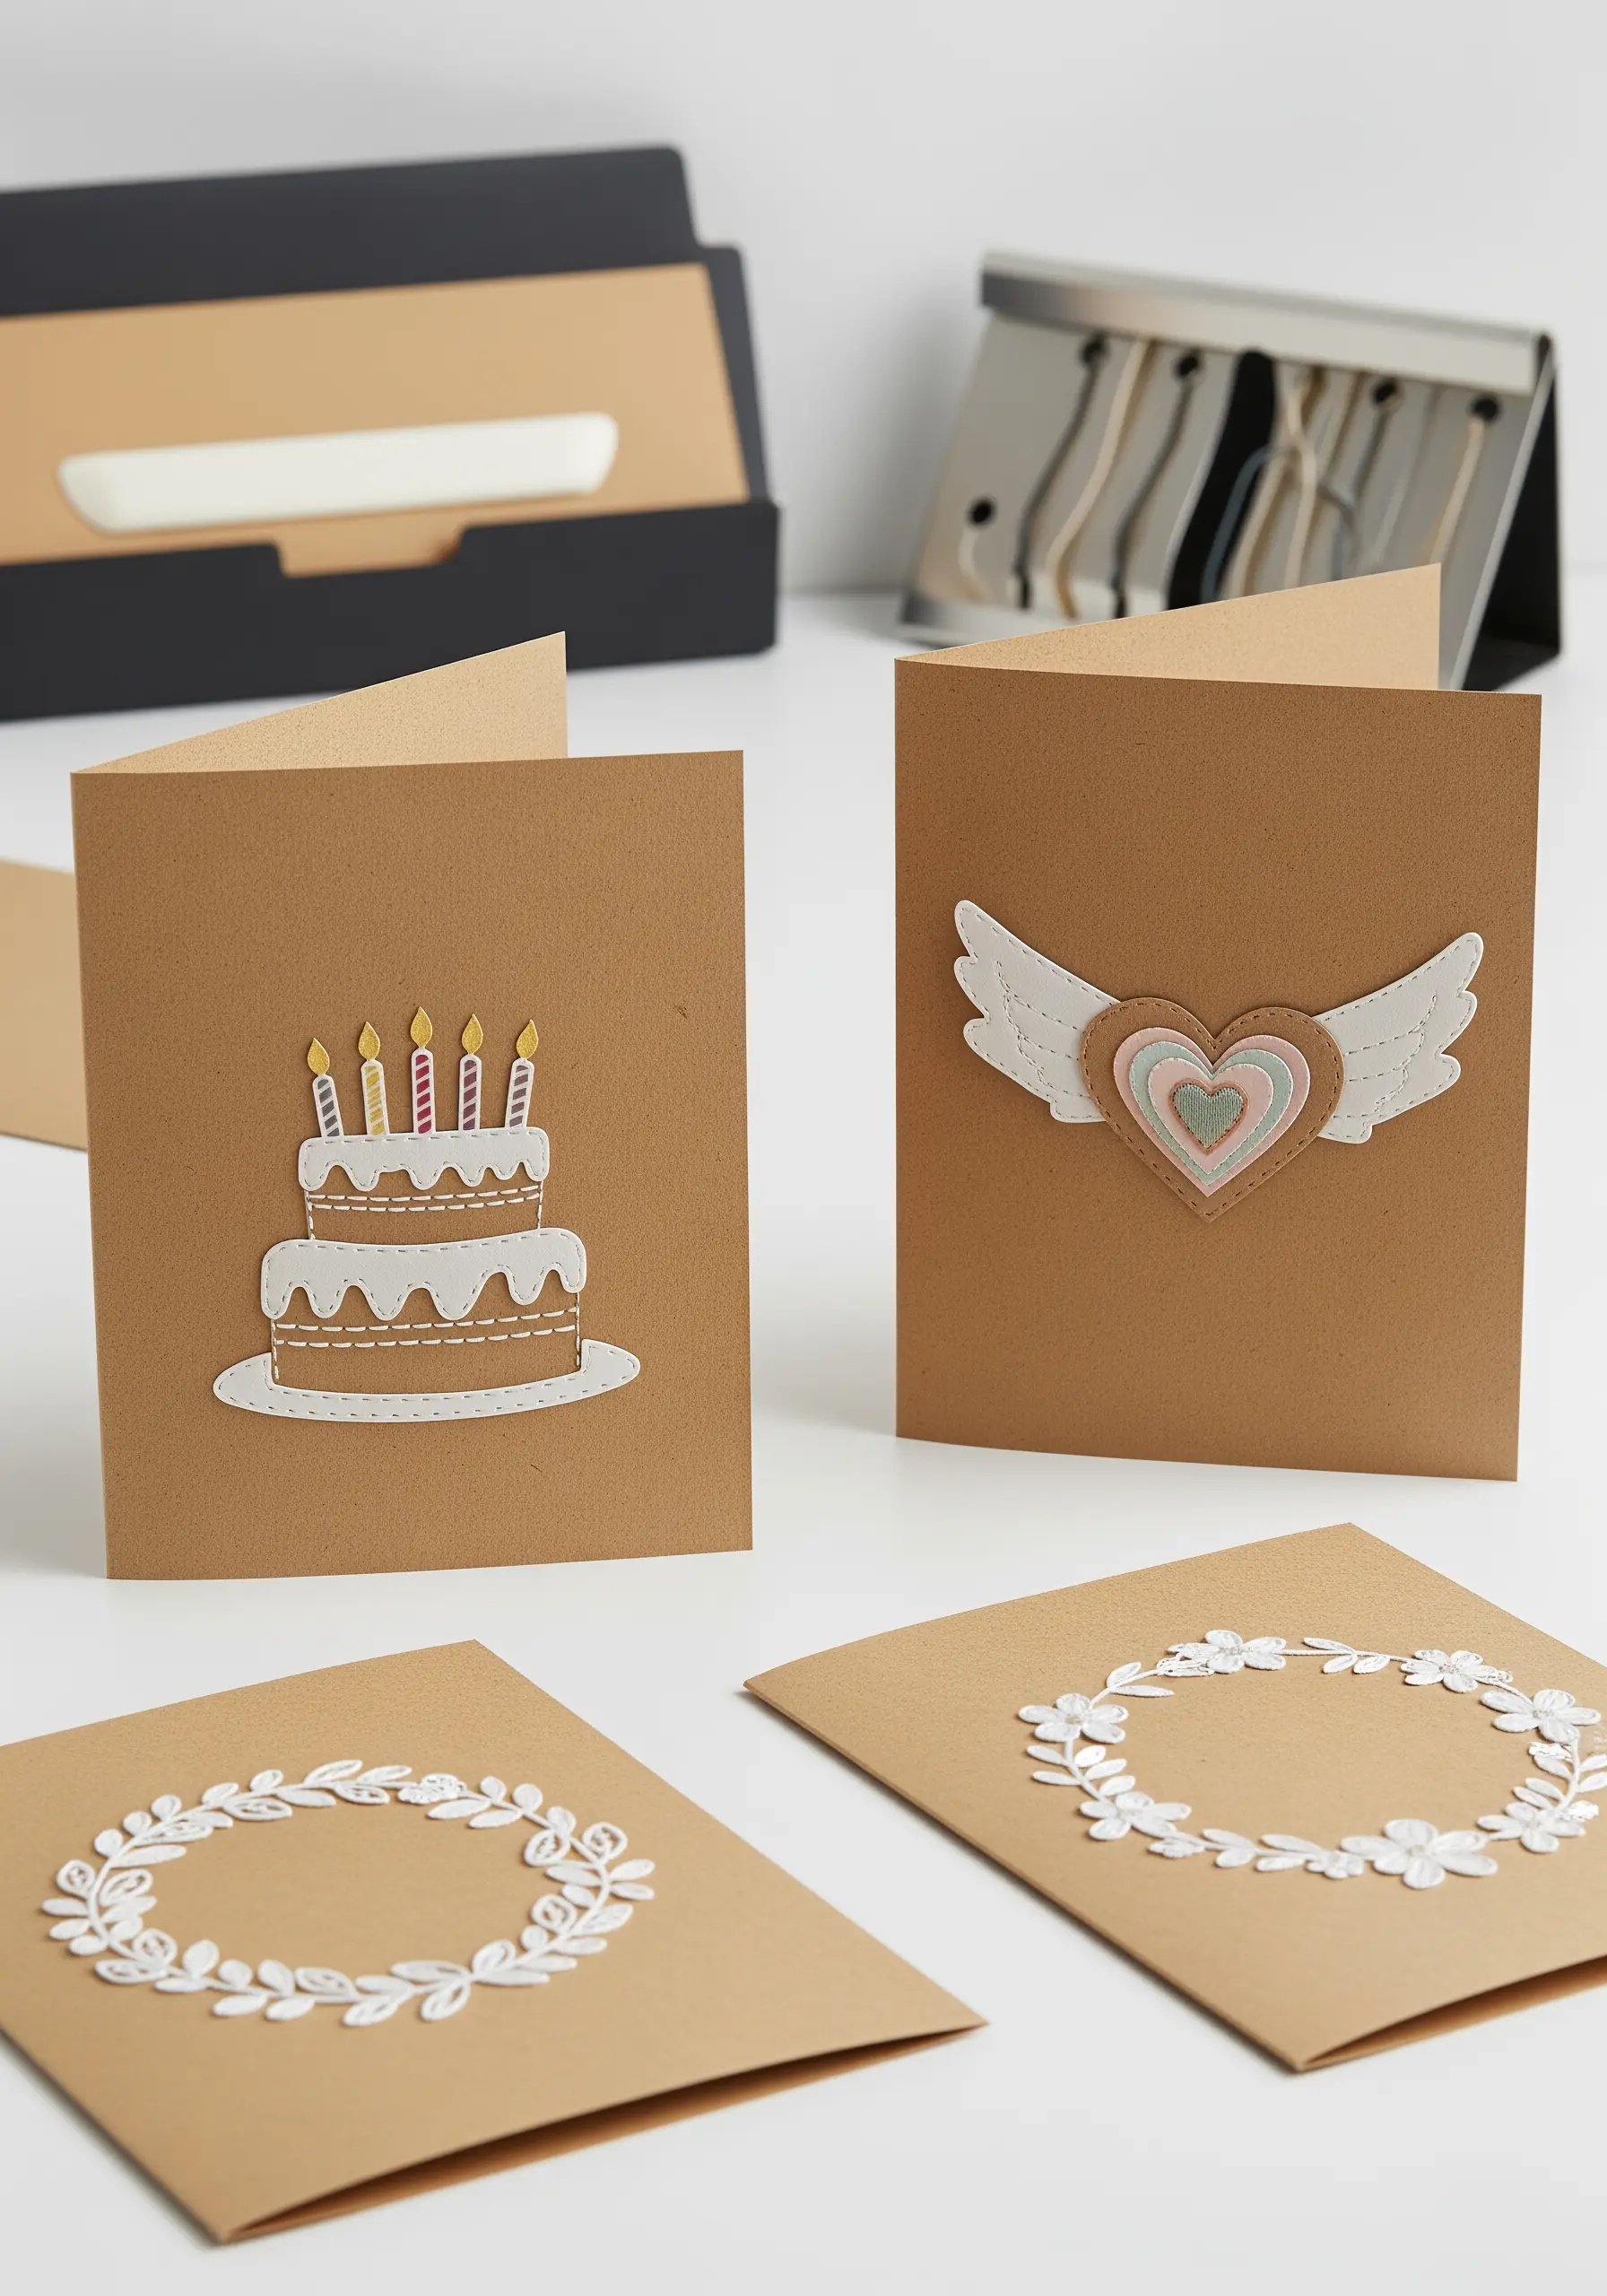
Combine simple paper cutouts with minimal stitching to create beautifully refined handmade cards.
Cut your main motif from a contrasting paper and lightly affix it to the front of your card.
Instead of just gluing it, secure the shape with a few strategically placed stitches—a simple running stitch around the border or a few French knots for detail.
This subtle addition of thread elevates the card from a simple craft to a thoughtful, multi-textured keepsake.
10. Craft a 3D Specimen Box with Paper and Thread
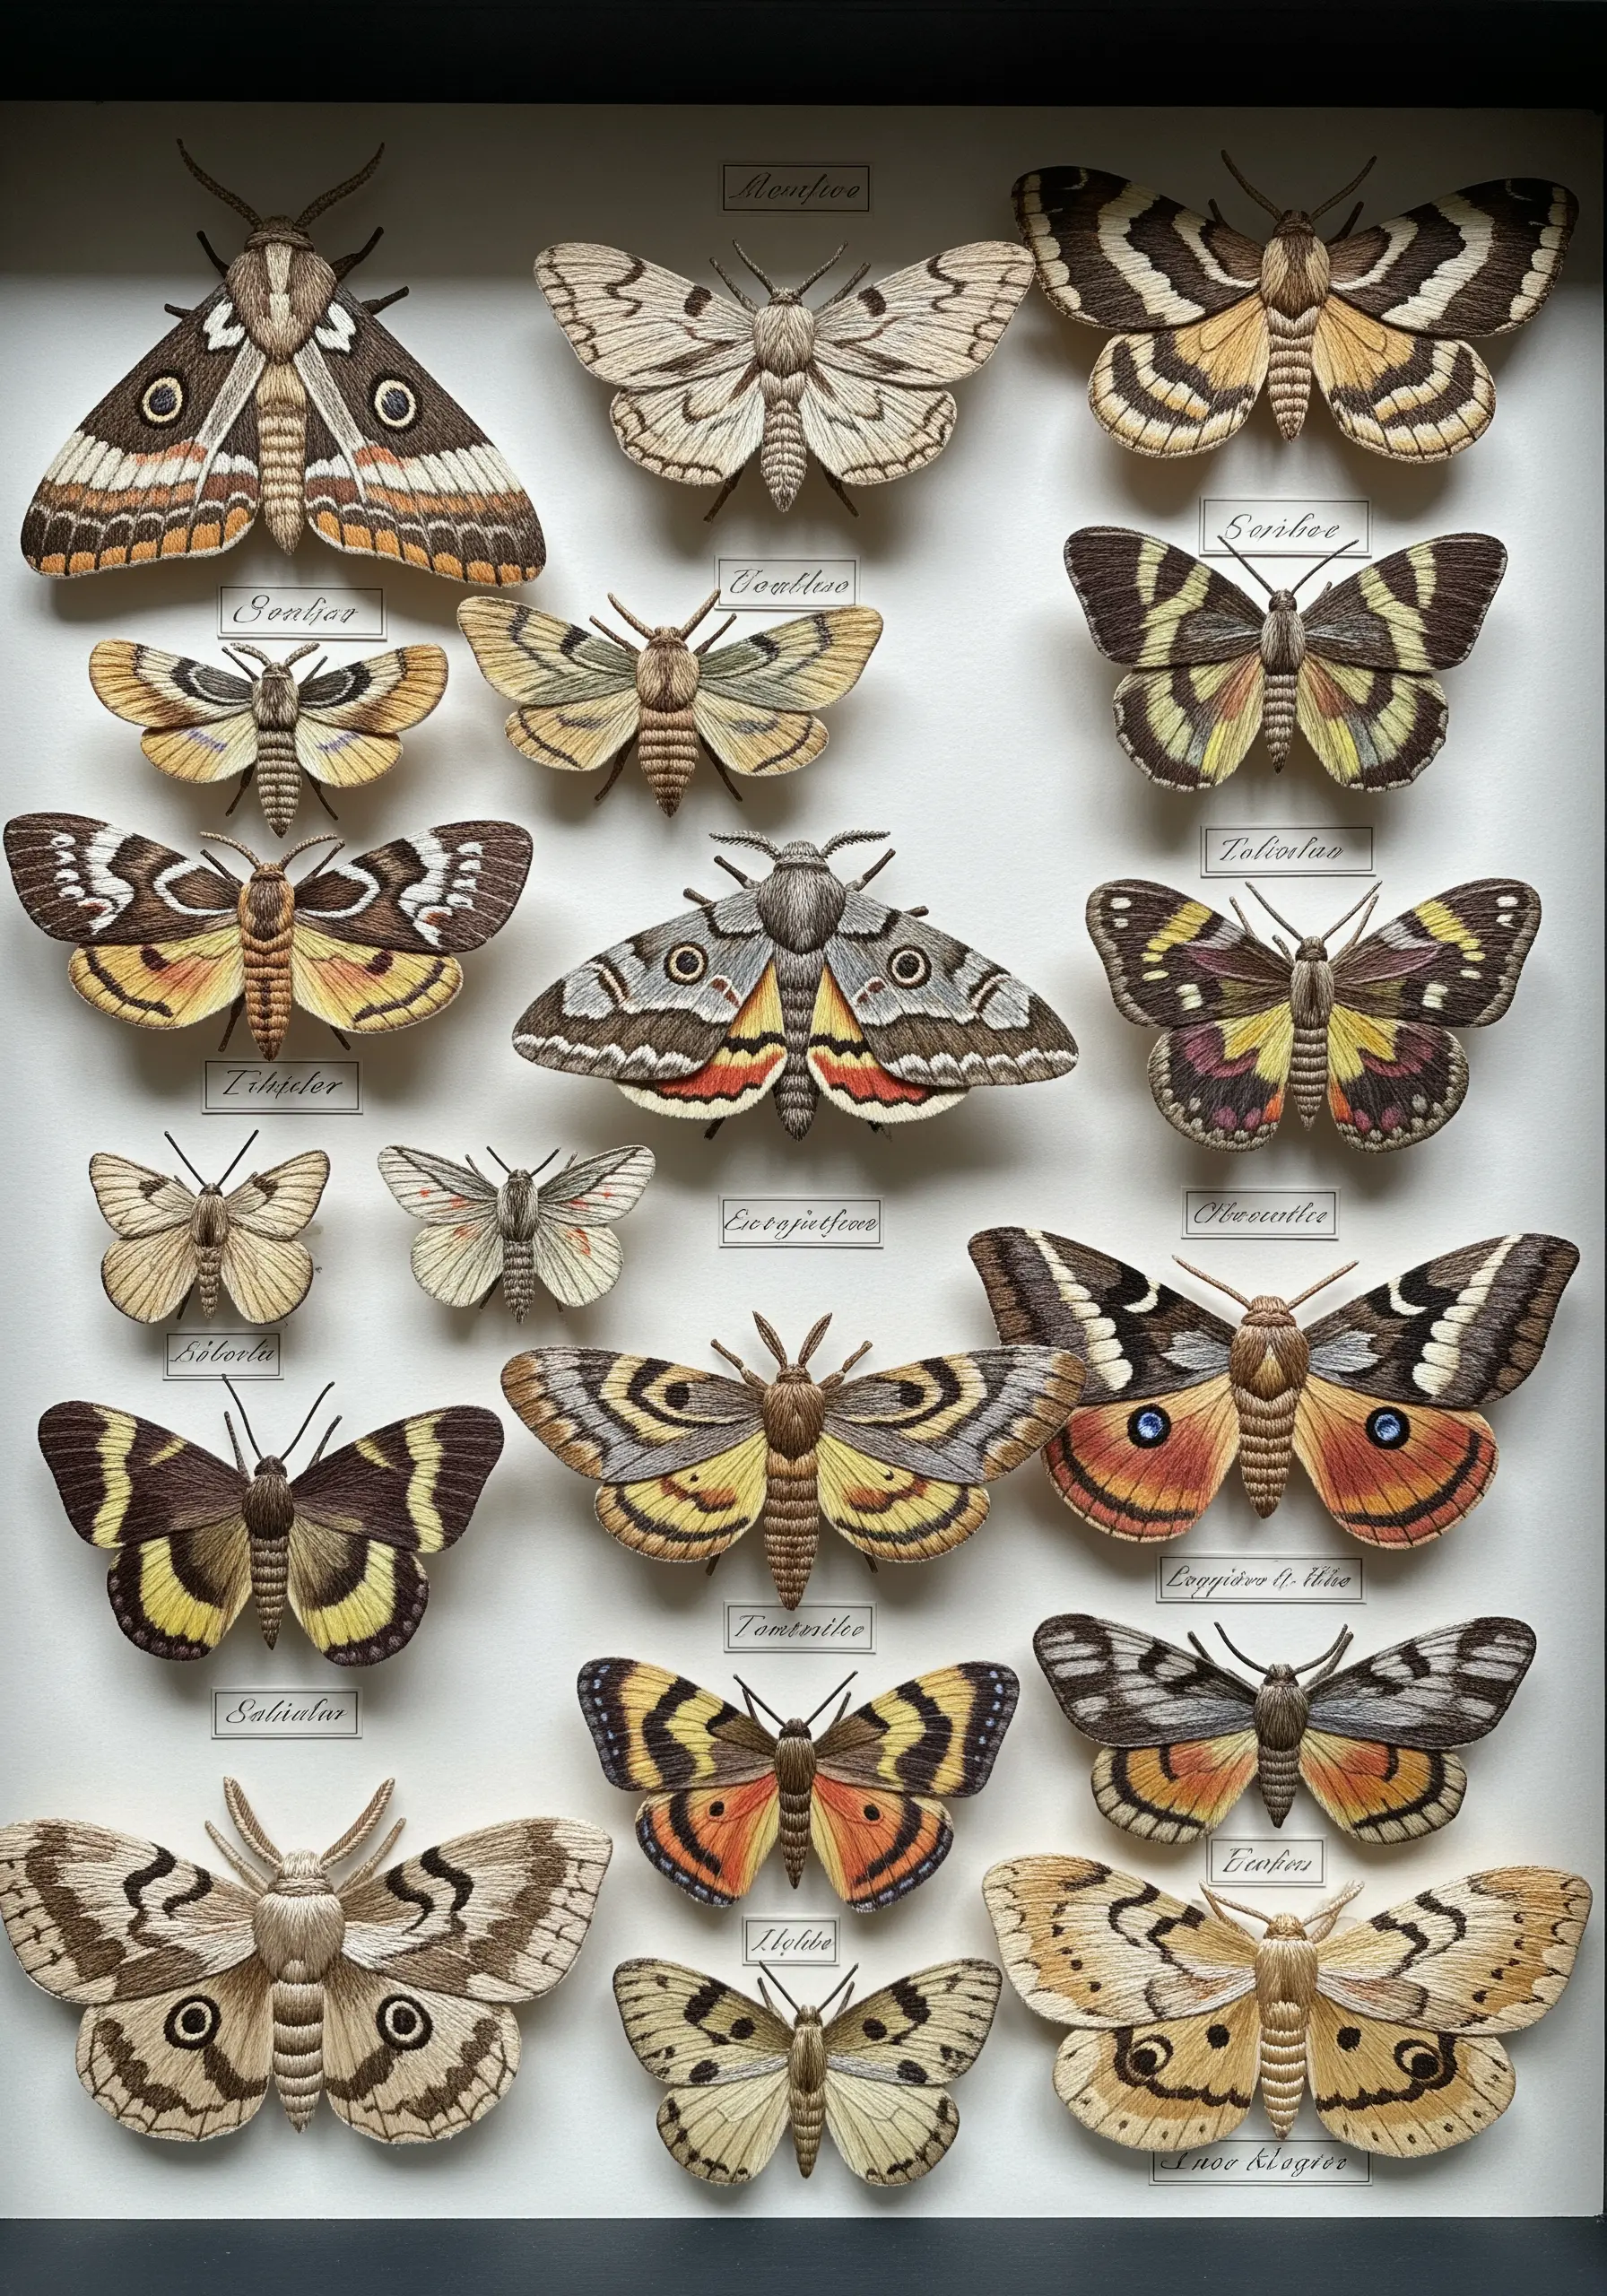
Create stunningly realistic moths and butterflies by using paper as a stable, lightweight base for detailed embroidery.
Print or draw your insect designs onto heavy cardstock and use thread painting techniques to fill in the wings with intricate color gradients and patterns.
Once stitched, carefully cut out each specimen and gently bend the wings to give them a lifelike, three-dimensional form before mounting them in a shadow box.
This method allows for a level of detail and rigidity that’s difficult to achieve with fabric alone.
11. Design a Stitch Sampler with Paper Swatches
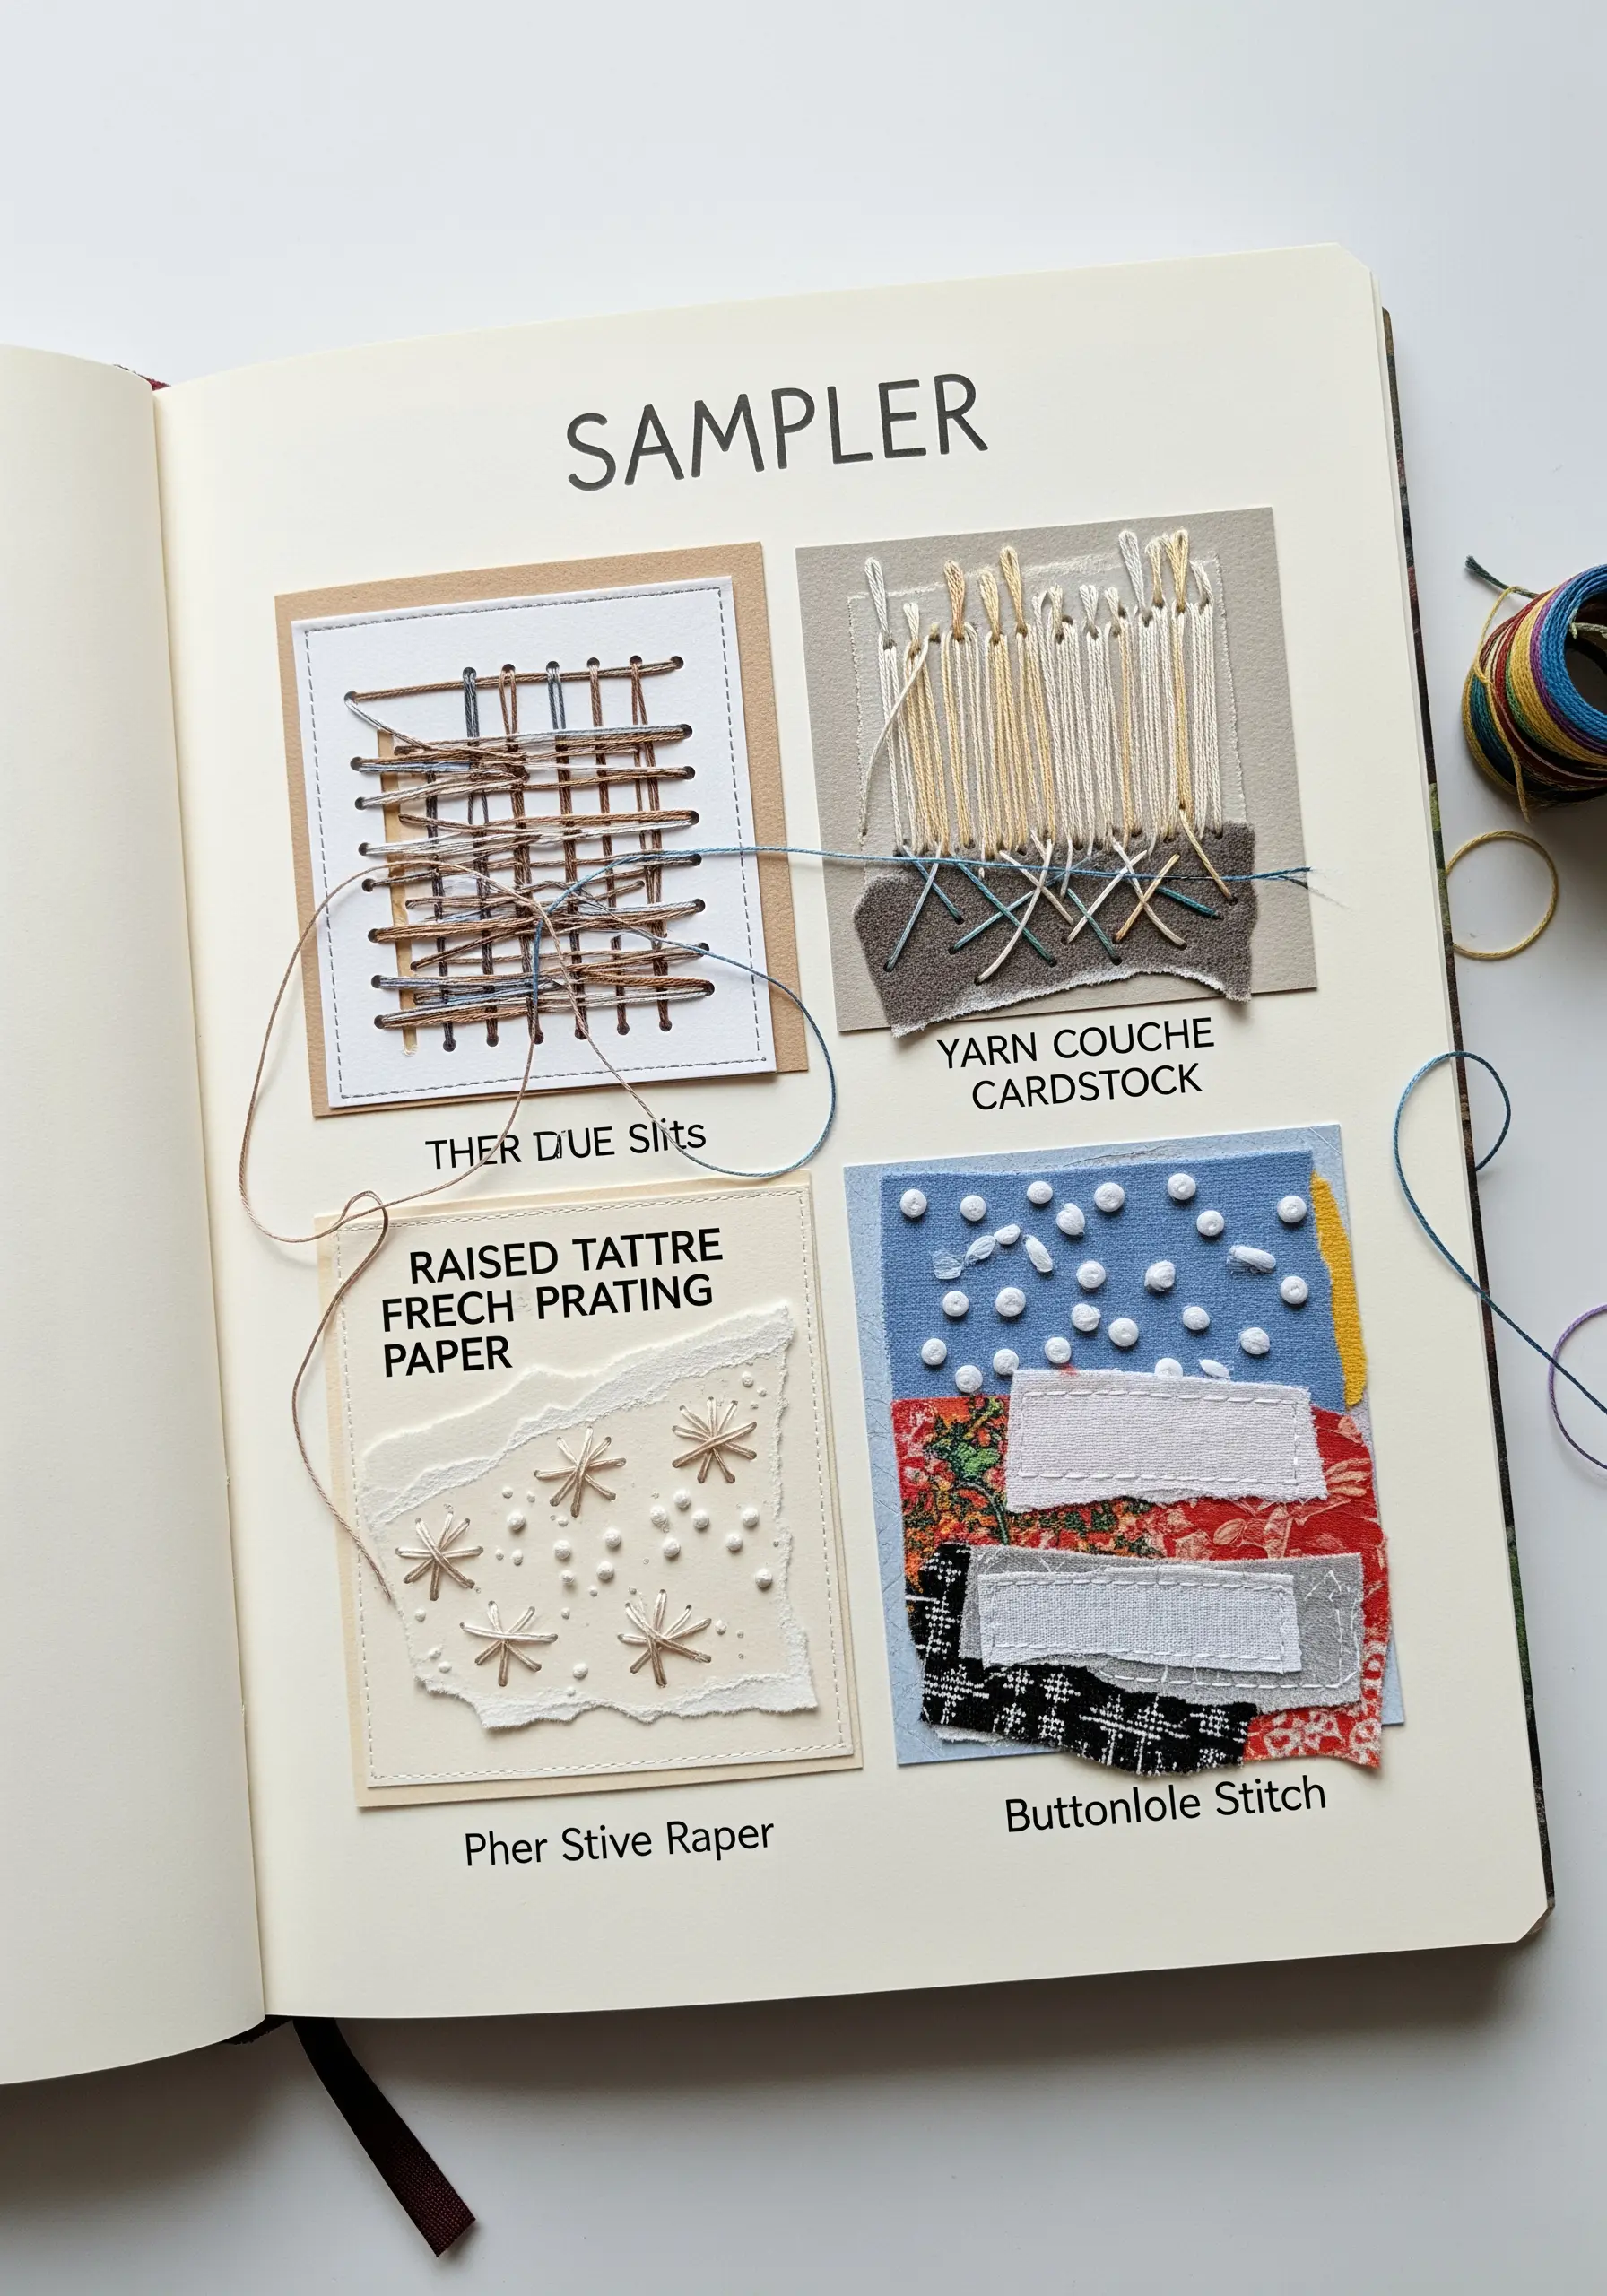
Use a journal or sketchbook to create a tactile reference library of your favorite stitches on different surfaces.
Instead of working only on fabric, create small swatches on various types of paper, cardstock, and fabric scraps.
Mount these samples onto the pages and add notes about the thread type, needle size, and technique used.
This practice not only builds your skills but also creates a beautiful, personal catalog of mixed-media contemporary embroidery designs to inspire future projects.
12. Construct Sculptural Feathers with Stitched Paper
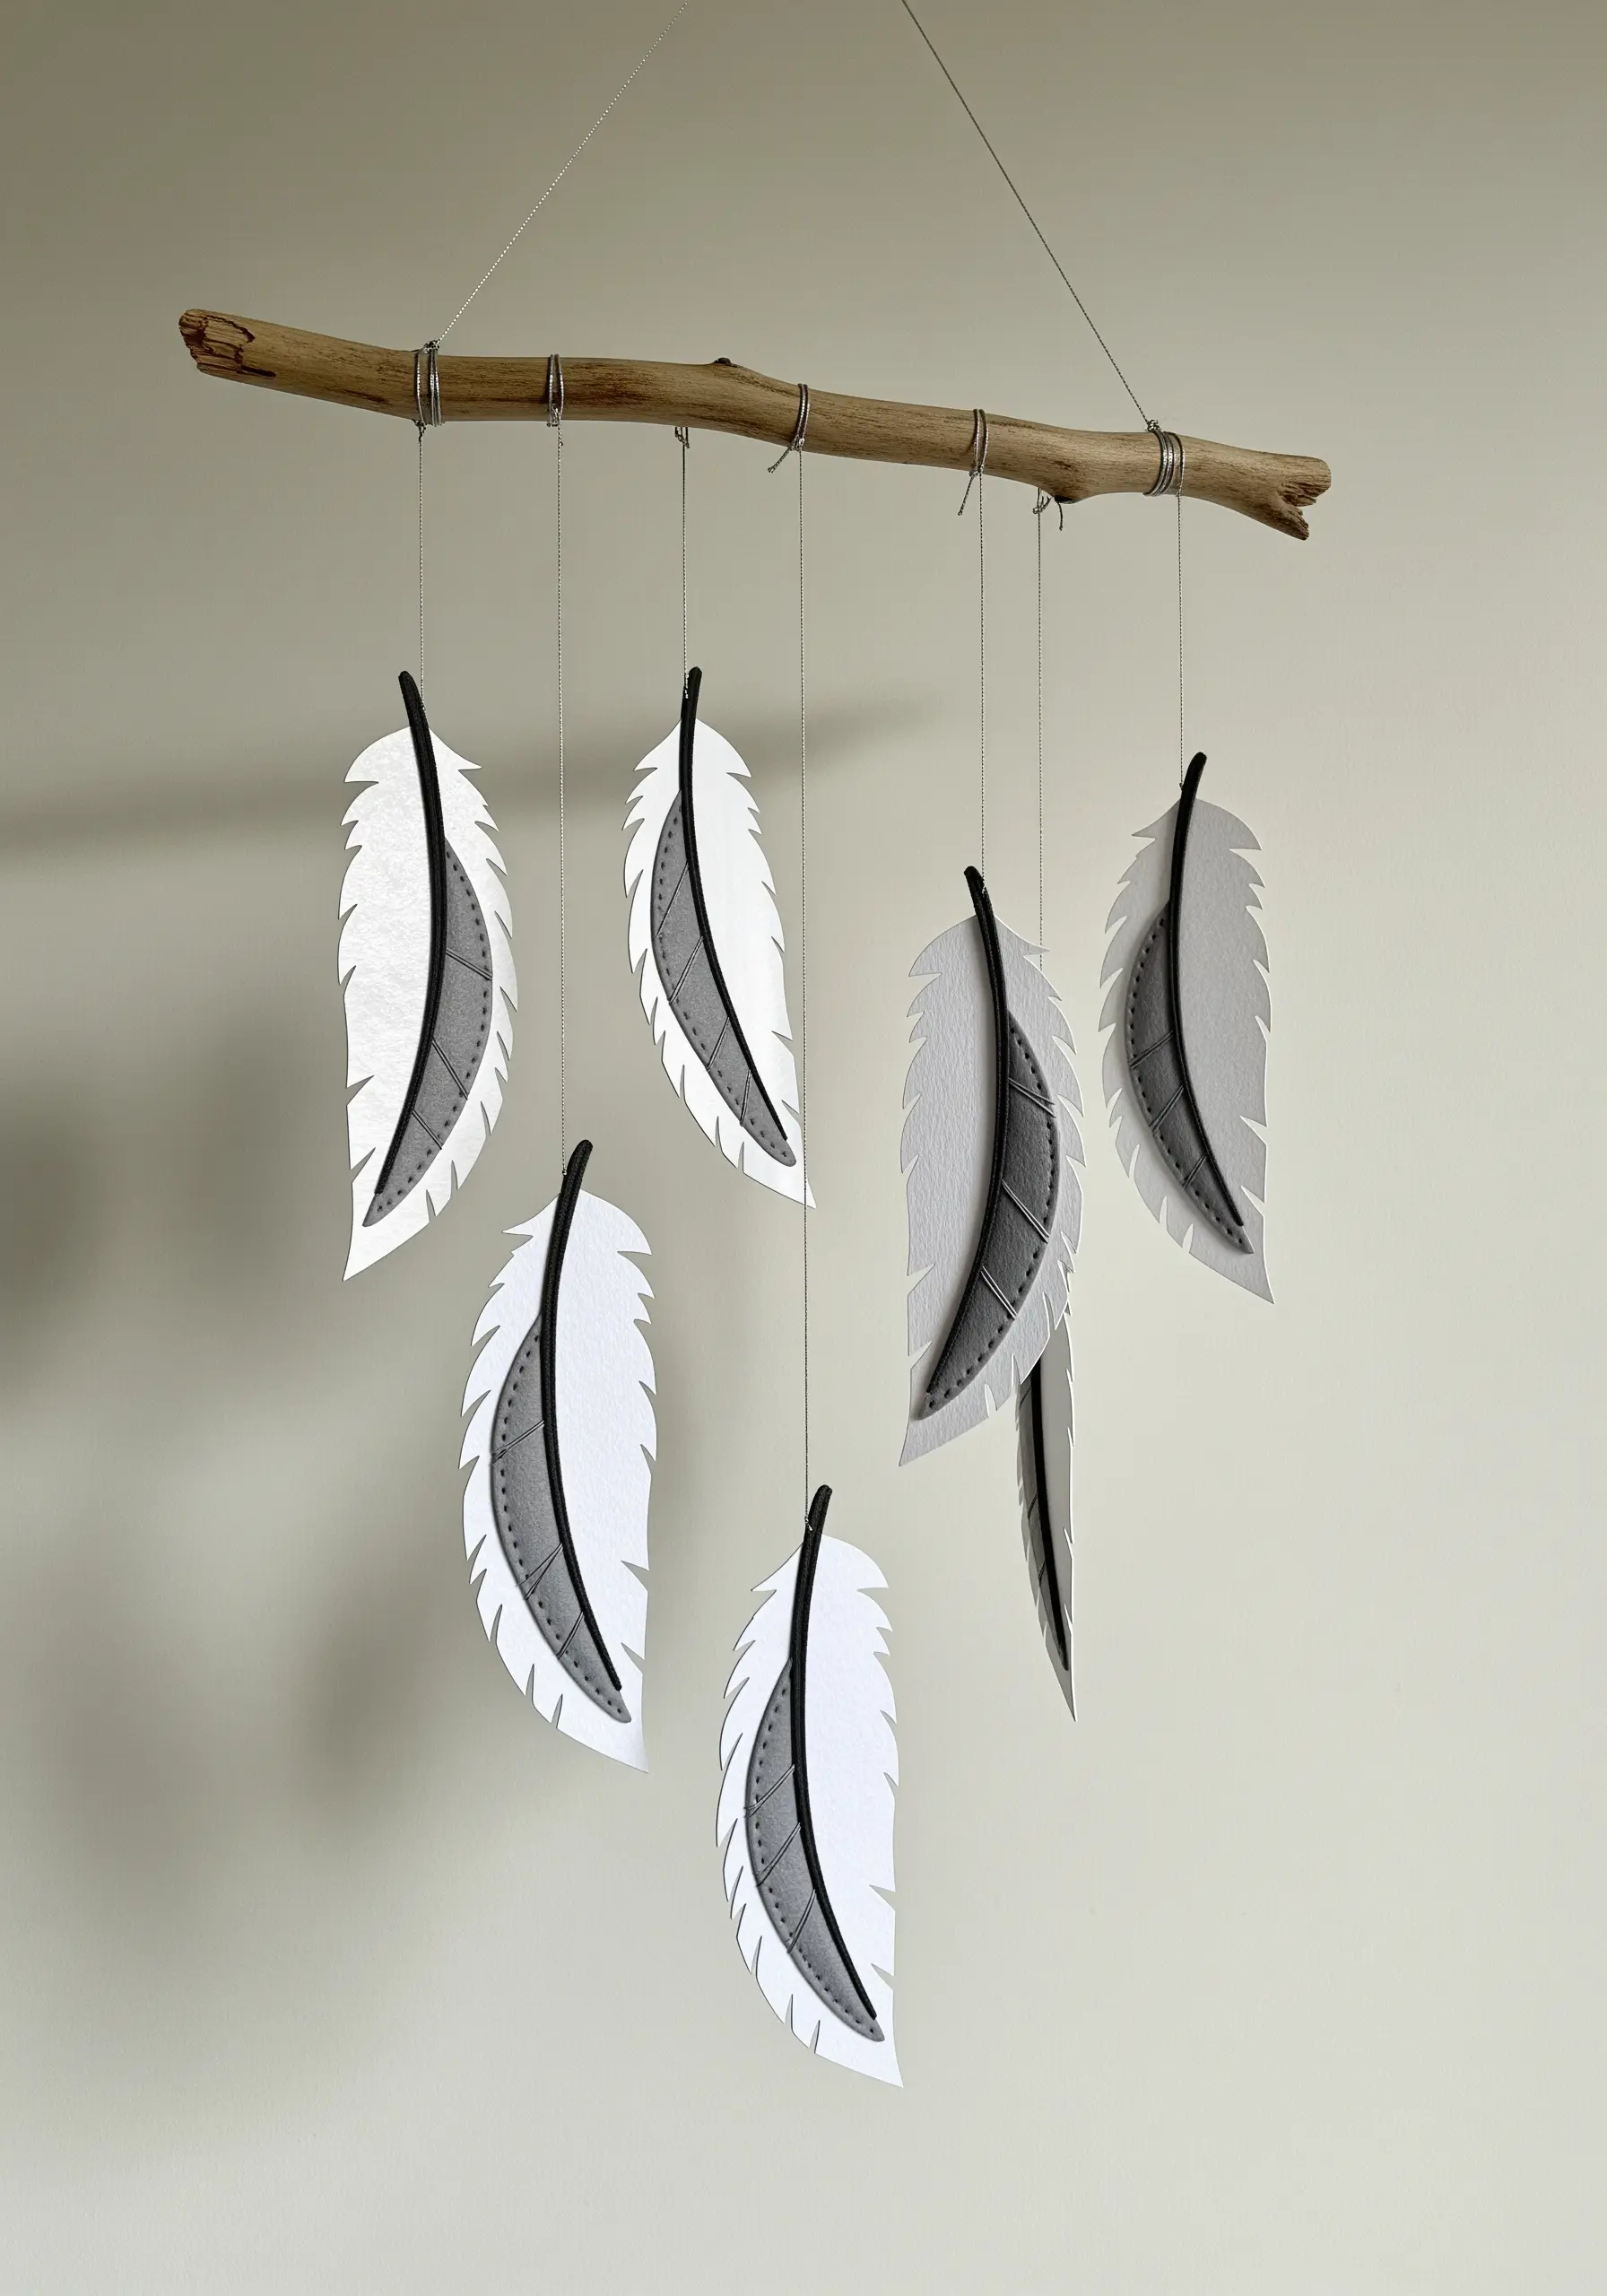
Explore creating lightweight, sculptural elements by combining paper cutting with embroidery.
Cut feather shapes from stiff, high-quality paper, then use a sewing machine (with a fresh needle) or hand stitching to add the central quill and fine barbs.
The rigidity of the paper holds the shape perfectly, allowing you to create mobiles or wall hangings with delicate, airy components that wouldn’t be possible with fabric alone.
13. Replicate Patchwork Quilts with Stitched Paper
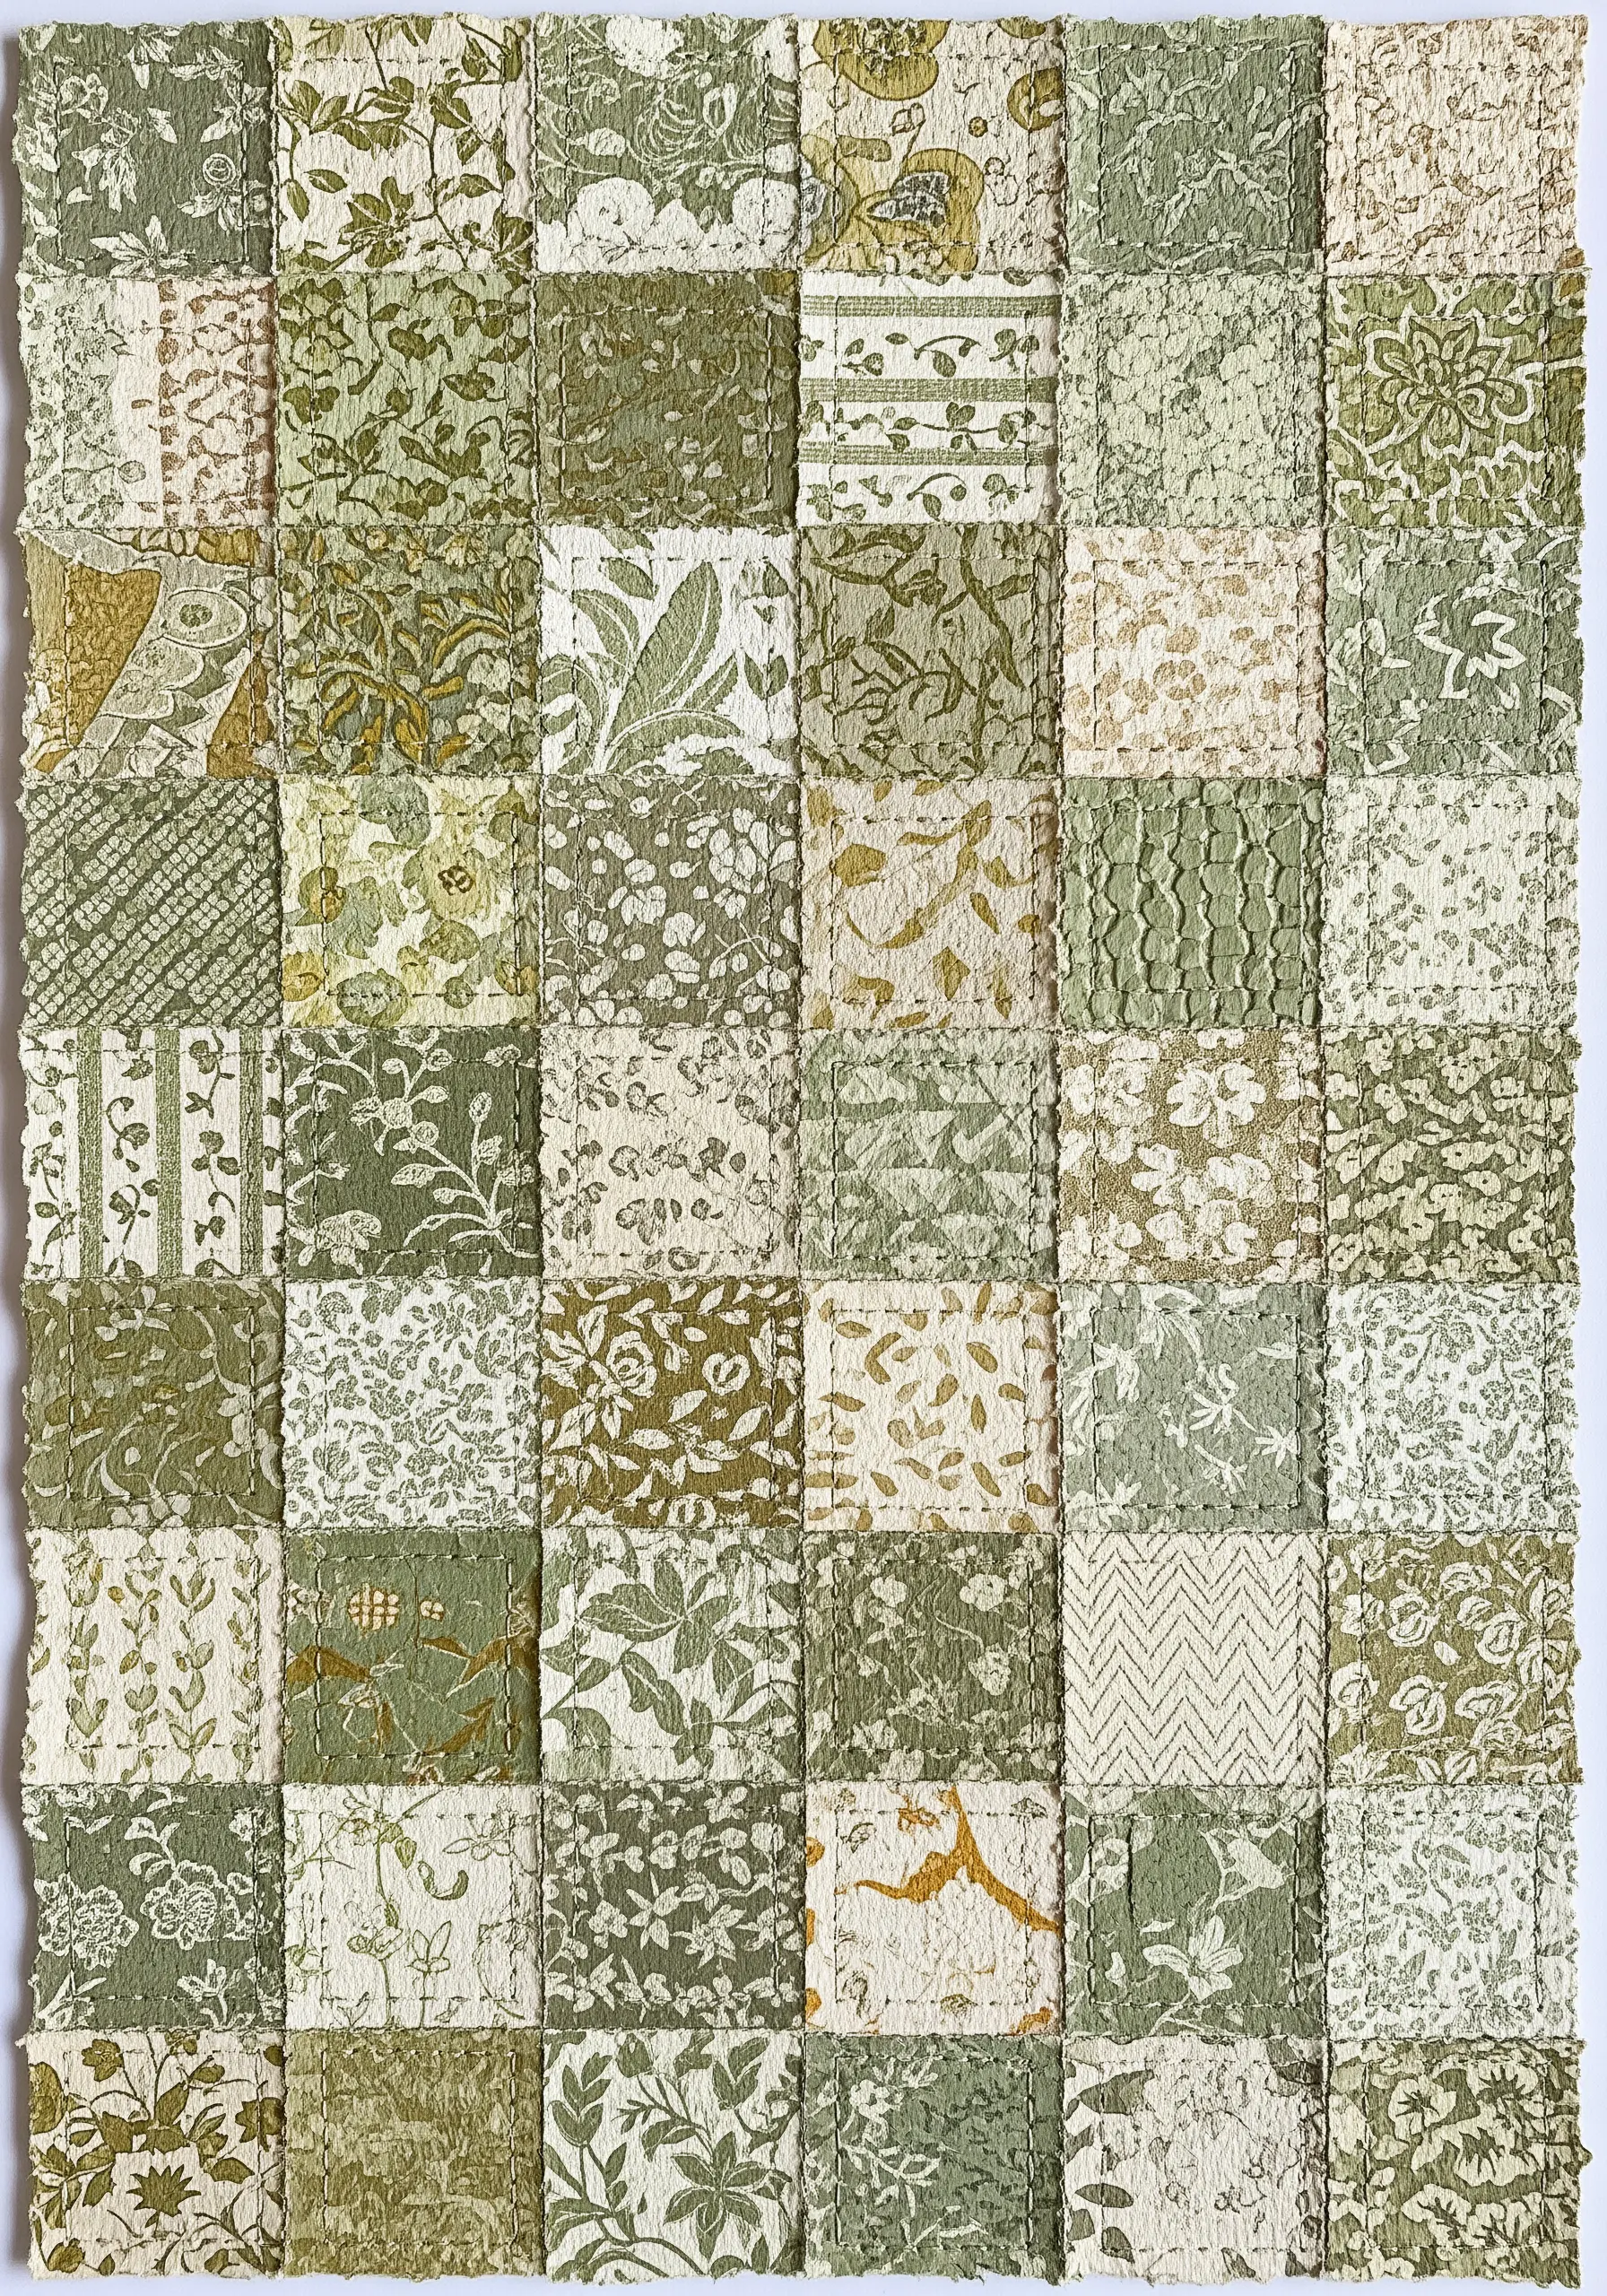
Channel the aesthetic of a traditional quilt by creating a collage from squares of patterned paper and unifying them with thread.
Cut small squares from various decorative papers and arrange them in a grid on a larger backing sheet.
Use a sewing machine or hand stitch a simple running stitch along the ‘seams’ where the paper squares meet.
This technique mimics the look of patchwork, creating a richly textured piece that celebrates pattern and repetition.
14. Add a New Dimension by Stitching on Photographs
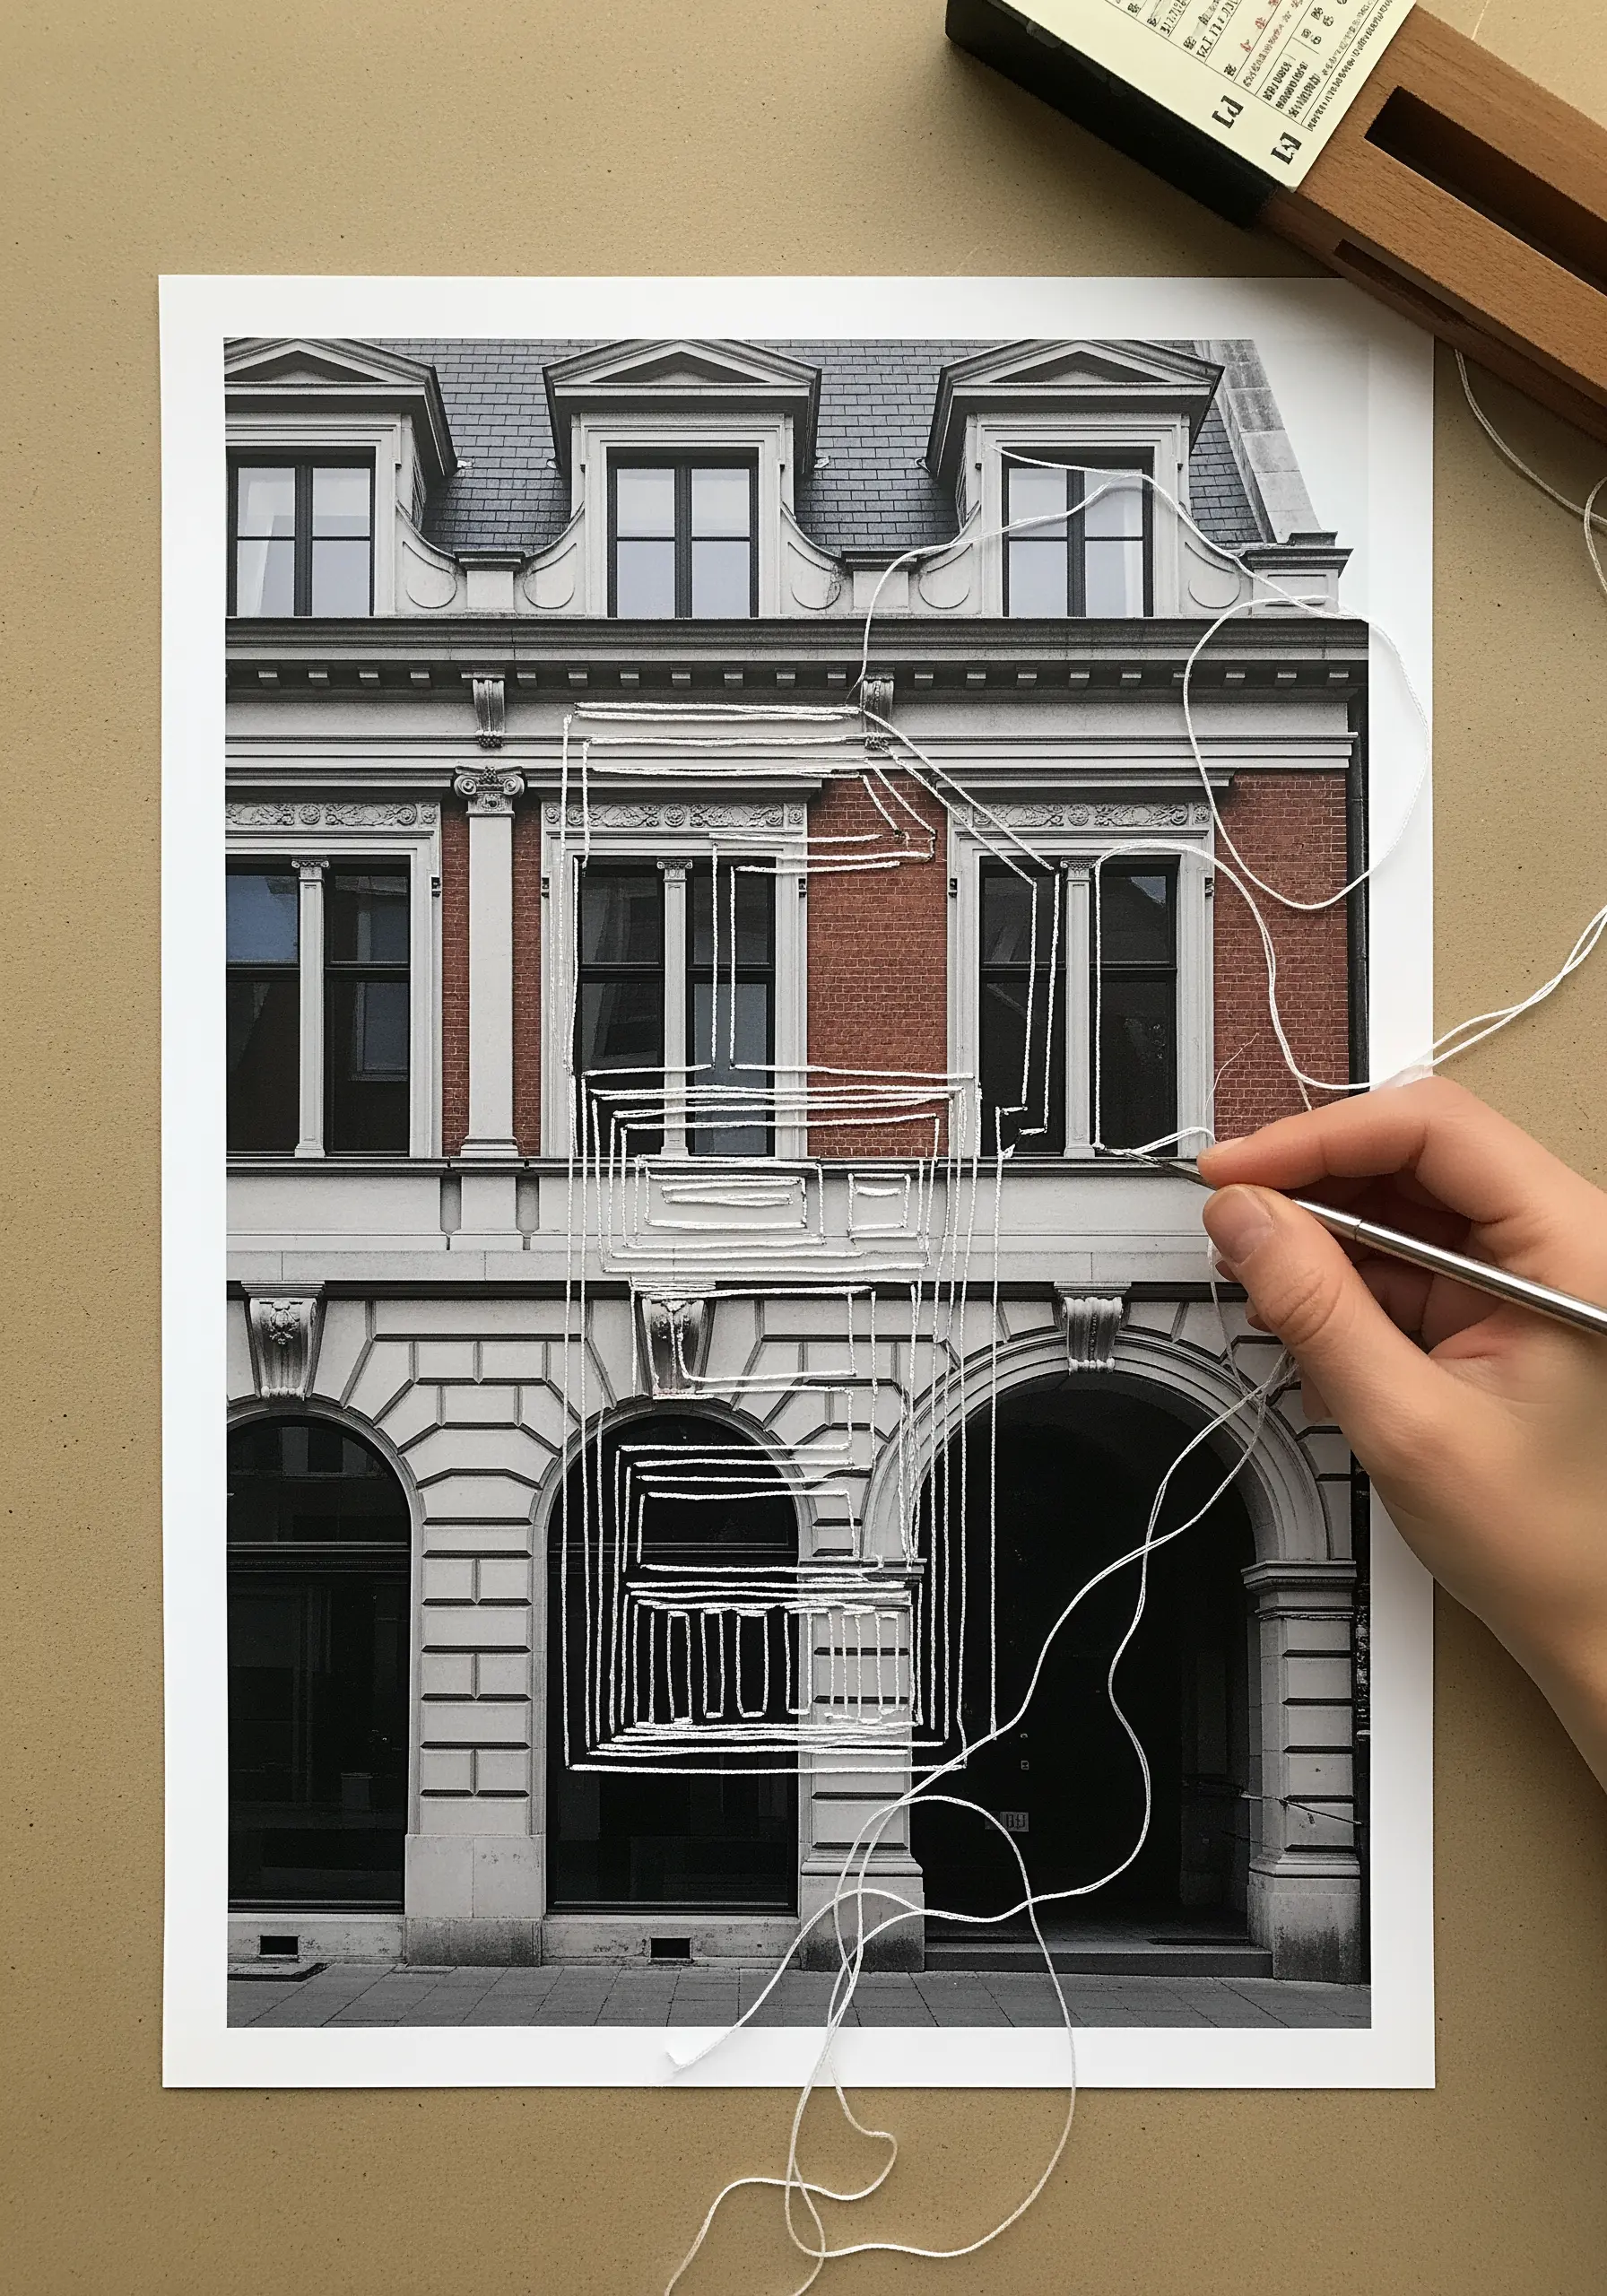
Transform a printed photograph into a one-of-a-kind piece of art by adding embroidered details.
Choose a photo printed on matte paper, as glossy surfaces can crack and show fingerprints.
Use a single strand of thread and a fine needle to trace architectural lines, outline natural shapes, or add abstract patterns over the image.
The thread introduces a tactile, three-dimensional quality that completely changes the viewer’s relationship to the original photograph.
15. Sculpt and Stitch Functional Paper Bowls
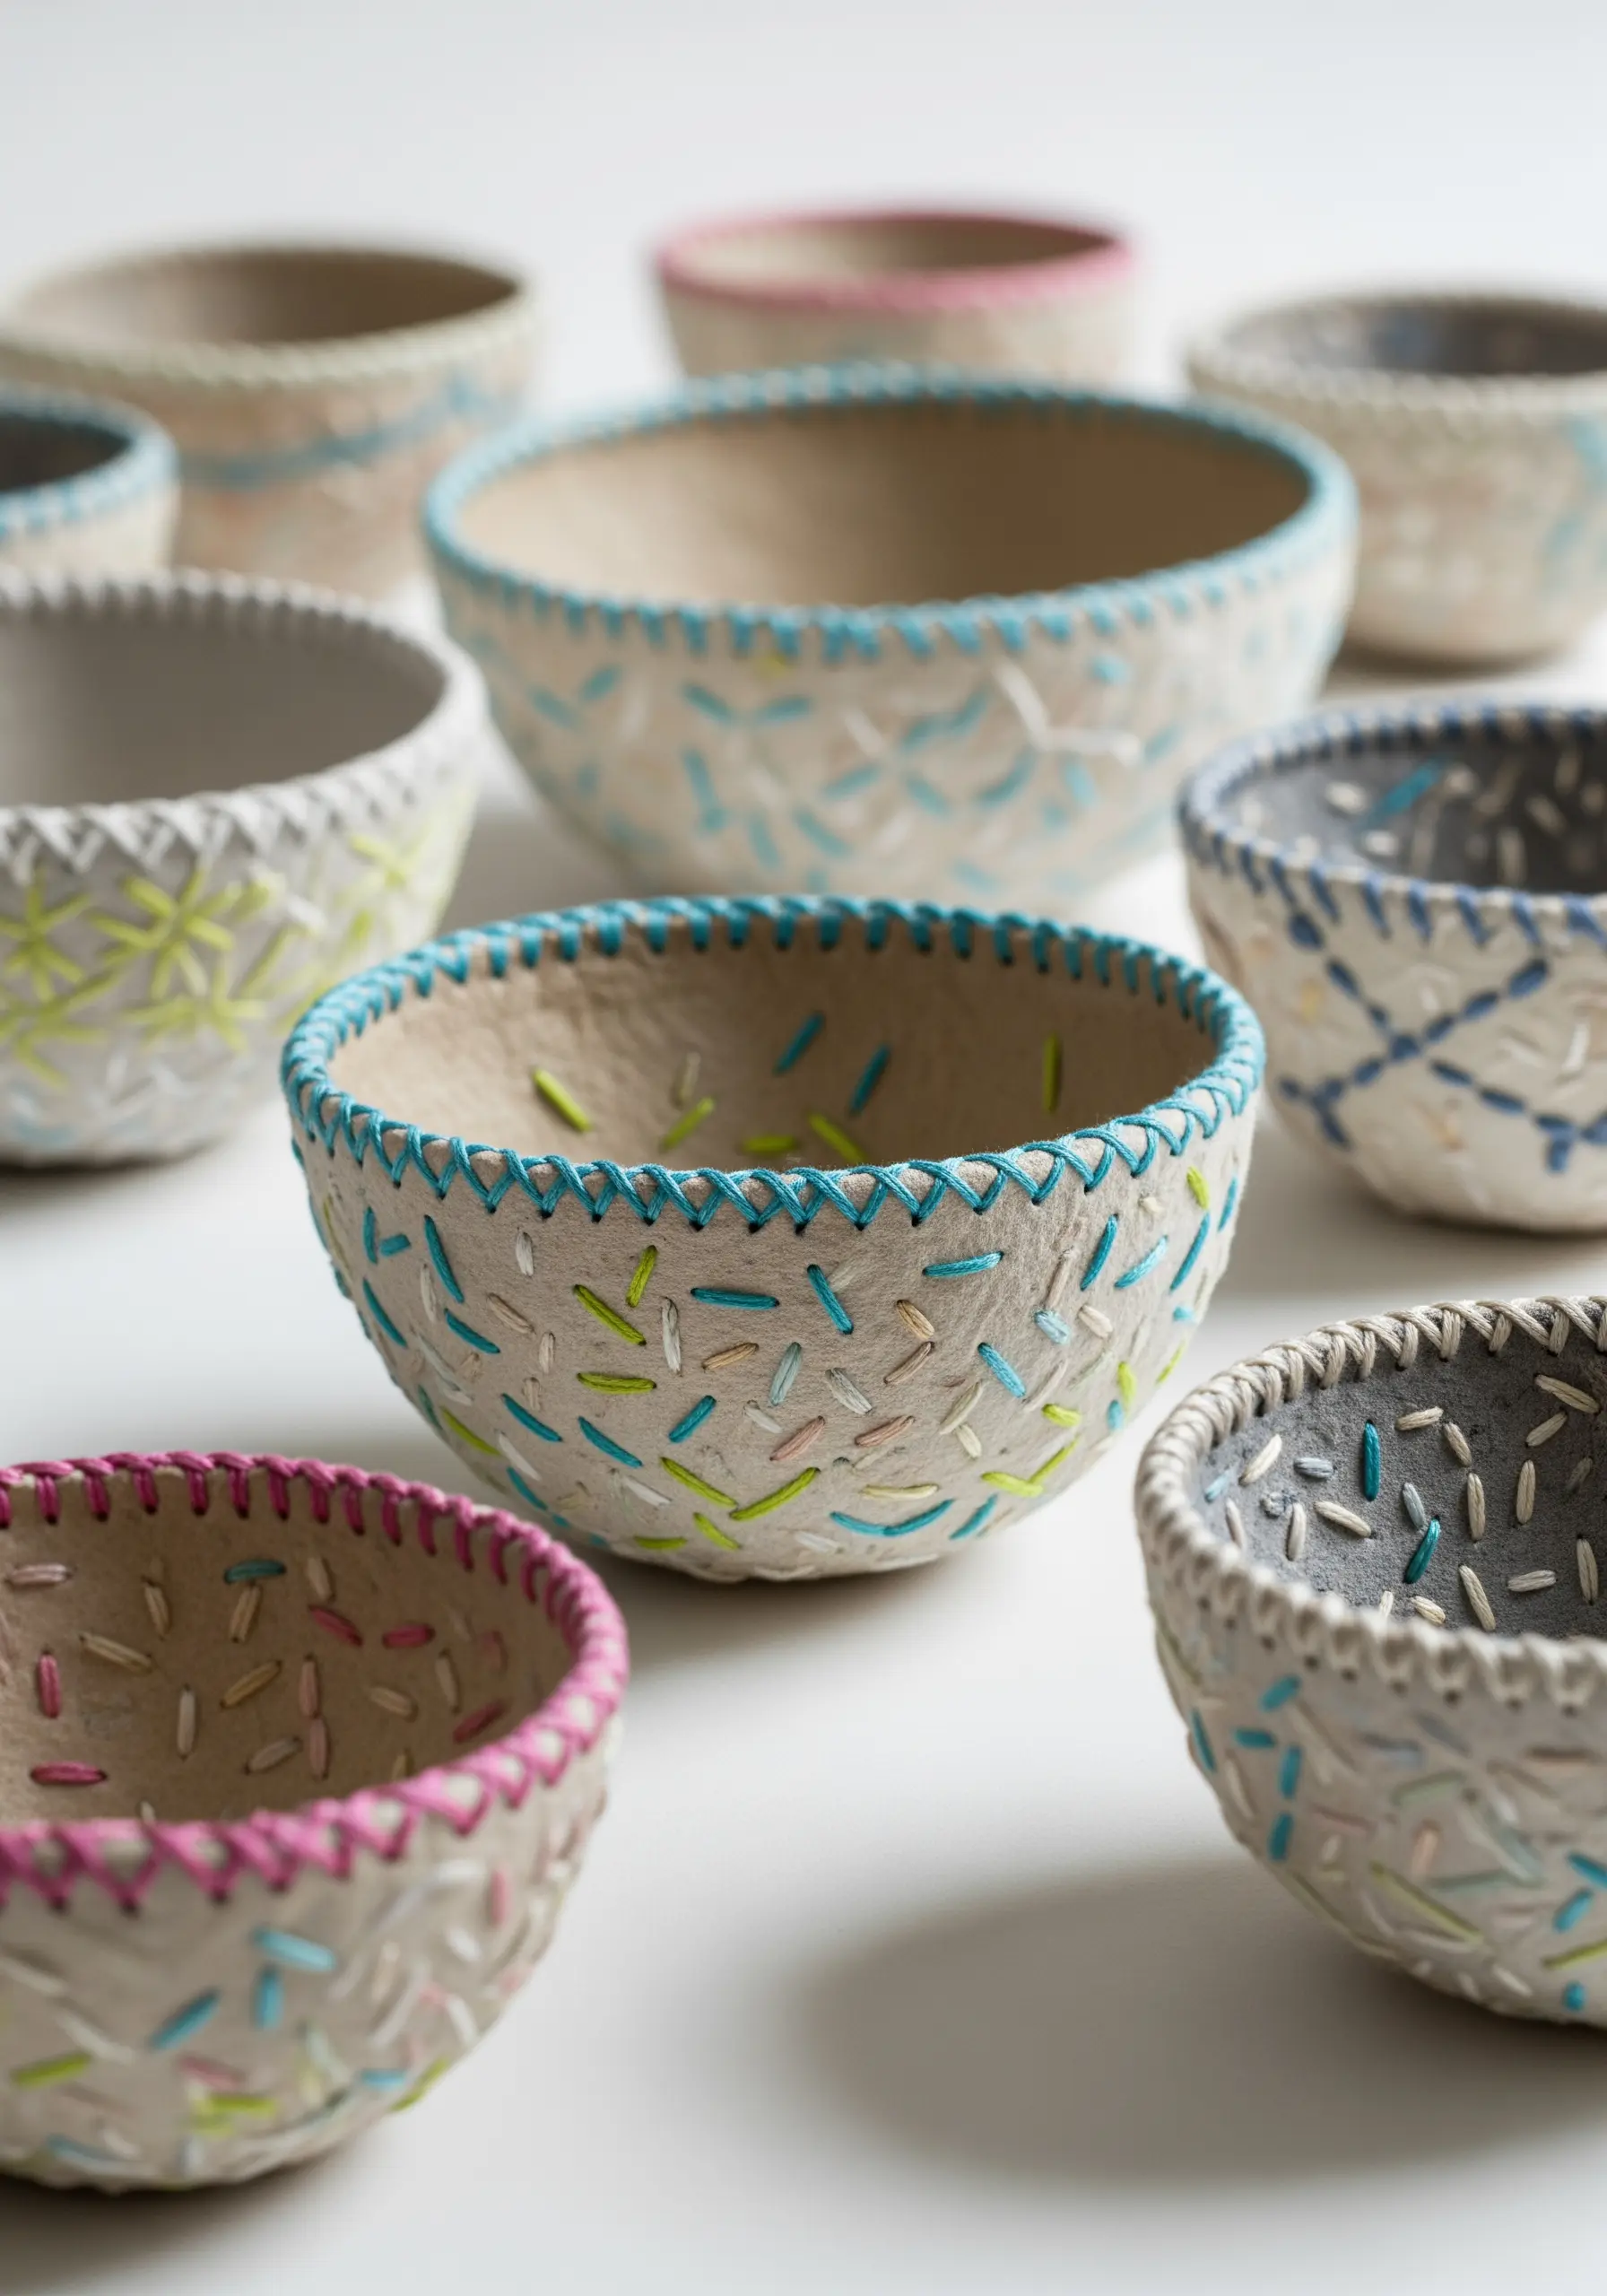
Push the boundaries of your craft by creating three-dimensional vessels from paper pulp or papier-mâché and embellishing them with thread.
Once your paper bowl is formed and dried, use an awl to punch holes around the rim and along the body.
Thread these holes with colorful floss, using stitches like the blanket stitch or simple cross-stitches to add decoration and structural reinforcement.
This fusion of sculpture and needlework results in beautiful, handmade organic pieces that are both artful and unique.
16. Intensify Colors by Stitching a Mandala on Black Paper
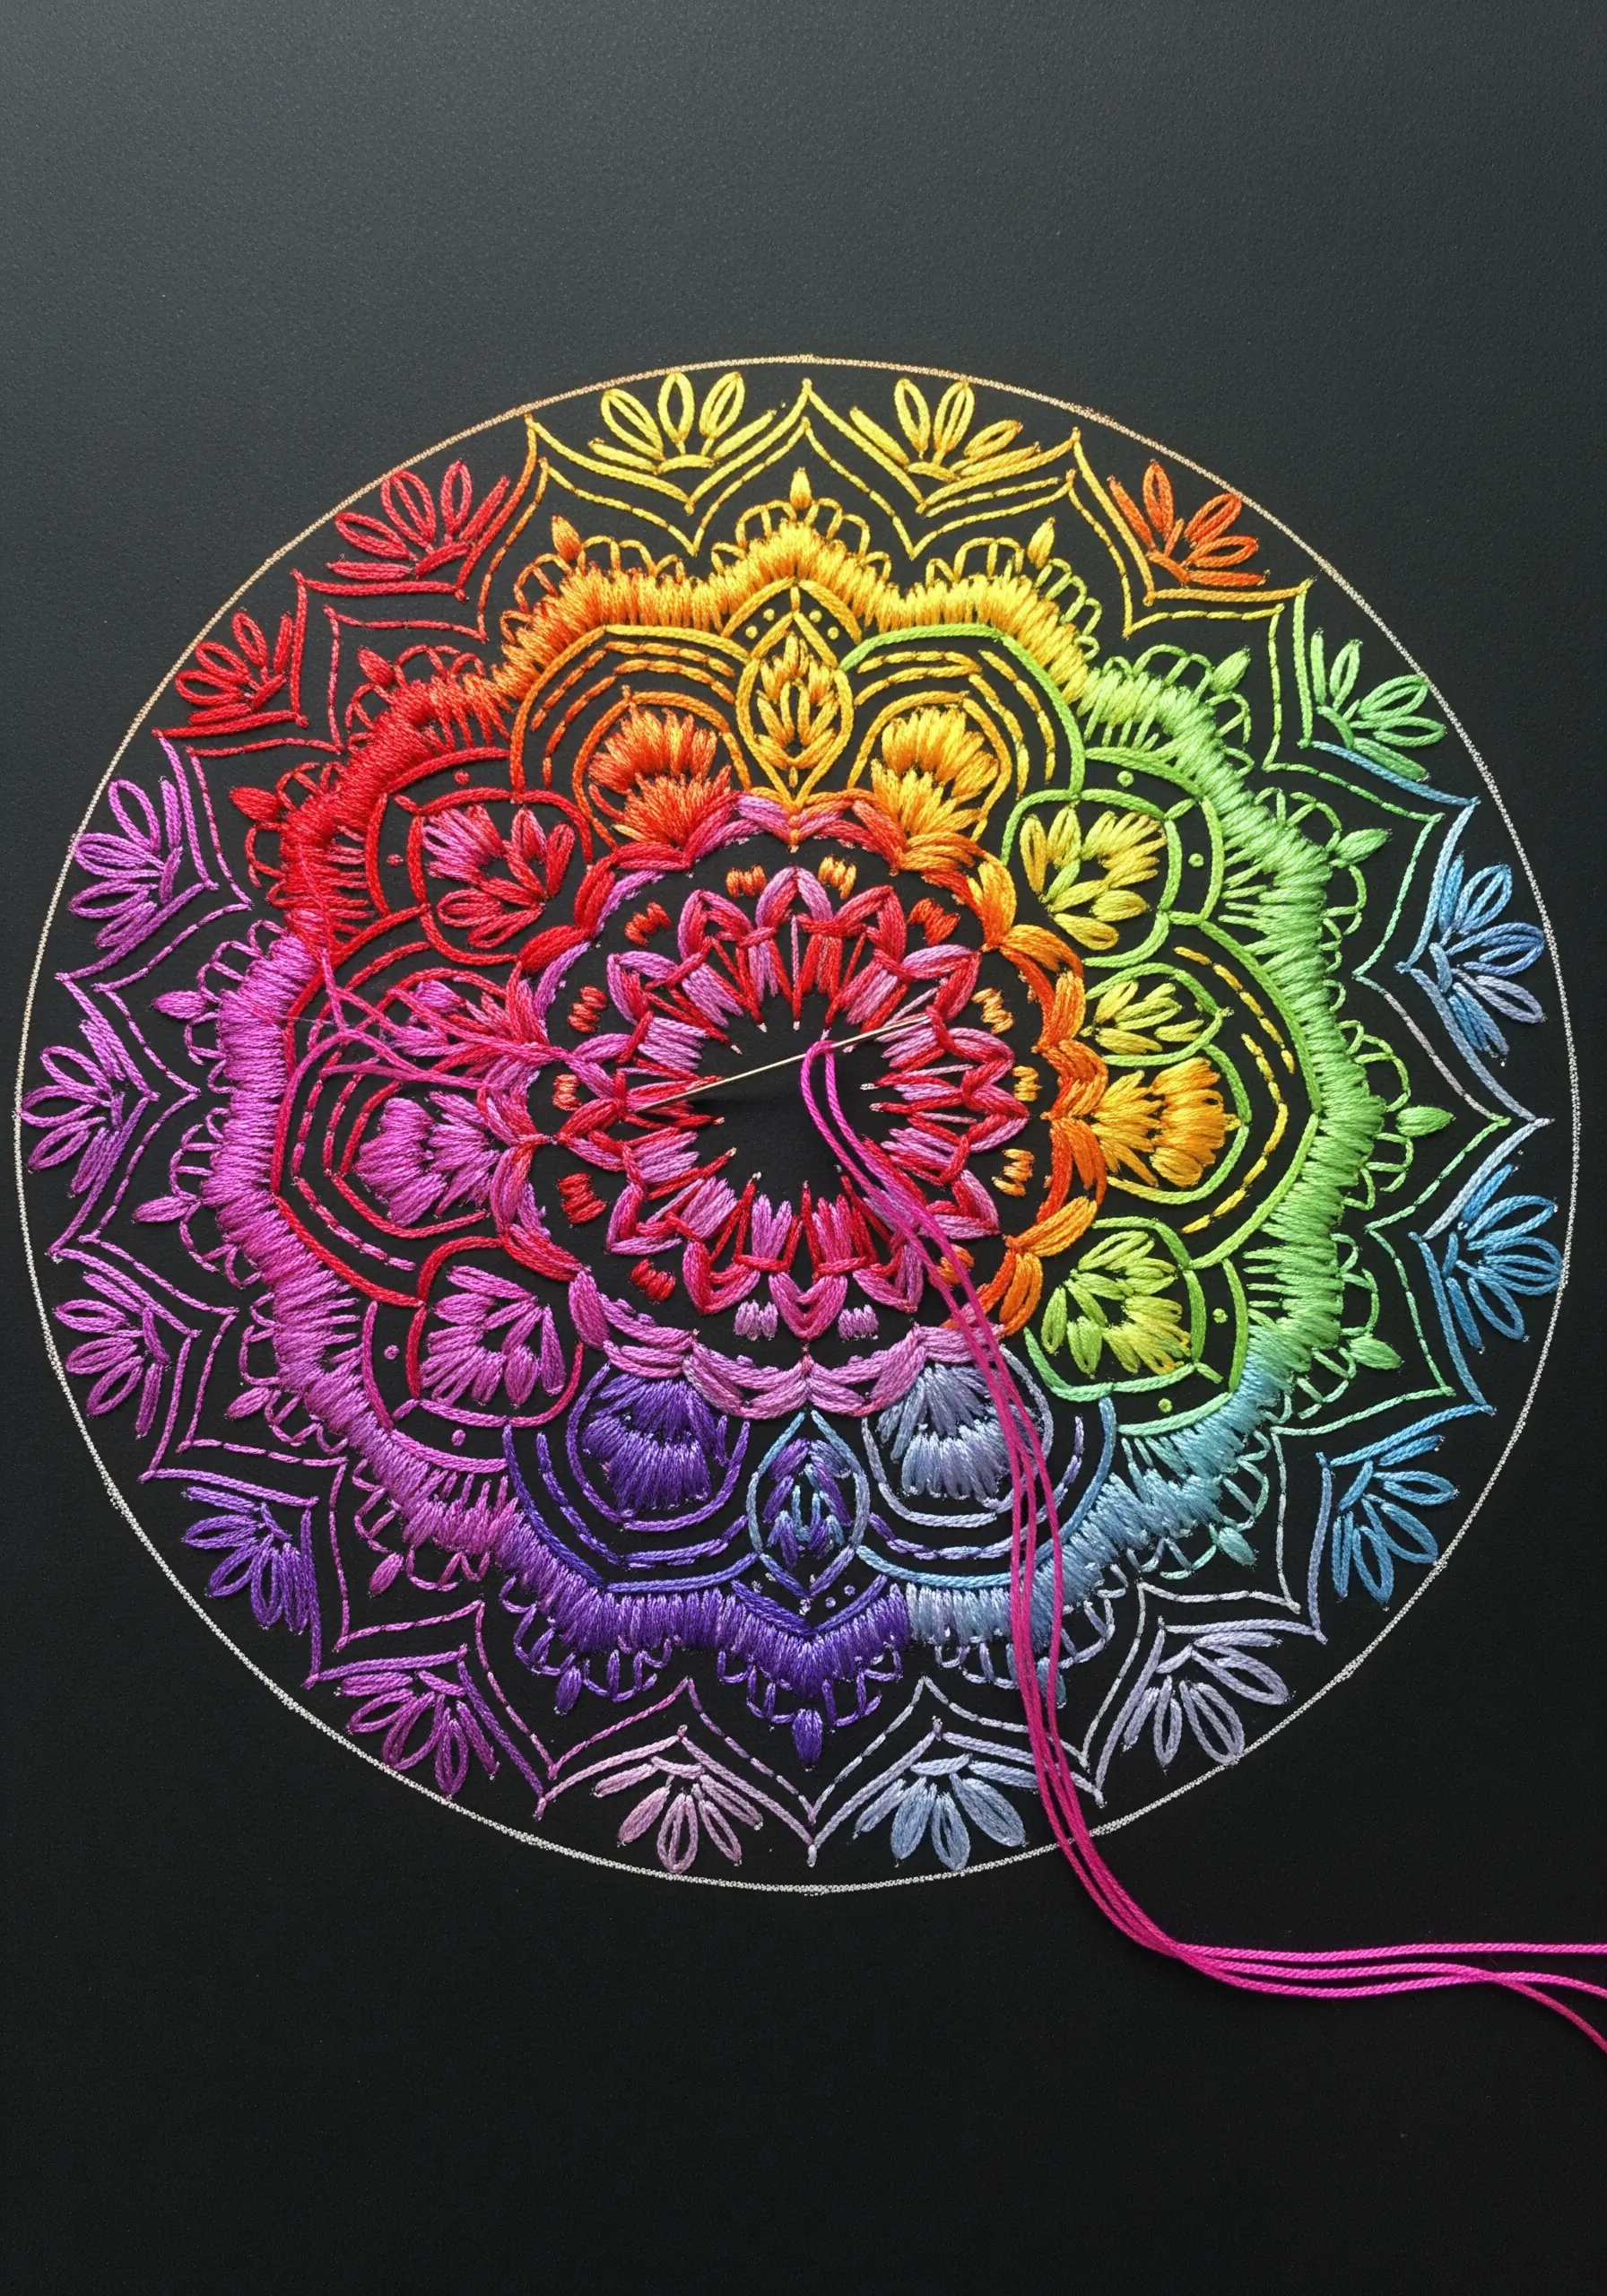
Make your thread colors vibrate with intensity by choosing a deep black cardstock as your canvas.
The high contrast between the dark, matte paper and bright, lustrous embroidery floss makes every stitch pop.
Draw your mandala pattern with a white gel pen or chalk pencil, then pre-punch your holes along the lines before you begin stitching.
This ensures clean entry points and prevents accidental tearing, resulting in a stunningly crisp and radiant modern minimal mandala.
17. Build a Narrative with a Paper-and-Ink Family Tree
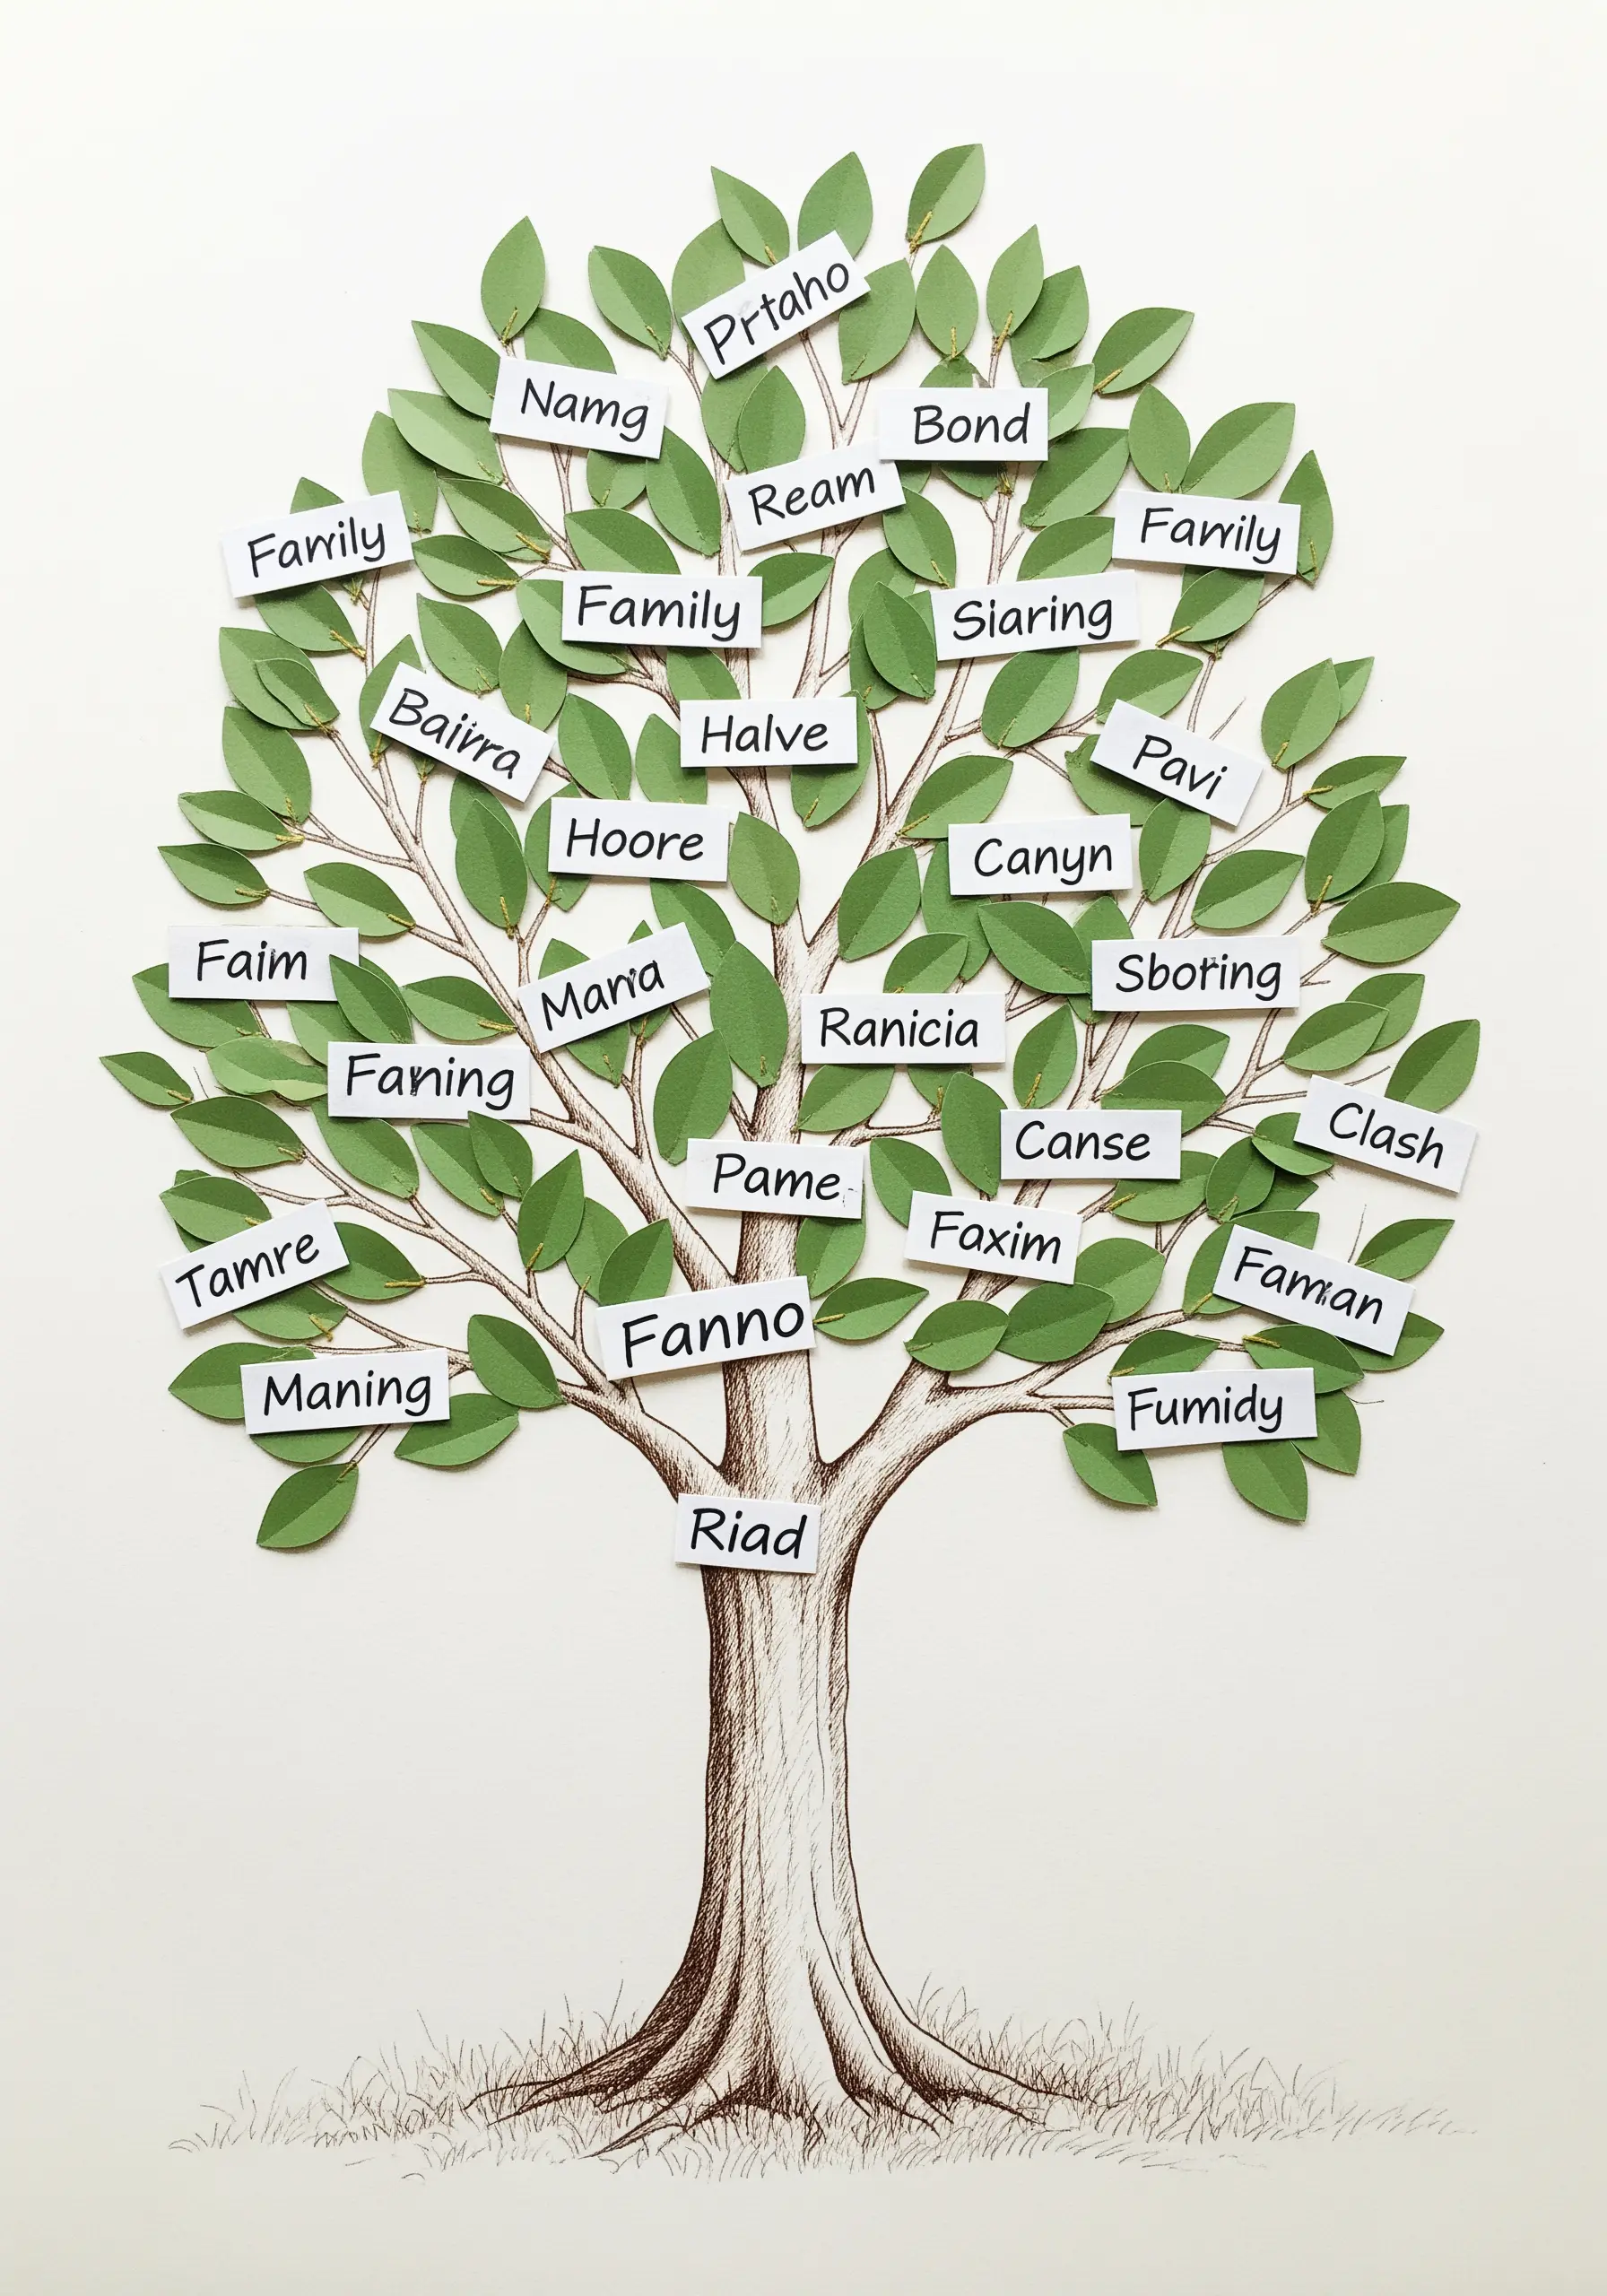
Combine illustration, papercraft, and handwriting to create a family tree that feels both personal and dimensional.
Start by drawing or embroidering the trunk and branches of the tree onto a heavy paper base.
Then, cut out individual leaves from green cardstock and write or print names on small paper banners.
Layer these paper elements onto the branches with a dab of glue or a single stitch, creating a rich, multi-layered heirloom piece.
18. Couch Metallic Cord over Paper for Luxe Finishes
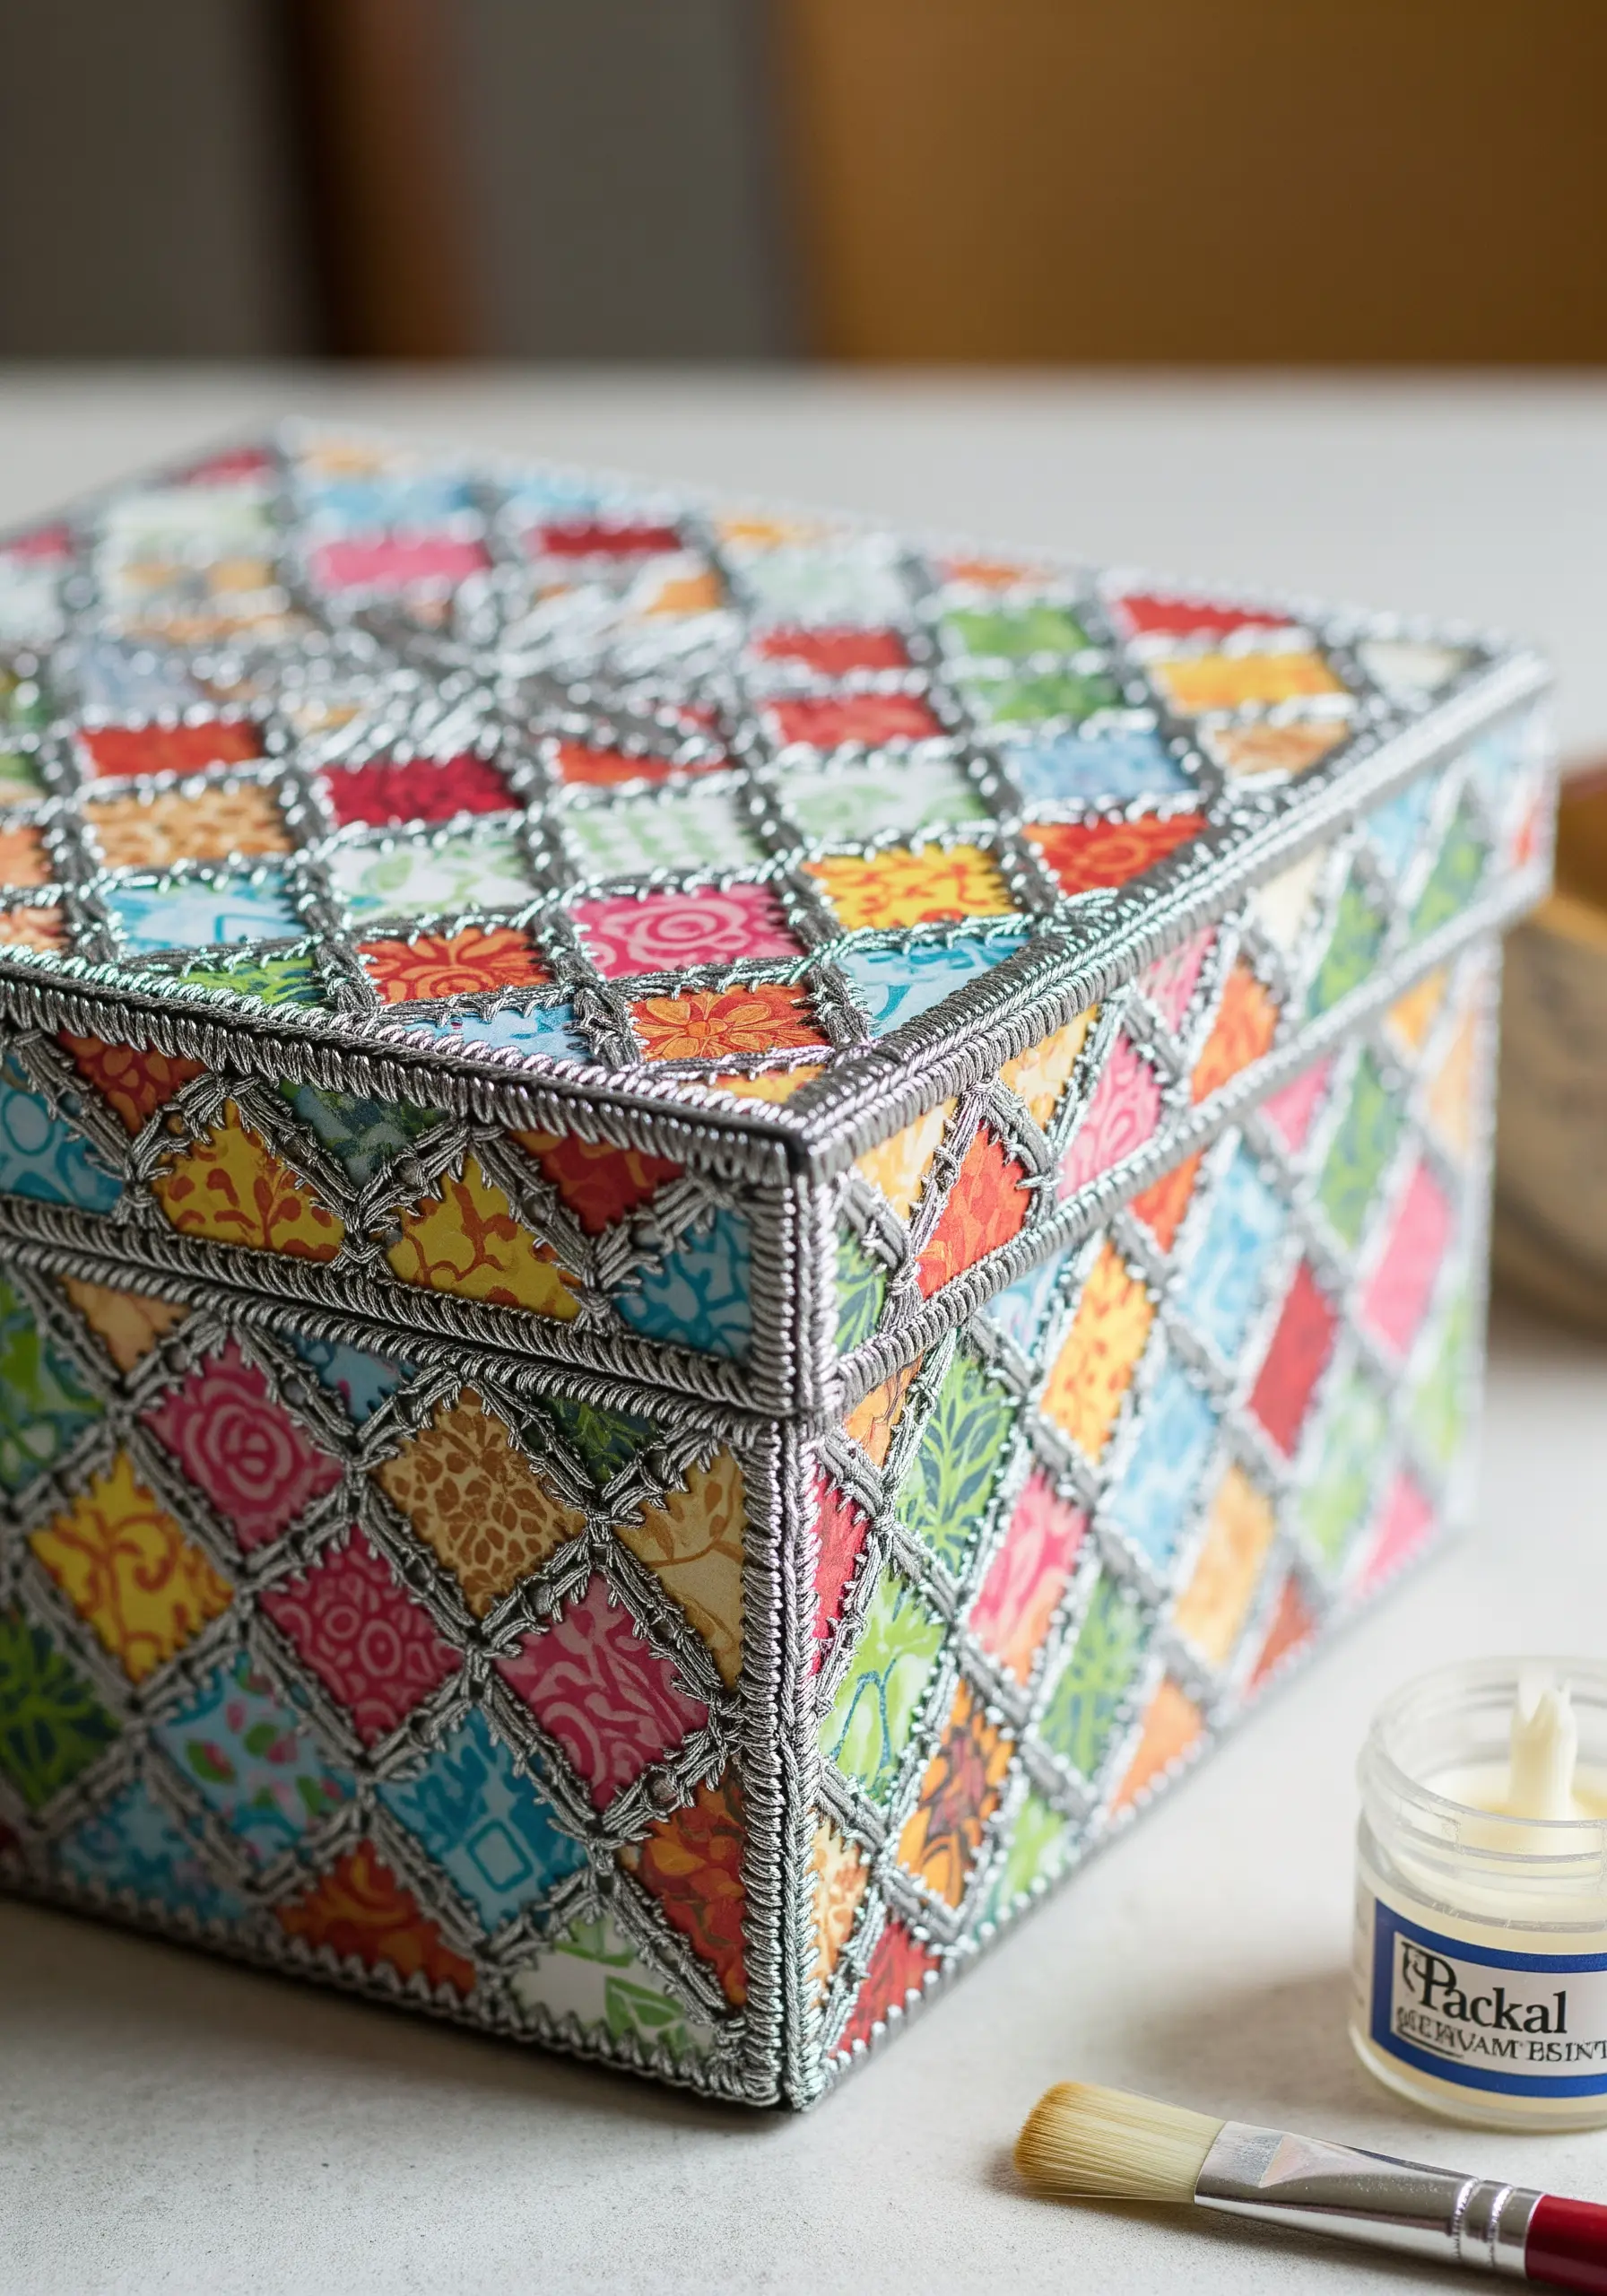
Take inspiration from this decorated box and apply the technique of couching to your own mixed-media projects.
Instead of stitching with fine thread, lay down thick, decorative cords or metallic braids over a paper-collaged surface.
Use a thinner, contrasting thread to tack the cord into place with small, evenly spaced stitches.
This method is perfect for creating bold, graphic outlines and borders that add a touch of medieval richness to your work.
19. Let Handmade Paper Be Your Canvas
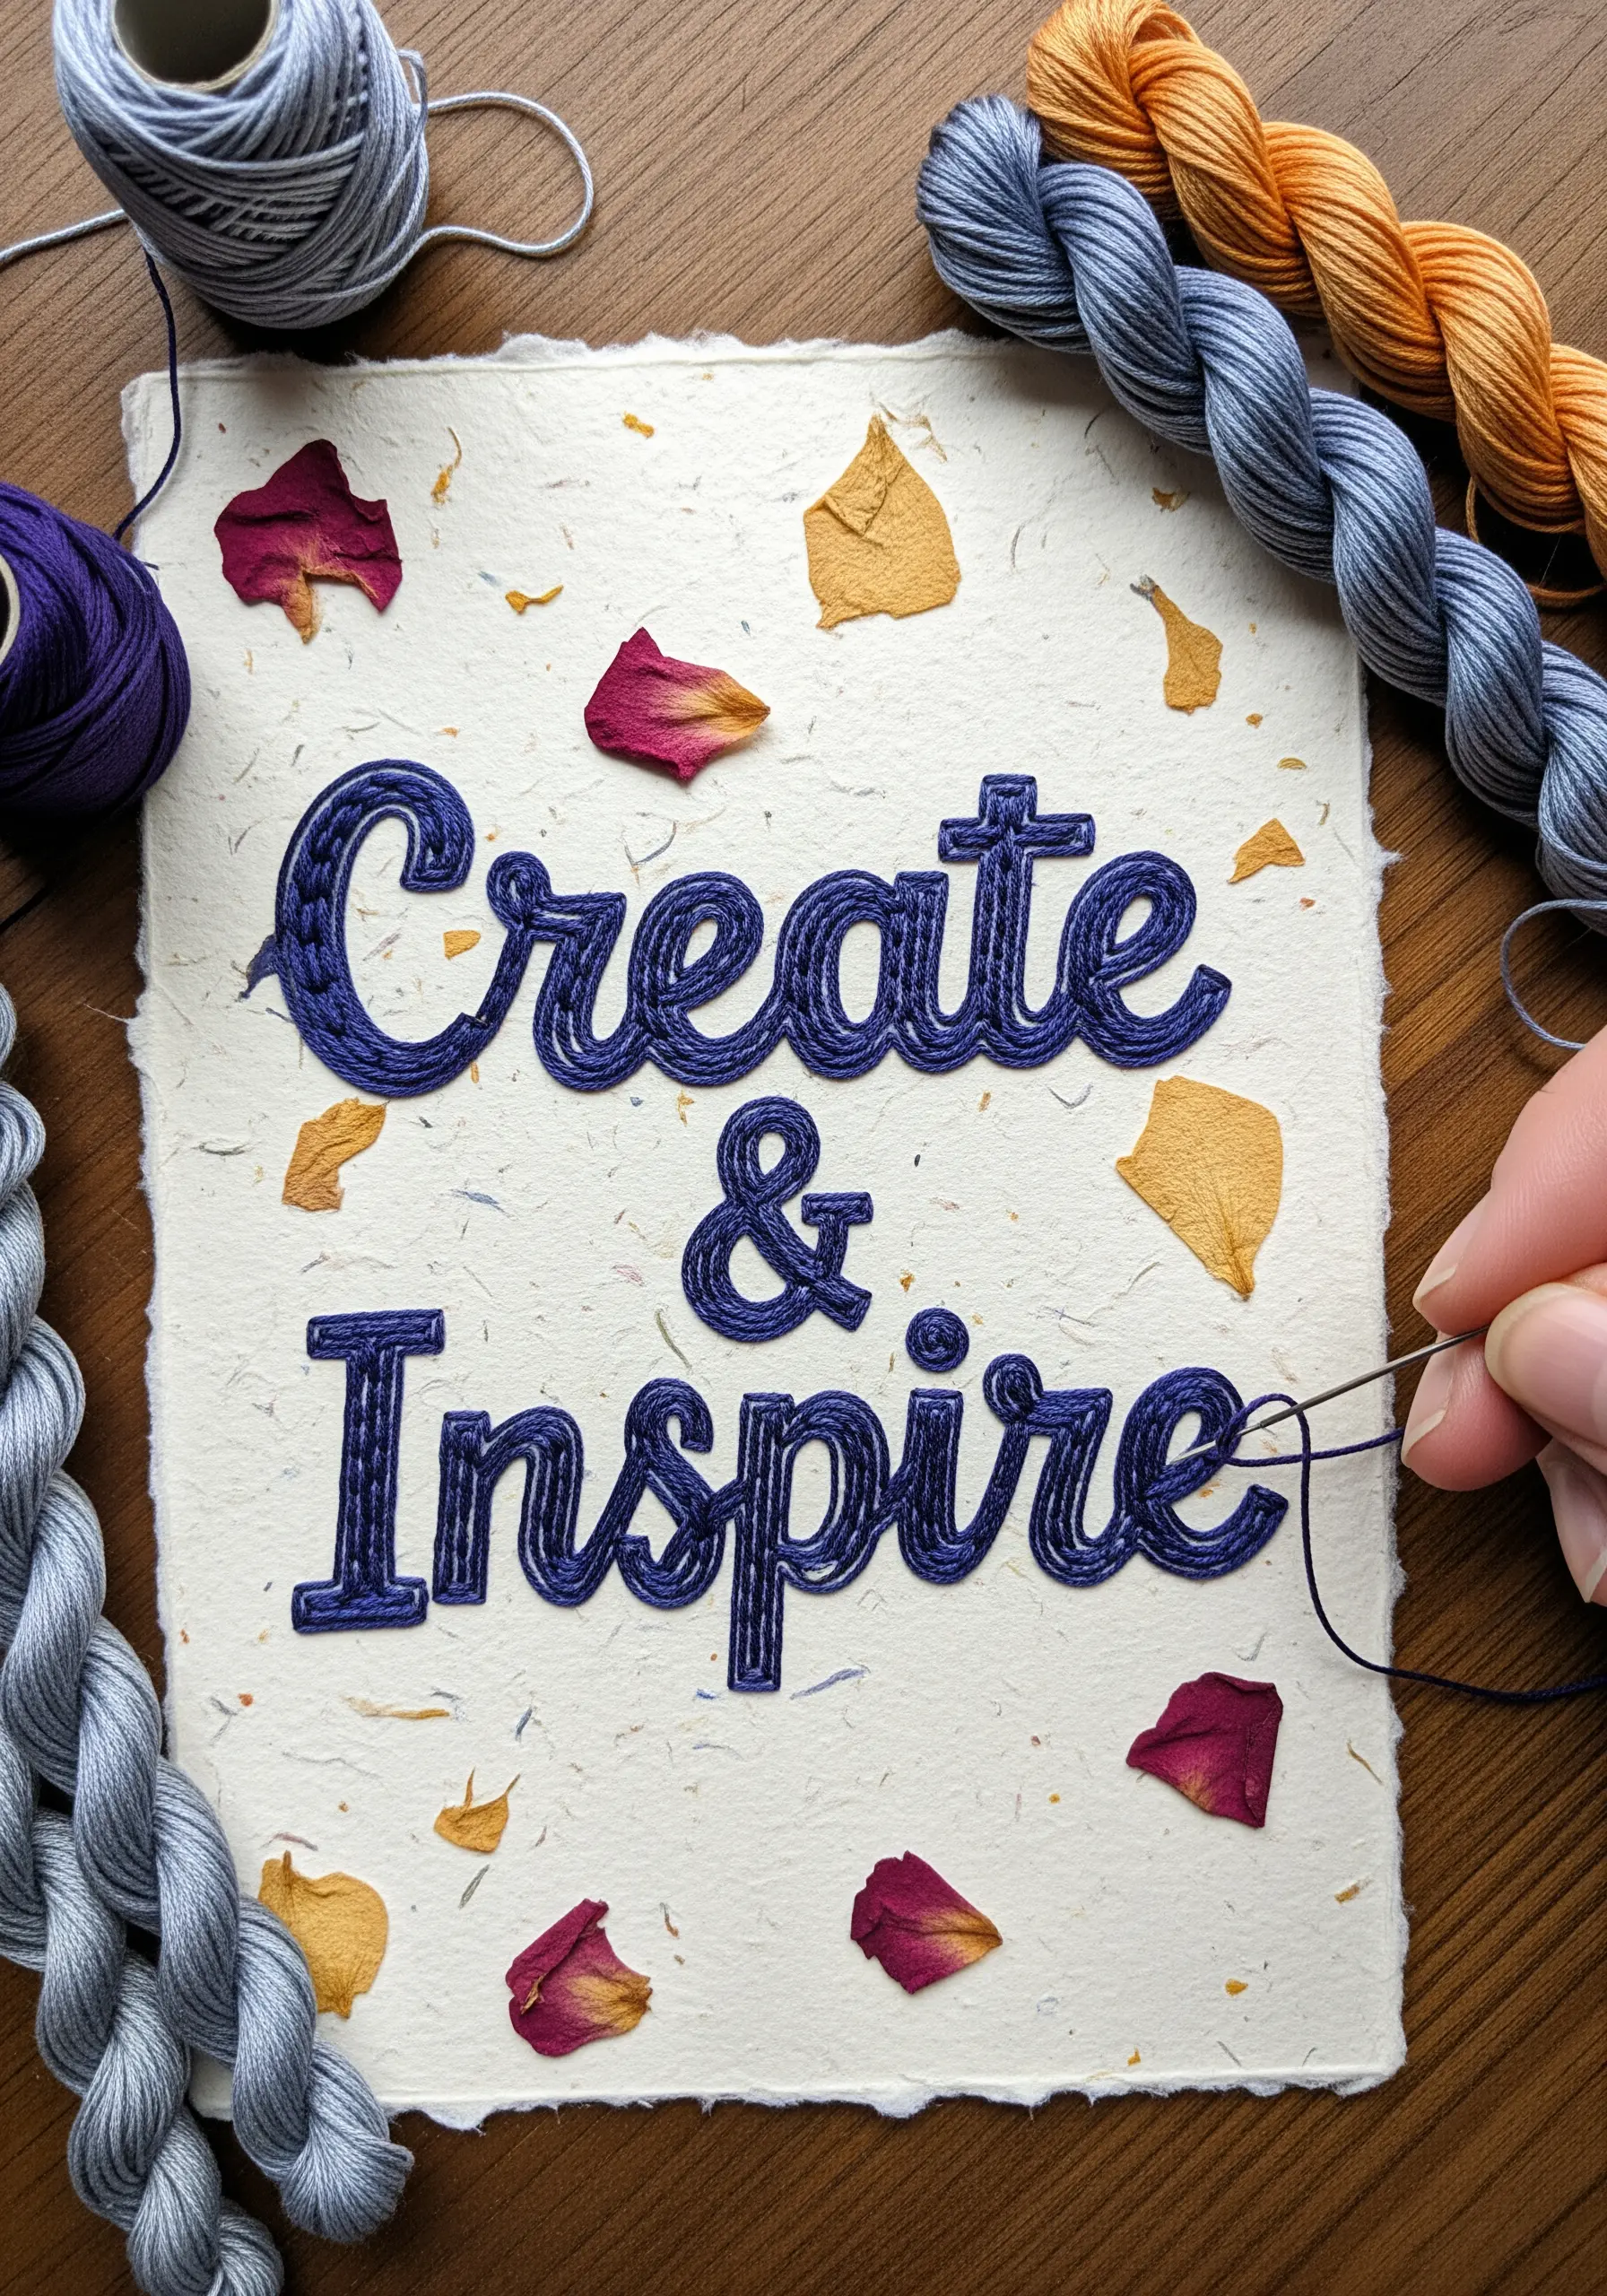
When your canvas is a work of art in itself, your embroidery can be beautifully simple.
Choose a high-quality handmade paper with interesting inclusions like flower petals, leaves, or threads.
The inherent texture and visual interest of the paper mean you only need a few well-placed stitches to create a finished piece.
A simple word or phrase in a clean satin stitch will feel perfectly balanced, allowing the beauty of the paper to shine through.
20. Achieve Delicate Detail with Paper-Stitched Seashells
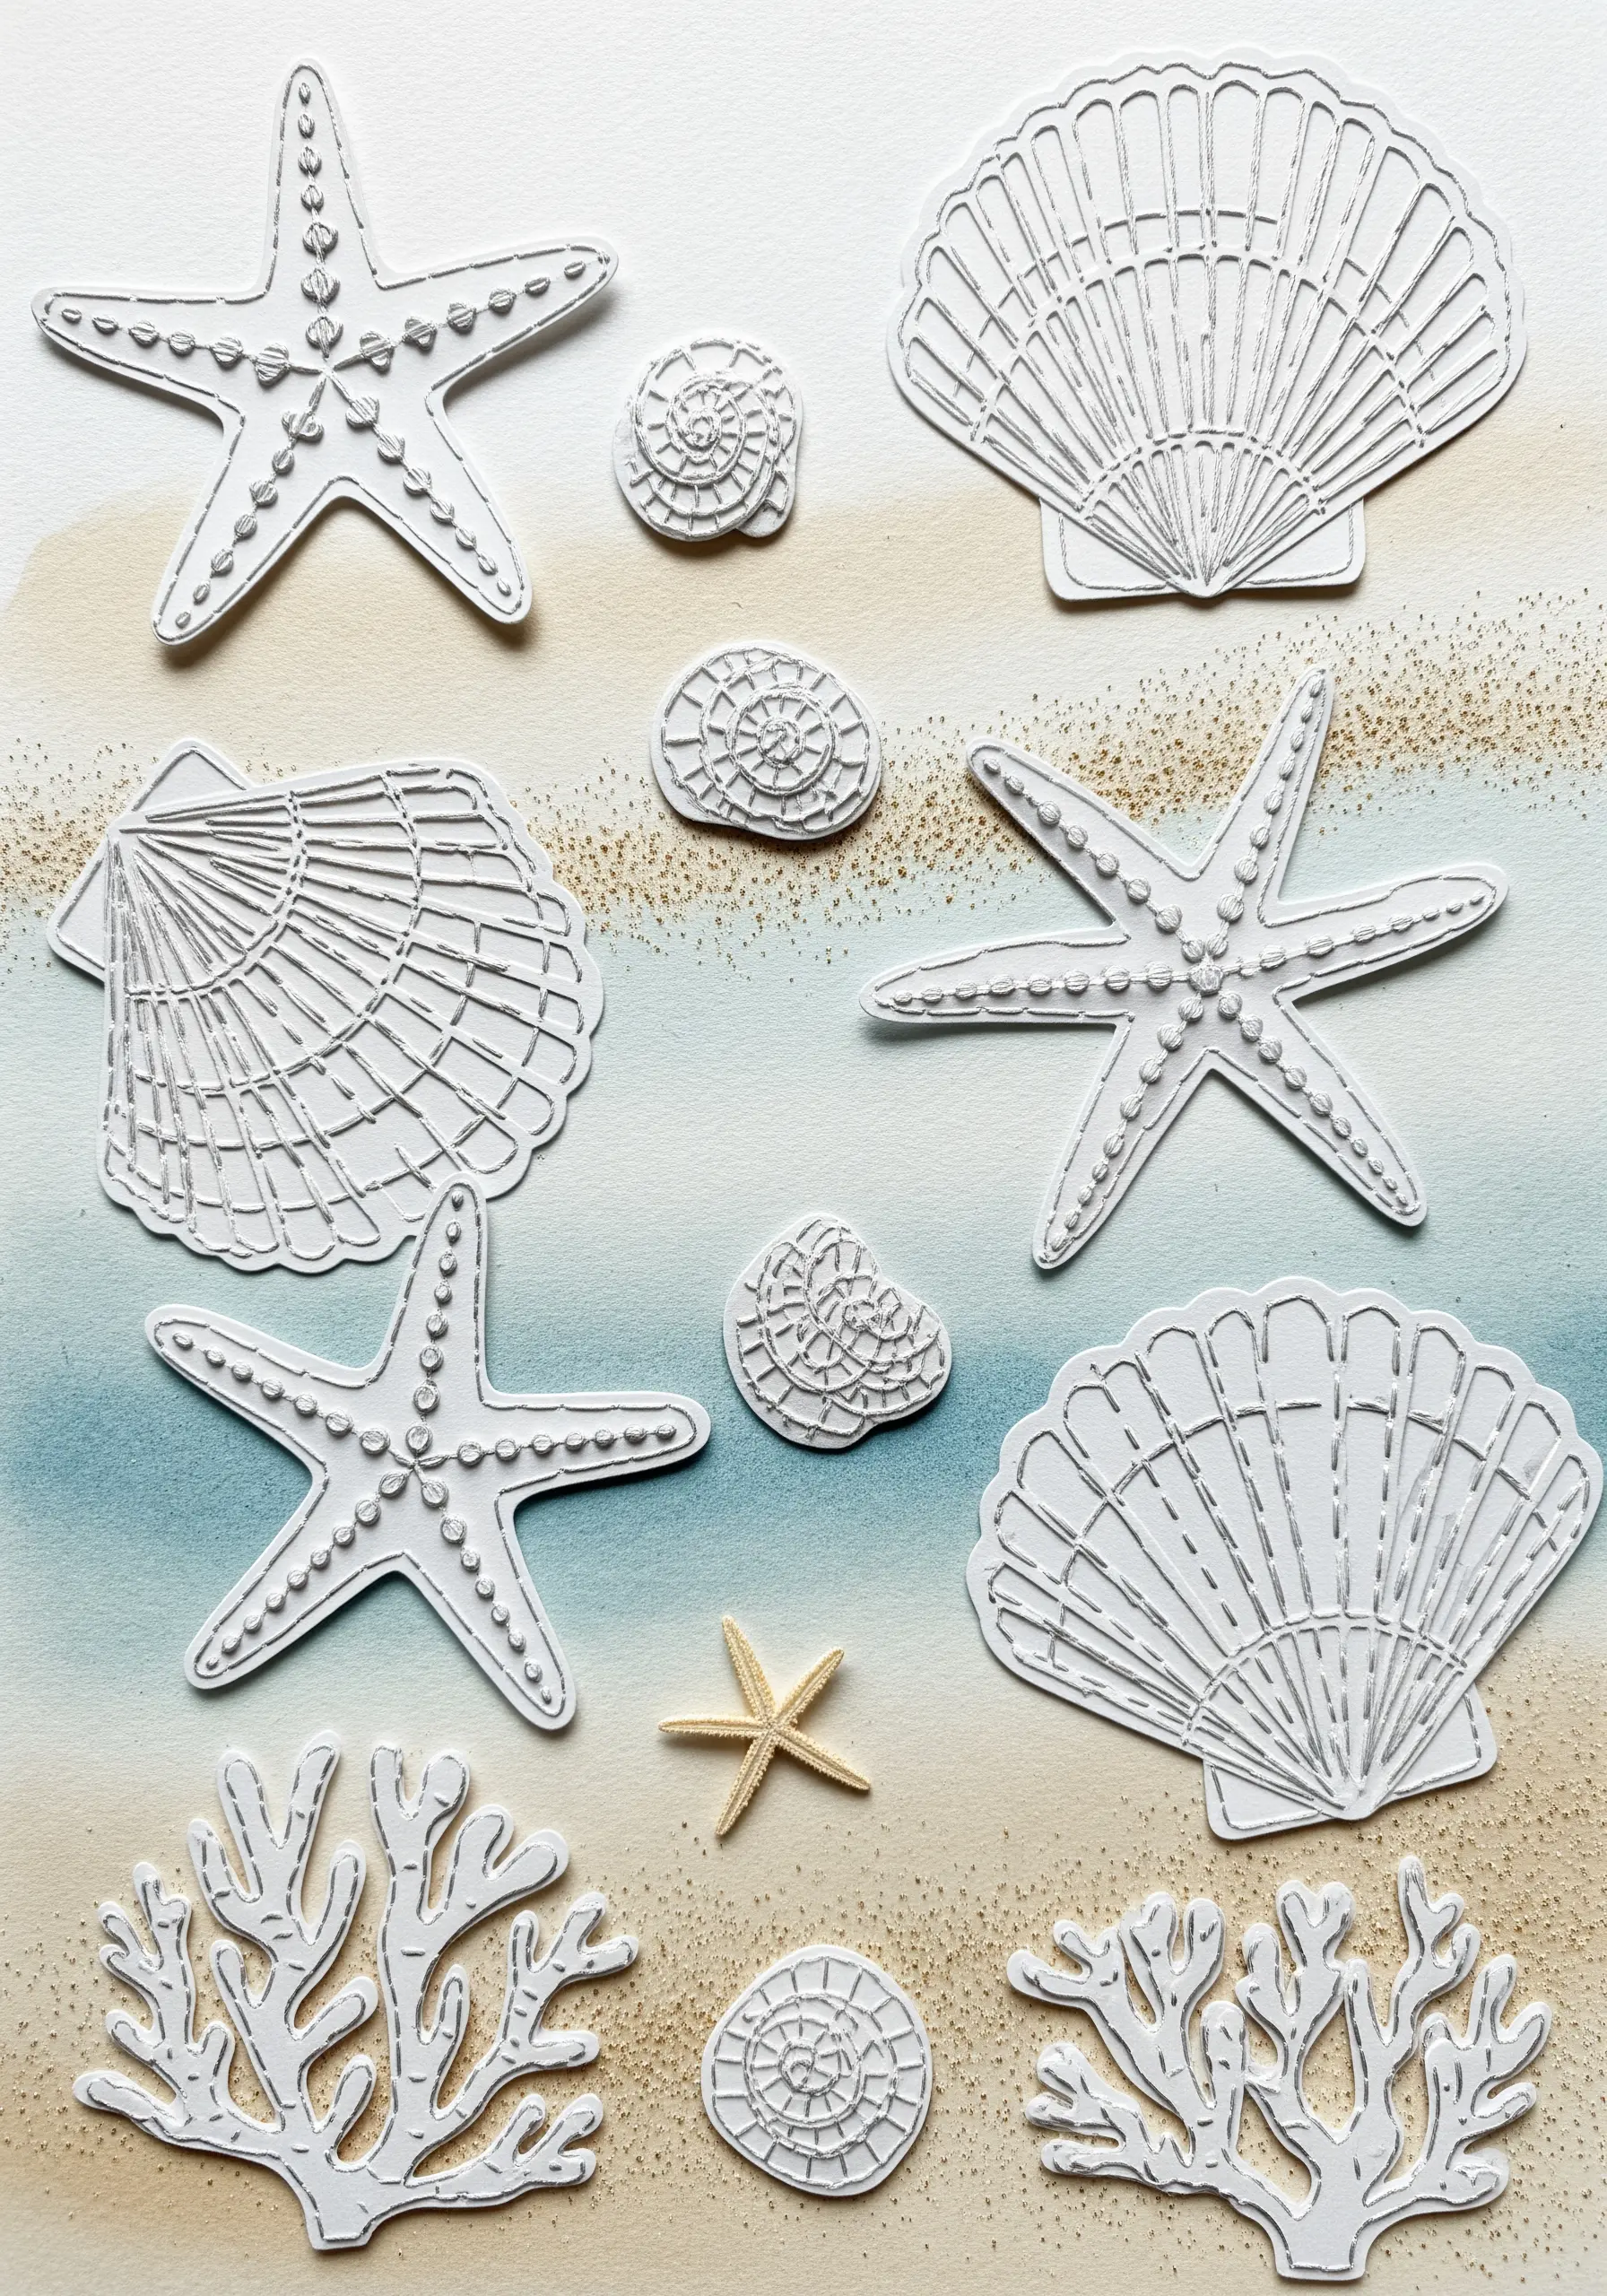
Recreate the fine, intricate lines of seashells by stitching on sturdy paper or cardstock.
Draw or transfer your shell designs onto the paper and use a simple backstitch or running stitch with a single strand of thread.
The paper’s stability allows you to create incredibly fine, precise lines that mimic the delicate growth rings and textures found in nature.
This technique is a beautiful way to explore the potential of minimalist, ocean-inspired hoop embroidery.
21. Integrate Thread into Papercut Designs
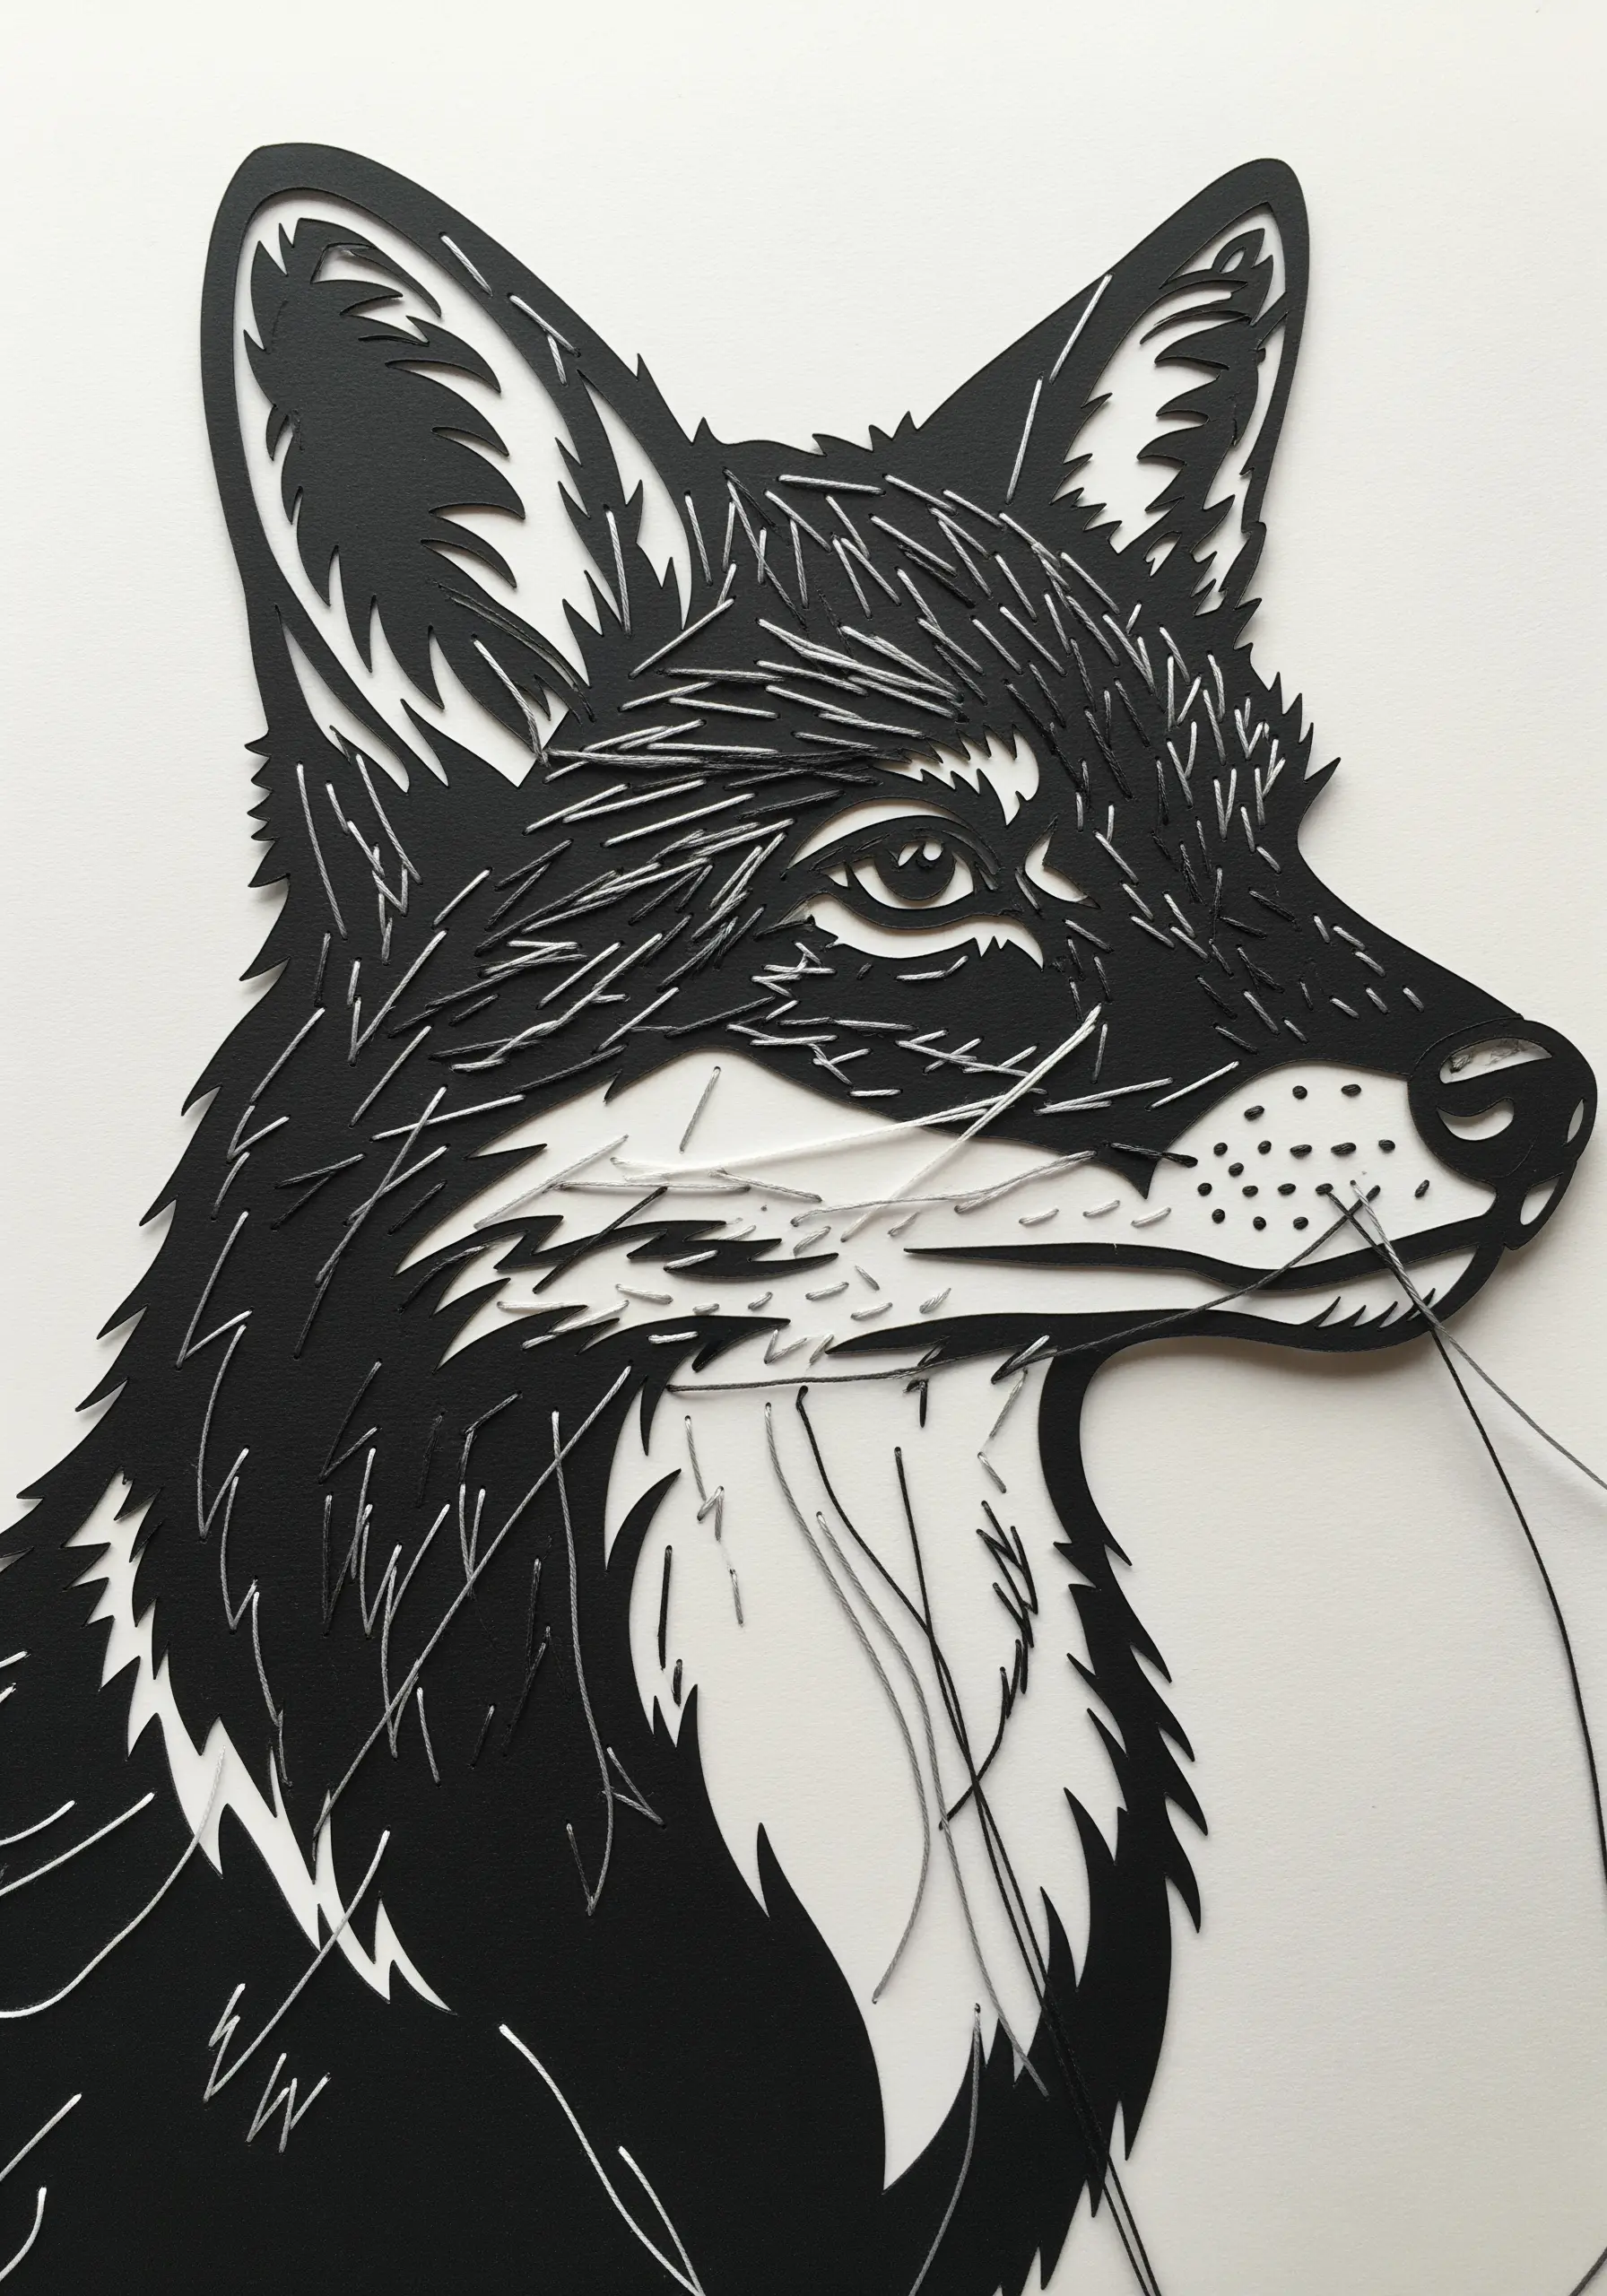
Combine the bold, graphic nature of paper cutting with the fine, textural quality of embroidery thread.
Create your main silhouette by cutting it from black cardstock, focusing on clean lines and negative space.
Then, introduce thread as a secondary element—use it to add delicate whiskers, soft fur texture, or subtle highlights.
This thoughtful integration of two distinct mediums creates a piece that is visually striking and wonderfully tactile.
22. Build 3D Architectural Models with Paper and Thread
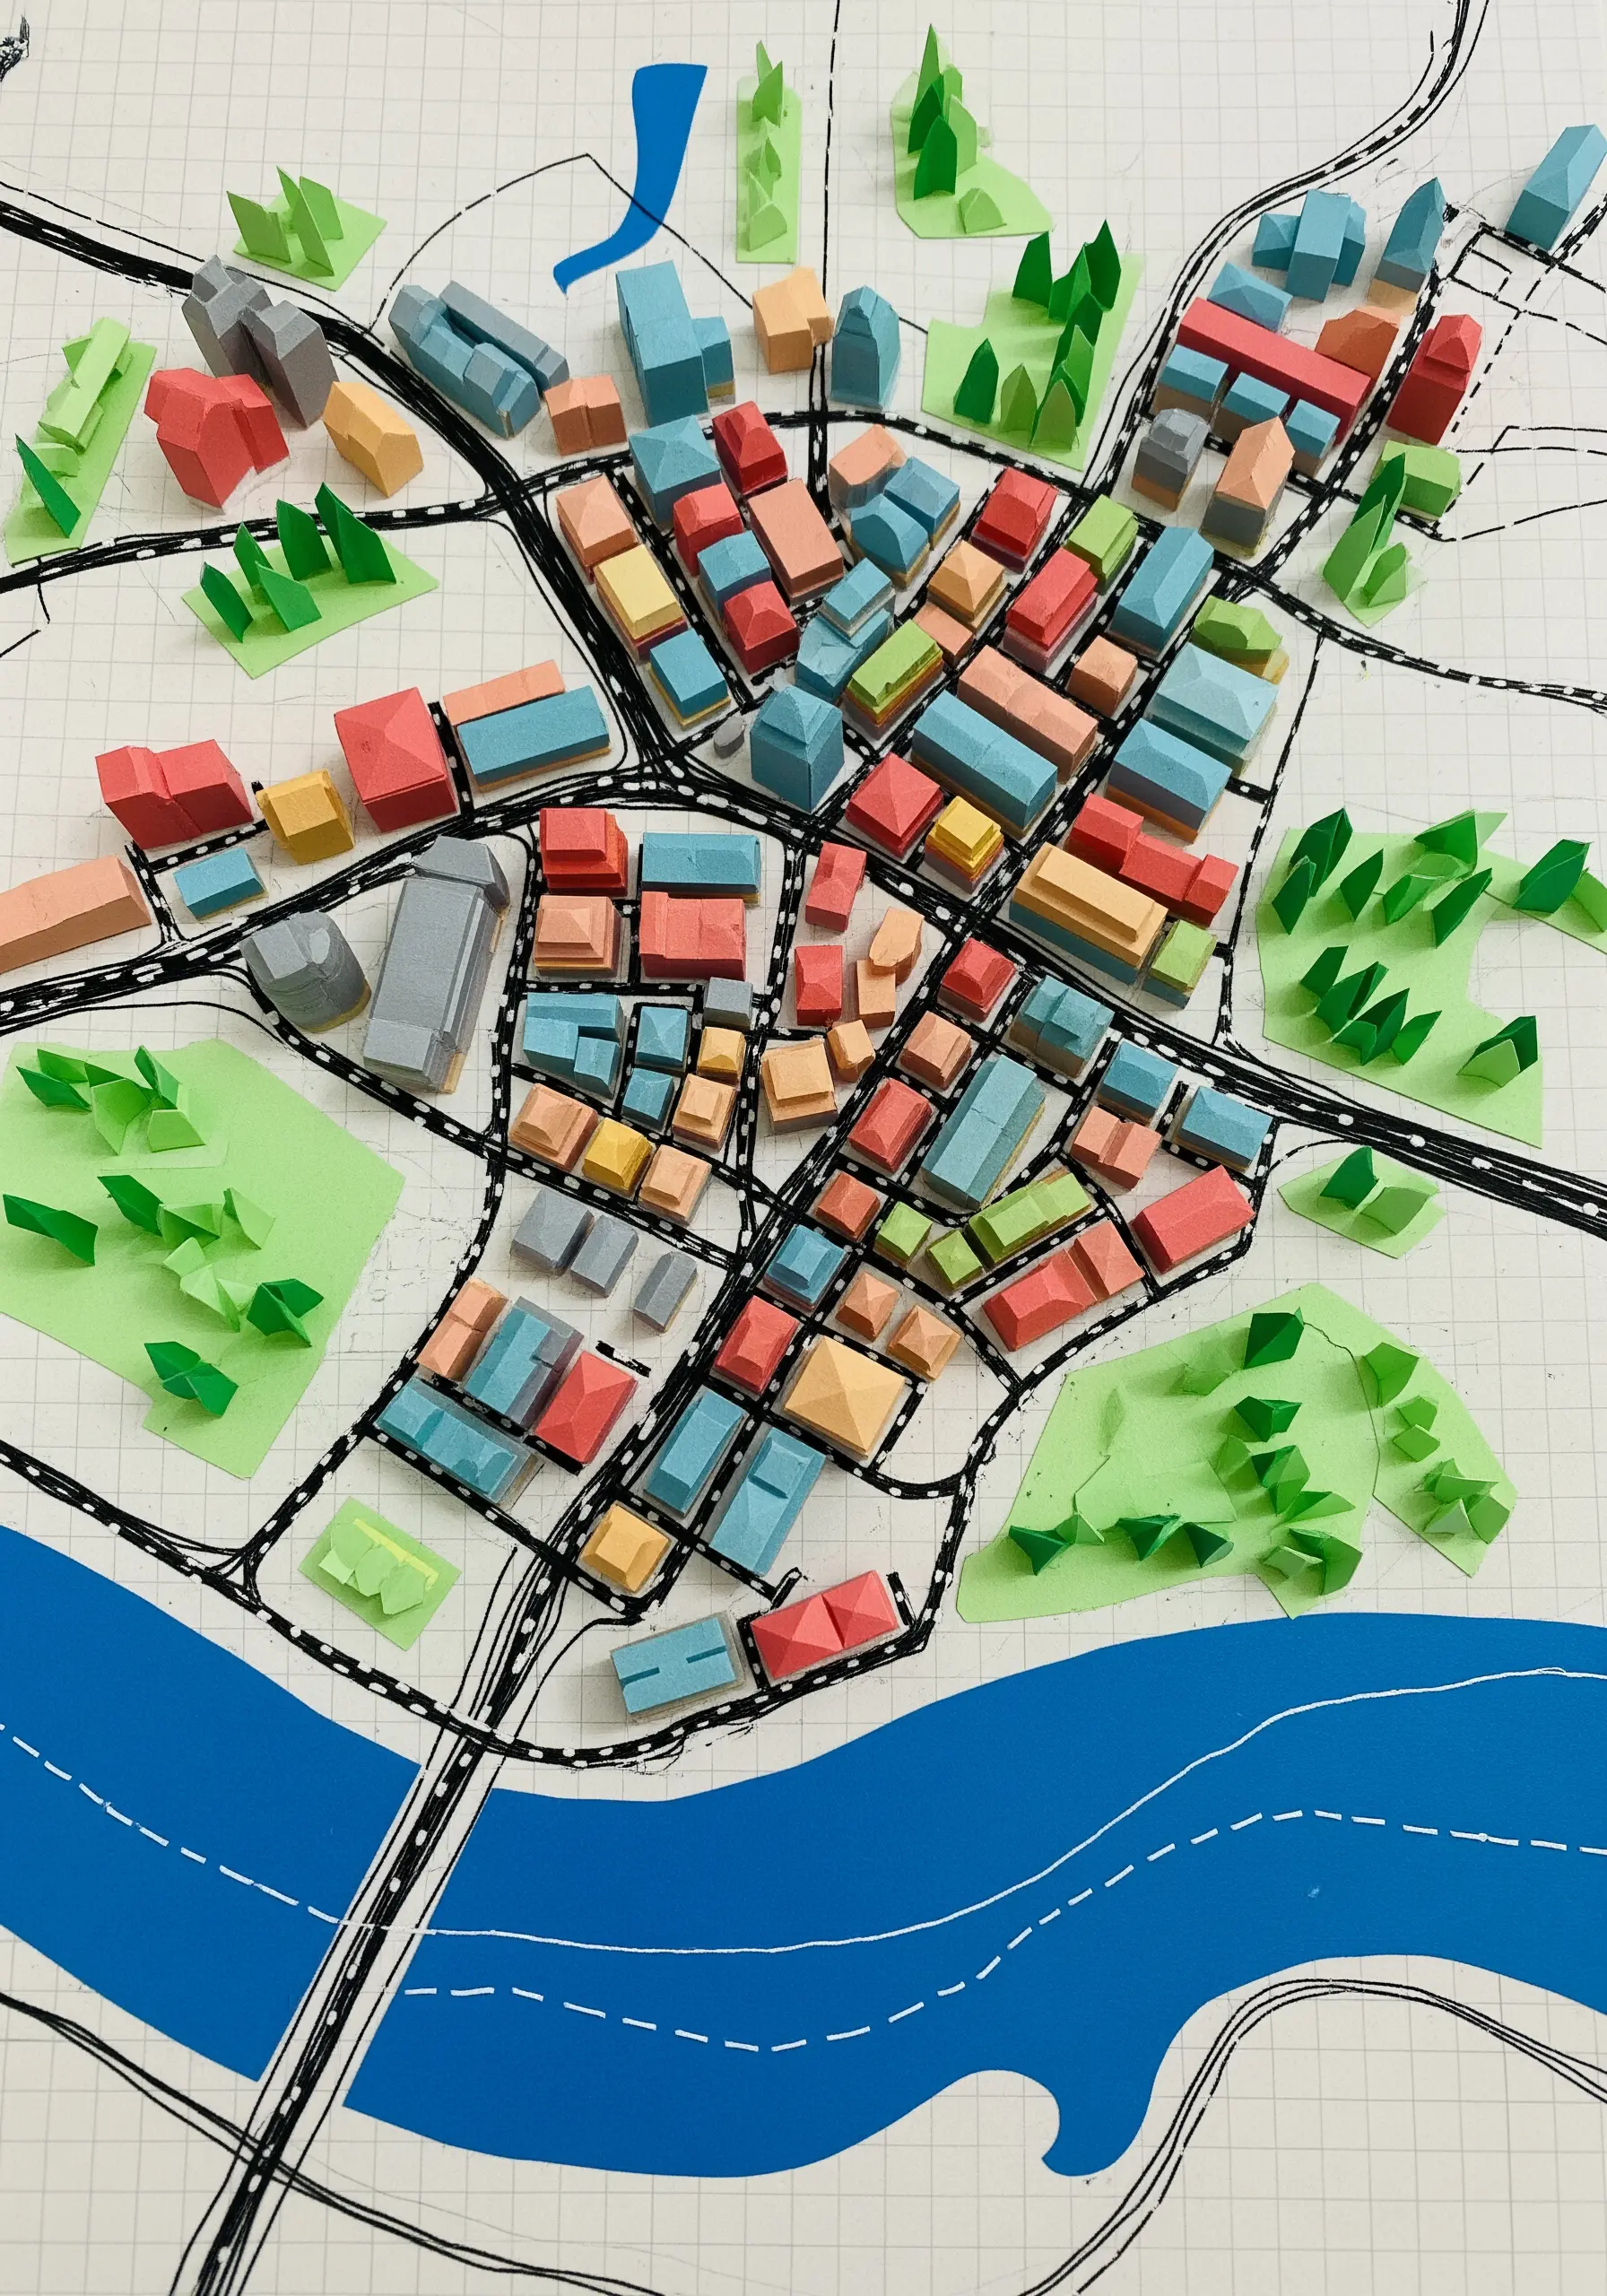
Use the principles of 3D paper modeling to inform your embroidery and create dimensional cityscapes.
Instead of stitching a flat building, build up the structure using small, folded paper shapes or pieces of felt as a foundation.
Stitch over these raised forms to add windows, doors, and textures.
This method of padded satin stitch or stumpwork gives your architectural embroidery a tangible presence and a playful, map-like quality.
23. Craft Lightweight Jewelry with Stitched Paper
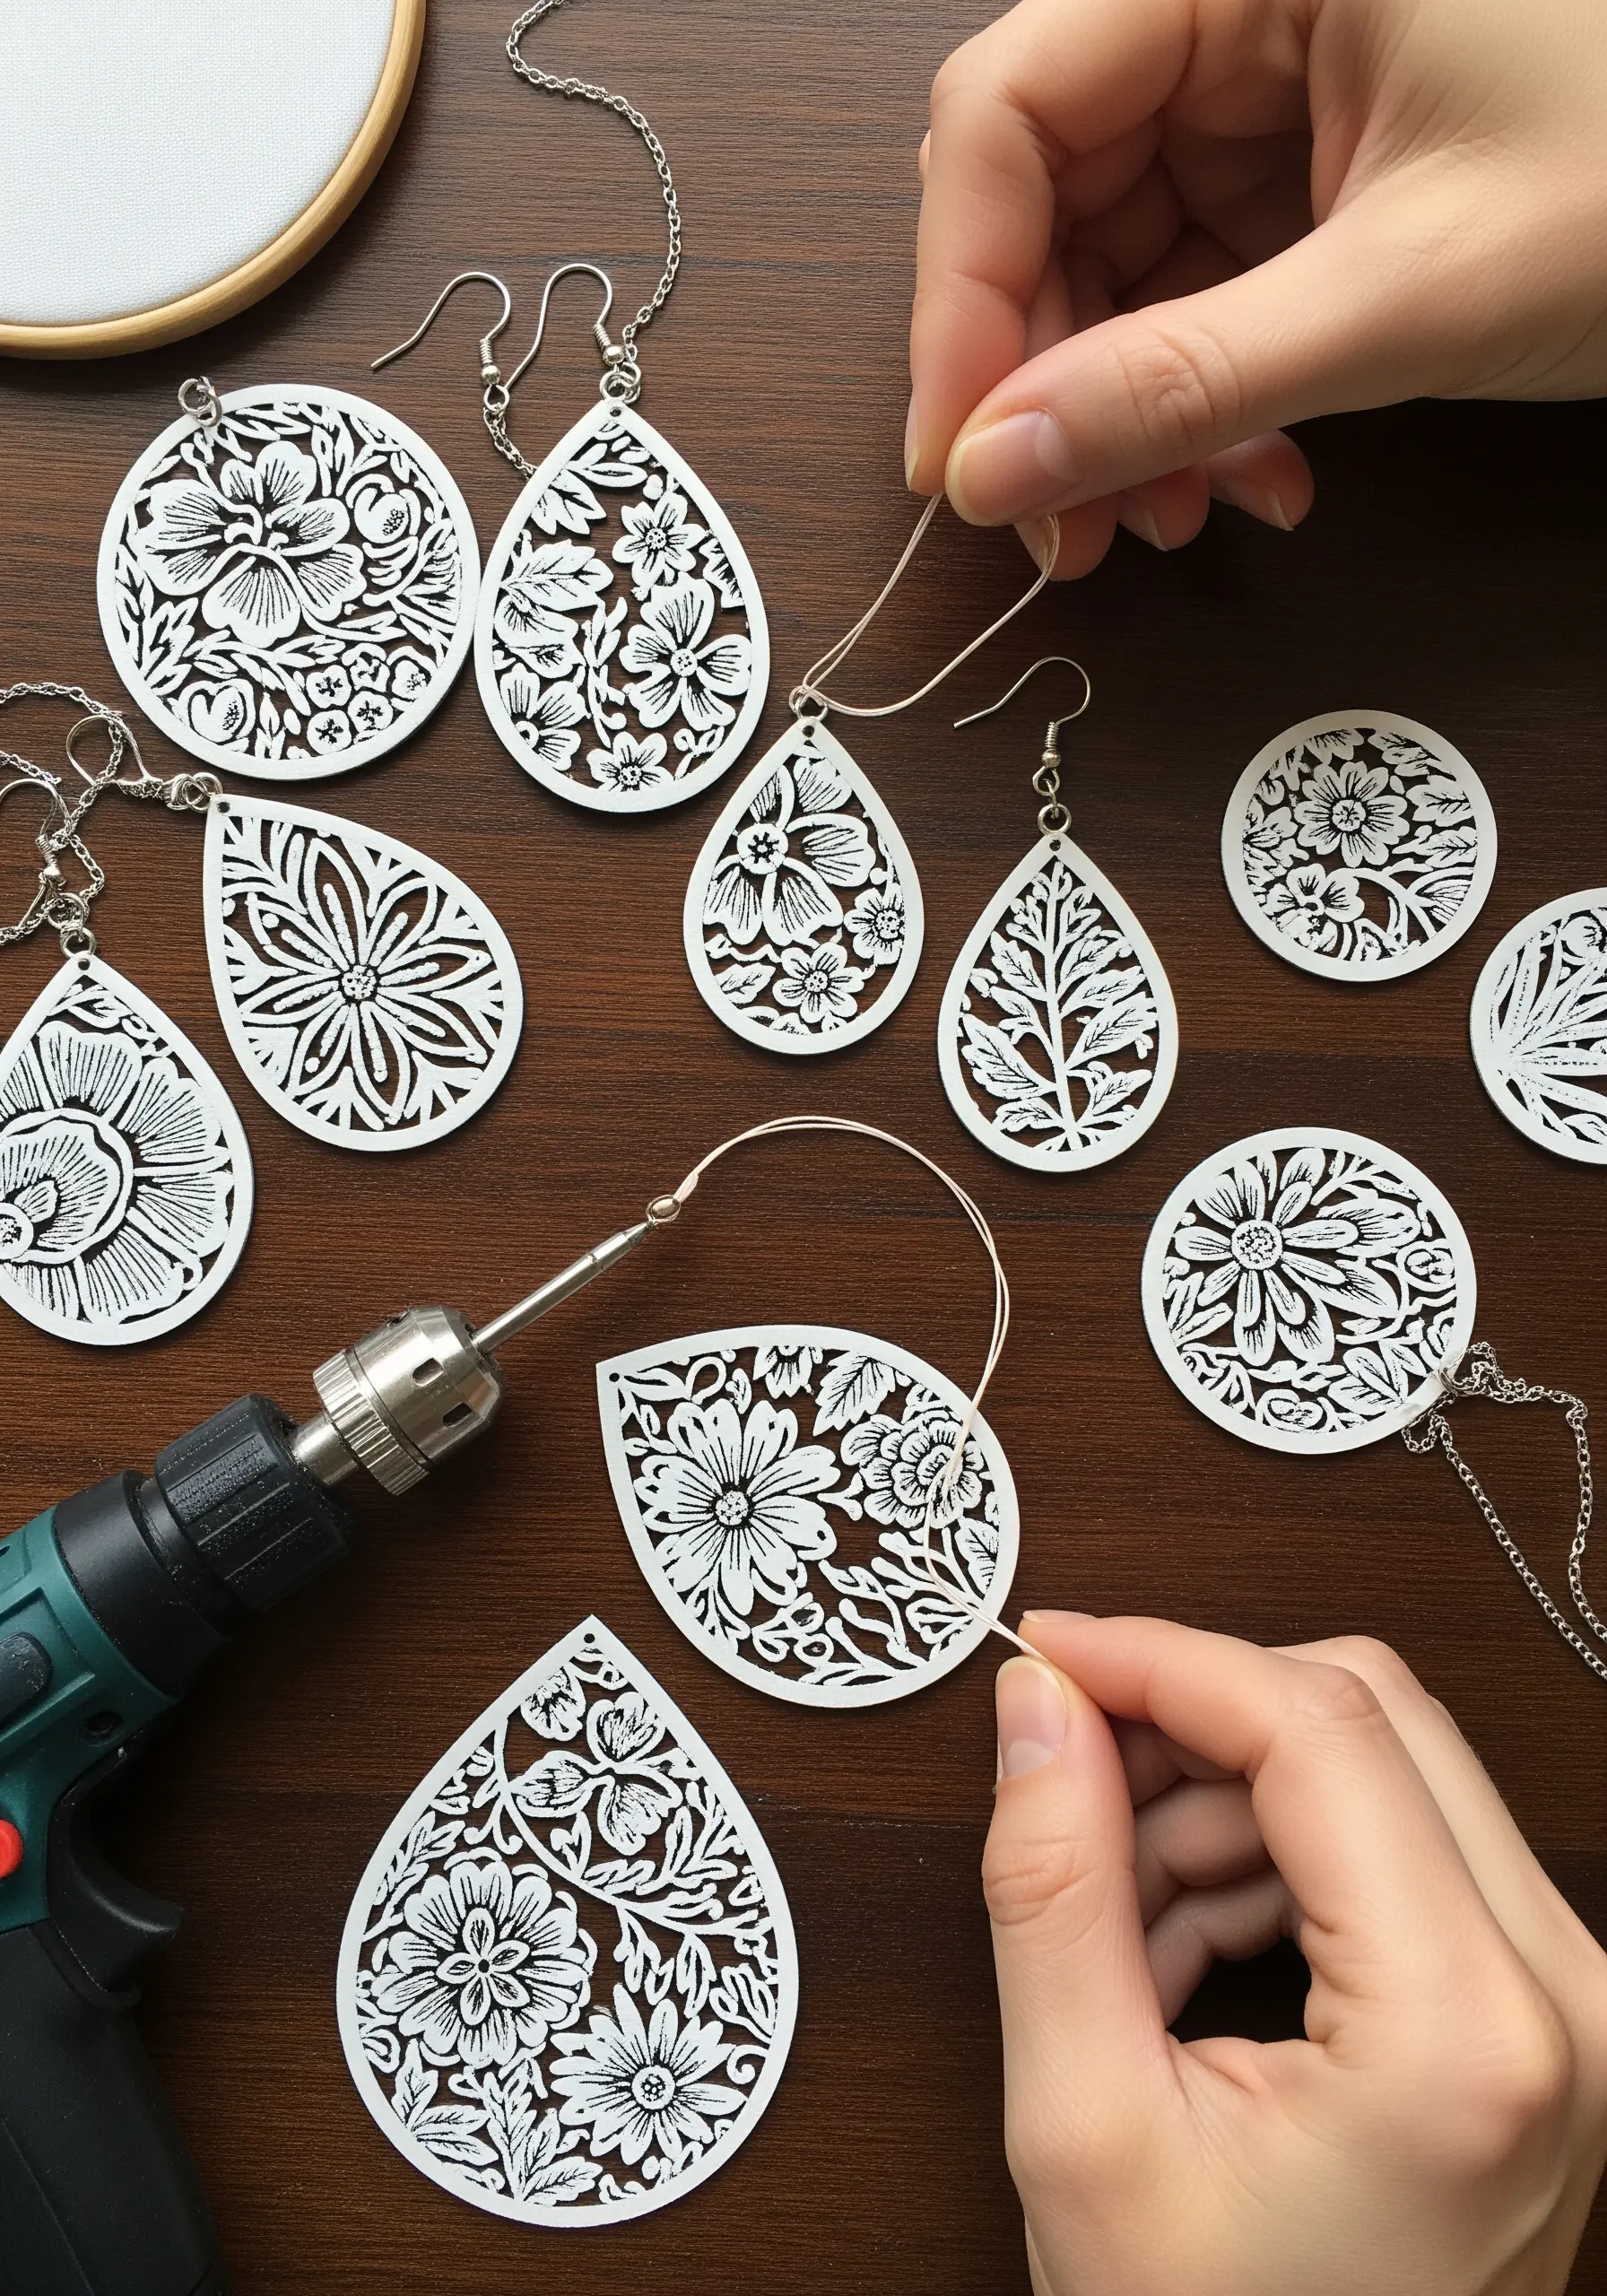
The rigidity and lightness of paper make it an ideal—and surprising—material for creating embroidered jewelry.
Use a craft knife to cut intricate floral or geometric patterns from a sturdy, high-quality cardstock.
You can then add subtle stitched details to the paper itself, or use the papercut as a template for creating freestanding lace designs on a water-soluble stabilizer.
This technique opens up a world of possibilities for creating delicate, wearable art.
24. Mimic Paper Quilling with 3D Embroidery Stitches
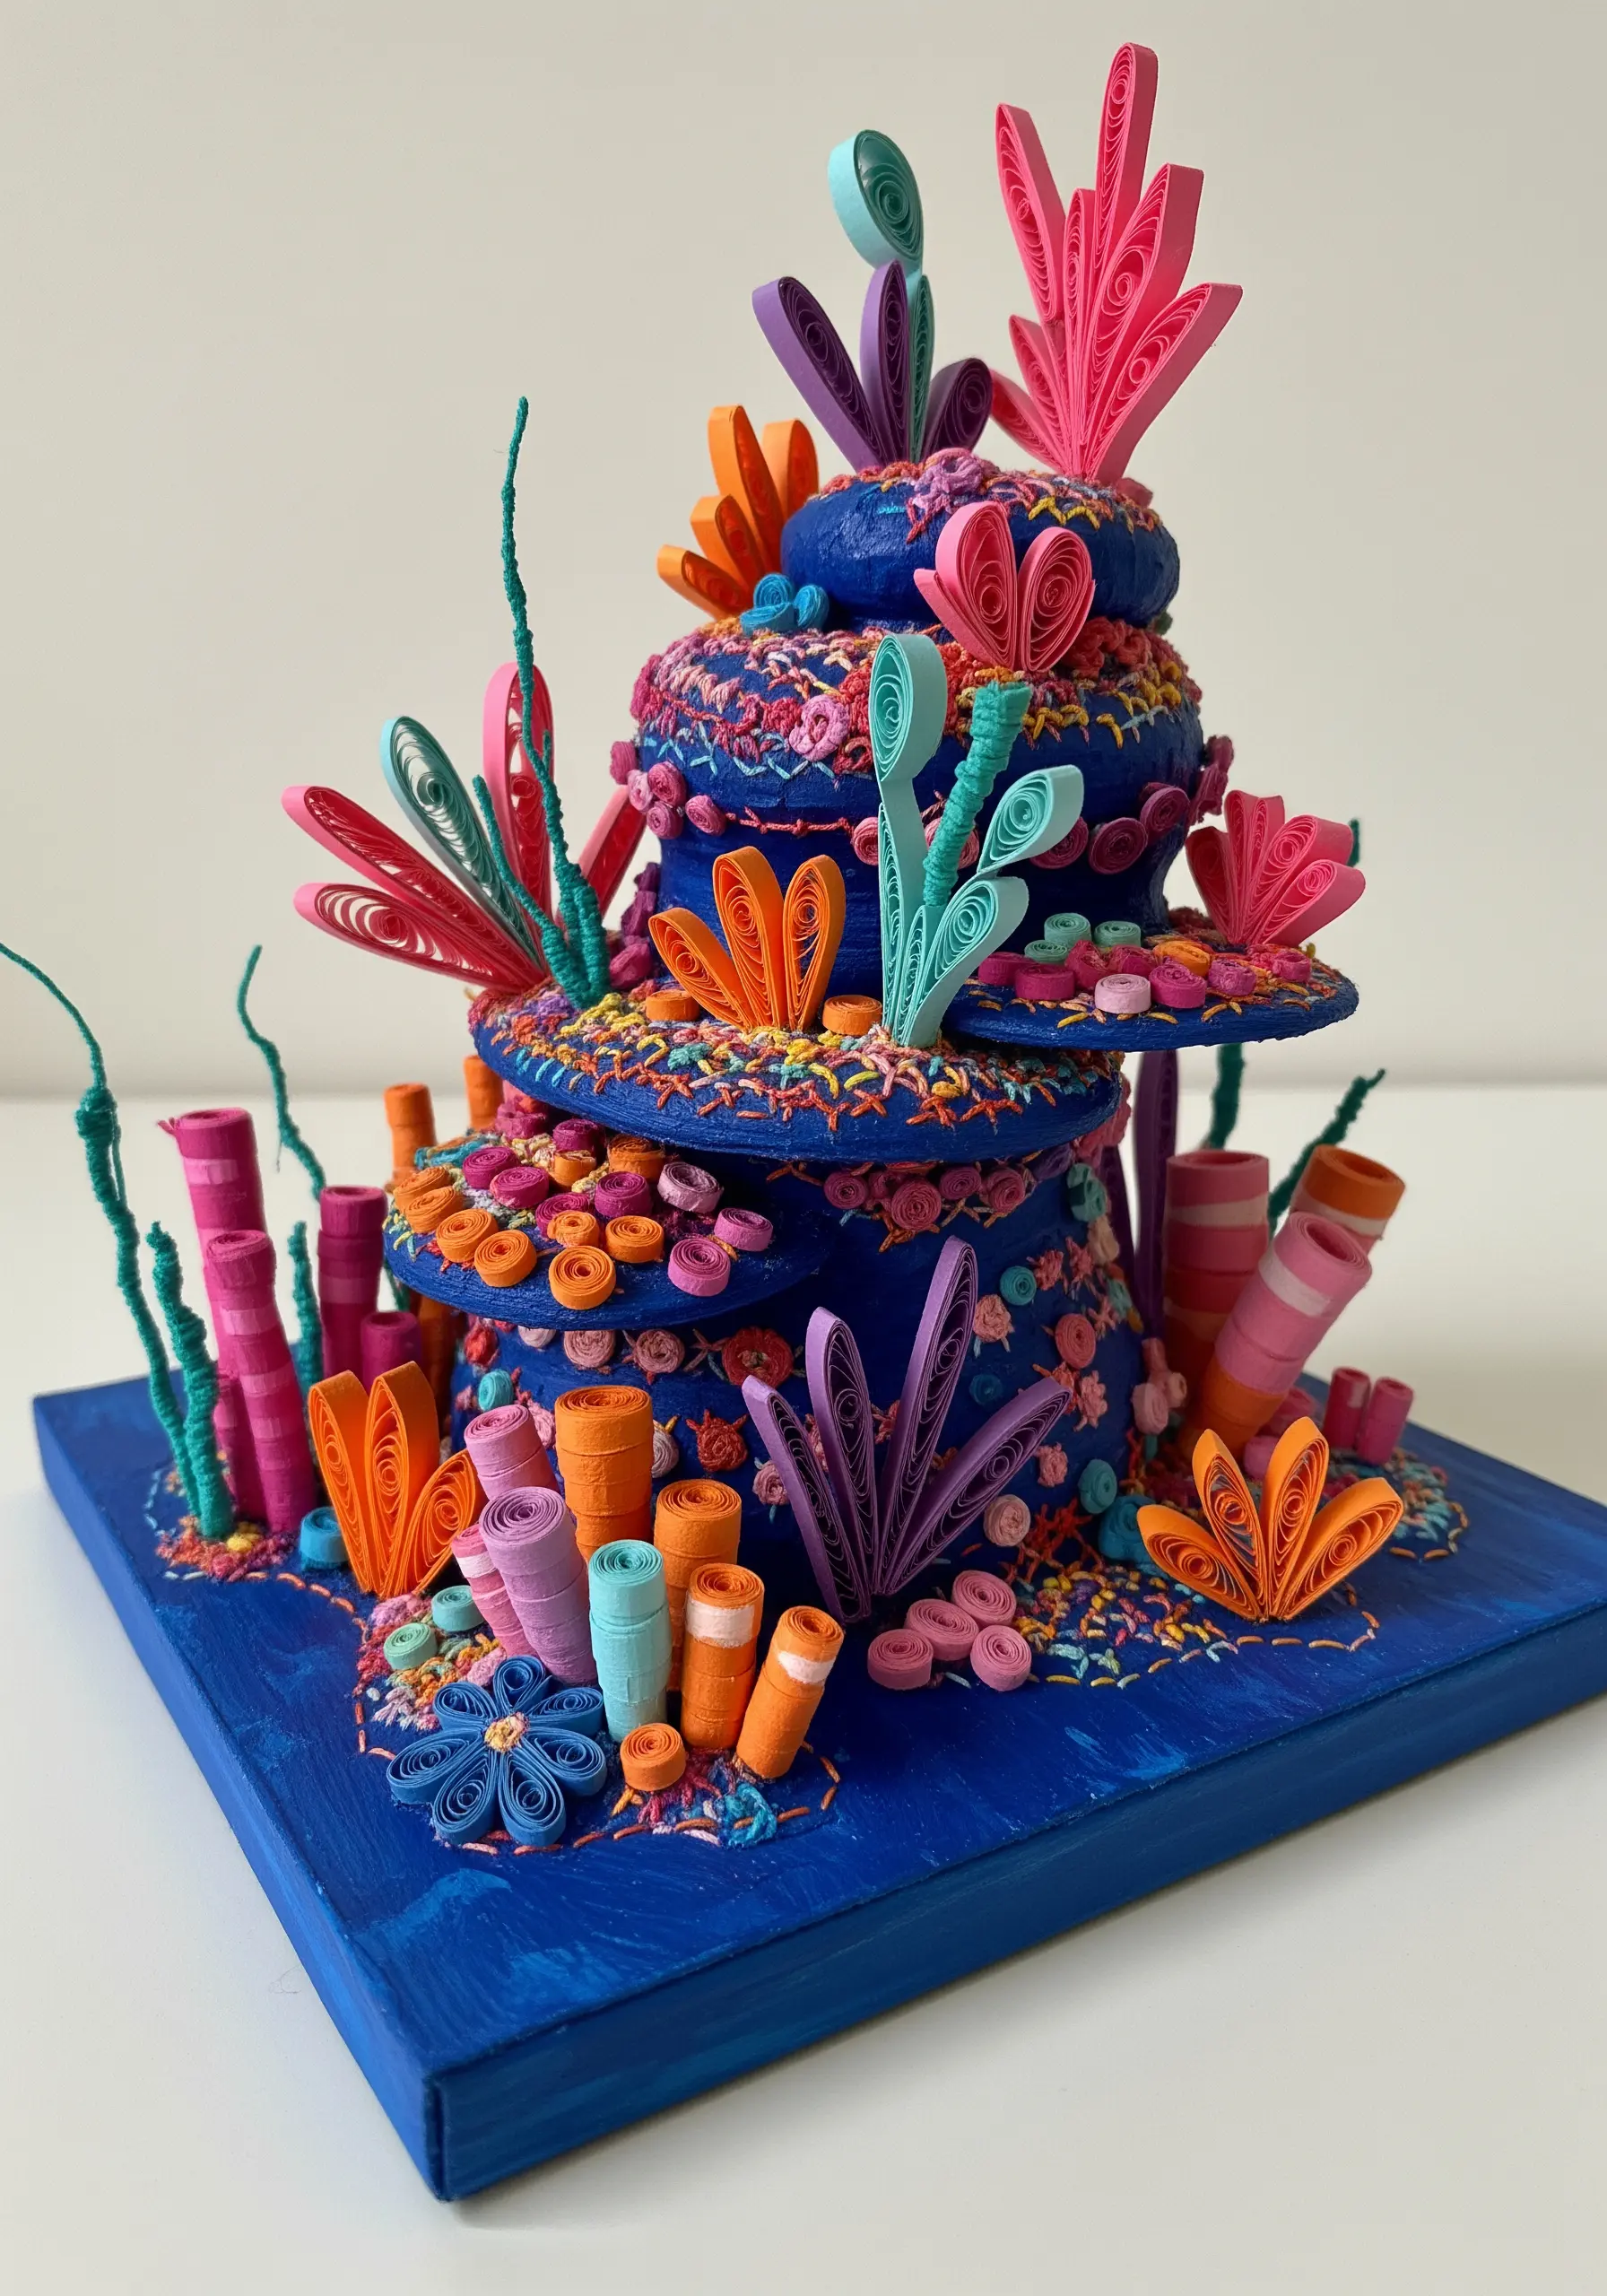
The art of quilling, which involves rolling and shaping strips of paper, can be beautifully translated into embroidery.
Use stitches that create three-dimensional loops, coils, and textures to replicate the look of rolled paper.
Experiment with cast-on stitches, bullion knots, and French knots packed closely together.
This approach allows you to build up sculptural, coral-like forms directly on your fabric, creating a piece with incredible depth and tactile appeal.
25. Add a Refined Finish with Stitched Paper Tags
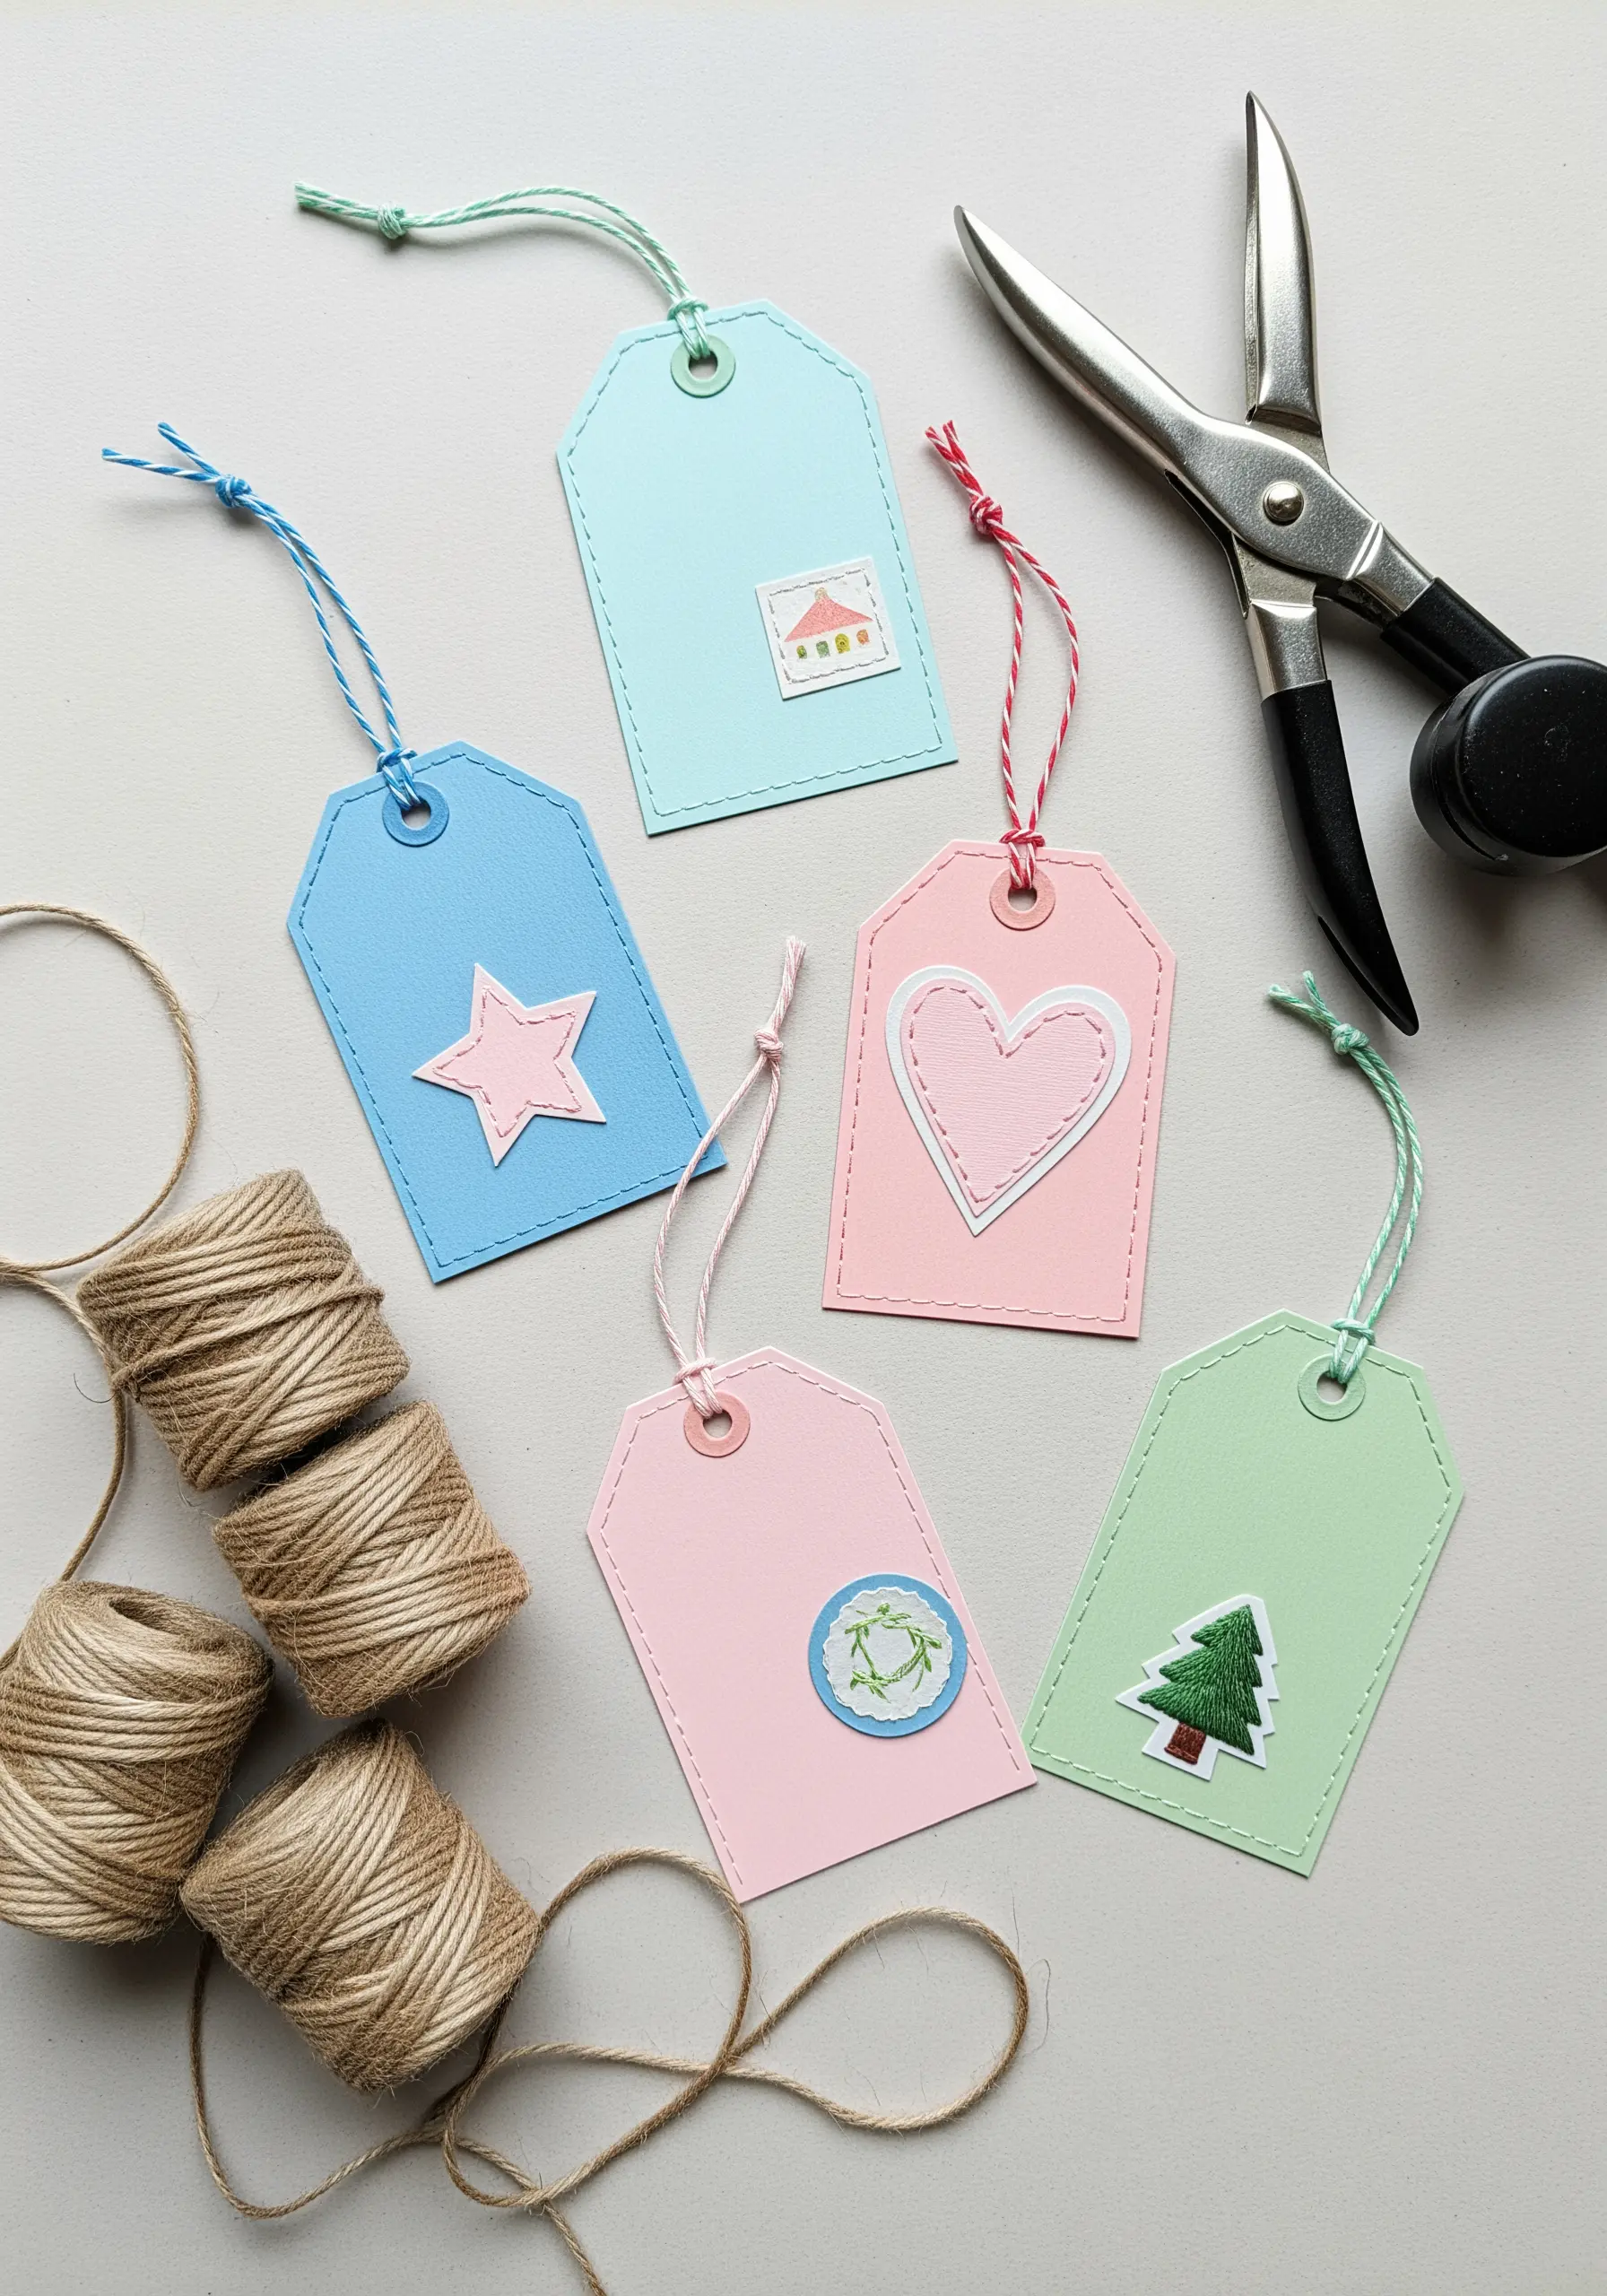
Elevate simple paper gift tags into miniature works of art with the addition of a clean, stitched border.
Layer two pieces of colored cardstock and use a sewing machine or a simple hand-stitched running stitch to secure them together just inside the edge.
This small, thoughtful detail adds a touch of texture and craftsmanship that makes any gift feel more special.
It’s a perfect way to use up small scraps of thread and paper to create thoughtful embroidery gifts.
26. Weave Paper Strips to Create a Unique Canvas
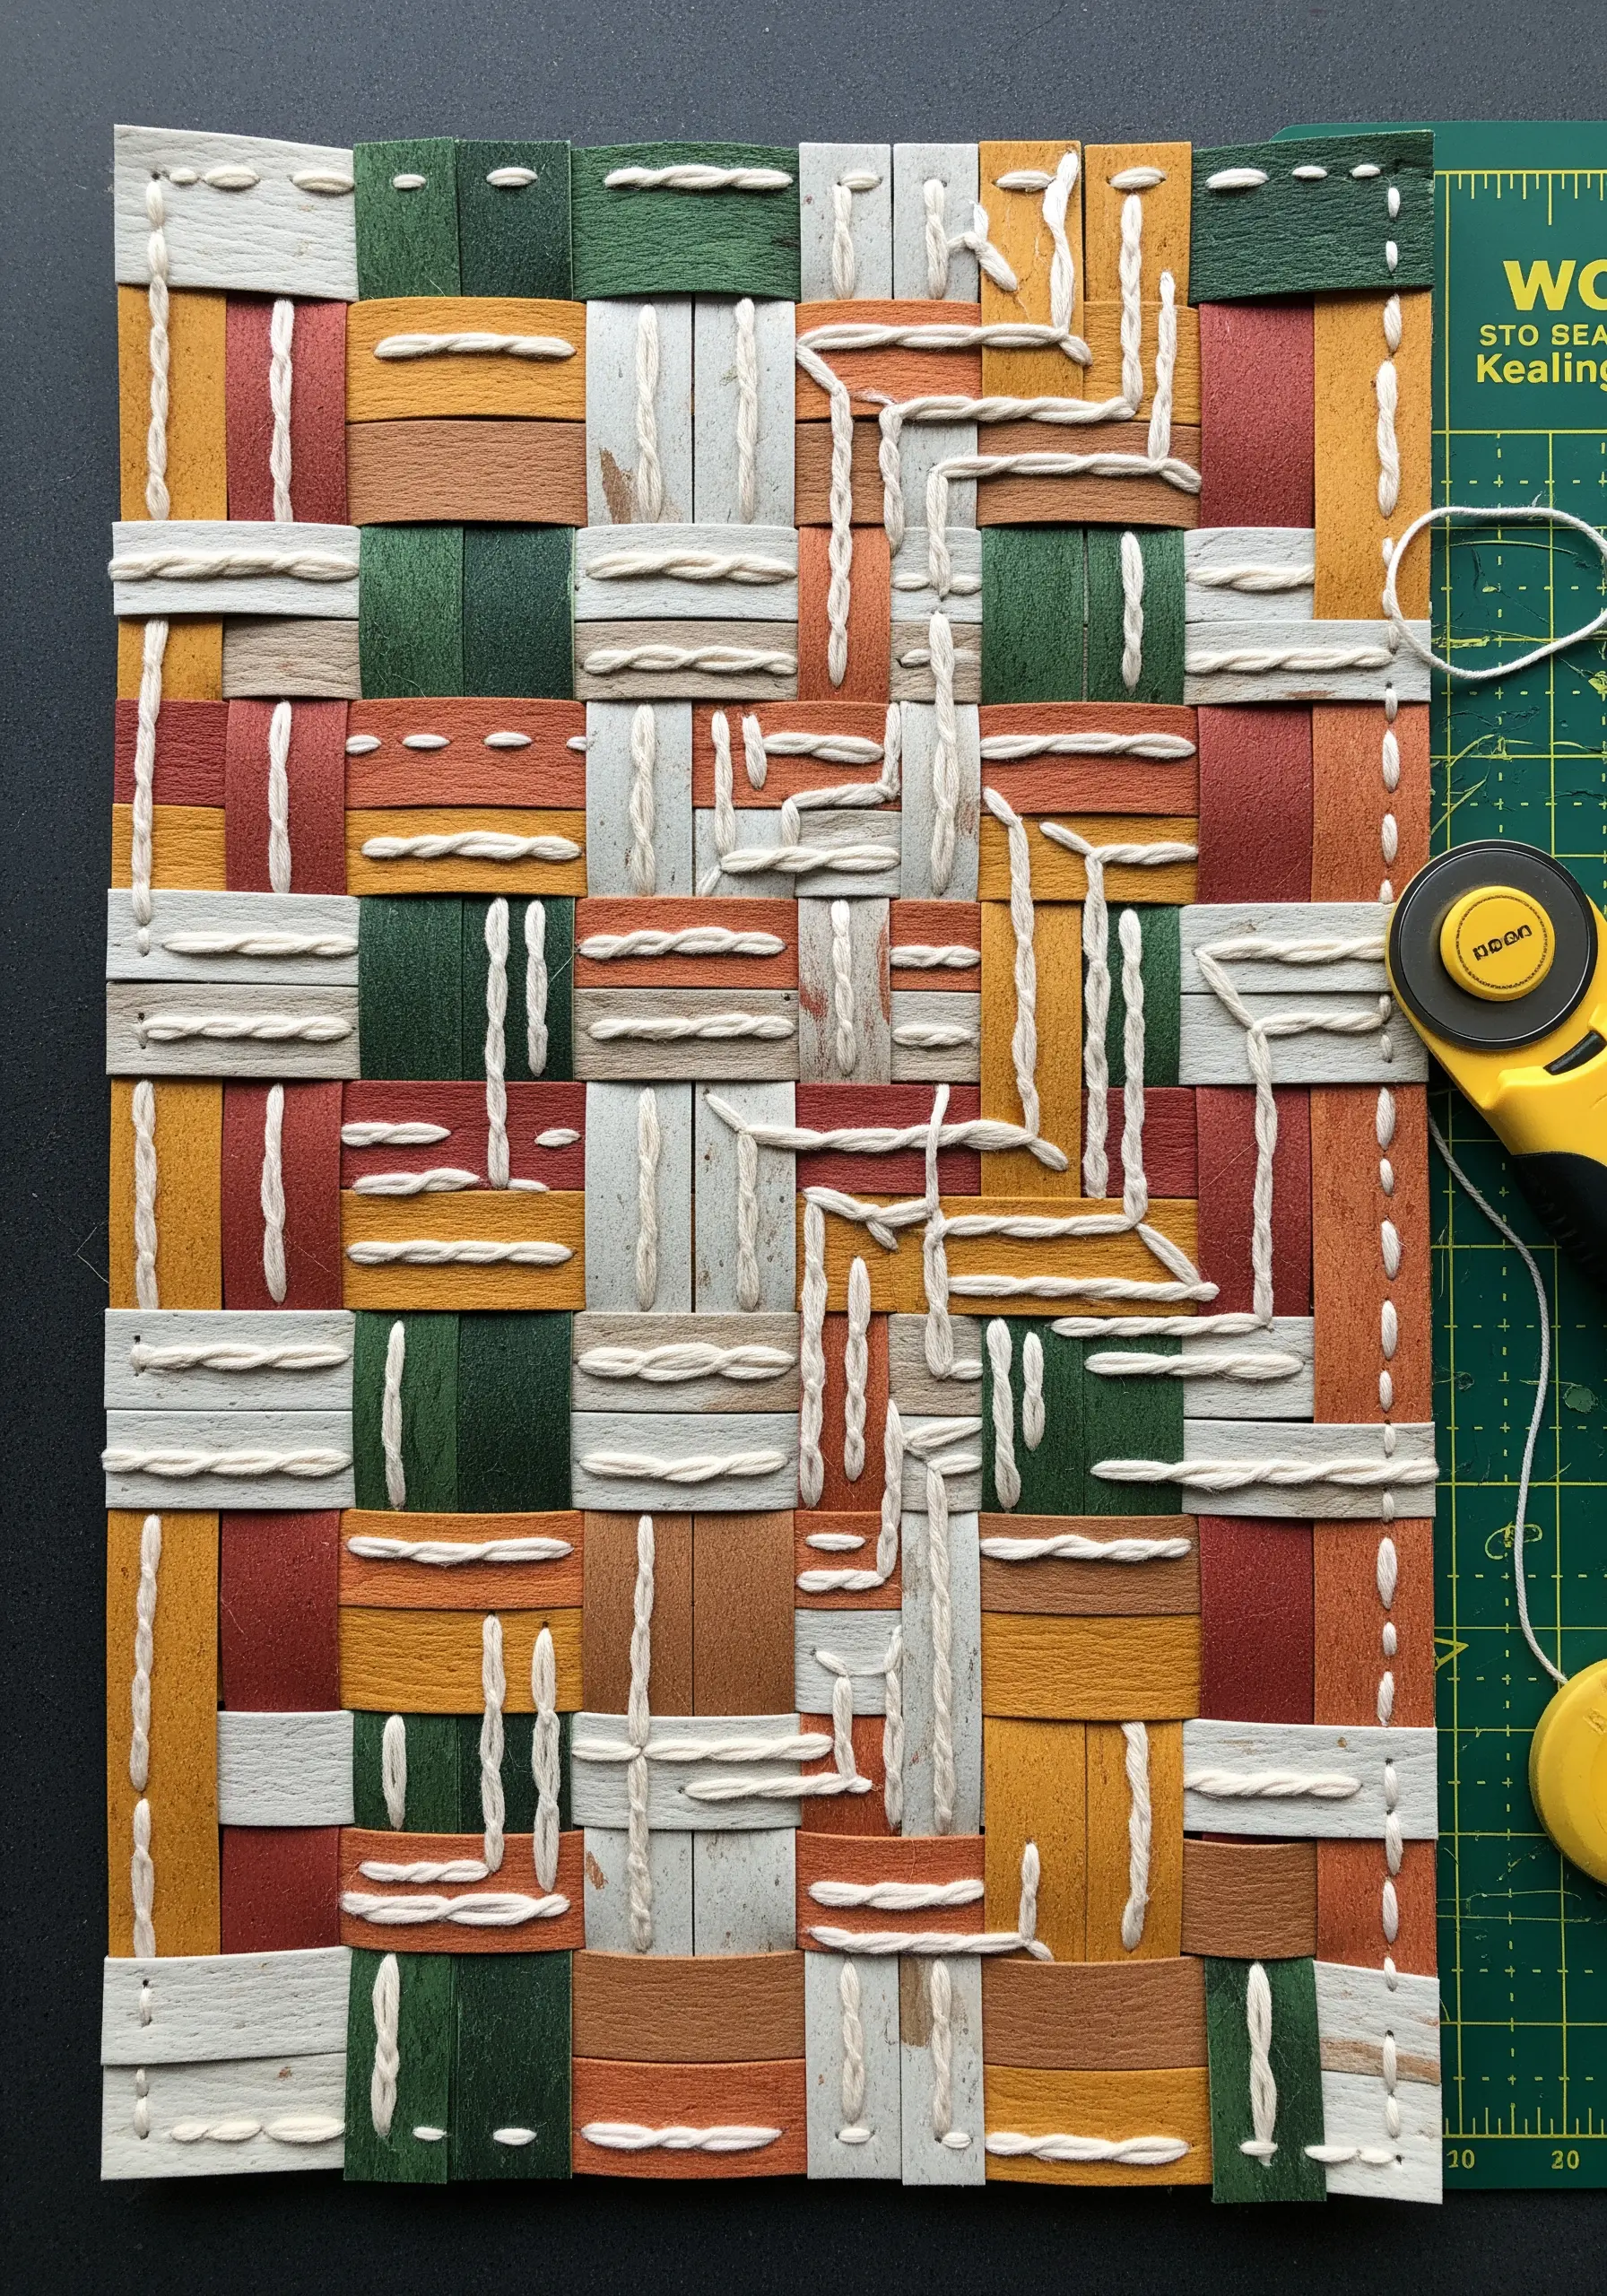
Create a foundation with incredible texture by weaving strips of paper or cardstock together before you even begin to stitch.
Cut paper into even strips and weave them into a tight grid, securing the edges with tape or glue.
This woven surface becomes your canvas, offering a unique, dimensional ground for abstract embroidery.
Use a thick yarn and a tapestry needle to stitch patterns that interact with the woven grid, moving over and under the paper strips.
27. Bind a Journal with an Embroidered Paper Cover
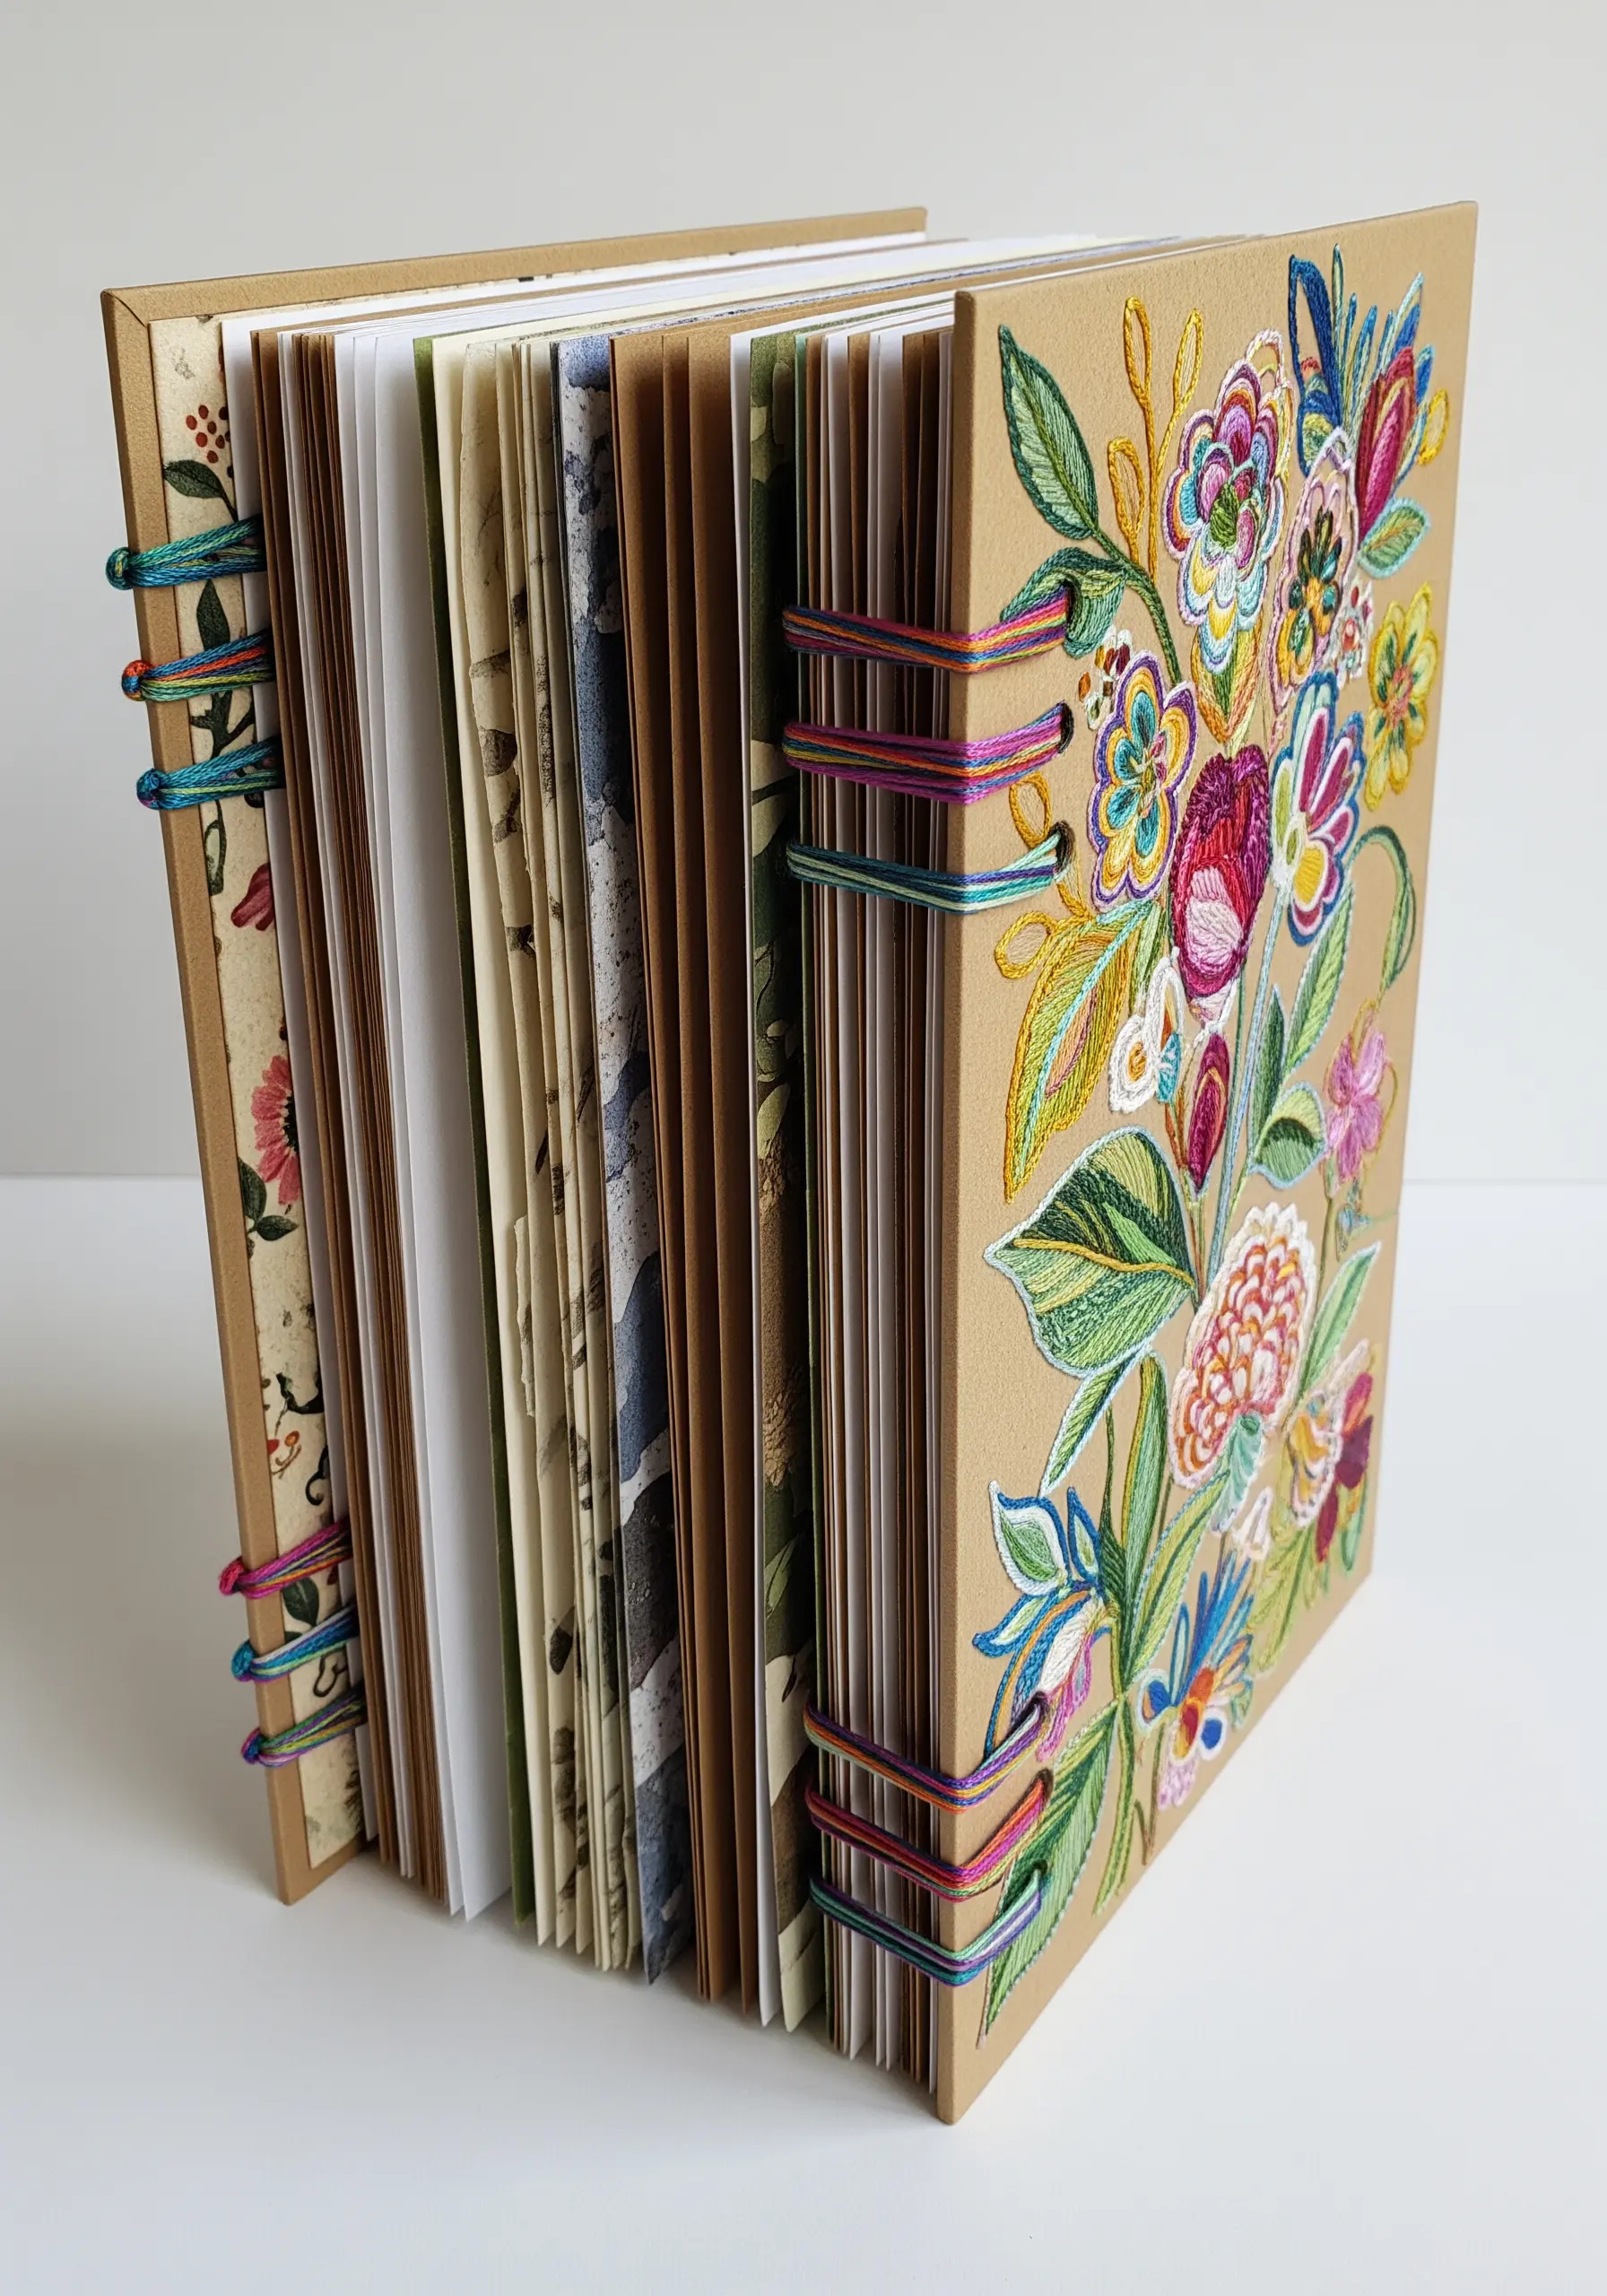
Combine your love of stitching and stationery by creating a hand-bound journal with an embroidered cover.
Choose a durable, heavy cardstock or book cloth as your cover material and complete your embroidery design on it before you begin the bookbinding process.
The flat, stable surface is perfect for achieving neat, even stitches.
This project transforms a simple notebook into a deeply personal artifact, where the cover is as much a part of the story as the pages within.


