

It’s easy to feel stuck in a cycle of simple stitches, wondering how other artists achieve such polish and personality in their work. The secret isn’t in complex patterns or expensive threads, but in the small, intentional decisions you make before the needle ever touches the fabric.
Think of each tiny motif in this collection not as a final project, but as a focused exercise. This is your chance to experiment with texture, to understand how a single extra strand of thread can change a line from delicate to bold, or how angling a stitch can create the illusion of light.
Let these small hoops be your private studio. Here, you can practice a new technique, master your tension, and discover the subtle details that will transform your stitching from a craft into an art form. You have the skill; this is how you refine your voice.
1. Render a Sprout with Gradient Leaves
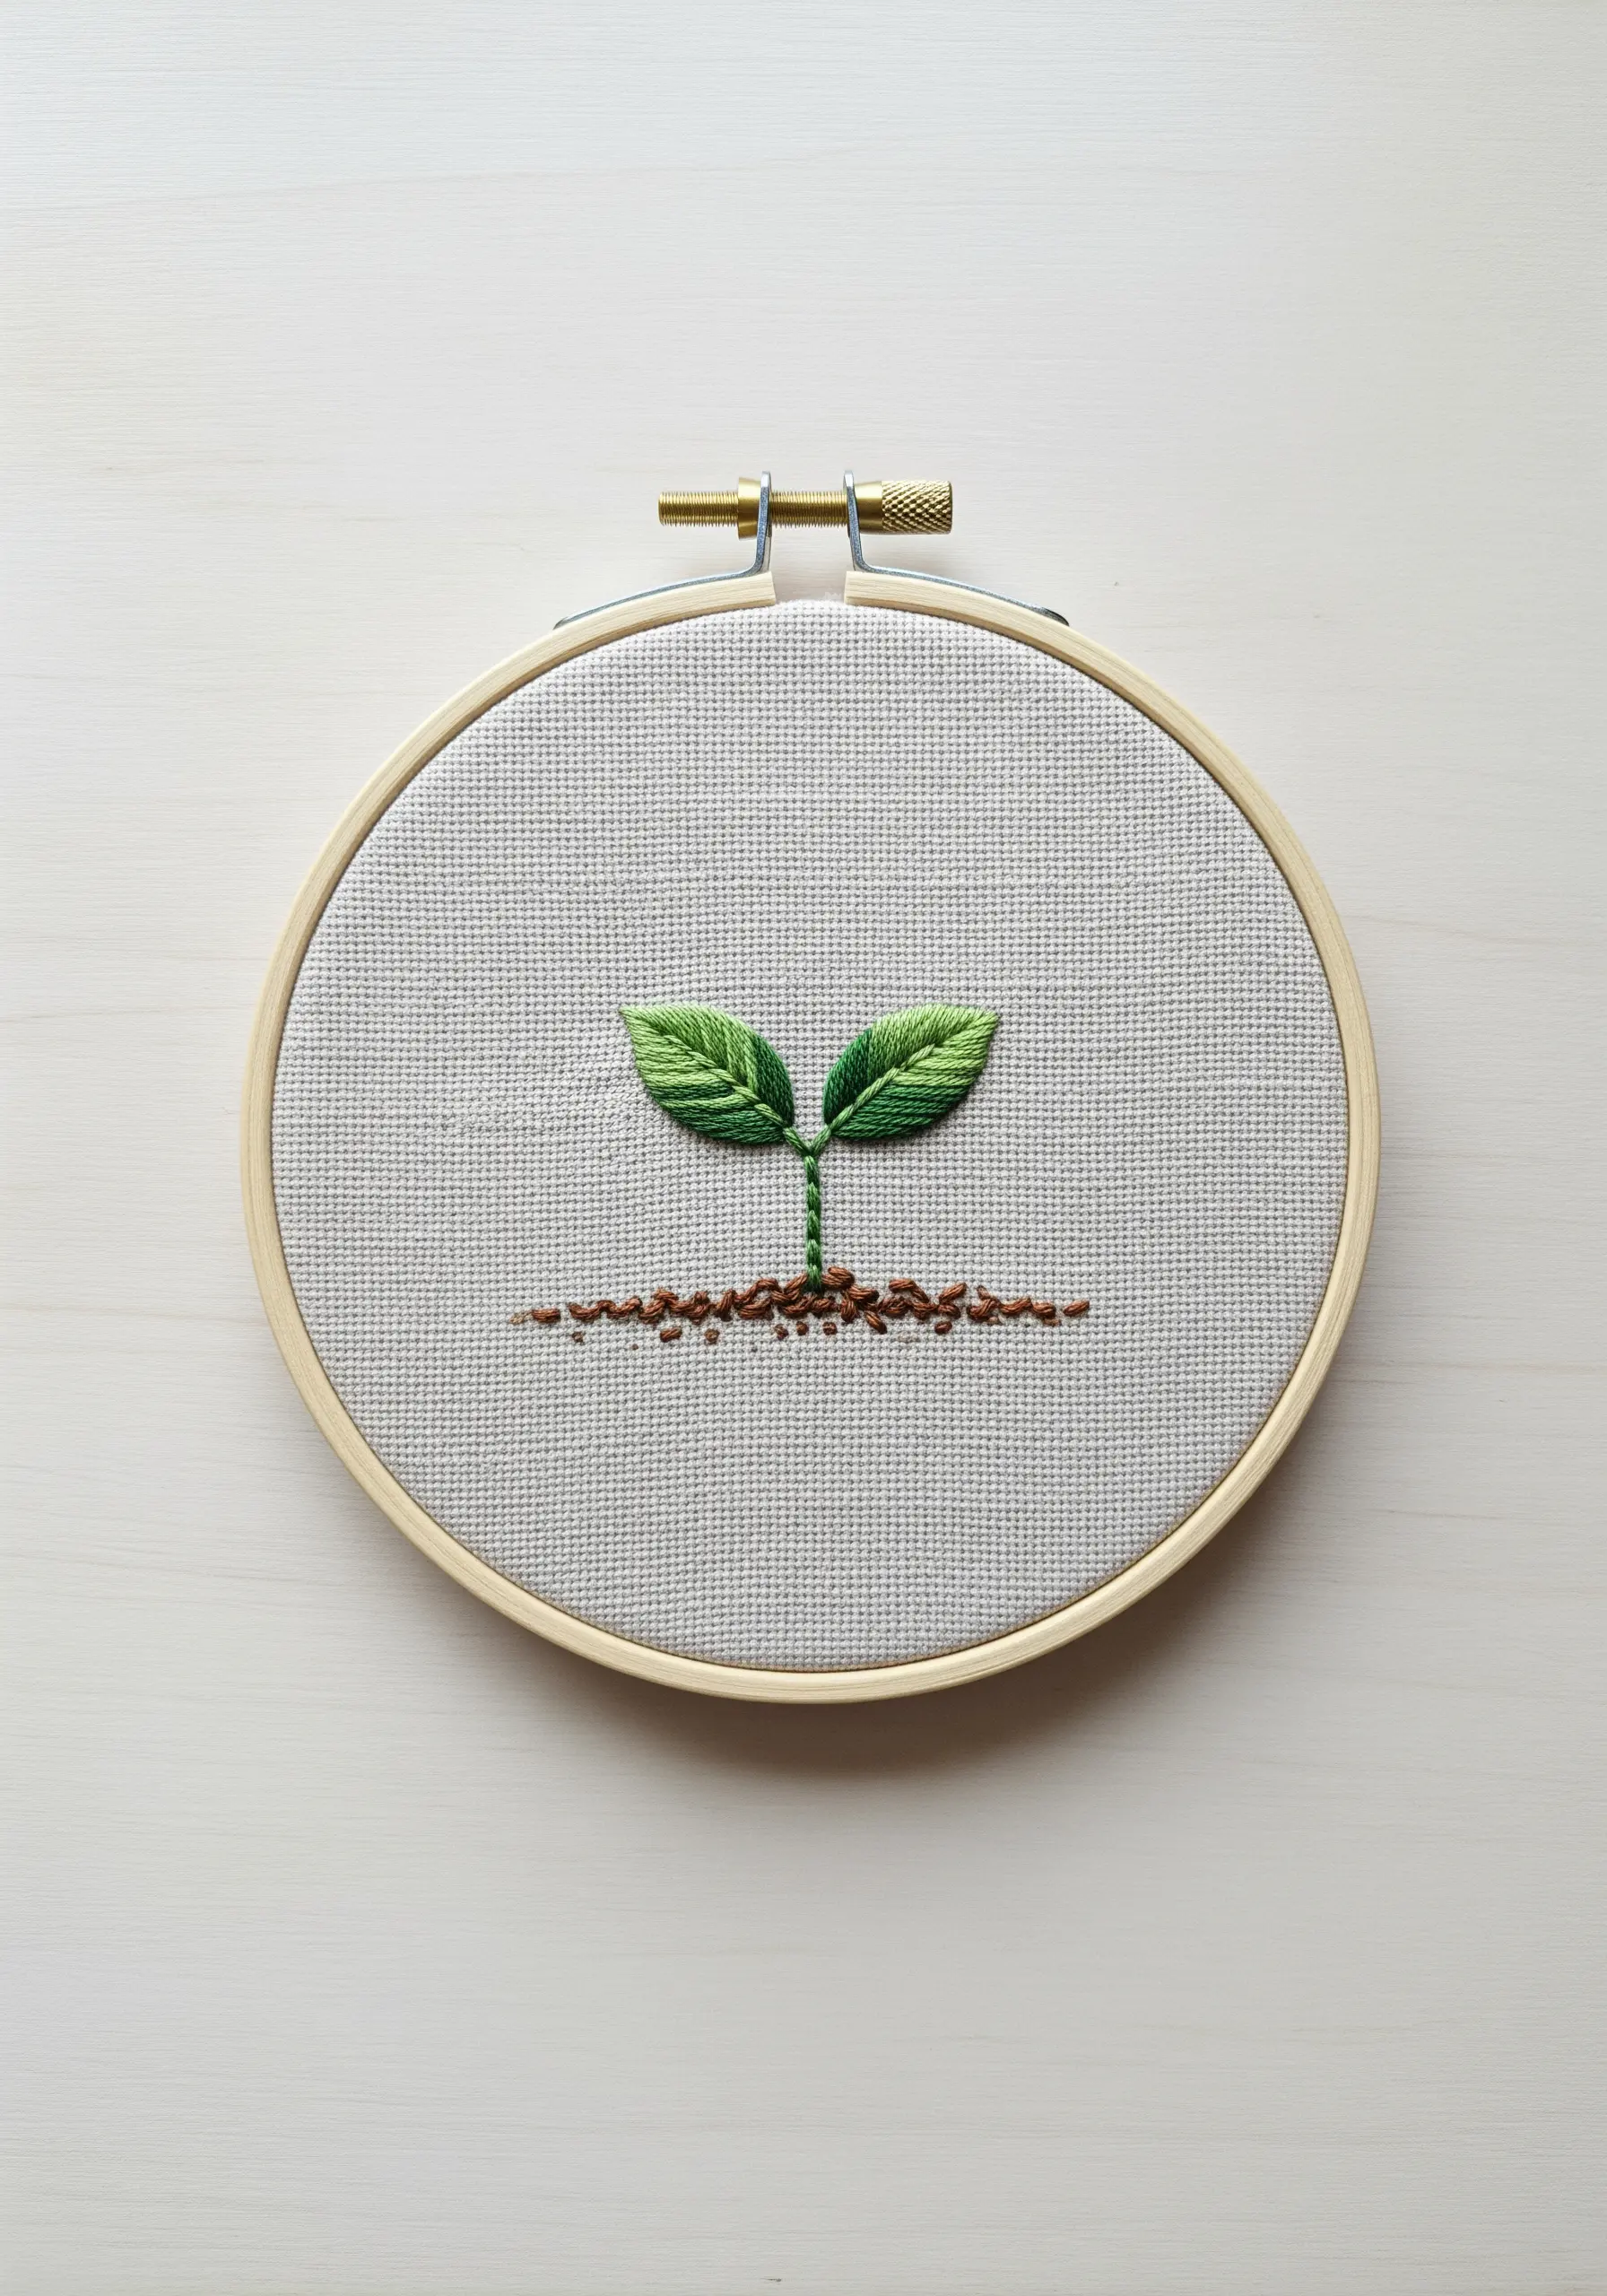
To create lifelike leaves, abandon solid satin stitch for the more nuanced long-and-short stitch.
Use two or three shades of green, blending them where they meet to create a soft, natural gradient that suggests light and shadow.
For the soil, use French knots with two and three strands of brown floss, varying the size and density to build an organic, uneven texture.
This combination of smooth fill and bumpy texture creates a compelling contrast that elevates a simple motif into a small piece of nature-texture embroidery.
2. Stitch a Bee with Delicate, Sheer Wings
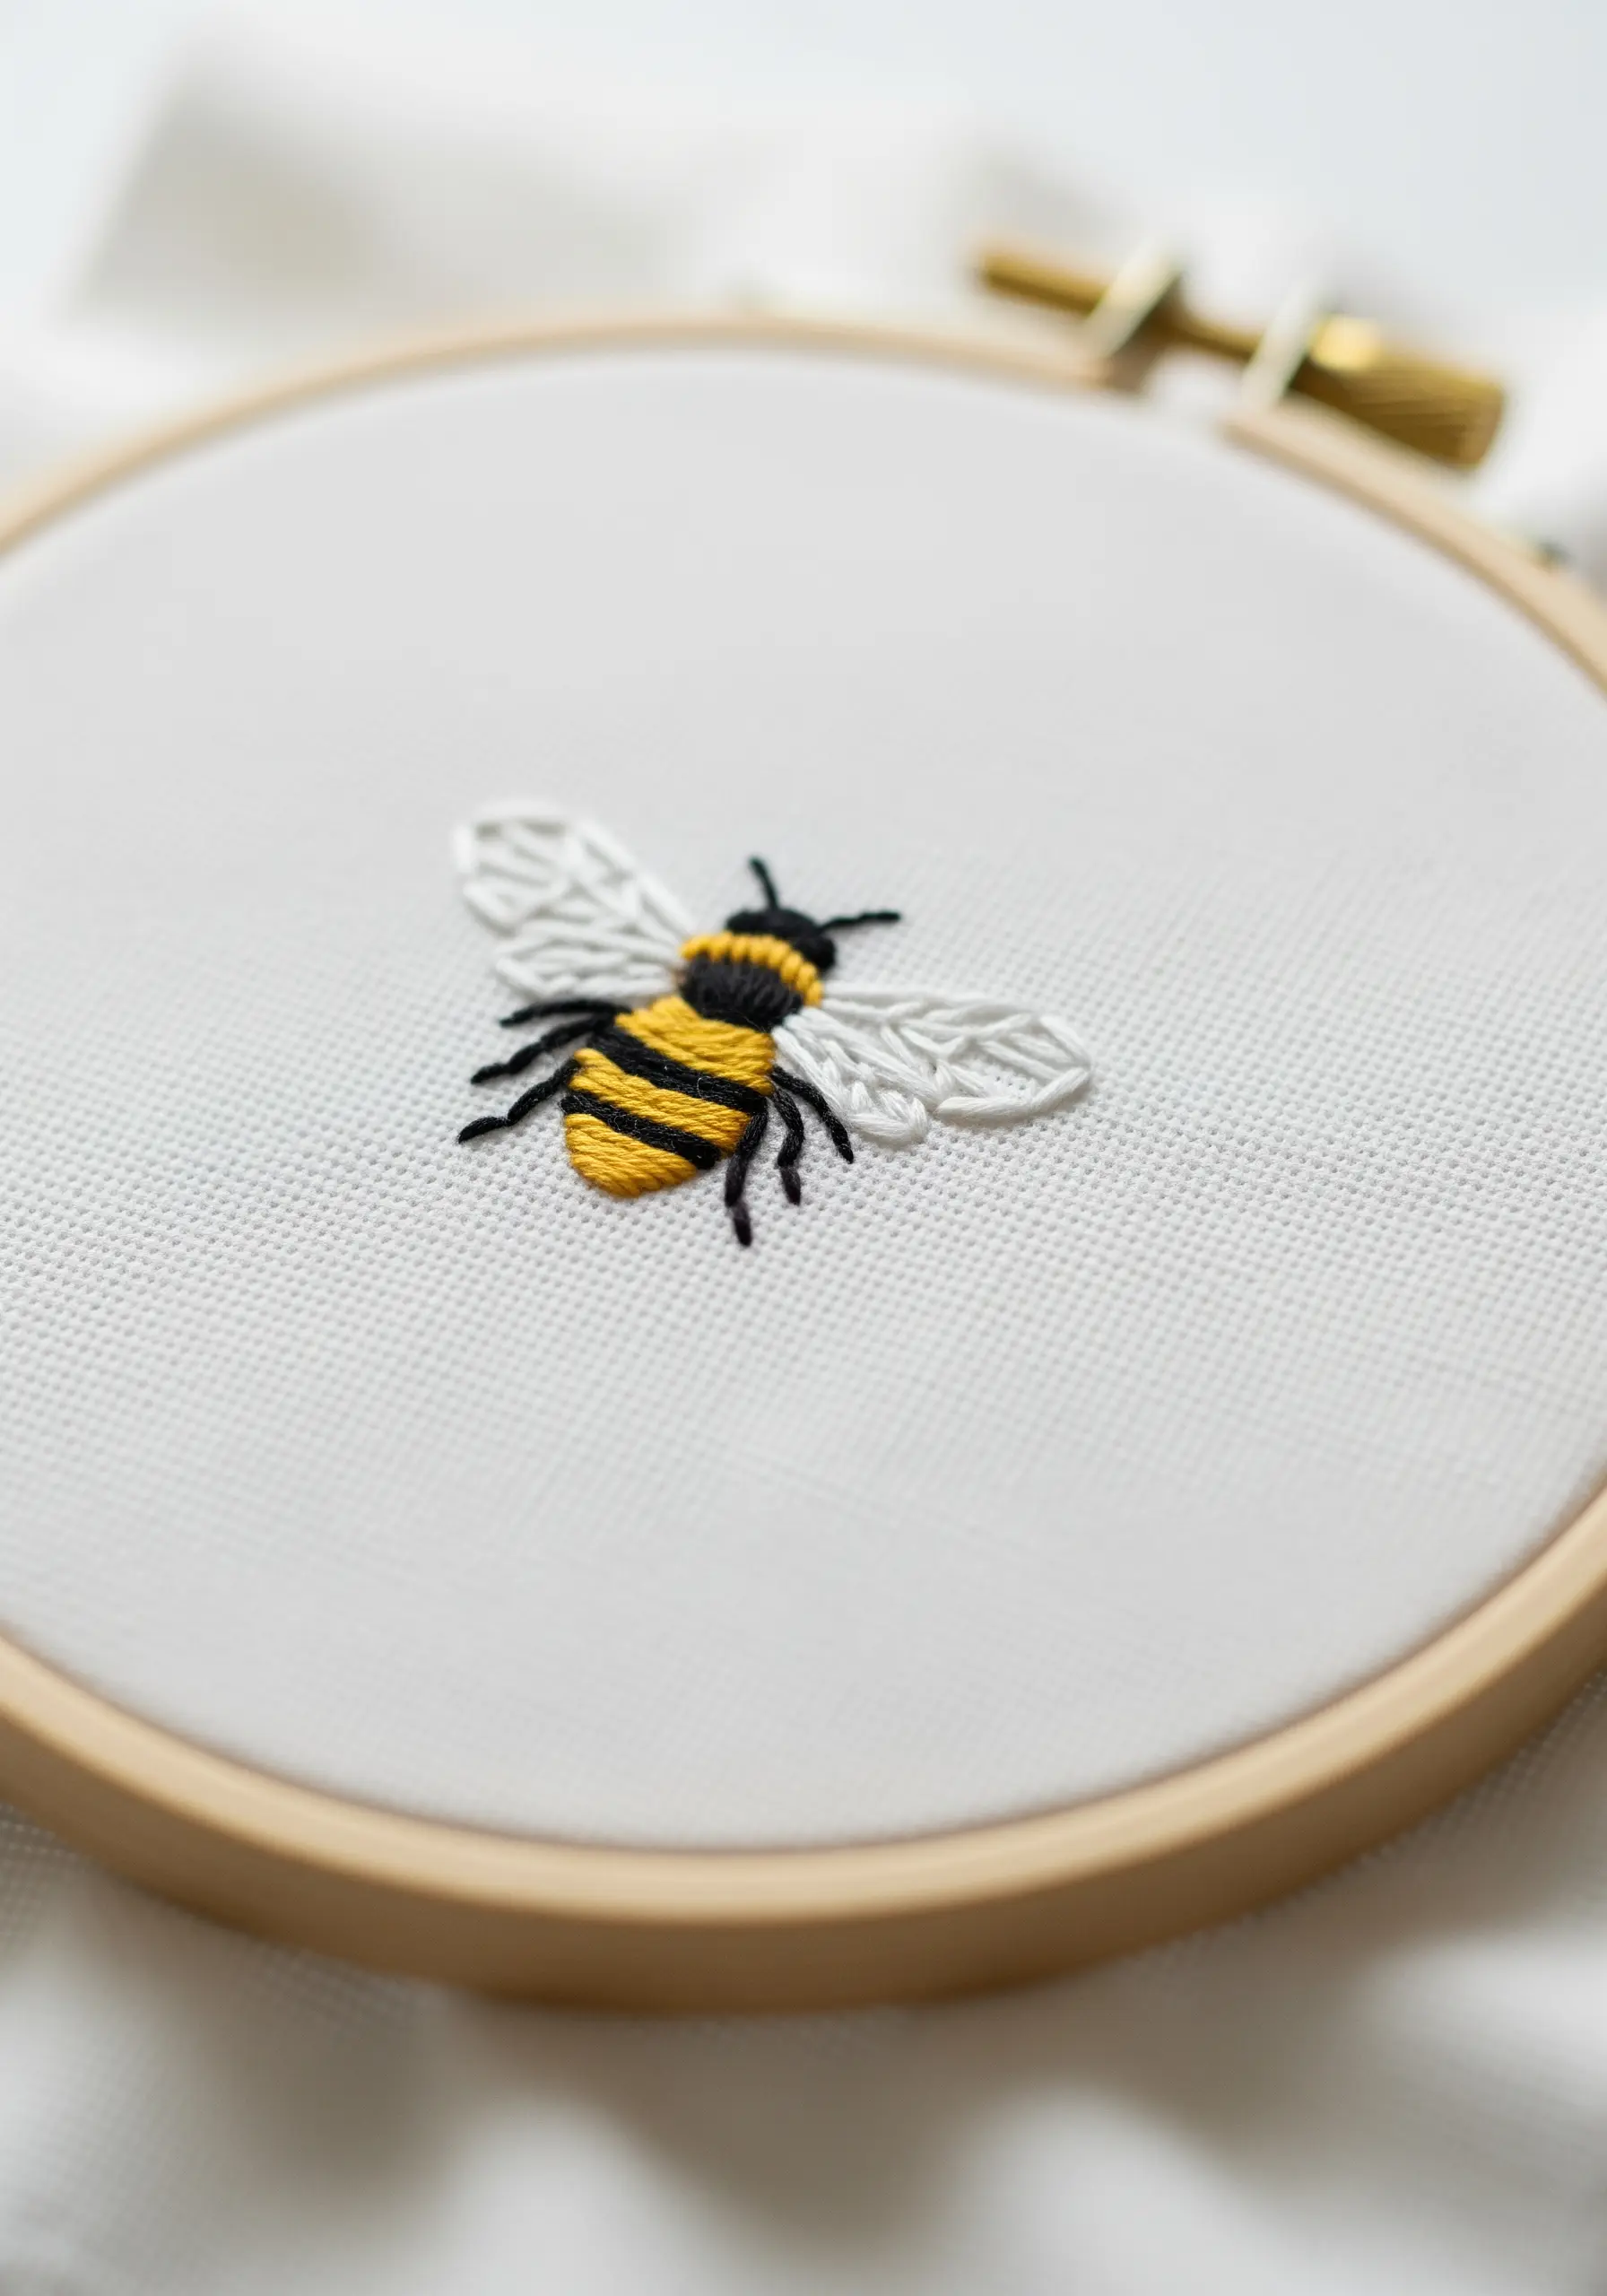
Capture the bee’s fuzzy texture by using a short satin stitch for the yellow and black stripes, angling your stitches slightly to mimic the curve of its body.
For the wings, create an outline with a single strand of white or light gray thread using a split stitch.
Fill the wing area with a sparse fishbone stitch or a few strategic straight stitches—this open-fill technique suggests translucency without adding bulk, making the wings look delicate and light.
3. Craft a Braided Moon Pendant
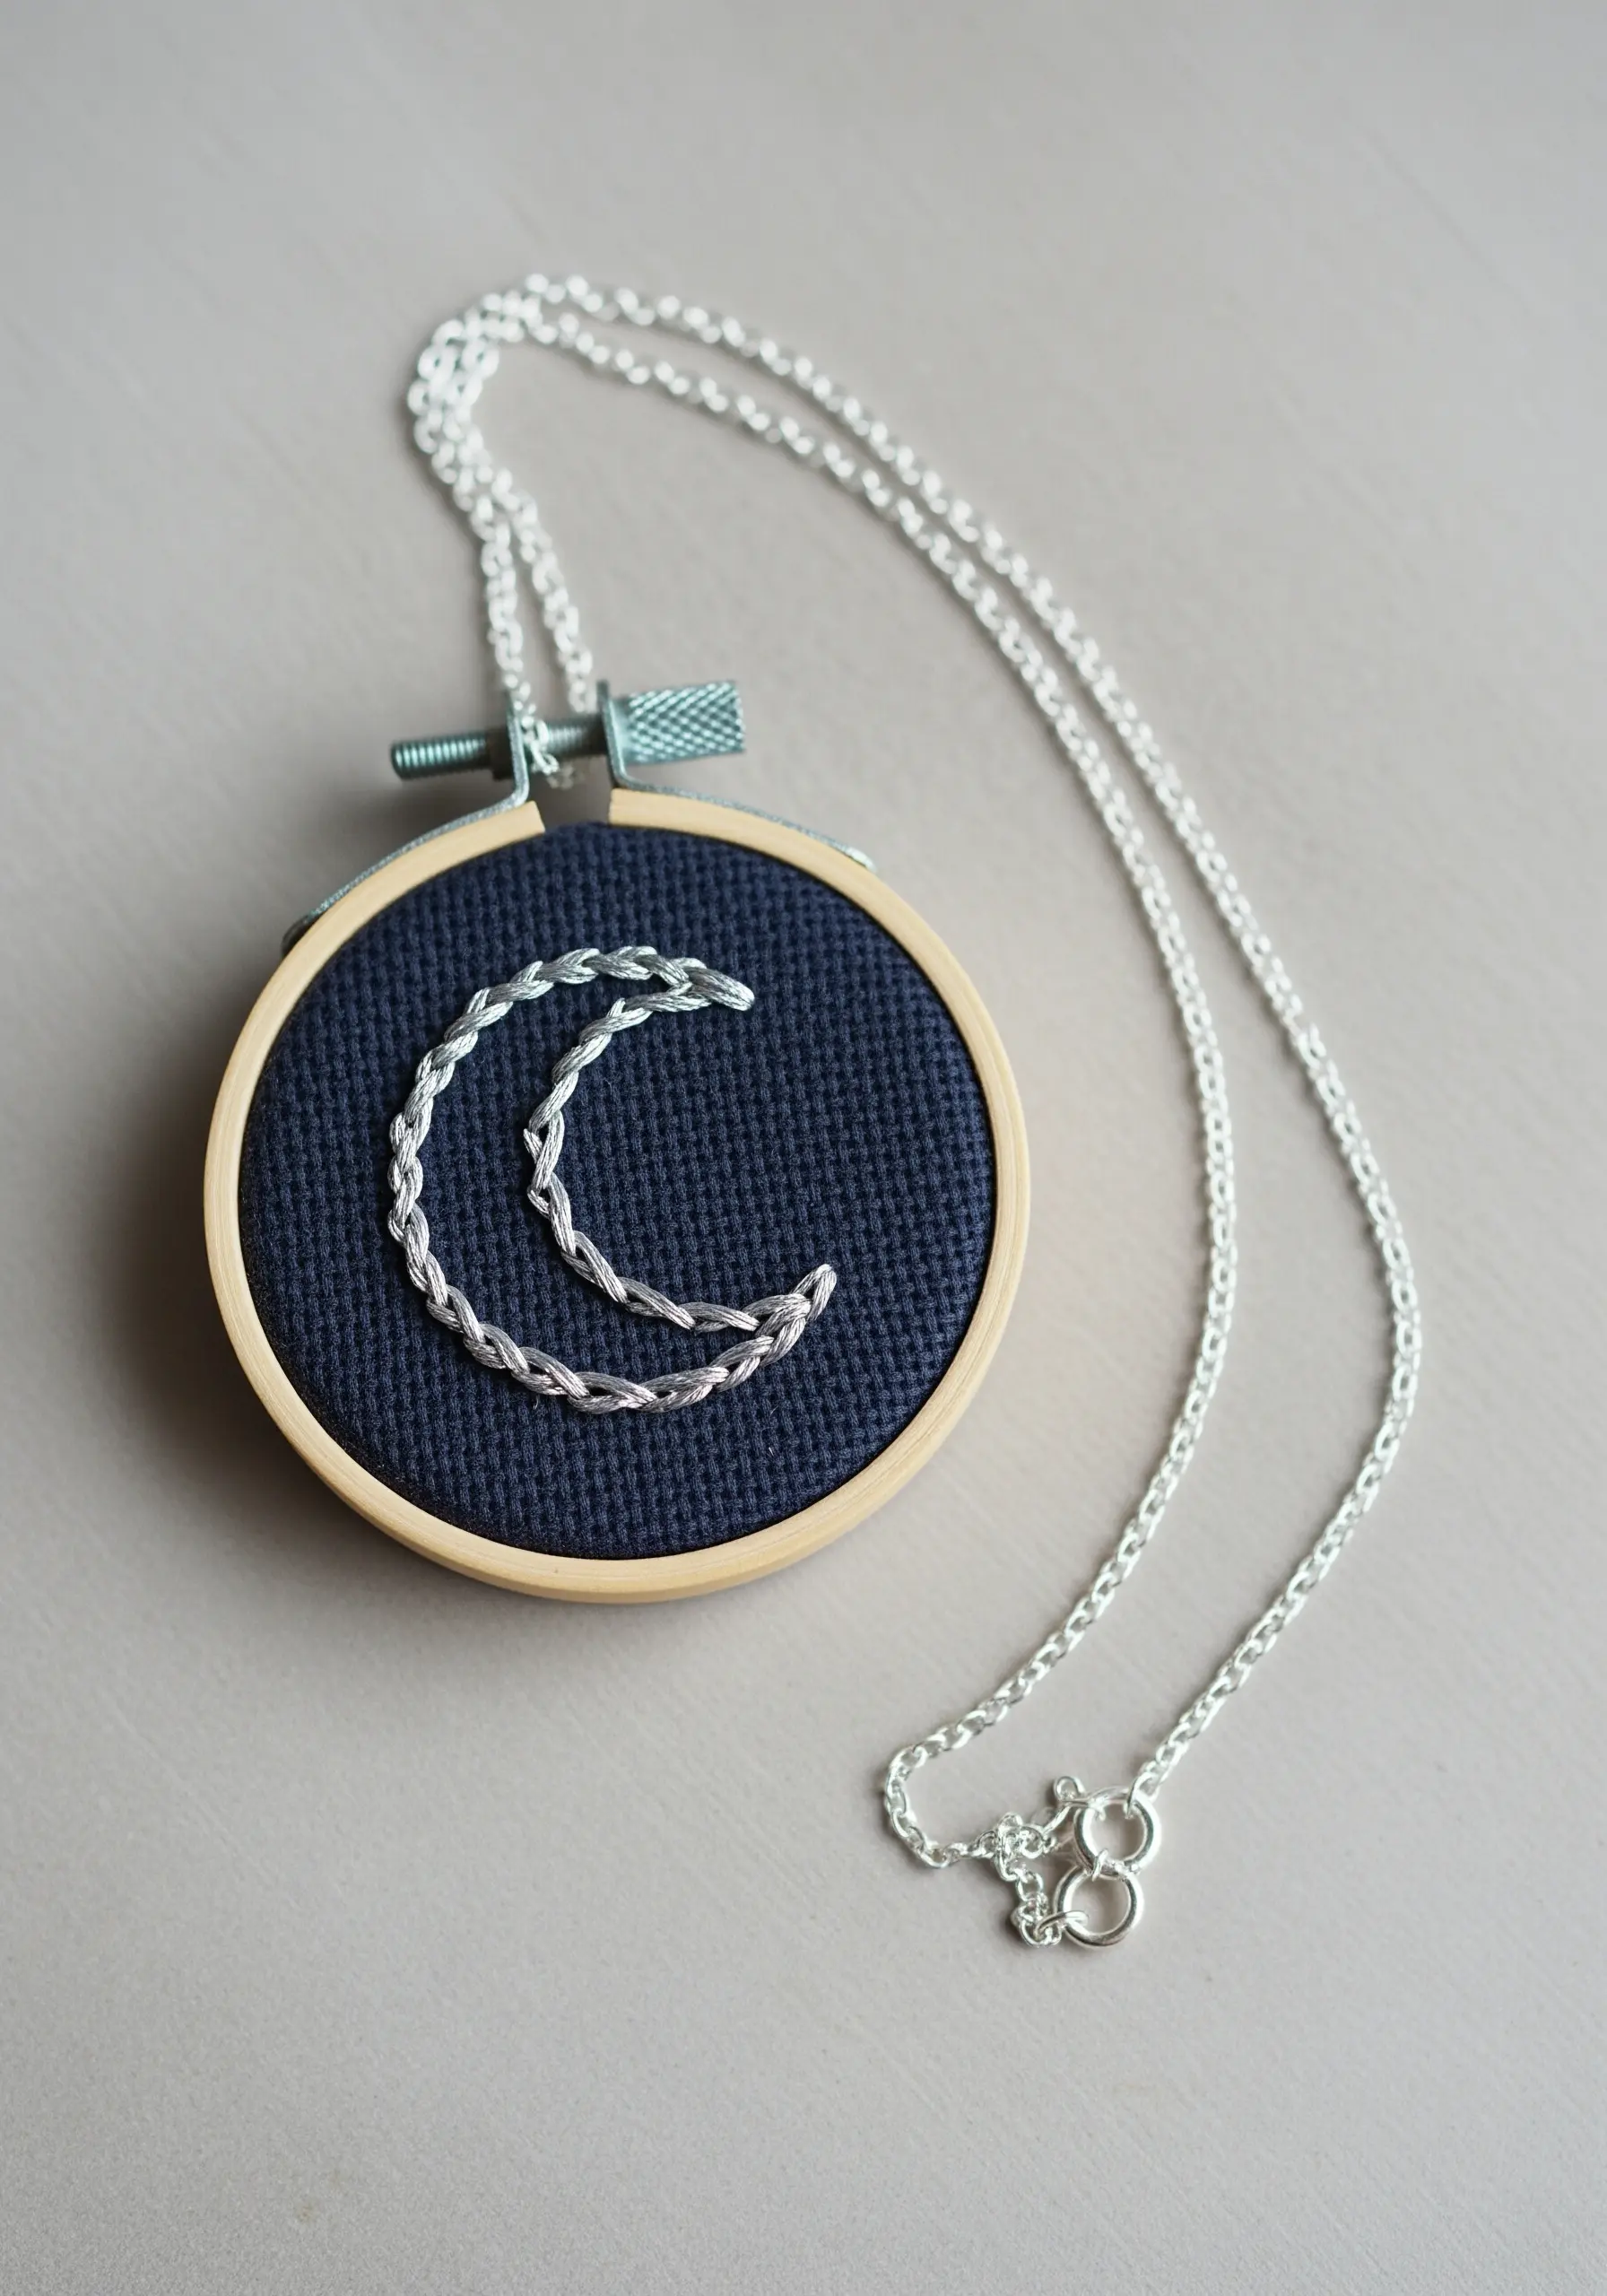
Transform a simple outline into a textural statement by using a heavy chain stitch.
This stitch creates a raised, braided line that catches the light beautifully, especially when stitched with a silver metallic or a high-sheen silk floss.
The contrast between the shimmering thread and the matte, dark fabric creates a dramatic effect perfect for a tiny hoop pendant—a beautiful way to make unique DIY embroidery presents.
4. Illustrate a Steaming Cup with Fine Lines
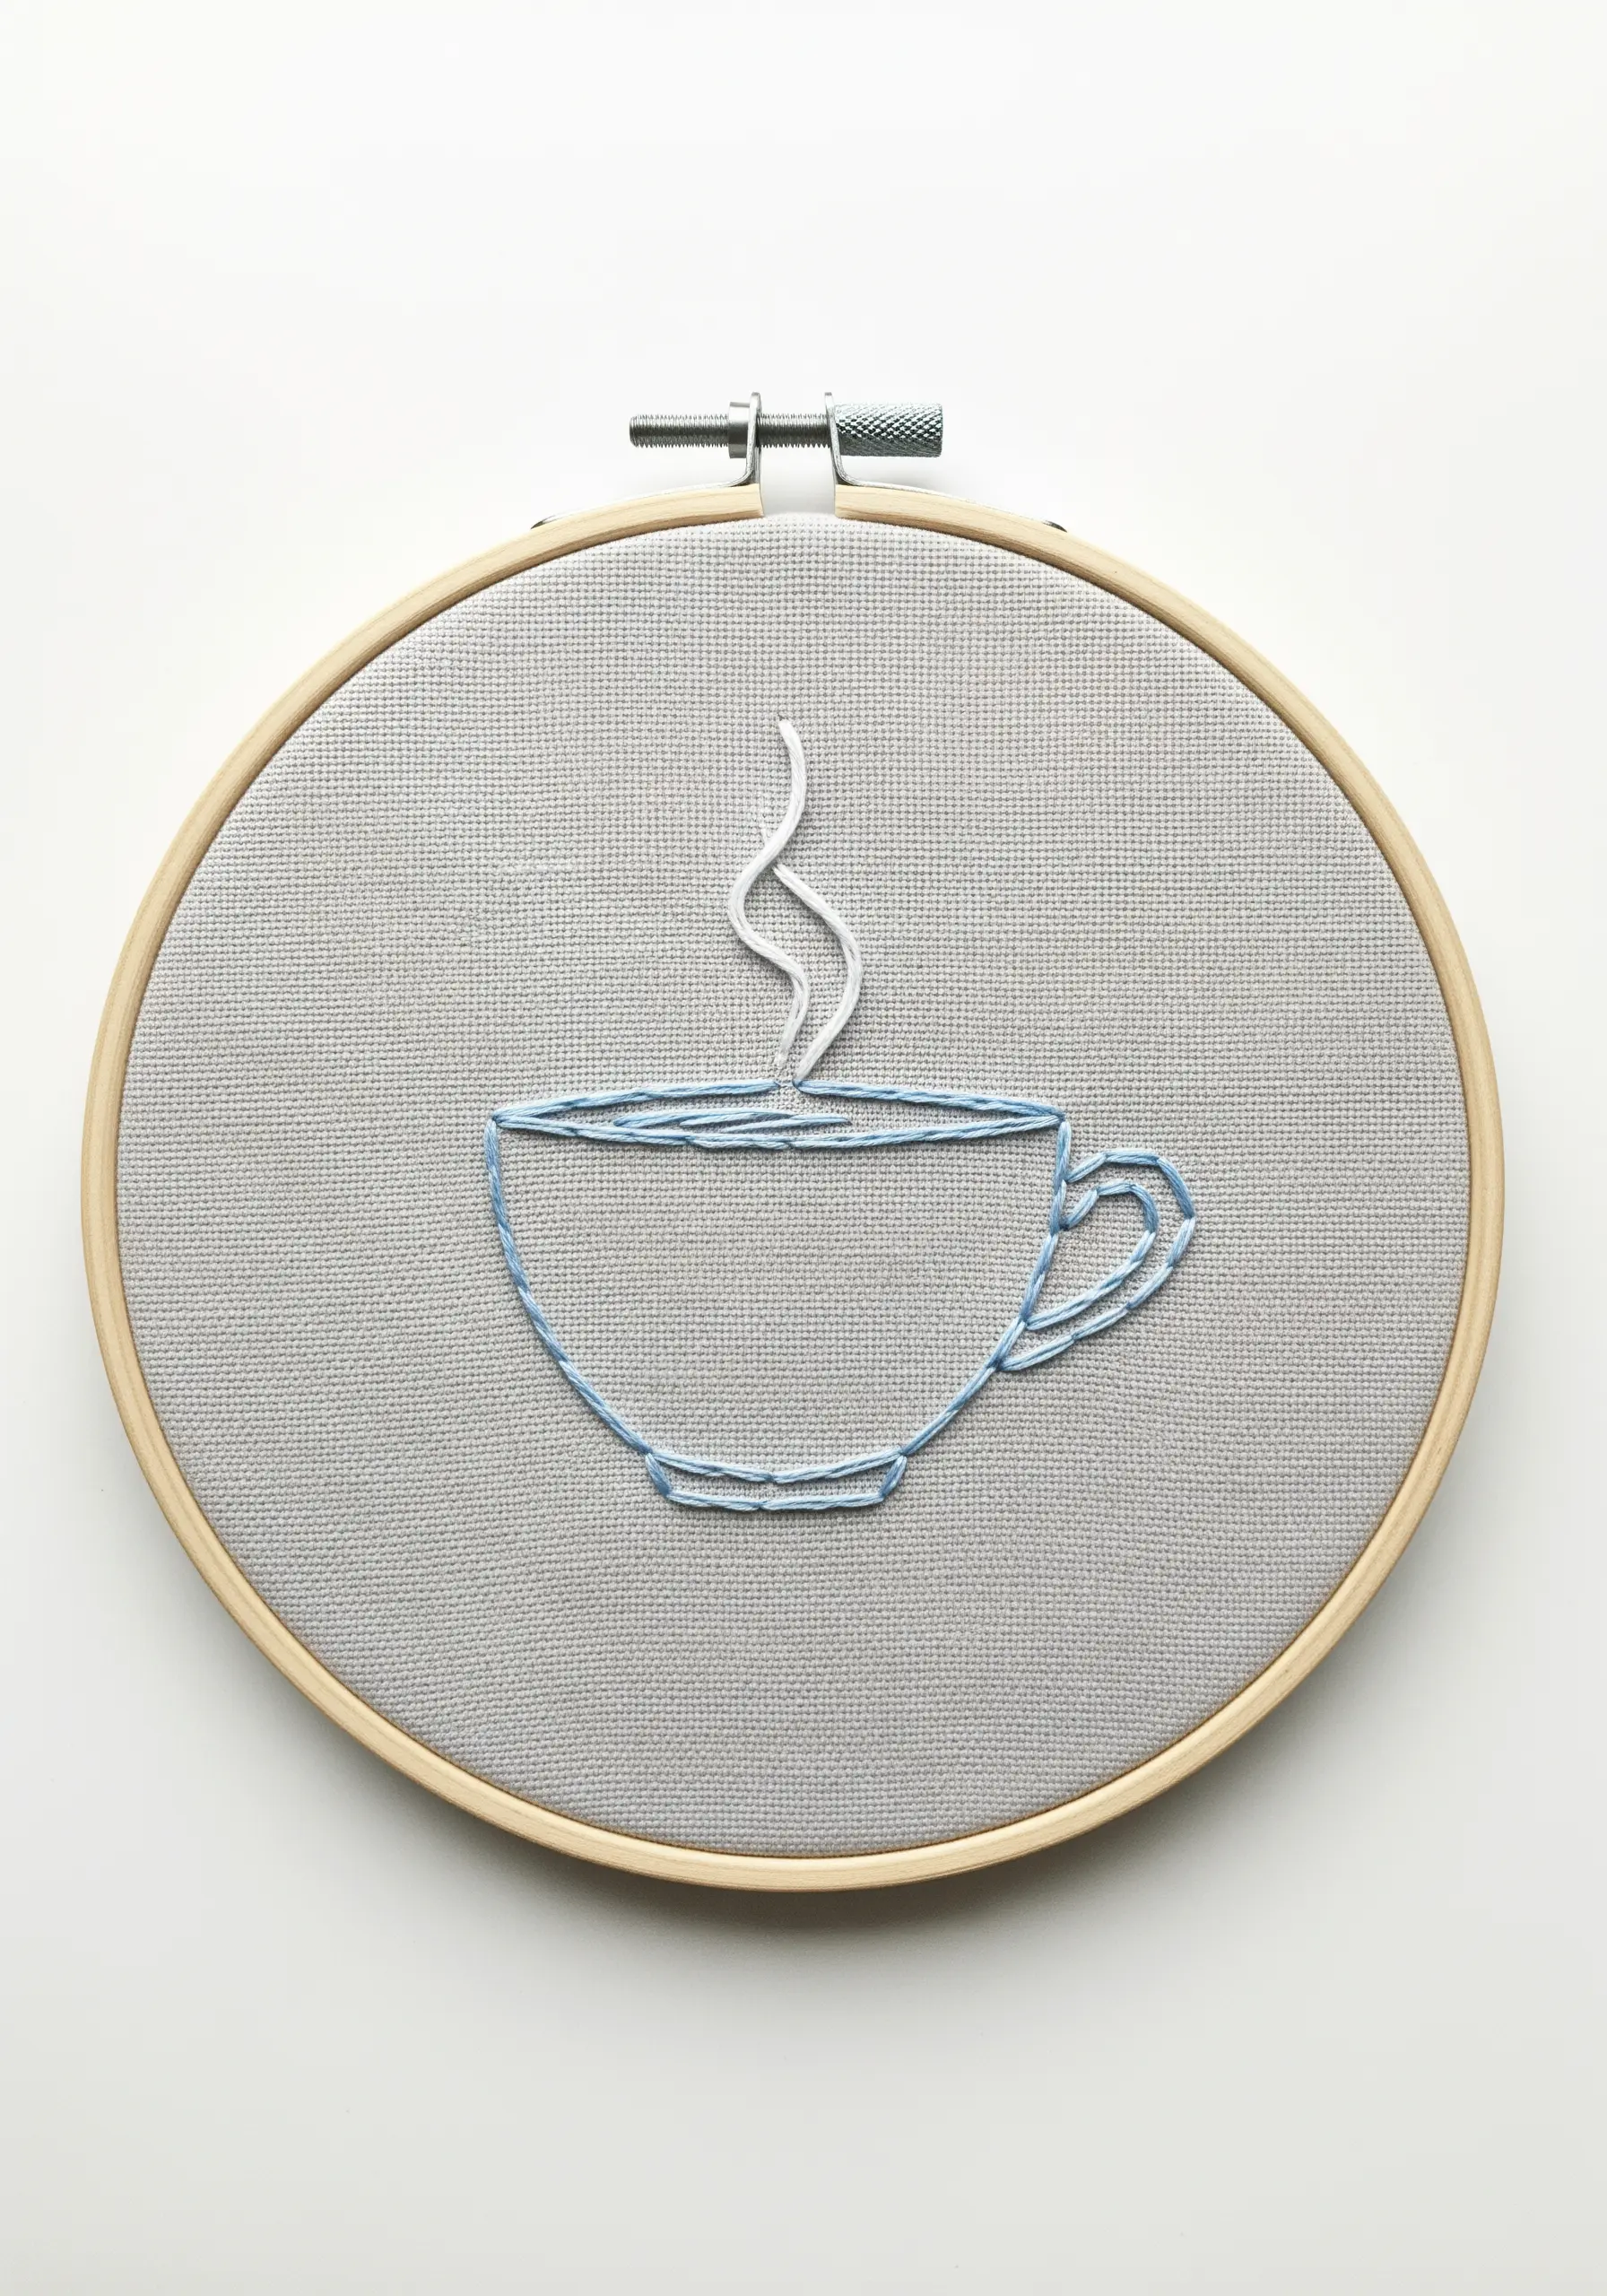
For clean, minimalist illustrations, your outline stitch is everything.
Use a two-strand backstitch or split stitch for the cup’s body to achieve a crisp, consistent line.
To create the delicate steam, switch to a single strand of thread and use a whipped backstitch or stem stitch.
This subtle shift in thread weight and stitch style makes the steam appear light and ethereal, contrasting perfectly with the solid form of the cup.
5. Build Dimensional Lavender Buds
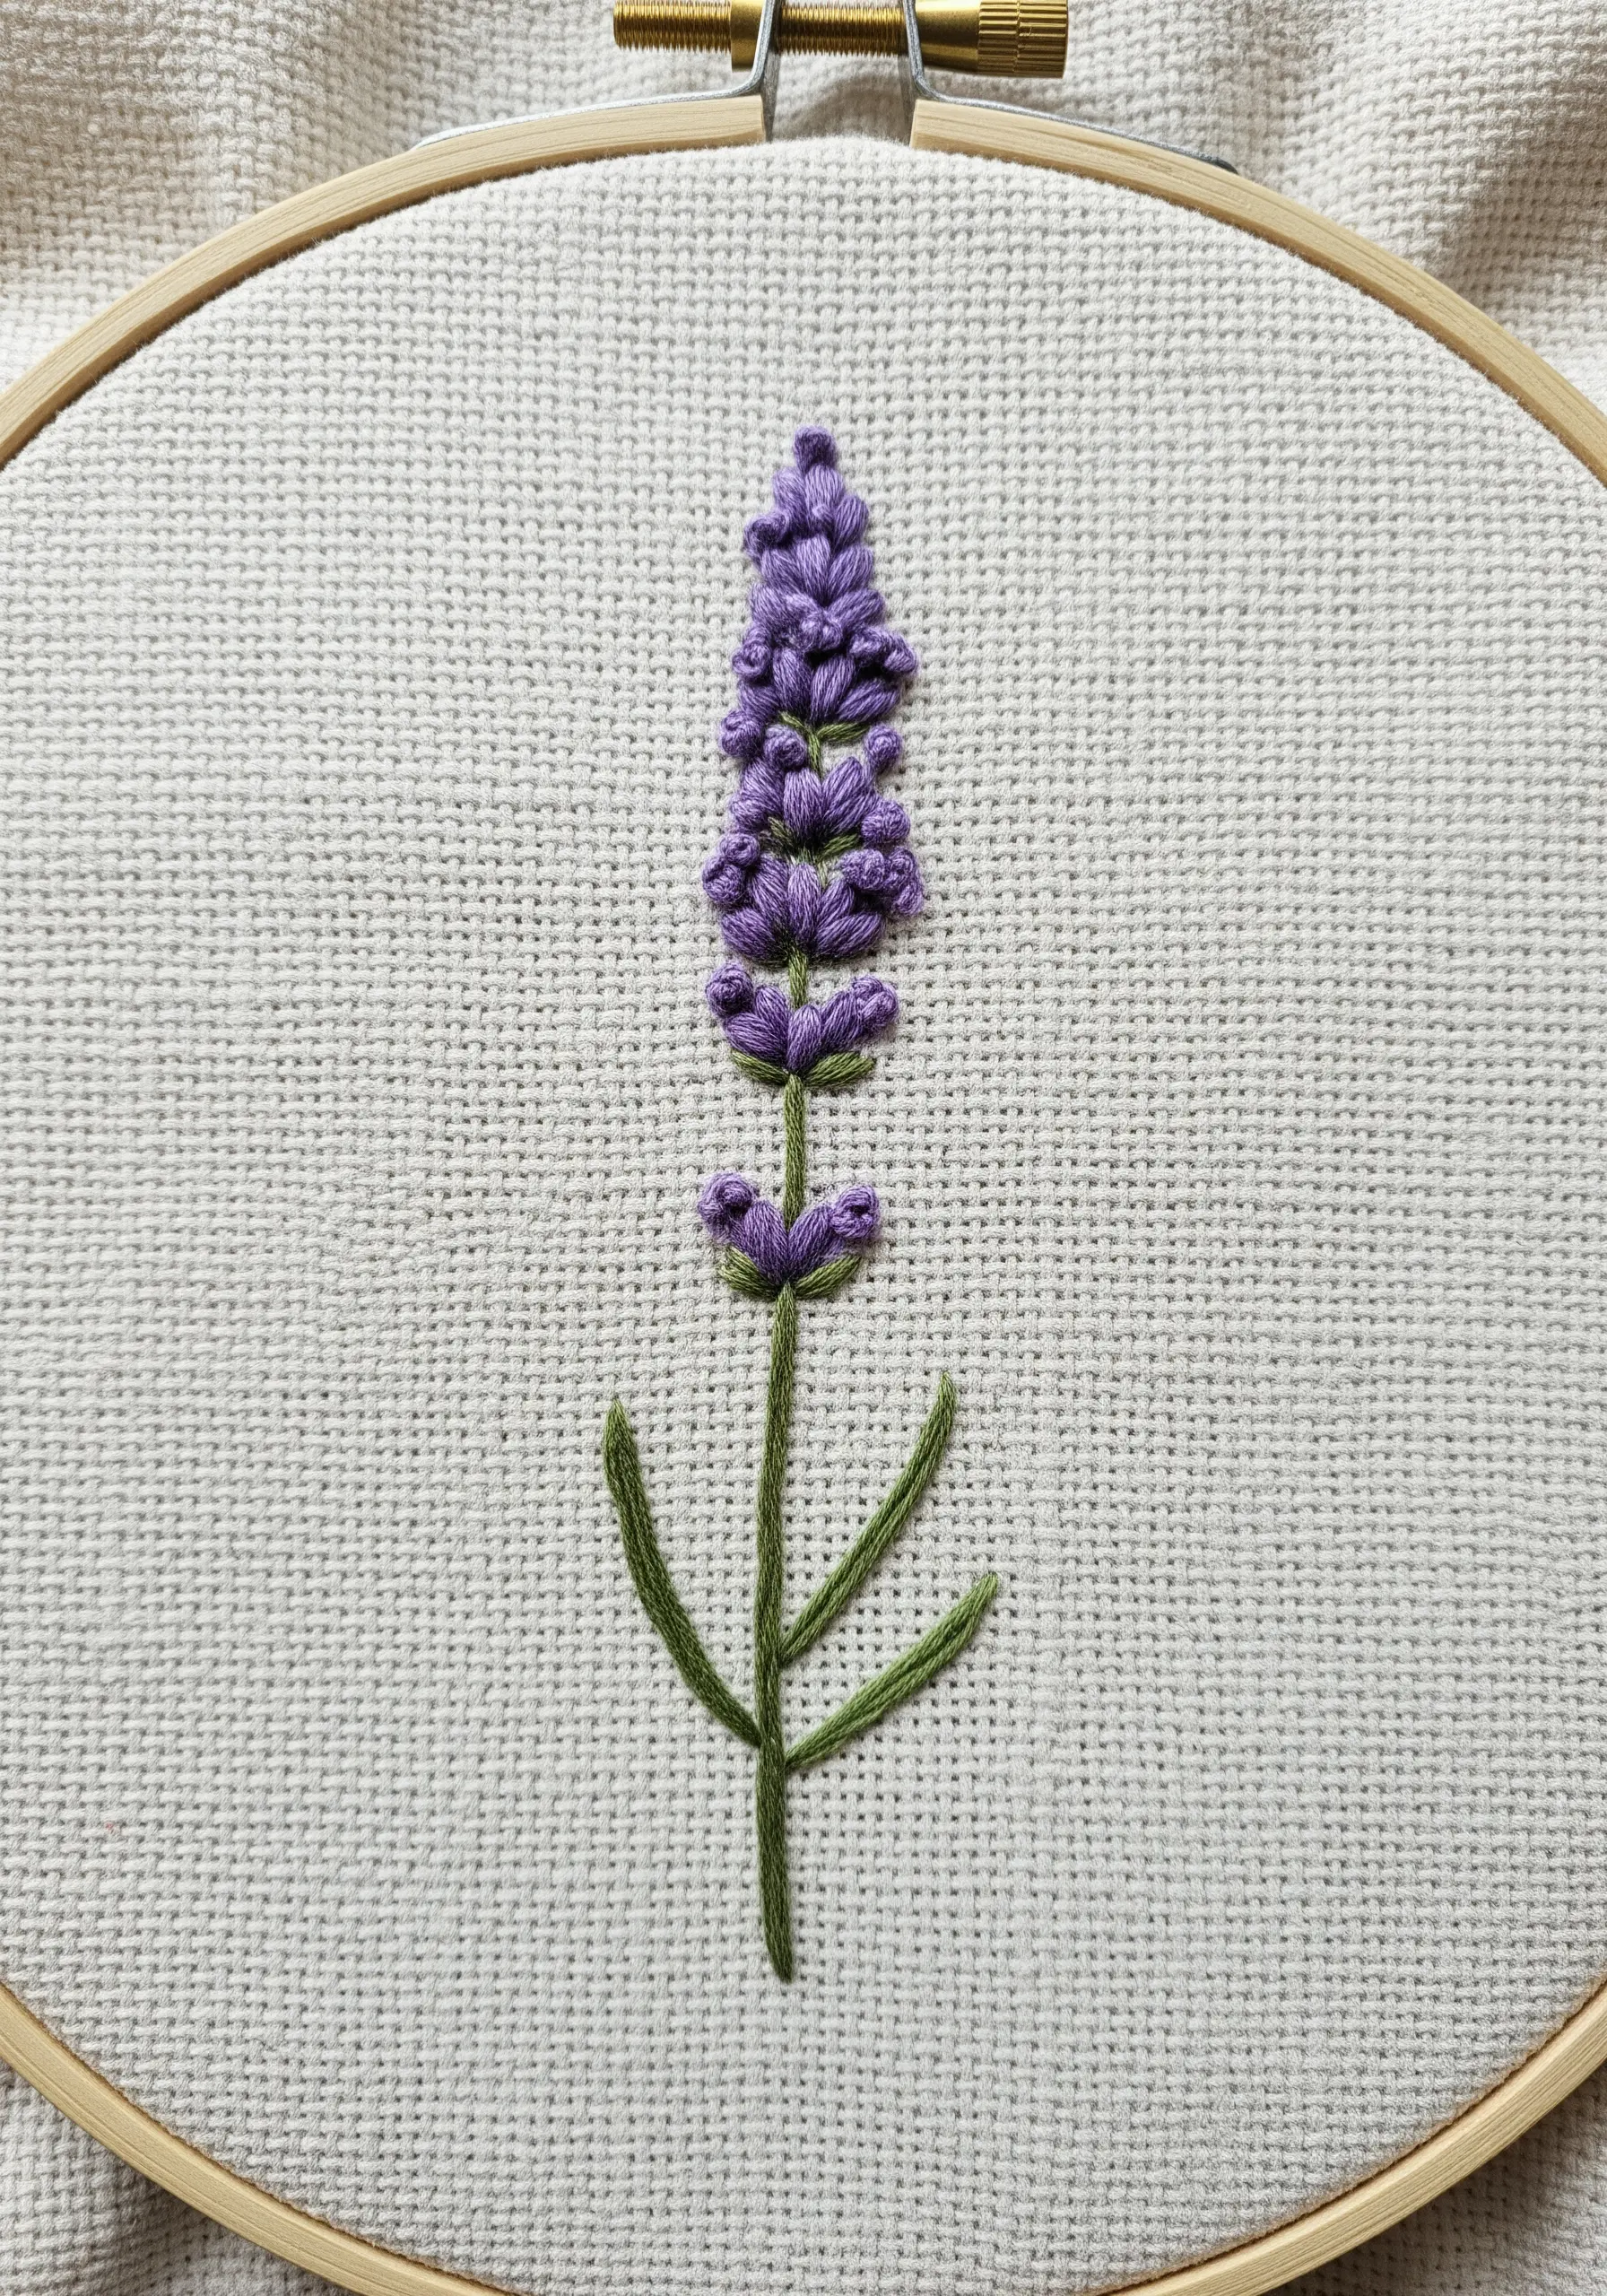
Move beyond simple straight stitches to give your lavender stalk realistic volume and texture.
Use bullion knots for the individual flower buds, varying their length and angle to create a natural, clustered appearance.
If bullion knots feel intimidating, small detached chain stitches (lazy daisies) placed closely together will achieve a similar three-dimensional effect.
These delicate lavender stitch ideas add instant botanical accuracy to your work.
6. Fold a Paper Boat with Thread
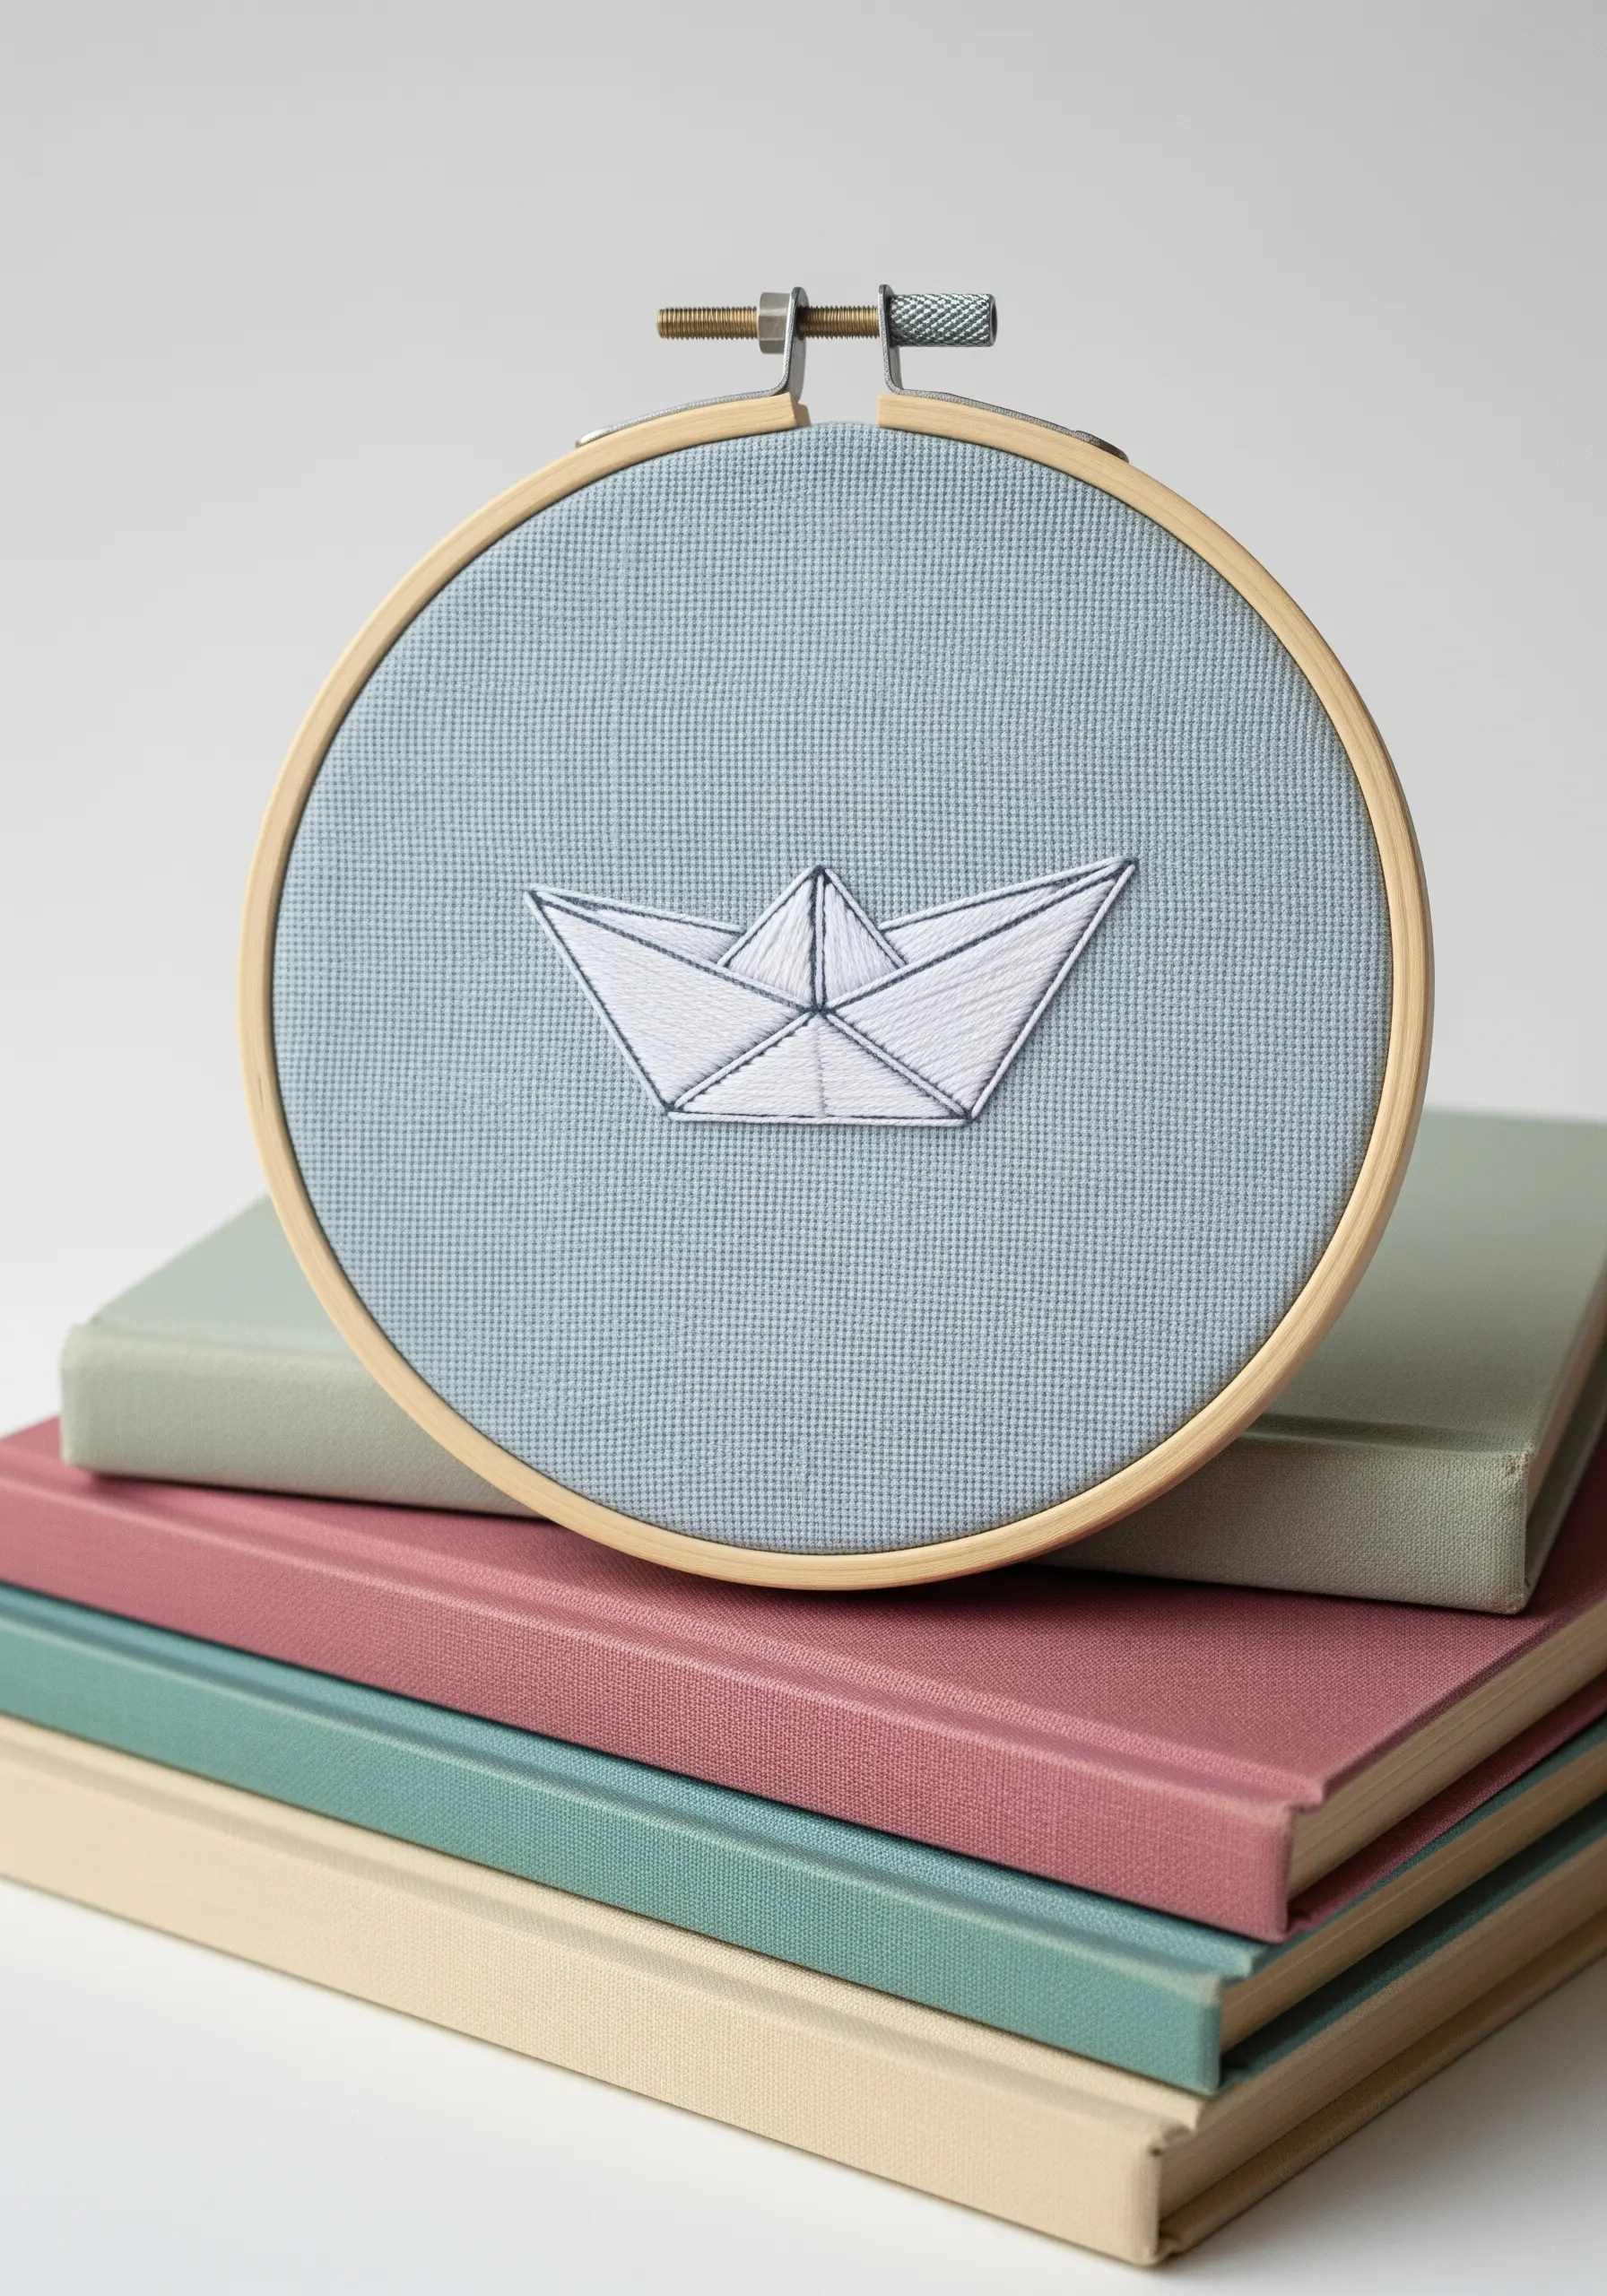
To make this origami-inspired design look sharp and believable, focus on the direction of your stitches.
Outline the boat with a precise, single-strand backstitch in a slightly darker shade to define the folds.
Fill each panel with a directional satin stitch, ensuring your stitches follow the angle of the paper’s imagined plane.
This technique creates subtle shadows and highlights that give the flat design a convincing three-dimensional quality.
7. Sketch Mountain Peaks with Varied Stitches
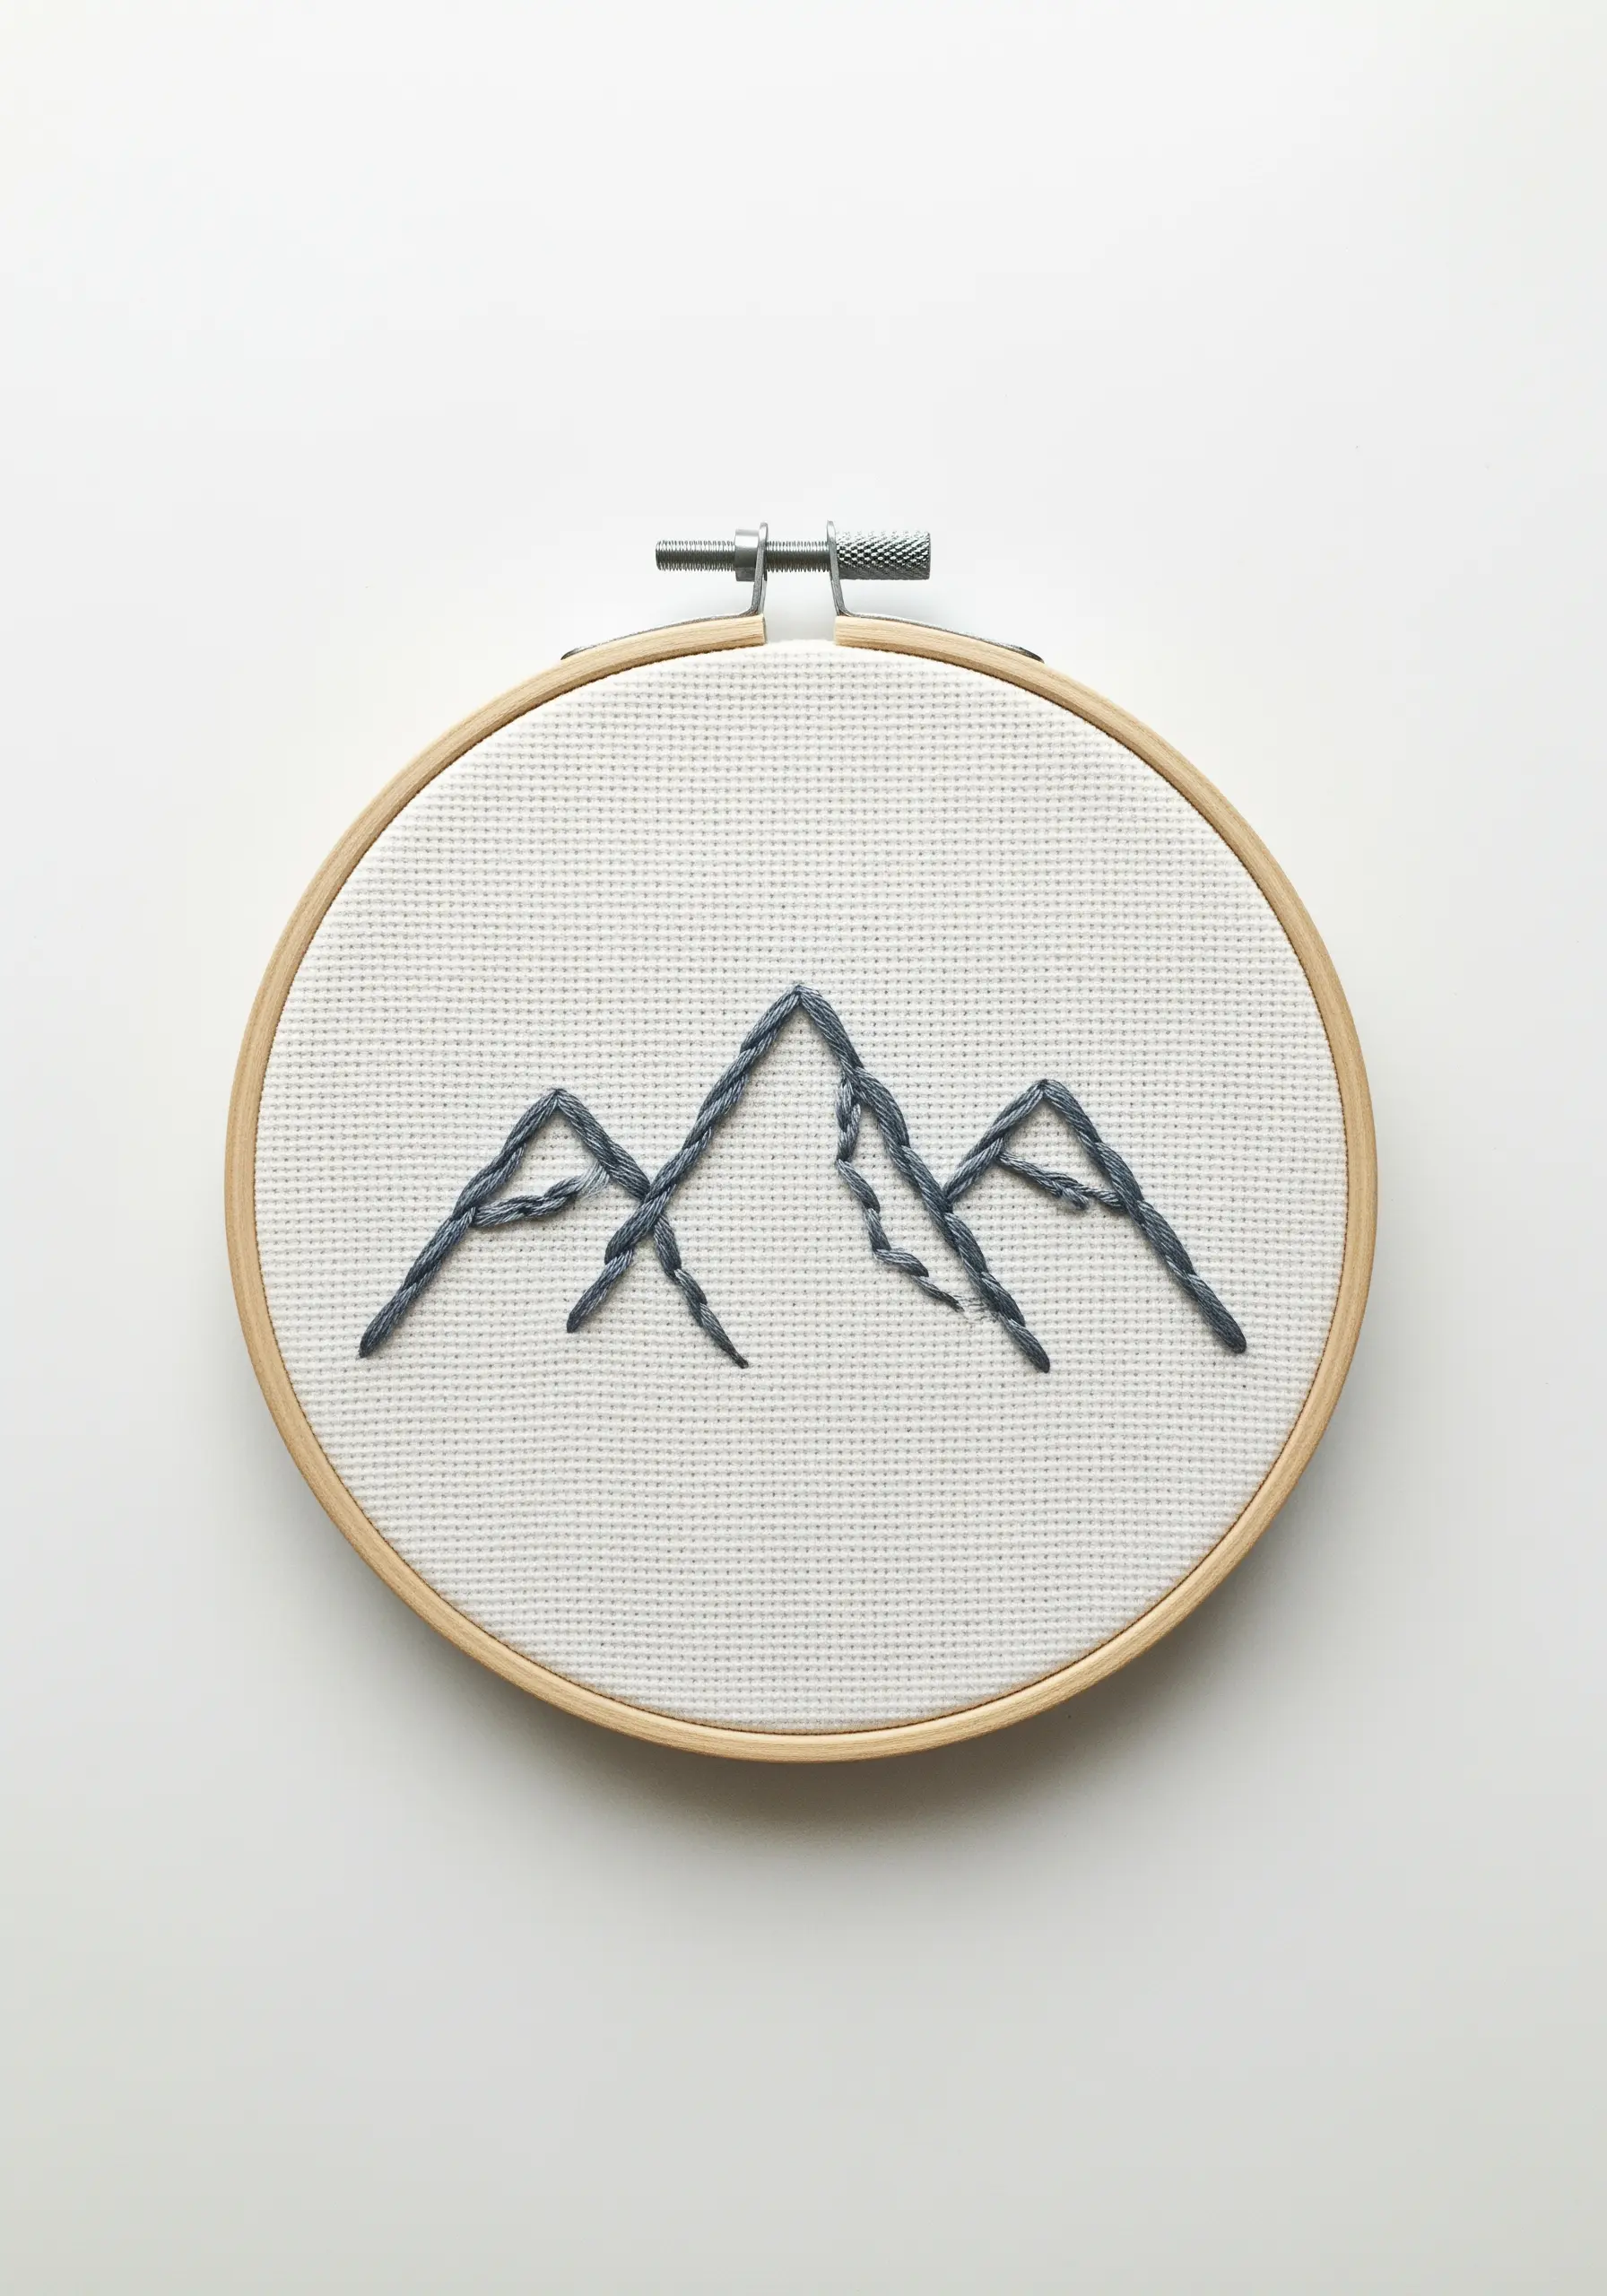
Capture the rugged, organic feel of a mountain range by letting go of perfectly uniform stitches.
Use a thick thread, like all six strands of floss, and fill the outline with straight stitches of varying lengths and angles.
This technique, often called thread sketching, creates texture and suggests rocky, uneven surfaces far more effectively than a smooth satin stitch would.
It’s a fast, expressive way to render landscapes and perfect for adding to backpacks and passport covers.
8. Map a Constellation with Precise Knots
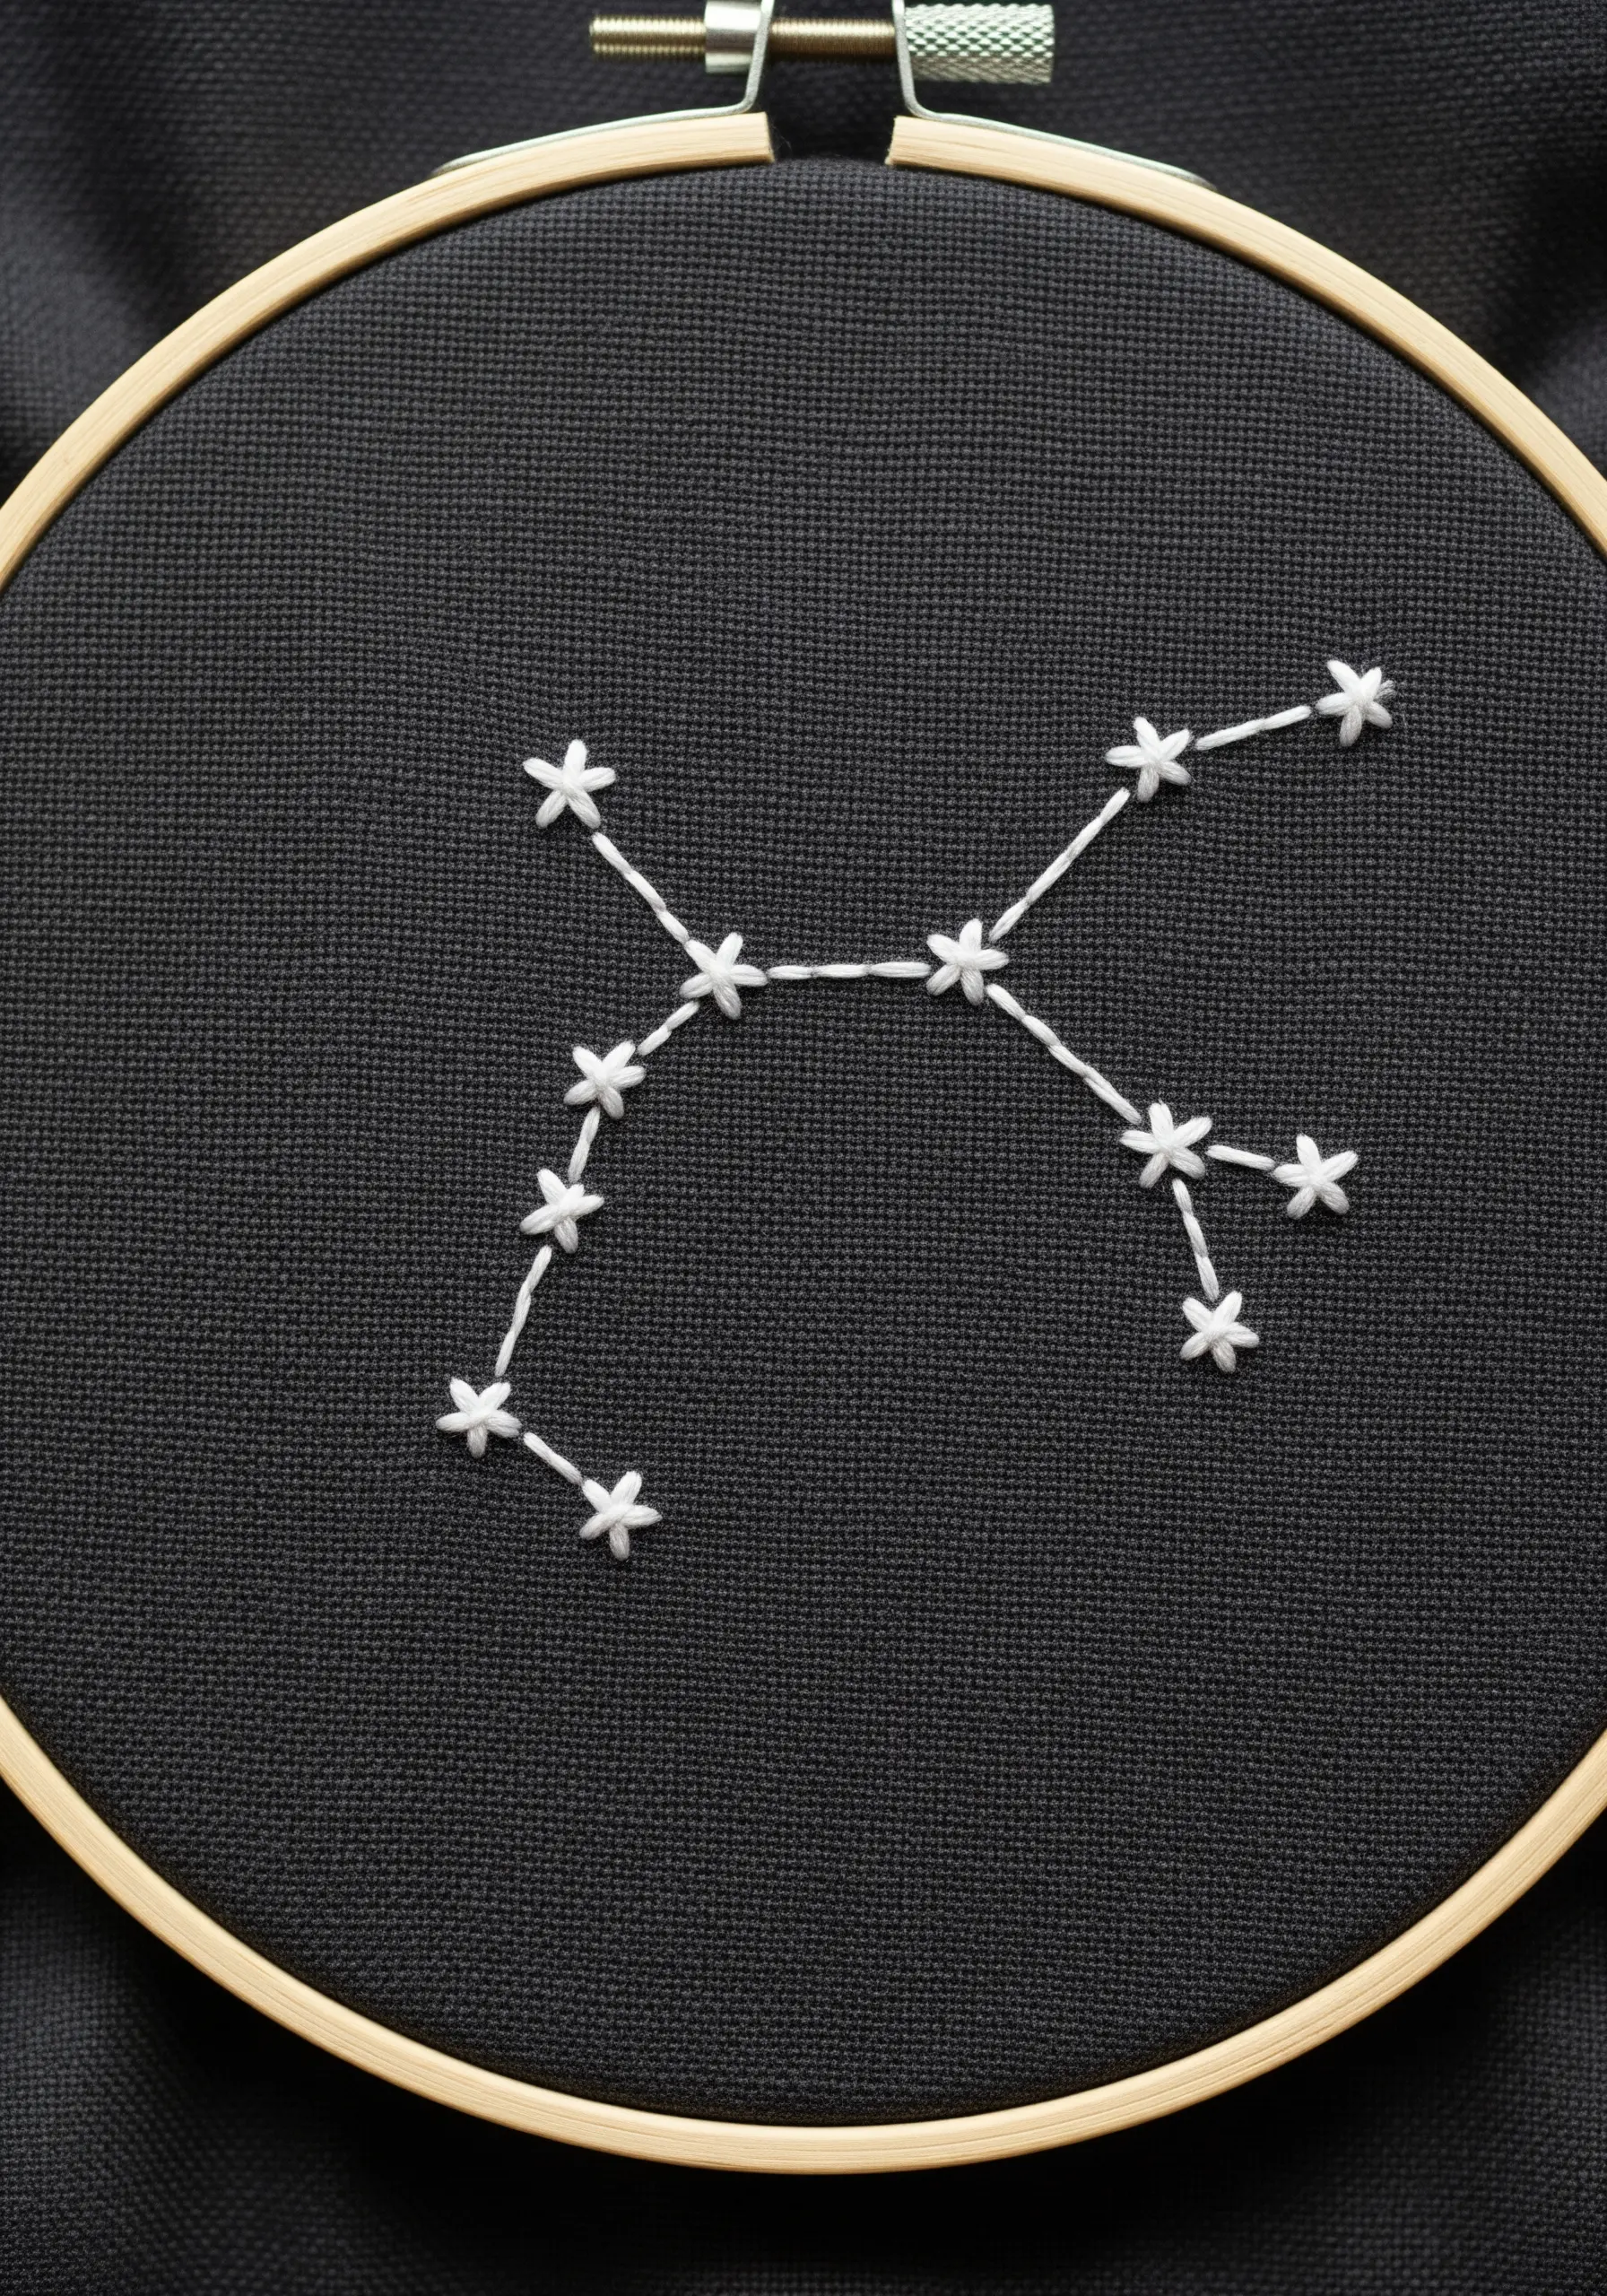
The elegance of a constellation motif lies in its precision and the drama of negative space.
Use a dark, evenweave fabric like Aida or linen to help guide your stitch placement.
For the stars, create small, tight star stitches or colonial knots, which are sturdier and more rounded than French knots.
Connect them with a taut, single-strand backstitch to ensure the lines are crisp and delicate against the dark background.
9. Layer Details on a Textured Strawberry
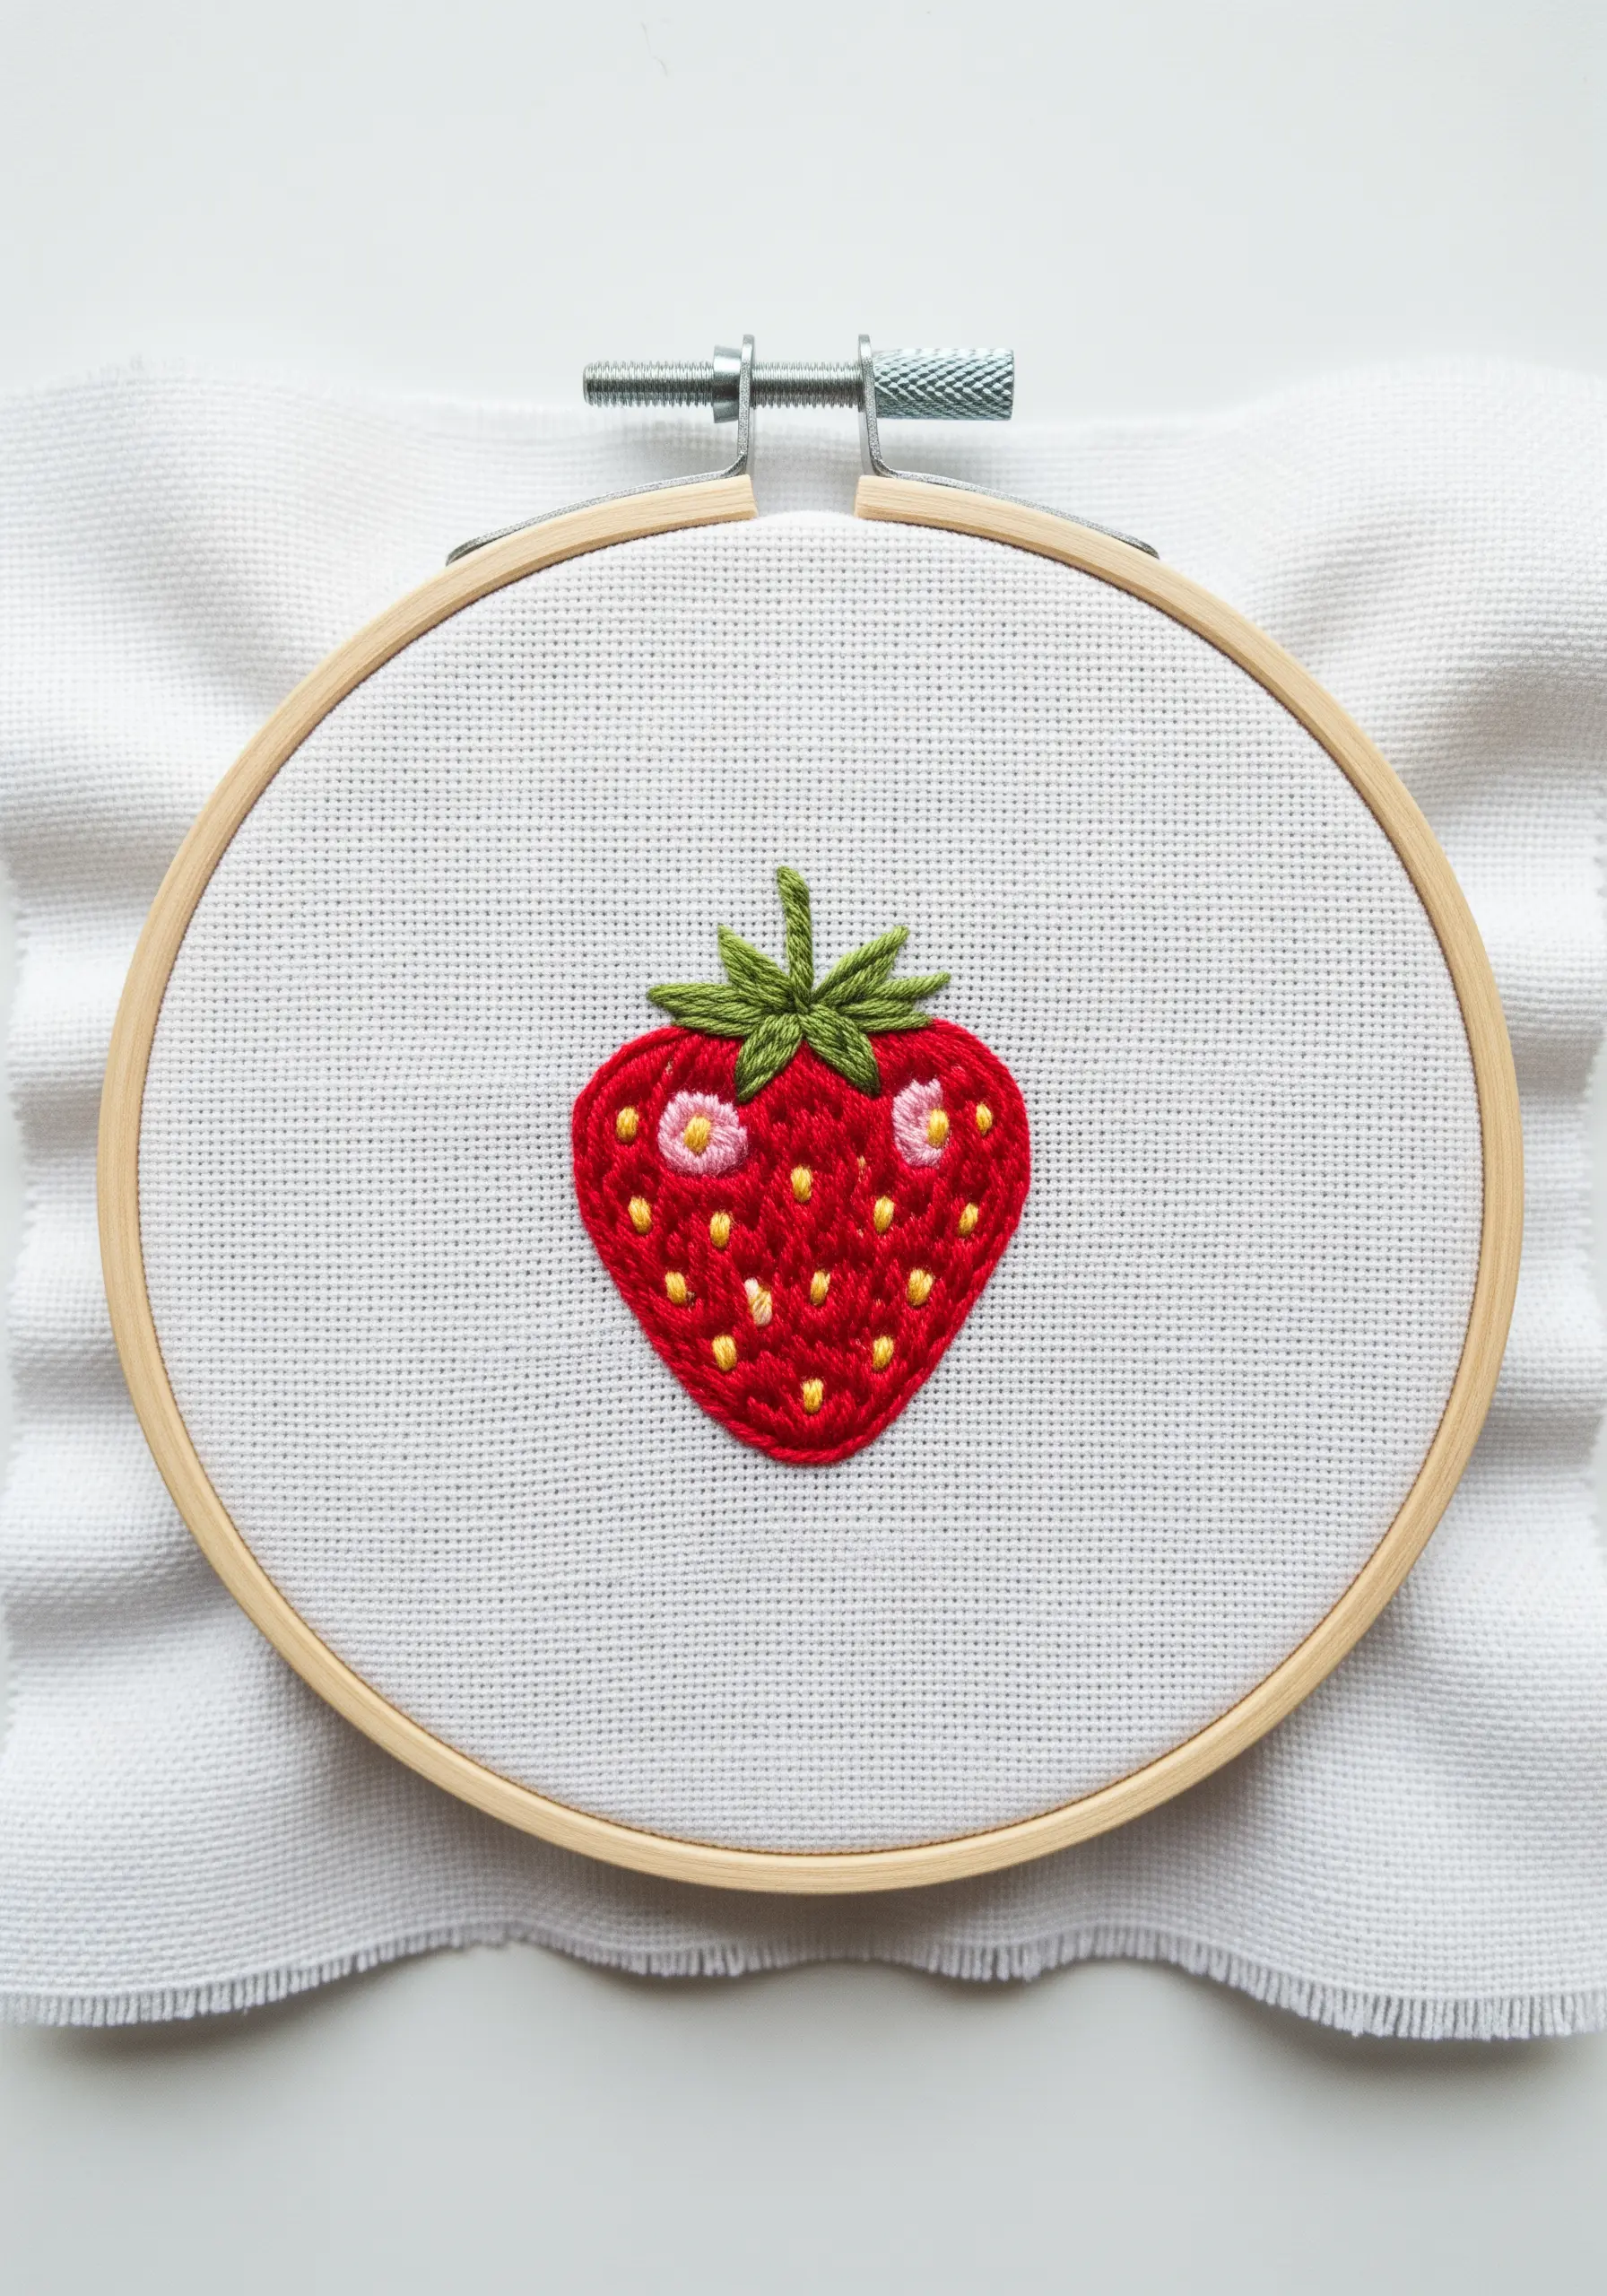
Create a rich, tactile surface by layering different stitches.
First, fill the strawberry shape with a base of red satin stitch.
Next, add dimension by scattering yellow French knots on top for seeds and a few white seed stitches for highlights.
For the leaves, a fishbone stitch creates a natural-looking central vein.
This multi-layered approach makes the simple fruit motif feel dynamic and visually interesting.
10. Create a Sunburst with Perfect Tension
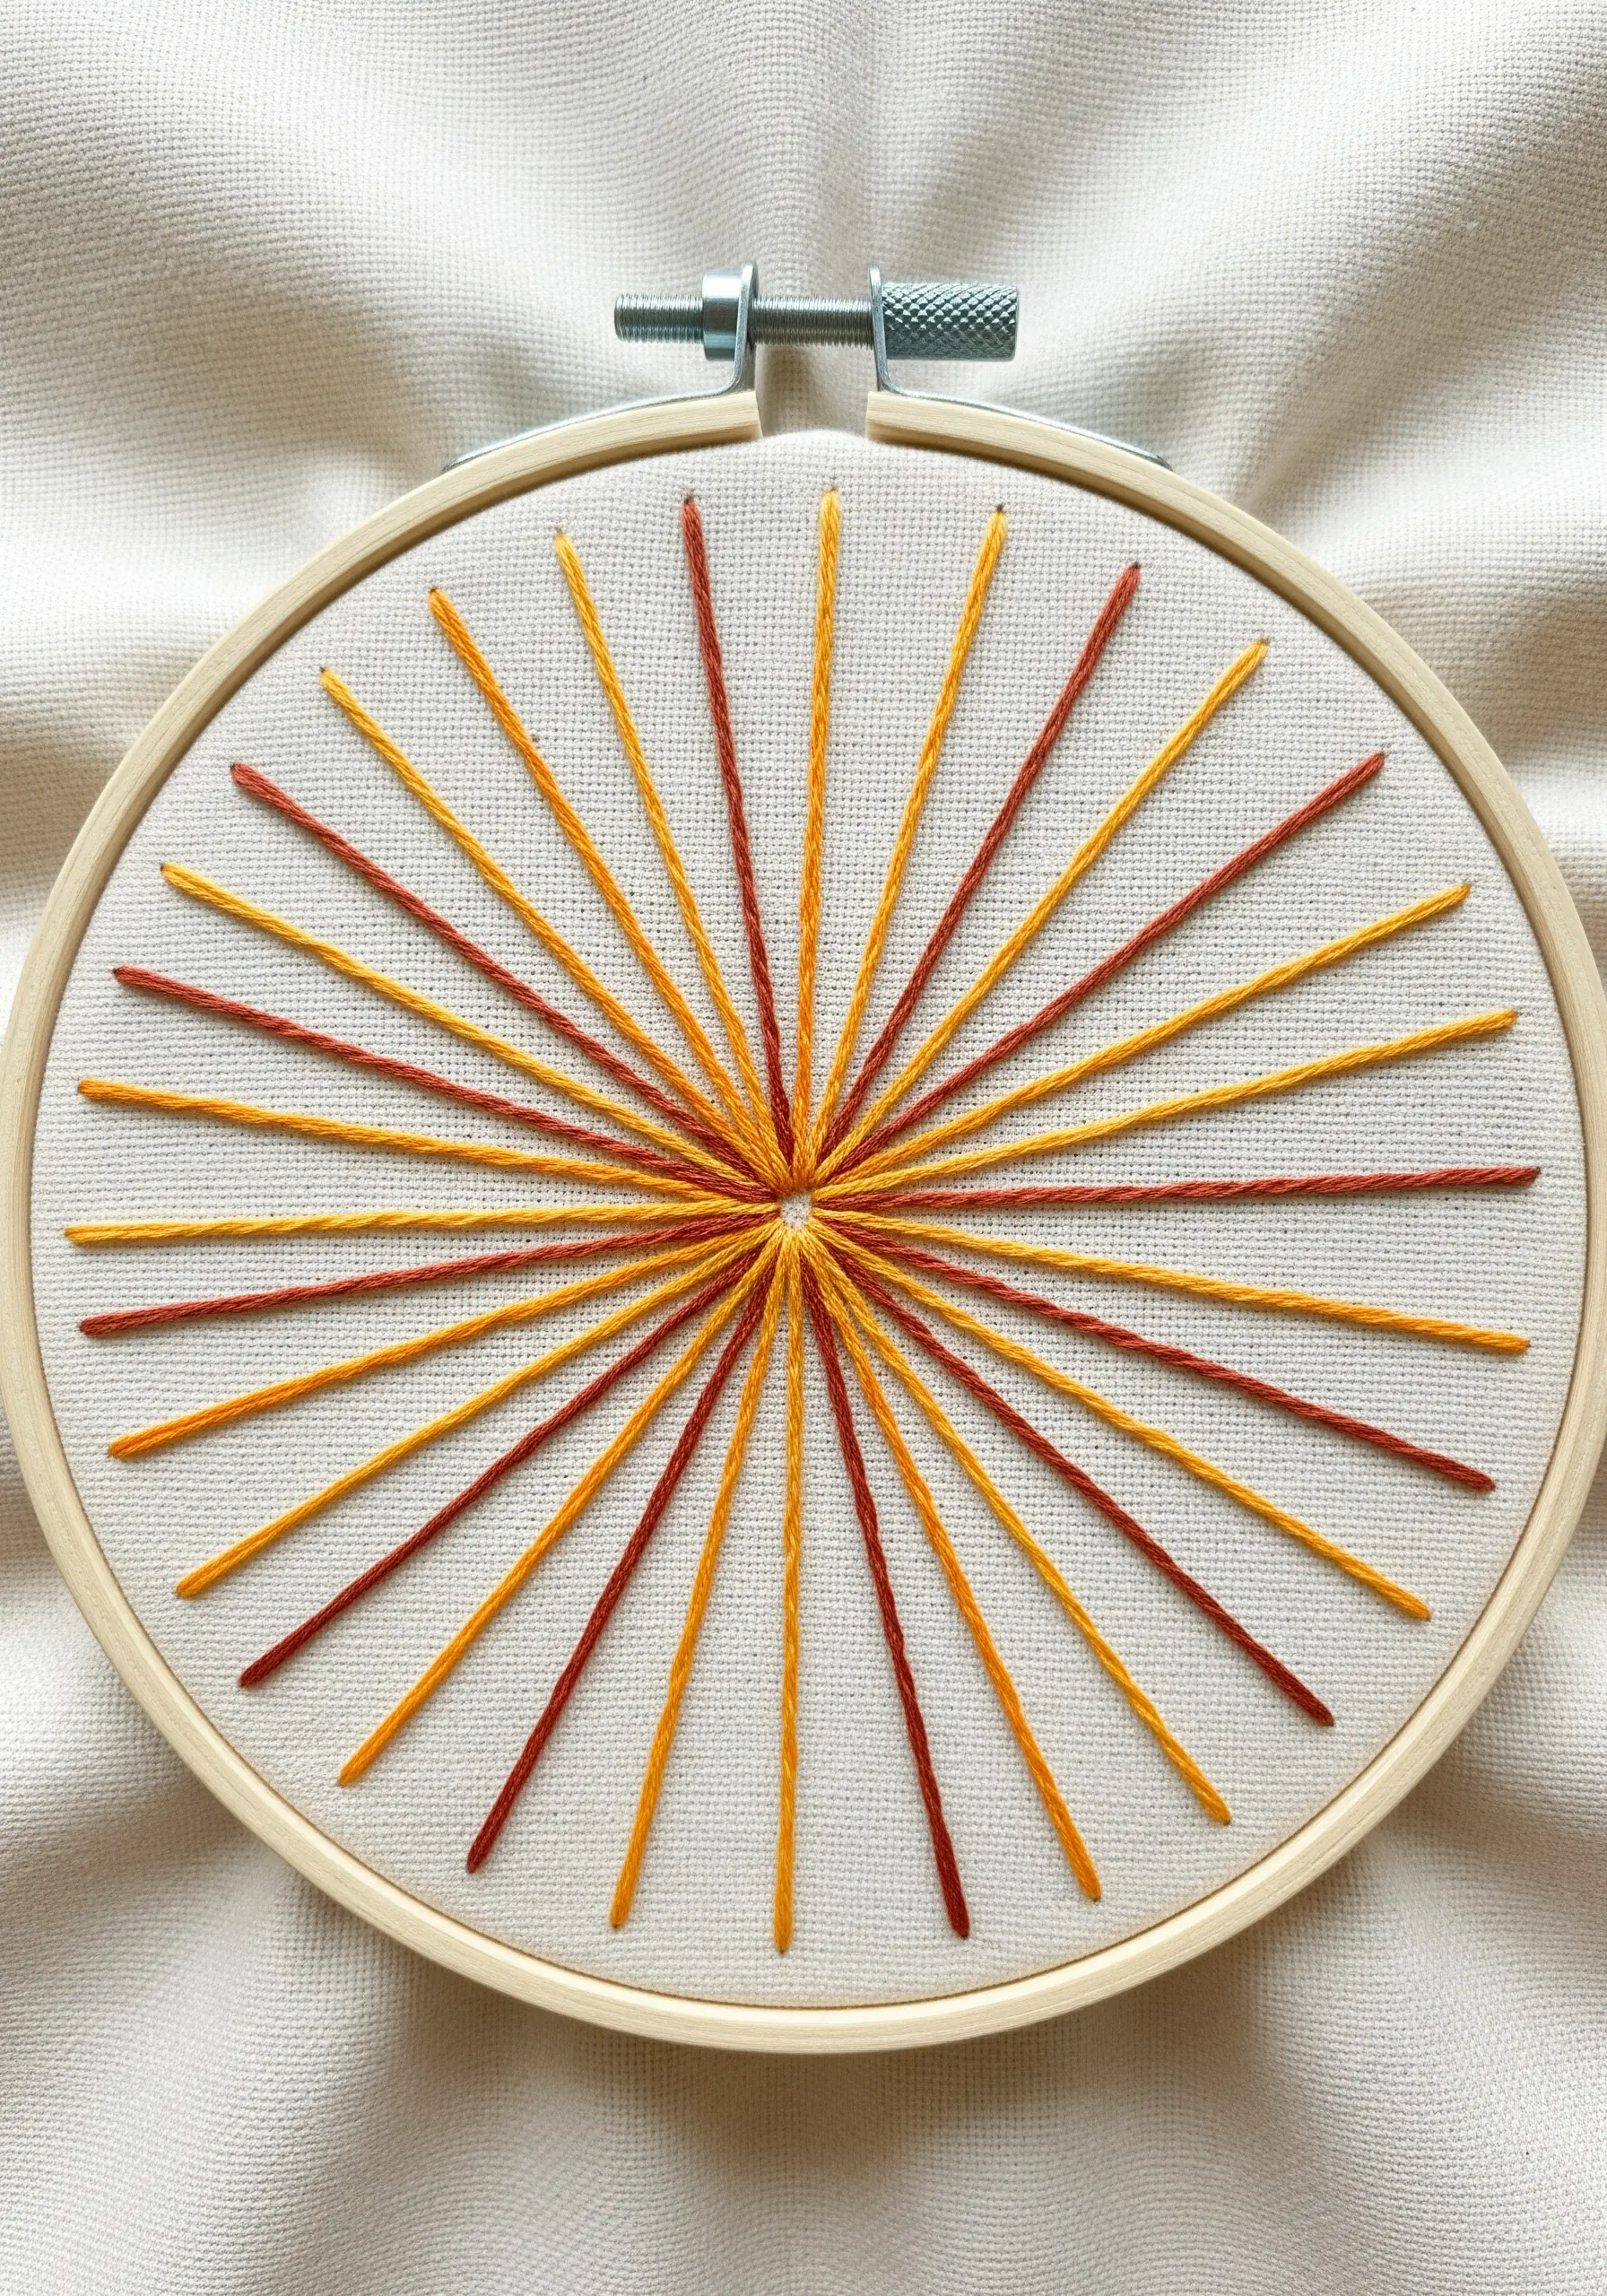
This seemingly simple design is an excellent exercise in mastering stitch tension and placement.
Begin by drawing a central point and radiating lines on your fabric with a water-soluble marker.
Use a single long straight stitch for each ray, pulling the thread taut enough to be straight but not so tight that it puckers the fabric.
Using two or three harmonious colors adds warmth and rhythm to the composition.
11. Define a Silhouette with a Whipped Backstitch

When embroidering a simple silhouette, the quality of the outline determines the success of the piece.
A standard backstitch can sometimes look gappy or jagged on curves.
Instead, first lay down a backstitch outline, then whip it with the same thread.
This wrapping motion covers the gaps between stitches, creating a solid, fluid, and slightly raised line that gives your pet-themed line art a polished, professional finish.
12. Fill a Cloud with Textured French Knots
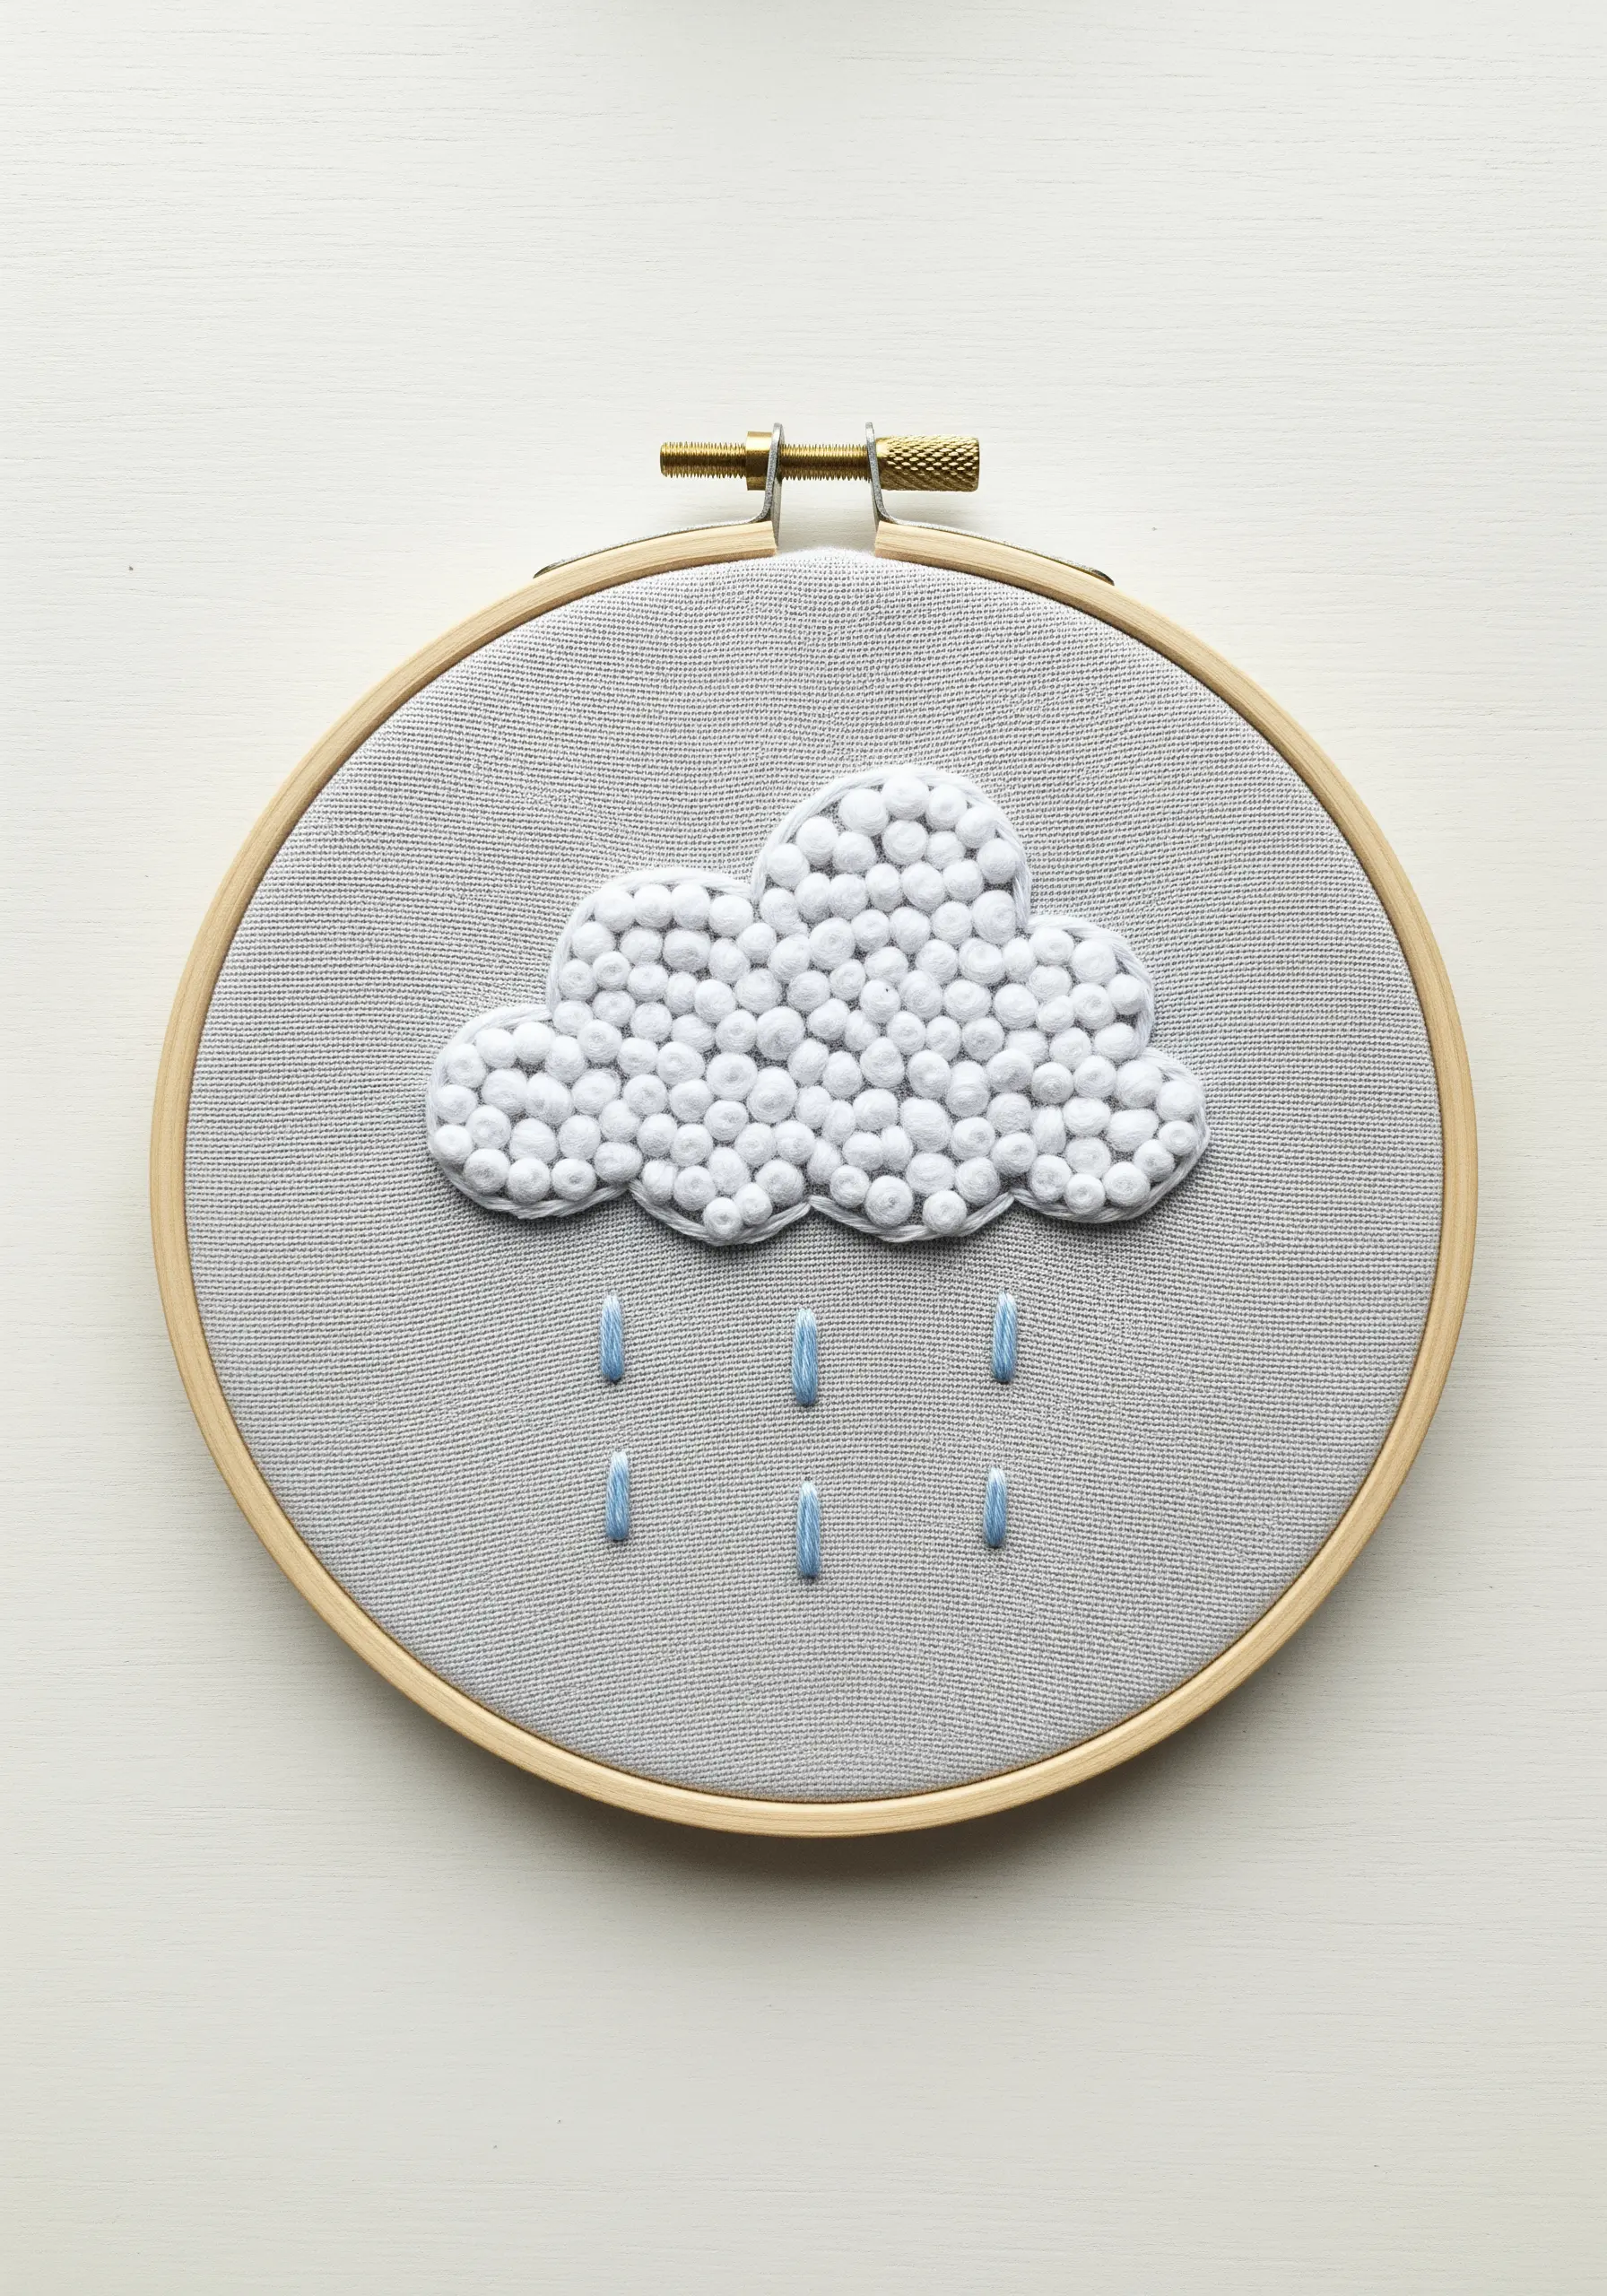
Give a simple cloud shape a wonderfully puffy, tactile quality by filling it entirely with French knots.
Outline the shape first with a split stitch to create a defined edge.
Work from the outline inward, packing the knots tightly together.
Vary the number of wraps around your needle (one, two, or three) to create knots of slightly different sizes, mimicking the billowy, uneven surface of a real cloud.
13. Trace a Skeleton Leaf with a Single Thread

This intricate design demonstrates that detail doesn’t require complexity, but rather precision.
Choose a fine, single strand of embroidery floss to keep the lines delicate and crisp.
Use a basic backstitch for the entire piece, focusing on keeping your stitch length short and consistent, especially on the tight curves of the veins.
This is a meditative exercise in line work that results in stunning, lace-like hand-embroidery leaf patterns.
14. Add Luster with Metallic Thread
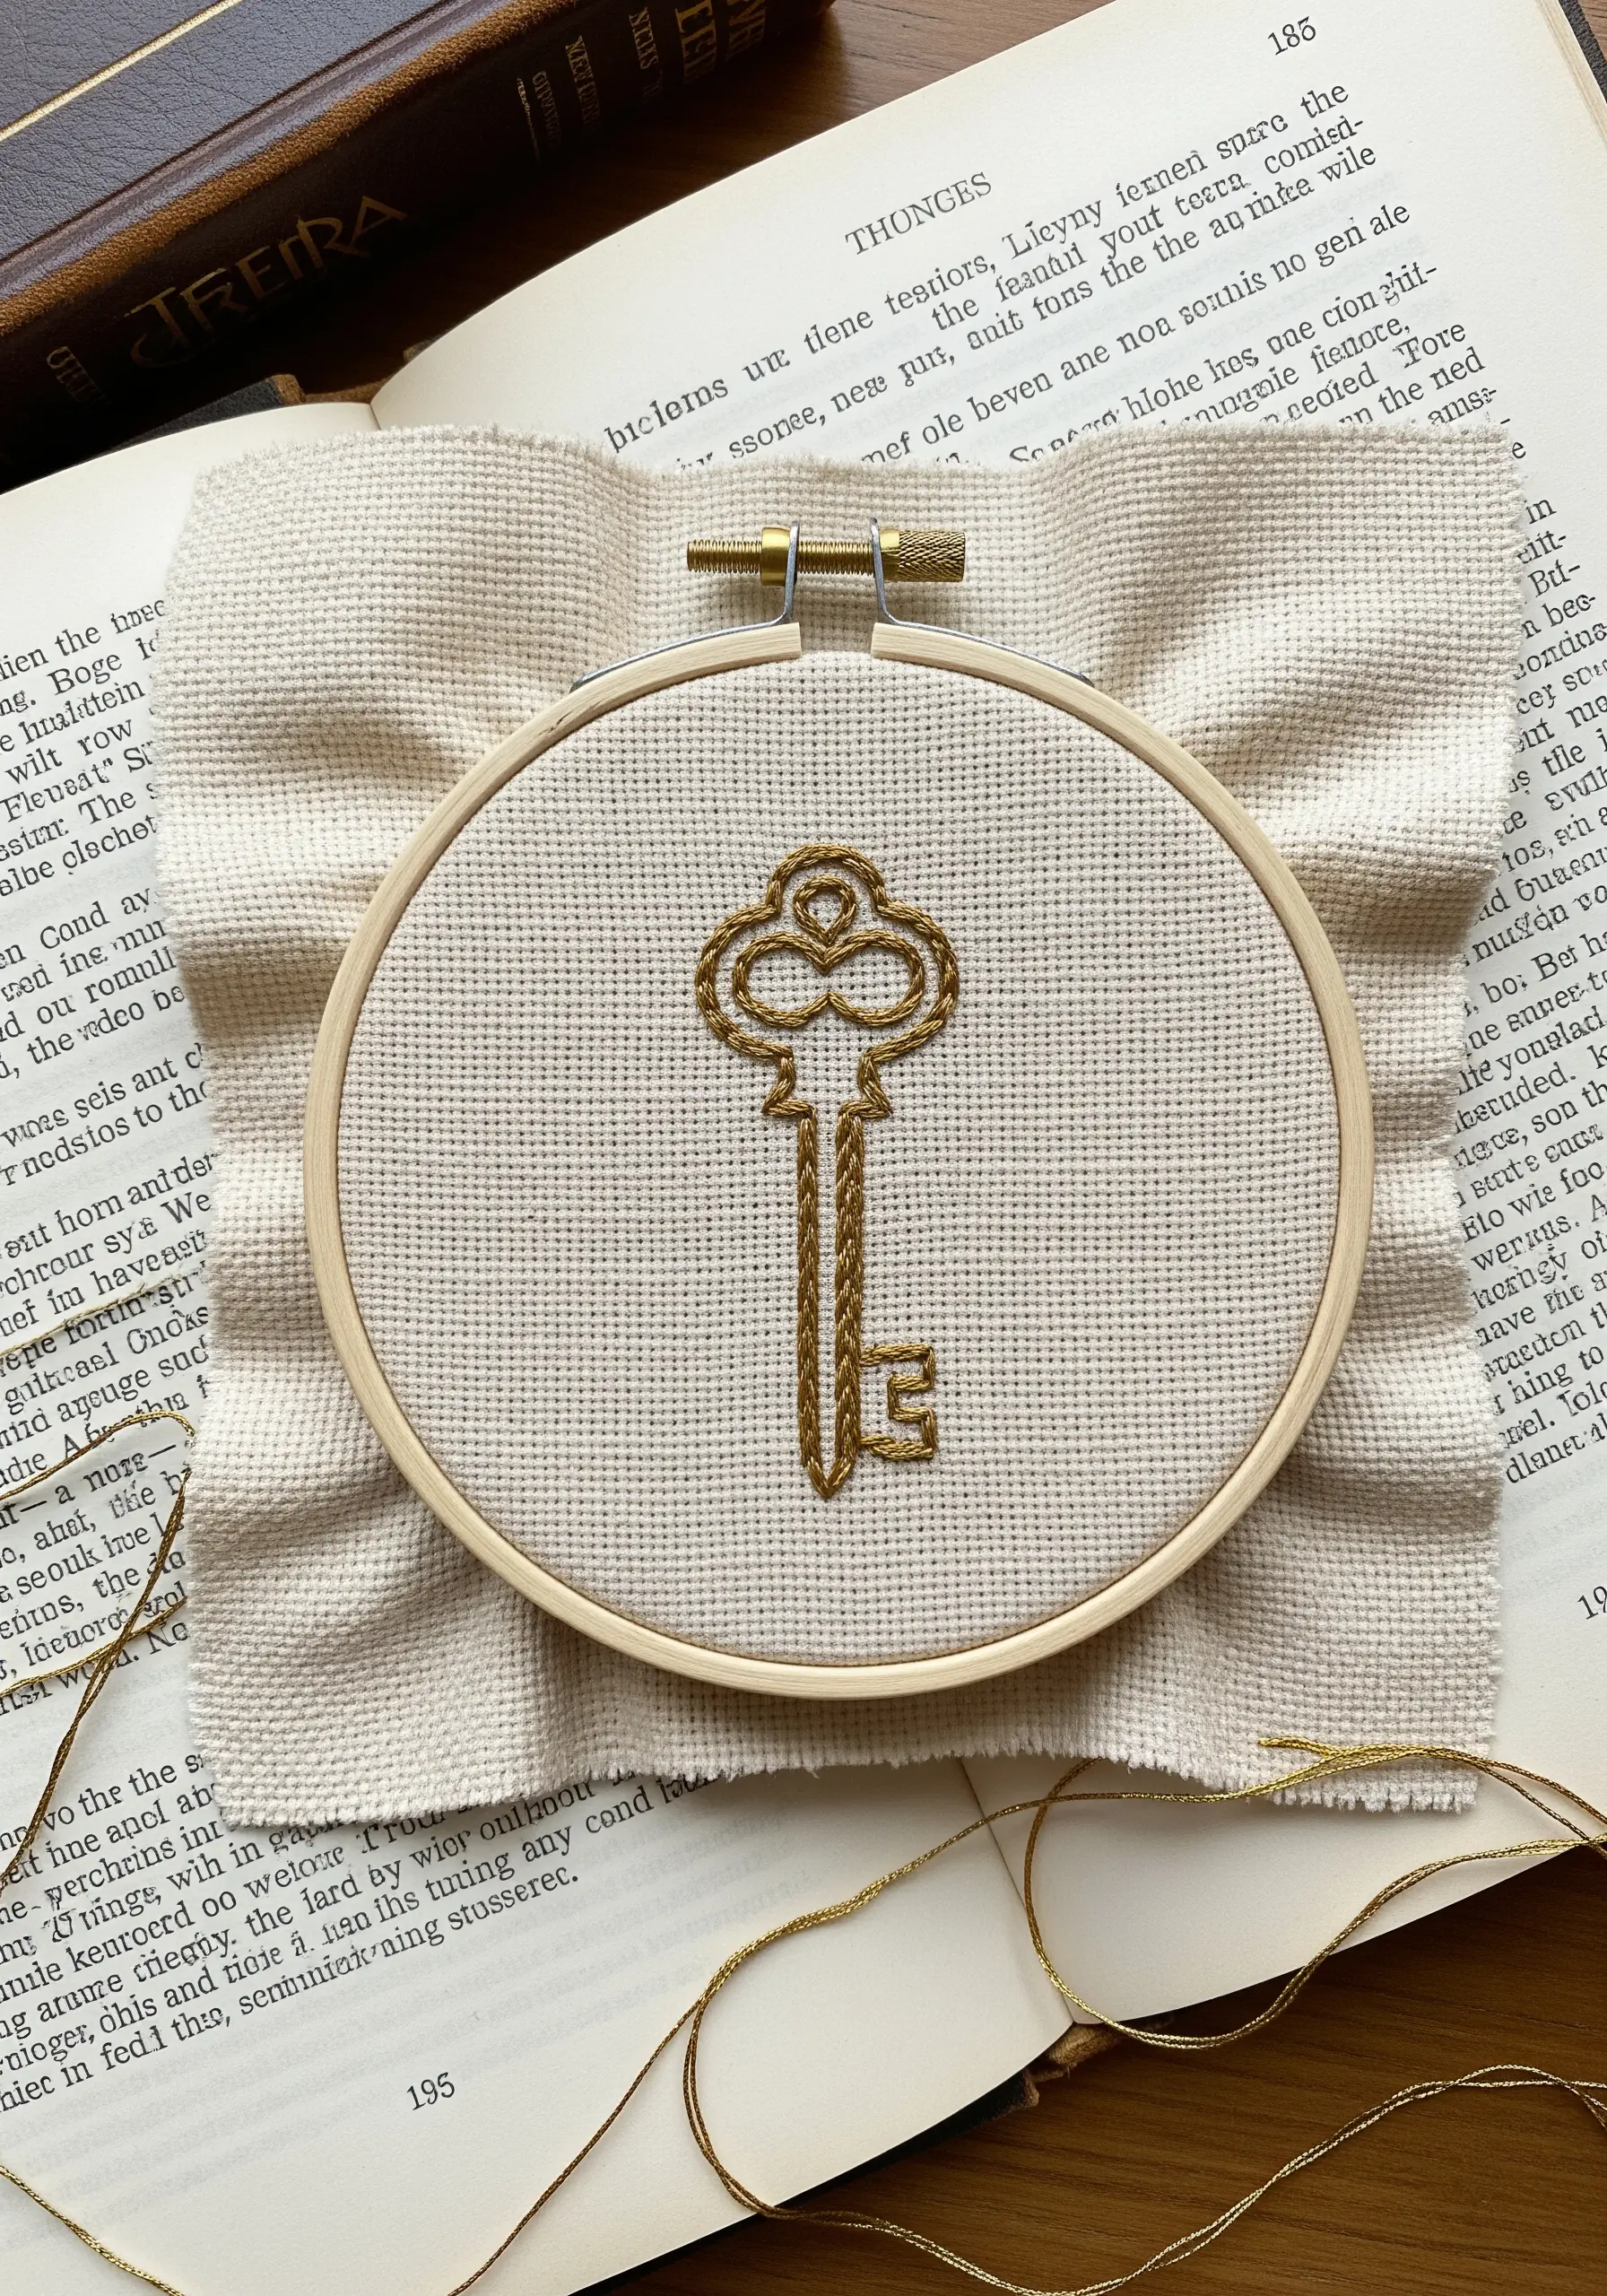
Working with metallic thread can be challenging, but the result is unmatched for adding a touch of elegance.
To prevent fraying and tangling, use a shorter length of thread than you normally would—no more than 12 inches.
Outline the key with a split stitch, which helps lock the slippery thread in place, and fill the interior with a smooth satin stitch.
The metallic sheen against a simple fabric creates an immediate sense of value and importance.
15. Shade Mushroom Caps with Thread Painting
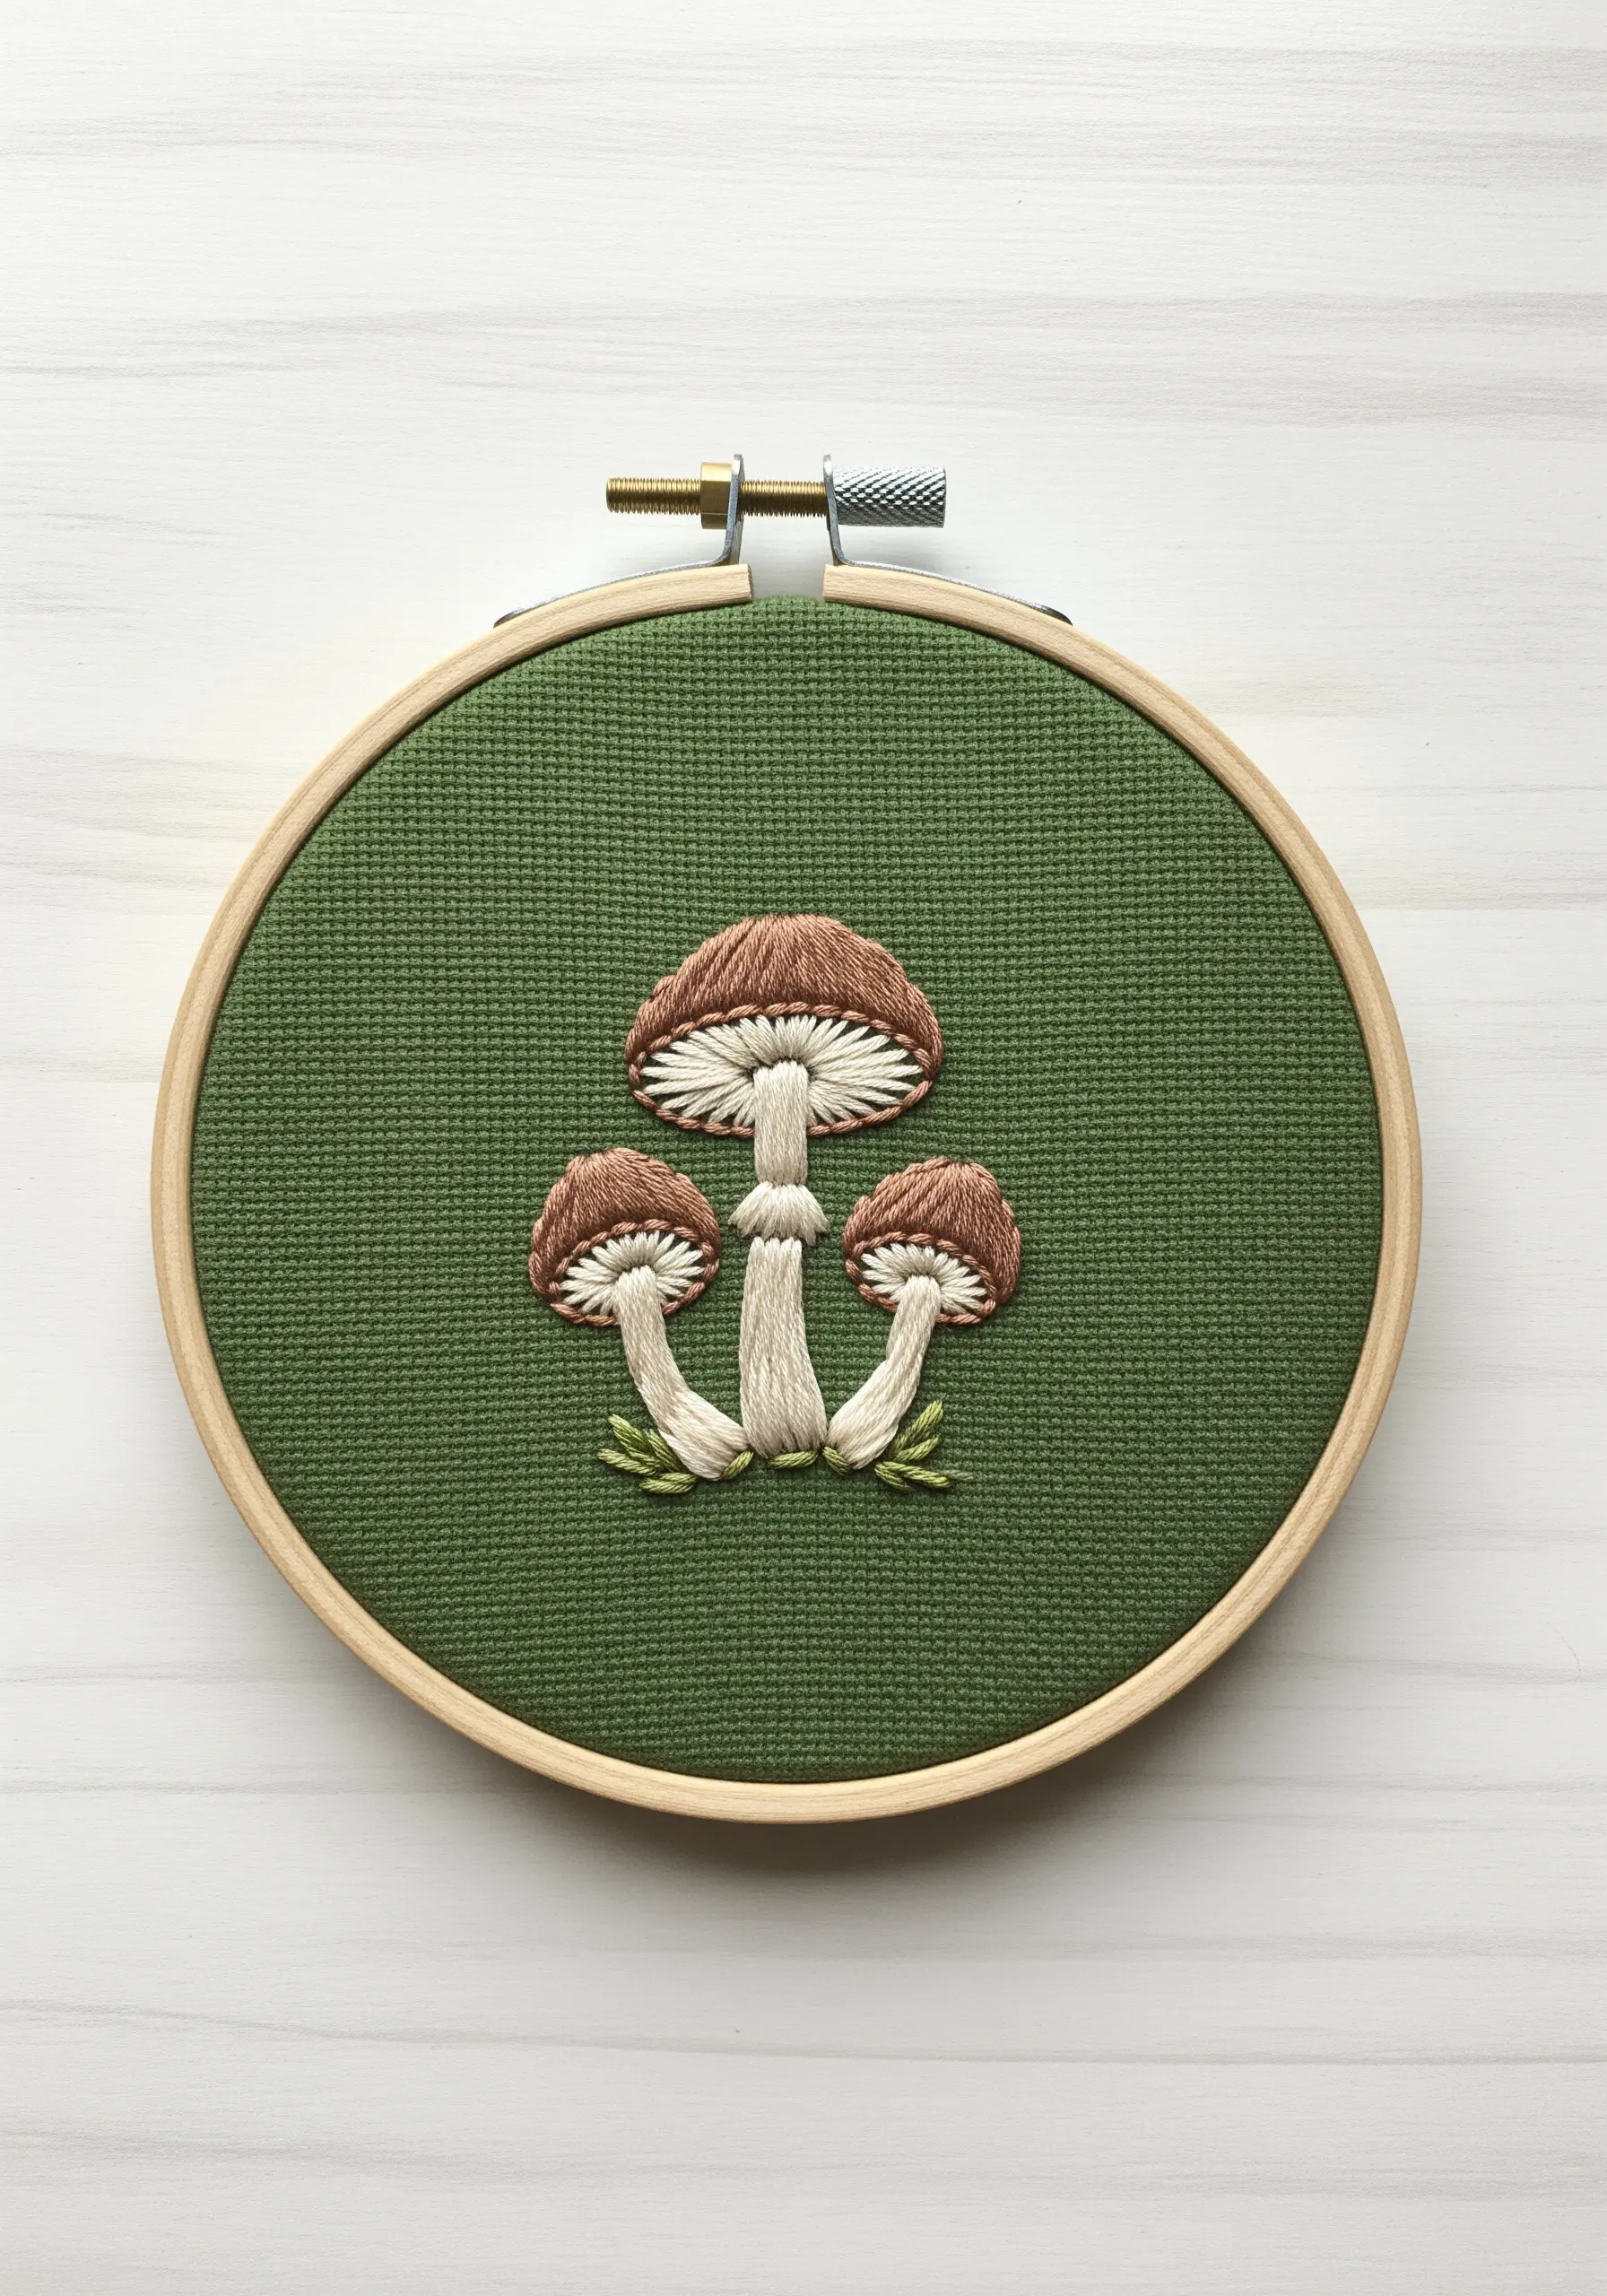
Achieve a realistic, painted look on these mushrooms using the long-and-short stitch technique.
For the caps, blend two or three shades of brown by staggering your stitches and overlapping the colors slightly, creating a soft gradient.
The gills underneath are simply tiny, vertical straight stitches in an off-white or light gray, packed closely together to suggest fine texture.
This technique turns you from a stitcher into a painter with thread, creating realistic mushroom forest floor embroidery.
16. Create Movement with a Dotted Flight Path
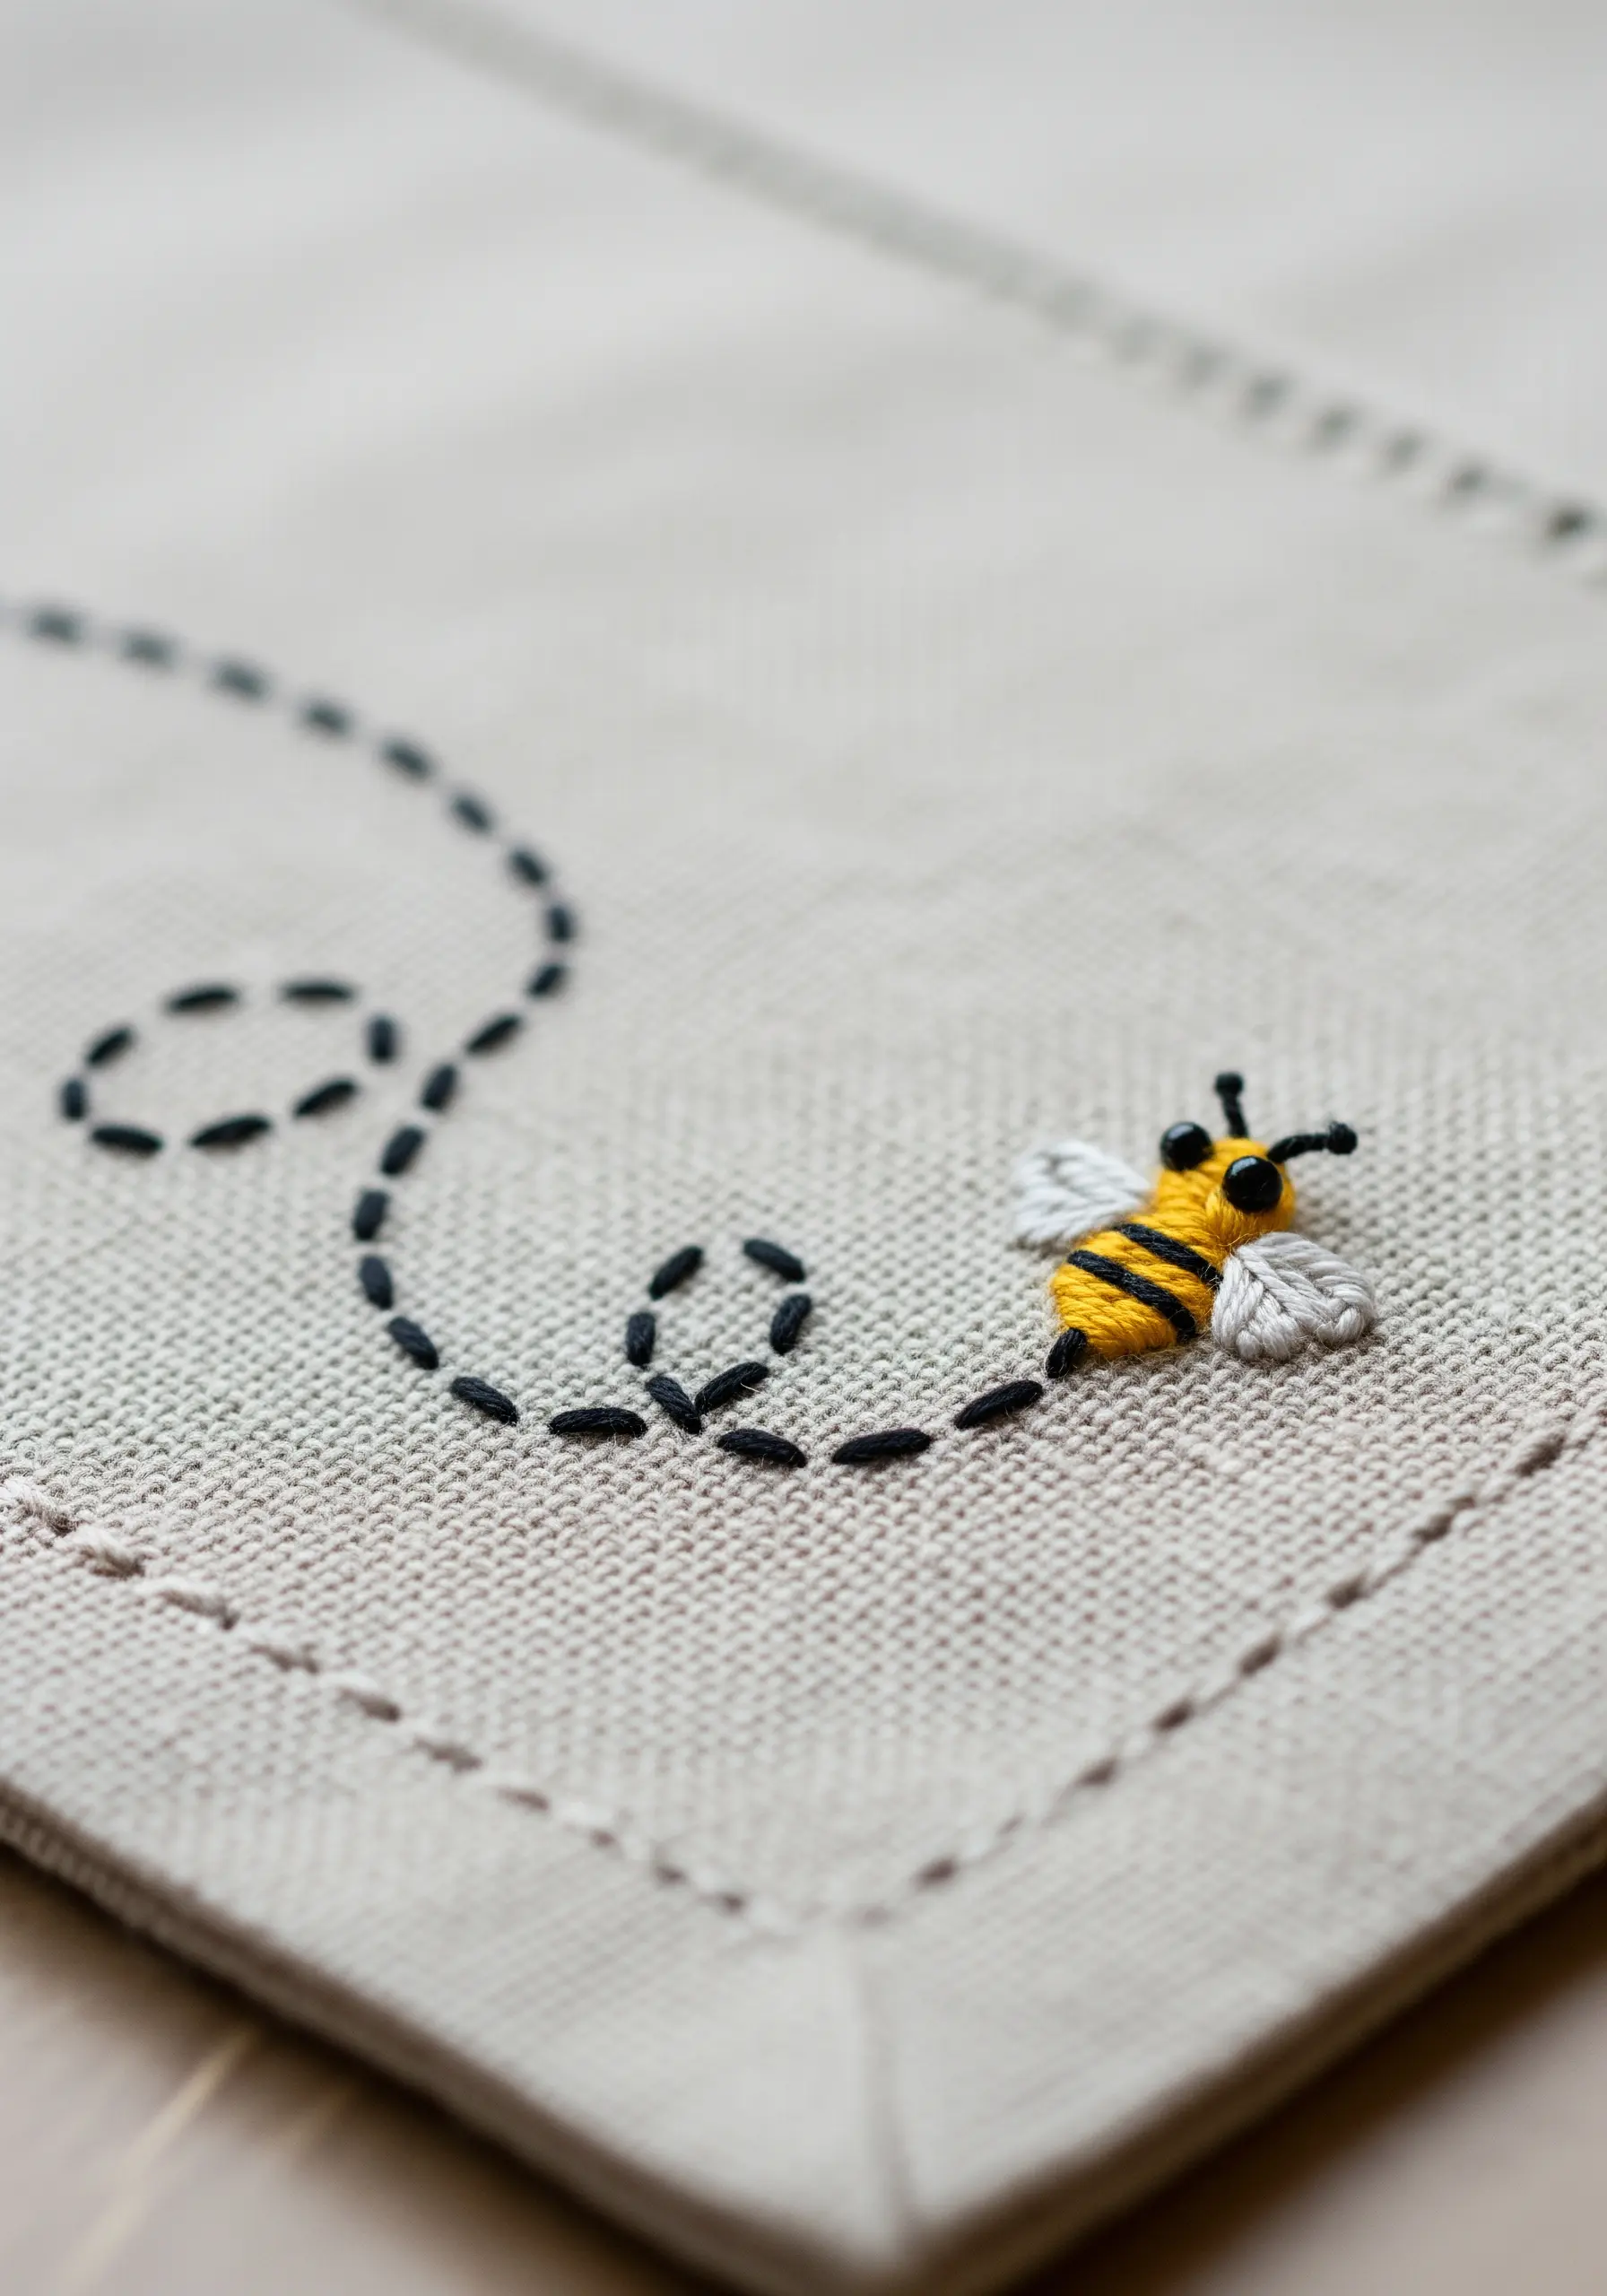
Bring a static motif to life by adding a line that implies movement.
Instead of a solid line, use a dashed or dotted line created with a simple running stitch or individual seed stitches.
This simple addition transforms the bee from a stationary object into a character buzzing across the fabric, adding a sense of narrative and playfulness to your piece.
Finish the bee with tiny French knots for eyes to give it personality.
17. Embroider a Balloon on Sheer Fabric
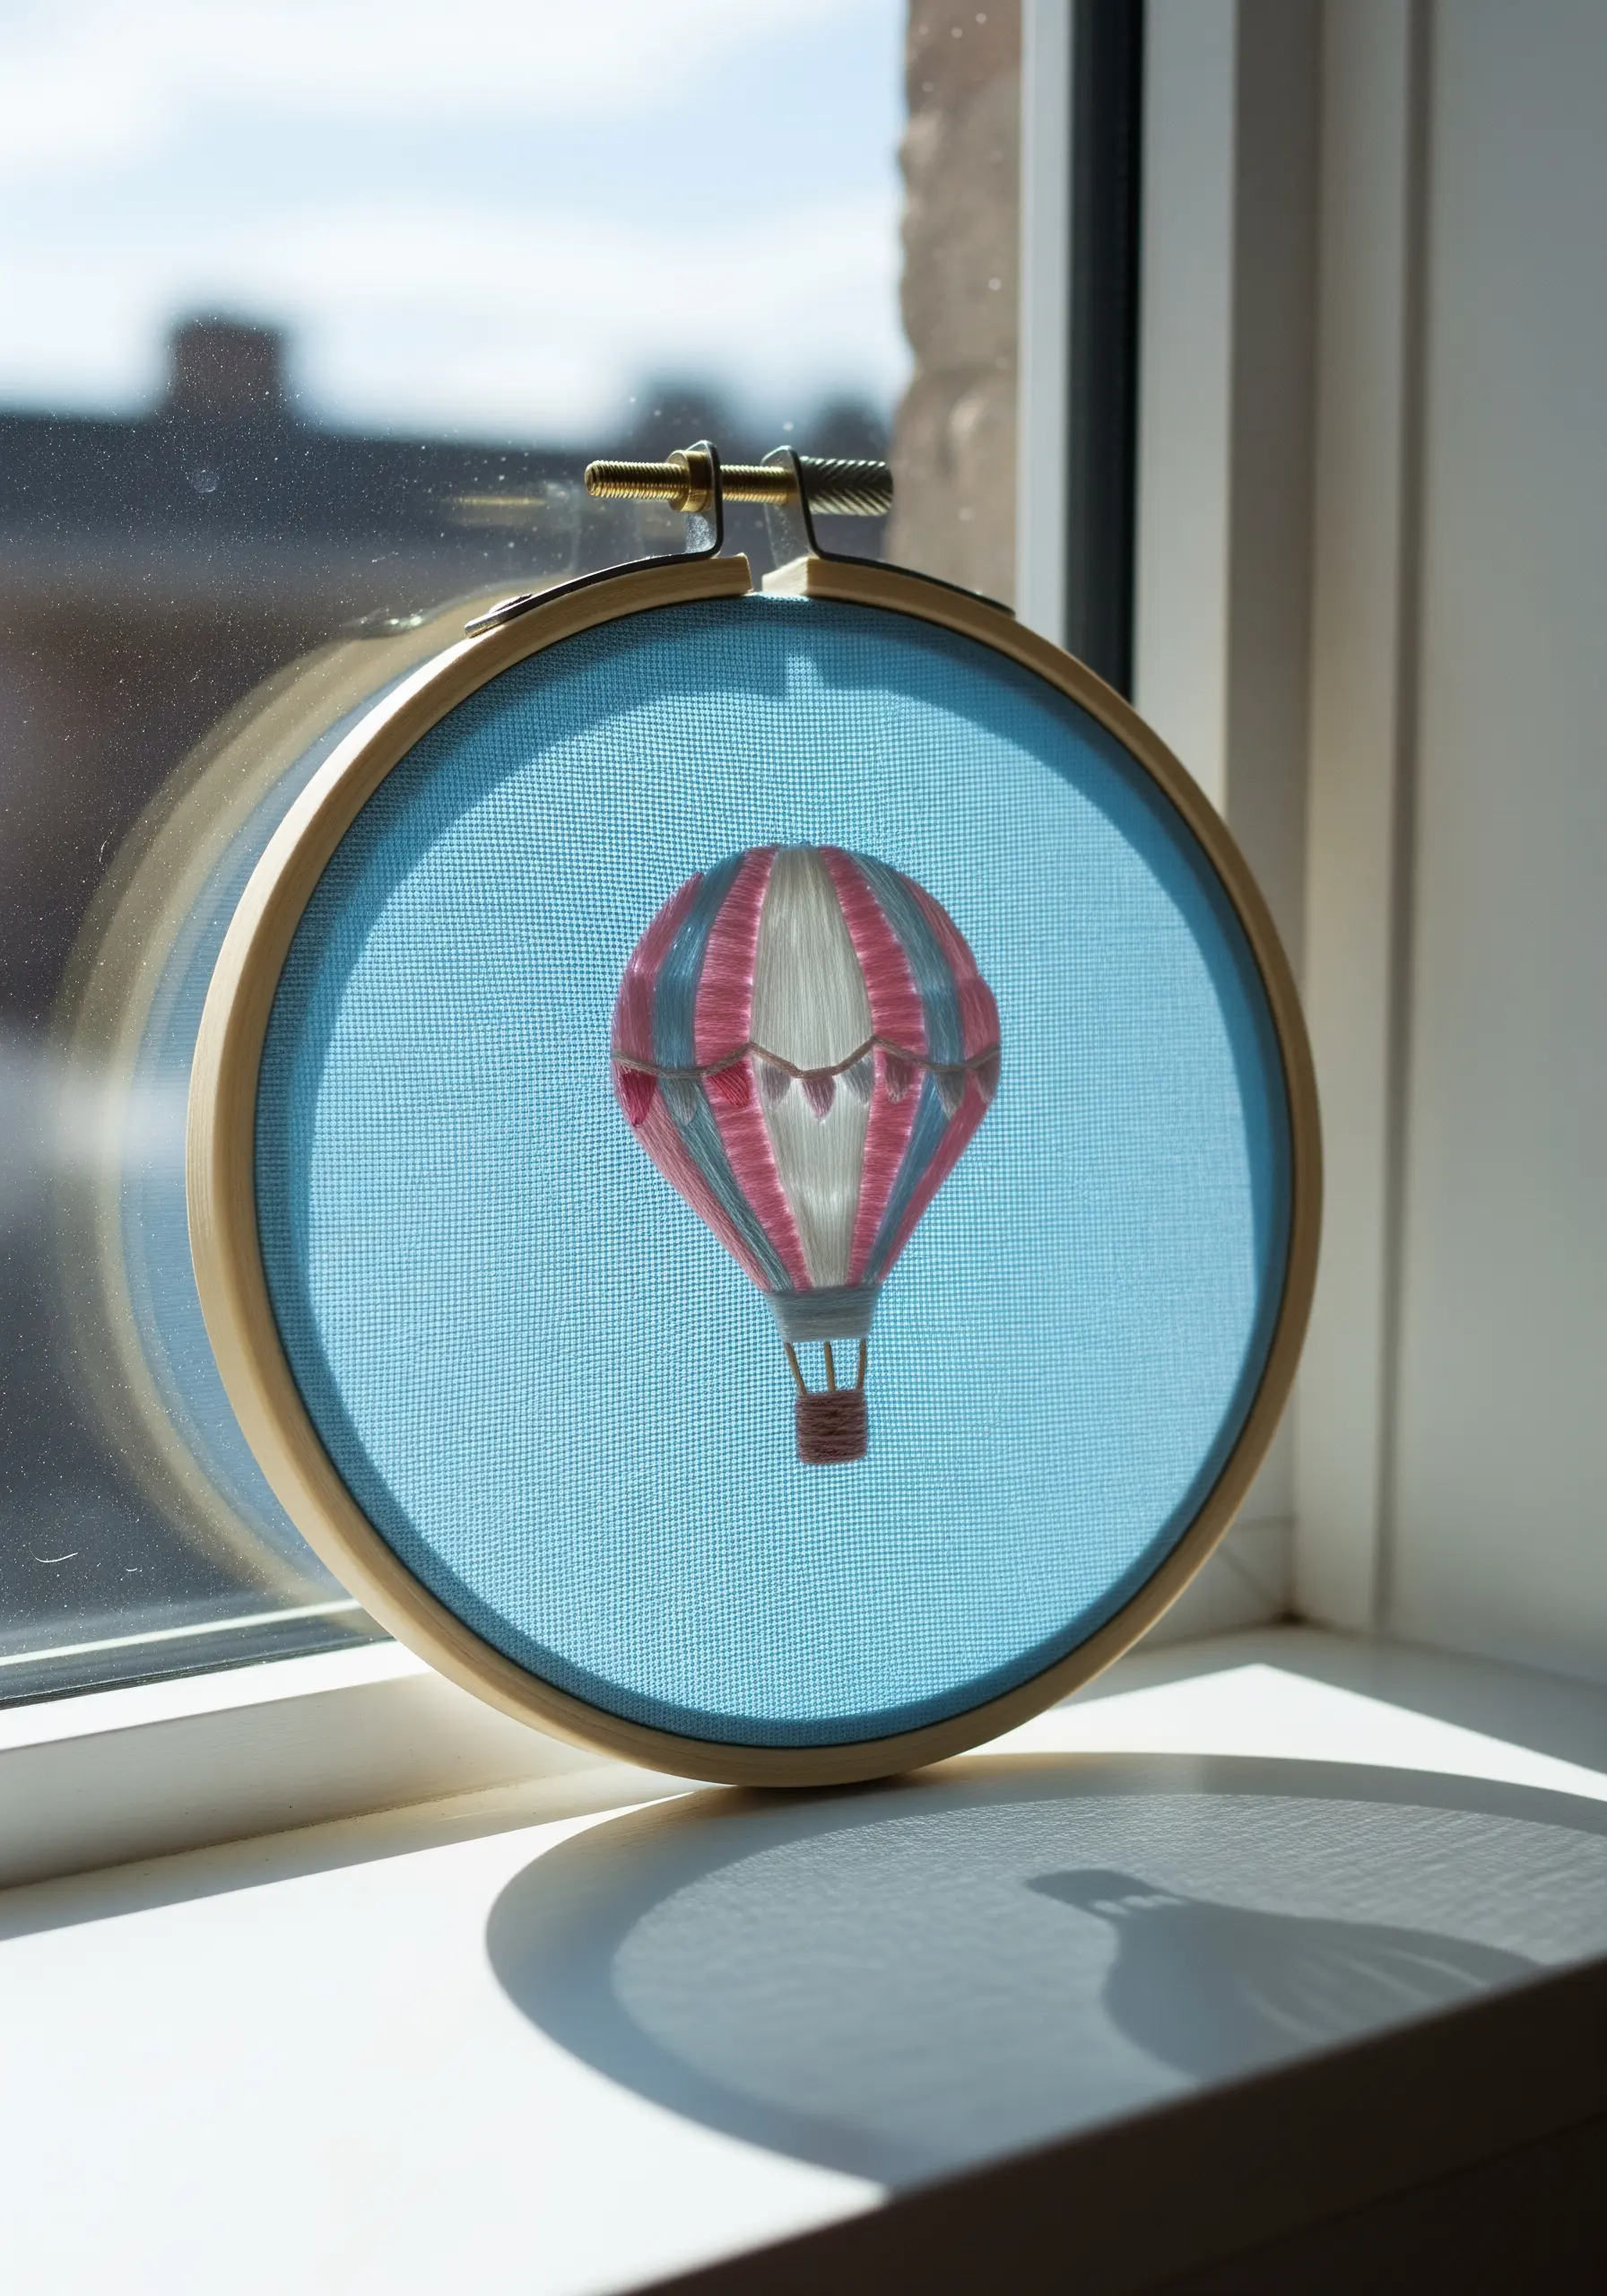
Stitching on tulle or organza creates a stunning, ethereal effect where the design appears to float.
Because the back of your work is visible, you must keep it exceptionally neat, trimming thread tails closely.
Use a water-soluble stabilizer to transfer your pattern, then stitch your design—a padded satin stitch works beautifully for the balloon’s bold stripes.
These unexpected embroidery techniques on sheer fabric create truly magical results.
18. Craft a Feather with Angled Stitches
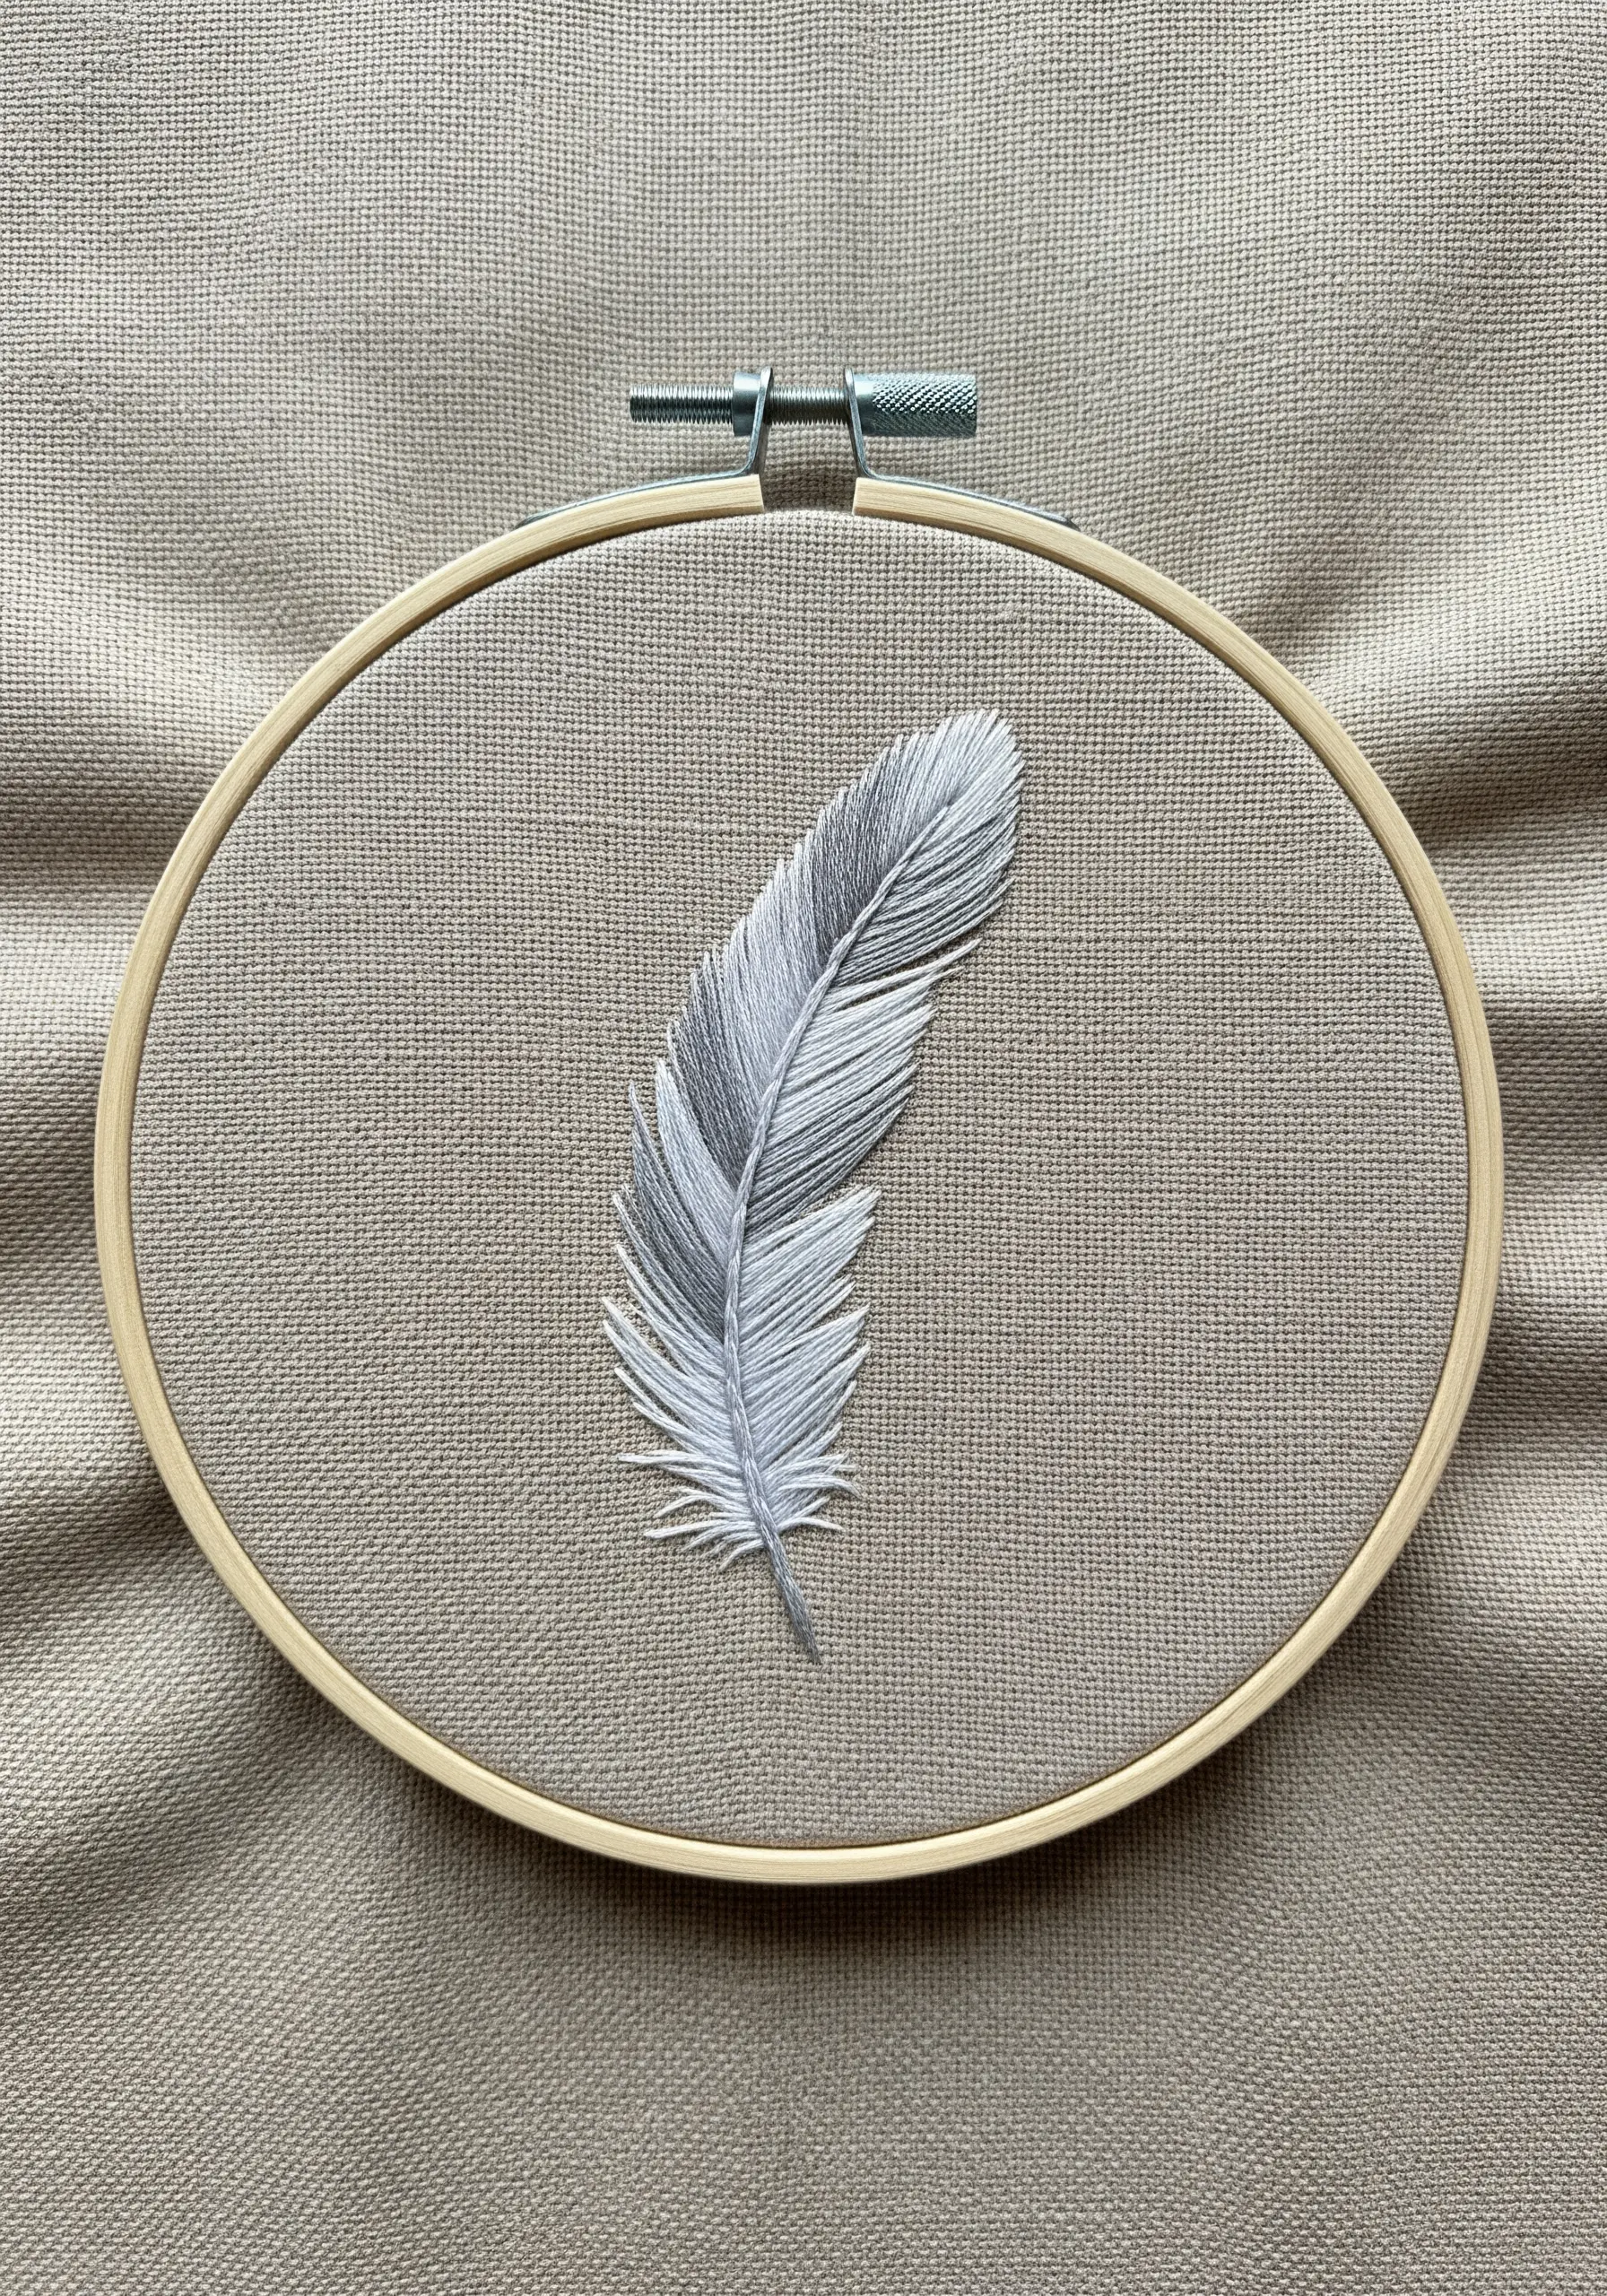
To replicate the soft texture of a feather, the direction and layering of your stitches are crucial.
Create the central shaft with a raised stem stitch or a line of chain stitches to give it prominence.
For the feather’s barbs, use long, angled straight stitches or fly stitches, working from the outer edge in toward the shaft.
Slightly overlap your stitches and use a few shades of gray and white to create depth and softness.
19. Make a Motif Pop with Padding
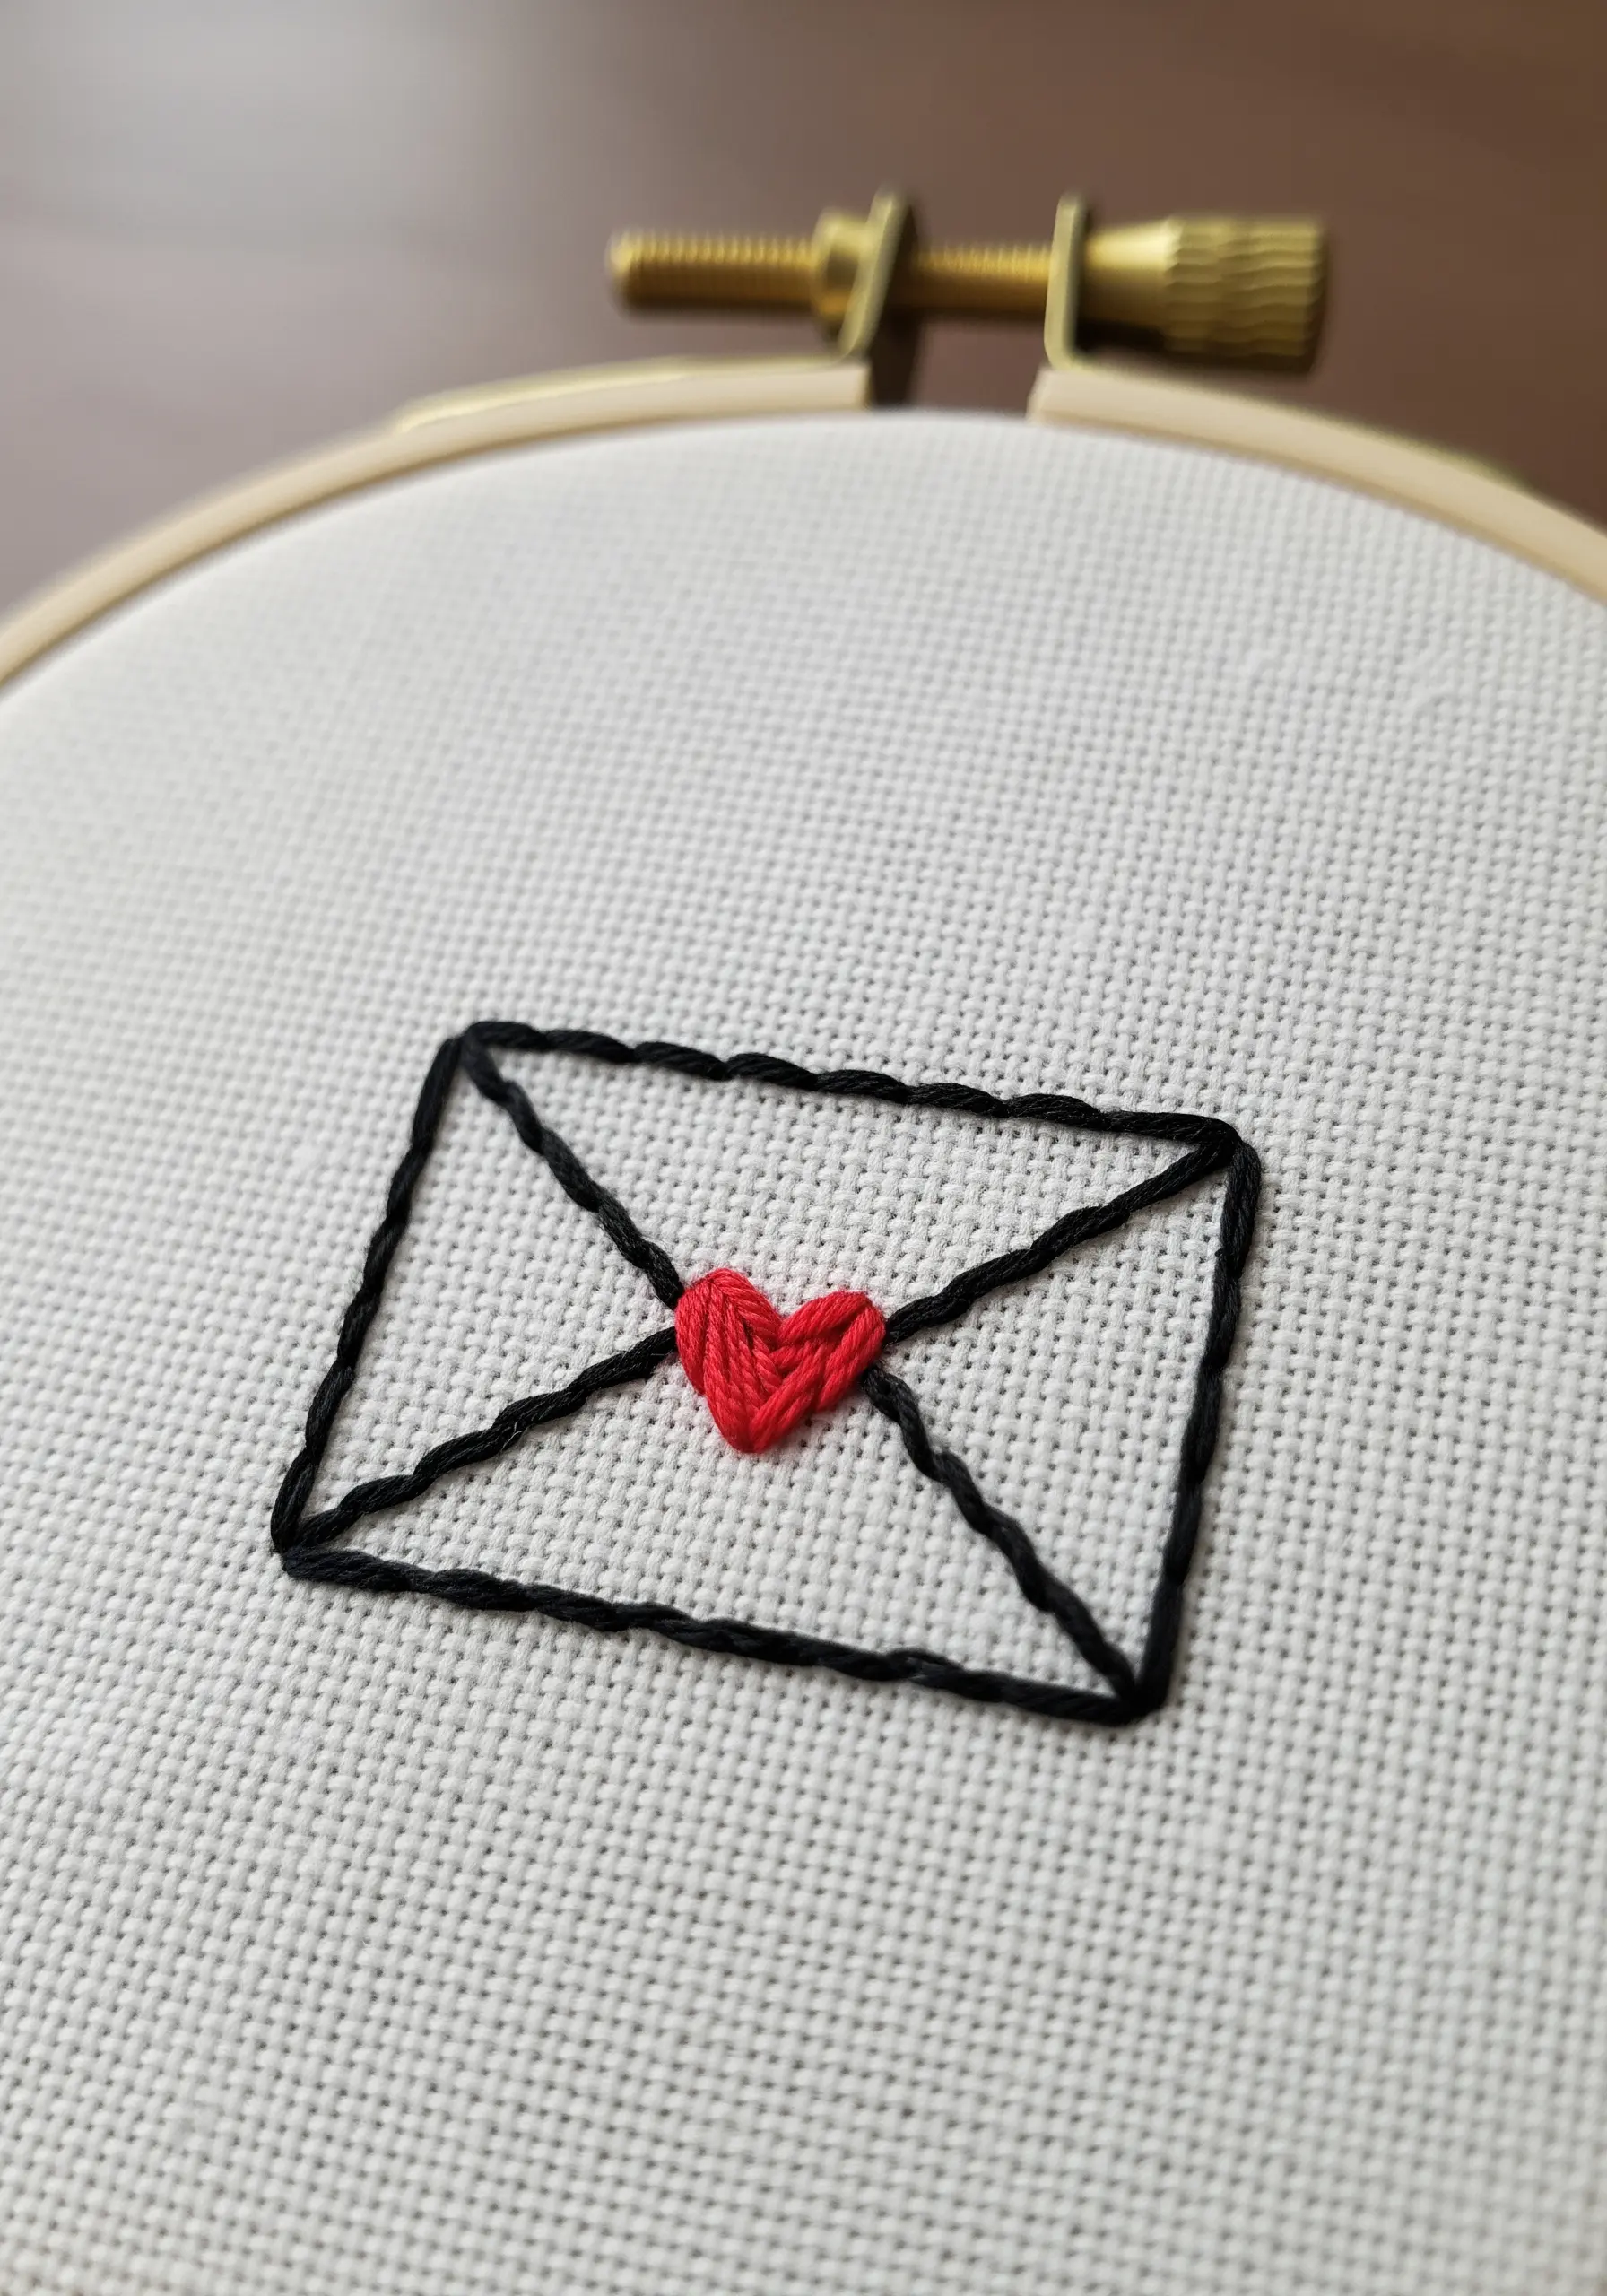
Draw attention to a small but important detail, like this heart, by giving it dimension with padded satin stitch.
Before stitching the final layer, fill the shape with a foundation of small, horizontal straight stitches or seed stitches.
Then, work your final satin stitch vertically over this padding.
The raised effect makes the heart the undeniable focal point of these simple love letter designs, giving it a pleasing, tactile quality.
20. Achieve Punch-Needle Texture with French Knots
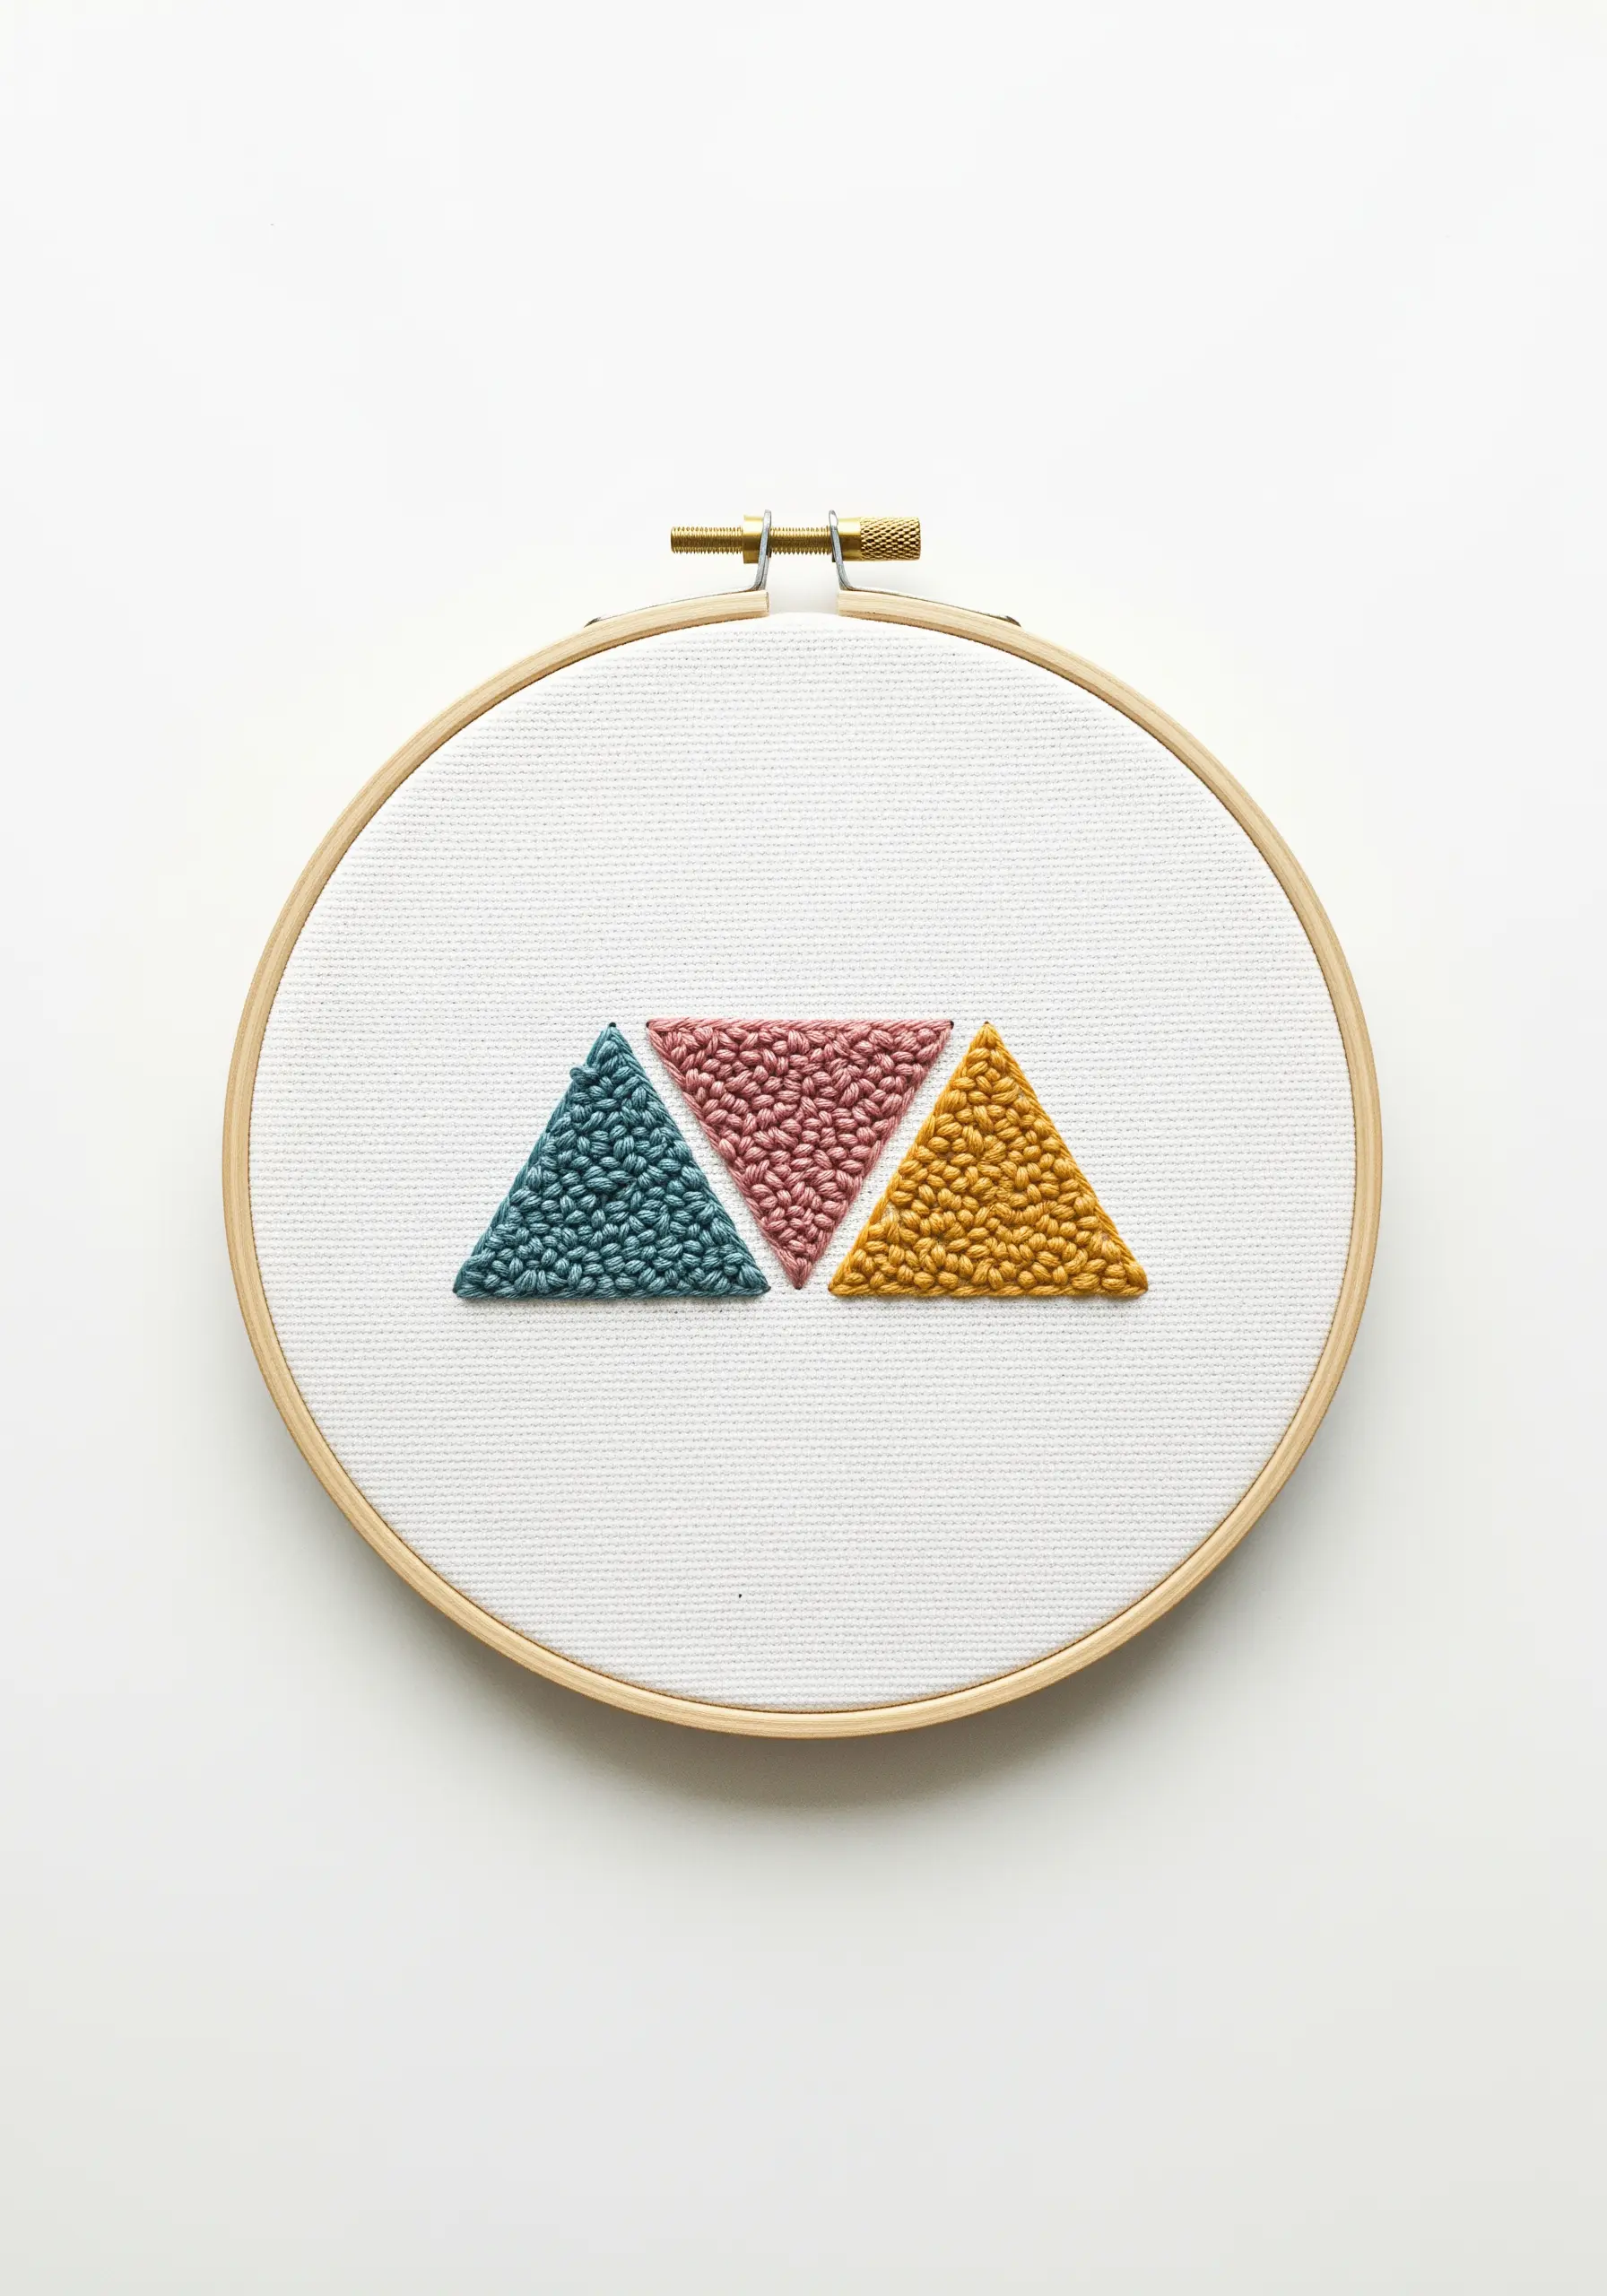
You can create a dense, plush texture similar to punch needle using traditional embroidery stitches.
Outline your shapes with a backstitch, then fill them completely with tightly packed French knots or bullion knots.
This technique is highly tactile and works best with thicker thread, like pearl cotton or all six strands of floss.
The result is a raised, carpet-like surface that adds wonderful dimension and a modern, graphic feel to your art.
21. Cluster Knots for Delicate Florals
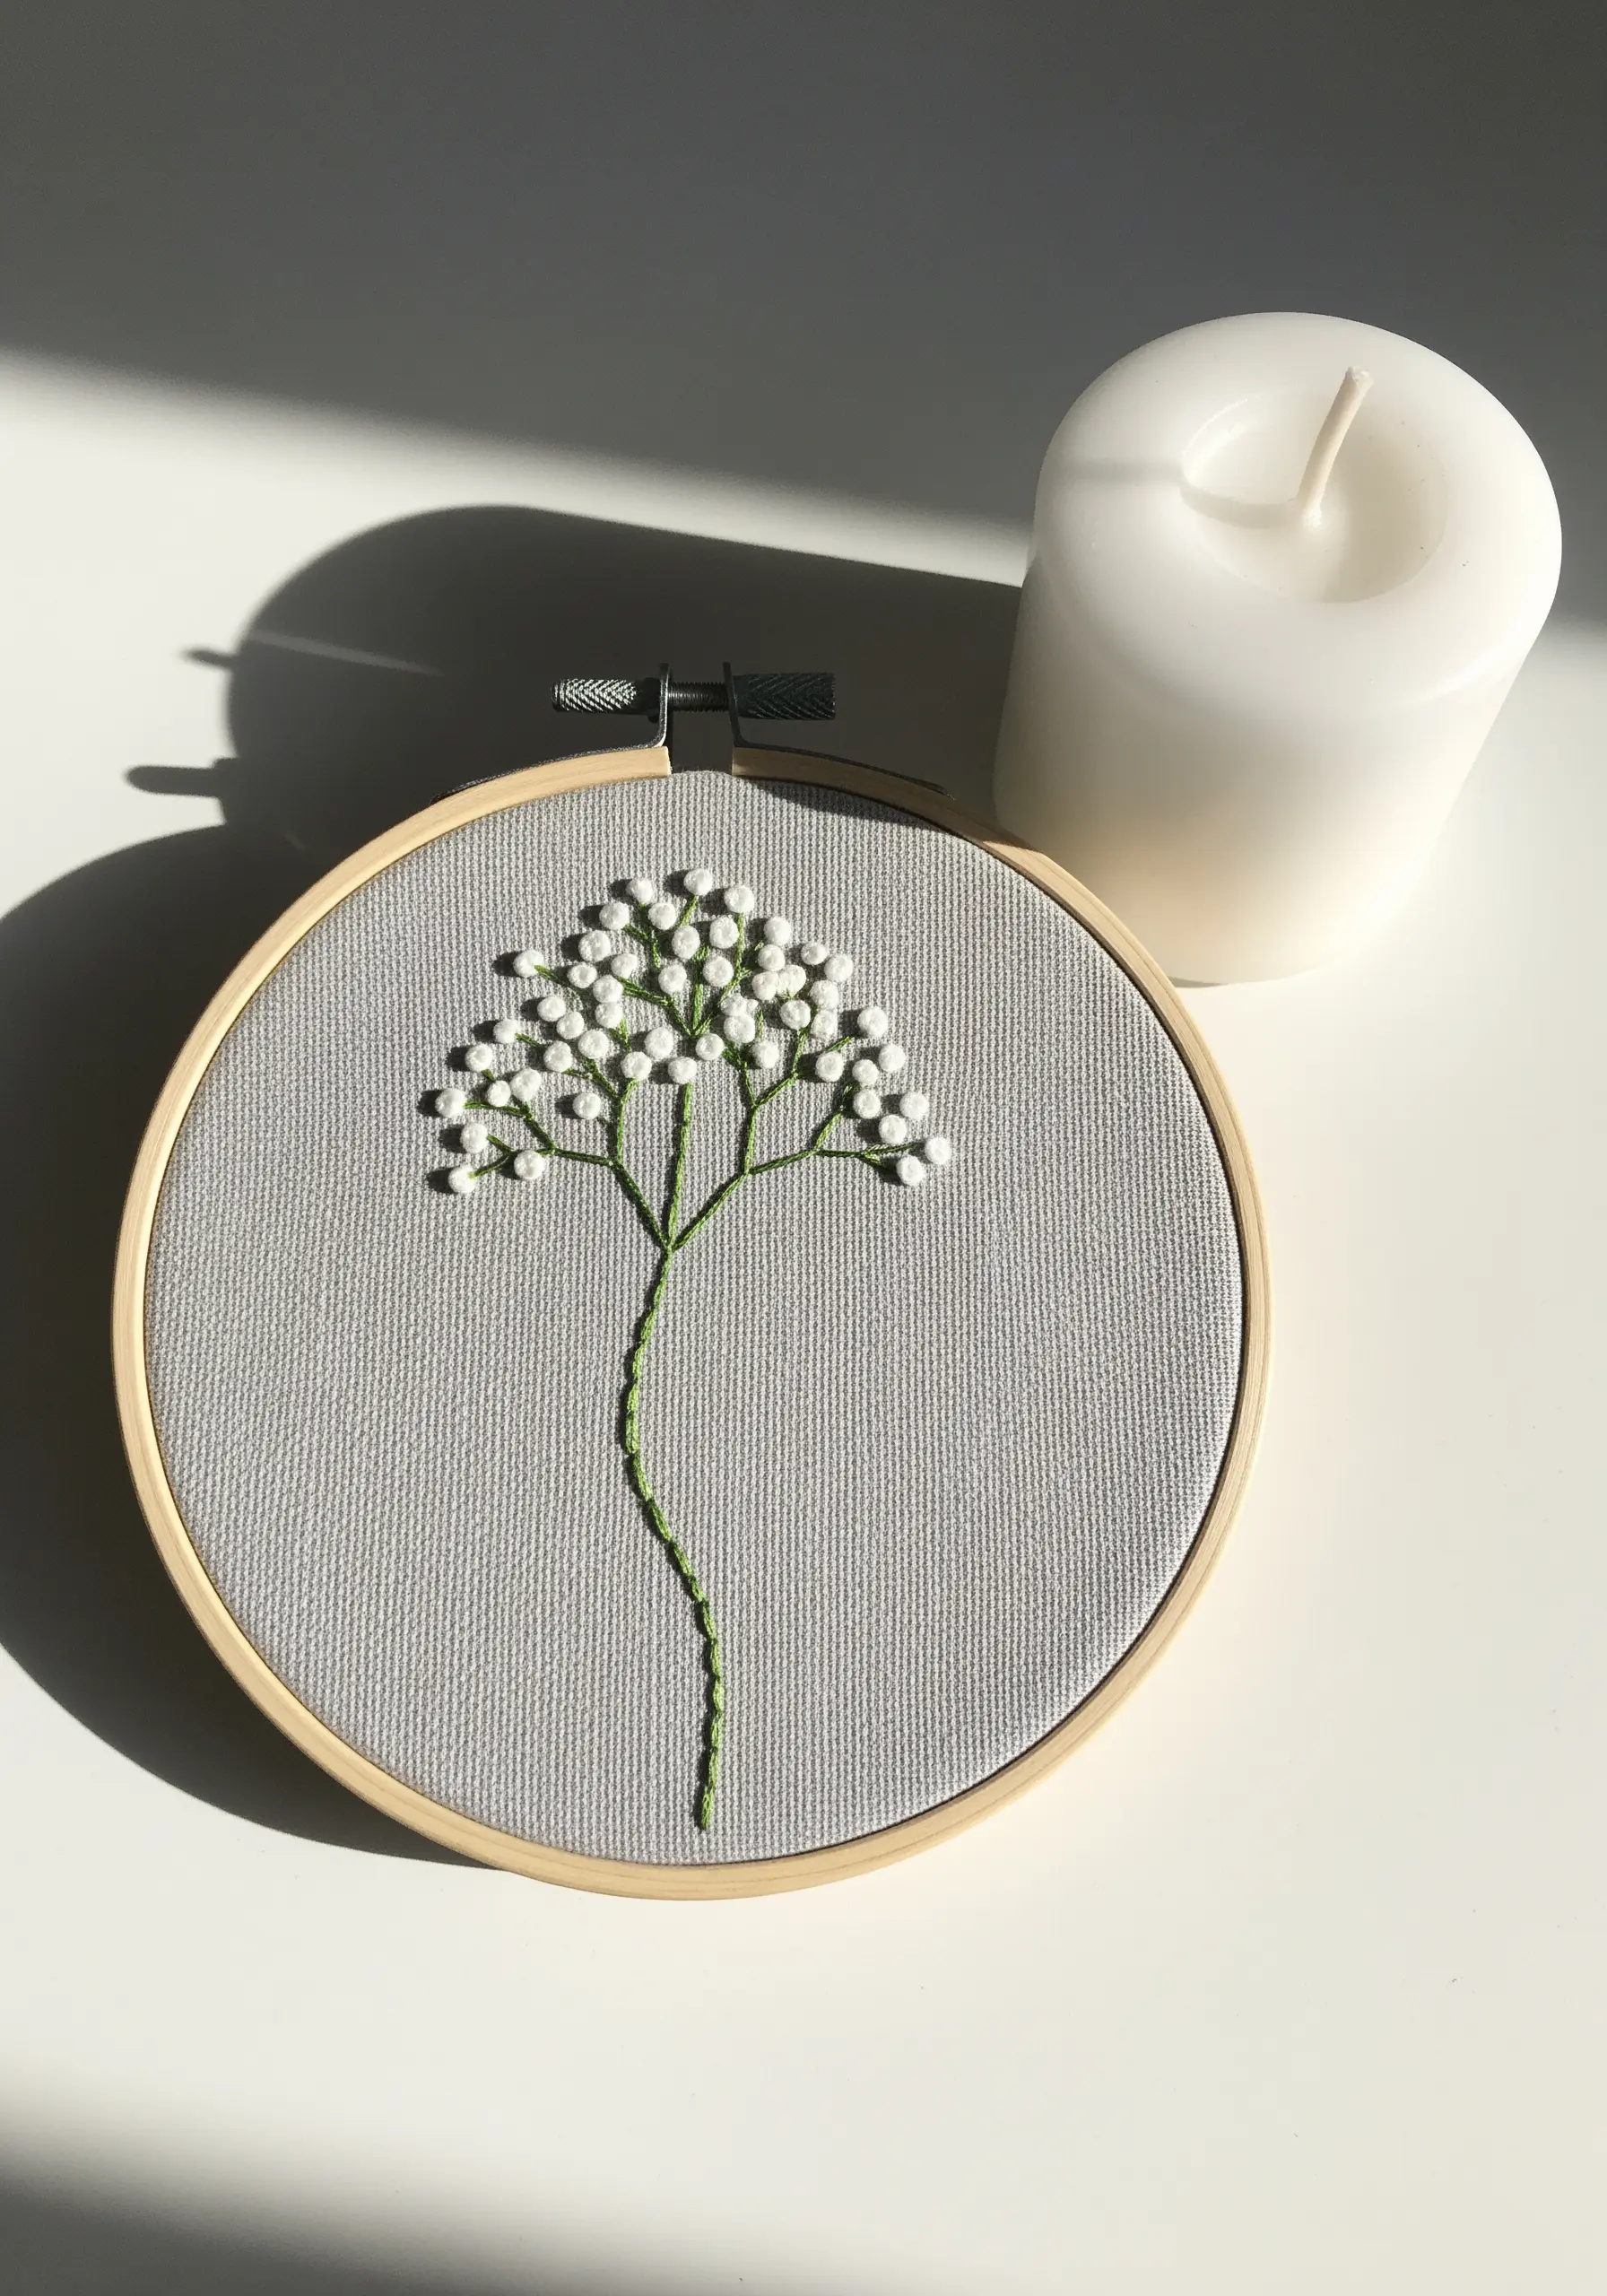
Recreate the look of delicate flowers like baby’s breath or Queen Anne’s lace by clustering French knots.
Use a thin, elegant stem stitch for the branches to provide structure.
Then, scatter white or cream-colored French knots at the ends of the branches.
Varying the number of wraps (one or two) will give the knots slightly different sizes, resulting in a more organic and less uniform appearance, perfect for minimalist embroidery projects.
22. Define a Hummingbird with Elegant Lines
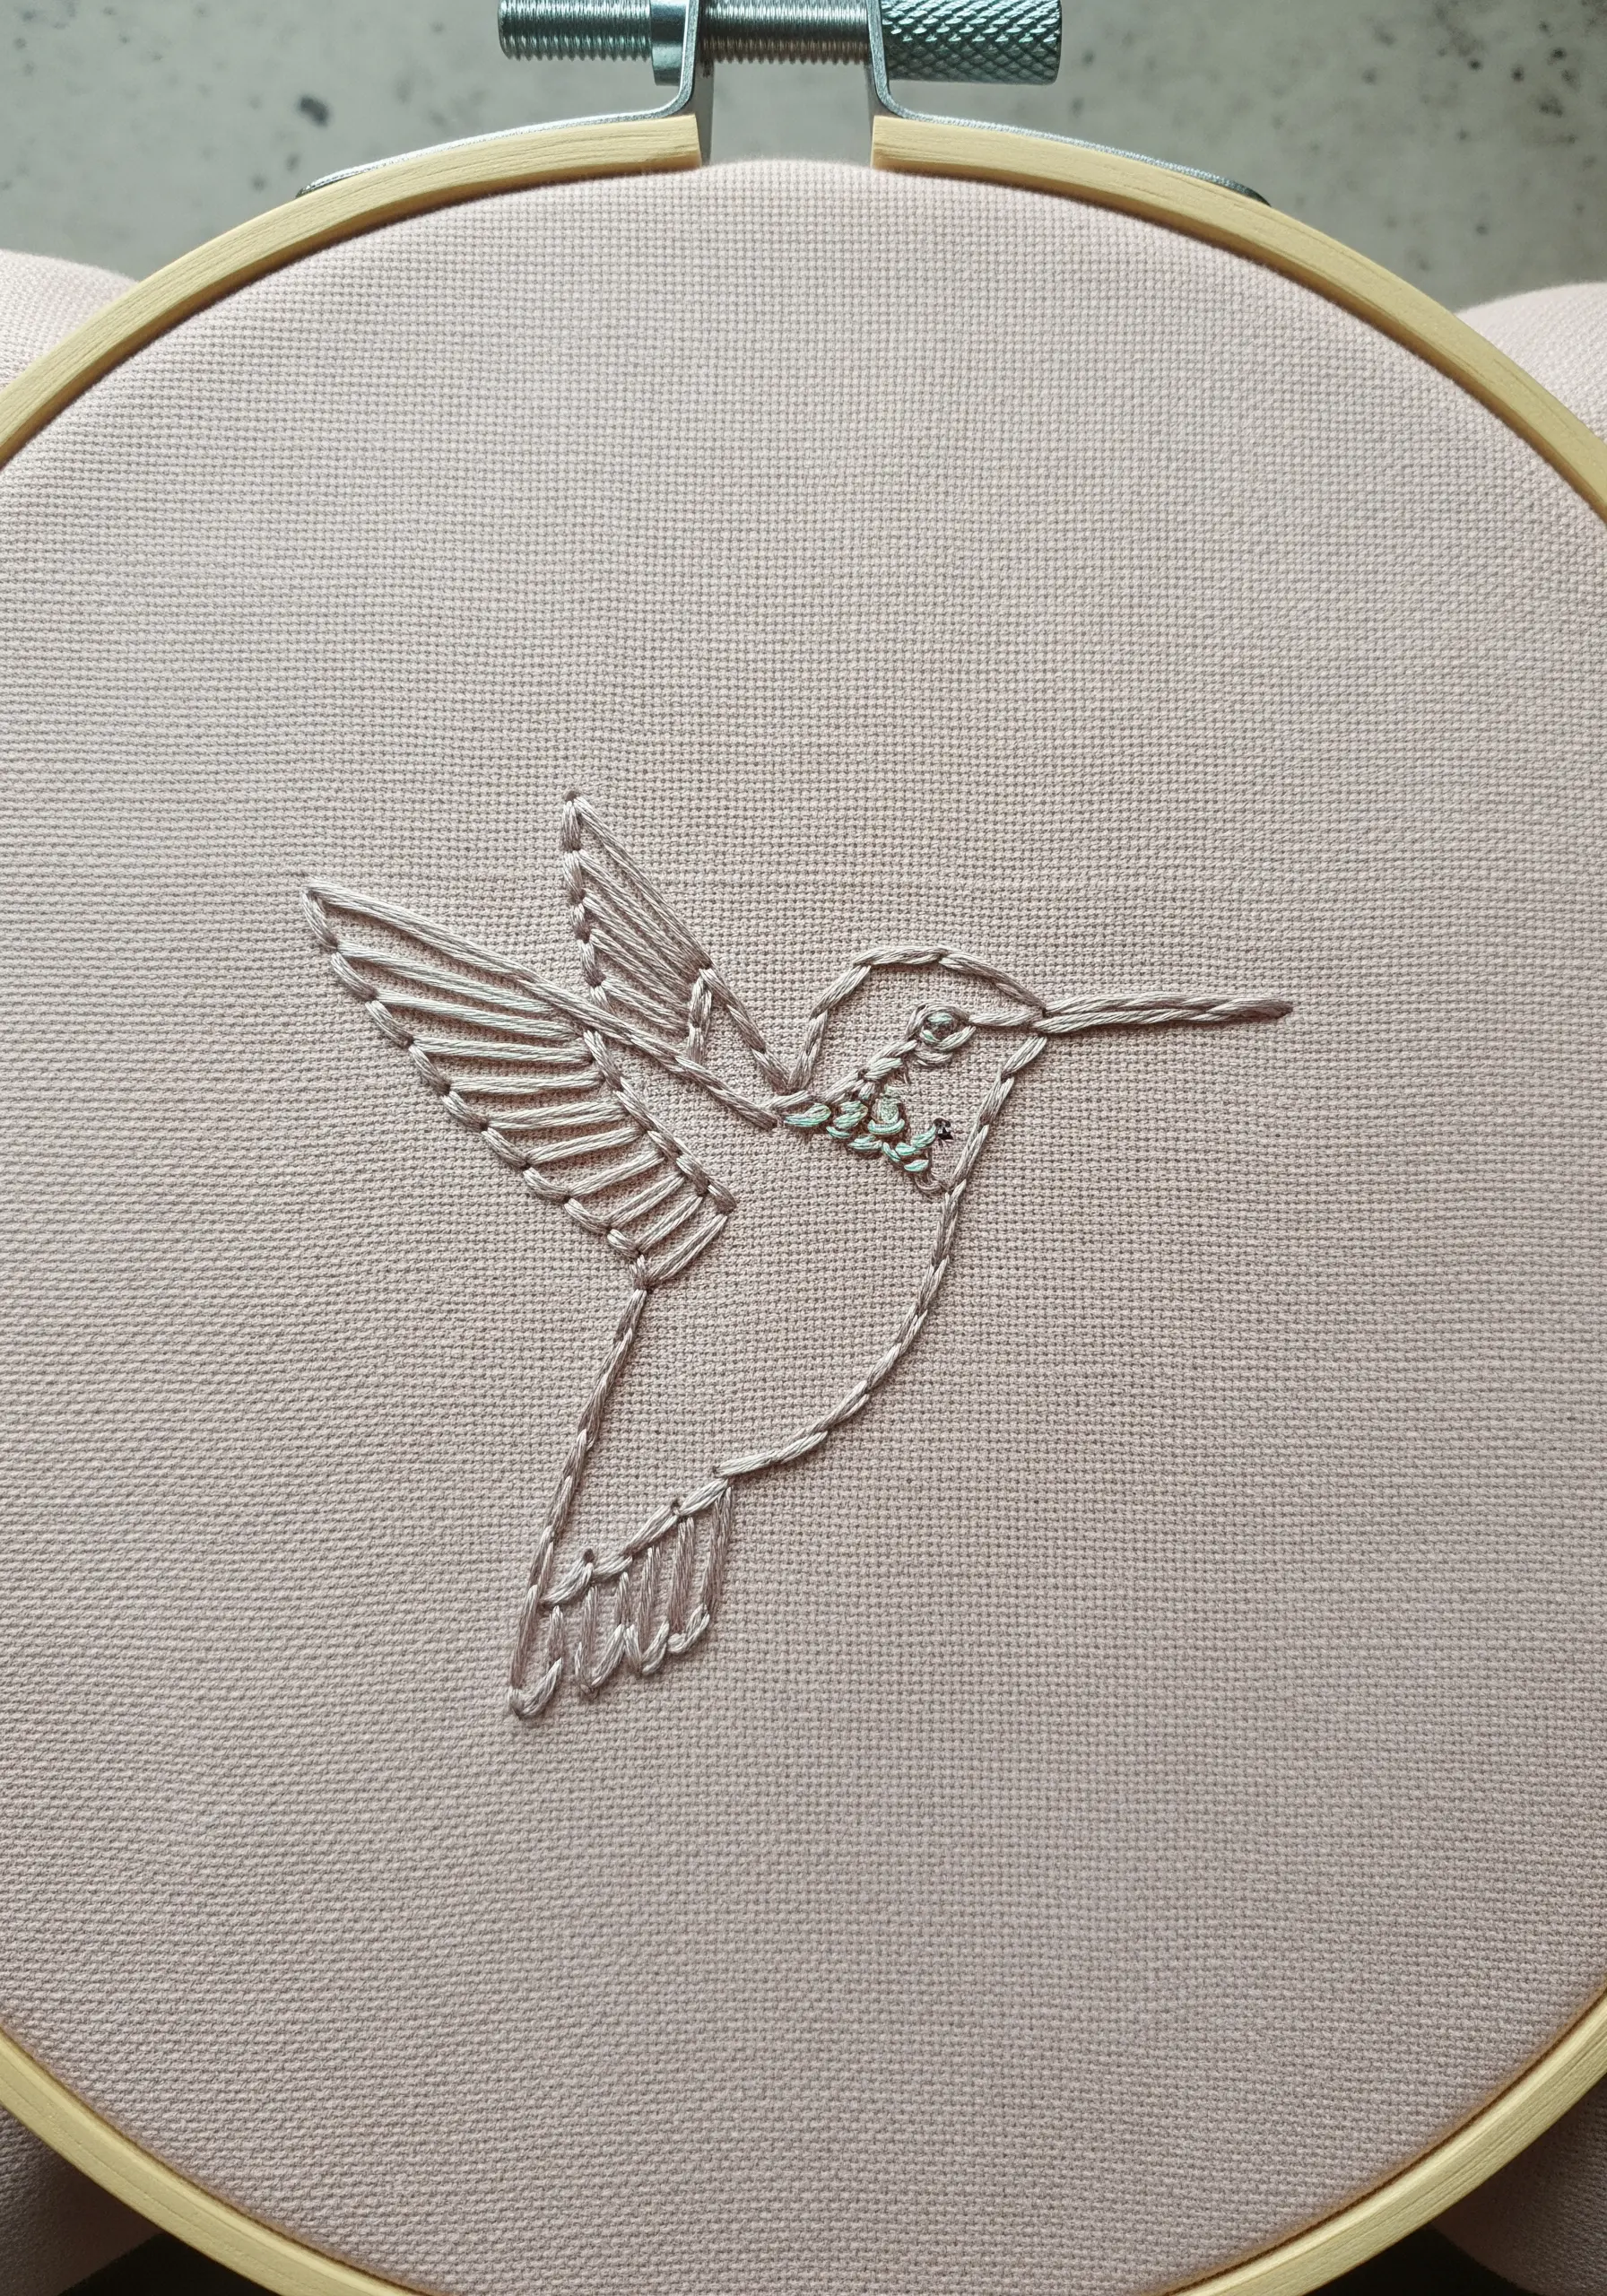
This design shows how a simple outline can convey grace and movement.
Use a split stitch for the bird’s body, as its chain-like texture creates a finer, more detailed line than a backstitch.
For the wing feathers, use rows of detached chain stitches to create a layered, scalloped effect.
A few tiny seed stitches in a contrasting color on the throat add a perfect, iridescent highlight to these tiny hummingbird embroidery ideas.
23. Stitch a Lemon with Radial Satin Stitch
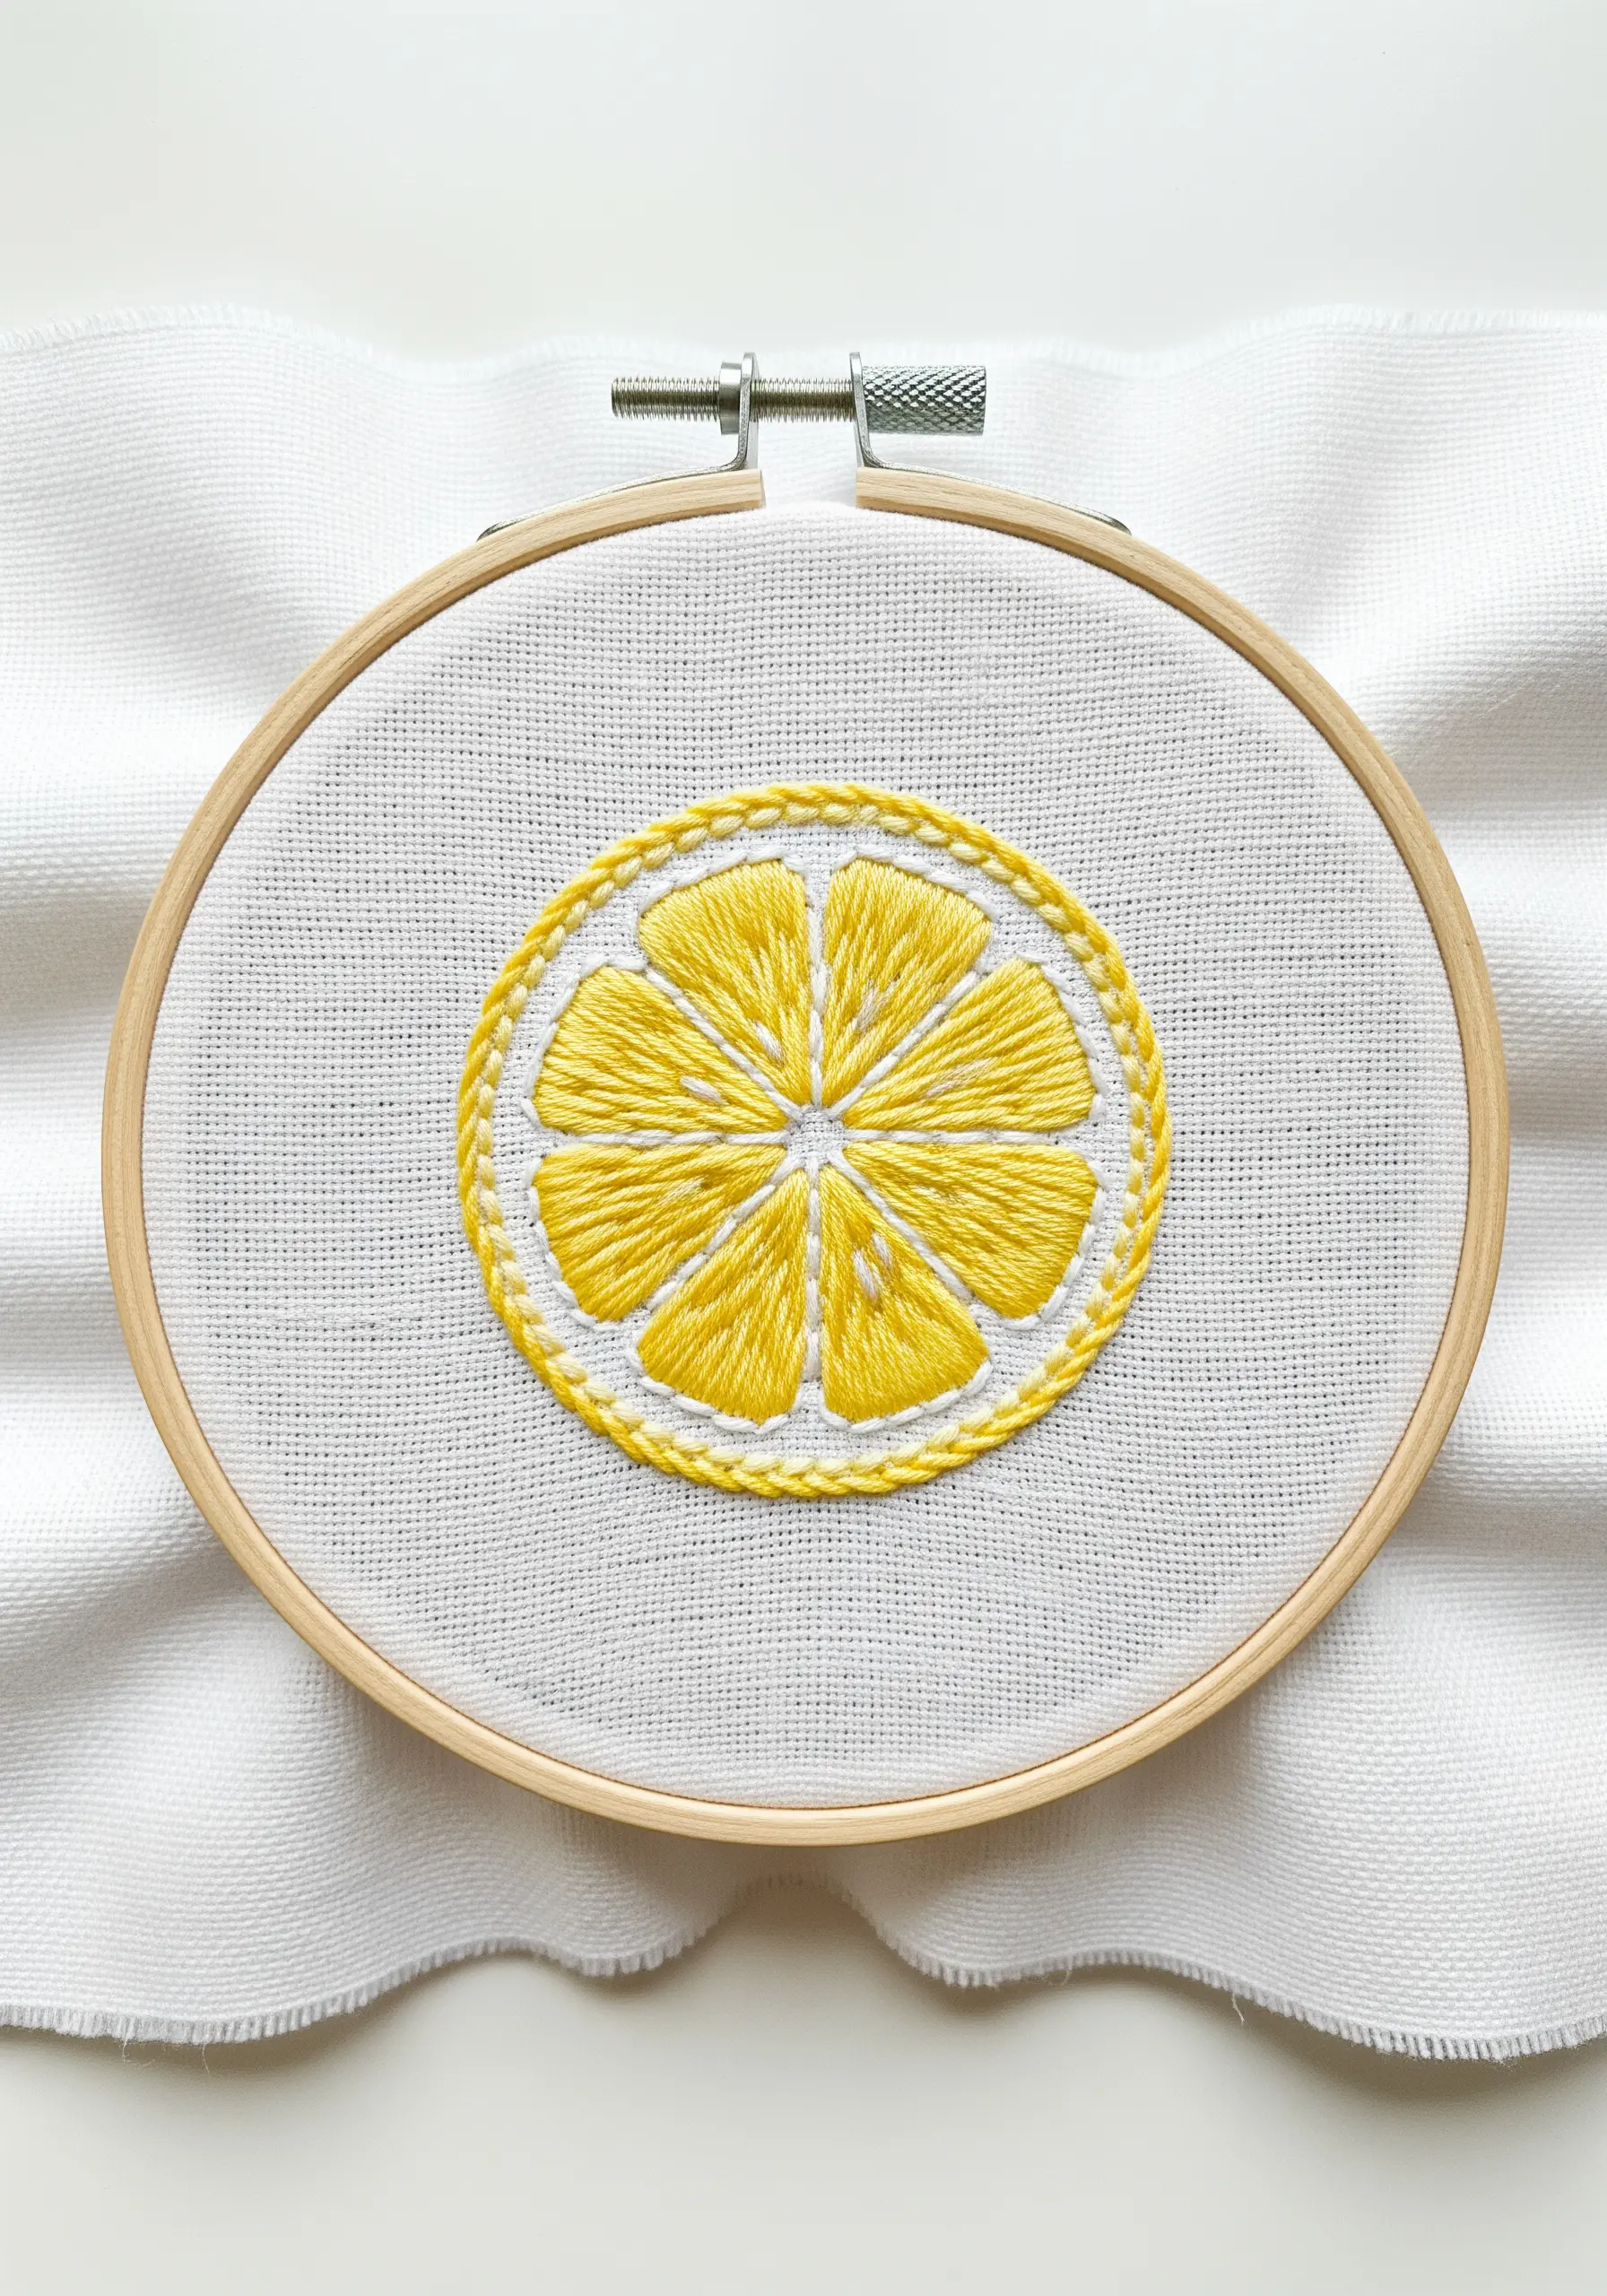
For a clean, geometric look in a circular motif, a radial satin stitch is the perfect technique.
Lightly draw guidelines to divide the circle into segments.
Stitch each segment individually, angling all your stitches toward the center point.
This ensures the filled sections look neat and uniform.
Finish with a bold chain stitch or whipped backstitch around the circumference to create a crisp outer edge for your line art fruit motifs.
24. Add Character with a Playful Outline

Even the simplest cartoon-style motifs can be elevated with the right stitch choice.
Use a thick thread (3-4 strands) and a whipped backstitch for the whale’s outline.
This creates a smooth, rounded, and slightly raised line that feels more substantial and polished than a simple backstitch.
A single, well-placed French knot or a black seed bead for the eye is all you need to bring this charming character to life.


