

A bookmark is more than just a tool to save your page. For those of us who love the feel of thread and fabric, it’s an opportunity to create a small, quiet piece of art—a companion for the stories we cherish.
But making something truly special isn’t about complex patterns. It’s about the deliberate choice of a stitch that creates the perfect curve of a vine, or the right thread that catches the light like a real moonbeam. It’s about elevating a simple object through intention and technique.
Consider these ideas not as strict rules, but as invitations. They are here to help you refine your skills, trust your creative instincts, and stitch a bookmark that feels deeply, wonderfully yours. Something to make you smile every time you open your book.
1. Create a Luminous Celestial Scene
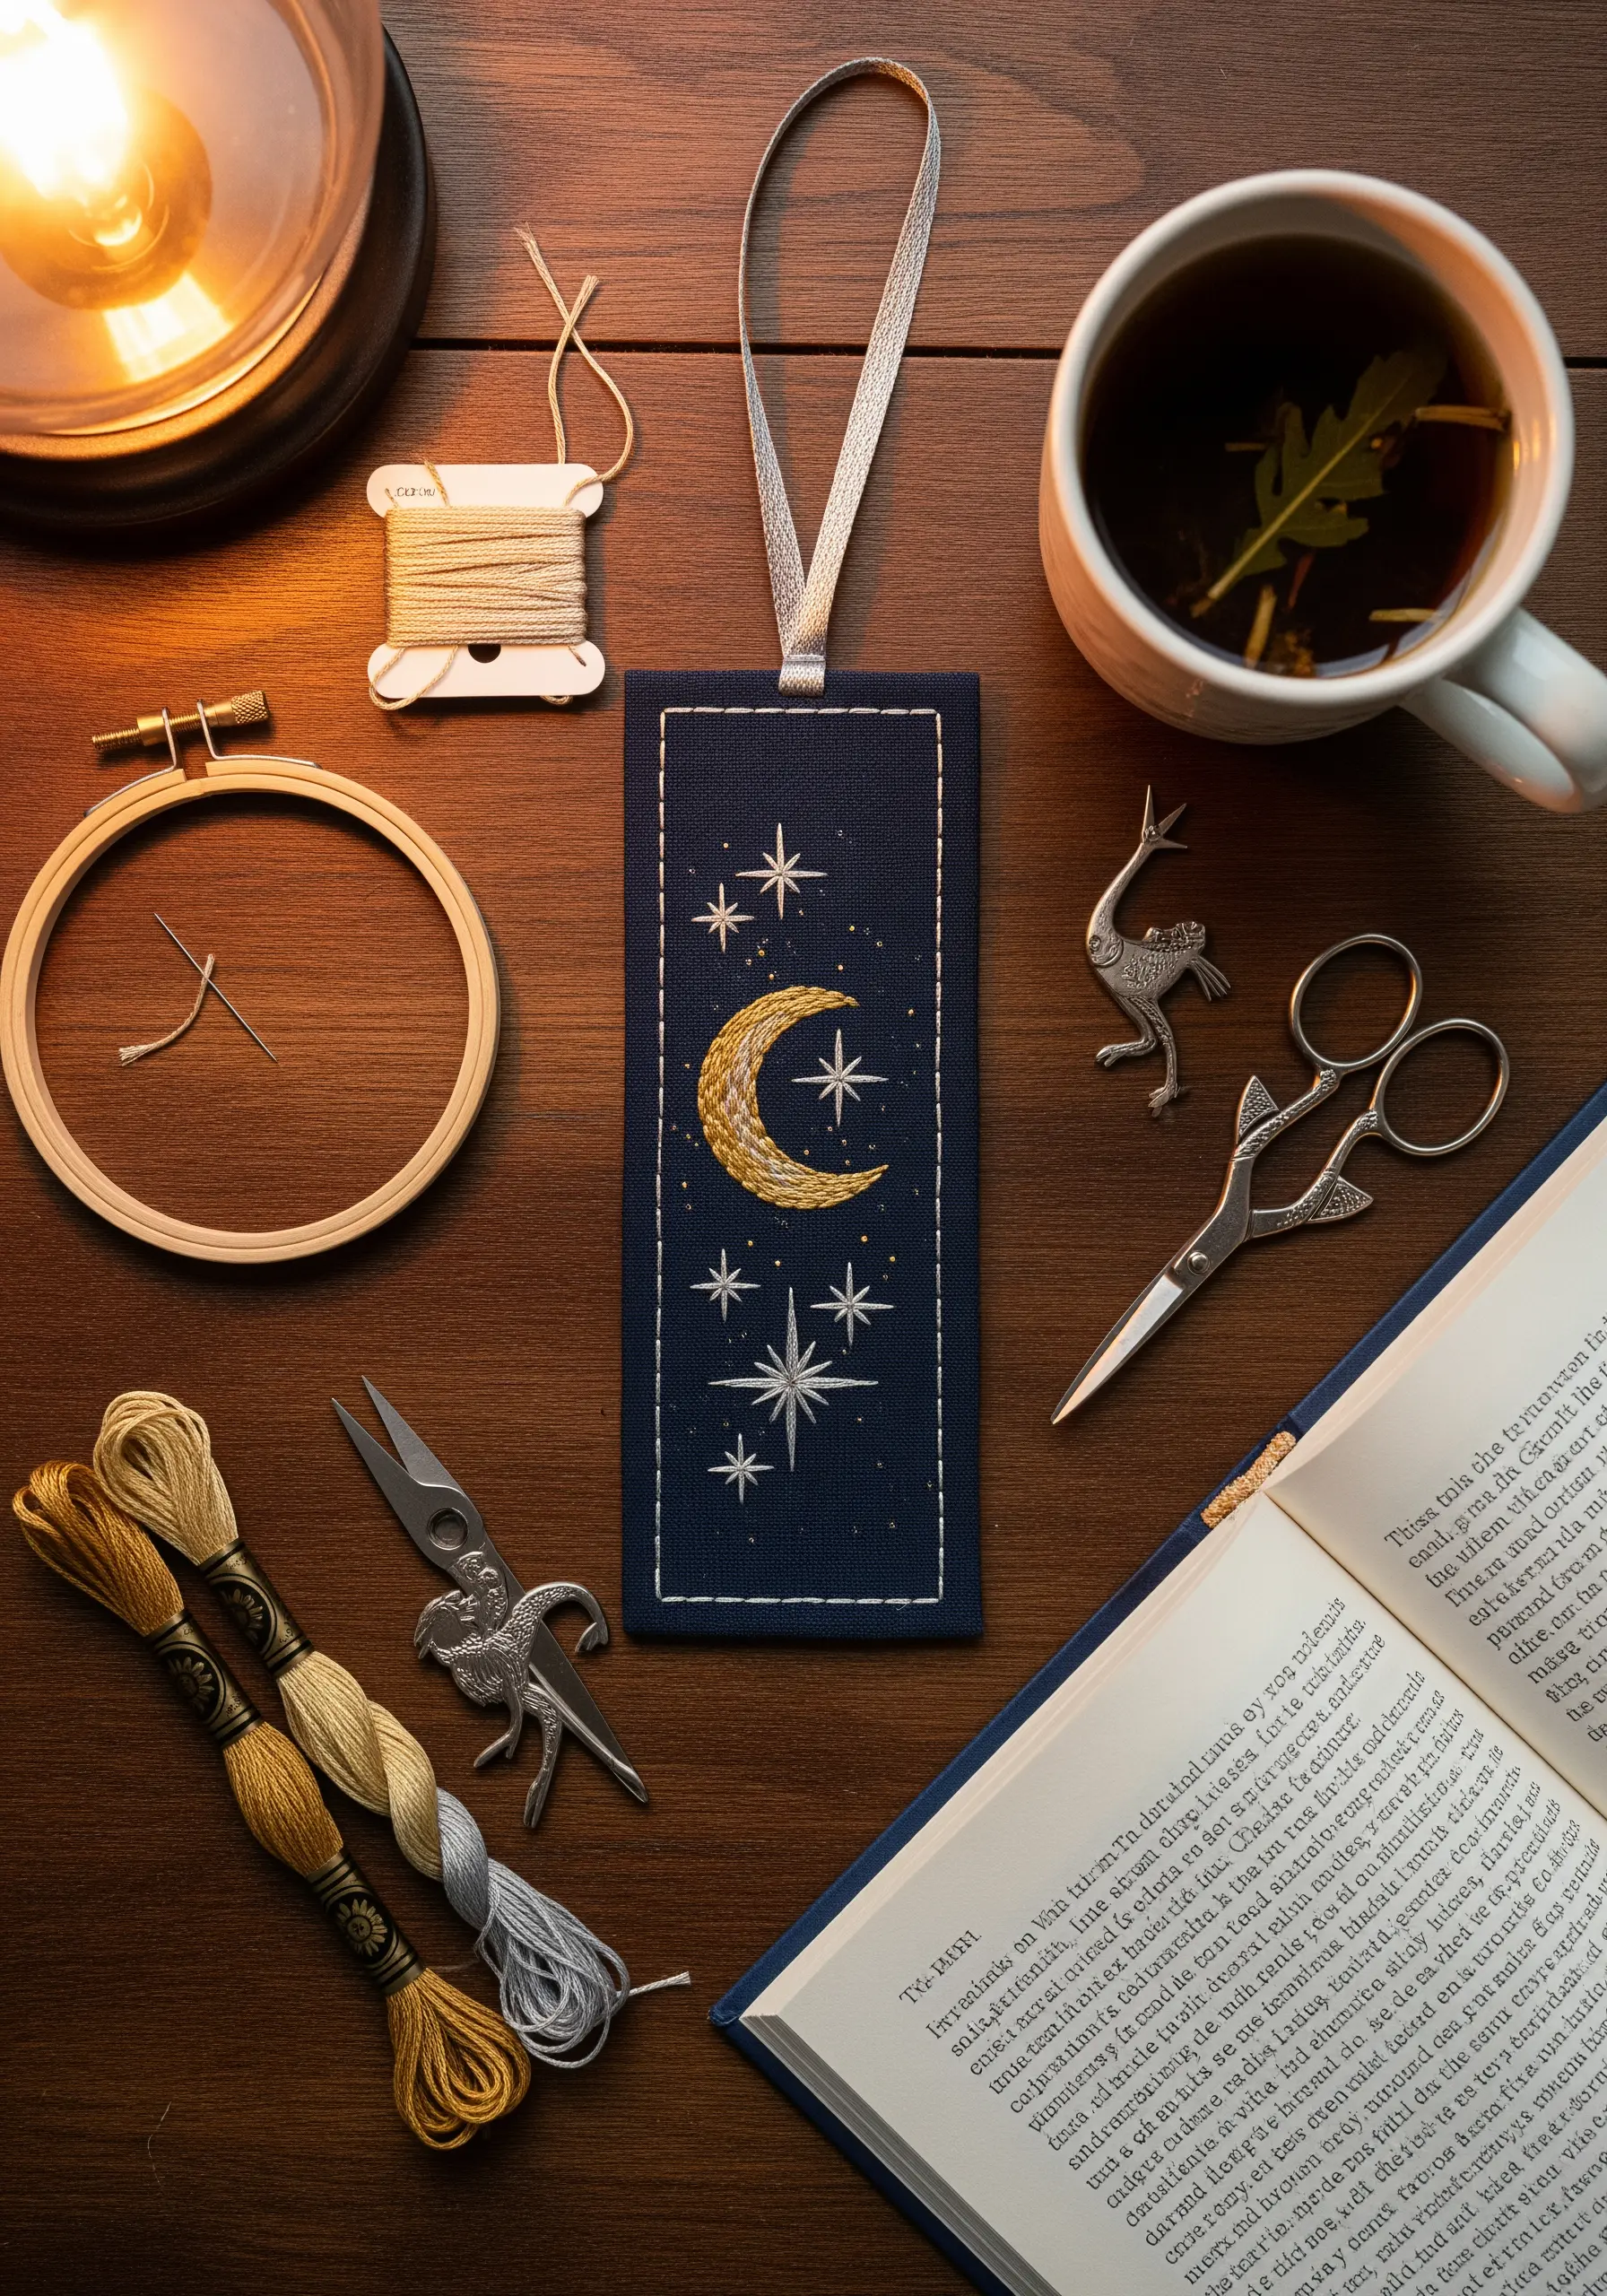
To give your crescent moon a soft, textured glow, use a padded satin stitch.
First, lay down a foundation of smaller satin stitches perpendicular to the final direction you intend to stitch.
Then, cover this padding with your final satin stitches using a metallic or high-sheen golden thread; this slight lift catches the light beautifully, creating dimension against the flat, dark fabric.
For the stars, use single strands of silver or white floss to execute sharp, single straight stitches or tiny French knots for a varied celestial texture.
2. Stitch a Graceful Climbing Vine
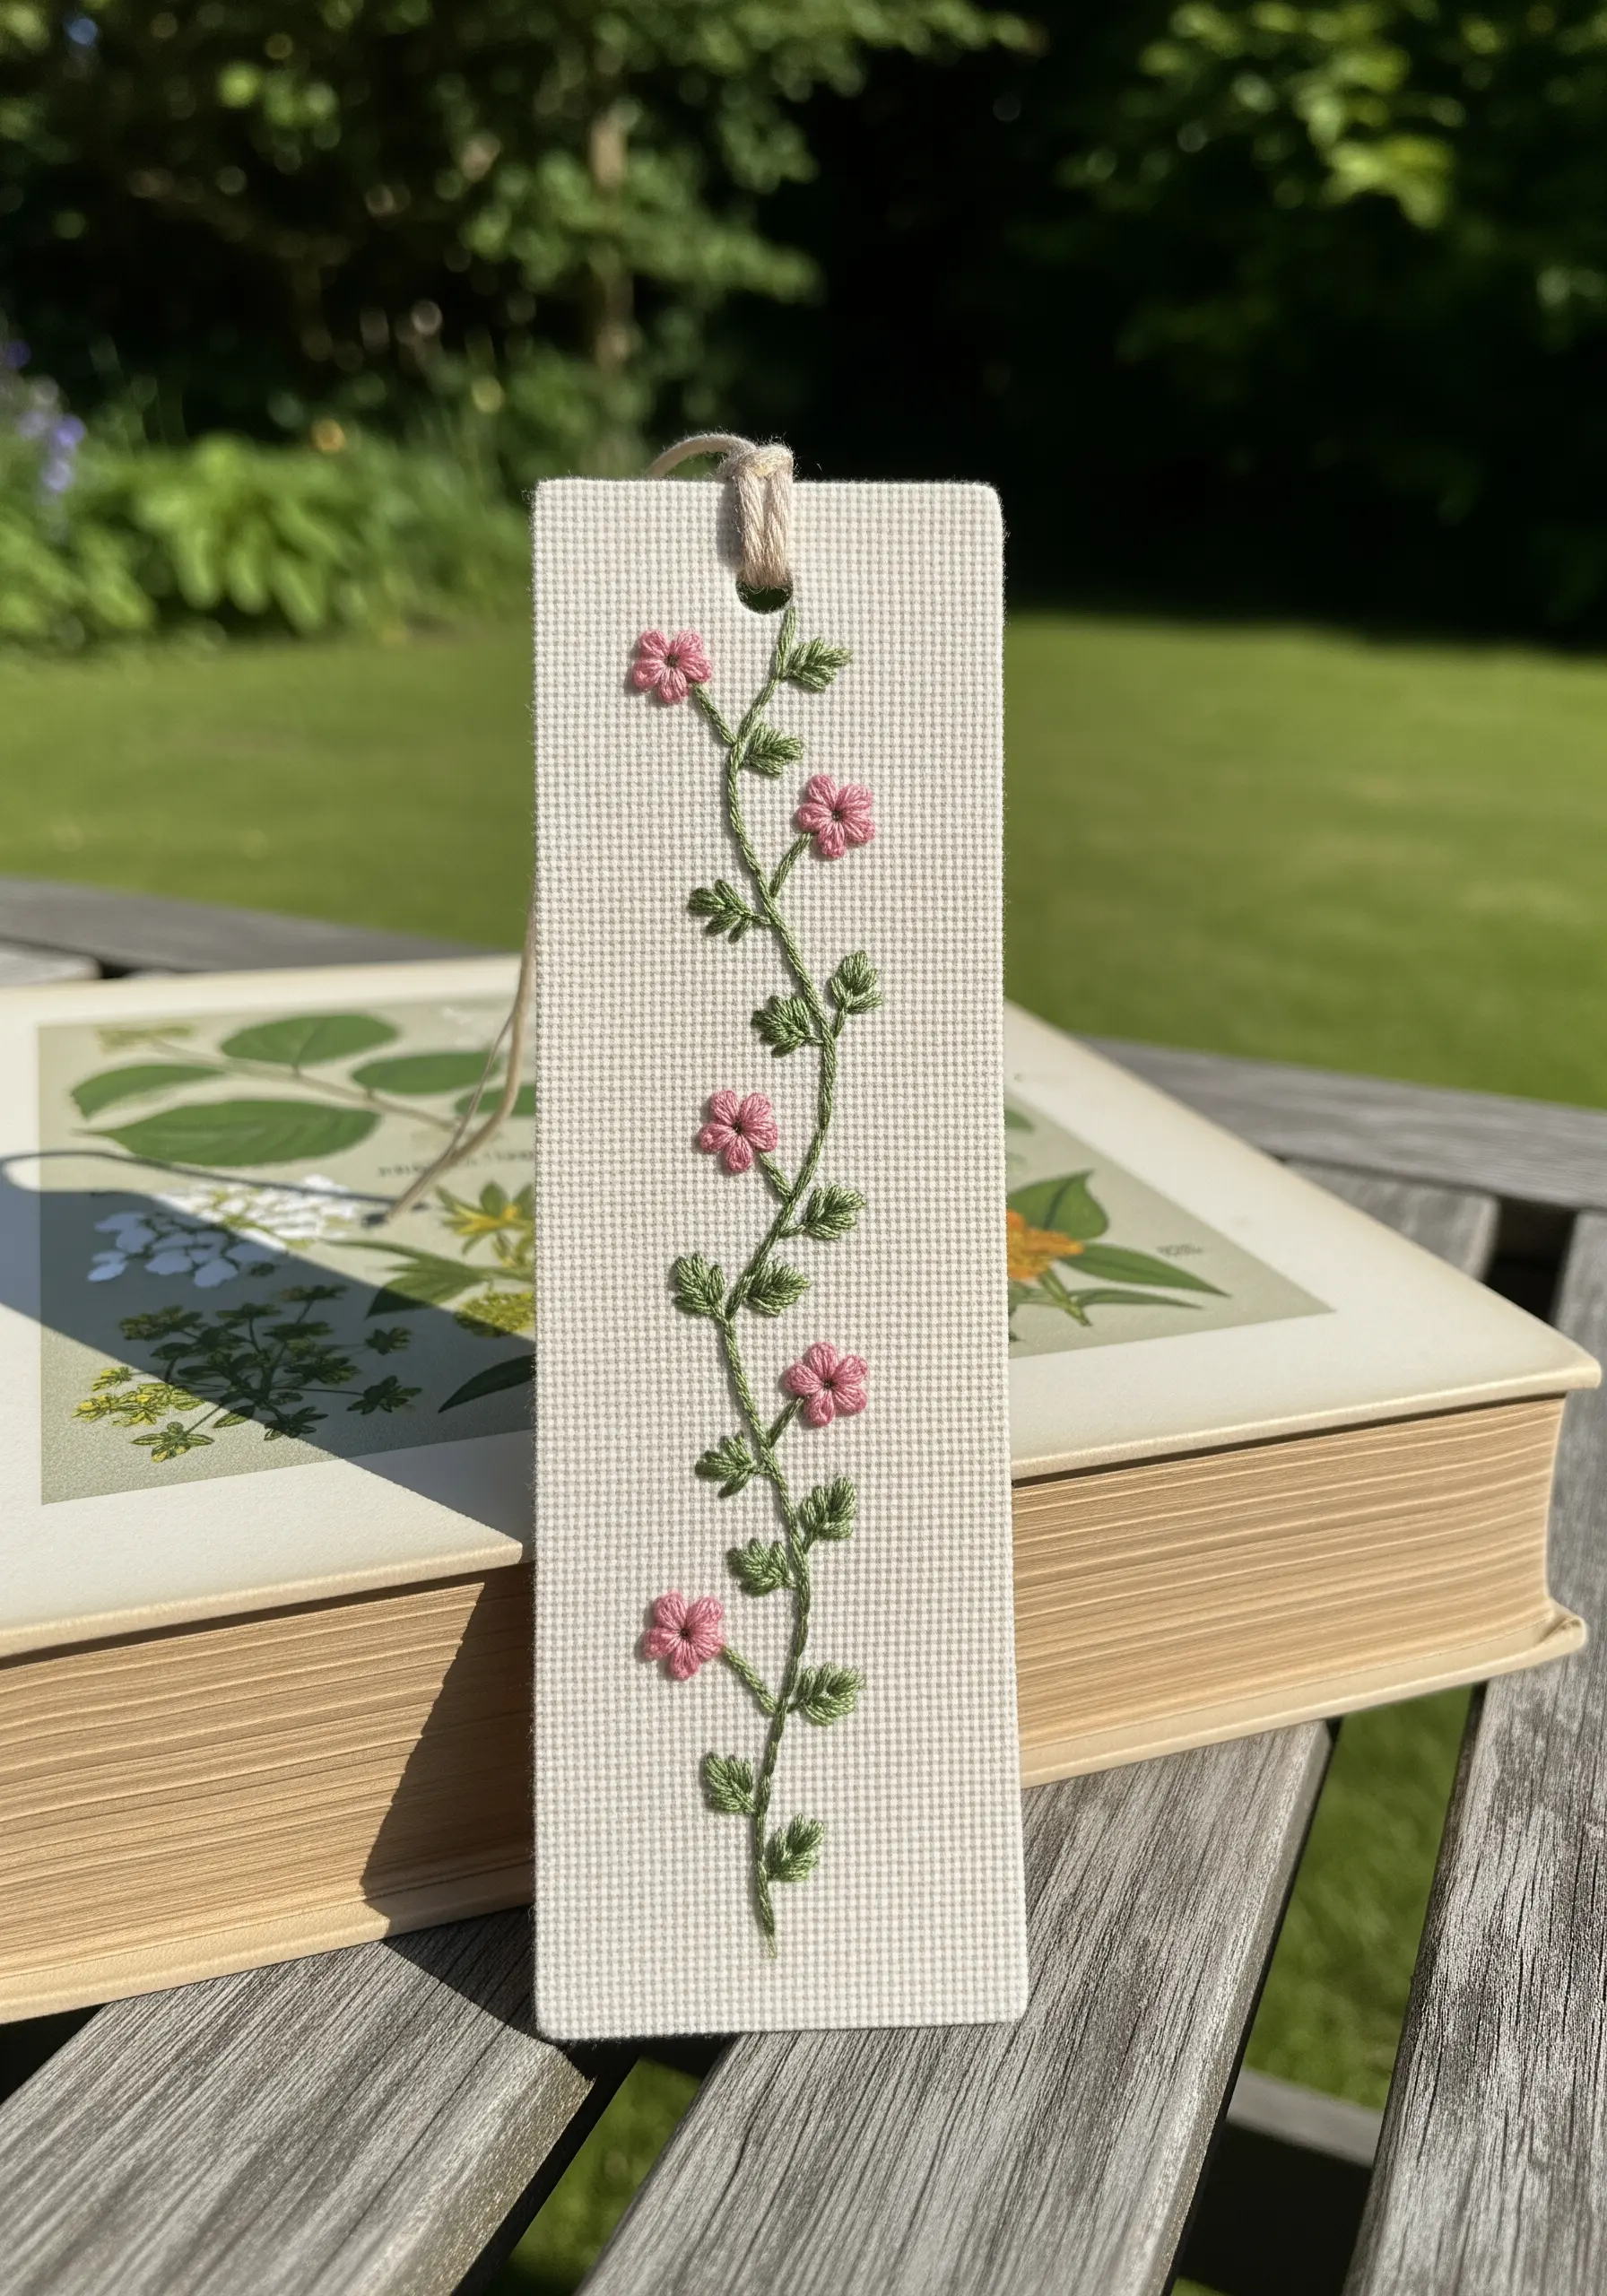
For a vine that appears to grow naturally up the bookmark, use a whipped backstitch for the stem.
This technique smooths out the segmented look of a standard backstitch, creating a fluid, uninterrupted line perfect for organic curves.
Stitch the flowers using detached chain stitches (lazy daisies) with two strands of floss for delicate, airy petals.
Anchor each flower with a single French knot in a contrasting color to add a pop of detail and secure the composition.
3. Master Fur with Thread Painting
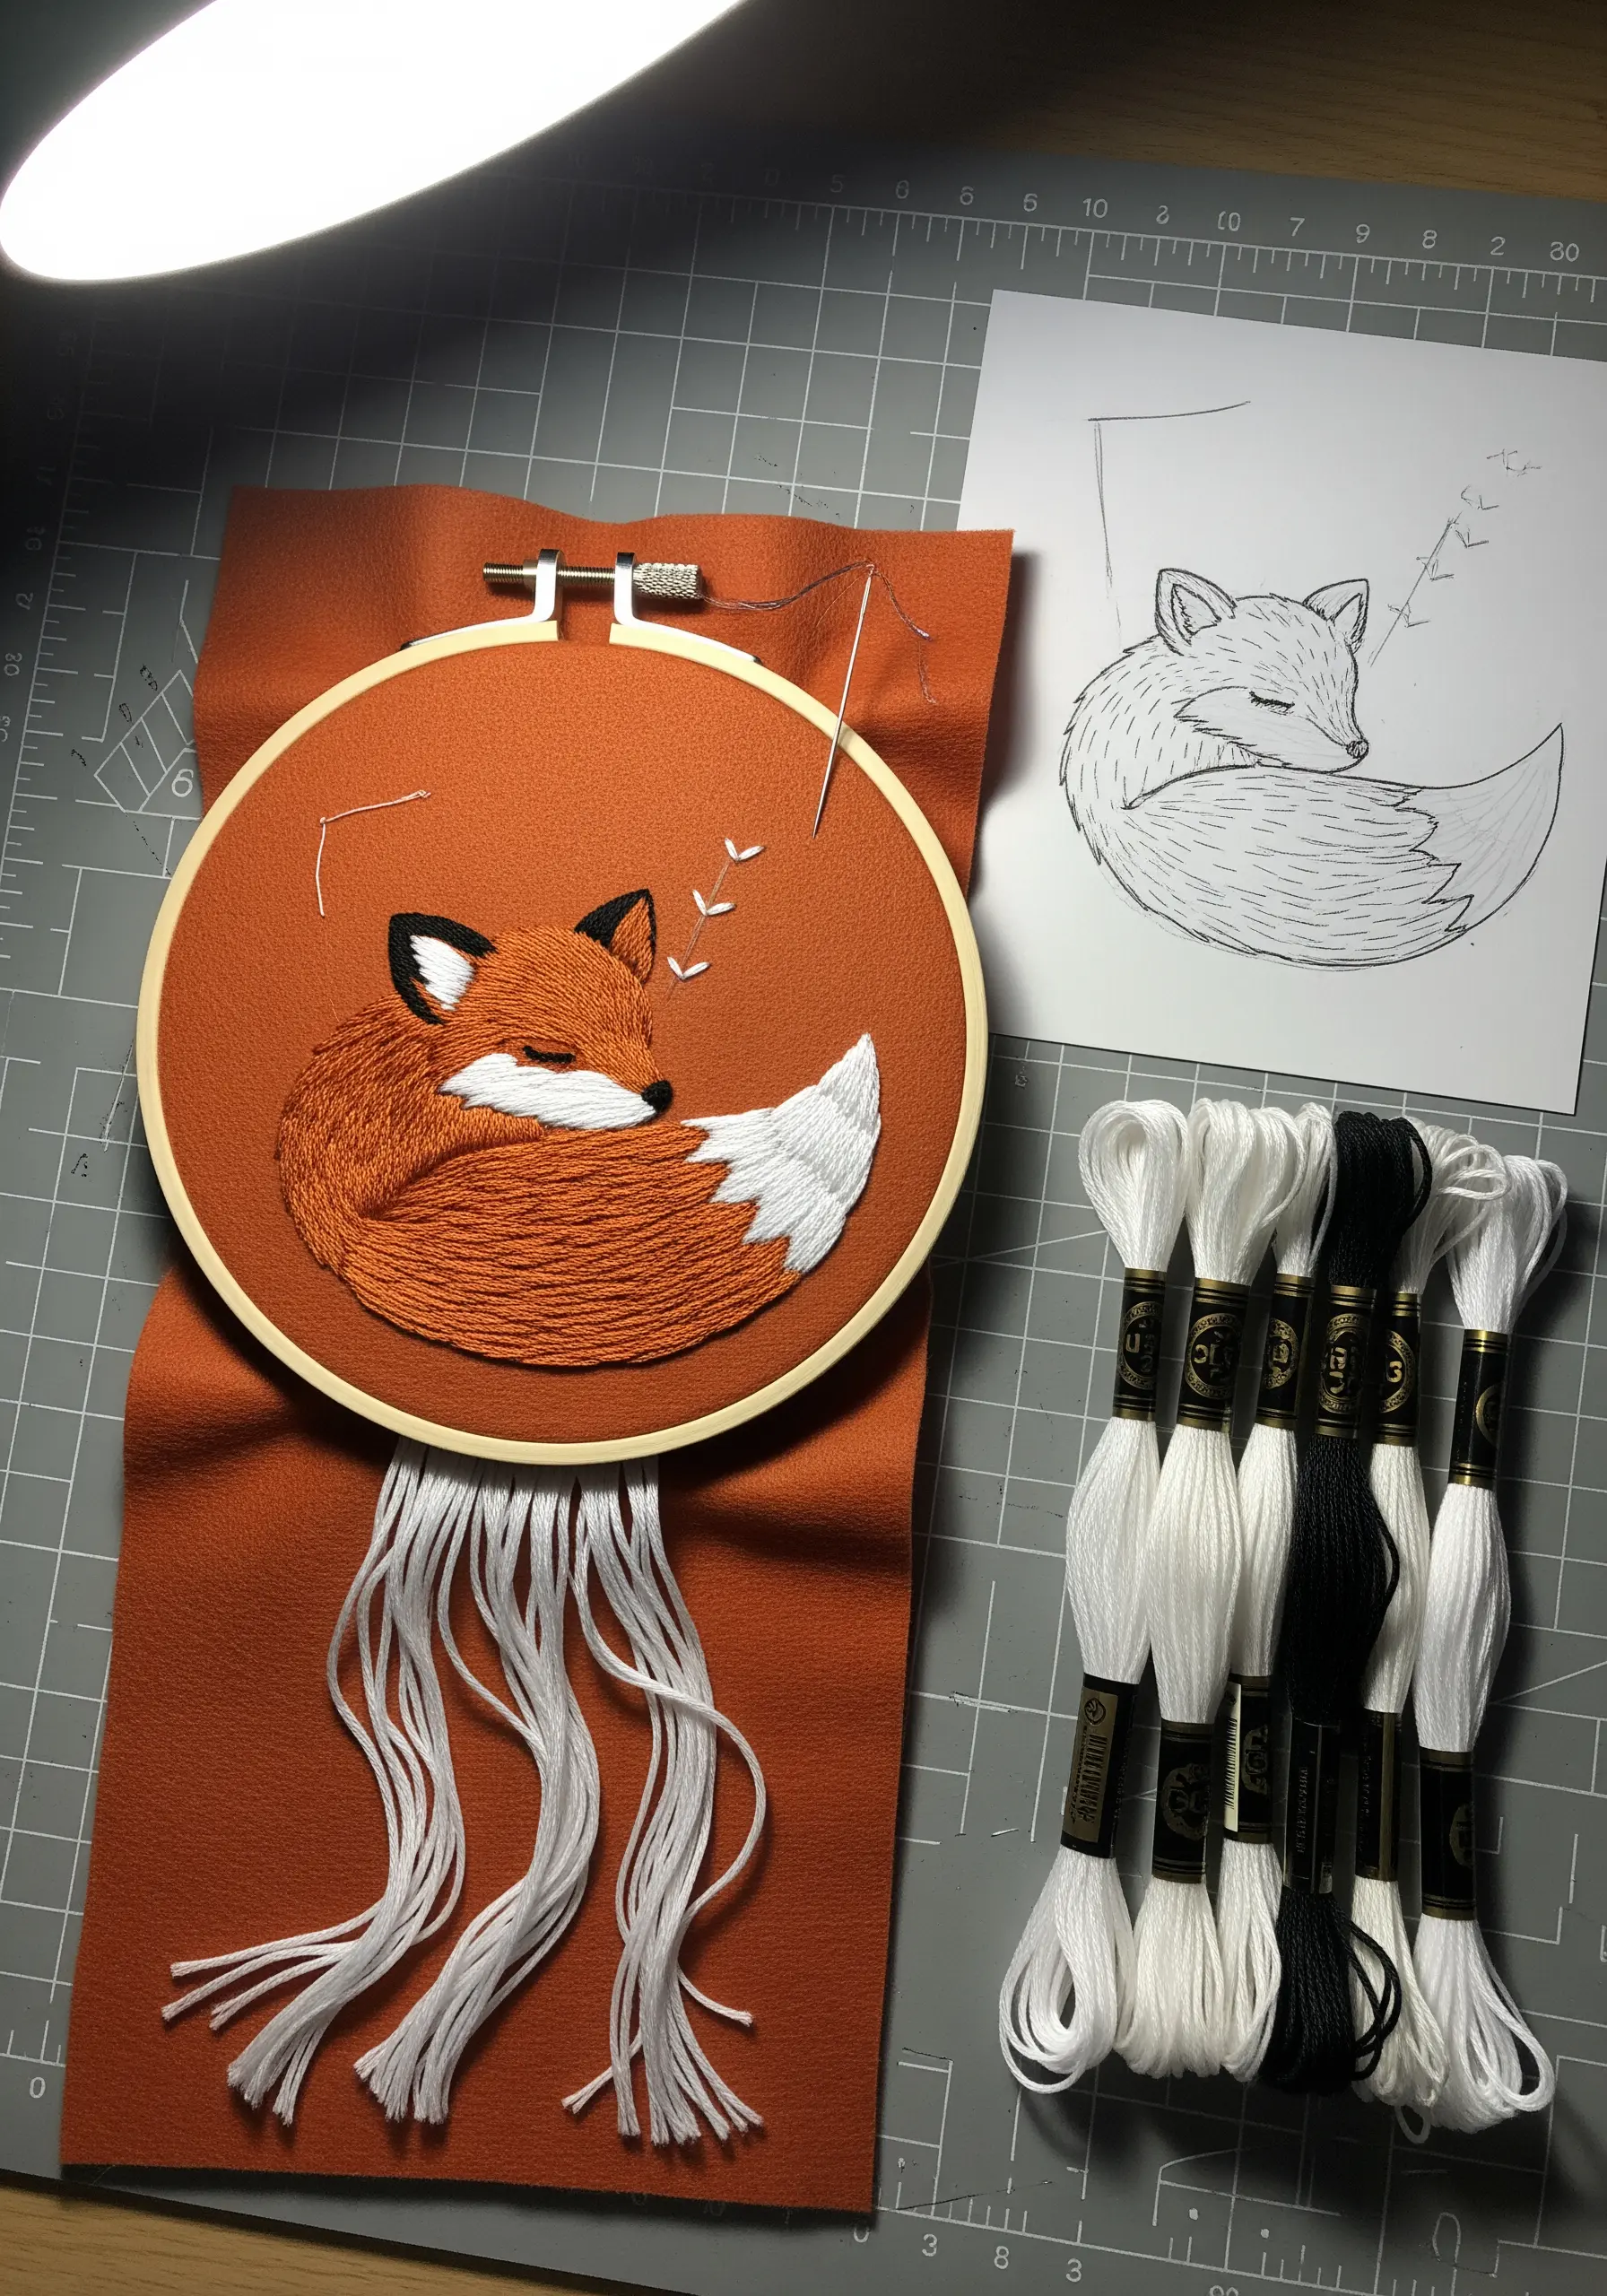
To achieve the soft, dense fur of this sleeping fox, you’ll use the long-and-short stitch technique.
Work in sections, layering shades of orange, rust, and cream to create realistic depth and contour.
Always stitch in the direction of fur growth, allowing your stitches to blend seamlessly into one another.
Use a single strand of black thread for the fine details like the nose and closed eyes; this sharpens the features without overwhelming the soft texture of the fur.
This project is perfect for adapting into one of your realistic wolf embroidery motifs for a larger piece.
4. Build a Layered Pine Forest
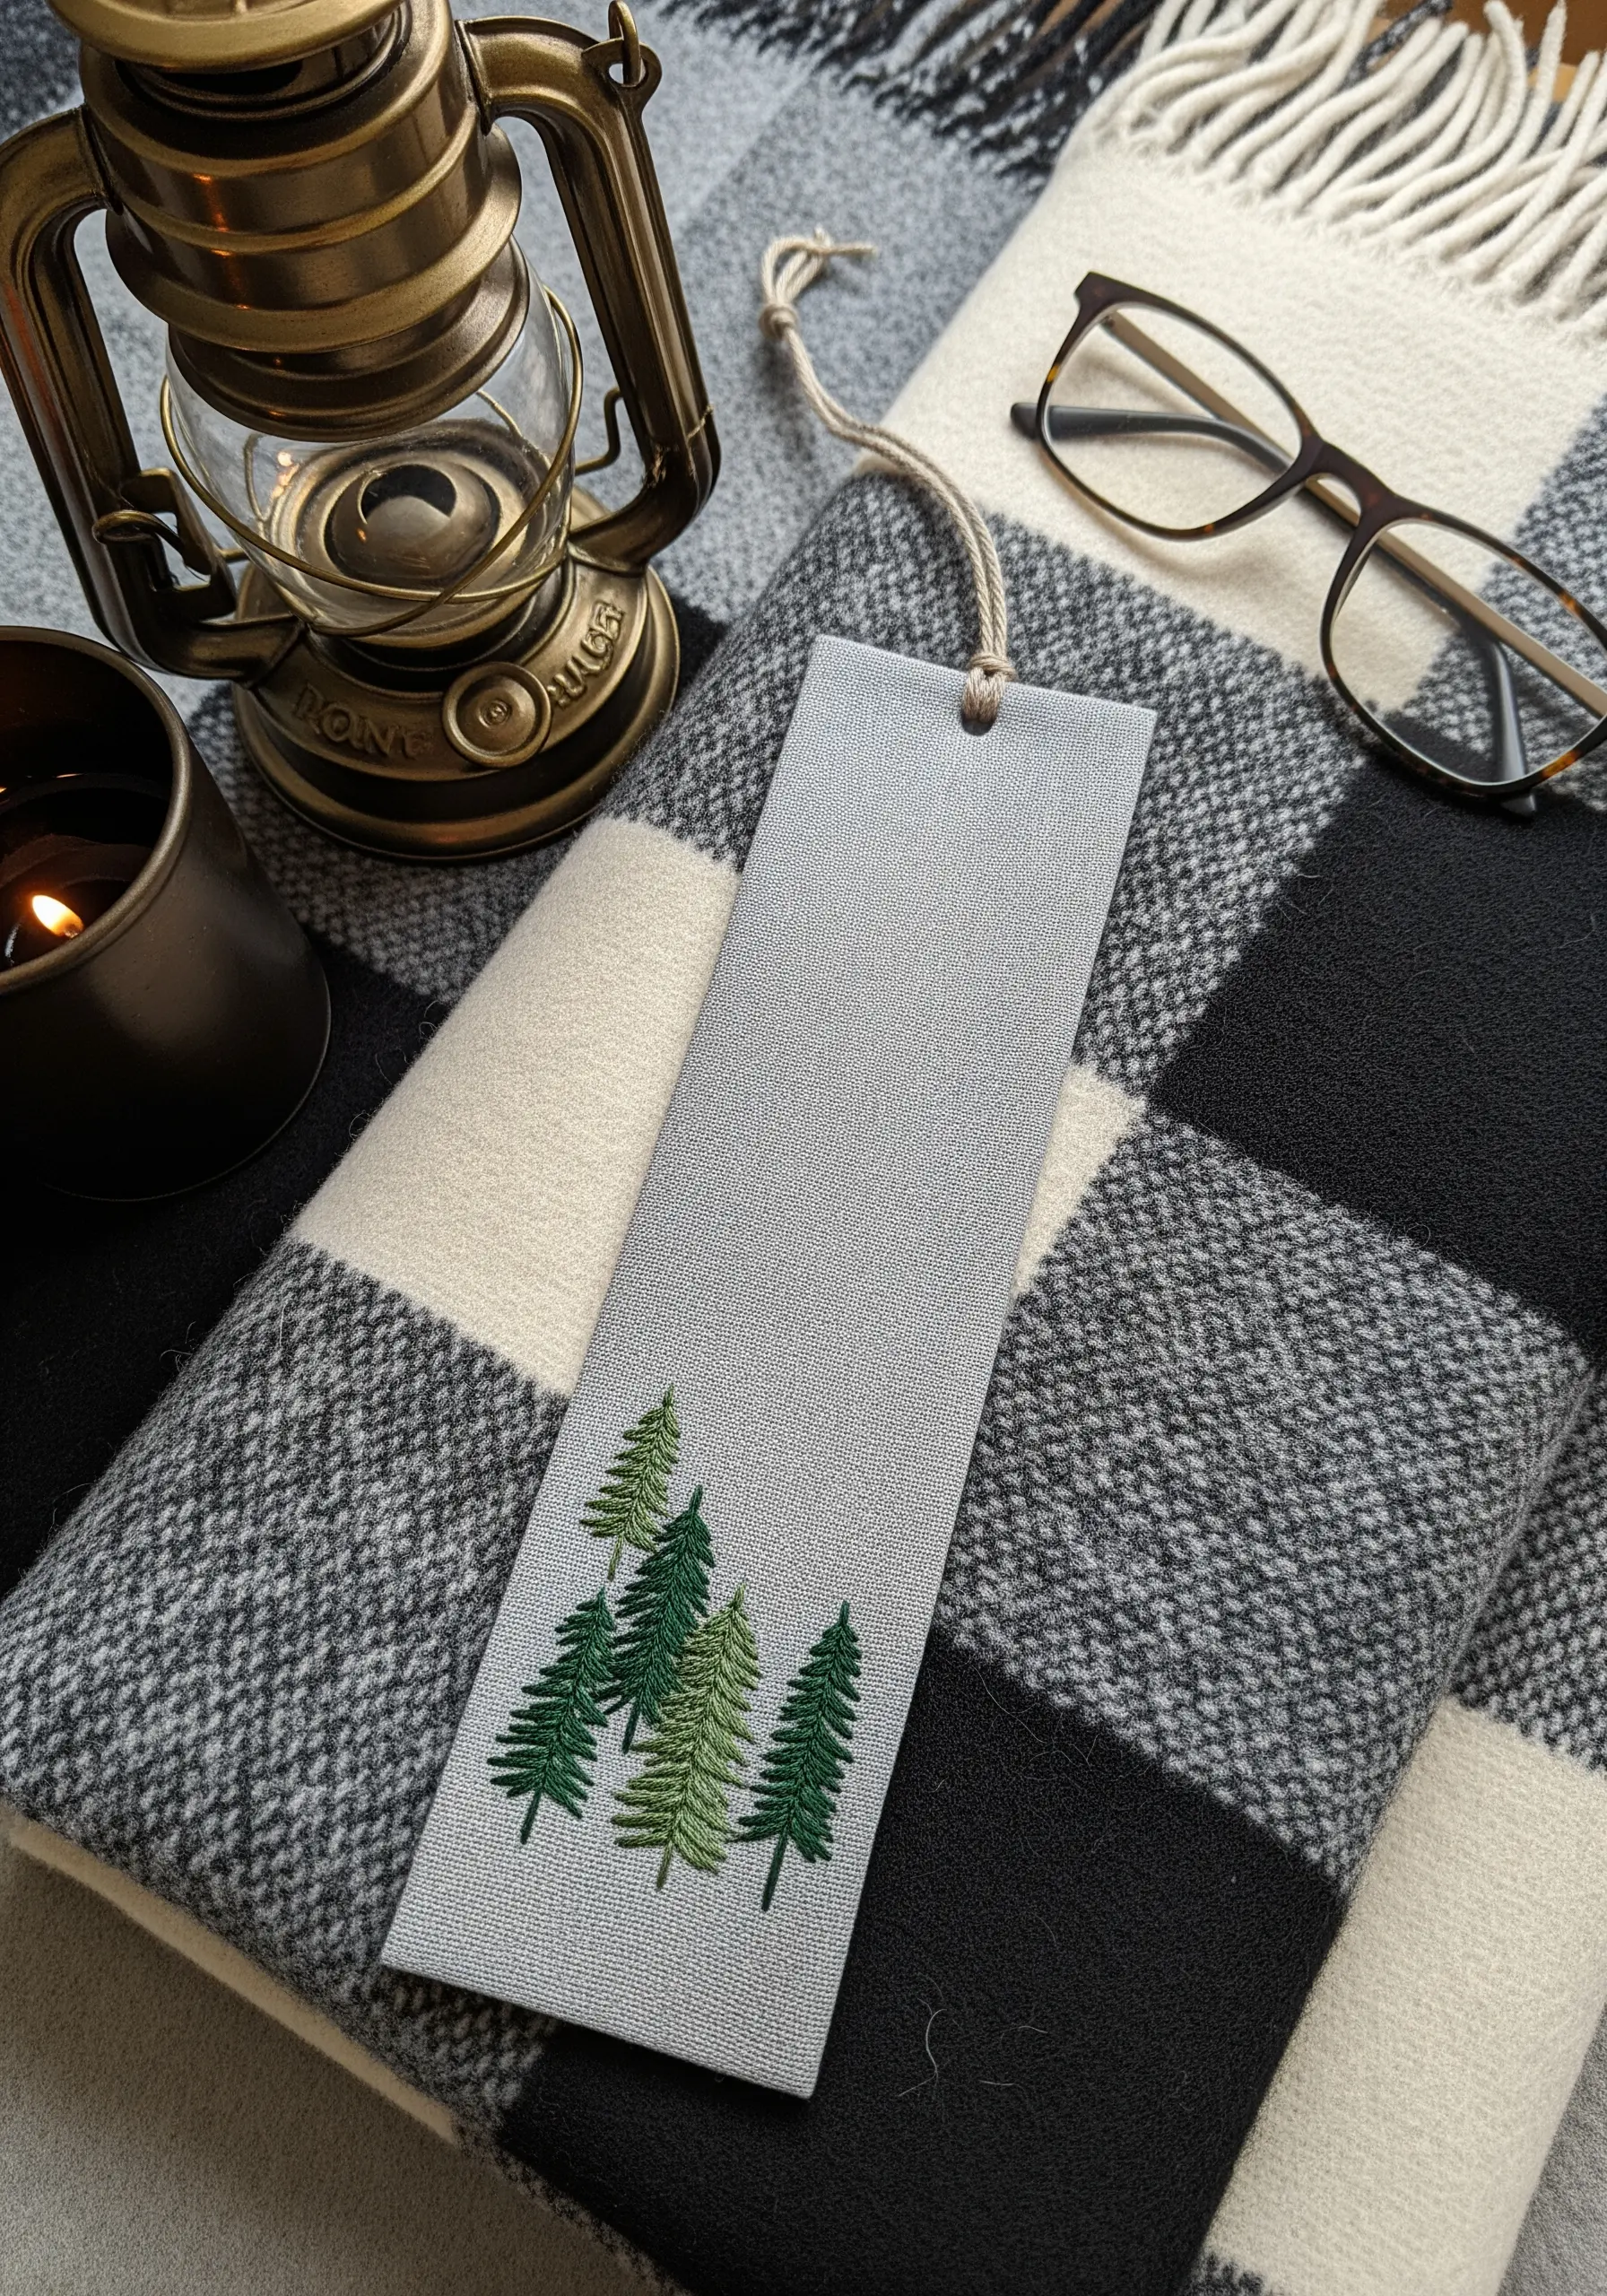
Create a sense of depth in your forest scene by varying both color and stitch density.
Embroider the trees in the foreground with a darker green thread and slightly denser satin stitches to make them feel closer.
For the trees further back, switch to a lighter green and use fewer strands of floss for a more delicate, distant appearance.
This subtle shift in weight and color is a simple yet highly effective way to create perspective on a small surface.
5. Craft with Felt and Appliqué
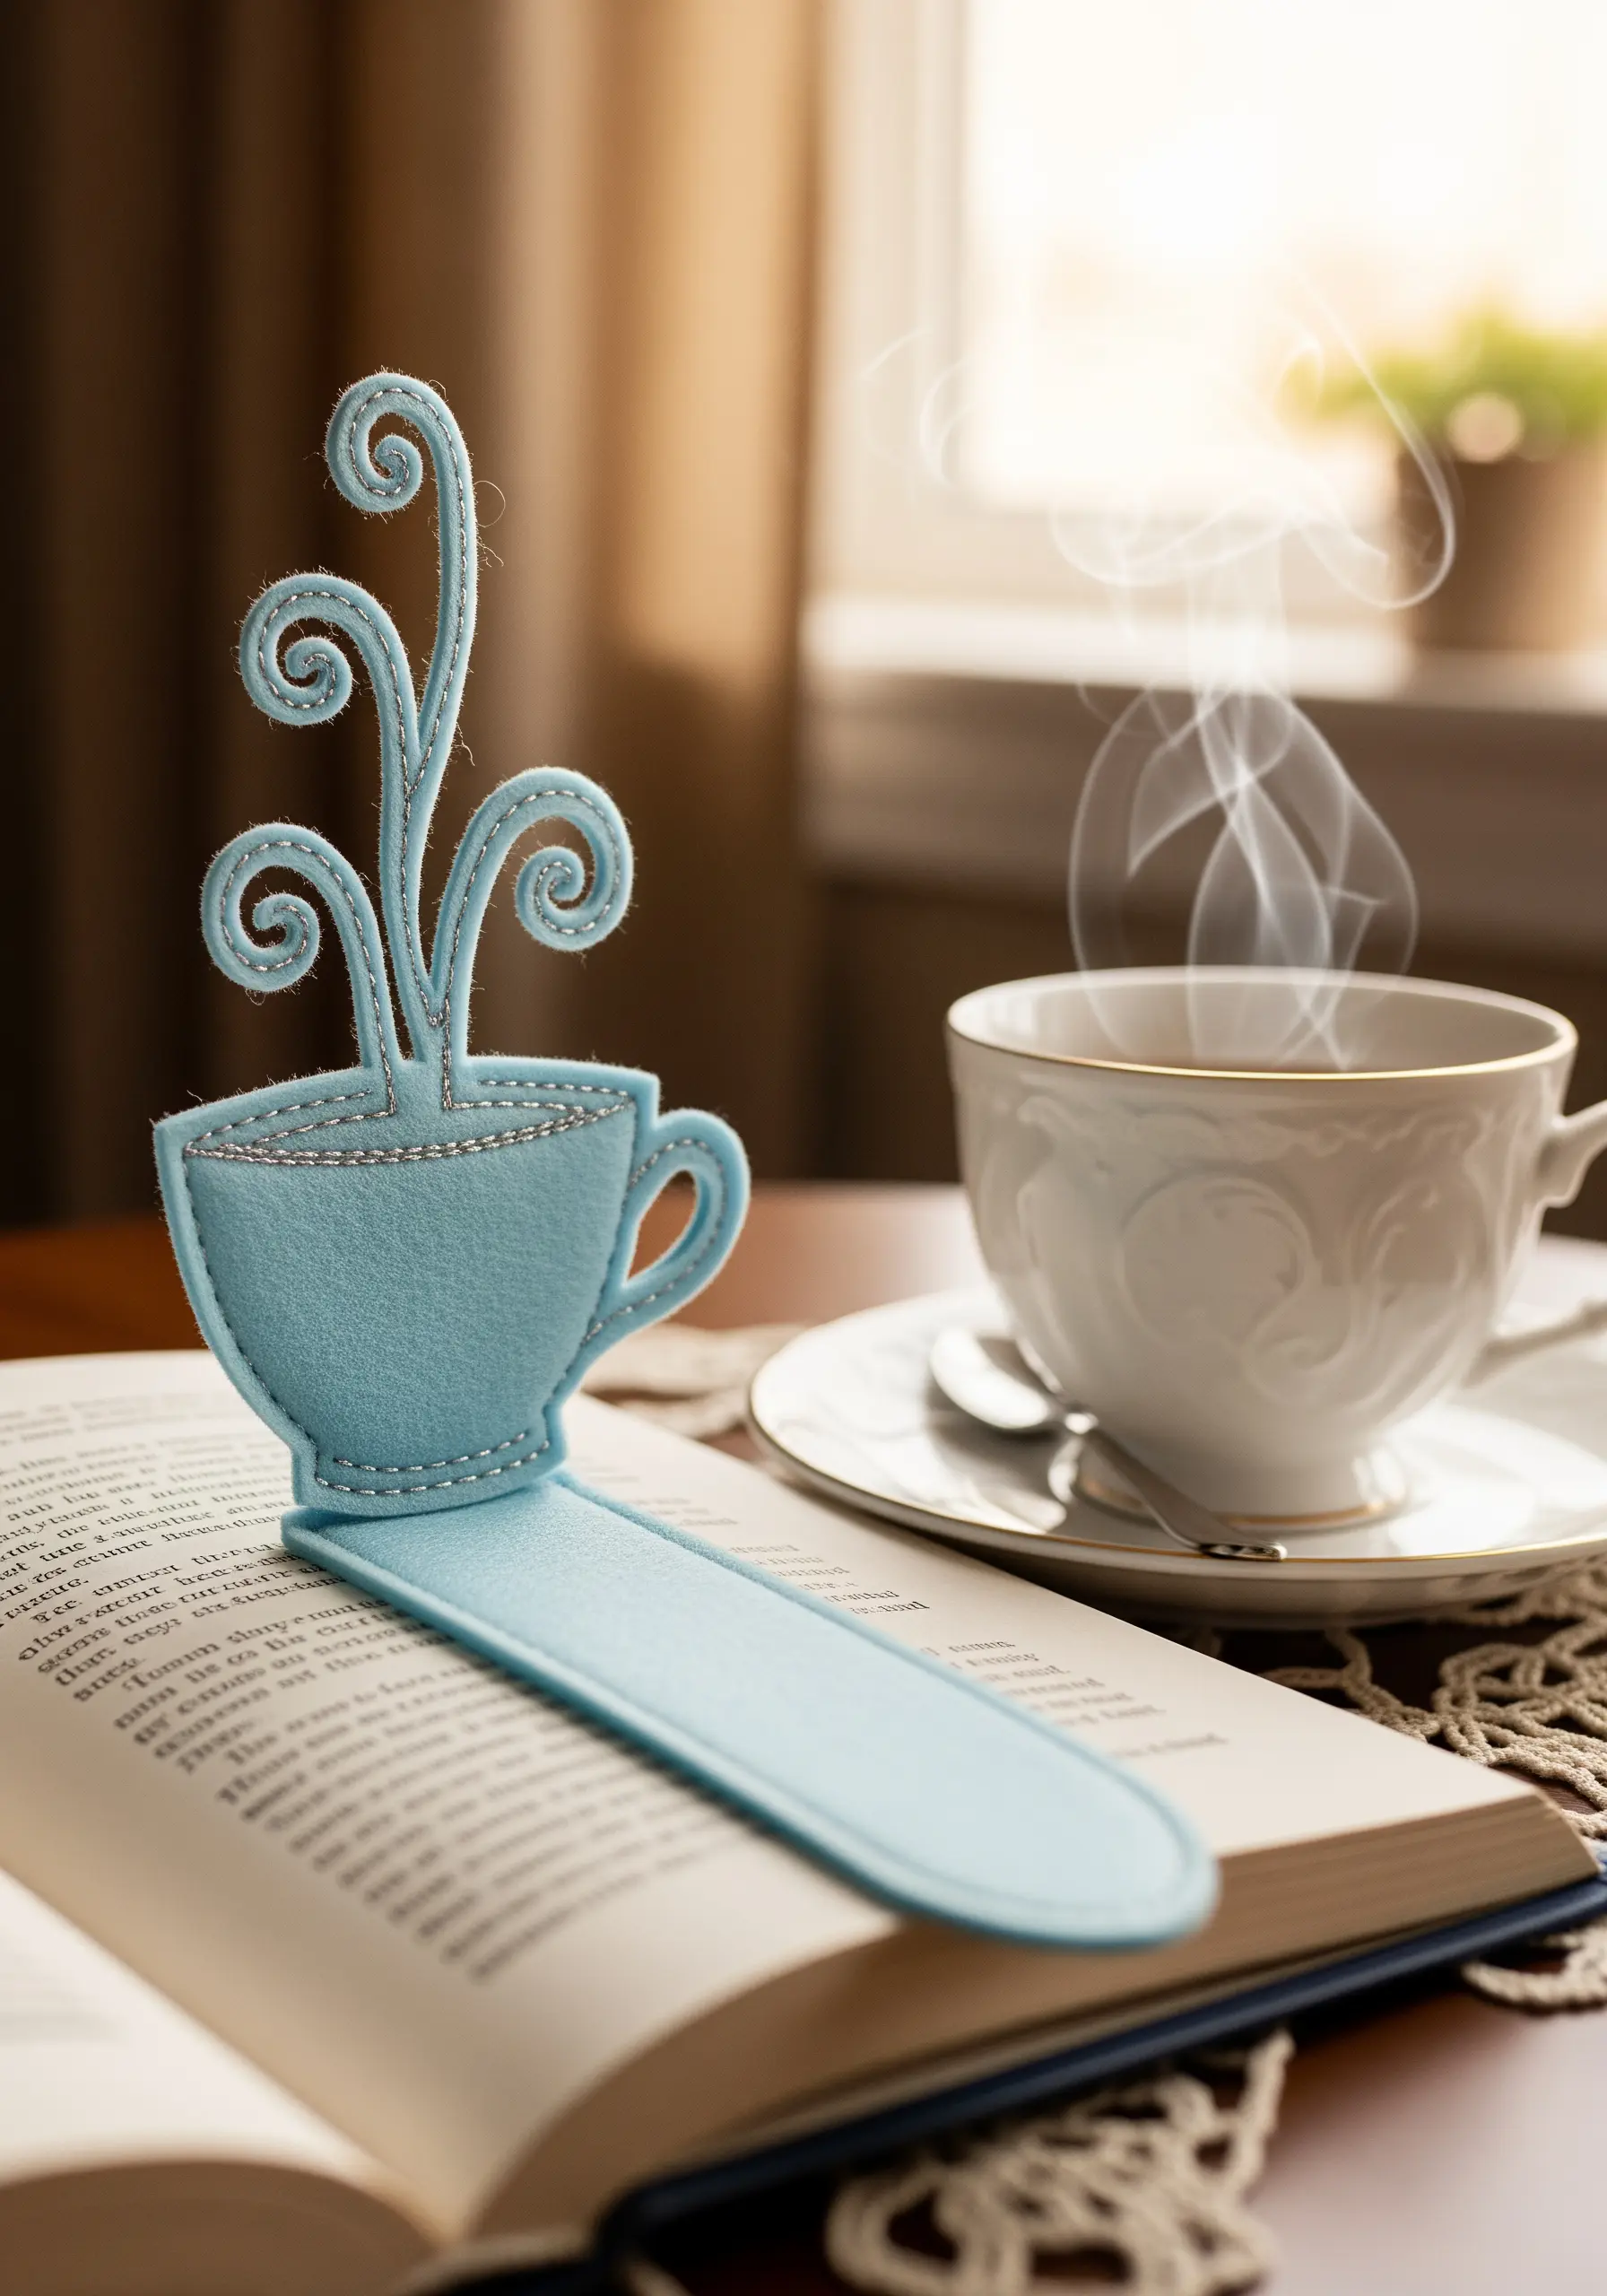
This design relies on the clean lines of felt appliqué rather than dense stitching.
Cut your felt shapes with sharp scissors for precise edges, then use a matching single strand of thread to attach them to the bookmark base with a neat blanket stitch.
The blanket stitch not only secures the felt but also provides a decorative, hand-finished border.
For the delicate swirls of steam, a simple backstitch in a contrasting color creates an elegant, graphic effect.
6. Refine Your Embroidered Lettering

To achieve crisp, readable cursive, outline your letters with a split stitch before covering them with a final layer of satin stitch.
This underlayer stabilizes the fabric and gives you a raised, defined edge to stitch against, preventing unevenness.
Use two strands of floss for a balance of delicacy and visibility.
This approach to tiny lettering embroidery ideas ensures your favorite reading quote looks polished and professional, not wobbly.
7. Play with Geometric Fills and Color
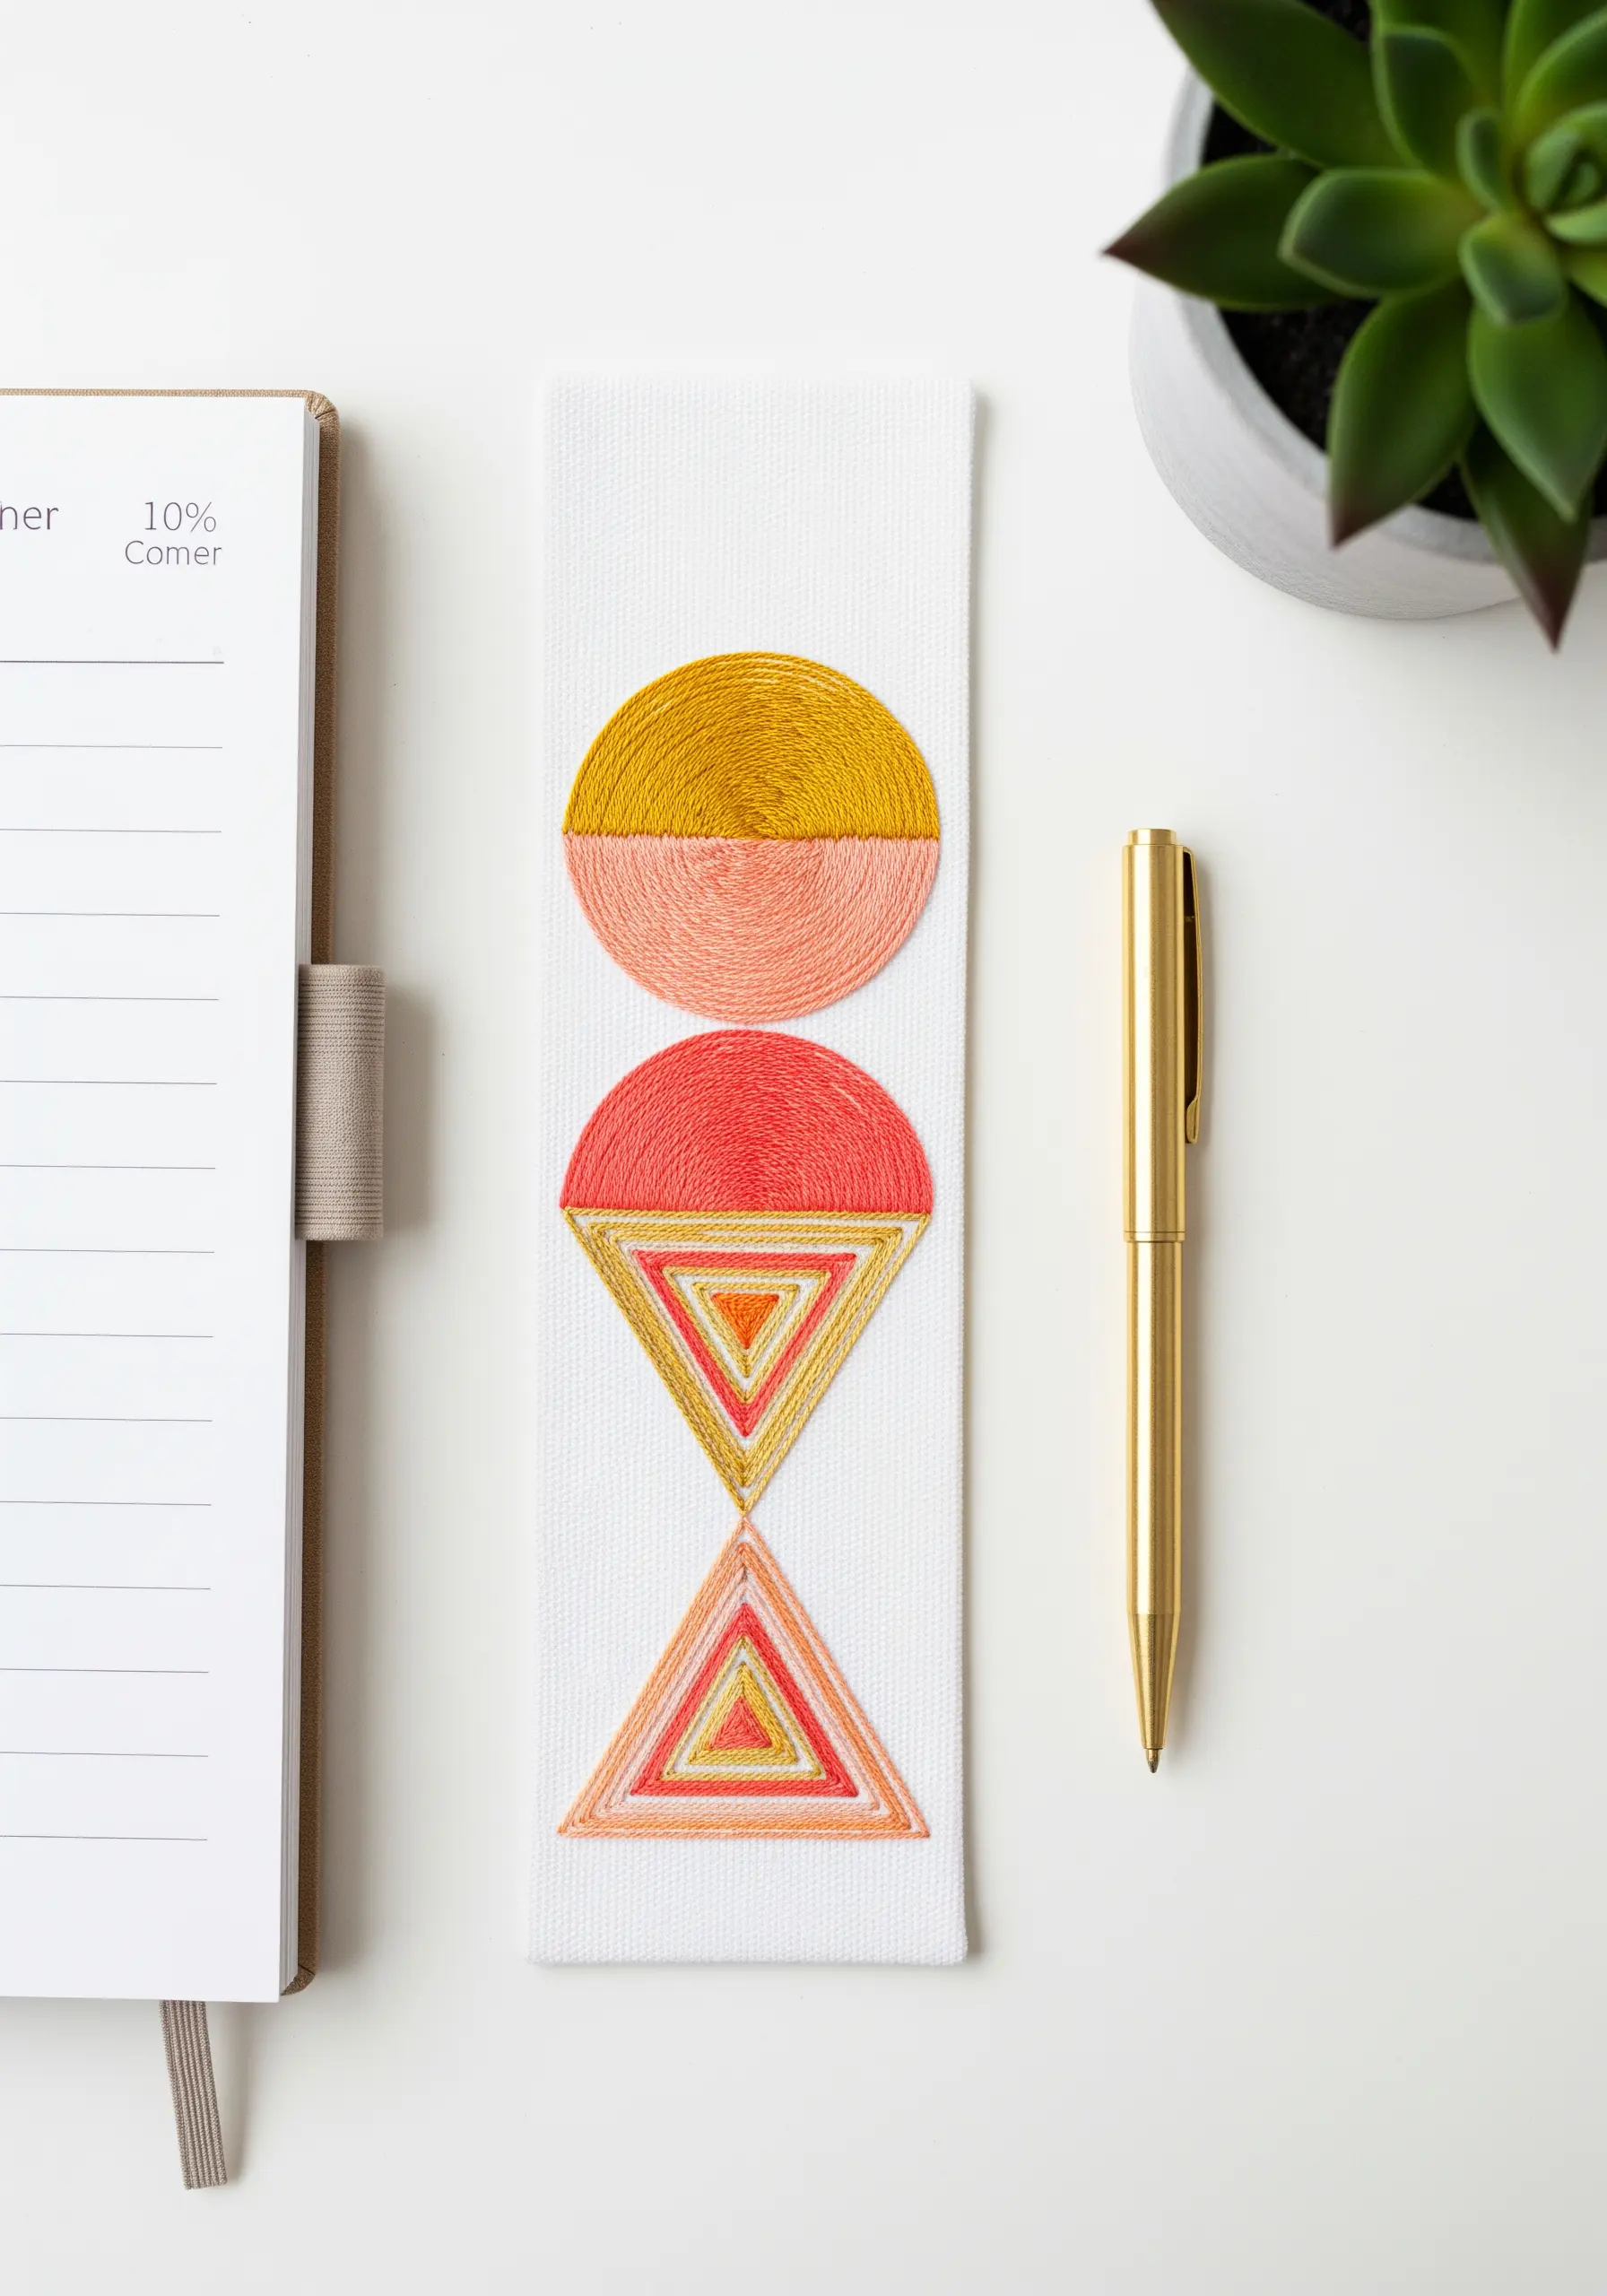
The power of this design lies in its perfectly executed satin stitch fills.
To keep your geometric shapes sharp, always create an outline using a split stitch first.
This tiny ridge acts as a boundary, allowing you to tuck the ends of your satin stitches neatly against it for a razor-sharp edge.
When filling shapes, ensure your thread tension is consistent to avoid puckering and maintain a smooth, unified surface.
Explore these shapes in other abstract thread pattern mashups for larger wall art.
8. Construct a Whimsical Felt Mushroom
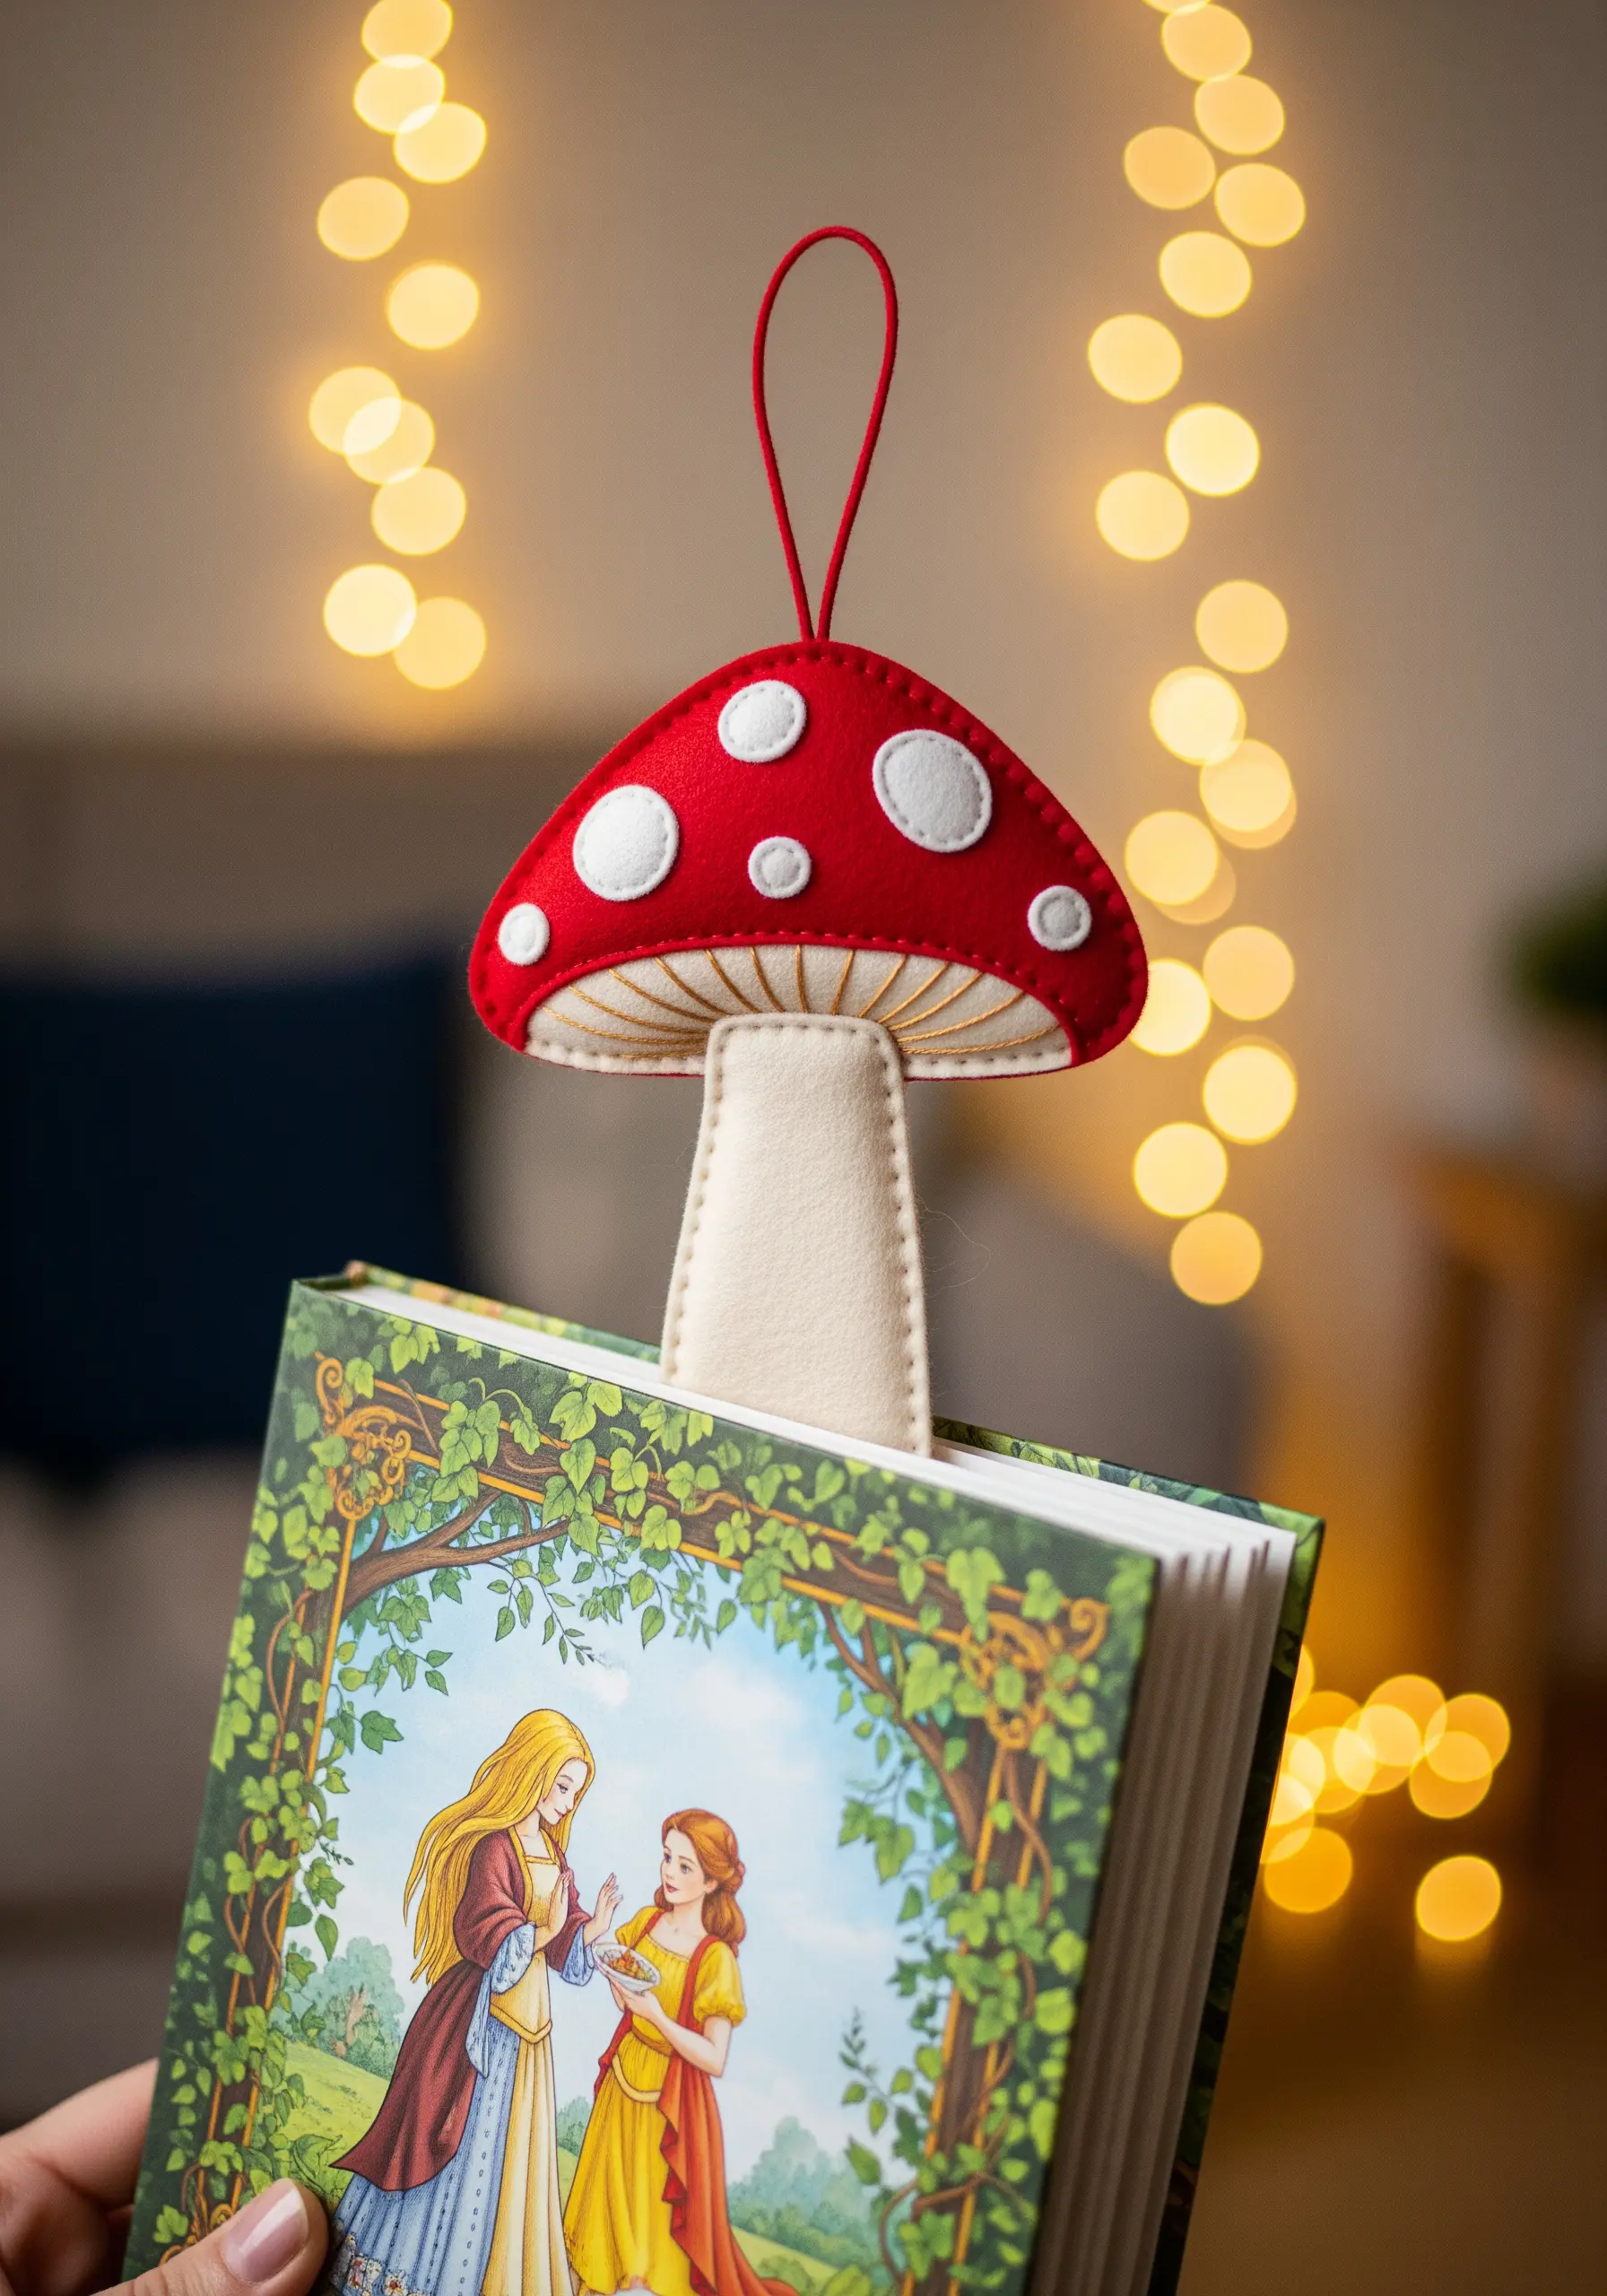
Create this charming toadstool by layering precisely cut pieces of felt.
Use craft glue sparingly to hold the pieces in place before stitching to prevent shifting.
A simple, neat running stitch around the edges in a matching thread is all you need to secure the layers and add a subtle handmade detail.
The magic is in the clean cuts and careful assembly, making it one of the most easy-to-make embroidery designs that looks surprisingly polished.
9. Weave Texture into Ocean Waves

Capture the motion of the sea by combining different textural stitches.
Use tightly packed French knots for the frothy crest of the waves, creating a bubbly, raised effect.
Outline the wave’s curve with a heavy chain stitch to give it weight and definition.
Fill the body of the water with a gradient of blues using long-and-short stitch to mimic the ocean’s depth, transforming a simple scene into one of many ways to capture nature’s textures.
10. Detail a Bee with Fine Stitches
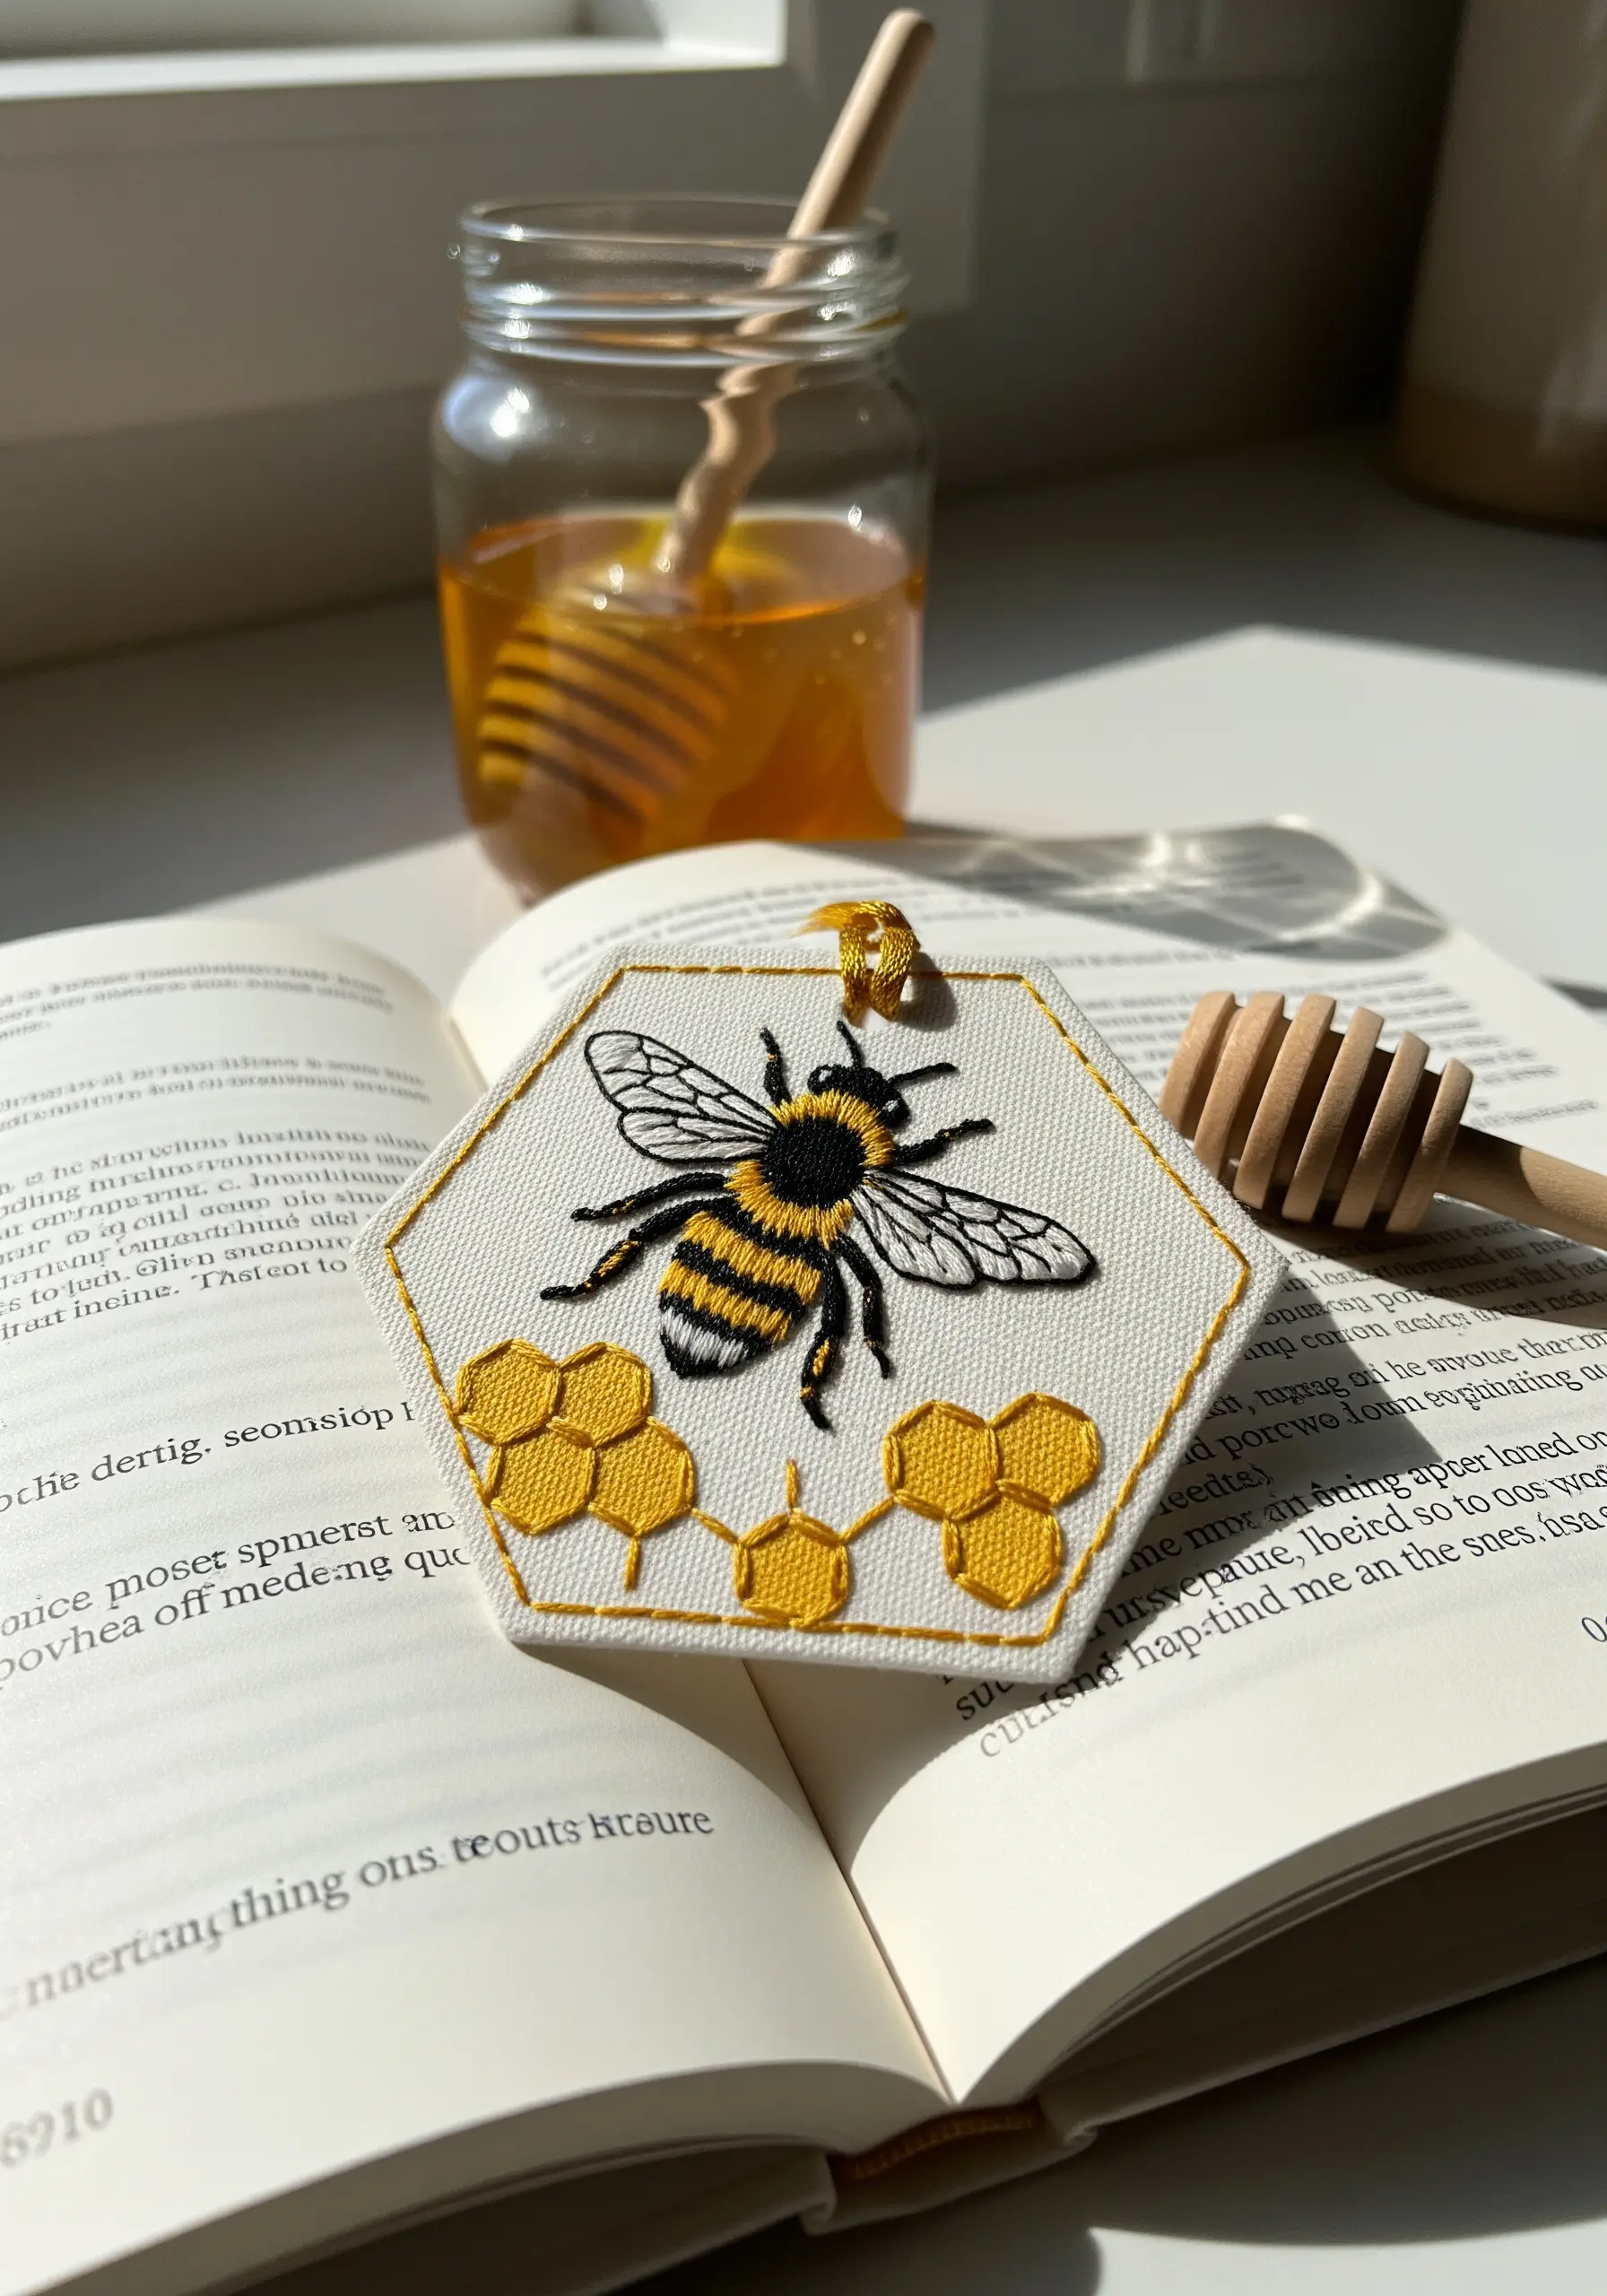
To give the bee’s wings a delicate, translucent quality, use a single strand of light gray or off-white thread.
Outline the wing shape with a fine backstitch, then fill with sparse, open straight stitches to suggest veining without adding bulk.
For the fuzzy body, use a series of short satin stitches with two strands of black and yellow floss, and add a few tiny French knots with chenille thread for a plush, pollen-dusted texture.
11. Blend Autumnal Hues in a Maple Leaf
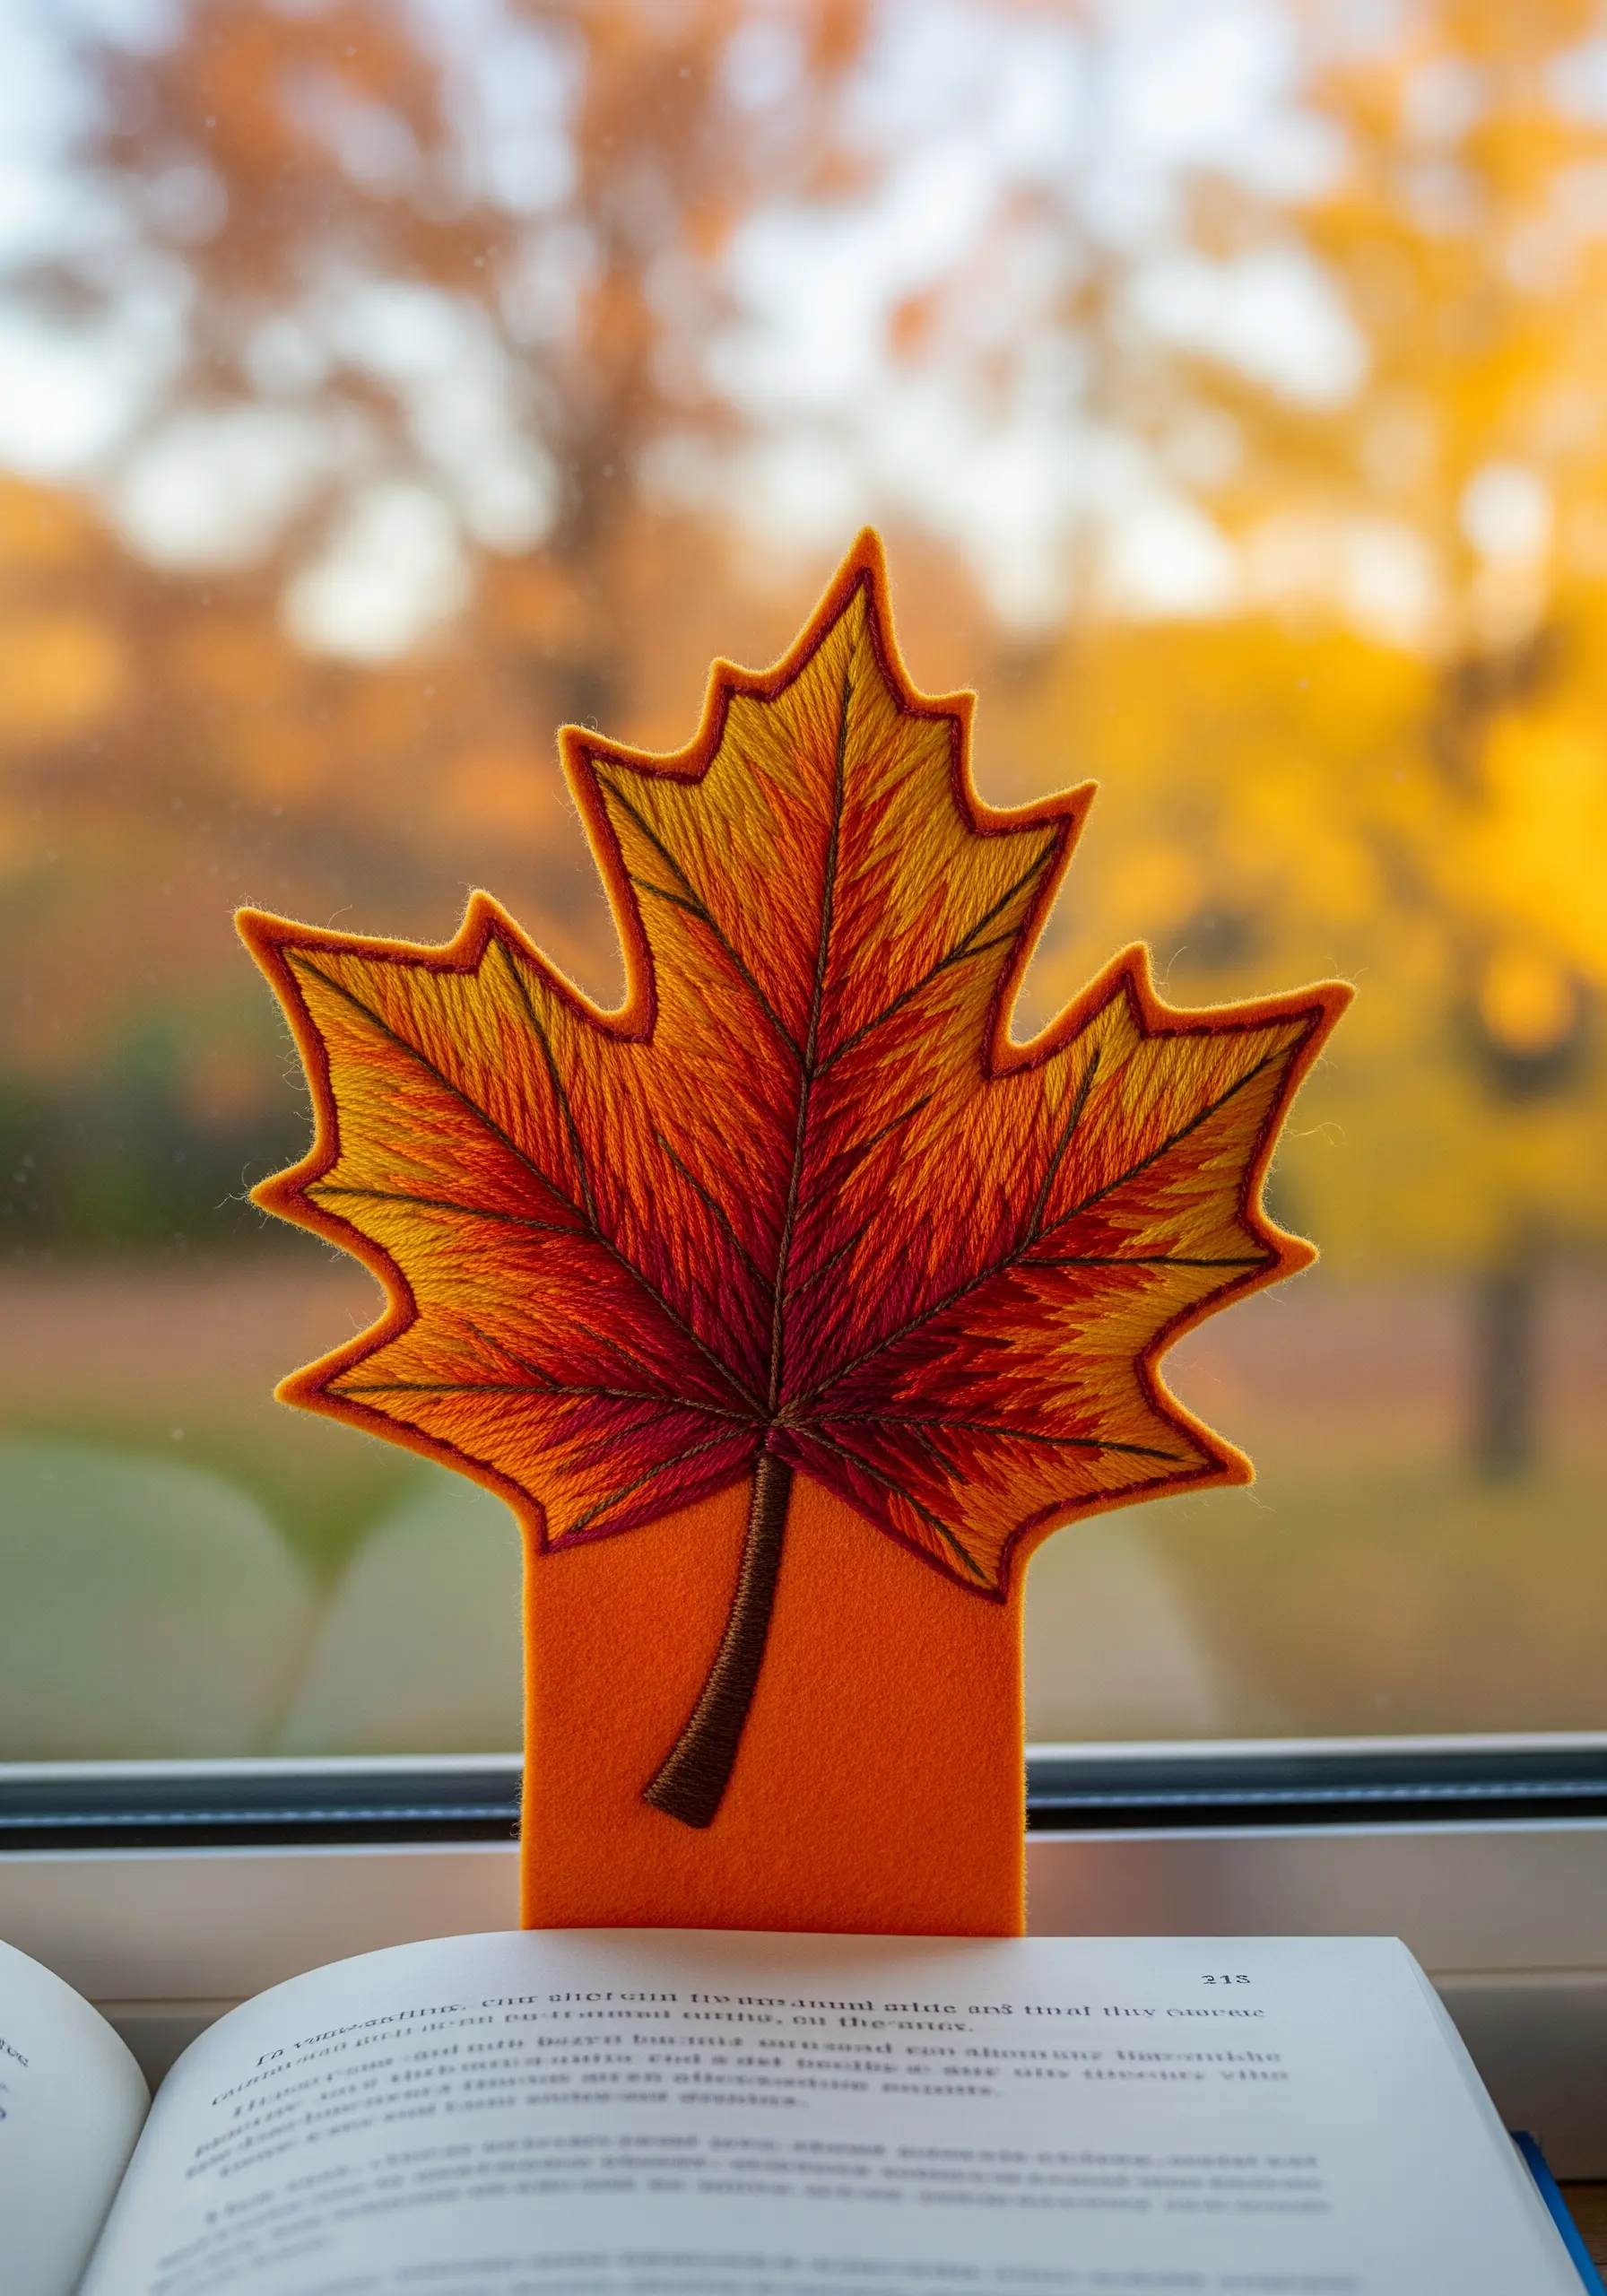
This vibrant leaf is an exercise in advanced thread painting.
To achieve the smooth color transition from yellow to deep red, use single strands of floss and the long-and-short stitch technique.
Instead of blocking colors, introduce new shades gradually, allowing your stitches to interlock and blend like watercolor on paper.
Focus on the direction of your stitches to mimic the leaf’s natural veins, adding another layer of realism to these rich earth-tone patterns.
12. Illuminate the Night with Special Thread
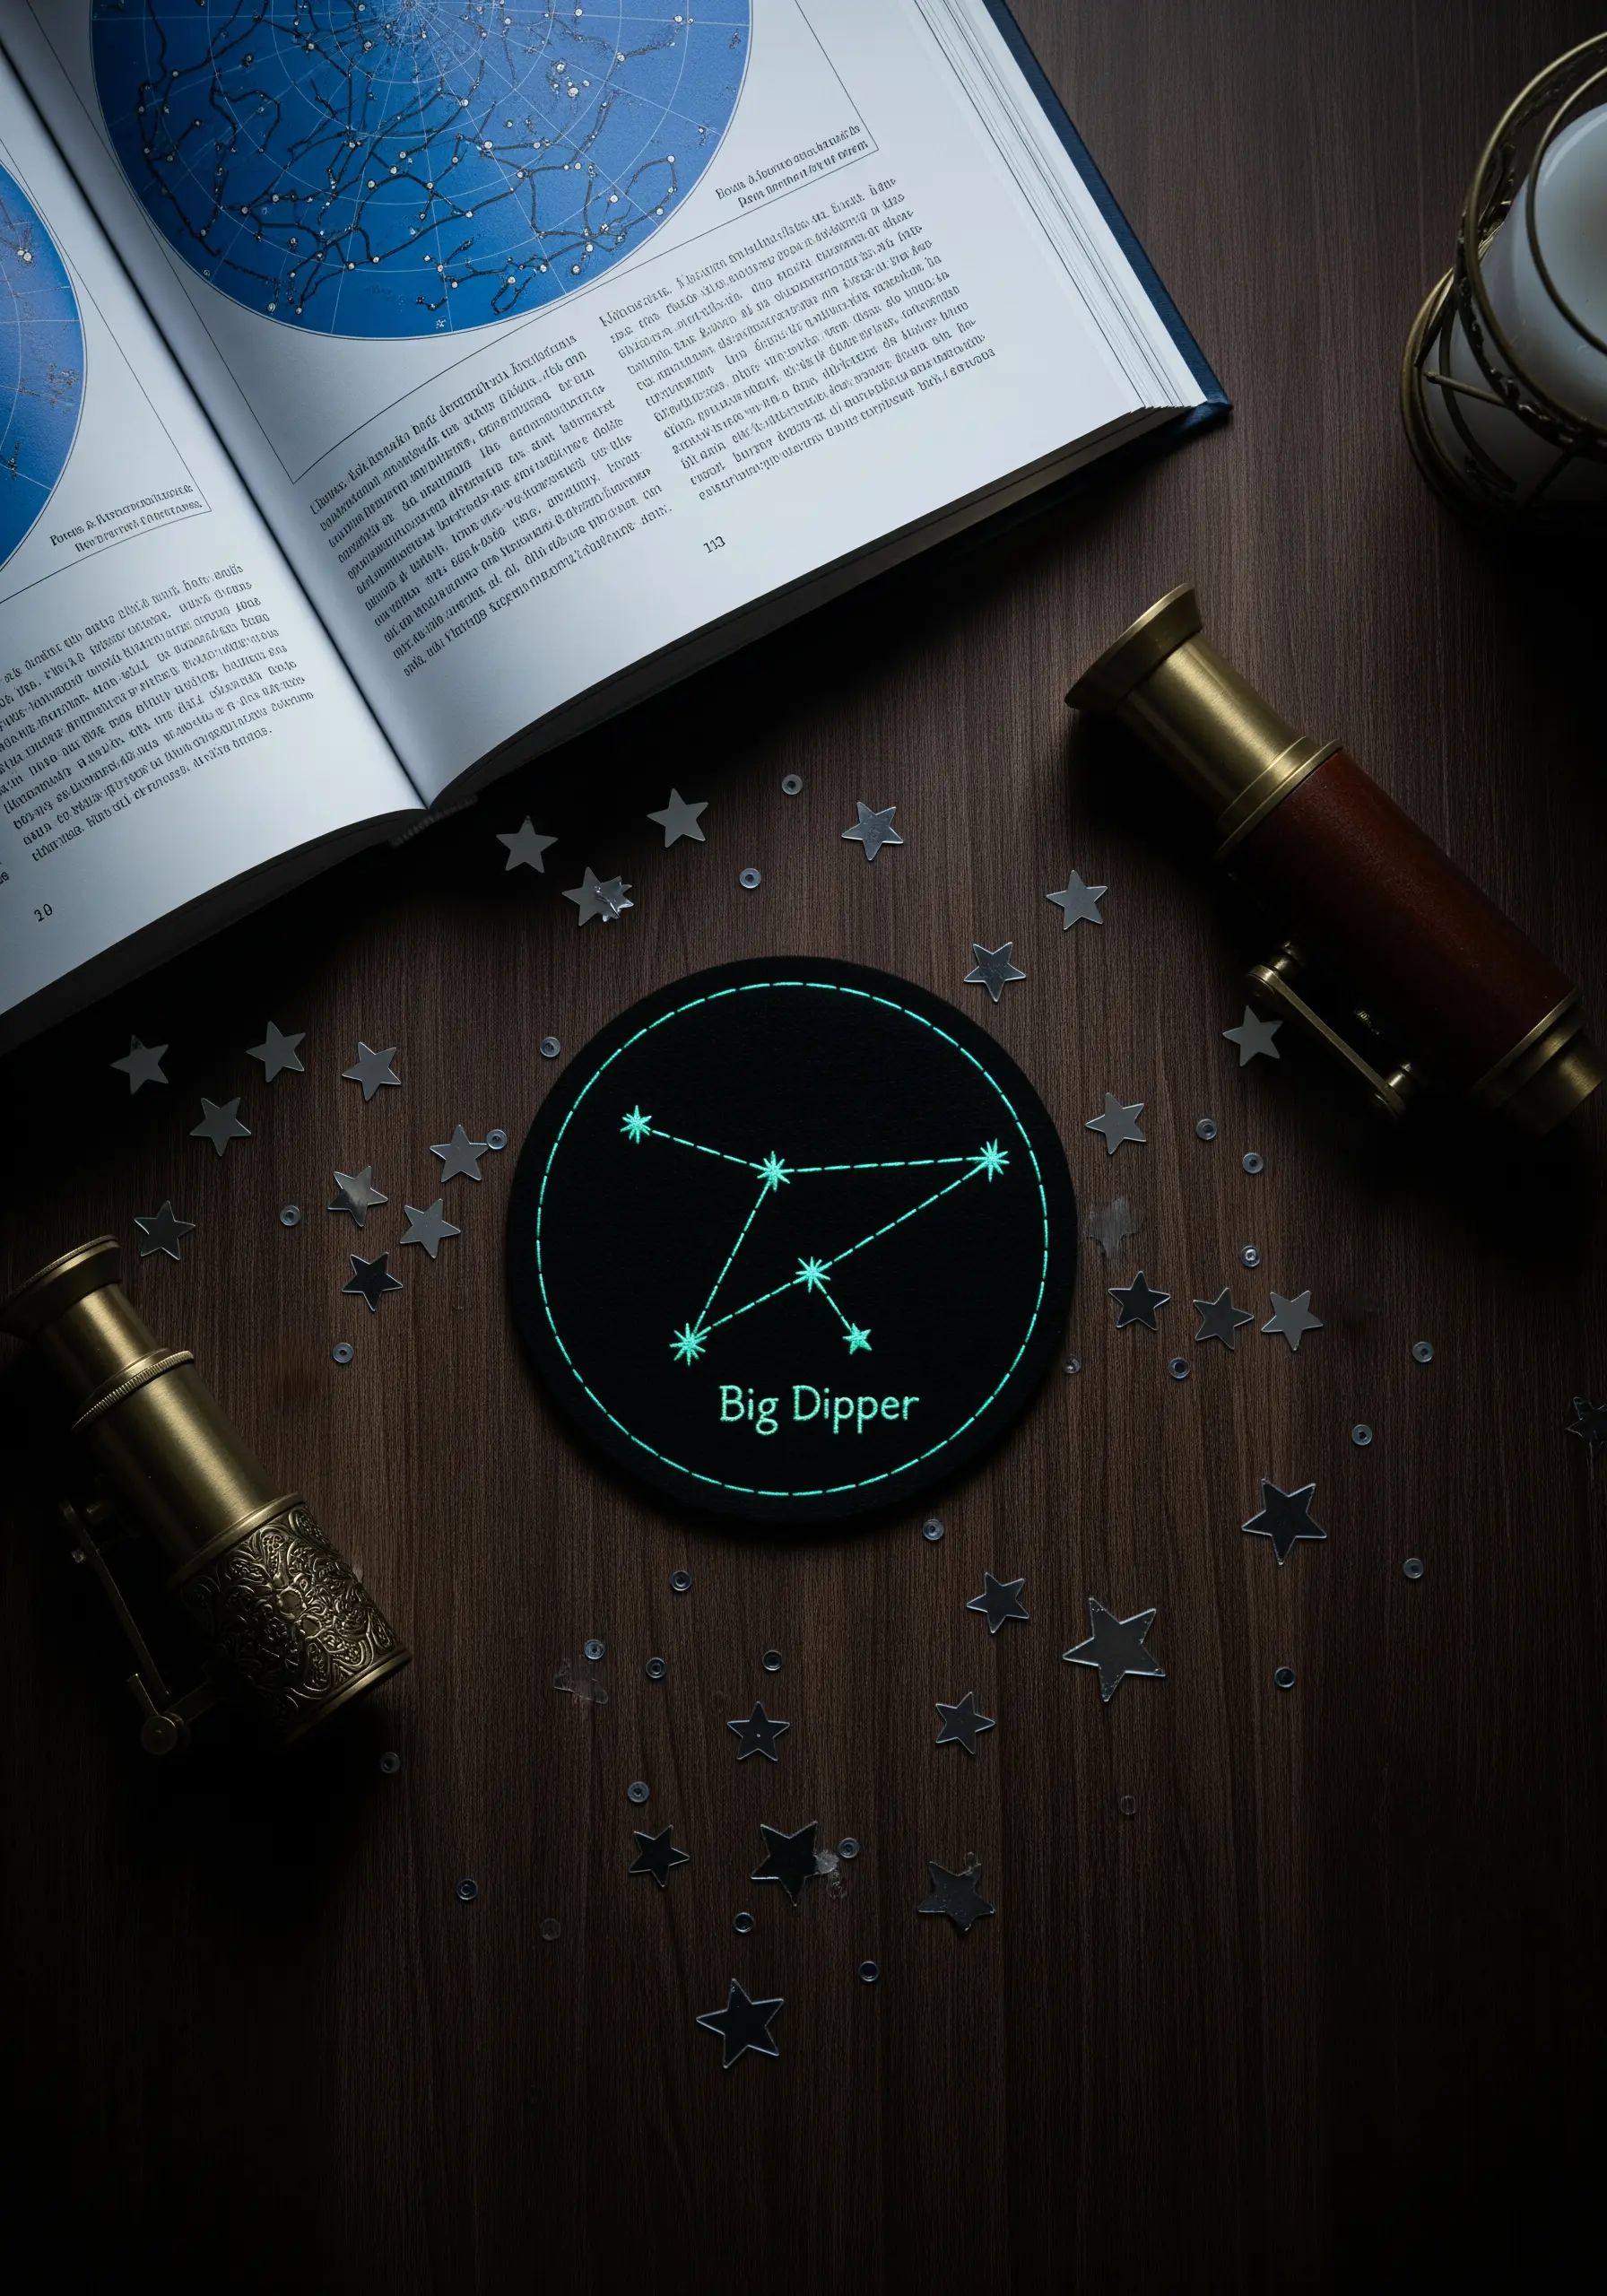
The secret to this magical bookmark is using glow-in-the-dark embroidery floss.
Keep the design minimal—simple straight stitches to connect the stars and small French knots for the stars themselves.
Stitch on a dark, non-stretch fabric like black cotton drill or felt for maximum contrast.
The simplicity of the stitching allows the thread’s unique property to be the main focus, creating a delightful surprise when the lights go out.
13. Capture Lavender’s Delicate Form
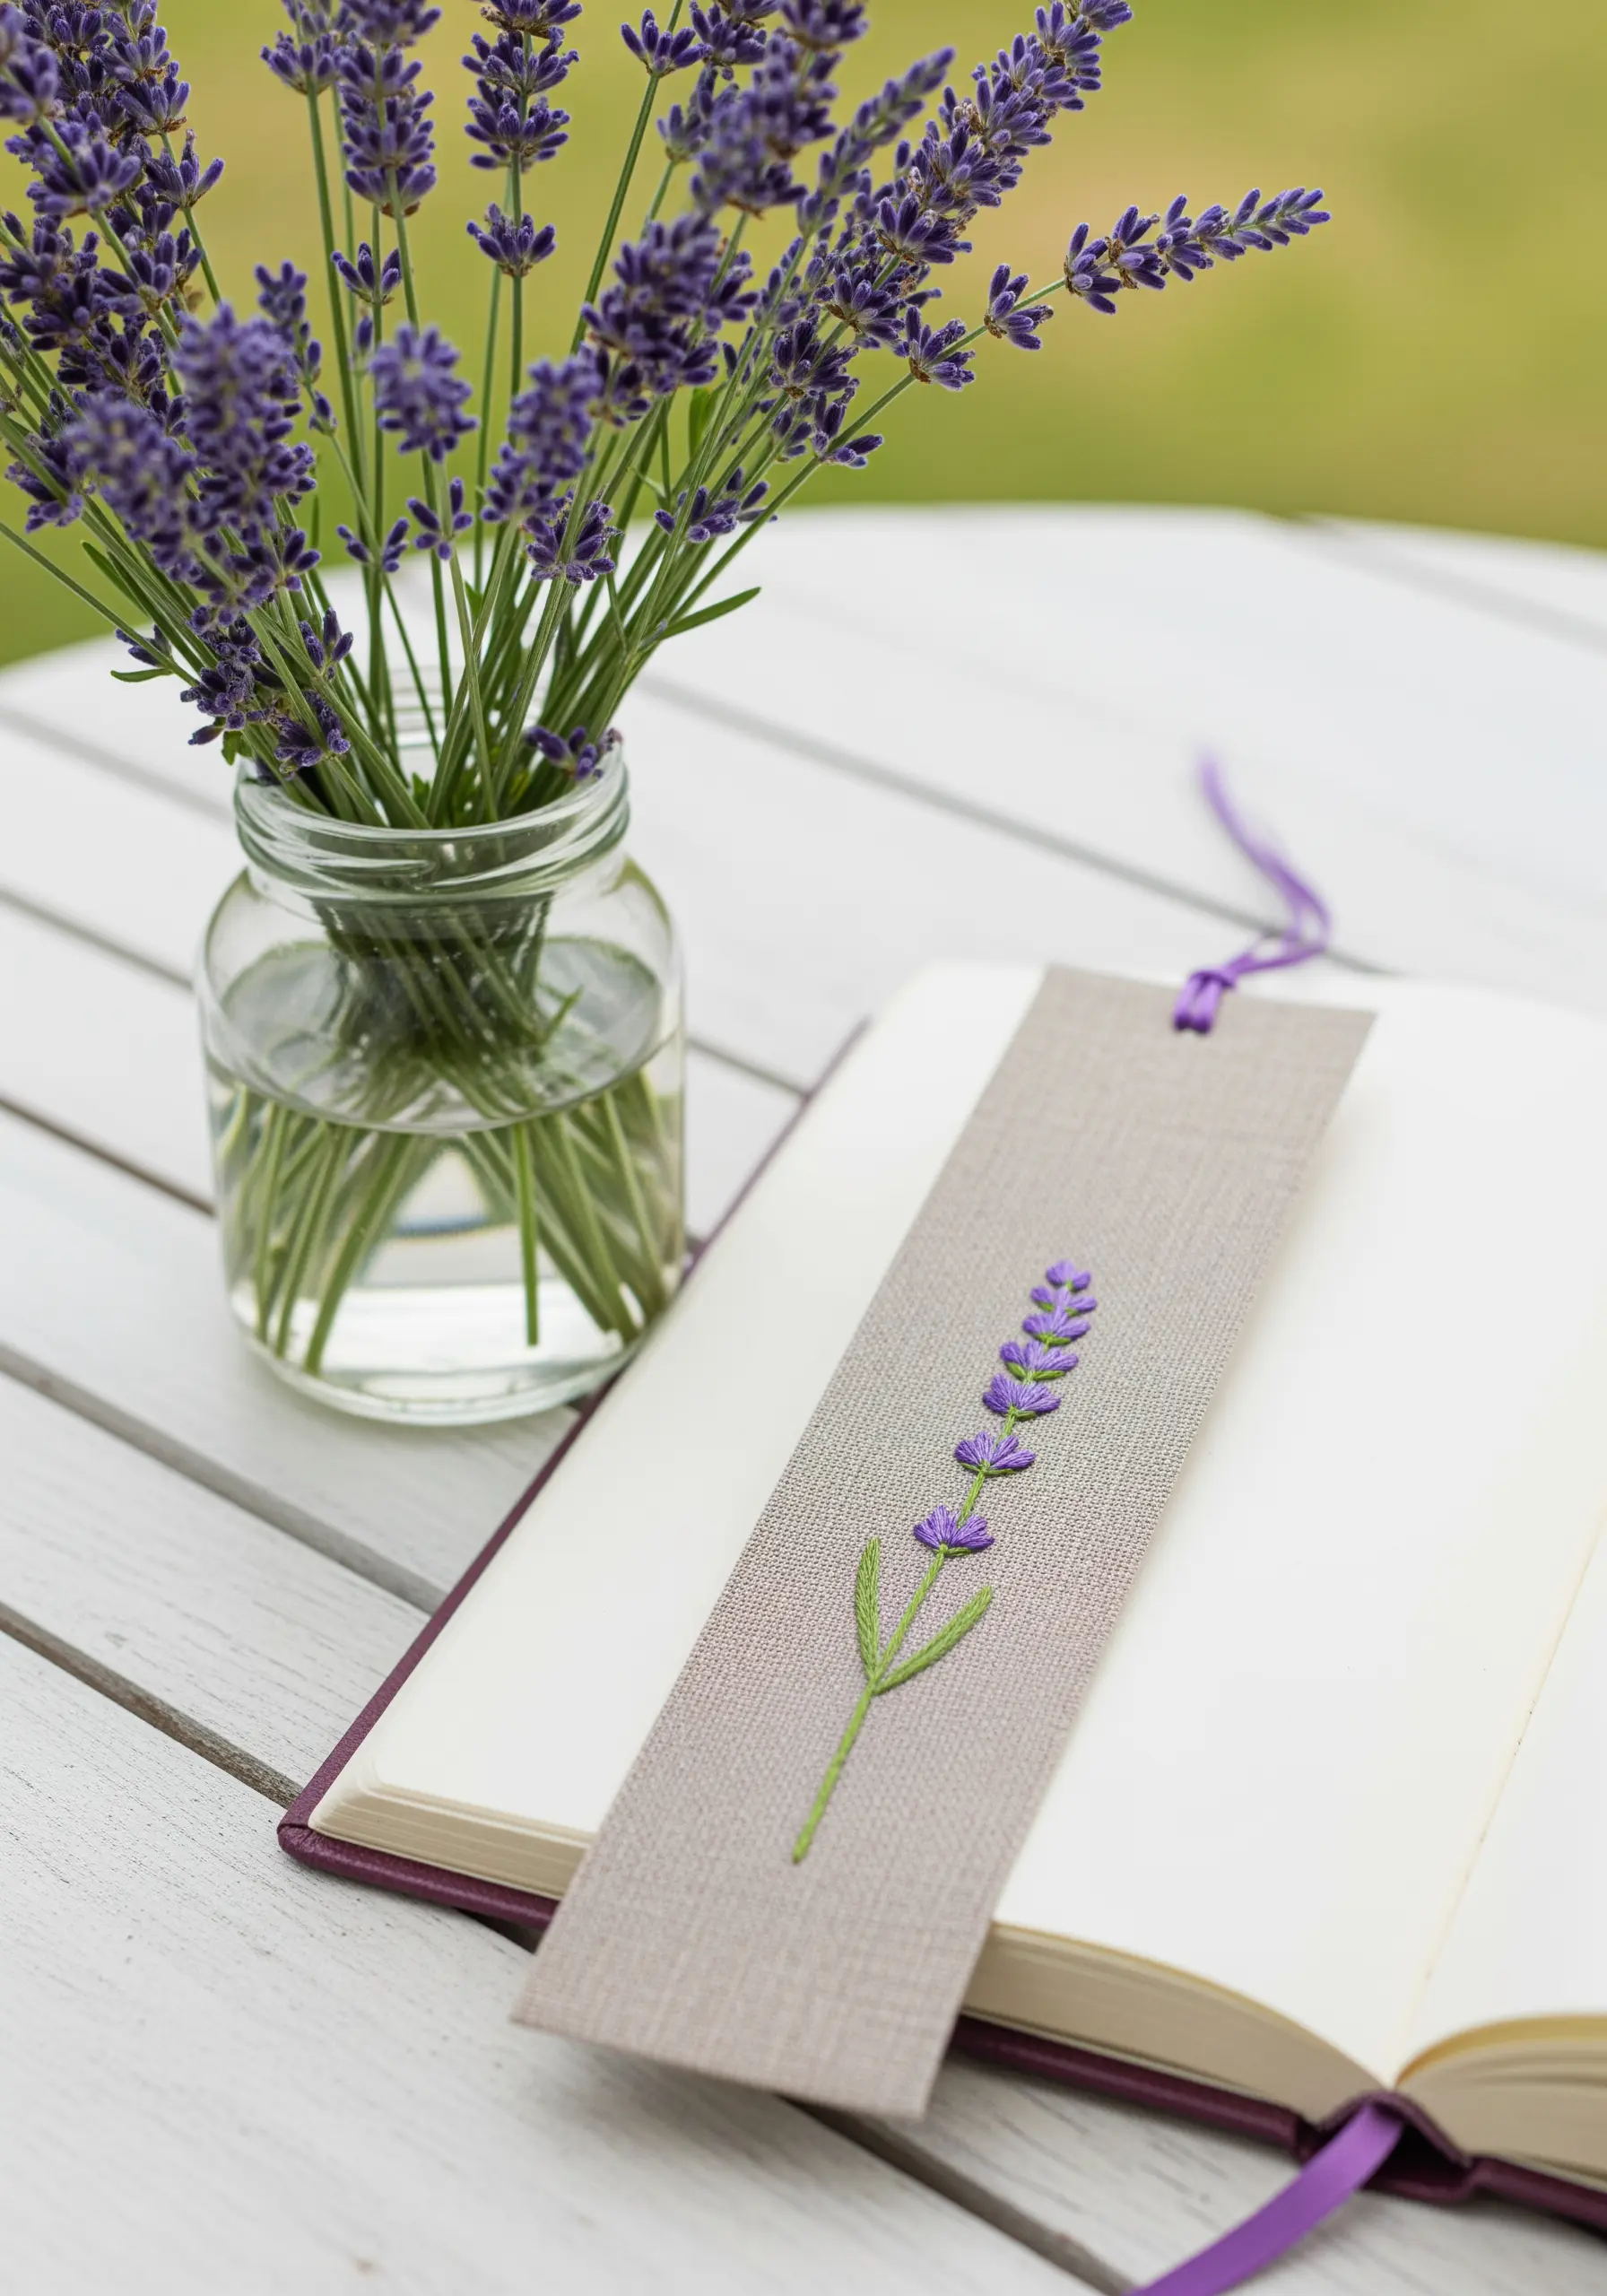
Embrace minimalism to capture the essence of lavender.
Use a simple stem stitch for the stalk, ensuring a smooth, elegant curve.
For the lavender florets, arrange a series of small, straight satin stitches or seed stitches in a tapered shape. Using two shades of purple adds subtle dimension without complexity.
This design is a perfect example of how minimalist embroidery projects can feel both serene and sophisticated.
14. Recreate Knitted Texture with Cross-Stitch

Mimic the look of a cozy Fair Isle sweater by using cross-stitch on Aida cloth or evenweave fabric.
The gridded nature of the fabric ensures perfectly uniform stitches that replicate the geometric patterns of traditional knitting.
Choose a classic color palette of navy, cream, and burgundy to enhance the cozy, heritage feel.
This project is less about freeform artistry and more about the meditative pleasure of precision.
15. Weave a Floral Monogram
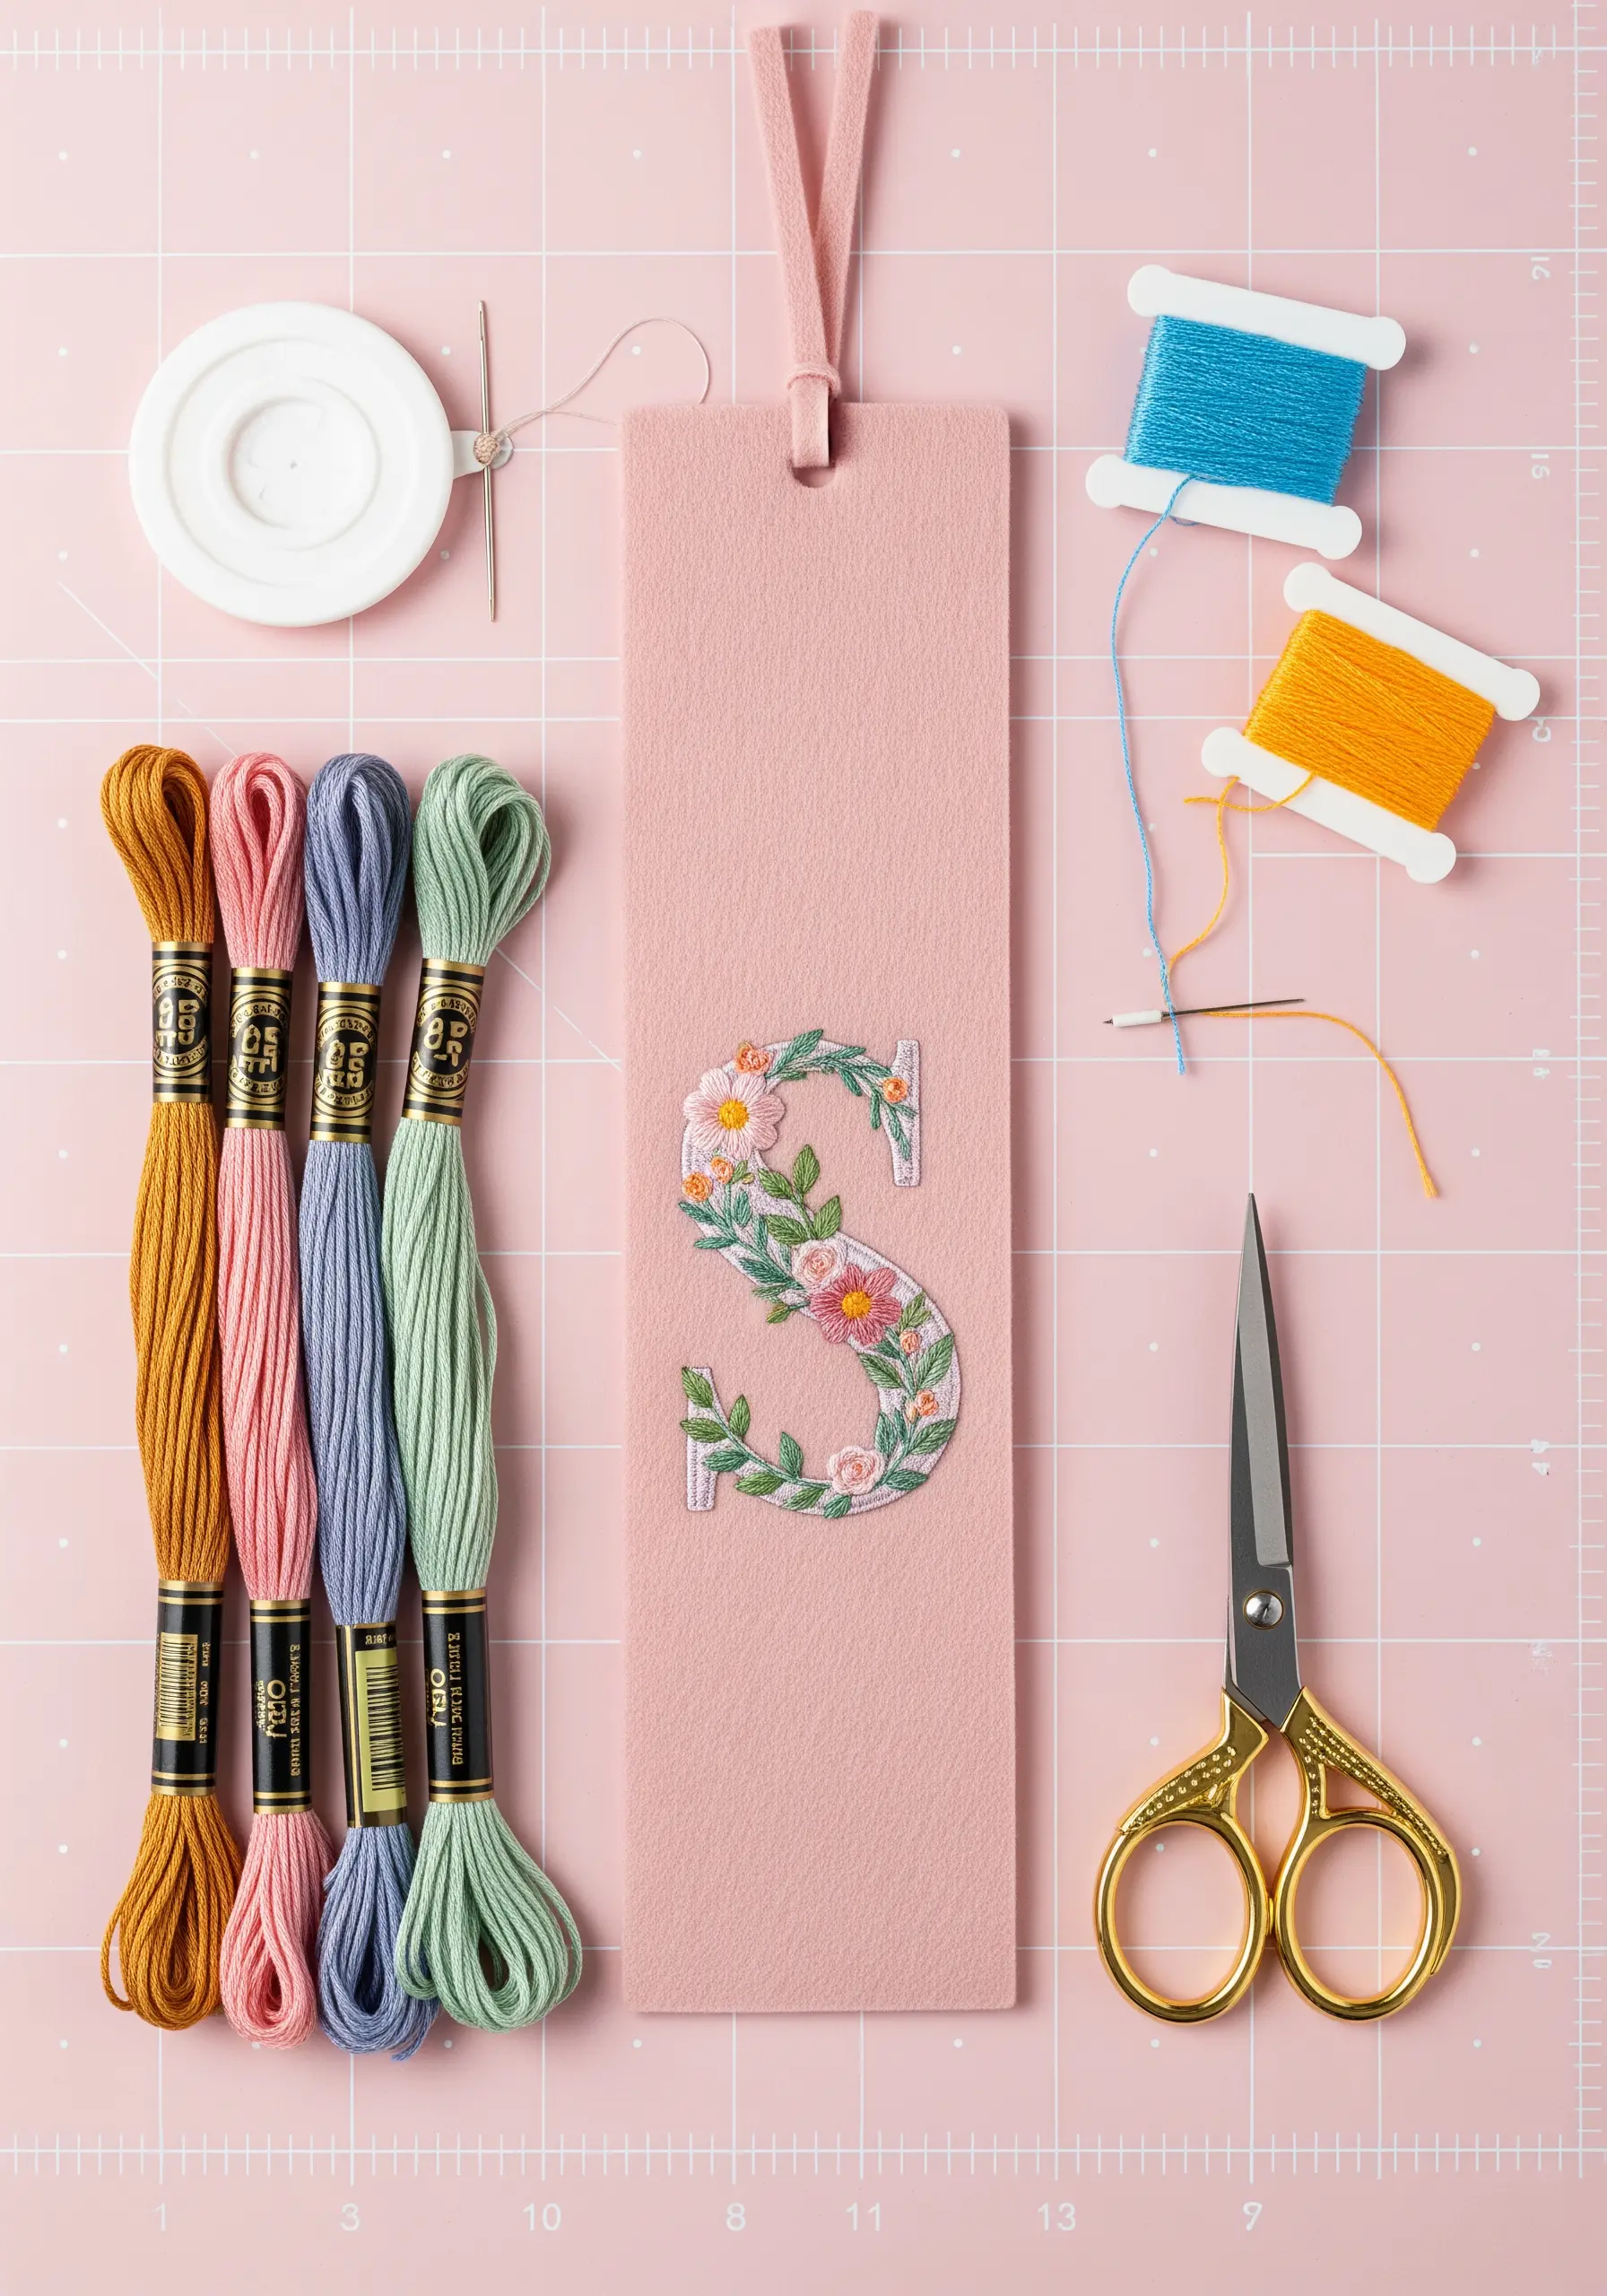
To create a monogram that feels lush and botanical, focus on varying your stitch types and textures.
Use padded satin stitch for the larger flower petals to make them pop, tiny French knots for the flower centers, and delicate fishbone stitch for the leaves.
Lightly trace the letter’s outline first, then allow your floral elements to gracefully overlap the lines.
This technique turns a simple initial into one of your own personalized name monogram wall embroidery gifts, but in miniature.
16. Add Dimension with Metallic Couching
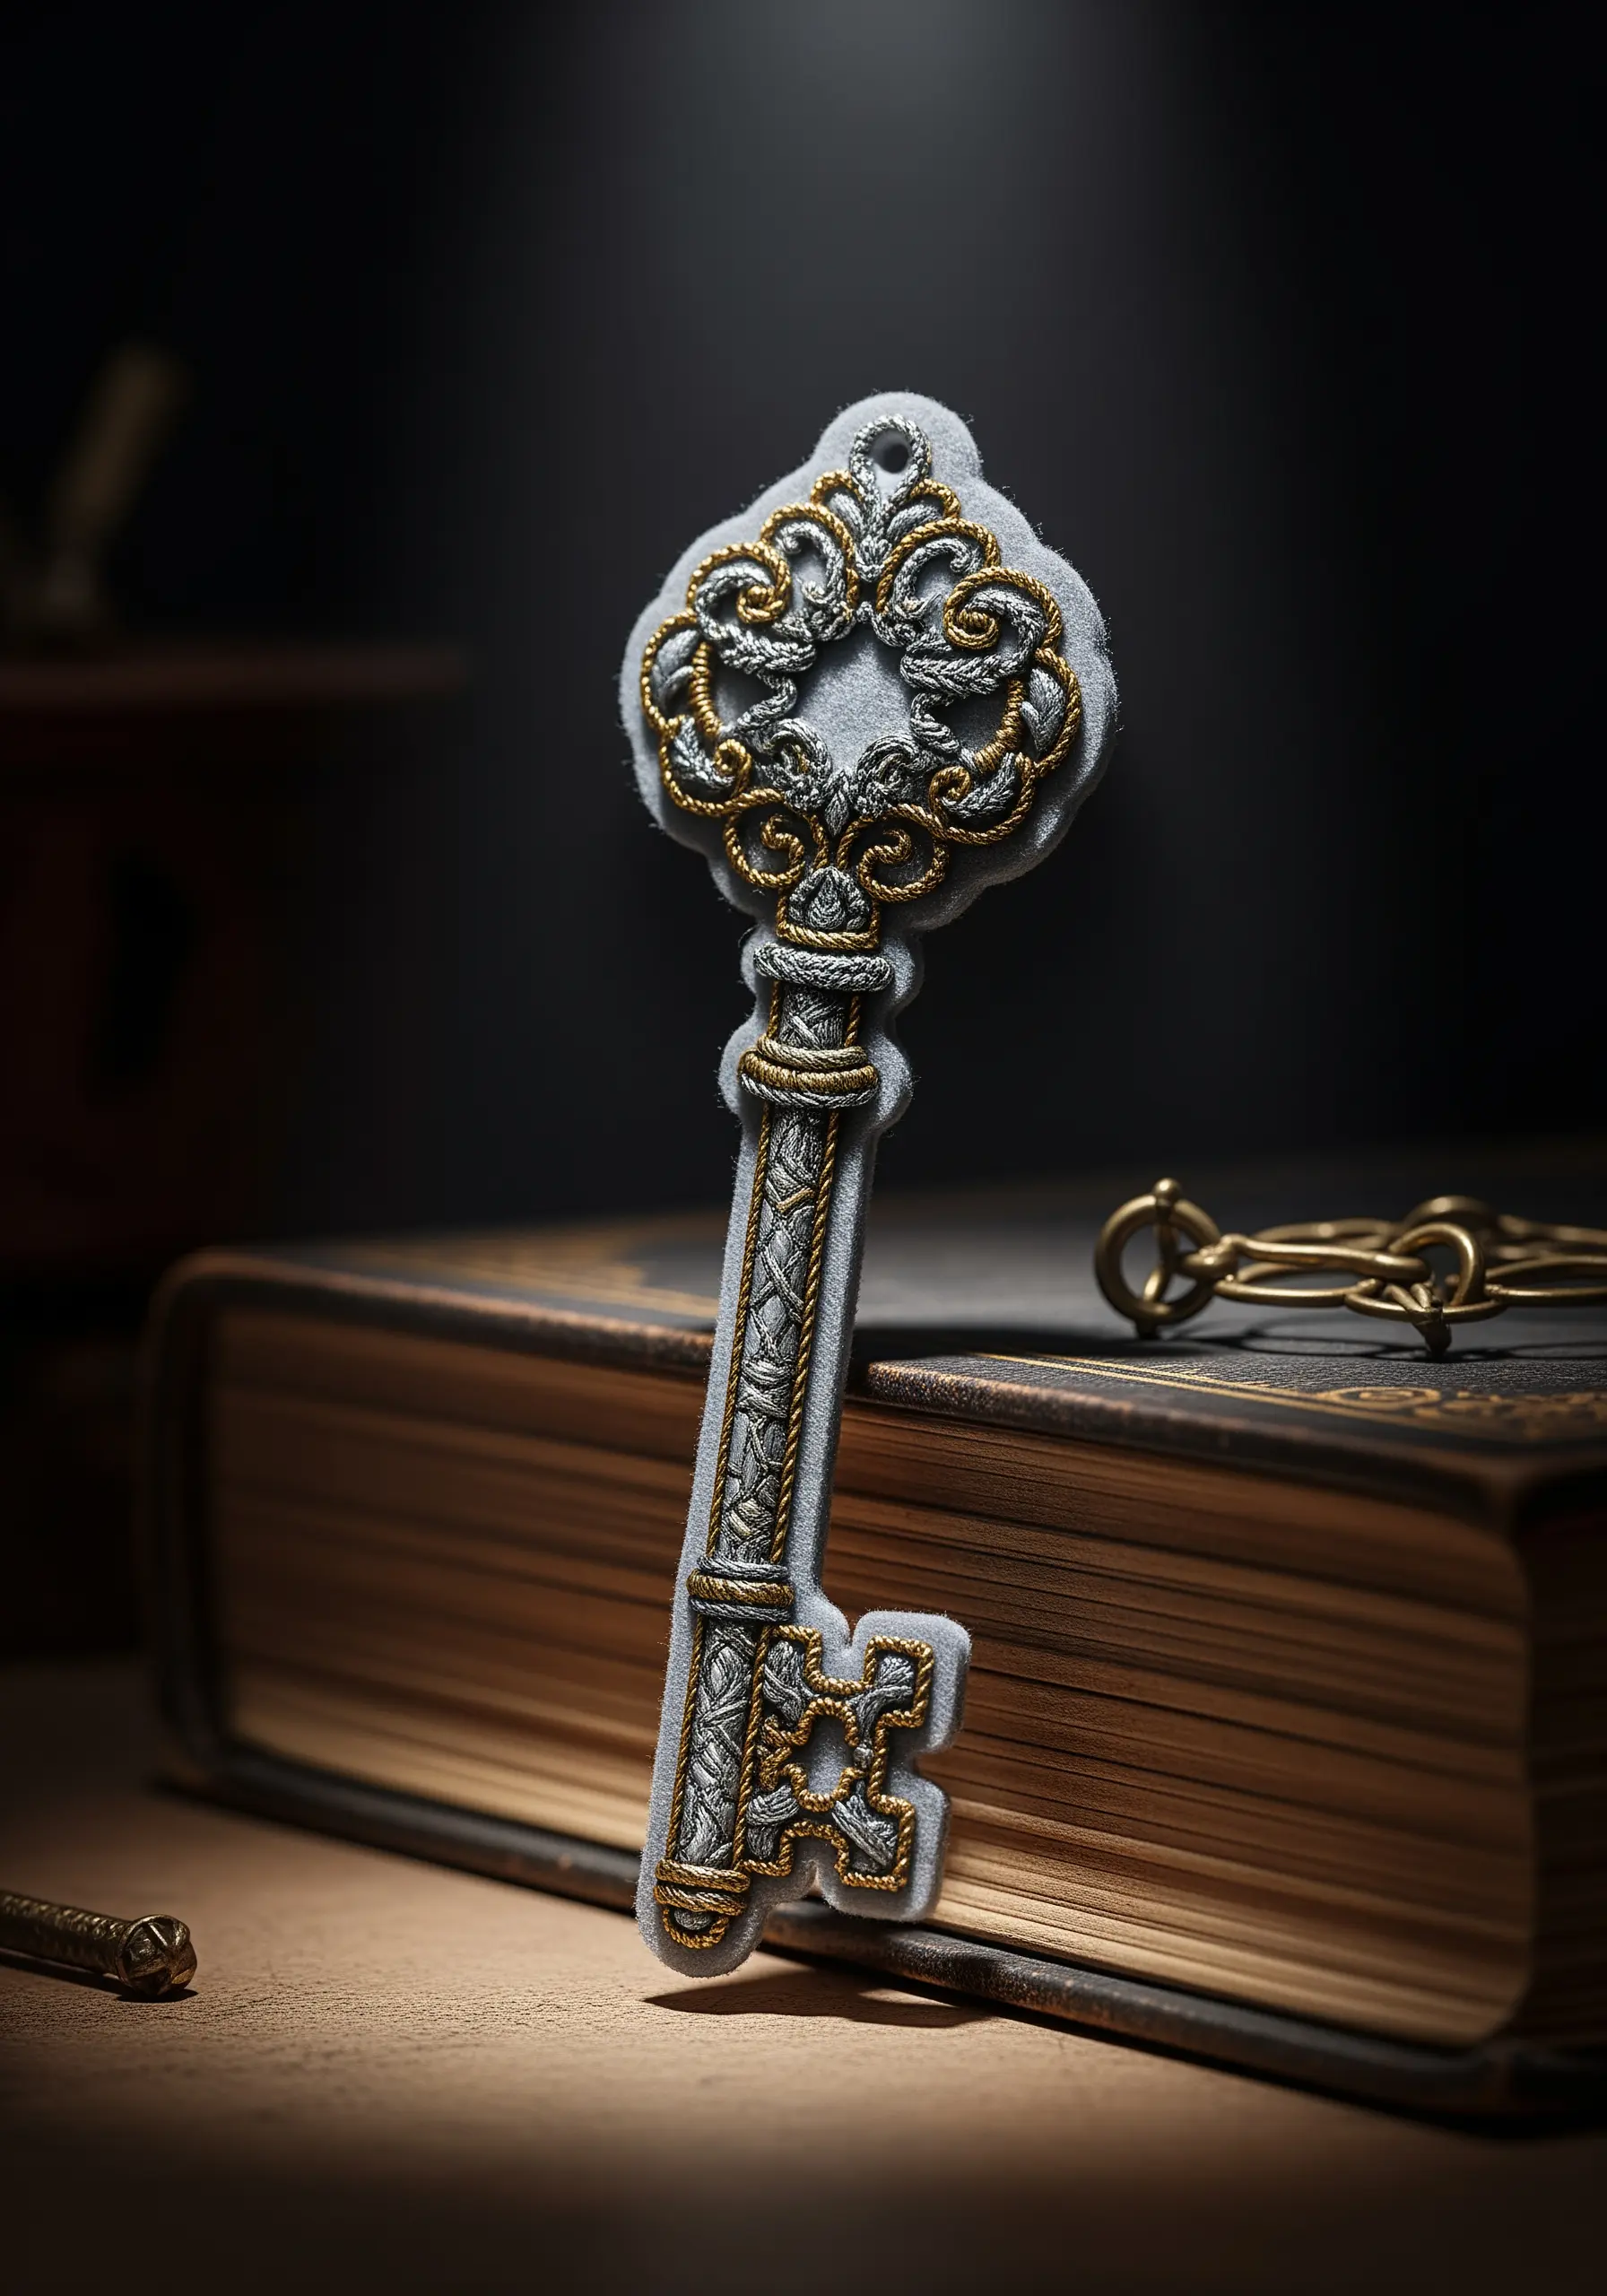
To create the ornate, twisted metalwork on this vintage key, use the couching technique.
Lay down a thicker metallic cord or several strands of metallic floss along your design line, then use a second, finer thread (in a matching or contrasting color) to tack it down with small, perpendicular stitches.
This method allows you to create bold, textural lines that would be impossible with standard stitching, giving the key a sculptural, antique quality.
17. Cultivate a 3D Wildflower Garden

This bookmark is a masterclass in textural variety, perfect for your cottage garden embroidery themes.
Build up layers of flowers using high-dimension stitches: bullion knots for rosebuds, cast-on stitches for daisy petals, and masses of French knots for filler blossoms like forget-me-nots.
Vary the number of thread strands and the tightness of your knots to create a dense, meadow-like effect where no two flowers are exactly alike.
Stitch the taller flowers first, then fill in the background to create natural-looking layers.
18. Sculpt Dimensional Dragon Scales

Achieve this stunning 3D scale effect using the detached buttonhole stitch, a stumpwork technique.
Create each scale individually by stitching a small arch and then weaving your needle through the stitch to build up a solid, raised shape that lifts off the fabric.
Use a variegated or multiple shades of green and blue thread to give the scales an iridescent sheen.
Layer the scales by overlapping the bottom of one row over the top of the row below it, just as they would appear on a dragon.
19. Achieve Crisp Lines on a Hot Air Balloon
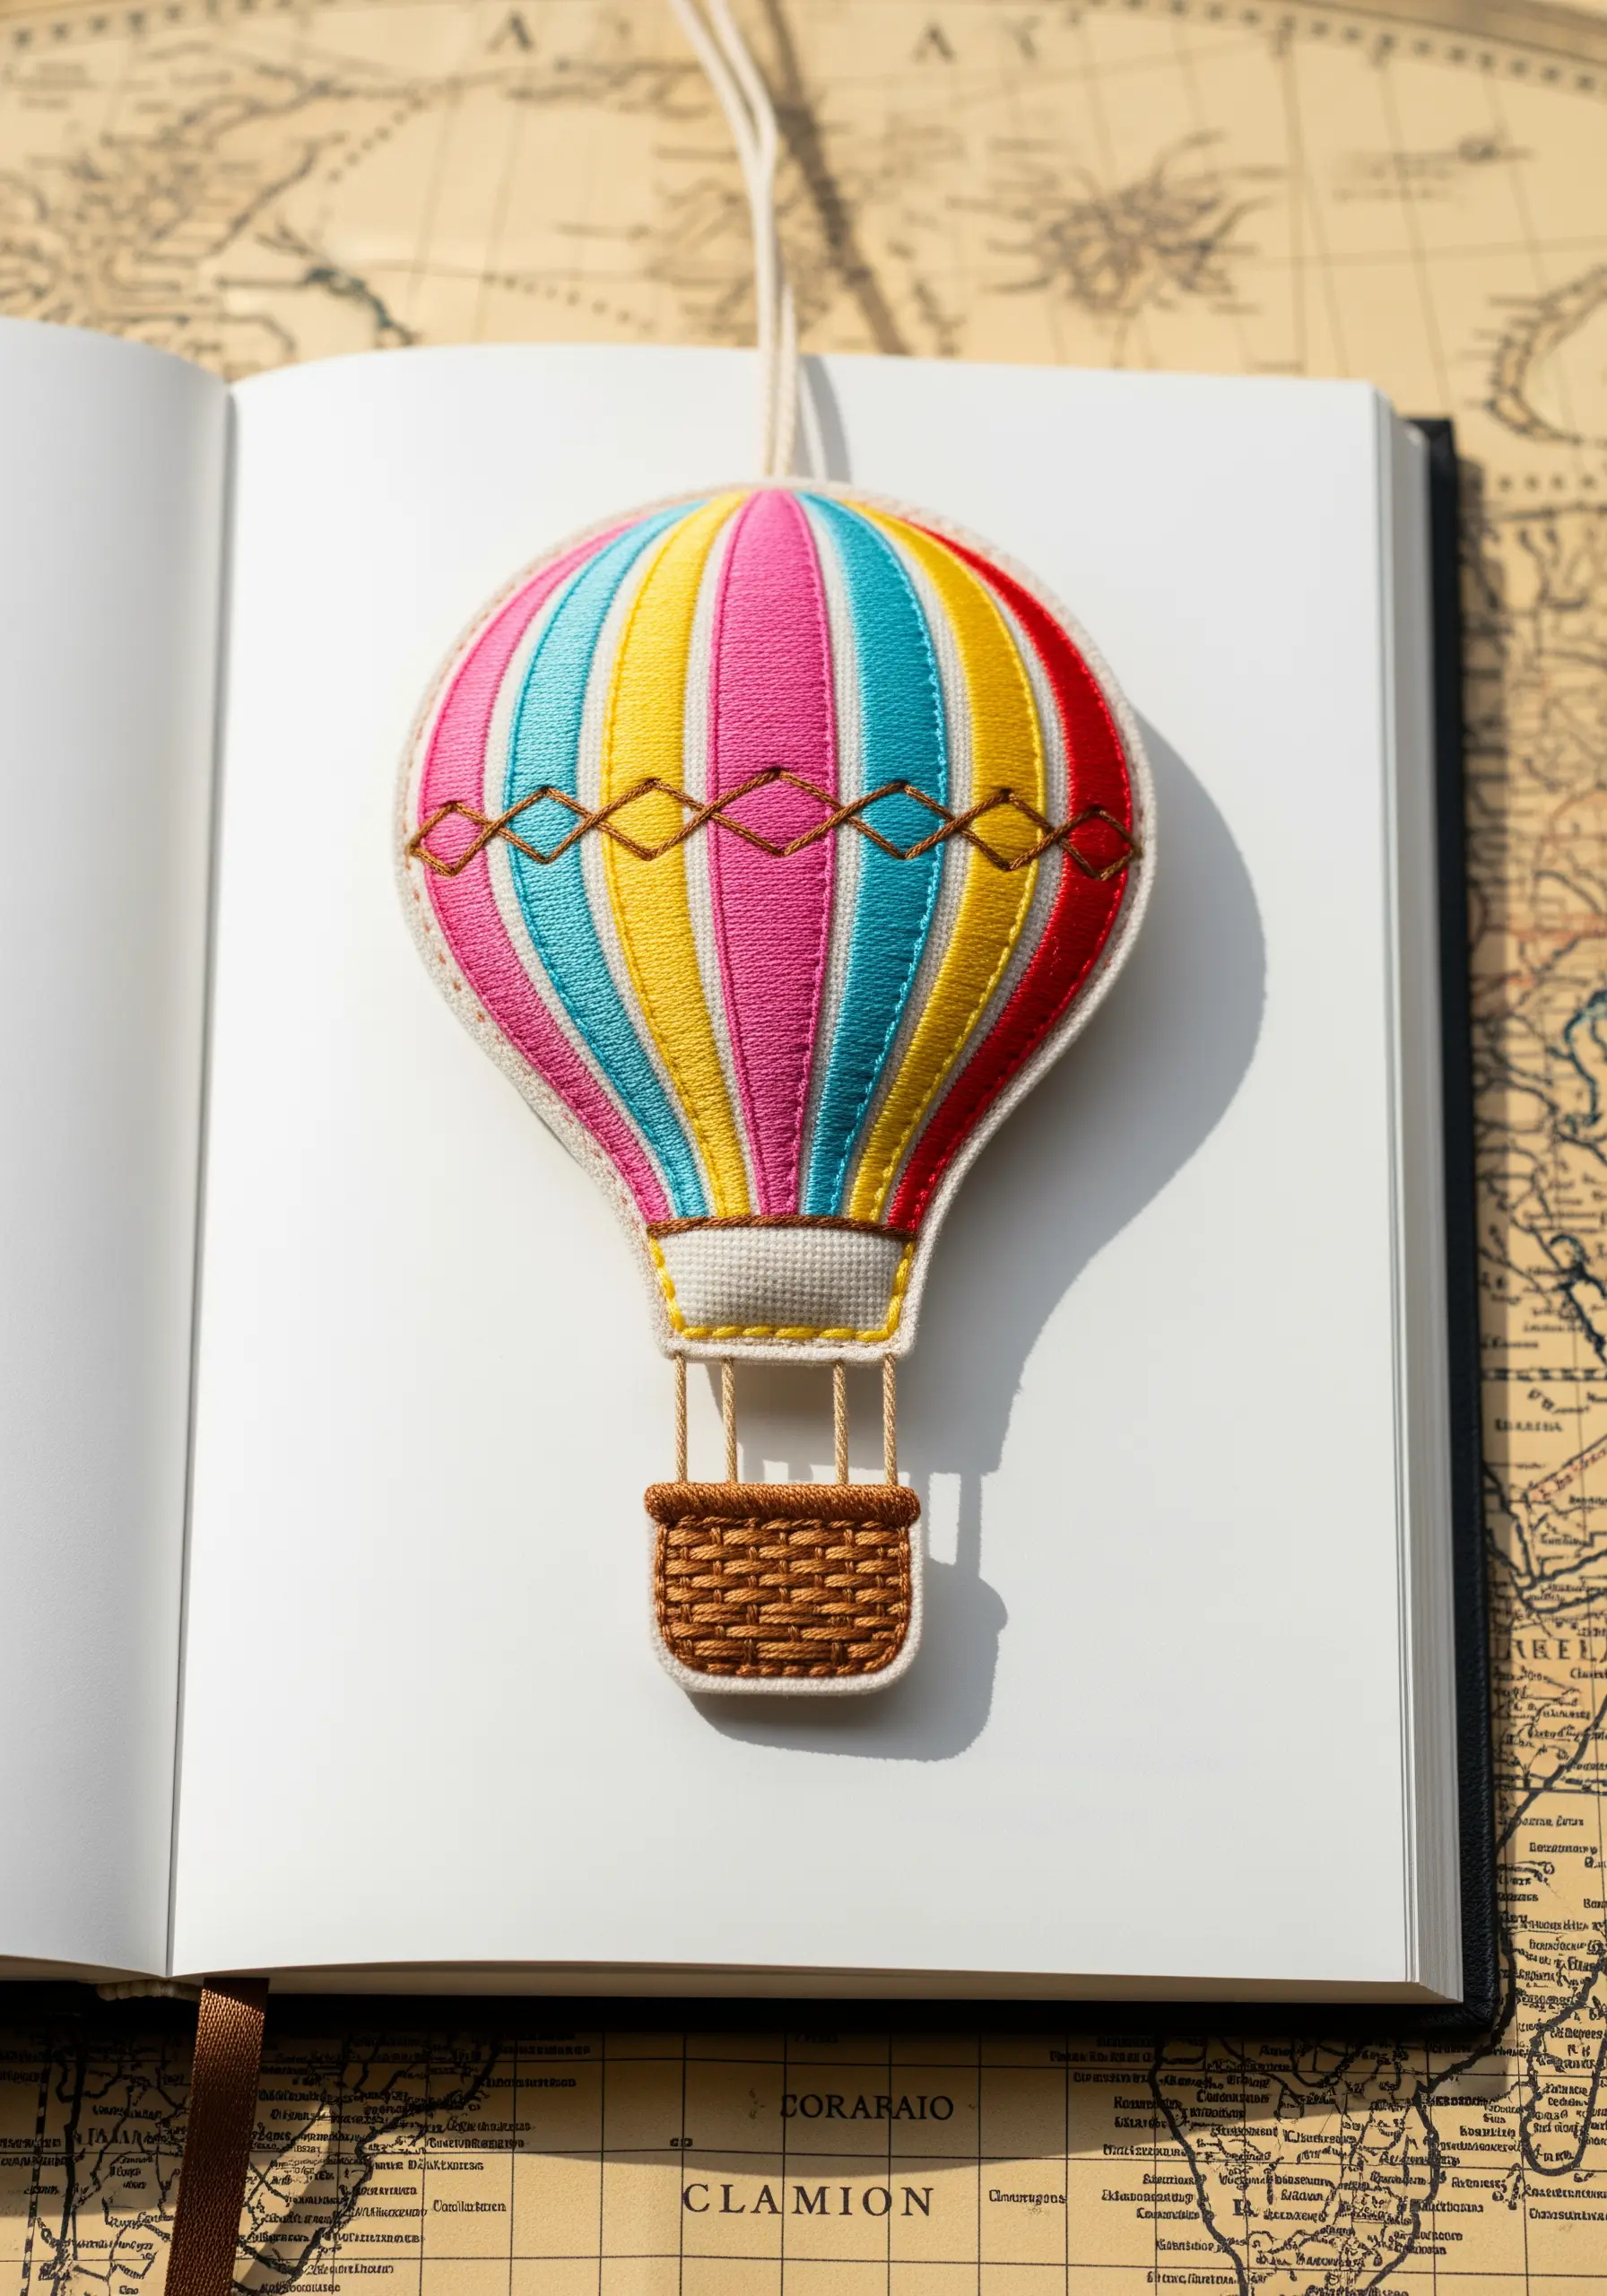
Combine appliqué and embroidery for this cheerful design.
Cut the fabric panels for the balloon slightly larger than needed, then secure them with a satin stitch border that defines the final shape.
This method creates incredibly sharp, clean edges between the colors.
For the basket, use a woven filling stitch (or basket weave stitch) to create a realistic, interlaced texture that contrasts with the smooth balloon panels.
20. Outline a Cozy Library Shelf
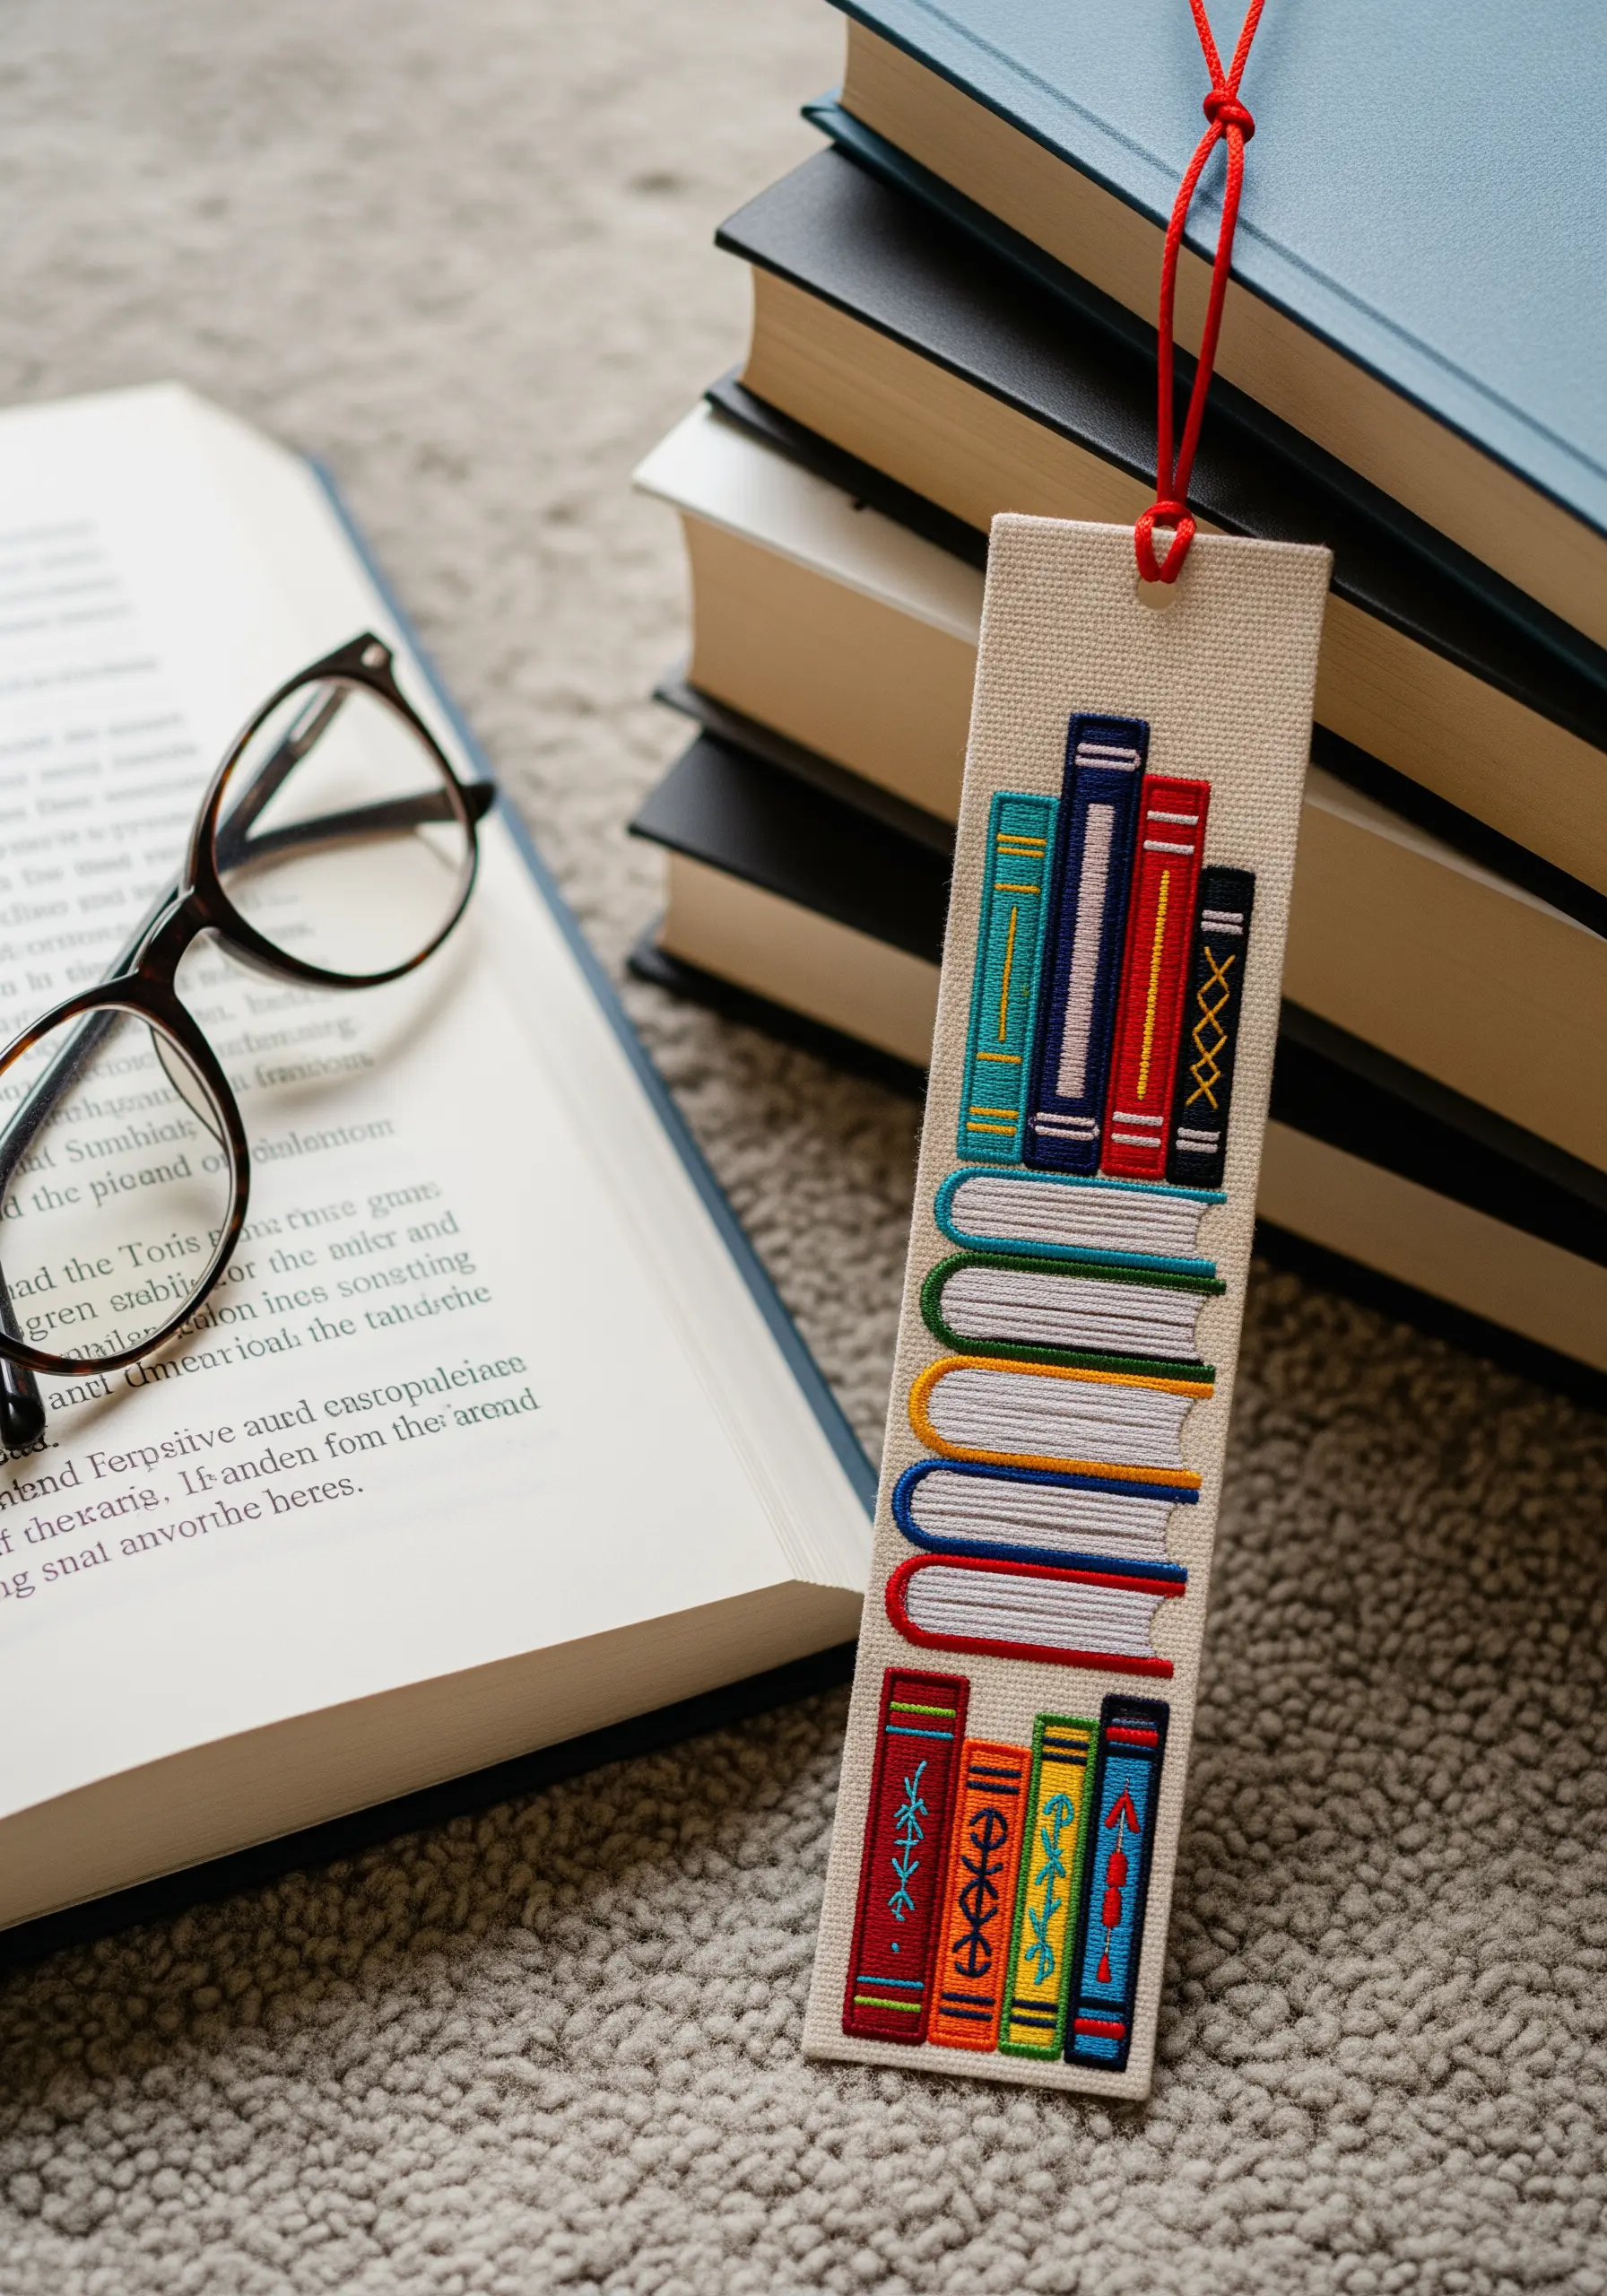
This design celebrates the simple beauty of books through clean line work.
Use a consistent backstitch or stem stitch for all the outlines to maintain a uniform, illustrative style.
Vary the number of strands—two strands for the book outlines and a single strand for the finer details on the spines—to create subtle visual hierarchy.
A split stitch is perfect for the small, decorative spine motifs, as it allows for tight curves and sharp points.


