

The way you frame your embroidery does more than just hold the fabric taut; it completes the story you started with your very first stitch. It’s the final detail that can transform a simple piece into a personal work of art that truly belongs in your space.
Instead of seeing the frame as an afterthought, consider it part of the design process from the beginning. Think about how a dark wood hoop might deepen the mood of a celestial pattern, or how a simple, modern frame could elevate a single line of text into a minimalist statement.
Here, you’ll find ideas that move beyond the standard hoop. We’ll explore how texture, scale, material, and display context can give your work the presence and personality it deserves, turning your bedroom into a quiet gallery of your own making.
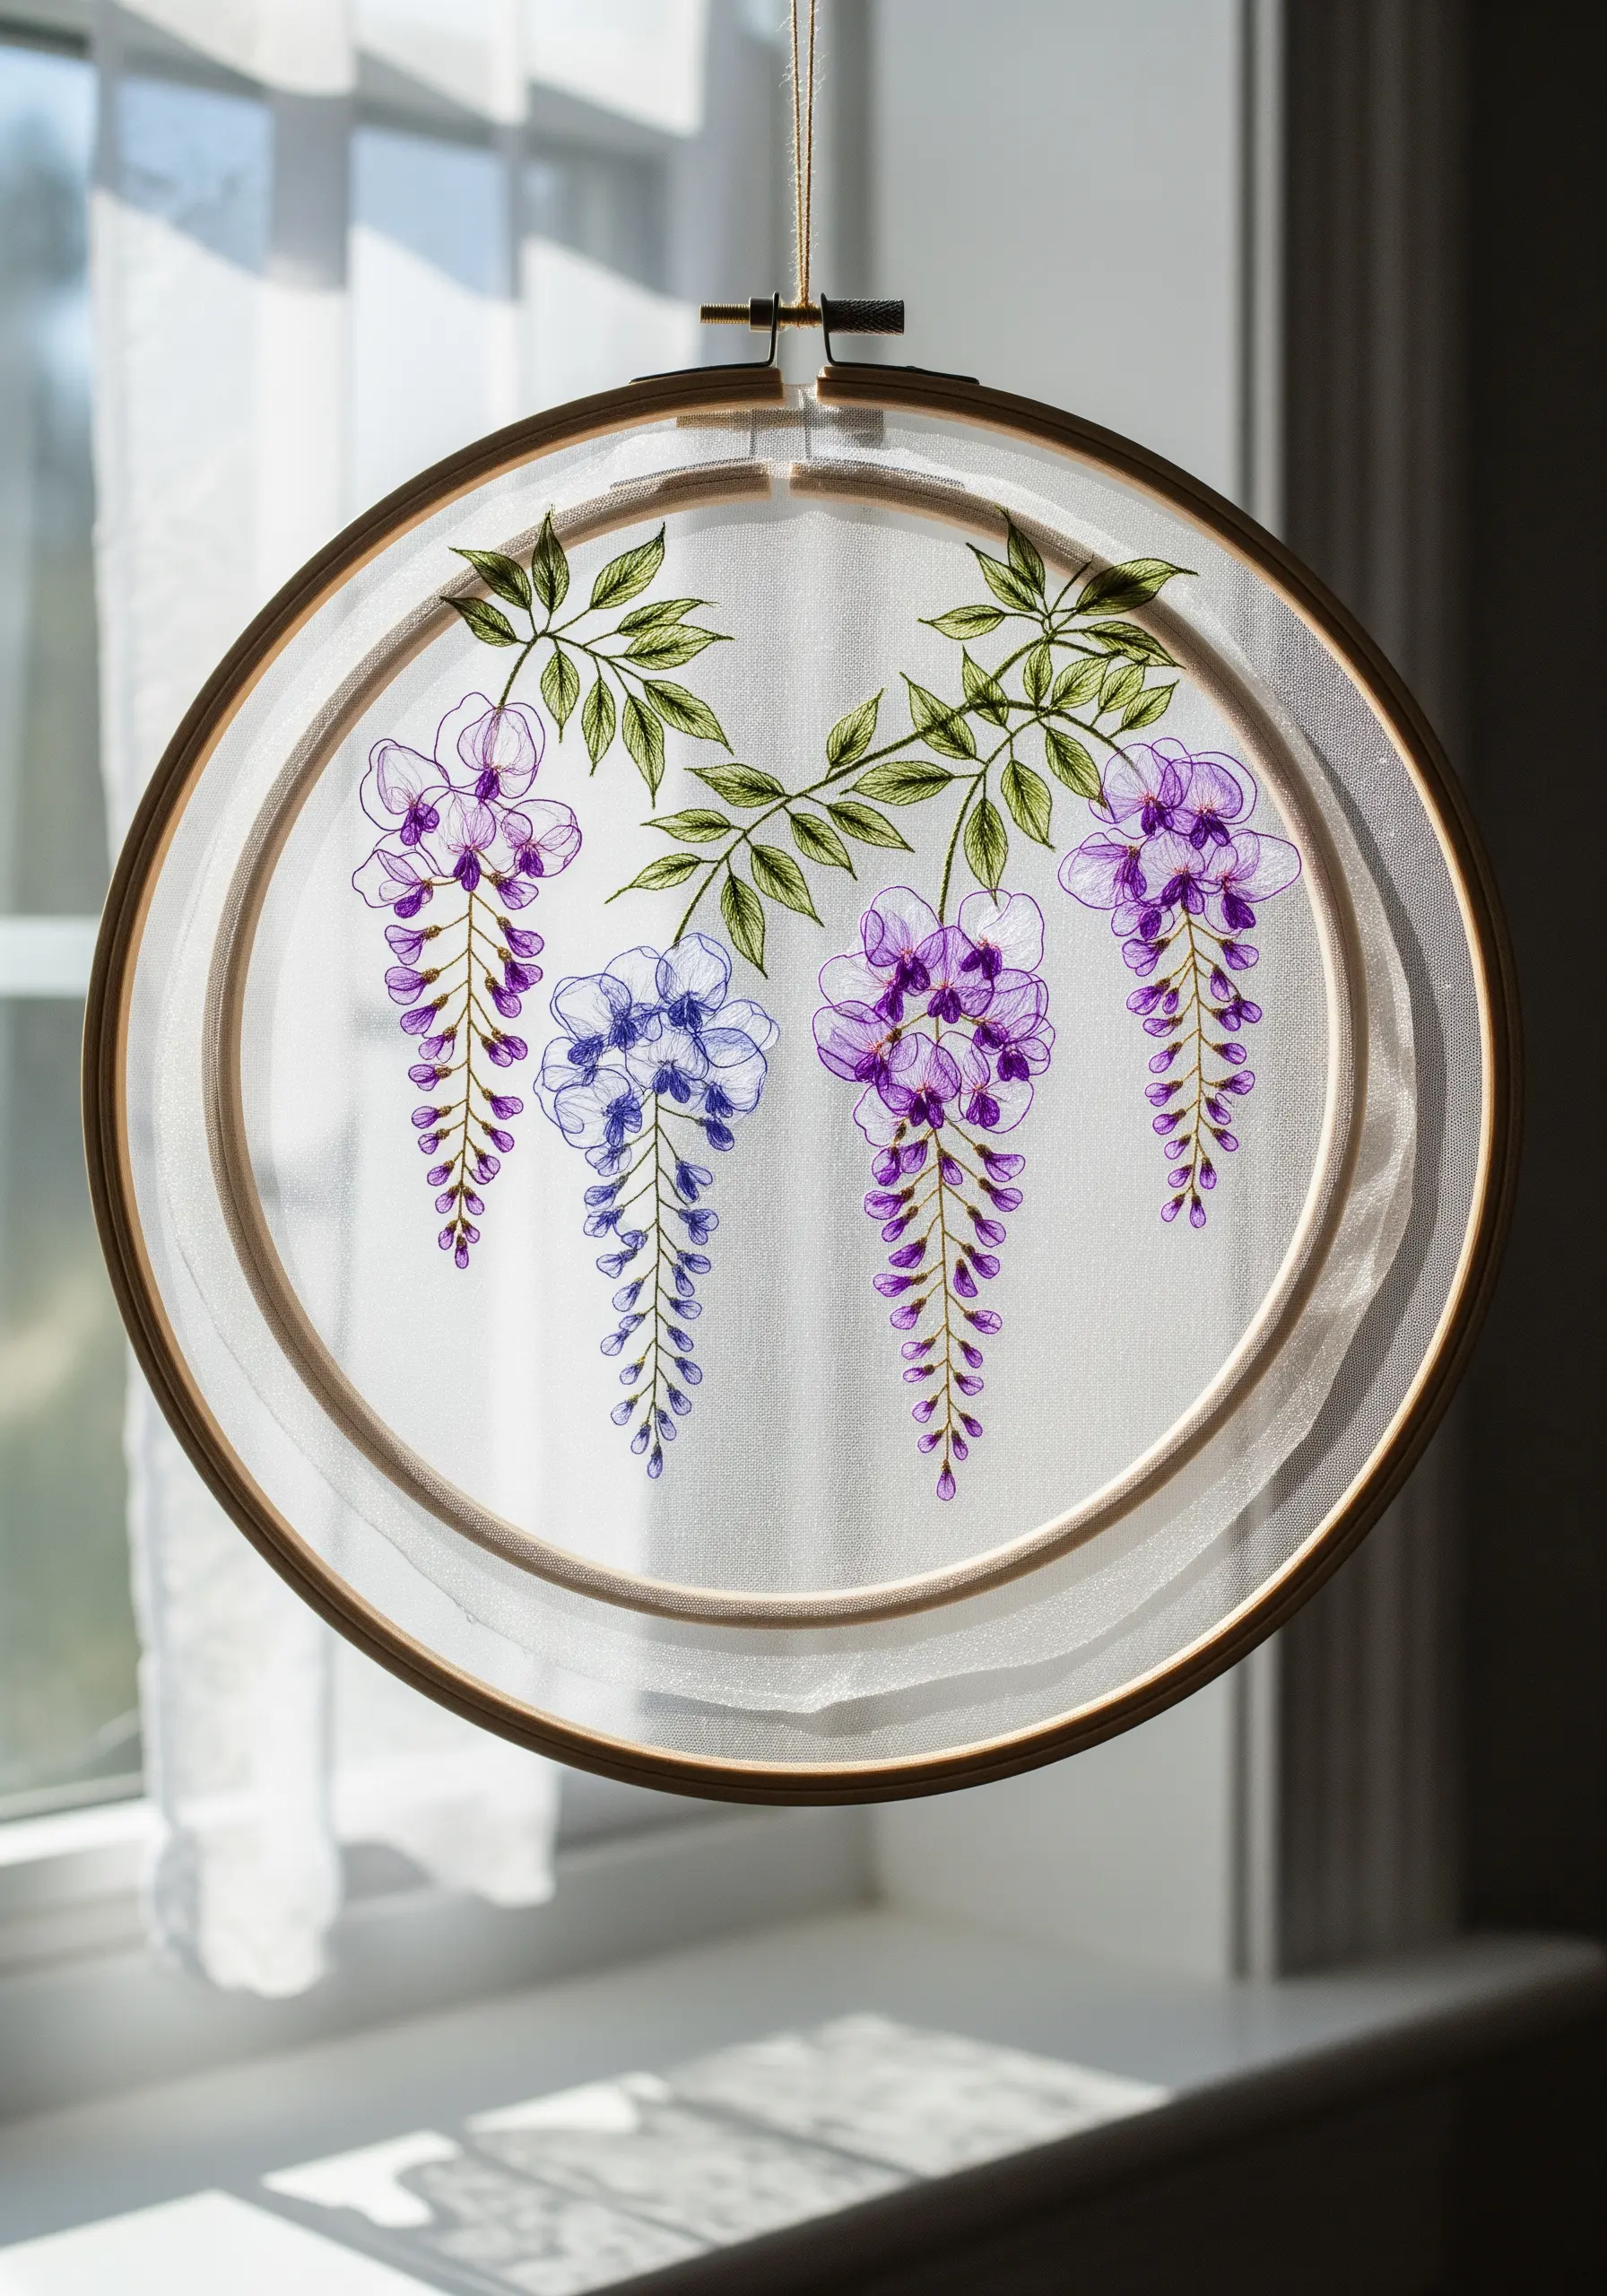
1. Create a Statement Piece with Oversized Botanicals
Transform a simple embroidery hoop into a focal point by scaling up your design.
For realistic leaves, use a long-and-short stitch to blend multiple shades of green, creating natural highlights and shadows.
Define the veins with a single, sharp line of split stitch in a darker tone; this adds depth and structure without overpowering the leaf’s texture.
Stretching your finished work in one of these oversized hoop wall displays gives it the presence of a framed painting, making it a perfect anchor piece above a headboard.
2. Integrate Embroidery into a Modern Gallery Wall
Position your stitch work as fine art by framing it and including it in a curated gallery wall.
Choose a minimalist line-art design, which feels contemporary and integrates seamlessly with photographic prints.
For perfectly smooth, continuous lines, use a whipped backstitch—it eliminates the segmented look of a standard backstitch.
These single-line face profiles framed in a simple wood or black frame provide a soft, textural contrast to the crispness of photography.
3. Turn Your Hoop into a Tabletop Accent
Your embroidery doesn’t have to hang on a wall; a small wooden easel transforms it into a charming piece of decor for a nightstand or vanity.
Create a delicate wildflower meadow using a variety of stitches for texture: French knots for tiny buds, detached chain stitches for petals, and straight stitches for grass.
This approach gives your work a three-dimensional, tactile quality that invites a closer look.
Displaying these cottagecore floral embroidery ideas on an easel adds a touch of thoughtful, handmade elegance to any surface.
4. Use High-Contrast Thread on Dark Fabric
Create a dramatic, celestial statement by stitching with bright white or metallic thread on a dark navy or black fabric.
The contrast makes every stitch pop, so precision is key—use a stabilizer to prevent fabric puckering and keep your lines crisp.
For the starry background, scatter tiny seed stitches and French knots unevenly; this creates a more organic, less uniform starfield.
Staining your hoop black or using a pre-finished black one completes the cosmic aesthetic, perfect for these minimal sky moon designs.
5. Frame Your Stitches in an Unconventional Ornate Frame
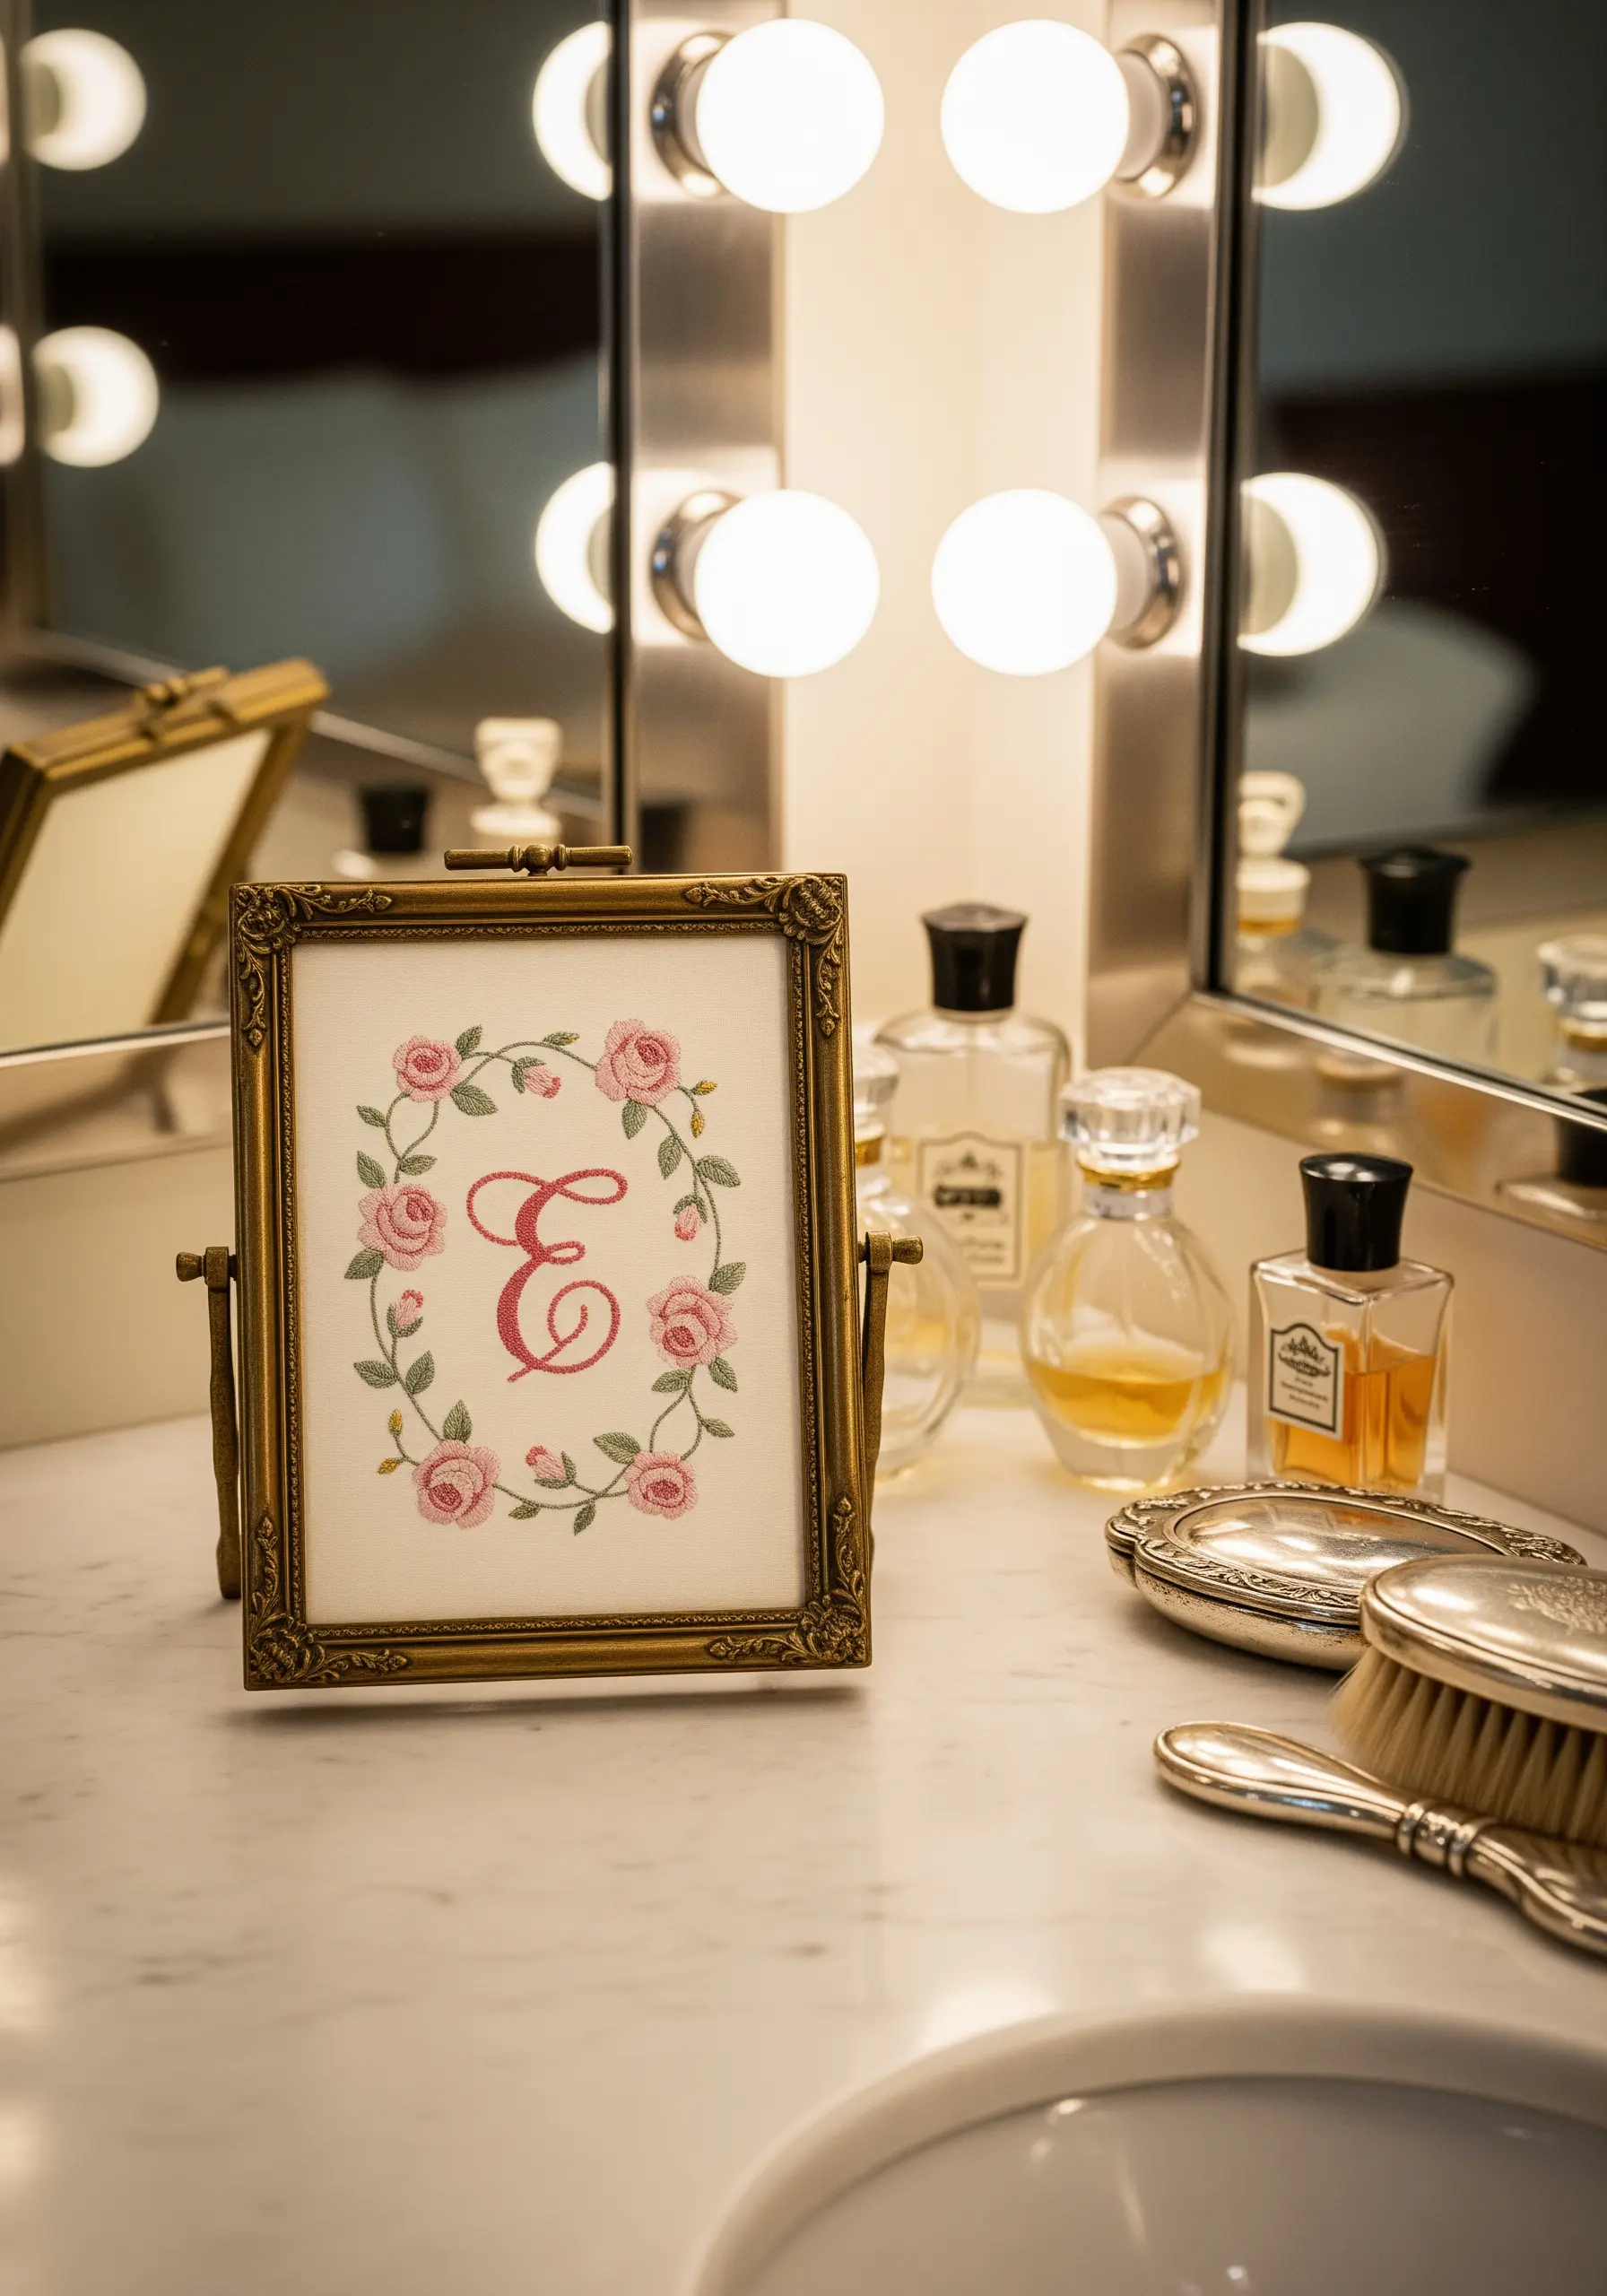
Move beyond the hoop and give your embroidery a classic, heirloom feel by mounting it in a vintage-style metal or gilded frame.
This is especially effective for traditional motifs like monograms and delicate floral wreaths.
To mount it, stretch the finished embroidery over a piece of acid-free mat board cut to the frame’s size, then secure it on the back with archival tape or stitches.
This finishing touch transforms mini monogram embroidery frames into precious objects perfect for a dressing table or shelf.
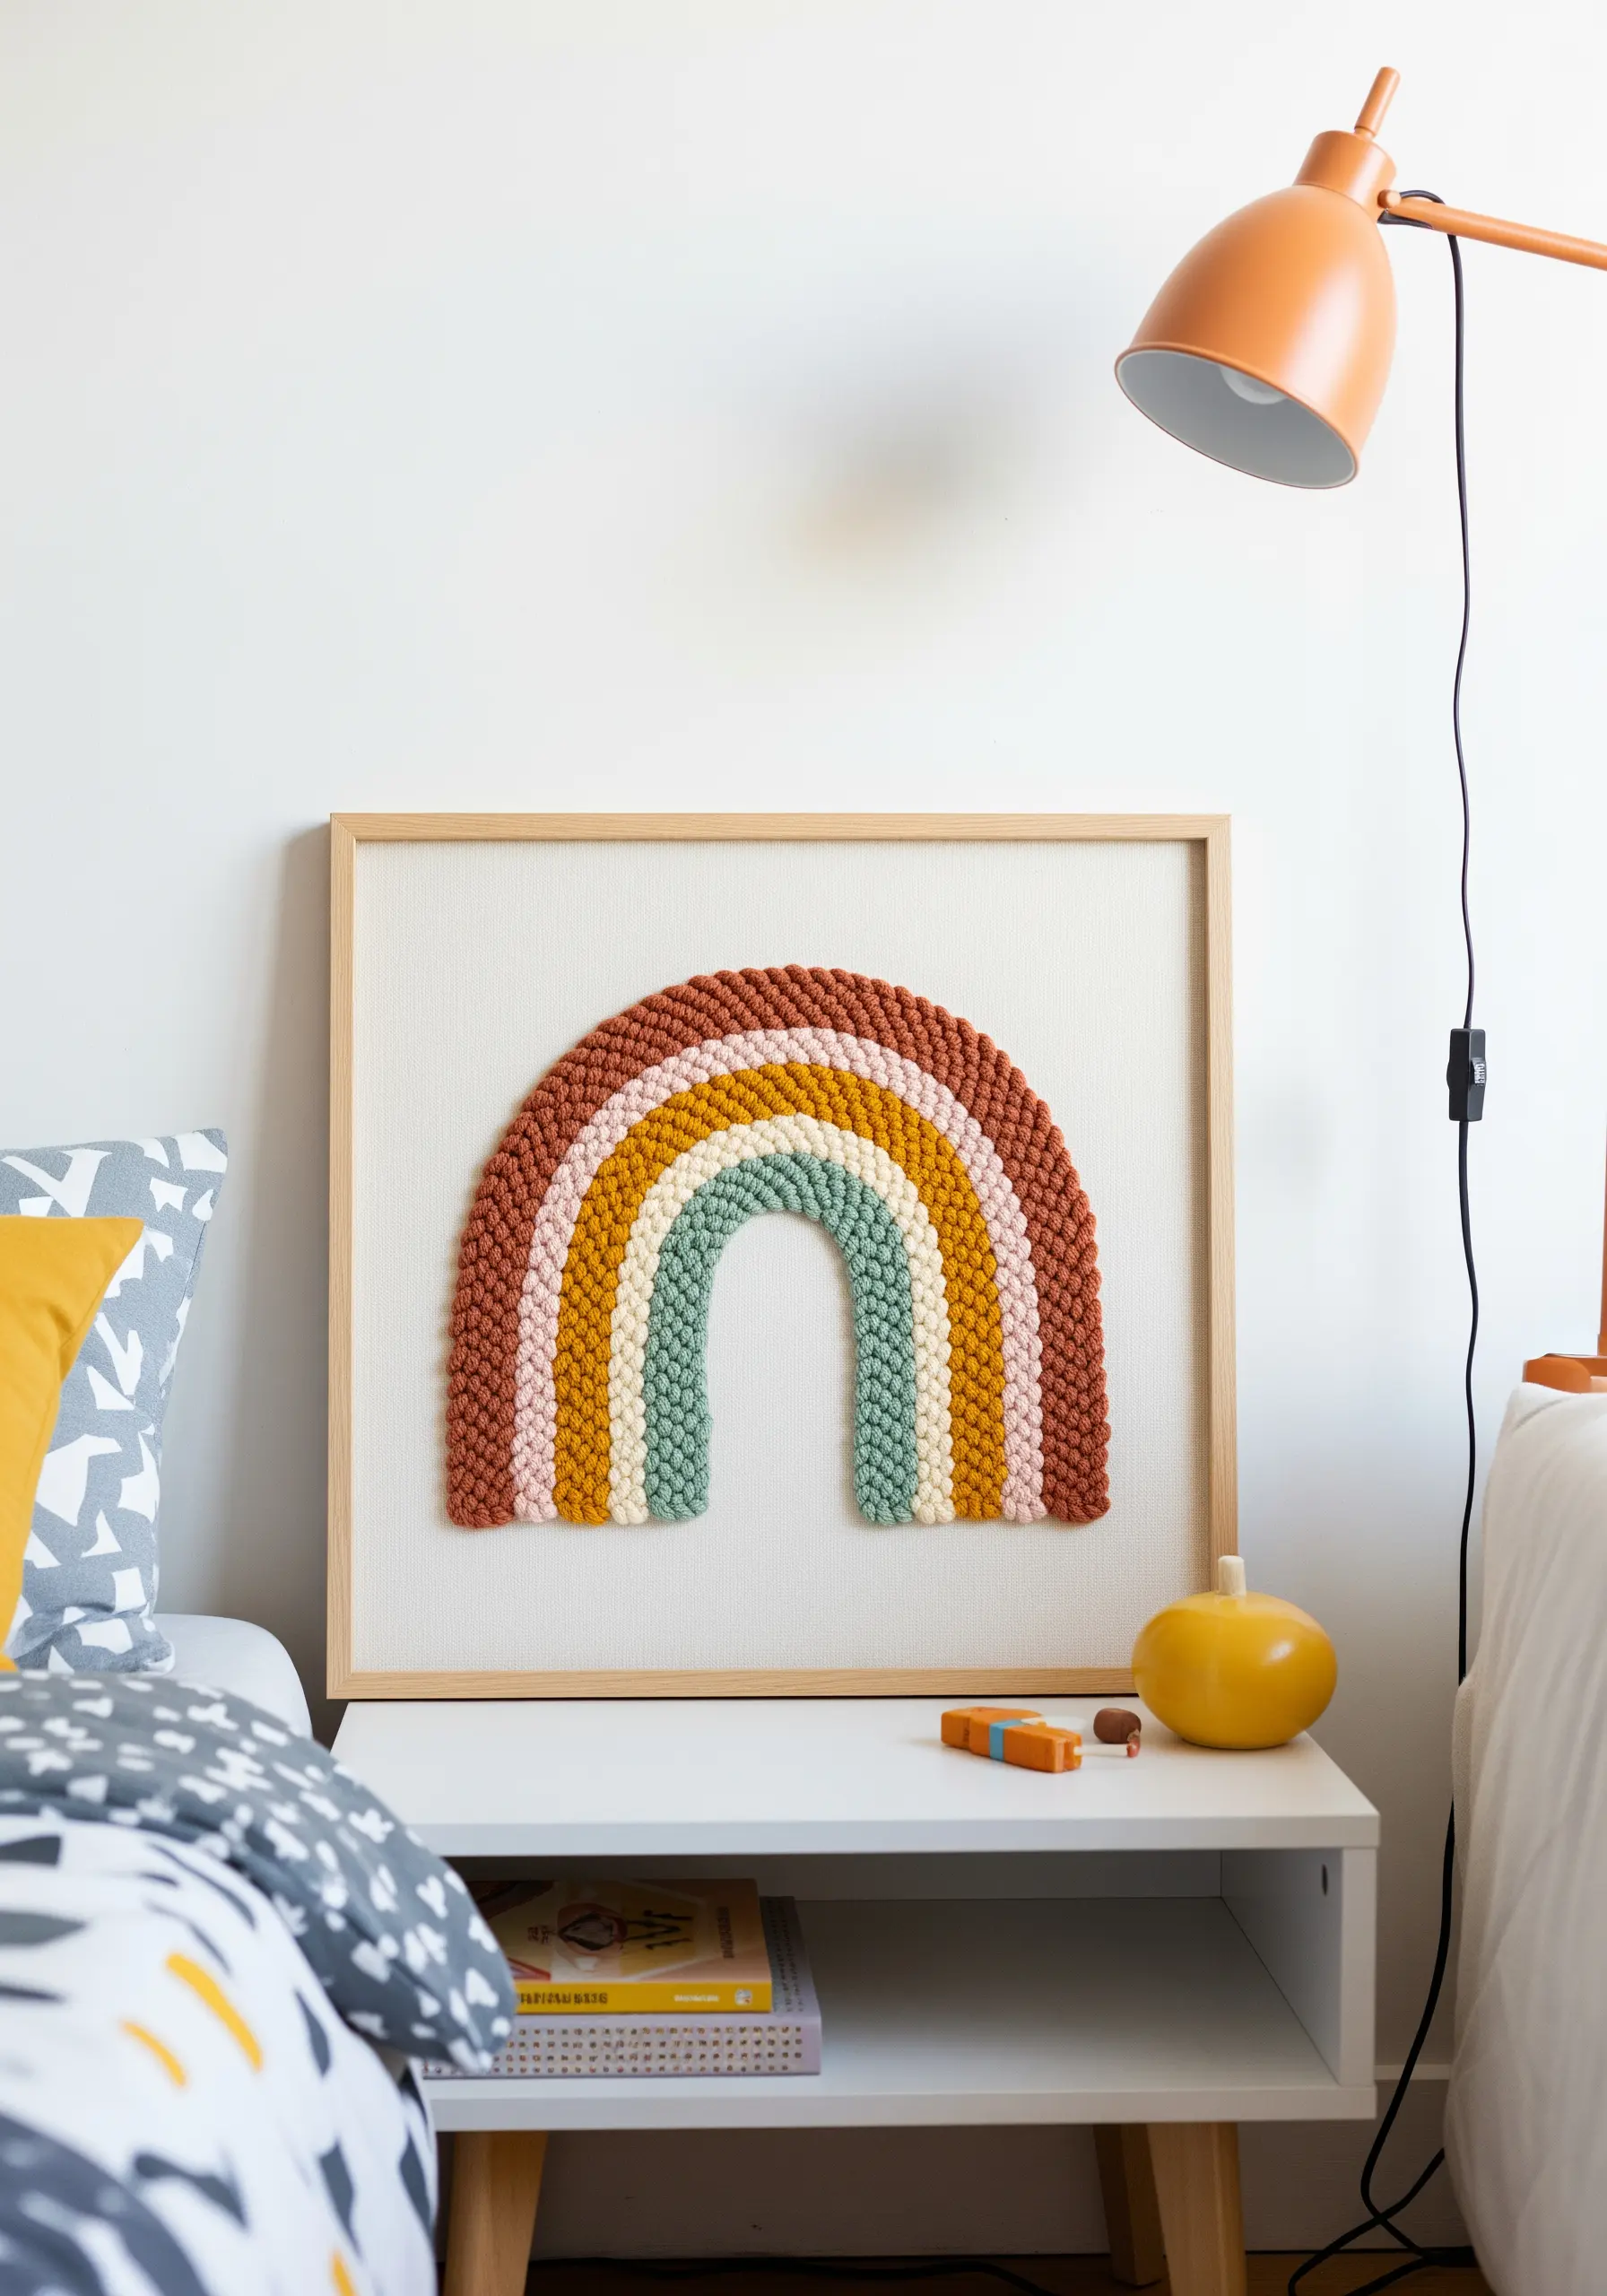
6. Paint with Yarn for Bold, Textural Landscapes
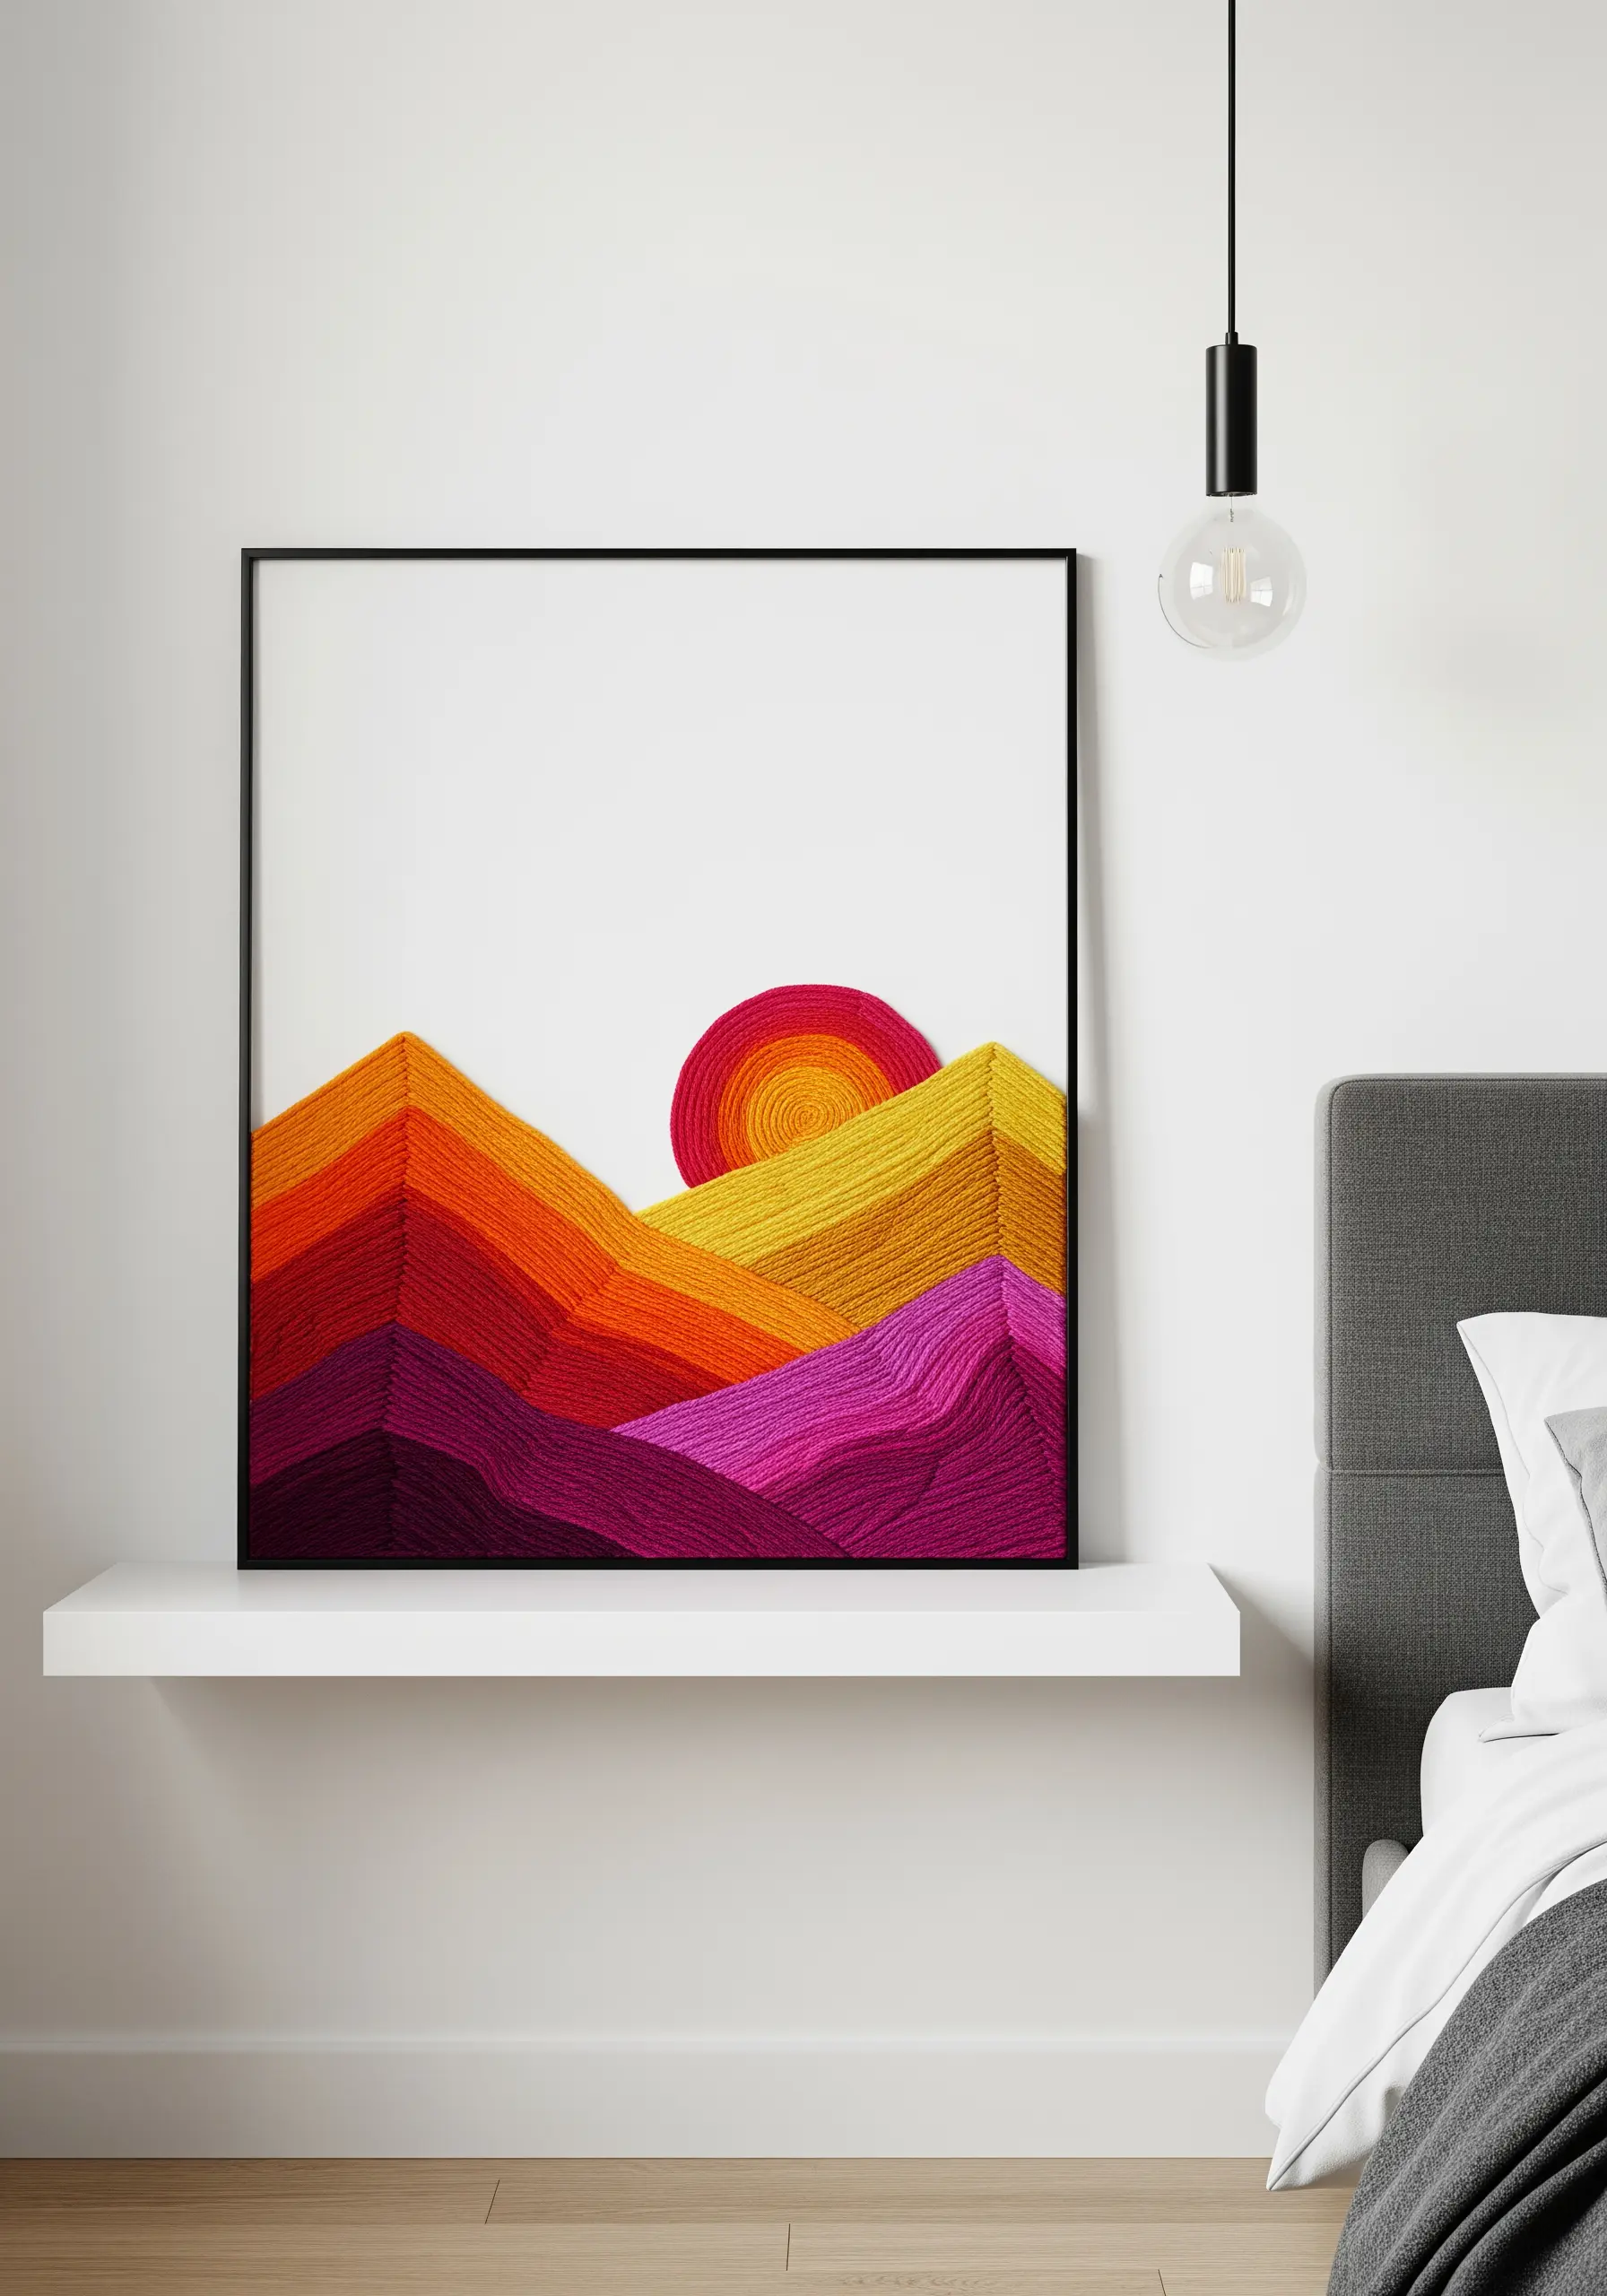
For a high-impact piece that feels both graphic and soft, swap floss for yarn.
Create bold, color-blocked landscapes using a couching technique: lay down strands of thick yarn and secure them with a thinner, matching thread.
This method allows you to create clean lines and solid fields of color with incredible texture, turning your canvas into a piece of touchable art.
These stunning fiber art installations offer a modern, sculptural alternative to traditional embroidery.
7. Master Realistic Fur with Thread Painting
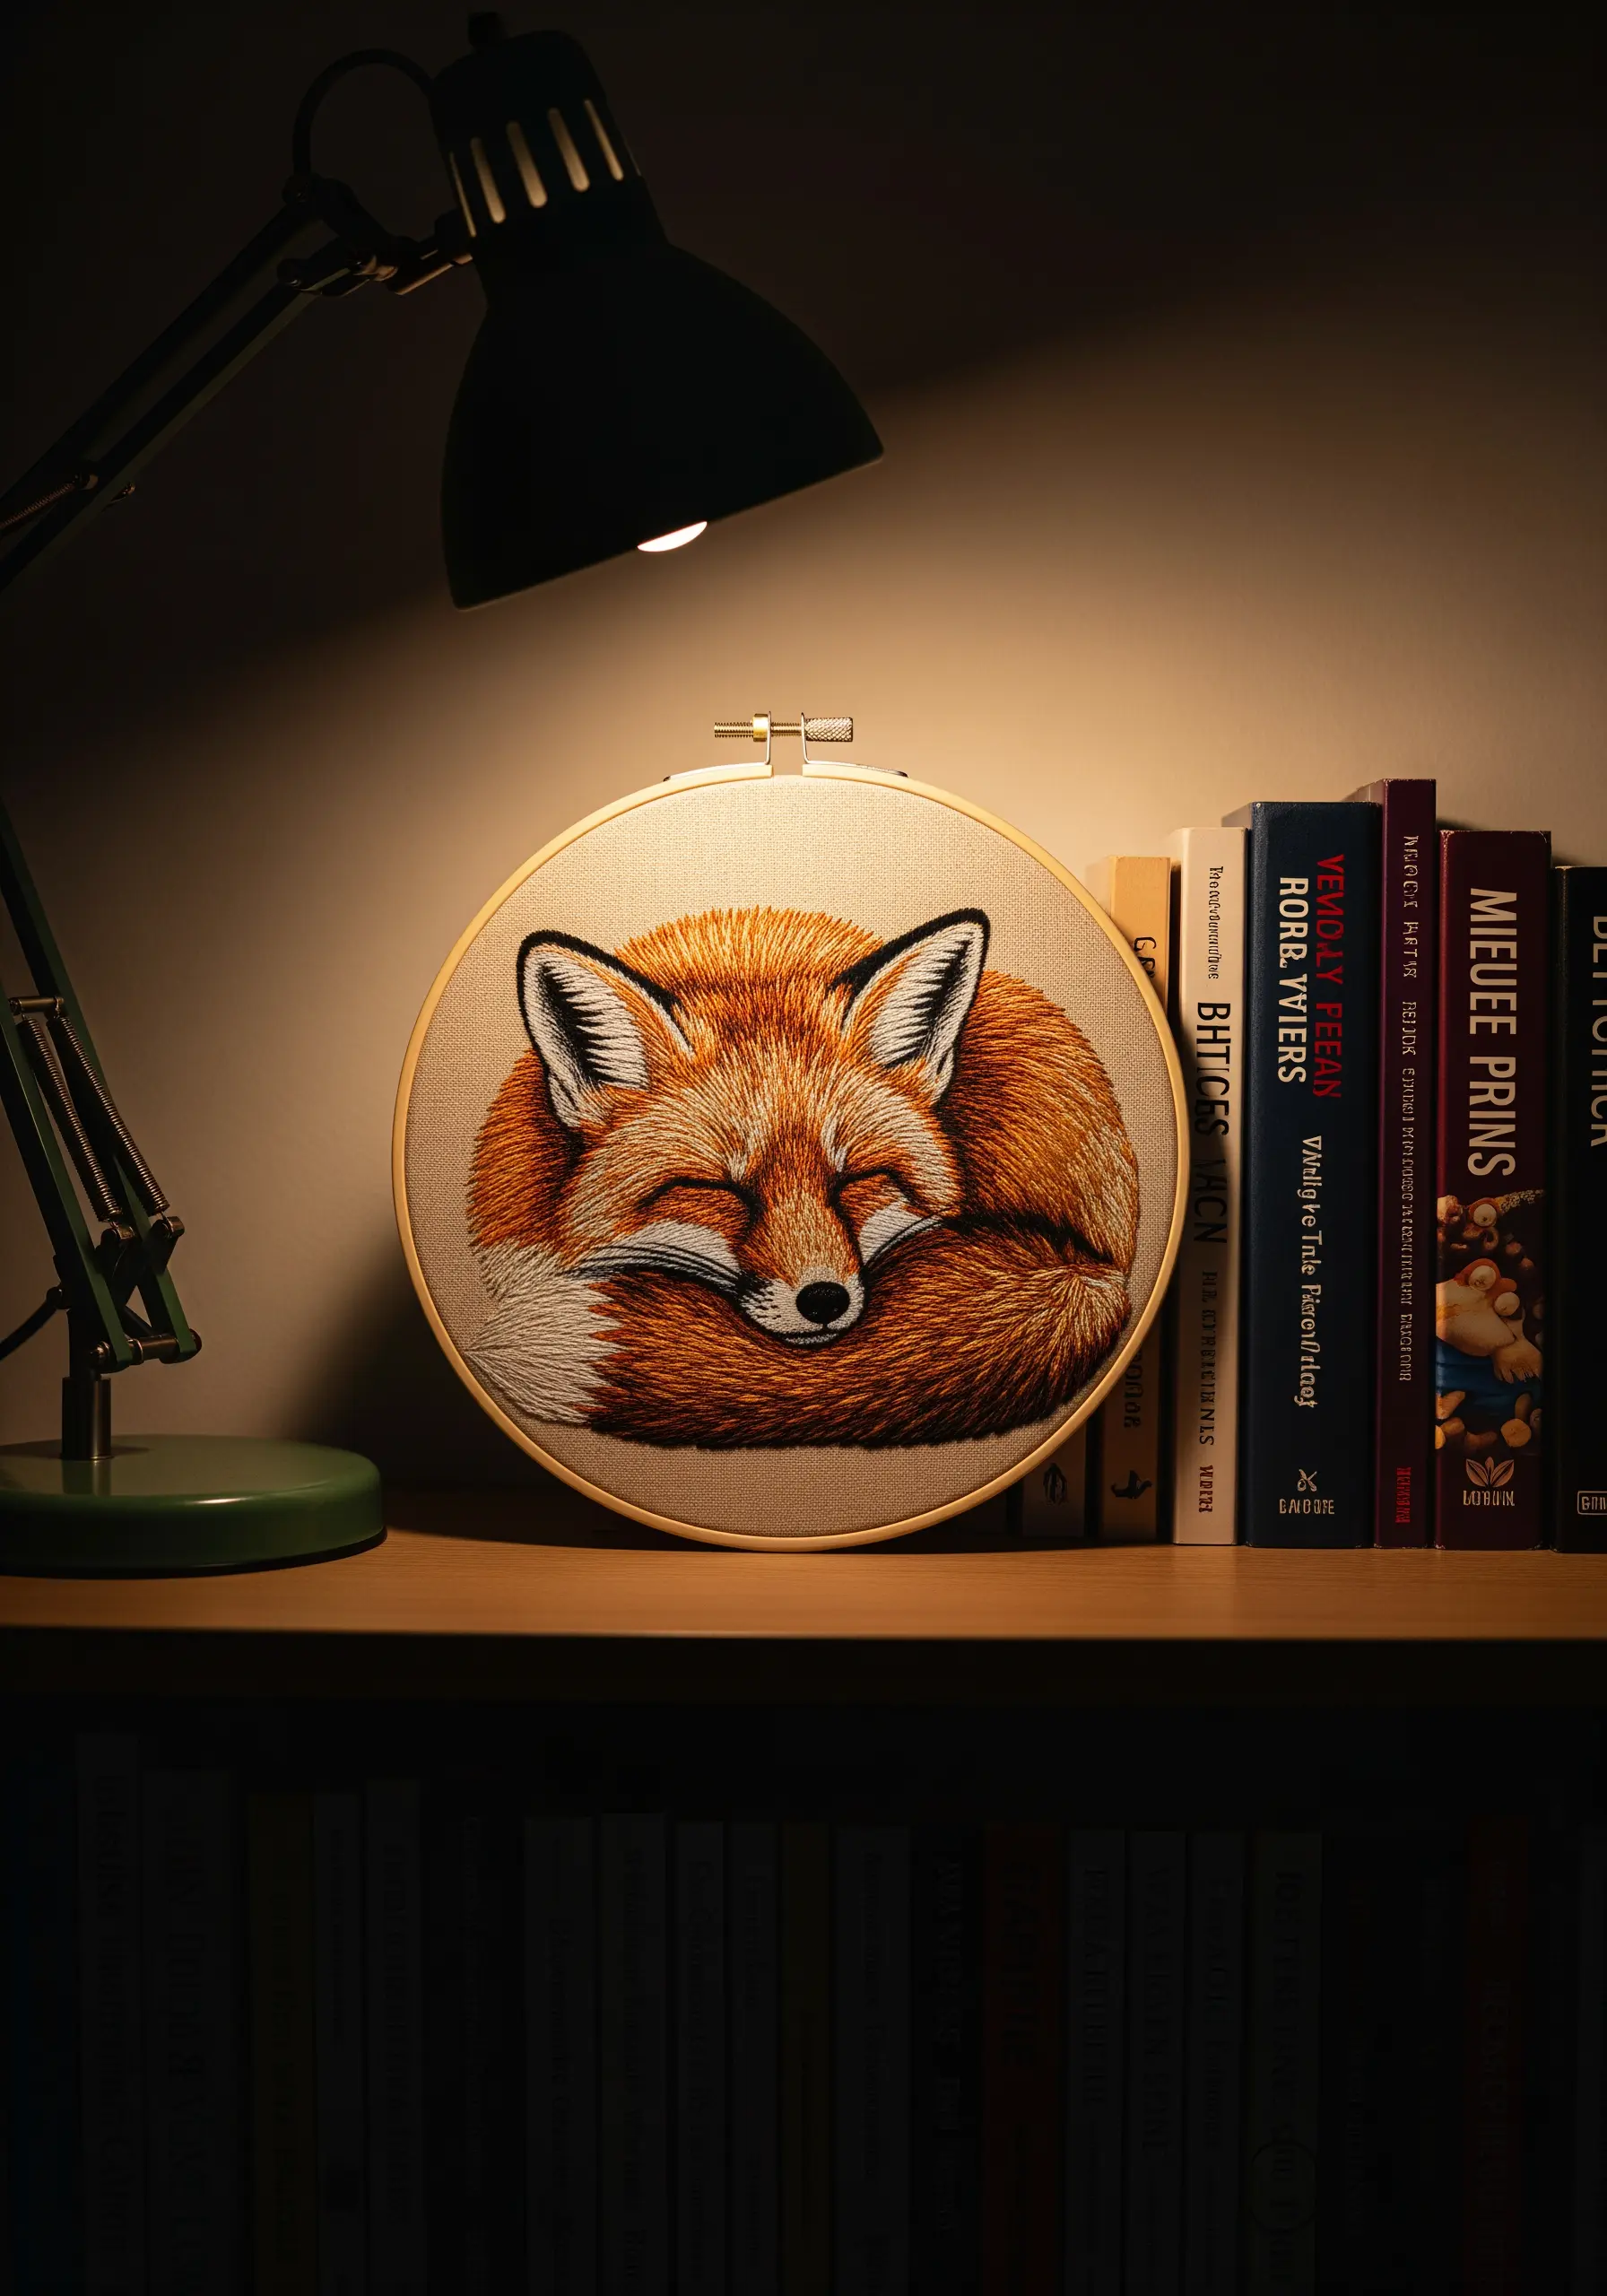
Bring animals to life by using the thread painting technique, which mimics the texture and direction of fur.
Work with a single strand of embroidery floss and use directional long-and-short stitches that follow the natural growth pattern of the fur.
Blend several shades of a similar color—like rust, orange, and cream for a fox—to create depth and realism.
Patience is key, but mastering realistic animal embroidery patterns results in a truly breathtaking piece that feels alive.
8. Let Typography Be the Art

A simple, meaningful quote can be a powerful piece of decor when stitched with intention.
Choose a clean, modern font and use a fine backstitch or stem stitch with two strands of floss for crisp, readable lettering.
To ensure perfect curves and straight lines, trace your design with a water-soluble pen and use a tautly stretched linen-blend fabric.
These peaceful, poetic quote embroidery hoops serve as gentle reminders, turning words into a calming visual anchor.
9. Create an Interactive, Embroidered Travel Map
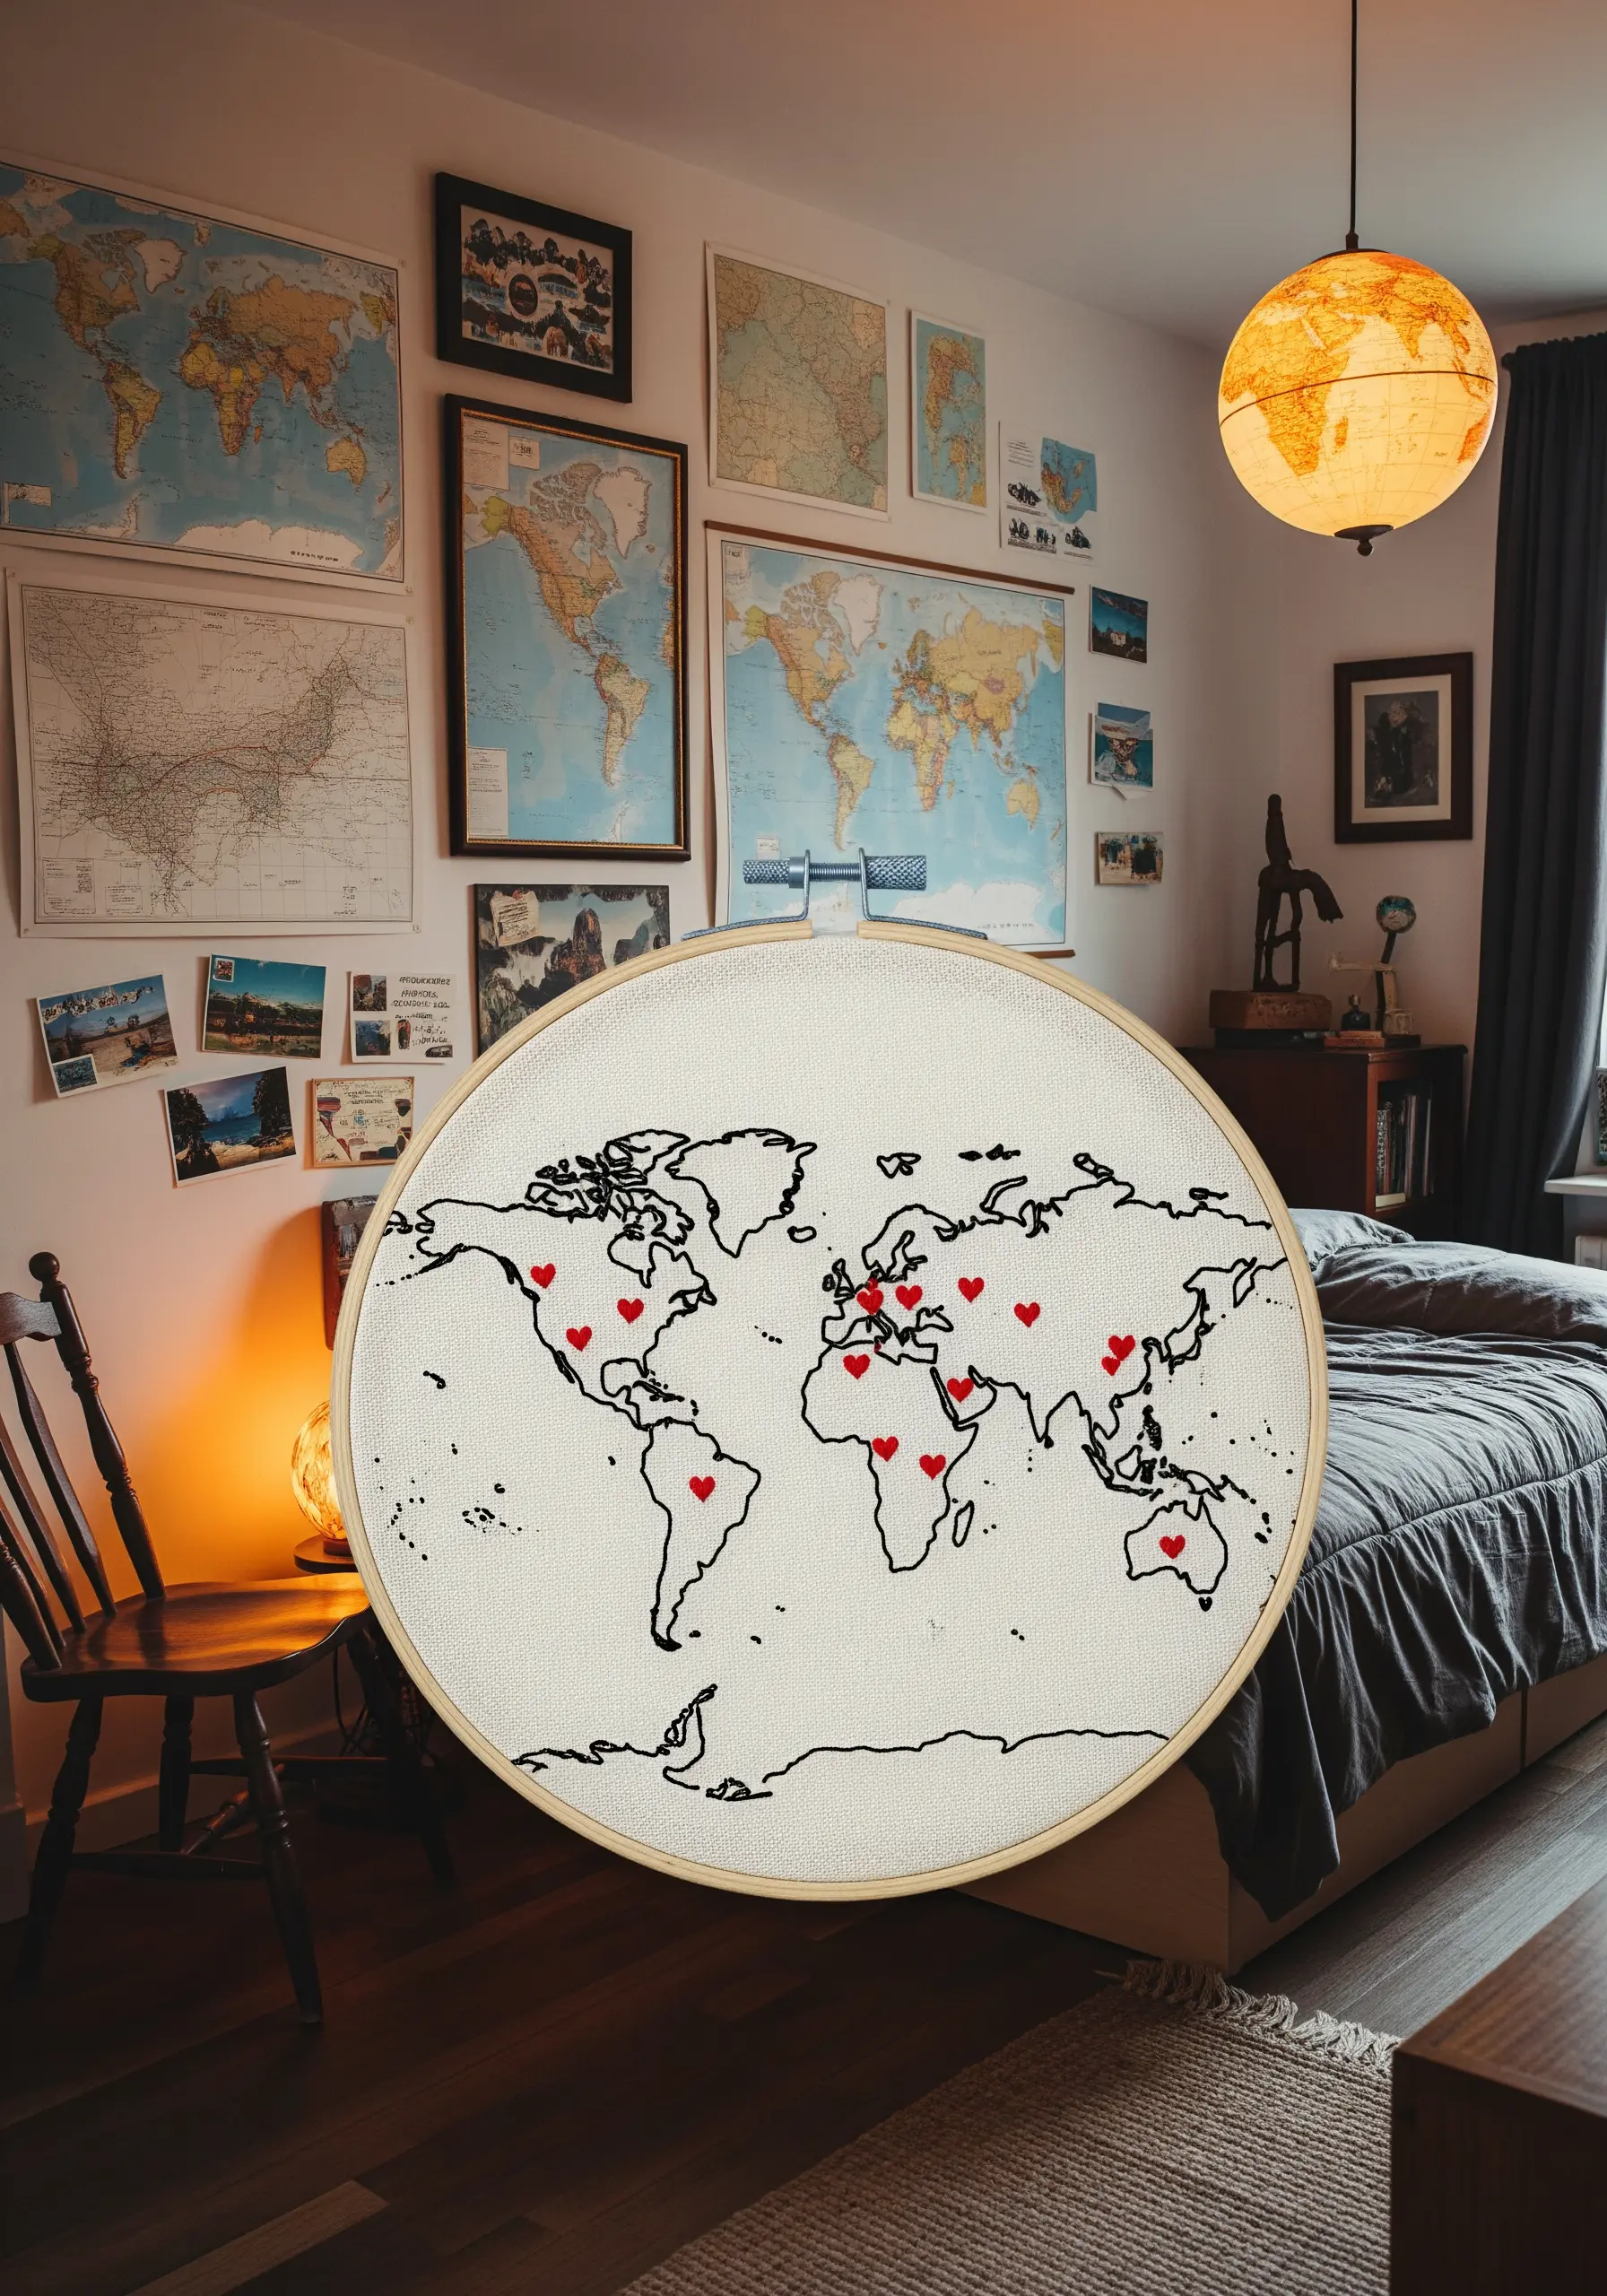
Stitch a map that tells your personal story.
Outline the continents with a simple backstitch, then use small red hearts or French knots to mark places you’ve been or dream of visiting.
This turns your frame into a living piece of art that you can add to over time, making it a dynamic and deeply personal element in your room.
These travel-inspired string art maps become a beautiful record of your life’s adventures.
10. Stitch on Sheer Fabric for an Ethereal Effect
Create a design that seems to float in mid-air by embroidering on a sheer material like tulle or organza.
This technique requires neatness, as the back of your work is visible. Secure thread ends by weaving them under existing stitches instead of knotting.
The transparency of the fabric allows light to pass through, giving the threads a delicate, watercolor-like appearance.
Try pressed flower embroidery designs on tulle to capture their fragile beauty in a unique and lasting way.
11. Build Tactile Art with Punch Needle
If you love texture, explore punch needle embroidery to create soft, looped designs with a plush feel.
Using chunky yarn and a punch needle tool, you can fill in shapes quickly, making it a satisfying technique for larger pieces.
The resulting texture is dense and rug-like, adding warmth and a playful element to your bedroom decor.
Framing a punch needle piece in a simple wooden frame contains its bold texture and presents it as a modern work of fiber art, perfect for trying contemporary rainbow blend stitches.
12. Personalize Your Space with a Zodiac Constellation

Stitch a celestial design that’s uniquely yours by embroidering your zodiac constellation.
Use a metallic gold thread on dark fabric for a luxurious, starry-night effect. Place small French knots or beads for the stars and connect them with a fine backstitch.
This is a subtle yet meaningful way to create personalized embroidery ideas that feel both mystical and modern.
Display it in a dark wood hoop to complement the moody, celestial theme.
13. Add a Finishing Touch with a Velvet Ribbon
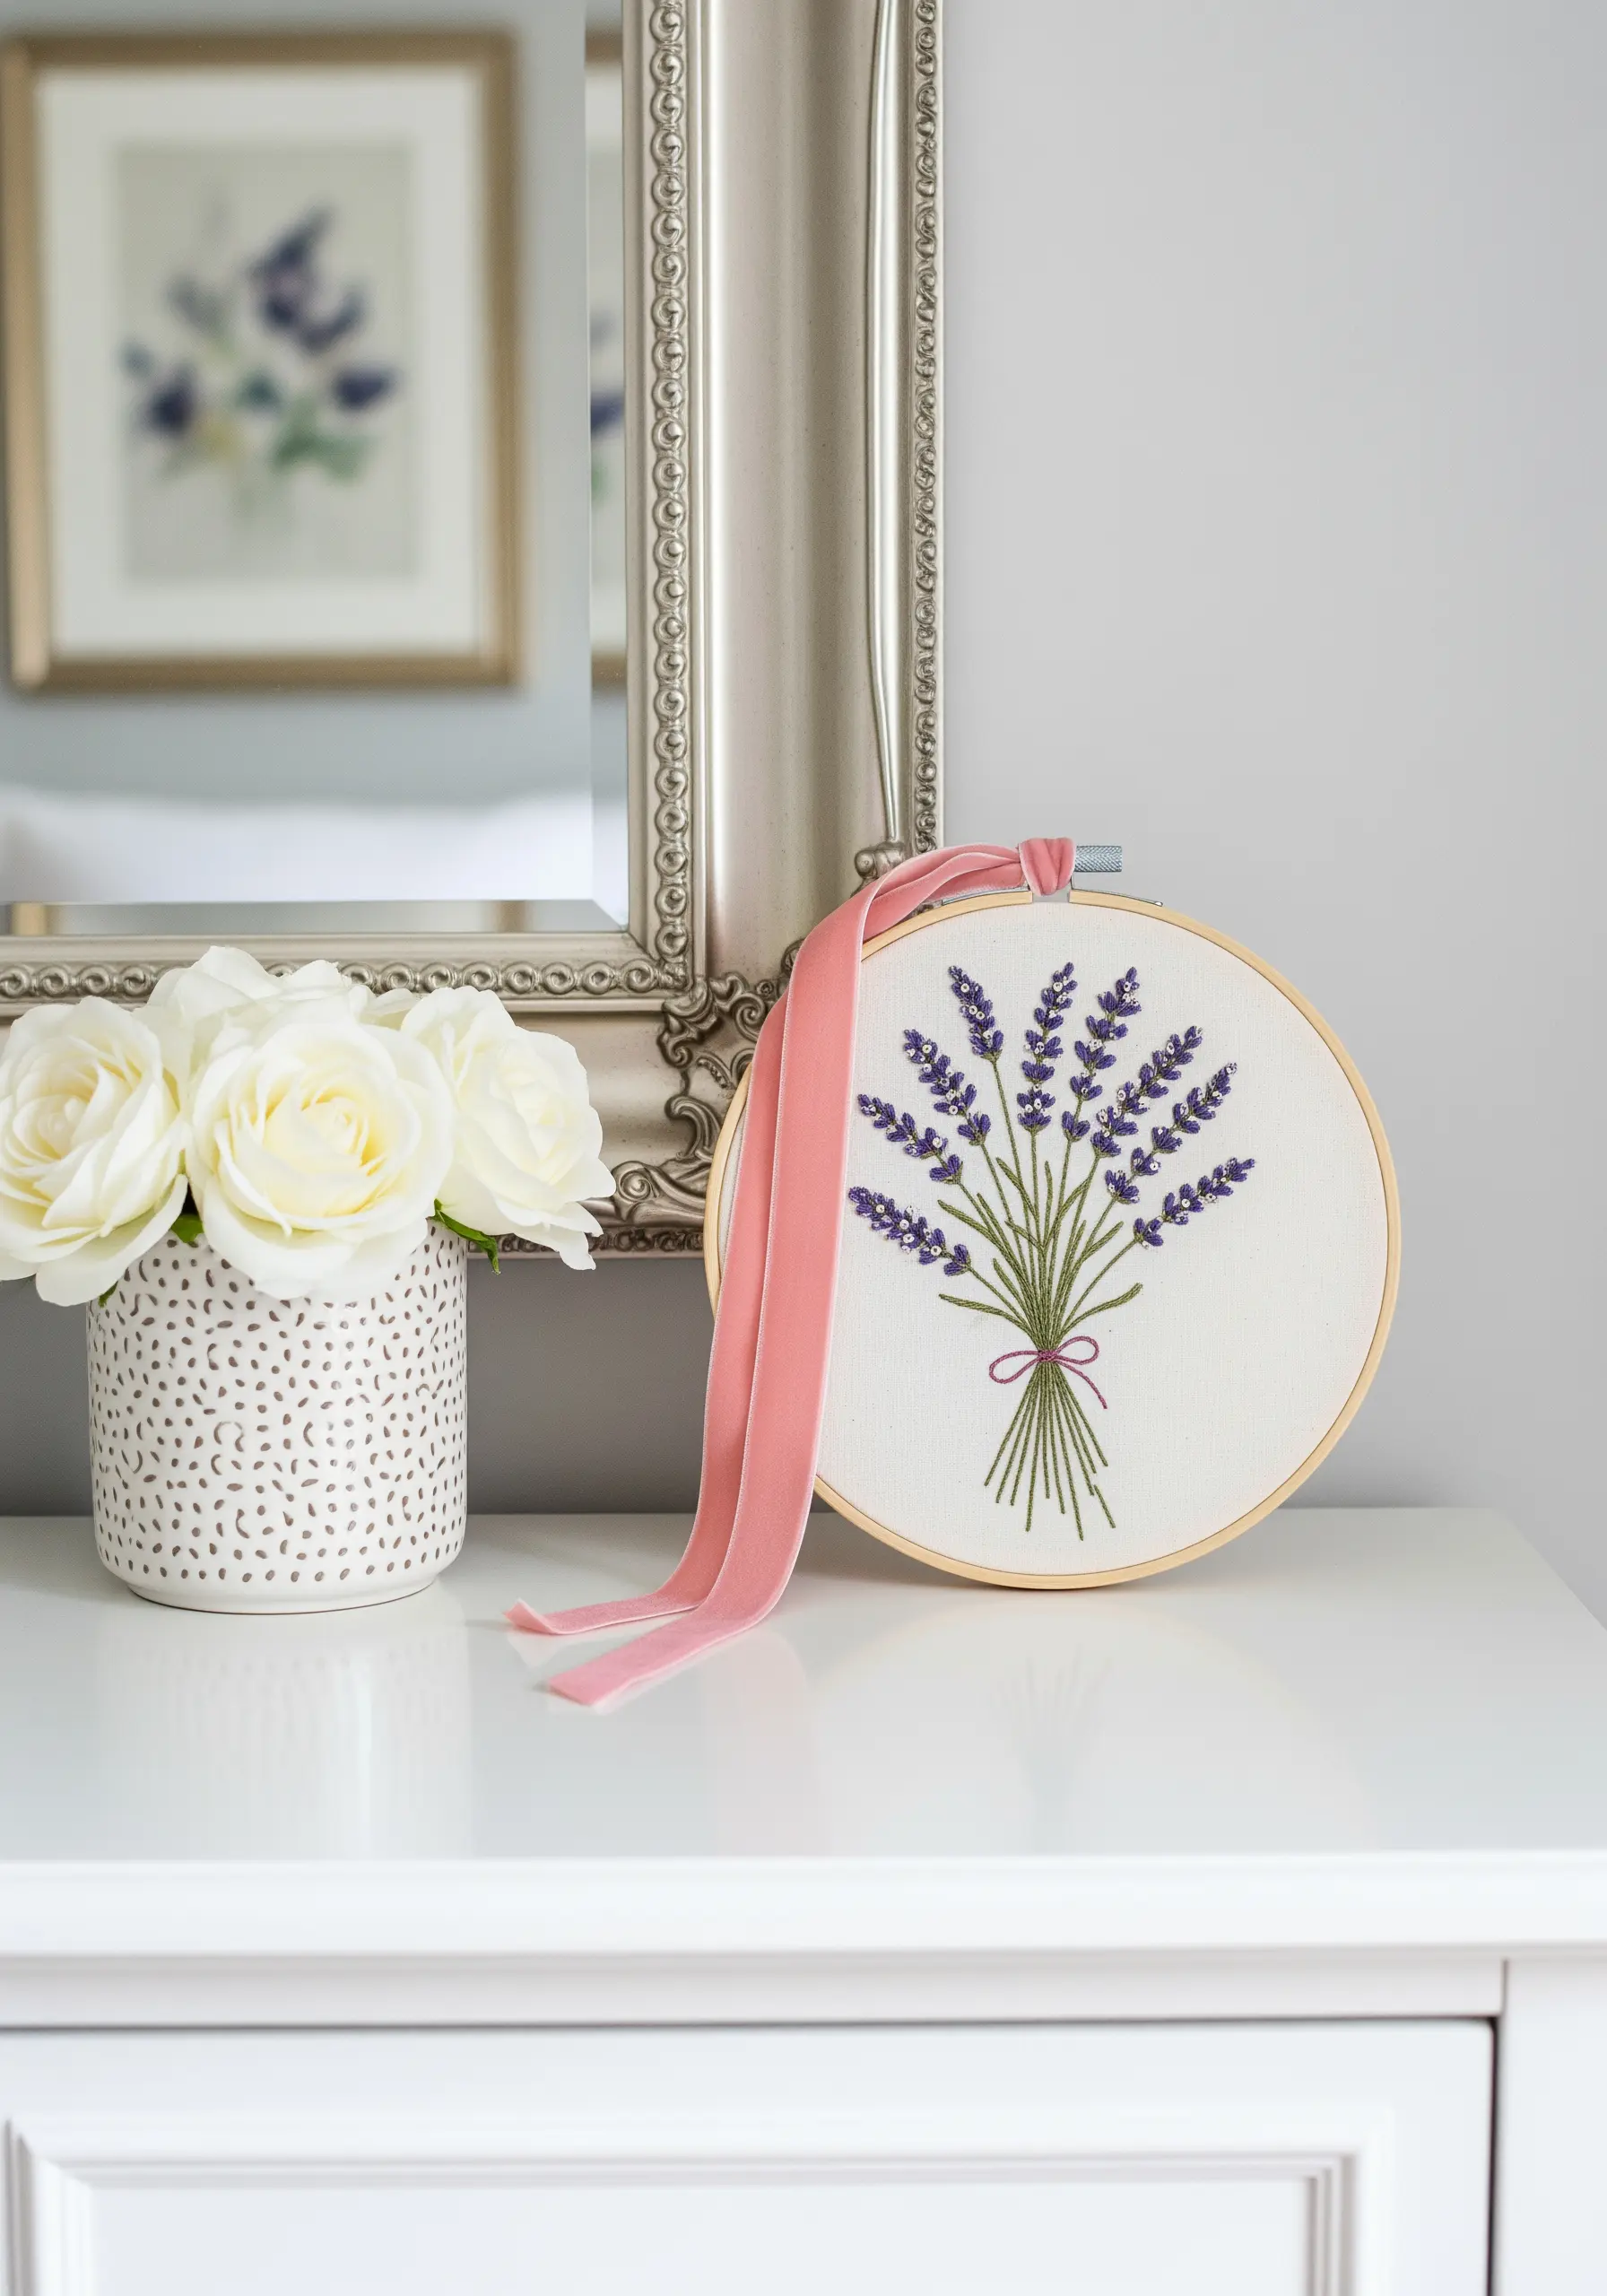
Elevate a simple wooden hoop with an elegant, textural detail.
After completing your embroidery, tie a length of luxurious velvet ribbon around the hoop’s closure hardware.
This small addition softens the utilitarian look of the screw and adds a pop of color and texture that can coordinate with your decor or the thread in your design.
It’s an effortless way to make framed embroidery ideas feel more polished and intentionally styled.
14. Frame Fabric Like a Canvas for a Gallery Finish
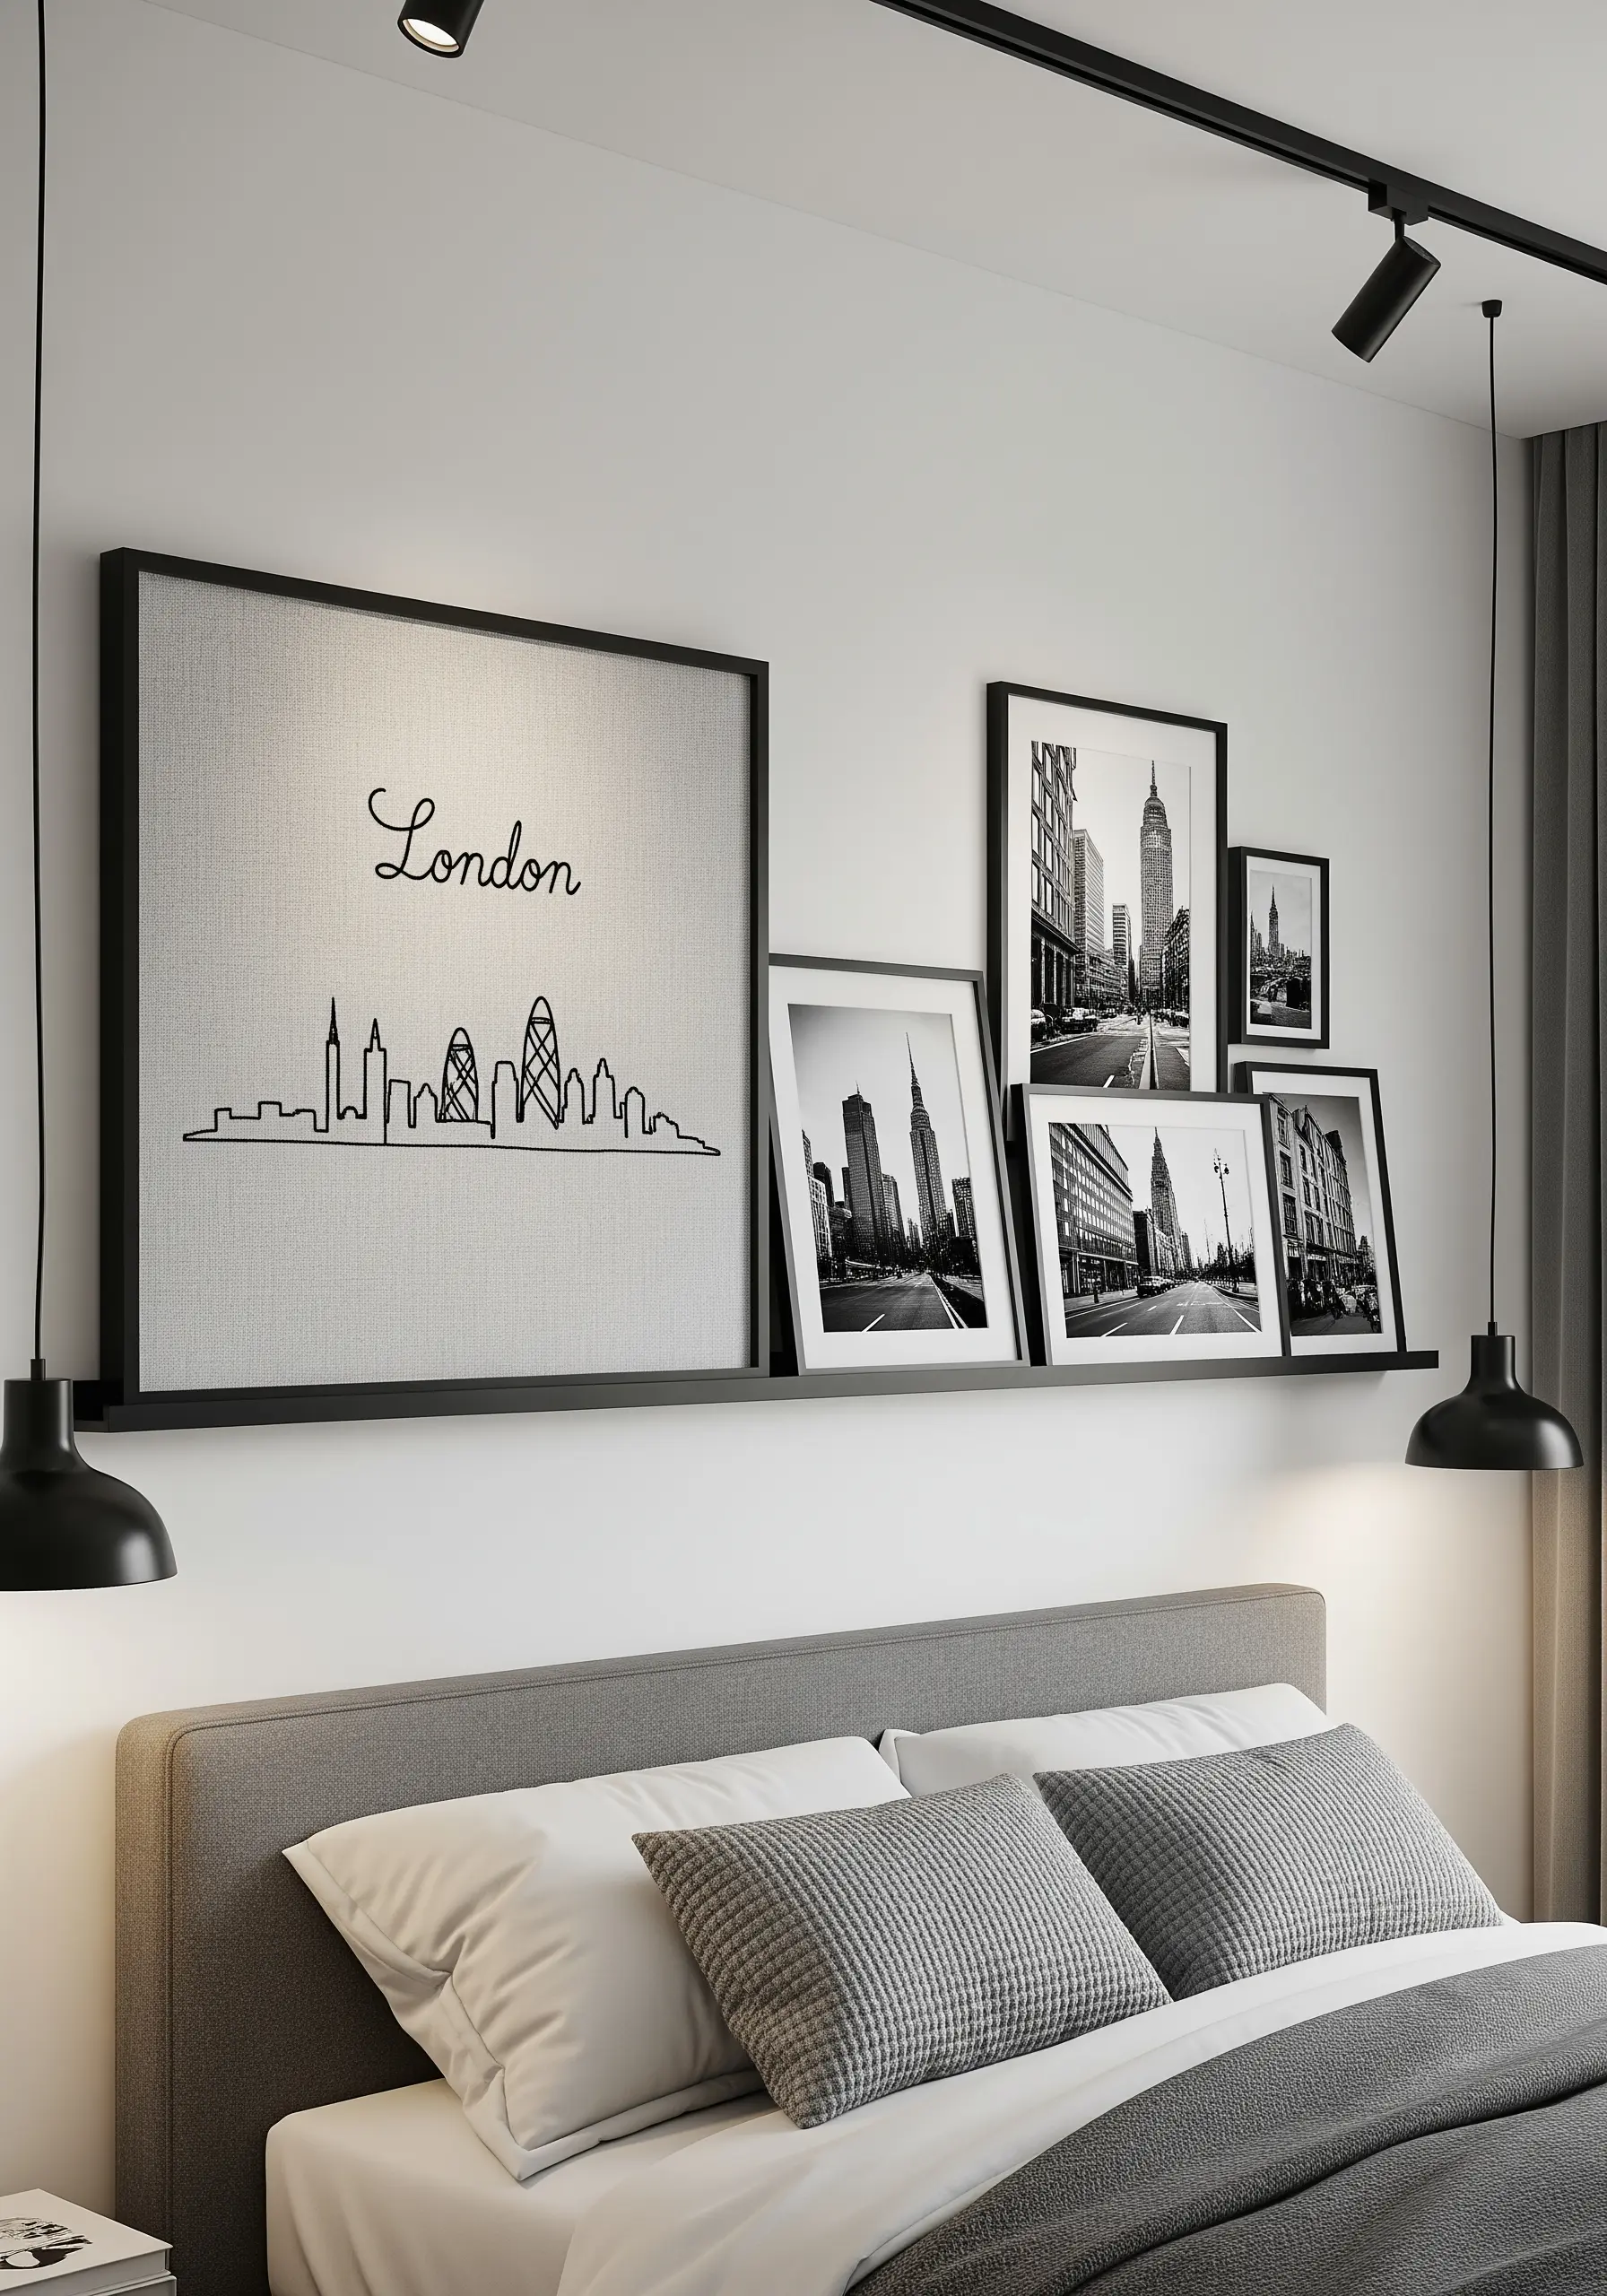
For a clean, contemporary look, present your embroidery in a stretched-canvas style frame instead of a traditional hoop.
Stitch a minimal design, like a city skyline, on a neutral fabric like linen or evenweave.
Stretch the finished piece over a square wooden frame, securing it at the back with staples for a taut, gallery-wrapped finish.
This method transforms embroidered city skyline wall decor into a sophisticated piece that integrates perfectly into a modern bedroom.
15. Create a Playful Scene with Colorful Satin Stitch
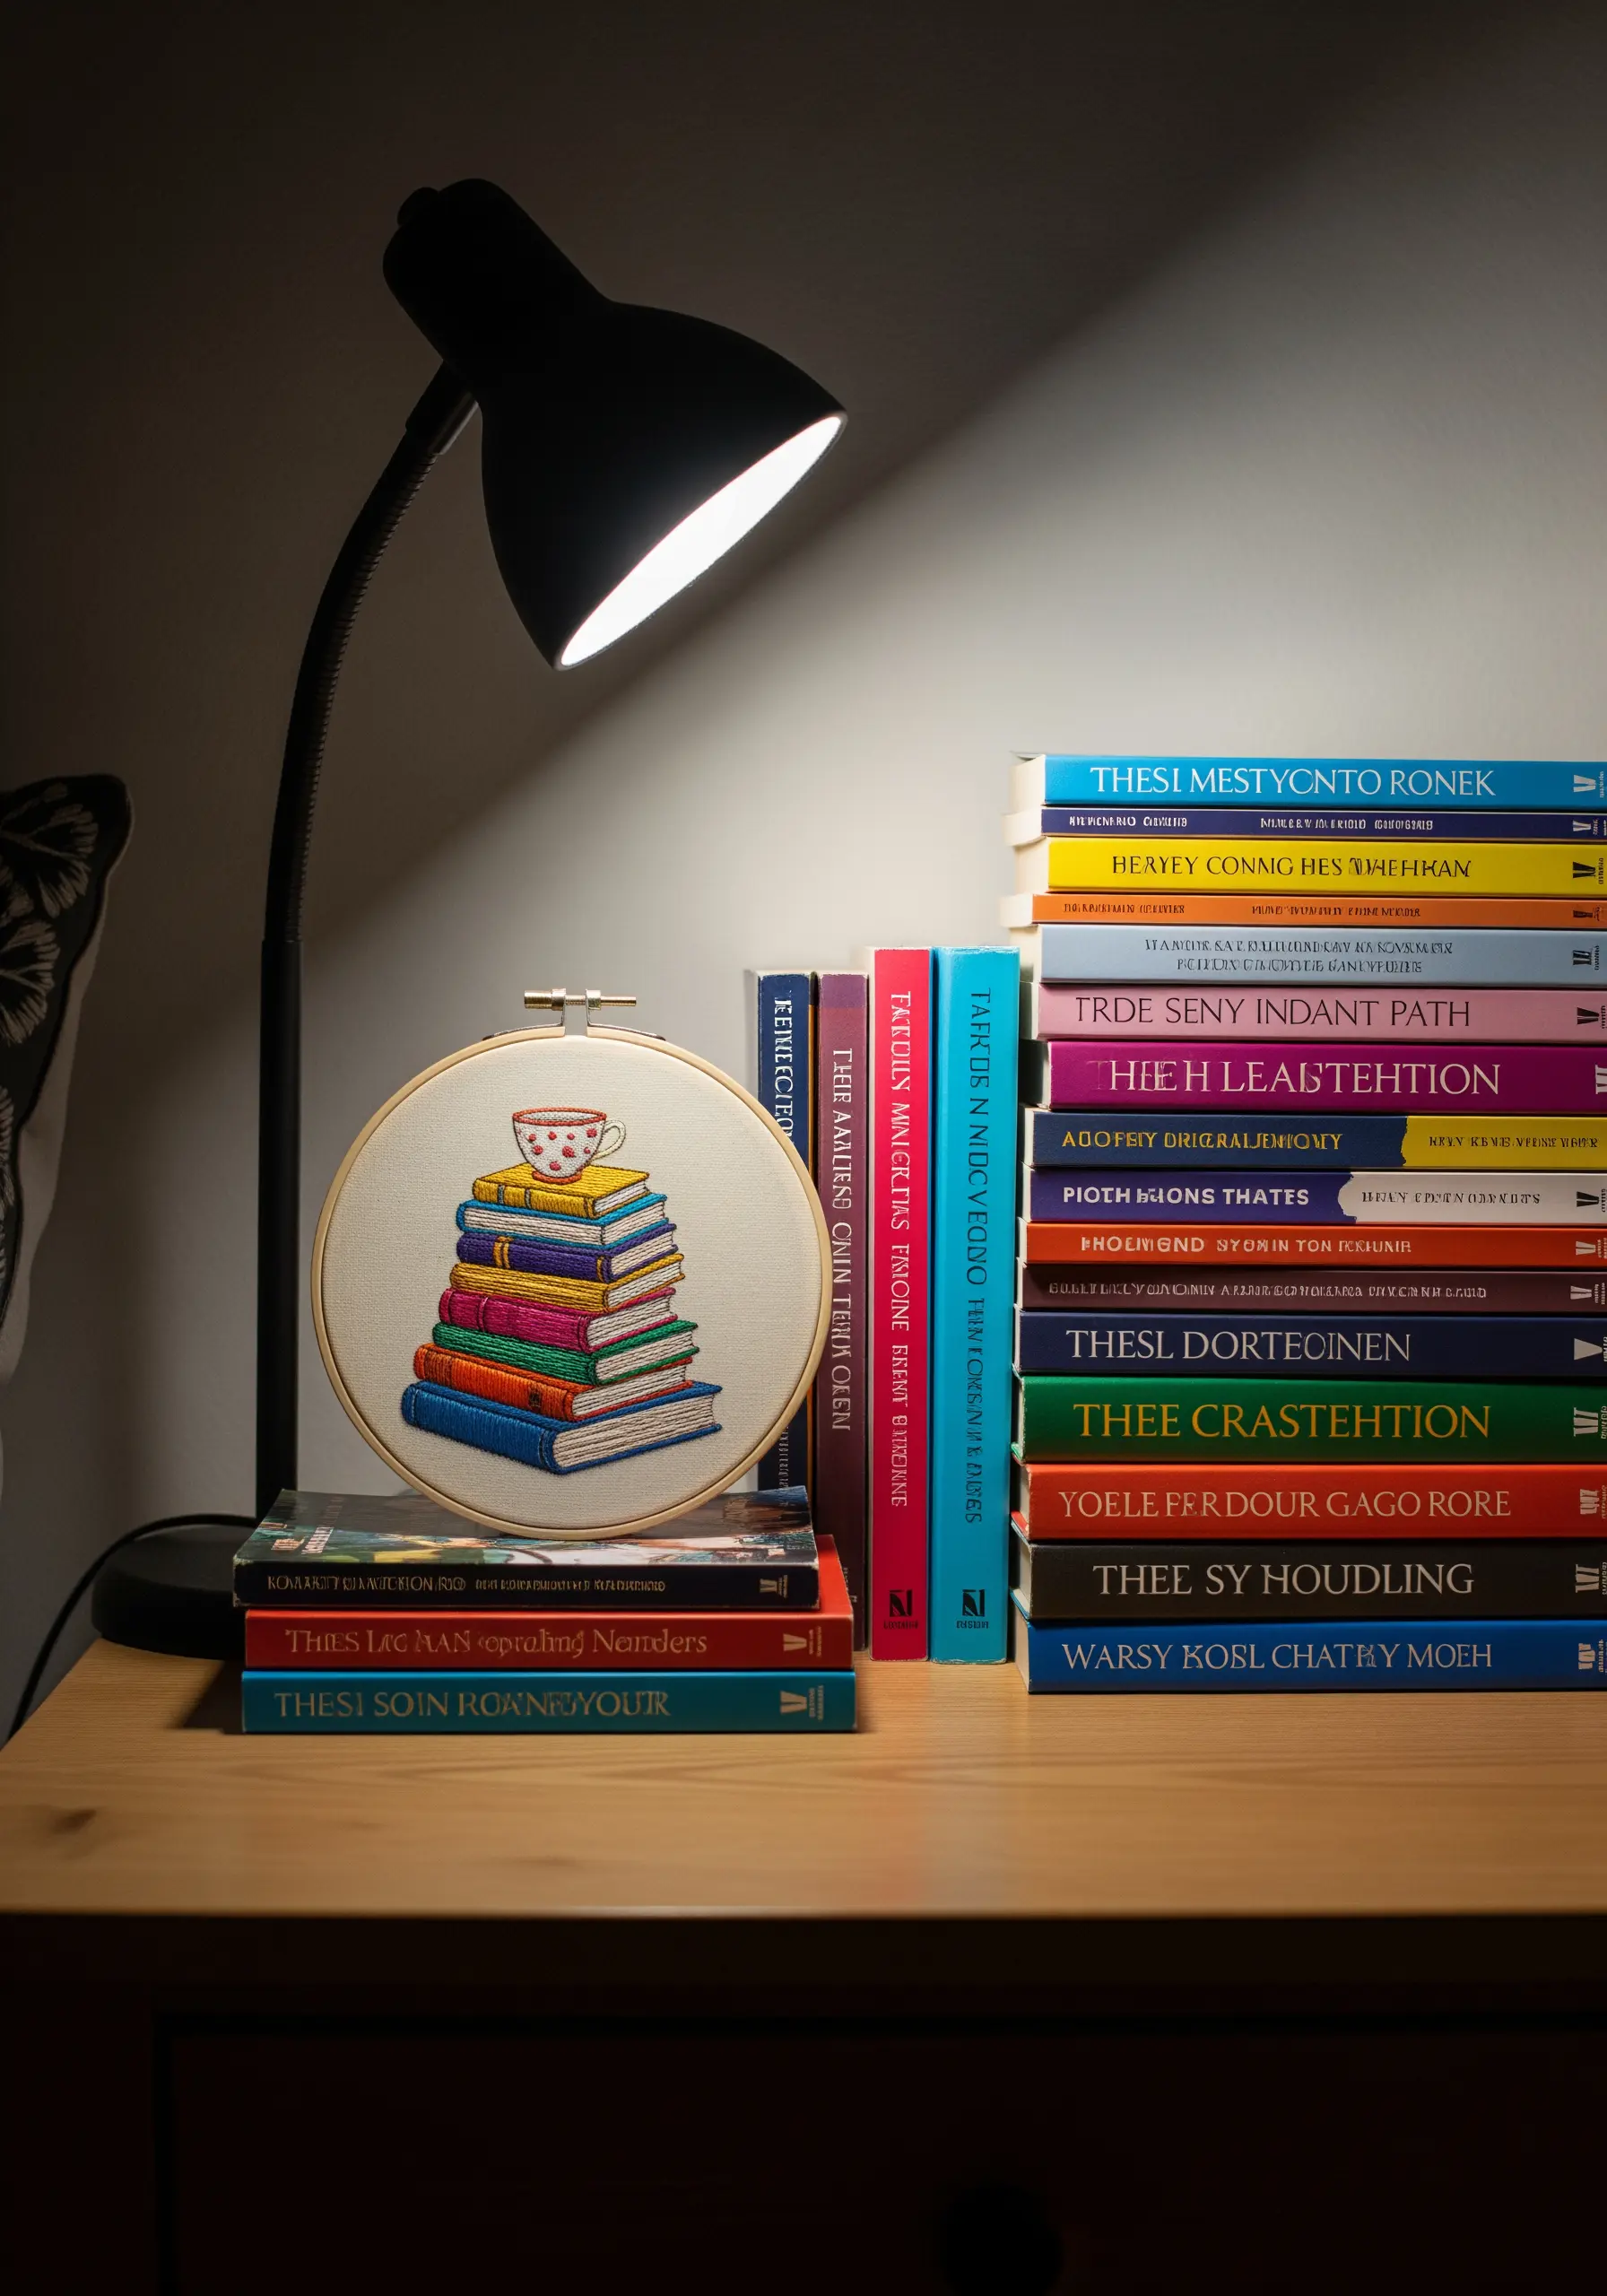
Use satin stitch to its full potential by creating designs with solid, bold blocks of color.
A stack of colorful books is a perfect subject, allowing you to practice keeping your satin stitches smooth, even, and tightly packed for a flawless finish.
Use a fine backstitch with a single strand of black thread to add small details like titles or patterns, which will make the colors pop even more.
This is one of the best embroidery patterns to bring life to boring fabric scraps and leftover threads.
16. Embroider a Seasonal Wreath for Timeless Decor
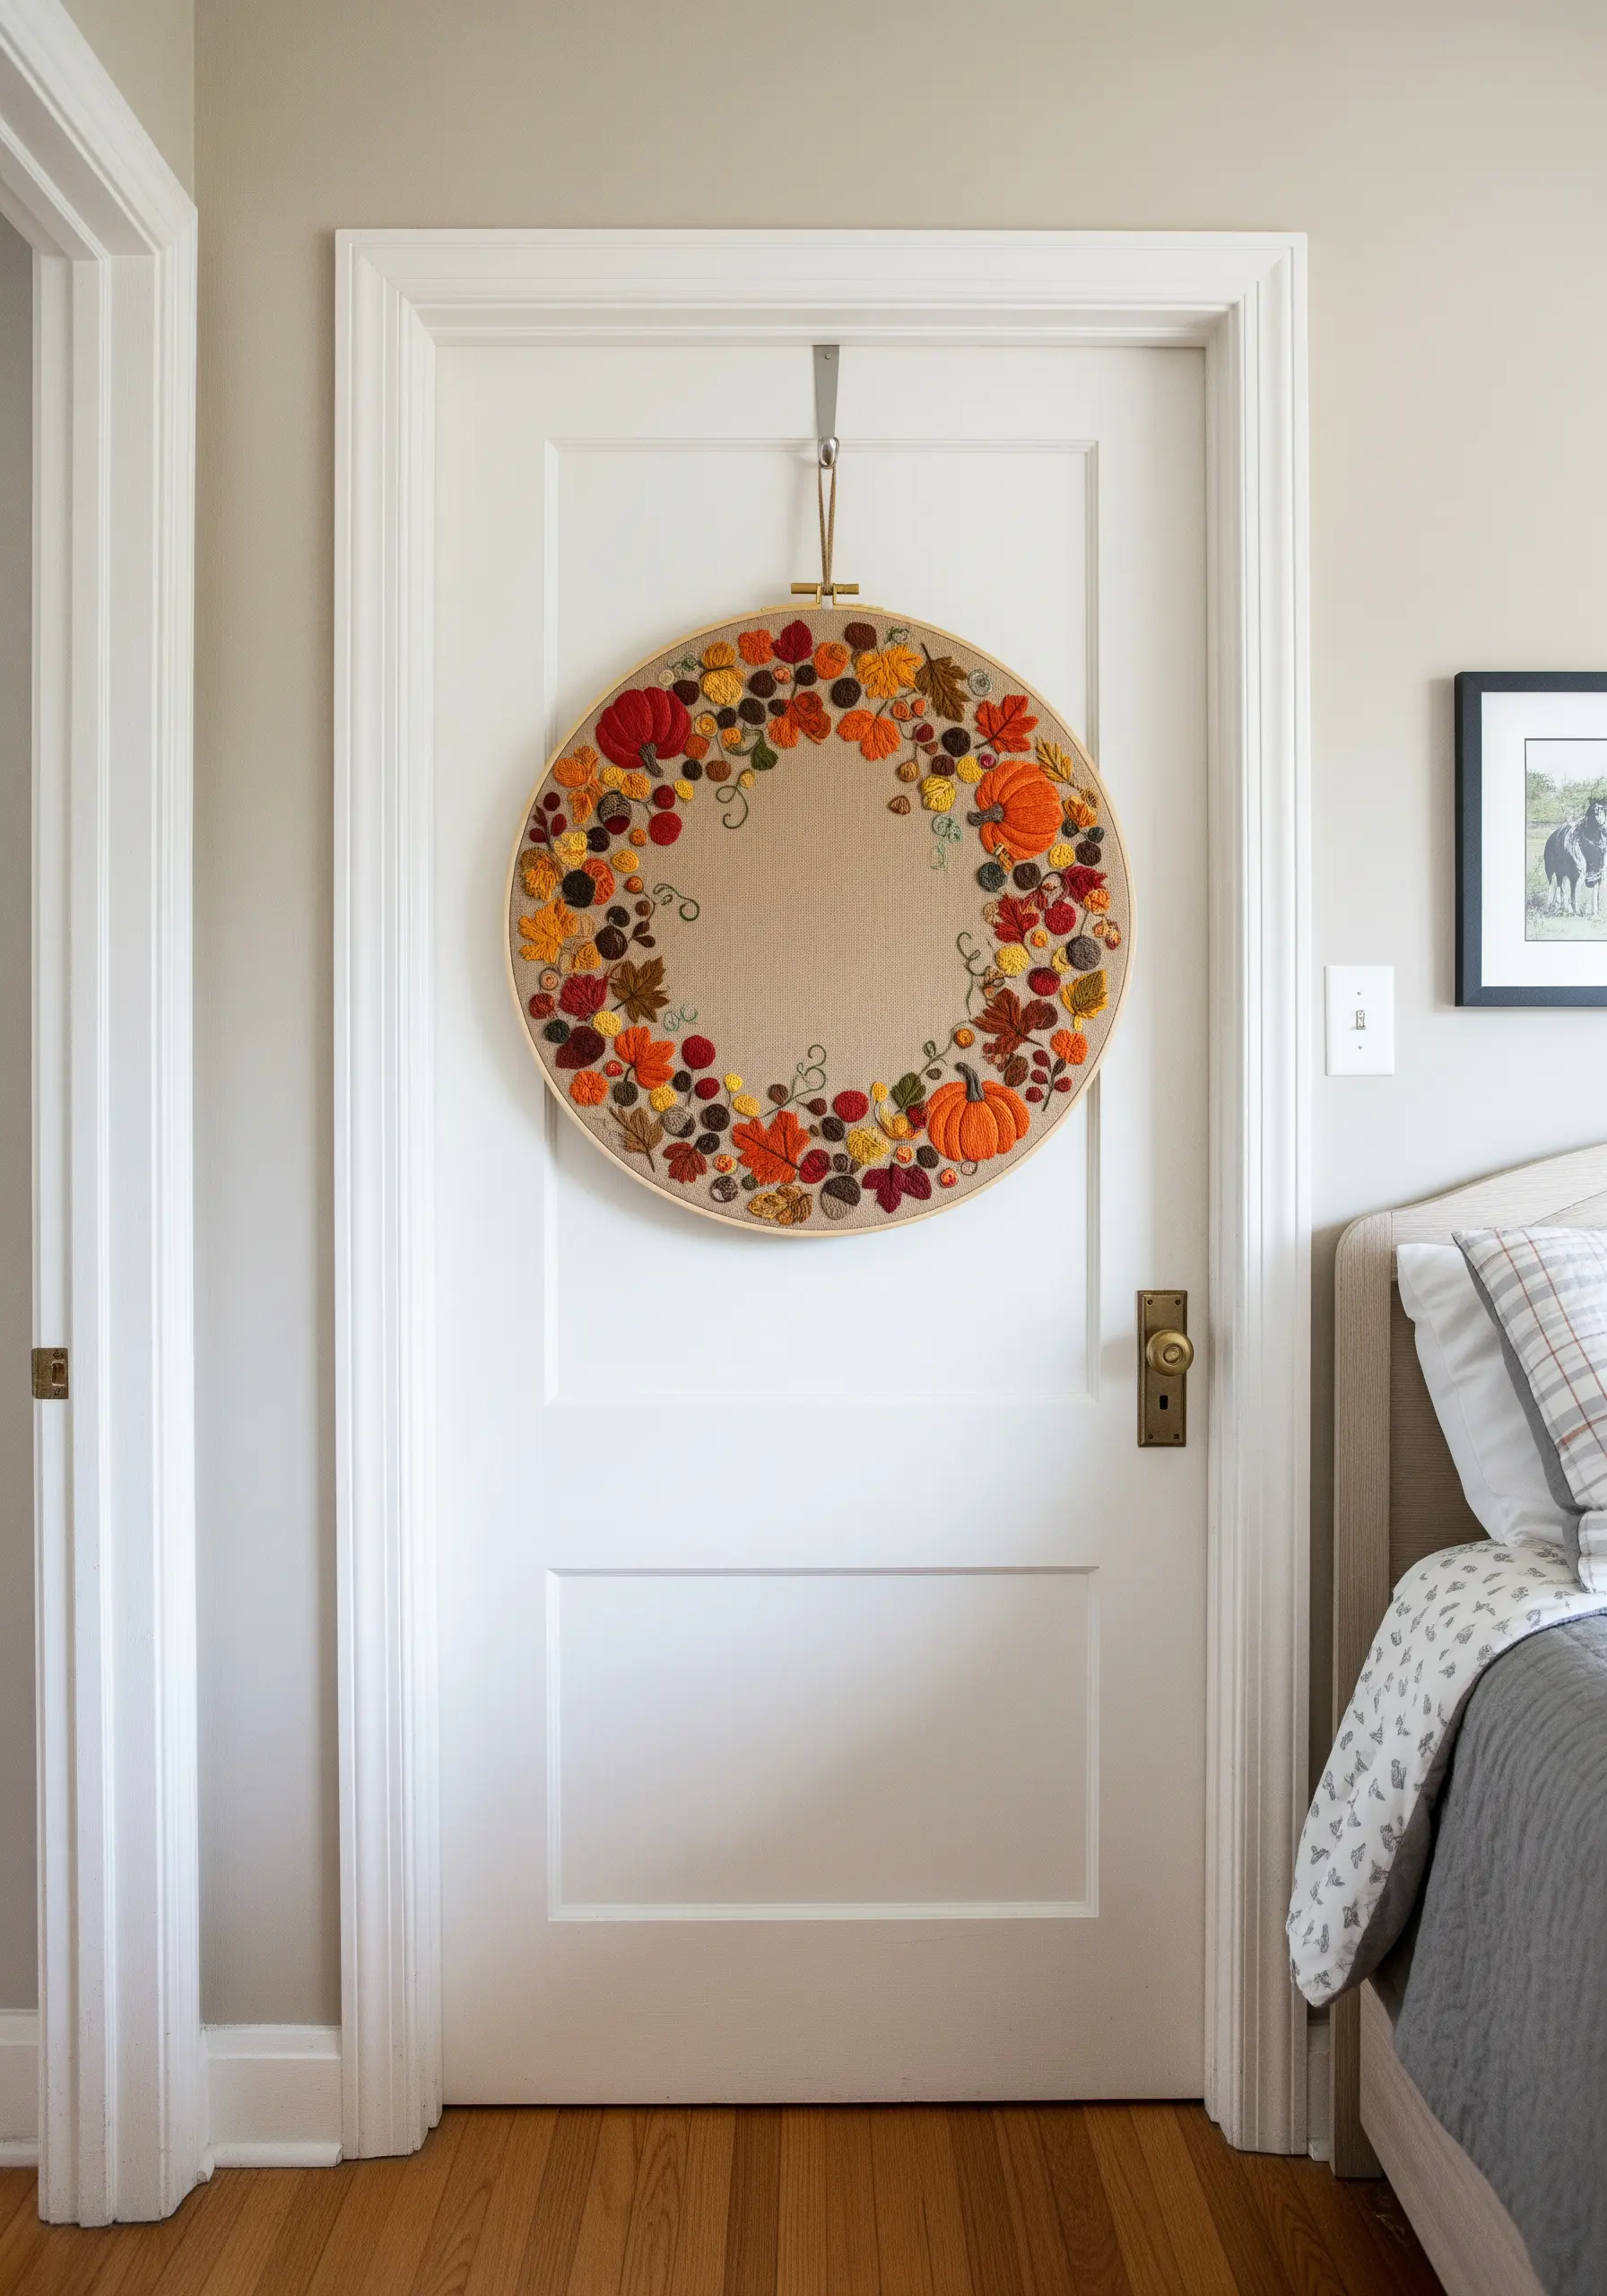
Capture the feeling of a season by stitching a detailed wreath in an oversized hoop.
For an autumn design, combine various textures: plump satin-stitched pumpkins, French knot berries, and fishbone stitch leaves in warm oranges, reds, and golds.
The negative space in the center keeps the design from feeling too heavy and draws the eye to the intricate details around the edge.
These holiday-themed string art patterns can be swapped out seasonally on a bedroom door or wall.
17. Recreate Iconic Art with Directional Stitches
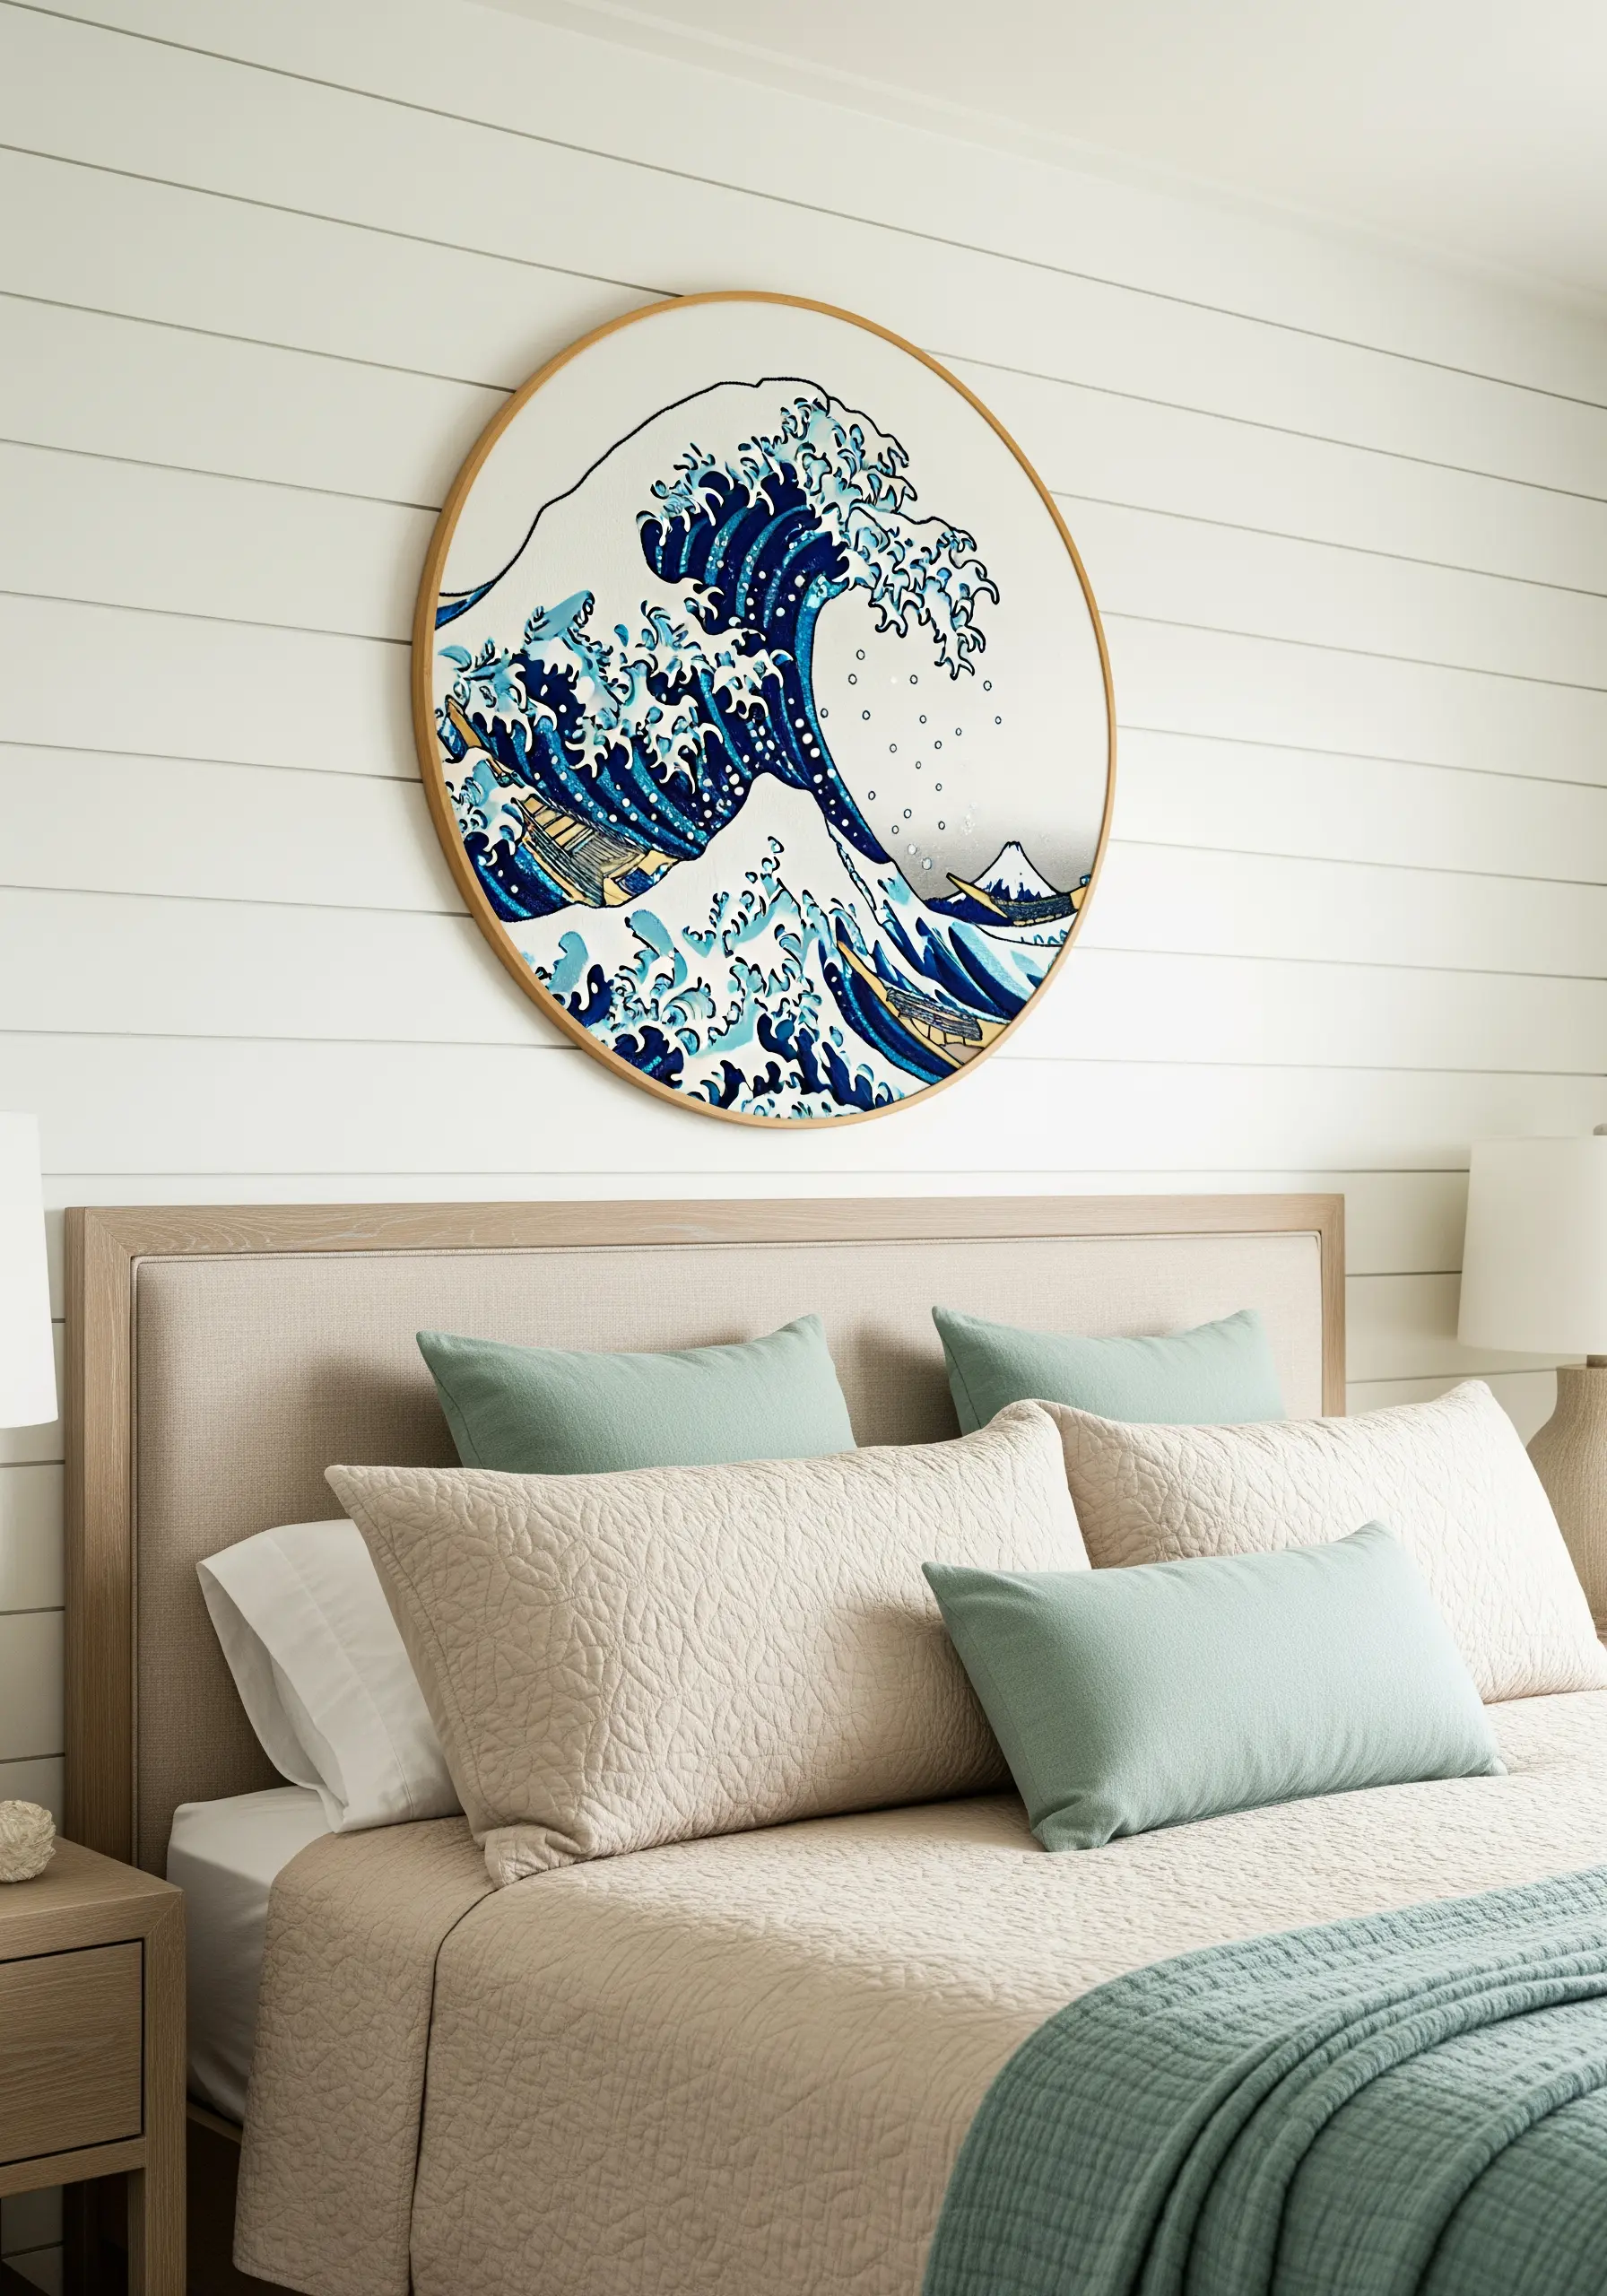
Tackle a masterpiece by translating its movement and energy into thread.
For a piece like ‘The Great Wave,’ use directional stitches—such as split stitch or long-and-short stitch—that follow the flow and curl of the water.
Break the image down into distinct color blocks, focusing on one section at a time to keep the complex design manageable.
These DIY framed embroidery art projects let you create a powerful statement piece that showcases your skill and artistic appreciation.


