

Your pillowcase is more than just a place to rest your head—it’s a canvas waiting for a story. Instead of seeing it as a large, intimidating project, think of it as a small garden you can tend to, one stitch at a time. This is your chance to move beyond simple patterns and create something that feels truly alive.
We’ll explore how to give your florals dimension, your leaves a natural shimmer, and your compositions a sense of gentle movement. It’s not about mastering dozens of complicated stitches, but about understanding *why* a French knot cluster feels more organic than a satin stitch fill, or how changing the direction of your stitches can mimic the way a petal catches the light.
Let these ideas guide you toward creating textiles that are not just decorated, but transformed. You have the skill; now it’s time to stitch with quiet confidence and turn a simple pillowcase into a piece of personal art.
1. Build Dimension with Sculptural Roses
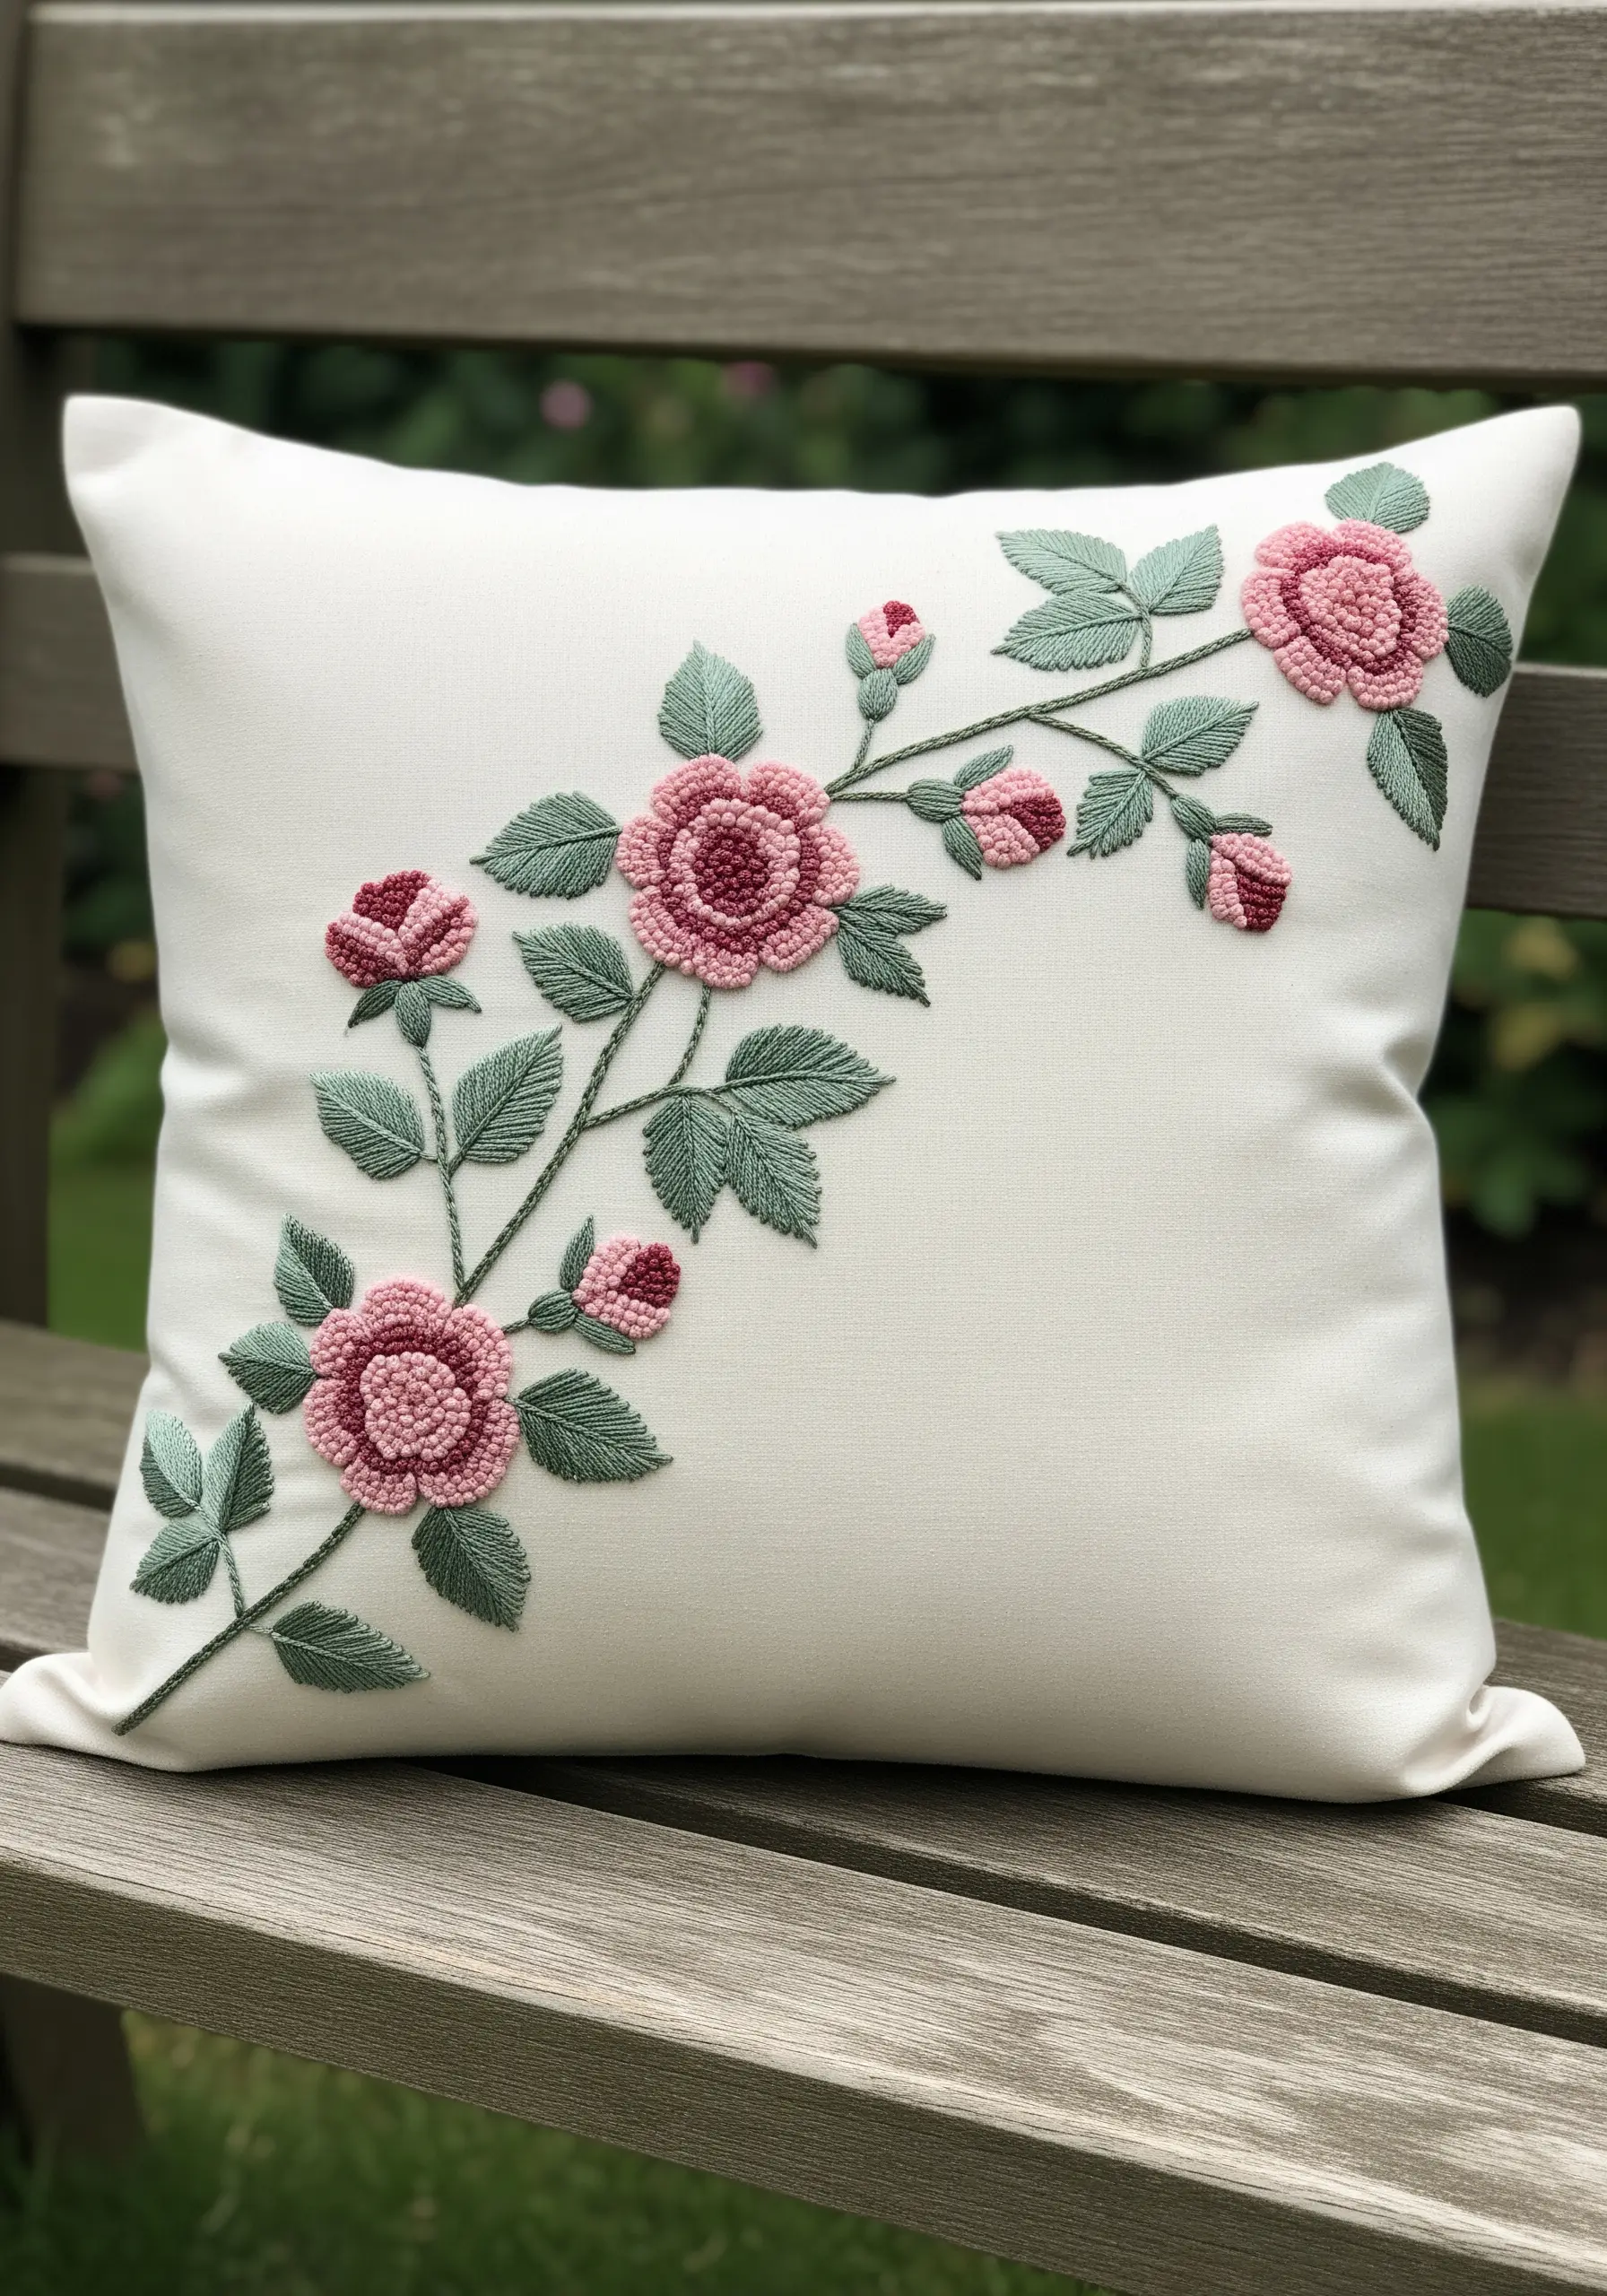
Give your roses a tangible, raised texture by filling the centers with tightly packed French knots in a contrasting darker shade.
For the petals, use a circular satin stitch, layering each stitch closely to create a dense, smooth surface that catches the light.
Use a fishbone stitch for the leaves, which creates a central vein and gives them a more realistic, dimensional shape than a simple satin stitch.
This combination of textures—the bumpy knots, smooth petals, and ribbed leaves—makes the entire design feel more dynamic and touchable.
2. Stitch a Balanced Lavender & Bee Wreath
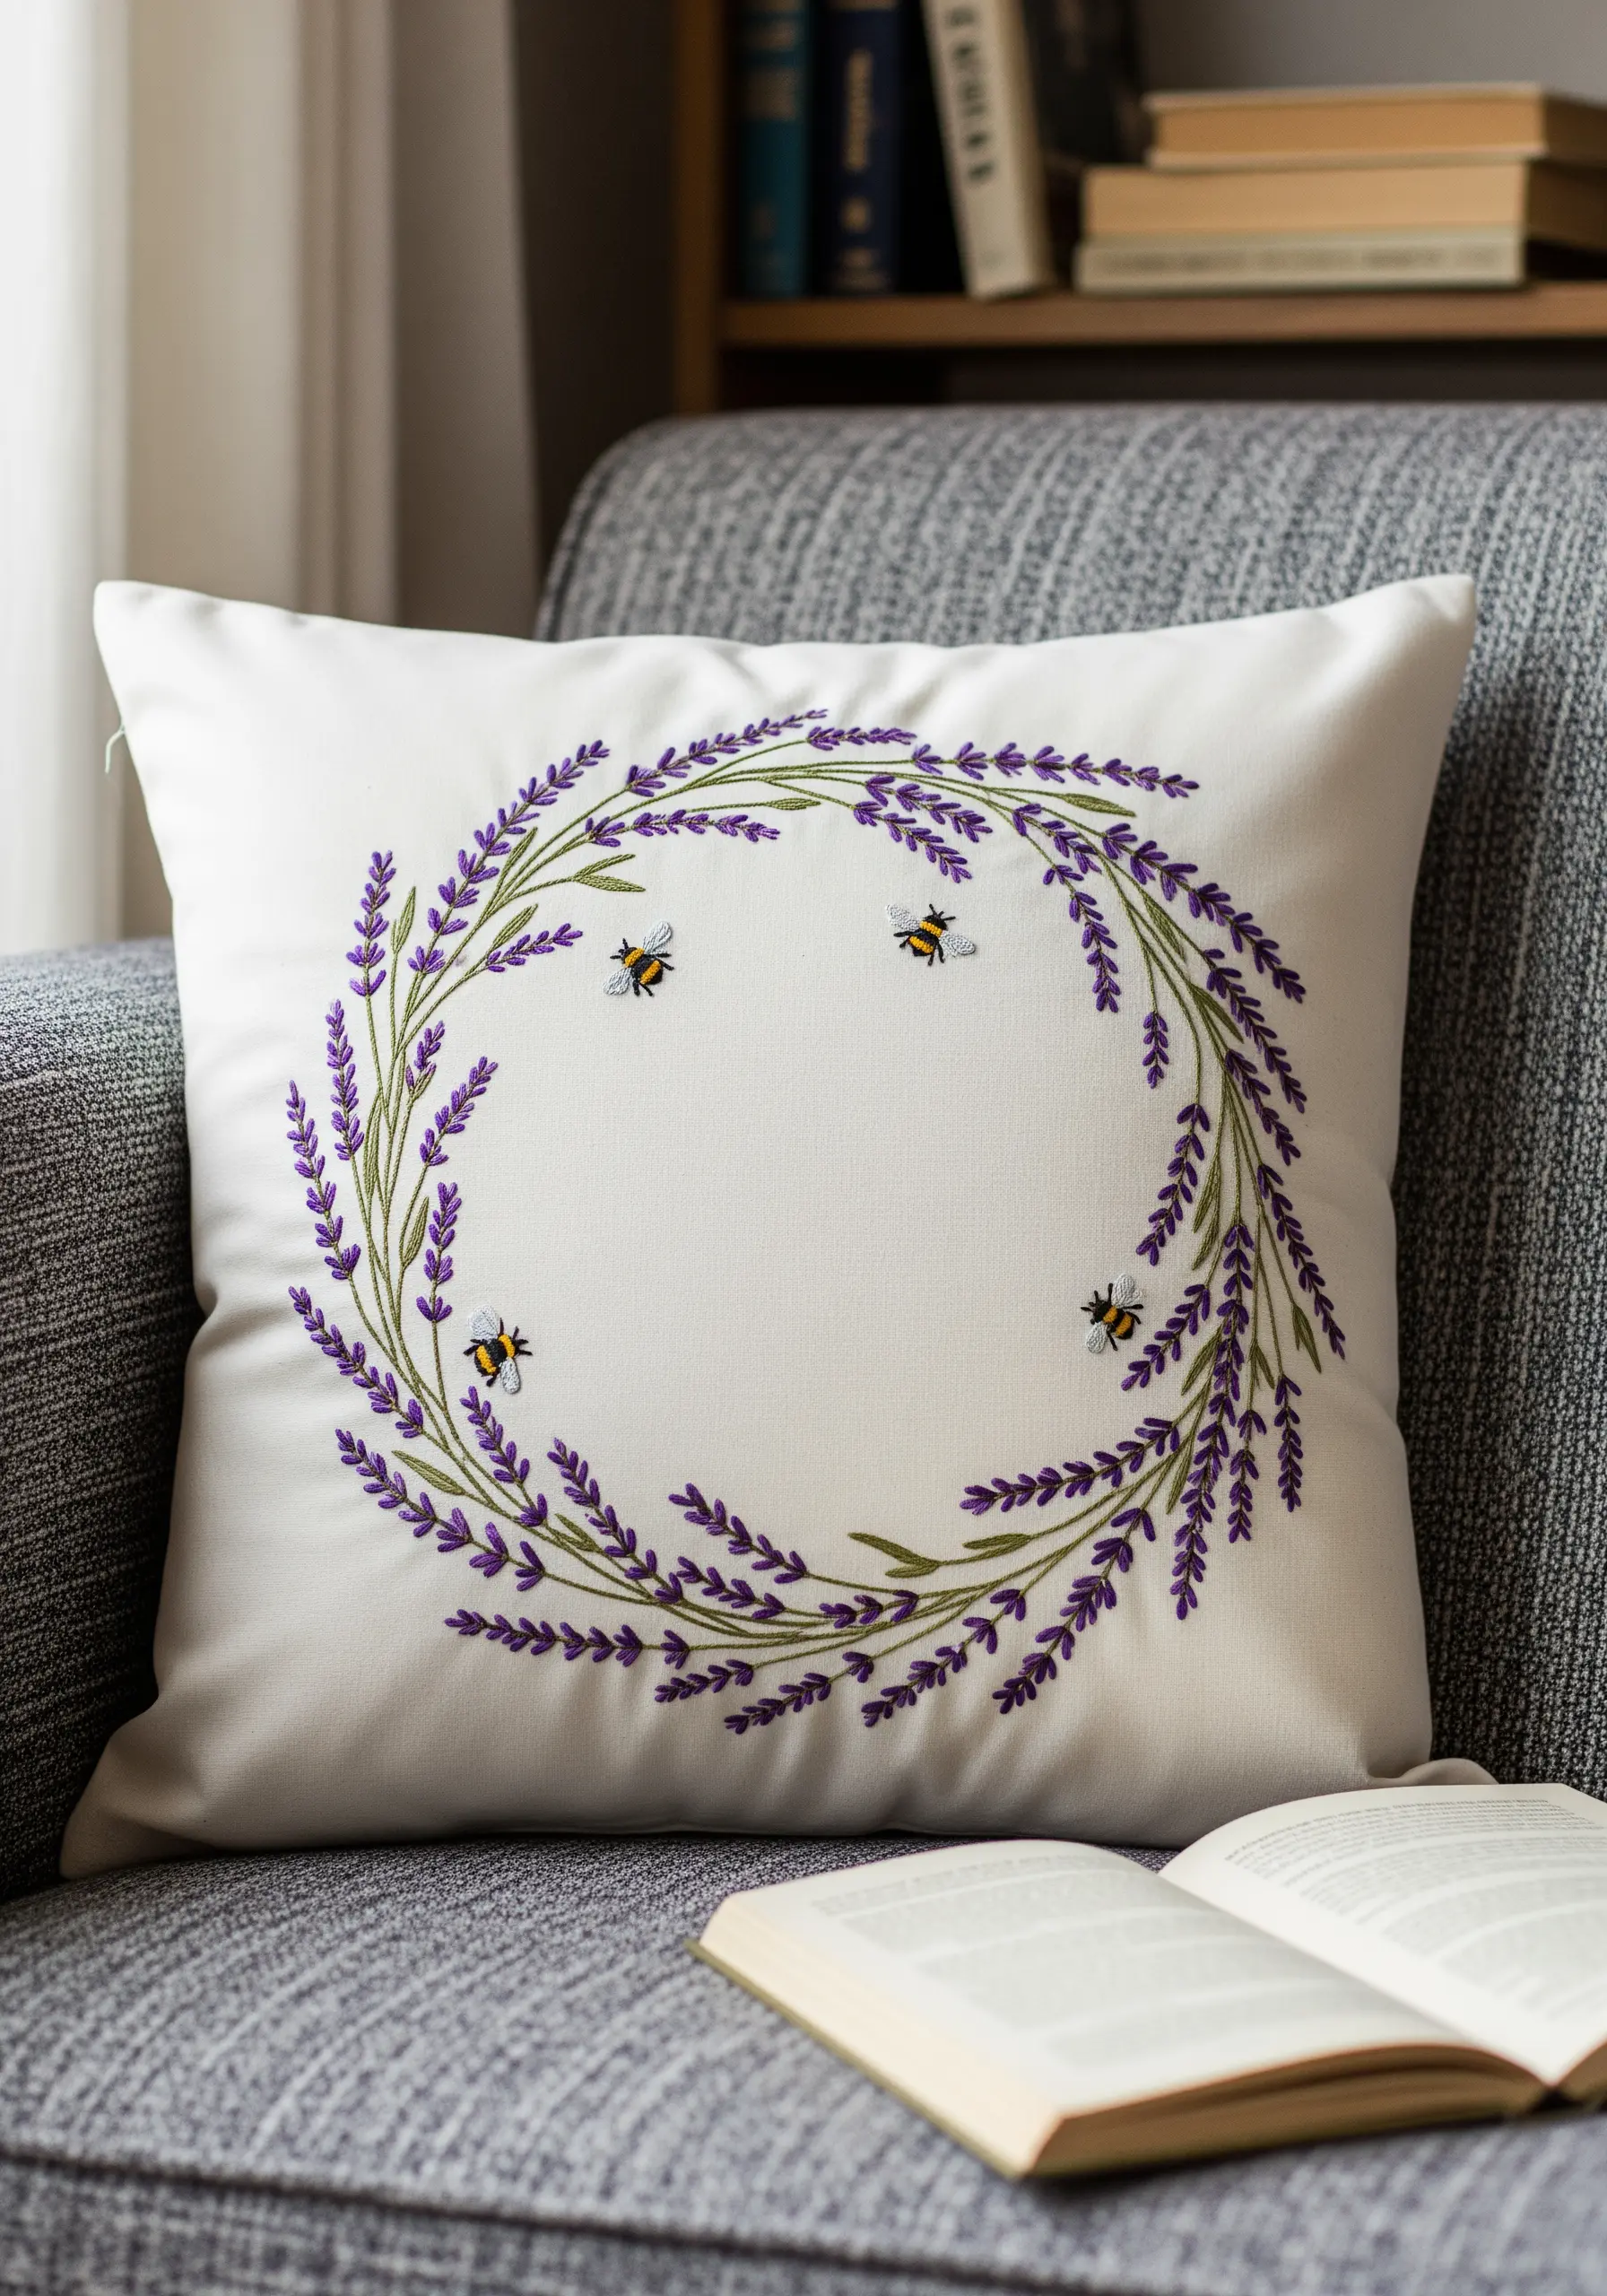
To create a perfectly balanced wreath, lightly trace a circle onto your fabric as a guide for the stems, which you can stitch with a simple backstitch.
Form the lavender buds with single detached chain stitches (lazy daisies) using two or three shades of purple to create depth and avoid a flat, uniform look.
The bees add a touch of life and movement; stitch their bodies with a few satin stitches and use a single strand of black thread for the delicate legs and antennae.
This composition feels peaceful because the negative space inside the wreath allows the design to breathe.
3. Create a Flowing Strawberry Vine Border
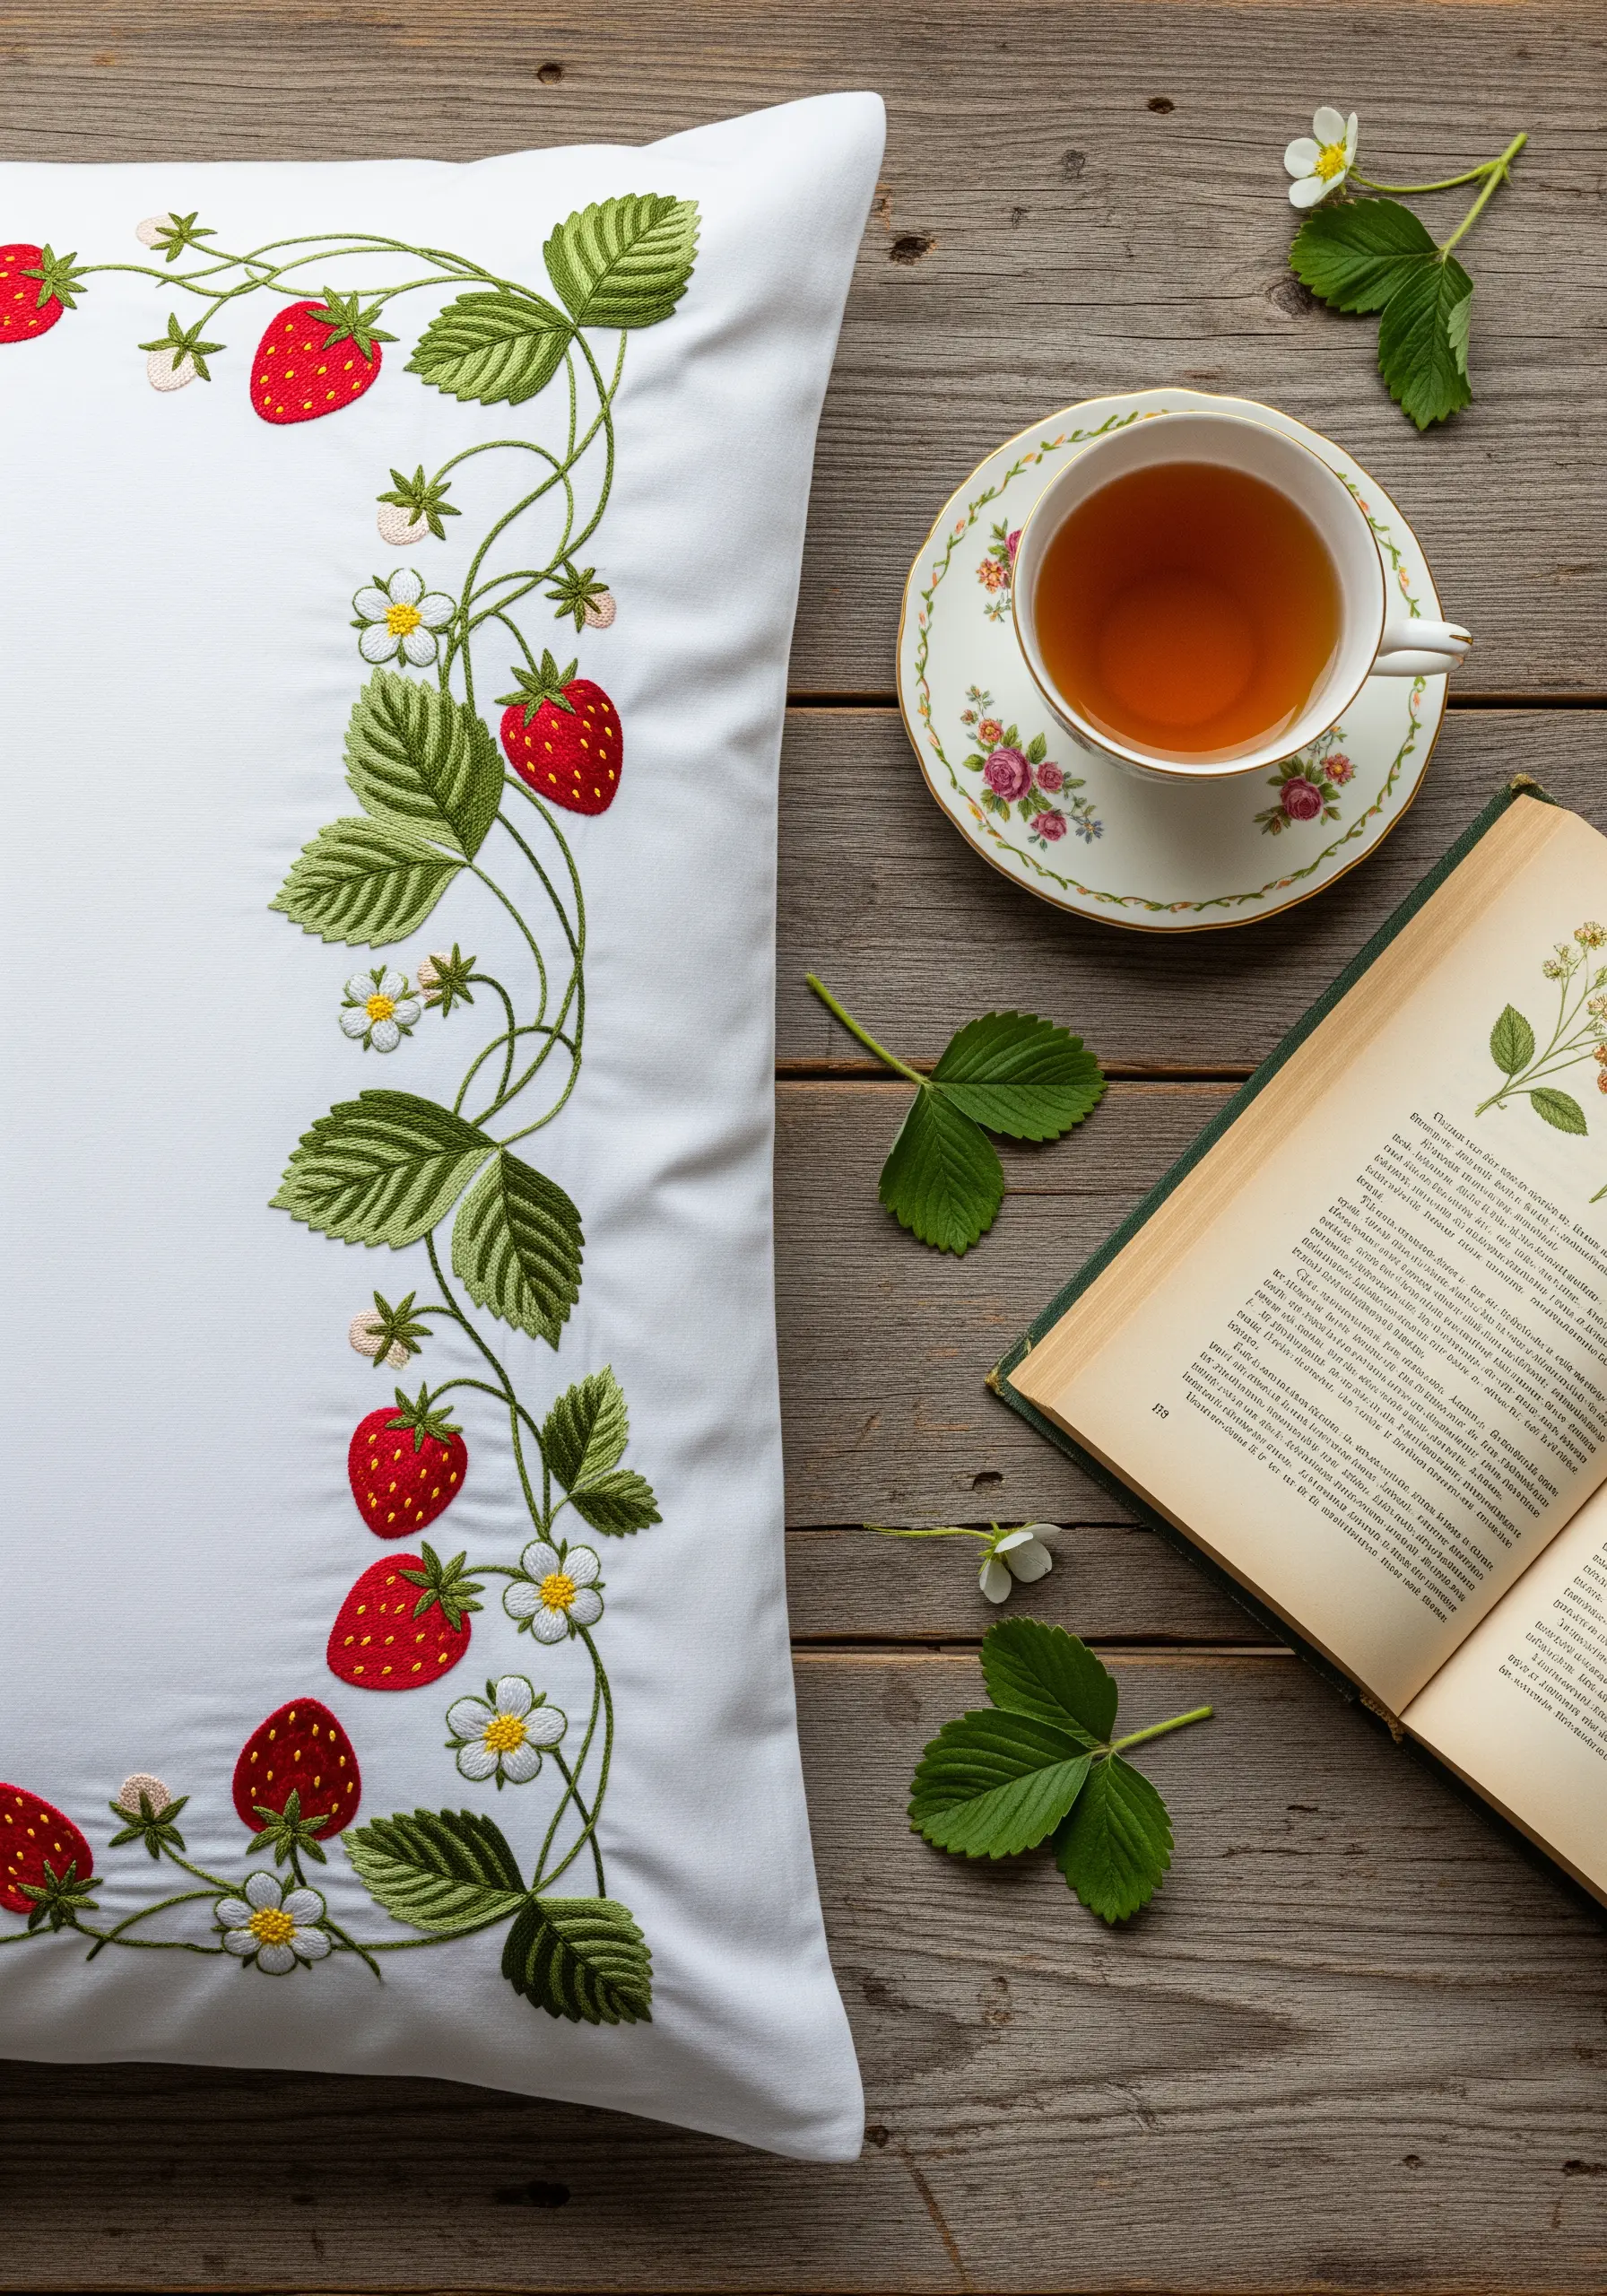
Design a meandering vine that guides the eye naturally along the edge of the pillowcase instead of a rigid, straight line.
Use a long-and-short stitch to fill the strawberries, blending two shades of red to give them a rounded, juicy appearance.
Add a single tiny French knot or a seed stitch in white or pale yellow on the surface of the berry to mimic seeds for a touch of realism.
Vary the shades of green in the leaves to suggest age and light, making the vine look like it grew right on the fabric.
4. Achieve Woodland Texture with Mushrooms & Ferns
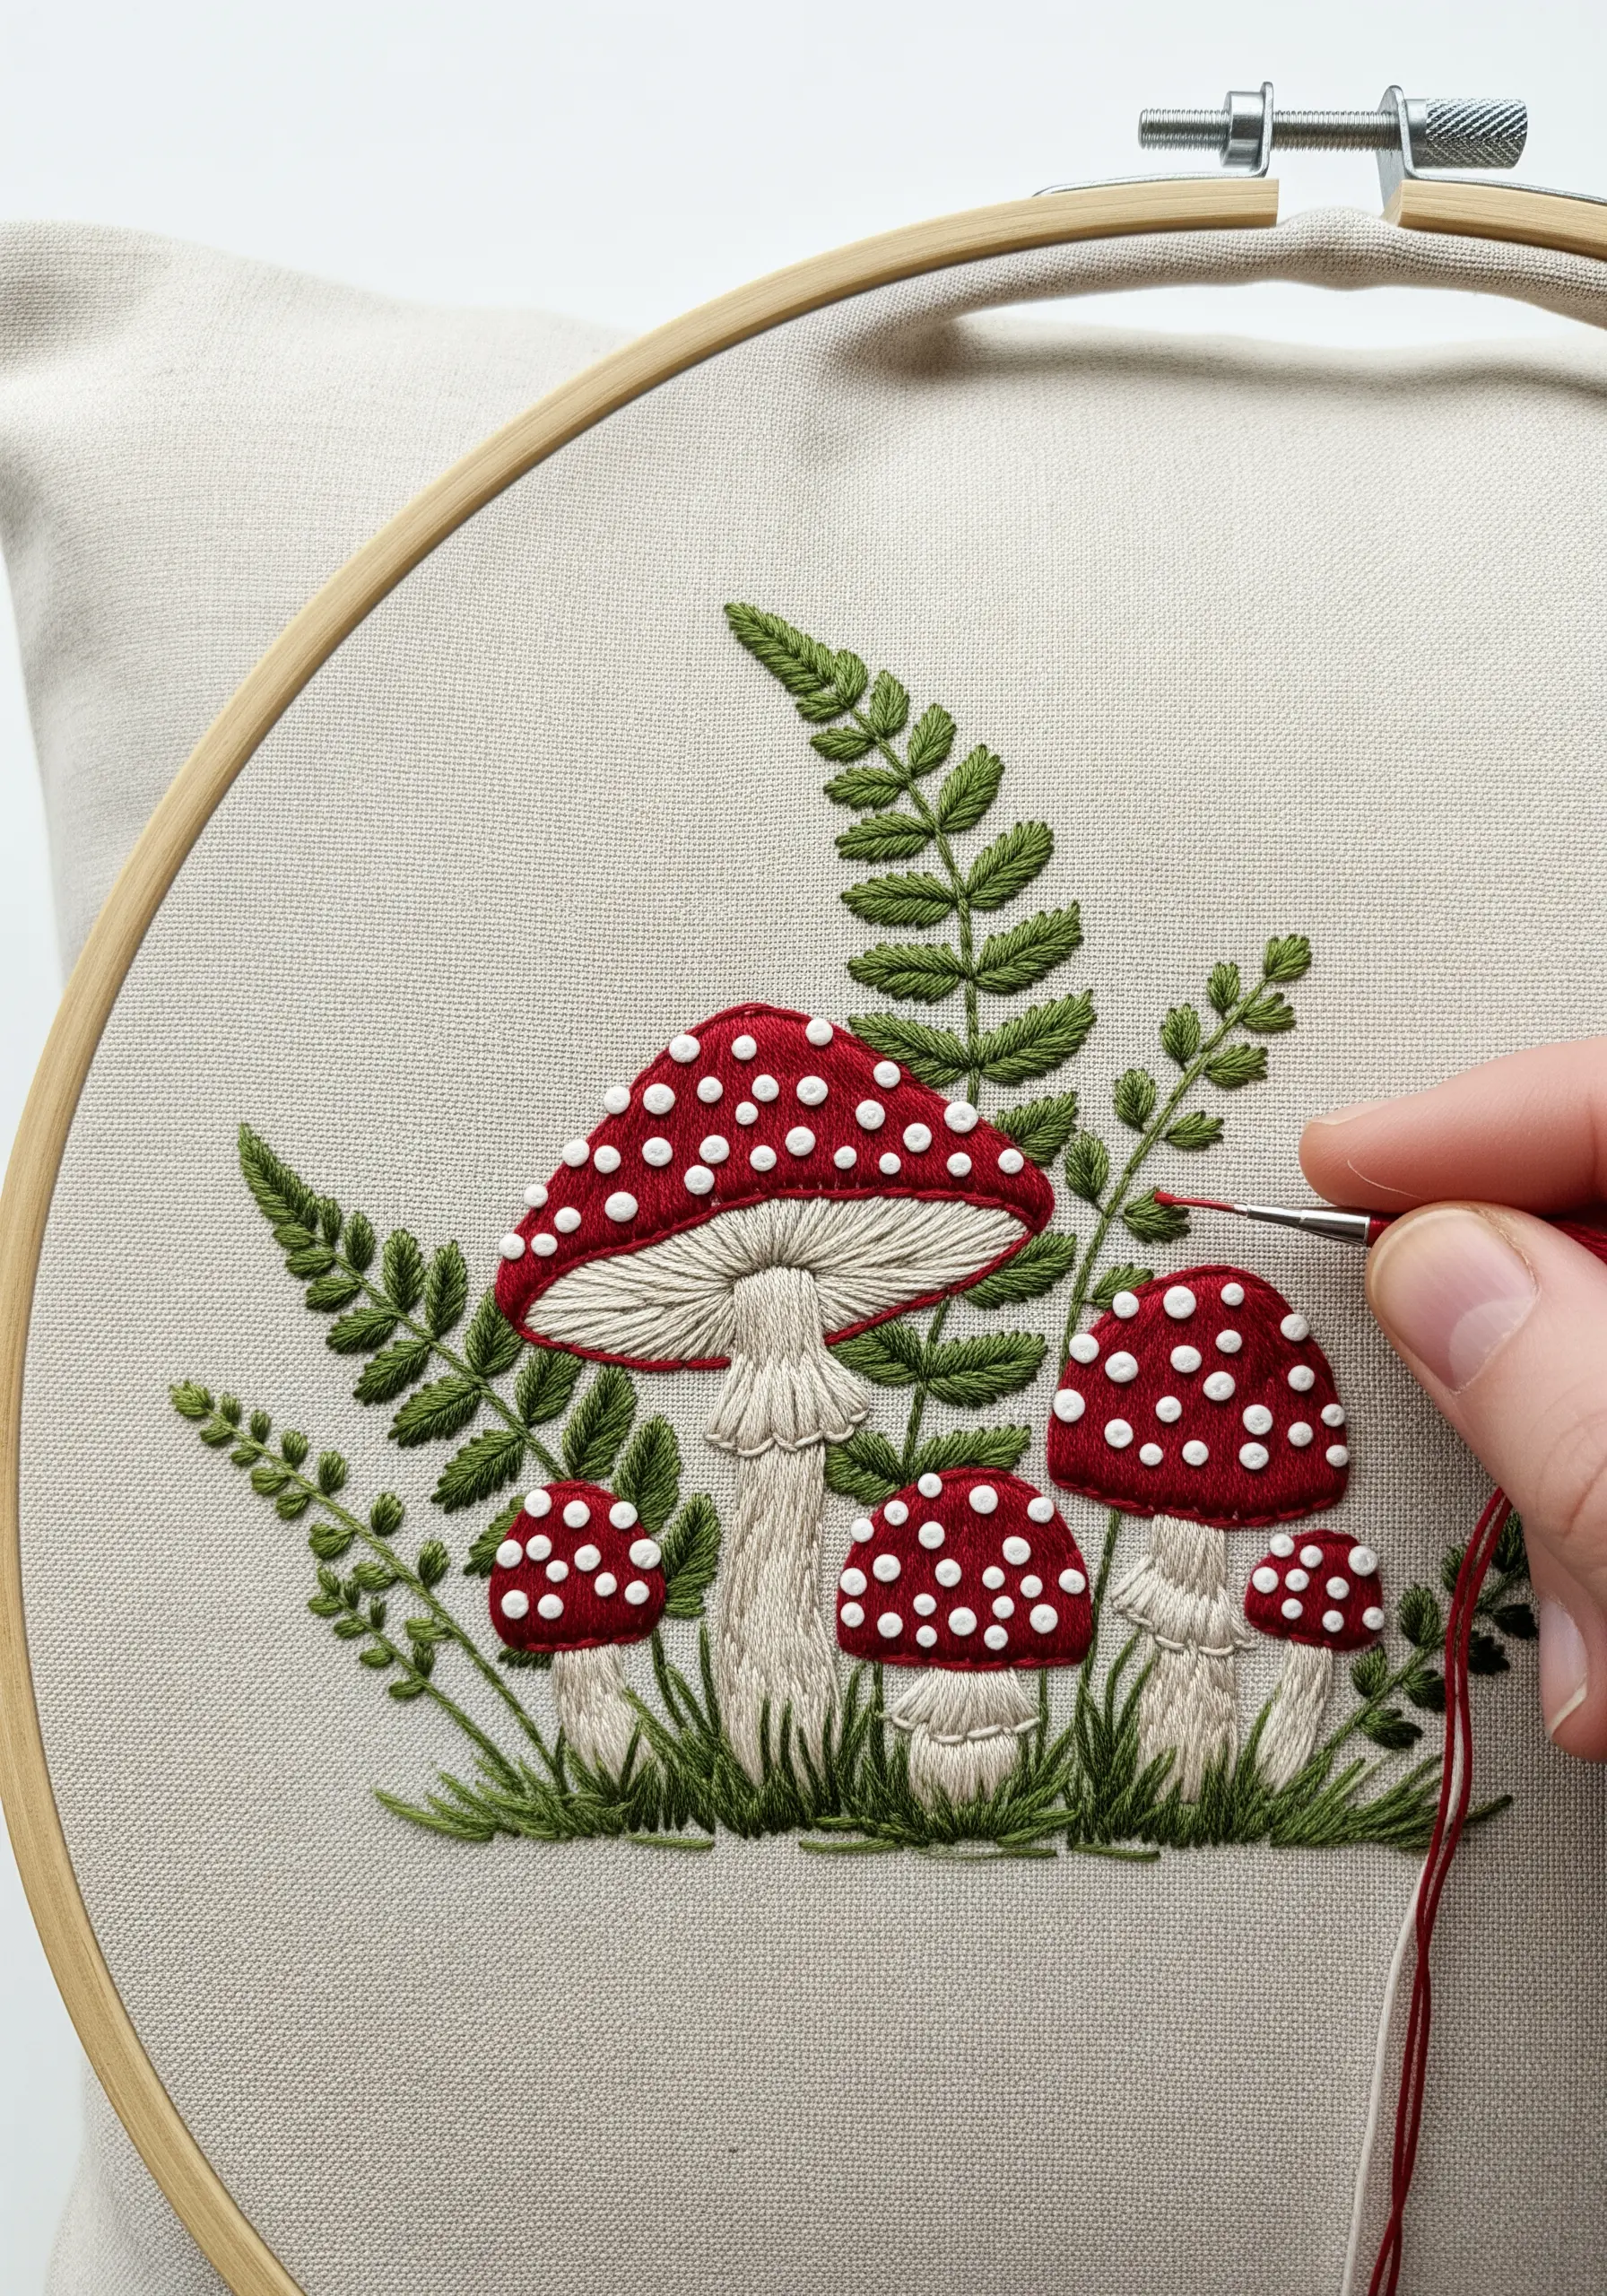
Capture the classic fairytale look by using a dense satin stitch for the red mushroom caps, ensuring your stitches lie flat and smooth.
Create perfectly uniform white spots with French knots, pulling each knot just tight enough to form a raised dot without puckering the fabric.
For the delicate fern leaves, use a fishbone stitch or fly stitch worked closely together along a central stem.
Combining these distinct textures is key to realistic mushroom forest floor embroidery projects that feel like a slice of nature.
5. Layer Floral Textures for a Wildflower Bouquet
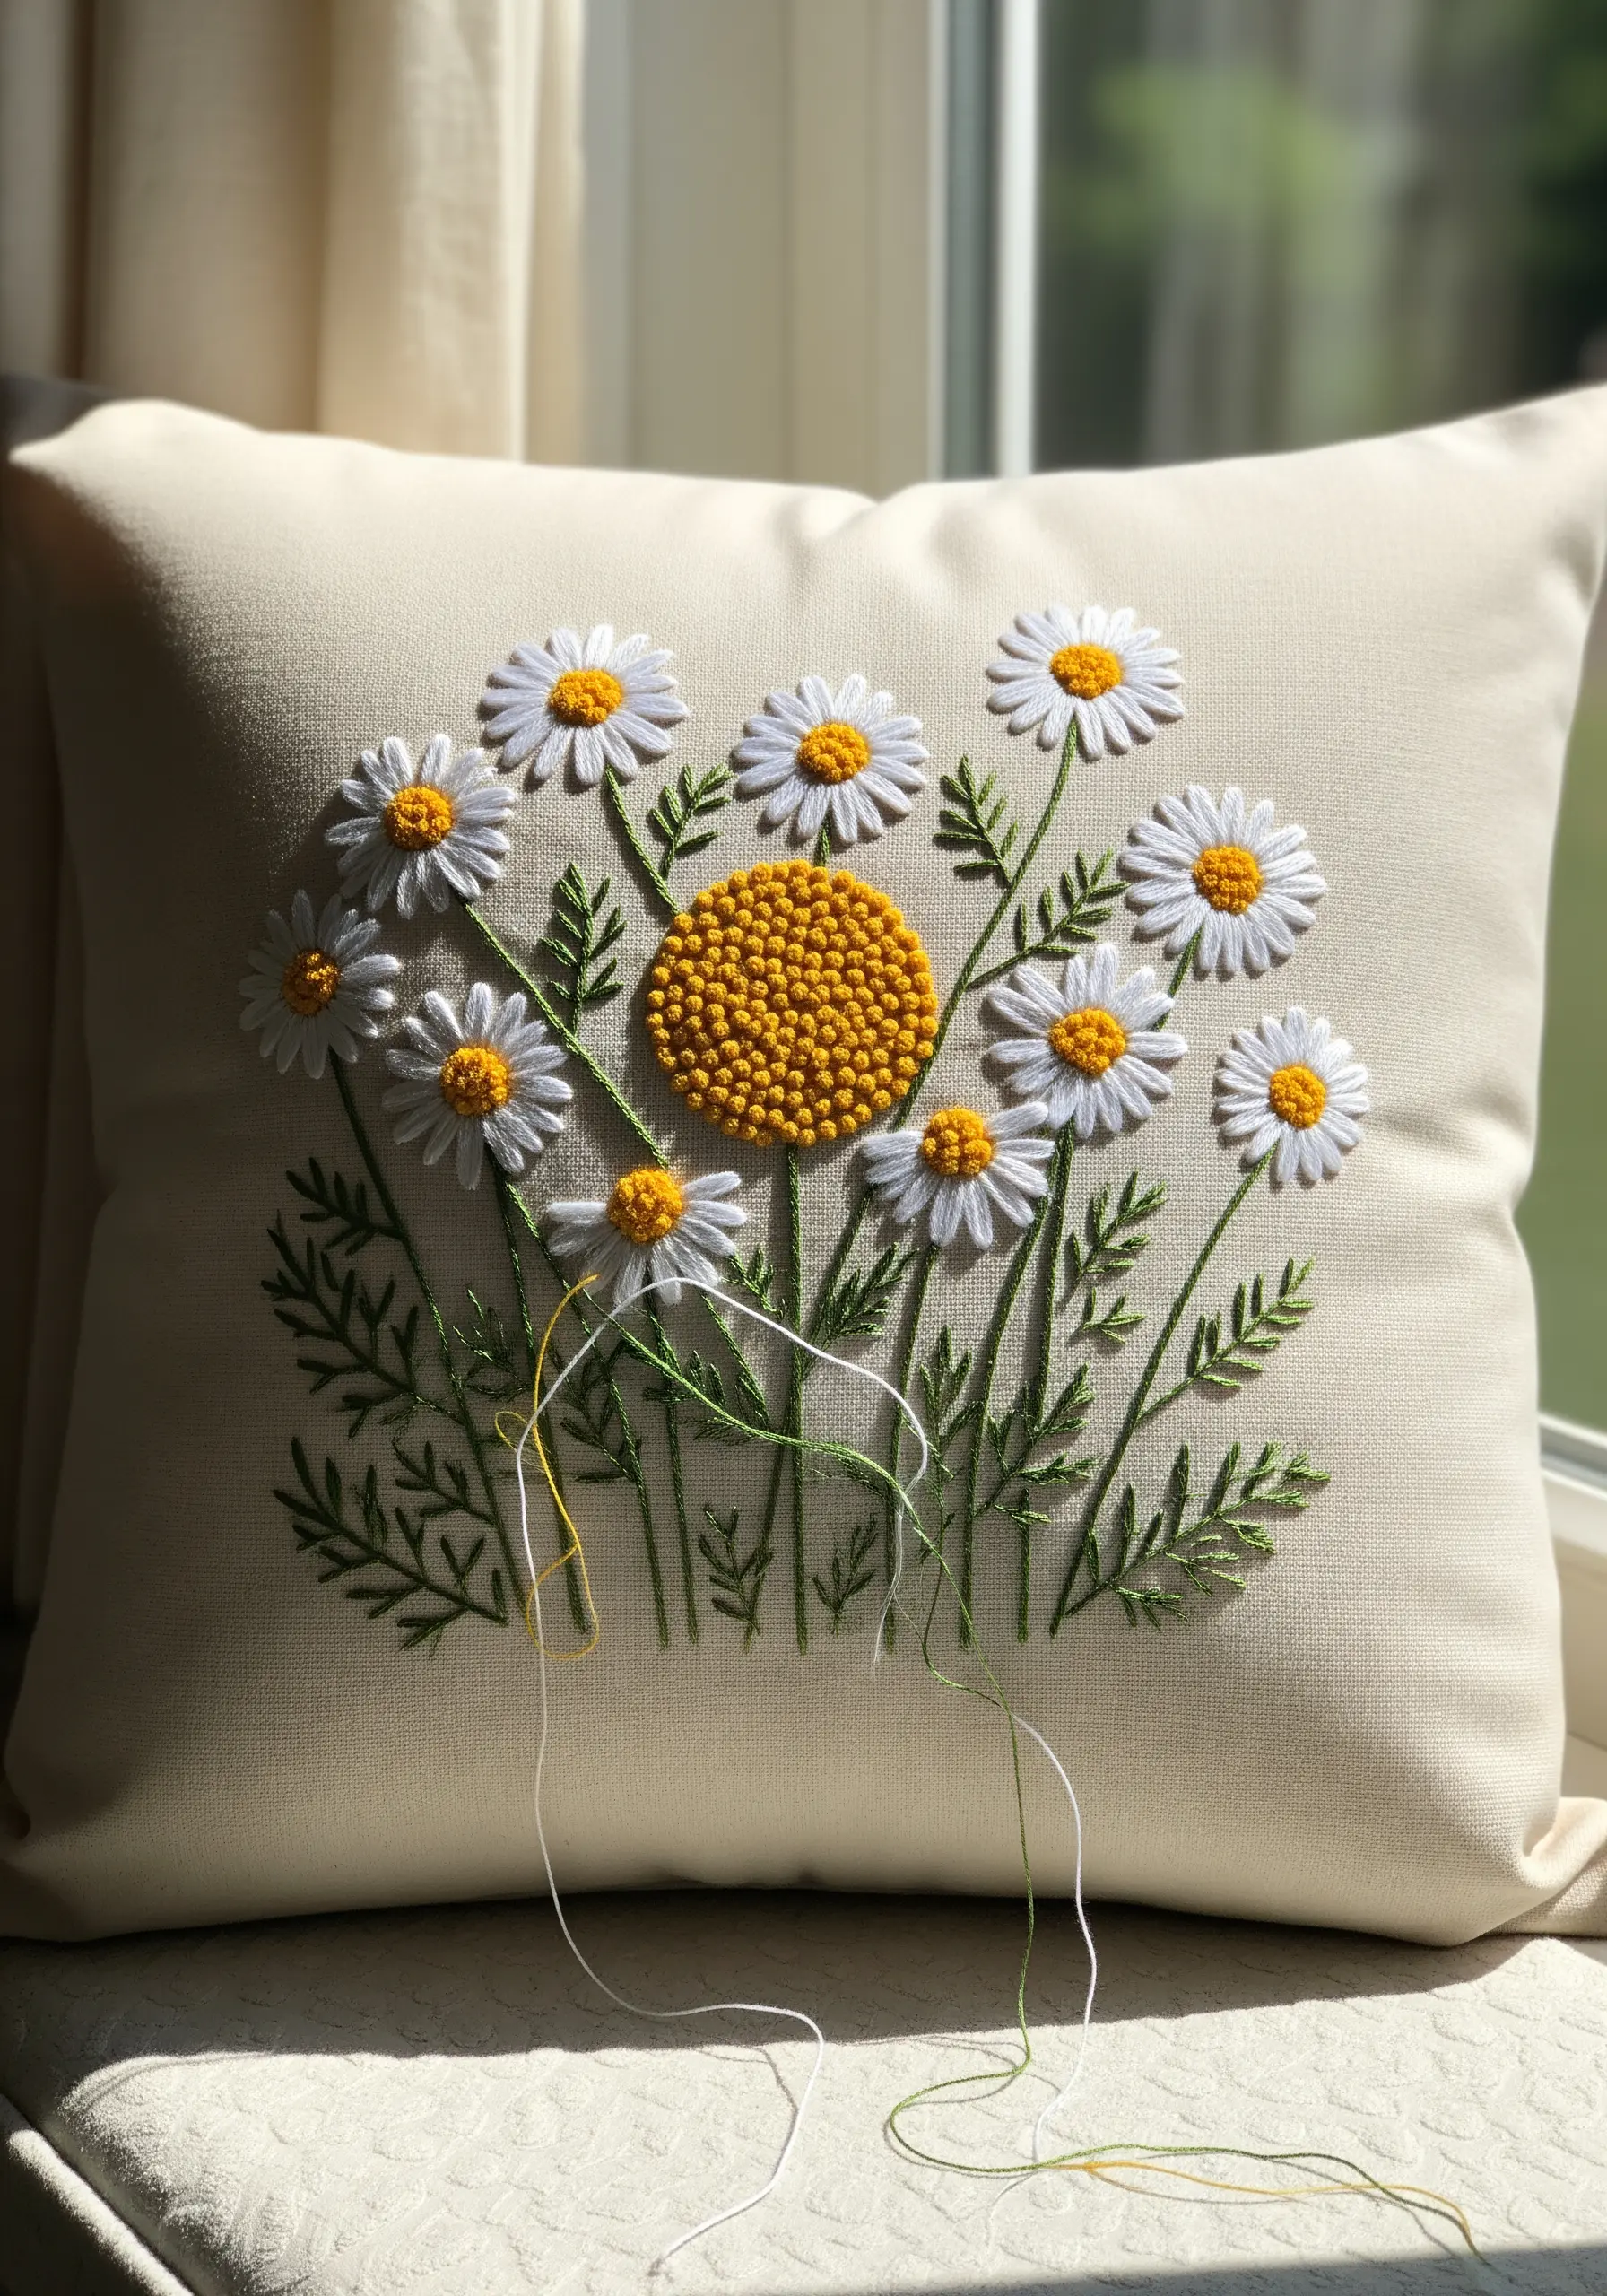
Create a focal point of high texture by filling a central flower, like a dandelion or sunflower, with a dense sea of French knots.
Surround it with daisies stitched with a simple detached chain stitch for the petals, which provides a flatter, more graphic contrast to the knotted center.
This play between high-relief knots and flat-stitched petals makes the composition visually interesting and draws the eye inward.
Use a single thread for the stems to keep them delicate, preventing the bouquet from looking heavy or cluttered.
6. Add Ethereal Sheen with Metallics and Beads
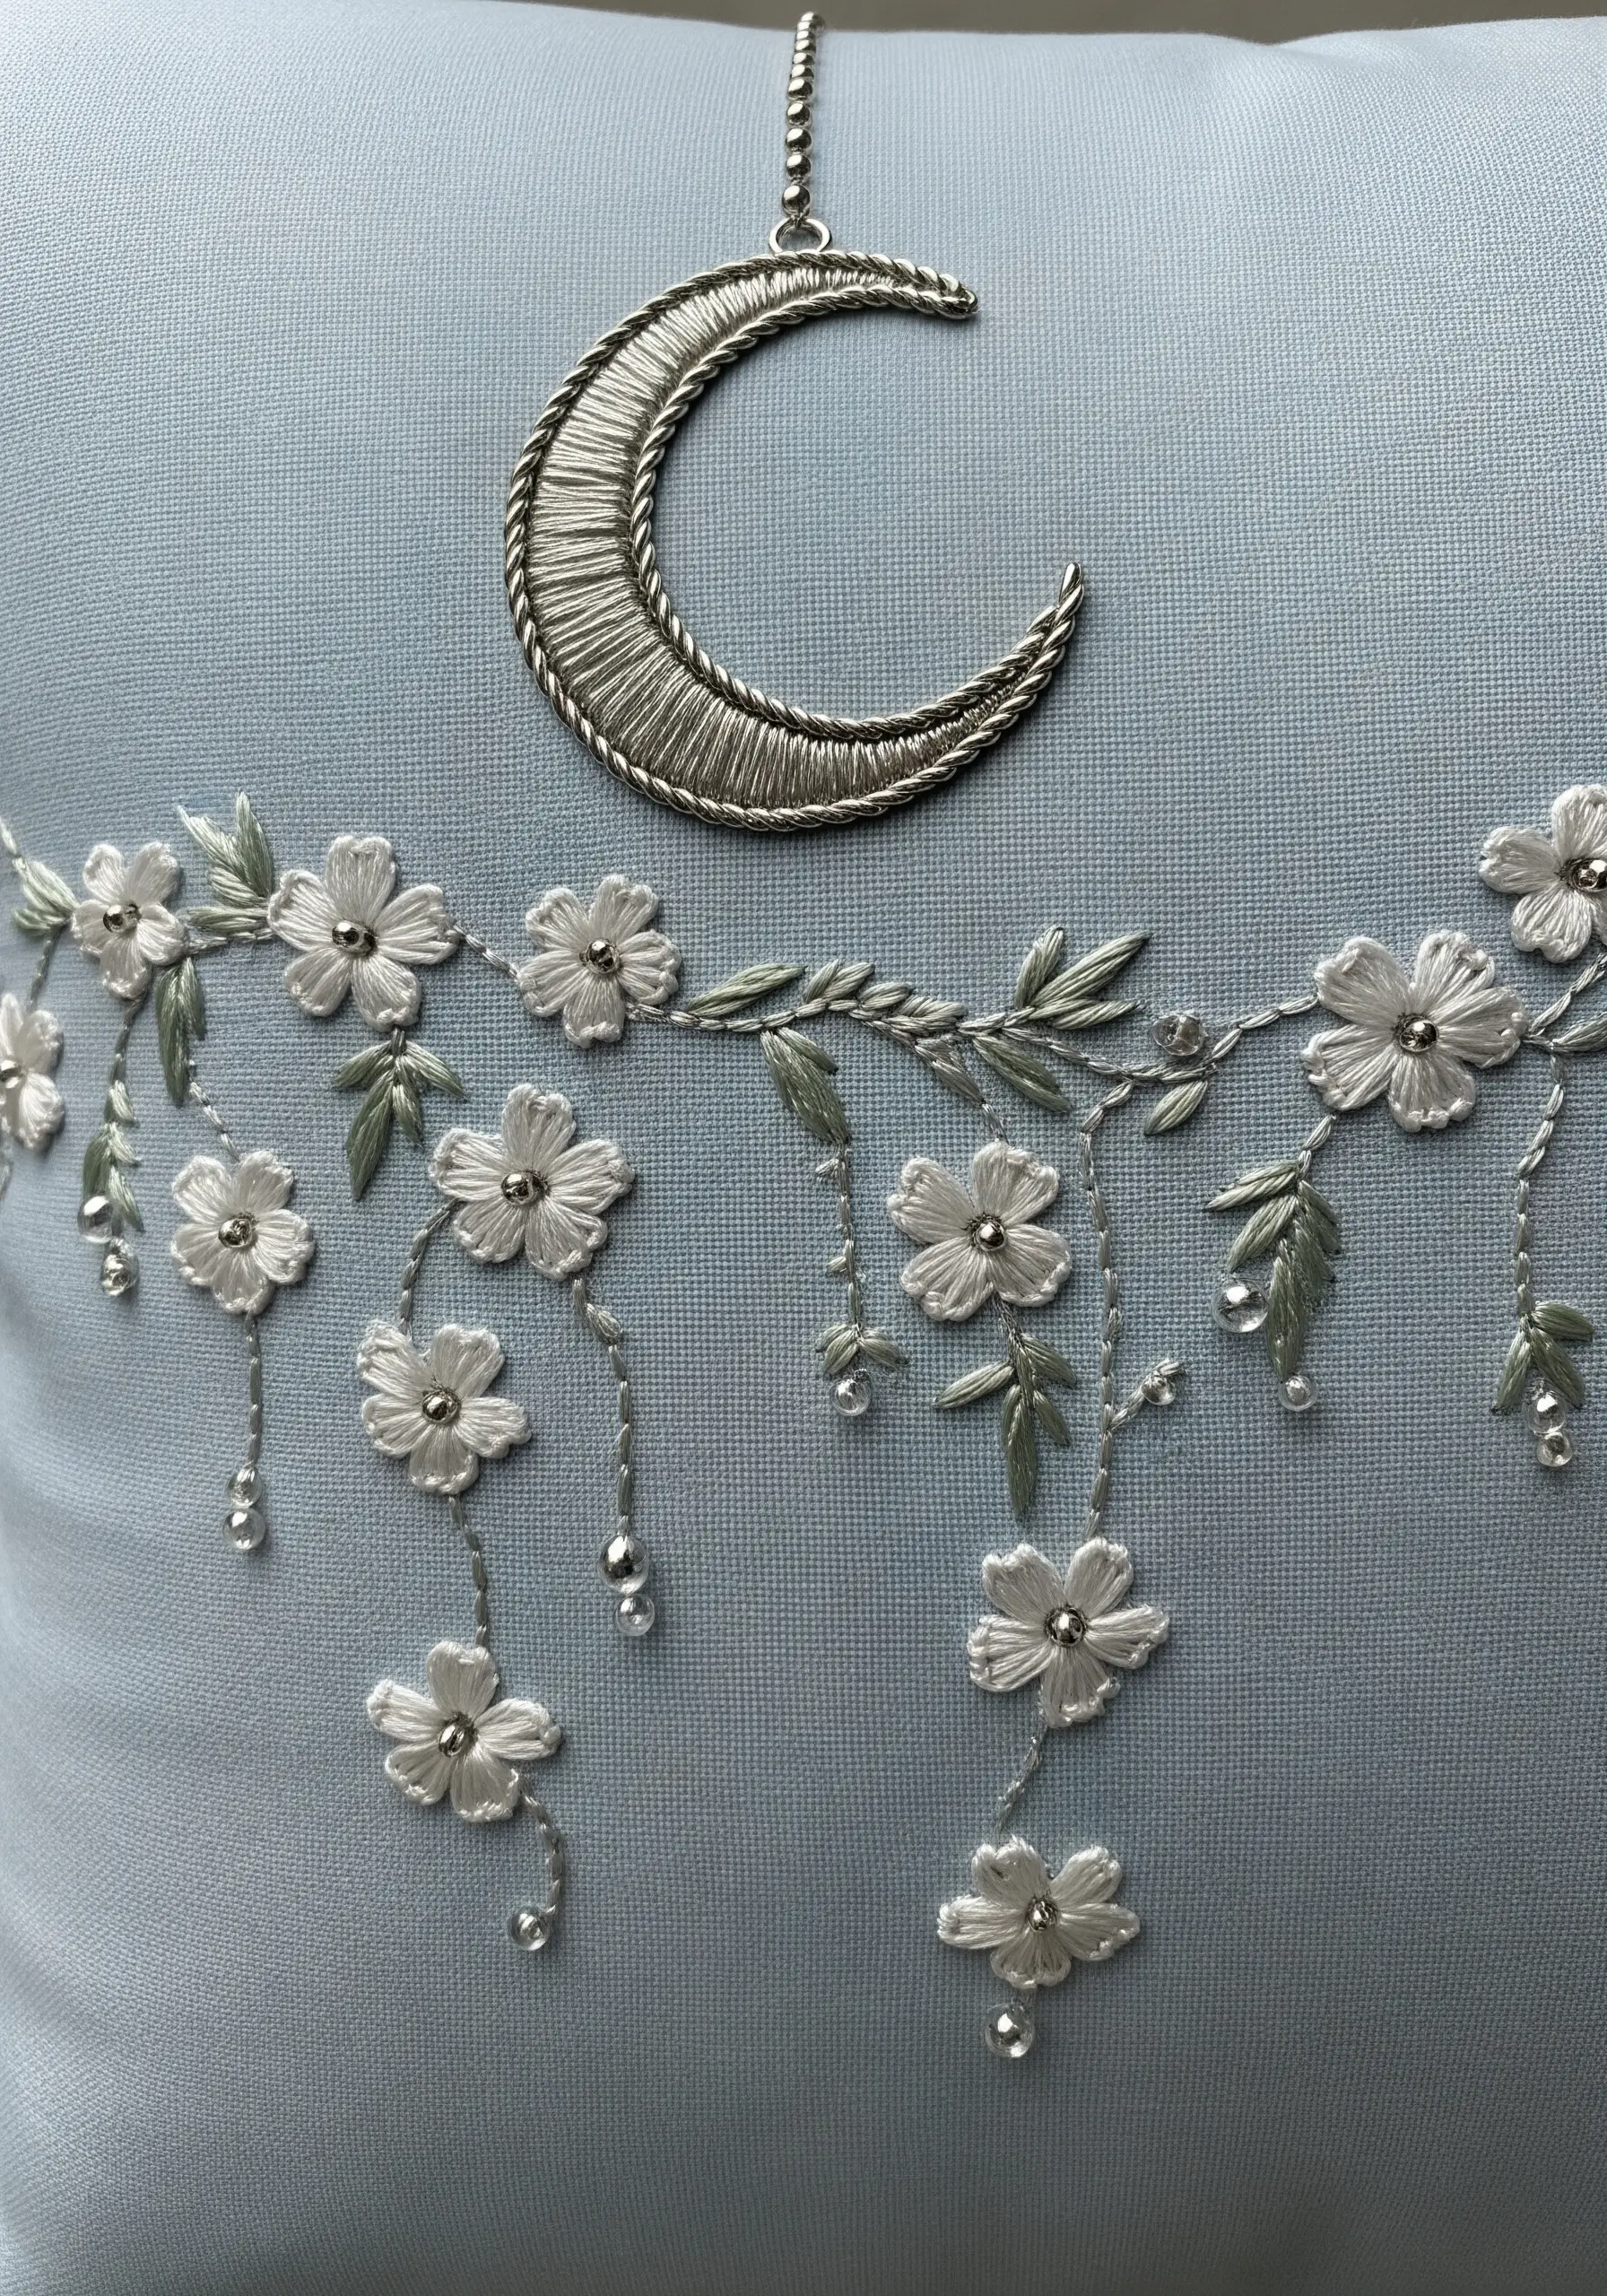
Elevate a simple floral design by incorporating a metallic silver thread for select elements, like stems or outlines, to catch the light.
Use a silk or satin floss for the flower petals; its natural sheen provides a soft luster that complements the metallic thread without overwhelming it.
For a final touch of magic, stitch tiny clear seed beads at the end of trailing vines to mimic dewdrops.
These subtle mixed-media crafts with embroidery transform a piece from simple stitching to wearable art.
7. Design a Delicate Forget-Me-Not Scatter
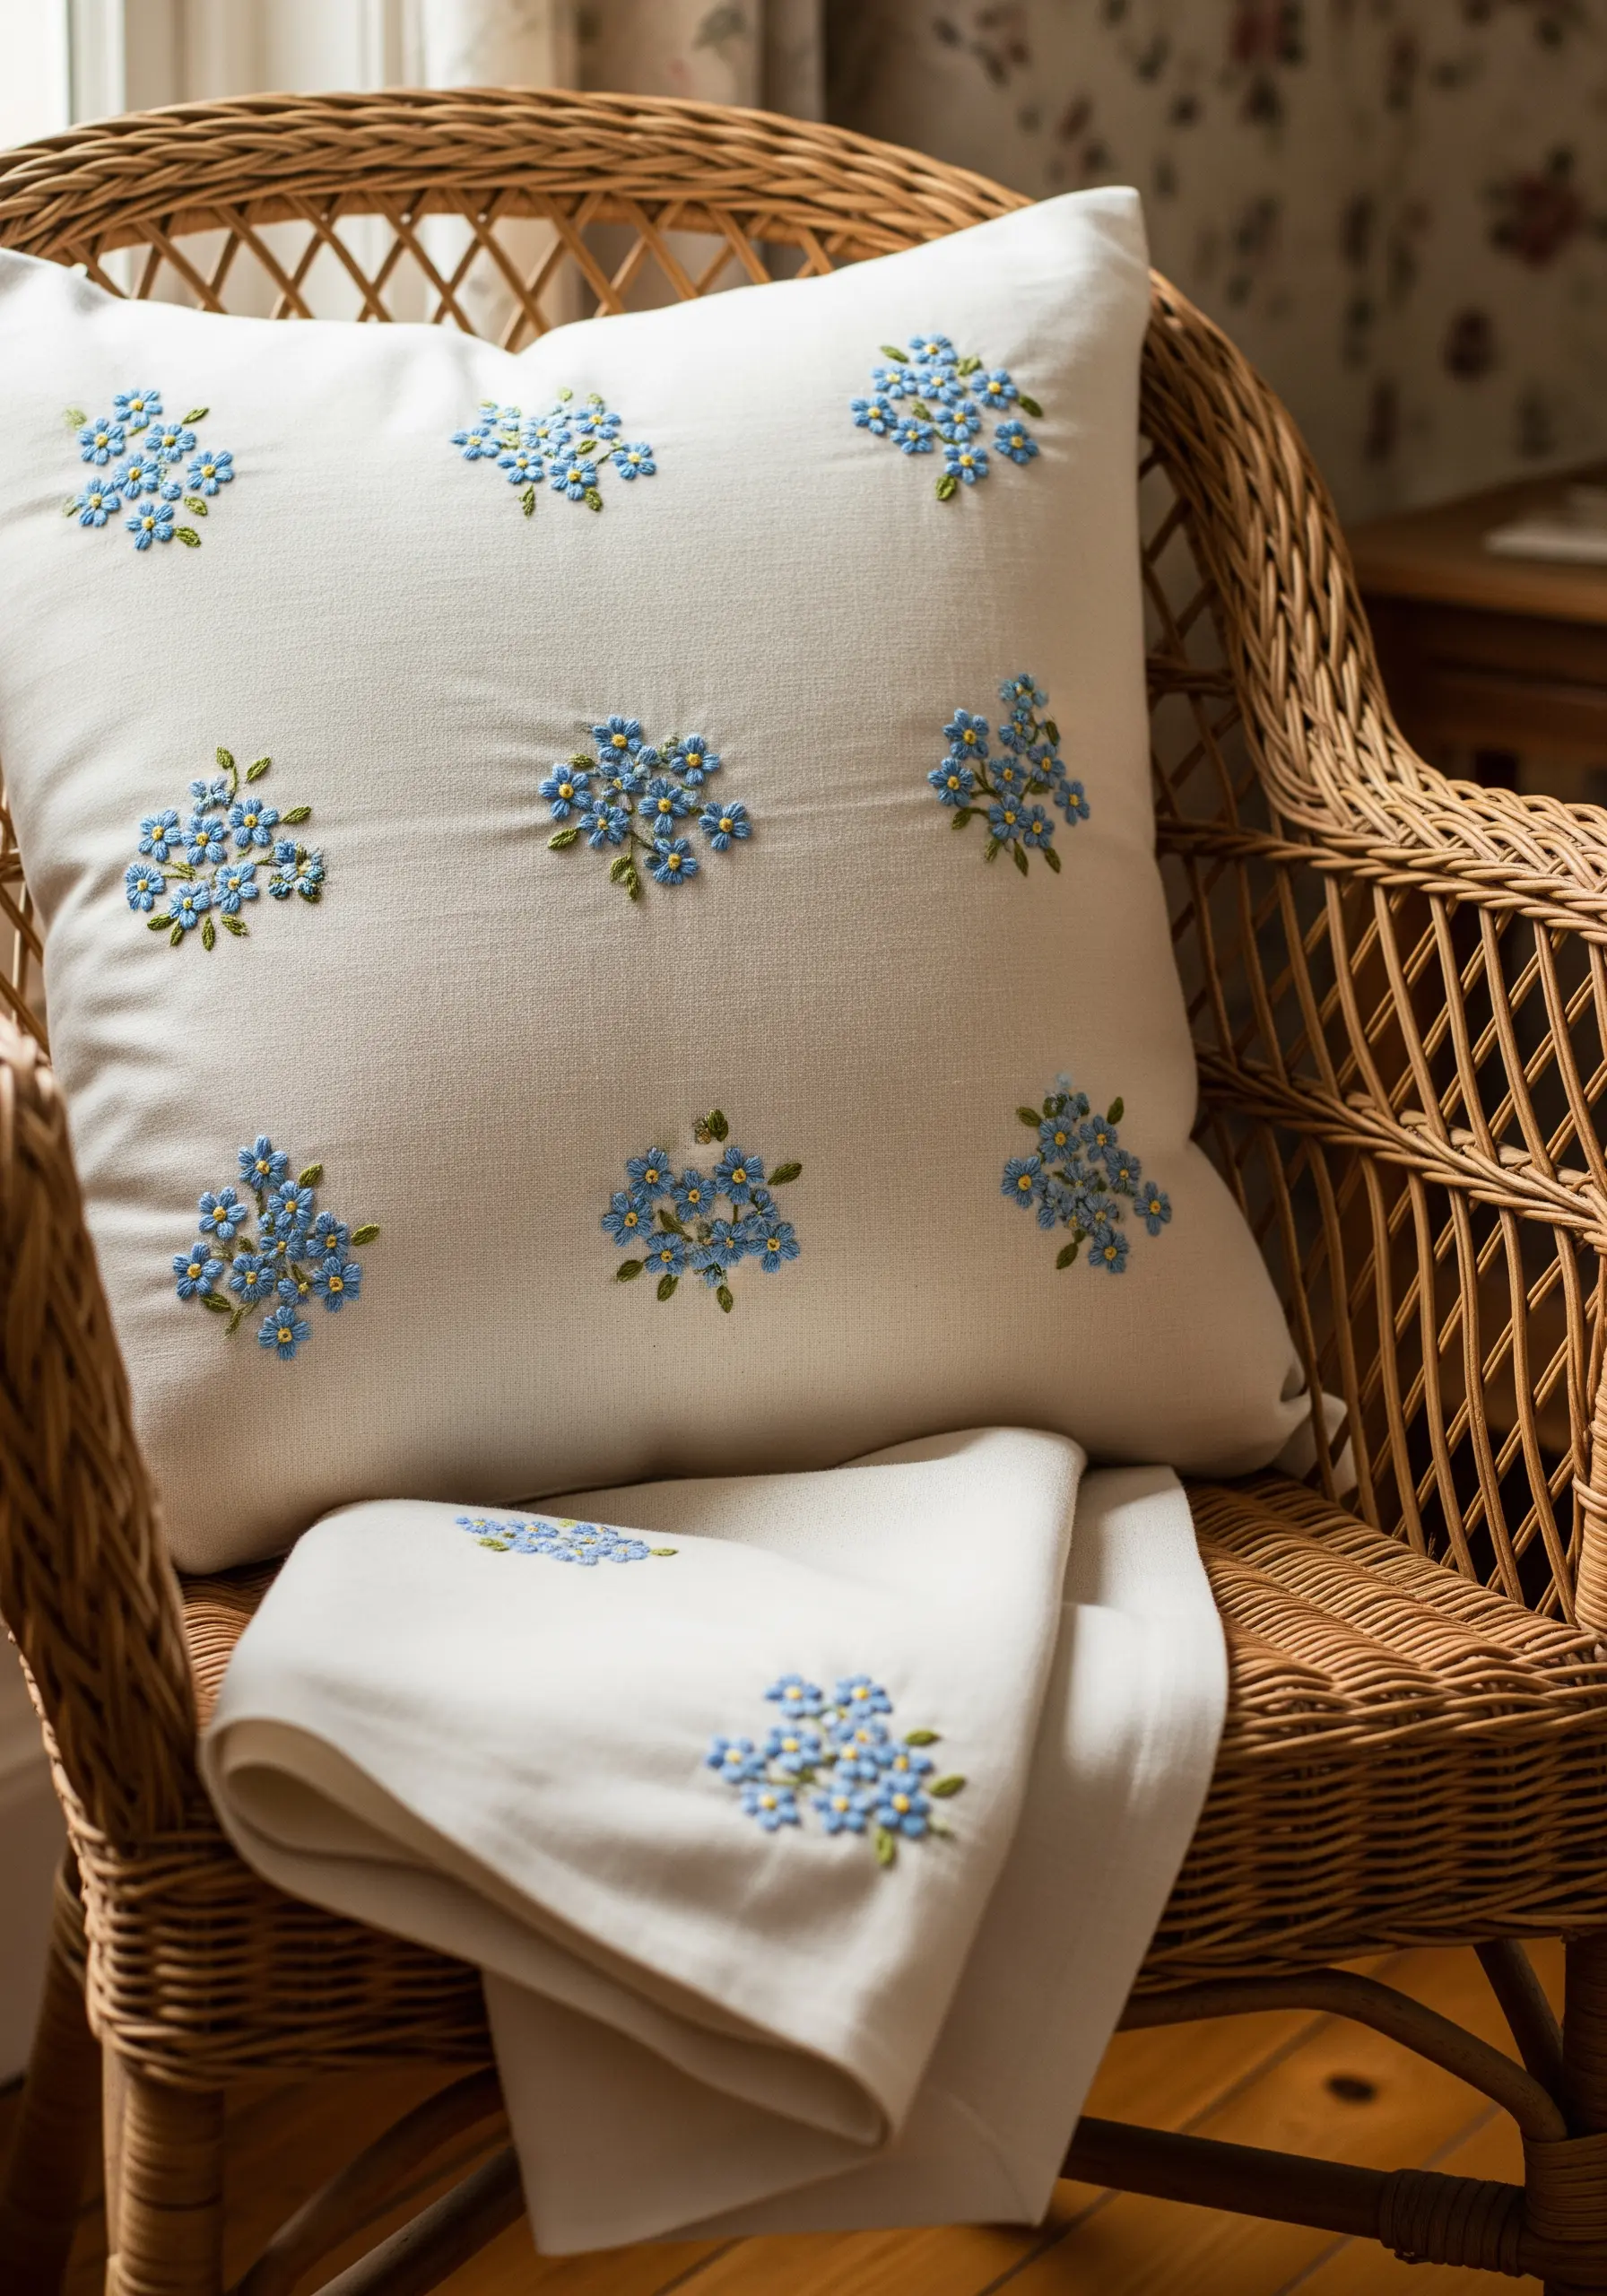
Instead of a single large motif, create a light, airy feel by scattering small clusters of forget-me-nots across the pillowcase.
Form each tiny flower with five detached chain stitches in a circle around a central French knot in yellow.
Keep the clusters asymmetrical and vary the spacing between them to achieve a natural, ‘just-tossed’ look.
This technique is perfect for adding a subtle, romantic touch that doesn’t dominate the entire fabric surface.
8. Master Realistic Leaves with an Olive Branch Wreath
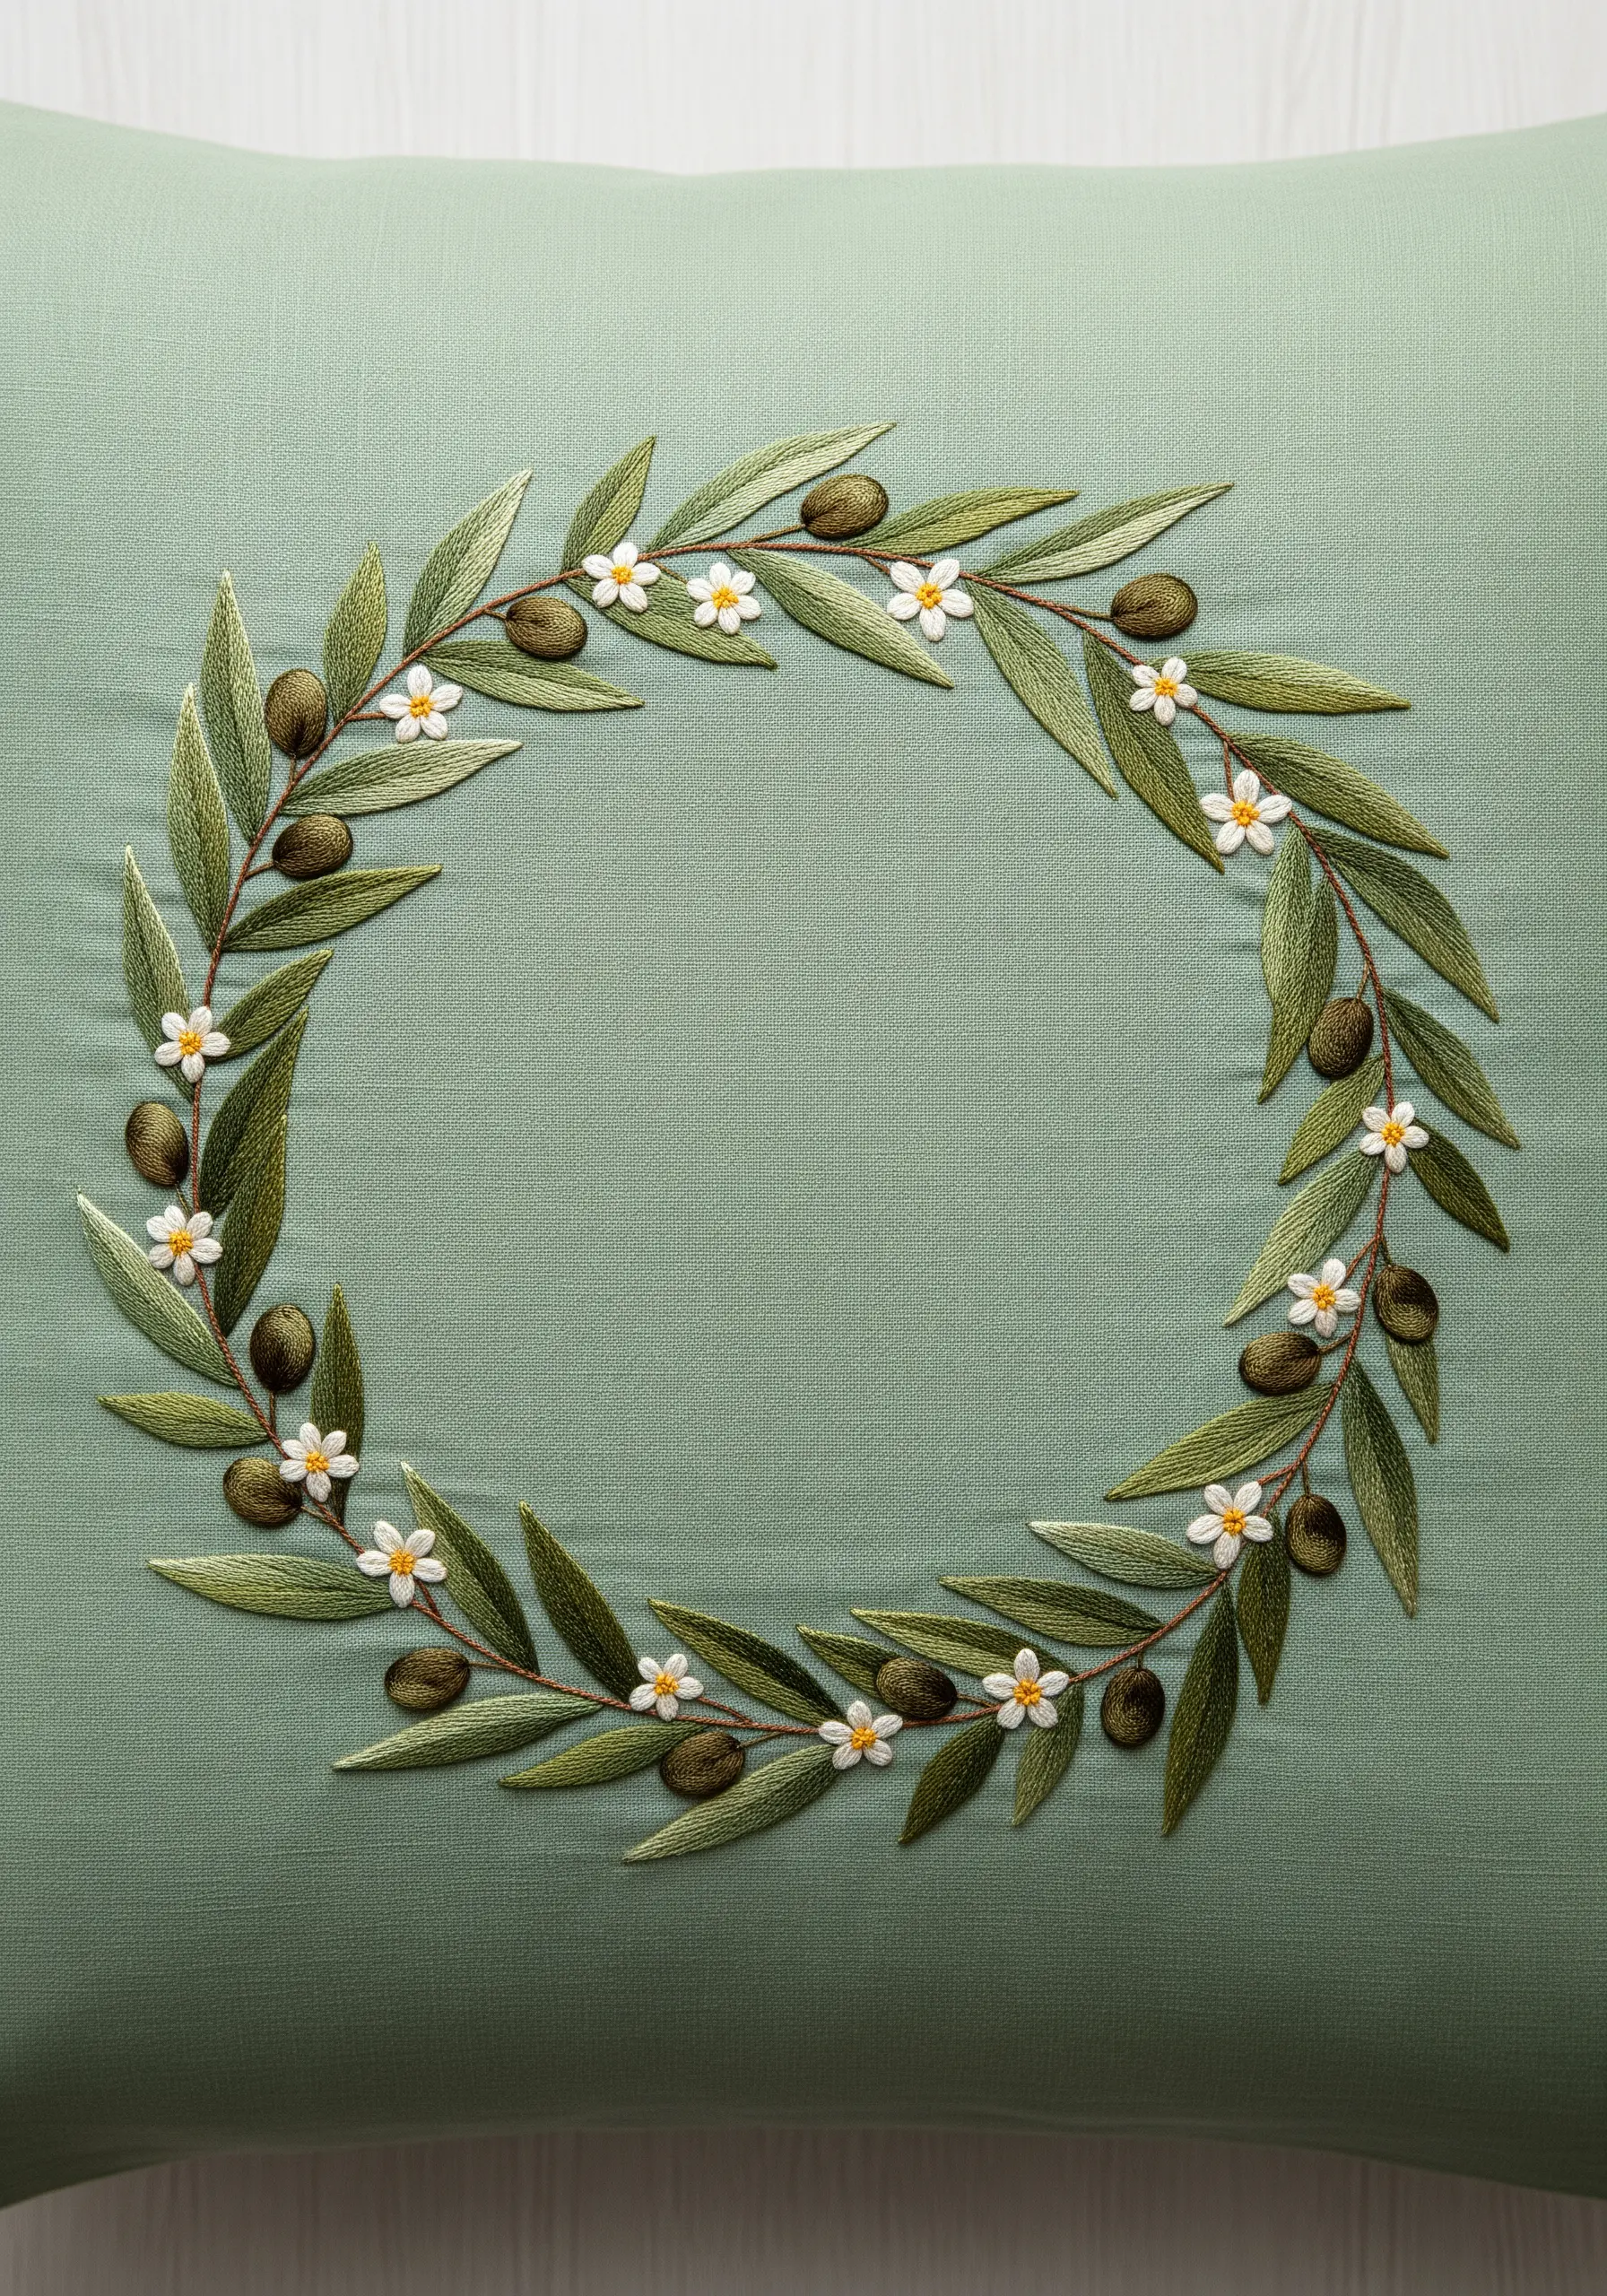
For the olive leaves, use a fishbone stitch with two closely related shades of green—one for each side of the central vein—to create a subtle, realistic highlight.
Stitch the olives themselves with a padded satin stitch; create a small satin stitch underlayer first, then stitch over it to give them a raised, rounded shape.
The tiny white blossoms, made with detached chain stitches, provide a delicate contrast to the richer greens and browns of the foliage.
9. Paint with Thread for Lifelike Poppy Petals
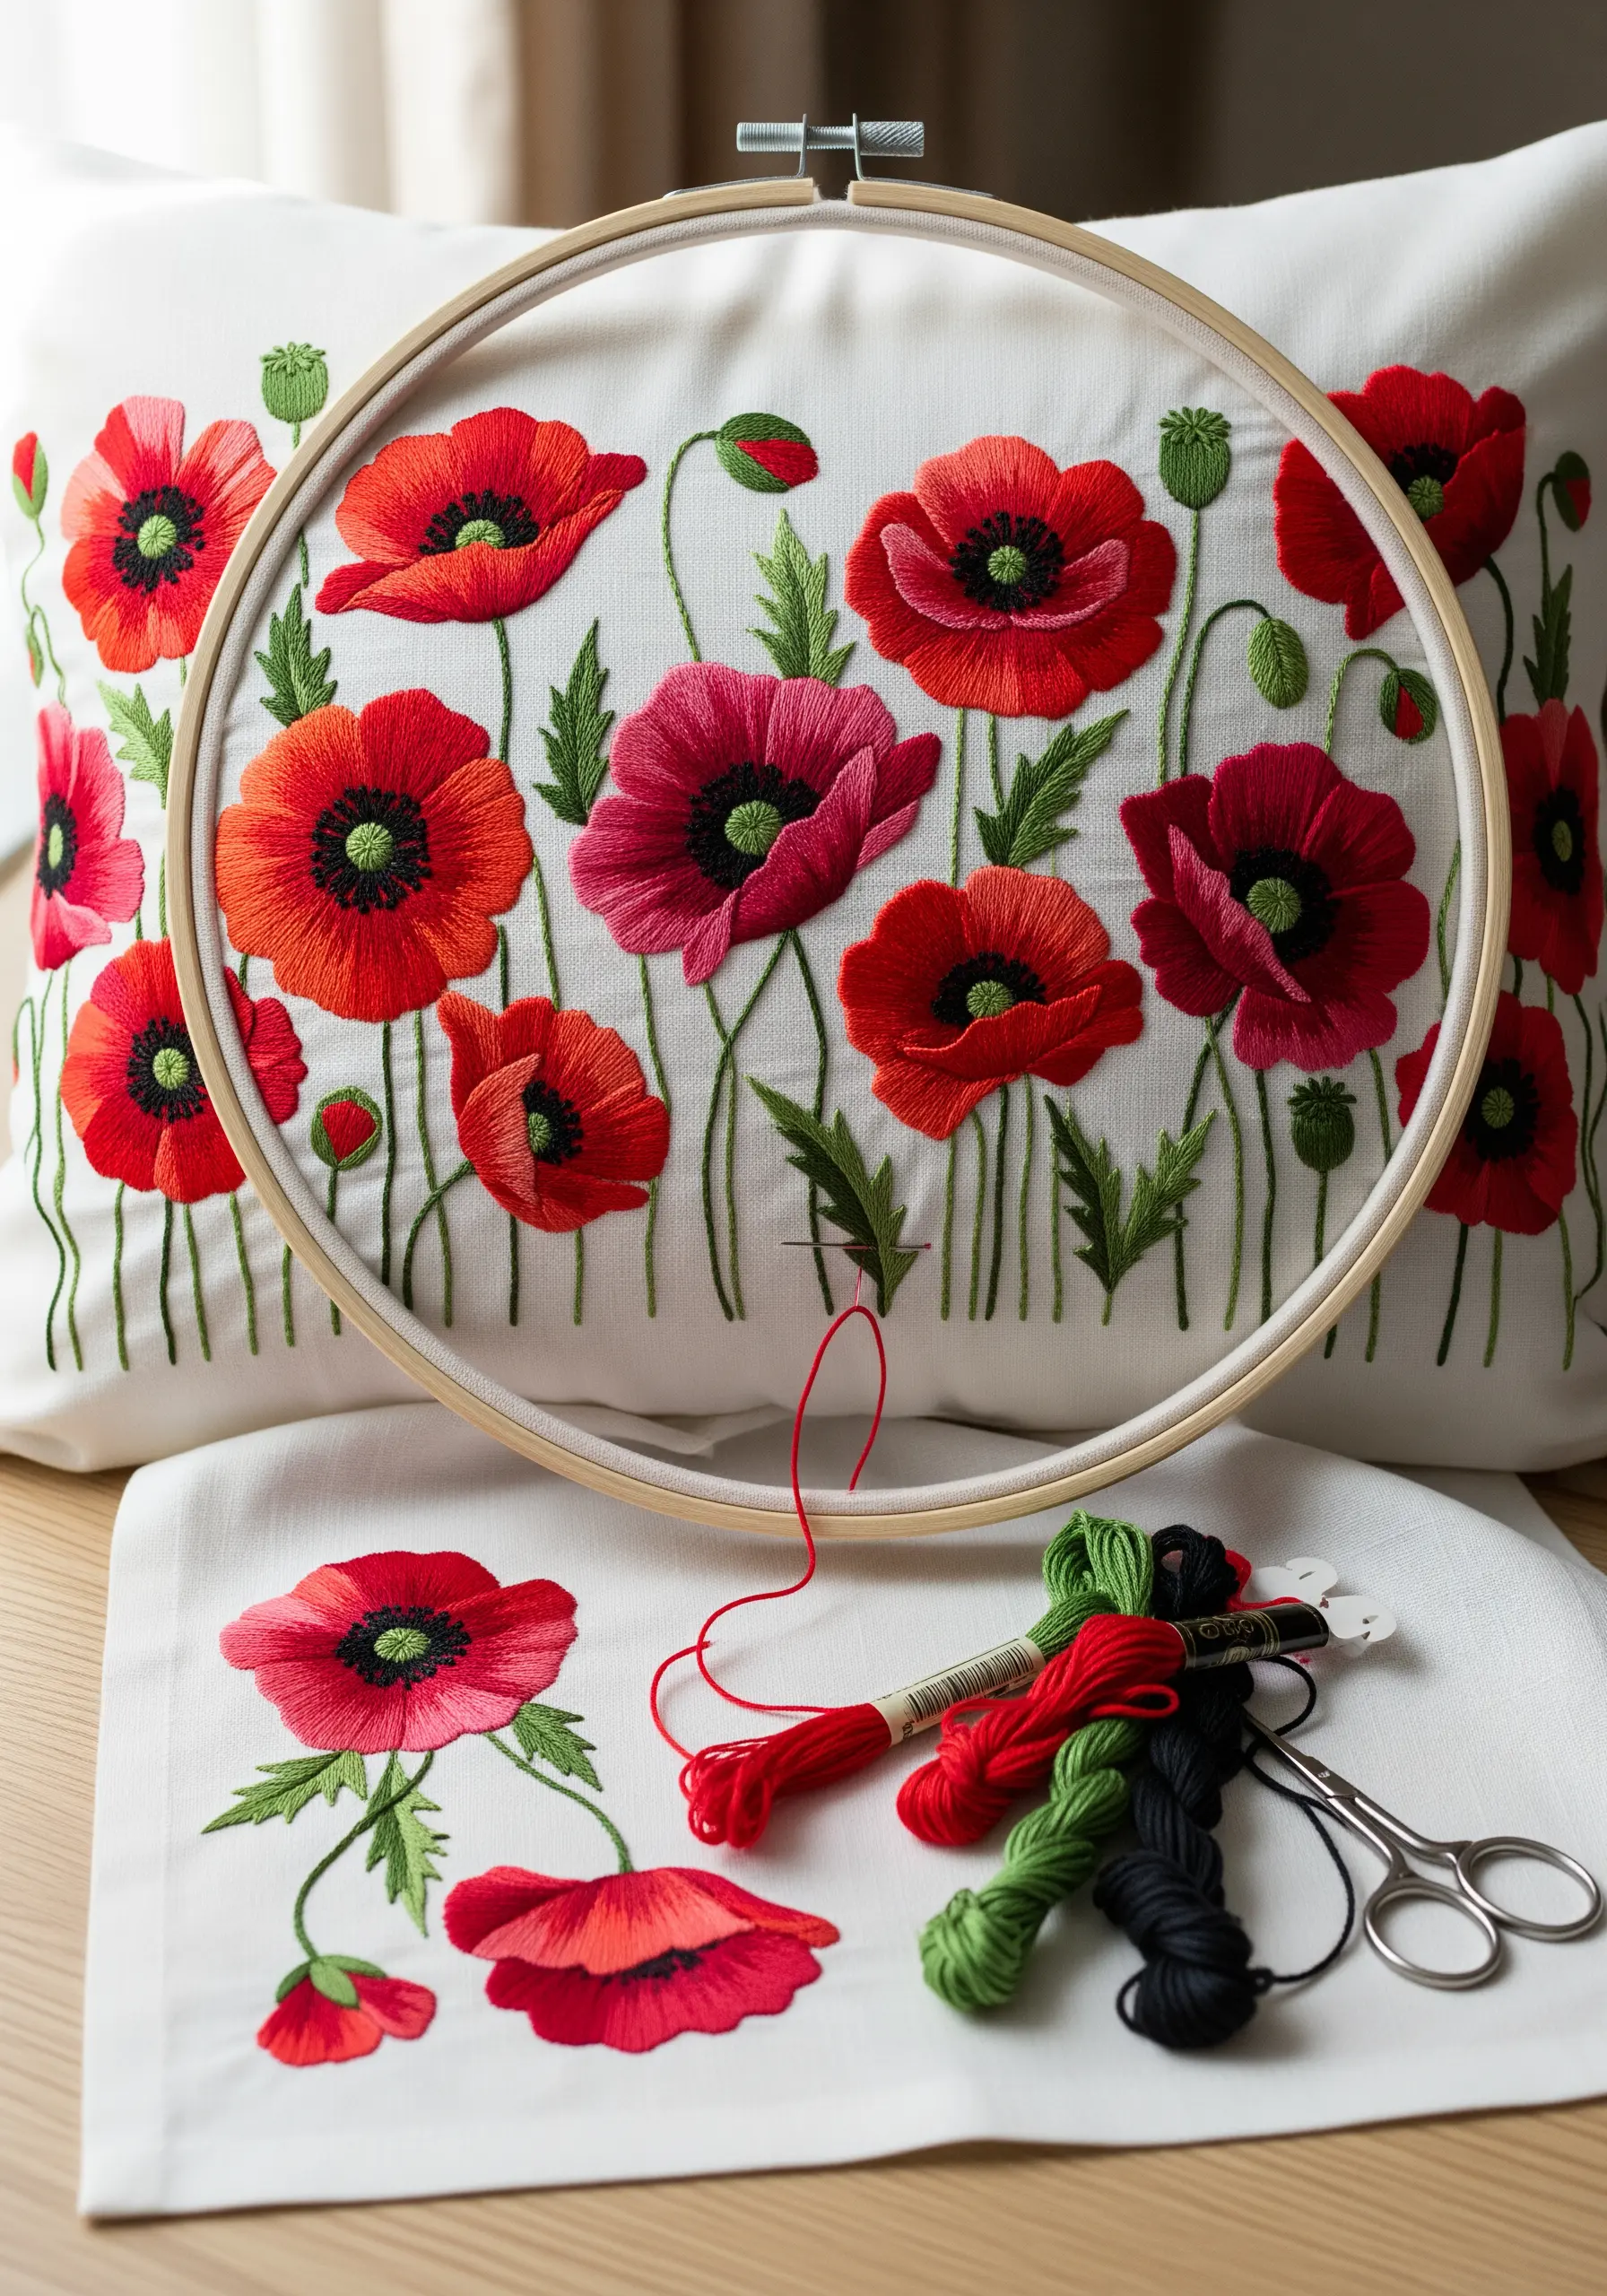
Use long-and-short stitch, also known as needle painting, to blend shades of red and pink within each poppy petal.
This technique eliminates hard lines between colors, creating soft, realistic transitions that mimic the delicate texture of the real flower.
Start with the lightest color at the petal’s edge and work your way in with progressively darker shades for a natural look.
These gradient color floral embroidery ideas give your work a painterly, sophisticated finish.
10. Create Cascading Wisteria with Layered Knots
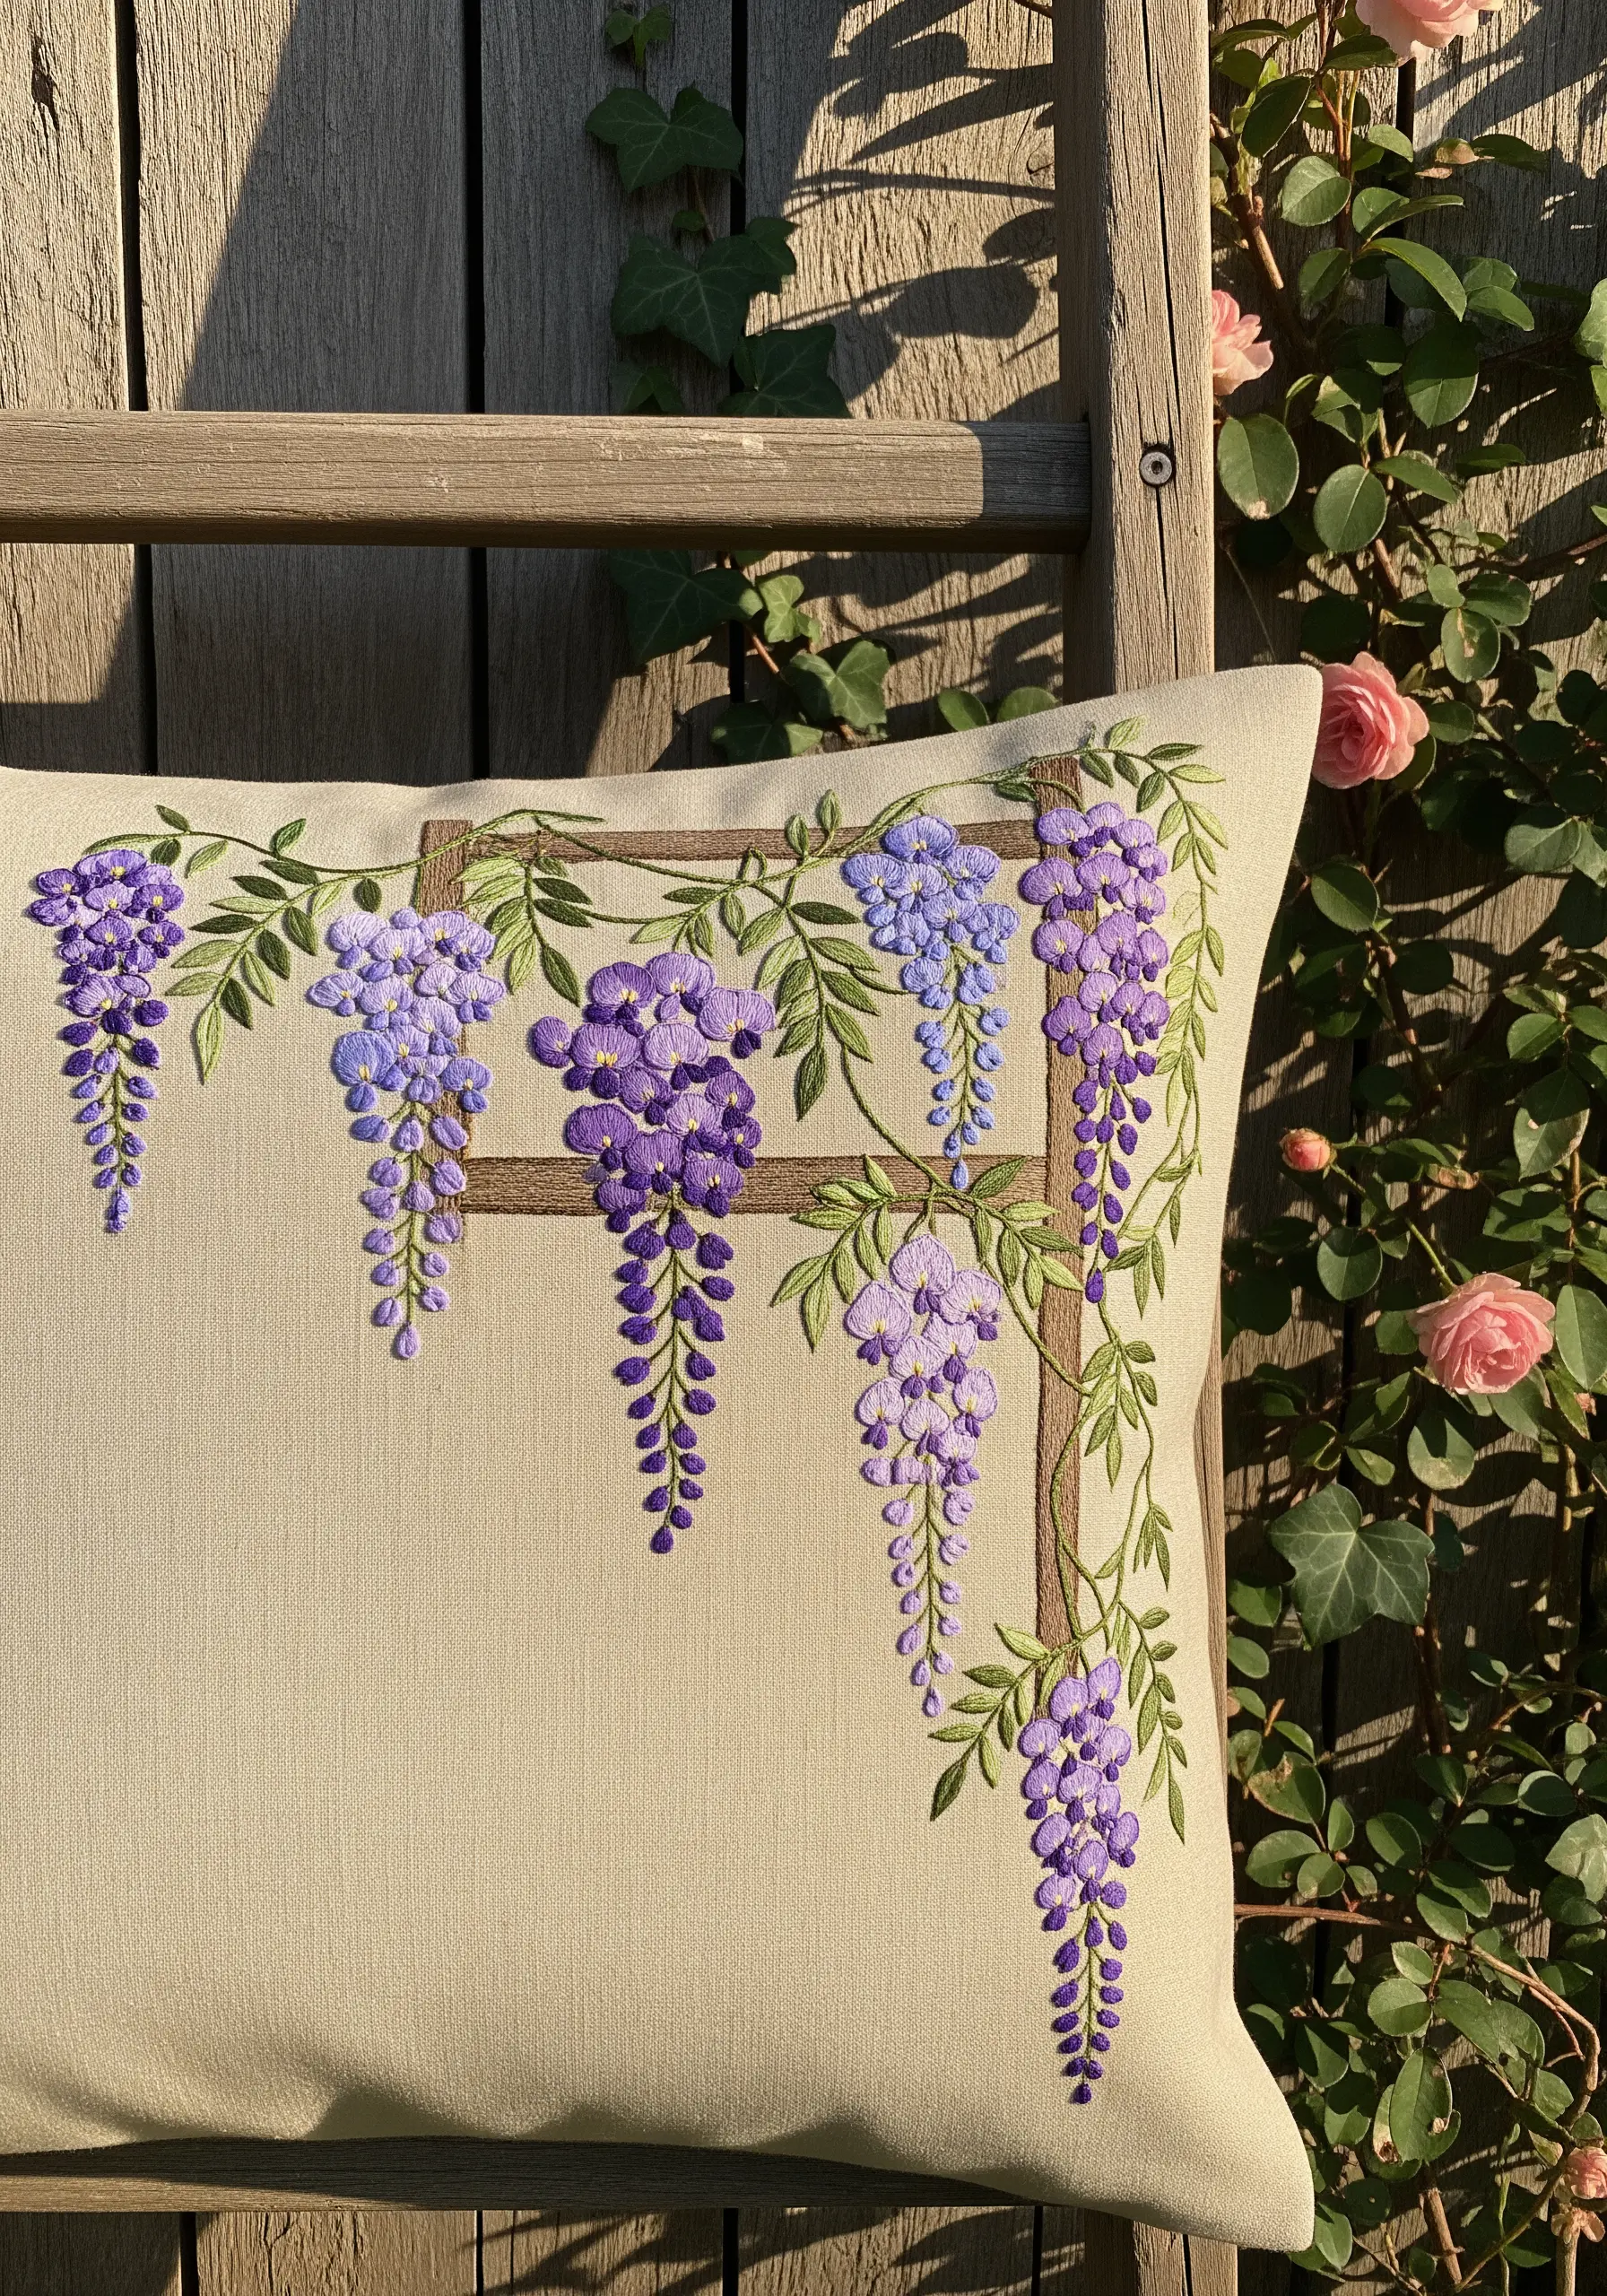
To capture the drooping elegance of wisteria, build the flower clusters using a mix of French knots and teardrop-shaped straight stitches.
Start at the top of the cluster with denser knots, then gradually lengthen your stitches and space them out as you work downwards to create the signature tapered shape.
Use three or four shades of purple, lavender, and blue, scattering them randomly to give the blossoms a natural, multi-tonal appearance.
11. Build Hyper-Textural Moss with French Knots
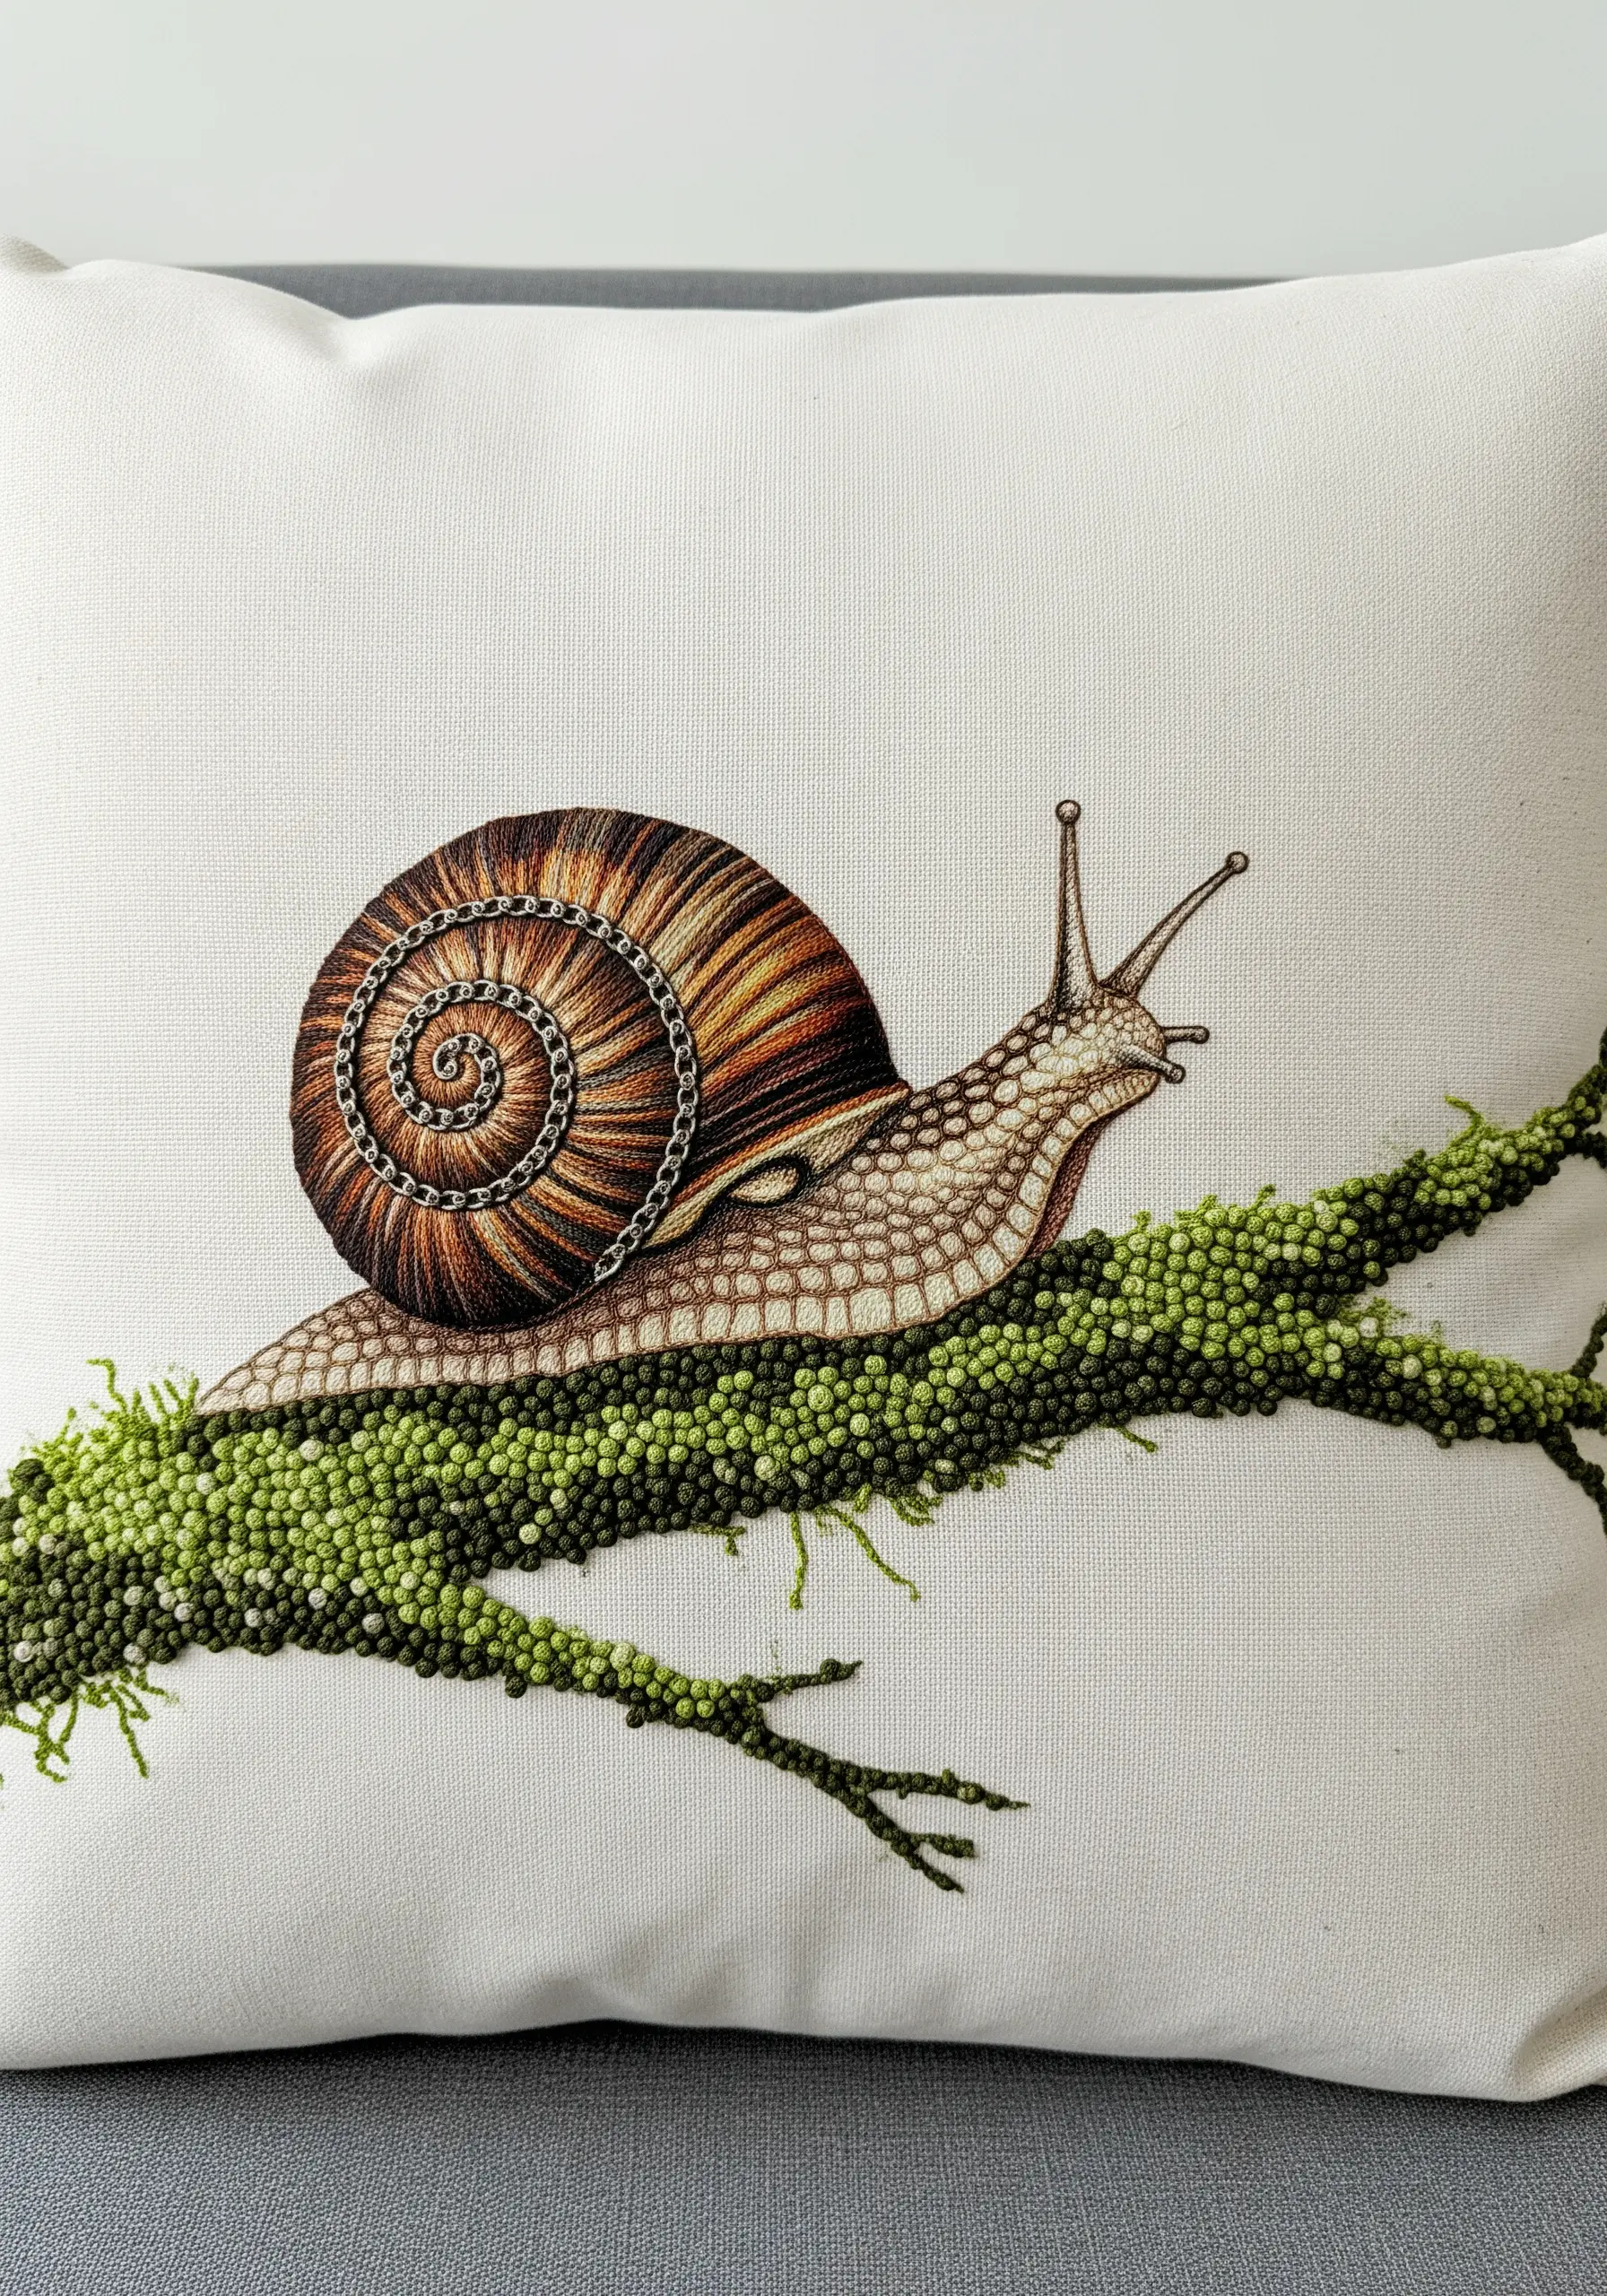
Create a wonderfully tactile moss effect by filling the branch area with hundreds of French knots worked very close together.
Use at least three or four different shades of green and chartreuse, and vary the number of wraps for each knot to create an uneven, organic surface.
For the snail’s shell, use a precise split stitch for the outlines and fill with concentric rows of satin stitch to mimic the spiral growth lines.
These nature texture embroidery hacks elevate a simple design into a sensory experience.
12. Frame a Bold Sunflower with Raised Stitches

Make your sunflower petals pop by outlining them with a raised chain stitch, which gives them a bold, graphic quality.
Fill the center with tightly packed French knots in a rich brown, creating a dense, seed-like texture that contrasts beautifully with the smooth petals.
This technique focuses on clean lines and distinct textures rather than realistic shading, resulting in a cheerful, modern take on a classic flower.
13. Capture the Delicacy of Queen Anne’s Lace
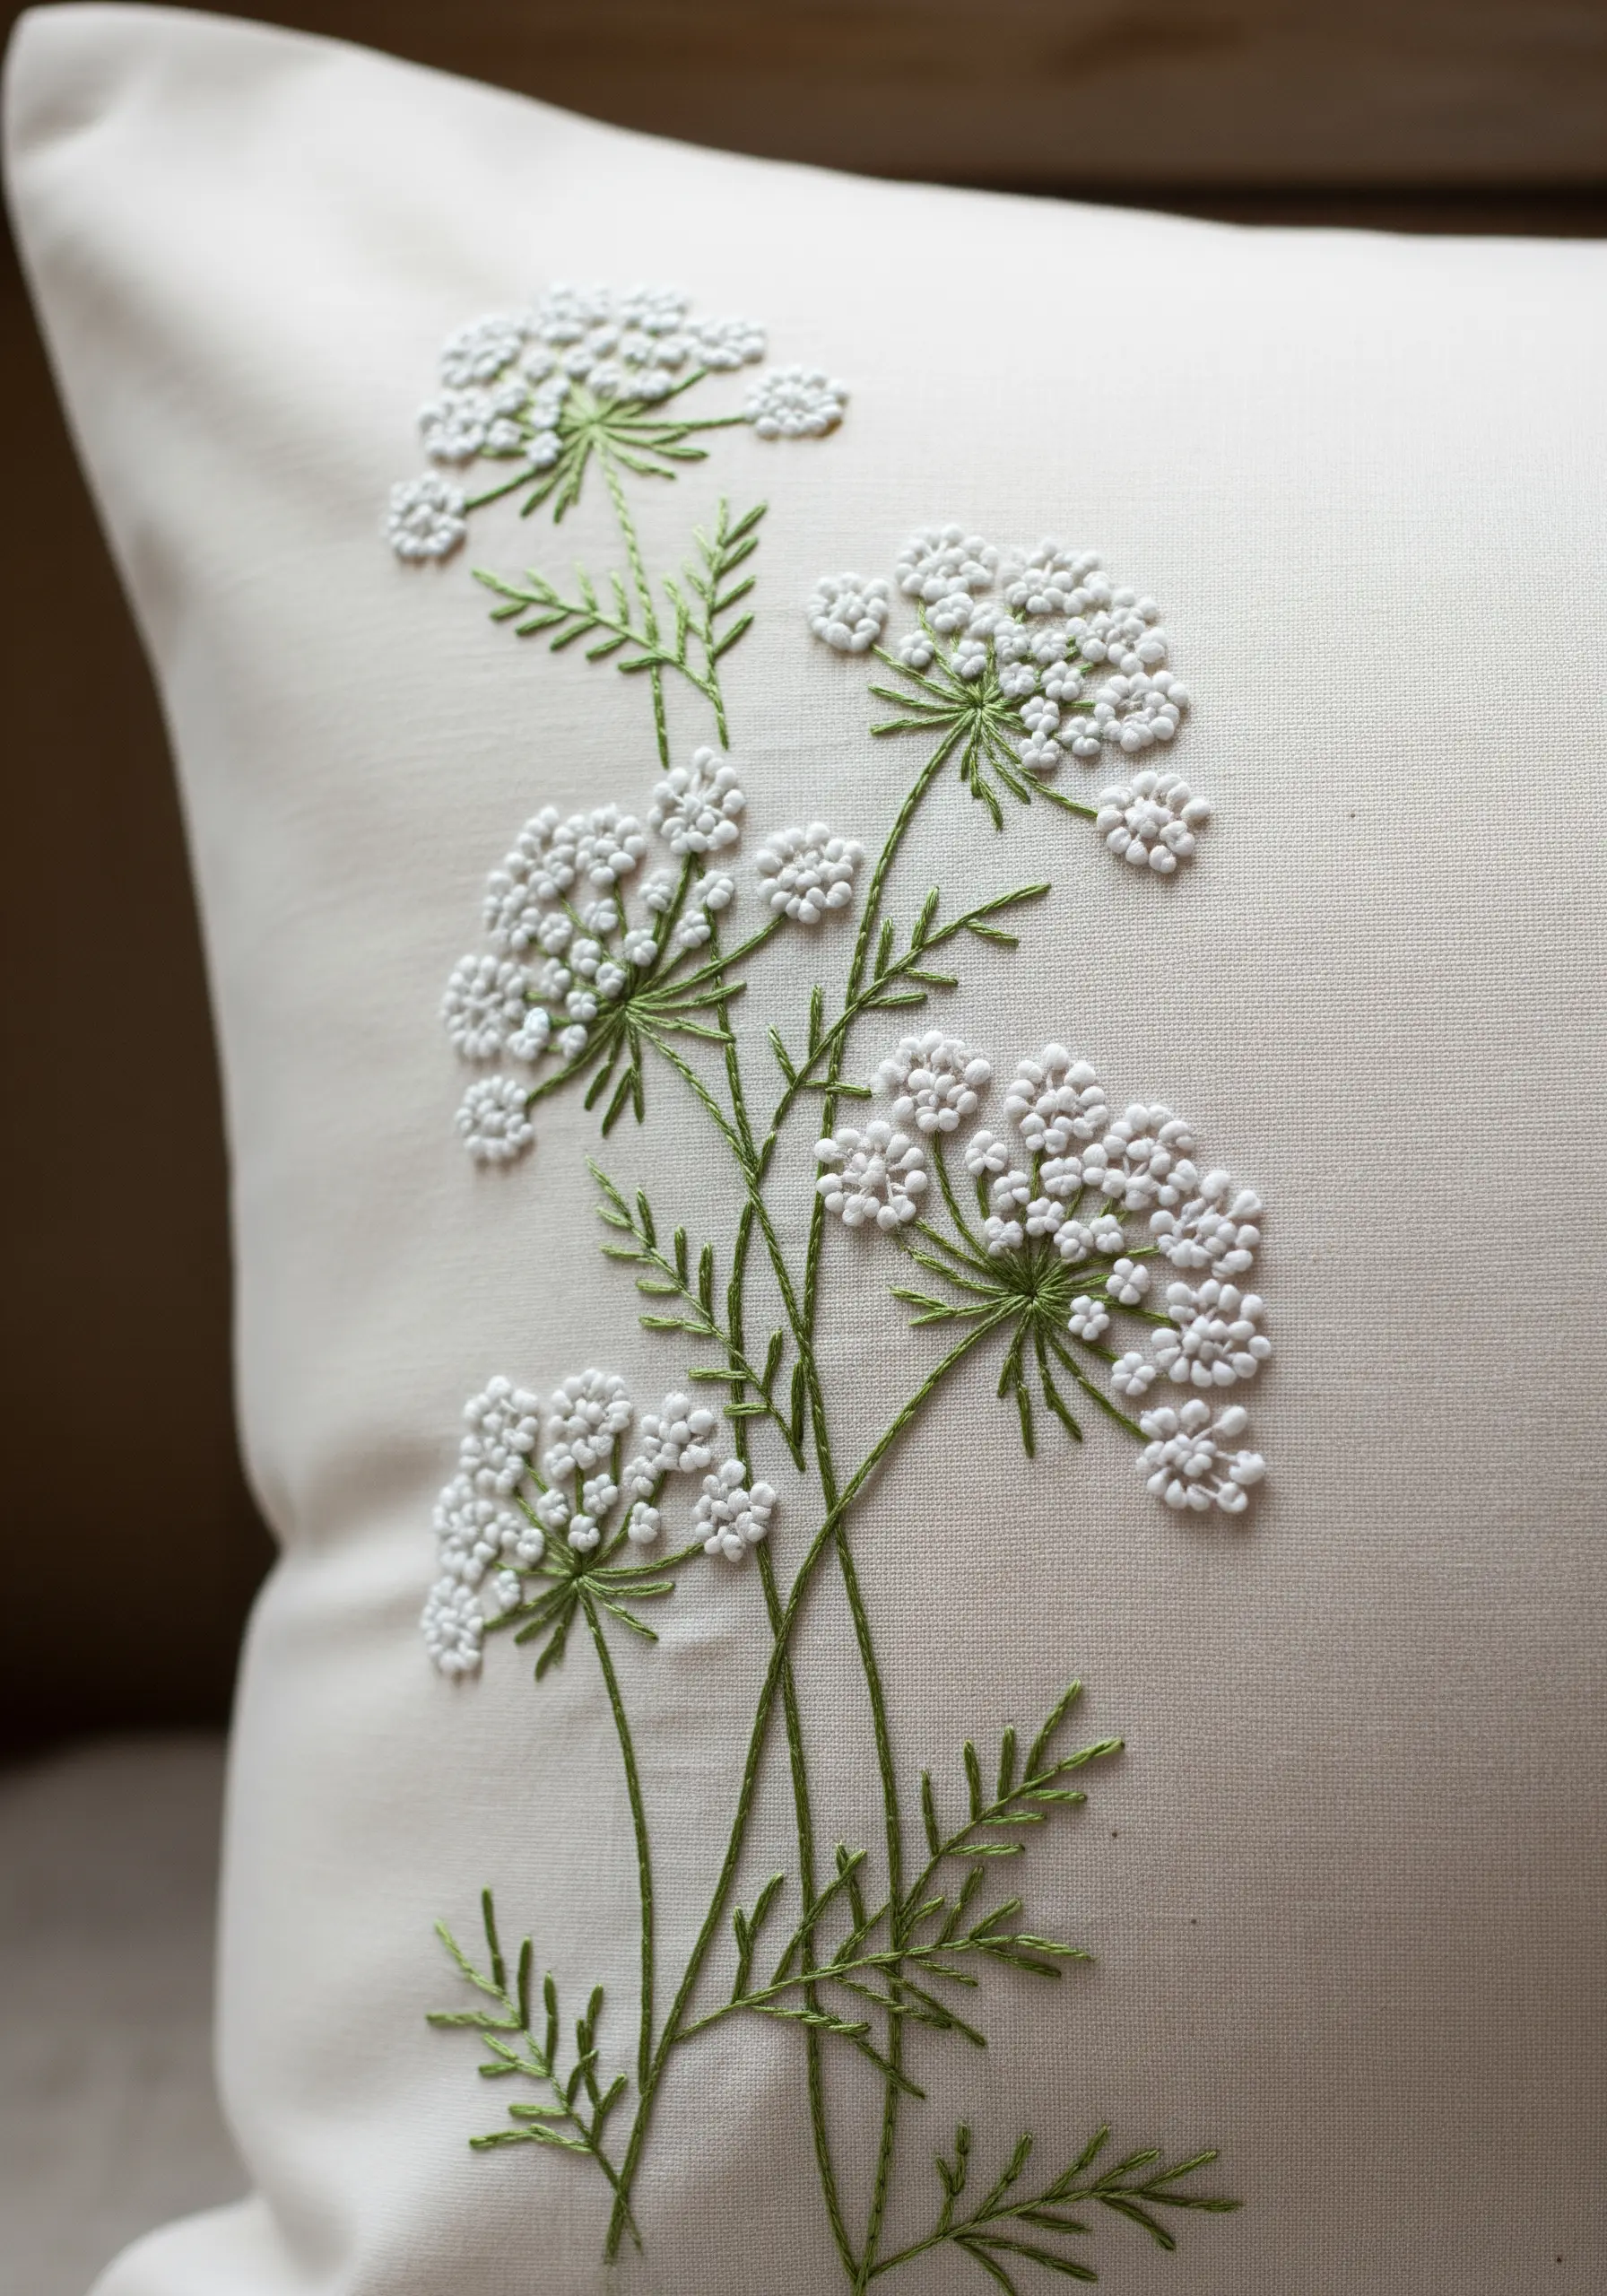
To replicate the airy, lace-like flower heads, use tiny white French knots grouped into small, flat-topped clusters.
Keep the stems exceptionally fine by using a single strand of green floss and a simple backstitch, allowing the delicate blossoms to be the main focus.
The key to this design is restraint and negative space; don’t overcrowd the knots, as the space between them is what creates the lacy effect.
Stitching fine details like these helps you practice realistic plant shapes from nature-themed embroidery samplers.
14. Weave in Fairy Lights for a Magical Glow
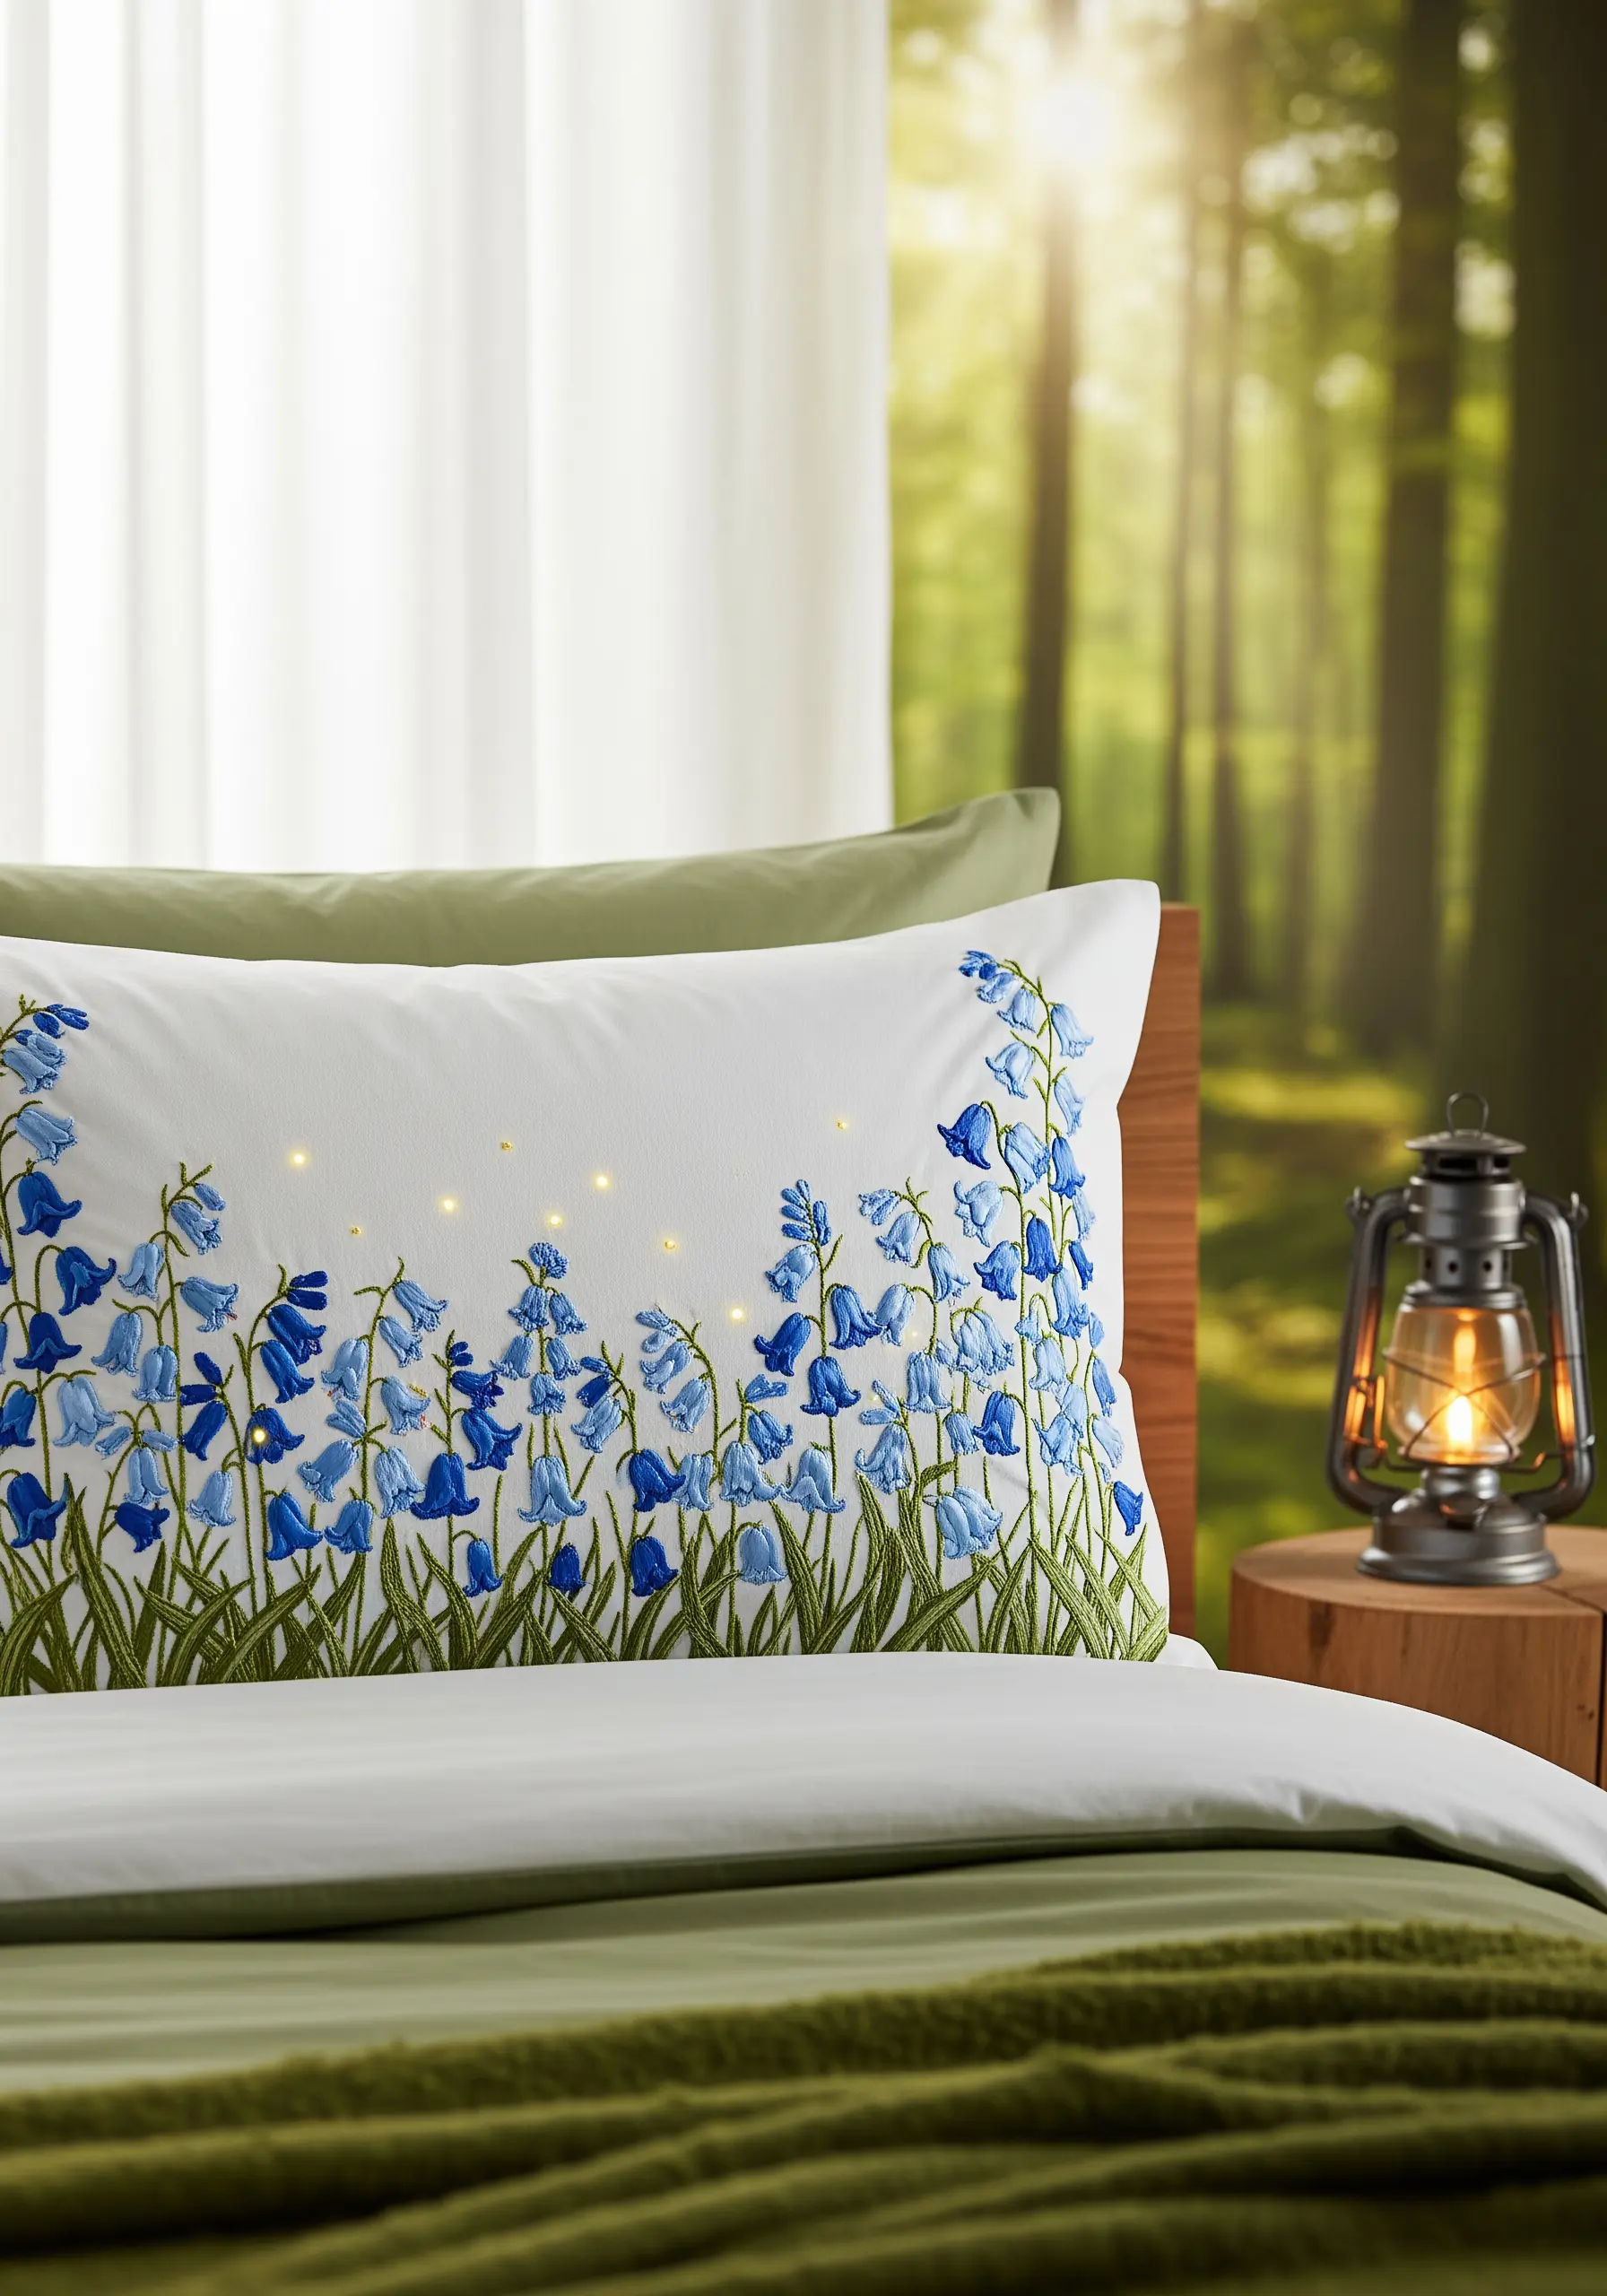
Integrate a string of micro LED fairy lights into your bluebell meadow design for an unexpected touch of magic.
Carefully stitch around the thin wire on the back of the fabric, securing it with small couching stitches of a matching thread color.
Position the tiny bulbs among the flowers so they appear like fireflies or magical glowing pollen, enhancing the fantasy garden theme.
This is one of the most enchanting embroidered nursery decor ideas for creating a truly special atmosphere.
15. Define a Thistle with Sharp Lines and Color Blending

For the spiky flower head, use long, straight stitches radiating from a central point, allowing the threads to overlap slightly for a dense, bristly texture.
Create the sharp, thorny leaves by outlining each point with a precise split stitch and then filling it with a long-and-short stitch, blending greens with touches of white or yellow on the edges.
Tiny yellow French knots at the tips of the purple flower add a final touch of realism and color contrast.
16. Add Dimension with Pearls and Ivy

Create a simple, elegant garland using satin stitch for the ivy leaves, angling your stitches to follow the natural direction of the veins.
Instead of stitching berries, sew on small pearl beads in their place. This adds a subtle, three-dimensional element and a touch of classic sophistication.
The contrast between the matte finish of the thread and the soft luster of the pearls makes the design feel refined and luxurious, perfect for bedroom embroidery accents.
17. Create a Nocturnal Scene with Glow-in-the-Dark Thread
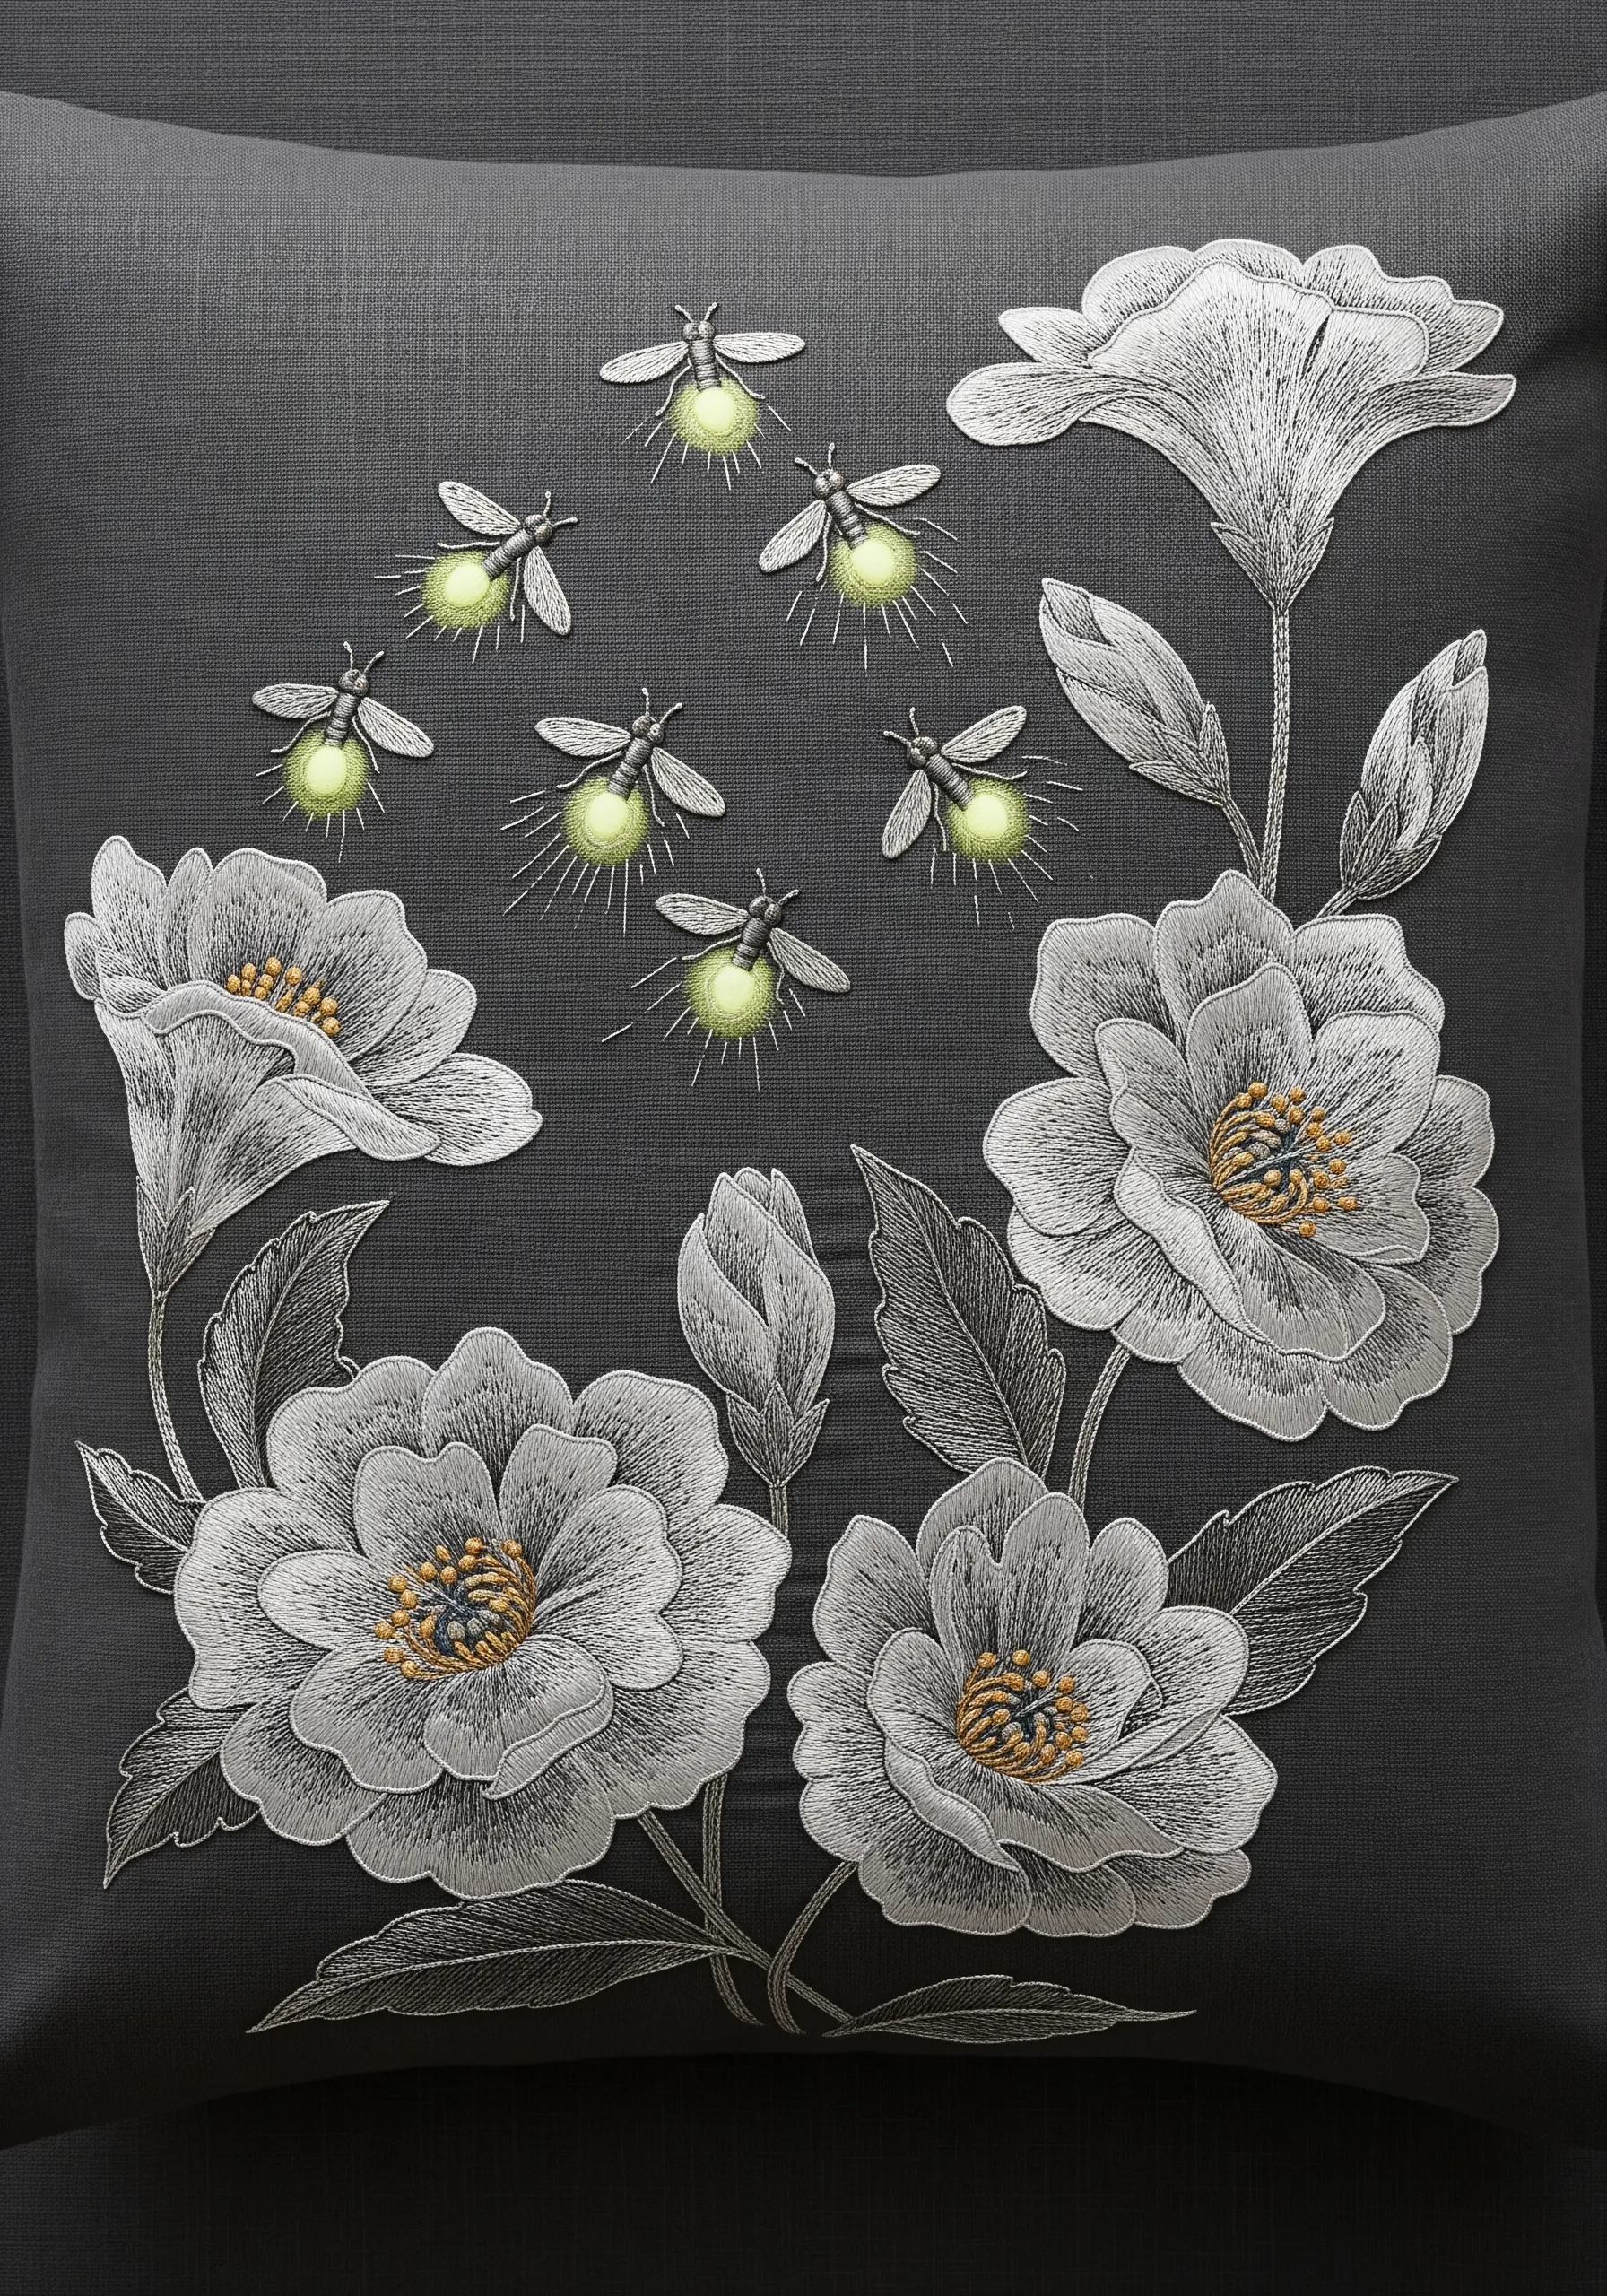
Use glow-in-the-dark embroidery floss for the bodies of the fireflies to create a design that comes alive after dark.
For the flowers, stitch on a dark fabric using shades of white, grey, and silver to create highlights and shadows, a technique known as ‘blackwork’ or ‘whitework’.
This contrast between the subtly shaded monochrome florals and the glowing insects creates a captivating and moody atmosphere.
18. Stitch a Sampler of Aromatic Herbs

Showcase different stitch techniques by creating a sampler of various herbs, each with its unique texture.
Use a whipped backstitch for rosemary to mimic its woody stem, a fishbone stitch for the flat leaves of sage, and tiny detached chain stitches for thyme or oregano.
For the fuzzy texture of sage, consider using a single strand of fuzzy or wool-blend thread to add tactile realism.
This project is a beautiful way to practice capturing the subtle textures found in nature.
19. Tell a Story with a Whimsical Dandelion
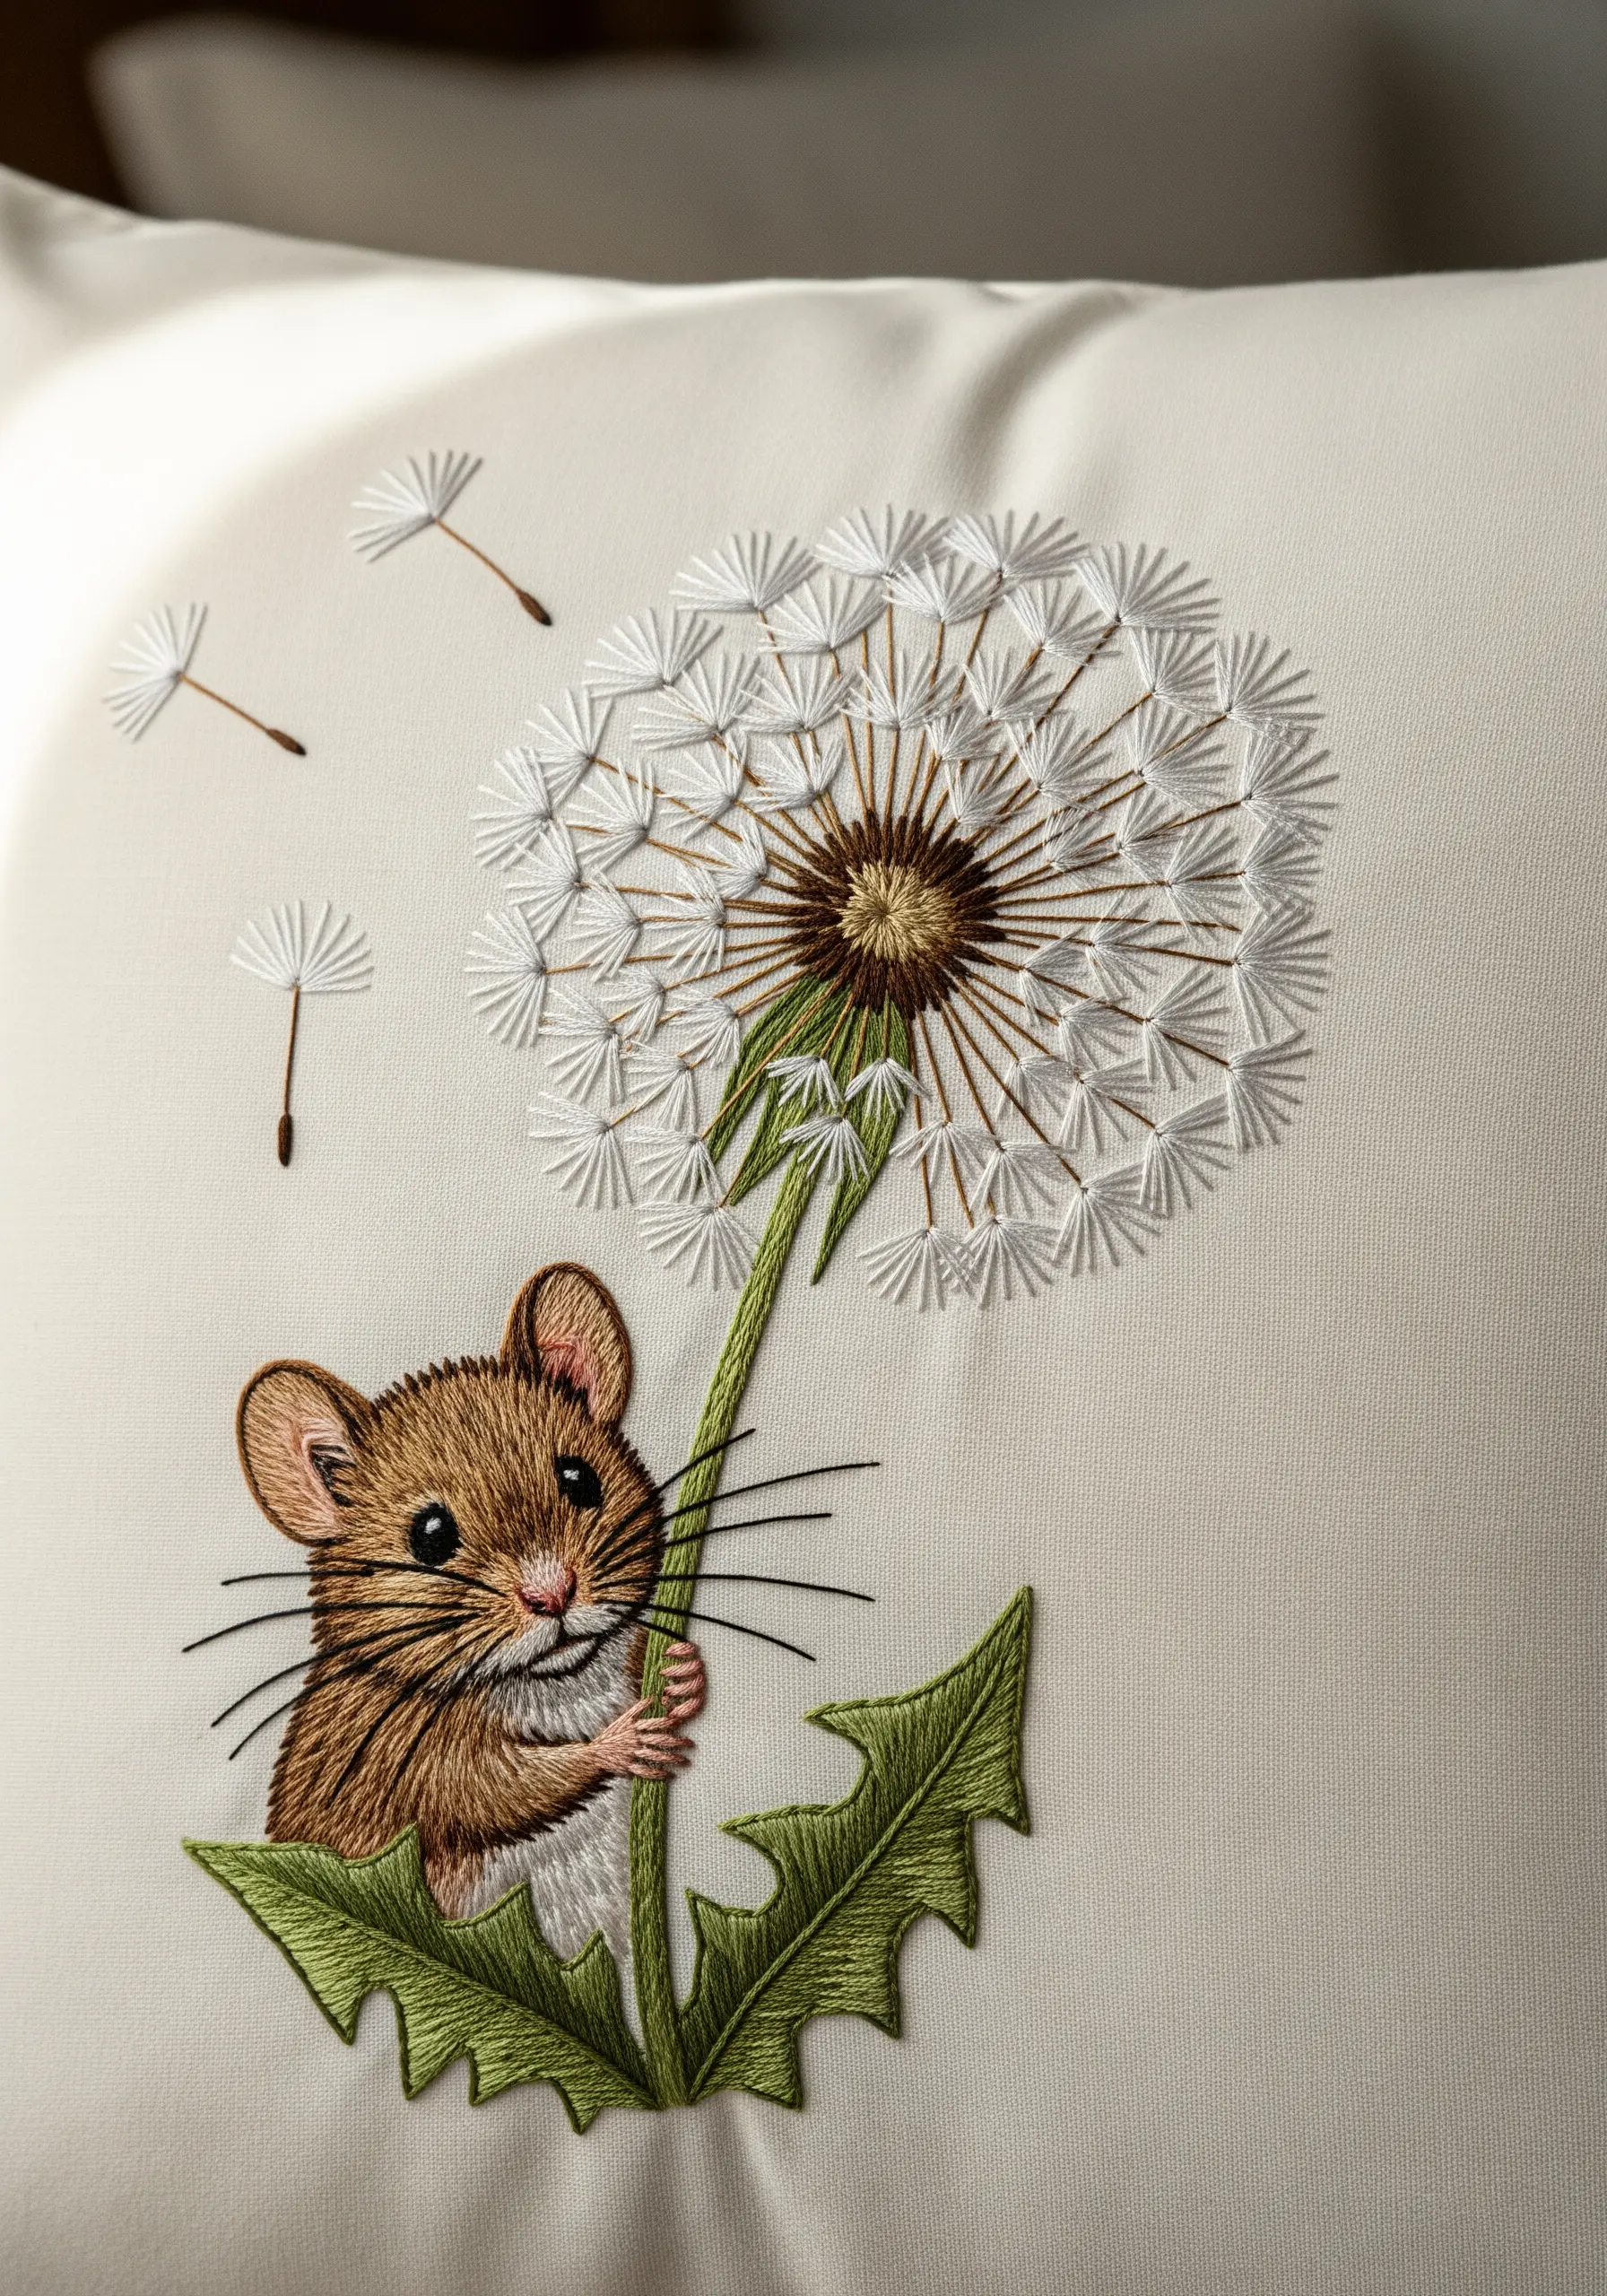
Bring a narrative element to your pillowcase with a scene that captures a moment in time, like a mouse holding a dandelion.
Create the dandelion head with long straight stitches radiating from a brown satin-stitched center. For the floating seeds, use a single straight stitch for the stem and three tiny straight stitches at the top.
Use short and long stitches in shades of brown to give the mouse a soft, furry texture, making it look cuddly and alive.
20. Map a Garden with Varied Textural Fills
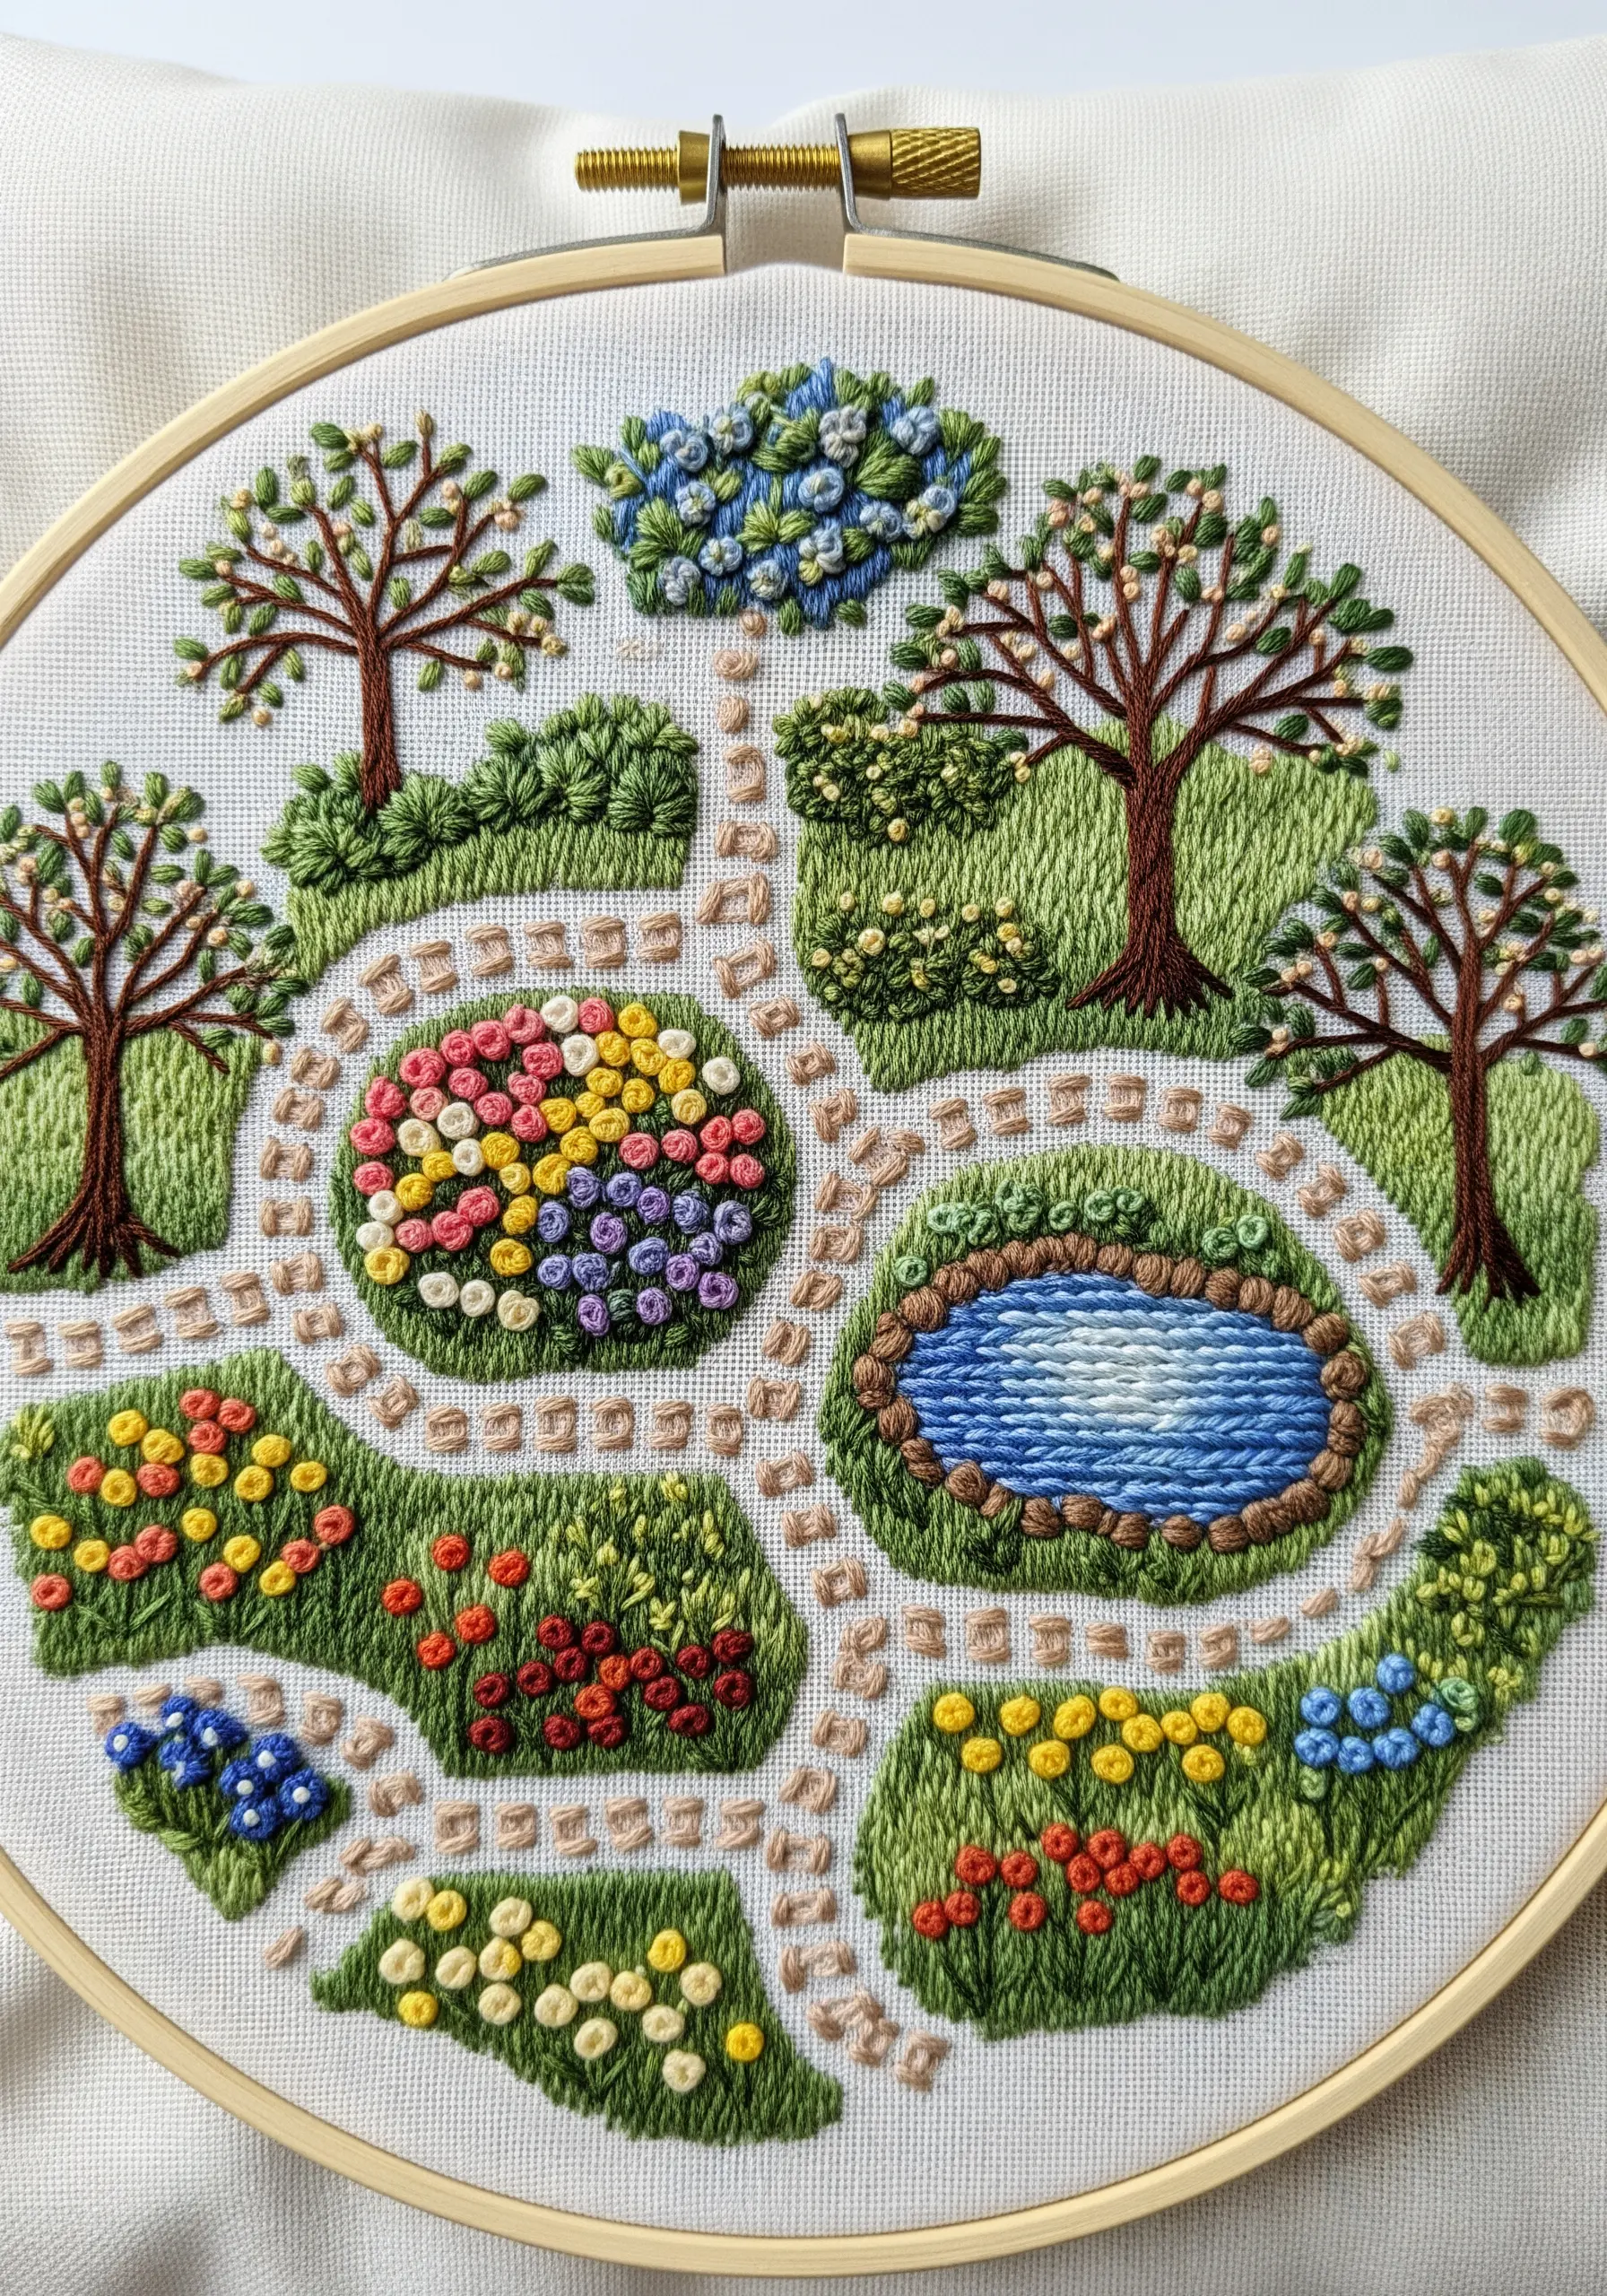
Create a charming bird’s-eye view of a garden by using different stitches to represent various landscape features.
Fill flowerbeds with dense clusters of French knots in multiple colors, use a smooth satin stitch for a pond to mimic water, and lay down straight stitches for a cobblestone path.
The grass can be filled with seed stitches or short straight stitches in various greens to create a lawn-like texture.
This approach transforms your embroidery into a playful, high-texture fabric collage.
21. Achieve Graphic Realism on a Monarch Butterfly
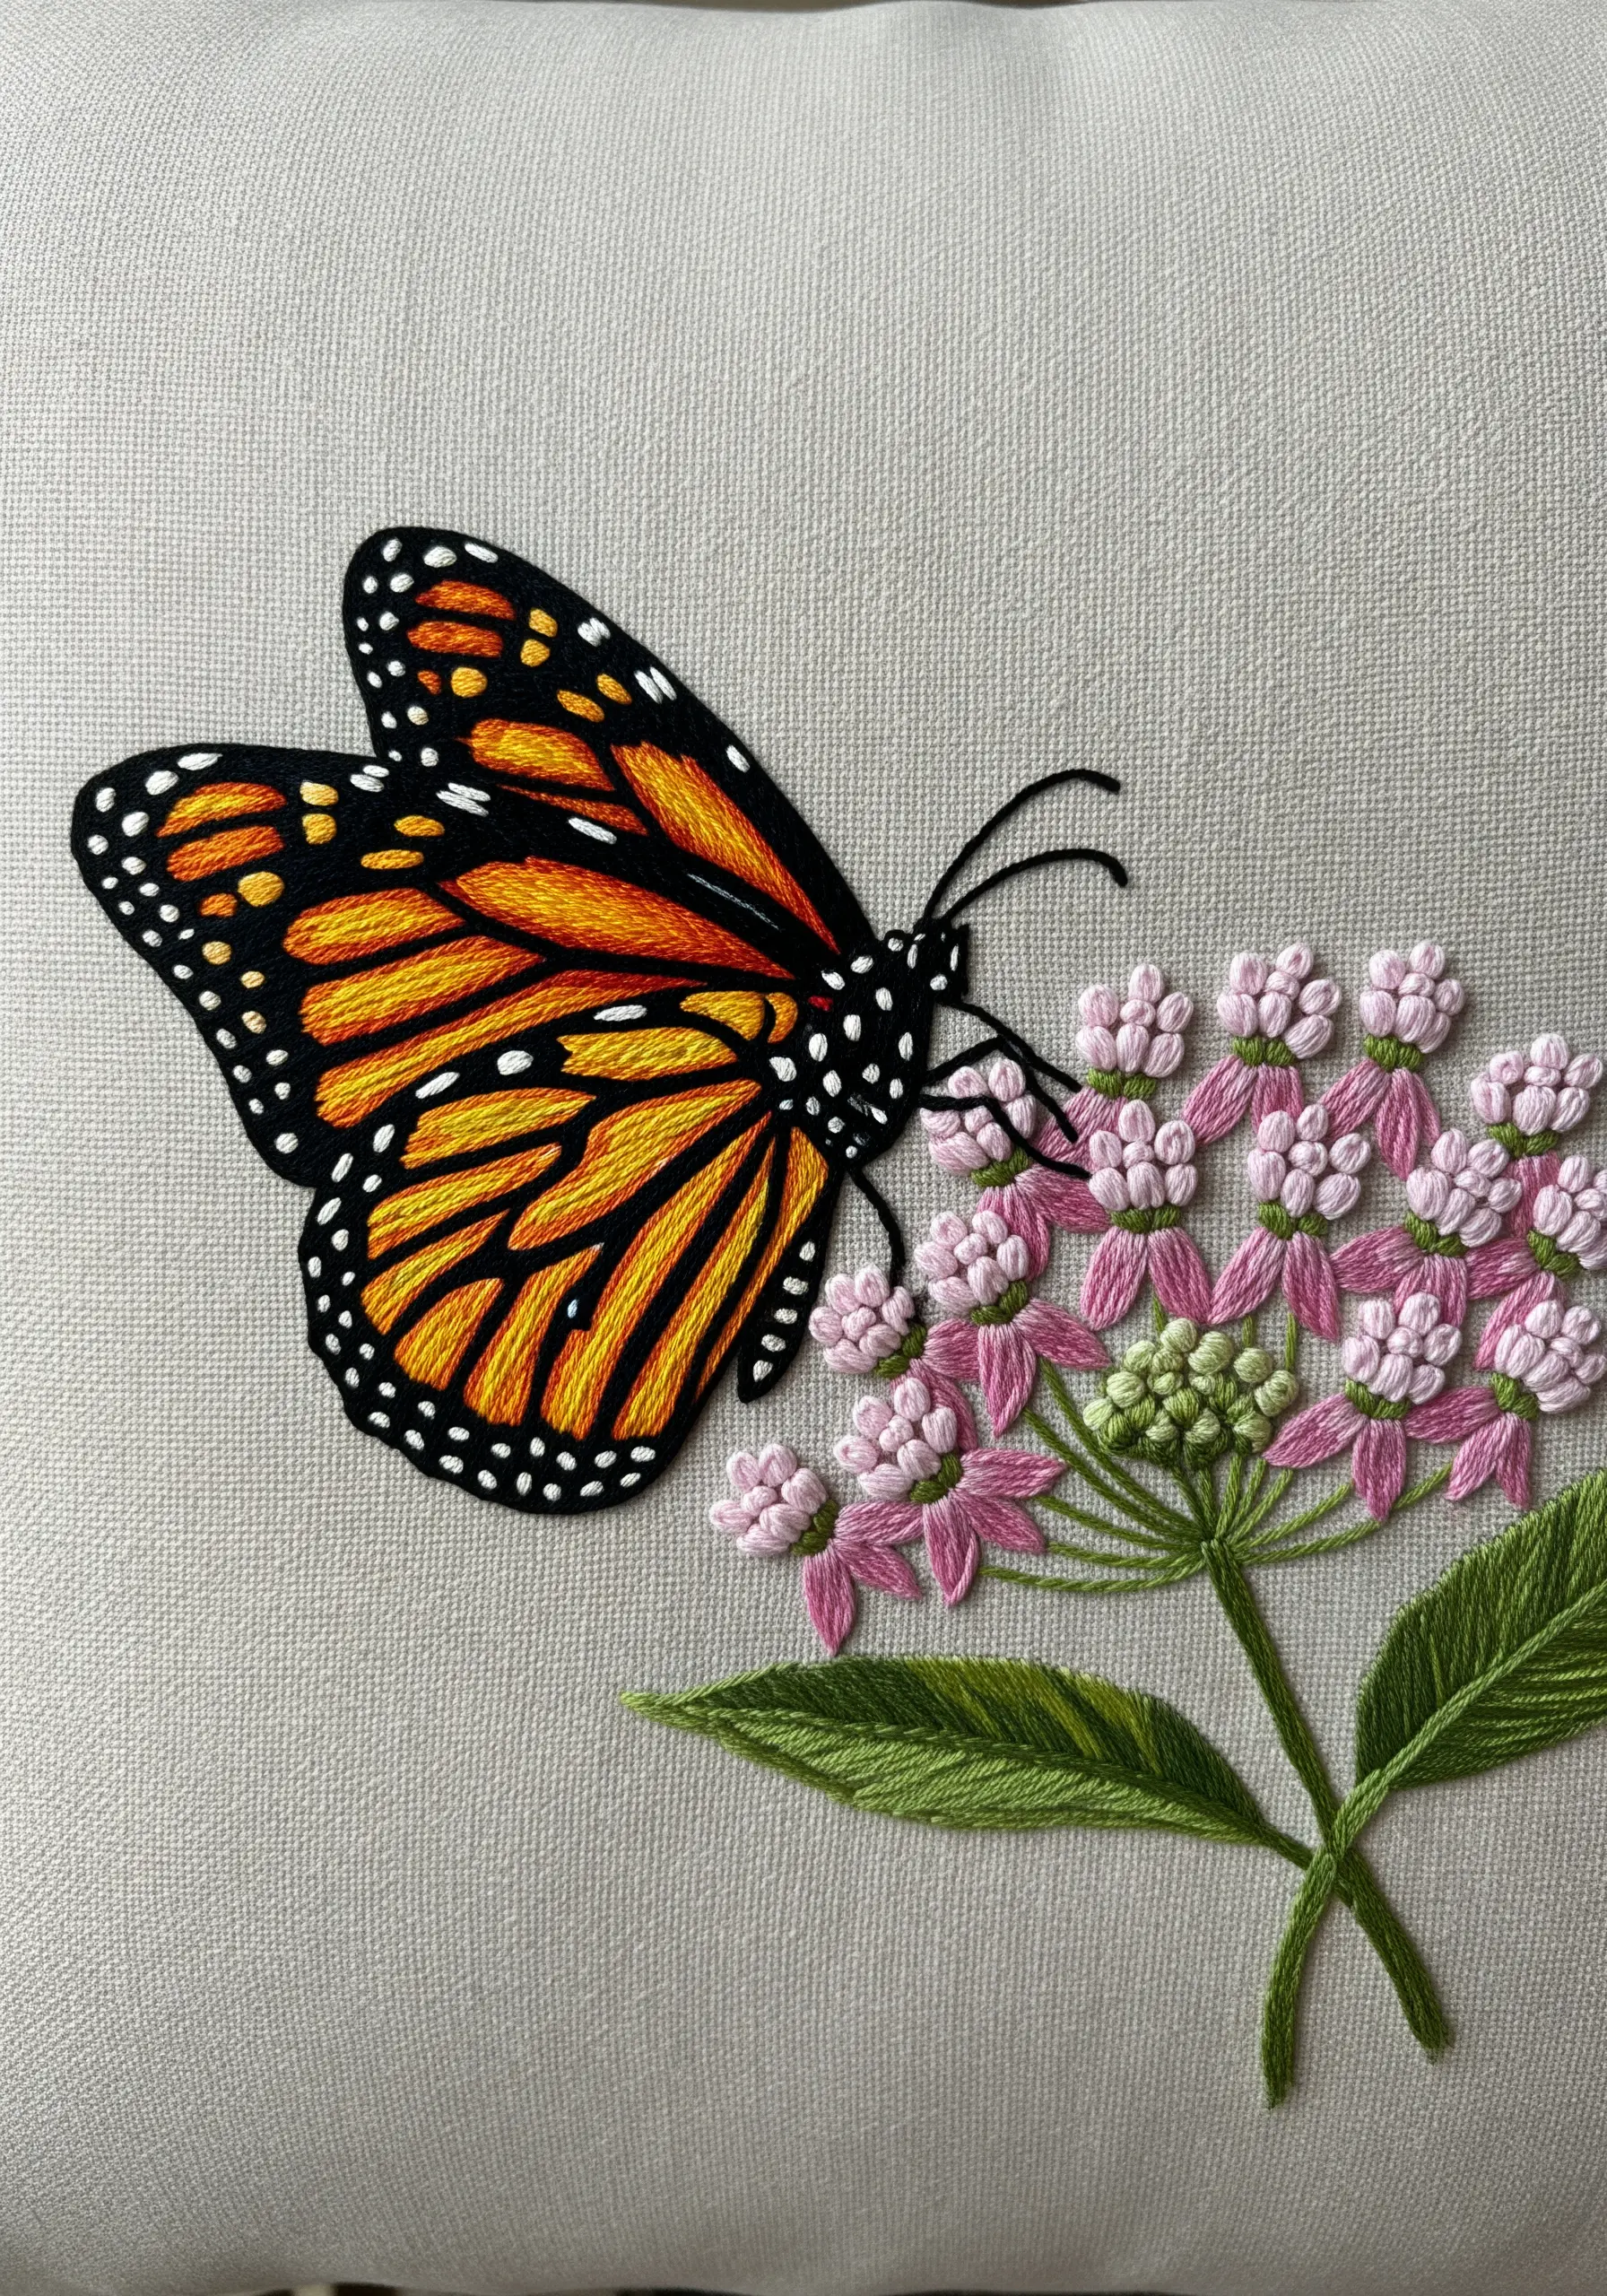
For the butterfly’s wings, use a split stitch to create a sharp, clean outline before filling the sections with a directional satin stitch.
This outlining technique prevents the edges from looking fuzzy and gives the design a crisp, illustrative quality.
For the tiny white dots along the edges, use a dot of white fabric paint applied with a pinhead instead of French knots for ultimate precision and uniformity.
The flowers can be softer, using bullion knots for the petals to provide a textural contrast to the smooth wings.
22. Capture the Grace of Weeping Willow Branches

Mimic the fluid drape of willow branches by using long, slightly curved fishbone stitches for the leaves.
Avoid making the branches perfectly symmetrical; instead, vary the length and angle of the leaves to create a more natural, wind-swept appearance.
Use three to four shades of green, from olive to spring green, and allow them to blend organically throughout the design to give it depth and a sense of gentle movement.
23. Layer Stitches for a Dimensional Artichoke

Build the complex structure of an artichoke by working in layers from the outside in.
Stitch the outer leaves (bracts) first using a satin stitch, then overlap the next layer of leaves on top, slightly covering the base of the previous row.
Use a gradient of color, from deep green and purple on the outer layers to lighter green and soft purple near the center, to create a convincing sense of depth and form.
The top thistle-like bloom can be done with radiating straight stitches in a vibrant purple.
24. Embrace Autumn with Variegated Thread
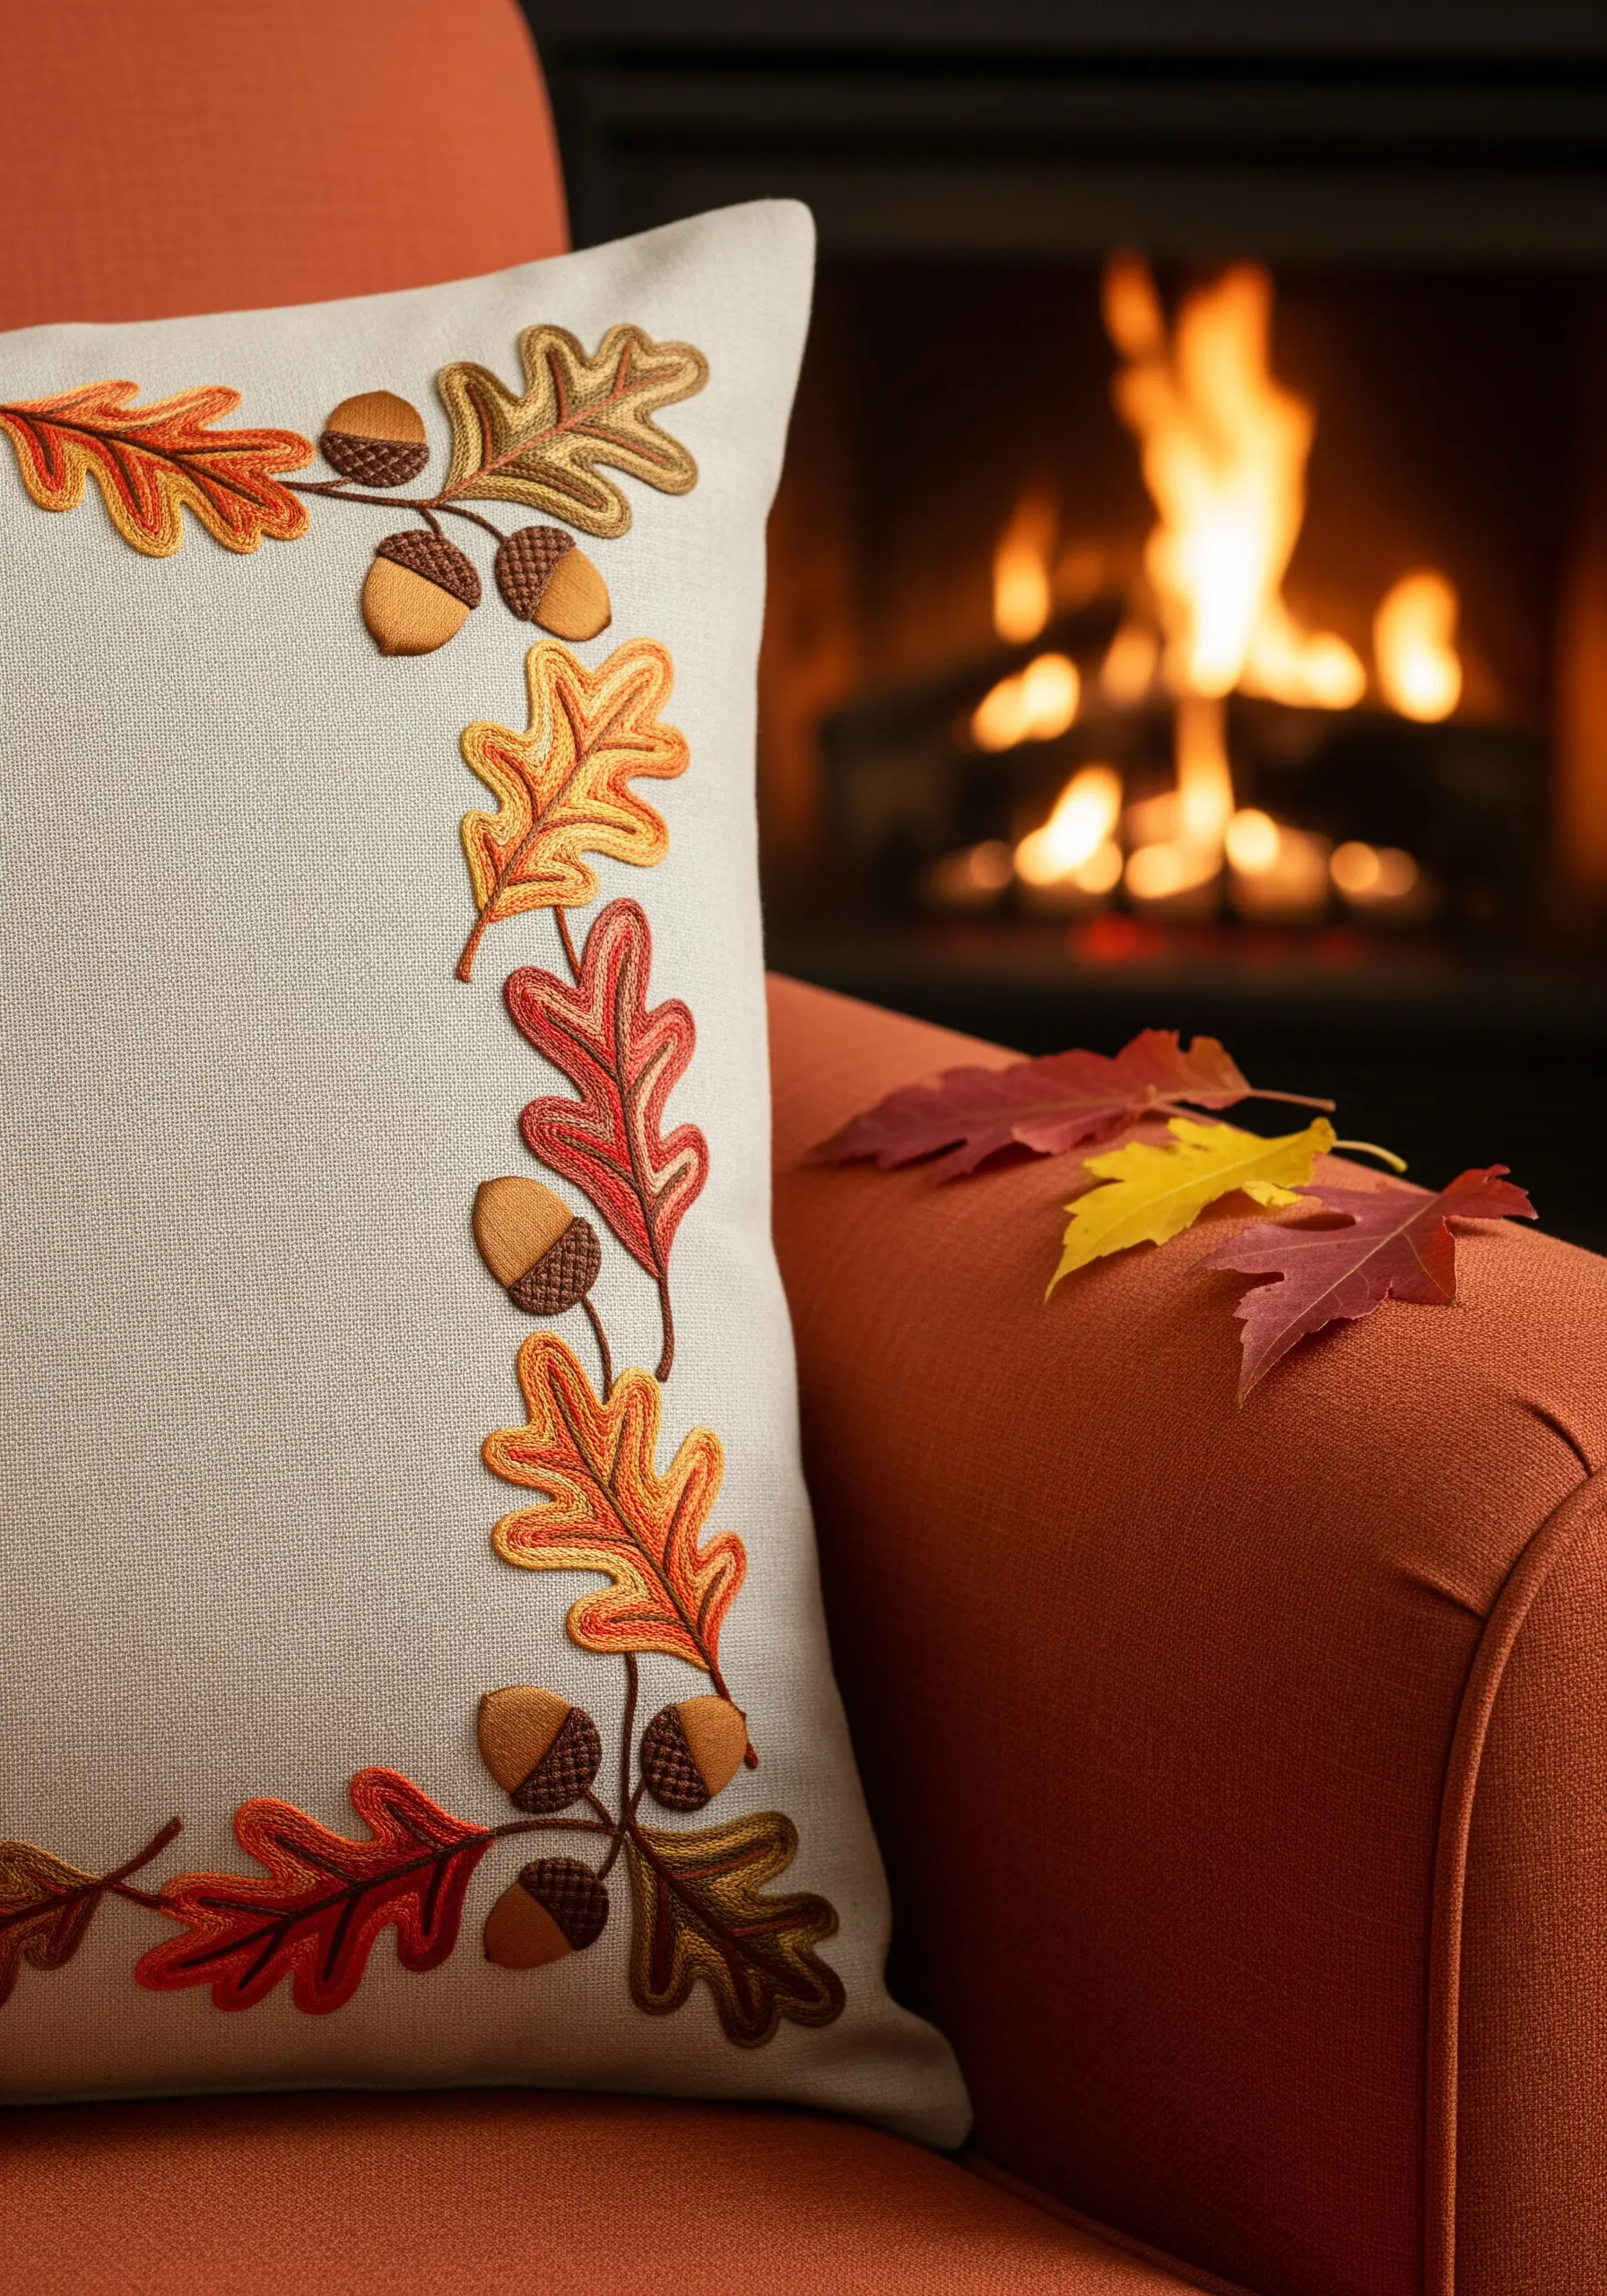
Simplify your colorwork for the autumn leaves by using a variegated floss that contains shades of red, orange, and yellow.
As you fill each leaf with a long-and-short stitch, the colors will change randomly, creating natural, mottled transitions that look incredibly realistic.
This is one of the most effective texture-rich thread art ideas using variegated thread because it does the color-blending work for you, resulting in a complex look with minimal effort.
25. Sculpt a 3D Beehive with Woven Wheels
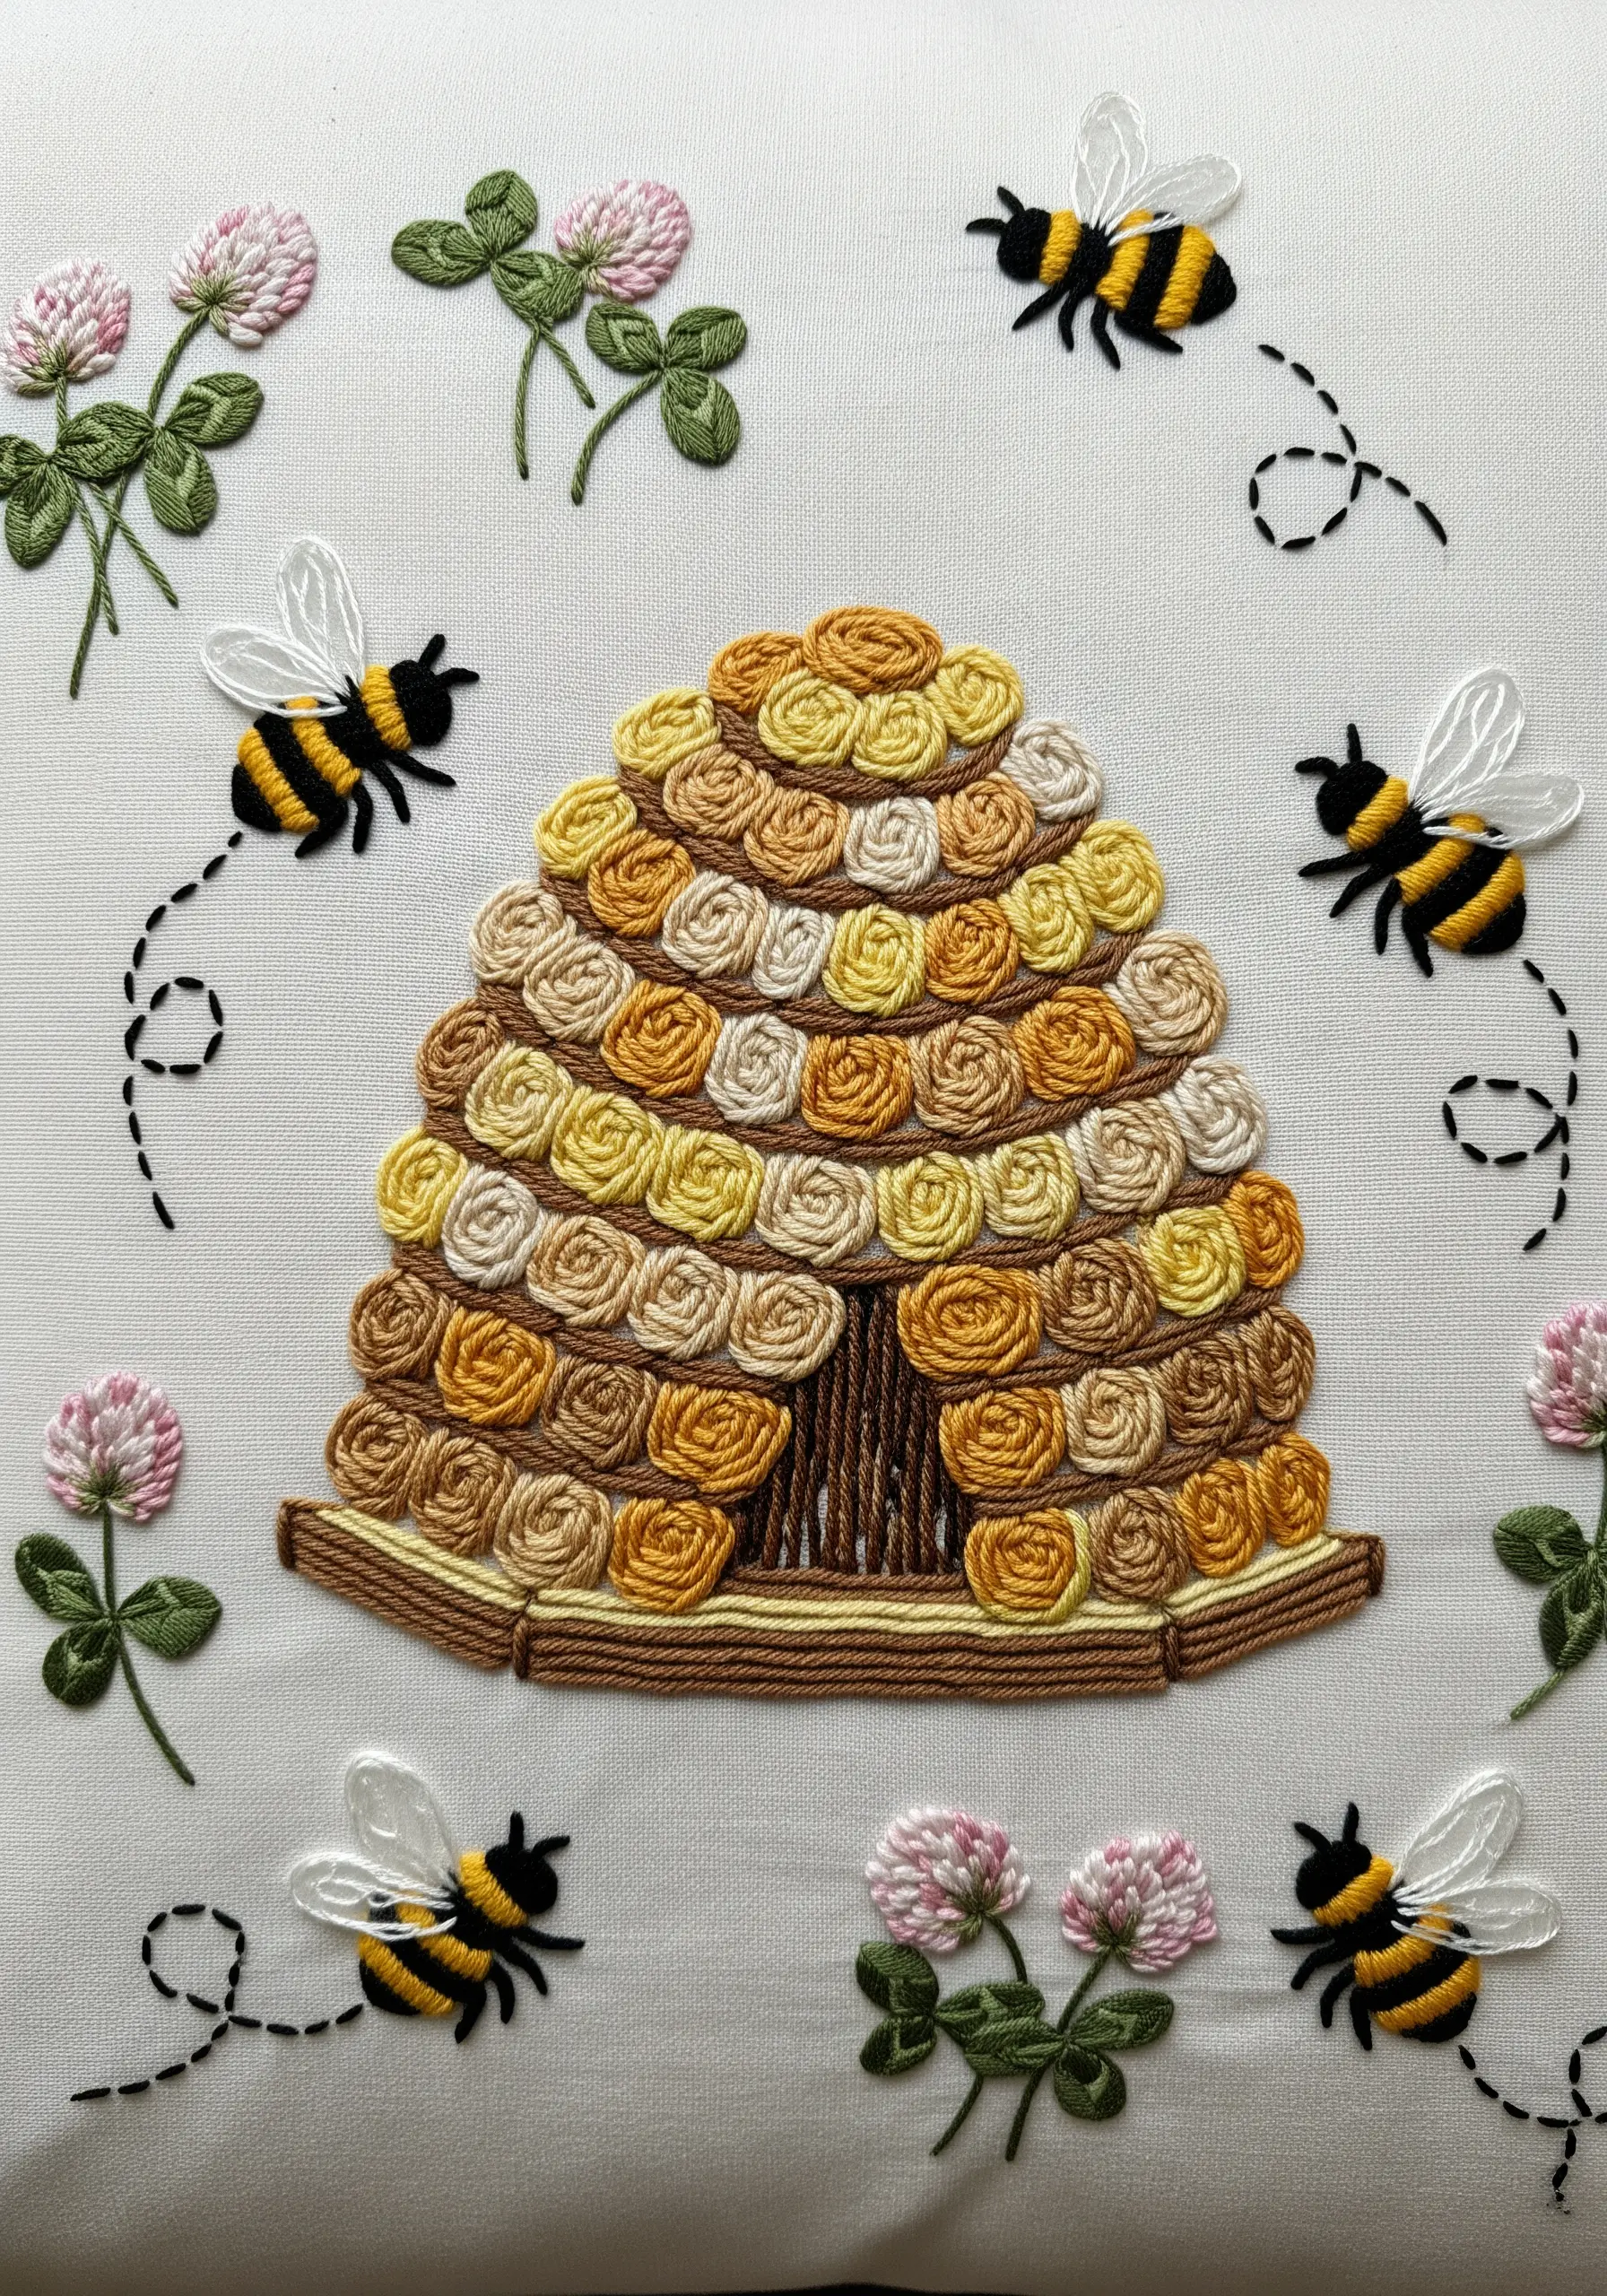
Create a stunning, three-dimensional beehive by stitching overlapping woven wheel stitches (or spider web stitches) in rows.
Use a thicker thread, like pearl cotton or multiple strands of floss, in shades of gold, brown, and cream to mimic the texture of coiled straw.
This stitch is naturally raised, so layering them enhances the sculptural effect, making the beehive the tactile centerpiece of your design.
26. Build a Terrarium Scene with Layered Foliage
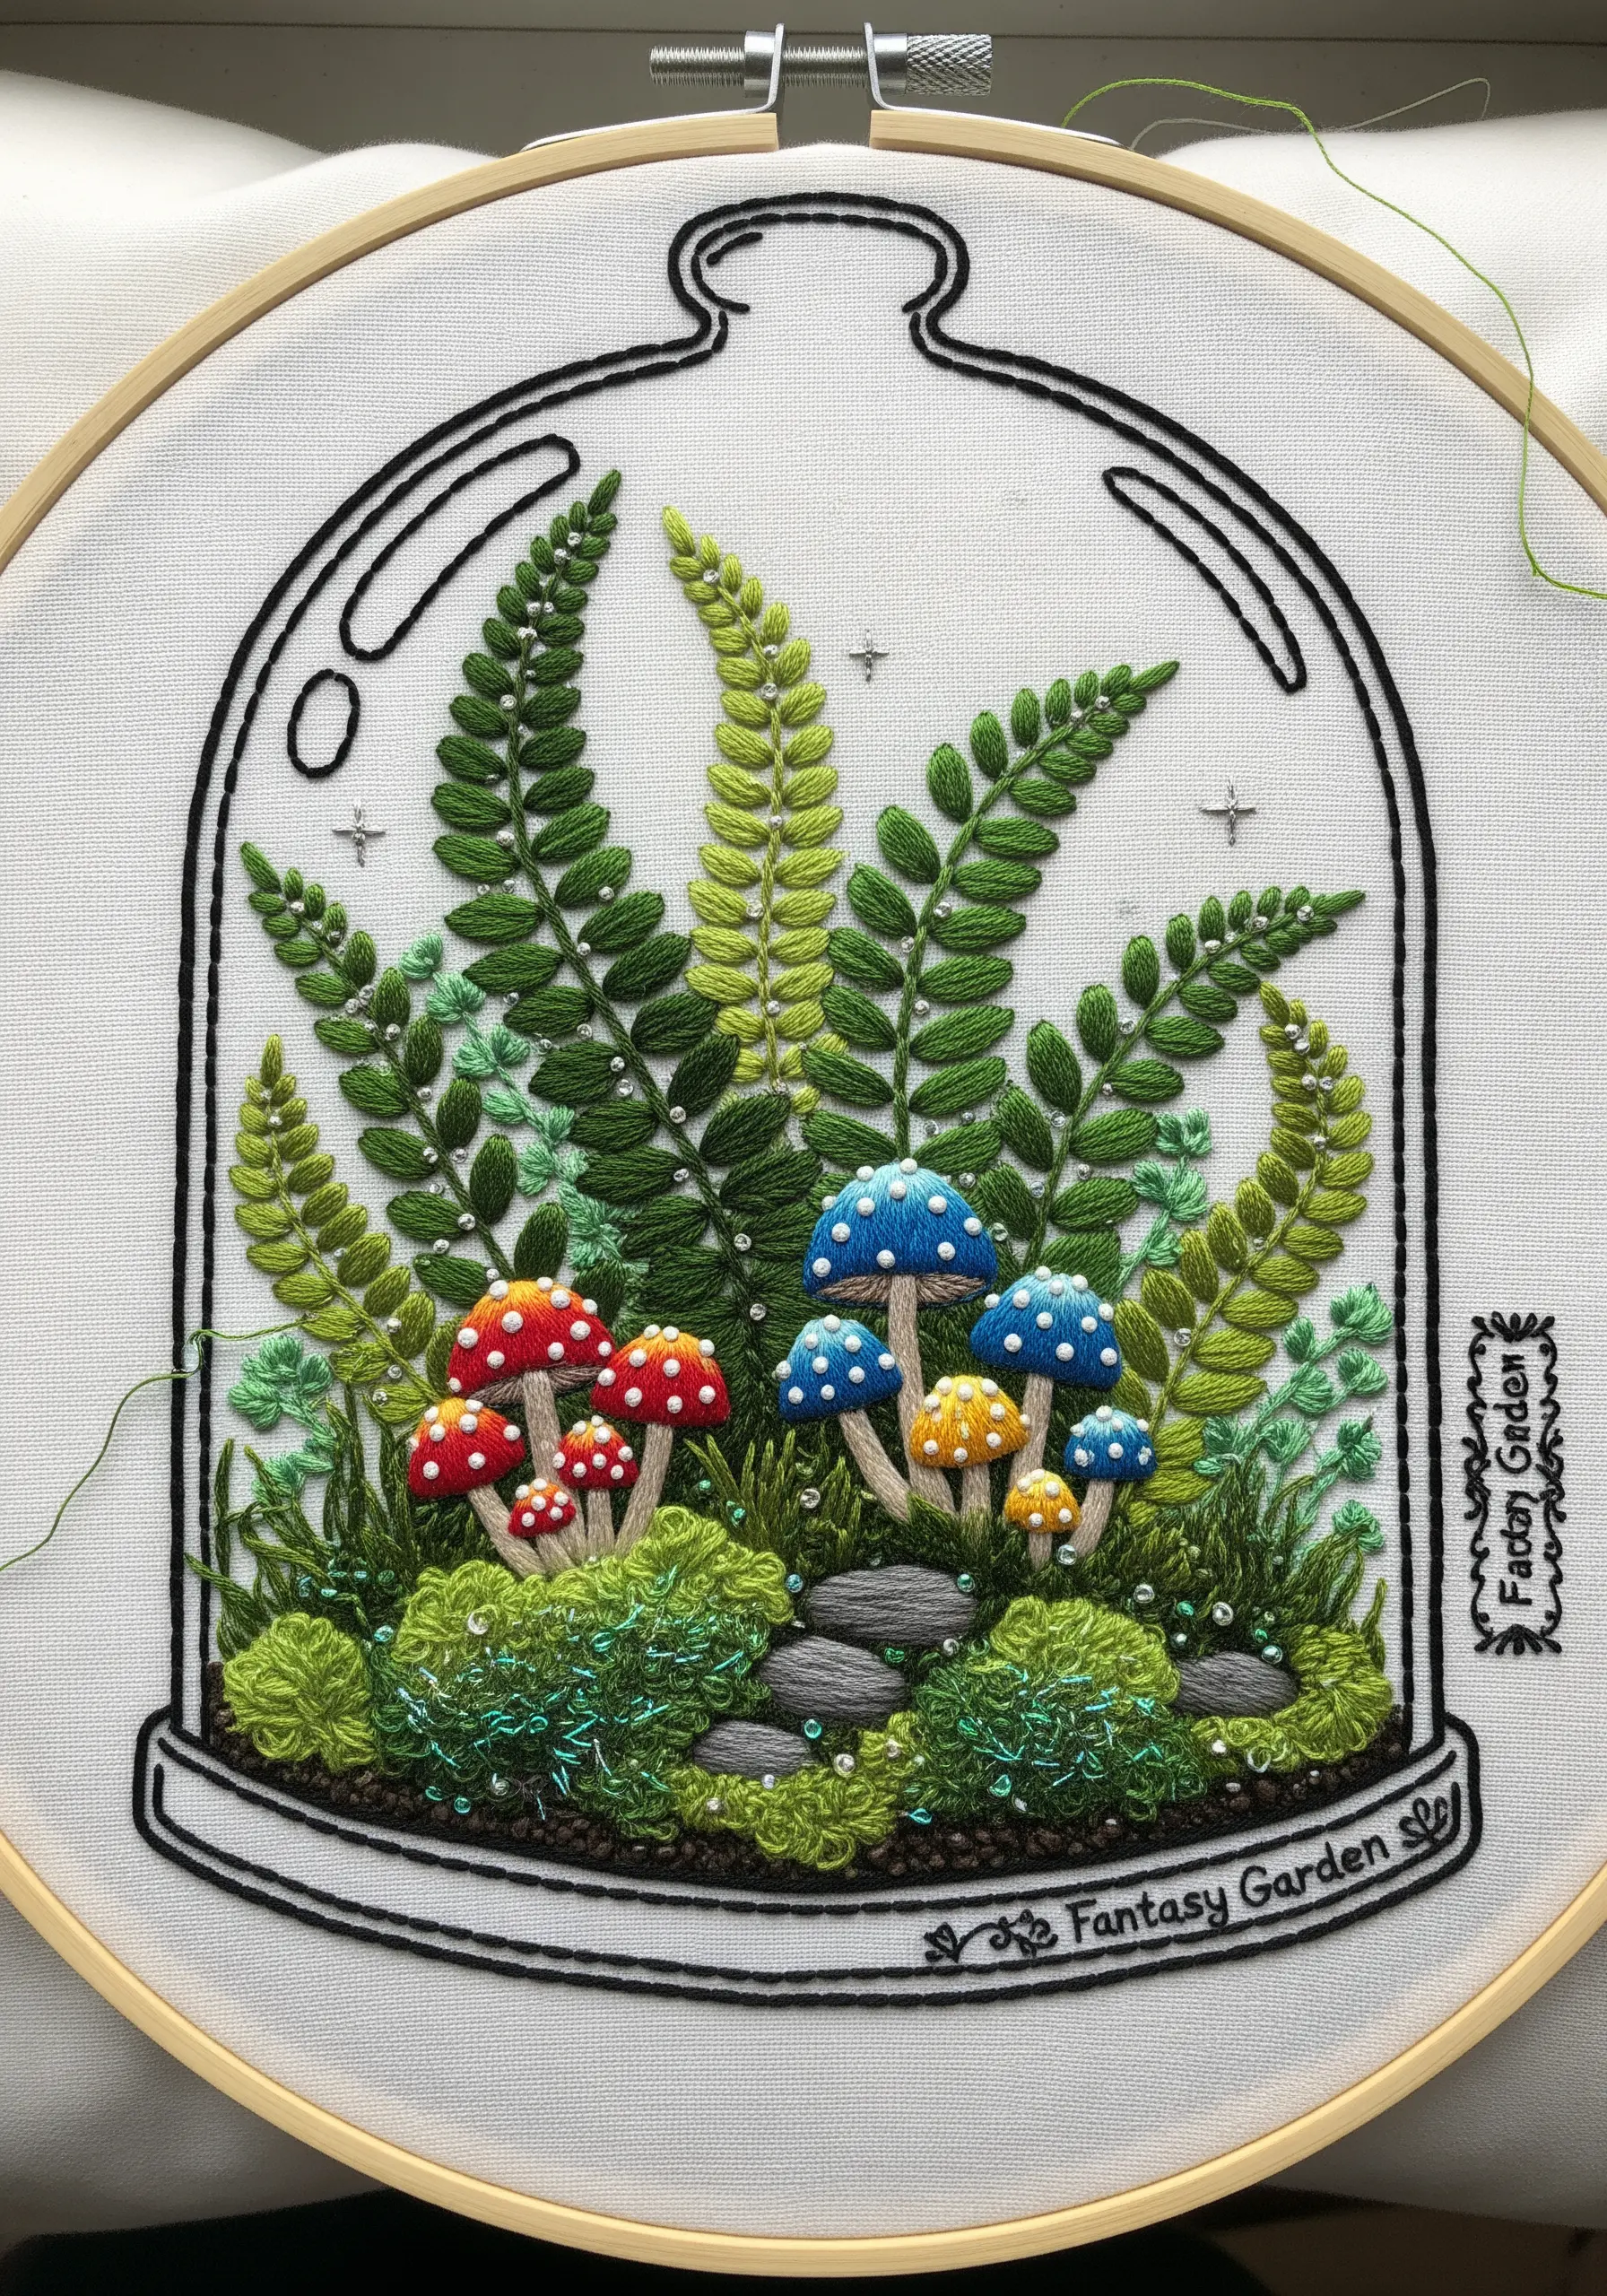
To create a sense of depth within the glass jar, stitch the elements in layers, starting with the rearmost foliage.
Use fishbone stitch for the large background ferns, then add the mid-ground mushrooms, and finish with foreground moss made from French knots or Turkey work for a fuzzy texture.
Intersperse tiny seed beads or metallic French knots to represent water droplets or magical sparkles, enhancing the enclosed ecosystem’s feel.
A clean backstitch outline defines the glass, completing your miniature ‘fantasy garden’.


