
You have the threads, the fabric, and the desire to create something that feels truly your own. But sometimes, your finished work doesn’t quite capture the feeling you started with. It’s easy to get lost in complex patterns, wondering how to make your stitches look less like a hobby and more like art.
The answer isn’t always in learning a hundred new stitches. Often, it’s found in subtlety—in choosing a palette that feels grounding, in understanding how one texture plays against another, and in allowing your materials to speak for themselves.
These ideas are here to guide you back to that intention. We’ll explore how earth tones can unify your work, how simple shifts in technique can add profound depth, and how you can create pieces for your home that feel calm, connected, and deeply personal. It’s time to stitch with quiet confidence.
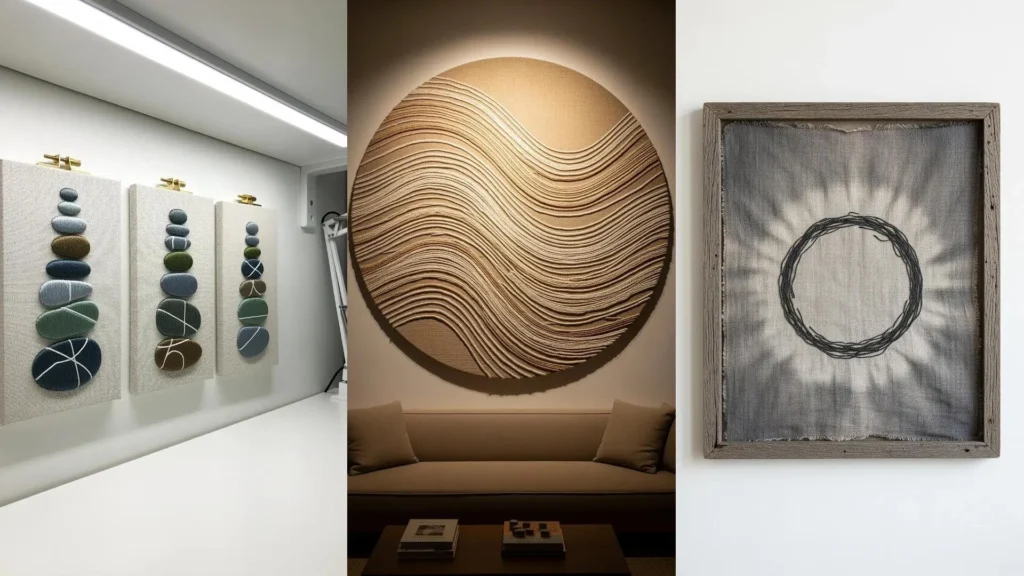
1. Sculpt Topographic Textures

Create a sense of elevation by combining dense clusters of French knots with clean, flowing stem stitches.
Use a single strand of dark thread for the contour lines to ensure they remain crisp and defined, providing a graphic base for your textural work.
For the raised areas, vary the number of wraps on your French knots and use a slightly thicker thread (three strands) in terracotta, ochre, and rust to build dimension.
This contrast between flat lines and dimensional knots transforms a simple pattern into a tactile map you can feel.
2. Weave a Mountain Landscape
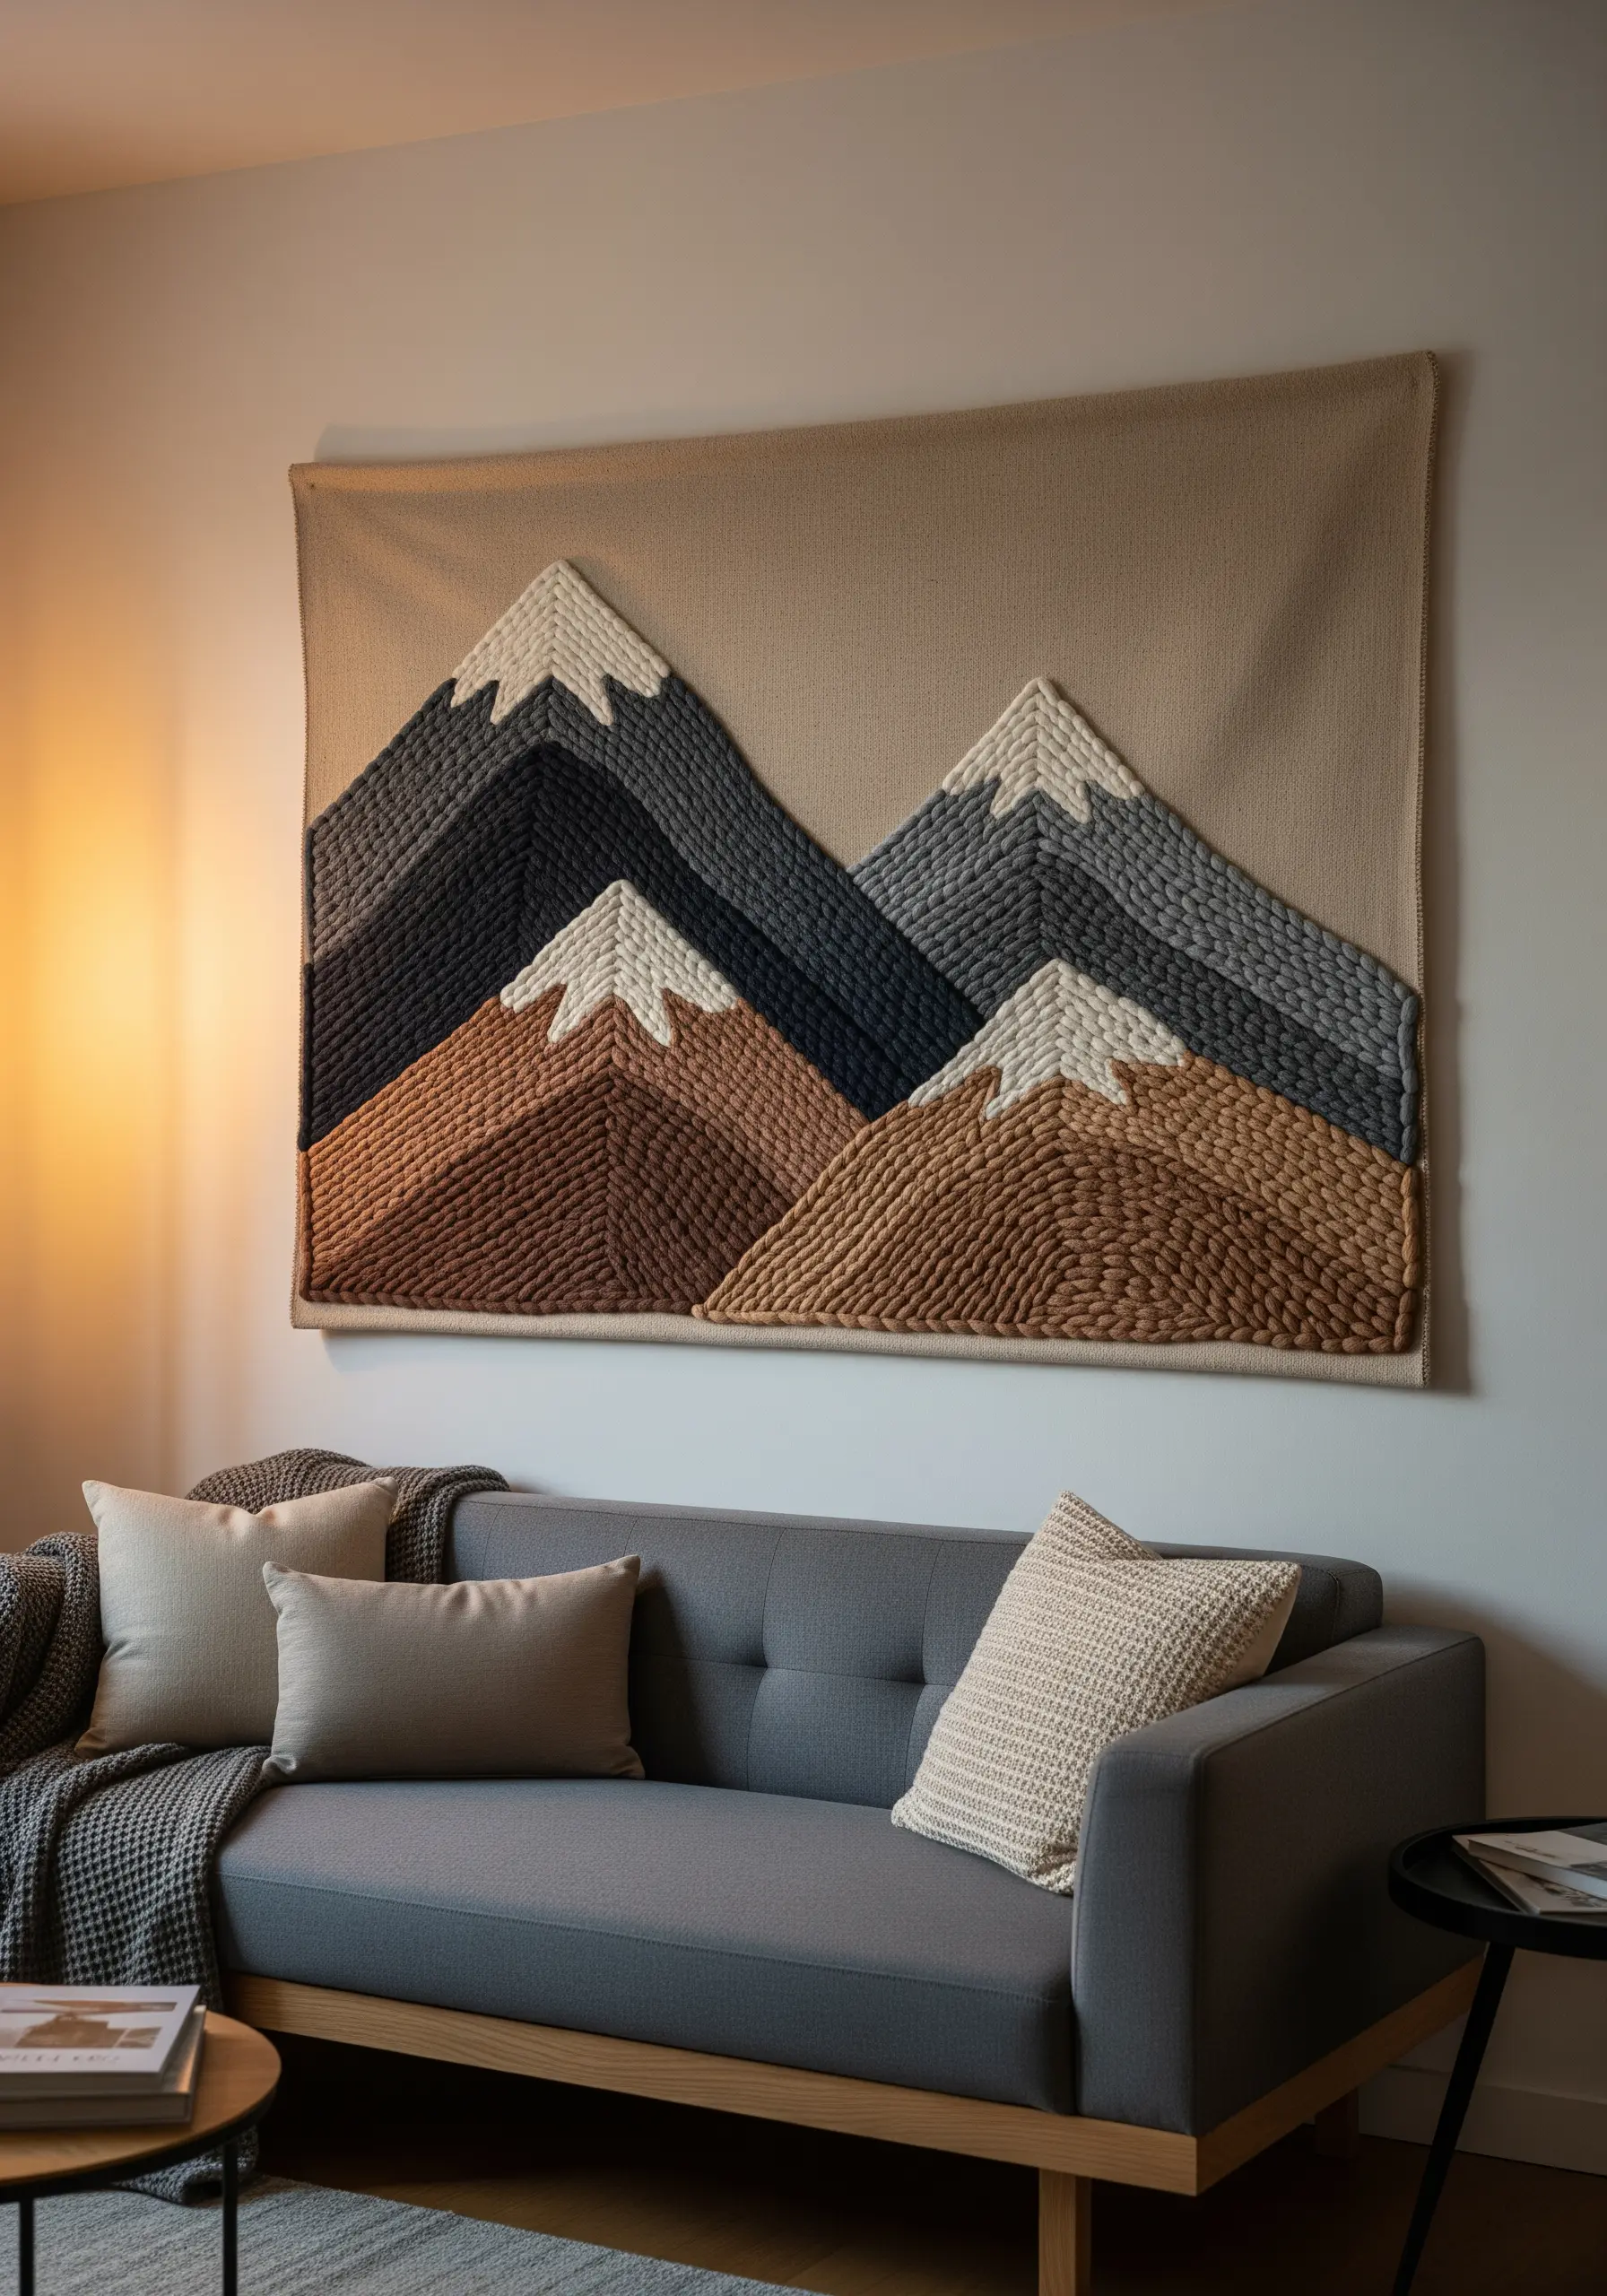
To build a statement-size embroidered textile hanging, work with chunky yarn instead of fine floss.
Outline your mountain shapes with a simple backstitch, then fill each section using a couching technique, laying thick yarn on the surface and tacking it down with a thinner, matching thread.
Vary the direction of your couched yarn—horizontal for the mountain base, angled for the slopes—to create visual movement and definition between the color-blocked sections.
This method allows you to cover large areas quickly while creating a bold, graphic texture that feels both modern and handmade.
3. Capture Botanical Details with Satin Stitch
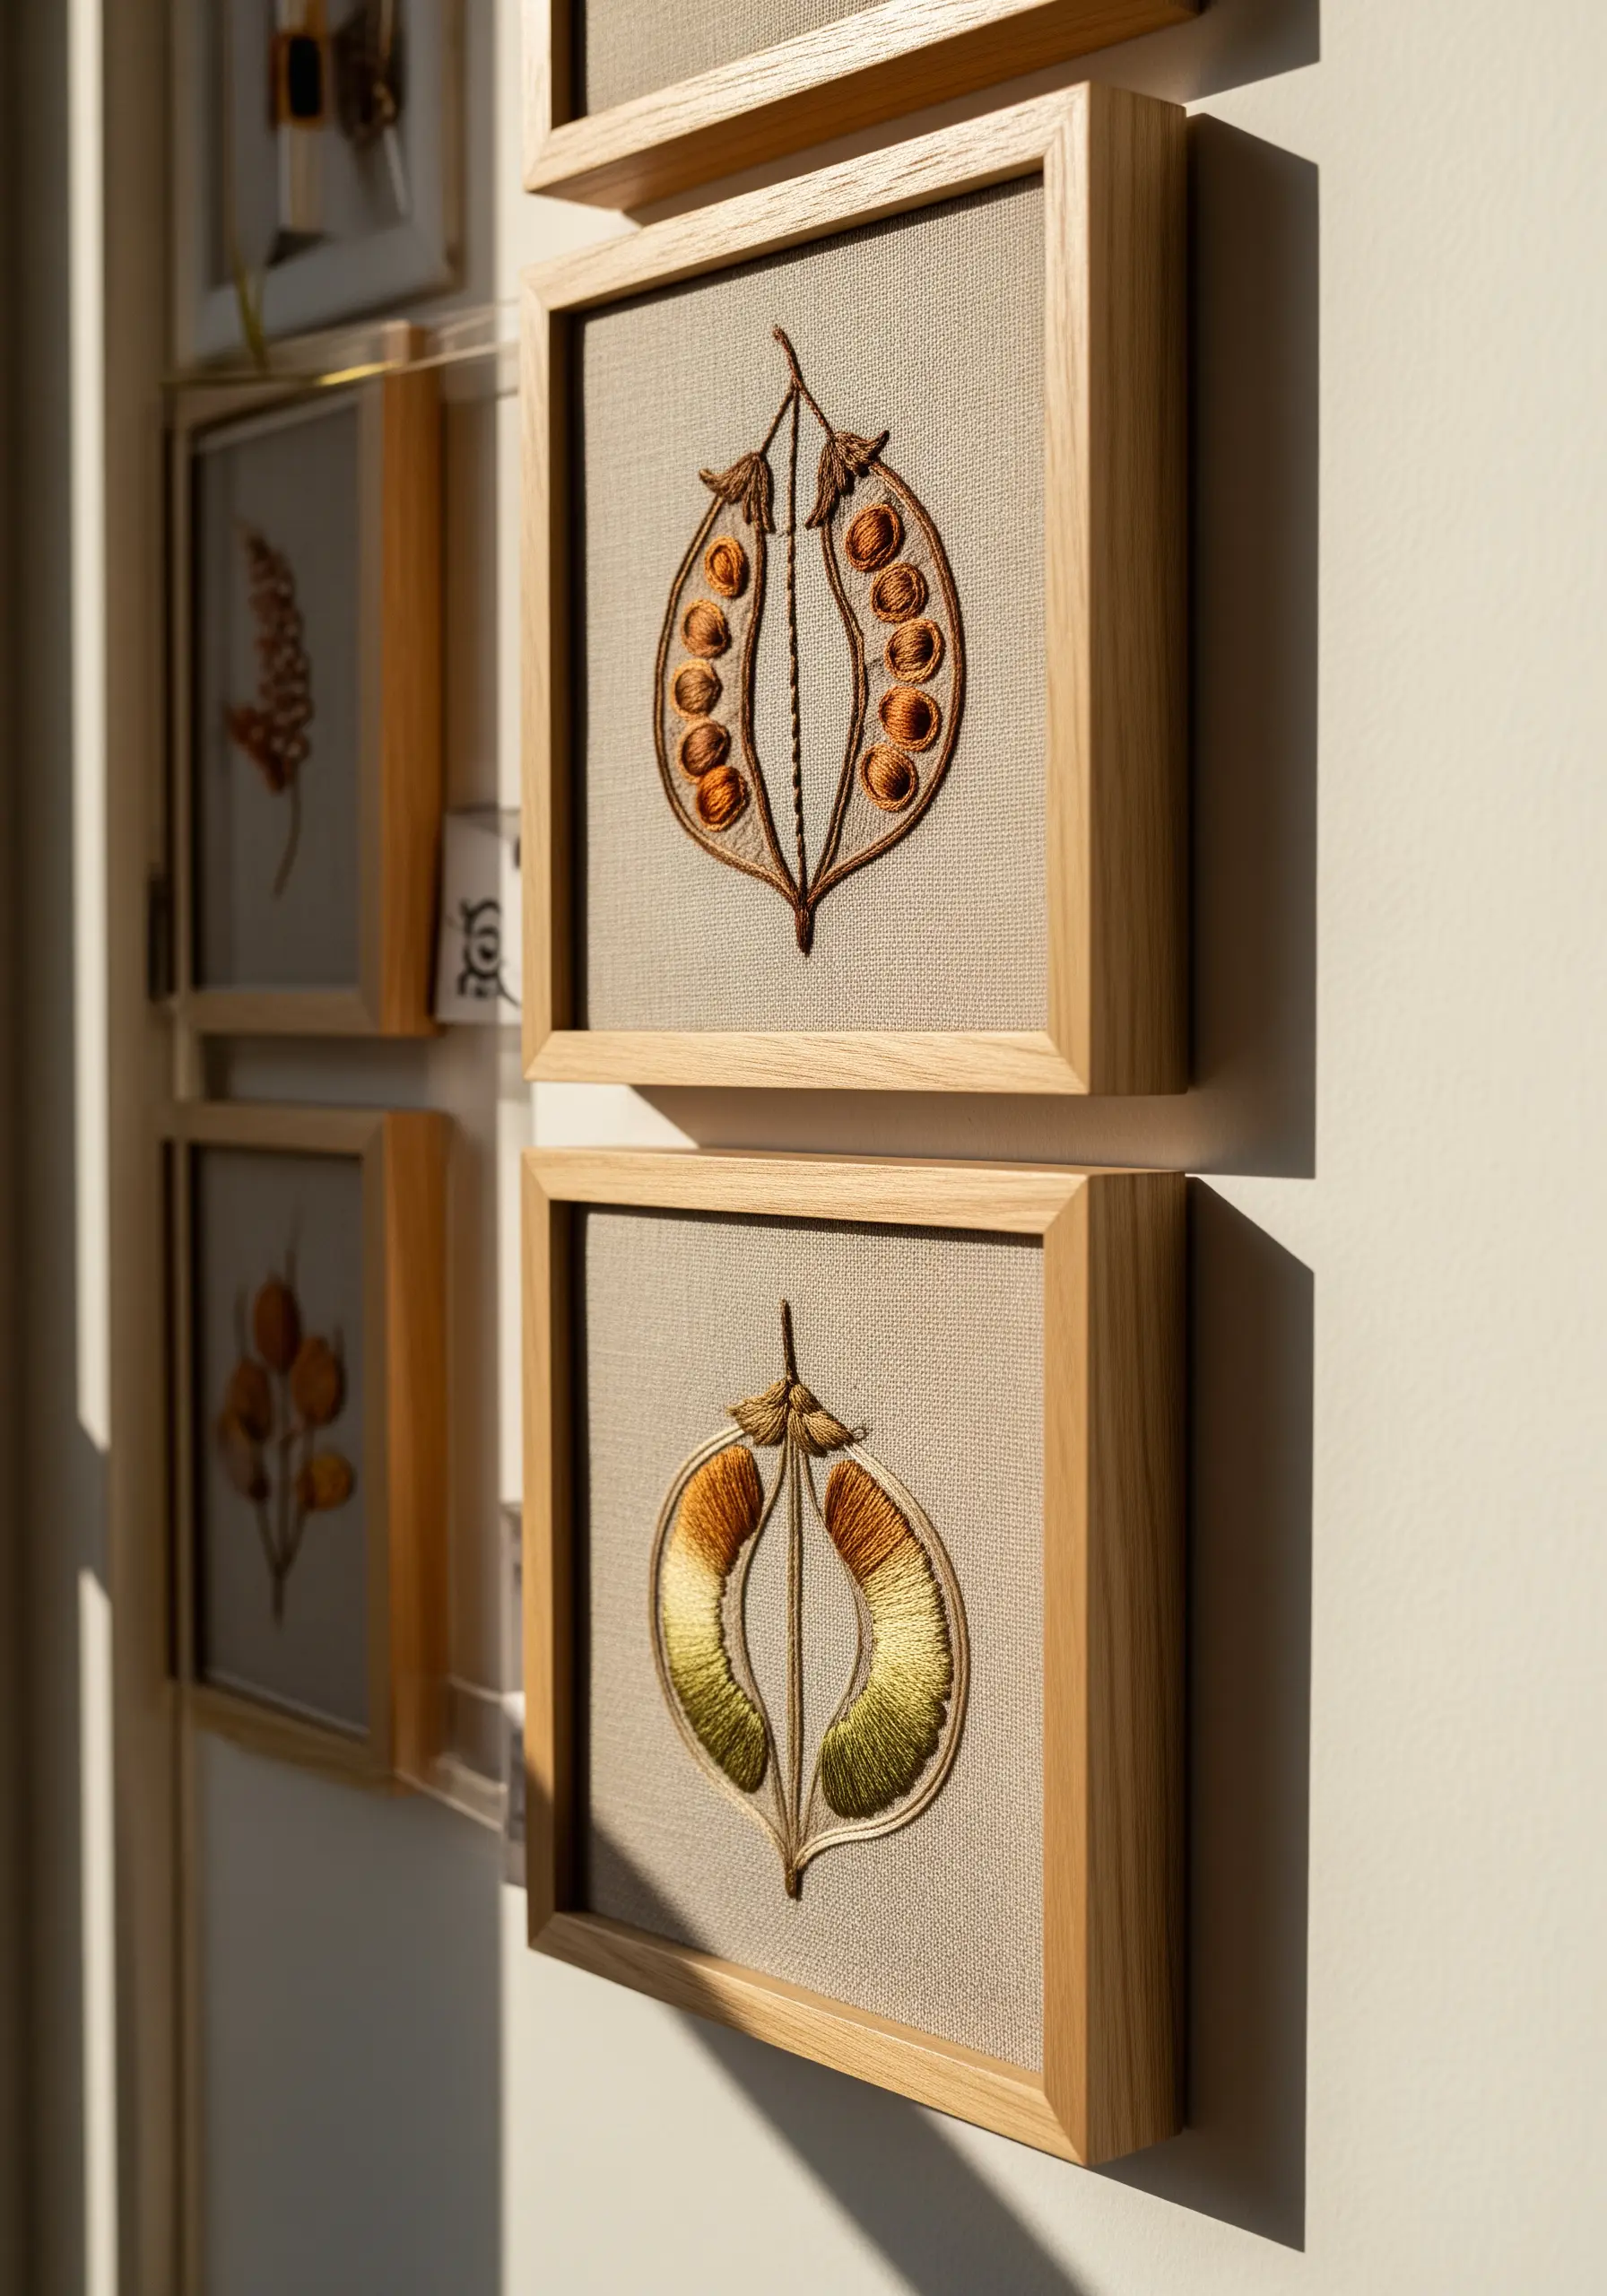
For clean, illustrative botanicals, precision is everything.
Outline your seed pod shape with a single-strand split stitch to create a sharp, raised edge for your satin stitch to rest against.
When filling the shape, use long, parallel satin stitches with a high-sheen rayon or silk thread. This catches the light beautifully, giving the seeds a plump, dimensional look.
A subtle gradient—moving from deep amber to pale gold—adds a layer of realism without complicating the design, making these framed embroidery art pieces feel like scientific studies.
4. Cultivate a Moss and Lichen Garden
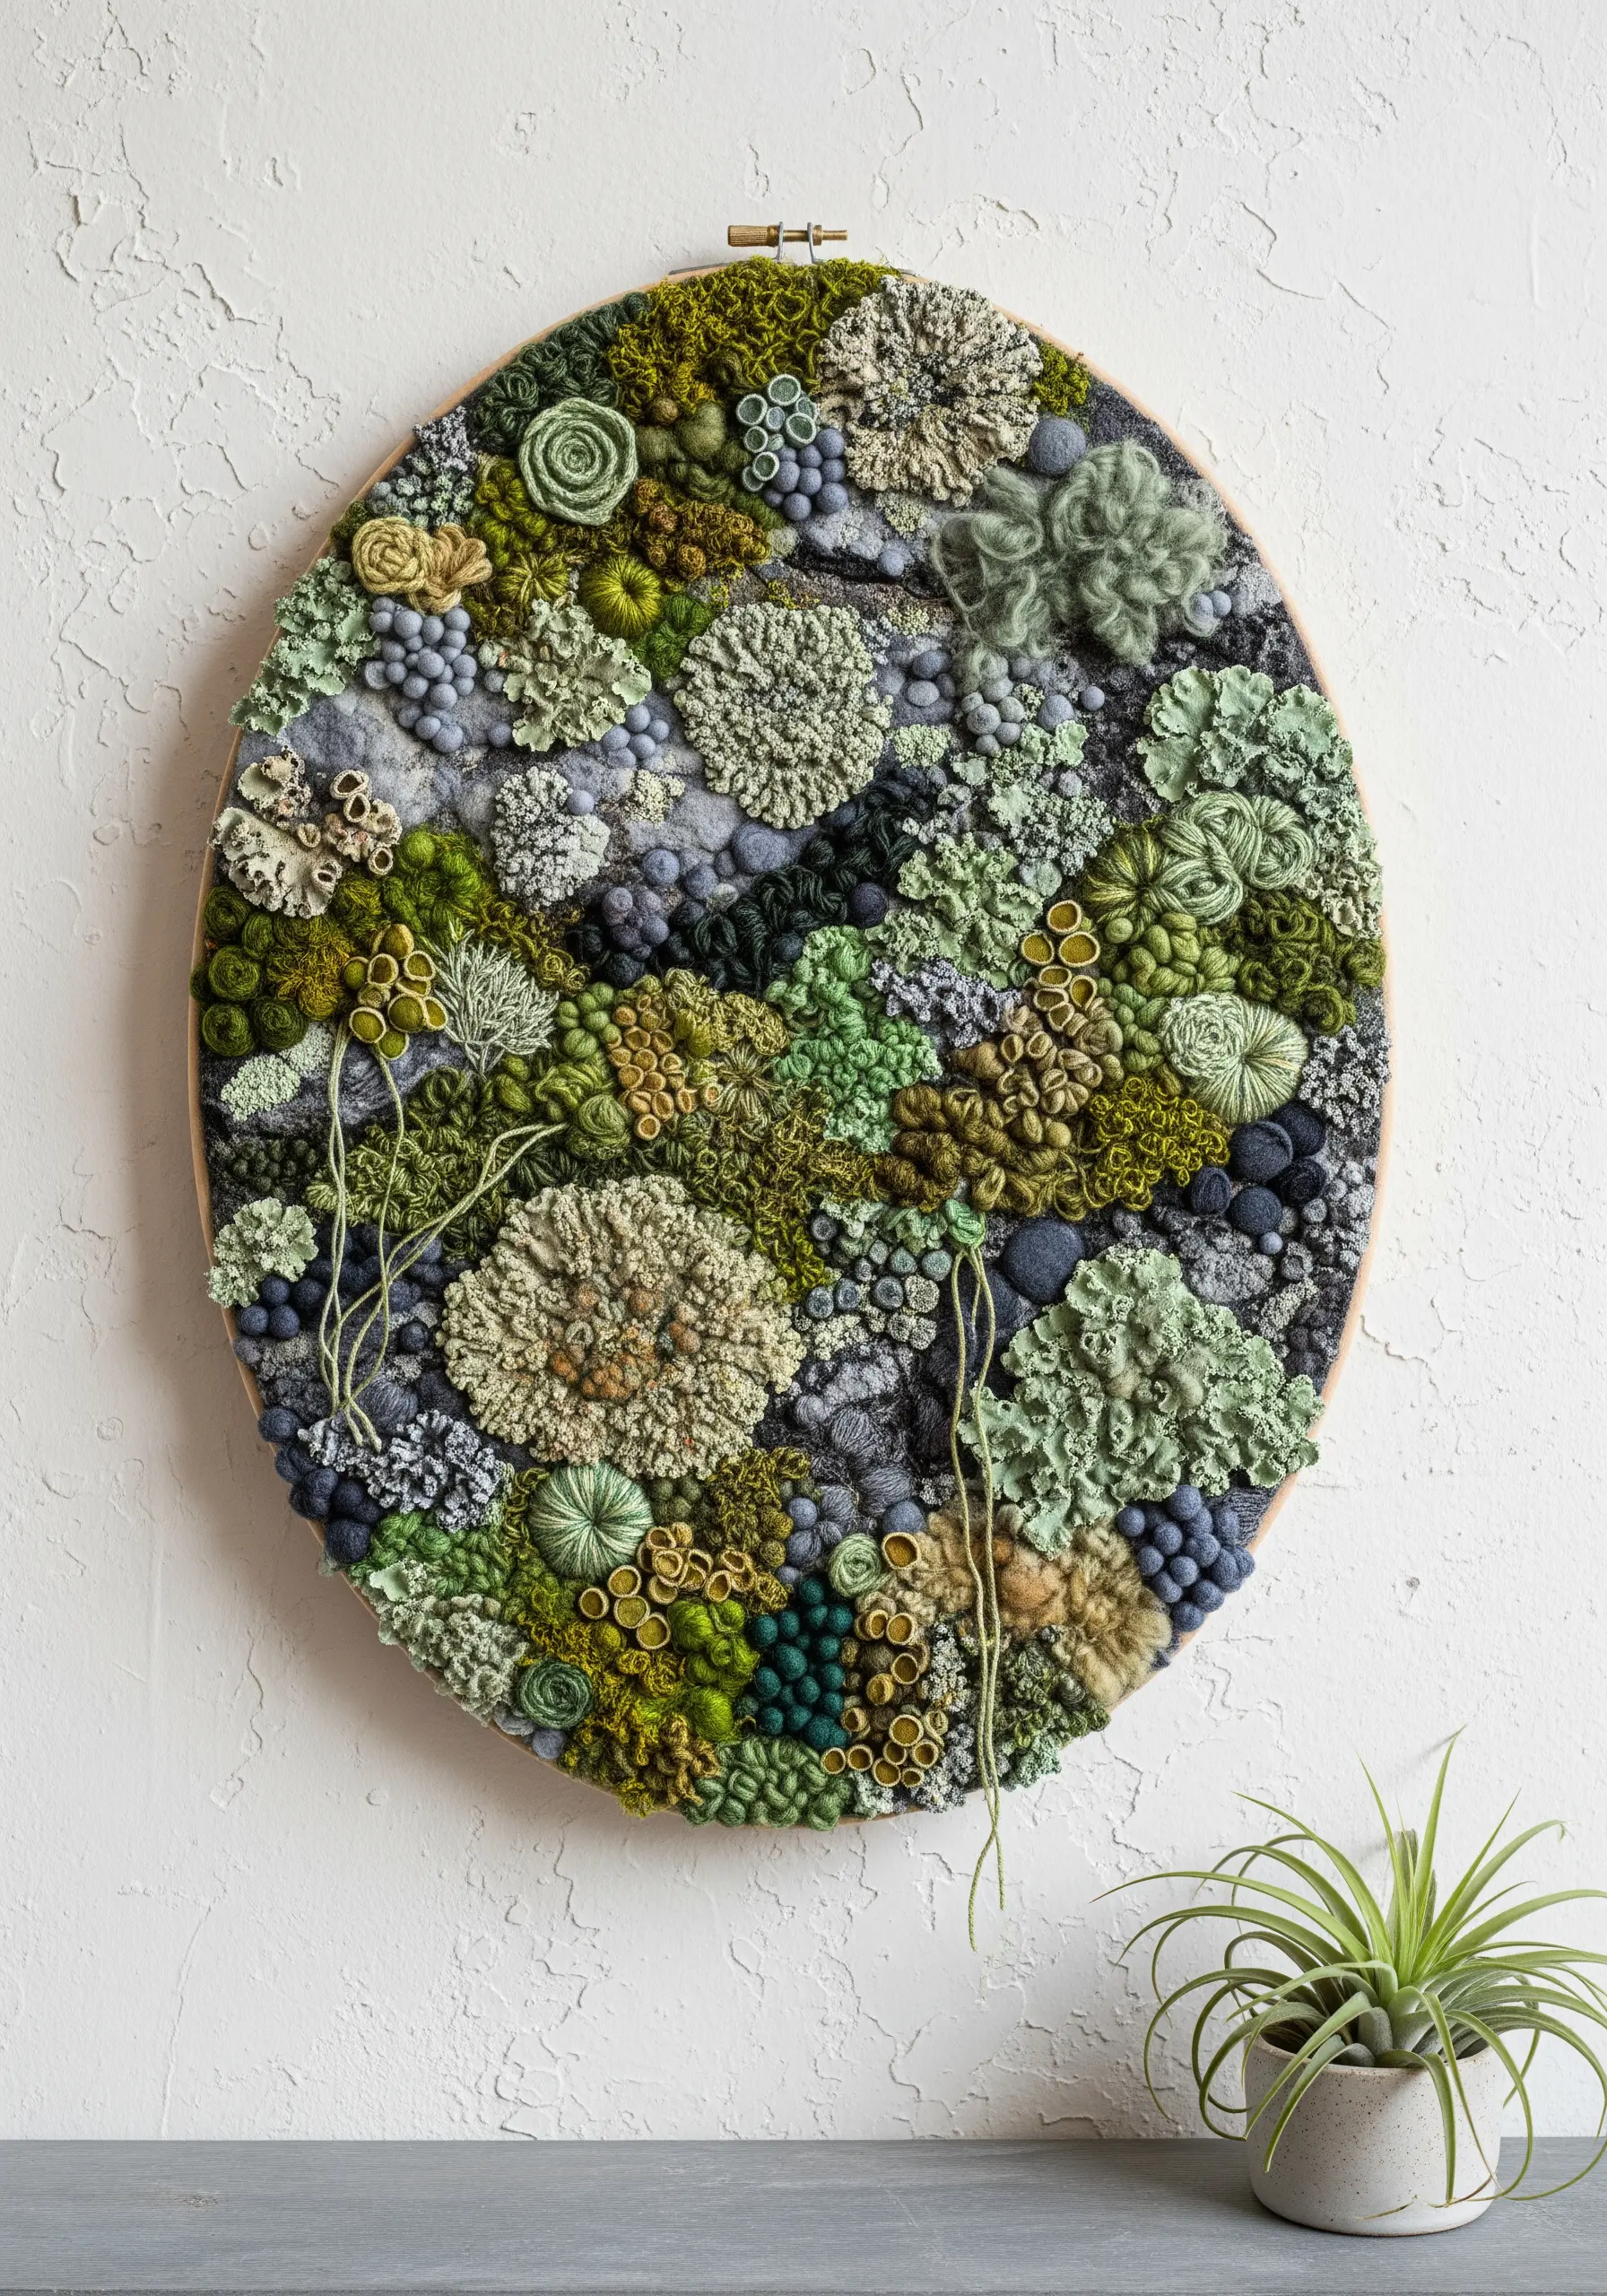
Recreate the rich textures of a forest floor by combining a variety of looped and knotted stitches.
Use French knots in sage green and grey-blue for dense, lichen-like clusters, varying the size by changing the number of thread strands and wraps around the needle.
Introduce bullion knots and woven wheel stitches to create larger, rosette shapes that mimic different moss species.
The key to a natural look is layering these moss and fern embroidery textures close together, allowing some colors to overlap and blend, just as they do in nature.
5. Stitch a Luminous Lunar Cycle
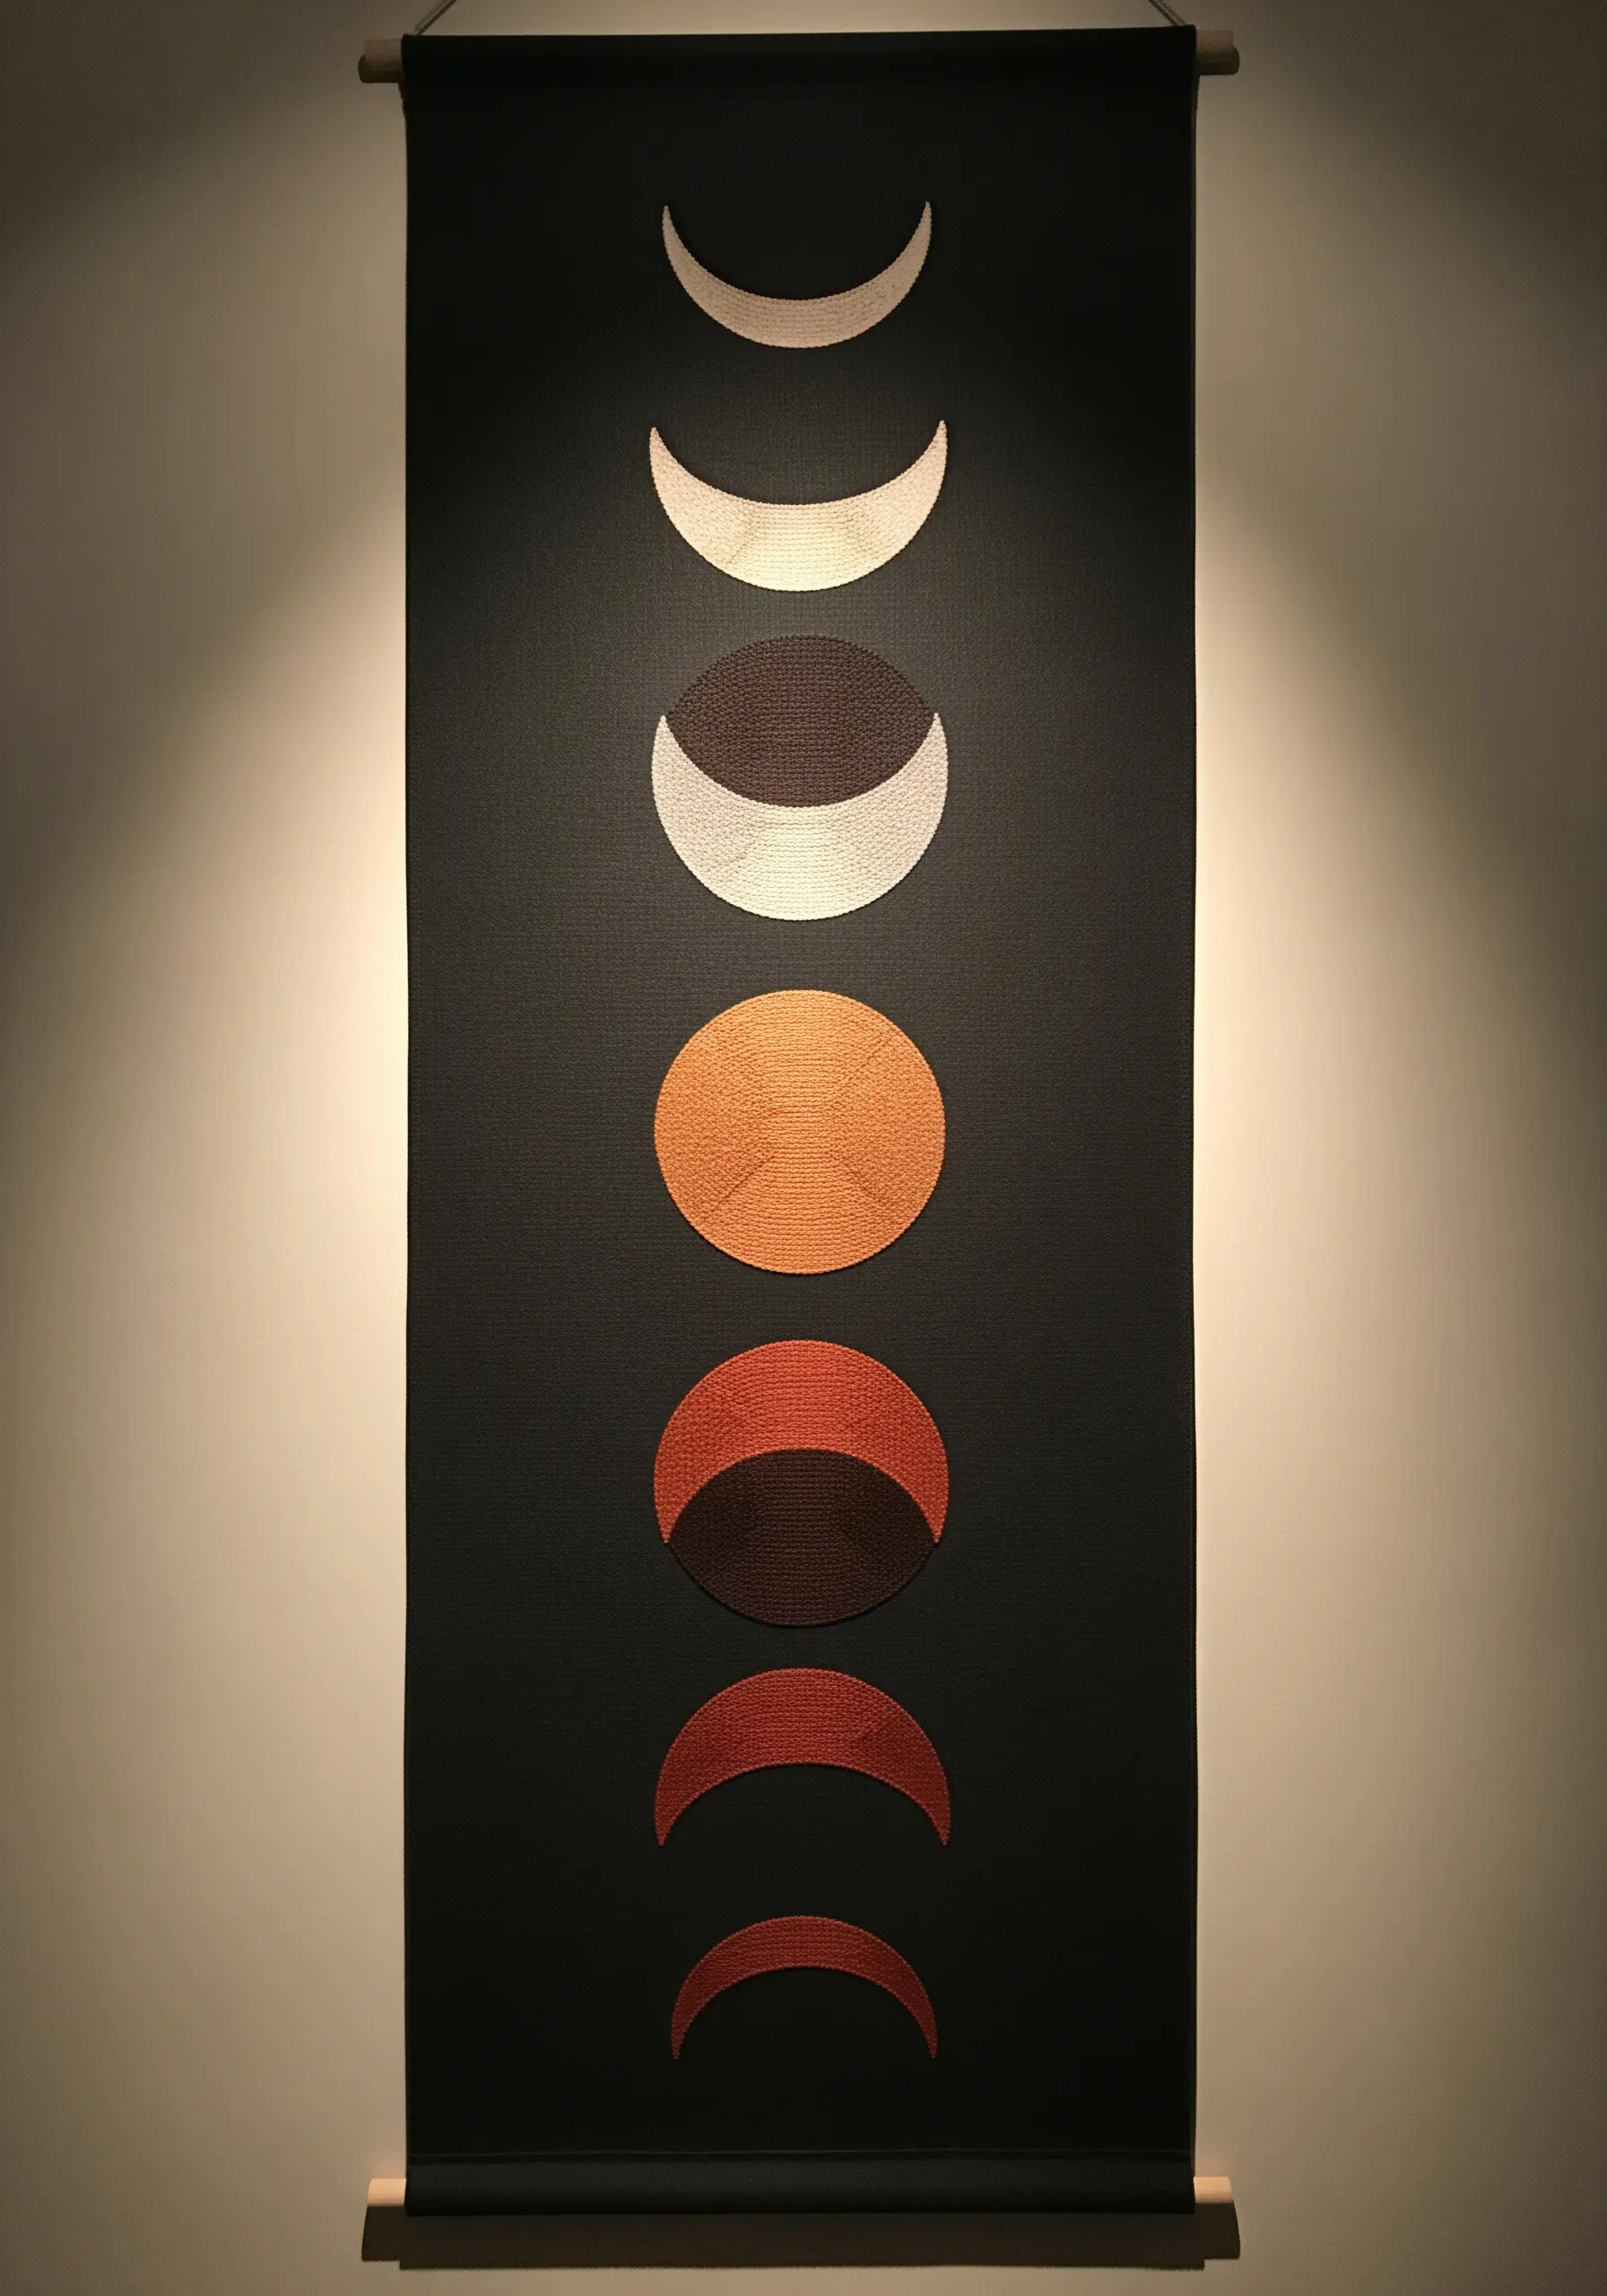
When embroidering on black fabric, your stitch direction becomes a source of light.
For these minimal sky and moon designs, fill each lunar phase with satin stitch, ensuring all stitches run in the same parallel direction.
Use threads with a subtle sheen, like a mercerized cotton or a single strand of metallic floss blended with cotton, to enhance the light-reflecting properties.
The contrast between the matte black fabric and the lustrous, directional stitches creates a powerful illusion of moonlight and shadow.
6. Layer with Unconventional Fibers
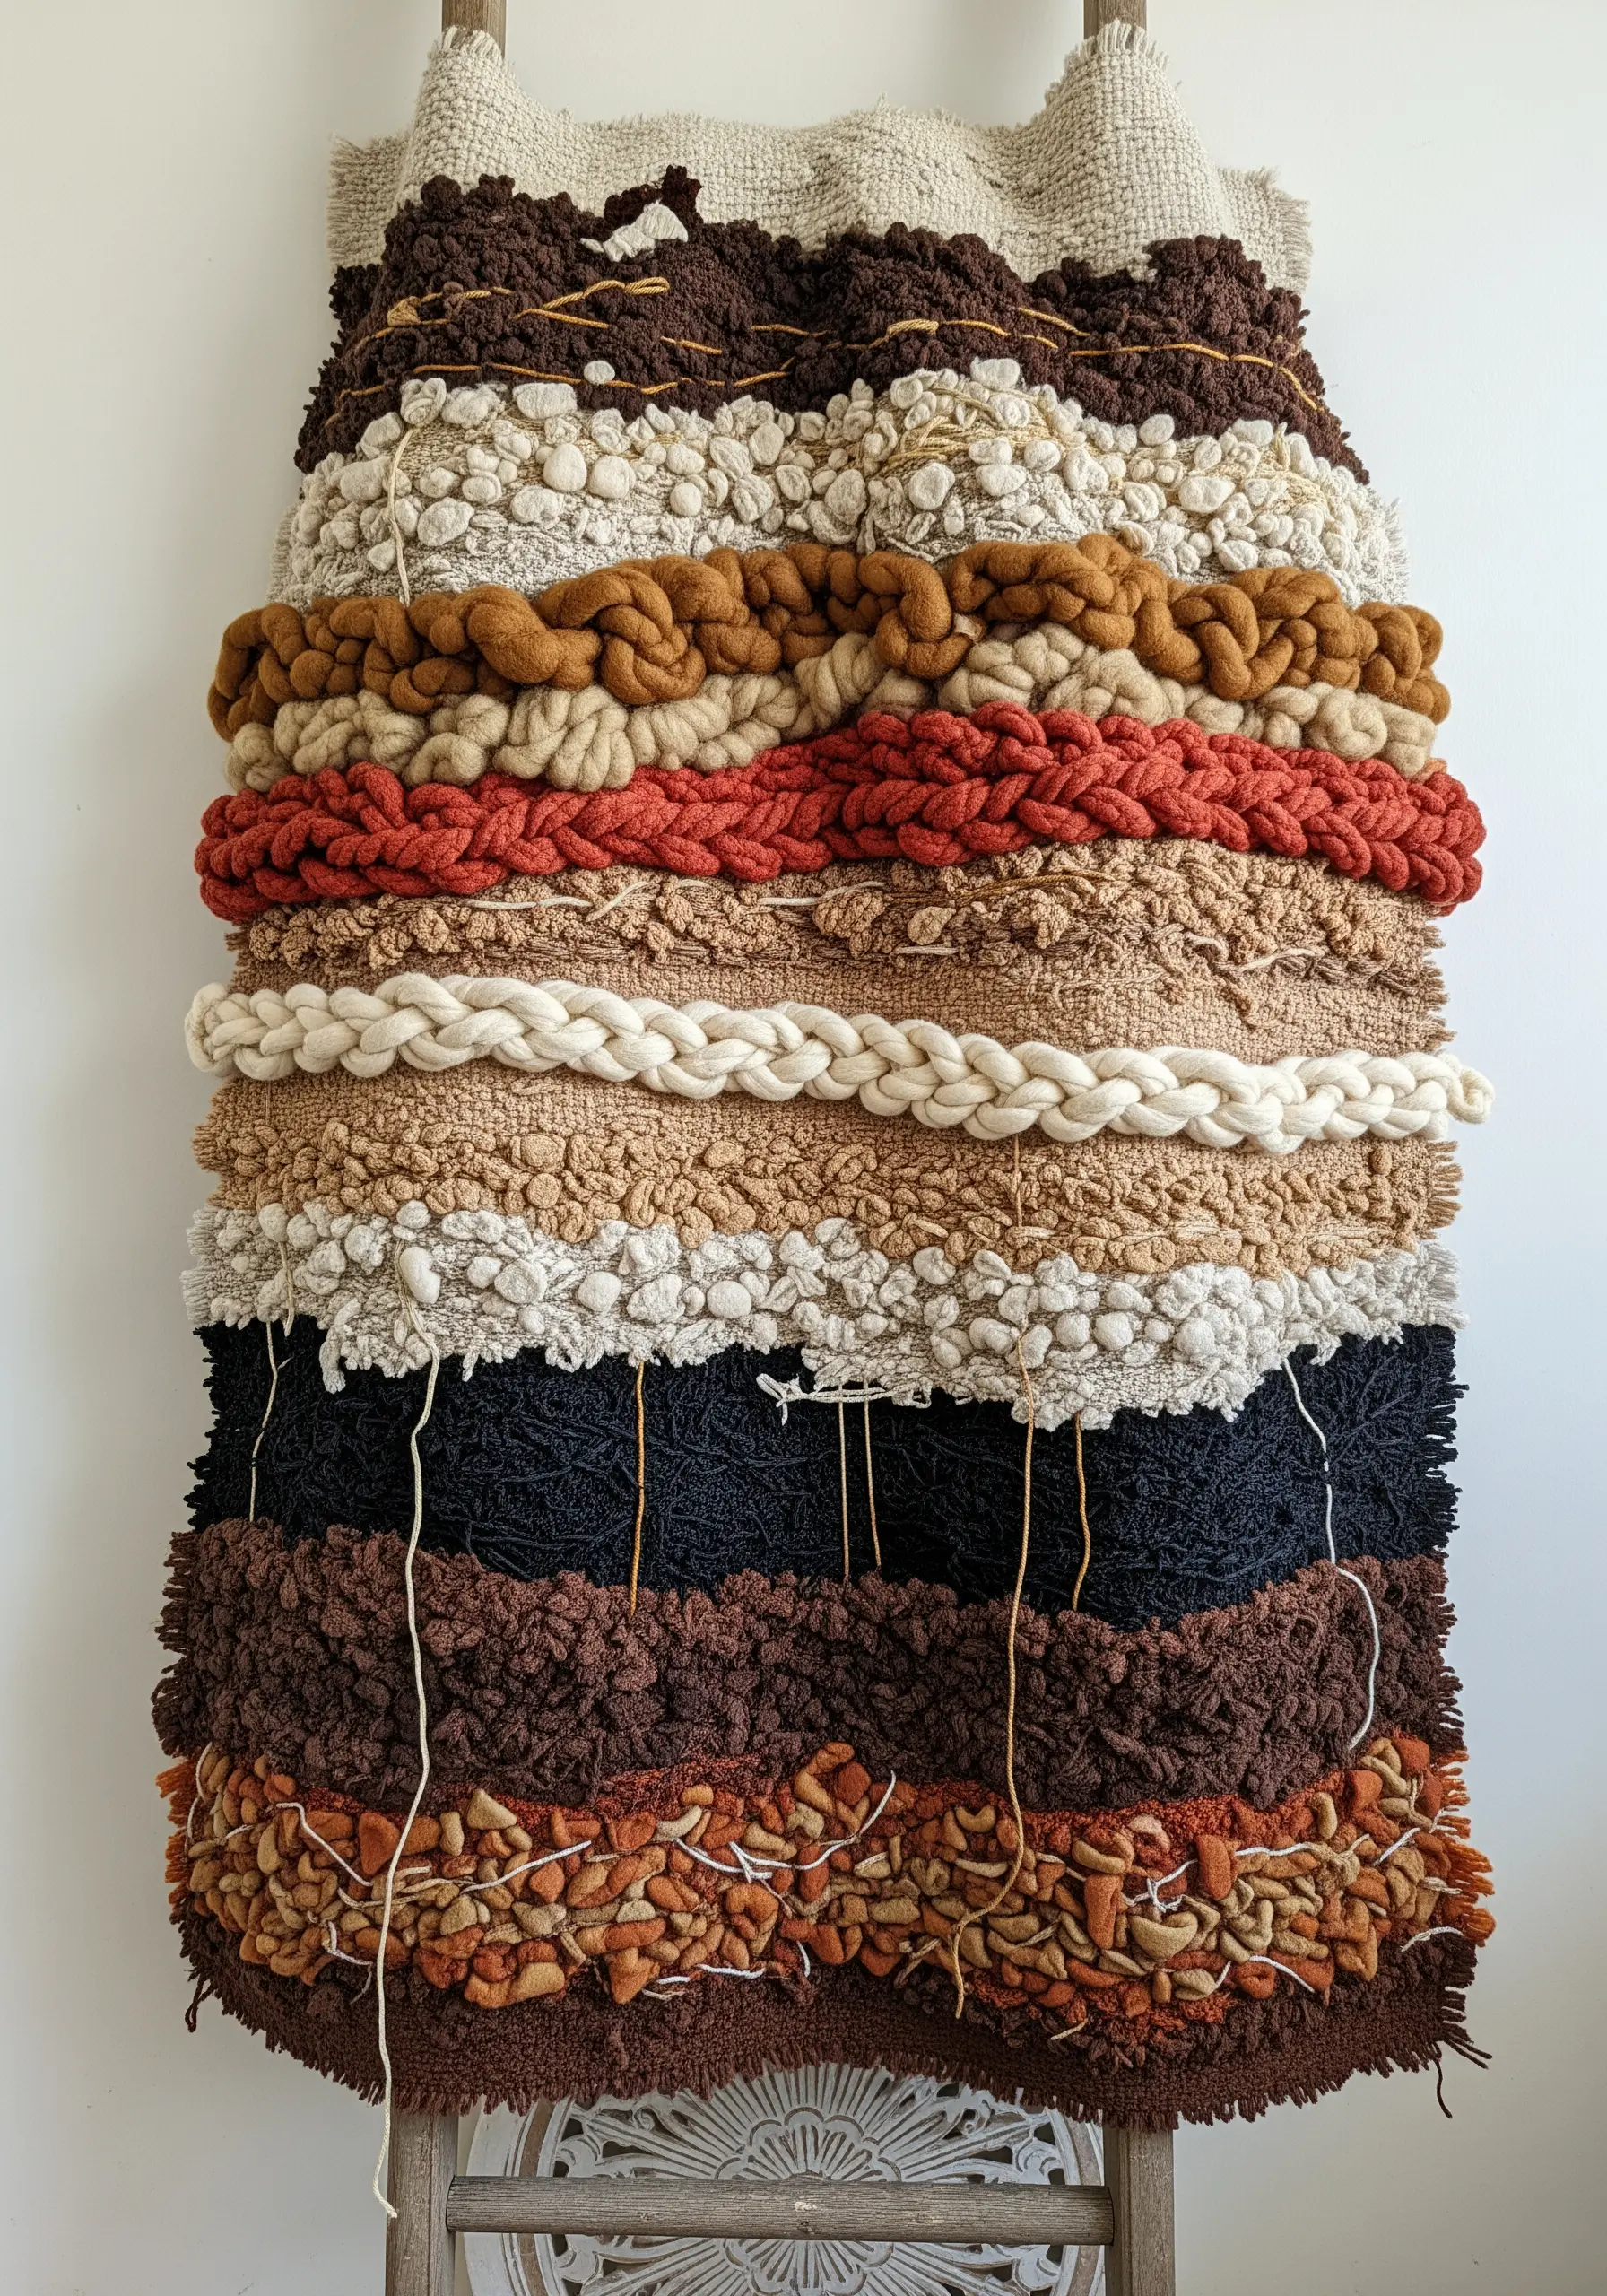
Move beyond standard floss and introduce chunky wool roving, braided yarns, and thick cotton cording into your work.
This style of mixed-fiber wall hanging relies on contrasting textures for its impact.
Use a sturdy canvas or burlap as your base and couch the thicker fibers onto the surface with a strong, discreet thread.
Arrange the fibers in horizontal bands of varying thickness and texture—a smooth braid next to a bumpy bullion knot row—to create a piece with immense tactile appeal.
7. Achieve Realism with Thread Painting
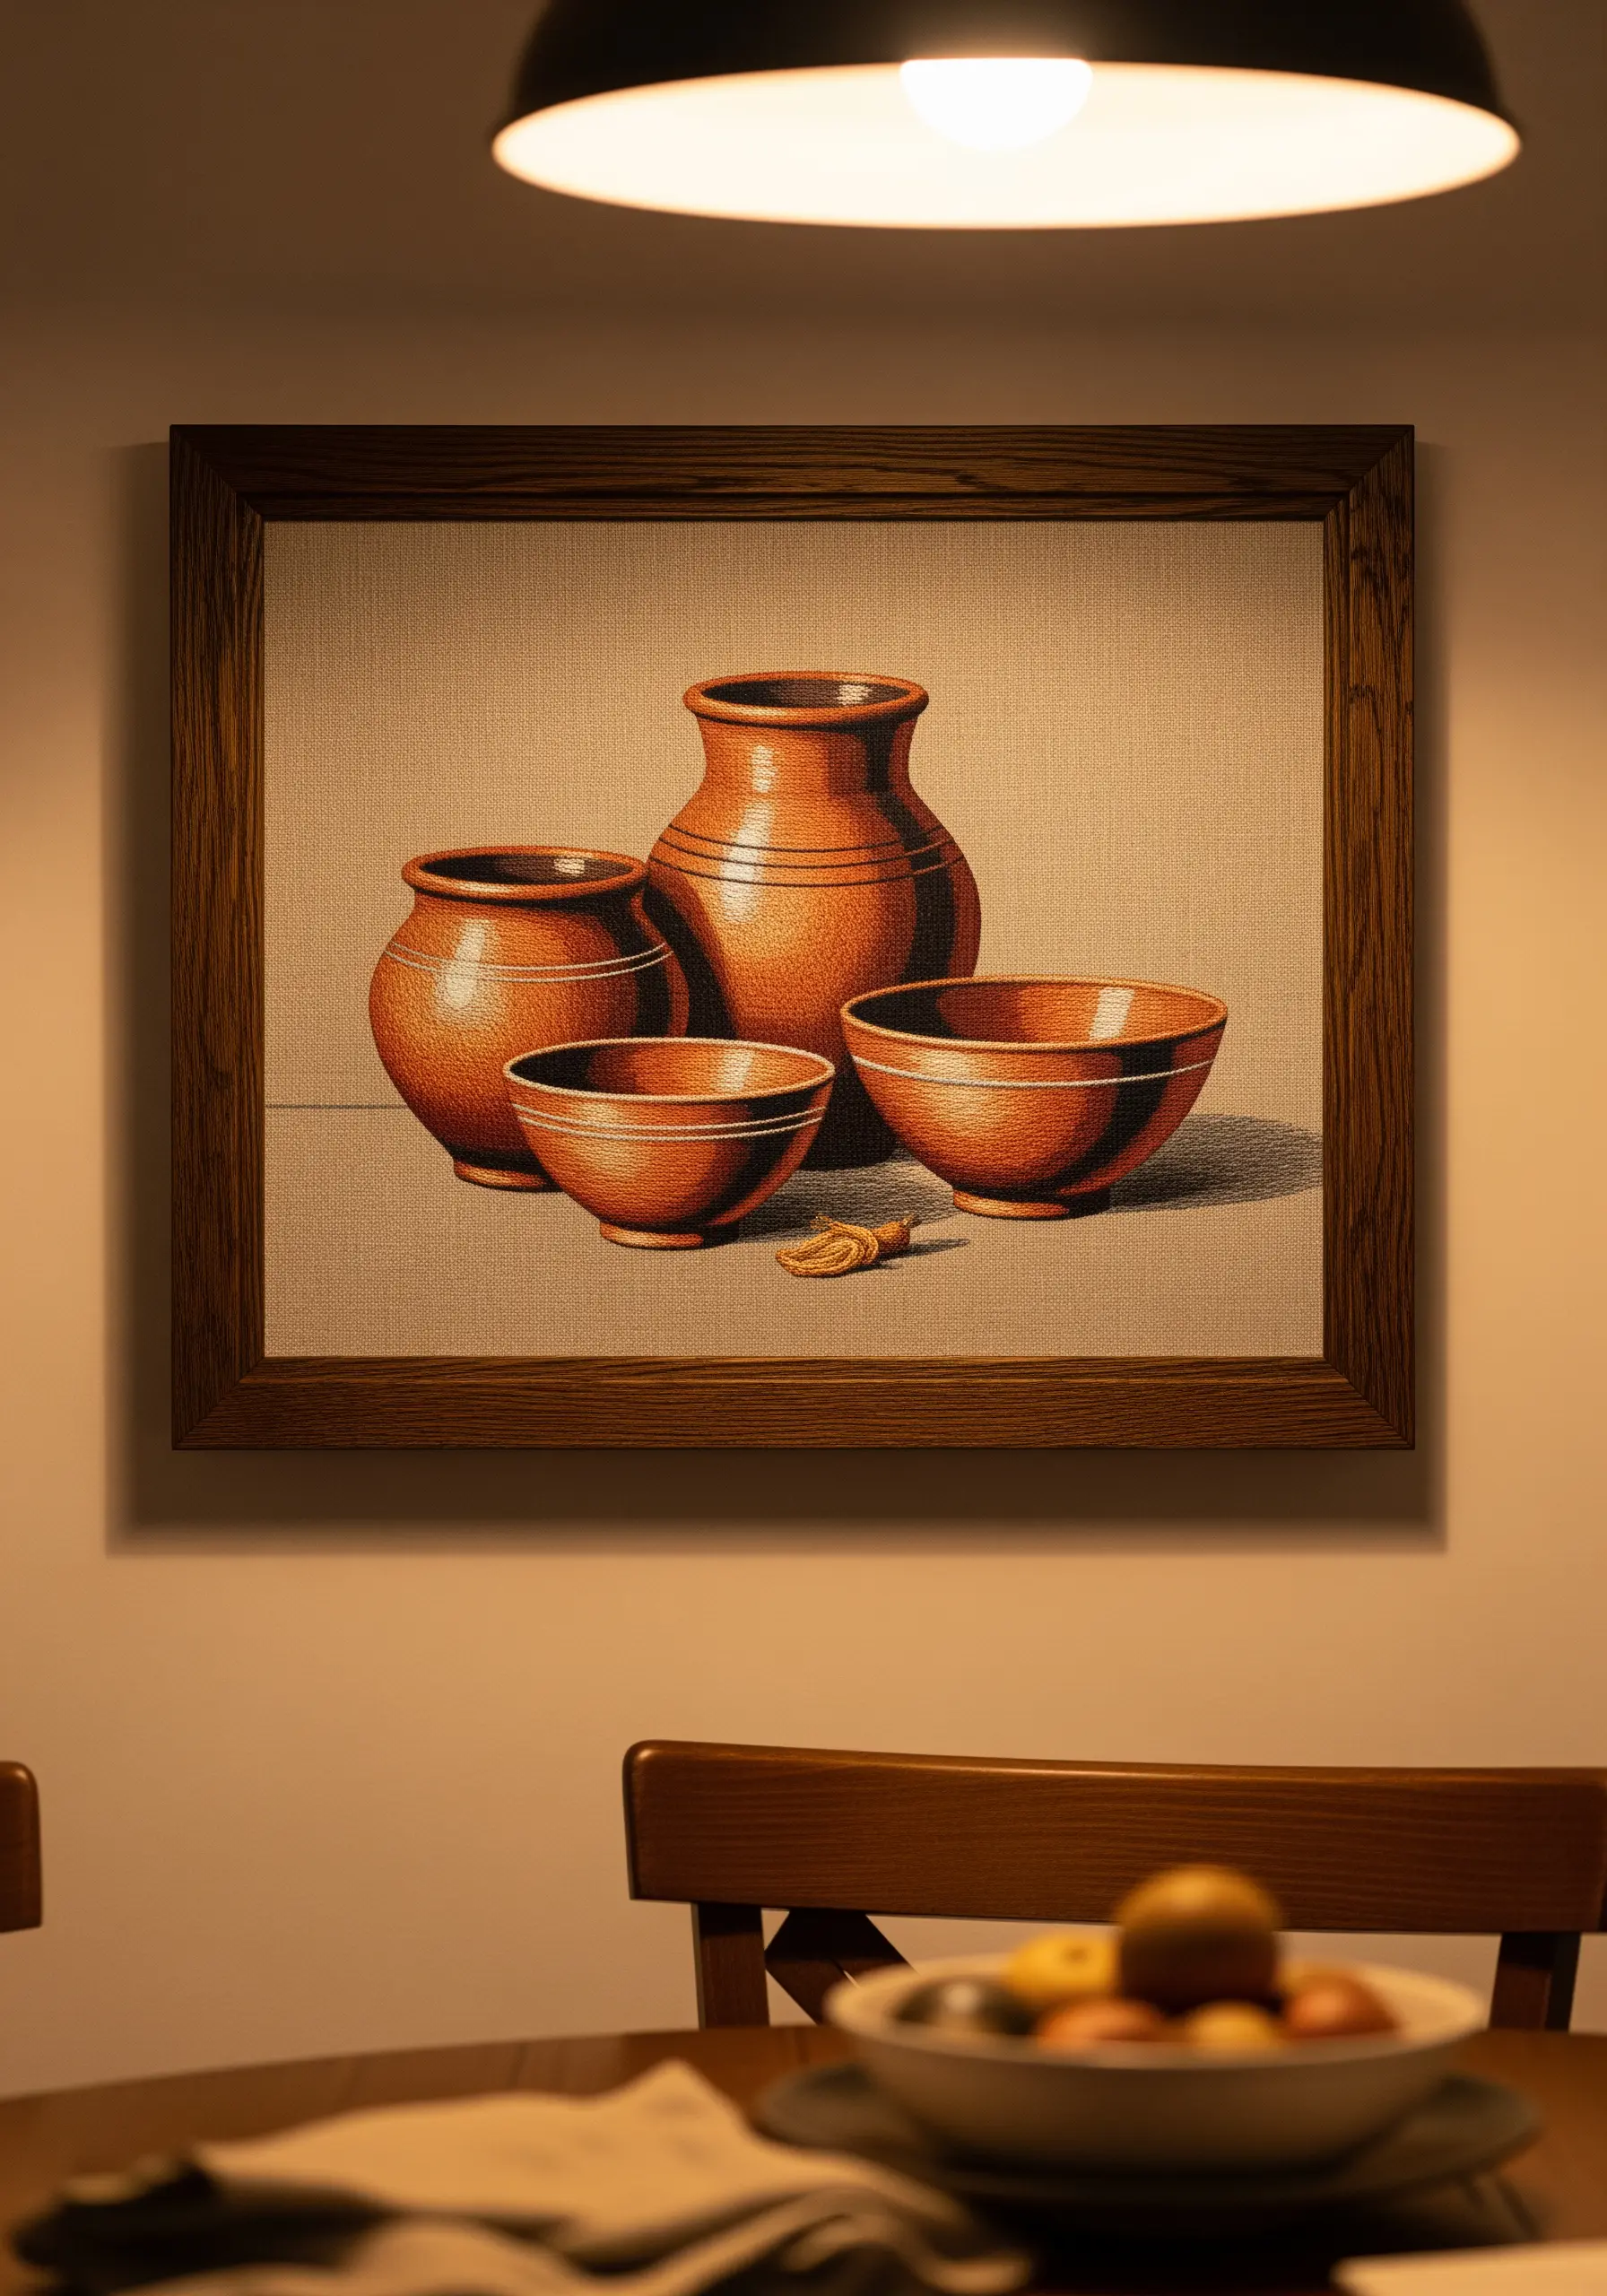
To give simple objects a photorealistic quality, use the long-and-short stitch technique with a single strand of cotton floss.
Work with a closely related palette of four to five shades of terracotta, from a deep shadow brown to a light-catching orange.
Blend the colors seamlessly by splitting the stitches of the previous row with your needle, creating soft, imperceptible transitions.
This meticulous shading technique, known as contemporary thread painting, is what gives the pottery its smooth, rounded appearance and captures the play of light.
8. Emulate the Texture of Tree Bark
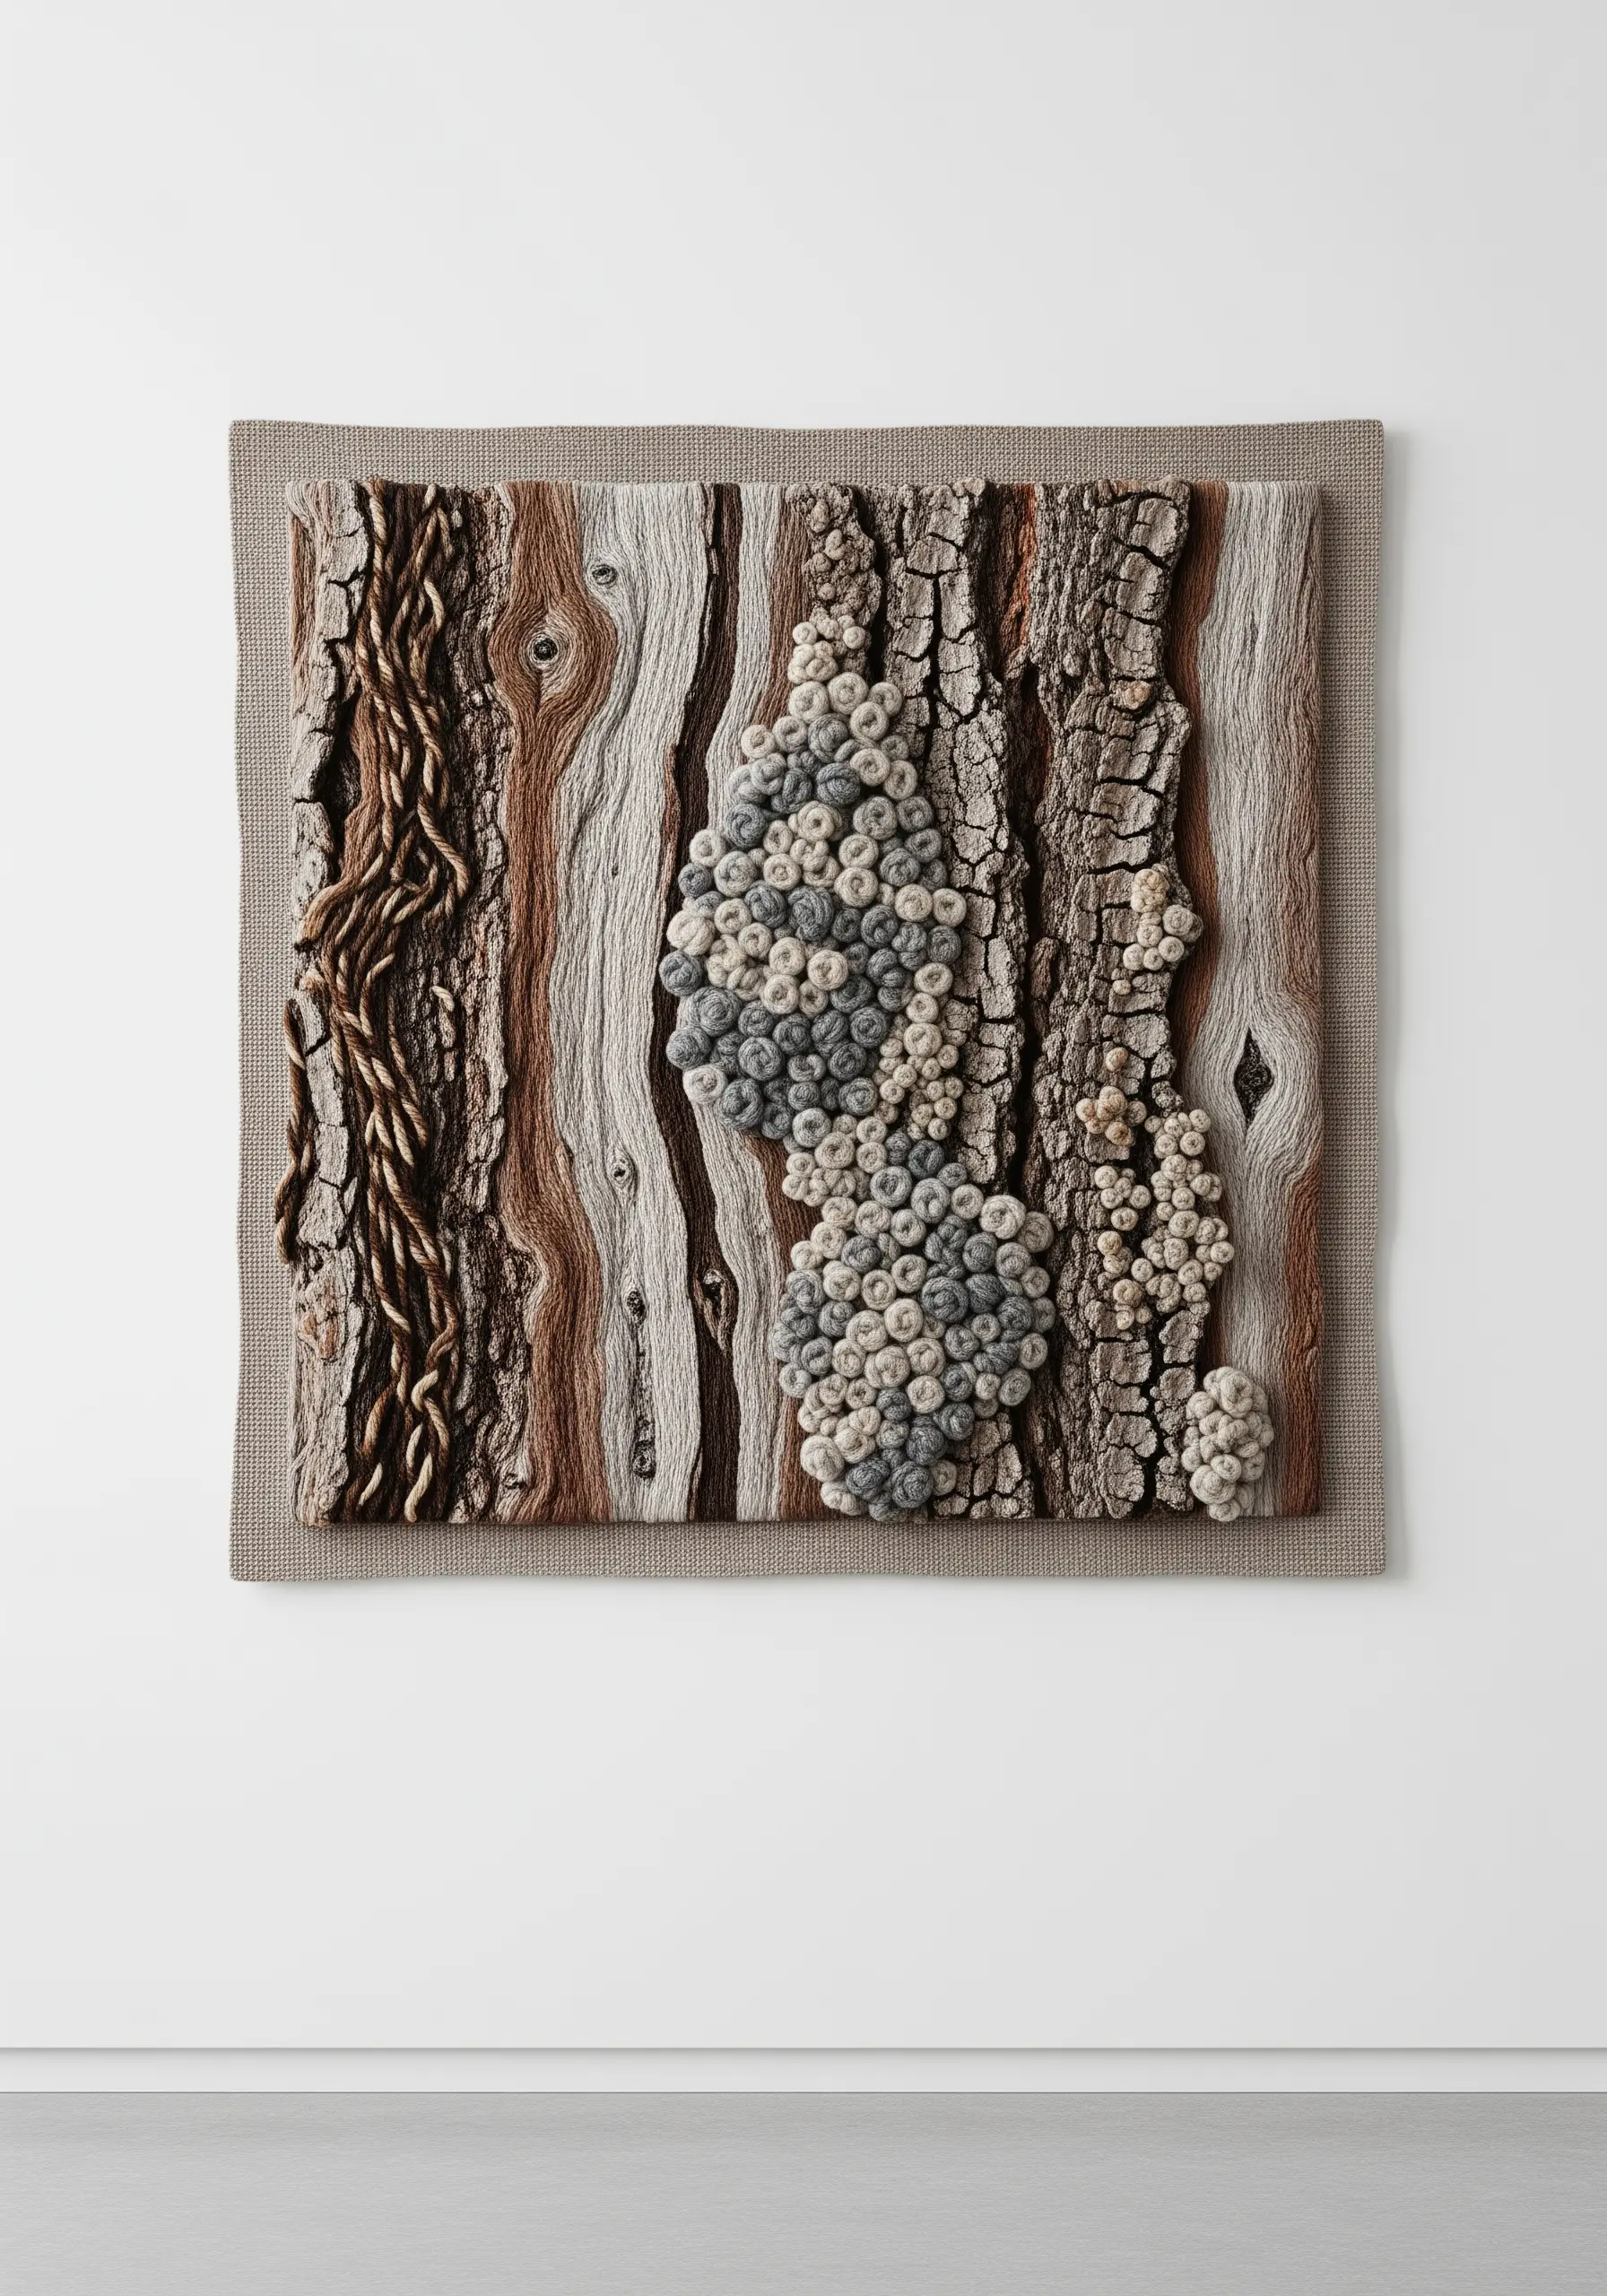
To capture the organic patterns of bark, think in layers of line and texture.
Create the foundational wood grain with long straight stitches in varying shades of brown, grey, and cream, laying them down to follow the natural flow of the wood.
For the rough, cracked texture of bark, couch down a twisted, thicker brown yarn in meandering lines.
Finally, add clusters of French knots in pale grey and off-white to simulate lichen, making your embroidery inspired by stones, wood, and leaves feel incredibly lifelike.
9. Illuminate a Design with Metallic Thread

Elevate a simple botanical silhouette by stitching it entirely in a high-sheen metallic or rayon thread.
To create the elegant veins of this ginkgo leaf, use long, radiating satin stitches that all originate from a central point.
This technique turns the entire motif into a light-catching surface, adding a touch of luxury and visual interest to a plain cushion cover.
The contrast between the matte olive fabric and the glowing gold thread makes the design feel both modern and timeless, perfect for cushions that look boutique-level.
10. Craft a Landscape with Fabric and Thread
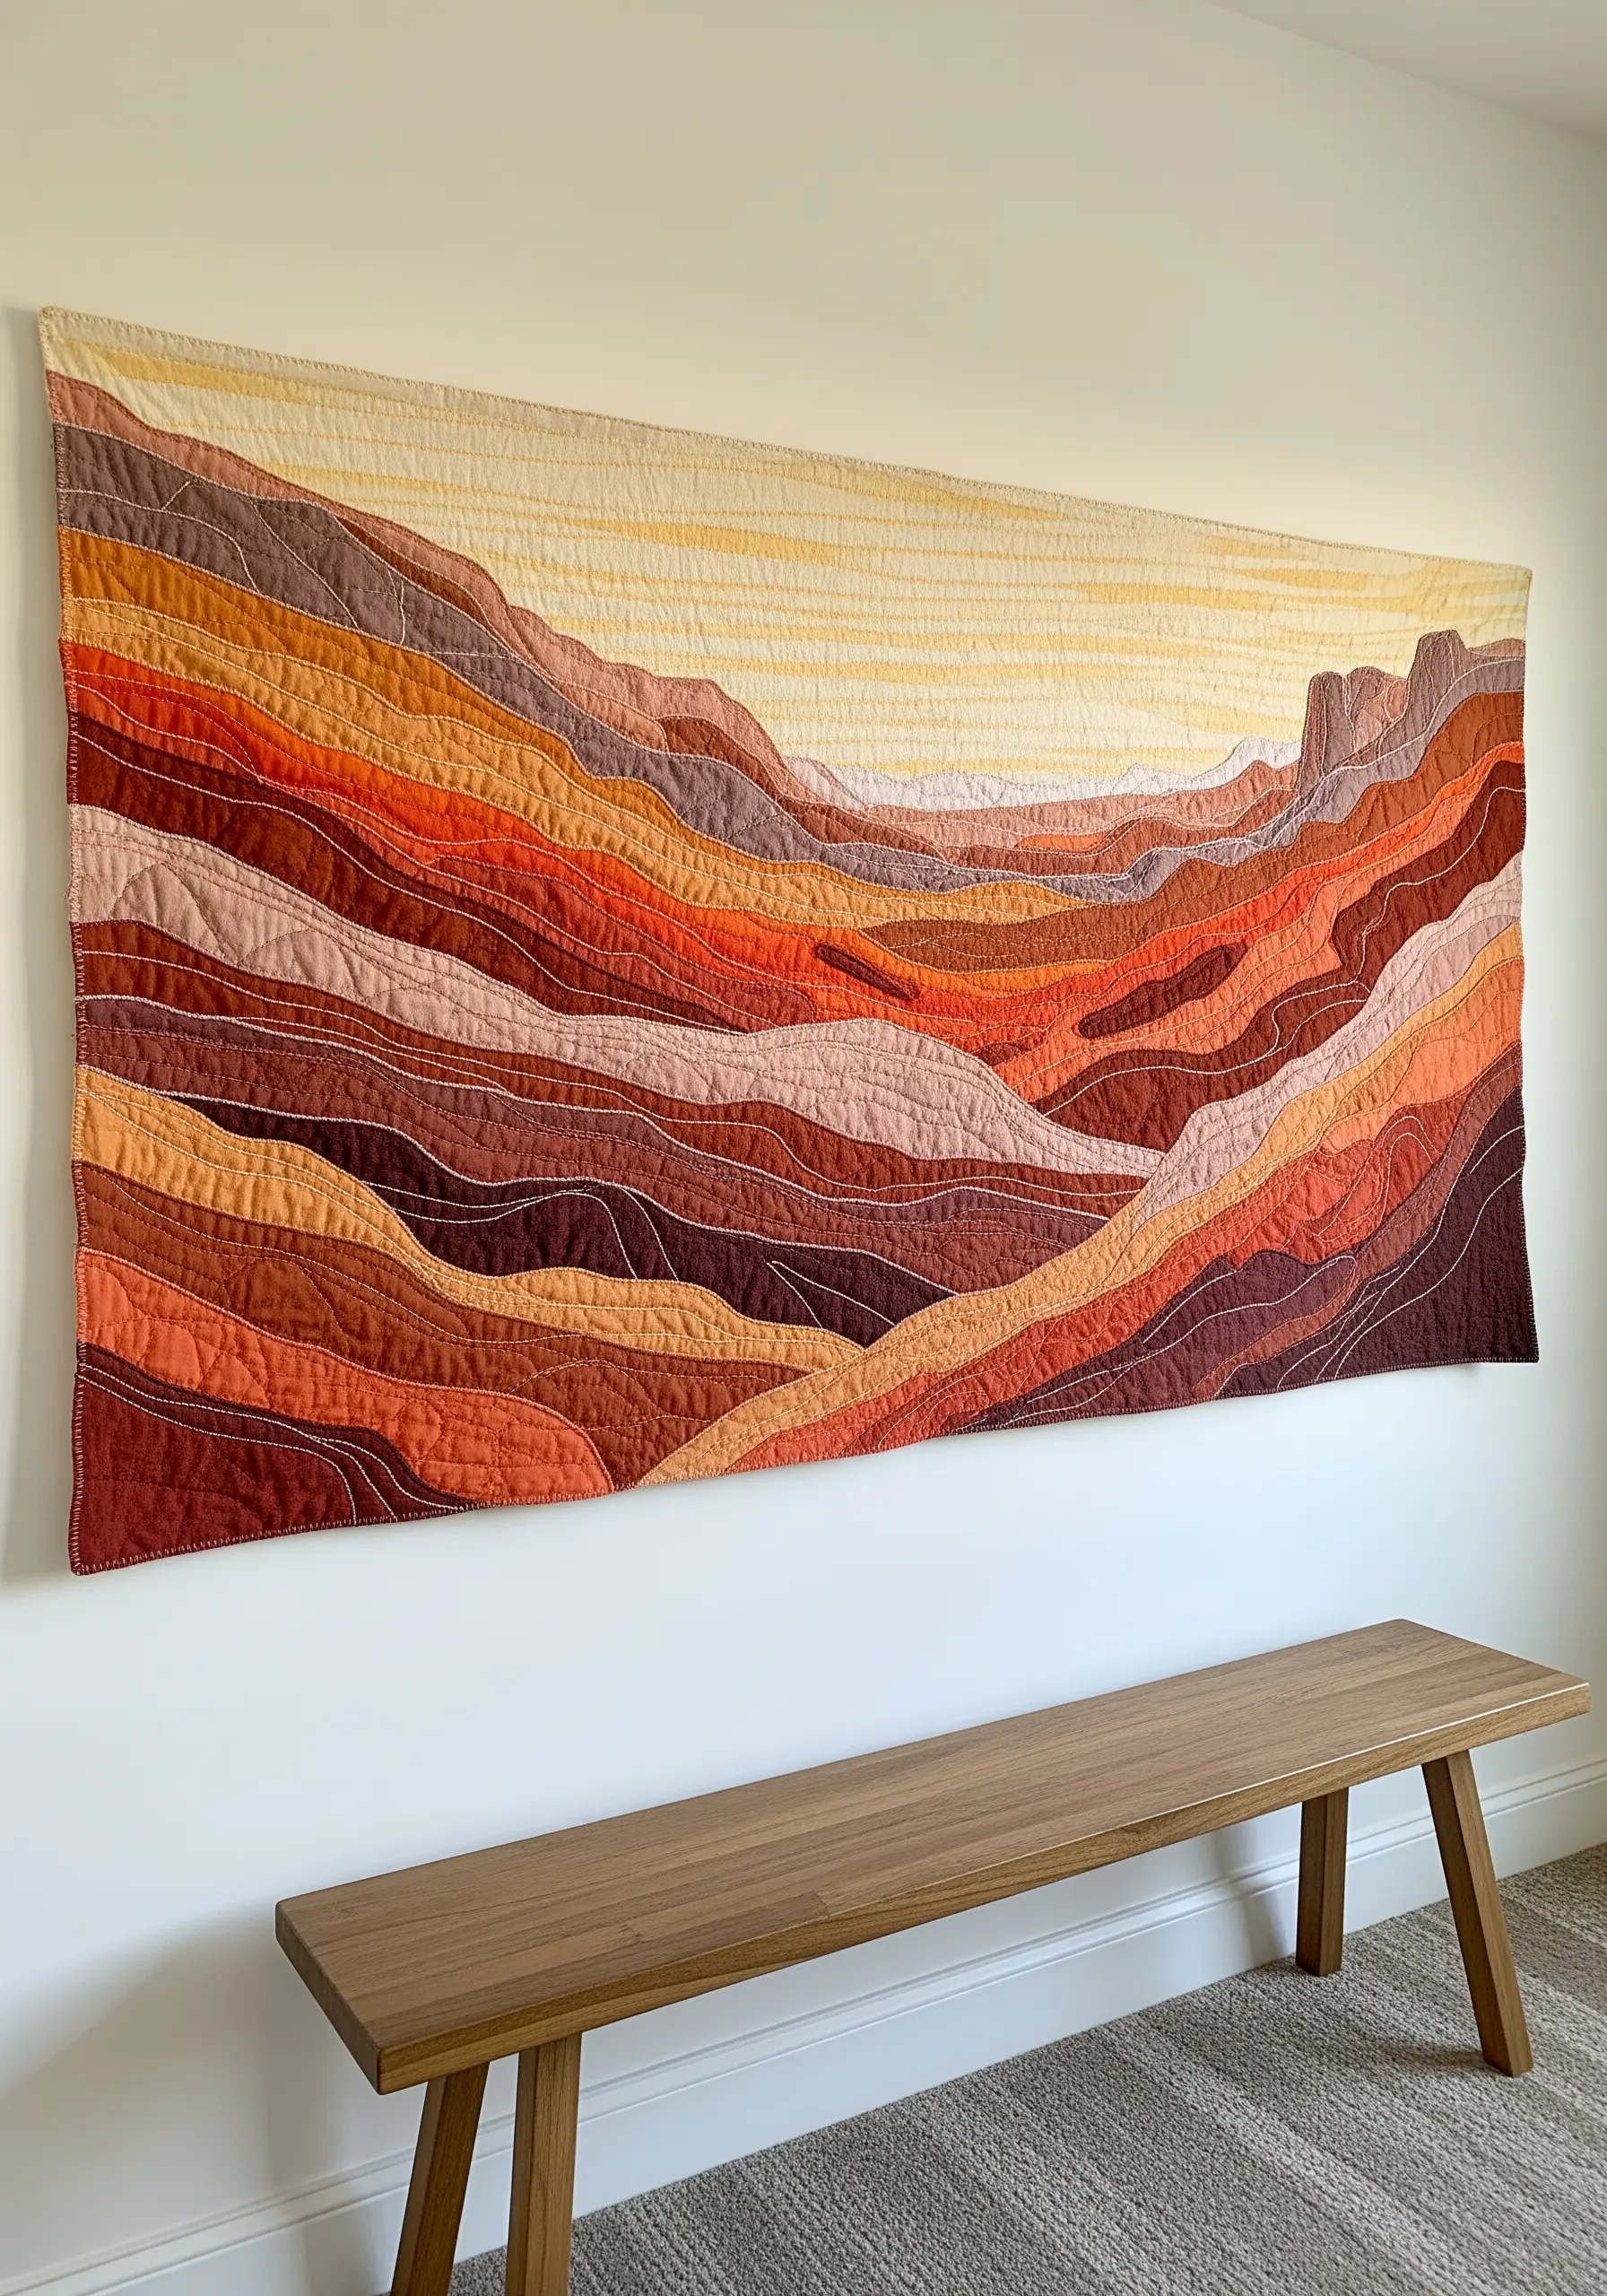
Build depth in a large-scale piece by combining fabric appliqué with minimal stitching.
Cut wavy strips of cotton and linen in a gradient of canyon-inspired earth tones and layer them to form the landscape.
Instead of dense embroidery, use a simple running stitch in a contrasting color to quilt the layers together and add contour lines.
This method allows you to create expansive, abstract thread landscapes with rich color and subtle texture without the time commitment of filling the entire surface with stitches.
11. Define Elegance with a Single Line
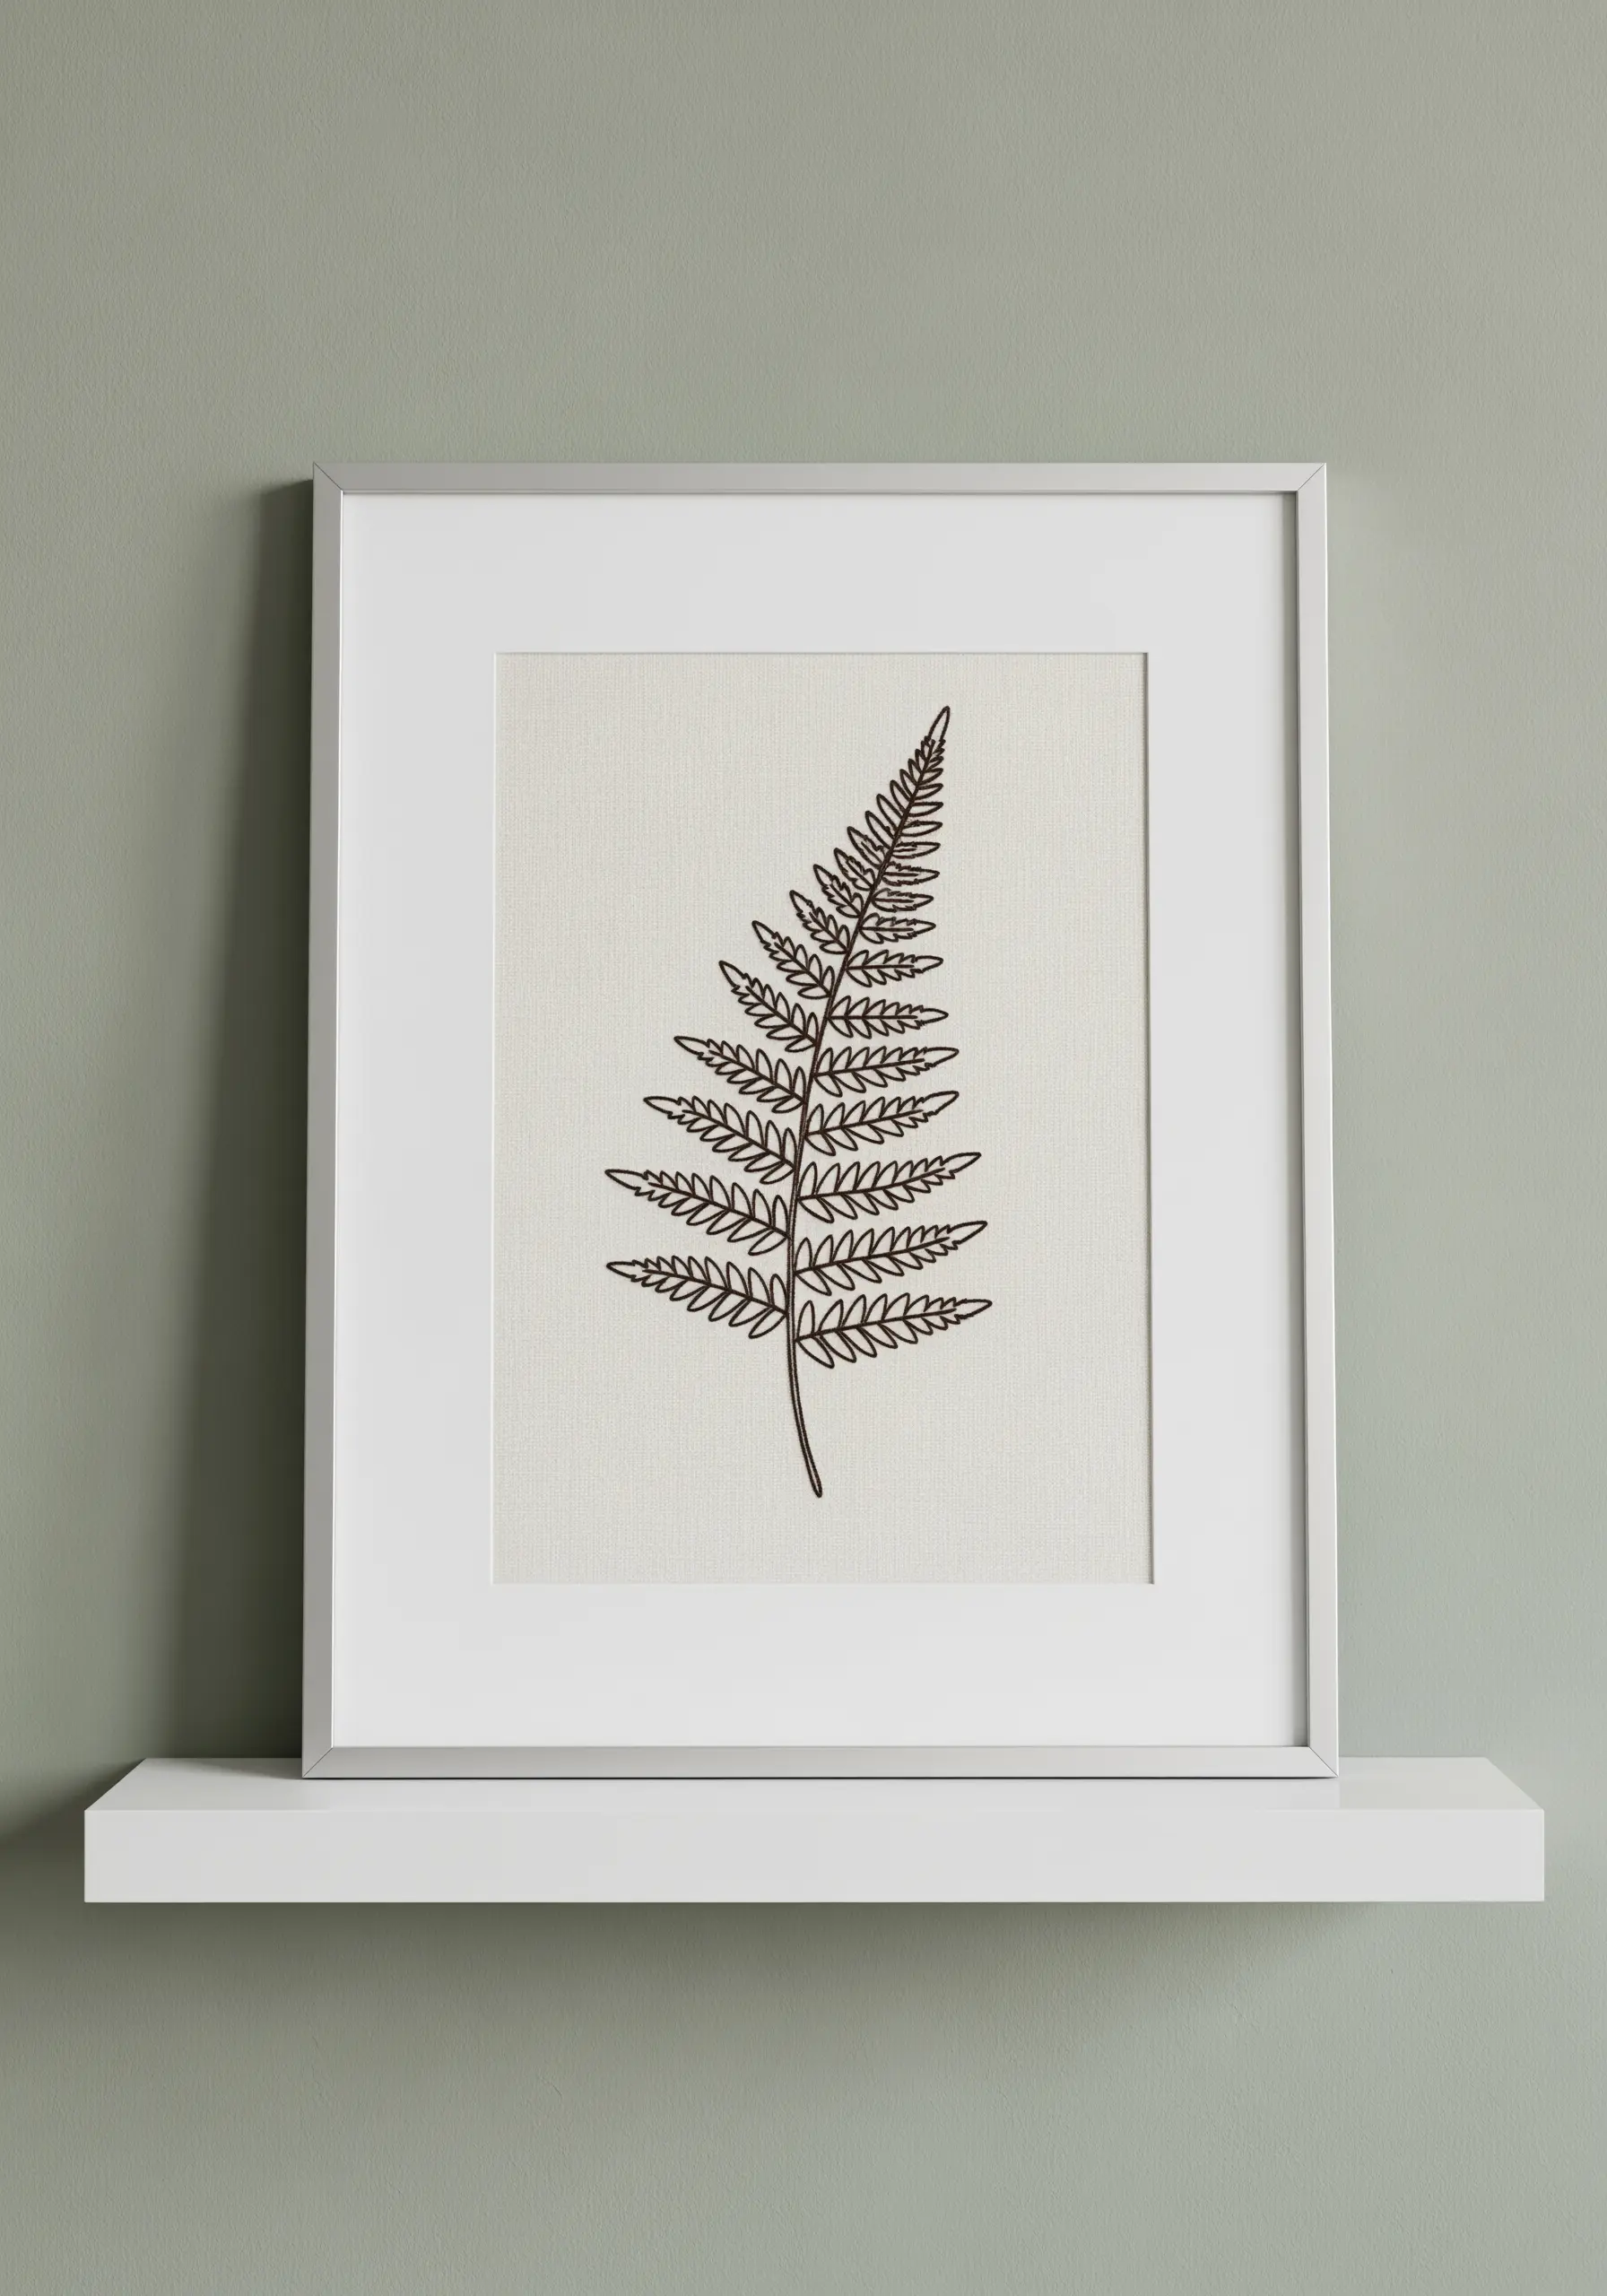
The beauty of a minimalist botanical comes from the quality of its line.
Trace a fern or leaf onto your fabric, then use a two-strand backstitch or stem stitch to create a clean, unbroken outline.
Choose a dark brown or charcoal thread against a neutral linen or cotton fabric for a sophisticated, high-contrast look.
The success of these minimalist line art nature embroidery pieces lies in their simplicity and precise execution, proving that a single, well-placed line can be more powerful than a thousand stitches.
12. Construct a Sculptural Woven Headboard

Transform a headboard into a functional work of art by using ultra-chunky yarn and a weaving technique.
Working on a sturdy canvas backing, use a large needle to couch down thick, soft roving in organic, flowing waves.
Arrange the colors in bold, distinct blocks to create a graphic pattern that serves as a calming focal point for the room.
This approach to bedroom wall embroidery is more about sculpture and texture than intricate stitching, adding softness and warmth to the space.
13. Add Whimsy with Woodland Motifs
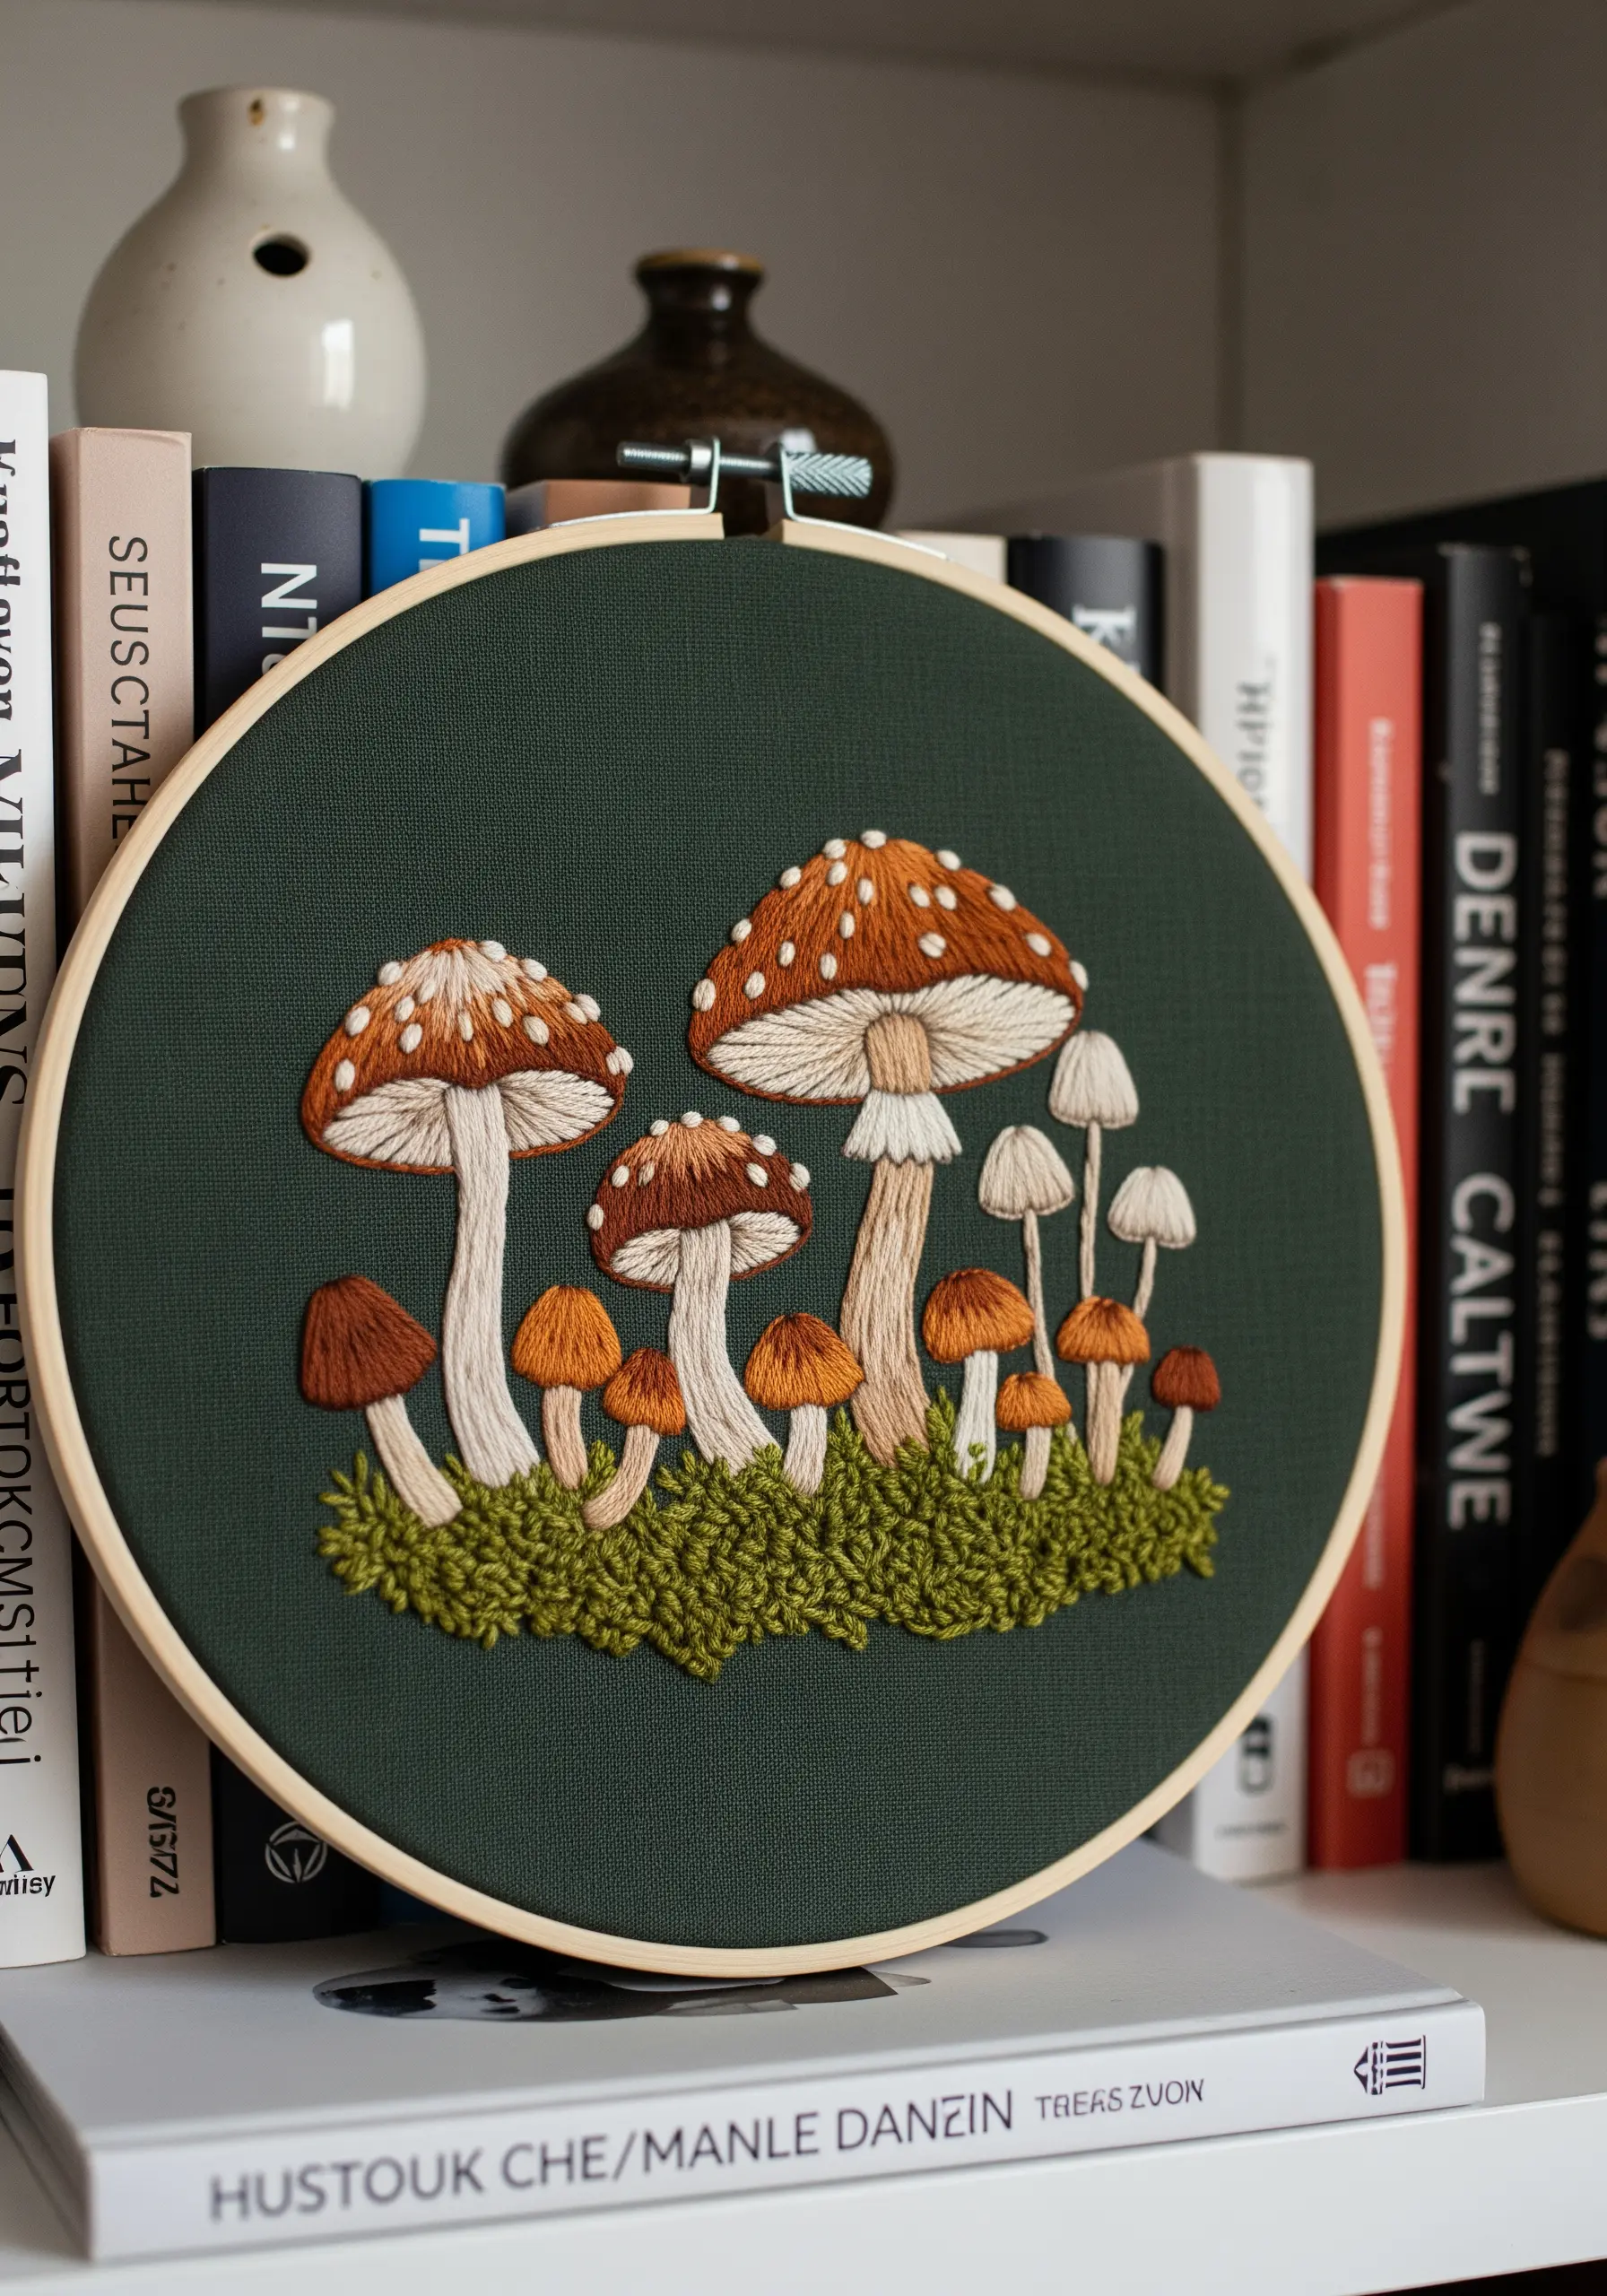
Bring a storybook scene to life by combining several stitches to render different textures.
For the mushroom caps, use a long-and-short stitch to blend shades of brown and white for a smooth, rounded look.
Create the mossy ground with turkey work—a looped stitch that you can trim to create a plush, carpet-like effect.
Add tiny white seed stitches to the caps for detail. This mix of techniques makes these cottage garden embroidery themes wonderfully tactile and visually engaging.
14. Frame Your Work with Intention

Elevate a simple design by paying attention to your materials and finishing.
Stitch a simple, organic circle using a rustic whipped backstitch on hand-dyed fabric to give it character and depth.
Instead of a standard hoop, choose a weathered, reclaimed wood frame that complements the earthy aesthetic.
Leaving the fabric edges raw adds to the piece’s handmade charm. Thoughtful framed embroidery patterns consider the frame and fabric as integral parts of the final artwork.
15. Stitch the Delicacy of Wild Grasses
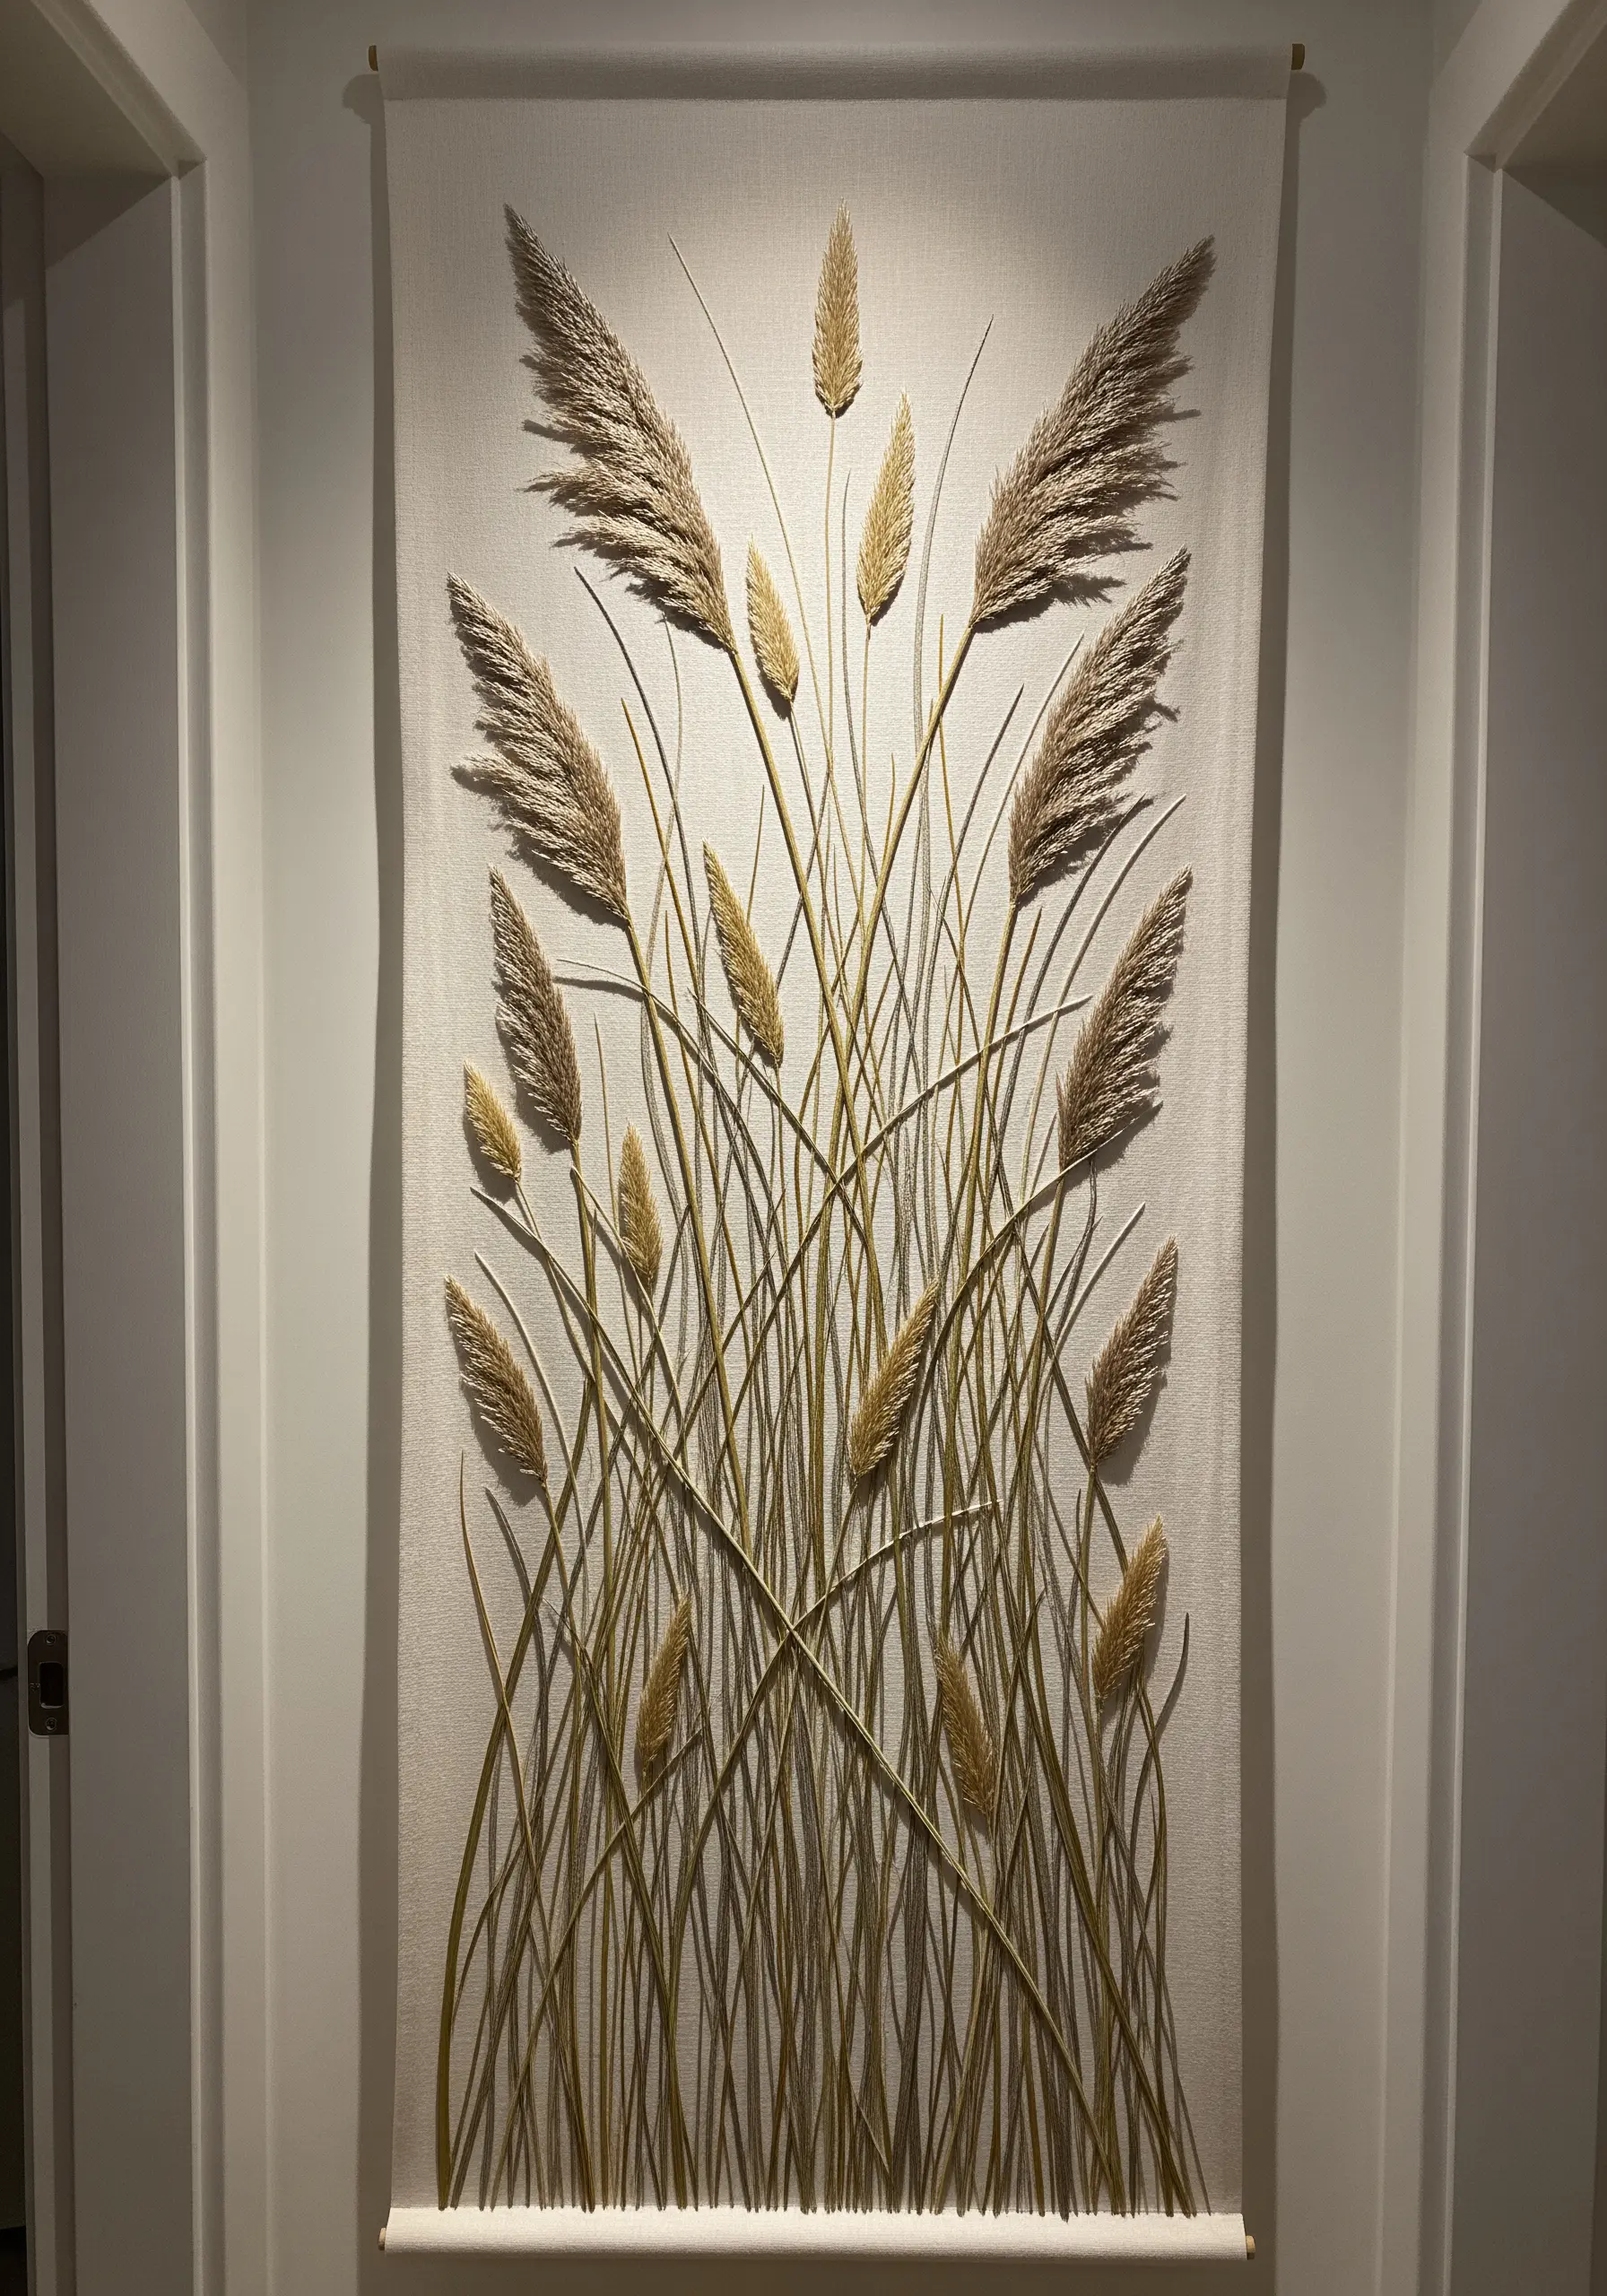
To capture the airy, feathery quality of pampas grass, you need to think about creating movement and light texture.
Use a single strand of floss for the long, elegant stems, stitched with a simple straight stitch or stem stitch.
For the plumes, employ a fishbone stitch or detached chain stitches layered loosely over one another in shades of cream, beige, and taupe.
This layering technique gives the grass heads a fluffy, three-dimensional quality, making your botanical embroidery wall pieces seem to sway gently on the fabric.
16. Create Rhythm with Repetitive Stitches
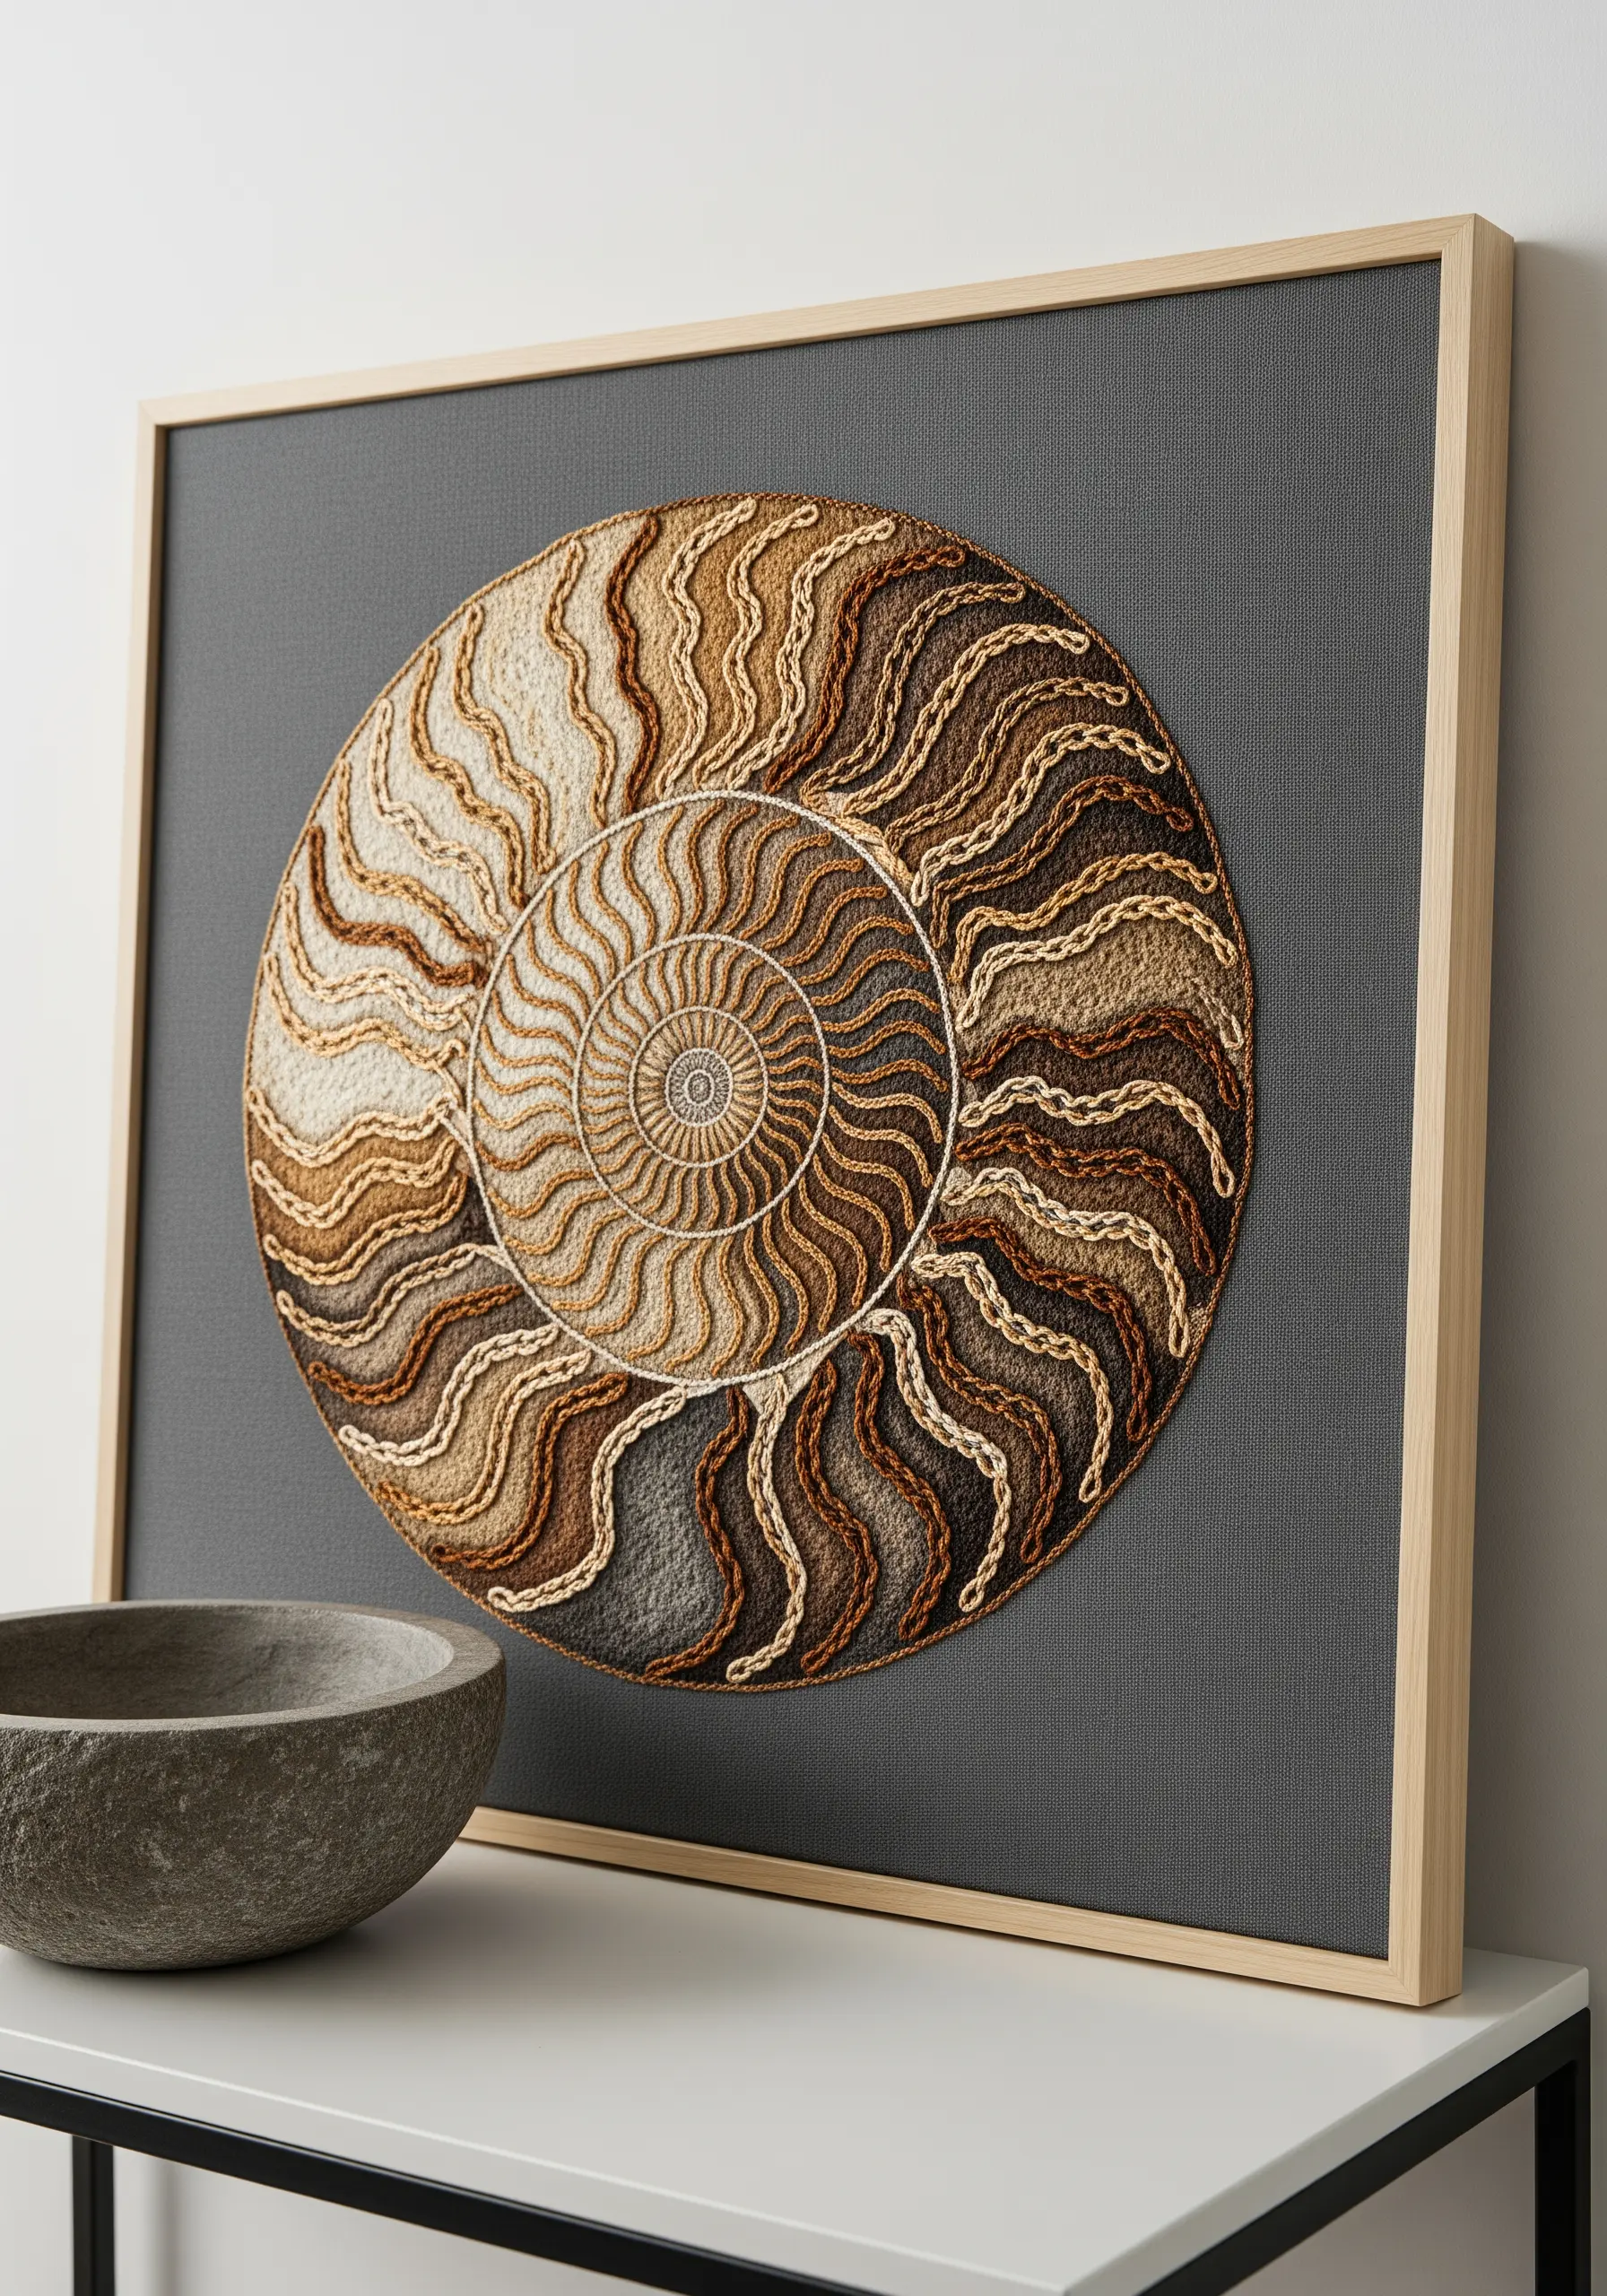
The meditative quality of this ammonite design comes from the disciplined repetition of a single stitch.
Use a chain stitch or a whipped backstitch to create the raised, swirling lines.
Work with a carefully chosen palette of sandy beiges, rich browns, and cool greys, transitioning colors to create a sense of depth and shadow.
The power of these organic shape embroidery patterns is not in their complexity, but in their perfect, rhythmic consistency.
17. Capture Motion with Flowing Lines

Suggest the gentle movement of sand dunes or water with long, sculptural lines.
Couch thick cotton cord or multiple strands of yarn onto a neutral linen background, creating smooth, undulating waves.
Vary the spacing between the lines and introduce subtle color shifts from cream to sand to create a sense of light and shadow.
This technique turns your thread into a drawing tool, allowing you to create large-scale abstract thread waves and swirls that feel both massive and serene.
18. Build Dimension with Padded Satin Stitch

To make these stacked stones feel solid and three-dimensional, use a padded satin stitch.
First, fill the shape of each stone with a base layer of small, dense seed stitches or a piece of cut felt.
Then, cover this padding with smooth, horizontal satin stitches using a matte cotton floss in natural stone colors.
This simple preparation lifts the stitches off the fabric surface, creating tangible depth and transforming your embroidery inspired by stones, sand, and soil into a small sculpture.
19. Explore Weaving on a Fabric Canvas
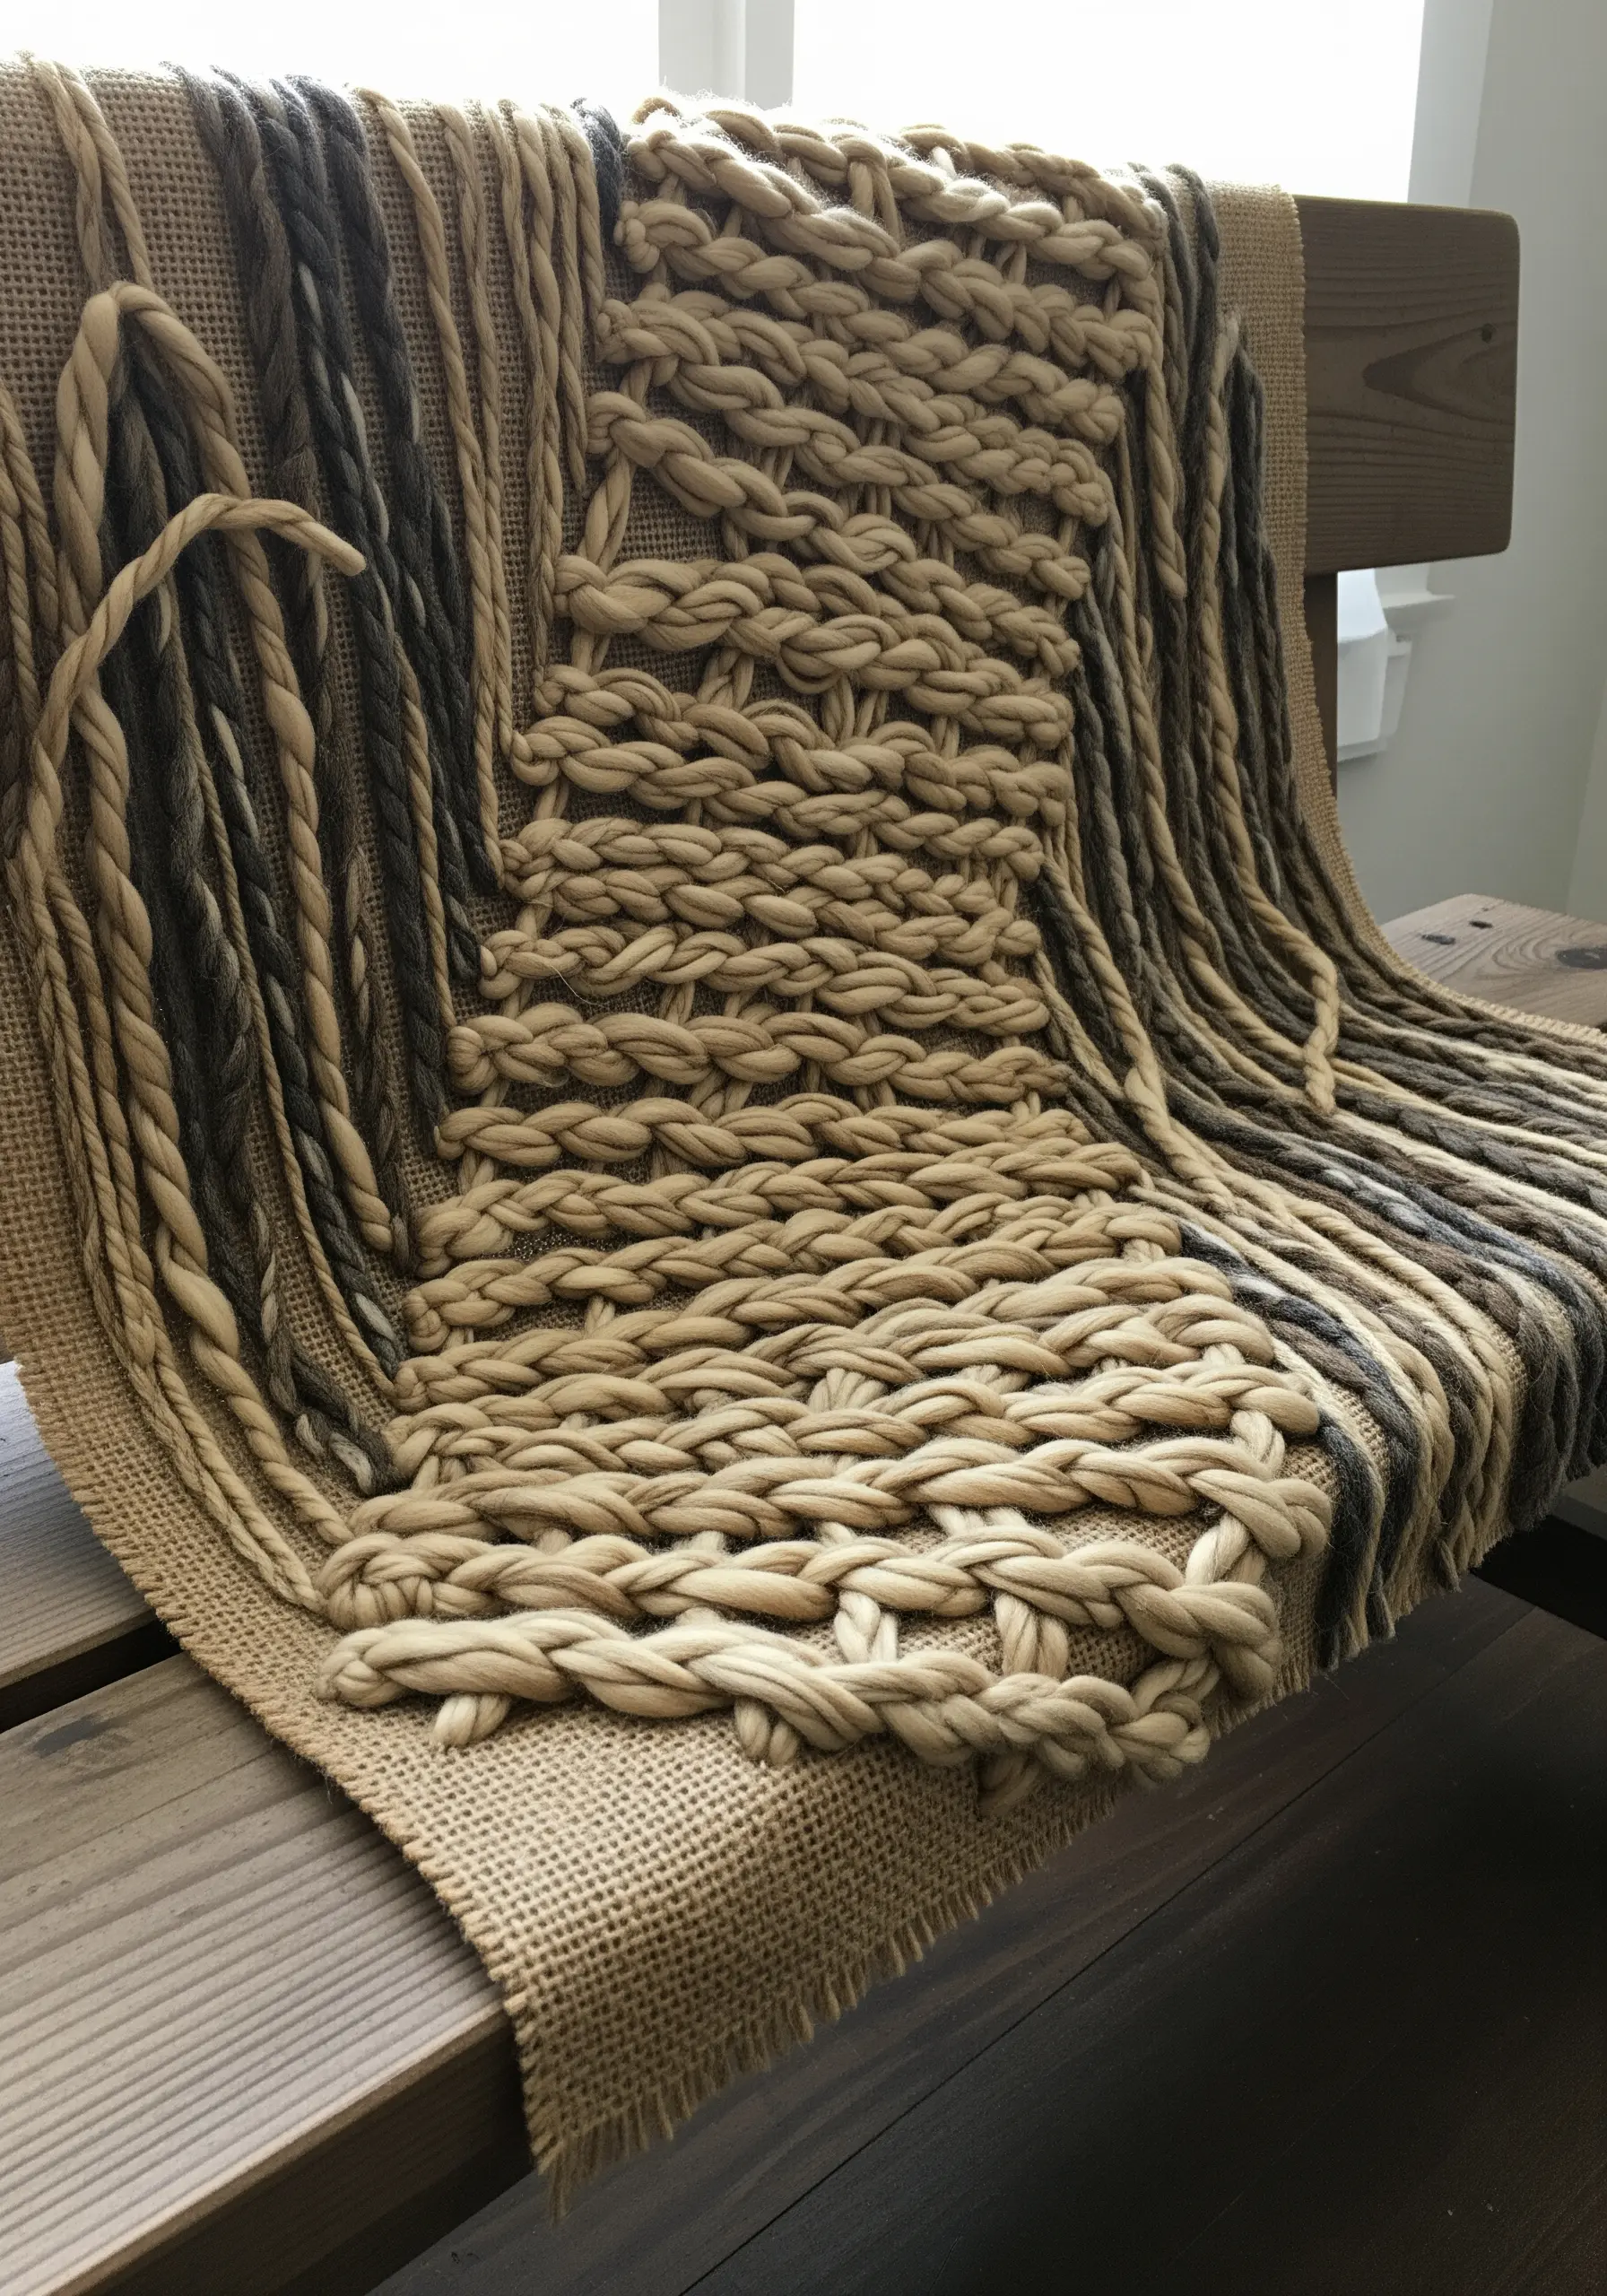
Challenge the boundary between weaving and embroidery by using your fabric as a loom.
On an open-weave fabric like burlap, you can weave thick, chunky yarns directly through the fabric’s grid without a hoop.
This technique creates a wonderfully raw and rustic texture that highlights the materials themselves.
It’s an intuitive, freeform approach that allows you to create mixed-fiber projects that are rich in texture and organic appeal.
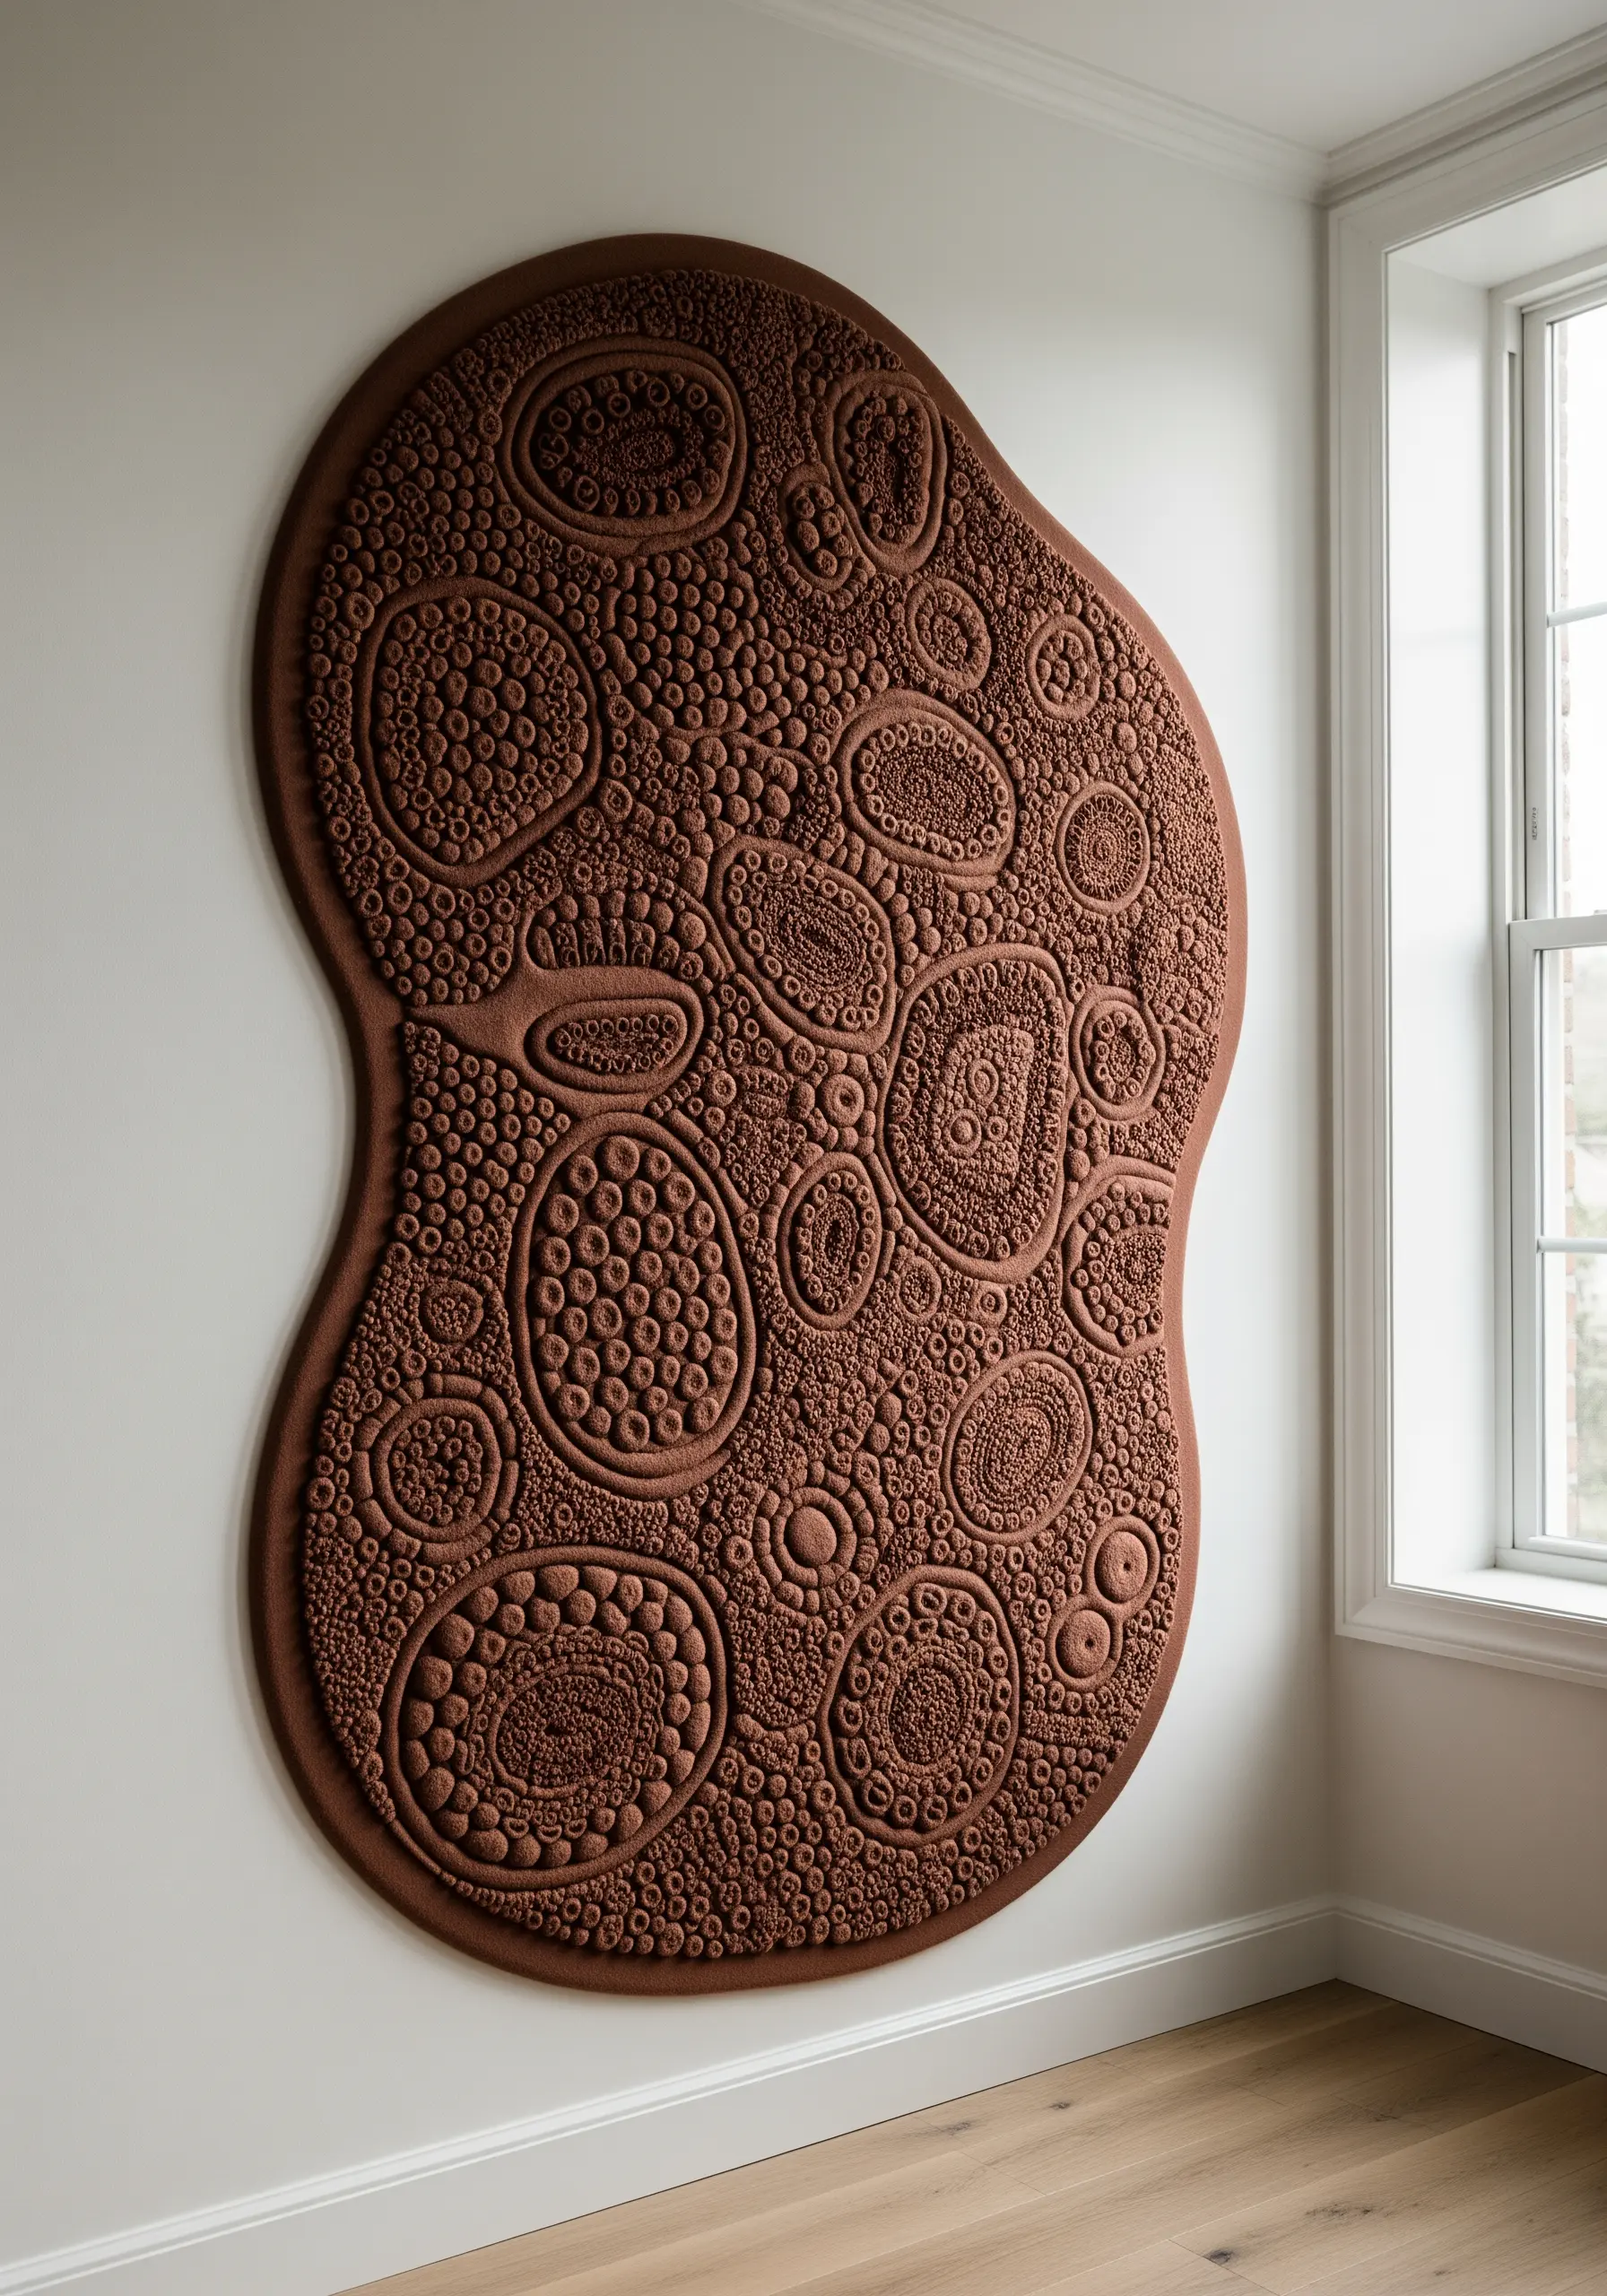
20. Embrace Minimalism with Punch Needle

For a clean, modern aesthetic, use a punch needle or dense French knots to create blocks of solid texture.
The uniform loops of the punch needle technique result in a surface that feels like a miniature rug, adding warmth and softness.
Keep the composition simple—a semi-circle over two lines—and let the texture and negative space do the work.
This is one of the most effective simple embroidery patterns that make statement wall art, proving that minimalism can be incredibly impactful.
21. Paint with Thread to Recreate Wood Grain
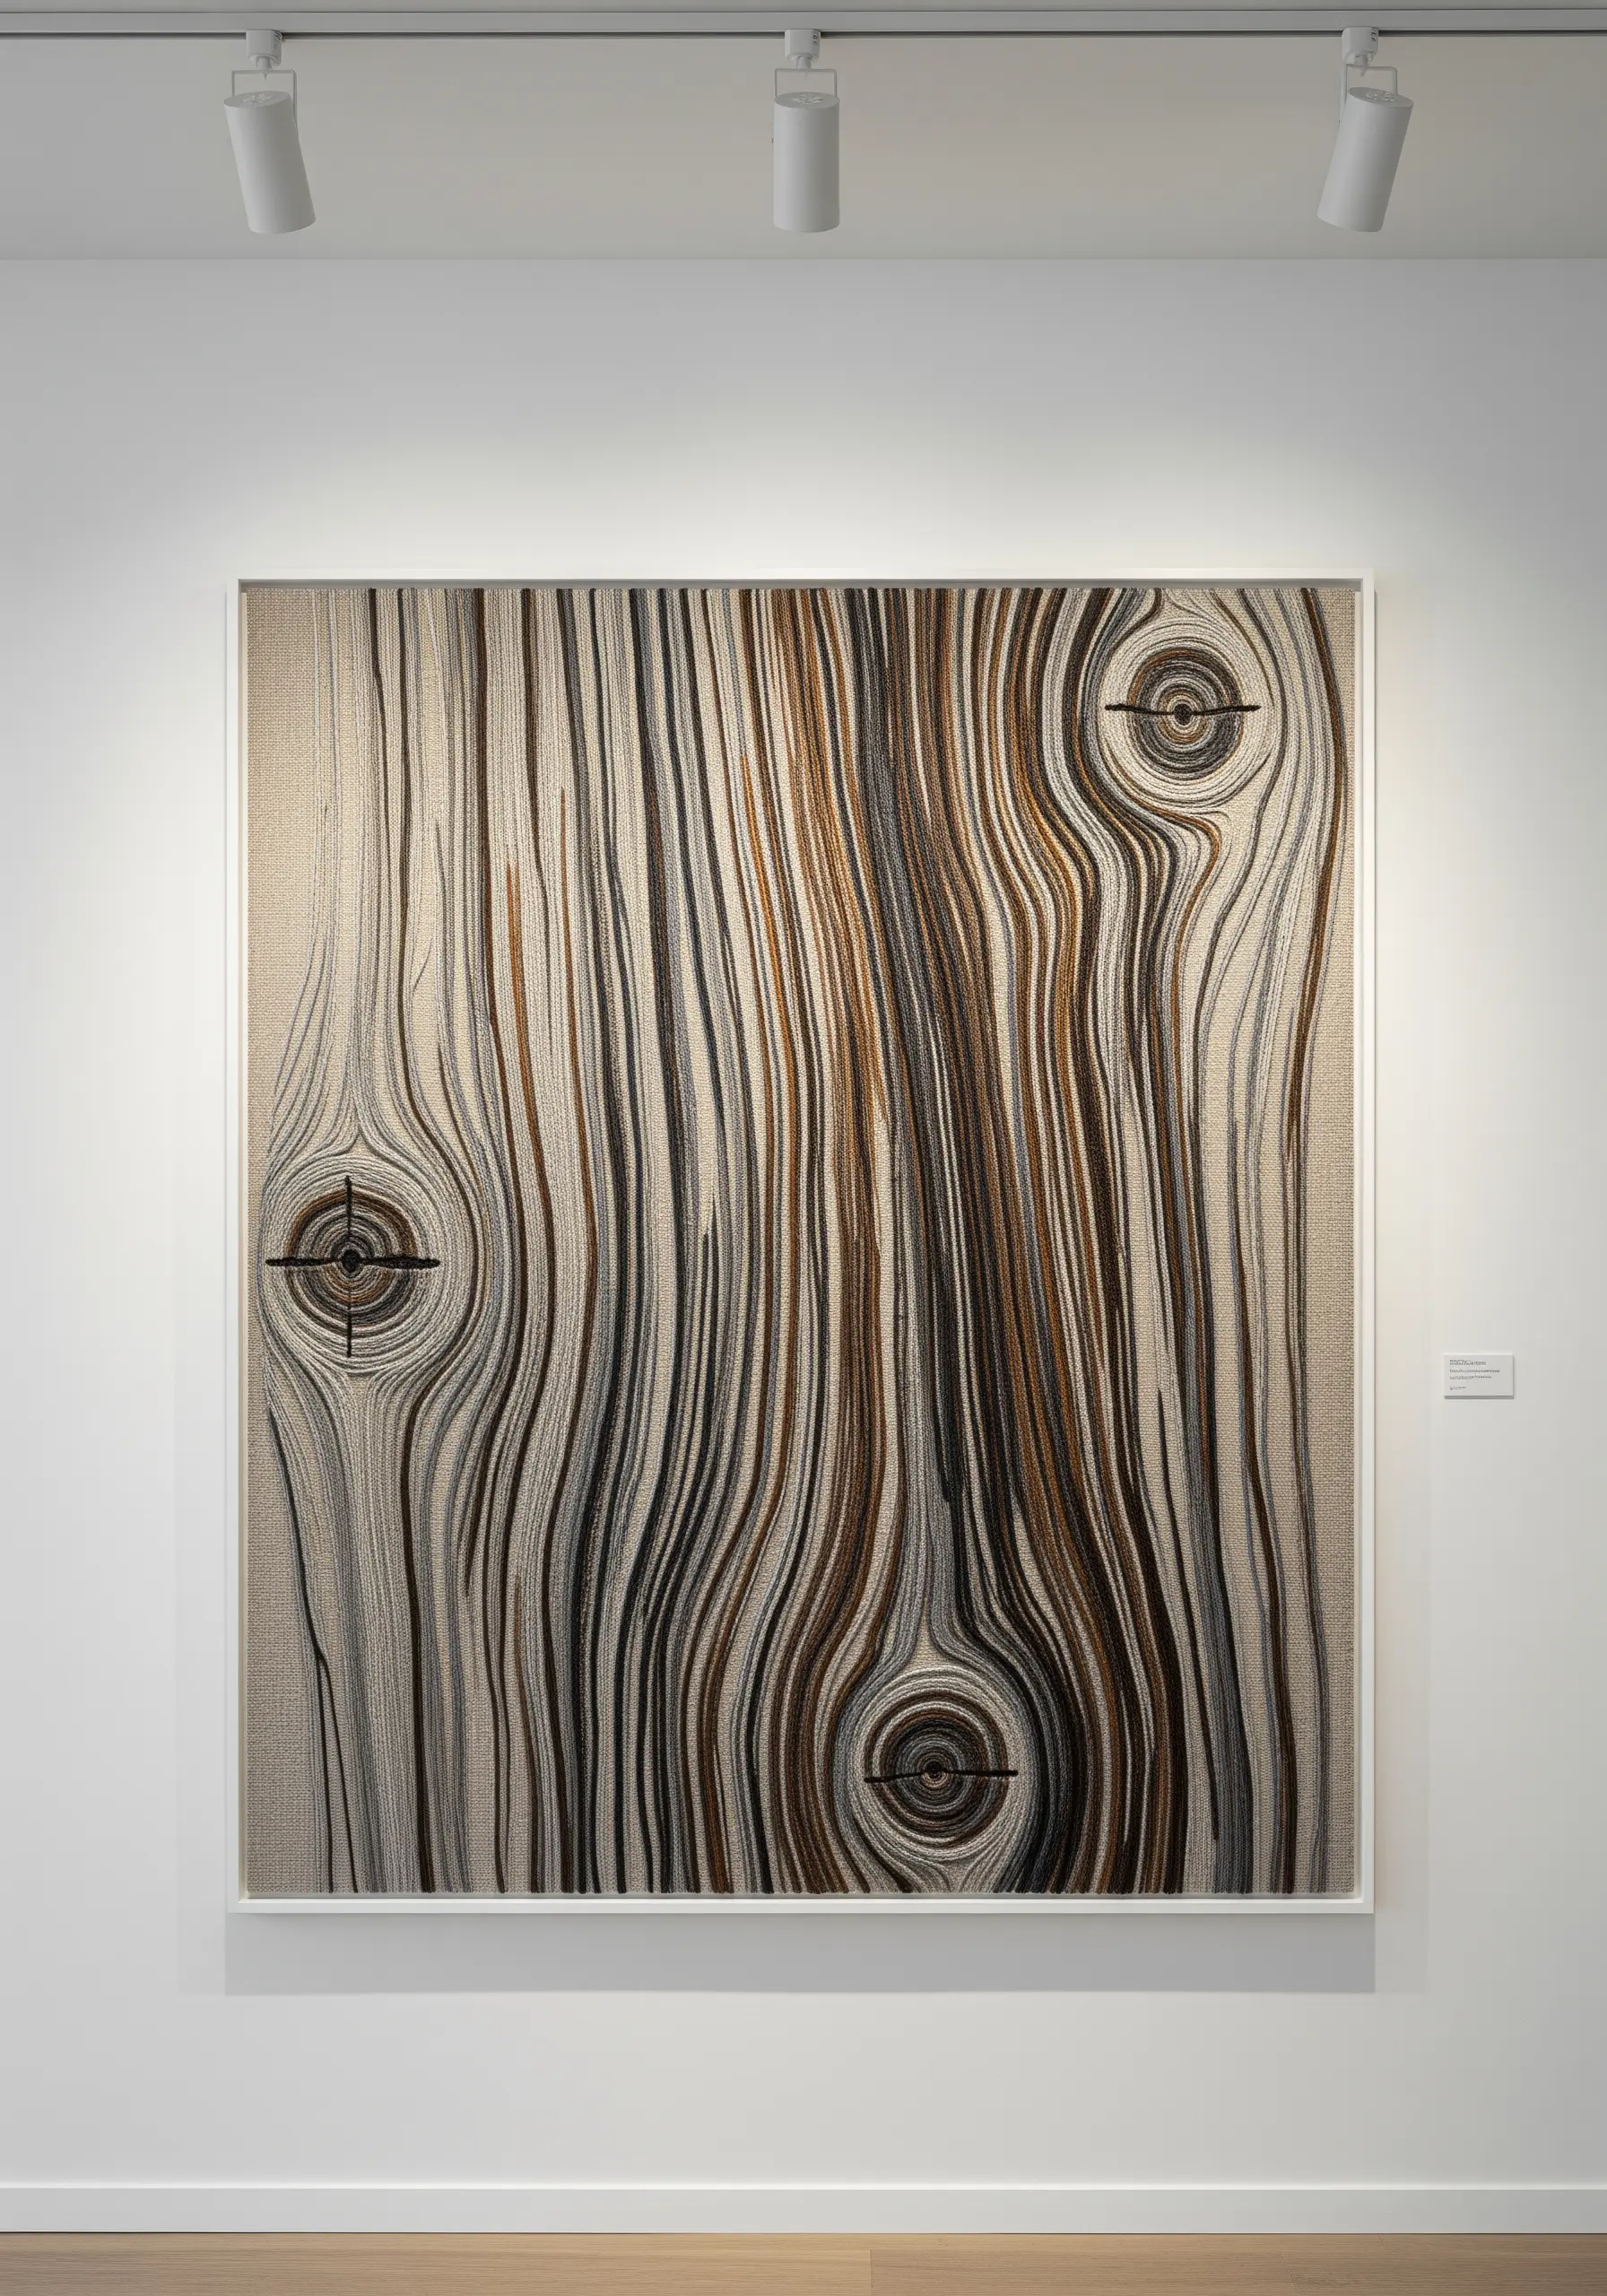
Turn your needle into a paintbrush by using single strands of floss to mimic the fine lines of wood grain.
Work on a light, neutral fabric and use long, slightly wavy straight stitches, placing shades of brown, grey, and cream next to each other to create the illusion of natural wood.
For the knots, work your stitches in a circular or spiral pattern.
This meticulous technique is all about ways to capture nature’s textures, transforming simple thread into a complex, organic surface.
22. Explore Monochrome Texture
Create a visually complex piece using only a single color of thread.
The key is to build an entire landscape of texture by varying your stitches: dense fields of French knots, smooth satin-stitched circles, and tiny seed stitch fillers.
By placing these different textures next to each other, you create a dynamic surface where light and shadow play across the different stitch patterns.
This form of abstract texture play proves that you don’t need a wide color palette to create a rich, captivating work of art.


